Blog by Dal Stanton
With 4 of 7 of Daniel’s commissioned pipes completed, the pipes remaining are the last 2 Aldo Velani Trios that remained in the For “Pipe Dreamers” Only! collection and what I have called a, ‘Spotted Bent Billiard’ or perhaps, dragon skin! This pipe is a ‘specialty pipe’ where the stummel was wrapped with a carbon resin material. The ‘skin’ almost looks like dragon hide to me.  The 2 Aldo Velani Trios remaining were acquired in 2018 in what I have called the St. Louis Lot of 26 that my son, Josiah, found in an antique shop. He was impressed by the quality of pipes in the Lot and emailed me in Bulgaria with a proposition of going in together for the Lot of 26. His part in the purchase would be his Christmas present to me – that I would choose a pipe for my own from the Lot. My part of the purchase would be to restore the pipes to benefit the Daughters of Bulgaria. It was a proposal hard to refuse and some weeks later I unwrapped the St. Louis Lot of 26 in Denver where our family had gathered for Christmas. The original 4 Aldo Velani ‘brothers’ stand out among the St. Louis Lot of 26 below. The upper Bent Apple and the lower Rusticated Volcano have already found homes with new stewards. The Pot and Billiard are next on the worktable.
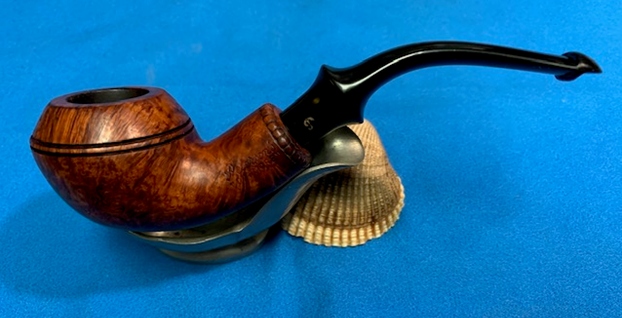
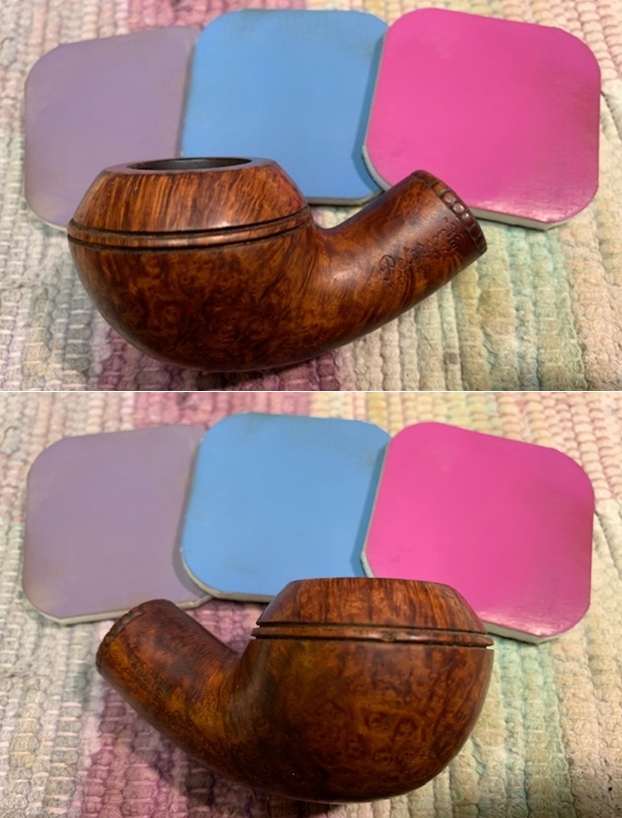
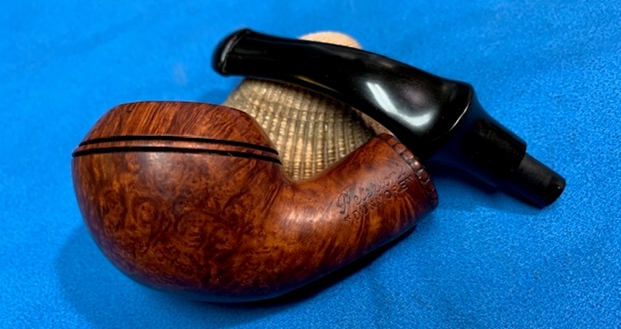
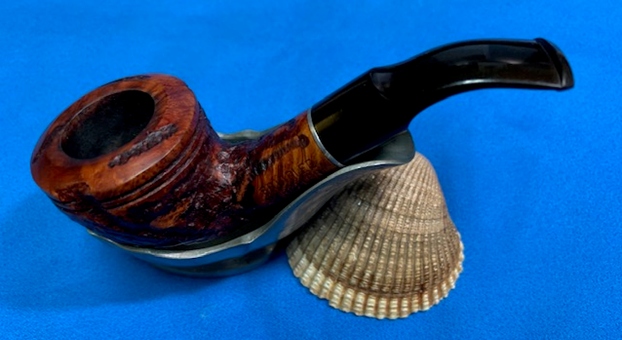
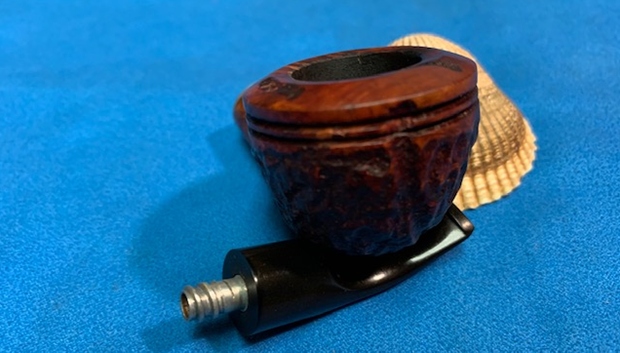
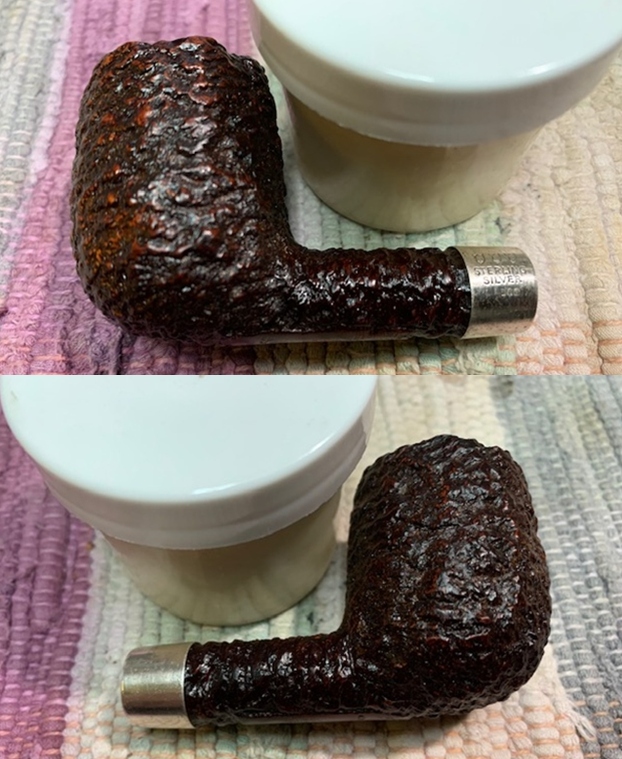
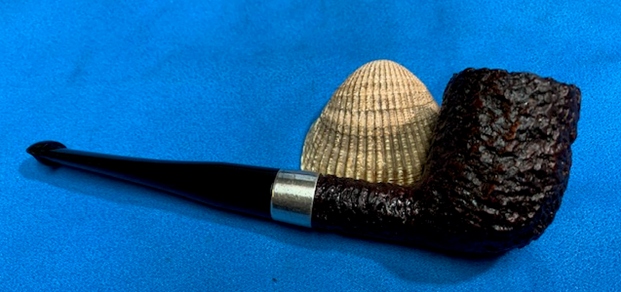
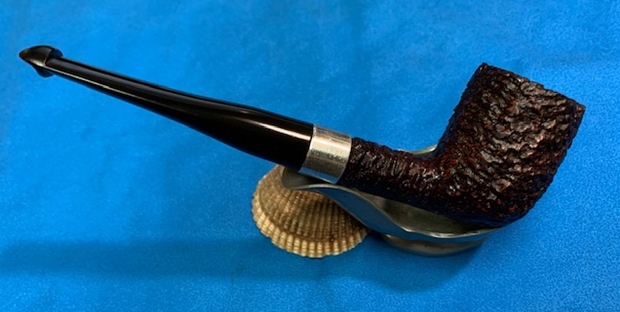
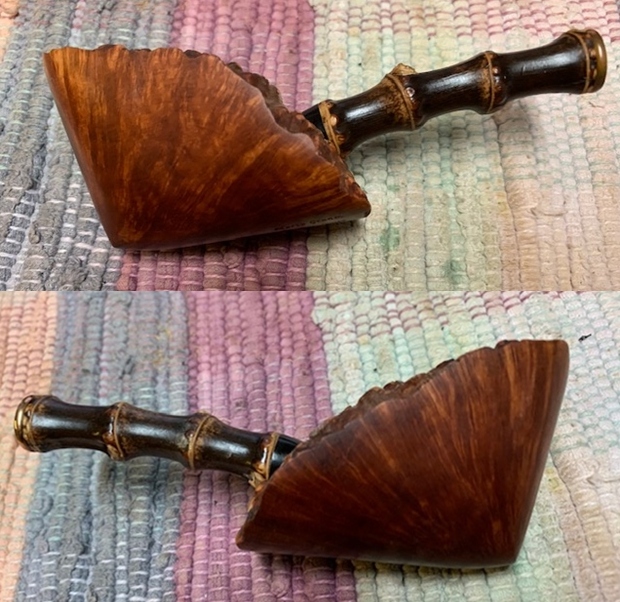
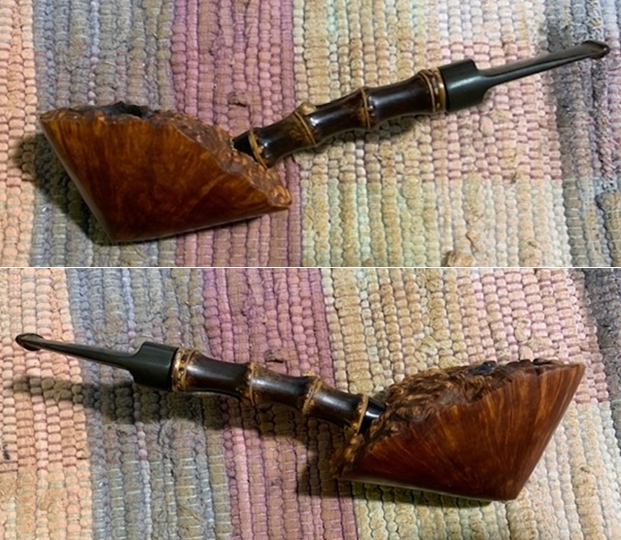
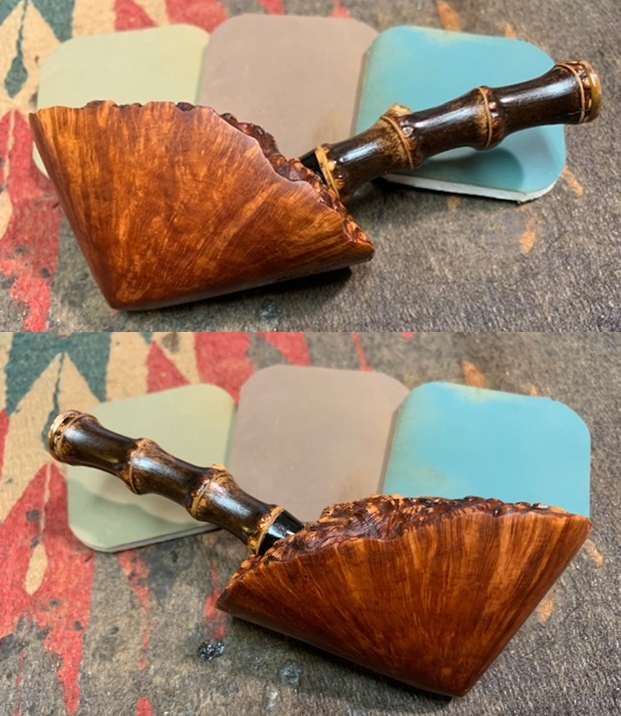
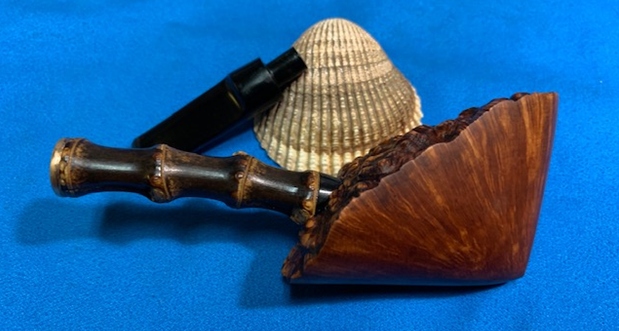
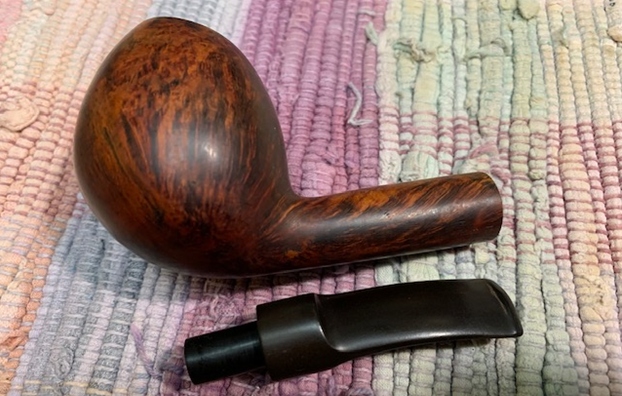
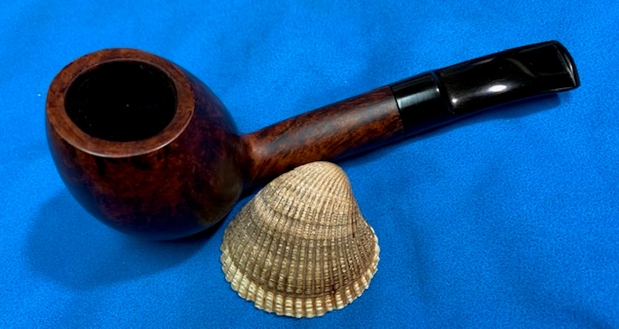
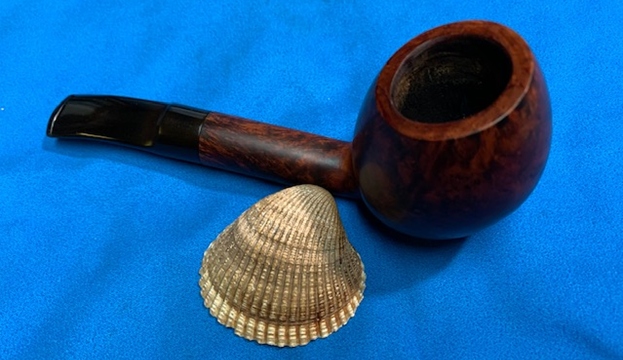
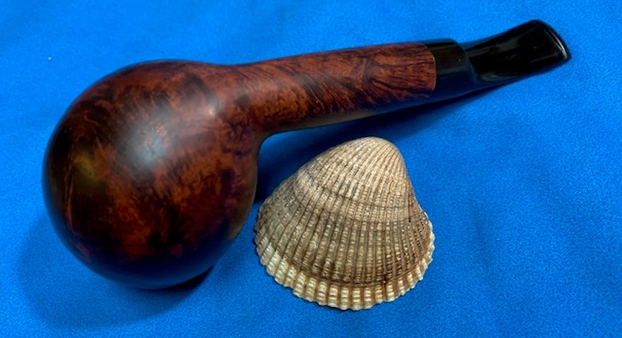
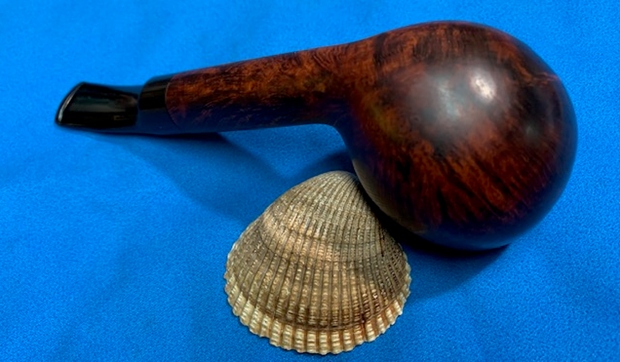
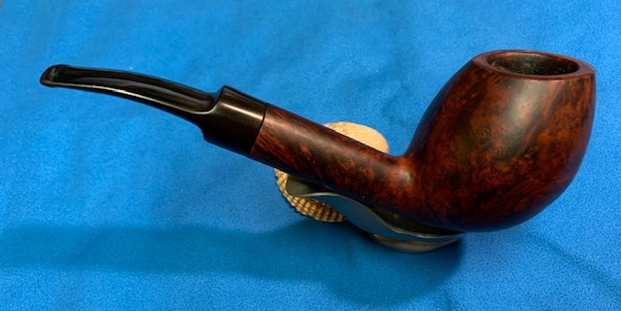
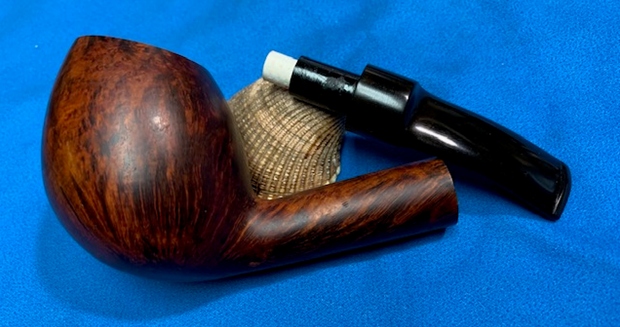
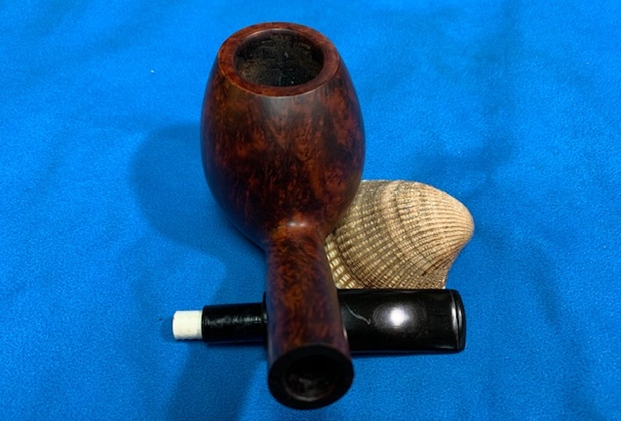
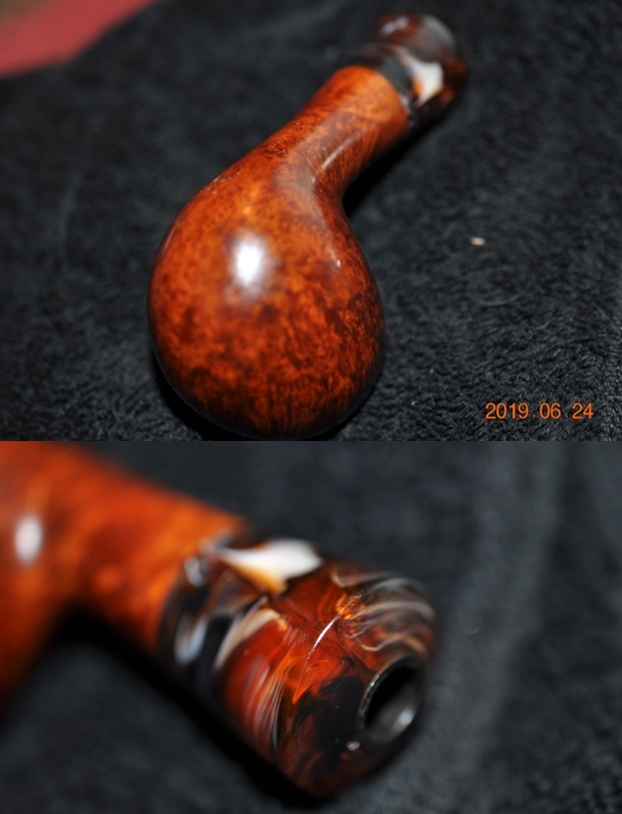
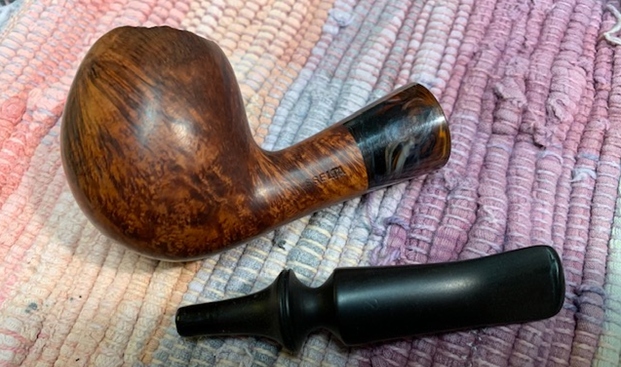
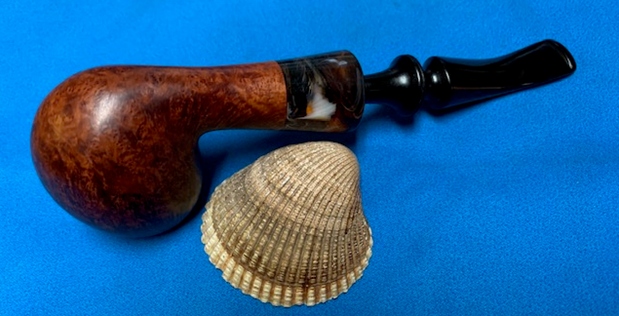
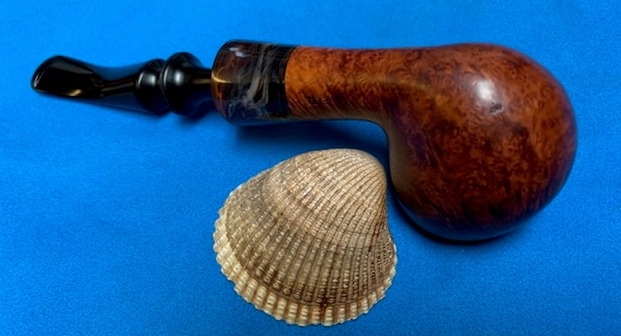
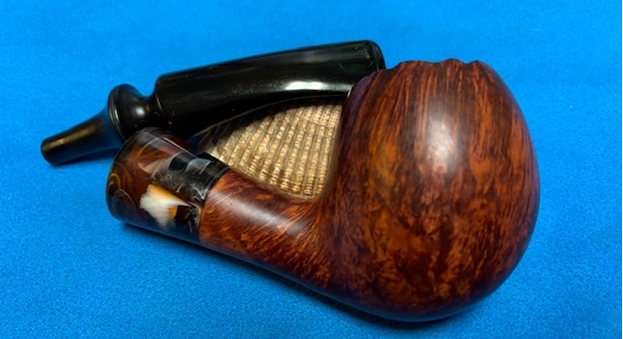
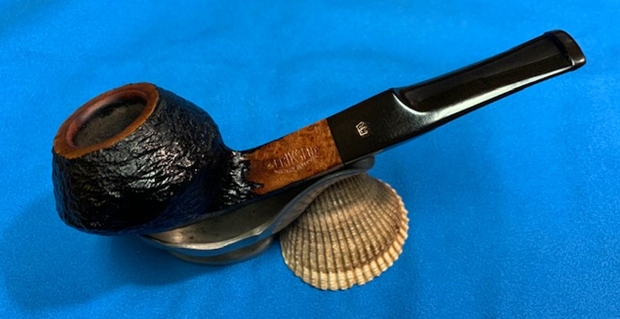
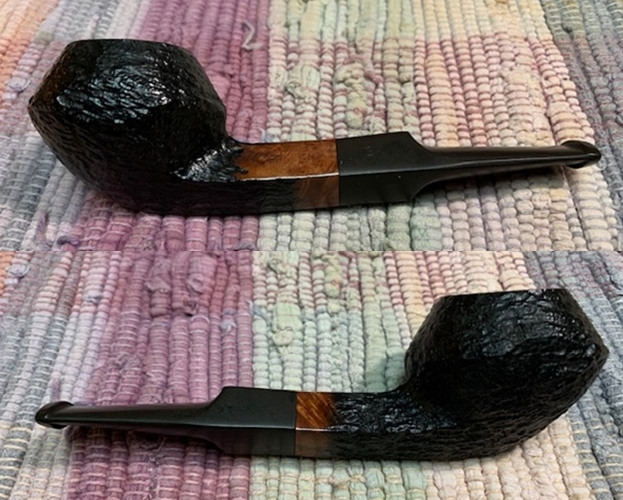
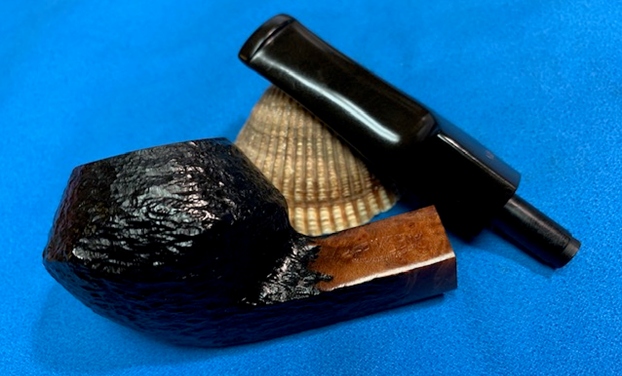
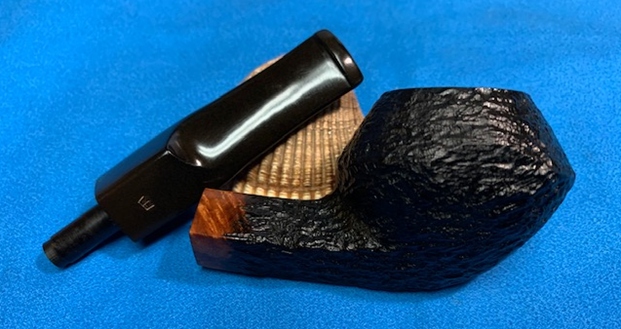
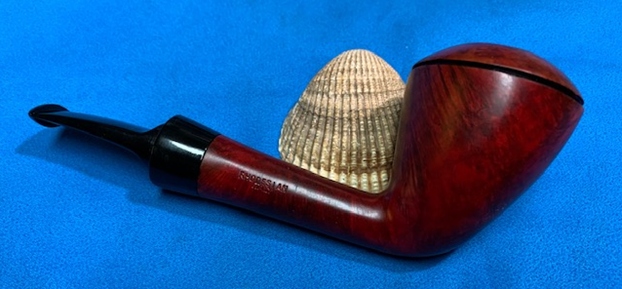
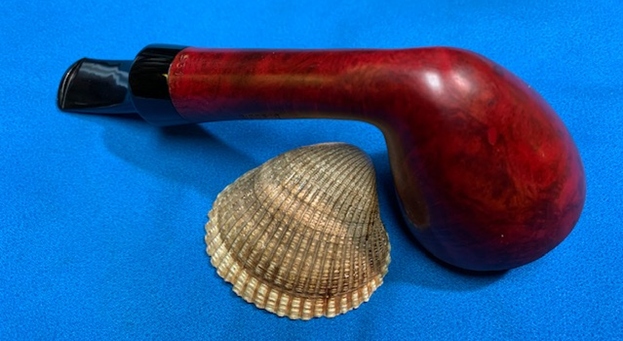
 All the Aldo Velani pipes have in common the bling of nickel gold-plated shank rings and acrylic stems. The Billiard’s stem is a clear acrylic, but the Pot shows off an eye-catching ruby/burgundy stem complementing the characteristic red burgundy Aldo Velani stummel. With the Pot first in line, some pictures provide a closer look.
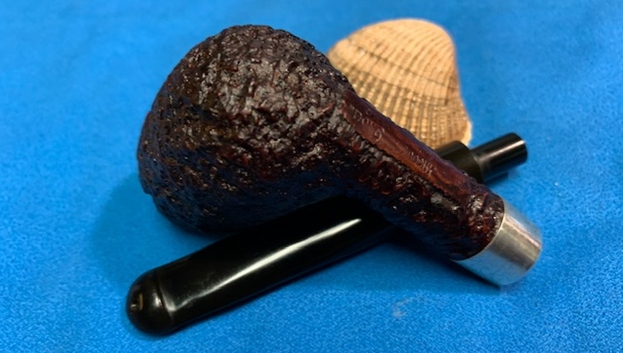
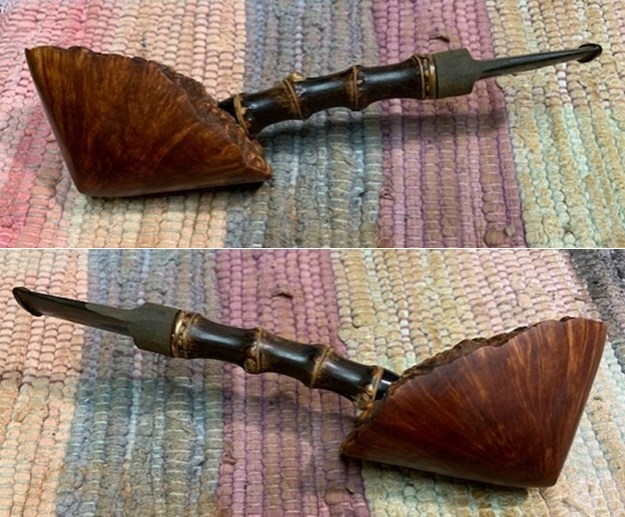
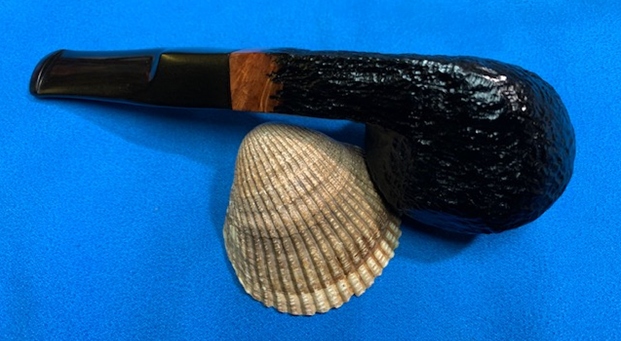
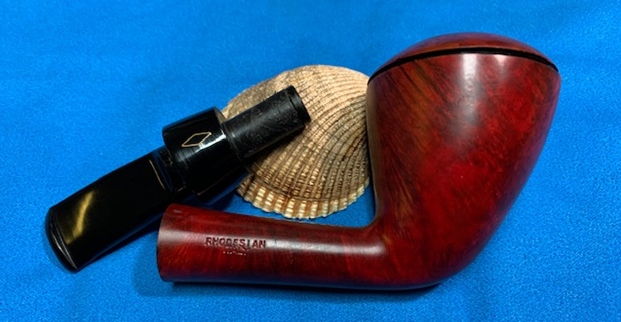

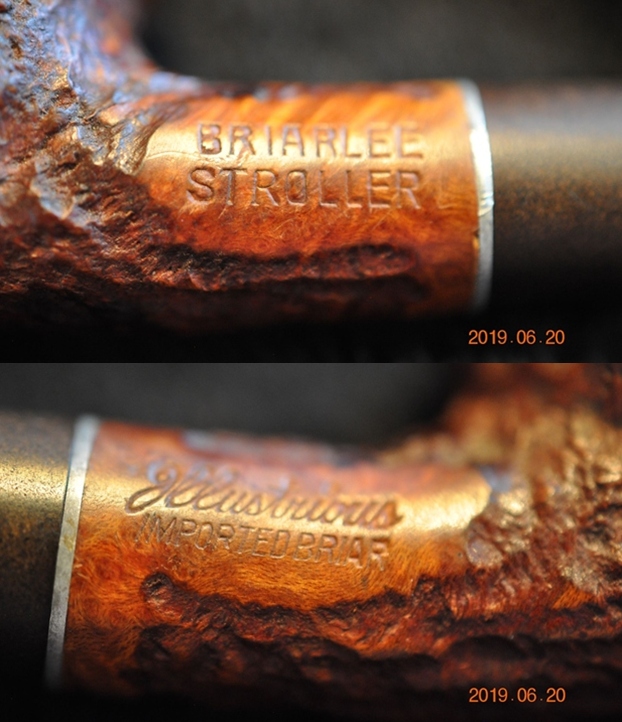
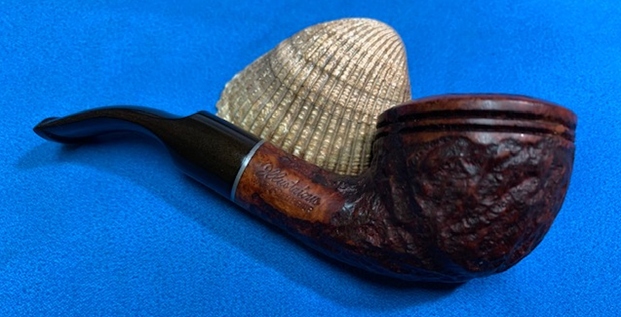
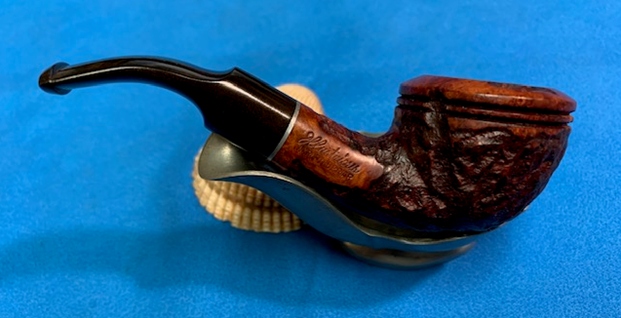
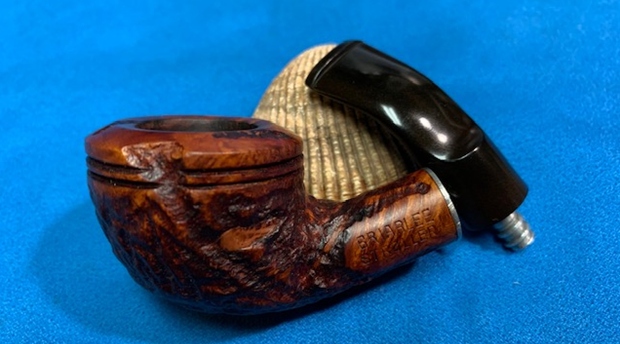
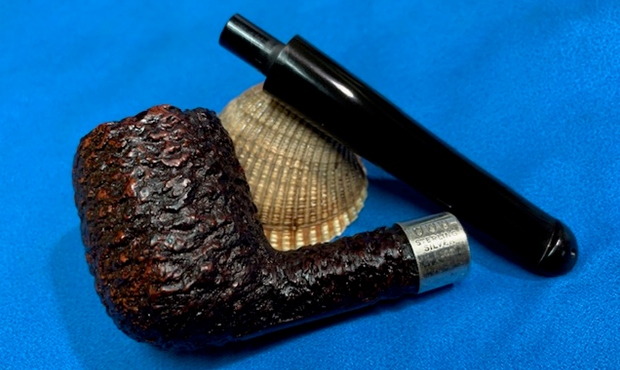
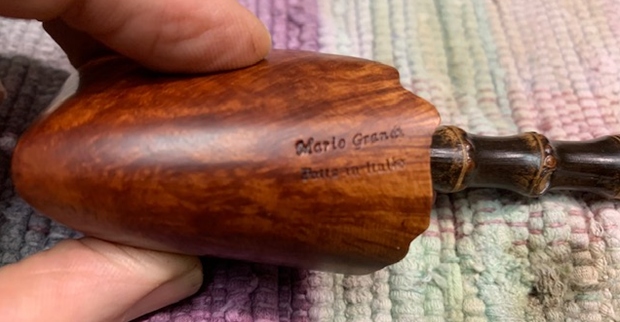
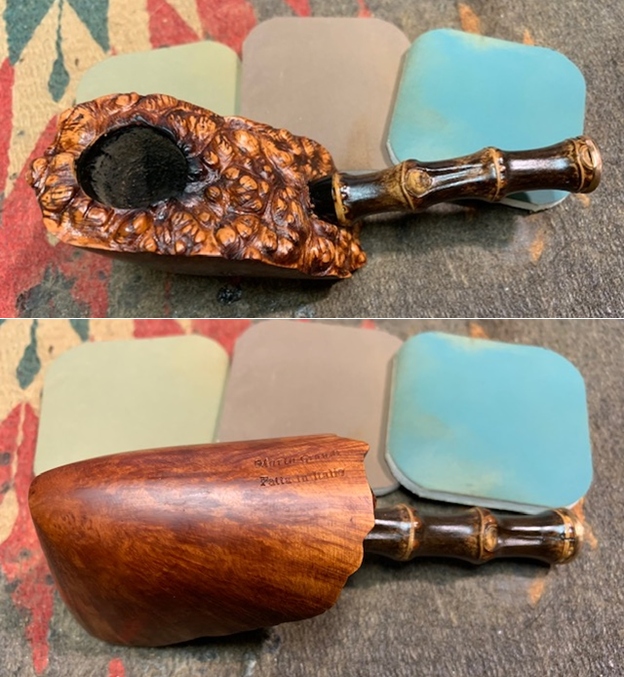
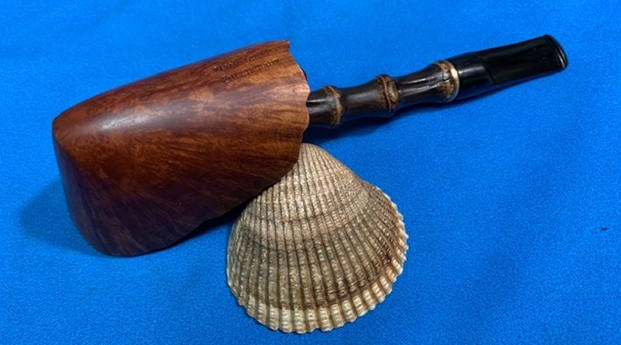
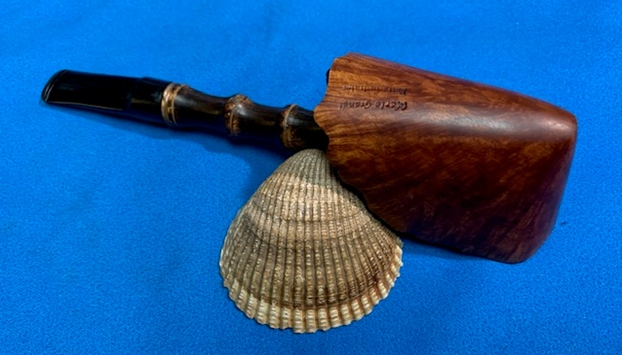
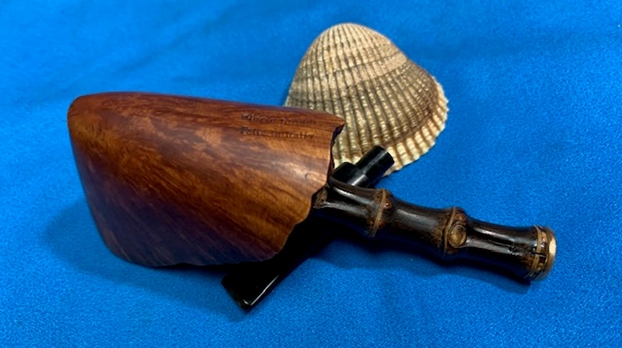
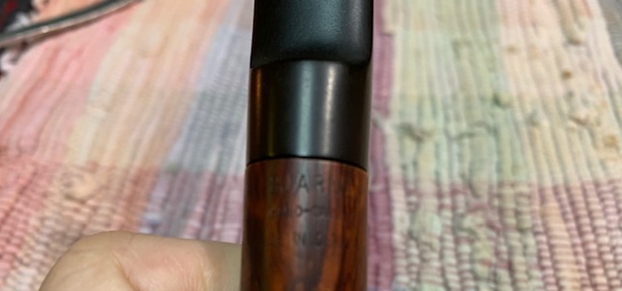
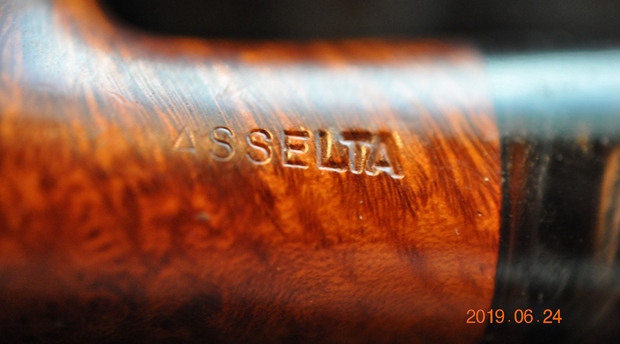
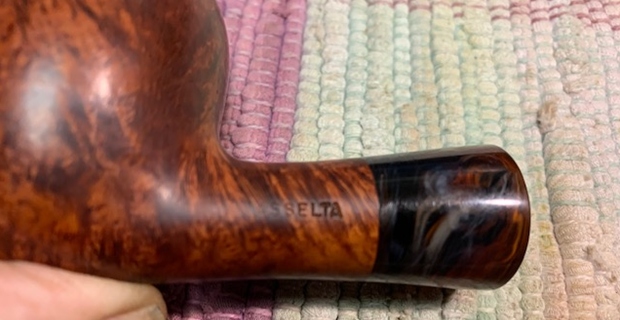
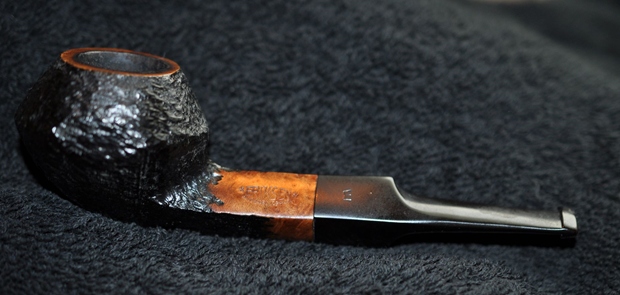
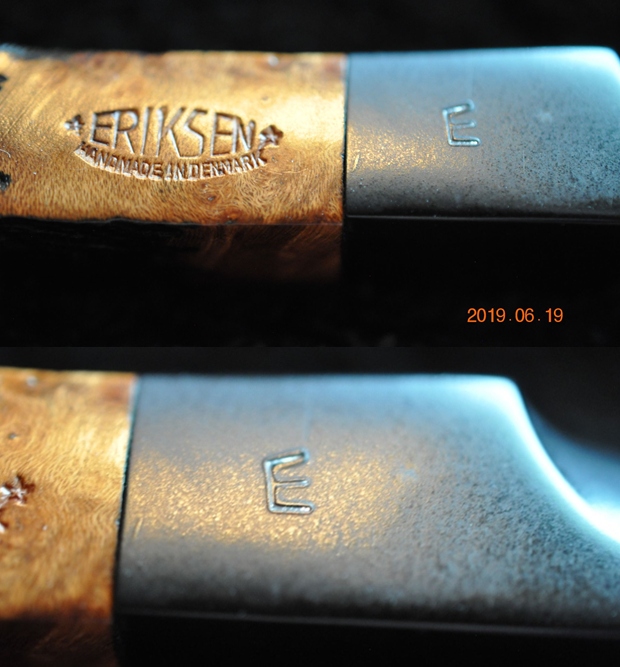
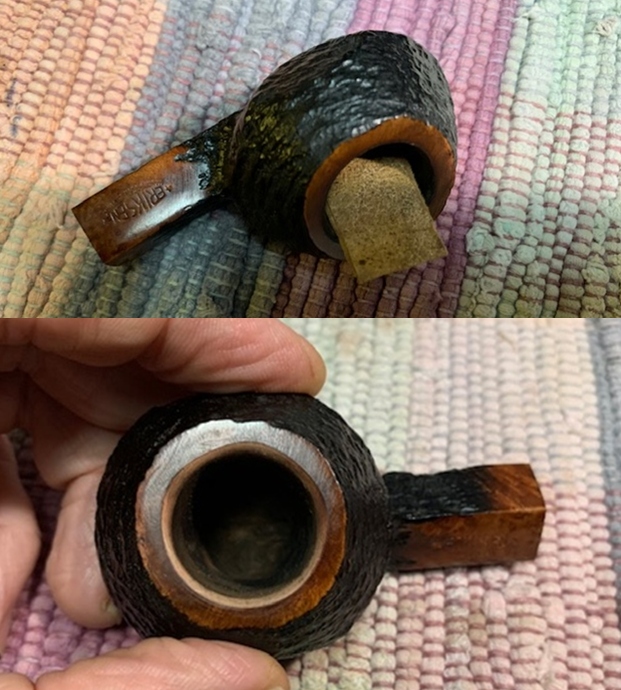
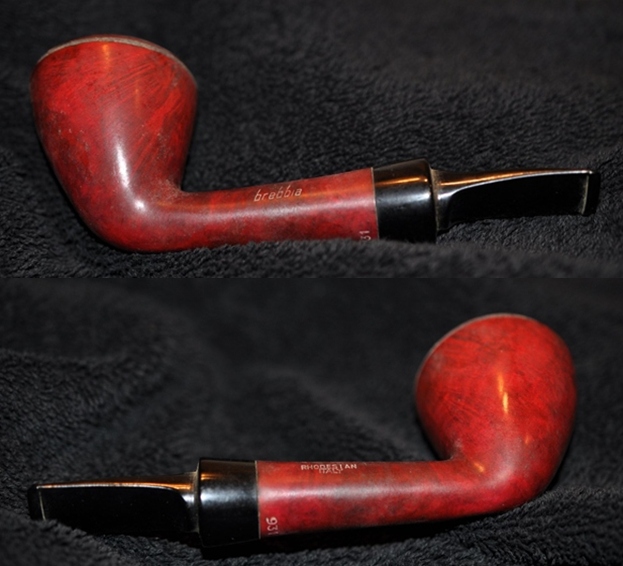
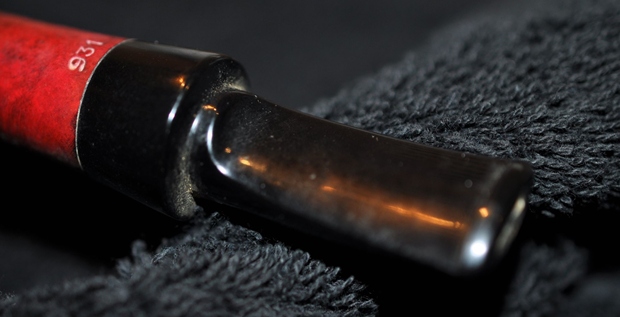
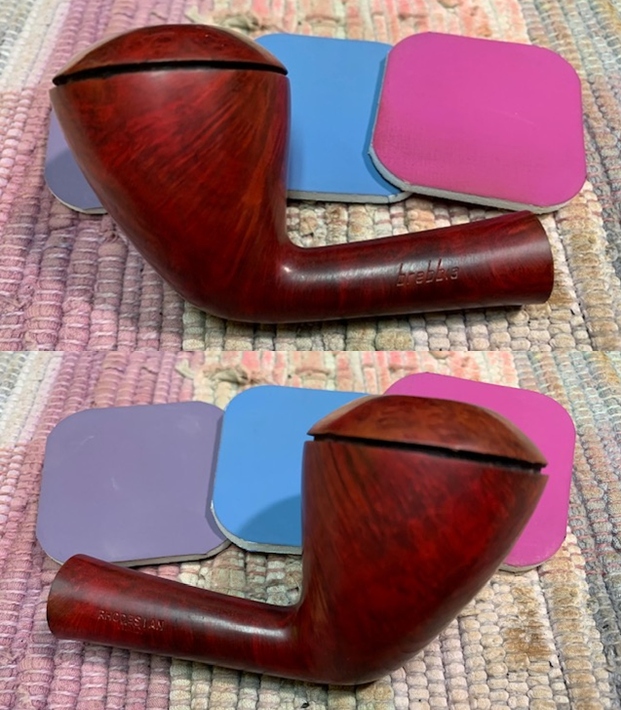
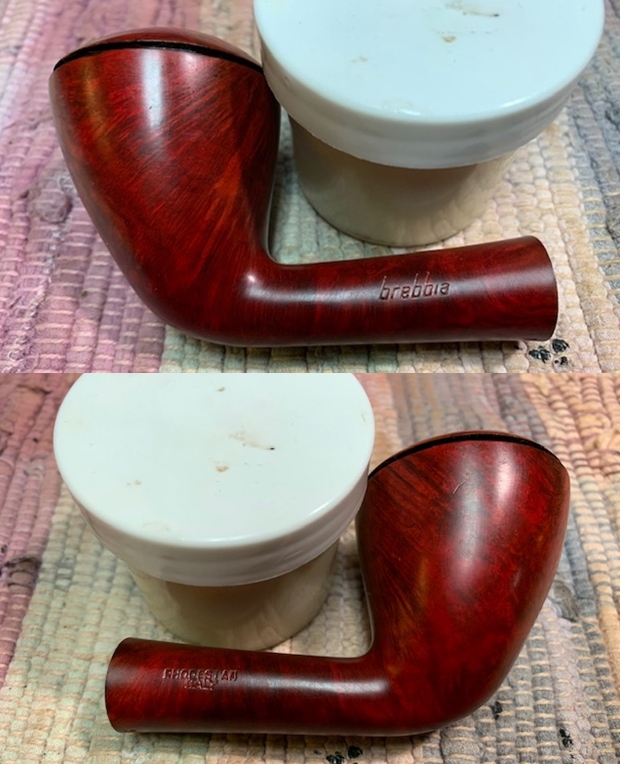
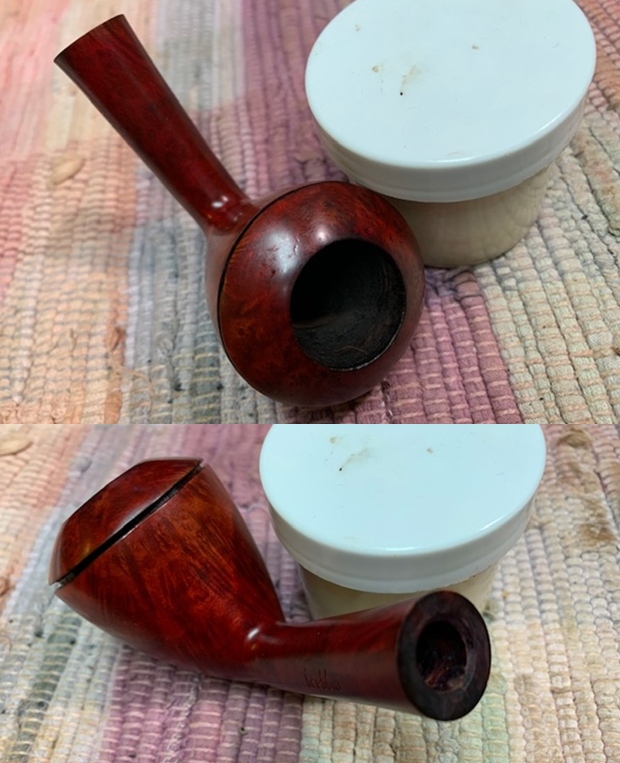
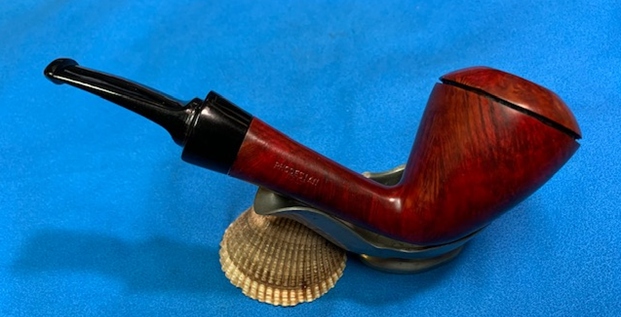
 The nomenclature on the left shank side is cursive script, ‘Aldo Velani’ [over] ‘TRIO’. On the shank underside, the COM, ‘ITALY’ is followed by the shape number ‘51’.
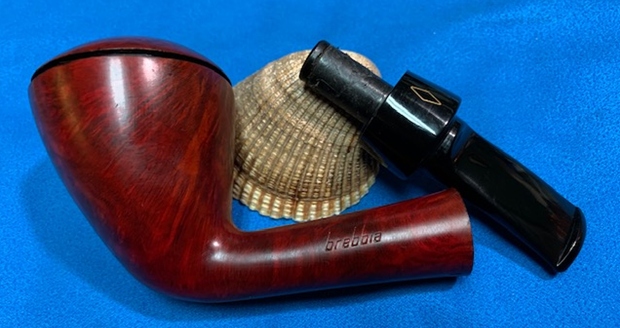
  The Aldo Velani stem stamp is interesting and in the previous research discovered what it was. I found in Pipedia’s Aldo Velani article, an example and details of the stamping on an original Aldo Velani box (courtesy of Doug Valitchka). The stamp depicts a pipe as the front leg of the ‘A’ for Aldo and the back leg of the ‘A’ forms the front riser of the ‘V’ of Velani.
 As a good refresher, I repeat the previous research here: The article cited from Pipedia provides helpful information understanding the provenance of the Aldo Velani name:
Most Aldo Velani pipes are made in Livorno, Italy, for the USA market by Cesare Barontini. They were previously imported by Lane Limited. Lane spokesman Frank Blews once described Velani’s stylish, intrinsically Italian designs as “Billiards with more ball, bulldogs with more jaw.” The name “Aldo Velani” is actually fictional.
Another Barontini 2nd is named “Cesare”.
I learn two interesting things from this information. First, Aldo Velani is a faux name that does not describe an Italian pipe house but a specific line of pipes. Secondly, the Aldo Velani is made by the Casare Barontini name based in Livorno, Italy. Further information is available cross referencing to Casare Barontini in Pipedia:
In 1890 Turildo Barontini opened a factory for the production of briar. In 1925 his son Bruno began to produce the first pipes. Cesare Barontini, son of Bruno, started direction of the factory in 1955, and still runs it together with his daughters Barbara and Silvia.
Sub-brands & Seconds: Aldo Velani. Cesare, L’artigiana, Stuart, Cortina
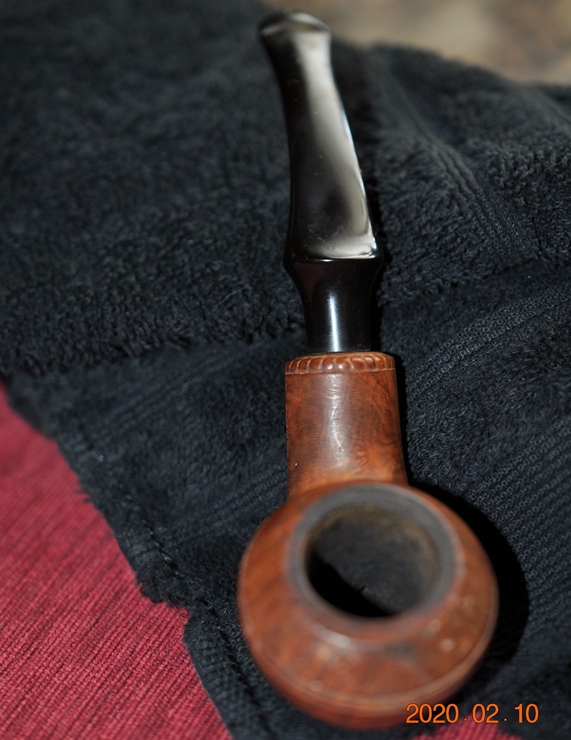
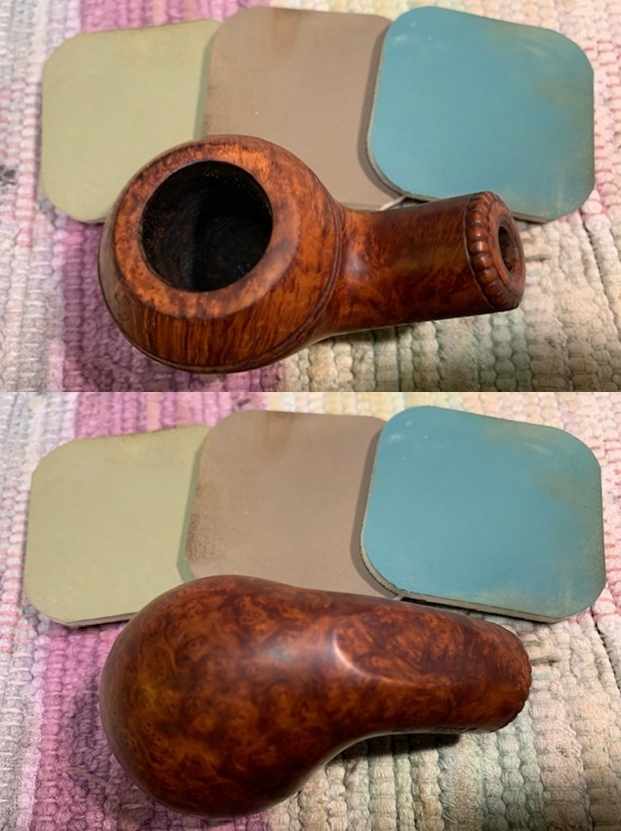
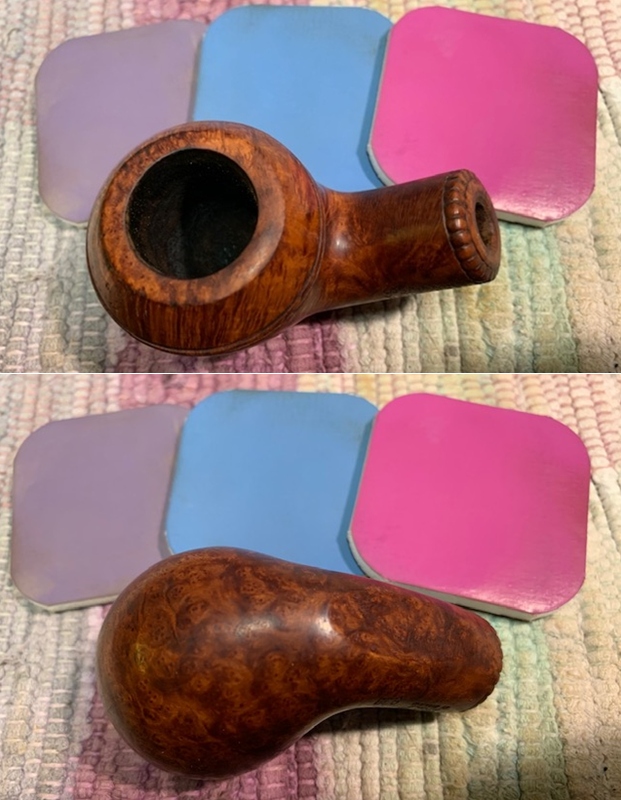
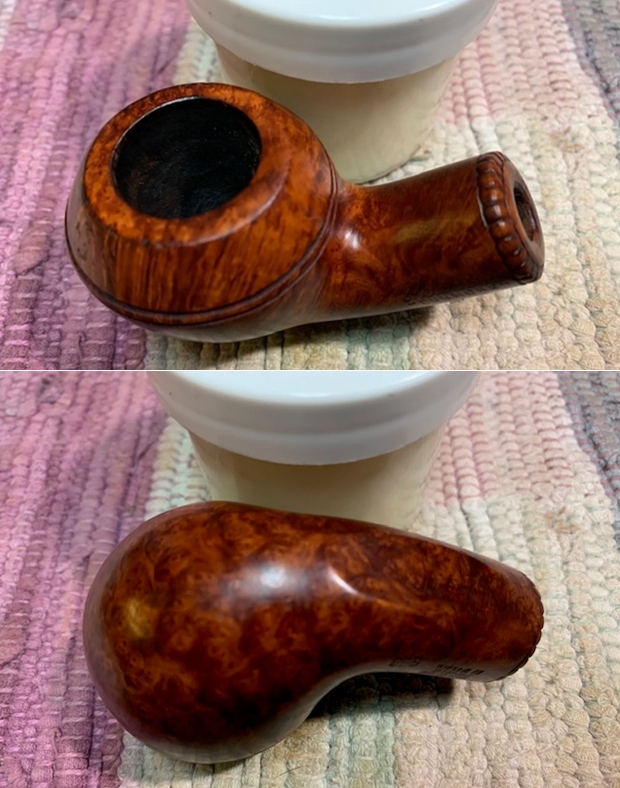
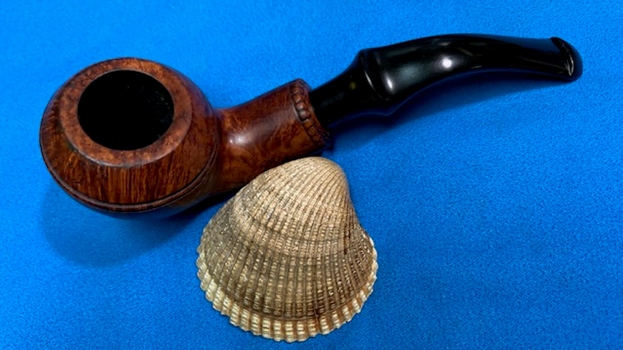
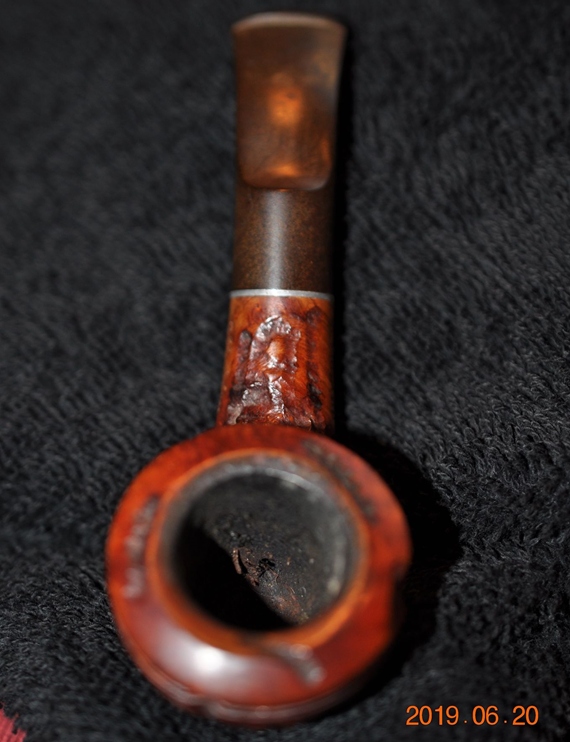
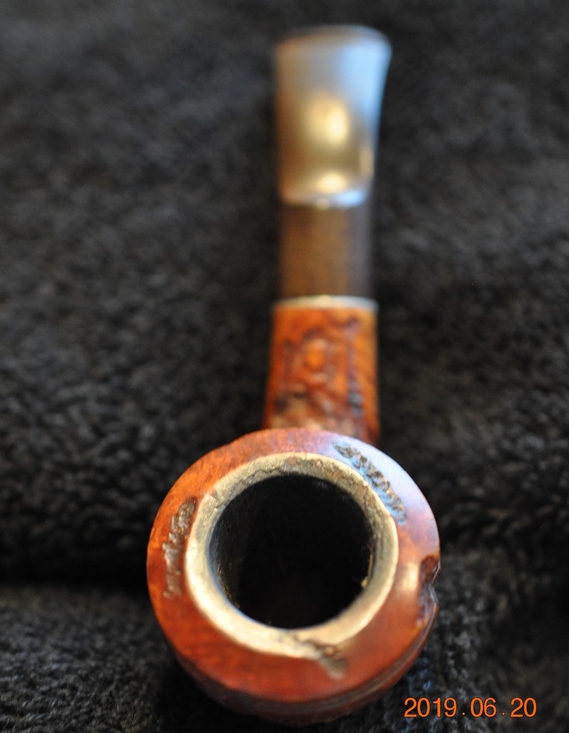
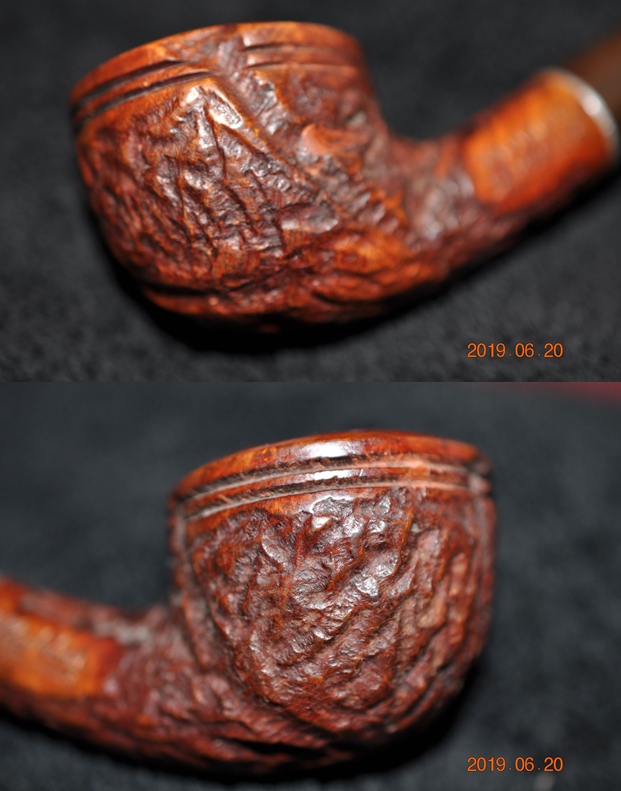
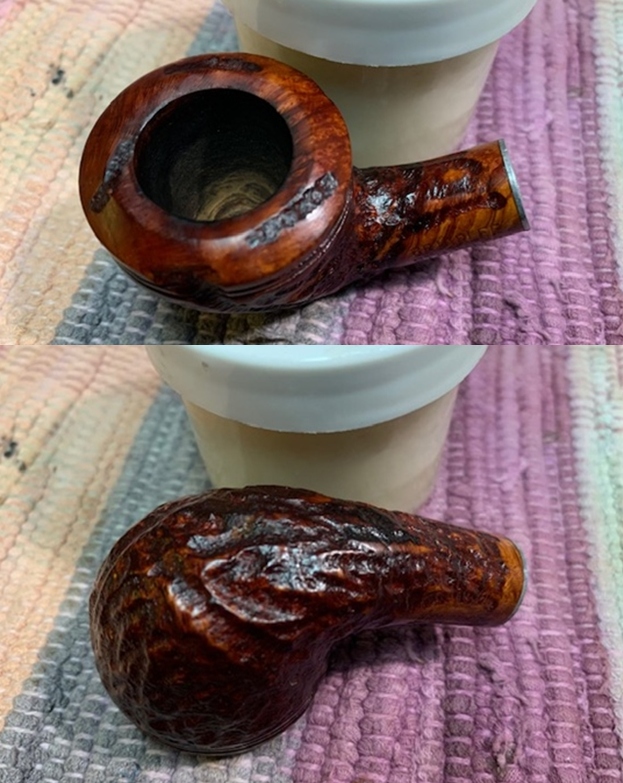
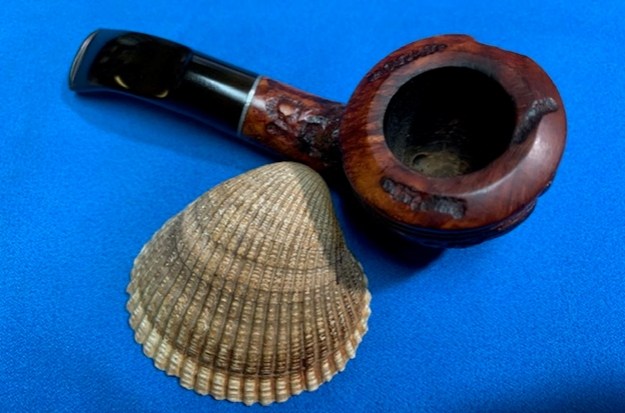
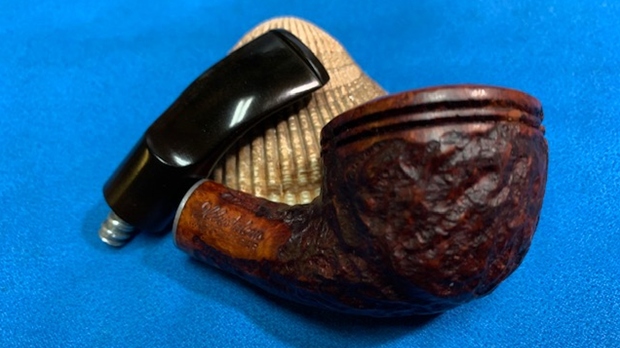
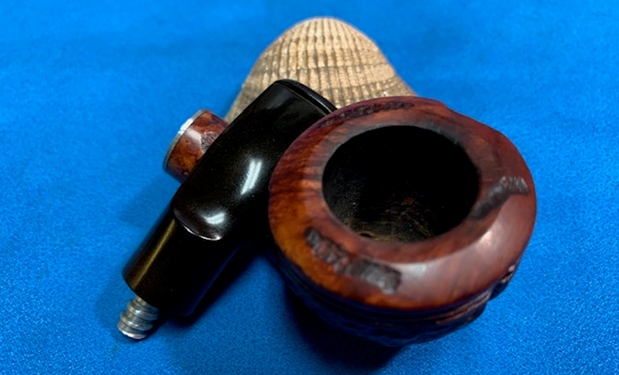
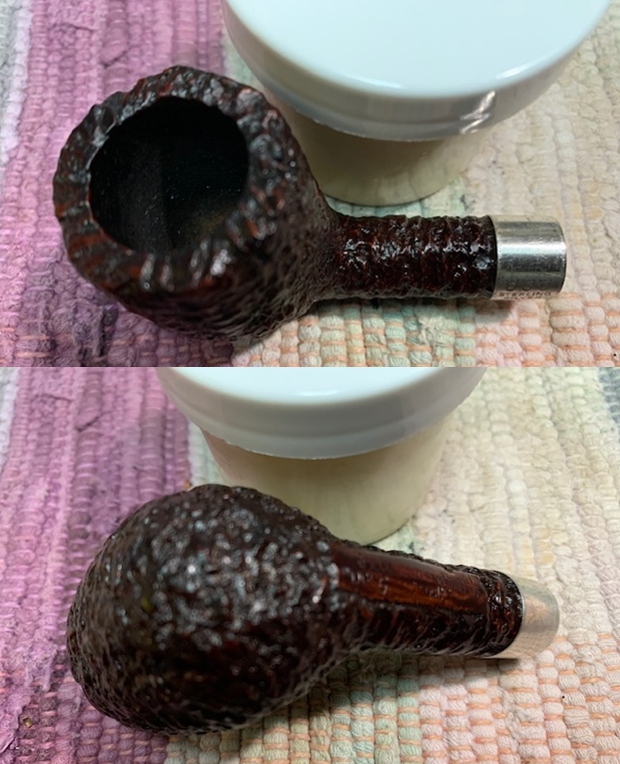
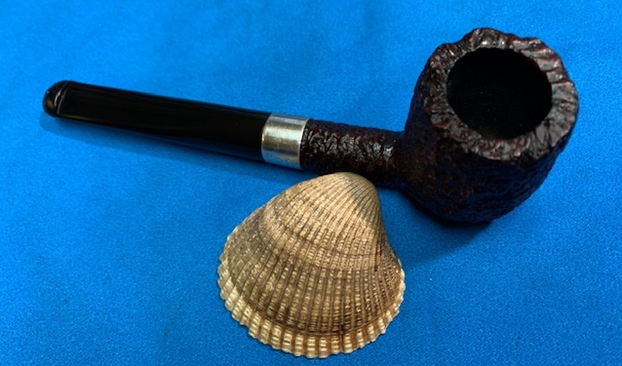
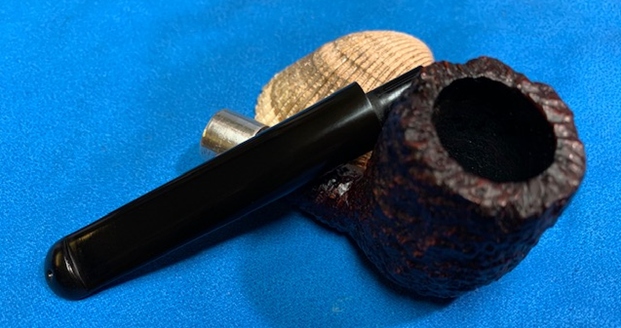
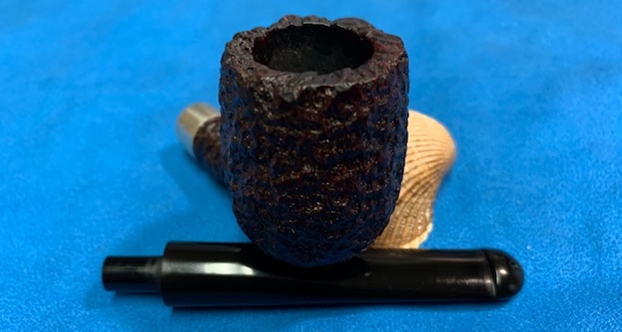
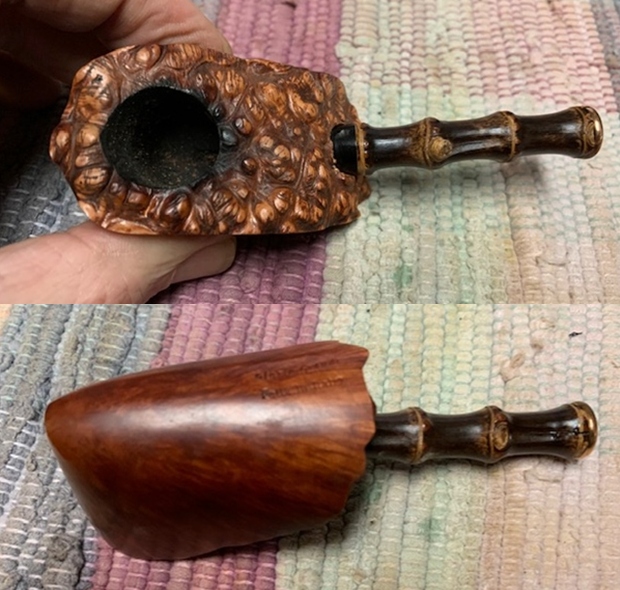
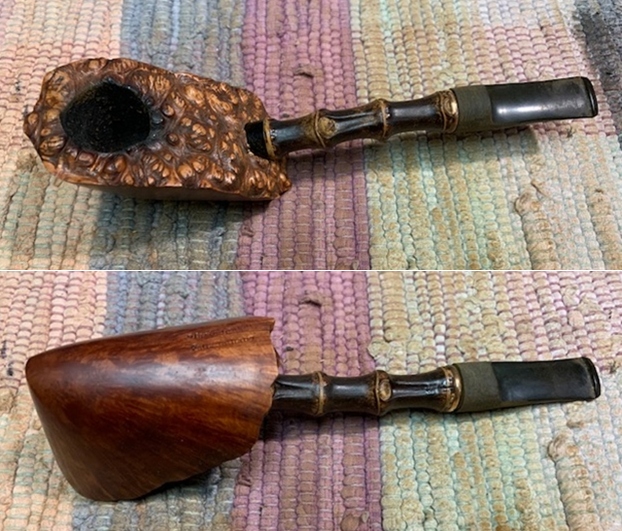
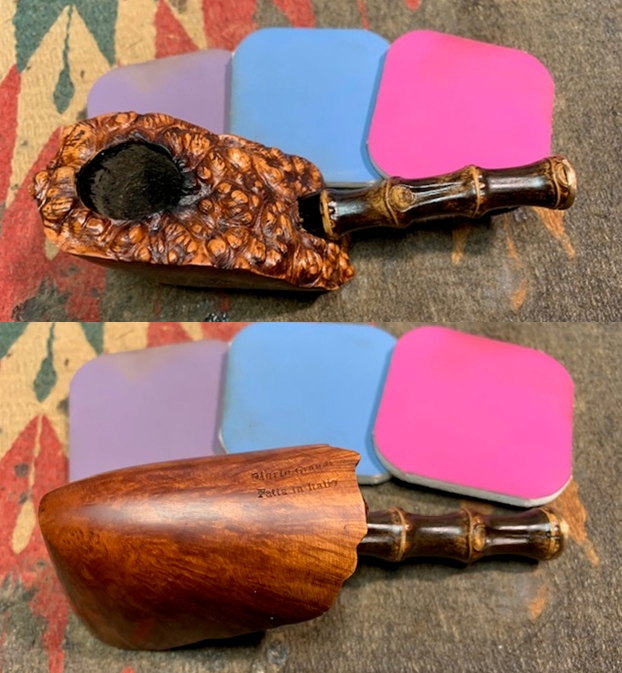
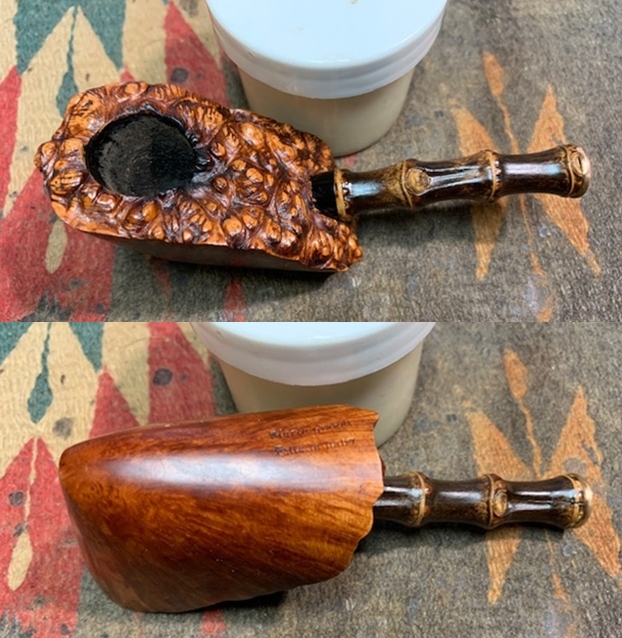
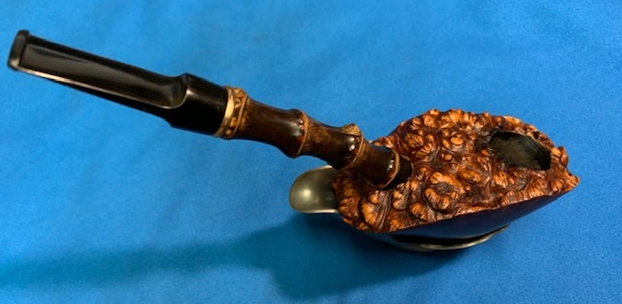
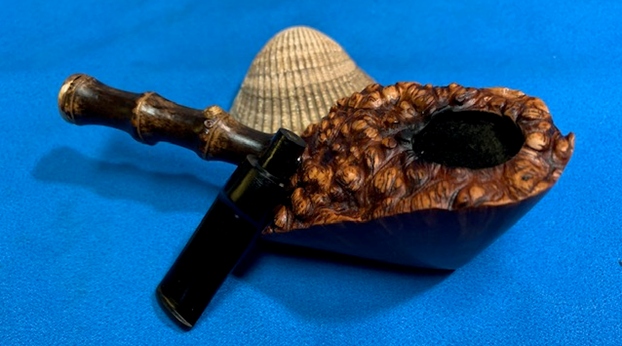
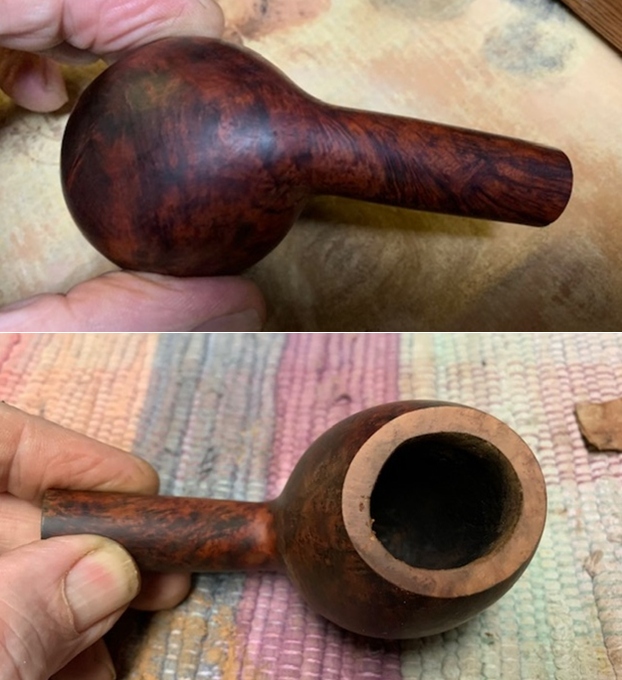
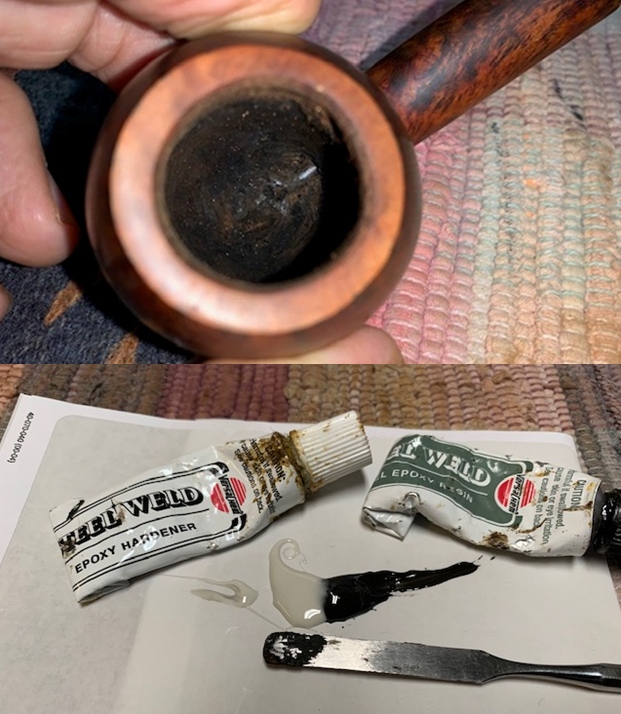
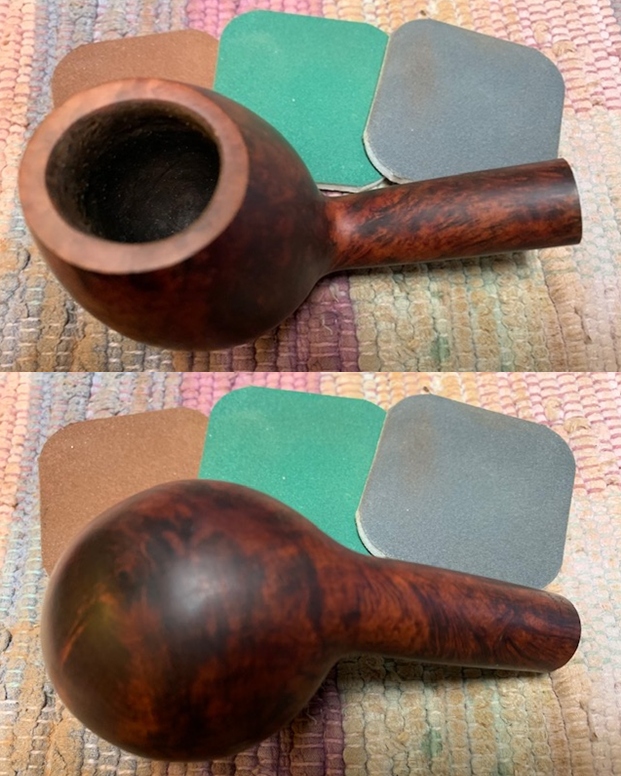
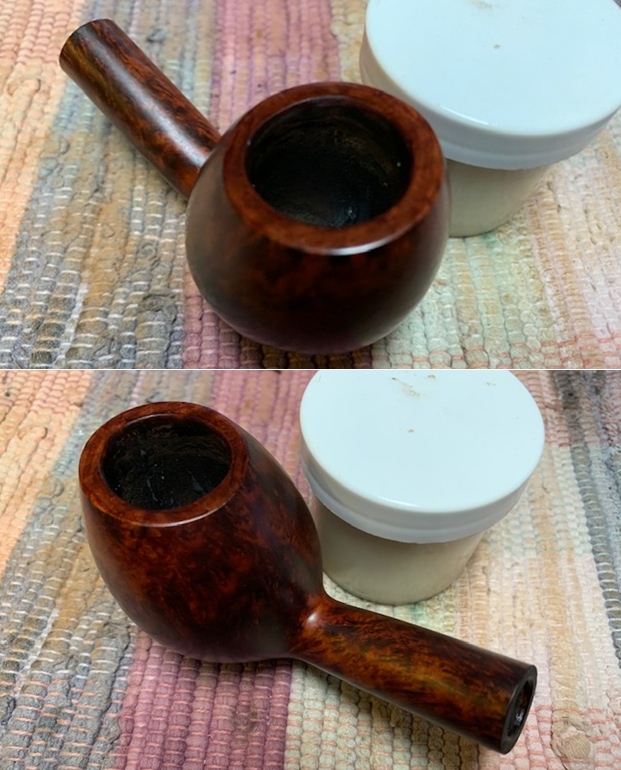
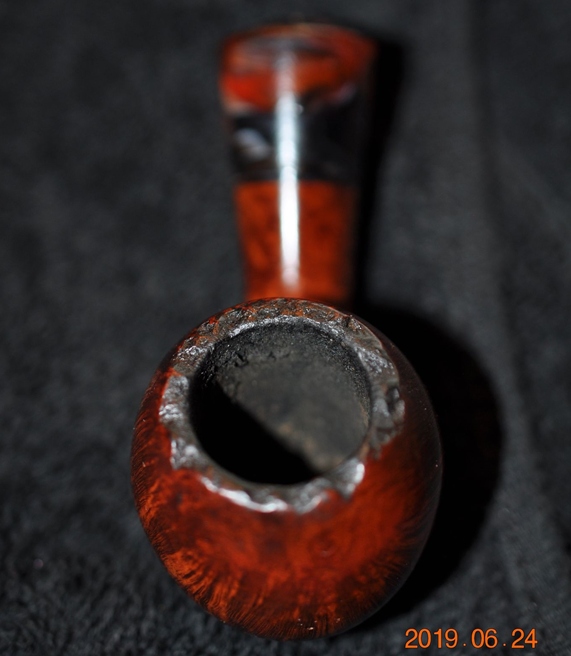
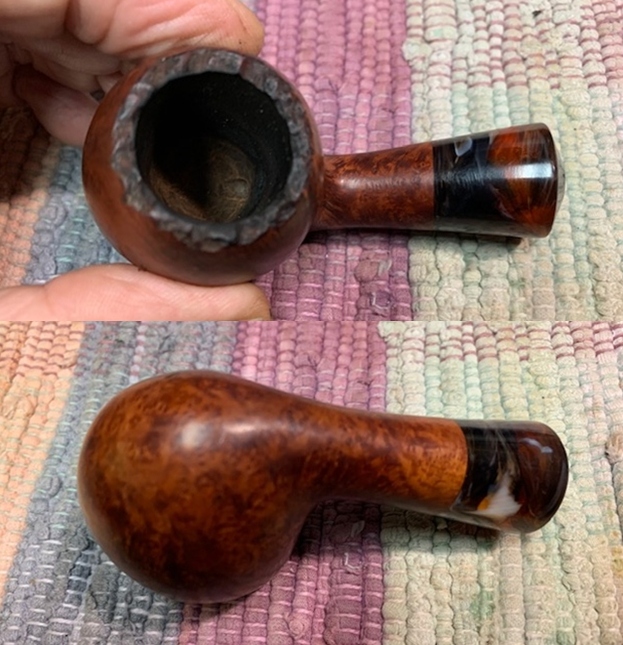
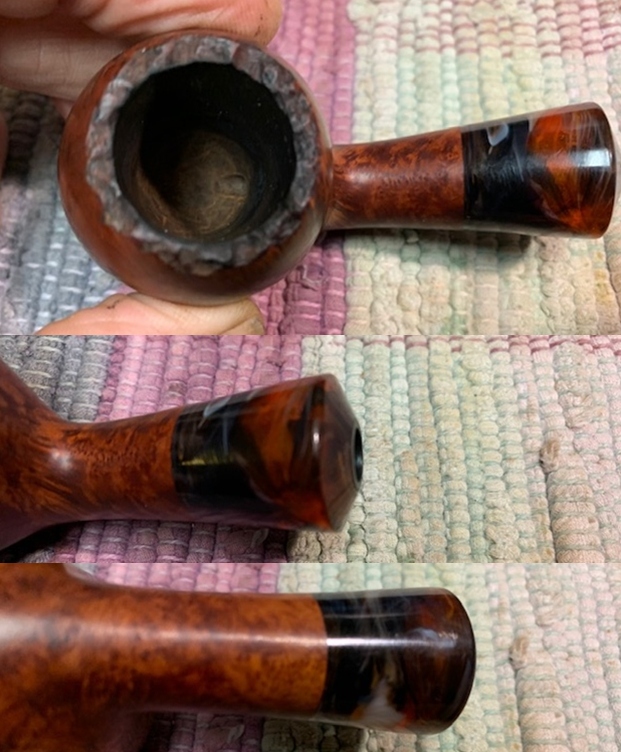
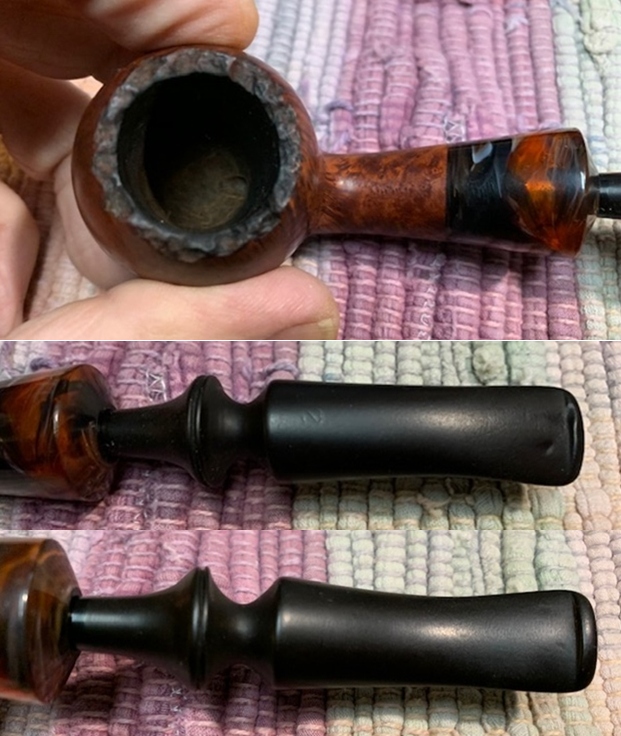
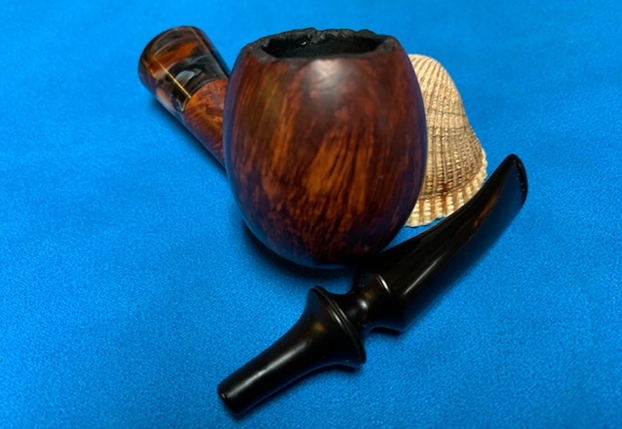
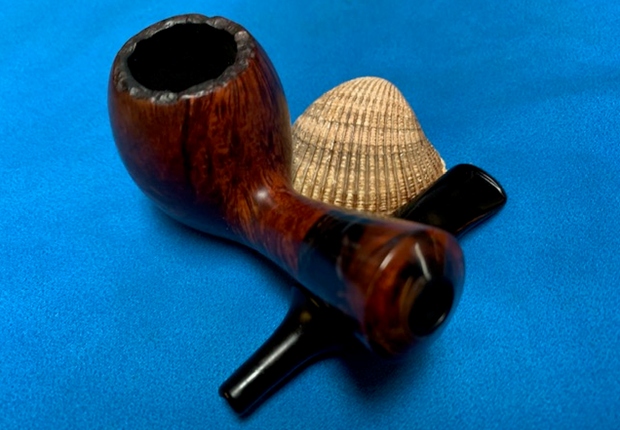
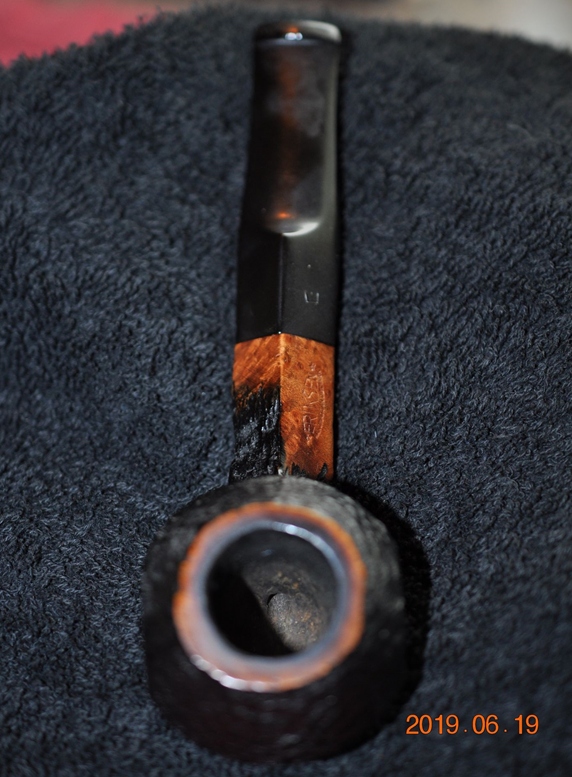
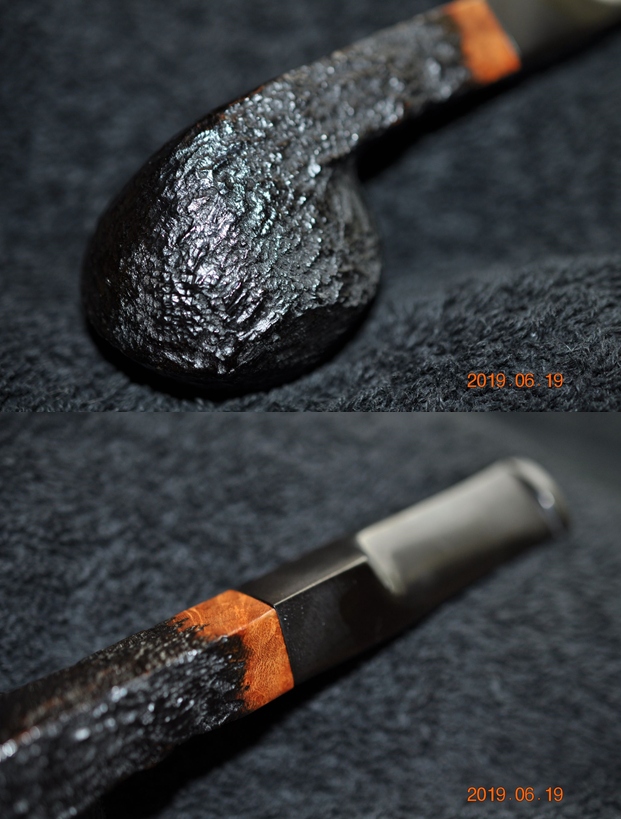
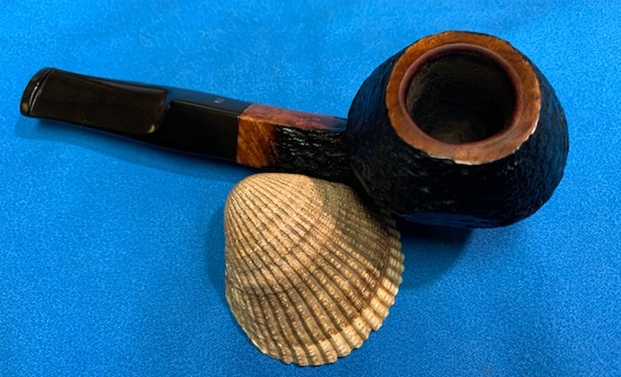
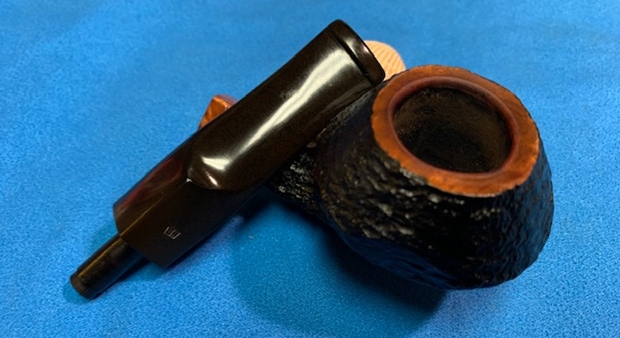
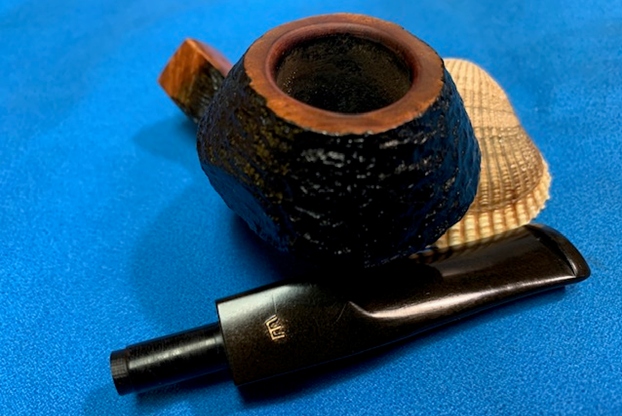
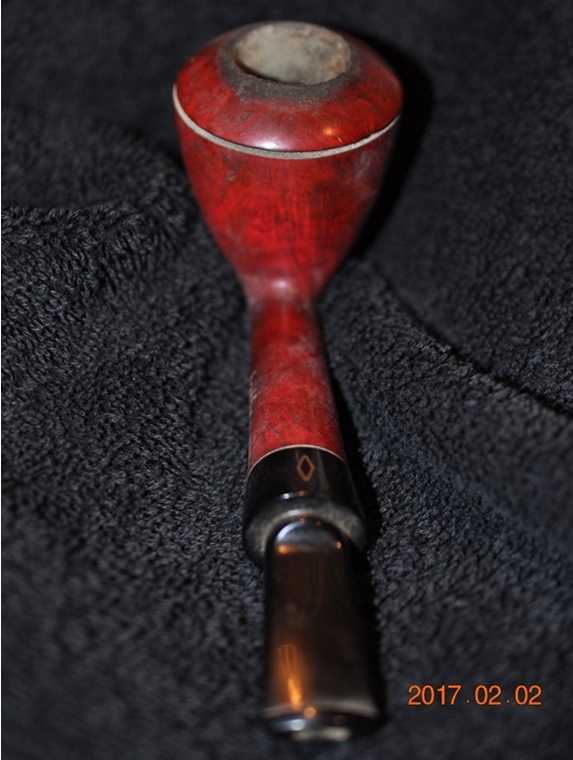
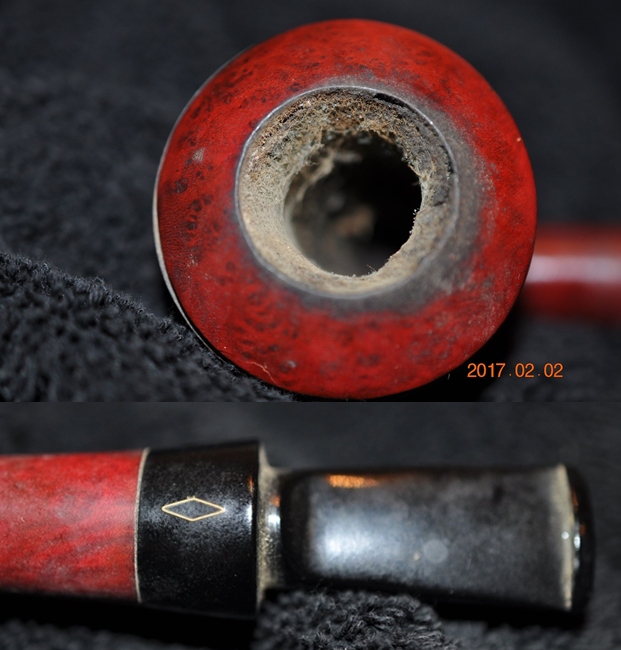
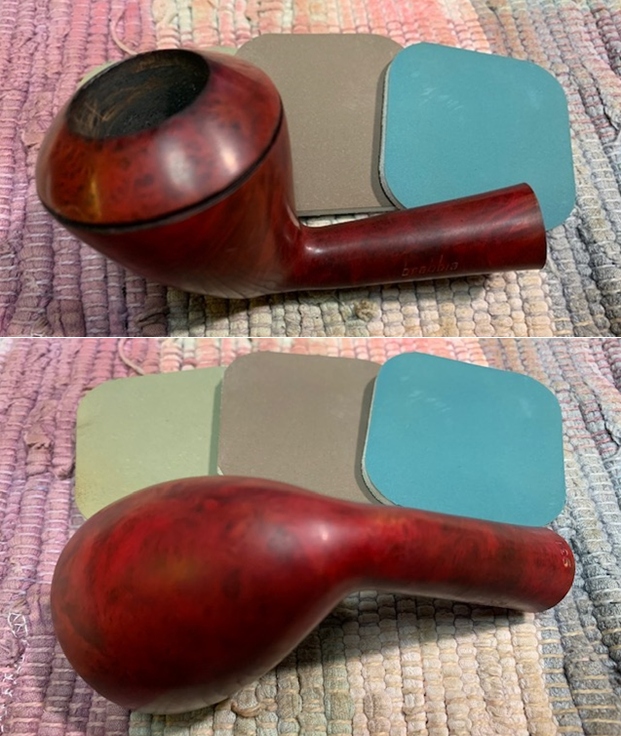
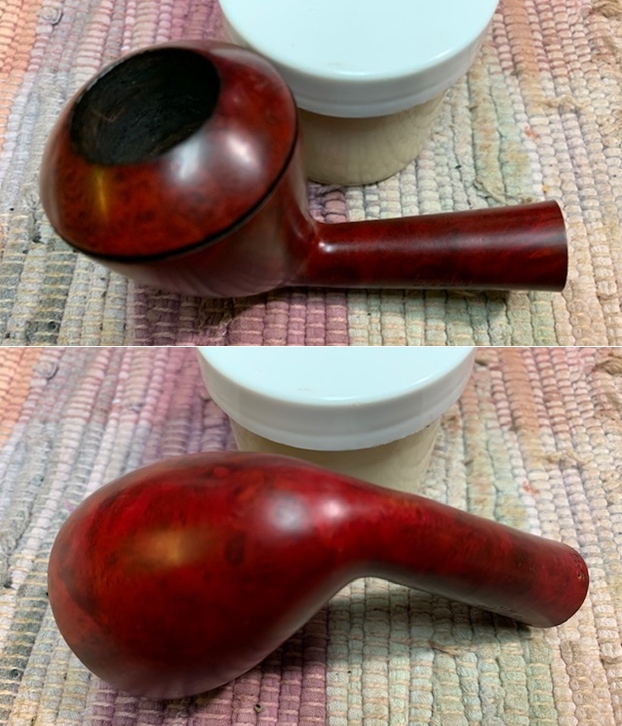
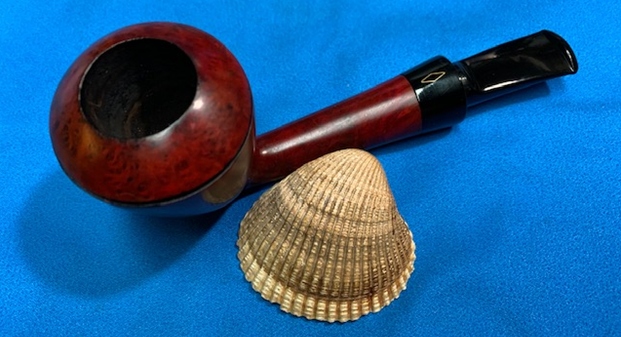
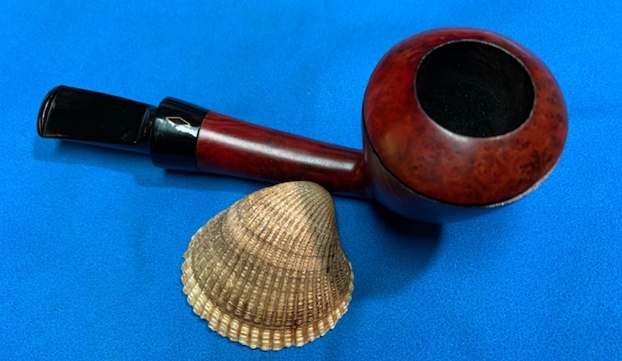
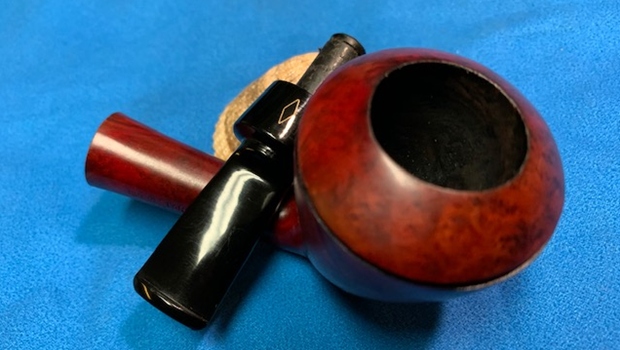
Pipephil’s site has several examples of the Aldo Velani line depicted which tend to be very stylish and nice-looking pipes which confirms the Pipedia assertion that Casare Brontini produced the Aldo Velani lines primarily for export. It is evident that there was not a consistency in the stem stamping or name style for Aldo Velani as different examples are given. Here are the stem stamping variations provided by Pipephil: Looking now to the condition of the Aldo Velani Trio Pot, the chamber has some cake build up as well as a crusted layer of lava flow over the broad Pot rim. Taking a close look, I can see fissures on the back side of the chamber wall. This could be an indication of burning problems with the Pot. He’s been well used and when I ream the chamber, I’ll be able to see if the fissures are only the cake or if it goes deeper into the chamber wall briar – not something I’m hoping for!
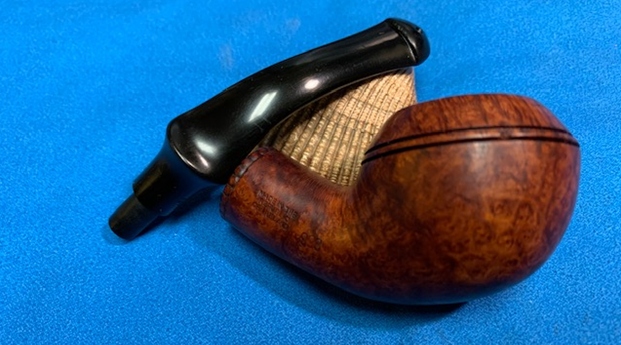
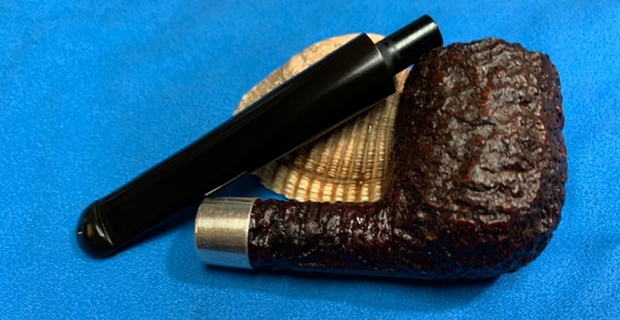
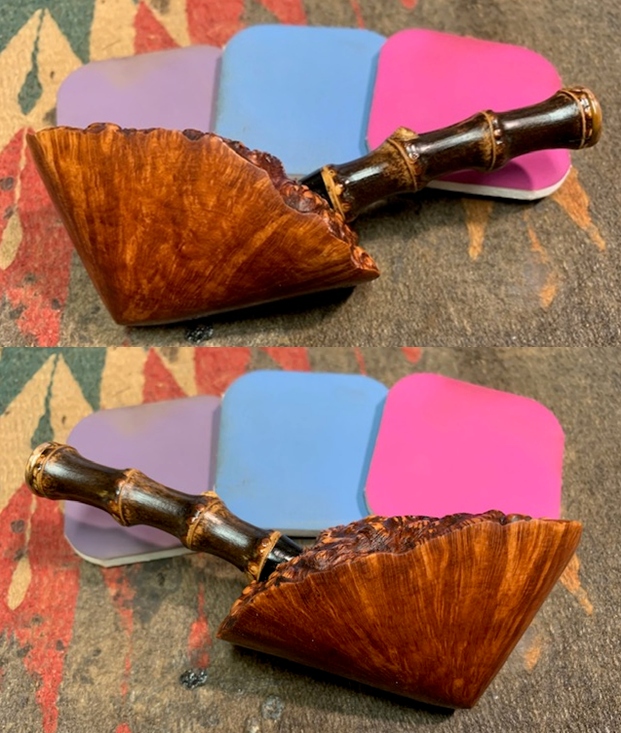
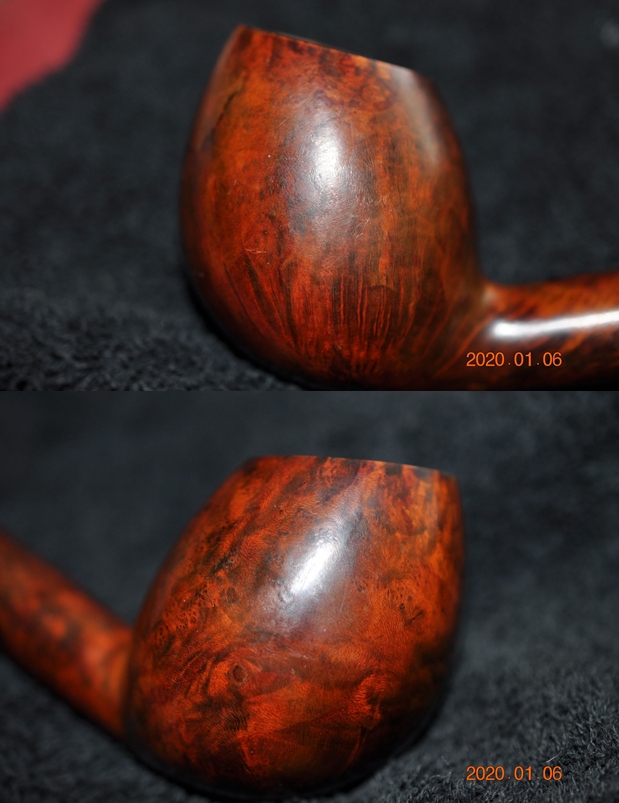
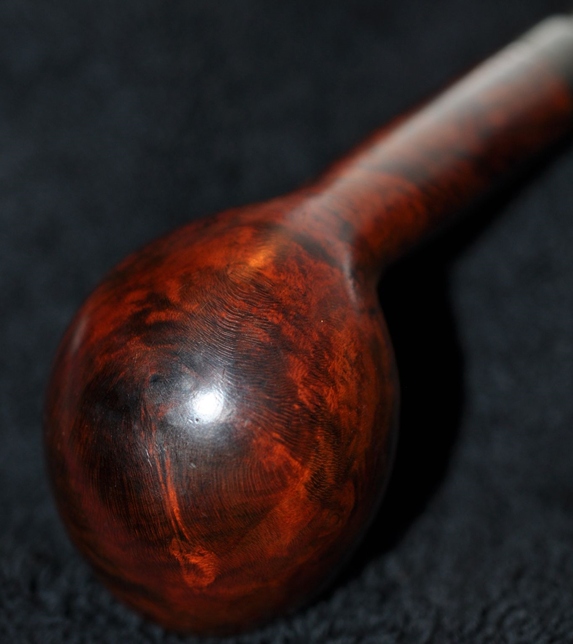
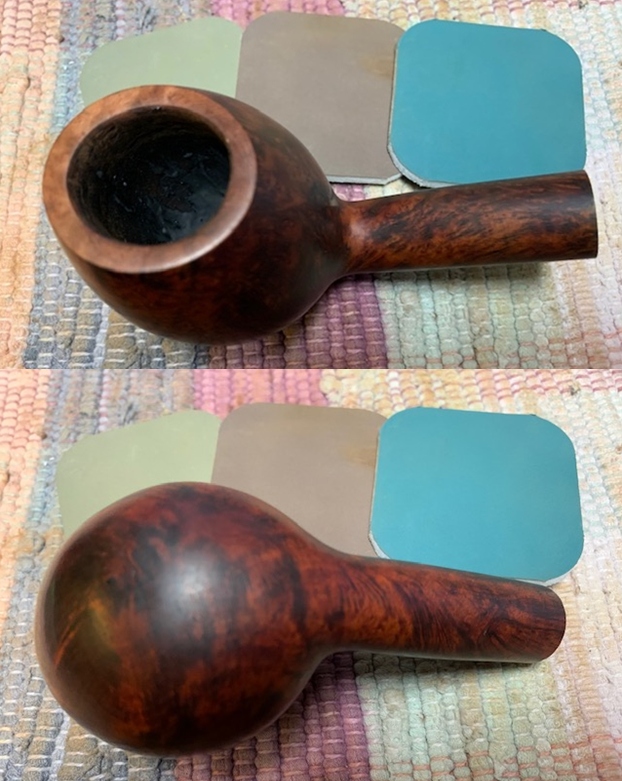
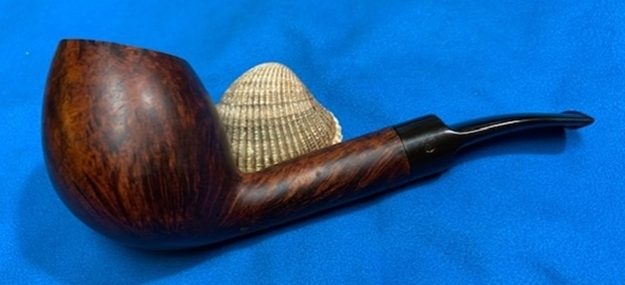
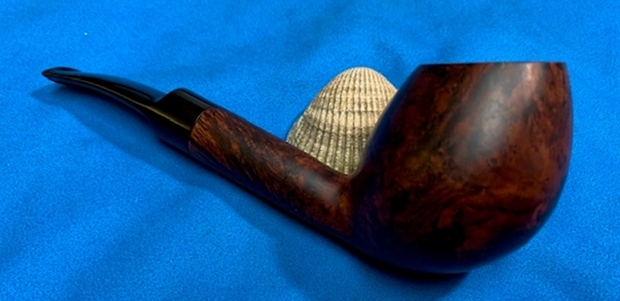
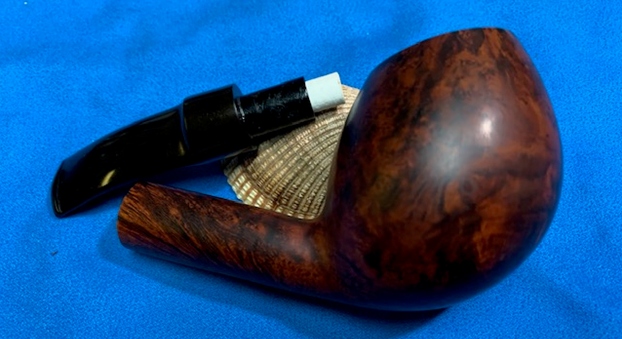
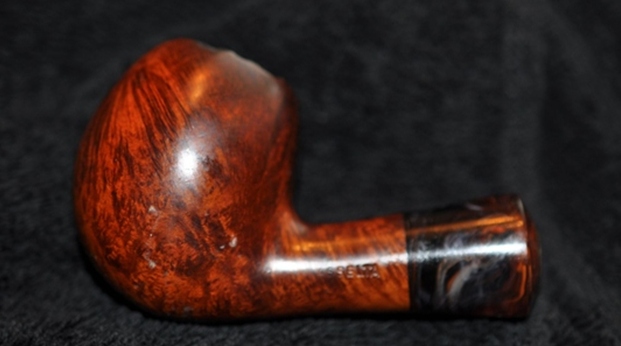
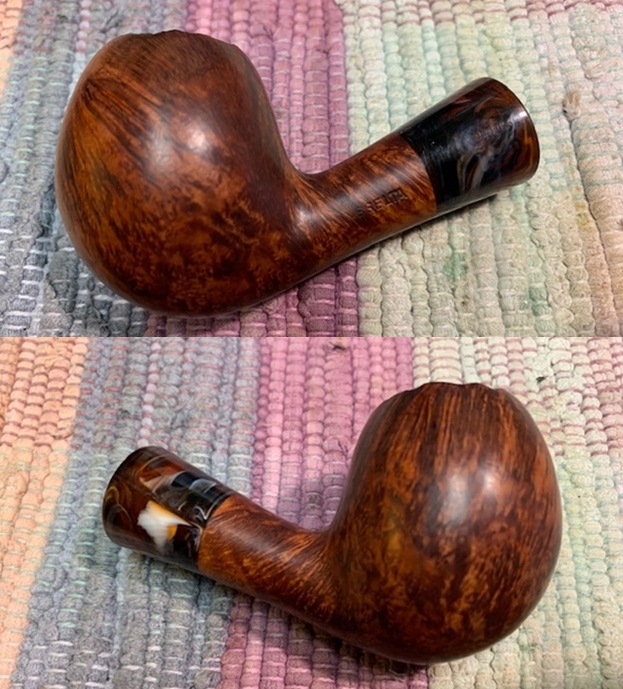
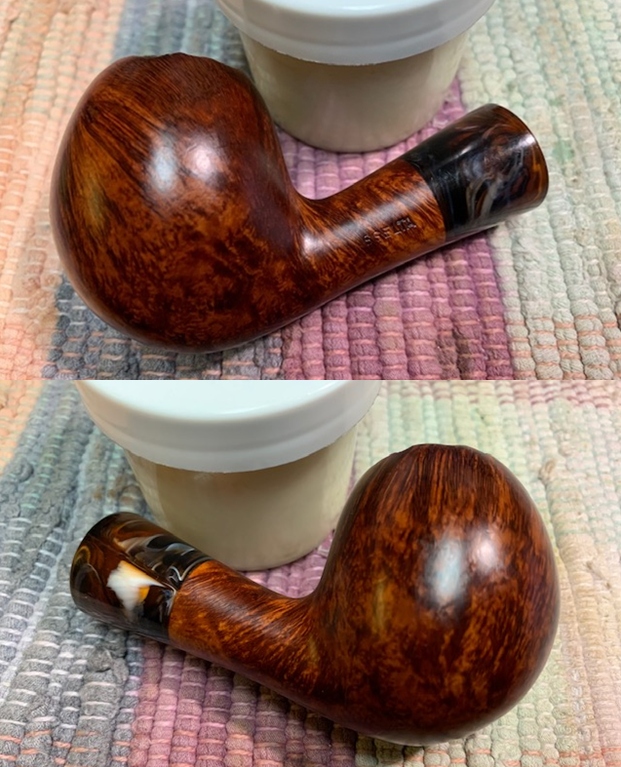
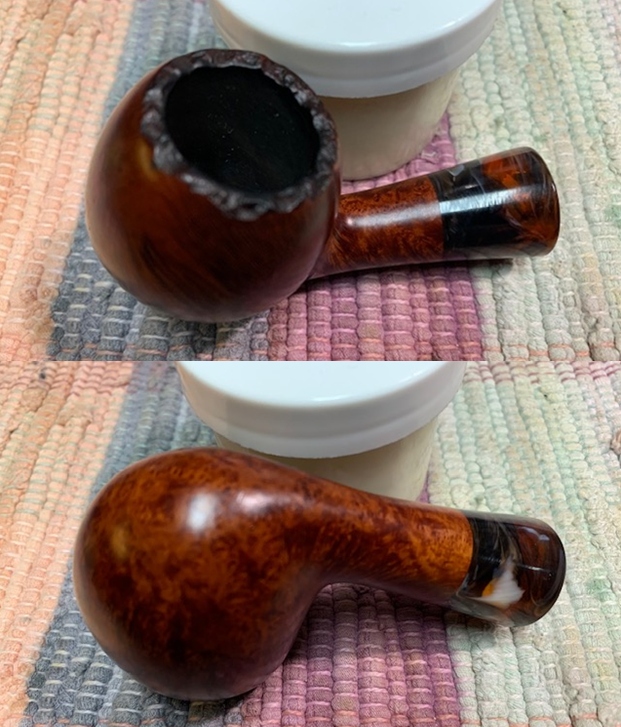
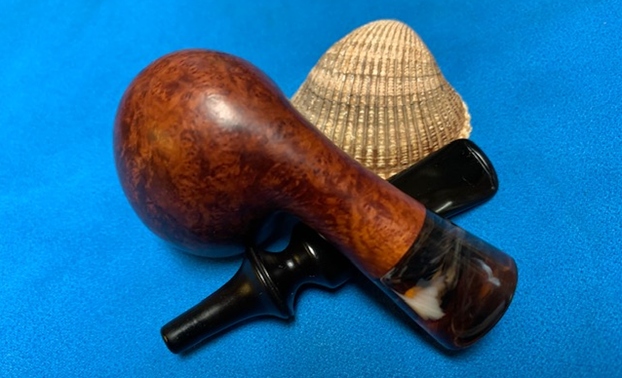
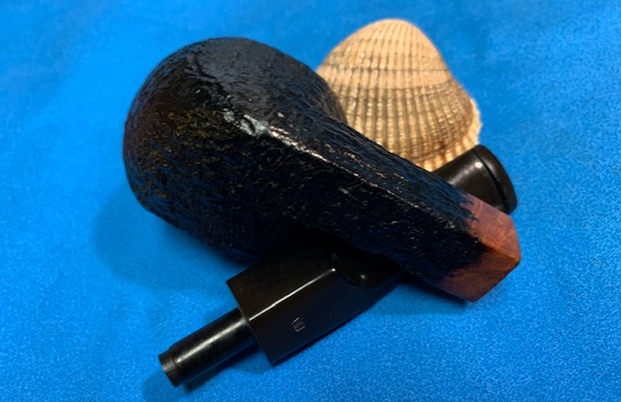
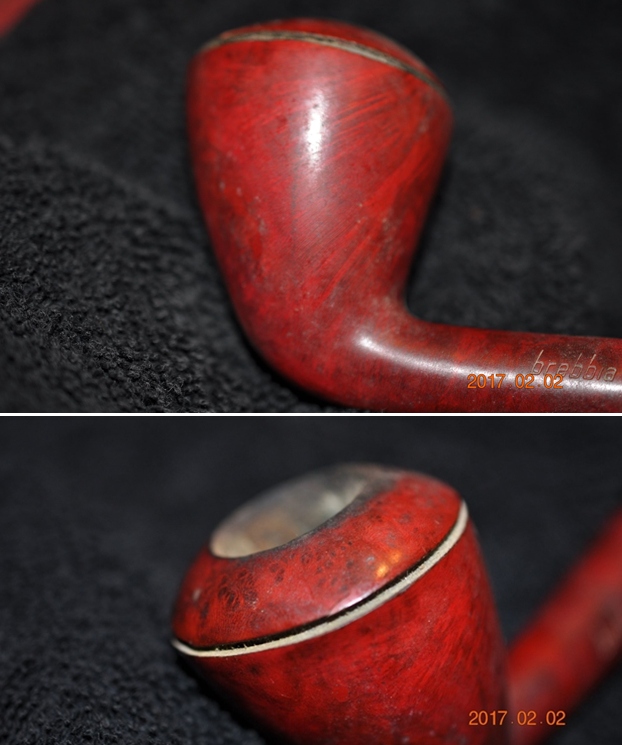
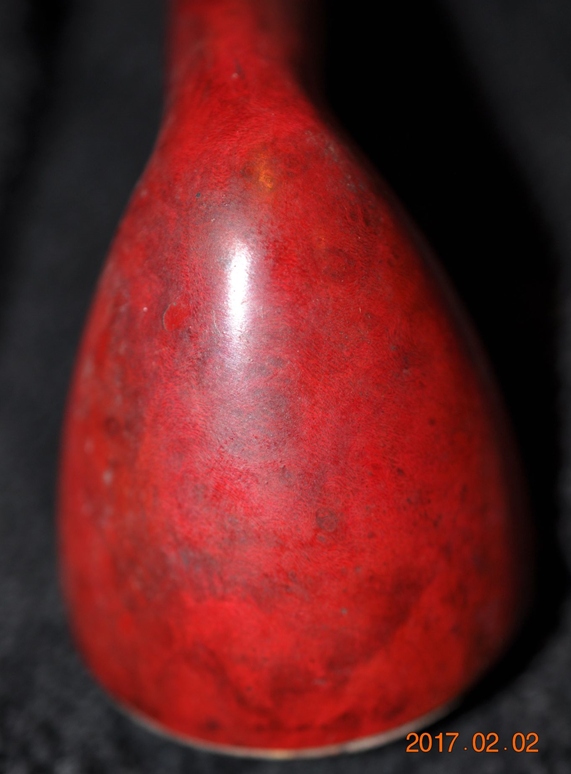
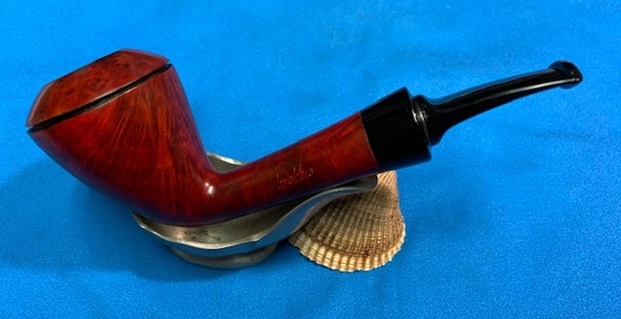
 The ruby/burgundy stummel is sharp but covered with grunge. The challenge in restoring these two Aldo Velani Trio brothers together, first the Pot then the Billiard, is to maintain the consistency of hue. The ruby/burgundy is a unique, eye catching hue that sets the entire line apart in a classy way. They strike me as ‘after dinner pipes’ when the pipe is packed with one’s favorite blend and the glass is poured with one’s favorite adult beverage! It is possible that during cleaning and possible repairs to the stummel that the hue can change a bit or a lot. With the previous Aldo Velani Apple, all the stummel needed was a cleaning. I’m hopeful of the same for the most part with the Pot and Billiard. A few pictures show some closer looks at the surface’s need of cleaning.
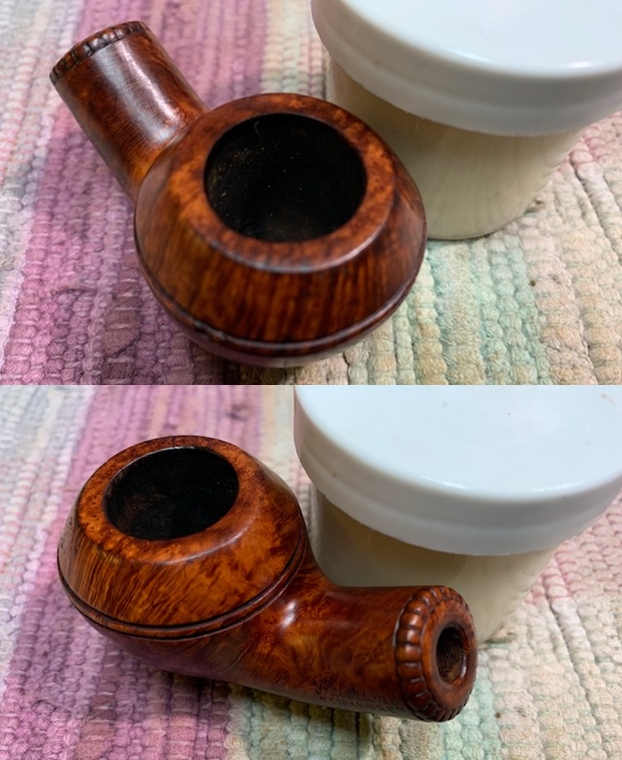
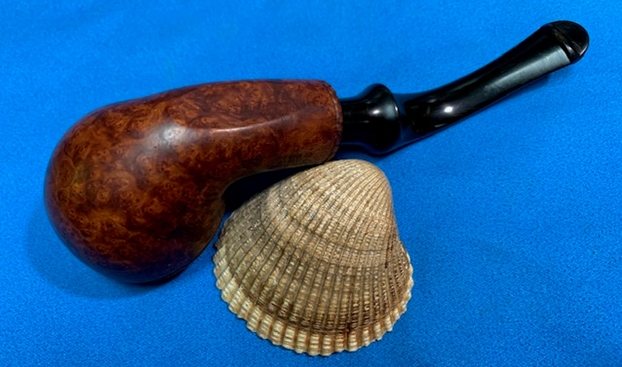
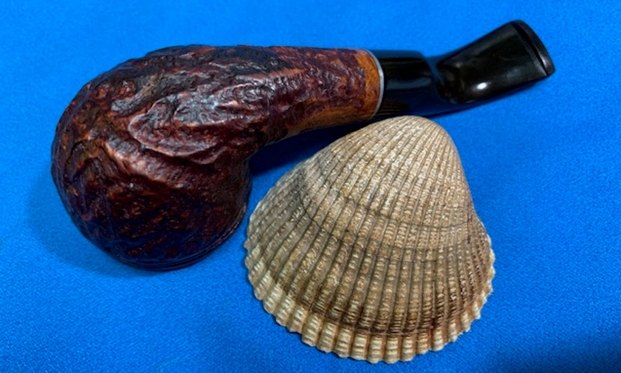
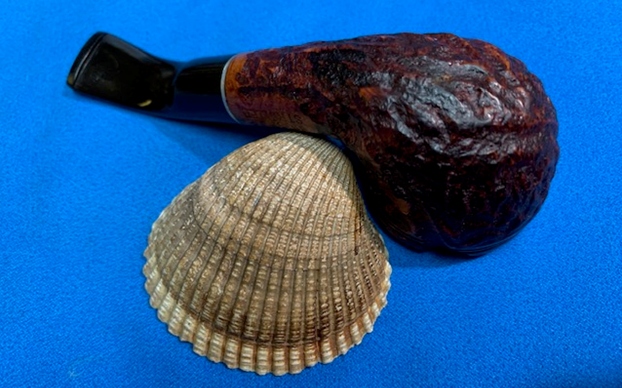
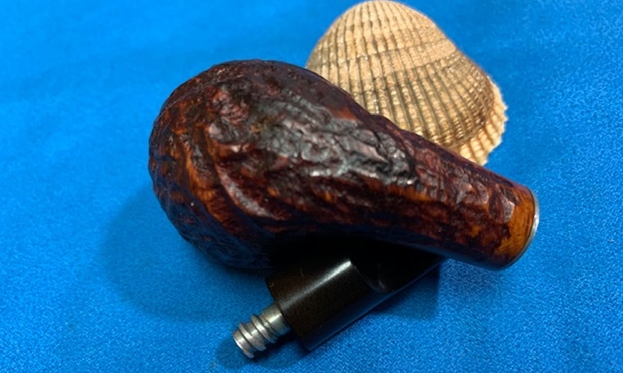
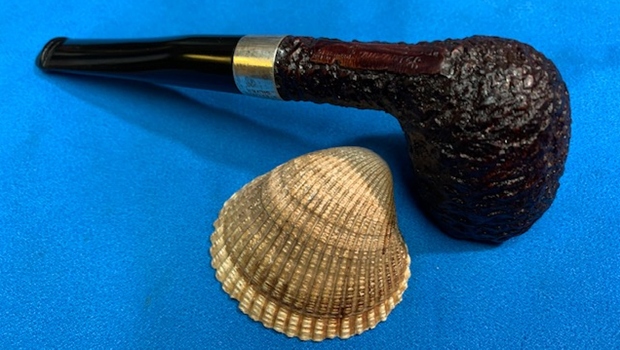
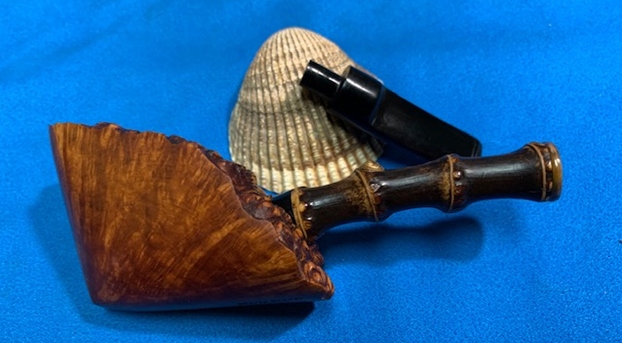
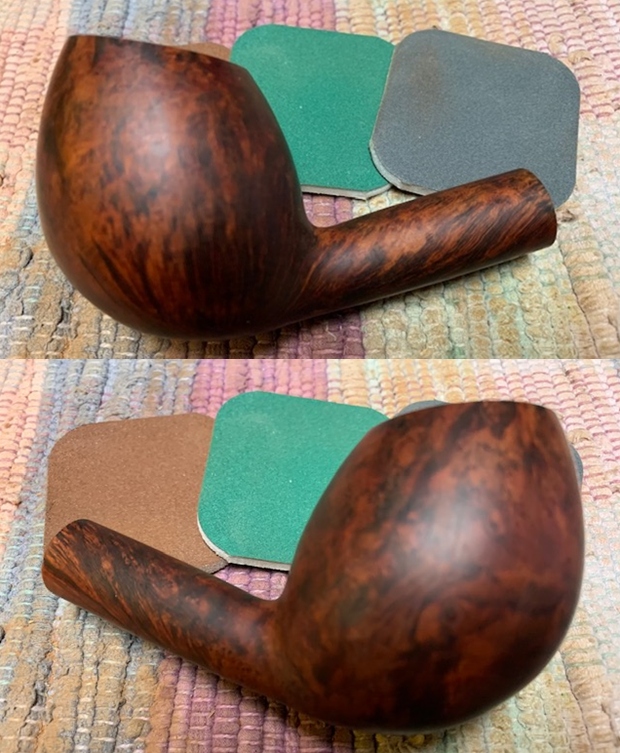
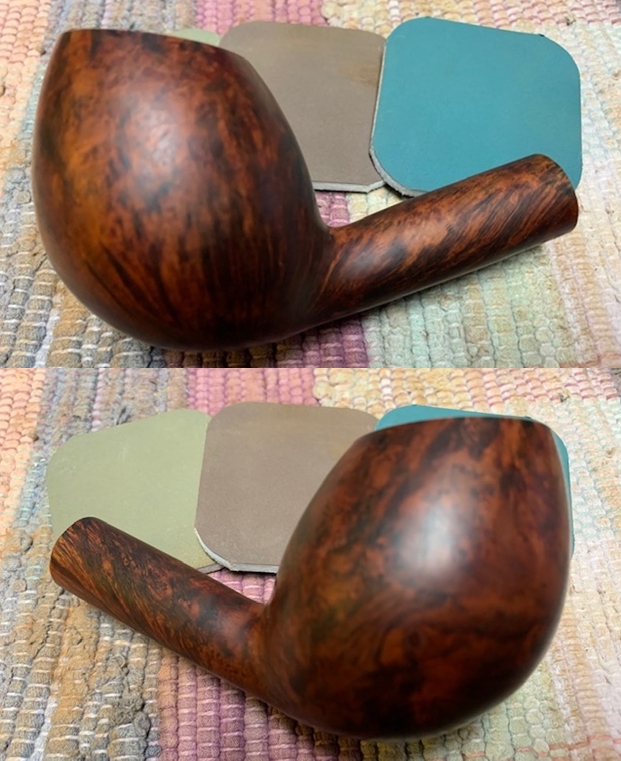
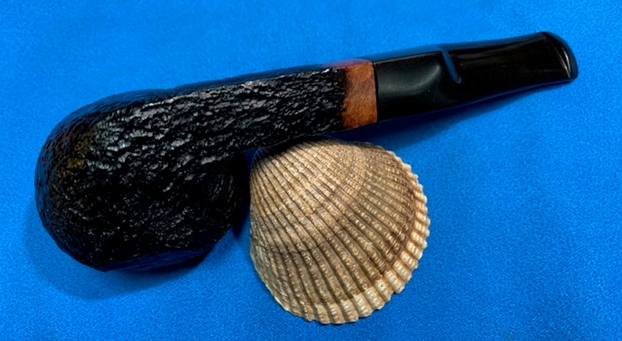
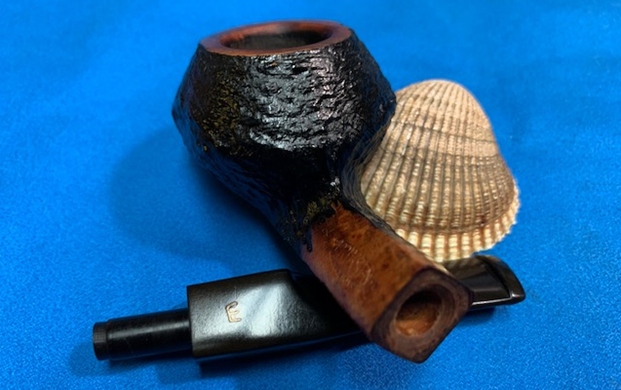
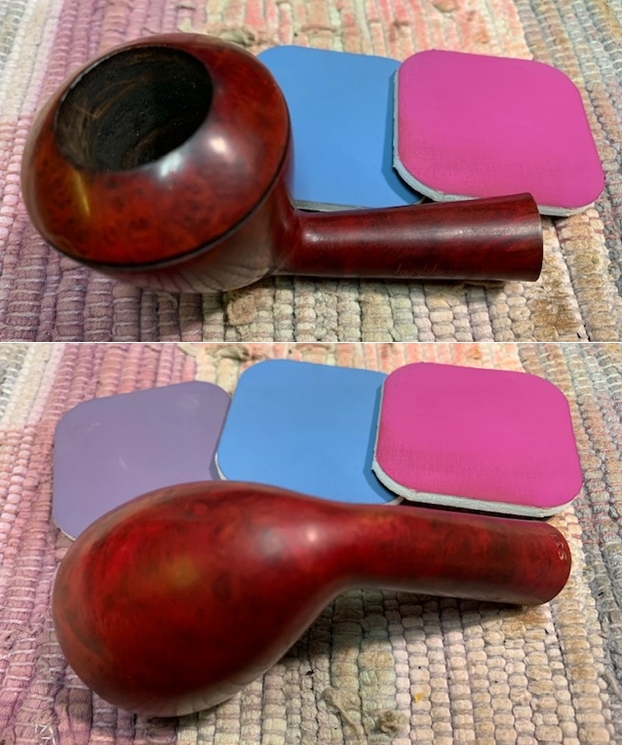
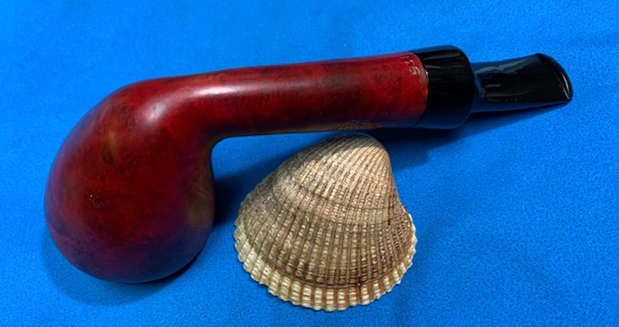
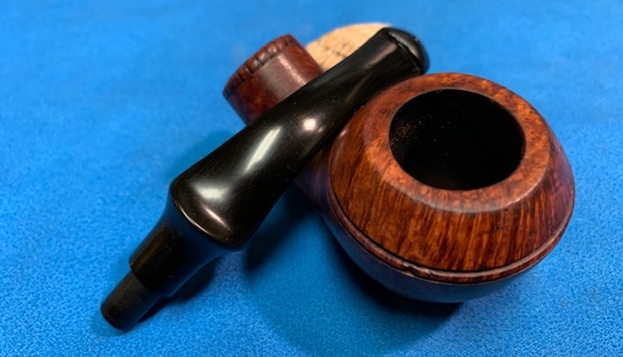
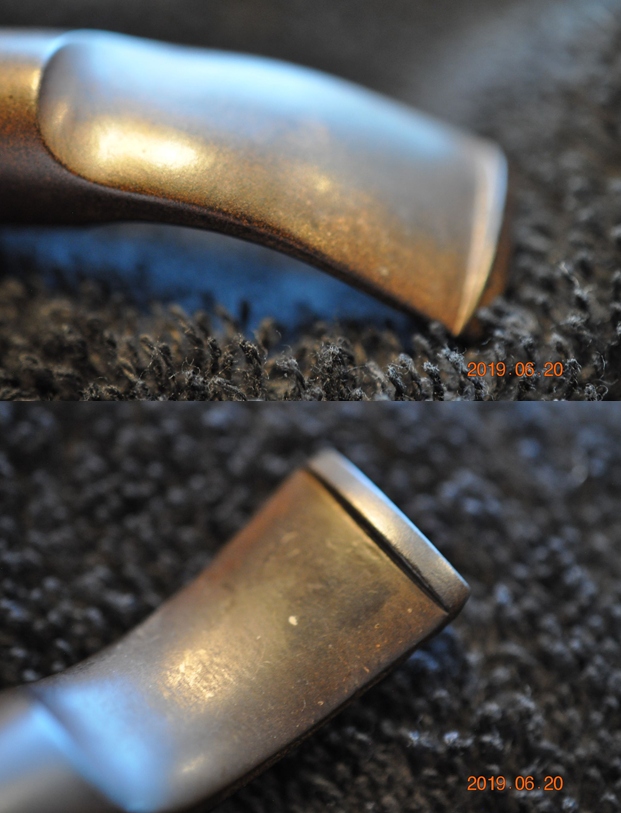
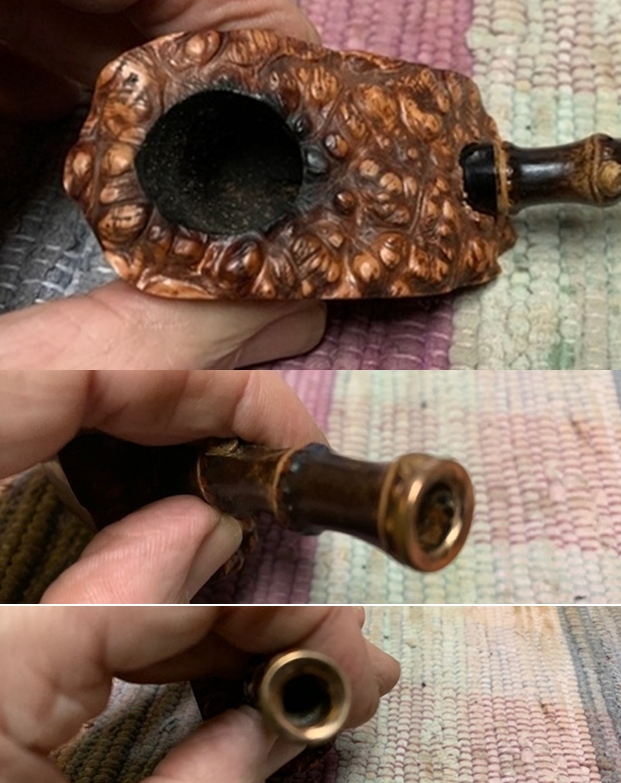
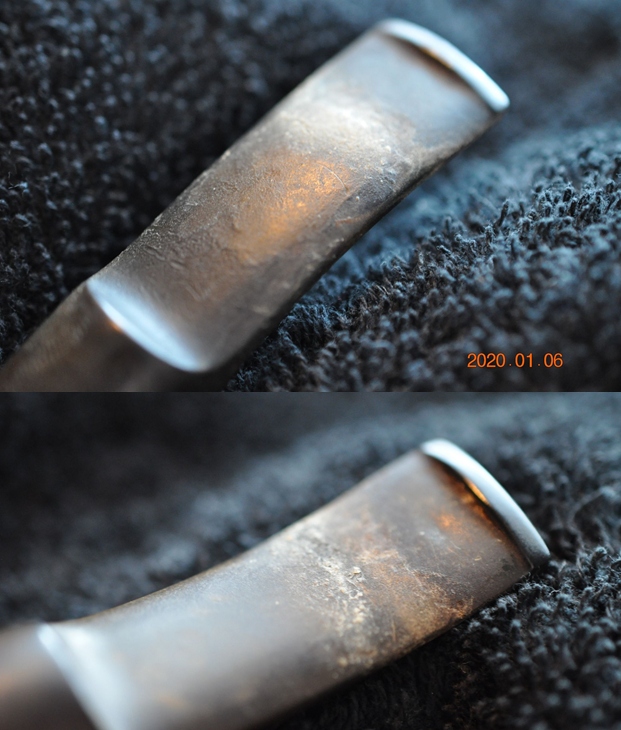
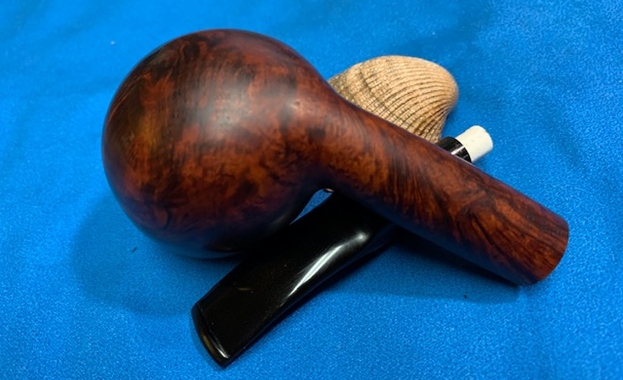
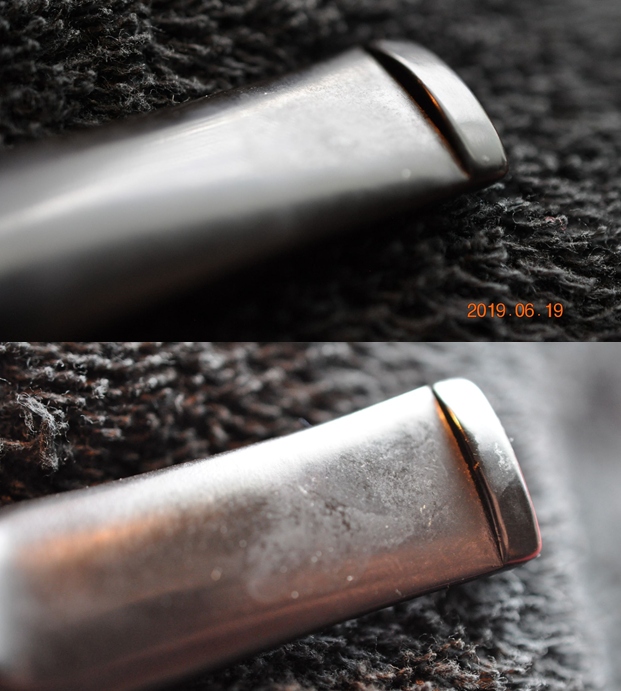
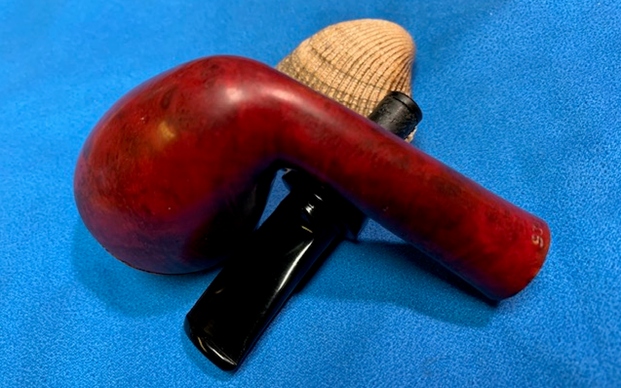
 The ruby red acrylic stem has amazing ‘fire’ and presents a spectrum of colors which will be beautiful when the stem is cleaned. The chatter on the bit is more severe on the lower side with a characteristic, singular tooth compression which is consistent with all the Aldo Velani pipes I’ve worked on. This indicates a common steward of all.
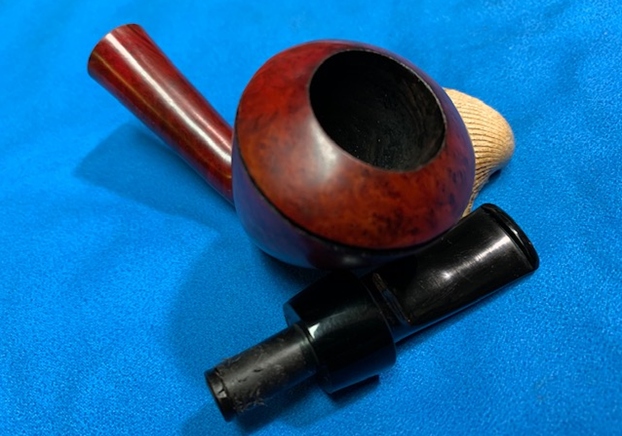
  To begin with the cleanup of this Aldo Velani Trio Pot, the Pipnet Reaming Kit is employed to begin the process of clearing the chamber of the cake build up which hopefully reveals a healthy chamber. I take a few more pictures to mark the starting point.
 Working on a piece of paper towel to help cleanup, starting first with the smallest blade head and moving toward the larger from the Pipnet Reaming Kit, I use 3 of the 4 blade heads available. Next, the Savinelli Fitsall Tool is employed to scrape the walls. This is followed by sanding the chamber with 240 sanding paper wrapped around a Sharpie Pen. Finally, a cotton pad wetted with alcohol is used to wipe the chamber to clean the carbon dust residue.

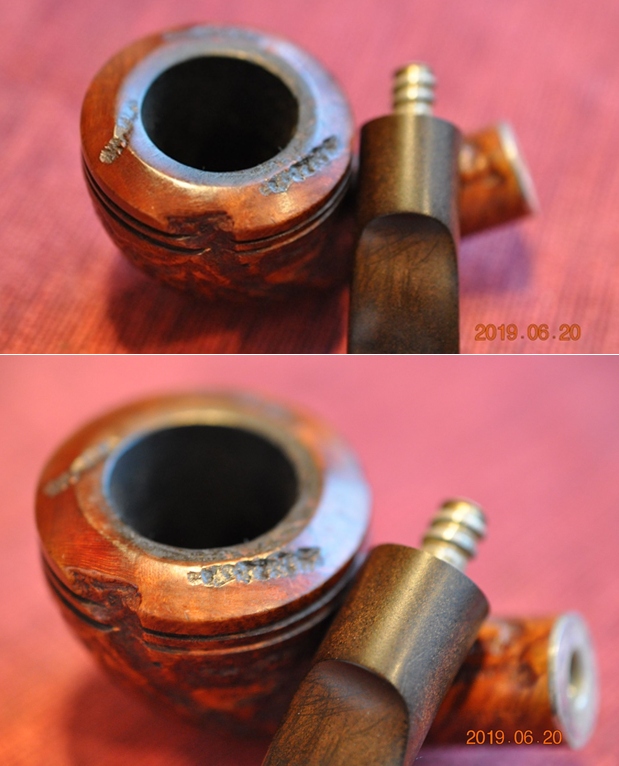
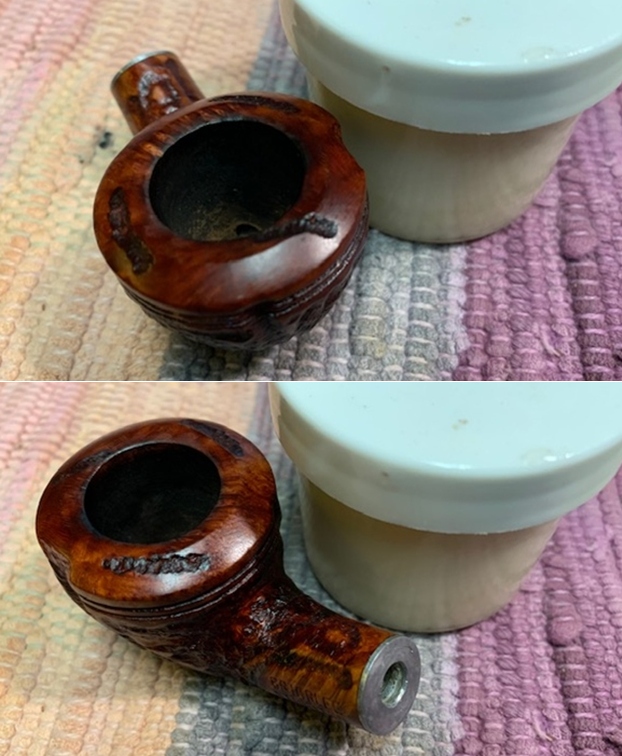
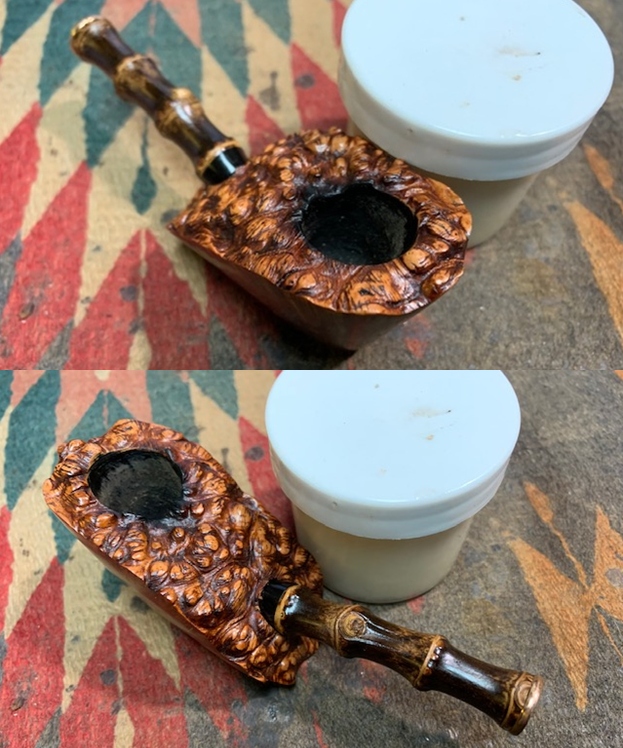
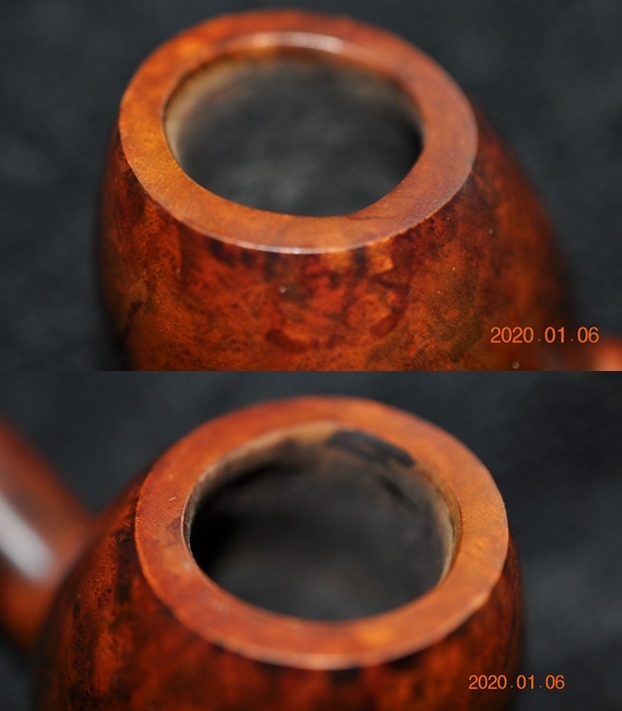
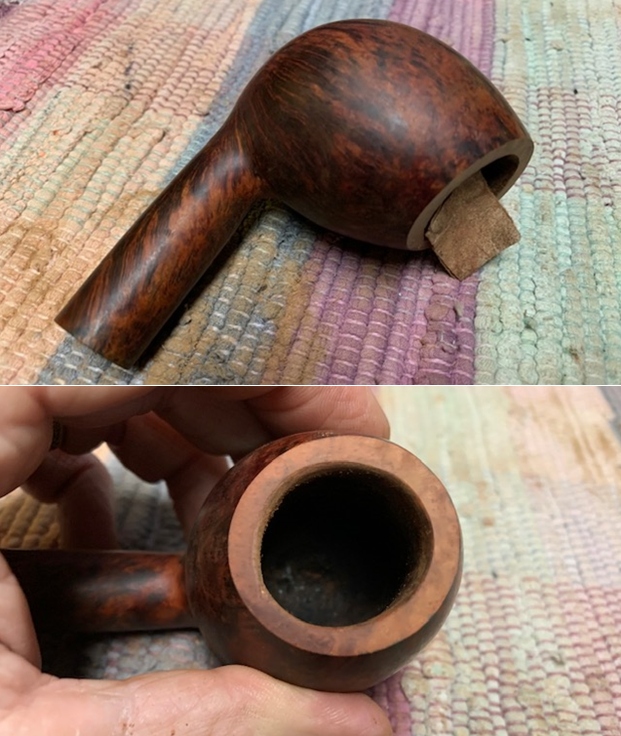
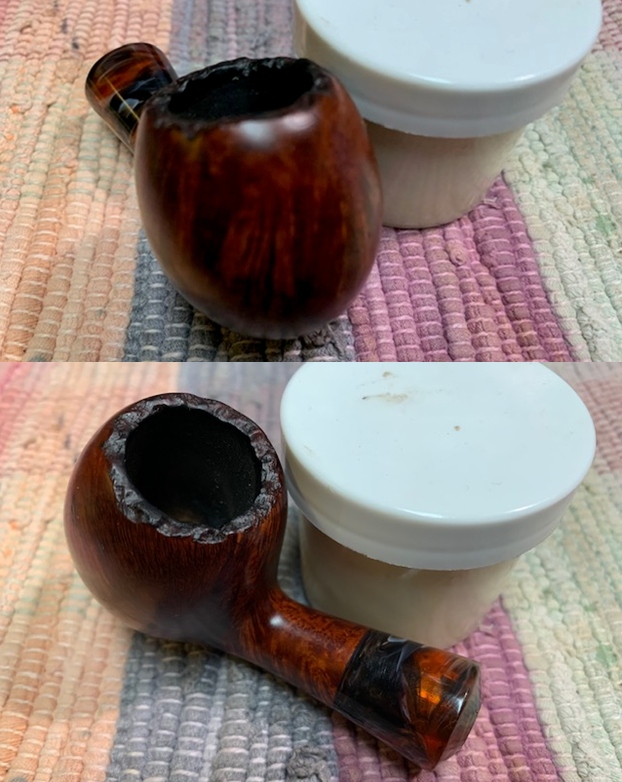
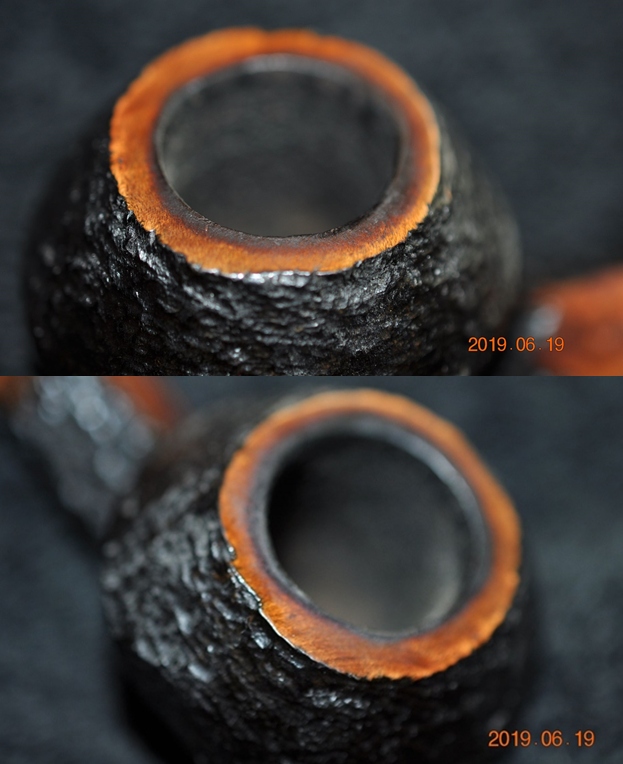
 An inspection of the chamber shows some chamber damage from heating where fissures have developed. The thickness of the carbon cake buildup was deeper toward the backside of the chamber where the damage is located. It’s important to remove all the charred wood and in doing this, the contour of the chamber is wider or ‘bowed out’ where more char was removed toward the shank-side.
 Another result of this damage is shown in the next picture. The shank-side of the rim is thinner just a bit and this has created a flatness on the back of the rim lip. The result is that the chamber mouth is out of round. This can be seen in the next picture with a downward perspective. As I continue to clean the rim and stummel, it will give me time to consider how to approach the chamber repair.
 Next, I work on scraping the lava caked on the rim. Both a Winchester pocketknife and the Savinelli Fitsall tool are used to gently scrape the buildup off the rim.
 I don’t scrape too much to risk scratching or gouging the briar. Next, I transition to cleaning the rim and stummel using undiluted Murphy’s Oil. A cotton pad is used to scrub the stummel and a brass wire brush is used to help break up the remaining lava clinging to the rim.
 Transitioning from the worktable, the next stop is to the sink to continue the cleaning. Using shank brushes and anti-oil dish washing soap, the mortise is scrubbed with warm water. The stummel is then rinsed thoroughly with warm tap water. Back on the worktable, I take another picture.
 The stummel cleaned up well. The rim reveals places where the finish has thinned and is absent. This picture also continues to show the issue of the ‘out-of-round’ chamber. The challenge in restoring the rim will be to continue to clean the rim and to match the burgundy color of the rim after the repairs are done.
 While I think about this approach, I continue to fine tune the internal cleaning by using pipe cleaners and cotton buds dipped in isopropyl 99%. After several buds and pipe cleaners they start emerging lighter. I move on!
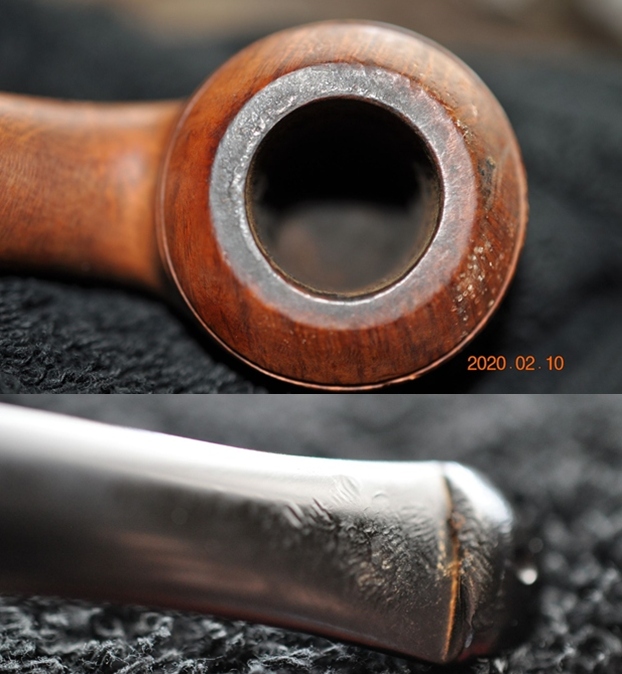
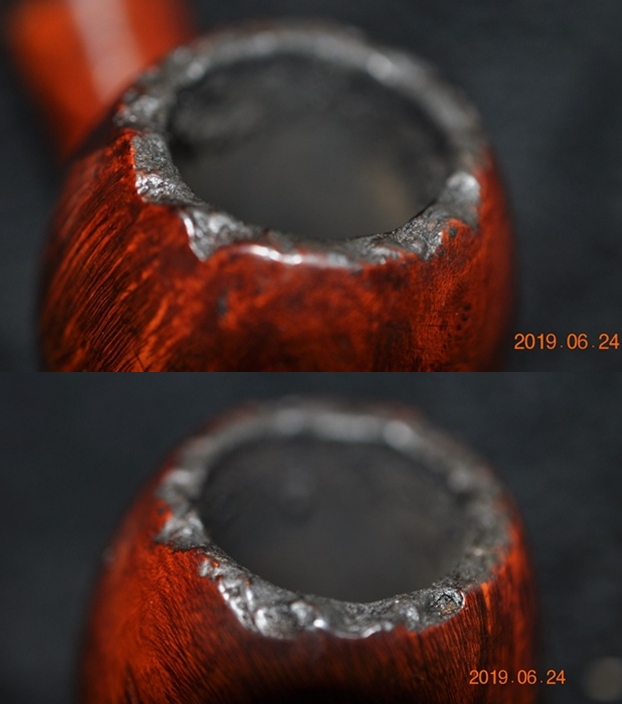
 With the stummel cleaned, I decide to address the rim issues before going on to the stem work. I take a fresh picture of the rim to shape out the issues. First, the reaming of the chamber revealed some heating problems resulting in some smaller fissures on the shank-side of the chamber. The picture below is facing toward the back or shank-side of the chamber. You can see the heating cracks. They are not serious enough to take extraordinary measures to repair – using a product like J-B Weld, a heat resistant epoxy which I’ve used with success with past projects. To address these heating veins, later I will apply ‘pipe mud’ to the chamber which is made of water and cigar ash. This mixture will provide a protective layer to help enhance the natural development of a protective carbon cake of about a dime’s width. The following picture also shows, though not easy to see, the chamber bowing toward the shank because of the charred briar removed. The rim is also out of shape above this – flattened, throwing the entire rim out of round. The second picture shows this as well.
 My plan is to sand the upper chamber on the shank-side (right side below) and transition the sanding up toward the rim. My goal is to ease the chamber bowing and ‘re-round’ the chamber mouth. I’m considering after the sanding, creating a sharp, internal rim bevel which should help the rounding and appearance.
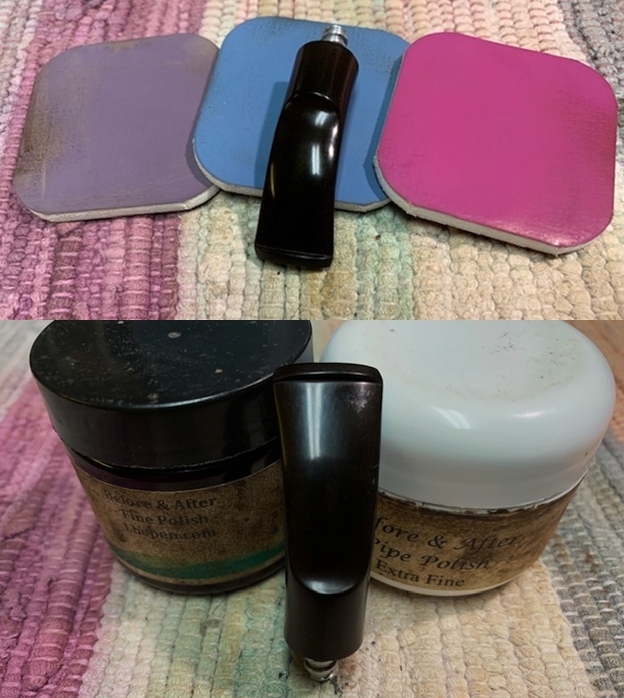
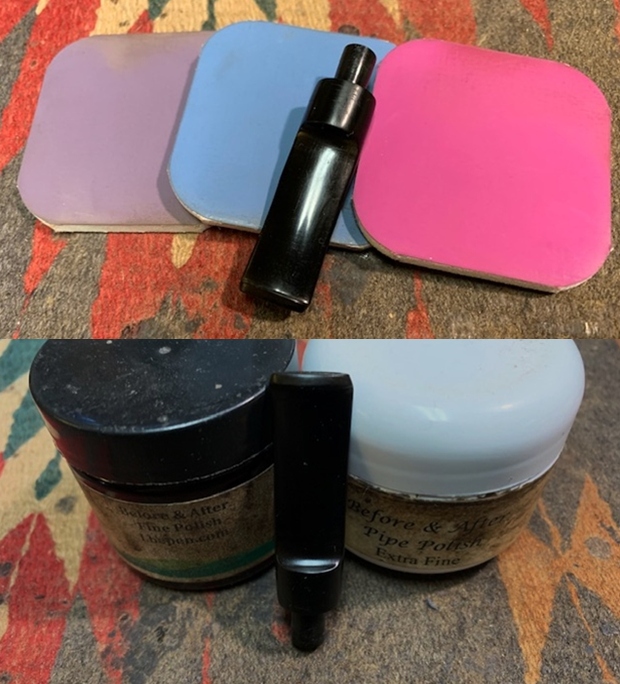
 The next issue is the rim itself – the finish is shot and needs help. I’ll start by lightly sanding the rim with micromesh pads to see if this cleans things while retaining a measure of the hue. I’ll seek to match the hue with bottle dyes or dye sticks.
 Starting on the chamber sanding, I use 240 paper wrapped around a Sharpie Pen. This not only gives me some leverage but helps with the rounded shaping needed on the flattened portion of the rim. After sanding with the 240 Sharpie, trying to regain as much rounding as possible, I use a round hard backing behind 240 paper to cut a bevel. I hope to gain more rounding doing this. The picture below shows the result of this approach. There is a sacrifice of the narrowing of the shank-side rim surface as the sanding and rounding is achieved to some degree. There is no perfection, but I like the progress made.
 Next, I sand the rim top, or almost a plateau, to clean and smooth the surface instead of a full topping of the stummel.
 I follow by applying the full regimen of micromesh pads to smooth the rim – pads 1500 to 12000.
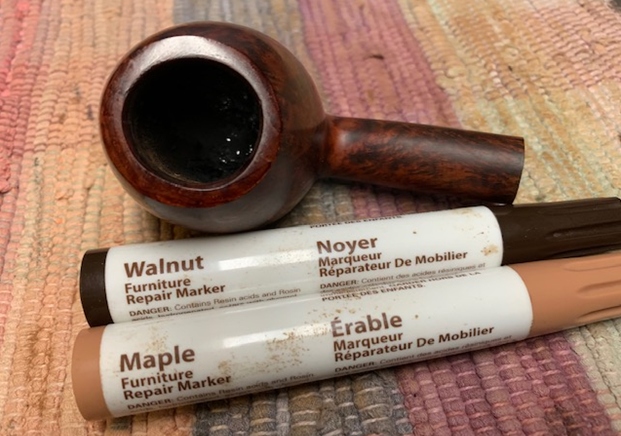
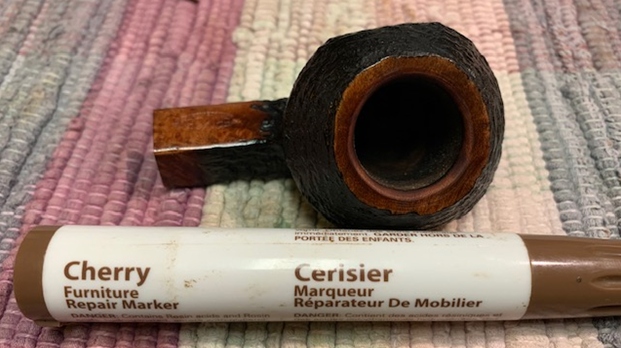
 The next challenge is to color the rim to match, as closely as possible, the ruby/burgundy stummel finish. The closest color that I have to matching the stummel, after testing several candidates on a cotton pad, is Oxblood. Yet, I’m concerned that Oxblood hue by itself might not be dark or deep enough.
  I decide to use Fiebing’s Oxblood Leather Dye as the base, but I add a drop of Black Leather Dye to deepen the hue a few degrees. I use a shot glass to mix the dyes. I use a large eye dropper to draw out a small portion of the Oxblood and place it in the shot glass. After cleaning the dropper with alcohol, I then draw some Black Dye and allow one drop to join the Oxblood.
  I use a cotton bud to place some of the mixture on a cotton pad and compare. Well, this isn’t rocket science and it looks good to me.
 I then use a cotton bud to apply the dye mixture carefully to the rim. The next picture shows the result. It looks good, but I decide to add another drop of Fiebing’s Black Leather Dye to the mixture and give the rim another application.
 This mixture was hitting the bull’s eye a bit more it seemed to me. As I apply the dye with the cotton bud, I’m careful to apply dye to the small inner rim lip bevel but not to drift into the chamber. After applying a few coats of dye, I put the stummel aside to allow the dye to settle. I also save the mixture in case it’s needed for the next pipe on my table, the Aldo Velani Trio Billiard. In this way I’ll have consistency of color between the brothers!
 With the stummel now in the wings, I turn to the acrylic stem and use pipe cleaners dipped in isopropyl 99% to clean the airway. It does not take a lot of effort and I move on.
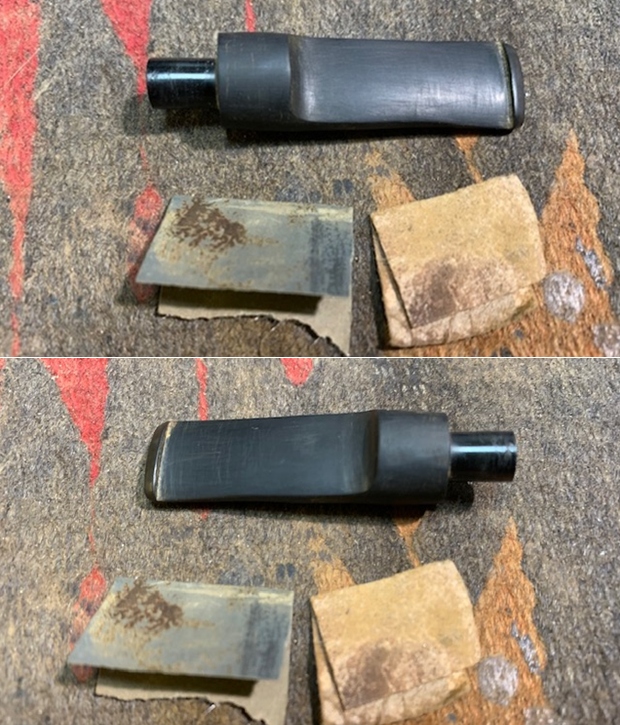
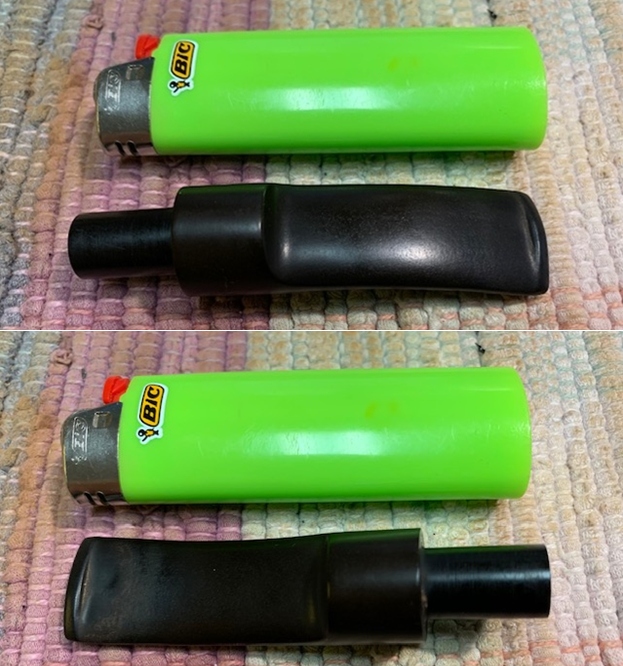
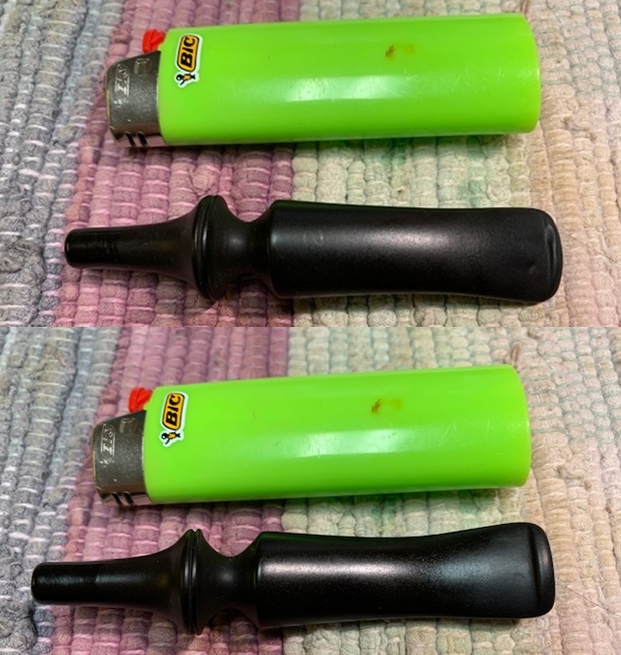
 The stem is dirty, but the main issues are the tooth chatter and a singular tooth depression that has been consistent with all the Aldo Velani Pipes that came from the St. Louis Lot. The steward who had these pipes was consistent in his clenching habits! The button has also experienced some clenching and will need to be addressed.
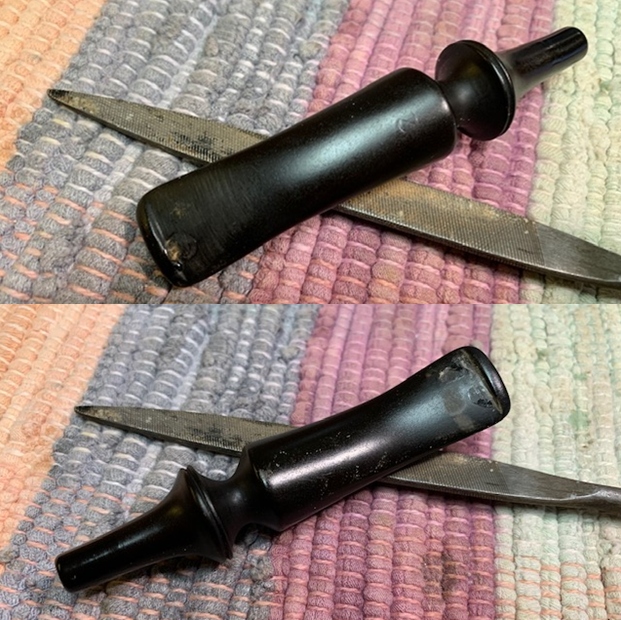
  I begin with the lower bit looking at the lone tooth compression, most likely from the steward’s eyetooth. Before sanding, I use regular clear CA glue to fill the compression. I first clean the bit with alcohol and then, using a toothpick, I spot-drop CA glue in the compression. I also apply some CA on a compression on the button lip. I set the stem aside for the CA patches to cure.
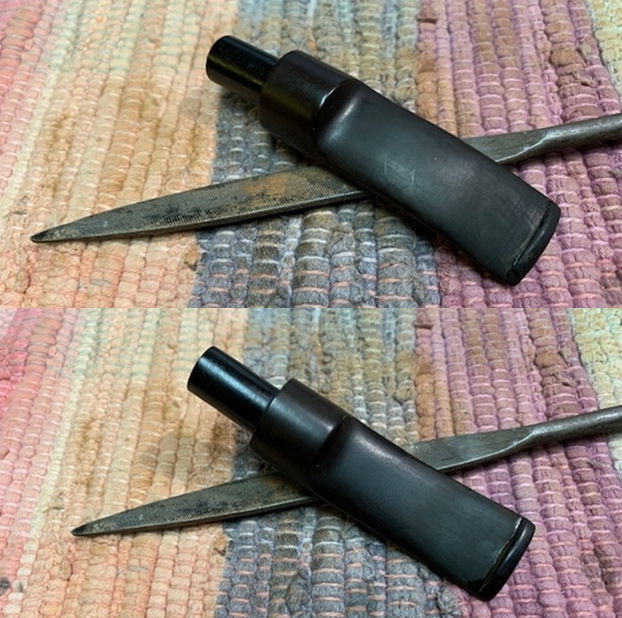
 After a time, the patches are cured and using a flat needle file, the patches are filed down to the acrylic surface. I also refresh the button lips with the file.
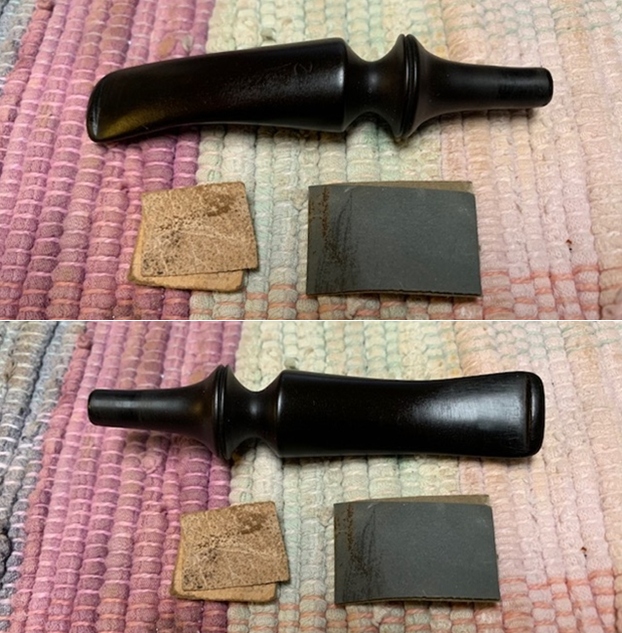
 Next, I continue to sand with 240 paper on first, the lower side then the upper bit. The patch looks good.
 On the upper side, along with sanding out the tooth chatter with 240, the button lip is refreshed with the flat needle file.
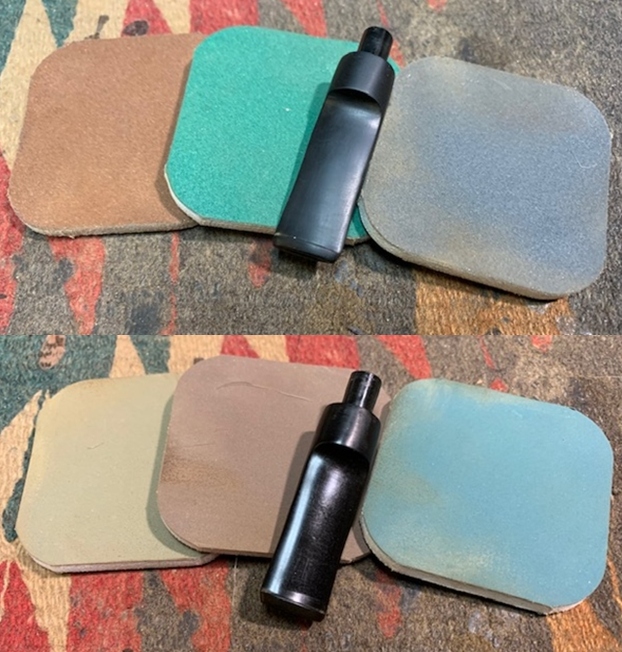
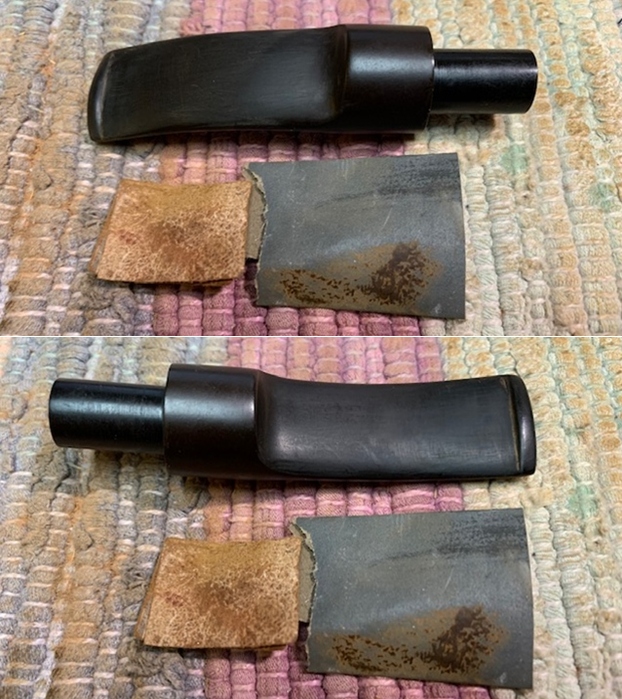
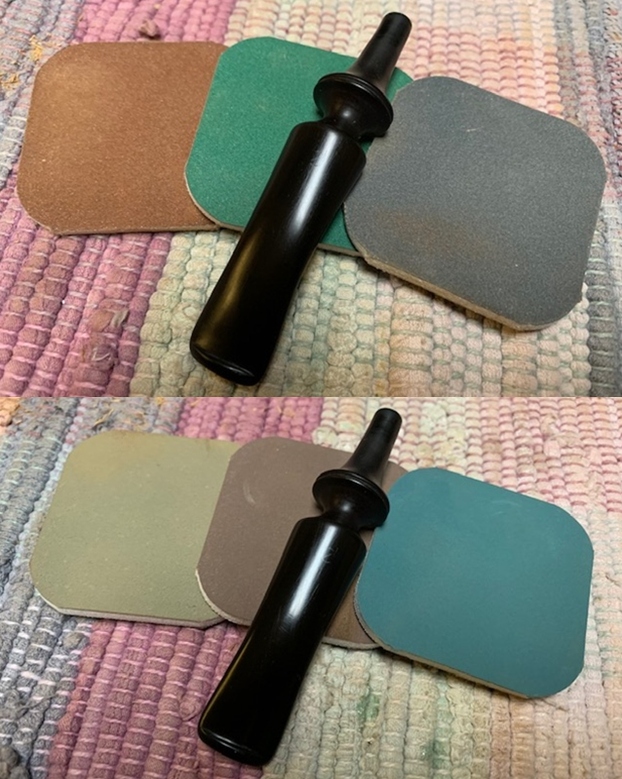
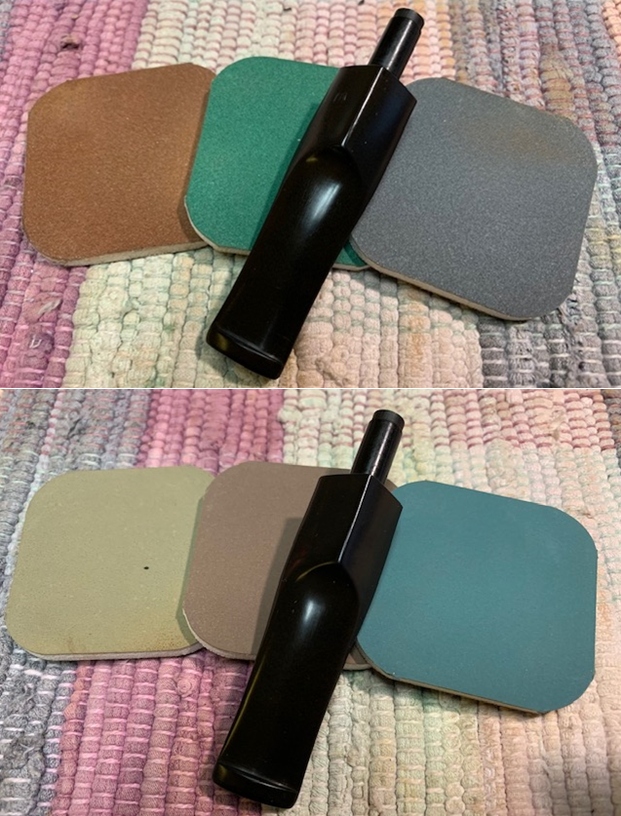
 Next, using 600 grade paper, the entire stem is wet sanded. This is followed by applying 0000 grade steel wool.
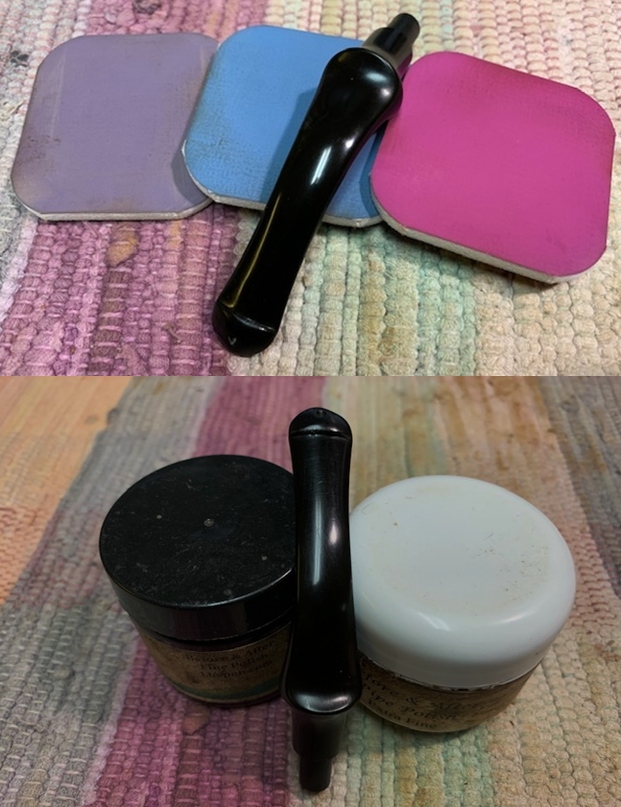
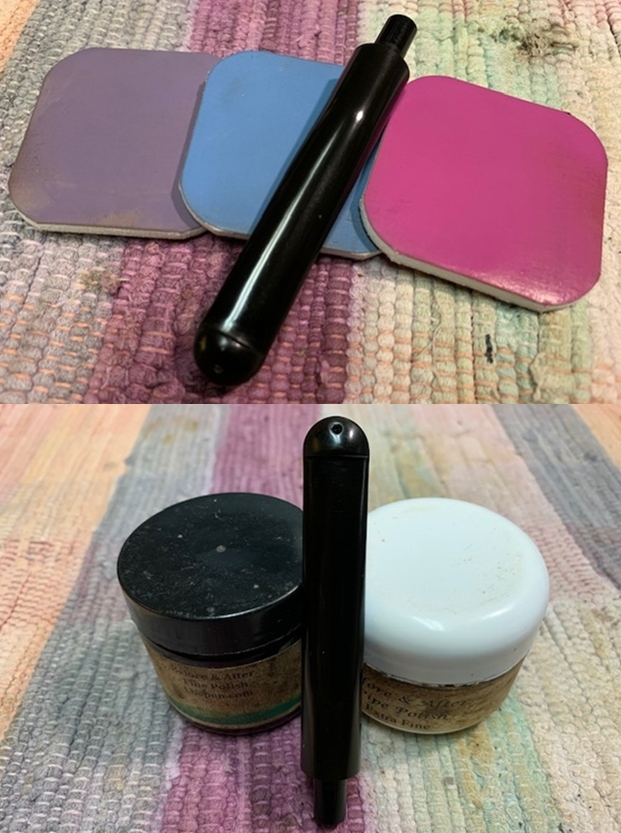
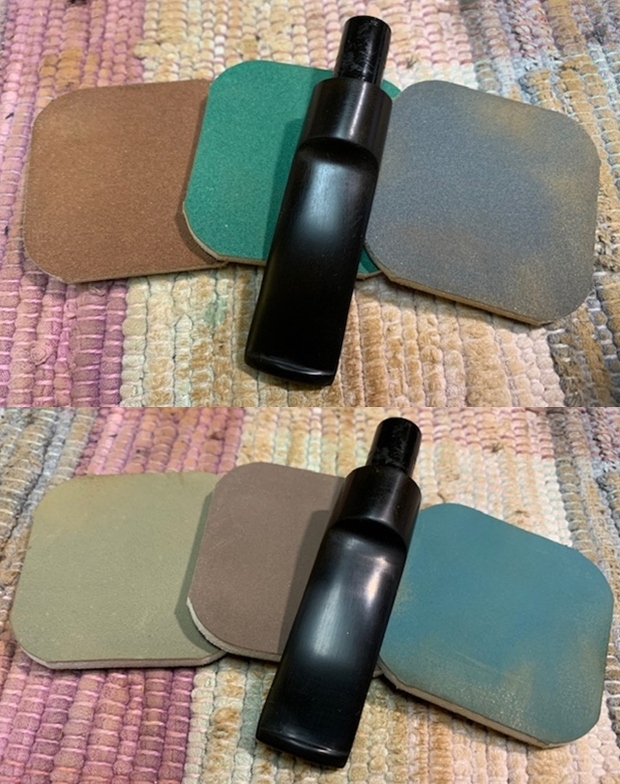
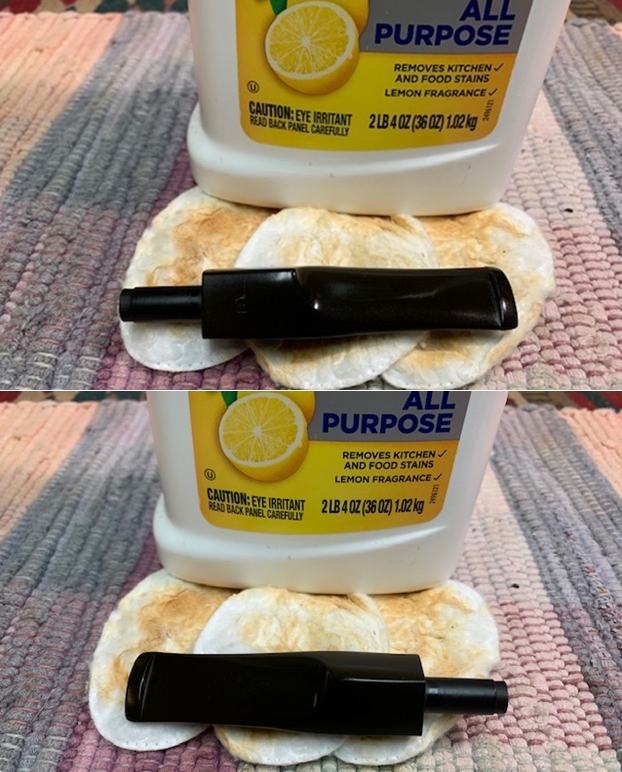
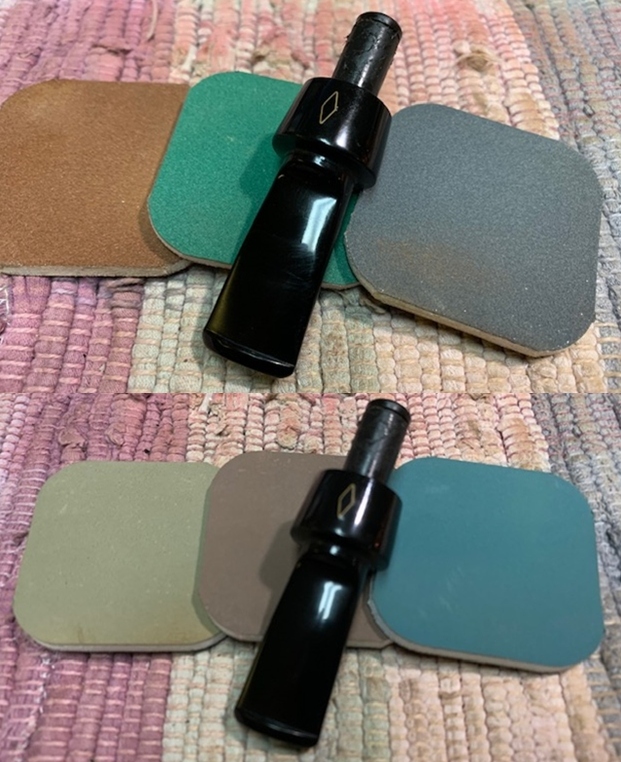
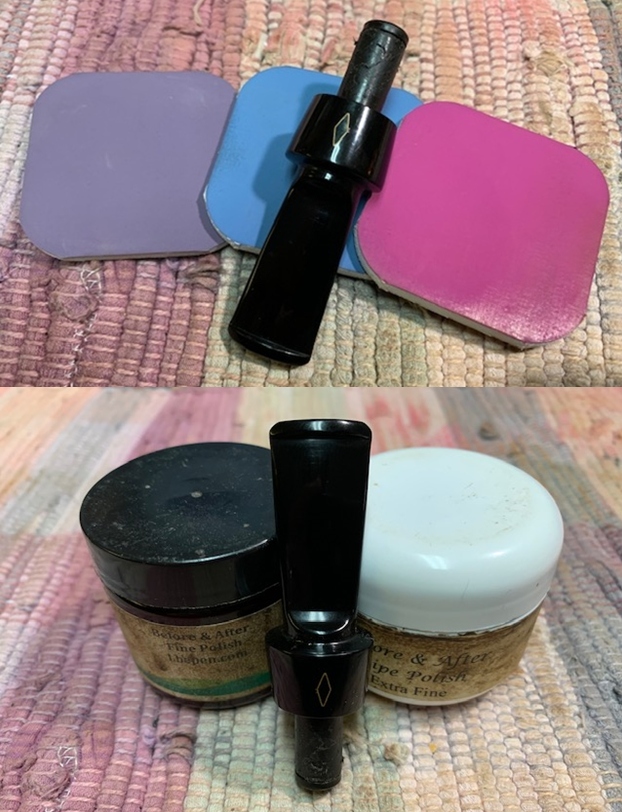
  Moving next to applying the full regimen of micromesh pads, the stem first is wet sanded with pads 1500 to 2400. After this, the stem is dry sanded with pads 3200 to 4000 then 6000 to 12000. Between each set of thee pads, Obsidian Oil is applied to the acrylic stem. The stem’s swirls emerged nicely during the process.
 Before rejoining the stem and Pot stummel, I refresh the nickel gold shank ring. This ring is one of the aspects of the Aldo Velani Trio line that augments the ‘bling factor’. I use a product called Tarn-X Tarnish Remover that works well with several metals to remove the tarnish and increase the shine.
 I take a closeup to provide a comparison of before and after application. Using a cotton pad, I carefully apply some of the Tarn-X to the ring and rub in it in well avoiding the briar. Per the directions, I then immediately use another cotton pad wetted with water to rinse off the remover.
 I buff up the ring with a cotton cloth and the bling factor has increased!
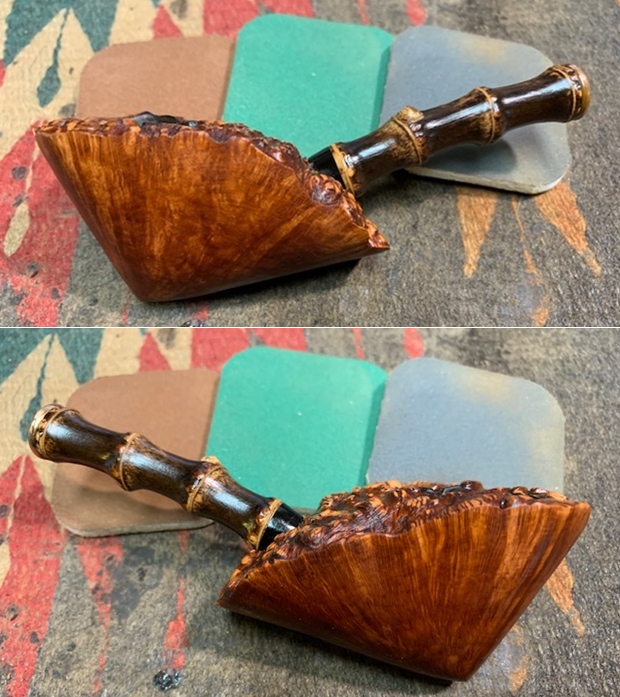
 After reuniting the acrylic stem and Pot stummel, a cotton cloth buffing wheel is mounted onto the extender arm of the rotary tool. With speed set at about 40% full power, Blue Diamond compound is applied to the stem and stummel. In the picture below you can see that the rim is still dull from the dye that was applied earlier after having plenty of time to settle. I start with the rim and remove the excess and continue with the rest of the stummel and stem with the mildly abrasive Blue Diamond.
 After applying the Blue Diamond, I use a felt cloth to wipe and buff the stummel and stem to remove compound dust. I do this before applying wax. The compound is an abrasive and is the final sanding phase in a restoration to sand out fine blemishes and scratches. It leaves abrasive particles behind which would not be good to mix with a carnauba wax application – which is not an abrasive.
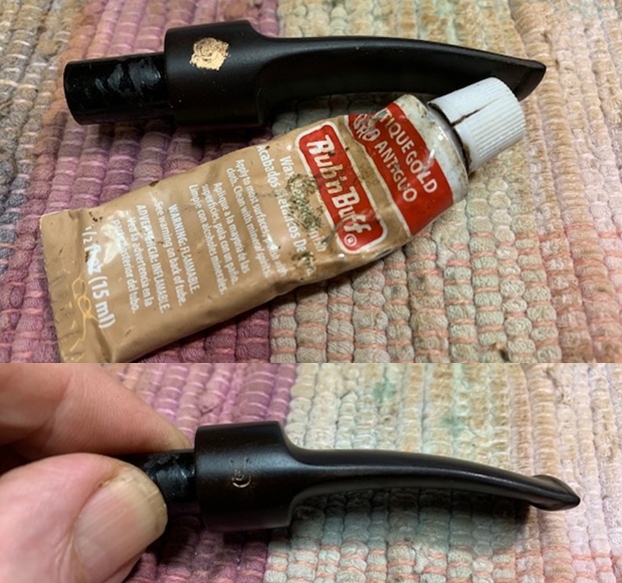
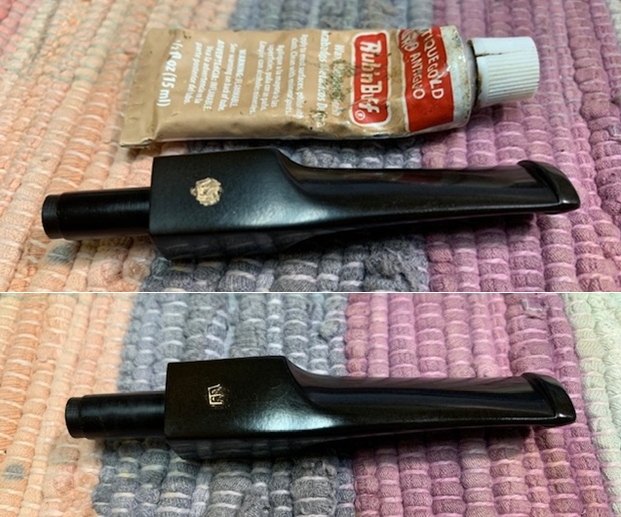
There is still one more cosmetic project before applying wax. I use European Gold Run ‘n Buff to refresh the Aldo Velani stem stamp. The gold of the metallic paint will match nicely the gold shank ring. I place a small amount of the Rub ‘n Buff on the end of a toothpick and rub it over the stamp imprint. After making sure that the paint has found all the crevasses of the lettering, I first lightly scrape the excess paint over the stamping with the flat edge of the toothpick then rub the area with a cotton pad. The results are great!
 Next, after mounting another cotton cloth buffing wheel onto the Dremel, set at 40% full power, I apply carnauba wax to the stem and stummel. Little wax is needed on the highly glossed surface of both the bowl and the acrylic stem. After applying the wax over the entire pipe, I give the pipe a rigorous hand buffing with a microfiber cloth. This not only raises the shine but removes excess wax from the surface.
 After completing the application of wax, one mini project remains. Earlier during the chamber repair of the heating issues, I decided I would apply ‘pipe mud’ to the chamber walls to provide a starter for a protective cake. In the picture below, not only am I giving a close up of the now beautiful rim, but also visible are remnants of cracks in the chamber wall. Earlier sanding almost erased the cracking. I decide to do a mini tutorial on making pipe mud to conclude the restoration of this Aldo Velani Trio Pot.
 Pipe mud consists of cigar ash and water. If you have cigar smoking friends, ask them to save the ash of the cigars they enjoy! Often, cigars will come in heavy duty plastic tubes or flutes, with caps. They can use these tubes to store the ash. When I collect cigar ash, seldom is it ‘clean’. Often it as chunks of debris left that isn’t great for making pipe mud. I have my ash in a ‘throw-away’ salt grinder that you can buy at the supermarket with salt in it. When the salt is used, the grinder works well with grinding up cigar ash!
 I also have a strainer that I use to catch big stuff that comes through the grinder. Placing the grinder on a paper plate I grind the ash into the strainer.
  When I have enough ash ground, I then sift the ash onto the paper plate. The picture below shows the ‘big stuff’ caught in the strainer and the finer ‘gold’ on the paper plate.
 The paper plate is helpful because it then becomes a funnel by bending the plate. Then with the plate folded and functioning as a funnel or a chute, I transfer the ash to the mixing glass.
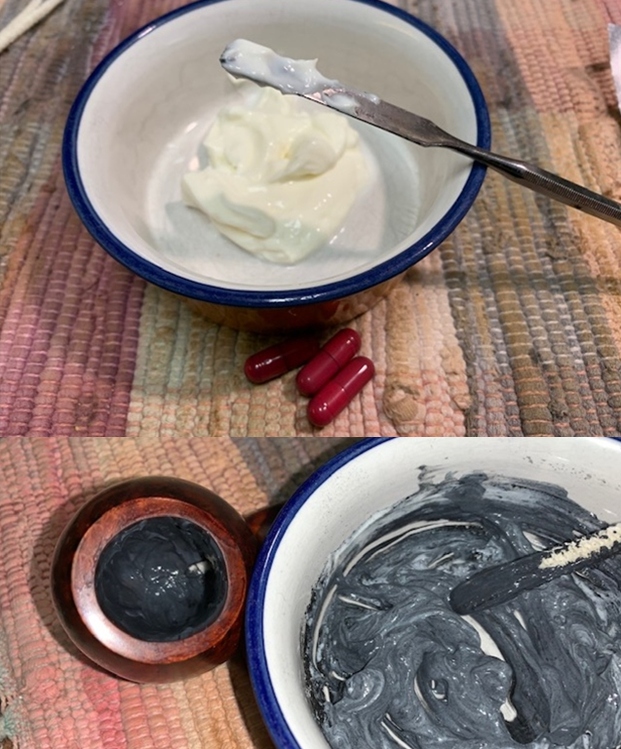
 Using a large eye dropper, I then add a small amount of water into the ash and stir it with a pipe nail tool. CAUTION! Go slowly on the water. If too much water is added, then the resulting concoction will be more like an ash slurry rather than a mud that will hold its shape and adhere to the chamber wall. If too much water is added, then more ash must be added to again thicken the consistency.
 The mud below is looking good. It’s holding its shape as I press it against the glass.
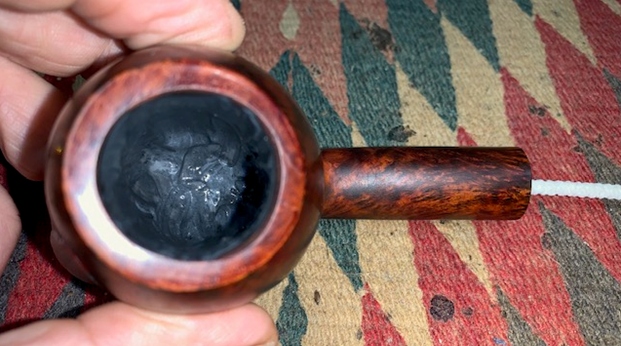
 I place a pipe cleaner through the draft hole to guard against blockage. Then, using the pipe nail, mud is troweled into the chamber and spread over the wall. I start at the floor of the chamber and work my way up to the rim. The flat side of the nail is good to use as a trowel and the round side is good to spread. The picture below shows the finished job.
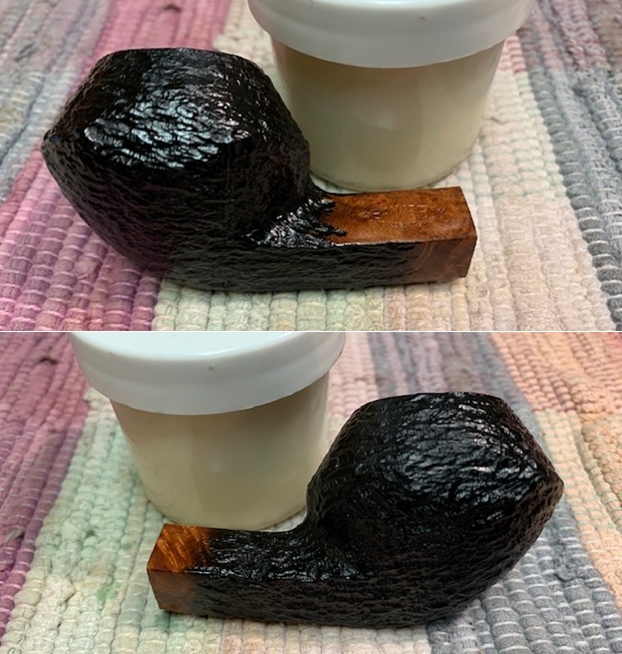
  When the mud dries, it hardens. During the curing time, I place the pipe with the bowl down so that leaching water won’t settle in the bottom of the chamber but spread out toward the mouth of the chamber. It seems to dry better this way. The hour is late, so I’ll let the pipe mud cure through the night.
  The next morning in Golden, Colorado, I’m up with coffee in hand. The pipe mud has cured, the protective layer is in place and this pipe is ready to go. I give it one more hand buffing with a microfiber cloth for good measure.
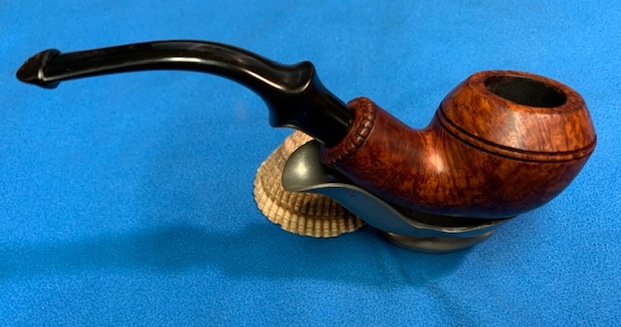
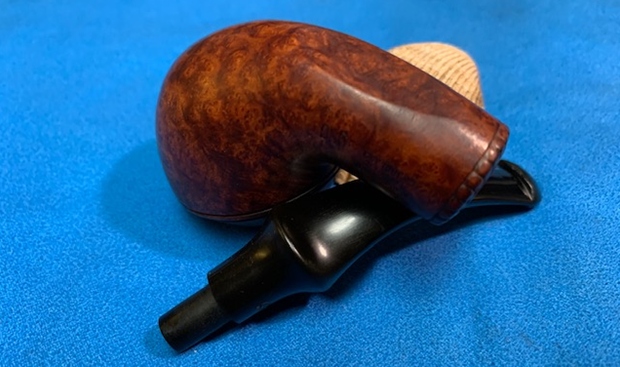
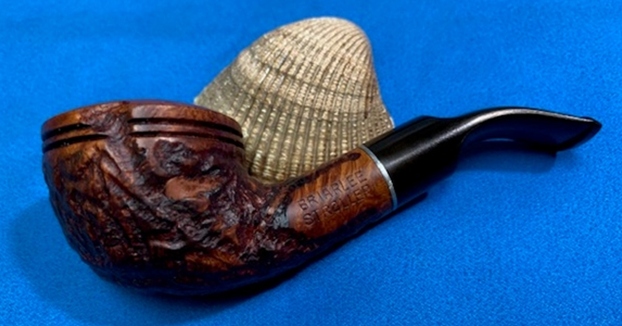
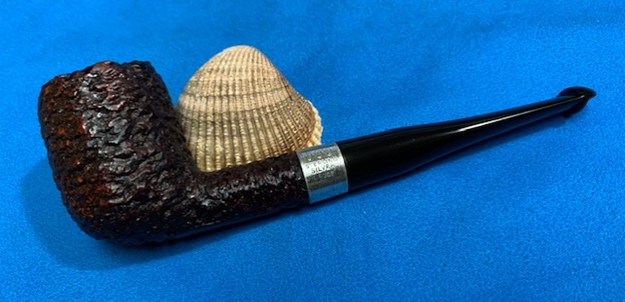
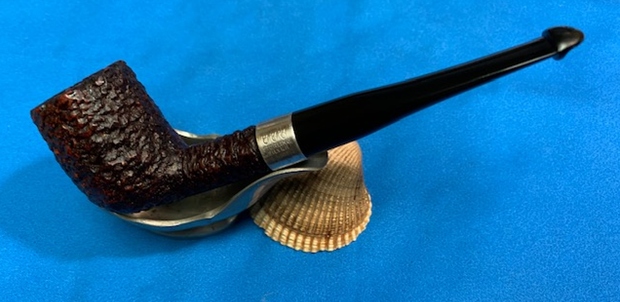
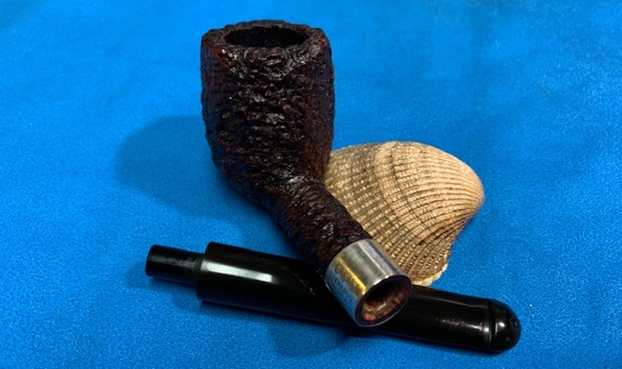
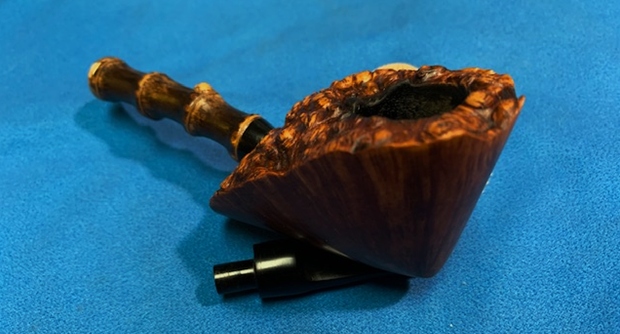
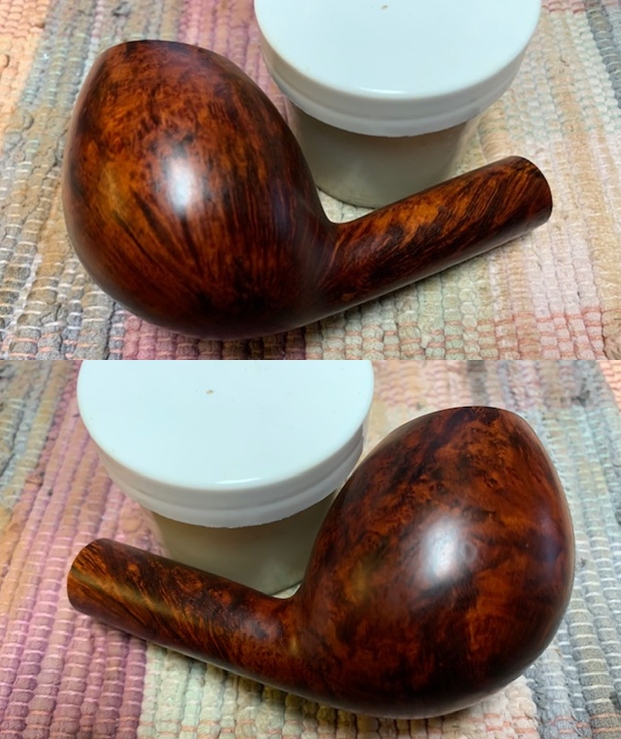
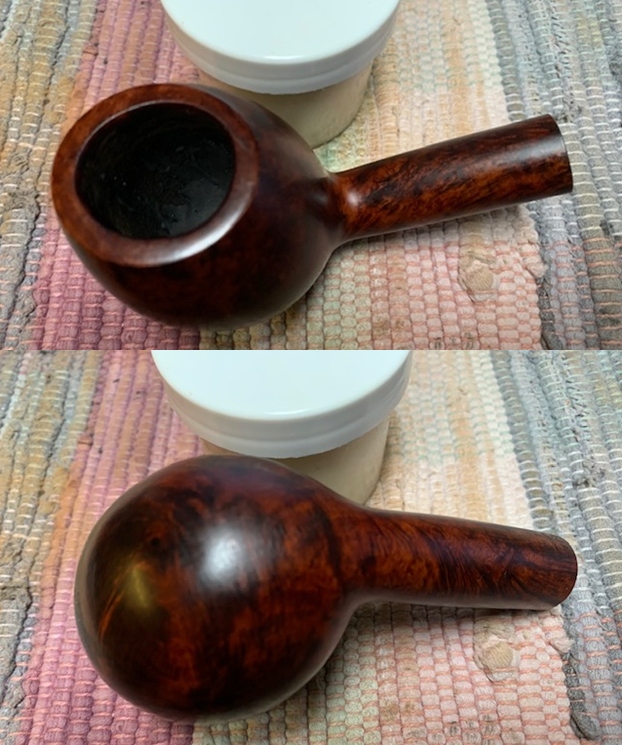
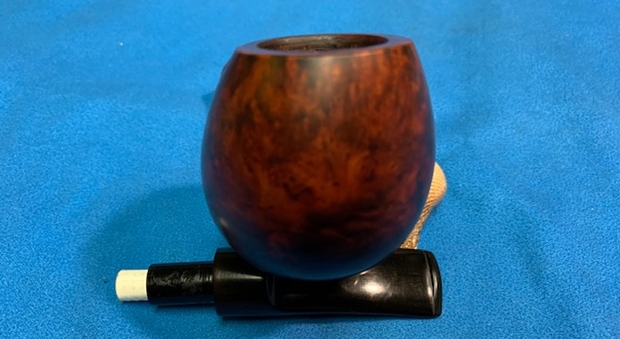
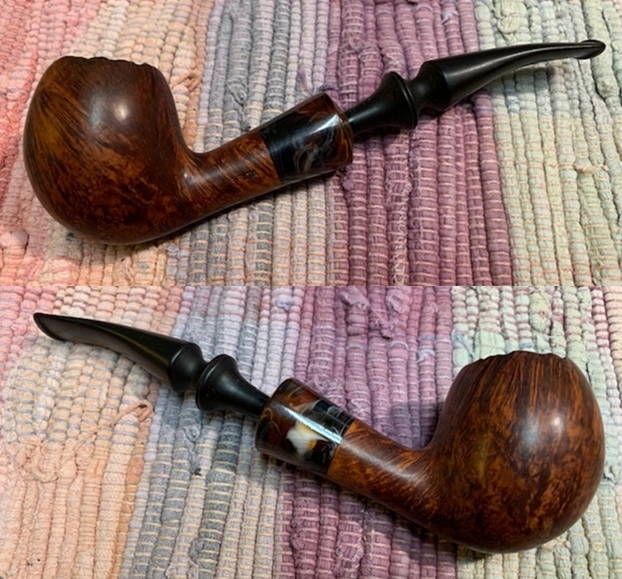
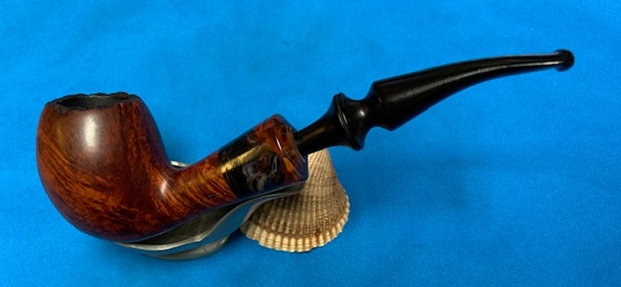
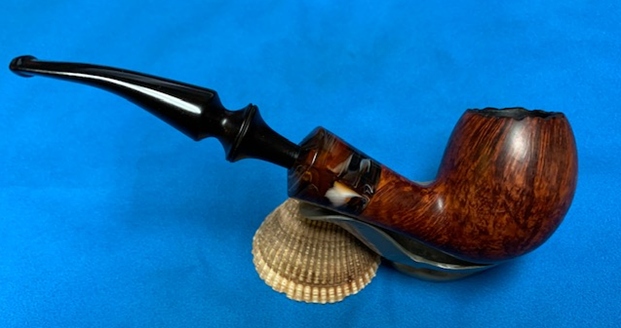
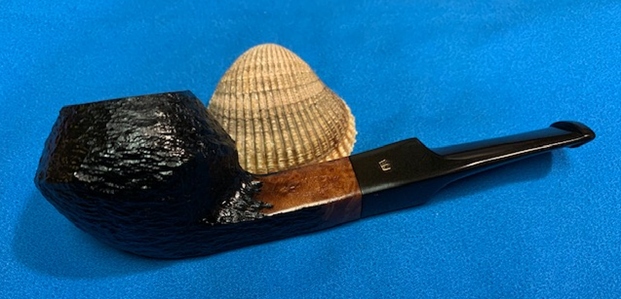
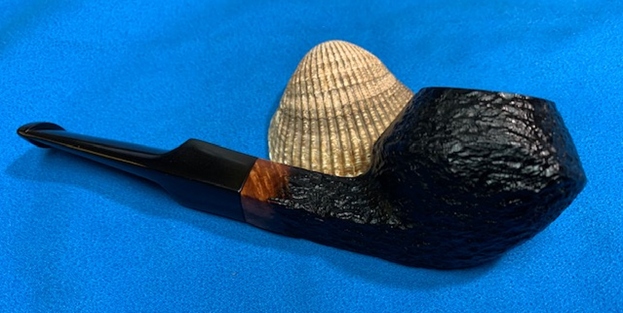
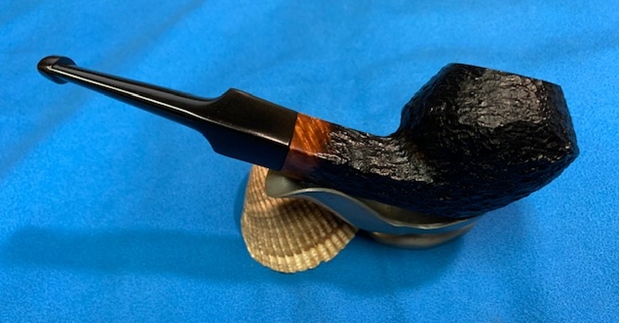
 This is the 5th of the pipes that Daniel has commissioned – the first of the Aldo Velani Trio brothers. This Aldo Velani Trio Pot had some chamber and rim issues that had to be addressed and I think the results are great. The style of this Pot stummel brings attention to the broad Pot rim – could almost be described as a plateau. The characteristic that predominates on the Trio line though, is the ruby red/burgundy finish. It catches the eye very quickly. The gold shank ring dials up the bling factor as it transitions from the bowl to the kaleidoscopic acrylic stem alive with all shades of reds, ruby, burgundy and colors that I don’t have a name for! This pipe, packed with one’s favorite blend, is an after-dinner player which looks good next to a glass of one’s favorite adult beverage – for me, a single malt. Daniel will have the first opportunity to claim this pipe in The Pipe Steward Store benefiting the Daughters of Bulgaria. Thanks for joining me!


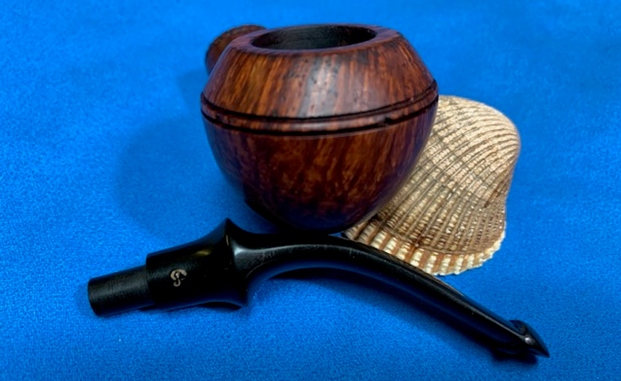
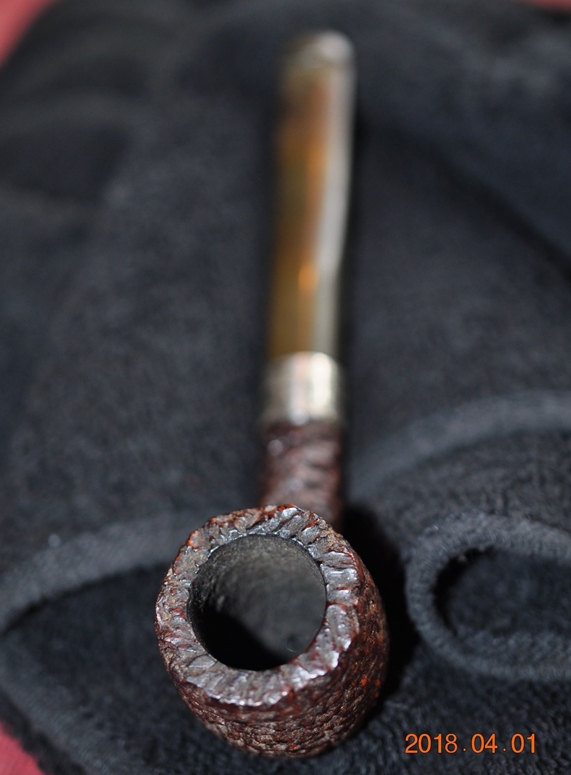
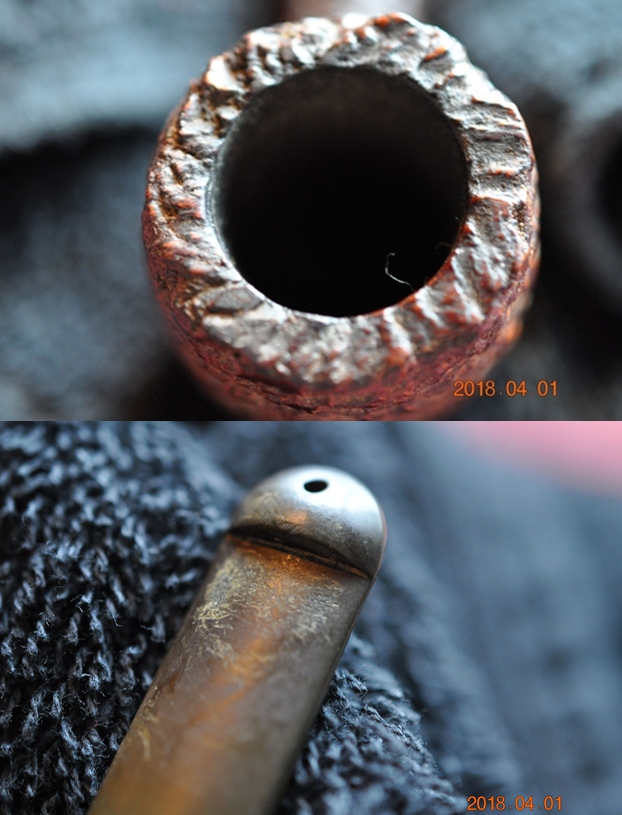
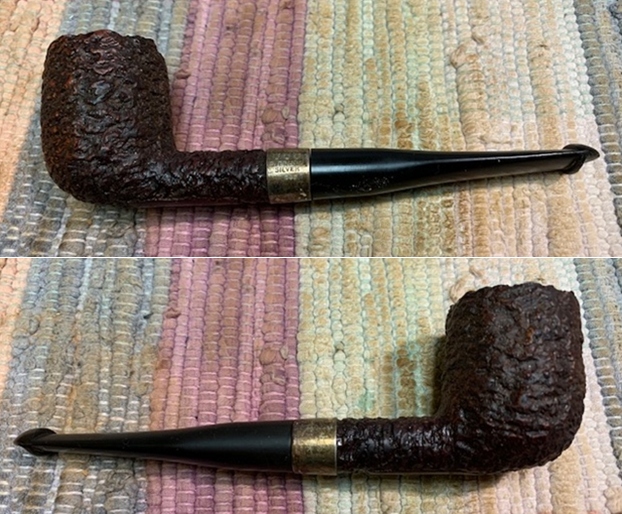
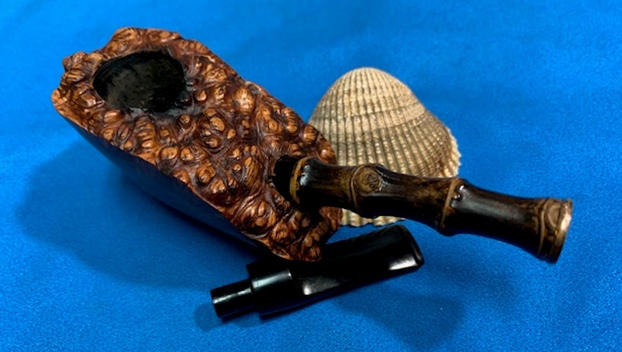
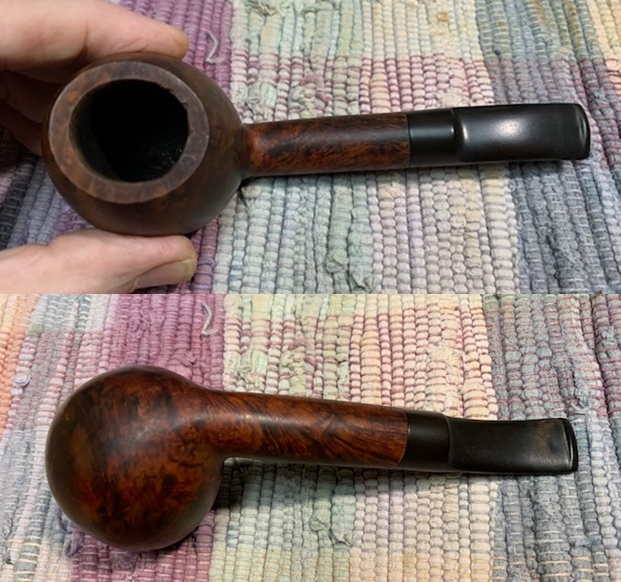
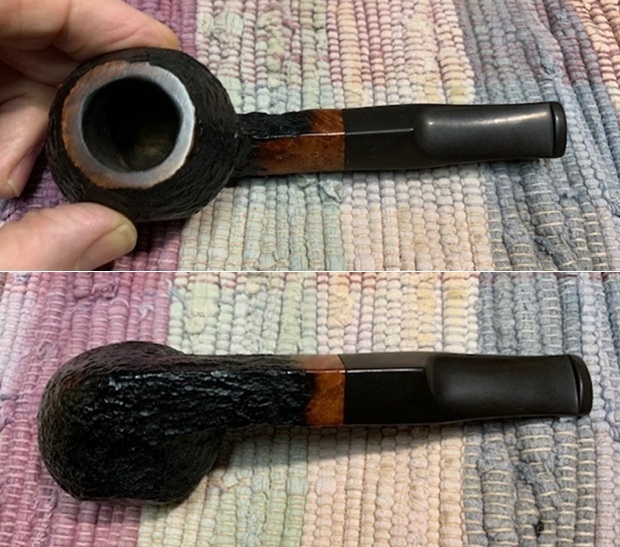
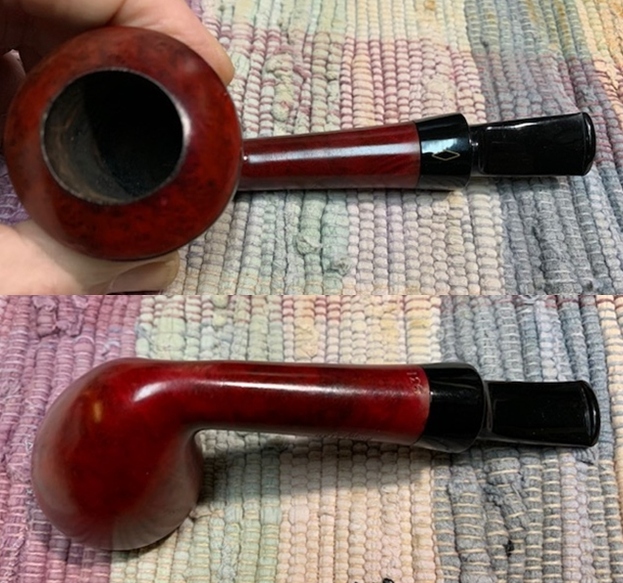
 Jeff took photos of the rim top and stem to show the general condition of the pipe. The bowl is heavily caked with a lava overflow on the rim top. You can see the grime on the outside of the bowl. The stem is oxidized, calcified and has tooth marks on the top and underside near the button.
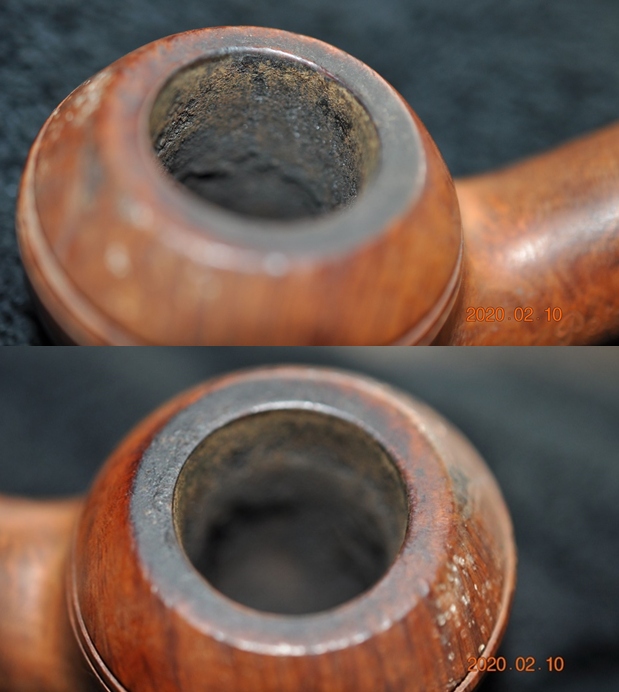
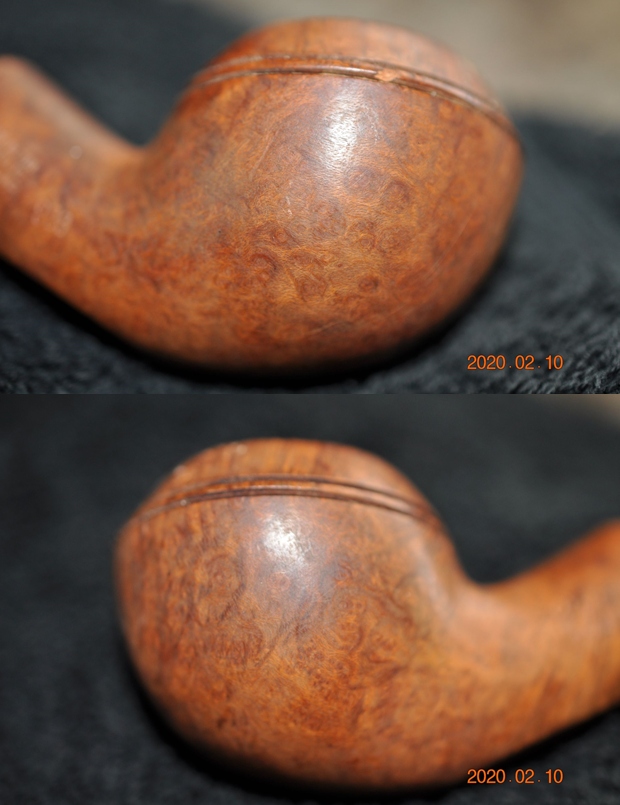
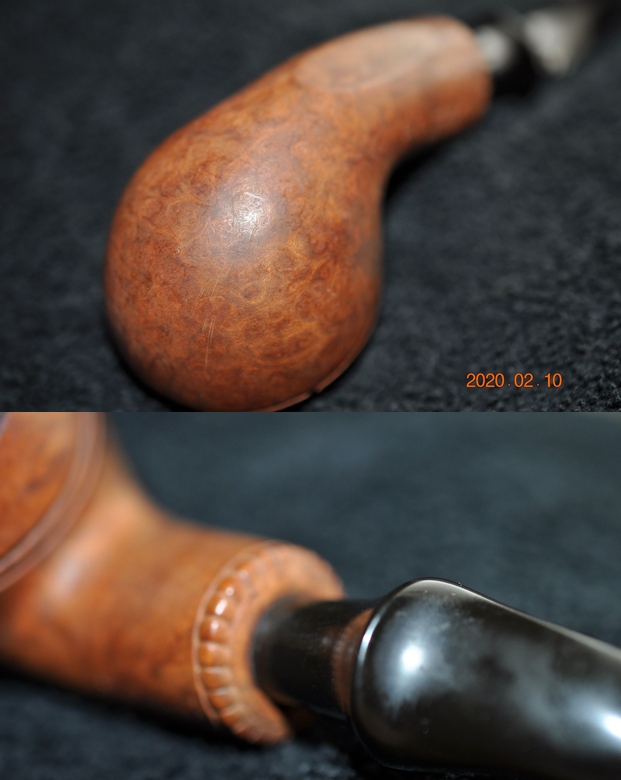
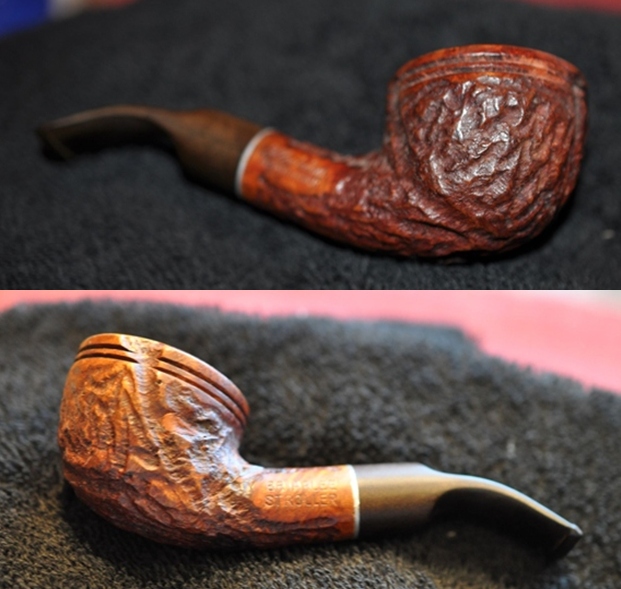
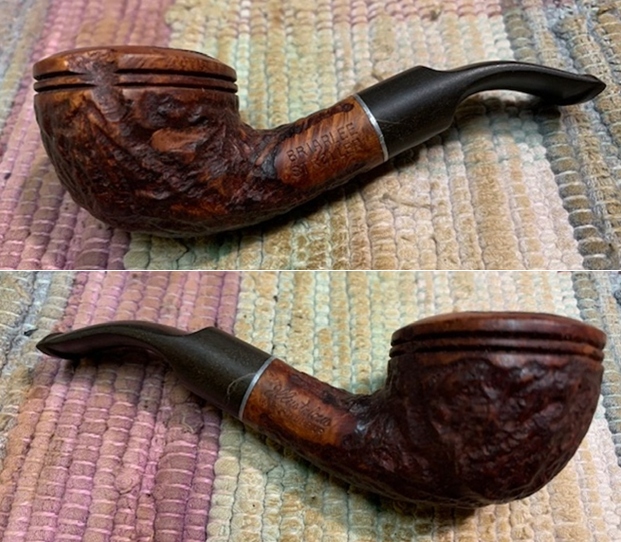
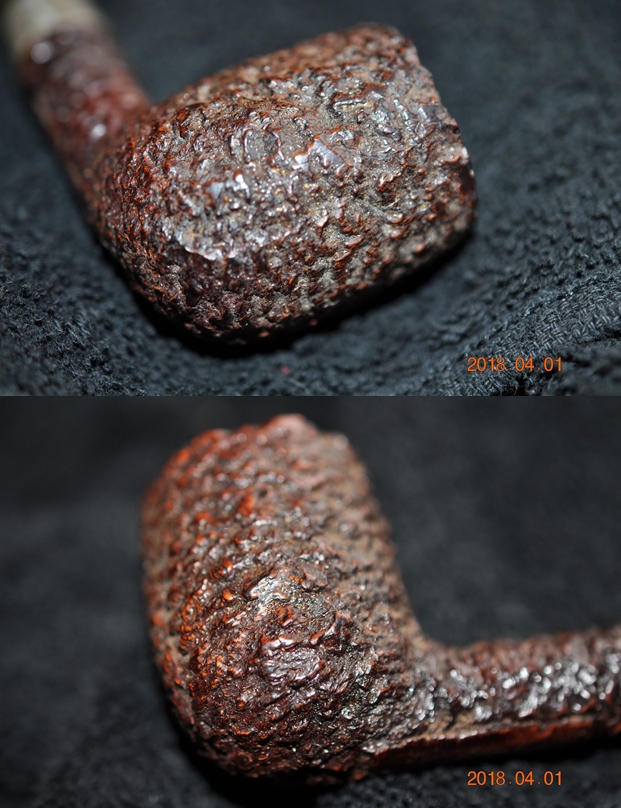
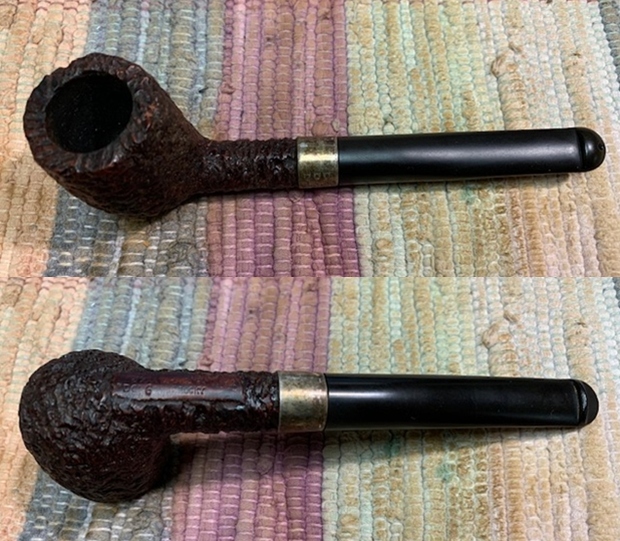
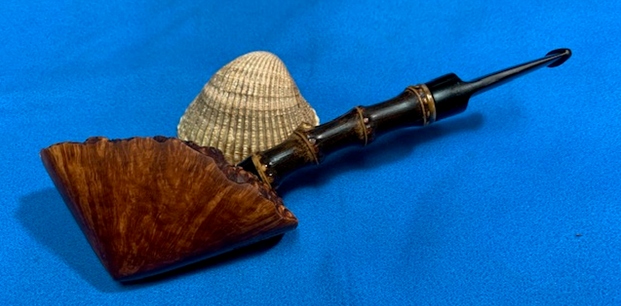
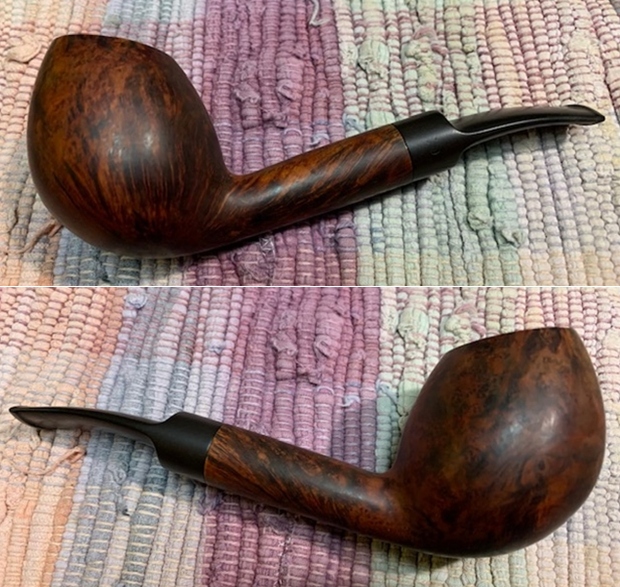
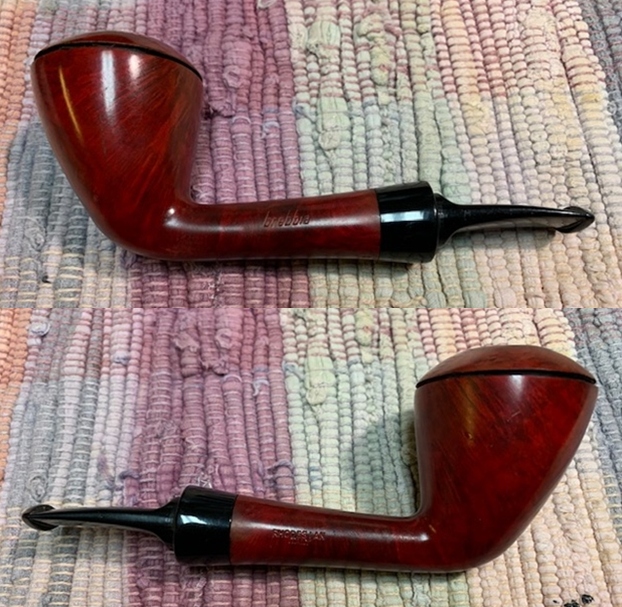
 Jeff took some photos of the bowl sides and heel to show grain that was around this bowl. It is a nice looking pipe. Notice the chips out of the middle of the twin rings are different points of the bowl in the photos below.
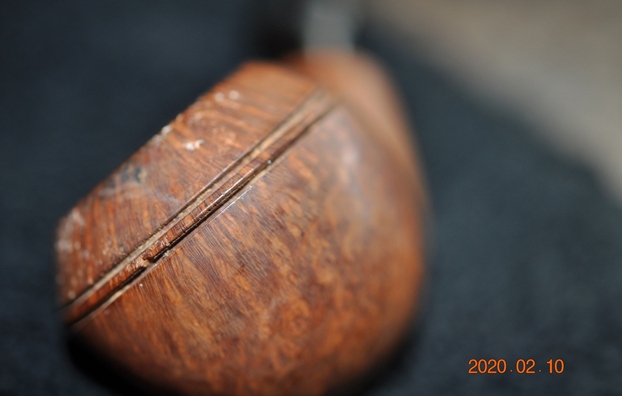
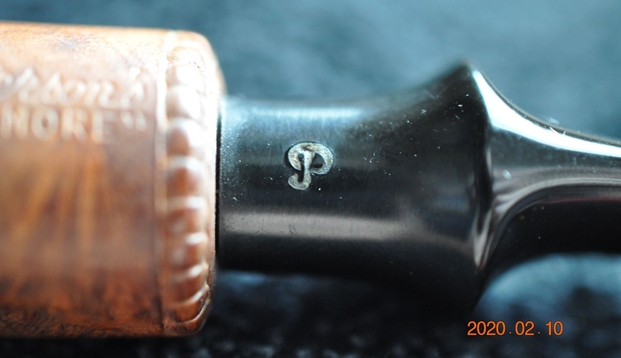
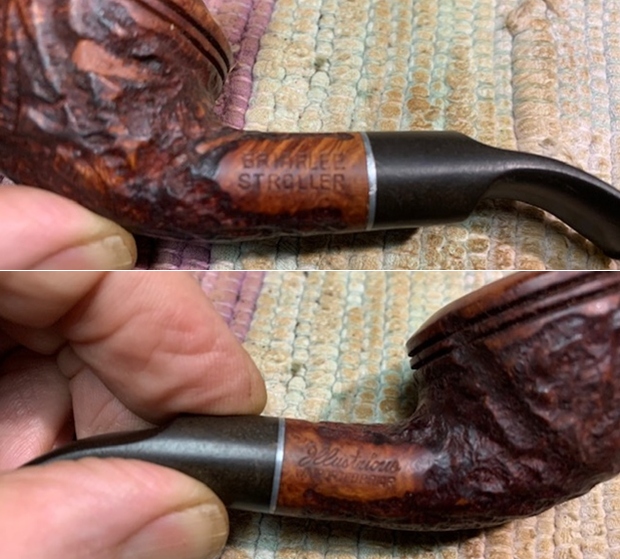
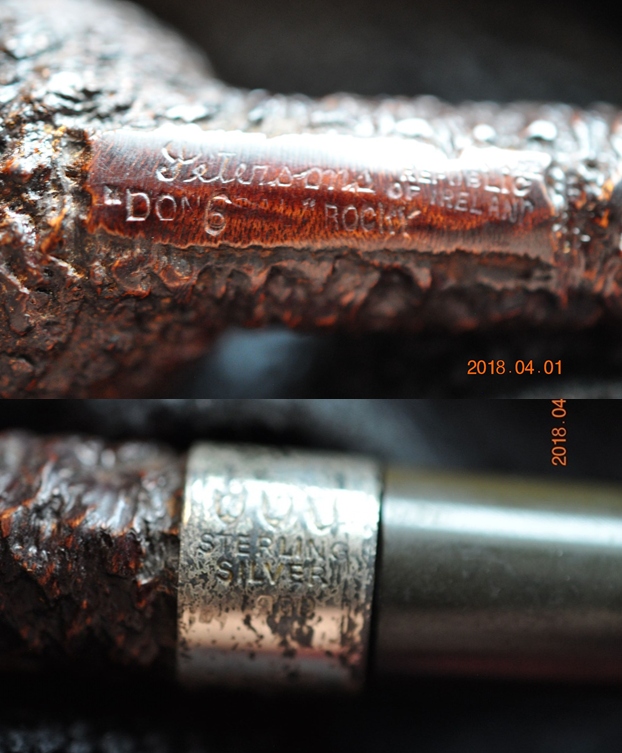
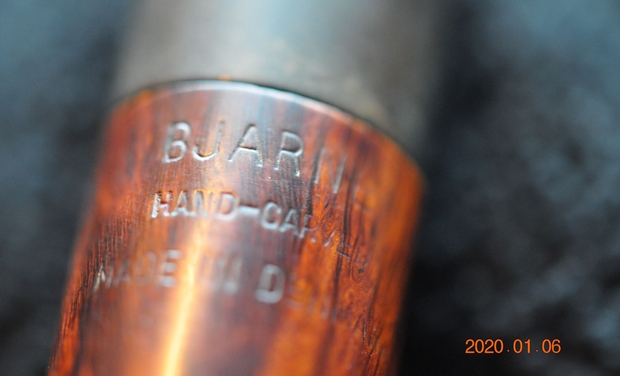
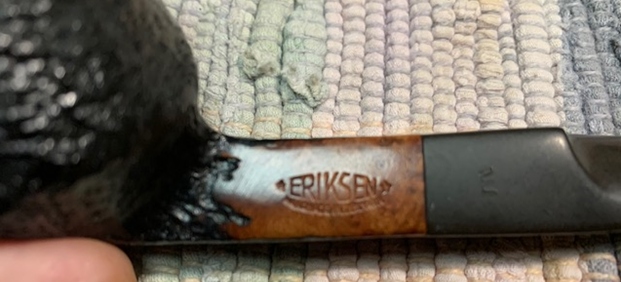
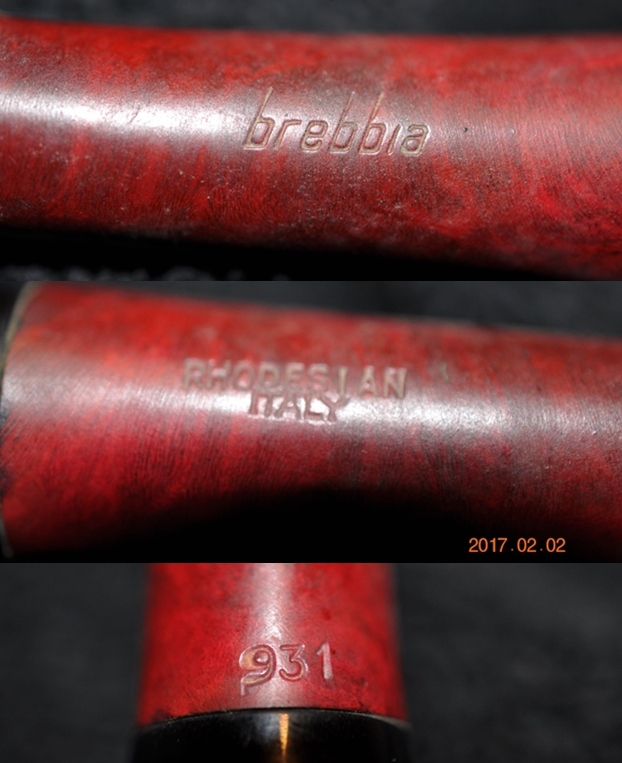
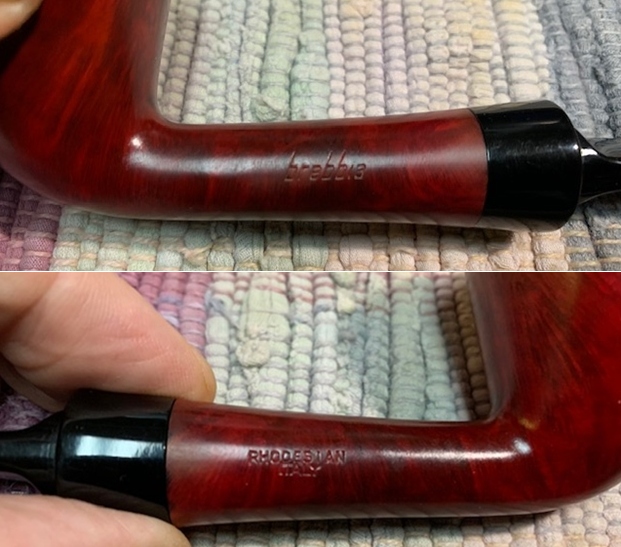
 He took photos of the sides of the shank to show the stamping. The stamping is readable in the photos below and is as noted above.
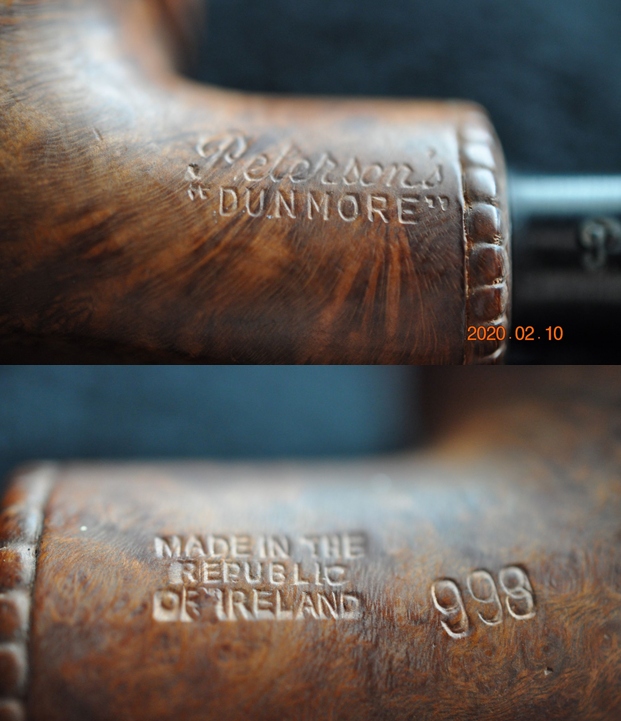
 I am including the information from Pipedia’s article on Peterson pipes. It is a great read in terms of the history of the brand (https://pipedia.org/wiki/Peterson). I have included a bit of the pertinent history here.
 I then turned to the book I should have consulted first, The Peterson Pipe, by Mark Irwin and Gary Malmberg to garner some background on the “Dunmore” line. On page 298 there is an entry for Dunmore pipes. It reads as follows:
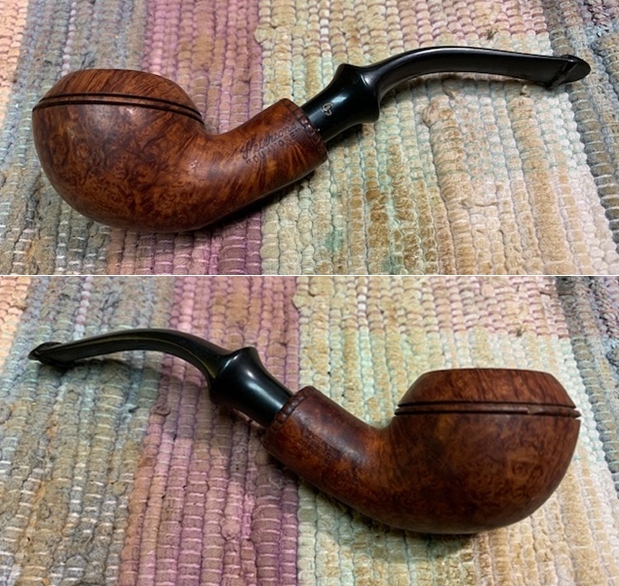
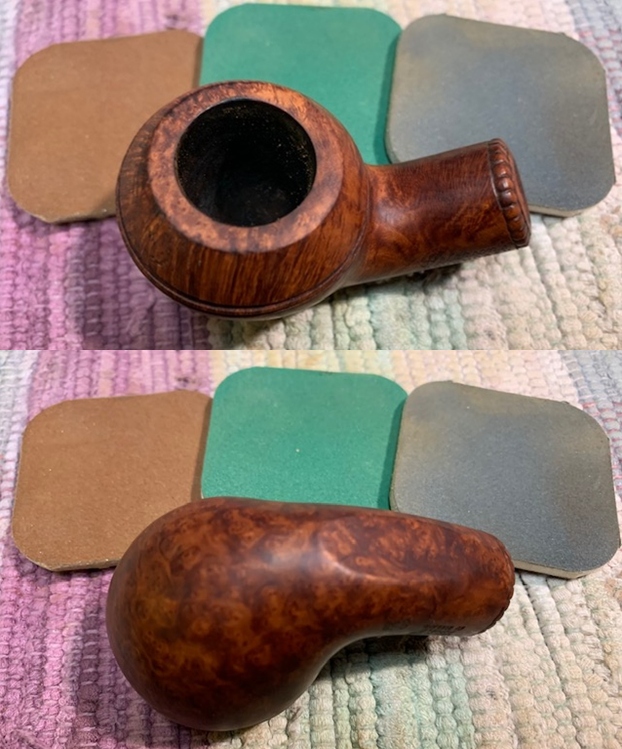
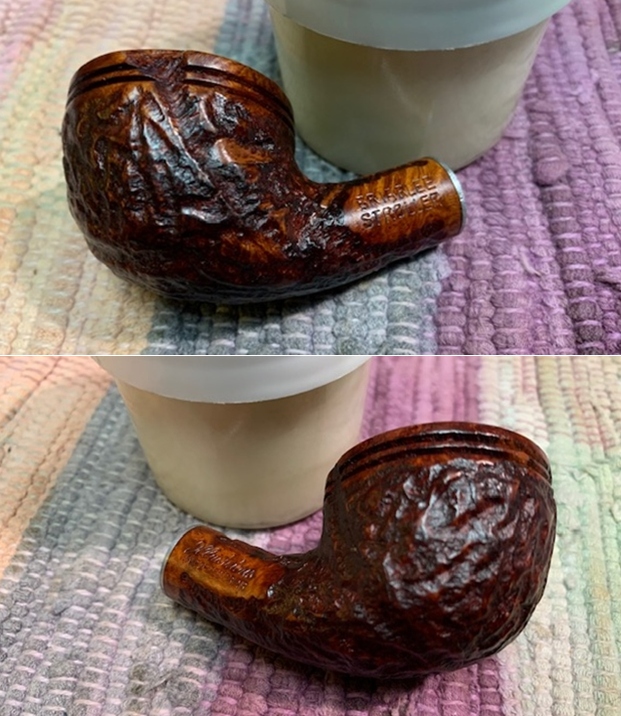
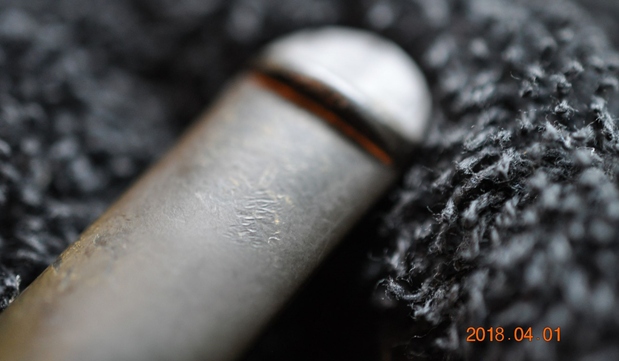
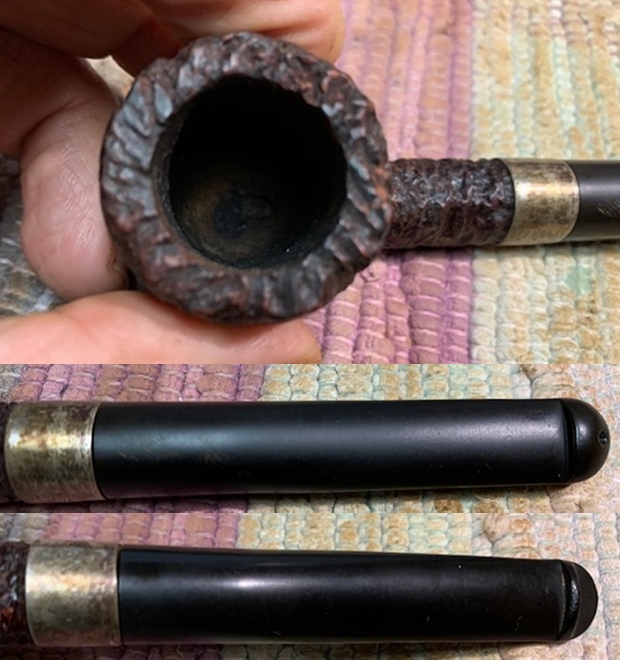
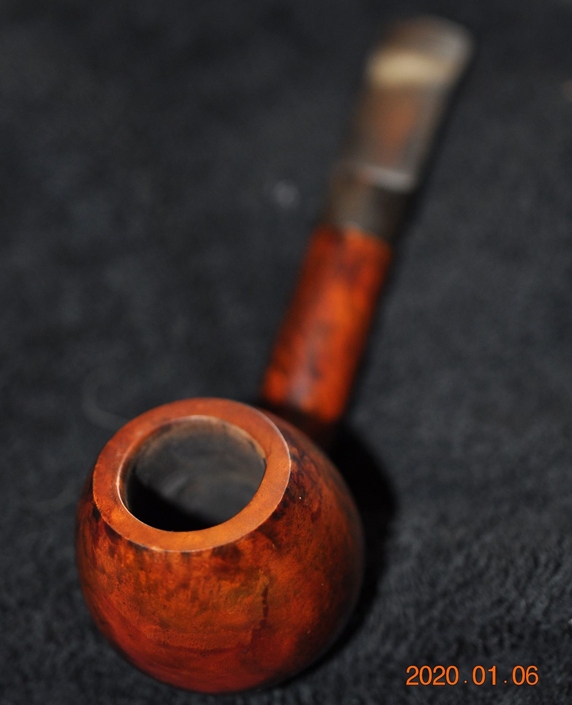
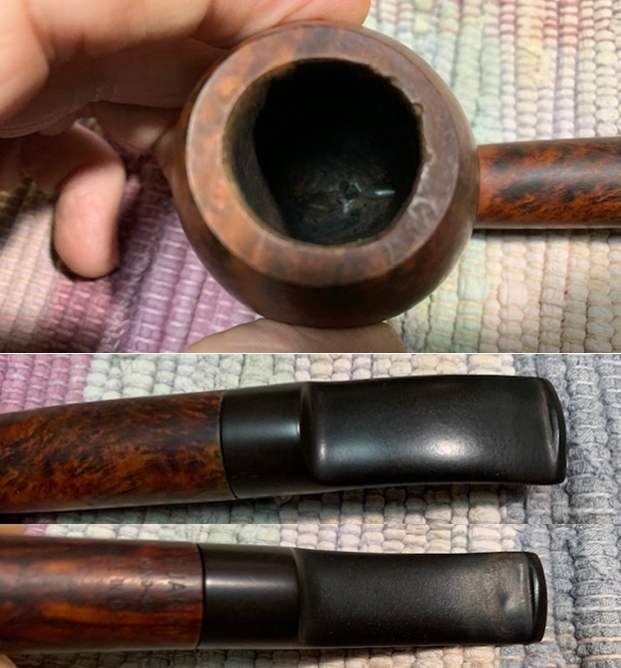
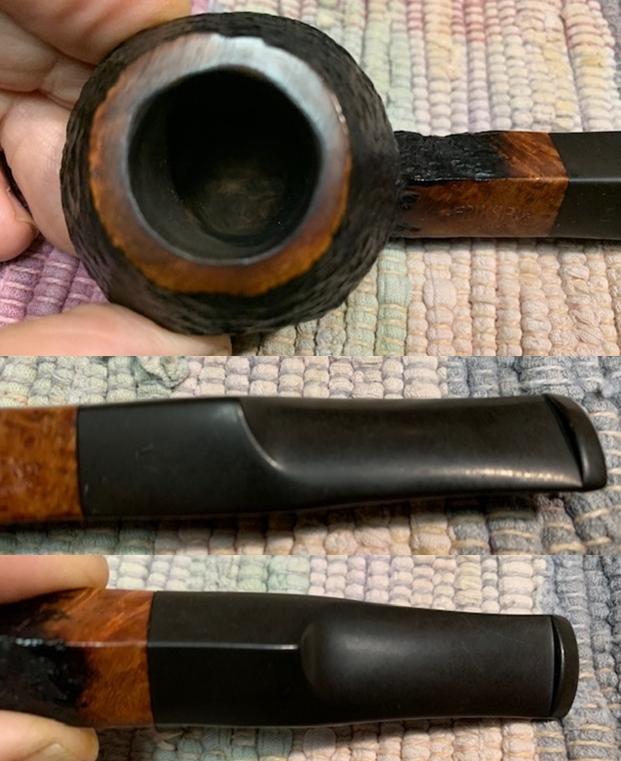
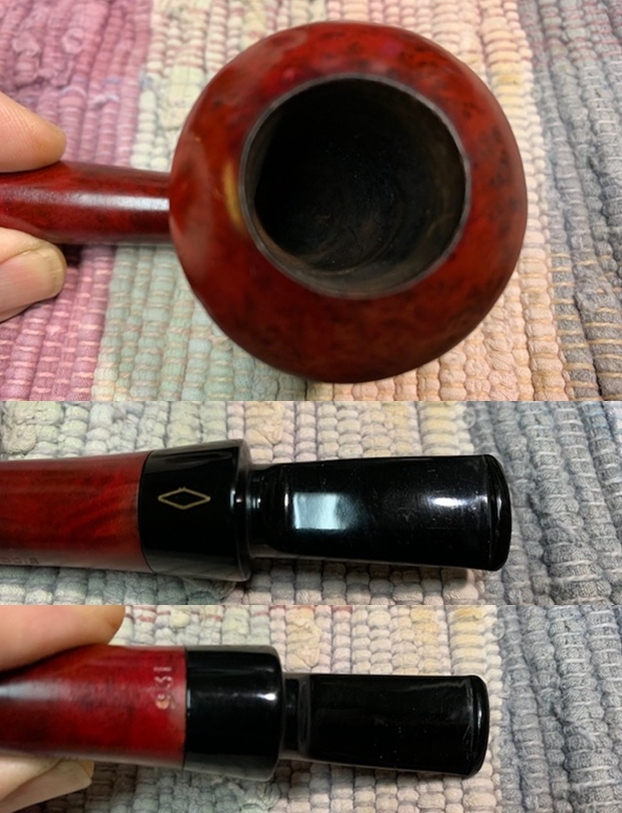
 I took some close up photos of the rim top and also of the stem surface. I wanted to show how well it had cleaned up. The rim top and edges look quite good. There is a small chip on the back outer edge of the bowl. It should clean up really well. I also took close up photos of the stem to show the light tooth marks on the surface near the button.
 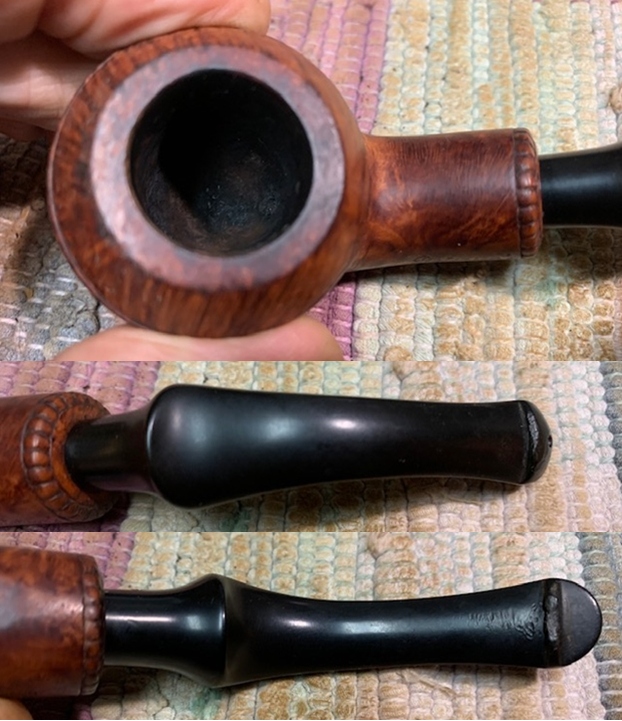 I took photos of the stamping on the sides of the shank. You can see that it is stamped as noted above. It is clear and readable.
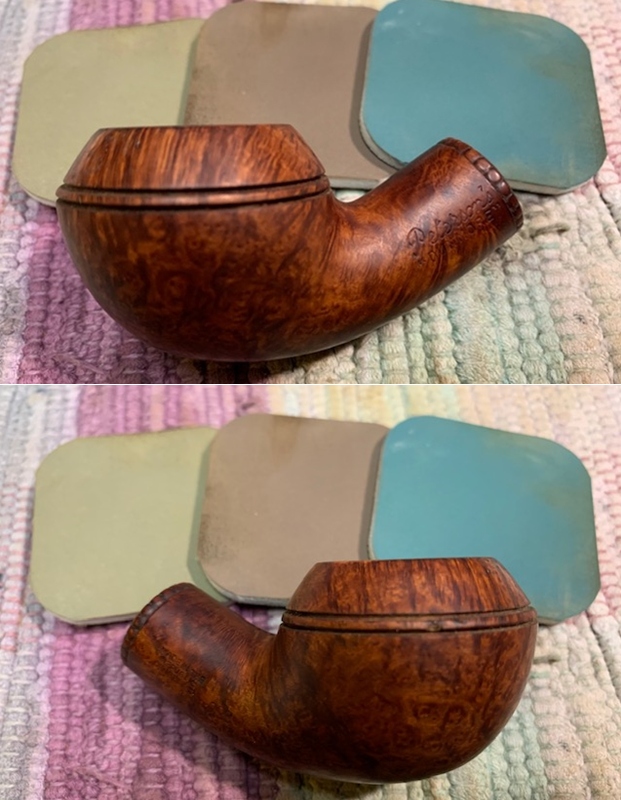
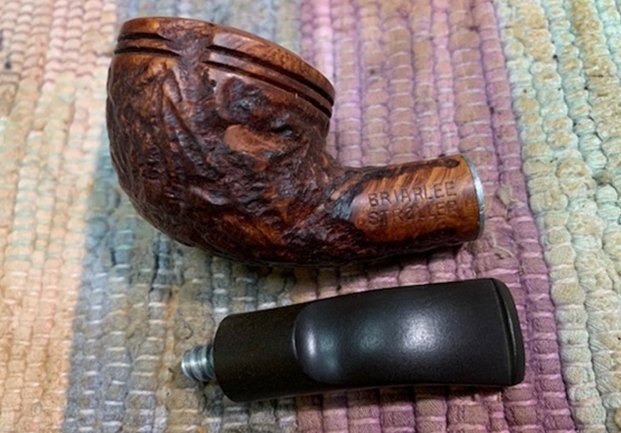
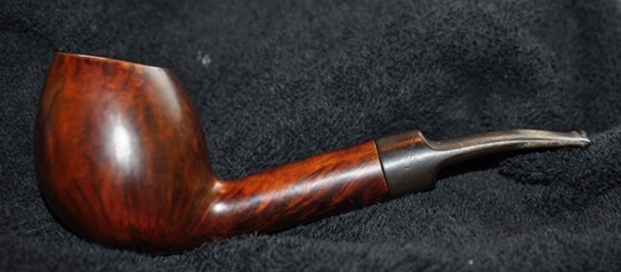
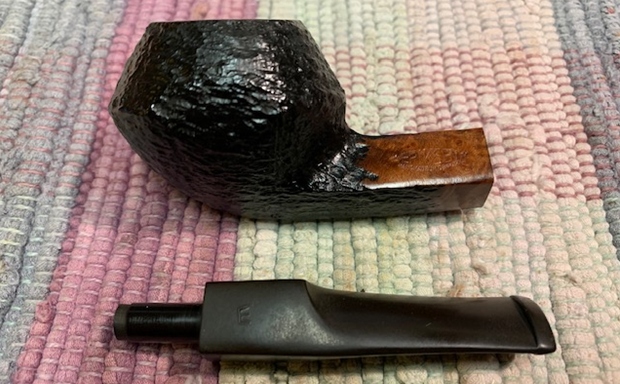
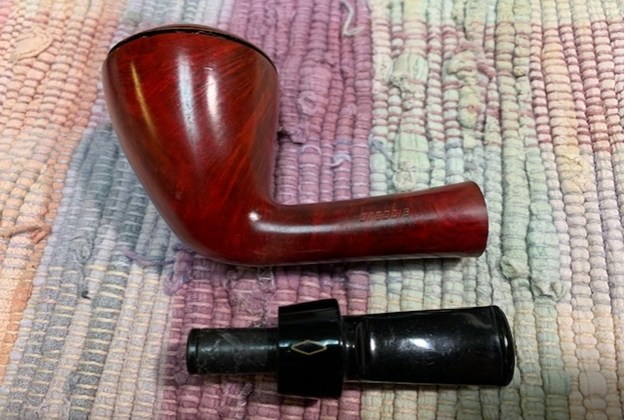
 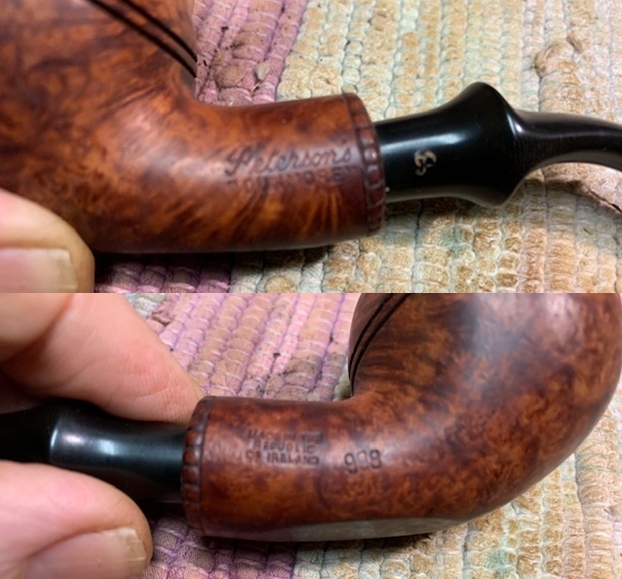 I took the pipe apart and took a photo of the pipe. It is a good looking pipe and has some great grain around the bowl and shank.
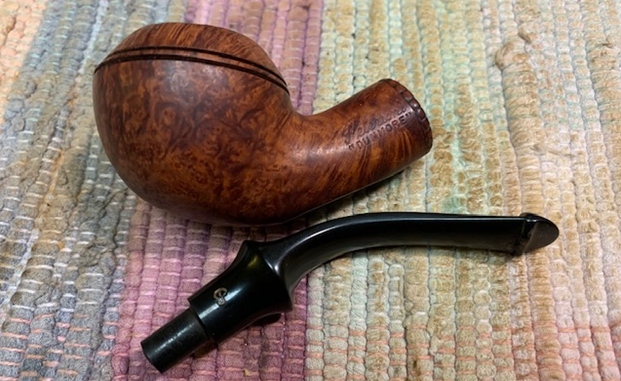 I repaired the chip in the twin rings with super glue and briar dust. Once it cured I smoothed it out with 220 grit sandpaper. I sanded the rim top with 220 grit sandpaper to remove some of the darkening on the rim top at the back of the bowl. It came out looking good.
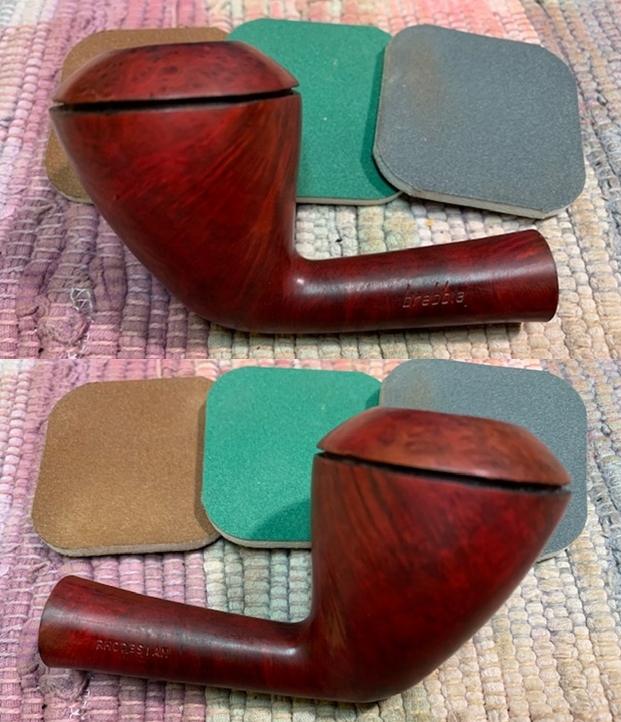
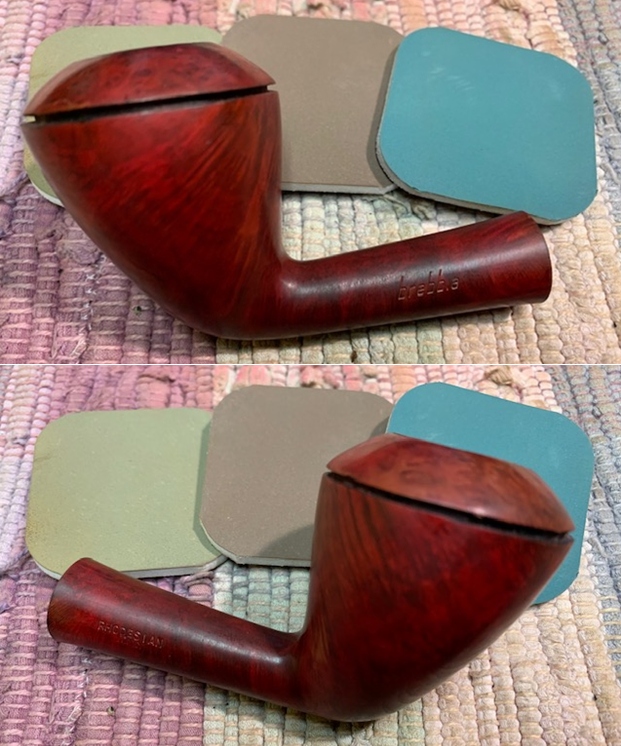
  I polished the briar with micromesh sanding pads. I dry sanded with 1500-12000 grit sanding pads. I wiped the briar and bamboo down with a damp cloth after each sanding pad.
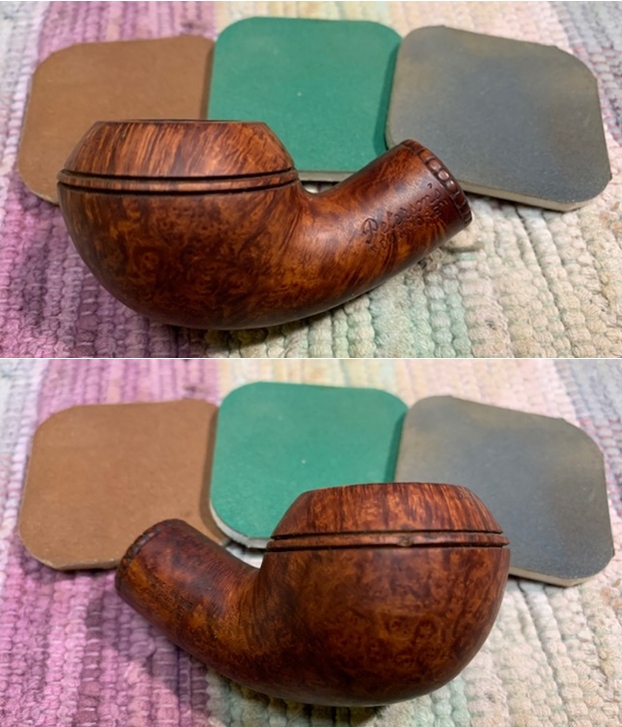
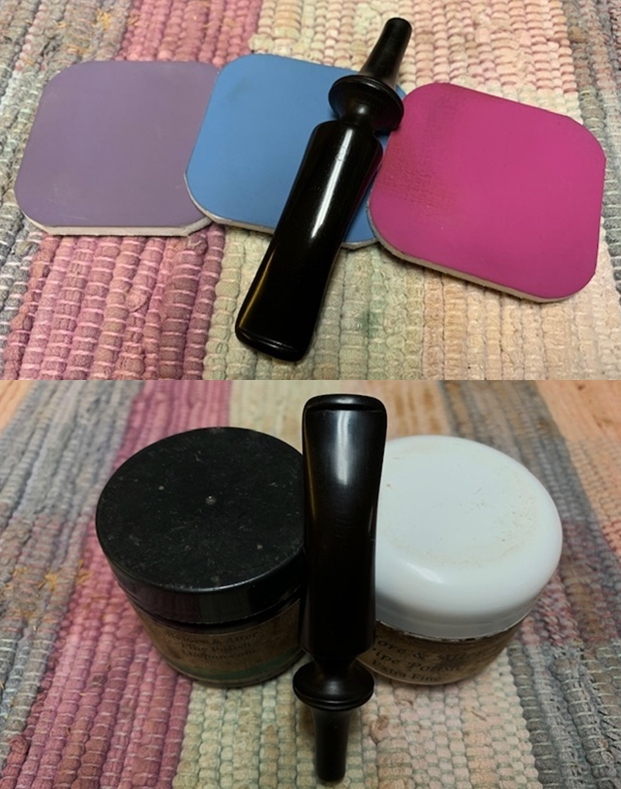
 I worked some Before & After Restoration Balm into the surface of the briar with my fingertips and a horsehair shoe brush to clean, enliven and protect the briar. I let the balm sit for 15 minutes and then buffed with a cotton cloth to raise the shine. The grain really pops.
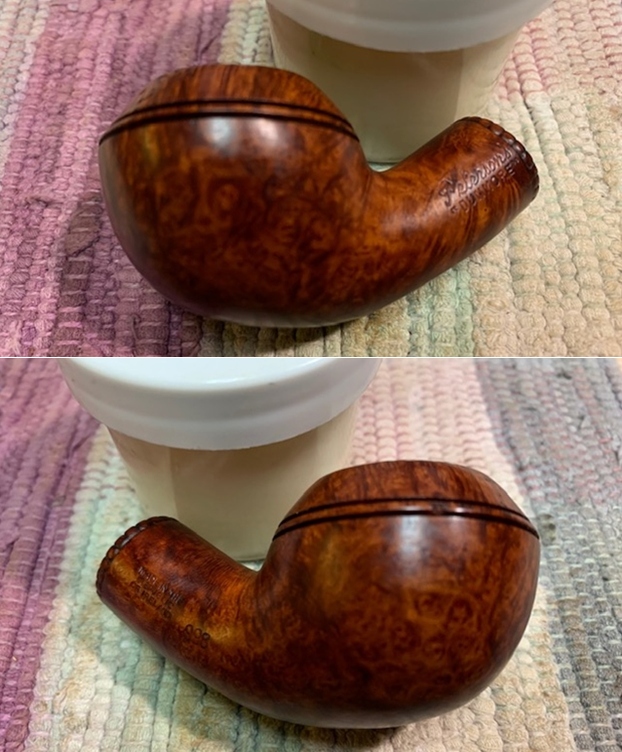
 I sanded out the tooth marks on the top and underside of the stem with 220 grit sandpaper. I worked over the area ahead of the button and on the button edges as well. I started the polishing process with 400 grit wet dry sandpaper.
  I polished the stem with micromesh sanding pads – wet sanding with 1500-12000 grit sanding pads. I wiped it down after each sanding pad with Obsidian Oil. I polished it with Before & After Pipe Stem Polish – both Fine and Extra Fine.
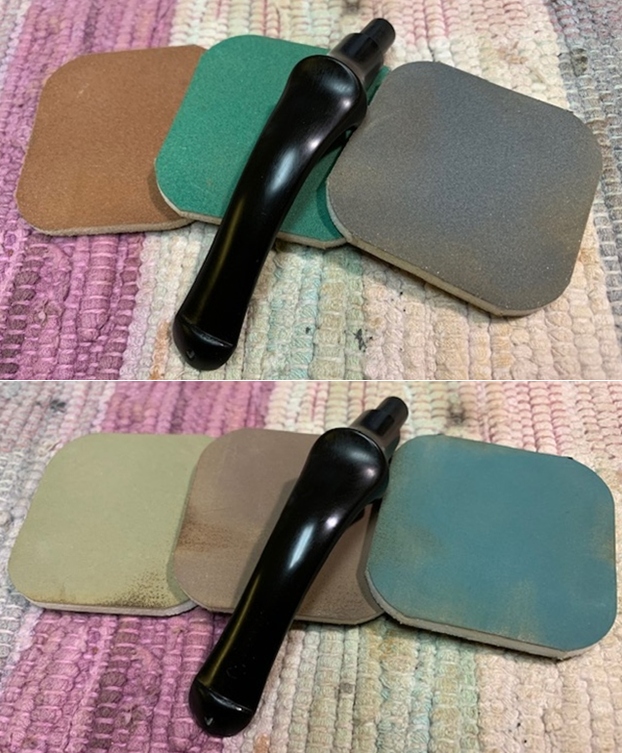
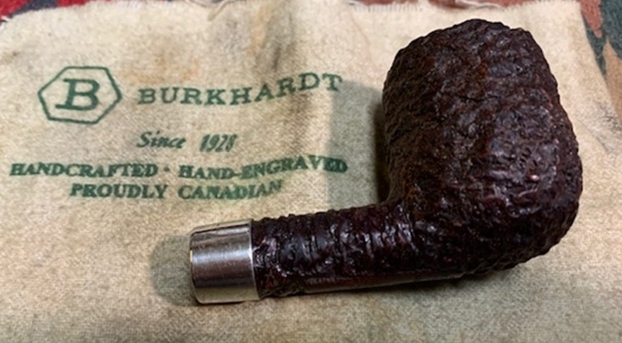
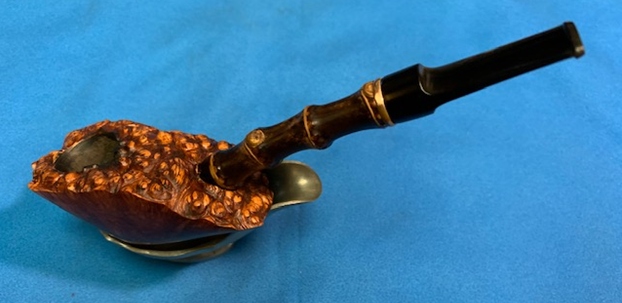
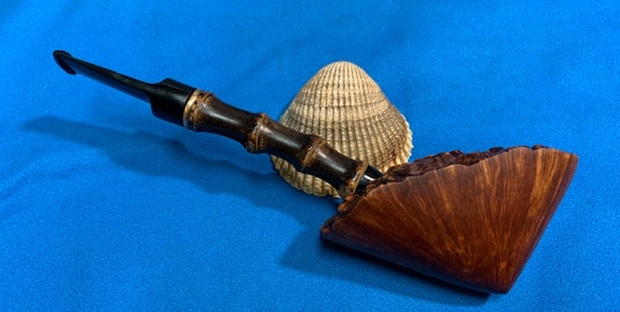
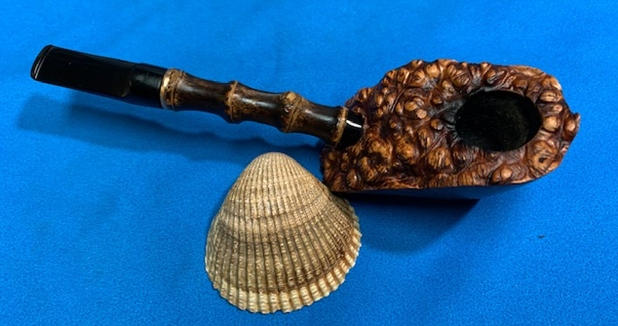
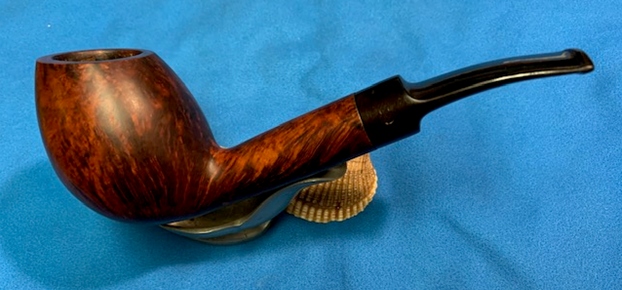
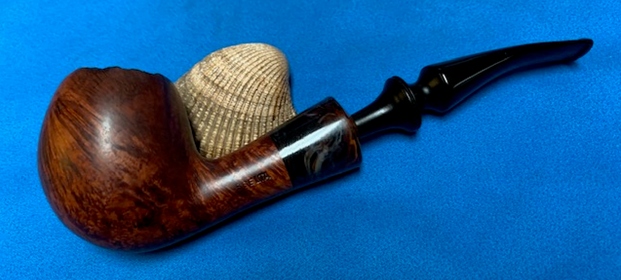
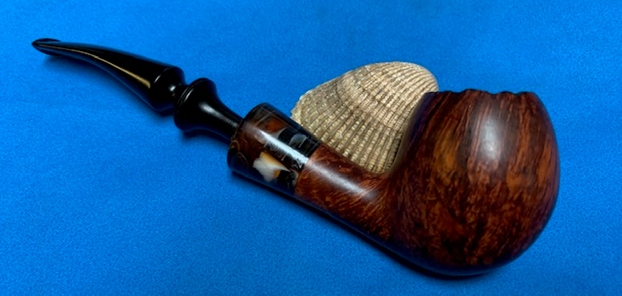
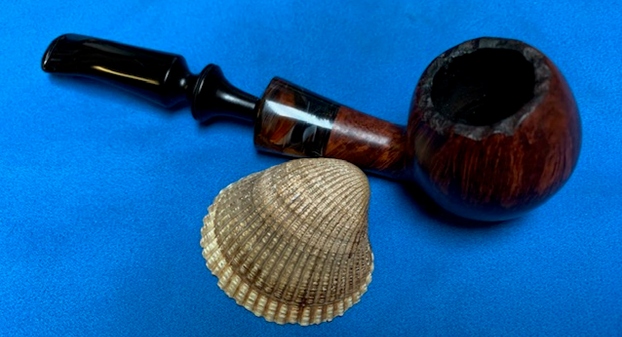
 I am excited to finish this Republic Era Peterson’s “Dunmore” 998 Rhodesian. Al Jones’ contribution to the shape number helped to cinch this one for me. It is definitely more petite than the 999 pipes that I have worked on. I put the pipe back together and buffed it with Blue Diamond on the buffing wheel. I gave the bowl and the stem multiple coats of carnauba wax. I hand buffed the pipe with a clean buffing pad to raise the shine. It is fun to see what the polished bowl looks like with the grain popping through on the bowls sides and rim top. The polished black vulcanite stem was beautiful. This Republic Era Rhodesian is a nice looking and the pipe feels great in my hand. It is light and well balanced. Have a look at it with the photos below. The dimensions are Length: 6 inches, Height: 1 ½ inches, Outside diameter of the bowl: 1 ½ inches, Chamber diameter: ¾ of an inch. The weight of the pipe is 42grams/1.48oz. It is a beautiful pipe and one that will be on the Irish Pipe Makers section of the rebornpipes store soon. If you are interested in adding it to your collection let me know. Thanks for walking through the restoration with me as I worked over this pipe. Thanks to each of you who are reading this blog.
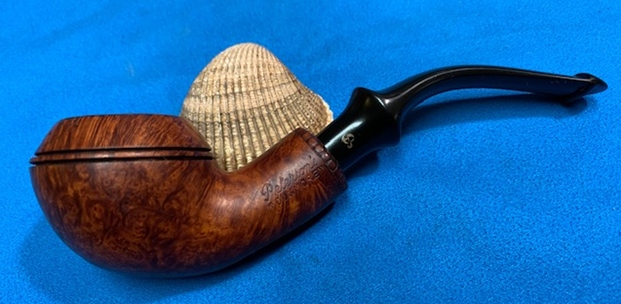


