Blog by Dal Stanton
I saw this Comoy’s Bent Bulldog as a charity listing on eBay for the Akron Art Museum, in Akron, Ohio. The seller, like me, was providing pipes for a good cause and I like that. I also liked the Bulldog I saw in the pictures the seller provided and by the description, it seemed the seller was a pipe person. The nuts and bolts description:
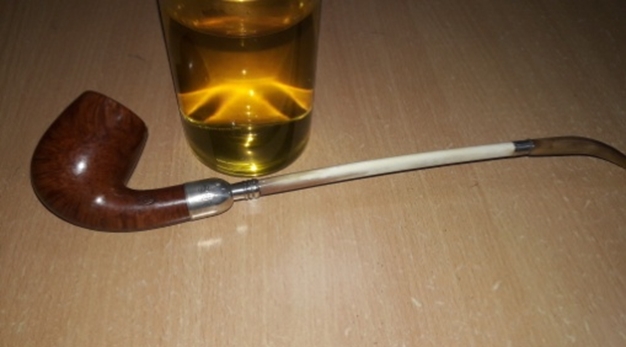
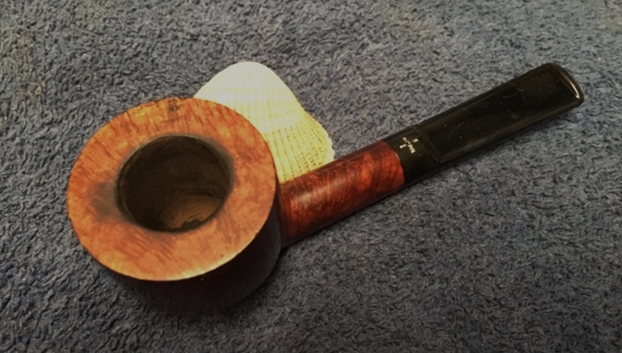
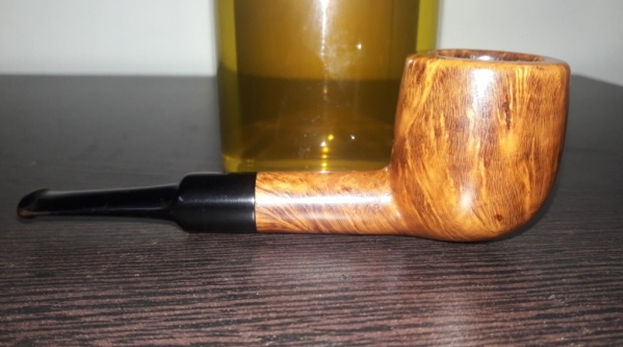
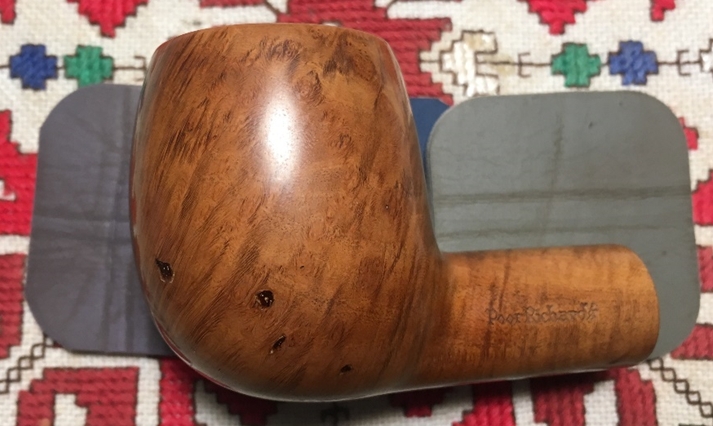
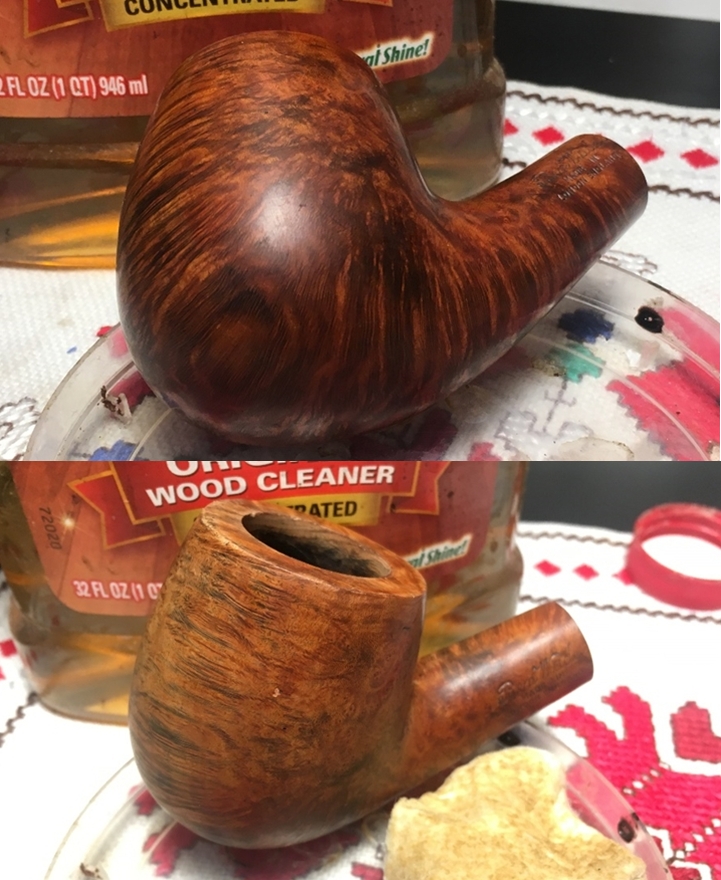
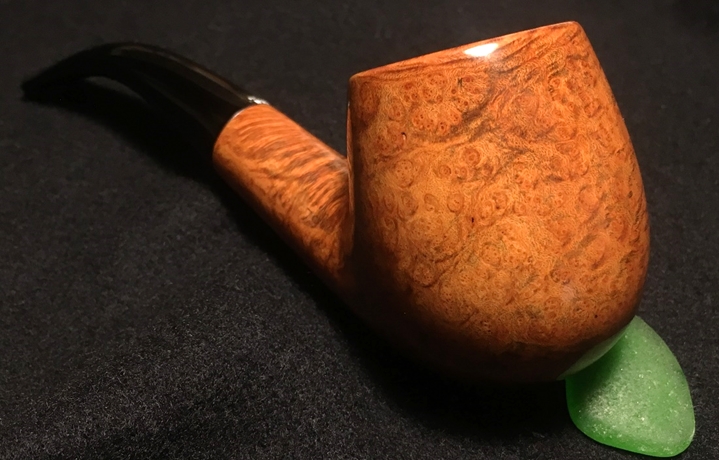
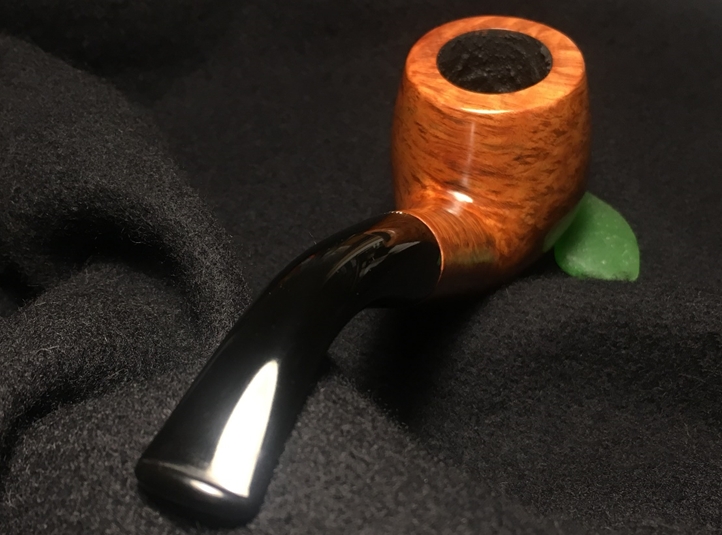
A classic bulldog! About 5 1/4” long, bowl is 1 1/2” tall, 1 5/8” wide tapering to 1 1/8” at rim. ID 13/16”, depth 1 5/16”. Marked on one side of shank COMOY’S, other side MADE IN LONDON ENGLAND in circular fashion 4097, beneath shank a capital H. A capital C stamped on side of bit. No other marks detected.
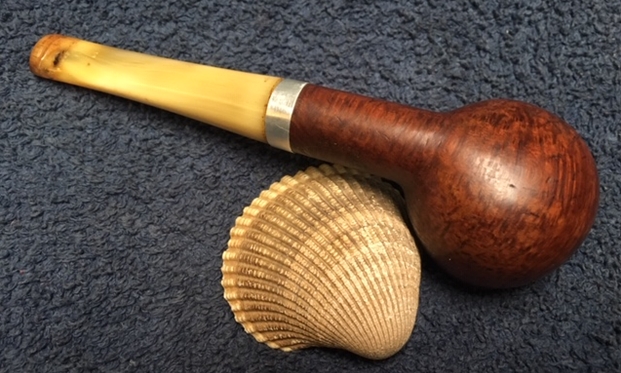
Diamond saddle bit is well-seated push fit, cleaned and polished, showing some bite wear but no holes through. Some oxidation as well. Stummel is well hand worn and smoothed, some dings and scratches, scorch on rim, light cake in bowl. Though the pipe is smokable as is, this one has the possibility of being a real beauty with some TLC!
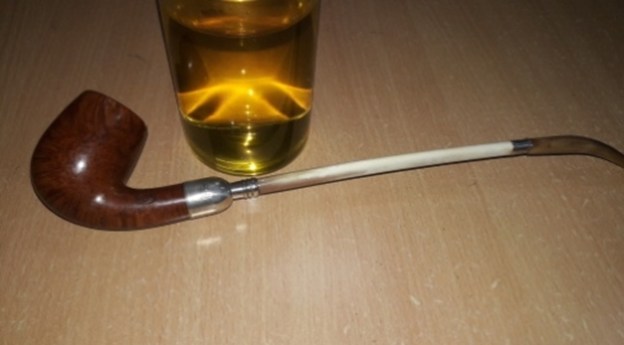
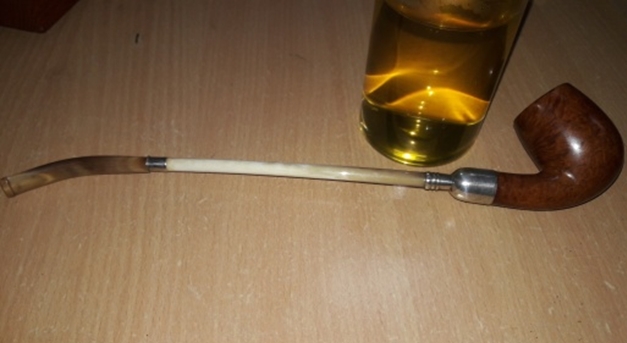
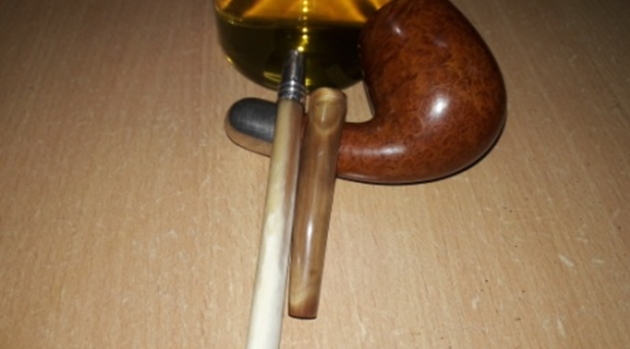
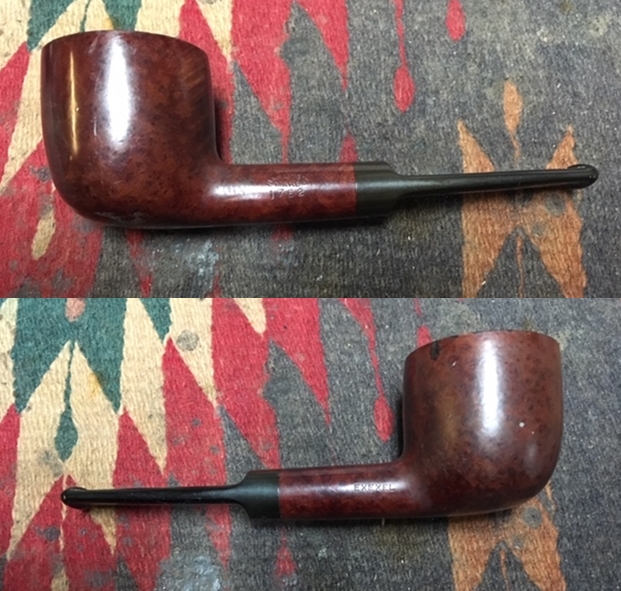
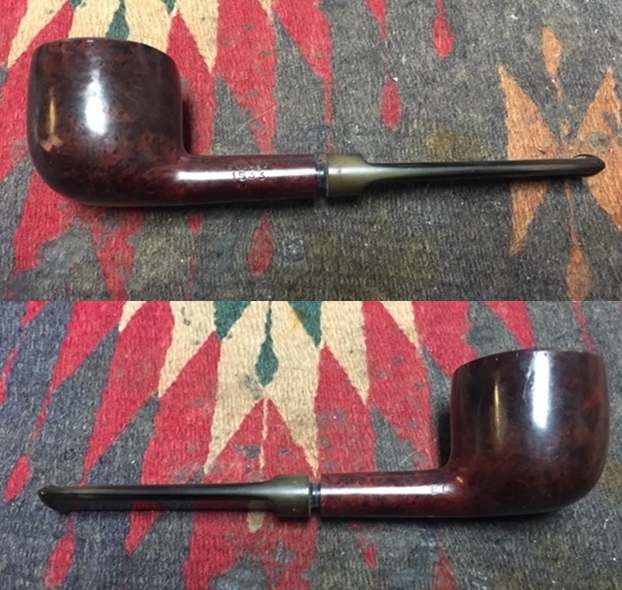
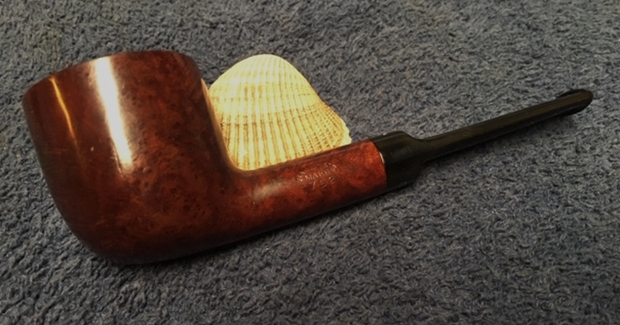
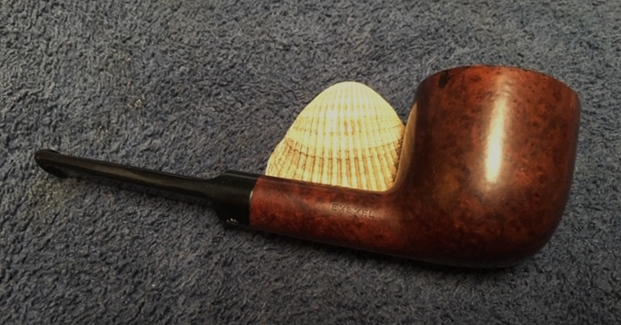
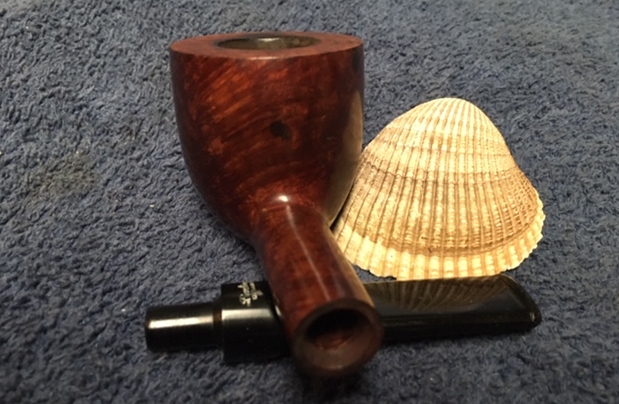
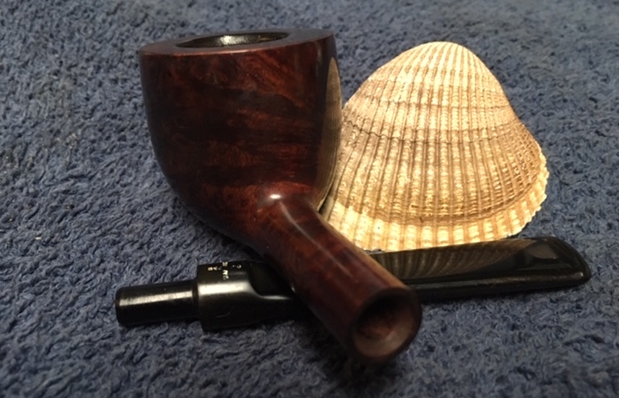
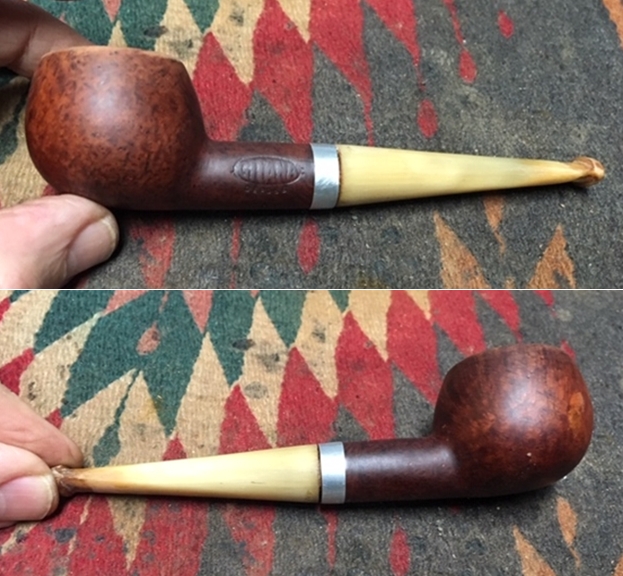
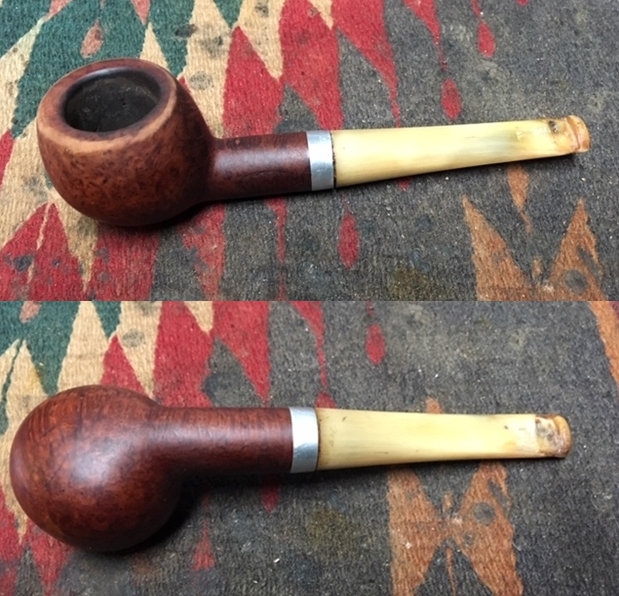
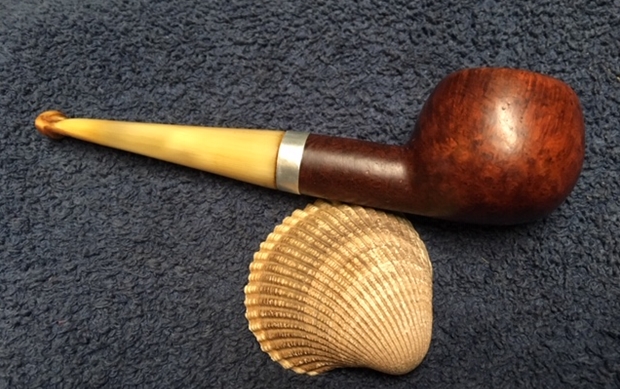
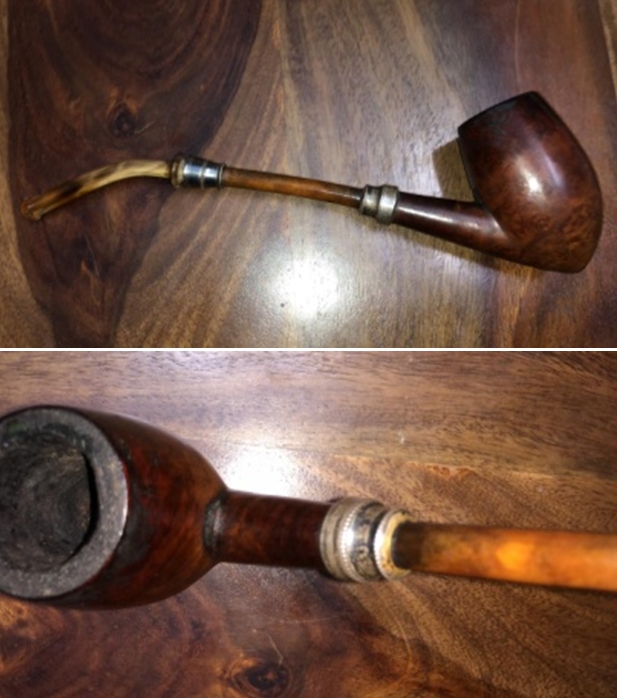
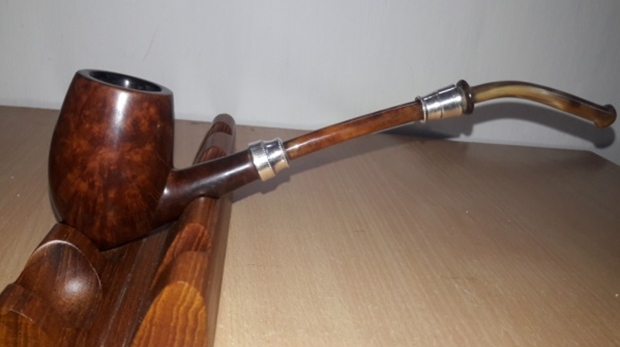
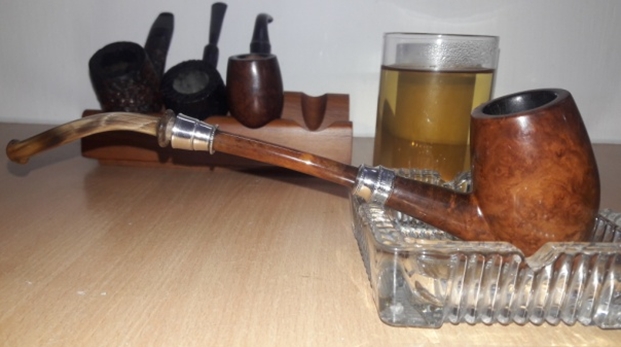
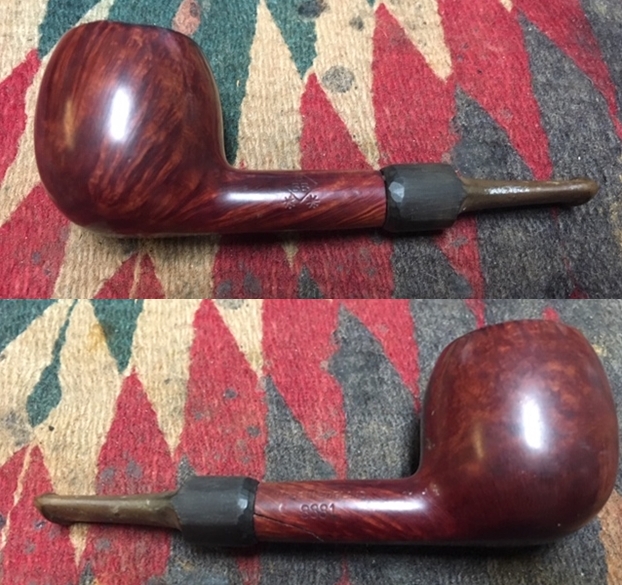
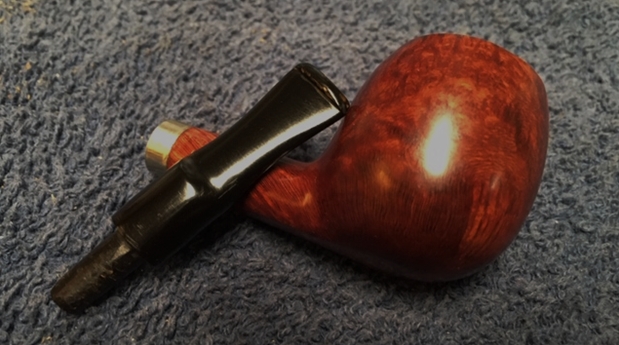
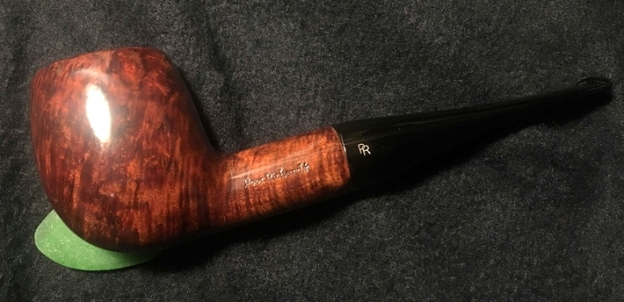
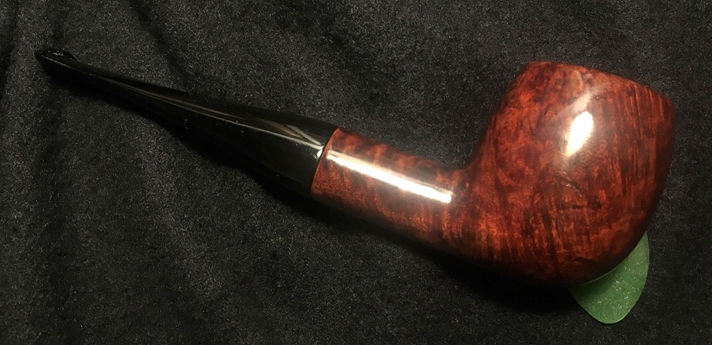
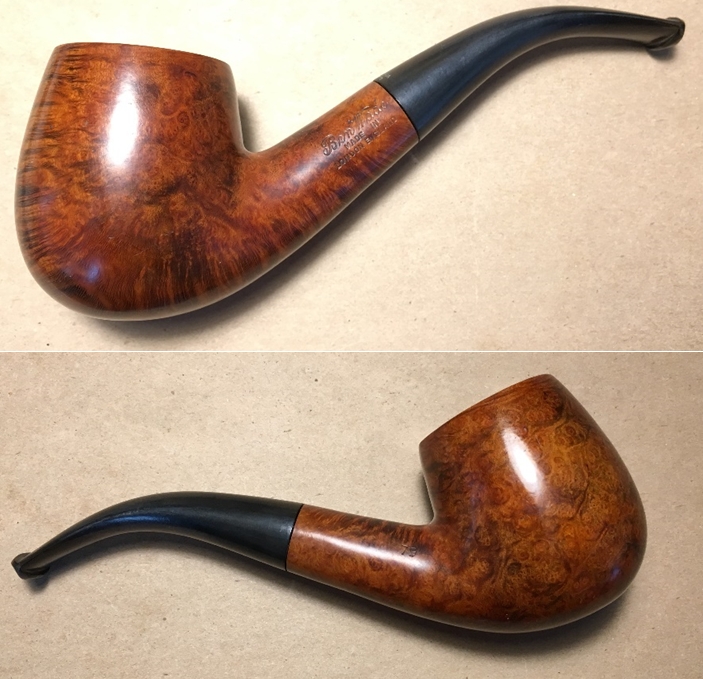
I took the gambit dangled in the last sentence regarding this Bulldog’s possible condition with some TLC. My bid on the auction block was sufficient, I supported the Akron Art Museum, and now this Comoy’s Bent Bulldog is on the worktable here in Sofia, Bulgaria, on track to benefit the Daughters of Bulgaria, my favorite cause. This was the second pipe that Stephen commissioned along with a Custom-Bilt Rusticated Panel. Here’s the picture I saw on eBay which got Stephen’s attention in the For ‘Pipe Dreamers’ Only! collection: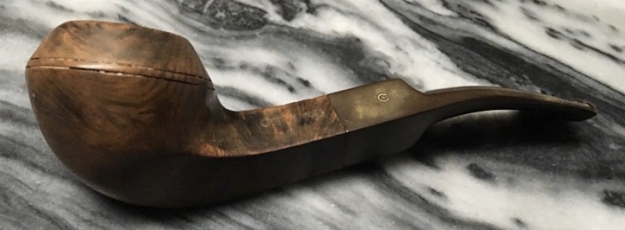 Now on my worktable, I take more pictures to get a closer look at the condition of this Comoy’s Bent Bulldog.
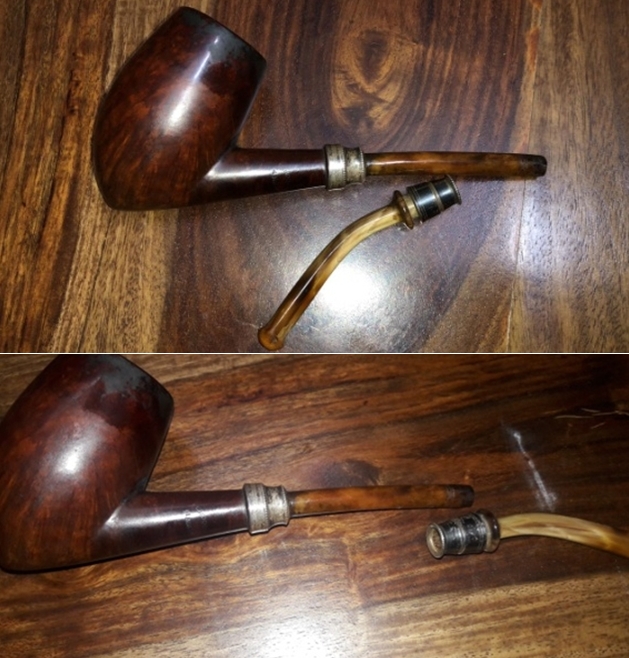
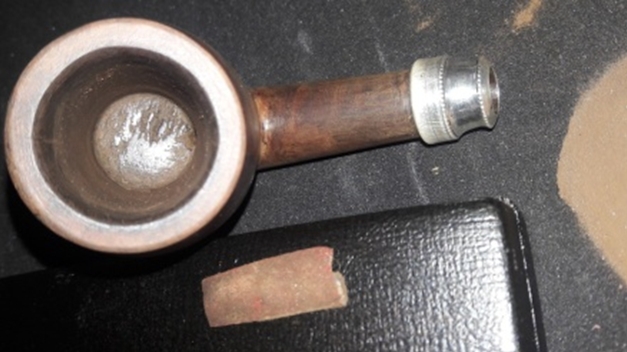


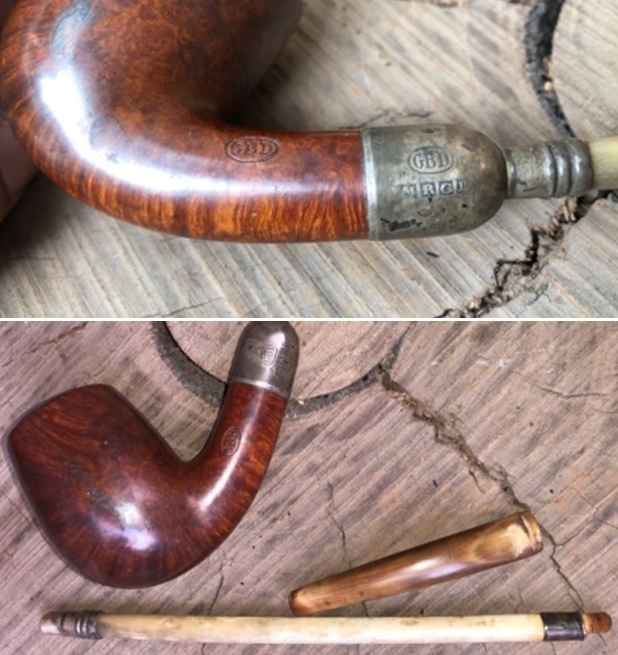
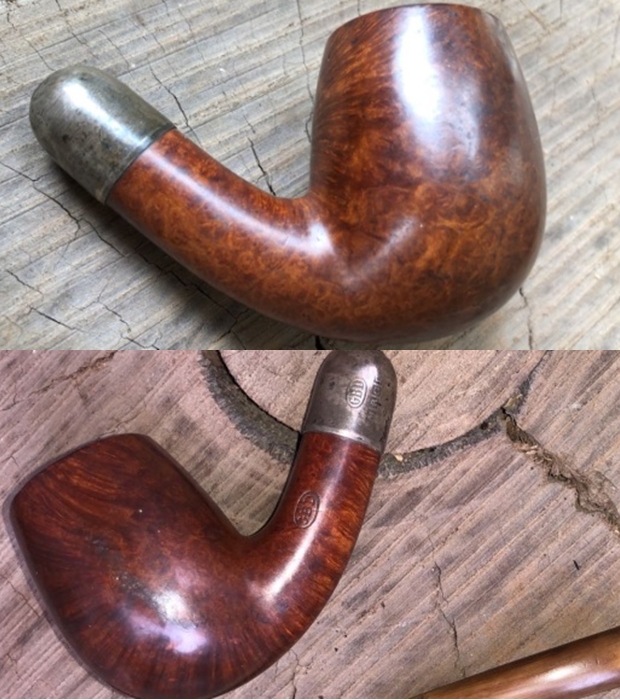
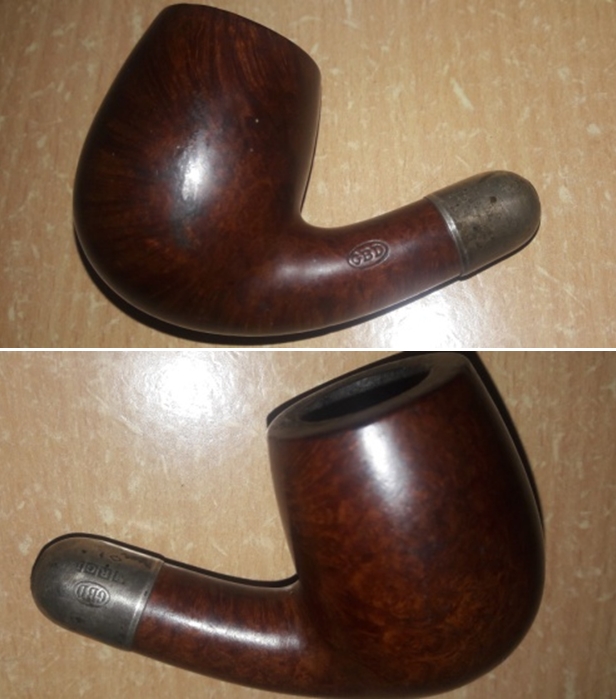
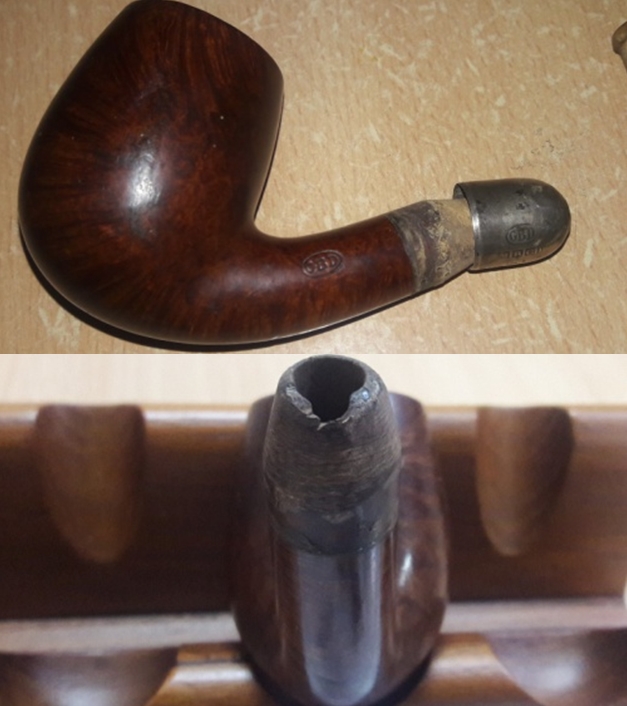
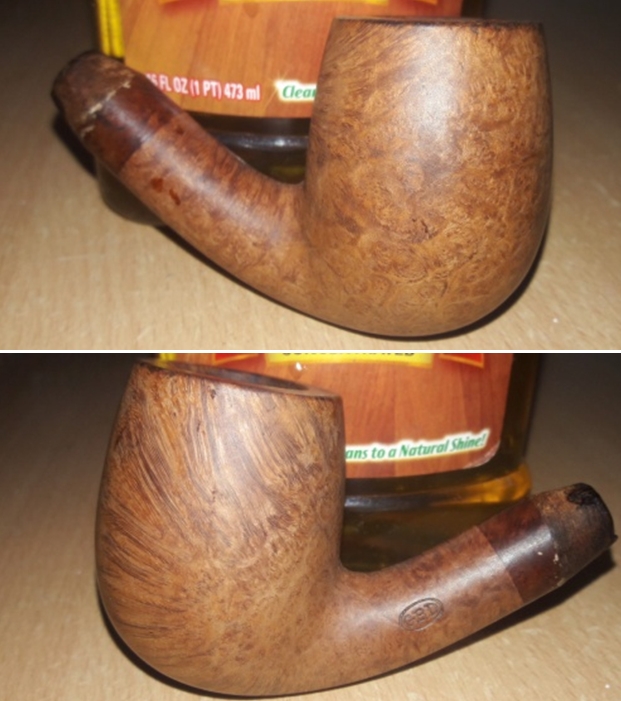
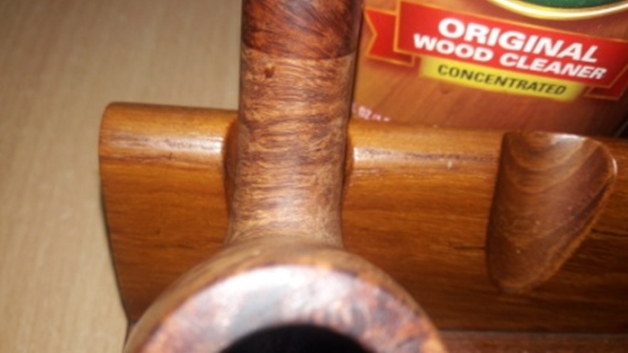
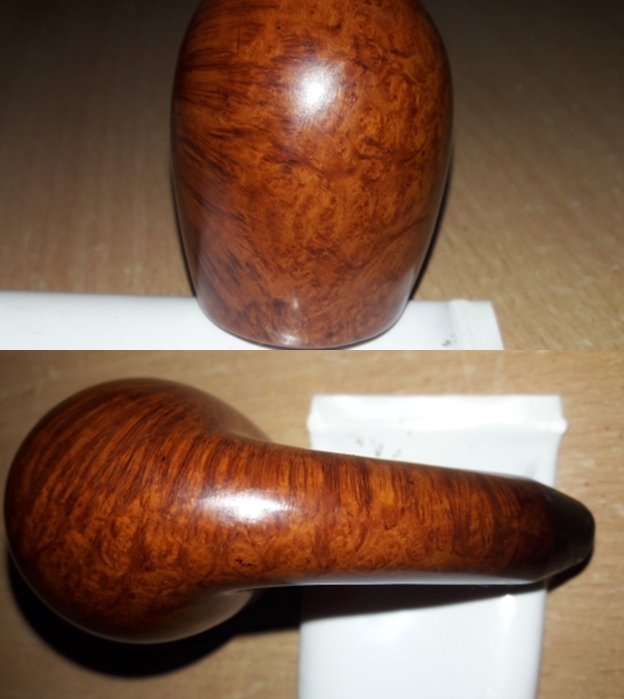
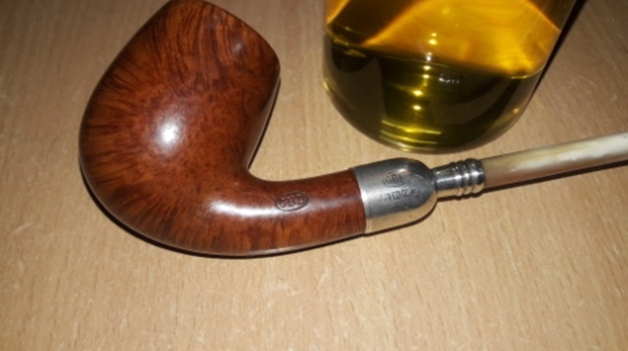
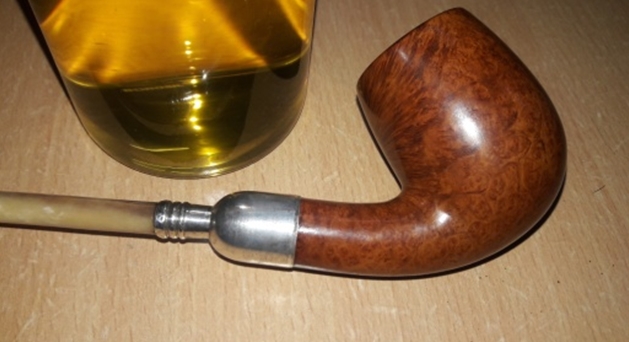
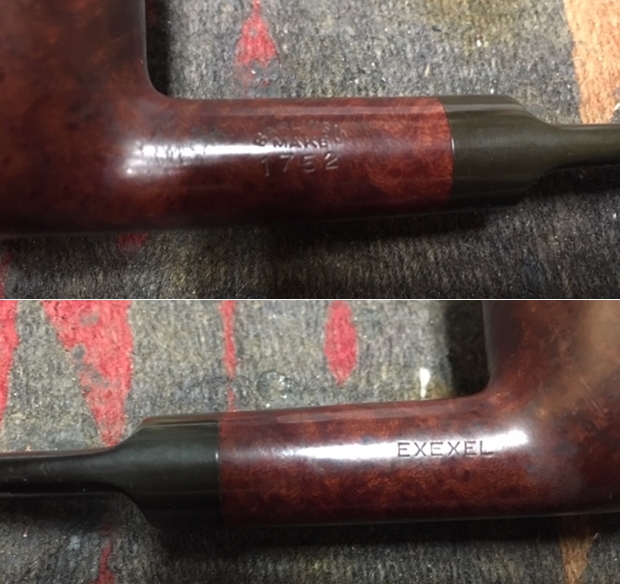
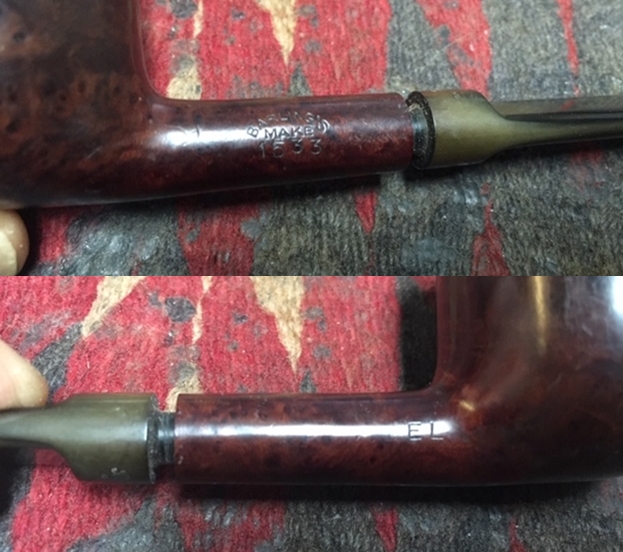
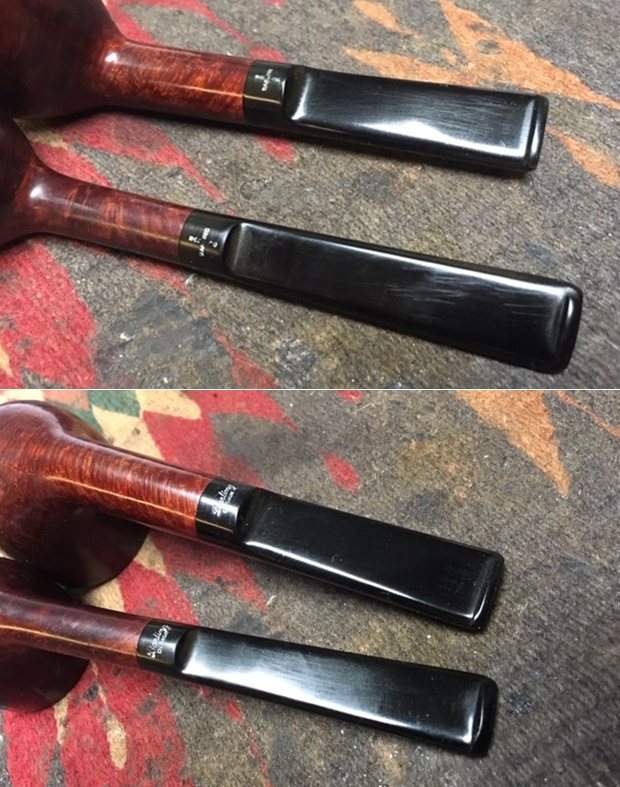
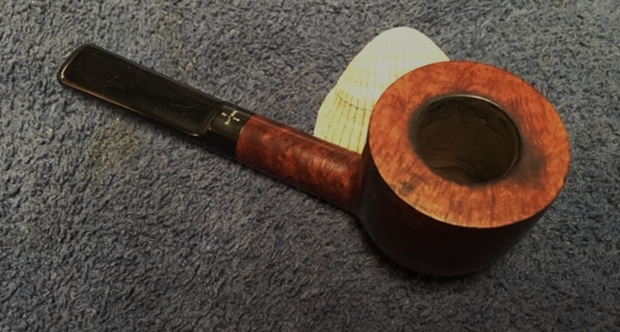
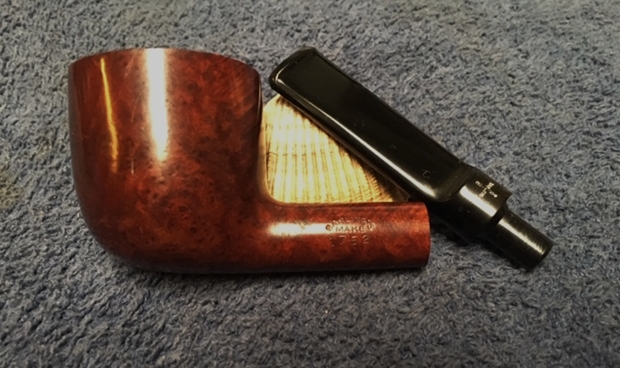
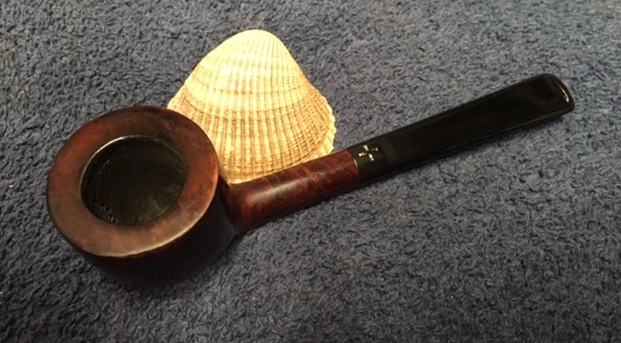
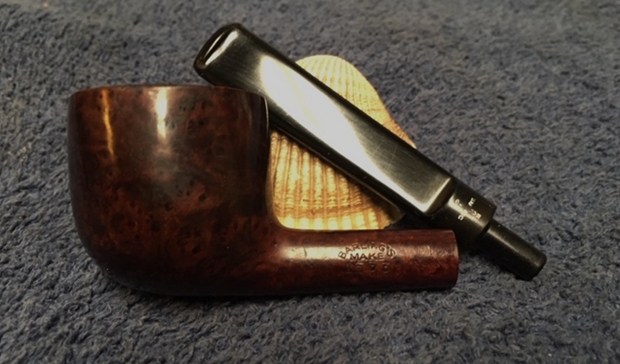
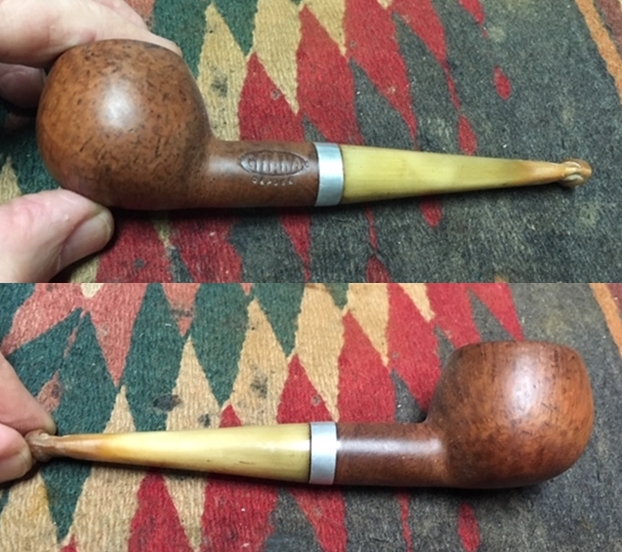
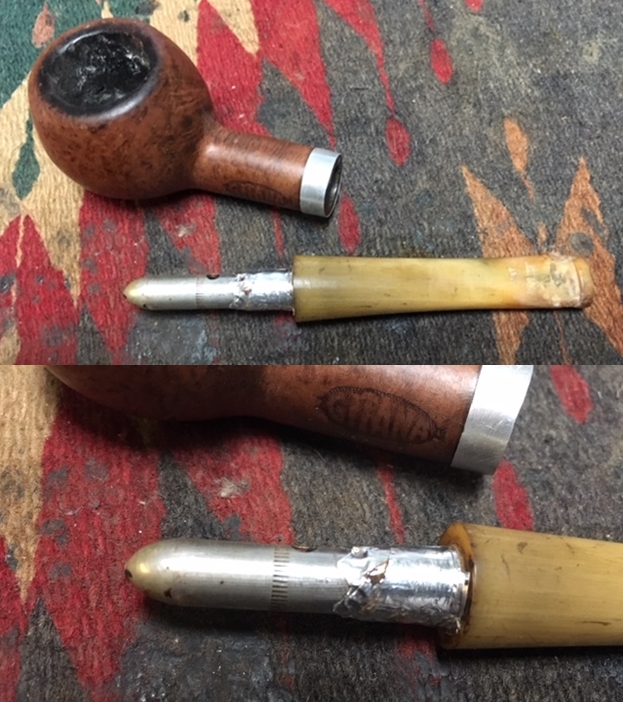
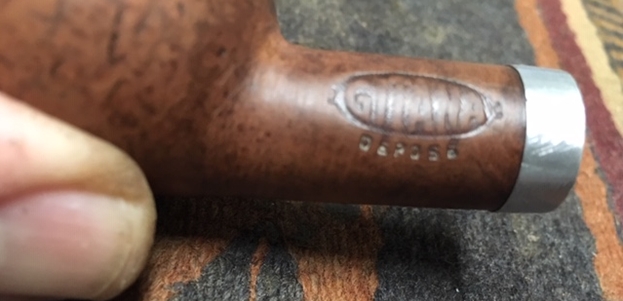
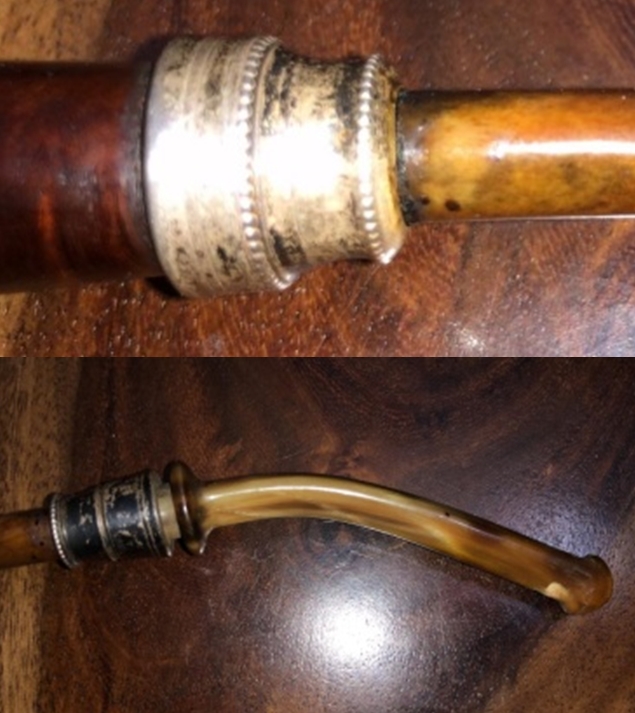
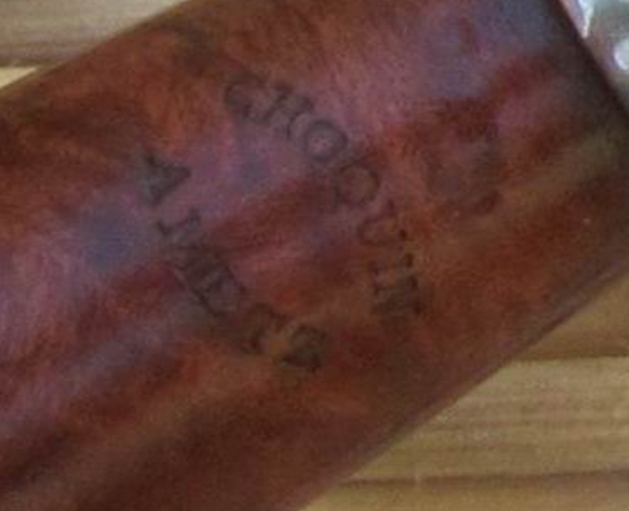
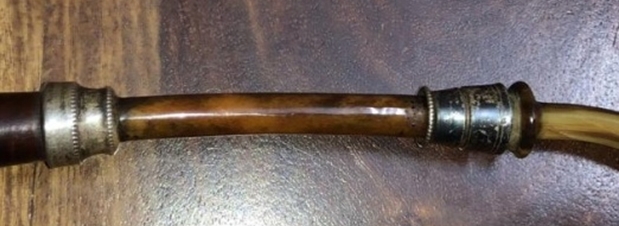
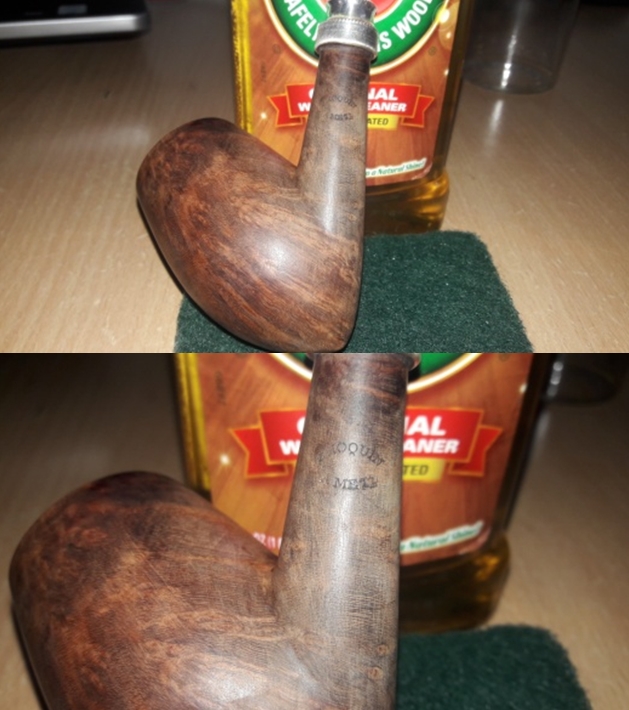
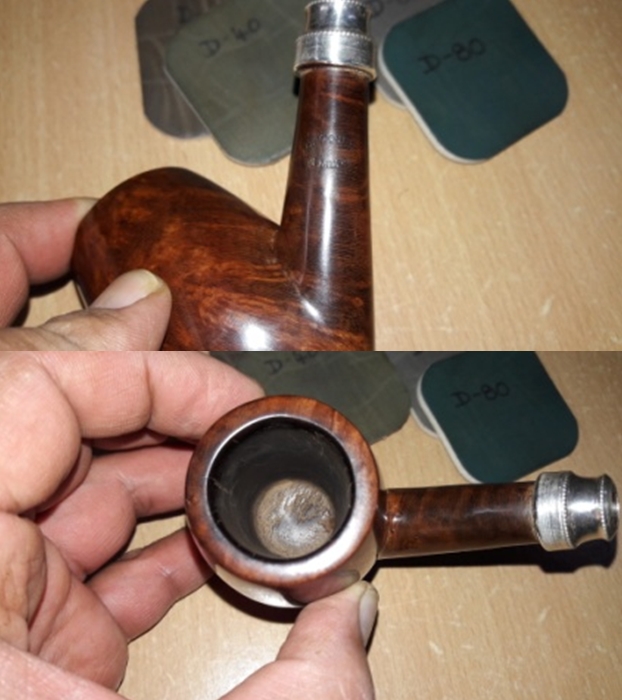
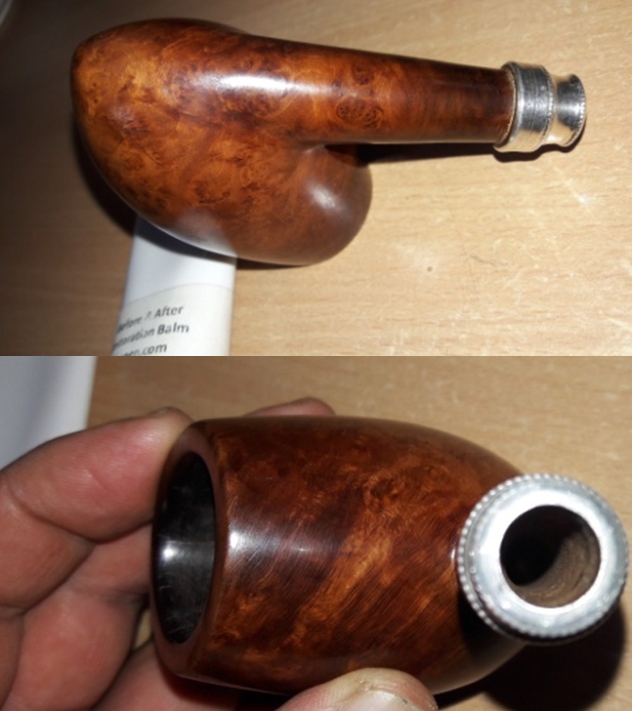
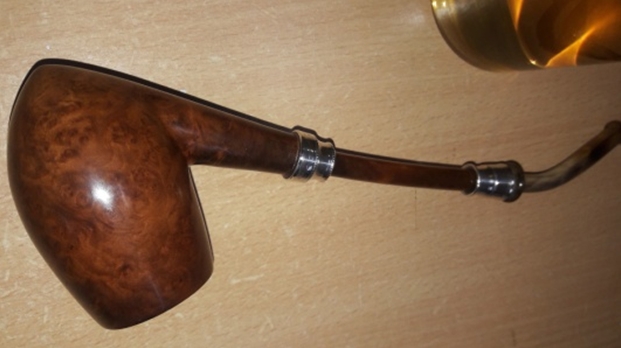
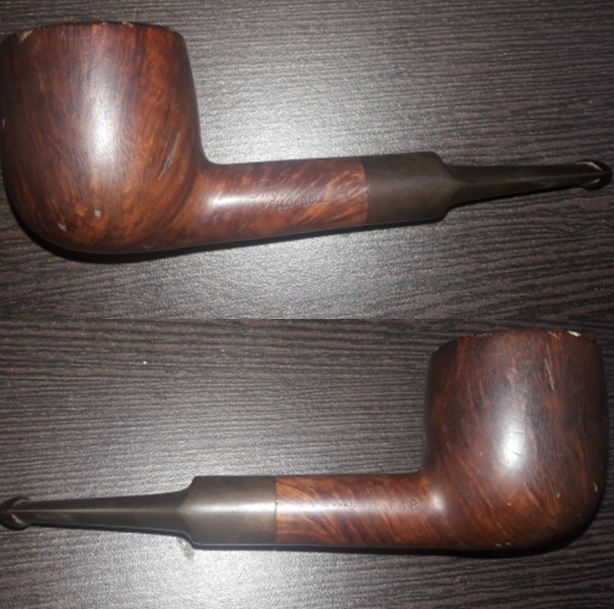
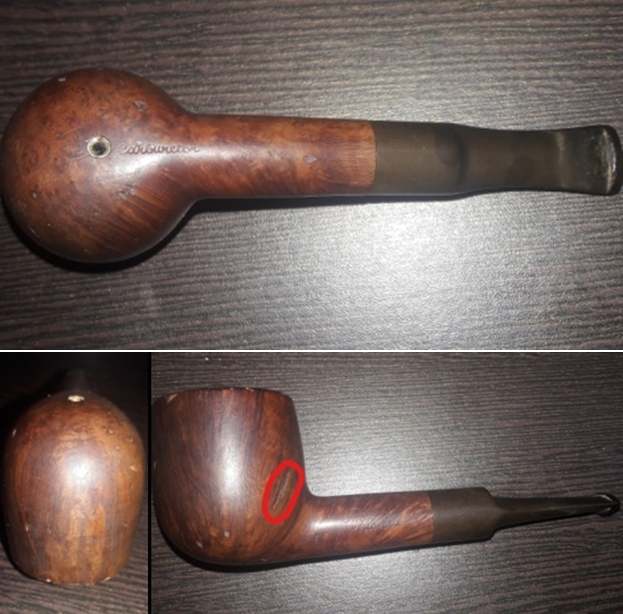
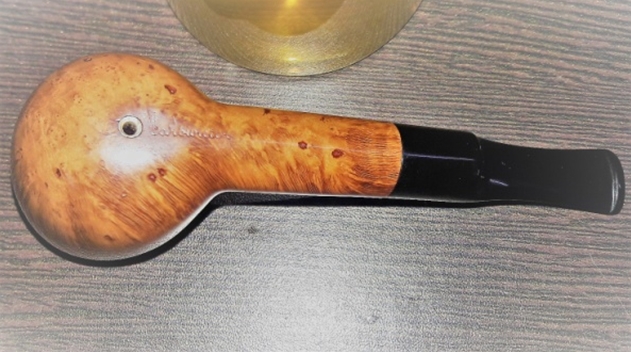
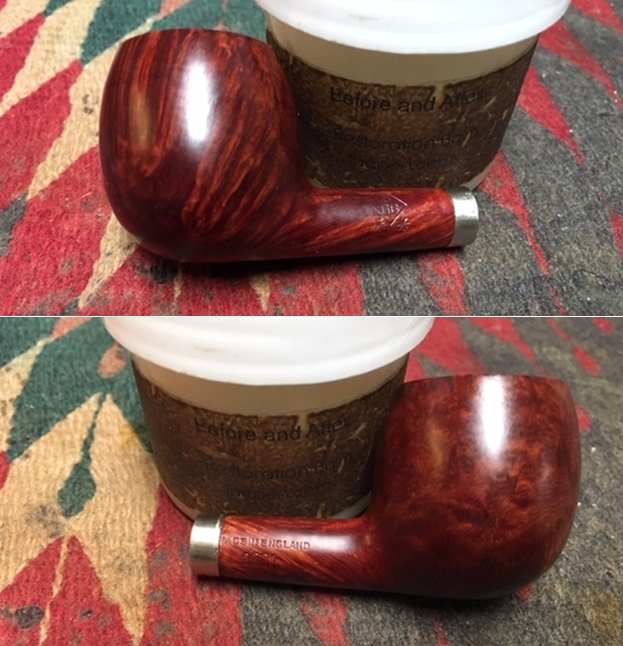
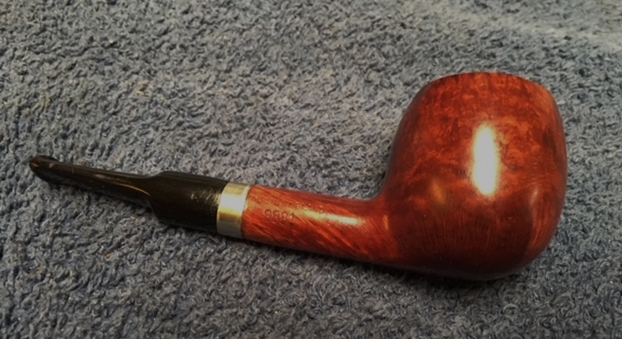
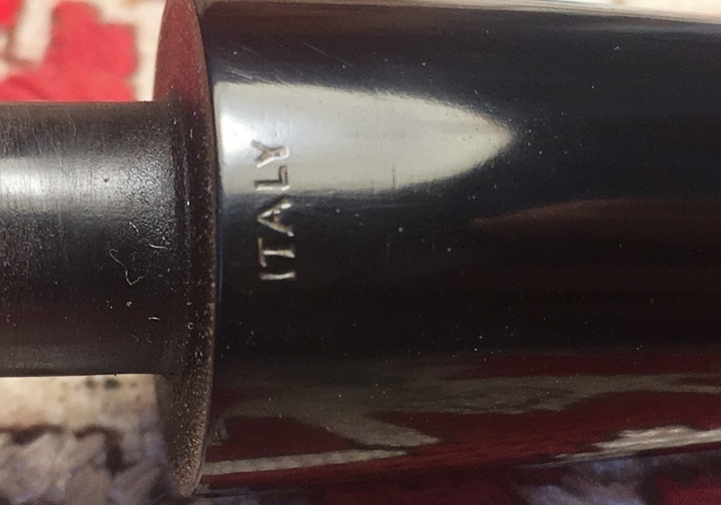
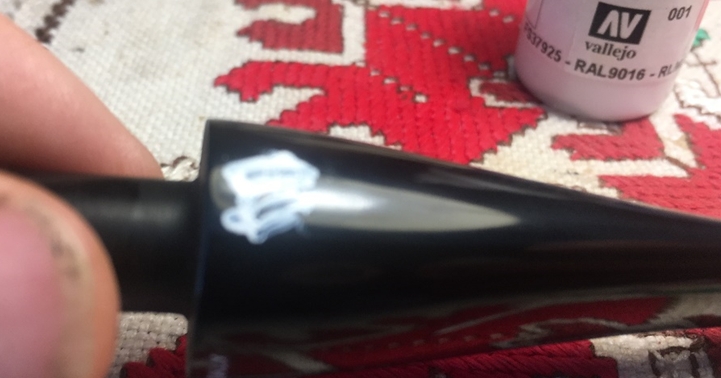
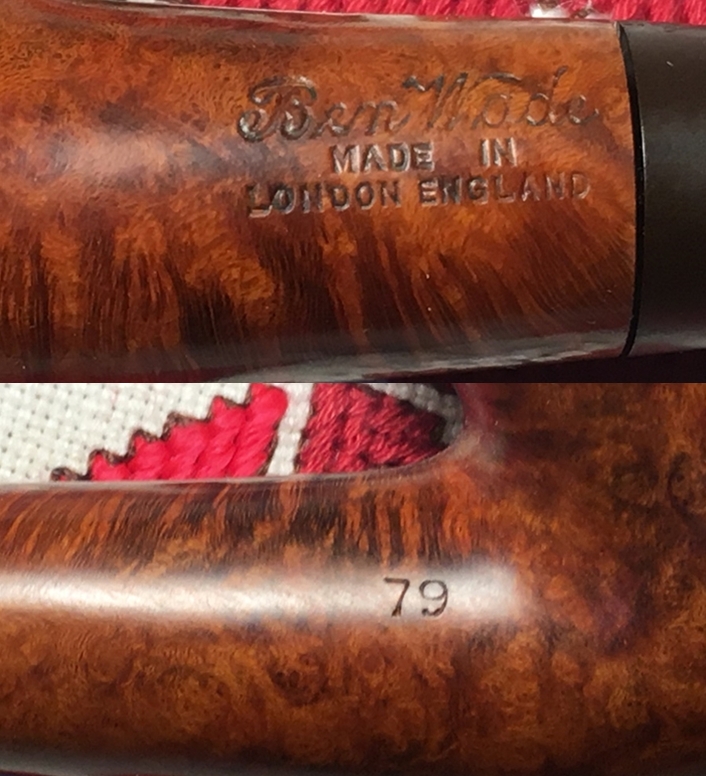
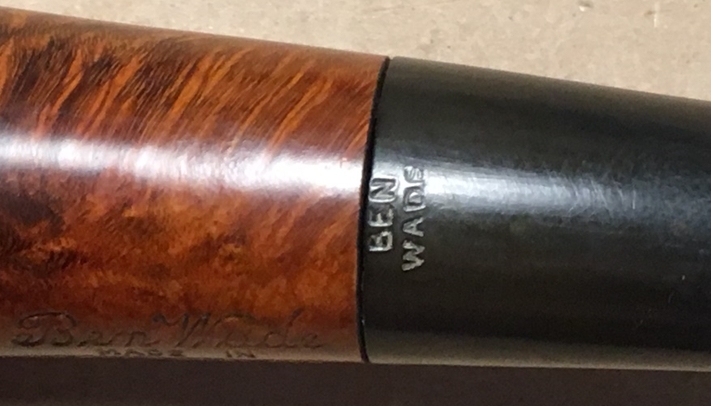
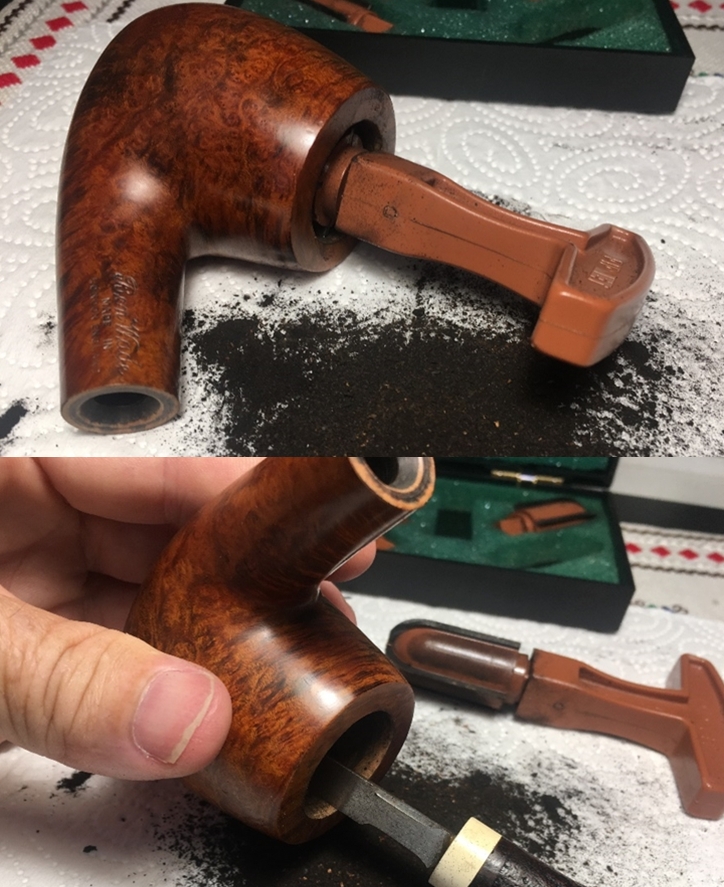
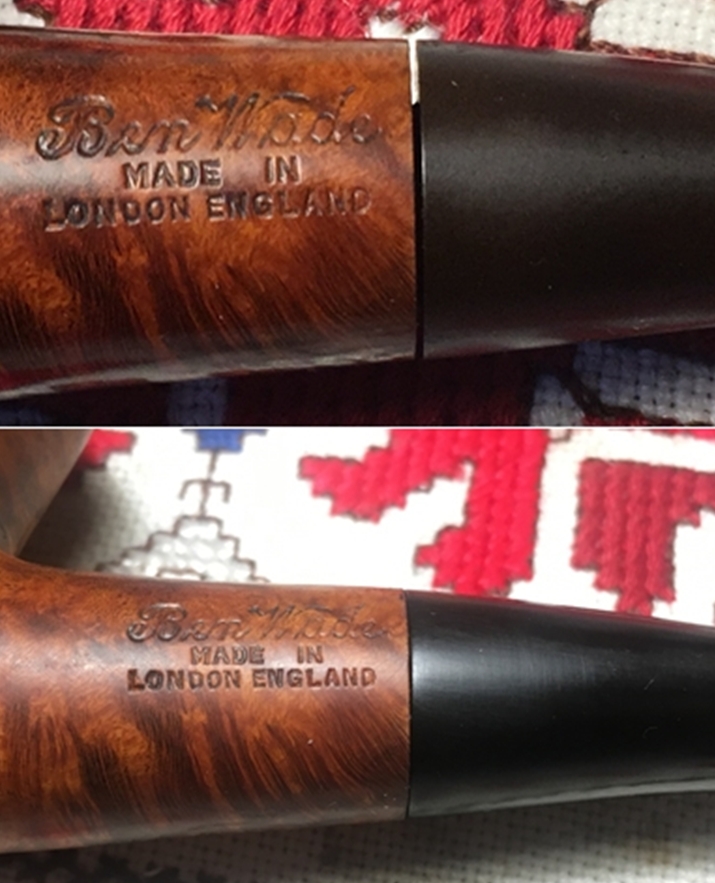
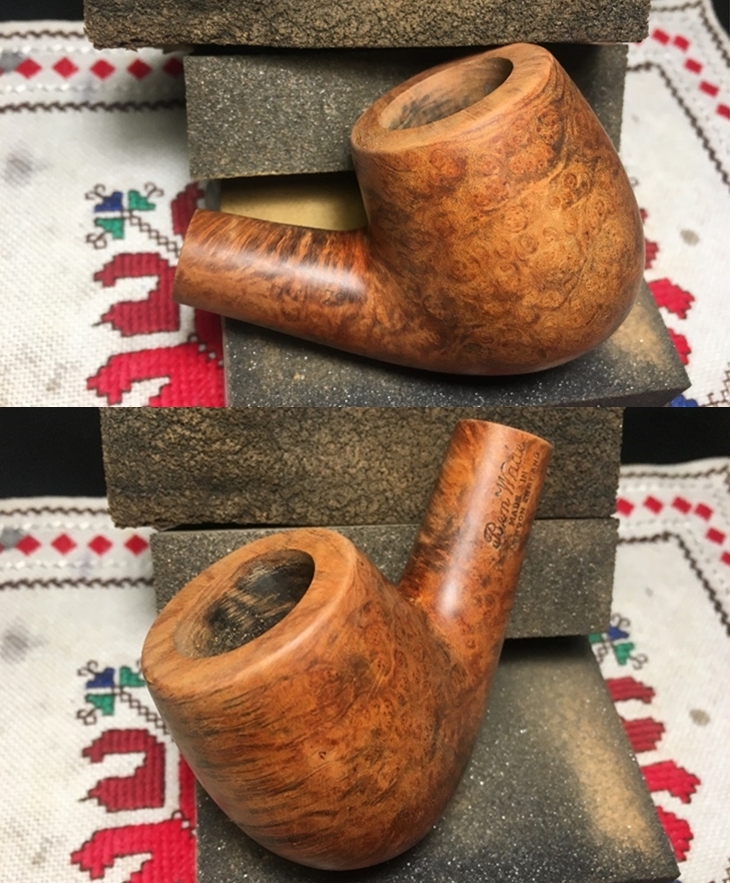
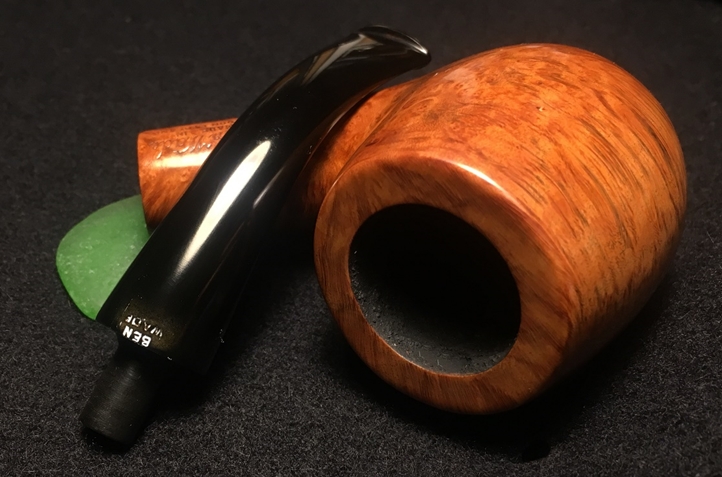
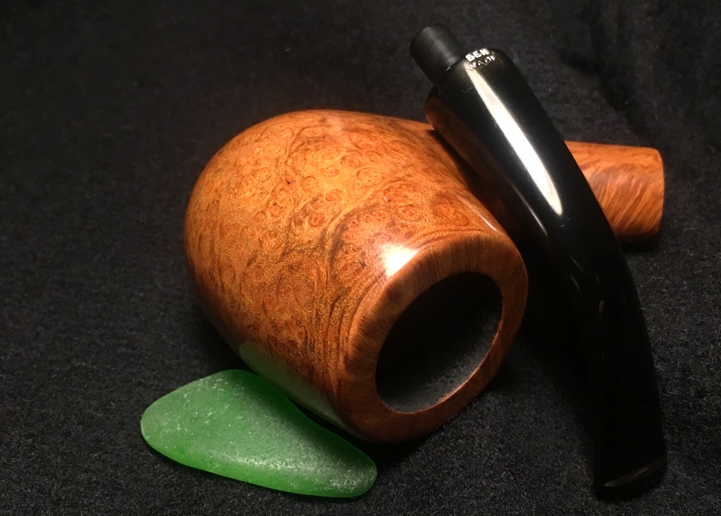
 The nomenclature on the Bulldog’s diamond shank is clear. On the upper left shank is stamped ‘Comoy’s’. The right upper shank has encircled, ‘MADE’ with ‘IN’ in the center and ‘LONDON’ on the bottom. Underneath the circle is ‘ENGLAND’ in straight script. To the right is shape number ‘409 7’. Underneath this on the lower right shank panel is stamped ‘H’. All indicators of the nomenclature point to a Cadogan era pipe which began in 1979 with the merger absorbing Comoy’s. The simple ‘C’ stem stamp confirms this without the classic 3 piece inlaid ‘C’.
 The shape number of 409 has historically indicated a Bulldog on earlier shape charts with a slight quarter bend. The addition of the ‘7’ on this Bulldog I’m not clear on this, except that during the Cadogan era they added a 4th number to the shapes according to the Pipepedia article on shapes.
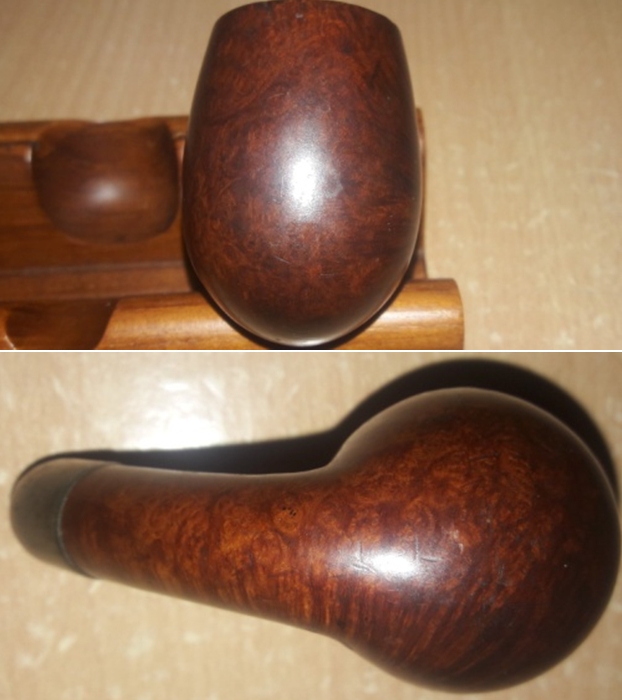
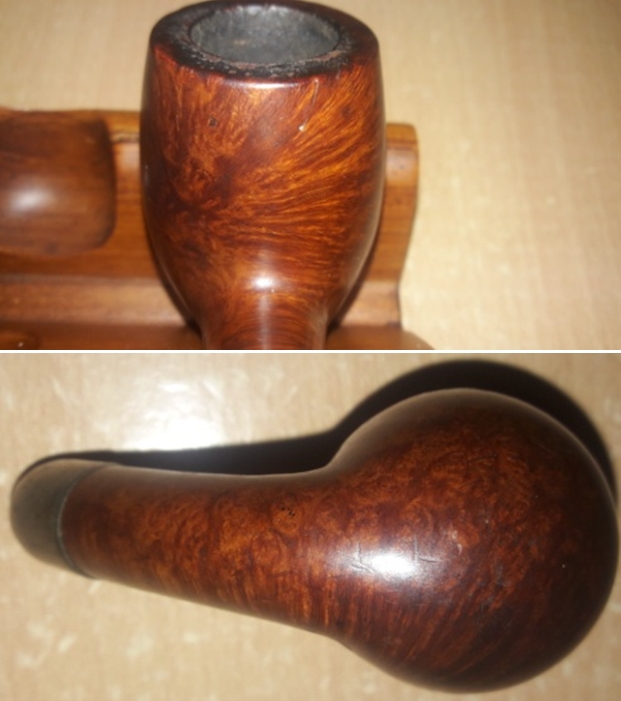
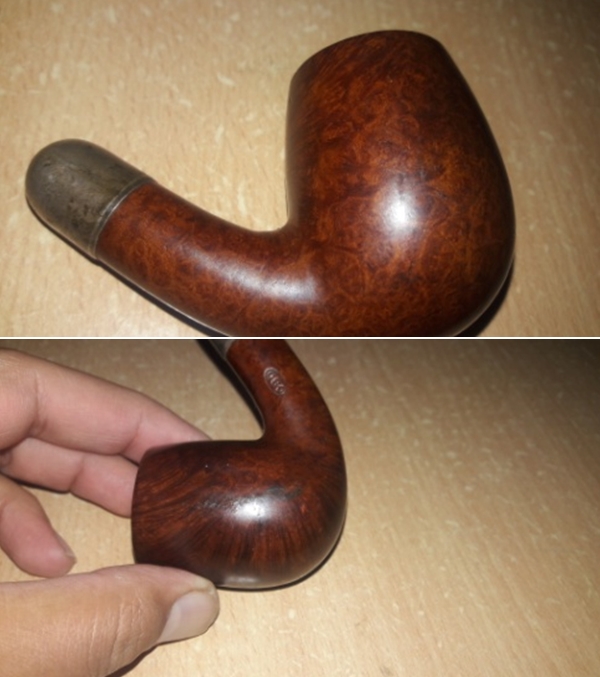
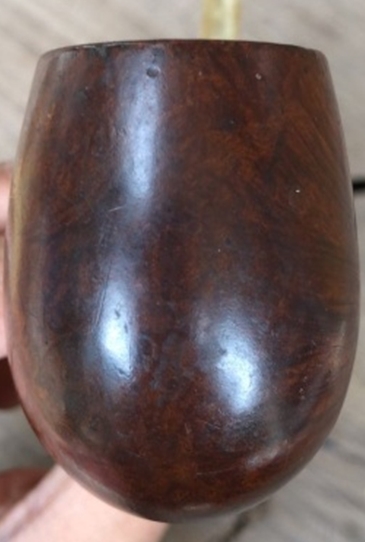
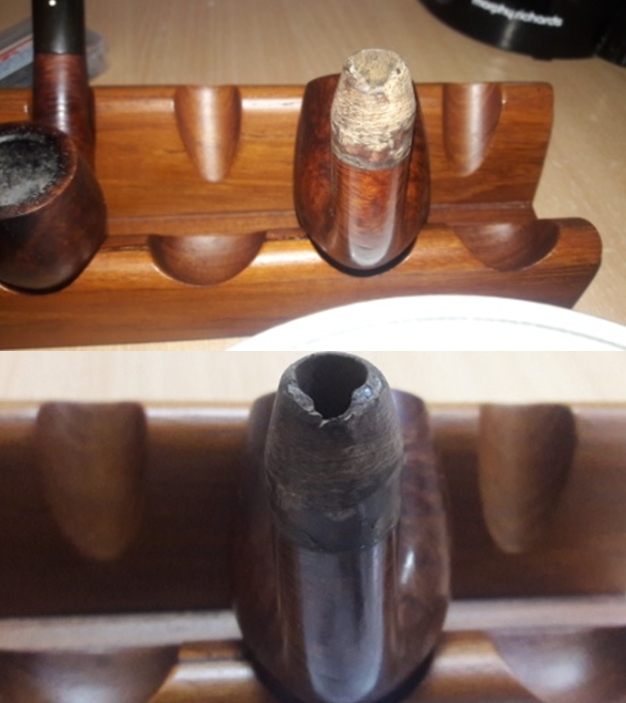
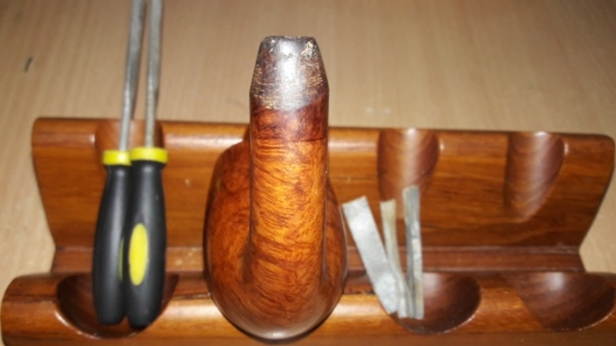
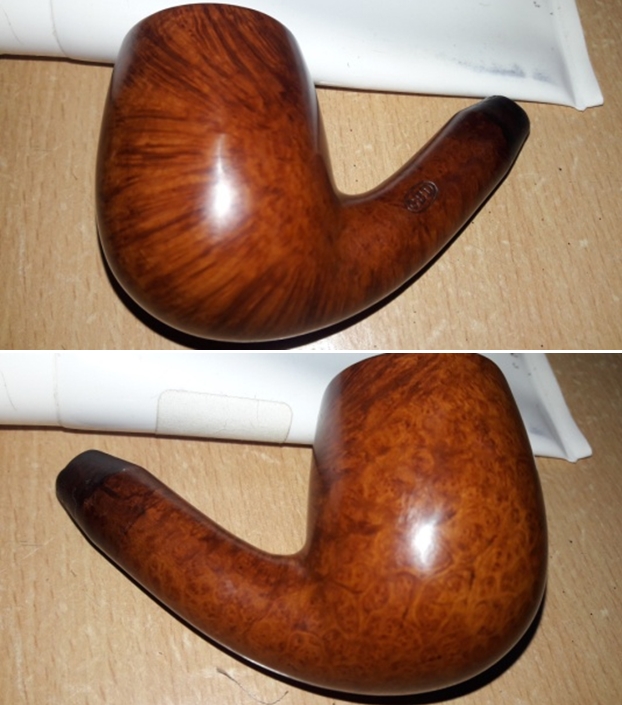
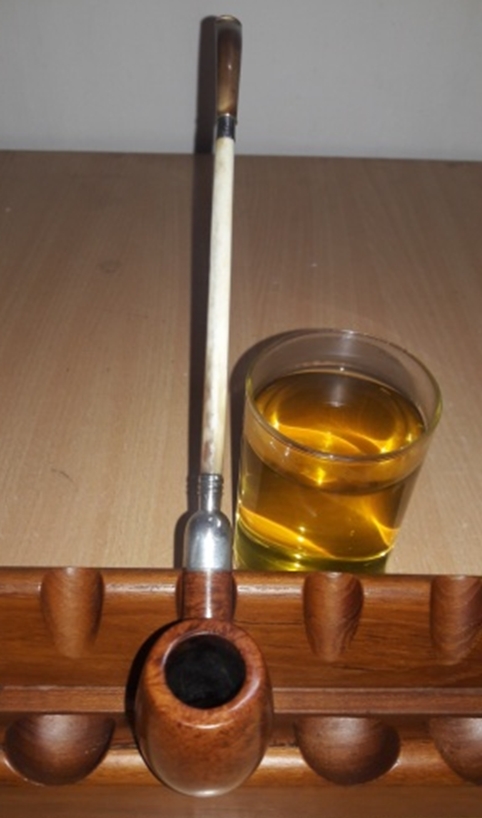
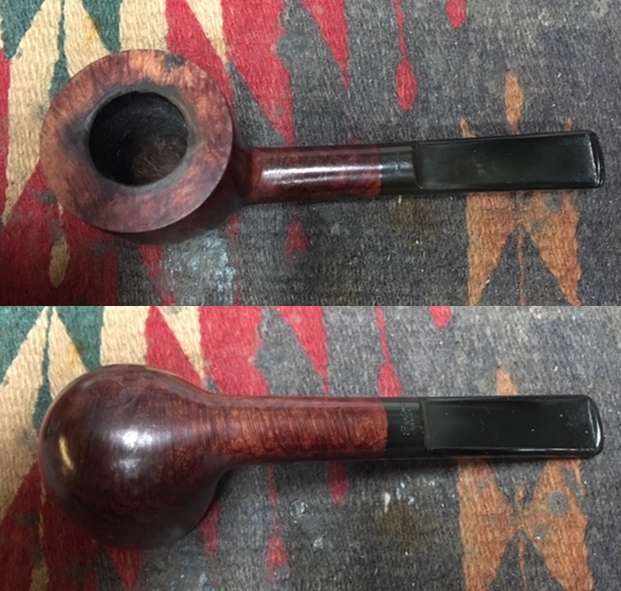
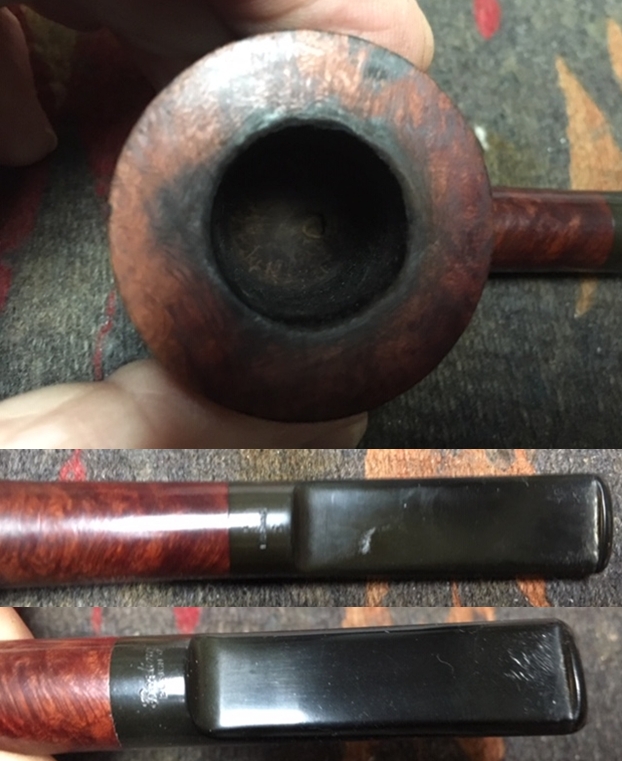
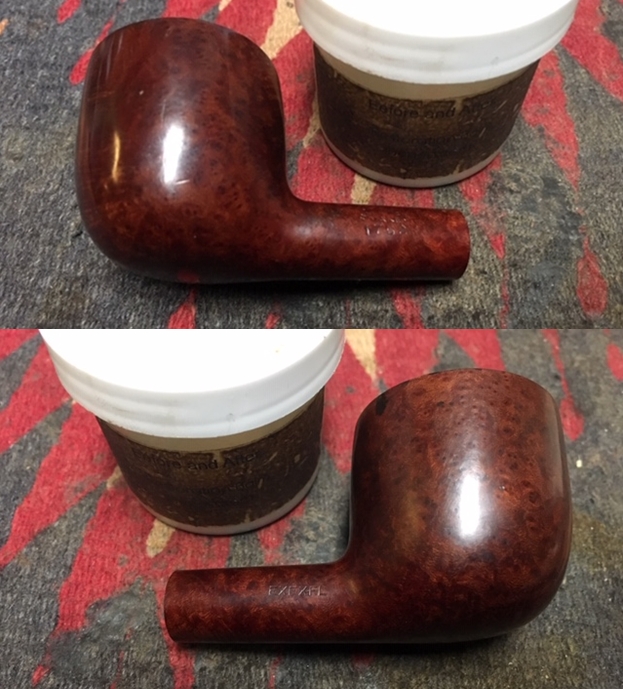
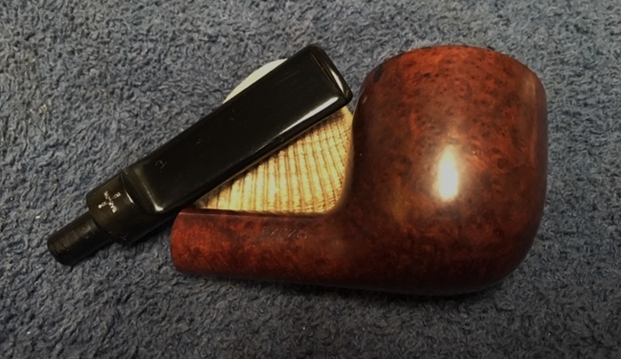
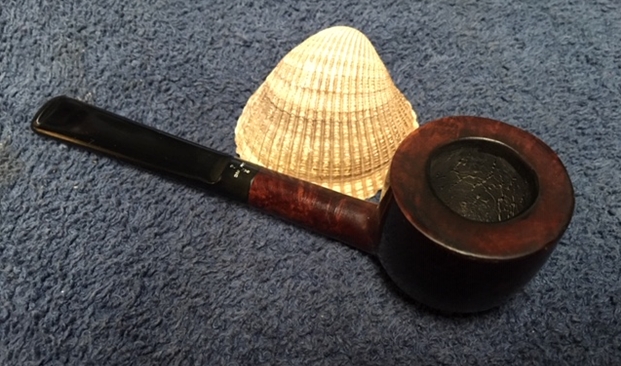
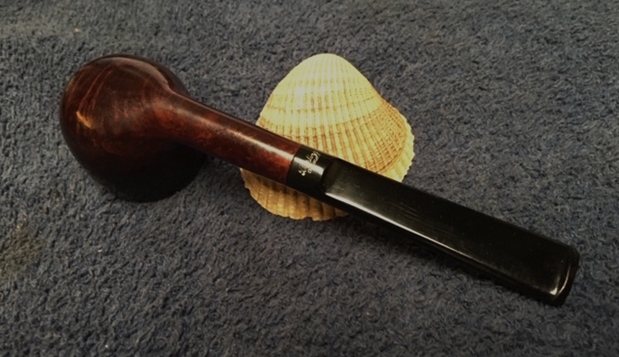
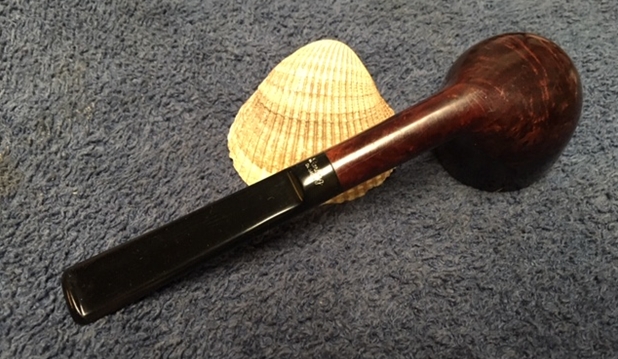
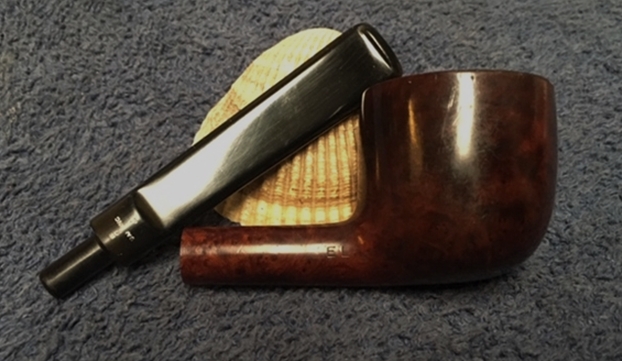
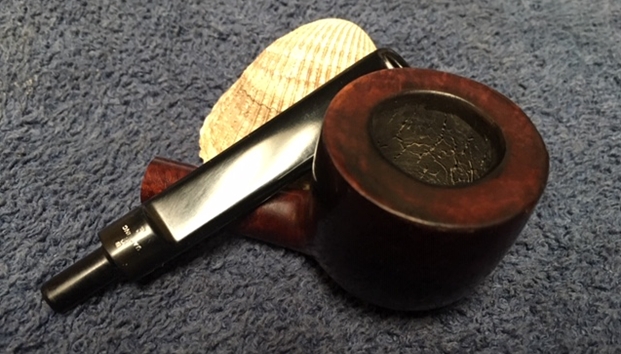
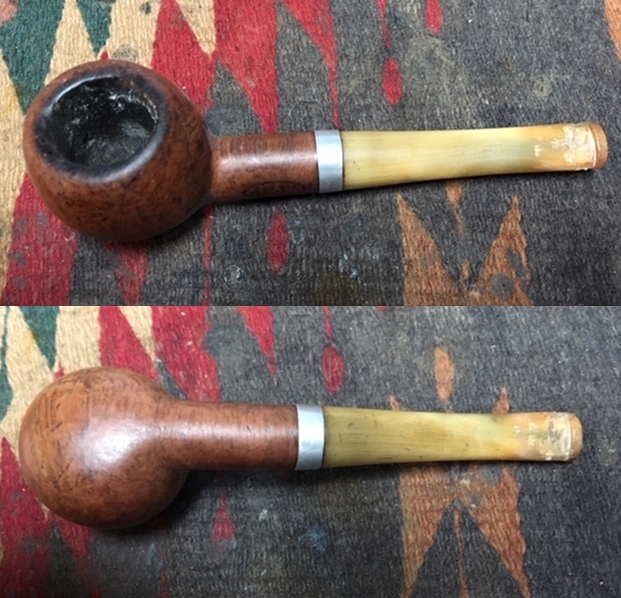
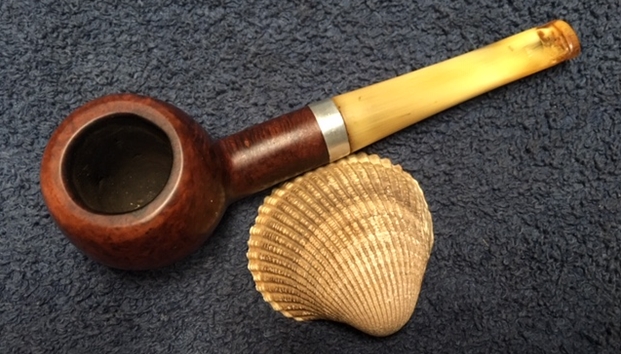
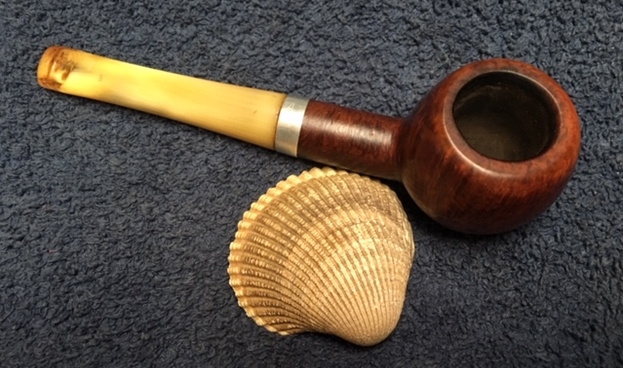
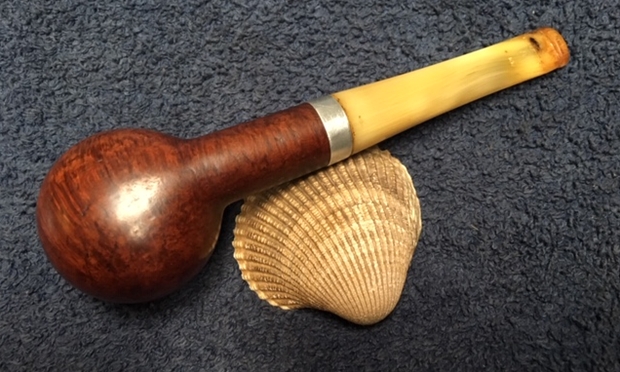
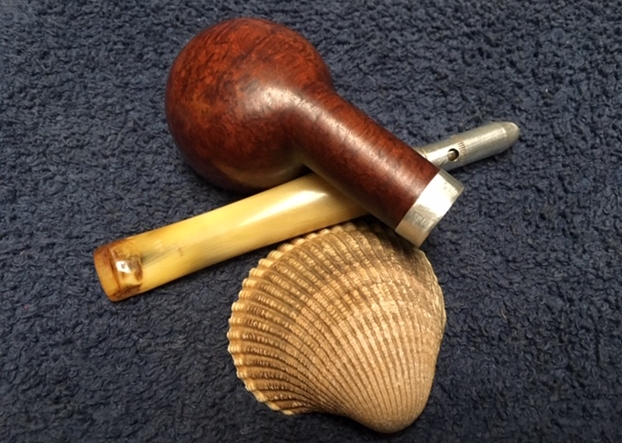
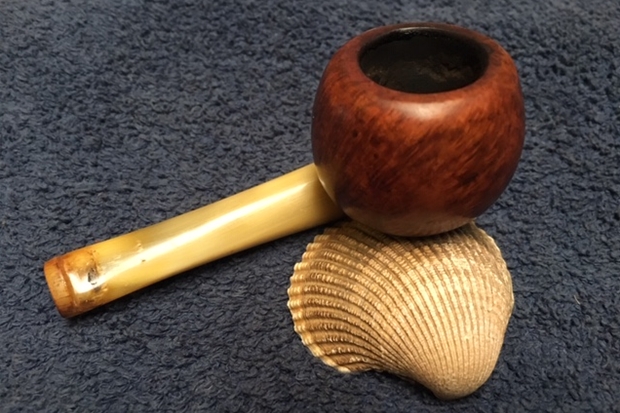
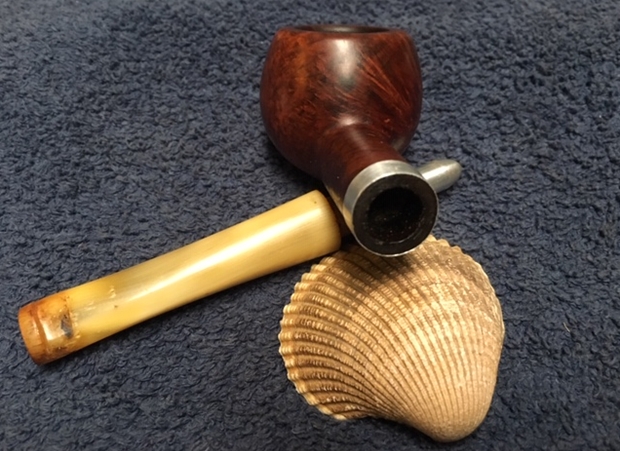
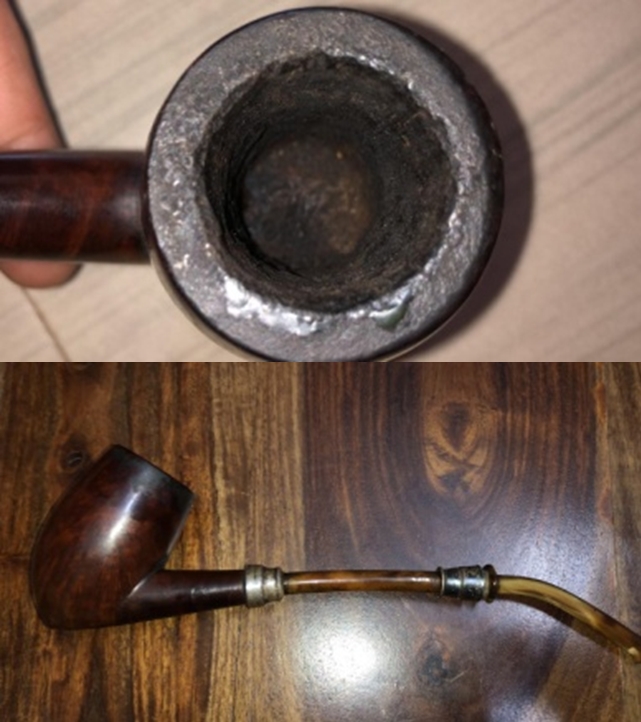
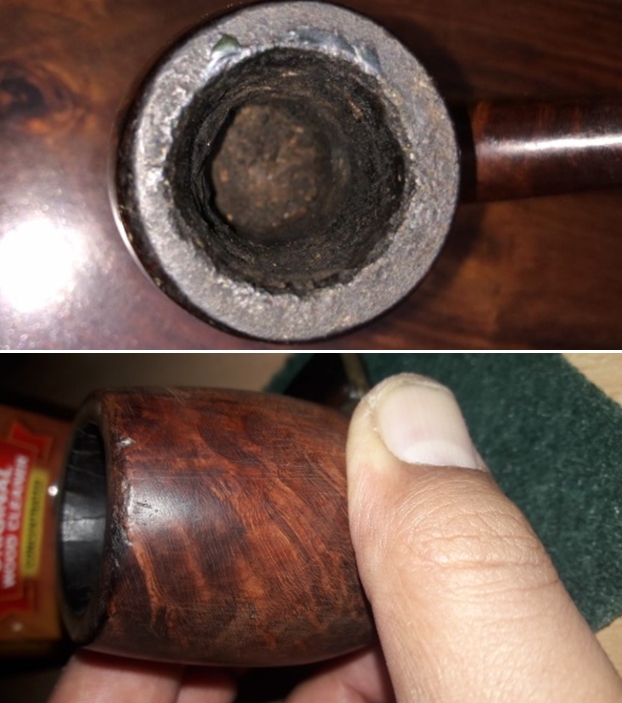
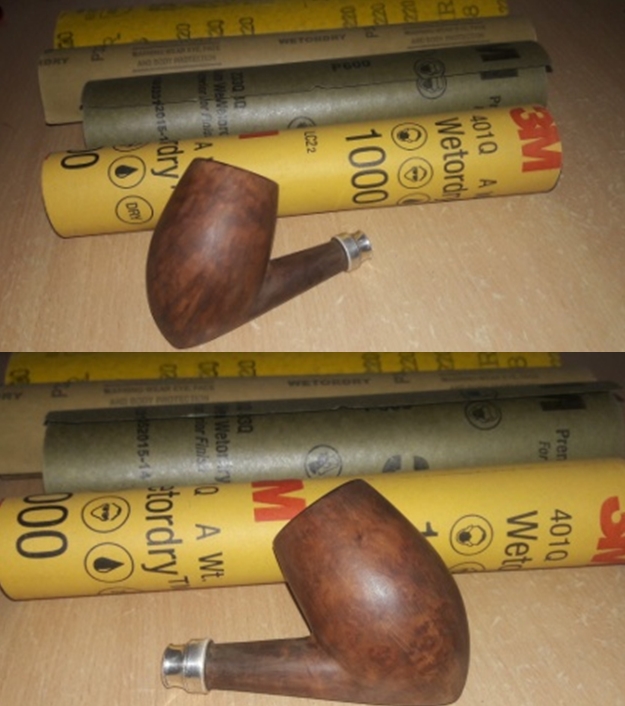
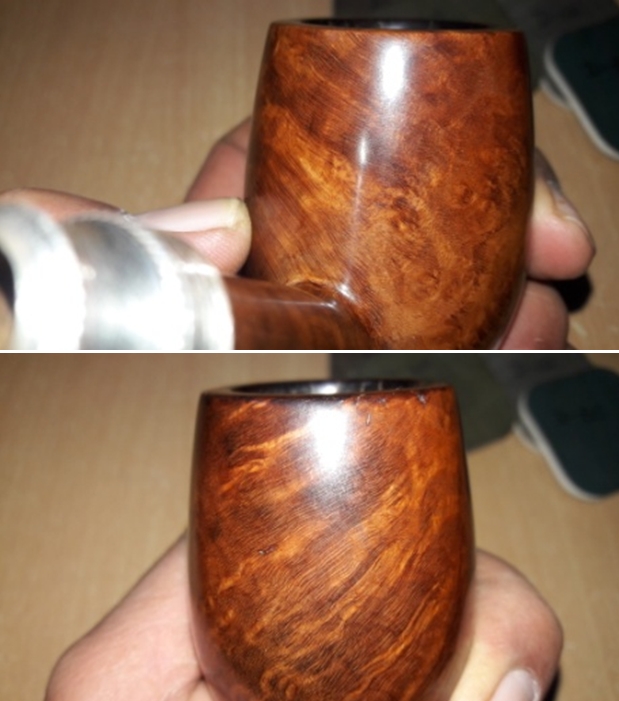
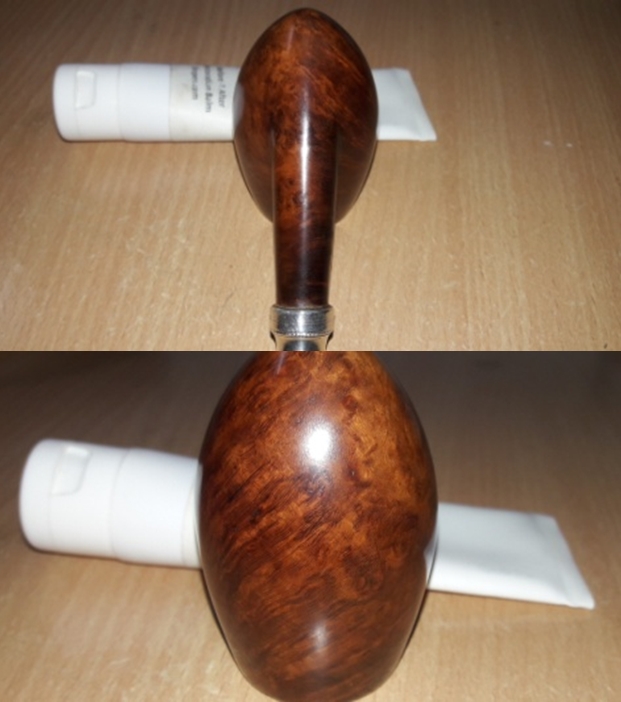
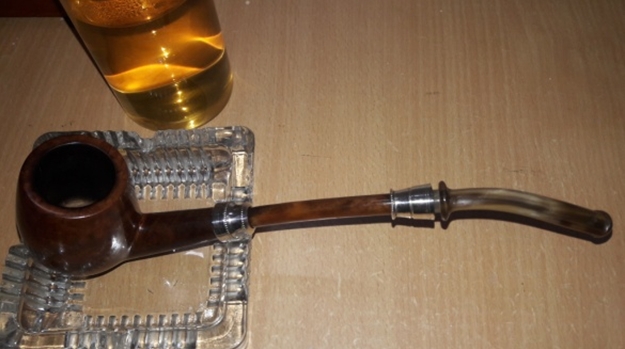
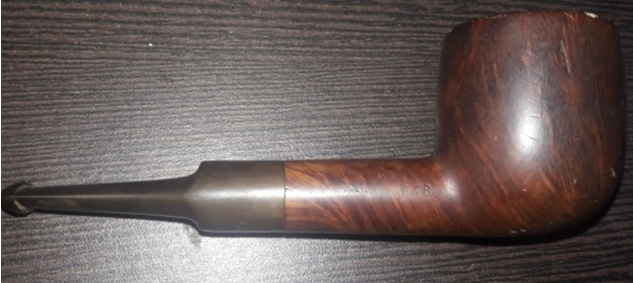
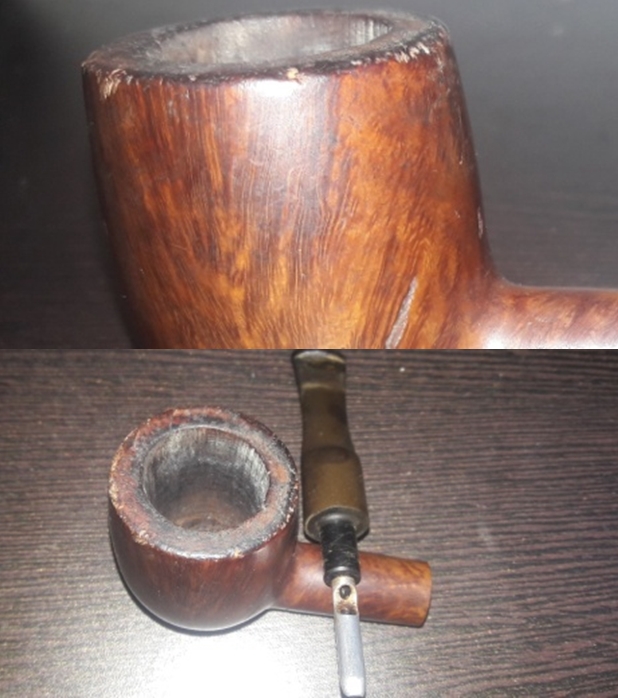
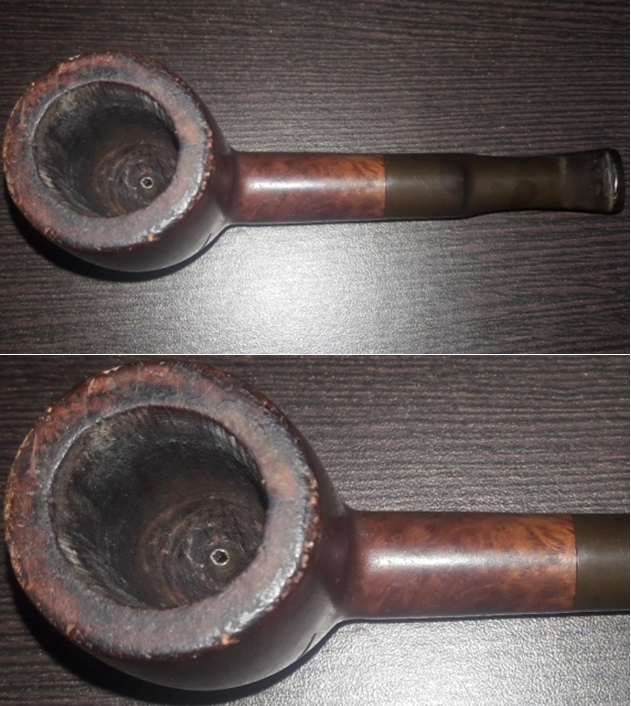
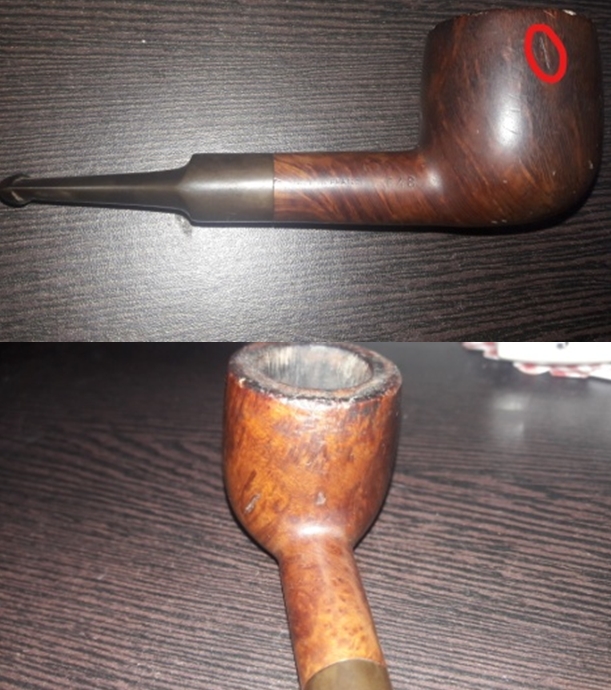
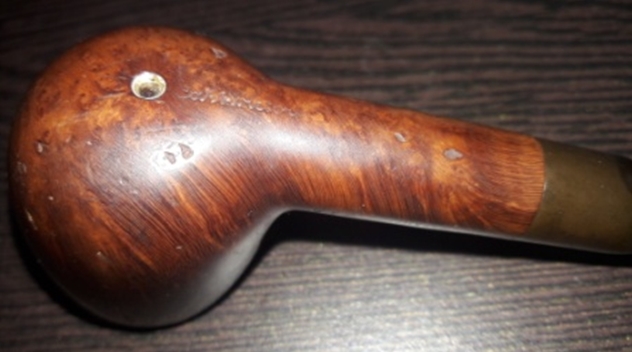
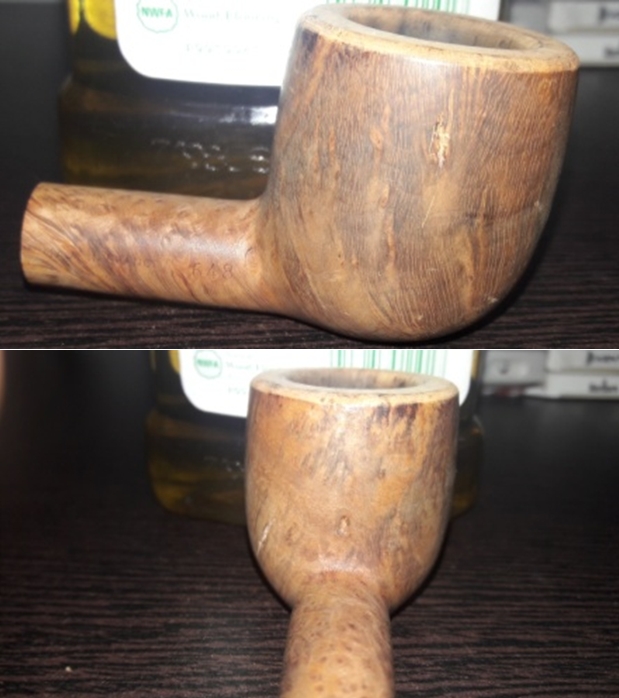
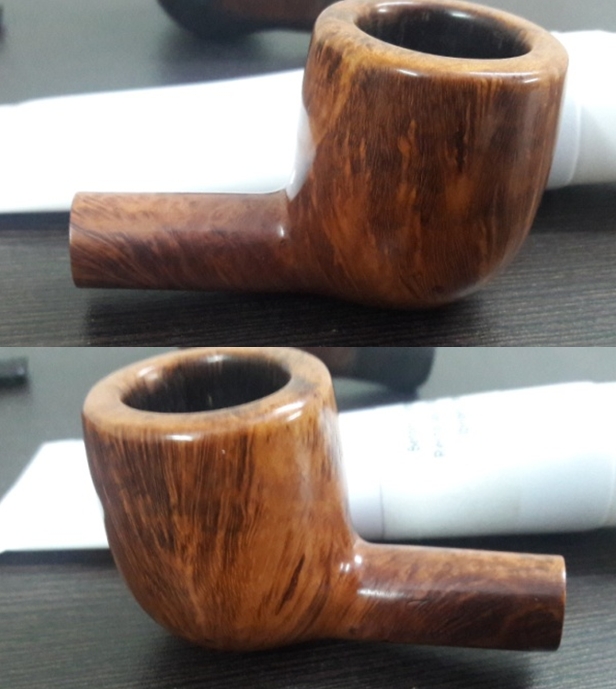
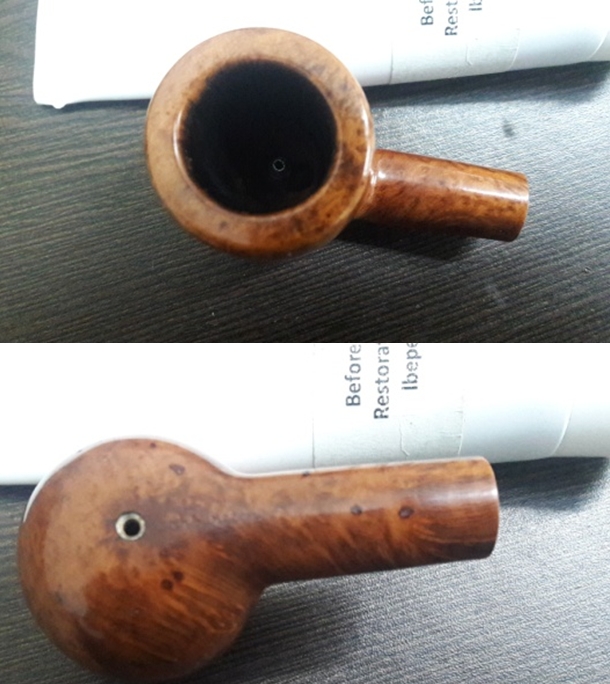
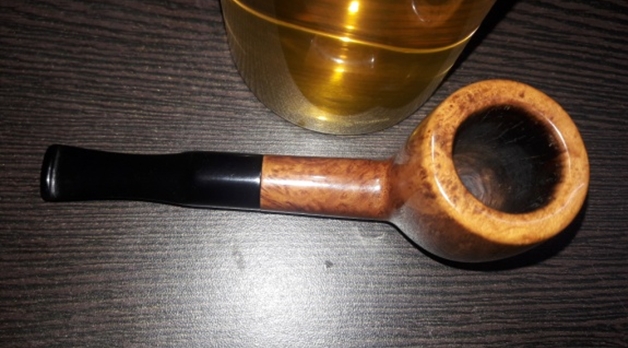
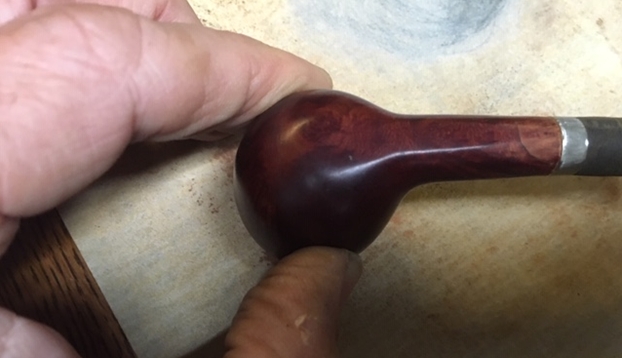
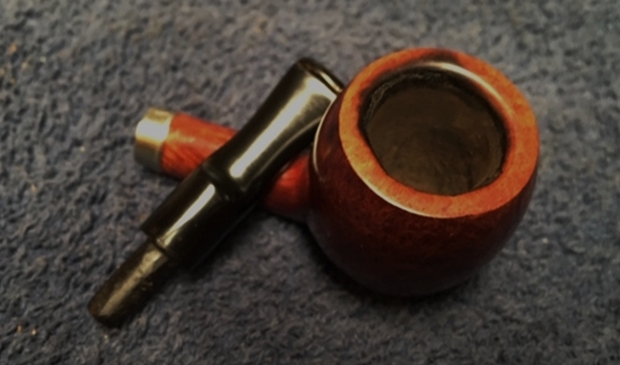
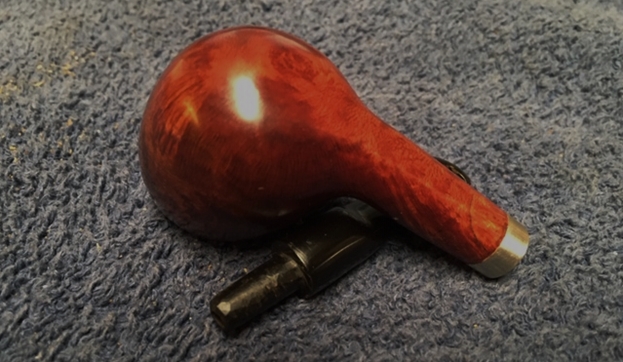
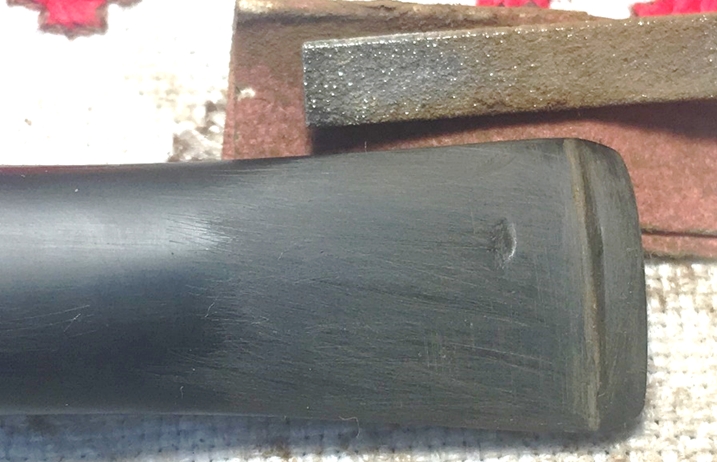
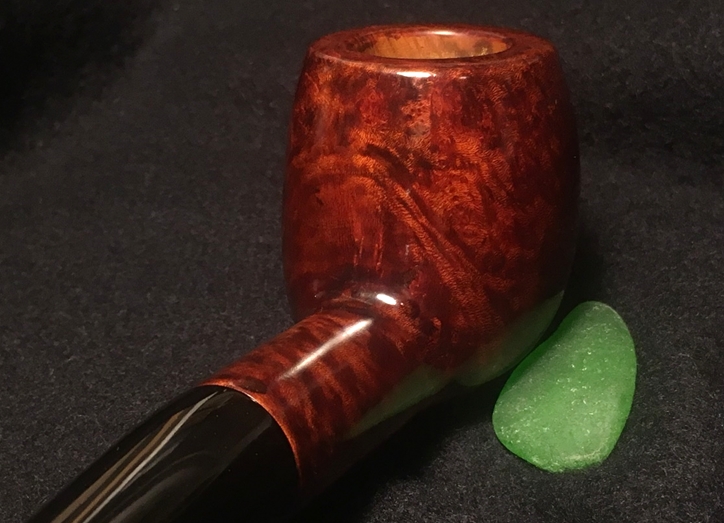
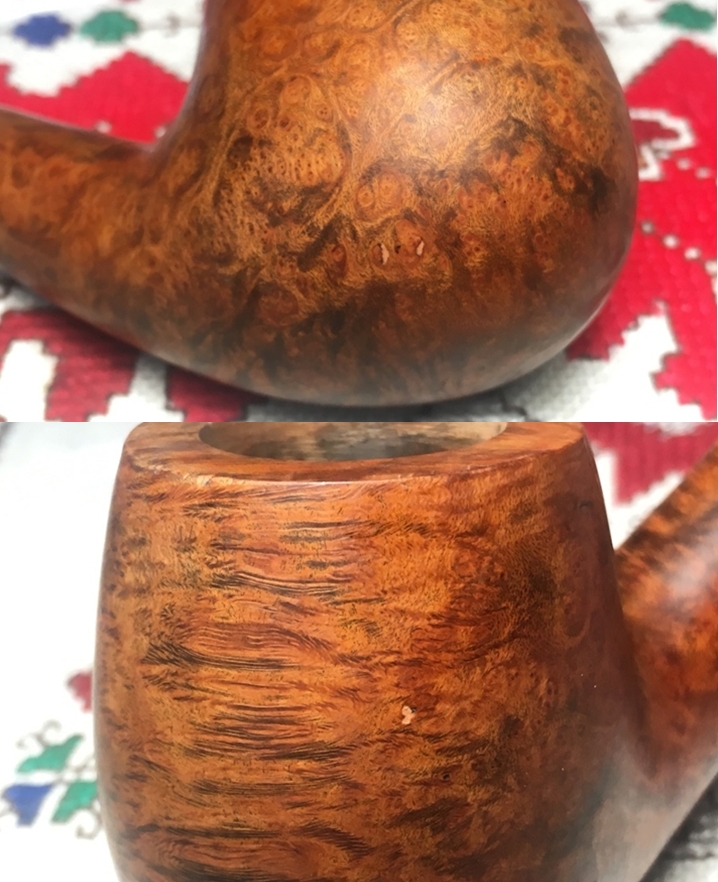
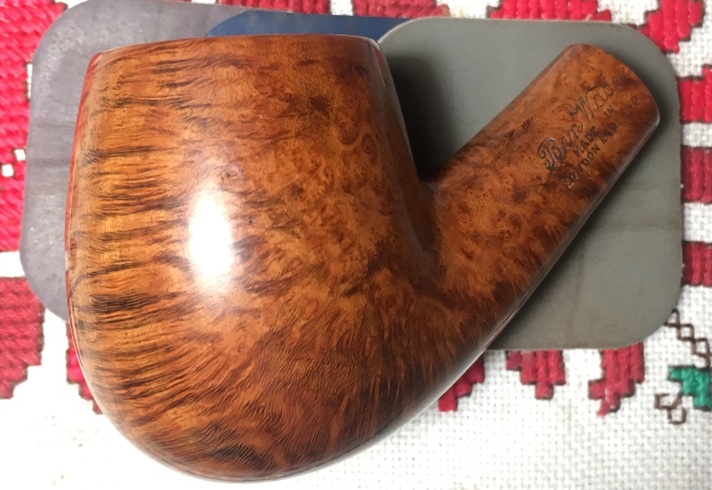
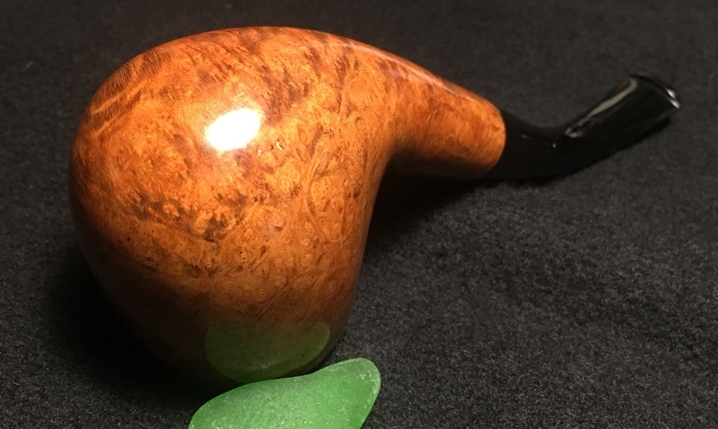
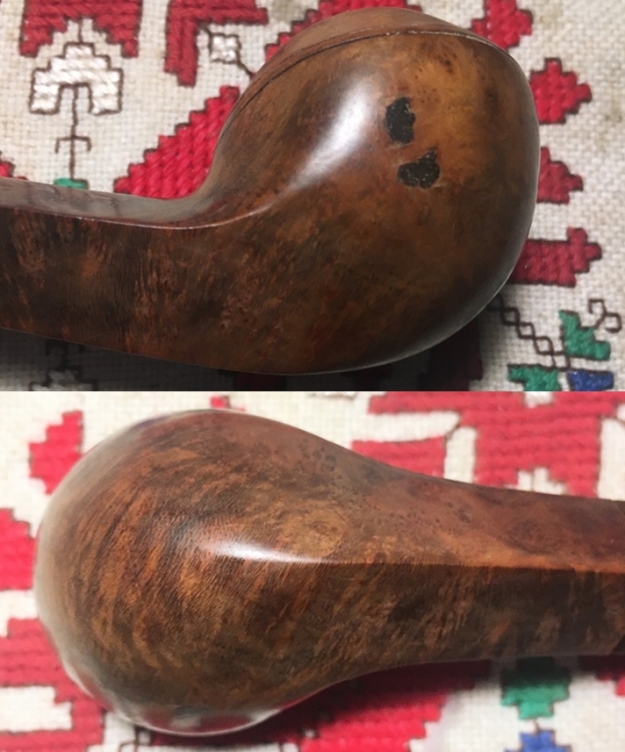
  I would say that this Comoy’s Bent Bulldog has been lovingly enjoyed over the years. He’s got quite a few scrapes and bruises for the wear, mainly on his dome and circling the double grooves. I took quite a few pictures of these above. I’ll need to do some repairs especially on the back side of the dome where there are several small concentrated dents. The front of the rim has been scorched from lighting practices it appears. The dome grooves need to be cleaned and I detect a few chips of briar on the back-right side along the grooves. Also, of interest are two huge fills on the right side of the bowl as it tapers down. I’ll need to take a good long look at these. The stem has oxidation and typical tooth chatter and compression dents on the button lip and just before the button. The former steward was a clencher.
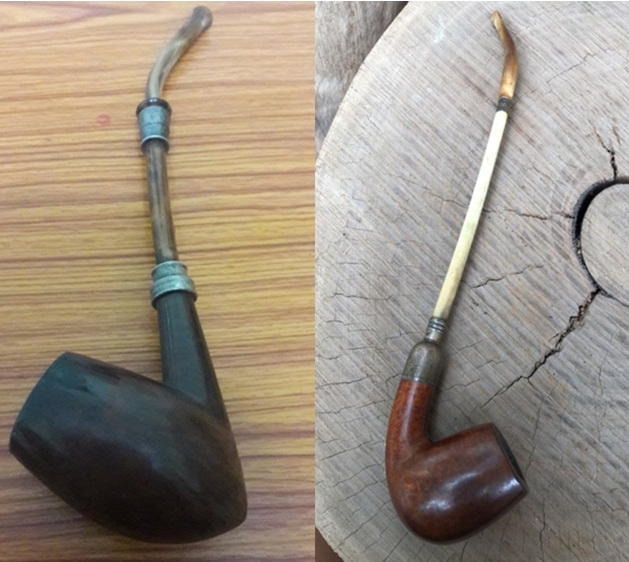
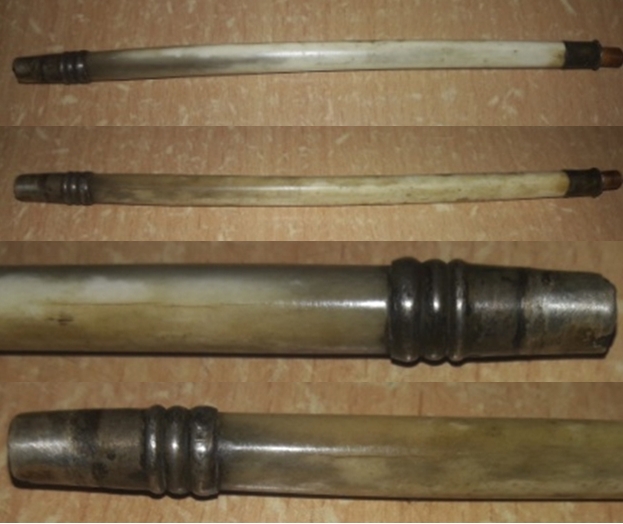
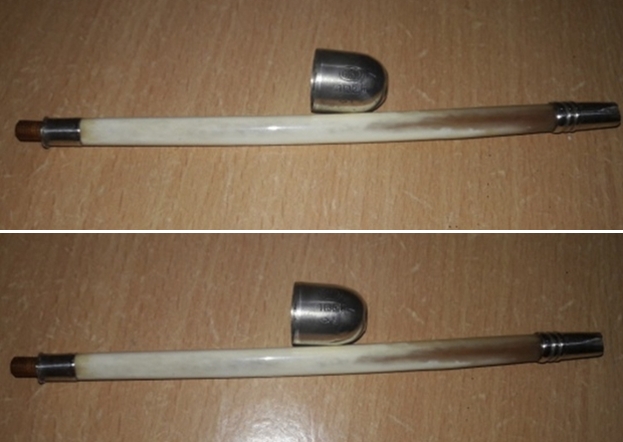
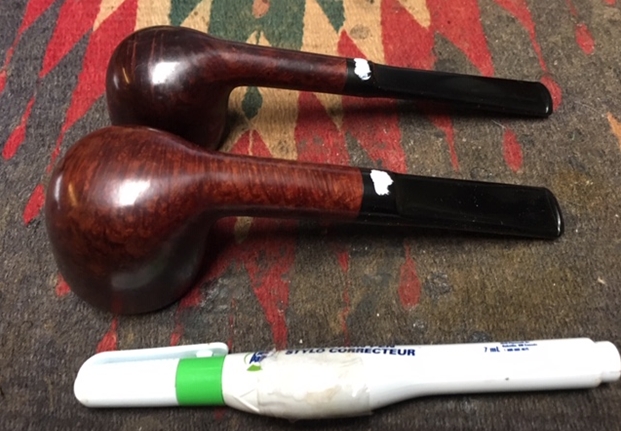
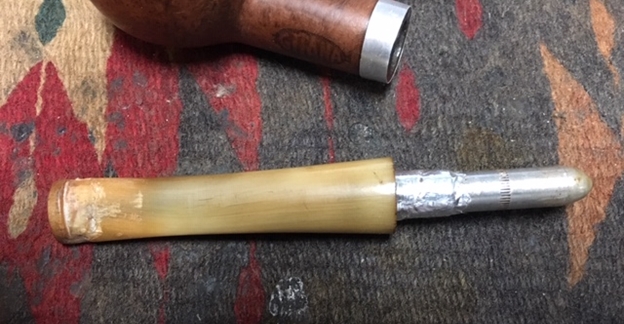
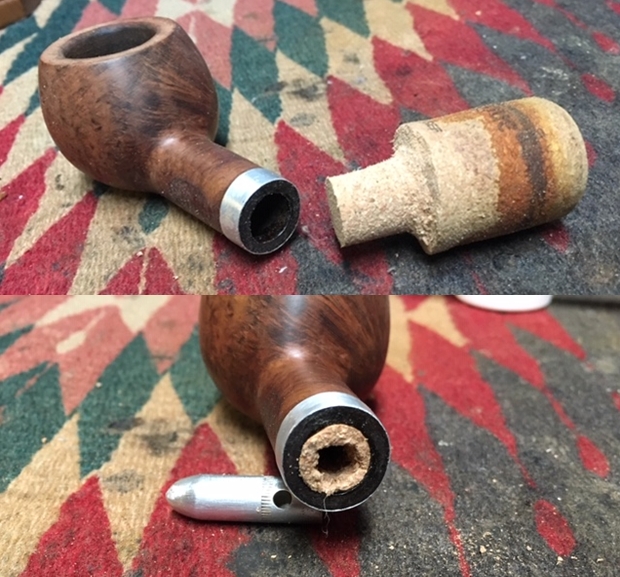
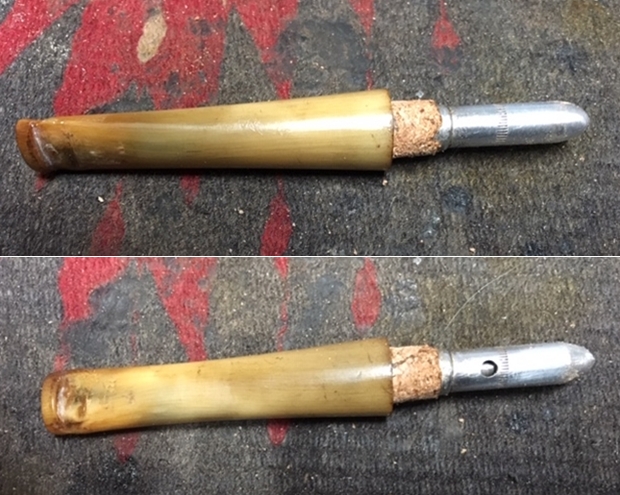
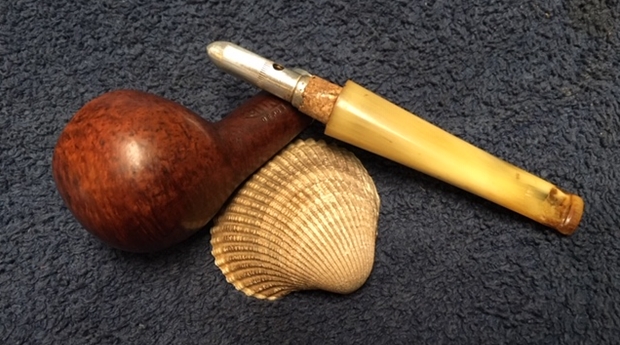
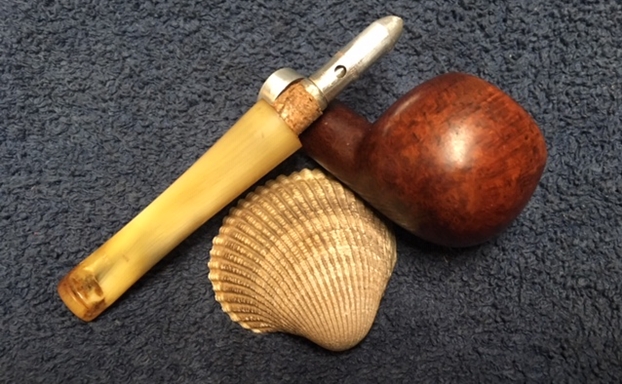
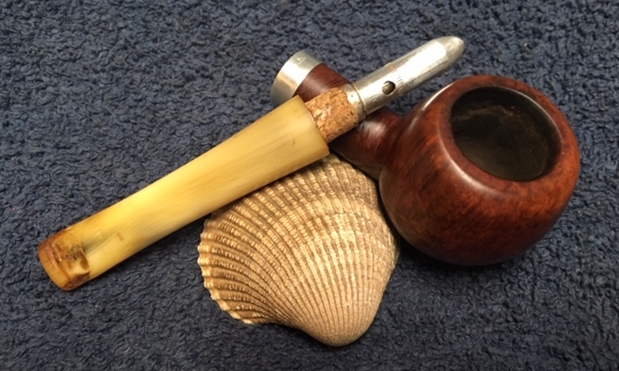
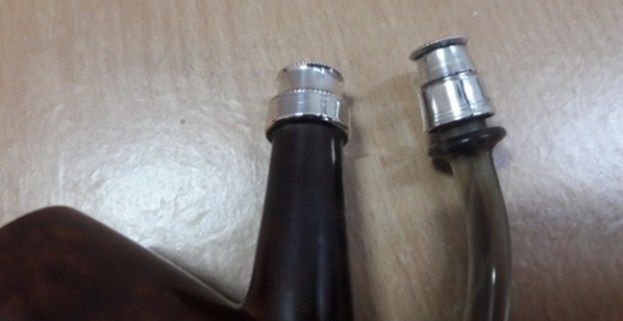
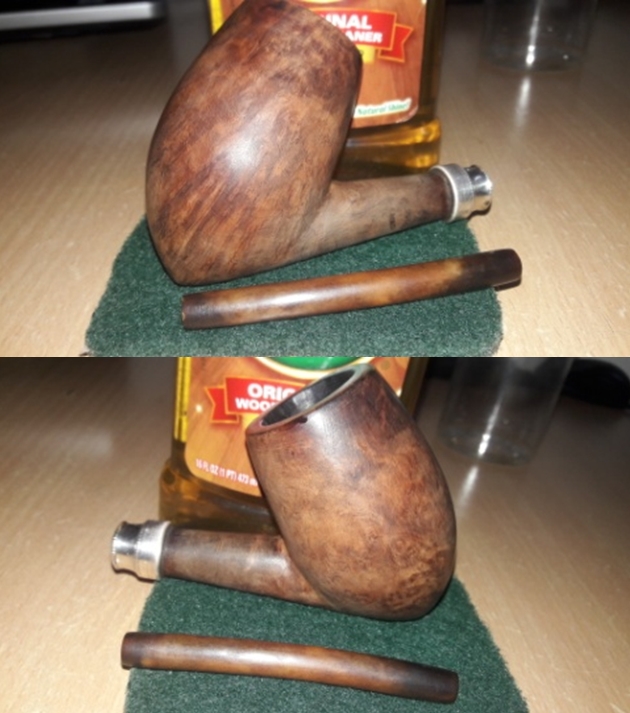
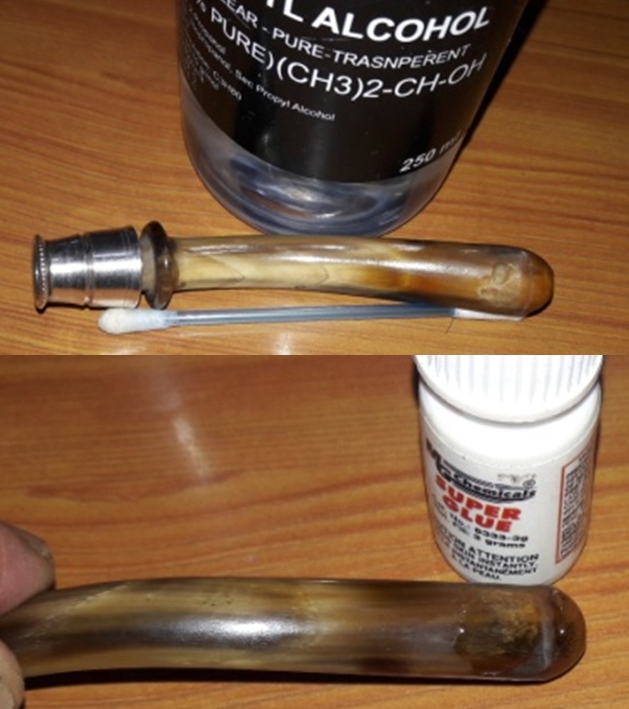
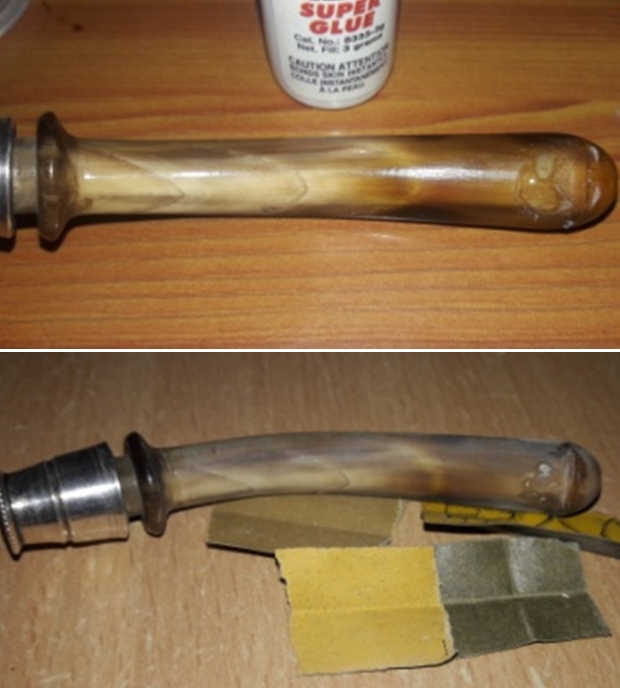
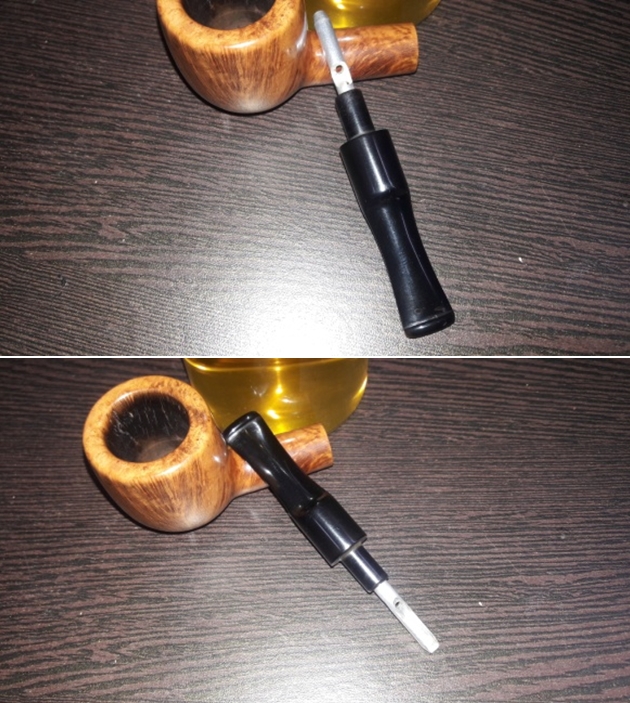
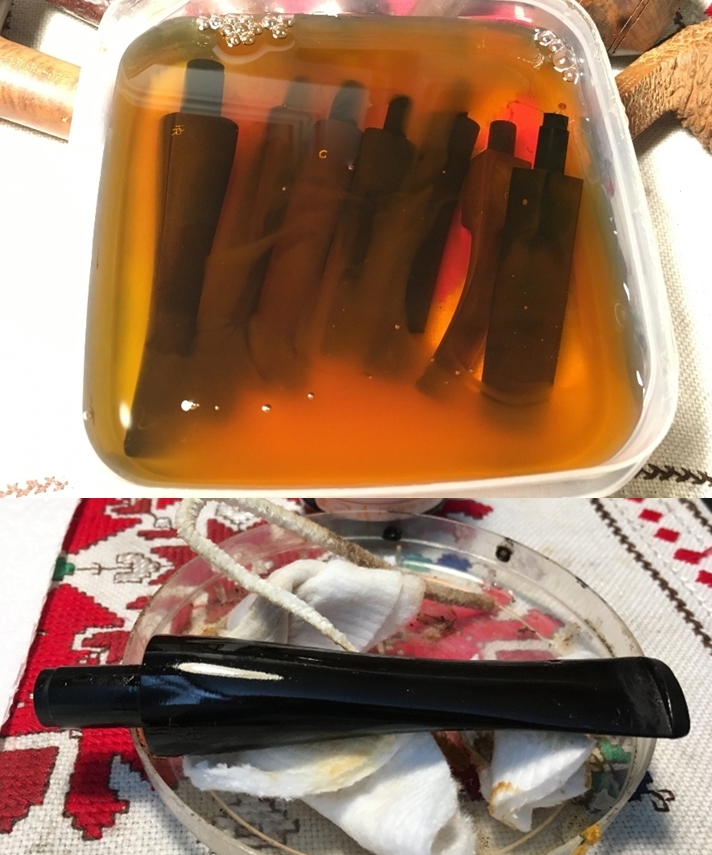
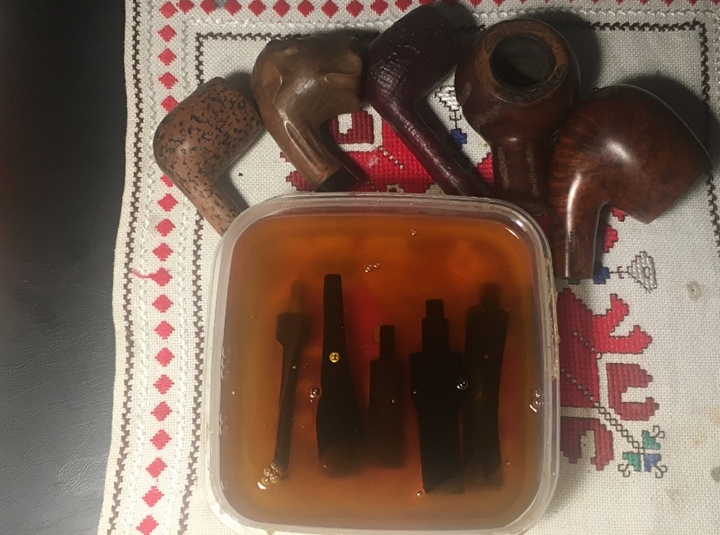
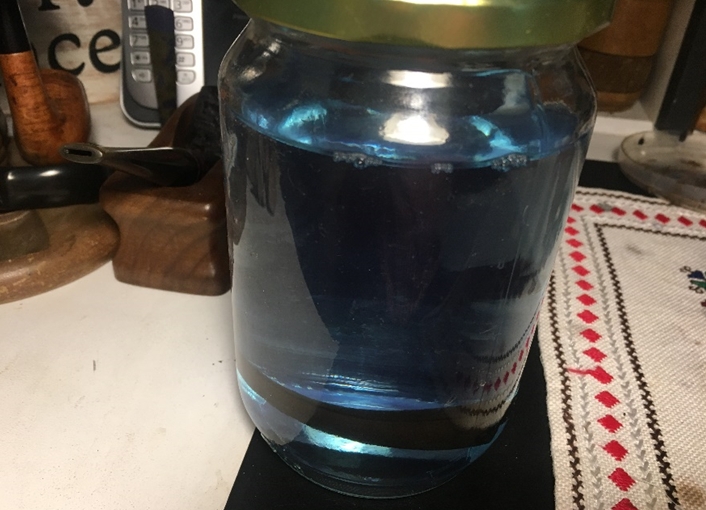
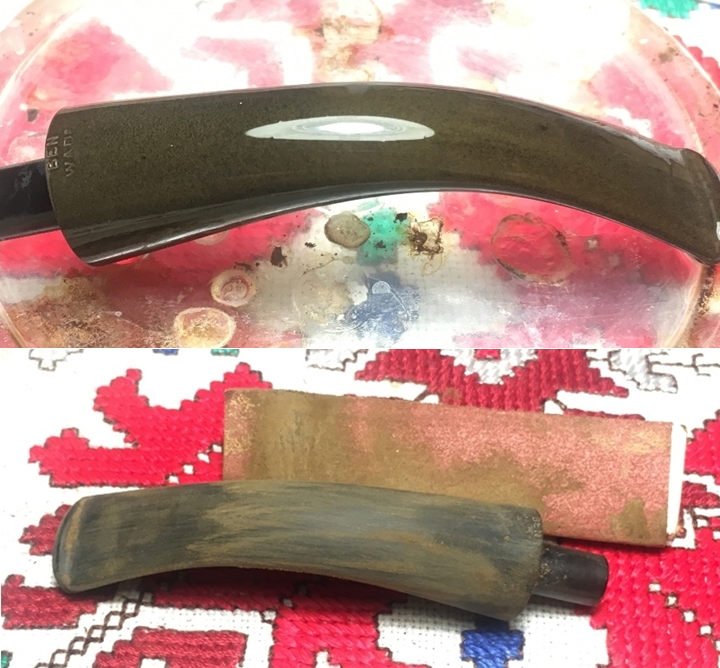
I begin the restoration of this Comoy’s Bulldog by placing the stem in a soak of Before & After Deoxidizer along with other pipes and stems in the queue. Whoops, I include the original seller’s pictures – I forgot to take pictures of the original stem’s condition before putting the stem into the soak.

 After some hours of soaking, I remove the Bulldog stem and using a cotton cloth wetted with alcohol, I wipe down the stem removing the raised oxidation. I follow this by wetting a cotton pad with light paraffin oil (mineral oil) and continue to wipe off the oxidation and the oil helps rejuvenate the vulcanite.
 After the soak wiping and the stem dries, I can still detect oxidation on the stem which requires more attention.
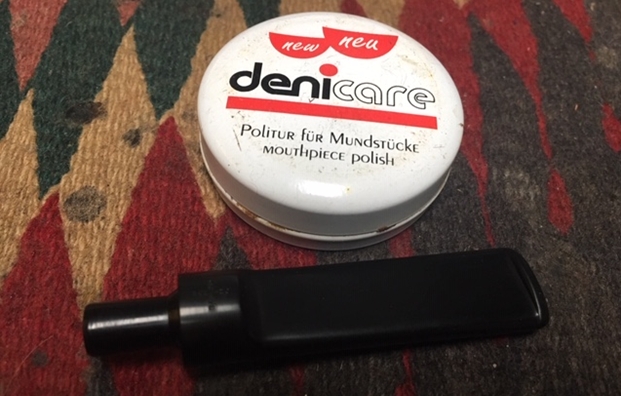
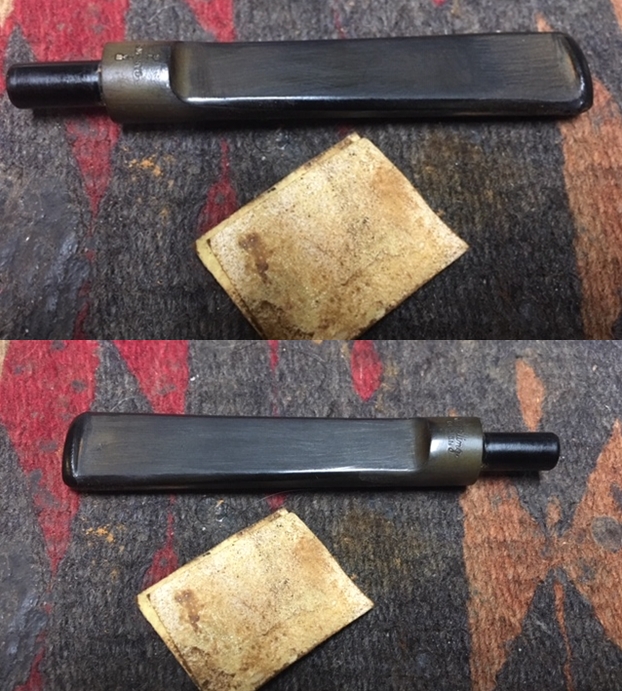
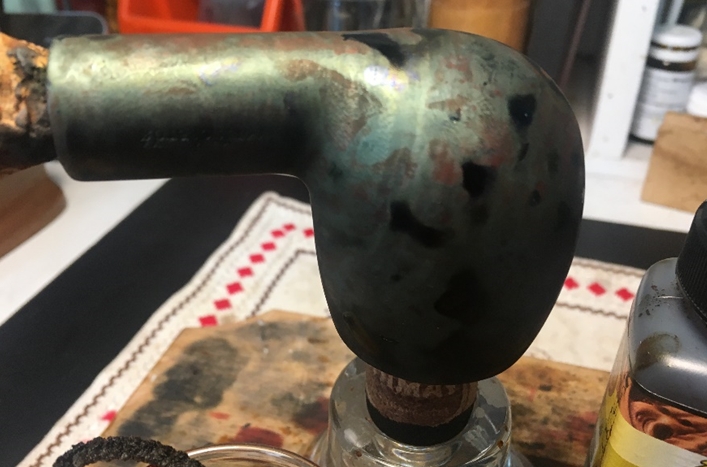
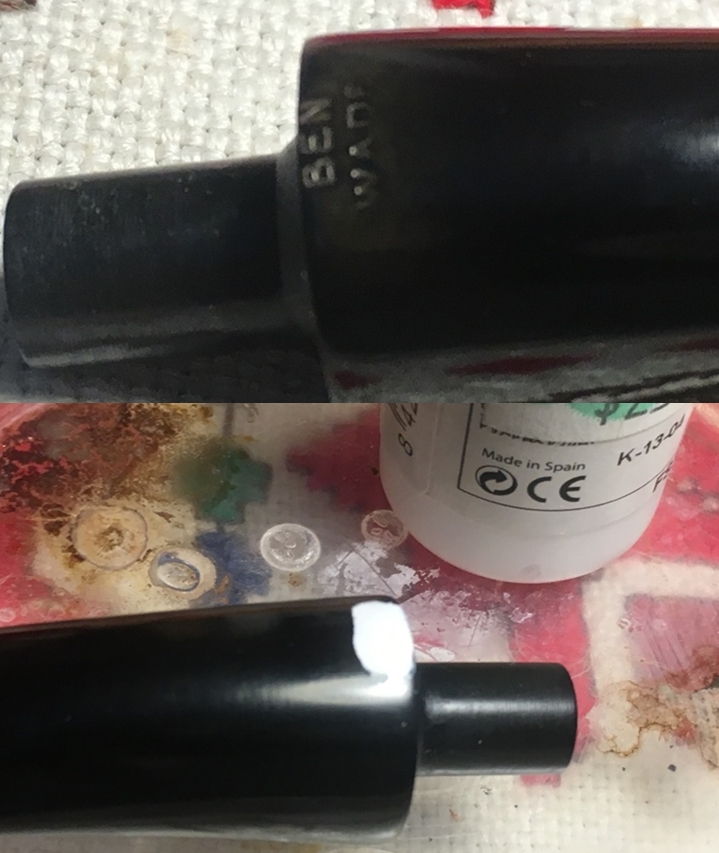
  Before I start sanding the stem, I use Before & After Fine and Extra Fine Polishes to work on the oxidation. It is advertised to continue the raising process of oxidation. I start first with the Fine Polish by putting some on my finger and rubbing it in the vulcanite. I also work it in well around the ‘C’ stamping to clean it more. After applying, I allow it to stand for some time and then wipe off. I do the same with the Extra Fine Polish. After I’ve finished, I still see a deep greenish hue indicating the oxidation is still holding on. The last picture below tries to capture what I see with the naked eye – it doesn’t do a very good job!
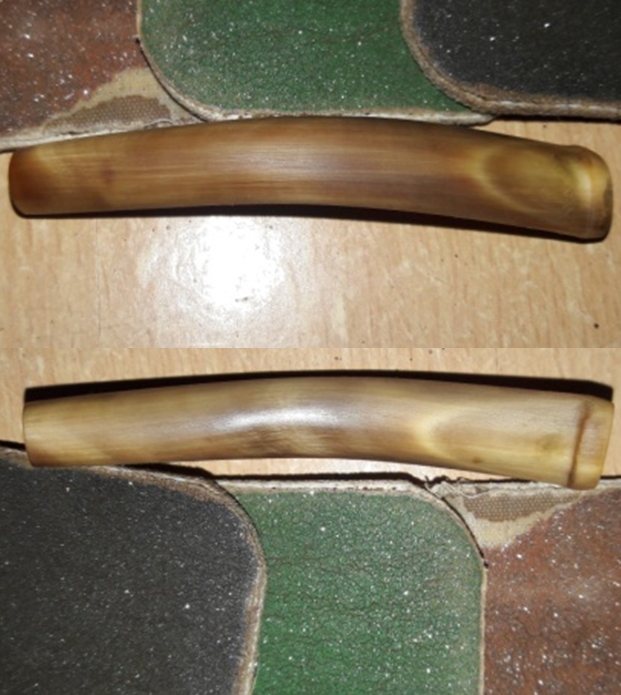
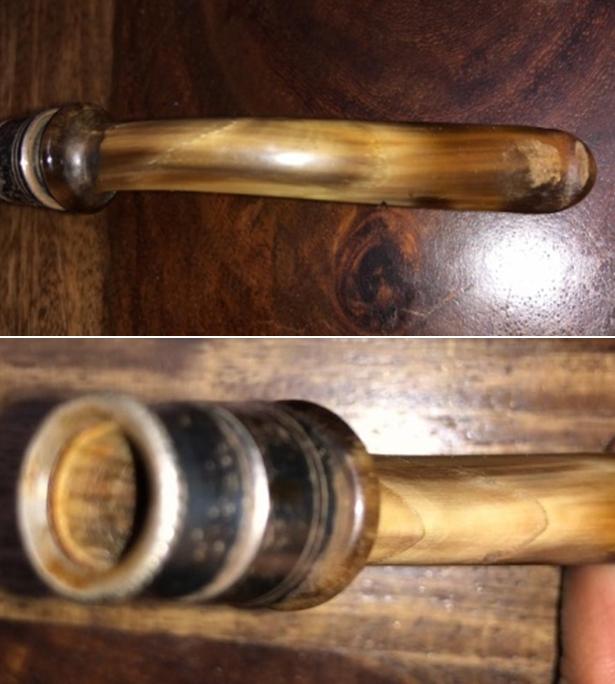
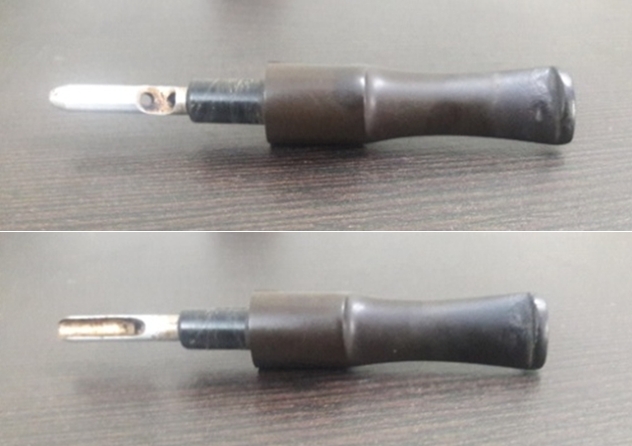
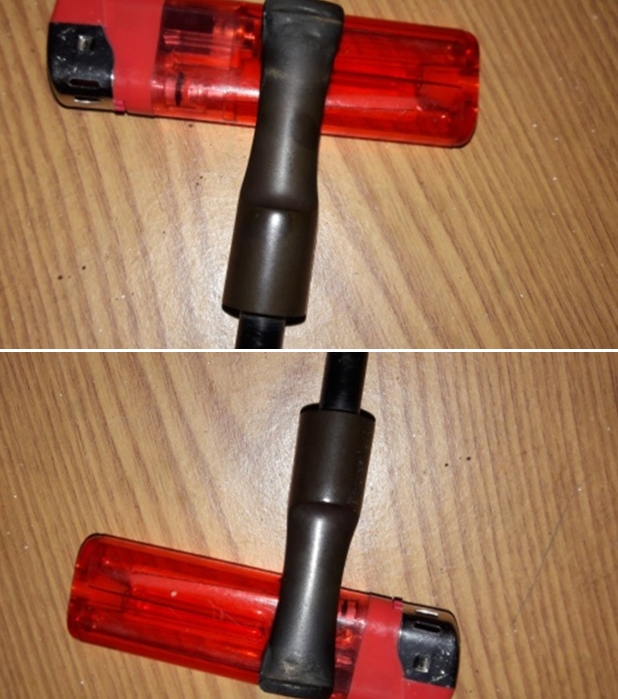
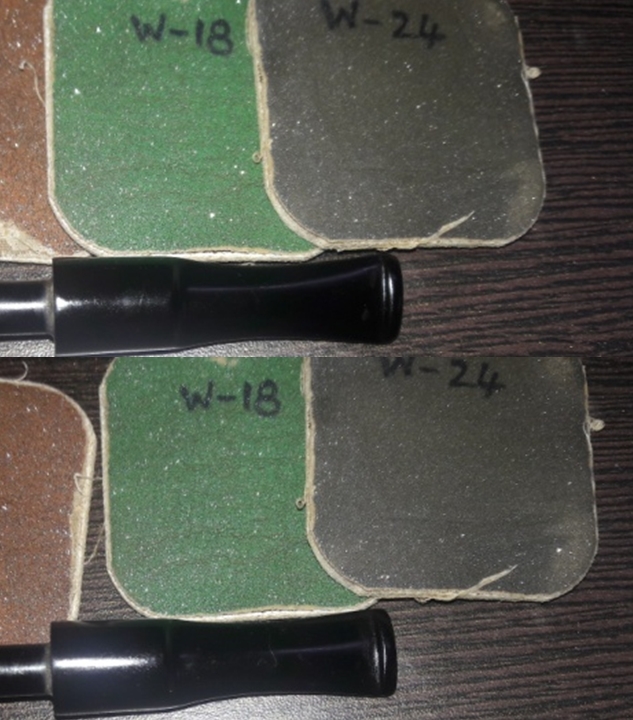
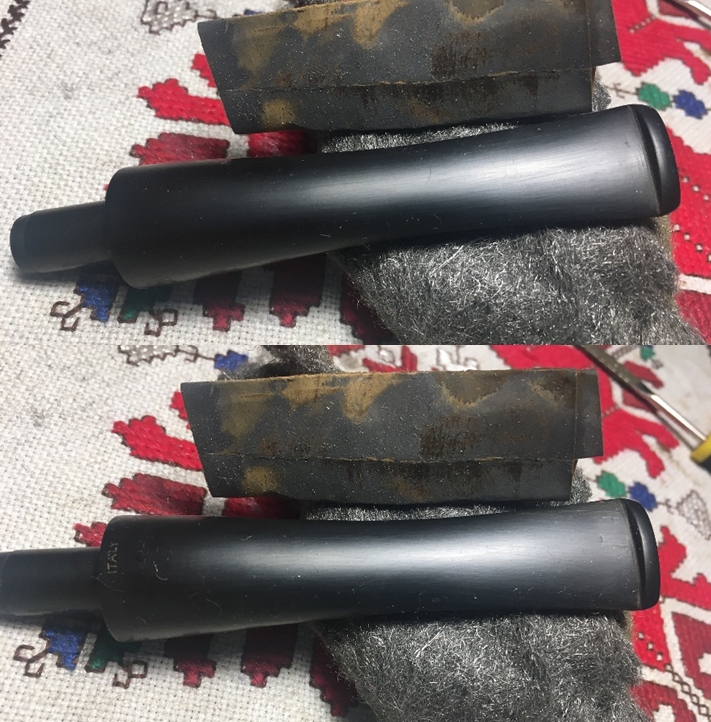
 One more noninvasive approach to the oxidation I’ll try. I scrub the stem surface using Magic Eraser. After working the white sponge over the entire surface, it did do a good job. More oxidation was removed, but not enough to make me happy! I still see oxidation especially on the ‘saddle’ of the saddle stem. The pictures show the progression.
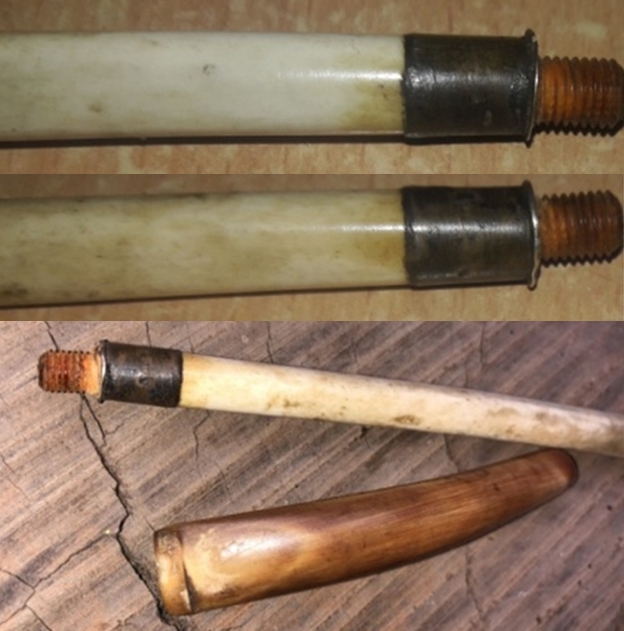
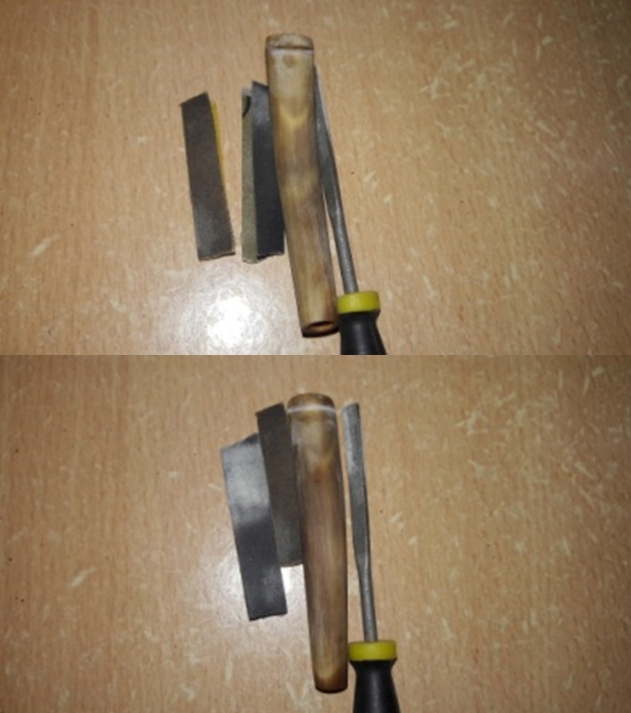
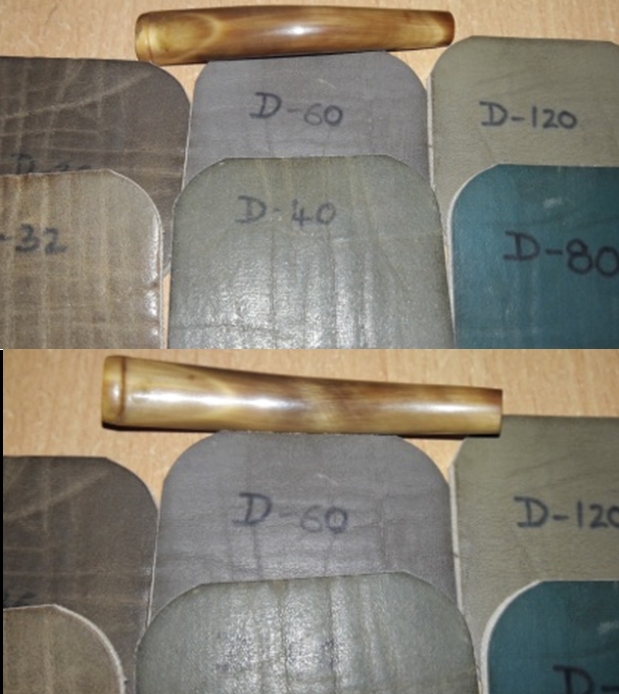
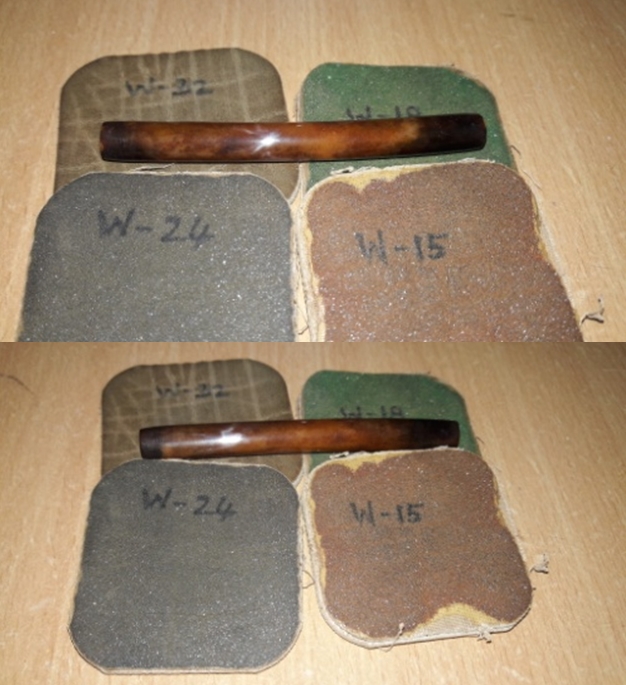
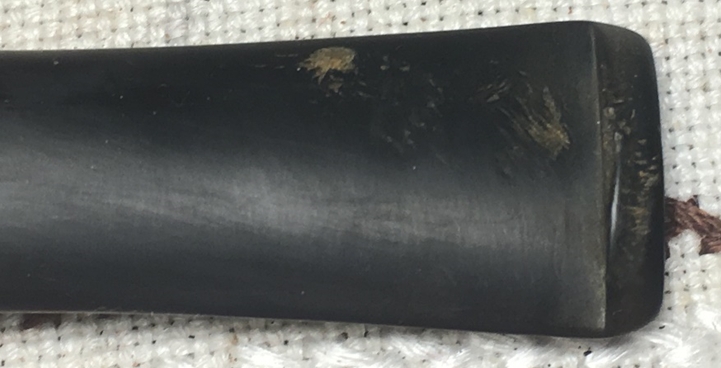
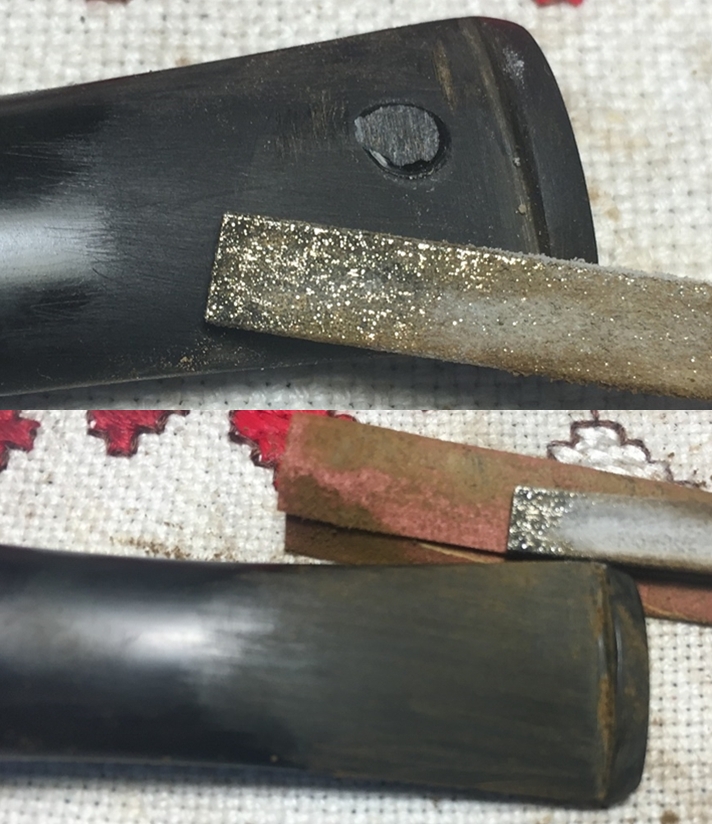
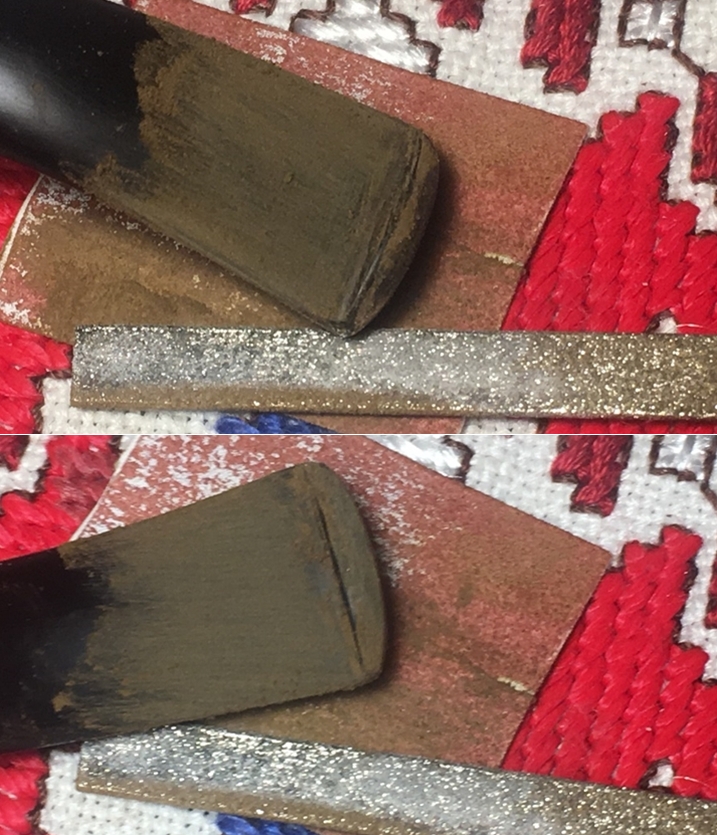
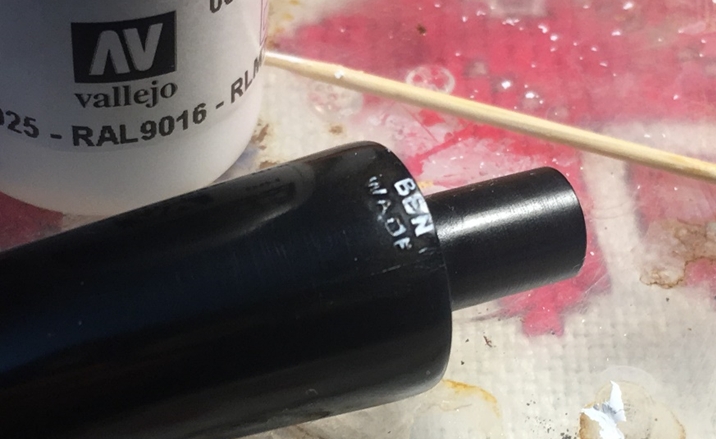
 Next, I sand the stem starting first with 240 grit paper. I do not like going through the fine tune buffing with micromesh pads and start seeing oxidation! So, I sand the entire stem, avoiding the Comoy’s ‘C’ stamping. I also use at disc to sand against at the stank side of the stem. The disc helps to guard against shouldering the stem so that the edges are not sharp as the stem joins the shank. This sanding is primarily for dealing with the oxidation. In the pictures below, you can see the bit area compressions that are left untouched by the sanding.
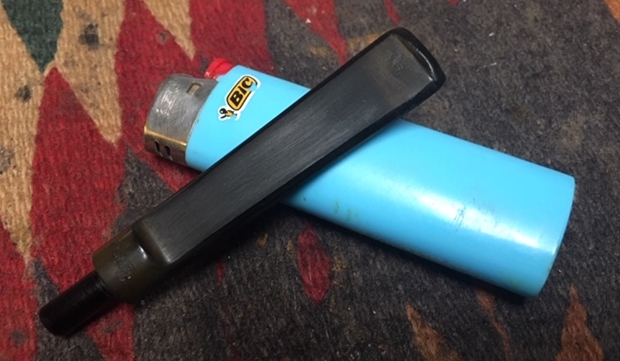
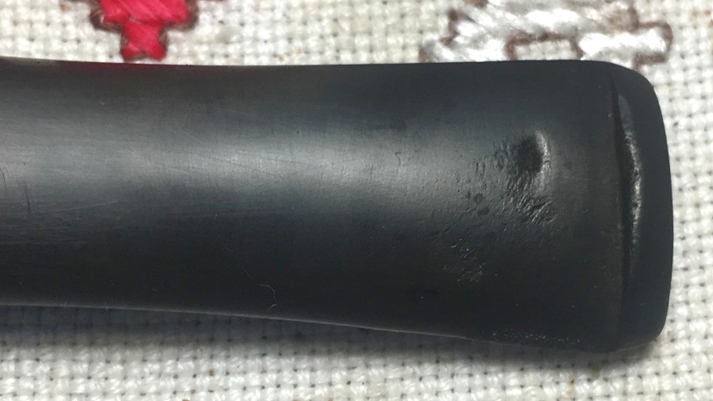
 Before proceeding further with the sanding of the stem, I use the heating method to raise the compressions in the vulcanite in the bit area. Using a Bic lighter, I paint the bit and button to heat the vulcanite which causes it to expand. The hope is that this will cause the indentations perhaps to go away or lessen in their impact so that they will then sand out more easily. After painting the bit with the open flame, it helped to minimize some, but it did not erase the dents and compressions on the bit and on the button lips. I follow with a flat needle file to file the button to refresh and shape the edges. I follow again with 240 grit paper continuing to sand the dents on the bit. Using the Bic lighter to raise the dents helps and I’m able to sand out all the dents and compressions from biting. Before proceeding further with the sanding of the stem, I use the heating method to raise the compressions in the vulcanite in the bit area. Using a Bic lighter, I paint the bit and button to heat the vulcanite which causes it to expand. The hope is that this will cause the indentations perhaps to go away or lessen in their impact so that they will then sand out more easily. After painting the bit with the open flame, it helped to minimize some, but it did not erase the dents and compressions on the bit and on the button lips. I follow with a flat needle file to file the button to refresh and shape the edges. I follow again with 240 grit paper continuing to sand the dents on the bit. Using the Bic lighter to raise the dents helps and I’m able to sand out all the dents and compressions from biting.
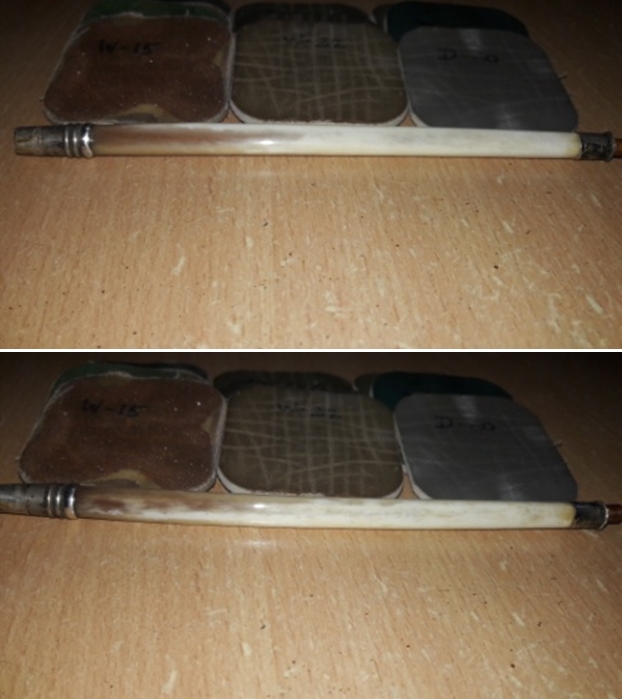
 Next, I wet sand the entire stem using 600 grade paper and follow this by buffing with 0000 steel wool. One last thing at this point before turning to the stummel, I give the stem a coat of light paraffin oil to help revitalize it. I put the stem aside to absorb the oil and dry.
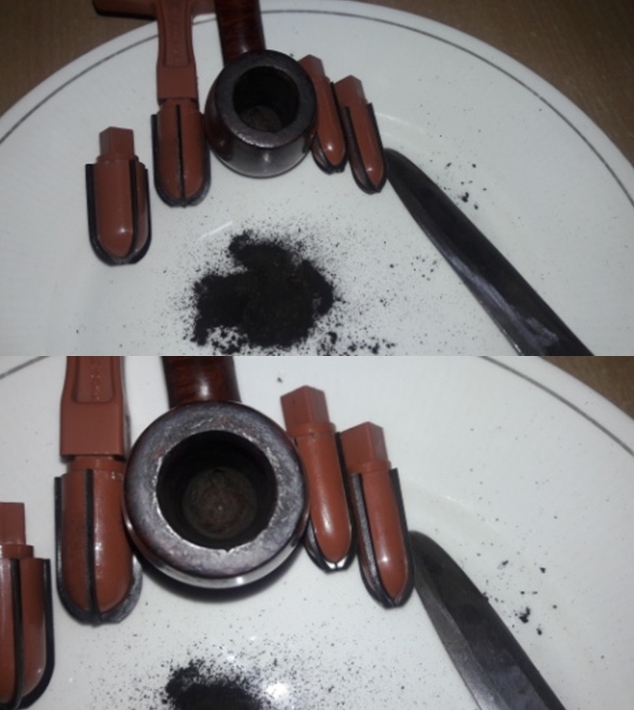
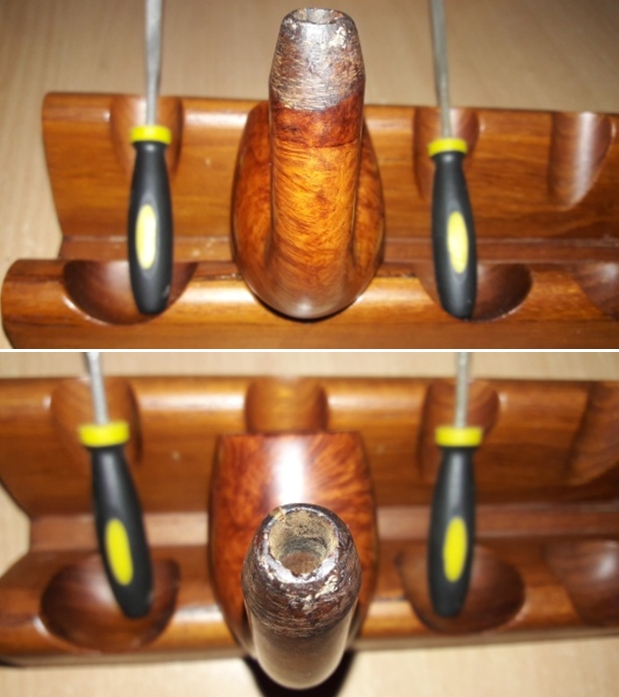
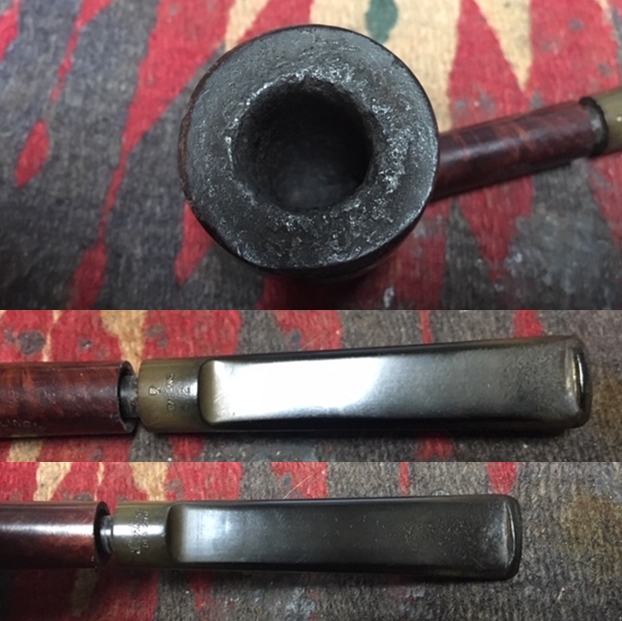
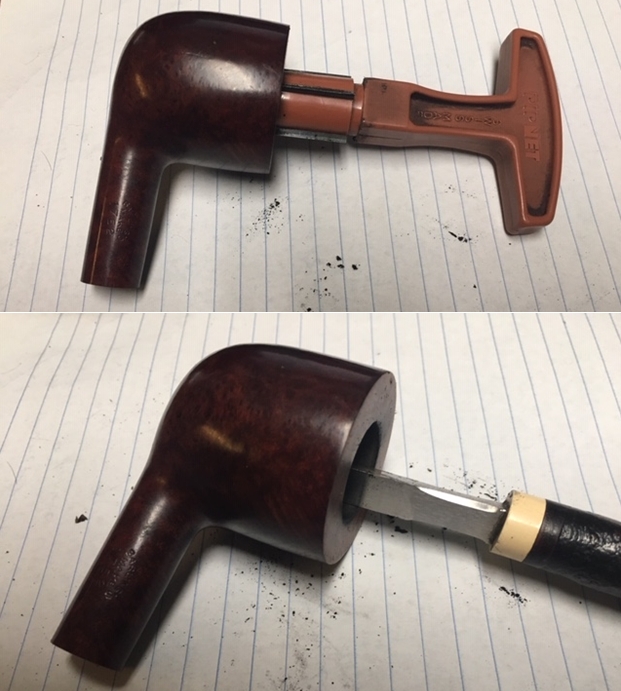
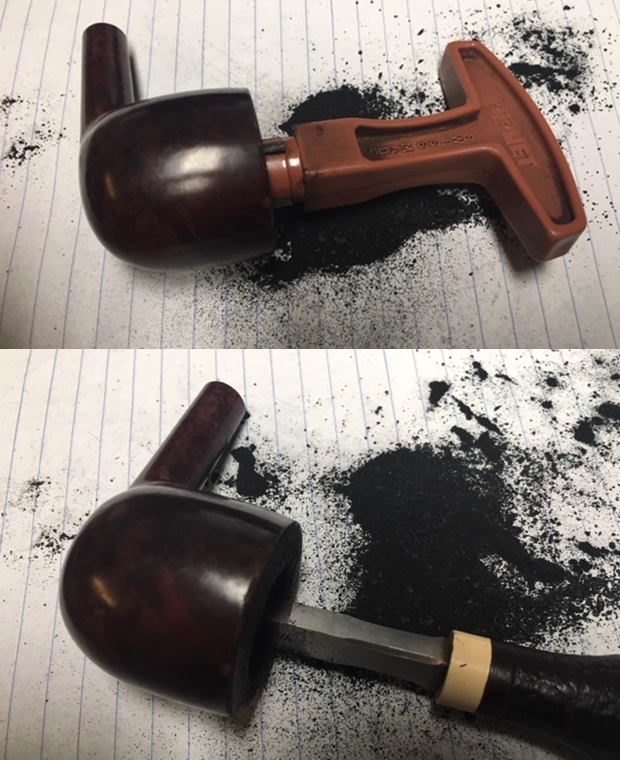
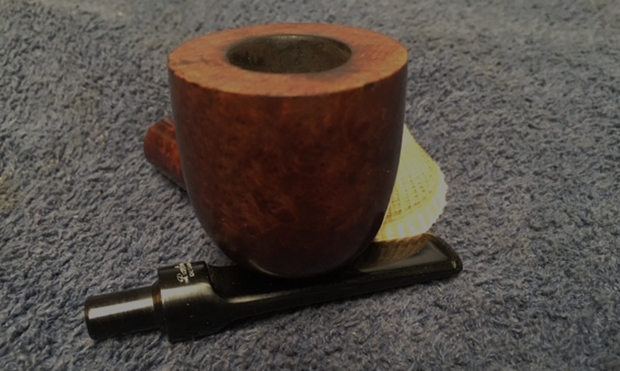
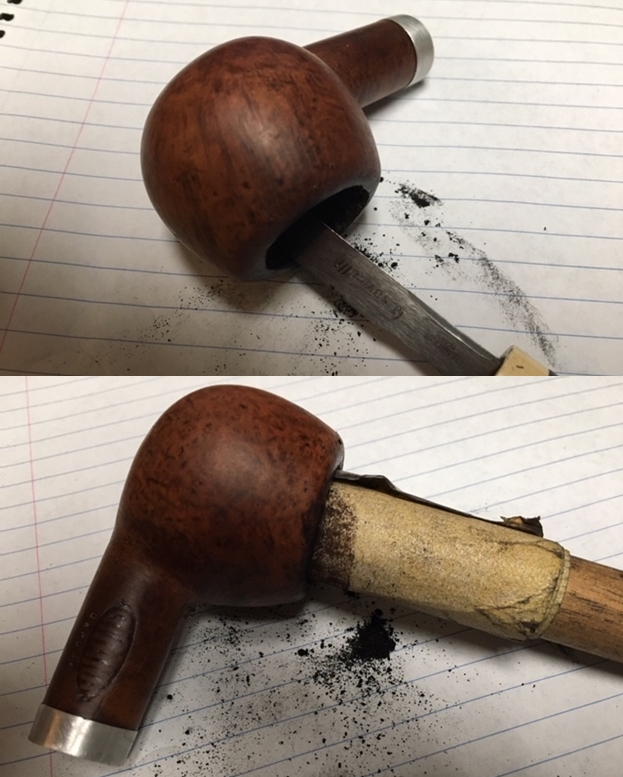
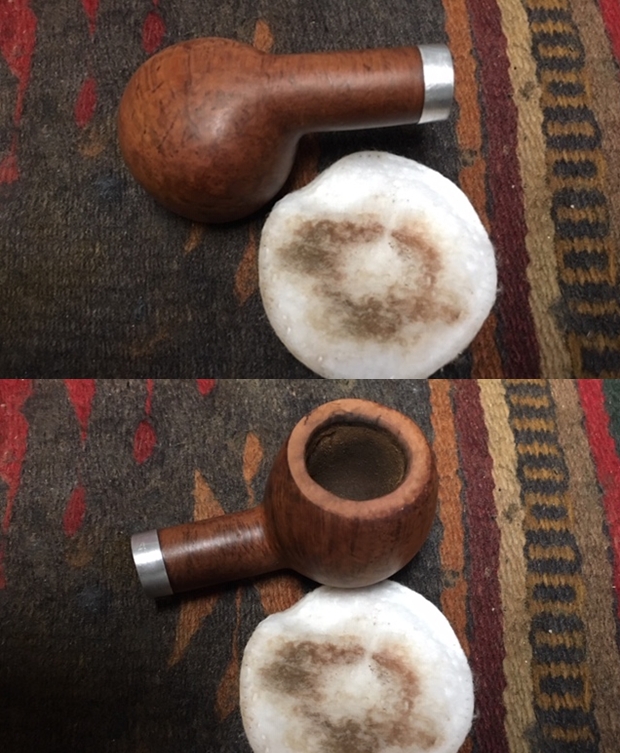
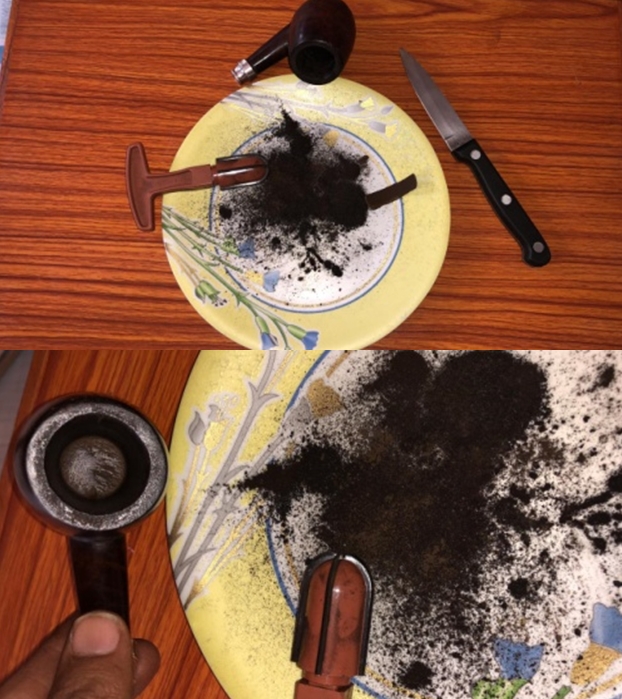
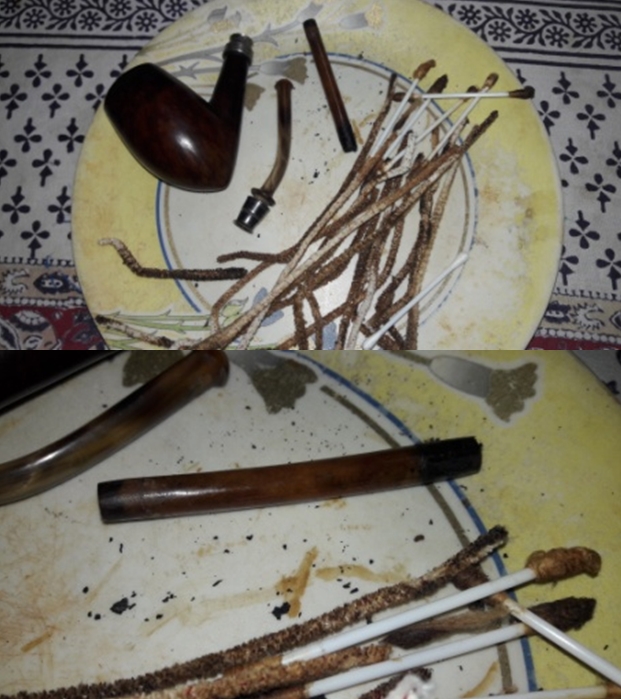
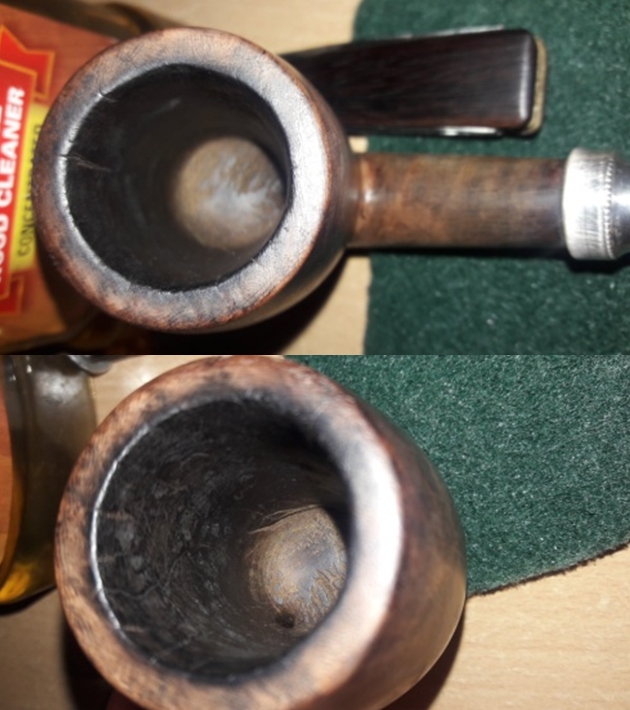
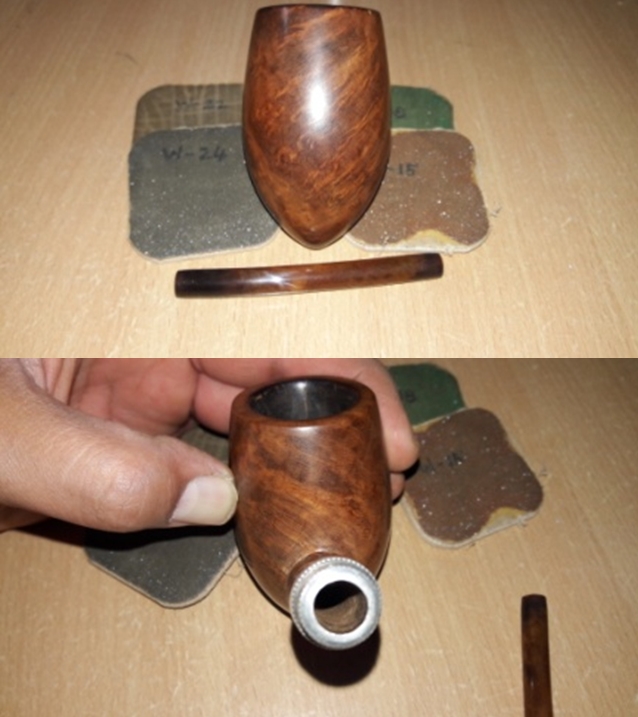
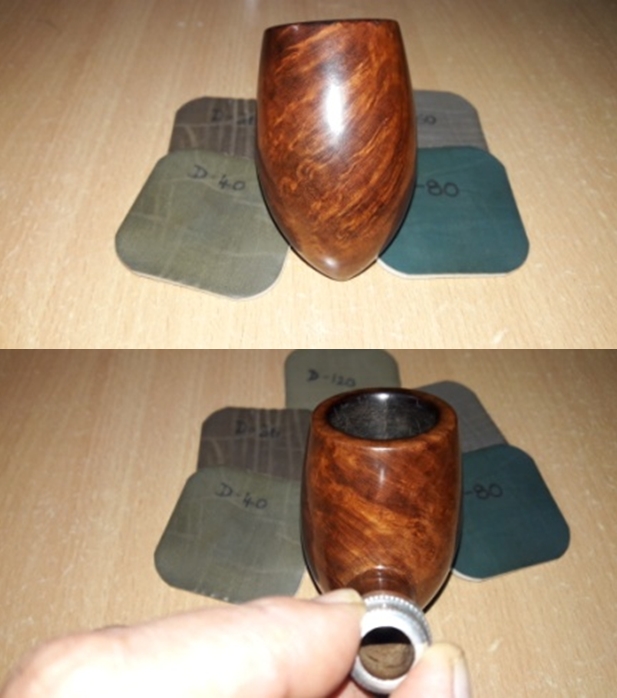
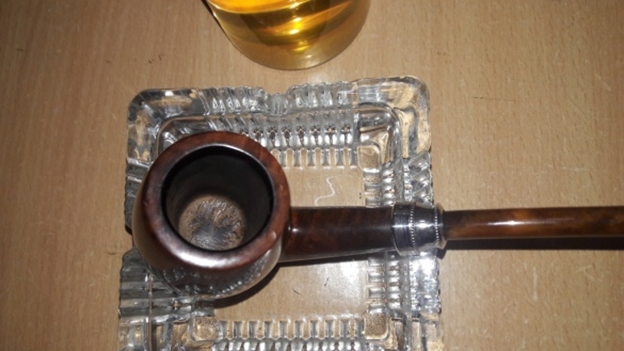
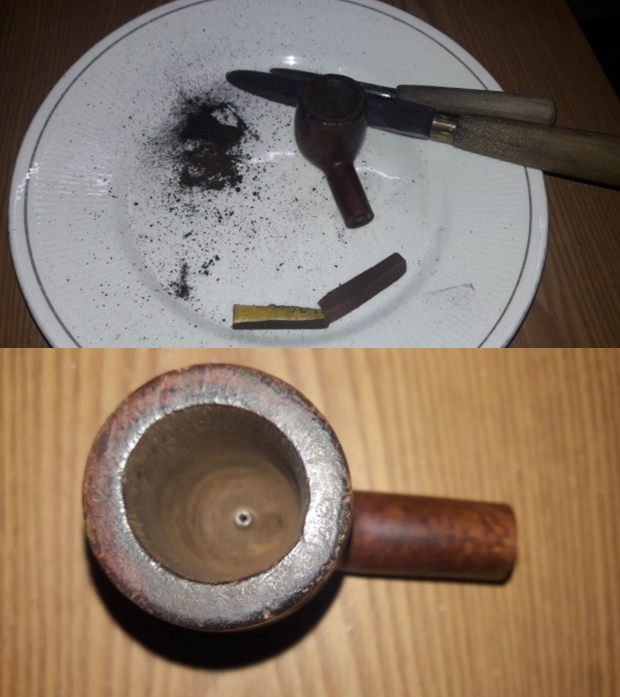
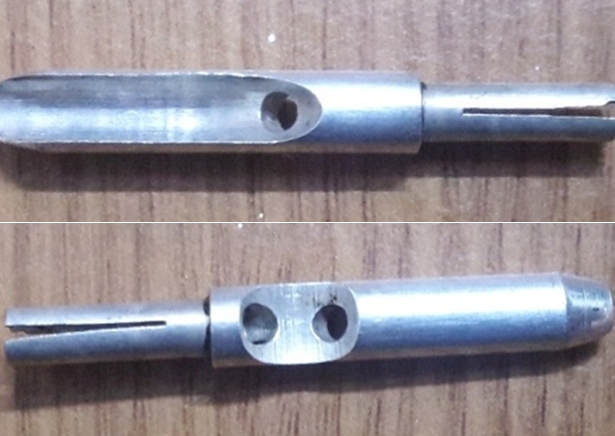
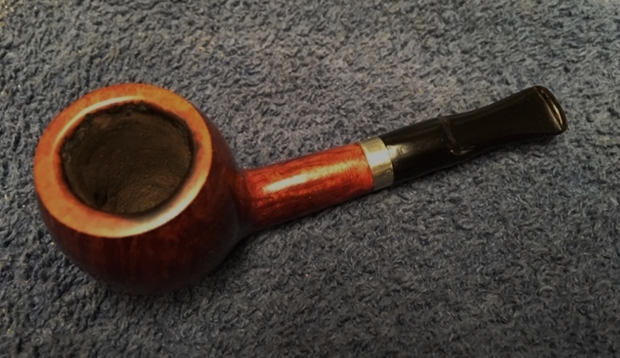
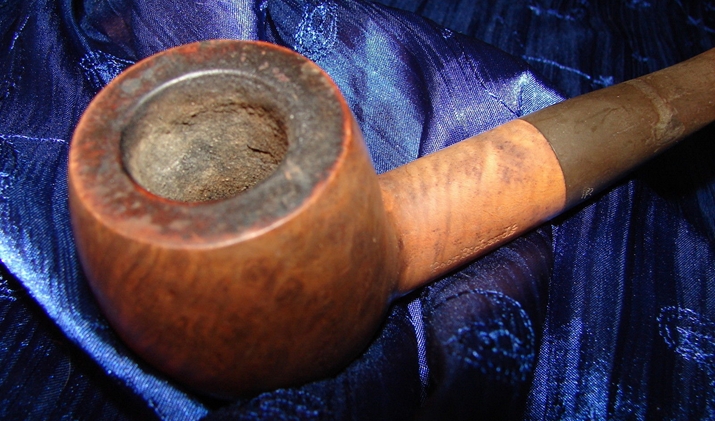
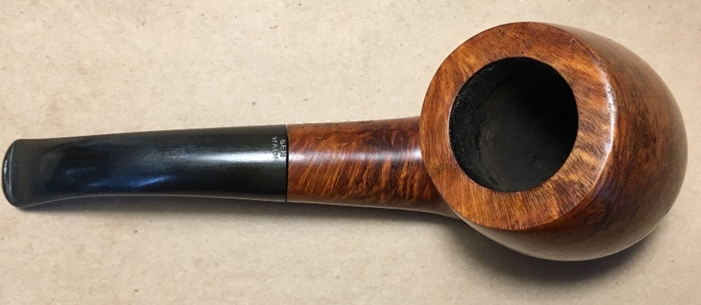
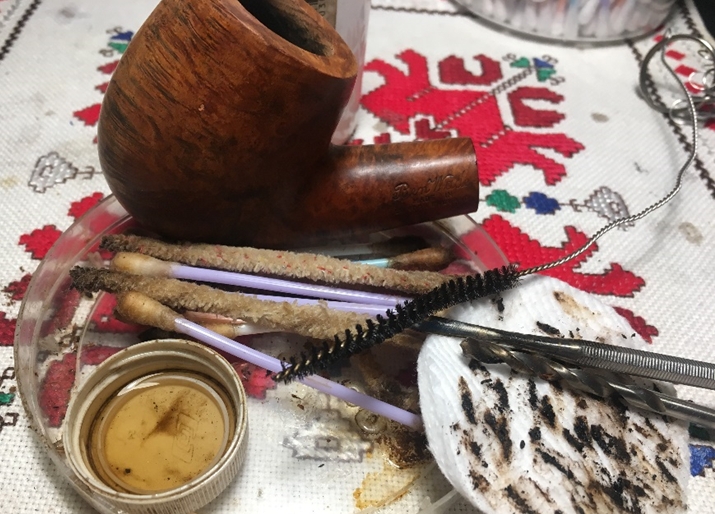
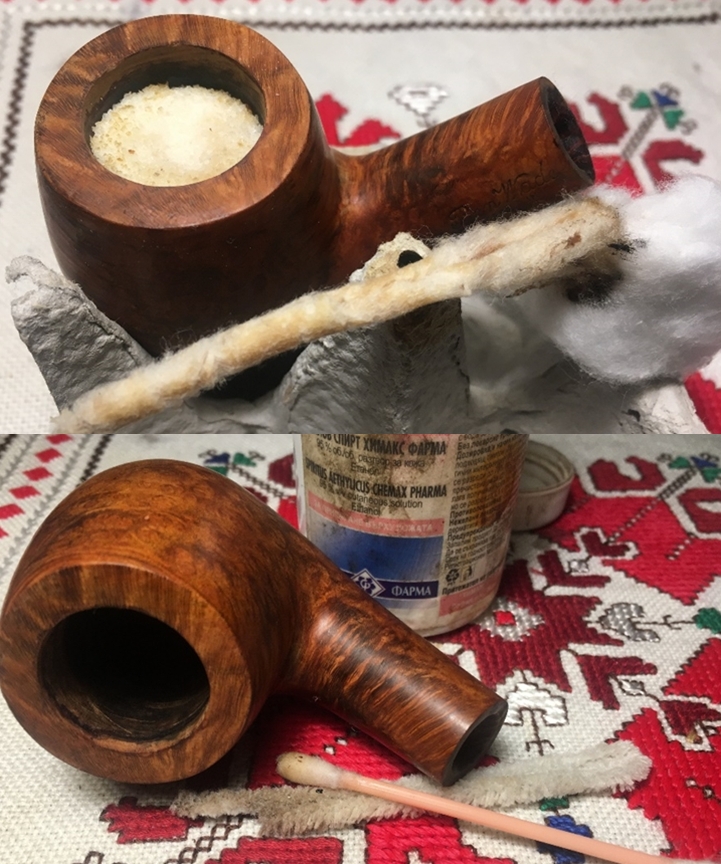
 With the stummel in hand, I begin the internal cleaning by reaming the light cake build up in the chamber. I use 3 of the 4 blade heads available from the Pipnet Reaming Kit. I then use the Savinelli Fitsall Pipe Tool to reach the hard to reach places in the chamber. I then sand the chamber with 240 grade paper wrapped around a Sharpie Pen followed by wiping the bowl with a cotton pad wetted with alcohol to clean the carbon dust left behind.

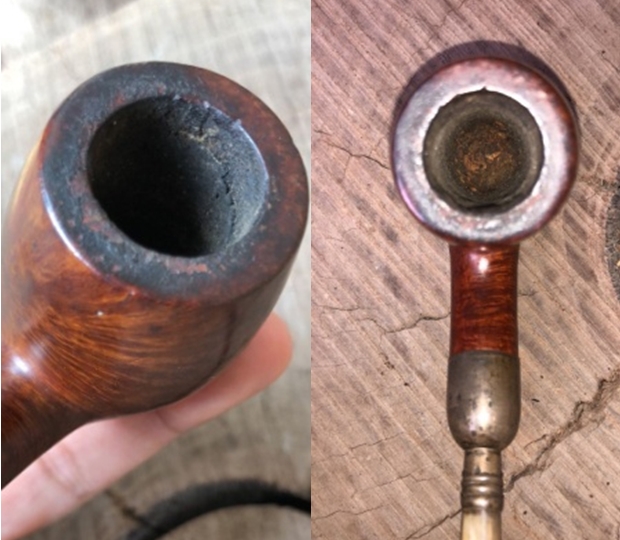
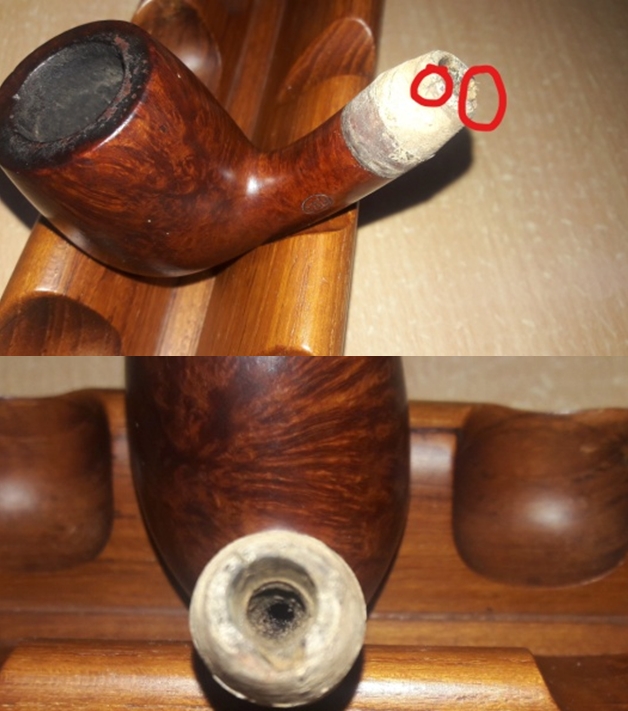
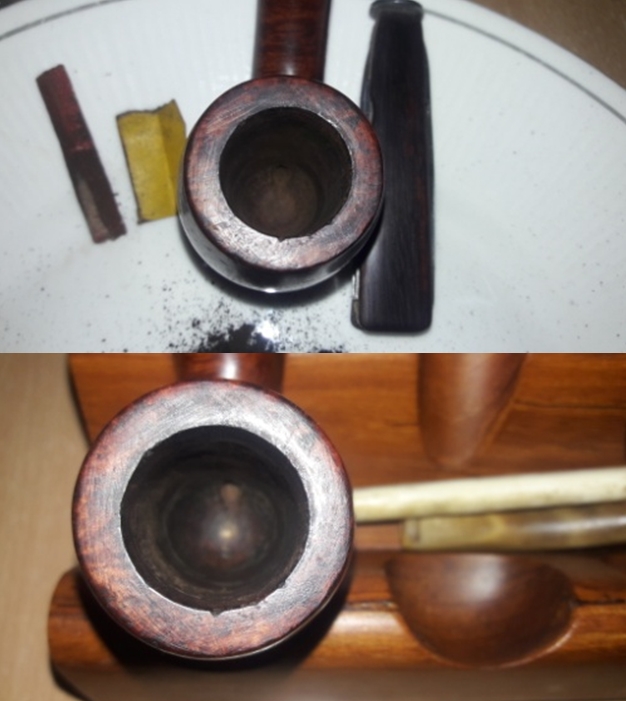
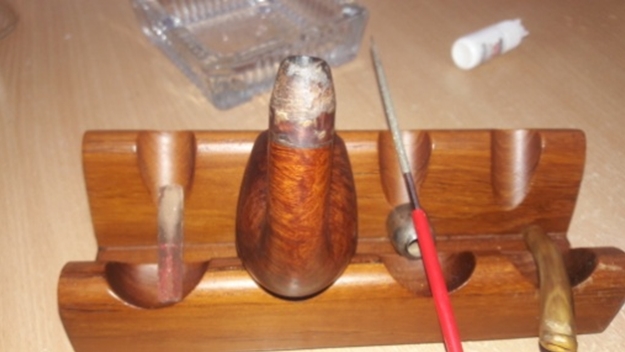
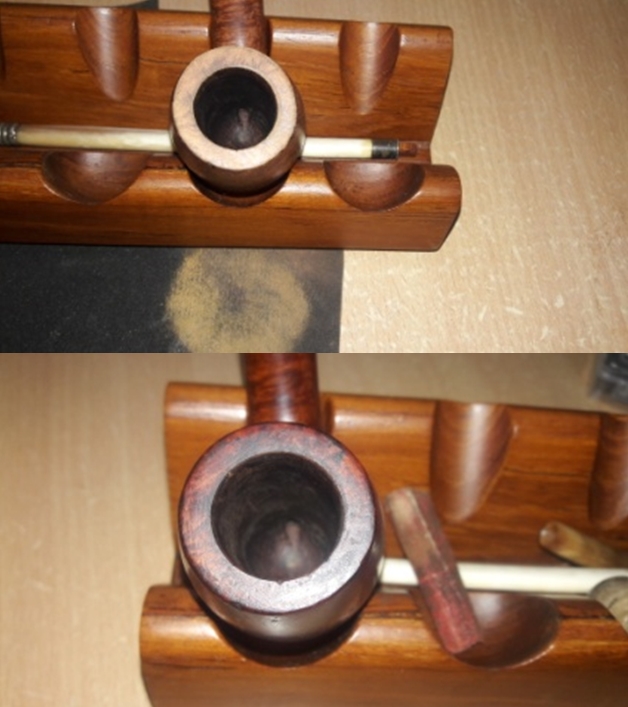
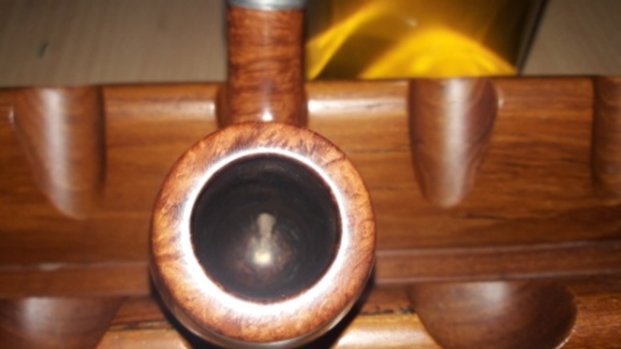
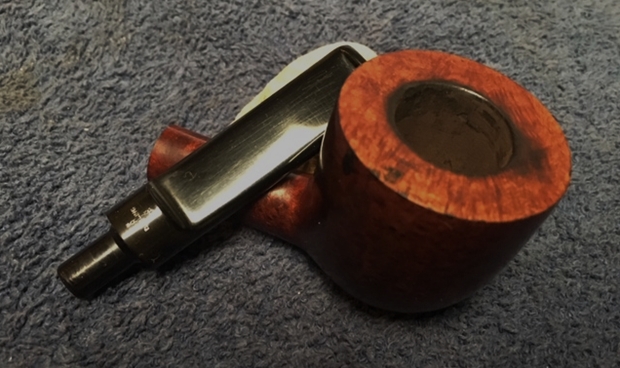
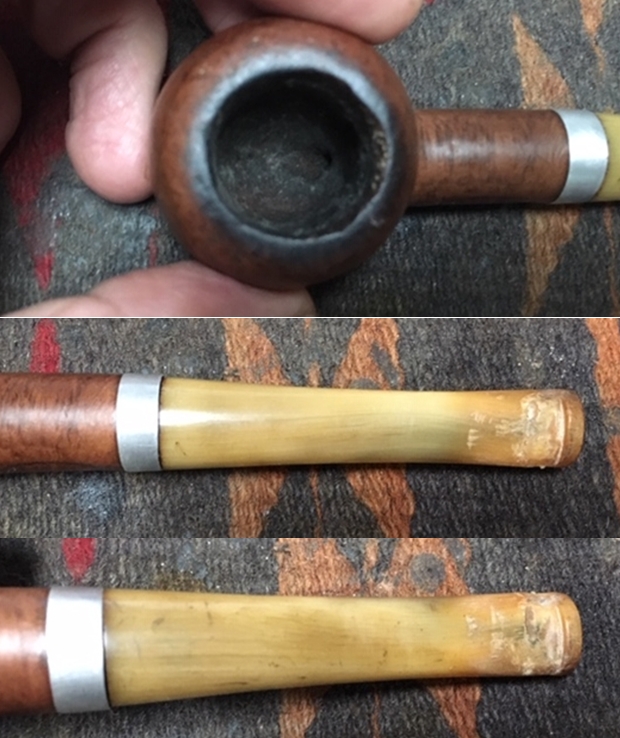
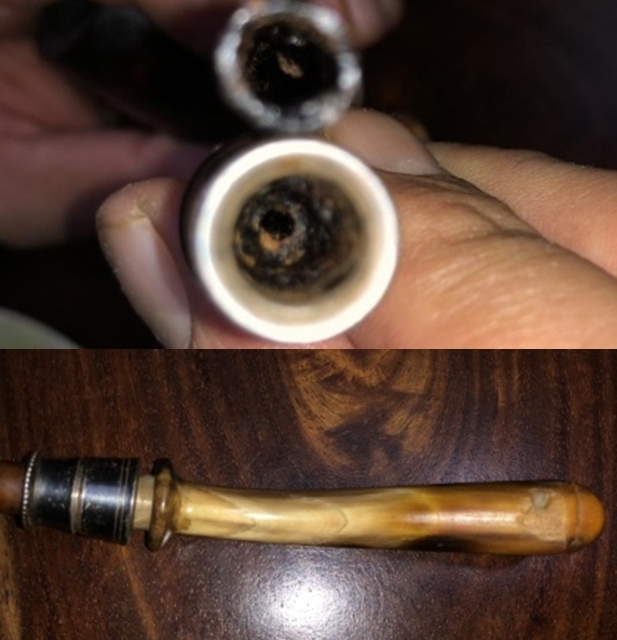
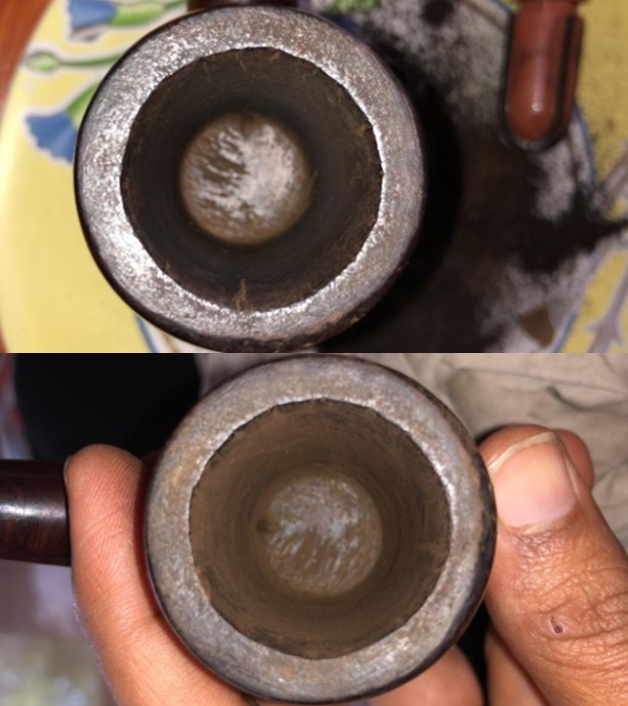
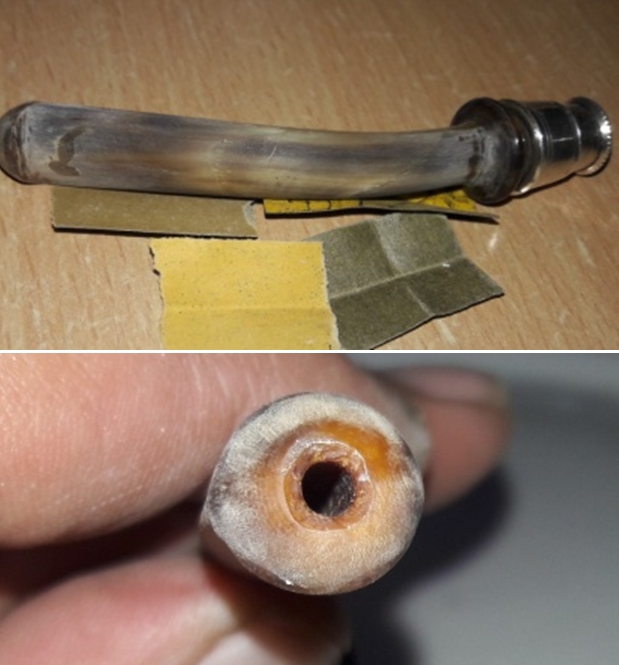
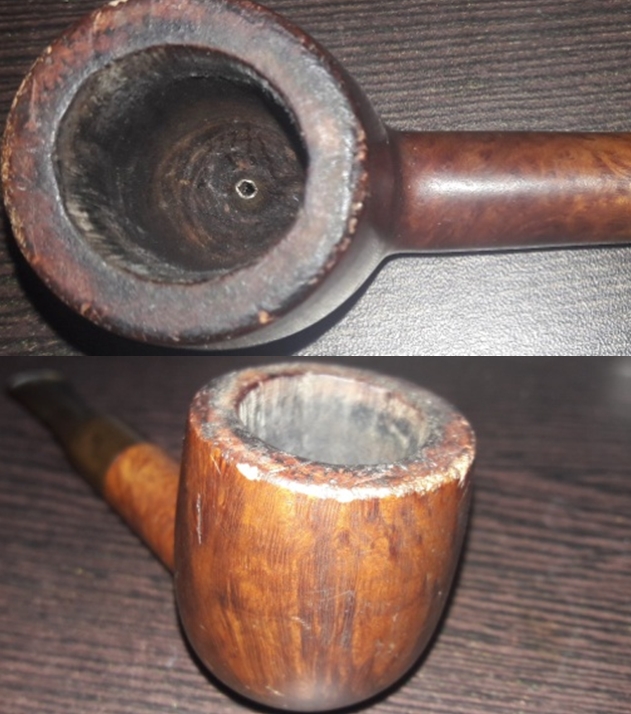
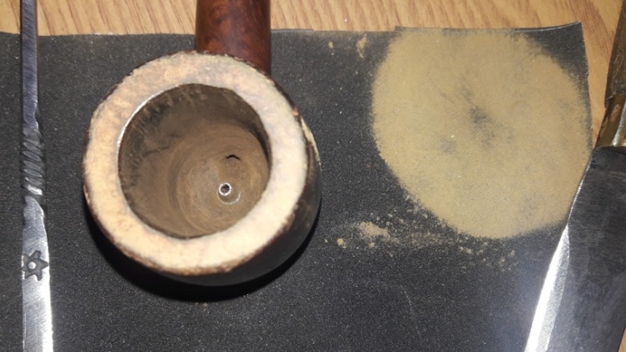
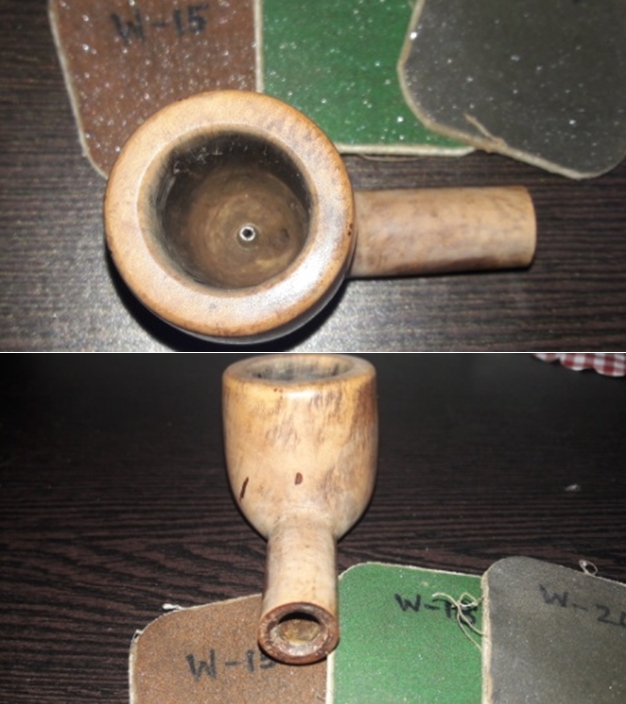
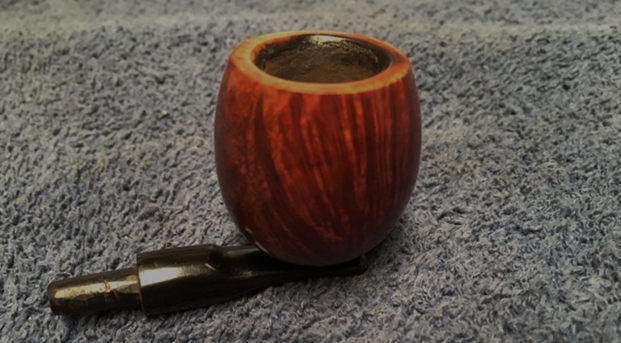
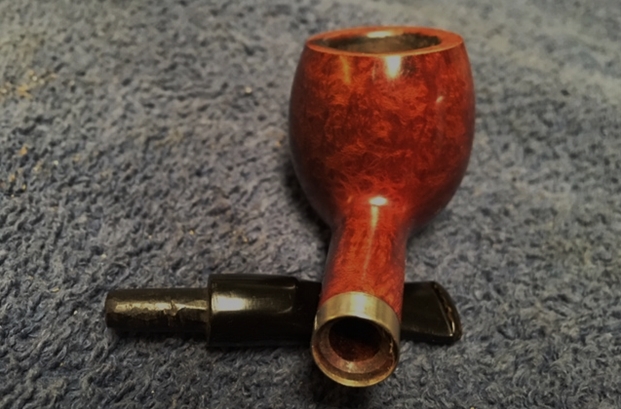
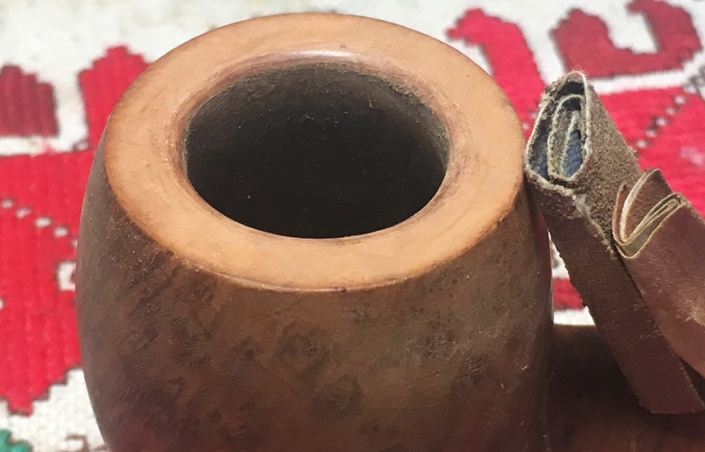
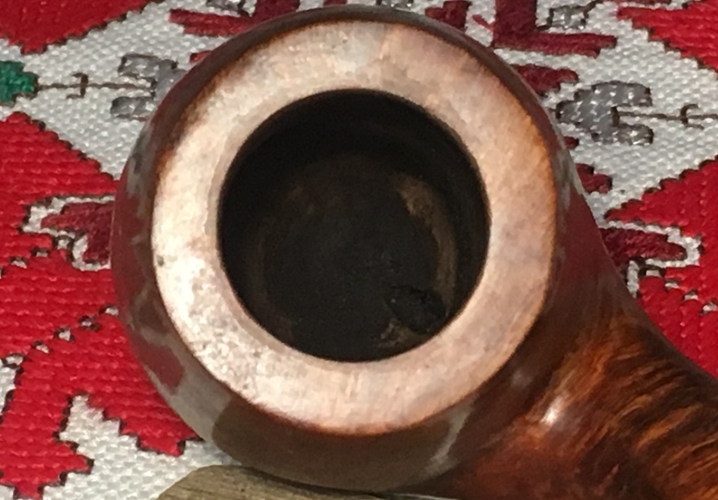
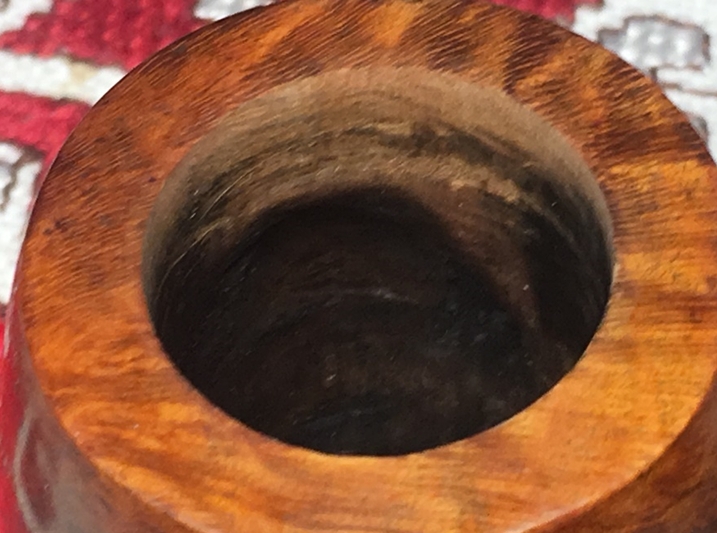
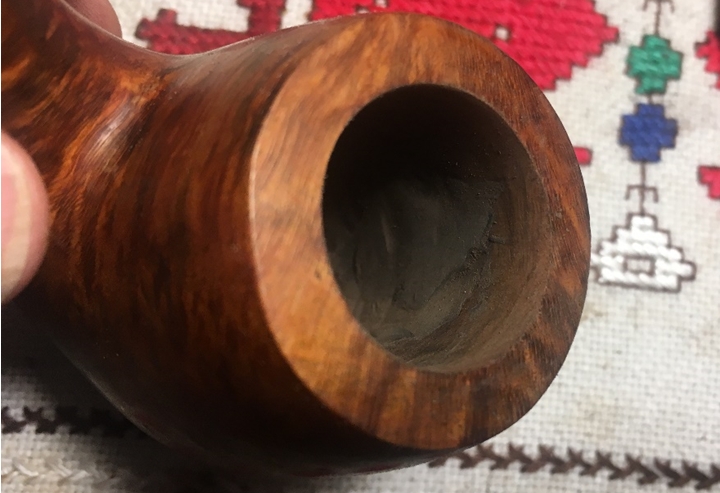
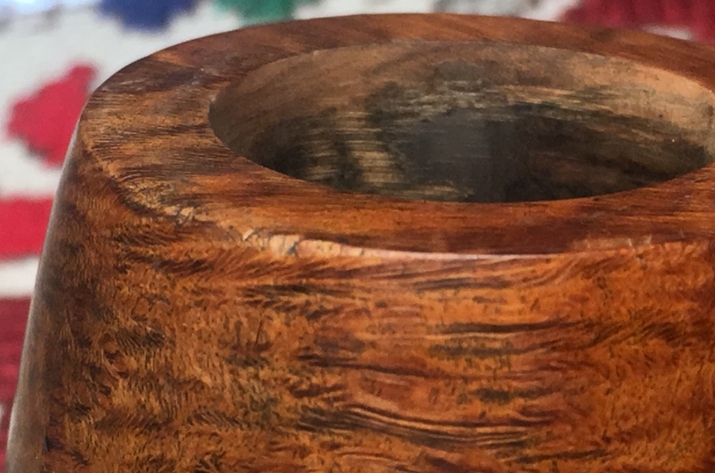
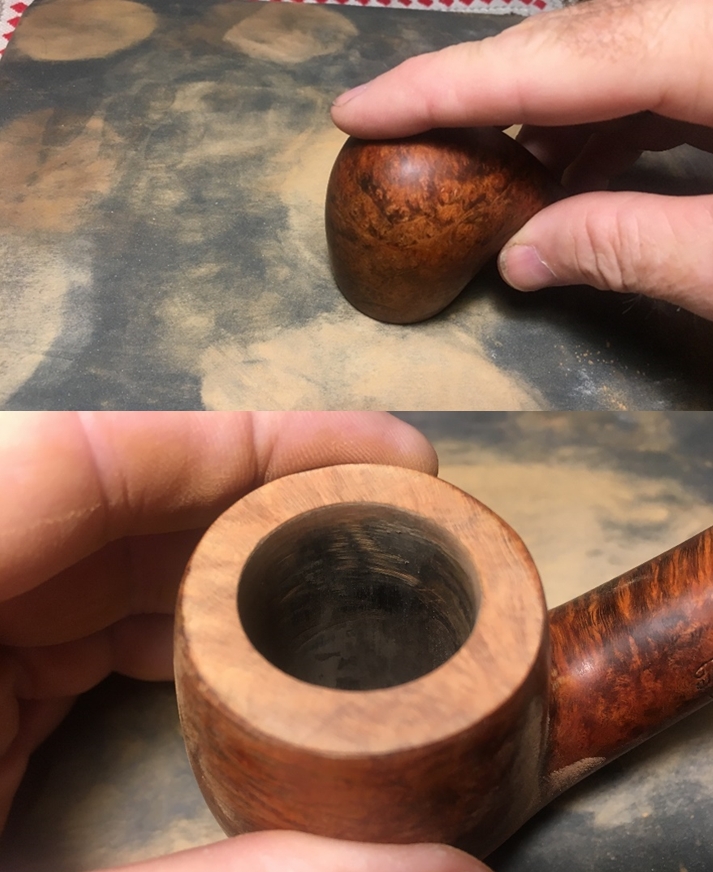
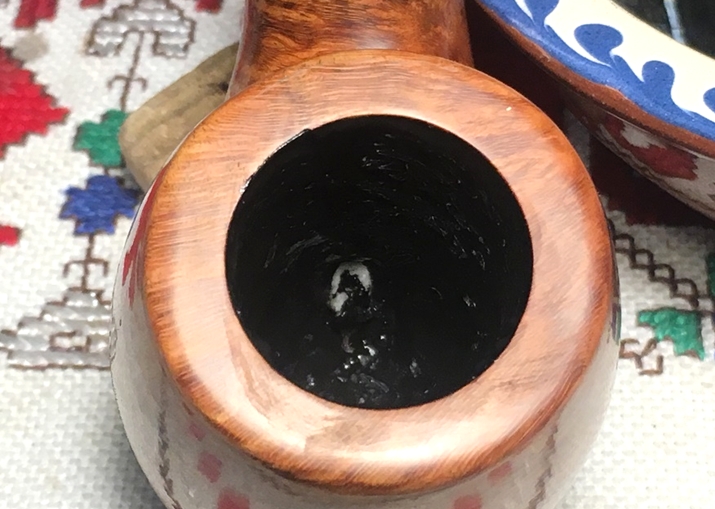
 Inspection of the chamber reveals some heat fissures on the floor of the chamber. There also appears to be a small fissure creeping up just above the draft hole. I take a few pictures that show what I’m seeing. Are these fissures severe enough to warrant a durable patch or perhaps apply a pipe mud to enhance the growth of a protective cake? That’s what I’ll be considering.
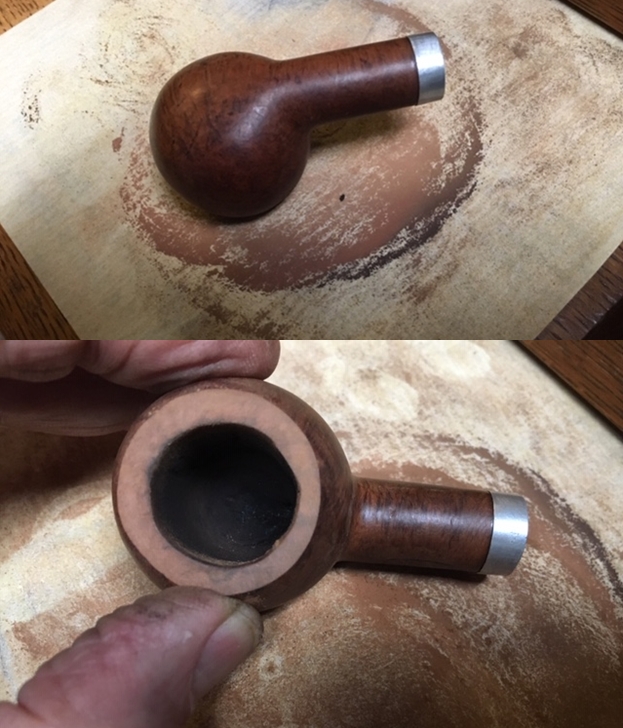
 Continuing the cleaning, I use undiluted Murphy’s Soap on the external briar surface. To work on the grit lodged in the grooves I use a bristled tooth brush. I also use a brass wire brush to work around the dome and rim to clear away the old oils. Using a sharp dental probe, I painstakingly clean both dome groves, scraping packed dirt out. I’m careful not to jump ‘track’ out of the grooves and scratching the briar surface. The picture shows the cleaning progress.
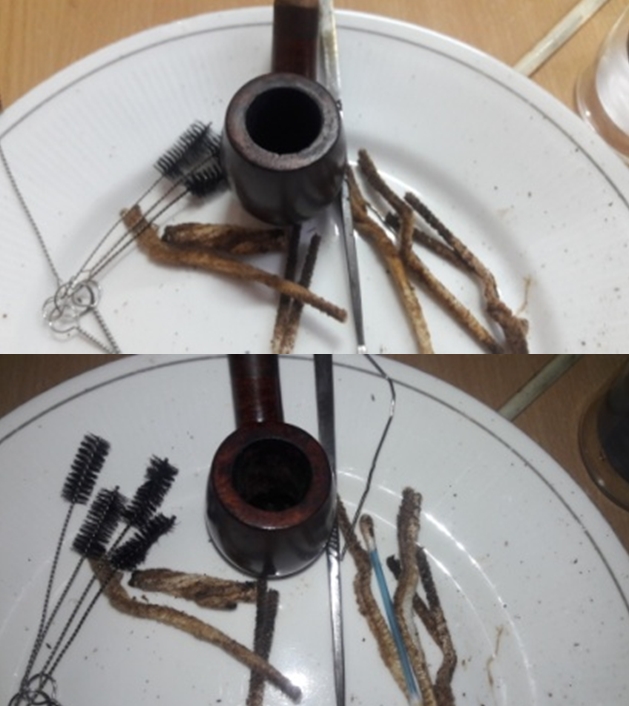
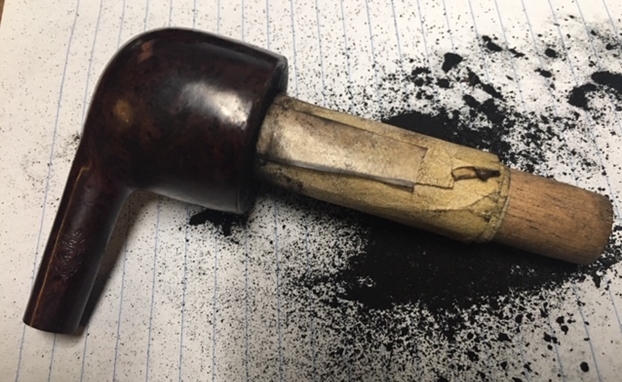
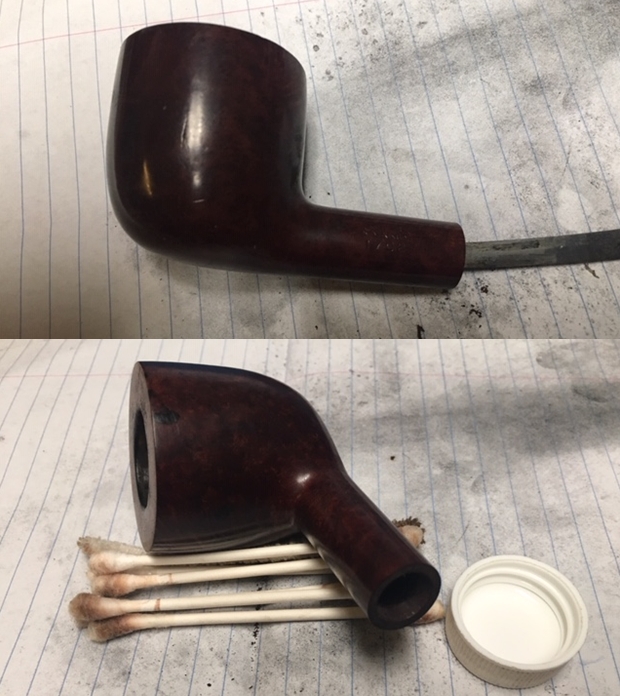
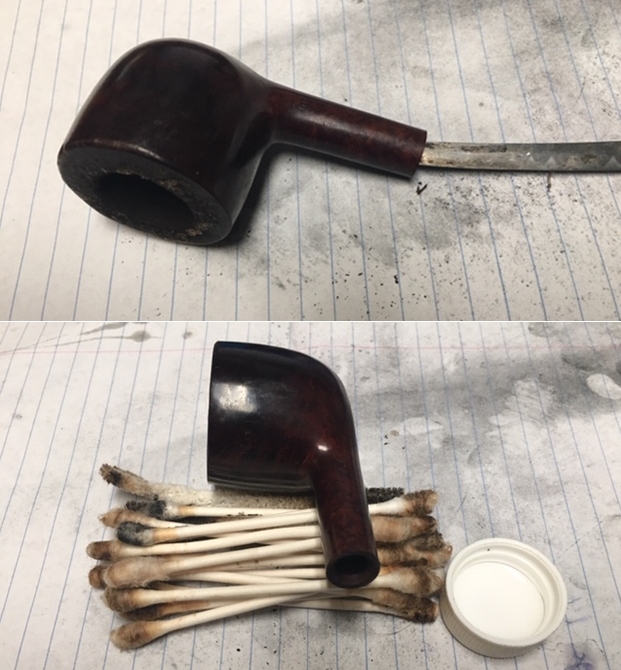
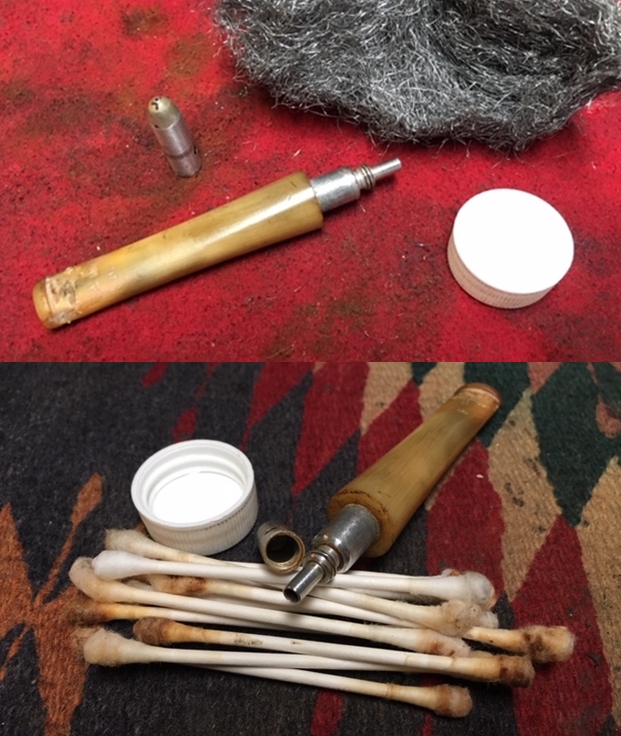
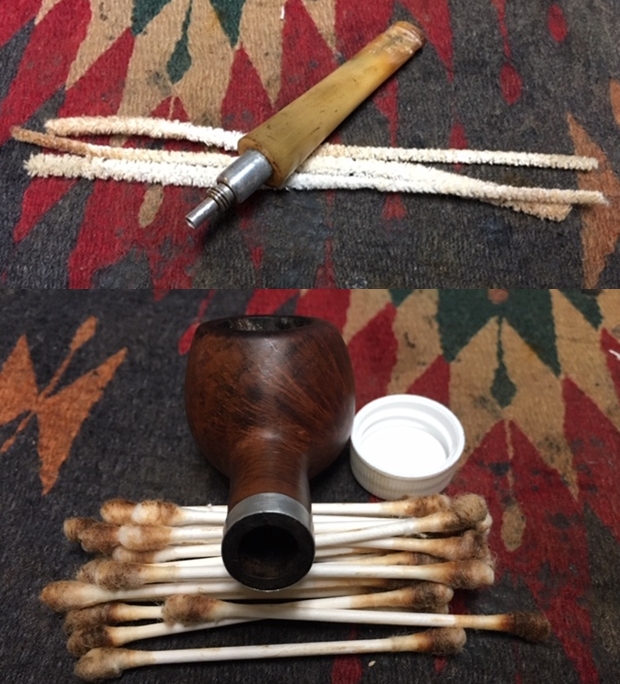
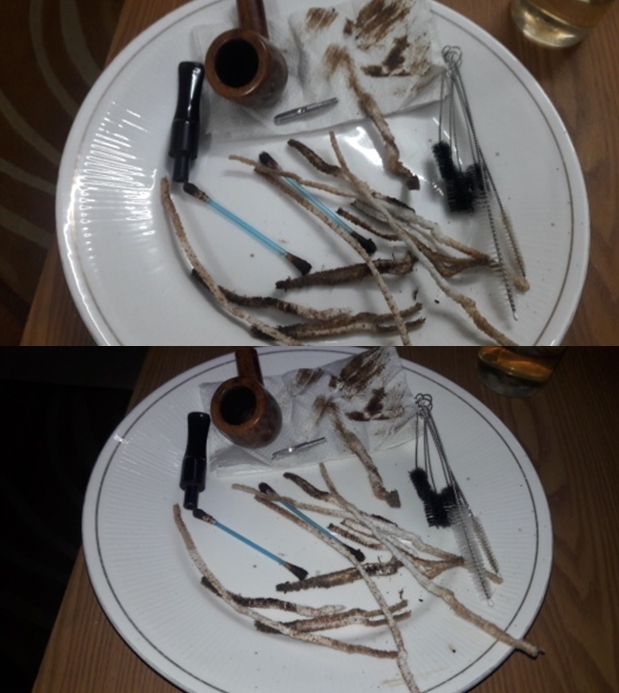
 With the externals cleaned up, I turn now to the internal mortise and airway. Using pipe cleaners and cotton buds dipped in isopropyl 95% I go to work. I quicken the work by scraping the mortise with a dental spatula. In time, the cotton buds and pipe cleaners were coming out clean. I’ll continue cleaning later using a kosher salt and alcohol soak.
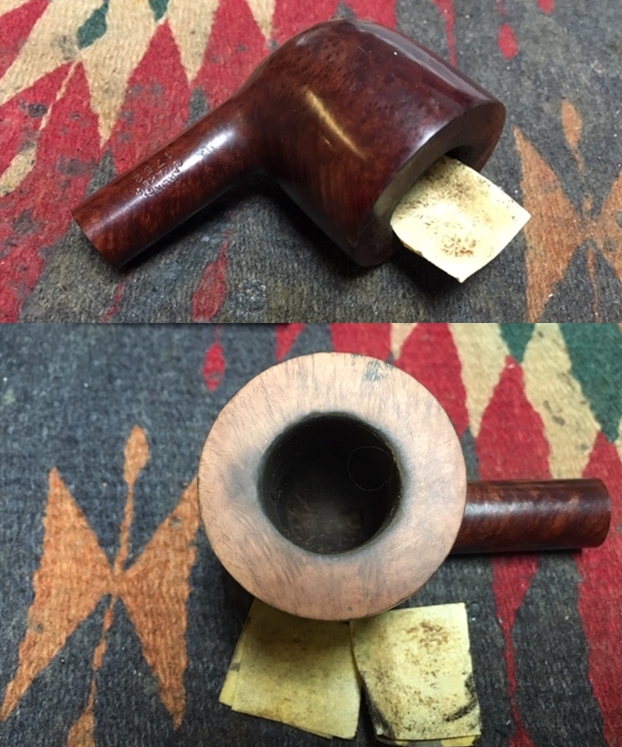
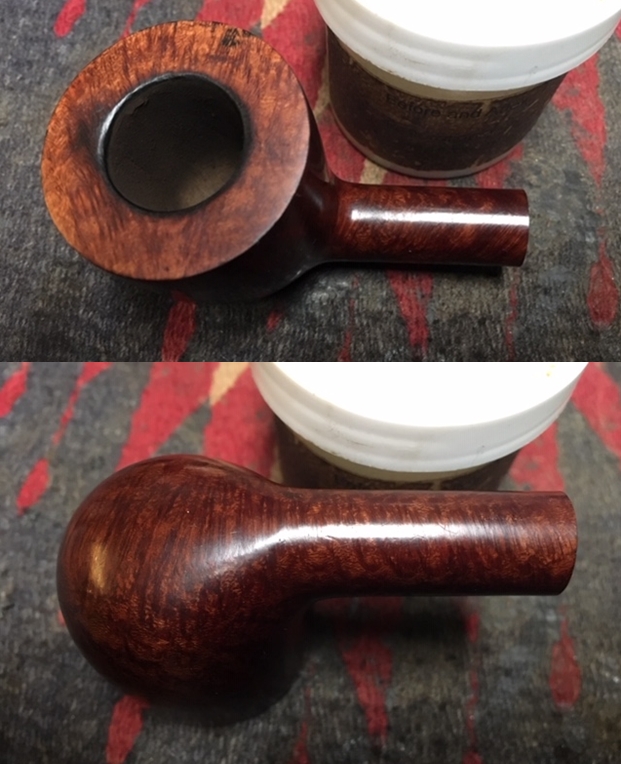
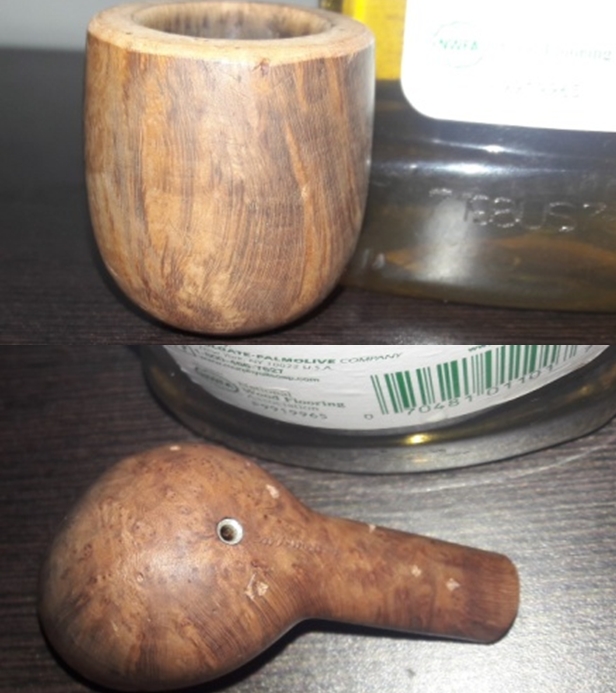
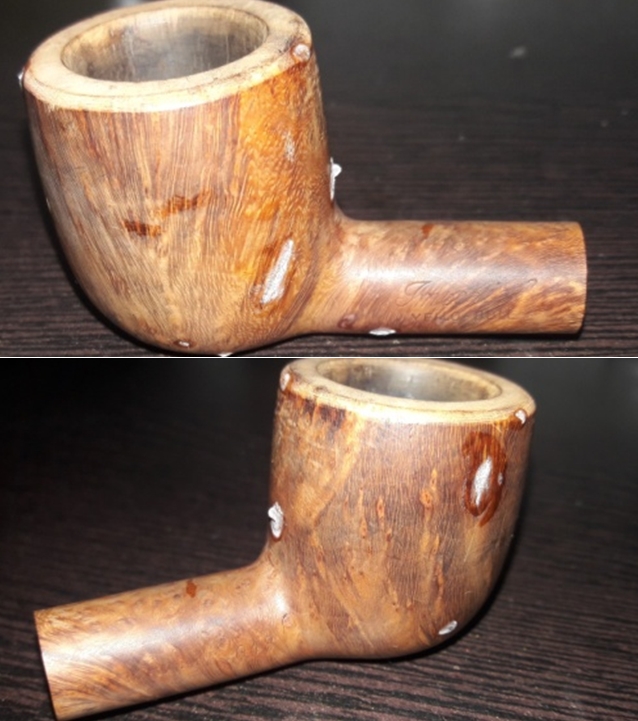
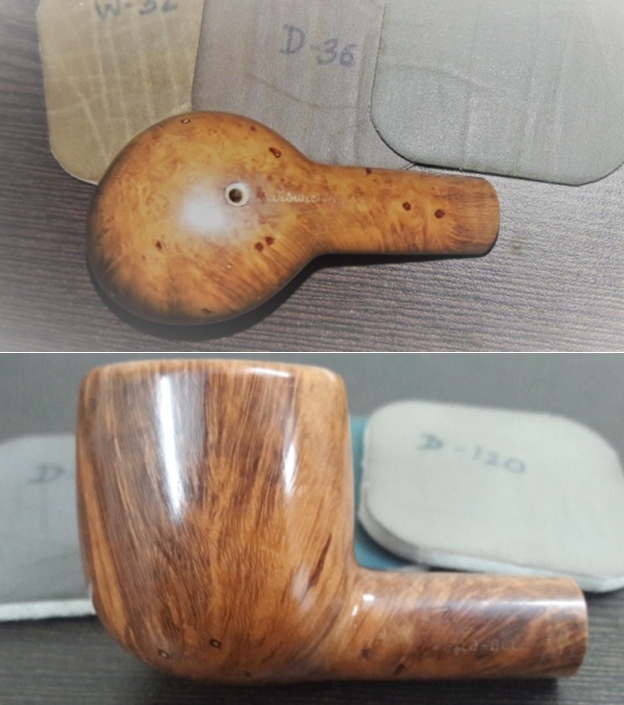
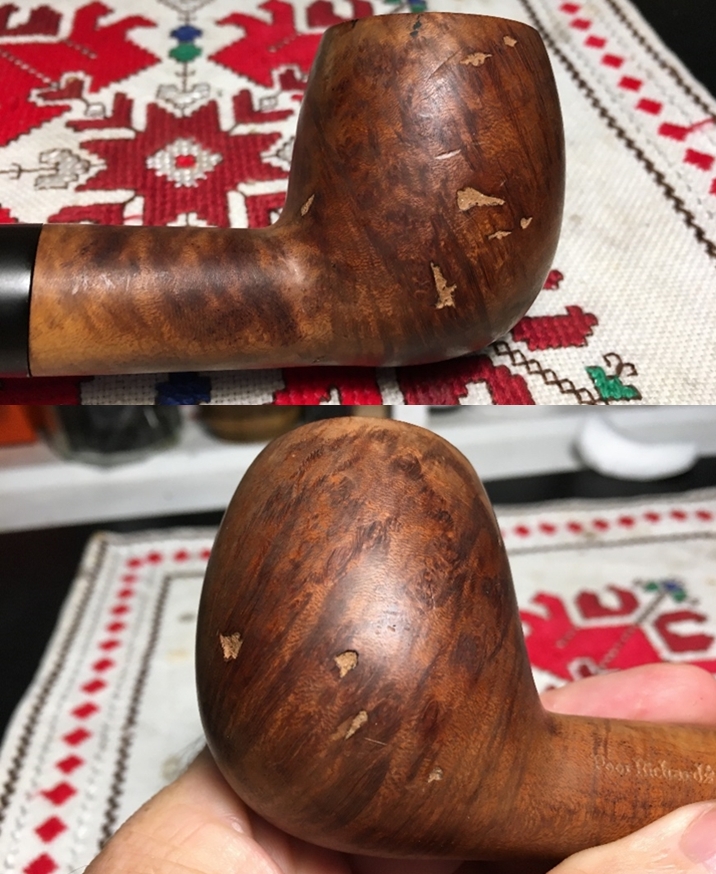
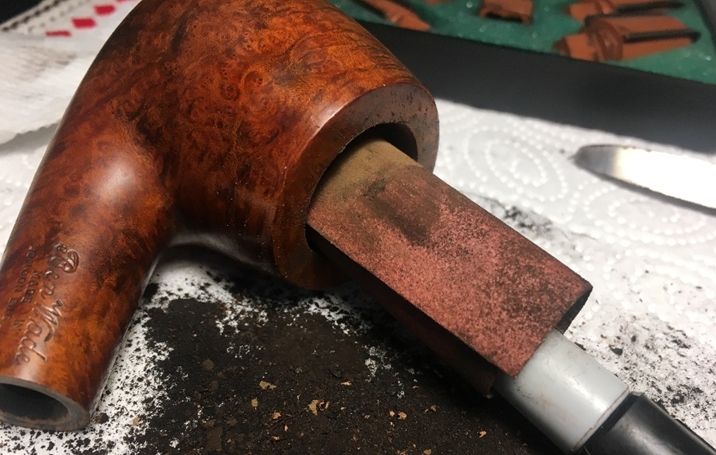
 Turning again to the stummel surface, the rim and dome cleaned up well but show the dents and pockets from knocks and drops. There remains a scorched area at the front of the rim/dome area. There are small chips in several places around the circumference of the dome grooves. I believe they’re all too small to patch, but with sanding I’m hoping that most should disappear or be minimized. The most daunting aspect of the briar landscape is a huge, double fill patch on the right lower side of the stummel. I take two pictures of the fills to show the position and a super close-up to show the appearance of the fills. I poked the fills with a dental probe and both fills are rock solid. Yet, as the close-up picture reveals, there are small air pocket holes in the fills and gaping around the fills. I’ll leave the fills in place but touch them up with thin, clear CA glue and then sand to blend. These fills will pretty well drive the boat regarding the finished look of the Comoy’s Bulldog. The finish needs to be darker in order to mask the fills as much as possible, though even a dark stain will not hide these giants.
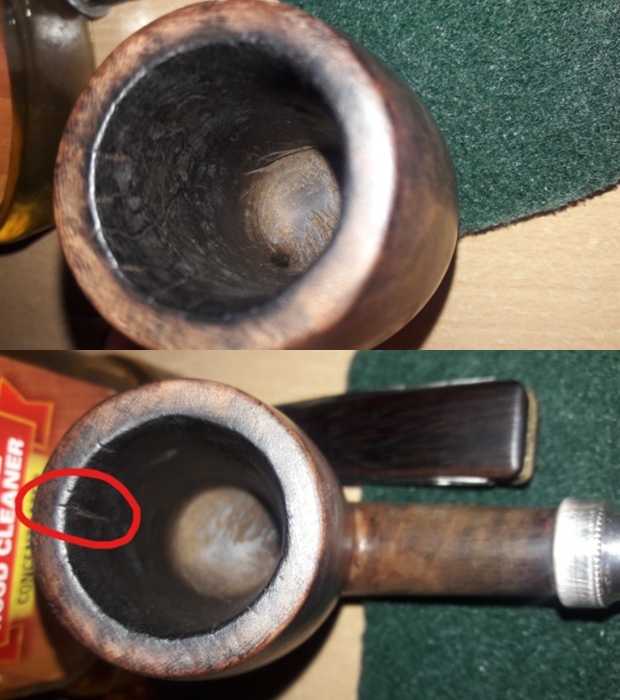
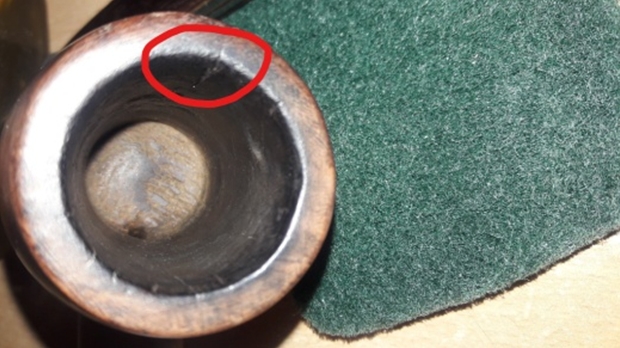
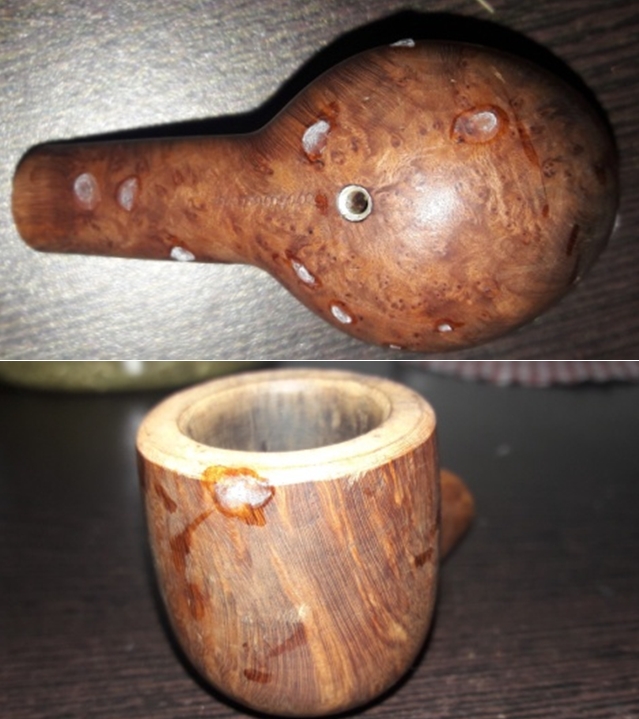
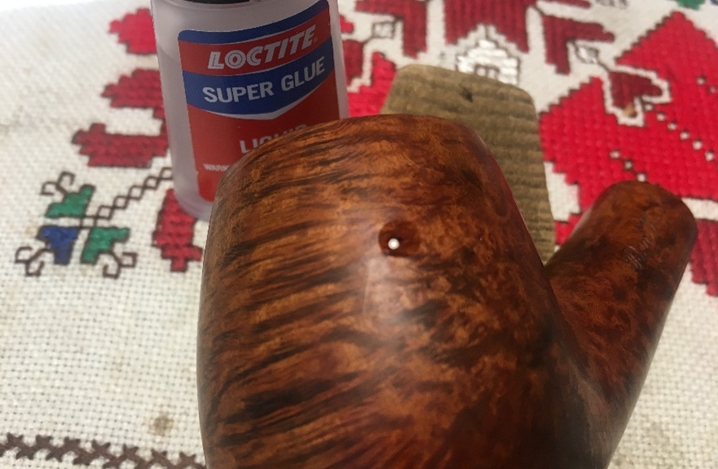
 Looking again around the dome grooves, on the back-right quadrant there may be at least 2 candidates for a patch before sanding. I take a picture of this area. To the top left of the groove chips, there are also a few small holes that I’ll fill with a spot-drop of CA glue. In this picture there are also two other small fills that seem to be in good shape.
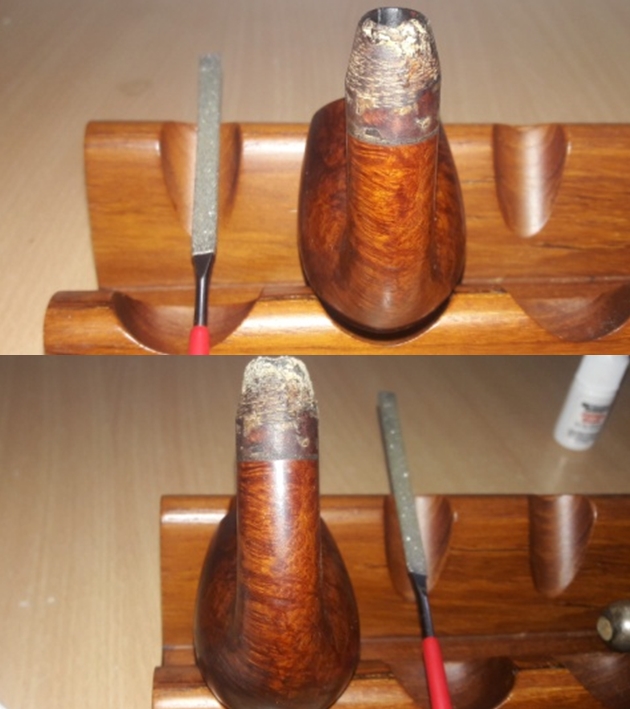
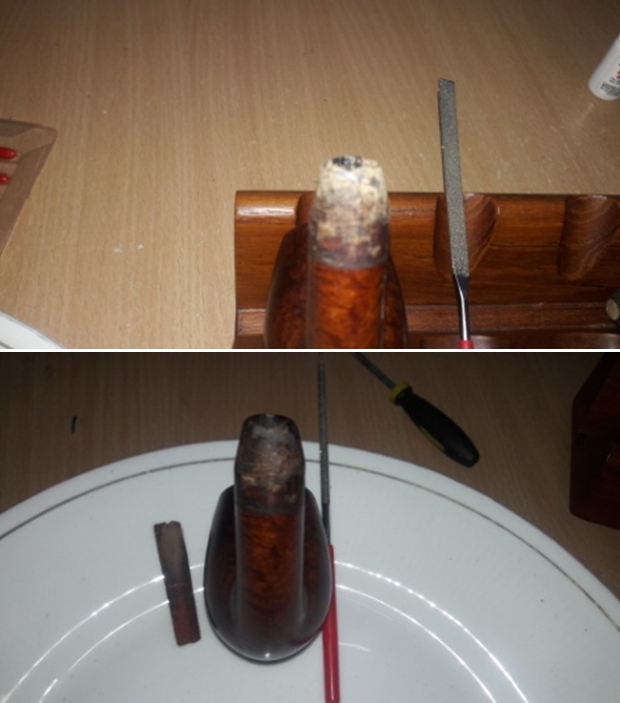
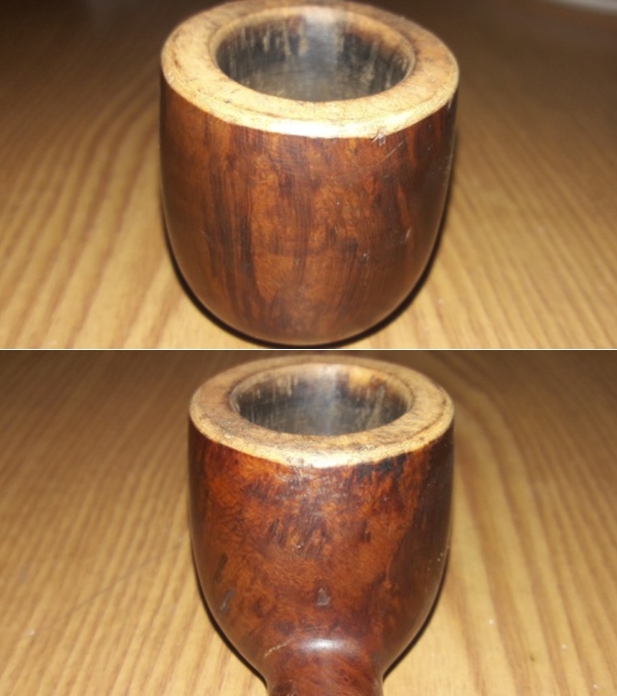
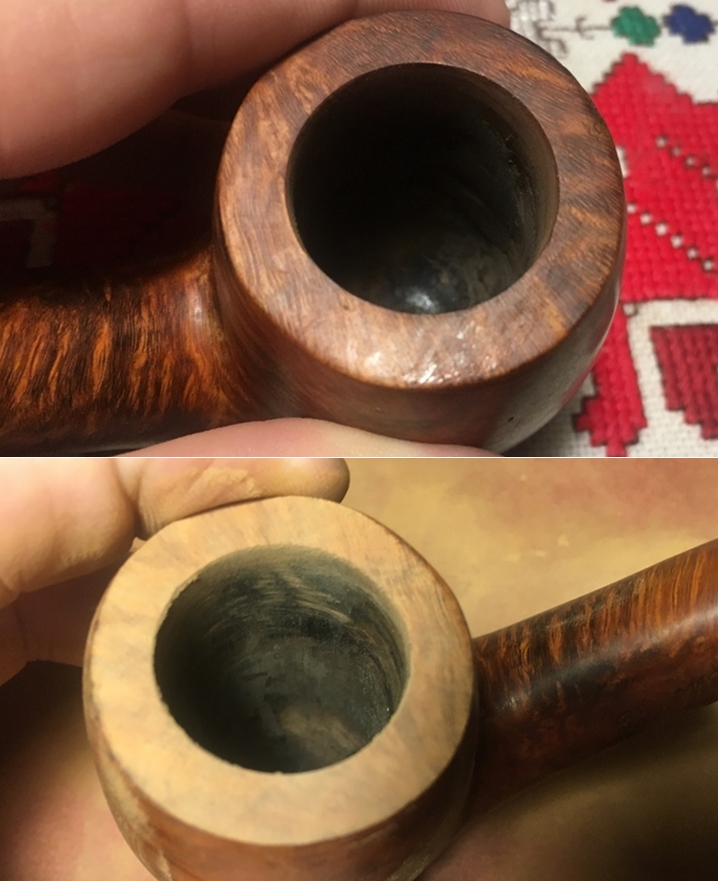
 Before I begin sanding and patching, I start from the top and work my way down! Topping the stummel will re-define the rim and address the front quadrant of the rim/dome where the former burn damage has thinned the rim. I take some pictures to show these issues and mark the start.
  I put 240 grade paper on the chopping board and rotate the inverted stummel several times, checking as I go to make sure I’m staying level and not leaning into soft spots in the briar. When enough of the top is removed, I then switch the paper to 600 grade paper and turn the stummel a few more rotations. I take pictures to show the progress.
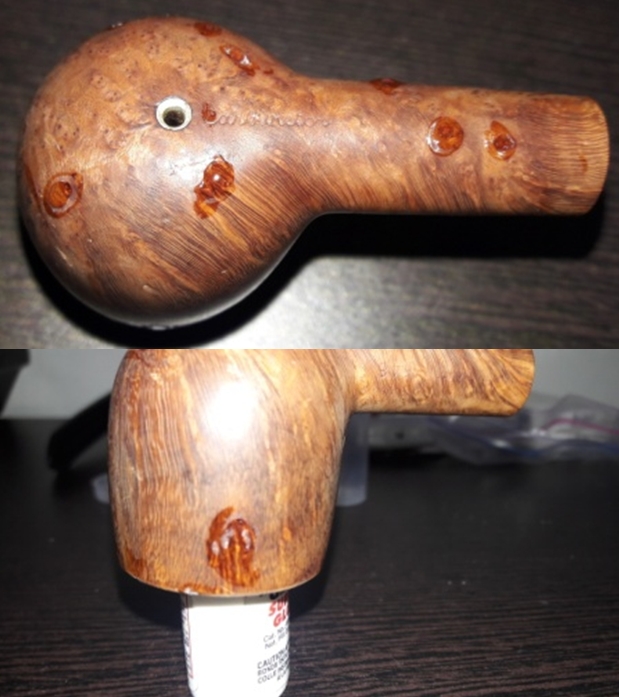
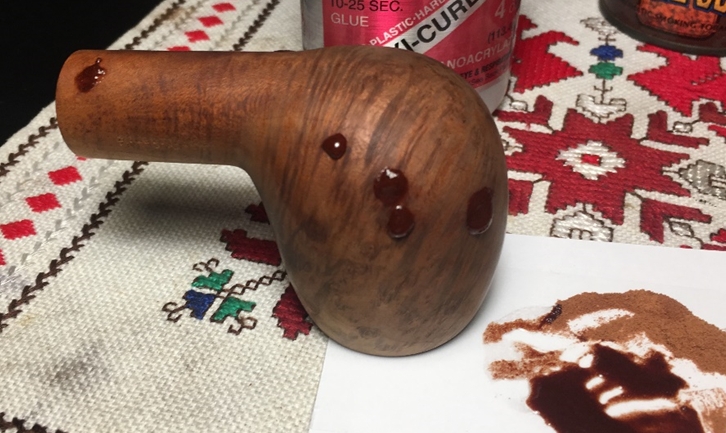
 Now to the patching party! I first wipe the stummel with a cotton pad wetted with alcohol to clean the area. I start with the two large fills by spot dropping a small amount of thin CA glue over the fills and spreading the glue over the entire fill – filling the pockets and gaps. To move the work along faster, since these are not ‘weight bearing’ patches, I use an accelerator to quicken the curing process.
 For the groove patch, I insert a piece of an index card into the groove to create a flow barrier for the CA glue. I then spot-drop a small amount of CA glue slightly above the chip and draw the glue over the chipped area with a toothpick. Again, I use an accelerator to solidify the glue. After a few minutes, I pull the index card away and use a sharp dental probe to make sure the groove is clear of CA glue seepage.

 Next, I apply small drops to four other small pits near the grooves and above them – again, I use an accelerator. I decide also to apply a small drop to the right of the primary groove repair. The repairs look a mess now, but I’m hopeful that the sanding will prove to reveal a more pleasing surface!
 Next, I begin the filing and sanding of the two large fill patches down to the surface level. I use a flat needle file to do this initially when the patch mound is more distinct, then follow with 240 grade paper as the sanding nears the briar surface. The gaps and pits in the original patch filled nicely, blending better with the surrounding briar.
 To both clean and sharpen the grooves at the groove patch repair, I insert 240 grade paper into the groove itself. The groove is only large enough to accommodate a single sheet, so I must flip the paper to sand both the upper and lower edges of the groove. I use a sawing motion with the paper while in the groove and I flex the paper up to apply a little more sanding action to the groove edge. This technique does a good job redefining and cleaning up groove edges, especially at the point of the CA glue repair.
 After filing, sanding the groove patch repairs, and ‘groove sanding’ the groove repair looks great! The patch has blended, and the groove is cleaner and smarter.
 Next, I move on to filing and sanding the 4 patches to the left of the groove repair on the dome. I file the patch mounds down until near the briar surface and then take over with 240 grit paper. I sand the area of the patches to blend. It looks good – not pristine, but much less ragged! The battered stummel is showing some signs of life!
 I follow by ‘groove sanding’ this area. I like the results of this technique, so I decide to continue the groove sanding around the entire circumference of the dome for both the upper and lower grooves. Since I’m able only to do one directional sanding on the grooves, it requires four circuits around the dome to do the job! I refined the technique as I work – by flexing the paper somewhat I can sand more directly chips encountered on the groove edge as I slowly work around the dome. The pictures show the groove sanding progress and results – much cleaner and crisper for this Comoy’s Bulldog!
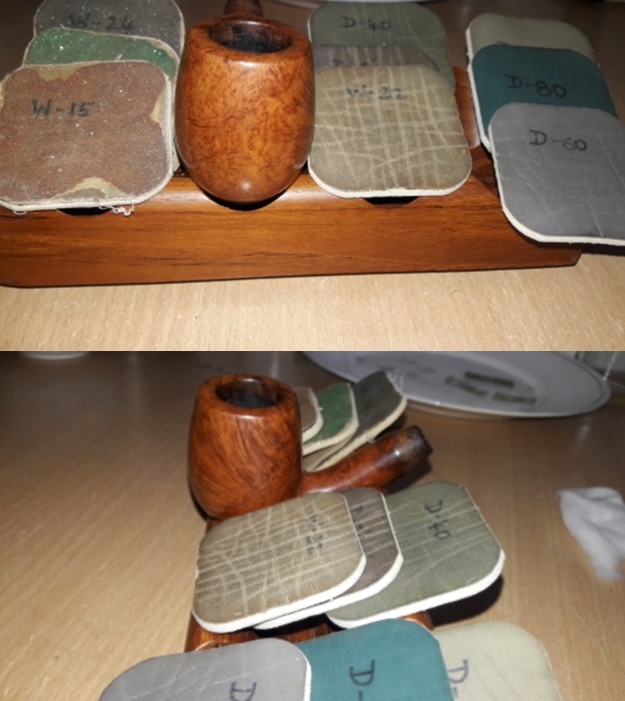
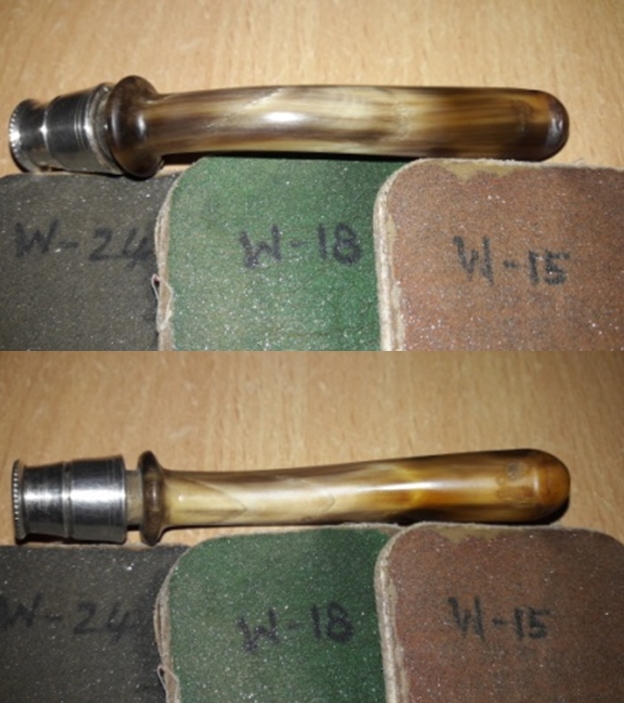
 I continue preparing the external briar surface by sponge sanding starting first with the coarse sanding sponge. I then use a medium grade sponge then finish with a light grade sanding sponge. I avoid totally the upper shank panels with the nomenclature. Sanding sponges help to clean the surface of the minor nicks and cuts and soften the look without an overly intrusive sanding effect. The pictures show the results of the 3 sponges.
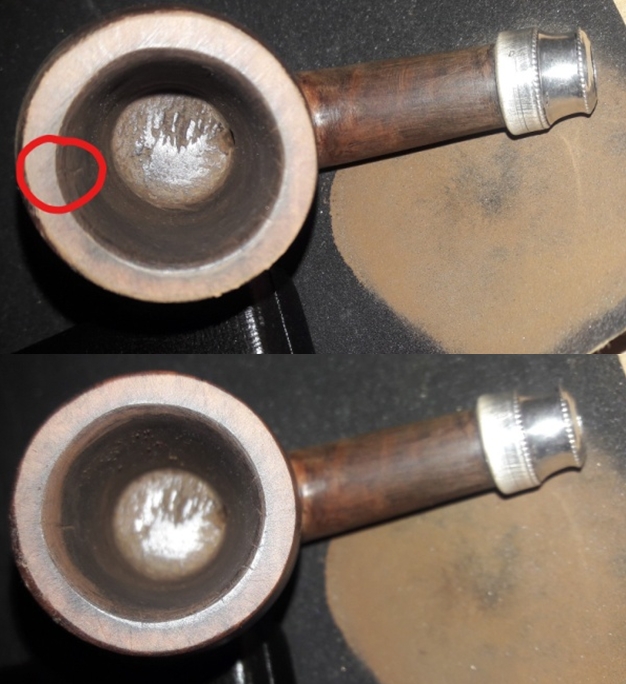
 As I sponge sand the dome of the Bulldog, I notice a chip in the inner lip of the rim that became more distinct during the sanding process. To erase this small divot, I introduce a very gentle inner bevel to the rim using 240 grade paper rolled. This dispatched the divot quickly.
  Earlier, I avoided using the sanding sponges on the nomenclature panels in order not to diminish the Comoy’s stampings. I do want to clean the panels more to rid the old residue finish before applying a fresh stained finish. To remove the old finish and to clean the panel I apply acetone to a cotton pad and wipe the panels. This does the job.
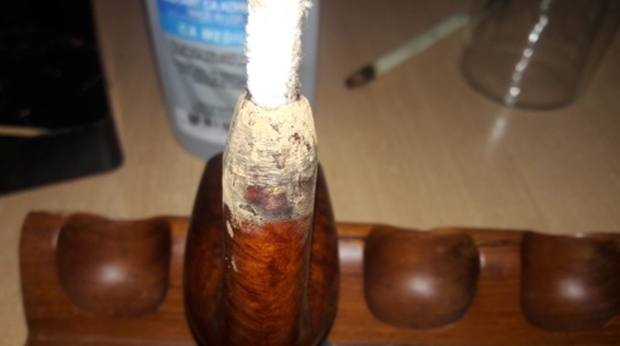
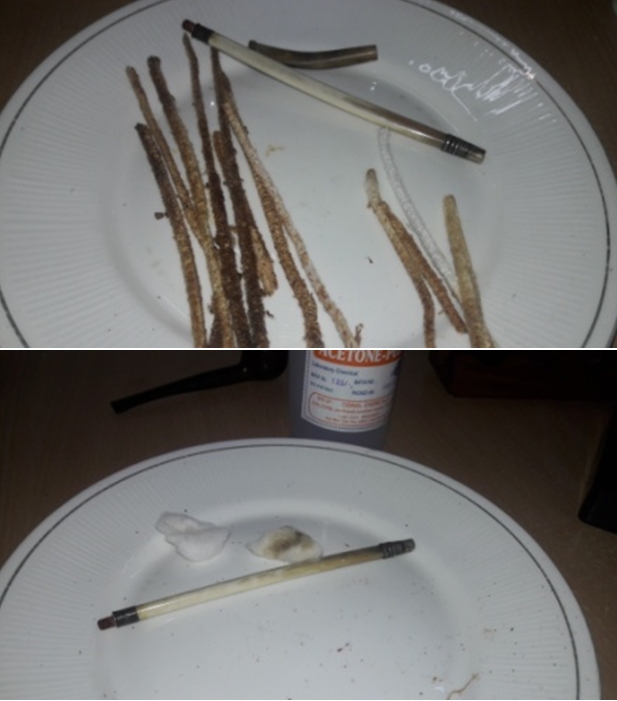
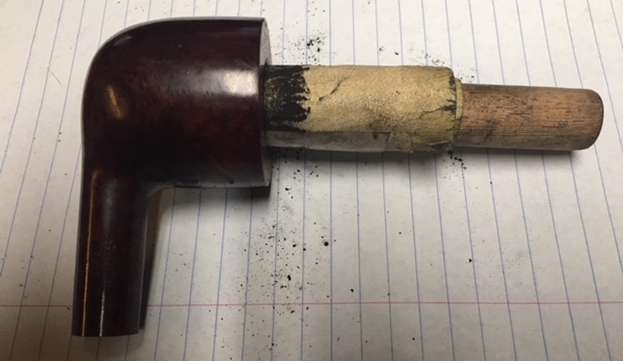
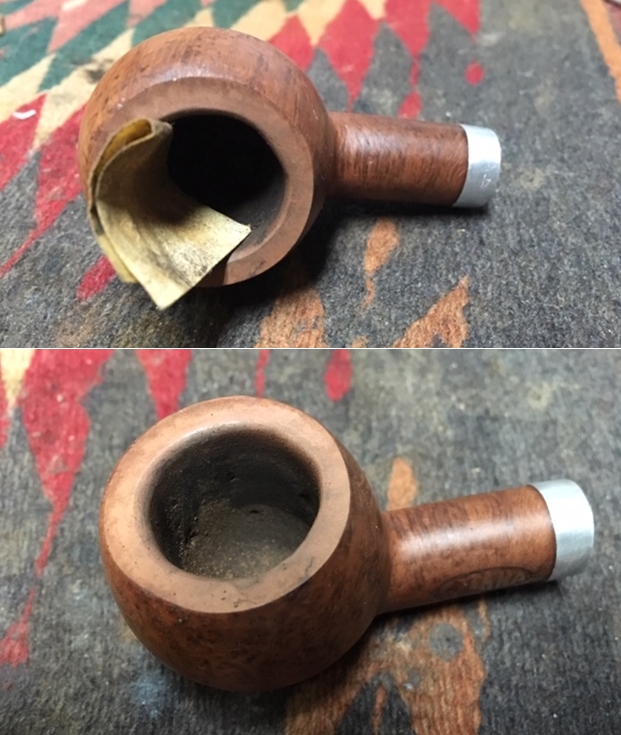
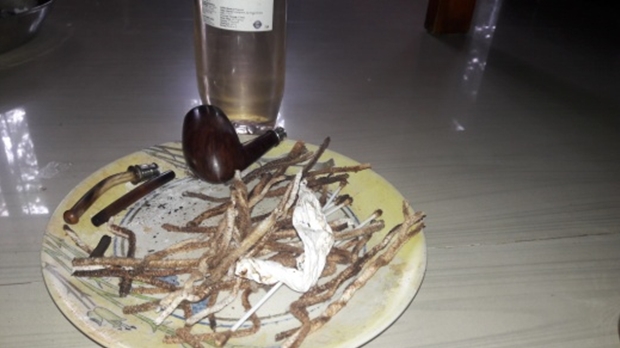
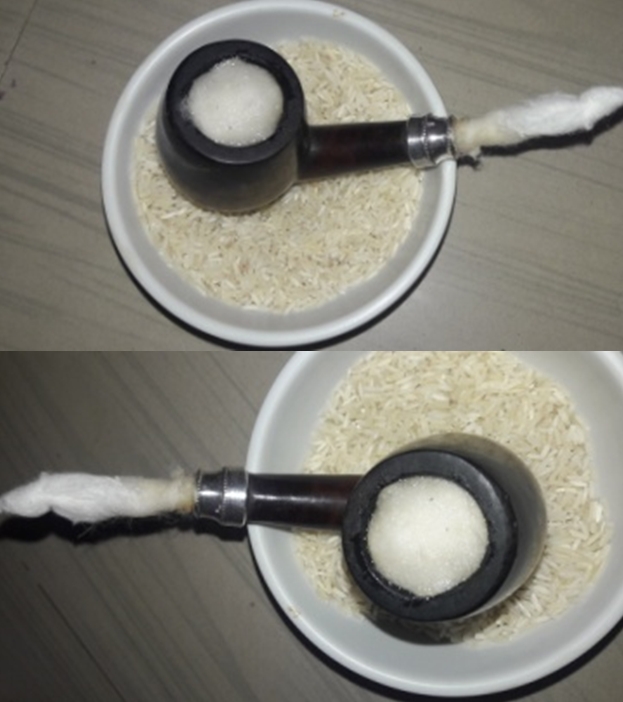
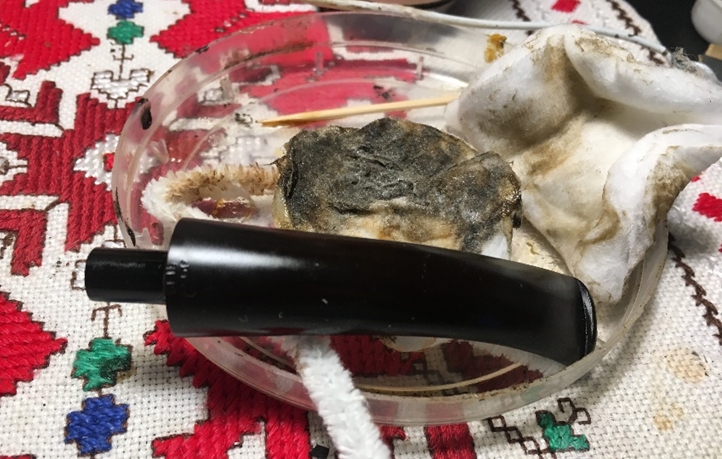
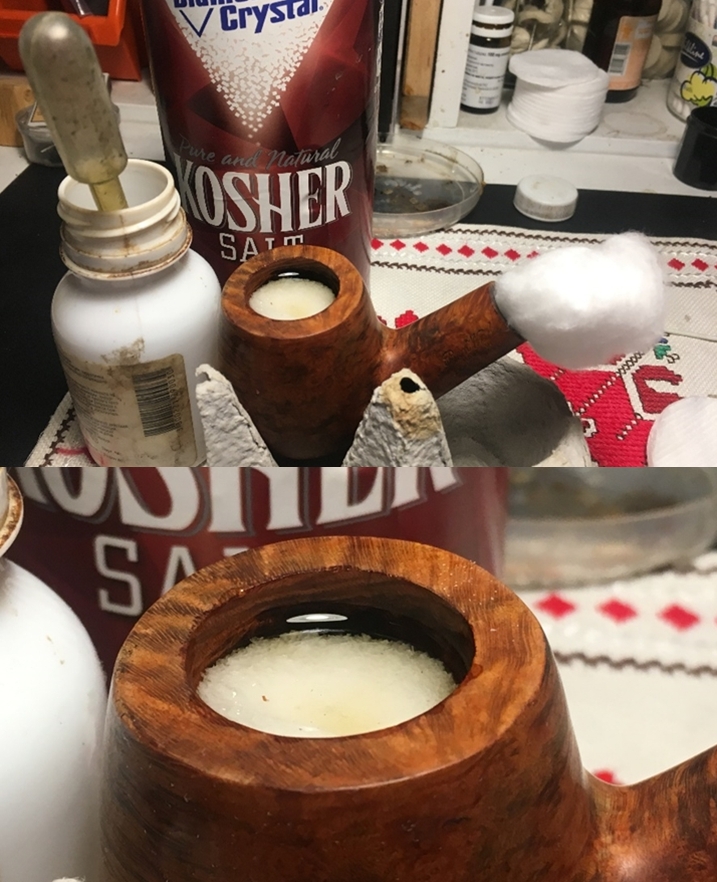
 With the time of my departure for the work day rapidly approaching, I continue the internal cleaning of the mortise and airway using a kosher salt and alcohol soak. After forming a wick by stretching and twisting a cotton ball, I insert it down the mortise and airway using a stiff wire. The wick acts to draw out the tars and oils. I then add kosher salt (no aftertaste) to the chamber and place the stummel in an egg crate for stability. With a large eyedropper, I add isopropyl 95% to the chamber until is surfaces over the salt. After a few minutes, after the alcohol has absorbed into the chamber, I top off the alcohol and set the stummel aside to soak for the day.
 Arriving home several hours later, the soak did the job of finishing the internal cleaning. I clean the expended salt from the chamber with paper towel and shank brushes as well as blowing through the mortise. I run an additional pipe cleaner and cotton bud wetted with alcohol to assure the internals were clean. They are, now moving on!
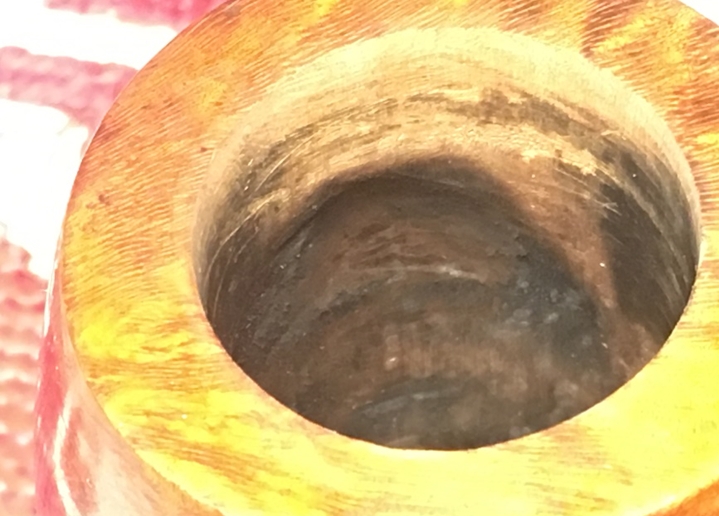
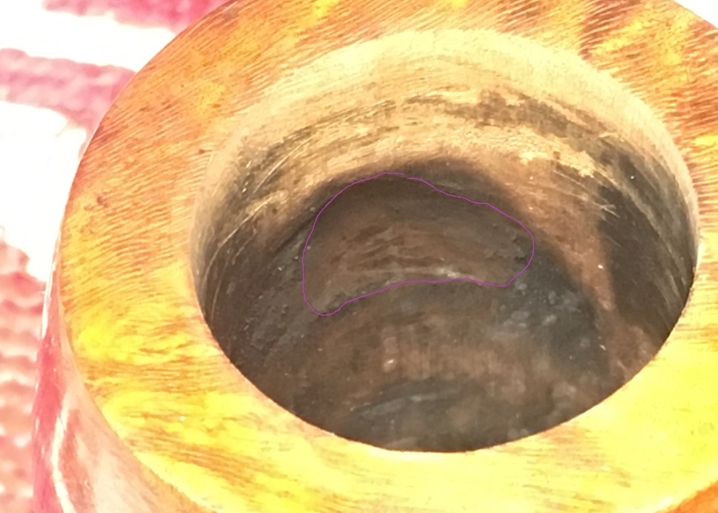
 Before proceeding further with the external stummel preparation, I’ve come to a decision point regarding the chamber issues that I saw earlier. The floor of the chamber has heat fissures which the first picture shows. The second picture shows the fissure immediately above the draft hole. The upper chamber shows some heating issues with small, more normal chamber wear. Earlier, my question had been, do the fissures on the floor of the chamber need a more durable response than simply applying a pipe mud mixture to enhance the growth of a protective cake? The floor of the chamber has experience overheating issues and I believe at this point would benefit from applying J-B Weld to prevent further damage and to reinforce the resistance of the chamber floor.
 J-B Weld comes with two components that are mixed together and once mixed harden to form a heat resistant bond. I’ll mix a small amount and apply it to the floor of the chamber then spread it over the area, including above the draft hole, filling the fissures with the Weld. After it hardens and cures, I’ll sand the excess. I first wipe the chamber with alcohol and put a pipe cleaner through the airway to block seepage into the draft hole. After I mix J-B Weld components in equal parts, I apply a small amount on the floor of the chamber and spread it with a dental spatula and my finger. I rotate the pipe cleaner so that it is not stuck but I leave it in place – I don’t want to pull it out while the J-B Weld is wet leaving the mixture in the mortise. I put the stummel aside for the J-B Weld to cure.

 After the repair cured overnight, I take a picture of the sanding process using 240 grade paper wrapped around a Sharpie Pen. I concentrate on removing the excess J-B Weld so that all that is left of the weld is what has filled the fissures and cracks.
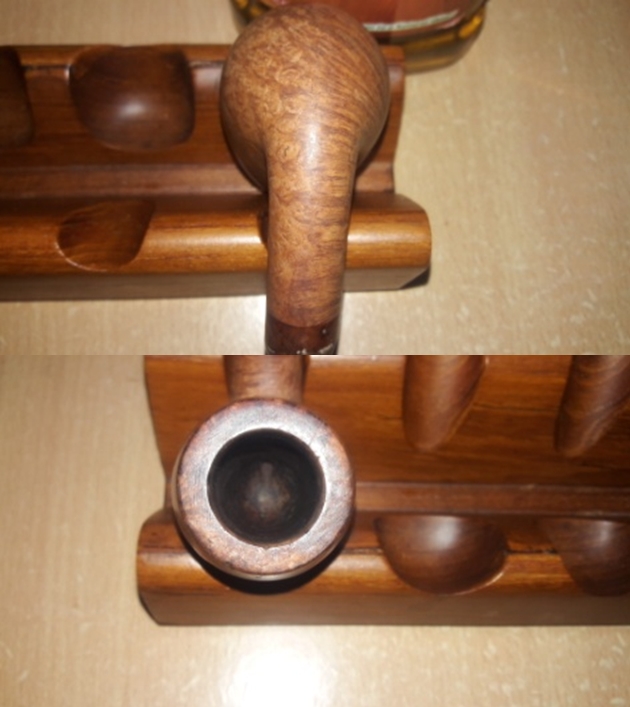
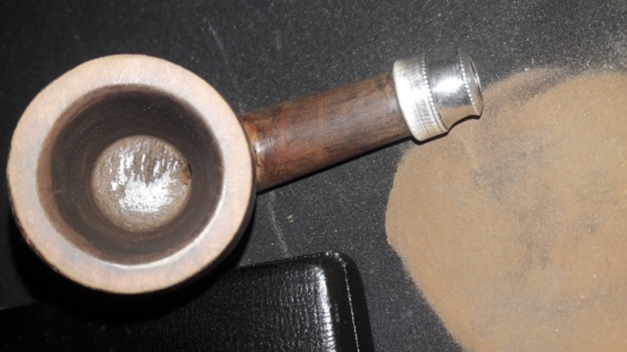
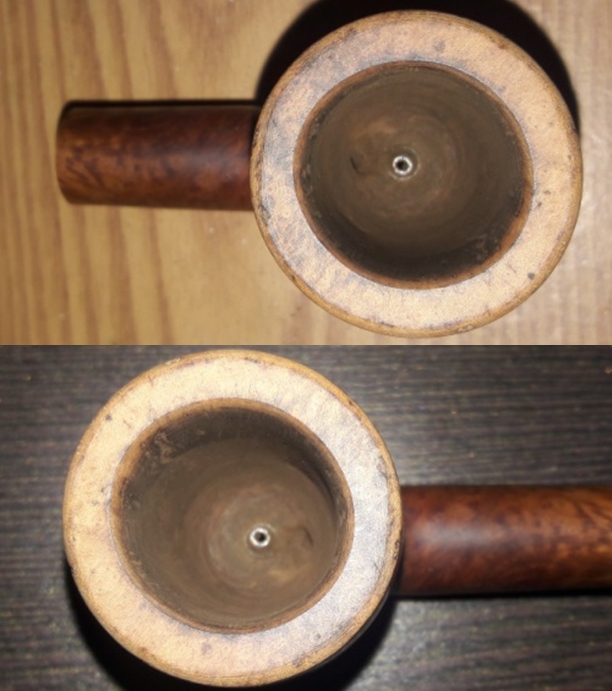
 The next pictures show a much healthier chamber. At the floor of the chamber in the first pictures and concentrating on the area immediately above the draft hole in the second picture, you still see what appears to be rough spots, but it is now smooth to the touch in large measure. The Weld filled the cracks and reinforced the area. The application of J-B Weld and the additional sanding on the floor and the walls of the chamber cleaned it up nicely.
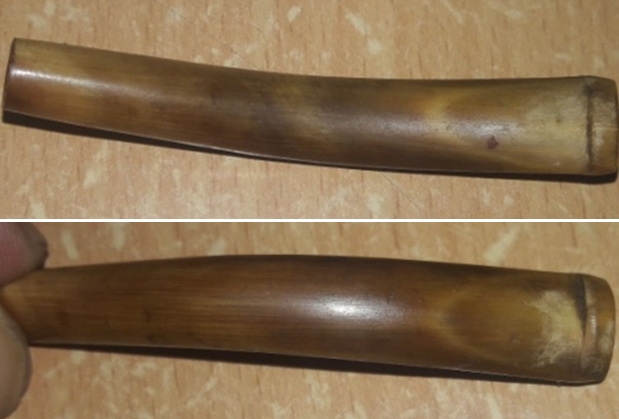
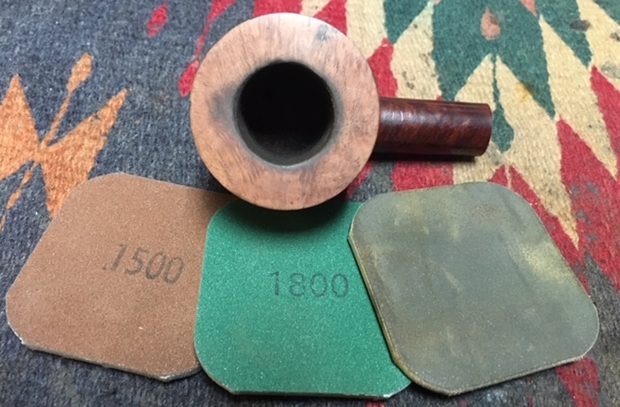
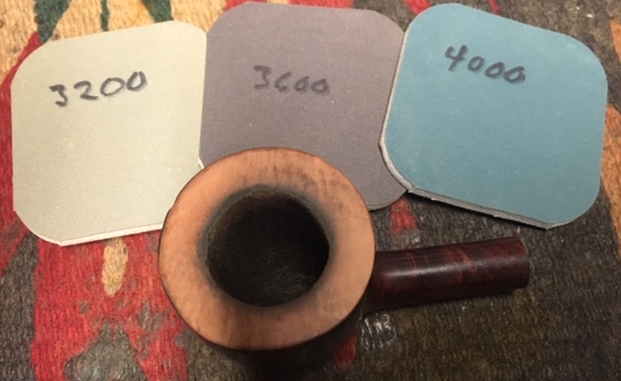
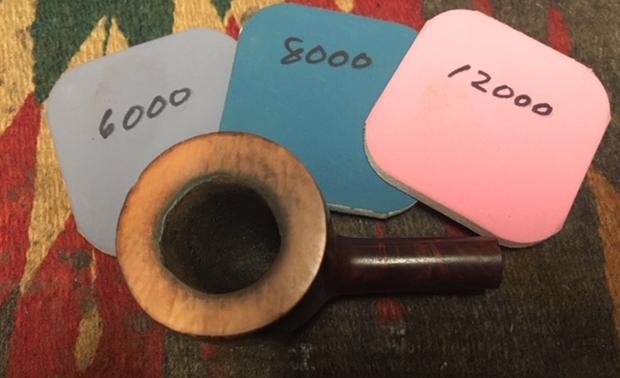
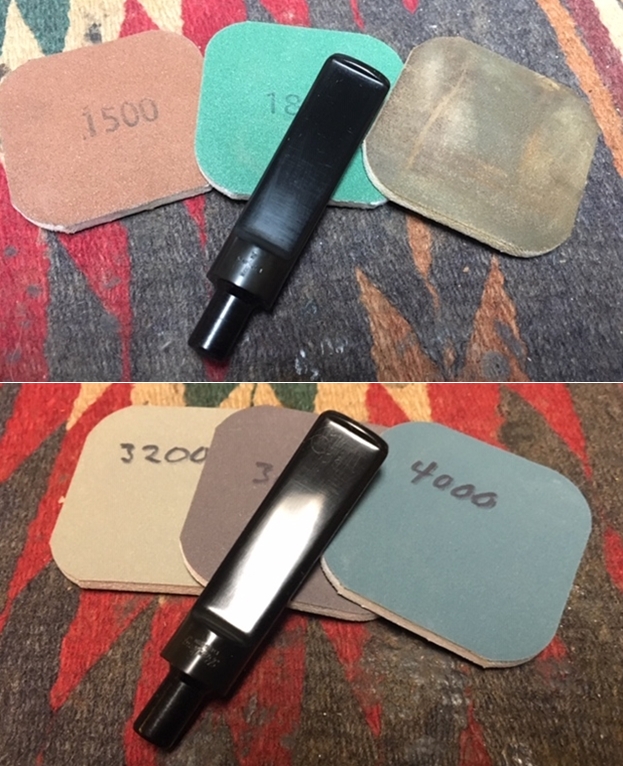
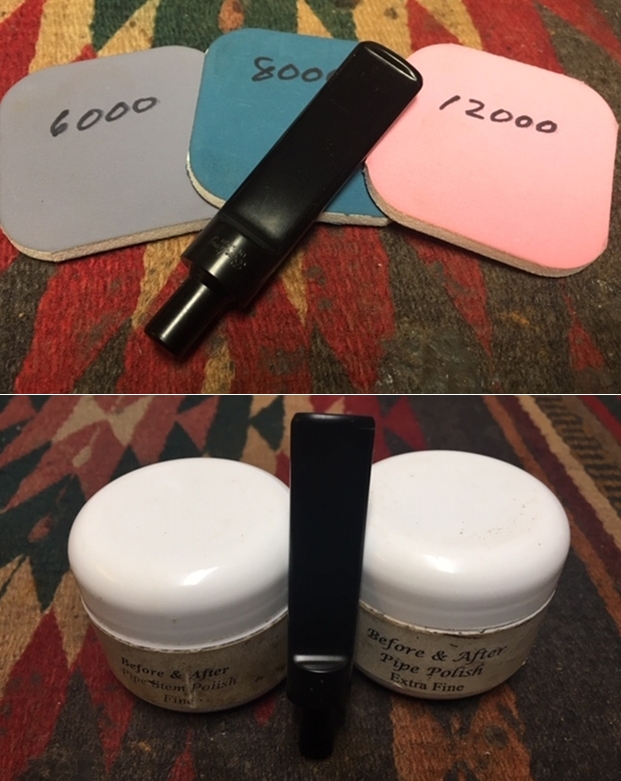
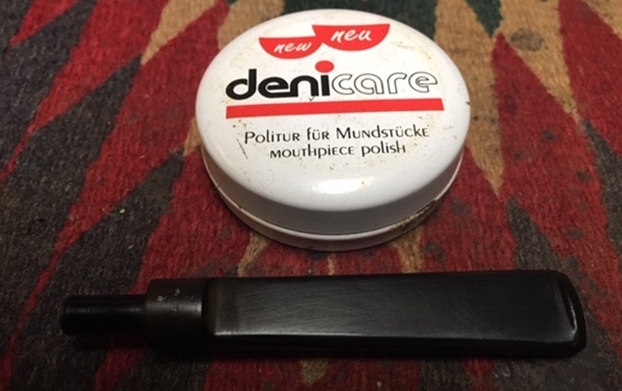
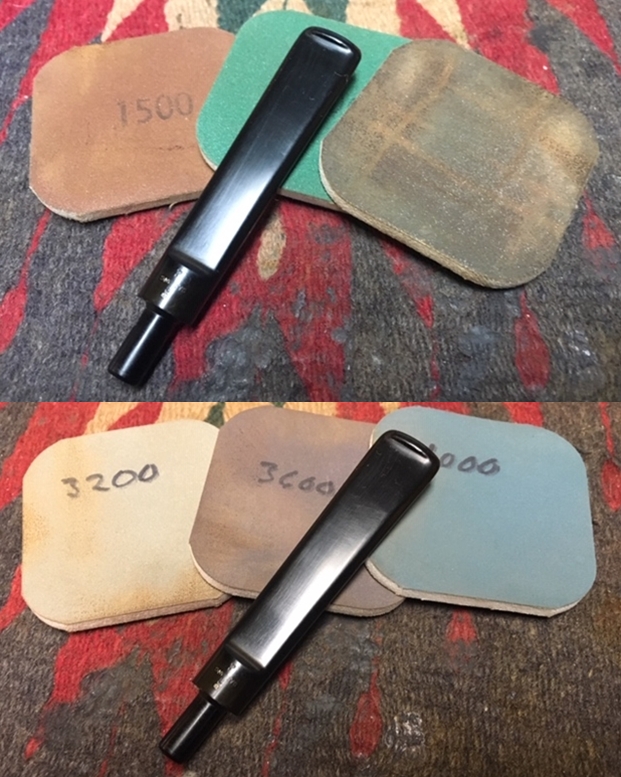
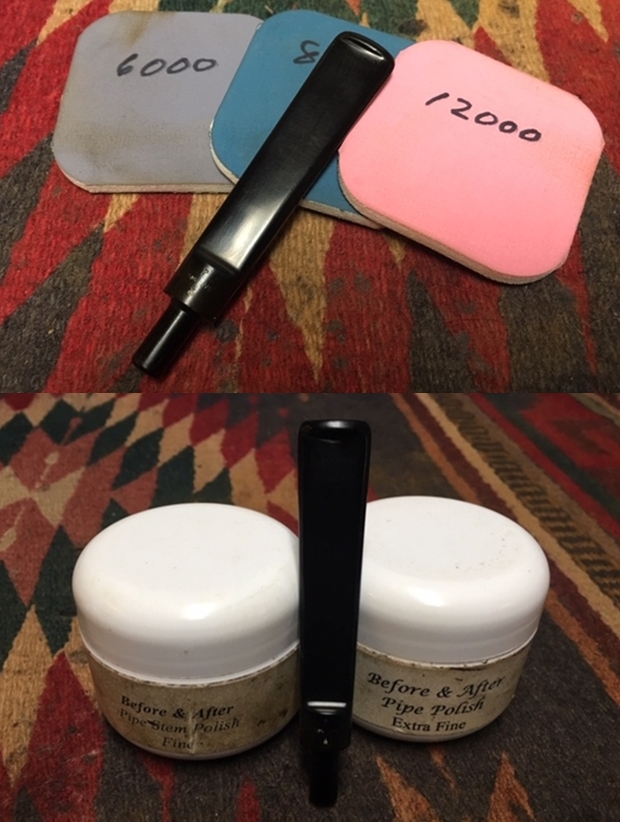
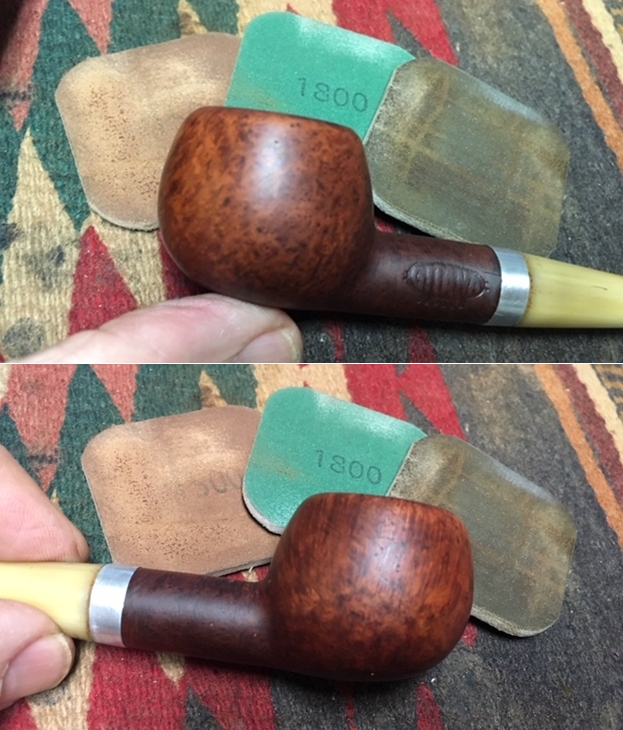
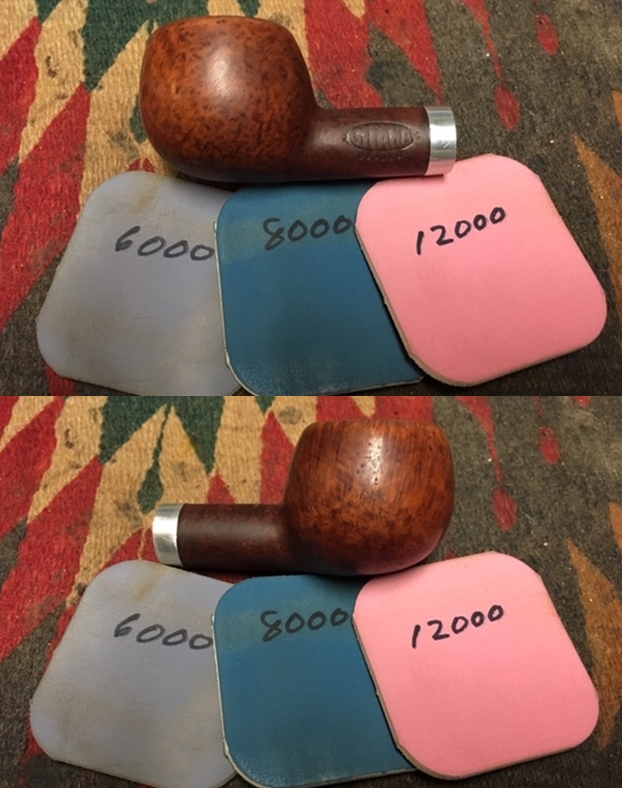
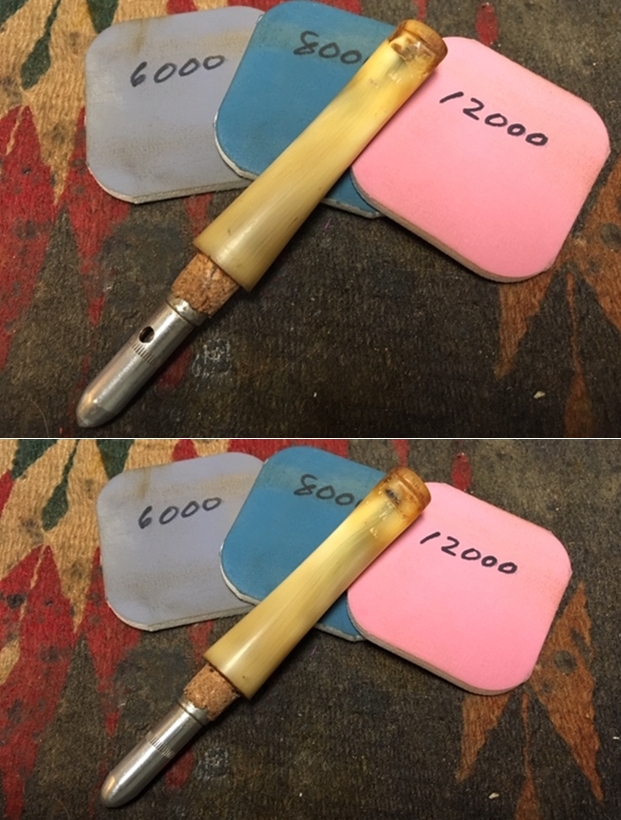
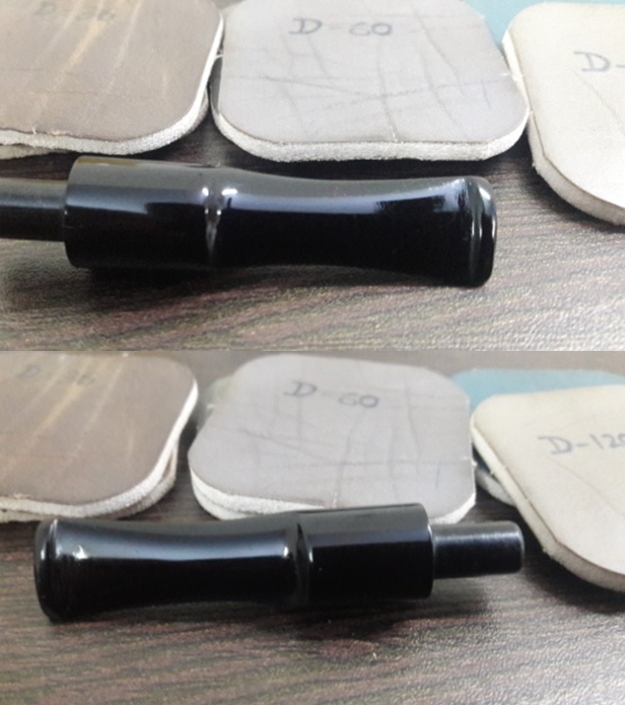
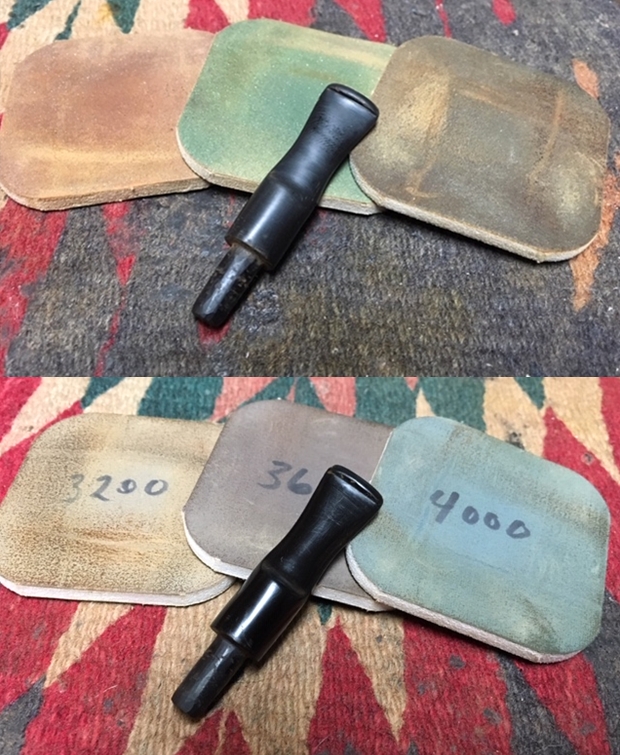
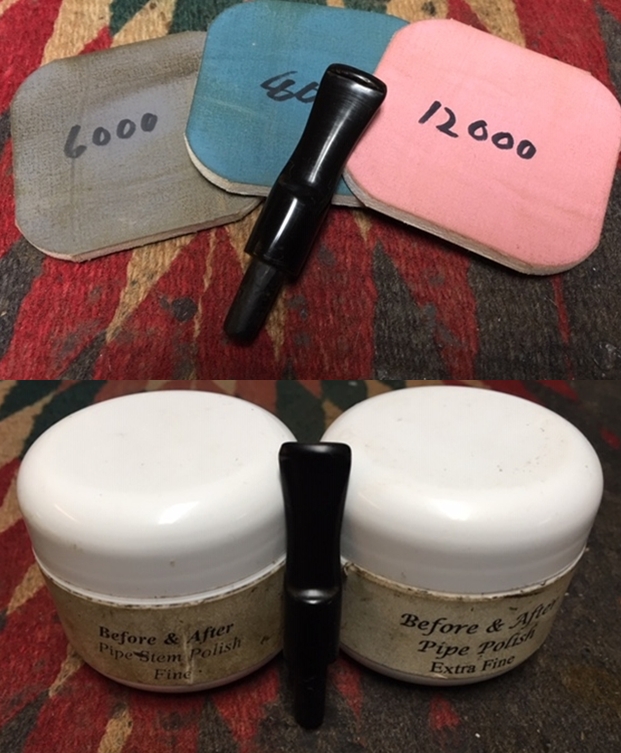
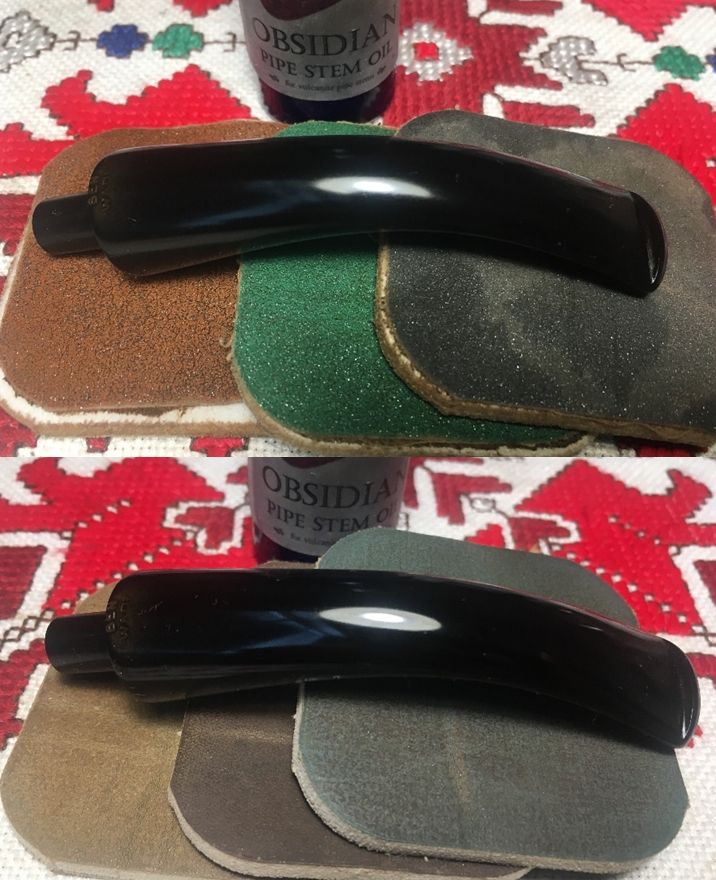
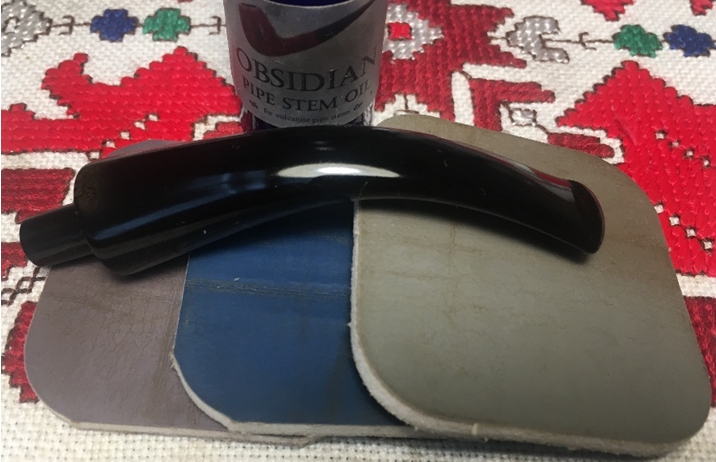
 Putting the stummel aside, I take the stem and wet sand using micromesh pads 1500 to 2400. I follow by dry sanding with pads 3200 to 4000 and 6000 to 12000. Between each set of 3 pads I apply Obsidian Oil to revitalize the vulcanite.
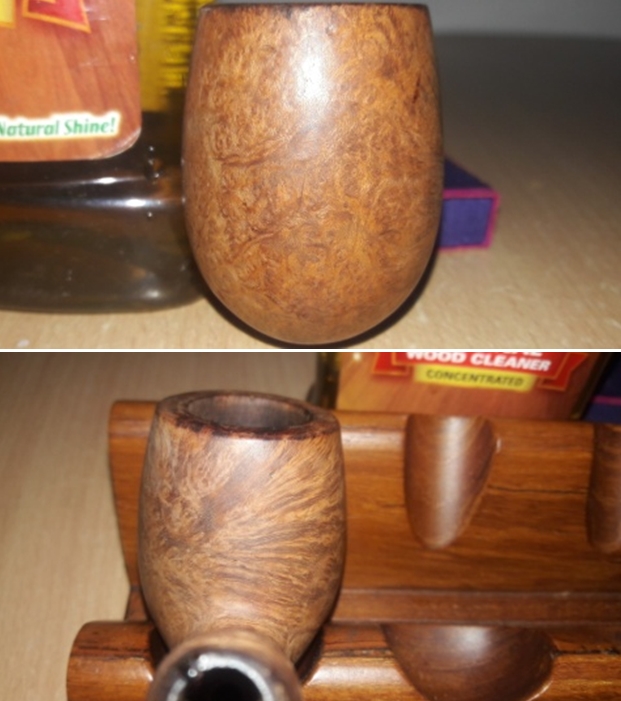
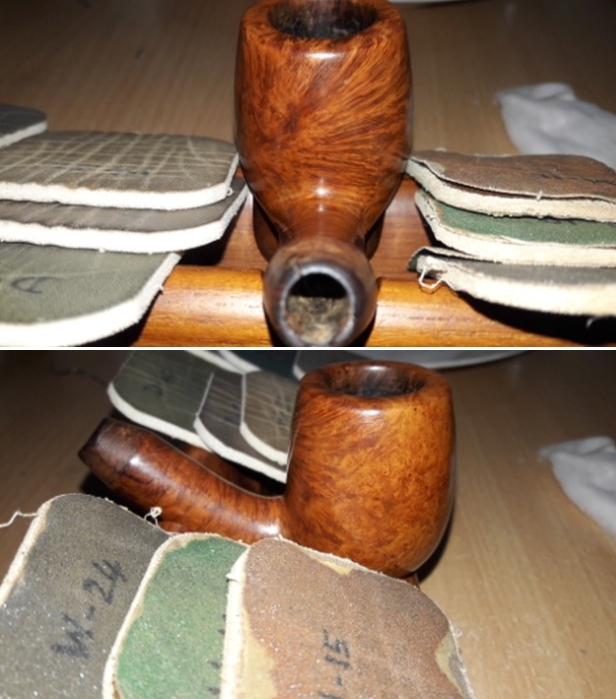
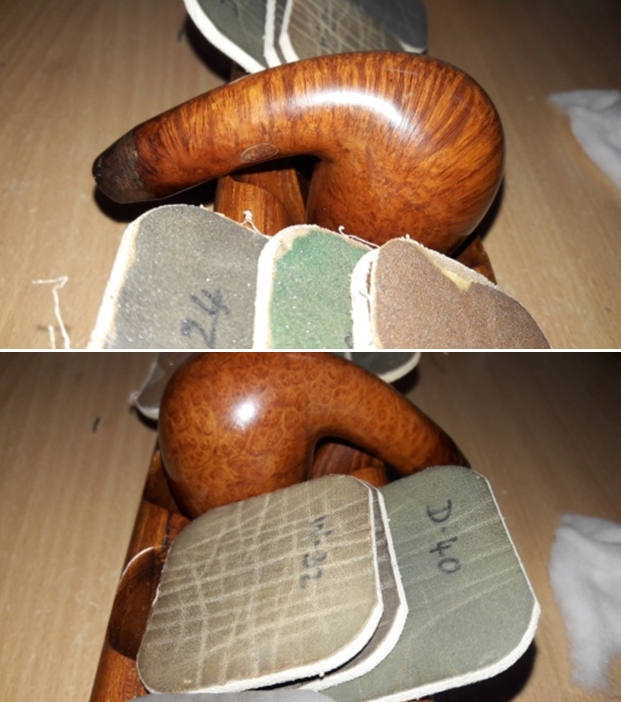
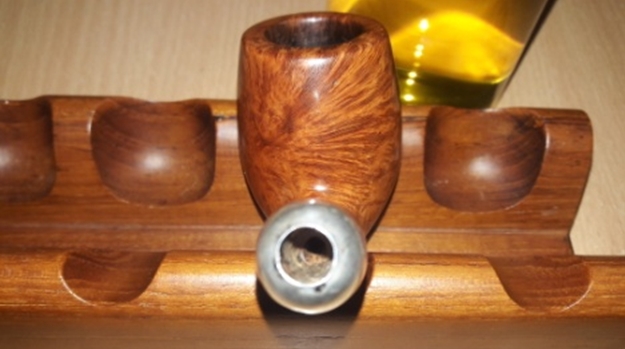
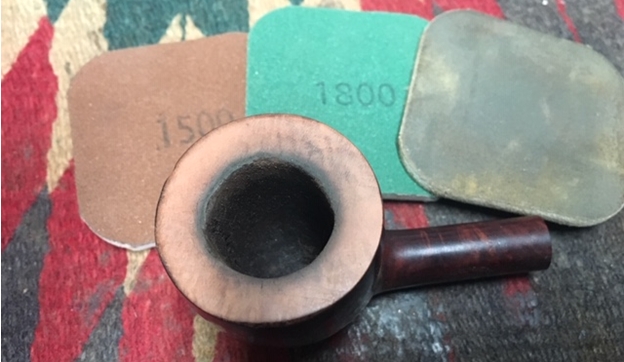
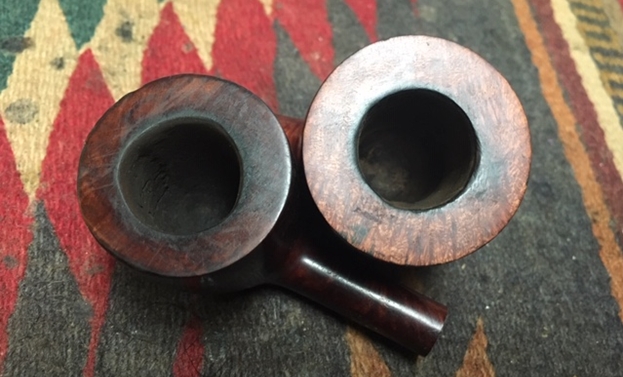
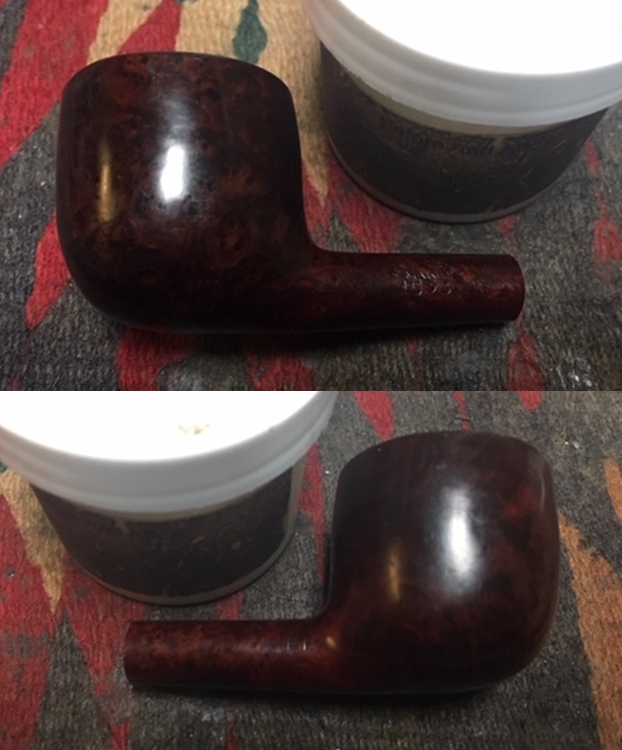
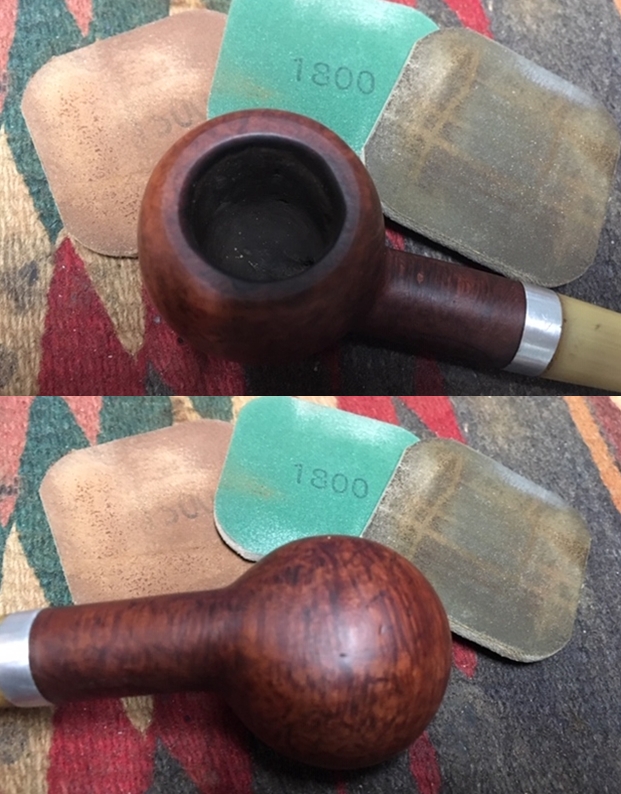
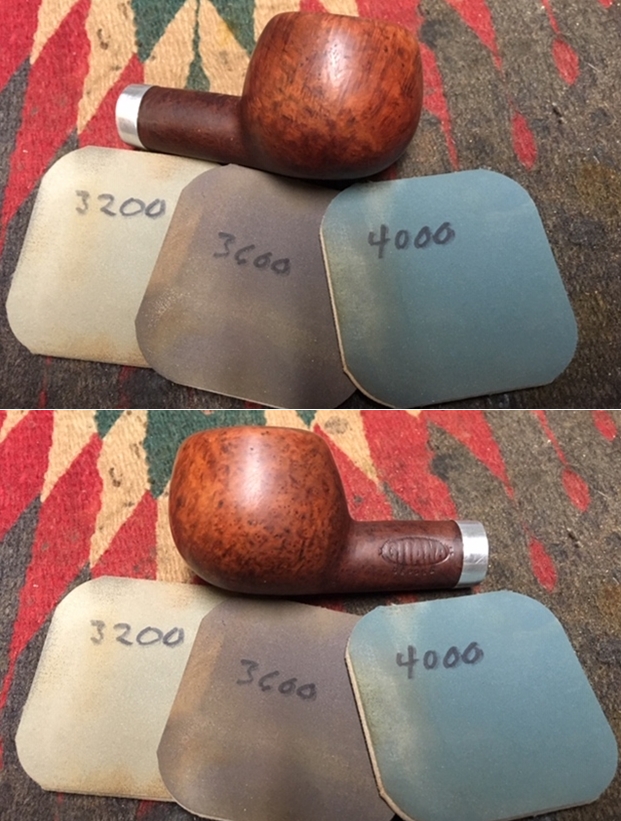
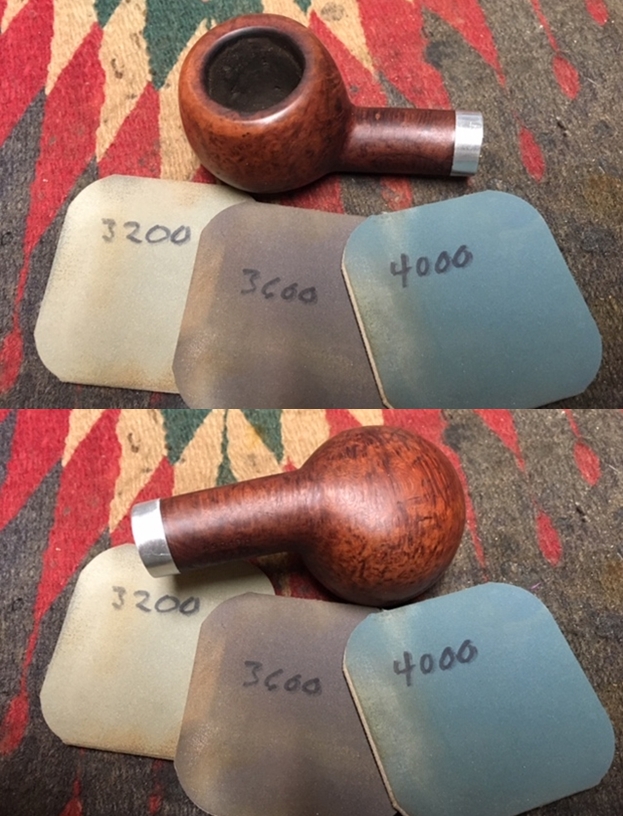
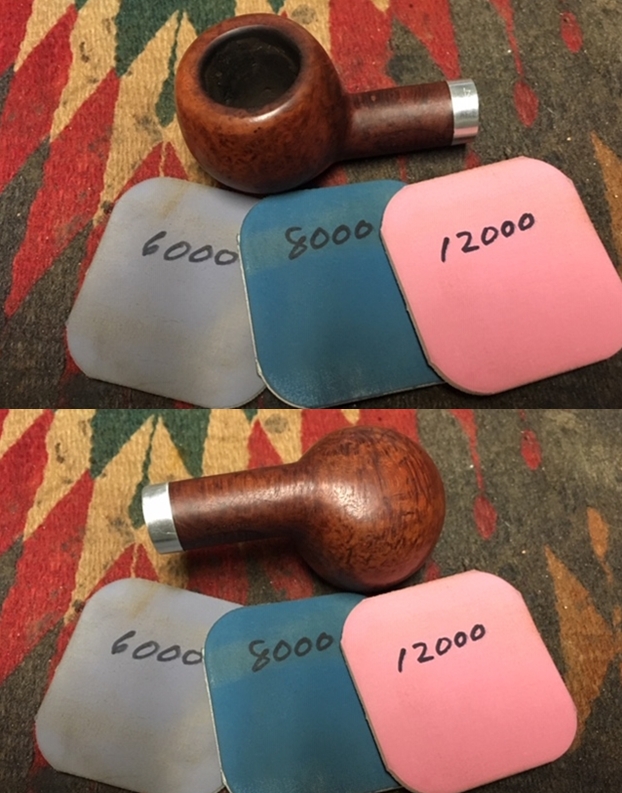
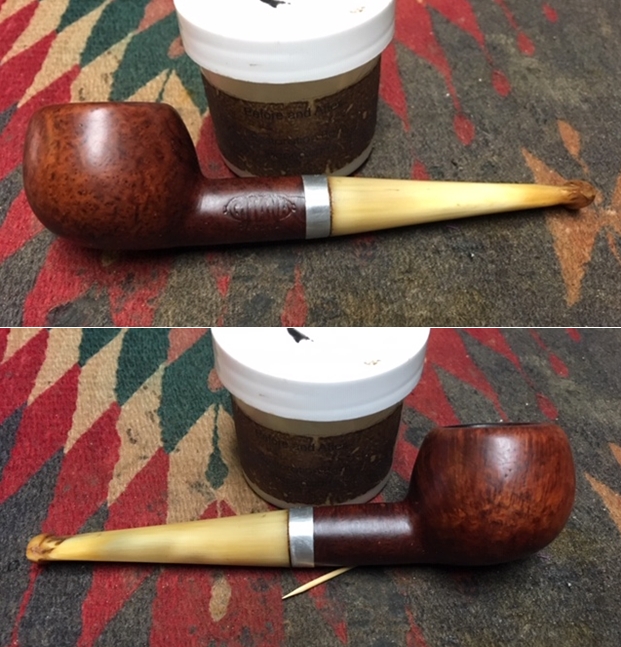
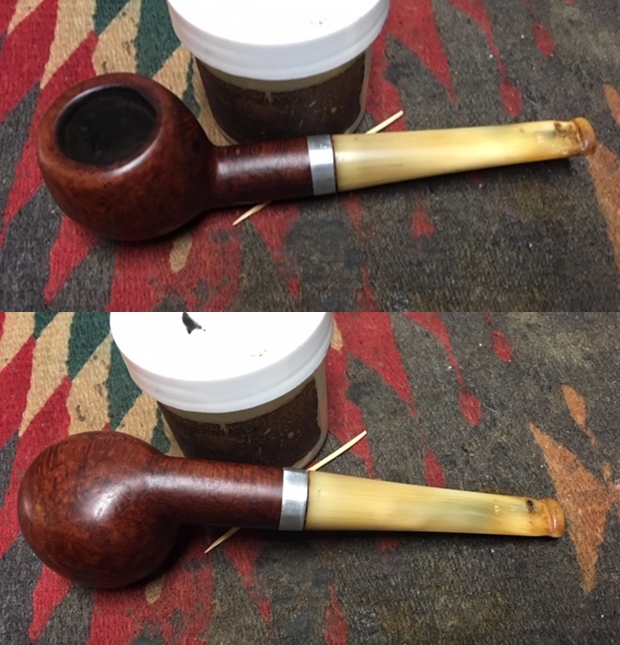
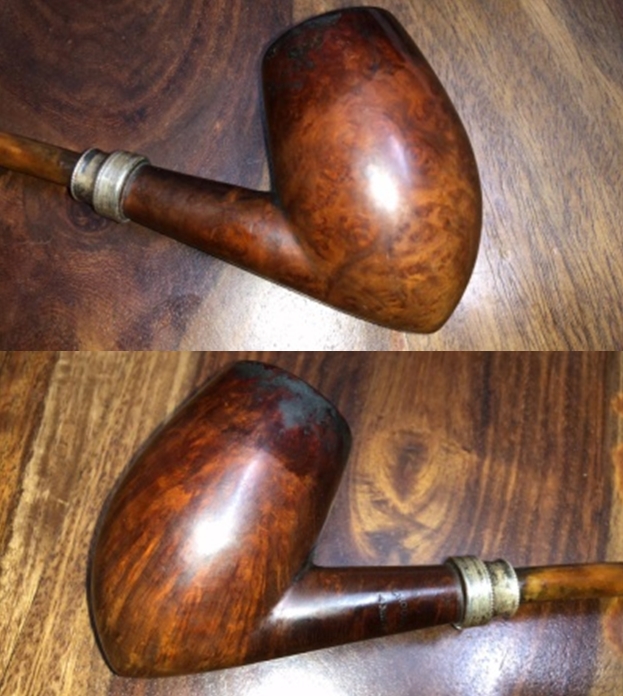
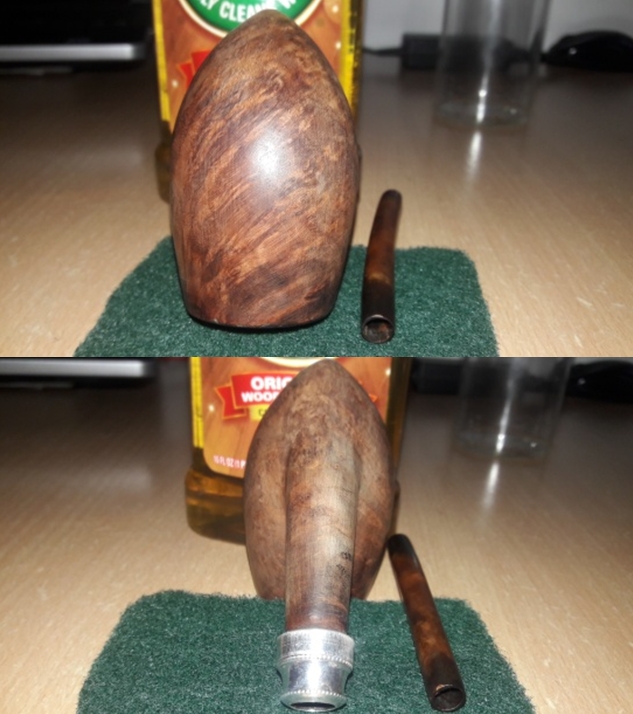
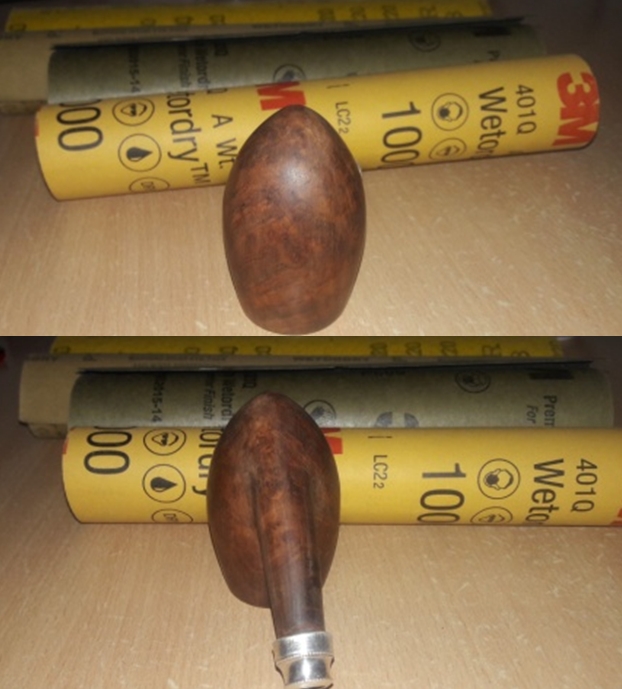
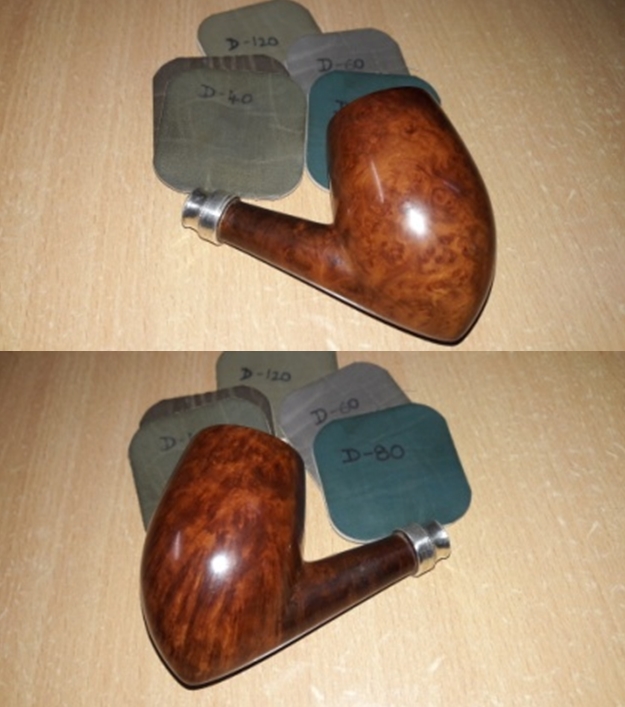
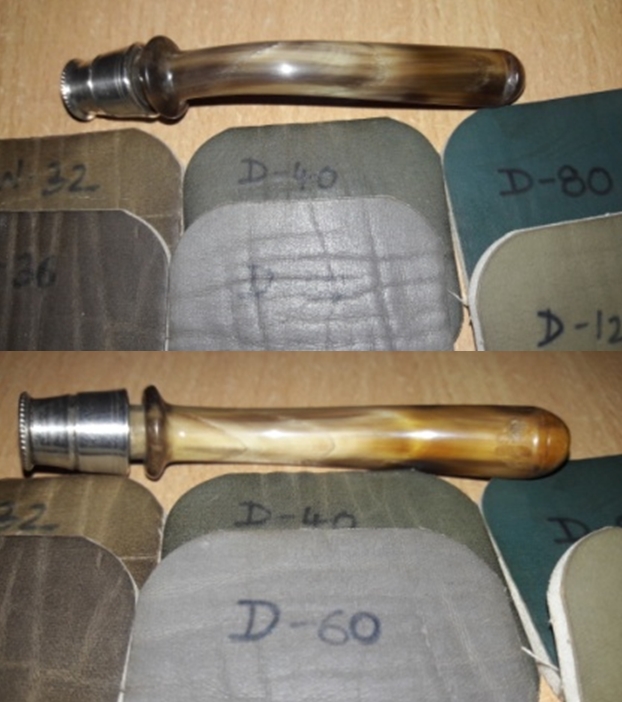
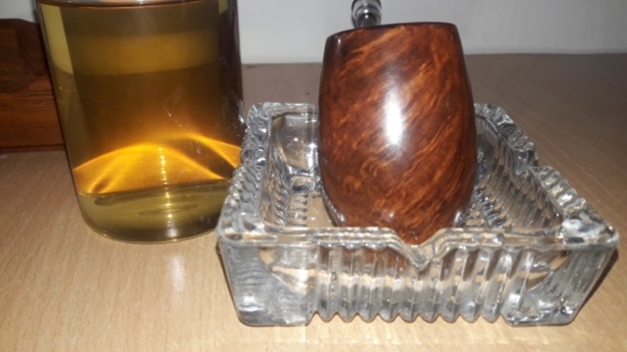
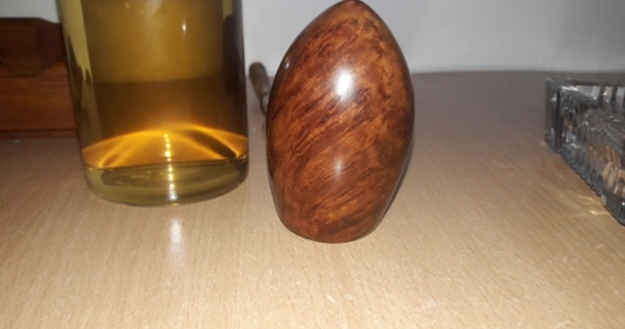
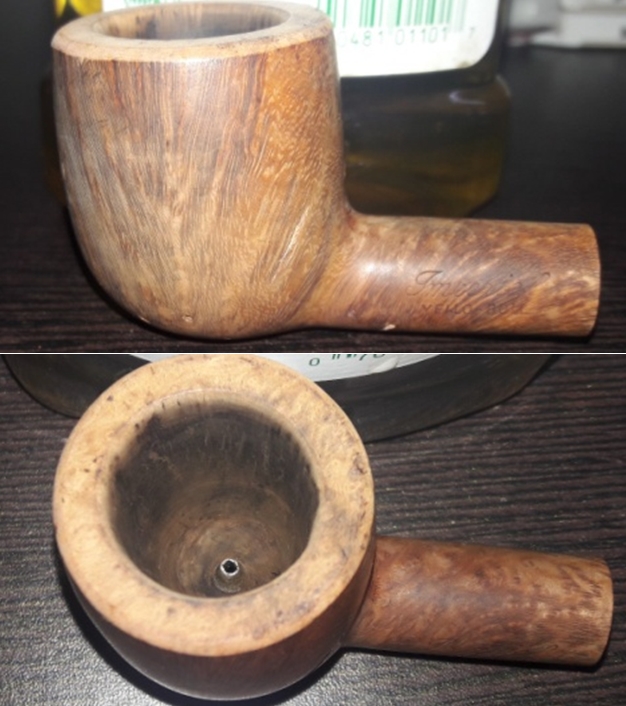
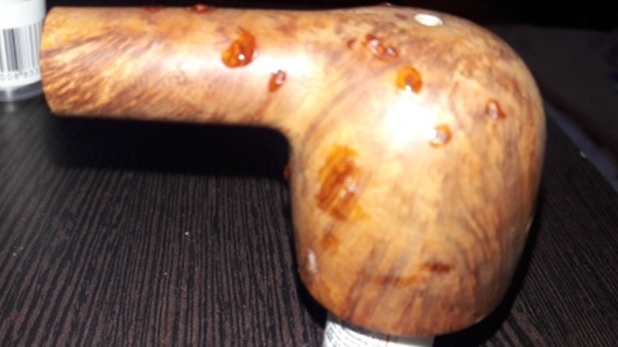
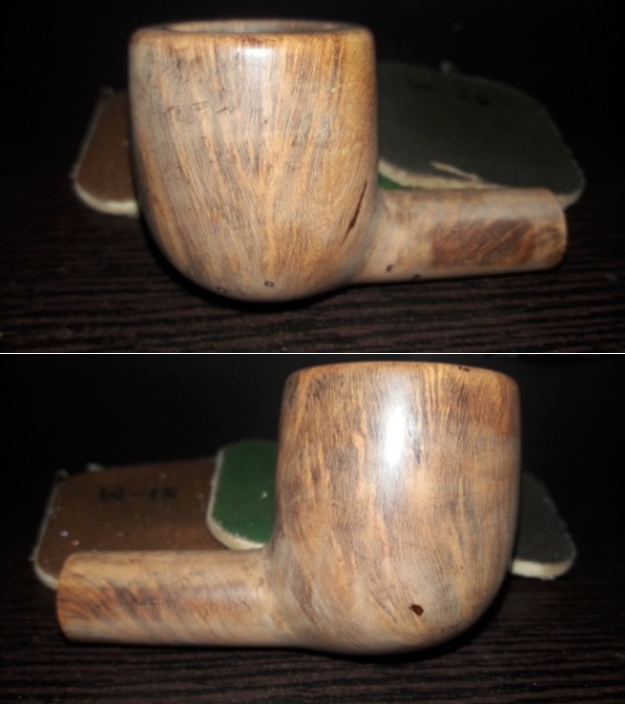
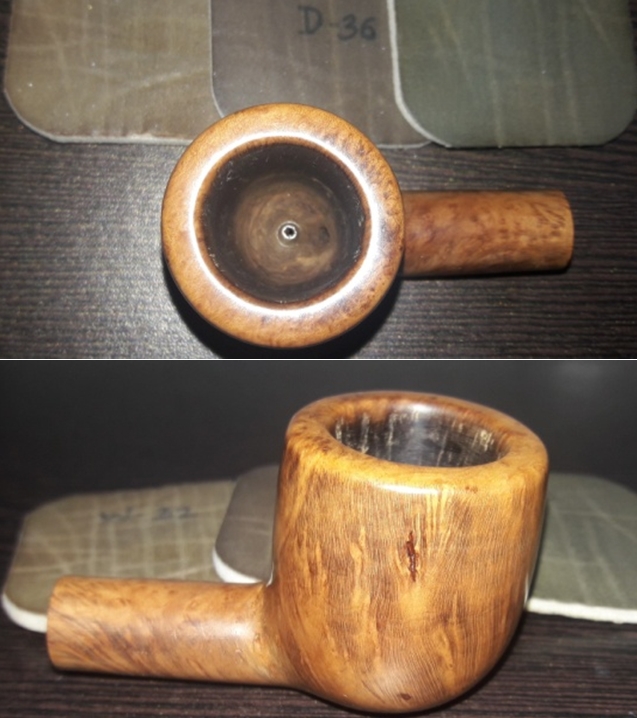
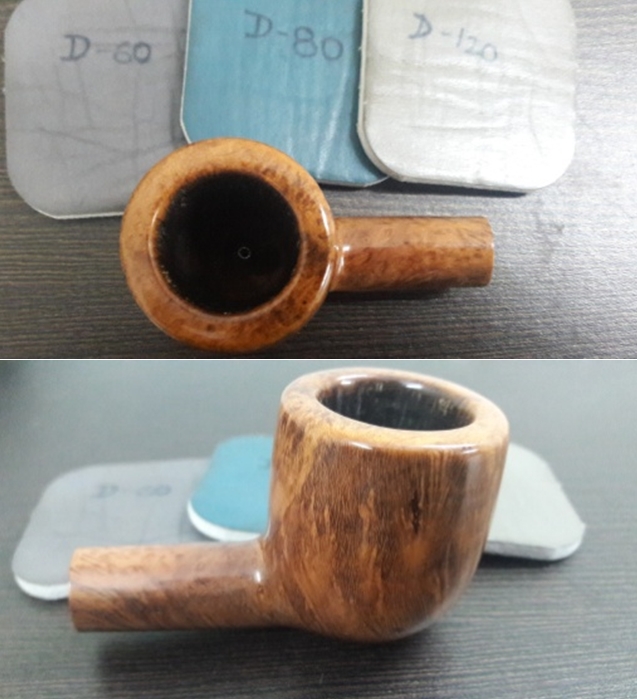
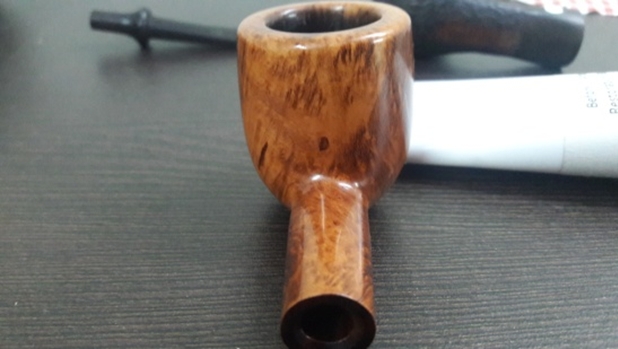
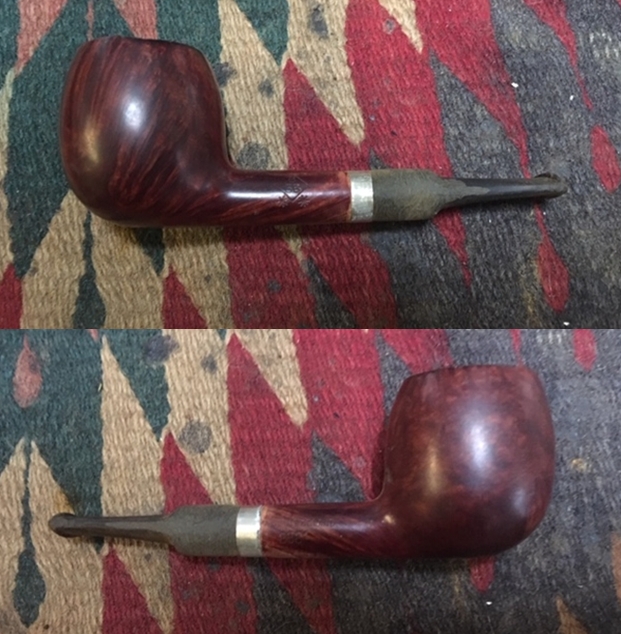
 With the stem waiting in the wings, I continue with the stummel by wet sanding with micromesh pads 1500 to 2400. I follow this by dry sanding with pads 3200 to 4000 and 6000 to 12000. I take pictures of both sides of the stummel to show the huge fills on the right side. If it weren’t for these unavoidable fills, the fantastic recovery the stummel has made would encourage me to leave the original, natural grain finish in place. The briar surface had many issues, but the results of the micromesh sanding reveal a very attractive grain presentation.

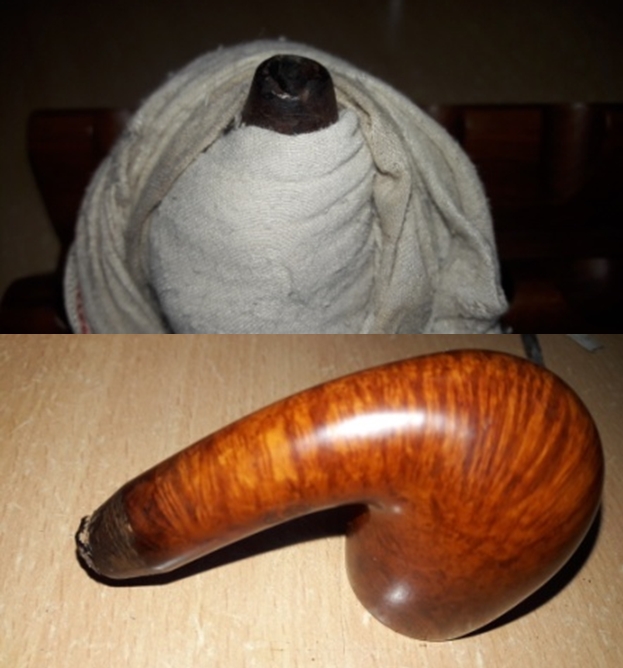
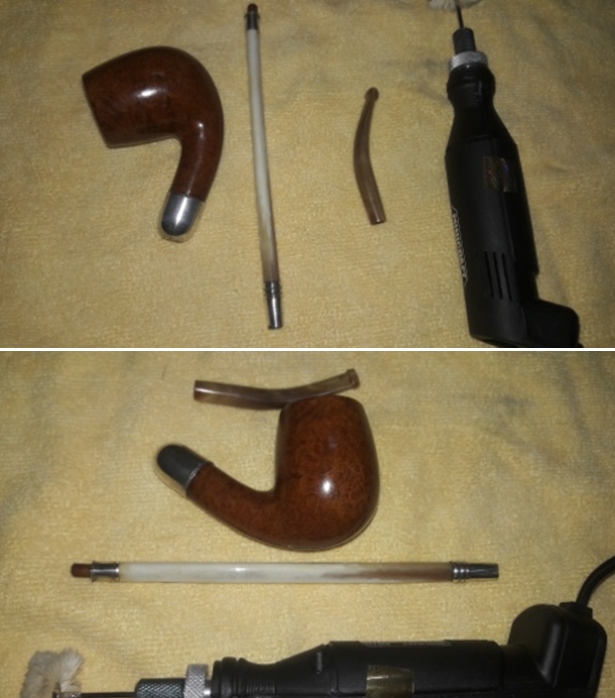
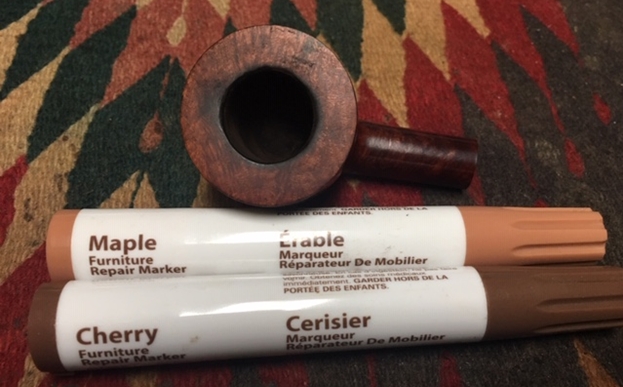
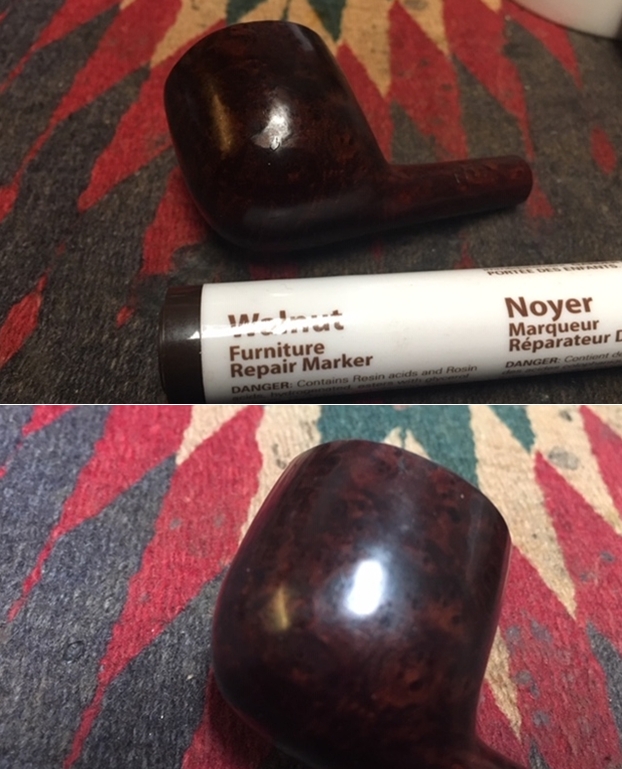
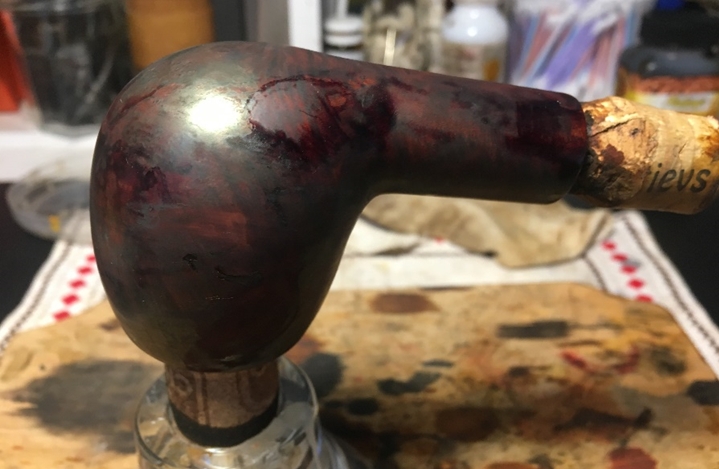
 The next step is to apply a dark stain to the Comoy’s Bulldog that will serve to help mask the issues prevalent on the surface. Without question, my plan is to apply Fiebing’s Dark Brown Leather Dye to the stummel surface. I assemble all the needed components on the table to apply the stain. First, using a sharp dental probe I carefully dig out and scrape the dome grooves to make sure the debris is gone. After wiping the stummel with alcohol to clean and prepare the surface, I fit the stummel with a cork I’ve fashioned as a handle inserted into the mortise. Next, I heat the stummel with a hot air gun to expand the briar grain. This aids the briar in absorbing the dye pigment. Using a folded over pipe cleaner, I apply the dye to the stummel. After a thorough application, I flame the stummel with a lit candle and the alcohol-based aniline dye combusts and sets the dye in the grain. After a few minutes, I apply the dye again and flame again to make sure there is an even coverage. I then set the stummel aside for the dyed stummel to rest.


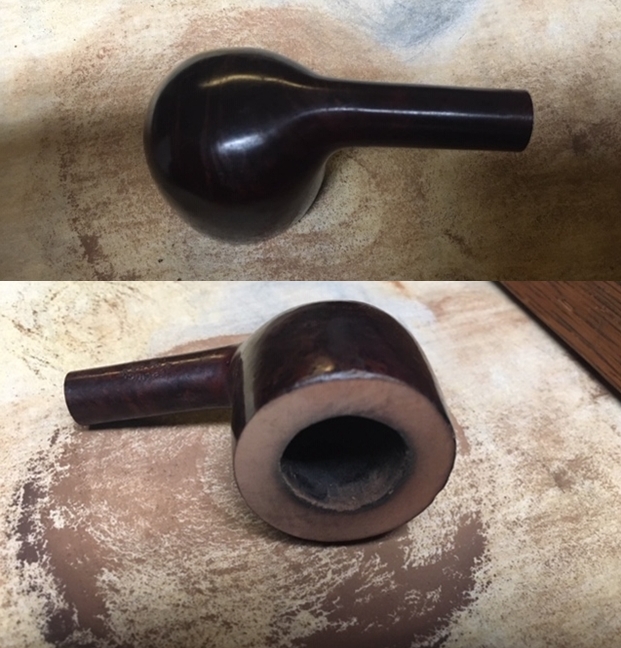
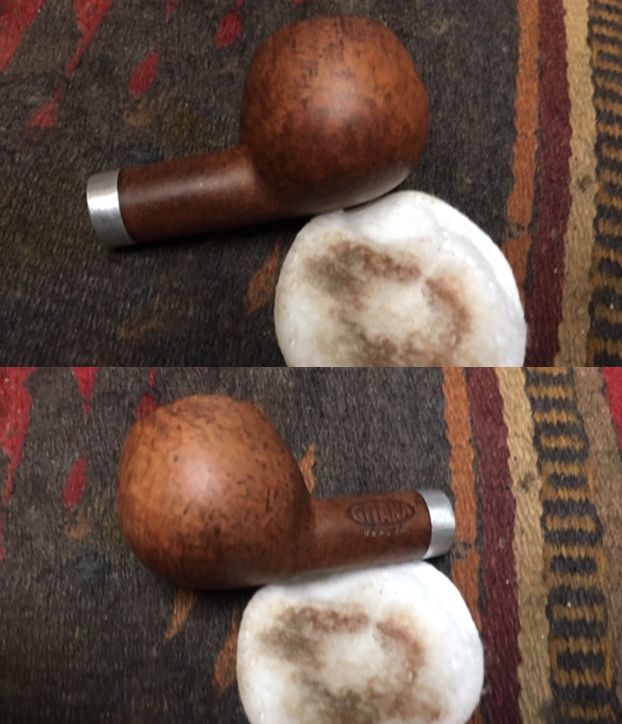
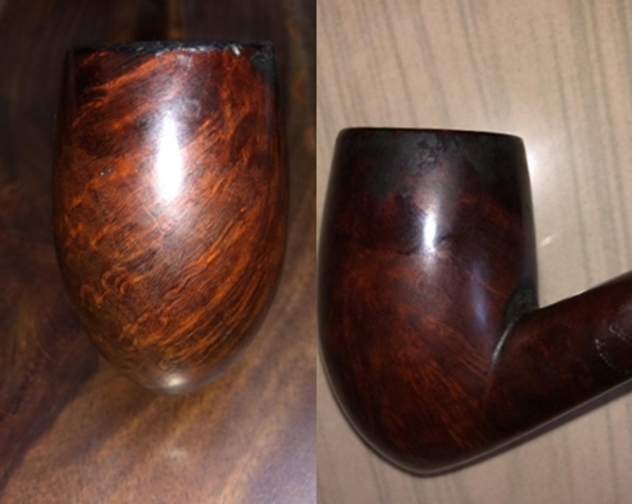
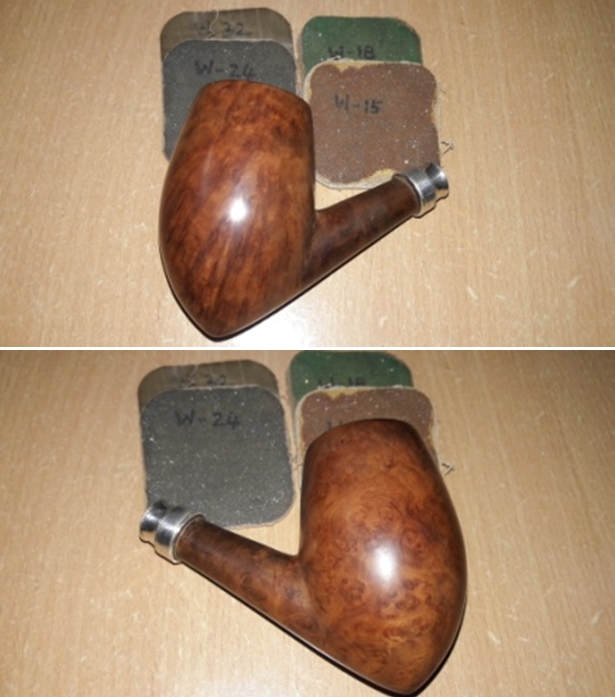
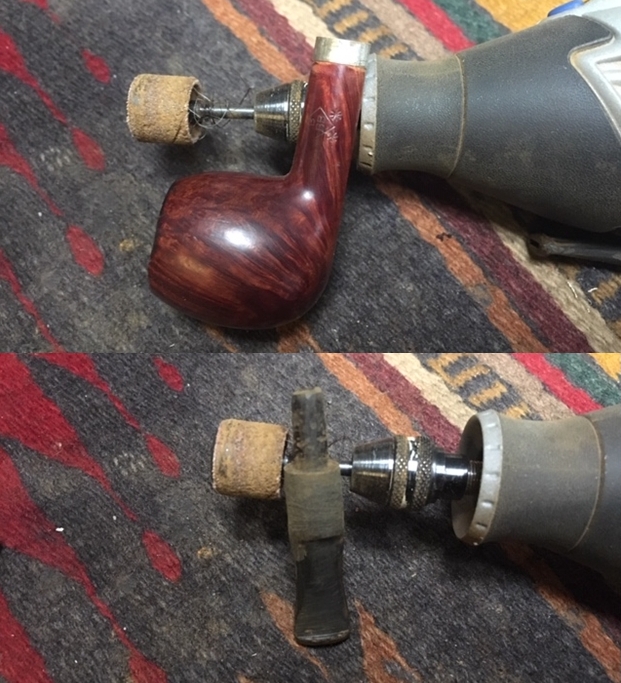
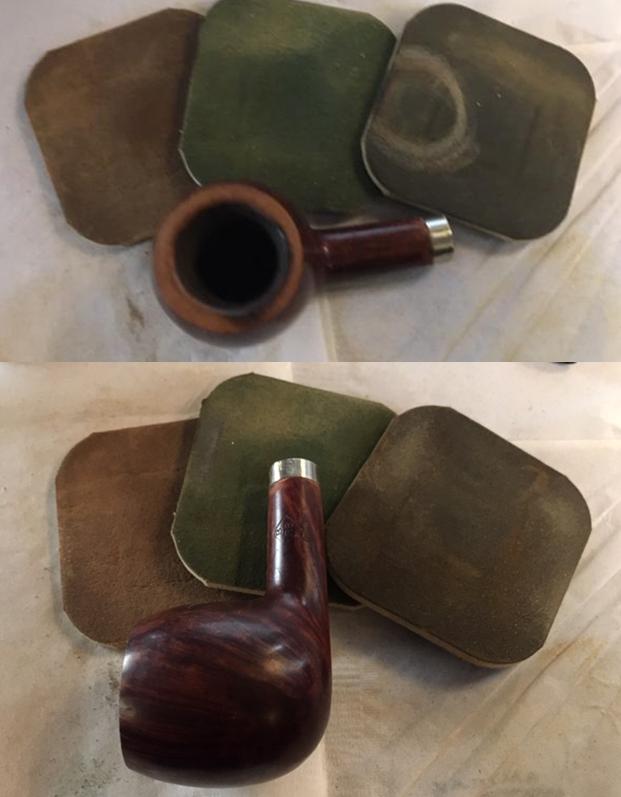
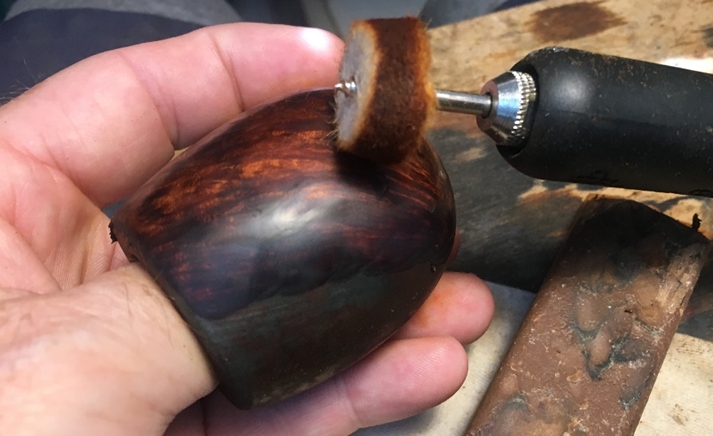
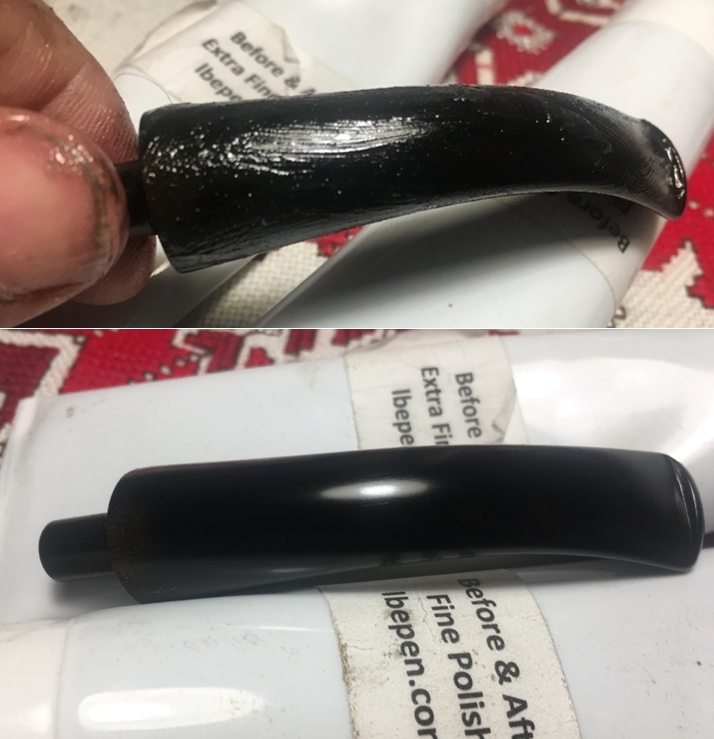
 After resting for several hours through the night, it’s time to unwrap the fire-crusted Comoy’s stummel. Over time, I have developed my own techniques for use with the Dremel since this is my main and only work horse tool on the 10th floor flat of a formerly Communist block apartment building! My usual method for ‘unwrapping’ has been with the use of a felt buffing wheel, which is more abrasive than cotton, applying Tripoli compound. I love this technique because the result reveals a more brilliant grain pattern as it lightens the grain veins leaving them in contrast to the softer briar wood which absorbs more of the dye. However, I have found that using the felt buffing wheel lightens the entire stummel. With the large dark fills on this stummel in need of remaining masked for better blending, I use a cotton cloth buffing wheel with Tripoli compound to unwrap the flamed crust. The softer cotton wheel isn’t as abrasive and leaves a darker dyed hue on the briar surface. After mounting a cotton cloth wheel on the Dremel, I set the speed at the lowest RPM and I apply Tripoli to the stummel. I take a couple staged pictures to show the contrast between the flamed crust and the surface that has been ‘unwrapped’ and buffed with compound. After completing with the Tripoli, I wet a cotton pad with alcohol to wipe the stummel not so much to lighten but to blend the new stained finish.

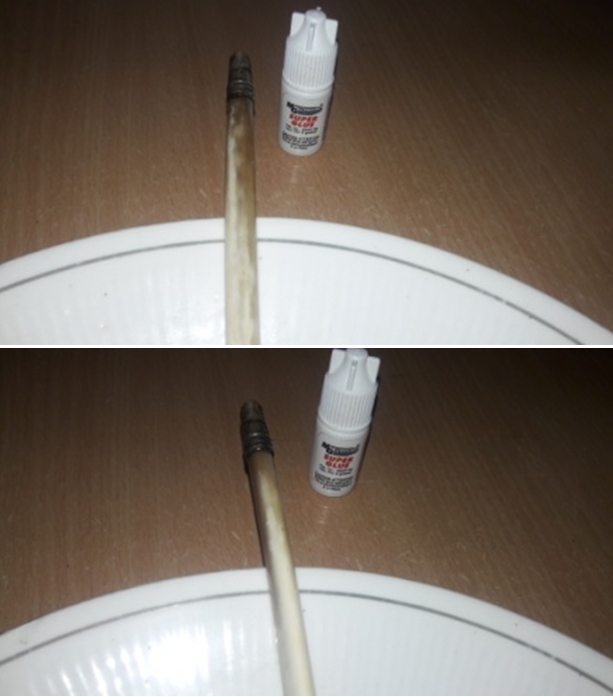
 Next, I rejoin the stem and stummel to apply Blue Diamond compound. I discover that the junction between the tenon and mortise has loosened through the cleaning process – a common thing in my experience. To remedy this, I take a drill bit the next size larger than will fit through the tenon airway. I use a Bic lighter and heat the tenon and after a bit, the vulcanite tenon becomes supple and allows me gradually to insert the drill bit end into the airway. This expands the tenon and tightens the connection. This works like a charm!
 With the stem now fitting snuggly, I continue to apply Blue Diamond to the stummel and stem. I mount a cotton cloth buffing wheel to the Dremel and increase the speed to about 40% full power. I apply Blue Diamond compound to both stem and stummel.
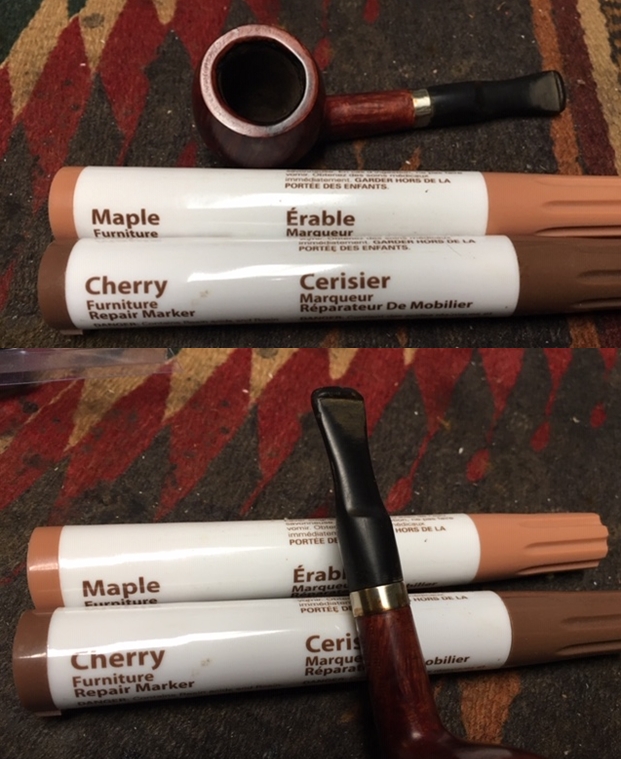
 Before moving on to applying carnauba wax to the pipe, I have two more projects to do. The first is to apply white acrylic paint to refresh the Comoy’s ‘C’ stamping on the stem. The second is to apply pipe mud to the chamber. I decide to do the latter first. After the repair done to the chamber, to enhance the healthy development of a protective cake (which should be maintained at about the width of a US dime coin) I use a mixture called pipe mud – a combination of cigar ash and water. This mixture, once applied to the chamber and dries, hardens to create a starter surface for the cake to develop. My colleague, Gary, who lives in Plovdiv, Bulgaria, is the cigar man who saves his ash for my use. Thanks, Gary! I mix some water with ash in a plastic dish and mix it with my pipe nail until it starts to thicken. At this point, I apply it in the chamber with the nail and my finger. It doesn’t dry quickly so there’s time to spread it evenly over the chamber. After spread, I insert a pipe cleaner through the draft hole to keep it clear of the mud. I then put the stummel aside in the egg cart for the mud to cure.
 Turning now to the Comoy’s ‘C’ stem stamp, I put a drop of white acrylic paint over the ‘C’ and absorb the excess with a cotton pad and ‘dob’ it out so that the paint thins and dries. I then use a toothpick’s flat edge to gently scrape the excess paint off after it dries. I have to reapply paint a few times to get it right. The pictures show the process.

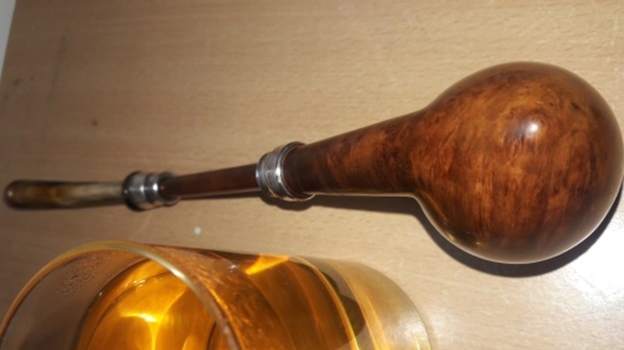
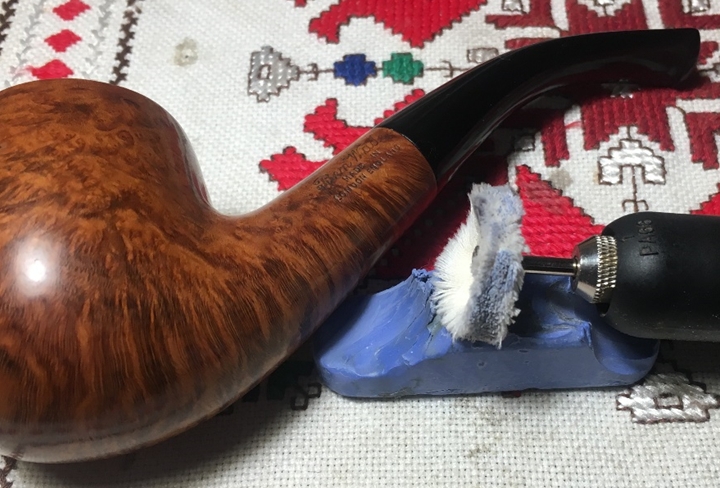
 After allowing the pipe mud to cure, I rejoin stem and stummel and once more, run the sharp dental probe in the grooves around the circumference of the dome then buff the pipe with a felt cloth clearing away the compound dust before applying wax. I then mount a cotton cloth buffing wheel to the Dremel, keep the speed at about 40% full power and apply a few coats of carnauba wax to the pipe. I finish the restoration by using a microfiber cloth to give the pipe a rigorous hand buffing to raise the shine.
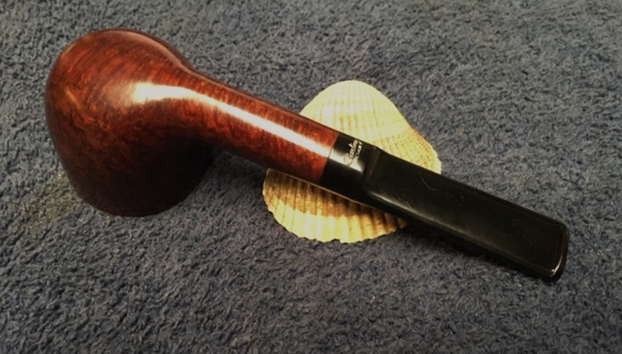
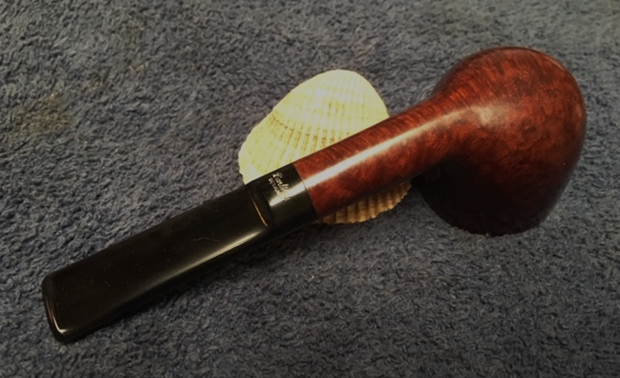
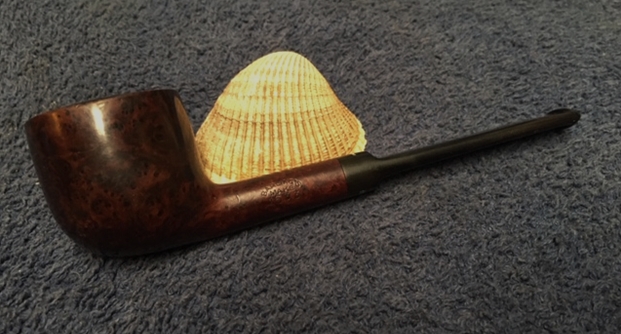
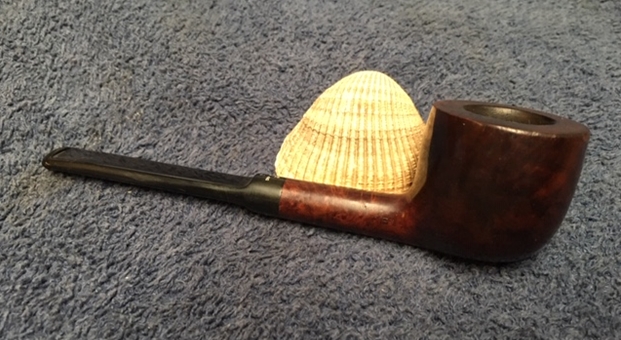
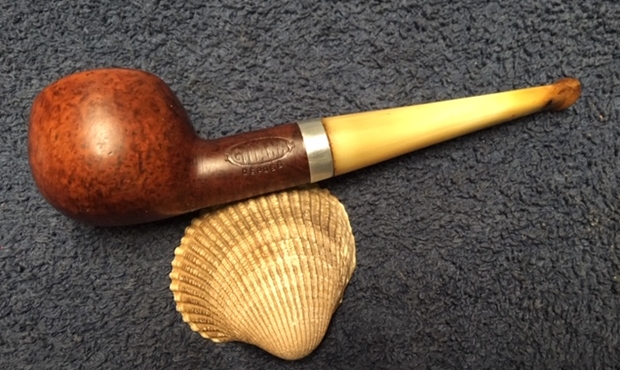
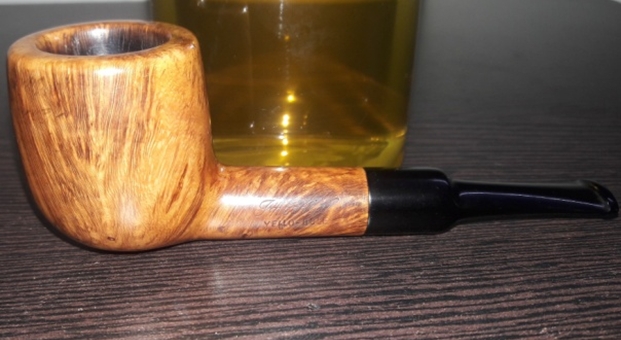
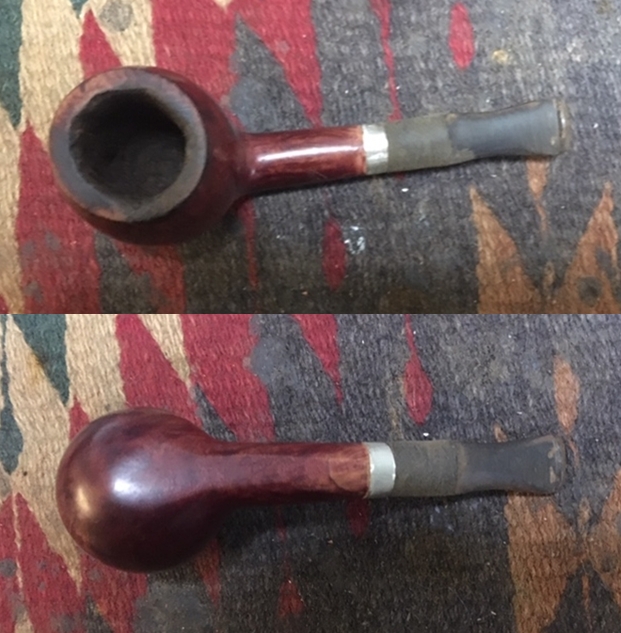
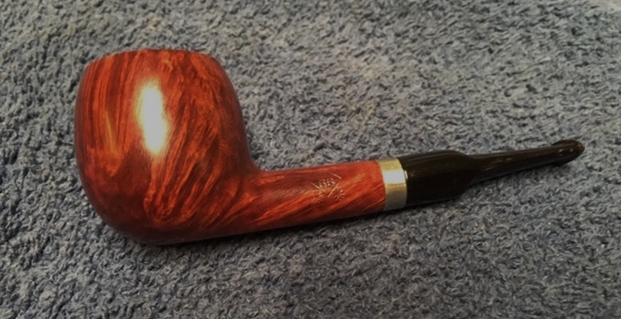
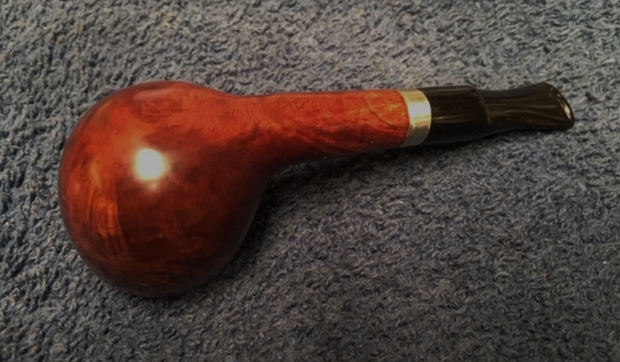
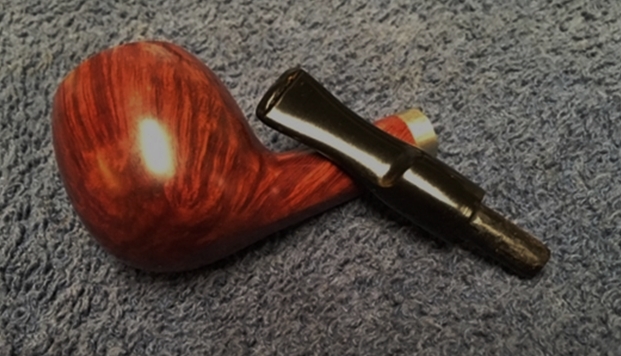
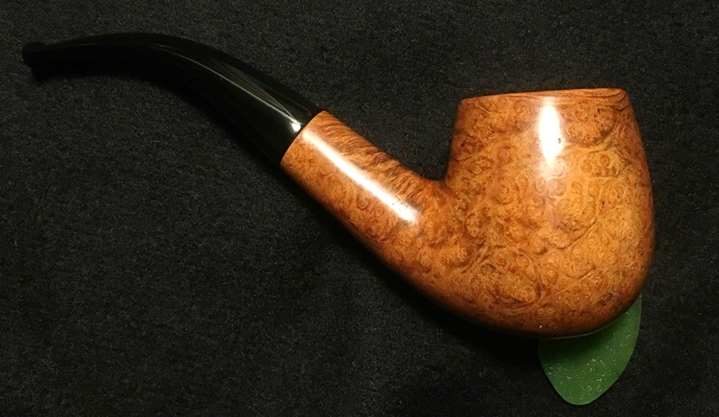
I’m pleased with the results of this Comoy’s Made in London, England, Bent Bulldog. The restoration was fought in the trenches! The many repairs done to the stummel surface came out well, though the two large fills are still evident, but not as overt. The dark brown dye came out beautifully and the groove patches and repairs have all but disappeared. I’m glad I also addressed the heat fissure issues in the chamber. This Comoy’s Bent Bulldog will provide many more years of service to a new steward. Stephen commissioned this Comoy’s and will have first opportunity to acquire it in the Pipe Steward Store and this pipe benefits the Daughters of Bulgaria – women and girls who have been trafficked and sexually abused. Thanks for joining me!