Blog by Kenneth Lieblich
No, not the French Connection – but French Collection! I have long had an interest in French pipes and pipemaking. In recent decades, French pipes have received a fair amount of derision – and deservedly so. However, early French pipes are very often beautiful, well-made, and – best of all – good smokers. In my own small way, I am aiming to resurrect the reputation of early French pipes. There are superb pipes to be had from France. This blog post is about the restoration of the first pipe that is going into my “French Collection”.
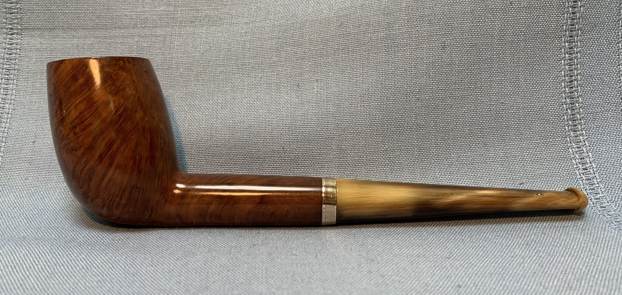
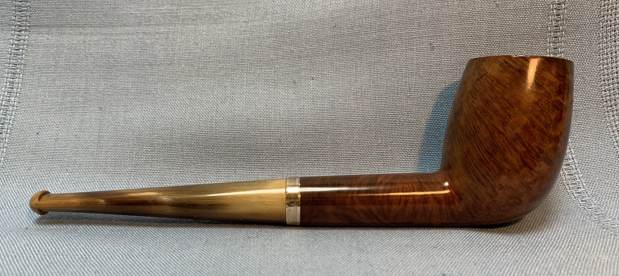
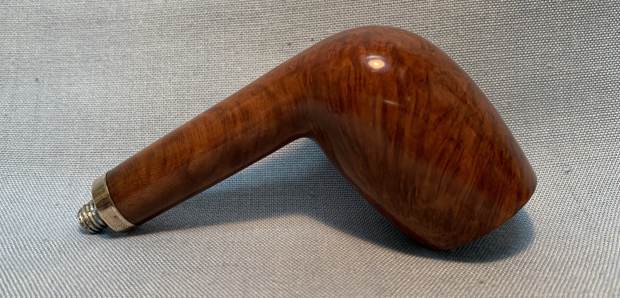
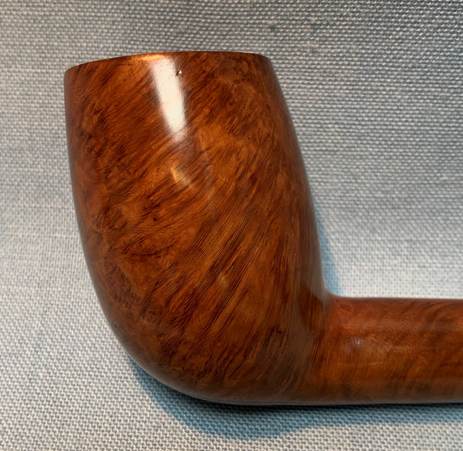
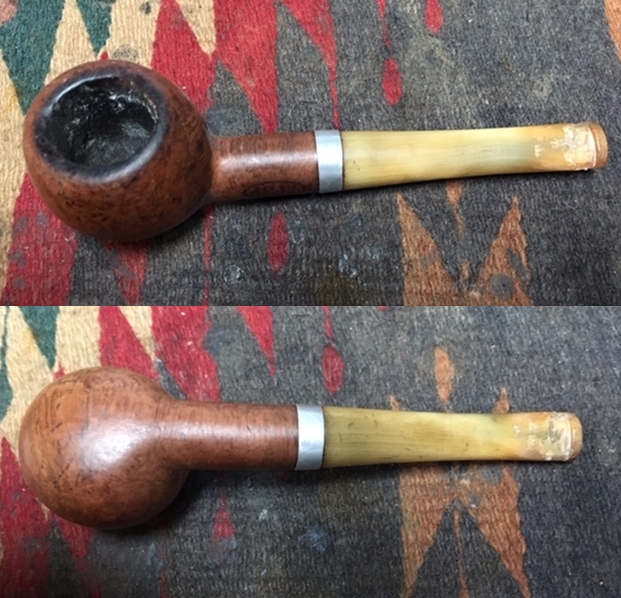
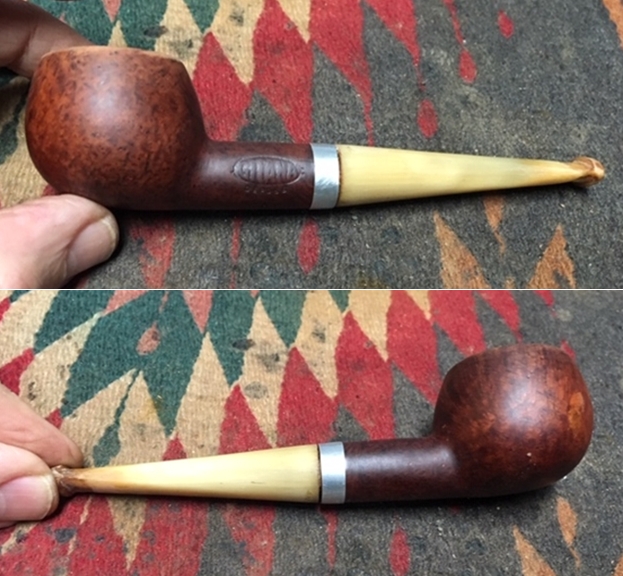
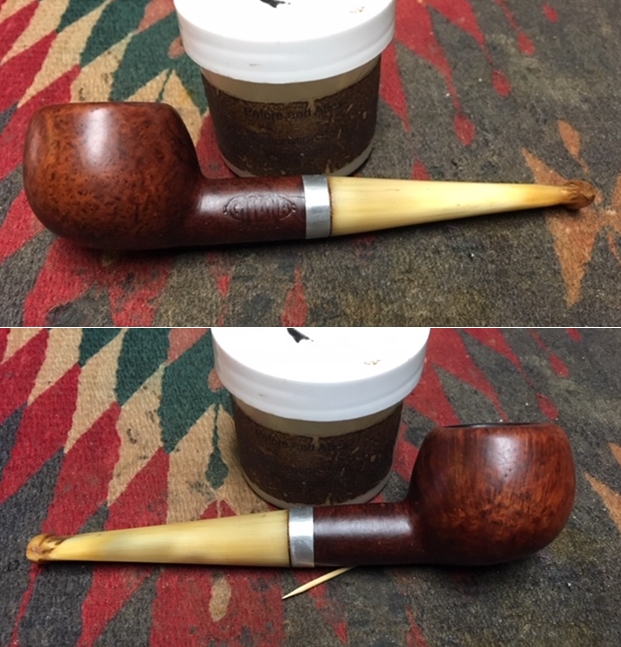
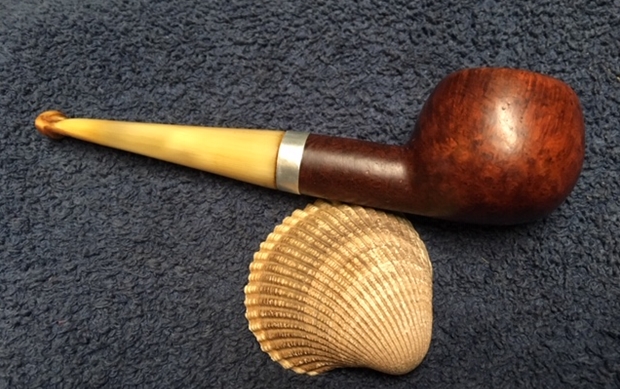
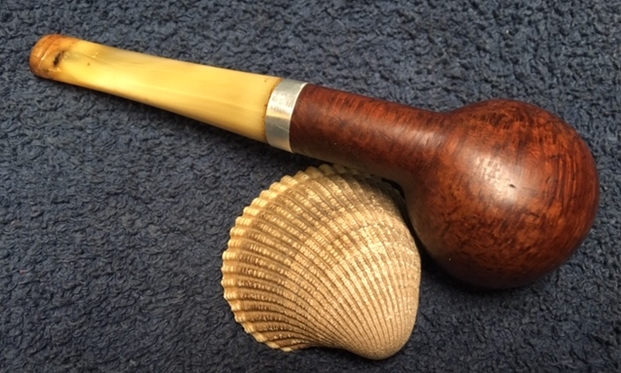
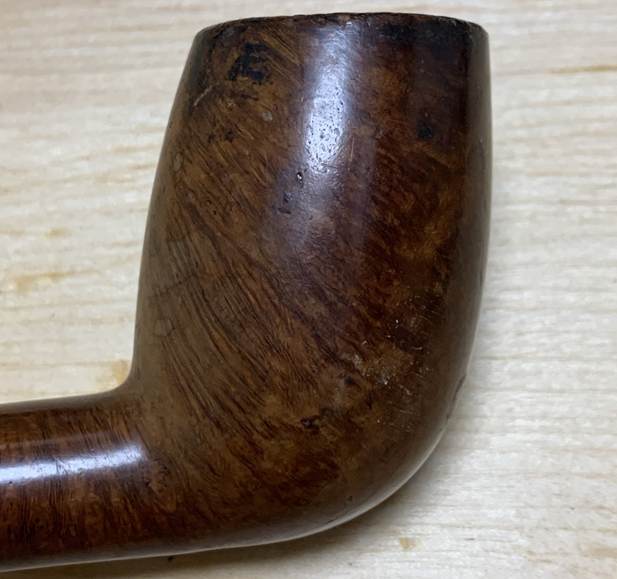
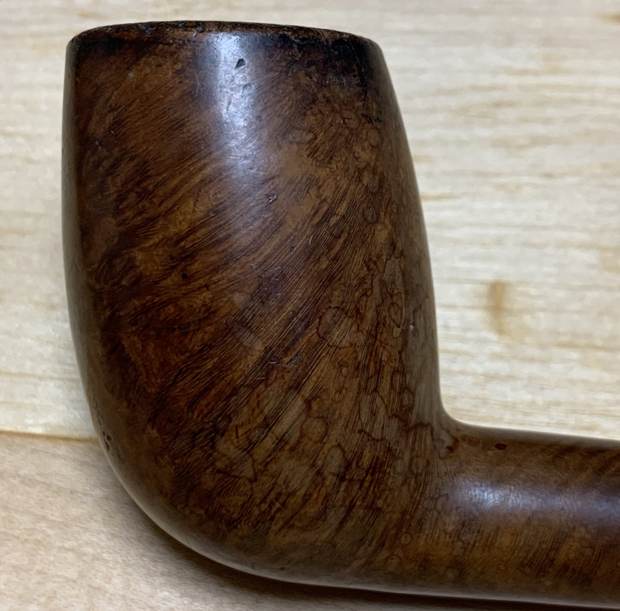
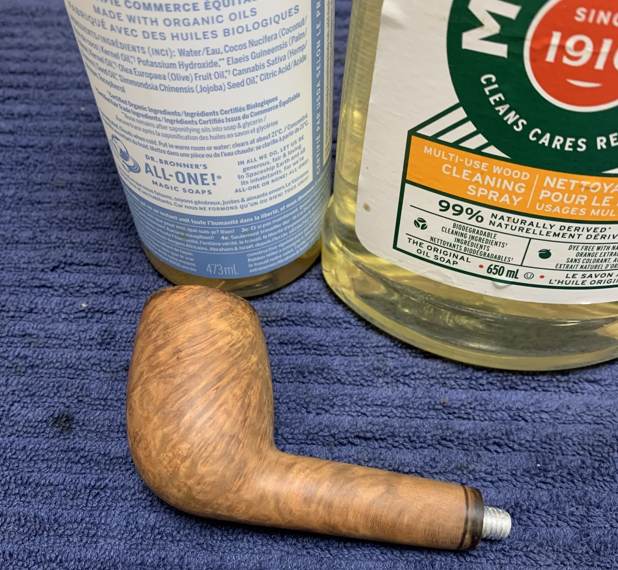
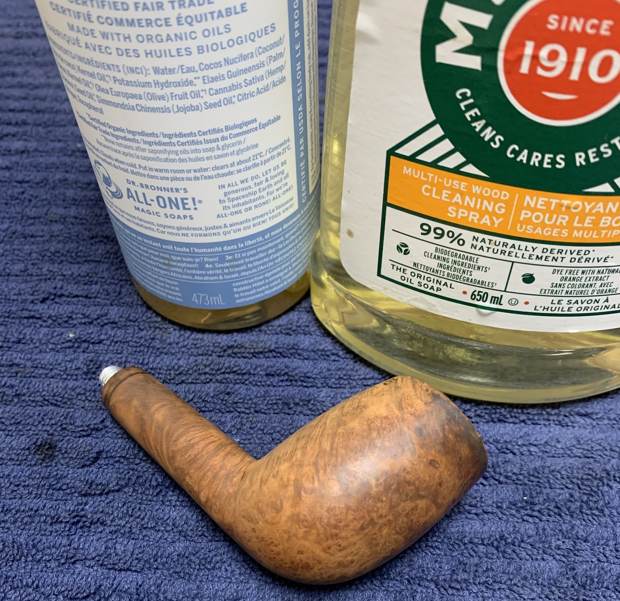
The pipe in question has no markings whatsoever. So how do I know it’s French? Well, I don’t have absolute proof, but I’ve got good circumstantial evidence: the pipe has a very French look to it, it smells like old French tobacco, it came in a lot of exclusively French pipes from France, and – most definitively – Steve thinks it’s French too. 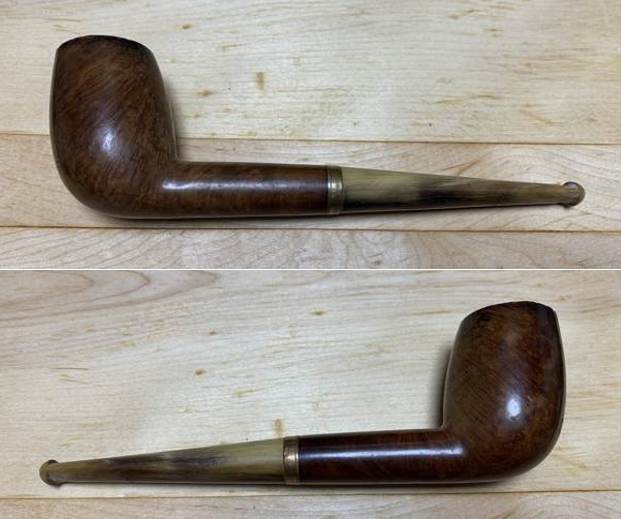 As the photos show, this is a cutty-shaped pipe, albeit without the spur. However, it shows the distinctive, canted bowl of the cutty. It is a handsome pipe with a jaunty look to it, and I liked the pipe straight away.
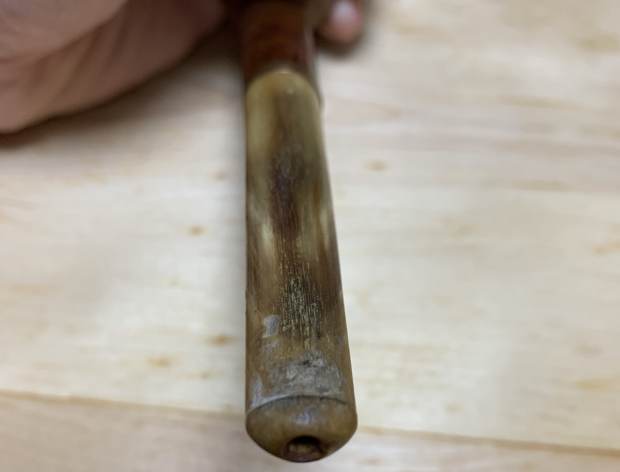

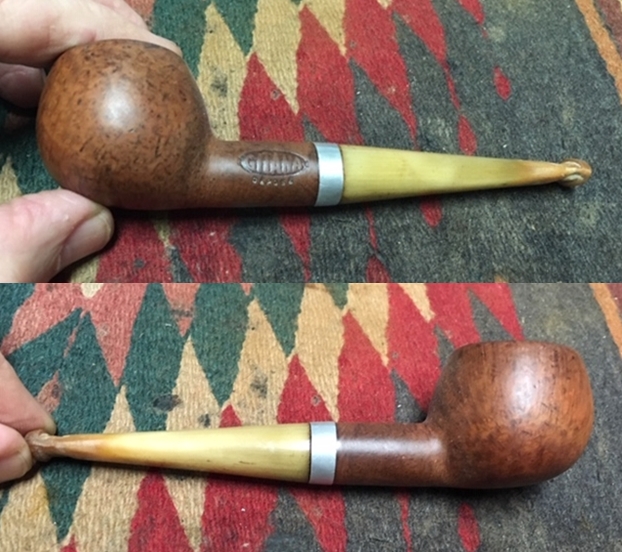
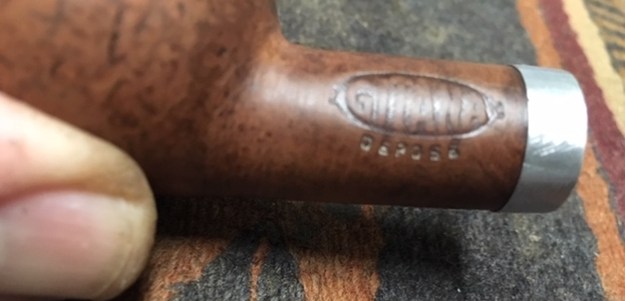
 As I mentioned, this pipe has no marks of any kind. This obviously makes identification trickier. I know that Georges Vincent-Genod company used to make pipes similar to this once upon a time, but I cannot, in good conscience, definitely ascribe this pipe to the GVG company. Having said that, the following pipe from Genod certainly has its similarities…
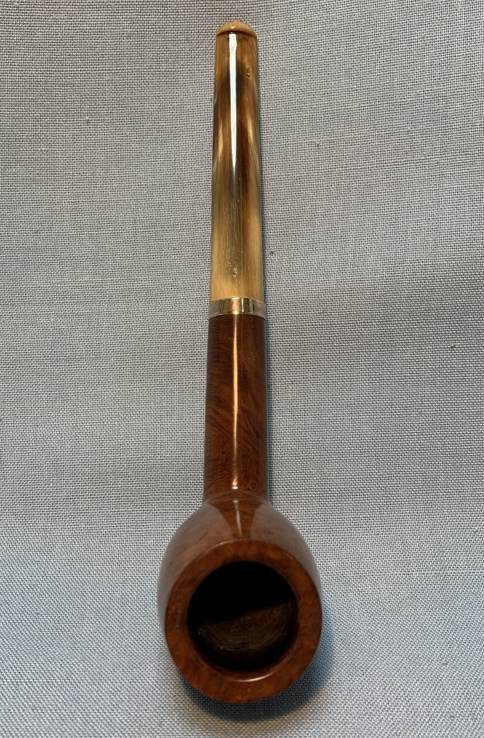
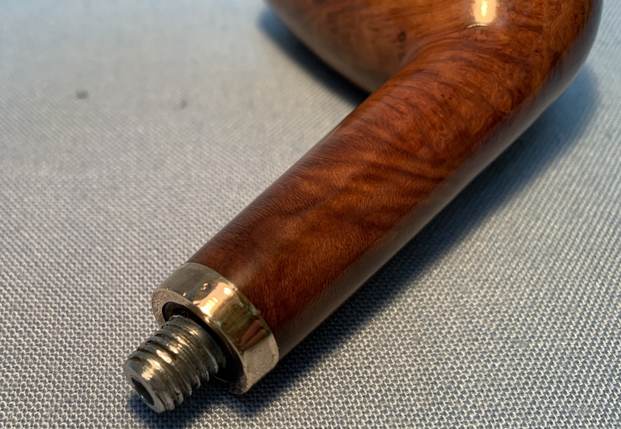
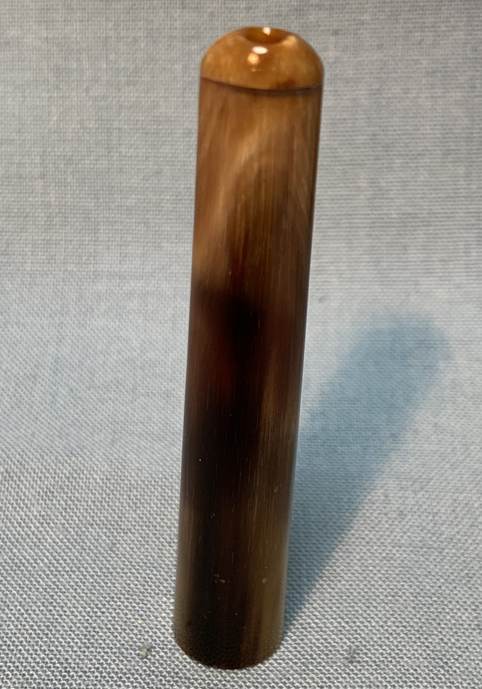
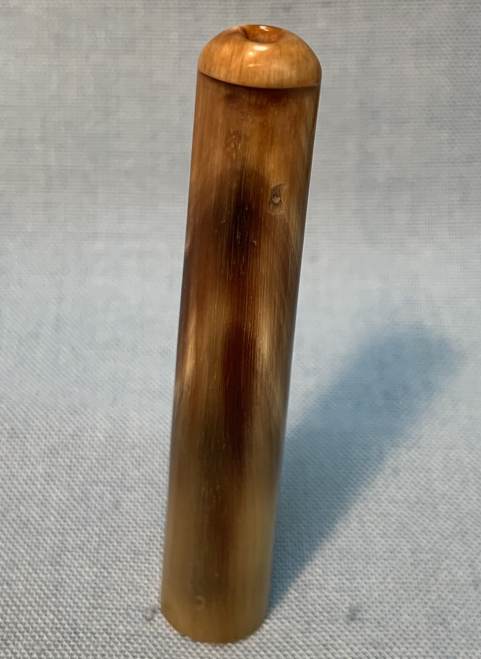
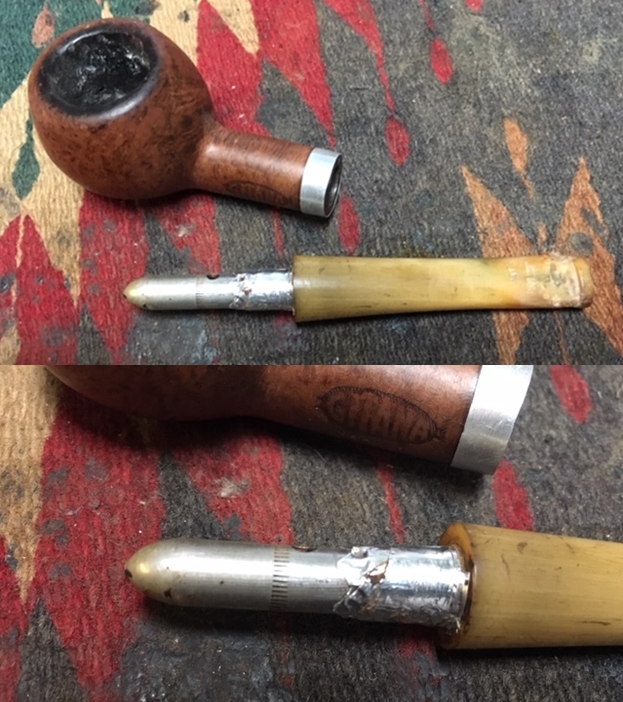
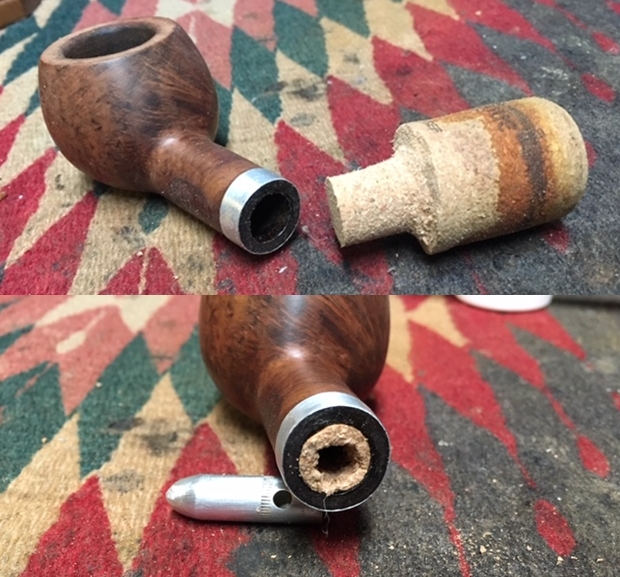
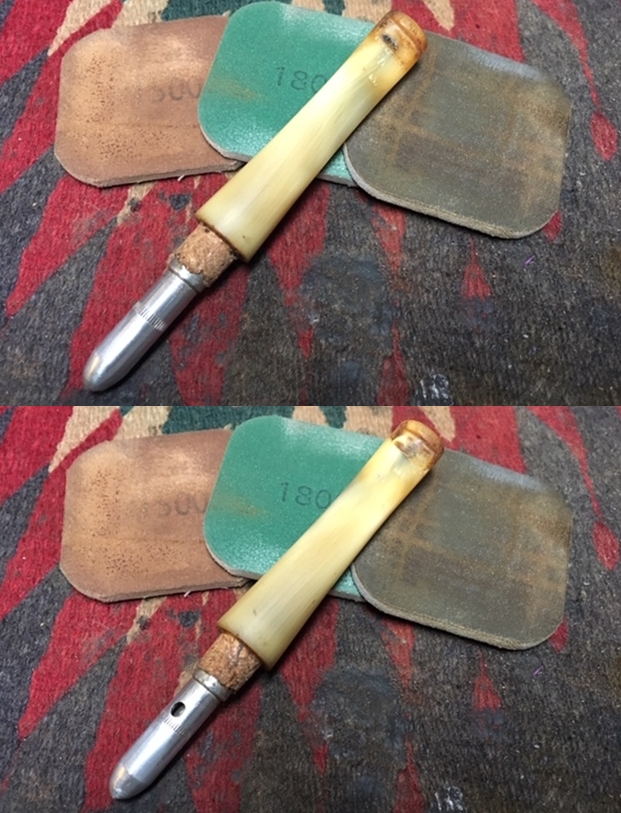
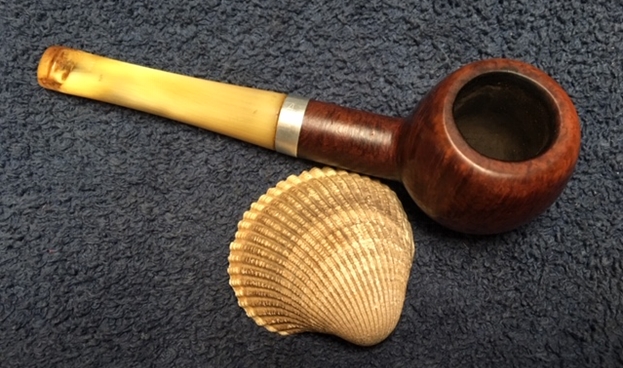
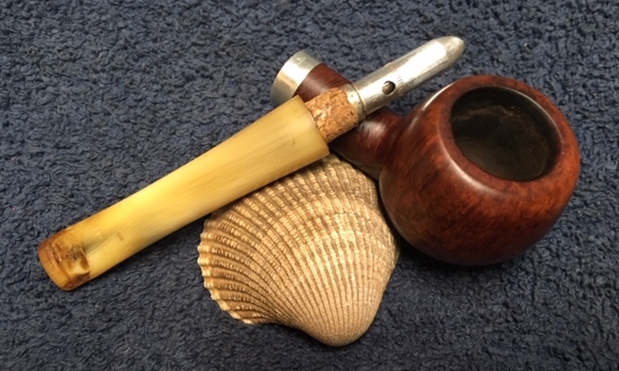
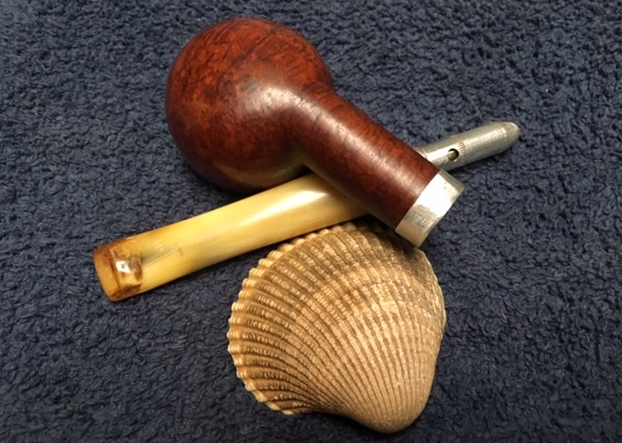
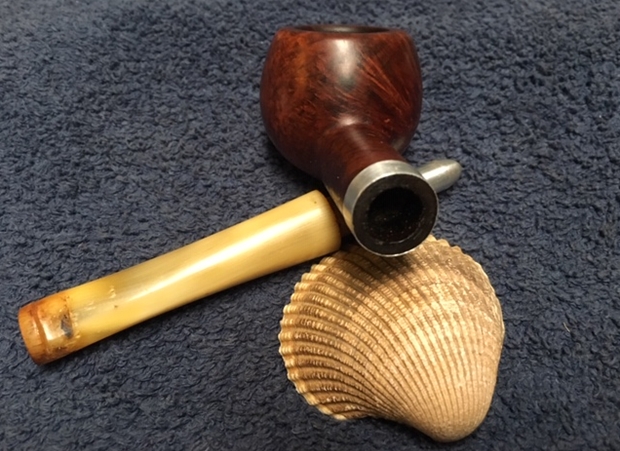
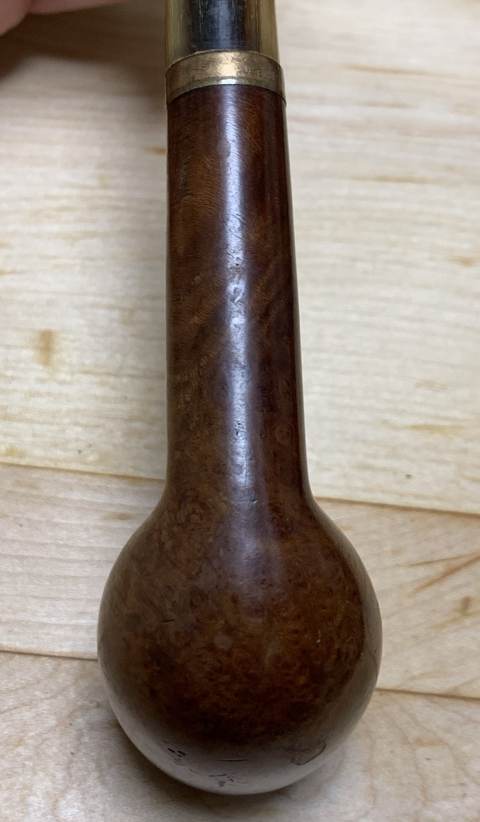
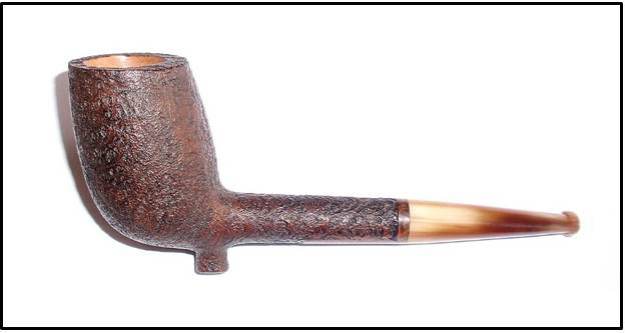 The age of this pipe is quite interesting. As you can see, the stem of the pipe is made of horn and has an orific button at the end. For more information on the orifice button, take the time to read Steve’s interesting article on the subject. This type of button is a feature that apparently disappeared by the 1930s, so the pipe must be around a hundred years old, right? Not so fast. The stummel has a threaded tenon made of metal – not bone (as one might expect from a century ago). Steve, my walking encyclopedia, informed me that the fact the tenon is in metal (instead of bone) suggests a date closer to World War II. He figures that the stem itself could be significantly older, but that it was left over in the factory and married to a ”newer” stummel. Therefore, we can surmise that the pipe is about 80 years old.
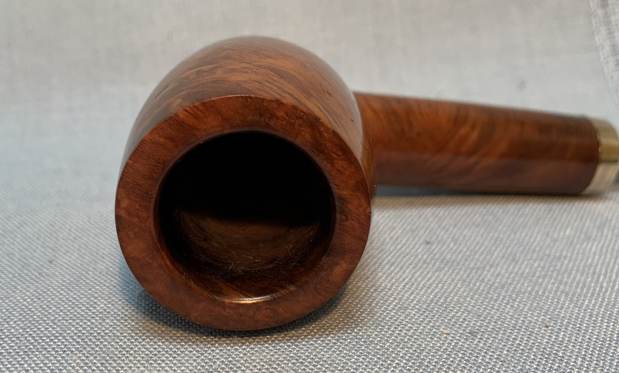
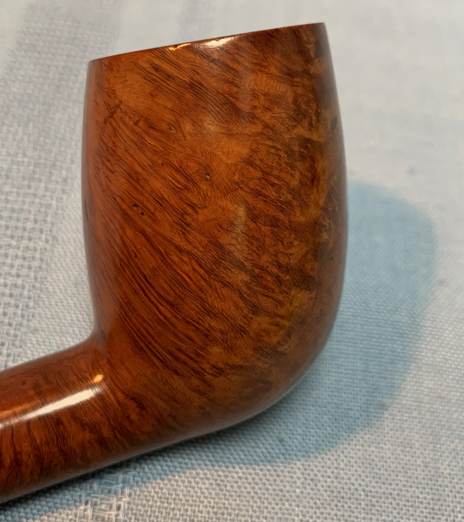
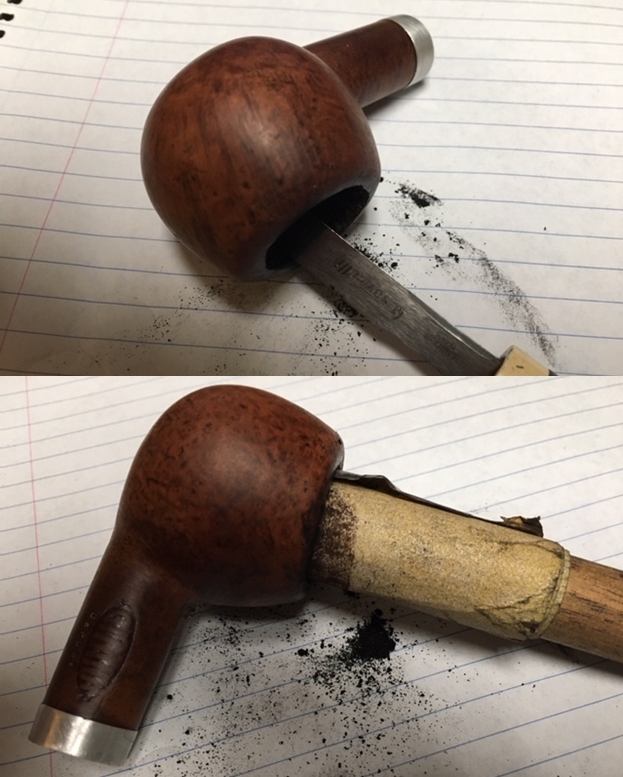
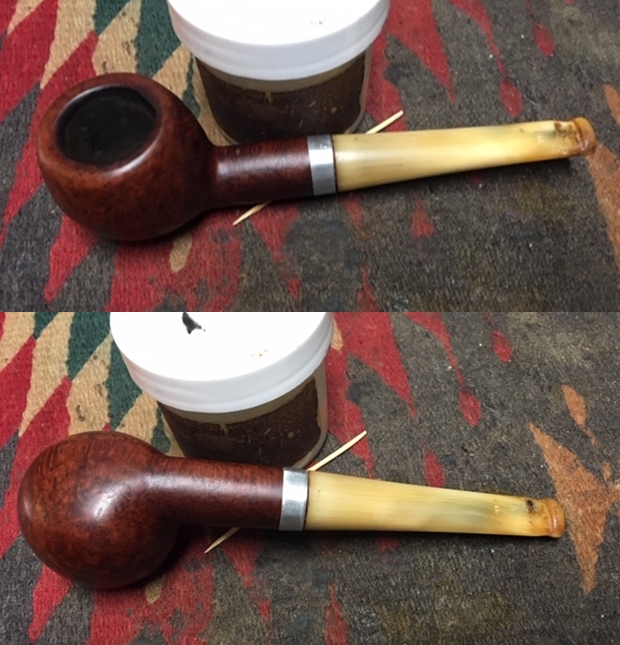
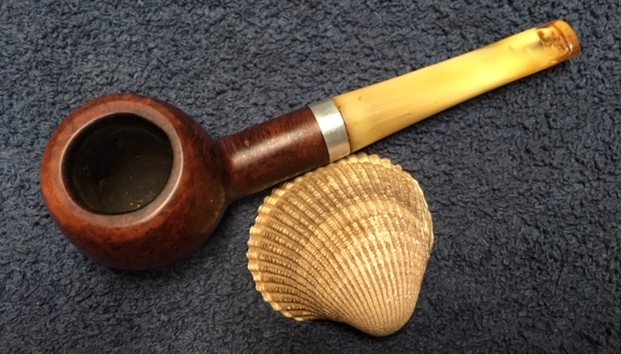
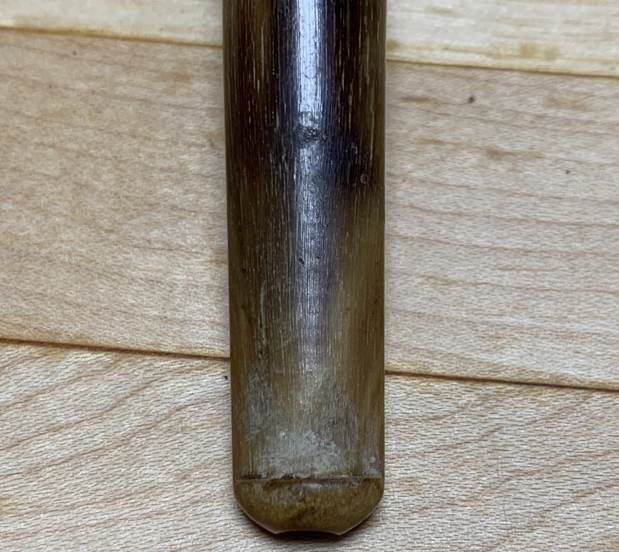
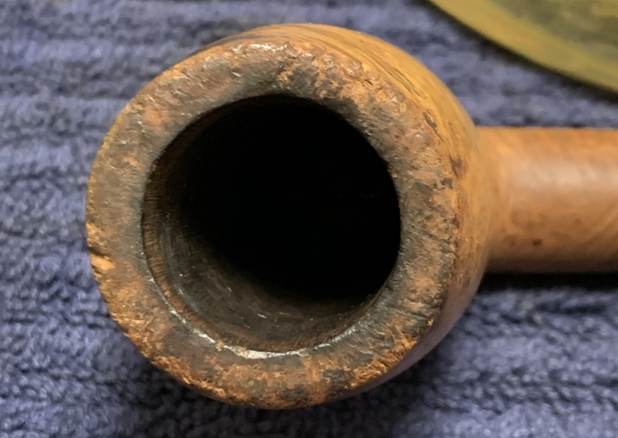
Let’s have a closer look at the condition of the pipe. The stem was dirty and worn, with plenty of evidence of tooth marks and dents. The insides were dirty too, but nothing too unusual. Meanwhile, the stummel was incredibly dirty.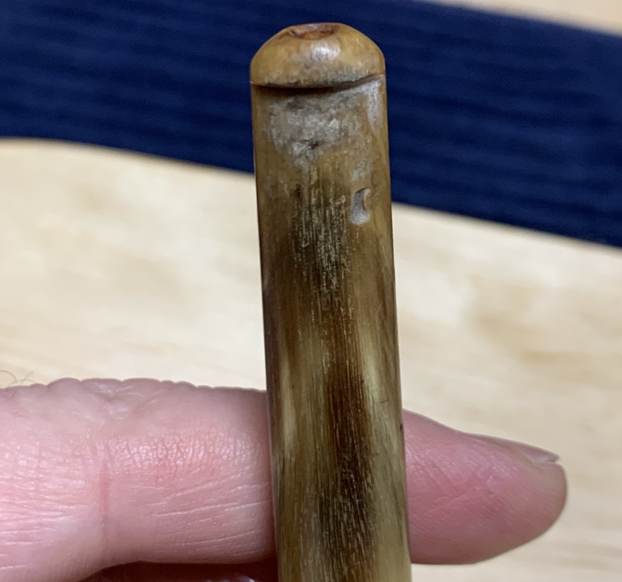 The bowl was so full of cake and the rim so overwhelmed with lava, that I couldn’t really tell what the condition of the wood inside was. Certainly, there was some lovely patina on the old wood on the outside of the bowl.
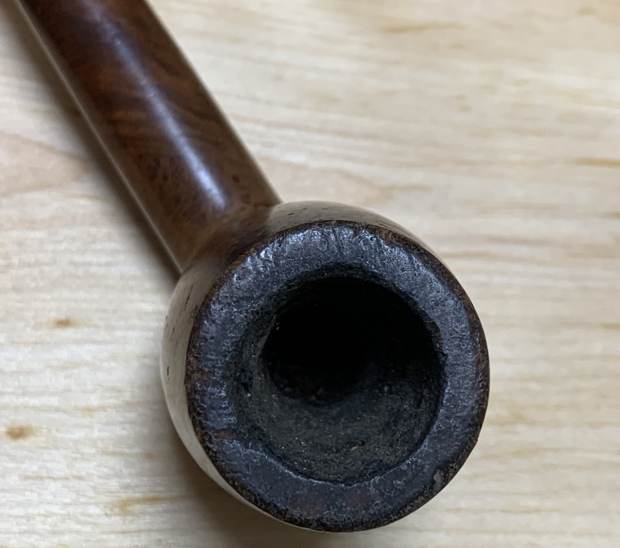 I wanted to work on the stem first, but needed some help to unscrew it! I brought out the heat gun and gave a quick blast to loosen the goo holding the pipe together. That loosened the stem sufficiently to unscrew it.
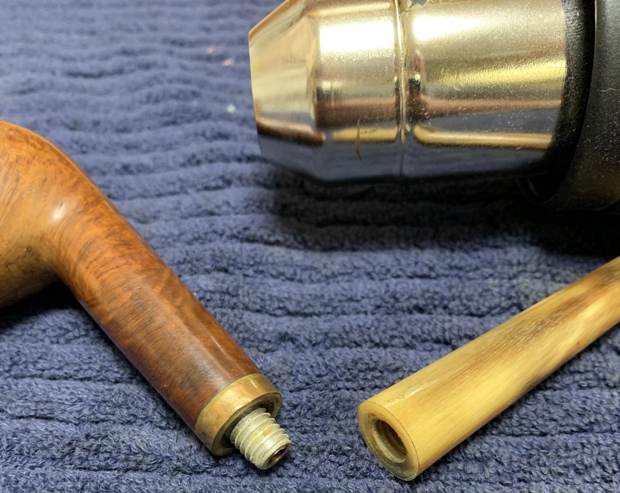
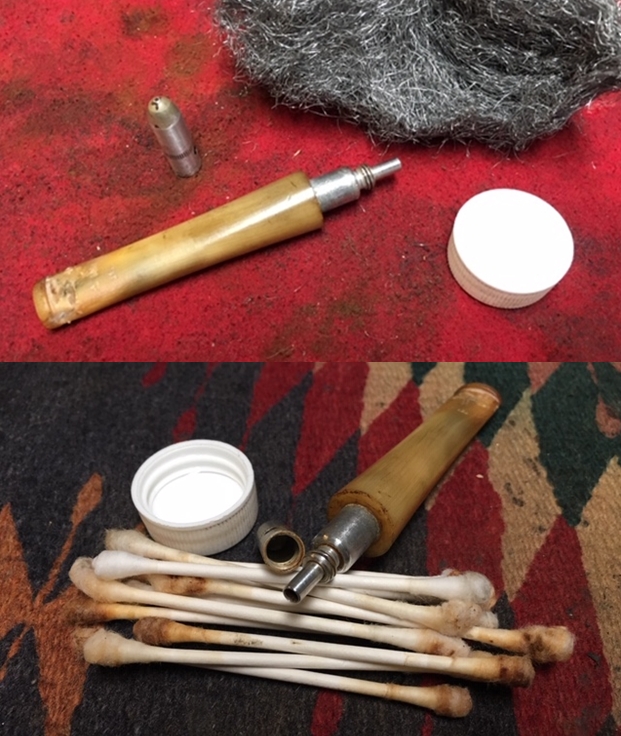
 I wiped the stem with Murphy’s Oil Soap on some cotton pads. There was some filth there and I needed to remove it. I attacked the inside of the stem with pipe cleaners, cotton swabs, and isopropyl alcohol. It required a good amount of cotton to come clean.
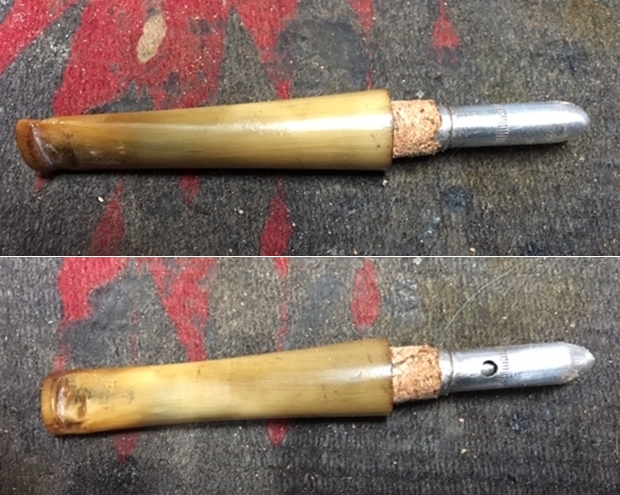
 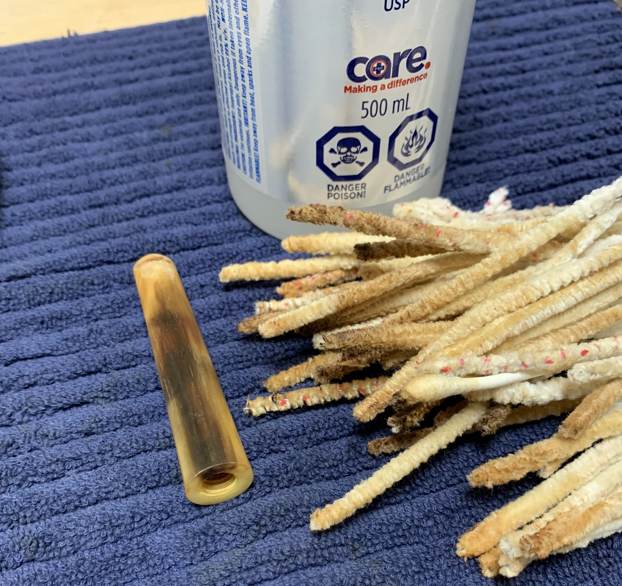 Now work on repairing the tooth marks, etc. on the outside of the stem. I built up the bite marks on the stem with cyanoacrylate adhesive and let it fully cure. There were a couple of small worm holes (or something similar) on the stem and I filled them the same way. Upon closer inspection, the button on the stem was a bit mangled. Simply doing the normal sanding wouldn’t do. I opted to use a small file and rework the horn to ensure a proper shape.
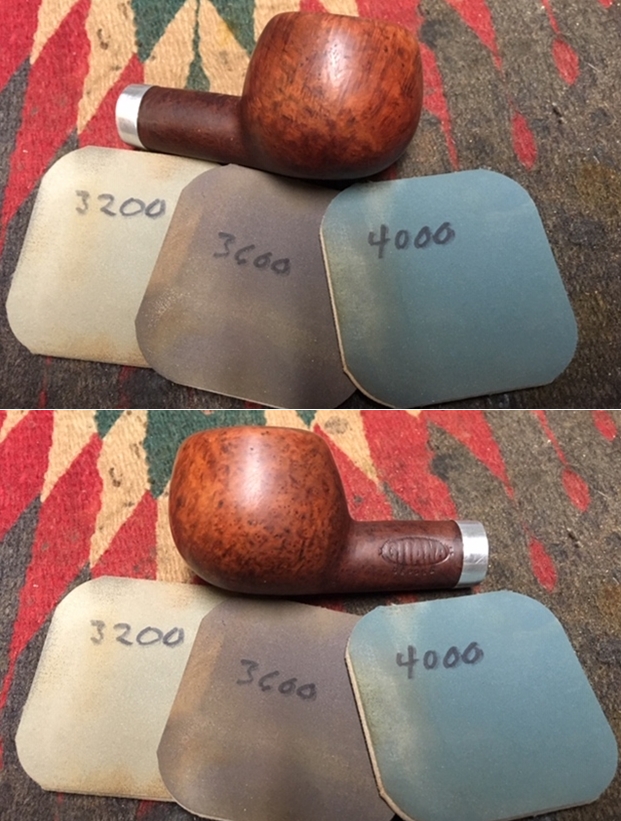
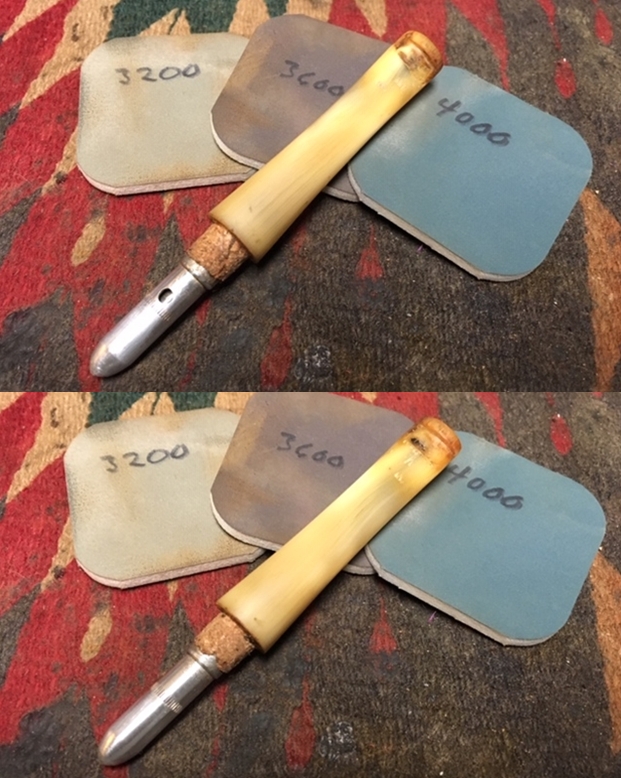
 Following that, I sanded the adhesive down with 220- and 400-grit sandpapers to meld seamlessly into the stem. I then used all nine Micromesh pads (1,500 through 12,000 grit) to bring out the beautiful designs in the horn, with some Obsidian Pipe Stem Oil in between each pad scrubbing.
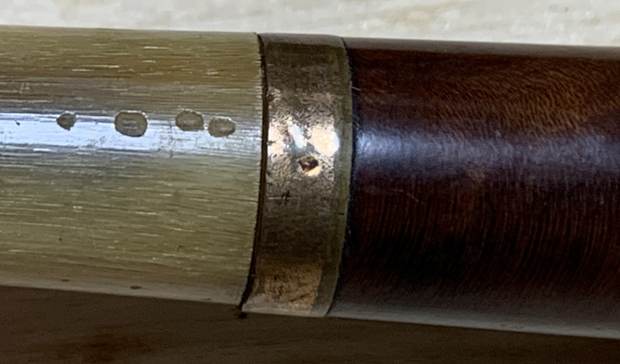
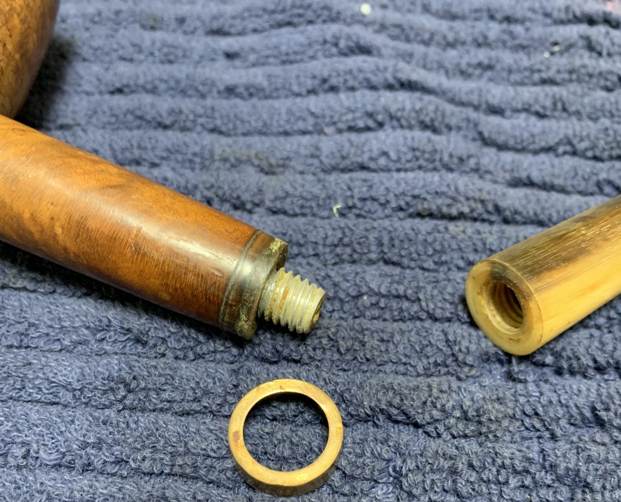
 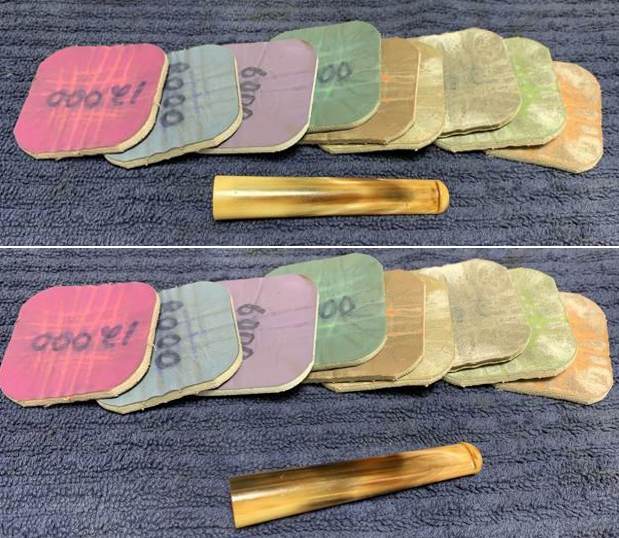 Now for the stummel. The brass ferrule came off very easily. I set it aside for now and would return to clean it later. First, I decided to ream out the bowl. I used the KleenReem and the PipNet to remove the built-up cake and followed that with 220-grit sandpaper taped to a dowel to eliminate as much as I could. Wow, there was a lot of debris! I took the chamber down to bare briar to ensure there were no hidden flaws in the wall. Fortunately (and surprisingly), there were none.
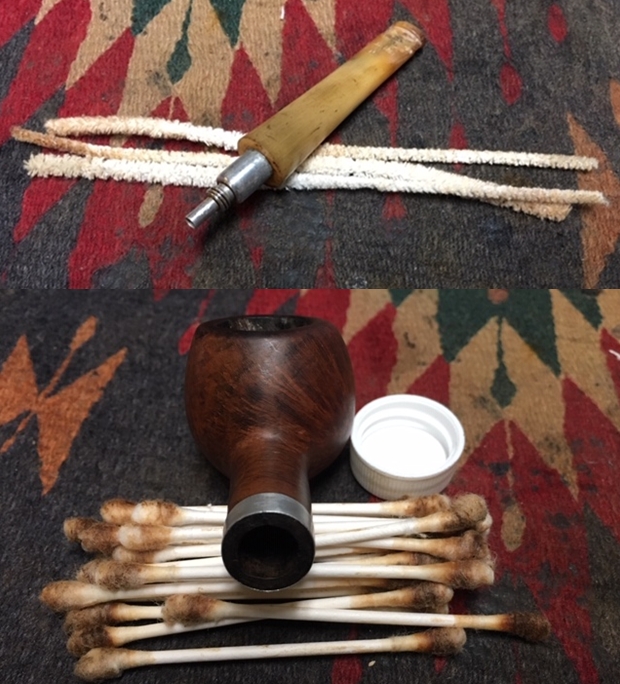
 Following this, I cleaned the insides with the requisite pipe cleaners, Q-tips and isopropyl alcohol. As the stack of cleaning materials show, it was a mess!
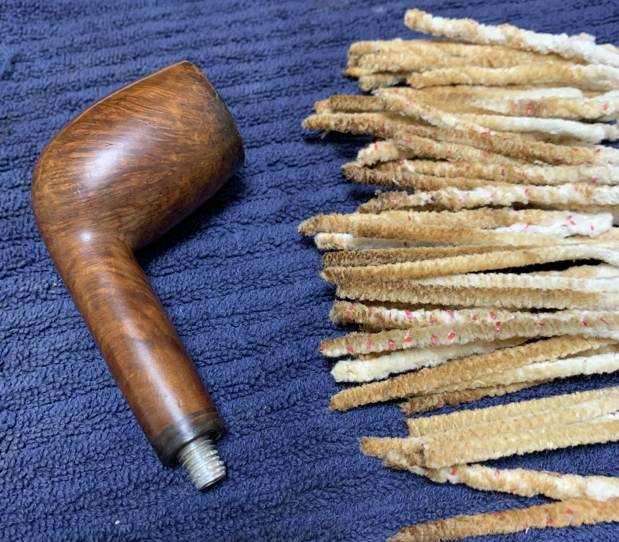 I also took this opportunity to wash the stummel with Murphy’s Oil Soap and remove as much grime as I could. The pipe’s rim was so caked with filth that I opted to soak it in a jar-lid of Murphy’s to soften it.
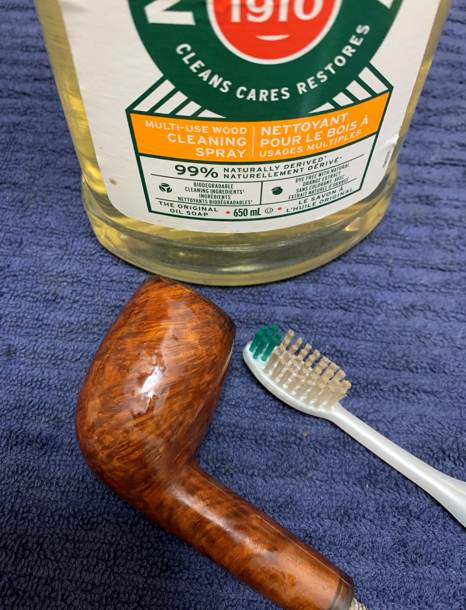
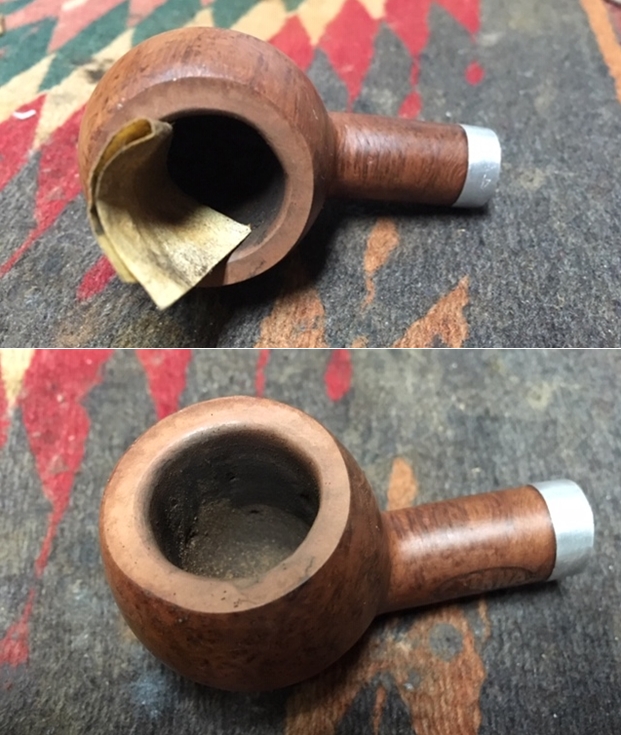
 Then I used a brush to work out all the gunk on the rim. As the pictures show, the rim was badly worn. There were gouges and burn marks. Additional work would need to be done. Before that, however, I decided the pipe needed some additional TLC and I chose to de-ghost it. I thrust cotton balls in the bowl (and plugged up the shank) and saturated it with isopropyl alcohol. I left it overnight and let all the evil spirits in the pipe leech into the cotton. Once complete, the pipe looked great and smelled even better.
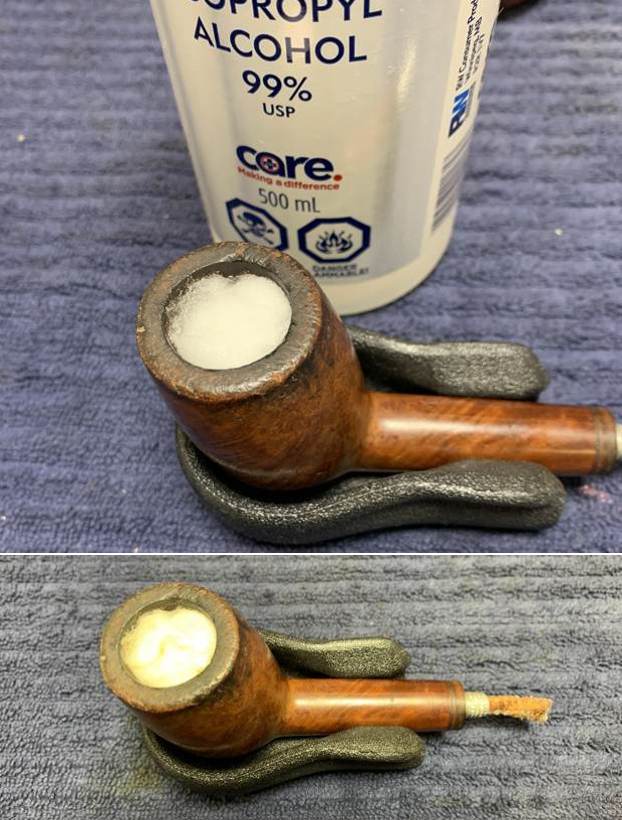 I was, at first, very reluctant to “top” the pipe – that is to say, gently and evenly sanding down the rim on a piece of 220-grit sandpaper. I was reluctant because I loved the height of the bowl and didn’t want to change it. However, I did decide to do it – it just didn’t look right without it. I was especially careful this time, so as to remove the bare minimum from the rim.
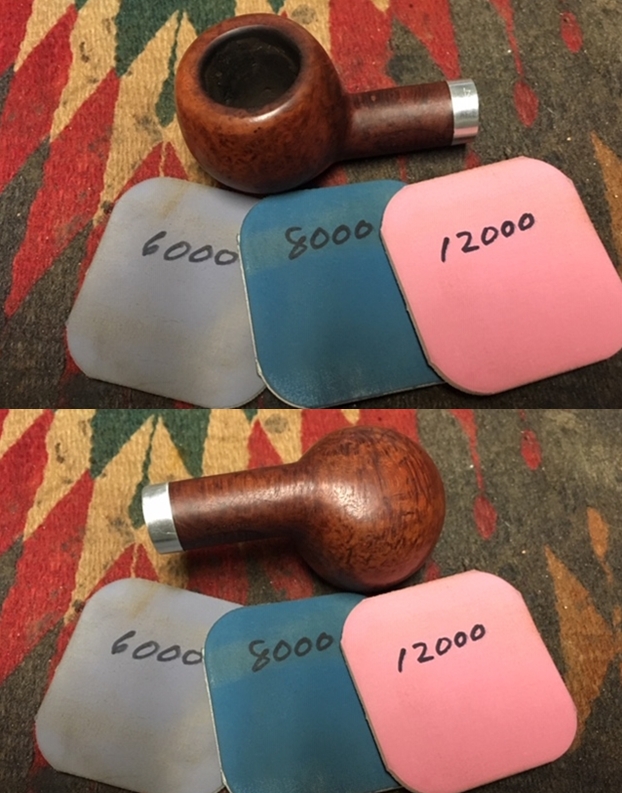
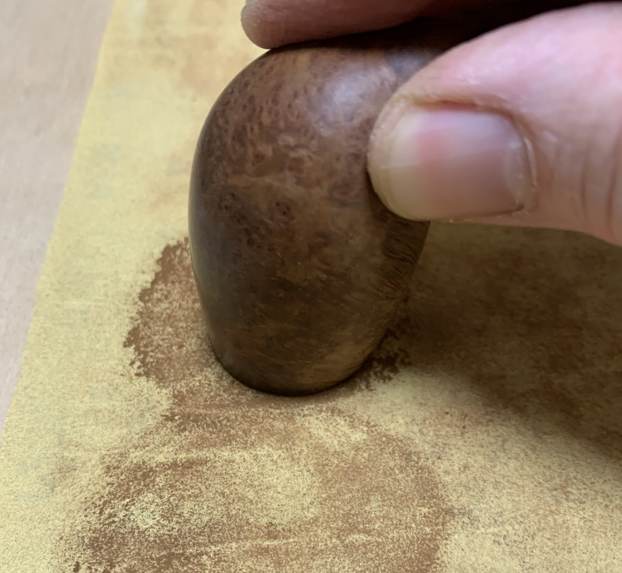 As I mentioned earlier, there were some burns on the inside of the rim that also needed to be addressed. I took some oxalic acid on a cotton swab and rubbed and rubbed. The burn improved but not sufficiently, in my opinion. So, I took a solid wooden sphere, wrapped sandpaper around it, and sanded until such time as the burns were removed. I proceeded very carefully, as I had to ensure that I was not removing too much. I think I got it just right and the rim looked much improved.
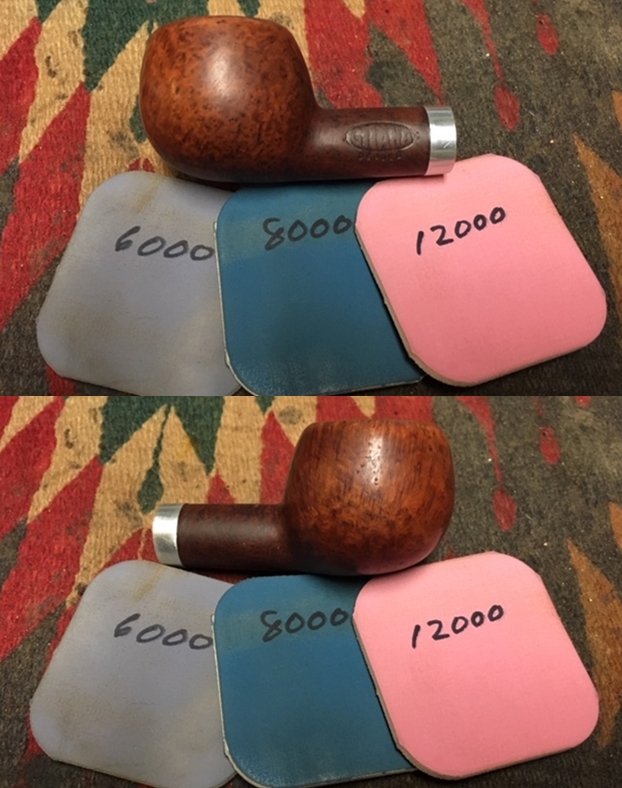
 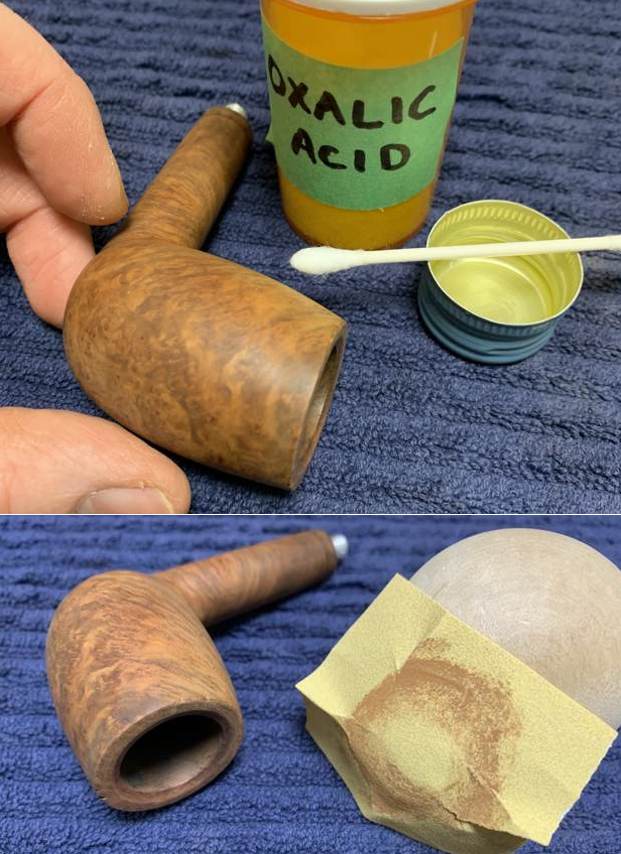 After this, I used all nine Micromesh pads (1,500 through 12,000 grit) to sand the stummel smooth.
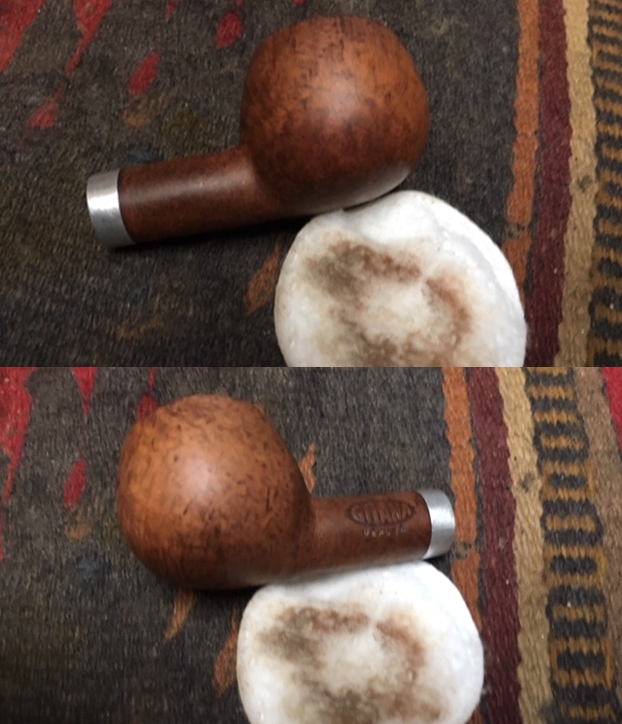
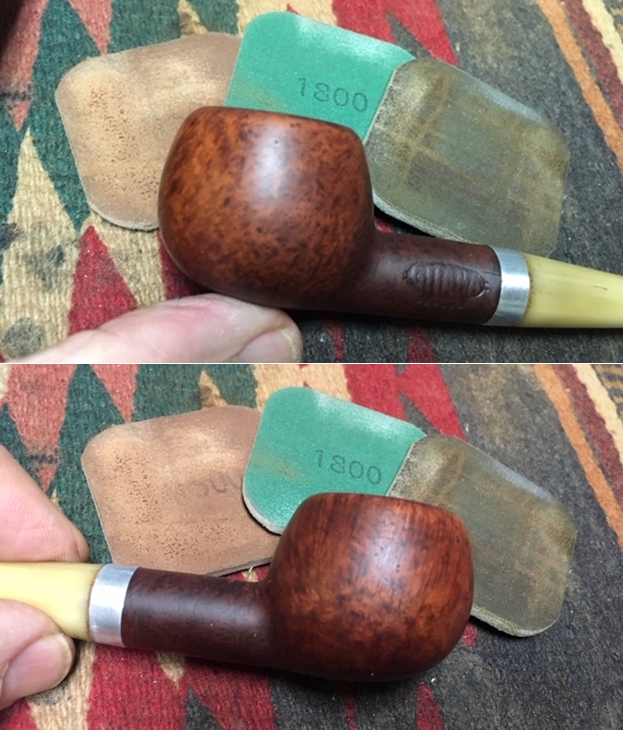
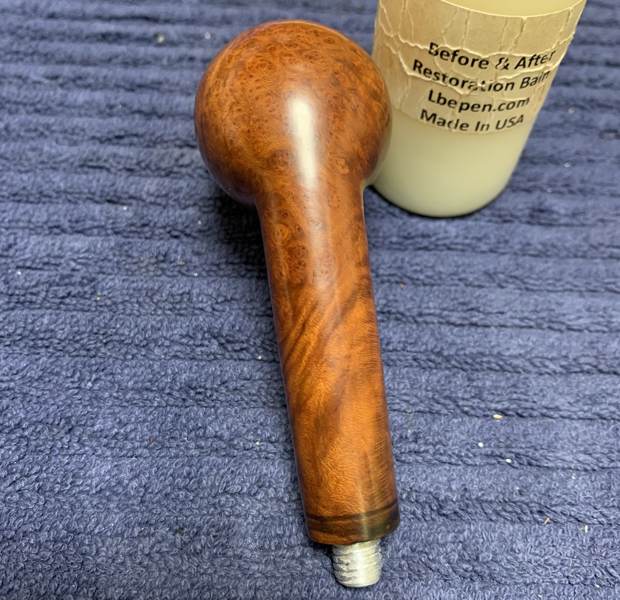
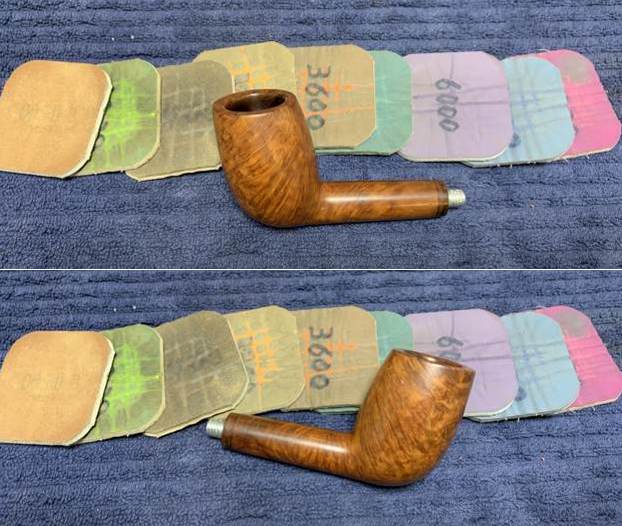 I then applied some Before & After Restoration Balm which I massaged into the wood and let sit for 15-20 minutes. After that, I rubbed it with a microfiber cloth. The balm brings out the best in the beautiful wood. It makes things shine and really shows the lustre.
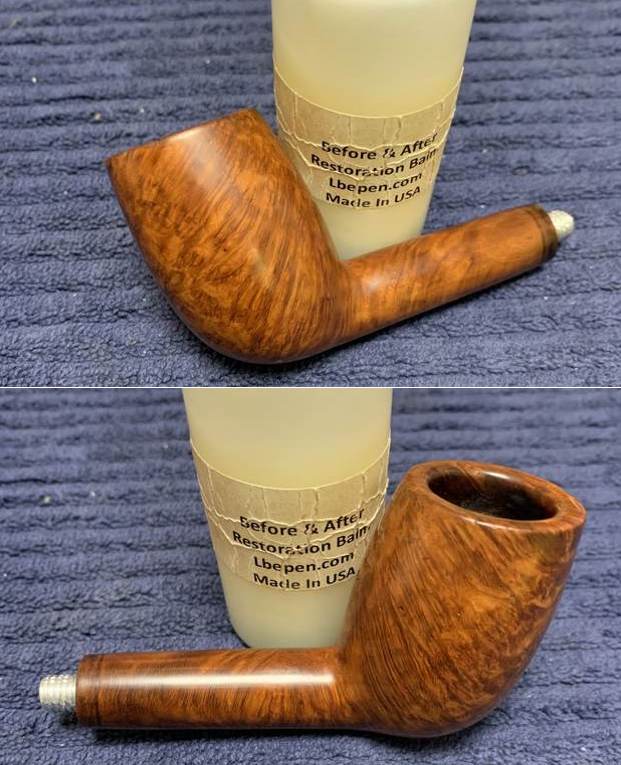

 I came back to the brass ferrule. It was pretty dirty too. I used some SoftScrub on a cotton pad and scrubbed it clean. Then I buffed it with a microfibre cloth and made it shine. I reattached it to the stummel with some glue and let it set.
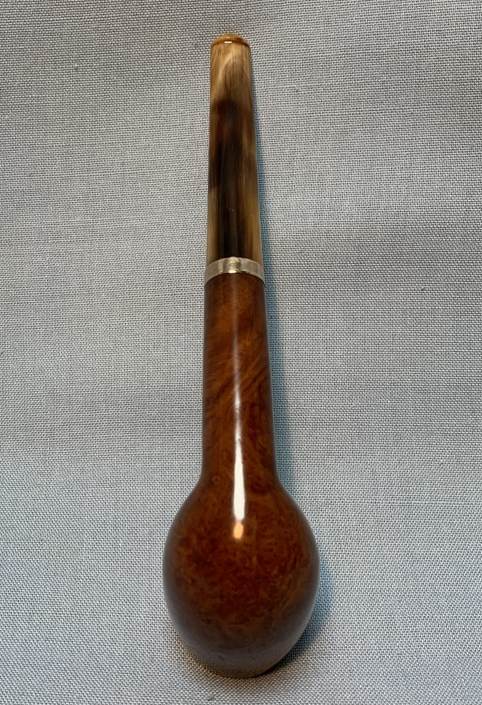
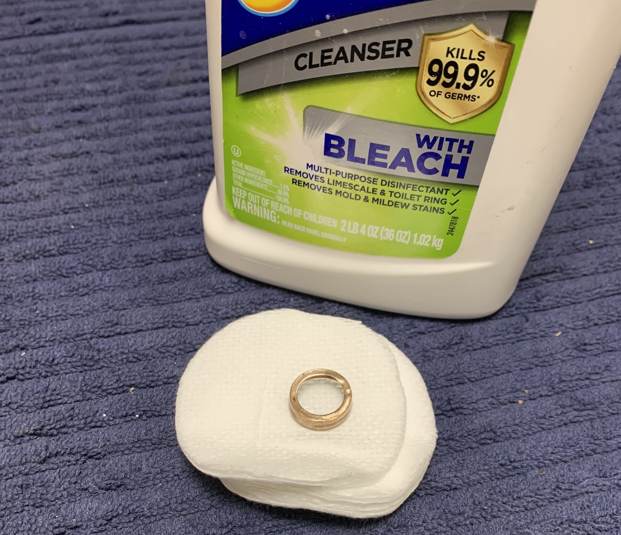 Finally, it was off for a trip to the buffer. The more I look at this pipe, the more I really like the elegant lines and the old-time feel of the wood. At the buffer, a dose of White Diamond and a few coats of carnauba wax were just what this pipe needed to shine properly.
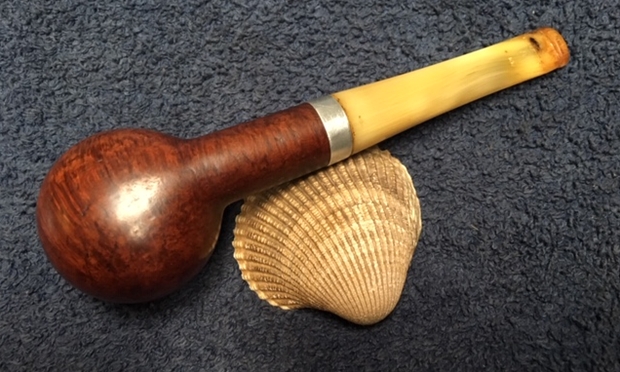
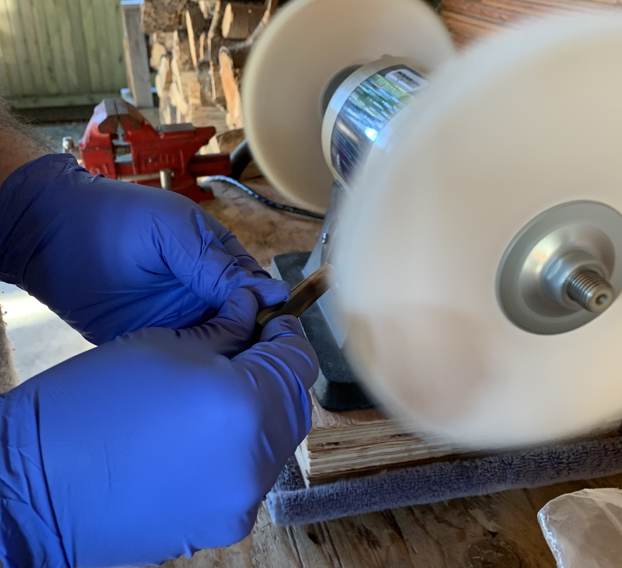
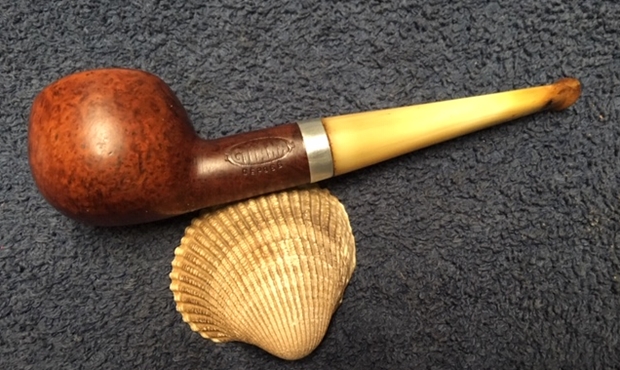
 All finished! This is a wonderfully crafted pipe and has a very sporty feel to it. It took some work, but I am proud of it and the final product suits me to a T. It retains some wounds from battle, but, as Steve would say, they are part of this pipe’s story. This is one pipe that I am keeping for myself and adding to my newly-founded French Collection. I am sure that I will be enjoying this one for many years to come. The approximate dimensions of the pipe are as follows: length 6½ in. (165 mm); height 2 in. (51 mm); bowl diameter 1¼ in. (30 mm); chamber diameter ¾ in. (19 mm). The weight of the pipe is ⅞ oz. (25 g). I hope you enjoyed reading the story of this restoration as much as I enjoyed restoring it. If you are interested in more of my work, please follow me here on Steve’s website or send me an email. Thank you very much for reading and, as always, I welcome and encourage your comments. I hope you enjoyed reading the story of this pipe as much I as I did restoring it. If you are interested in more of my work, please follow me here on Steve’s website or email me directly at kenneth@knightsofthepipe.com. Thank you very much for reading and, as always, I welcome and encourage your comments.