Blog by Steve Laug
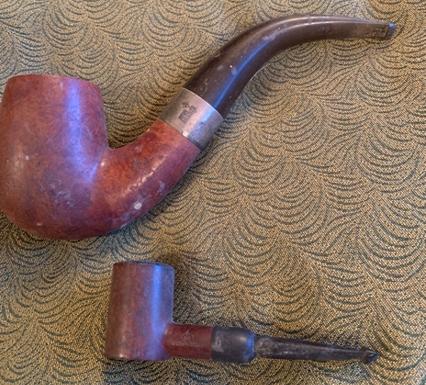
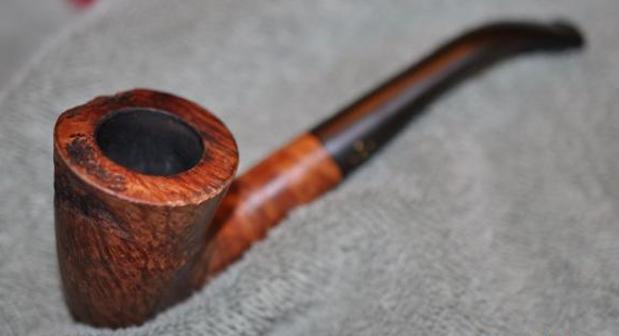
The next pipe on the table is one that Jeff and I picked up on a pipe hunt in Alberta, Canada a few years ago. We hit antique shops and malls from Lethbridge in the south to Edmonton in the north and found a lot of nice looking pipes. The photo below shows some of those pipes and in particular the one on the table today. I have drawn a box around it in the photo below. It came from and antique mall in Edmonton, Alberta. I could tell by looking at it that it was an old timer even before I picked it up. The shape and finish looked English to me and I was thinking maybe a Comoy’s or a GBD pipe. The stamping on the left side of the shank read Lords in an oval with London Made arced underneath. On the right side of the shank is where the pipe got even more interesting to me. It read MIKES [over] EDMONTON [over] 4811 (the shape number). The more I looked at it the more I am convinced it is a GBD made pipe. But after reading the stamping I had to know more about MIKES EDMONTON. I had no idea what that referred to and I wondered how a British made pipe came to be stamped with that information. I put the pipe in a box and Jeff took it home to clean up and I promptly forgot about it until he sent it back to me not to long ago. Now it is on the table and it is the focus of my attention. Jeff took photos of the pipe before he did his clean up work. It was a great looking piece of briar with a mix of grain around the bowl and shank. There was a heavy cake in the bowl and a heavy overflow of lava on the inwardly beveled rim top. The stem was heavily oxidized and there was calcification around the button area. There were tooth marks and chatter on the top and underside just ahead of the button.
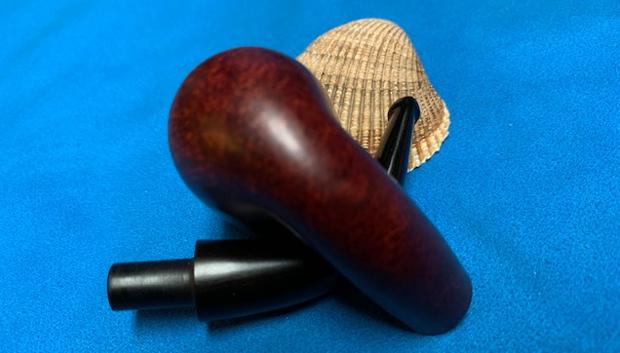
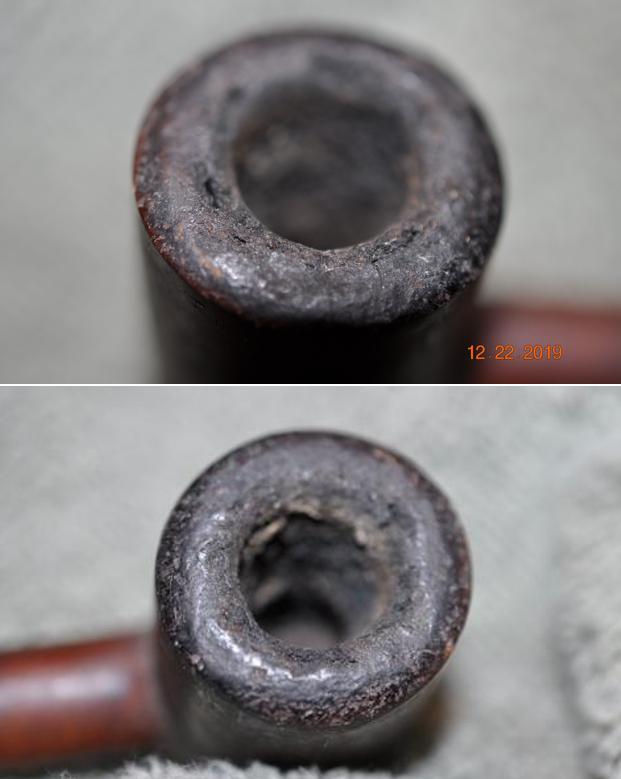
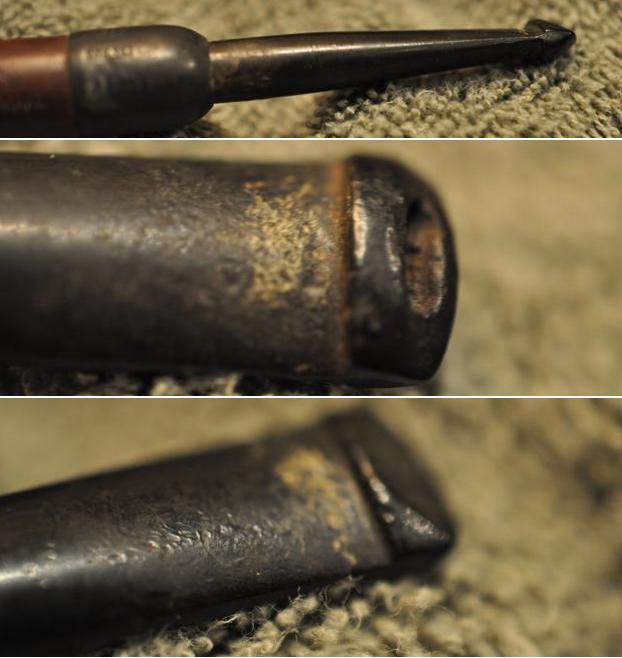
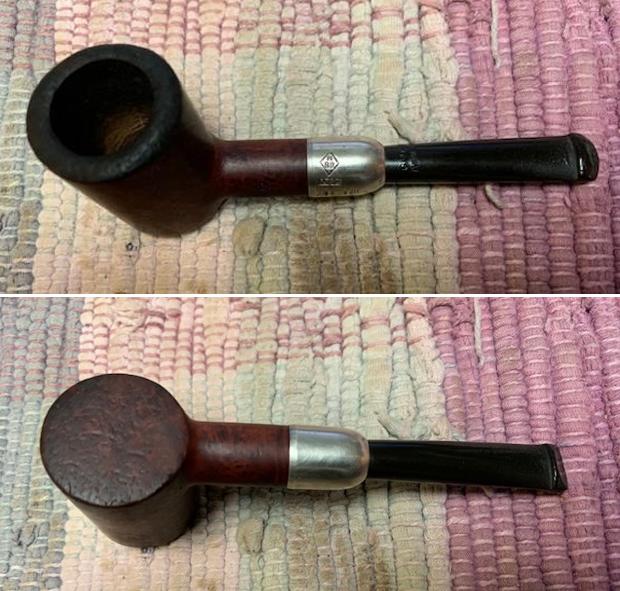
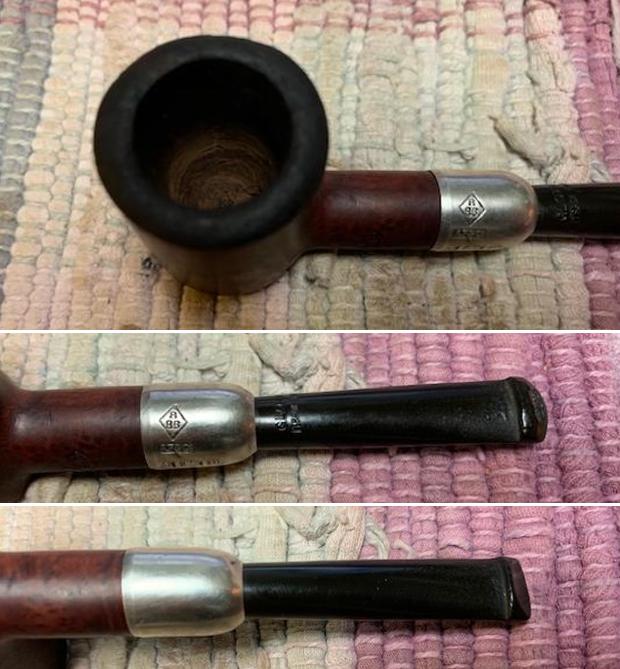
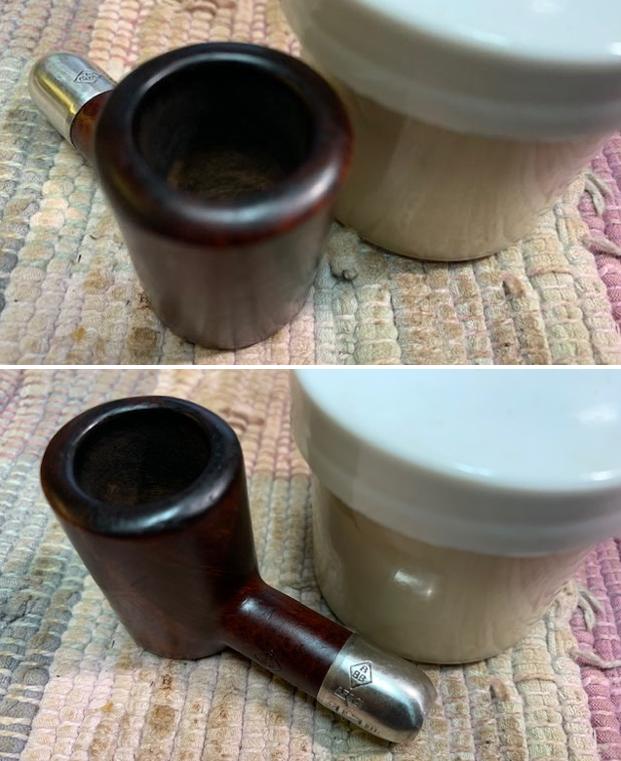
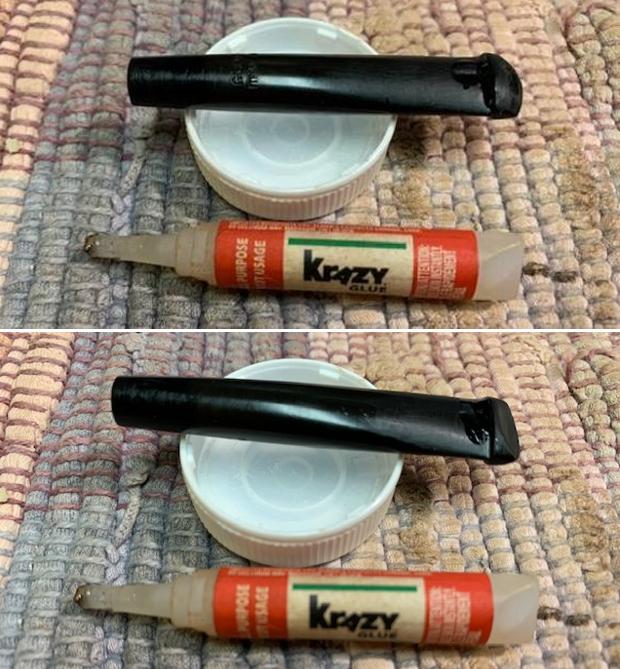
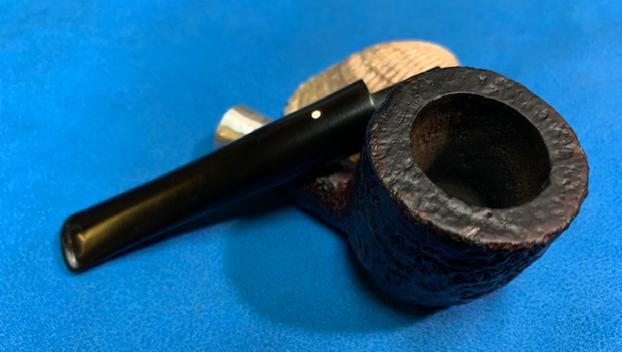
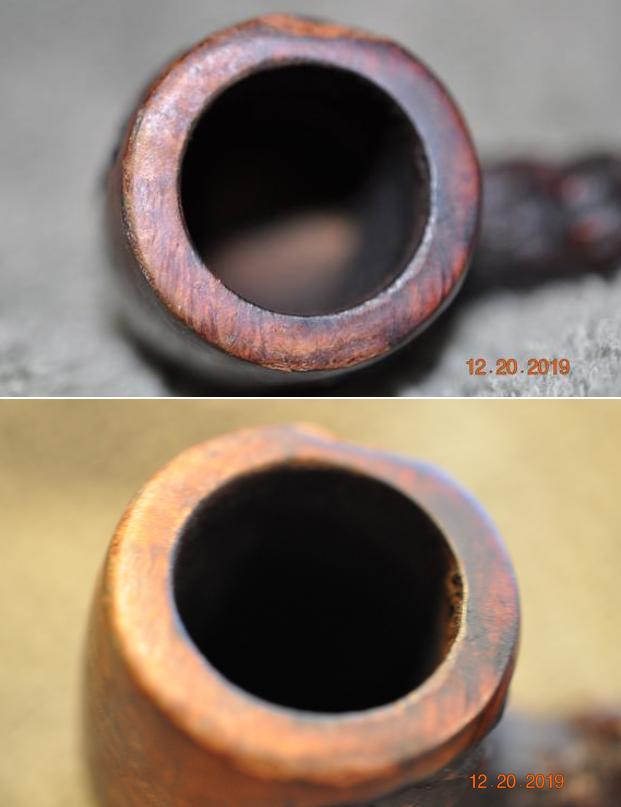
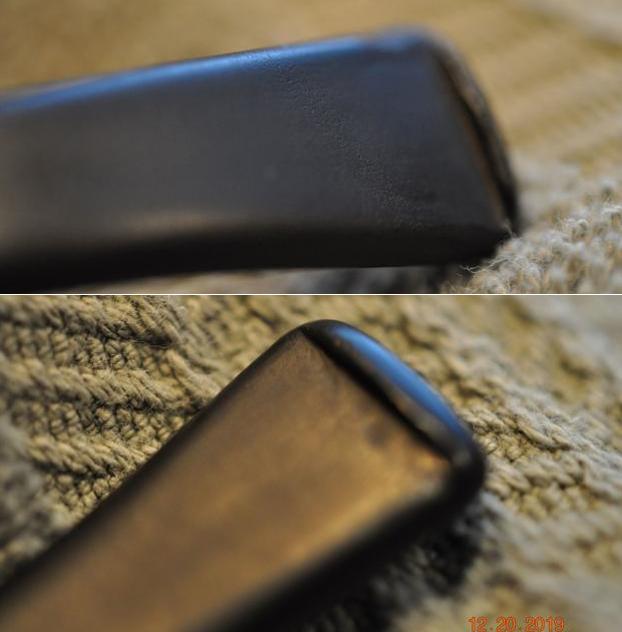
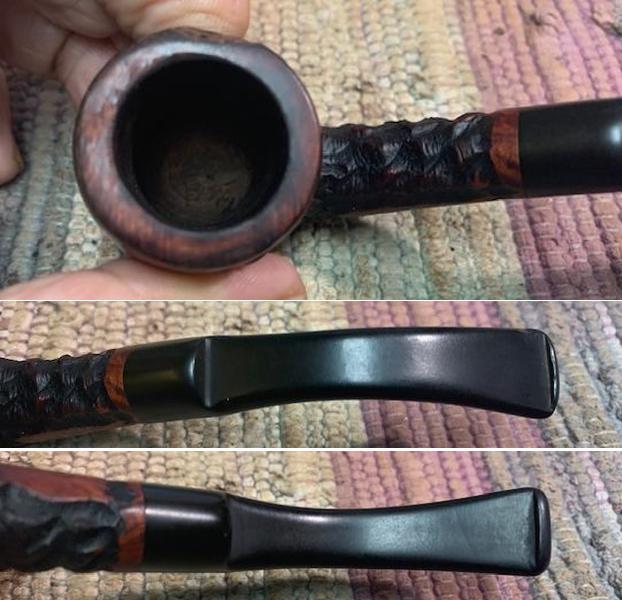
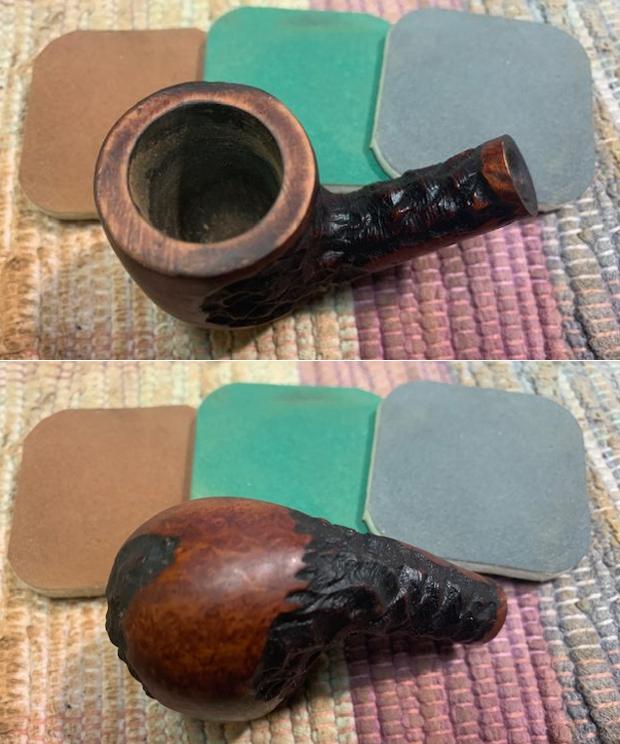
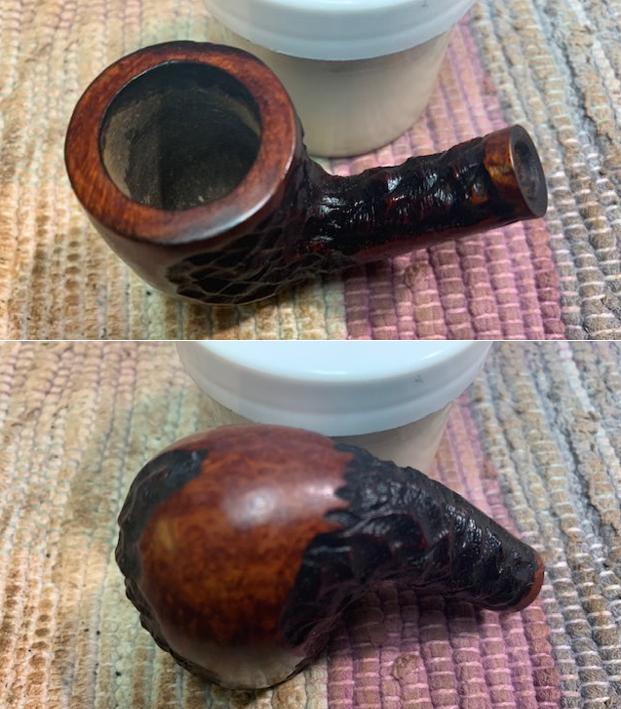
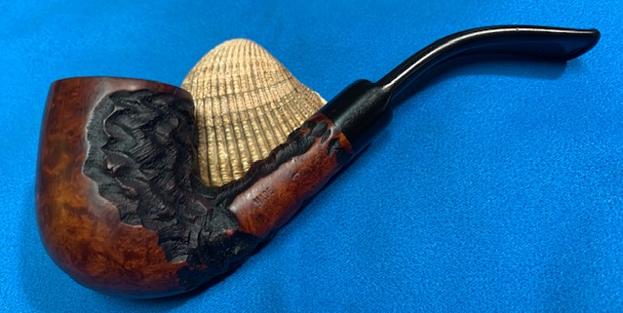
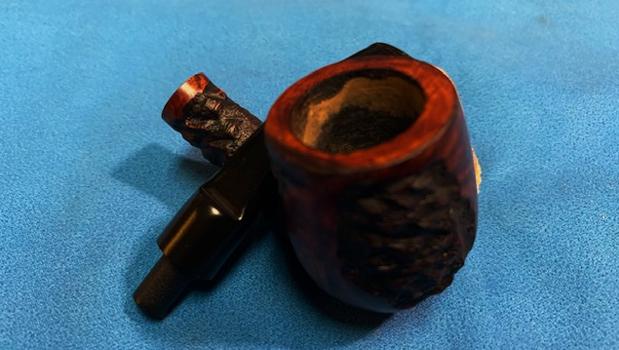
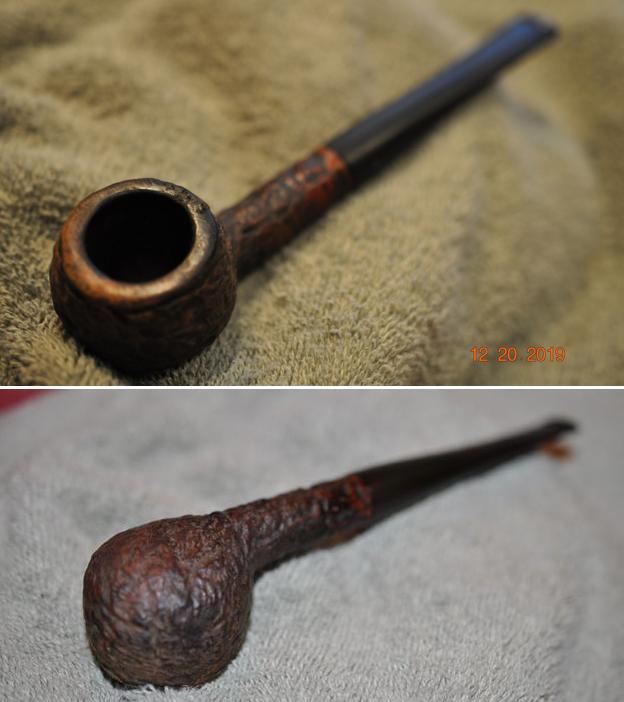
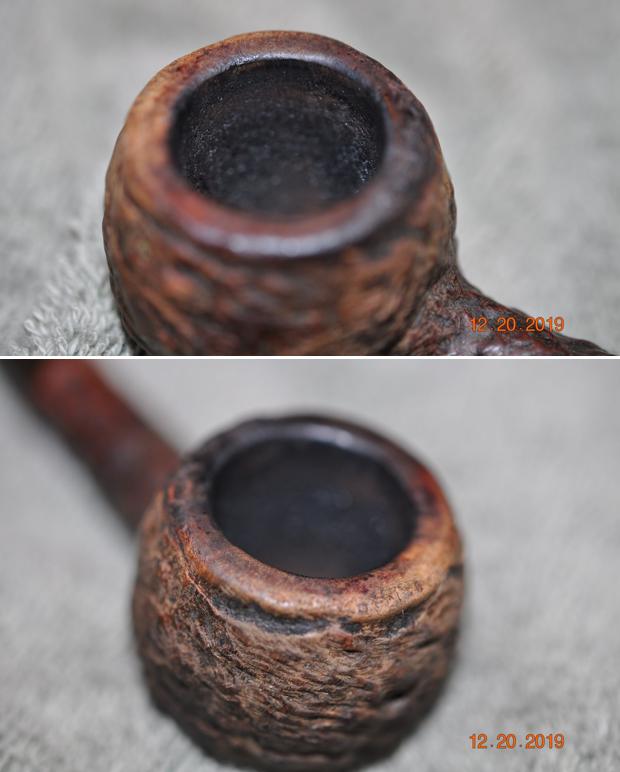
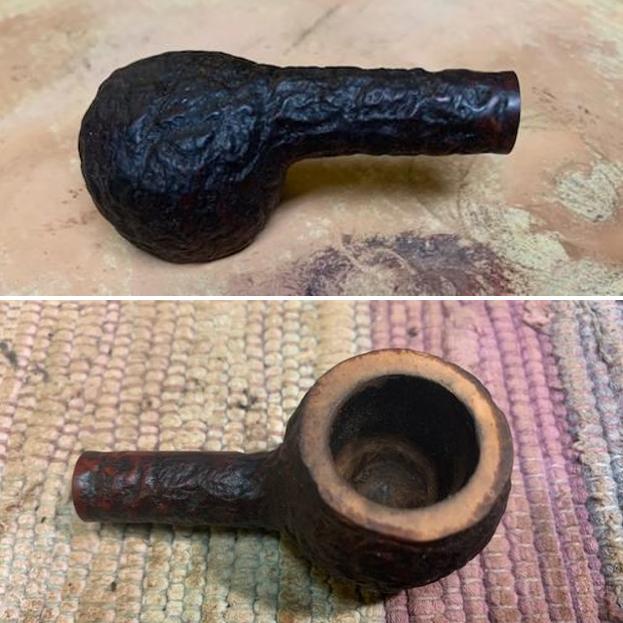
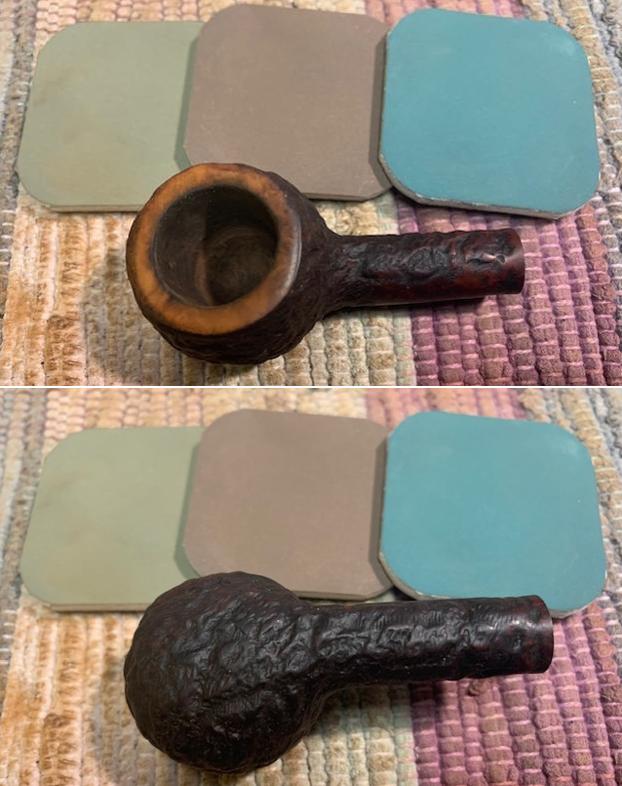
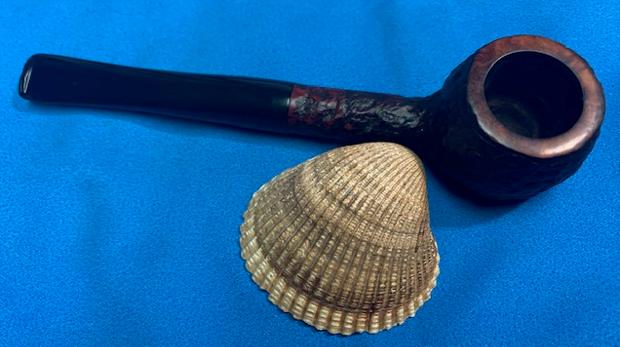
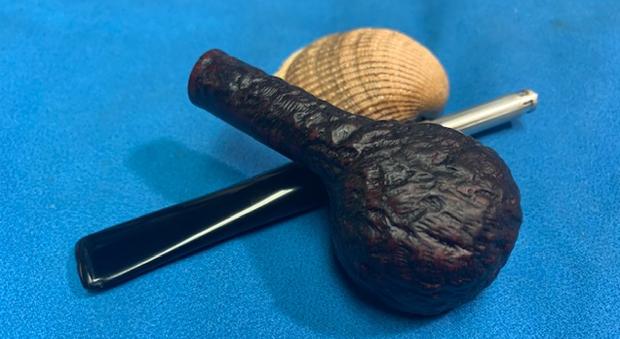
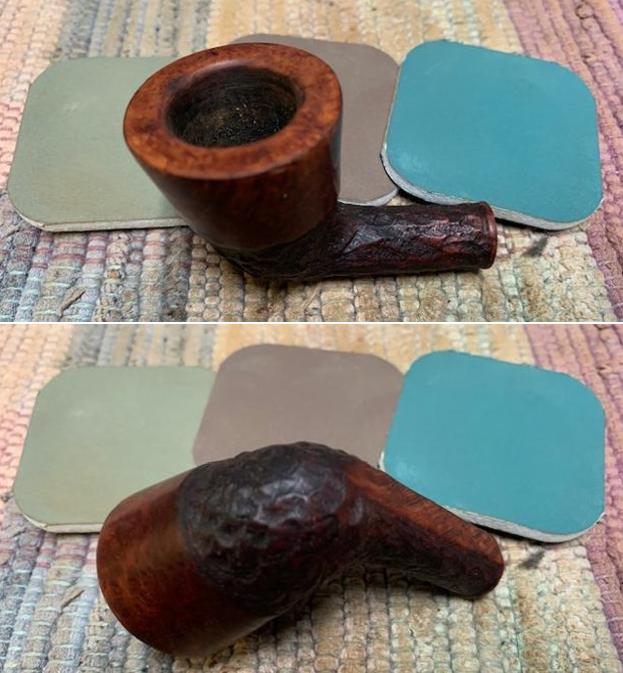
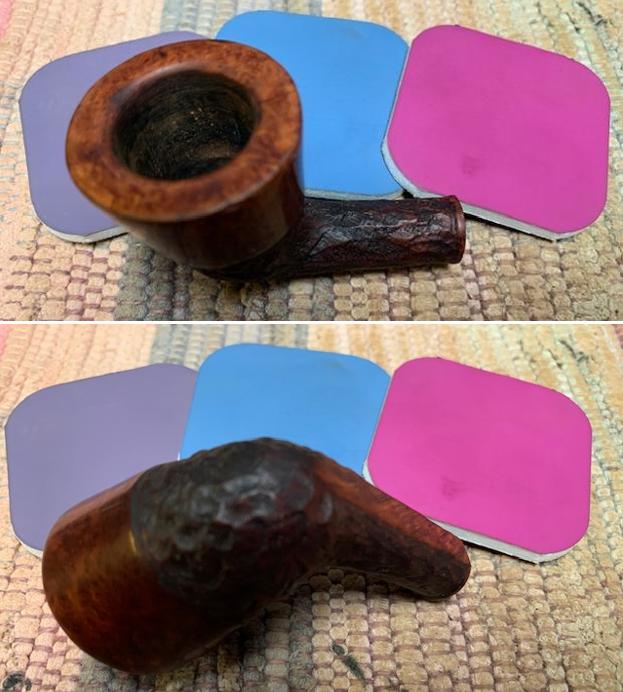
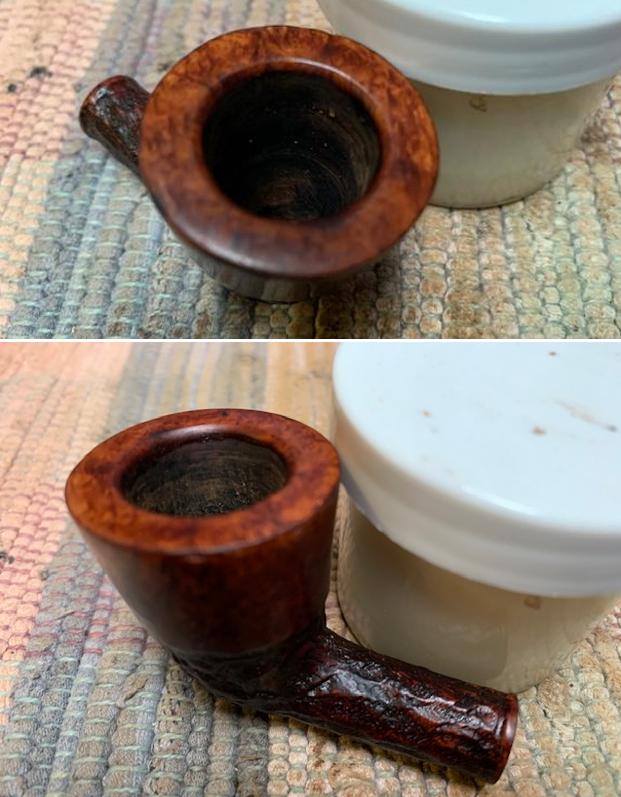
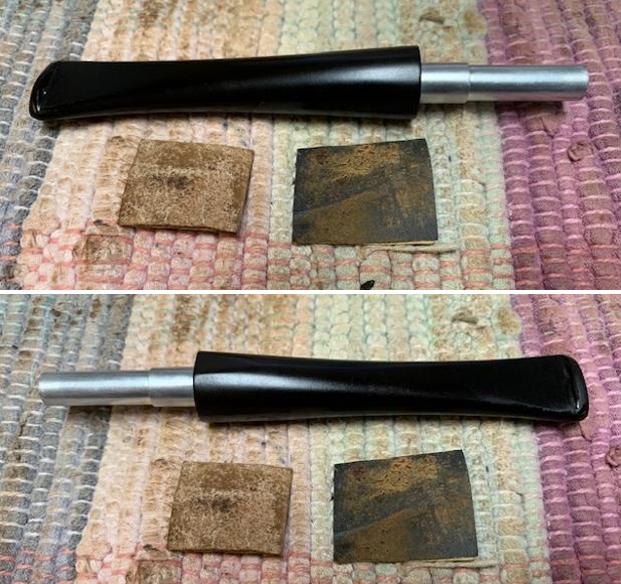
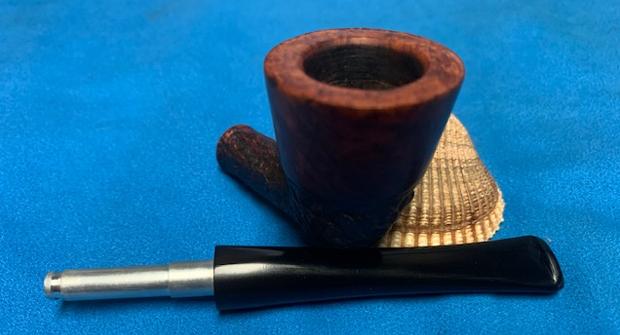
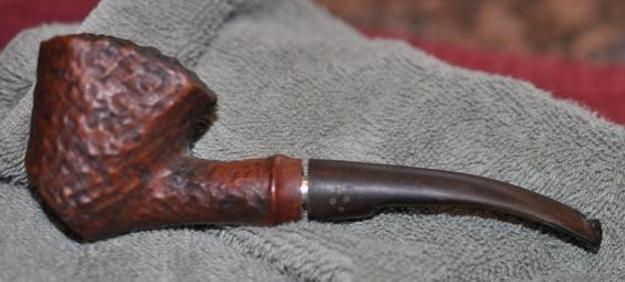
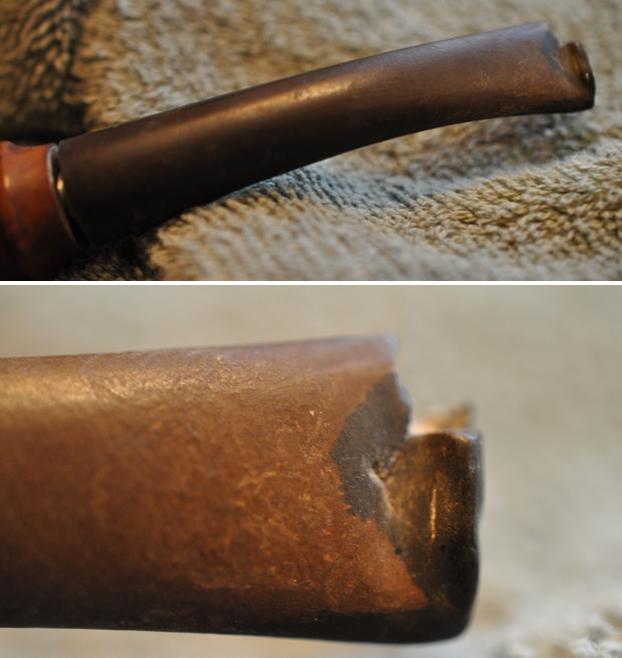
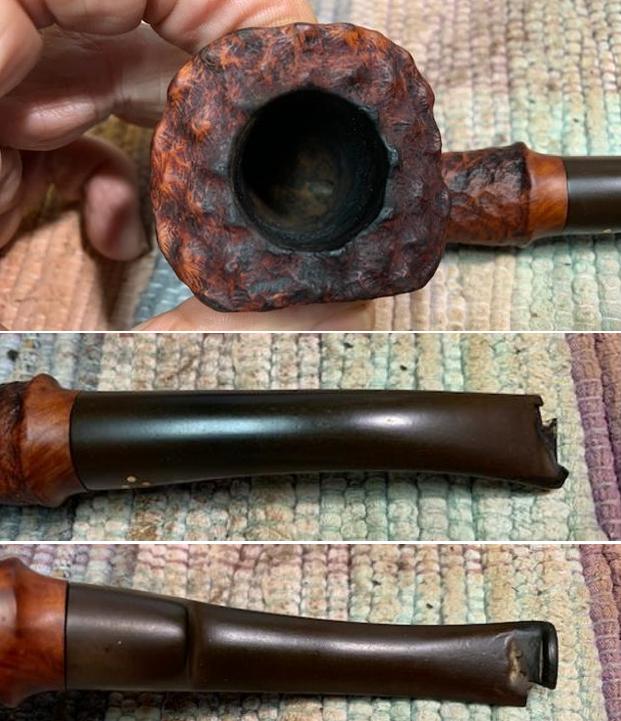
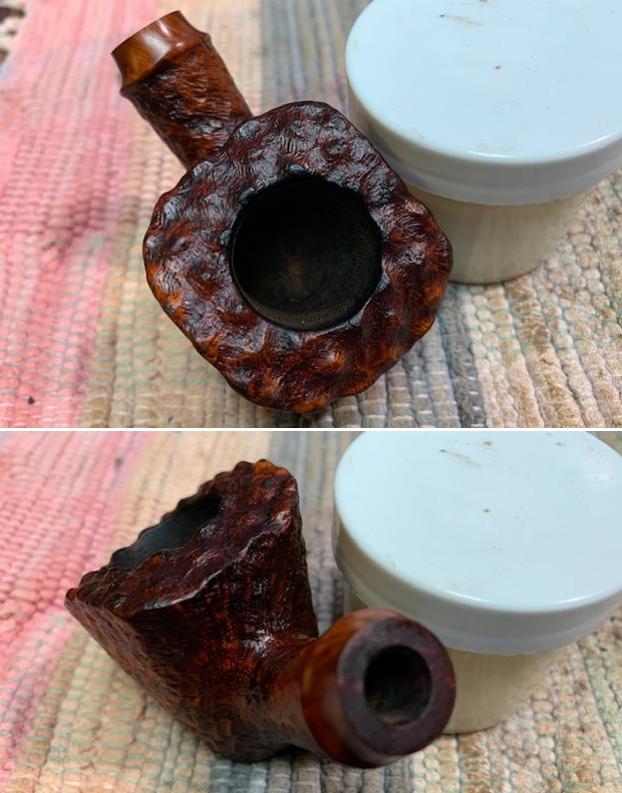
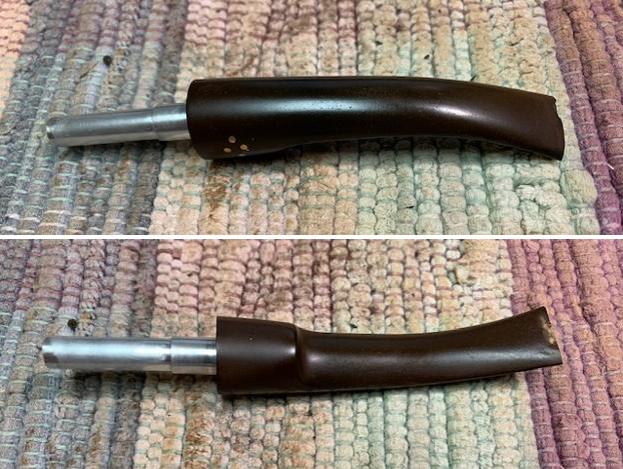
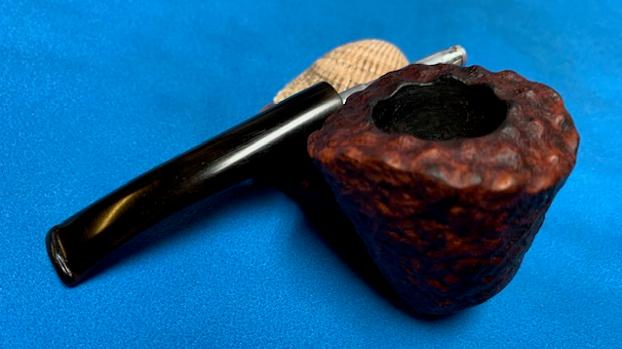
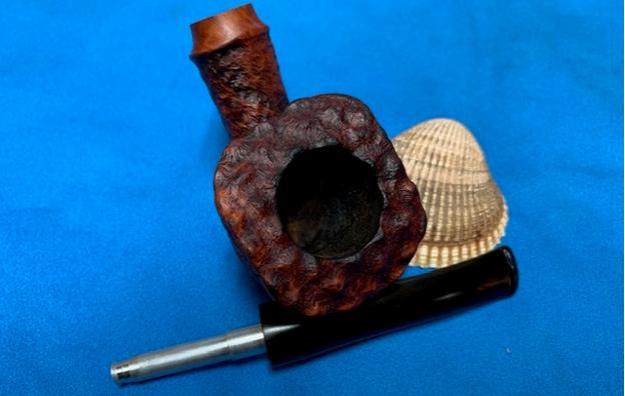
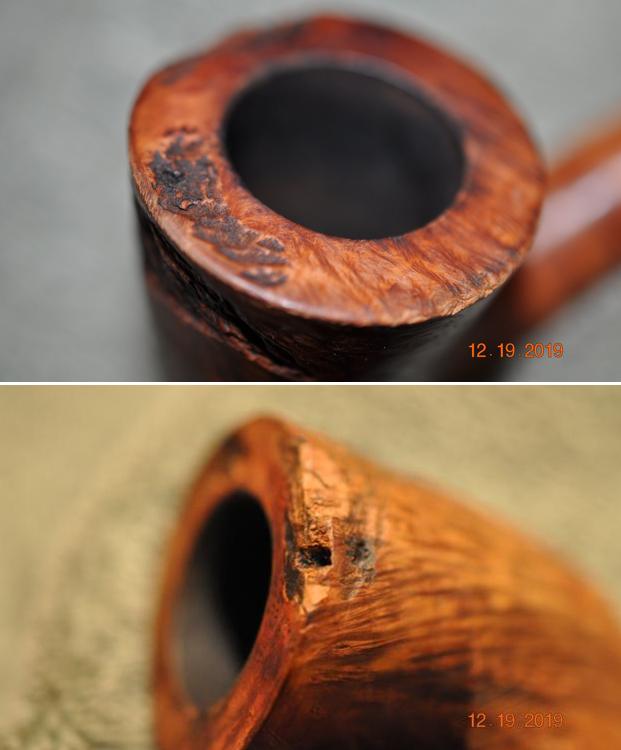
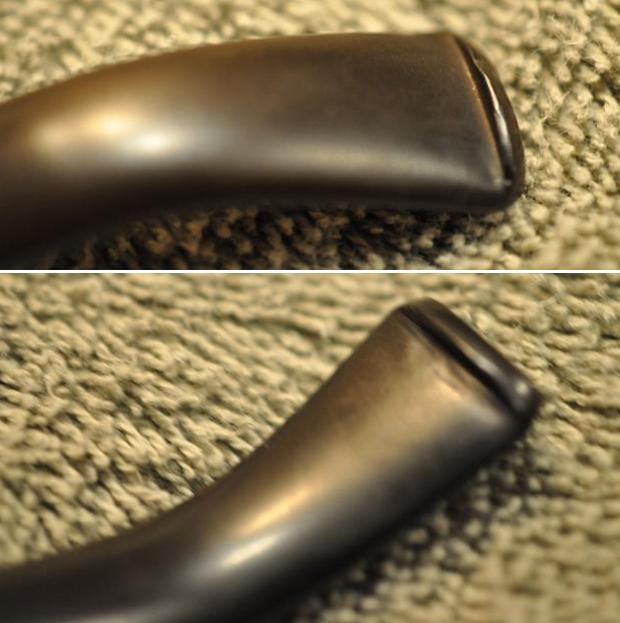
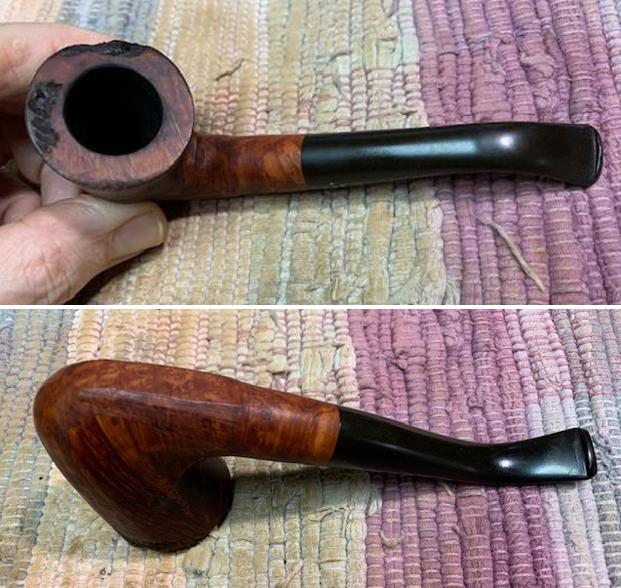
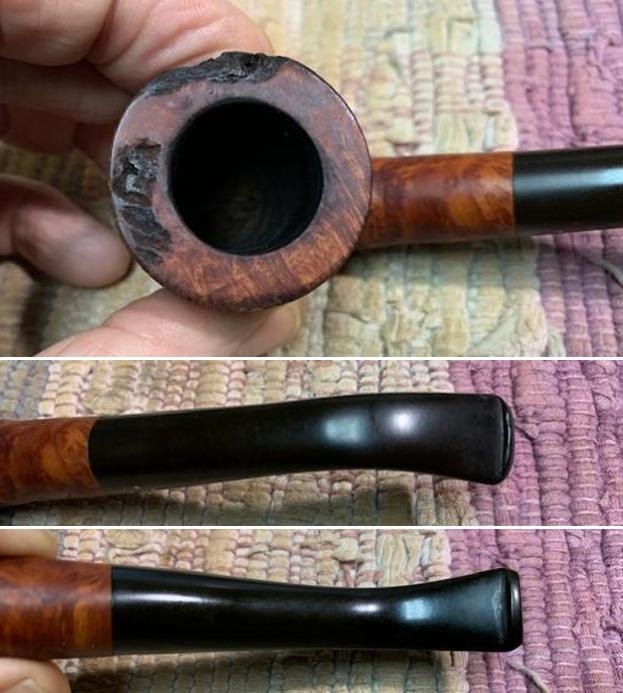
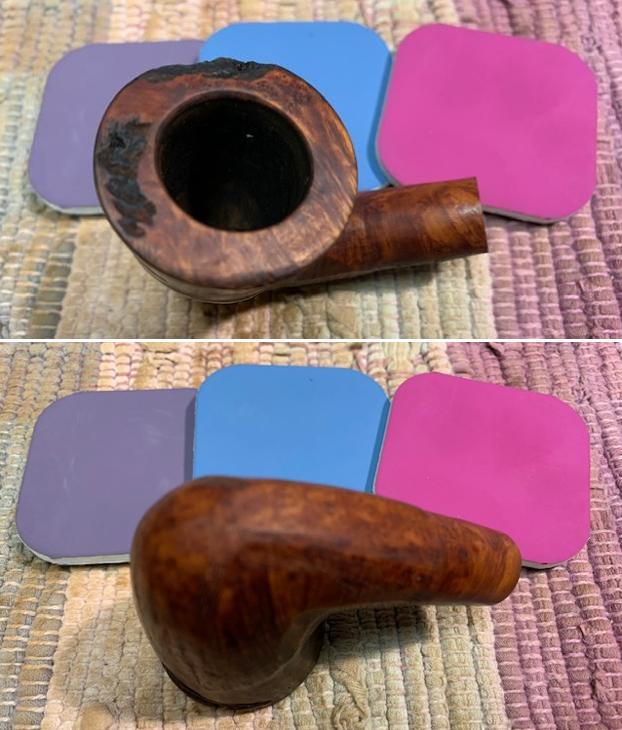
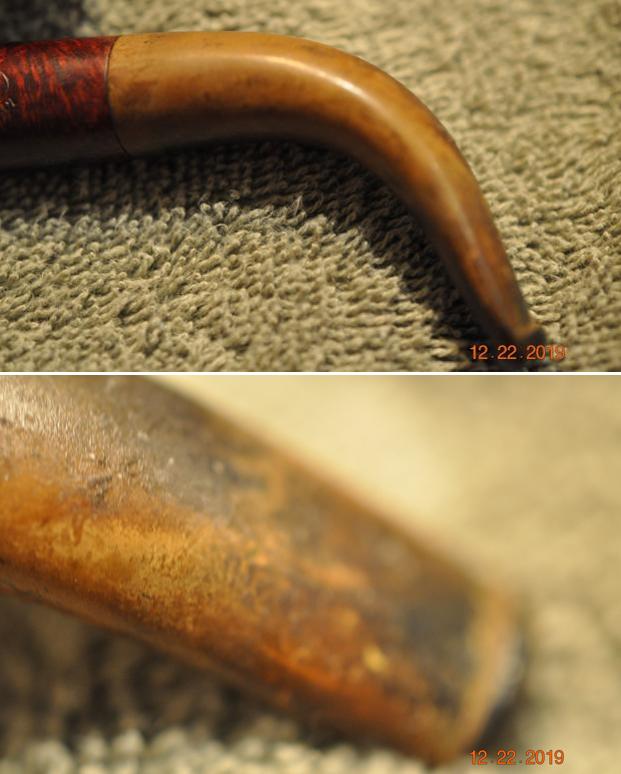
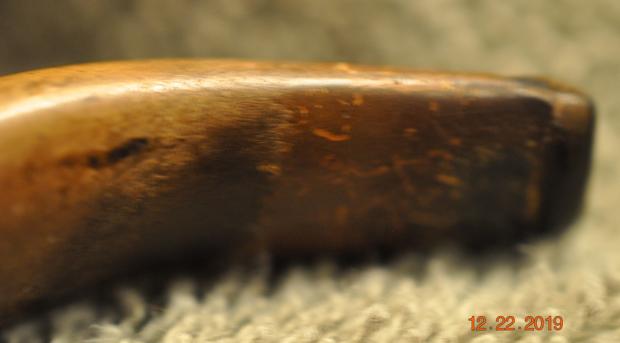
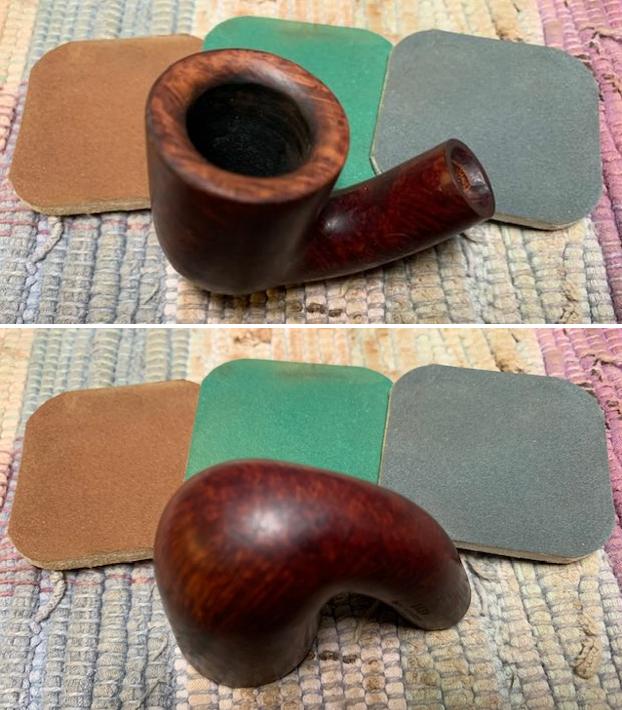
  Jeff took photos of the bowl and rim top to show the cake in the bowl. The smooth beveled rim top showed thick coat of lava that filled in the rim top and hopefully protected the edges from damage. He took photos of the top and underside of the stem showing the tooth chatter, scratching and oxidation on the stem surface and wear on the edges of the button.
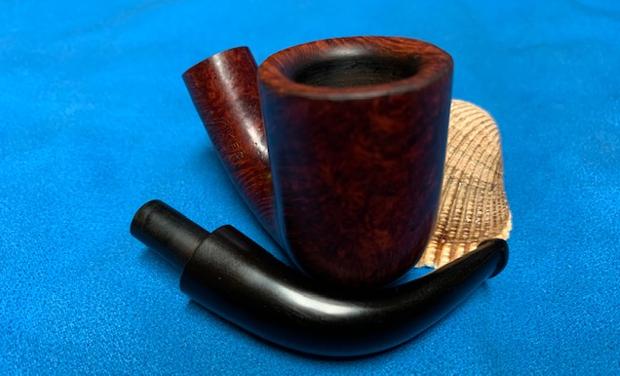
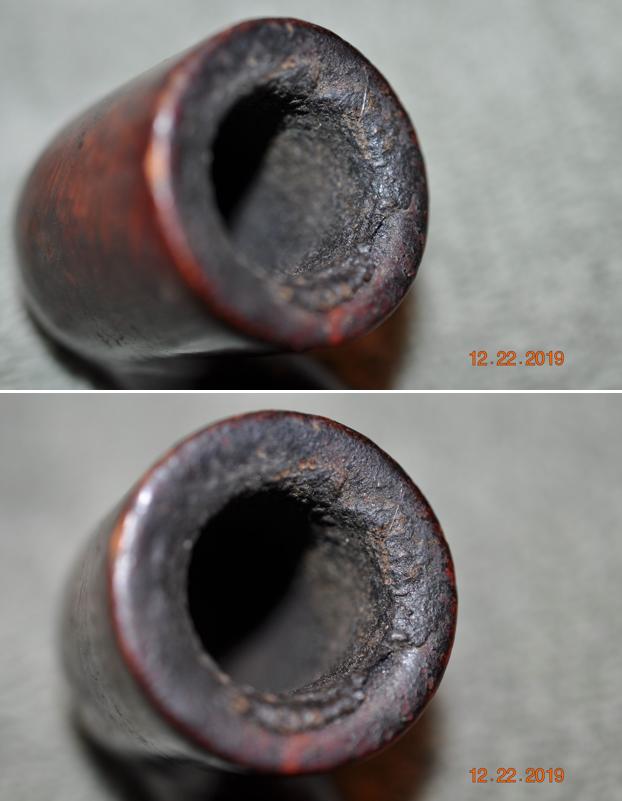
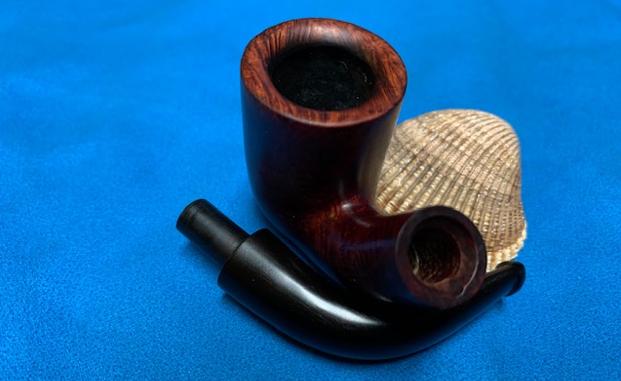
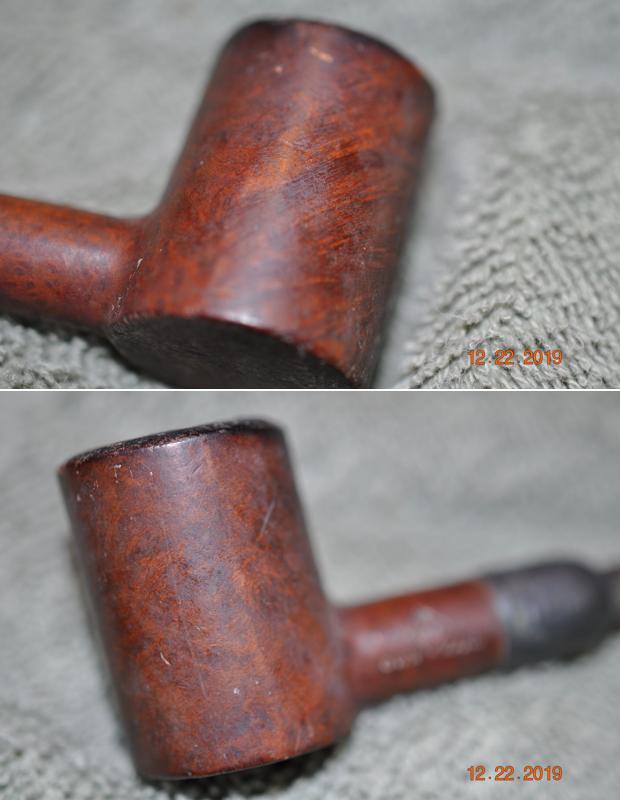
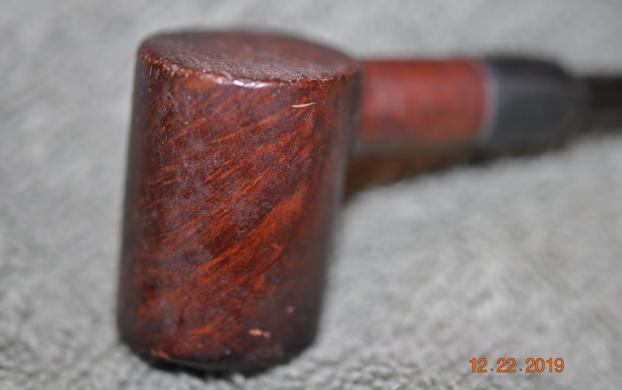
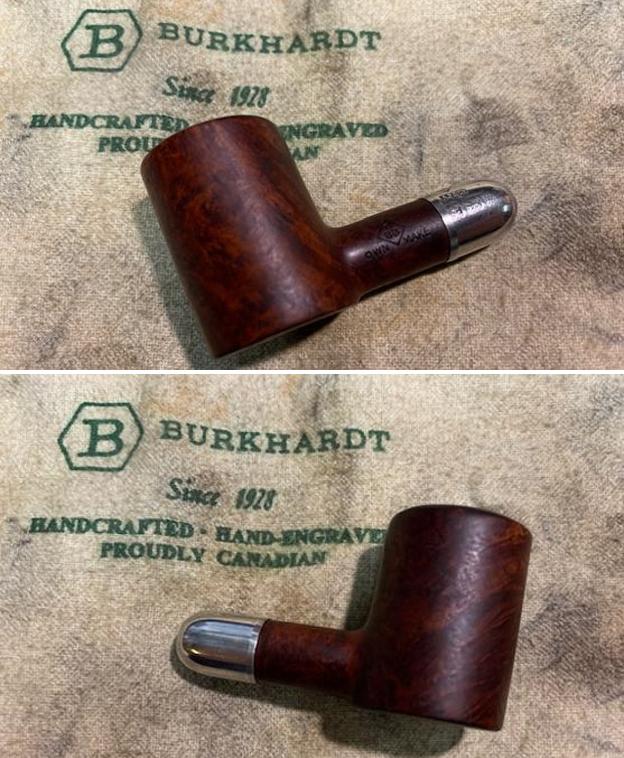
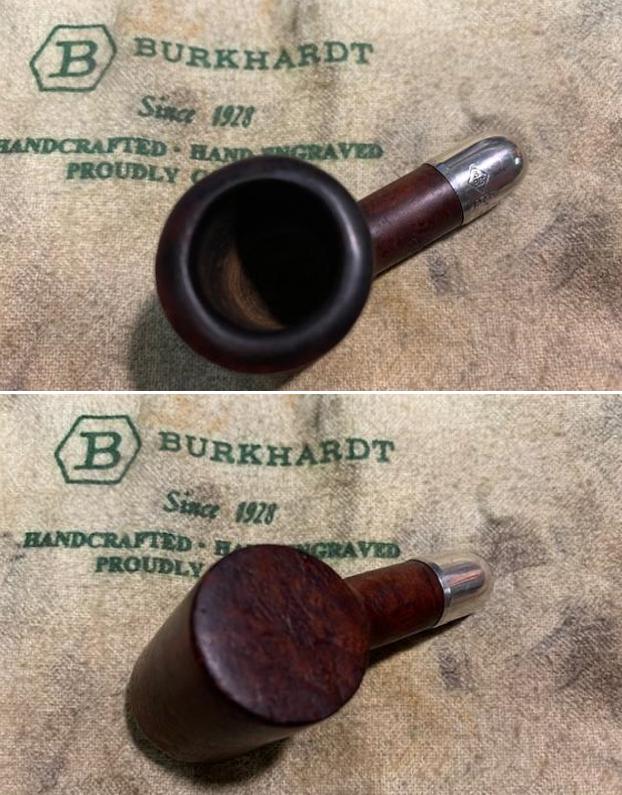
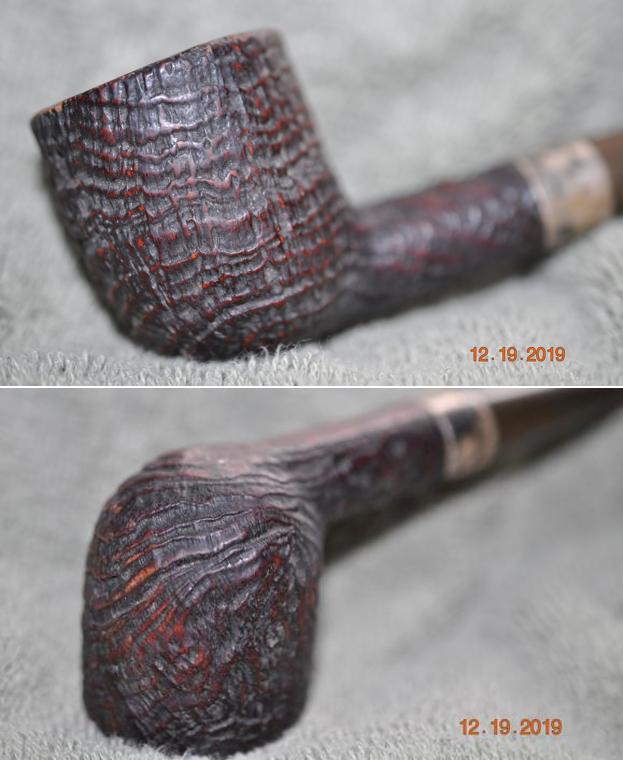
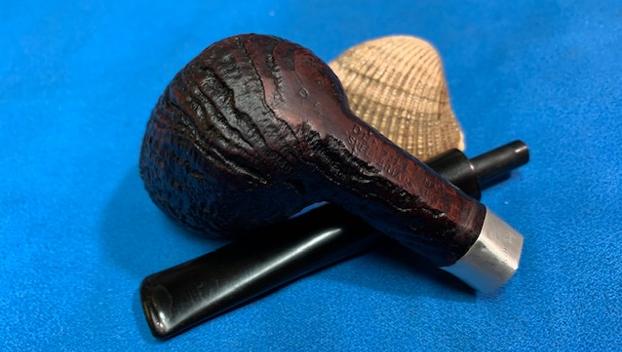
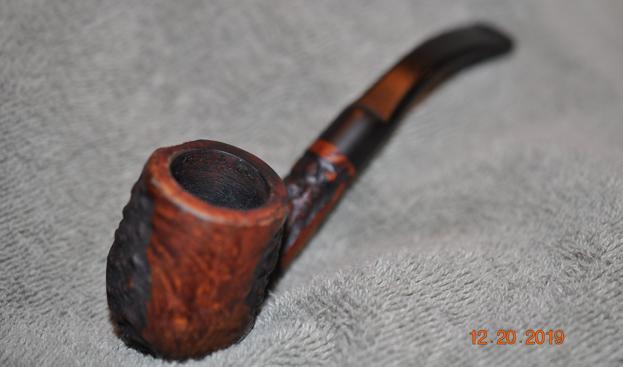
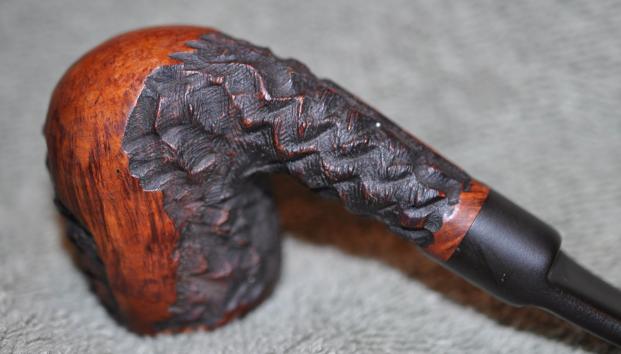
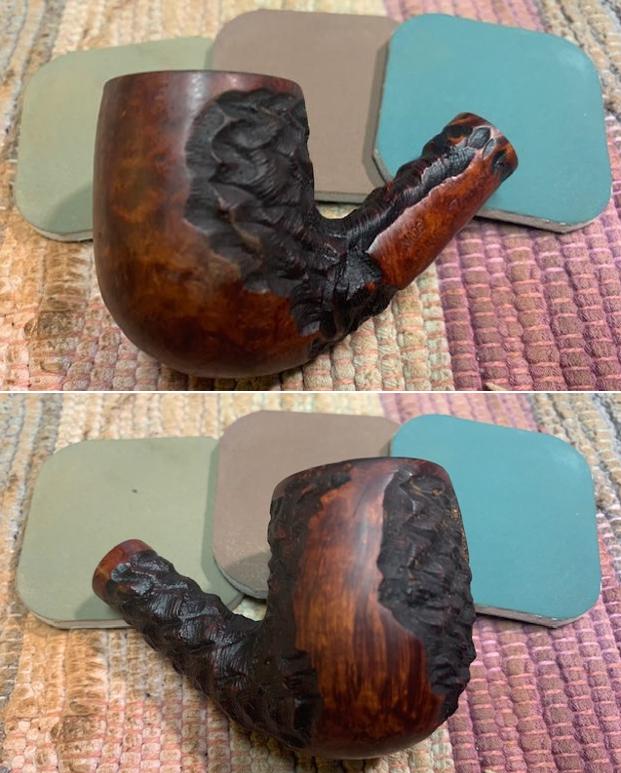
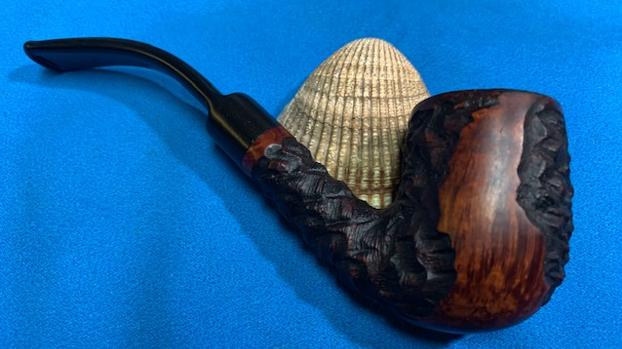
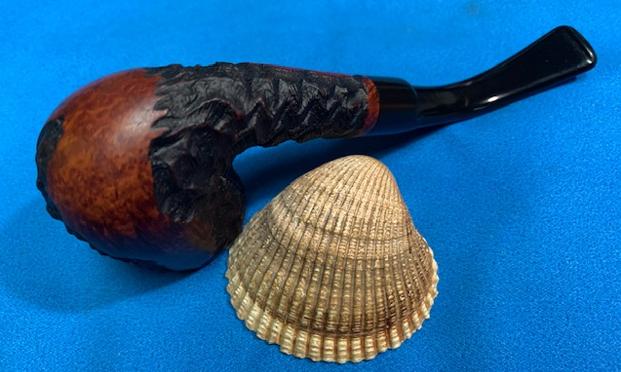
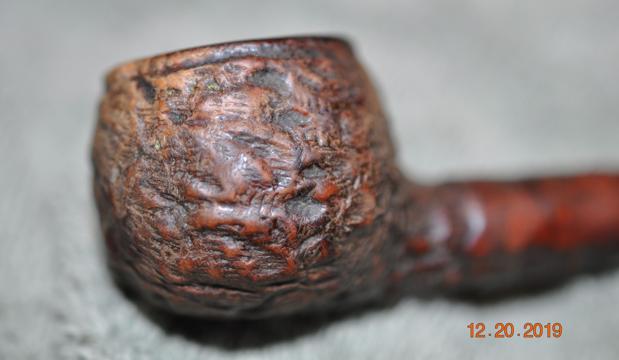
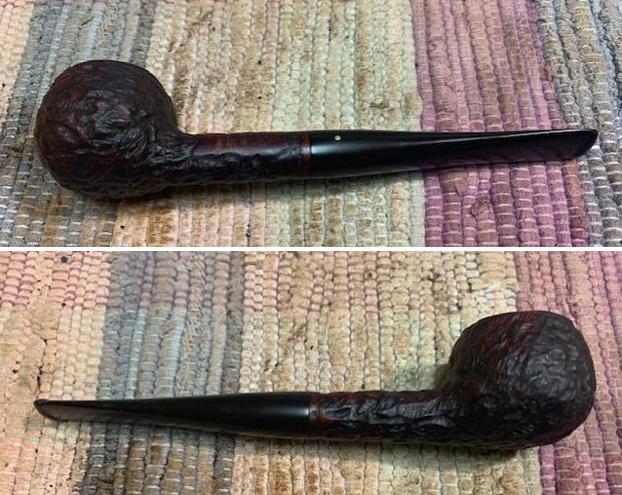
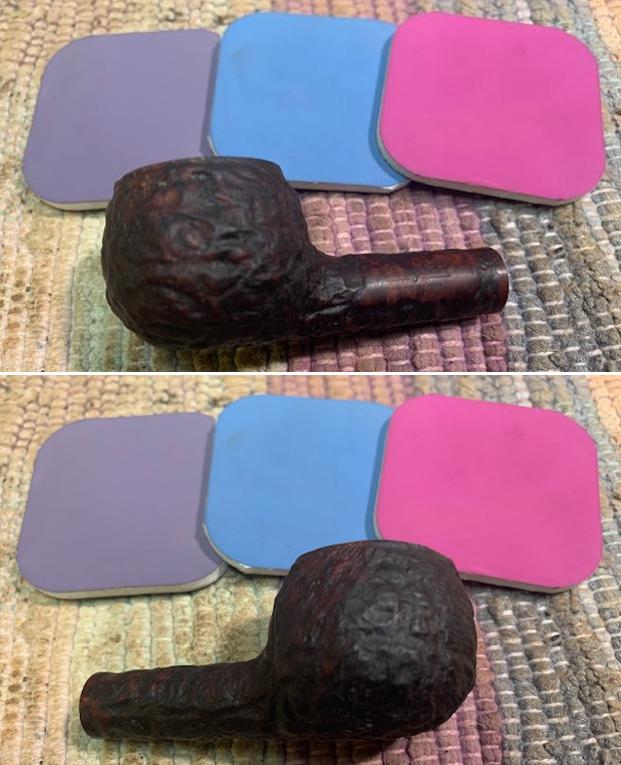
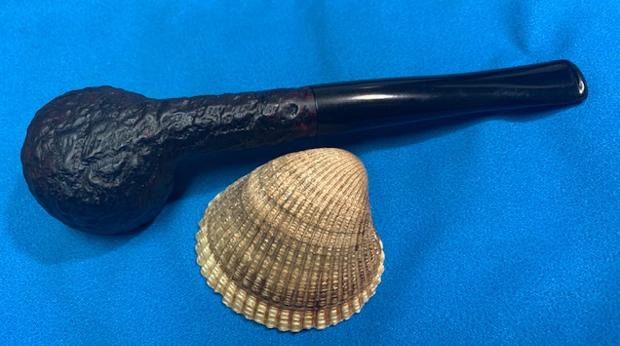
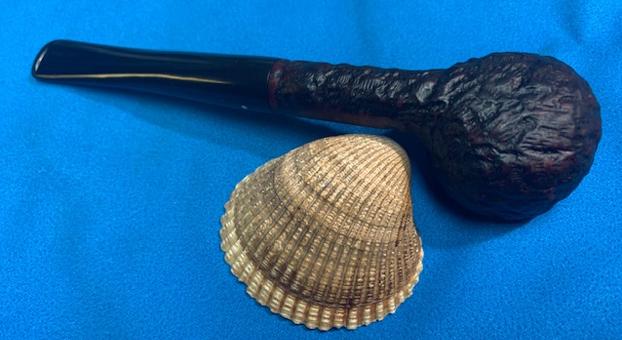
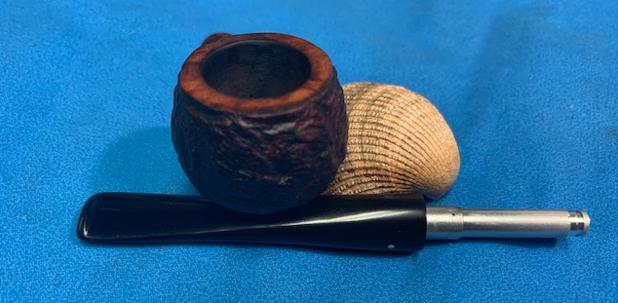
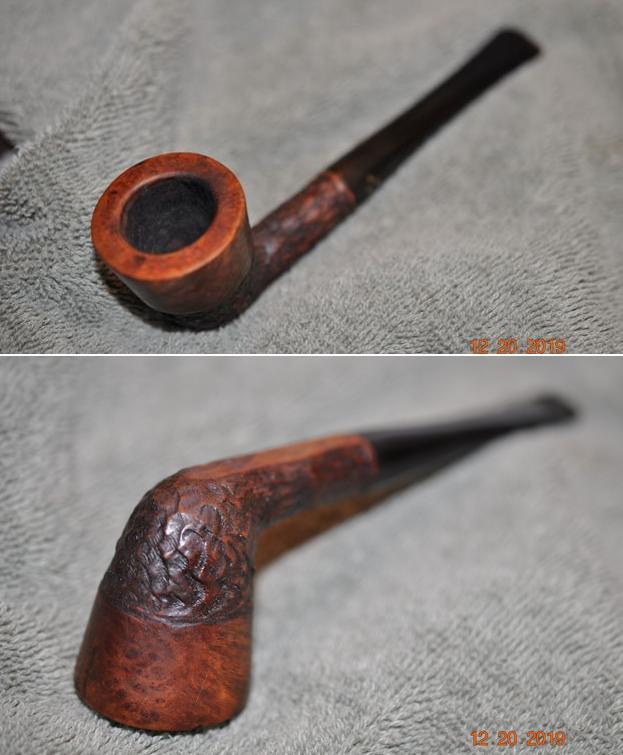
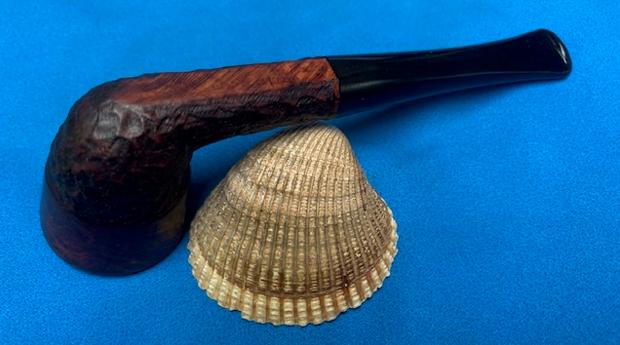
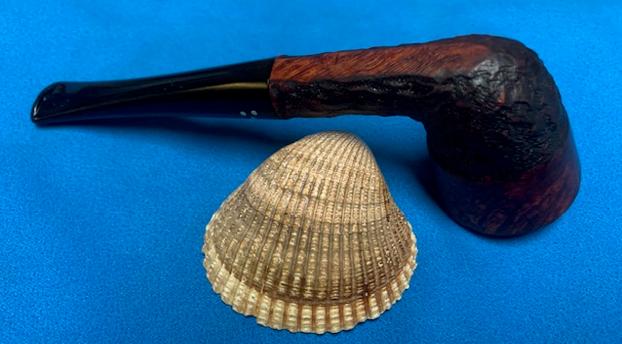
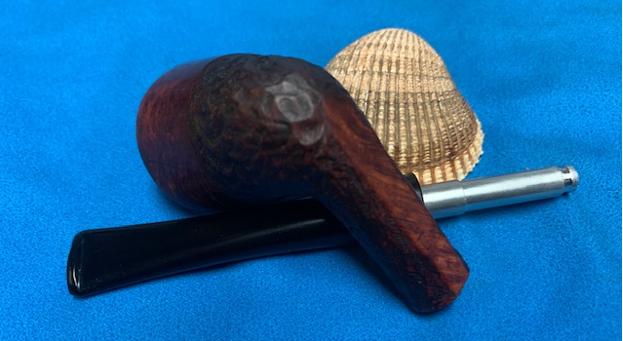
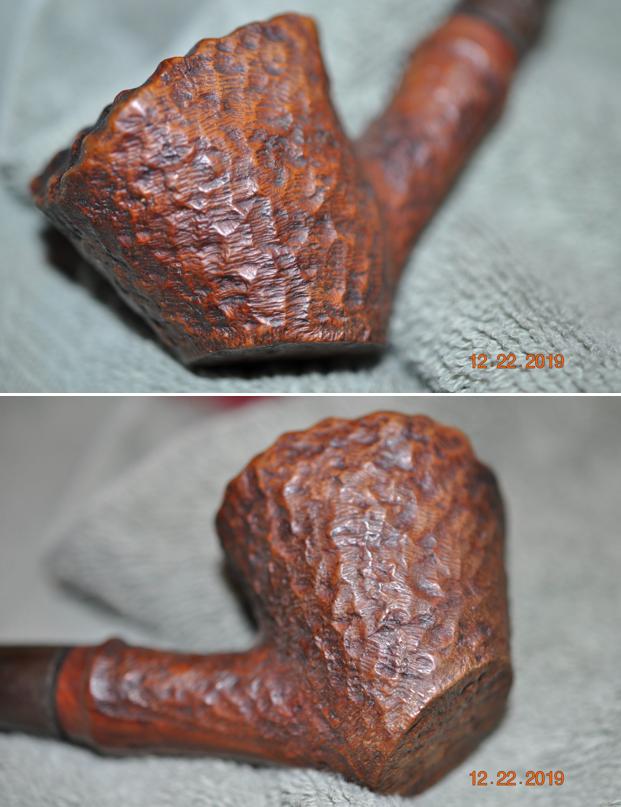
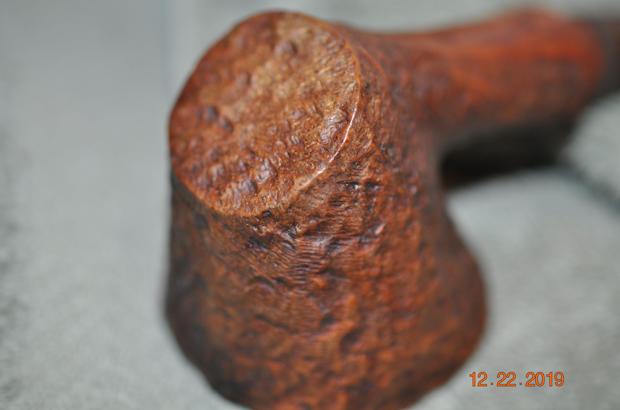
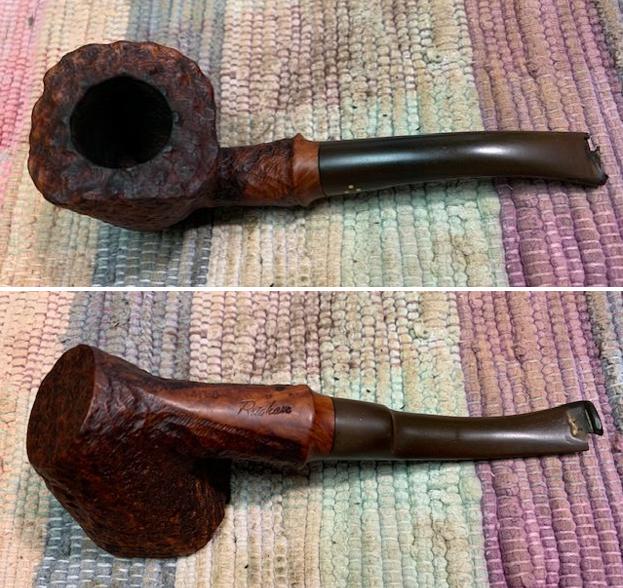
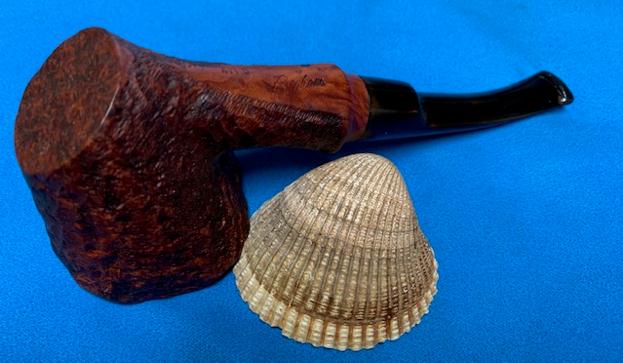
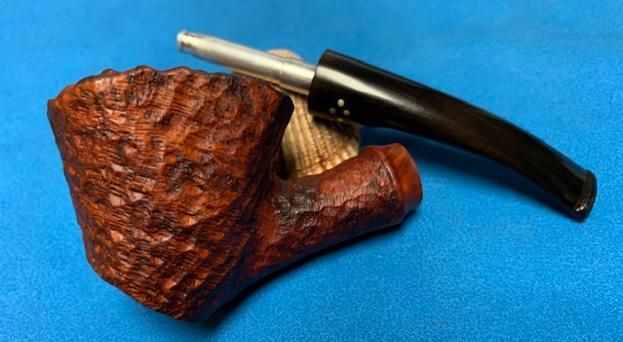
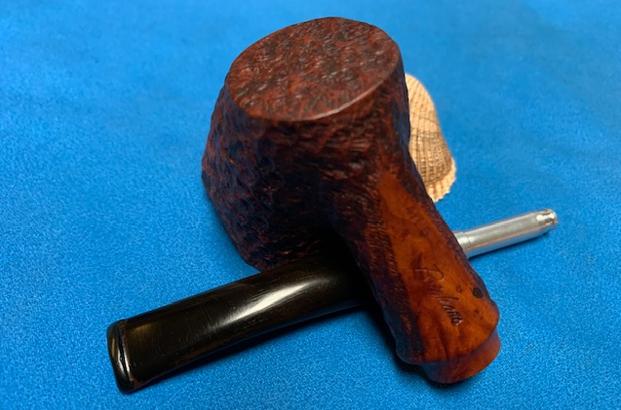
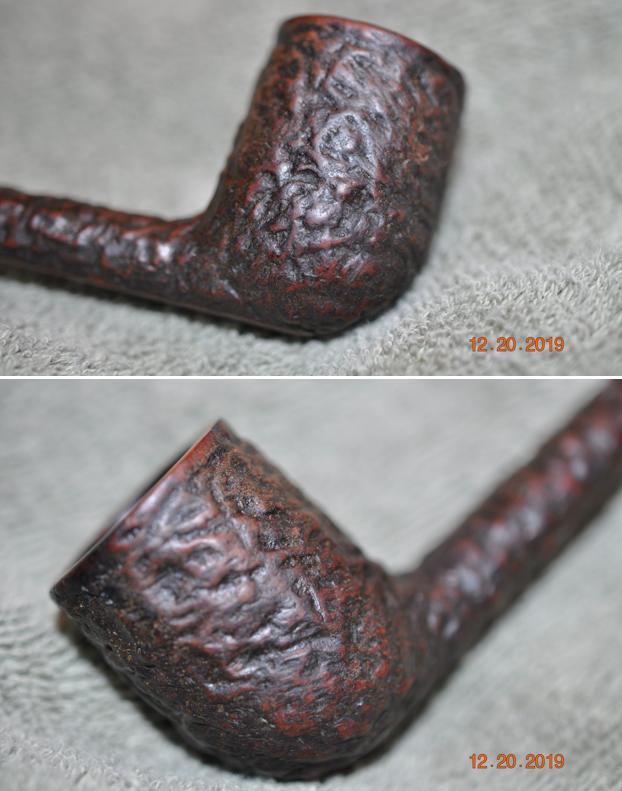
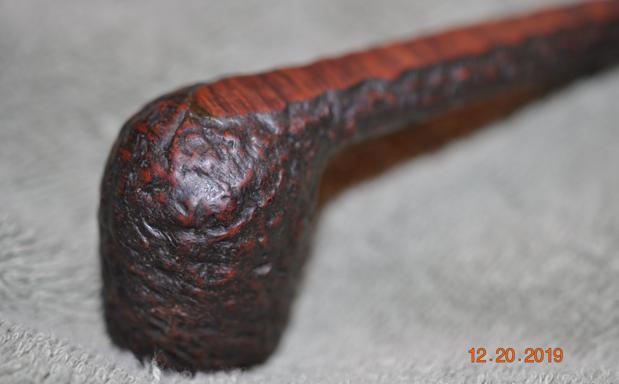
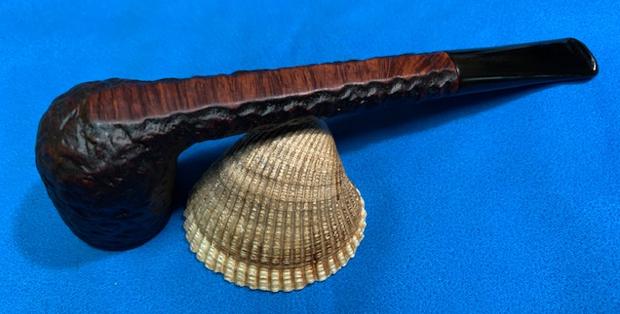
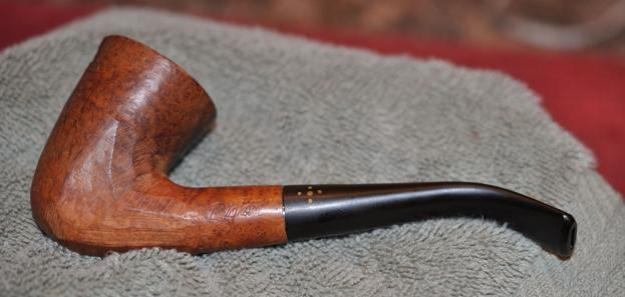
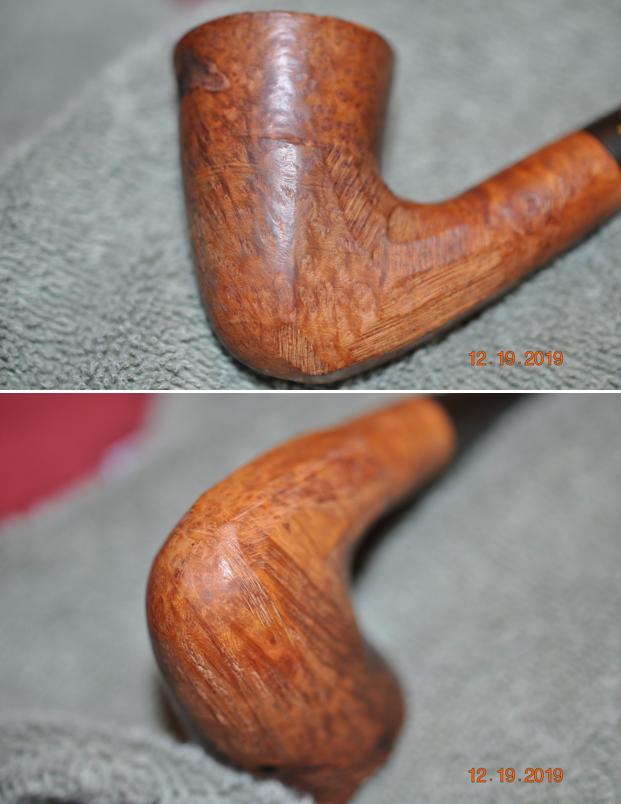
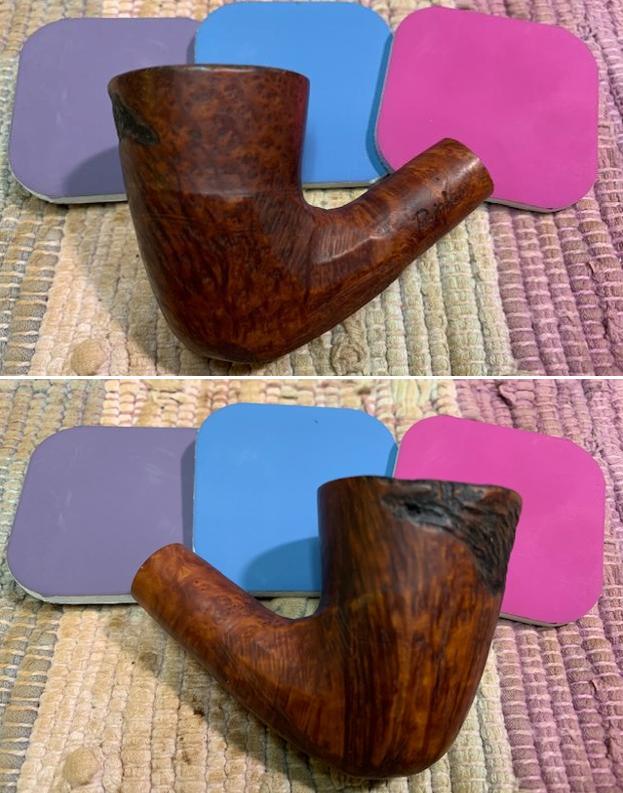
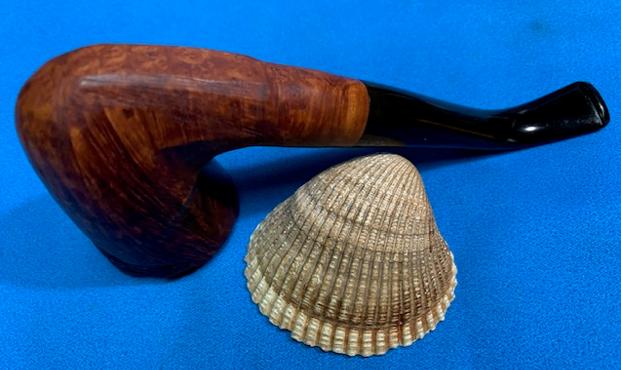
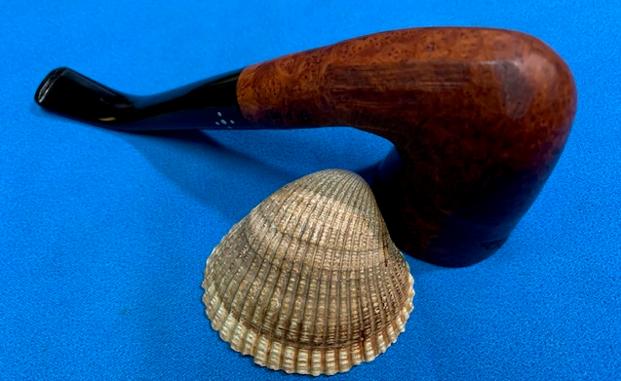
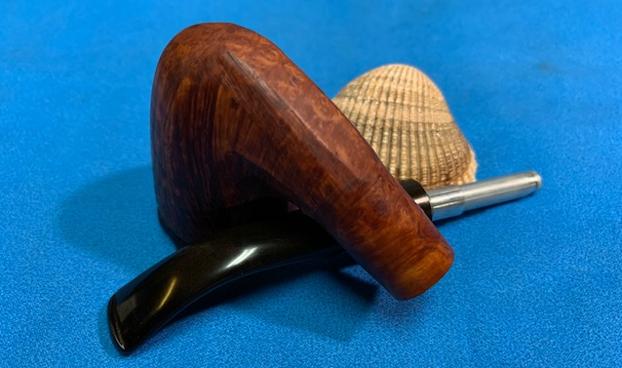
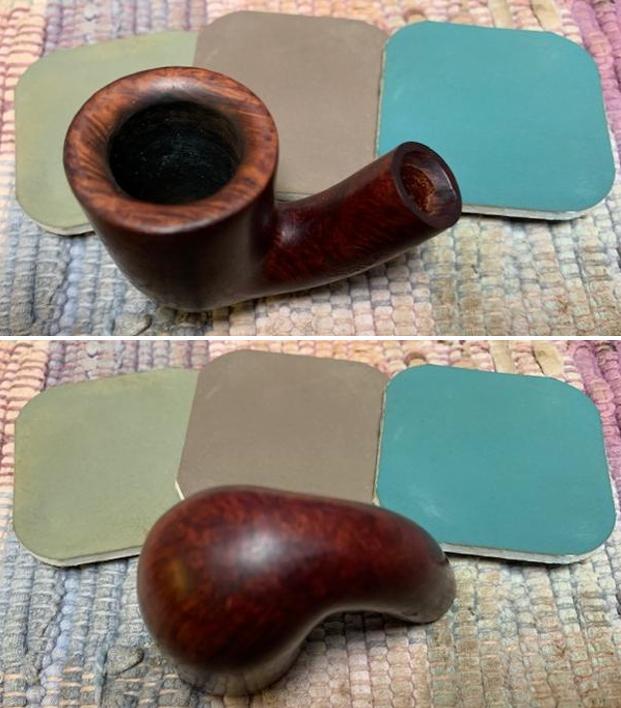
 Jeff took a photo of the side and heel of the bowl to show the condition of the finish. You can see the well done shape and he amazing grain around the bowl and shank. Even under the dirt and debris of the years it looked very good.
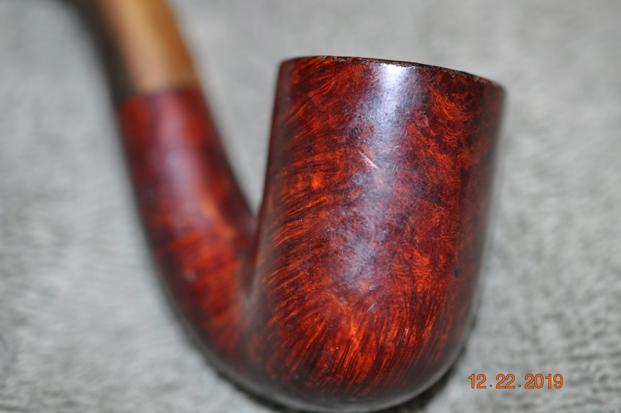
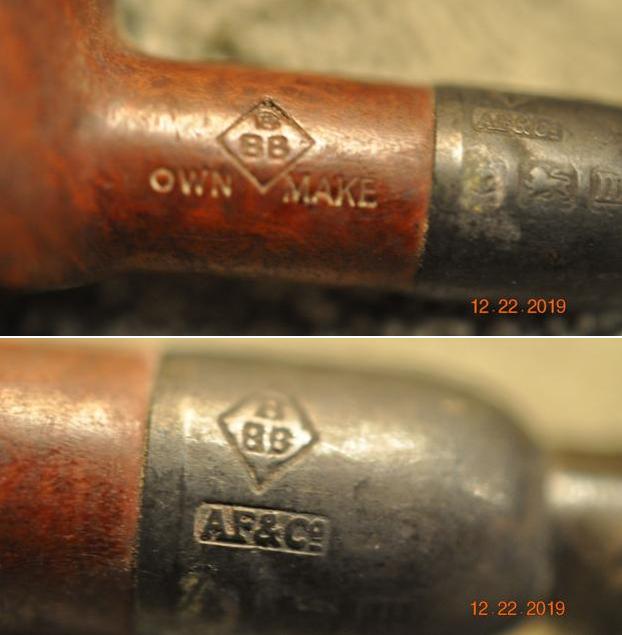
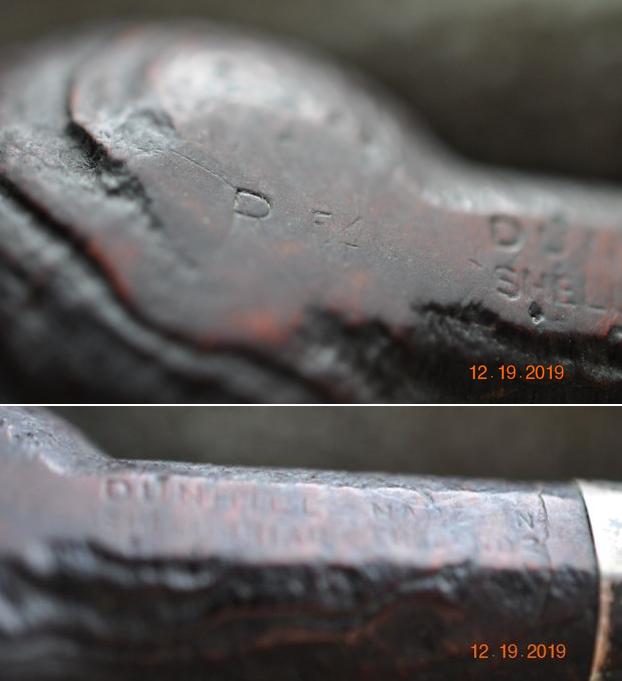
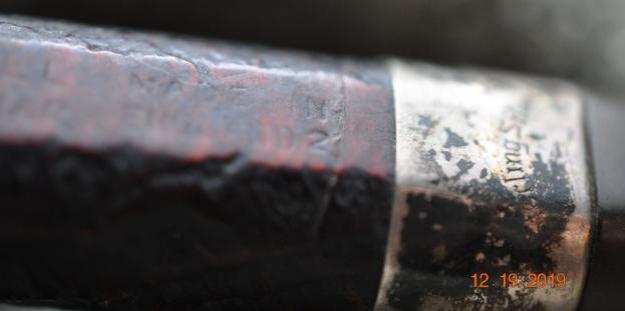
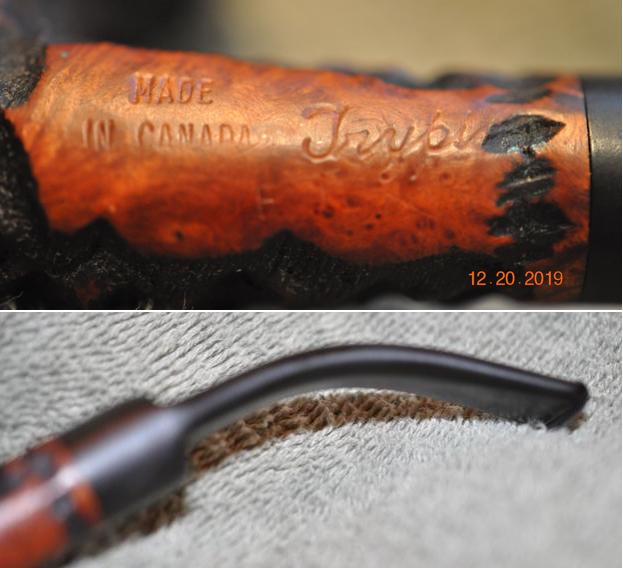
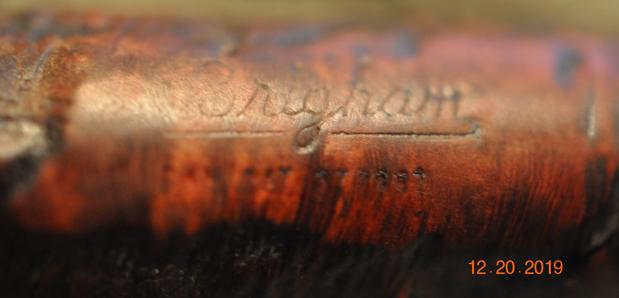
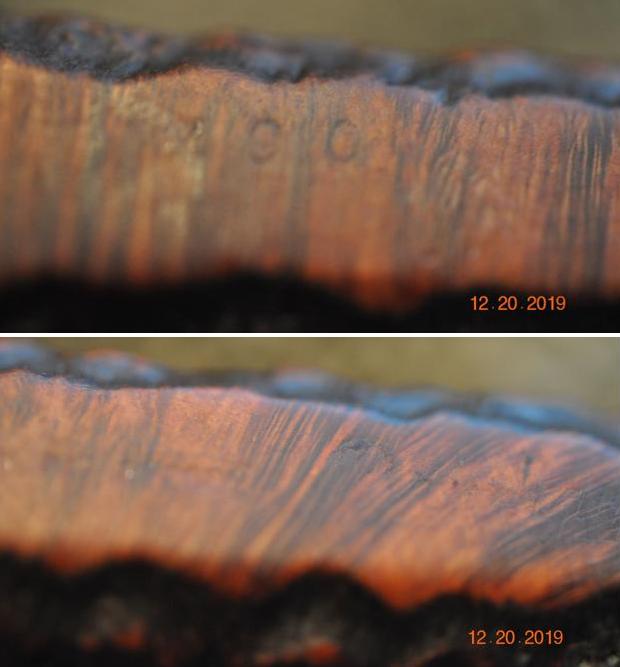
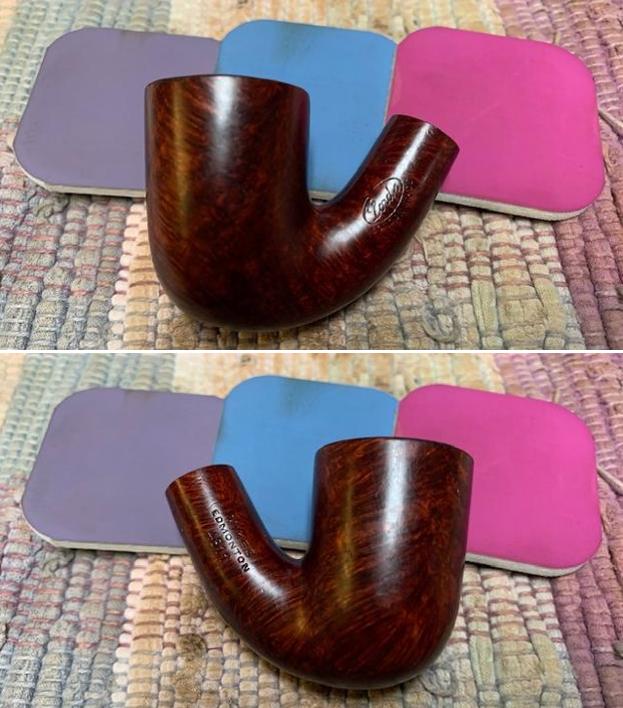
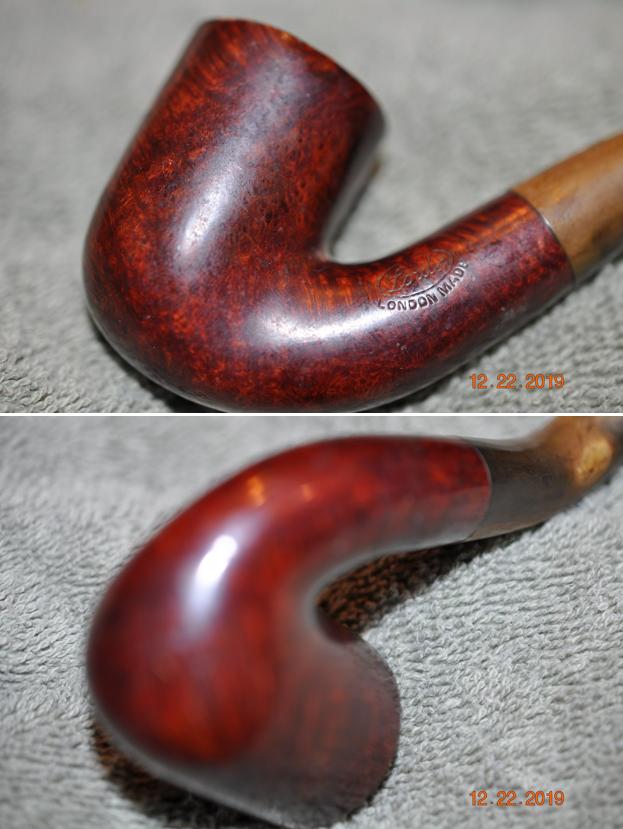 The stamping is clear and readable as noted above. I am still thinking it is linked to GBD pipes.
I was very curious about the Mikes Edmonton stamp on the shank so I did a bit of searching for information on Google to see what I could find. I searched for Mikes Edmonton Tobacco shop to see what I could find. I found a location on the web called Mikes News Stand. They sold newspapers, magazines, cigarettes, cigars and pipes and tobacco it. It was an institution in Edmonton. I found an article about the shop written by Lawrence Herzog in 2015 and I have included portions of the article below (https://citymuseumedmonton.ca/2015/05/04/mikes-news-stand/). I am including clips from the article as well as some photos.
 Mike’s News Stand – Author Lawrence Herzog May 4, 2015
Mike’s quickly became the place to go to hear the local gossip, the fascinating exploits of the bush pilots who gathered there and catch the latest sports scores. Each day, newsboys would fan out from the store along Jasper Avenue, shouting “extra, extra, read all about it!”
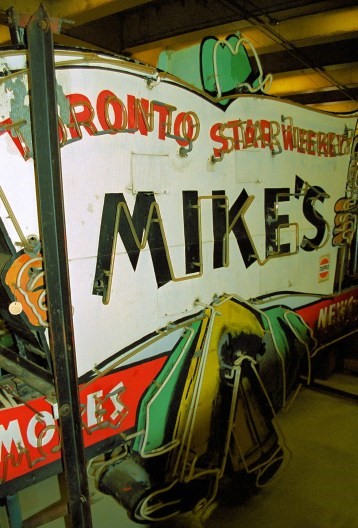
For 70 years, Mike’s News Stand was an Edmonton institution. For most of that time, it operated from a storefront at 10062 Jasper Avenue, and its animated neon sign was a famous downtown landmark.
The sign, with a legs-crossed man reading the Toronto Star Weekly and with one leg that swung back and forth as if by magic, was erected above the entrance in 1934. “News…Smokes,” the sign shouted to Jasper Avenue passersby. Now, it hangs proudly once again as part of the Neon Sign Museum on the side of the Telus building on 104th Street and 104th Avenue.
The store itself opened for business on Tuesday, December 5, 1916, and was called Mike’s News and Tobacco Stand. Named for its owner John Michaels (who everybody knew as Mike), it was billed a place where citizens could send magazines or periodicals and smokes to boys on the front, fighting in the First World War…..

 With its ancient worn linoleum floor, tin ceiling, varnished wood magazine and newspaper shelves darkened by time, distinctive fragrance and cacophony of sounds, Mike’s News Stand was a singular experience. The floors creaked under the coming and going of customers, and the tang of Cuban cigars and pipe tobacco hung in the air. The storefront had housed a shooting gallery in an earlier existence and had bullet holes near the ticket office sign to prove it.…
Michaels retired in 1957 and died in 1962 at the University Hospital at the age of 71. He was survived by his wife Ruth and daughter Audrey Lovelace. The neighbourhood of Michaels Park at 38th Avenue north of Whitemud Drive, 66th Street to 76th Street, was later named by the City in his honour….
Two years later, with plans afoot to demolish the building Mike’s had long called home and construct gleaming new Scotia Place, the news stand relocated to a sterile cubicle in the Metropolitan Building at 10162 101st Street. The landmark sign, counters and some of the old fixtures went with it, but the spirit of the old place didn’t.
Ruth Michaels told a Journal reporter that it was too bad the old store had to close. “I suppose it’s one of those things called progress,” she said at the time from her retirement home in Hollywood, Florida. “Sometimes I wondered how the place has stood up this long.” She said the secret to the success and the longevity was “simply because we gave personal attention to the individual. Johnny knew practically everyone personally.”
The store returned to Jasper Avenue in January 1983 in the Melton Building at 103rd Street, and then moved again to a retail frontage at 10119 101 Street. But business continued to drop, and the end came in April 1986. Wire and wooden display fixtures were hauled out, and Mike’s closed its doors for good.
With the information I learned in the above article I had the background on the stamping on the pipe. It was a pipe made for Mike’s News and Tobacco Stand. I could not however find out who made the pipe. The shape number on the pipe seemed to point to GBD as the maker in my opinion but I would not be certain of that. Now it was time to work on the pipe.
I am really happy to have Jeff’s help on cleaning up the pipes that we pick up along the way. He cleaned this filthy pipe with his usual penchant for thoroughness that I really appreciate. This one was a real mess and I did not know what to expect when I unwrapped it from his box. He reamed it with a PipNet pipe reamer and cleaned up the reaming with a Savinelli Fitsall Pipe Knife. He scrubbed out the internals with alcohol, pipe cleaners and cotton swabs until the pipe was clean. He scrubbed the exterior of the bowl with Murphy’s Oil Soap and a tooth brush to remove the grime and grit on the briar and the lava on the rim top. The finish looks much better and the beveled rim top was actually very visible. There were scratches and nicks in the bevel that needed to be cleaned up but it looked good. Jeff soaked the stem in Before & After Deoxidizer to remove the oxidation on the rubber. He scrubbed it with Soft Scrub All Purpose Cleaner to remove the majority of the oxidation. When the pipe arrived here in Vancouver I was amazed it looked so good.
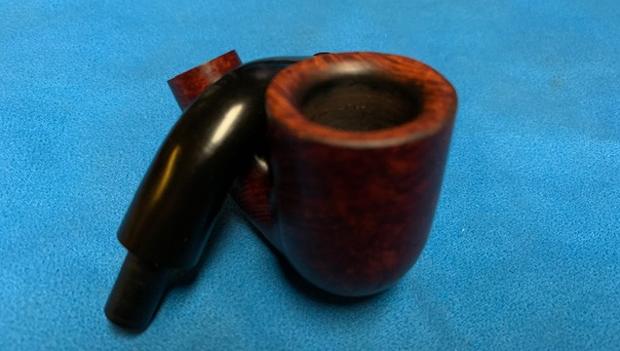
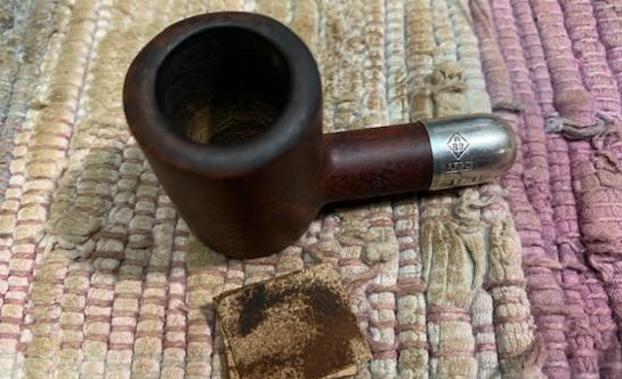
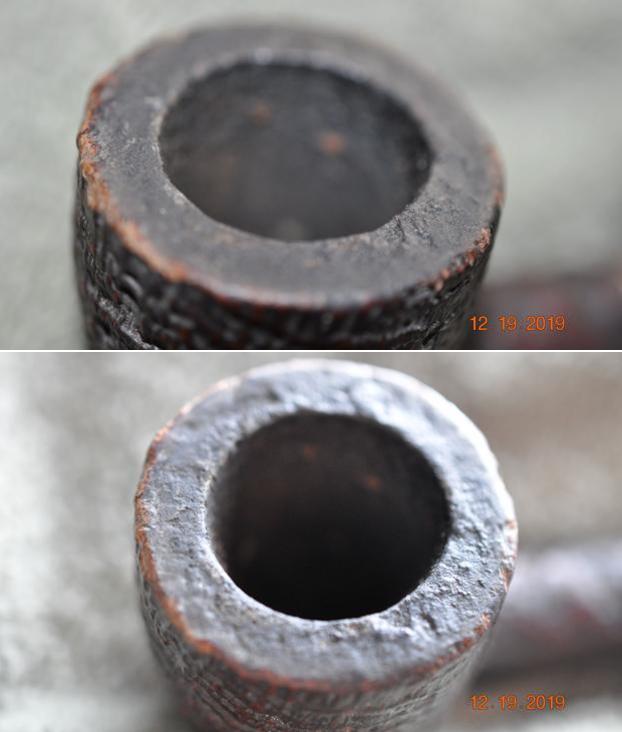
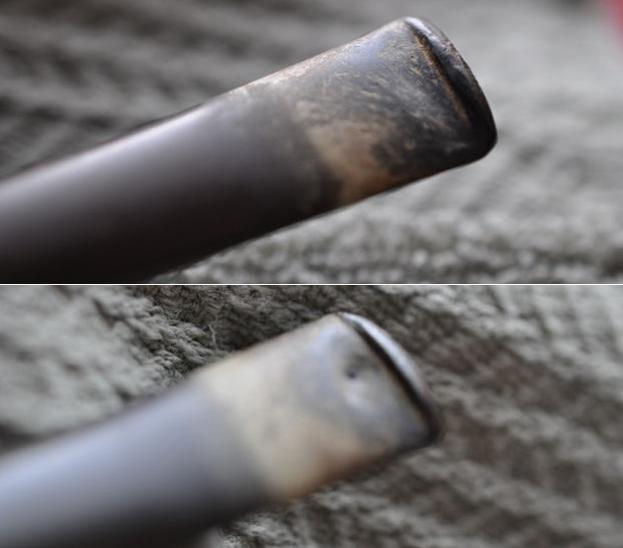
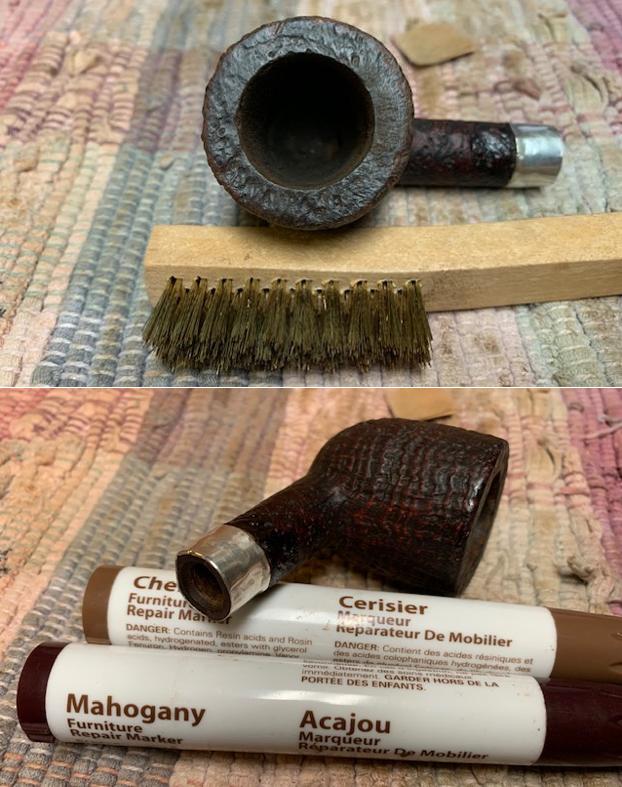
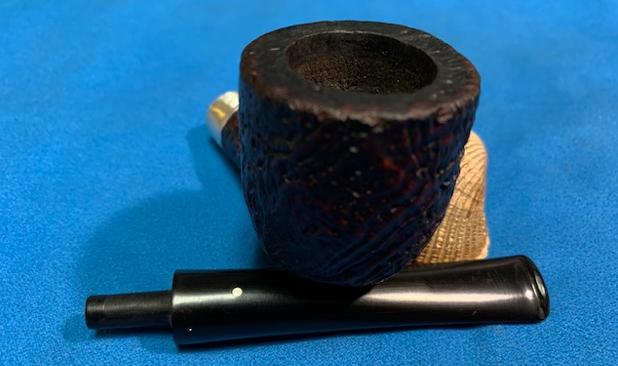
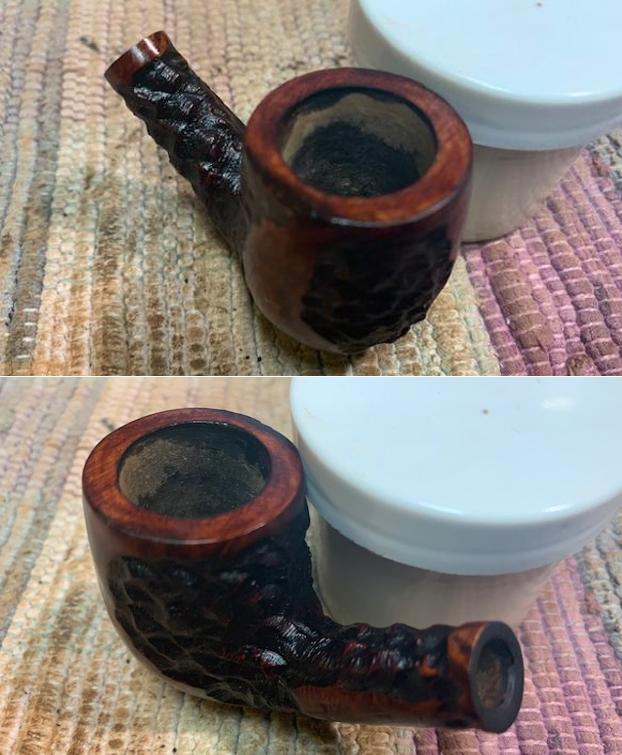
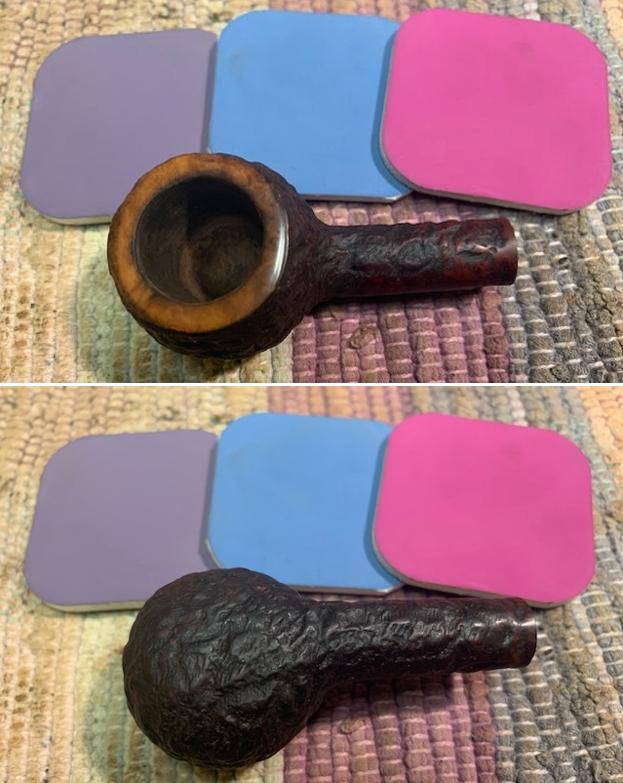
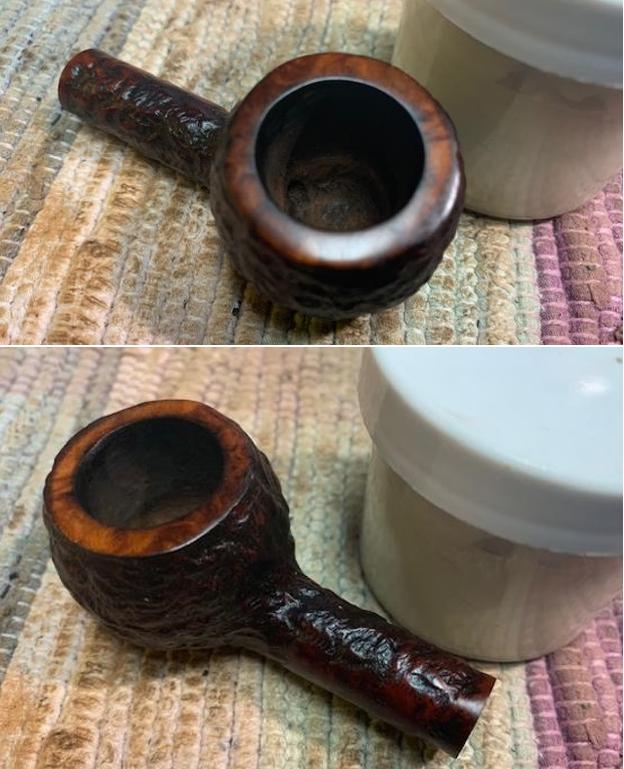
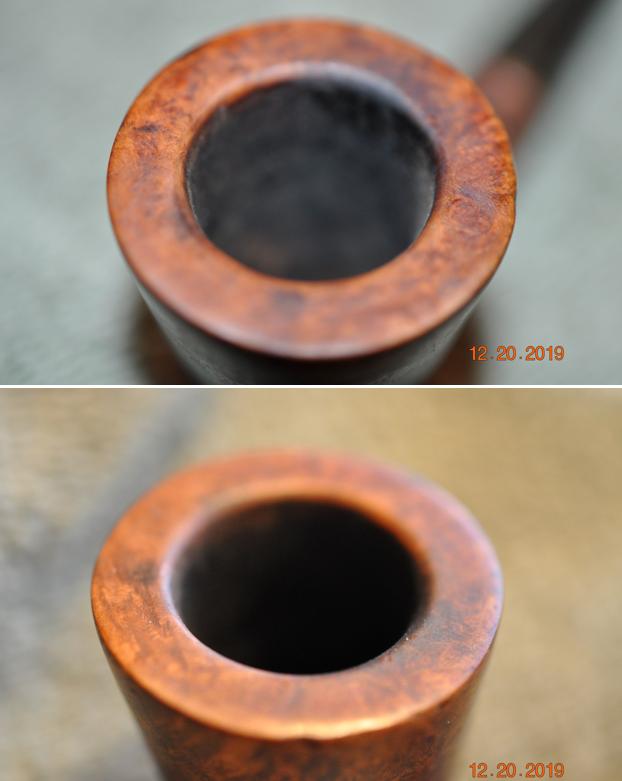
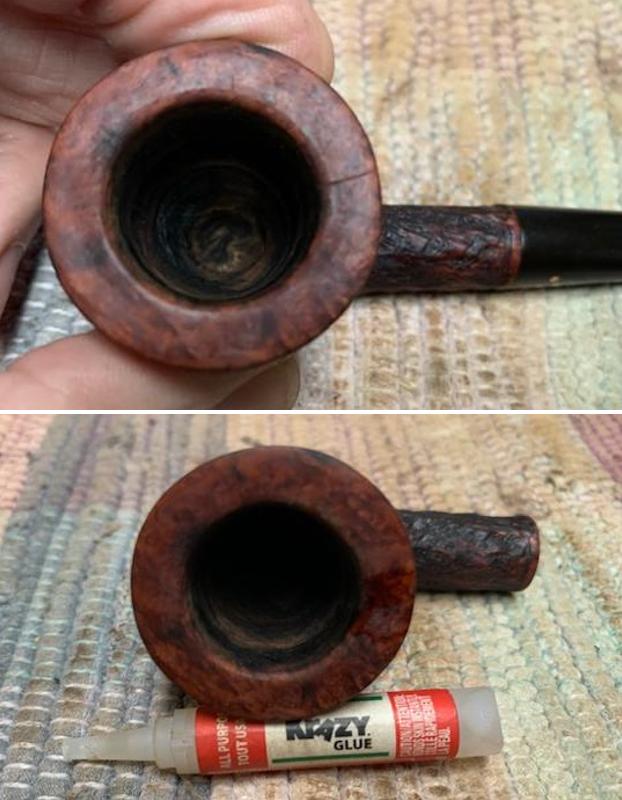
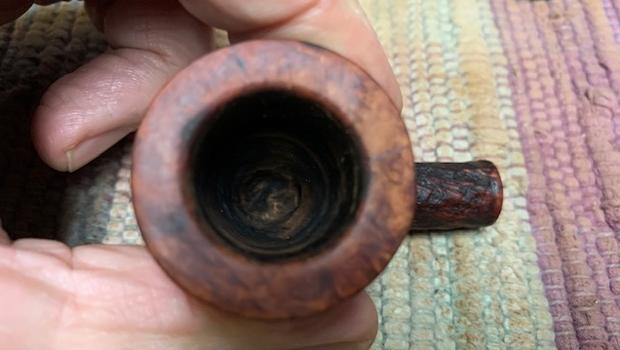
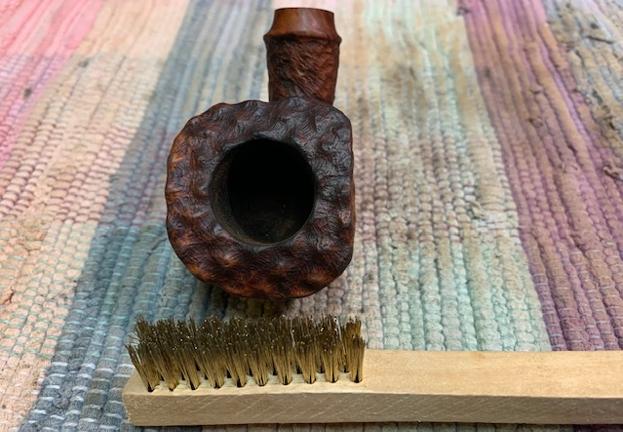
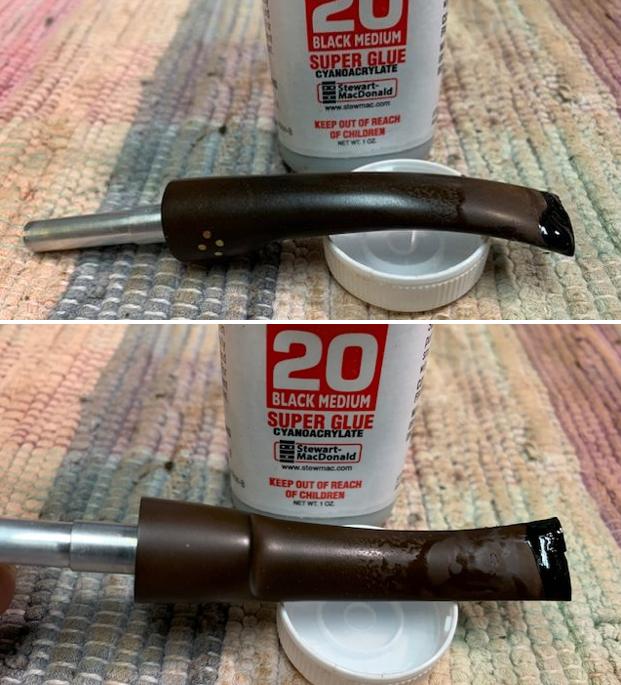
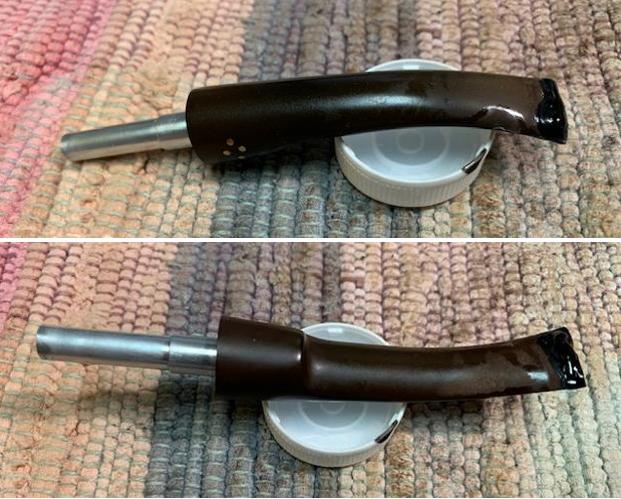
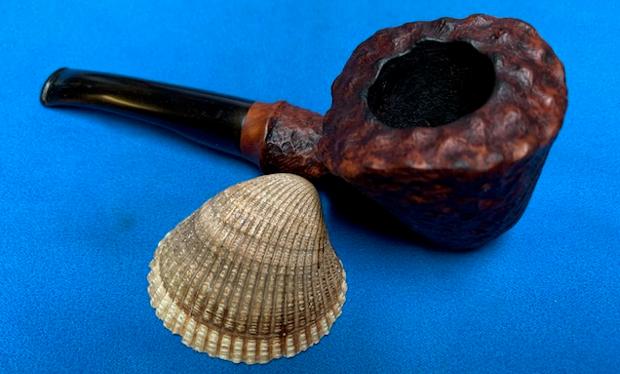
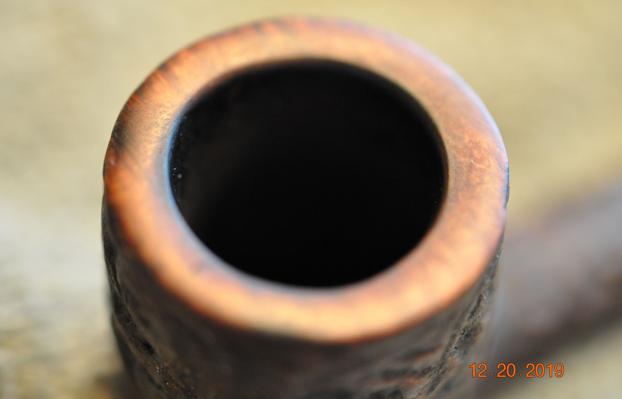
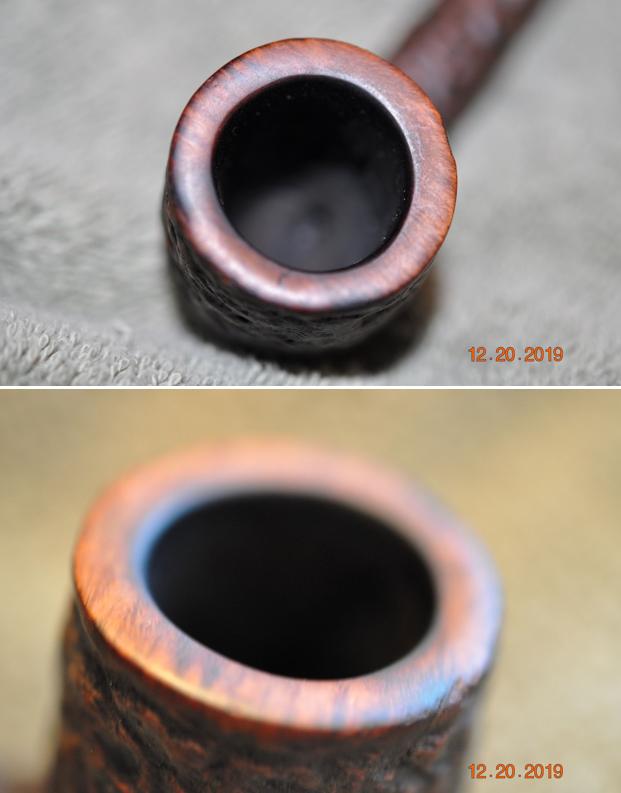
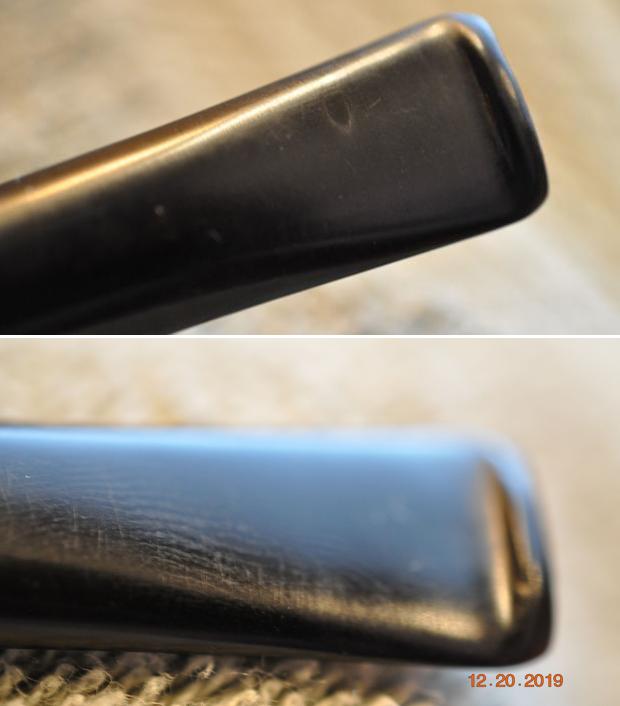
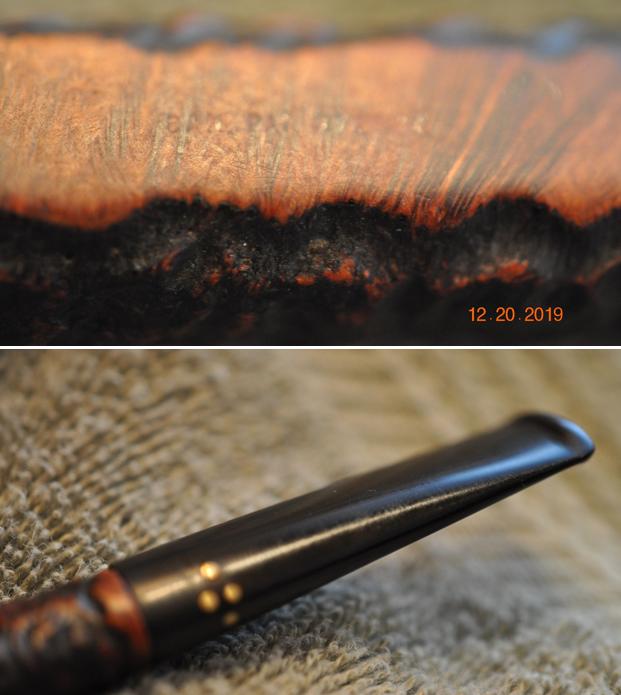
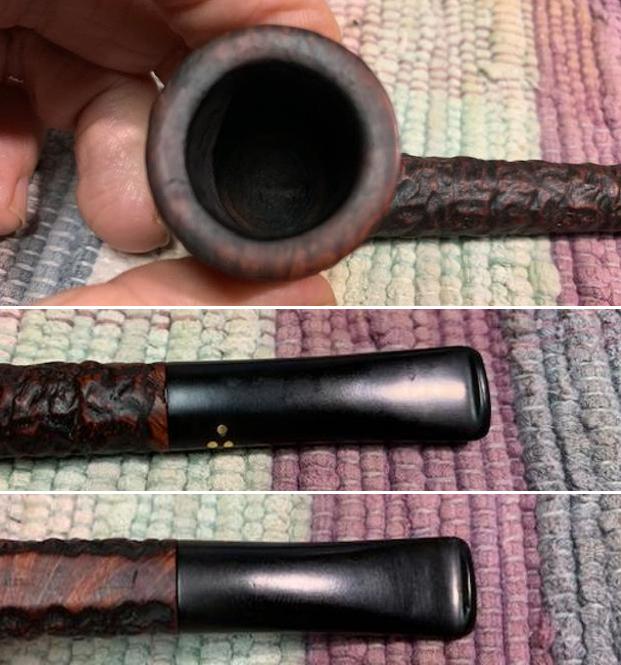
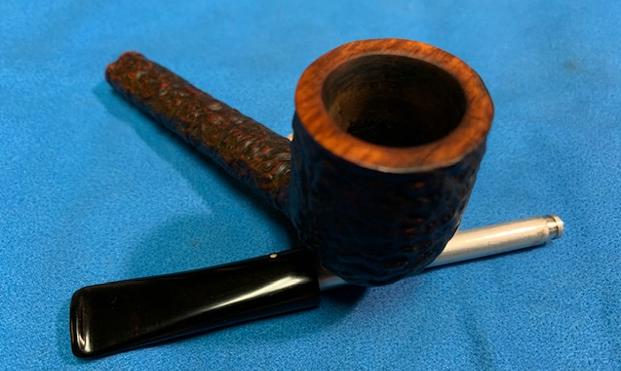
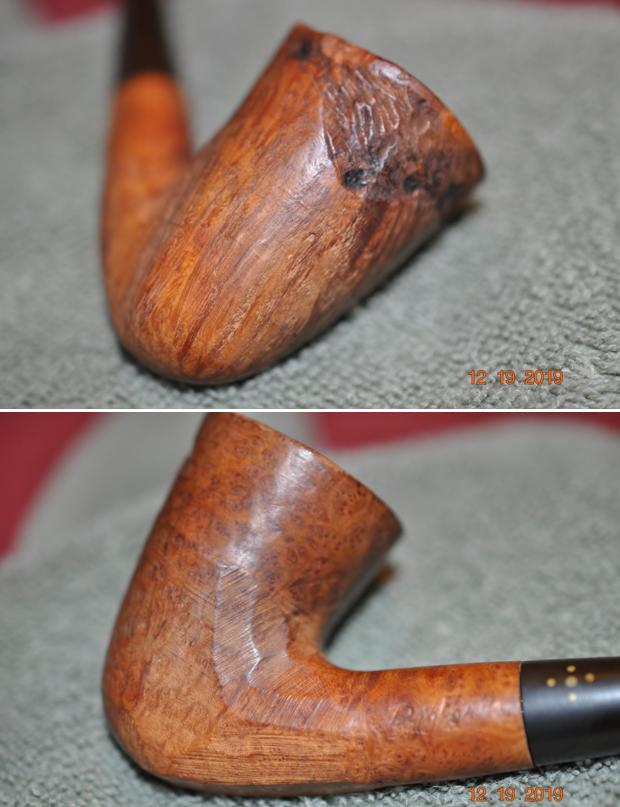
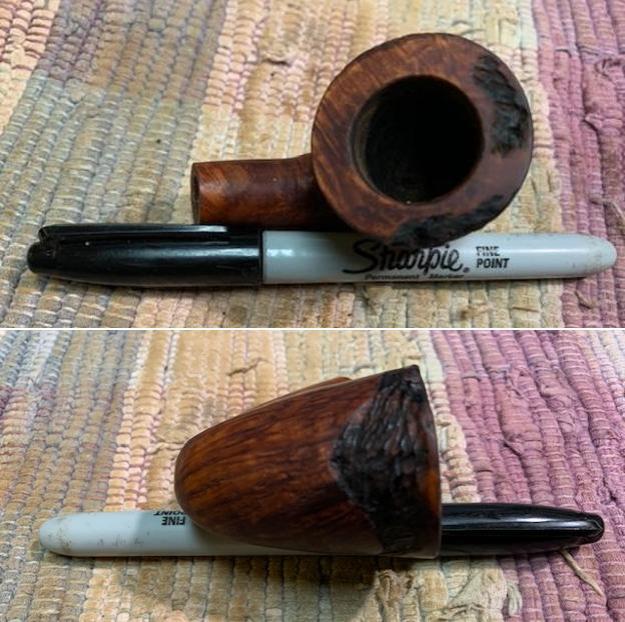
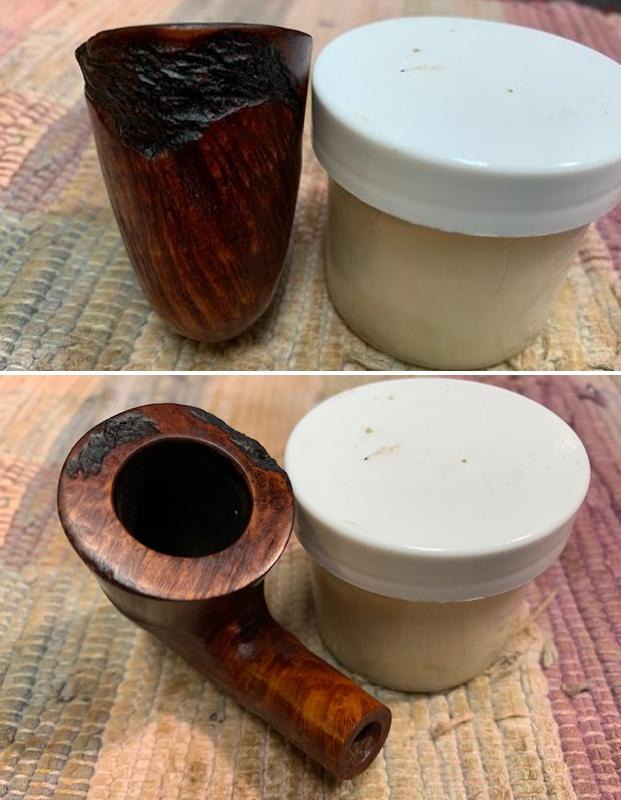
 I took some close up photos of the rim top and the stem surface. The rim top looked very good but there were dents and nicks in the rim top surface and on the outer edge of the bowl. I took close up photos of the stem to show the condition of the surface and button.
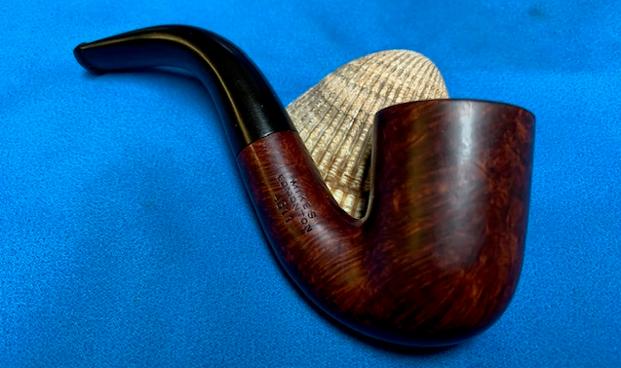
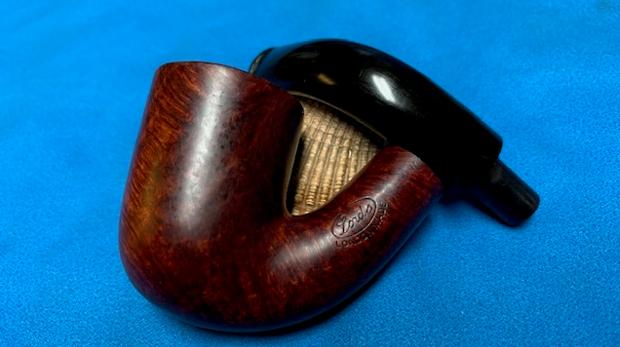
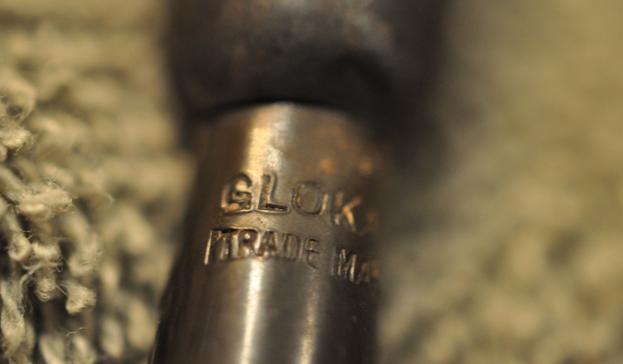
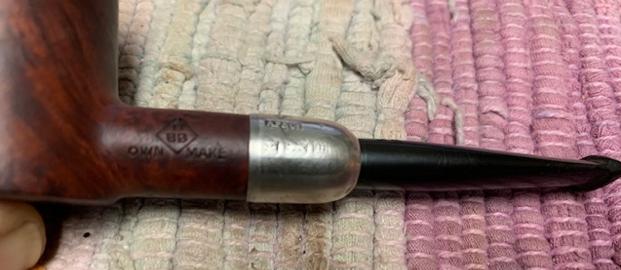
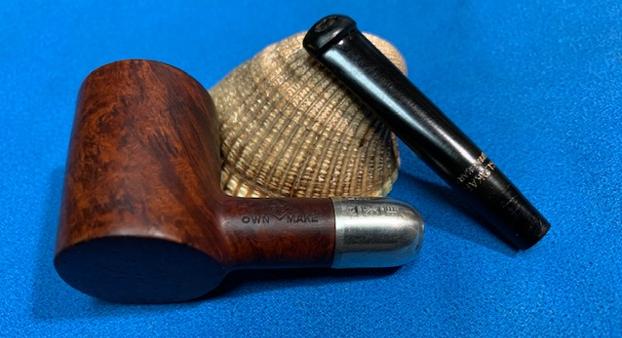
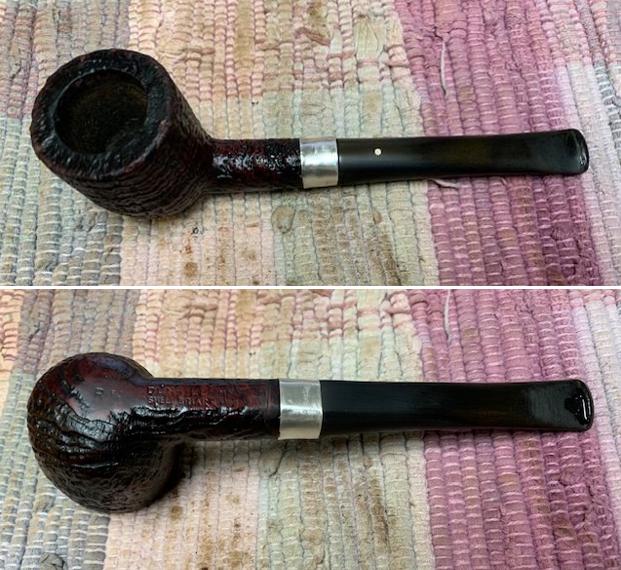
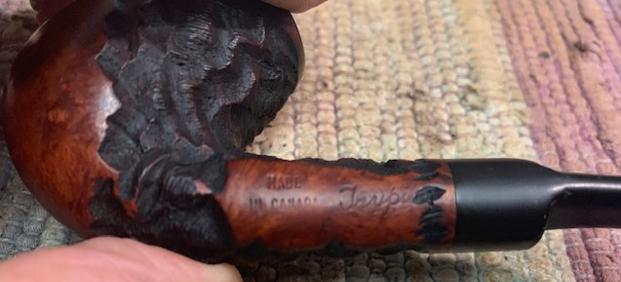
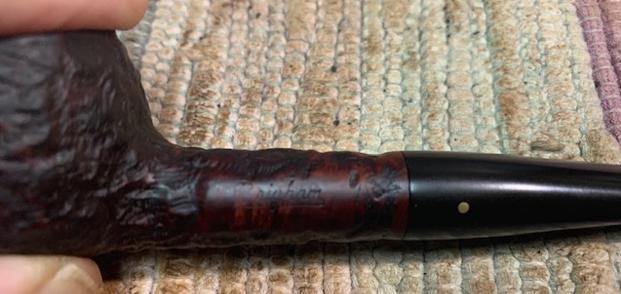
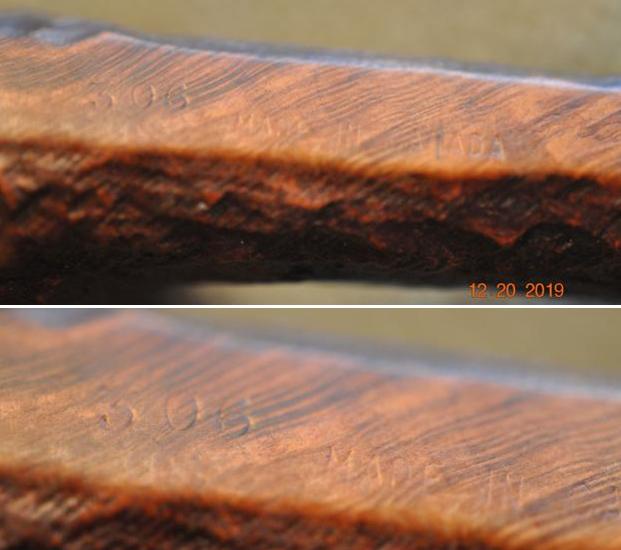
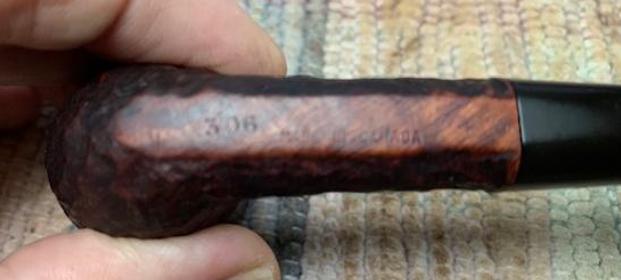
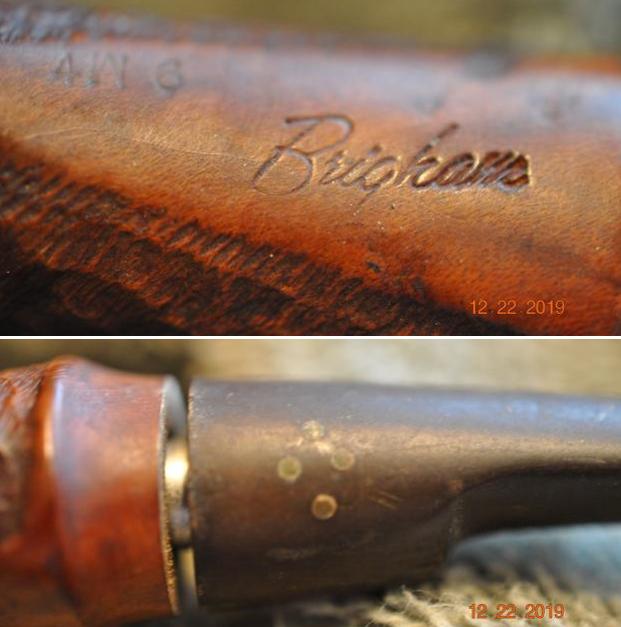
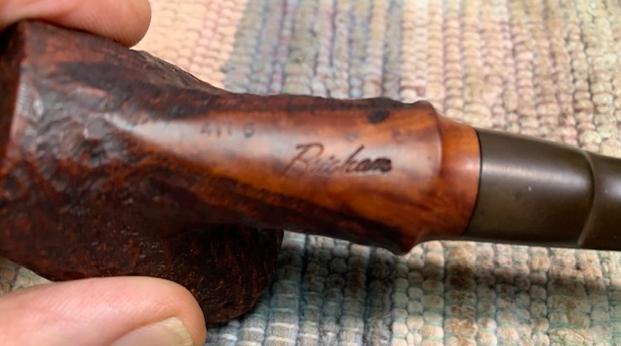
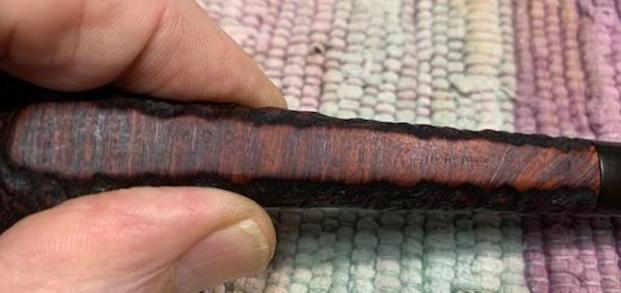
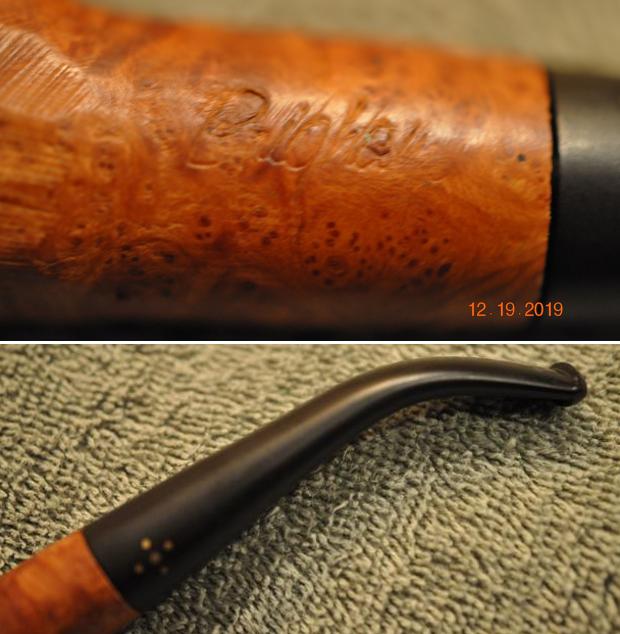
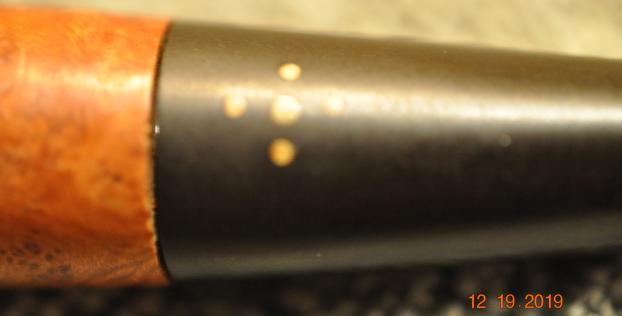
  I took a photo of the stamping on the left side of the shank. You can see that it is stamped as noted above. It is faint but readable.
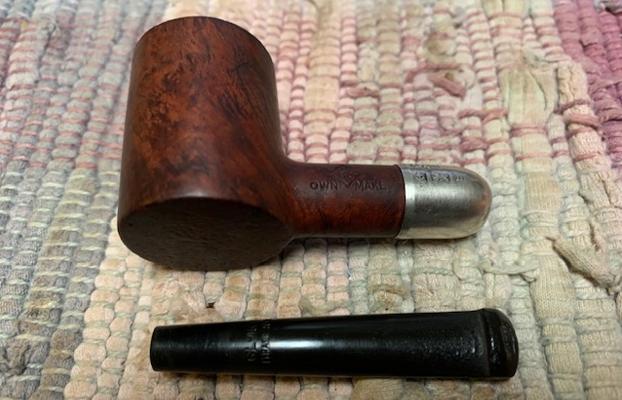
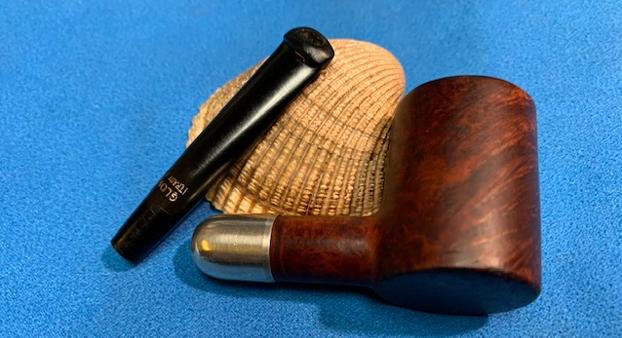
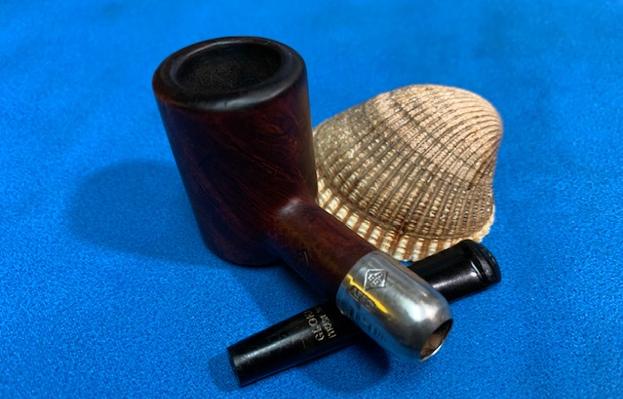
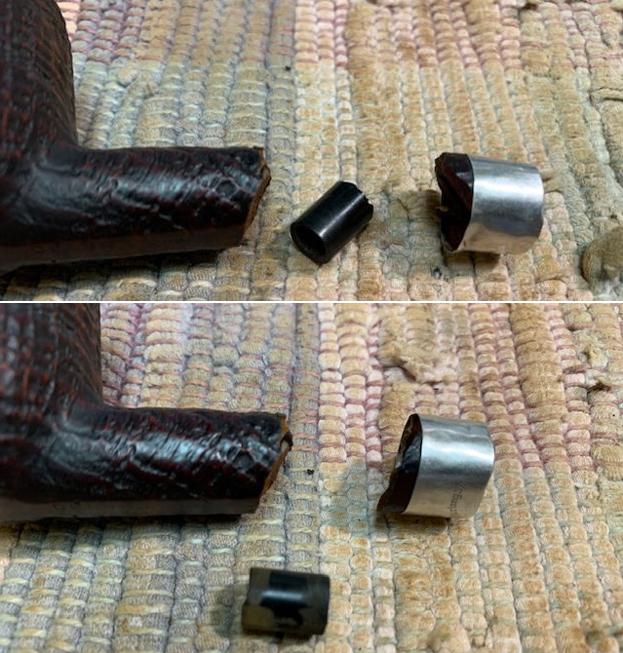
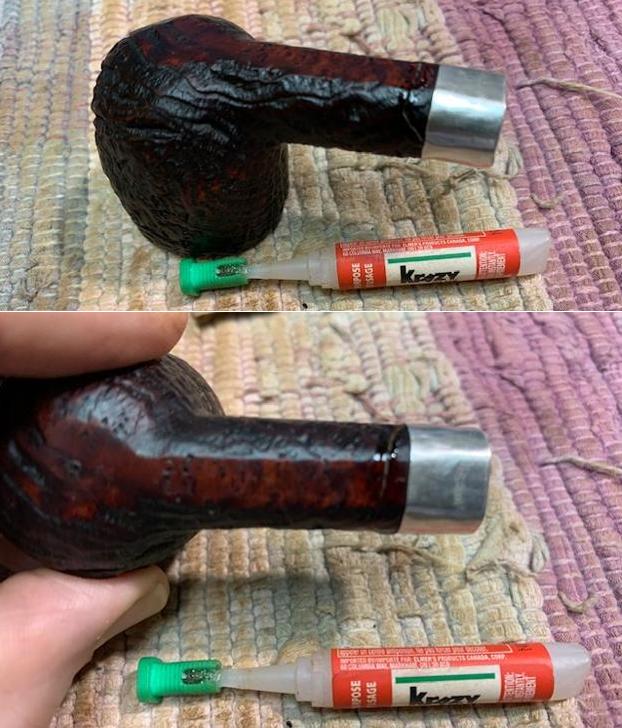
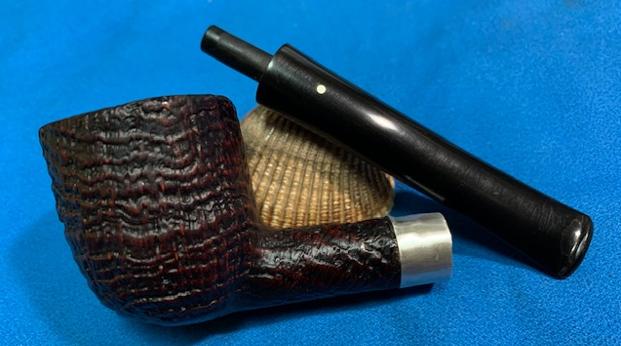
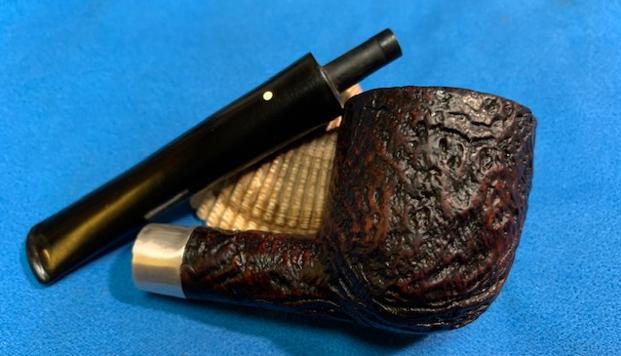
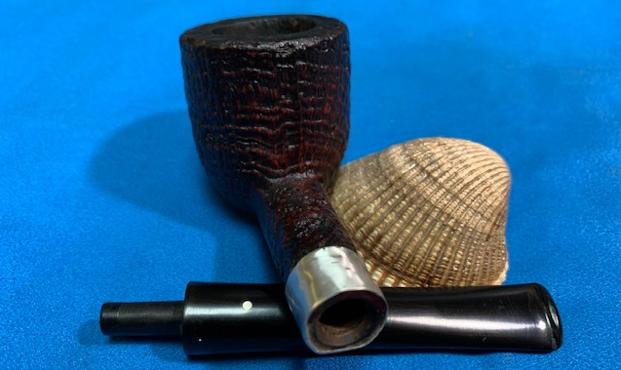
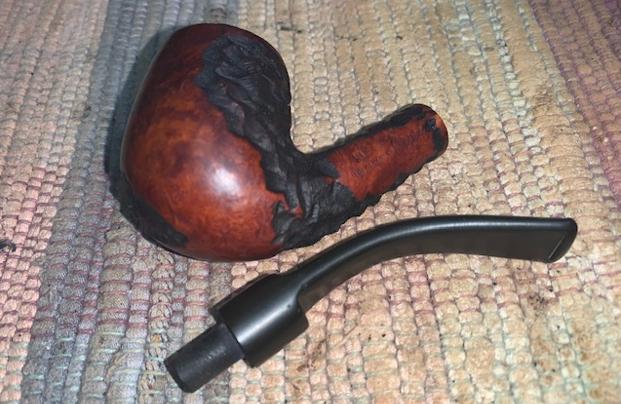
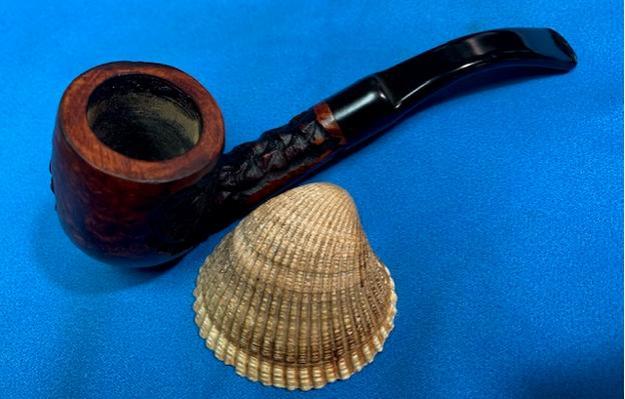
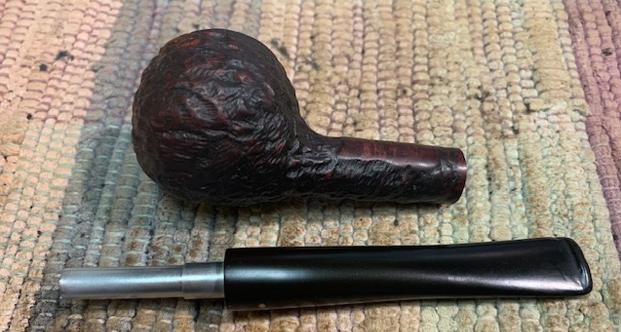
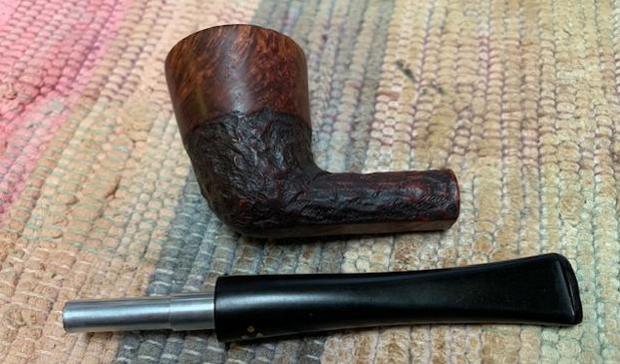
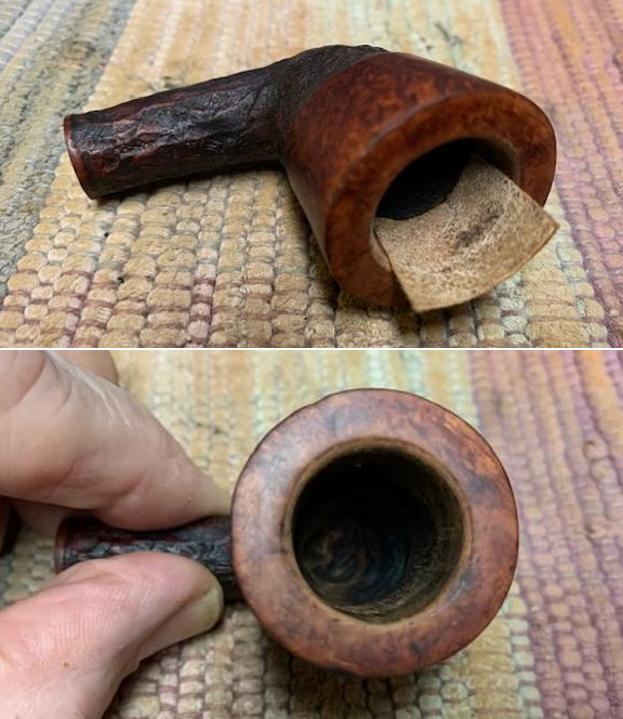
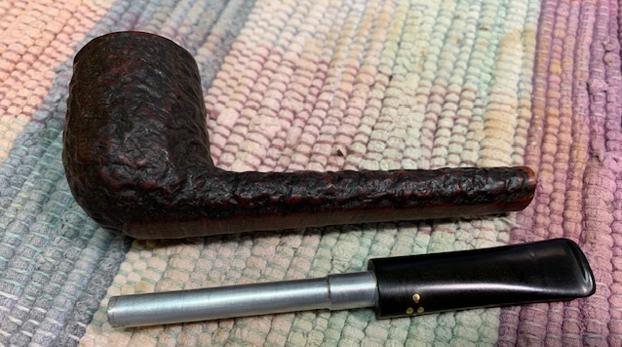
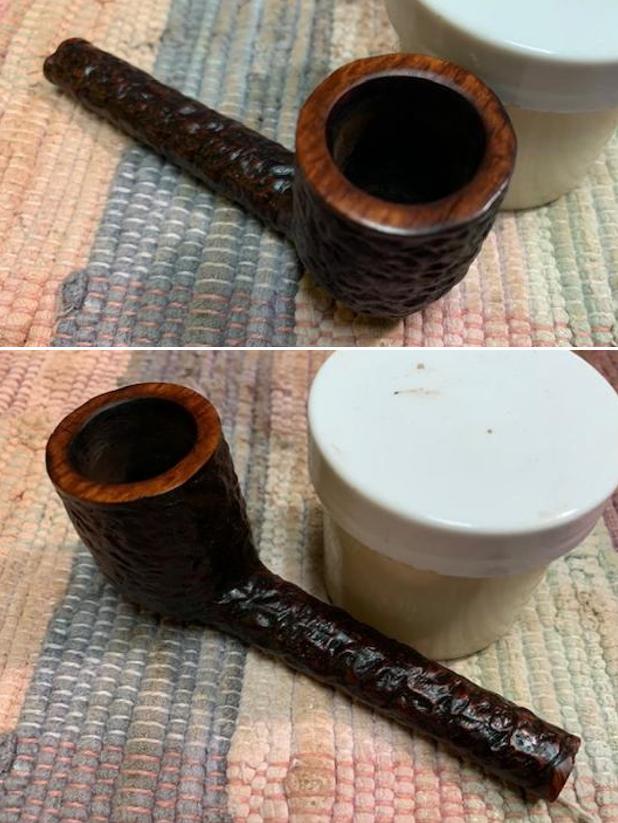
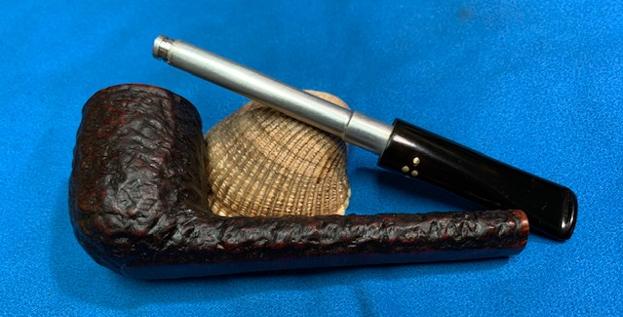
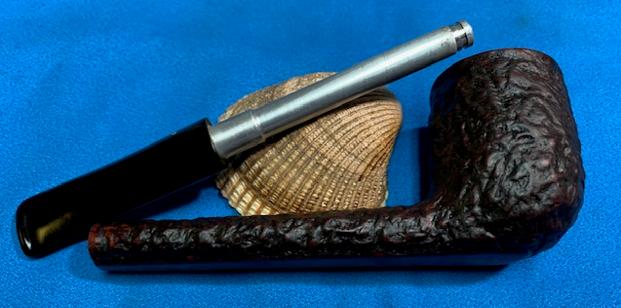
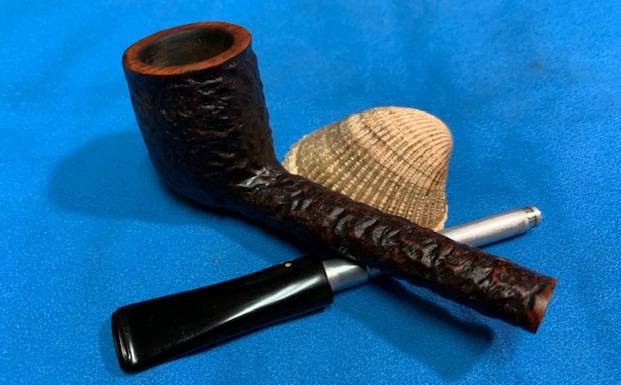
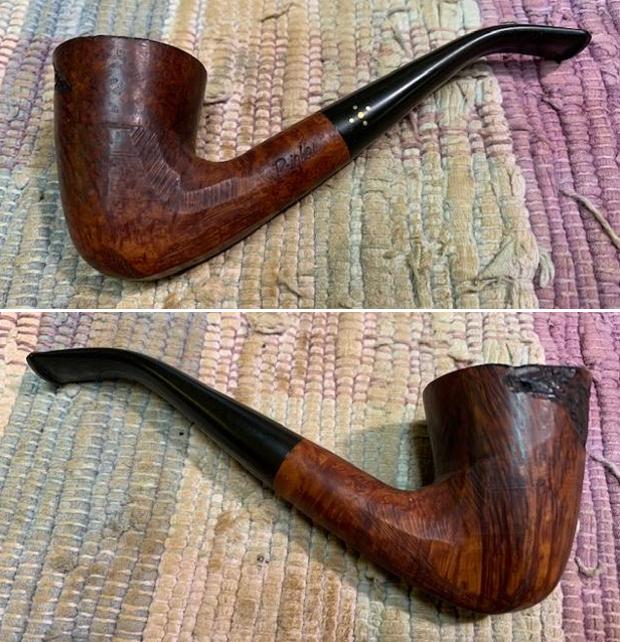
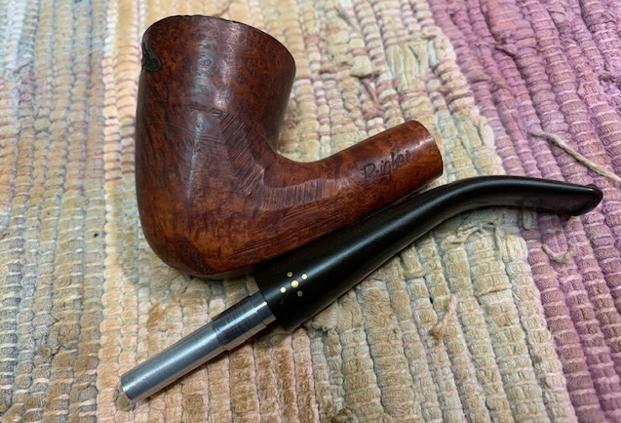
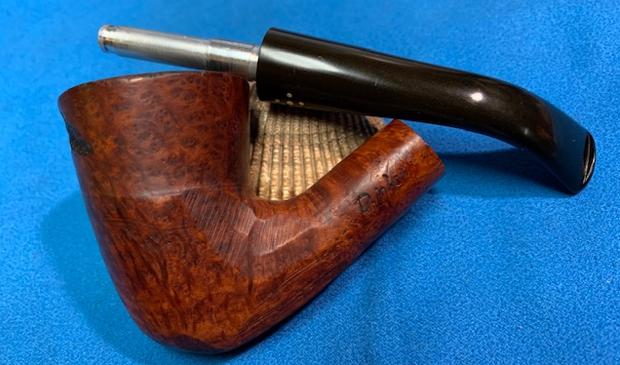
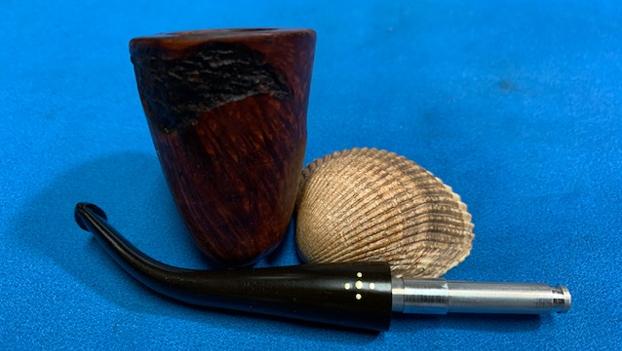
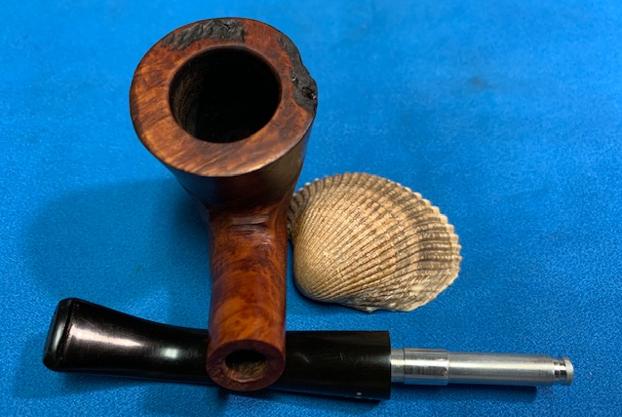
 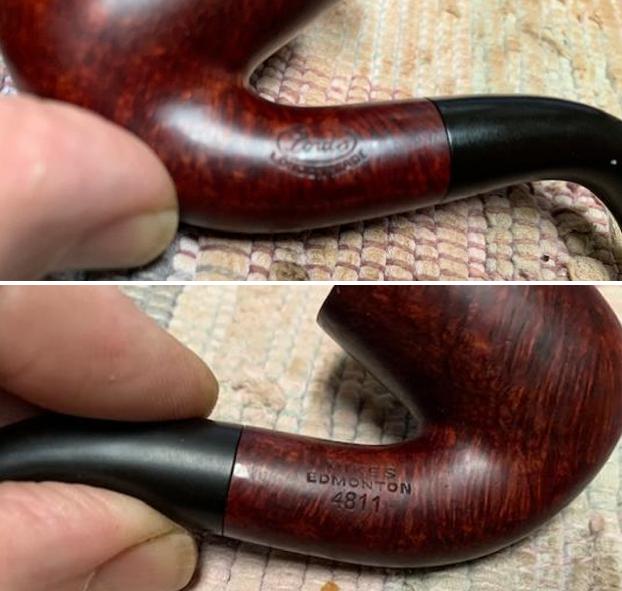 I took the pipe apart and took a photo of the pipe. It is a good looking pipe and has some great grain on the bowl and shank.
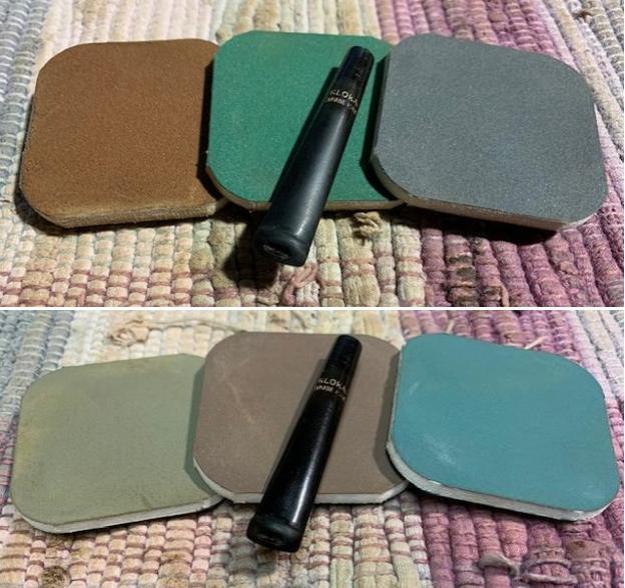
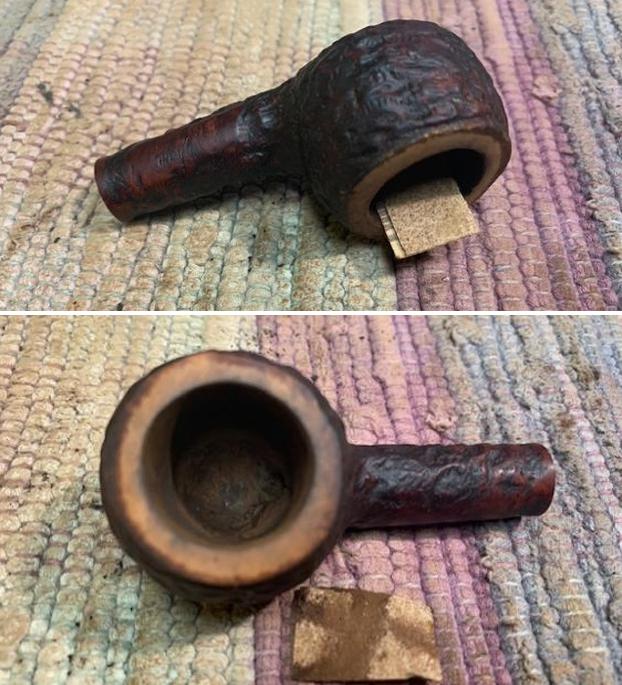
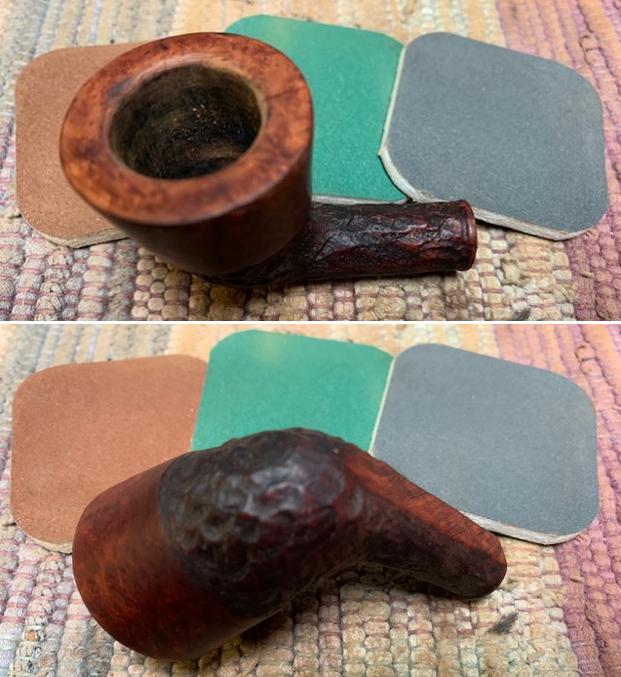
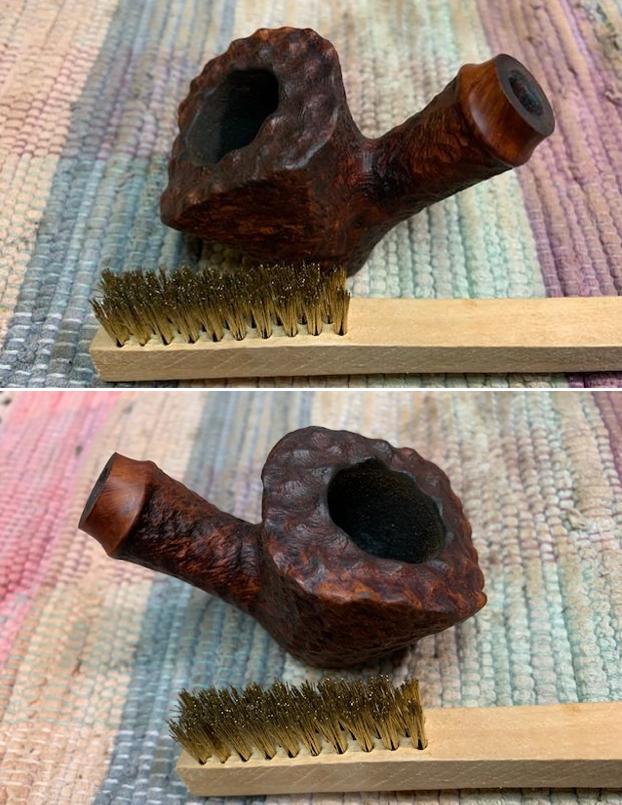
 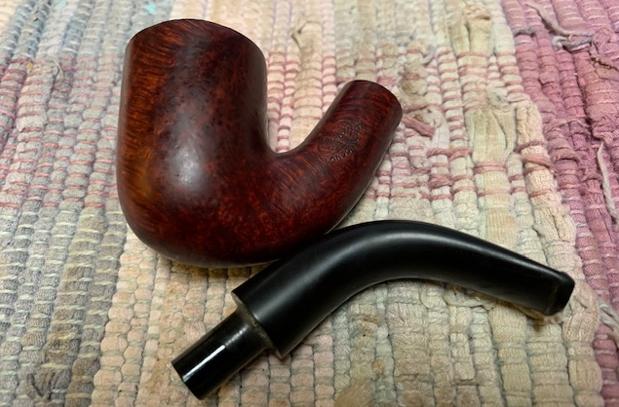 I decided to start my restoration work on this one by dealing with the damage to the rim top and edges. I used a folded piece of 220 grit sandpaper to smooth out the damage on the beveled rim top. I started polishing the rim top with 400 grit wet dry sandpaper.
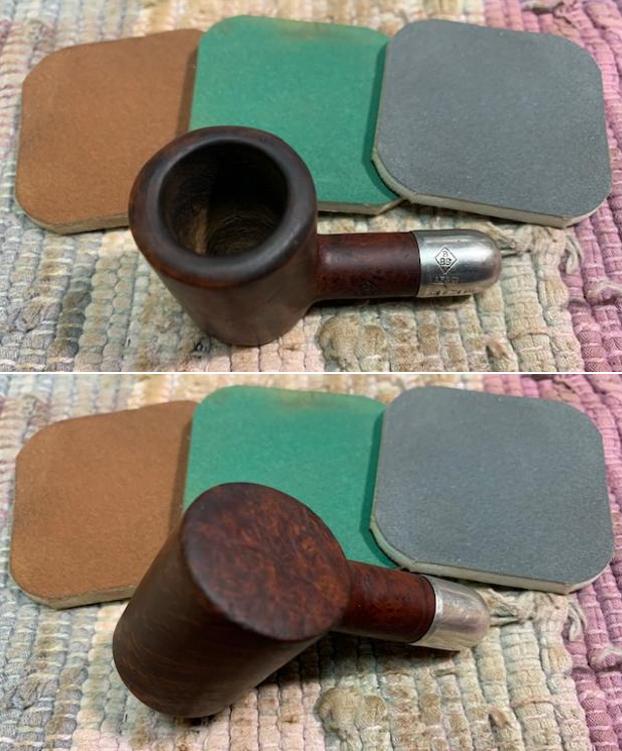
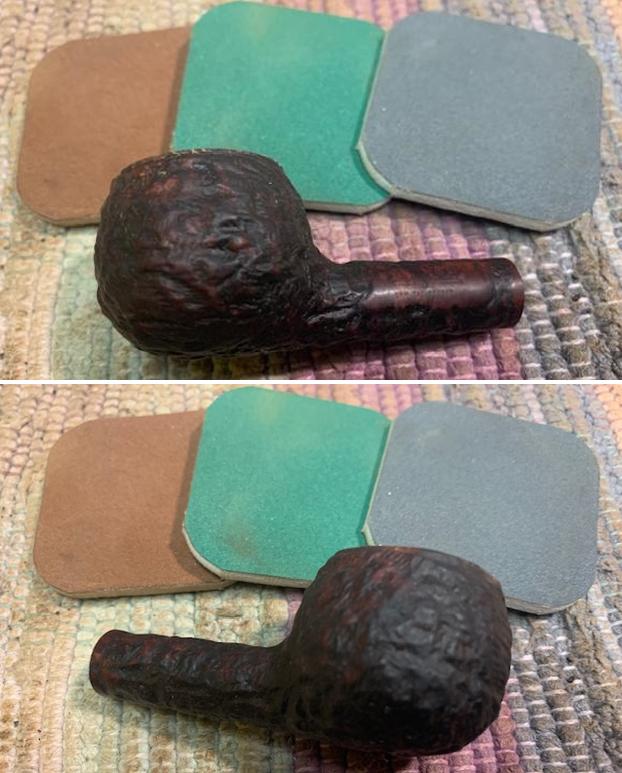
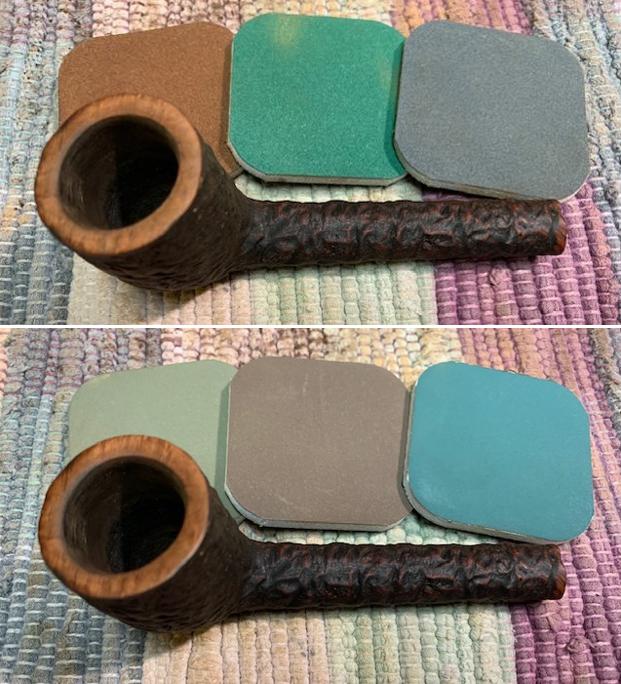
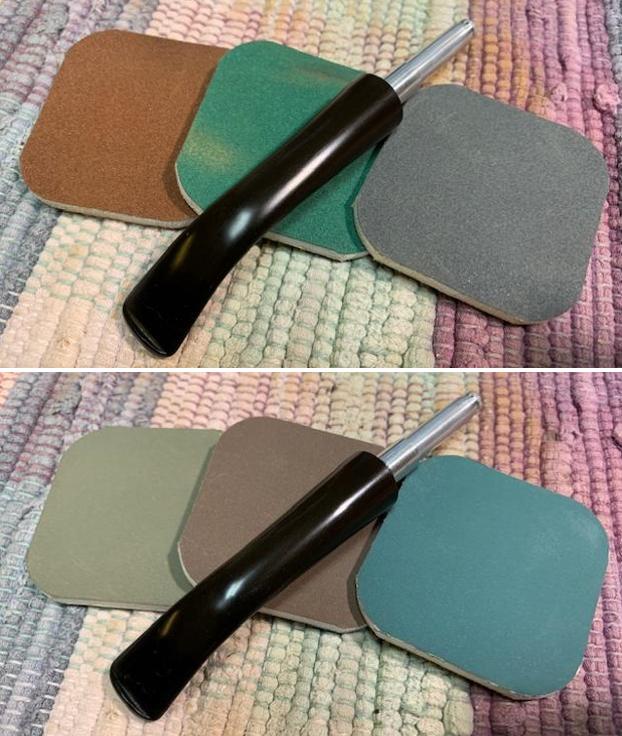
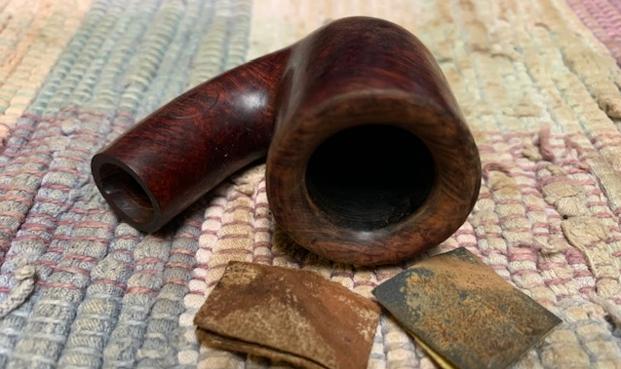 I polished the smooth rim top and sides of the bowl with micromesh sanding pads – dry sanding it with 1500-12000 grit pads. After each pad I wiped the briar down with a damp cloth.
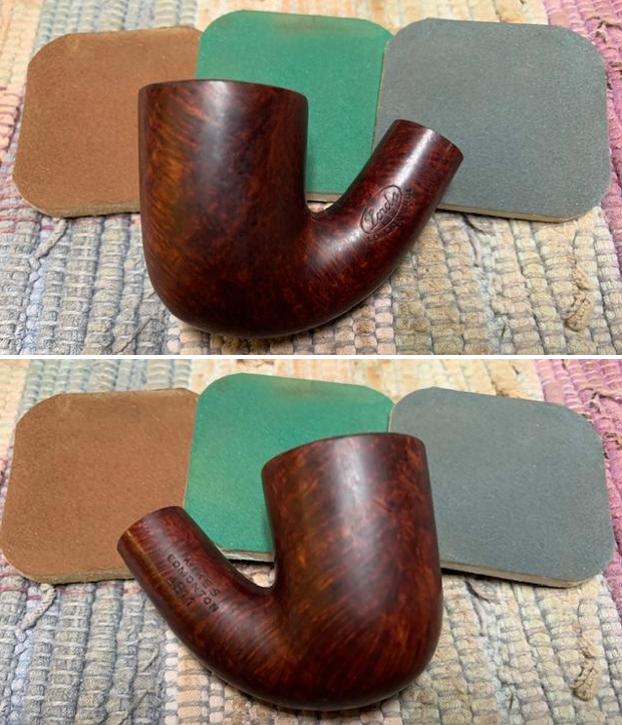

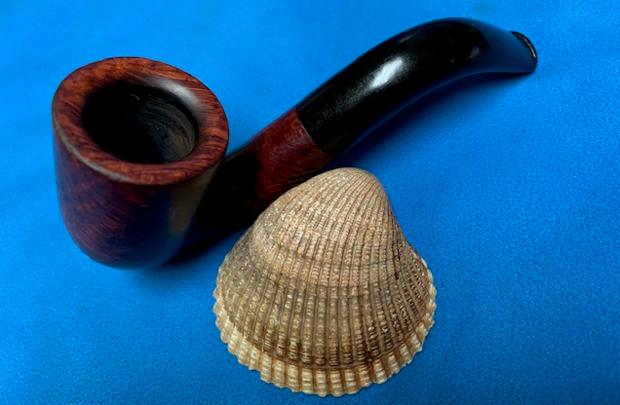
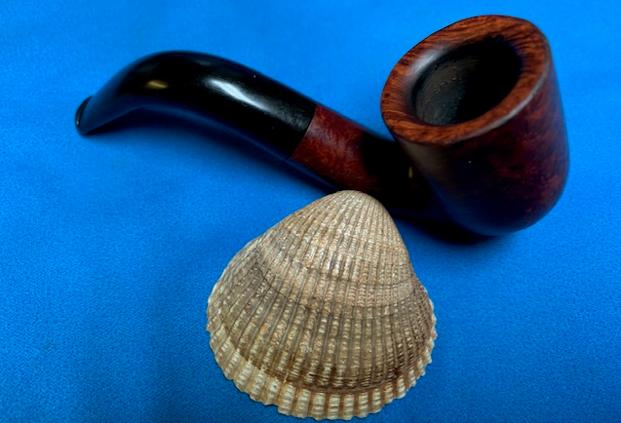
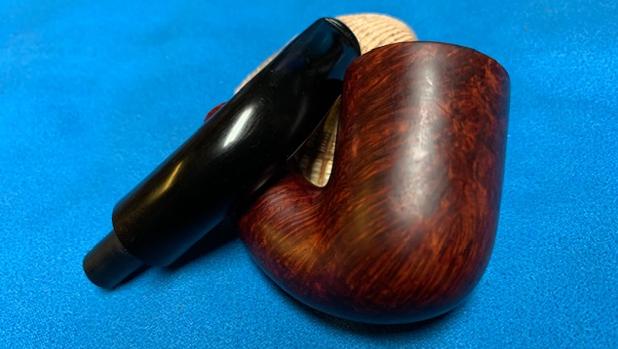
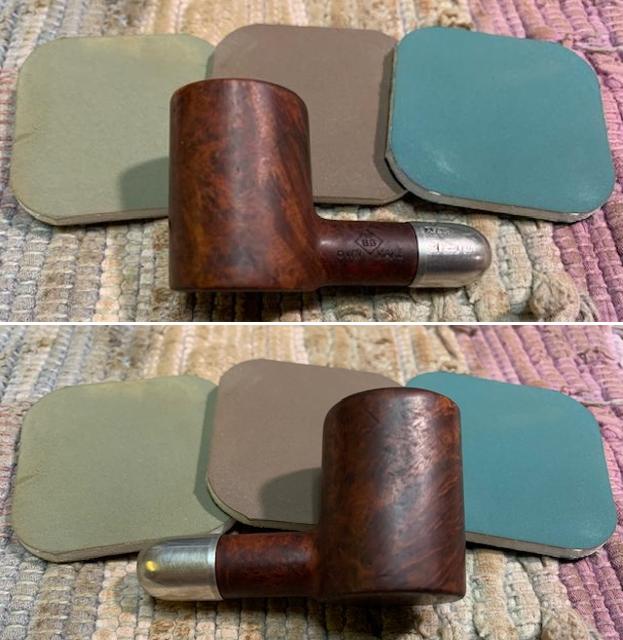
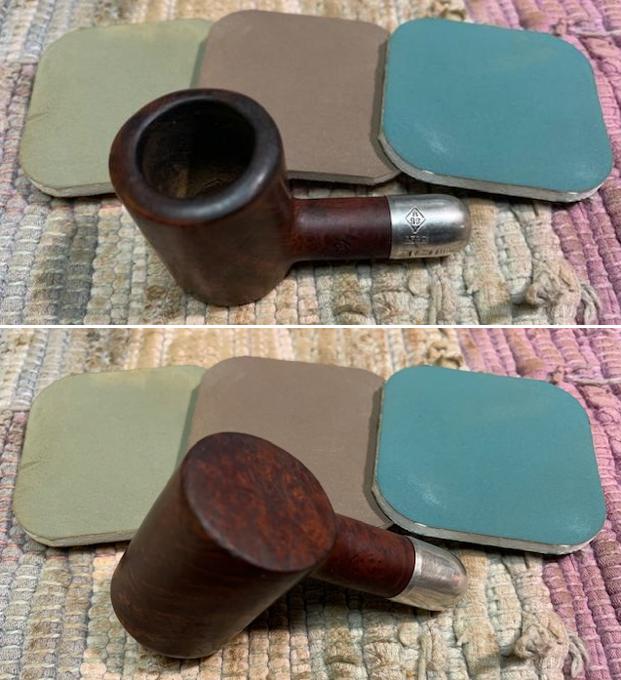
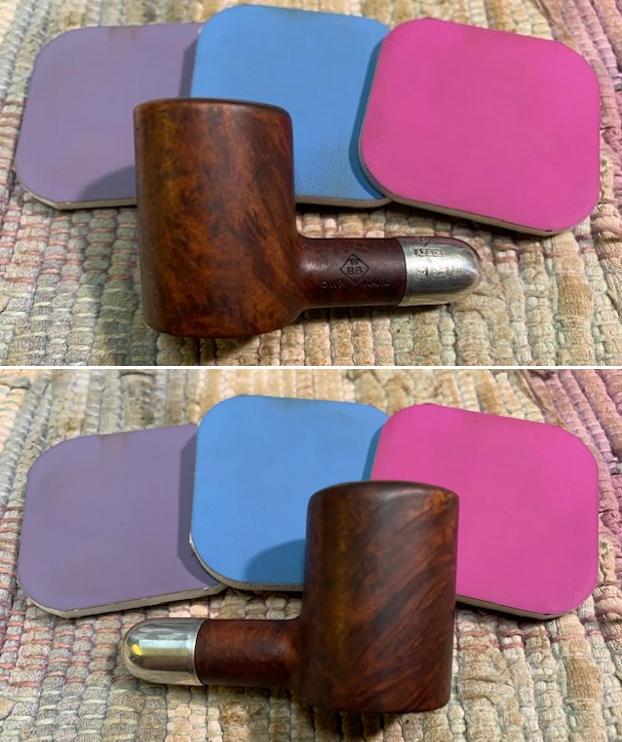
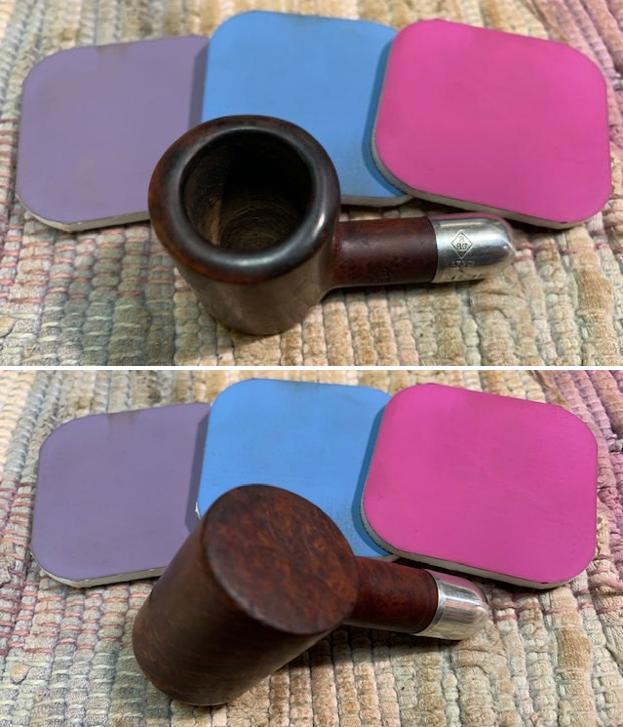
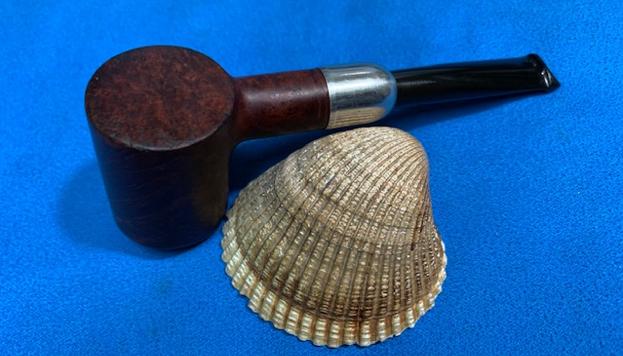
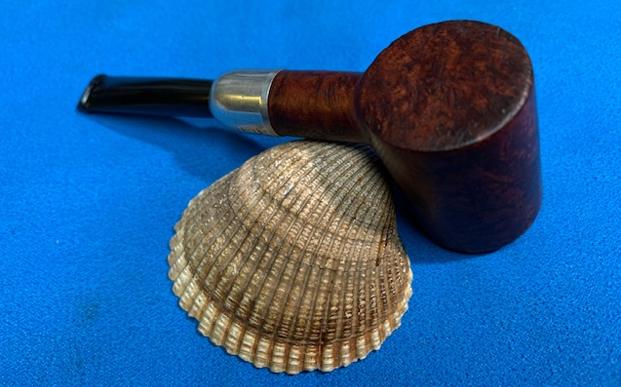
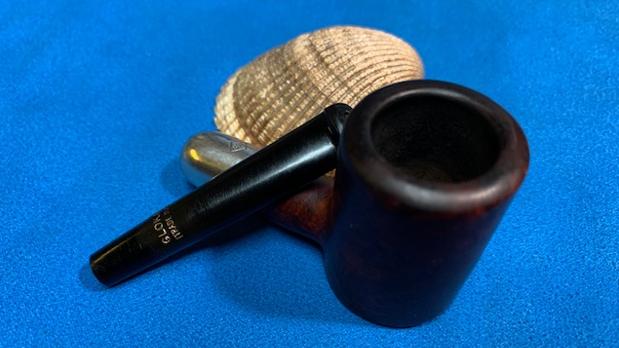
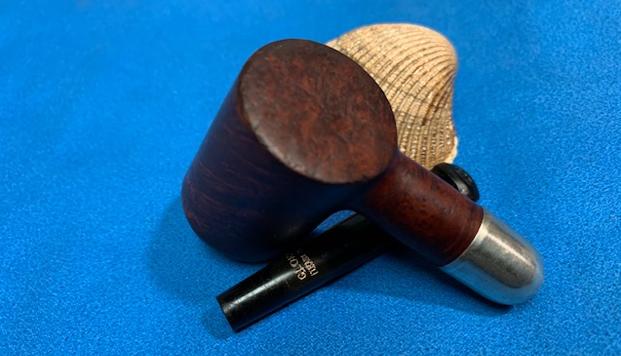
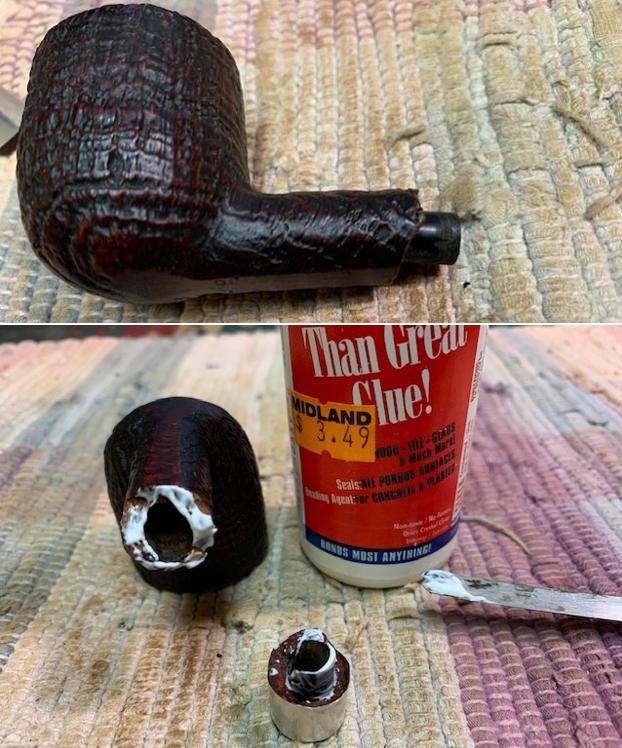
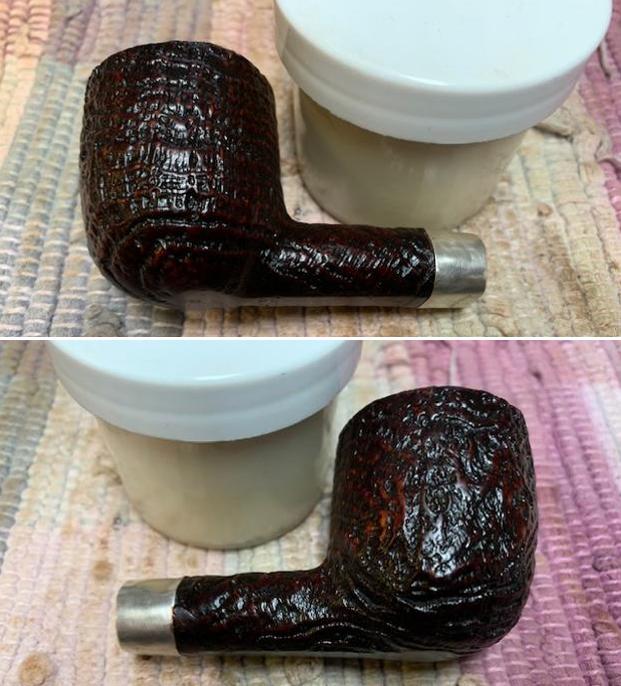
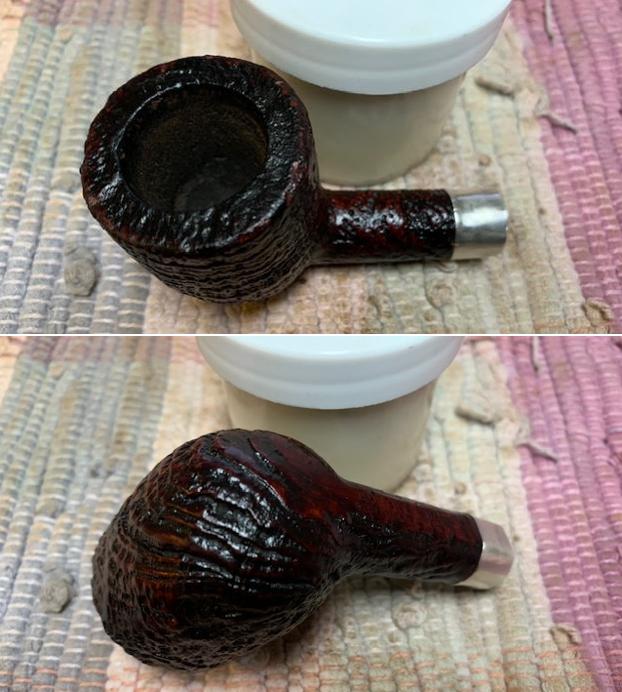
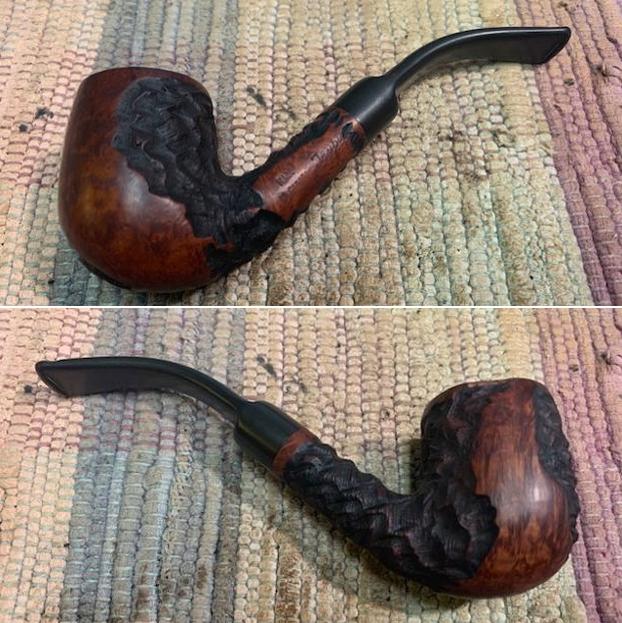
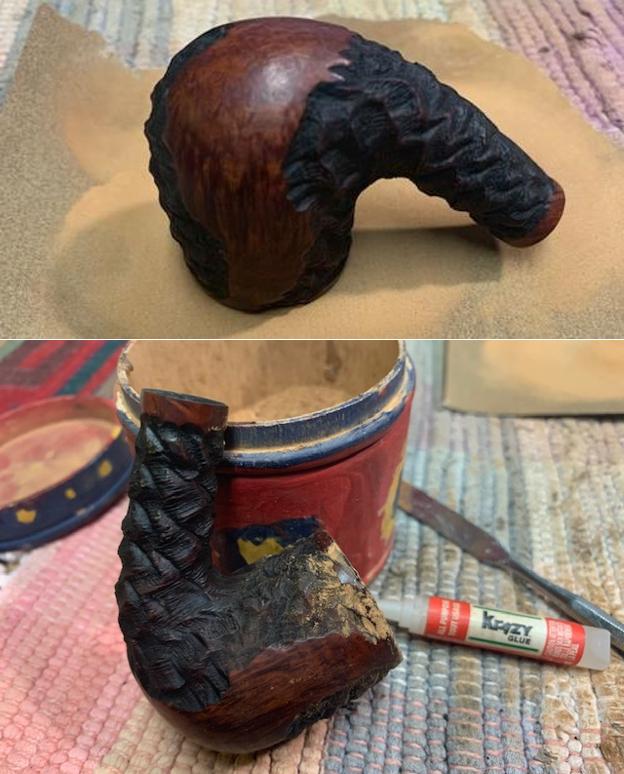
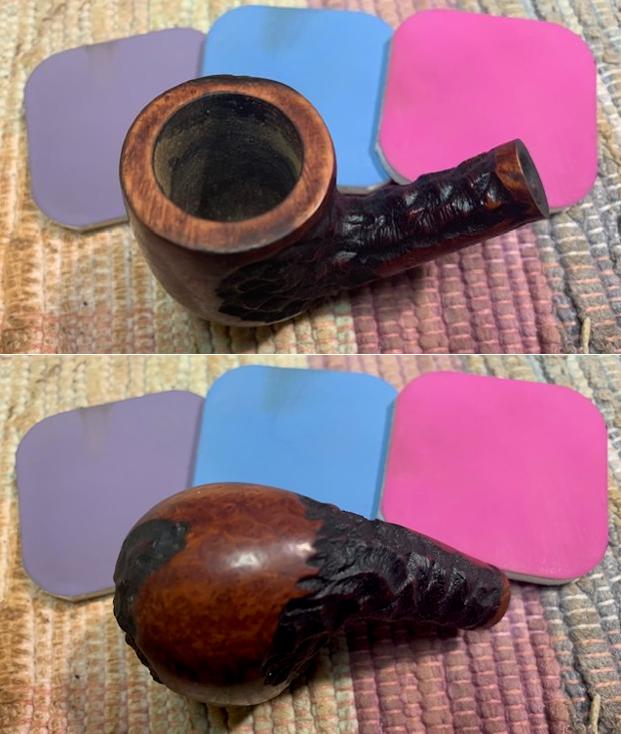
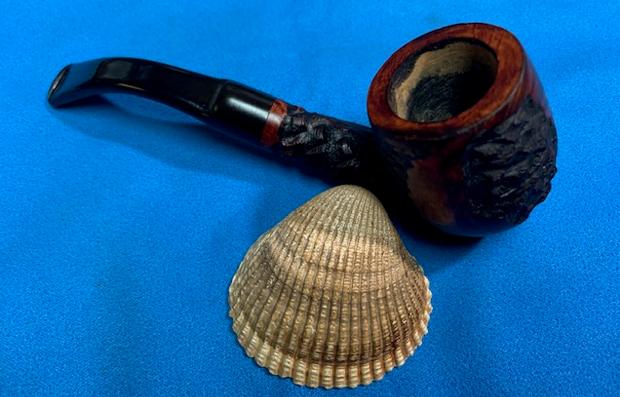
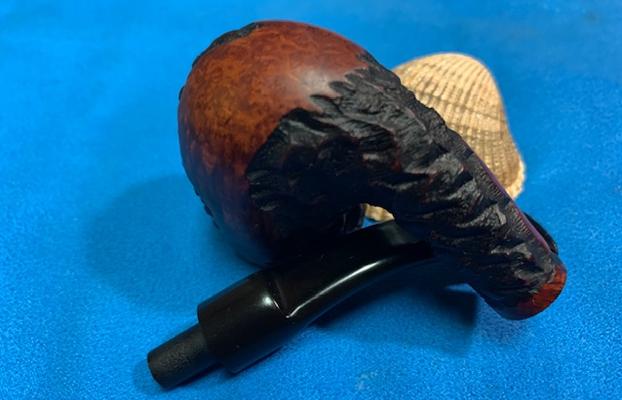
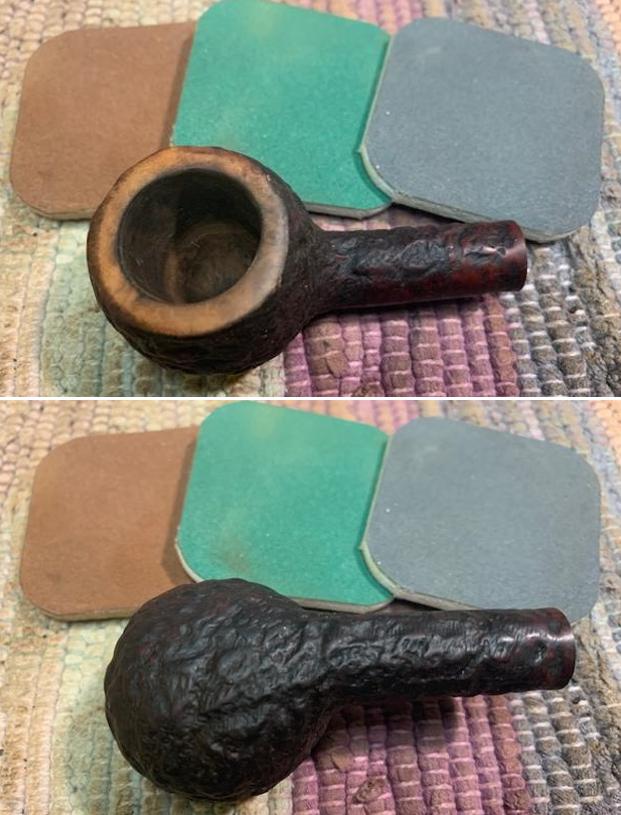
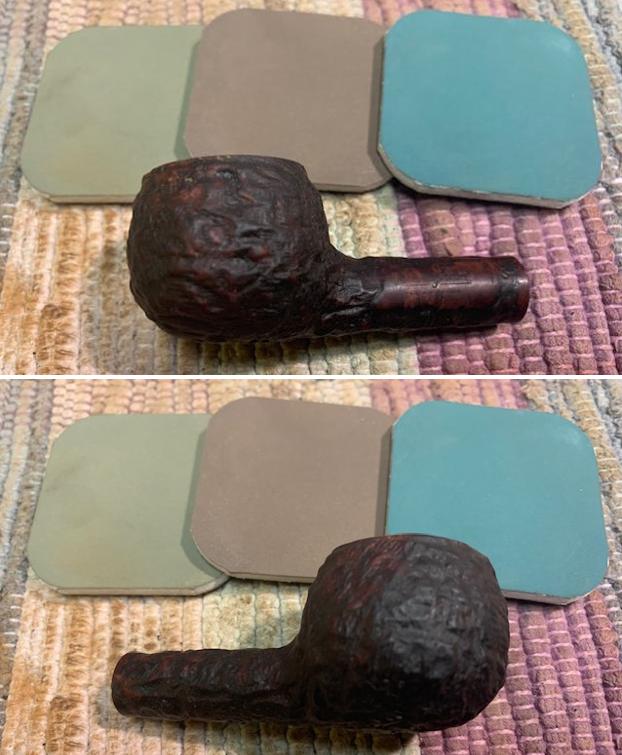
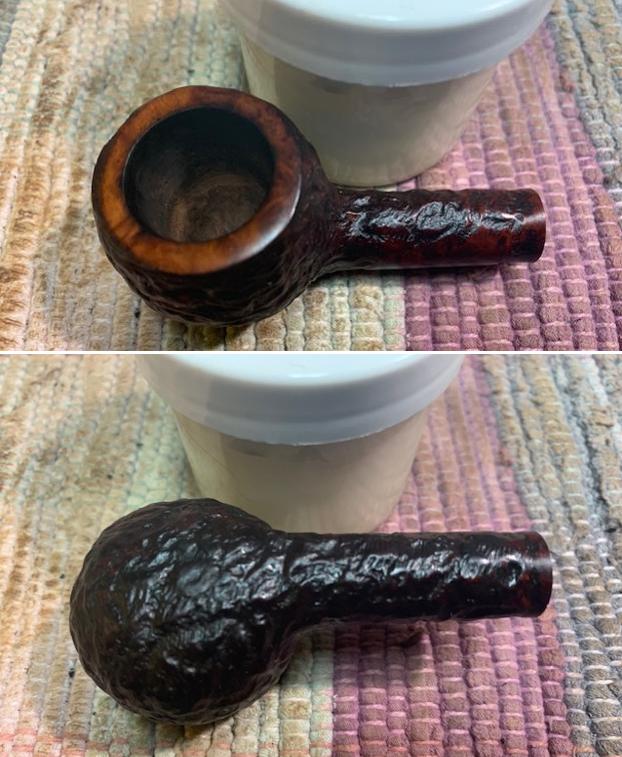
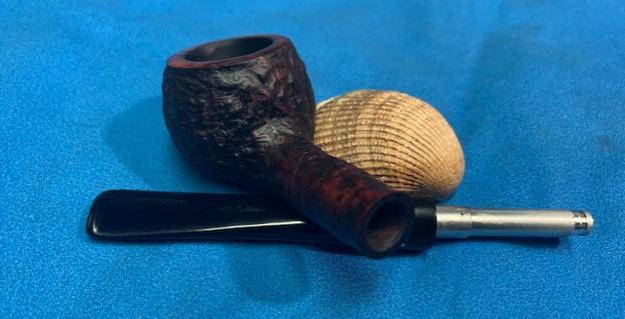
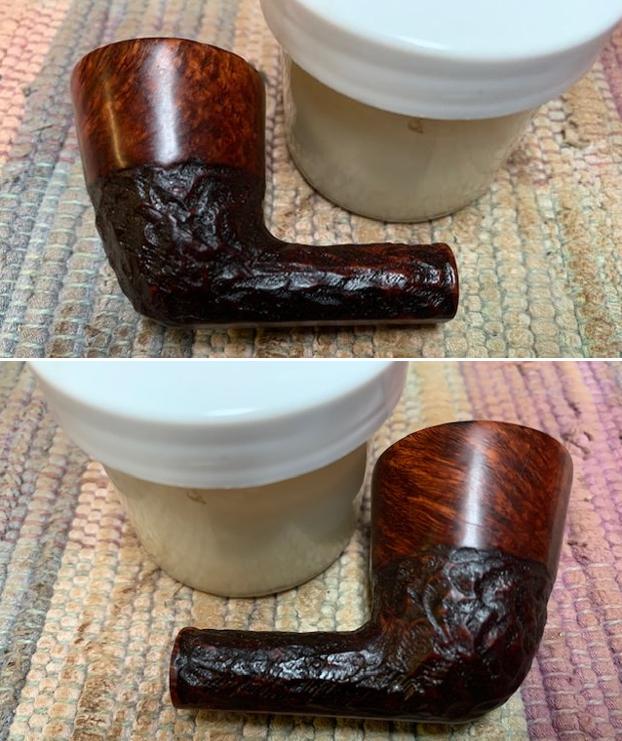
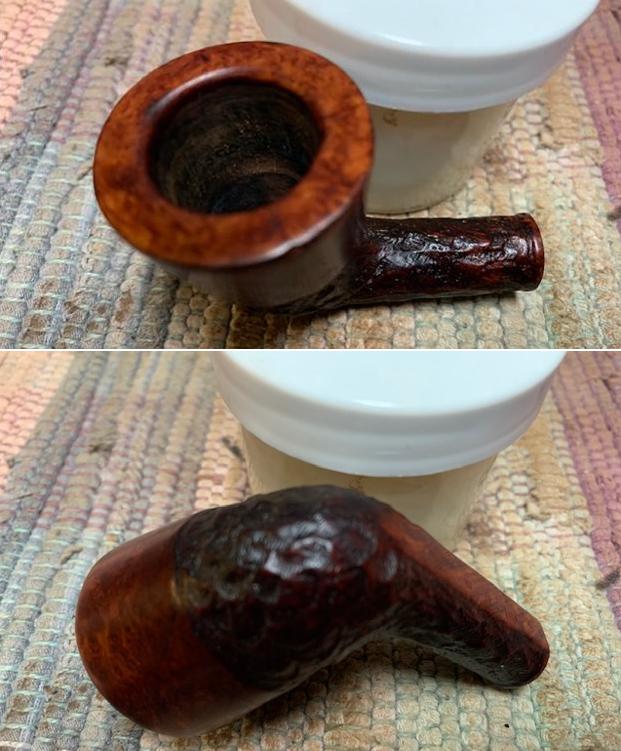
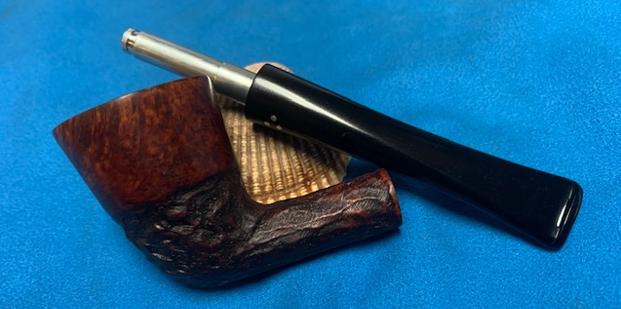
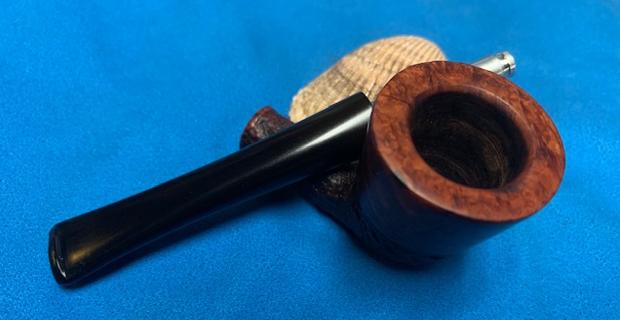
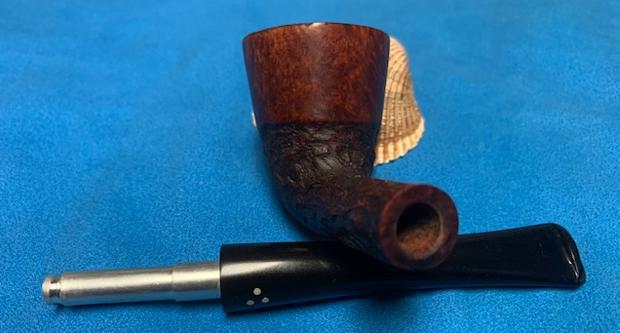
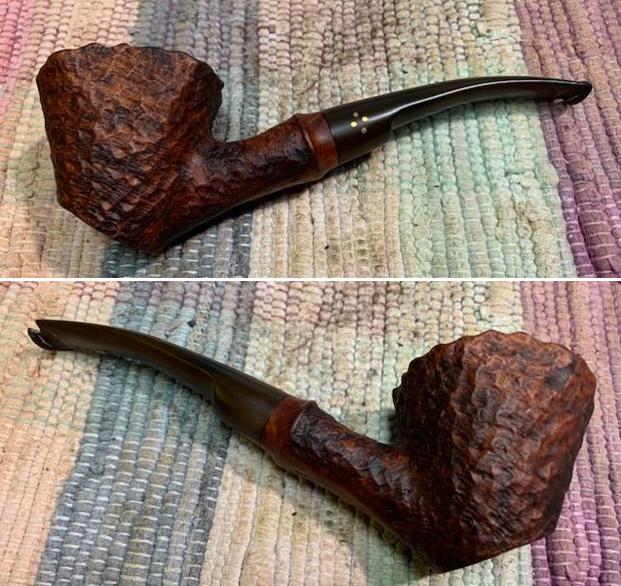
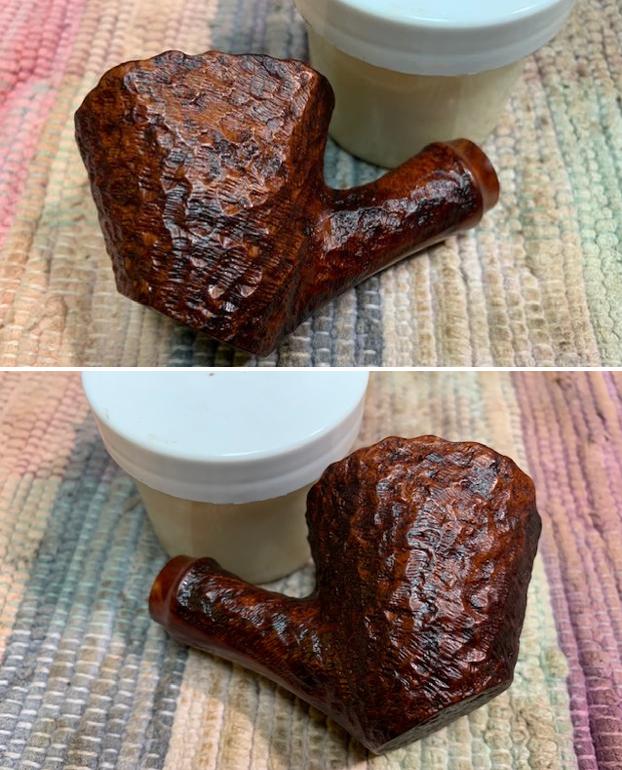
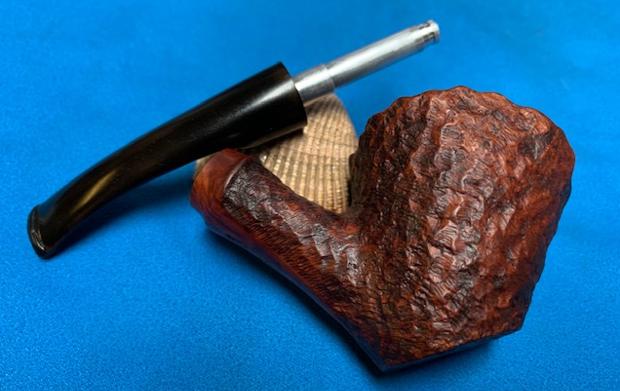
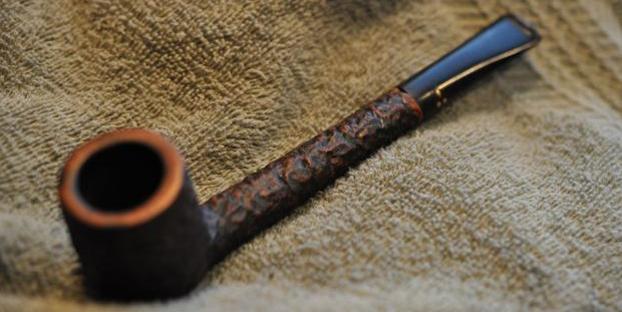
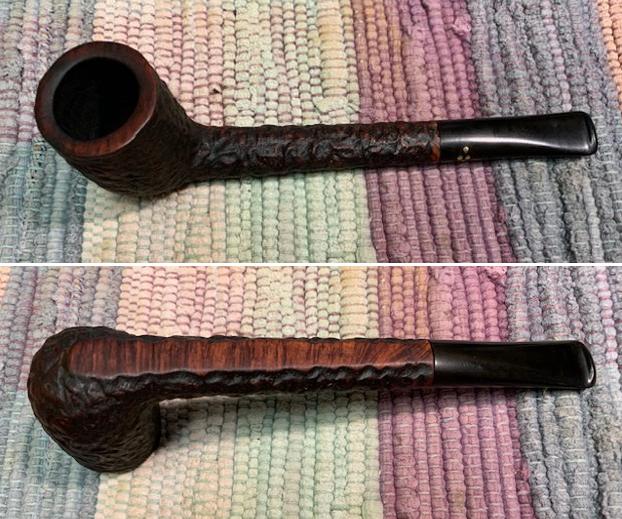
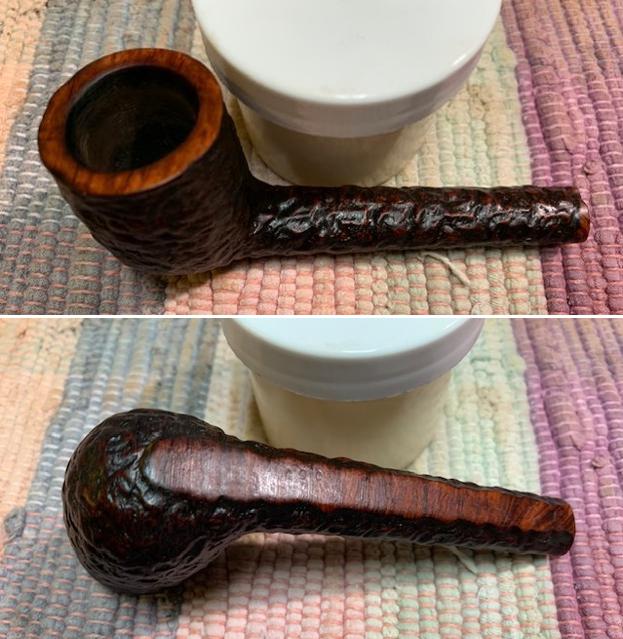
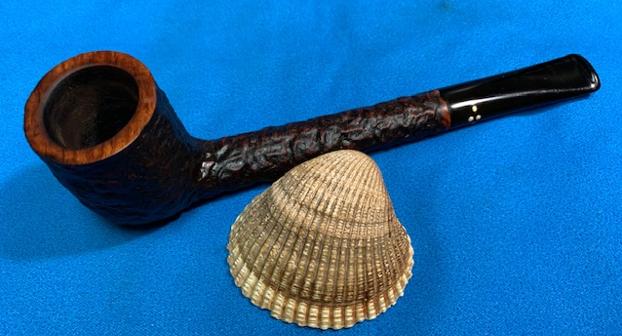
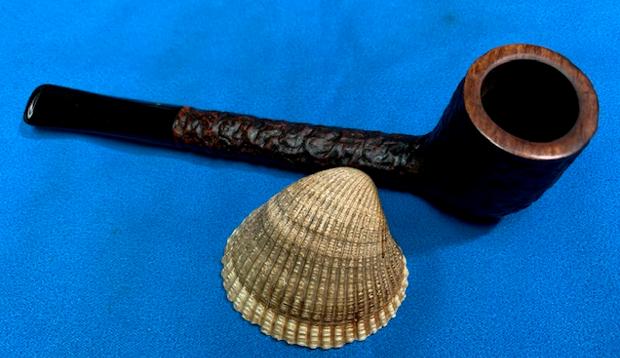
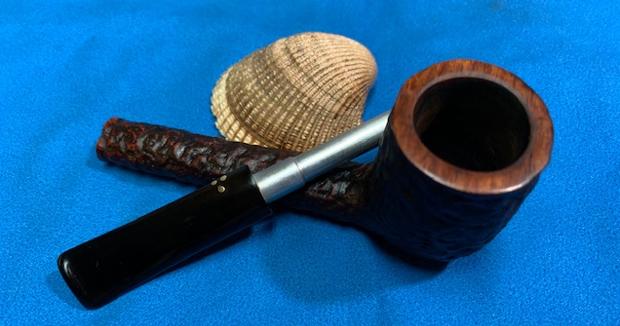
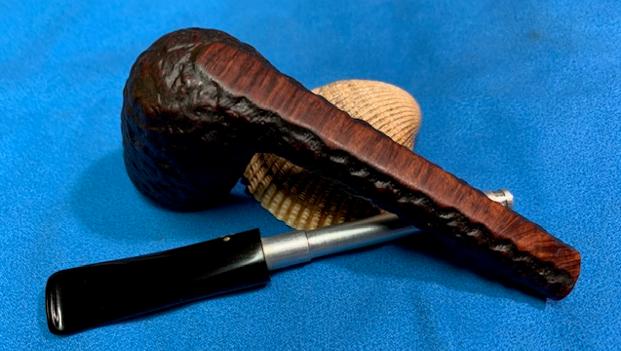
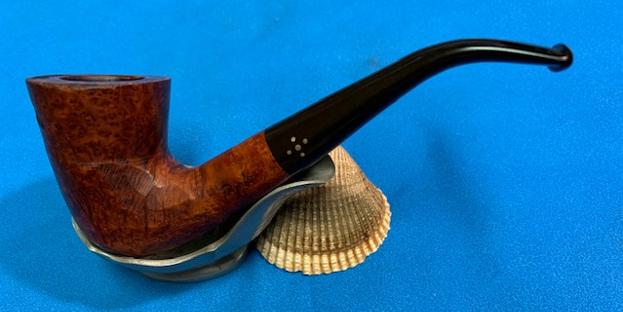
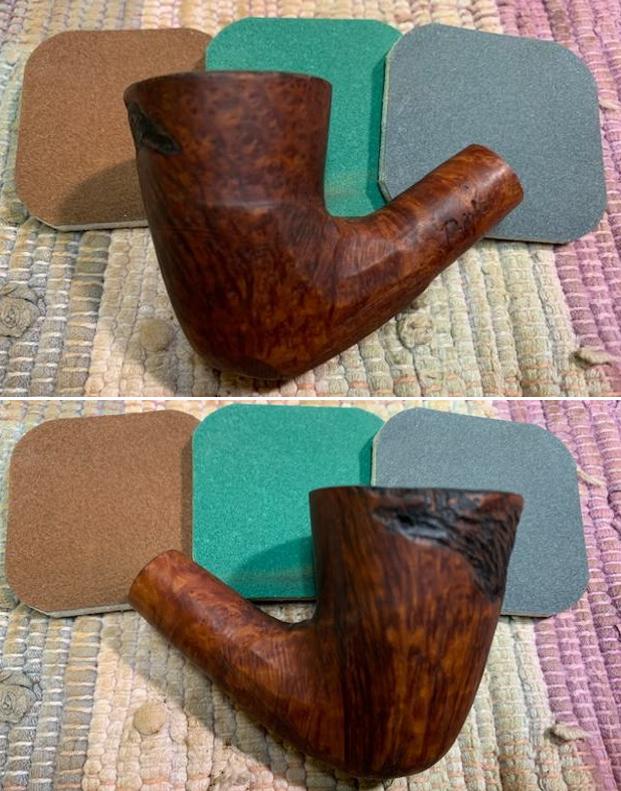
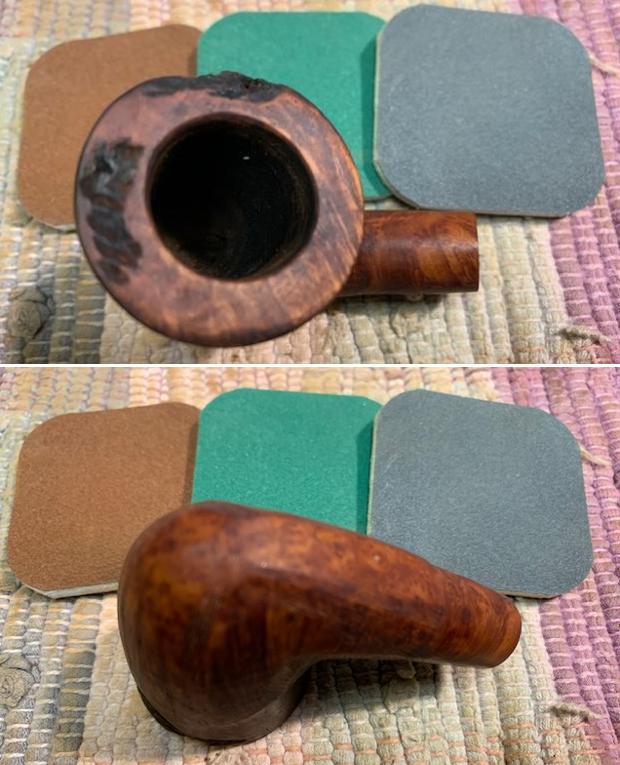
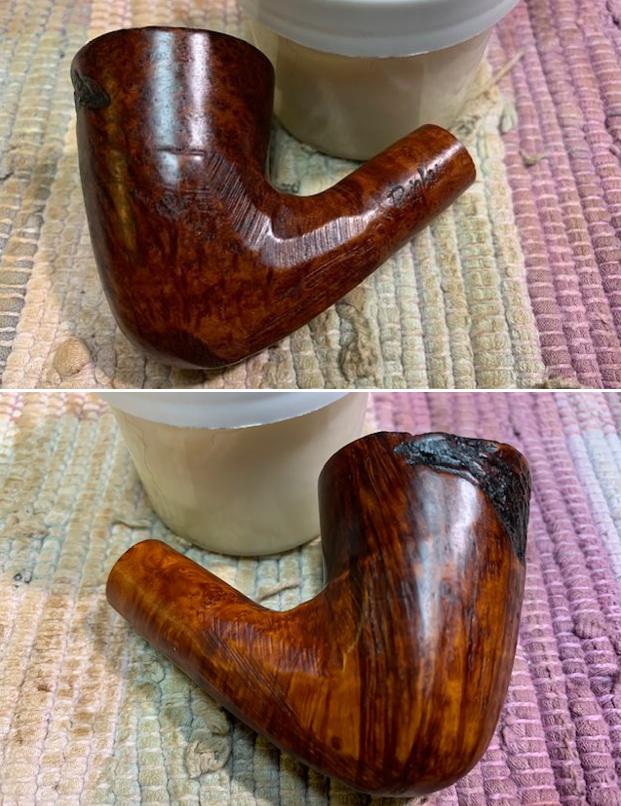
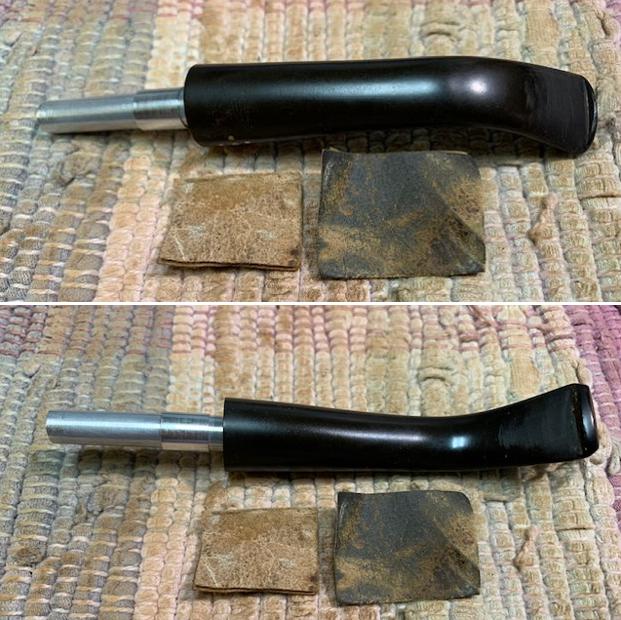
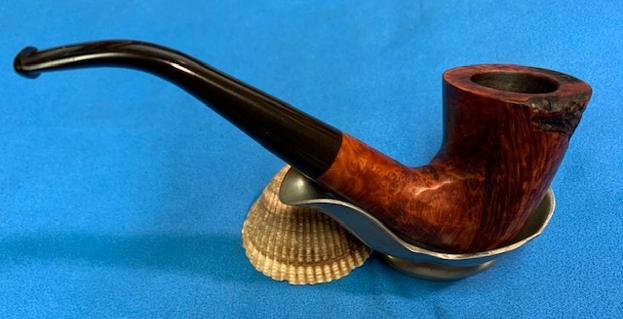
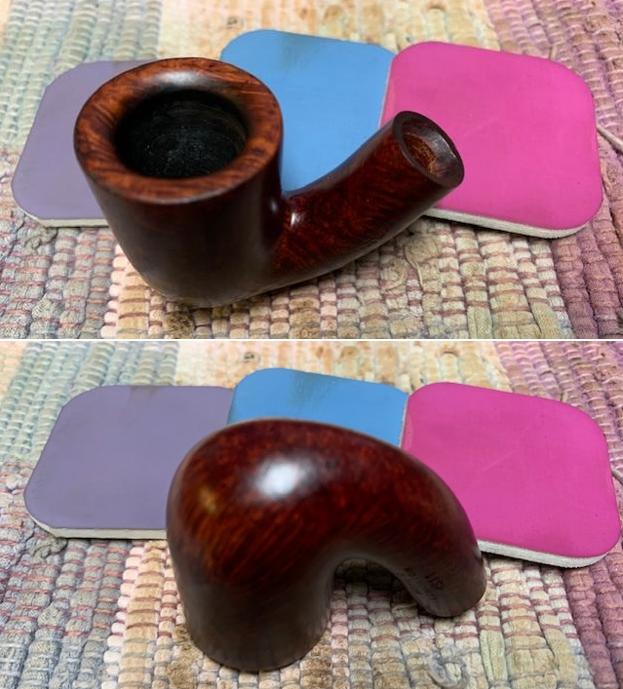 I worked some Before & After Restoration Balm into the surface of the briar with my fingertips to clean, enliven and protect the briar. I let the balm sit for 15 minutes and then buffed with a cotton cloth to raise the shine. The photos show the bowl at this point in the restoration process.
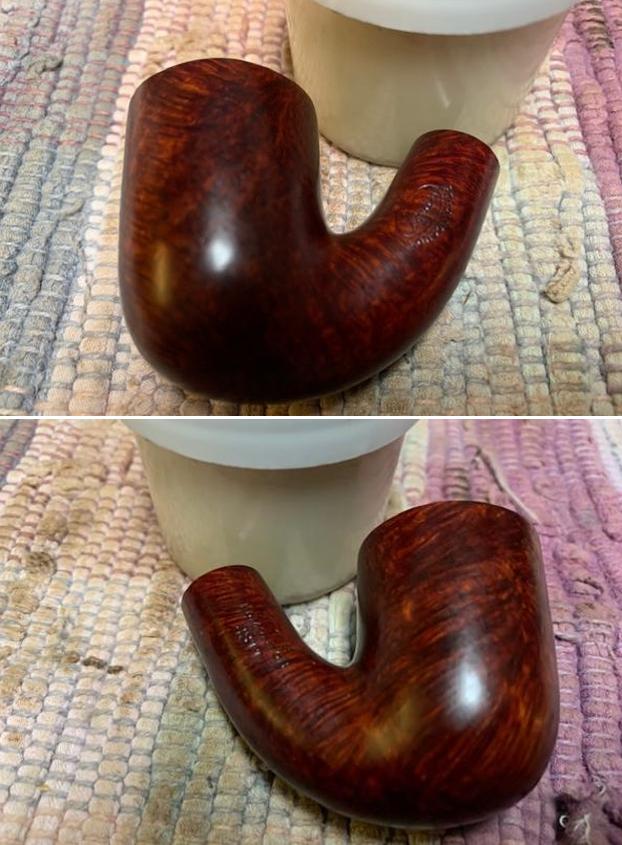

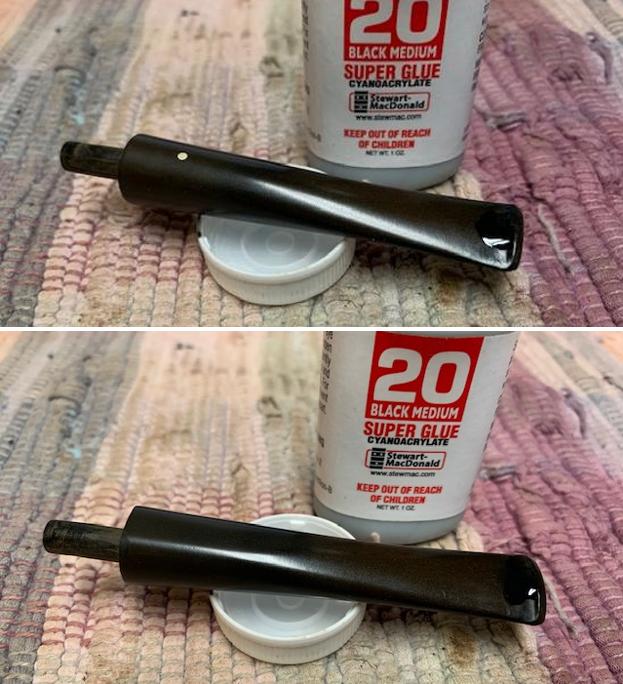
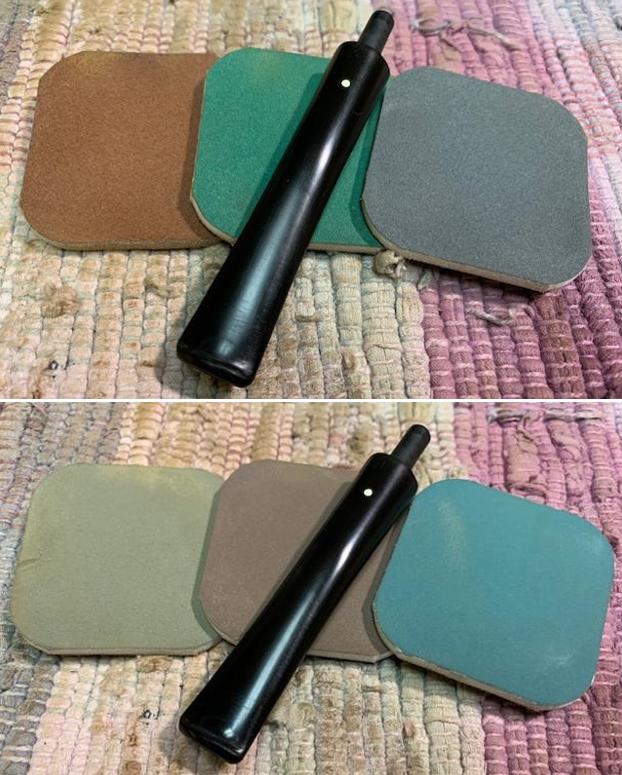
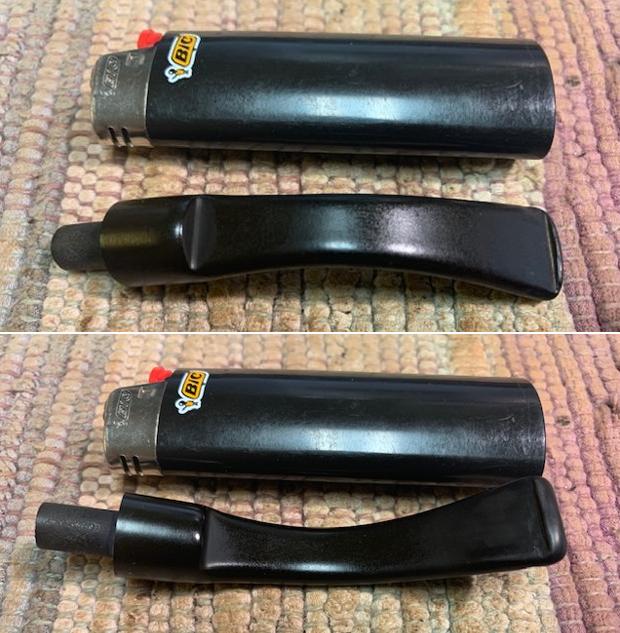
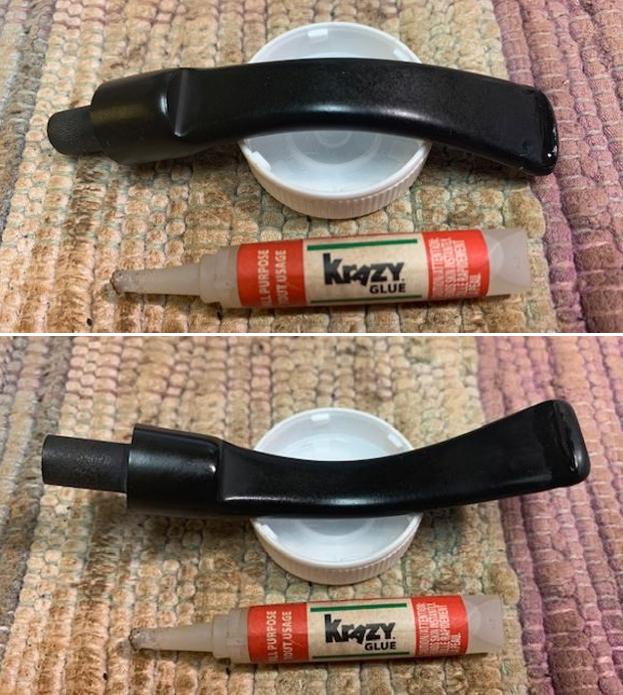
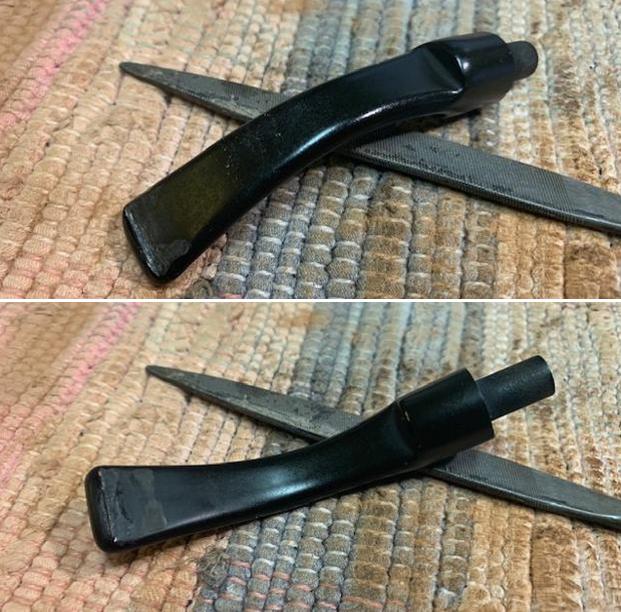
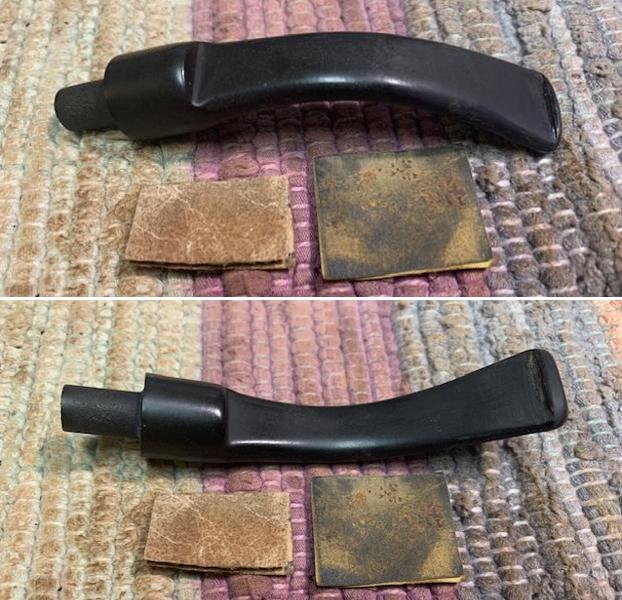
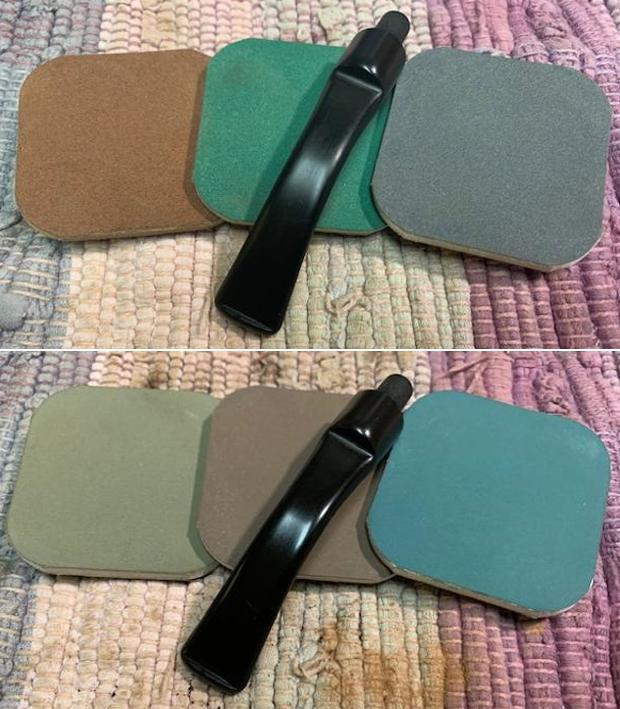
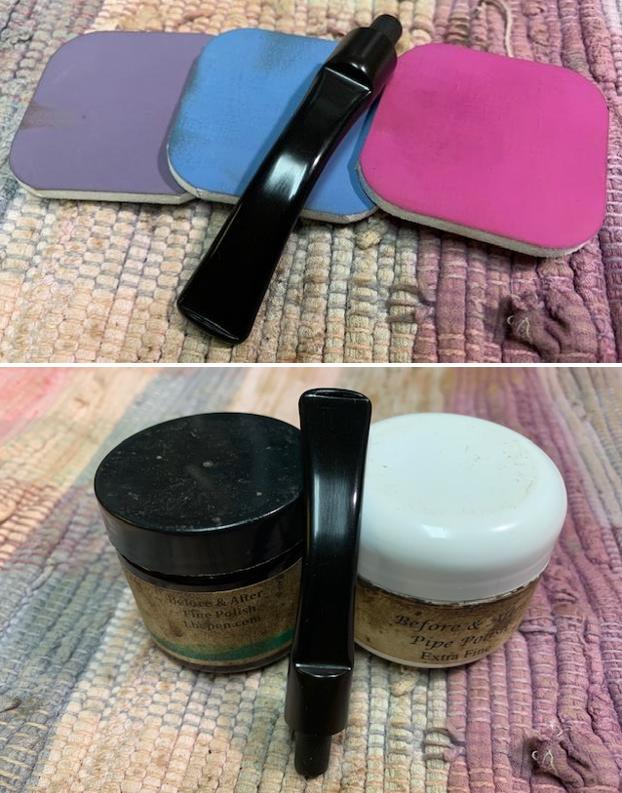
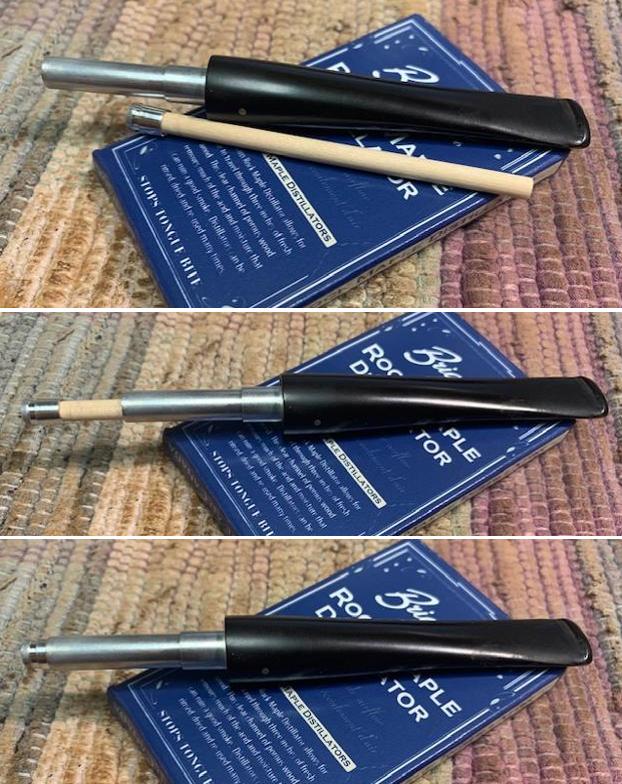
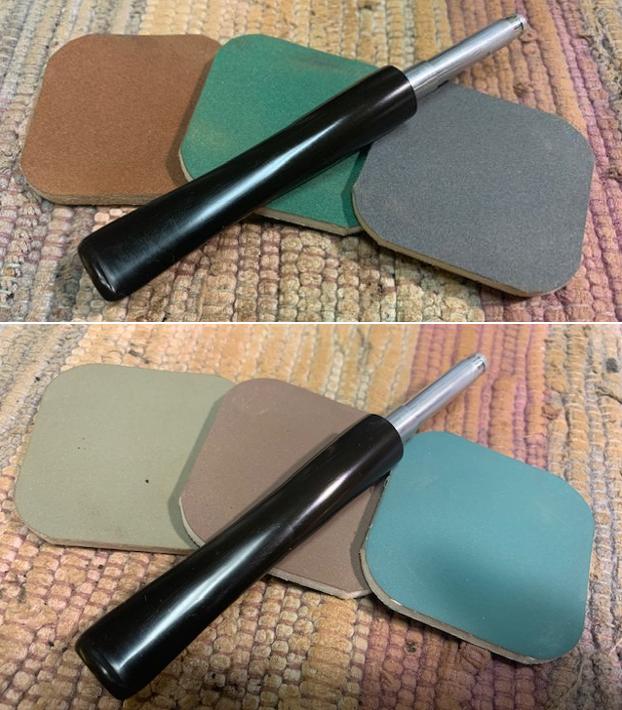
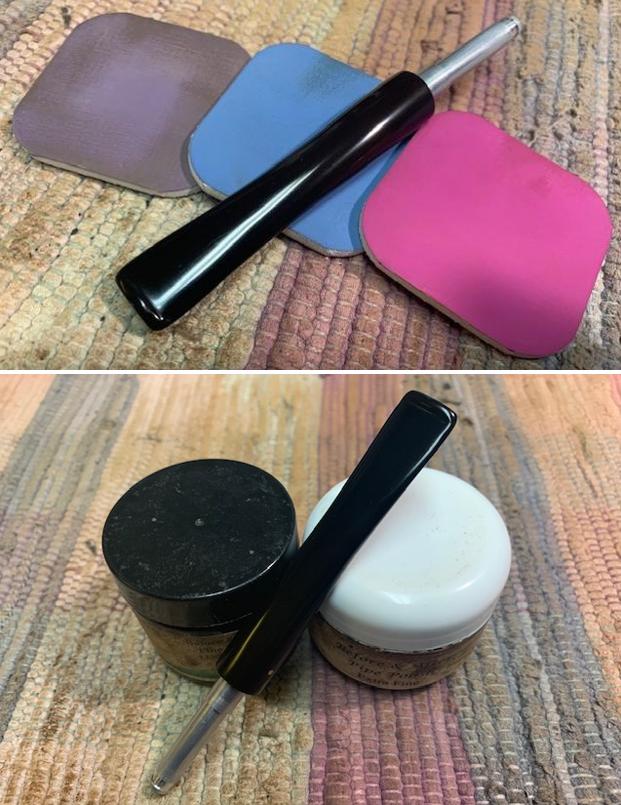
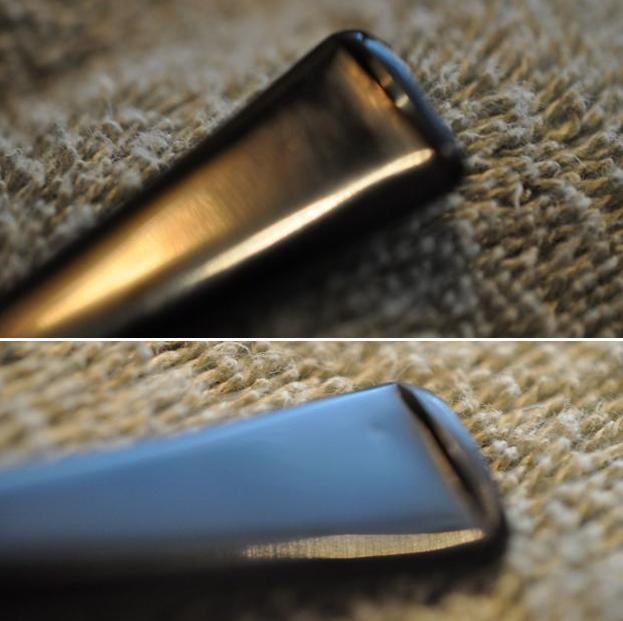
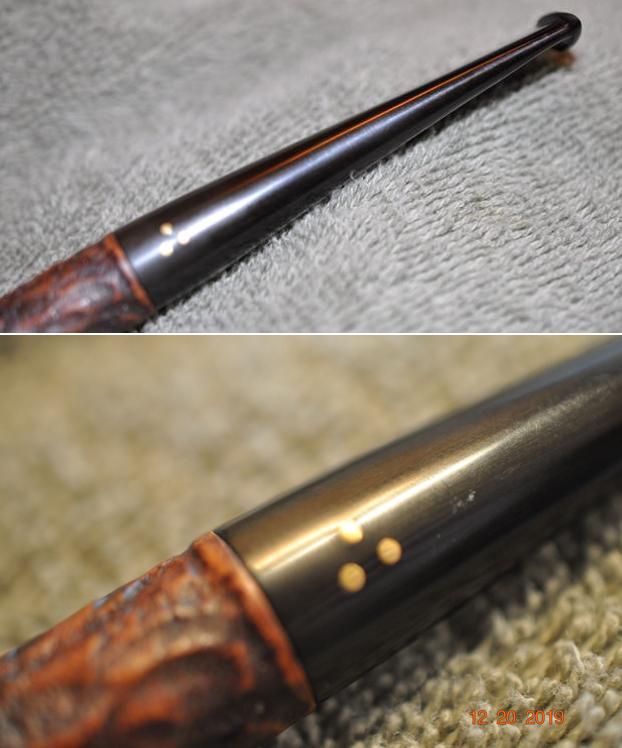
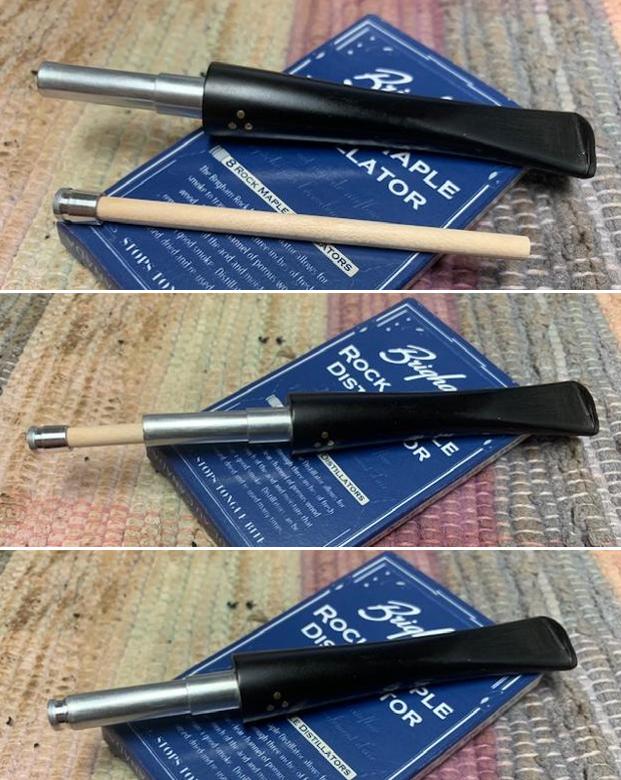
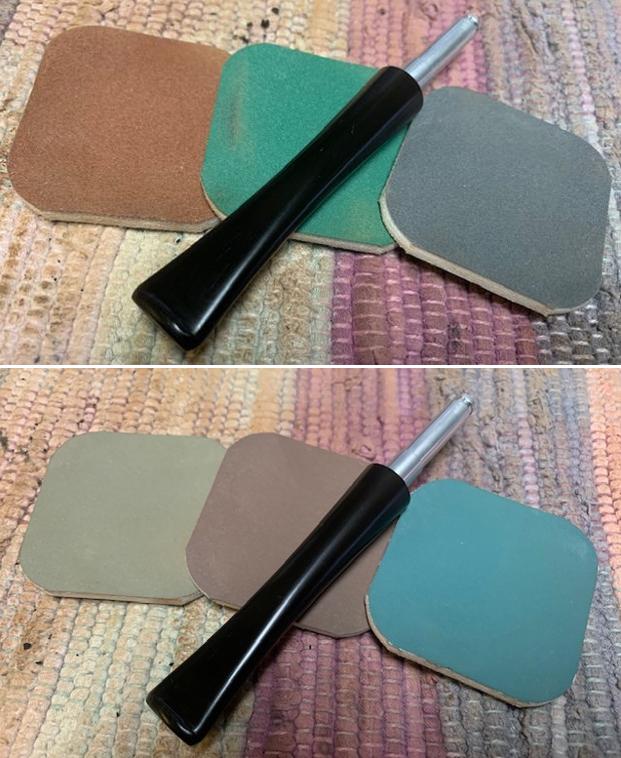
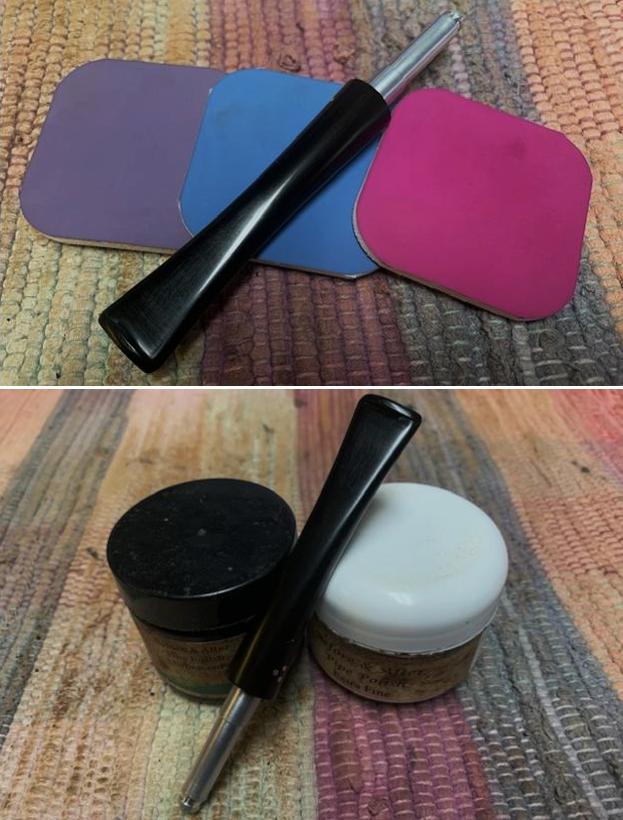
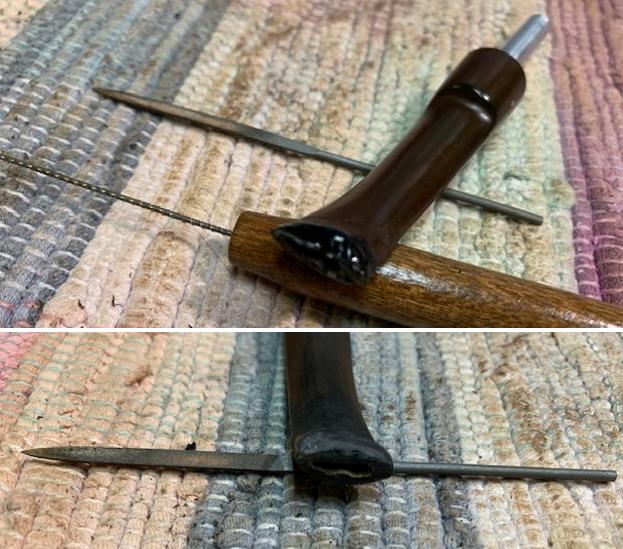
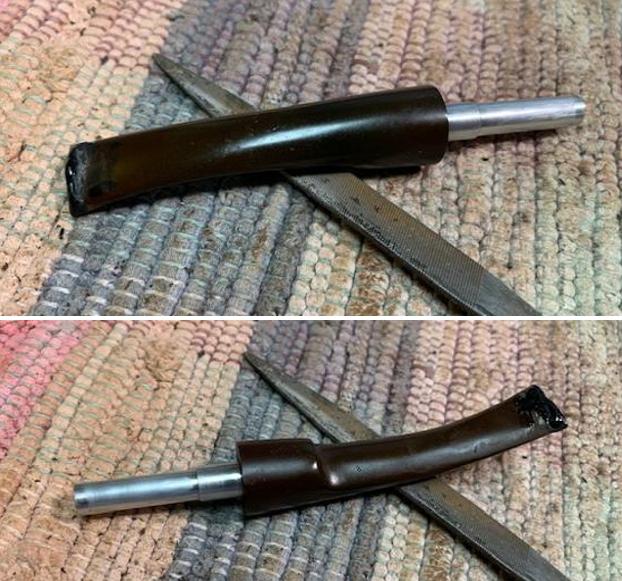
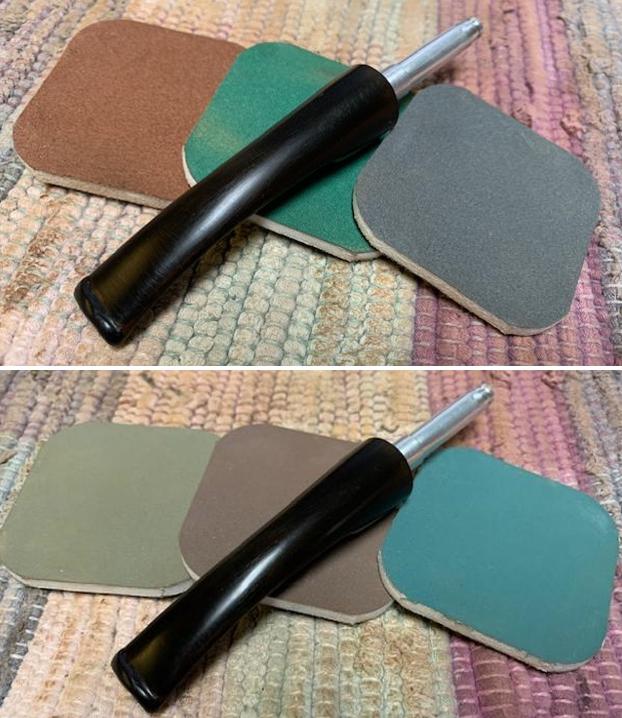
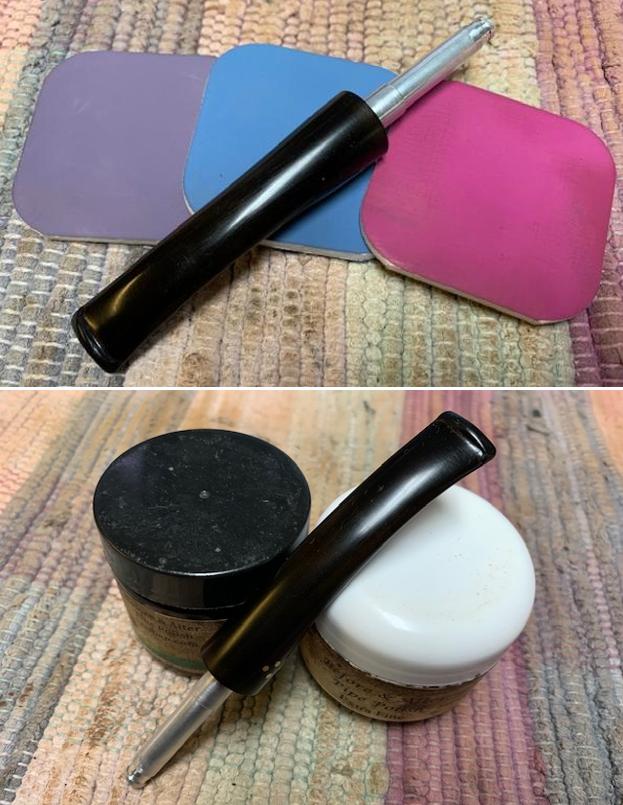
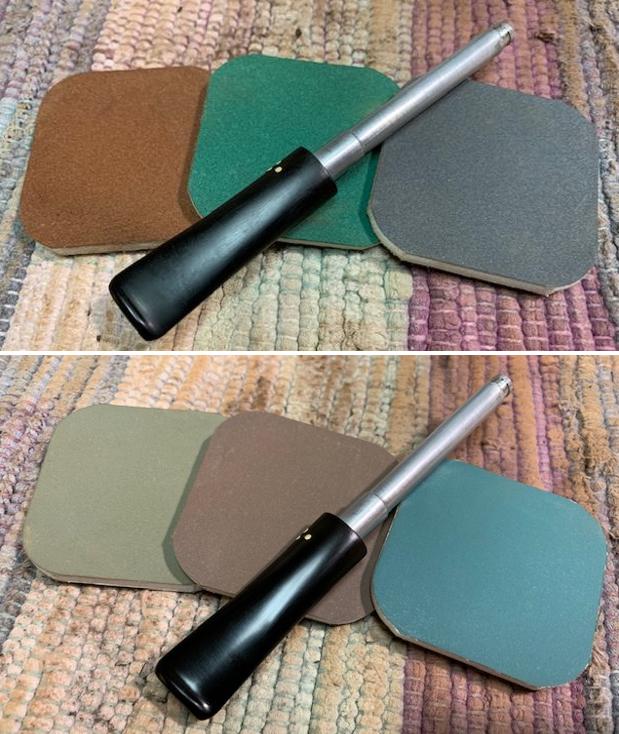
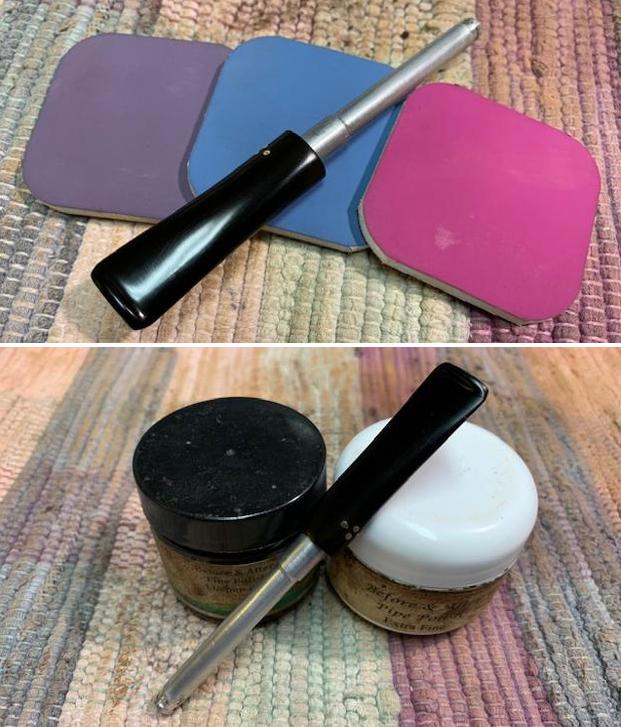
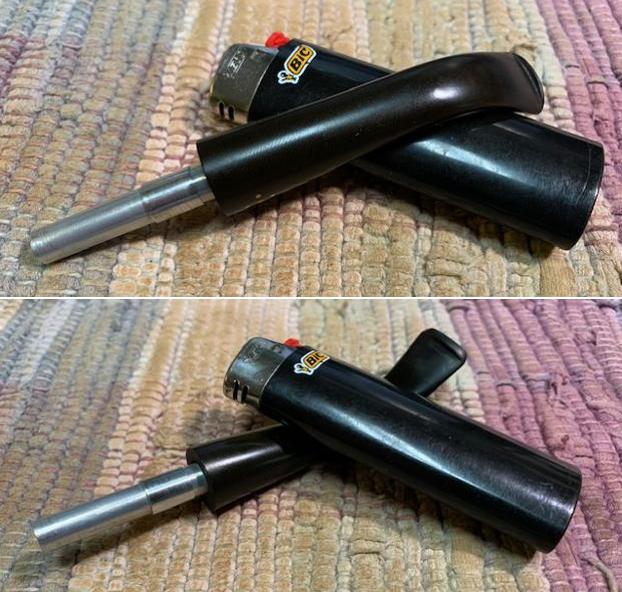
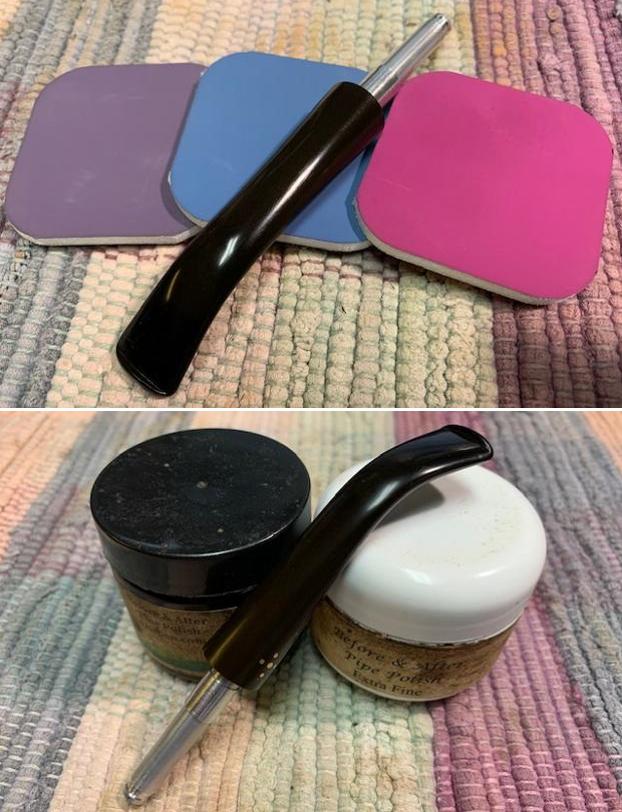
 With that done the bowl was finished other than the final buffing. I set it aside and turned my attention to the stem. I looked at the tooth chatter on the stem and concluded that none of it was deep so I figured I could polish it out with micromesh sanding pads. I polished the stem with with 1500-12000 grit sanding pads. I wiped it down after each sanding pad with Obsidian Oil. I polished it with Before & After Pipe Stem Polish – both Fine and Extra Fine.
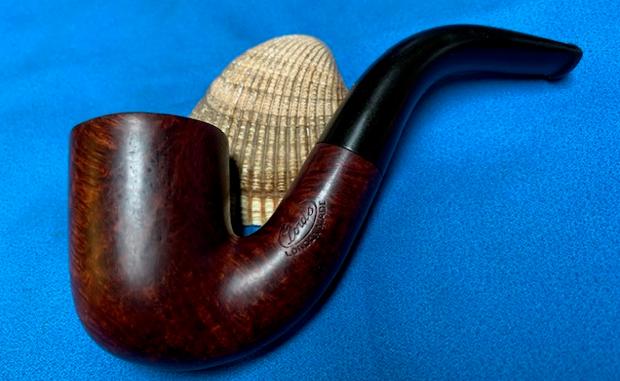
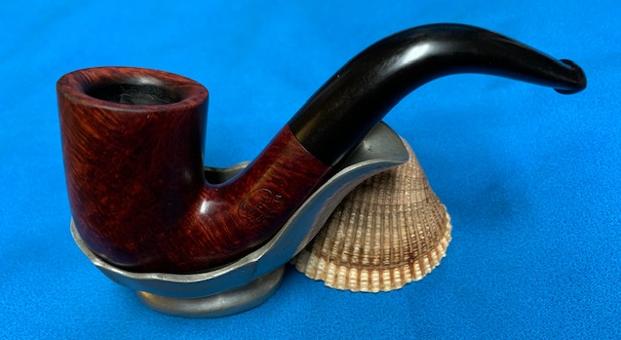
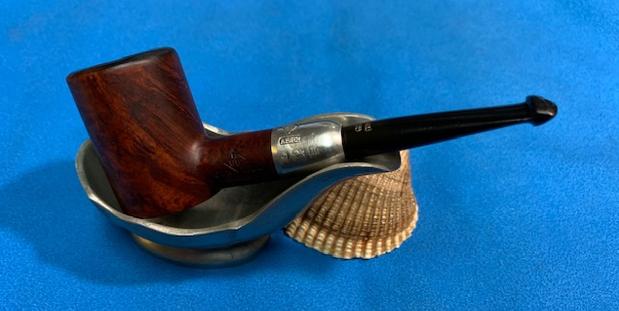
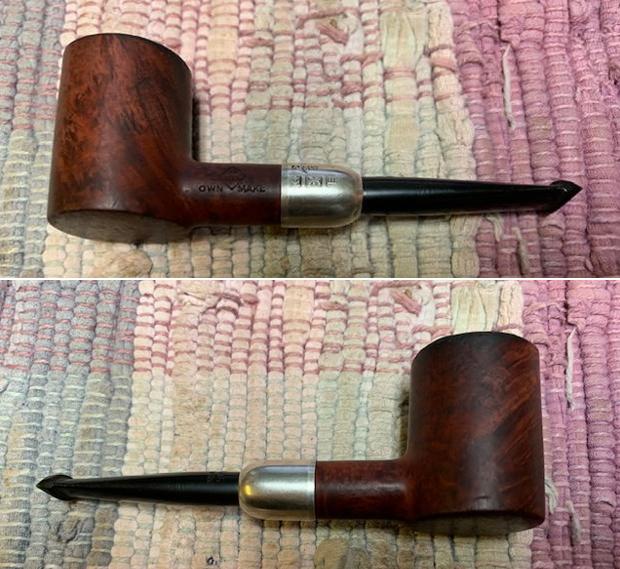
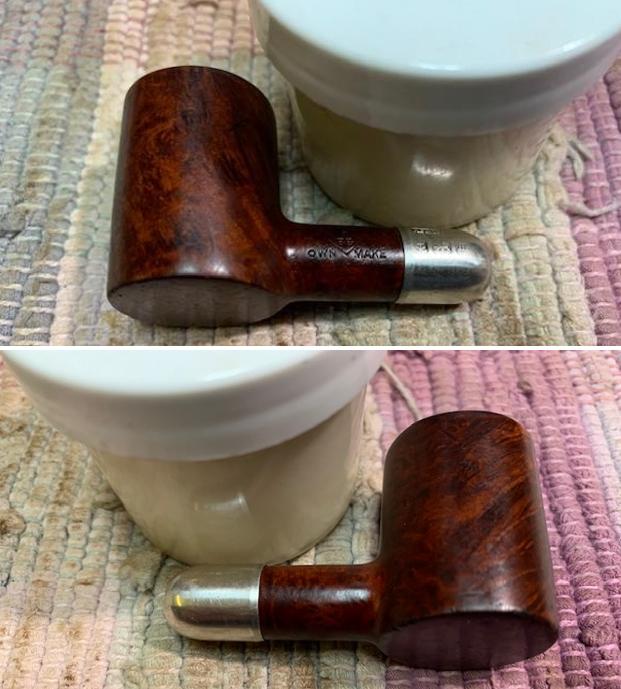
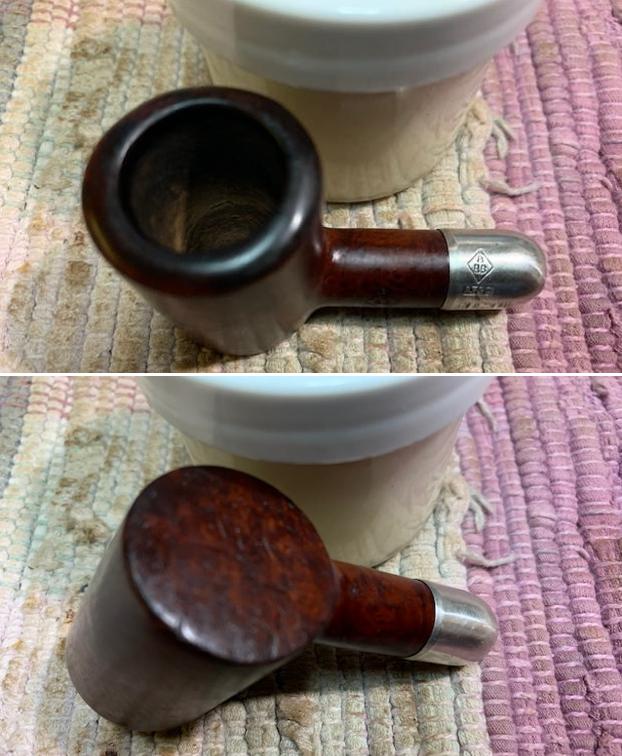
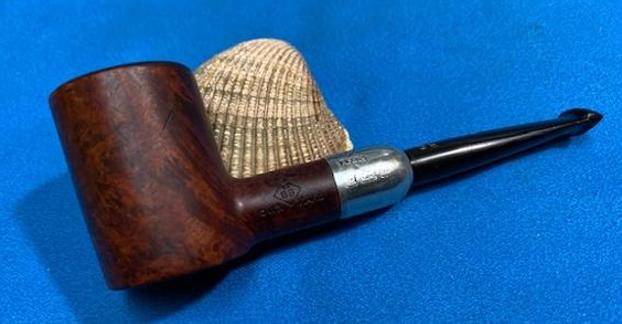
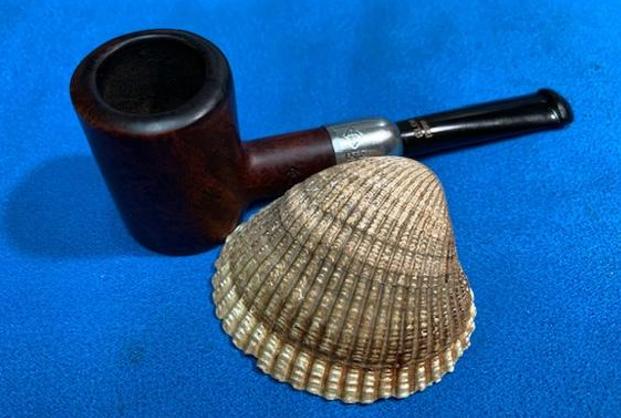
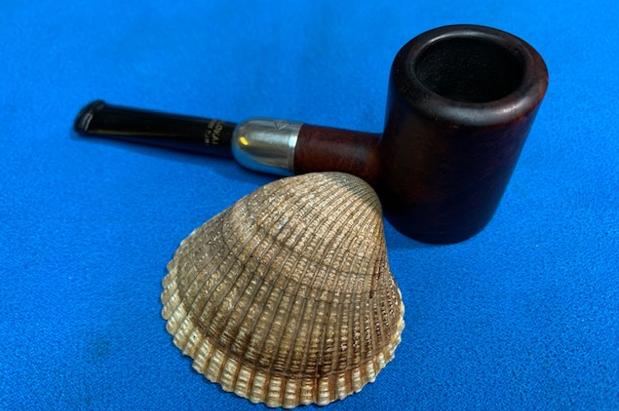
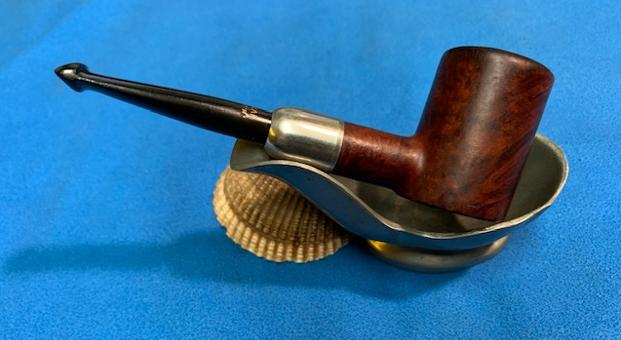
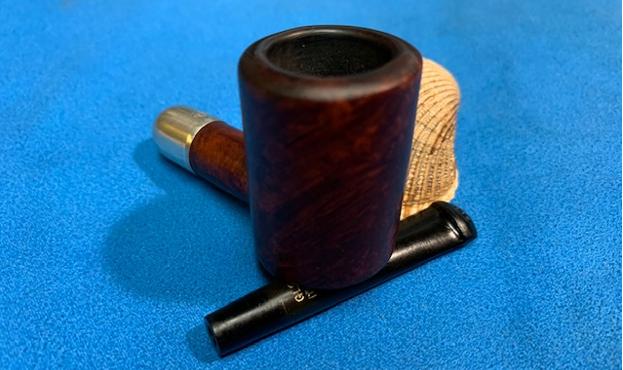
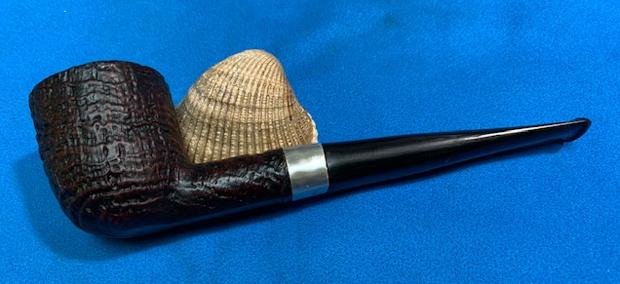
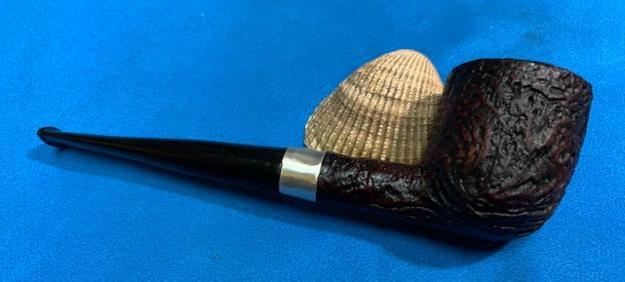
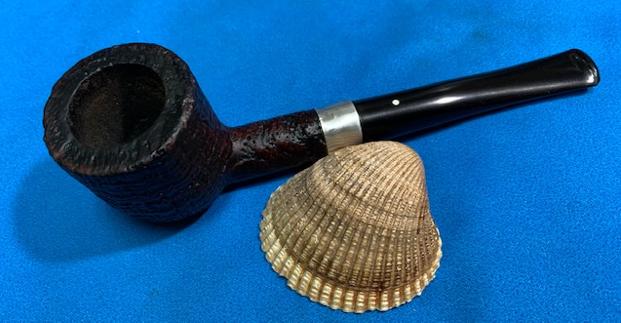
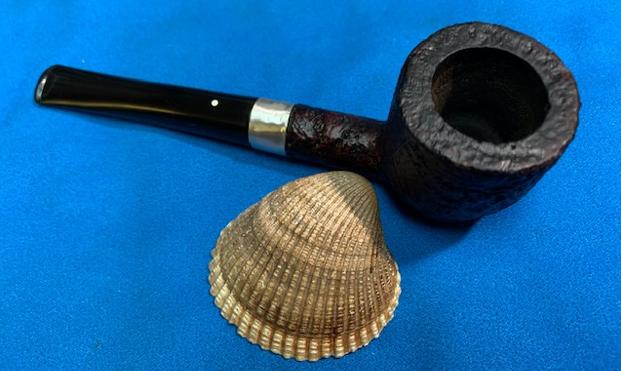
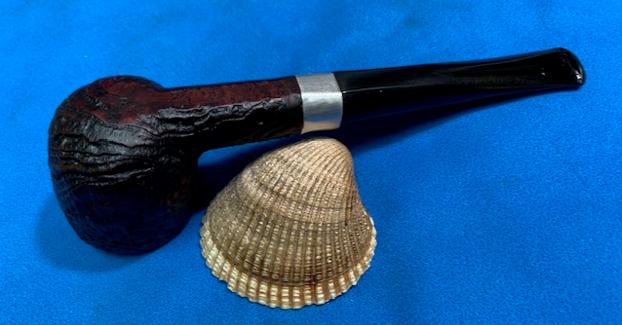
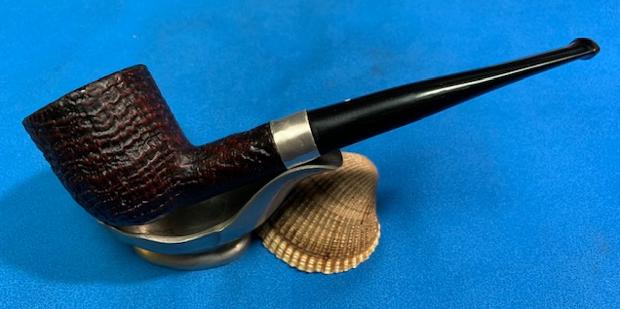
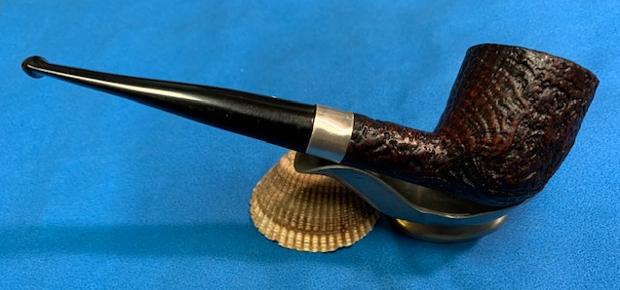
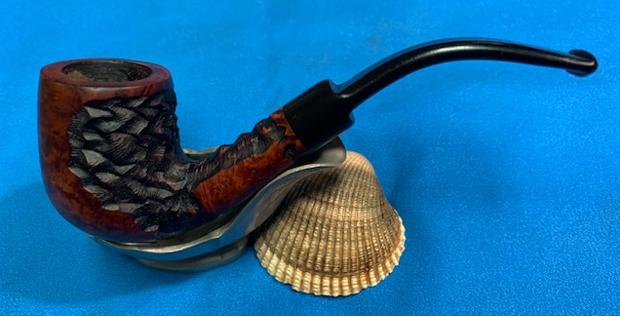
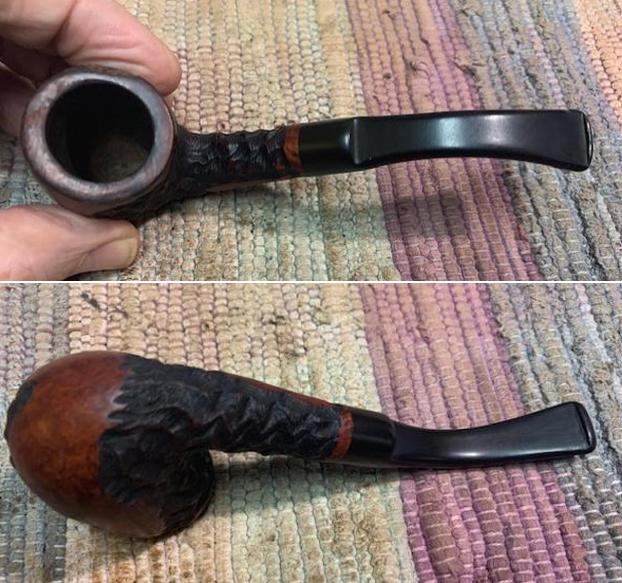
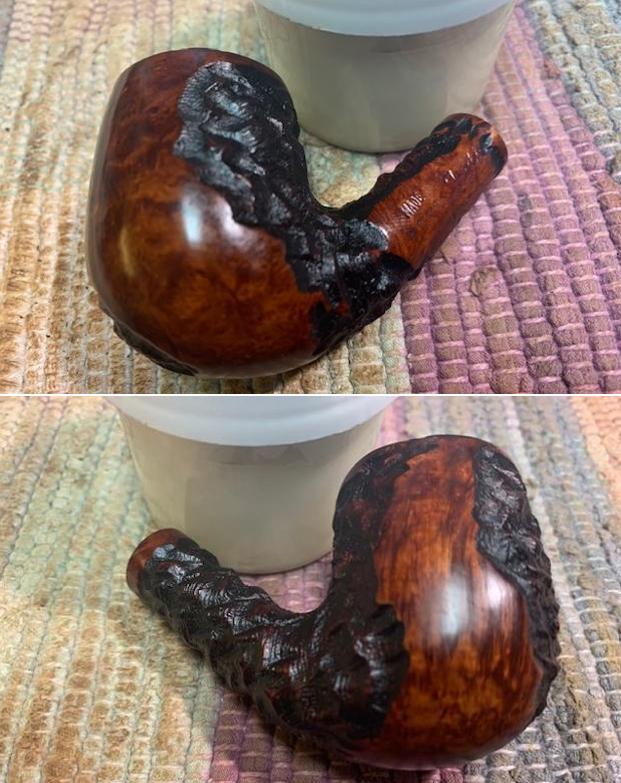
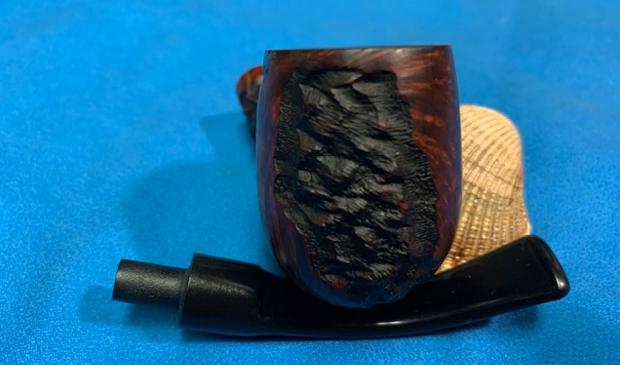
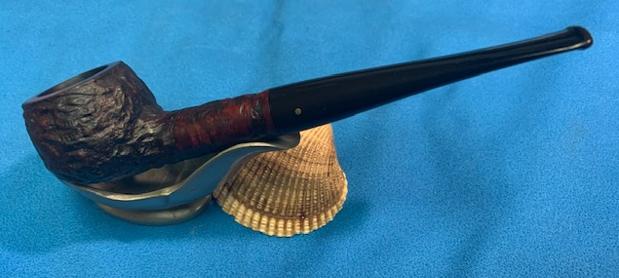
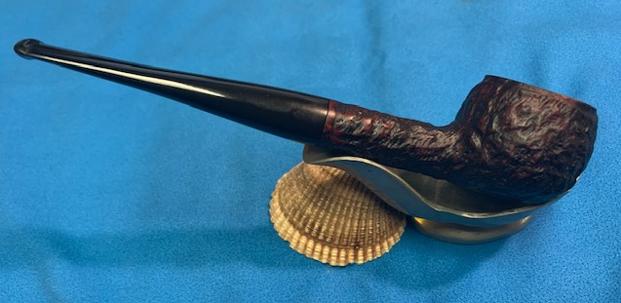
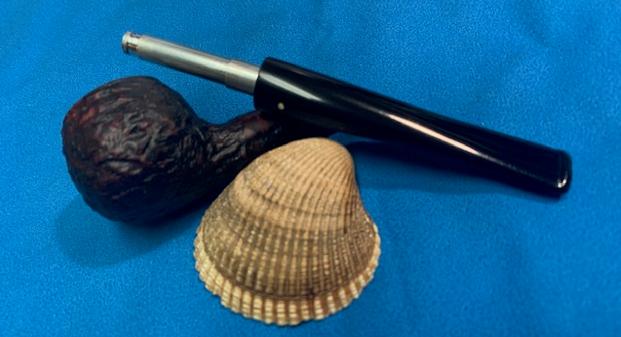
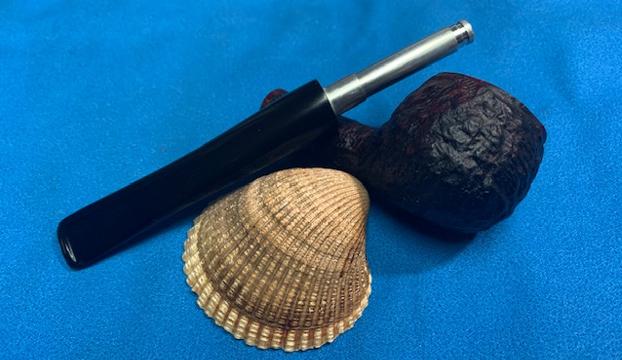
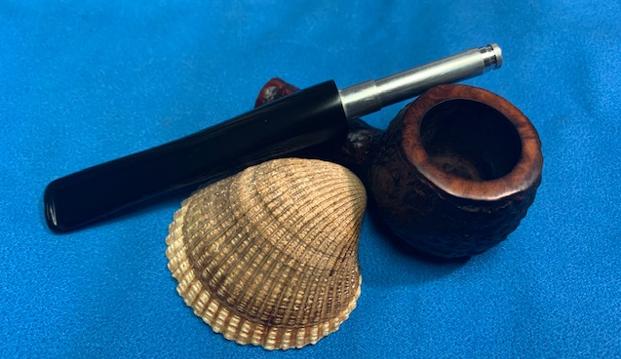
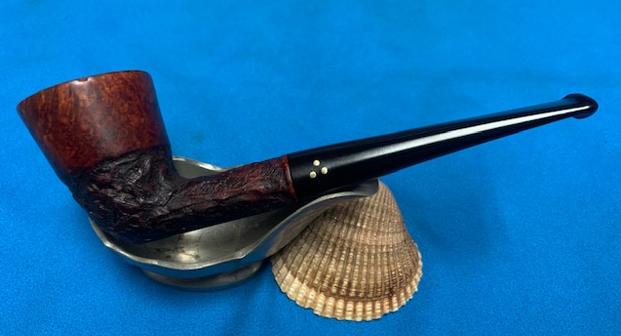
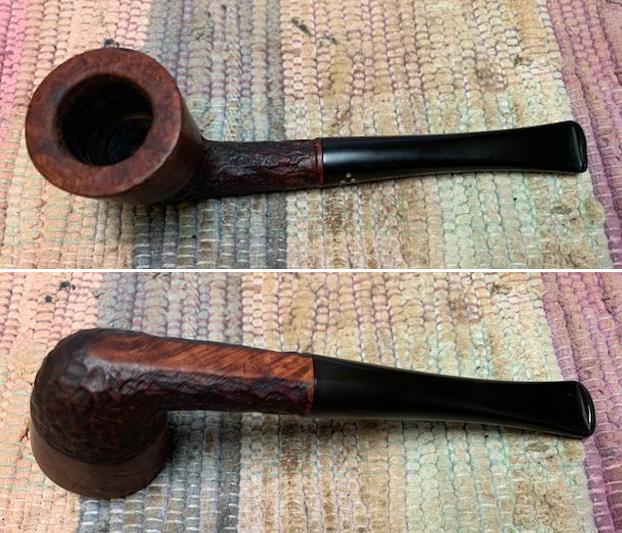
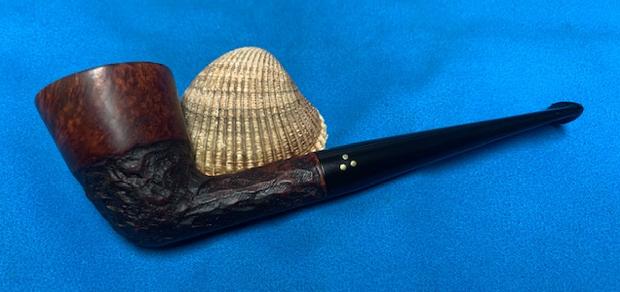
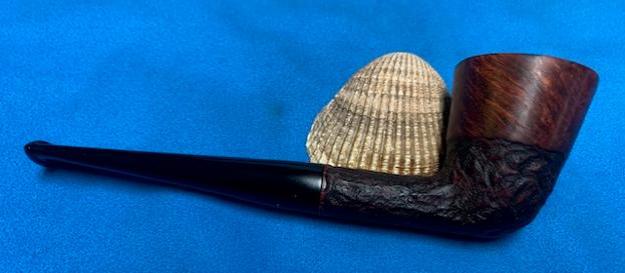
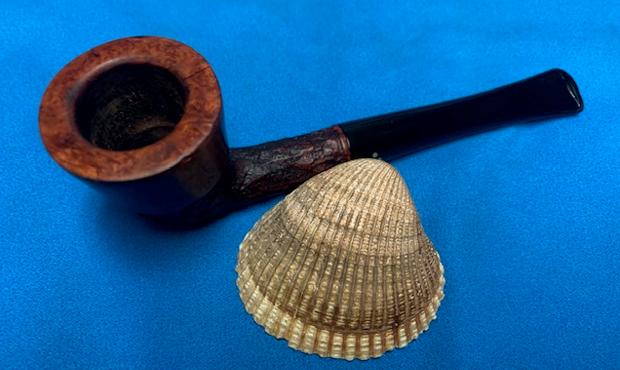
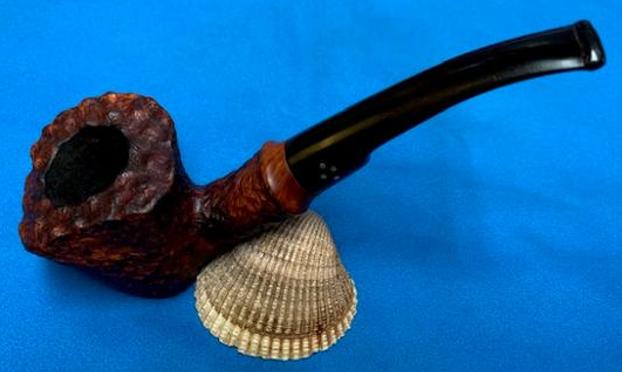
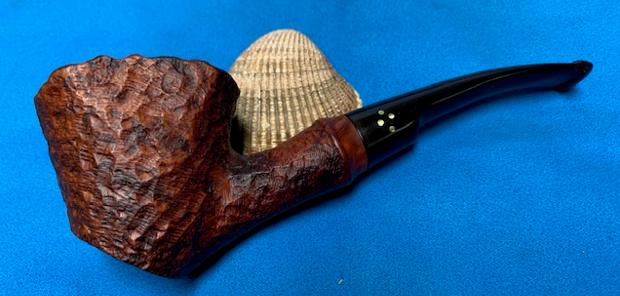
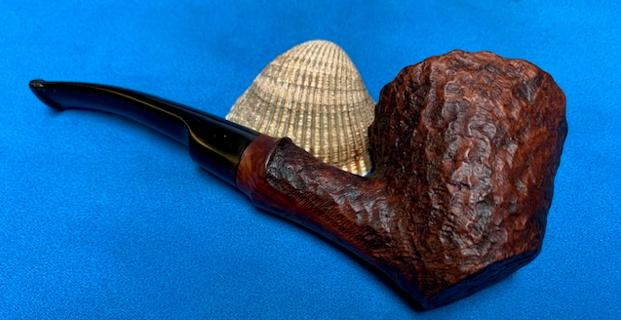
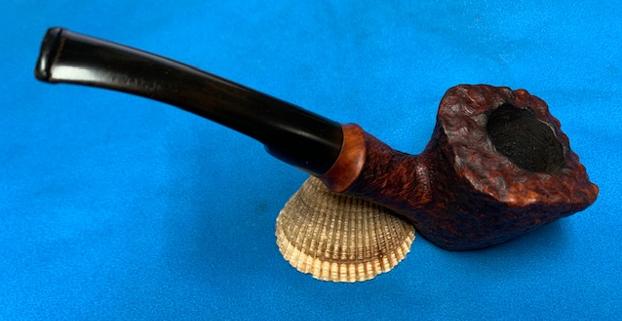
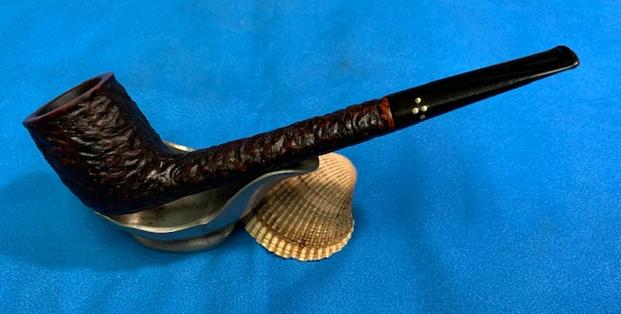
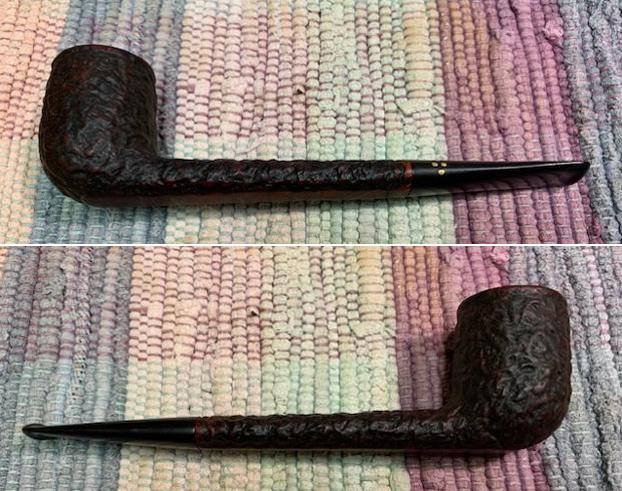
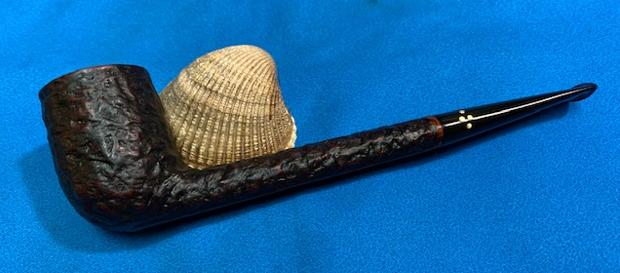
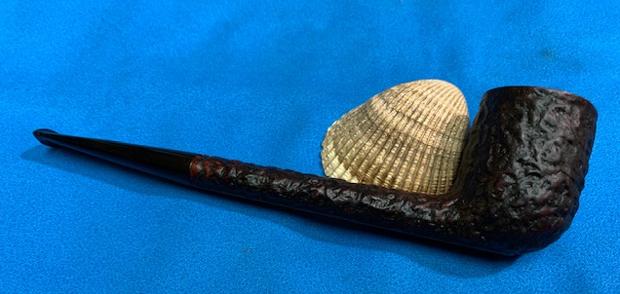
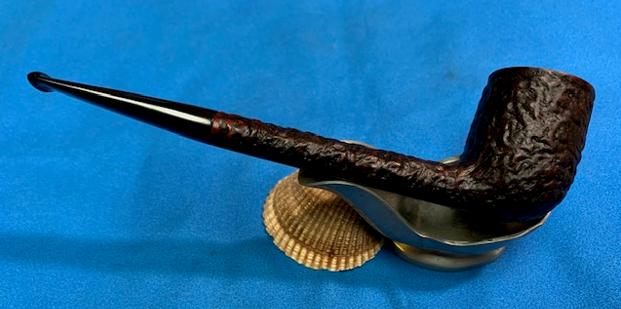
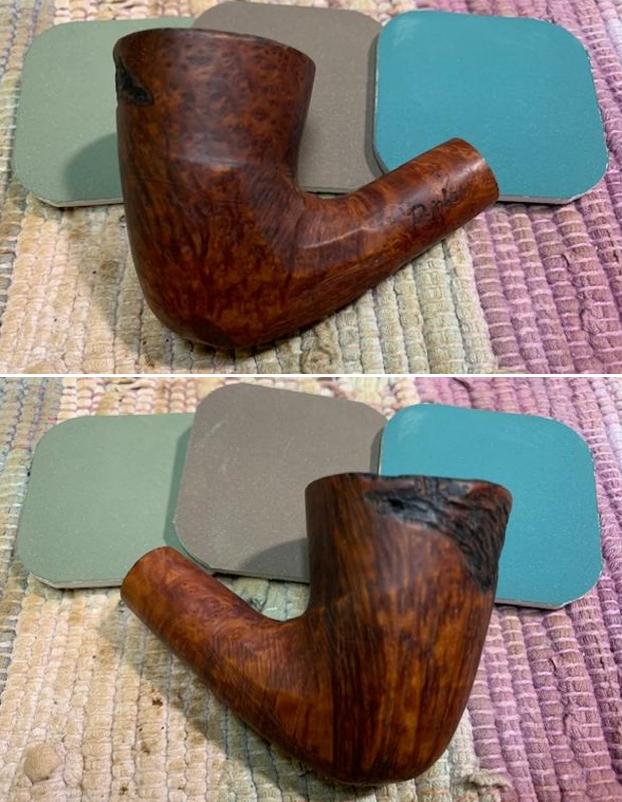
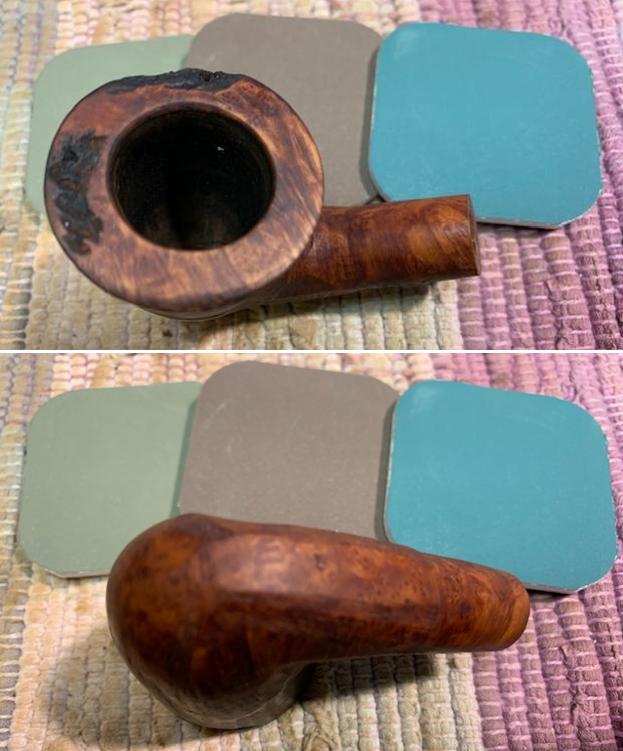
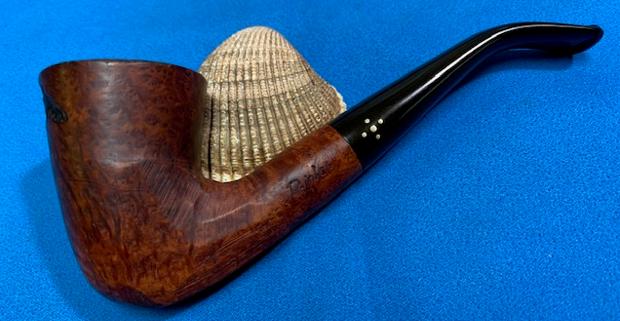
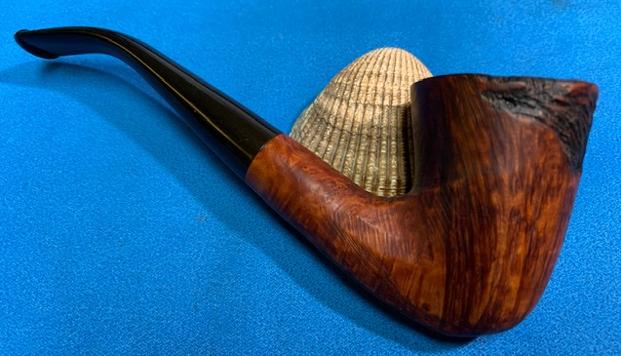
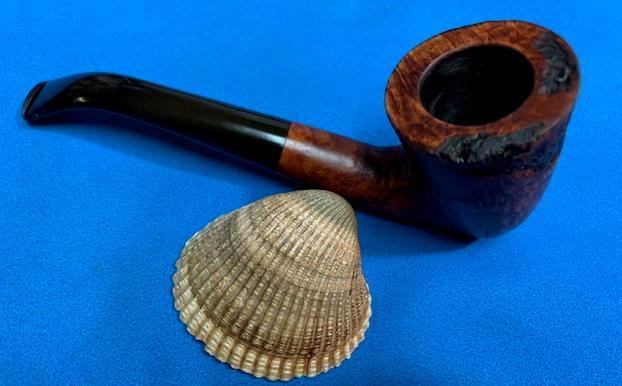
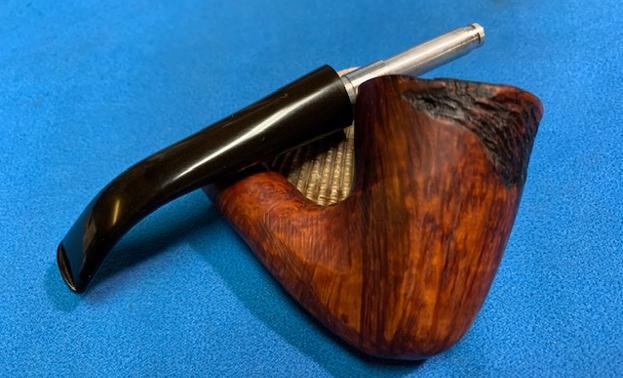
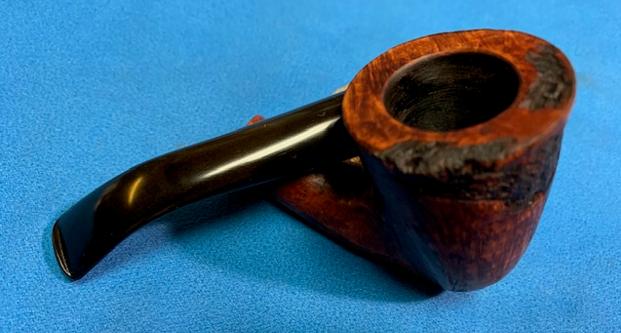
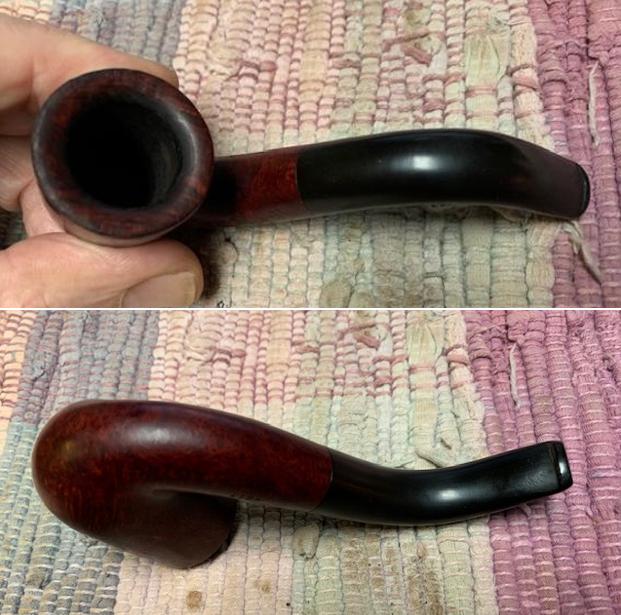
 It is fun to come to end of the restoration of the Mikes Edmonton Lords London Made Bent Billiard. It was interesting to be able to at least tentatively to link the pipe to the tobacco shop in Edmonton. It turned out to be a nice looking Bent Billiard. The finish came alive with the work I had done so far. I put the pipe back together and buffed it with Blue Diamond on the buffing wheel. I gave the bowl and the stem multiple coats of carnauba wax. I hand buffed the pipe with a clean buffing pad to raise the shine. It is fun to see what the polished bowl looks like with the grain popping through and the polished black vulcanite taper stem. It really was beautiful. This older English Bent Billiard is nice looking and the pipe feels great in my hand. It is light and well balanced. Have a look at it with the photos below. The dimensions are Length: 4 ½ inches, Height: 1 ¾ inches, Outside diameter of the bowl: 1 ¼ inches, Chamber diameter: ¾ of an inch. The weight of the pipe is 34grams/1.20ounces. It is a beautiful pipe that I am still trying to figure out if I want to sell. Perhaps if you are an Edmontonian we should chat. Thanks for walking through the restoration with me as I worked over this pipe. Thanks to each of you who are reading this blog. Remember we are not pipe owners; we are pipemen and women who hold our pipes in trust until they pass on into the trust of the next pipeman or woman.