by Steve Laug
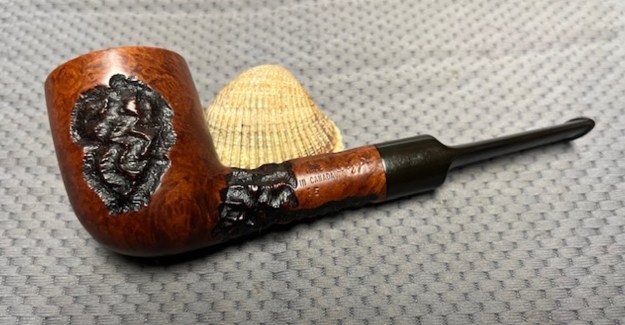
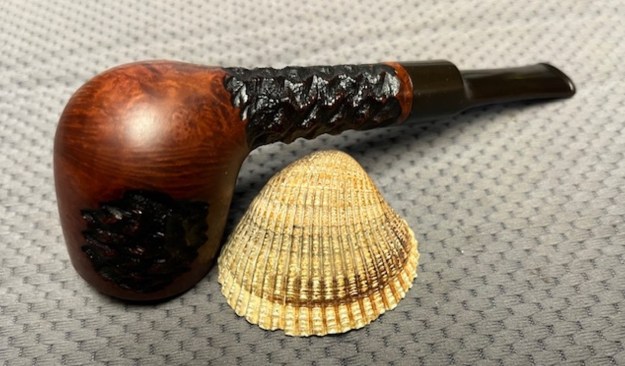
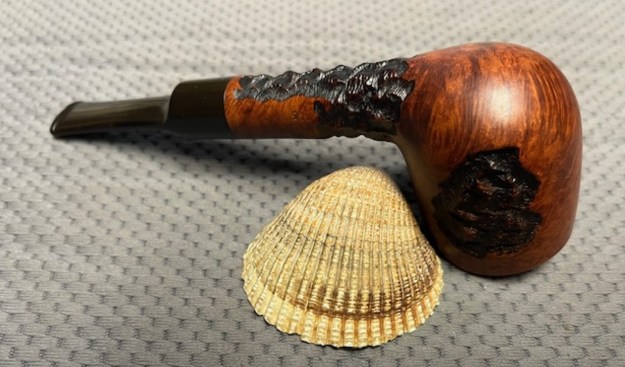
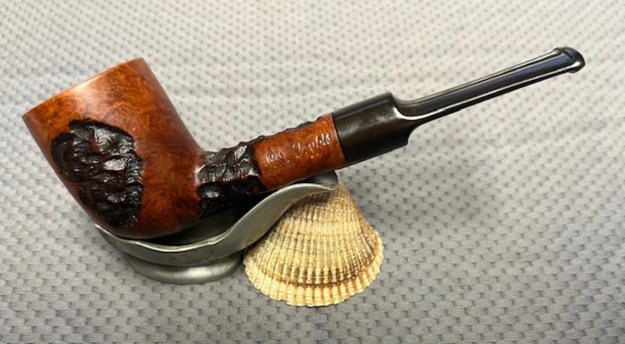
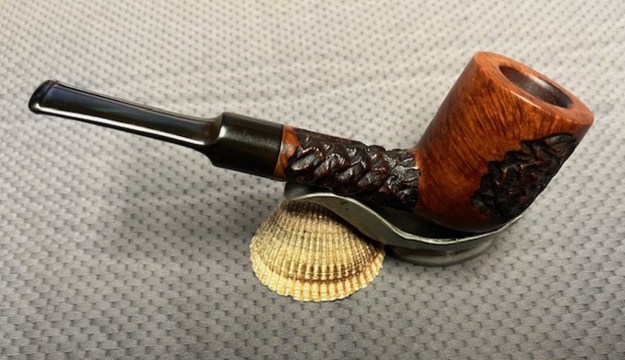
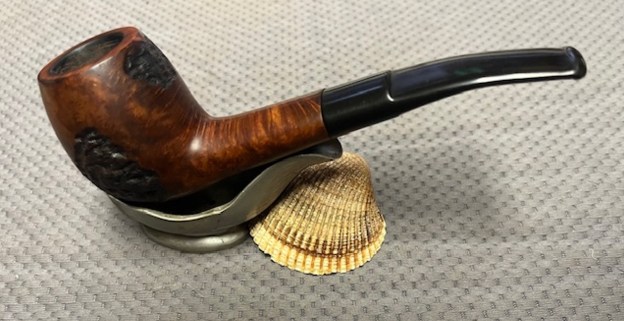
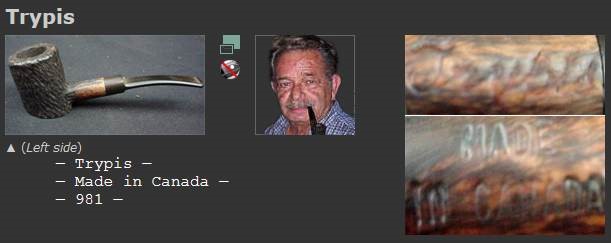
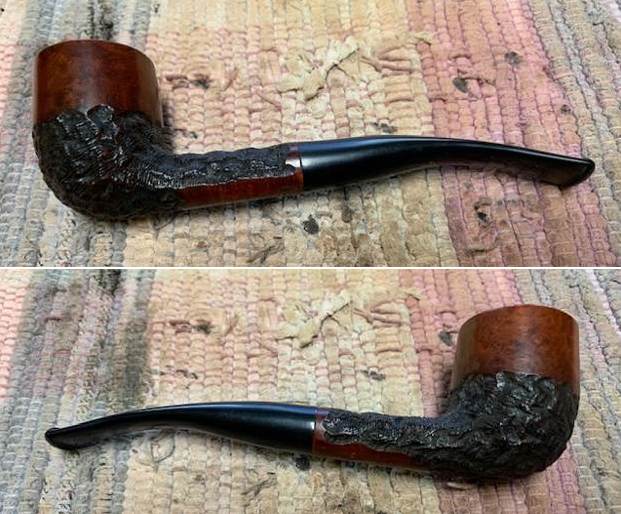
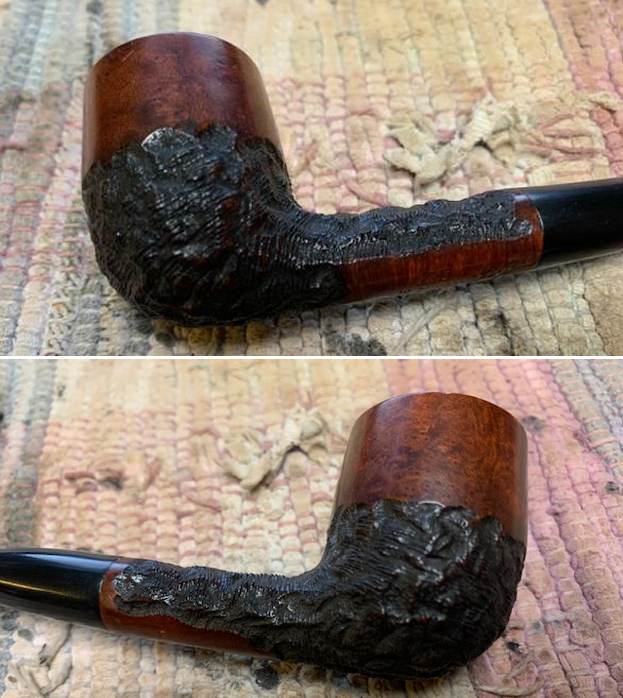
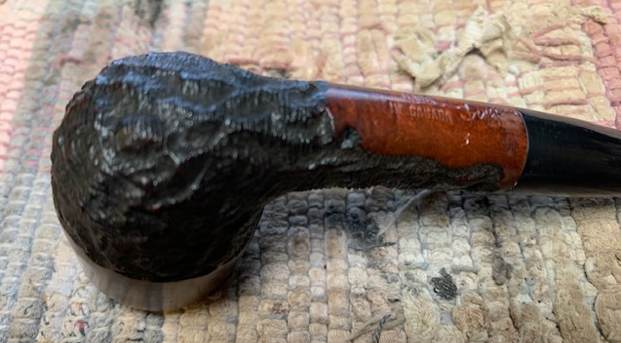
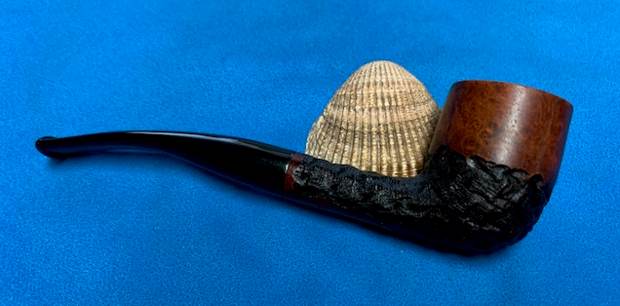
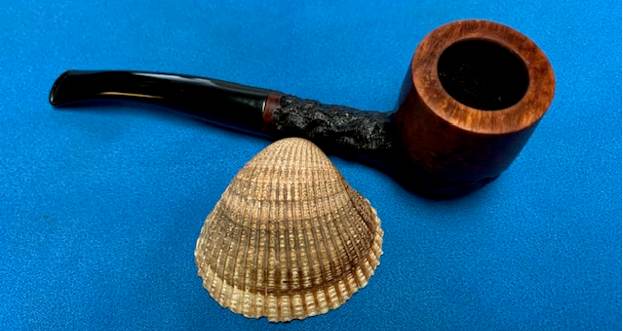
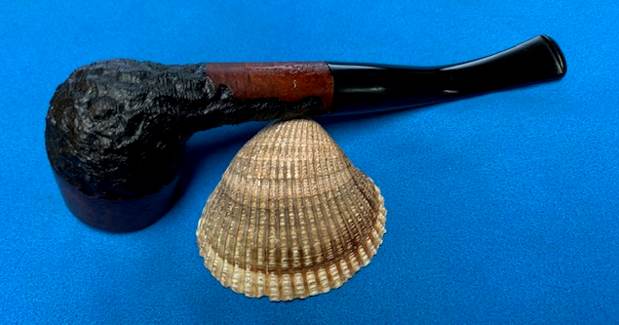
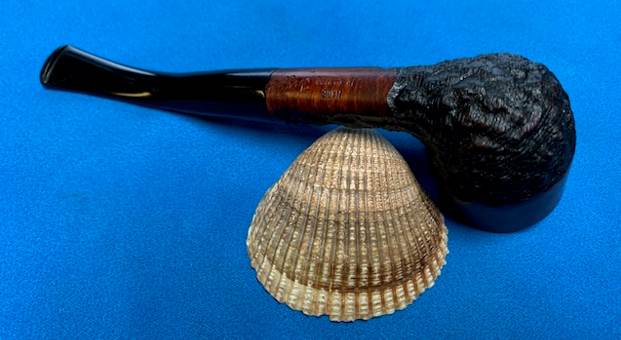
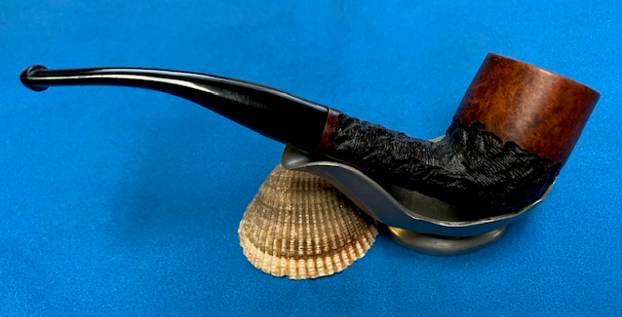
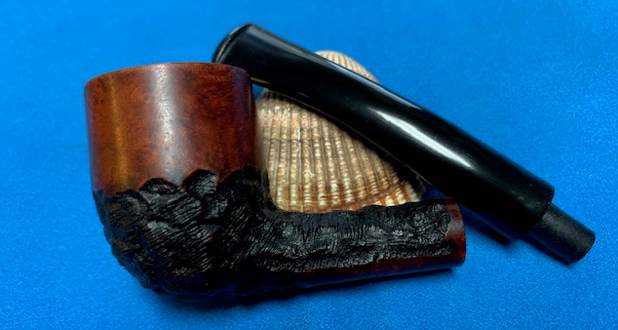
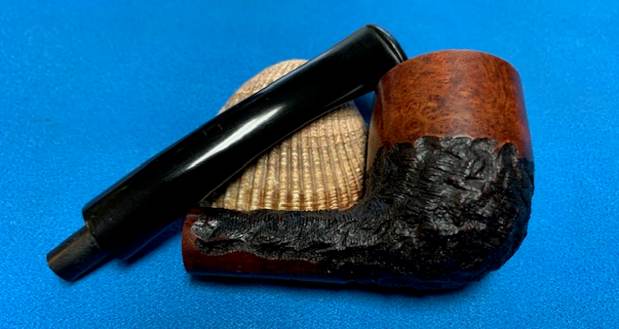
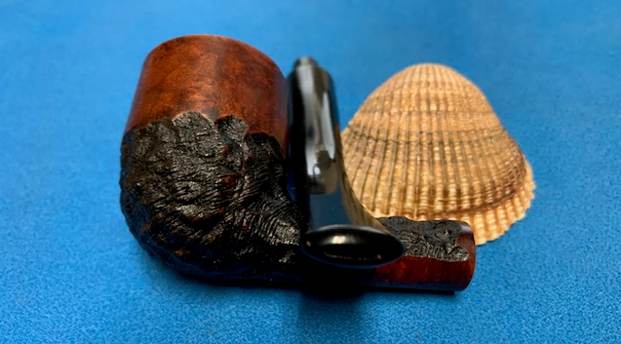
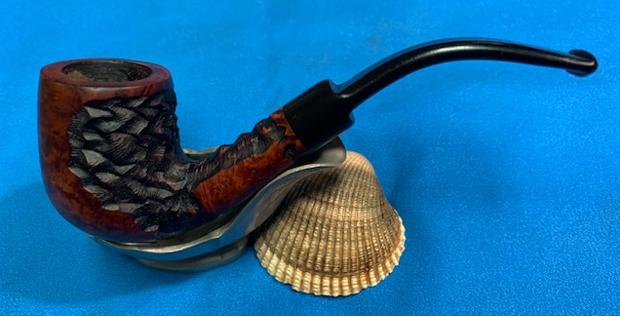
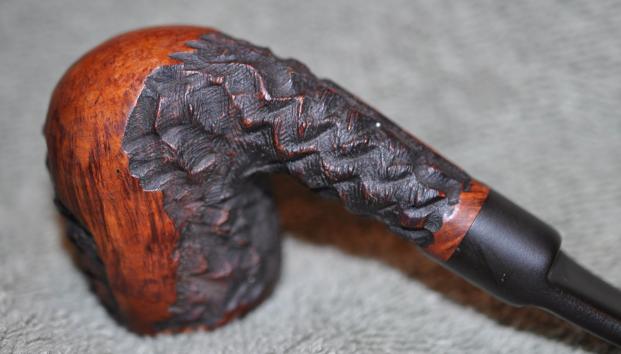
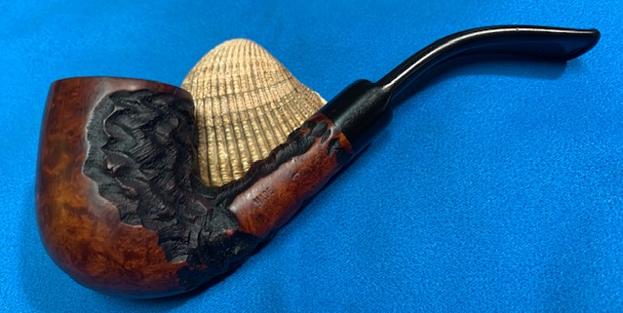
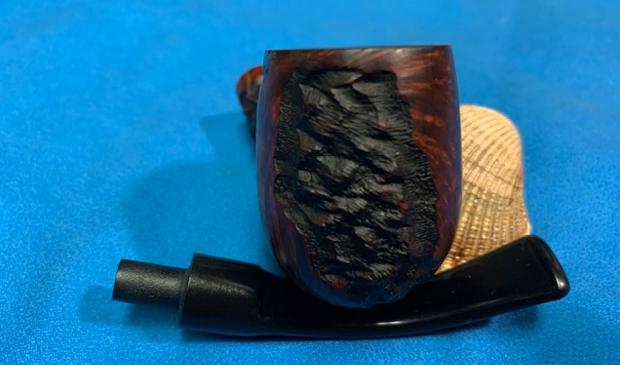
The next pipe I have chosen to work on is one I picked up on eBay a couple of weeks ago. It is an interesting mixed finish saddle stem Billiard. It has rusticated panels on the sides of the bowl and the shank. The finish is in good condition with the bowl stained in brown and the rusticated portions are stained black. The contrast is quite beautiful. The rim top is smooth and has some darkening and damage on the inner edge of the bowl. It looks like the damage was caused by the reaming. The bowl is clean and from mid bowl down it was raw briar. All that tells me that the pipe is lightly smoked. I saved the photos that the seller in Eastern Canada included in the sales listing. The photos I have included below are the photos included by the seller.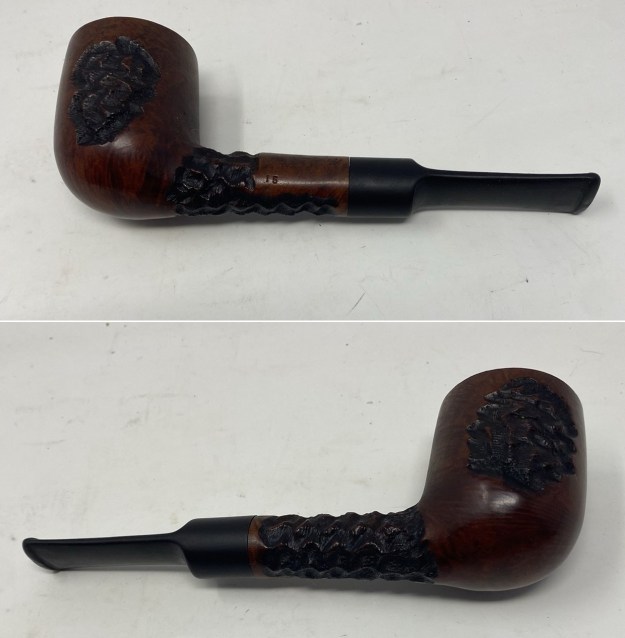
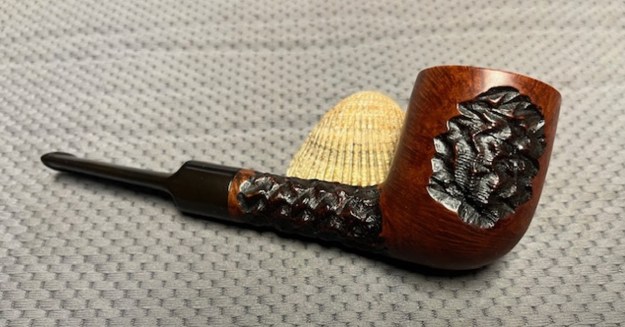
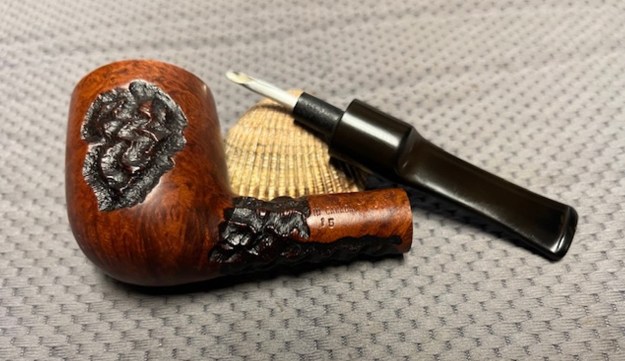
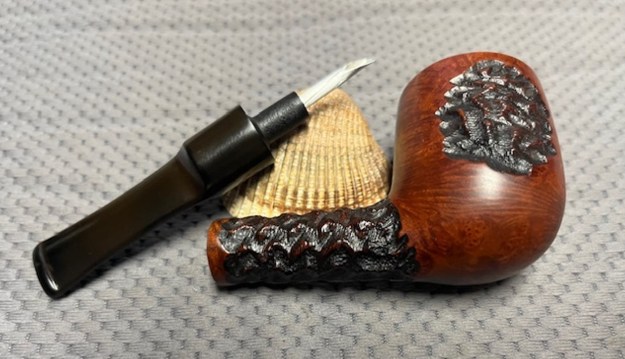
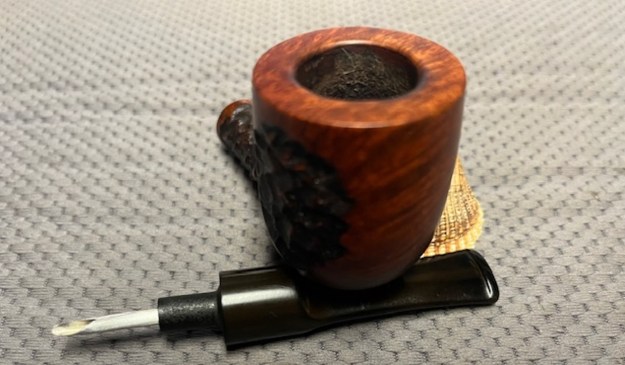
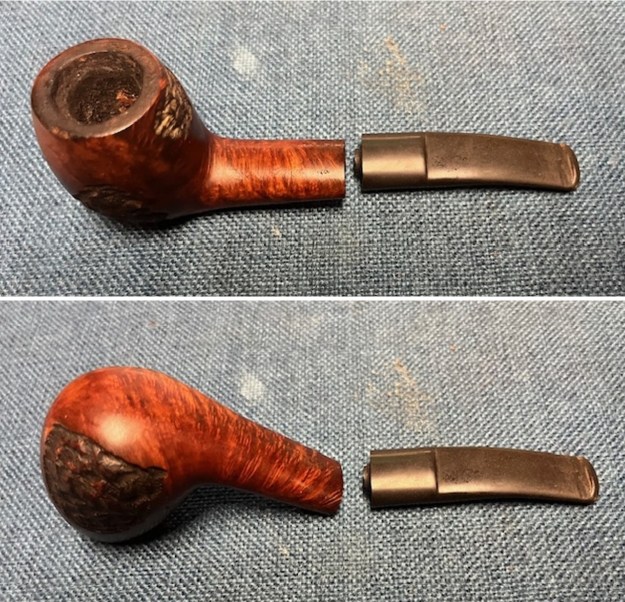
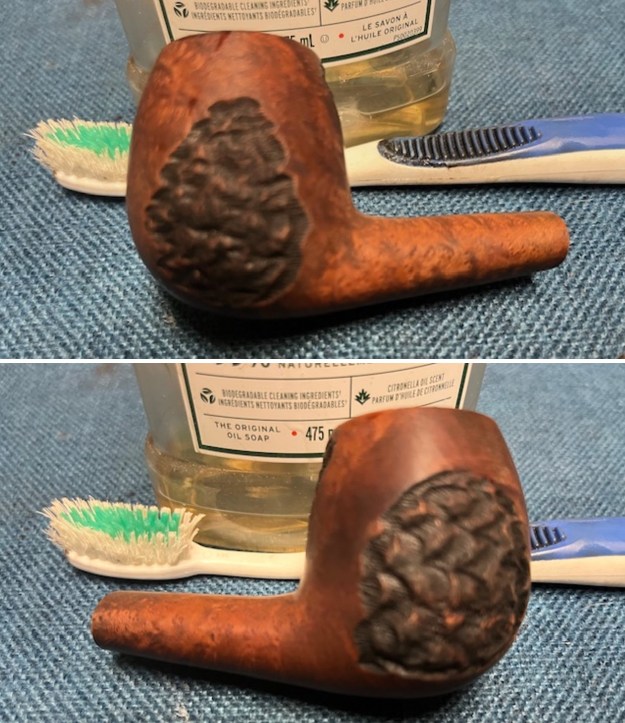
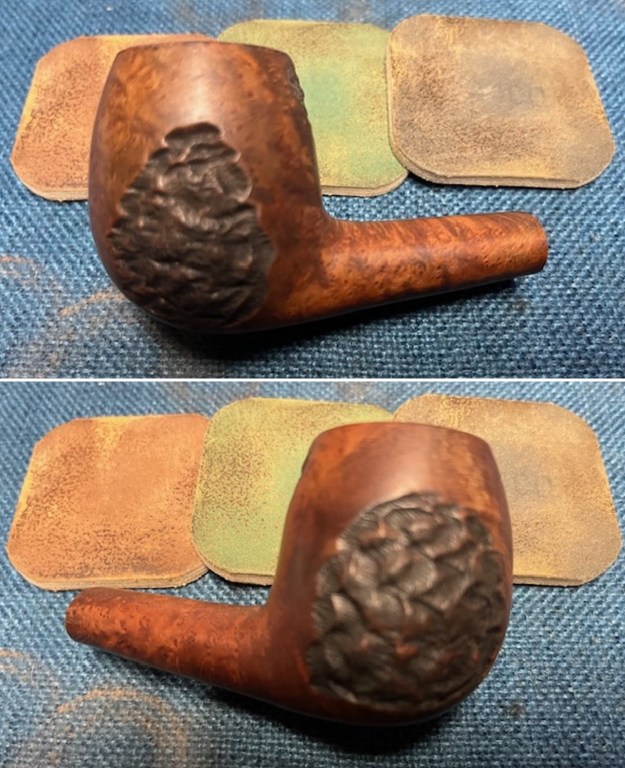
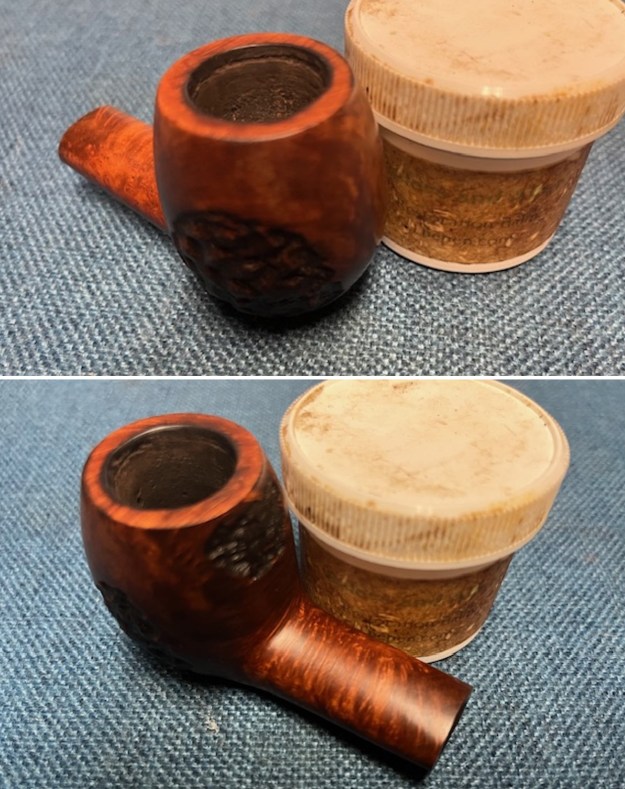
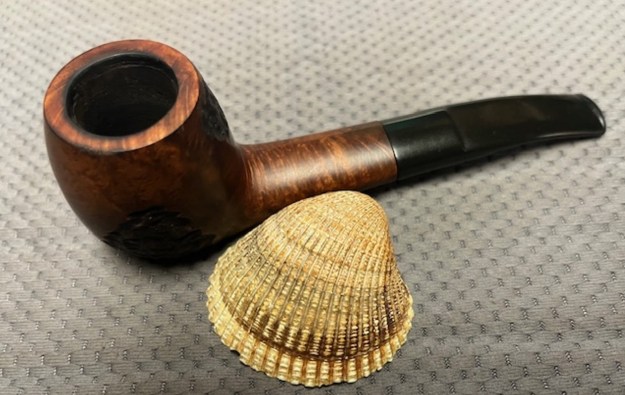
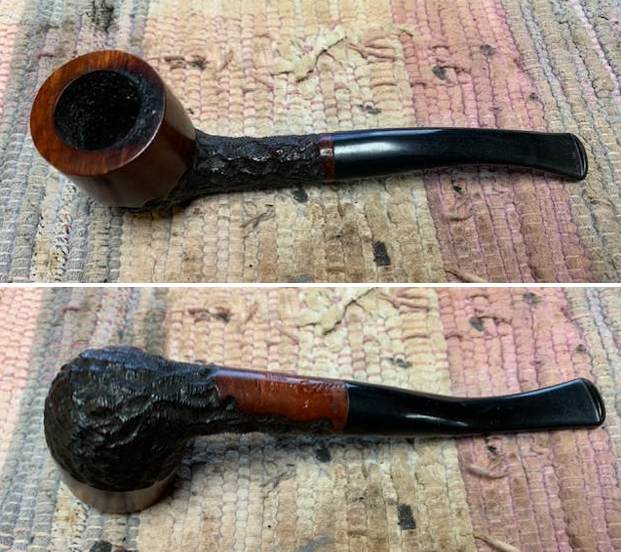
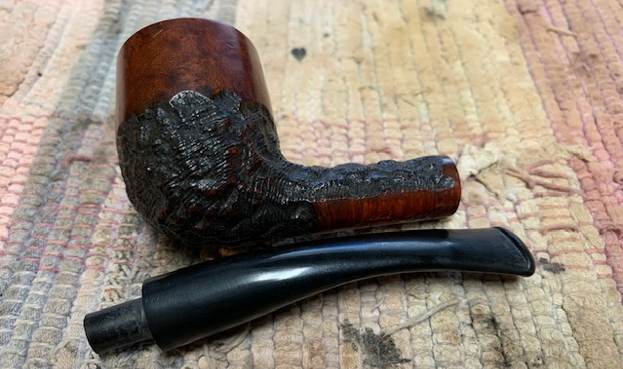
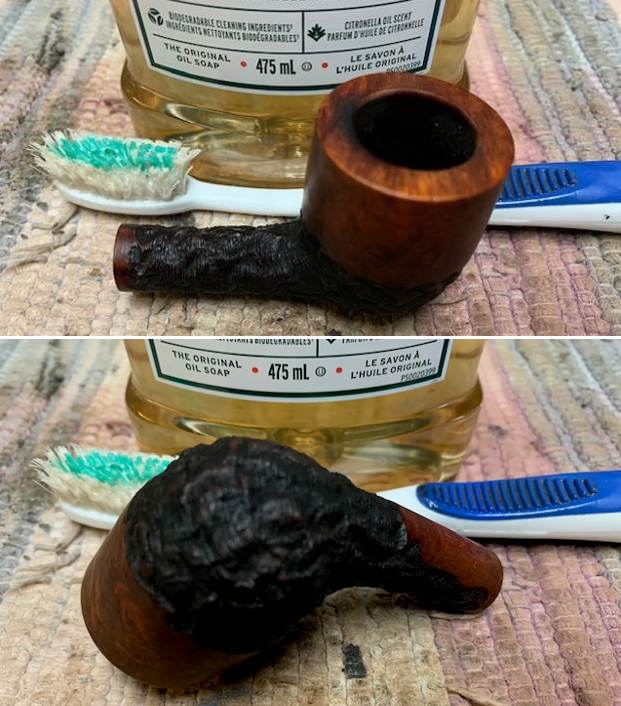
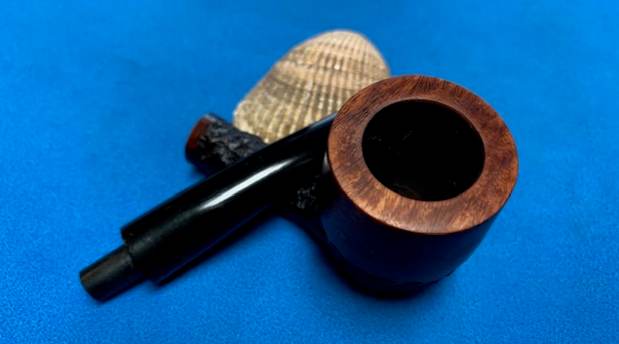
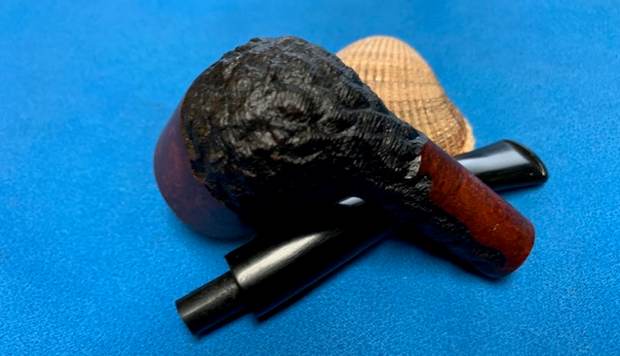
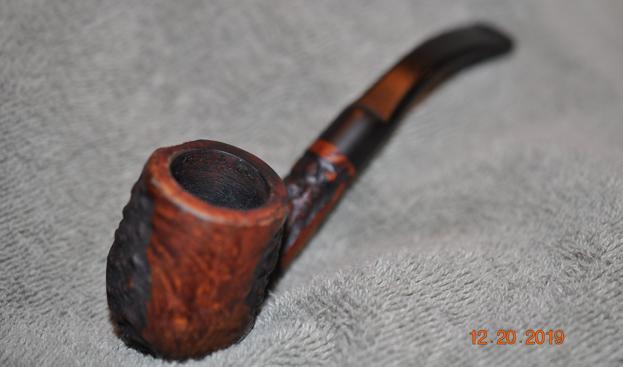
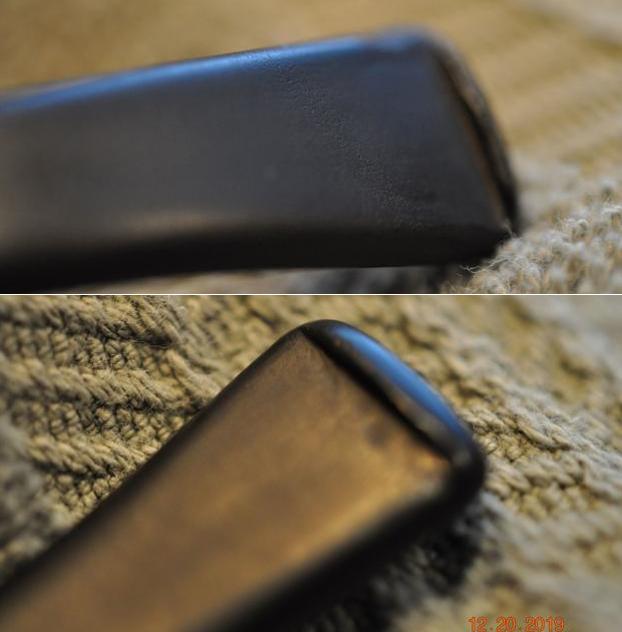
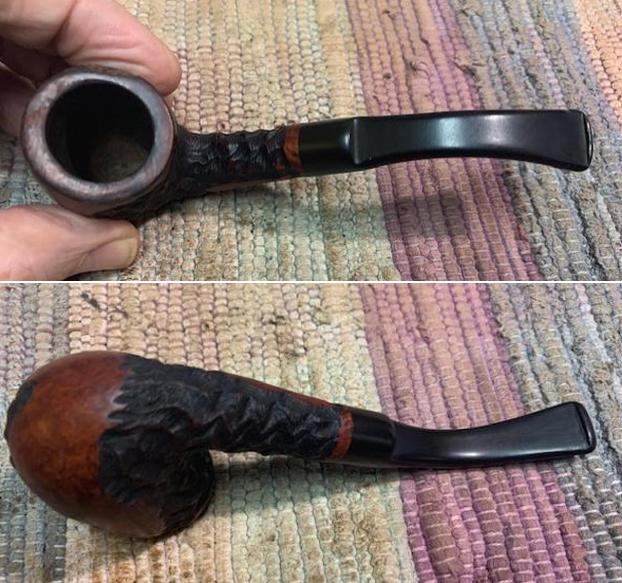
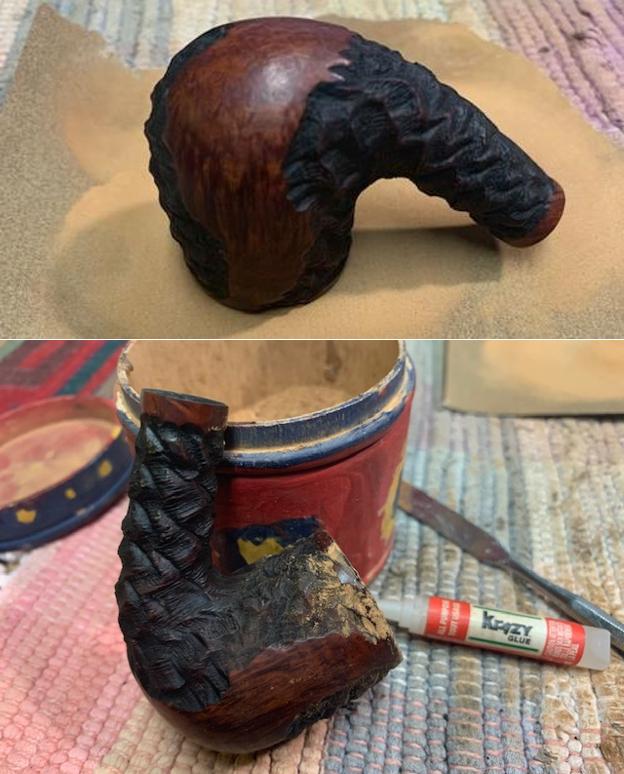
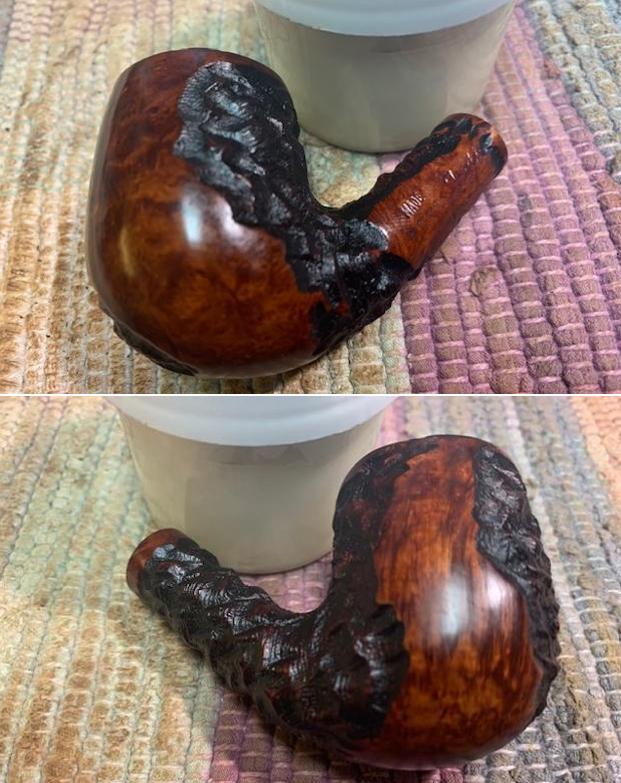
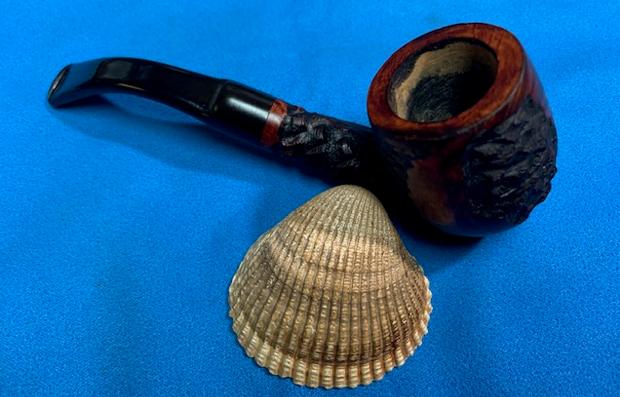
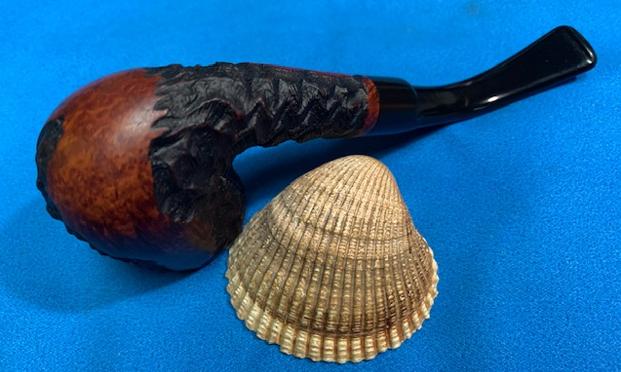
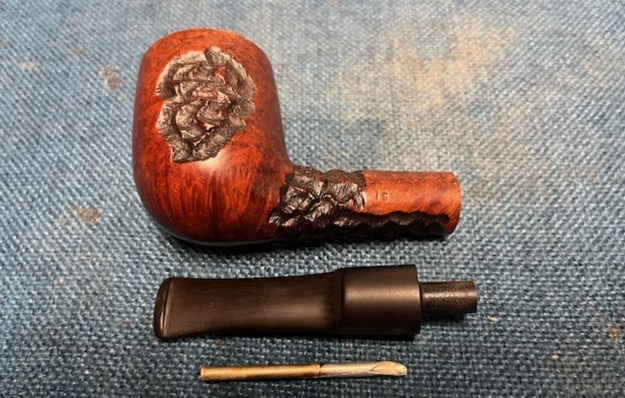
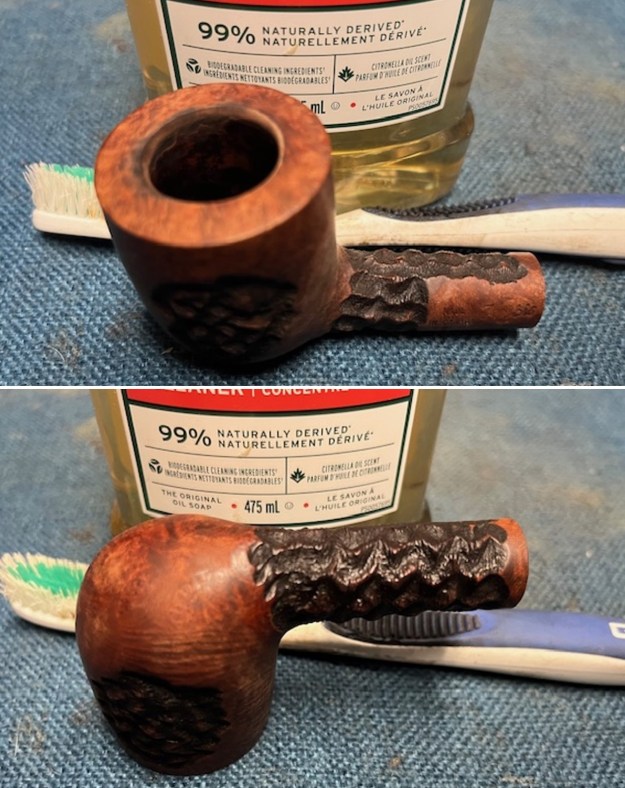
 The pipe arrived in Vancouver on the weekend and I unpacked it. I took photos of the pipe after I opened it. It is in good condition. The finish is lightly dirty and the rim top has some burn damage on the inner edge. There was grime on the rim top and bowl sides. The stem was lightly oxidized with light tooth marks on both sides ahead of the button.
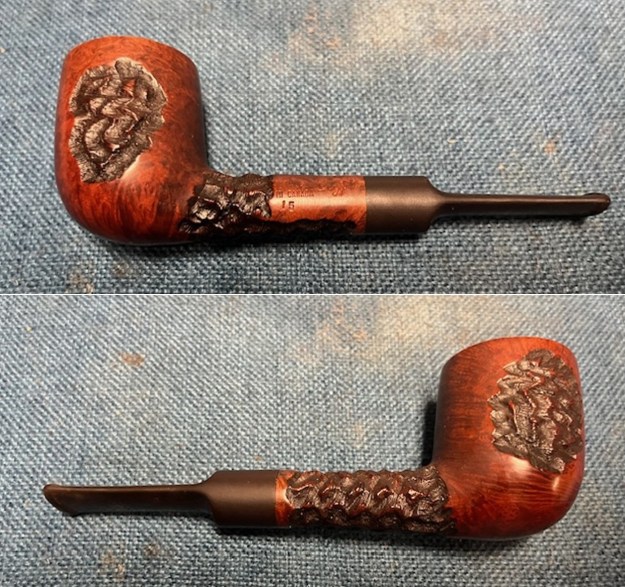
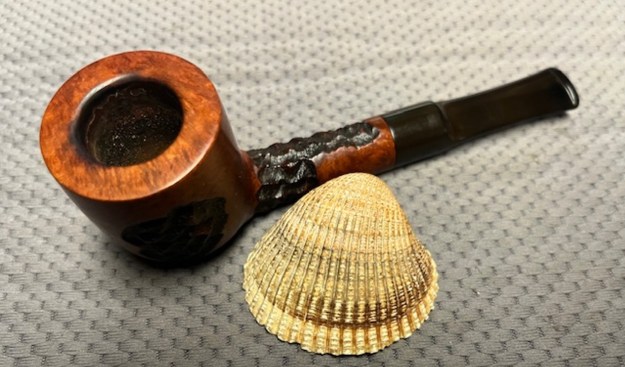
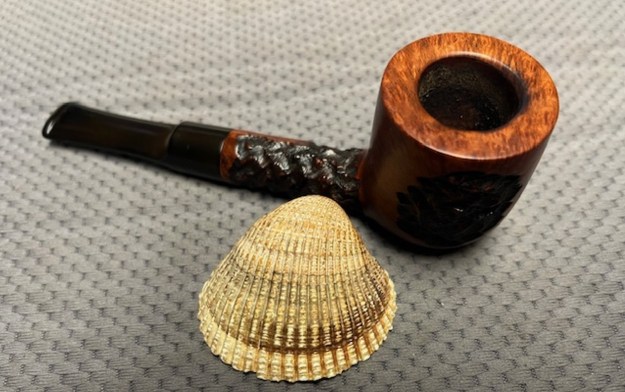
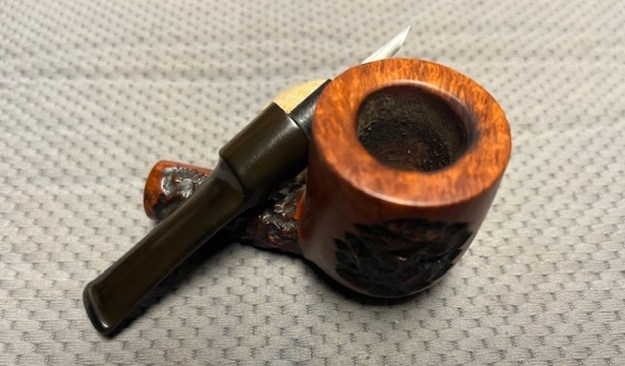
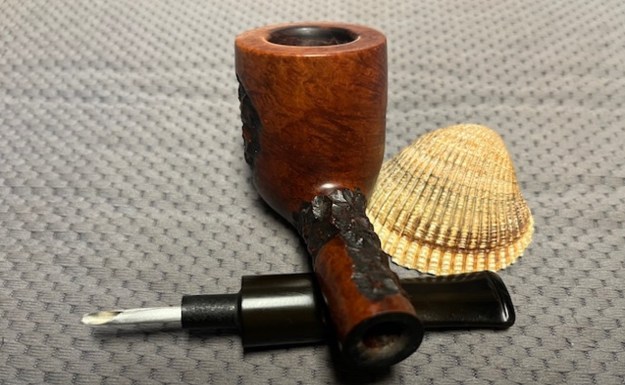
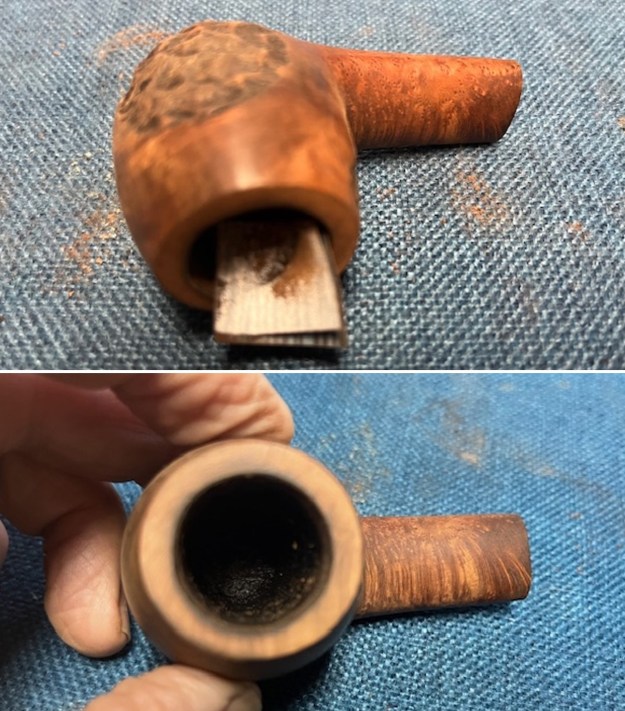
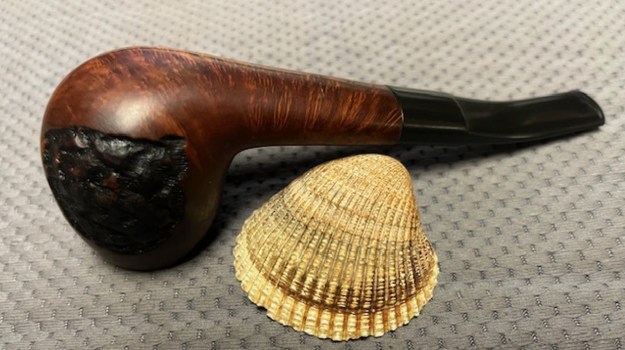
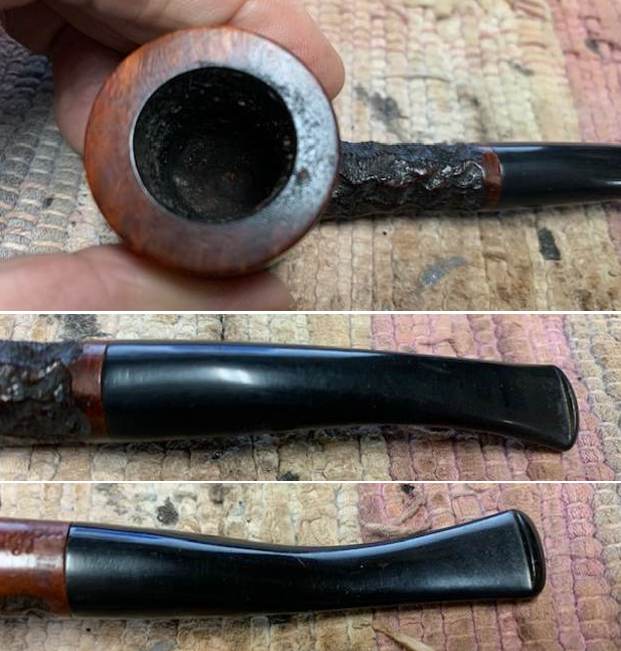
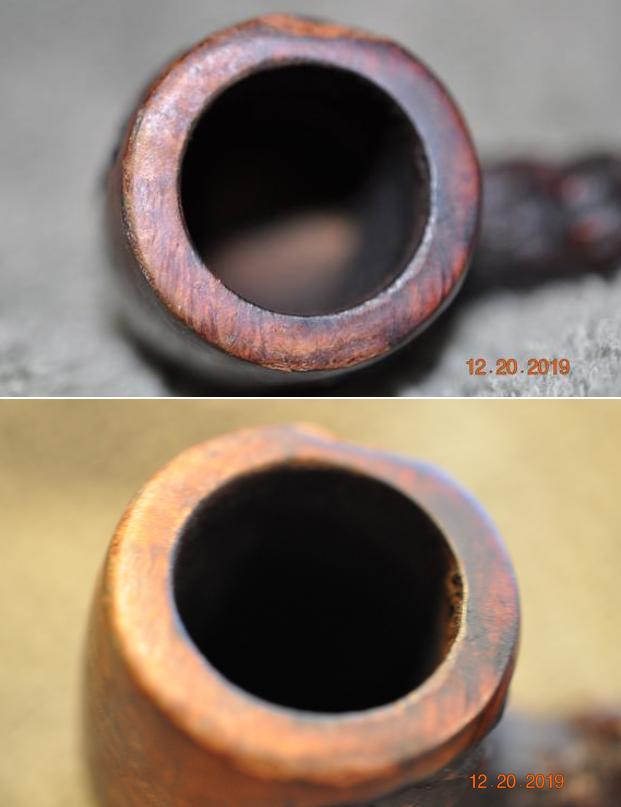
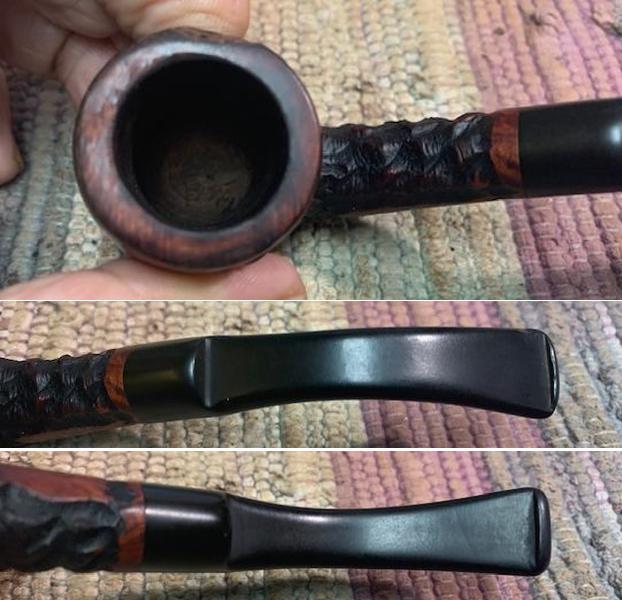
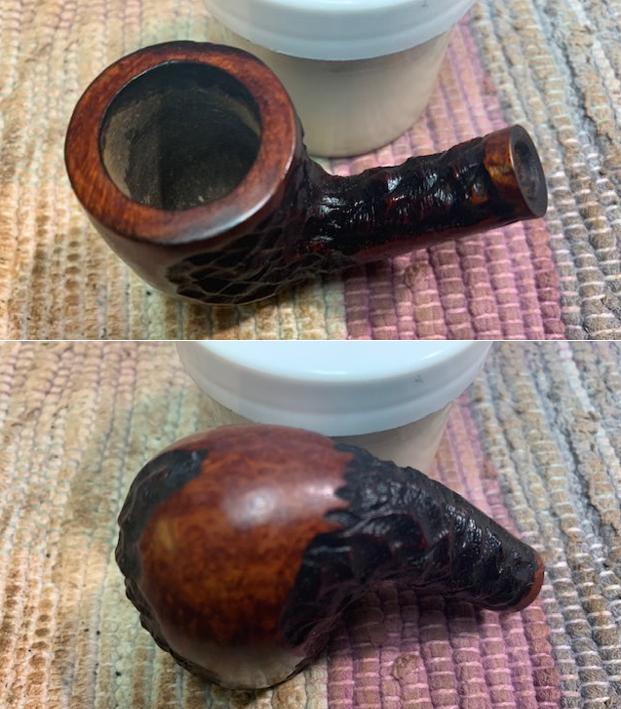
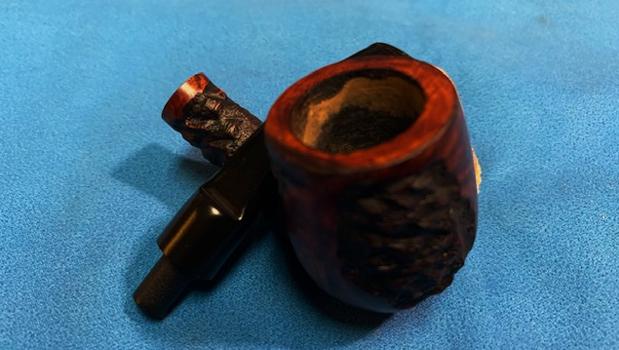
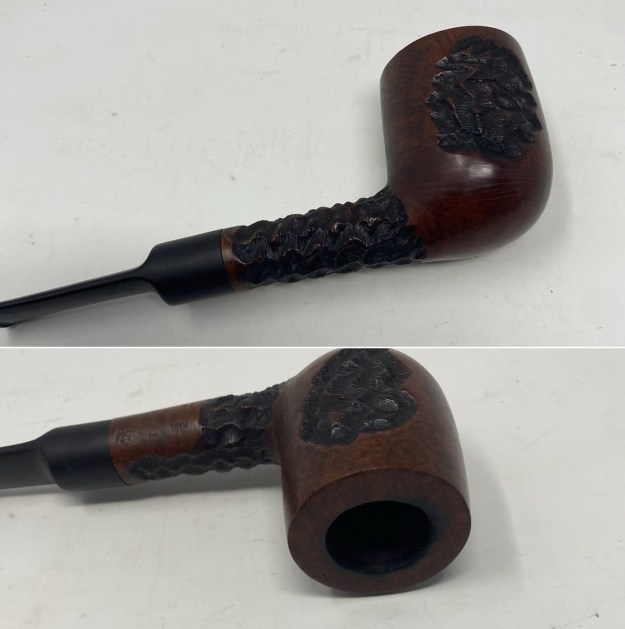
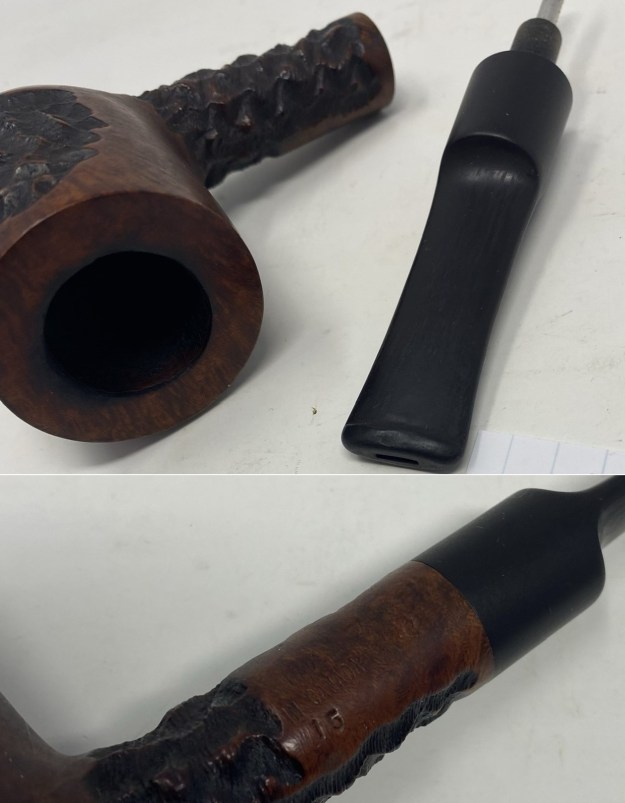
 I took photos of the bowl and rim top and stem surfaces. The rim top and inner edge of the bowl is very clear. The inner edge shows damage and burn damage and reaming damage. The stem surfaces show oxidation and some tooth marks on both sides ahead of the button.
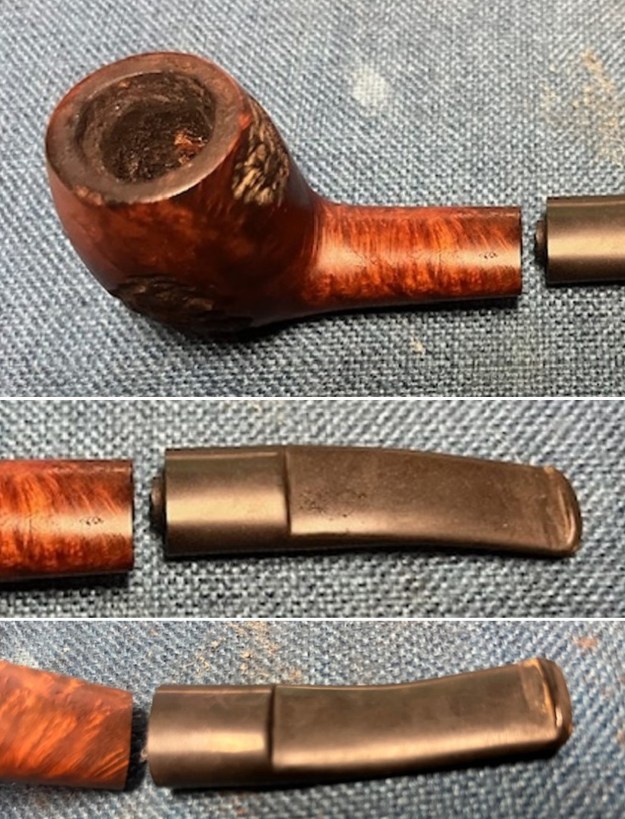
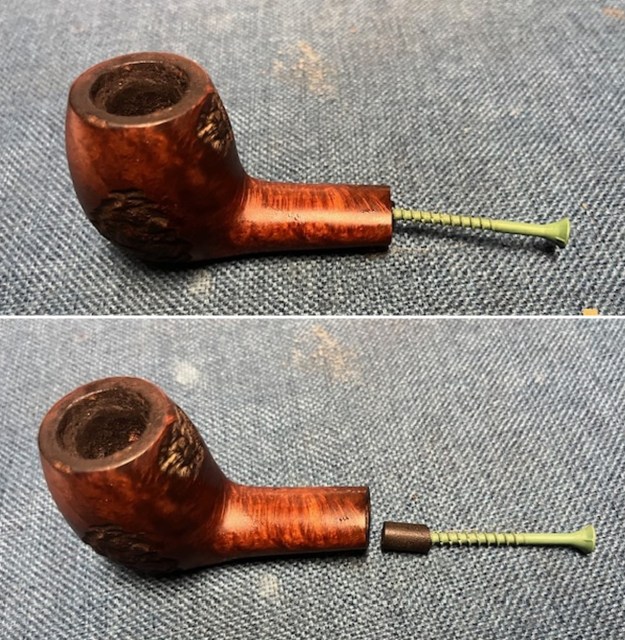
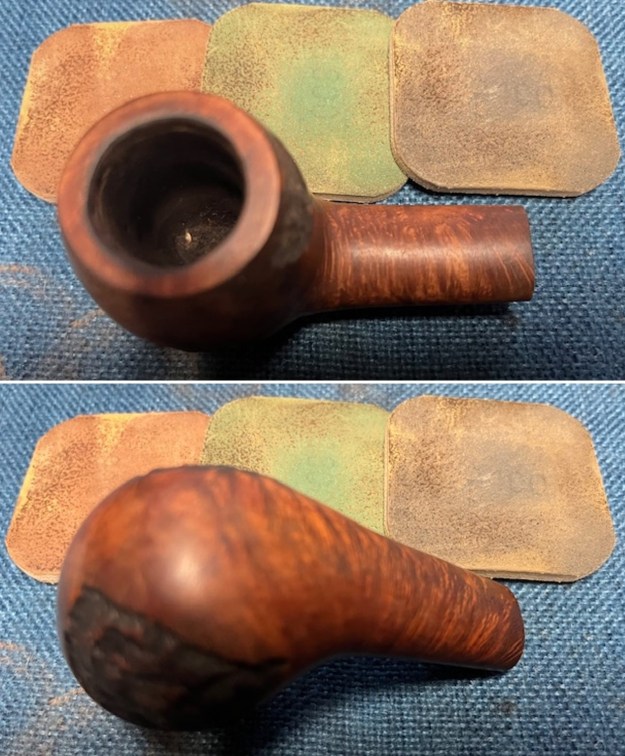
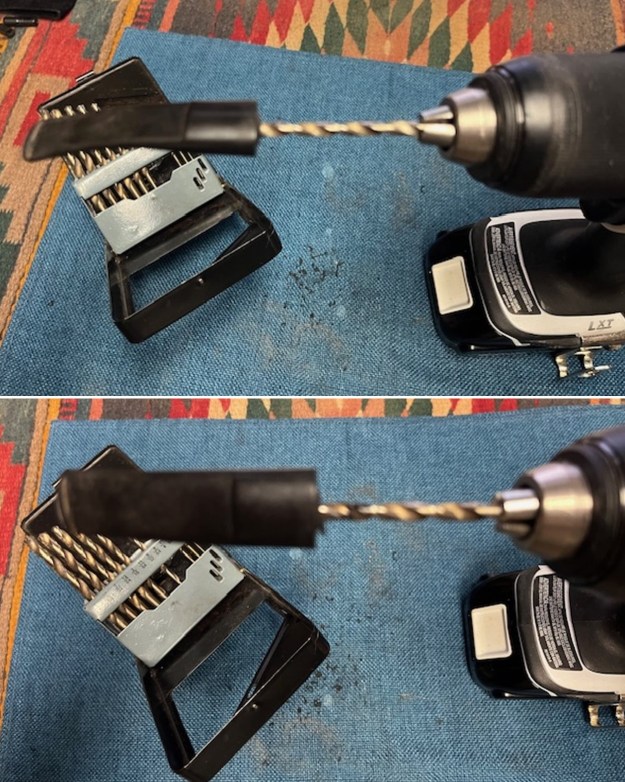
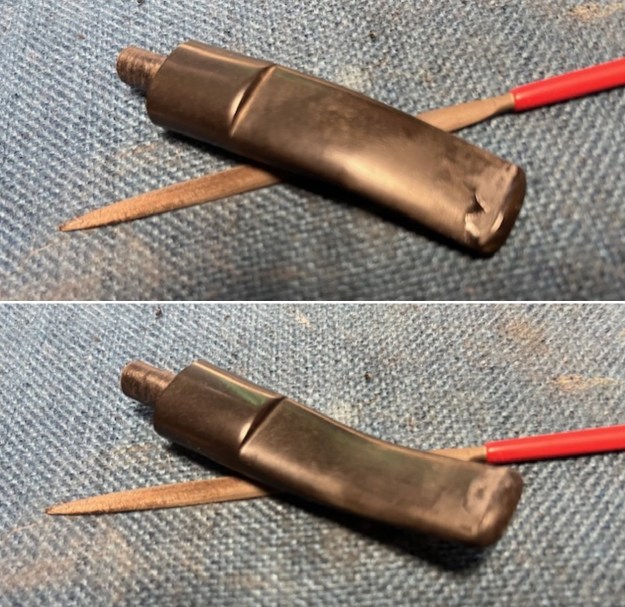
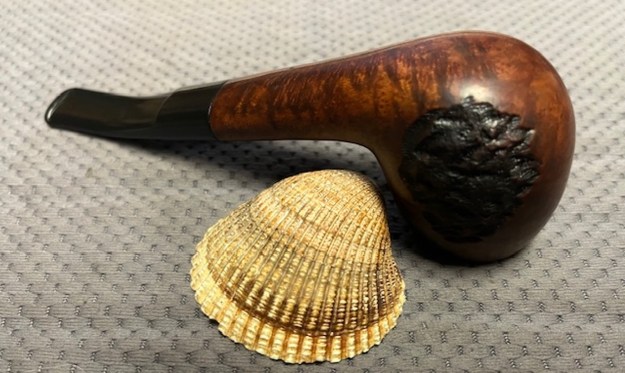
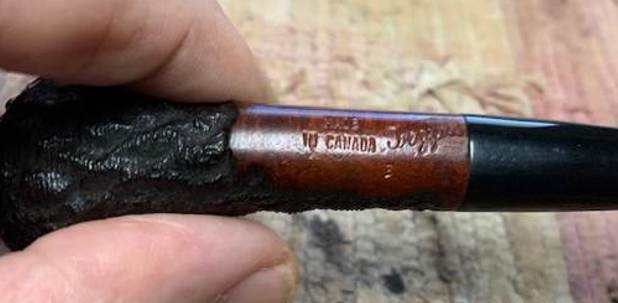
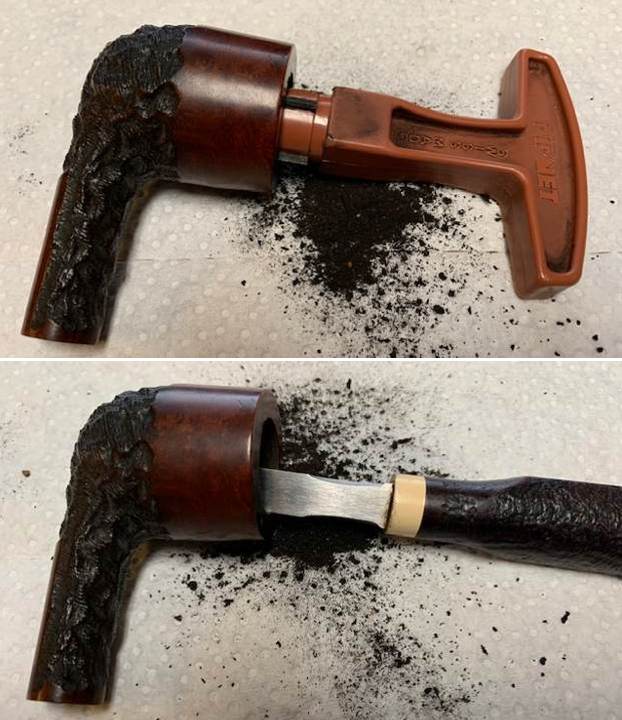
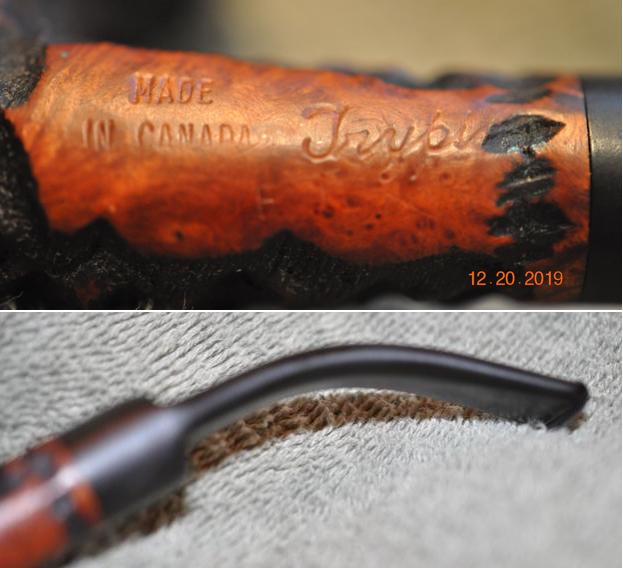
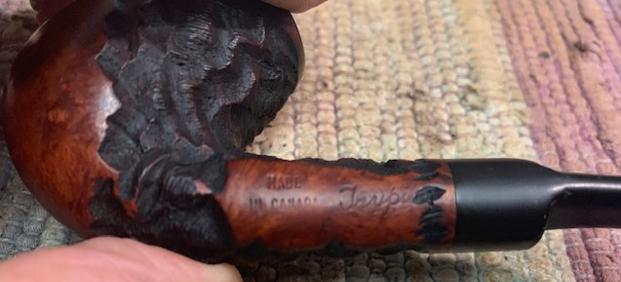
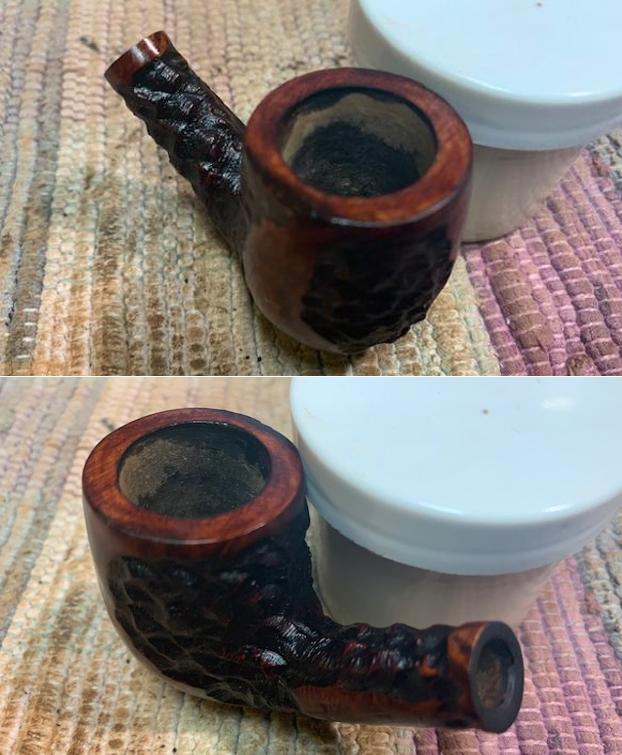
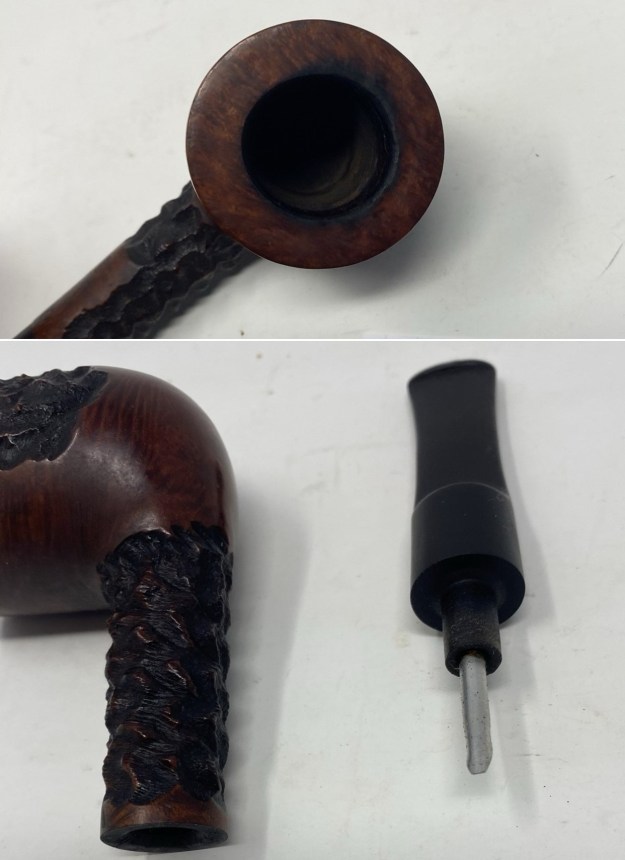
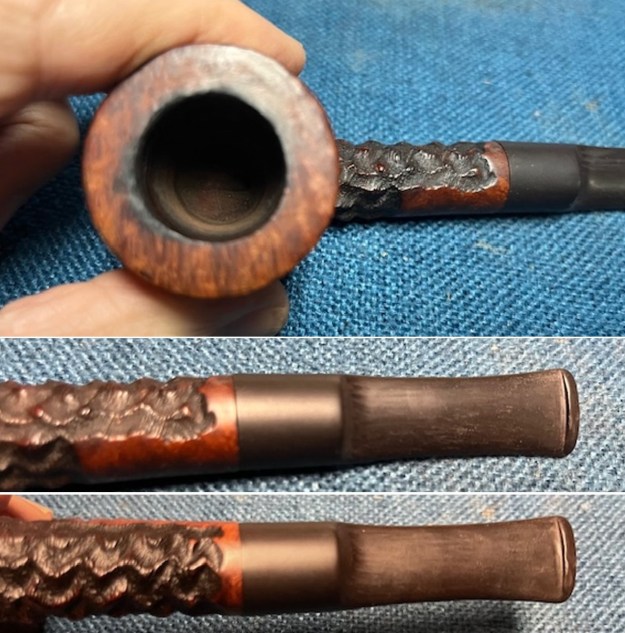 I took a photo of stamping on the left side of the shank. It read Made [over] in Canada [over] shape number 15. That is followed by Trypis in cursive. It is clear and readable. I took a photo of the bowl with the stem removed. The first photo I took below show the aluminum inner tube in the tenon. The second photo shows the inner tube removed.
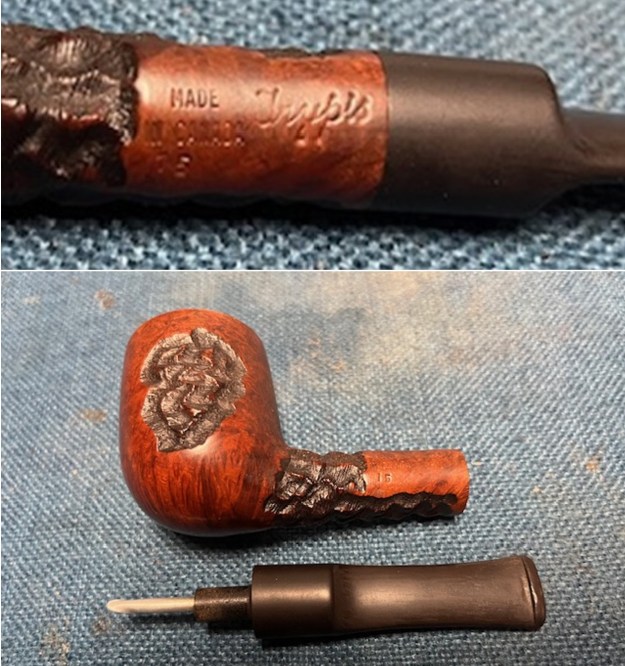
 I turned to Pipephil to confirm what I remembered about Trypis. I wanted to read a bit of the history (http://pipephil.eu/logos/en/logo-t8.html). I have included a screen capture of information on the site below. I have also included information from the sidebar below the screen capture.
 Artisan: Phillip Trypis first worked for Brigham as production manager. He continued to supply the Canadian brand when he was established on his own with his own Trypis label. Phillip Trypis had a pipe shop in Toronto.
I turned to the section on Pipedia about Trypis Pipes (https://pipedia.org/wiki/Trypis_Pipes). I quote below.
Quoting Stefan Seles: “Phillip Trypis has been a pipe maker in Canada for well over 40 years. Originally from Greece, his experience ranges from cutting burls in a briar mill to making literally thousands of pipes out of his home in the hamlet of Oakwood, Ontario. Brigham pipes benefited from Phillip’s skills where he worked for a number of years. There he directed the pipe production of the company when it was producing over 50,000 a year. Even though he left to start his own pipe shop, he still imported briar and turned tens of thousands of bowls for Brigham not to mention produce a large number of his own branded pipes.
Just over a year ago, Phillip had a serious fall and although he is back making pipes, he is unable to travel around to sell them as he once did. He has asked me to help him in that effort.
The pipes listed below are some of his best work made from decades old MF and R ebuchauns as well as some recently purchased Italian plateau. The prices are excellent, especially given the age and quality of the briar used. In fact, I would venture to say that these pipes have no peers, especially below the $100.00 price. You must be the judge.
Many of the styles are traditional in form although Phillip has a number of freehand styles that are both familiar and off the beaten path. The vast majority of the higher priced pipes are very large pieces to be sure.”
I have worked on quite a few of Phillip’s pipes through the years and it is always a pleasure as they are well engineered and crafted.
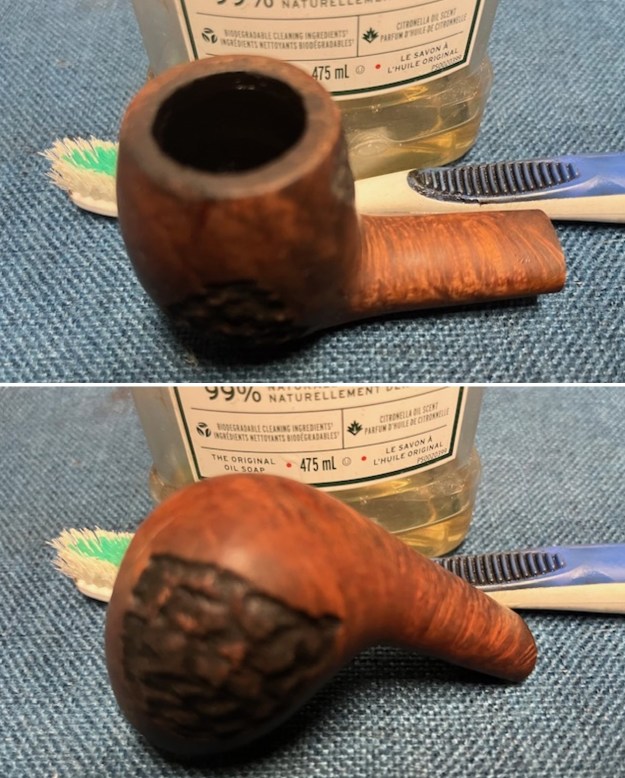
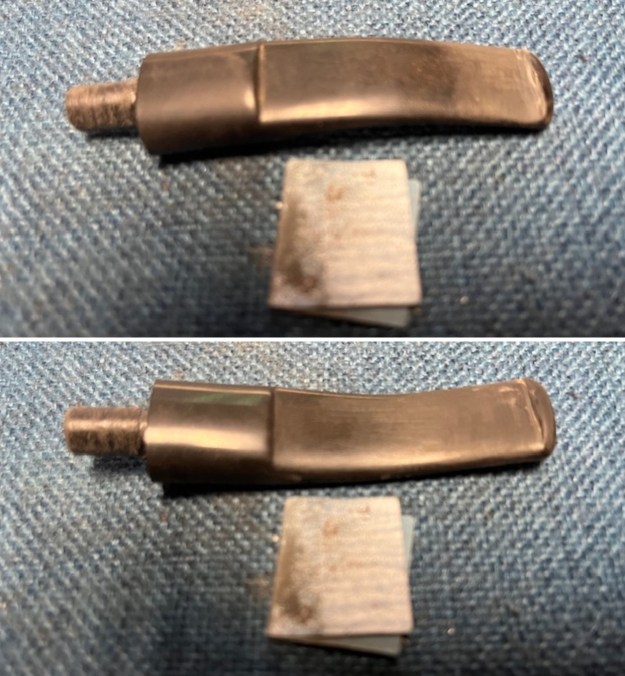
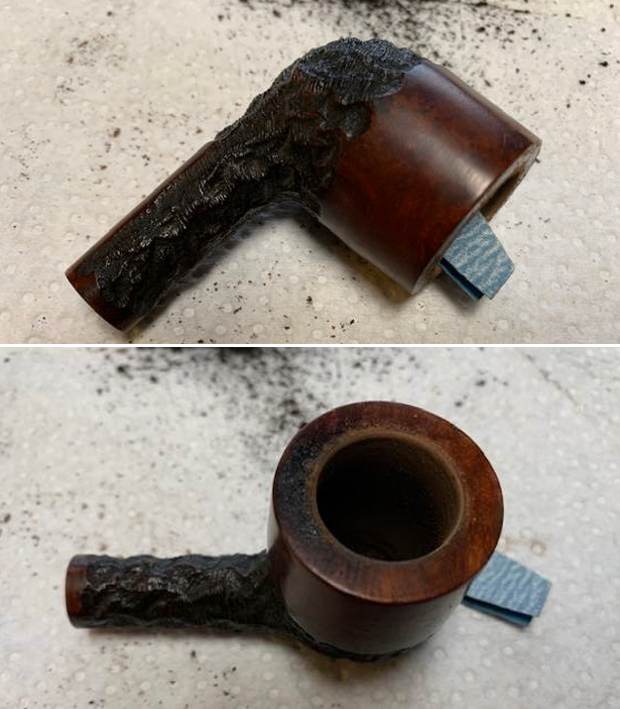
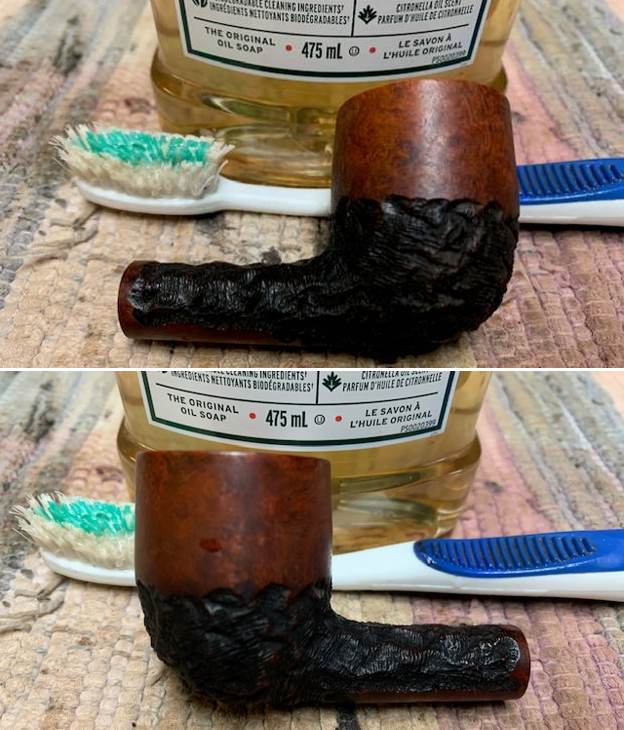
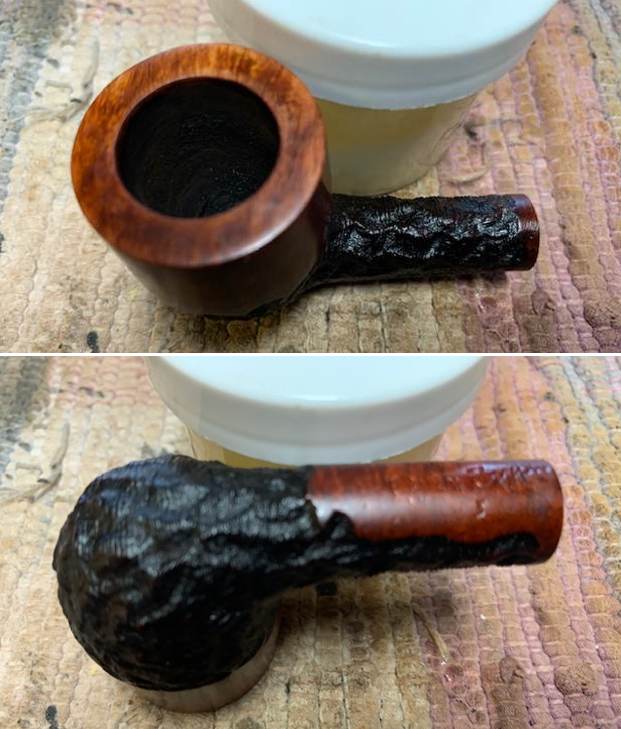
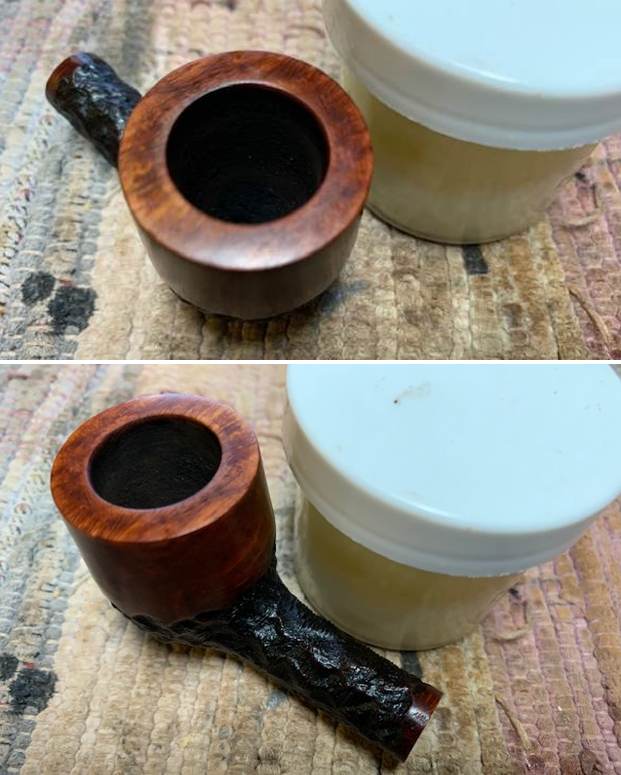
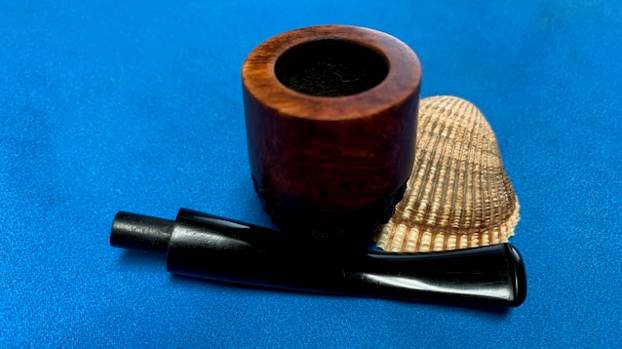
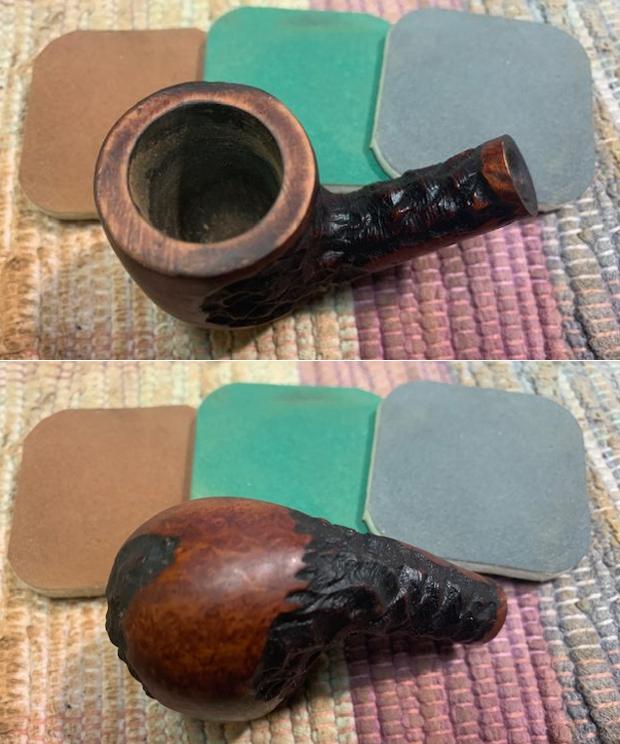
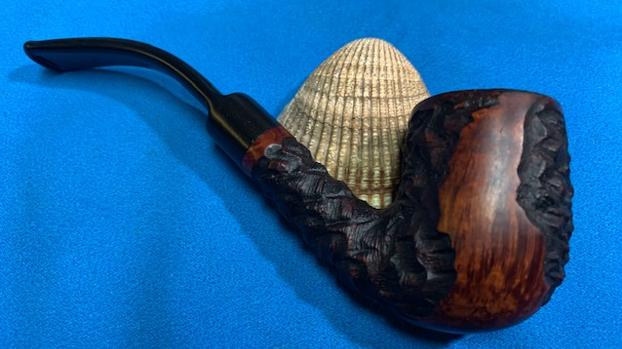
I decided to start my work on the pipe by cleaning up the rim top and inner edge of the bowl with a folded piece of 220 grit sandpaper. I removed the damage on the inner edge and top. The rim looked significantly better.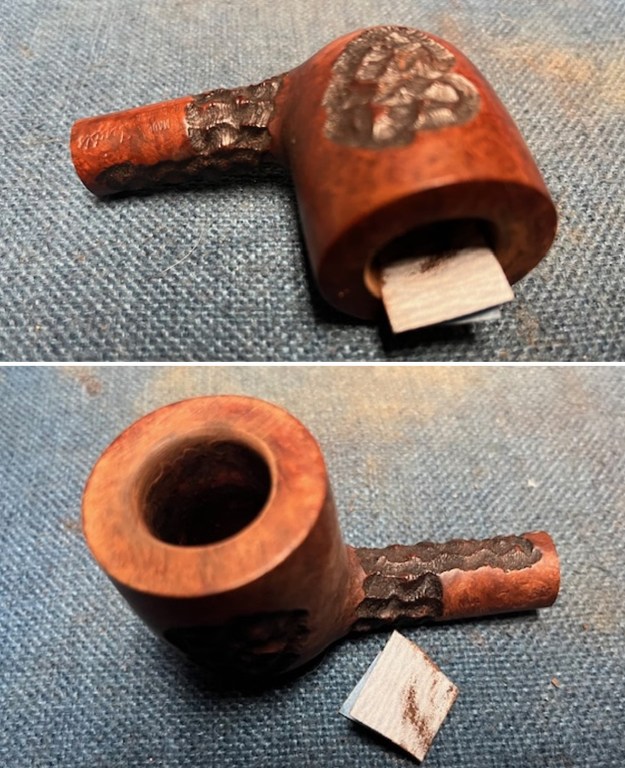 I scrubbed the surface of the briar with Murphy’s Oil Soap and a tooth brush. I worked the soap into the rustication and on the rim top and edges with the brush. I rinsed it off with warm water and dried it off with a soft cloth.
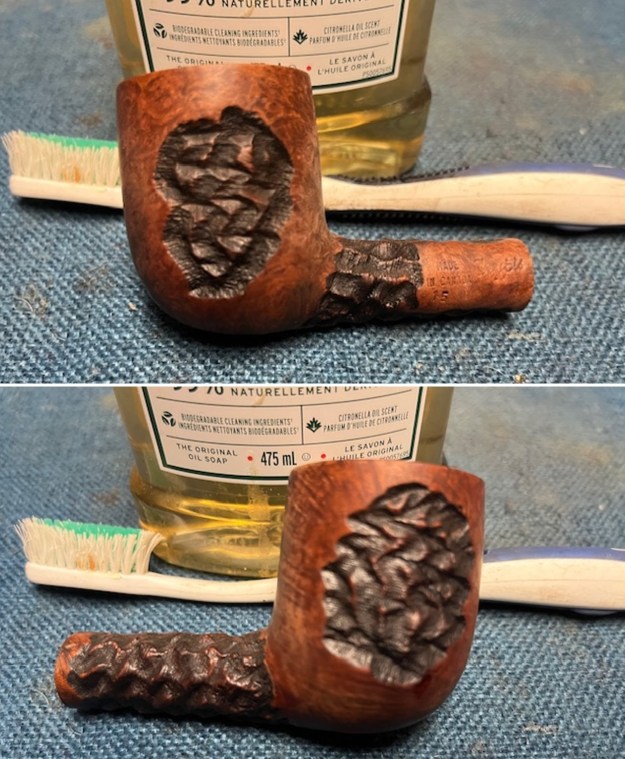
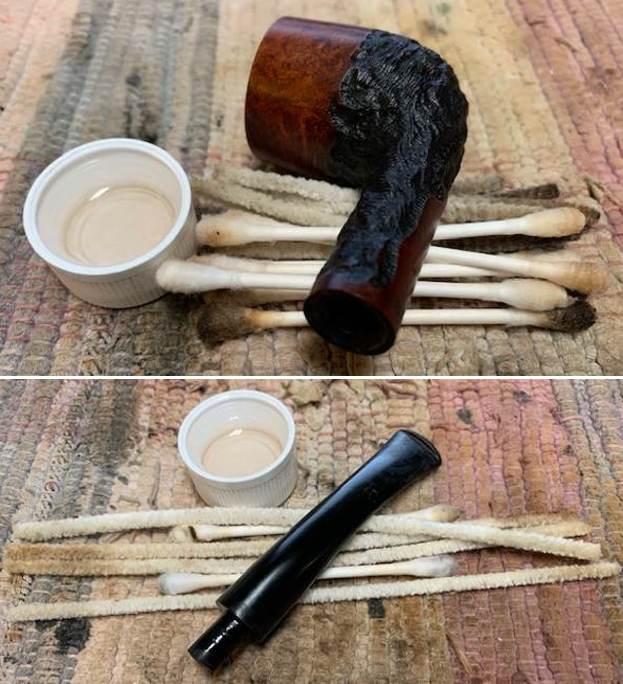
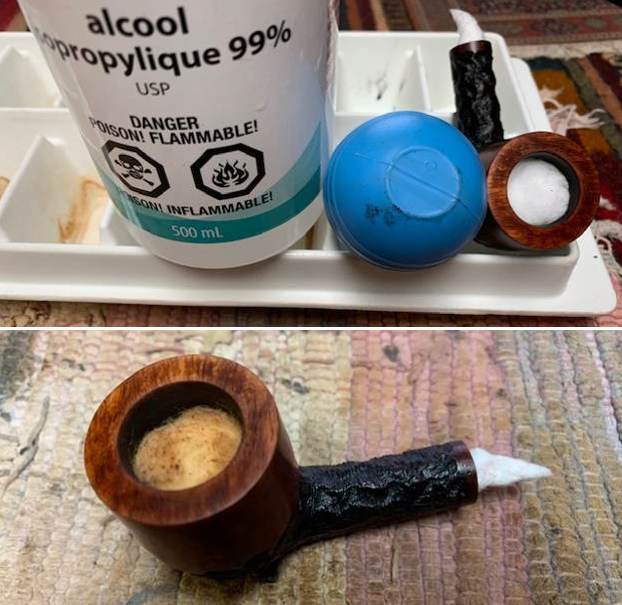
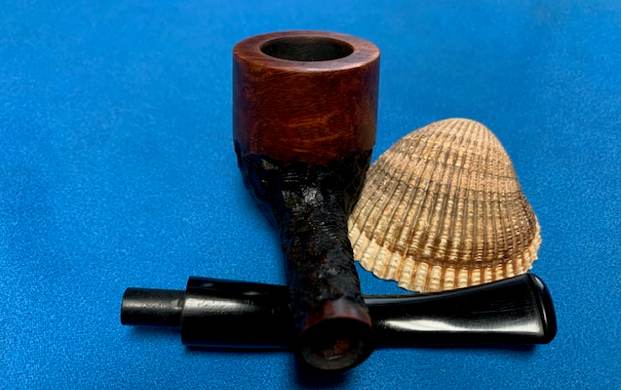
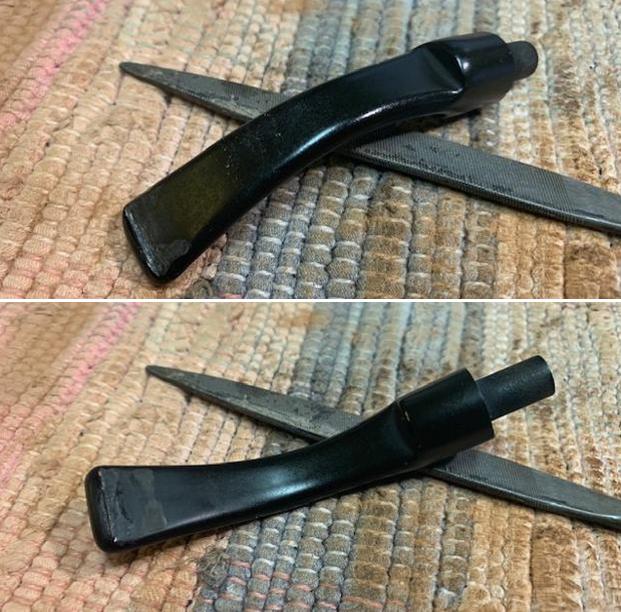
 I cleaned out the mortise and airway in the shank and stem with cotton swabs, regular and bristle pipe cleaners and isopropyl alcohol. It came out looking and smelling very clean.
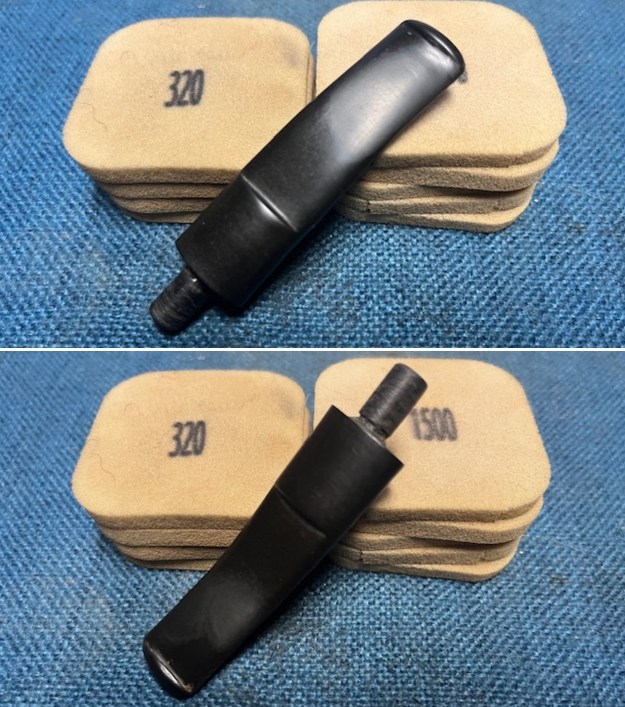
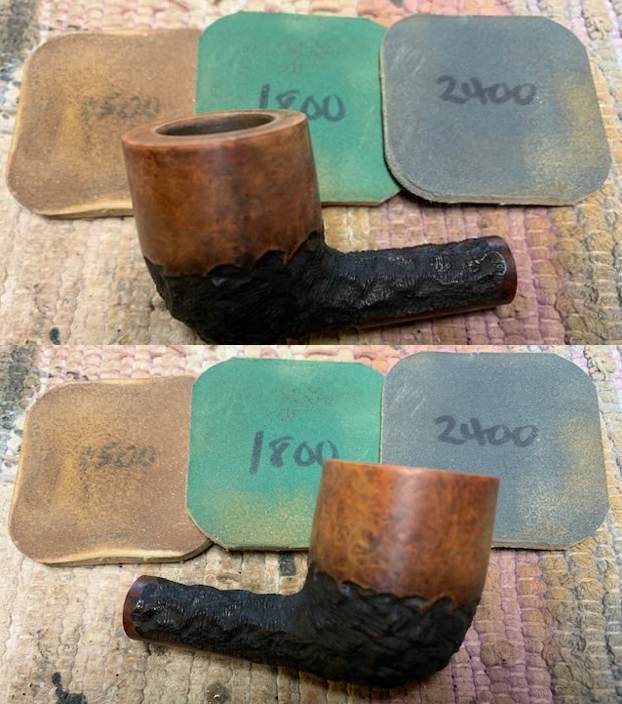
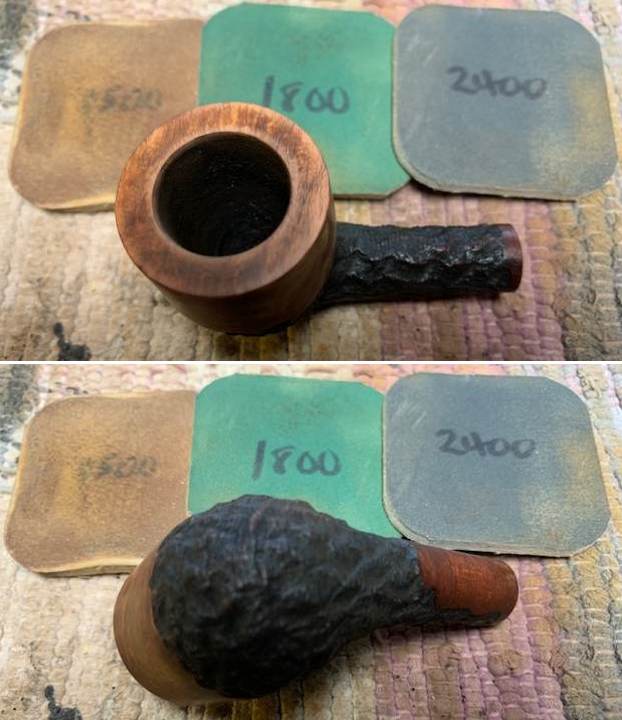
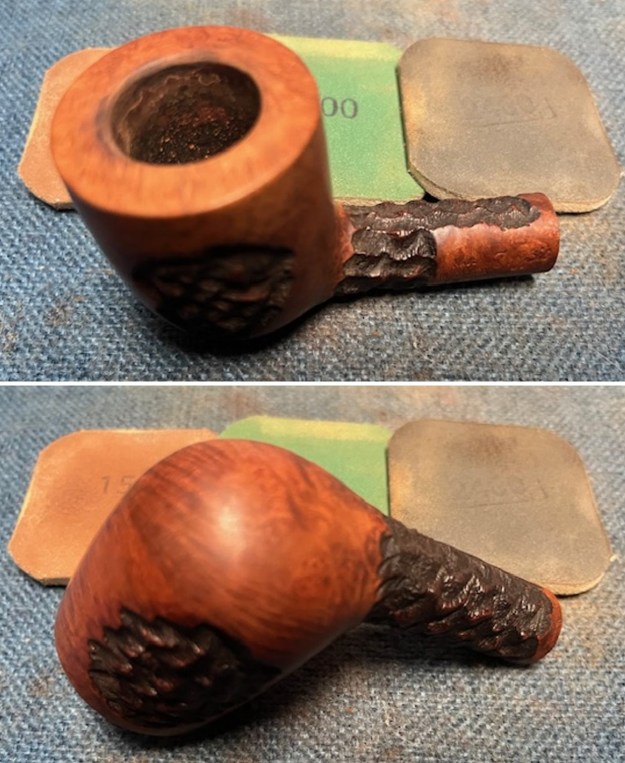
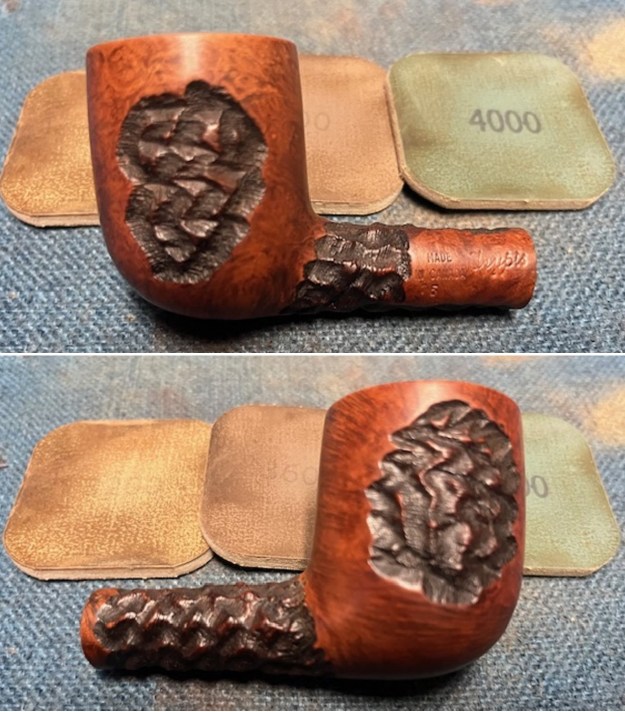
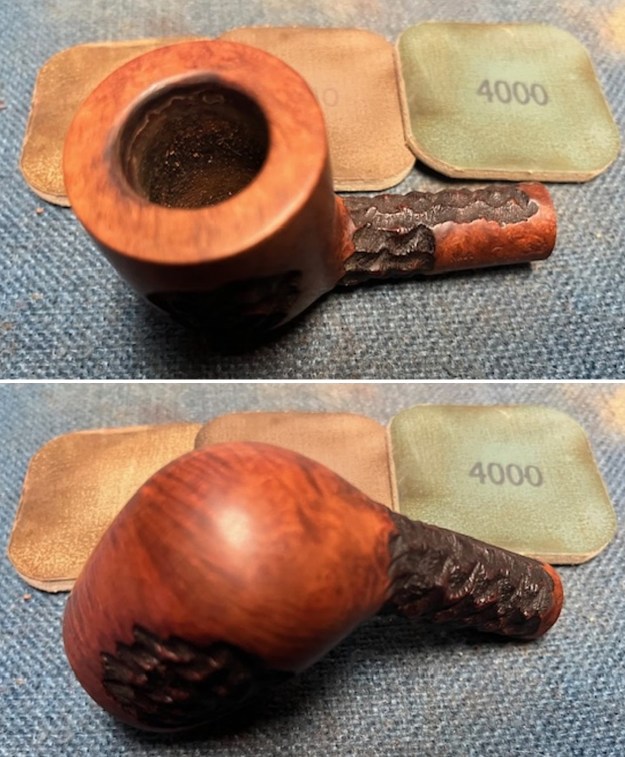
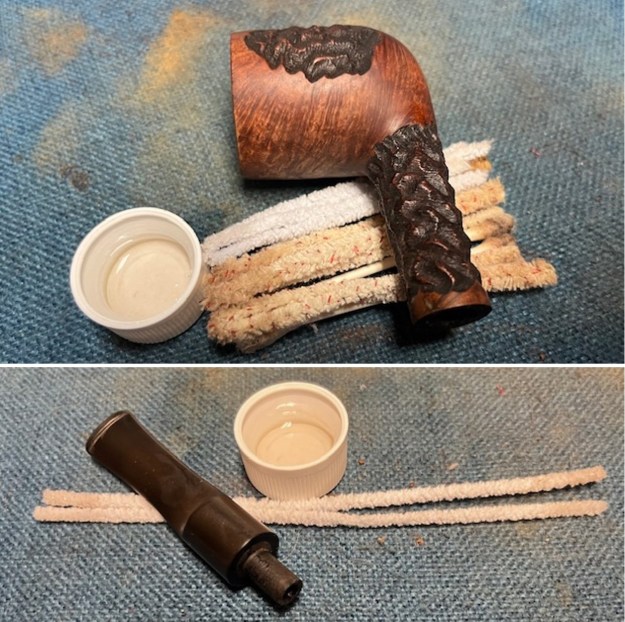 I sanded the bowl and shank with 320-3500 grit 2 x2 inch sanding pad. I wiped the bowl down after each sanding pad with a damp cloth. The grain can be seen through the finish.
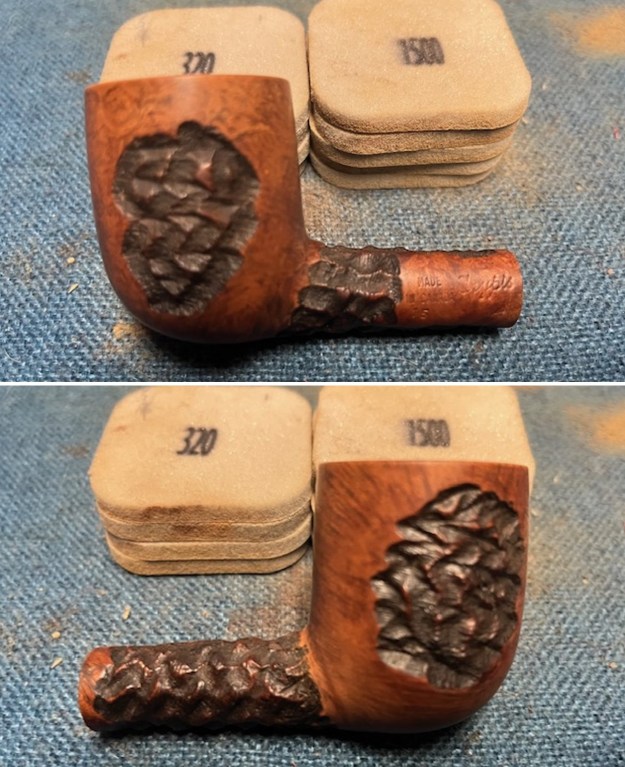
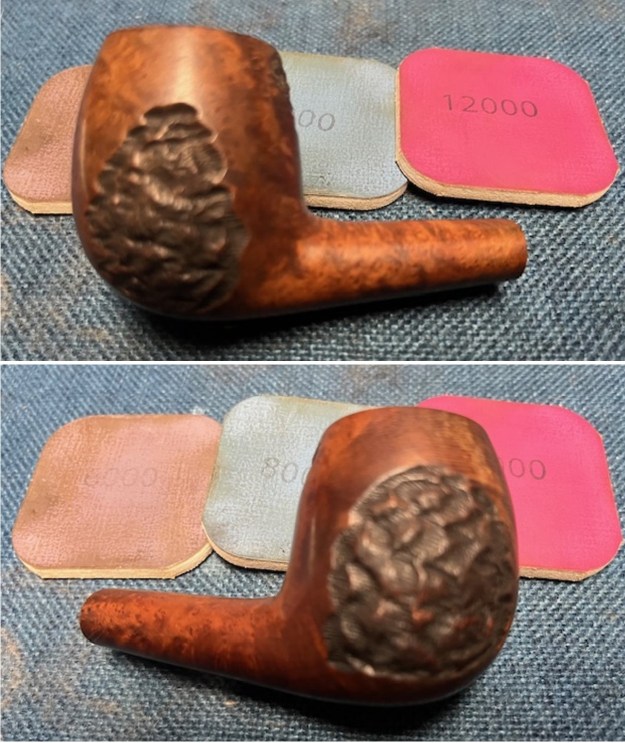
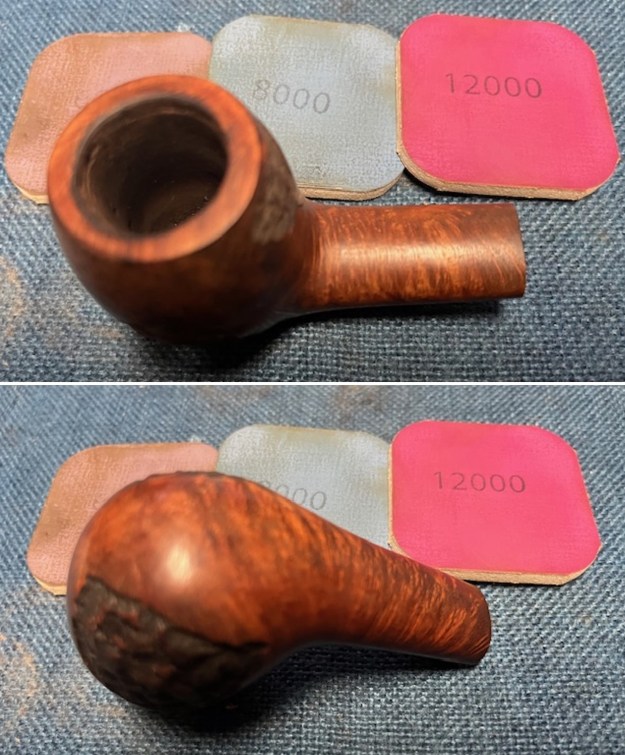
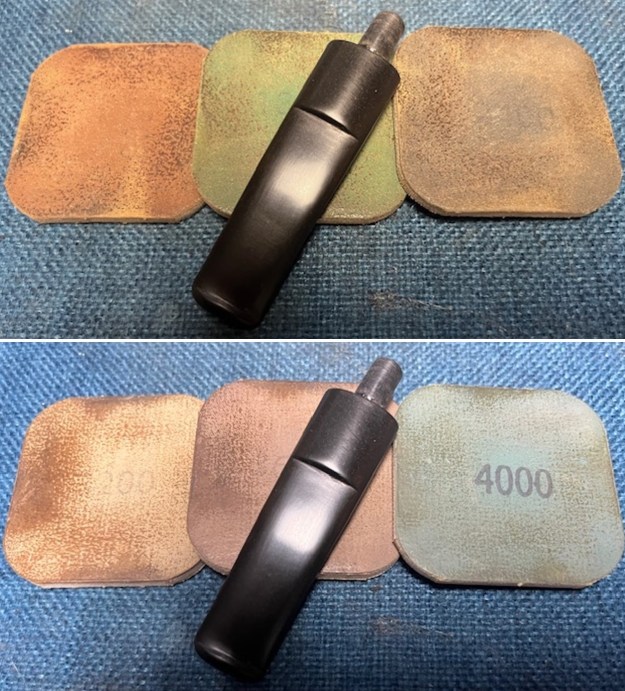
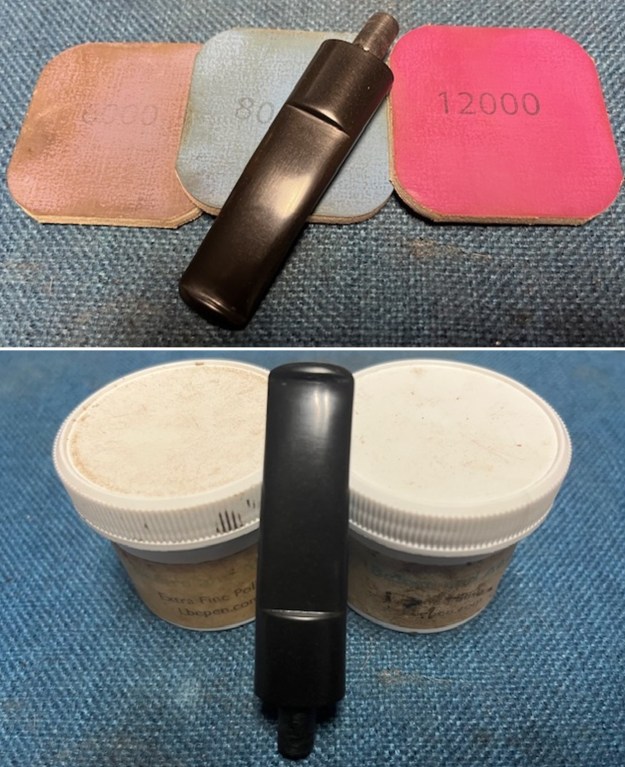
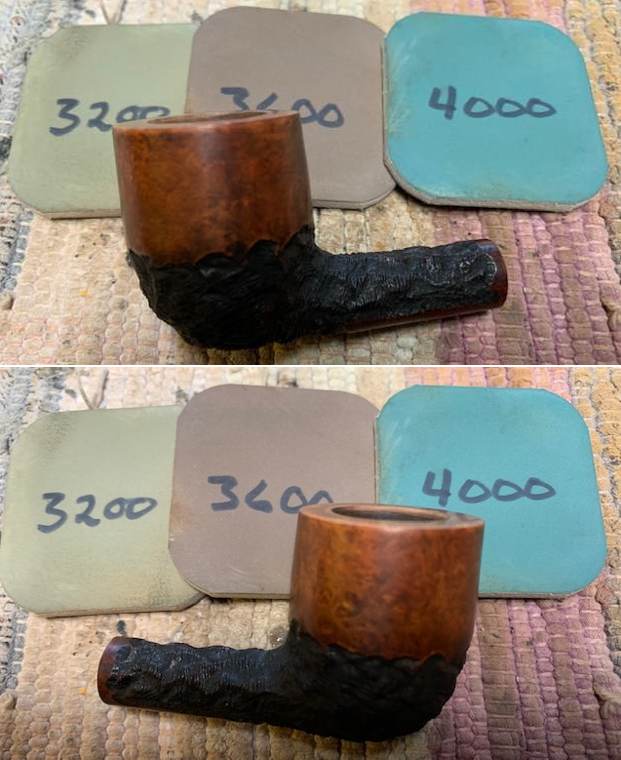
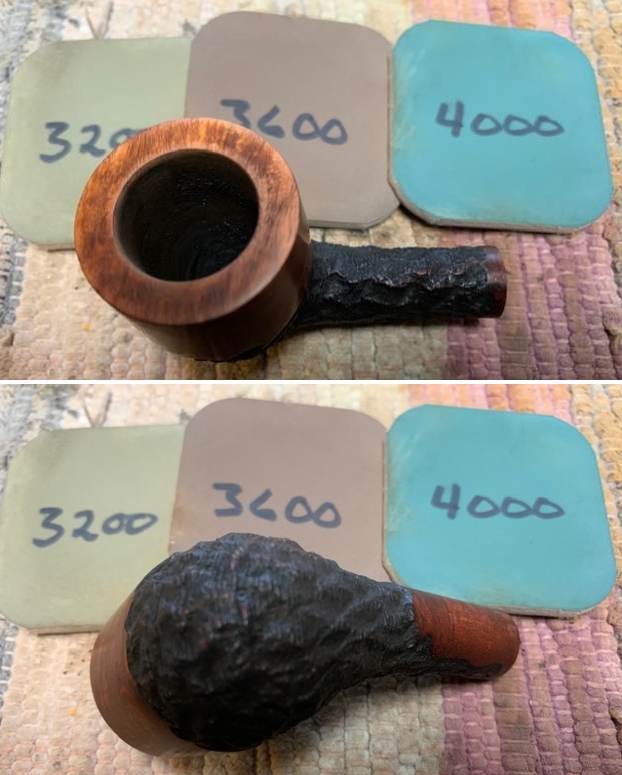
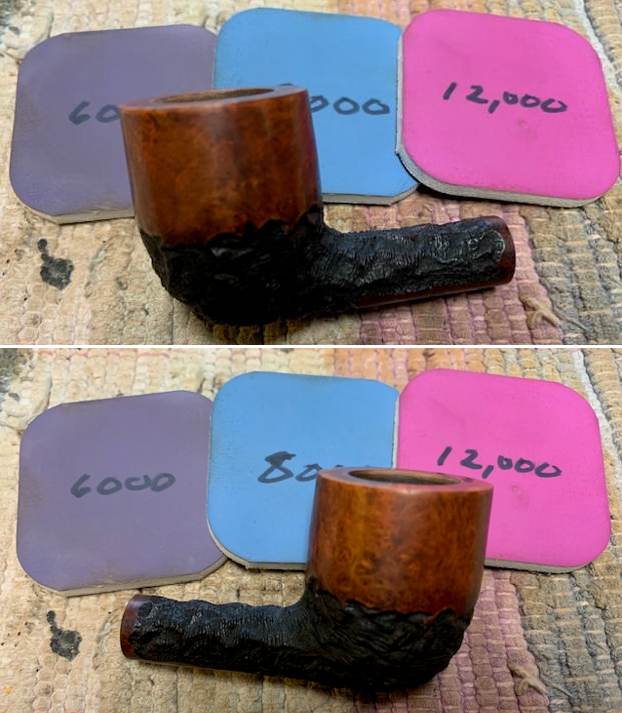
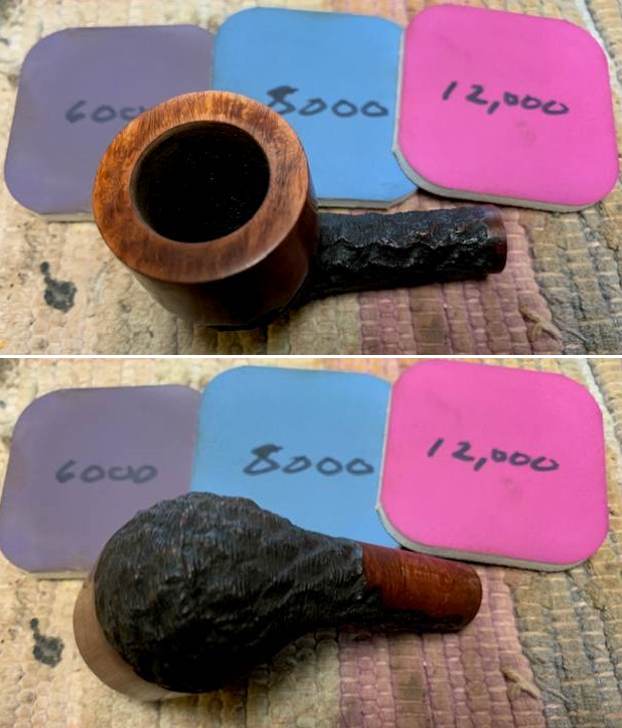
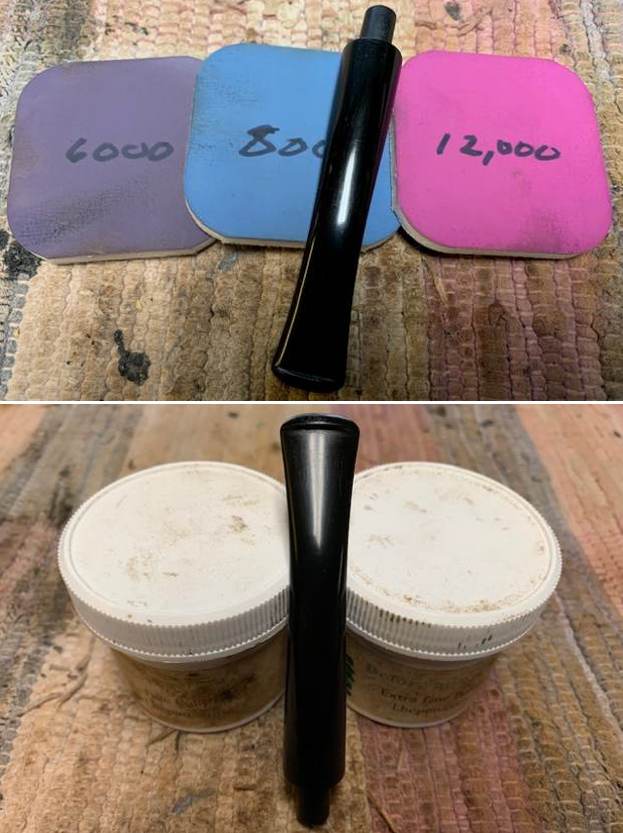
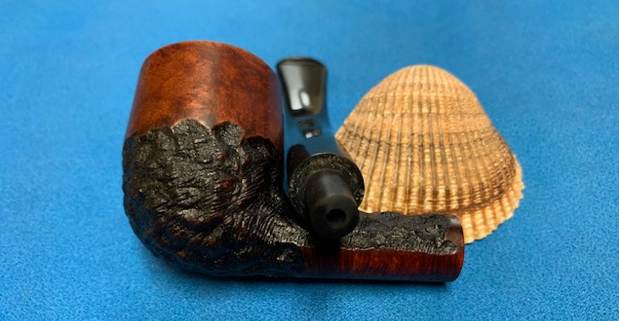
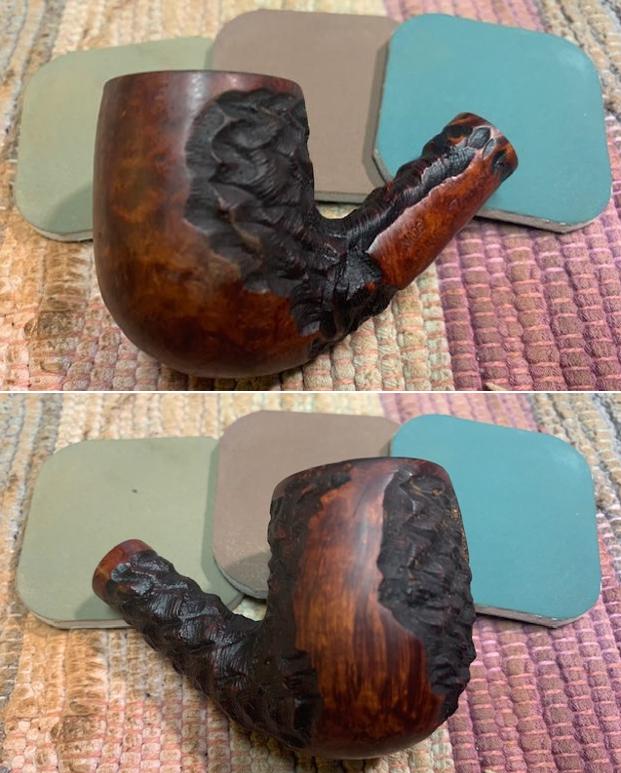
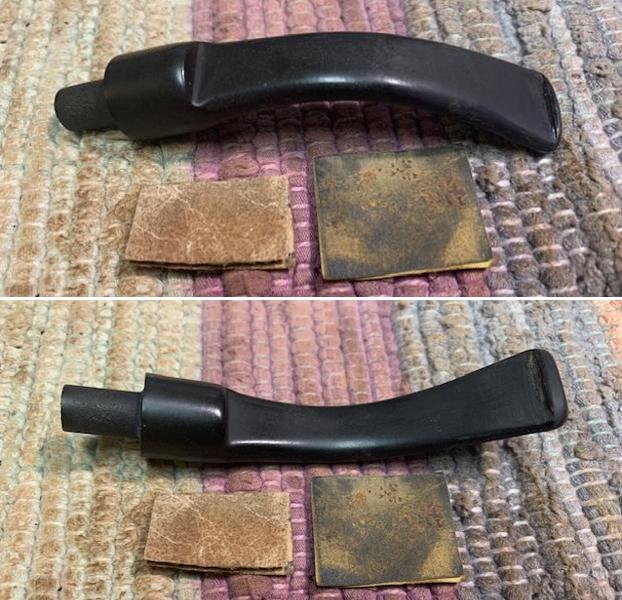
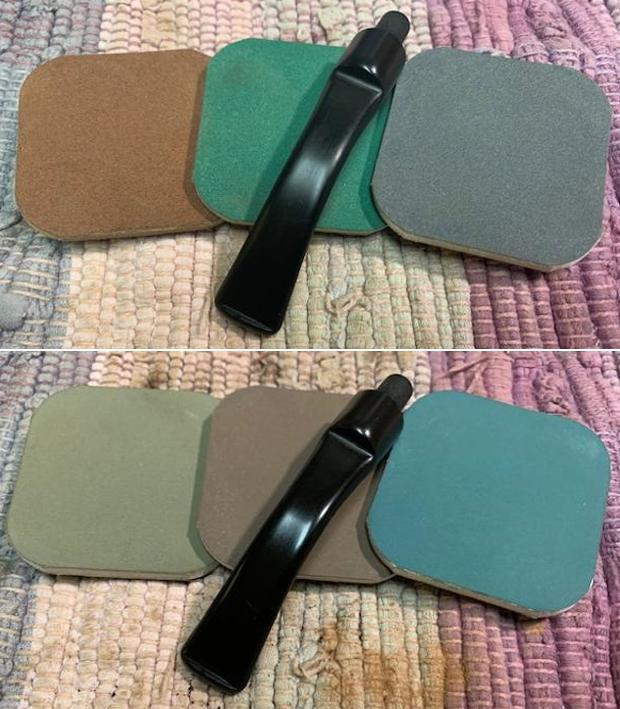
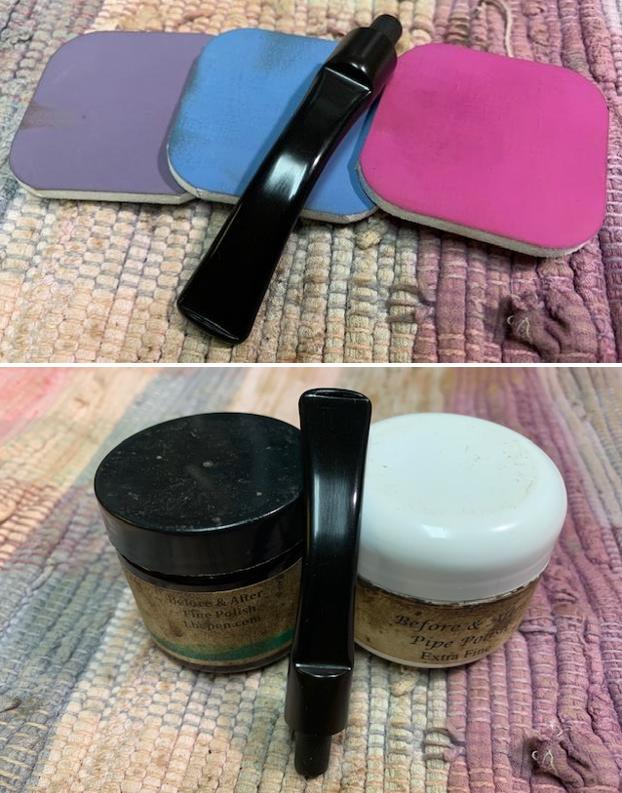
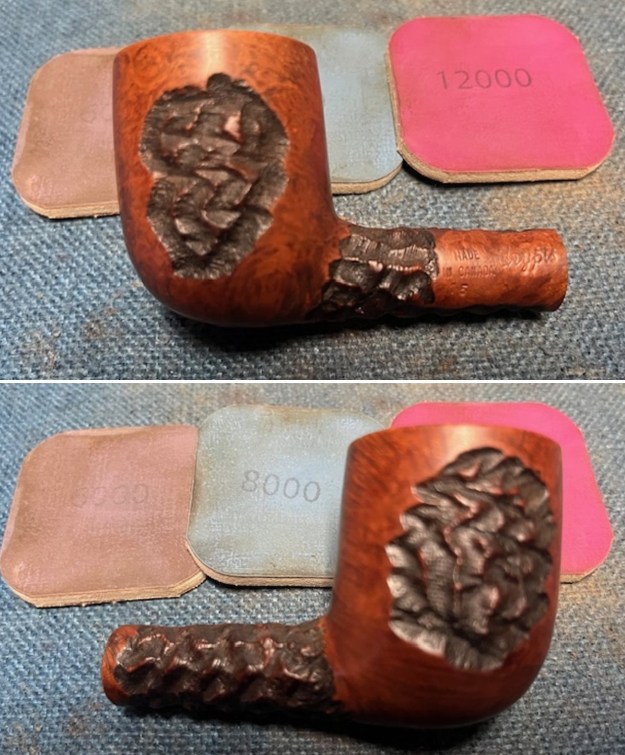
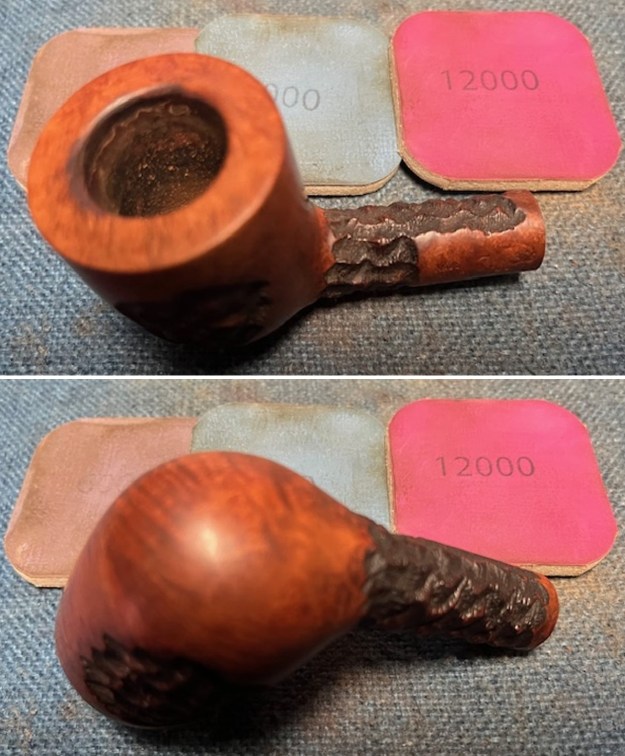
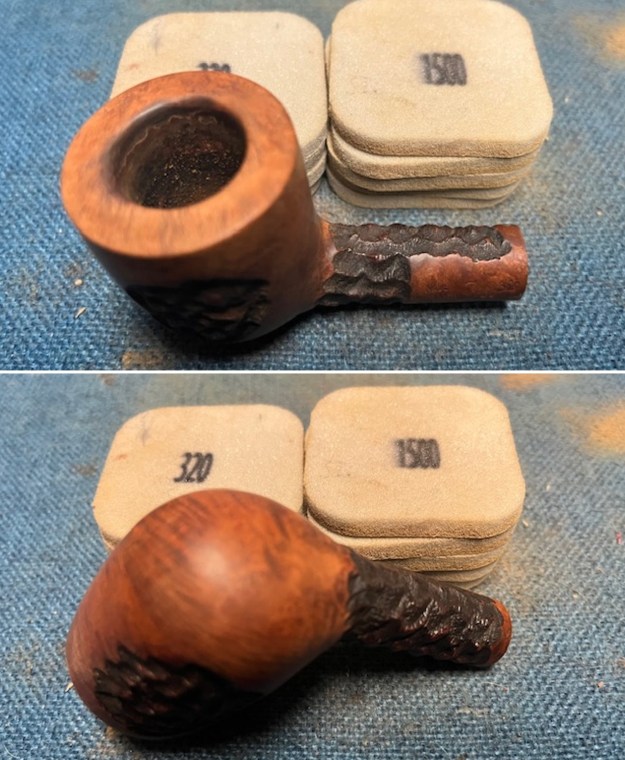 I polished the briar with micromesh sanding pads – dry sanding it with 1500-12000 grit sanding pads. I wiped it down with a damp cloth after each sanding pad to remove the dust. The briar was really shining by the final pad.
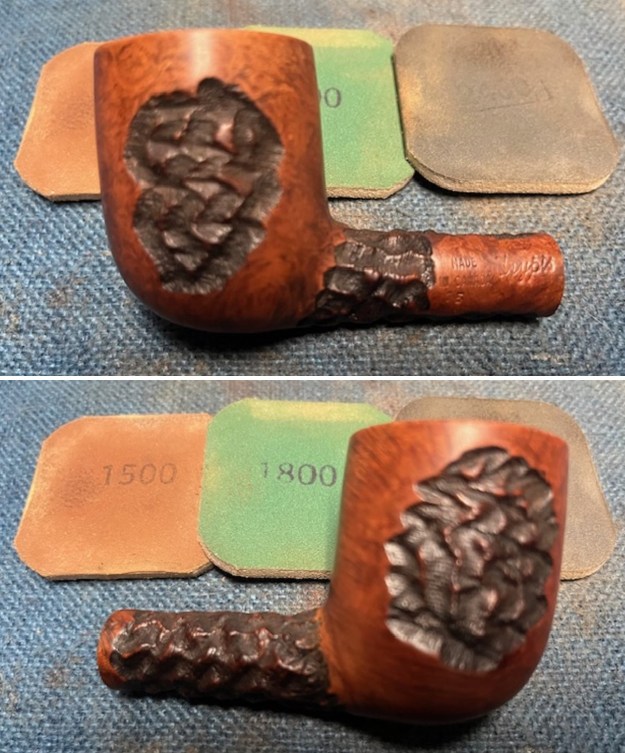
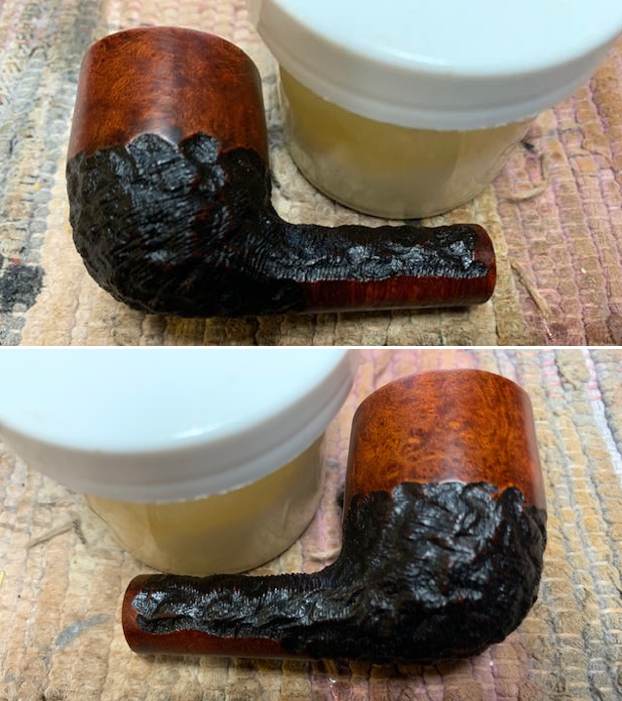
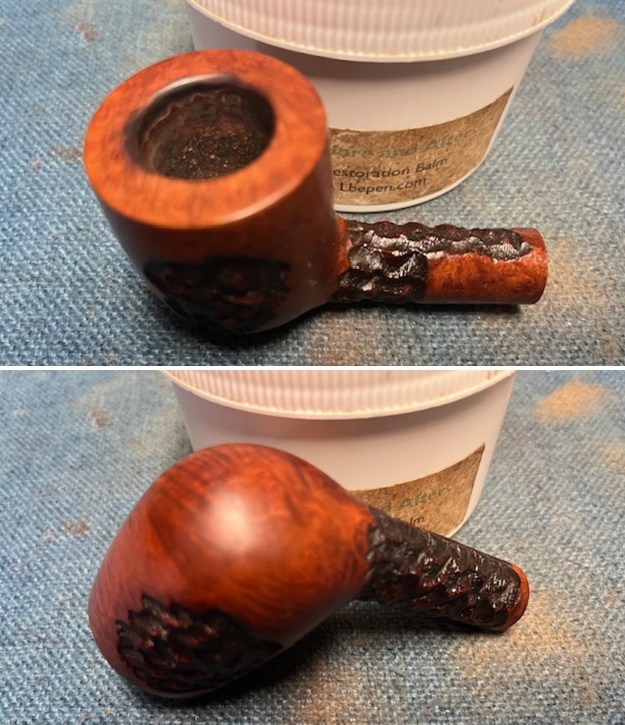
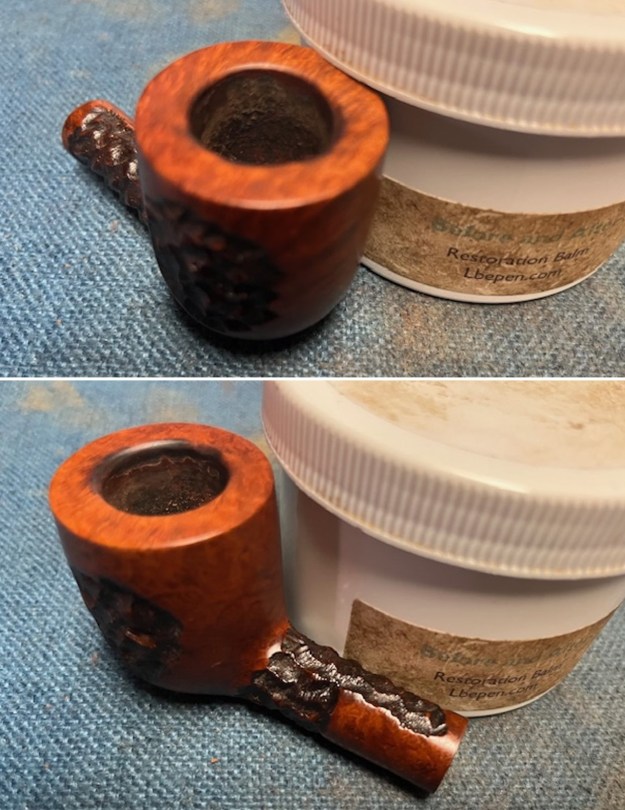
 I rubbed the bowl and rim down with Before & After Restoration Balm. I worked it into the surface of the briar with my fingertips and a shoe brush to clean, enliven and protect it. I let the balm sit for 10 minutes and then buffed with a cotton cloth to raise the shine. I really like watching the Balm do its magic and bring the briar alive.
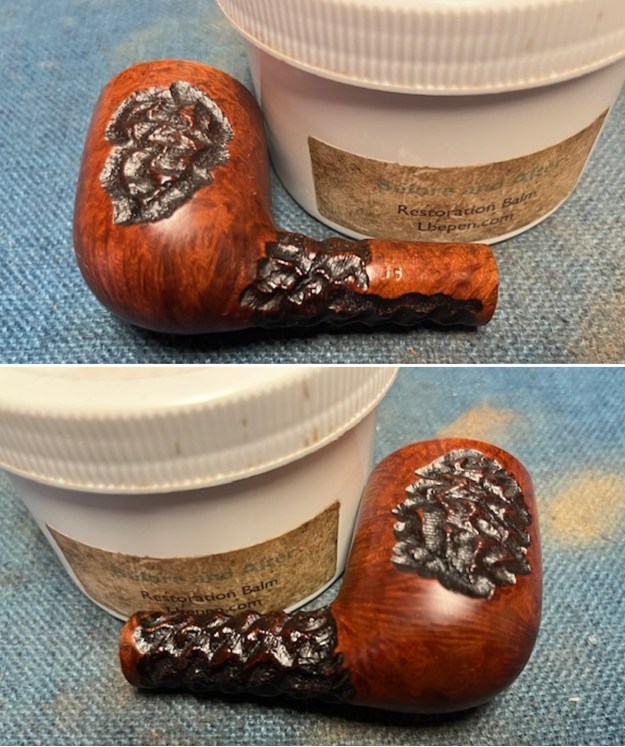
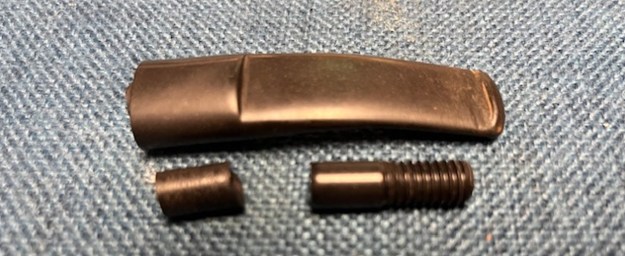
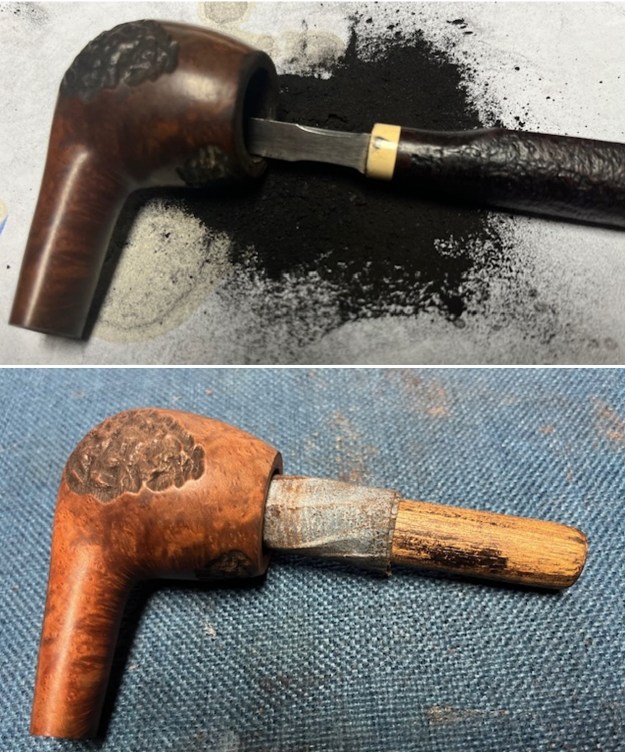
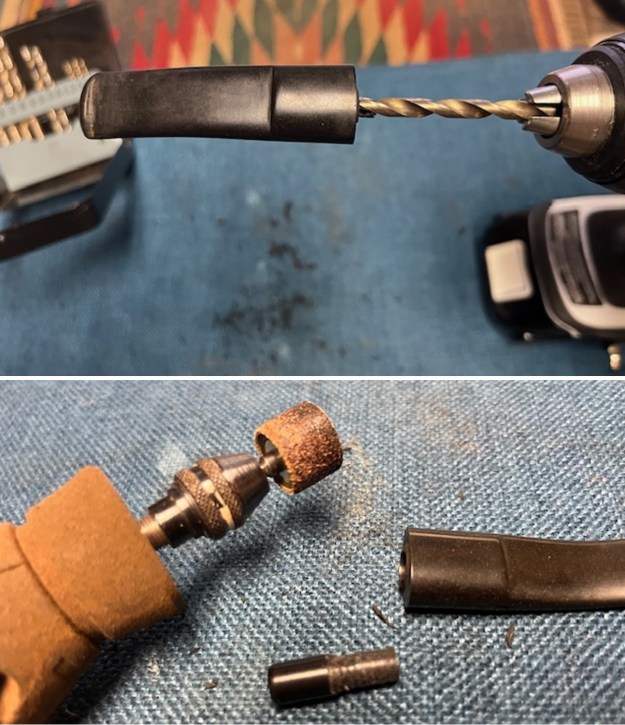
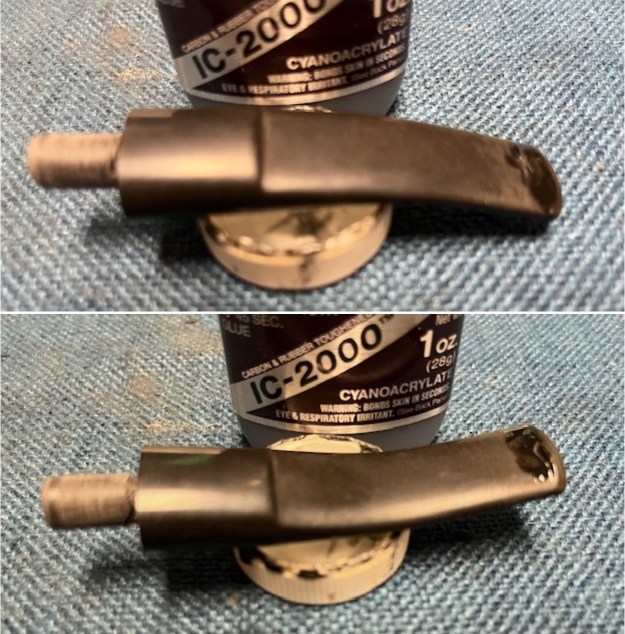
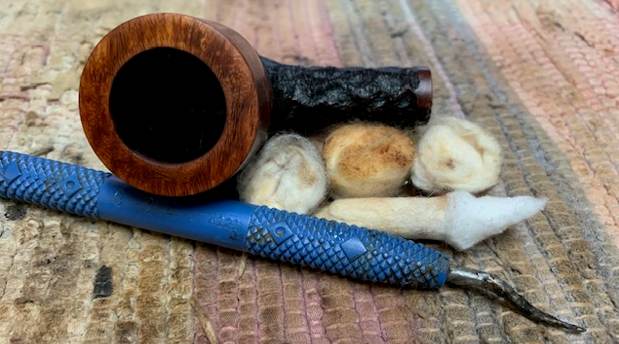
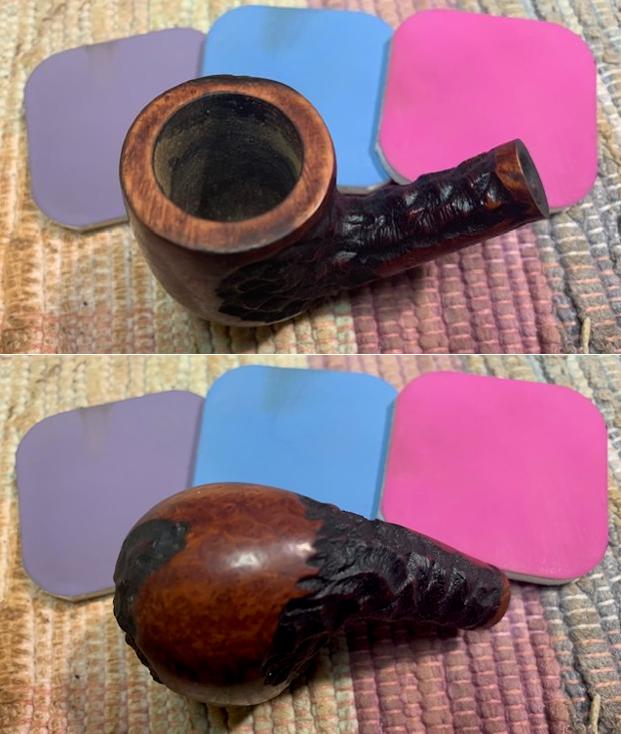
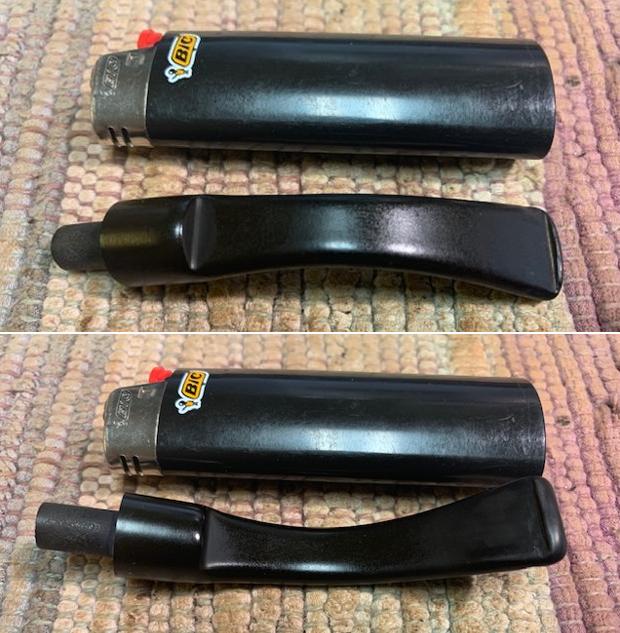
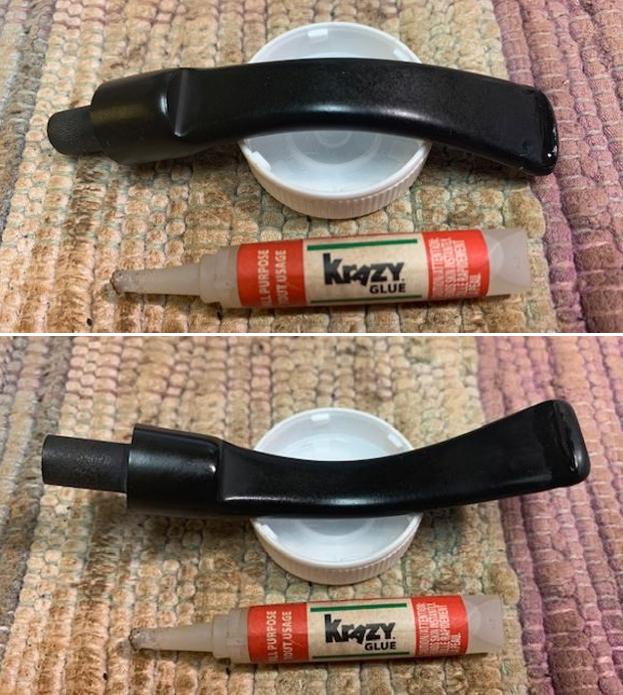
 I sanded the tobacco juice lacquer to remove it from the aluminum tube. I used 320-3500 grit sanding pads and wiped it down after each sanding pad. It looked very good at this point.
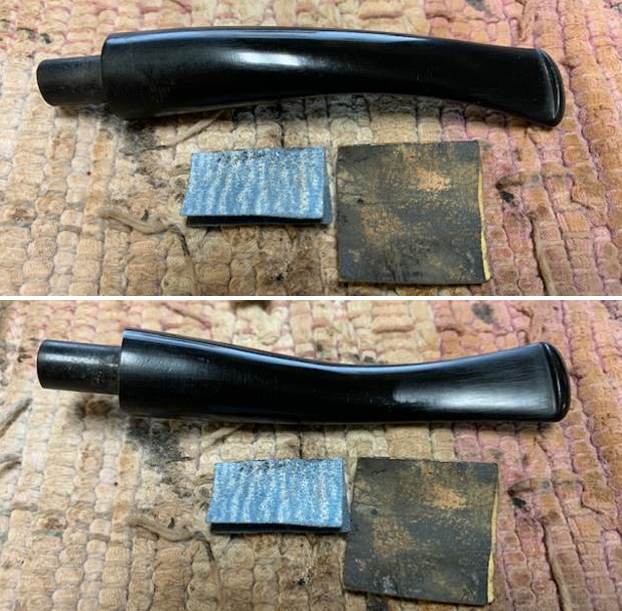
  I set the bowl and the inner tube aside and turned my attention to the stem. I sanded the stem with 320-3500 grit 2×2 inch sanding pads. I wiped the stem down after each sanding pad with Obsidian Oil. I blended in the tooth marks and chatter in the surface and after the final pad a deep shine began to develop.
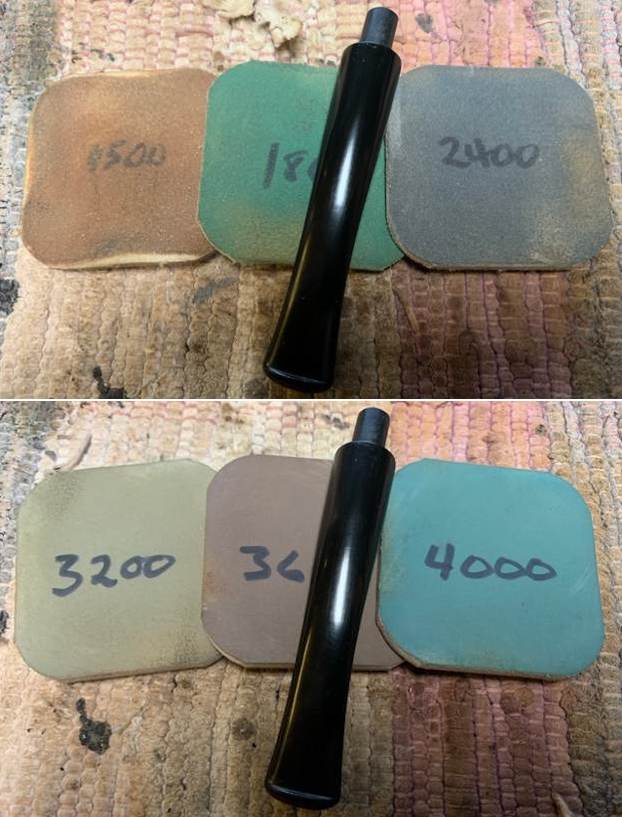
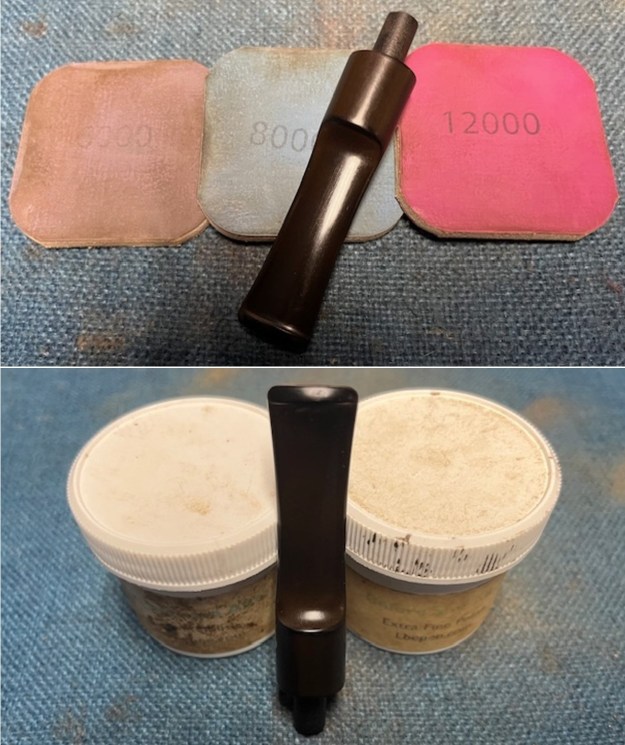
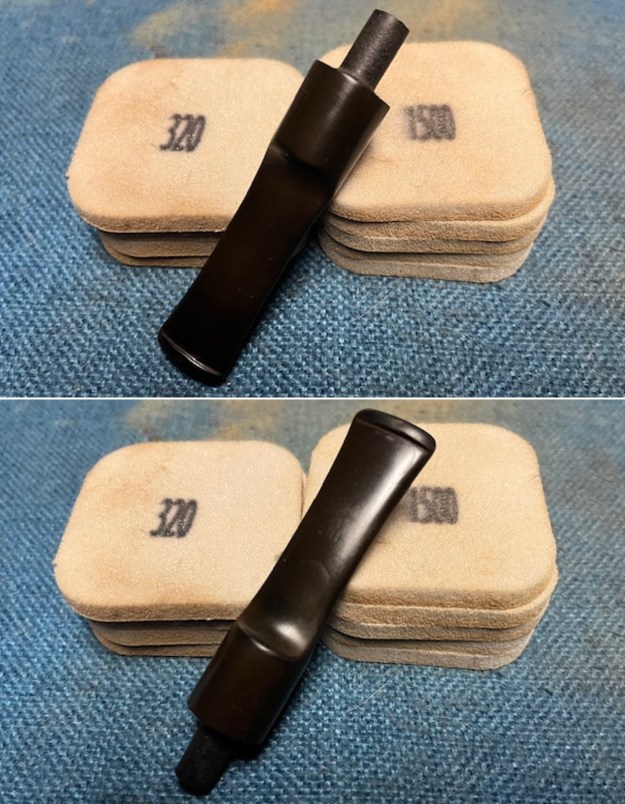 I polished the stem with 1500-12000 grit micromesh sanding pads. I wiped the stem down after each sanding pad with Obsidian Oil. I polished it with Before & After Pipe Stem Polish – both Fine and Extra Fine. I gave it a coat of Obsidian Pipe Stem Oil. It works to protect the stem from oxidizing. I set it aside to dry.
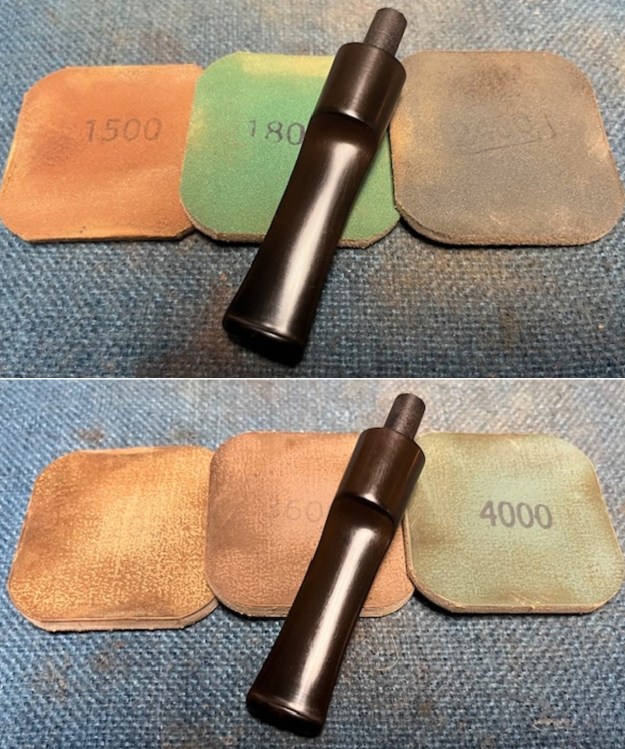
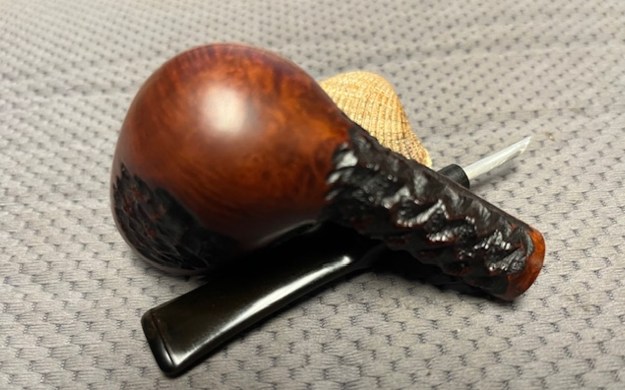
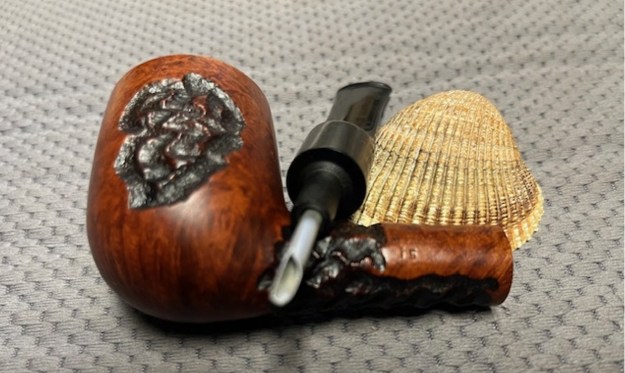
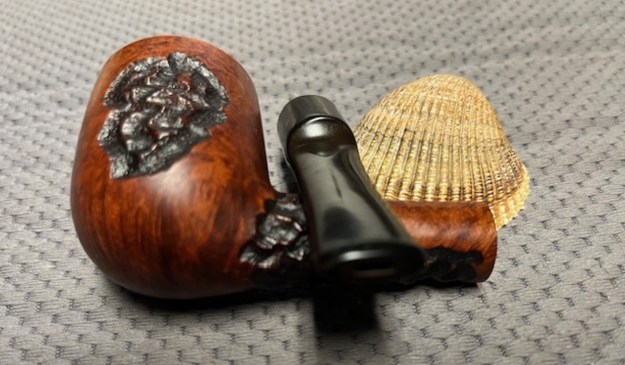
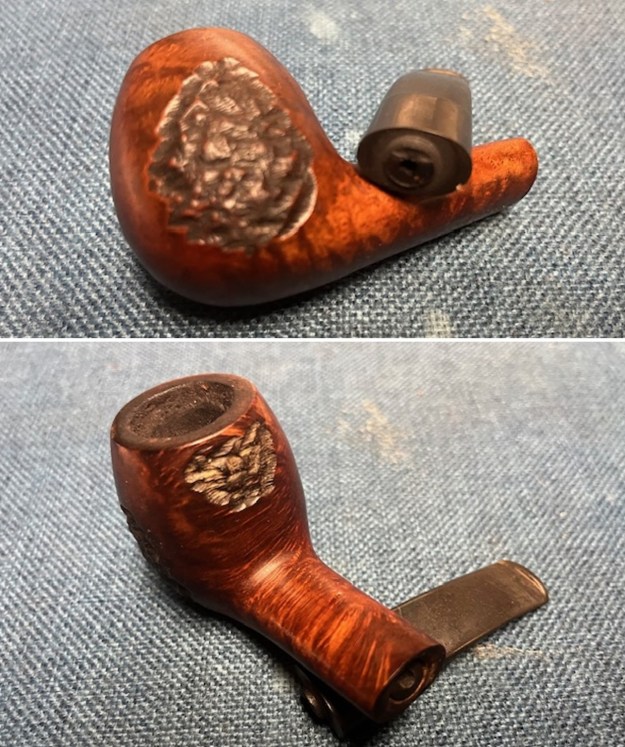
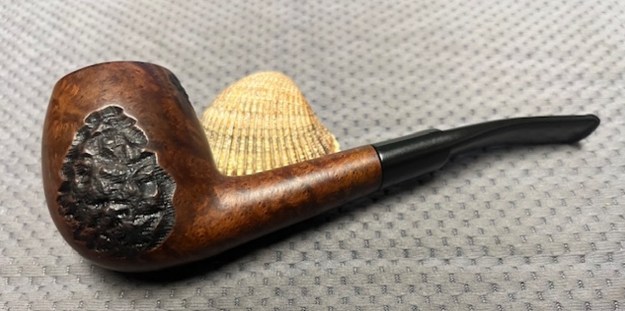
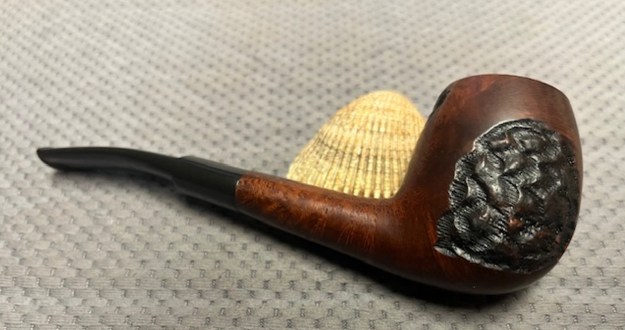
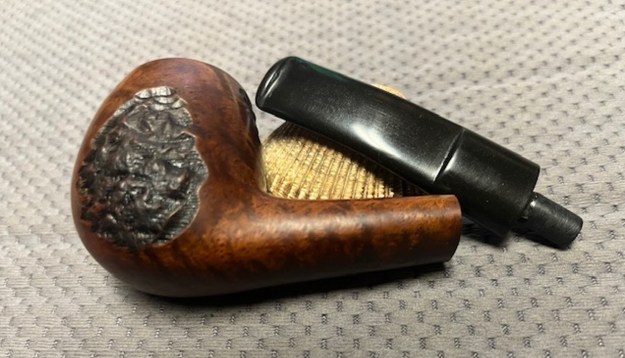
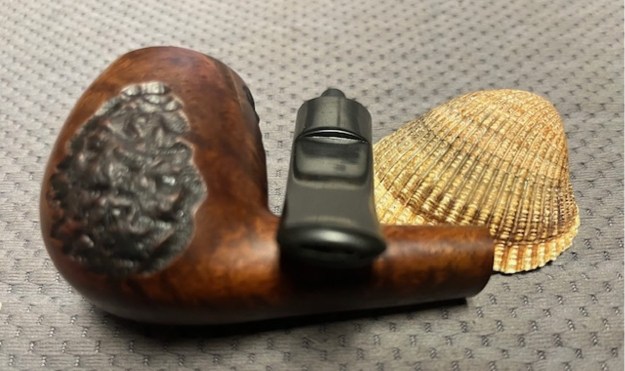
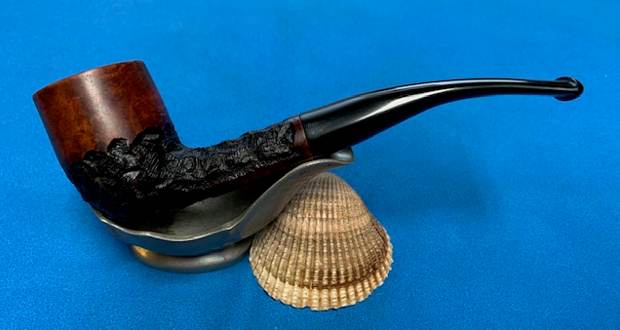
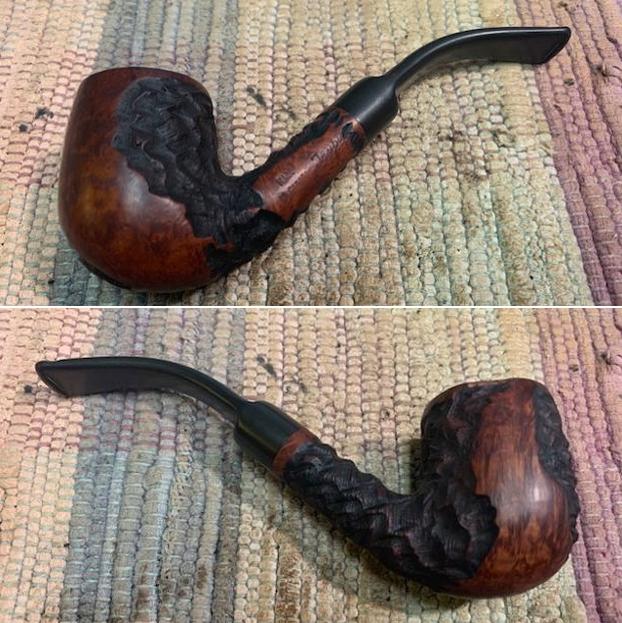
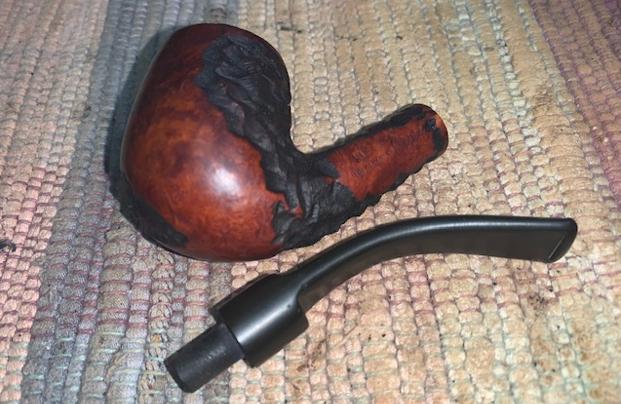
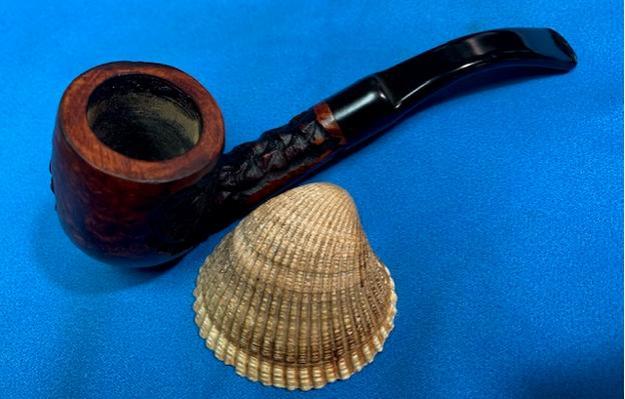
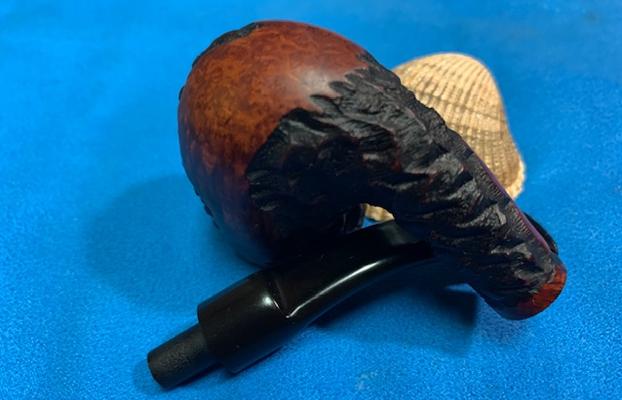
 I put the inner tube back in the tenon on the stem and took a photo of the pipe and stem.
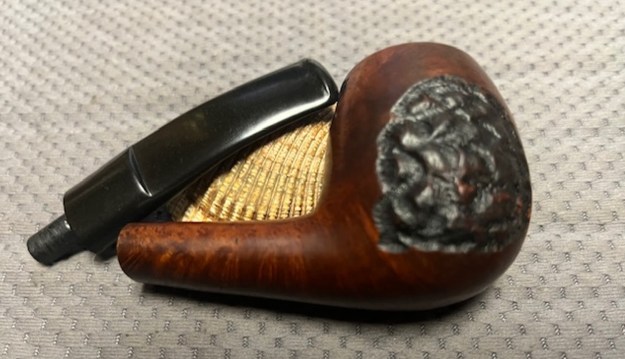
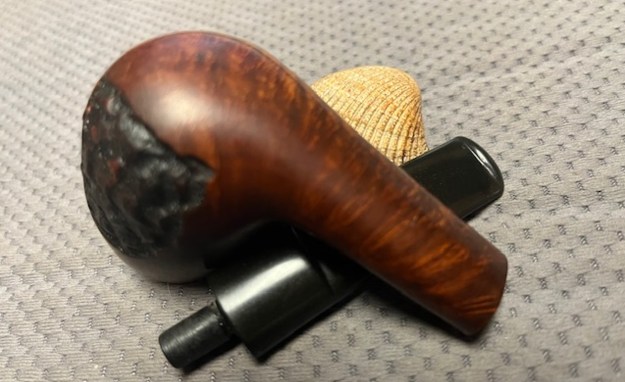
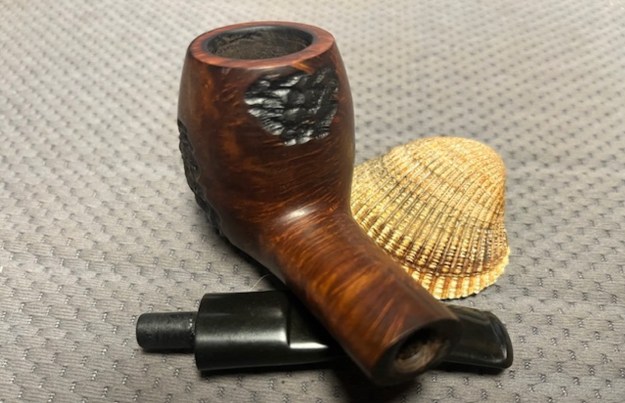
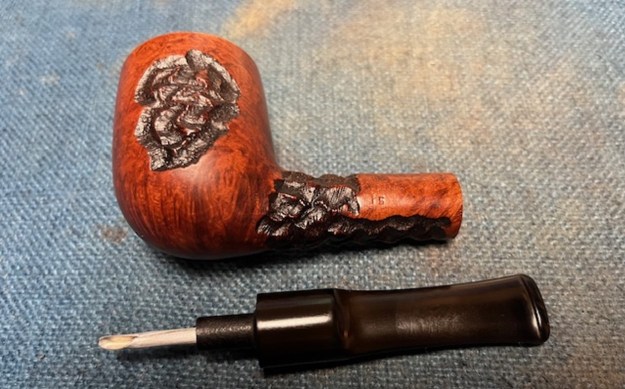 It was great to finish the tenon replacement and the restoration of this Mixed Finish Trypis 15 Billiard. I put the pipe back together and buffed it with Blue Diamond on the buffing wheel. I gave the rusticated patches on the bowl multiple coats of Conservator’s Wax and the smooth portions and the stem multiple coats of carnauba wax. I buffed the pipe with a clean buffing pad to raise the shine. I hand buffed the pipe with a microfiber cloth to deepen the shine. It is fun to see what the polished bowl looks like with deep sandblast all around it. Added to that the polished black, vulcanite, saddle stem was beautiful. This Trypis 15 Billiard is great looking and the pipe feels great in my hand. It is light and well balanced. Have a look at it with the photos below. The dimensions are Length: 5 ¾ inches, Height: 2 inches, Outside diameter of the bowl: 1 ½ inches, Chamber diameter: ¾ of an inch. The weight of the pipe is 47 grams/ 1.66 ounces. It is a beautiful pipe and one that I will soon be adding to the rebornpipes store in the Pipes Made by Canadian Pipemakers Section if you are interested in adding it to your colleciton. Thanks for walking through the restoration with me as I worked over this pipe. Thanks to each of you who are reading this blog.
As always, I encourage your questions and comments as you read the blog. Thanks to each of you who are reading this blog. Remember we are not pipe owners; we are pipe men and women who hold our pipes in trust until they pass on into the trust of those who follow us.