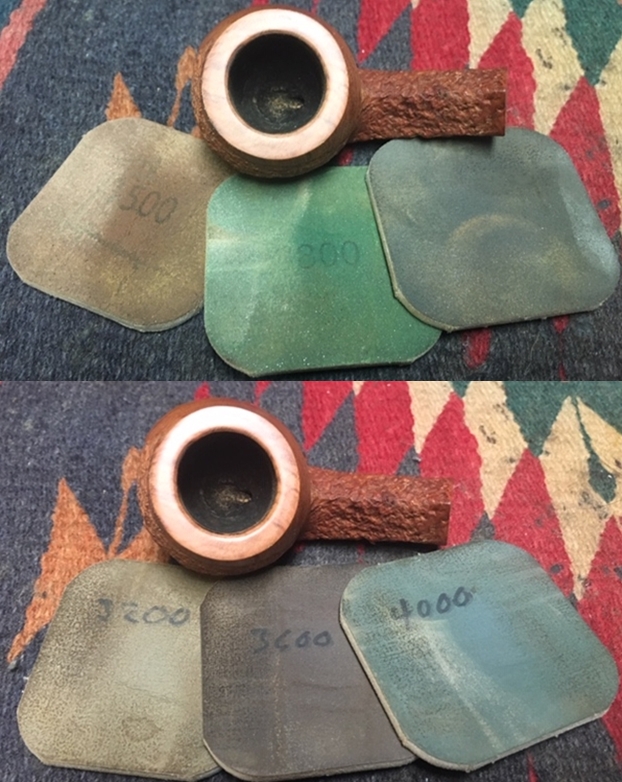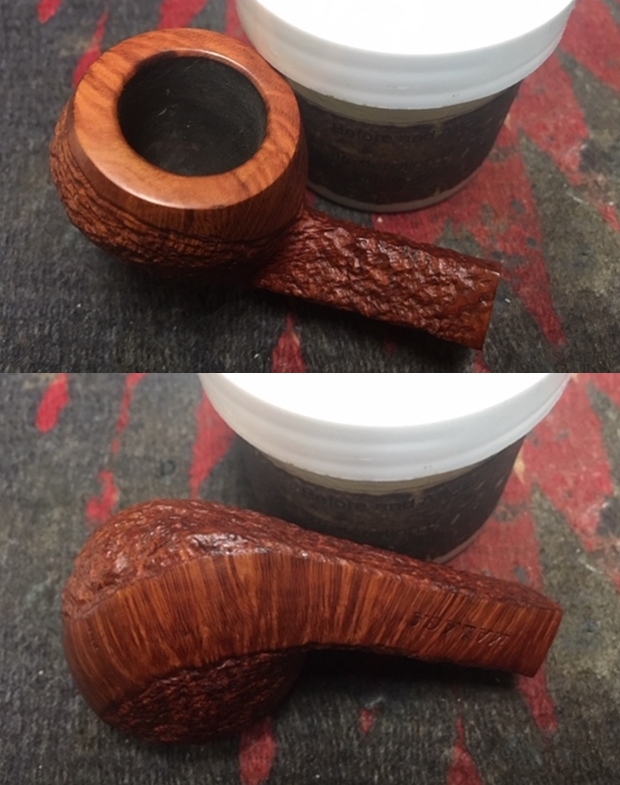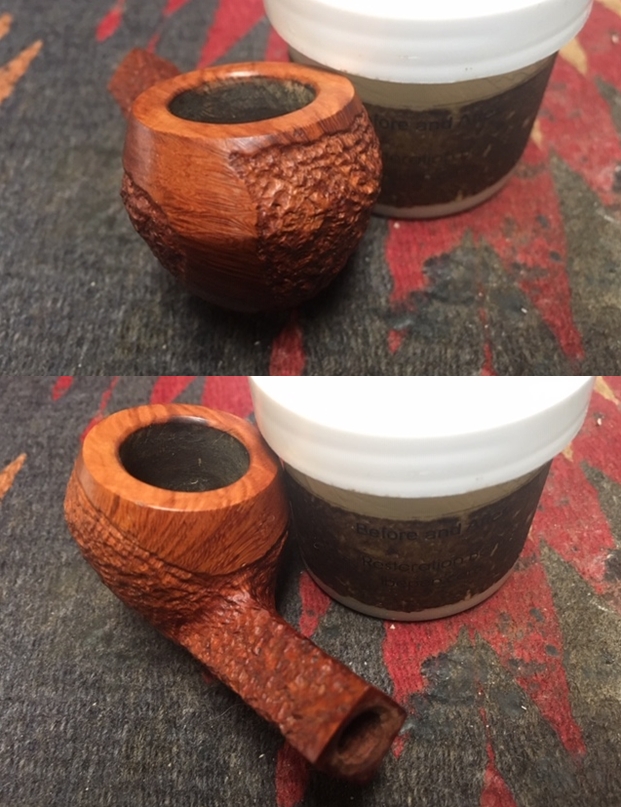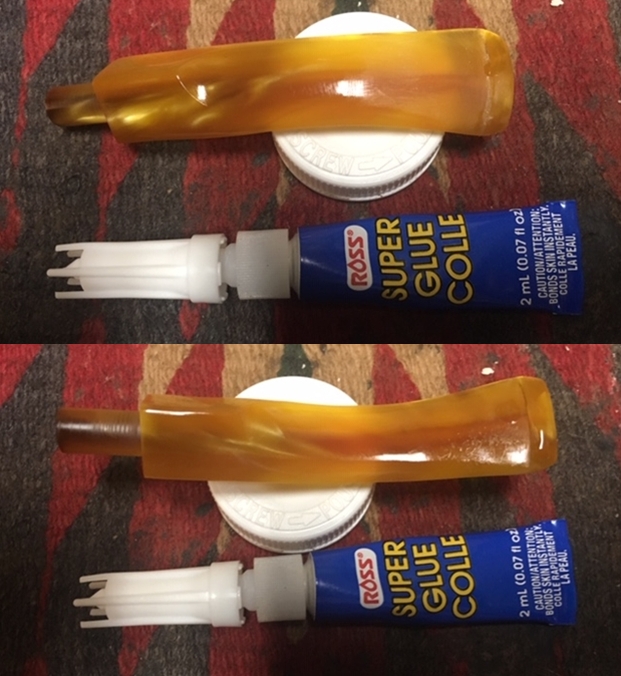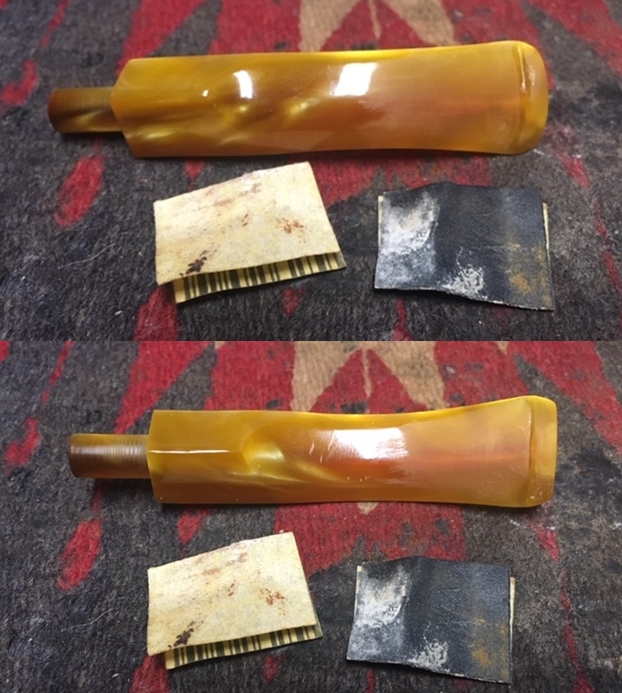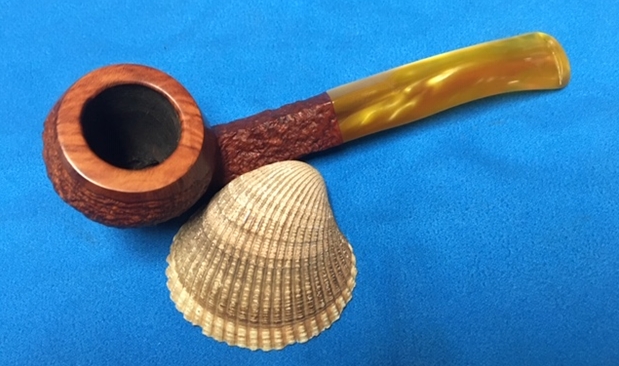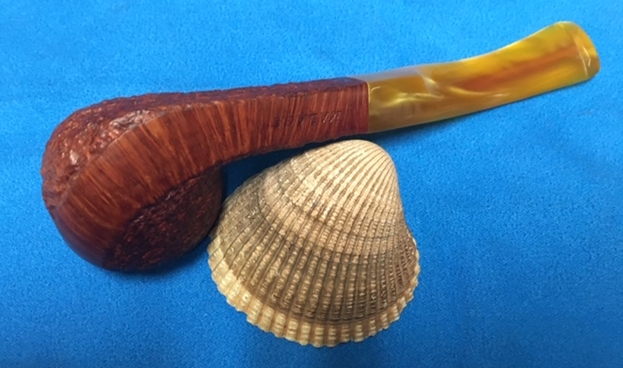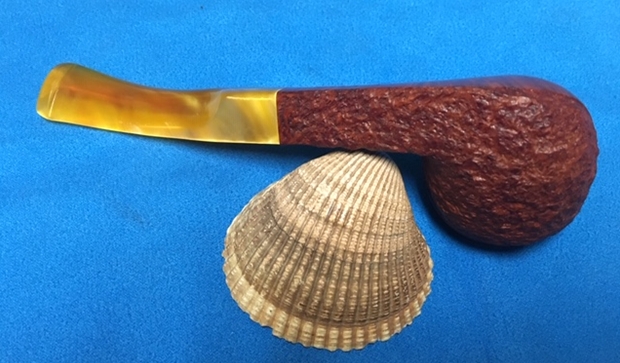
Tag Archives: bite marks

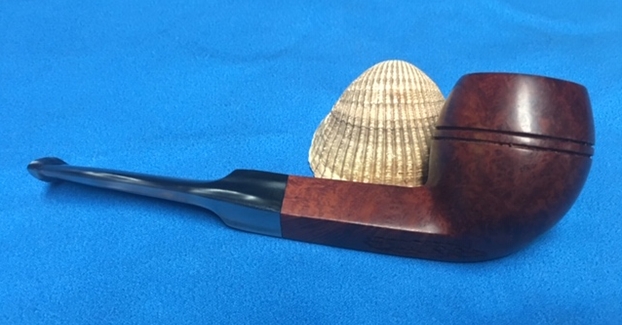
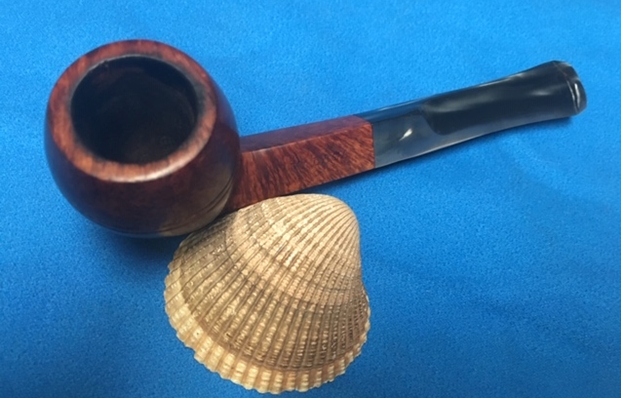
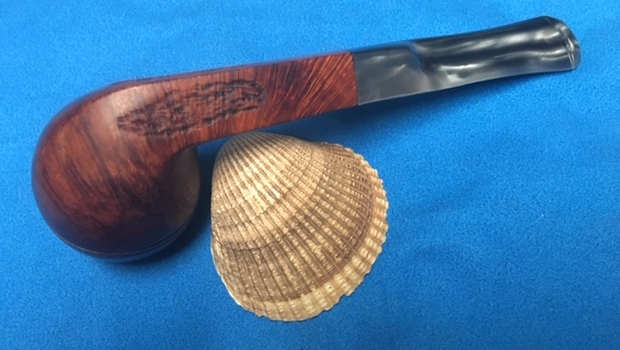
New Life for Farida’s Dad’s Final Pipe – a Dunhill 5203 Shell Billiard


Blog by Steve Laug

I have had the last Dunhill from Farida’s Dad’s estate sitting on a cupboard behind my desk and every time I sit down I look at it and think that I need to finish it up. I sold the rest of the estate and purchased this one myself so that I could have some time to work on it. Yes you are right, read between the lines – I wanted to put off working on it. Well, this morning I sat down at the desk and posted a couple of blogs and then turned and there it was looking at me. I decided then and there to pick it up and do the work to finish this estate.

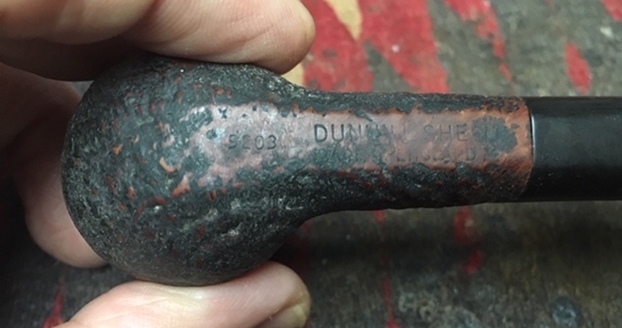
The pipe came from the estate of an elderly gentleman here in Vancouver. I met with his daughter Farida over a year ago and we looked at his pipes and talked about them then. Over the Christmas 2017 holiday she brought them by for me to work on, restore and then sell for her. There are 10 pipes in all – 7 Dunhills (one of them, a Shell Bulldog, has a burned out bowl), 2 Charatan Makes, and a Savinelli Autograph. This is the last of the lot – a lone Dunhill Billiard with a saddle stem. His pipes are worn and dirty and for some folks they have a lot of damage and wear that reduce their value. To me each one tells a story. I only wish they could speak and talk about the travels they have had with Farida’s Dad. The first photo shows the underside of the shank and its virtual illegibility under the tars and filth on the finish.You can see from the above photo the challenge that the pipe I am working on today will be. The stamping identifies it as a Dunhill Shell Billiard with a saddle stem. It is stamped on the underside of the heel and shank on a smooth flat area. On the heel is the shape number, a 4 digit number – 5203. I looked on Pipephil to get the lowdown on the shape number (http://www.pipephil.eu/logos/en/dunhill/shapes.html). I quote that below:
Dunhill pipes are stamped with a four digit code.

Digit 1: (from 1 to 6) denotes the size of the pipe (the group).

Digit 2: denotes the style of the mouthpiece (0,1=tapered, 2=saddle)

Digit 3 and 4: denote the generic pipe shape (in yellow in the chart on top)

Example: 5102 — (5 = size | 1 = tapered stem | 02 = Bent)

When 5 digits occur, the meaning of the 4 first remain the same

The one I am working on, 5203, is thus a SIZE 5 (Group 5), saddle stem (2) billiard (03) shaped pipe. The rest of the stamping is DUNHILL SHELL over MADE IN ENGLAND with the underlined superscript 34 after the D in ENGLAND. The number 34 tells me the date the pipe was made 1994.

My work on each of these pipes has already caused a lot of discussion on the Facebook Tobacco Pipe Restorers Group. The ongoing debate of Restoration vs. Preservation has filled a lot of ongoing airtime on the group. I do not care to relive or recount that as I am only following the directives of the daughter of the original deceased pipeman. She wanted them restored to usable condition so others can carry on her father’s love of these pipes. She is quite happy with the finished results and others of his pipes are now all over the world being enjoyed by the next generation of pipemen.

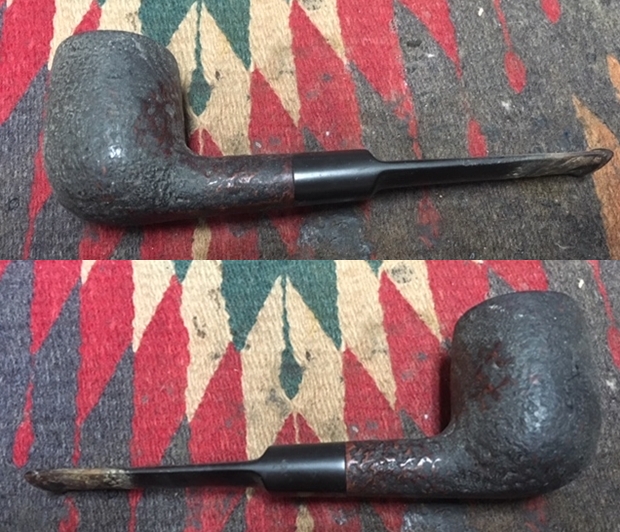
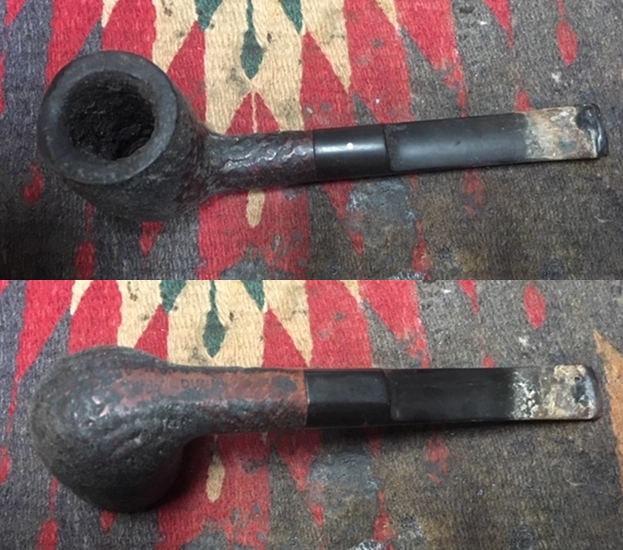
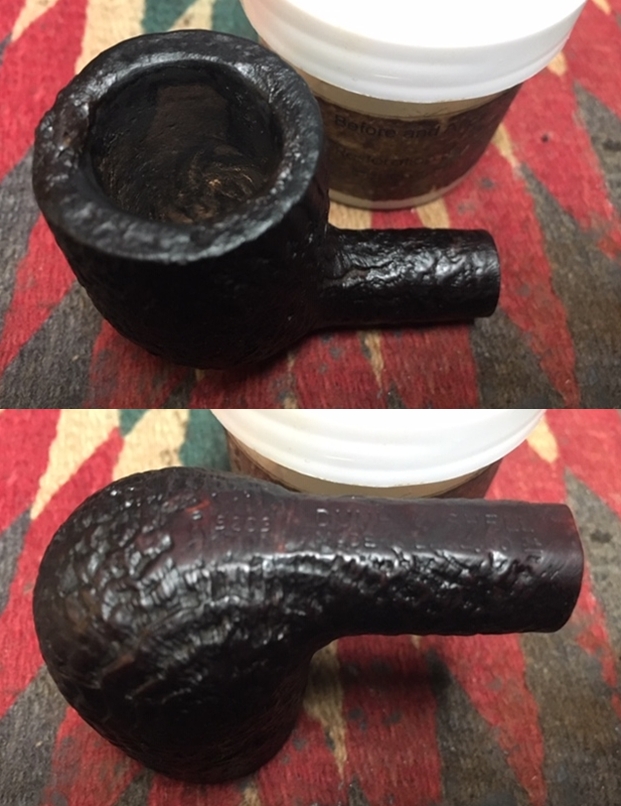
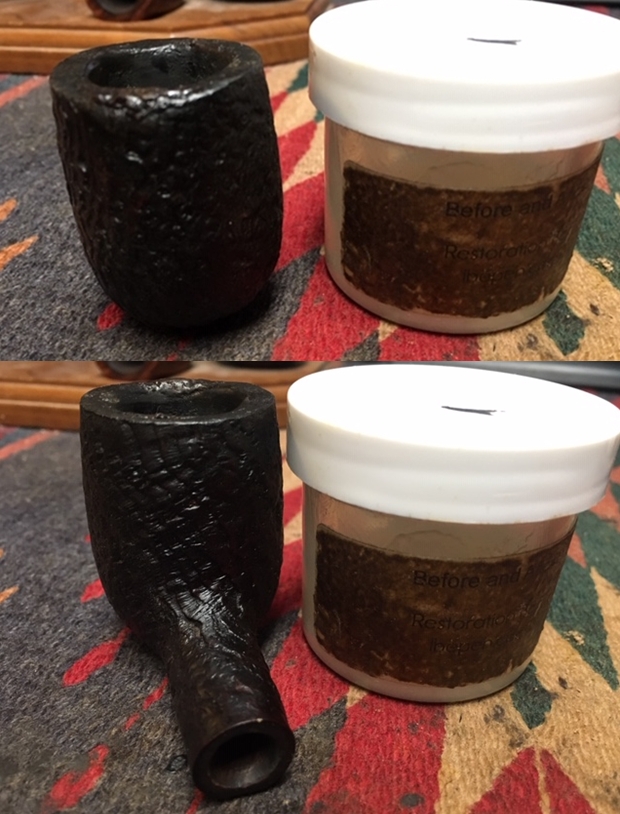
When first looked at the pipe here is what I saw. The bowl was thickly caked and the cake had flowed over onto the sandblast finish on the rim top forming hard lava that made the top uneven. There was a serious burn mark on the front edge of the bowl causing the rim to have a dip in the surface. It was hard to know if there was damage to the inner edge of the rim and I would not know until I removed some of the grime. The outer edge looked far very good all around the bowl except for the front. The finish was invisible under the thick coat of oils and grime that covered the bowl and shank. In fact at this point I had no idea what the stamping looked like because it was covered. I have wondered as I cleaned the other pipes in this lot if the oily build up was just a part of the life lived in the Antarctic. The stem was oxidized and very dirty. There was a thick sticky, oily substance on the surface of the stem and a calcification that I could scrape with my fingernail. There were tooth marks and chatter on both sides in front of the button as well as damage to the edges of the button. I took photos of the rest of the pipe to show what it looked like before I started the cleanup work. I took close up photos of the bowl and rim top as well as the stem. You can see the condition of the rim top and bowl in the first two photos. The damage to the rim top and the front outer edge is very visible even under the grime and lava. The inner edge looks like it has some damage on the backside. I won’t really know the full story until I remove the thick lava overflow on the surface. The stem had tooth chatter and some deep bite marks on the top and the underside of the stem just ahead of the button. The button itself also showed wear and damage. It has been a while since I have worked on the pipes that belonged to Farida’s Dad. I thought it might be helpful to remind us all of the background story of these pipes. Here is the material that I quoted in previous blogs. I have included both the written material and the photo that Farida included of her Dad. Here is what she wrote:
My dad, John Barber, loved his pipes. He was a huge fan of Dunhill and his favourite smoke was St. Bruno. No one ever complained of the smell of St. Bruno, we all loved it. I see the bowls and they’re large because he had big hands. When he was finished with his couple of puffs, he would grasp the bowl in the palm of his hand, holding the warmth as the embers faded. The rough bowled pipes were for daytime and especially if he was fixing something. The smooth bowled pipes were for an evening with a glass of brandy and a good movie. In his 20s, he was an adventurer travelling the world on ships as their radio operator. He spent a year in the Antarctic, a year in the Arctic and stopped in most ports in all the other continents. He immigrated to Canada in the mid-fifties, working on the BC Ferries earning money to pay for his education. He graduated from UBC as an engineer and spent the rest of his working life as a consultant, mostly to the mining companies. Whatever he was doing though, his pipe was always close by.

She sent this photo of him with his sled dogs in the Antarctic sometime in 1953-1954. It is a fascinating photo showing him with a pipe in his mouth. He is happily rough housing with his dogs. A true pipeman, he seems oblivious to the cold. Thank Farida for sending the photo and the story of your Dad. I find that it explains a lot about their condition and gives me a sense of your Dad. If your Dad was rarely without a pipe I can certainly tell which pipes were his favourites. In fact the condition of the billiard I am working on now makes me wonder if it is not the one in his mouth in the photo below.As I looked back over all of her Dad’s pipes that I have restored each of them had rim damage and some had deeply burned gouges in the rim tops. The bowls seemed to have been reamed not too long ago because they did not show the amount of cake I would have expected. The stems were all covered with deep tooth marks and chatter and were oxidized and dirty. The internals of the mortise, the airway in the shank and stem were filled with tars and oils. These were nice looking pipes when her Dad bought them and they would be nice looking once more when I finished.

Here are the links to the previous seven blogs that I wrote on the rest of the finished pipes. The first was a Dunhill Shell oval shank pot (https://rebornpipes.com/2018/02/04/restoring-a-1983-dunhill-shell-41009-oval-shank-pot/). The second was a Dunhill Classic Series Shell Billiard (https://rebornpipes.com/2018/02/08/faridas-dads-pipes-2-restoring-a-1990-lbs-classic-series-dunhill-shell-billiard/). The third pipe was a Savinelli Autograph (https://rebornpipes.com/2018/02/15/faridas-dads-pipes-3-restoring-a-savinelli-autograph-4/).The fourth pipe was a Dunhill Red Bark Pot that was in rough shape (https://rebornpipes.com/2018/03/10/faridas-dads-pipes-4-restoring-a-dunhill-red-bark-pot-43061/). The fifth pipe was a Dunhill Root Briar Bent Billiard (https://rebornpipes.com/2018/07/07/faridas-dads-pipes-5-restoring-a-dunhill-root-briar-56-bent-billiard/). The sixth pipe was a Charatan’s Make Distinction https://rebornpipes.com/2018/08/22/faridas-dads-pipes-6-restoring-a-charatan-make-distinction/. The seventh pipe was a Charatan’s Make Belvedere https://rebornpipes.com/2018/12/05/faridas-dads-pipes-7-restoring-a-charatans-make-belvedere-48dc-pot/.

Like most work the refurbisher does, this walks a fine line between restoration and preservation. The deciding feature for me regarding this pipe was the wishes of the family. They wanted the pipe to be cleaned and smoked by someone who could carry on the pipe man’s legacy of their Dad. None of them was interested in the pipes for themselves. They had no desire to keep them and memorialize their Dad and Grandad in that manner. I understand that to work on this pipe the way they wanted meant changing the current state of the pipe to bring it back closer to the way it was when their Dad bought it.

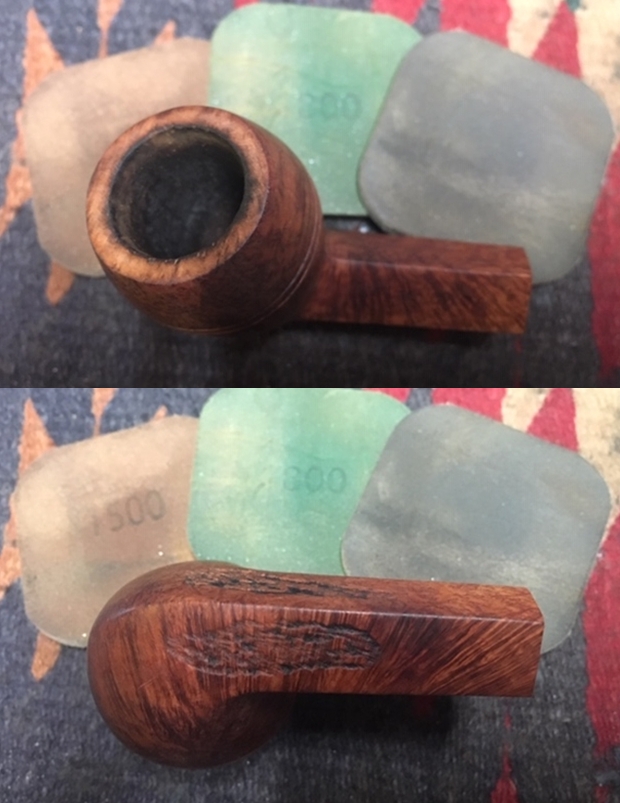
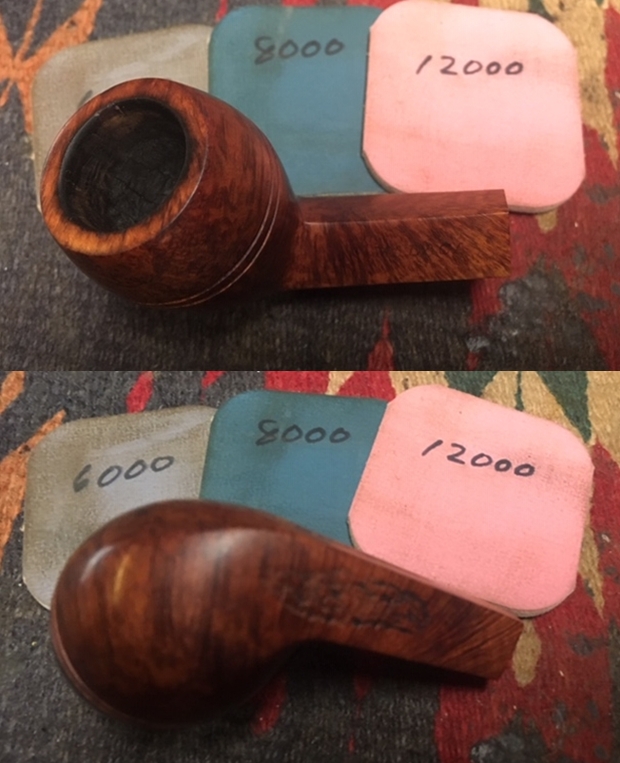
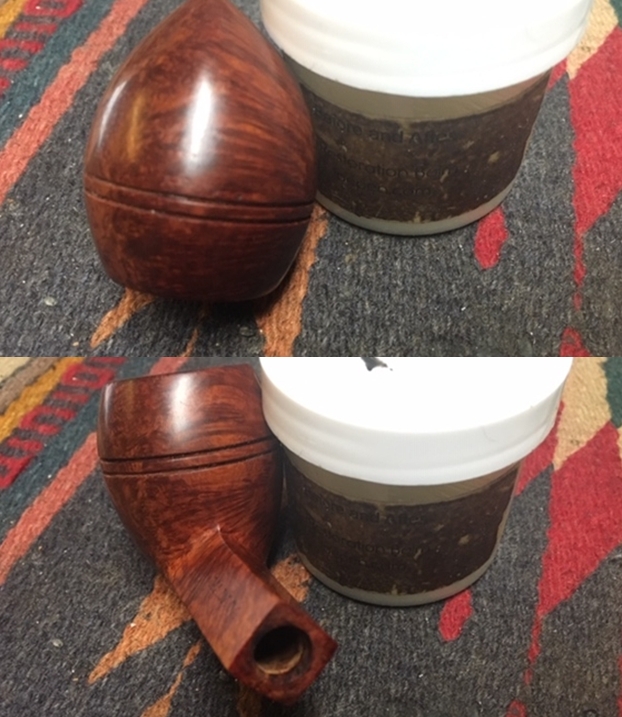
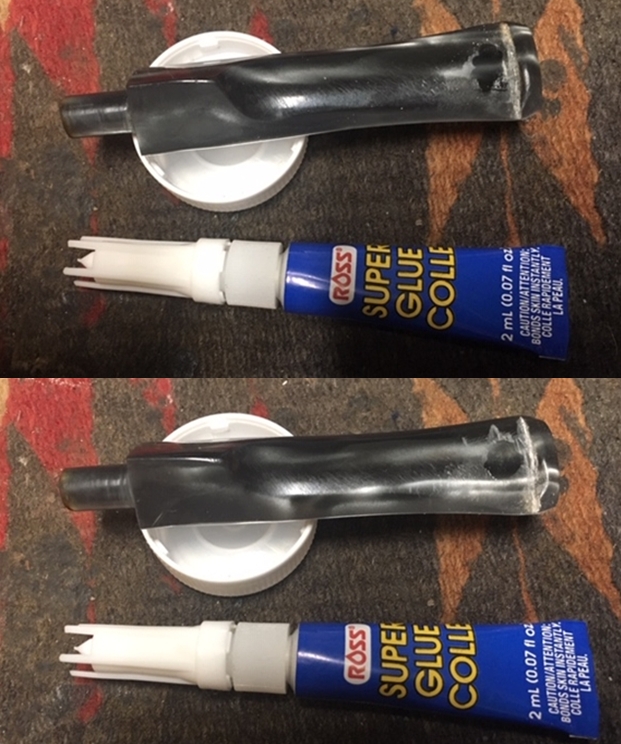
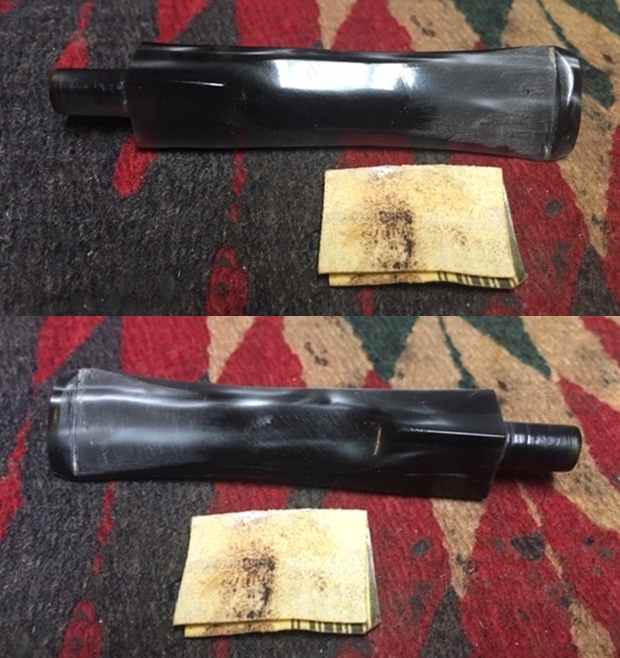
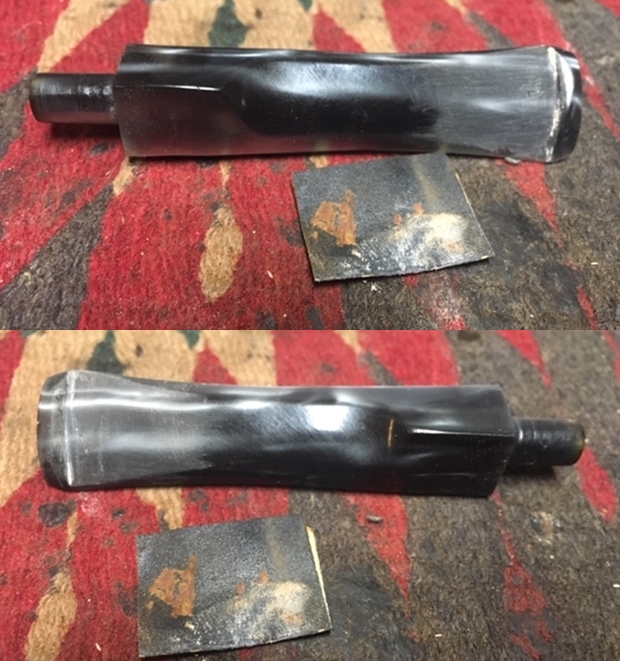
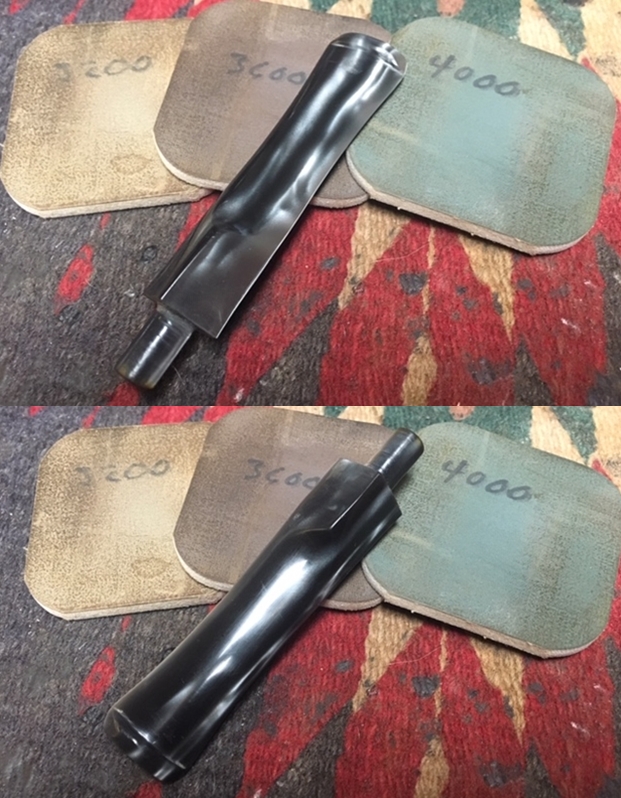
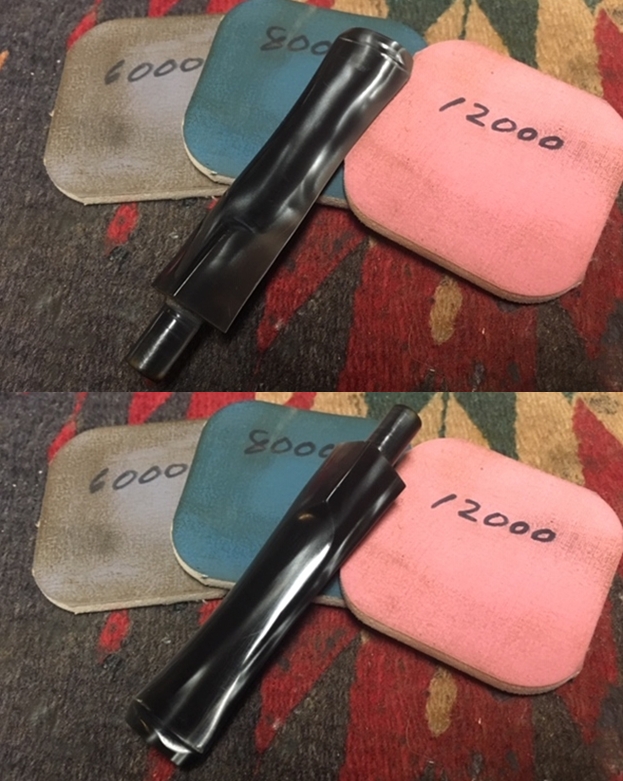
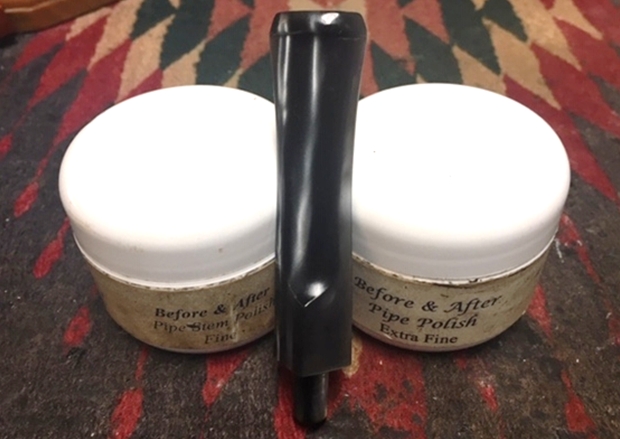
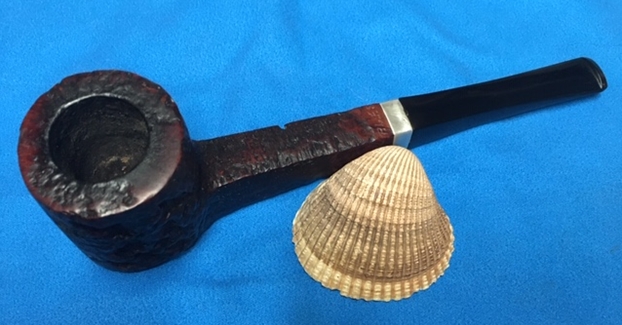
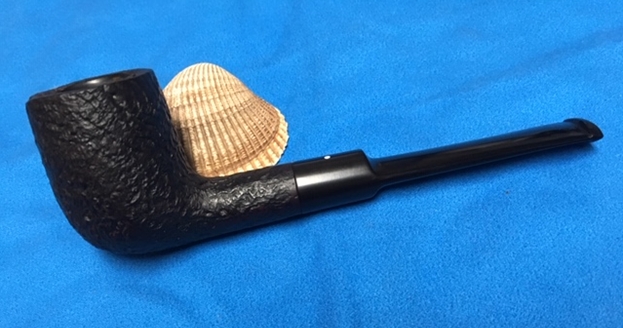
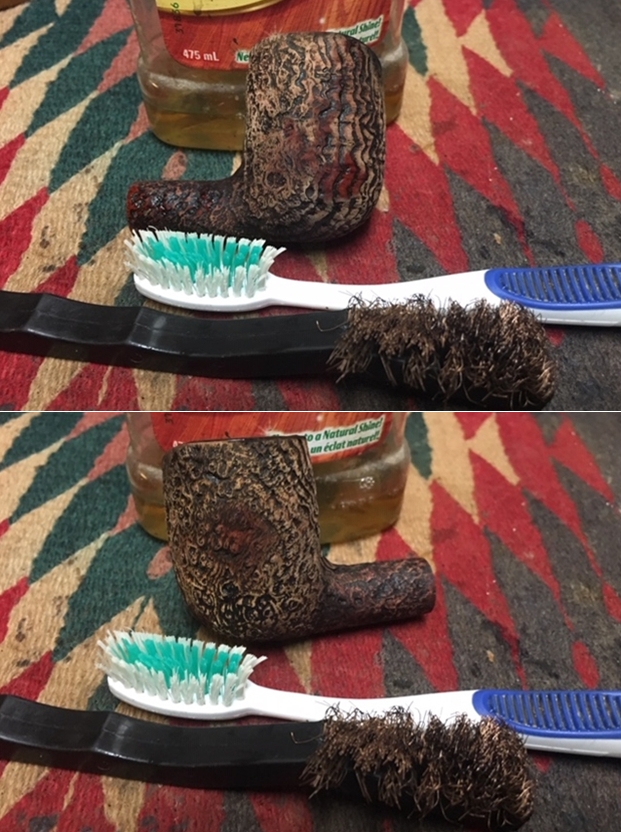
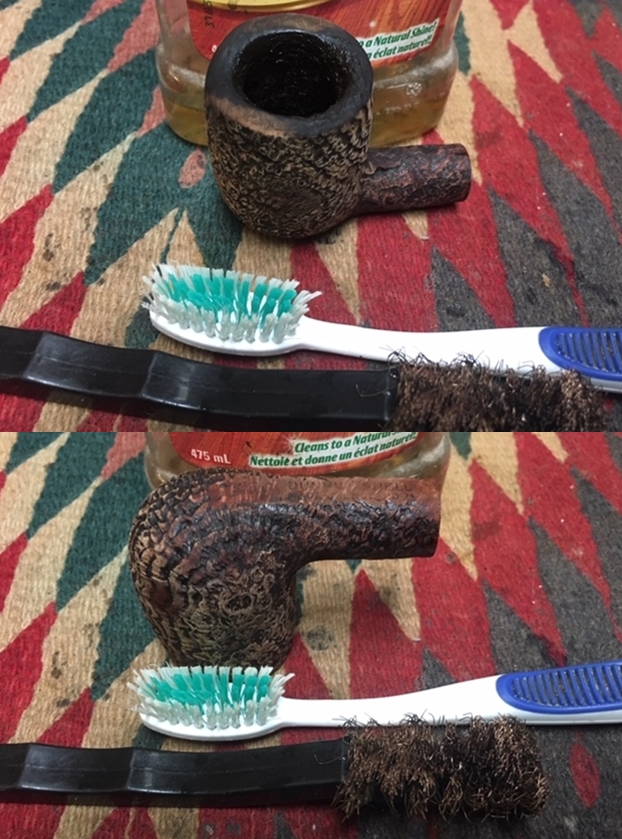
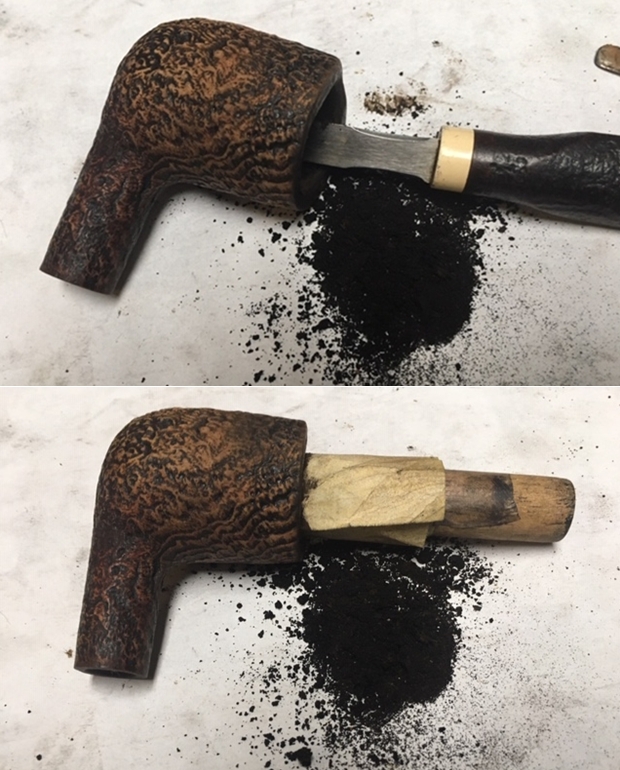
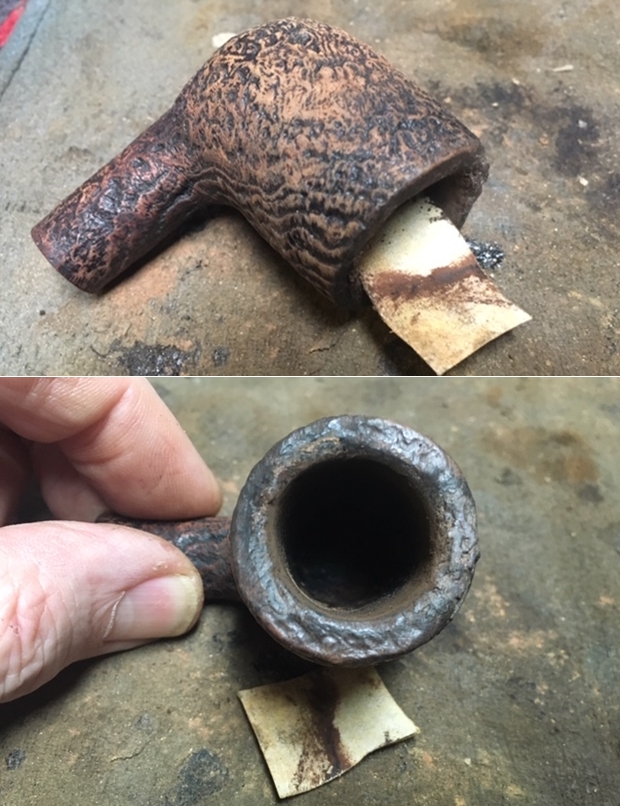
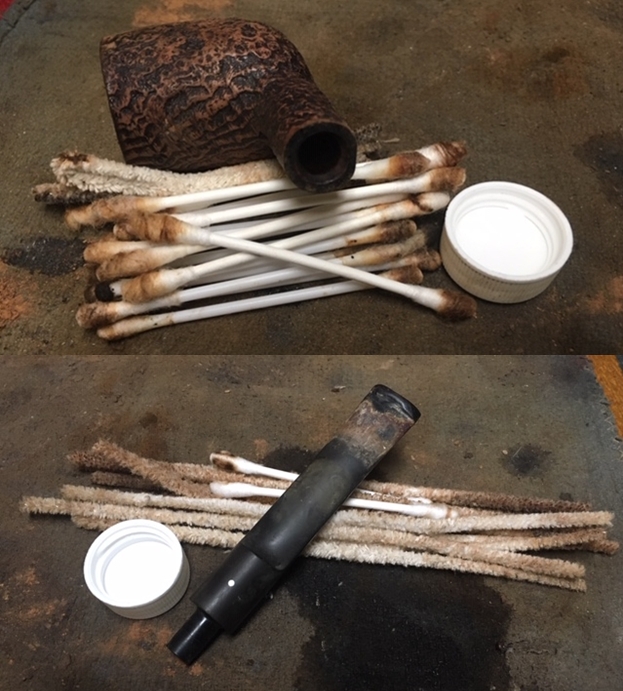
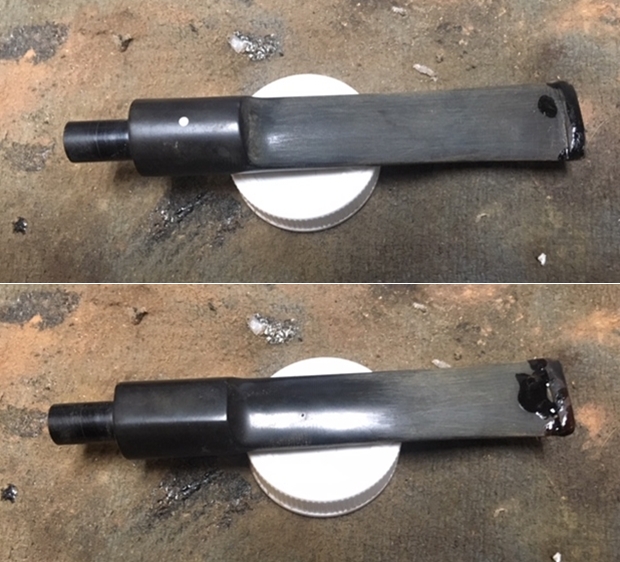
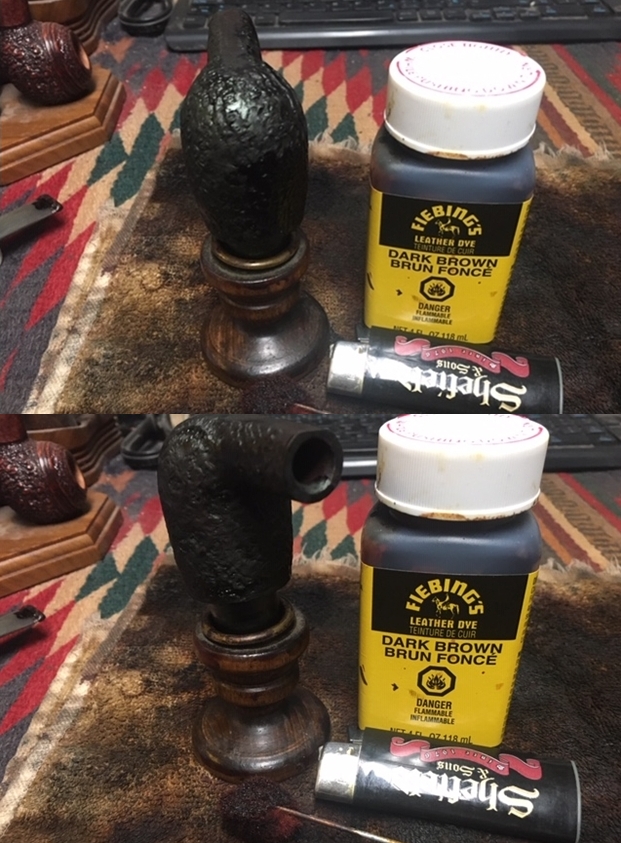
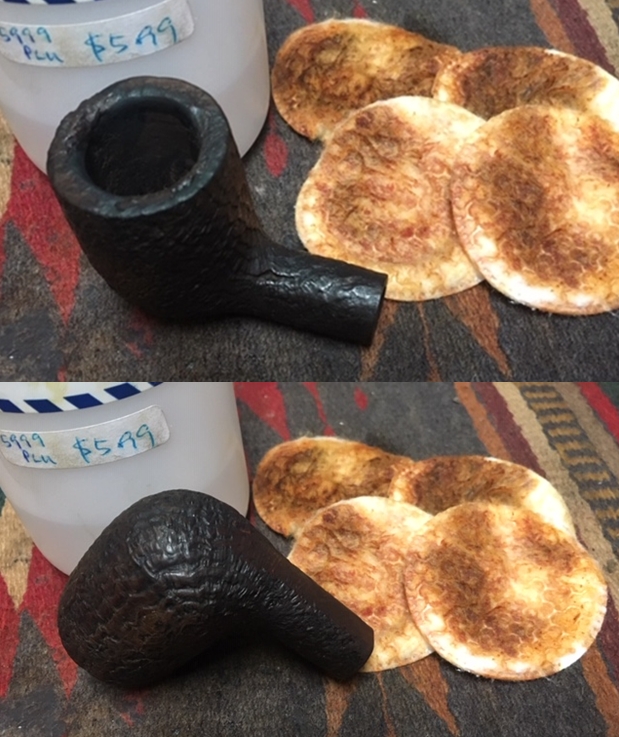
I decided to change things up a bit in the routine on this one. Holding it in my hand to ream and clean was a dirty prospect so I decided to scrub the thick grime off the exterior of the bowl and shank. The grit was deep in the sandblast finish rendering the pipe almost smooth. I scrubbed it with a tooth brush, a brass bristle wire brush and Murphy’s Oil Soap. I worked hard to get the grime out the grooves and crevices of the blast. I also worked on the rim top to remove the tars and oils that had formed a hard lava coat on the rim top. I worked on the burn damage as well on the front top and edge of the bowl. I rinsed the bowl under running water to remove the debris from the scrubbing. I reamed the bowl with a PipNet reamer. I used two of the four cutting heads to clean out the cake. The bowl was thickly caked I started with the smaller of the two and worked my way up to the second which was about the same size as the bowl. I cleaned the remnants with a Savinelli Fitsall Pipe Knife and scraped it back to bare briar. I finished by sanding the inside of the bowl with a dowel wrapped in sandpaper. I scraped the top of the rim with the edge of the Savinelli Fitsall Pipe Knife to remove the lava. I decided to start with the rebuilding of the rim top the bowl. I wiped the rim top down with isopropyl alcohol on a cotton pad to clean off the damaged areas on the front edge and on the rear inner edge. On the damaged front edge I started by laying down a coat of clear super glue on the gouged out burned area. On top of that I layered some briar dust with a dental spatula. I repeated the process of layer until the damaged area was level with the rest of the rim top. I used the brass bristle wire brush to texture the surface of the rim top over the repaired area to match the rest of the rim. I did the same layering process on the inner edge at the back of the bowl. When I had finished the rebuild I textured that area with the wire brush as well. The photos tell the story of the process. I worked over the inner edge of the rim with a folded piece of sandpaper to smooth it out and bring the damaged edges into round. The rim top was beginning to look normal. It would take a bit more texturing but it was looking a lot better.With the externals clean it was time to clean out the mortise and shank and airway into the bowl and the airway in the stem with alcohol, cotton swabs and pipe cleaners. I scraped the mortise with a dental spatula and a pen knife to loosen the tars before cleaning. I worked on the bowl and stem until the insides were clean.I used a needle file to sharpen the edges of the button on both sides of the stem. I sanded the “crud” off the stem and the tooth marks out of the topside of the stem. The underside would take a bit more work so I spent a lot more time cleaning out the large tooth mark on the stem near the button with sandpaper and alcohol and cotton swabs.It took some work to clean out the damaged area on the underside of the stem. Once I had it clear of debris I wiped it down with alcohol. I  filled in the deep tooth mark on the underside and the small tooth mark and rebuilt the button on the topside using clear super glue. I set the stem aside to let the repairs cure.I decided to stain the bowl with a dark brown stain. It would go over the black stain that was in the grooves of the sandblast. Once it had set I would wipe off the excess stain and buff the bowl and rim to get the finish I wanted. The photos tell the story. I applied the stain and flamed it with a lighter to set it in the grain. I repeated the process until I was happy with the coverage. Once the stain had cured I wiped the bowl down with isopropyl alcohol on cotton pads to make it more transparent. I wanted to be able to see the contrast between the dark brown and the black in the crevices of the finish. I rubbed down the briar with Before & After Restoration Balm. I worked it into the nooks and crannies of the sandblast finish to clean, enliven and protect the new finish. It also evened out the stain coat and gave the stain a dimensional feel. I let the balm sit for a little wall and then buffed it with a horsehair shoe brush. I buffed the bowl with a cotton cloth to raise the shine. I set the bowl aside and turned my attention to the stem. I sanded out the repairs on the stem surface on both sides with 220 grit sandpaper to blend them into the surface of the vulcanite.I polished the stem with micromesh sanding pads – wet sanding with 1500-2400 grit micromesh sanding pads and dry sanding it with 3200-12000 grit pads. I rubbed the stem down with Obsidian Oil after each pad. I polished it with Before & After Pipe Polish – both Fine and Extra Fine and buffed it into the vulcanite with a cotton pad. When I finished I gave it a final rub down with the oil and set it aside to dry.  With the stem polished I put it back on the pipe and lightly buffed the bowl with Blue Diamond. I did not want to get the buffing compound in the sandblast finish. I buffed the stem with a more aggressive buff of Blue Diamond. I hand rubbed the bowl several coats of Conservator’s Wax and the stem several coats of carnauba wax and buffed the pipe with a clean buffing pad to raise the shine. I hand buffed it with a microfiber cloth to deepen the shine. The pipe polished up pretty nicely. The finished pipe is shown in the photos below. This is the last of Farida’s Dad’s pipes that I am restoring from his collection. I am looking forward to hearing what Farida thinks once she sees the finished pipe on the blog. This Dunhill Shell 5203 Billiard will soon be on the rebornpipes store if you want to add it to your rack. The dimensions are Length: 6 inches, Height: 1 7/8 inches, Outside diameter of the bowl: 1 1/4 inches, Chamber diameter: 3/4 inches. Thanks for walking through the restoration with me as I worked over the last of her Dad’s pipes. With the completion of this one I have finished this estate. Thanks for walking through the restoration and reclamation of this lot of pipes. It has been an interesting journey for me and a continuance of my education. Cheers
The First of a Foursome – A JR Hand Made Bulldog


Blog by Steve Laug

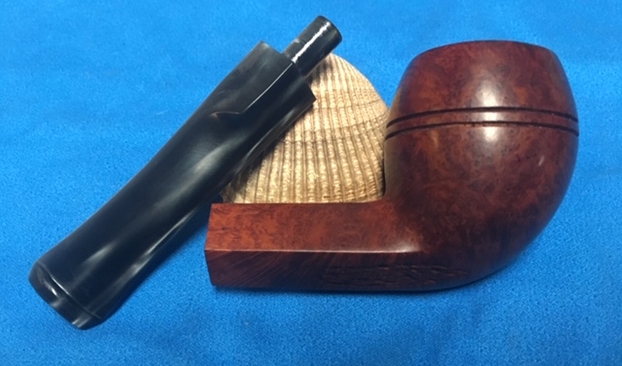
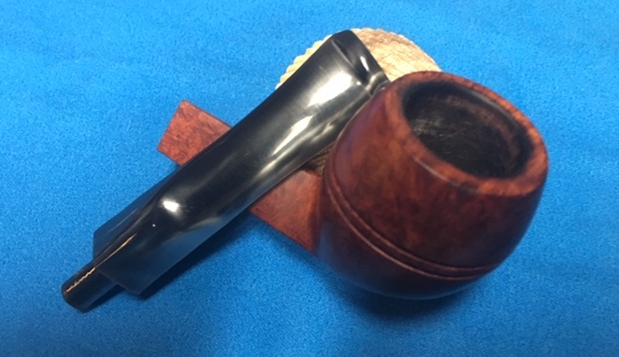
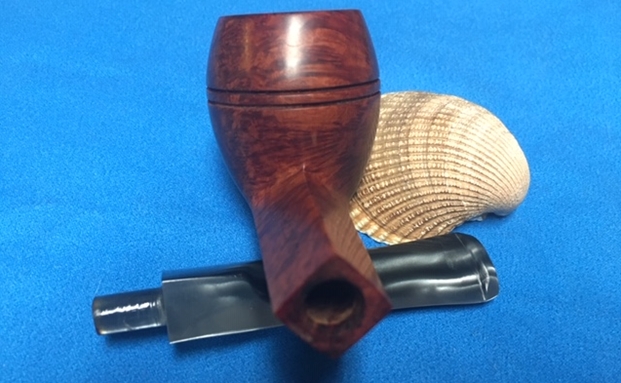
My brother Jeff picked up four pipes in classic shapes at an auction in Nampa, Idaho. All four pipes are stamped JR Handmade. Beside the Bulldog there were two Canadians and an Apple. All were stamped the same on the left side of the shank JR over Handmade and on the right side Algerian Briar. I have been researching the brand on the web. I came across a potential pipemaker with the JR initials on Pipedia named J. Rinaldi but from what I can see he did not make classic shaped pipes. He pipes are very well made and have more of a freehand/freeform shape with shank adornments so it makes me wonder if these are his. I enlarged each photo on the Pipedia article but I was unable to see the stamping on his pipes for comparison sake. This leaves me with a lot of questions about the brand. The foursome came from the Boise, Idaho area like the House of Robertson pipes that I worked on last year. Those came from a pipe shop in Boise, Idaho and I wonder if it is not possible that the JR Handmade brand was also a pipe shop brand from a small shop in that area. Perhaps I will never know… if any of you readers have any idea about the brand your help would be greatly appreciated.The above photo shows the foursome after Jeff had cleaned them. But before he cleaned each of them he took photos of the pipes as they came to him. I have included the photos of the Bulldog before cleanup. The JR Handmade straight Bulldog with a vulcanite stem is next on the table. The pipe is very well made and follows the classic shape of the straight bulldog perfectly. The bowl was stained with a dark brown/black and a medium brown stain over it. The pipe has twin rings around the cap on the bowl. It is a well-shaped pipe that captures the mixture of swirling grain around the bowl sides and shank. The top of the bowl had some damage on the top and inner edge. The bowl had a very thick cake and cobwebs in the bowl. There was an overflow of lava onto the rim top. The stamping on the left side of the diamond shank read JR over HAND MADE. The stamping on the right side read Algerian Briar. The black vulcanite stem had tooth dents and chatter on the top and the underside of the stem. There was some damage to the top and bottom edges of the button. It was also oxidized and had some calcification on the top and underside near the button. Jeff took two close-up photos of the bowl and rim with different lighting to capture the condition of the pipe pre-cleanup work. The rim top had a thick lava overflow. There appeared to be some rim damage on the inner edge at different points around the bowl but it was hard to know for certain with the lava coat. The pipe is dirty with thick cake and cobwebs in the bowl. He also took photos of the sides and bottom of the bowl and shank to show the various grains on the bowl and shank. The photos also show the rich colour of the stain that make the grain just pop. The finish is very dirty but this is another beautiful pipe.Jeff took a photo to capture the stamping on the top left side of the diamond shank. The photo shows stamping JR over HAND MADE on the left shank and ALGERIAN BRIAR on the right shank. The next two photos show the stem surface. There are tooth marks and chatter on both sides near the button. There is also some wear on the sharp edge of the button.Over the past years Jeff and I have developed pattern of working on the pipes that has become habit to both Jeff and I. I include it here so you have a sense of that pattern. Jeff reamed the bowl with a PipNet pipe reamer and followed up with a Savinelli Fitsall pipe knife to remove the cake. He scrubbed out the mortise and the airway in the shank and the stem with alcohol, cotton swabs and pipe cleaners. He scrubbed the exterior of the bowl, rim, shank and stem with a tooth brush and Murphy’s Oil Soap to remove the oils and tars on the rim and the grime on the finish of the bowl. He rinsed it under running water. He dried it off with a soft cloth. He was able to remove the lava build up on the rim top and you could see the damage to the flat surface of the rim and the inner edge on the right side and toward the front of the bowl. I took photos of the pipe to show its condition before I started my work on it. I took close up photos of the bowl and rim top as well as the stem. You can see the condition of the rim top and bowl in the first photo. Jeff was able to remove all of the tar and oils but you can now see the damage to the inner edge of the bowl. The vulcanite stem had tooth chatter and some tooth marks on the top and underside of the stem near and on the button surface. I decided to address the damage to the rim top first. I topped the bowl with 220 grit sandpaper on a topping board to remove the damage to the flat surface of the rim top and also to try to minimize the damage to the inner edge of the rim.I worked over the inner edge of the rim with a folded piece of 220 grit sandpaper to smooth out the damage. I gave it a slight bevel to hide the damage on the inner edge of the rim. The photos tell the story. The damage to the rim top is gone and the inner edge looks far better with the light bevel. The damage to the front edge is quite hidden.I polished the rim top, the edge and exterior of the bowl with micromesh sanding pads – wet sanding with 1500-2400 grit pads and dry sanding with 3200-12000 grit pads. I wiped the rim off after each sanding pad to remove the dust. The damage on the rim is pretty much invisible after polishing and the rim top really looked good. I worked some Before & After Restoration Balm into the smooth surface of the briar with my fingertips to clean, enliven and protect it. I let the balm sit for a little wall and then buffed with a cotton cloth to raise the shine. The following photos show the bowl at this point in the restoration process. The reworked rim top looks really good and matches the colour of the rest of the pipe. I set the bowl aside and worked on the stem. There were some tooth marks on the top and underside at the button that needed to be addressed. I also needed to do some work on the surface of the button on both sides. I filled the damaged areas in and build up the surface with clear super glue and set the stem aside until the repairs cured.I sanded both sides smooth with 220 grit sandpaper and 400 grit sandpaper to blend the tooth chatter and the repair into the surface of the stem. As I sanded and reshaped the button and stem surface the repaired areas and the tooth chatter disappeared.I polished the stem with micromesh sanding pads – wet sanding with 1500-2400 grit sanding pads and dry sanding it with 3200-12000 grit sanding pads. I wiped it down after each sanding pad with Obsidian Oil. I polished it with Before & After Pipe Stem Polish and wiped it down with a last coat of Obsidian Oil. The more I work on the JR Hand Made pipes from the Nampa, Idaho auction the more I wonder if there is some connection to the House of Robertson Pipe Shop in Boise, Idaho. This is the nicest one of the four JR Hand Made pipes that I have to restore. It does not have any fills in the briar and the stain job was done to highlight the swirling grain. I polished stem and the bowl with Blue Diamond polish on the buffing wheel. I gave the bowl and the stem multiple coats of carnauba wax. I buffed the pipe with a clean buffing pad to raise the shine. I hand buffed it with a microfiber cloth to deepen the shine. The pipe polished up pretty nicely. The contrasting grain really began to stand out; it seemed to take on life with the buffing. The rich contrasting brown colour works well with the polished black vulcanite stem. The finished pipe has a rich look that is quite catching. Have a look at it with the photos below. The shape, finish and flow of the pipe and stem are very well done. The dimensions are Length: 5 1/2 inches, Height: 1 7/8 inches, Outside diameter of the bowl: 1 1/4 inches, Chamber diameter: 3/4 of an inch. I will be putting this newly finished JR Hand Made Bulldog on the rebornpipes store shortly if you are interested in adding it to your collection. Thanks for walking through the restoration with me as I worked over the first of the foursome from JR Hand Made pipes.
A Unique Malaga from Kathy’s Dad’s Pipes –a ¼ Bent Bulldog


Blog by Steve Laug

The next pipe on the work table is also from George Koch’s estate. It is another one of George’s Malaga pipes – this time a ¼ bent Bulldog with a golden acrylic stem. It is quite a stunning pipe and caught my eye when I was going through the bag of Malaga pipes that I still have to work on. The Bulldog was just one of the many Malaga pipes that came to my brother and me in several shipments of pipes from George’s daughter Kathy. When Jeff got each box the pipes were well wrapped and packed. Jeff unwrapped them and took the following photo to give an idea of the volume of the pipes that we purchased. The next Malaga came in mixed in a box of pipes much like the one below.In each of the previous blogs that I have written on the restoration of George’s pipes I have told his story. If you have followed the restorations you will have read the information and the background piece that Kathy did on her father. Here is a link to the last Malaga where that is included in full (https://rebornpipes.com/2019/01/26/back-to-kathys-dads-pipes-restoring-a-%c2%bc-bent-malaga-author/). You can also read the bio on her Dad, George Koch. It is an interesting read and one that shows just how far our pipe collecting passion can go when we find a brand of pipes that we enjoy. I am going to only include the portion on the Malagas at this point. If you wish to read the rest follow the link above.

Kathy writes…We lived in Livonia, and that’s where his love for Malaga pipes began. After a few years he returned to Allis Chalmers and we moved back to Springfield. I remember that when we went back to Michigan to visit friends, Dad had to go to the Malaga store and acquire a few new pipes. Many a year I wrote to Malaga and they picked out a pipe for me to purchase that I could give Dad for a Christmas or birthday present. He was always pleased. His favorites were the straight stemmed medium sized bowl pipes, but he liked them all. 

He had some other pipes, but the Malagas were his favorites. I remember him smoking them sitting in his easy chair after work, with feet up on the ledge by the fire burning in the fireplace.  Growing up it was my job to clean them and he liked the inner bowl and stem coated with Watkins vanilla, leaving a little of that liquid in the bowl to soak in when I put them back on the rack…I’m very happy they are being restored by you and your brother and hope they find homes who enjoy them as much as Dad did. Thank-you for your care and interest. — Kathy, the oldest daughter

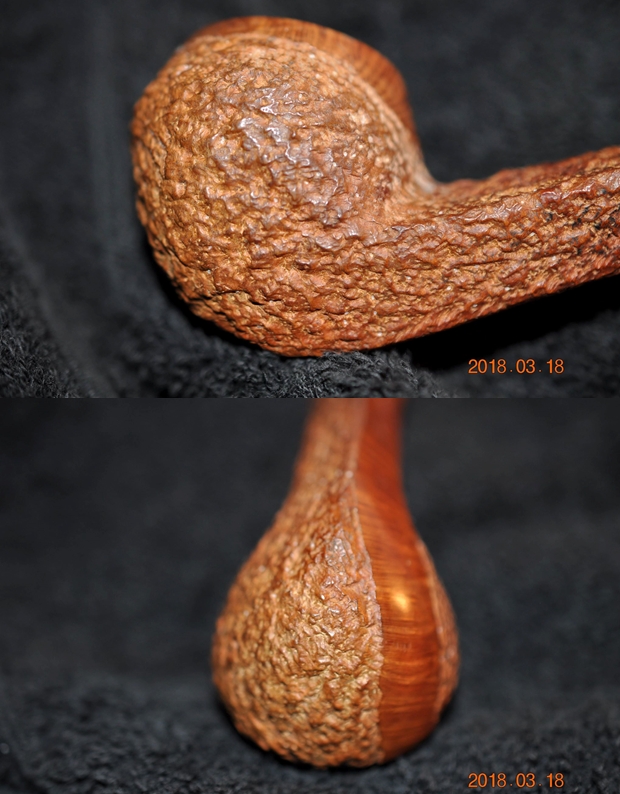
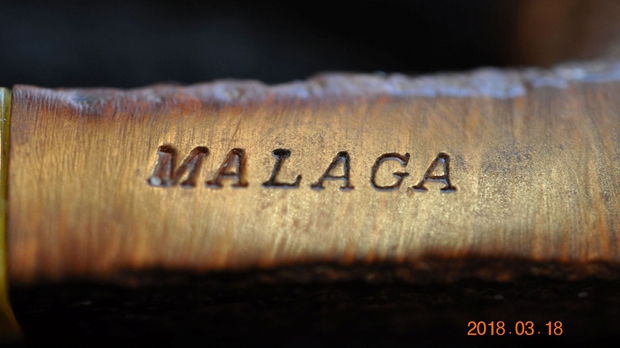
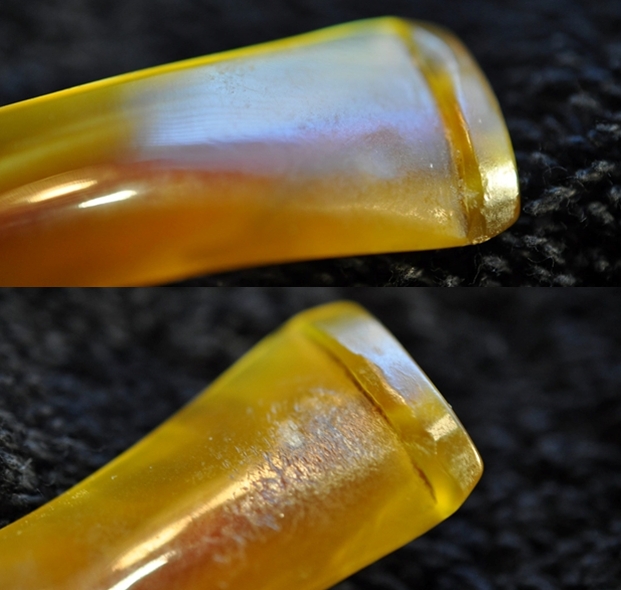
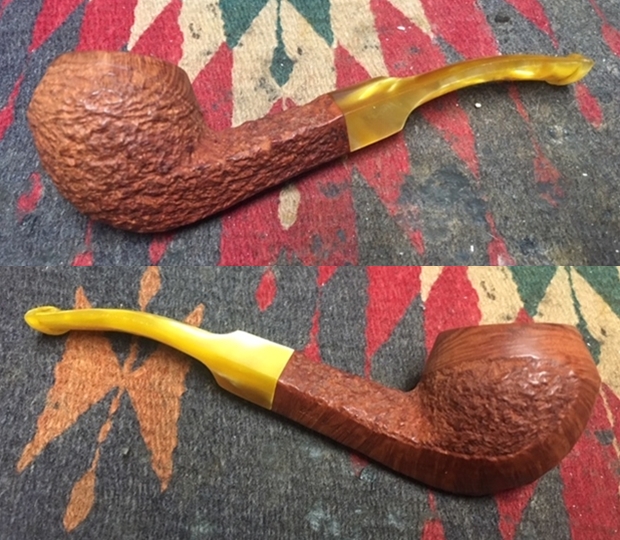
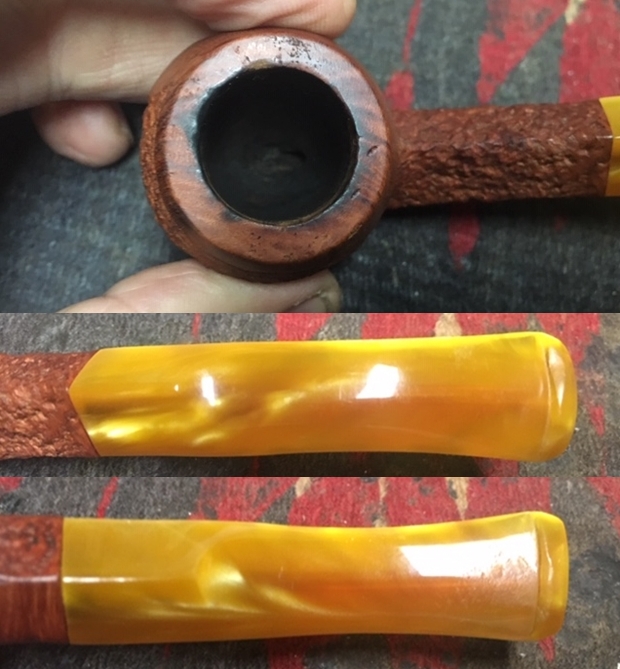
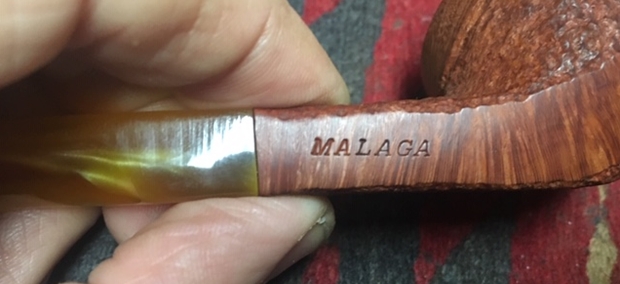
The Malaga ¼ Bent Bulldog with a variegated gold/yellow acrylic stem is next on the table. The carver combined rustication with a smooth stripe of cross grain up the right underside of the diamond shank and a portion of the right side of the bowl. There is a band of smooth briar around the shank end and the bowl top as well as a smooth rim top. There are no rings around the cap of the bowl. It is a well-shaped pipe that captures the cross grain in the stripe and adds the tactile feature of the rustication. The top of the bowl has some damage on the top and inner edge. The bowl had a very thick cake and cobwebs in the bowl. There was an overflow of lava onto the thin rim top. The stamping on the smooth underside of the diamond shank read MALAGA. The gold/yellow swirled acrylic stem had tooth dents and chatter on the top and the underside of the stem. Jeff took these photos before he started the cleanup work on the pipe. Jeff took two close up photos of the bowl and rim with different lighting to capture the condition of the pipe before he started his cleanup work. The rim top had some lava overflow and some darkening. There appeared to be some rim damage on the inner edge at the front of the bowl. You can see the wear on the rim top, the cake and cobwebs in the bowl. The pipe is dirty. He also took photos of the sides and bottom of the bowl and shank to show the beautiful cross grain on the stripe, around the rim and the rim itself. The photos also show the rugged rustication that gives the pipe a tactile sense as well.The finish is very dirty but this is another beautiful pipe. Jeff took a photo to capture the stamping on the top left side of the diamond shank. The photo shows stamping MALAGA. The stamping does not have the quotation marks that I have seen on some of the pipes.The next two photos show the stem surface. There are tooth marks and chatter on both sides near the button. There is also some wear on the sharp edge of the button.I am also including the link to a blog that I wrote that gives some of the history of the Malaga brand and the Malaga Pipe Shop in Royal Oak, Michigan in the USA. I have written an earlier blog to give a little history of the Malaga Brand and the pipemaker, George Khoubesser. Here is the link – https://rebornpipes.com/tag/malaga-pipes/.That blog also includes links to a catalogue and the history of the pipemaker George Khoubesser. Follow the link to get a feel for the brand and the pipemaker.

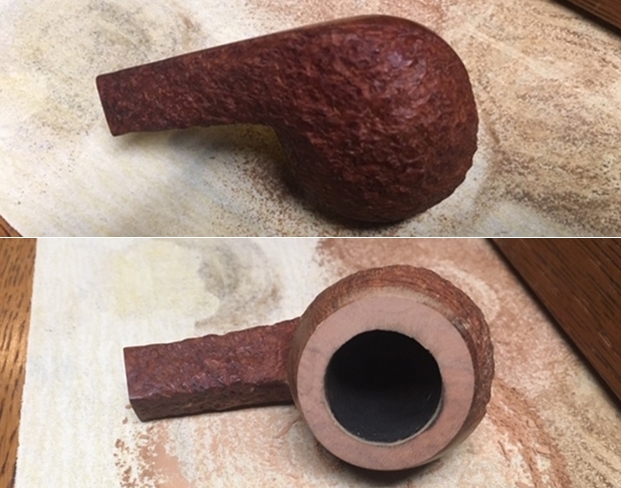
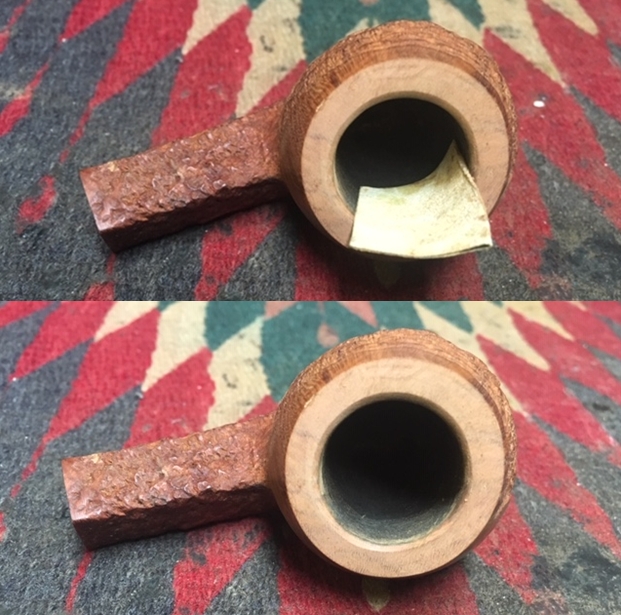
It has become a habitual pattern now for both Jeff and I when we work on pipes to follow the same procedure. I include it here so you have a sense of that pattern. Jeff reamed the bowl with a PipNet pipe reamer and followed up with a Savinelli Fitsall pipe knife to remove the cake. He scrubbed out the mortise and the airway in the shank and the stem with alcohol, cotton swabs and pipe cleaners. He scrubbed the exterior of the bowl, rim, shank and stem with a tooth brush and Murphy’s Oil Soap to remove the oils and tars on the rim and the grime on the finish of the bowl. He rinsed it under running water. He dried it off with a soft cloth. He was able to remove the lava build up on the rim top and you could see the damage to the flat surface of the rim and the inner edge on the right side and toward the front of the bowl. I took photos of the pipe to show its condition before I started my work on it. I took close up photos of the bowl and rim top as well as the stem. You can see the condition of the rim top and bowl in the first photo. Jeff was able to remove all of the tar and oils but you can now see the damaged areas on the surface clearly. There are damaged spots all around the top surface and on the right side and front of the inner edge of the bowl. The acrylic/Lucite stem had tooth chatter and some tooth marks on the top and underside of the stem near and on the button surface.I took a photo of the stamping on the shank to show how good the condition is. The stamp is deep and legible on the lower right side.I decided to address the damage to the rim top first. I topped the bowl with 220 grit sandpaper on a topping board to remove the damage to the flat surface of the rim top and also to try and minimize the damage to the inner edge of the rim.I worked over the inner edge of the rim with a folded piece of 220 grit sandpaper to smooth out the damage. I gave it a slight bevel to hide the burn damage on the front edge of the rim. The photos tell the story. The damage to the rim top is gone and the inner edge looks far better with the light bevel. The damage to the front edge is quite hidden.I polished the rim top and edge with micromesh sanding pads – wet sanding with 1500-2400 grit pads and dry sanding with 3200-12000 grit pads. I wiped the rim off after each sanding pad to remove the dust. The damage on the rim is pretty much invisible after polishing and the rim top really looked good. I worked some Before & After Restoration Balm into the rusticated and the smooth surface of the briar with my fingertips to clean, enliven and protect it. It took some time to really get it into the grooves and valleys of the rustication but I was able to work it in. I let the balm sit for a little wall and then buffed with a cotton cloth to raise the shine. The following photos show the bowl at this point in the restoration process. The reworked rim top looks really good and matches the colour of the rest of the pipe. I am very happy with the results. I set the bowl aside and worked on the stem. There were some tooth marks on the top and underside at the button that needed to be addressed. I also needed to do some work on the surface of the button on both sides. I filled the damaged areas in and build up the surface with clear super glue and set the stem aside until the repairs cured. I sanded both sides smooth with 220 grit sandpaper and 400 grit sandpaper to blend the tooth chatter and the repair into the surface of the stem. As I sanded and reshaped the button and stem surface the repaired areas and the tooth chatter disappeared.I polished the acrylic stem with micromesh sanding pads – wet sanding with 1500-2400 grit sanding pads and dry sanding it with 3200-12000 grit sanding pads. I wiped it down after each sanding pad with a damp cloth. I polished it with Before & After Pipe Stem Polish and wiped it down with a last coat of Obsidian Oil. This is one of the more unique Malaga pipes that I have worked from George’s collection. The combination of rustication and smooth is really nicely done and the shape flows with the grain. I polished stem and the bowl with Blue Diamond polish on the buffing wheel. I gave the bowl multiple coats of Conservator’s Wax and the stem multiple coats of carnauba wax. I buffed the pipe with a clean buffing pad to raise the shine. I hand buffed it with a microfiber cloth to deepen the shine. The pipe polished up pretty nicely. The cross grain and the rustication took on life with the buffing. The rich oil cured colour works well with the polished variegated gold/yellow acrylic stem. The finished pipe has a rich look that is quite catching. Have a look at it with the photos below. The shape, finish and flow of the pipe and stem are very well done. The dimensions are Length: 5 1/2 inches, Height: 1 5/8 inches, Outside diameter of the bowl: 1 3/8 inches, Chamber diameter: 3/4 of an inch. I will be putting this newly finished Malaga pipe on the rebornpipes store shortly if you are interested in adding it to your collection and carrying on the trust. Thanks for walking through the restoration with me as I worked over another one of Kathy’s Dad’s Pipes.

Restoring a Jobey Florentine Canadian that weary and worn


Blog by Steve Laug

Along with the recent Kaywoodie Original (https://rebornpipes.com/2019/01/25/new-life-for-a-kaywoodie-original-imported-briar-freehand-stack/) and the Royal Danish 984R Canadian (https://rebornpipes.com/2019/01/26/an-easy-restore-a-royal-danish-984r-canadian/) that I worked on, my brother Jeff sent me an interesting Jobey Canadian. The pipe has a Sea Rock style finish. The underside of the shank is stamped Jobey over Florentine in script followed by EXTRA and finally by PATENT PENDING. That helps to date this to the time after the patent was filed in 1970. Like the other pipes that came from this Idaho auction the pipe was in good condition – dirty but really not too bad. The finish was very dirty with grime worked into the grooves and valleys of the rustication. The bowl had a thick cake that flowed over the rim top leaving a thick coat of lava. It was hard to know what the inner and outer edges of the bowl looked like until the pipe was reamed and cleaned. The stem looked good but had deep tooth marks on both sides of the stem. Jeff took these pictures of the pipe to show its condition before he started his cleanup work. Jeff took a close up of the bowl and rim. The bowl thick cake and the photos show the lava overflow onto the rim top. It was thick and had filled in the crevices and valleys of the rustication.On the underside of the shank the stamping was very clear and readable. It is stamped in a smooth panel that runs from the heel of the bowl to end of the shank. It is evidently an early Jobey that is stamped Patent Pending. I am sure that the Patent refers to the Jobey Link in the shank.He took photos of the stem to show the oxidation on the stem. The first photo shows the faint/light Royal Danish Crown on the top side of the taper near the shank. The second and third photo show the oxidation and the otherwise pristine stem surface.On the topside of the tapered stem there is a brass Jobey insert that is pressed into the vulcanite. It was readable but dirty.Jeff followed his usual regimen of cleaning an estate pipe. He had reamed the bowl with a PipNet pipe reamer and followed up with a Savinelli Fitsall pipe knife to remove the cake. He scrubbed out the mortise and the airway in the shank and the stem with alcohol, cotton swabs and pipe cleaners. He scrubbed the exterior of the bowl, rim, shank and stem with a tooth brush and Murphy’s Oil Soap to remove the oils and tars on the bowl, rim and shank. He rinsed it under running water and dried it off with a soft cloth. It looked a lot better but the rim was still dirty. The stem had deep tooth marks on both sides from the button forward. I took photos of the pipe to show its condition before I started my work on it. I took close up photos of the rim top that shows the clean bowl and the remaining hard coat of lava in the grooves at the front right side of the rim top. The stem was clean and Jeff had used Before & After Deoxidizer to soak and remove much of the oxidation. He rinsed out the inside of the stem and rinsed off the exterior as well. It is hard to see the rippling tooth marks in the photos but they are on both sides of the stem.I removed the stem from the shank to show the Jobey Link that screwed into the shank and the smooth end that the stem sat on.I used a brass bristle wire brush to clean up the rim top of the bowl and loosen the remaining debris and dust in the grooves in the rustication toward the front of the bowl.I rubbed the bowl down with Before & After Restoration Balm into the coral rusticated finish of the bowl and the shank to deep clean the briar. I worked it into the smooth portions the sides and the bottom of the bowl. The product works to clean, enliven and protect the briar. I hand rubbed it with my fingers and wiped it off with a soft cloth. I buffed the bowl with a horsehair shoe brush to polish it. The briar really began to have a rich shine. I took some photos of the bowl at this point to mark the progress in the restoration. I sanded the stem down with a folded piece of 220 grit sandpaper to smooth out the tooth marks and waves in the surface of both sides. I used a piece of 400 grit wet dry sandpaper to polish out the scratches in the stem. I polished the stem with micromesh sanding pads – wet sanding it with 1500-2400 grit pads and dry sanding it with 3200-12000 grit pads. I wiped the stem down after each pad with a damp cloth to remove the sanding dust. I used the Before & After Pipe Polish to remove the small minute scratches left in the vulcanite. I finished by wiping the stem down with a final coat of Obsidian Oil and set it aside to dry.   I polished the stem with Blue Diamond to polish out the remaining small scratches and gave it several coats of carnauba. I polished the bowl and shank with Conservator’s Wax and buffed it with a shoe brush. I buffed the pipe with a clean buffing pad to raise the shine. I hand buffed it with a microfiber cloth to deepen the shine. The pipe polished up pretty nicely. The finished pipe is shown in the photos below. The dimensions are Length: 6 3/4 inches, Height: 1 3/4 inches, Outside diameter of the bowl: 1 1/4 inches, Chamber diameter: ¾ of an inch. I will be adding it to the rebornpipes store shortly. If you are interested in adding it to your collection email me at slaug@uniserve.com or send me a message on Facebook. Thanks for walking through the restoration with me as I worked over this rusticated Patent Pending Jobey made Canadian.

Back to Kathy’s Dad’s Pipes – A ¼ Bent Malaga Author


Blog by Steve Laug

The next pipe on the work table is also from George Koch’s estate. It is another one of George’s Malaga pipes – a ¼ bent Author with an acrylic stem. The pipe was one of many that came to my brother and me in several shipments of pipes from George’s daughter Kathy. When Jeff got each box the pipes were well wrapped and packed. Jeff unwrapped them and took the following photo to give an idea of the volume of the pipes that we purchased. The next Malaga came in mixed in a box of pipes much like the one below.In each of the previous blogs that I have written on the restoration of George’s pipes I have told his story. It has been awhile since I worked on one of his pipes so I want to remind you of his story. To me it is important to keep the story attached to the pipes that came from his collection. Each pipe I work on I remind myself of the man and in the work give a remembrance to the pipeman who owned these pipes. Having held a large number of his pipes in my hand and having a pretty good feel for the shapes, colour and stems that he liked, I can almost imagine George picking out each pipe in his collection at the Malaga shop in Michigan. I am including Kathy’s brief bio of her father and a photo of her Dad enjoying his “Malagas”. Here is George’s bio written by his daughter.

Dad was born in 1926 and lived almost all his life in Springfield, Illinois. He was the youngest son of German immigrants and started grade school knowing no English. His father was a coal miner who died when Dad was about seven and his sixteen year old brother quit school to go to work to support the family. There was not much money, but that doesn’t ruin a good childhood, and dad had a good one, working many odd jobs, as a newspaper carrier, at a dairy, and at the newspaper printing press among others.

He learned to fly even before he got his automobile driver’s license and carried his love of flying with him through life, recertifying his license in retirement and getting his instrumental license in his seventies and flying until he was grounded by the FAA in his early eighties due to their strict health requirements. (He was never happy with them about that.) He was in the Army Air Corps during World War II, trained to be a bomber, but the war ended before he was sent overseas. He ended service with them as a photographer and then earned his engineering degree from University of Illinois. He worked for Allis Chalmers manufacturing in Springfield until the early sixties, when he took a job at Massey Ferguson in Detroit, Michigan.

We lived in Livonia, and that’s where his love for Malaga pipes began. After a few years he returned to Allis Chalmers and we moved back to Springfield. I remember that when we went back to Michigan to visit friends, Dad had to go to the Malaga store and acquire a few new pipes. Many a year I wrote to Malaga and they picked out a pipe for me to purchase that I could give Dad for a Christmas or birthday present. He was always pleased. His favorites were the straight stemmed medium sized bowl pipes, but he liked them all. 

He had some other pipes, but the Malagas were his favorites. I remember him smoking them sitting in his easy chair after work, with feet up on the ledge by the fire burning in the fireplace.  Growing up it was my job to clean them and he liked the inner bowl and stem coated with Watkins vanilla, leaving a little of that liquid in the bowl to soak in when I put them back on the rack. Dad quit smoking later in life and so they’ve sat on the racks for many years unattended, a part of his area by his easy chair and fireplace. Dad passed when he was 89 years old and it finally is time for the pipes to move on. I’m very happy they are being restored by you and your brother and hope they find homes who enjoy them as much as Dad did. Thank-you for your care and interest. — Kathy, the oldest daughter

Thank you Kathy for providing this beautiful tribute to your Dad. Jeff and I appreciate your trust in allowing us to clean and restore these pipes. We are also trusting that those of you who are reading this might carry on the legacy of her Dad’s pipes as they will be added to the rebornpipes store once they are finished.

The next the pipe is a nicely shaped Malaga ¼ Bent Author with a variegated grey and black acrylic stem. It has beautiful grain all around the bowl – flame grain around the bowl and birdseye grain on the bottom of the bowl and shank that is highlighted by the natural oil finish on the pipe. It is a well-shaped pipe following the pattern of the grain.The top of the bowl has some damage on the top and inner and outer edges. The bowl had a very thick cake and cobwebs in the bowl. There was an overflow of lava onto the thin rim top. The stamping on the top left side of the shank read “MALAGA”. On the right side of the shank it is stamped Imported Briar (upside down). The grey and black swirled, pearlized acrylic stem had tooth dents and chatter on the top and the underside of the stem. Jeff took these photos before he started the cleanup work on the pipe. Jeff took a close up photo of the bowl and rim to show the condition of the pipe before he started his cleanup work. The rim top had some lava overflow and some darkening. There appeared to be some rim damage on the inner edge the right side of the bowl. You can see the wear on the rim top, the cake and cobwebs in the bowl. The pipe is dirty but in good condition. He also took photos of the sides and bottom of the bowl and shank from the side to show the grain. The finish is very dirty but this is another beautiful pipe. Jeff took some photos to capture the stamping on the top left side of the diamond shank. The photo shows stamping “MALAGA”. The stamping does not have the quotation marks that I have seen on some of the pipes. The next two photos show the stem surface. There are tooth marks and chatter on both sides near the button. There is also some wear on the sharp edge of the button.Jeff has picked up quite pipes of this brand over the past year along with the ones from Kathy’s Dad’s estate. All of the pipes were made by the Malaga Pipe Shop in Royal Oak, Michigan in the USA. The more I work on the brand the more I am impressed by the quality of the craftsmanship and beauty of the pipes that came from the shop. I have written an earlier blog to give a little history of the Malaga Brand if you are interested: https://rebornpipes.com/tag/malaga-pipes/. That blog also includes links to a catalogue and the history of the pipemaker George Khoubesser). Follow the link to get a feel for the brand and the pipemaker.

Jeff had reamed the bowl with a PipNet pipe reamer and followed up with a Savinelli Fitsall pipe knife to remove the cake. He scrubbed out the mortise and the airway in the shank and the stem with alcohol, cotton swabs and pipe cleaners. He scrubbed the exterior of the bowl, rim, shank and stem with a tooth brush and Murphy’s Oil Soap to remove the oils and tars on the rim and the grime on the finish of the bowl. He rinsed it under running water. He dried it off with a soft cloth. The rim was thoroughly cleaned and the damage was very clear. Without the grime the finish looked really good. The bowl looked very clean and was unchecked or damaged. The acrylic stem would need to be worked on but I really liked the profile it cast. I took photos of the pipe to show its condition before I started my work on it. I took close up photos of the bowl and rim top as well as the stem. You can see the condition of the rim top and bowl in the first photo. Jeff was able to remove all of the tar and oils but you can now see the damaged areas on the surface clearly. There are damaged spots all around the top surface and on the inner edge of the bowl. The acrylic/Lucite stem had tooth chatter and some tooth marks on the top and underside of the stem just ahead of the button. I took some photos of the stamping on the shank to show the condition but to also show the upside Imported Briar stamping on the right side.I decided to address the damage to the rim top first. I worked over the thin rim top and the inner and outer edges with a folded piece of 220 grit sandpaper and followed that by sanding it with 400 grit wet dry sandpaper.I polished the rim top and the rest of the bowl and shank with micromesh sanding pads – wet sanding with 1500-2400 grit pads and dry sanding with 3200-12000 grit pads. I wiped the bowl and rim off after each sanding pad to remove the dust. The rim really shone once it was polished. I rubbed down the briar with Before & After Restoration Balm. I worked it into the smooth surface of the briar with my fingertips to clean, enliven and protect it. I let the balm sit for a little wall and then buffed with a cotton cloth to raise the shine. The following photos show the bowl at this point in the restoration process. The rim matches well but still needs to be polished and buffed to raise a shine on it. I set the bowl aside and worked on the stem. There were some tooth marks on the top and underside at the button that needed to be addressed. I sanded both sides smooth with 220 grit sandpaper and 400 grit sandpaper to blend the tooth chatter into the surface of the stem. When it was sanded it was smooth and the marks were gone. I used several round and oval needle files to open up the round airway in the end of the button and give shape to a slot. I polished the acrylic stem with micromesh sanding pads – wet sanding with 1500-2400 grit sanding pads and dry sanding it with 3200-12000 grit sanding pads. I wiped it down after each sanding pad with a damp cloth. I polished it with Before & After Pipe Stem Polish and wiped it down with a last coat of Obsidian Oil. I polished stem and the bowl with Blue Diamond polish on the buffing wheel. I gave the bowl and the stem multiple coats of carnauba wax. I buffed the pipe with a clean buffing pad to raise the shine. I hand buffed it with a microfiber cloth to deepen the shine. The pipe polished up pretty nicely. The straight, flame and birdseye grain really came with the buffing. The rich oil cured colour works well with the polished variegated grey/black acrylic stem. Together the pipe looks much better than when I began and has a rich look. The finished pipe is shown in the photos below. The shape, finish and flow of the pipe and stem are very well done. The dimensions are Length: 5 3/4 inches, Height: 1 1/4 inches, Outside diameter of the bowl: 1 1/2 inches, Chamber diameter: 3/4 of an inch. I will be putting this newly finished Malaga pipe on the rebornpipes store shortly if you are interested in adding it to your collection and carrying on the trust. Thanks for walking through the restoration with me as I worked over another one of Kathy’s Dad’s Pipes.

Back to Kathy’s Dad’s Pipes – Restoring a Malaga Straight Bulldog


Blog by Steve Laug

The next pipe on the work table is also from George Koch’s estate. It is another one of George’s Malaga pipes – a straight Bulldog with an acrylic stem. The pipe was one of many that came to my brother and me in several shipments of pipes from George’s daughter Kathy. When Jeff got each box the pipes were well wrapped and packed. Jeff unwrapped them and took the following photo to give an idea of the volume of the pipes that we purchased. The next Malaga came in mixed in a box of pipes much like the one below.In each of the previous blogs that I have written on the restoration of George’s pipes I have told his story. It has been awhile since I worked on one of his pipes so I want to remind you of his story. To me it is important to keep the story attached to the pipes that came from his collection. Each pipe I work on I remind myself of the man and in the work give a remembrance to the pipeman who owned these pipes. Having held a large number of his pipes in my hand and having a pretty good feel for the shapes, colour and stems that he liked, I can almost imagine George picking out each pipe in his collection at the Malaga shop in Michigan. I am including Kathy’s brief bio of her father and a photo of her Dad enjoying his “Malagas”. Here is George’s bio written by his daughter.

Dad was born in 1926 and lived almost all his life in Springfield, Illinois. He was the youngest son of German immigrants and started grade school knowing no English. His father was a coal miner who died when Dad was about seven and his sixteen year old brother quit school to go to work to support the family. There was not much money, but that doesn’t ruin a good childhood, and dad had a good one, working many odd jobs, as a newspaper carrier, at a dairy, and at the newspaper printing press among others.

He learned to fly even before he got his automobile driver’s license and carried his love of flying with him through life, recertifying his license in retirement and getting his instrumental license in his seventies and flying until he was grounded by the FAA in his early eighties due to their strict health requirements. (He was never happy with them about that.) He was in the Army Air Corps during World War II, trained to be a bomber, but the war ended before he was sent overseas. He ended service with them as a photographer and then earned his engineering degree from University of Illinois. He worked for Allis Chalmers manufacturing in Springfield until the early sixties, when he took a job at Massey Ferguson in Detroit, Michigan.

We lived in Livonia, and that’s where his love for Malaga pipes began. After a few years he returned to Allis Chalmers and we moved back to Springfield. I remember that when we went back to Michigan to visit friends, Dad had to go to the Malaga store and acquire a few new pipes. Many a year I wrote to Malaga and they picked out a pipe for me to purchase that I could give Dad for a Christmas or birthday present. He was always pleased. His favorites were the straight stemmed medium sized bowl pipes, but he liked them all. 

He had some other pipes, but the Malagas were his favorites. I remember him smoking them sitting in his easy chair after work, with feet up on the ledge by the fire burning in the fireplace.  Growing up it was my job to clean them and he liked the inner bowl and stem coated with Watkins vanilla, leaving a little of that liquid in the bowl to soak in when I put them back on the rack. Dad quit smoking later in life and so they’ve sat on the racks for many years unattended, a part of his area by his easy chair and fireplace. Dad passed when he was 89 years old and it finally is time for the pipes to move on. I’m very happy they are being restored by you and your brother and hope they find homes who enjoy them as much as Dad did. Thank-you for your care and interest. — Kathy, the oldest daughter

Thank you Kathy for providing this beautiful tribute to your Dad. Jeff and I appreciate your trust in allowing us to clean and restore these pipes. We are also trusting that those of you who are reading this might carry on the legacy of her Dad’s pipes as they will be added to the rebornpipes store once they are finished.

The next the pipe is a nicely shaped Malaga Bulldog with a variegated grey acrylic stem. It has beautiful grain all around the bowl – cross grain and birdseye grain that is highlighted by the natural oil finish on the pipe. The top of the bowl is had some damage on the top and inner and outer edges. The bowl had a very thick cake that had overflowed in lava onto the rim top. The stamping on the top left side of the shank read MALAGA. On the underside of the shank (both right and left) has a carved leaf pattern. The grey and silver, swirled, pearlized acrylic stem had tooth dents and chatter on the top and the underside of the stem. Jeff took these photos before he started the cleanup work on the pipe. Jeff took a close up photo of the bowl and rim to show the condition of the pipe before he started his cleanup work. The rim top had some lava overflow and some darkening. There appeared to be some rim damage on the inner edge toward the front of the bowl. You can see the wear on the rim top, the cake and remnants of tobacco in the bowl. The pipe is dirty but in good condition. He also took photos of the sides and bottom of the bowl and shank from the side to show the grain and the carved leaf patterns on this pipe. The finish is very dirty but this is a beautiful pipe. Jeff took some photos to capture the stamping on the top left side of the diamond shank. The photo shows stamping MALAGA. The stamping does not have the quotation marks that I have seen on some of the pipes. The next two photos show the stem surface. There are tooth marks and chatter on both sides near the button. There is also some wear on the sharp edge of the button.

Jeff has picked up quite pipes of this brand over the past year along with the ones from Kathy’s Dad’s estate. All of the pipes were made by the Malaga Pipe Shop in Royal Oak, Michigan in the USA. The more I work on the brand the more I am impressed by the quality of the craftsmanship and beauty of the pipes that came from the shop. I have written an earlier blog to give a little history of the Malaga Brand if you are interested: https://rebornpipes.com/tag/malaga-pipes/. That blog also includes links to a catalogue and the history of the pipemaker George Khoubesser). Follow the link to get a feel for the brand and the pipemaker.

Jeff had reamed the bowl with a PipNet pipe reamer and followed up with a Savinelli Fitsall pipe knife to remove the cake. He scrubbed out the mortise and the airway in the shank and the stem with alcohol, cotton swabs and pipe cleaners. He scrubbed the exterior of the bowl, rim, shank and stem with a tooth brush and Murphy’s Oil Soap to remove the oils and tars on the rim and the grime on the finish of the bowl. He rinsed it under running water. He dried it off with a soft cloth. The rim was thoroughly cleaned and the damage was very clear. Without the grime the finish looked really good. The bowl looked very clean and was unchecked or damaged. The acrylic saddle stem would need to be worked on but I really like the profile it cast. I took photos of the pipe to show its condition before I started my work on it. profile it cast. I took photos of the pipe to show its condition before I started my work on it. I took close up photos of the bowl and rim top as well as the stem. You can see the condition of the rim top and bowl in the first photo. Jeff was able to remove all of the tar and oils but you can now see the damaged areas on the surface clearly. There are damaged spots on the front inner edge and the back inner edge. There are also some deep dents and nicks in the flat surface of the rim. The acrylic/Lucite stem had tooth chatter and some light tooth marks on the top and underside of the stem just ahead of the button. There were deeper tooth marks on both the top and underside near the button. I decided to address the damage to the rim top first. I topped the bowl on a topping board using 220 grit sandpaper. I removed the damaged surface of the rim and made it smooth once again. I cleaned up the inner edge of the rim with a folded piece of 220 grit sandpaper.I polished the rim top with micromesh sanding pads – wet sanding with 1500-2400 grit pads and dry sanding with 3200-12000 grit pads. I wiped the rim off after each sanding pad to remove the dust. The rim really shone once it was polished. I rubbed down the briar with Before & After Restoration Balm. I worked it into the smooth surface of the briar with my fingertips to clean, enliven and protect it. I let the balm sit for a little wall and then buffed with a cotton cloth to raise the shine. The following photos show the bowl at this point in the restoration process. The rim matches well but still needs to be polished and buffed to raise a shine on it. I set the bowl aside and worked on the stem. There were some deep tooth marks on the top and underside of the acrylic stem at the button. I cleaned off the surface of the stem with alcohol and filled in the deep tooth mark with clear super glue.Once it cured, I sanded both sides smooth with 220 grit sandpaper and 400 grit sandpaper to blend the tooth chatter and the repair into the surface of the stem. When it was sanded it was smooth and the marks were gone. I polished the acrylic stem with micromesh sanding pads – wet sanding with 1500-2400 grit sanding pads and dry sanding it with 3200-12000 grit sanding pads. I wiped it down after each sanding pad with a damp cloth. I polished stem and the bowl with Blue Diamond polish on the buffing wheel. I gave the bowl and the stem multiple coats of carnauba wax. I buffed the pipe with a clean buffing pad to raise the shine. I hand buffed it with a microfiber cloth to deepen the shine. The pipe polished up pretty nicely. The grain really came alive in both the carved leaves on the shank sides and the rest of the smooth briar with the buffing. The rich oil cured colour works well with the polished variegated grey/silver acrylic stem. Together the pipe looks much better than when I began and has a rich look. The finished pipe is shown in the photos below. The shape, finish and flow of the pipe and stem are very well done. The dimensions are Length: 5 1/2 inches, Height: 2 inches, Outside diameter of the bowl: 1 ¼ inches, Chamber diameter: 3/4 of an inch. I will be putting this newly finished Malaga pipe on the rebornpipes store shortly if you are interested in adding it to your collection and carrying on the trust. Thanks for walking through the restoration with me as I worked over another one of Kathy’s Dad’s Pipes.

Repairing a Broken Tenon on a House of Robertson War Club


Blog by Steve Laug

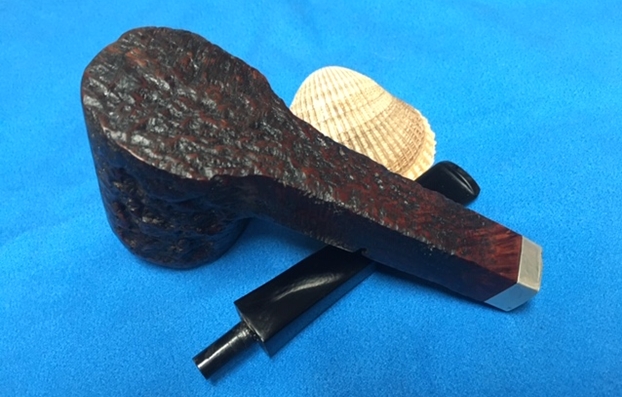
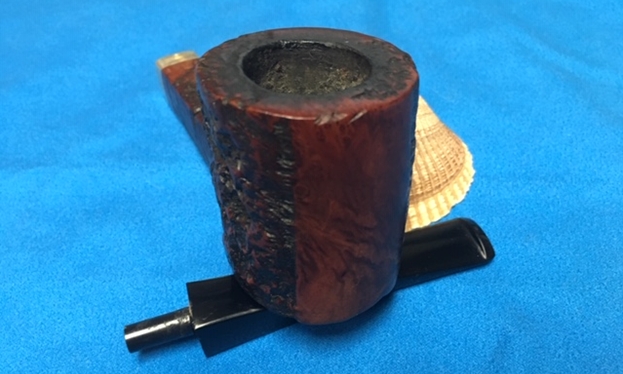
Back in February of 2018 (almost a year ago now) I posted my restoration of an interesting House of Robertson Pipe that was made by a carver in a pipe shop in Boise, Idaho. It was not only an interesting pipe but also one that had some history that was interesting to me as I was raised in Idaho for the better part of my childhood and adolescence. It was a huge piece of wood and had both smooth and rusticated portions on the shank and bowl. It was a flat bottom sitter with a square shank. The dimensions of the pipe are: Length: 7 3/8 inches, Height: 2 inches, Outside Diameter: 1 5/8 inches, Diameter of the chamber: 7/8 inches. I sent it back to a fellow in Idaho who collected House of Robertson pipes and who used to frequent the Boise shop. He was excited to add it to his collection. (https://rebornpipes.com/2018/02/28/restoring-a-rusticated-house-of-robertson-war-club/). Here is what it looked like when I sent it to him. About the same time I picked up the Calich, I received an email from the collector in Idaho asking for help. This is what he wrote to me:

Steve, I purchased the rusticated House of Robertson War Club pipe earlier this year. I have thoroughly enjoyed it. The bad news is i was polishing it and dropped it. The stem broke at the tenon and is still lodged in the briar. Hopefully you can repair or replace it. If so, please let me know and then how to proceed with mailing and payment. Thanks…

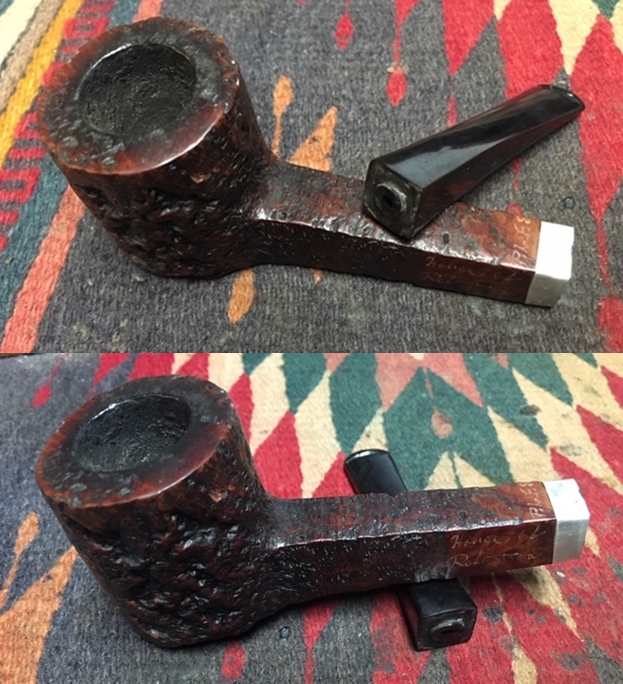
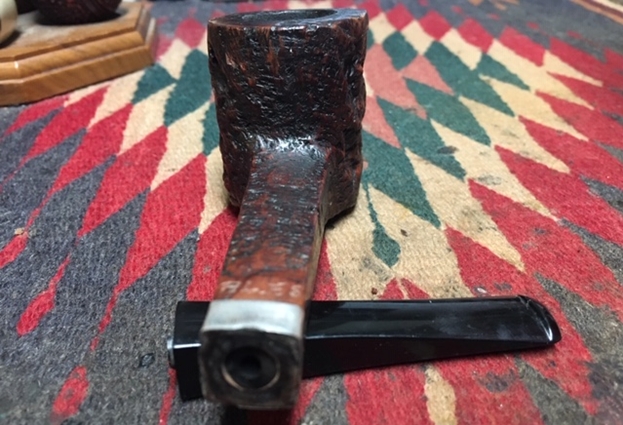
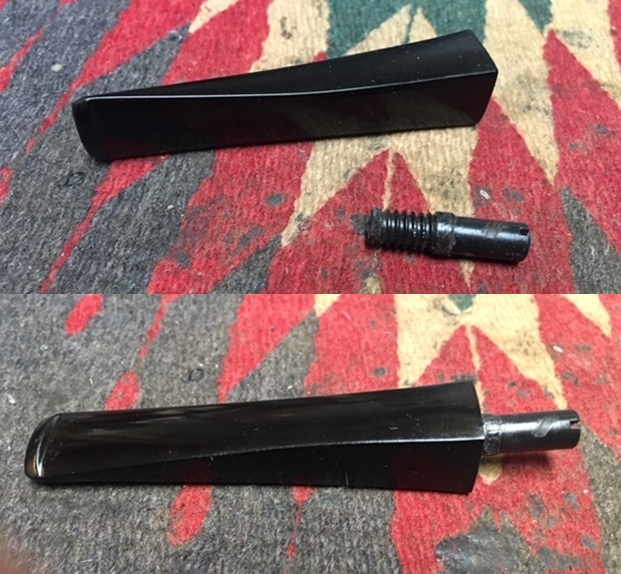
I wrote him back pretty quickly and he put it in the mail. It arrived here yesterday and was waiting for me when I got home from work. I opened the envelope that it had been mailed in and took out the two plastic Ziploc bags and the bubble wrap that was around the bowl and stem. I took them out of the mailer and unwrapped the protective layers and took them out of the Ziploc bag. This is what I saw. The stem had snapped off almost perfectly against the stem end. There was a small ledge but really nothing stuck out from the original tenon.I took an end view photo to show the snapped off tenon in the shank of the pipe. You can see in that photo that it is also a clean break.This morning I was “chatting” with Charles Lemon on the Tobacco Pipe Restorers Group on Facebook about Jobey Links and how easy they were to work with when replacing a tenon. I went through my container of tenons and I did not have one that would work in this shank without a lot of work. I took out my box of Jobey Link replacement tenons and one of them was absolutely the perfect size for this shank. I would need to use it backwards and do some modifications but it was exactly what I wanted for this repair. I used a topping board to flatten out the remnants of the broken tenon on the stem. I used a knife to bevel the airway to make drilling it easier. I took the following photo to show the parts of the repair.I tried my usual method for removing a broken tenon from the shank – a drywall screw turned into the airway in the shank until it was tight and then wiggling the broken tenon out of the shank. It failed to produce any results. It was almost like the tenon was glued/bonded to the walls of the shank. I used a cotton swab to dribble alcohol down the shank around the broken tenon. I left the shank and tenon sitting while I went to work for the day. When I came home I tried the screw again and still absolutely no movement on the tenon… it was stuck.

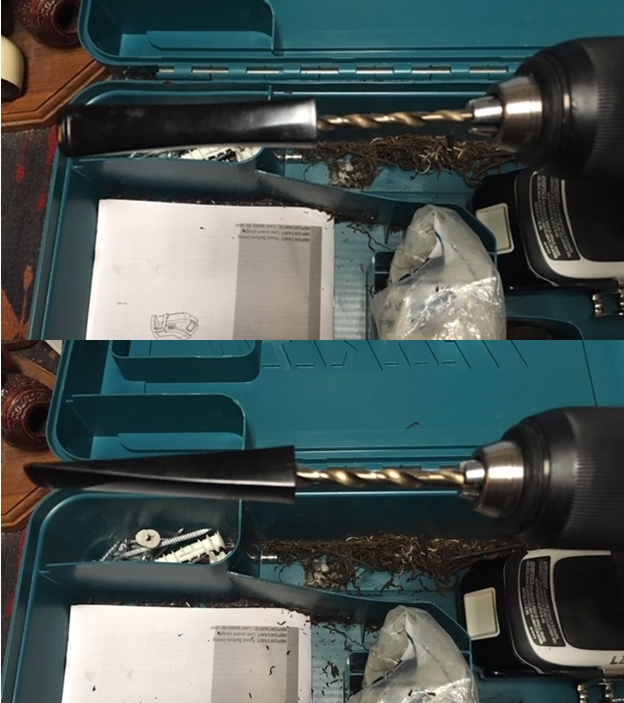
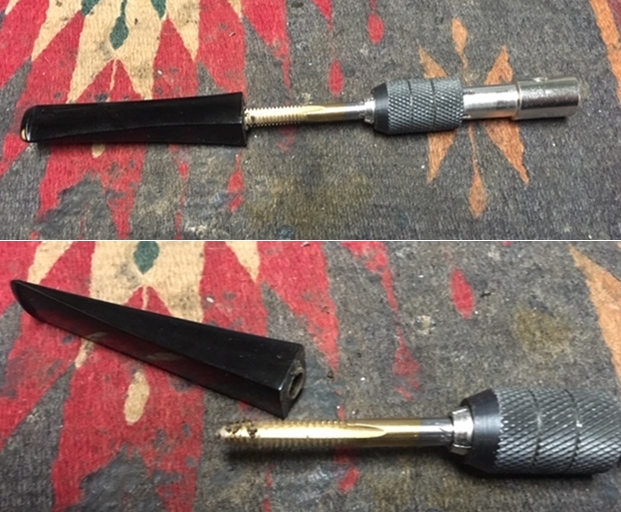
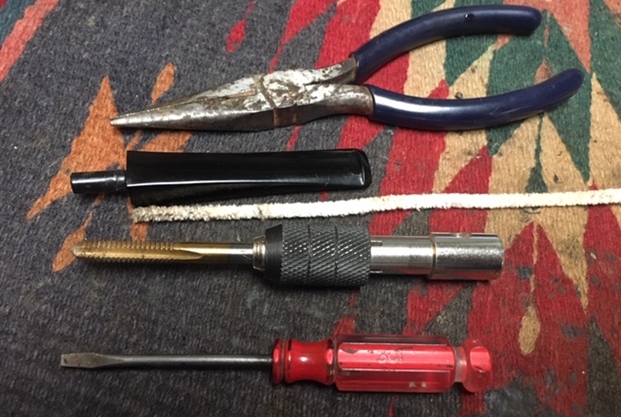
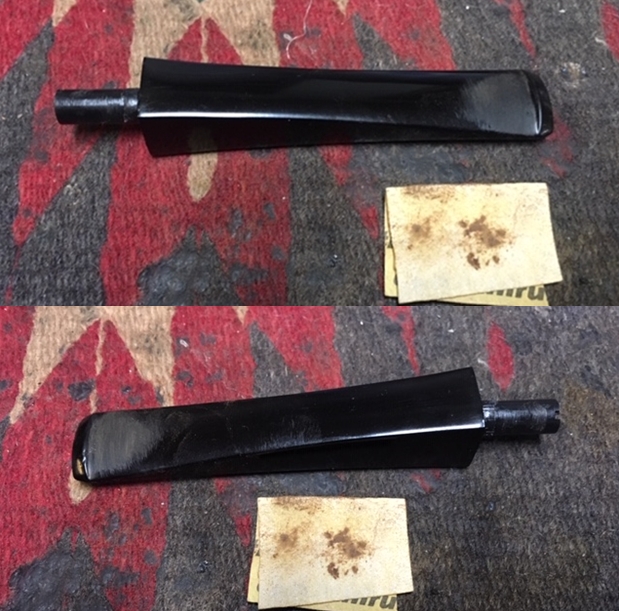
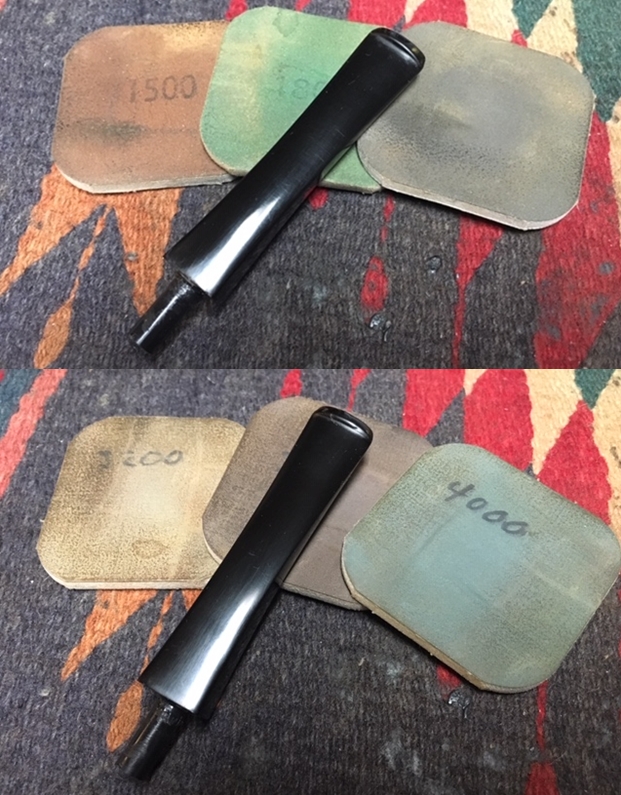
I resorted to the next best method – drilling the tenon out of the shank with my cordless drill. I started with a bit a little larger than the airway and turned it into the airway with the drill and then reversed the drill to see if I could pull it out. Nope. It still did not move. I tried a larger drill bit and repeated the process still no movement at all. I tried a third bit – a little bit smaller than the diameter of the original tenon. I drilled it in and backed it out – no luck. I then decided to just drill out the tenon all together. It did not take too much to drill it with the ¼ inch drill bit and then take out the pieces of the old tenon. The fourth photo below shows the clean airway in the shank. The tenon is gone. Now with that half of the job done I set the bowl aside and picked up the stem. I used a drill bit slightly smaller than the threaded portion of the Jobey Link. I drilled out the airway in the stem with increasingly larger drill bit until it was the perfect size for the Link. I still needed to tap the newly drilled airway so that I could turn the tenon into the stem. I used a tap set that I have and tapped threads into the newly drilled airway in the stem. It did not take long to tap thread into the vulcanite. I tapped the airway until it was deep enough for to take the threaded tenon. I shortened the threaded end of the tenon to deal with the taper of the stem. I used a Dremel and sanding drum and then smoothed it out on the 220 grit sandpaper topping board. I used the Dremel and sanding drum to remove the hip on the Jobey Link. I flattened it out to match the smooth part of the tenon that would go into the shank. The added length of the tenon fit perfect in the depth of the mortise on the pipe. I turned the tenon into the airway with a pair of pliers.I sanded out the scratch marks from the Dremel removal of the hip on the tenon with 220 grit sandpaper and polished it with 1500-2400 grit micromesh and took a photo of the stem with the new tenon and the tools I used to work on it.When I looked over the stem I could see a few tooth marks on the surface on both the top and underside near the button. I figured that since I was working on it anyway I would remove those areas. I sanded the stem with 220 grit sandpaper to remove the damage and polished the sanding marks with 400 grit wet dry sandpaper. I polished the vulcanite stem with micromesh sanding pads – wet sanding with 1500-2400 grit pads and dry sanding with 3200-12000 grit pads. I wiped the stem down after each pad with Obsidian Oil. When I finished the last pad I gave it a final coat of Obsidian Oil and set it aside to dry. I set the stem aside and turned my attention to the bowl. I examined it and found that there were a few small nicks and chips around the rim top and outer edge of the bowl. I touched these up with a walnut stain pen to blend them into the rest of the finish on the bowl. I rubbed the bowl down with Before & After Restoration Balm to enliven the wood and protect the newly finished portions of the briar. I took these photos after to show the bowl and the repairs are unnoticeable. I put the stem back on the shank and buffed the pipe with a clean buffing pad to bring a shine back to the bowl and stem. I gave it several coats of Conservator’s Wax and continue the buff. I hand buffed it with a microfibre cloth to deepen the shine. The finished pipe is shown in the photos below. Tomorrow I will box it up and send it back to Idaho. Can’t wait to see what he thinks when he has it in his hands. Thanks for reading this. Cheers.

On the table – a Clipper High Class Briar Bent Churchwarden


Blog by Steve Laug

Over the past several years my brother Jeff has picked up some very interesting Churchwarden pipes. They have varied from classic shapes to Freehands. They have been anywhere from 7 to 10 inches long and have had straight, ¼, ½ and almost full bent stems. Each box he sends has at least one of these pipes – at least it seems so. In one of the recent boxes there was a beautiful little half bent Churchwarden. I have been keeping an eye out for one that I thought Paresh would like and this seemed like it was the one. When I showed it Paresh during one of our Whatsapp calls he fell in love with it and I added it to his box.

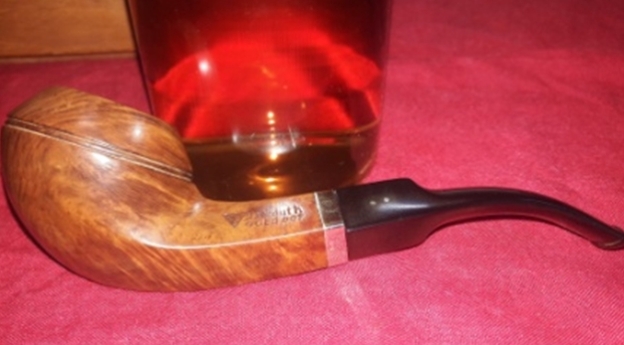
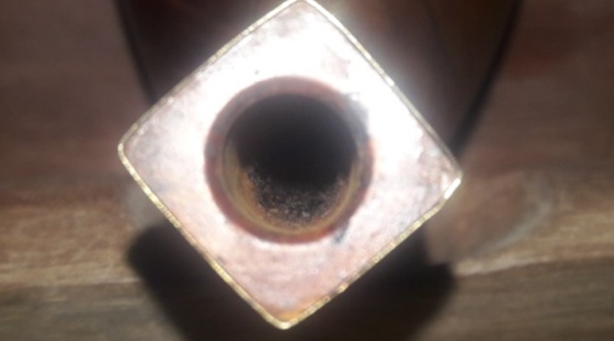
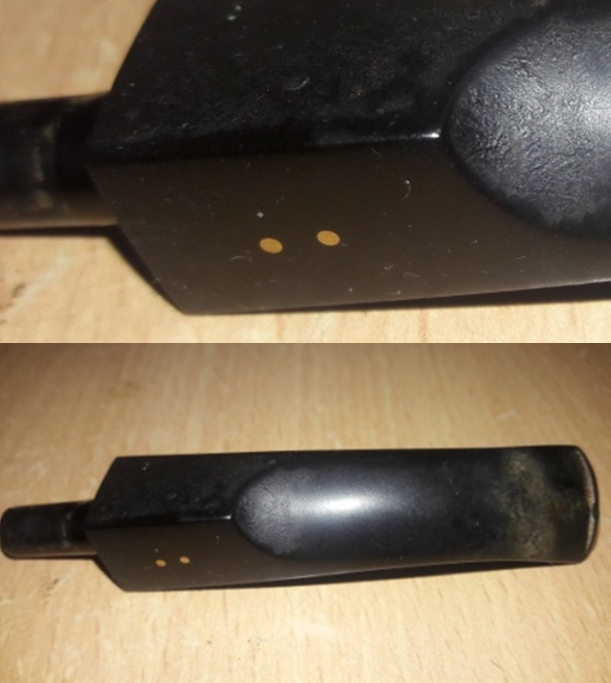
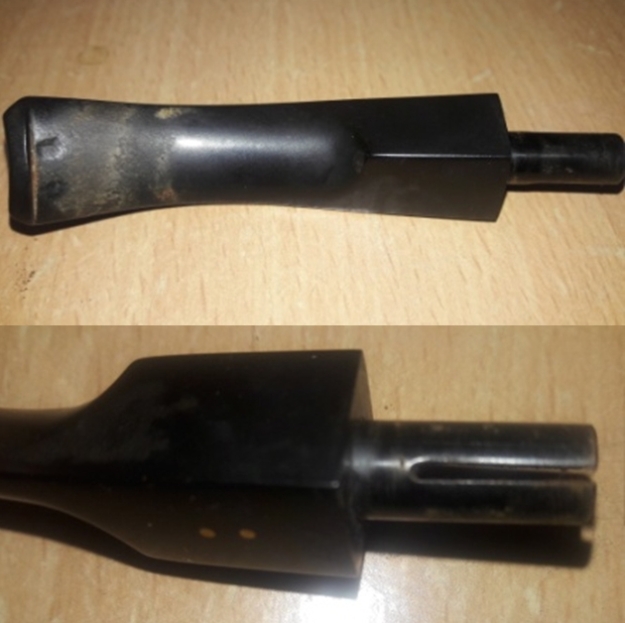
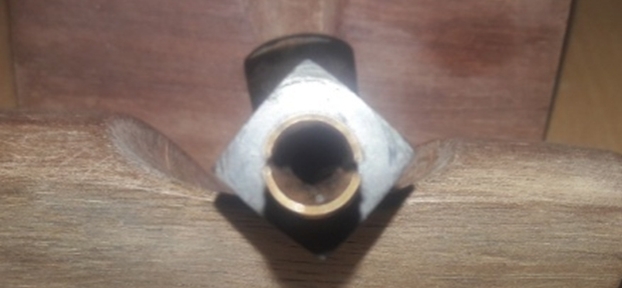
When Jeff received the pipe it was in pretty decent condition – dirty but really not too bad. The finish was dusty and dirty with grime worked into the lovely grain of the briar. The bowl had a moderate cake in it but the rim top was free of lava. The inner edge of the bowl was in great condition other than what appeared to be a small burned area toward to the front. That would not be clear until it was reamed. The rim top had some nicks and scratches as did the outer edge of the bowl. The left side of the shank was stamped Clipper over High Class Briar over IBERPIPSA. On the right side of the shank it had a square box with a pipe and puff of smoke as a logo. The underside at the stem/shank union it had the shape number 512. The stem did not seat in the shank due to the buildup of tars and oils. At the shank the stem had two vertical dots on the topside. The stem had some deep tooth marks on both sides at the button. It was oxidized but in decent condition. Jeff took these pictures of the pipe to show its condition before he started his cleanup work. He took close up photos of the rim top and the side and bottom of the bowl to show the condition of the briar and the bowl. You can see the cake in the bowl and the slight burn mark toward the front of the inner edge of the rim. You can also see the small nicks around the outer edge of the bowl. The finish is pretty but quite dirty. He took a photo of the stamping on the left, right and underside of the shank as well as the two vertical dots on the stem. The photos of the stem show the tooth chatter and marks on both sides of the stem near the button and the wear on the button itself.I did some research on the brand and found many different pipes that bore this stamping. They also seemed to have the name Swensson stamped on the shank as well. This link shows the same stamping with the addition of the Swensson name (https://en.todocoleccion.net/collectable-smoking-pipes/pipa-swensson-iberpipsa-car07~x111057347). Here is a second link that shows the box that the brand came in as well as a leaflet (https://en.todocoleccion.net/collectable-smoking-pipes/pipa-clipper-5740-iberpipsa~x33567017). I have included that photo for the information that it includes. There were other references to the brand with lots of photos of pipes in a variety of classic shapes. However there was nothing on either Pipedia or Pipephil that I could find. All of the examples of pipes bearing this brand that I saw were well made and showed beautiful grain.Armed with little bit of information that I could find it was time to start working on this pipe. Jeff had cleaned the pipe with his usual thoroughness – reaming the bowl with a PipNet pipe reamer and cleaning up the remnants with a Savinelli Fitsall Pipe Knife. He scrubbed the internals of the bowl, shank and stem with alcohol, cotton swabs and pipe cleaners. He scrubbed the exterior with Murphy’s Oil Soap to clean off the dust and grime on the finish. The rim top looked very good other than the small burned inner edge at the front of the bowl. The inside of the bowl itself looked great. The pipe had some beautiful grain all around the bowl and the cut of the briar maximized that. The stem was in great condition other than the oxidation and tooth marks on both sides near the button. I took photos of the pipe before I started working on it. I took some close up photos of the rim top, bowl and stem to show what they looked like after Jeff’s cleanup. The two different photos show the damage at the front inner edge of the rim from different angles. The stem was in good shape other than the tooth marks and chatter on both sides near the button.I took some photos of the stampings around the shank to give a picture of what they looked like after the cleanup. I worked on the damage to the front of  inner edge first. I used a folded piece of 220 grit sandpaper to smooth out the burned area and bevel the inner edge slightly to minimize the damage there. I polished the rim edges – both inner and outer with micromesh sanding pads – wet sanding with 1500-2400 and dry sanding with 3200-12000 grit pads. I worked on the nicked edges on the outside of the bowl to smooth them out. I polished the entire bowl avoiding the stamping with the pads. I wiped it down with a damp cloth after each sanding pad. You can see the progress in the photos below.  I worked some Before & After Restoration Balm into the smooth finish of the bowl and the rim top. I worked it into the surface of the briar with my fingertips to clean, enliven and protect the wood. Once the bowl was covered with the balm I let it sit for about 20 minutes and buffed it off with a soft cotton cloth and then polished it with a microfiber cloth. I took photos of the pipe at this point in the process to show what the bowl looked like at this point. I set the bowl aside and turned my attention to the stem. I decided to address the oxidation and the tooth marks on both sides of the stem ahead of the button. I sanded the tooth marks and chatter with 220 grit sandpaper and was able to remove them all. I sanded the stem surface with the 220 grit sandpaper and removed the majority of the oxidation. I polished the stem with Denicare Mouthpiece Polish to take out the oxidation at the button edge and on the end of the mouthpiece. I also worked hard to scrub it from the surface of the stem at the tenon end.I polished the stem, button and blade with micromesh sanding pads – wet sanding with 1500-2400 grit pads and dry sanding with 3200-12000 grit pads. I wiped the stem down after each sanding pad with Obsidian Oil. I polished it with Before & After Pipe Stem Polish – both Fine and Extra Fine. Once I had finished the polishing I gave it a final coat of oil and set it aside to dry. I put the bowl and stem back together. I buffed the bowl and stem with Blue Diamond to polish the briar and the vulcanite. I gave the bowl and the stem multiple coats of carnauba wax. I buffed the pipe with a clean buffing pad to raise the shine. I hand buffed it with a microfiber cloth to deepen the shine. The pipe polished up pretty nicely. The pipe turned out very well and shows the grain shining through. The contrast of the various grains – birdseye, flame and straight swirling around the bowl and shank looked good with the polished, long black vulcanite. This Churchwarden will soon be joining the other pipes I have boxed up for Paresh. The finished pipe is shown in the photos below. The dimensions of the pipe are Length: 10 inches, Height: 1 3/4 inches, Outside diameter of the bowl: 1 1/4 inches, Chamber diameter: 3/4 of an inch. I am looking forward to hearing what Paresh thinks of the pipe now. Thanks for reading this blog and my reflections on the pipe while I worked on it. Addendum: I posted on Facebook Tobacco Pipe Restorers Group and asked questions about the brand. I received this response from Sam Vior, a member there:      Iberpipsa: Iberica de Pipas, SA it was founded late 1980’s and made several lines: Swenson, Everest, Clipper, Brio, Coral, Commodore. In Spain.

That led me to a page on Pipedia (https://pipedia.org/wiki/Iberica_de_Pipas). I quote from that article in full.

“Founded in 1919, Iberica de Pipas is a company dedicated to the manufacture of pipes and gift items in wood. More than eighty years of presence in the market guarantee our products. Our accumulated experience has strengthened and allowed us to both continue making improvements and maintain the professional standards which our name inspires throughout the years.

In our effort to maintain client satisfaction, we offer an increased variety of quality products ranging from smoking to gift and home articles at an excellent price-quality relationship. Thanks to our professional standards and transparency, we can also manufacture any personally designed specialty items that our clients so desire. Contact us, we are eager to discuss how we can fulfil your needs.”

Brands (afak):

New Life for an old Custombilt Apple


Blog by Steve Laug

I have always been intrigued by Tracy Mincer and his Custom-Bilt pipes and even his Custombilt pipes like this one. There is something about the rugged carving and appearance of the pipes that gets my attention. I have a few of them in my collection and always enjoy the tactile nature of the pipe when it is being smoked. This old apple has the Custombilt stamp and I had reacquainted myself with the eras of the various spellings of the brand so that I can place it along with the previous billiard within the Rich Era. The pipe was in pretty decent condition when Jeff received it – dirty but really not too bad. The finish was dusty and dirty in the worm trail carvings. The bowl had a thick cake in it that flowed over the rim top into the rustication. The inner edge of the bowl appeared have some damage toward to the front but that would not be clear until it was reamed. The rim top had some deep scratches and gouges toward the right front. The stem had some deep tooth marks on both sides at the button but otherwise was in decent condition. The smooth part of the shank stamped Custombilt in script on the left side. On a smooth panel on the heel of the bowl it is stamped Imported Briar. Jeff took these pictures of the pipe to show its condition before he started his cleanup work. He took close up photos of the rim top and the side and bottom of the bowl to show the condition of the briar and the bowl. You can see the cake in the bowl and the lava overflowing onto the top of the rim. The worm trail rustication is quite dusty and dirty. He took a photo of the stamping on the left shank side and the heel of the bowl.The photos of the stem show the tooth chatter and marks on both sides of the stem near the button and the wear on the button itself.I did the research on the brand when I worked on the previous Custombilt that I restored earlier today (https://rebornpipes.com/2019/01/18/bringing-an-old-custombilt-billiard-to-back-to-life/). I have included much of that here for you to read. It comes from a great article on Pipedia that helps understand the brand and give a sense of what the various stamping looks like on the pipes (https://pipedia.org/wiki/Custom-Bilt). I cite from that article to give a feel for the brand:

In 1946, the name was changed to Custombilt after Mincer began an association with Eugene J. Rich, Inc. There were some big changes in advertising and distribution. The slogan “AS INDIVIDUAL AS A THUMBPRINT” began at this time as well.

In 1953, Leonard Rodgers bought the company and emphasized tobacco pouches and butane lighters. (However, it appears Mincer was working on his new pipe, the Doodler.) In 1968, Rodgers sold the Company to Consolidated Cigars. In the early 1970s, Wally Frank Co. bought the Custombilt trademark and began to produce their version of the pipe in 1974 or 1975. Hollco Rohr owned the Weber pipe factory, located in New Jersey, and produced the Custombilt pipes there. In 1987, the pipes were made out of the Butz-Choquin factory (France) and then Mexico until the late 1990s. Currently, the Custombilt name is owned by Tobacalera of Spain.

Along with the information above I found that the stamping that is on this pipe is identical to that identified in the article as Stamp Number Five. I have included that graphic because of the information that it included. It brings some of the issues in identifying the maker and the time period of the brand. In my mind the pipe I have in hand is very much like the Rich era pipes that I have seen and the note below says that. Interestingly the author also says he has seen the same stamping on the Wally Frank era pipes. It is a fascinating piece of history and a beautifully made old pipe.Armed with that information I turned to working on the pipe. Jeff had cleaned the pipe with his usual thoroughness – reaming the bowl with a PipNet pipe reamer and cleaning up the remnants with a Savinelli Fitsall Pipe Knife. He scrubbed the internals of the bowl, shank and stem with alcohol, cotton swabs and pipe cleaners. He scrubbed the exterior with Murphy’s Oil Soap to clean off the dust and grime on the finish. The rim top looked very good under the thick lava coat. I love the way the grain of the briar shows through the rustication. There were just a few nicks and scratches to deal with. The inside of the bowl itself looked great. The stem was in great condition other than the tooth marks on both sides near the button. I took photos of the pipe before I started working on it. I took some close up photos of the rim top, bowl and stem to show what they looked like after Jeff’s cleanup. The rim top has some darkening around the top and the edges. There is also some nicks and scratches on the surface ant the edges. Some are quite deep looking. The stem was in good shape other than the tooth marks and chatter on both sides near the button.  I took some photos of the stamping which seemed far more visible after Jeff’s cleanup than before.I worked on the  rim top and inner edge damage first. I gently topped the bowl to remove the deep cuts and gouges and smooth out the damage. I used a folded piece of 220 grit sandpaper to  further clean up the inner edge and leave it smooth. I polished the sanded rim top with micromesh sanding pads – wet sanding with 1500-2400 and dry sanding with 3200-12000 grit pads. I wiped it down with a damp cloth after each sanding pad. You can see the progress in the photos below. I stained the rim with three different stain pens – Cherry, Walnut and Mahogany. It still needed to be blended in a bit but the match of colour is perfect. I buffed it on the buffing wheel with Blue Diamond polish. The second photo shows the polished rim top. The match is good.Since the briar was in such good condition I started with rejuvenating the wood. I worked some Before & After Restoration Balm into the rustication and worm trails on the bowl and the rim top. I worked it into the surface of the briar with my fingertips to clean, enliven and protect the wood. Once the bowl was covered with the balm I let it sit for about 20 minutes and buffed it off with a soft cotton cloth and then polished it with a microfiber cloth. I took photos of the pipe at this point in the process to show what the bowl looked like at this point. I set the bowl aside and turned my attention to the stem. I decided to address the deep tooth marks on both sides of the stem ahead of the button. I filled in the tooth marks on the both sides of the stem with a clear super glue (Jeff had already cleaned the stem very well so it was not an issue). I set the stem aside to let the repairs cure.Once the repair had cured I used a flat blade needle file to sharpen the edge of the button on both sides of the stem. I also used it to flatten out the repairs. I worked on the remaining repaired areas with 220 grit sandpaper to blend them into the surface of the stem. I polished the stem with Denicare Mouthpiece Polish to take out the oxidation at the button edge and on the end of the mouthpiece. I also worked hard to scrub it from the surface of the stem at the tenon end.I polished repaired areas on the stem, button and blade with micromesh sanding pads – wet sanding with 1500-2400 grit pads and dry sanding with 3200-12000 grit pads. I wiped the stem down after each sanding pad with Obsidian Oil. I polished it with Before & After Pipe Stem Polish – both Fine and Extra Fine. Once I had finished the polishing I gave it a final coat of oil and set it aside to dry. I put the bowl and stem back together. I buffed the bowl and stem with Blue Diamond to polish out any light scratches that remained in the briar and the vulcanite. I gave the bowl and the stem multiple coats of carnauba wax. I buffed the pipe with a clean buffing pad to raise the shine. I hand buffed it with a microfiber cloth to deepen the shine. The pipe polished up pretty nicely. The worm trail rusticated finish on this Rich era Custombilt and the smooth portion around the cap on the rim and shank turned out very nice and shows the grain shining through. It has the kind of rustic beauty that draws collectors to them after all of these years. The contrast of the worm trails with the grain swirling through them looked good with the polished black vulcanite. This Custombilt Apple will soon be joining the other pipes I have on the rebornpipes store. The finished pipe is shown in the photos below. The dimensions of the pipe are Length: 5 1/2 inches, Height: 1 7/8 inches, Outside diameter of the bowl: 1 ½ inches, Chamber diameter: 7/8 of an inch. If you are interested in adding it to your collection let me know. Thanks for reading this blog and my reflections on the pipe while I worked on it.

Sprucing up the first of my WDC; a Demuth Gold Dot #77 Bulldog


Blog by Paresh Deshpande

There a quite a few WDCs that I have inherited from my old man and the one on my table now is a “Demuth, Gold Dot”. I love the classic Bulldog and Rhodesian shape in pipes and am naturally attracted to pipes with this shape. Thus, no surprise here that I chose to work on this WDC Demuth Gold Dot in a classic Bulldog shape!!

This is the first WDC from my grandfather’s collection, a smooth Gold Dot in an impressive Bulldog shape. The beautiful straight grain follow a circular pattern on the right and front of the bowl while linear pattern adorns the left side of the bowl and along the diamond shank, neatly divided by the spine on either side. The shank is stamped on the left with the trademark inverted equilateral triangle with letters “WDC” enclosed in it. This is followed by “Demuth” over “GOLD DOT” in block capital letters. On the right, the shank is stamped “IMPORTED” over “BRIAR ROOT” followed by the shape number “77” towards the bowl and shank joint. A half inch thick gold band adorns the shank end and is stamped on the left with the trademark WDC triangle over “14 K”, indicating the purity of the gold band. The ¾ bent saddle stem has two gold filled dots in the center of the saddle portion of the stem on the left side. I searched pipedia.com for more information on this pipe and attempt at estimating the vintage of this pipe. Here is what I have found on pipedia:-

William Demuth. (Wilhelm C. Demuth, 1835-1911), a native of Germany, entered the United States at the age of 16 as a penniless immigrant. After a series of odd jobs he found work as a clerk in the import business of a tobacco tradesman in New York City. In 1862 William established his own company. The William Demuth Company specialized in pipes, smoker’s requisites, cigar-store figures, canes and other carved objects.

The Demuth Company is probably well known for the famous trademark, WDC in an inverted equilateral triangle. William commissioned the figurative meerschaum Presidential series, 29 precision-carved likenesses of John Adams, the second president of the United States (1797-1801) to Herbert Hoover, the 30th president (1929-1933), and “Columbus Landing in America,” a 32-inch-long centennial meerschaum masterpiece that took two years to complete and was exhibited at the World’s Columbian Exposition in Chicago in 1893.

The Presidential series was the result of Demuth’s friendship with President James A. Garfield, a connoisseur of meerschaum pipes. Demuth presented two pipes to Garfield at his inauguration in 1881, one in his likeness, the other in the likeness of the President’s wife. Later, Demuth arranged for another figurative matching the others to be added to the collection as each new president acceded to the White House, terminating with President Hoover.

In early 1937, the City of New York notified S.M. Frank & Co. of their intent to take by eminent domain, part of the land on which the companies pipe factory was located. This was being done to widen two of the adjacent streets. As a result of this, Frank entered into negotiations to purchase the Wm. Demuth Co.’s pipe factory in the Richmond Hill section of Queens. It was agreed upon that Demuth would become a subsidiary of S.M. Frank and all pipe production of the two companies would be moved to DeMuth factory. New Corporate offices were located at 133 Fifth Avenue, NYC.

Demuth pipes continued to be made at the Richmond Hill plant till December 31. 1972. Then the Wm. Demuth Company met its official end as a subsidiary company by liquidation.

I came across an interesting advertisement on the same page on pipedia.com which shows the exact same pipe that I am now working on. It is the same pipe as the first pipe on the left. A close scrutiny of the picture confirms the following:

(a) The Gold Dot line of WDC pipes was offered sometime before 1941 as inferred from the bottom line of this flyer which encourages readers to “WRITE FOR NEW 1941 STYLE BOOKLET”, implying that this flyer was published prior to 1941!!!!!

(b) The Gold Dot line of WDC pipes was at the time their top of the line product as it is the most expensive of all the pipes advertised in the flyer, retailing at $10!!!Pipephil.eu too has the same pipe shown with shape # 77. Here is the link; http://www.pipephil.eu/logos/en/logo-w1.html

From the above gleaned information, it is safe to conclude that the pipe now on my worktable is of 1940s vintage and at that point in time was WDC’s top-of-the-line offering!!!!

INITIAL VISUAL INSPECTION
Age definitely shows on the stummel surface!!! The briar is dull and lifeless and has taken on a layer of aged patina, through which one can make out the beautiful straight grain patterns all around. There is a heavy overflow of lava all over the entire stummel surface. The bowl cap, bowl, shank and even the stem is covered in oils, tars and grime accumulated over the years of storage and is sticky to the touch. To be honest, the stummel is filthy to say the least. A thorough cleaning of the stummel followed by polish should accentuate the beautiful straight grain pattern seen on the stummel through all the dirt. The double ring that separates the cap from the rest of the bowl is even and undamaged; however, it is filled with dust, dirt and grime. The chamber exudes a strong, but not definitely unpleasant, smell. I hope that this will be addressed once the chamber has been reamed and internals of the shank and mortise is cleaned with isopropyl alcohol. There is heavy buildup of cake with a thick layer in the chamber. The buildup is such that I am barely able to squeeze my little finger in to the bowl. The condition of the inner walls of the chamber can be ascertained only after the cake has been removed completely and taken down to bare briar. The bowl however, feels robust and solid to the touch from the outside. The rim top has a thick layer of overflowing lava. The condition of the beveled inner and outer edge and rim top can be commented upon once the overflow of lava is removed and the chamber is reamed. The shank end of the pipe is clean. However, the mortise does show signs of accumulated dried oils, tars and remnants of ash, greatly restricting the air flow, or dare I say, completely restricting air flow. These issues should be a breeze to address, unless some hidden gremlins present themselves!! The vulcanite stem has deep tooth indentations and minor tooth chatter on the upper and lower surface. It is heavily oxidized and has traces of overflowing lava, dust, oils and tars on the saddle portion of the stem. The opening of the tenon is filled with dried oils and tars. The air flow through the stem is greatly restricted to say the least. The fit of the stem in to the mortise is very tight, which will loosen further after the mortise and tenon have been cleaned. The metal tenon has a slot like groove extending more than half way towards the stem end on either side; probably to securely seat the “changeable filter” as advertised in the flyer above (actually I was wondering the purpose of the metal tenon, which as it is, was new to me, with slots on either side. This doubt was cleared by the flyer!!). The overall condition of the pipe, with the thick build-up of cake in the chamber, clogged mortises and stem airway, overflowing of lava covering the entire stummel, makes me believe that this would have been one of my grandfather’s favorite pipes.

THE PROCESS
I started this project by reaming the chamber with size 2 and followed it up with size 3 head of PipNet reamer. I used a 220 grit sand paper, pinched between my thumb and forefinger, to sand the inner walls of the chamber of the pipe. Once I had reached the bare briar, I wiped the chamber with a cotton pad dipped in isopropyl alcohol. This removed all the residual carbon dust from the chamber. The walls of the chamber are nice and solid with no signs of heat fissures or cracks. I scrapped out the overflowing lava from the rim top with my fabricated knife. The inner and outer rim edges are pristine and that was a big relief.This was followed by cleaning the mortise and air way of the pipe using hard bristled and regular pipe cleaners, q-tips dipped in alcohol. The mortise and the draught hole were given a final clean with shank brushes dipped in alcohol. I dried the mortise with a rolled paper napkin. The shank internals and the draught hole are now nice and clean with an open and full draw. The gunk in the mortise had hardened to such an extent that I had to resort to using all the tools of the trade to get rid of the accumulated gunk, not to mention the time spent on cleaning it. The crud that was extracted from the mortise can be seen in the picture below. I had expected that the ghosting would be history by this stage. However, that was not to be the case. I had to resort to alcohol treatment to get rid of all the ghosting. I packed a few cotton balls in to the chamber. Drawing out a wick from one cotton ball, I inserted it in to the mortise of the pipe. Using a syringe, I topped the chamber with isopropyl alcohol and set it aside. Half hour later, I topped the chamber again with isopropyl alcohol as the level of alcohol had gone down from spreading inside the stummel. This process is usually done using Kosher salt as it leaves no aftertaste or smells. But here, in my part of the world, Kosher salts costs a huge bomb and from my personal experience, I have realized that cotton works equally well in drawing out all the oils and tars from the internals of the stummel exactly as Kosher salt does, but at a very economical cost. I set the stummel aside overnight to allow the alcohol to do its intended task. Next morning, I discard the wick and cotton balls from the stummel and wipe the bowl clean. Though the cotton balls and the cotton wick did not turn a dirty color as usual, the old smells were completely eliminated. While the stummel was soaking in the alcohol bath, I cleaned out the internals of the stem using hard bristled and regular pipe cleaners dipped in alcohol. Well, that sounds easier than actually done. From the amount of overflowing lava deposits on the stem, I had anticipated a difficult time in cleaning the stem internals. But what really confronted me was a nightmare of a time cleaning it. For starters, the pipe cleaners would not move an inch in to the airway from either ends!!! I soak the internals of the stem, after packing the slot with a pipe cleaner, by filling it with isopropyl alcohol using a syringe. This helped in loosening the hardened oils and tars in the air way. Thereafter began the tedious process of cleaning the stem internals with a straightened paper clip and scrubbing the aluminum tenon with the fabricated dental spatula. The blobs of accumulated gunk removed from the air way could not be photographed as my table and tray was cleaned out by my helper before I could take a few pictures!!!! After a great deal of struggle, time and lots of pipe cleaners, the air way is finally clean with an open draw.The deep bite marks on the stem were flamed using a Bic lighter. However, this did not work. From my experience, I have learnt that getting rid of the oxidation from and around the surface to be filled helps in subsequent better blending of the fill with the stem surface. With a folded piece of used 220 grit sand paper, I sand the area that is required to be filled. I cleaned the sanded portion of the stem with cotton pad dipped in alcohol and spot filled the damaged area with a mixture of activated charcoal and clear superglue. I set the stem aside for the fill to cure. Now, it was the turn of the stummel to get cleaned up. Using a hard bristled tooth brush dipped in undiluted Murphy’s oil soap, I very deliberately scrubbed the stummel, cleaning the surface thoroughly. I was very deliberate on the surface areas which were covered in overflowed lava over which dirt and grime had accumulated over the years. I rinsed the stummel under tap water, taking care that water does not enter the mortise or the chamber. I dried the stummel using cotton cloth and paper napkins. On close inspection, I observed a couple of dents and ding on the front portion of the crown. These would need to be addressed. Other than this, the stummel is now clean and devoid of any grime and dirt. It is really surprising that the rim top, inner bevel and edges and the stummel is in such pristine condition after so many years of storage and without a single fill. Speaks volumes about the quality of this line of pipes from WDC!! I addressed the dents and dings to the front portion of the crown by the steaming process. I heated my fabricated knife over a candle. I placed a soaked Turkish hand towel over the dents and placed the hot knife over the wet towel. The steam that was generated pulled the dents to the surface. The stummel is now without any blemishes.To further clean and highlight the grains, I sand the stummel with micromesh pads, wet sanding with 1500 to 2400 grit pads and dry sanding with 3200 to 12000 grit pads. I wiped the stummel after each wet pad with a moist cloth to remove the resulting dust. I rub a small quantity of “Before and After Restoration Balm” in to briar and let it rest for a few minutes. The balm almost immediately works its magic and the briar now has a nice vibrant appearance. I further buff it with a horse hair shoe brush. The pipe now looks lovely with beautiful grains showing off their beauty in all glory!! With the stummel nice and clean and attractive, I worked the stem of the “GOLD DOT” by sanding the fills with a flat heat needle to achieve a rough match with the surrounding stem surface. I sharpened the lip edges using a needle file and sand the entire stem with 220 followed by 400, 800 and 1000 grit sand paper to perfectly blend the filled surface with the rest of the stem surface. This helps to reduce the sanding marks left behind by the more abrasive 220 grit paper. By mere sanding itself, the minor tooth marks seen on stem surfaces were completely addressed. This process also eliminated the deep oxidation seen on the vulcanite stem. To bring a deep shine to the vulcanite stem, I went through the complete set of micromesh pads, wet sanding with 1500 to 2400 grit pads and dry sanding with 3200 to 12000 grit pads. I rubbed the stem down with Extra Virgin Olive oil after every three pads. I completed the restoration of the stummel by cleaning the grooves between the twin rings separating the crown from the rest of the stummel, of all the dust, grime and polishing compounds accumulated during the restoration process. Lucky me, there is no damage to the rings, which would have been a challenge to restore.To finish, I re-attach the stem with the stummel. I mount a cotton cloth buffing wheel on to my local machine which is similar to a Dremel.  I set the speed at about half of the full power and polished the entire pipe with White Diamond compound. I wiped/ buffed the pipe with a soft cotton cloth to clear it of any leftover compound dust. I then mounted another cotton cloth wheel on to the polishing machine and applied several coats of carnauba wax over the stummel and the stem. I finished the restoration by giving the pipe a rigorous hand buffing using a microfiber cloth to raise the shine further. The completed pipe, with the dark brown hues of the grains on the stummel contrasting with the shiny black stem, looks lovely, fresh and vibrant; the photographs speak for themselves. If only the pipe could tell some of my grand Old man’s stories and recount incidents witnessed while being smoked.…Cheers!! I am grateful to all the readers for their valuable time spent in reading this write up and joining me on this part of the journey in to the world of pipe restoration while I attempt to preserve a heritage and past memories of a part of me.