Tag Archives: bite marks

Breathing Life into a Carlo Scotti Castello Sea Rock Briar SC31 ¼ Bent Canadian


Blog by Steve Laug

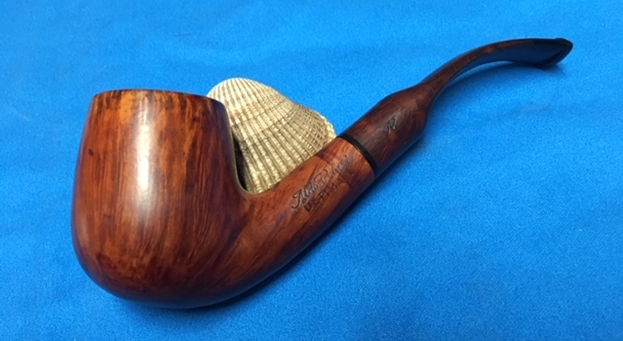
It is the second day of the New Year 2019 and I am continuing to work on pipes. My wife and kids are convinced it is an illness but at least it keeps me out of their way! I am continuing my break from the Bob Kerr estates that I have piled in boxes around my basement shop to work on another different pipe. I am still working under the watchful eye of my buddy and Shop Foreman, Spencer. His life is pretty much laying on a blanket by my feet while I am fiddling with pipes. At 14+ years old my fiddling does not faze him much him, he just wants to make sure I stay put with him in the basement. He snoozes, comes over to me now and then to smack my leg and beg for a treat and then retreats to nap again. He really is company in the shop and keeps me mindful to get up and move around now and then.As you might have figured out from the title I am continuing to work on Italian pipes. This is another one that I may have a hard time letting go of when I am finished. It is a Castello Sea Rock Briar. It is stamped on the smooth heel of the bowl and the shank bottom and reads Castello Sea Rock Briar. Next to that is stamped SC31 which I assume is the shape number. It is followed by Reg. No. 66171 No. That is followed by Made in Cantu over Italy with an oval containing the name Carlo Scotti next to the stem shank union. The Castello “diamond” inset is on the left side of the tapered stem. My brother Jeff picked this pipe up at an auction in Nampa, Idaho. It was in pretty filthy looking condition when he got it but still showed promise. He took the following photos of the pipe before he worked his magic on them. 
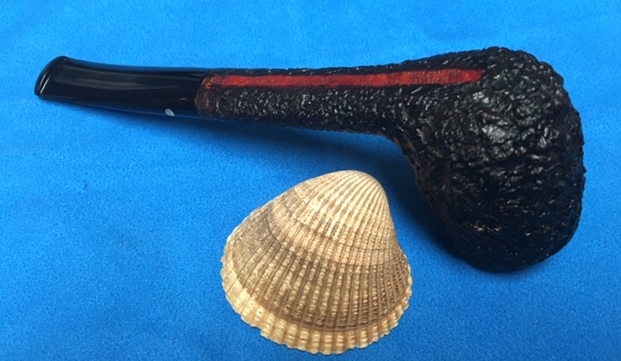
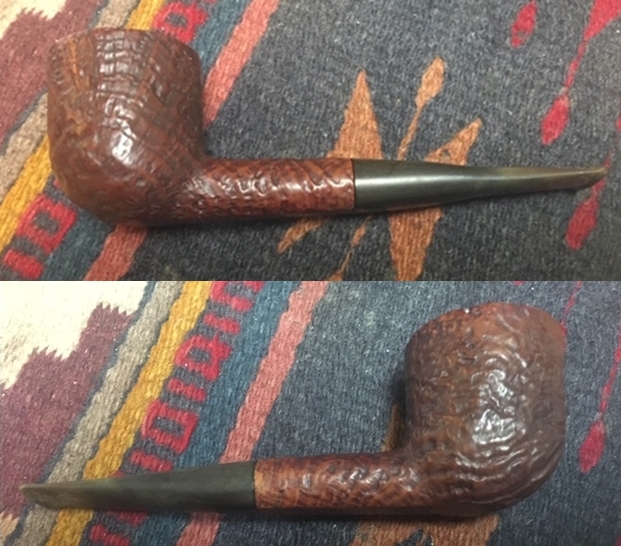
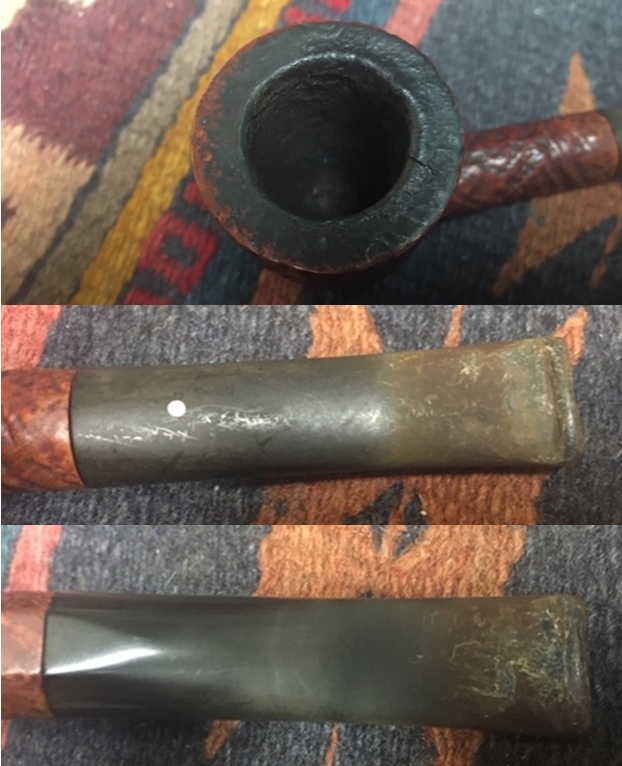
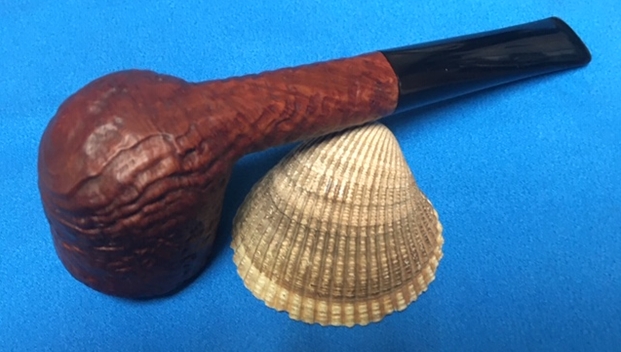
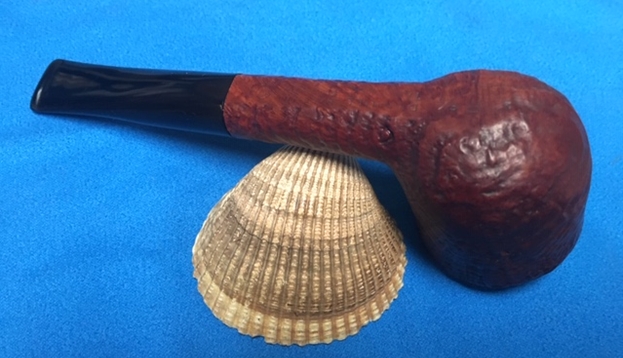
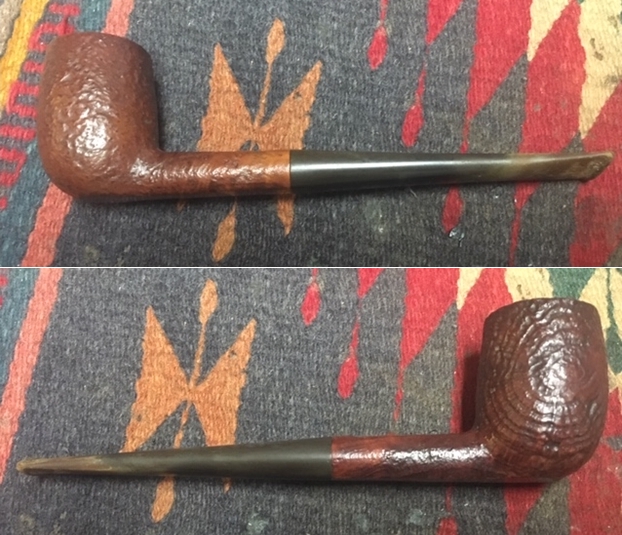
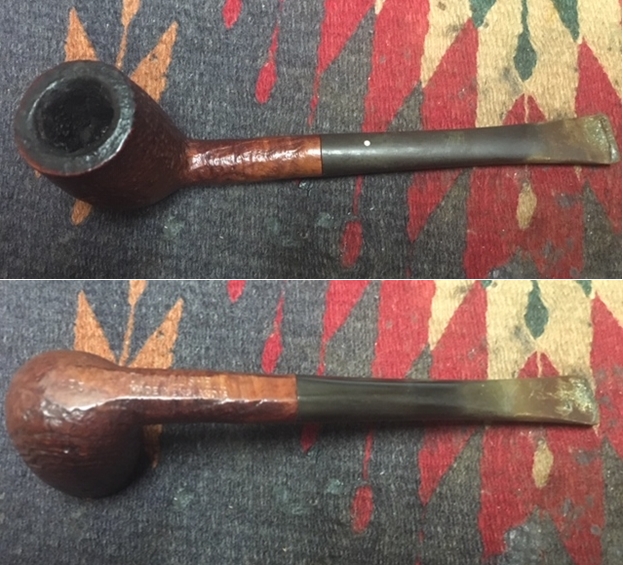
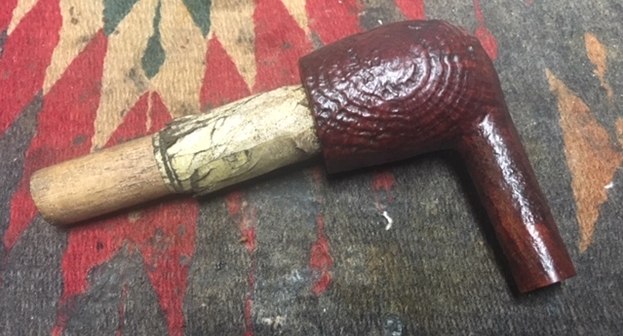
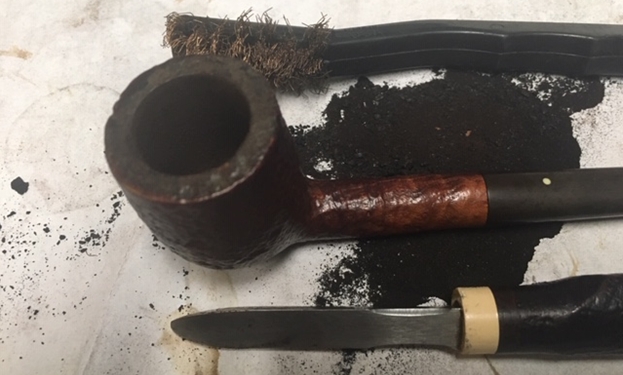
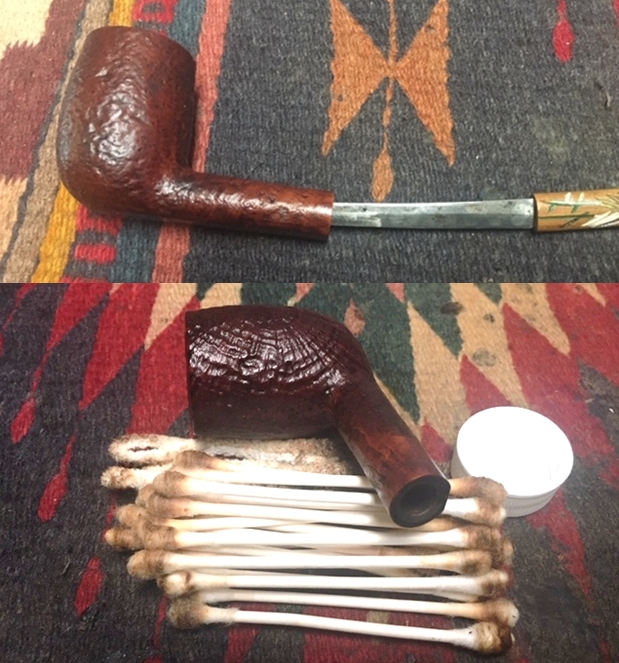
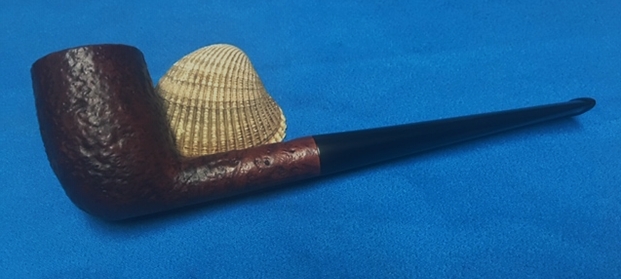
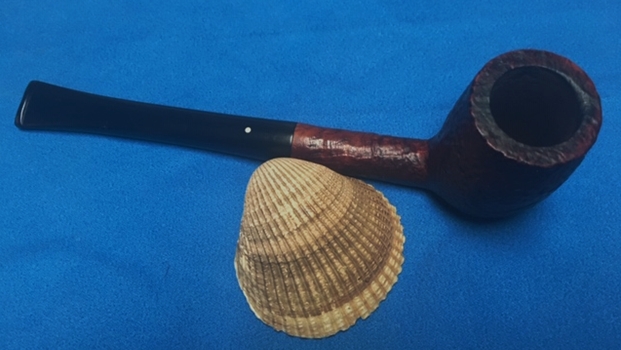
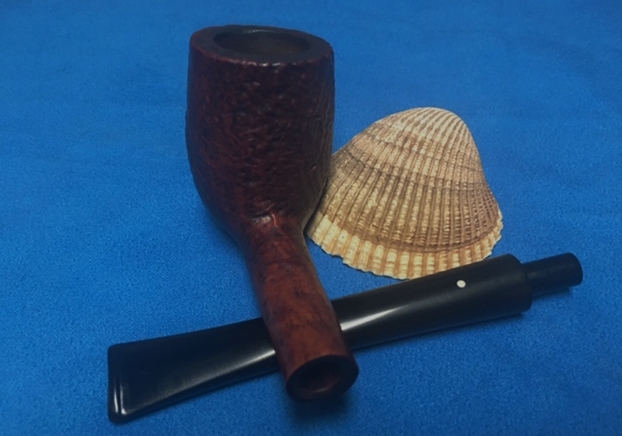
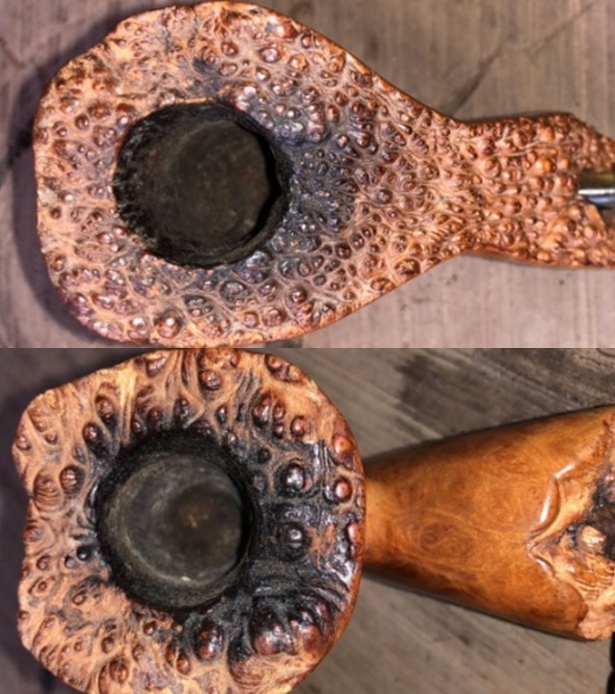
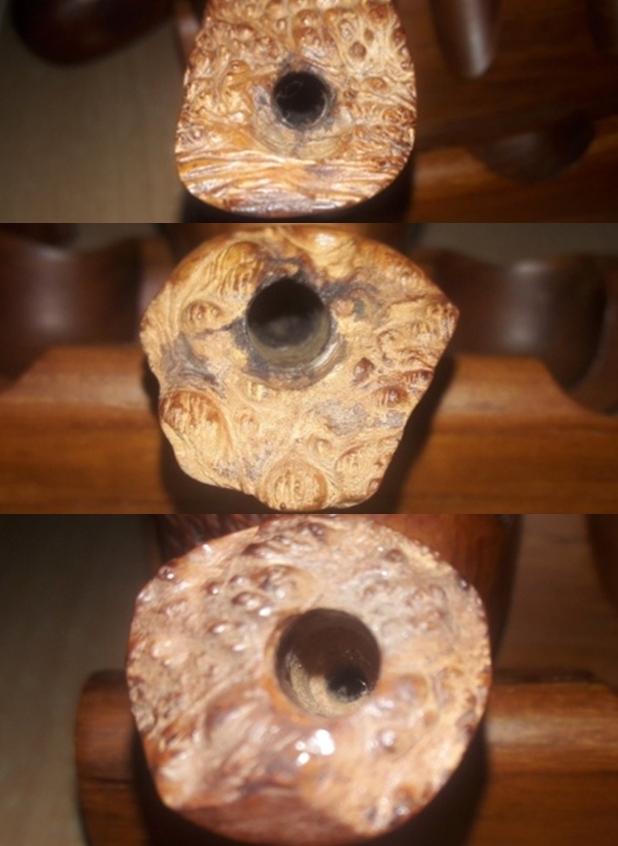
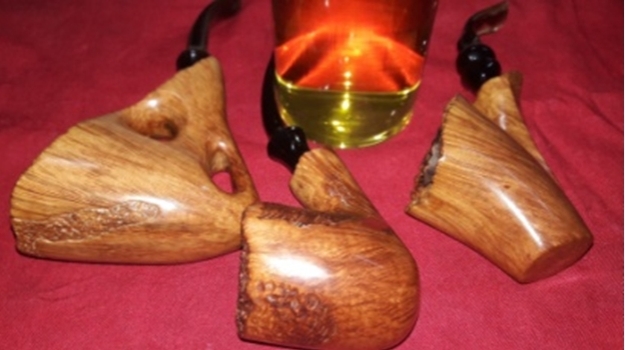
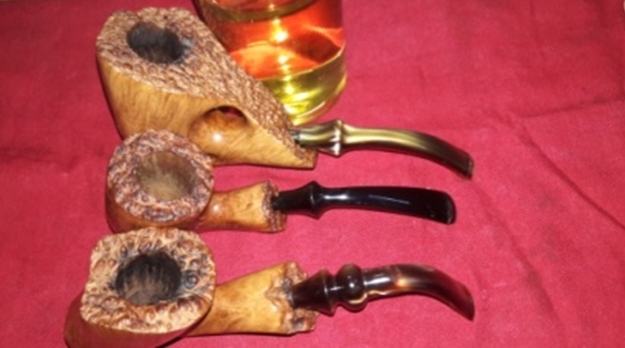
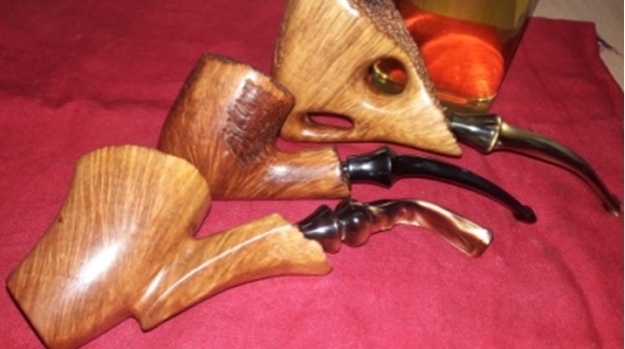
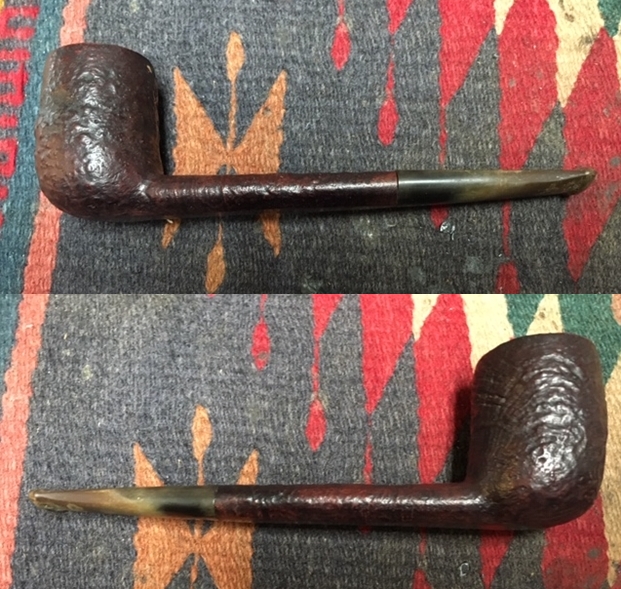
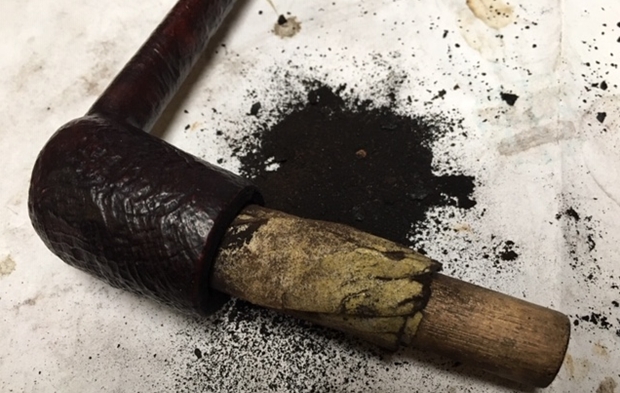
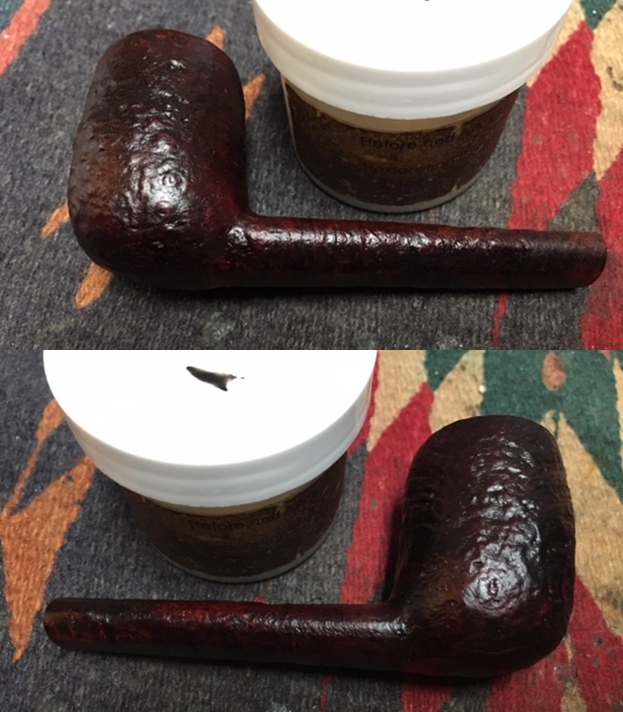
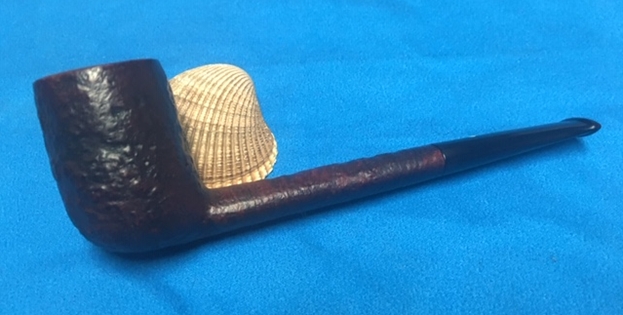
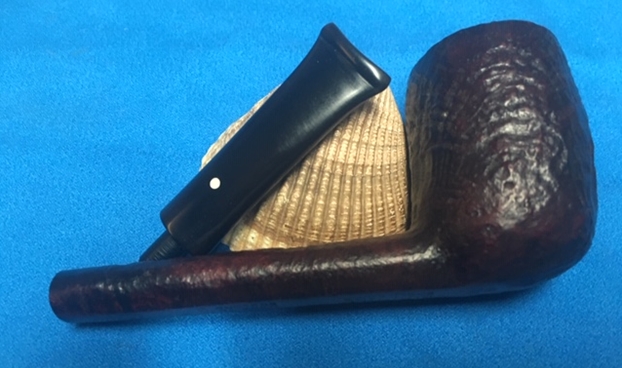
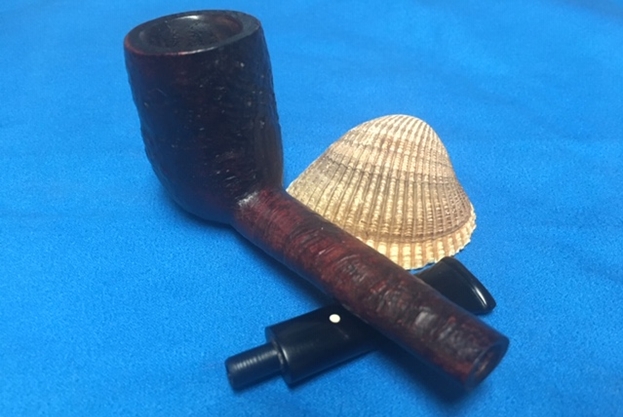
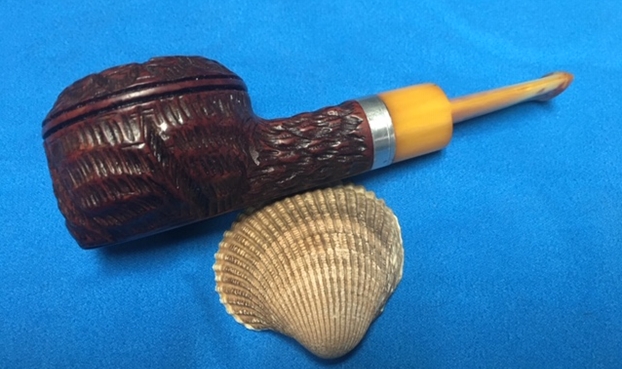
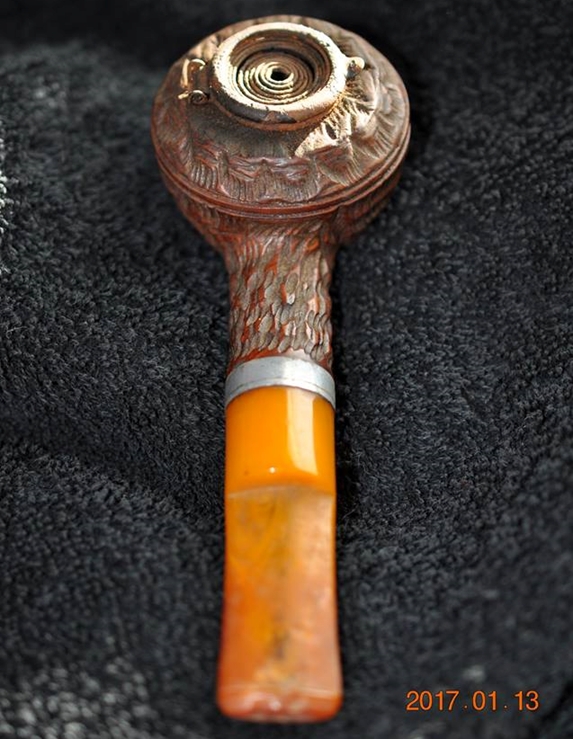
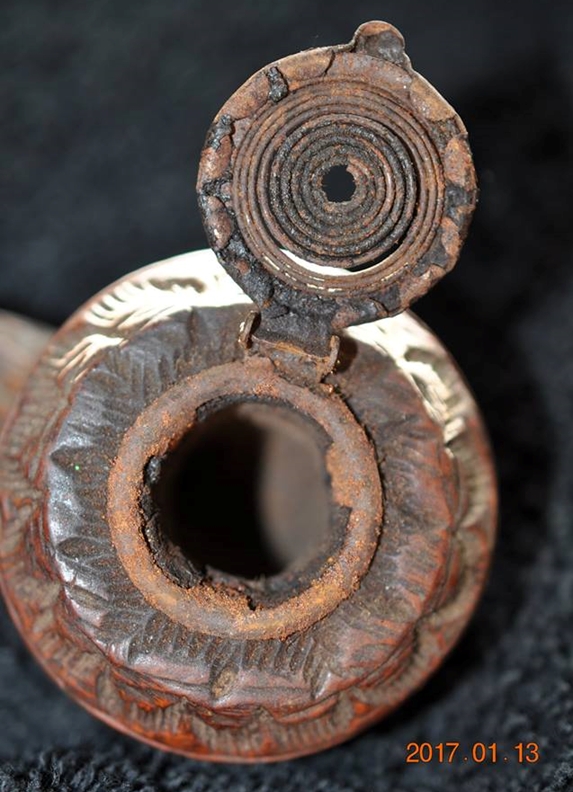
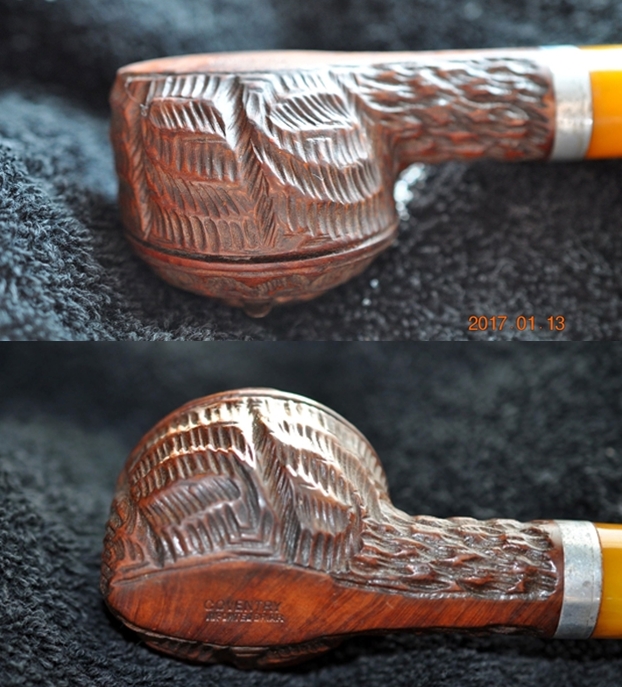
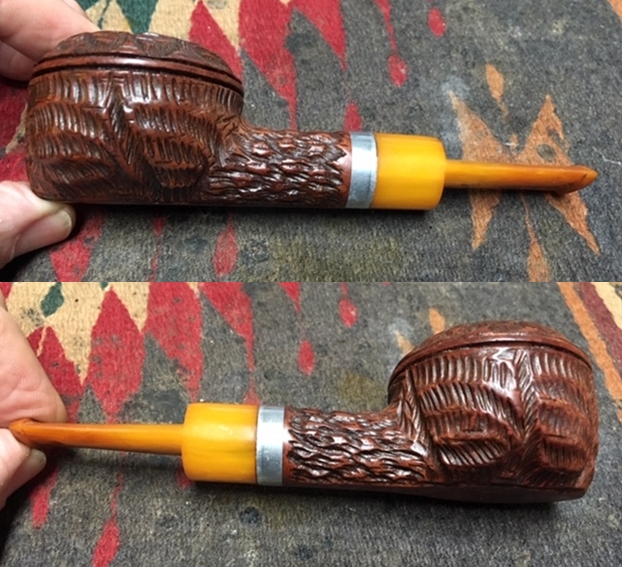
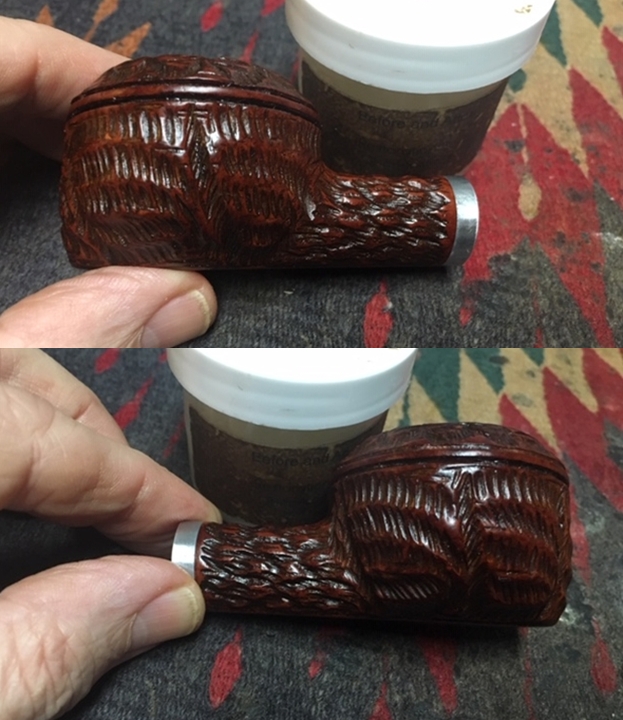
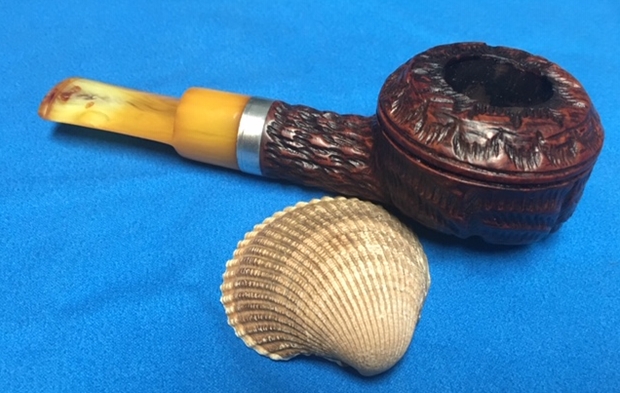
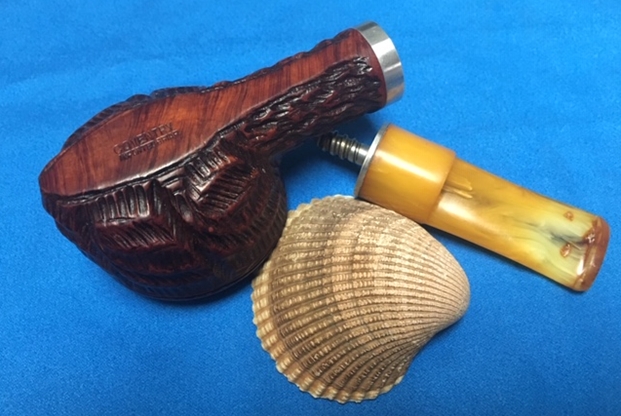
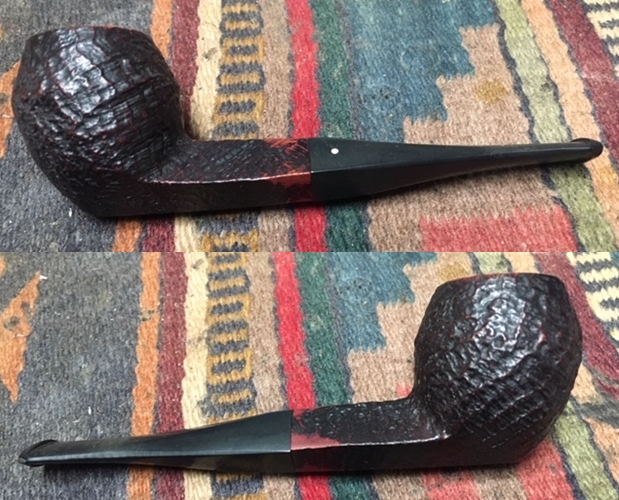
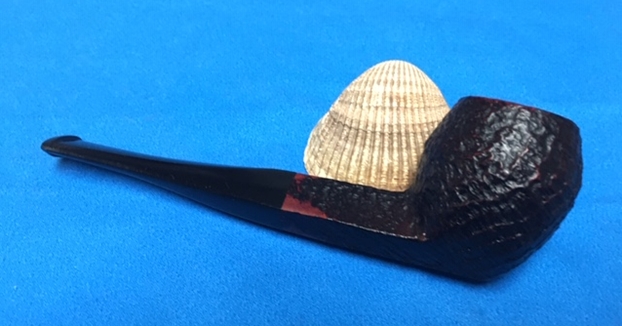
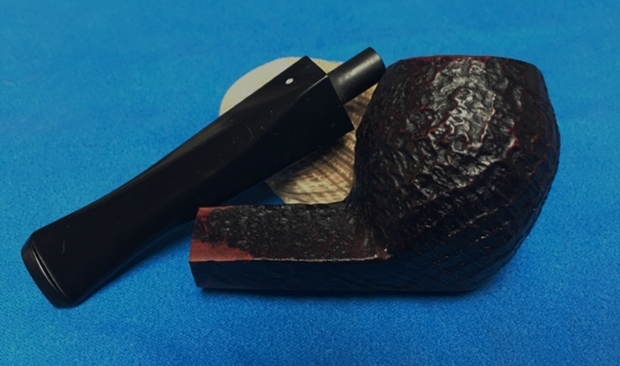
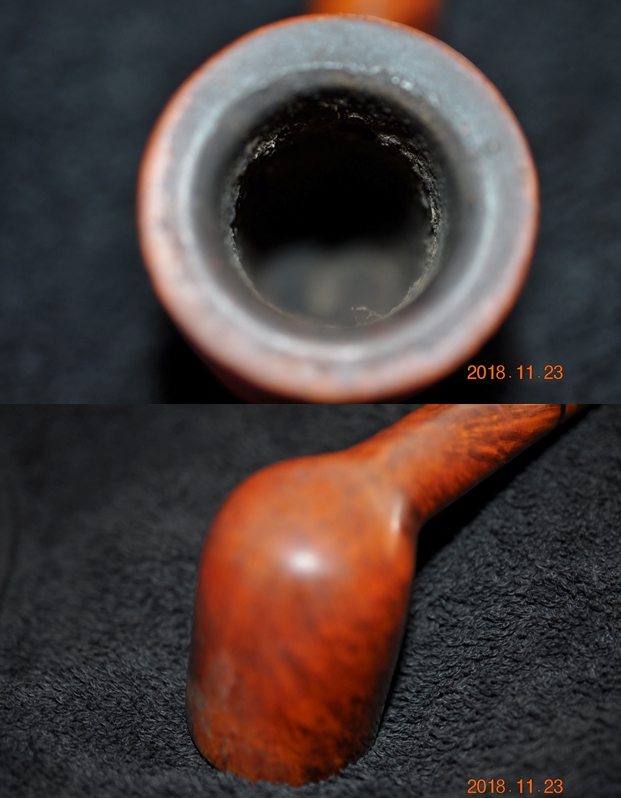
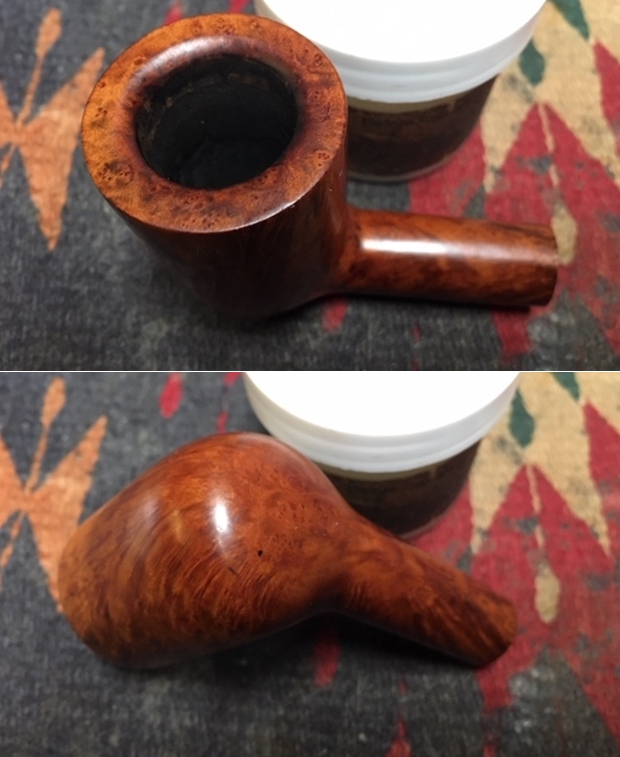
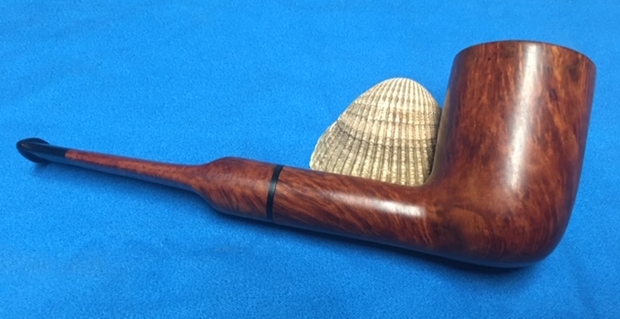
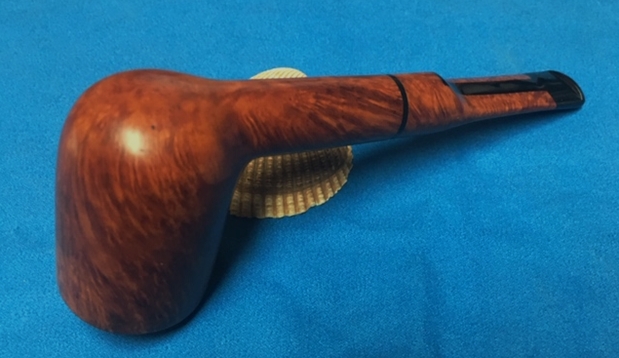
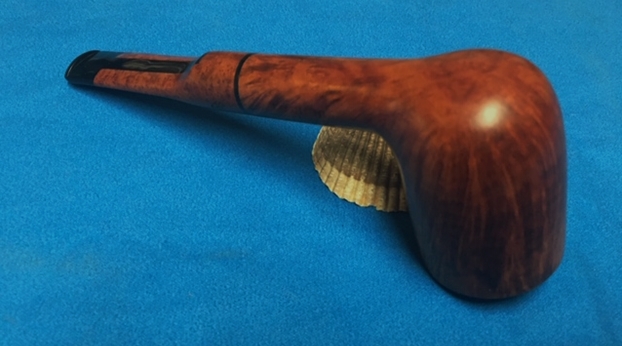
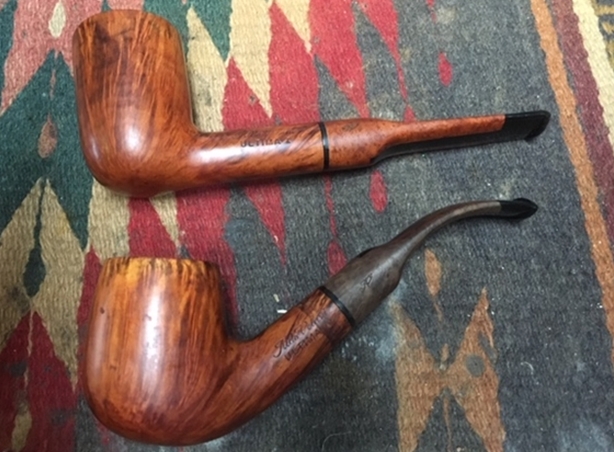
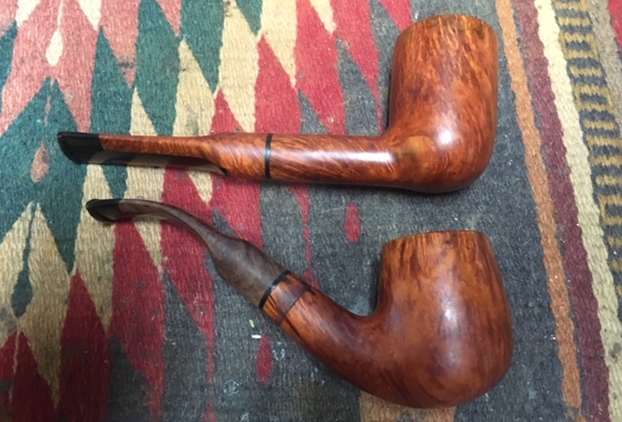
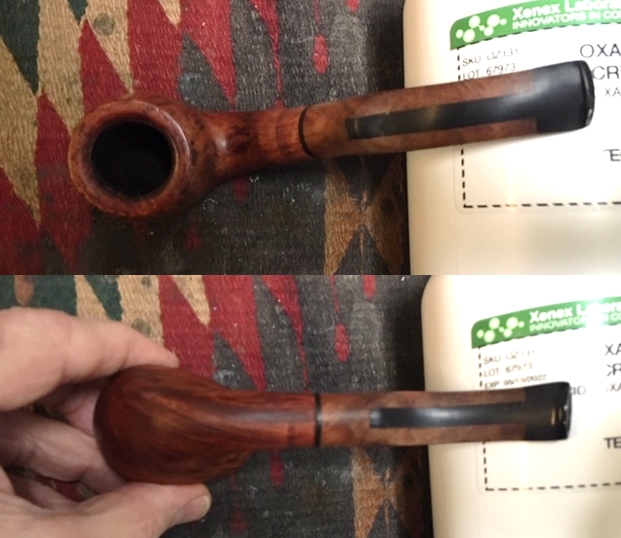
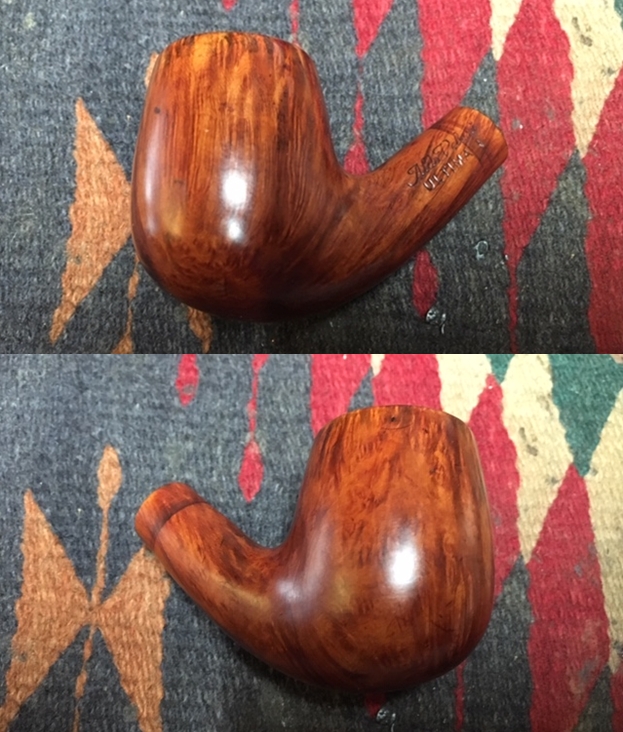
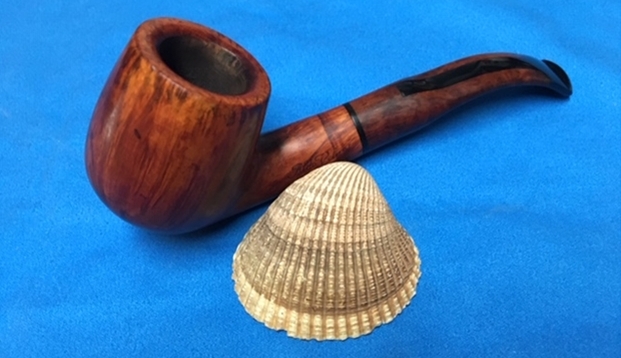
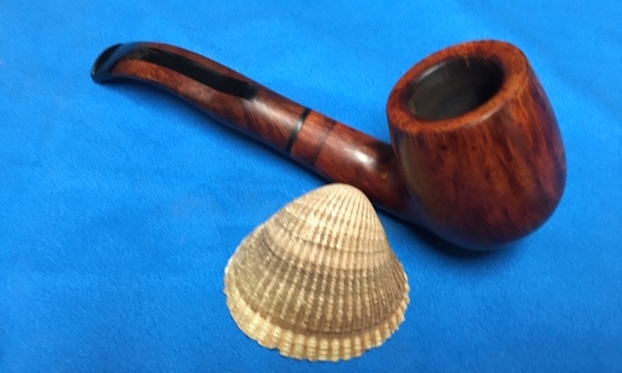
The pipe must have been another terrific smoker because the bowl was pretty clogged up with cake and lava flowing over the rim top. It really was a mess and the cake was hard from sitting. It was from an estate that was liquidating the belonging of a fellow in the area. In its condition it was going to take some work to clean out that bowl and be able to see what the rim looked like underneath the layer of lava. The rest of the bowl looked dirty but the photos give an idea of what Jeff saw before his cleanup revealed the condition of the pipe. The next photos show the side and bottom of the bowl to give a good idea of what it looked like.
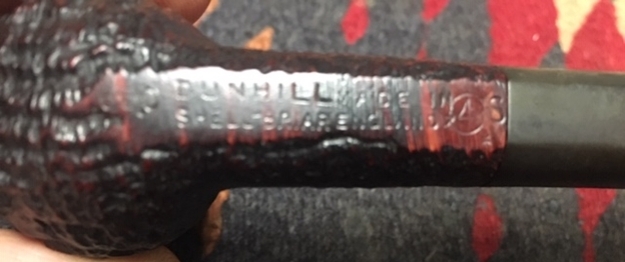
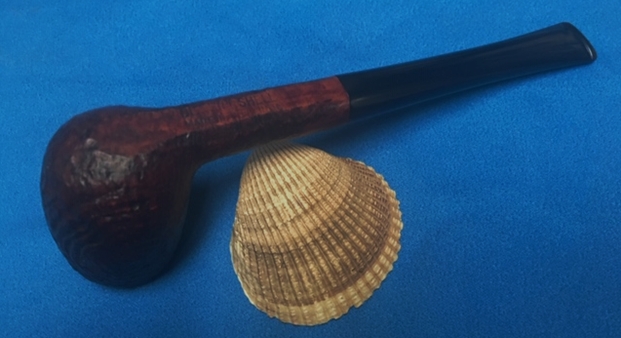
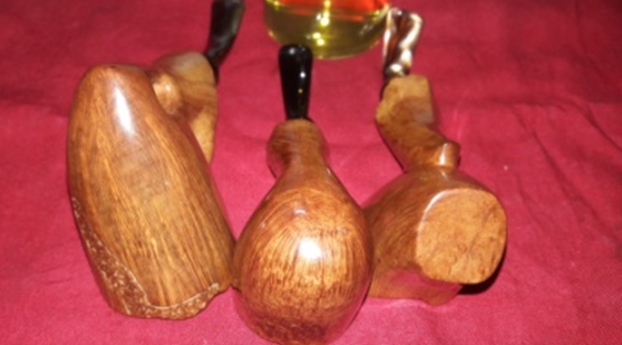
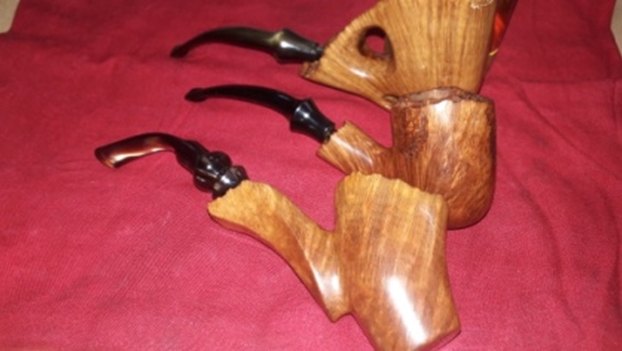
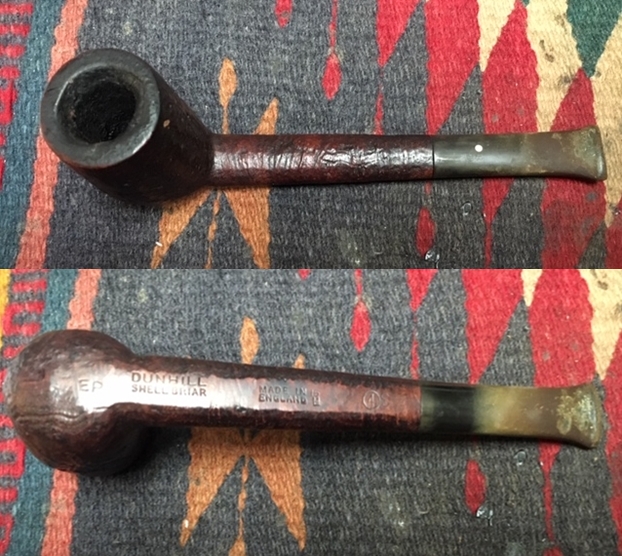
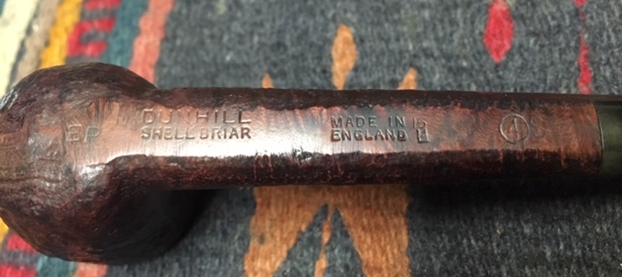
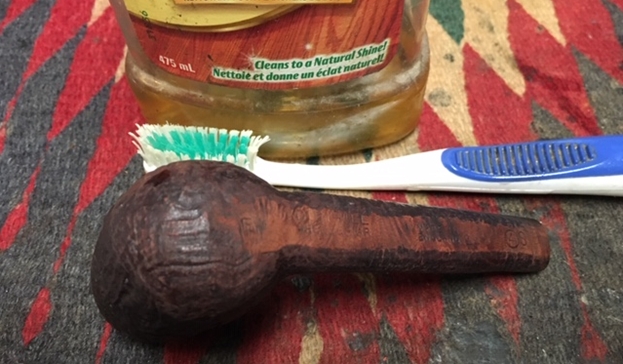
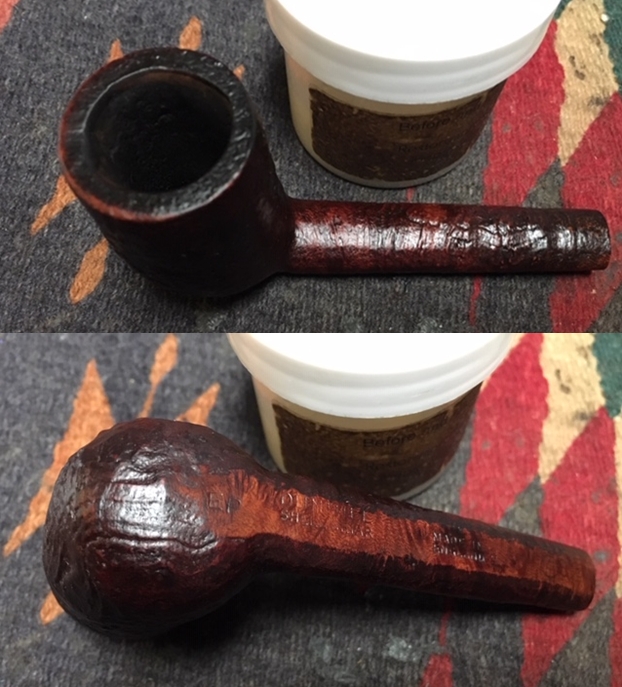
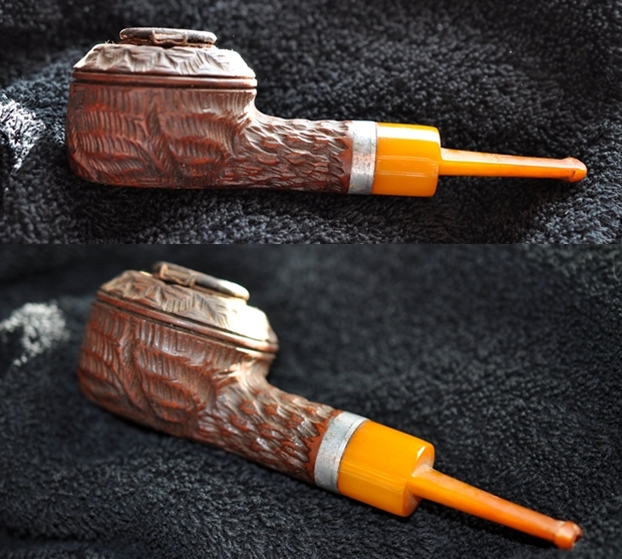
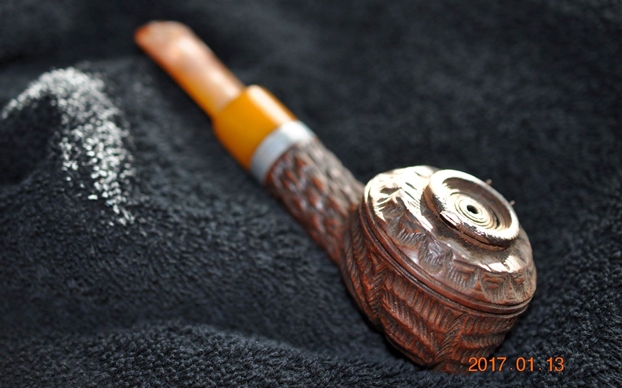
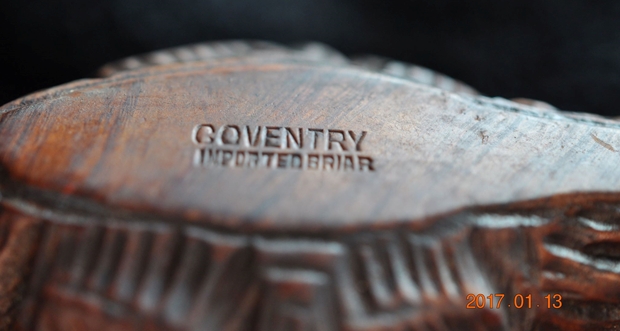
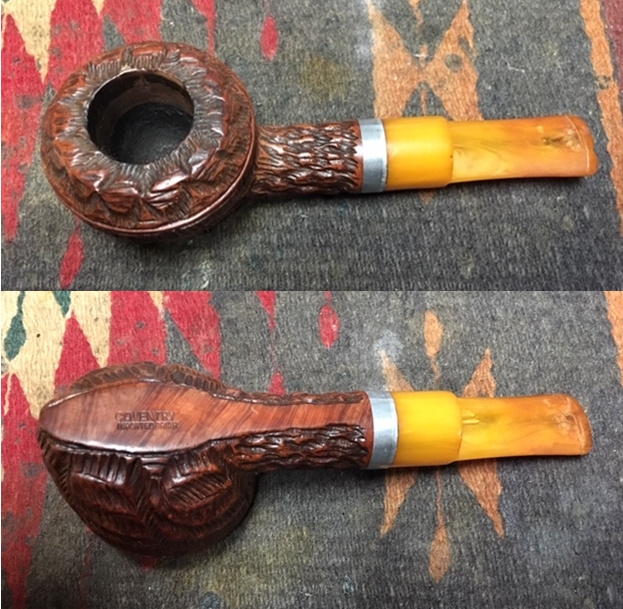
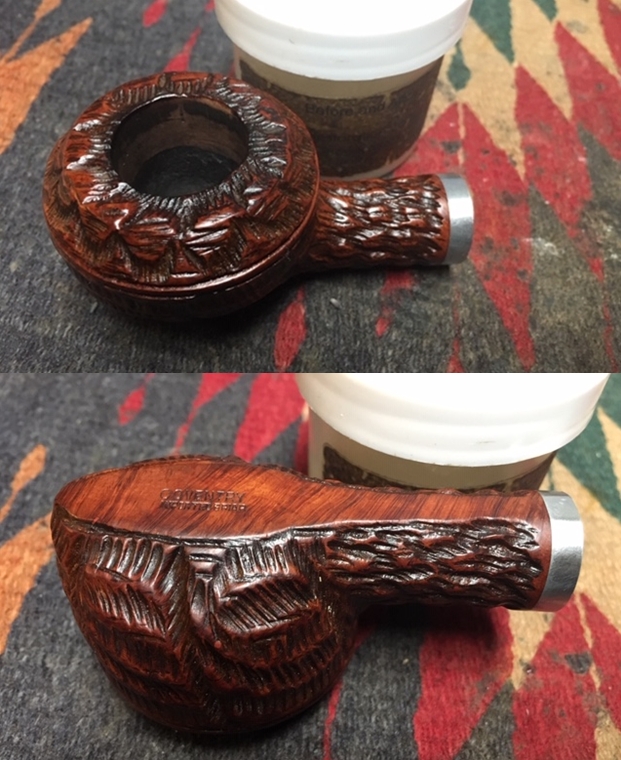
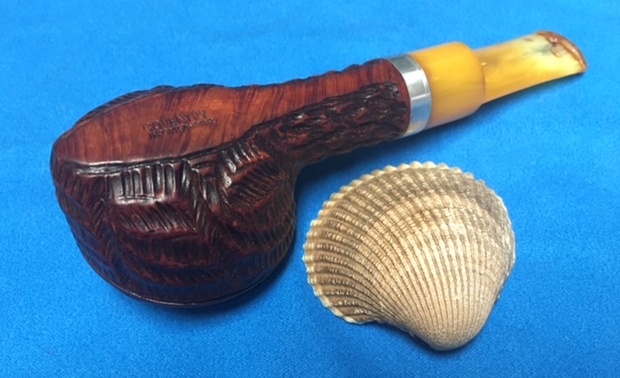
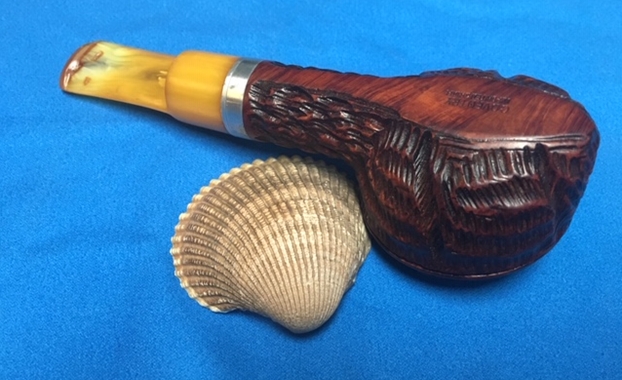
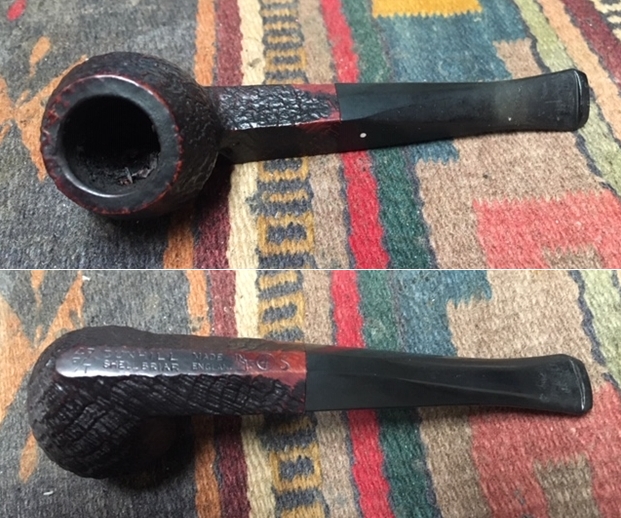
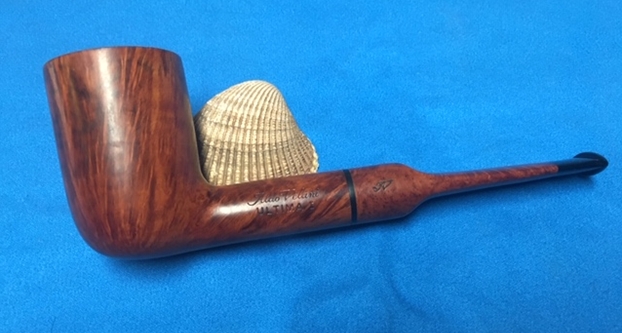
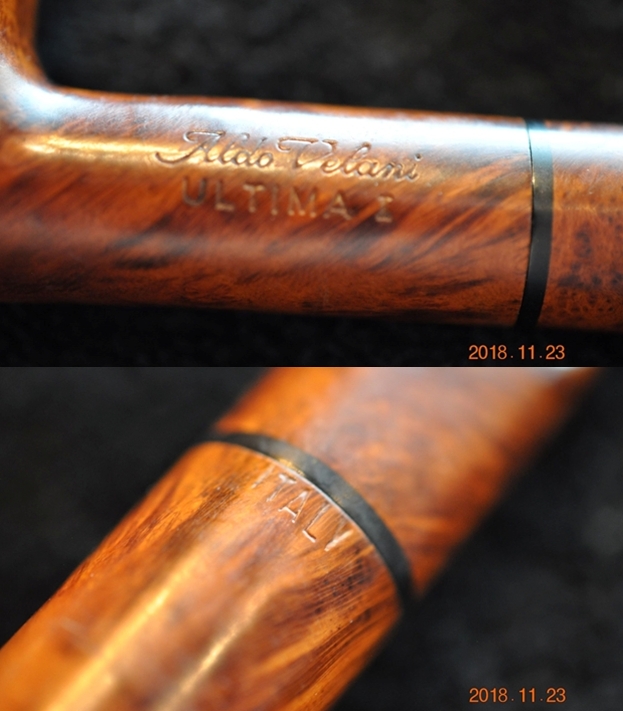
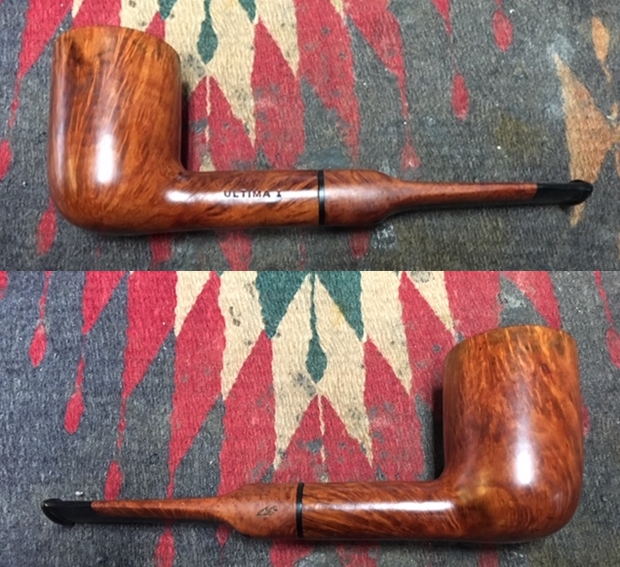
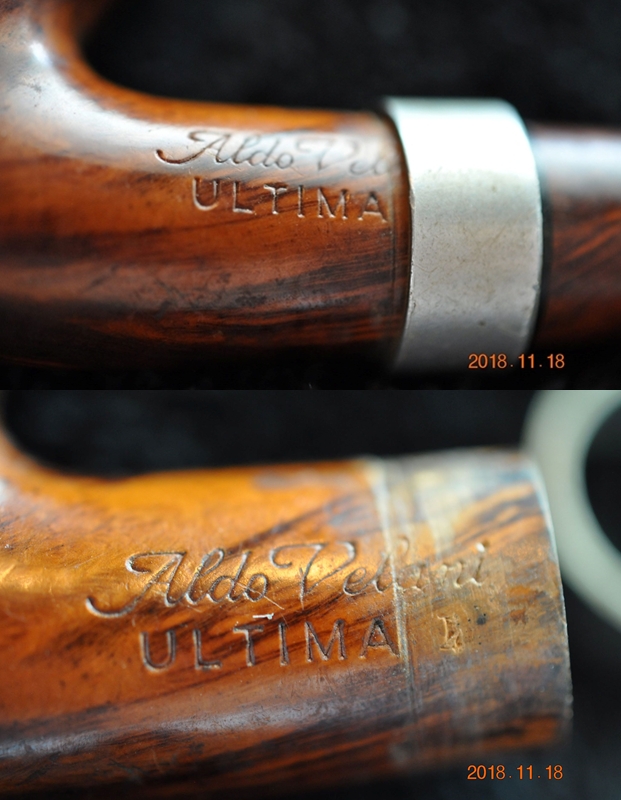
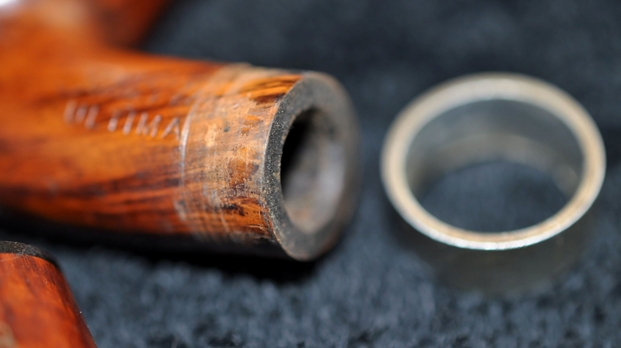
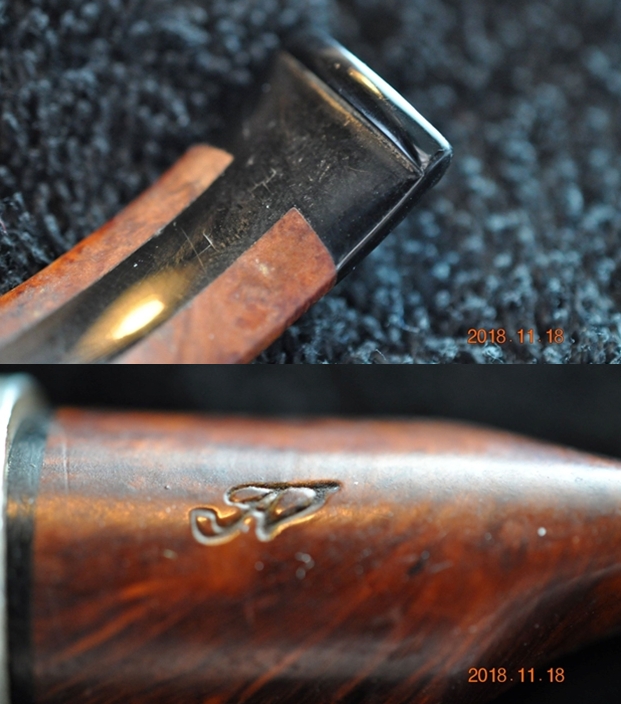
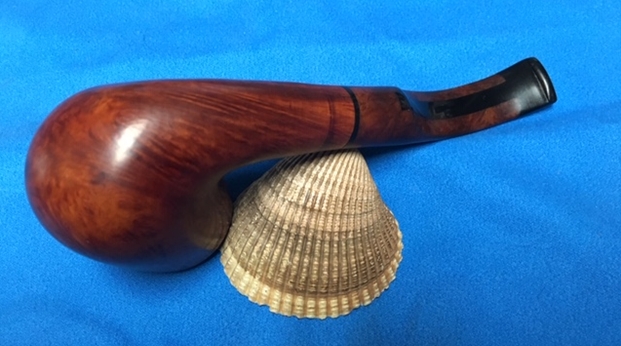
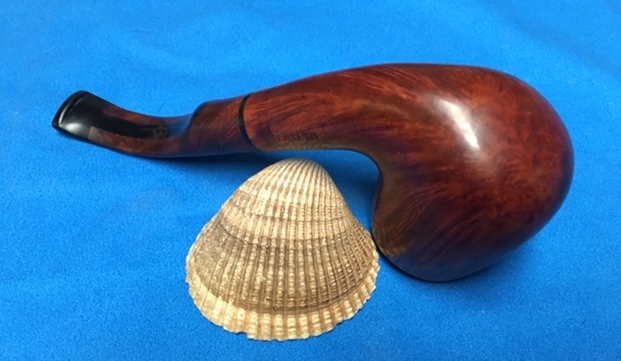
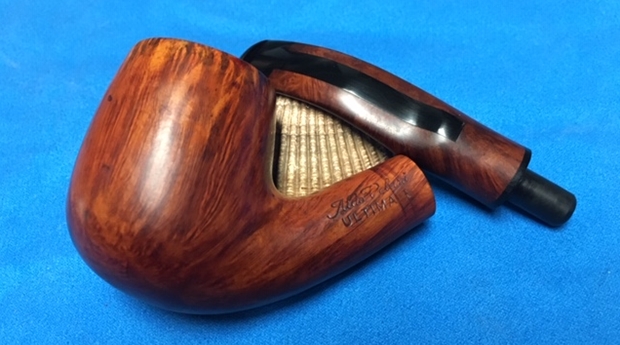
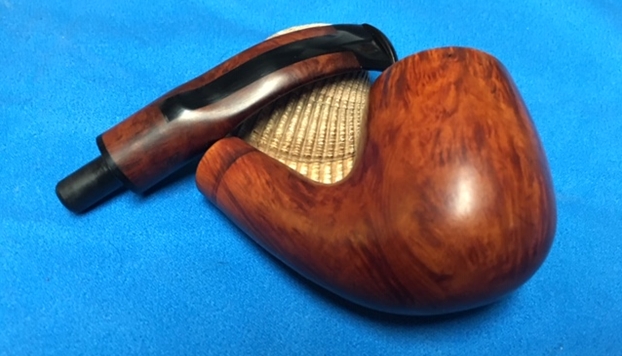
The next photos try to capture the stamping around the sides of the shank. They read as I have noted above. 
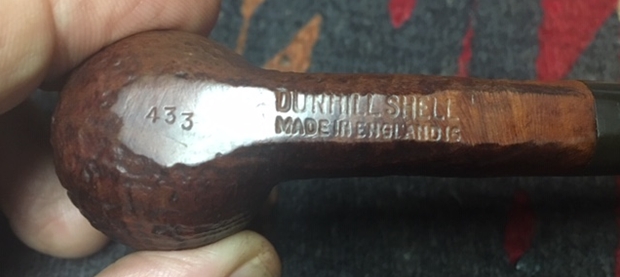
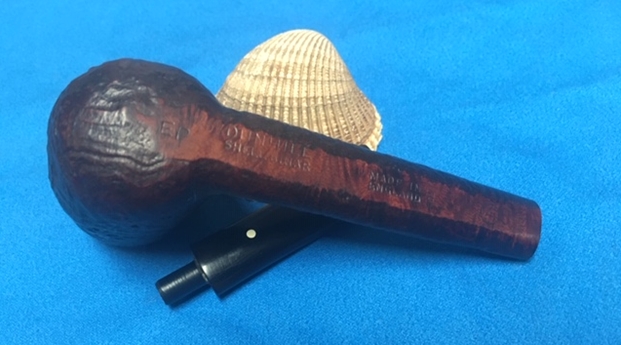
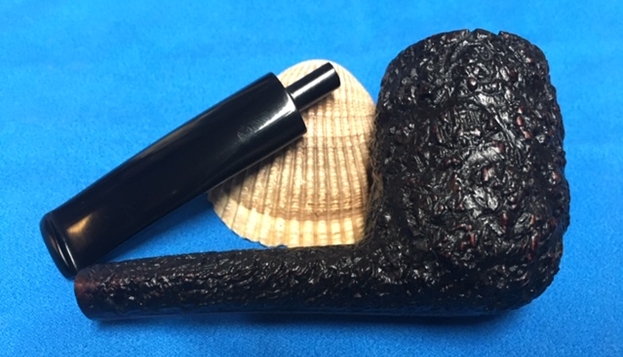
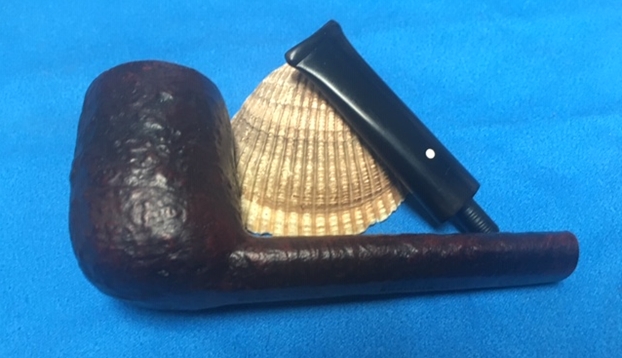
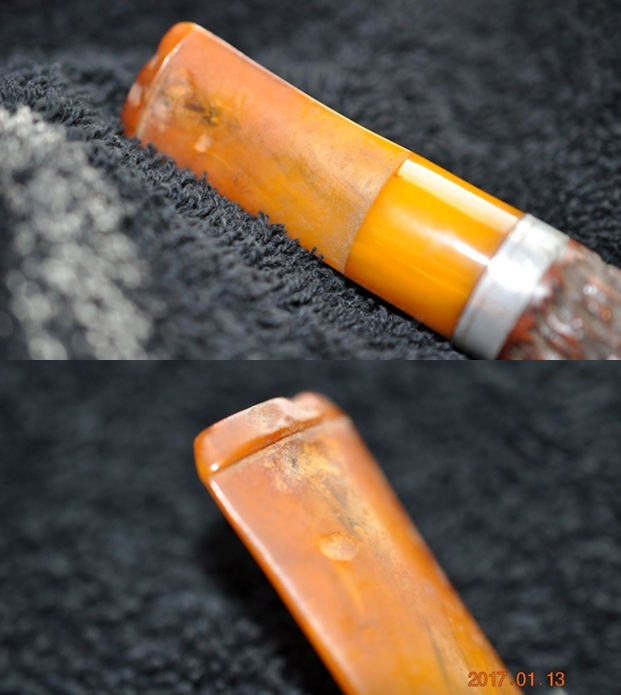
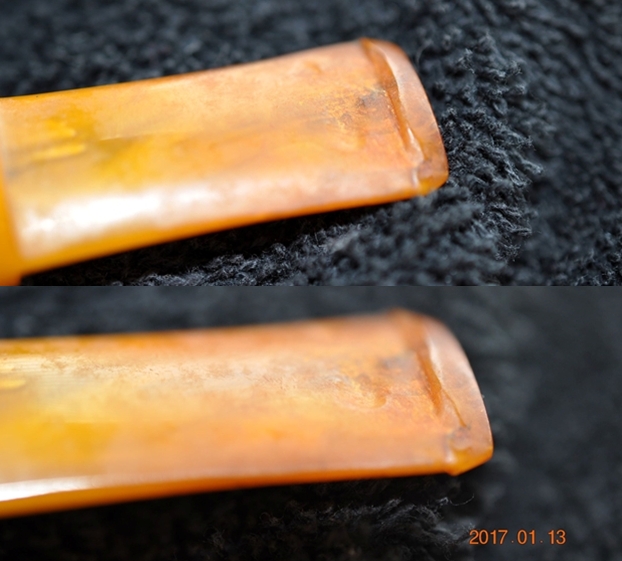
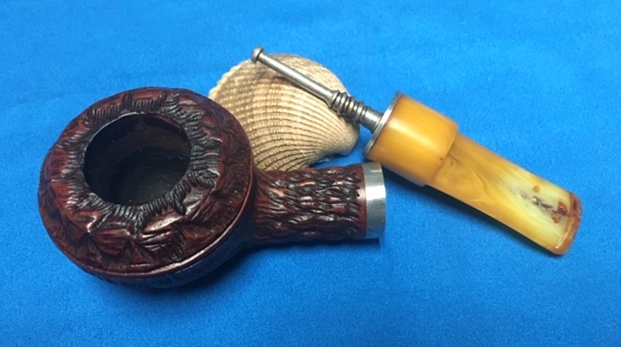
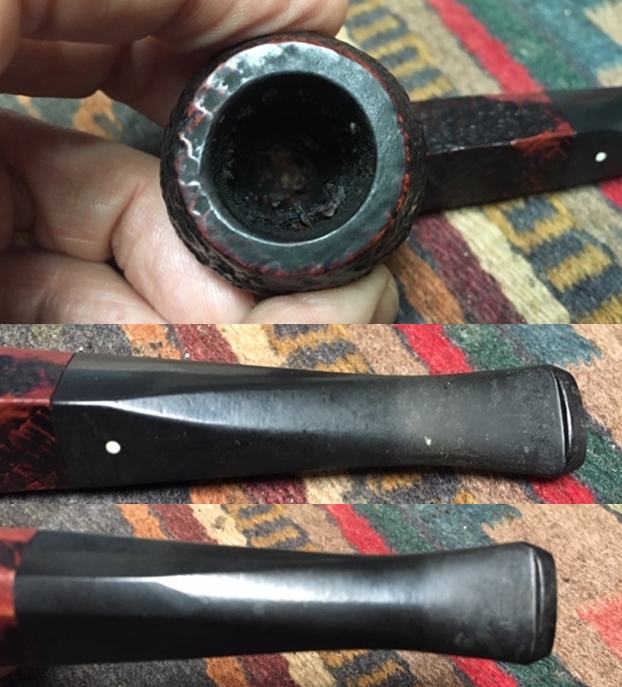
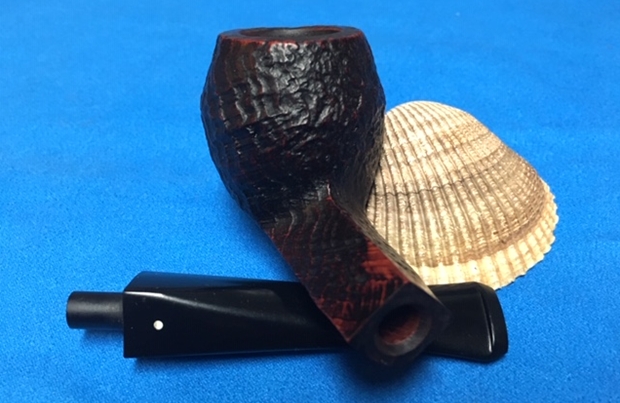
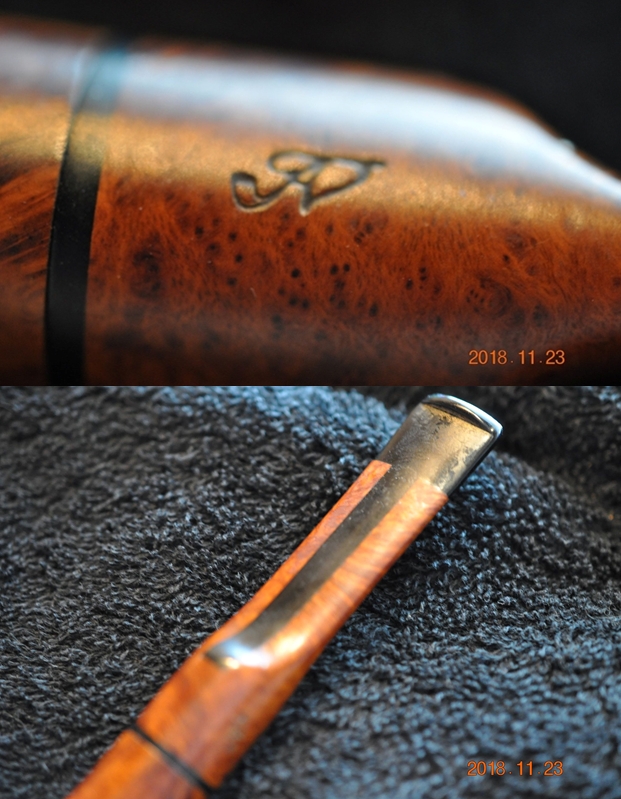
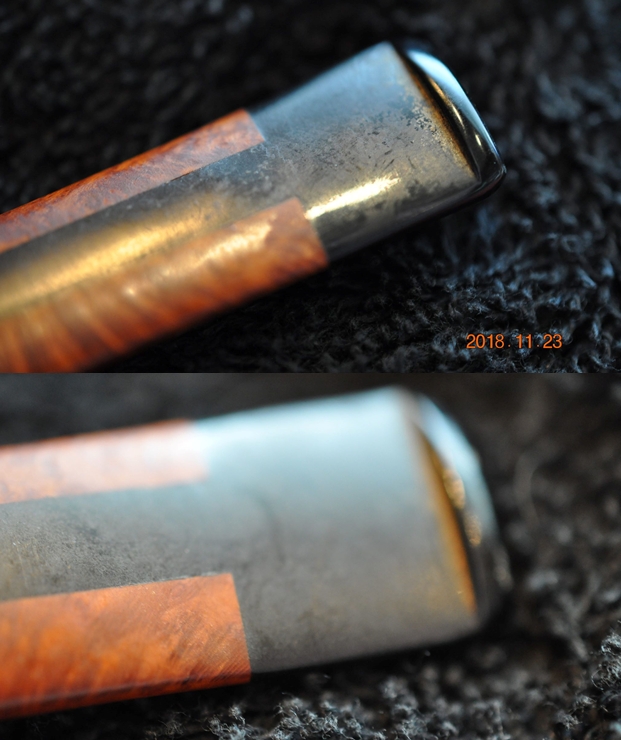
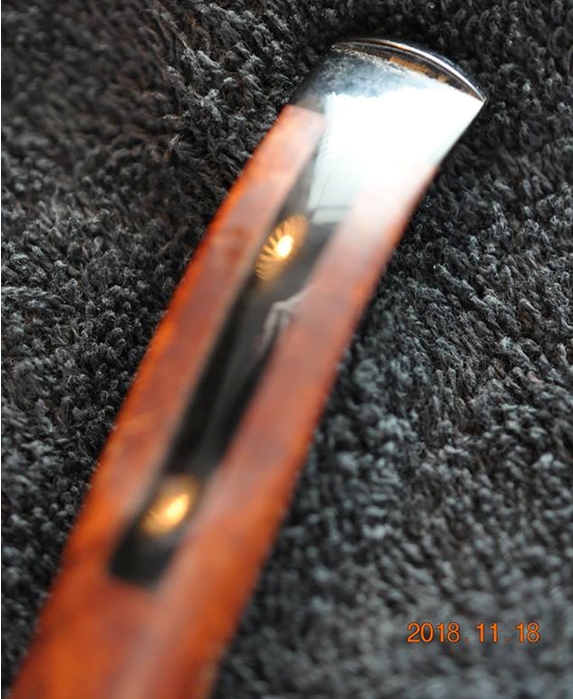
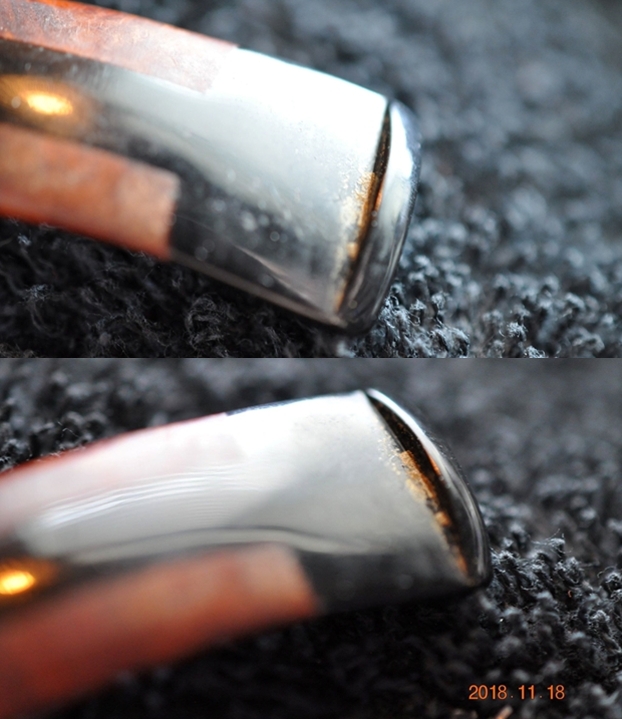
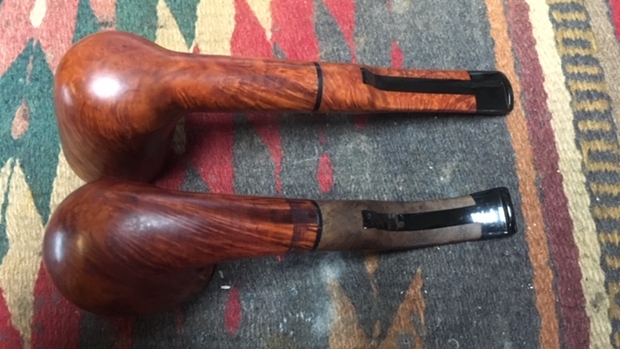
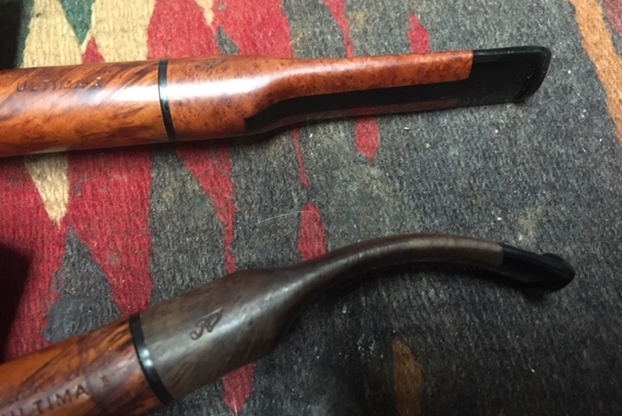
The acrylic/Lucite stem was in excellent condition. It was dirty and had light tooth chatter but no deep tooth marks in the stem surface. The Castello “Diamond” on the left side of the shank is quite nice and undamaged. The button also looks pretty good but I would know more once it arrived in Vancouver.
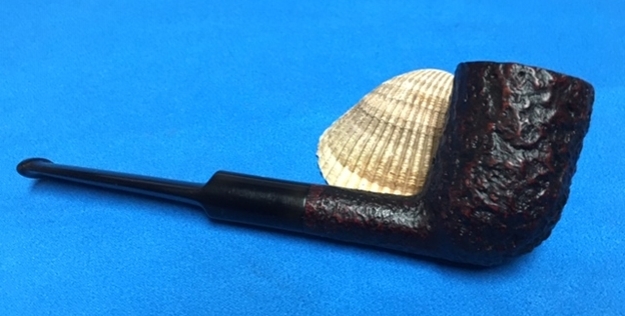
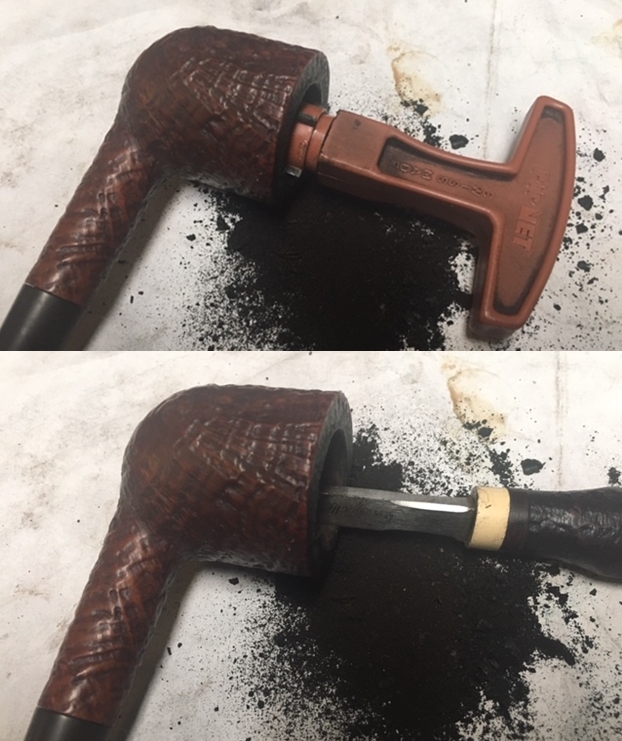
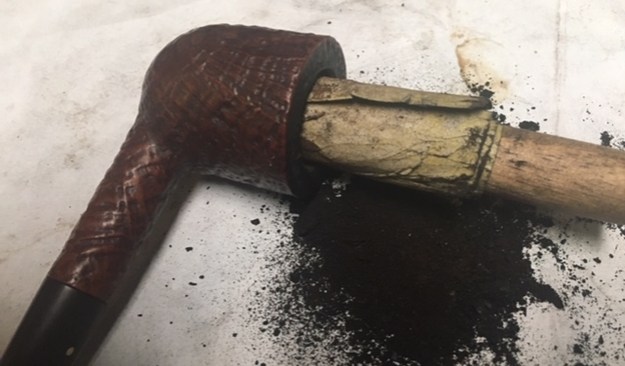
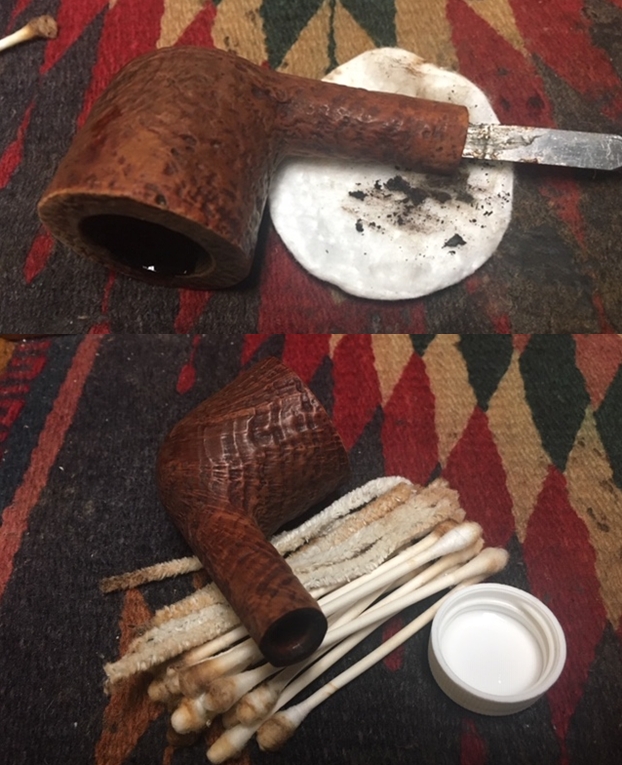
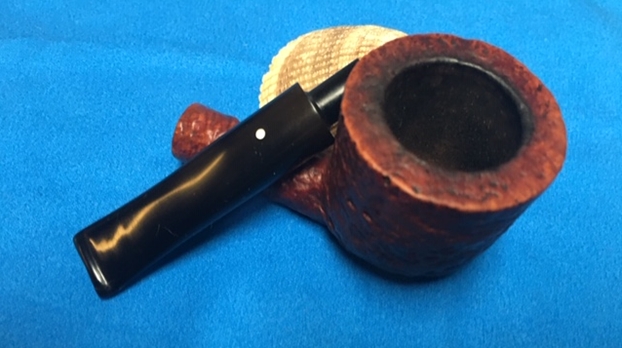
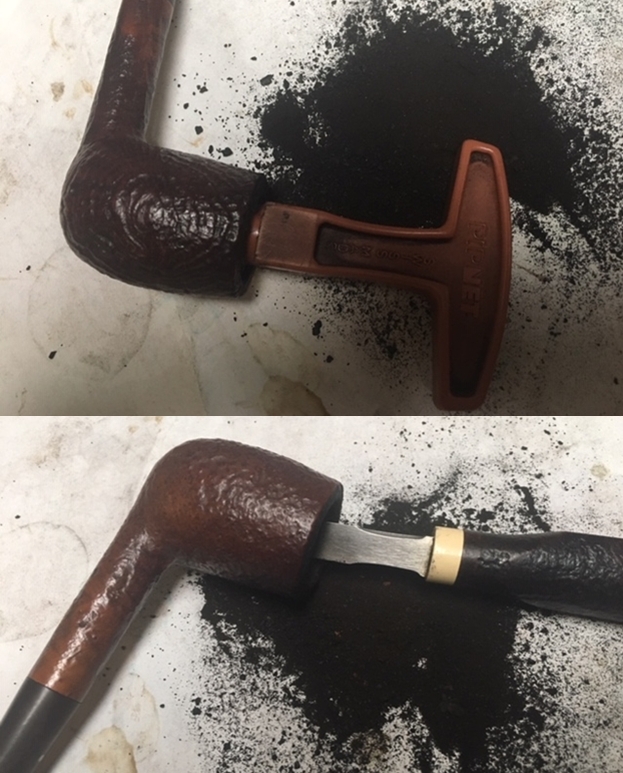
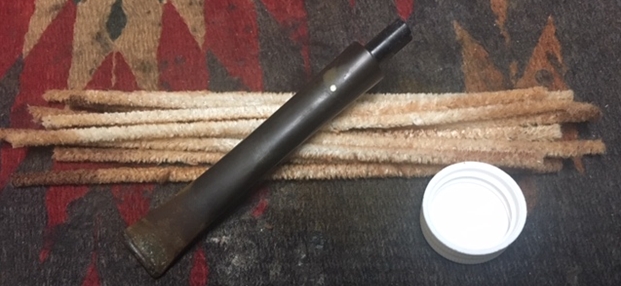
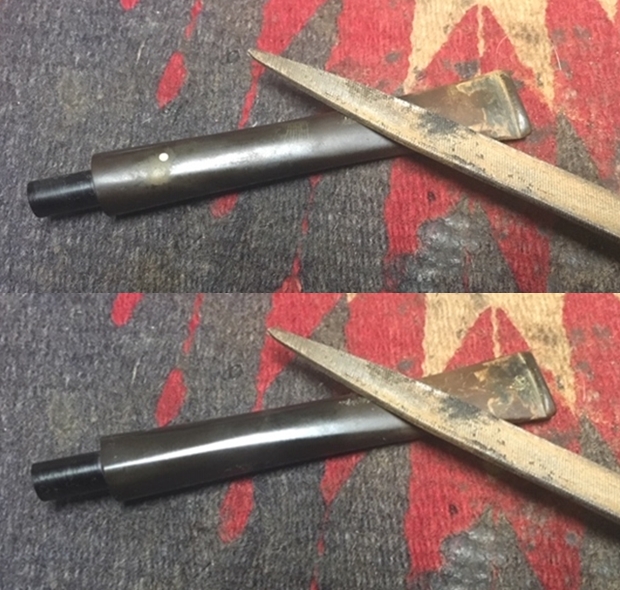
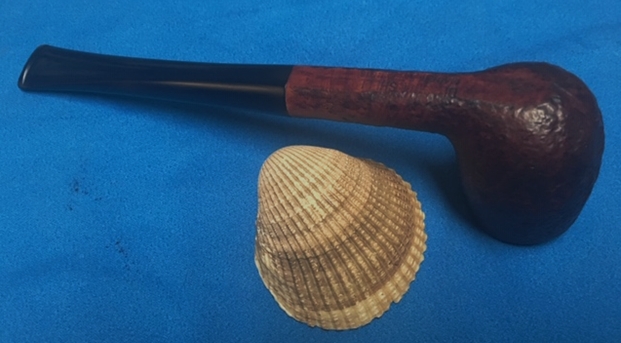
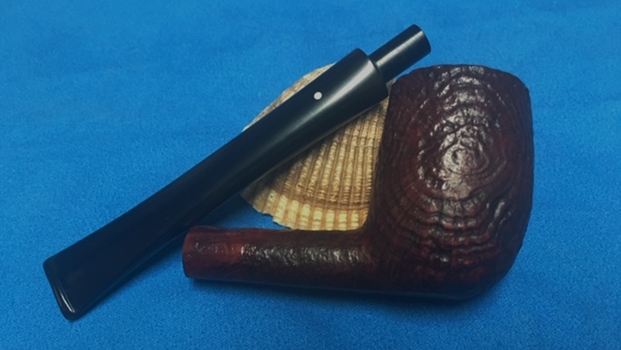
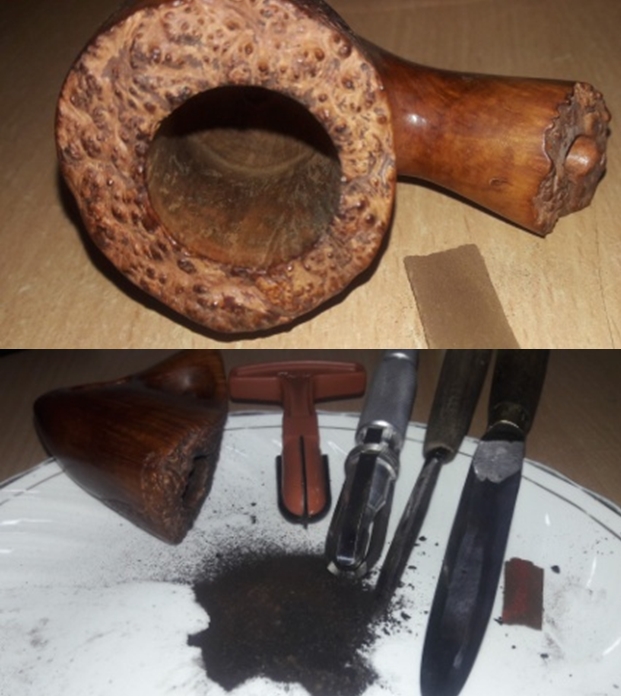
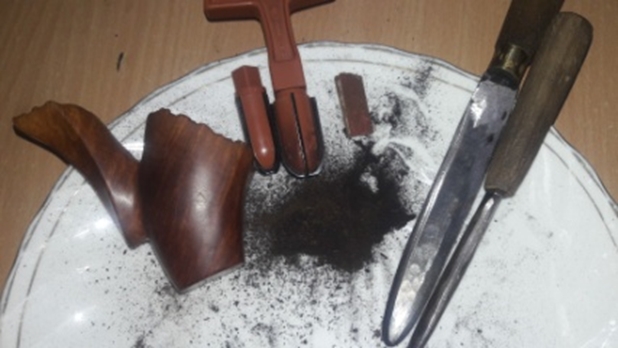
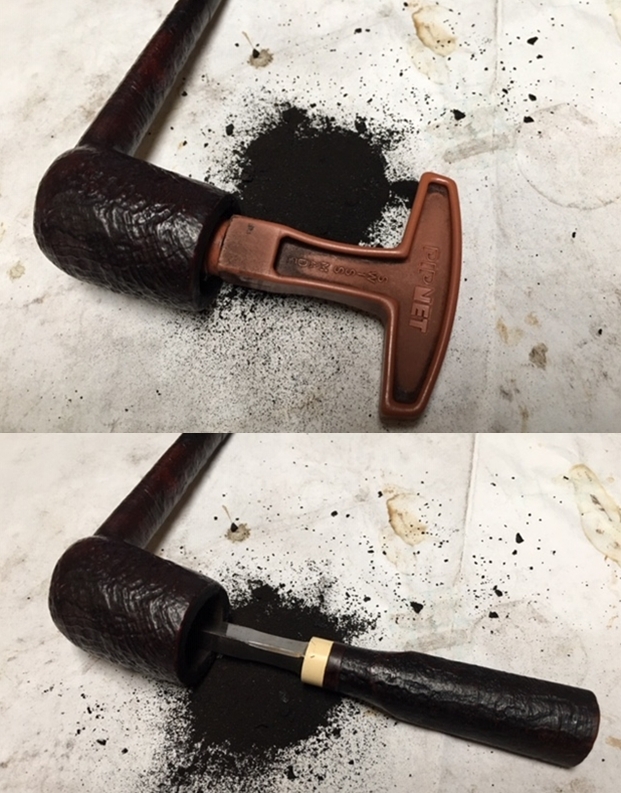
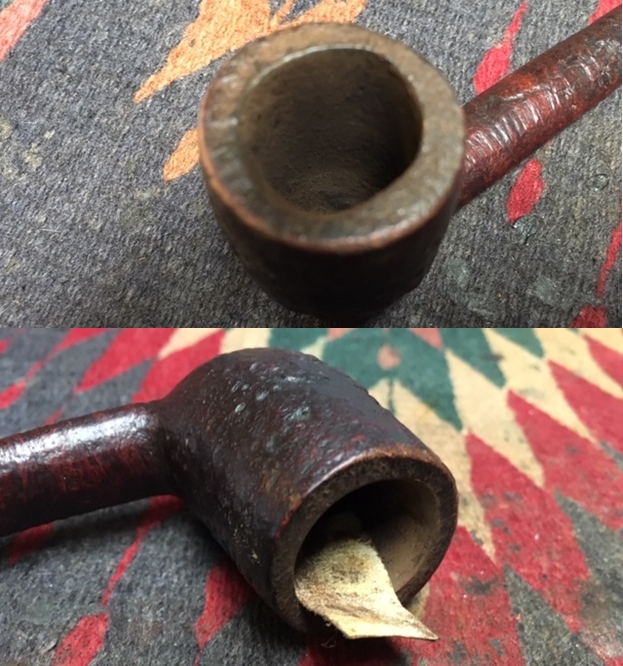
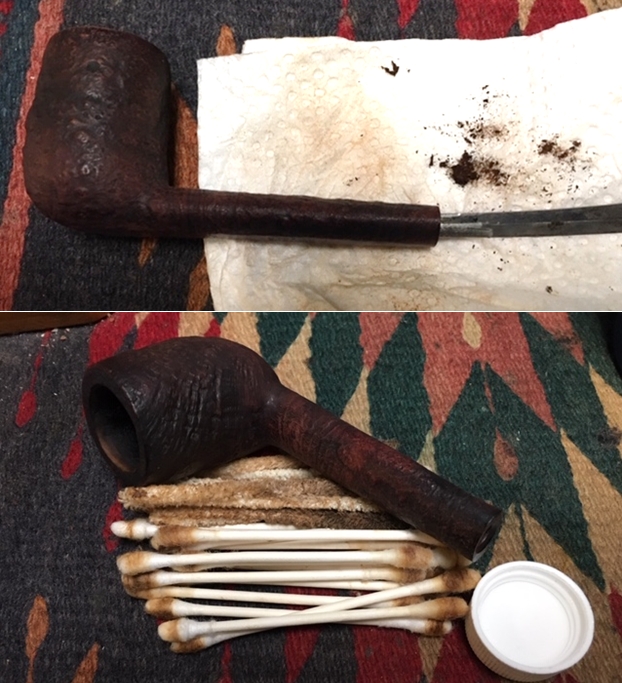
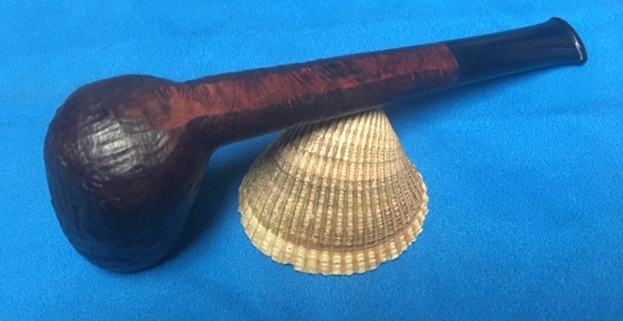
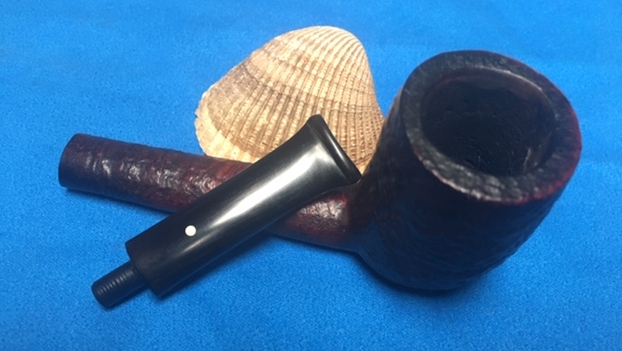
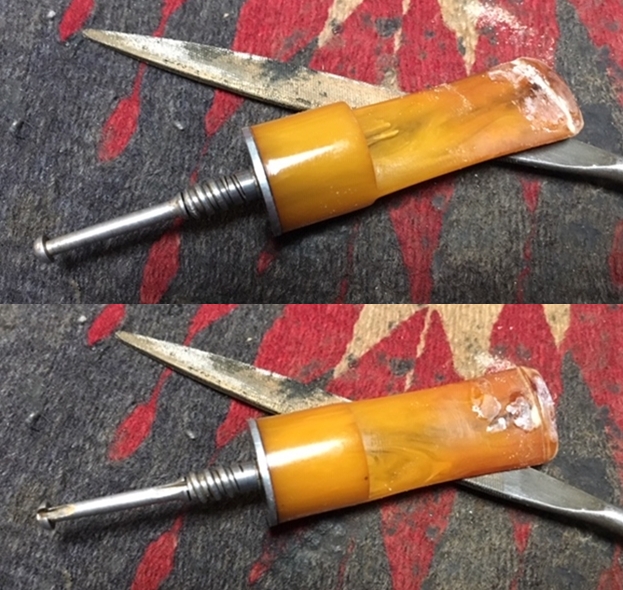
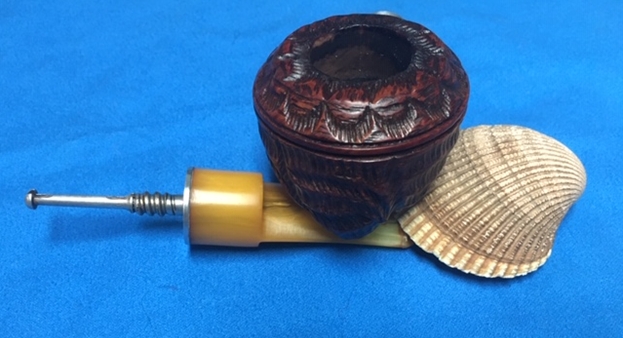
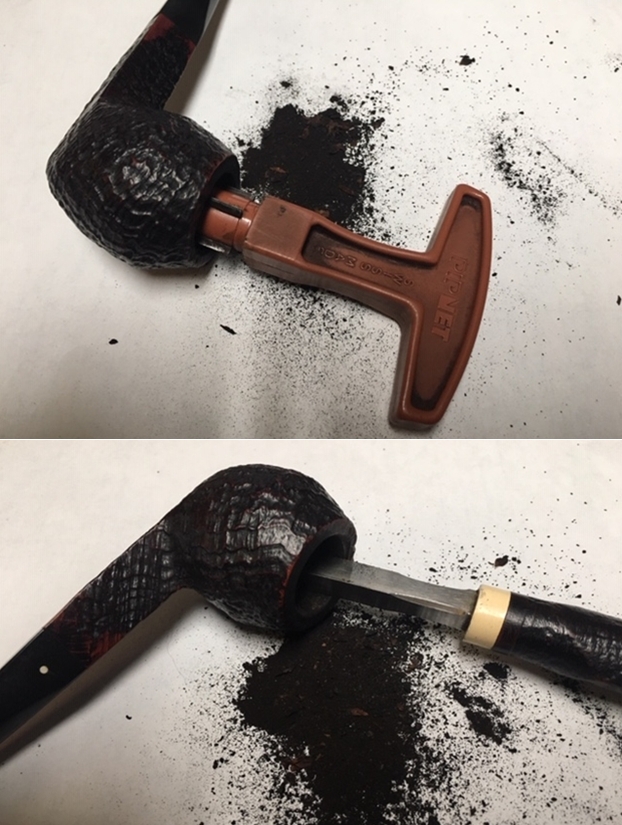
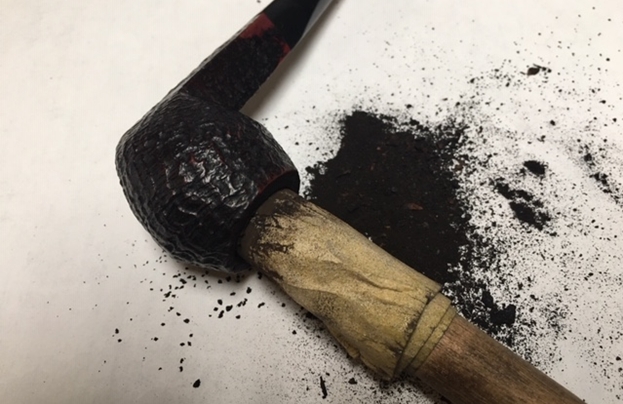
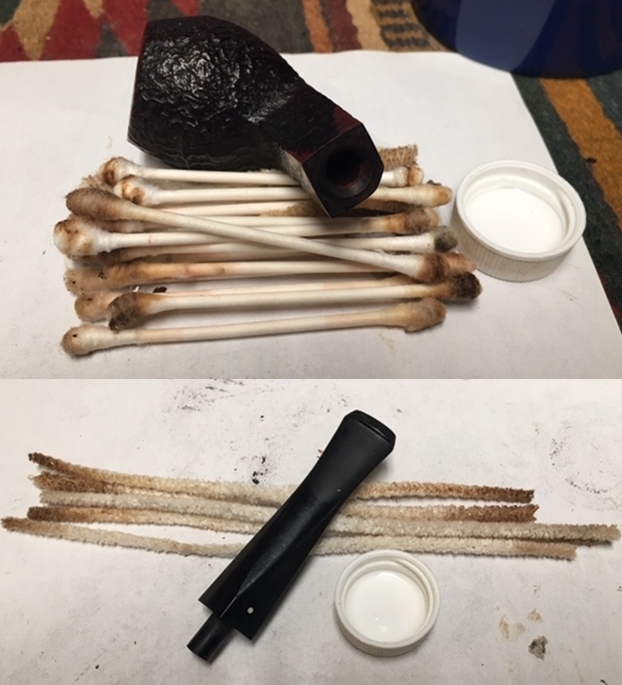
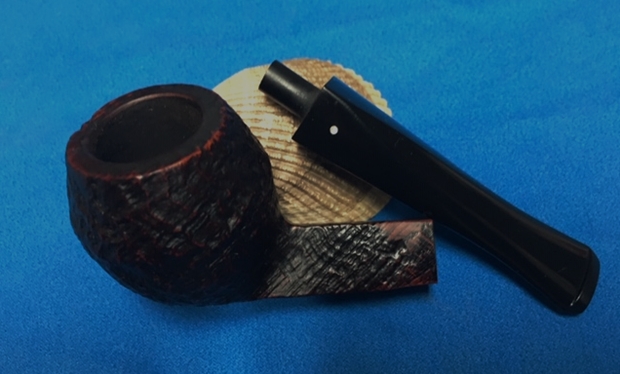
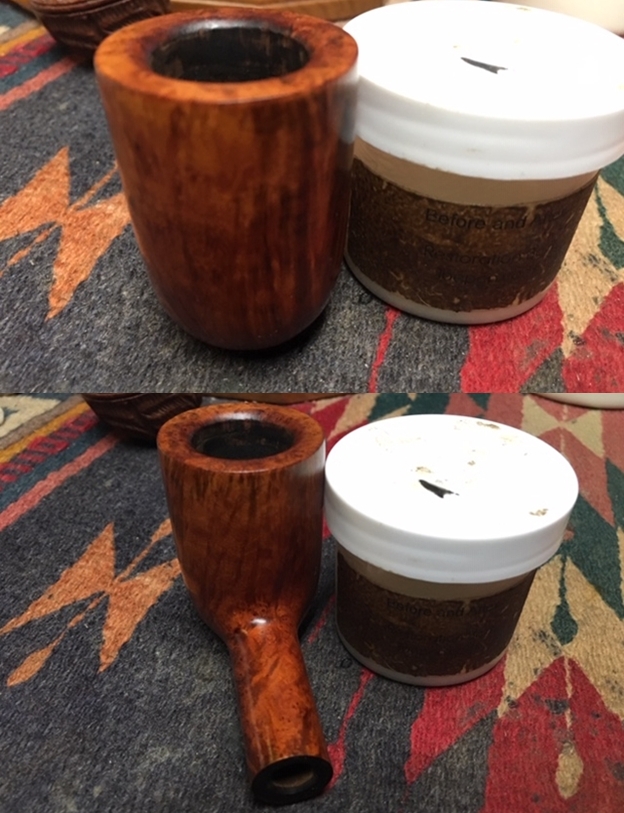
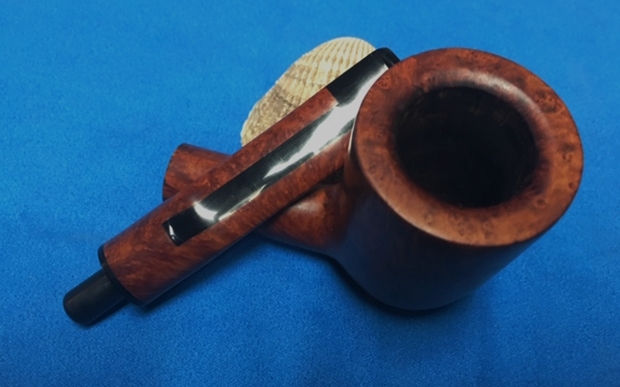
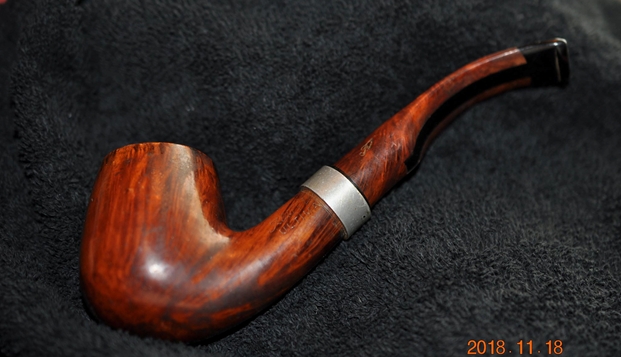
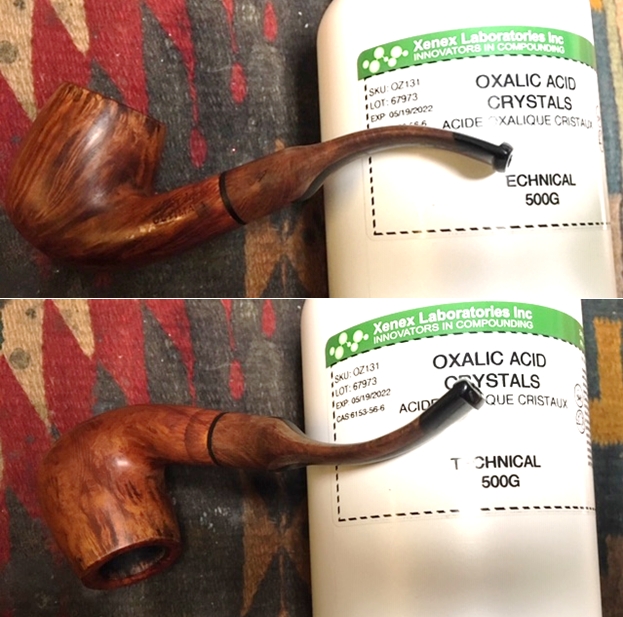
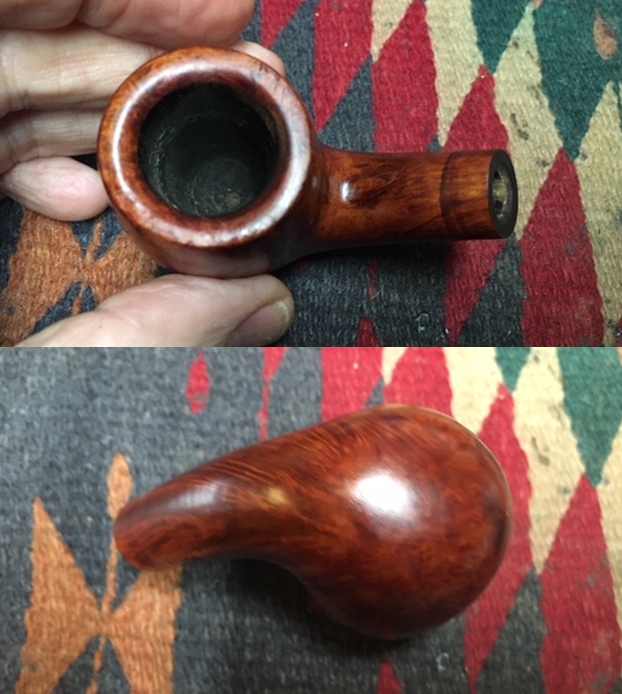
Jeff cleaned the pipe with his usual thoroughness – reaming the bowl with a PipNet pipe reamer and cleaning up the remnants with a Savinelli Fitsall Pipe Knife. He scrubbed the internals of the bowl, shank and stem with alcohol, cotton swabs and pipe cleaners. He scrubbed the exterior with Murphy’s Oil Soap to clean off the dust and grime on the rusticated Sea Rock finish. The rusticated rim top looked very good under the thick lava coat. It was a bit dull and some lava still in the deep crevices that I would need to deal with but nothing in comparison to what it looked like when Jeff got it. The inside of the bowl itself looked great. The stem was in great shape other than a bit of tooth chatter. I took photos of the pipe when it arrived here. 
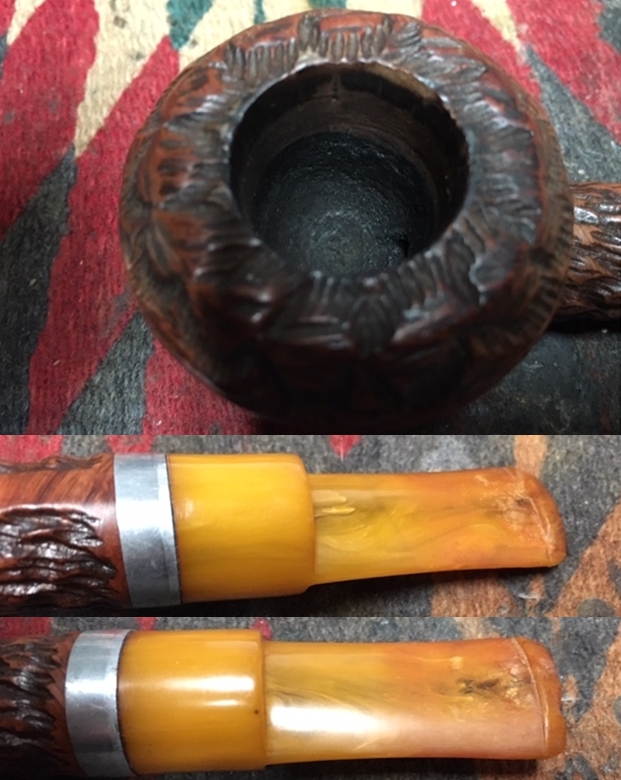
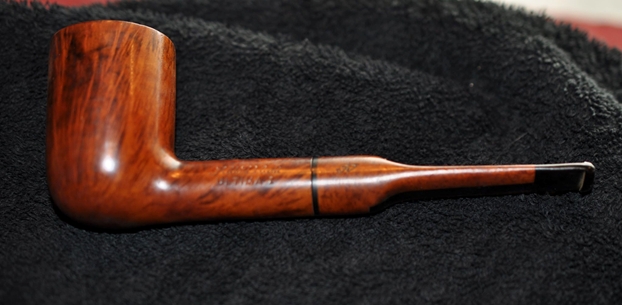
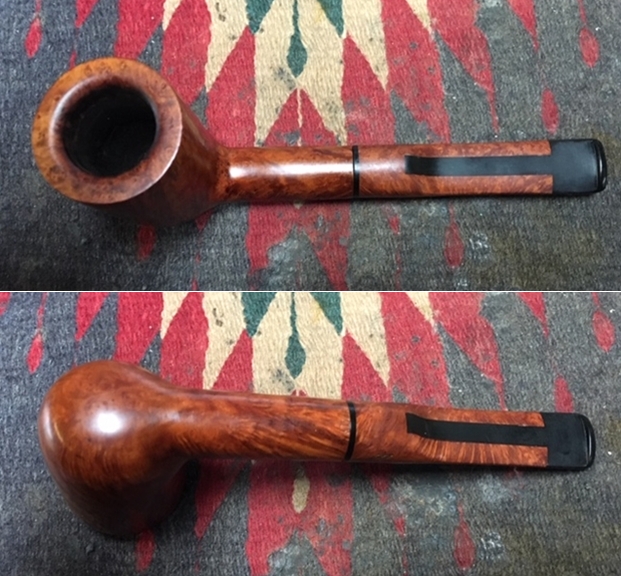
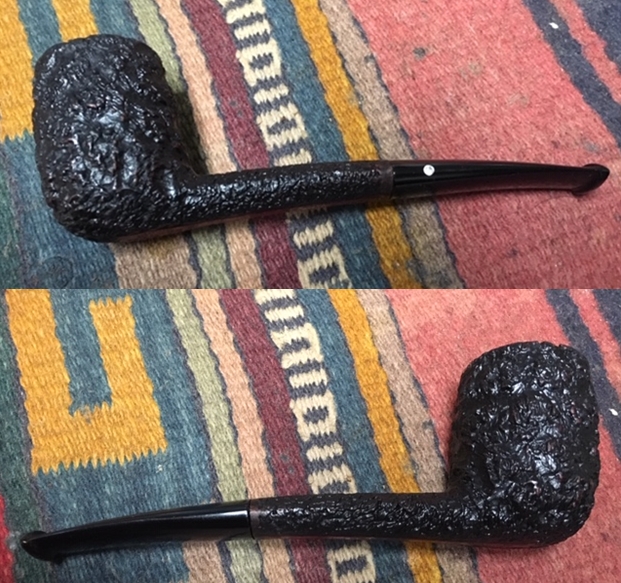
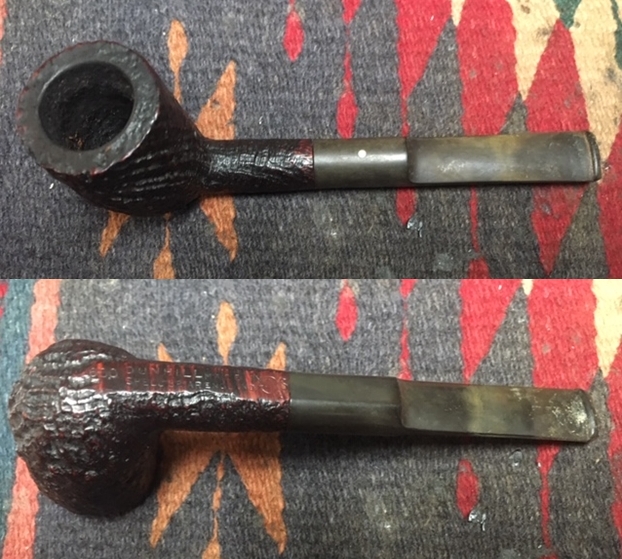
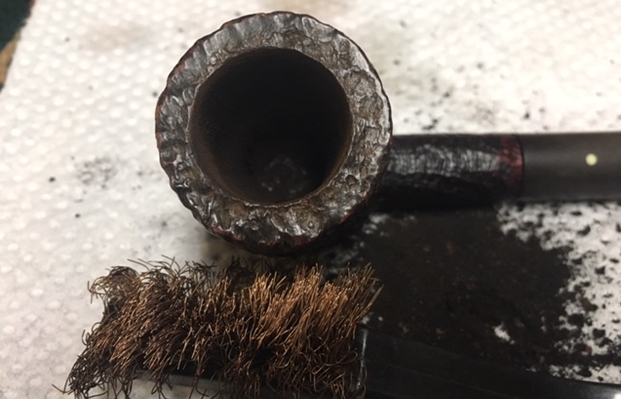
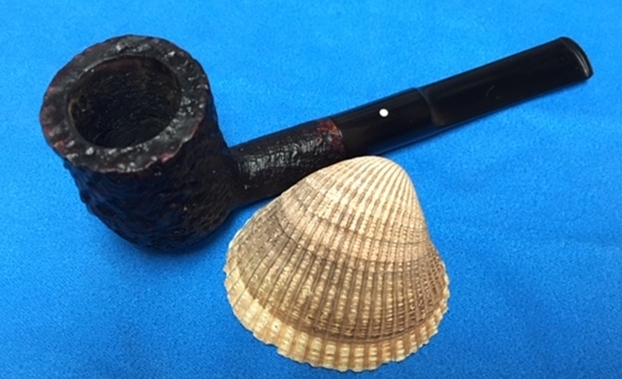
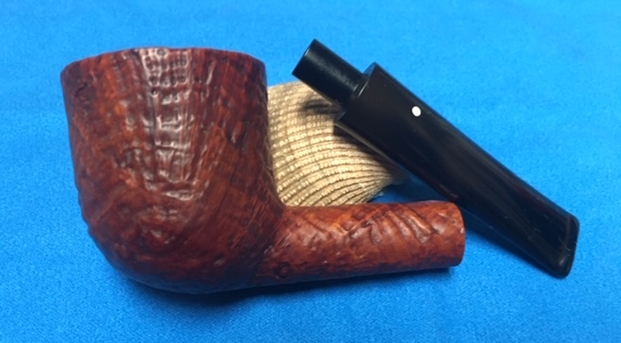
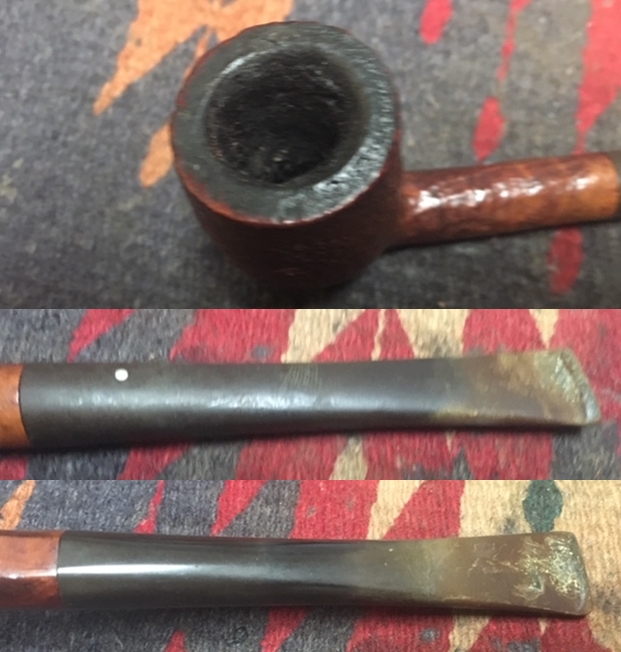
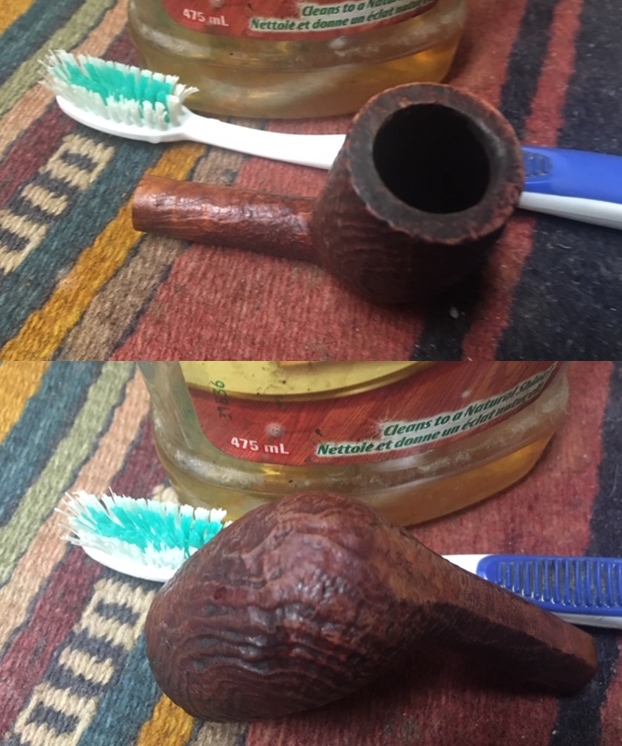
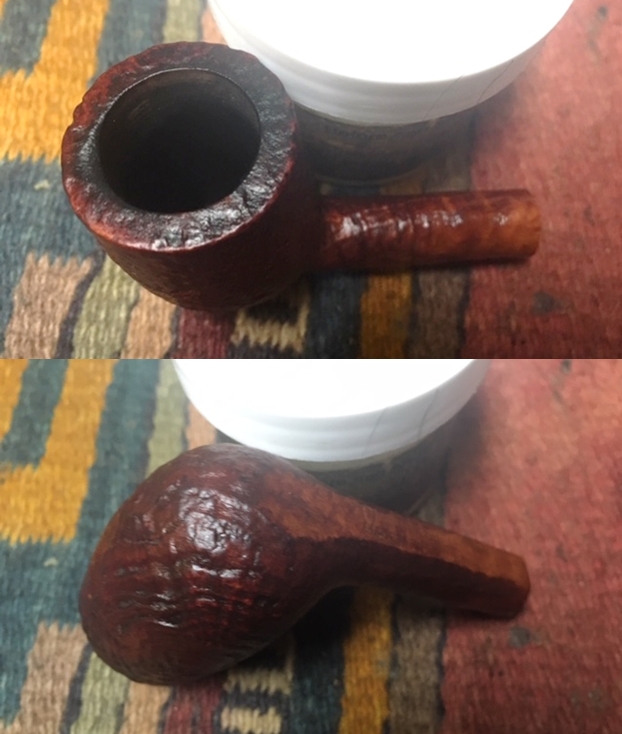
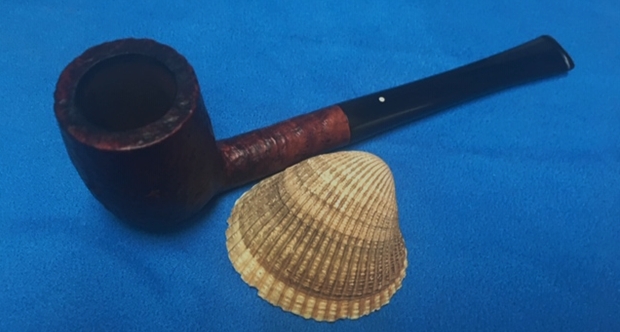
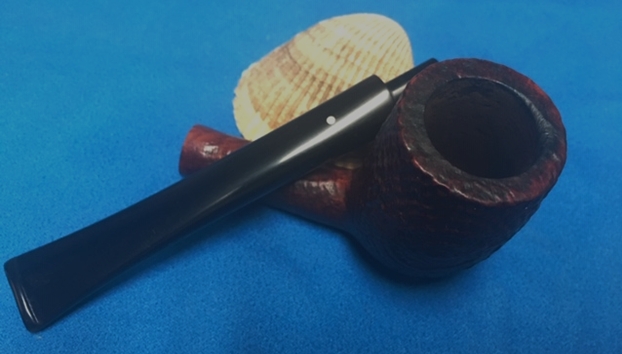
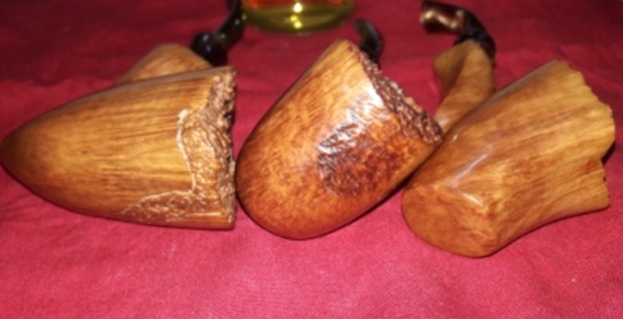
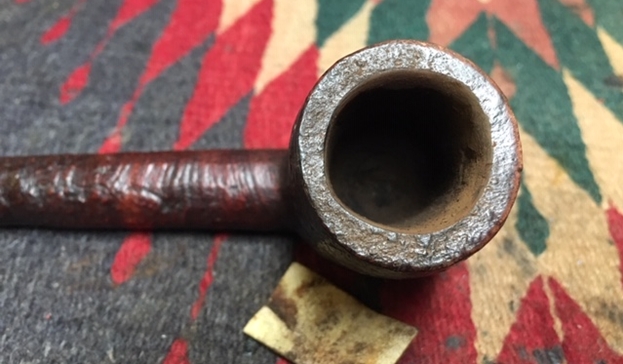
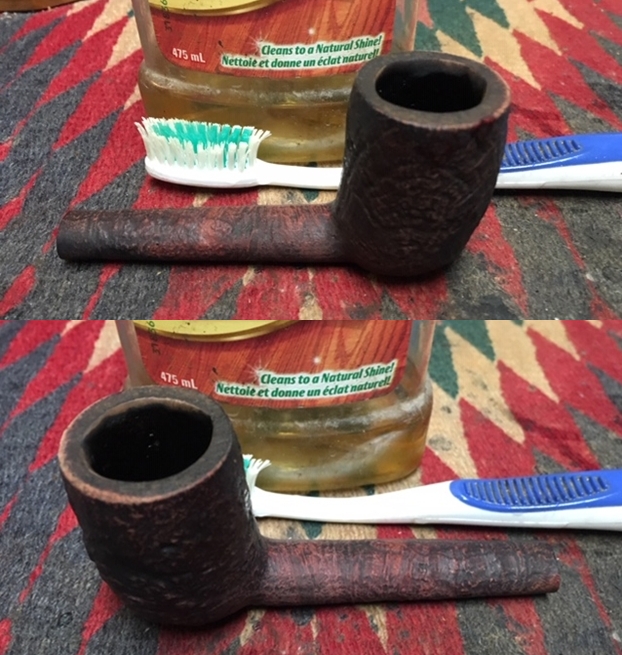
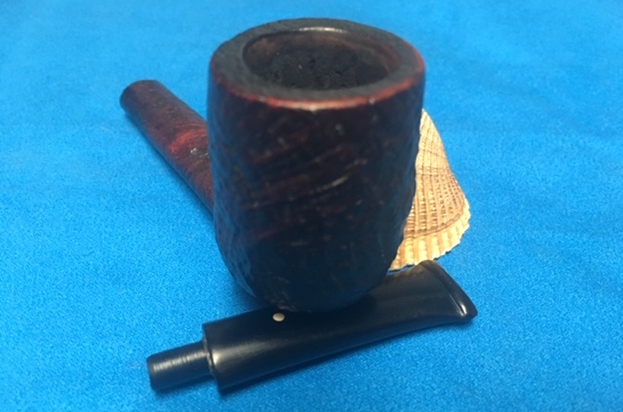
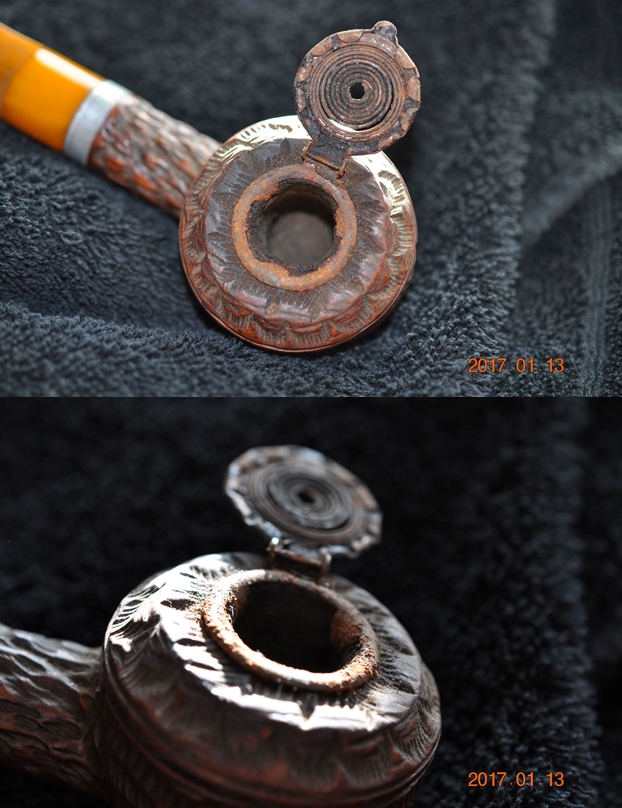
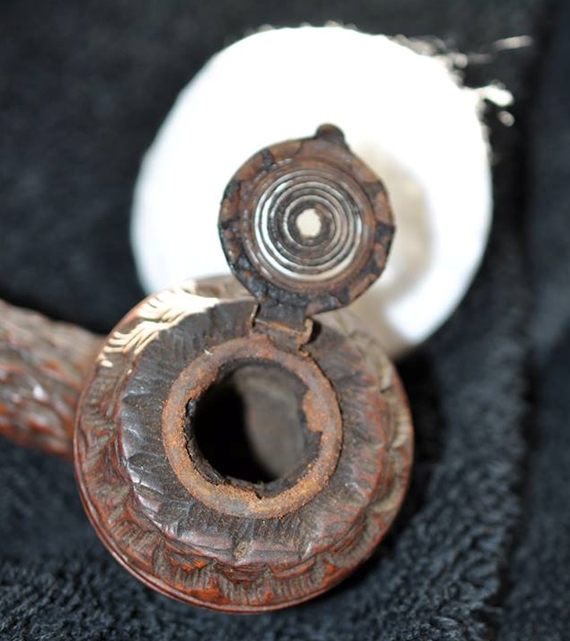
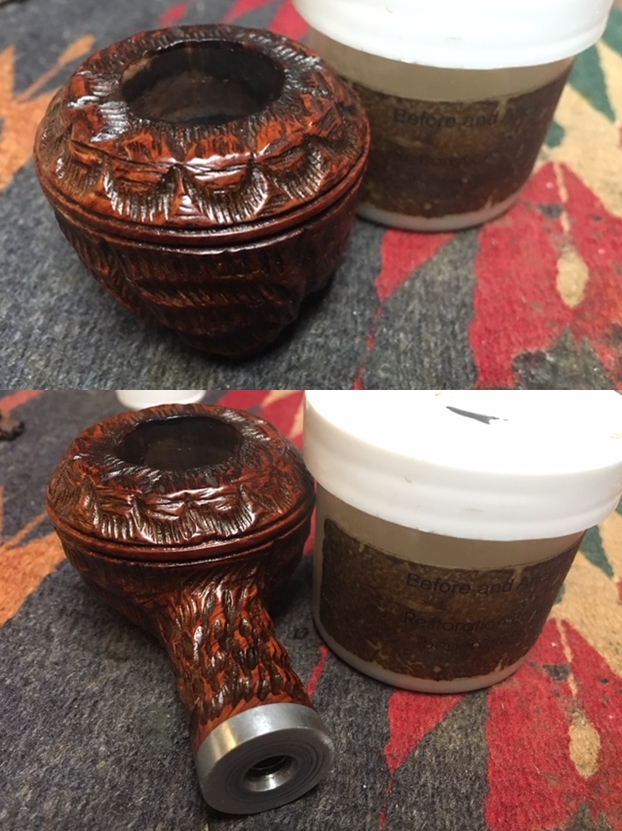
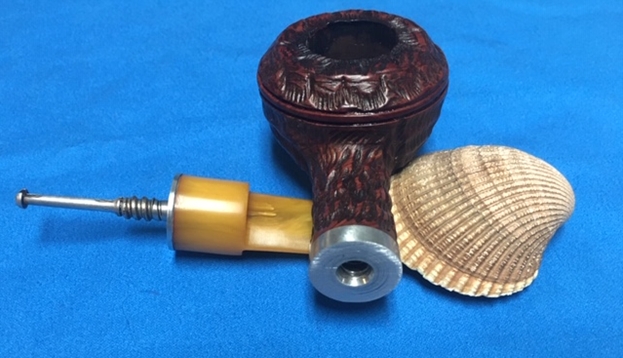
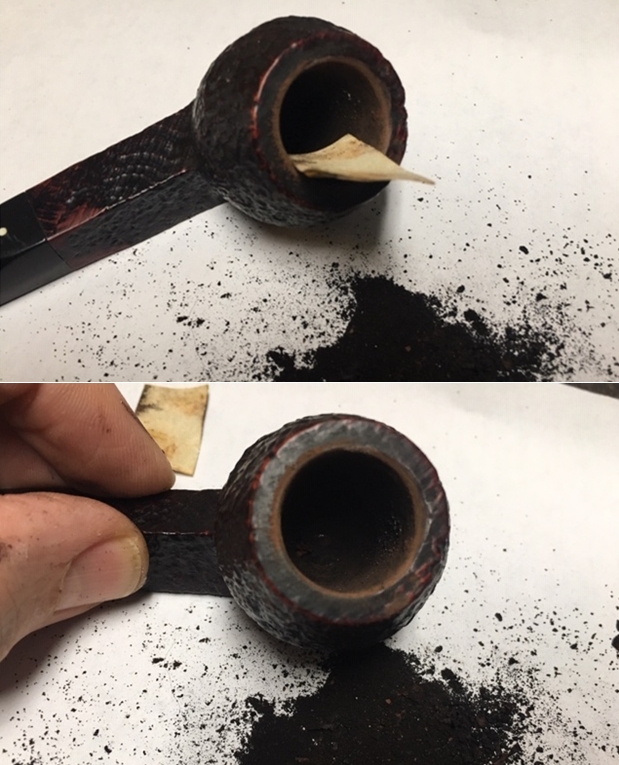
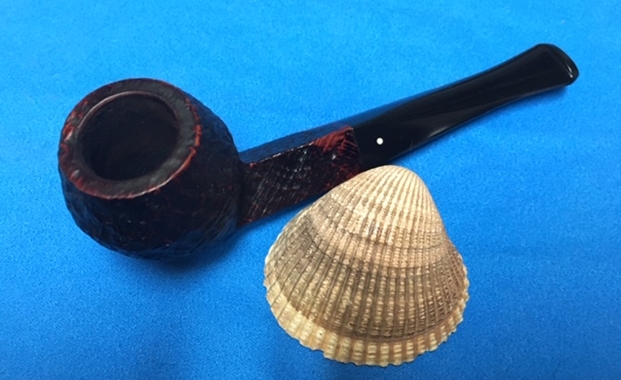
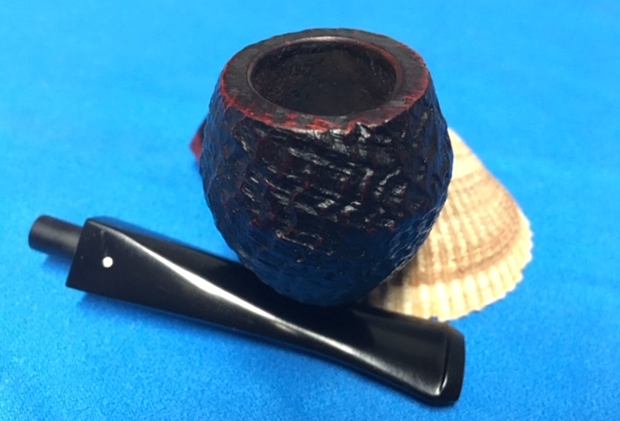
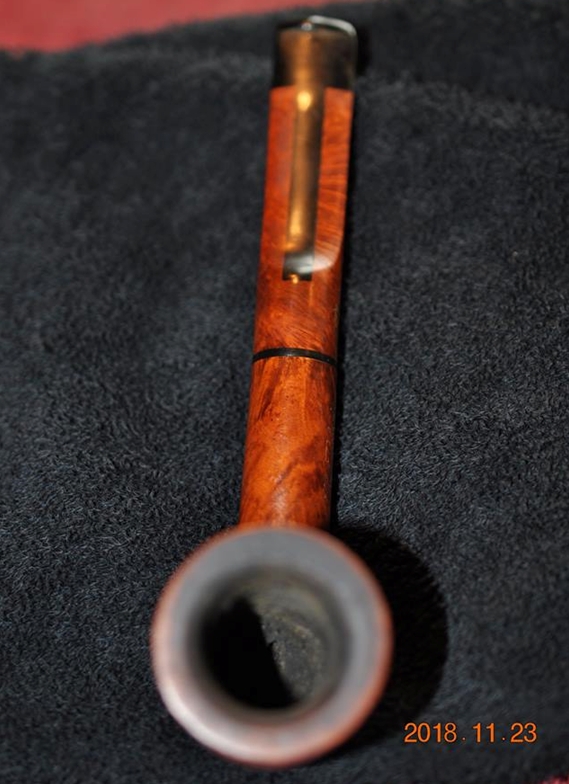
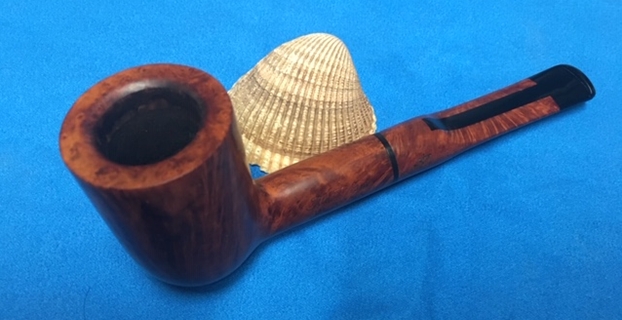
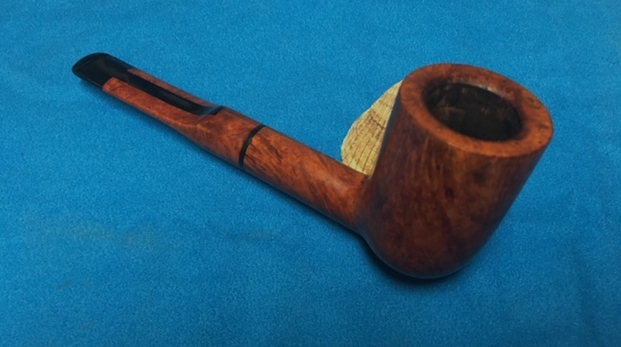
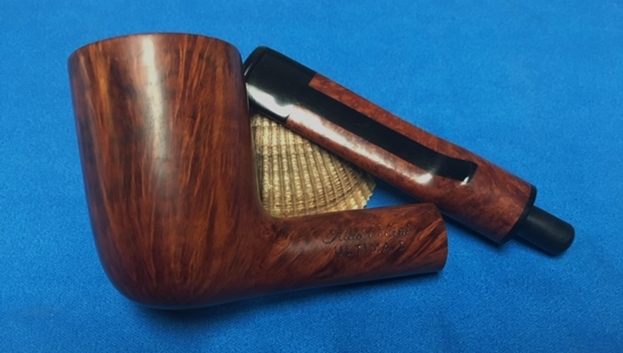
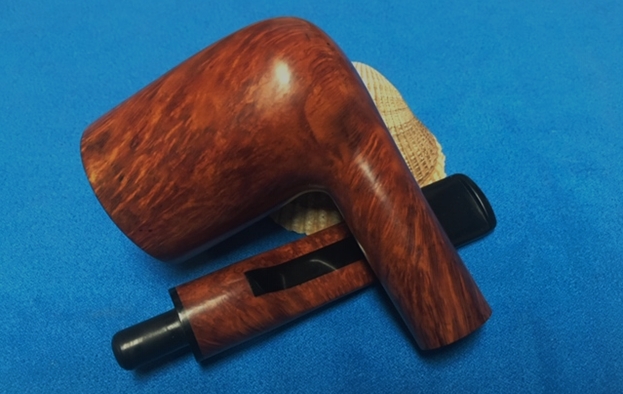
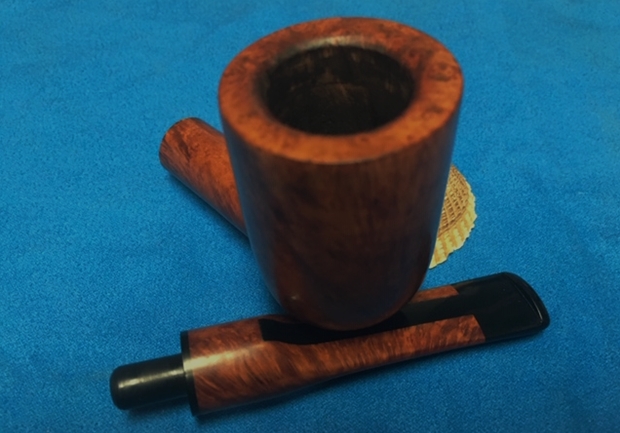
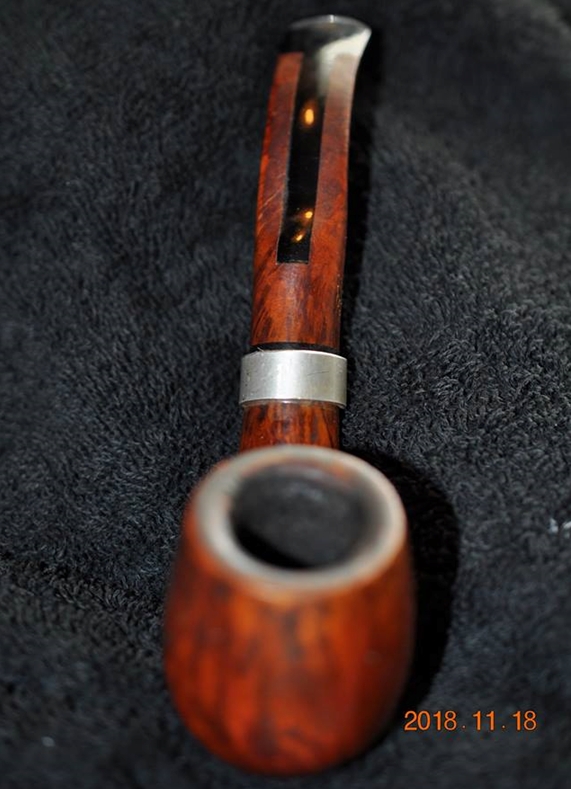
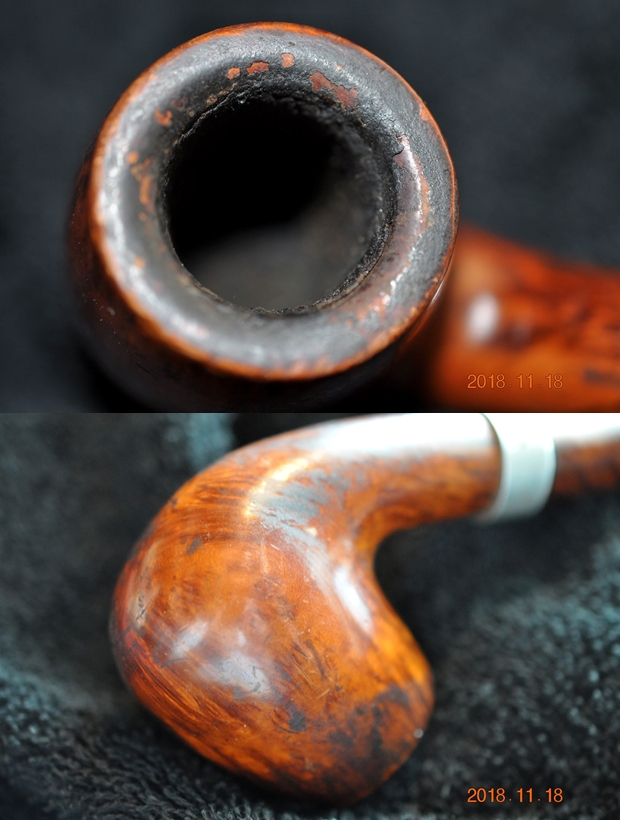
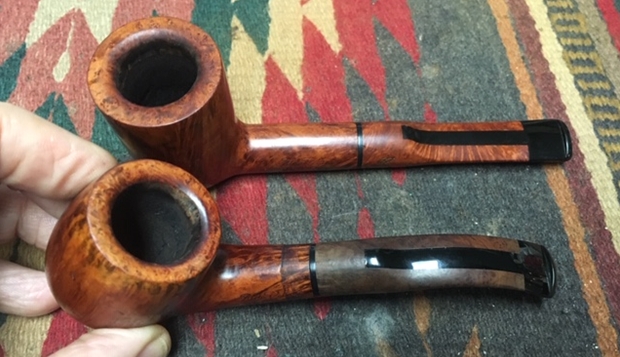
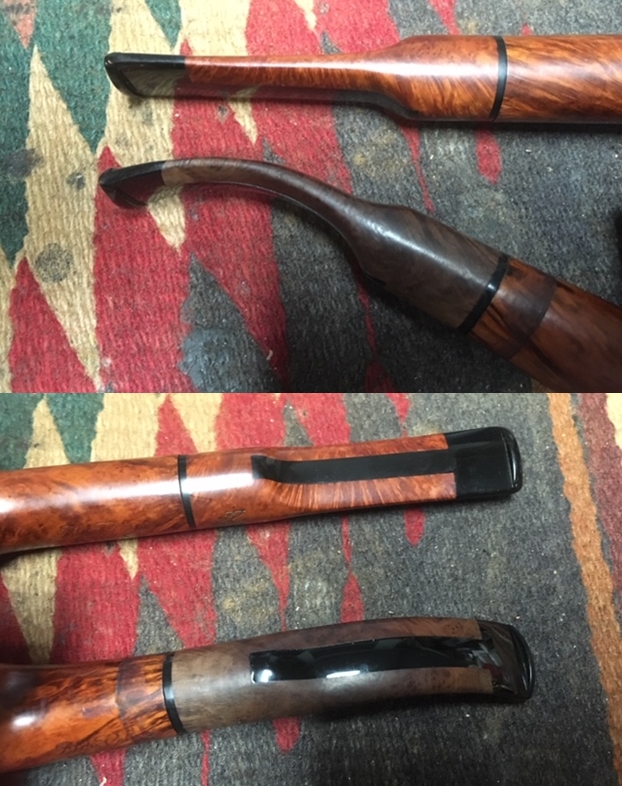
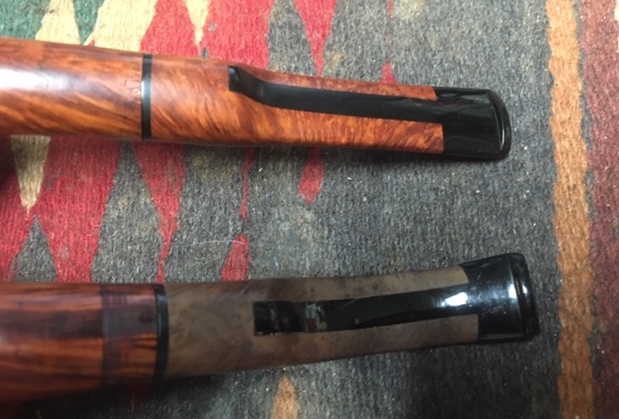
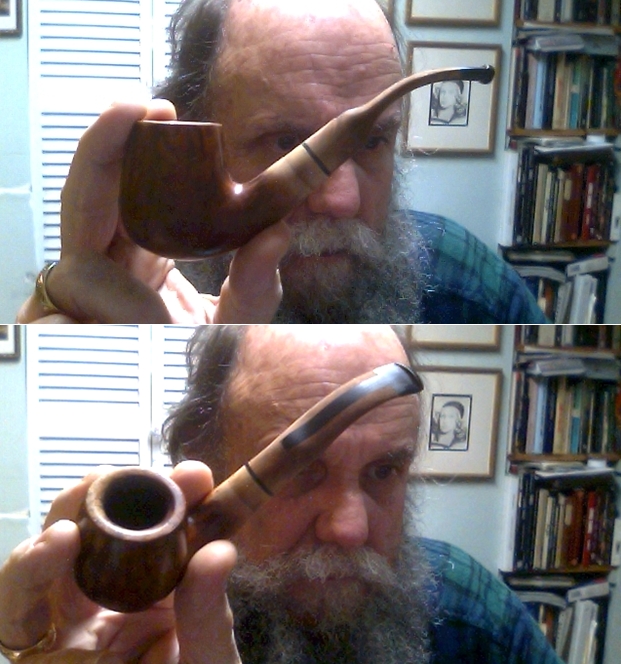
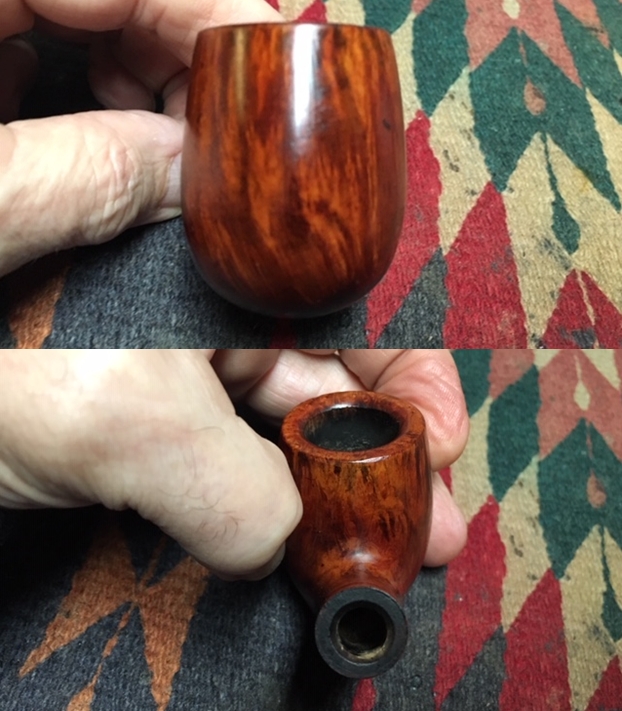
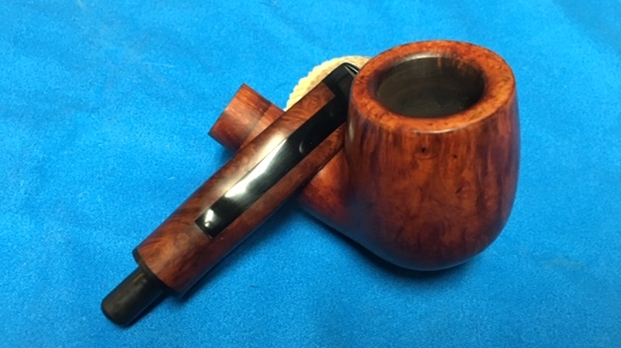
I took some close up photos of the rim top, bowl and stem to show what they looked like after Jeff’s cleanup. It is a startling difference. The rim top will take some work to take care of the damage. The stem will take very little to polish out the tooth chatter on both sides and give it a deep shine.It has been awhile since I had cleaned up a Castello and the Reg. No. and the Carlo Scotti stamp left me with some questions that I need to answer before I began to work on the pipe. I turned first to the Pipephil site (http://www.pipephil.eu/logos/en/logo-castello.html) because of the general quick summary of information I get there. I quote:

Castello PIPA CASTELLO di Carlo Scotti & C. was founded in 1947 by Carlo Scotti († 1988). Franco Coppo (AKA “Kino”) who married Carlo Scotti’s daughter Savina, manages (2012) the corporate since 1985.

The site also gave a good summary of the grading and sizes of the pipes. I quote that in full.

Sizes (ascending):

1K to 4K, G (Giant) and GG (Extra large)

Rusticated grading: SEA ROCK, OLD SEA ROCK, NATURAL VIRGIN,

Sandblasted grading: ANTIQUARI, OLD ANTIQUARI

Smooth grading (ascending): TRADEMARK, CASTELLO, COLLECTION

Other stampings: Great Line (Non-standard or freestyle) Fiammata (Straight grain)

Production (2012): ~4000 pipes / year

I also found a note on the page that the Rhinestone logo was originally on pipes for the US market. It is occasionally used now.

I turned then to Pipedia for more information on the brand (https://pipedia.org/wiki/Castello). The majority of the information was what was already quoted above in abbreviated form. However there was a link to an article by Bob Hamlin that gave some interesting bits of information that I found helpful (http://www.pipes.org/BURST/FORMATTED/196.016.html). I quote in part from that article.

SEA ROCK [Carved Black or dark brown]:  This is the lowest grade of the Castello line and is the most common in the USA.  Sea Rocks are produced by taking a smooth bowl that has not been “final finished” and surface carving the finish with tools. This “carved” finish is then evened out using a steel wire brush, stained and then waxed. The Natural Vergin carved finish is left unstained and unwaxed as a rule, although we have seen waxed and partially waxed “Vergins”. 

All carved Castello pipes  are graded by the number of K’s that are stamped on each piece and are K-graded by SIZE.  1K is the smallest and fairly rare, 2K is small to medium, with  3K or 4K being the most common and ranges from medium to medium large. Large pieces are stamped “G” for giant and extra large pieces are stamped “GG” for double giant.  In addition to the number of K’s on a carved Sea Rock piece the shape number is almost always added.  As a rule a Sea Rock Castello is stained Black, although recently there have been quite a few coming in stained deep brown and still stamped “Sea Rock”.  American Logo’d Sea Rocks are all priced the same to the consumer, although most are 2 or 3 K’ed models.  G/GG models are charged at a higher price on American pieces and are basically the same as their European counterparts.

The Castello Sea Rock briar I was working on did not have the K stamping. It definitely was made for the American Market with the Rhinestone in the stem. It had the black finish. The shape number still needed to be determined.

Pipedia also gave a link to Mike’s Briar Blues site for help in dating and determining shapes (http://www.briarblues.com/castello.htm). I quote a piece on the Reg. No. that I found helpful.

1947 – Carlo Scotti begins the company.  In the beginning ( 1947 – 1949, maybe 1950 ) the pipes were stamped Mi Reserva ( my reserve ).  Later the Reg No was added.  This Reg No has nothing to do with shape numbers, but is merely the Castello company trademark…

Shape numbers. Shape numbers are all 2 digits. A 2 in front indicates a “fancy” interpretation, a 3 in front means that the carving is somehow unique. I don’t know when the change was made, but currently, a π symbol is used instead of the 3xx. I’ve only seen this on Sea Rocks, but that doesn’t mean anything…

Pre K grading.  Late 1950’s to mid 1960’s the pipe carried stamps which indicated sizes. These were as follows; SA, SB, SC, and SS.  SA being the smallest and SS the largest.

Now I had more information to work with. The Castello in my hands was pre K graded. That told me that it came out in the late 1950s to mid 1960s. The SC stamp makes it a mid-sized pipe from that time period. The number 31 makes it a Canadian with an oval shank and a ¼ bent stem.

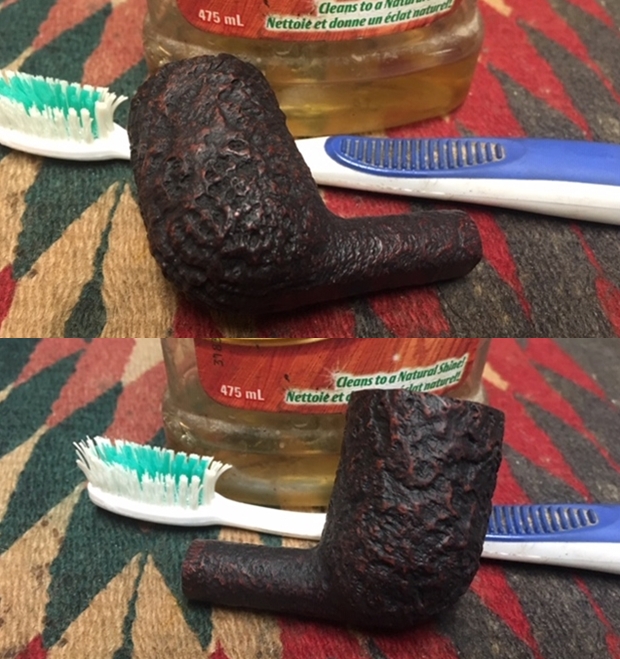
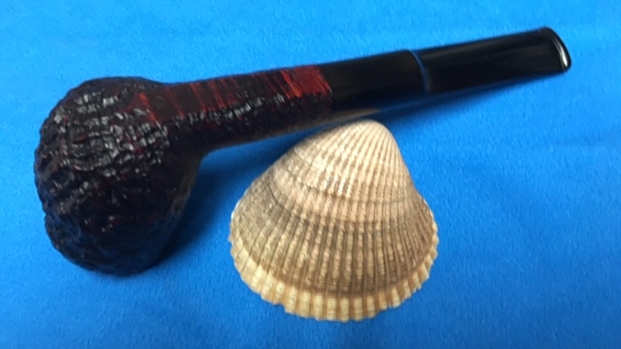
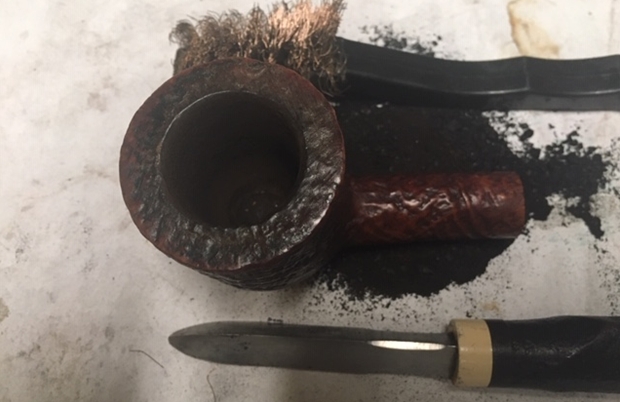
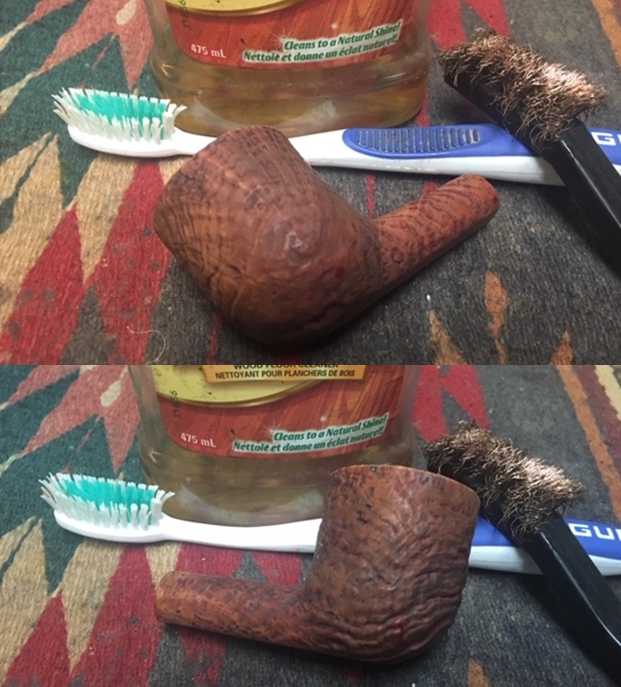
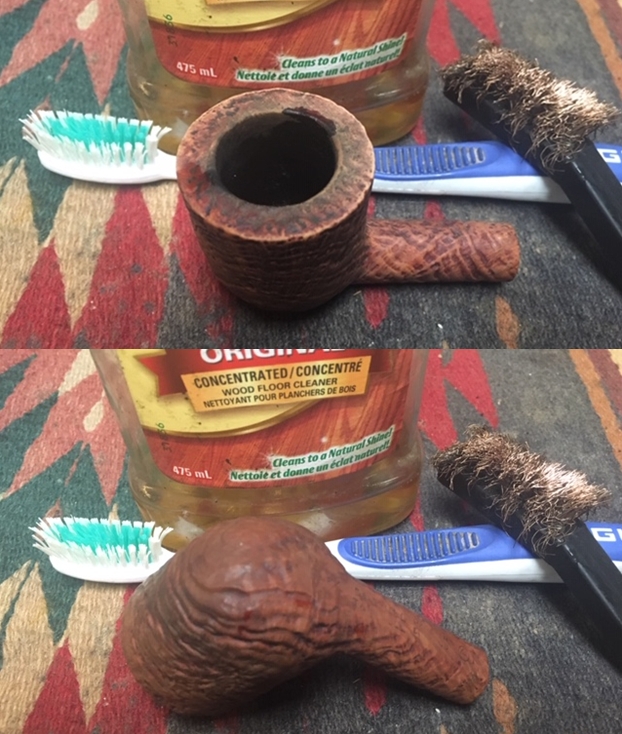
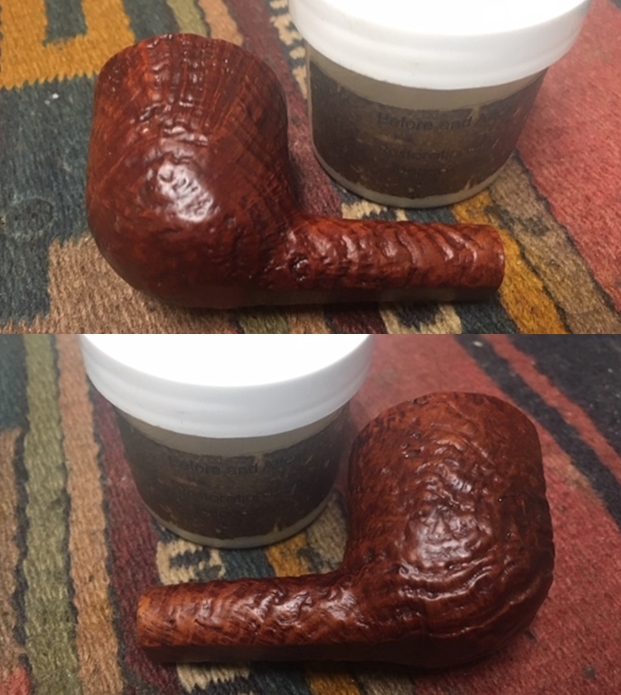
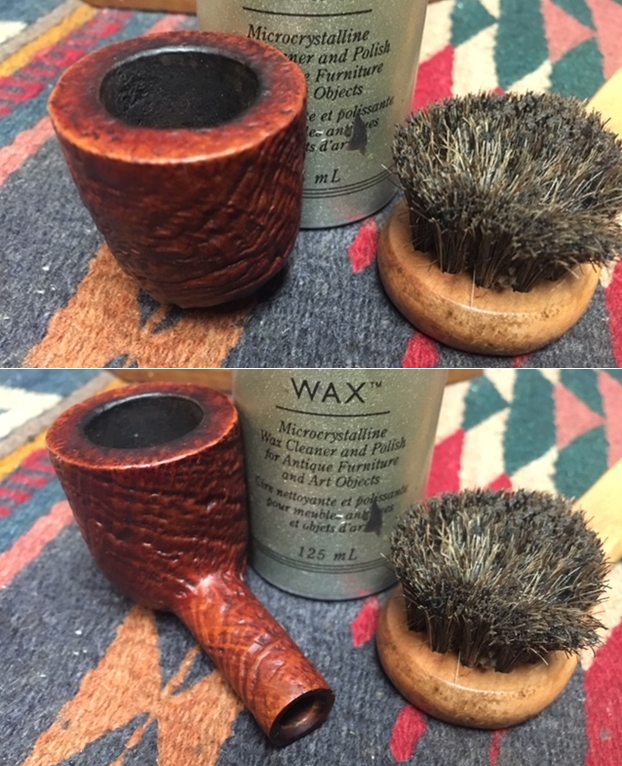
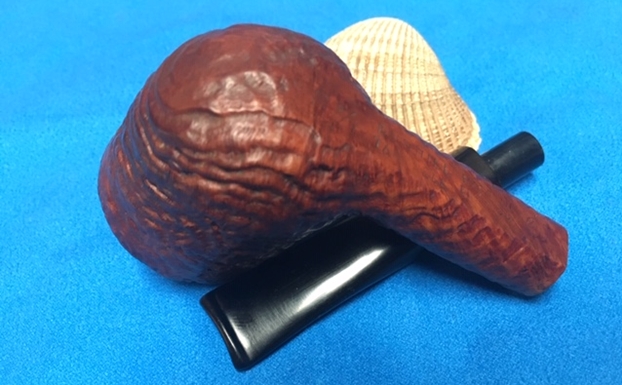
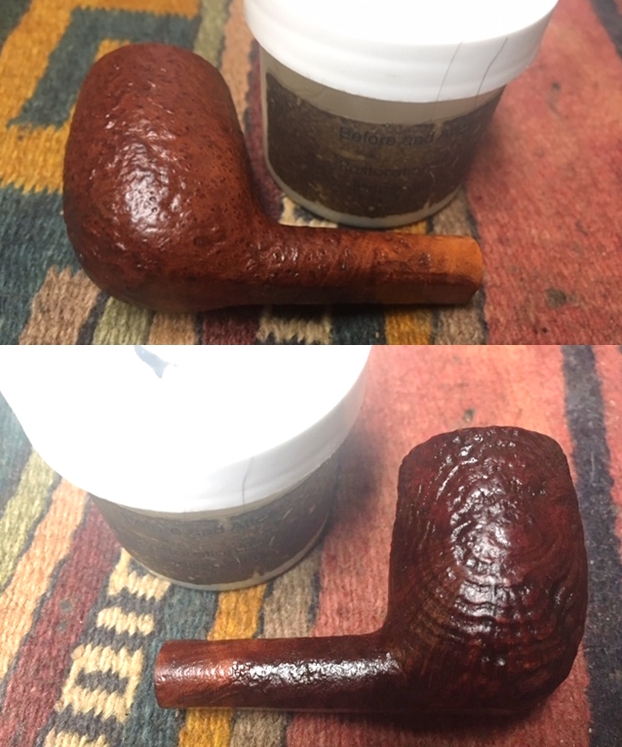
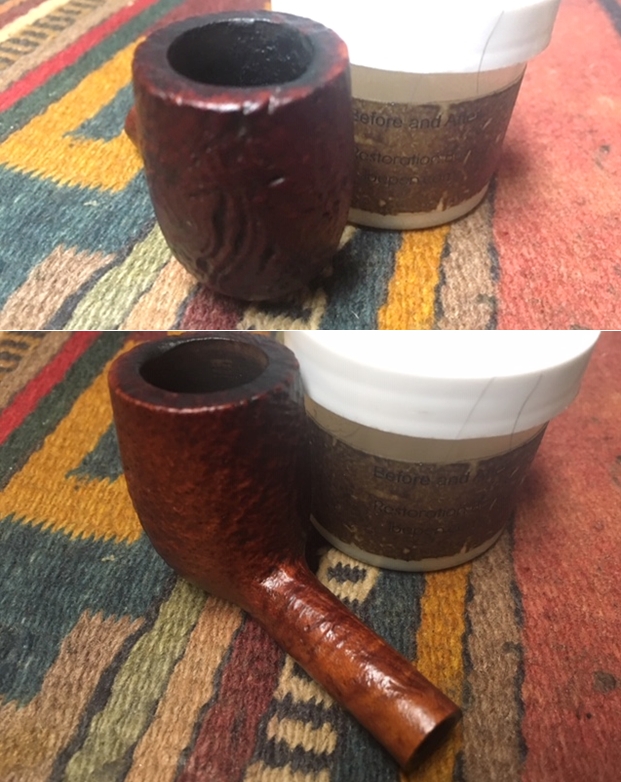
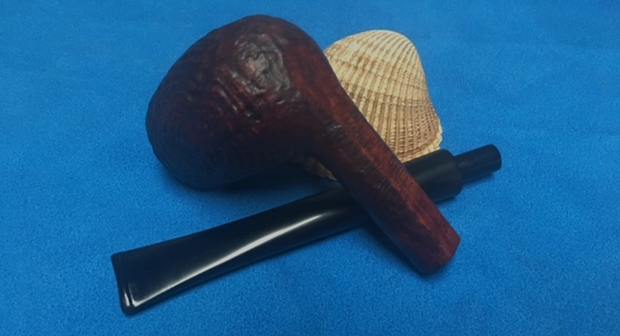
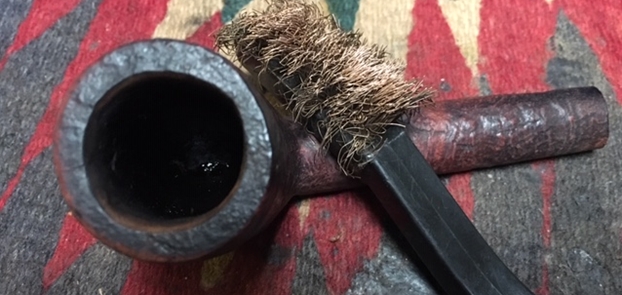
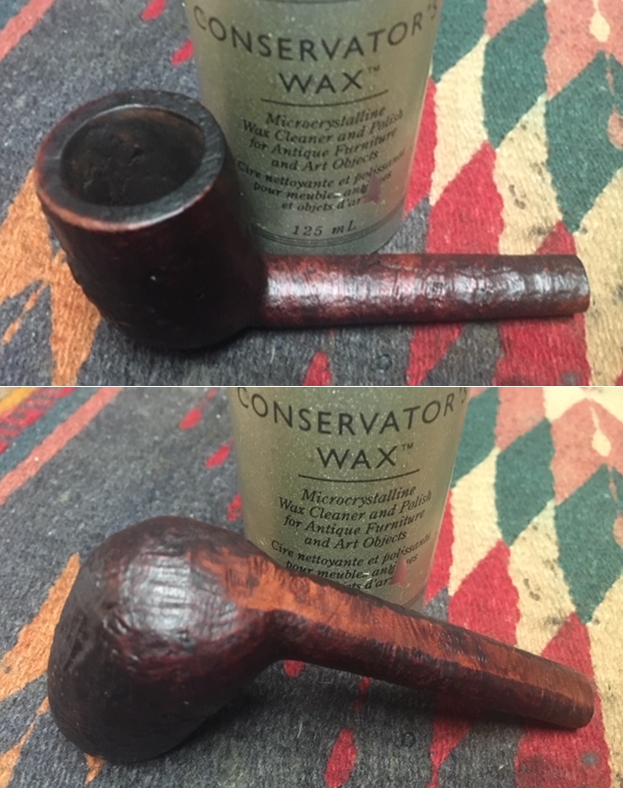
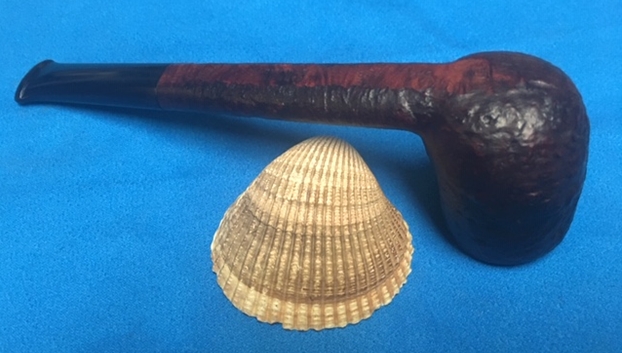
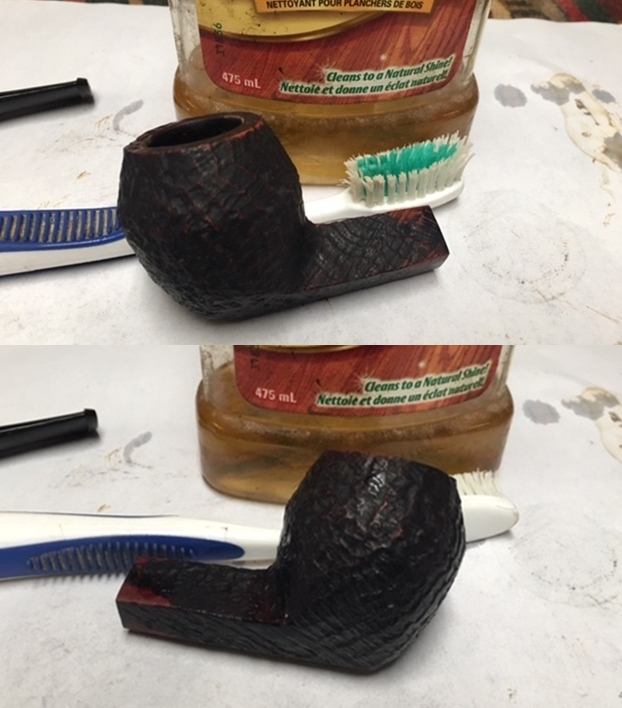
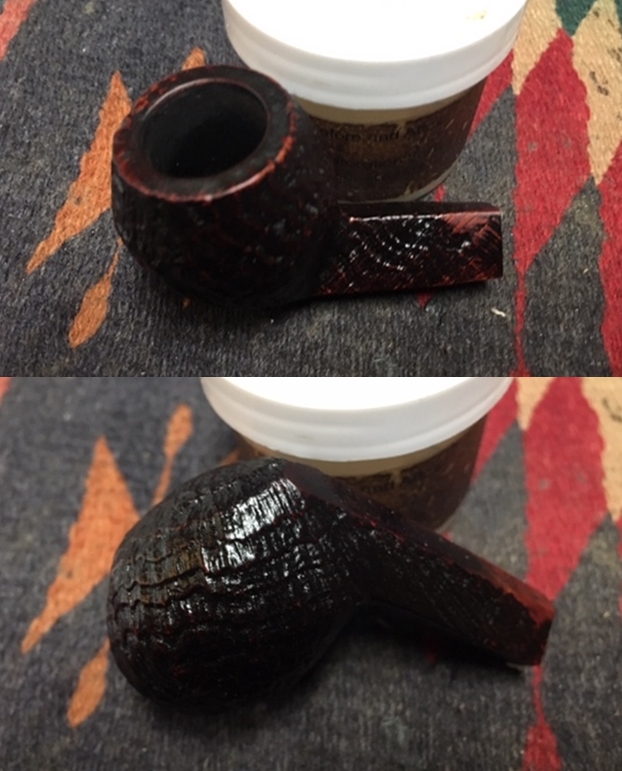
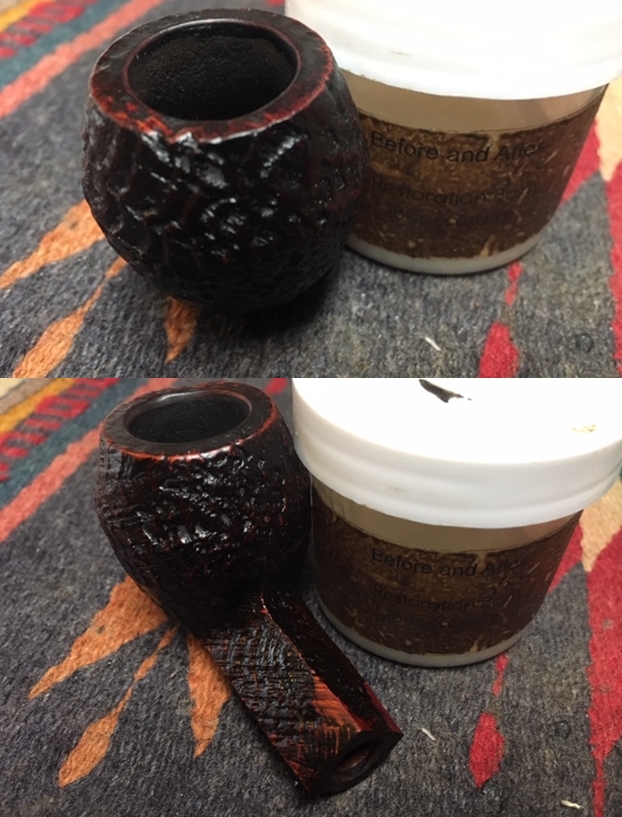
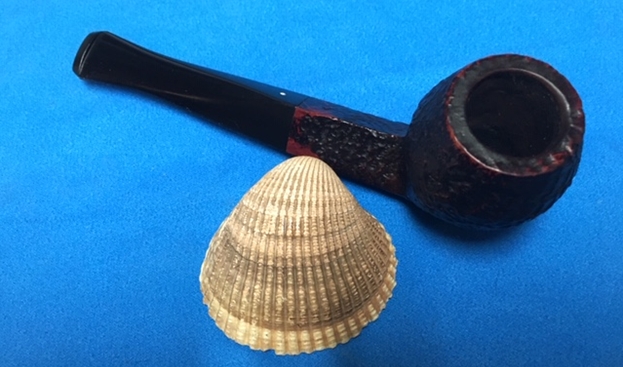
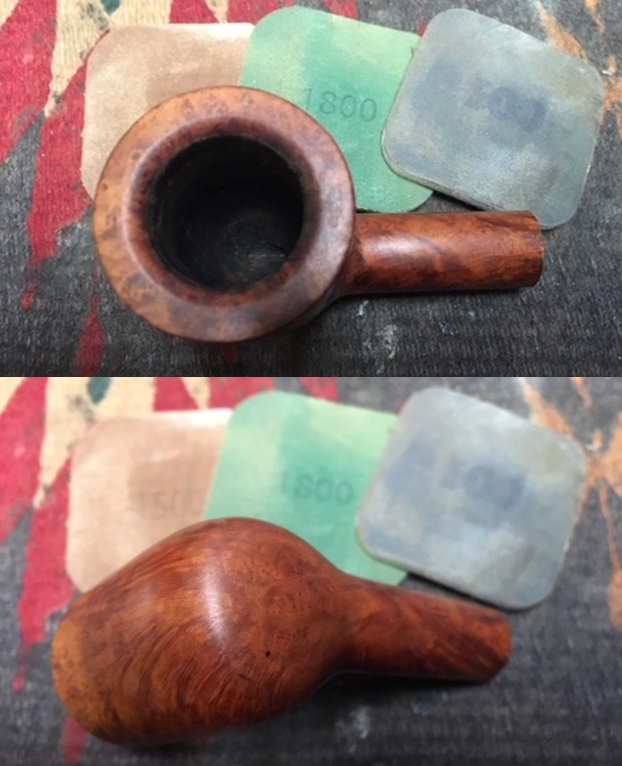
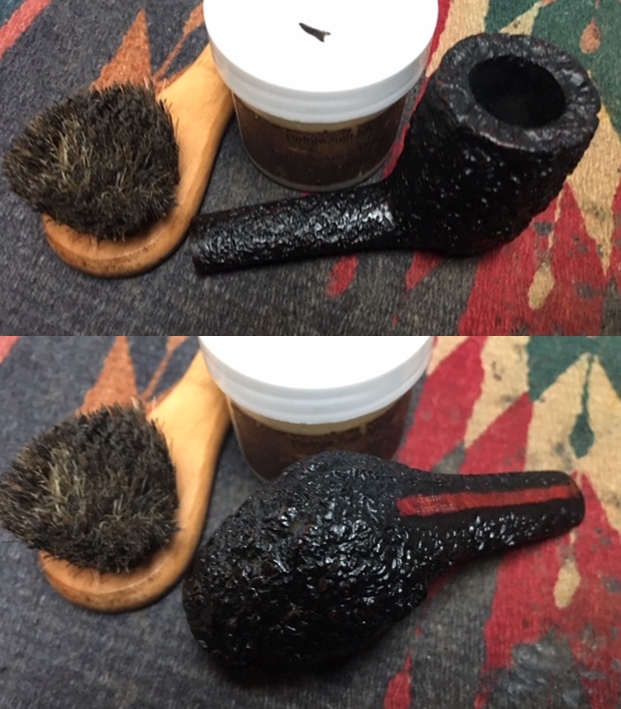
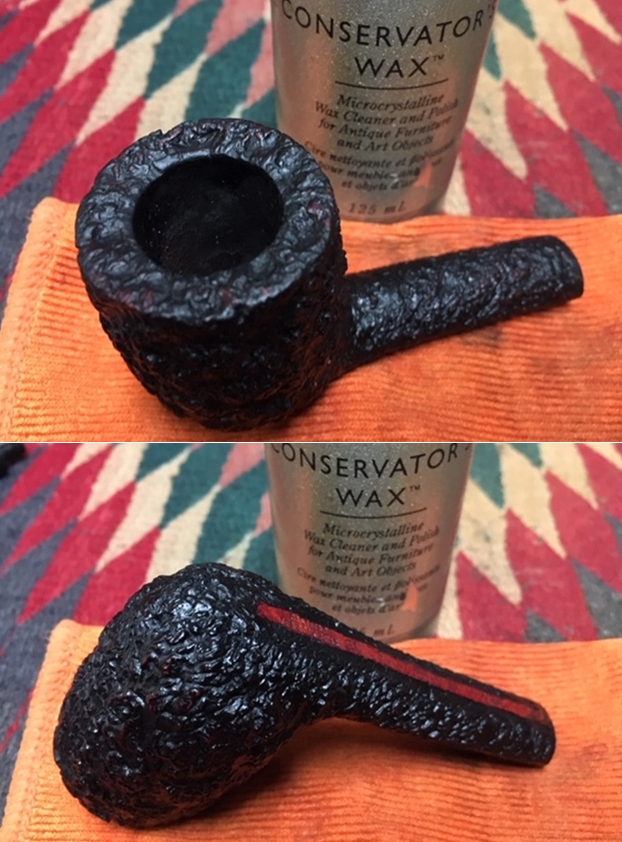
Armed with that information and renewing my knowledge of the brand it was time to work on the pipe. I decided to begin by addressing the deep lava and grime that made the rim top dull looking. I used a brass bristle wire brush to work over the nooks and crannies of the finish and a lot of dust and debris came out of the grooves. I used a tooth brush and some Murphy’s Oil Soap to clean up the remaining dust and rinsed of the rim with some tap water. I dried it off and gave it a light polish with the cloth. It did not take too long for the rim to look clean and debris free.I worked some Before & After Restoration Balm into the rusticated Sea Rock finish on the bowl and the rim top. I worked it into the surface of the briar with my fingertips to clean, enliven and protect the wood. I used a horse hair shoe brush to work it into the crevices and keep from building up in the valleys and crevices of the finish. Once the bowl was covered with the balm I let it sit for about 20 minutes and buffed it off with a soft cotton cloth and the shoe brush. I polished it with a microfiber cloth. I took photos of the pipe at this point in the process to show what the bowl looked like at this point. 
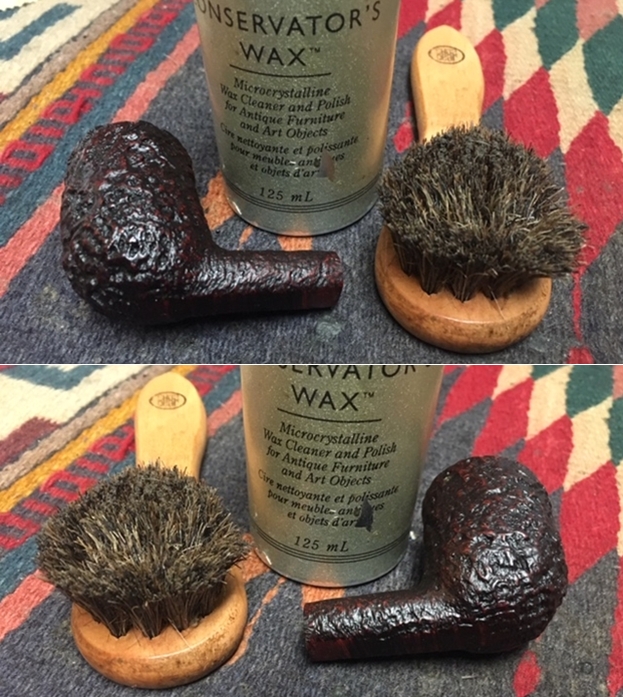
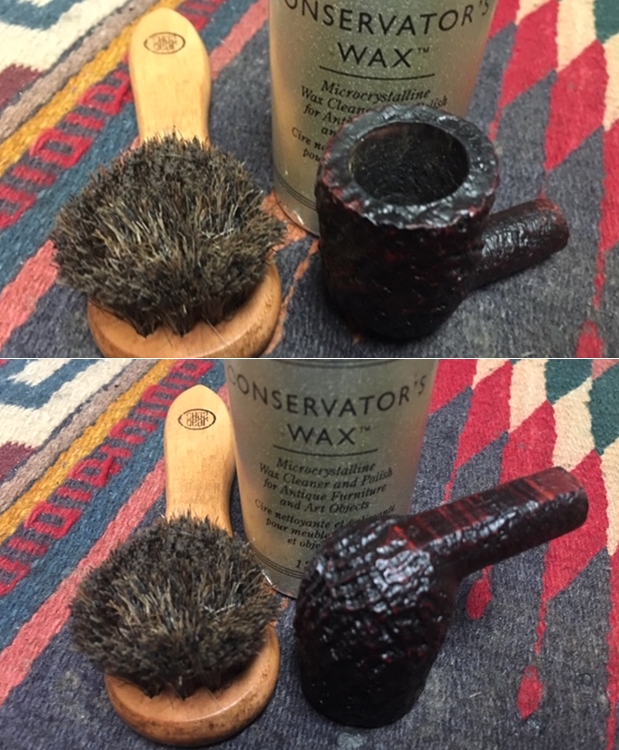
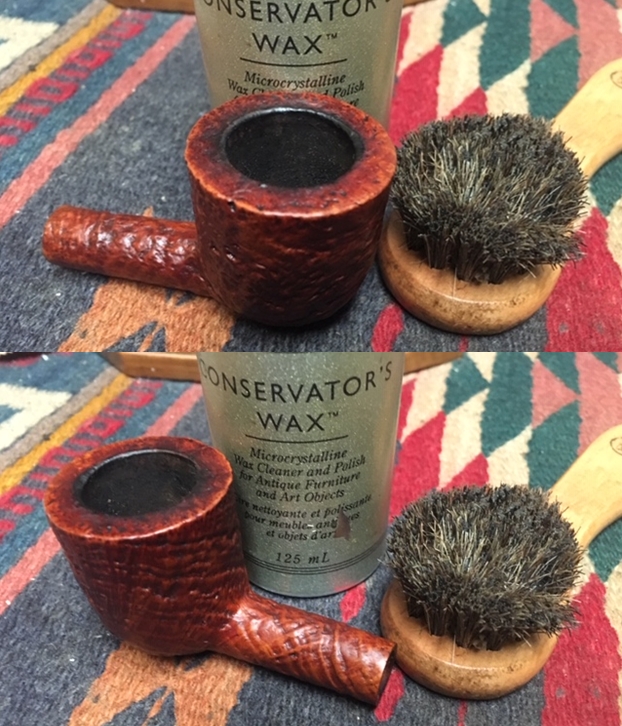
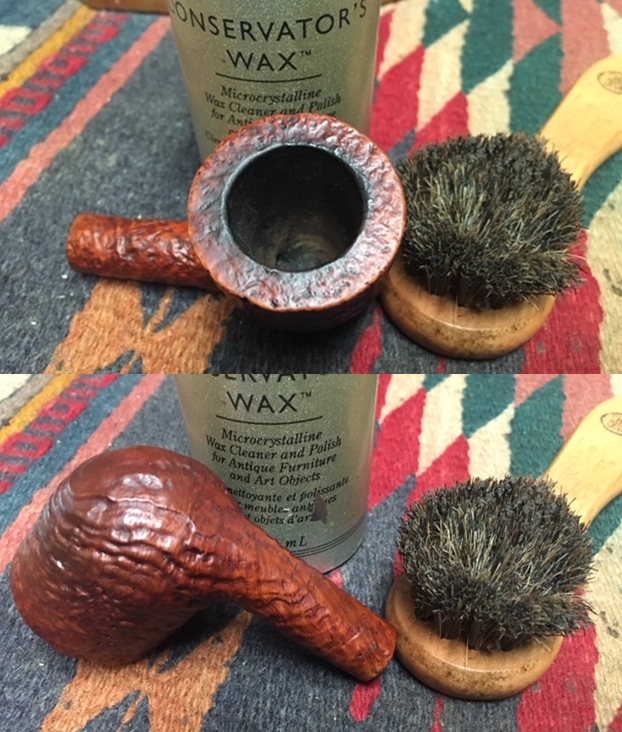
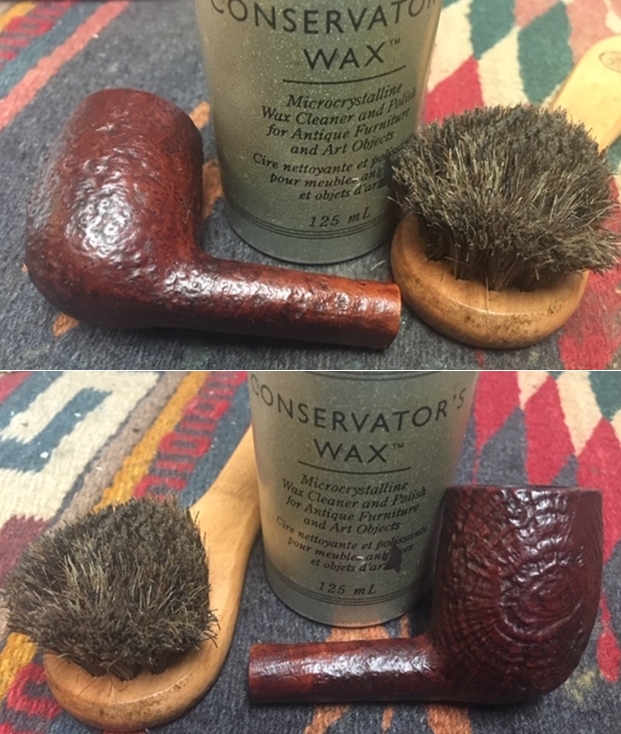
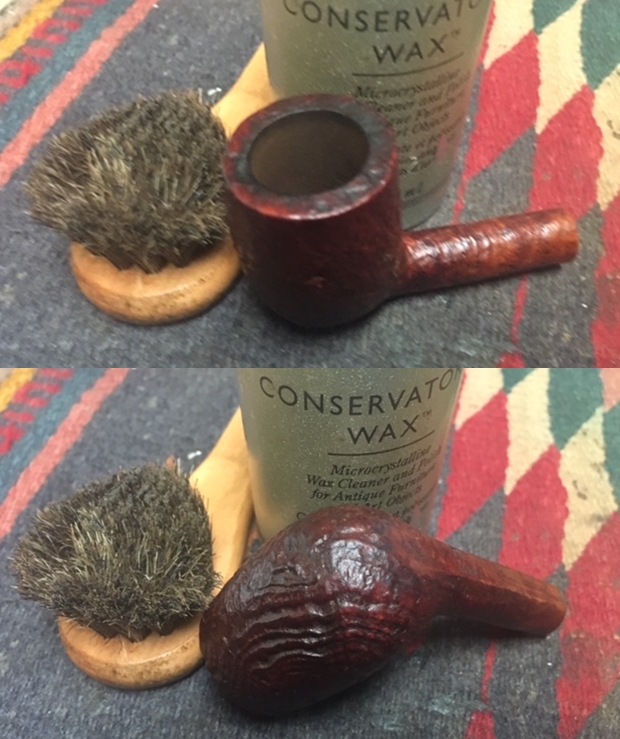
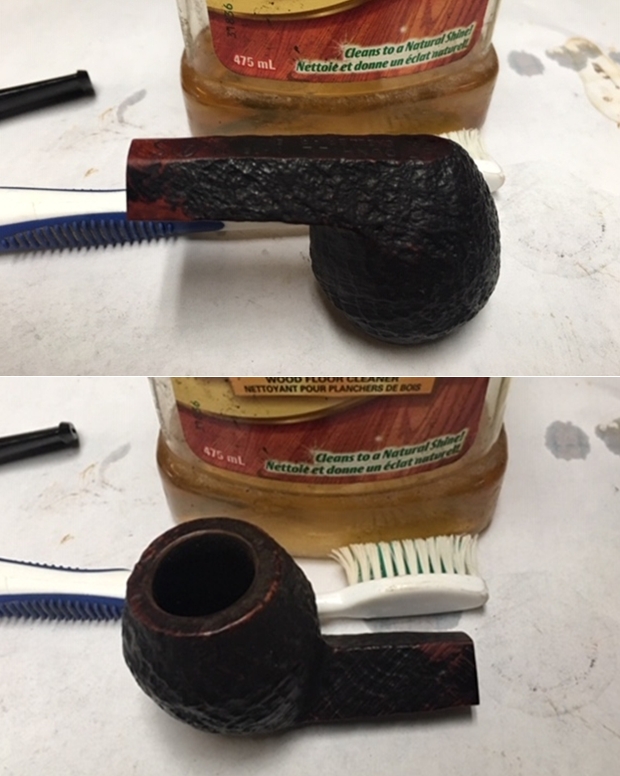
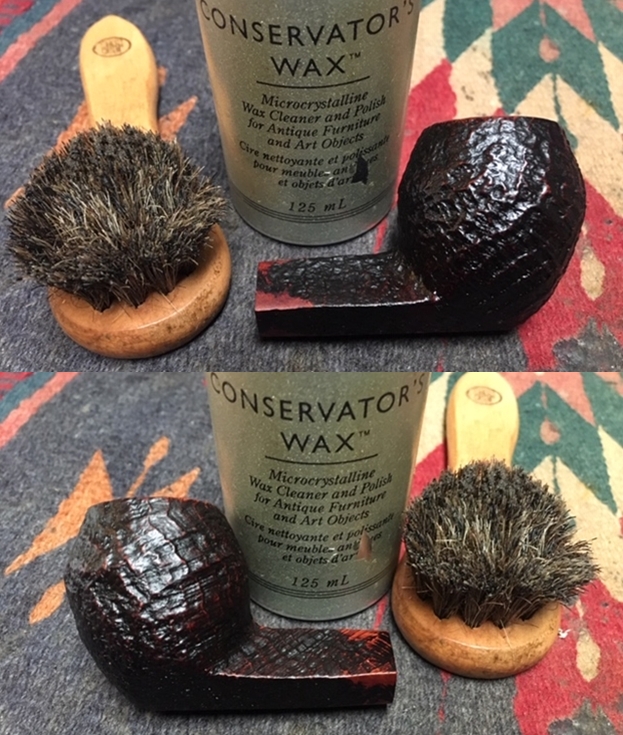
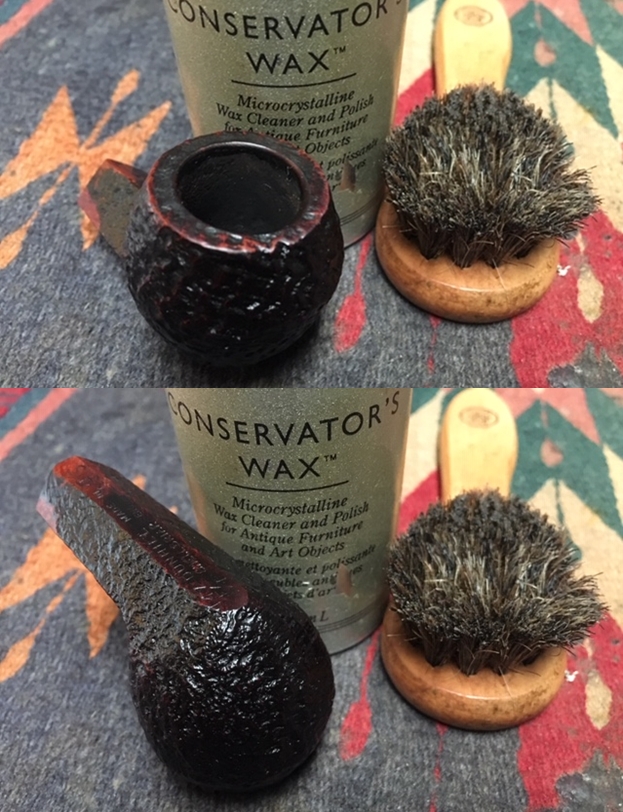
I gave the bowl and shank multiple coats of Conservator’s Wax and buffed it with a shoe brush to raise the shine. The wax is great protection and I love using it on rusticated and sandblast finishes because it does not build up in the grooves and valleys like carnauba wax does. I buffed it by hand with a microfiber cloth to finish the shine. 
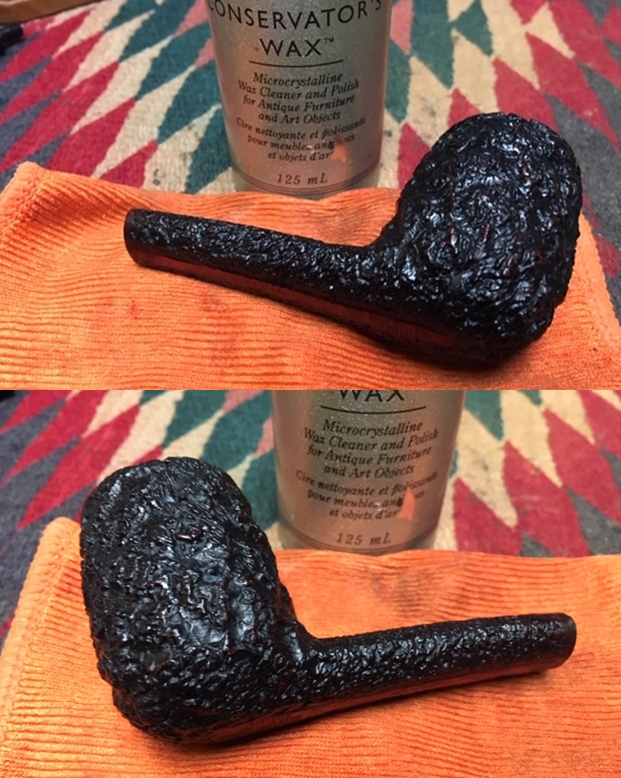
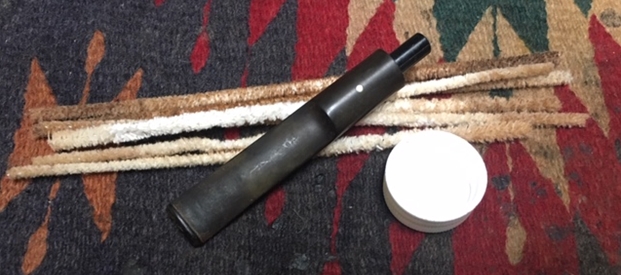
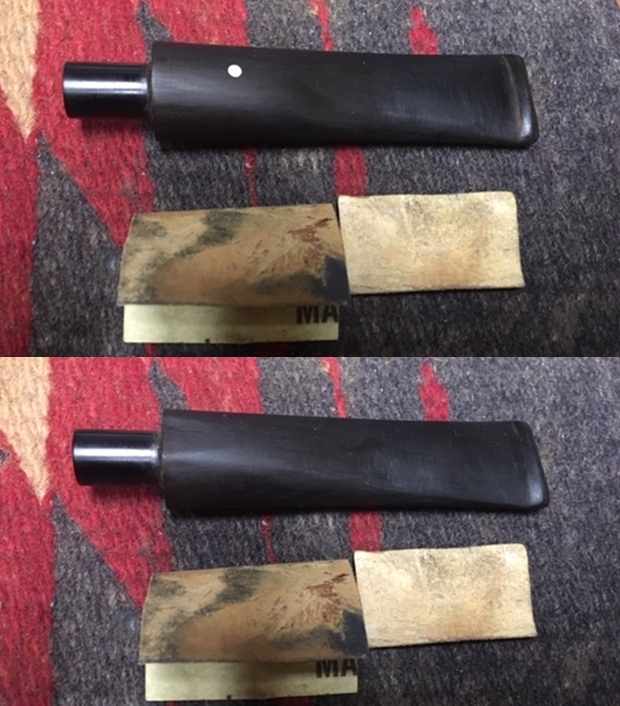
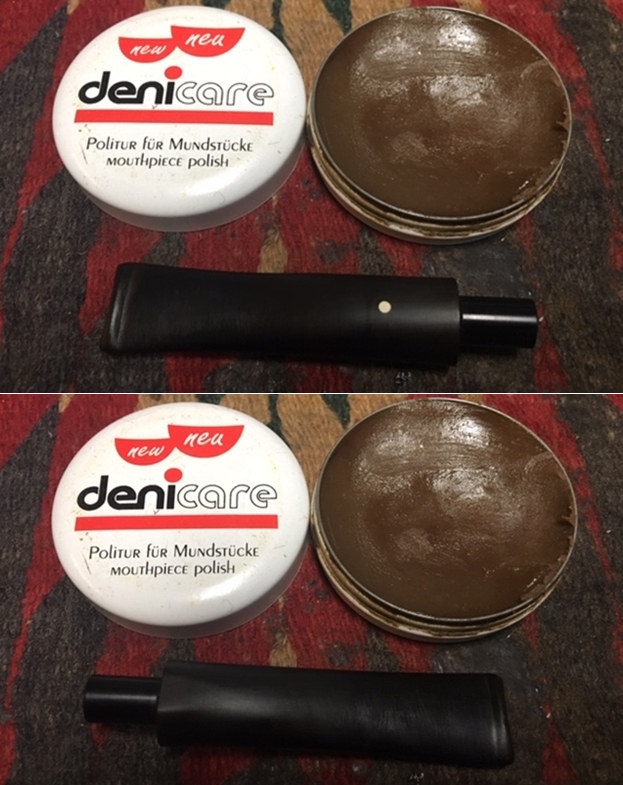
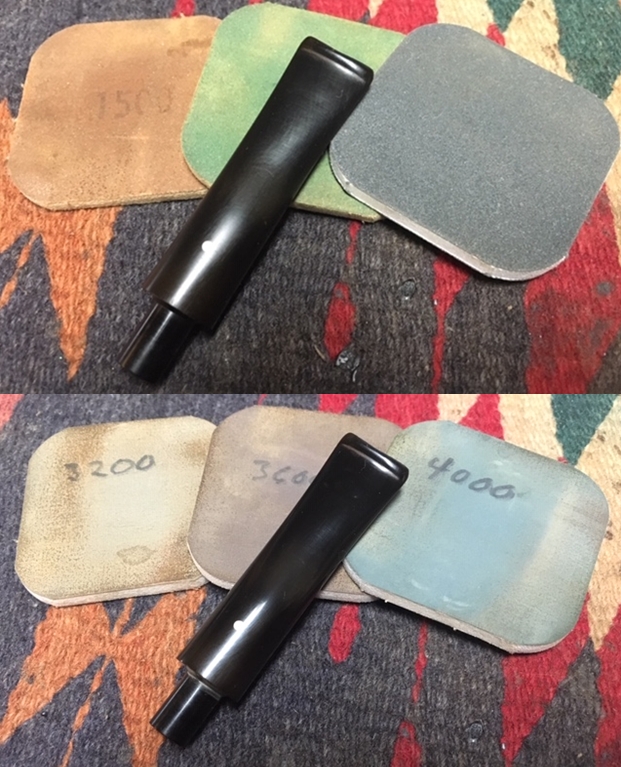
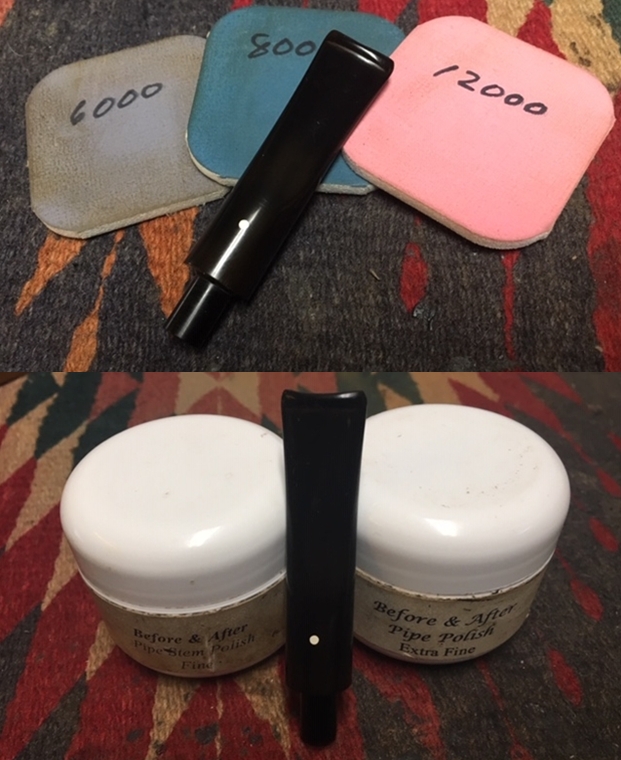
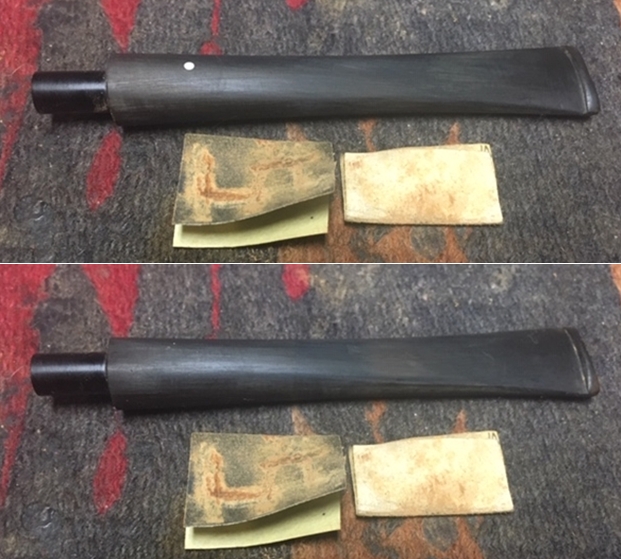
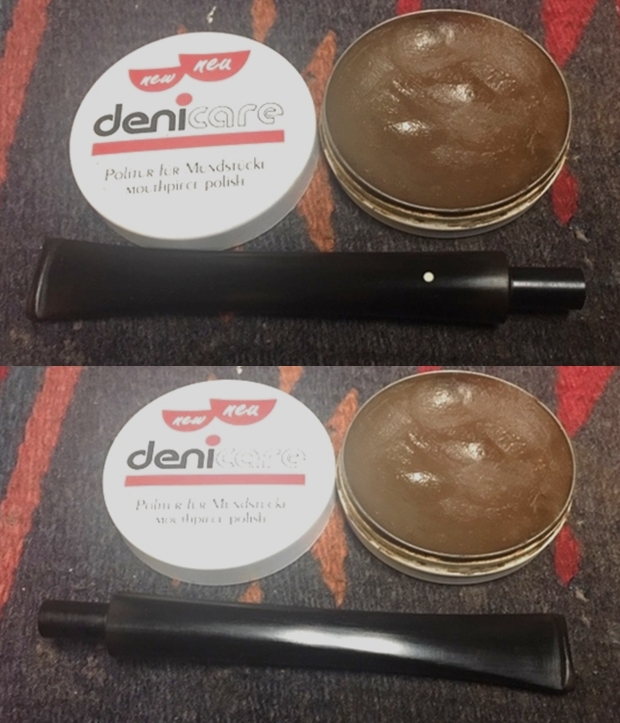
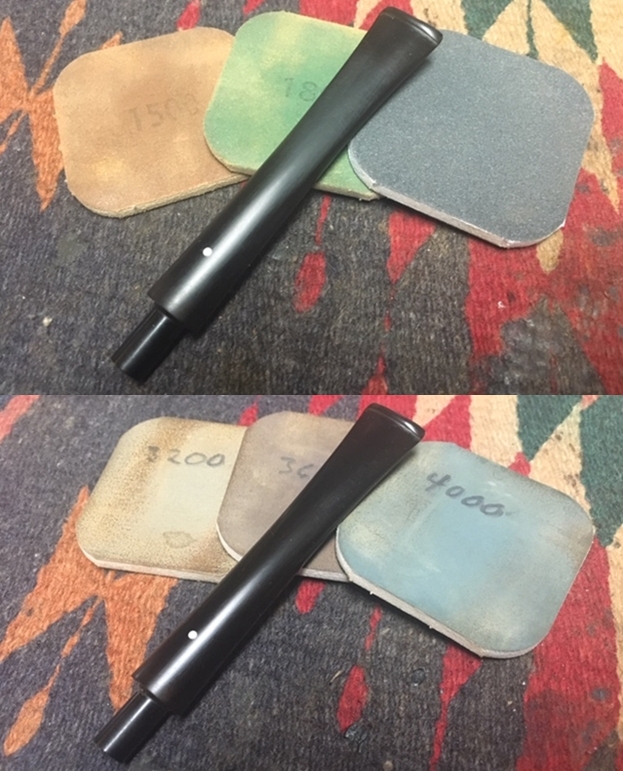
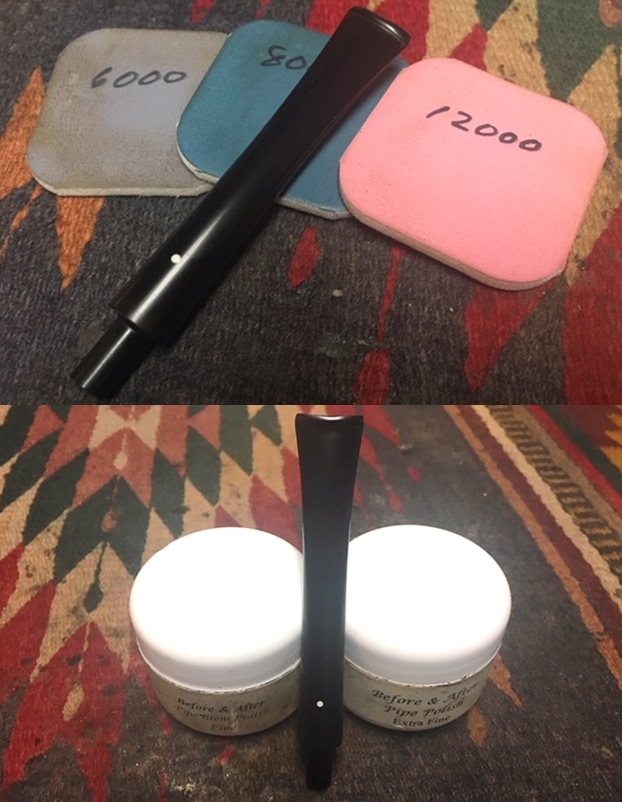
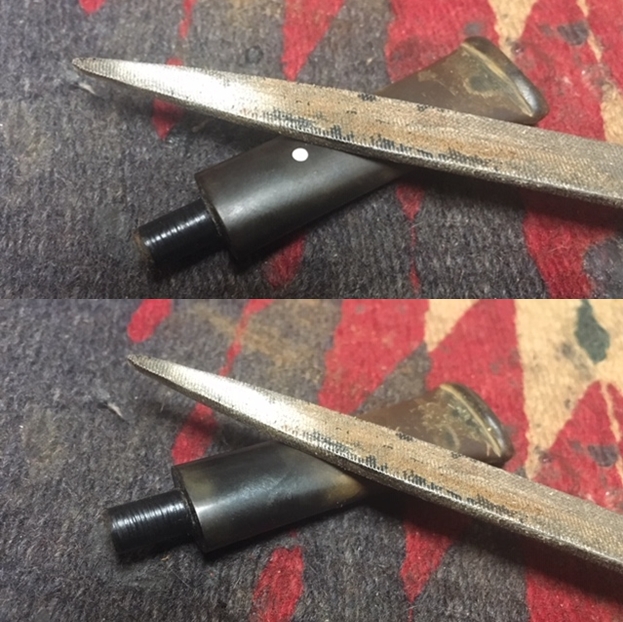
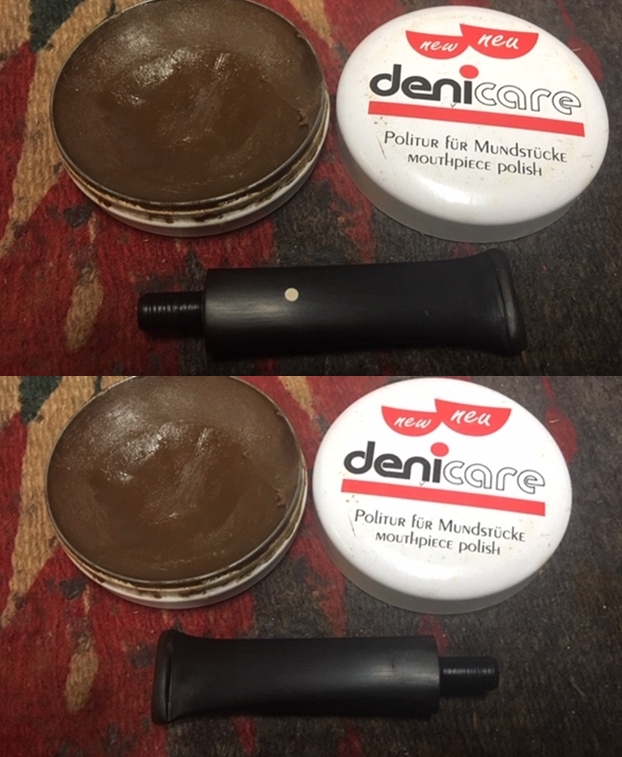
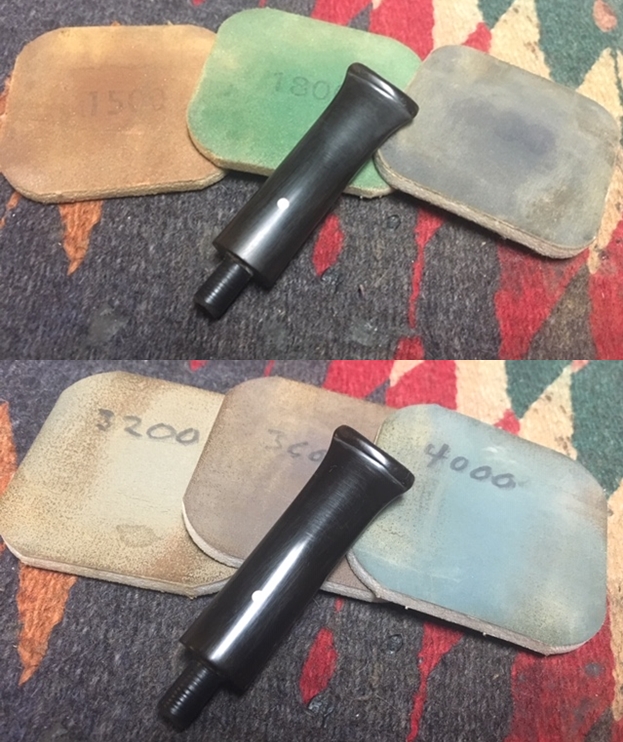
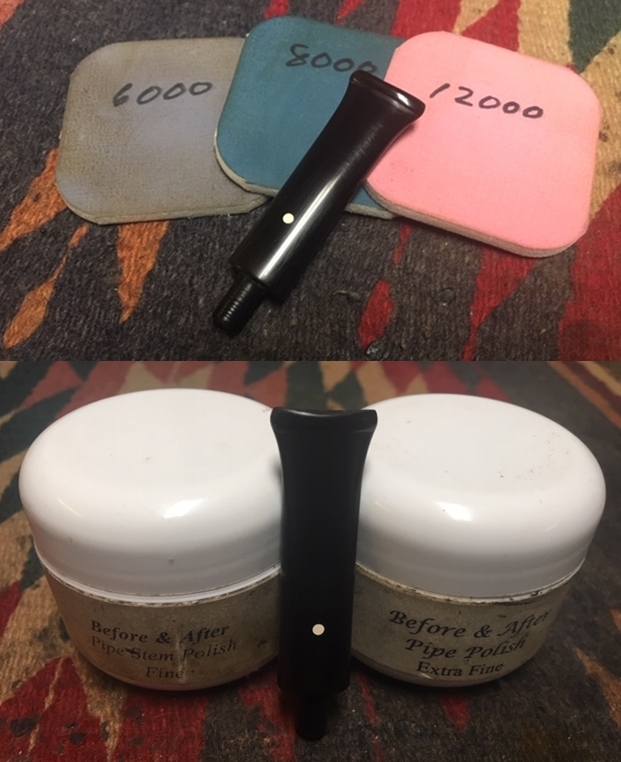
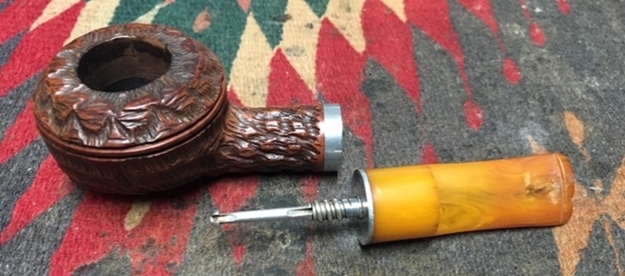
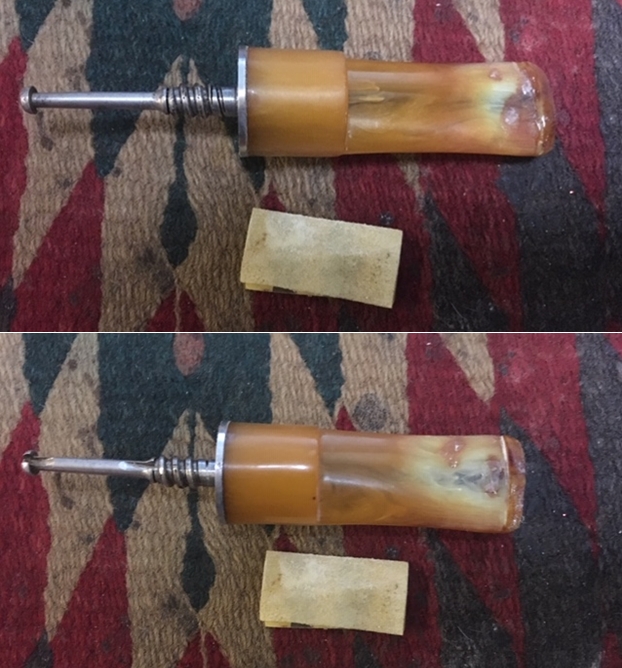
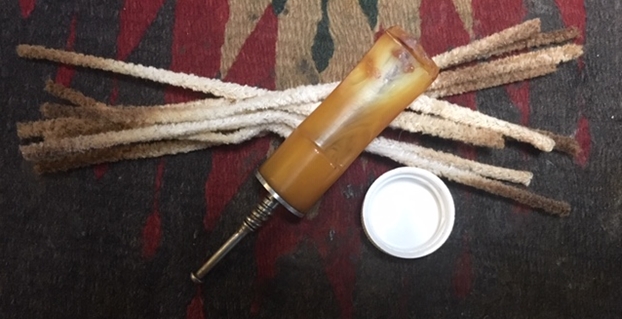
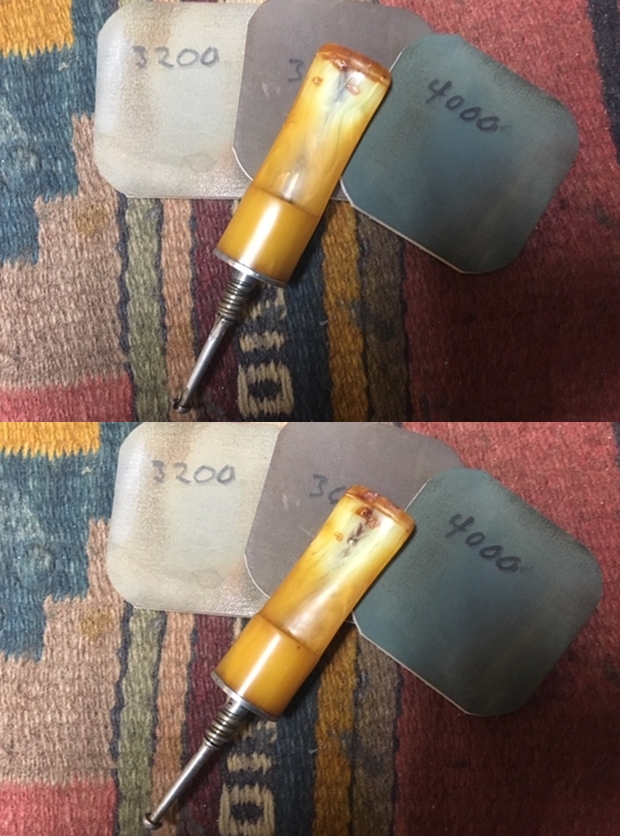
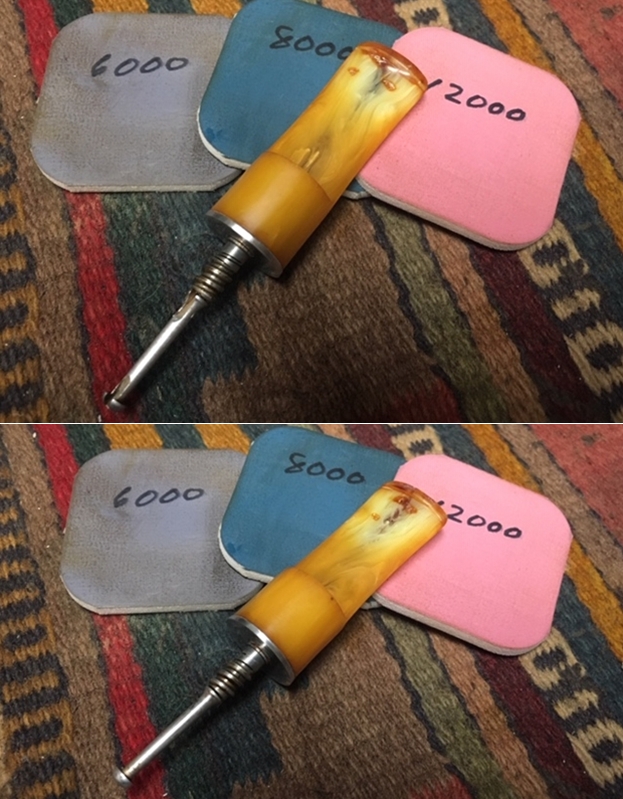
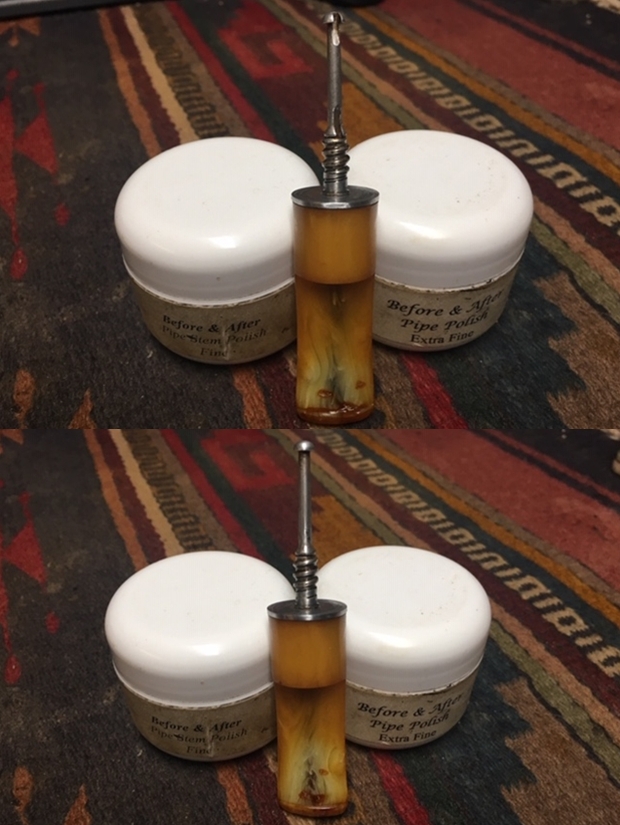
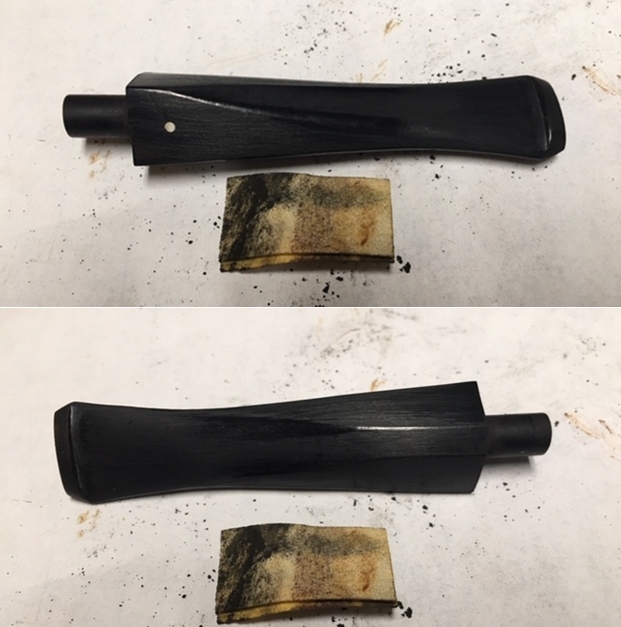
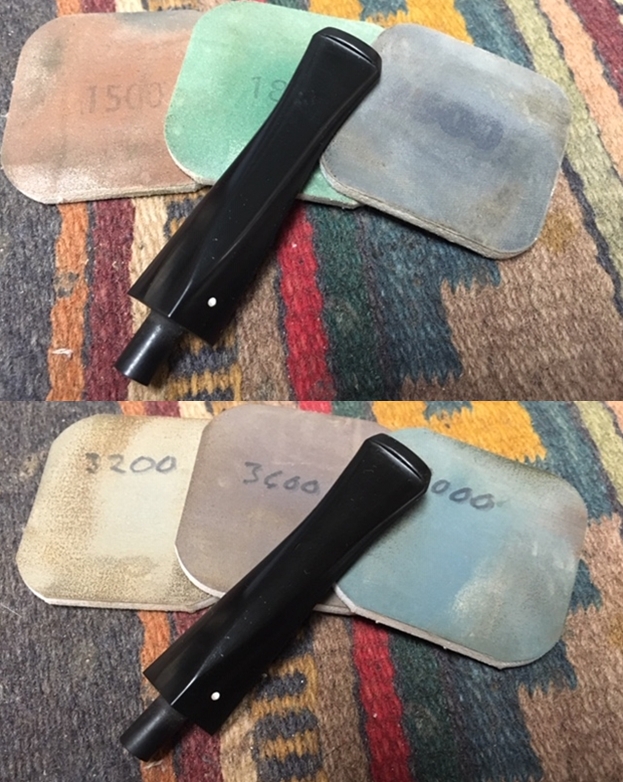
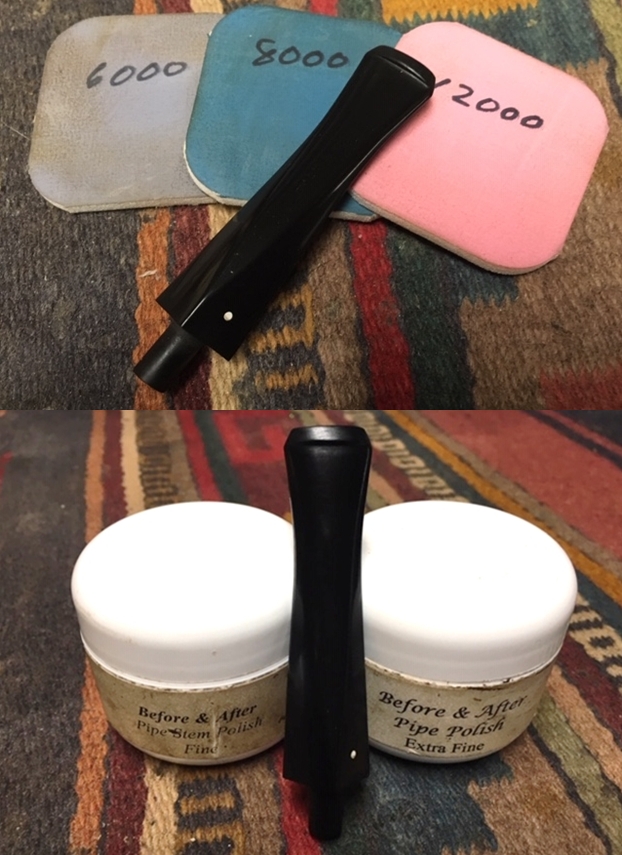
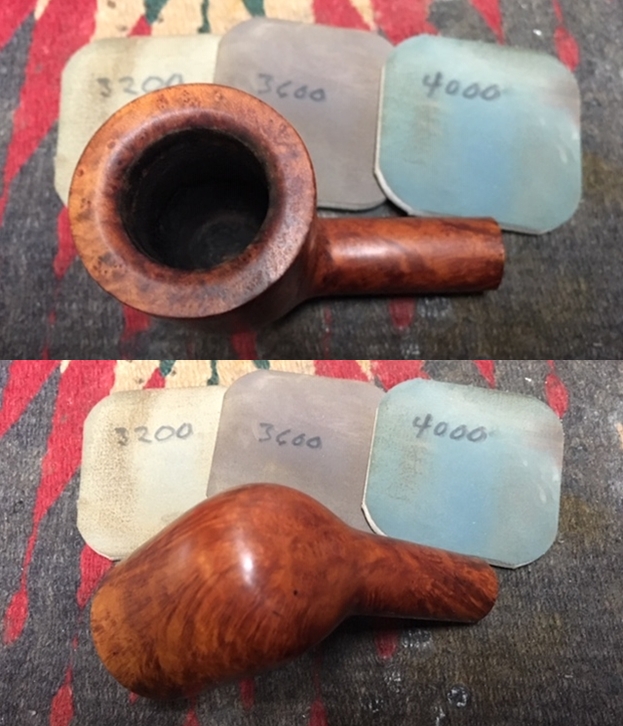
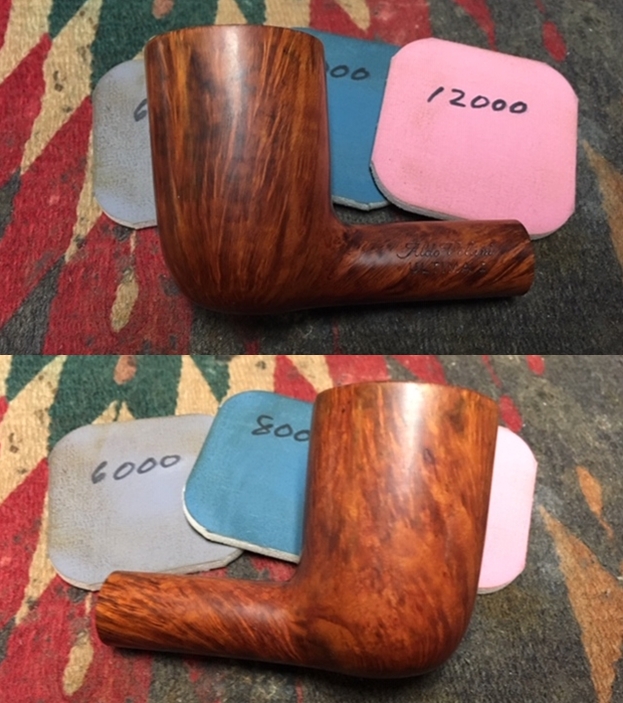
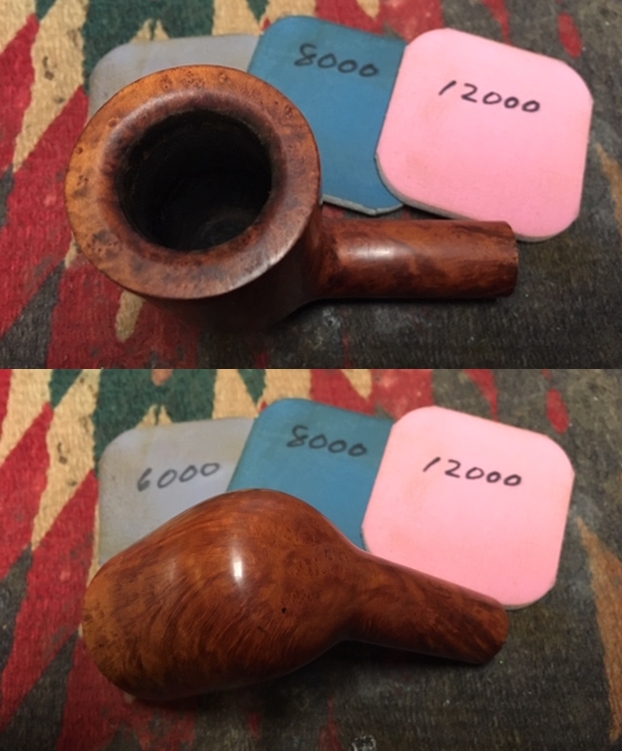
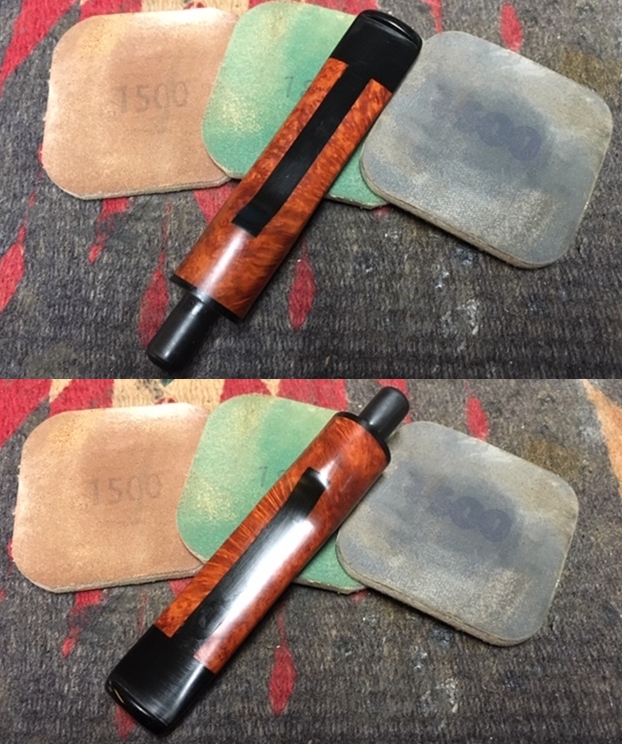
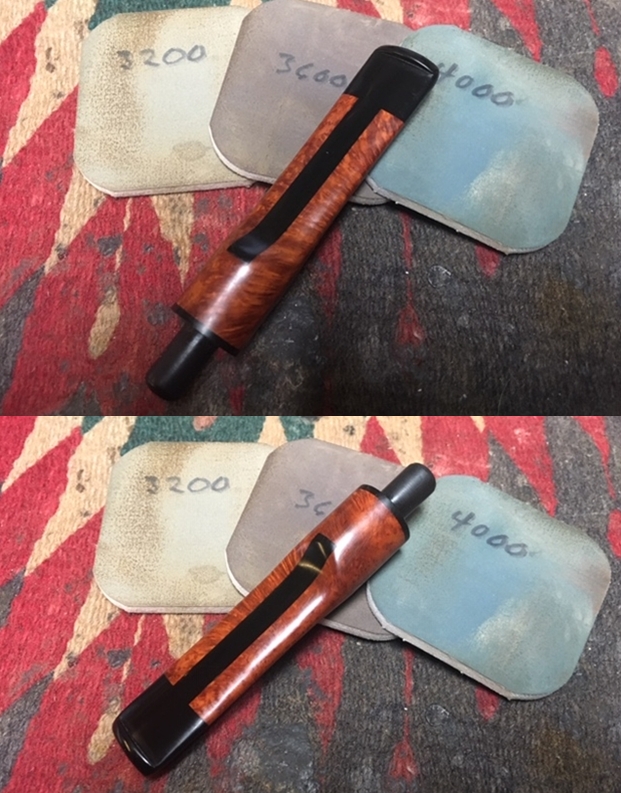
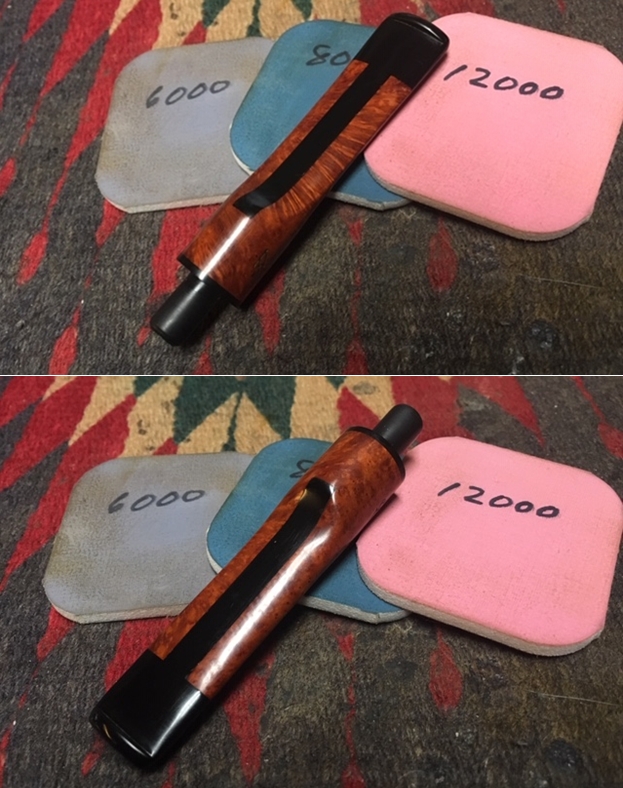
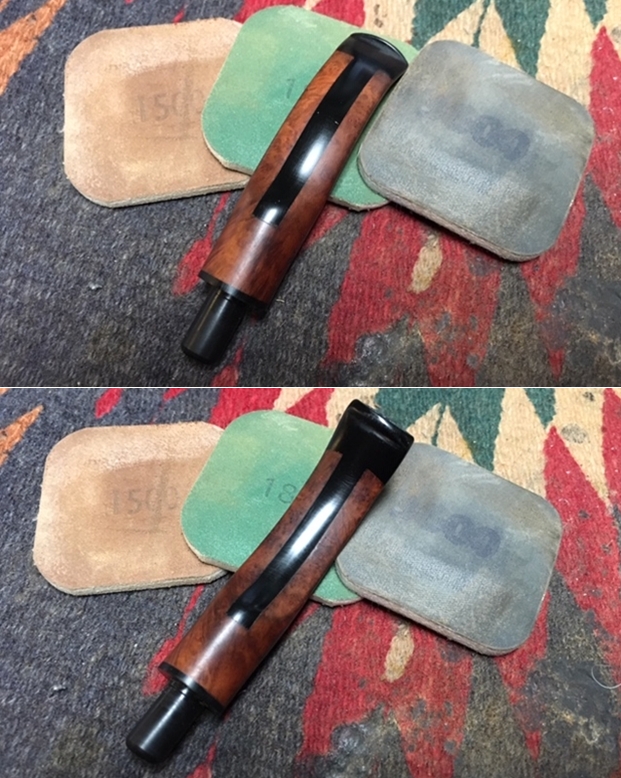
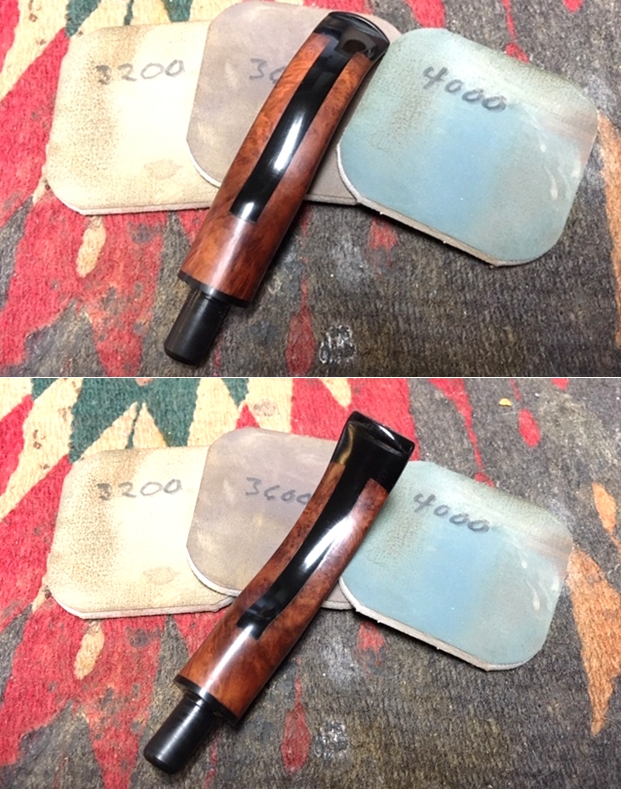
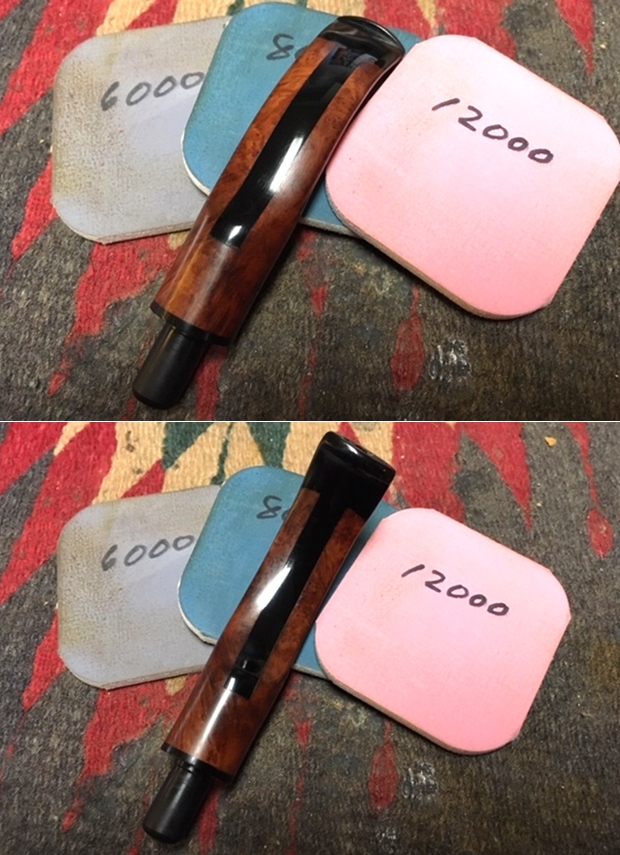
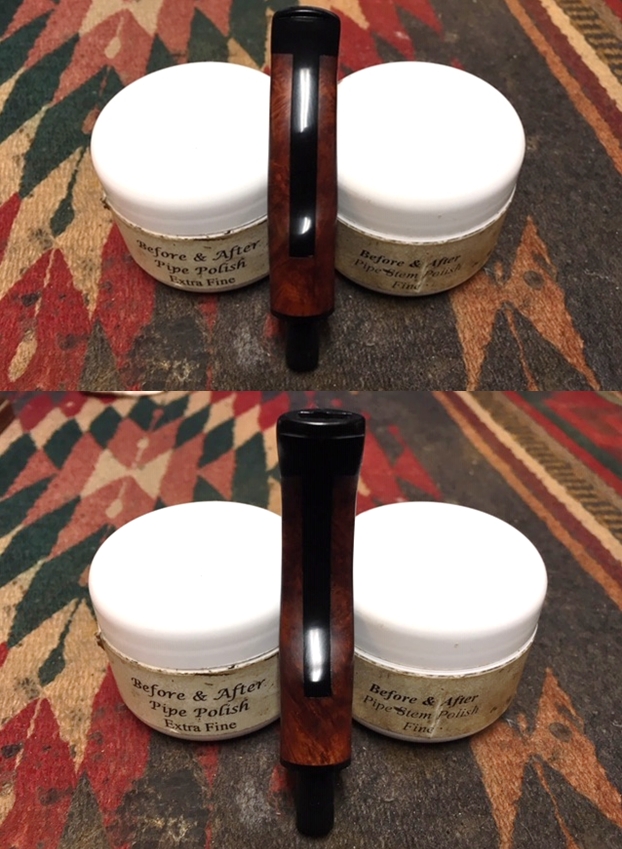
I set the bowl aside and worked on the stem. I wet sanded the tooth chatter on both sides of the stem with 1500-2400 grit micromesh sanding pads. I was able to remove it. I dry sanded it with 3200-12000 grit pads to polish it further. I wiped it down with a damp cloth after each sanding pad. I finished polishing the stem with Before & After Pipe Polish – both Fine and Extra Fine polishes. I wiped the stem down with a damp cotton pad afterwards and buffed it with a soft microfiber cloth. 
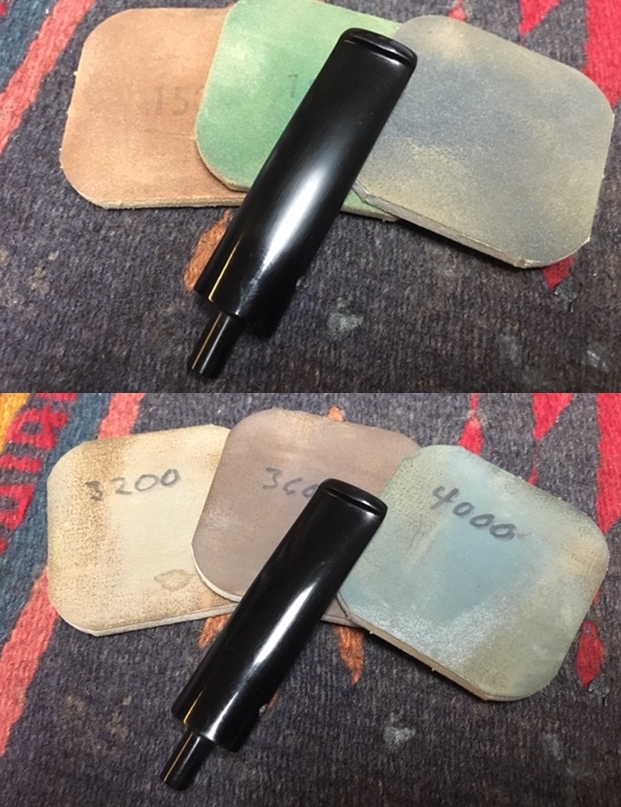
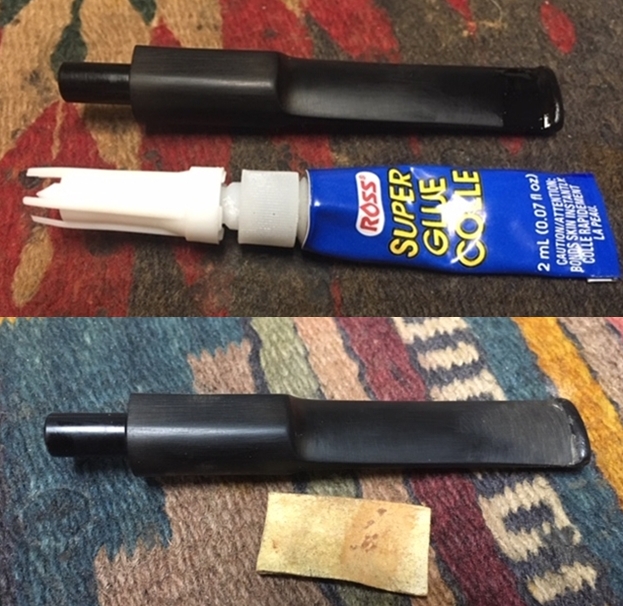
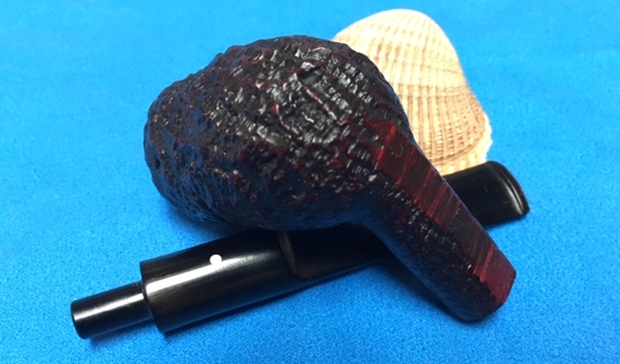
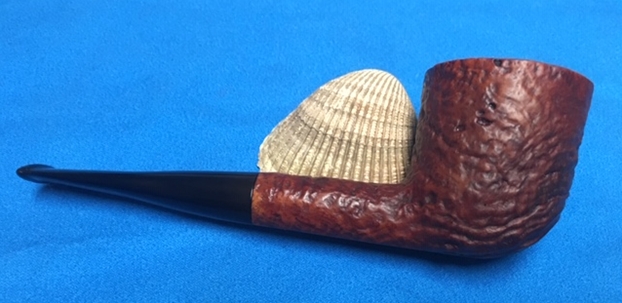
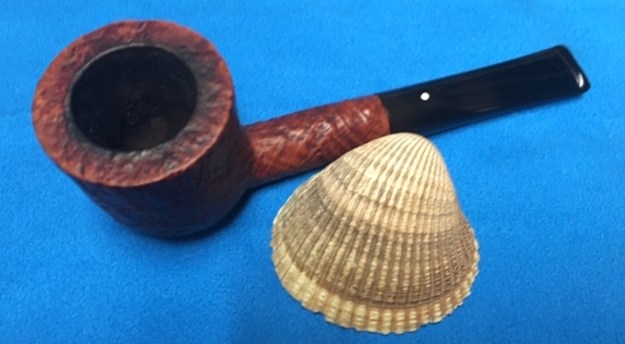
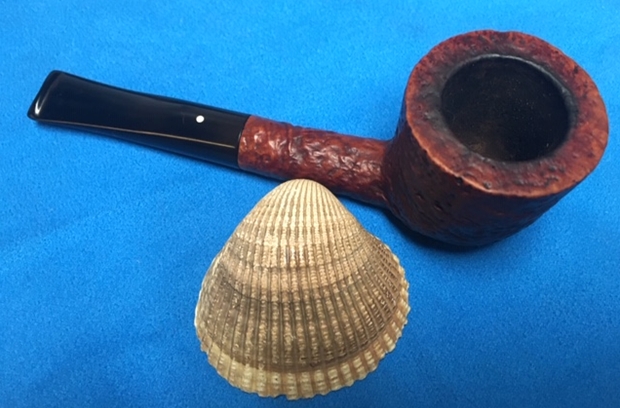
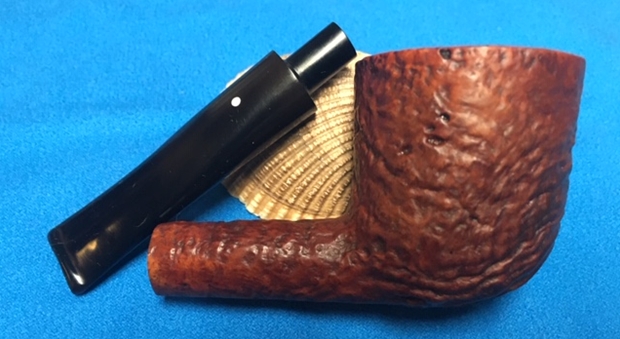
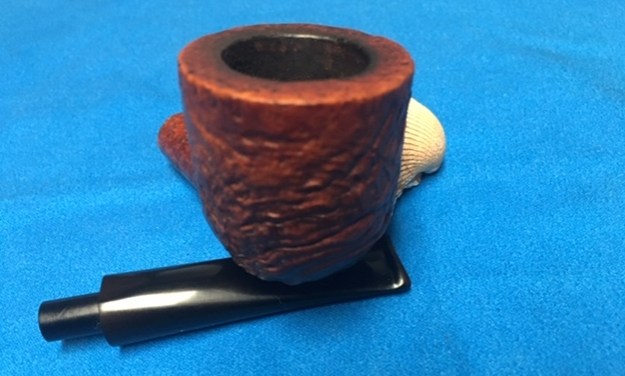
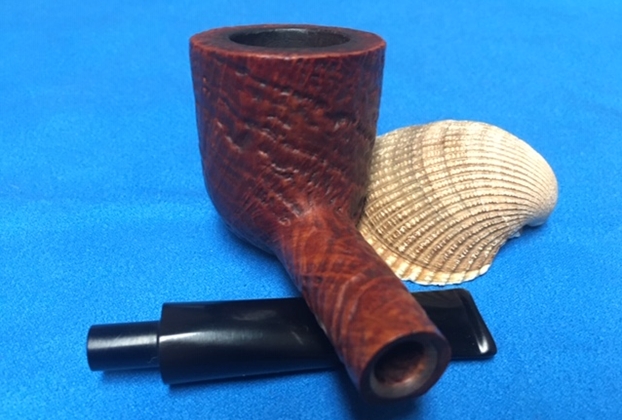
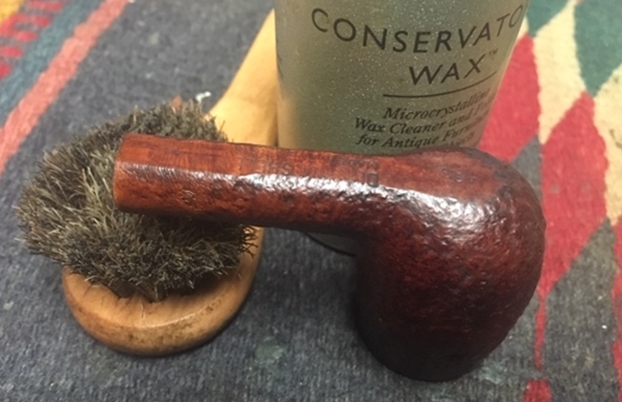
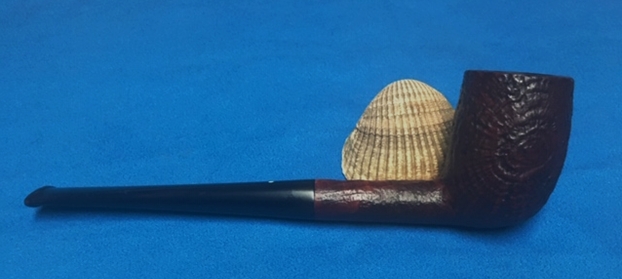
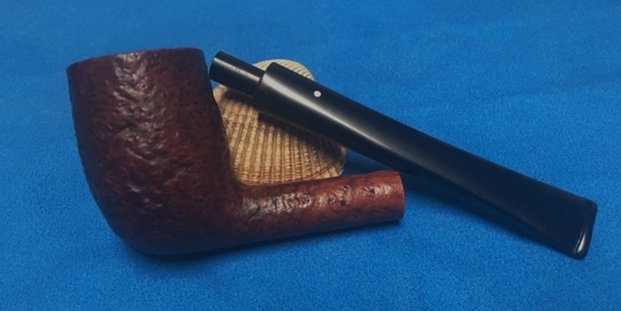
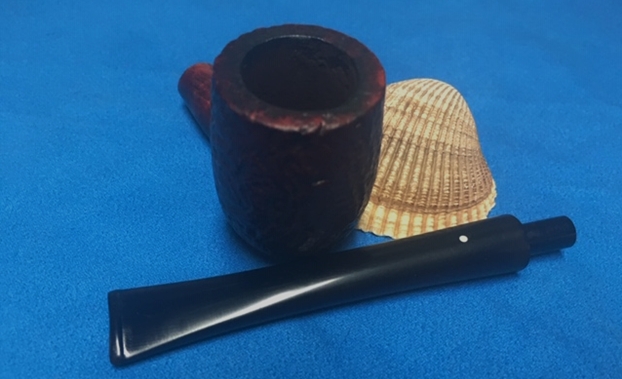
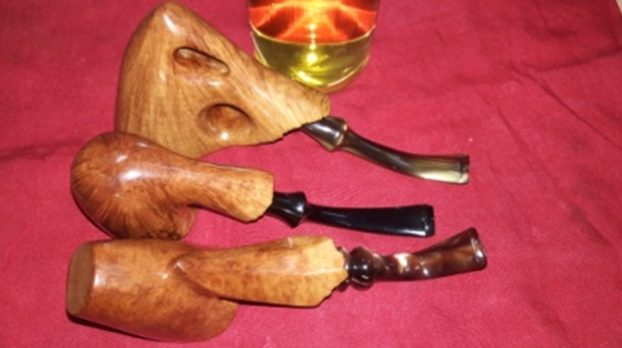
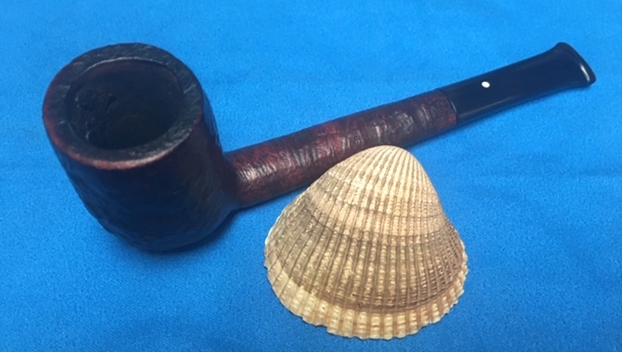
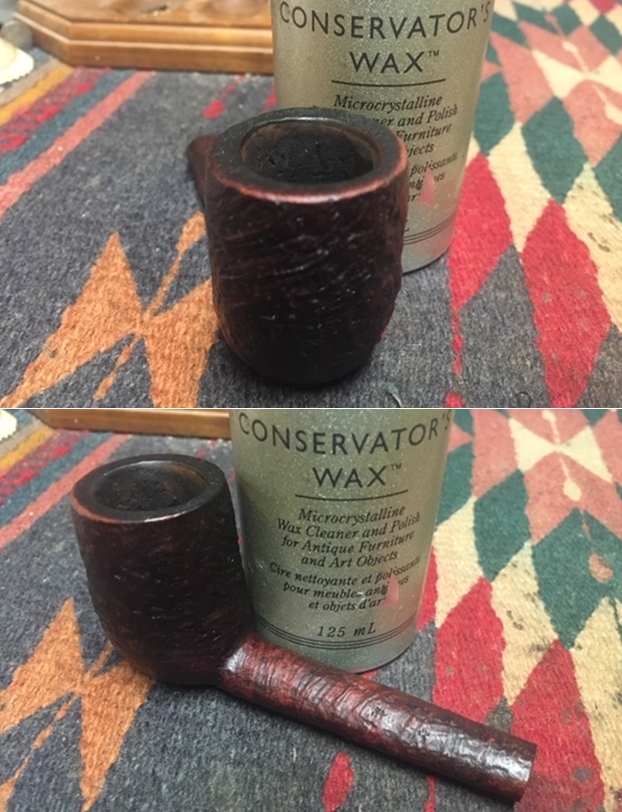
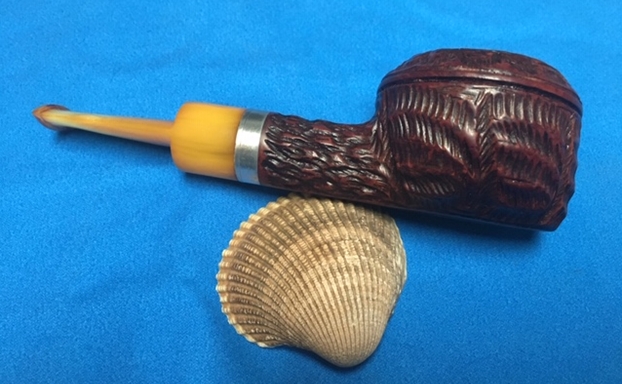
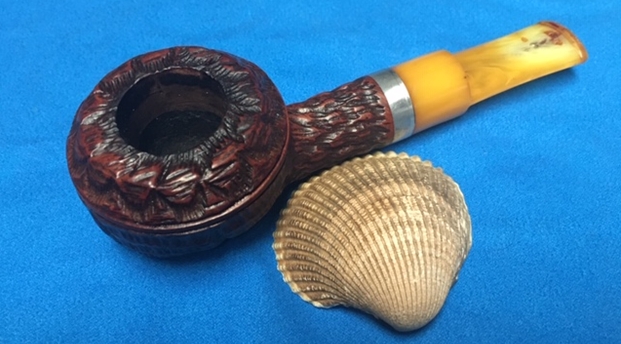
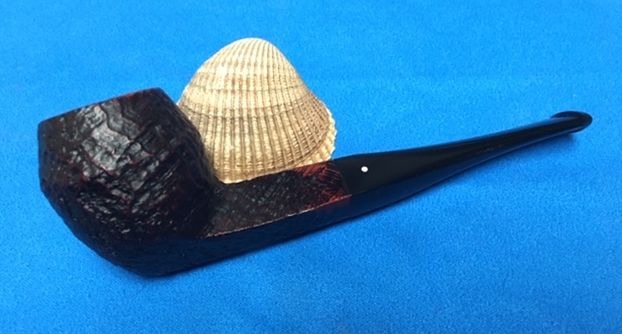
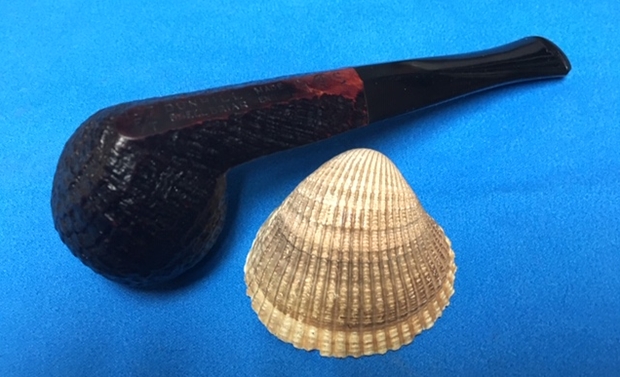
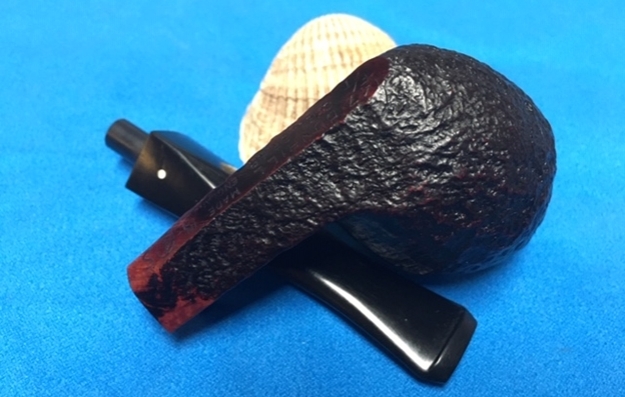
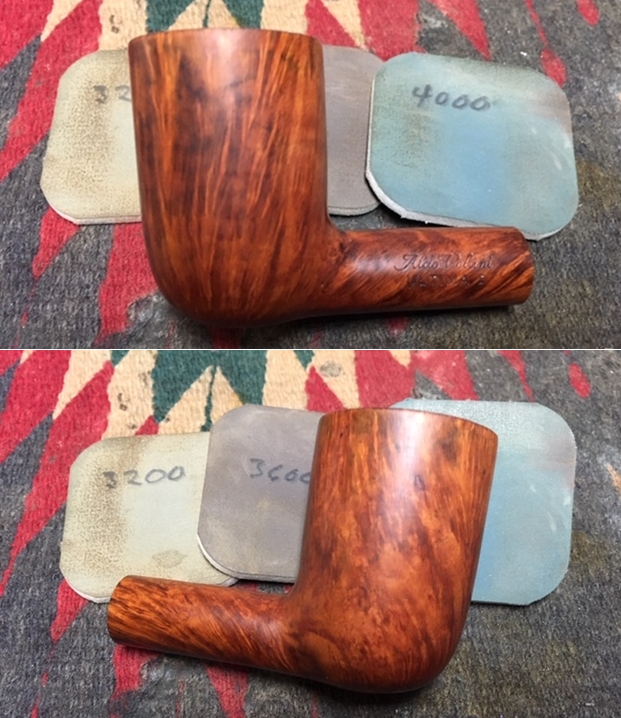
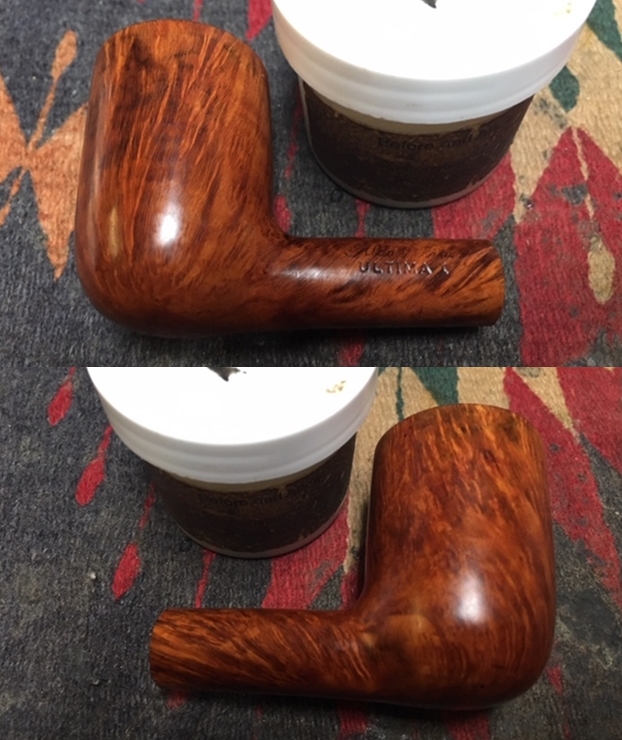
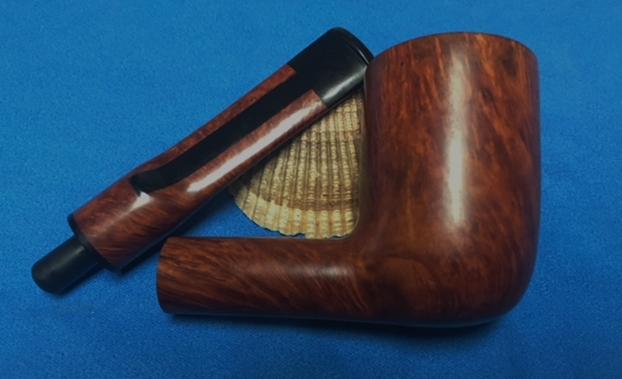
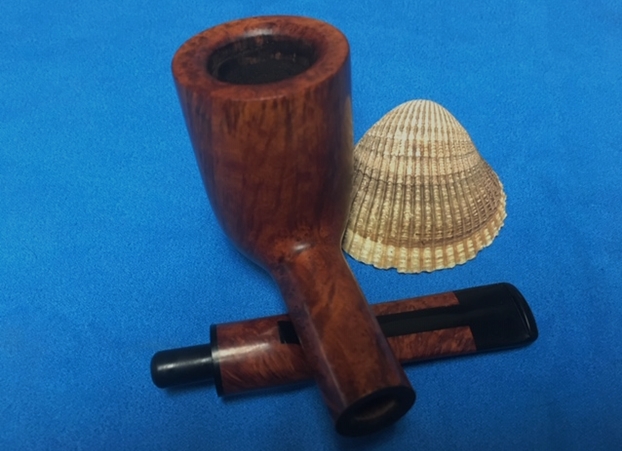
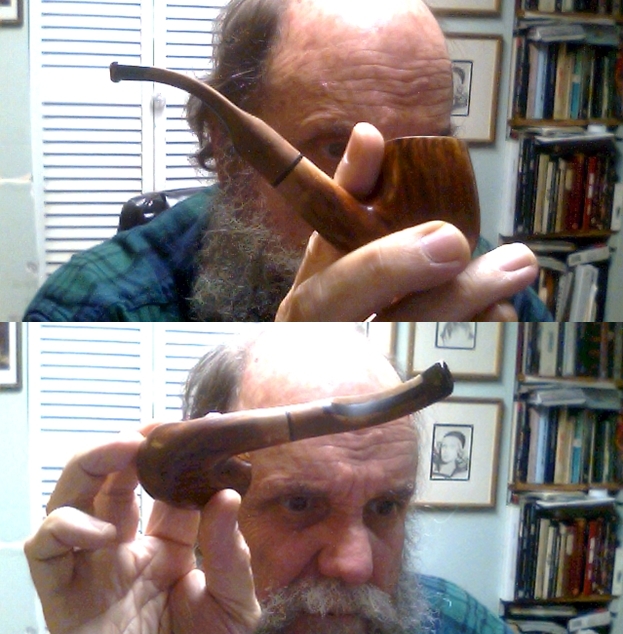
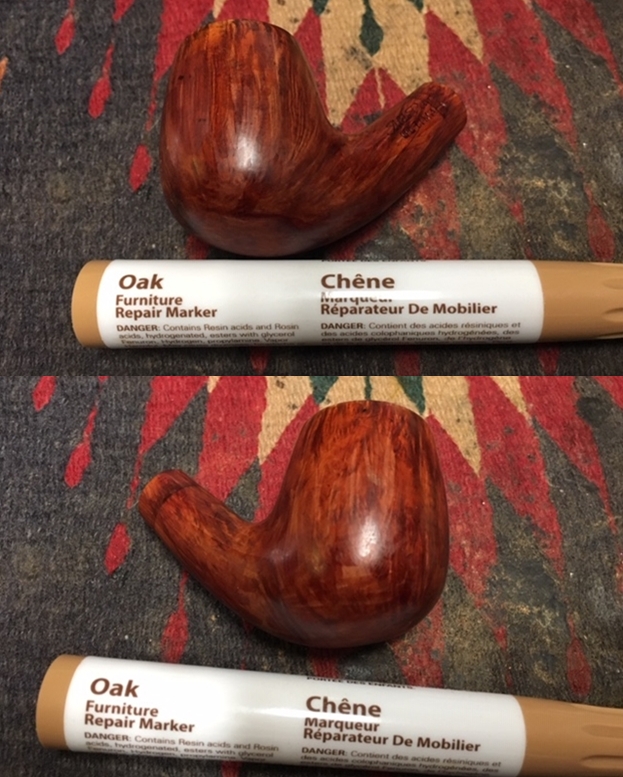
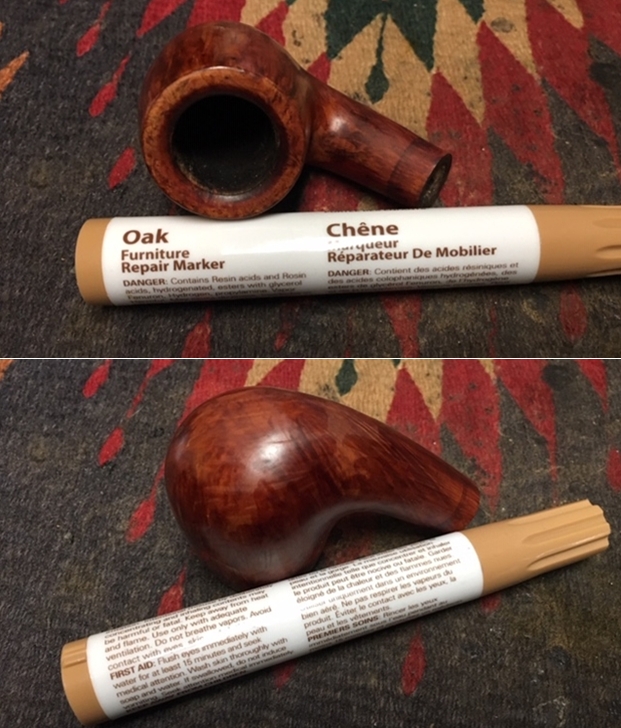
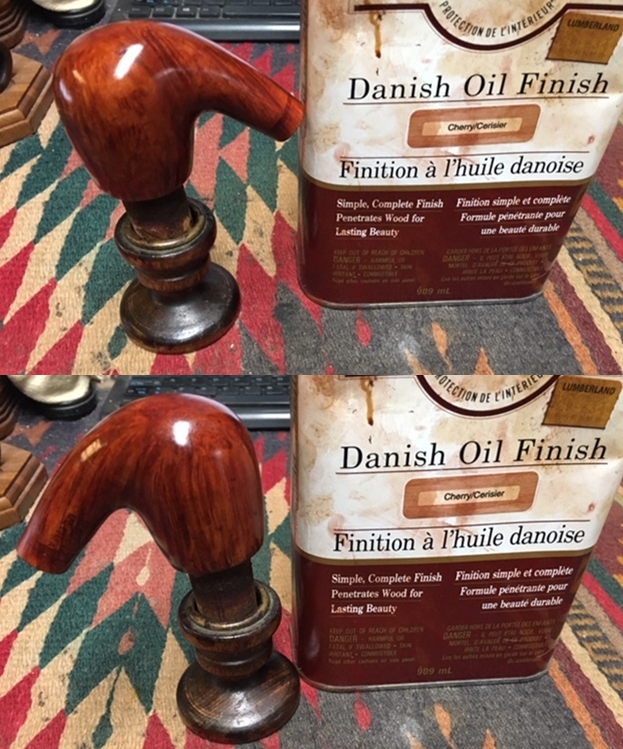
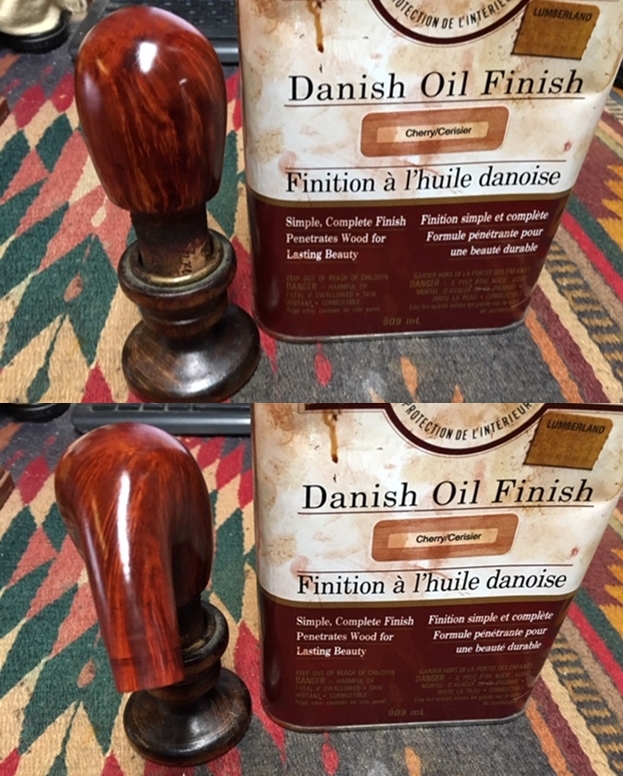
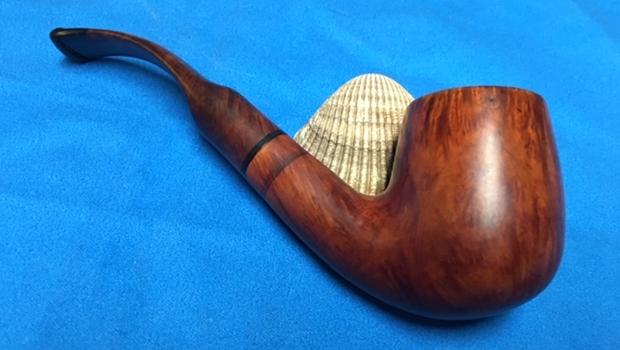
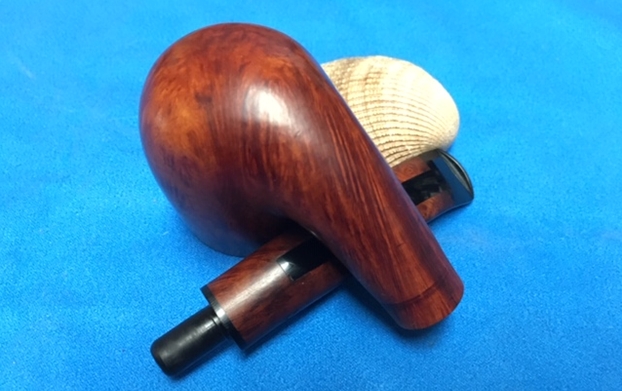
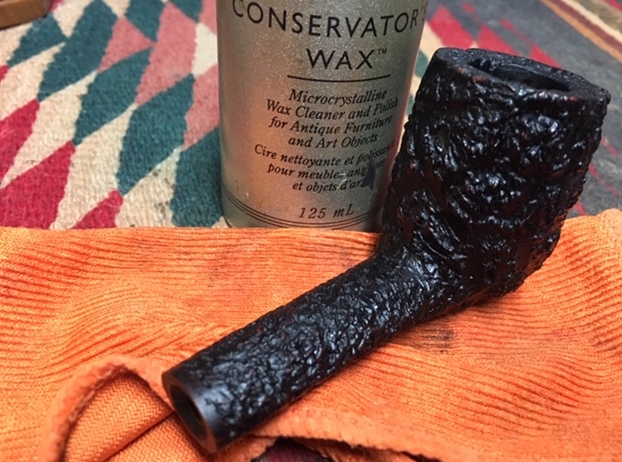
I put the bowl and stem back together. I polished the stem with Blue Diamond to polish out the scratches in the Lucite. I gave the bowl multiple coats of Conservator’s Wax and the stem multiple coats of carnauba wax. I buffed the pipe with a clean buffing pad to raise the shine. I hand buffed it with a microfiber cloth to deepen the shine. The pipe polished up pretty nicely. The contrast of the blacks and dark browns of the briar with the polished black acrylic/Lucite is quite stunning. The dark and coral like rustication around the bowl and shank is quite remarkable and gives the pipe an incredible tactile presence. This is truly a beautiful pipe that is for sure and one that I think I will keep around for a while. The finished pipe is shown in the photos below. The dimensions of the pipe are Length: 6 inches, Height: 2 inches, Outside diameter of the bowl: 1 1/8 inches, Chamber diameter: 3/4 of an inch. I have a few Castellos in the collection that have come to me in a variety of ways. They have all been beautiful pipes and the look of this Canadian Sea Rock in the hand makes me pause. Thanks for walking through the restoration with me. It was a great break away from the estates that await me. Cheers.  

Restoring the 10th Pipe from Bob Kerr’s Estate – A Dunhill Shell 660 Saddle Stem Billiard


Blog by Steve Laug

In my ongoing work on Bob Kerr’s Estate I seem to be making a dent. I am working my way through the Dunhills in his collection – the Shell and Tanshell pipes. I am cleaning them for the family and moving them out into the hands of pipemen and women who will carry on the trust that began with Bob and in some pipes was carried on by Bob. In the collection along with the Dunhills are a good bevy of Petersons, some Comoys and Barlings as well as a lot of other pipes – a total of 125 pipes along with a box of parts. This is the largest estate that I have had the opportunity to work on. I put together a spread sheet of the pipes and stampings to create an invoice. I was taking on what would take me a fair amount of time to clean up. I could not pass up the opportunity to work on these pipes though. They were just too tempting.

I sorted the pipes into groups of the various brands and had a box of 25 different Dunhill pipes in different shapes, styles and sizes. I decided to work on the Dunhills first. It was a great chance to see the shape variety up close and personal. The photo below shows the box of Dunhill pipes.I went through the box of Dunhills shown above and chose the 10th sandblast pipe to work on – a Group 4 Shell Billiard with a saddle stem. It is stamped on the heel and the underside of the 660 followed by Dunhill over Shell. Then it reads Made in England 7, Circle 4S – Group 4 size Shell made in 1968. The round shank of the billiard flows into a short saddle stem that is oxidized and has tooth marks and chatter near the button. There is some calcification on the first inch of the stem ahead of the button and there is some light damage to the top of the button. The Shell finish is very craggy and has a deep blast. It is dirty with grime and tars filling in much of the craggy finish. The bowl had a thick cake and lava overflowed on the rim top. The bowl had tobacco stuck in the lava on the cake on the walls of the bowl like the other pipes from this estate. With a little work this pipe would look good once again. I took pictures of the pipe before I started working on it. I took some close up photos of the rim top and stem to show what I was dealing with. Judging from the condition this little billiard was in I think I can safely say that it was another one of Bob’s favourite pipes. The cake in the bowl is another thick one and the lava on the rim top is also very thick. You can see the cake and tobacco in the bowl. The saddle stem was dirty, oxidized, calcified and had a lot of tooth chatter on the top and underside for about an inch ahead of the button. The button surface was also marked with tooth chatter. The sharp edge defining the button was worn down and almost smoothed out. It will be an interesting challenge to bring back to life.I took a photo of the stamping on the underside of the bowl and shank. It was clear and readable.I am sure if you have read the restoration work on the previous 8 pipes you have already read what I included about Bob Kerr, the pipeman who held these pipes in trust before I came to work on them. Also, if you have followed the blog for long you will already know that I like to include background information on the pipeman whose pipes I am restoring. For me, when I am working on an estate I really like to have a sense of the person who held the pipes in trust before I worked on them. It gives me another dimension of the restoration work. I asked Brian if he or his wife would like to write a brief biographical tribute to her father, Bob. His daughter worked on it and I received the following short write up on him and some pictures to go along with the words. Thank you Brian and tell your wife thank you as well.

I am delighted to pass on these beloved pipes of my father’s. I hope each user gets many hours of contemplative pleasure as he did. I remember the aroma of tobacco in the rec room, as he put up his feet on his lazy boy. He’d be first at the paper then, no one could touch it before him. Maybe there would be a movie on with an actor smoking a pipe. He would have very definite opinions on whether the performer was a ‘real’ smoker or not, a distinction which I could never see but it would be very clear to him. He worked by day as a sales manager of a paper products company, a job he hated. What he longed for was the life of an artist, so on the weekends and sometimes mid-week evenings he would journey to his workshop and come out with wood sculptures, all of which he declared as crap but every one of them treasured by my sister and myself. Enjoy the pipes, and maybe a little of his creative spirit will enter you!

I have included one of Bob’s wood carvings to give you an idea of what he daughter wrote about above. You can see his artistry in the carving that is patterned after British Columbia’s Coastal First Nations people. To me this is a sea otter but perhaps a reader may enlighten us.Having already worked on 9 other pipes from Bob’s estate I was beginning to get a feel for how he used and viewed his pipes. Even with the pipes so far I could tell which ones were his favoured ones and which were his work horses. I could get a sense of the ones that accompanied him into his carving shop. In many ways it was as if he was standing over my shoulder while I cleaned up his pipes. With that in mind I turned to work on the 10th of his pipes. I reamed the bowl to remove the cake on the walls and the debris of tobacco shards that still remained. I used a PipNet pipe reamer to start the process. I followed that with a Savinelli Fitsall Pipe Knife to clean up the remaining cake in the conical bottom of the bowl. I sanded the bowl with 220 grit sandpaper wrapped around a piece of dowel. It smooths out the walls and also helps bring the inner edges back to round. With the bowl reamed it was time to work on the rim top and remove the thick lava coat in the blast of the rim. I used the Savinelli Fitsall knife to scrape away the high spots of lava and a brass bristle tire brush to work on the rim top and remove the buildup there.With the bowl reamed and rim top cleaned I scrubbed the sandblast finish. This is pretty much my process in cleaning either sandblast or rusticated finishes. I scrubbed it with undiluted Murphy’s Oil Soap and a tooth brush to remove the grime from the grooves and canyons of the blast. I worked over the tarry lava overflow on the rim with the tooth brush and a brass brush. I rinsed the pipe under running water to remove the grime. I dried it off with a soft towel. The pictures below show the finish after scrubbing and rinsing. I scraped out the inside of the mortise with a small pen knife to break away the tarry buildup on the walls of the shank. I cleaned out the internals of the bowl, shank and the airway in the shank and the stem with alcohol, pipe cleaners and cotton swabs until they came out clean. It was very dirty in the shank and stem but now it not only looks clean but smells clean.  I worked some Before & After Restoration Balm into the briar on the bowl and the rim top. I worked it into the nooks and crannies of the sandblast surface with my fingertips to clean, enliven and protect the wood. I let the balm sit for about 20 minutes and buffed it off with a soft cotton cloth and then polished it with a horsehair shoe brush. I took photos of the pipe at this point in the process to show what the bowl looked like at this point. I gave the bowl several coats of Conservator’s Wax and buffed it with a shoe brush after each coat of wax to raise the shine. The bowl looks really good at this point. The sandblast grain just shines and is showing all of the different layers of colour that make up a Dunhill Shell finish. I set the bowl aside and turned my attention to the stem. I sanded out the majority of the marks and tooth chatter on the surface of the vulcanite with a folded piece of 220 grit sandpaper. I followed the 220 grit sandpaper with 400 grit wet dry sandpaper to minimize the scratching. The two papers combined did a pretty decent job of getting rid of the tooth marks and chatter as well as the oxidation and calcification. There were still a few small tooth marks that needed work.I polished the stem with Denicare Mouthpiece Polish to take out the oxidation at the button edge and on the end of the mouthpiece. I also worked hard to scrub it from the surface of the stem at the tenon end.There were two small tooth marks on the underside of the stem that needed a bit of attention. I filled them in with some clear super glue. I set it aside to dry. Once the glue dried I sanded the repairs smooth with 220 grit sandpaper to blend them into the surface of the stem. I polished out the scratches with micromesh sanding pads – wet sanding with 1500-2400 grit pads and dry sanding with 3200-12000 grit pads. I wiped the stem down after each sanding pad with Obsidian Oil. I polished it with Before & After Pipe Stem Polish – both Fine and Extra Fine. Once I had finished the polishing I gave it a final coat of oil and set it aside to dry. I put the bowl and stem back together. I polished the bowl and stem with Blue Diamond to polish out the scratches in the briar and the vulcanite. I gave the bowl multiple coats of Conservator’s Wax and the stem multiple coats of carnauba wax. I buffed the pipe with a clean buffing pad to raise the shine. I hand buffed it with a microfiber cloth to deepen the shine. The pipe polished up pretty nicely. The contrast of colours that show up in the sandblast of the Shell briar bowl looked good with the polished black vulcanite. The swirled grain “target” on the right side of the bowl is quite stunning. This 1968 Dunhill Shell 660 Saddle stem Billiard turned out really well and I was able to repair the tooth marks on the underside of the stem. It really has that classic Dunhill look that catches the eye. The finished pipe is shown in the photos below. The dimensions of the pipe are Length: 5 ¼ inches, Height: 1 3/4 inches, Outside diameter of the bowl: 1 1/4 inches, Chamber diameter: 3/4 of an inch. This is the 10th Dunhill and the 9th Shell from the many pipes that will be coming onto the work table from the estate. This pipe is already sold to a fellow who wrote me an email after the first restoration. I quote part of that now as it gives testimony to our small pipesmoking community.

“Hello, I must say this is an incredibly small world. I’ve been following rebornpipes for a while now and when i saw your first write up about Bob Kerr I was incredibly surprised,  he was a prominent member of the community here on Pender Island and has been greatly missed.  I would be honored to buy one of his Dunhills…  Thanks for your time. — Jon”

The pipe will be heading over to Pender Island with the Tanshell Pot early this week. I think Jon will enjoy it! Thanks for reading this blog and my reflections on the pipe while I worked on it. I am having fun working on this estate.

Restoring the 9th Pipe from Bob Kerr’s Estate – A Dunhill Tanshell Briar R F/T Pot


Blog by Steve Laug

In my ongoing work on Bob Kerr’s Estate I seem to be making a dent. I am working my way through the Dunhills in his collection – the Shell and Tanshell pipes. I am cleaning them for the family and moving them out into the hands of pipemen and women who will carry on the trust that began with Bob and in some pipes was carried on by Bob. In the collection along with the Dunhills are a good bevy of Petersons, some Comoy’s and Barlings as well as a lot of other pipes – a total of 125 pipes along with a box of parts. This is the largest estate that I have had the opportunity to work on. I put together a spread sheet of the pipes and stampings to create an invoice. I was taking on what would take me a fair amount of time to clean up. I could not pass up the opportunity to work on these pipes though. They were just too tempting.

I sorted the pipes into groups of the various brands and had a box of 25 different Dunhill pipes in different shapes, styles and sizes. I decided to work on the Dunhills first. It was a great chance to see the shape variety up close and personal. The photo below shows the box of Dunhill pipes.I went through the box of Dunhills shown above and chose the 9th sandblast pipe to work on – a Group 4 Tanshell Pot. It is stamped on the heel and the underside of the shank R F/T followed by Dunhill over Tanshell. That is followed by Made in England 8 and ending with a Circle 4T at the shank/stem junction. The 4T gives both size (in this case 4) and the T for a Tan Shell. The date code at the end of the Made in England stamp tells me that it was made in 1969. Finish is dirty, bowl caked and lava overflow on the rim top. Bowl is out of round, damaged edge. The round shank of the Pot shape flows into a short tapered stem that is oxidized and has tooth marks and chatter near the button. There is some calcification on the first inch of the stem ahead of the button and there is some light damage to the button. The Tanshell finish is significantly lighter in colour than the Shell Briars I have been working on. It is dirty with grime and tars filling in much of the craggy finish. The bowl had a thick cake and lava overflowed on the rim top. The inner edge of the rim had damage on the front from a burn mark and it makes the bowl out of round.  The bowl had tobacco stuck in the lava on the walls of the bowl like the other pipes from this estate. With a little work this pipe would look good once again. I took pictures of the pipe before I started working on it. I took some close up photos of the rim top and stem to show what I was dealing with. Judging from the condition this Pot was in I think I can safely say that it was another one of Bob’s favourite pipes. The cake in the bowl is another thick one and the lava on the rim top is also very thick. You can see the cake and tobacco in the bowl. The fishtail stem was dirty, oxidized, calcified and had a lot of tooth chatter on the top and underside for about an inch ahead of the button. The button surface was also marked with tooth chatter. The sharp edge defining the button was worn down and almost smoothed out. It will be an interesting challenge to bring back to life. (What appears to be a crack at the back left side of the bowl is not one! Whew it was only a crack in the thick lava coat.)I took a photo of the stamping on the underside of the bowl and shank. It was clear and readable.I am sure if you have read the restoration work on the previous 8 pipes you have already read what I included about Bob Kerr, the pipeman who held these pipes in trust before I came to work on them. Also, if you have followed the blog for long you will already know that I like to include background information on the pipeman whose pipes I am restoring. For me, when I am working on an estate I really like to have a sense of the person who held the pipes in trust before I worked on them. It gives me another dimension of the restoration work. I asked Brian if he or his wife would like to write a brief biographical tribute to her father, Bob. His daughter worked on it and I received the following short write up on him and some pictures to go along with the words. Thank you Brian and tell your wife thank you as well.

I am delighted to pass on these beloved pipes of my father’s. I hope each user gets many hours of contemplative pleasure as he did. I remember the aroma of tobacco in the rec room, as he put up his feet on his lazy boy. He’d be first at the paper then, no one could touch it before him. Maybe there would be a movie on with an actor smoking a pipe. He would have very definite opinions on whether the performer was a ‘real’ smoker or not, a distinction which I could never see but it would be very clear to him. He worked by day as a sales manager of a paper products company, a job he hated. What he longed for was the life of an artist, so on the weekends and sometimes mid-week evenings he would journey to his workshop and come out with wood sculptures, all of which he declared as crap but every one of them treasured by my sister and myself. Enjoy the pipes, and maybe a little of his creative spirit will enter you!

I have included one of Bob’s wood carvings to give you an idea of what he daughter wrote about above. You can see his artistry in the carving that is patterned after British Columbia’s Coastal First Nations people. To me this is a sea otter but perhaps a reader may enlighten us.Having already worked on 8 other pipes from Bob’s estate I was beginning to get a feel for how he used and viewed his pipes. Even with the pipes so far I could tell which ones were his favoured ones and which were his work horses. I could get a sense of the ones that accompanied him into his carving shop. In many ways it was as if he was standing over my shoulder while I cleaned up his pipes. With that in mind I turned to work on the eighth of his pipes. I reamed the bowl to remove the cake on the walls and the debris of tobacco shards that still remained. I used a PipNet pipe reamer to start the process. I followed that with a Savinelli Fitsall Pipe Knife to clean up the remaining cake in the conical bottom of the bowl. I sanded the bowl with 220 grit sandpaper wrapped around a piece of dowel. It smooths out the walls and also helps minimize damage on the inner edges of the rim. With the bowl reamed it was time to work on the rim top and remove the thick lava coat in the blast of the rim. I used the Savinelli Fitsall knife to scrape away the high spots of lava and a brass bristle tire brush to work on the rim top and remove the buildup there.With the bowl reamed and rim top cleaned I scrubbed the sandblast finish. This is pretty much my process in cleaning either sandblast or rusticated finishes. I scrubbed it with undiluted Murphy’s Oil Soap and a tooth brush to remove the grime from the grooves and canyons of the blast. I worked over the tarry lava overflow on the rim with the tooth brush and a brass brush. I rinsed the pipe under running water to remove the grime. I dried it off with a soft towel. The pictures below show the finish after scrubbing and rinsing. I scraped out the inside of the mortise with a small pen knife to break away the tarry buildup on the walls of the shank. I cleaned out the internals of the bowl, shank and the airway in the shank and the stem with alcohol, pipe cleaners and cotton swabs until they came out clean. It was very dirty in the shank and stem but now it not only looks clean but smells clean.  I worked some Before & After Restoration Balm into the briar on the bowl and the rim top. I worked it into the nooks and crannies of the sandblast surface with my fingertips to clean, enliven and protect the wood. I let the balm sit for about 20 minutes and buffed it off with a soft cotton cloth and then polished it with a horsehair shoe brush. I took photos of the pipe at this point in the process to show what the bowl looked like at this point. I gave the bowl several coats of Conservator’s Wax and buffed it with a shoe brush to raise the shine. The bowl looks really good at this point. The sandblast grain just shines and is showing all of the different layers of colour that make up a Tanshell finish. I set the bowl aside and turned my attention to the stem. I used a needle file to recut the sharp edge of the button and give it back its definition on the stem. I sanded out the marks and tooth chatter on the surface of the vulcanite with a folded piece of 220 grit sandpaper. I followed the 220 grit sandpaper with 400 grit wet dry sandpaper to minimize the scratching. The two papers combined did a pretty decent job of getting rid of the tooth marks and chatter as well as the oxidation and calcification.I polished the stem with Denicare Mouthpiece Polish to take out the oxidation at the button edge and on the end of the mouthpiece. I also worked hard to scrub it from the surface of the stem at the tenon end.I polished out the scratches with micromesh sanding pads – wet sanding with 1500-2400 grit pads and dry sanding with 3200-12000 grit pads. I wiped the stem down after each sanding pad with Obsidian Oil. I polished it with Before & After Pipe Stem Polish – both Fine and Extra Fine. Once I had finished the polishing I gave it a final coat of oil and set it aside to dry. I put the bowl and stem back together. I polished the bowl and stem with Blue Diamond to polish out the scratches in the briar and the vulcanite. I gave the bowl multiple coats of Conservator’s Wax and the stem multiple coats of carnauba wax. I buffed the pipe with a clean buffing pad to raise the shine. I hand buffed it with a microfiber cloth to deepen the shine. The pipe polished up pretty nicely. The contrast of colours that show up in the sandblast of the Shell briar bowl looked good with the polished black vulcanite. The swirled grain “target” on the right side of the bowl is quite stunning. This 1969 Dunhill Tanshell R F/T Pot turned out really well and I was able to minimize the burn damage on the front inner edge of the rim. It really has that classic Dunhill look that catches the eye. The finished pipe is shown in the photos below. The dimensions of the pipe are Length: 5 1/2 inches, Height: 1 3/4 inches, Outside diameter of the bowl: 1 1/2 inches, Chamber diameter: 7/8 of an inch. This is the ninth Dunhill and is one of two Tanshells from the many pipes that will be coming onto the work table from this estate. This pipe is already sold to a fellow who wrote me an email after the first restoration. I quote part of that now as it gives testimony to our small pipesmoking community.

“Hello, I must say this is an incredibly small world. I’ve been following rebornpipes for a while now and when i saw your first write up about Bob Kerr I was incredibly surprised,  he was a prominent member of the community here on Pender Island and has been greatly missed.  I would be honored to buy one of his Dunhills…  Thanks for your time. — Jon”

The pipe will be heading over to Pender Island in a few days to carry on the life it lived there before. I think Jon will enjoy it! Thanks for reading this blog and my reflections on the pipe while I worked on it. I am having fun working on this estate.

Restoring the 8th Pipe from Bob Kerr’s Estate – A Dunhill Shell Briar 433 Billiard


Blog by Steve Laug

I am finally getting around to working on Bob Kerr’s Estate. His son-in-law, Brian contacted me a few months ago saying that the family needed to clean out the estate as they were getting the family home ready to move. He asked if I would be interested in restoring and selling the pipes for them. He brought what originally he said was a few pipes over to show me. When I opened the door Brian was there with a few flats of pipes. There were Dunhills, Petersons, Comoy’s Barlings and a lot of other pipes – a total of 125 pipes and a box of parts. That is the largest estate I had the opportunity to work on. I put together a spread sheet of the pipes and stampings to create an invoice. I was taking on what would take me a fair amount of time to clean up. I could not pass up the opportunity to work on these pipes though. They were just too tempting.

I sorted the pipes into groups of the various brands and had a box of 25 different Dunhill pipes in different shapes, styles and sizes. I decided to work on the Dunhills first. It was a great chance to see the shape variety up close and personal. The photo below shows the box of Dunhill pipes.I went through the box of Dunhills shown above and chose the 8th pipe to work on – a Group 4 sandblast long stem Billiard. It is stamped on the heel and the underside of the shank with the shape number 433 followed by Dunhill Shell over Made in England 16 which dates it as being made in 1967. It is yet another Dunhill Billiard but with a shape number I have not seen in the rest of the lot. The round shank of the Billiard flows into a long tapered stem that is oxidized and has tooth marks and chatter near the button. There is some calcification on the first inch of the stem ahead of the button and there is some light damage to the button. The finish is significantly lighter in colour than the other Shell Briars I have been working on. It is dirty with grime and tars filling in much of the craggy finish. The bowl had a thick cake and lava overflowed on the rim top. The inner edge of the rim had damage on the front from a burn mark and it makes the bowl out of round.  The bowl had tobacco stuck in the lava on the walls of the bowl like the other pipes from this estate. With a little work this pipe would look good once again. I took pictures of the pipe before I started working on it. I took some close up photos of the rim top and stem to show what I was dealing with. Judging from the condition this Billiard was in I think I can safely say that it was another one of Bob’s favourite pipes. The cake in the bowl is another thick one and the lava on the rim top is also very thick. You can see the cake and tobacco in the bowl. You can also see that the inner edge of the bowl is out of round in the mid front. It appears to have been burned by repeated lighting in the same place with a lighter or match. I am assuming from the way Bob cared for his other pipes that this one came to him in that condition and it was one he used when working in his shop. The fishtail stem was dirty, oxidized, calcified and had a lot of tooth chatter on the top and underside for about an inch ahead of the button. The button surface was also marked with tooth chatter. The sharp edge defining the button was worn down and almost smoothed out. It will be an interesting challenge to bring back to life.I took a photo of the stamping on the underside of the bowl and shank. It should be easier to read once I get it cleaned up a bit.I am sure if you have read the restoration work on the previous four pipes you have already read what I included about Bob Kerr, the pipeman who held these pipes in trust before I came to work on them. Also, if you have followed the blog for long you will already know that I like to include background information on the pipeman whose pipes I am restoring. For me, when I am working on an estate I really like to have a sense of the person who held the pipes in trust before I worked on them. It gives me another dimension of the restoration work. I asked Brian if he or his wife would like to write a brief biographical tribute to her father, Bob. His daughter worked on it and I received the following short write up on him and some pictures to go along with the words. Thank you Brian and tell your wife thank you as well.

I am delighted to pass on these beloved pipes of my father’s. I hope each user gets many hours of contemplative pleasure as he did. I remember the aroma of tobacco in the rec room, as he put up his feet on his lazy boy. He’d be first at the paper then, no one could touch it before him. Maybe there would be a movie on with an actor smoking a pipe. He would have very definite opinions on whether the performer was a ‘real’ smoker or not, a distinction which I could never see but it would be very clear to him. He worked by day as a sales manager of a paper products company, a job he hated. What he longed for was the life of an artist, so on the weekends and sometimes mid-week evenings he would journey to his workshop and come out with wood sculptures, all of which he declared as crap but every one of them treasured by my sister and myself. Enjoy the pipes, and maybe a little of his creative spirit will enter you!

I have included one of Bob’s wood carvings to give you an idea of what he daughter wrote about above. You can see his artistry in the carving that is patterned after British Columbia’s Coastal First Nations people. To me this is a sea otter but perhaps a reader may enlighten us.Having already worked on 7 other pipes from Bob’s estate I was beginning to get a feel for how he used and viewed his pipes. Even with these I eight I could tell which ones were pipes he favoured and which were his work horses. I could get a sense of the ones that accompanied him into his carving shop. In many ways it was as if he was standing over my shoulder while I cleaned up his pipes. With that in mind I turned to work on the eighth of his pipes. I reamed the bowl to remove the cake on the walls and the debris of tobacco shards that still remained. I used a PipNet pipe reamer to start the process. I followed that with a Savinelli Fitsall Pipe Knife to clean up the remaining cake in the conical bottom of the bowl. I sanded the bowl with 220 grit sandpaper wrapped around a piece of dowel. It smooths out the walls and also helps bring the inner edges back to round. With the bowl reamed it was time to work on the rim top and remove the thick lava coat in the blast of the rim. I used the Savinelli Fitsall knife to scrape away the high spots of lava and a brass bristle tire brush to work on the rim top and remove the buildup there.With the bowl reamed and rim top cleaned I scrubbed the sandblast finish. This is pretty much my process in cleaning either sandblast or rusticated finishes. I scrubbed it with undiluted Murphy’s Oil Soap and a tooth brush to remove the grime from the grooves and canyons of the blast. I worked over the tarry lava overflow on the rim with the tooth brush and a brass brush. I rinsed the pipe under running water to remove the grime. I dried it off with a soft towel. The pictures below show the finish after scrubbing and rinsing. I scraped out the inside of the mortise with a small pen knife to break away the tarry buildup on the walls of the shank. I cleaned out the internals of the bowl, shank and the airway in the shank and the stem with alcohol, pipe cleaners and cotton swabs until they came out clean. It was very dirty in the shank and stem but now it not only looks clean but smells clean.  I worked some Before & After Restoration Balm into the briar on the bowl and the rim top. I worked it into the nooks and crannies of the sandblast surface with my fingertips to clean, enliven and protect the wood. I let the balm sit for about 20 minutes and buffed it off with a soft cotton cloth and then polished it with a horsehair shoe brush. I took photos of the pipe at this point in the process to show what the bowl looked like at this point. I gave the bowl several coats of Conservator’s Wax and buffed it with a shoe brush to raise the shine. The bowl looks really good at this point. The sandblast grain just shines and is showing all of the layers of colour that make up a Shell finish. I set the bowl aside and turned my attention to the stem. I used a needle file to recut the sharp edge of the button and give it back its definition on the stem. I sanded out the marks and tooth chatter on the surface of the vulcanite with a folded piece of 220 grit sandpaper. I followed the 220 grit sandpaper with 400 grit wet dry sandpaper to minimize the scratching. The two papers combined did a pretty decent job of getting rid of the tooth marks and chatter as well as the oxidation and calcification.I polished the stem with Denicare Mouthpiece Polish to take out the oxidation at the button edge and on the end of the mouthpiece. I also worked hard to scrub it from the surface of the stem at the tenon end. I polished out the scratches with micromesh sanding pads – wet sanding with 1500-2400 grit pads and dry sanding with 3200-12000 grit pads. I wiped the stem down after each sanding pad with Obsidian Oil. I polished it with Before & After Pipe Stem Polish – both Fine and Extra Fine. Once I had finished the polishing I gave it a final coat of oil and set it aside to dry. I put the bowl and stem back together. I polished the bowl and stem with Blue Diamond to polish out the scratches in the briar and the vulcanite. I gave the bowl multiple coats of Conservator’s Wax and the stem multiple coats of carnauba wax. I buffed the pipe with a clean buffing pad to raise the shine. I hand buffed it with a microfiber cloth to deepen the shine. The pipe polished up pretty nicely. The contrast of colours that show up in the sandblast of the Shell briar bowl looked good with the polished black vulcanite. The swirled grain “target” on the right side of the bowl is quite stunning. This 1967 Dunhill Shell 433 Billiard turned out really well and I was able to minimize the burn damage on the front inner edge of the rim. It really has that classic Dunhill Billiard look that catches the eye. The finished pipe is shown in the photos below. The dimensions of the pipe are Length: 6 ¼ inches, Height: 1 7/8 inches, Outside diameter of the bowl: 1 1/4 inches, Chamber diameter: 3/4 of an inch. This is the eighth Dunhill Shell from the many pipes that will be coming onto the work table and eventually be posted on the rebornpipes store if you are interested in adding it to your collection. Thanks for reading this blog and my reflections on the pipe while I worked on it. I am having fun working on this estate.  


A Tribute to an American Pipecarver – “John L. Lakatosh”


Blog by Paresh Deshpande

In my last blog on Boswell ’96 pipe restoration, I had confessed my growing admiration for pipes made by American pipe carvers after having worked on a number of pipes like Tracy Mincer, Custom-Bilts, Kaywoodies, John Bessai, J M Boswell etcetera. I realized that American pipe carvers are artistic, technologically inventive and that the pipes they made are robust, life lasting with a nice feel and heft and of very high quality. However, my liking for freehand pipes has remained undiminished. So now I have on my work table, three freehand pipes made by an iconic American small time pipe carver, who passed away in March this year. The carver that I am mentioning is Mr. John Lakatosh.

The three pipes currently on my work table are large sized freehand which were hand carved by John Lakatosh. The first is a large bent freehand billiard carved in 4-81; the second is a large sized triangular freehand pipe with a nice heft and hand feel, carved in 1-83 while the third is a sitter Saxophone (or should I call it a Ballerina!!!!!) carved in 5-85, the first digit indicating the month and later two digits denoting the year in which they were carved. All these pipes bear the stamping “HANDMADE” over “LAKATOSH” over the “MONTH AND YEAR” in which they were made. These stamps are in engraved in a script hand on the shank end of each pipe. I was keen to know more about John Lakatosh, the carver, his pipe making techniques and philosophy. I searched pipedia.com and there is a very brief write up on him. I reproduce the information available on pipedia.com for a quick read.

John Lakatosh was a carver from New Columbia, Pennsylvania. He made pipes in his home workshop in the Susquehana Valley up above Sunbury. John made pipes during the week and sold most of them at craft fairs in Central and Southern Pennsylvania. He retired from carving, to go back to bus mechanic work after the tobacco industry took a decline. He now lives with his wife in Lewisburg Pennsylvania, where he now crafts furniture for family and friends. He recently passed on March 8th 2018. (Primary/Familial Source)

As I was surfing the net for more information on Mr. John Lakatosh, I came across his obituary. Here is the link (https://www.heffnercare.com/obituaries/obituary-listings?obId=3010702)

INITIAL VISUAL INSPECTION
The stummel surface of all three pipes boasts of beautiful straight and flame grains all along the stummel surface. The 4-81 carved pipe has three hand rusticated patches, one on either sides of the bowl and one on the front side. The front of the stummel on the one carved in 1-83, has a beautiful and delicate sliver of rustication extending from top left side of the rim and extends to half way down towards the heel on the right side. The sitter carved in 5-85 has smooth surface with no rustications.  The stummel is relatively clean and has a few dents and dings likely due to uncared for storage. The briar is dull and lifeless and has taken on a layer of aged patina, through which one can make out the beautiful grains all round. All three pipes should clean up nicely. Apart from the pipe 4-81 which appear to have been smoked maybe once or unsmoked, the other two pipes have seen considerable use and have a decent layer of cake. The condition of the inner walls of the chamber on both used pipes can be ascertained only after the cake has been removed completely and taken down to bare briar. Both the bowl feels robust and solid to the touch from the outside. This issue should be a breeze to address. The plateau rim top has darkened on the 1-83 and 5-85, more so on the later due to frequent lighting, on the back side of the rim. This can be seen in above pictures. The plateau rim top of the 4-81 is pristine. The condition of the inner edge and rim top can be commented upon only once the rim has been cleaned. The plateau shank ends of all three pipes are clean and without any accumulation of dirt and grime. However, the mortise does show signs of accumulated dried oils, tars and remnants of ash, greatly restricting the air flow.The 1-83 and 5-85 have green and brown acrylic stem respectively. The 4-81 has a vulcanite stem. The acrylic stems have beautiful swirls of contrasting light and dark colors. The green stem has significant damage in the form of deep bite marks on both the upper and lower stem surface near the edge of the lip. The brown acrylic stem has tooth chatter on both surfaces of the stem, also near the edge of the lip while the vulcanite stem is devoid of any tooth chatter or bite marks, but is heavily oxidized. There is some damage to the stem in form of cuts, on the flared edge towards the tenon. The tenons on both the green and brown acrylic stem are covered in dried oils and tars and so is the airway. The air flow through the stems is laborious to say the least. The fit of both these stems in to the mortise is very loose, which will loosen further after the mortise and tenon have been cleaned. These issues will need to be addressed. THE PROCESS
I started this project by reaming the chambers of 1-83 and 5-85 with size 3 head of PipNet reamer. I used a 220 grit sand paper, pinched between my thumb and forefinger, to sand the inner walls of the chamber of all three pipes. Once I had reached the bare briar, I wiped the chamber with a cotton pad dipped in isopropyl alcohol. This removed all the residual carbon dust and also rid the chamber of all ghost smells. I followed up the reaming by cleaning the mortise and air way of all three pipes, using hard bristled and regular pipe cleaners, q-tips dipped in alcohol. The mortise and the draught hole of 5-85 was so chock-a- block with all the dried tars, oils and gunk that I had to use my fabricated spatula and the drill bit from the Kleen Reem pipe reamer!!!! I gave a final clean with shank brushes dipped in alcohol and dried the mortise with a rolled paper napkin. The shank internals and the draught hole are now nice and clean with an open and full draw.I cleaned out the internals of the stem using hard bristled and regular pipe cleaners dipped in alcohol. I scraped the dried oils and tars from the tenon with the sharp edge of my fabricated dental spatula. The deep bite marks on the green stem of 1-83 were cleaned with cotton pad dipped in alcohol and spot filled with clear superglue. I set the stem aside to cure the fill. Now, it was the turn of the stummel of all three pipes to get cleaned up. Using a hard bristled tooth brush dipped in undiluted Murphy’s oil soap, I very deliberately scrubbed the stummel, cleaning the surface thoroughly. Special attention was paid to scrub out all the dirt and dust from the crevices in the rustication on the sides and front of the stummel on 4-81. I cleaned the plateau rim and shank end too. The stummel, plateau shank end and rim top were dried using paper napkins and soft cotton cloth. The cleaning of the stummel revealed three dents on the stummel of 5-85. I decided to raise these dents to the surface using the steaming method. I heated my smaller fabricated knife over a candle. Once the knife was hot, I placed a soaked Turkish towel over the dent and placed the heated knife over it. The steam generated pulled out two of the three dents. I spot filled the remaining dent with clear superglue and set it aside to cure overnight. Once the fill had cured, using a flat head needle file, I blend the fill with the surrounding briar and further sand it with a piece of 220 grit sand paper to achieve finer match. I wanted to highlight the grains seen and further blend all the repairs carried out to the stummel. To achieve this aim, I sand down the three stummel using micromesh pads, wet sanding with 1500 to 2400 grit pads and dry sanding with 3200 to 12000 grit pads. The three stummel now have a deep shine with grains popping out with magnificent contrast. Though this part of restoration is the second most time consuming and laborious, the end results are also the most satisfying. The play of grains, the contrast and the smooth surface are well worth the efforts. I rub a small quantity of “Before and After Restoration Balm” in to briar and let it rest for a few minutes. I took some extra efforts to work the balm in to the hand carved rustication on the bottom of the bowl. The balm almost immediately works its magic and the briar now has a nice vibrant appearance. I further buff it with a horse hair shoe brush. With the stummel nice and clean and attractive, I worked the stems of all three pipes. The fill on the green acrylic stem had cured nicely and I sand it down with a flat head needle file. I sharpened the lip edges using a needle file and sand the entire stem with 220 followed by 400, 800 and 1000 grit sand paper. This helps to reduce the sanding marks left behind by the more abrasive 220 grit paper. By mere sanding itself, the minor tooth marks seen on stem surfaces of the brown stem of 5-85 were addressed completely while this process eliminated the deep oxidation seen on the vulcanite stem of the 4-81 pipe. To bring a deep shine to the vulcanite stem as well as the green and brown acrylic stems, I went through the complete set of micromesh pads, wet sanding with 1500 to 2400 grit pads and dry sanding with 3200 to 12000 grit pads. I wiped the stem with alcohol after each pad and rubbed it down with Extra Virgin Olive oil. The internals of the stem was cleaned out using alcohol and pipe cleaners. The pictures of the process and final results are shown below. To finish, I re-attach the stem with the stummel. I mount a cotton cloth buffing wheel on to my local machine which is similar to a Dremel. I set the speed at about half of the full power and applied White Diamond compound to each of the three pipes. I wiped/ buffed all the pipes with a soft cotton cloth to clear it of any leftover compound dust. I then mounted another cotton cloth wheel on to the polishing machine and applied several coats of carnauba wax over the stummel and the stem of all three pipes. I finished the restoration by giving all the pipes a rigorous hand buffing using a microfiber cloth to raise the shine further. The completed pipes, with the dark brown hues of the stummel contrasting with the shiny black stem, looks lovely, fresh and vibrant; the photographs speak for themselves. The beauty, size and shapes of all these pipes make it one of my favorites and will find a place of pride in my modest collection. If only the pipe could tell some of the stories and techniques used by Mr. John Lakatosh while carving pipes.… Cheers!!

Restoring the 7th Pipe from Bob Kerr’s Estate – A Dunhill Shell Briar EP Canadian


Blog by Steve Laug

I am finally getting around to working on Bob Kerr’s Estate. His son-in-law, Brian contacted me a few months ago saying that the family needed to clean out the estate as they were getting the family home ready to move. He asked if I would be interested in restoring and selling the pipes for them. He brought what originally he said was a few pipes over to show me. When I opened the door Brian was there with a few flats of pipes. There were Dunhills, Petersons, Comoy’s Barlings and a lot of other pipes – a total of 125 pipes and a box of parts. That is the largest estate I had the opportunity to work on. I put together a spread sheet of the pipes and stampings to create an invoice. I was taking on what would take me a fair amount of time to clean up. I could not pass up the opportunity to work on these pipes though. They were just too tempting.

I sorted the pipes into groups of the various brands and had a box of 25 different Dunhill pipes in different shapes, styles and sizes. I decided to work on the Dunhills first. It was a great chance to see the shape variety up close and personal. The photo below shows the box of Dunhill pipes.I went through the box of Dunhills shown above and chose the 7th pipe to work on – a Group 4 sandblast Canadian. It is stamped on the heel and the shank EP and next to that it reads Dunhill over Shell Briar. That is followed by Made in England 14/15 and near the stem shank junction is  Circle 4S – Group 4 size. The stamping tells me that this Canadian Shell Briar was made in 1965 and sold in 1966. The oval shank of the Canadian flows into a nice tapered stem that is oxidized and has tooth marks and chatter near the button. There is some calcification on the first inch of the stem ahead of the button and there is some light damage to the button. The finish is dirty with grime and tars filling in much of the craggy finish. The bowl had a thick cake and lava overflowed on the rim top. The inner edge of the rim was in bad condition and out of round. It looked like it had been reamed with a knife at some time in its life. The bowl had tobacco stuck in the lava on the walls of the bowl like the other pipes from this estate. With a little work this pipe would look good once again. I took pictures of the pipe before I started working on it. I took some close up photos of the rim top and stem to show what I was dealing with. Judging from the condition this Canadian was in I think I can safely say that it was one of Bob’s favourite pipes. The cake in the bowl is the thickest of the lot so far and the lava on the rim top is also very thick. You can see the cake and tobacco in the bowl. You can also see that the inner edge of the bowl is out of round on the back right and the front left. It appears to have been reamed with a knife somewhere in the mix. I am assuming from the way Bob cared for his other pipes that this one came to him in that condition and it was one he used when working in his shop. The fishtail stem was dirty, oxidized, calcified and had a lot of tooth chatter on the top and underside for about an inch ahead of the button. The button surface was also marked with tooth chatter. The sharp edge defining the button was worn down and almost smoothed out. This pipe is by far in the roughest condition of the pipes I have worked on from the estate. It will be an interesting challenge to bring back to life.I took a photo of the stamping on the underside of the bowl and shank. It should be easier to read once I get it cleaned up a bit.I am sure if you have read the restoration work on the previous four pipes you have already read what I included about Bob Kerr, the pipeman who held these pipes in trust before I came to work on them. Also, if you have followed the blog for long you will already know that I like to include background information on the pipeman whose pipes I am restoring. For me, when I am working on an estate I really like to have a sense of the person who held the pipes in trust before I worked on them. It gives me another dimension of the restoration work. I asked Brian if he or his wife would like to write a brief biographical tribute to her father, Bob. His daughter worked on it and I received the following short write up on him and some pictures to go along with the words. Thank you Brian and tell your wife thank you as well.

I am delighted to pass on these beloved pipes of my father’s. I hope each user gets many hours of contemplative pleasure as he did. I remember the aroma of tobacco in the rec room, as he put up his feet on his lazy boy. He’d be first at the paper then, no one could touch it before him. Maybe there would be a movie on with an actor smoking a pipe. He would have very definite opinions on whether the performer was a ‘real’ smoker or not, a distinction which I could never see but it would be very clear to him. He worked by day as a sales manager of a paper products company, a job he hated. What he longed for was the life of an artist, so on the weekends and sometimes mid-week evenings he would journey to his workshop and come out with wood sculptures, all of which he declared as crap but every one of them treasured by my sister and myself. Enjoy the pipes, and maybe a little of his creative spirit will enter you!Now that I had a sense of Bob’s spirit in my mind, I could work on his estate with a sense of his presence with me. I turned to work on the seventh of his pipes. I reamed the bowl to remove the cake on the walls and the debris of tobacco shards that still remained. I used a PipNet pipe reamer to start the process. I followed that with a Savinelli Fitsall Pipe Knife to clean up the remaining cake in the conical bottom of the bowl. I sanded the bowl with 220 grit sandpaper wrapped around a piece of dowel. It smooths out the walls and also helps bring the inner edges back to round. With the bowl reamed it was time to work on the rim top and remove the thick lava coat in the blast of the rim. I used the Savinelli Fitsall knife to scrape away the high spots of lava and a brass bristle tire brush to work on the rim top and remove the buildup there.With the rim top cleaned of the lava coat I decided to work on the out of round bowl. It would take some work to get the edge smoothed out and lessen the sharp edges of the knife damage. I sanded the edge with a folded piece of sandpaper. The first photo shows the edge before I started cleaning up the damage. The following photos show the result of the sanding. With the bowl reamed and rim top cleaned I scrubbed the sandblast finish. This is pretty much my process in cleaning either sandblast or rusticated finishes. I scrubbed it with undiluted Murphy’s Oil Soap and a tooth brush to remove the grime from the grooves and canyons of the blast. I worked over the tarry lava overflow on the rim with the tooth brush and a brass brush. I rinsed the pipe under running water to remove the grime. I dried it off with a soft towel. The pictures below show the finish after scrubbing and rinsing. I scraped out the inside of the mortise with a small pen knife to break away the tarry buildup on the walls of the shank. I cleaned out the internals of the bowl, shank and the airway in the shank and the stem with alcohol, pipe cleaners and cotton swabs until they came out clean. It was very dirty in the shank and stem but now it not only looks clean but smells clean. I worked some Before & After Restoration Balm into the briar on the bowl and the rim top. I worked it into the nooks and crannies of the sandblast surface with my fingertips to clean, enliven and protect the wood. I let the balm sit for about 20 minutes and buffed it off with a soft cotton cloth and then polished it with a horsehair shoe brush. I took photos of the pipe at this point in the process to show what the bowl looked like at this point. I gave the bowl several coats of Conservator’s Wax and buffed it with a shoe brush to raise the shine. The bowl looks really good at this point. The sandblast grain just shines and is showing all of the layers of colour that make up a Shell finish. I set the bowl aside and turned my attention to the stem. I used a needle file to recut the sharp edge of the button and give it back its definition on the stem. I sanded out the marks and tooth chatter on the surface of the vulcanite with a folded piece of 220 grit sandpaper. I wanted to reshape the edge in front of the button and also remove the oxidation on the surface of the stem.I polished the stem with Denicare Mouthpiece Polish to take out the oxidation at the button edge and on the end of the mouthpiece. I also worked hard to scrub it from the surface of the stem at the tenon end. I polished out the scratches with micromesh sanding pads – wet sanding with 1500-2400 grit pads and dry sanding with 3200-12000 grit pads. I wiped the stem down after each sanding pad with Obsidian Oil. I polished it with Before & After Pipe Stem Polish – both Fine and Extra Fine. Once I had finished the polishing I gave it a final coat of oil and set it aside to dry. I put the bowl and stem back together. I polished the bowl and stem with Blue Diamond to polish out the scratches in the briar and the vulcanite. I gave the bowl multiple coats of Conservator’s Wax and the stem multiple coats of carnauba wax. I buffed the pipe with a clean buffing pad to raise the shine. I hand buffed it with a microfiber cloth to deepen the shine. The pipe polished up pretty nicely. The contrast of colours that show up in the sandblast of the Shell briar bowl looked good with the polished black vulcanite. The Dunhill Shell EP Canadian turned out really well even with the slightly out of round bowl. It really has that classic Dunhill Canadian look that catches the eye. The finished pipe is shown in the photos below. The dimensions of the pipe are Length: 6 inches, Height: 1 7/8 inches, Outside diameter of the bowl: 1 1/4 inches, Chamber diameter: 3/4 of an inch. This is the seventh Dunhill Shell from the many pipes that will be coming onto the work table and eventually be posted on the rebornpipes store if you are interested in adding it to your collection. Thanks for reading this blog and my reflections on the pipe while I worked on it. I am having fun working on this estate.

A Reborn Coventry Rusticated Bullmoose


Blog by Steve Laug

My brother Jeff picked up this Coventry pipe off eBay from Bradenton, FL. in January 2017. It is an interestingly shaped pipe and the rustication is quite unique. The rustication is dirty but in good condition. There is dust and debris in the grooves and valleys of the briar. The aluminum band is split with 1/3 remaining on the stem and 2/3 on the shank end. It is the exterior of the threaded mortise insert. The pipe had an aftermarket windcap that was absolutely filthy with debris, rust and tobacco tars and oils. There was a thick cake in the bowl that overflowed onto the windcap. The edges of the rim were in surprisingly good condition. The acrylic saddle stem was dirty and had deep tooth marks around the button on both sides and on the surface of the button as well. Jeff took photos of the pipe before he started his clean up. He took some photos of the rim top and the exterior of the bowl to show how dirty it was. You can see the lava on the rim and the rust and tars on the windcap. There is also a thick cake visible in the bowl. You can also see the sticky buildup on the exterior of the bowl. He took a photo of the stamping on the smooth, flat heel of the bowl – it read Coventry over Imported Briar.The stem showed a lot of wear and tear. There were deep tooth marks on the button surface itself and deep gouges and tooth marks on the stem for about an inch in front of the button. The material is an old style acrylic and I have learned from experience that it does not have memory like vulcanite. The tooth marks are there permanently. I have also learned that the colour darkens with time and sanding repairs always lightens the yellow. Knowing that means that some decisions will need to be made regarding the repairs. Jeff cleaned the pipe with his usual thoroughness. He removed the windcap and cleaned it as well as the pipe. He reamed the bowl with a PipNet reamer and cleaned it up with a Savinelli Fitsall Pipe Knife. He scrubbed the exterior with Murphy’s Oil Soap and a tooth brush to clean the dust and grime out of the valleys and grooves of the rustication. He scrubbed the rim top and it looked very good with no damage to the edges. The inside of the bowl was also in great condition. He scrubbed the internals of the shank and the stem with alcohol, cotton swabs and pipe cleaners. There was a long stinger in the shank that needed to be cleaned and he did that as well. The damage on the stem was quite visible once the stem was cleaned. I took photos of the pipe when it arrived here. I took some close up photos of the rim top and the stem to show the condition. The bowl and rim were perfect. The stem needed a lot of attention.I unscrewed the stem to get a photo of the long stinger that extends almost into the bottom of the bowl.I worked some Before & After Restoration Balm into the briar on the bowl and the rim top. I worked it into the surface with my fingertips to clean, enliven and protect the wood. I let the balm sit for about 20 minutes and buffed it off with a soft cotton cloth. I took photos of the pipe at this point in the process to show what the bowl looked like at this point. I set the bowl aside at this point and turned my attention to the stem. These early Bakelite/acrylic/plastic stems are really a pain and I do not relish repairing them. I have found that when they have been repaired and polished the stem loses the rich colour around the repairs. This one had been gnawed and there were deep tooth marks on the stem and button as well as several gouges in the surface of the stem. I cleaned the surface of the stem and filled in the marks with clear super glue. I rebuilt the top of the button and the edge. Once the repair cured I recut the edge of the button and flattened out the repairs with a flat needle file. It was still a mess but the bite marks and damage were no longer present.It is at this point that the issues always arise on these stems – sanding the repair smooth. When I blended the repair into the surface of the stem the area around the repair lightens significantly. It is ugly to my eye but I am willing to let it be because it improves the integrity of the stem.I cleaned out the dust in the airway in the stem and also some of the residual tars that are hard to get out of a pipe with the metal stinger apparatus like this one. I used pipe cleaners and alcohol and worked until the cleaners came out white.Now it was time to polish out the repairs and make the most of what looked rough. I polished the stem with micromesh sanding pads to remove the scratching left behind by the 220 grit sandpaper and give the briar and the acrylic a shine. I wet sanded with 1500-2400 grit pads and dry sanded with 3200-12000 grit pads. I wiped the stem down with a damp cloth after each pad. I gave it a final polish with Before & After Pipe Polish – both Fine and Extra Fine. Then gave it a final coat of Obsidian Oil. When I was finished the stem looked better than it did when I started. I still need to figure out how to keep the yellow from changing but oh well it is clean and sound. The photos tell the story. I put the bowl and stem back together. I polished the bowl and stem with Blue Diamond to polish out the scratches in the briar and acrylic. I gave the bowl several coats of Conservator’s Wax and the stem multiple coats of carnauba wax. I buffed the pipe with a clean buffing pad to raise the shine. I hand buffed it with a microfiber cloth to deepen the shine. The pipe polished up pretty nicely. The contrast of colours between the briar bowl and the yellow/gold acrylic stem really looked good in spite of the repairs. The Coventry Bullmoose looked really good and has a unique shape and finish that catches the eye. The finished pipe is shown in the photos below. The dimensions of the pipe are Length: 5 1/2 inches, Height: 1 ½ inches, Outside diameter of the bowl: 2 inches, Chamber diameter: 7/8 of an inch. This one will soon be on the rebornpipes store if you are interested in adding it to your collection. Thanks for reading this while I worked on it. It was interesting and unusual piece to restore and I really enjoyed the work.

Restoring the 1st Pipe from Bob Kerr’s Estate – A Dunhill Shell 147 FT Bulldog


Blog by Steve Laug

I am finally getting around to working on Bob Kerr’s Estate. His son-in-law, Brian contacted me a few months ago saying that the family needed to clean out the estate as they were getting the family home ready to move. He asked if I would be interested in restoring and selling the pipes for them. He brought what originally he said was a few pipes over to show me. When I opened the door Brian was there with a few flats of pipes. There were Dunhills, Petersons, Comoy’s Barlings and a lot of other pipes – a total of 125 pipes and a box of parts. That is the largest estate I had seen. I put together a spread sheet of the pipes and stampings to create an invoice. I was taking on what would take me a fair amount of time to clean up. I could not pass up the opportunity to work on these pipes though. They were just too tempting.

I sorted the pipes into groups of the various brands and had a box of 25 different Dunhill pipes in different shapes, styles and sizes. I decided to work on the Dunhills first. It was a great chance to see the shape variety up close and personal. The photo below shows the box of Dunhill pipes.I went through the box and chose to work on a little sandblast straight shank bulldog. It is stamped on the flat panel on the underside of the bowl and shank as follows. 147F/T Dunhill over Shell Briar. Next to that it read Made in England 12/13 followed by Circle 4S. The pipe was a shape 147 Bulldog with a fish tail stem (F/T). The finish was a sandblast that Dunhill named a Shell Briar. It was a Group 4 size that was made in 1963 and sold in 1964. The finish was dirty with an overflow of the cake onto the rim top. There was still tobacco in the bowl that was stuck in the cake on the walls. The inner edge of the bowl showed a little damage toward the front. The stem was lightly oxidized and had tooth marks and chatter near the button and on the button itself. Overall the pipe would take some work but it was a beauty with solid bones. I took pictures of the pipe before I started working on it. I took some close up photos of the rim top and stem to show what I was dealing with. You can see the cake and tobacco in the bowl. It looks like Bob Kerr had laid down the pipe after just finishing a bowl with the intention of picking it up and continuing later. The rim top shows the buildup of lava particularly on the back edge. You can also see the damage at the front of the bowl on the inner edge of the rim. The stem was dirty, lightly oxidized and had a lot of tooth chatter on the top and underside for about an inch ahead of the button. The button surface was also marked with tooth chatter.I took a photo of the stamping on the underside of the bowl and shank. It should be easier to read once I get it cleaned up a bit.If you have followed the blog for long then you will not be surprised when I include information on the pipeman whose pipes I am restoring. For me, when I am working on an estate I really like to have a sense of the person who held the pipes in trust before I worked on them. It gives me another dimension of the restoration work. I asked Brian if he or his wife would like to write a brief biographical tribute to her father, Bob. His daughter worked on it and I received the following short write up on him and some pictures to go along with the words. Thank you Brian and tell your wife thank you as well.

I am delighted to pass on these beloved pipes of my father’s. I hope each user gets many hours of contemplative pleasure as he did. I remember the aroma of tobacco in the rec room, as he put up his feet on his lazy boy. He’d be first at the paper then, no one could touch it before him. Maybe there would be a movie on with an actor smoking a pipe. He would have very definite opinions on whether the performer was a ‘real’ smoker or not, a distinction which I could never see but it would be very clear to him. He worked by day as a sales manager of a paper products company, a job he hated. What he longed for was the life of an artist, so on the weekends and sometimes mid-week evenings he would journey to his workshop and come out with wood sculptures, all of which he declared as crap but every one of them treasured by my sister and myself. Enjoy the pipes, and maybe a little of his creative spirit will enter you!

I have included one of Bob’s wood carvings to give you an idea of what he daughter wrote about above. You can see his artistry in the carving that is patterned after British Columbia’s Coastal First Nations people. To me this is a sea otter but perhaps a reader may enlighten us.Now I had a sense of Bob’s spirit as I turned to work on the first of his pipes. I reamed the bowl to remove the cake on the walls and the debris of tobacco shards that still remained. I used a PipNet pipe reamer to start the process. I followed that with a Savinelli Fitsall Pipe Knife to clean up the remaining cake in the conical bottom of the bowl. I sanded the bowl with 220 grit sandpaper wrapped around a piece of dowel. It smooths out the walls and also helps bring the inner edges back to round. With the bowl cleaned it was time to work on the inner edge of the rim. I used a folded piece of 220 grit sandpaper to smooth out the damaged area and give the edge a slight bevel to bring the bowl back to round as much as possible and remove the damage. The photos tell the story.With the bowl reamed I decided to scrub the sandblast finish. I scrubbed it with undiluted Murphy’s Oil Soap and a tooth brush to remove the grime from the grooves and canyons of the blast. I worked over the tarry lava overflow on the rim with the tooth brush and a brass brush. I rinsed the pipe under running water to remove the grime. I dried it off with a soft towel. I cleaned out the internals of the bowl, shank and the airway in the shank and the stem with alcohol, pipe cleaners and cotton swabs until they came out clean. It was very dirty in the shank and stem but it not only looks clean but smells clean now.I worked some Before & After Restoration Balm into the briar on the bowl and the rim top. I worked it into the nooks and crannies of the sandblast surface with my fingertips to clean, enliven and protect the wood. I let the balm sit for about 20 minutes and buffed it off with a soft cotton cloth and then polished it with a horsehair shoe brush. I took photos of the pipe at this point in the process to show what the bowl looked like at this point. I gave the bowl several coats of Conservator’s Wax and buffed it with a shoe brush to raise the shine. The bowl looks really good at this point. The grain just shines and the blast is showing all of the layers of colour that make up a Shell finish. With the bowl basically finished (I will buff it once the stem is finished and on the shank) I turned my attention to the stem. I sanded out the nicks and tooth chatter on the surface of the vulcanite with a folded piece of 220 grit sandpaper. I find that these older Dunhill stems are made of very high quality vulcanite and the sanding dust is black! Nice to work on. I polished out the scratches with micromesh sanding pads – wet sanding with 1500-2400 grit pads and dry sanding with 3200-12000 grit pads. I wiped the stem down after each sanding pad with Obsidian Oil. I polished it with Before & After Pipe Stem Polish – both Fine and Extra Fine. Once I had finished the polishing I gave it a final coat of oil and set it aside to dry. I put the bowl and stem back together. I polished the bowl and stem with Blue Diamond to polish out the scratches in the briar and the vulcanite. I gave the bowl multiple coats of Conservator’s Wax and the stem multiple coats of carnauba wax. I buffed the pipe with a clean buffing pad to raise the shine. I hand buffed it with a microfiber cloth to deepen the shine. The pipe polished up pretty nicely. The contrast of colours that show up in the sandblast of the Shell briar bowl looked good with the polished black vulcanite. The Dunhill Shell Bulldog 147F/T looked really good. The pipe has a unique look that catches the eye. The finished pipe is shown in the photos below. The dimensions of the pipe are Length: 5 1/2 inches, Height: 1 3/4 inches, Outside diameter of the bowl: 1 1/4 inches, Chamber diameter: 3/4 of an inch. This is the first of the many pipes that will be coming onto the work table and eventually be posted on the rebornpipes store if you are interested in adding it to your collection. Thanks for reading this while I worked on it. It was a fun pipe to restore and I am pleased with the finished pipe.

Cleaning a Second Aldo Velani Ultima 1 Straight Billiard


Blog by Steve Laug

My brother Jeff picked up a pair of Aldo Velani Ultima 1 pipes in a lot he purchased on an auction. The Ultima 1 has a composite stem with briar inserts on the saddle and along the sides of the stem with Lucite forming the base of the stem. There are strips of Lucite on the top and underside and in the bite area around the button. It really is a beautiful looking pipe with a lot of class and distinction. Most Aldo Velani pipes are made in Livorno, Italy, for the USA market by Cesare Barontini. They were previously imported by Lane Limited. The name “Aldo Velani” is actually fictional and the brand was made for export (https://pipedia.org/wiki/Aldo_Velani  http://www.pipephil.eu/logos/en/logo-a3.html).  The second pipe of the pair was in significantly better condition than the first one. The pipes were probably made in the 1990s. This one was dirty but the exterior was in better shape. There was a thick cake in the bowl and there was a lava overflow on the rim top. This one was as it was made – no band added and no changes to the pipe. The stem was dirty and had light tooth marks on the Lucite around the button. Jeff took photos of the pipe before he started his clean up. He took some photos of the rim top and the side of the bowl to show how dirty it was. You can see the lava on the rim and the cake in the bowl. You can also see the sticky buildup on the exterior of the bowl.He took photos of the stamping on the shank – it read Aldo Velani over Ultima 1. On the underside of the shank it is stamped ITALY next to the shank/stem union. There was a nice acrylic band on the stem between the briar of the shank and the briar on the stem. The stem showed some wear and tear but it was in much better condition than its brother. The left side of the saddle stem also had the AV stamp in the briar. It always amazes me how dirty some folks let their pipes get. This one has a sticky substance all over the stem surfaces and a build up of gunk on the button and along its edges. Jeff cleaned the pipe with his usual thoroughness – reaming the bowl and scrubbing the internals with alcohol, cotton swabs and pipe cleaners. He scrubbed the exterior with Murphy’s Oil Soap to clean off the dust and grime on the finish. The rim top looked very good and the bowl itself looked great. The stem was in great shape other than a bit of tooth chatter. He cleaned the inside of the airways with alcohol and pipe cleaners. He did not put this one in the Before & After Deoxidizer Bath having seen the effects on the other one. I took photos of the pipe when it arrived here. I polished the bowl and shank with 1500-12000 grit micromesh sanding pads. I wet sanded it with 1500-2400 and dry sanded it with 3200-12000 grit pads. I wiped it down after each pad with a damp cloth to remove the sanding dust. The photos below show the progress in the polishing. The pipe was beginning to look really good and the grain was beginning to really pop. It was time to work some Before & After Restoration Balm into the briar on the bowl and the rim top. I worked it into the surface with my fingertips to clean, enliven and protect the wood. I let the balm sit for about 20 minutes and buffed it off with a soft cotton cloth. I took photos of the pipe at this point in the process to show what the bowl looked like at this point. I set the bowl aside at this point and turned my attention to the stem. I was really glad to see that this composite briar and Lucite stem was in decent condition. There was some light tooth chatter and scratching but nothing serious. It would only need to be polished. I polished it with micromesh sanding pads to remove the scratching left behind by the 220 grit sandpaper and give the briar and the Lucite a shine. I wet sanded with 1500-2400 grit pads and dry sanded with 3200-12000 grit pads. I wiped the stem down with a damp cloth after each pad. When I was finished the stem looked great. The photos tell the story. I put the bowl and stem back together. I polished the bowl and stem with Blue Diamond to polish out the scratches in the briar and acrylic. I gave the bowl and the stem multiple coats of carnauba wax. I buffed the pipe with a clean buffing pad to raise the shine. I hand buffed it with a microfiber cloth to deepen the shine. The pipe polished up pretty nicely. The contrast of colours between the briar bowl and the briar inserts on the stem really looked good with the polished black Lucite. The Aldo Velani Ultima 1 looked really good and was a great match to its bent brother. The pipe has a unique look that catches the eye. The finished pipe is shown in the photos below. The dimensions of the pipe are Length: 6 inches, Height: 2 ¼ inches, Outside diameter of the bowl: 1 1/2 inches, Chamber diameter: 7/8 of an inch. This one will soon be on the rebornpipes store if you are interested in adding it to your collection. Thanks for reading this while I worked on it. It was interesting and unusual piece to restore and I really enjoyed the work.

Life for a Really Filthy Aldo Velani Ultima 1 Bent Billiard


Blog by Steve Laug

My brother Jeff picked up a pair of Aldo Velani Ultima 1 pipes in a lot he purchased on an auction. The Ultima 1 has a composite stem with briar inserts on the saddle and along the sides of the stem with Lucite forming the base of the stem. There are strips of Lucite on the top and underside and in the bite area around the button. It really is a beautiful looking pipe with a lot of class and distinction. Most Aldo Velani pipes are made in Livorno, Italy, for the USA market by Cesare Barontini. They were previously imported by Lane Limited. The name “Aldo Velani” is actually fictional and the brand was made for export (https://pipedia.org/wiki/Aldo_Velani  http://www.pipephil.eu/logos/en/logo-a3.html).  The first of the pair had definitely seen better days in its ‘not so long life’. The pipes were probably made in the 1990s. This one was filthy and there was a thick coat of scum on the outside of the briar bowl and the stem. It was sticky to touch and really a mess. The bowl had a thick cake and there was a lava overflow on the rim top. The previous owner must have thought the pipe would look better with a band so he cut a piece of aluminum conduit and made a band. It is quite thick and really scratched and edges were rough from cutting – it was a real cob job! The stem was dirty and had tooth marks on the Lucite around the button. Jeff took photos of the pipe before he started his clean up. It really was a mess and needed new life breathed into it! He took some photos of the rim top and the side of the bowl to show how dirty it was. You can see the lava on the rim and the cake in the bowl. You can also see the sticky buildup on the exterior of the bowl.He took photos of the stamping on the shank and the fit of the aluminum band. You can see how thick it is in the photos. You can see it with and without the band. The shank was discoloured and scratched by the poorly made band. It would take some work to deal with that. The sad thing is that the band was purely “cosmetic” because the shank was not cracked or damaged. The band definitely had to go for cosmetic reasons! The stem definitely showed some wear and tear as well but the structure was sound. It always amazes me how dirty folks let their pipes get. This one has food particles or something jammed against the sharp edge of the button. The AV logo was stamped on the left side of the briar portion of the saddle stem. Jeff cleaned the pipe with his usual thoroughness – reaming the bowl and scrubbing the internals with alcohol, cotton swabs and pipe cleaners. He scrubbed the exterior with Murphy’s Oil Soap to clean off the dust and grime on the finish. The rim top looked very good and the bowl itself looked great. There were a few nicks or sandpits on the right side and heel of the bowl. The area where the band had been was quite a bit better but still was not right but it still looked better without the band than with it.

Sometimes the cleaning and restoration work has some unexpected results that end up making more work for the restorer! In this case the issue arose when Jeff soaked the stem in Before & After Deoxidizer. He did not leave it in too long but the time it sat in the mix made the briar inserts almost black and it swelled above the Lucite. When he took it out and rinsed it off the stem looked awful and Jeff was just sick! I took photos of the stem and bowls on both pipes to show the contrast in the stem. Originally the stem on the bent looked like the stem on the straight. The photos below show the comparison and the damage to the stem on the bent. Now the trick would be to try to restore the stem to a semblance of its original colour. I was not sure I would be able to get it back but time would tell. I decided to start my restoration on this pipe by addressing the most irritating issue facing me with this pipe! I wanted to see what I could do with the stem and the staining where the band had been. I mixed up a batch of oxalic acid – crystals and water. I made it fairly concentrated –1 teaspoon of oxalic crystals to ½ cup of water. When my Dad was here we used it to remove water stain damage to a pipe stand that I was refinishing. I figured it was worth a try. I wiped the stem down with a cotton pad dipped in the oxalic mixture. I also wiped the darkened ring around the shank where the band had been. I wiped it on repeatedly and dried it off. The first set of four photos show the immediate results of the action. I sanded the shank area (carefully avoiding damaging the stamping) and the briar portions of the stem with a worn piece of 220 grit sandpaper to further remove the darkening. I was able to remove much of the issue on the stem. I sent the following photos via Facebook Messenger to my brother to ease his mind about the stem. You can see that things are looking quite hopeful with the stem and the shank at this point. Please ignore the curmudgeonly model that is posing with the pipe!I wiped the stem and bowl down with an alcohol wetted cotton pad to remove the sanding dust. I polished the briar with 1500-2400 micromesh sanding pads. I used some clear super glue to repair the deep sand pits and nicks in the briar. Once the repairs had cured I sanded them smooth with a small piece of 220 grit sandpaper to blend them into the briar and then sanded the repaired areas with 1500-2400 grit micromesh pads. When I had finished the repairs were smooth (I failed to take photos of this part of the process).I stained the repaired areas, the rim top and the shank end where I had stripped the finish with the oxalic acid wash with an Oak stain pen. The colour most accurately matched the rest of the bowl. I was happy with the overall look of the bowl but the ring damage on the shank end still stood out too much to my liking. The colour on the bowl was even but still was significantly browner than the reds of the stem. I decided to rub the bowl down with several coats of Danish Oil Cherry stain. I rubbed it down and wiped it off several times until I had the colour I wanted. I set it aside to let the stain sink into the briar. The pictures below show the bowl at this point in the process. I am making progress. I was happy with the finished bowl colour and the darkening left by the poorly done band looked better than it had before. There were still remnants that were left behind and these are the war wounds from the journey this pipe took before it came to me. Here are some photos of the bowl at this point. The colour is very good and works with the stem and the grain really sings. I set the bowl aside at this point and turned my attention to the stem. I polished it with micromesh sanding pads to remove the scratching left behind by the 220 grit sandpaper and give the briar and the Lucite a shine. The stem was looking far better than I expected or had hoped. Now came the test – would the bowl and stem look good together? I polished the bowl and stem with Blue Diamond to polish out the scratches in the briar and rubber. I gave the bowl and the stem multiple coats of carnauba wax. I buffed the pipe with a clean buffing pad to raise the shine. I hand buffed it with a microfiber cloth to deepen the shine. The pipe polished up pretty nicely. The Cherry Danish Oil had really breathed life into the briar on the bowl and stem and the pipe came alive with the buffing. The contrast of colours between the briar bowl and the briar inserts on the stem really looked good with the polished black Lucite. The Aldo Velani Ultima 1 looked far better than when it enter the queue and I was able to redeem the darkened stem. The finished pipe has a unique look that catches the eye. The finished pipe is shown in the photos below. The dimensions of the pipe are Length: 6 inches, Height: 2 inches, Outside diameter of the bowl: 1 3/8 inches, Chamber diameter: 7/8 of an inch. This one will soon be on the rebornpipes store if you are interested in adding it to your collection. Thanks for reading this while I worked on it. It was interesting and unusual piece to restore and I really enjoyed the work.