Tag Archives: bite marks

Reviving a Custom-Bilt Rusticated Panel


Blog by Dal Stanton

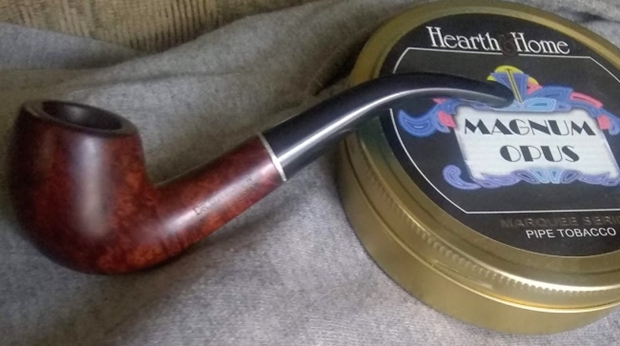
I acquired this Custom-Bilt Panel in the Lot of 66 which I won on the eBay auction block some time ago.  The Lot of 66 has been good to me as it has produced many good, collectible pipes.  Stephen,from Bowling Green, Kentucky, saw the Custom-Bilt in my For ‘Pipe Dreamers’Only! collection on the website and sent me an email asking to commission the Custom-Bilt as well as a very nice Comoy’s Made in London, England Bent Bulldog. In the email Stephen wrote,

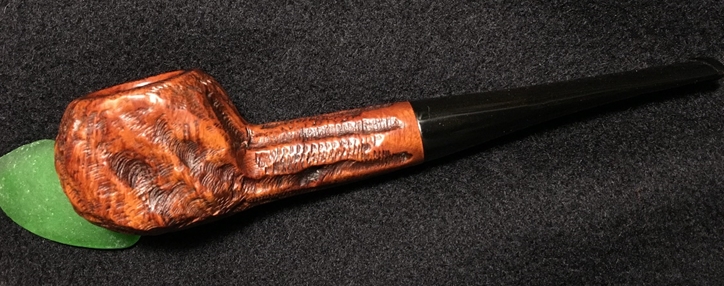
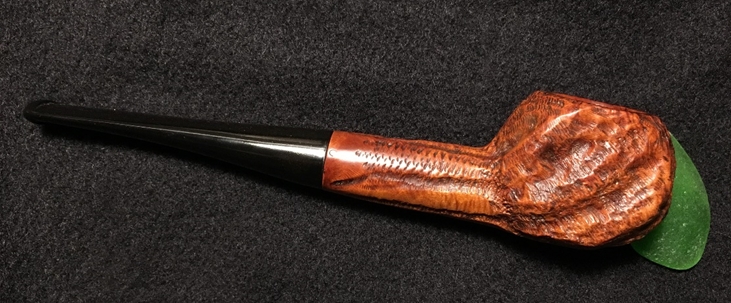
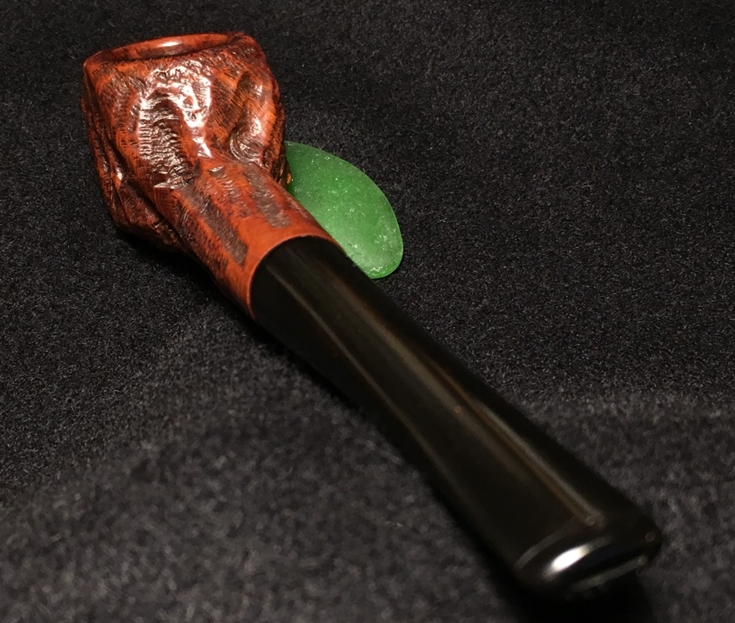
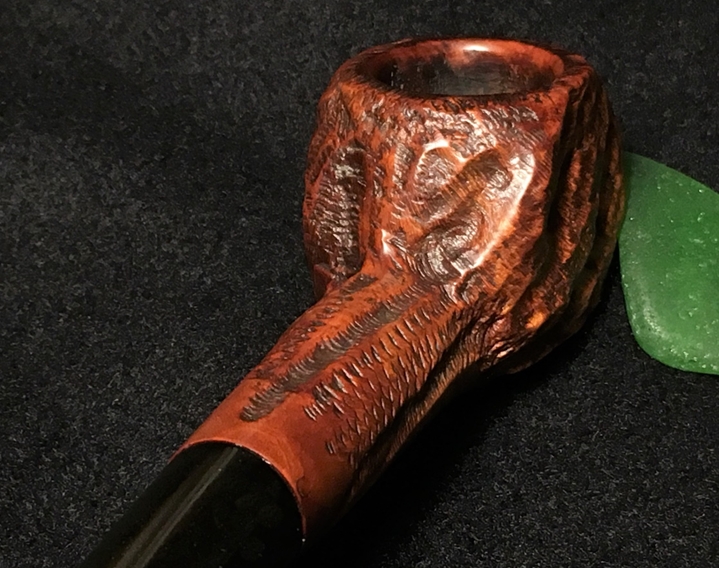
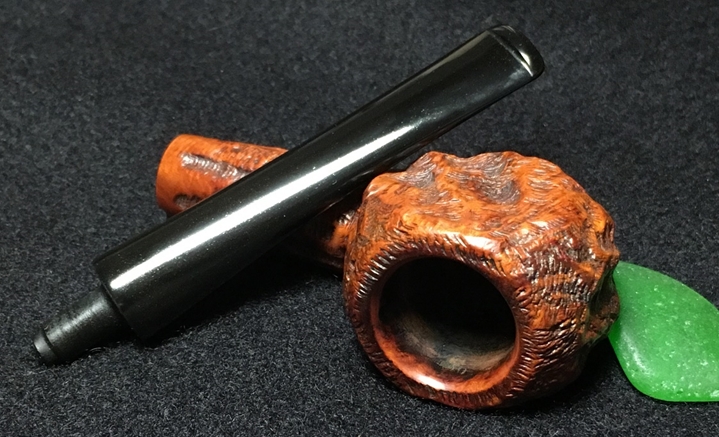
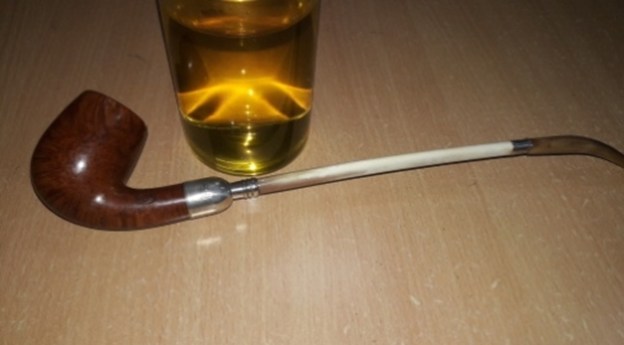
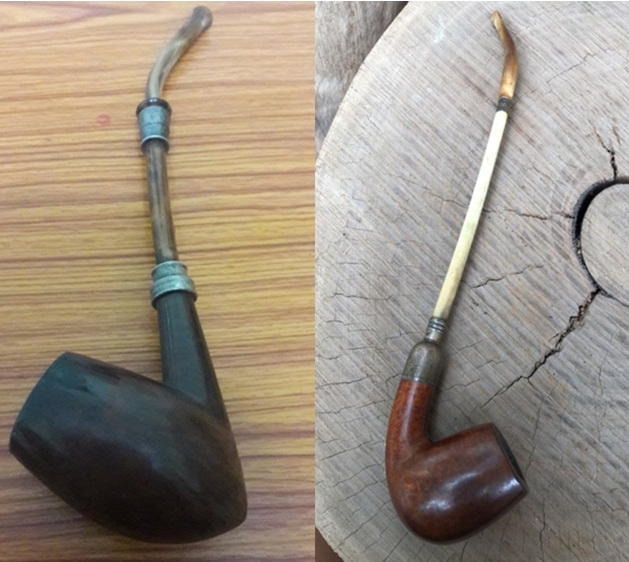
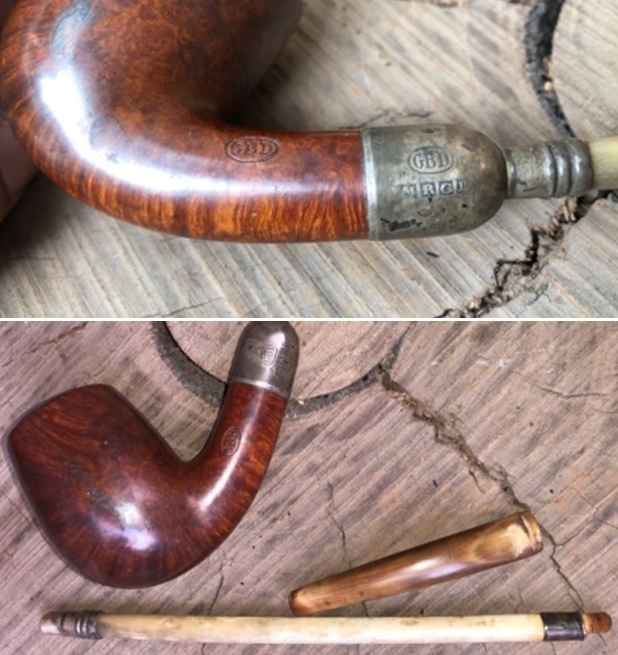
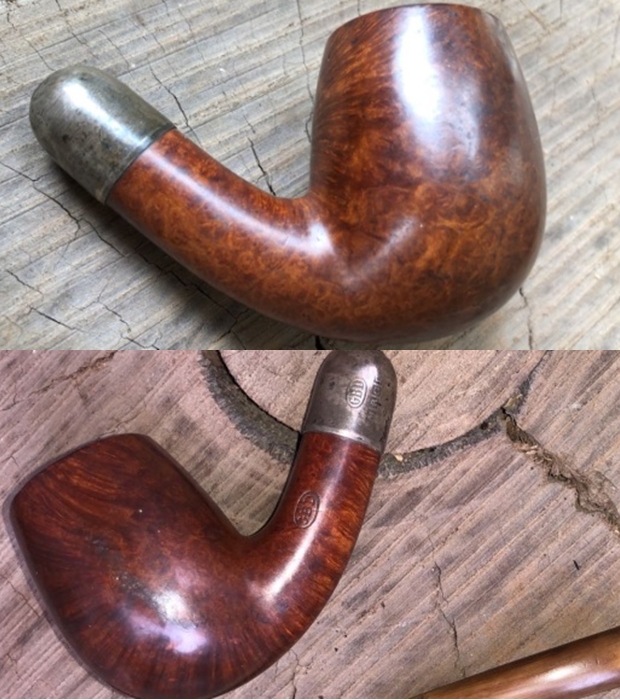
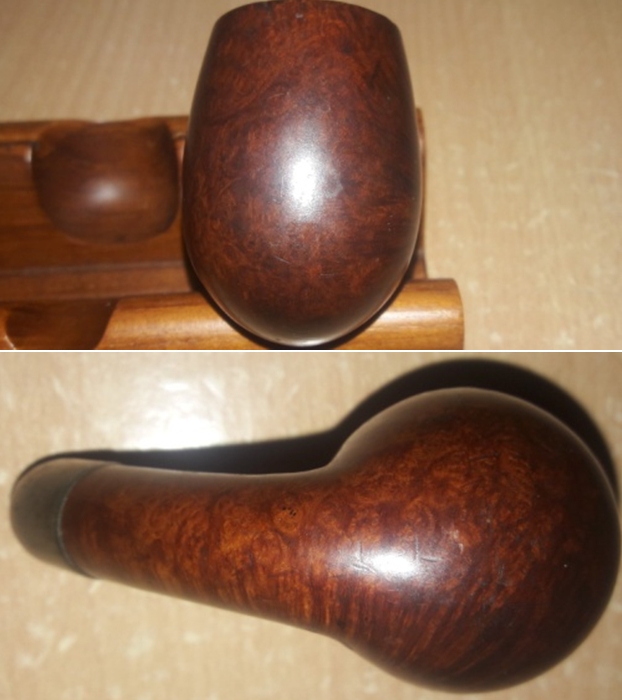
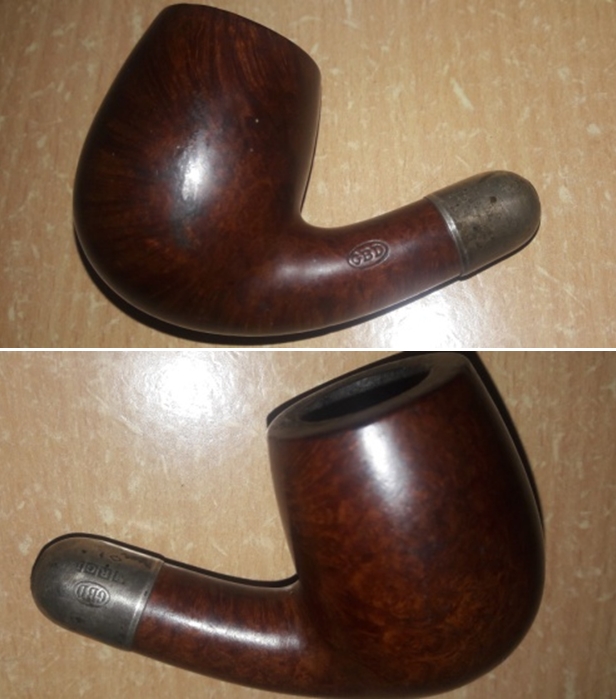
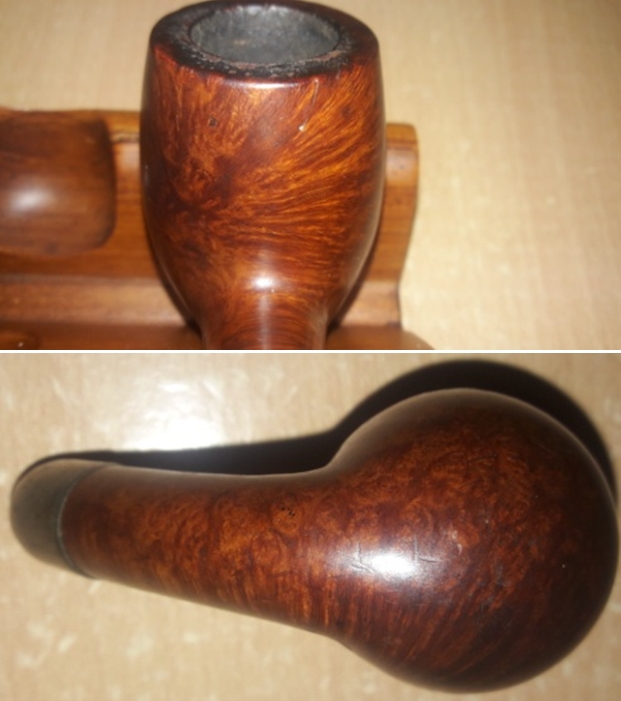
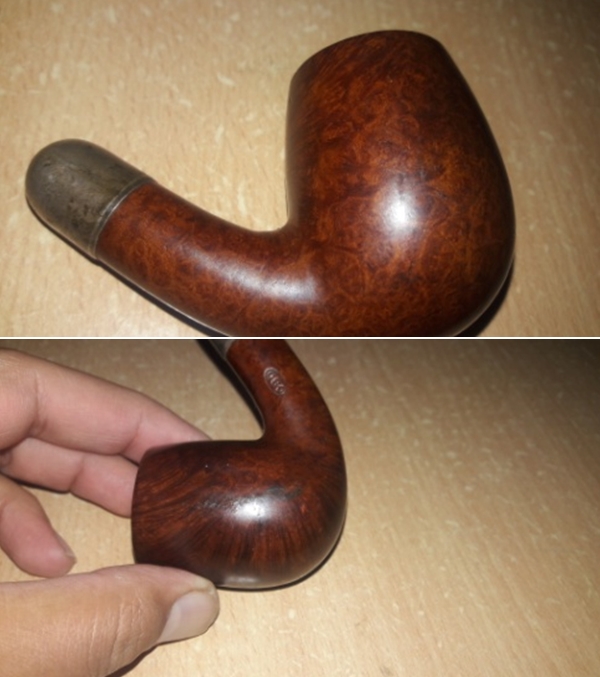
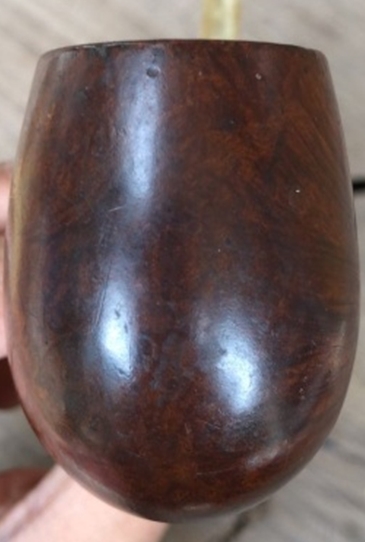
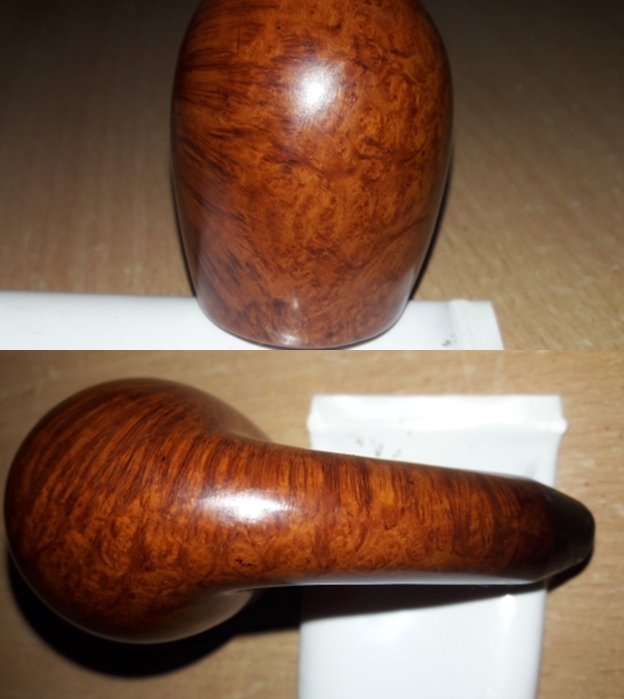
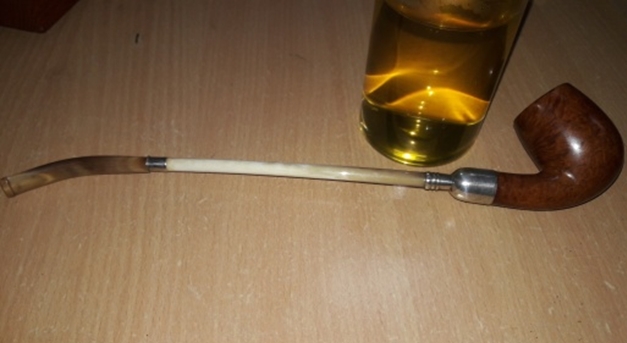
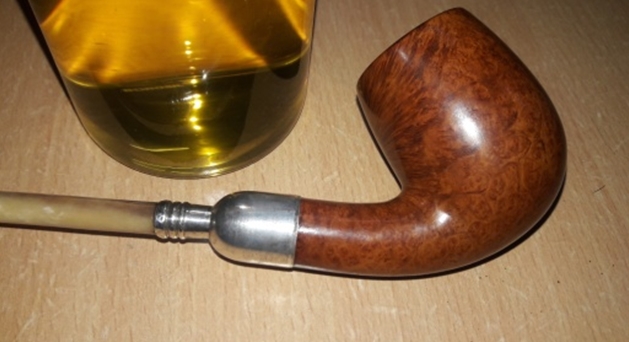
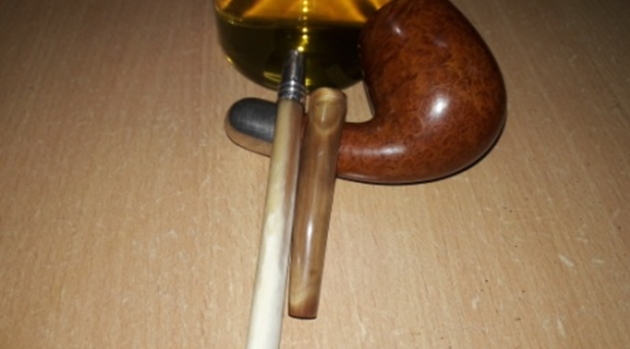
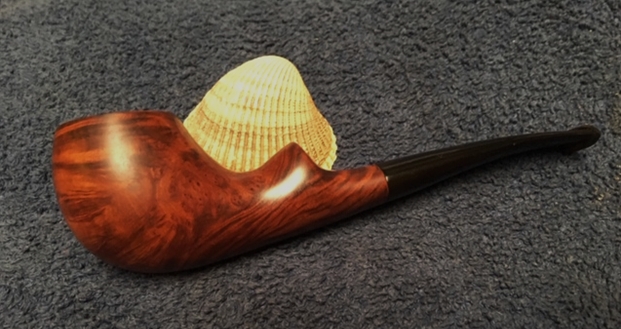
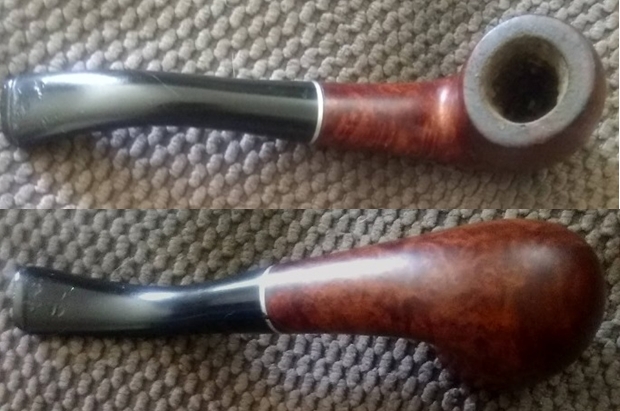
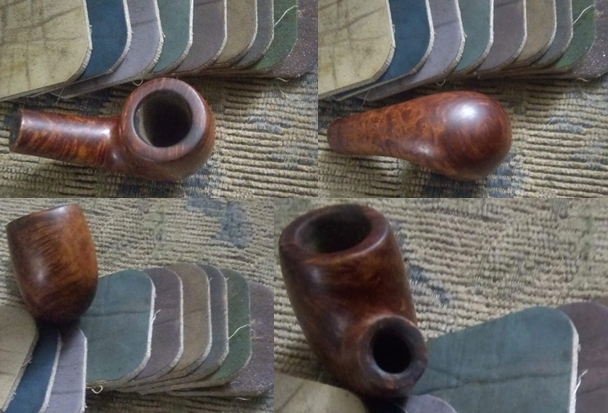
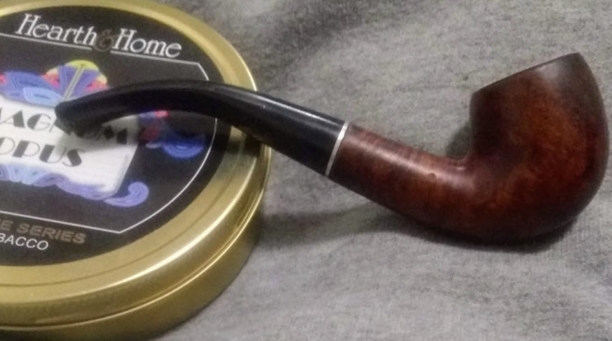
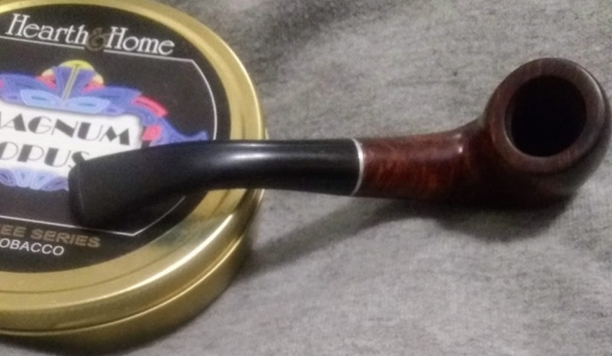
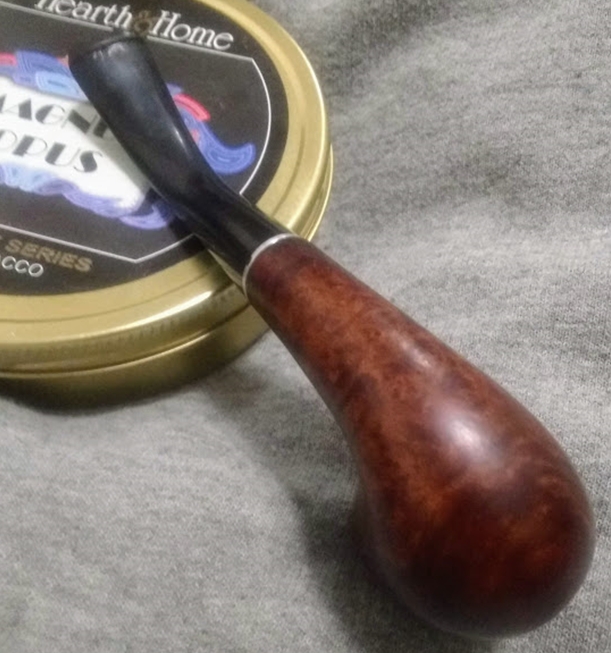
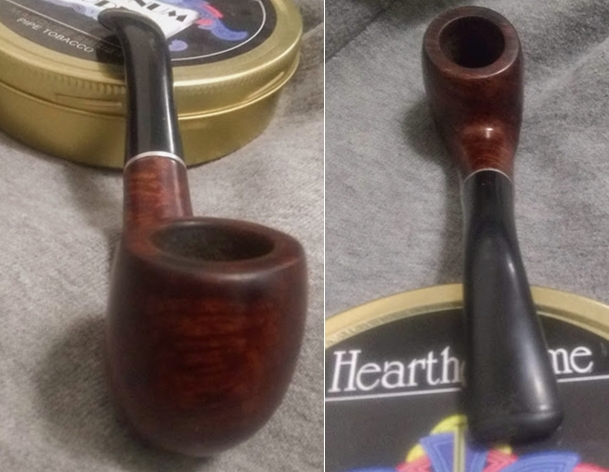
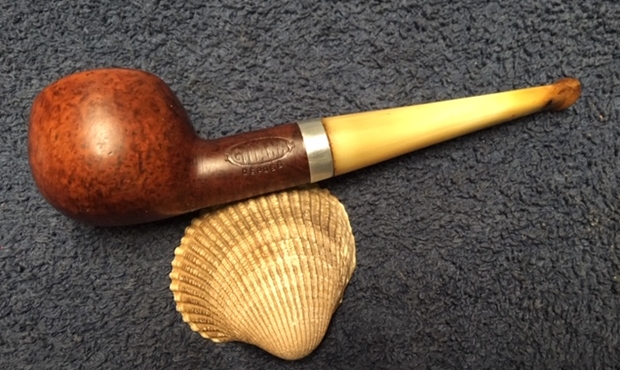
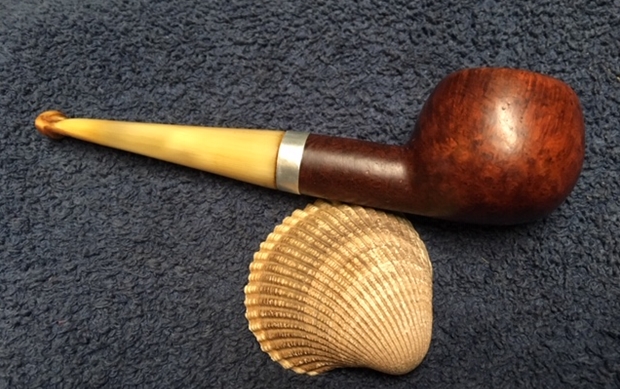
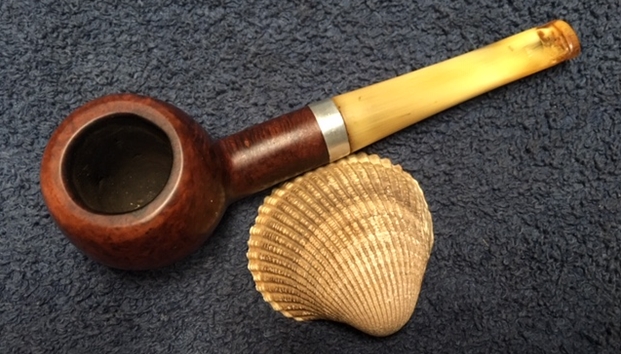
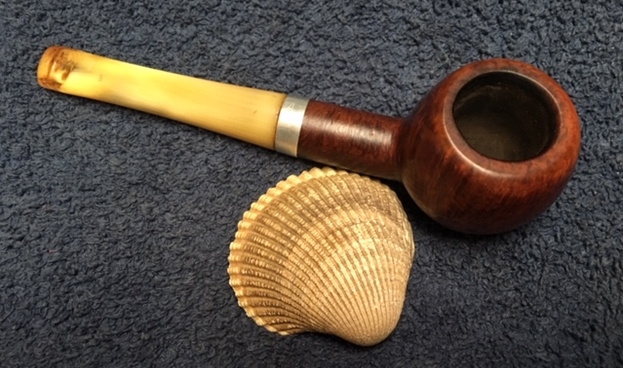
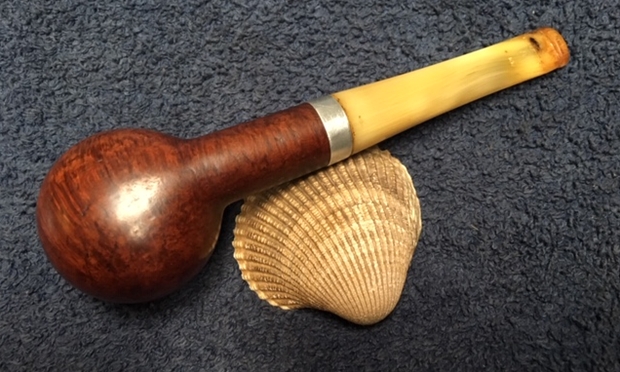
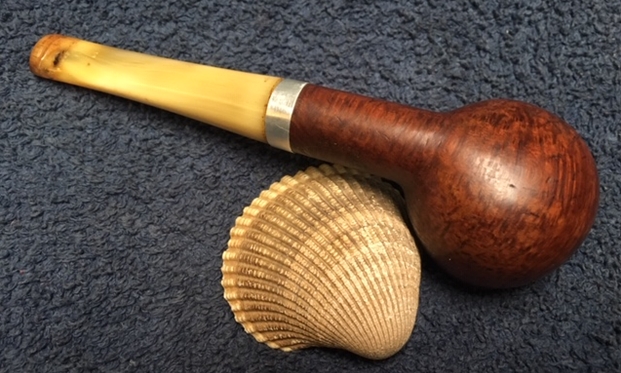
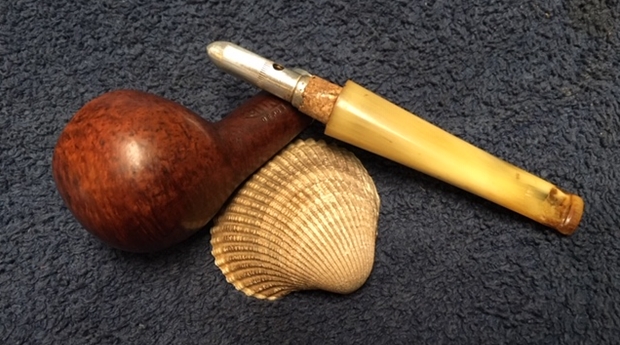
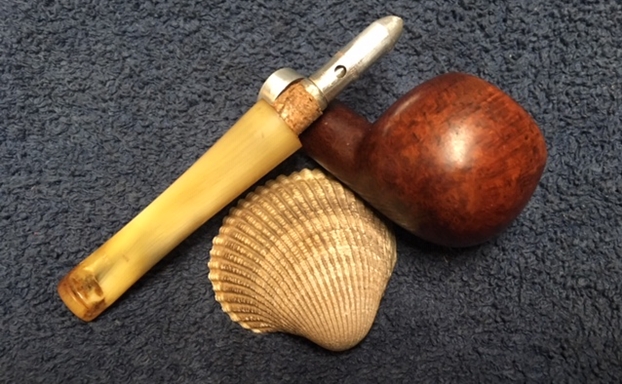
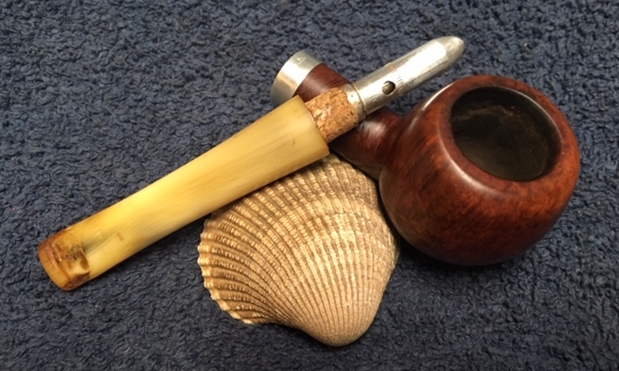
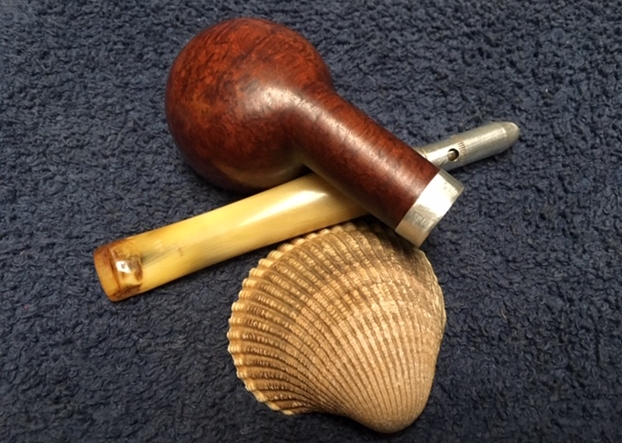
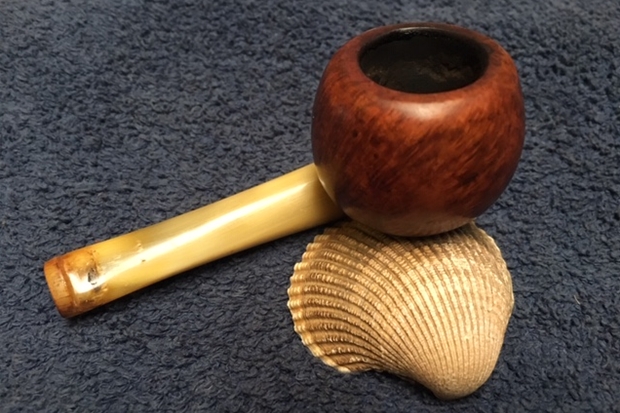
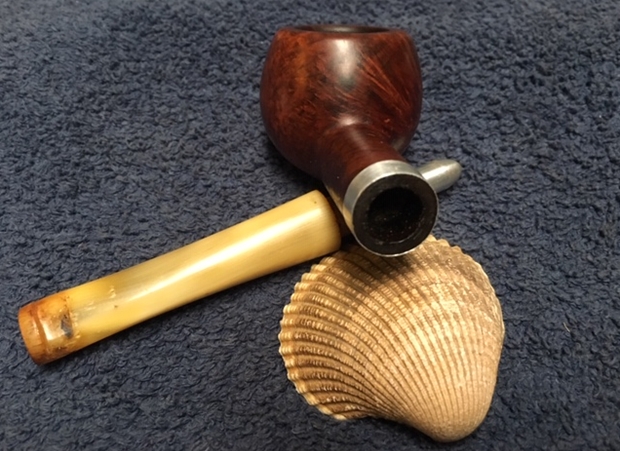
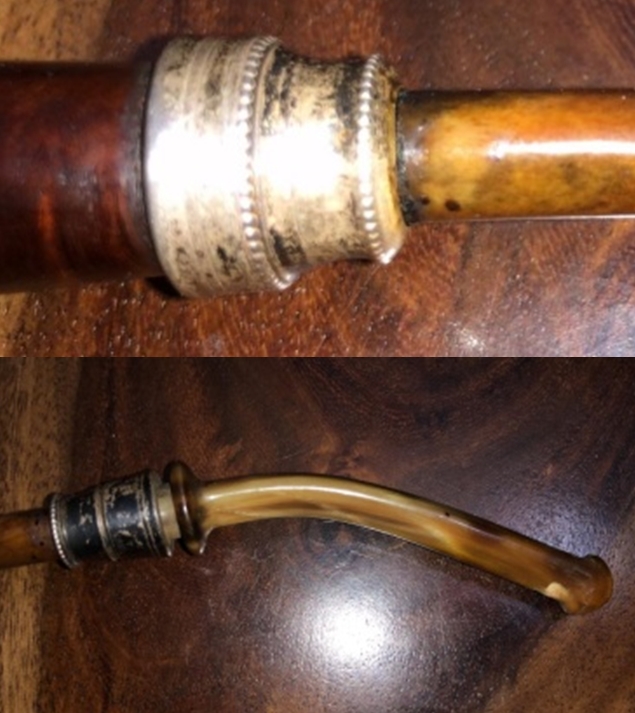
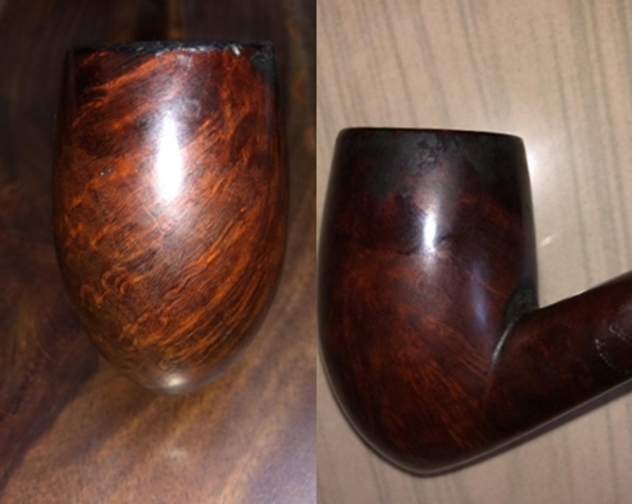
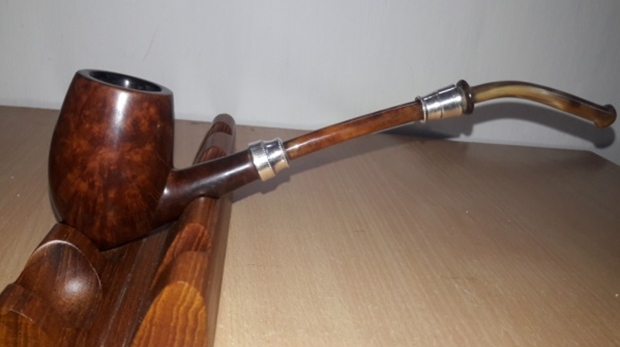
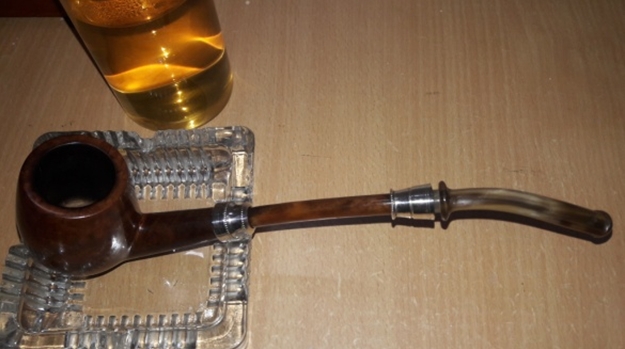
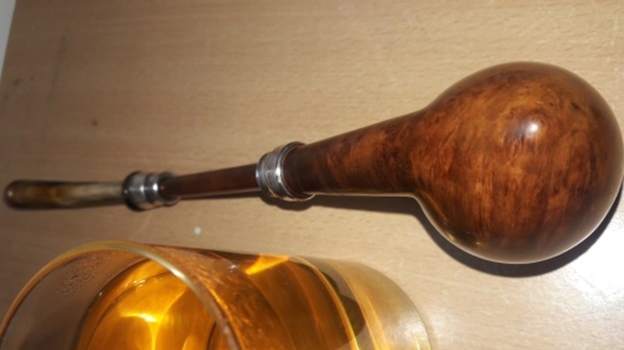
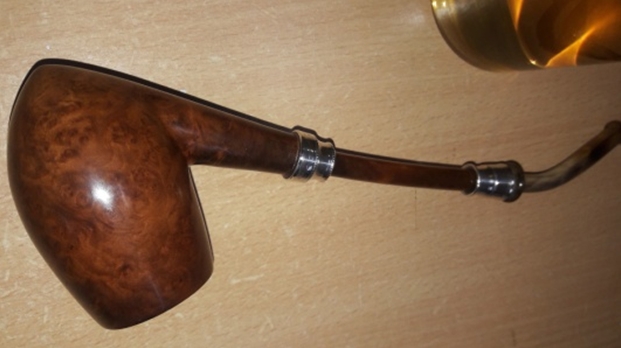
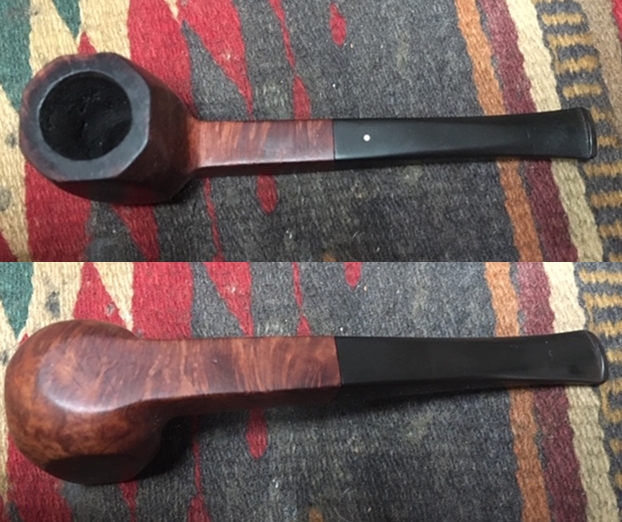
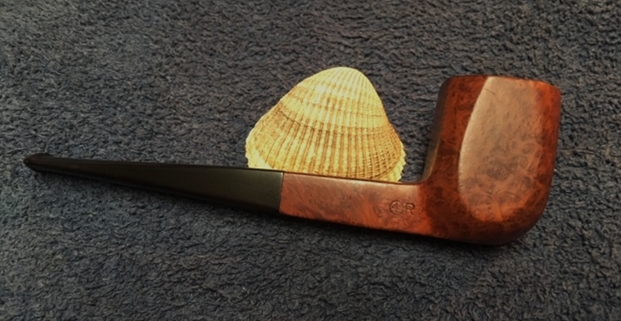
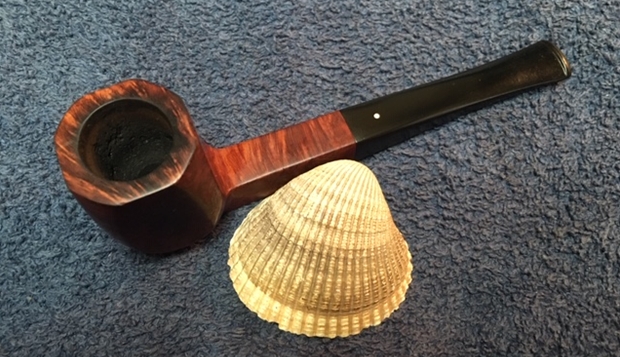
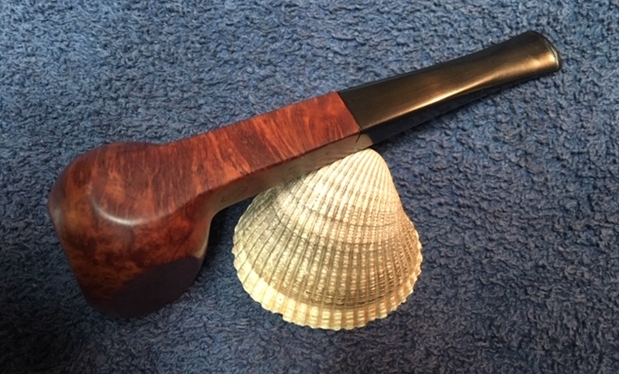
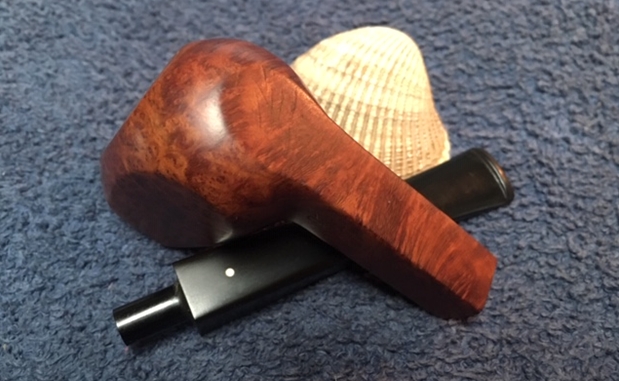
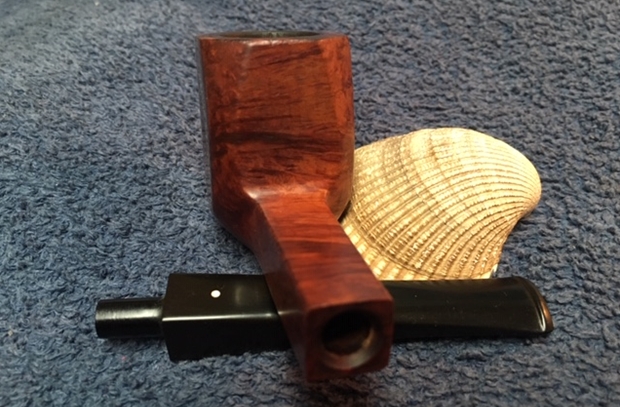
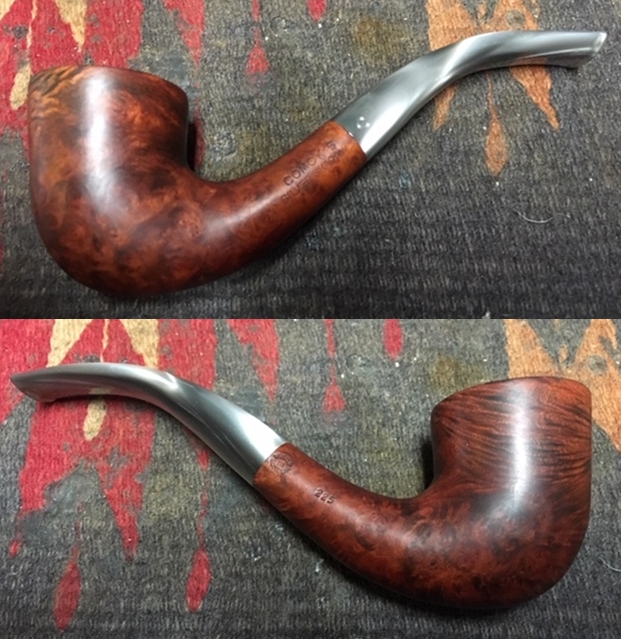
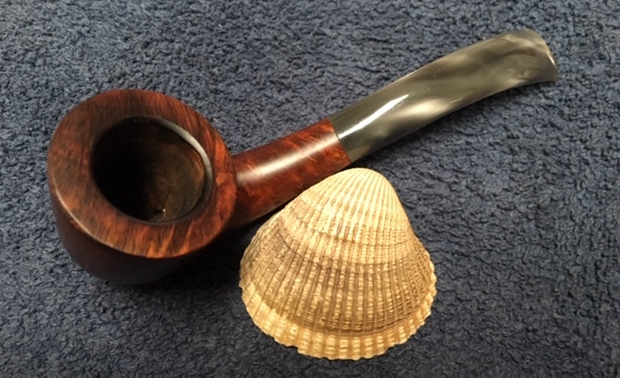
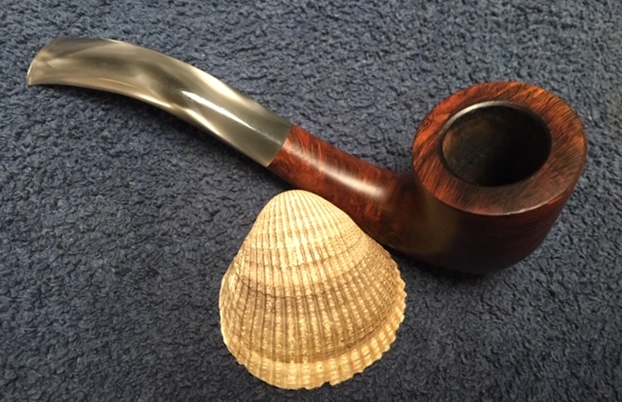
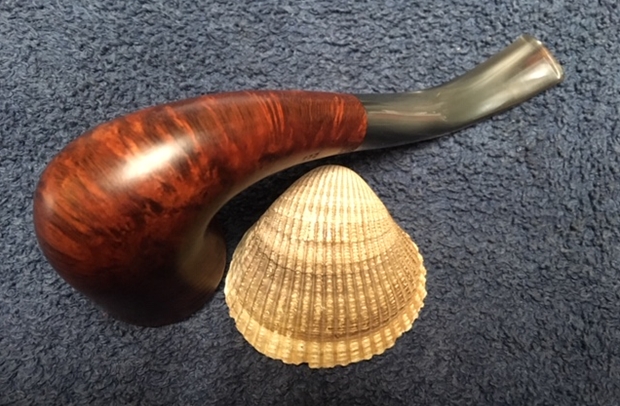
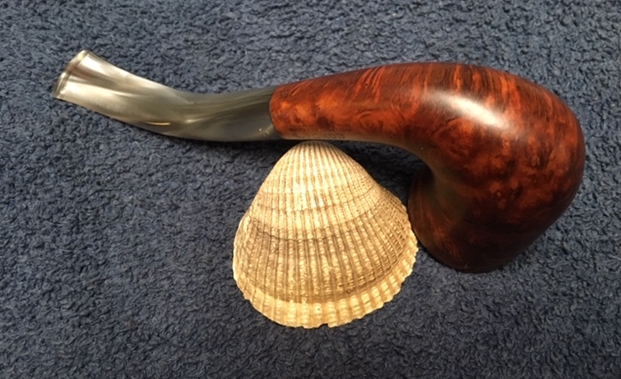
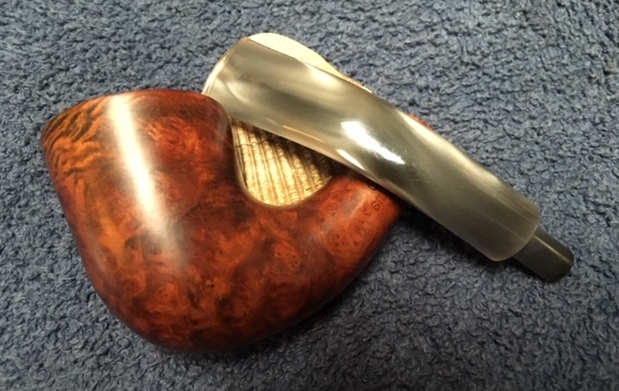
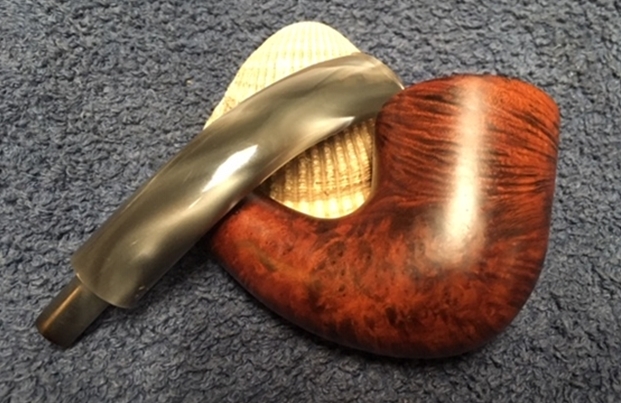
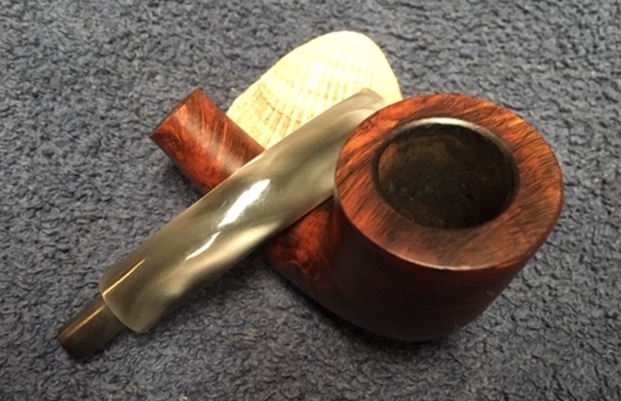
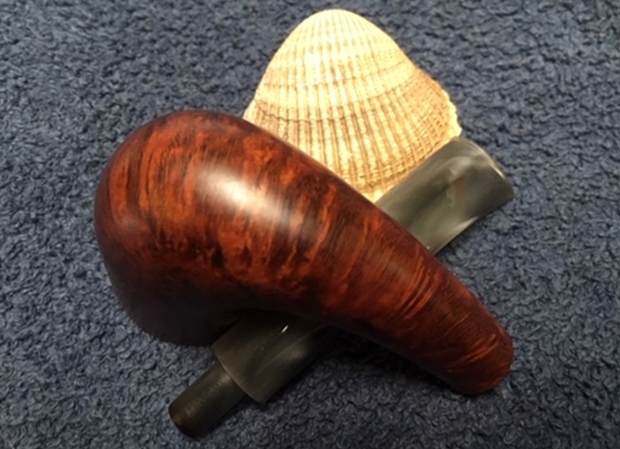
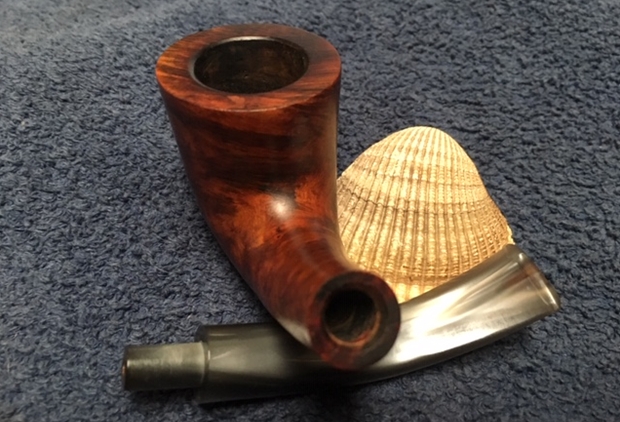
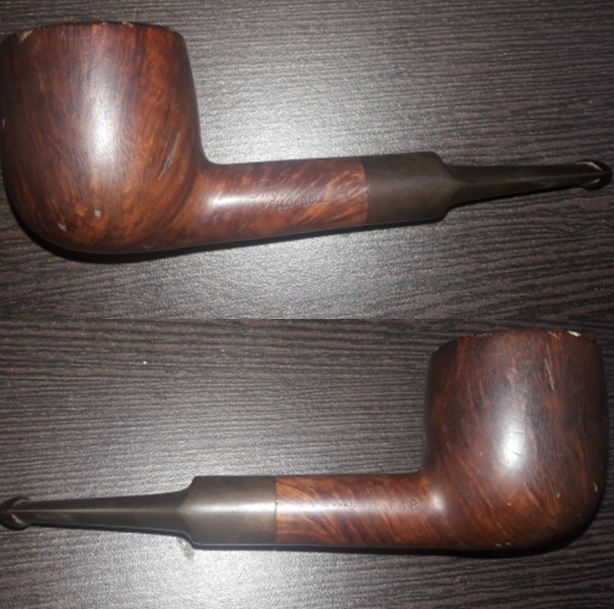
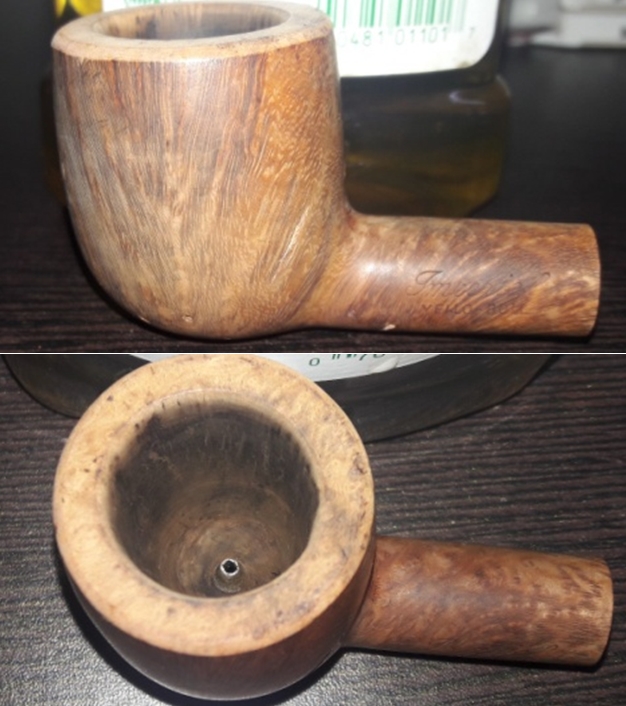
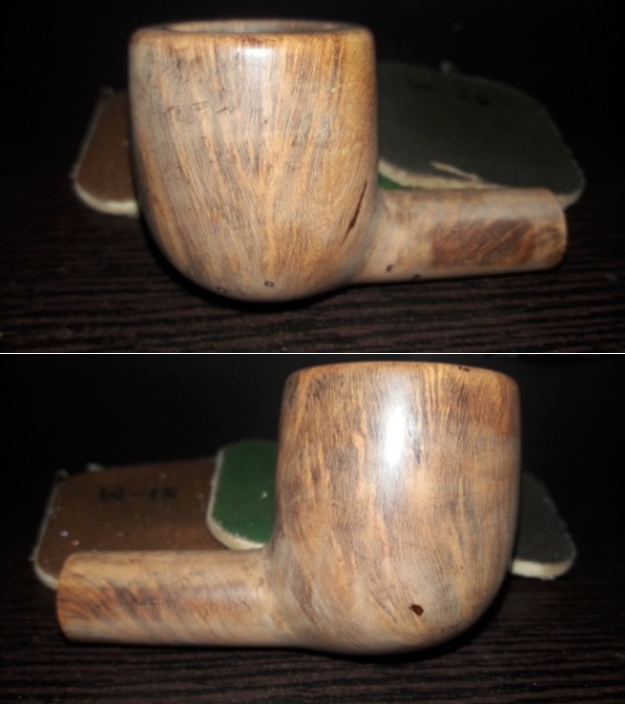
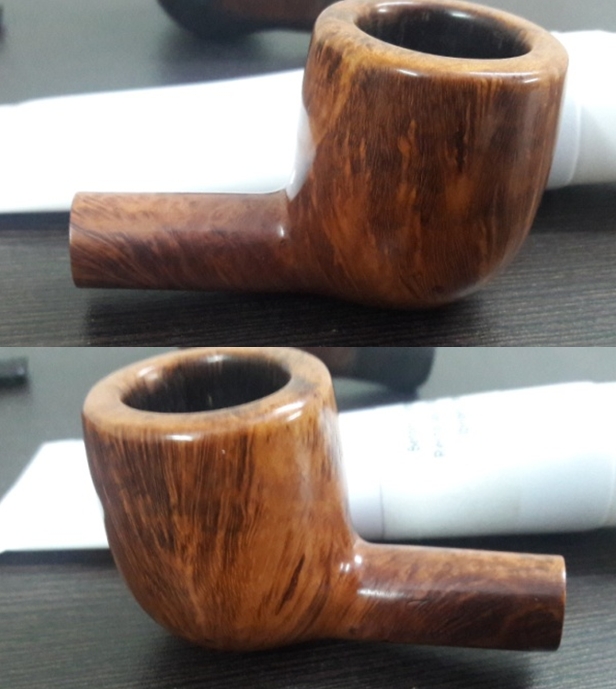
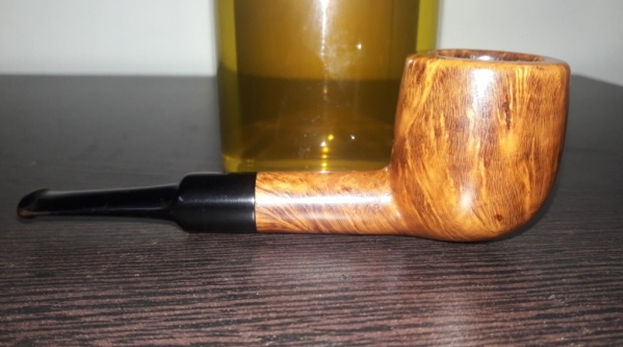
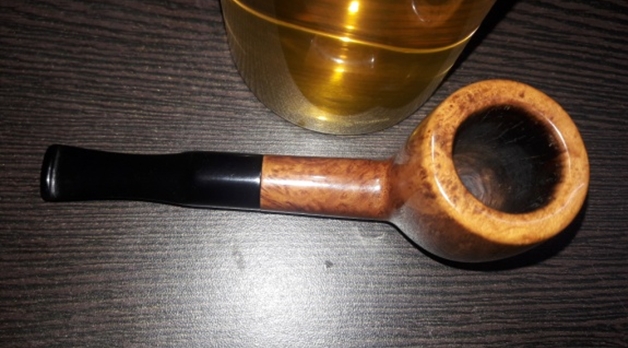
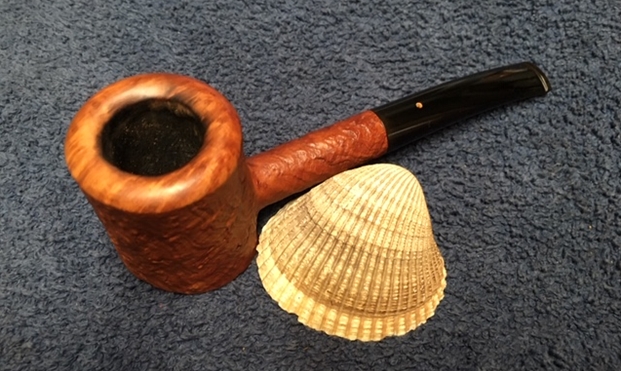
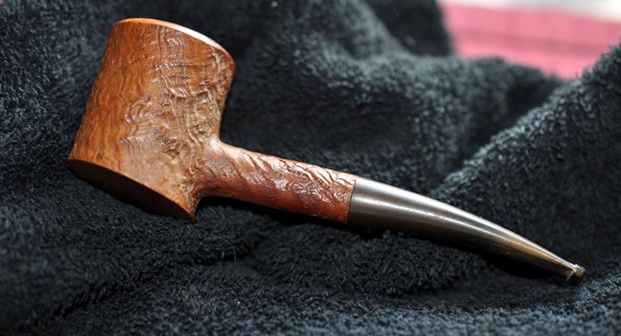
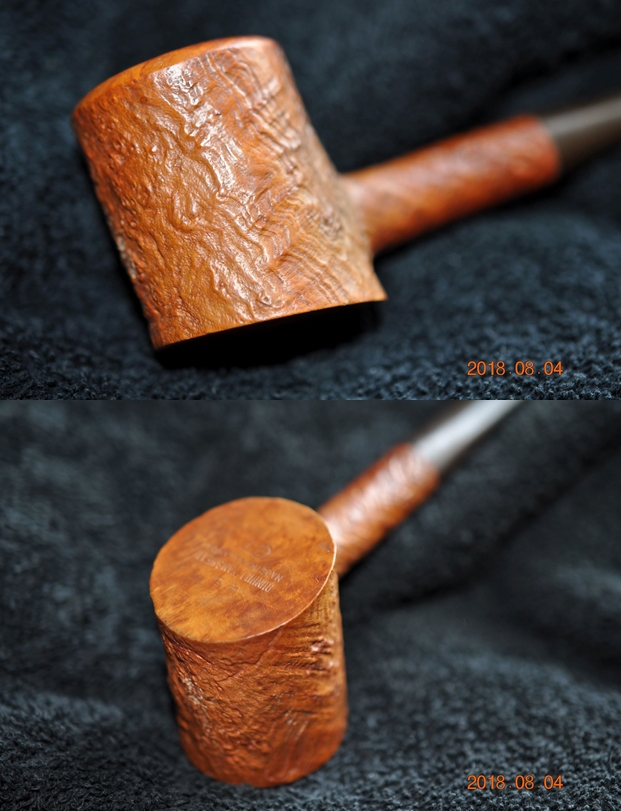
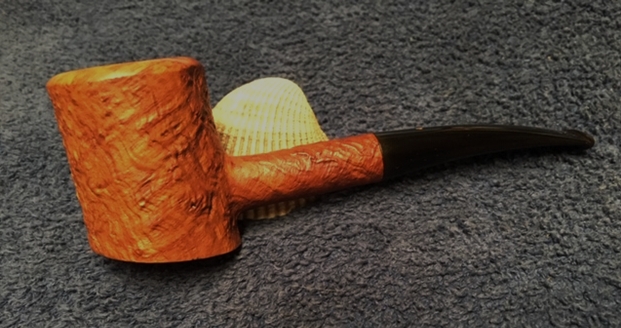
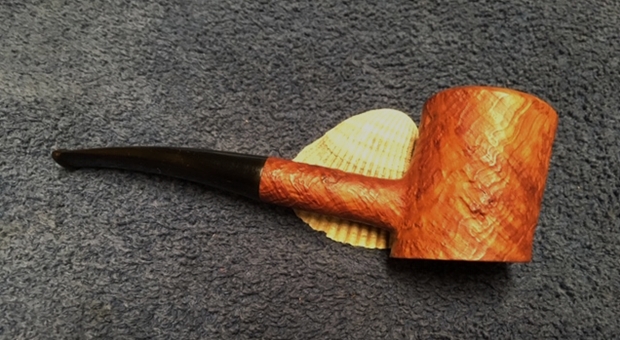
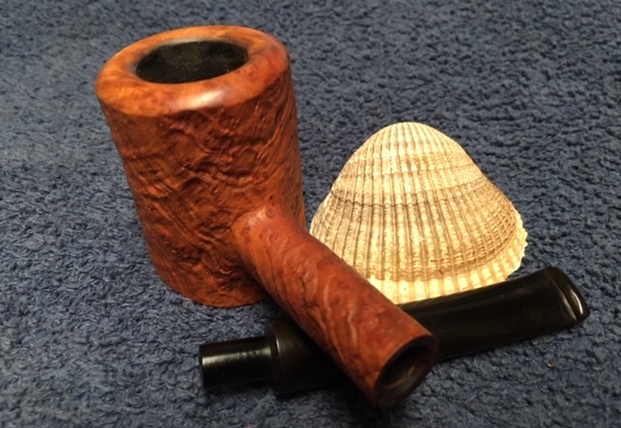
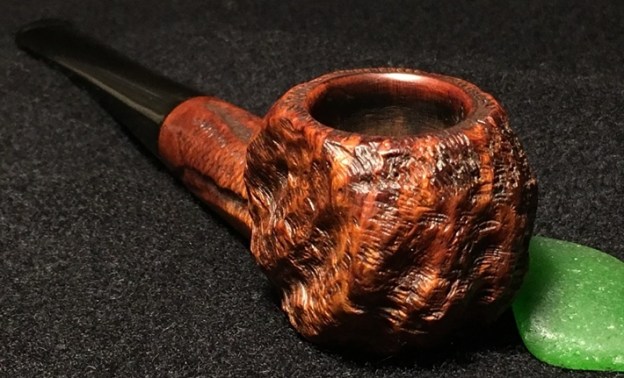
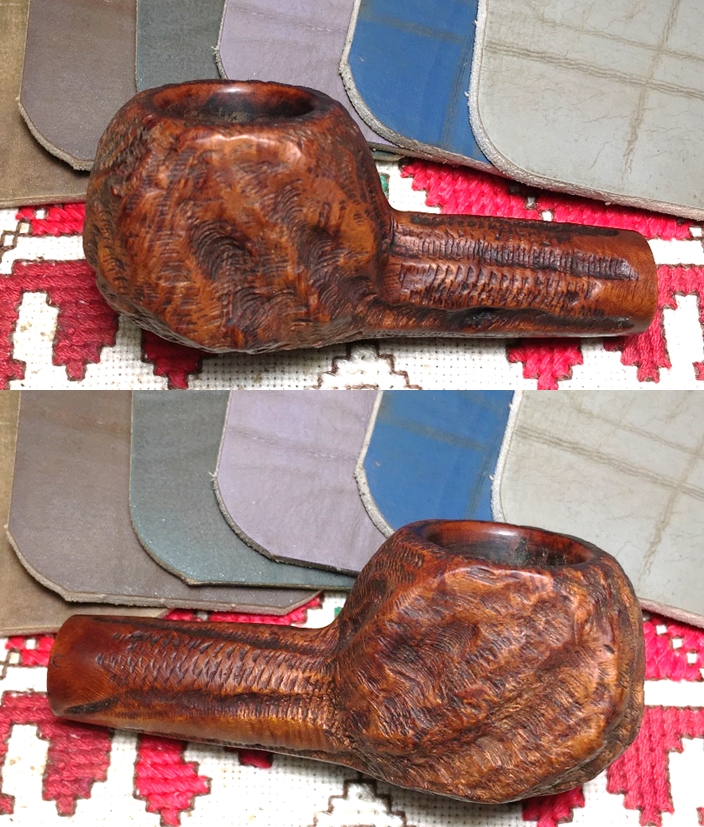
I actually have a Tinderbox pipe (by Comoys) on that shape, although at some point it has had a new stem put on. It’s a terrific smoker. And I have several Custom-Bilts from various eras, and love the pipes. Looking forward to seeing the finished pipes down the road!  I enjoy getting to know the pipe men and women who love pipes and I’m happy that this Custom-Bilt Panel, that snagged Stephen’s attention, will also benefit the Daughters of Bulgaria, our work here in Bulgaria helping women and girls who have been trafficked and sexually exploited.  Here are a few of the pictures that got Stephen’s attention in Pipe Dreamers. 
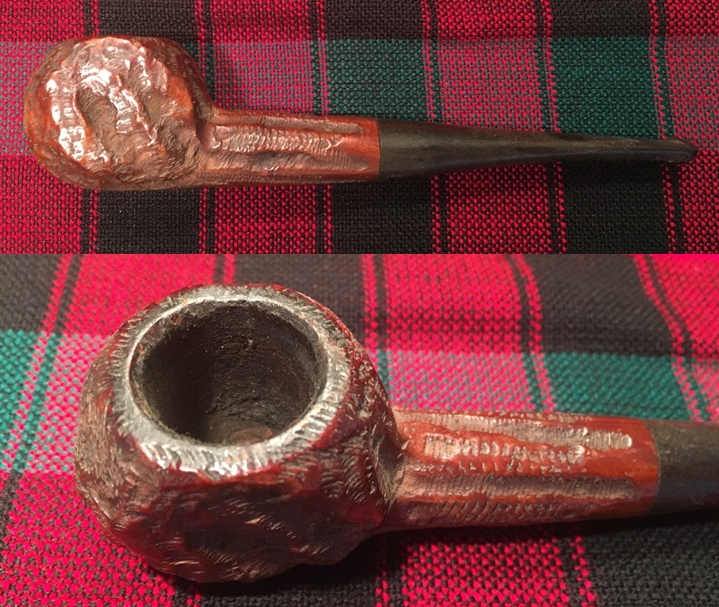
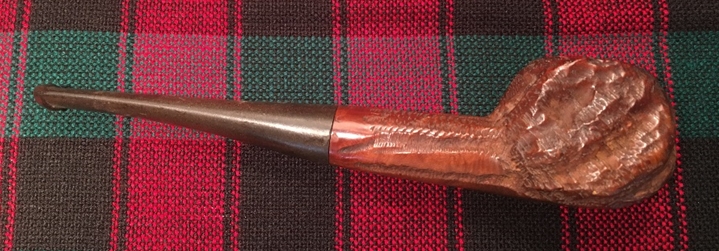
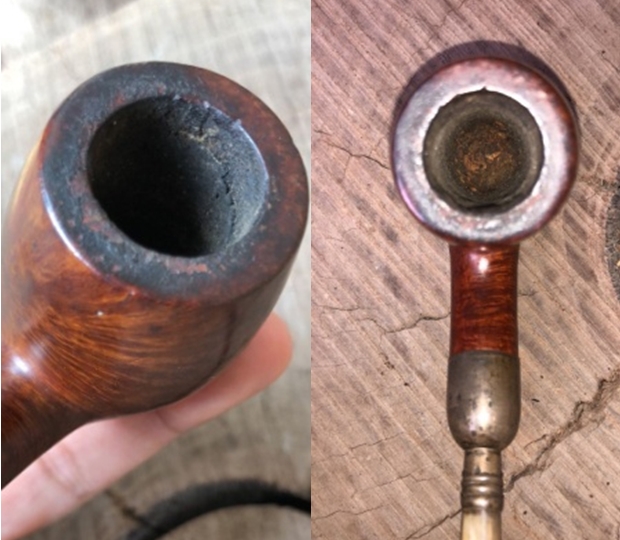
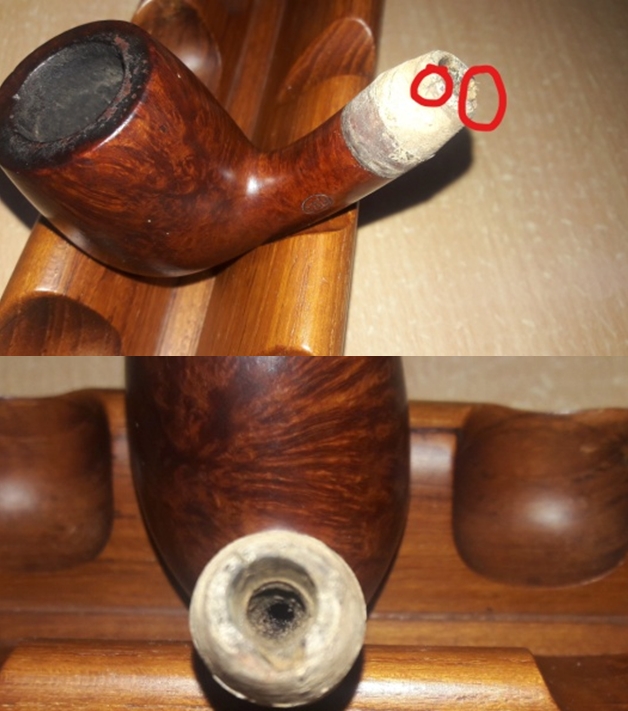
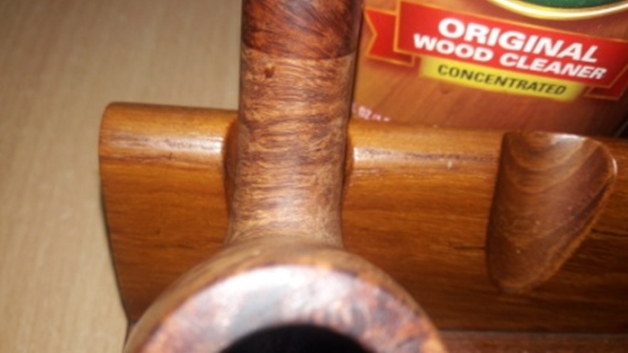
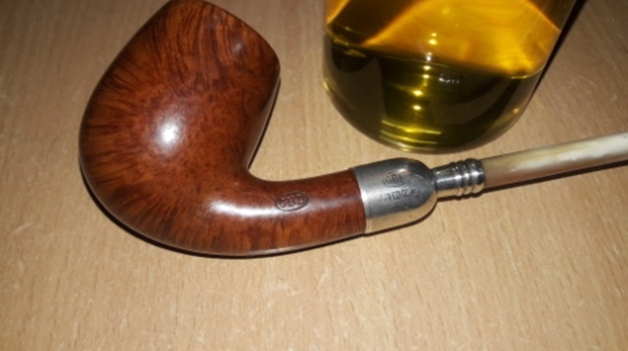
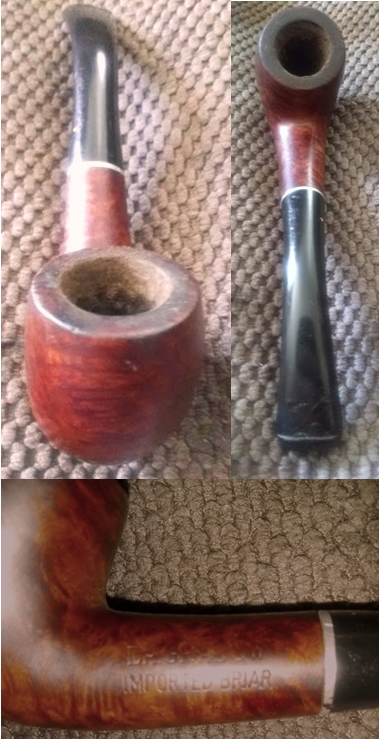
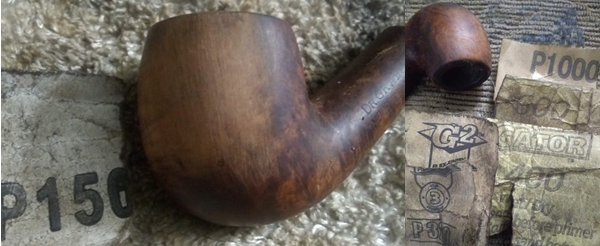
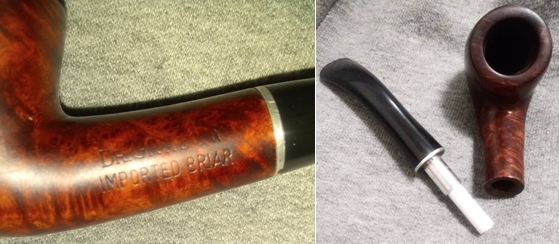
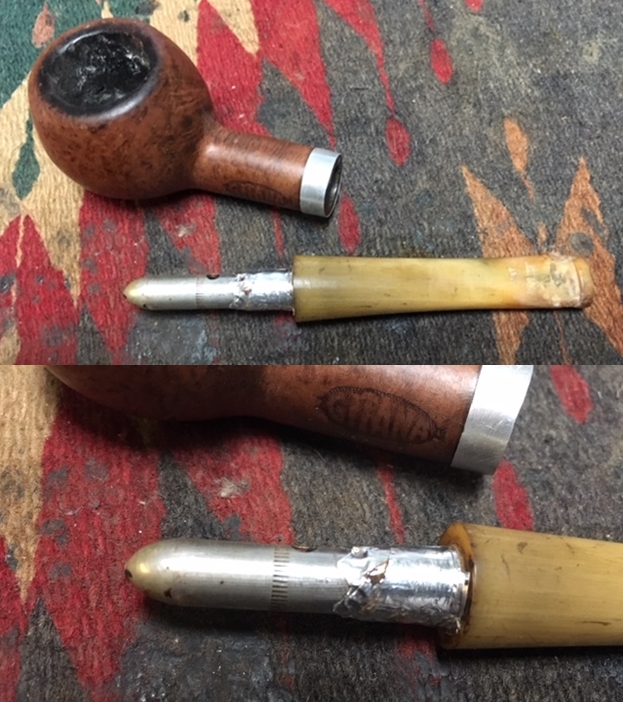
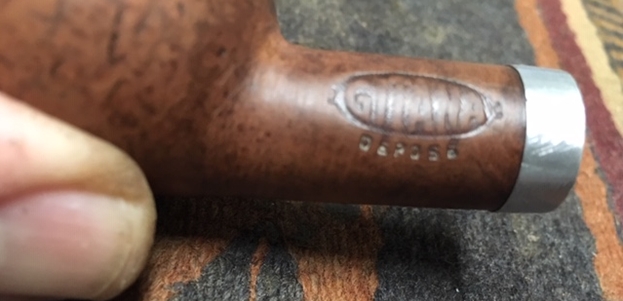
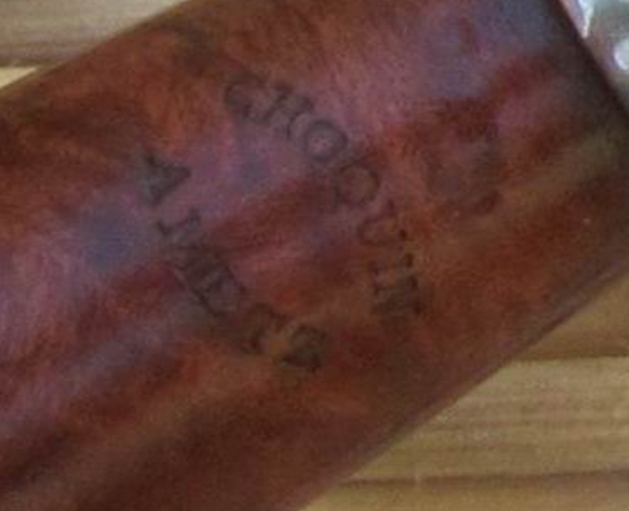
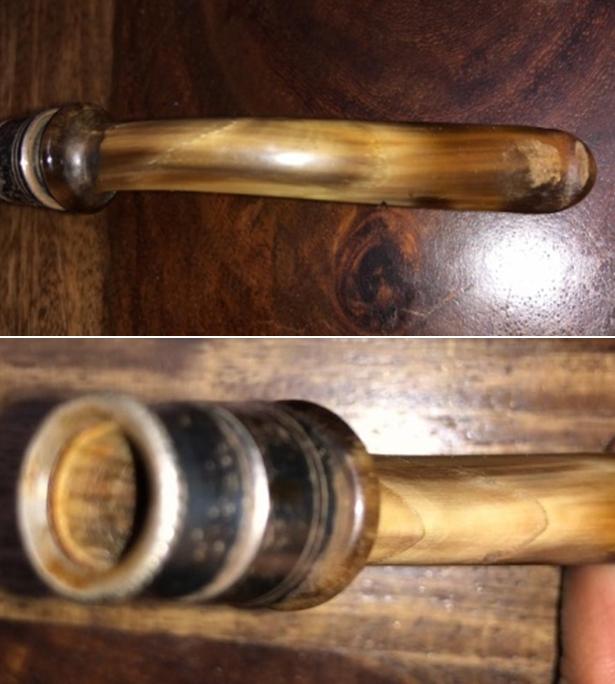
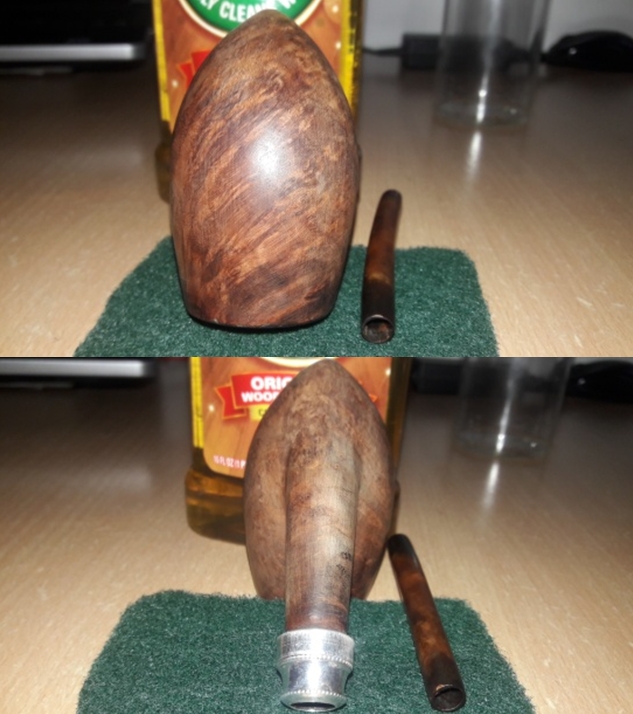
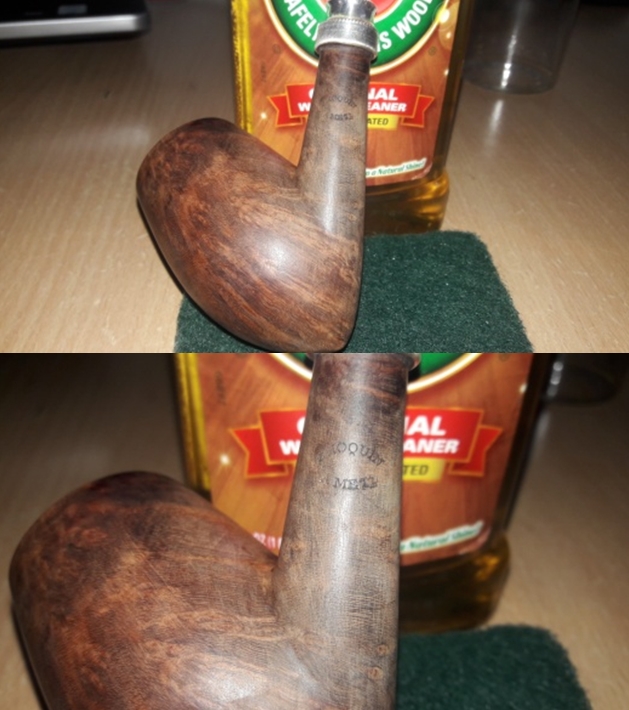
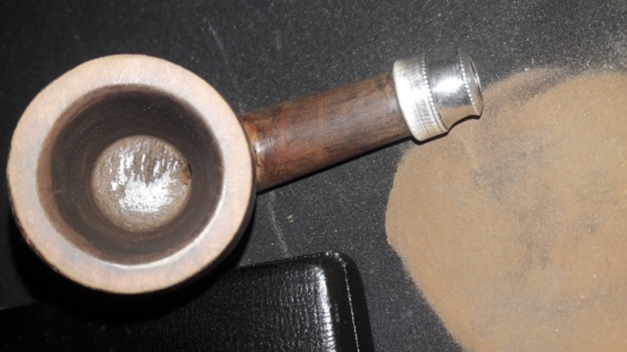
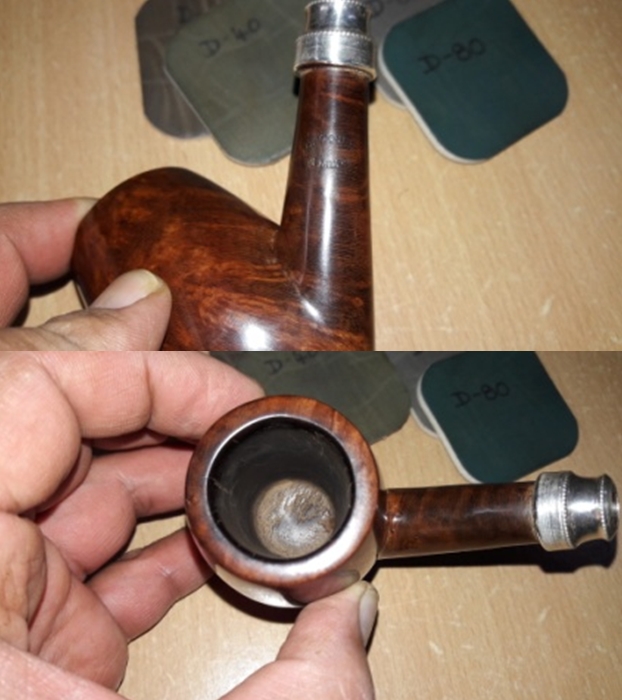
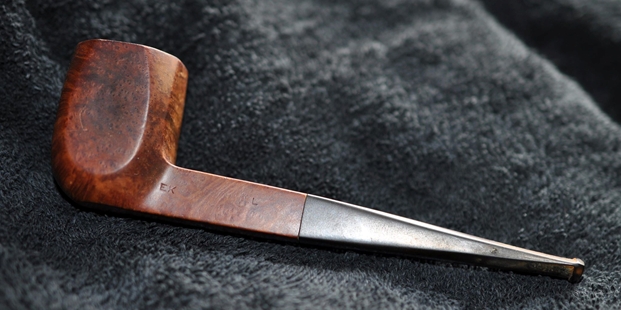
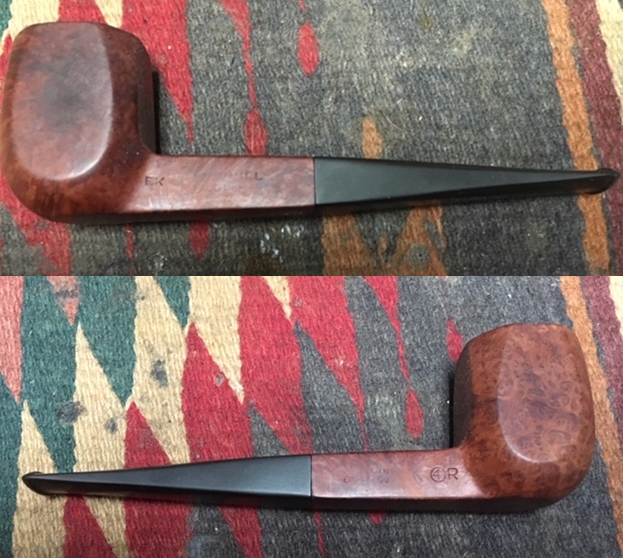
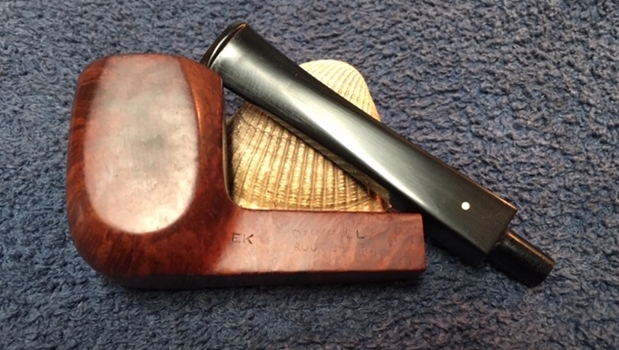
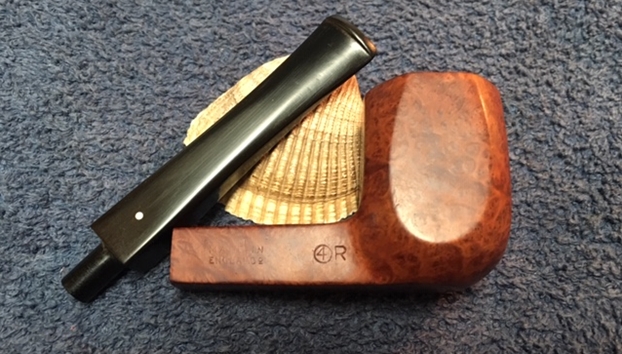
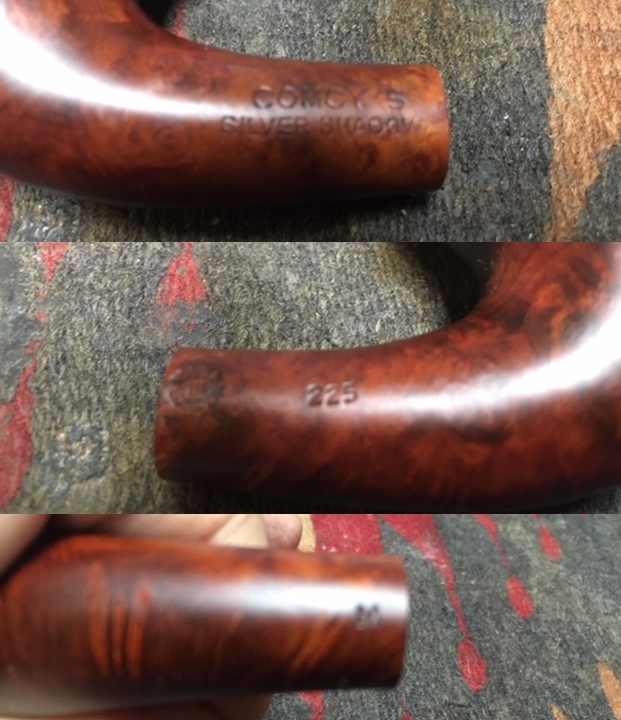
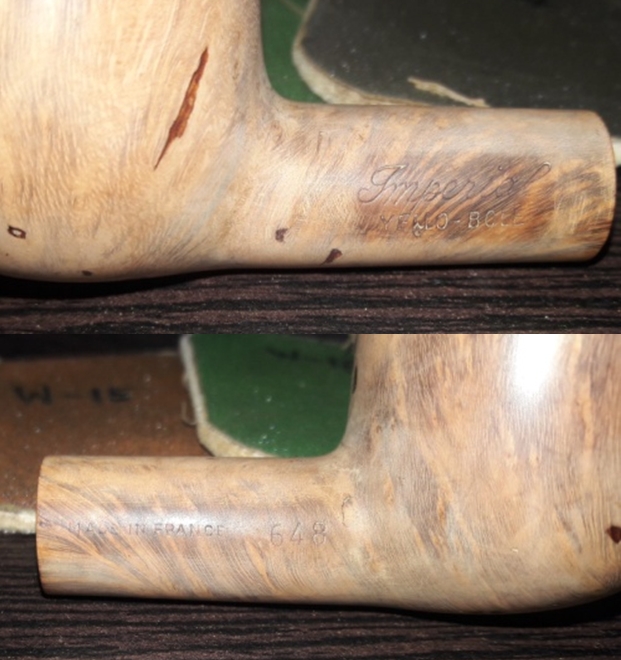
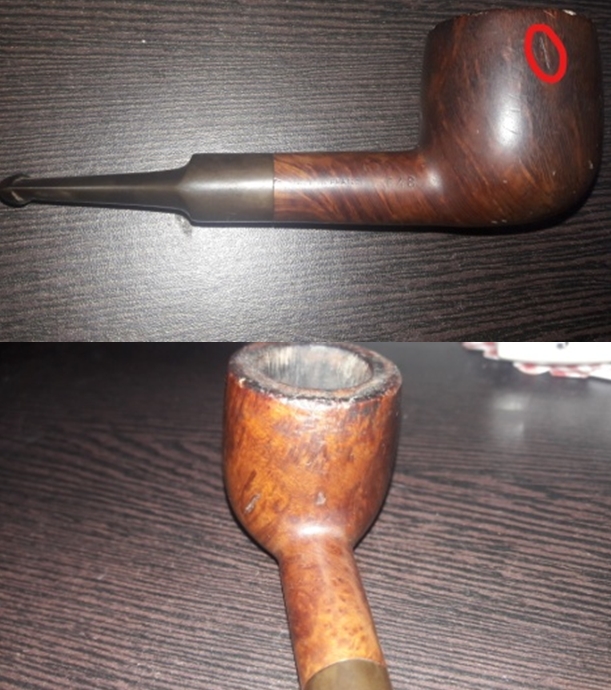
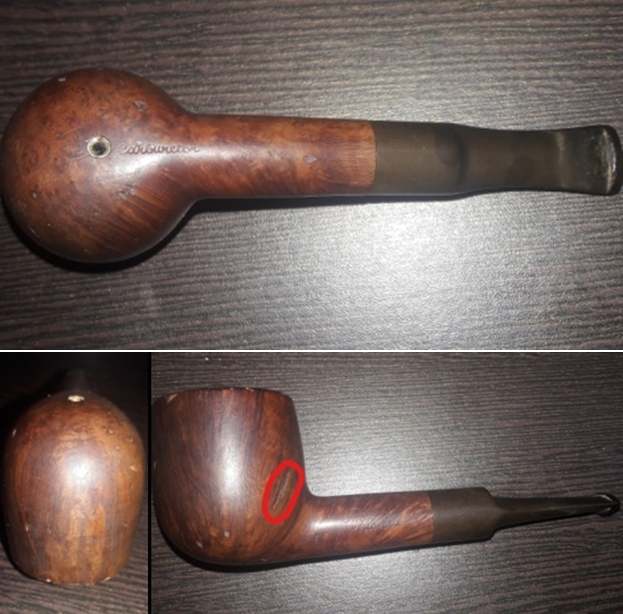
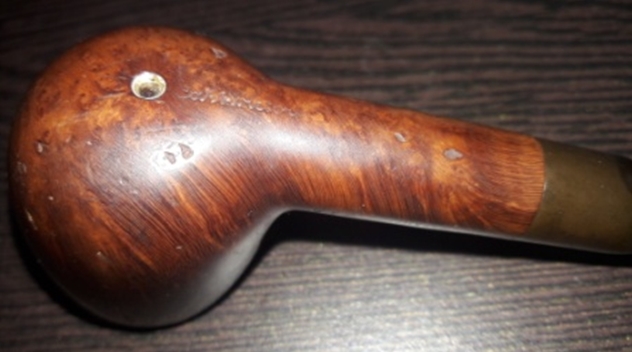
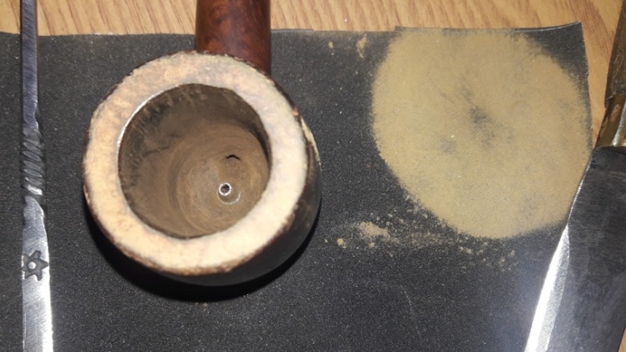
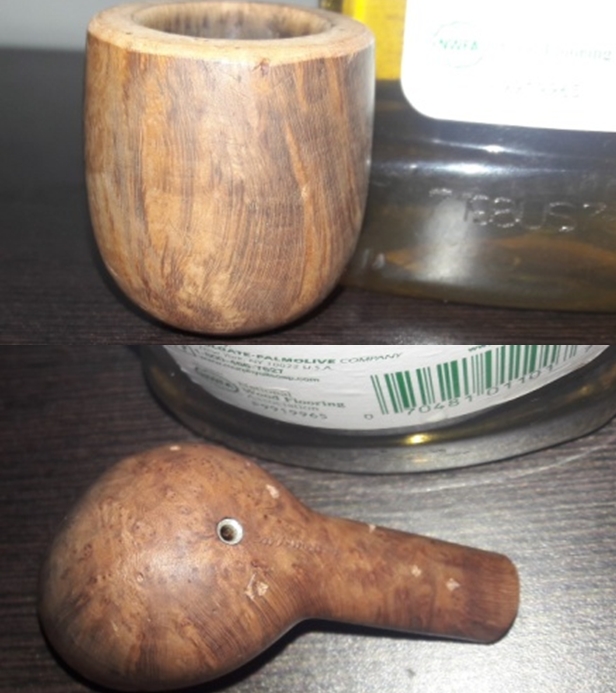
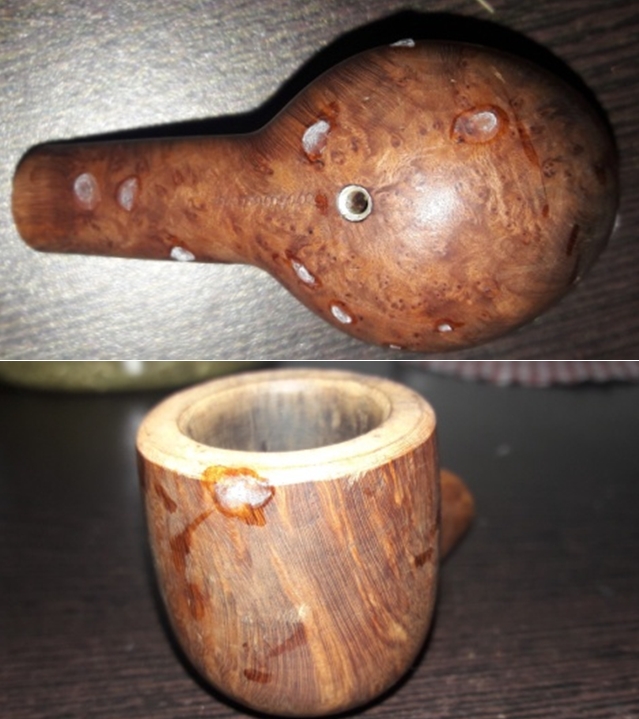
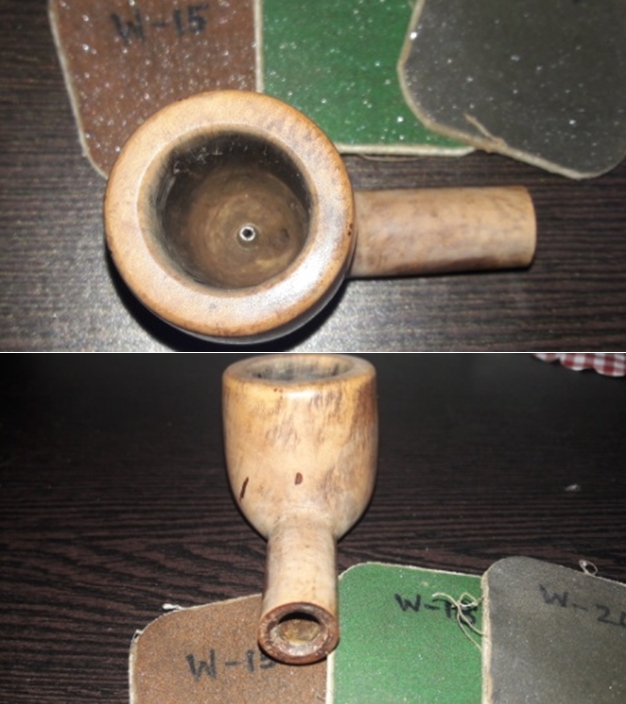
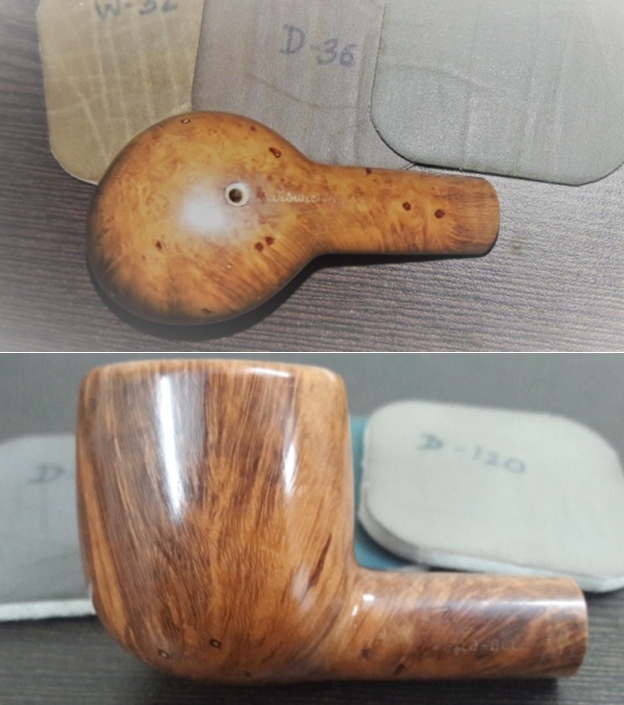
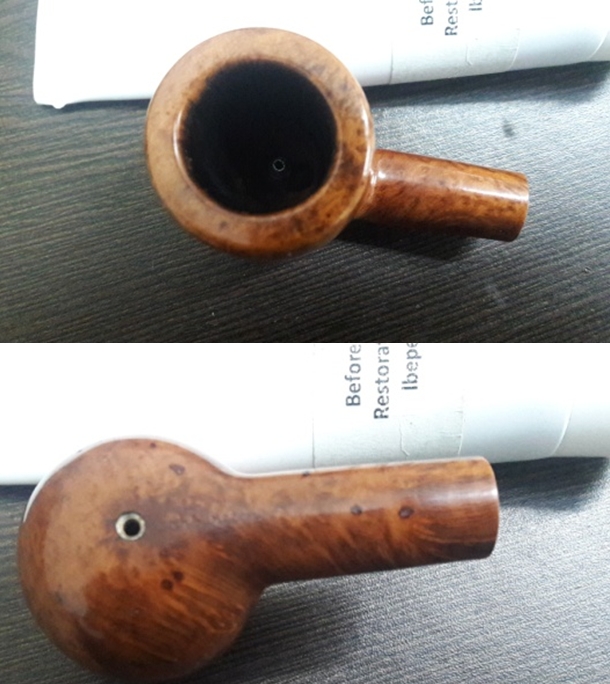
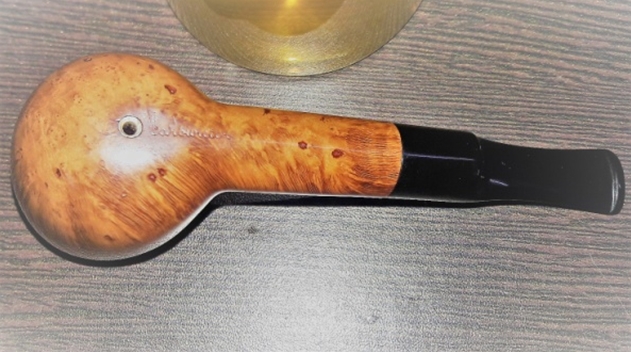
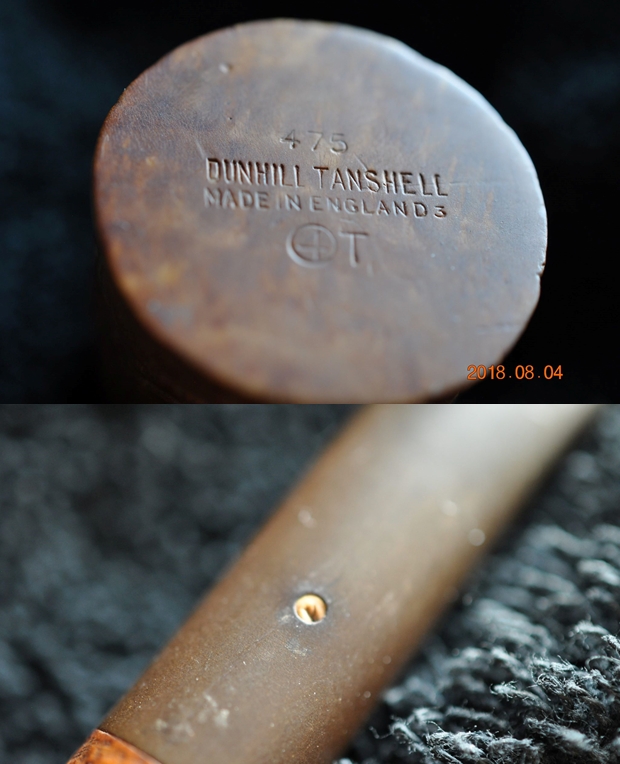
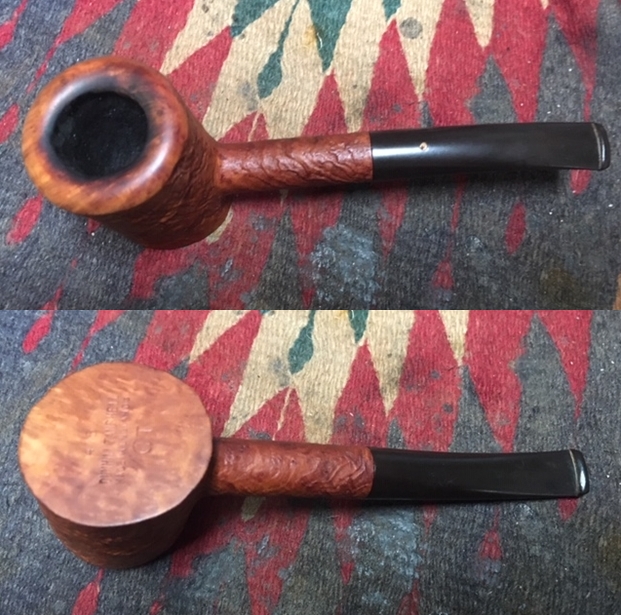
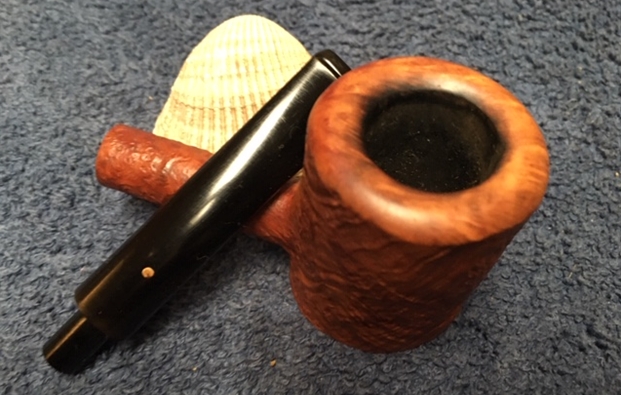
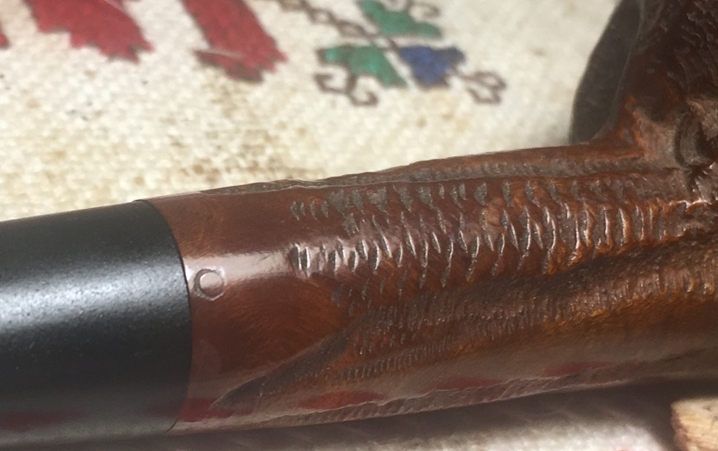
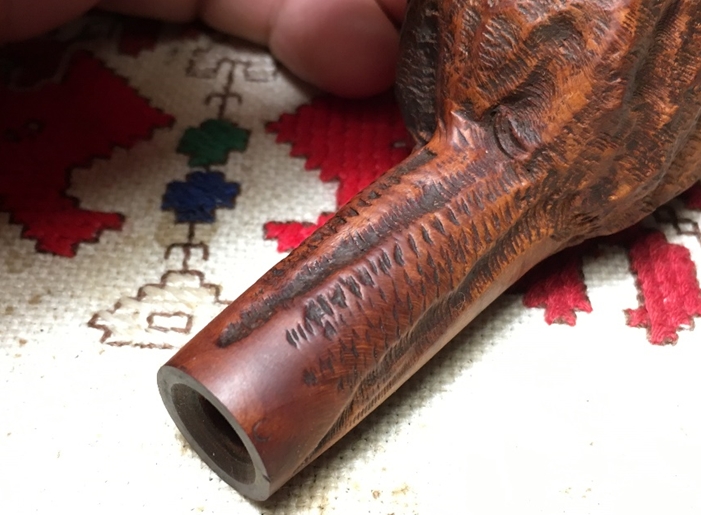
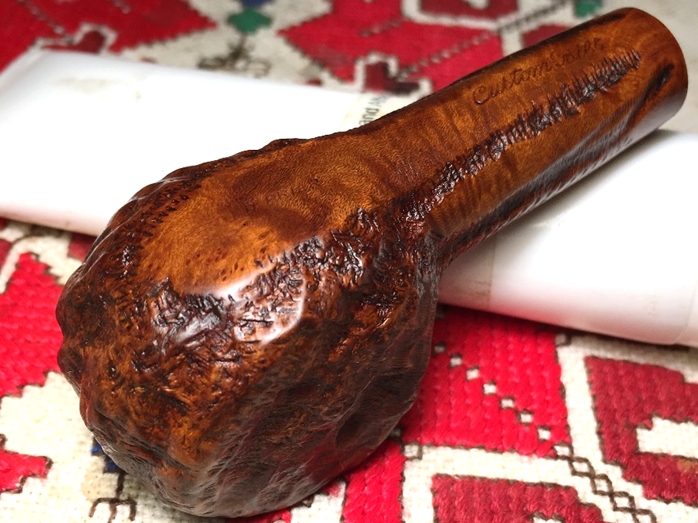
The nomenclature is on the lower smooth panel.  On the underside of the shank is cursive ‘Custom-Bilt’ with the hyphen separation.  On the underside of the bowl is stamped ‘IMPORTED BRIAR’.  After looking at the pipe on the work table, I also found a ‘O’ stamped on the upper right side of the shank, bordering the stem.  I’m not sure what this is if anything – an anomaly or the rustication tool gone awry!  
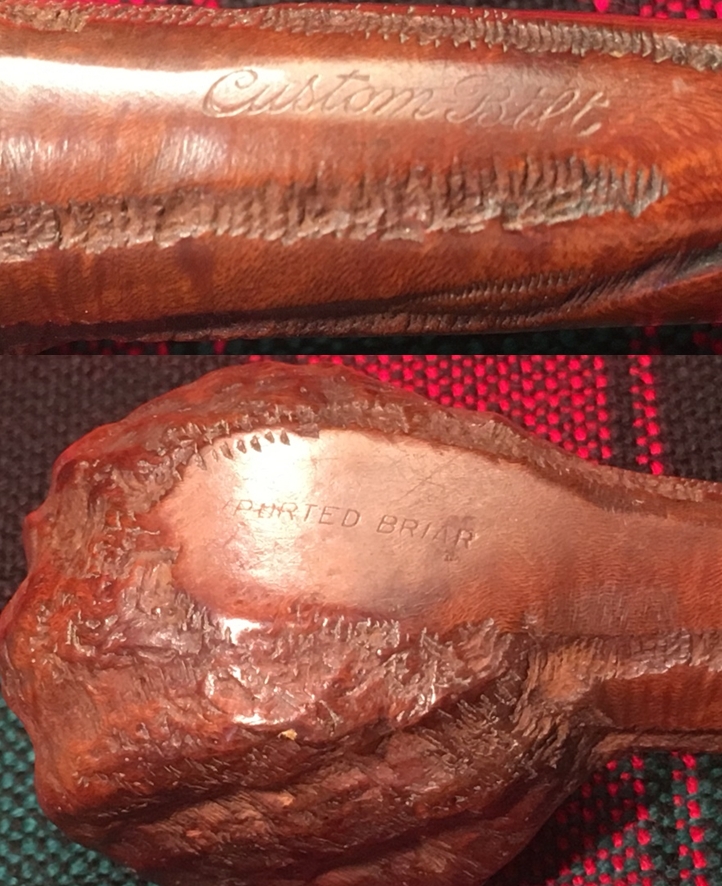
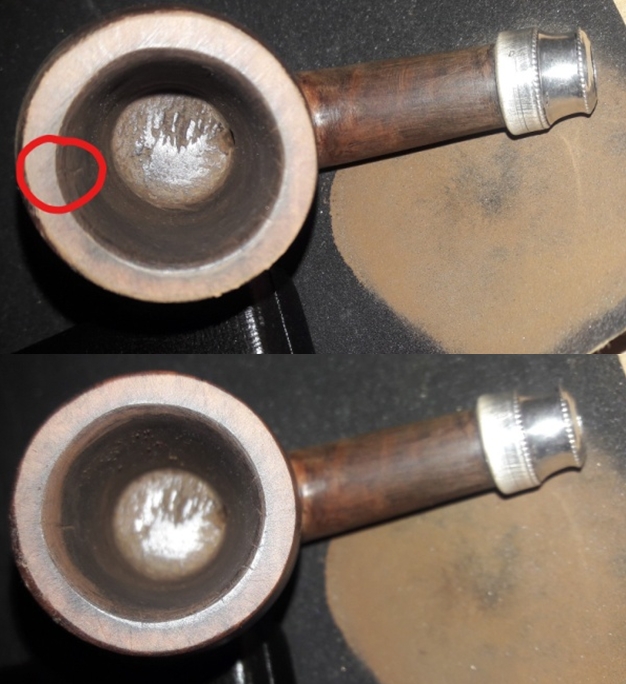
On a hunch, I look back at Pipephil.eu and I see what I missed the first time I looked.  The circle in the picture above is a marking listed as having appeared on some Custom-Bilt pipes.  It does not indicate which period or production lines each marking indicates. 
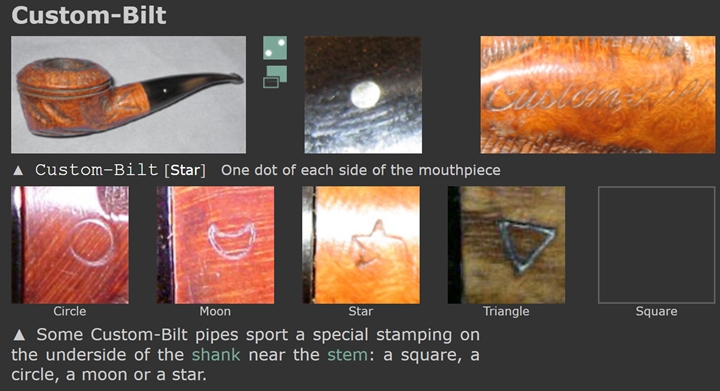
The information from Pipephil.eu about the multiple transitions in ownership of the American pipe name, Custom-Bilt was to the point:

Chunky bowls with rough carving or gouges.

Tracy Mincer stopped making Custom-Bilt pipes in the early 1950s. The trademark was successively bought by Leonard Rodgers (1953), Consolidated Cigars (1968) and Wally Frank Co. (early 1970s). The later began to produce again his version of the pipe in 1974 or 1975 at Weber pipe factory (NJ). In 1987, the pipes were made out of the Butz-Choquin factory (France) and then Mexico until the late 1990s. Currently (2010), the Custombilt name is owned by Tobacalera of Spain which is part of Altadis.

It is generally admitted (but not proved) pipes stamped “Custom – Bilt” (with the hyphen) are from the Mincer era. The name might have changed from Custom-Bilt to Custombilt (without the hyphen) in 1946.

If this information is accurate regarding the inclusion or exclusion of a hyphen indicating the period of manufacturing, the Custom-Bilt in front of me could be from the Mincer period and if so, could be dated from 1946 or earlier.  This is helpful information regarding the dating.

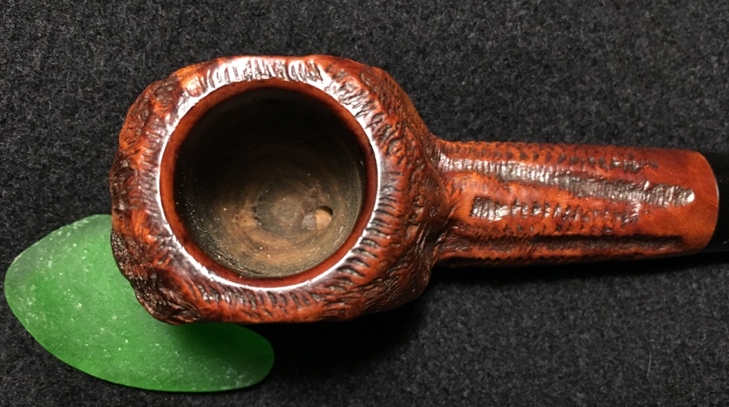
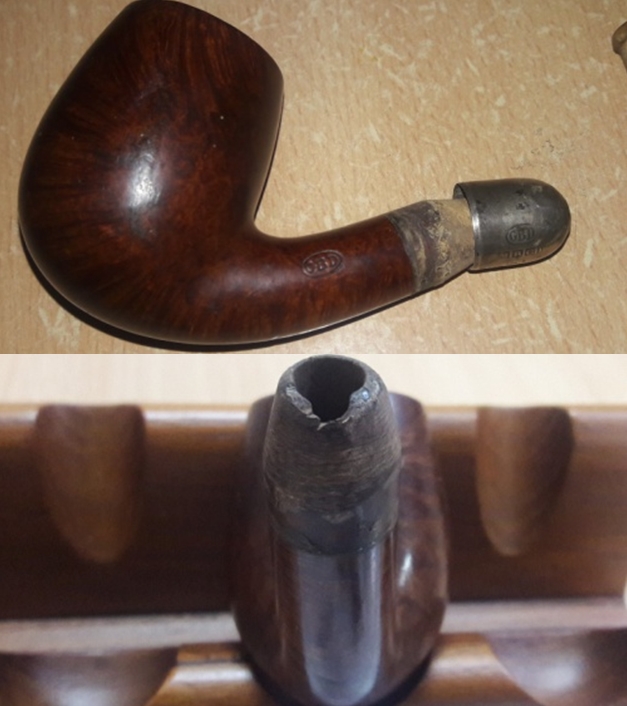
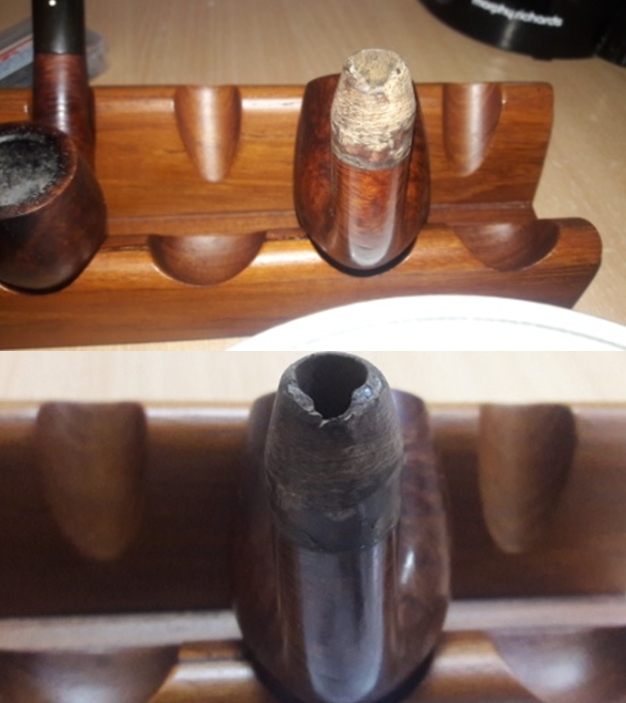
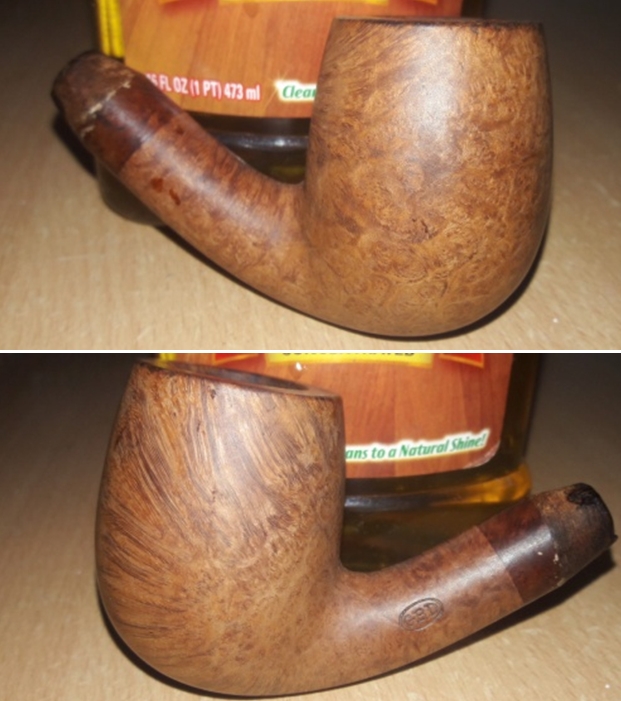
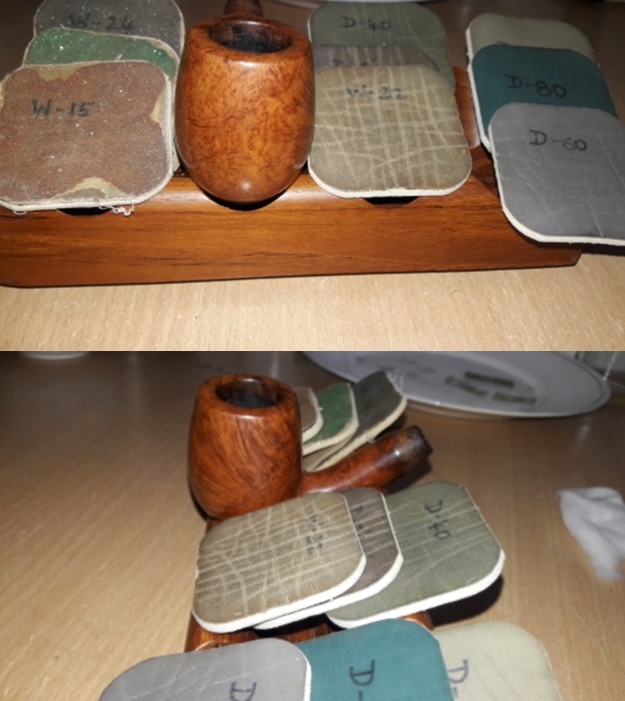
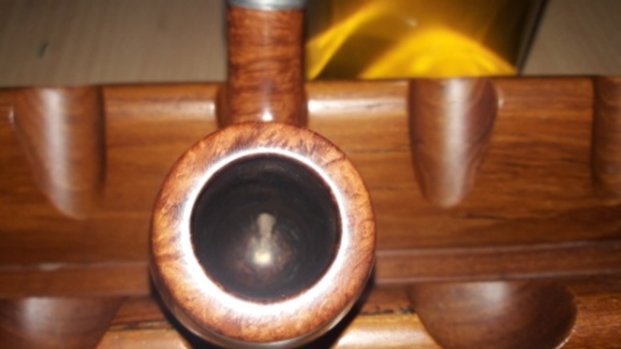
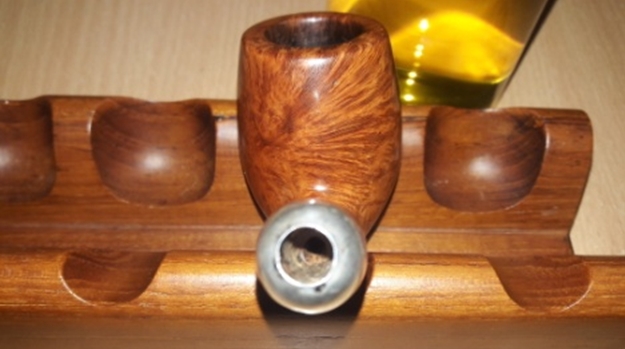
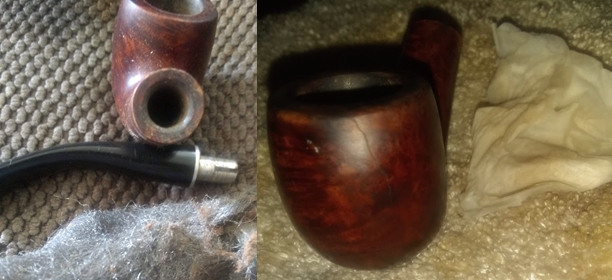
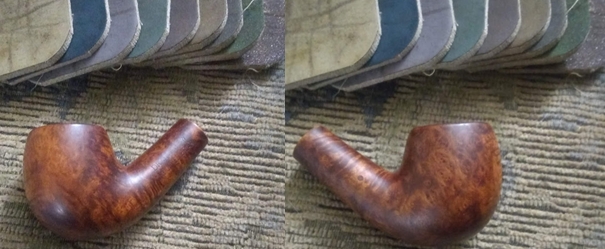
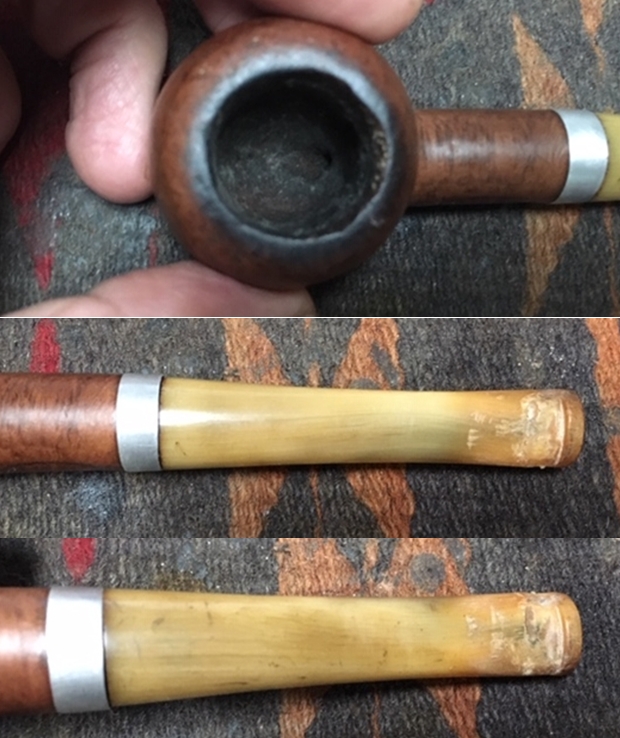
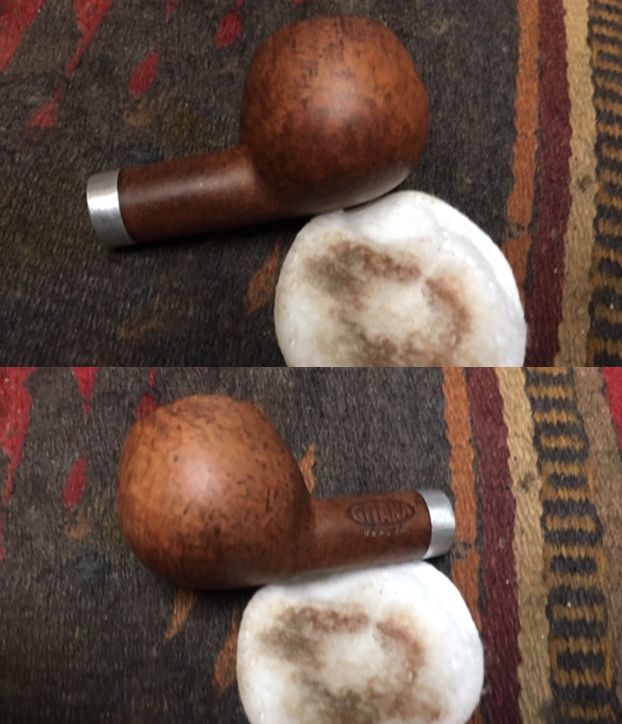
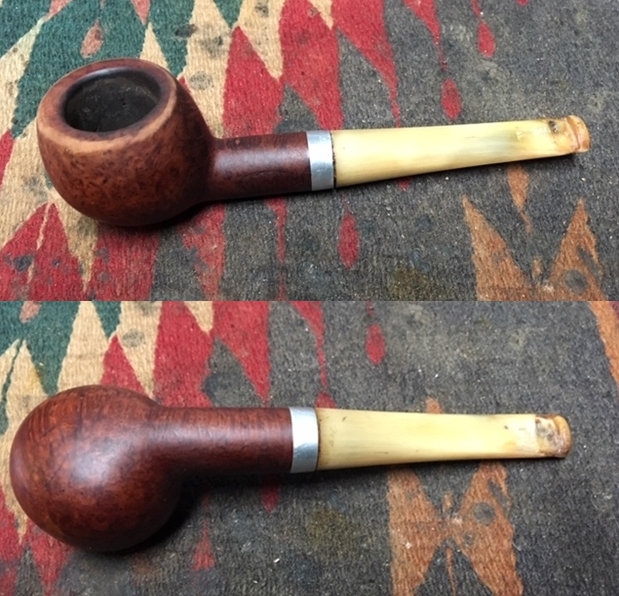
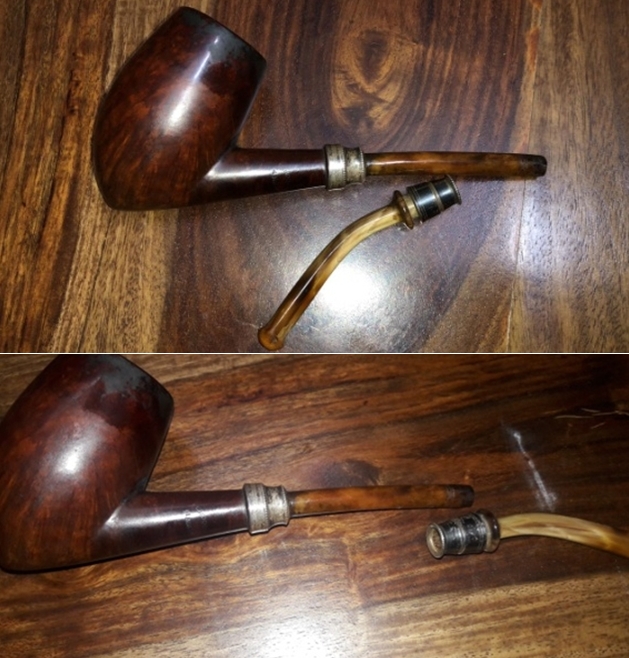
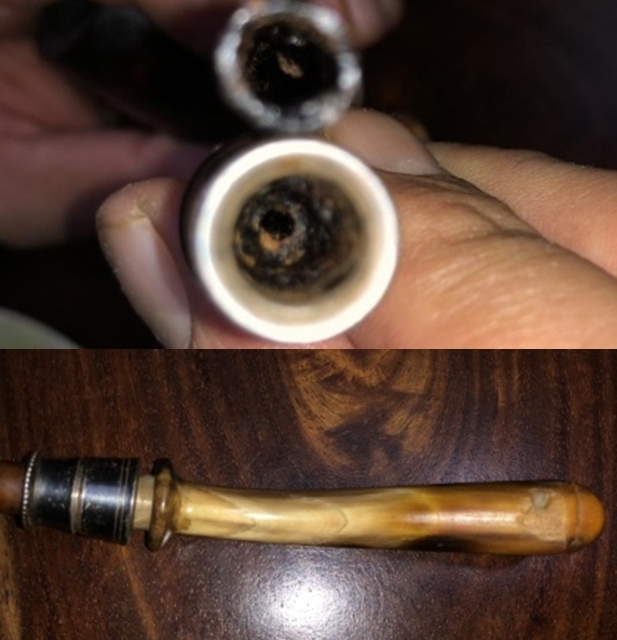
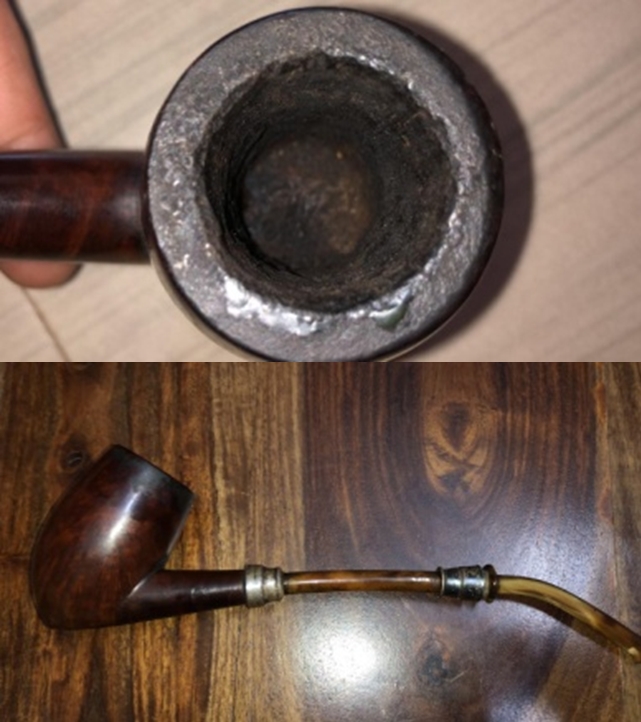
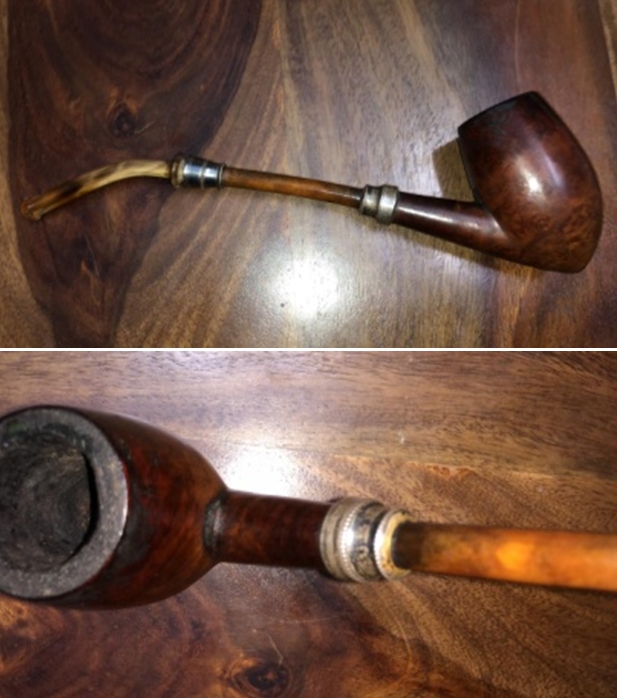
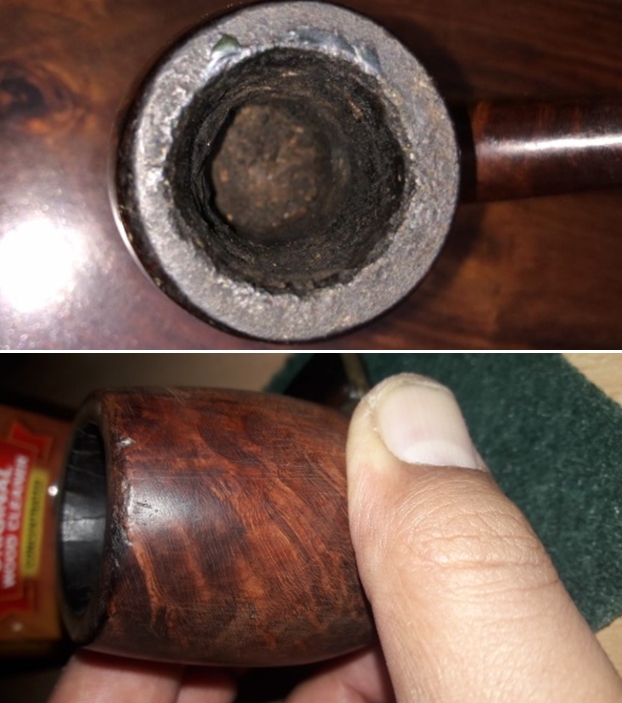
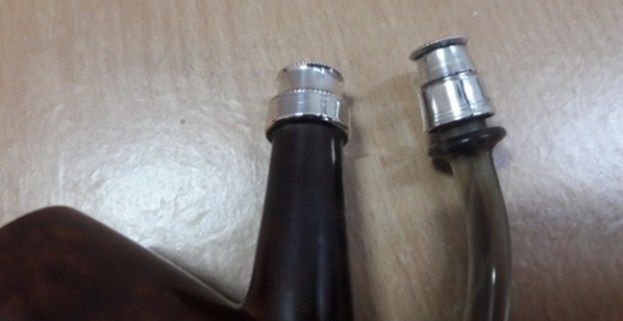
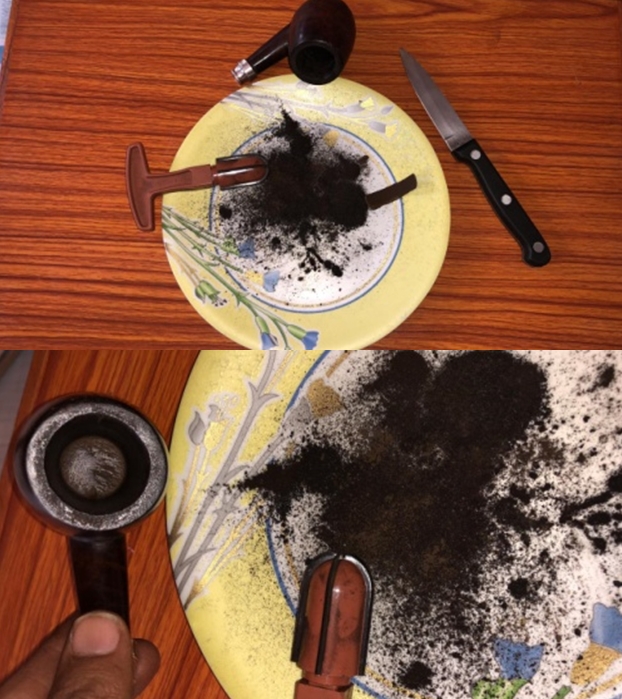
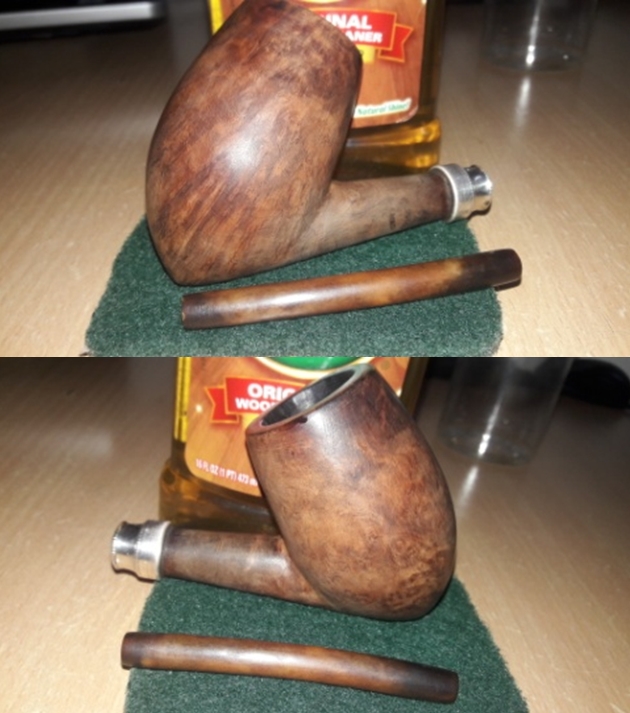
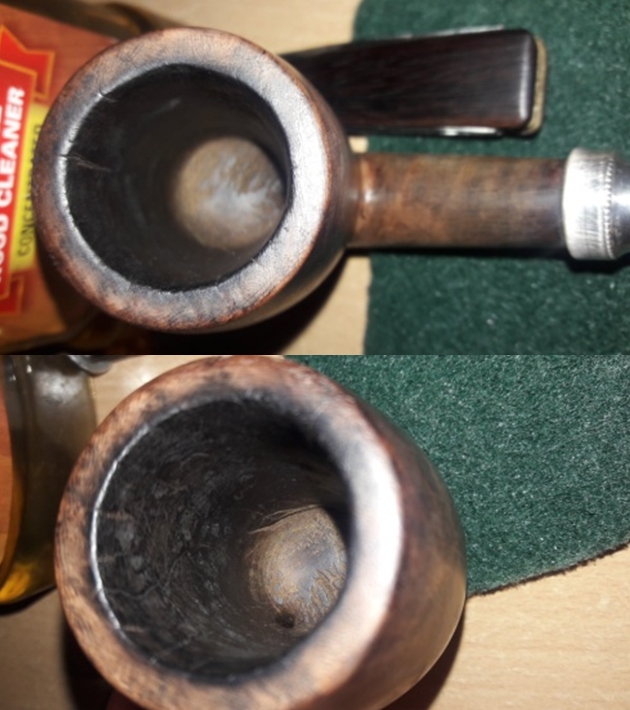
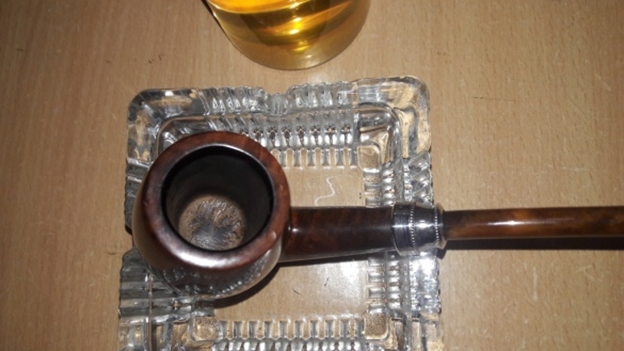
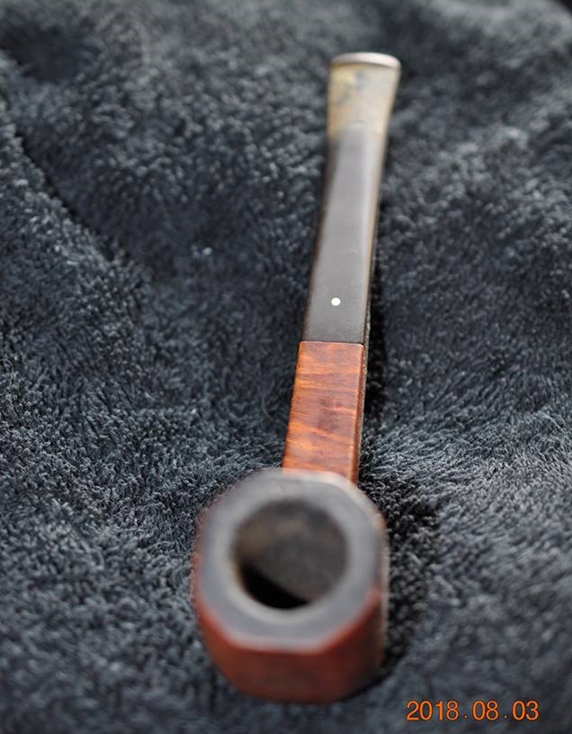
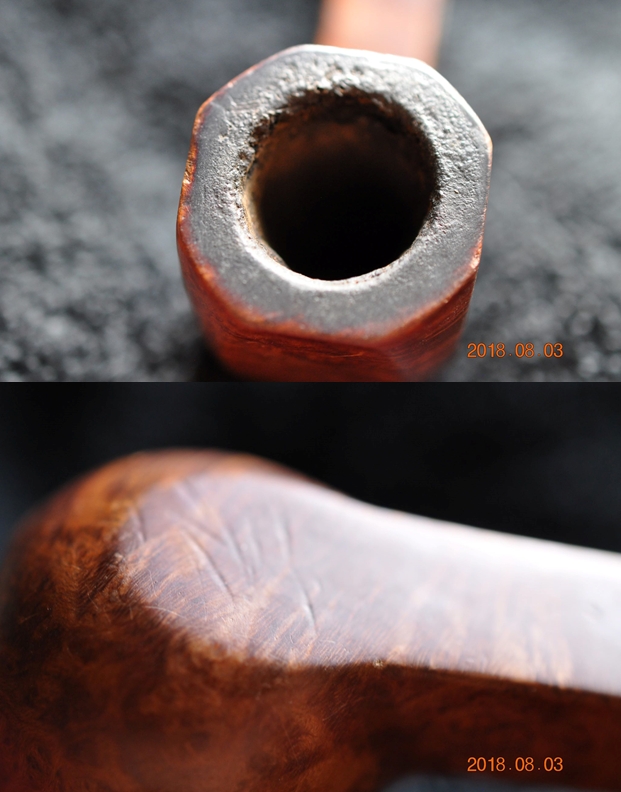
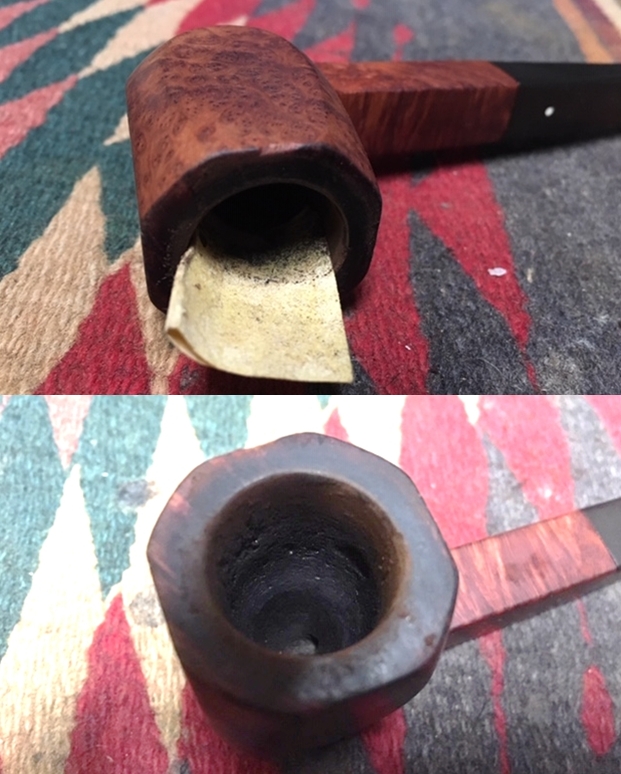
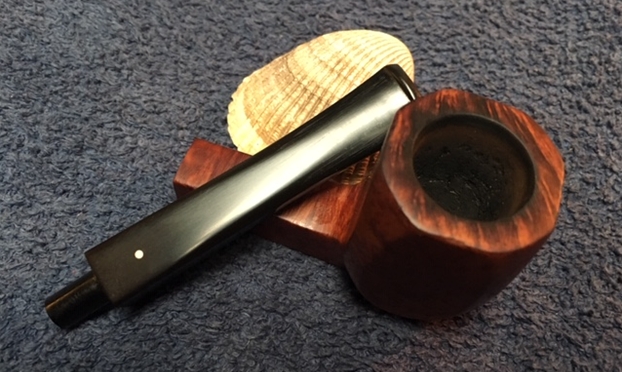
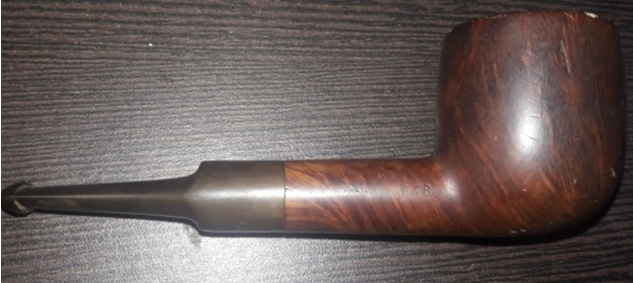
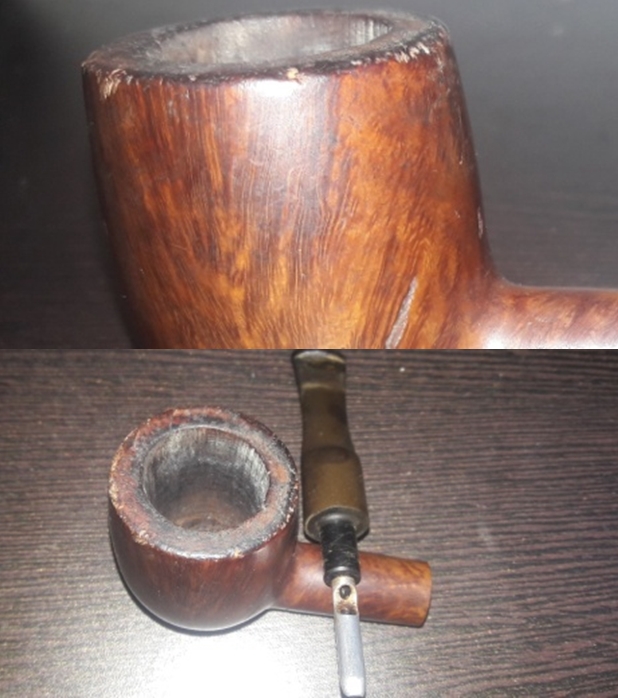
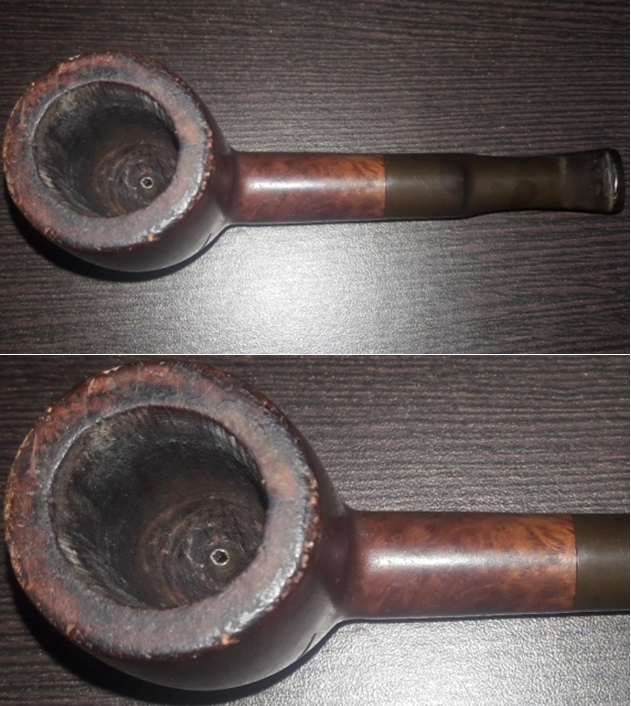
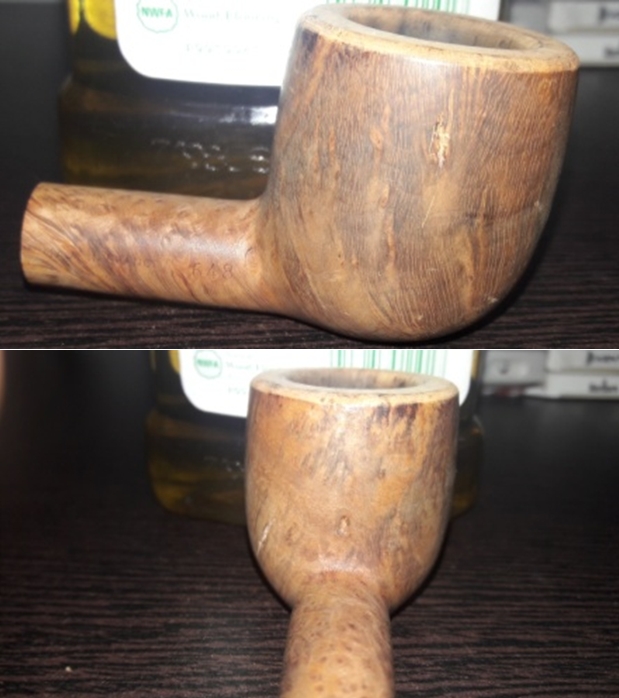
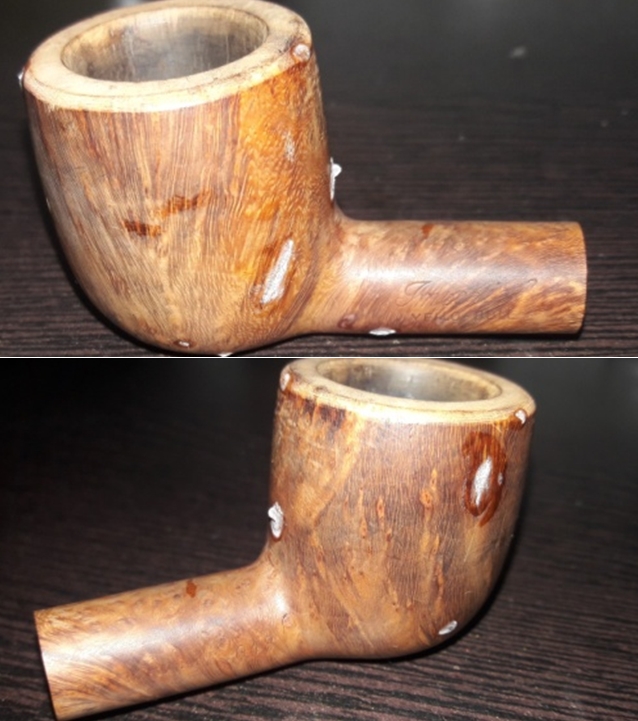
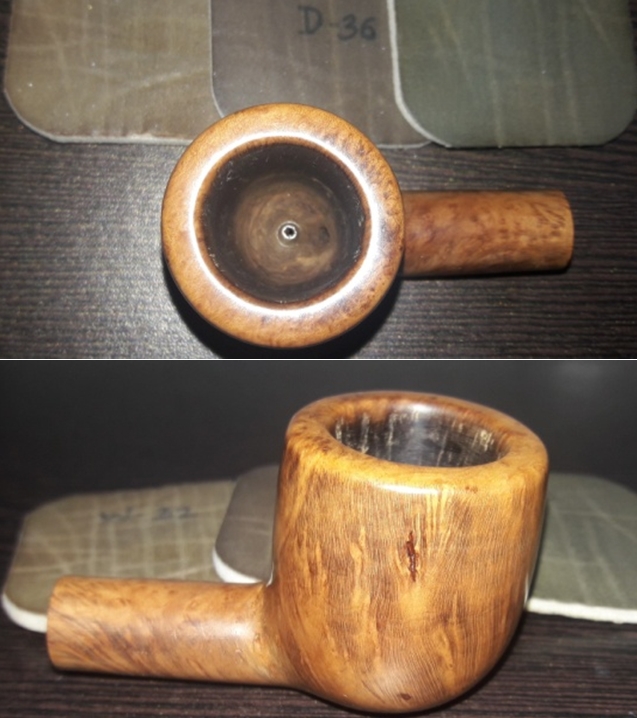
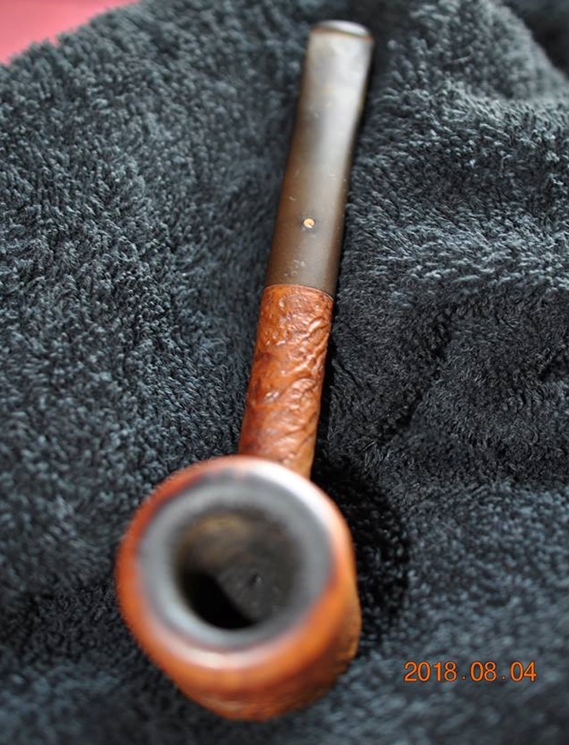
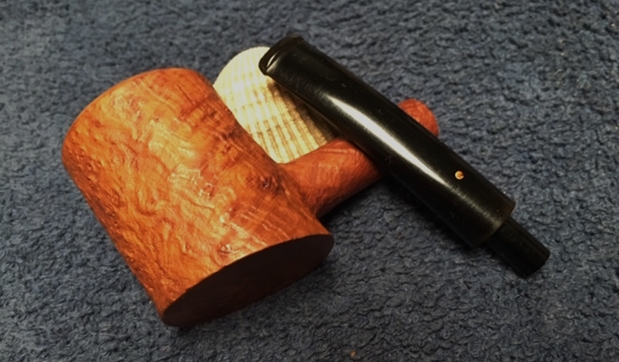
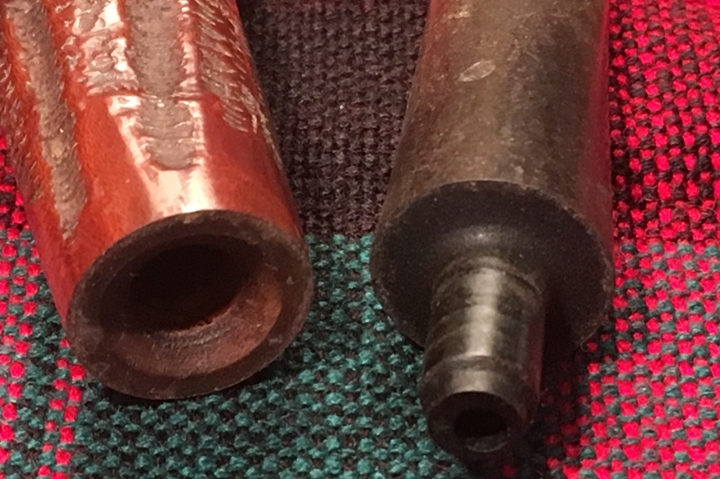
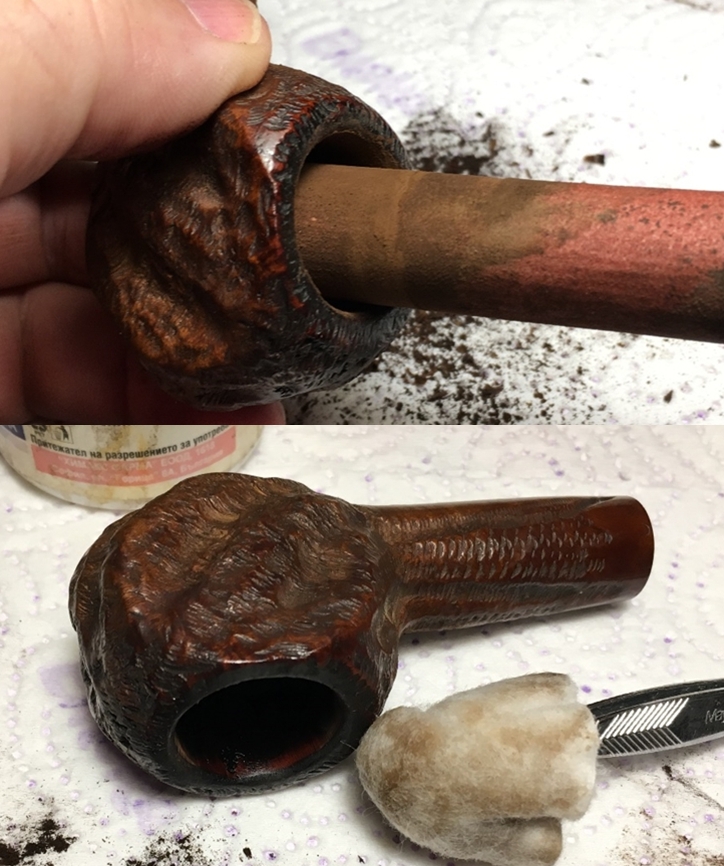
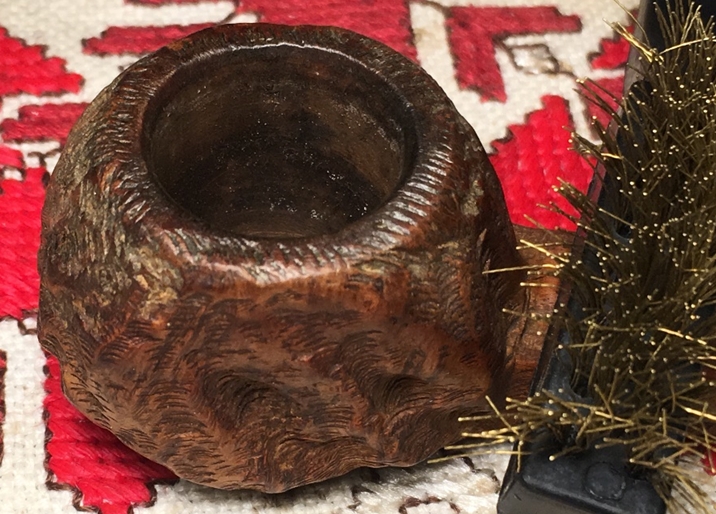
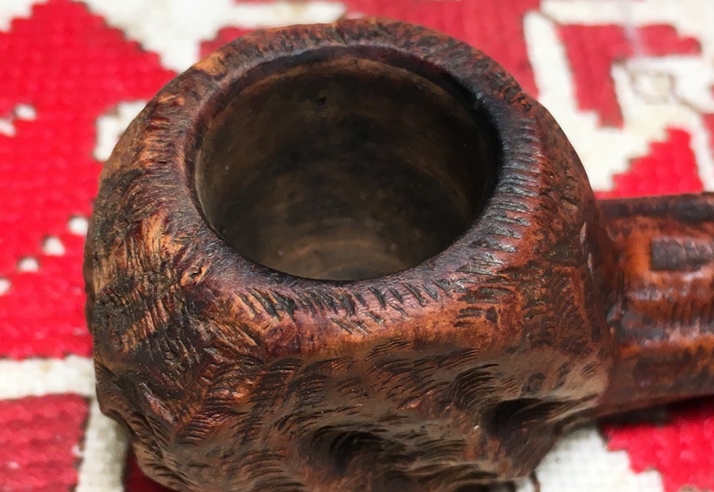
The pipe itself seems to be in solid condition.  The characteristic rustified, roughed-up surface of this Custom-Bilt pipe is darkened from grime and needs a thorough cleaning.  The chamber looks good with a thin cake build up.  The rim is in good shape but is darkened from scorching over the years.  The stem has mild oxidation and light tooth chatter and a compression on the lower bit, next to the button. I notice too, that the stem fitting may be a bit loose.  We’ll see how that shapes up after cleaning.  Overall, no major challenges are detected. 

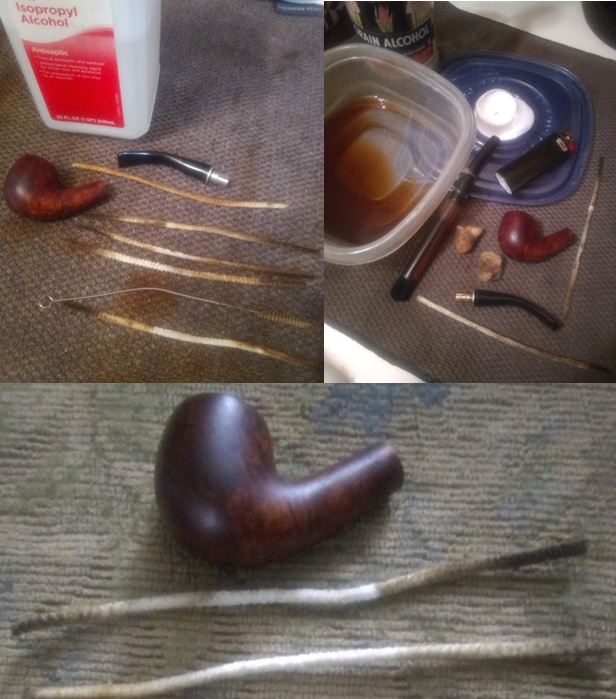
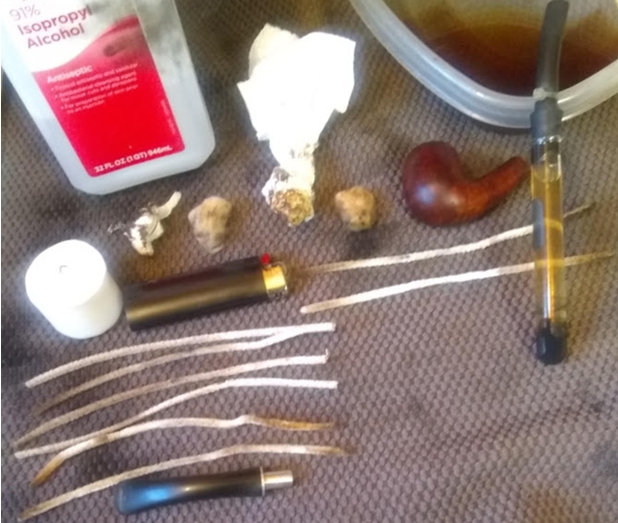
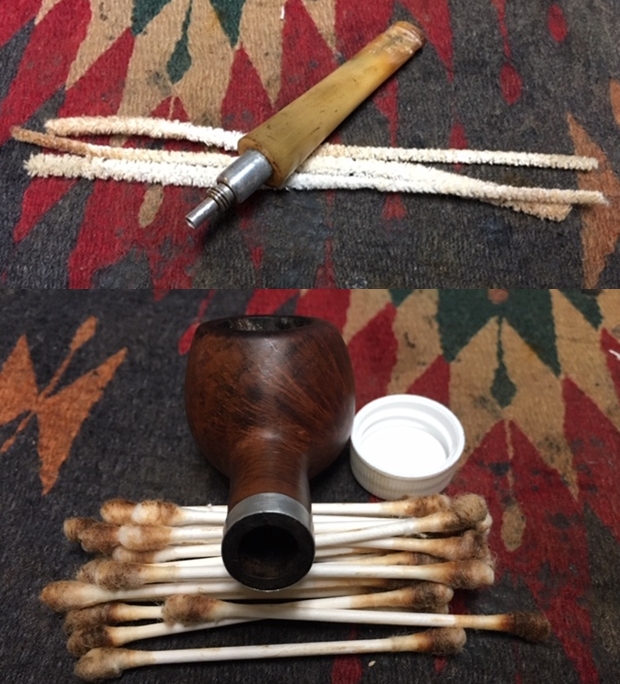
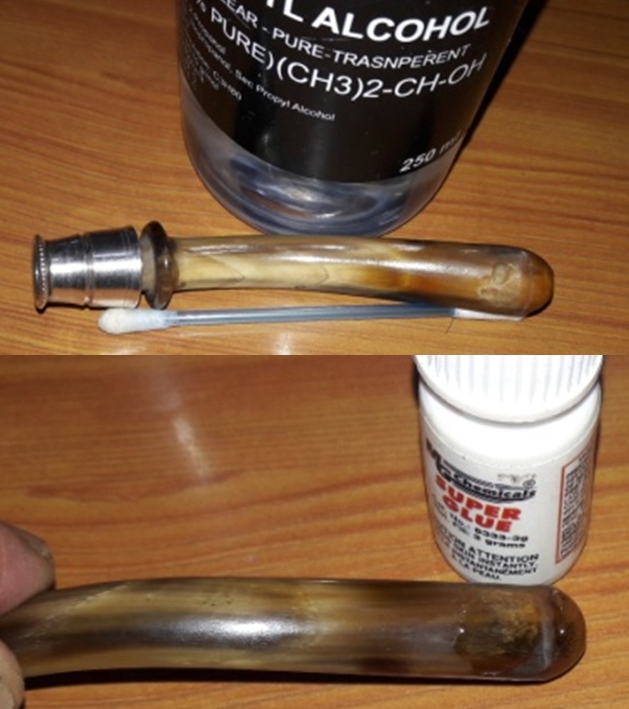
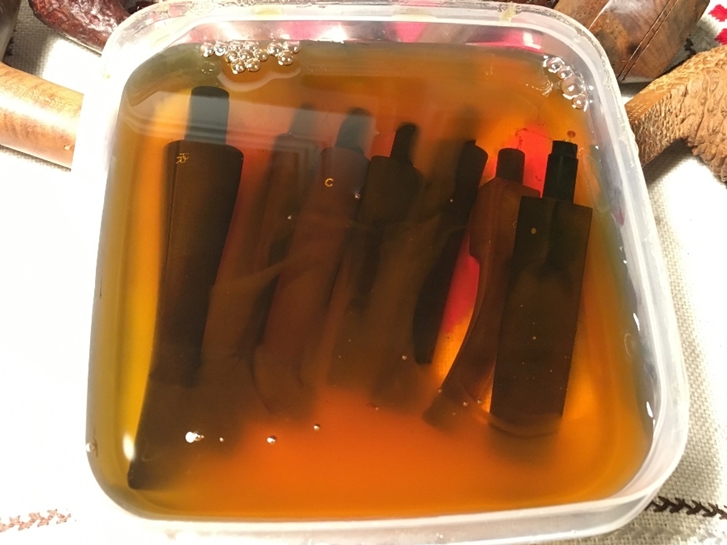
I begin what should be a straight forward restoration of this Custom-Bilt Panel by cleaning the stem’s airway using a pipe cleaner wetted with isopropyl 95%.  I then add the stem to a Before & After Deoxidizer soak, along with other pipes and stems in queue.  
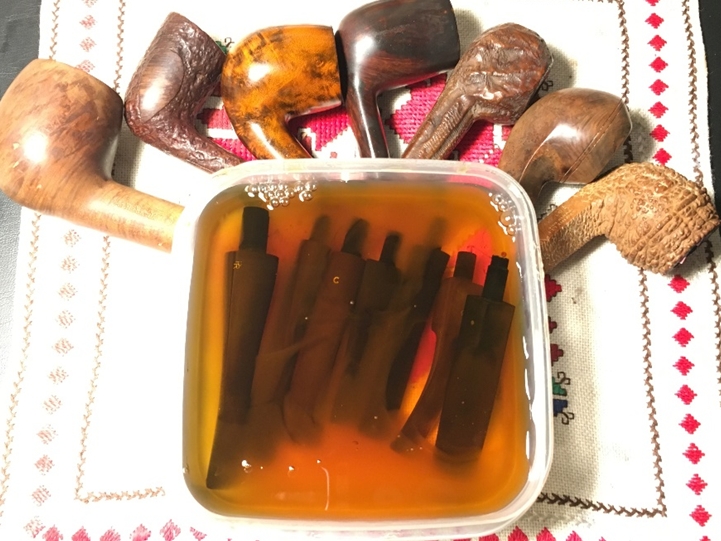
After several hours soaking, I remove the stem and allow the Deoxidizer to drain and then wipe off the raised oxidation with cotton pads wetted with alcohol.  I follow this with a cotton pad wetted with light paraffin oil that helps condition the vulcanite.
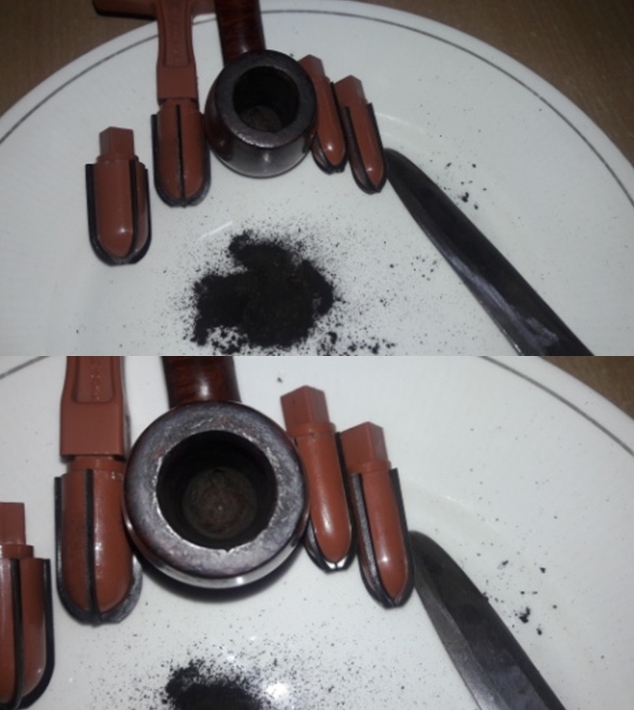
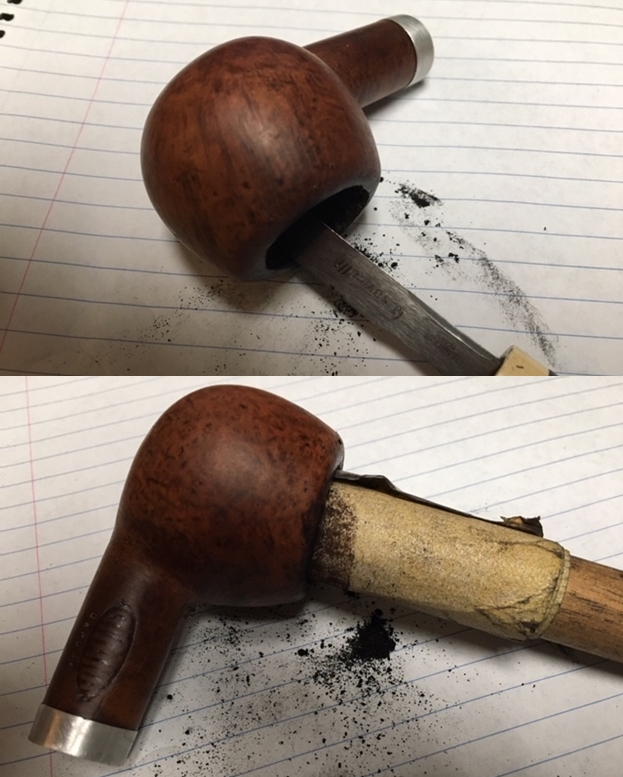
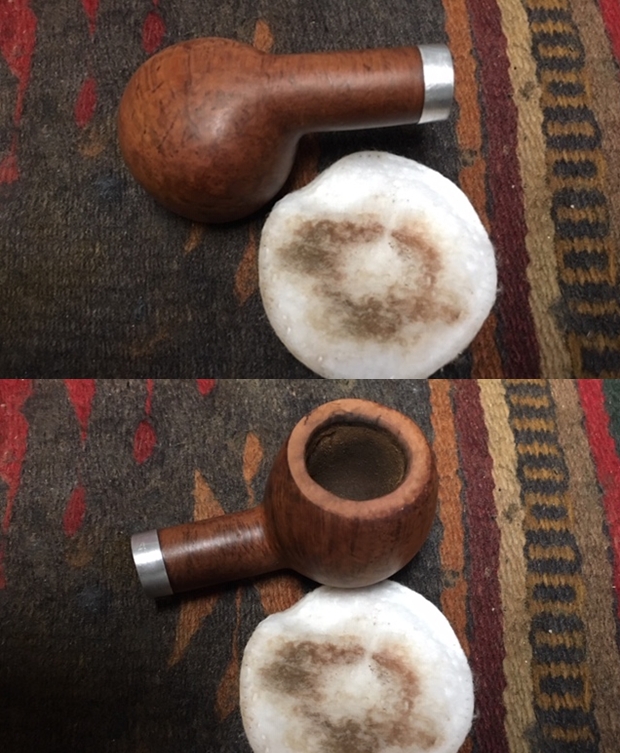
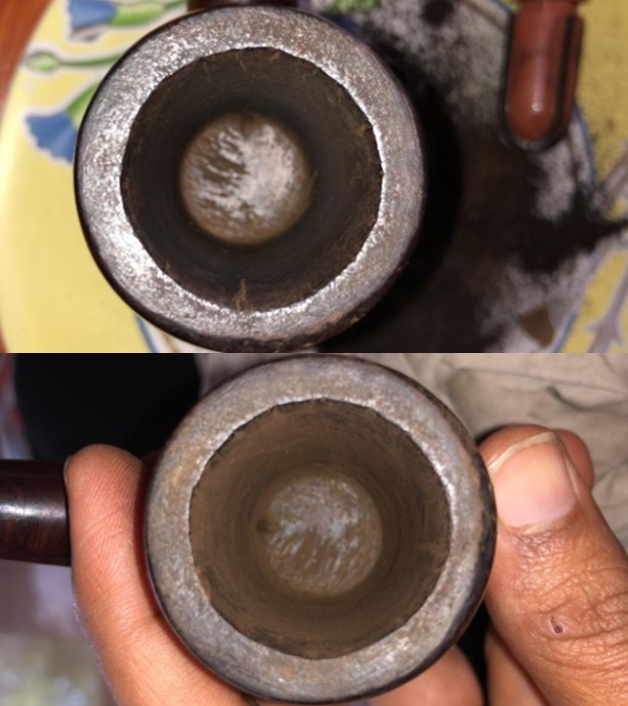
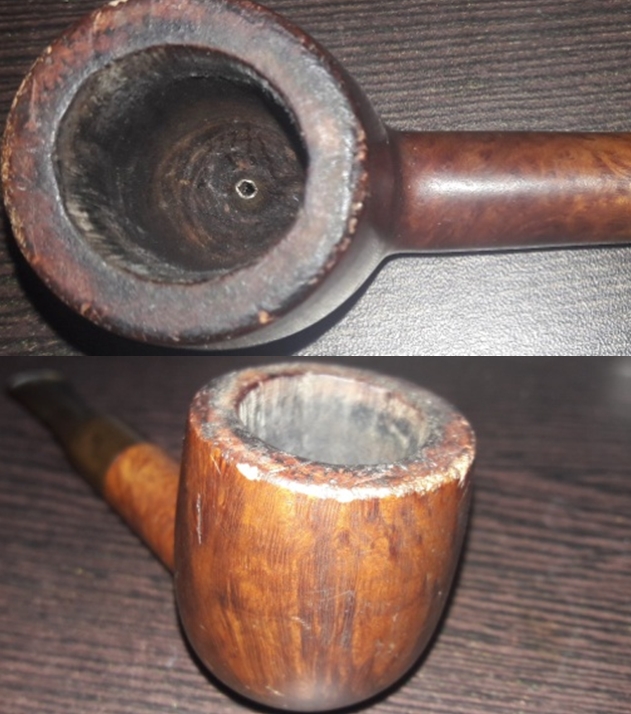
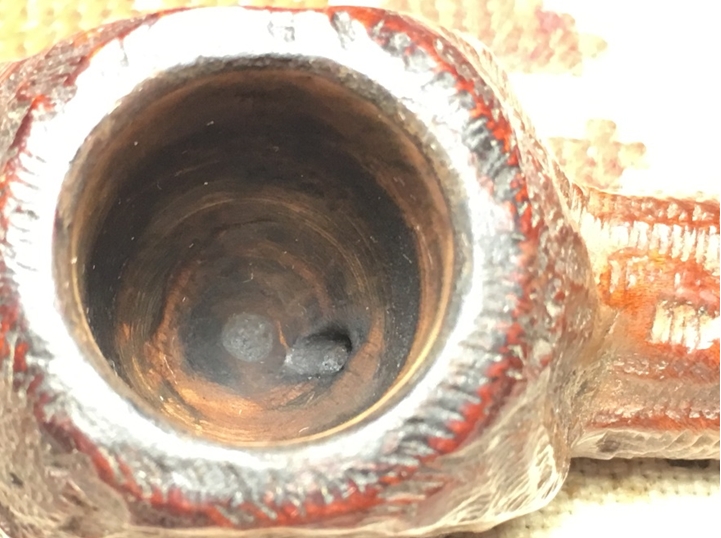
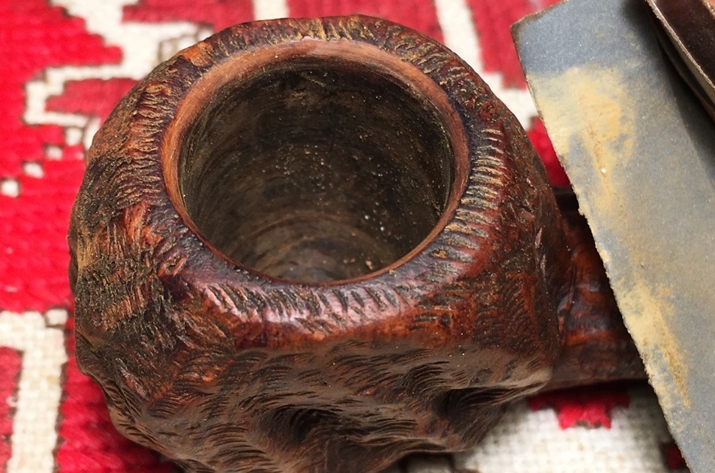
I then turn to the stummel and use the Pipnet Reaming Kit to clean the light cake in the chamber.  The chamber is not deep but wide and I use 3 of the 4 blades heads available.  I then transition to the Savinelli Fitsall Pipe Tool and scrape the chamber walls further. Finally, I sand the chamber by wrapping a Sharpie Pen with 240 grit paper.  To clean the carbon dust, I wipe the chamber with a cotton pad wetted with alcohol.  After inspection, the chamber shows now signs of heat damage.  The pictures show the progress. 
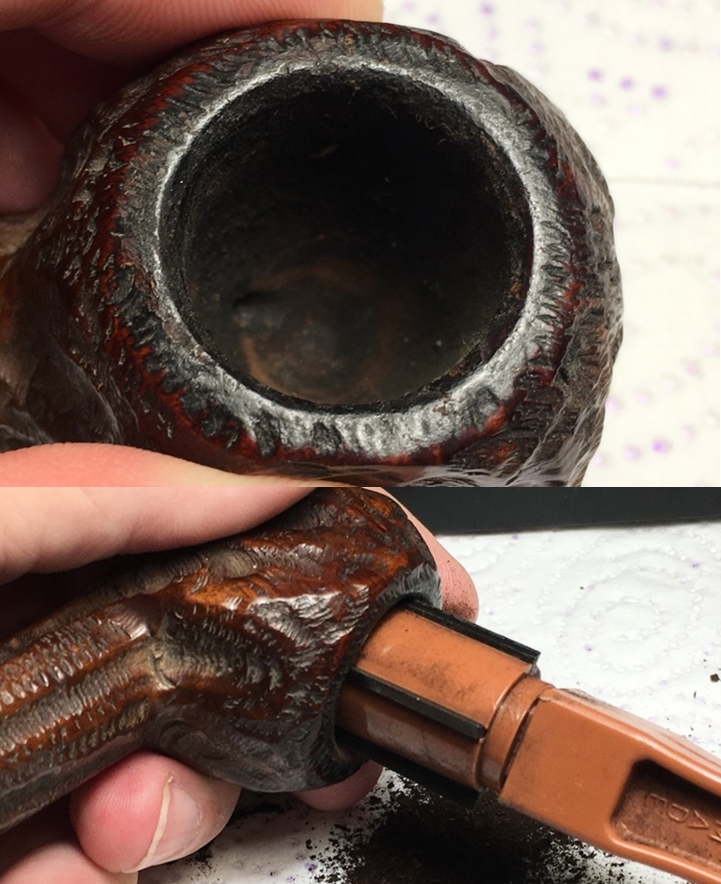
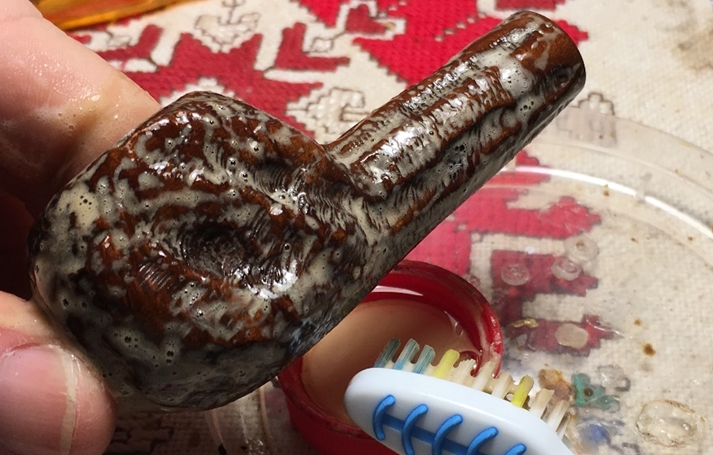
Now turning to the external surface, I use undiluted Murphy’s Oil Soap to scrub the rustified surface.  To get into all the nooks and crevices I also use a bristled tooth brush.  I also use the brass wire brush to work on the rim scorching.  The pictures show the progress. 
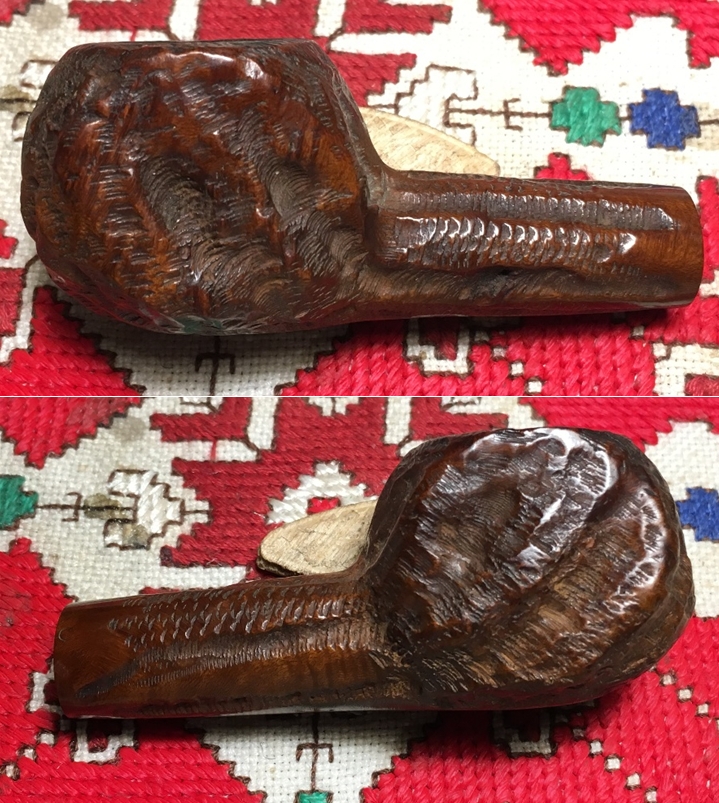
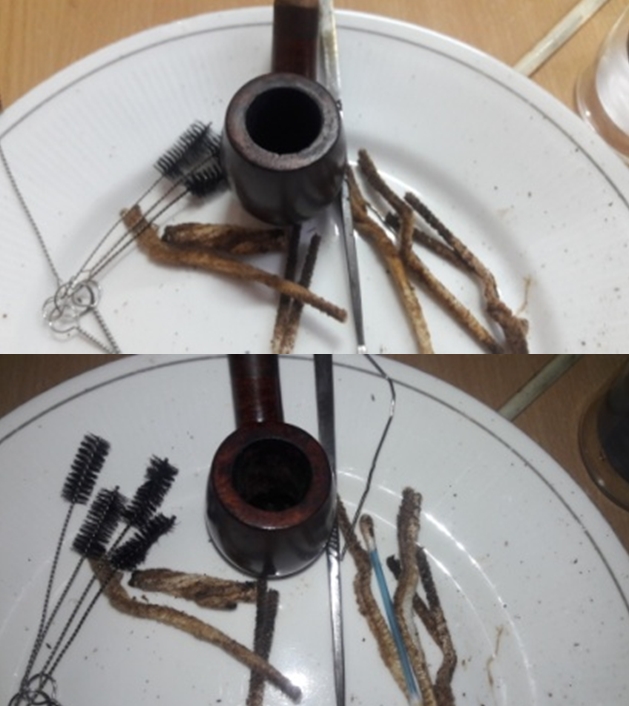
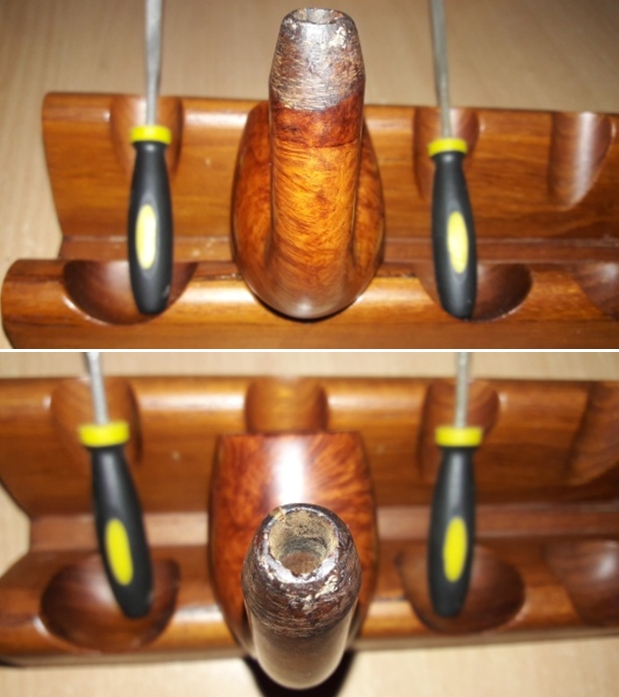
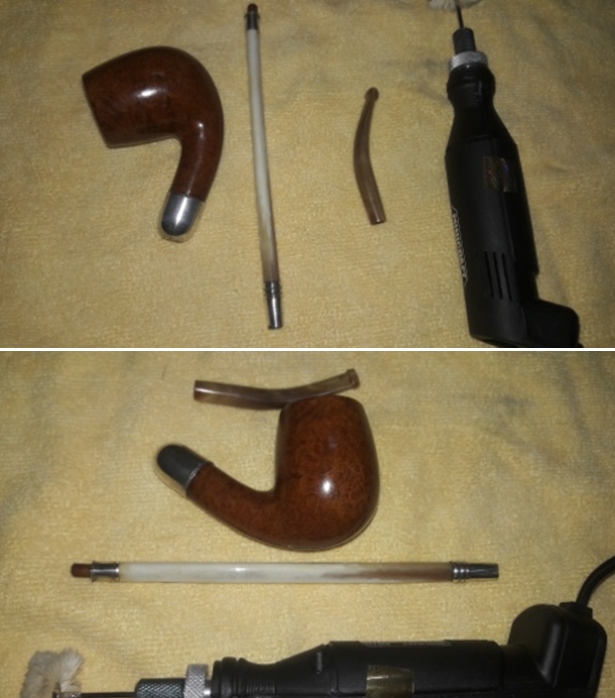
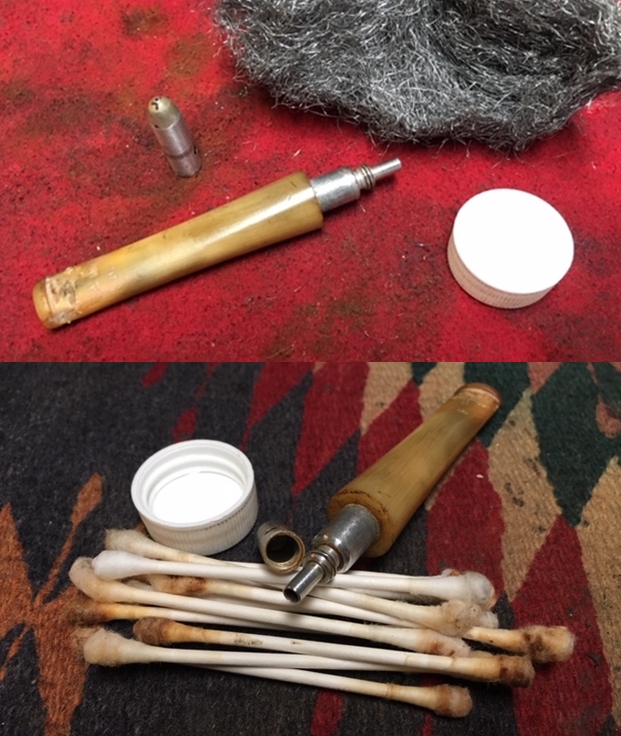
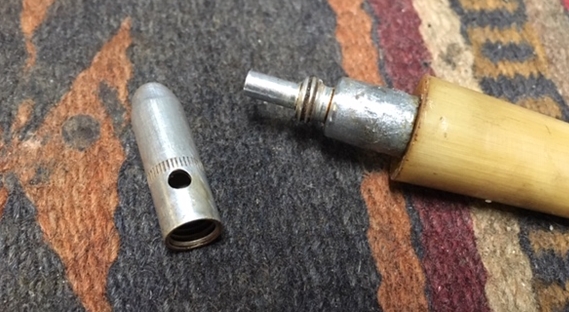
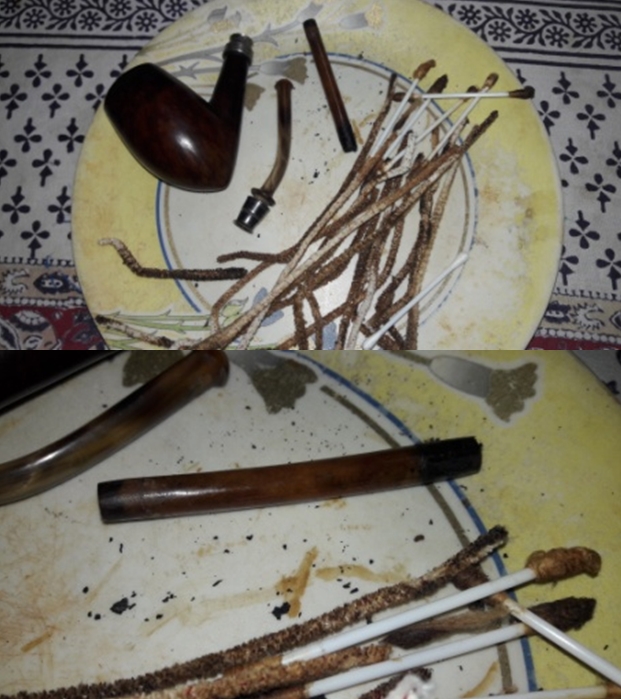
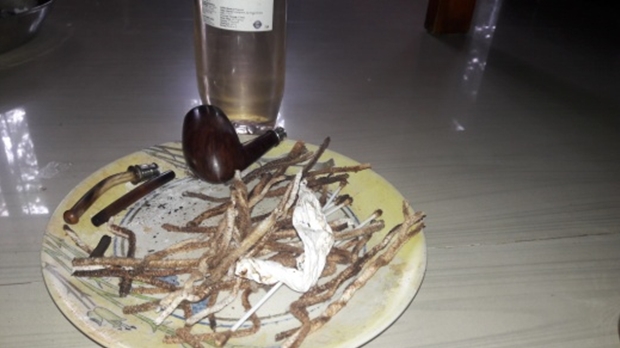
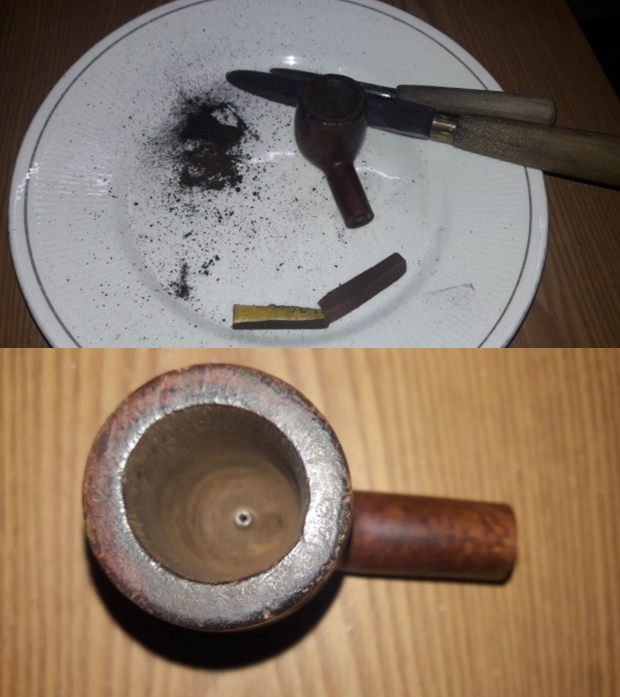
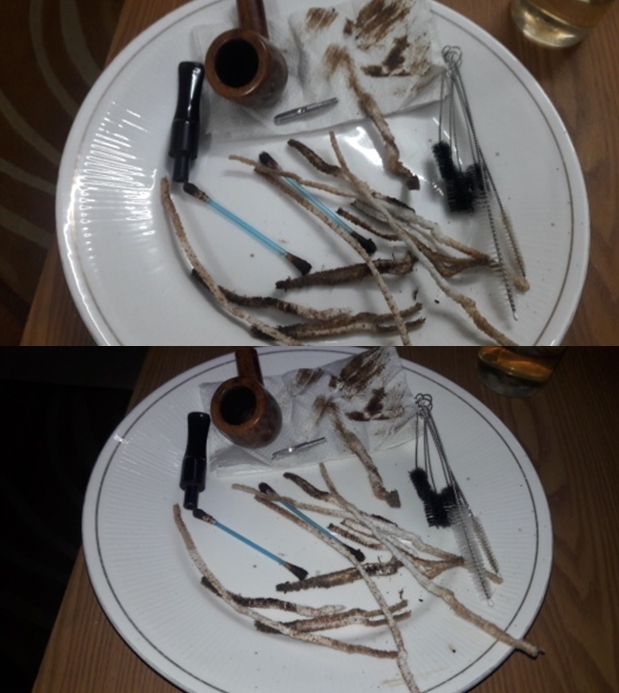
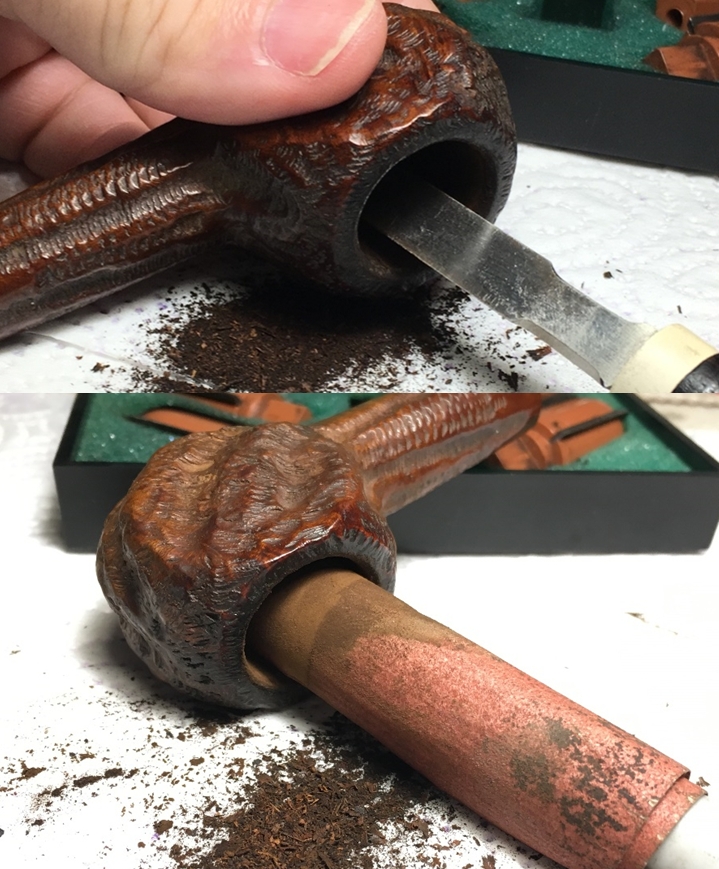
With the externals clean, I turn to the internals of the stummel using pipe cleaners and cotton buds dipped in isopropyl 95%.  Long shank brushes also prove to be helpful.  I scrape the mortise wall with a dental spatula to remove old oil and tar buildup.  Using a drill bit about the same size as the airway, I hand turn the bit and this also removes more buildup on the airway wall.  The pictures show the tools of cleaning. 
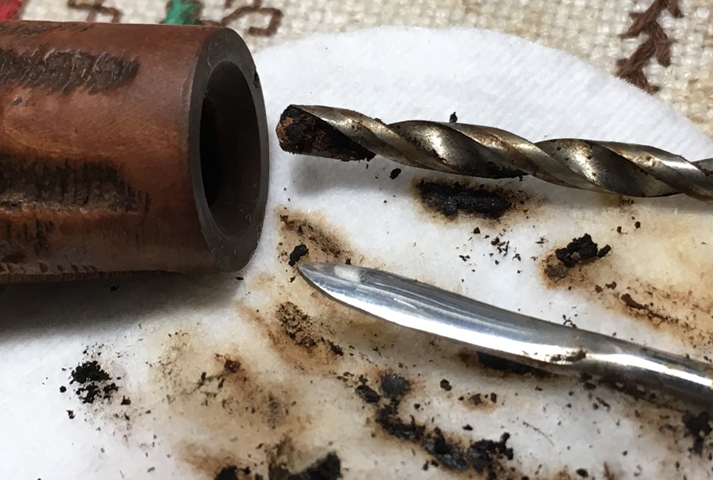
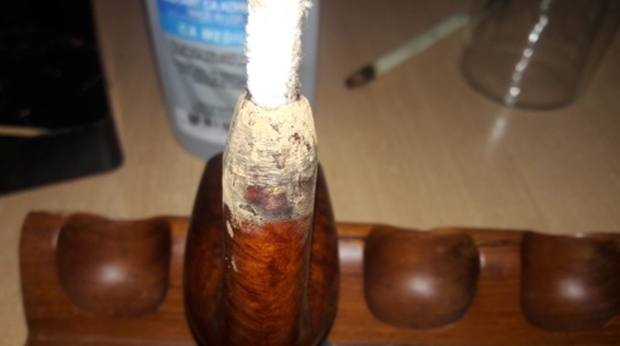
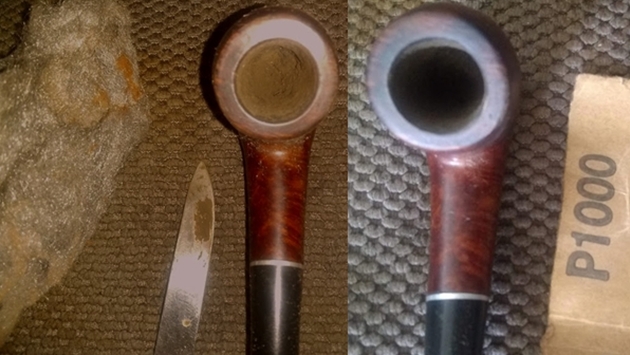
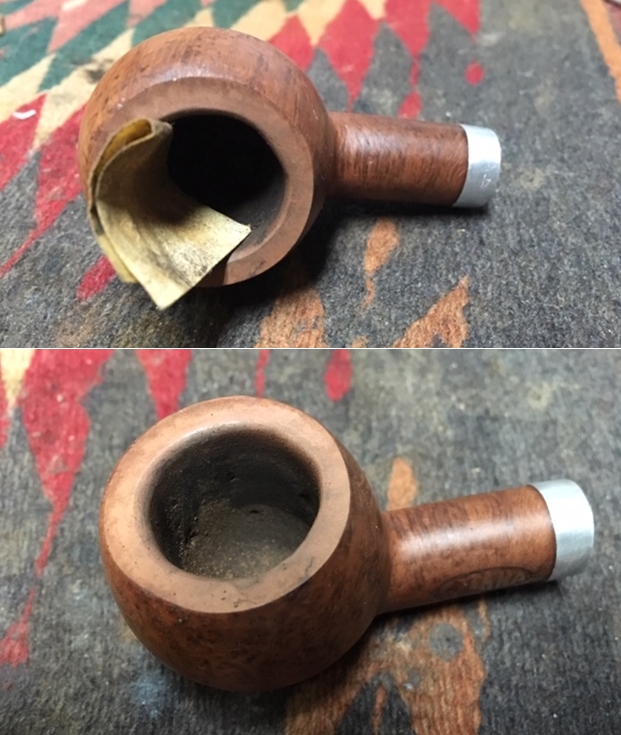
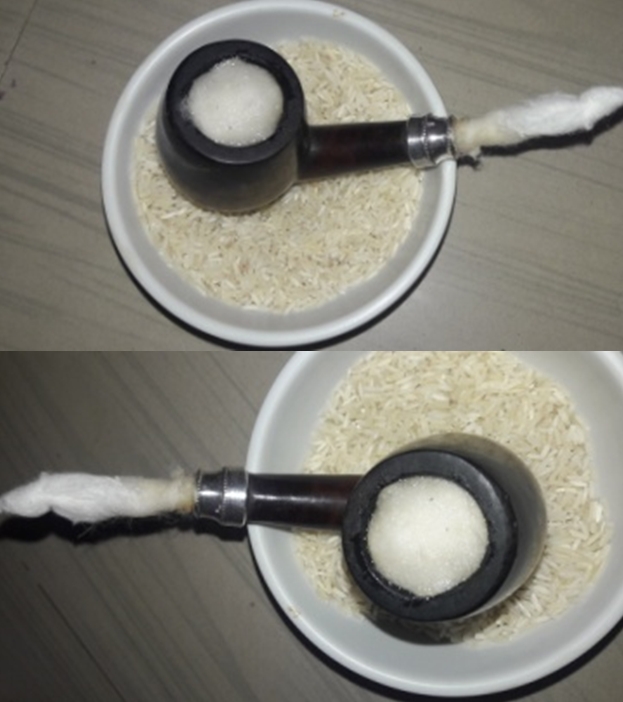
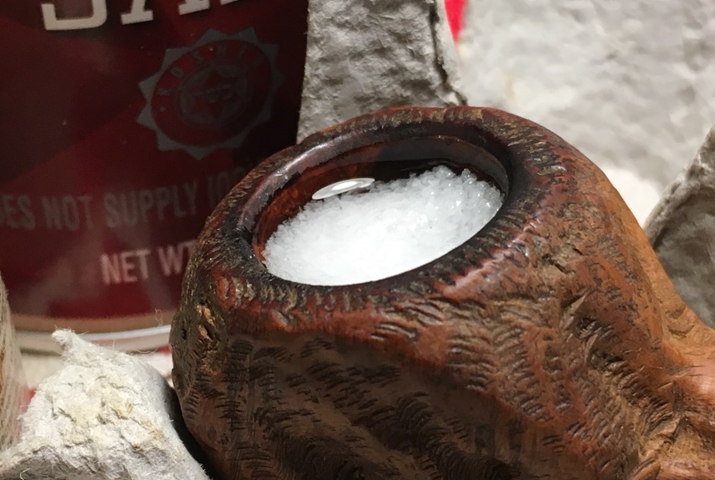
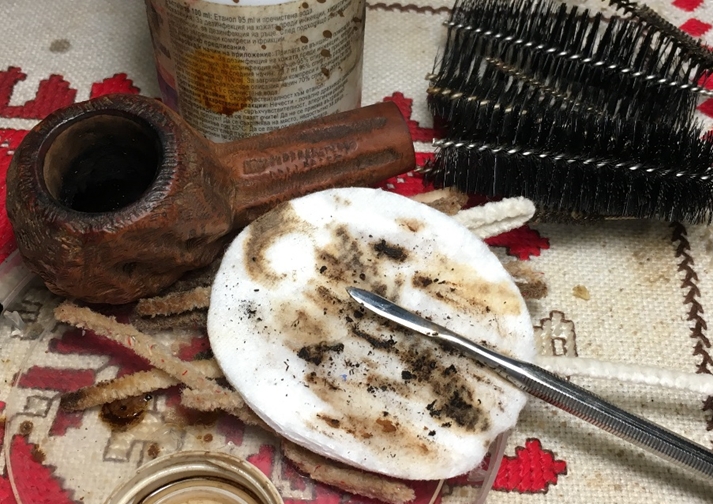
With my day ending, I continue cleaning the Custom-Bilt by giving it a kosher salt and alcohol soak through the night to work on the tars and oils absorbed into the briar.  I first stretch and twist a cotton ball to act as a ‘wick’ inserted down the mortise and airway.  This ‘wick’ draws the tars and oils from the mortise.  I then fill the bowl with kosher salt, which doesn’t leave an aftertaste, and I give the bowl a shake to disperse the salt.  After placing the stummel in an egg cart to stabilize, using a large eyedropper I fill the bowl with isopropyl 95% until it surfaces over the salt.  After few minutes I top off the alcohol which has absorbed into the pipe.  I put the pipe aside and turn off the lights. 
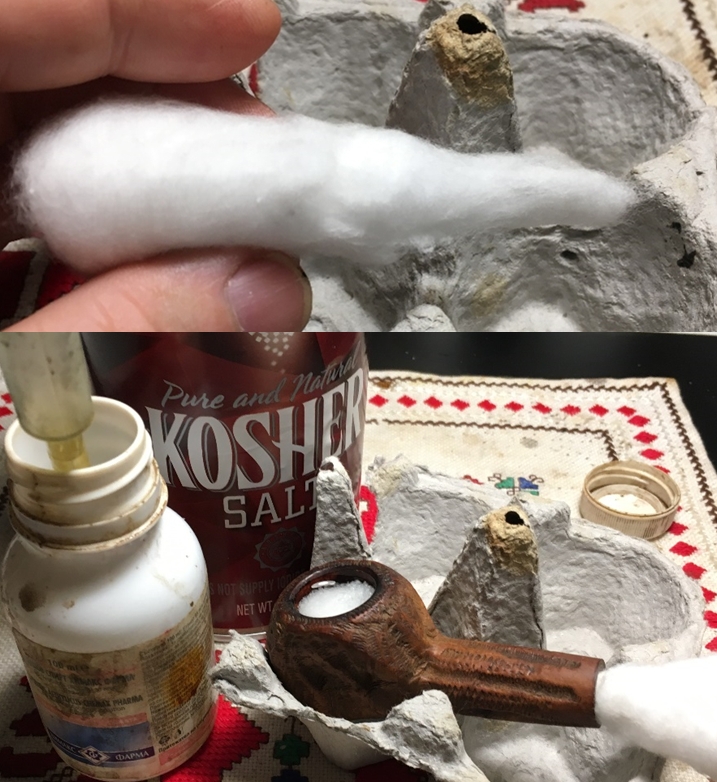
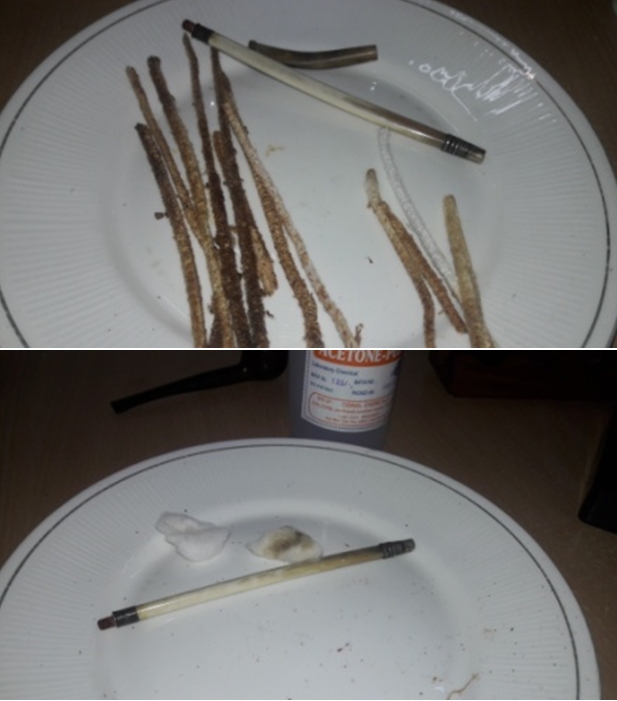
Rising with the sun, I go to the worktable and the salt and alcohol soak has done the work as hoped.  Both the salt and the wick are discolored with the extraction of the tars and oils.  I dump the expended salt in the waste can and wipe the chamber with paper towel to remove the salt.  I also run a shank brush through the mortise and airway followed by blowing through to clear salt crystals.  To make sure the cleaning is thorough, I dip a cotton bud and pipe cleaner in isopropyl 95% and run them through the mortise again and I’m satisfied all is clean.
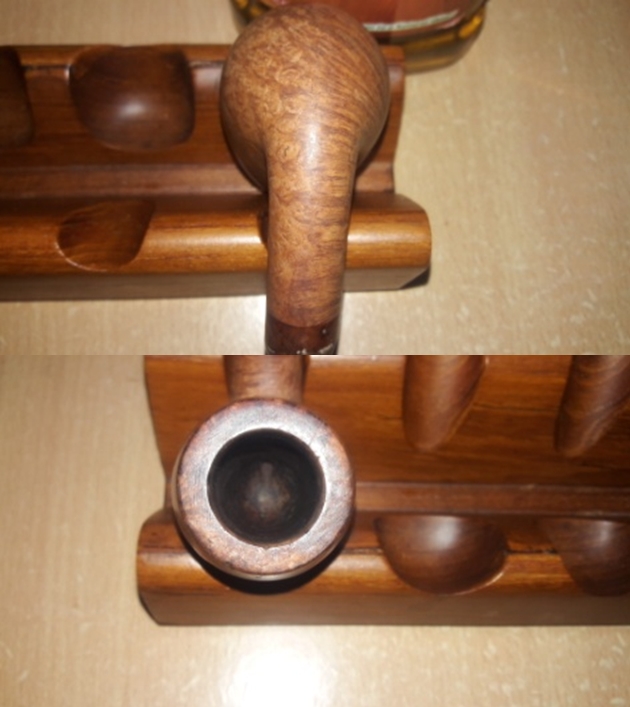
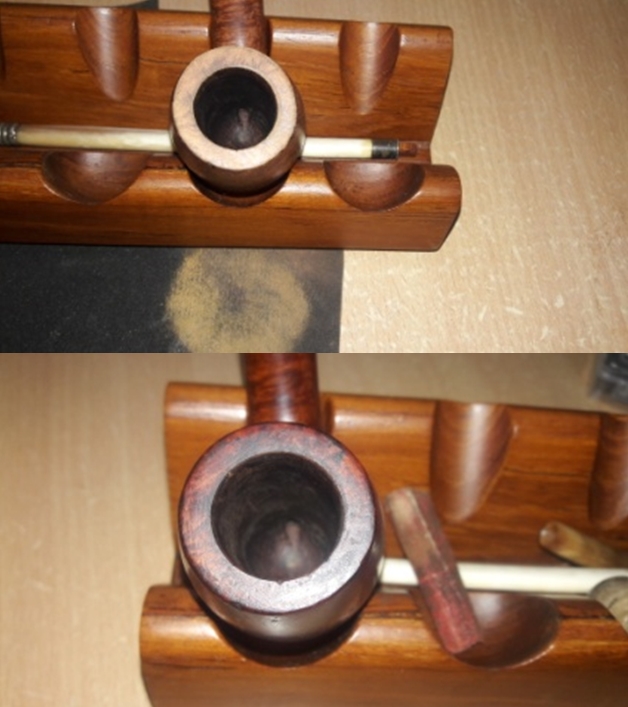
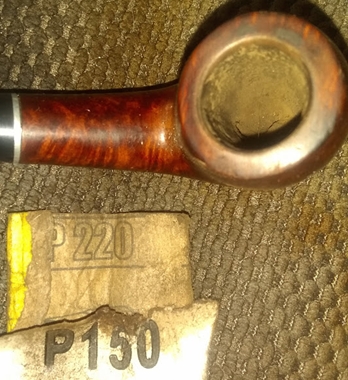
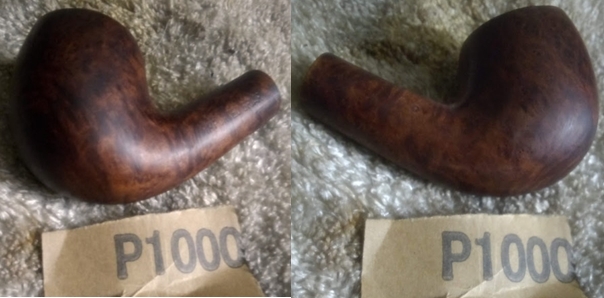
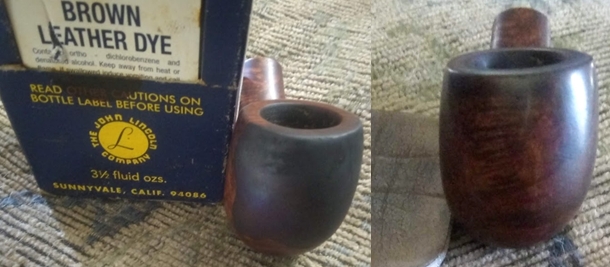
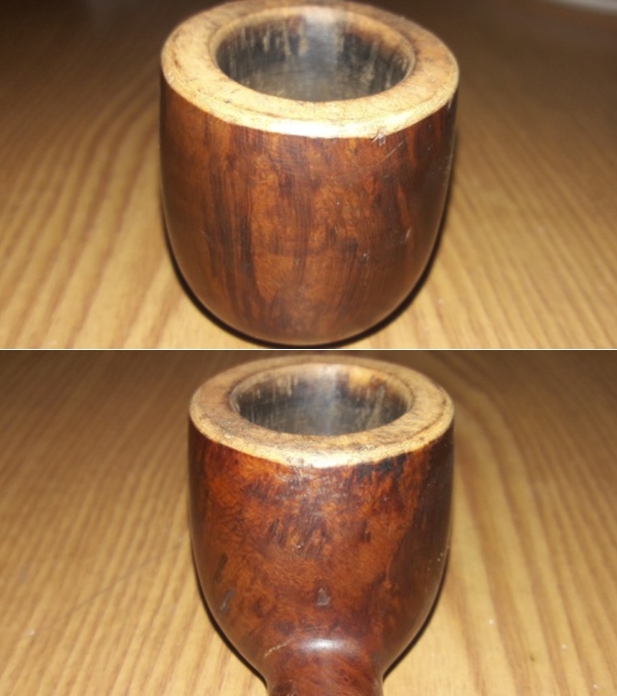
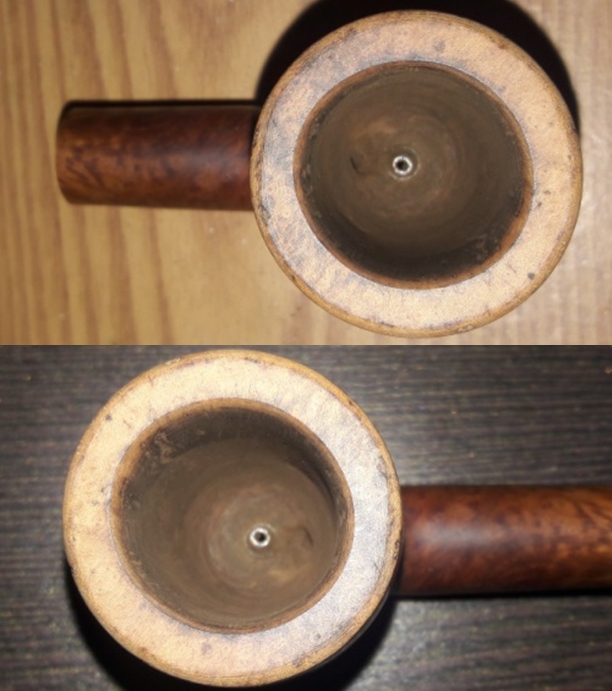
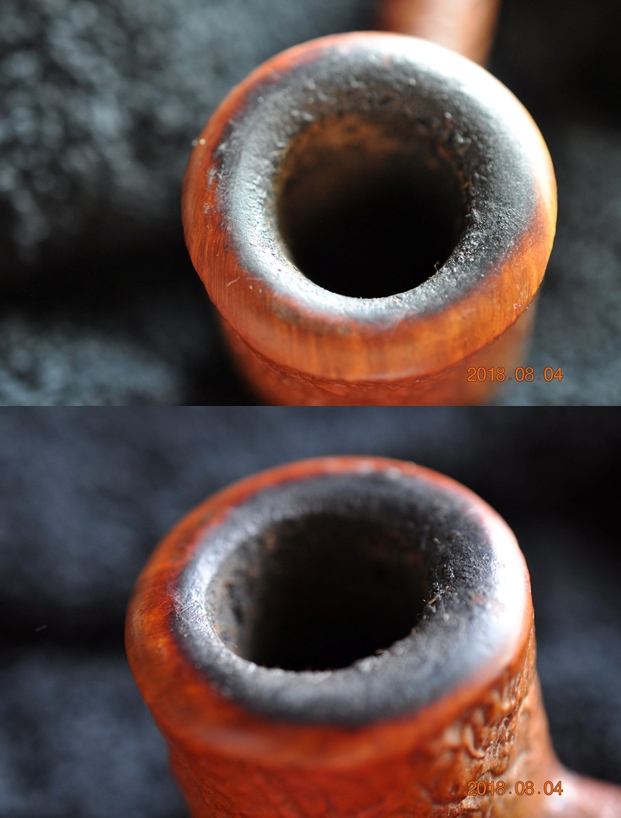
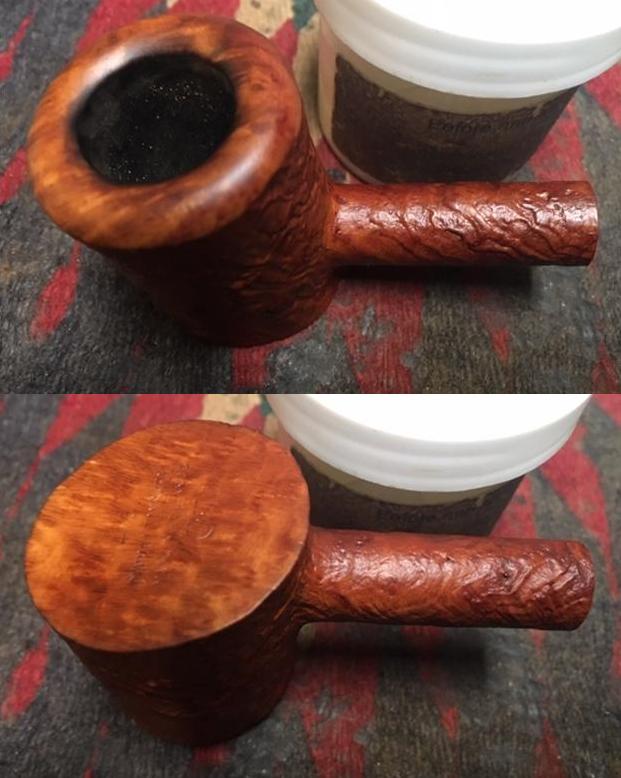
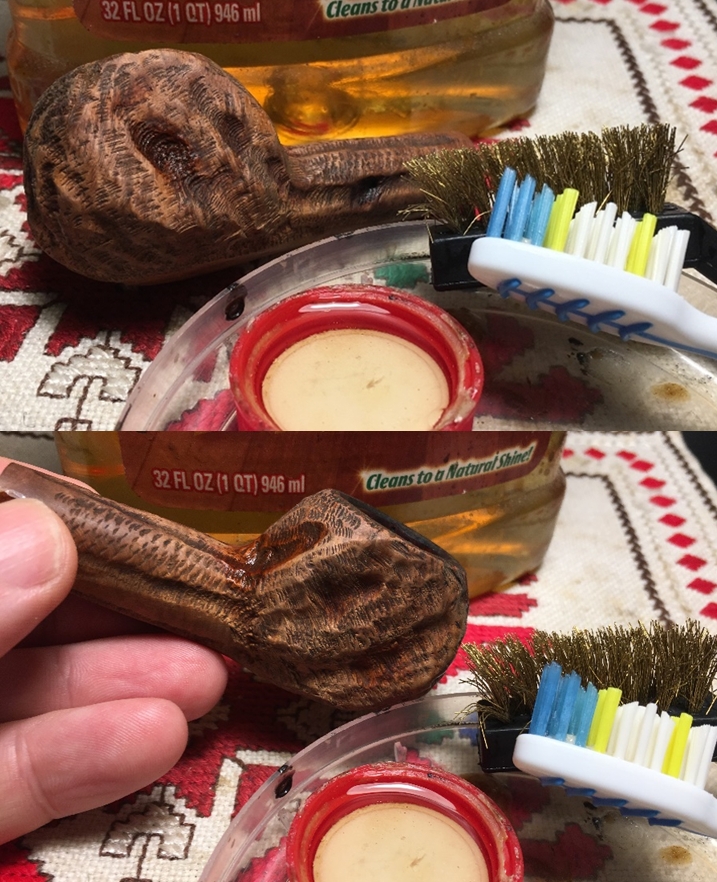
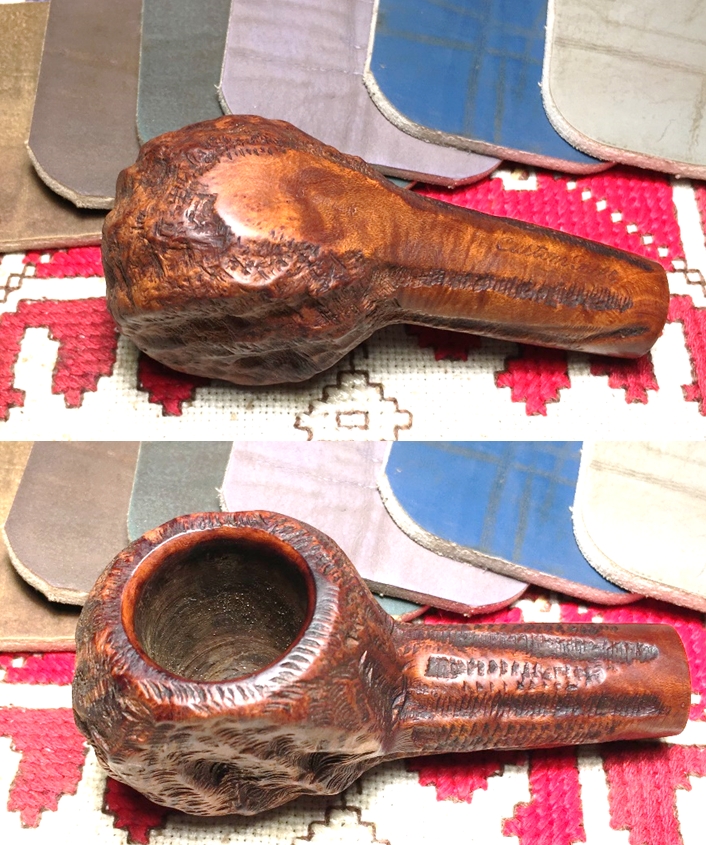
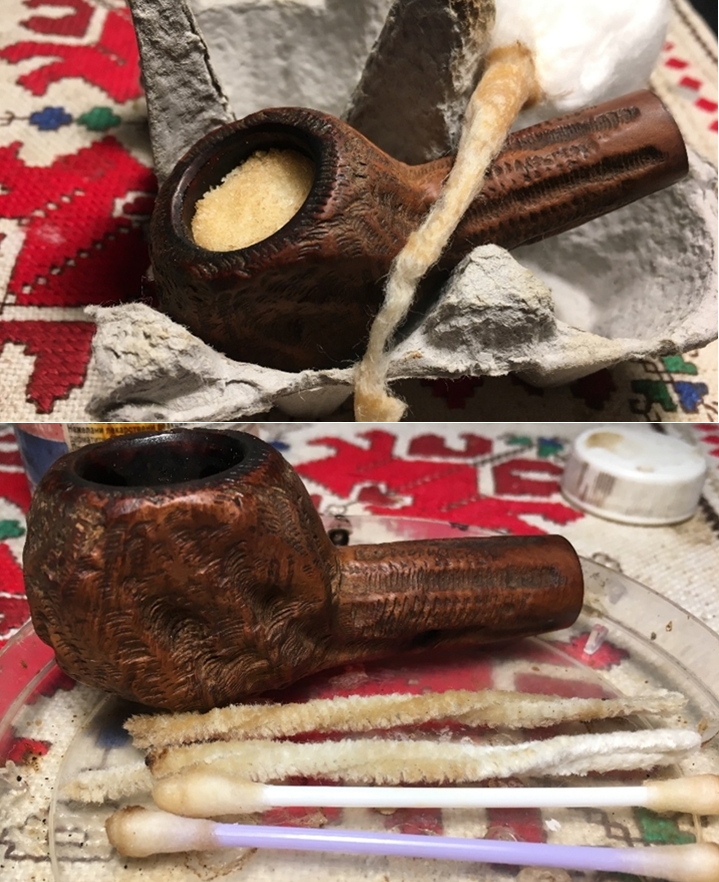
Looking again at the stummel, I’m not satisfied with rim – still darkened and scorched looking.  To protect and maintain the Custom-Bilt rim’s rustication I don’t want to sand.  I decide to return again to the brass wire brush, without any cleaner solvent and leaving the surface dry, I brush the rim rotating the brush around the rim so that my movement is parallel with the rustication cuts.  This dislodges more carbon stuck in the ridges.  I think it did do the trick.  Pictures show the before and after. 
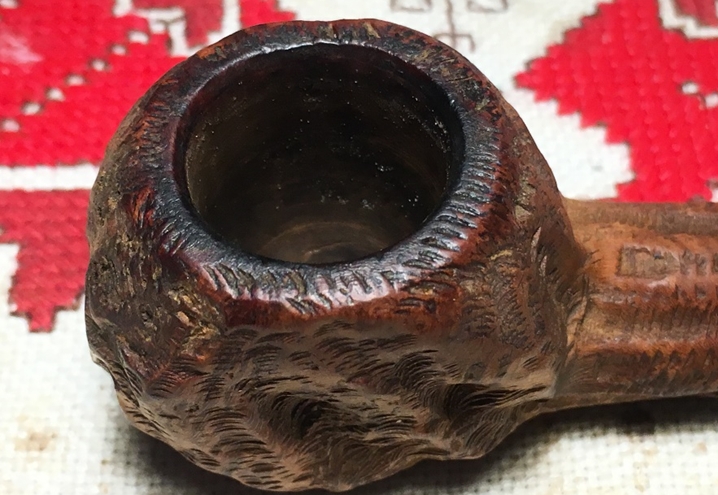
Before putting the stummel aside to work on the stem, I apply a coat of light paraffin oil to the rustified stummel surface to hydrate the wood. The oil is thin enough to seep into the crannies of the classic Custom-Bilt rustication using a cotton pad. After thoroughly applied, I put the stummel aside to absorb and dry.
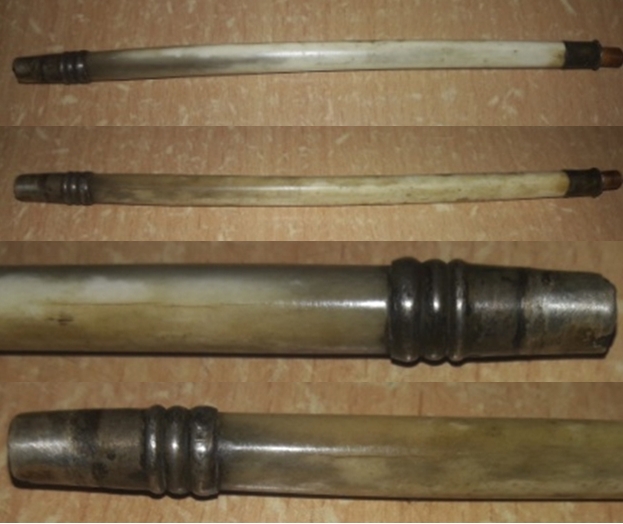
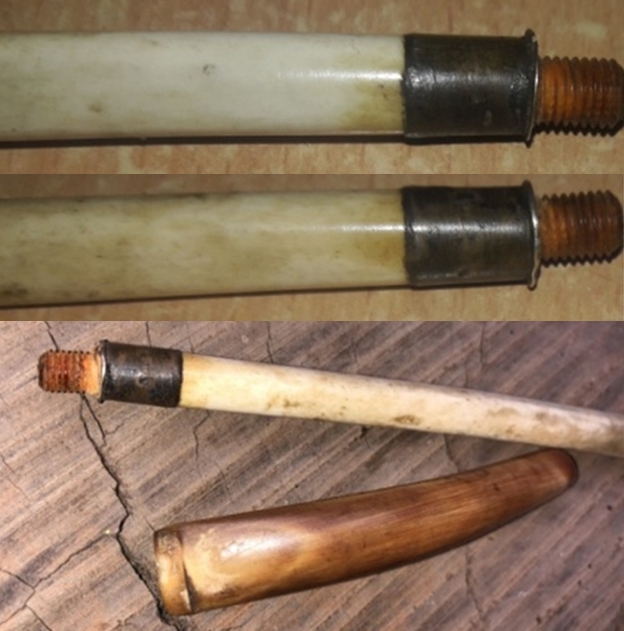
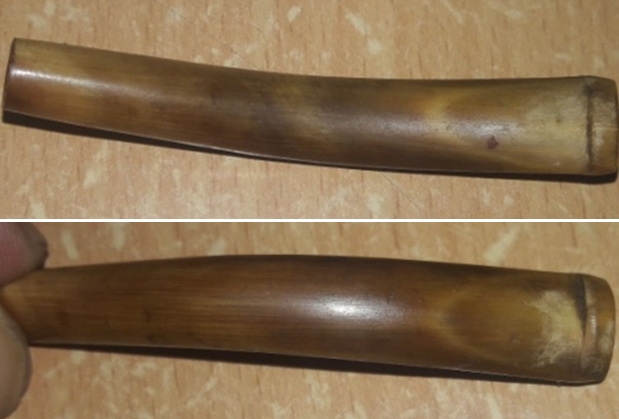
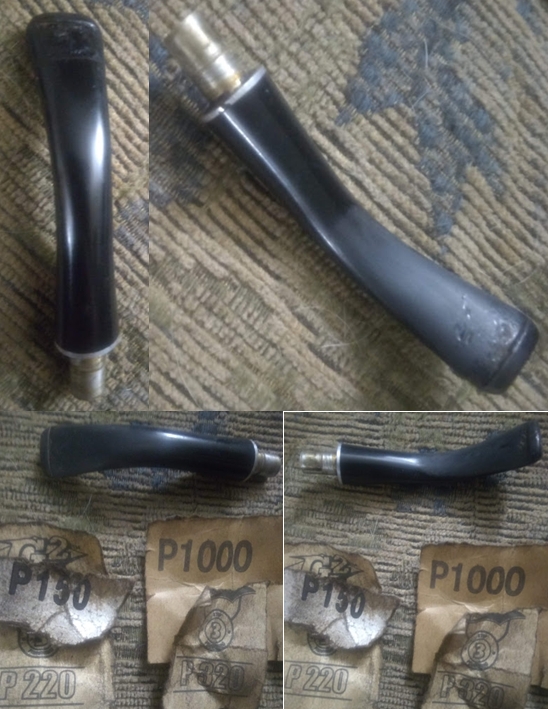
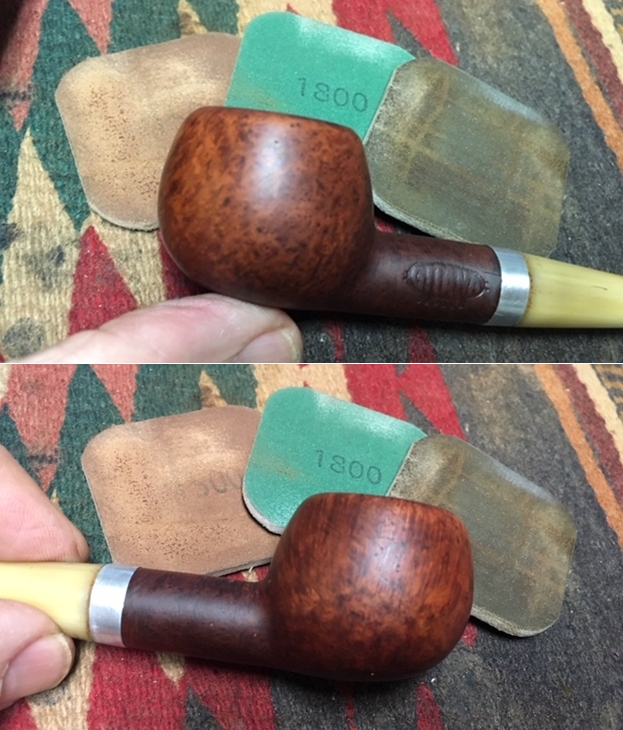
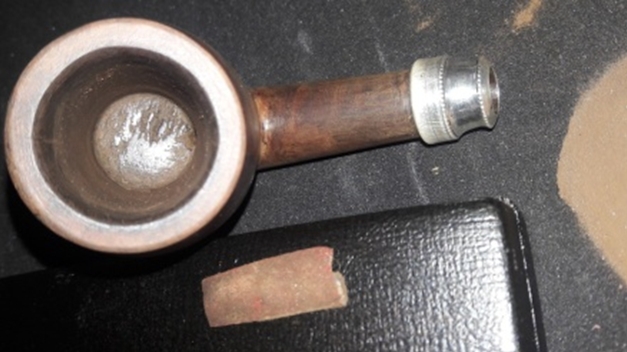
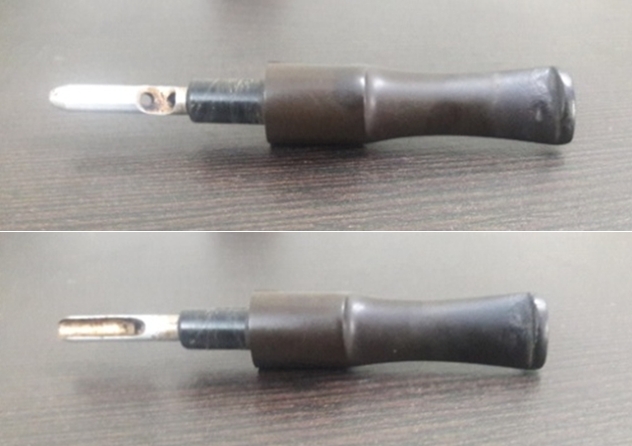
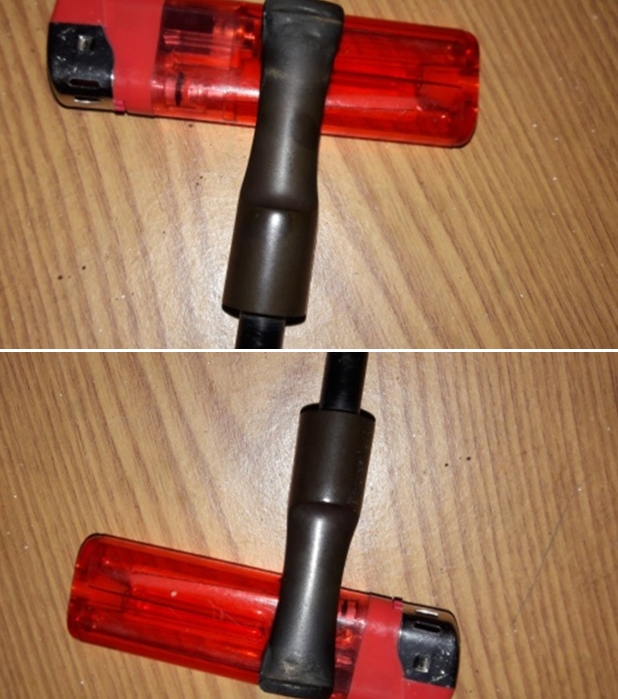
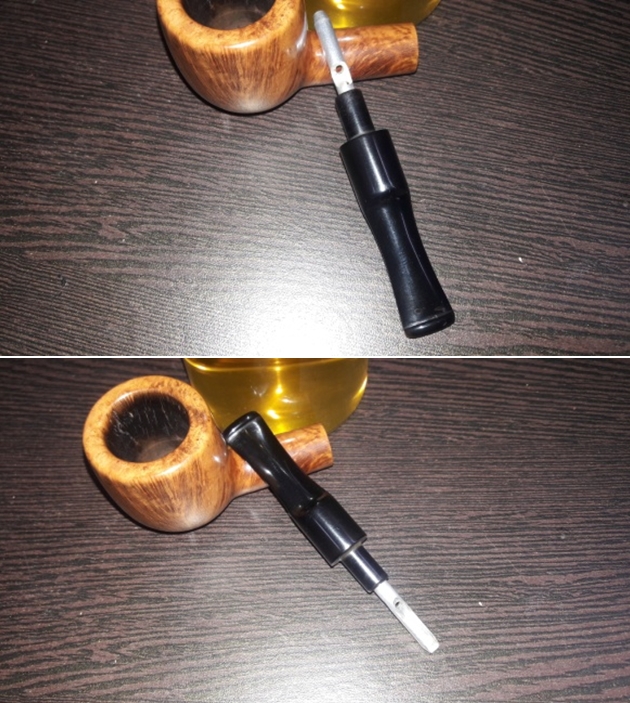
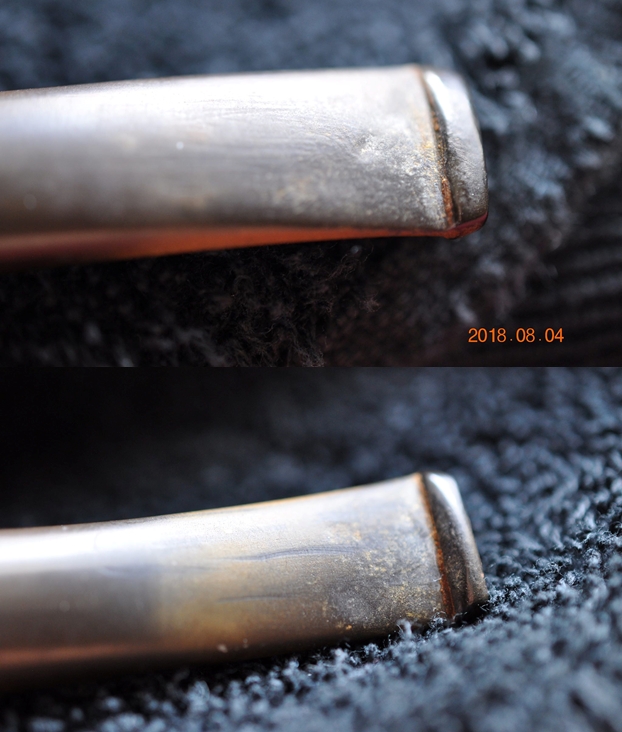
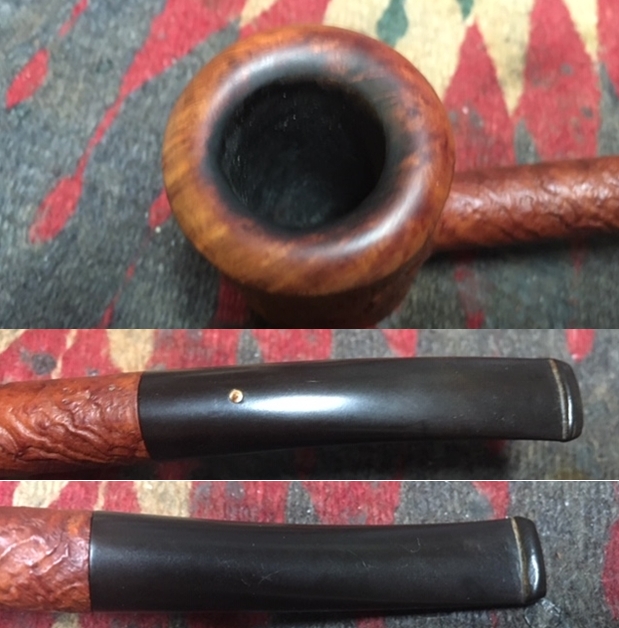
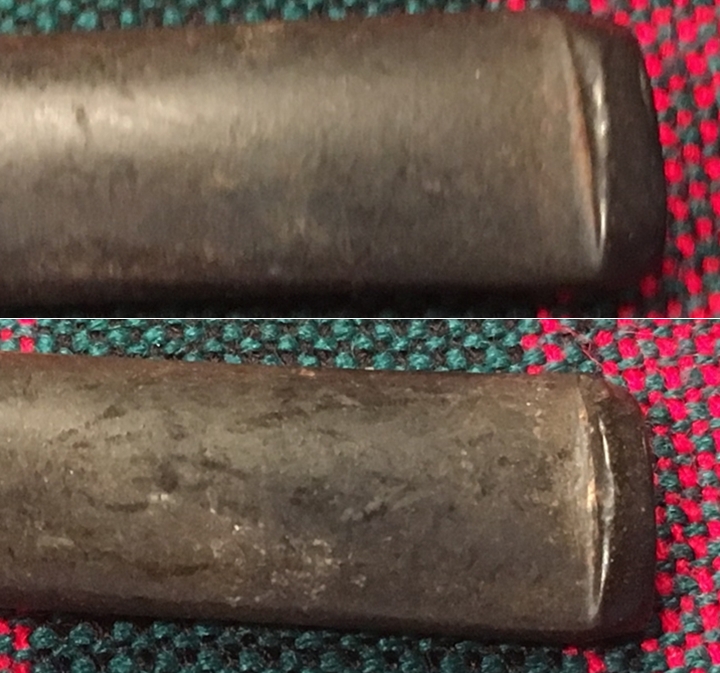
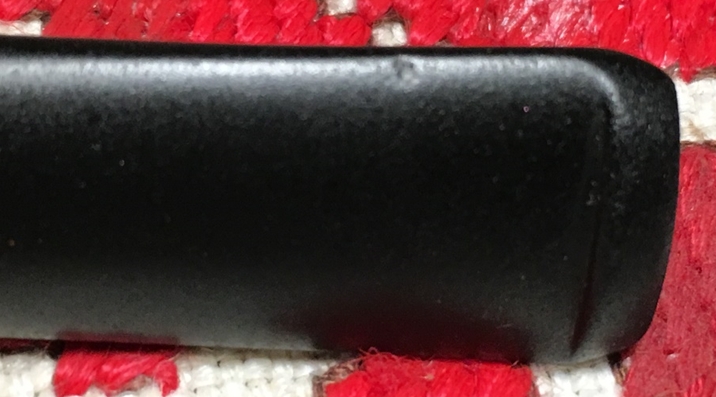
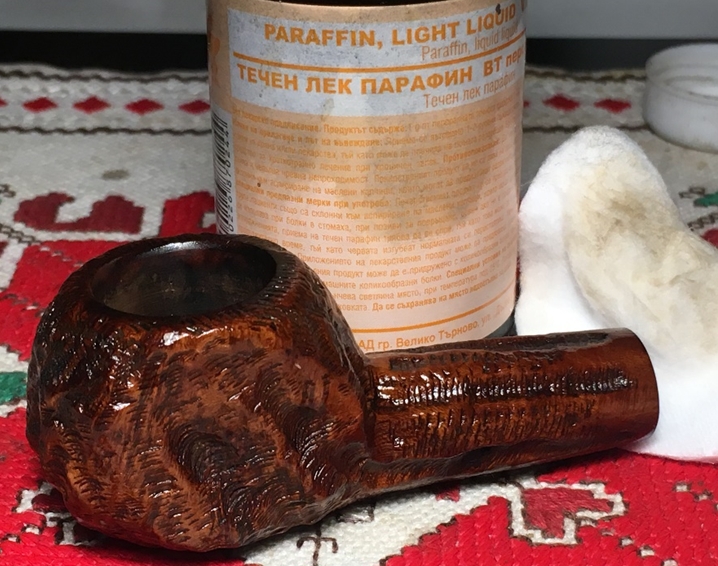
I now look at the stem again.  It has minor issues on the lower bit (second picture) with a bite compression on the button and on the bit.  There is also a small bite compression on the edge (third picture). 
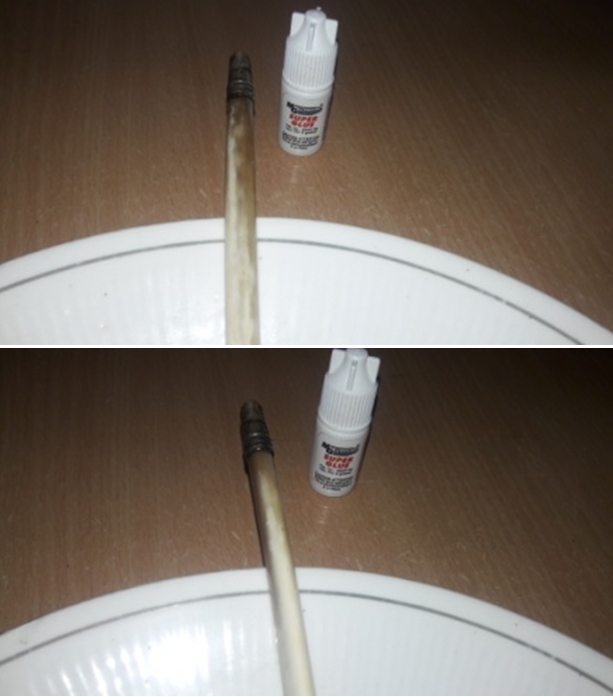
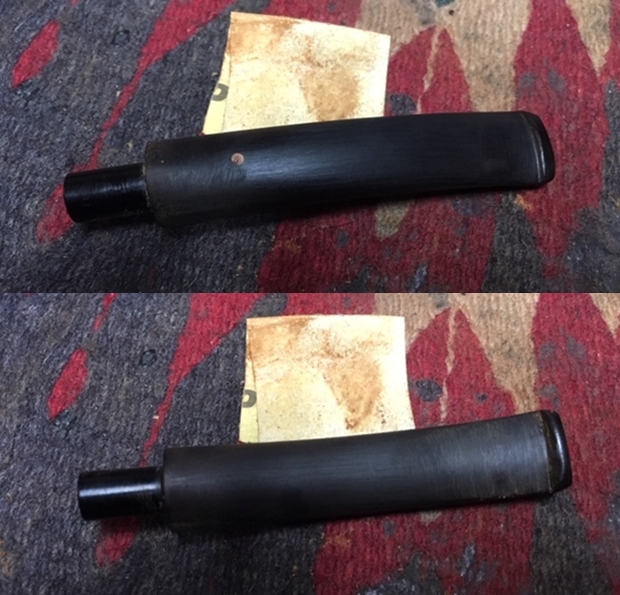
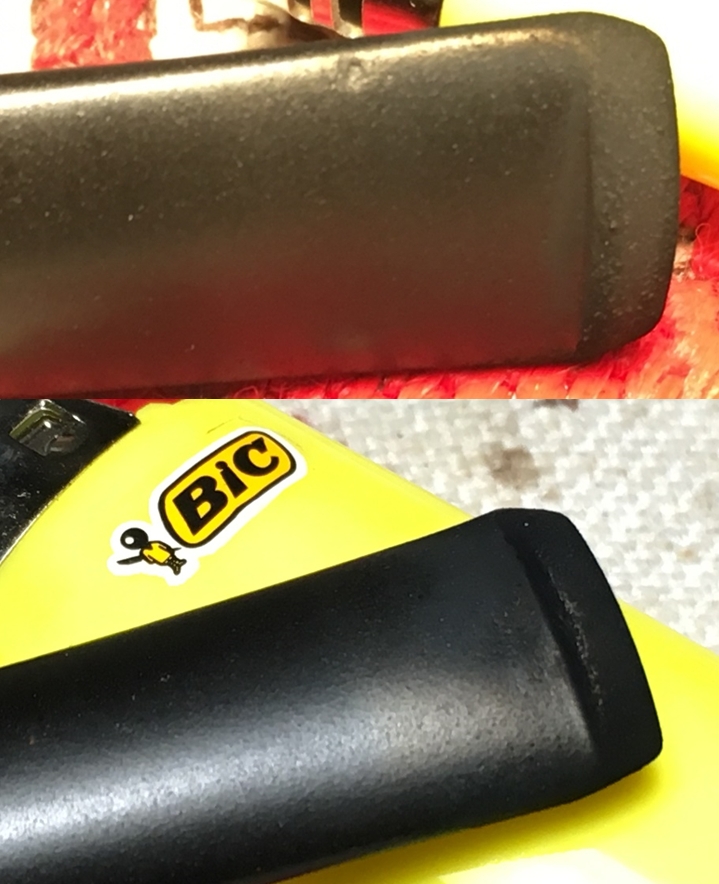
To address these, I first use the heating technique using a Bic lighter and painting the compression areas.  The flame heats the vulcanite, a rubber compound, expanding it and causing the compression to lessen or minimize.  The heating method helps in this case leaving the compressions to be easily sanded out. 
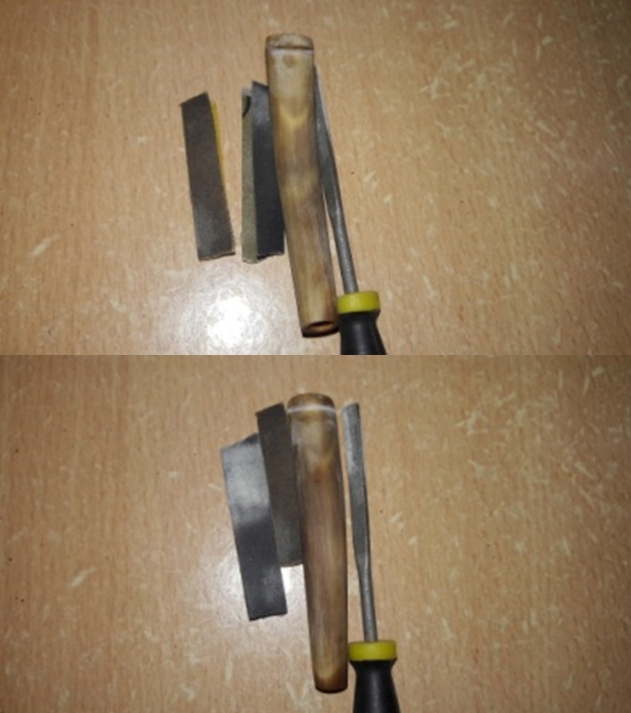
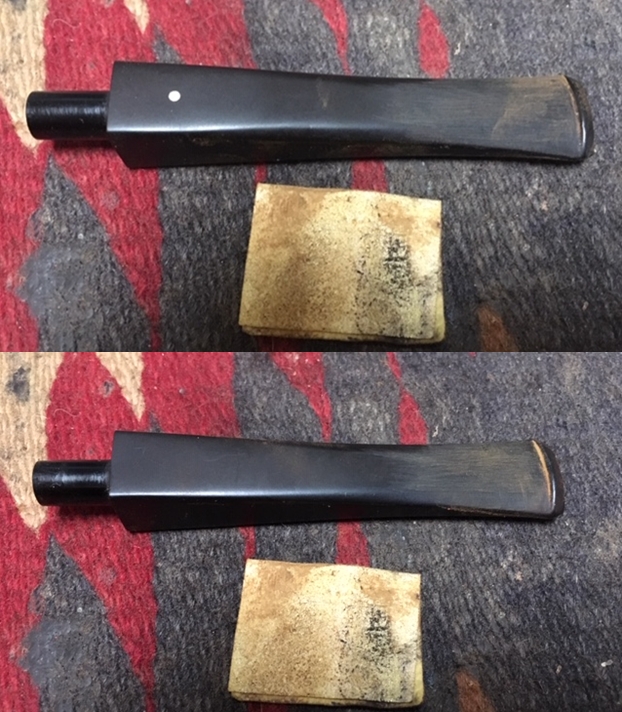
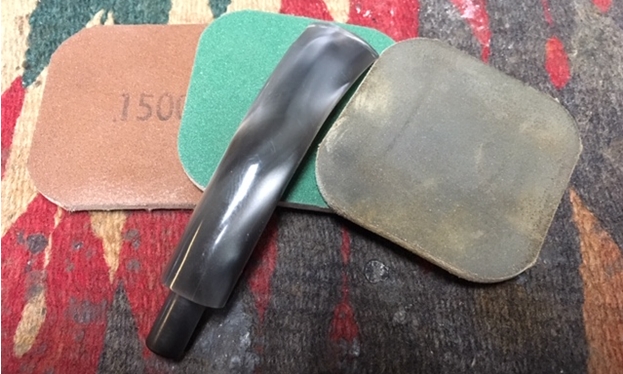
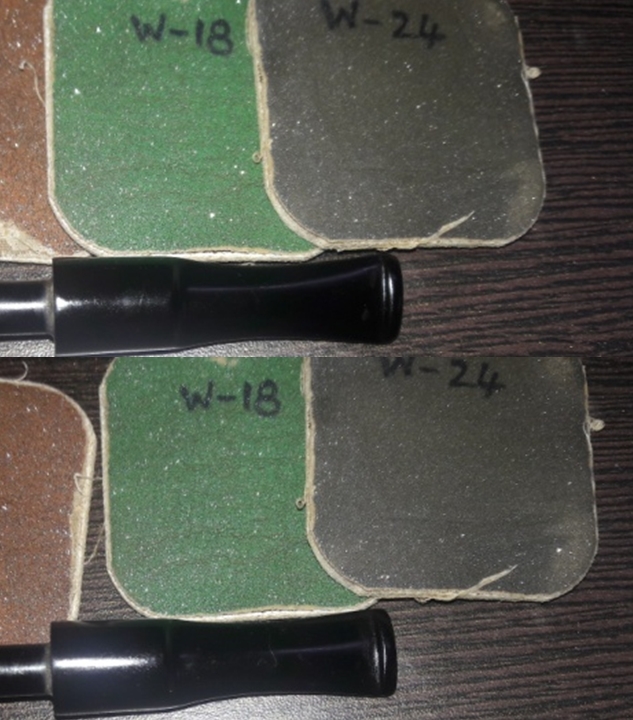
Using a flat needle file, I file the button area refining the button upper and lower lips.  I follow by erasing the file scratches by using 240 grade paper on upper and lower bit.
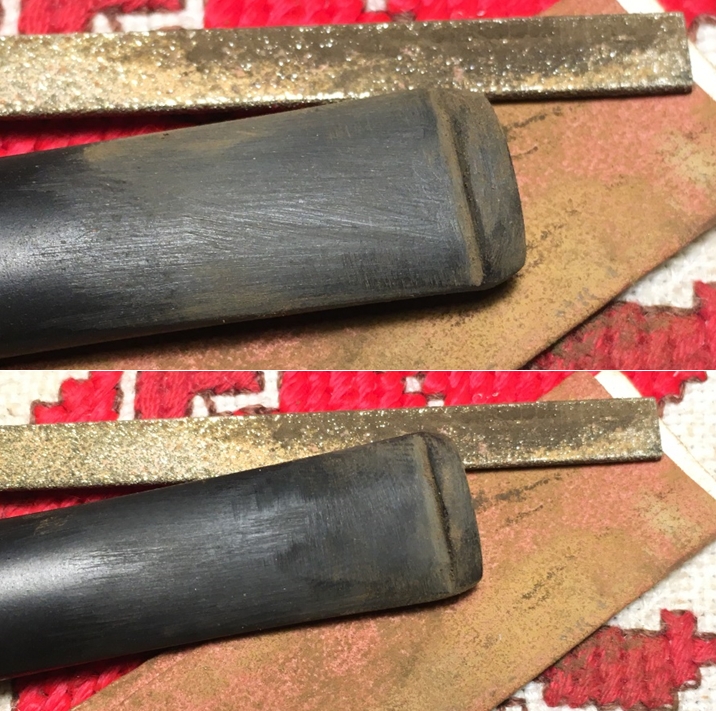
Following the 240, I erase the 240 scratches by wet sanding the entire stem with 600 grade paper followed by buffing the stem with 0000 steel wool.
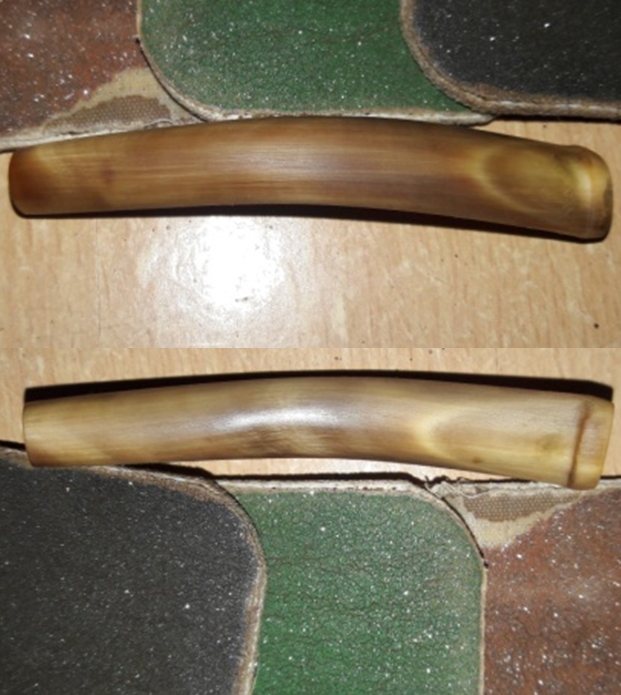
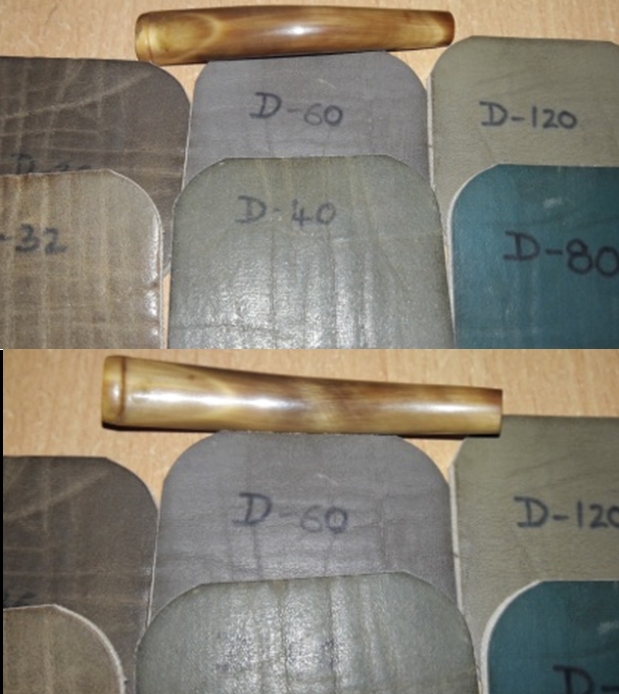
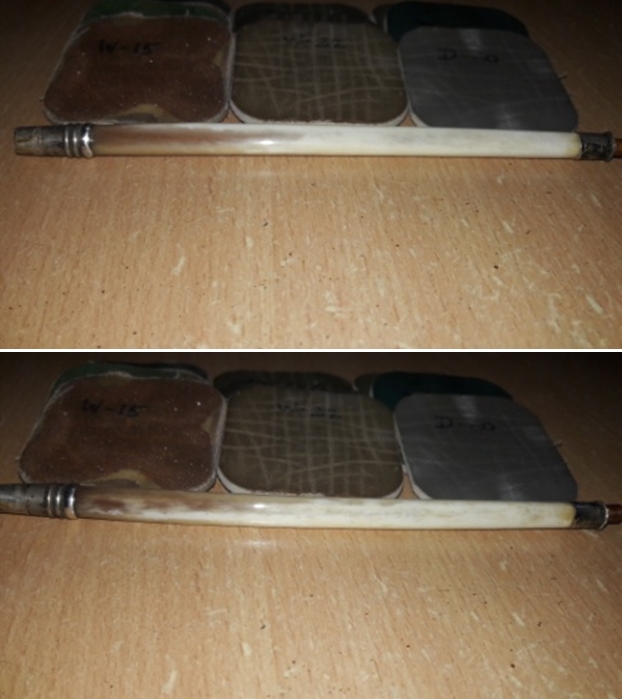
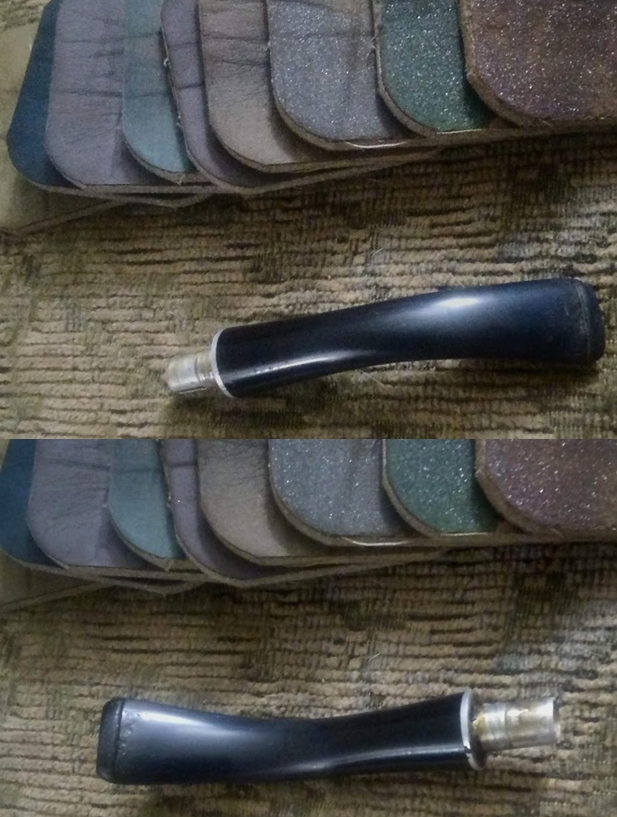
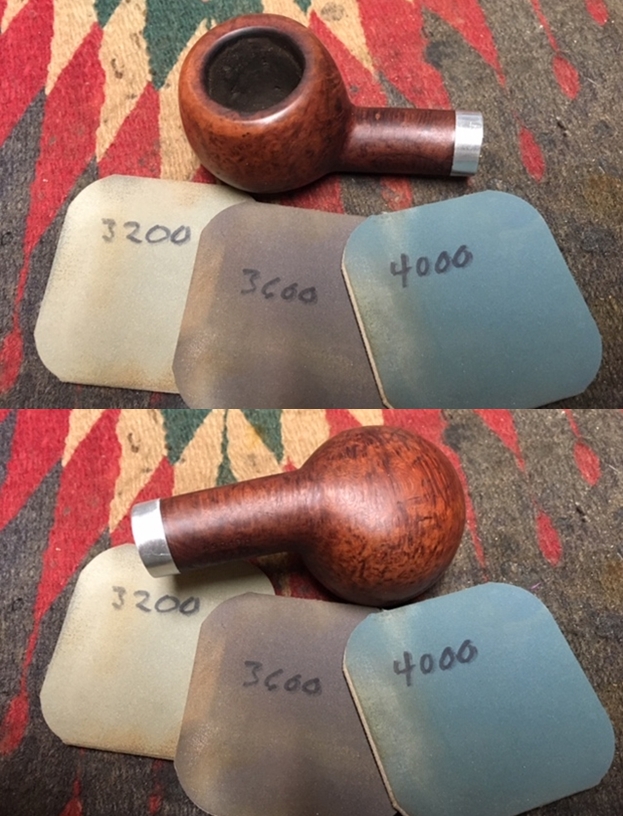
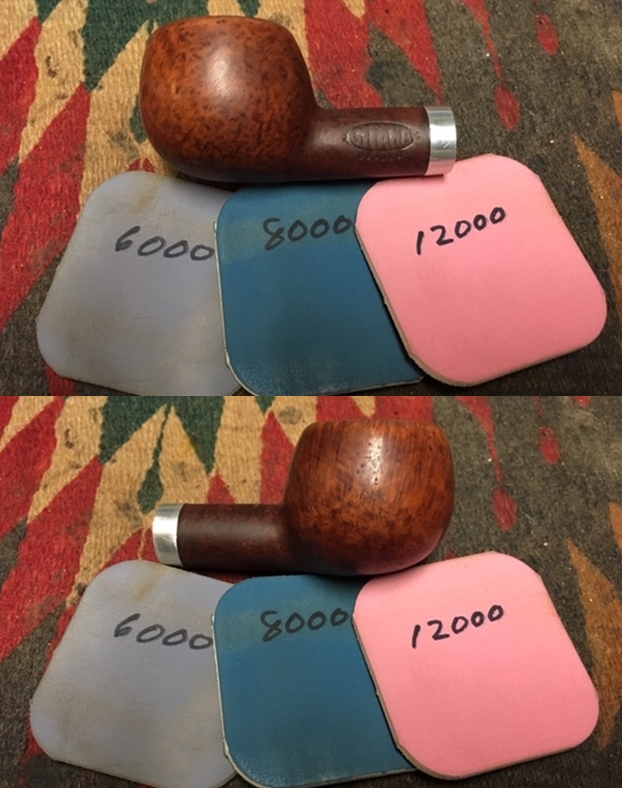
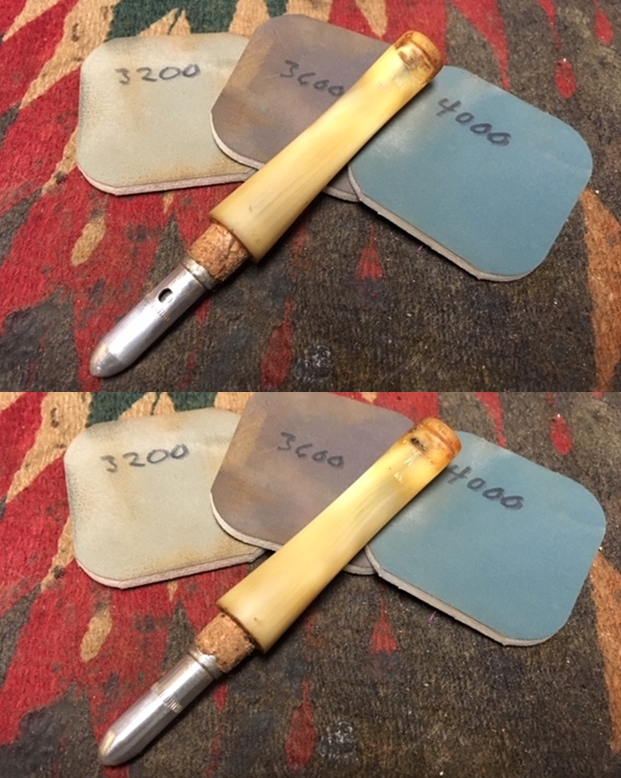
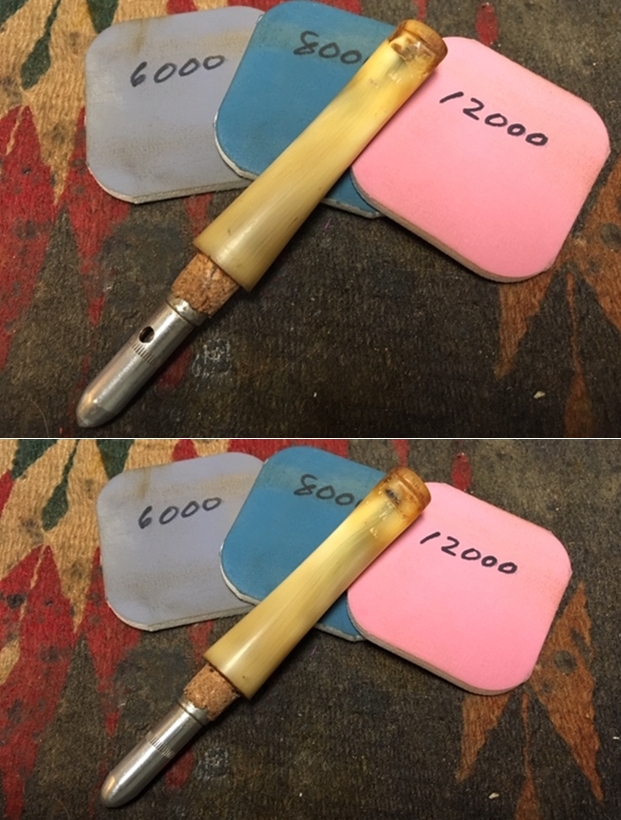
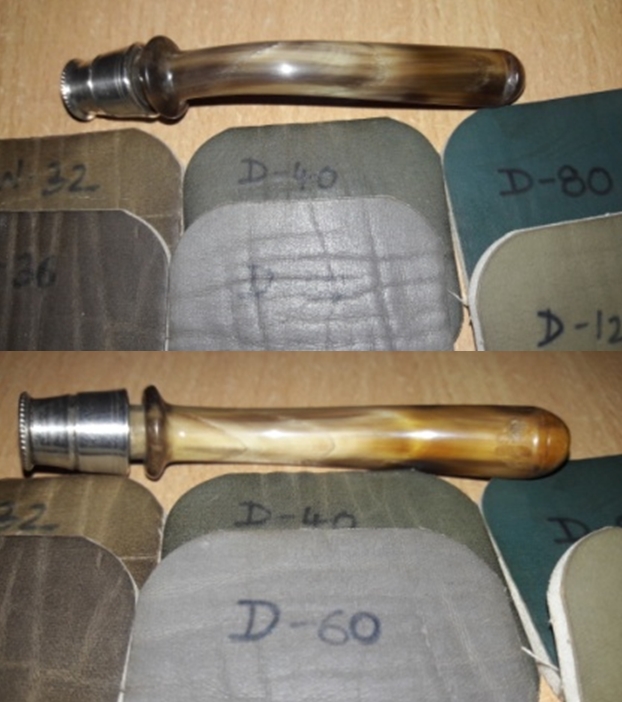
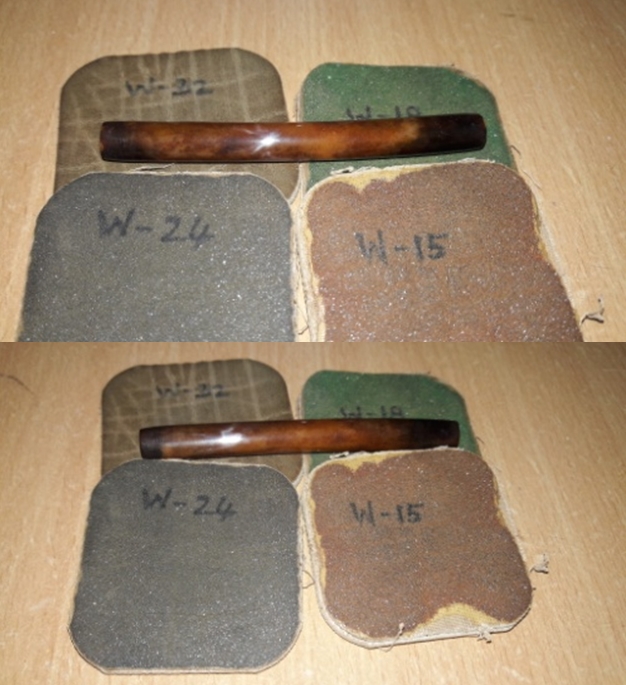
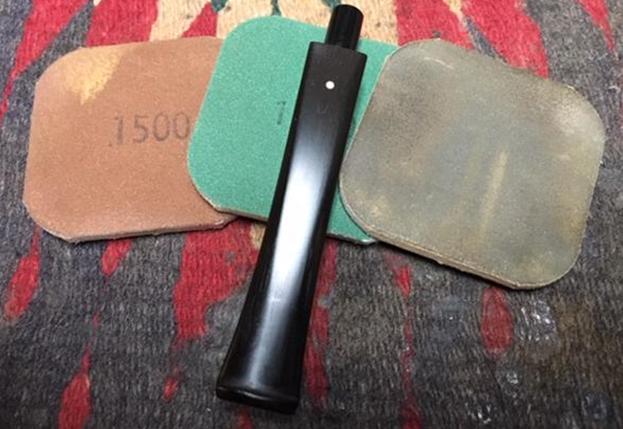
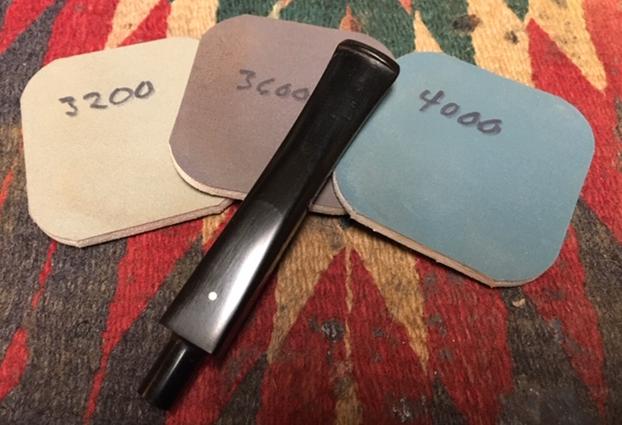
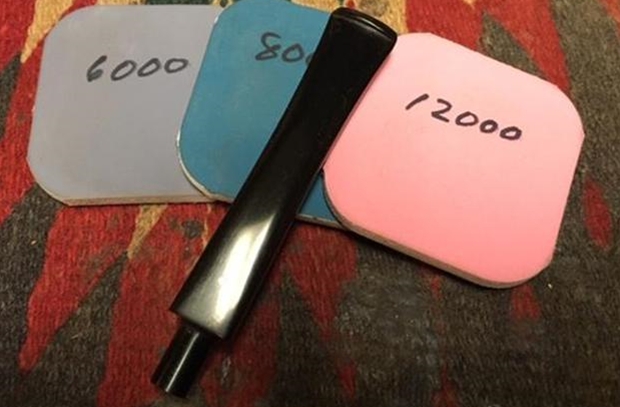
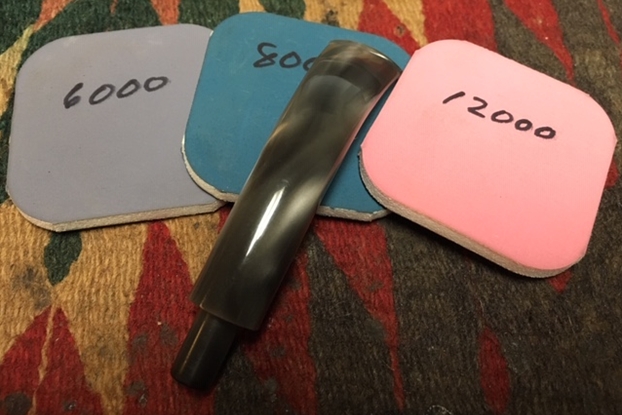
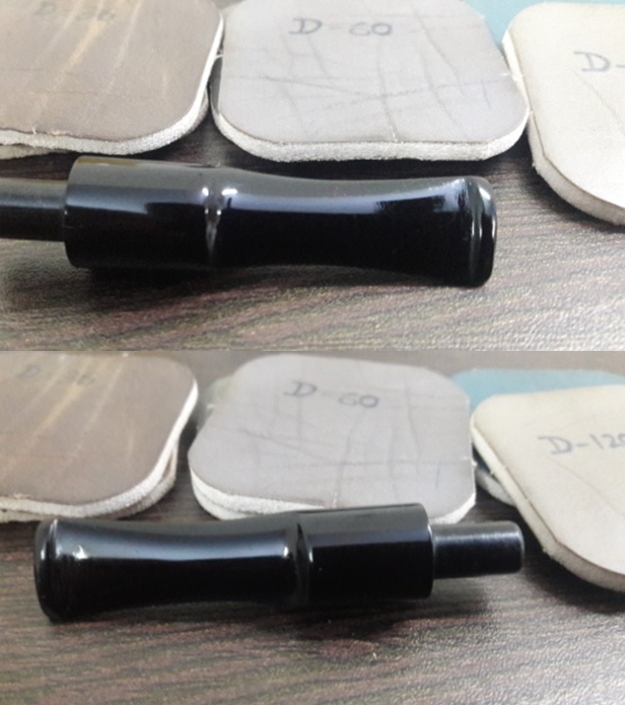
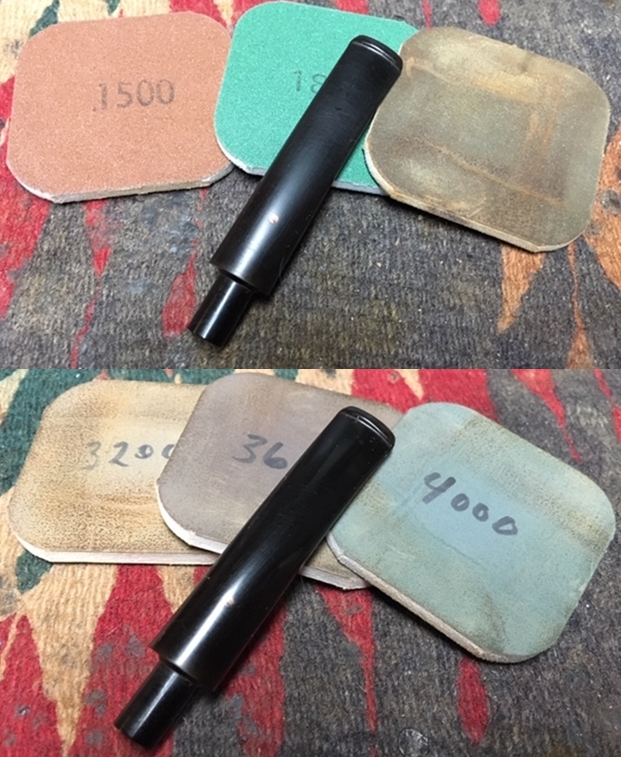
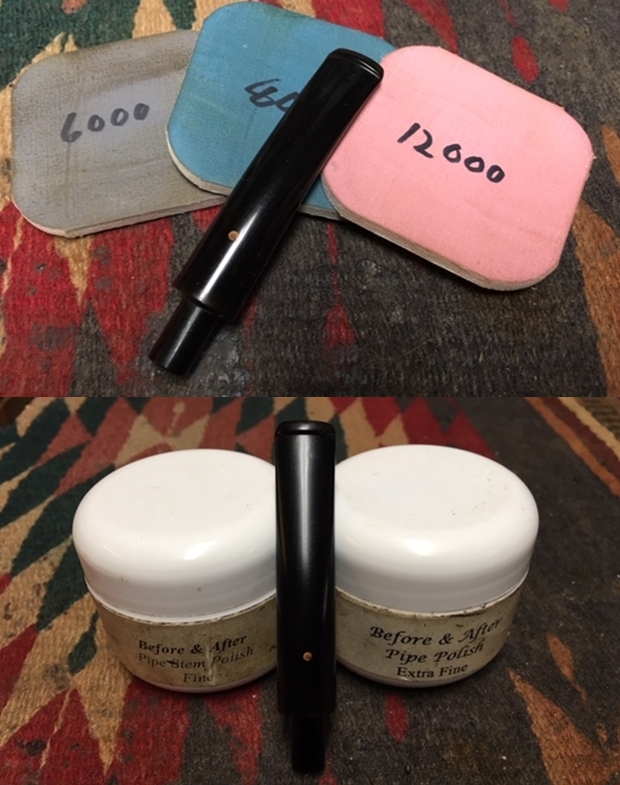
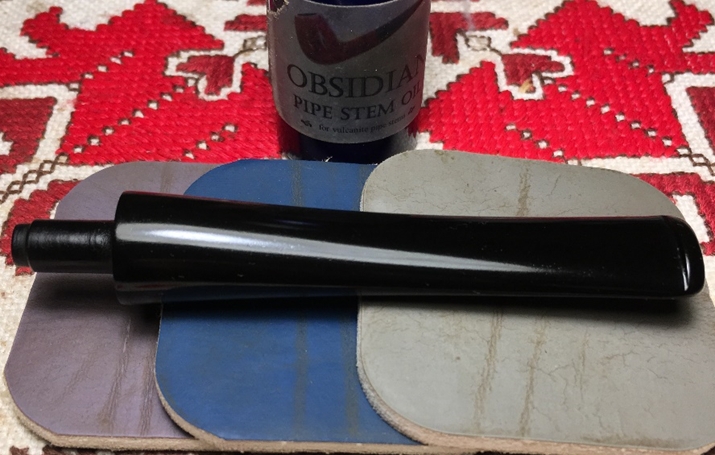
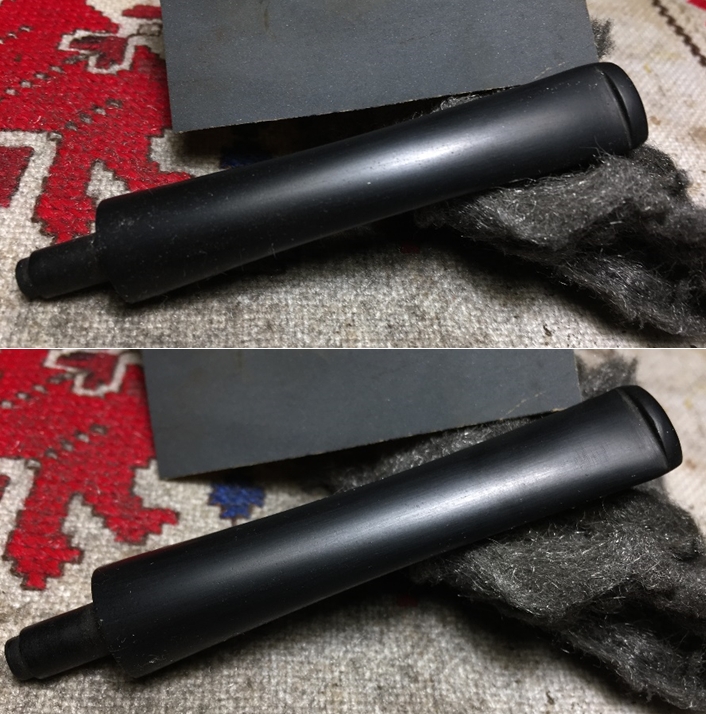
I move directly to the micromesh process by wet sanding with pads 1500 to 2400, then dry sanding with pads 3200 to 4000 and 6000 to 12000.  Between each set of three, I apply Obsidian oil which the vulcanite drinks in, revitalizing the stem. 
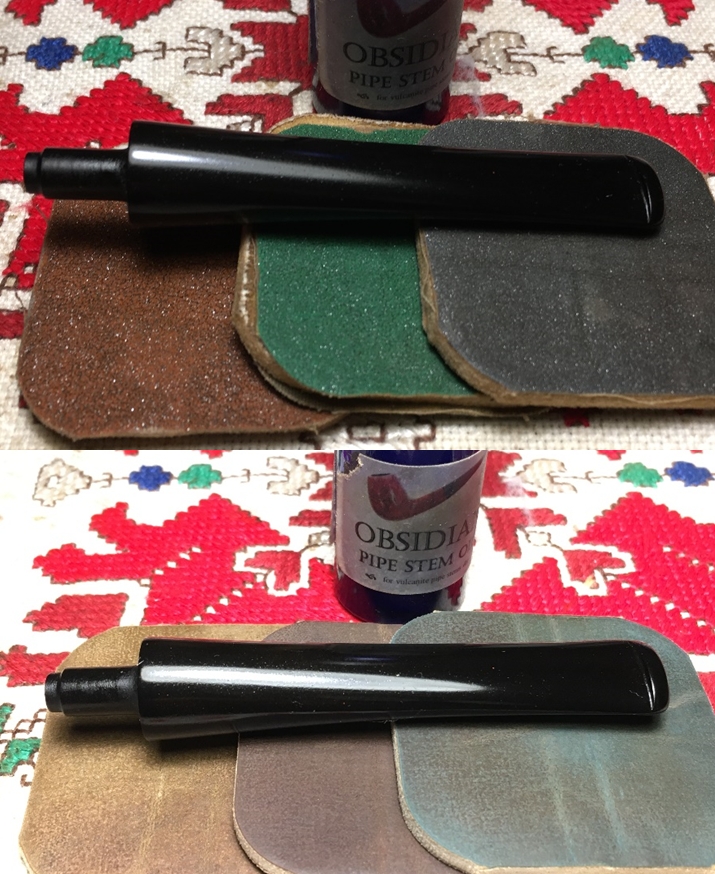
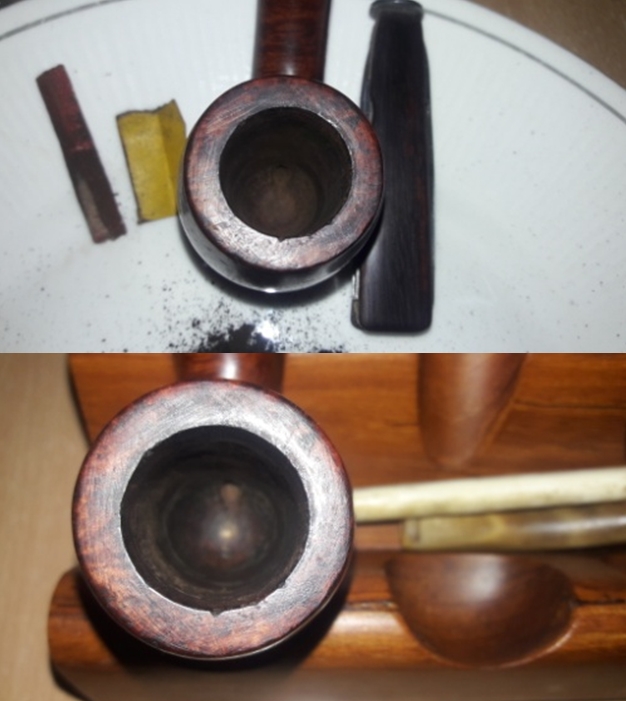
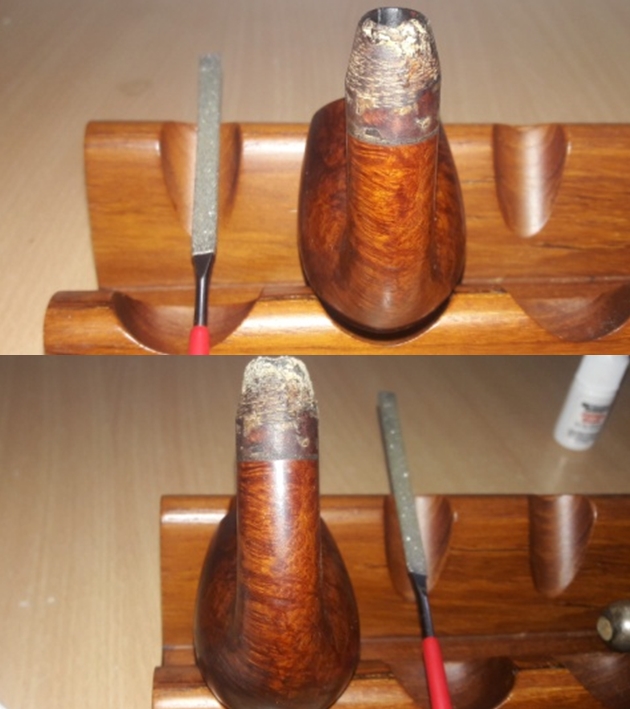
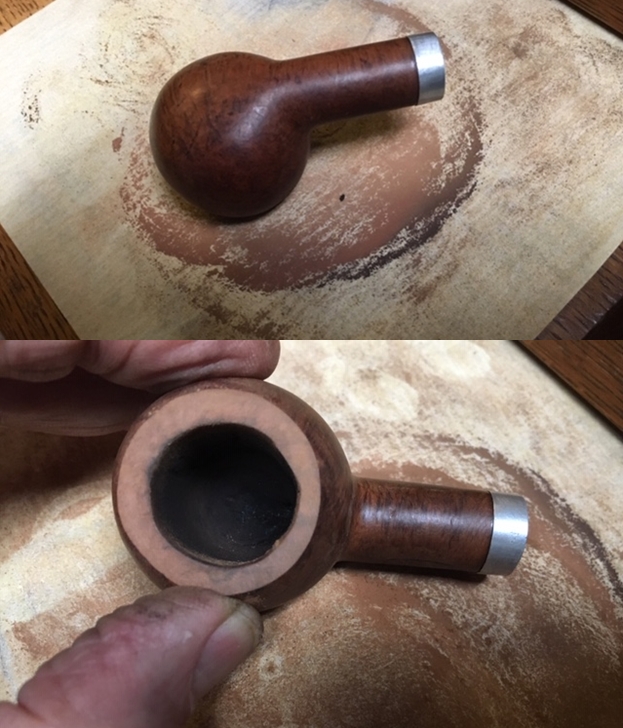
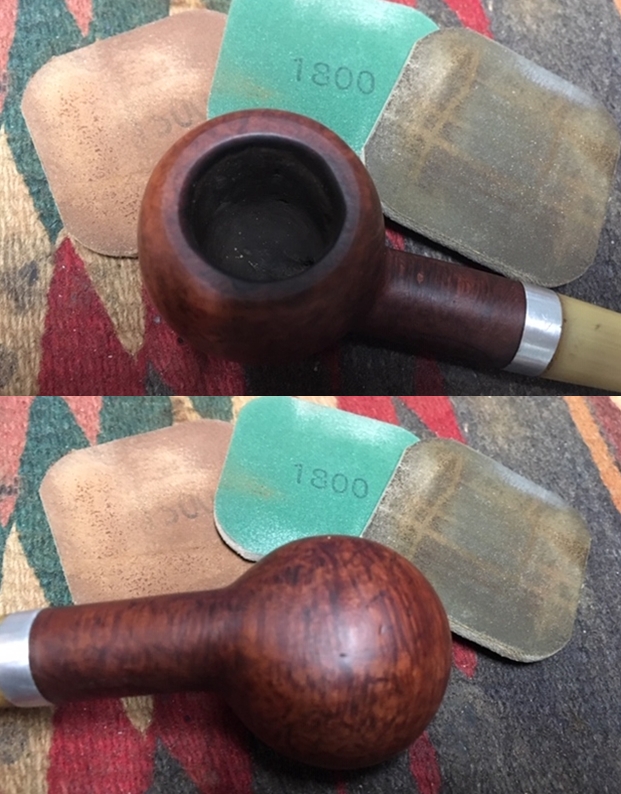
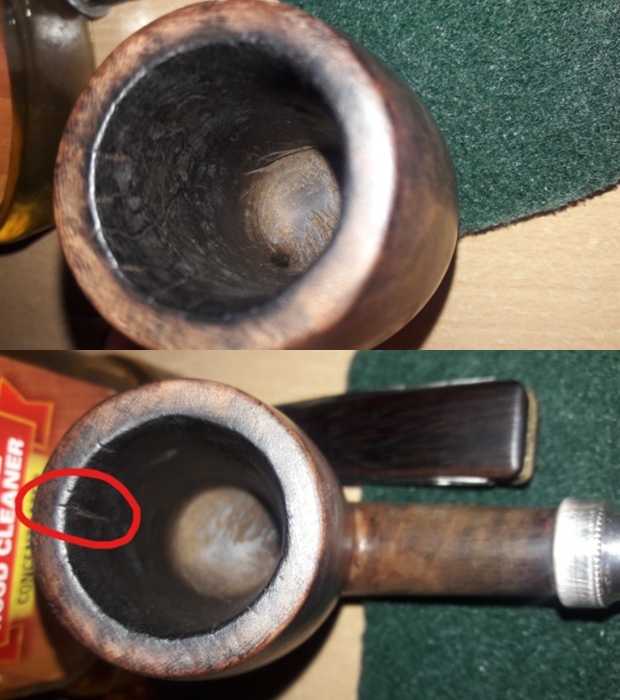
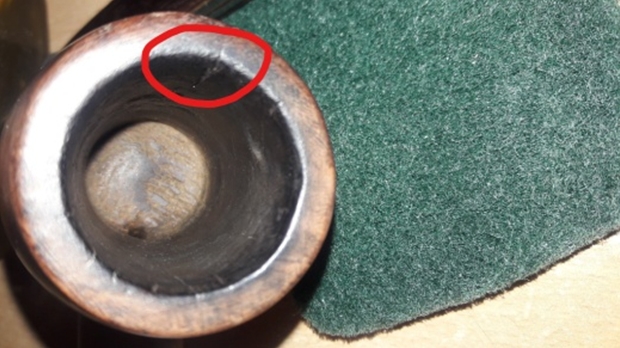
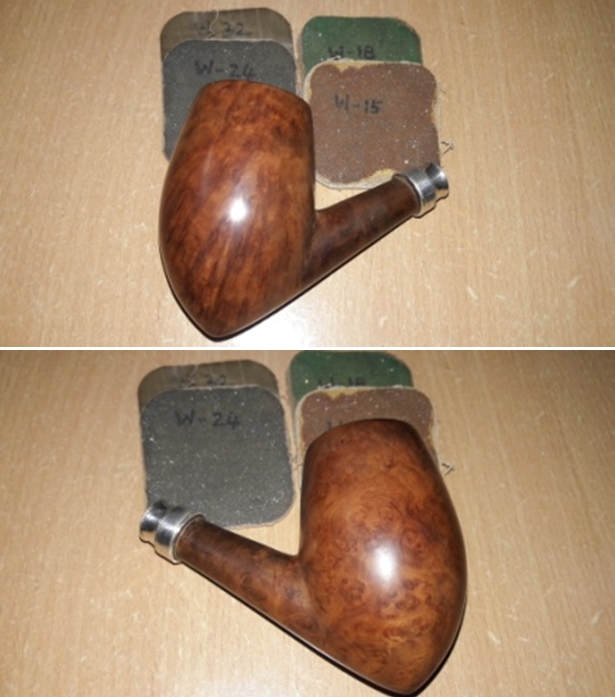
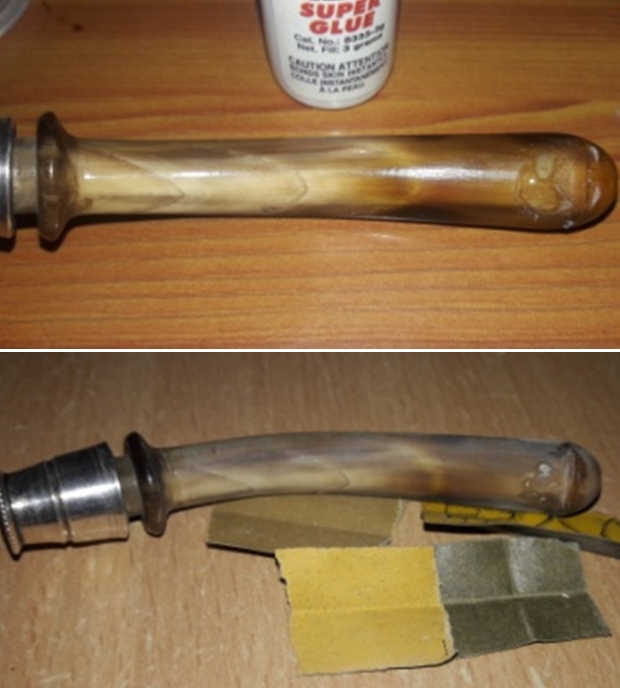
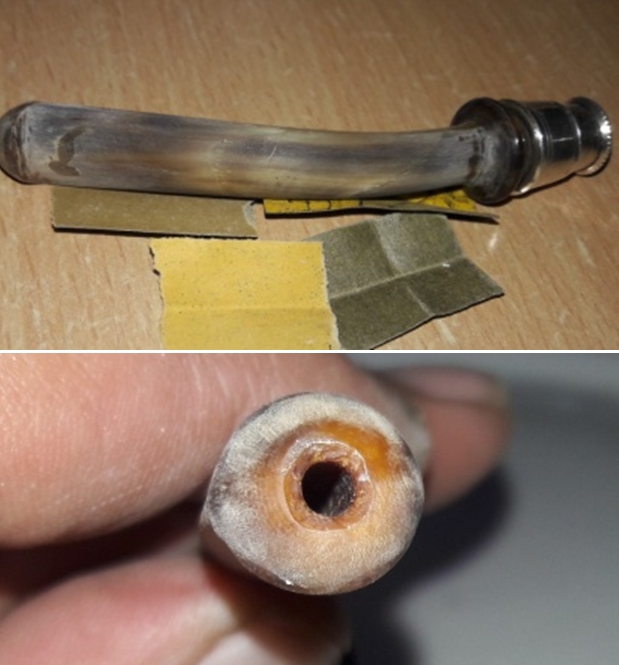
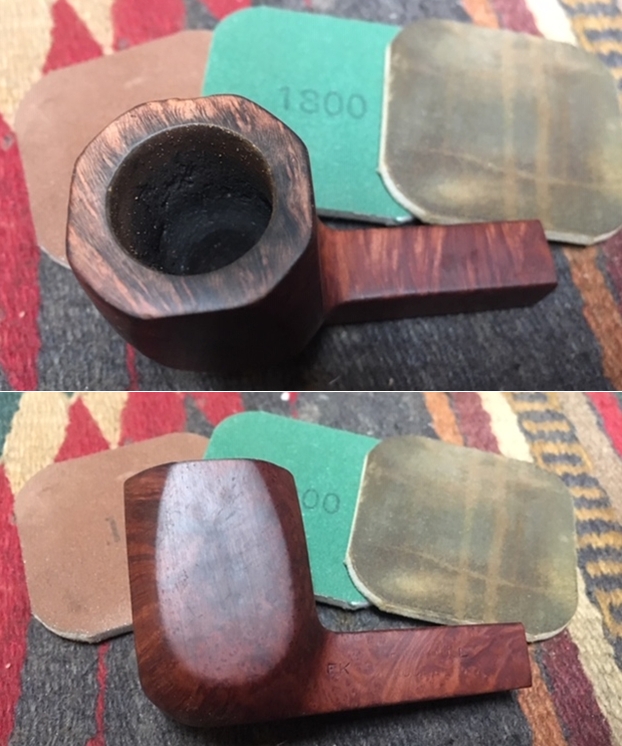
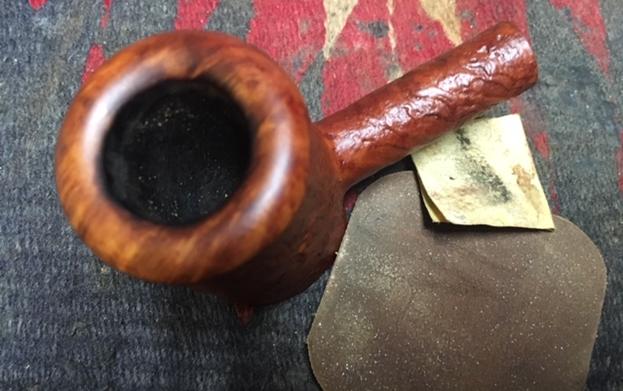
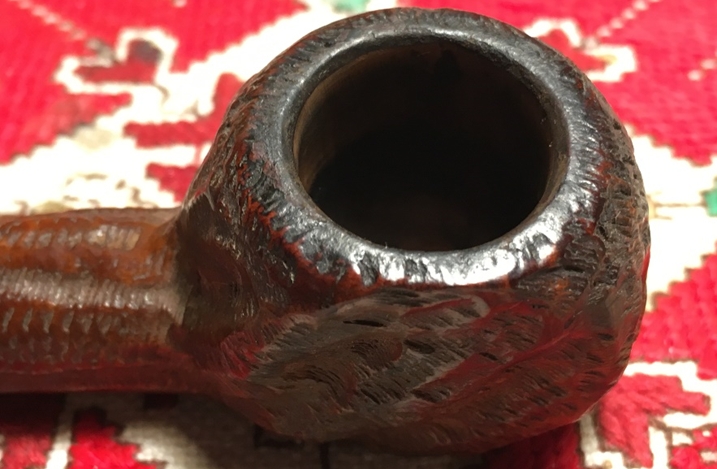
With the stem waiting in the wings, I turn again to the Custom-Bilt stummel and take another look.  What’s bothering me I realize is the black ring on the inner lip of the rim.  It continues to carry the charred look to the rim.  Without bothering or diminishing the rustication on the rim, I decide to create an internal bevel to remove the darkened wood thus helping to lighten the rim and make it look sharper.  I first use 240 grade paper tightly rolled to remove the heavy charring then follow with 600 grade paper to sharpen the bevel.  I like the rim presentation much better now.  The pictures show the adjustment. 
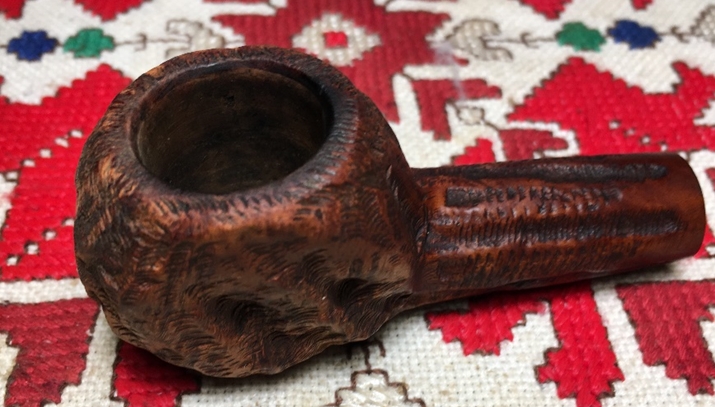
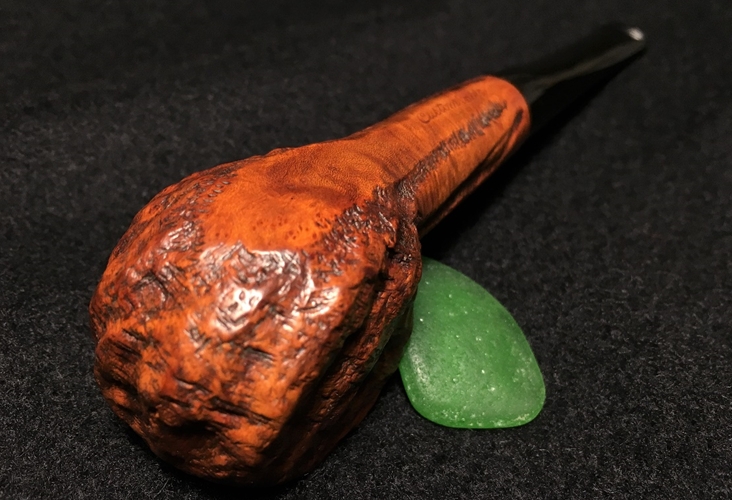
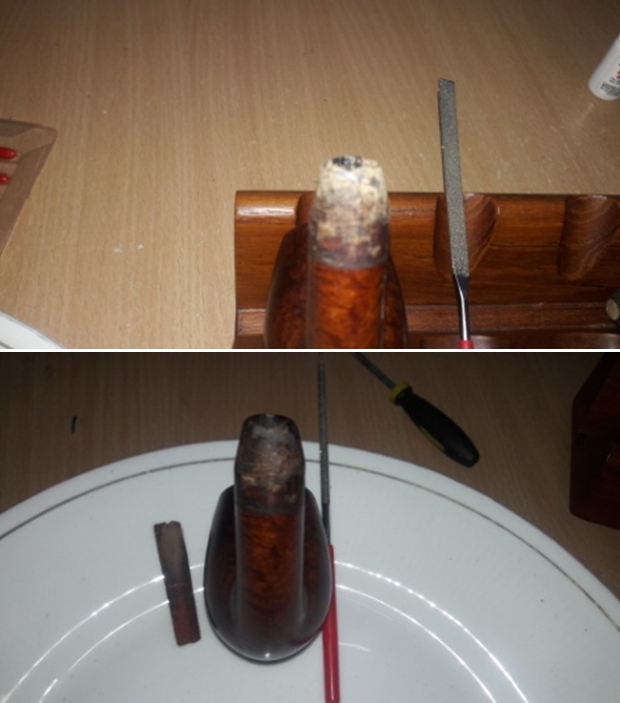
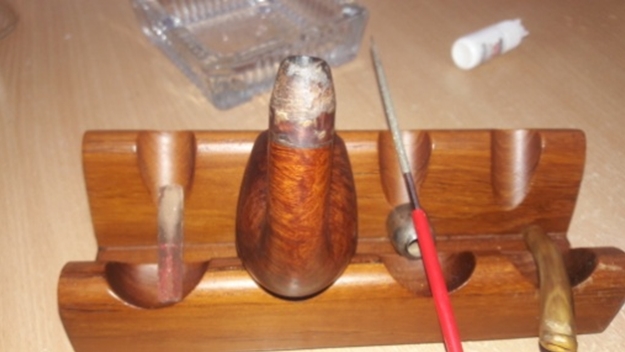
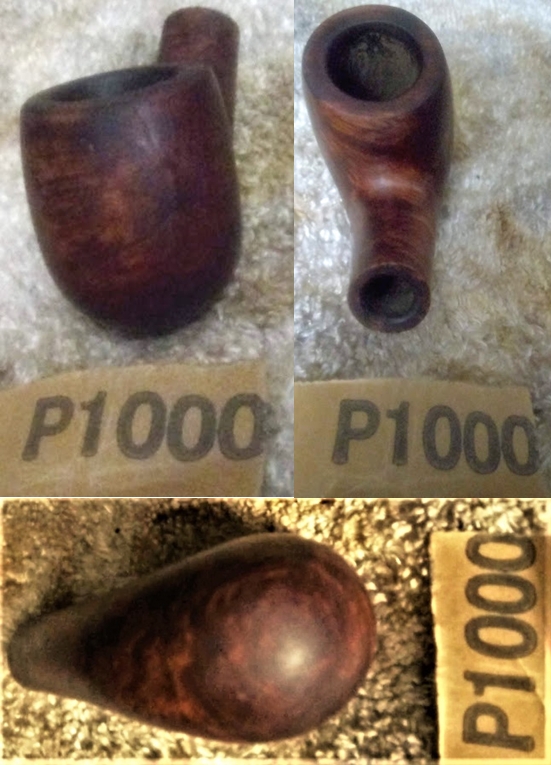
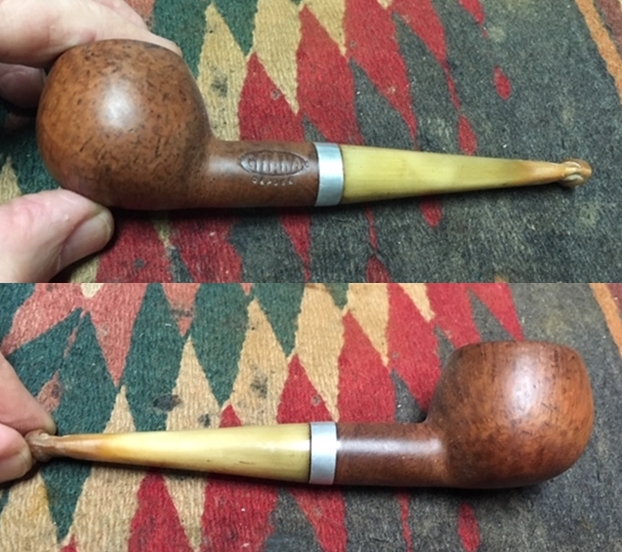
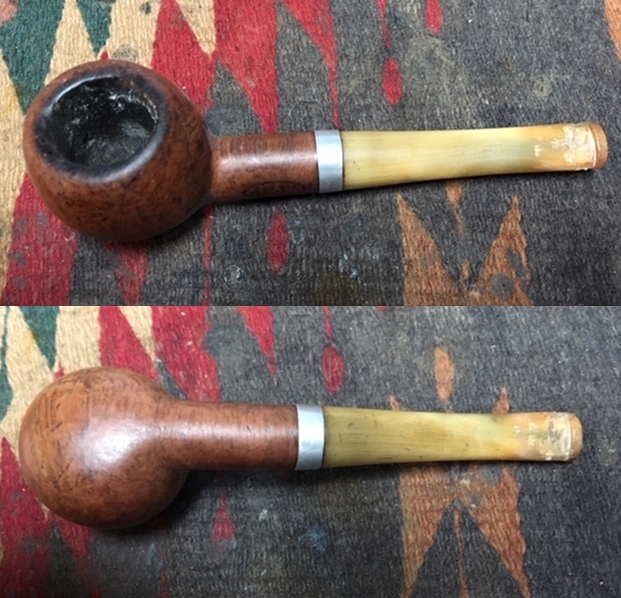
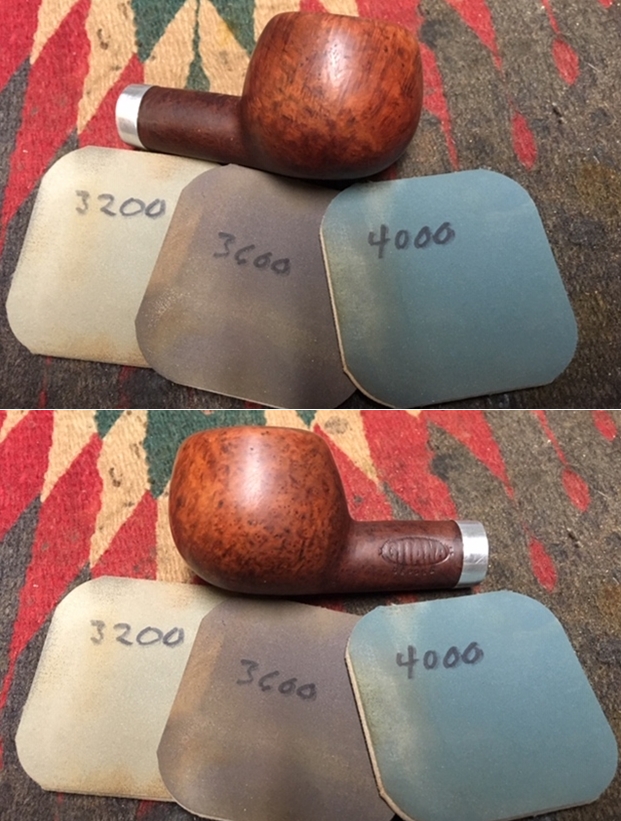
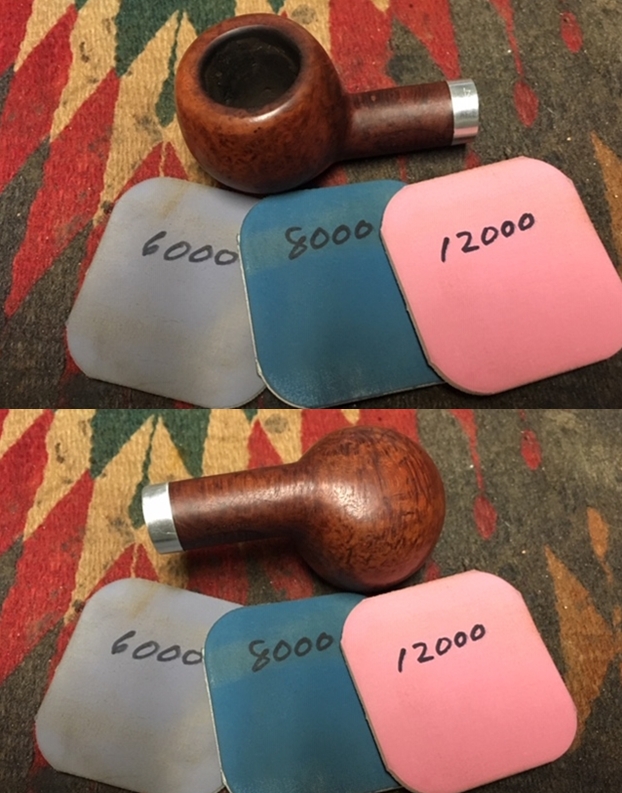
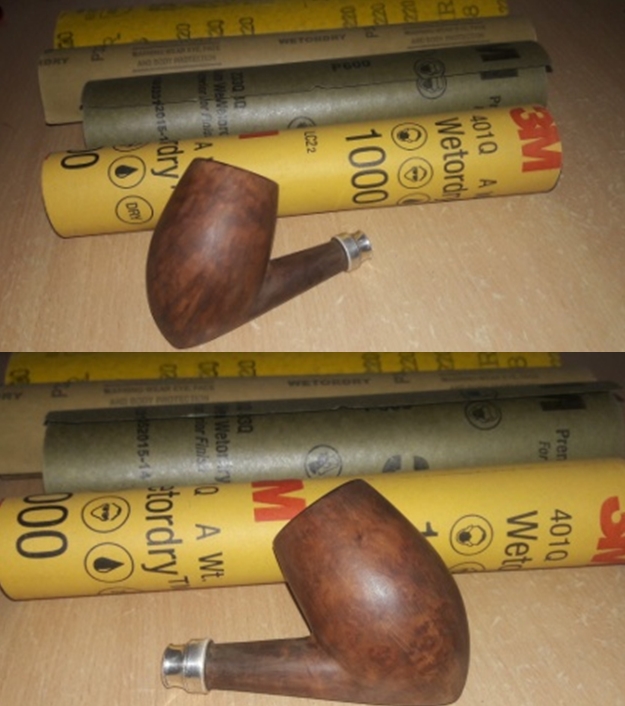
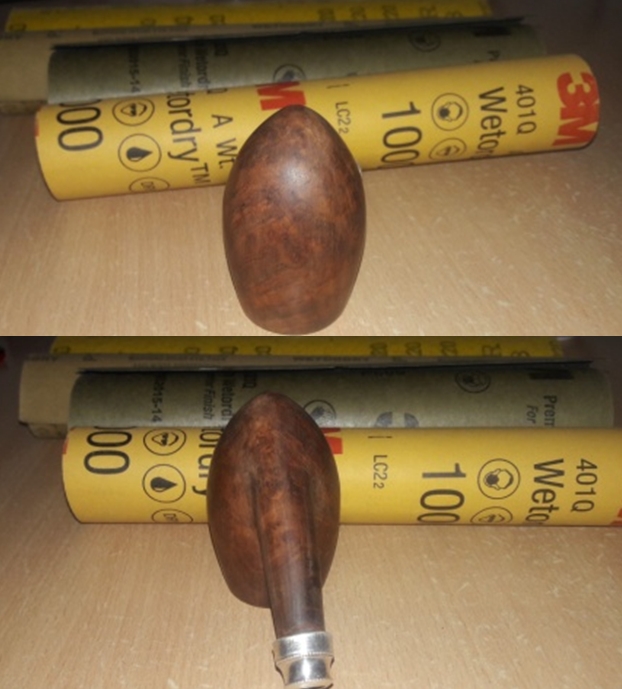
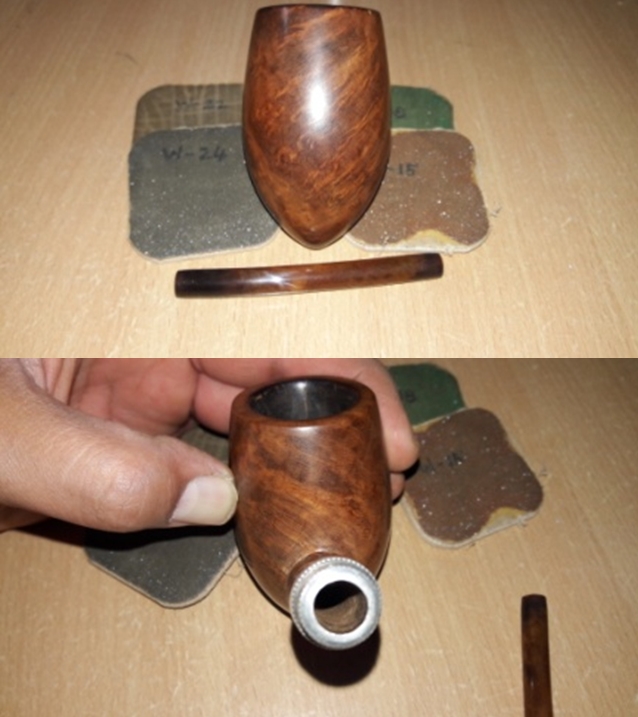
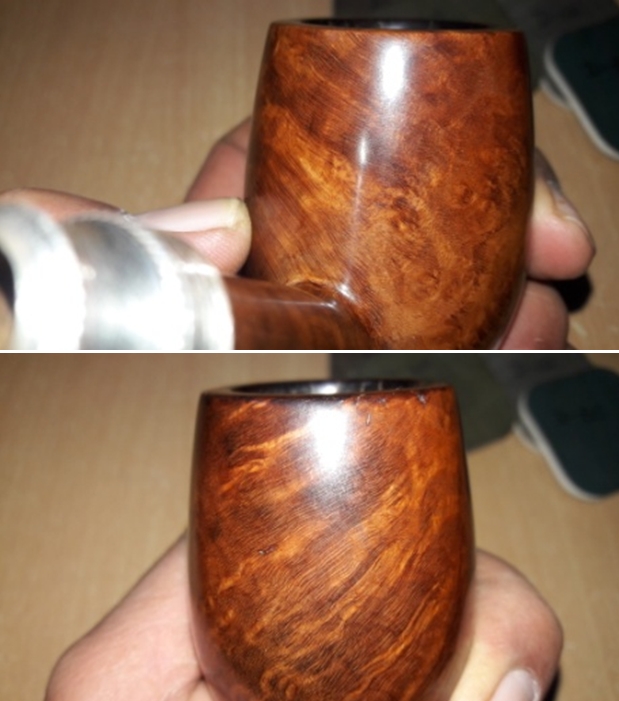
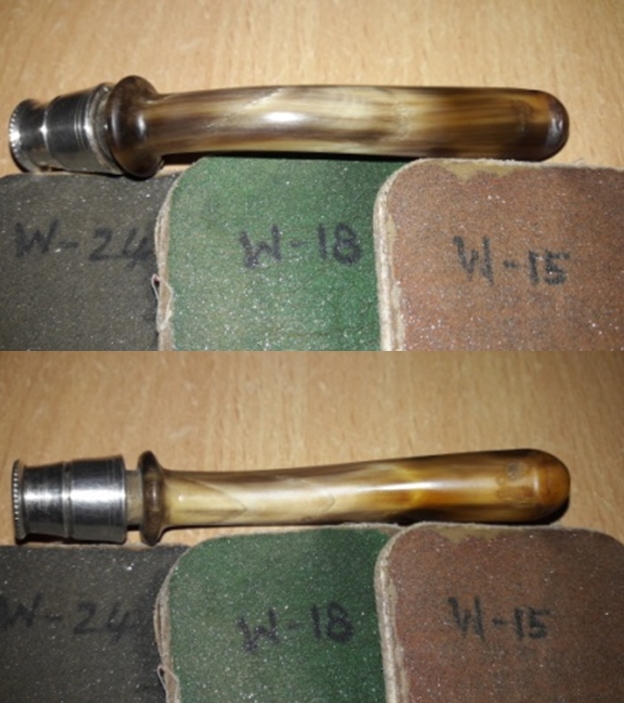
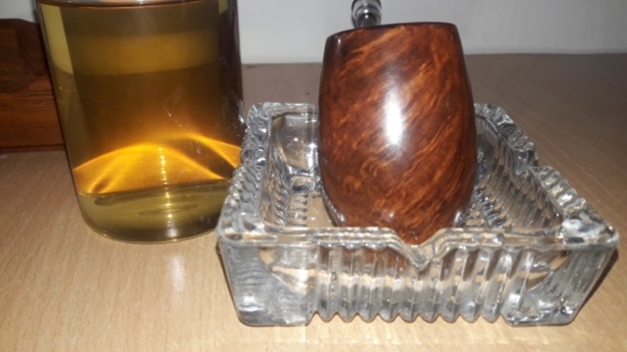
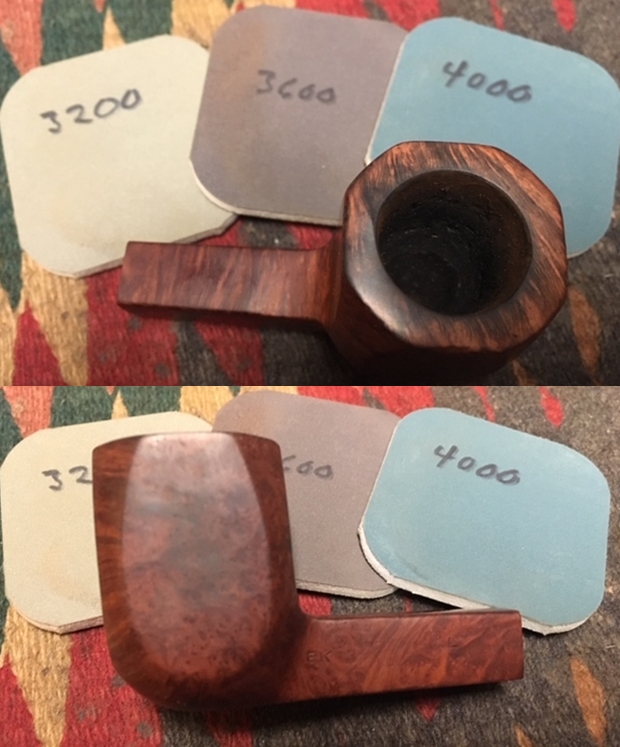
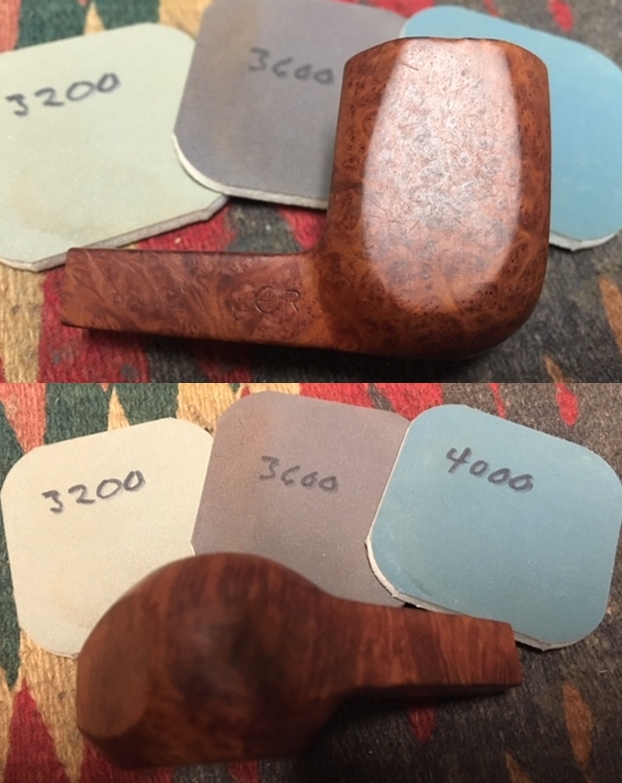
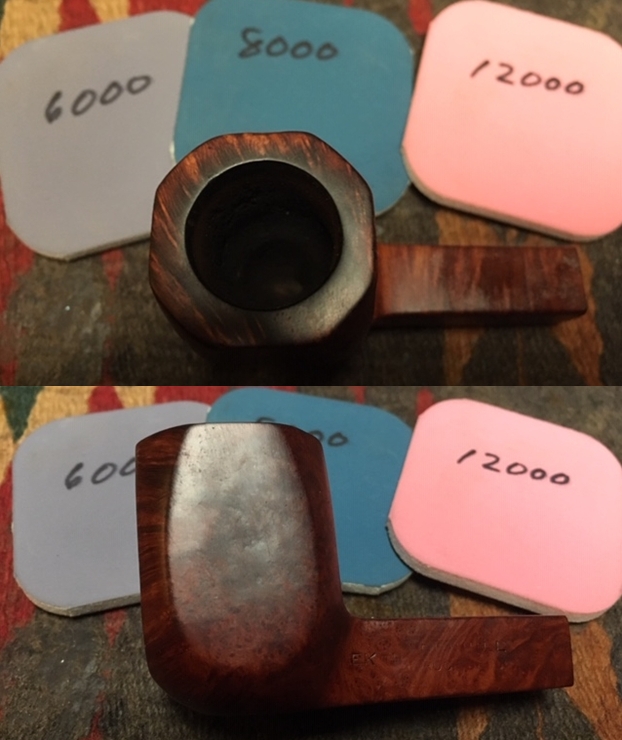
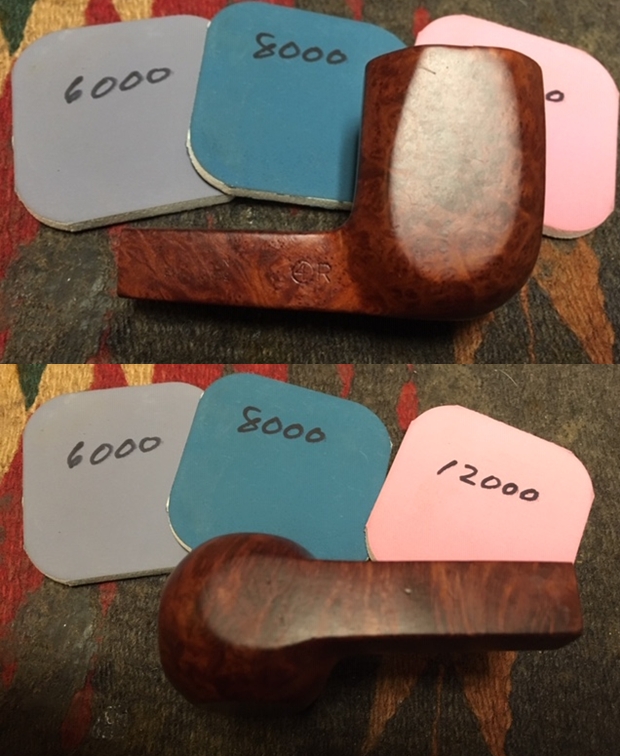
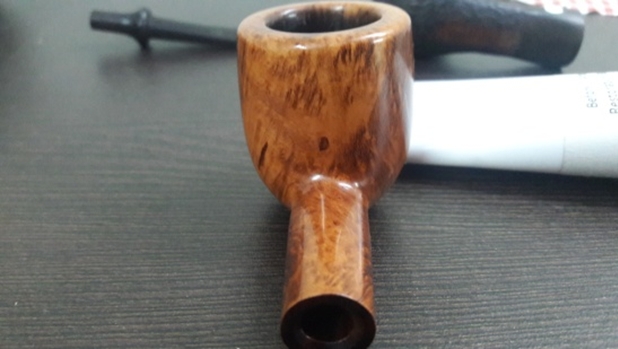
I’ve been learning through my research that the hallmark of the Custom-Bilt ‘look’ is rough and big.  This Custom-Bilt isn’t a large pipe, but he is rough with the classic Custom-Bilt rustication that is a consistent technique used in the C-B manufacturing.  I found it interesting that ‘smooths’ are the rarer and more collectible Custom-Bilts according to the Pipedia article.  Yet, the C-B rough look has a certain appeal.  To me, what causes a rustication motif to look classier is when the patches of smooth briar across its landscape are shined and buffed up in nice contrast.  To me also, every peak of a rustication ridge or ‘mountain top’ is smooth briar, not just the underside nomenclature panel and the shank panels.  To shine the peaks and panels, I take the top two thirds of the micromesh pads (3200 to 12000) and dry sand the entire stummel.  The first 3 pictures mark the stummel before using micromesh pads.  I pad sanding ‘lights up’ the rustication patterns and nuances a bit more softness to the rough look. 
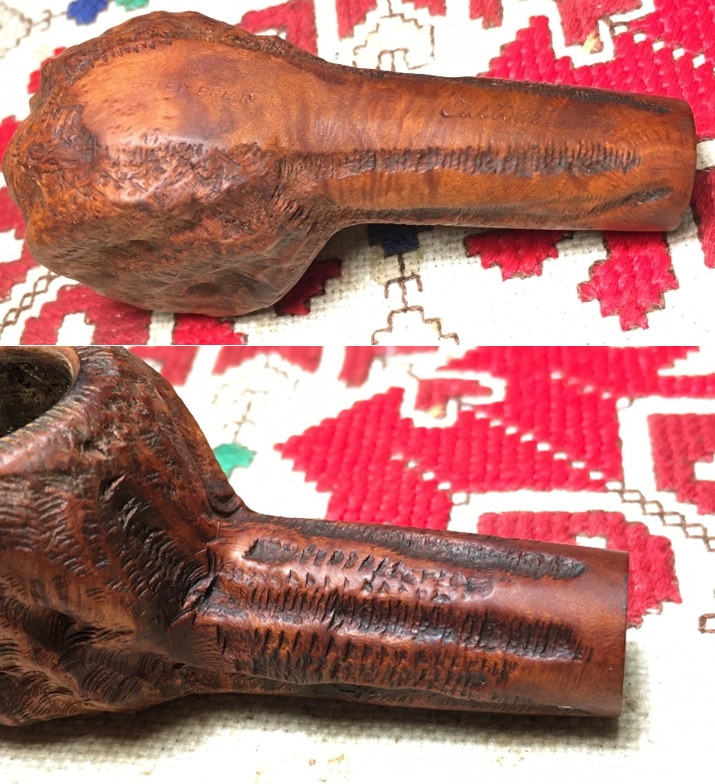
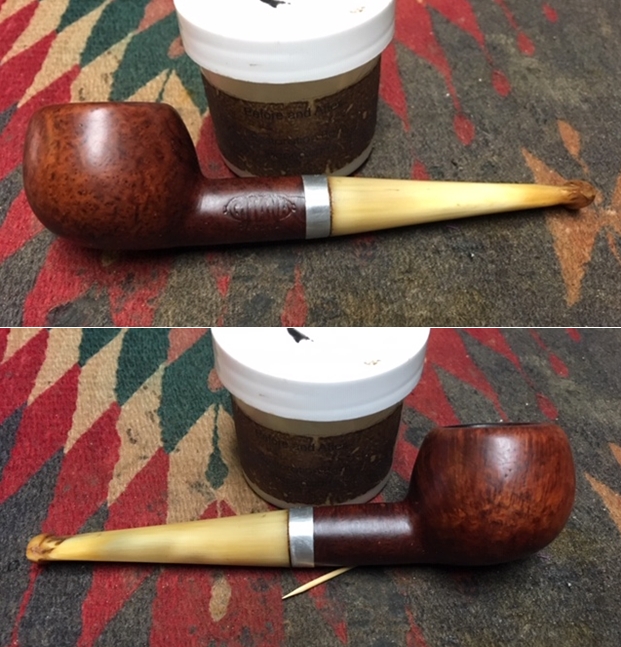
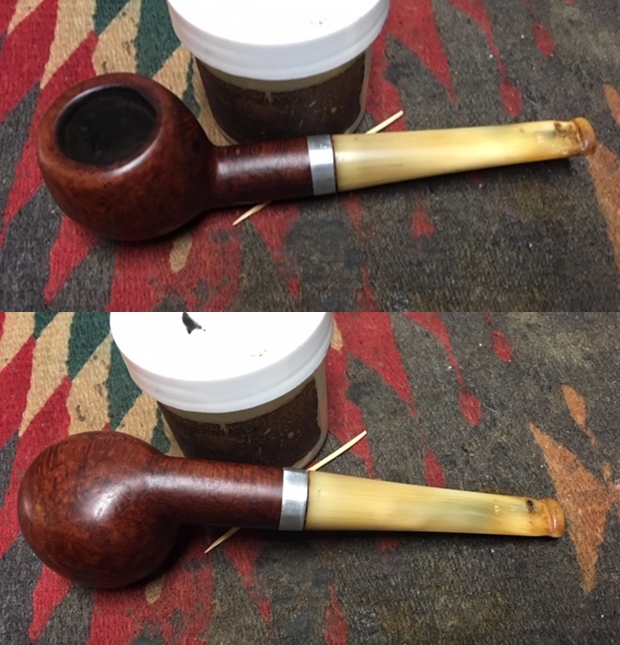
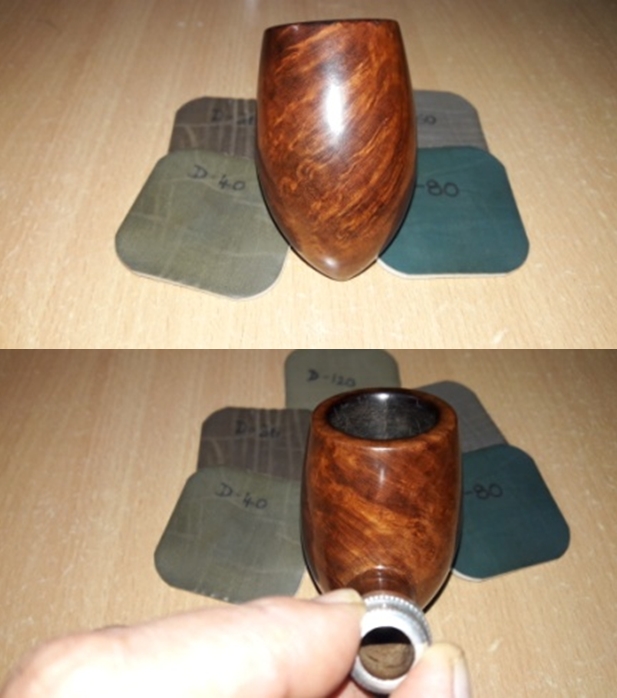
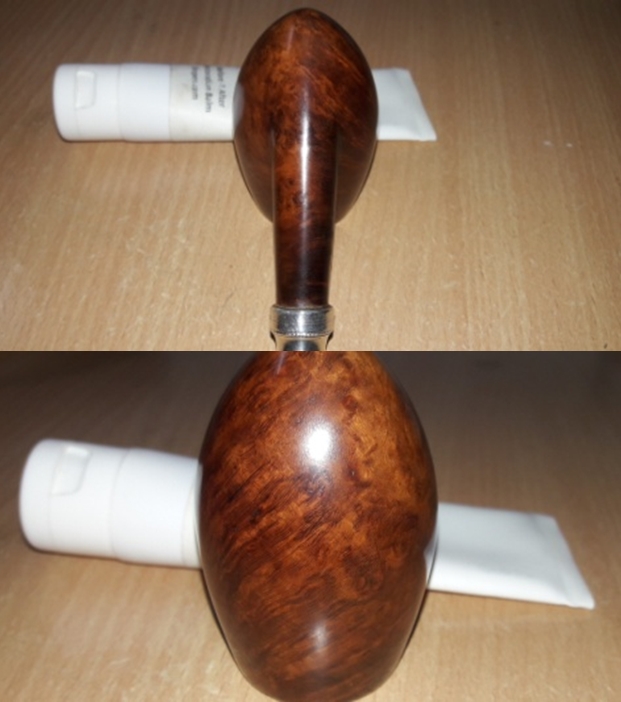
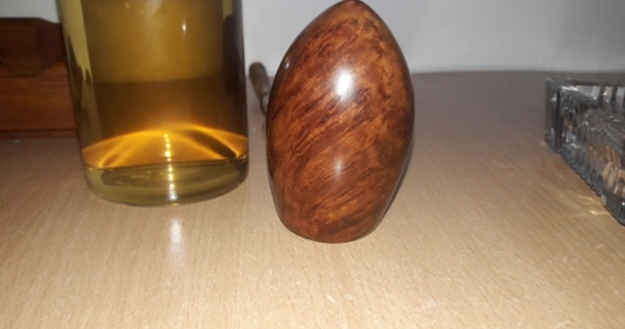
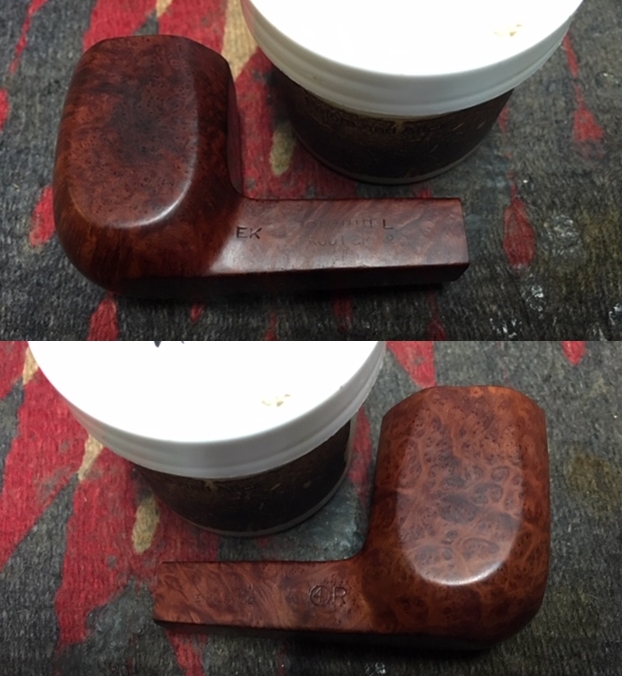
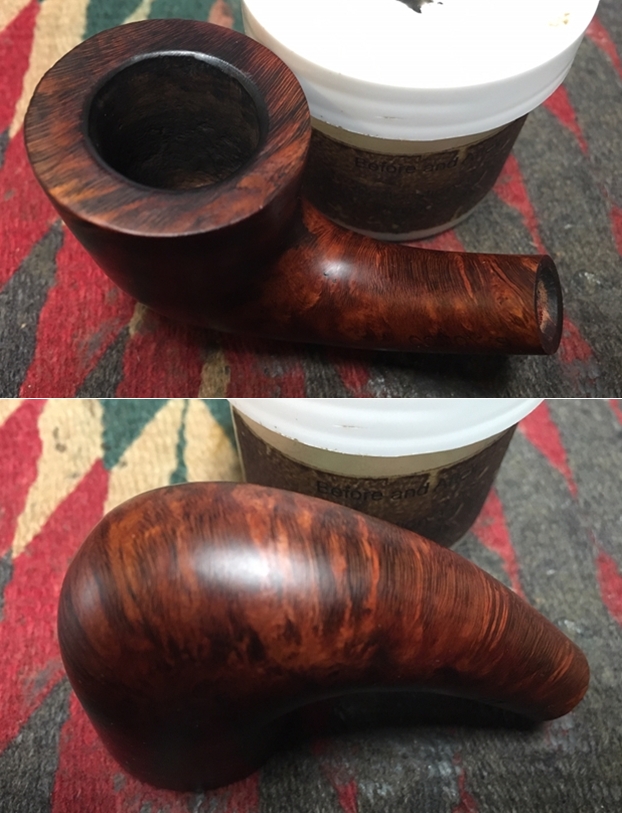
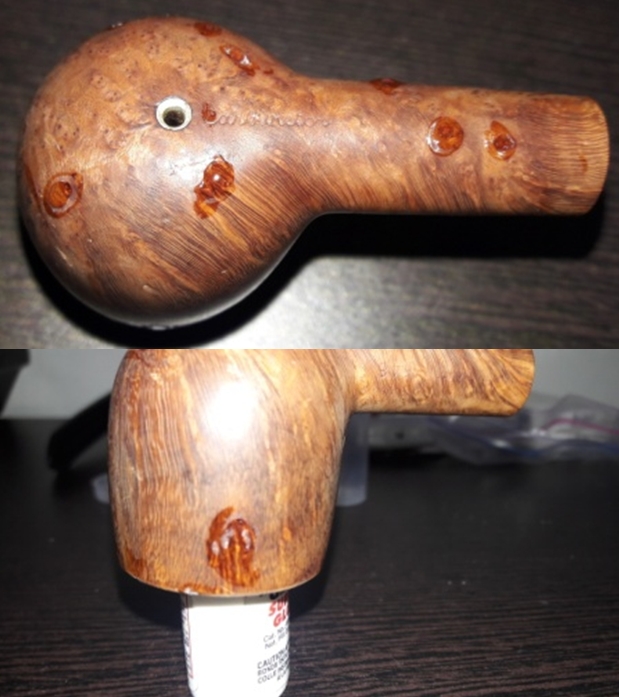
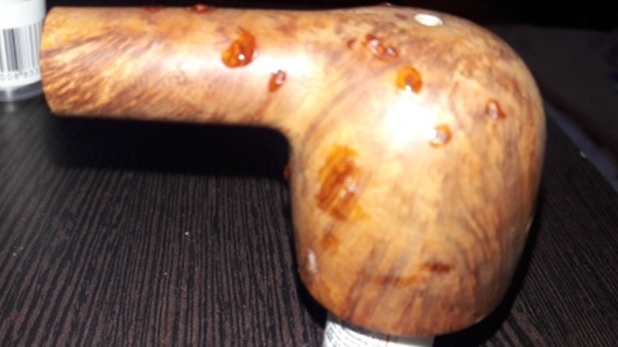
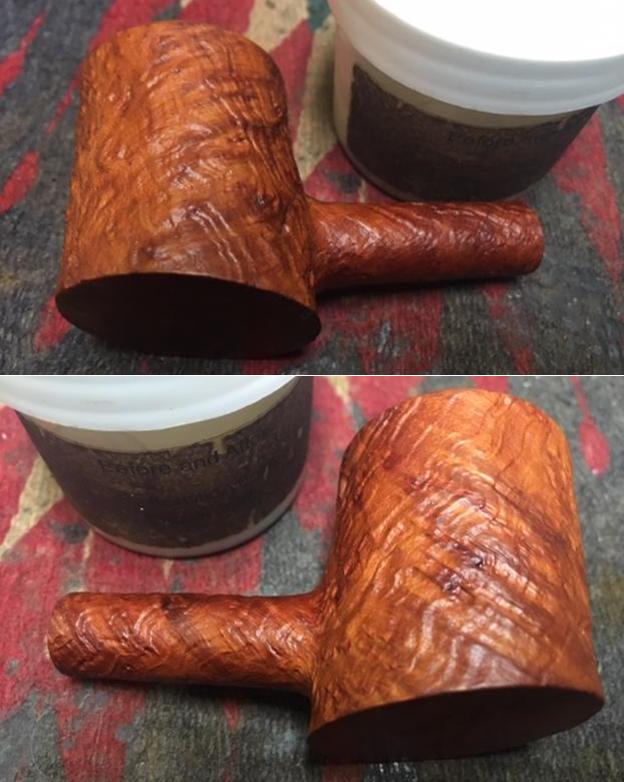
Next, I use Before & After Restoration Balm to condition the rusticated bowl.  The challenge will be to work the Balm into the nooks and crannies and make sure it is absorbed.  I put Balm on my fingers and work the Balm in the rough briar.  After its covered well, I let it sit for a few minutes then begin wiping and buffing using a microfiber cloth.  Wow!  The Balm does a great job enriching the briar.  It looks great. 
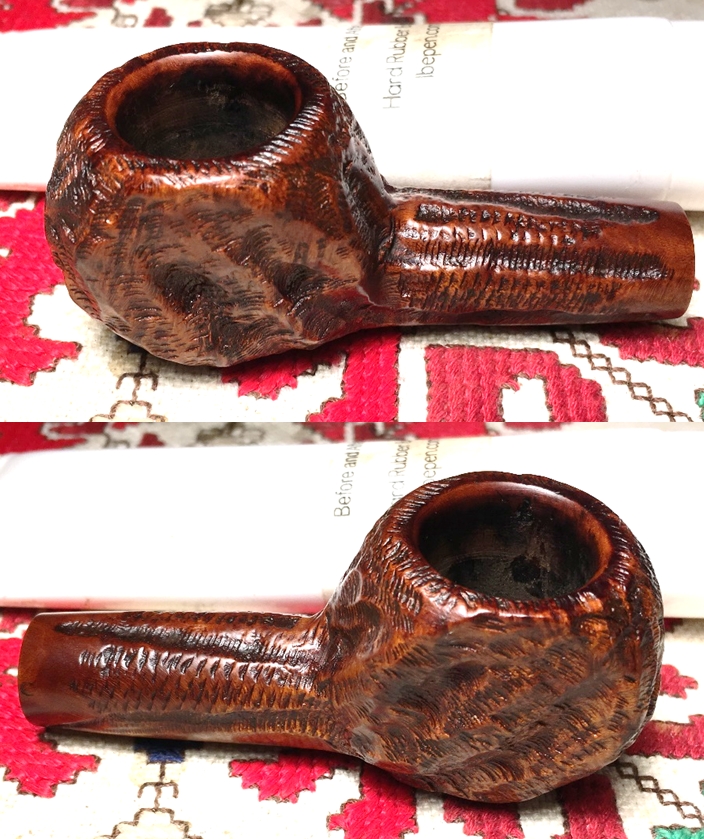
Next, I reunite stem and stummel and mount a cotton cloth wheel on the Dremel and set the speed at about 40% full power and I apply Blue Diamond compound to the entire pipe.  With the 1-inch buffing wheel on the Dremel, I’m able to navigate through the cuts, crannies and gullies of the rustication flow pretty well.  This minimizes the concern for the compound to ‘gunk up’ in the rustication.  After completing the application of Blue Diamond compound and buffing the stummel with a felt cloth to remove compound dust, I do detect some ‘gunking’ in some of the crannies.  Using a stiff plastic brush, I brush the stummel to dislodge the compound.  To make sure the stummel is clean and ready for wax, I use a small felt buffing wheel to work into the nooks and crannies of the rustication – this does a great job and further buffs up the briar.  Nice.
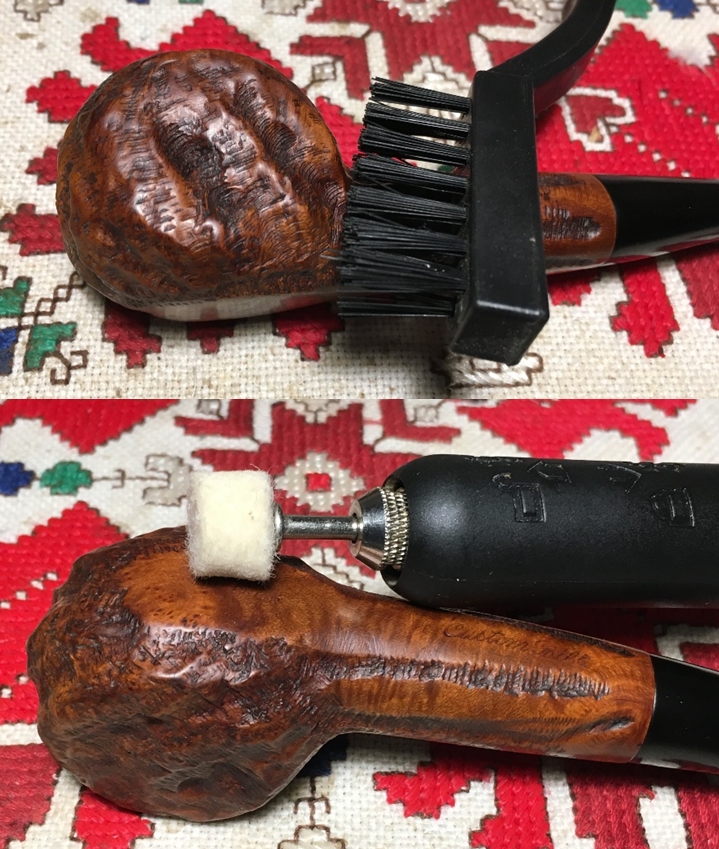
Again, I mount the Dremel with another cloth buffing wheel, increase the speed to about 50% full power. This is a little more RPM than normal for waxing.  I want to generate a little more heat than normal with the additional RPM to be sure the wax liquifies well into the briar.  This will assure an even application and avoid (I hope!) the wax from gunking up in the crannies.  I apply carnauba wax to the stummel with a light touch.  To avoid wax getting lodged in the rustication, I apply wax sparingly and rotate the Dremel buffing wheel to navigate through the crevices.  I apply several coats of carnauba to stem and stummel and follow by giving the stummel both a good buffing with a microfiber cloth and a brushing with a horse hair shoe brush on the stummel.

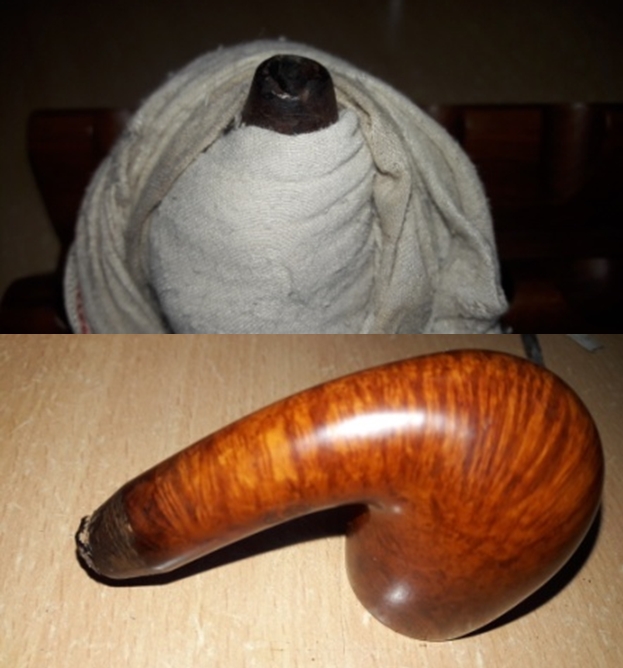
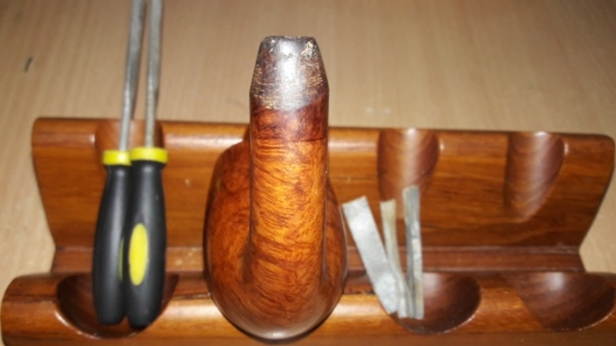
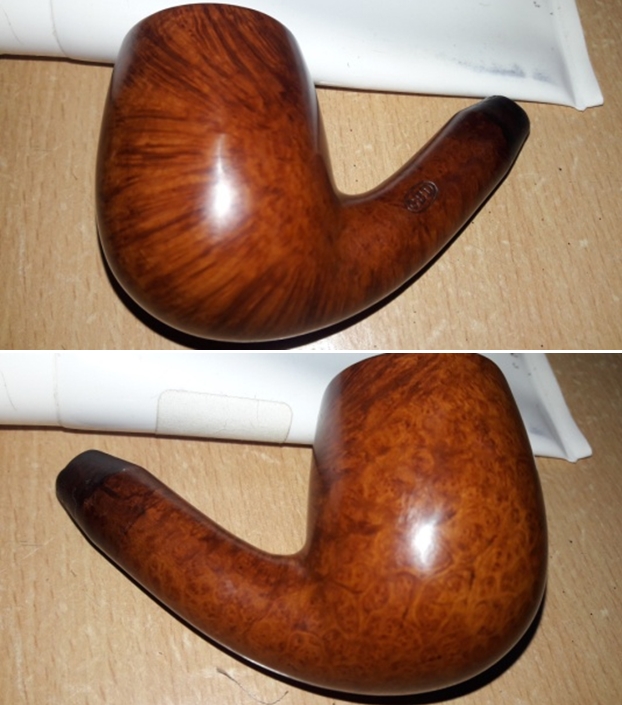
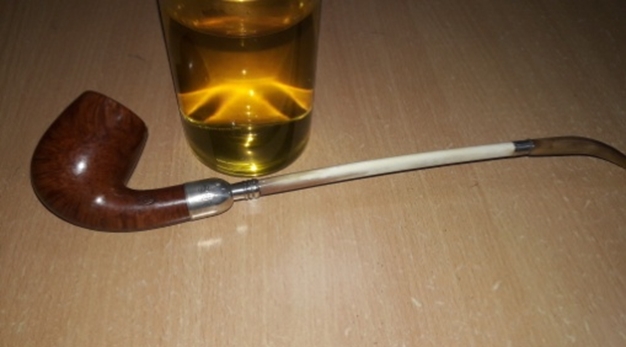
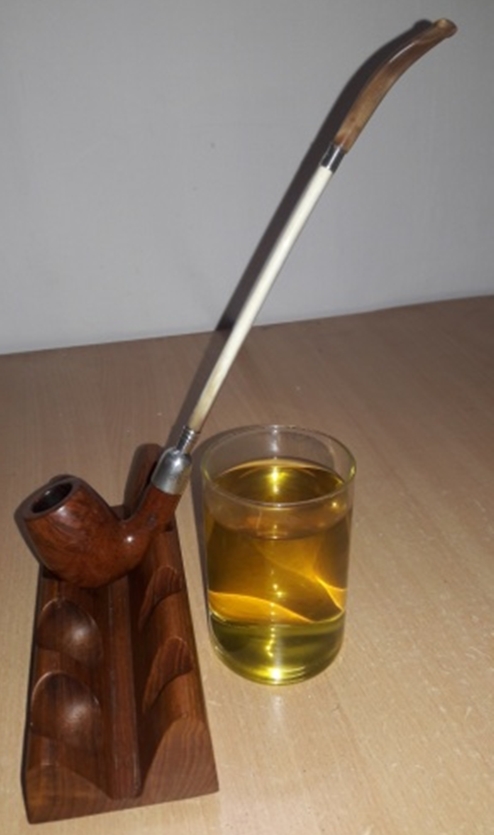
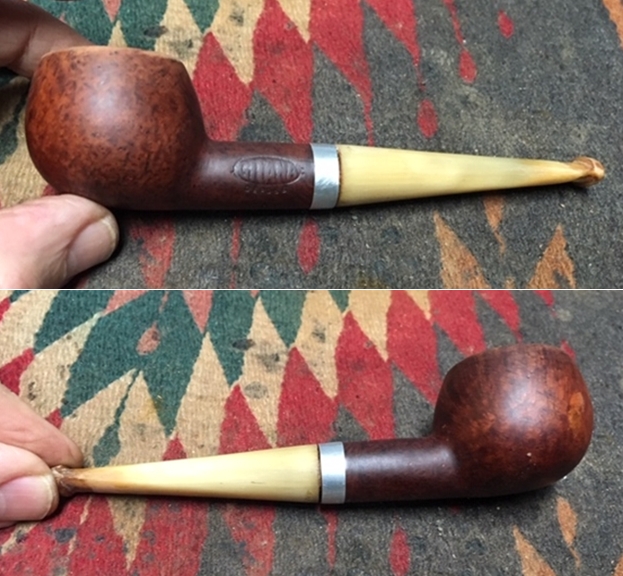
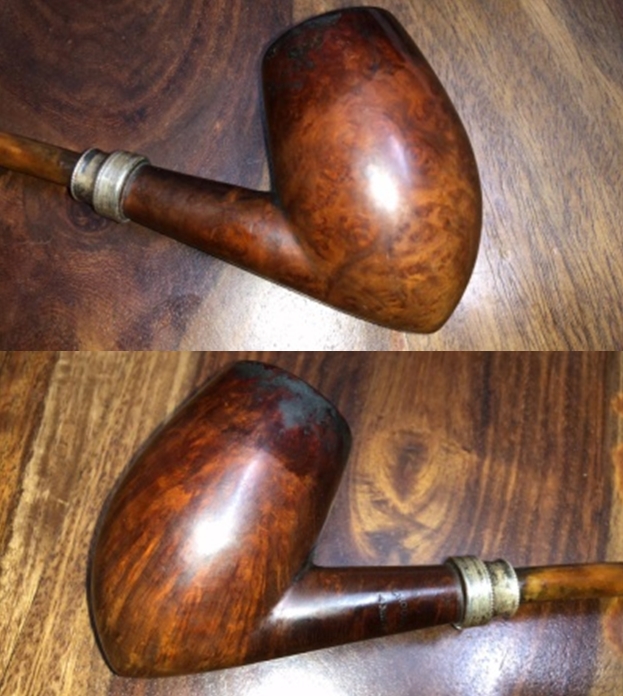
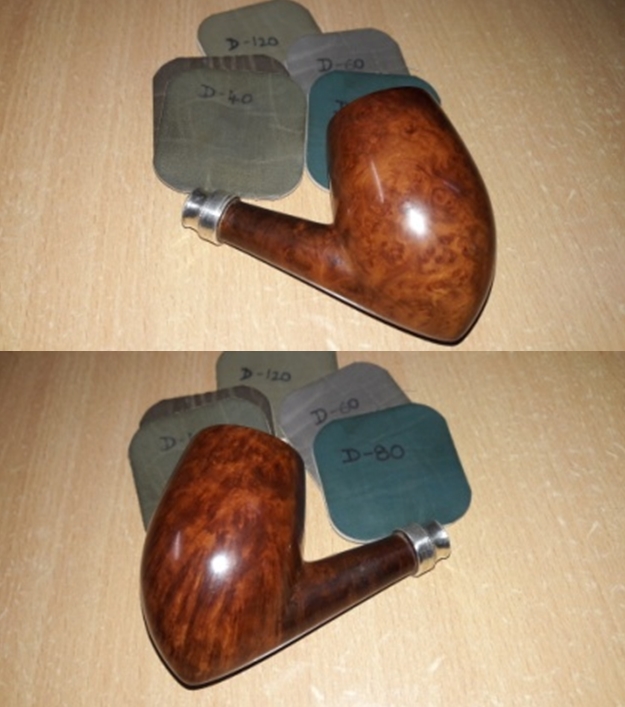
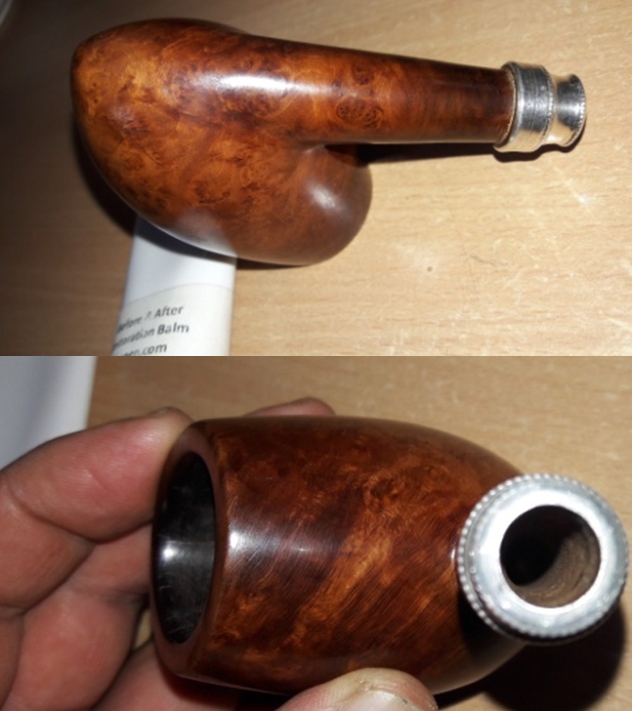
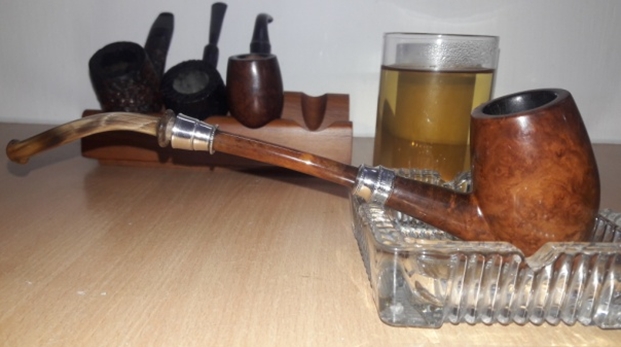
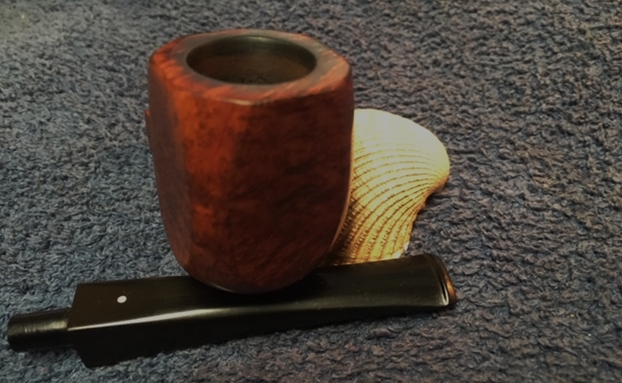
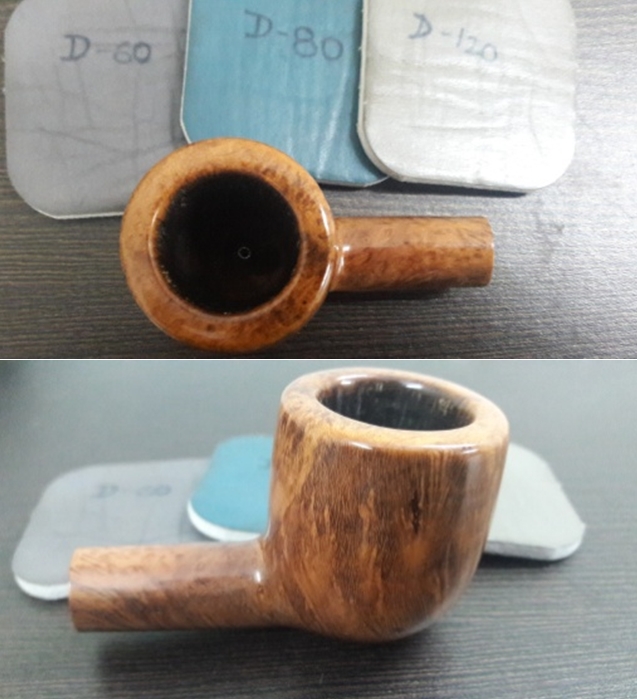
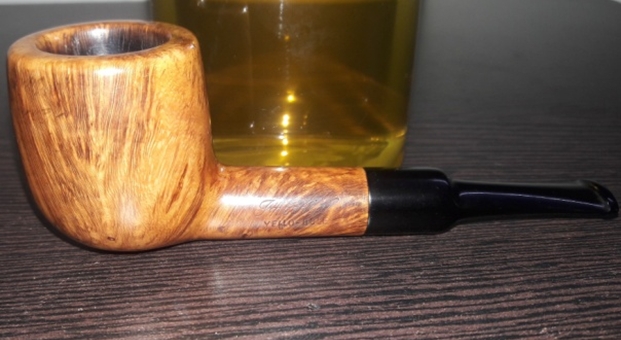
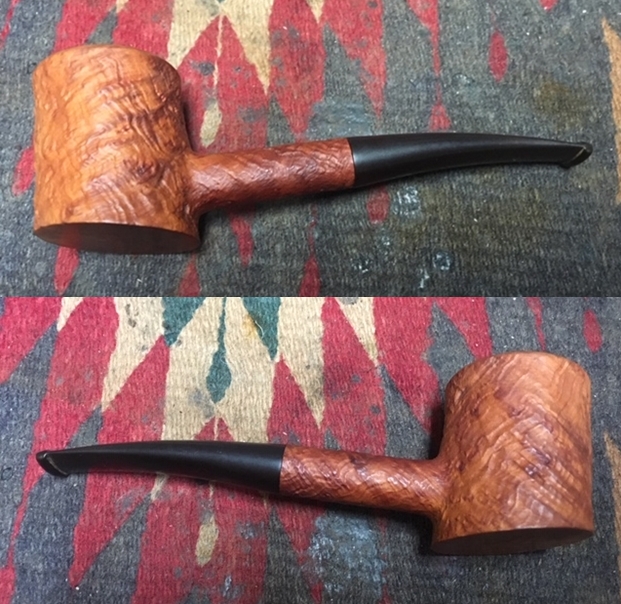
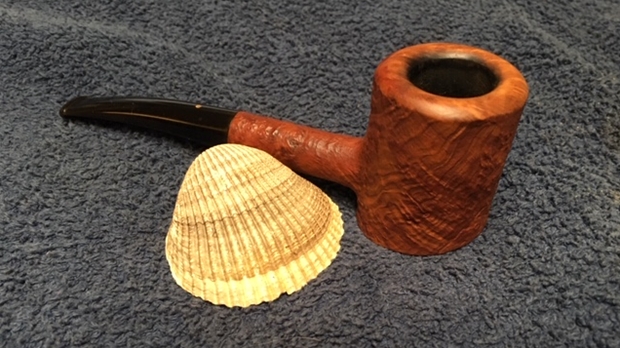
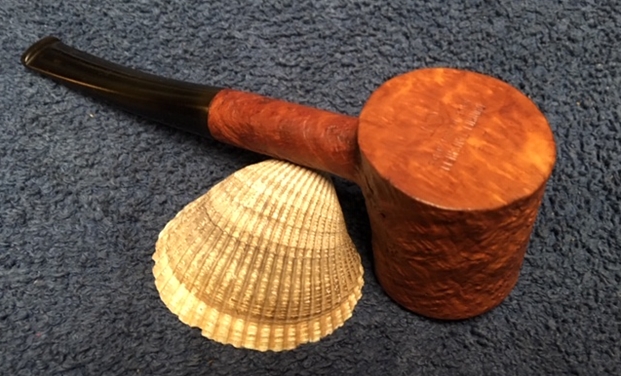
This probable 1940s/50s Custom-Bilt Panel came out much nicer than I was expecting. I’m drawn to the mountain-like landscape of the stummel. Cleaning and hydrating the briar along with bringing the rustication through a polishing regimen resulted in transforming an interesting pipe with rustication into an eye catching classy piece of sculpted briar – that just happens to be a Custom-Bilt, thank you.  One additional small change that made a big difference in the final look was the internal rim bevel.  The residual darkened rim from former scorching was helped immensely not only by the rigorous cleaning, but also cutting a simple internal bevel.  In the finished pipe (as shown in the first picture below), that bevel’s high polish now sets off well the rusticated rim – to me, a very classy addition for this Custom-Bilt Panel.  Stephen commissioned the Custom-Bilt Panel to add to his collection of C-Bs and will have the first opportunity to acquire it in the Pipe Steward Store.  The best part is what follows – that this C-B benefits the Daughters of Bulgaria – helping women and girls who have been trafficked and sexually exploited.  Thanks for joining me!


The Challenge Continues… Restoring a Vintage Era GBD


Blog by Paresh Deshpande

As I had remarked earlier in my write up on the late 1850s era FIRST CHOQUIN, A METZ (https://rebornpipes.com/2018/11/17/a-challenging-restoration-of-vintage-era-first-choquin-a-metz/),I could not contain my curiosity to open the third, and the last, box of my inherited pipes. In addition to the regular collection of Barlings, Charatans,Comoys and other assorted collection, I came across two pipes which caught my fancy!!!!!

The pipe on the left bears a football stamp that reads “CHOQUIN” over “A METZ” and the one on the right side simply reads “GBD”  (there are other stampings on the silver ferrule, details of which will be highlighted when it comes up for restoration). Both of these pipes looked vintage and unique enough that I immediately Facetimed with Mr. Steve of rebornpipes. His admission that he is willing for a trade off with me for these two pipes was an indication enough for me to know and understand their uniqueness!!! Thus these two pipes moved to the top of my unorganized and chaotic list of restoration. 

Having now restored the CHOQUIN and experienced the challenges that these vintage pipes pose, I was faced with a dilemma of whether I should consider restoring the GBD or take a break and restore another unique and interesting pipe. Mr. Steve suggested the latter and hence I decided to undertake the restoration of the GBD amidst my hectic schedule.  

This GBD is a long and large pipe with a fairly large and deep smooth briar bowl and a steeply raking shank, the end of which is adorned by a sterling silver ferrule.The horn stem is connected with the shank by a long and hollow Albatross wing bone extension having sterling silver end caps at either end, most probably to strengthen it. The stem attaches itself to the wing bone extension by screw-in type tenon which is attached to this extension. The bowl is stamped on the left side of the shank as “GBD” in an oval encirclement and is the only stamping seen on the stummel. The Sterling silver ferrule at the shank end bears the oval stamp of “GBD” over “M R C LTD”,all in separate squares, over a rhombus which in all likelihood, enclosed the faded number “925” for Sterling silver. For its age, the stamping is crisp and clear.

The large bowl shows beautiful, densely packed birdseye grain on the right side and extending to the front of the bowl,while a combination of tightly packed straight and cross grain adorns the left side and back of the bowl. The shank on the bottom surface appears to be divided into two exact halves, the right side with closely packed birdseye while the left side has tight straight grains. These grains on either side of the shank extend neatly in a straight line to the front of the bowl dividing the grains in symmetrical equal halves.

I searched Pipedia for information on this brand and this model in particular. Even though I could neither find any pictures or mention of this particular pipe that I was working on, I did find some important snippets of information which helped me making an intelligent guess as to the vintage of the pipe. I have reproduced the information that I had gleaned from Pipedia:

A HISTORY OF GBD

In 1850 three gentlemen got together in Paristo establish a firm dedicated to the fabrication of Meerschaum pipes – a courageous step in politically restless times. Ganneval probably came from the area of Saint-Claude where he had learned making wooden pipes. Bondier’s family obviously came from Paris and had immigrated in 1789 to Geneva. He himself had worked as a wood turner in the clay and china pipe industry in and around Saint-Claude making stem extensions etc. Donninger was an Austrian or Swiss and had worked in Vienna, the world’s center of the Meerschaum pipe. They agreed on the acronym GBD selecting the initials of their surnames.

There is a very simple explanation for GBD’s program to turn more”British”: GBD became a British company soon after the turn of the century! In 1902 Marechal and Ruchon sold GBD to A. Oppenheimer & Co.in London.

The business relation to GBD in Paris began as early as 1870. Being the most important customer in the English speaking world, Oppenheimer & Co. were designated as sole distributor for Great Britain, the USA and Canada in 1897.Especially Adolphe Oppenheimer had a burning interest in the pipe business, and Louis’ son James Adler shared that. He should play the most important role in the amicable merger of GBD. A. Marechal, Ruchon and Cie. in Paris was now Marechal, Ruchon & Co. Ltd. (see Marechal Ruchon & Cie. page) – a British firm with four directors: Adolphe Oppenheimer and James Adler had their seat in the head office in London while Auguste Marechal and Ferdinand Ruchon went on leading the GBD factory in the Rue des Balkan in Paris, which was considerably extended and modernised. Ruchon acted as CEO.

Marechal Ruchon & Cie. was a company owned by Auguste Marechal and Ferdinand Ruchon (“& Cie” is the french equivalent of “& Co”) which owned the GBD brand from the end of the 19th century until 1902 when they sold Marechal, Ruchon & Cie. to Oppenheimer Pipe,which in turn changed the name of the company to Marechal, Ruchon & Co., Ltd. Upon the creation of Cadogan, however, the brand was no more, remembered only in the name of the GBD Marcee pipes made until just after the Second World War.

Cadogan Investments Limited is a subsidiary of A. Oppenheimer& Co. Limited. It was formed by Oppenheimer Pipe in 1920 as a holding company for its many recent acquisitions, including BBB,Loewe & Co.,two pipe factories in St. Claude and others. It continued to acquire pipe brands and makers for decades, adding GBD and others to their marquee.

It is from the last two paragraphs above, that I can judge that this pipe was made somewhere between 1902 and 1920!!!!!!

INITIAL VISUAL INSPECTION

The large, deep chamber shows a decent amount of cake build up with overflow of tars and tobacco oils on the surface of the rim top. The condition of the inner walls of the chamber will be ascertained once the cake has been reamed back to the bare briar. The inner and outer edges of the rim show a few odd minute dings. Once I have scraped the lava overflow from the rim top, I shall decide on the method to tackle them and may even decide to let them be. I do not envisage any major surprises inside the chamber as the bowl feels solid to the touch from outside.Air flow is laborious and constricted through the shank and will improve once the internals are cleaned.

The surface of the stummel is covered in oils and tars from the overflowing lava and is sticky to the touch. There are a few dings to the surface of the stummel, more particularly near heel of the bowl and bottom surface of the shank. Should I address them by sanding, I am not sure, as I fear losing the patina during the abrasive process of sanding with sandpaper.

While I was handling the stummel, I realized that the sterling silver ferrule at the shank end had come loose. I removed the ferrule and what was revealed turned my stomach inside out. The glue was hard and dry and the briar had totally dried out and the shank end opening was uneven. I could even make out one small crack running down from the lip of the shank opening. Talk about challenges!!!! This will have to be addressed without fail.

The Albatross wing bone extension is dirty and covered in dirt and grime. There are two superficial cracks on either side near the shank end. I        know these cracks are superficial as the bone surface around it is solid and without any give. These cracks will have to be addressed. The sterling silver end cap towards the tenon end has a flared out rim which is uneven. This causes the bone stem to sit unevenly on the rim. Air flow through the shank extension is clean and full.

The horn stem shows some minor tooth chatter on both the top and underside, but more prominently on the top surface. This should be taken care of by sanding with a 220 or higher grade sand paper. All in all, the stem appears to be pretty solid. The edge of the lip on both upper and lower surface is slightly damaged and will need to be sharpened. Air flow through the stem is open and full.

The sterling silver ferrule and bone shank end caps are deeply oxidized and show the patina normal for its age. Once they are cleaned and shining they will add a class to this pipe.

THE PROCESS

I started the process of restoration by reaming the chamber with size two of the PipNet reamer head and progressing through to size three. I followed up the reaming with scraping the remnants of the cake from the walls of the chamber and the rim top surface with my fabricated knife.Once the cake was reamed back to the bare briar, I used a 150 grit sand paper followed by 220 grit sand paper to remove all the traces of remaining cake and also to smooth the inner walls of the chamber surface. Finally, to remove the carbon dust, I wiped the chamber with a cotton pad wetted with isopropyl 99%. I gently scraped the rim top surface with a sharp knife. Removing all the cake from the chamber and rim top revealed that firstly, the rim was well rounded with no charring and only a minor chip and secondly, as I had anticipated,there was no damage to the inner walls of the chamber.

With 220 grit sand paper, I cleaned the internal and the external surfaces of the shank end opening, which until now was covered by the sterling silver ferrule, to remove all the carbon build-up, oils, tars,grime, dried briar wood and the dried glue. This process results in even more dried briar crumbling off, leaving behind a gaping hole. This needed to be restored as the damage is to that portion which supports the Albatross wing bone extension where it sits in to the shank. I conferred with Mr. Steve and it was decided to reconstruct the damaged portion by layering the gap with superglue and briar dust as the glue hardened immediately on coming in contact with the briar dust.

Before beginning the reconstruction of the broken shank end, I cleaned the internals of the shank, using hard bristled and regular pipe cleaners, q-tips, shank brushes, all generously dipped in isopropyl alcohol. The pipe cleaners would not pass through the mortise airway and the draught hole and so had to resort to more invasive methods. I straightened a paper clip and curving it, probed the insides of the mortise and the airway. After some efforts, I was able to dislodge the block. I scraped the inner walls of the mortise with a fabricated dental spatula. I gave a final cleaning with pipe cleaners dipped in isopropyl alcohol till the pipe cleaners came out, well, clean!!!  The heap of pipe cleaners and q-tips that are seen in these pictures are just the proverbial tip of the iceberg. I must have gone through an entire packet of 50 of both types of pipe cleaners, in addition to the q-tips and brush cleaning!!!!!

I, thereafter, began the process of reconstructing the broken portion of the shank end. I folded a pipe cleaner to fit snugly in to the opening of the shank end. Once I was satisfied with the fit, I smeared the pipe cleaner with Vaseline jelly and inserted it in to the opening.I applied first layer of superglue and pressed a little briar dust over it and let it set for a few minutes. This is followed by another layering and continued this process till I was satisfied with the reconstruction. I set the stummel aside overnight for the reconstruction to cure.

As the shank end reconstruction was curing, I initiated the repair and clean up of the Albatross wing bone extension and the horn bone stem. I cleaned the internals of the wing bone extension and the horn stem with bristled and normal pipe cleaners dipped in isopropyl alcohol.Once the internals were clean, I cleaned the external surface of the extension with cotton swabs dipped in Acetone and finely applied superglue over the superficial crack. This was done primarily to stabilize, strengthen and prevent further spreading of the superficial crack and obviate any chances of air escaping from these cracks in future. I set the wing bone extension to cure overnight along with the shank end repair.

As I had remarked during my initial visual inspection, I felt that the tooth chatter on the lower and upper surface of the horn bone stem should be taken care with sanding it down with a 220 grit sandpaper. How wrong was I! After sanding the upper and lower surfaces of the horn stem, I realized that the tooth chatter was deeper than I had anticipated and would have to be addressed with a fill of clear superglue. And so I filled these tooth chatters with superglue and the stem too joined the ranks of the shank end repair and wing bone extension on the rack for curing overnight.

The next evening, after a hectic and tiring day in office, I decided to work on the shank end reconstruction. I filed the external repaired area with a flat head needle file and carefully matched the profile of the fill with that of the surrounding area so as not to adversely affect the fit of the ferrule at a later stage. I frequently checked the progress by fitting the ferrule over the shank end. I achieved a perfect profile match by sanding the shank end with a used 150 grit sand paper. Once the external profile was matched, I worked on the internal adjustment of the reconstruction to match the seating of the wing bone extension in to the mortise using a round needle file. I frequently checked the seating of the extension in to the mortise and making necessary adjustments by filing till I was able to achieve a perfect fit. To be honest, it was not as easy as it appears while reading it.The amount of time and concentration required cannot be described in words.

Staying on the stummel restoration, I cleaned the external surface of the stummel and the rim top surface with undiluted Murphy’s oil soap and a hard bristled toothbrush and rinsed it under running tap water, taking care that water does not enter the chamber and the mortise. I dried the stummel using paper towels and soft, absorbent cotton cloth and set it aside to dry out naturally. The beautiful grain really stands out at this stage with the symmetrical division of grains on the lower surface of the shank, more distinct and clear. It is easily one of the best grained pipes that I have in my collection. Somehow, I was not satisfied with the way the rim top surface had cleaned up and I again sought the advice of my mentor, Mr. Steve, and received his reply, in his peculiar style, as “I would”, that’s all he had remarked!!!!!!

And so my initial plan for not topping the rim top was shelved and I decided to carefully top the rim surface. This would also help to address the one single chip on the rim’s top surface and also to remove traces of lava overflow. I topped the rim surface with 220 grit sand paper.Though it is recommended to have a wooden board with the 220 grit sand paper firmly fixed over it, I just keep the sand paper on a flat table top, holding it firmly with my left hand and rotating the stummel rim top over it with my right hand. I have come to realize that this set up gives me lot more freedom of movement, better control and convenience of storage. The single chip was addressed to a great extent, but was still an eye sore. Using a folded 150 grits and paper pinched between my thumb and forefinger, I created a very light bevel to mask the chip. Though the bevel is not easily discernible, it helped address the issue of the chipped rim inner edge.

I followed it up by micromesh polishing pads,wet sanding with 1500 to 2400 grit pads. Again, I wiped the bowl with a moist cotton cloth after each pad. I used the 3200 to 12000 grit pads to dry sand the stummel to a nice shine. It was at this stage that DISASTER struck!!!!! The stummel slipped from hands and crashed to the ground, shattering the reconstructed shank end and sustain a big ding to the heel of the stummel. Oh my!!! What agony it would be to reconstruct,re-profile the exterior and readjust the seating of the extension in to the mortise. But at this stage of restoration, I was left with no recourse but to reconstruct.

 This time around, I slightly tweaked the process. I wound a cotton rag around the complete stummel, less area to be repaired, so that the glue and briar dust does not spill over rest of the stummel and create more work for me. I completely sanded the earlier reconstructed portion and applied a layer of superglue and let it cure for a few minutes. Once the glue had hardened, I applied second layer of super glue and pressed some briar dust over it. I repeated this process of layering till I had achieved a matching top surface. I applied a final layer of superglue over the complete reconstruction and set it aside to cure overnight.

The next evening, I worked on the wing bone extension and the horn stem. I sanded the fills on the shank extension and the stem with a 220 grit sand paper. I sharpened the edges on the lip with the help of a flat head needle file and a folded piece of 220 grit sand paper. When the fills were matched with rest of the surface, I progressed to micromesh polishing, wet sanding with 1500 to 2400 grit pads and dry sanding with 3200 to 12000 grit pads. I wiped the shank extension and the stem with a moist cloth after every pad and rubbed a little extra virgin olive oil on the surface after every three pads. The Albatross wing bone extension and the horn stem is nice, smooth and clean. The wing bone extension has retained its natural coloration and there is nothing one can do anything about it. I finished the restoration of the wing bone extension by polishing the sterling silver end caps with cigar ash. At this stage, the entire assembly of the extension and screw-in type of bone stem looks beautiful, smooth, shiny and classic. I call it a day and decide to work on the stummel the next evening.

I start work on the stummel by filing the external surface with a flat head needle file and go through the entire process described earlier to match the exterior and internal surface with the sterling silver ferrule and seating of the Albatross wing bone extension respectively. I was extra careful this time around while working the stummel. You may find it amusing, but I sat on my double bed while I worked on the stummel!!!! Such a fright this incident had caused.

Then there was the issue of a dent near the heel in the stummel surface. Mr. Steve suggested adopting the steaming method to address this dent. Though theoretically I was well conversed with this method, I had never attempted it before and now to attempt it on a pipe of such vintage, beauty and value, had me in doubts. Added to this, I did not have any electric iron in my room as all the laundry, including ironing, is done by the washer man (I do enjoy certain privileges that come at my seniority in my organization). But seeing no other way out, I decided to give it a go. I improvised a bit and heated my trusted fabricated knife on a candle flame, soaked a thick Turkish hand towel and placed it on the dent. When I felt that the knife was sufficiently hot (well, I got it nicely hot!!!), placed it over the hand towel and over the dent. When there was a nice sizzling sound and a thick whiff of steam, I immediately removed the knife away from the surface and with a thumping heart, removed the hand towel to inspect the results, and boy was I pleased!!! The dent was reduced to nothing with the briar expanding nicely to lift the dent due to the steam, but it did leave behind a stark discoloration around the area. After a brief discussion with Mr. Steve and exchange of pictures, he suggested to rub some ‘Before and After’ balm in to the affected area to see if this would help in addressing the issue. Fortunately, it did!!!!Since I had attempted this steaming method for the first time, I was too preoccupied and missed out on taking pictures, my sincere apology to all those who were looking forward to these pictures.

To match the repaired surface with the rest of the stummel, I went through the complete micromesh polish cycle again.

At the end of 12000 grit pad, I rubbed a little quantity of ‘Before and After’ restoration balm in to the stummel with my fingers and set it aside for 10-15 minutes while I polished the sterling silver ferrule. The transformation in the briar is amazing to say the least!!!!! I buffed the stummel with a soft cotton cloth. I finish this stage of restoration by re-attaching the nicely polished and shining sterling silver ferrule over the shank end using super glue.

To finish the restoration, I mounted a cotton cloth buffing wheel to the Dremel (actually it is not the brand machine, but a local machine which is similar).  I set the speed at about 40% full power and applied White Diamond compound to the entire pipe.  Afterwards, I wiped/buffed the pipe with a soft cotton cloth to clear it of any leftover compound dust. I then mounted another cotton cloth wheel to the polishing machine,maintaining 40% speed and applied several coats of carnauba wax.

I finished the restoration by giving the entire pipe a rigorous hand buffing using a microfiber cloth to raise the shine further. The completed pipe looks lovely, fresh and vibrant. Thank you for having the patience to reach this far while reading the write up. Your comments are of utmost importance to me for improving my skills in restoration process as well as writing about it. Cheers!!!

PS. During the journey of restoring this beauty, my Guru and mentor, Mr. Steve was always around with his words of wisdom and encouragement to egg me on towards completing this project. It felt like he was holding my hand and helping me take my first baby steps around towards completing this restoration. Thank you once again, Mr. Steve.

Restoring a Strangely Shaped Hilson Dromedary with an Oval Shank


Blog by  Steve Laug

My friend Alex stops by now and then with pipes that he has found on his pipe hunts in the city. Generally he has some very interesting pipes he picks up on these hunts. The other night when he came by he brought along a strange one made by Hilson after they had moved to Holland. It is called a Dromedary.    I suppose it was named after the Arabian one-humped camel that was a light and swift breed trained for riding or racing. When I was in Jaipur, India I saw Dromedary camels pulling carts and wagons in the streets of the fabric district (see the photo to the left). The single hump clearly distinguishes them from the other 2 humped camel.

This Hilson was obviously named after that work animal from the East. The single hump on the shank while at first glance is ugly nonetheless fits nicely as a thumb rest for either right or left handed pipe smokers. I cannot find a timeline for the duration of the brand but I have seen them on EBay and other sale sites so I am assuming there are enough of them out there to still be in existence. It is the first one that I have had in hand and the first one that I have worked on. I took photos of the pipe before I started my cleanup work on it. They show the general condition of the pipe.

The finish on the bowl is very dirty and grimy but you can see some interesting cross grain left side of the bowl working down to the underside of the shank. The back of the bowl show some of the same grain and on the sides there is a mix of birdseye and swirled grain. On the right side there is a small fill that has come loose from the briar leaving behind a divot. The rim top is very dirty with a thick coat of lava overflowing from the bowl. It also shows some damage on the inner edge – it looks to have been reamed with a knife and the gouges show even under the grime. There is a burn mark on the back ride side of the rim and going down the back of the bowl about a ¼ inch. The bowl has a thick cake that is uneven all around the bowl. The stamping on the shank is readable and the area around it is very dark. The stem is oxidized and dirty. There is a slight H mark on the top side near the shank stem junction but it is pretty shallow in the vulcanite.

The next closeup photos of the bowl and stem truly show the condition of the pipe before I started.You can see the lava build up and damage to the rim top as well as the cake in the bowl. The bowl had a fairly thick cake overflowing onto the rim. The stem was very oxidized and spotty with tooth chatter and marks on both the top and underside of the stem near the button. There is a faint Hilson H logo stamped on the top of the oval stem. I do not know if it is deep enough to salvage.

The pipe has some nice cross grain that is shown in the first photo of the left side of the bowl. The right side is a mix of grains – swirled, flame and cross grain. The top and underside of the bowl and shank show some interesting, almost undulating grain patterns. This is particularly visible on the top view moving up and over the hump. It is a great piece of briar that shows a lot of promise.

The pipe is stamped on the underside of the oval shank. It reads Hilson over Dromedary over Made in Holland. At the shank/stem junction it has the shape number stamp 712.The photo below shows that the stamping is readable. (The second photo shows the stamping after I had removed the dark stain and polished it carefully with the 1500-2400 micromesh sanding pads.)

It has been awhile since I worked on a Hilson so I did a quick review of the history of the brand. This always adds some value to my mind when I work on a pipe. I remembered at some point Hilson had been sold to Gubbels who made the Big Ben pipe. At that time, it moved from being a Belgian made pipe to being made in the Netherlands/Holland. I turned to Pipedia and read the entry on Hilson there(https://pipedia.org/wiki/Hilson)and to Pipephil’s site to read what he had for information (http://www.pipephil.eu/logos/en/logo-h3.html).I have combined and summarized the pertinent information from the two sites.

In 1846 a German named Jean Knödgen started to produce clay pipe in Belgium. In the late 19th century Jean Hillen who married into the Knödgen family took over the company and changed the firm in order to manufacture briar pipes. Jean Hillen had 2 sons: Jos Hillen was responsible for sales and Albert Hillen was responsible for the production.After WWII Albert founded the HILSON brand (Hillen and Son) and exported his pipes all over the world.

…In the 1960’s and still throughout the 1970’s the brand Hilson of Broers Hillen B.V. (Hillen Bros. Co.) was quite successful in many European countries. They produced large numbers of machine made pipes covering the whole range of shapes and finishes. The pipes were well respected for good quality and craftsmenship at very moderate prices.

…in 1980 Hillen faced major financial problems. After having gone bankrupt, the Belgian brand from Bree (Limburg) wastaken over by the Royal Dutch Pipe Factory. The owner, Elbert Gubbels used the favour of the hour and bought the company…The Hillen plant in Bree was closed down shortly after and ever since then Hilson pipes are manufactured in Roermond, NL.

Given that the plant in Bree, Belgium closed around 1980 after Gubbels had purchased the company, I knew that the pipe I was working on had been made after that time.The Made in Holland stamp on the underside of the shank gave that information.I am not sure that I can get any closer in terms of a date for the pipe.

I reamed the bowl with a PipNet reamer to remove the cake and cleaned up after the reaming with a Savinelli Fitsall pipe knife (no photo, sorry!). I wrapped 220 sandpaper around a piece of dowel and sanded the inside of the bowl.

I topped the bowl on a piece of 220 grit sandpaper on the topping board. I scrubbed the finish with a cotton pad and Murphy’s Oil Soap to remove the grit and grime. I scrubbed the rim top at the same time to remove the sanding dust. I rinsed the bowl under running water and dried it off. The grain really is quite beautiful at this point in the process. There are some repairs that need to be done on the right side of the bowl but the bowl shows a lot of promise.

I sanded the burn mark on the back side of the bowl and filled in the damaged fill on the right side with a mix of super glue and briar dust. When the glue dried I sanded the repair with 220 grit sandpaper to blend the area into the rest of the briar surface. I apologize because I was on a roll so I forgot to take photos of the repairs. I wiped down the bowl with an alcohol dampened cotton pad to remove the sanding dust and smooth out the finish. The grain is looking really good. The burn mark, though still visible is better. The repaired area is also far better.

I polished the briar with micromesh sanding pads –wet sanding with 1500-2400 grit pads and dry sanding with 3200-12000 grit pads.I wiped the bowl down with a damp cotton pad after each grit of micromesh was finished. The bowl is beginning to take on a real shine and the grain is becoming more prominent.

With the bowl polished it was time to address the lighter rim top and the repairs to the burn and the fill on the rear and right side respectively (result of sanding). I used an Oak Stain Pen to touch up the areas and darken them to match the rest of the bowl. Once the stain dried the match was really good and the pipe looked better.

I worked Before & After Restoration Balm into the briar with my fingertips to clean, enliven and protect the wood. I let the balm sit for about 20 minutes and buffed it off with a soft cotton cloth. I took photos of the pipe at this point in the process to show what the bowl looked like. The grain is quite beautiful and the colour of the briar is perfect to highlight it. I am happy with the look of the pipe.

I set the bowl aside and turned my attention to the stem. It was pretty rough looking and would take some work. I sanded the surface carefully with 220 grit sandpaper to remove the tooth chatter, marks and oxidation. While I worked on it I noticed I had not cleaned the inside of the stem and went back and looked at the shank and bowl… my goodness I totally forgot to even touch that part after reaming the bowl. I brought the stem sanding to a halt and turned back to cleaning up the internals. I cleaned out the airway in the stem and shank as well as the mortise with alcohol, cotton swabs and pipe cleaners. It was really a mess. I picked out the crud in the corners of the stem with a dental pick. Here are some photos of the cleanup. I feel better about the pipe now! Whew I can’t believe I missed that… been a hard week.

I returned to sand the stem some more. I was able to remove all of the chatter and all but one of the deep tooth marks on the underside of the stem. I heated it a little to raise it then filled it in with some clear super glue and set it aside to cure.

When the repair had cured I used a needle file to flatten the repaired area. I smoothed out and blend it into the stem surface with 220 grit sandpaper.

I polished the stem with micromesh sanding pads – wet sanding with 1500-2400 grit micromesh sanding pads and then polished it with Denicare Mouthpiece Polish.

I dry sanded it with 3200-12000 grit pads. I rubbed the stem down with Obsidian Oil after each pad. I polished it further with Before& After Pipe Polish, using both the Fine and Extra Fine polishes to furtherprotect and polish out the scratches. When I finished with those I gave it afinal rub down with the oil and set it aside to dry. 

With the stem polished I put it back on the pipe and buffed the bowl and the stem with Blue Diamond. I gave the bowl several coats of Conservator’s Wax and the stem several coats of carnauba wax and buffed the pipe with a clean buffing pad to raise the shine. I hand buffed it with a microfiber cloth to deepen the shine. The pipe polished up pretty nicely. The finished pipe is shown in the photos below. This Hilson Dromedary 712 will soon going back to Alex. The dimensions are Length: 5 3/4 inches, Height: 1 3/4 inches, Outside diameter of the bowl: 1 1/4 inches, Chamber diameter: 7/8 inches. I am looking forward to seeing what Alex thinks of this one. I will be calling him soon to come and pick up the pair. Thanks for walking through the restoration with me as I worked over this old dromedary.

The Filthiest Pipe I’ve Ever Seen


Blog by Robert M. Boughton
Copyright © Reborn Pipes and the Author except as cited
https://www.roadrunnerpipes2k.com/
https://www.facebook.com/roadrunnerpipes/

You can’t judge a book by its binding.
— From the journal American Speech, 1944

INTRODUCTION
The Dr. Grabow easy bent smooth billiard I came by in a foolish case of mistaken identity on eBay looked normal enough on the outside, other than an apparent crack that wasn’t visible in any of the seller’s few photos.  The zigzag flaw extended from the top front of the bowl almost halfway down, which of course was not a good sign in a pipe when the intent was to sell it – and I definitely did not want to keep it for my own collection.  The dubious pipe came as part of a lot with two others of its ilk; an old Karl Erik box; two very nice choice sleeves – one that was also for a Karl Erik and the other for a Butz-Choquin – and two Revelation Smoking Mixture tins of indeterminate age.  Venturing a guess, I’d say they’re no newer than the pipes.

My haul, minus the Dr. G, Yello-Bole and MedicoMy impression from the poor photos provided online was that one of the pipes must have been a Butz-Choquin.  You see, the only descriptions of the pipes given in the listing were that they were “vintage,” and you guessed it, I fell for the deliberate obfuscation, and Buy Now to boot.  As the only measure of self-defense I can muster, at least I only paid about $10, with shipping included.  They turned out to be this Dr. Grabow and two Yello-Boles, one a Spartan.  The Spartan did clean up purty compared to how it was.The Dr. G. is six inches long but otherwise very small.  The height is 1.5” and the inner bowl diameter is ⅝” x 1”  As a rule, unless the particular pipe is very old or has some other special attribute, I shy away from this name and Medicos and the like, although I’ve found almost anything will sell to someone who is a fan of a given brand.  In fact, just last week at my monthly pipe meeting I sold the Spartan with a stem logo of a yellow Y in a circle to a friend who happens to be my best customer.

The friend has accumulated some great pipes from me – such as a late 1930s Kaywoodie Super Grain and a Ropp last month – and an amazing collection of antiques including a few KB&B beauties, but he admits to having a weakness for vintage Yello-Boles.  I estimated the Spartan dated to the 1960s, and my friend somehow traced it on his cell phone to 1966.  That’s what I call a Yello-Bole devotee.

At any rate, the Dr. G. billiard remained quarantined in a box for more than a year with others that are so tragic I’m sure I’ll end up using them as examples of pipes never to buy.  In short, only when it was the last pipe I had to work on did I gather the gumption to go for it.

But as I already noted, all outward appearances showed nothing I couldn’t handle without too much effort, including the odd zigzag on the bowl.  The inside turned out to be a different matter altogether, one for the books as far as I’m concerned.

RESTORATION

I wanted to get the pipe in a basic clean order before tackling the crack.  Starting with the light rim char and cake in the chamber, I used super fine “0000” steel wool on the rim to begin and a pen knife around the walls of the chamber that was too small to insert a reamer – meaning the one size I have.  Then I sanded the rim with 1000-grit paper and the chamber using a pinkie and 150- and 220-grit papers. I cleaned off the old blackness from the shank opening with the same steel wool and wiped down the entire stummel with purified water on a paper towel.Now the crack I mentioned is apparent.  Knowing it wouldn’t get rid of the crack, I sanded the outside of the wood with 1000-grit paper to remove the other small but pervasive blemishes. With the pipe more or less spiffed up, I could see the crack was hairline, so to speak, not penetrating the bowl in any visible way.  That was a relief as I knew I could make it go away altogether with sanding.  I tried 150-grit paper, and that looked like the end of the ostensible crack.  I followed up with 320-, 400-, 600- and 1000-grit papers.A full micro mesh progression left the briar looking absolutely fabulous, or abfab, as British interior designers like to gush about wood.  To be serious, though, which I often try not to be, knowing it drives some readers nuts but keeps me sane, the micro mesh step – if I had to choose just one from all of the routine tasks in a pipe restoration – is my favorite.  Seeing the resilience of wood, or briar anyway, that allows it to bounce back from ruin is to me what sunshine was to John Denver.  Well, not exactly, but you get the idea. The front shot above, I’m sorry to say, doesn’t show how pale most of that side was even after micro meshing.  Suffice it to say, a spot stain was necessary with Lincoln brown leather dye.  I took a little more joy in staining and flaming it. Looks like everything is going great, doesn’t it?  That’s rhetorical.  Only after thinking I was almost finished did I commence the part that turned into a singular horror the like of which I never before experienced.  Without exaggerating at all, I admit I was sure I had found a pipe that could not be cleared of all impurities, no way, no how.  I’m sure this sounds like more of my melodramatic foolery, but for once I am being as serious as I get.  I suspect I may have some kind of world record, if people registered such statistics, but no doubt Steve, if perhaps no one else, has a worse story or stories to tell.  I’d love to hear them!

To wit, I found myself at the point of having to deal with the inside of the billiard.  Nothing prepared me for the almost human resistance and downright orneriness I encountered, not to mention the smoking implement’s physical manifestation of the common human psychological condition of filthiness.

The pictures that follow, showing the pre-cleaning, retort and aftermath of all that, with nine pipe cleaners, a nylon bristle cleaner, two cotton plugs and a wasted (in the colloquial sense) candle, don’t approximate the work and time already expended on cleaning and sanitizing the inner passageways of the pipe.  I included the Tupperware with spent alcohol as a clue to how much I boiled through the guts of the thing, with the wholly unsatisfying and unacceptable final Pyrex tube as dark as every other, but it still isn’t sufficient to understand my frustration, so I’ll tell you.  I had already used up 13 tubes of alcohol, getting nowhere.I knew I could use any number of pipe cleaners dipped in alcohol on the shank and it would do no good.  And so I started again, with a fresh retort (and candle and two more cotton plugs).  After nine more tubes boiled through the pipe – that’s a total of 22 – I at last achieved a clear enough result that didn’t get darker after three trips through the bowels of the Grabow.I don’t know, maybe this isn’t so unusual.  Or maybe I need a better retort system, as I’ve been looking forward to buying, something like the first one below, probably self-made by my friend Chuck Richards, or even the other I found online.

Hand-held laboratory-style retort system made by tbus6906, eBay, and an actual lab setup from best collection999 at eBay

And now for the stem, starting as it appeared when I got it and after the various phases of smoothing and buffing. And here is the finished pipe, the stem machine buffed with red and white Tripoli and the stummel with White Diamond and Carnauba. That’s a Medico filter in the stem, BTW, because it’s all I have and it fits!  Besides, whoever buys the Grabow will probably toss it.

CONCLUSION
This was an unusual restore for me for a couple of reasons. One, I set out thinking the big deal was going to be fixing a bad crack, and two, the real problem ended up being hidden within.  My previous record for the number of Pyrex tubes of alcohol I had to run through a pipe was nine, for a pipe I haven’t blogged yet.  I thought that was bad until I was faced with the harsh reality of this dainty little Grabow!  It’s the right size for most women (no sexism intended but I’ll probably get flack for that), but only a man could have smoked a pipe for possibly 40 years without ever really cleaning it.  Maybe that will get me off the hook with any female smokers who read this.

Oh, yes, a note about Revelation Pipe Mixture.  Never having heard of it and suspecting it’s out of production, I found I was correct about the latter part.  It was blended by House of Windsor, which still makes about 20 mixes, mostly aromatics, in the U.S.  Revelation was a coarse-cut (based on the photo I found, despite the description as ribbon cut) American blend of bright flake and red flake Virginias, cube cut burley, Kentucky, latakia, perique and “citrus/misc.”  It seems to have been somewhat popular given a 3.1 out of 4 rating at TobaccoReviews.com.  Legend says this was Albert Einstein’s go-to mix, so it couldn’t be all that bad.  It seems a reincarnation of this tobacco is being made in bulk form and true ribbon cut, from the same ingredients.  The link to the source is below for anyone interested.  Revelation was made by Philip Morris Co. Ltd. Inc. and distributed by Continental Tobacco Co.  I guess the tins are pretty old because companies aren’t named like that anymore.

SOURCES
https://www.ebay.com/itm/Professional-Pipe-Retort-Kit-/252292269562
https://www.ebay.com/itm/50cm-Lab-Laboratory-Retort-Stands-Support-Clamp-Flask-Platform-Alcohol-Bottle-Tu/113144136090?_trkparms=aid%3D555018%26algo%3DPL.SIM%26ao%3D1%26asc%3D20131003132420%26meid%3Dea98143cf6974165b8baaa44c36acc79%26pid%3D100005%26rk%3D3%26rkt%3D8%26sd%3D312302738289%26itm%3D113144136090&_trksid=p2047675.c100005.m1851
http://www.tobaccoreviews.com/blend/1219/house-of-windsor-revelation
http://www.tobaccoreviews.com/search?Blender=House%20of%20Windsor
http://wvsmokeshop.com/revelationalternativebytheounce.aspx

Restoring Life to a Early 20th Century Gitana Depose Apple


Blog by Steve Laug

I was going through boxes of old pipes here, sorting and getting them ready to sell as grab bags. In the process I came across this pipe. It is stamped Gitana in an oval with an L on the left of the oval and G on the right side of the oval. Underneath the oval stamp is the word Depose. There is a polished aluminum band on the end of the shank. The briar is quite nice with birdseye around the bowl. The stem is horn and has a lot of tooth damage next to the button on both sides. There are deep troughs carved by the teeth in the horn material on both sides. The rim had a lot of damage from burn marks and the inner edge had been damaged by reaming with a knife. There was a white waxy substance on the inside of the bowl from the edge down about a ½ inch. There was a light cake in the bowl and some light lava on the bowl top. I took a close up photo of the rim top to show the damage to the inner edge of the bowl from the reaming job. The cake on the bowl sides and the tarry oil on the rim top are also visible. The briar at the top is quite damaged and will take some work to remove the knife cuts and deep gouges in the briar. The stem is also shown with the chewed damage on both sides.  I removed the stem from the shank and was a bit surprised by the aluminum system that was inside. The tenon was aluminum and had a bullet shaped cap on the end of it. The cap had a hole in the top that allowed the smoke to be drawn through the airway in the stem. The previous own had wrapped the aluminum portion of the tenon with what looked like aluminum foil to build it up to fit tightly in the shank. The photos below show the tenon and the system. I was unfamiliar with the brand and was surprised by the tenon system. I did some searching online and could find nothing on the Gitana brand or the Gitana Depose brand. I did happen across a similar pipe on Smokingpipes.com. The writer who described the pipe for the site wrote the following which contained some really helpful information. I quote:

We were able to ascertain a little information about La Gitana, which was a French brand created by Chapel Frés…but this relic from the early 20th century still sports its original horn stem, coupled with a novel aluminum tenon arrangement that we can only assume is meant to trap moisture. Although we aren’t sure how well it achieves this, it does do quite well at looking like an old-school James Bond accessory. It fits securely within a cork-lined mortise, which many briars of this period tended to have. https://www.smokingpipes.com/pipes/estate/france/moreinfo.cfm?product_id=196840

From that I learned that the brand was called La Gitana. It was a French made pipe from a company called Chapel Frés. It was made in the early 20th century and the author had described the tenon system like the one I had.  I also learned that the mortise had originally been cork lined to facilitate holding the tenon snuggly in the shank. This was what was missing in the pipe I had and it had been replaced with the foil mess that is seen in the above photos.

Armed with the name Chapel Frés I looked on Pipedia under French Pipe Companies and found the brand there. It stated that it came from that factory and the brand had been founded in 1904 in Saint-Claude, France. Here is the link https://pipedia.org/wiki/Chapel_Fr%C3%A9s.

Armed with that information I started my cleanup of the stem. I scraped away the foil that was wrapped around the tenon. I examined the bullet shaped cap on the tenon and figured out that it unscrewed from the tenon. I cleaned the metal underneath alcohol, cotton swabs, pipe cleaners and steel wool. I cleaned out the airway in the shank at the same time. The tube in the end of the tenon looked clean. I used alcohol, cotton swabs and pipe cleaners to clean out the inside of the bullet cap. I cleaned out the walls in the shank with pipe cleaners, cotton swabs and alcohol. It was a very dirty pipe that once it was clean had an interesting look to it. I cleaned up the inside of the bowl with a Savinelli Fitsall Pipe Knife. I scraped the walls clean of the carbon build up. I sanded the walls of the bowl with a piece of dowel wrapped with 220 grit sandpaper.To remove the damage on the rim top I topped the bowl until the damaged areas were removed and the rim top was clean. I used a folded piece of sandpaper to smooth out the inner edge of the rim and bring it back to round as much as I could. I washed down the exterior of the bowl with acetone on a cotton pad to remove the finish and the grim on the briar. The pipe looked really good at this point. I needed to round down the outer edges to bring it back to the shape it was when I started but for now it was clean. I took a photo of the stamping on the left side of the shank. The stamping is quite readable and clear.The tenon had some sticky substance for the glue on the foil on the tenon end. The tenon and threads still needed more cleaning to remove the oils.I filled in the tooth marks and troughs in the surface of the horn with clear super glue. I set the stem aside to dry.I decided to try to fit a cork in the shank to line it as suggested above. I cut away some of the excess cork from a wine cork I had. I trimmed it down with a Dremel and sanding drum until the diameter was close to the inside of the shank. I drilled it out with a series of drill bits starting small and working my way up to one that was close to the size of the tenon. I sanded down the cork exterior until it was a fit in the shank. I pressed it in place in the shank.I used a needle file to thin down the inner walls of the cork lining. It needed to be very thin to allow the tenon to fit in the shank. I tried to put the tenon in the shank. The fit was still not right. The cork was too thick to allow a fit. I pulled it out of the shank and slid it over the tenon. I sanded it down with sandpaper and files until it was a good fit. I glued the cork on the tenon and let it dry. When it cured I rubbed the cork down with Vaseline to soften it and allow it to slide into the shank. The fit was very good. I took some photos to show what the pipe looked like at this point in the restoration (I had also started the shaping on the bowl top). I polished the briar with micromesh sanding pads – wet sanding it with 1500-2400 grit pads and dry sanding with 3200-12000 grit pads. I wiped it down with a clean cloth after each pad. The grain began to pop and really stand out. Once the glue repairs cured I sanded them with 220 grit sandpaper to smooth out the repairs. I sanded them to blend them into the surface of the horn. I polished the stem with micromesh sanding pads – wet sanding with 1500-2400 and dry sanding them with 3200-12000 grit pads. I wiped the stem down with Obsidian Oil after each pad. I gave it a final coat and let it dry. The following photos show both sides of the stem. I worked Before & After Restoration Balm into the briar and the horn stem with my fingertips to clean, enliven and protect the wood and the horn. I let the balm sit for about 20 minutes and buffed it off with a soft cotton cloth. I took photos of the pipe at this point in the process to show what the bowl and stem looked like. I am happy with the look of the pipe. I polished the bowl and stem with Blue Diamond to polish out the scratches in the briar and horn. I gave the bowl and the stem multiple coats of carnauba wax. I buffed the pipe with a clean buffing pad to raise the shine. I hand buffed it with a microfiber cloth to deepen the shine. The pipe polished up pretty nicely. The original patina on the bowl came alive with the buffing and worked well with the polished striated horn stem. The pipe has a rich look. The finished pipe is shown in the photos below. The shape, finish and flow of the pipe and stem work give the pipe a very classic look. The dimensions of the pipe are Length: 5 1/2 inches, Height: 1 1/2 inches, Outside diameter of the bowl: 1 1/2 inches, Chamber diameter: 3/4 of an inch. Thanks for reading this while I worked on it. It was interesting and unusual piece to restore and I really enjoyed the work.

A Challenging Restoration of Vintage Era First Choquin “A Metz”


Blog by Paresh Deshpande

I had been on a short leave to my home town last month and that is where this happened!!!!! Even though there are still a number of pipes from the two of the three inherited boxes of pipes waiting their turn for restoration, curiosity got the better of me and I could not resist the temptations of opening the third box. What happened thereafter is that I had to unpack all the pipes earmarked to accompany me to my work place for restoration in my free time which in turn invited the wrath of my wife who had helped in packing in the first place, and repack the newly selected pipes from the third box!!!!!! In addition to the regular collection of Barling’s, Charatan’s, Comoy’s and other assorted collection, I came across two pipes which caught my fancy!!!!!The pipe on the left bears a football stamp that reads “CHOQUIN” over “A METZ” and the one on the right side simply reads “GBD”  (there are other stampings on the silver ferrule, details of which will be highlighted when it comes up for restoration). Both these pipes looked vintage and unique enough that I immediately Facetimed with Mr. Steve of rebornpipes. His admission that he is willing for a trade with me for these two pipes was an indication enough for me to know and understand their uniqueness!!! Thus these two pipes moved to the top of my unorganized and chaotic list of restoration.

The pipe first on my work table is the CHOQUIN. It is a huge pipe with a humongous acorn shaped smooth briar bowl with a steeply raking shank, the end of which is adorned by a fixed sterling silver ornamented ferrule. This similarly designed sterling silver also masks the tenon of the horn stem.The shank and the horn stem are connected by a push-fit type bone extension. The huge acorn bowl shows beautiful, large and loosely packed birdseye grain on the right side while mixed grain adorns the left side. The stummel on the front, back and the shank displays densely packed straight grains. The only stamping that is seen on this pipe is the football stamp on the left side of the shank and reads “CHOQUIN” over “A METZ”. For its age, the stamping is crisp and clear.This time around, before commencing the restoration process, I posted the pictures of this pipe on the Tobacco Pipe Restorers group on Facebook as my next project. In addition to input from my mentor, Mr. Steve, I collected a lot of valuable information from all the knowledgeable stalwarts. From all the input that I have gathered, the flat bottom bowl, the stamping, the sterling silver adornments, the bone shank extension and horn stem, I can safely place this piece as being one of the first A Metz pipes from the 1858 era!!!!!

INITIAL VISUAL INSPECTION
Well, even before I could start my initial visual inspection, I faced the first of the many numerous hurdles that I had to overcome during the restoration of this pipe. The shank extension and the stem would not budge even a millimeter to separate from the shank and the bone extension respectively. I remembered Mr. Steve referring to the technique of freezing the stuck parts in the freezer for a couple of hours for easy separation. I followed his advice and had to put the complete pipe in the freezer for a couple of hours as it could not be dismantled. True enough, the horn stem separated from the shank extension with the application of a little force, but the extension would not budge from the shank!!!! So I went back to Mr. Steve to tap in to his wealth of knowledge and experience. He suggested that I should apply the method of “Hot and Cold” shock treatment in which you gently and carefully heat the stuck part using a heat gun and then get it back in to the freezer. This process may need to be repeated a number of times before the parts separate. Well, I did exactly that, albeit heating with a hair dryer as I did not have a heat gun, and after 3/4 attempts, the extension finally separated from the shank!!!!The first thing that I noticed was that the shank extension and the mortise were completely filled with oils, tars and grime. The shank extension was filled to an extent that a pipe cleaner would not pass through!!!! How very much typical of my Old Man!!!!!!! Through all this muck, just a swipe of the bone extension with a cotton swab dipped in isopropyl alcohol revealed no apparent damage to the shank extension. Cleaning this would need to be a very careful, meticulous, time consuming and a tedious process given the delicate structure of such a vintage bone. Likewise, the tenon also was filled with oils and grime. Air flow through the stem was laborious to say the least!!! Both the upper and lower surface of the horn stem shows significant damage. The lower surface is peppered with 3-4 worm holes with one significantly larger than the other. Thankfully, it had not migrated through the upper surface!!!! The tenon is completely and permanently encased in the sterling silver ornament. The condition of the stummel was an equally horrendous story. Firstly, the rim top is heavily covered in overflowing lava. The overflow is so heavy that it has accumulated over the rim surface in blobs of dried tar and tobacco oil which can be seen in the subsequent pictures. This overflow had not restricted itself to accumulation on the rim top, but has spilled on to the stummel surface covering the stummel in sticky grime which has attracted more dirt and dust giving the stummel a dull and lackluster appearance. The overflowing lava has even accumulated in the junction where the shank and bowl are joined.  Some dents and dings are seen on the surface through the overflow and I do not envisage any major issue like the ones I faced while working on an Imperial Yello-Bole Carburetor that I had I restored. However through all this dirt, tar, oil, grime and damage, lovely grains can be seen on the sides and the shank. It will be a challenge to address these issues and make the grains to reveal themselves in all glory. The chamber is no different story!!! There is a thick build up of cake in the chamber. The inner edge of the rim is covered under the thick cake and as such, its condition can be commented upon only after the cake has been scrapped. The outer edge of the rim, however, shows significant damage in the form of dents, dings and deep scratches to the front in 12 o’clock direction. The cause for this damage is….. Oh, forget it, let’s not even go there!!!! The condition of the inner walls of the chamber can be ascertained only after the chamber has been completely reamed devoid of any cake, but I do not foresee any major damages here as the stummel feels solid to the touch and this huge solid piece of briar can sustain some serious damage. You have to feel the stummel in your hand to understand what I am trying to write. It is one heavy and handful of a pipe!!!!The sterling silver ferrule and tenon ornament was black as is typically seen in heavily oxidized silver. However through all this discoloration, delicate, intricate decorative design can be appreciated. This is another pointer towards the vintage of this pipe.THE PROCESS
I started the process of restoration by polishing the sterling silver ornaments at the shank end and tenon with pipe ash as suggested by Mr. Steve. This was followed by reaming the chamber with size two of the PipNet reamer head and progressing through to size four. Yes Sirs, there is no typo error!!! It is indeed PipNet and not a Kleen Reem reamer as you have gotten used to reading in my write ups !!!!!! Mr. Steve has sent me a set along with some beautiful pipes that I had got from him. I followed up the reaming with scrapping the remnants of the cake from the walls, flat bottom of the chamber and the rim top surface with my fabricated knife (Oh, how I long for a Sav Fitsall reaming knife!!! Hope you are reading this Steve Sir). The cake was so hard, that I invariably ended up scratching the flat bottom surface while scraping. Once the cake was reamed back to the bare briar, I used a 150 grit sand paper followed by 220 grit sand paper to remove all the traces of remaining cake and also to smooth the inner walls of the chamber surface. Finally, to remove the carbon dust, I wipe the chamber with a cotton pad wetted with isopropyl 99%. I gently scrapped the rim top surface with a sharp knife. Removing all the cake from the chamber and rim top revealed that firstly, the rim was out of round and secondly was a web of fissures along the internal walls. There was one crack, which showed prominently after a cleanup with Murphy’s oil soap, bothered me and can be seen in the pictures below which has been highlighted by a red circle. I shared these images with Mr. Steve and Mr. Dal Stanton for their opinion as to the extent of damage and further repairs. They too expressed fears that the crack may have migrated through the stummel. Mr. Steve suggested picking the crack on the top of the rim using a toothpick and filling it with CA superglue. I decided that I would address this issue later after further investigations. I cleaned the internals of the shank, shank extension and the stem using hard bristled and regular pipe cleaners, q-tips, shank brushes, all generously dipped in isopropyl alcohol. I had never used such drastic measures like initially cleaning the bone shank extension by carefully inserting a round needle file for creating an opening through which pipe cleaners could pass through for subsequent cleaning. The heap of pipe cleaners and q-tips that are seen in these pictures are just the proverbial tip of the iceberg. I must have gone through an entire packet of 50 of both types of pipe cleaners, in addition to the q-tips and brush cleaning!!!!! To further deep clean and refresh the internals, I used cotton and alcohol soaks. Using a cotton ball to create a wick, I inserted it through the mortise and into the airway. I then stuffed the bowl with tightly packed cotton balls and placed it in bowl filled with rice grains to provide stability. Similarly I made a tight cotton wick and inserted it through the bone shank extension to further remove all the oils, tars and smells. With a large eye dropper, I then filled the bowl and the bone shank extension with isopropyl 99% until it surfaced over the cotton. I refilled the alcohol in a few minutes after it was absorbed into the cotton balls. I put the stummel and the bone shank extension aside for several hours to soak. After some time, the cotton and the wick were soiled. I discarded the expended cotton and wiped the bowl and the bone shank extension with paper towel. To make sure all was clean, I used a cotton bud and pipe cleaner dipped in isopropyl 99% and they came out clean. I cleaned the stummel with undiluted Murphy’s oil soap and Scotch- Brite pad and rinsed the stummel under running tap water. This cleaning helps in bringing to the fore any other damage which could be hidden under all the dirt and grime. Fortunately, there were no major dents, dings or gouges to the stummel. There were a few minor ones which I think would be addressed when I would sand the stummel surface and subsequent micromesh polish. I dried the bowl with a paper towel and soft cotton cloth. Initially I had decided that I would not be topping the rim top and maintain its original profile. However, in order to ascertain if the crack had migrated through the stummel, I decided to top the rim surface. This would also help to address the numerous dents, dings and scratches on the rim’s top surface and also to remove traces of lava overflow. I topped the rim surface on a 220 grit sand paper. Though it is recommended to have a wooden board with the 220 grit sand paper firmly fixed over it, I just keep the sand paper on a flat table top, holding it firmly with my left hand and rotating the stummel rim top over it with my right hand. I have come to realize that this set up gives me lot more freedom of movement, better control and convenience of storage. Fortunately, it was revealed that the supposed crack was superficial and had not migrated through. Staying with the rim, the next issue that I addressed was the inner rim edge. With a folded piece of 180 grit sand paper pinched between my thumb and fore finger, I created a light bevel on the inner edge. This addressed the issue of uneven and out of round inner edge. The damage to the outer edge was addressed to a great extent when I had topped the rim top surface. Whatever little dents and nicks that remained on the outer edge were very minor, though visible, and I decided to let them be.I sand the stummel surface with a 220, 320, 600 and 1000 grit sand paper, in that order, to remove the minor scratches and marks on the rim and stummel surface. I frequently wiped the sanded surface with a moist cloth to remove the briar dust and also to check the progress of my work. Once I was satisfied with the match, I followed it up by micromesh polishing pads, wet sanding with 1500 to 2400 grit pads. Again, I wiped the bowl with a moist cotton cloth after each pad. I used the 3200 to 12000 grit pads to dry sand the stummel to a nice shine. I was disappointed when after all my efforts up to this stage; there were some very minute chips that were visible in pictures. But overall, at this stage of restoration, the entire bowl, rim top surface and shank is looking fresh and clean. Even though some of the dents and chips could not be completely addressed and are visible only on very close visual scrutiny, in my view, they lend this pipe a battle scarred warrior like a character. I rubbed a small quantity of “Before and After Restoration Balm” with my fingers deep in to the stummel surface. What this balm does is it revitalizes the briar wood and breathes a new life in to the briar. It’s amazing to see the transformation as the balm works its magic on the briar wood. I further buff it with a horse hair shoe brush. Turning my attention to the horn stem, I cleaned the stem surface, including the worm holes, with q-tips dipped in isopropyl alcohol to remove all the dirt and dust before the fill. I filled the worm hole on the bottom and top surface with clear CA superglue and set it aside to cure.  Once the superglue had cured, I sanded the fills with a flat head needle file. To further match the fills with the surface of the stem, I sanded it with 220, 320, 600 and 1000 grit sand paper. I wiped the stem with cotton pad dipped in alcohol to remove the resultant dust. I rubbed some extra virgin olive oil in to the stem and set it aside to be absorbed in to stem. A few minutes later, I polished the stem and also the bone shank extension with micromesh pads, wet sanding with 1500 to 2400 grit pads and dry sanding with 3200 to 12000. I rubbed a little extra virgin olive oil in to both after every three pads. The stem is now nice, smooth and shiny while the extension though smooth and shiny, still had the golden brownish hues of the tobacco oils and tars. I was wondering as to next course of action, Mr. David Goostree, an experienced member from The Tobacco Pipe Restorer group on FB, provided valuable information that the bone is similar to a Meer and absorbs oils from the tobacco and colours just like a meerschaum. Another issue taken care of!!! To finish the restoration, I mounted a cotton cloth buffing wheel to the Dremel (actually it is not the brand machine, but a local machine which is similar).  I set the speed at about 40% full power and applied White Diamond compound to the entire pipe.  Afterwards, I wiped/ buffed the pipe with a soft cotton cloth to clear it of any leftover compound dust. I then mounted another cotton cloth wheel to the polishing machine, maintaining 40% speed and applied several coats of carnauba wax.  I finished the restoration by giving the entire pipe a rigorous hand buffing using a microfiber cloth to raise the shine further. In my excitement mixed with apprehension in using the polishing and waxes for the first time, I completely missed out on taking any pictures. The completed pipe looks lovely, fresh and vibrant. Thank you for having the patience to reach this far while reading the write up. Your comments are of utmost importance to me for improving my skills in restoration process as well as writing about it. Cheers!!!!!

PS: – During this journey of restoring this beauty, I had, on occasions felt low and demoralized as issues kept cropping up like the supposed crack to the stummel, the shank extension not supposedly cleaning up as I had incorrectly anticipated and the 2/3 occasions when the my polishing machine slipped on the surface and caused very minor scratches on the stummel. However, my Guru and mentor, Mr. Steve was always around with his words of wisdom and encouragement to egg me on towards completing this project. Thank you once again, Mr. Steve. I would like to thank all the esteemed members of “The Tobacco Pipe Restorer” group on FB for their interest and valuable inputs, which made this project interesting.

Restoring a Dunhill Root Briar EK Square Shank Panel Billiard


Blog by Steve Laug

The next pipe on the work table is a Dunhill Panel Billiard. It is a smooth briar pipe that is very dirty. It has four panels around the bowl and the corners are rounded. The shank is square as well and ends with a square tapered stem. The briar is worn and tired with oils in the briar. The rim top had a build of tars and lave that flowed over it from a thick cake in the bowl. The shank is stamped on the left side EK followed by Dunhill over Root Briar. On the right side it is stamped Made in England with an underlined superscript 0 followed by a 4 circled followed by an R. The stem has the standard white spot on the top side. It was oxidized and had some calcification build up on the first inch of the stem that appeared to have come from a rubber pipe Softee bit. The stamping is easily interpreted. The left side EK is the shape stamp for a panel billiard. The ROOT BRIAR stamping is the line of Dunhill pipes. The right side stamp superscript O tells me that the pipe is dated to 1960. The circled 4 is the size of the pipe (group four) and the R is the stamping for a Root Briar. Jeff took photos of the pipe before he started his cleanup work. Jeff took photos of the top, sides and the bottom of the bowl to show the condition of the briar. The topside showed a thick lava build up flowing out of a thick cake in the bowl. It was hard to know if there was damage on the outer or inner edges of the rim. The sides of the bowl show dents and wear but also some stunning birdseye and cross grain. Jeff took photos of the stamping on the pipe shank. It is faint but readable. It is as I wrote about above.Jeff took a photo of the stem to show the fit against the shank and the white spot. He also took photos of the top and underside of the stem showing the tooth chatter and marks as well as the calcification on the surface of the stem.I wanted to certify the date for myself so I had a look at the PipePhil site and looked the dating and stamping information (http://www.pipephil.eu/logos/en/dunhill/cledat-en1a.html). Using the charts there I was able to confirm that pipe was made in 1960.

I also looked on the Pipedia site and read as much information as I could find regarding the Root Briar line (https://pipedia.org/wiki/Dunhill#Root_Briar). Here is what it said: The line was… Introduced in 1931 and highly prized because the grain is more pronounced in this finish. The Root Briar finish required a perfectly clean bowl with excellent graining. Therefore, it is the most expensive of the Dunhill pipes. Corsican briar was most often used for the Root finish, since it was generally more finely grained. This is a rare finish, due to the scarcity of briar suitable to achieve it. These pipes are normally only available at Company stores, or Principle Pipe Dealers…

Jeff reamed the bowl with a PipNet pipe reamer and followed up with a Savinelli Fitsall pipe knife to remove the cake. He scrubbed out the mortise and the airway in the shank and the stem with alcohol, cotton swabs and pipe cleaners. He scrubbed the exterior of the bowl, rim, shank and stem with a tooth brush and Murphy’s Oil Soap to remove the oils, lava and tars on the rim and the grime on the finish of the bowl. He rinsed it under running water. He dried it off with a soft cloth. The rim was thoroughly cleaned and without the grime the finish had some rim darkening that hid the grain. The vulcanite stem would need to be worked on but I really like the profile it cast. I took photos of the pipe to show its condition before I started my work on it.  I took close up photos of the bowl and rim top as well as the stem. You can see the condition of the rim top and bowl in the first photo. Jeff was able to remove all of the tar and oils but you can now see the damage and darkening around the inner edge. The vulcanite stem had tooth chatter and some light tooth marks on the top and underside of the stem both on the surface of the button and just ahead it. There was one deeper tooth mark on the topside near the button.I started my refurbing work by addressing the darkening on the rim top and inner edge. I first sanded the inner edge with a folded piece of 220 grit sandpaper. I then lightly sanded the rim top with a worn piece of 220 grit sandpaper. I find that using a bit more tired piece of sandpaper works wonders on the dark edge without scratching the rim surface like a new piece. I followed that by wet sanding it with 1500-2400 grit micromesh. I sanded the rest of the pipe with the micromesh at the same time. I dry sanded it with 3200-12000 grit sanding pads. I wiped down the bowl after each pad with a damp cloth. The grain on the rim top began to shine through and the finish was in good condition under the darkened grain. I rubbed down the smooth briar with Before & After Restoration Balm. I worked it into the smooth surface of the briar on the rim, sides and the bottom of the bowl with my fingertips. I wanted to make sure that the balm got deep into the briar to do its work. The balm works to clean, enliven and protect the briar. I let it sit for a little while and then buffed with a cotton cloth to raise the shine. The following photos show the bowl at this point in the restoration process. The rim looks much better than when I started but still needs to be polished and buffed to raise a shine on it. I sanded out the tooth chatter and tooth marks on the stem surfaces. I sanded the rest of the stem with the sandpaper to remove the oxidation on the stem surface.I polished the vulcanite stem with micromesh sanding pads – wet sanding with 1500-2400 grit sanding pads and dry sanding it with 3200-12000 grit sanding pads. I wiped it down after each sanding pad with Obsidian Oil. I polished it further with Before & After Pipe Polish – both Fine and Extra Fine polishes and gave it a final coat of Obsidian Oil and set it aside to dry. I the polished stem and the bowl with Blue Diamond to polish out the remaining small scratches and raise the shine. I gave the bowl and the stem multiple coats of carnauba wax then buffed the pipe with a clean buffing pad to raise the shine. I hand buffed it with a microfiber cloth to deepen the shine. The pipe polished up pretty nicely. I left the some of the dents in place as I did not want to sand and ruin the patina. I think they are marks of the journey the pipe has taken. This turned out to be a beautiful pipe in terms of shape and finish. This is a nice looking Dunhill Panel Billiard pipe. The finished pipe is shown in the photos below. The dimensions are Length: 5 3/4 inches, Height: 1 3/4 inches, Outside diameter of the bowl: 1 1/4 inches, Chamber diameter: ¾ of an inch. Thanks for walking through the restoration with me as I worked this beautiful Dunhill Root Briar Panel. Thanks for looking.

Cleaning up a Cadogan Era Comoy’s Silver Shadow 225


Blog by Steve Laug

Jeff picked this Comoy’s Silver Shadow up from a friend on Facebook who was selling a batch of pipes that he picked up. When it arrived several of the pipes were unsmoked and in excellent condition. This Comoy’s was very nice but had tooth marks on the stem and was lightly smoked. There was some light cake in the bowl and the finish was dull. Jeff cleaned up the pipes with his usual thoroughness – reaming the bowl and scrubbing the internals with alcohol, cotton swabs and pipe cleaners. He scrubbed the exterior with Murphy’s Oil Soap to clean off the dust and grime on the finish. Jeff sent it to me recently in a batch of pipes that were ready to restore. I took photos of the pipe when I unpacked it. The bowl and rim are very clean. There is a light fill on the backside of the bowl that is solid and tight. The finish was clean and the pipe needed to be polished. The stem had bite and tooth marks on both the top and underside near the button.I took photos of the stamping on the sides of the shank and the underside. The left side is stamped Comoy’s over Silver Shadow. On the right side it is stamped with the shape number 225 and the COM stamp – Made in London in a circle over England. The underside of the shank is stamped with an upper case M.I started with the clean up on the stem first. I used a needle file to clean up the straight edge of the button and smooth out the wear on the button. I sanded the tooth marks out of the surface of the acrylic stem with 220 grit sandpaper.I polished the stem with micromesh sanding pads – dry sanding it with 1500-2400 grit pads and dry sanding it with 3200-12000 grit micromesh pads. I wiped it down with a damp cloth after each sanding pad. I set the stem aside and turned my attention to the bowl. I worked Before & After Restoration Balm into the briar with my fingertips to clean, enliven and protect the wood. I let the balm sit for about 20 minutes and buffed it off with a soft cotton cloth. I took photos of the pipe at this point in the process to show what the bowl and rim looked like. It looks really good after the balm and buffing. I polished the bowl and stem with Blue Diamond to polish out the scratches in the briar and acrylic. I gave the bowl and the stem multiple coats of carnauba wax. I buffed the pipe with a clean buffing pad to raise the shine. I hand buffed it with a microfiber cloth to deepen the shine. The pipe polished up pretty nicely. The original patina on the bowl came alive with the buffing and worked well with the polished silver swirled acrylic stem. The pipe has a rich look. The finished pipe is shown in the photo below. The shape, finish and flow of the pipe and stem is beautiful and combine very well. This should make a great smoking pipe and it is comfortable in both hand and mouth. The dimensions of the pipe are Length: 5 1/2 inches, Height: 1 7/8 inches, Outside diameter of the bowl: 1 1/2 inches, Chamber diameter: 3/4 of an inch. Thanks for walking through the restoration with me as I worked over this beautiful Comoy’s Silver Shadow. I will be putting it on the rebornpipes store shortly.


Reclaiming a Yello-Bole “Imperial Carburator” Vest Pipe


Blog by Paresh Despande

Having worked on the four Free Hand pipes that I had purchased on eBay, it was time again to work on one of my grandfather’s pipe from my inheritance. I chose to work on the second “Imperial Yello-Bole Carburetor” from his collection. The first had a cracked shank and was restored by my Guru and mentor, Mr. Steve of rebornpipes, here is the link for the write up (https://rebornpipes.com/2018/04/15/pareshs-grandfathers-pipe-2-a-yello-bole-carburetor-4522-billiard/).

This particular pipe was in a battered condition with significant damage to the inner and outer edges of the rim, a large number of chips, dents and dings to the bowl and shank, two deep gouges to the bowl and a heavily oxidized stem. I was not very sure if at all I should attempt at its restoration as I knew that to mask the repairs/ fills to the gouges and chips on the bowl and the shank, I would need to stain it with a darker stain followed by a delicate polish to make the grains pop and here I was, with neither materials nor experience to carry out staining and subsequent polishing. However, Mr. Steve encouraged me to go ahead and restore it nevertheless and keep the natural finish of the pipe and the scars of the repairs as a testimony of the pipe’s journey till date!!!! Well, it always pays to follow the advice of your mentor and I embarked upon this journey to give a fresh lease of life to this old and battered war-horse!!!

The pipe is stamped on the left side of the shank as “Imperial” in fancy cursive hand over “YELLO-BOLE” in block letters while the right side of the shank bears the stamp of “MADE IN FRANCE” starting from the shank end towards the bowl and followed by the model(?) number “648” or is it “64 B”? I have this doubt since I could find a match to this shape and size during my research as per the latter stamp, but the stamp appears as former to my eyes!!!! The center bottom of the pipe has a single hole, lined by an aluminum cone, open at both ends, which protrudes into the chamber. This is followed by “carburetor” in fancy cursive small letters. The stem is devoid of any stampings or logo. Before commencing the restoration, I decided to refresh my memory about Yello-Bole pipe brand and in particular, the Carburetor model, by visiting the blog written by Mr. Steve while restoring my first Yello-Bole. The first thing that struck me as odd was the difference in stampings seen on the pipe which is on my work table!!! The pipe currently on my work table is sans the stamp of KBB in clover leaf, U.S. patent number details, Cured with real honey, stem logo of a yellow circular ring and has shape number in three digits as against four on the one restored by Mr. Steve. However, the biggest and most significant difference which has me flummoxed was the stamping “MADE IN FRANCE”!!!!!!! No amount of research and surfing the internet provided me any clue as regards the origin and dating of this piece of briar.

INITIAL VISUAL INSPECTION
The first and foremost significant visual damage is seen to the rim top, inner and outer edges. It appears that the rim has been repeatedly banged against a hard surface to remove residual dottle over a prolonged period of time!!!! The damage to the rim top is in the form of dings and scratches while significant chipping and cinching is seen on the outer edge. The inner edge of the rim is out of round, apparently caused by use of a knife to remove the carbon cake. The overflow of lava from the rim top appears to be removed by scrapping the surface with a knife and in the process causing all the scratches and dings to the surface. There is a thin layer of cake on the bottom half of the chamber and appears to be a victim of over reamed chamber. The carburetor hole at the bottom of the chamber is clogged and will require to be cleaned. The condition of the inner walls of the chamber will be ascertained only after the chamber has been stripped completely of the existing cake layer.The second most significantly damaged part of the pipe is the stummel. It is covered in oils, dirt and grime of all these years of smoking and subsequent uncared for storage. The stummel surface is sticky to the touch, giving the stummel a dull, lifeless and lackluster appearance. It is peppered with a large number of chips, dents and dings. There are two significant gouges on the stummel; one on the left hand side towards the bottom and the second one is one the right hand side about an inch below the rim top. Overall, the stummel has sustained massive damage over the years due to both, rough usage and careless storage. However through all this dirt, tar, oil, grime and damage, lovely densely packed straight grains can be seen on the sides and shank. It will be a challenge to address these issues and make the grains to reveal themselves in all glory. The shank too is peppered with numerous minor dents and chips on the bottom surface as well as on the right side of the shank. The mortise is clogged and the air flow is constricted and the draw is laborious. This will need to be addressed by thorough cleaning of the same. The saddle stem is heavily oxidized with bite marks on both upper and lower surface of the stem. The lip too shows bite marks and will need to be redefined. The aluminum stinger is firmly attached inside the tenon and could not be removed. It is covered in oils, tars and grime from all the years of smoking and it appears that it has hardened, fixing the stinger inside the tenon.THE PROCESS
I started the process of restoration by reaming the chamber with my fabricated knife as the protruding aluminum cone of the carburetor prevented use of the Kleen Reem pipe reamer. Once the cake was reamed back to the bare briar, I used a 150 grit sand paper followed by 220 grit sand paper to remove all the traces of remaining cake and also to smooth the inner walls of the chamber surface. It was a big relief to note that there was no issue of heat fissures or cracks seen on the surface.To address the numerous dents, dings and scratches on the rim’s top surface and also to remove traces of lava overflow, I topped the rim surface on a 220 grit sand paper. Since the damage to the rim top was significant, I had applied more pressure than usual. Though it is recommended to have a wooden board with the 220 grit sand paper firmly fixed over it, I just keep the sand paper on a flat table top, holding it firmly with my left hand and rotating the stummel rim top over it with my right hand. I have come to realize that this set up gives me lot more freedom of movement, better control and convenience of storage.Staying with the rim, the next issue that I addressed was the rim edges, both inner and outer. With a folded piece of 180 grit sand paper pinched between my thumb and fore finger, I created a bevel on the inner edge. This addressed the issue of uneven and out of round inner edge. For addressing the outer edge, I had two options; first was to top the rim surface till the entire damaged outer rim surface was sanded out, maintaining the straight rim edge profile of the stummel. The disadvantage of this would be a significant loss of briar estate!!! The second (and easier too!!!) option was to create a bevel on the outer edge, sacrificing the original profile of the stummel. However, I envisaged that the bevel to the outer edge would add a new depth and dimension to the profile of the pipe while saving loss of briar. That decided, I created a bevel on the outer edge. Both the inner and outer edges now look much better and add a new dimension to the otherwise plain-Jane billiard shape of the bowl. I cleaned the stummel with Murphy’s oil soap and hard bristled toothbrush and rinsed the stummel under running tap water. This cleaning helps in bringing to the fore any other damage which could be hidden under all the dirt and grime. I dried the bowl with a paper towel and soft cotton cloth. With a thin, sharp and pointed knife, I cleaned out all the fills and gouges. I scrubbed the stummel surface clean with isopropyl alcohol to have a clean surface for a fresh fill. I decided to move ahead with only CA superglue for filling the chips and gouges. I spot filled these chips and gouges with superglue and set it aside for curing. Turning my attention to the stem, I flamed the surface with a Bic lighter to raise the tooth chatter and deeper bite marks to the surface as much as is possible. I followed it up with sanding the stem surface with a 220 grit sand paper to match the raised bite marks with the stem surface and also remove the oxidation before the fill. The deeper bite marks were filled with CA superglue and set aside to cure. After the fills on the stummel had completely cured, I sanded these with a flat head needle file to match them with the stummel surface. This was followed by sanding the fills and the stummel surface to achieve a match as well as remove the minor scratches and cinches on the surface. I frequently wiped the sanded surface with a moist cloth to remove the briar dust and also to check the progress of my work. Once I was satisfied with the match, I followed it up by micromesh polishing pads, wet sanding with 1500 to 2400 grit pads. Again, I wiped the bowl with a moist cotton cloth after each pad. I used the 3200 to 12000 grit pads to dry sand the stummel to a nice shine. At this stage of restoration, the entire bowl, rim top surface and shank is now looking fresh and clean with beautiful densely packed straight grains popping out in all their glory!!!! Even though the fills are prominently visible, in my view, they lend a battle scarred warrior like character to the pipe. While I worked the stummel, the fillings in the stem had cured. I sanded the fills with a flat head needle file. To further match the fills with the surface of the stem, I sanded it with 220, 400 and 800 grit sand paper. I wiped the stem with cotton pad dipped in alcohol to remove the resultant dust. I rubbed some extra virgin olive oil in to the stem and set it aside to be absorbed in to stem. I polished the stem with micromesh pads, wet sanding with 1500 to 2400 grit pads and dry sanding with 3200 to 12000. I rub a little extra virgin olive oil in to the stem after every three pads. I finish the polishing of the stem by rubbing a small quantity of Paragon wax and giving it a final polish with a soft cotton cloth. The stem is now nice, smooth and shiny. Now with the external restoration and cleaning of both the stummel and the stem completed, I proceeded to cleaning the internals of the stem and the shank. As I had observed during my initial visual inspection, the stinger was very firmly attached inside the tenon. To clean the stem air way, I had to separate the stinger from the tenon. I was certain that the stinger was a push-fit type and much easy to deal with. I carefully heated the stinger with the flame of a Bic lighter and wrapping a cloth on the stinger, with careful anti-clock wise rotations, dislodged the stinger from the tenon. I cleaned the internals of the shank with cue-tips, regular and bristled pipe cleaners dipped in alcohol. The mortise was cleaned using a shank brush. With a fabricated dental spatula, I scrapped the walls of the mortise and further cleaned with pipe cleaners till they came out white. Similarly, I cleaned the air way in the stem with pipe cleaners and alcohol. I cleaned the stinger of all the accumulated oils and tars with paper towels after soaking the stinger in isopropyl alcohol and reattached it in the tenon. The internals are now clean and the draw is full, easy and open. I was really not surprised at how dirty were the internals of the shank and stem as can be seen from the condition of the pipe cleaners in these pictures. To finish the restoration, I rub a small quantity of “Before and After Restoration Balm” in to briar and let it rest for a few minutes. The balm almost immediately works its magic and the briar now has a nice vibrant appearance. I further buff it with a horse hair shoe brush. Using a cotton cloth and brute muscle power, I gave it a final polish. I re-attach the stem with the stummel. The completed pipe looks lovely, fresh and vibrant; the photographs speak for themselves. Thank you for having the patience to reach this far while reading the write up. Your comments are of utmost importance to me for improving my skills in restoration process as well as writing about it. Cheers!!!!!

Restoring an Amazing 1963 Dunhill Tanshell Cherrywood 475


Blog by Steve Laug

Jeff picked up a pair of Dunhill pipes somewhere on his journeys. He becoming a very selective Pipe Hunter and this twosome are really quite nice. I am working on the first one of those at this time. It is a Dunhill Sandblast in a Cherrywood/Poker shape. It has a nice rugged blast with a smooth, rounded rim top and bowl bottom. It is stamped on the bottom of the smooth bowl. It reads 475 (shape number) over Dunhill Tanshell. Under that is stamped Made in England followed by a 3. Underneath that it has a 4 in circle and a T next to that. The stamping tells me that the pipe is a Tanshell (both the name and the T). The 475 is the shape number (I wonder if the 4 on the front is the size). The circle 4 is the size of the pipe. The 3 following the England stamp tells me that the pipe was made in 1963. Jeff took the following photos to show the condition of the pipe. The finish is dirty as can be seen in this photo.The stem is oxidized and there was a chip missing out of the white spot. The finish is dirty as noted above. There is an overflow of lava on the crowned rim top and a thick cake in the bowl.He took two photos of the rim top to show the thick lava overflow on the inner edge of the rim and the top of the bowl itself. You can also see the thick cake in the bowl.The deep grooves of the sandblast are dirty and there is debris in the grooves and crevices of the finish.The stamping on the underside of the bowl is very readable and gives the information that is written in the opening paragraph of the blog. The photo of the stem shows the chip in the white spot on the top of the stem. The white spot was slightly yellowed.The stem showed tooth chatter, marks and wear on the button on both sides. Jeff had reamed the bowl with a PipNet pipe reamer and followed up with a Savinelli Fitsall pipe knife to remove the cake. He scrubbed out the mortise and the airway in the shank and the stem with alcohol, cotton swabs and pipe cleaners. He scrubbed the exterior of the bowl, rim, shank and stem with a tooth brush and Murphy’s Oil Soap to remove the oils, lava and tars on the rim and the grime on the finish of the bowl. He rinsed it under running water. He dried it off with a soft cloth. The rim was thoroughly cleaned and without the grime the finish looked really good.  The rim had some darkening around the inner edge of the bowl. The vulcanite stem would need to be worked on but I really like the profile it cast. I took photos of the pipe to show its condition before I started my work on it.  I took close up photos of the bowl and rim top as well as the stem. You can see the condition of the rim top and bowl in the first photo. Jeff was able to remove all of the tar and oils but you can now see the darkening around the inner edge. The vulcanite stem had tooth chatter and some light tooth marks on the top and underside of the stem both on the surface of the button and just ahead it. There was one deeper tooth mark on the topside near the button.I started my refurbishing work by addressing the darkening on the rim top and inner edge. I first lightly sanded it with a worn piece of 220 grit sandpaper. I find that using a bit more tired piece of sandpaper works wonders on the dark edge without scratching the rim surface like a new piece. I followed that by wet sanding it with 1500 grit micromesh.I rubbed down the smooth and the sandblast briar with Before & After Restoration Balm. I worked it into the smooth surface of the briar on the rim and the bottom of the bowl. I worked it into the nooks and crannies of the sandblast on the bowl and shank with my fingertips and with a horsehair shoe brush. I wanted to make sure that the balm got into the deep crevices to do its work. The balm works to clean, enliven and protect the briar. I let it sit for a little while and then buffed with a cotton cloth to raise the shine. The following photos show the bowl at this point in the restoration process. The rim looks much better than when I started but still needs to be polished and buffed to raise a shine on it. I sanded out the tooth chatter and tooth marks on the stem surfaces. I put a drop of clear superglue in the chip on the white spot and sanded it smooth.I polished the vulcanite stem with micromesh sanding pads – wet sanding with 1500-2400 grit sanding pads and dry sanding it with 3200-12000 grit sanding pads. I wiped it down after each sanding pad with Obsidian Oil. I polished it further with Before & After Pipe Polish – both Fine and Extra Fine polishes and gave it a final coat of Obsidian Oil and set it aside to dry. I the polished stem and the smooth portions of the bowl with Blue Diamond to polish out the remaining small scratches and raise the shine. I gave the stem several coats of carnauba wax and the bowl several coats of Conservator’s Wax then buffed the pipe with a clean buffing pad to raise the shine. I hand buffed it with a microfiber cloth to deepen the shine. The pipe polished up pretty nicely. This turned out to be a beautiful pipe in terms of shape and finish. This is a nice looking Dunhill Cherrywood pipe. The finished pipe is shown in the photos below. The dimensions are Length: 5 1/2 inches, Height: 1 3/4 inches, Outside diameter of the bowl: 1 1/2 inches, Chamber diameter: ¾ of an inch. Thanks for walking through the restoration with me as I worked this beautiful little Dunhill sandblast. It will soon be heading to India to join Paresh’s collection. Thanks for looking.