Tag Archives: bite marks

Restoring a Patent Era Brigham 1 Dot Dublin Ken Bennett’s Estate


Blog by Steve Laug

Early in August I received an email from an interesting woman on Vancouver Island regarding some pipes that she had for sale. She was looking to sell the pipes from her late husband Ken and one from her Great Grandfather. Here is her email:

I have 5 John Calich pipes that date from 1979 to 1981. One is graded 11 and the other four are graded 12. I had bought them as Christmas and birthday gifts for my late husband. He was a very light smoker for a 3 year period.

I am a wood sculptor and always admired the grain and shapes of John’s best pipes. John was a friend as well. We exhibited at many exhibitions together for over 25 years.

I am wondering if you can provide any information on how I might be able to sell them.

Thanks you for any help you might be able to provide

I wrote her back and told I was very interested in the pipes that she had for sale and asked her to send me some photos of the lot. She quickly did just that and we struck a deal. I paid her through an e-transfer and the pipes were on their way to me. They arrived quite quickly and when they did I opened the box and found she had added three more pipes – a Brigham, a Dr. Plumb and a WDC Milano.

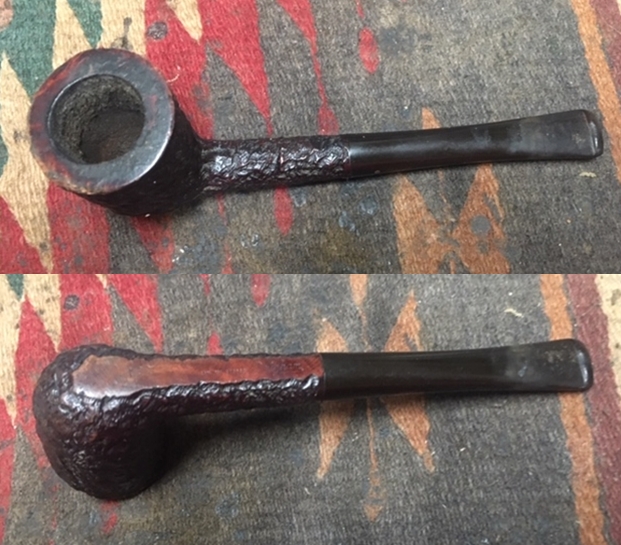
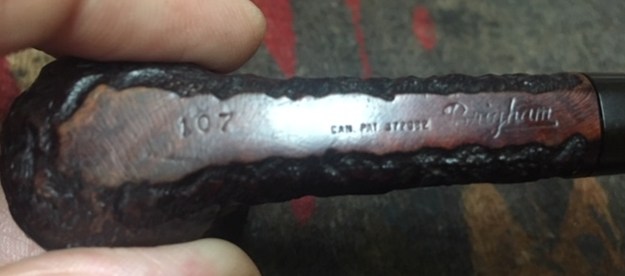
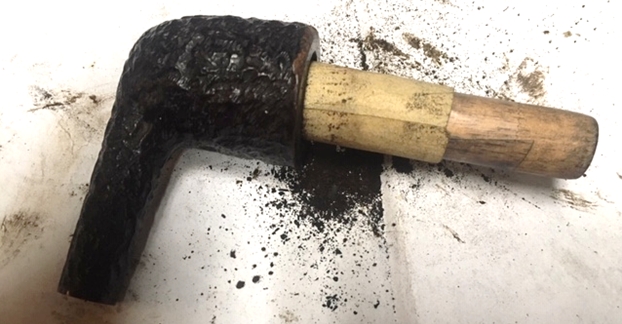
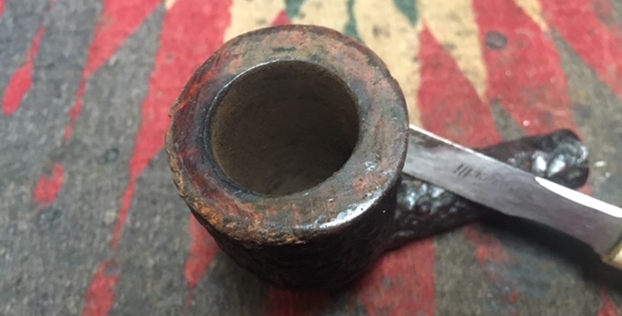
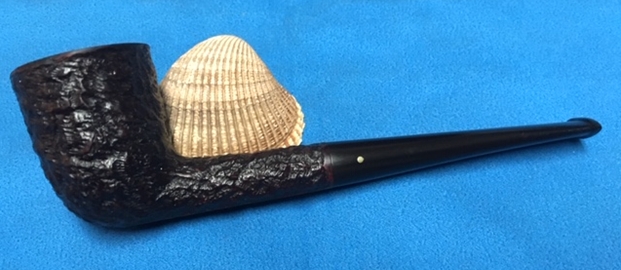
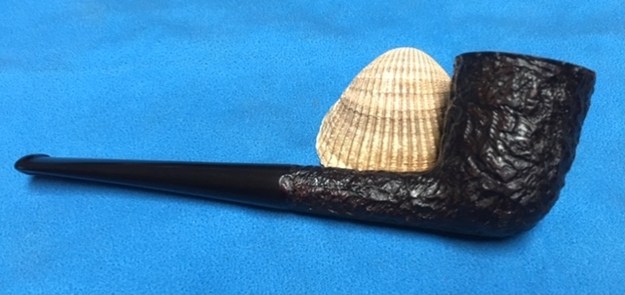
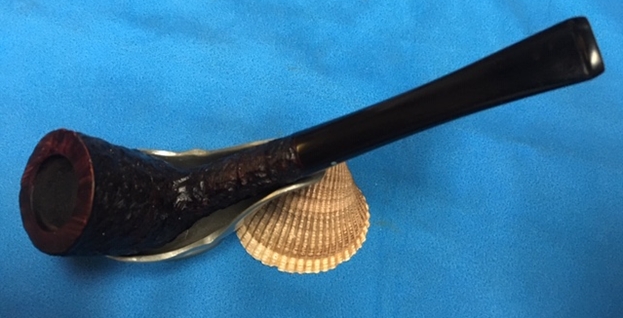
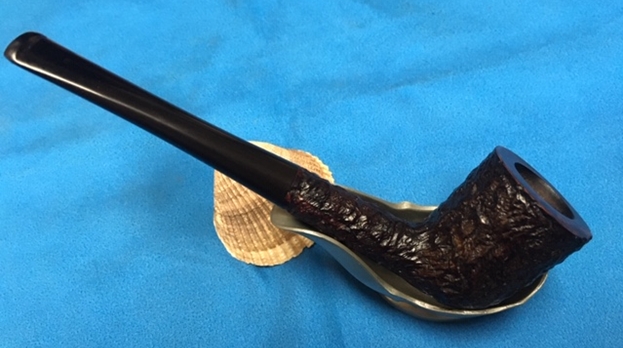
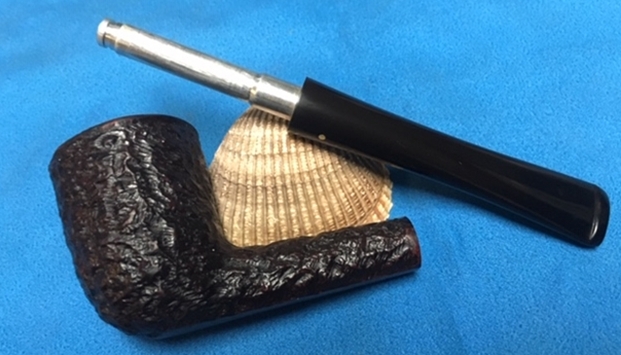
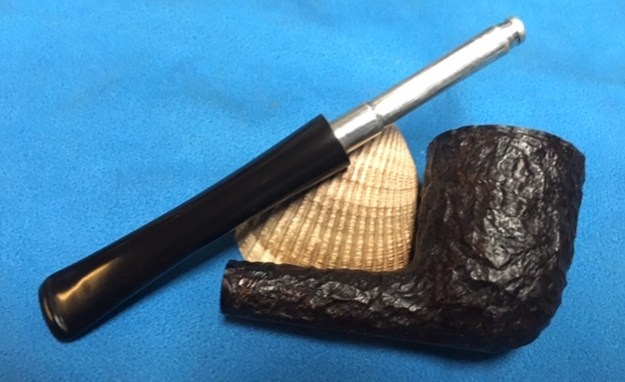
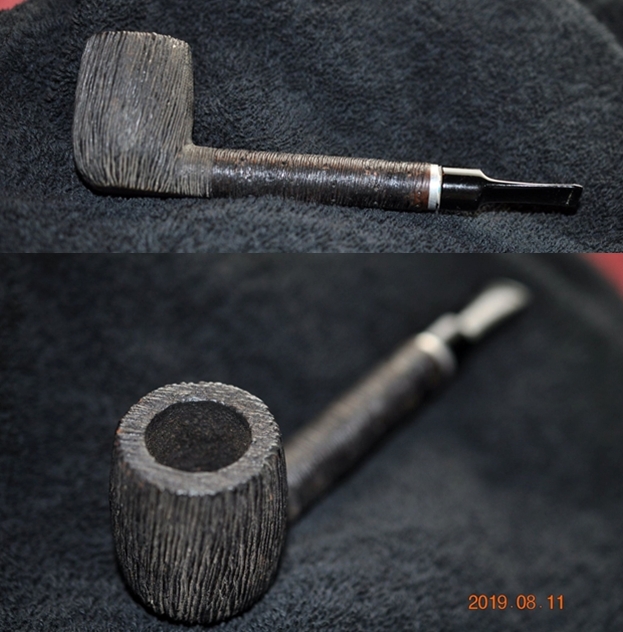
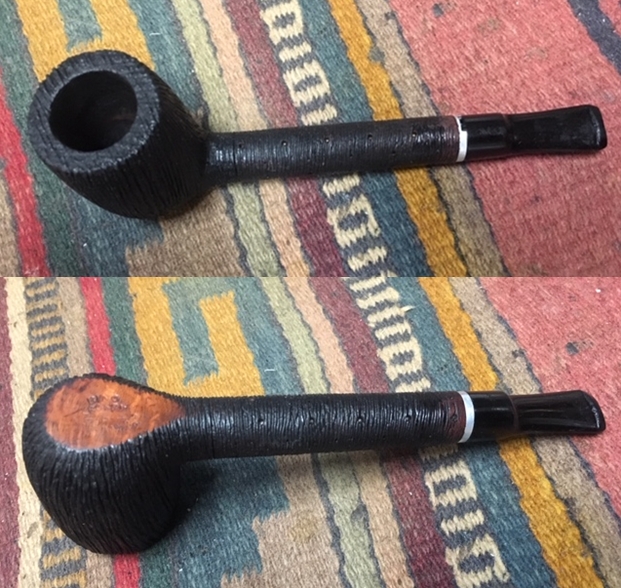
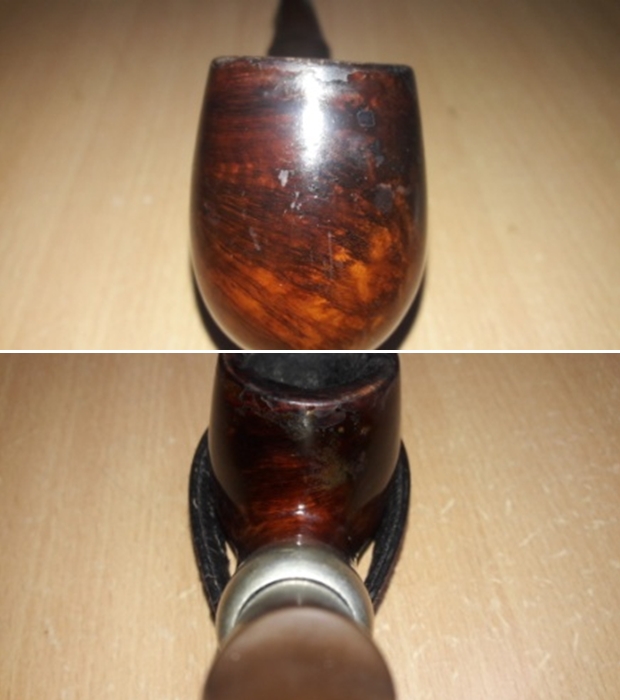
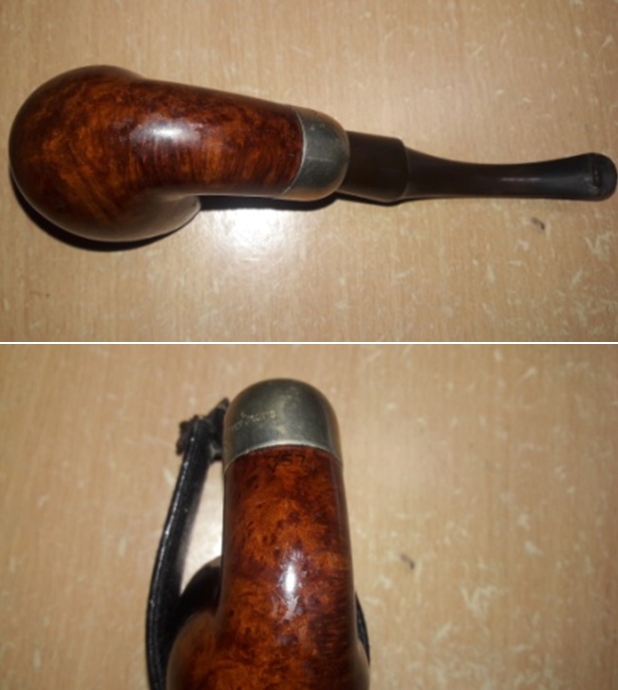
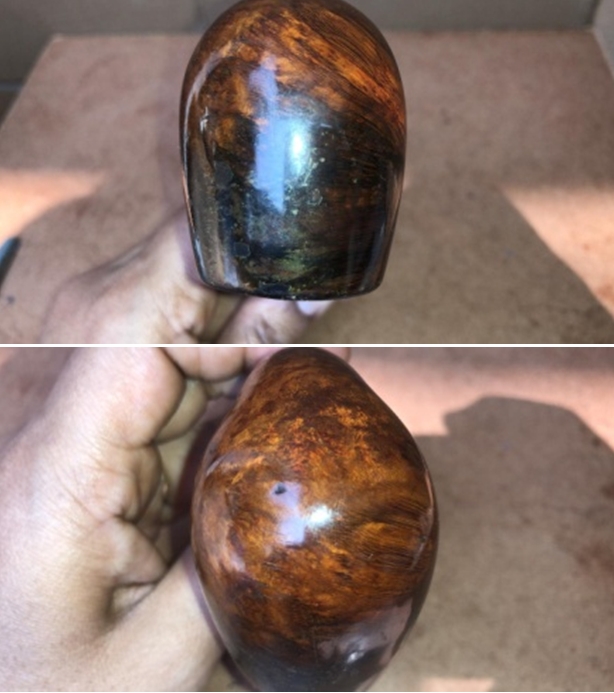
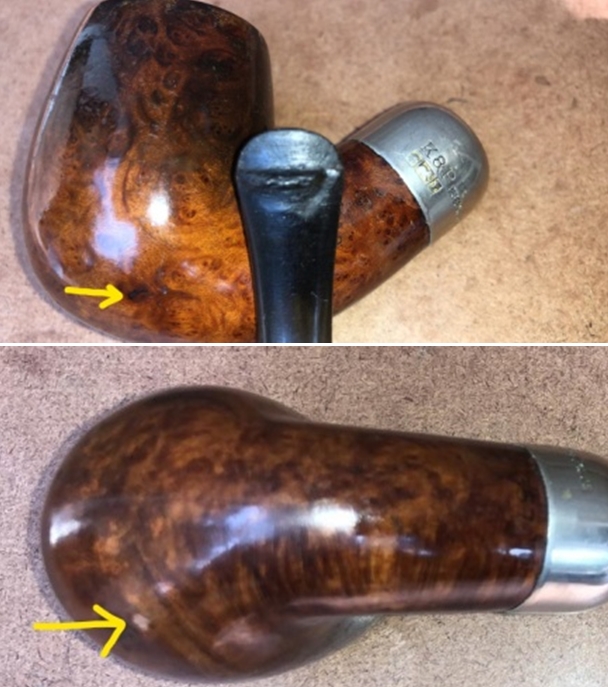
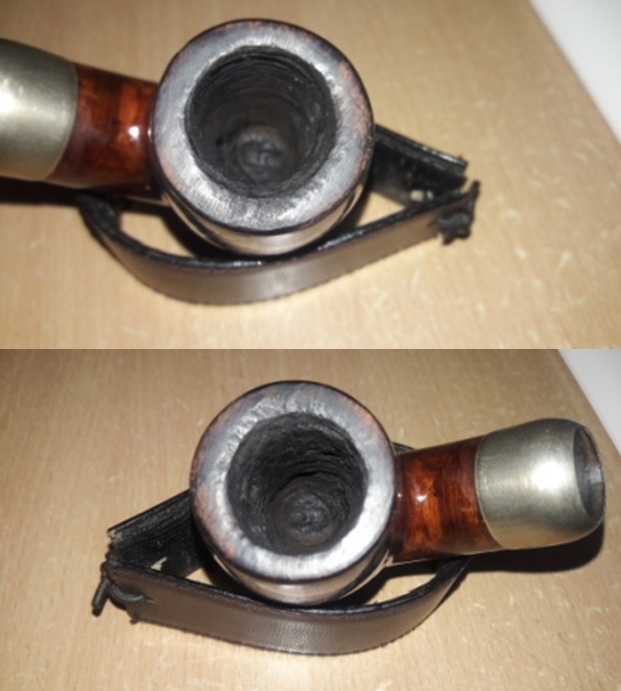
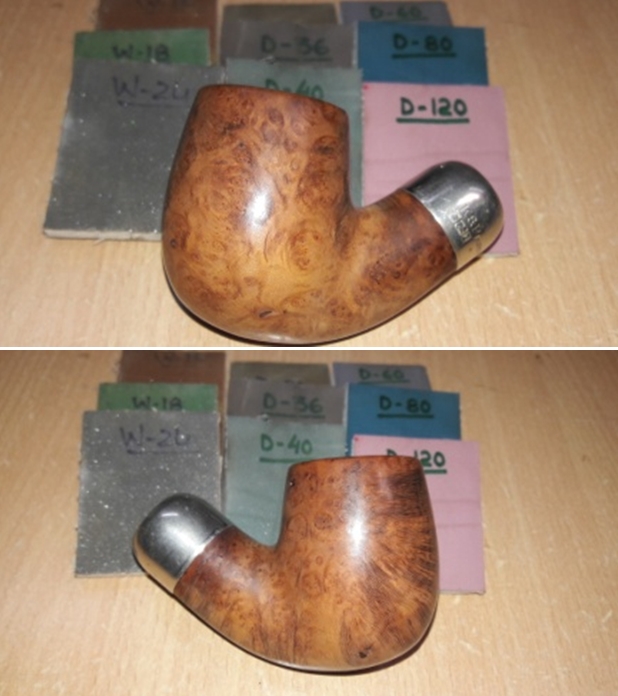
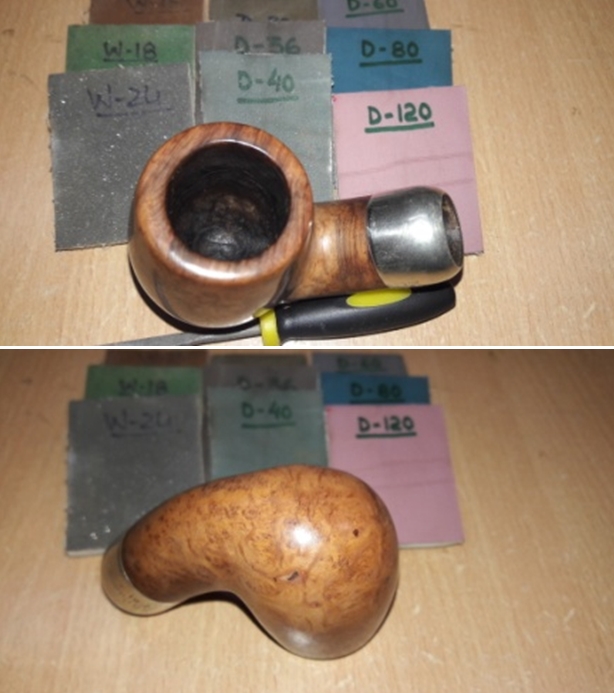
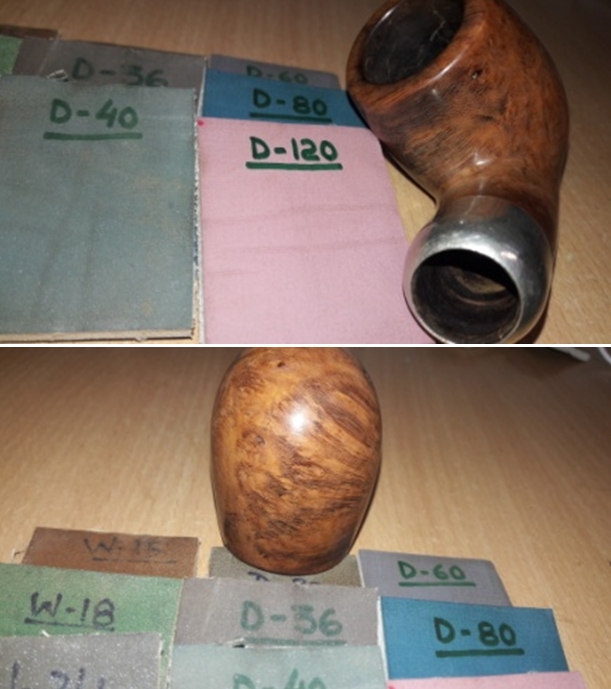
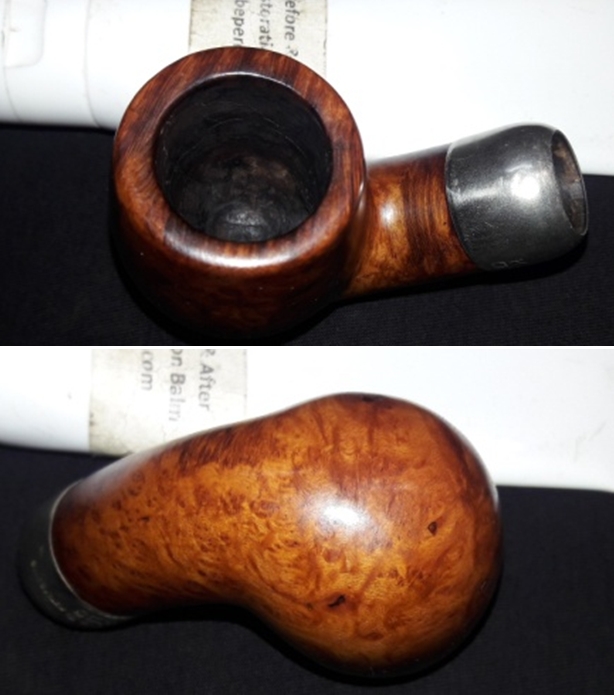
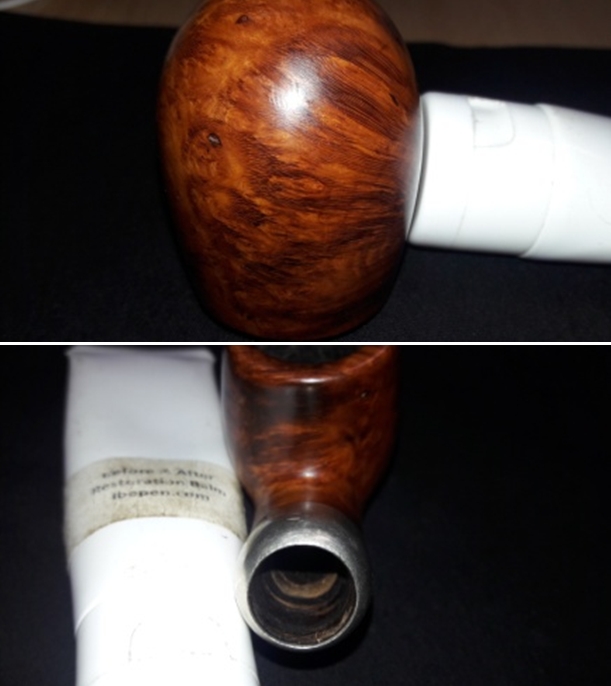
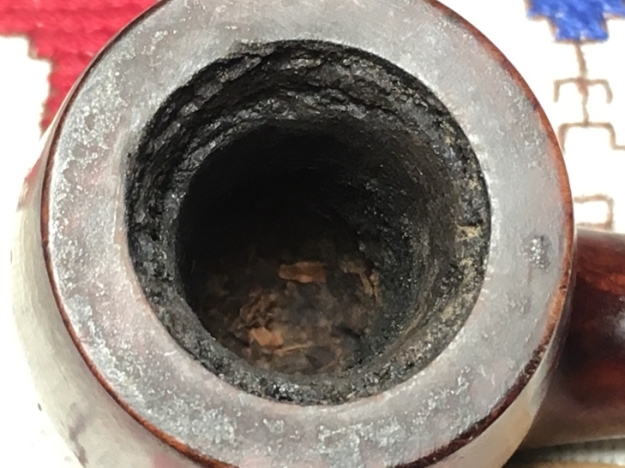
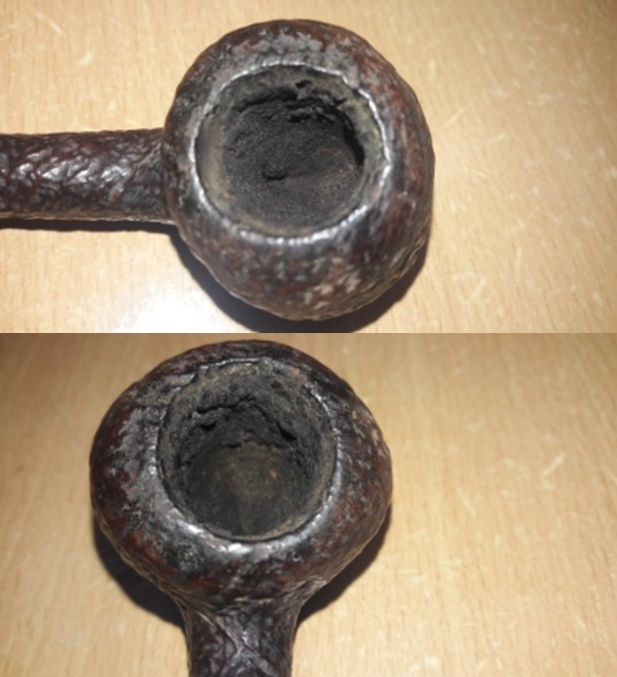
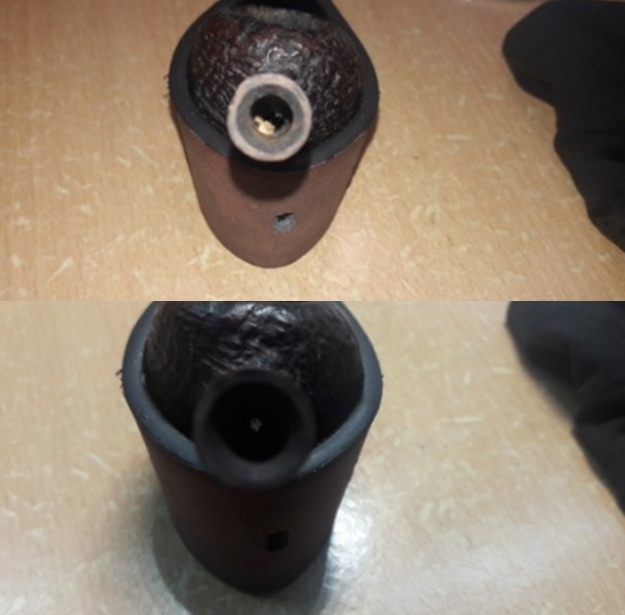
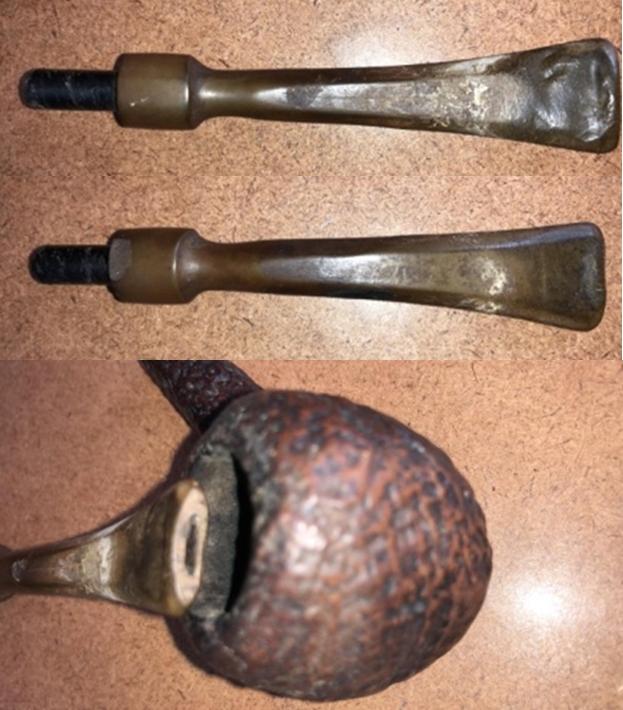
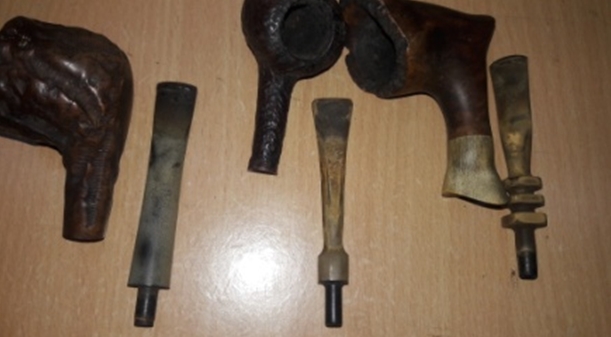
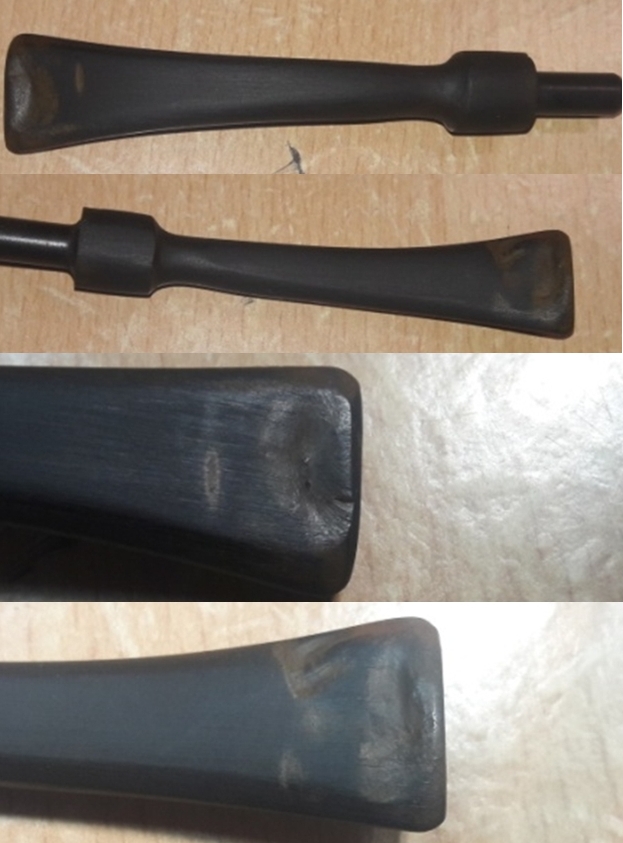
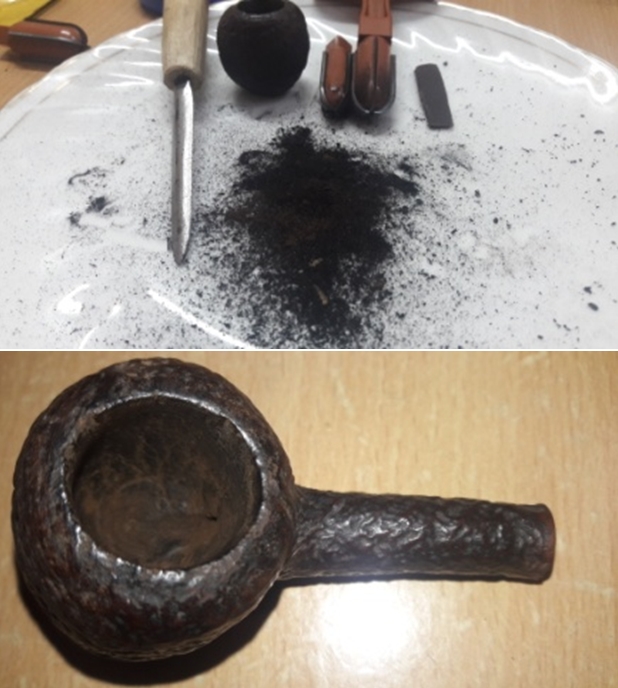
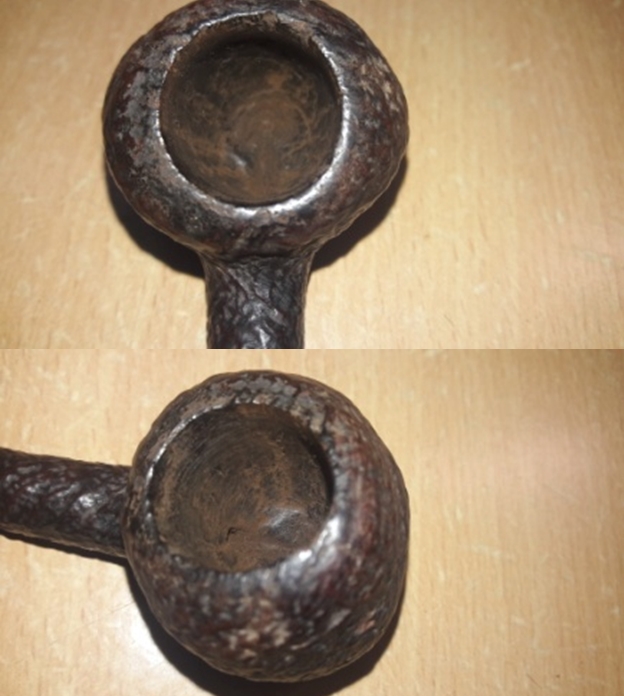
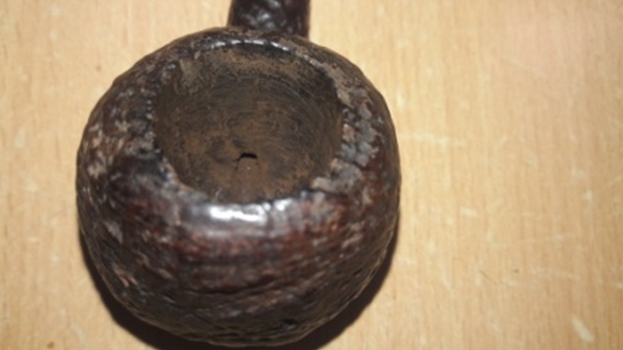
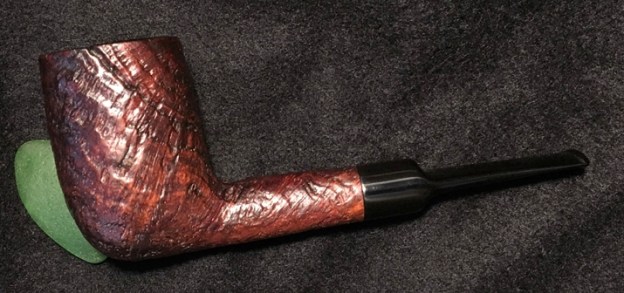
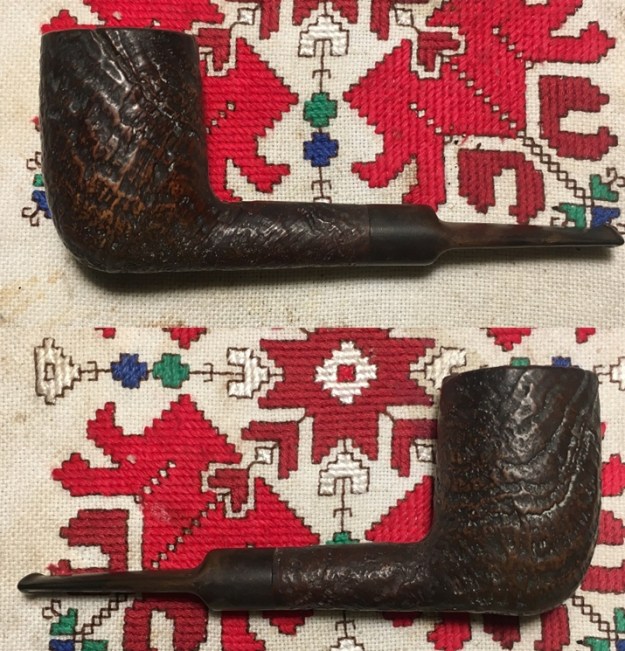
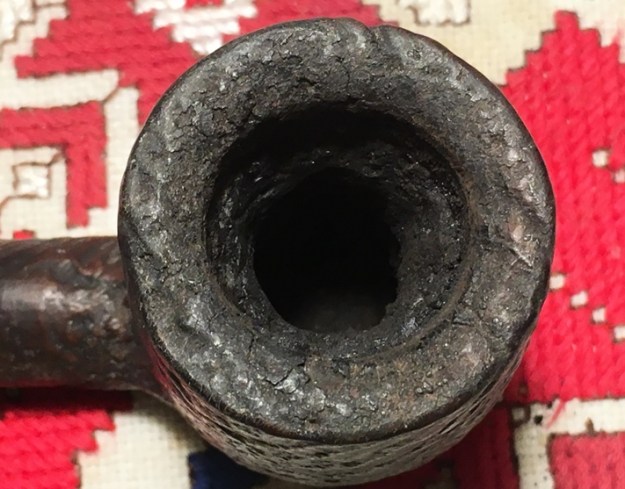
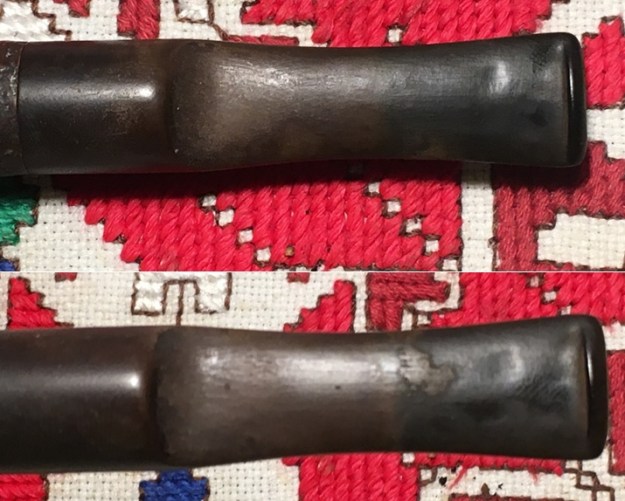
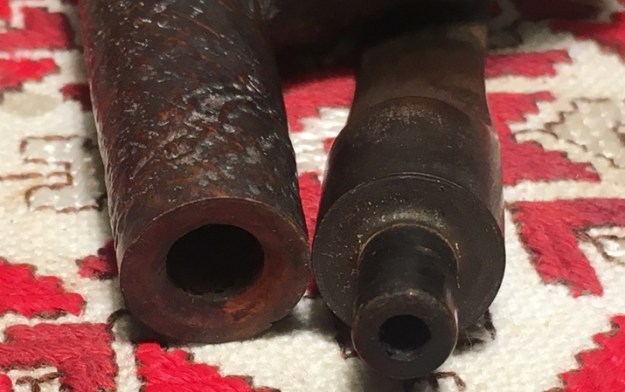
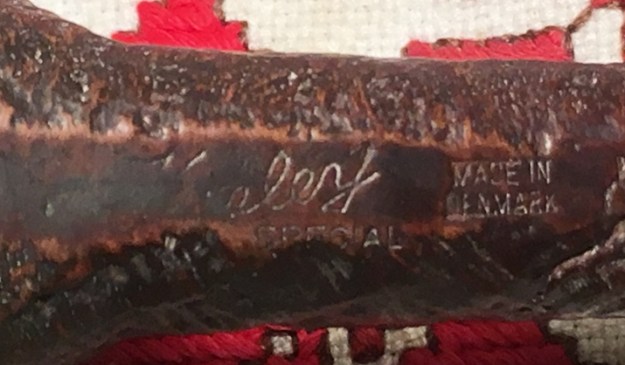
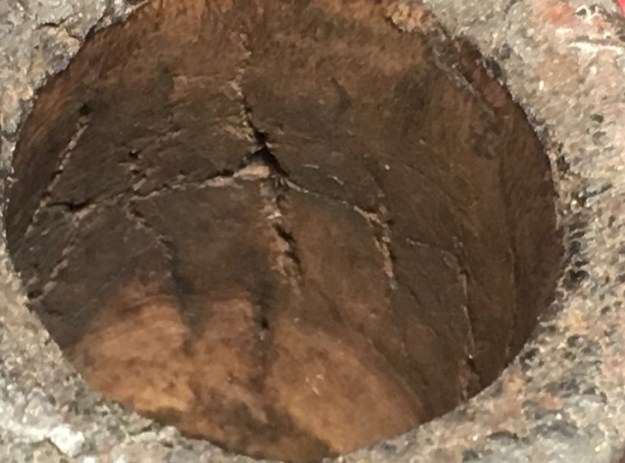
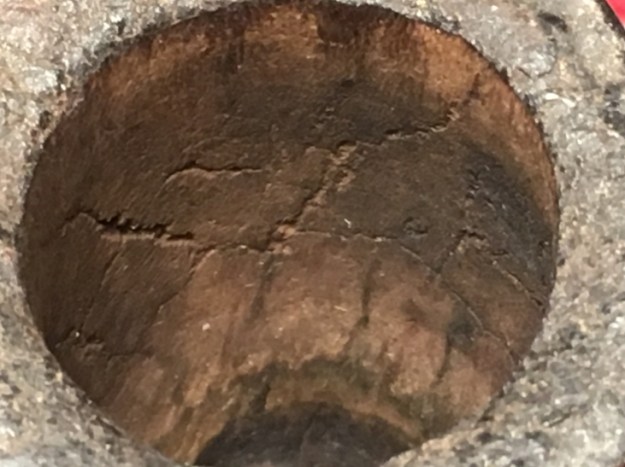
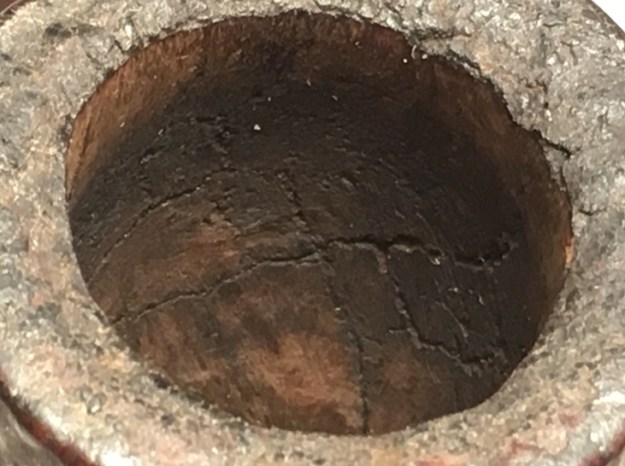
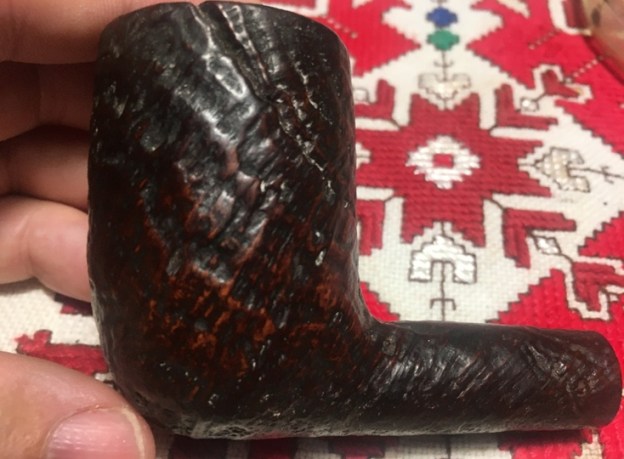
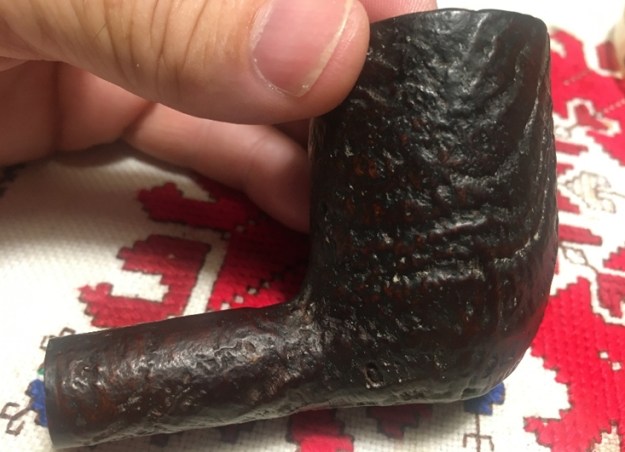
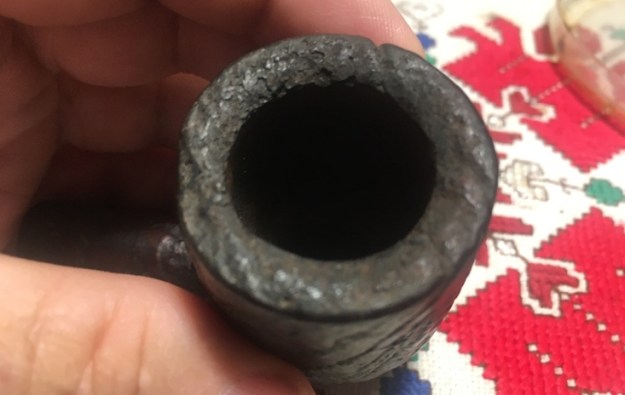
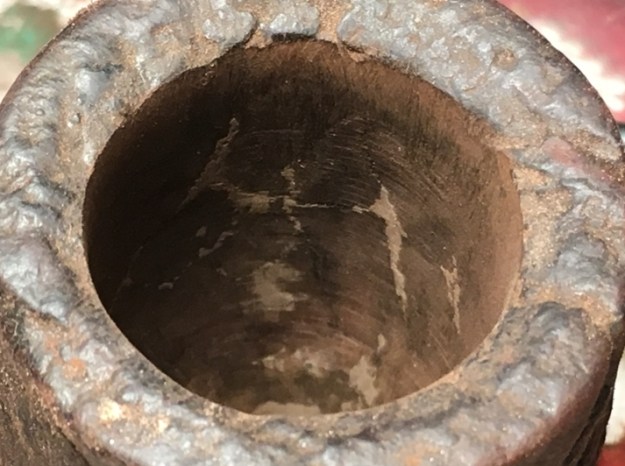
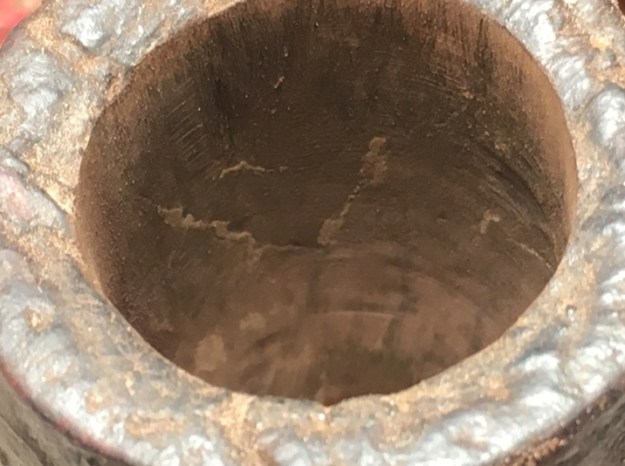
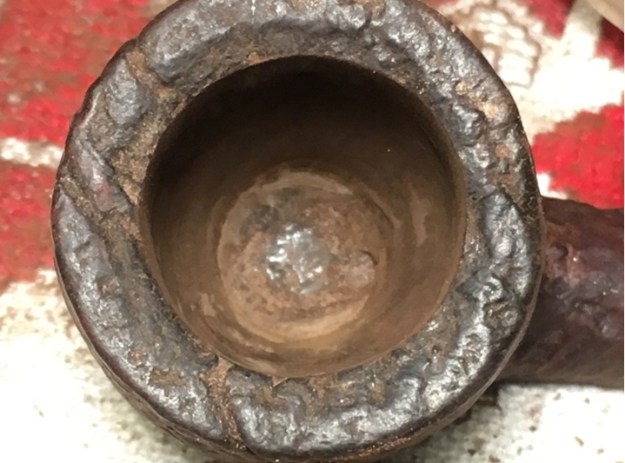
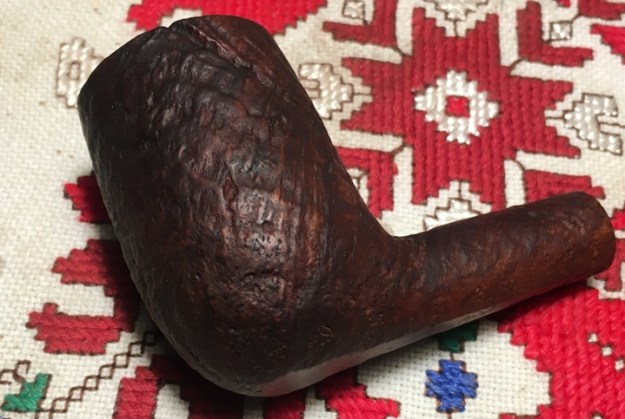
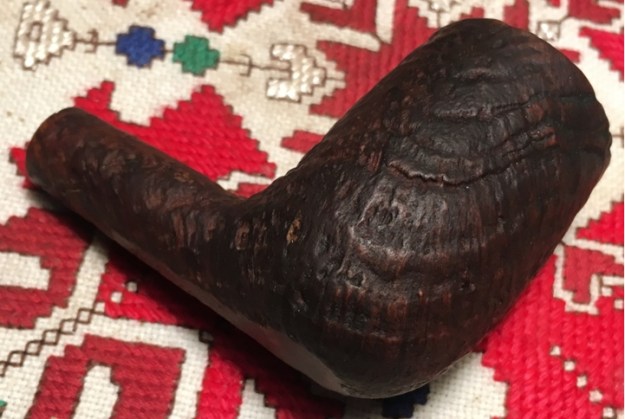
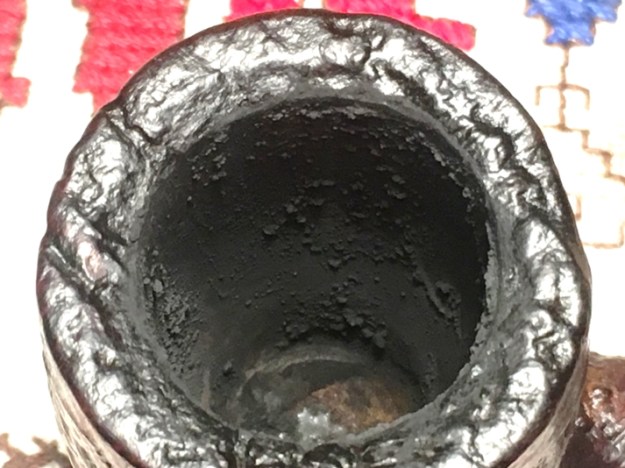
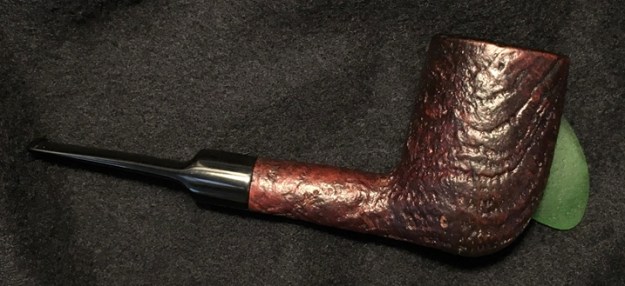
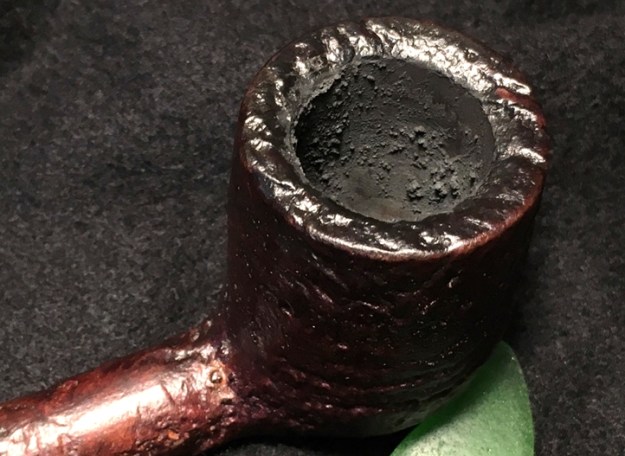
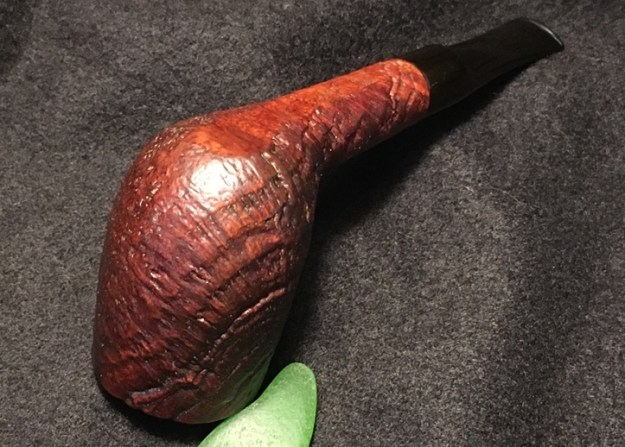
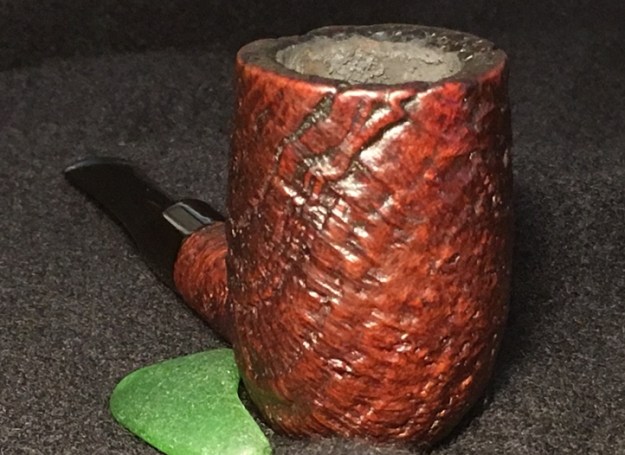
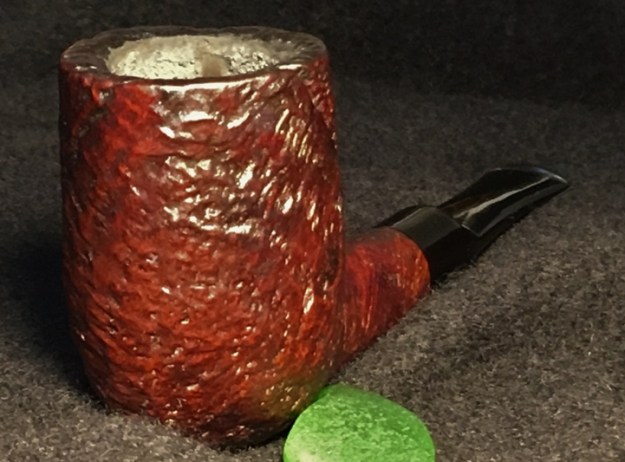
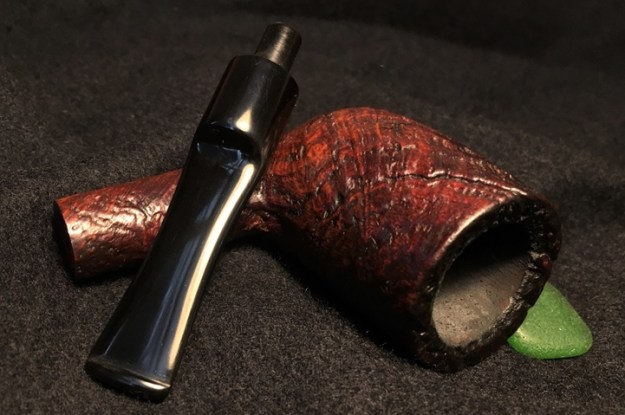
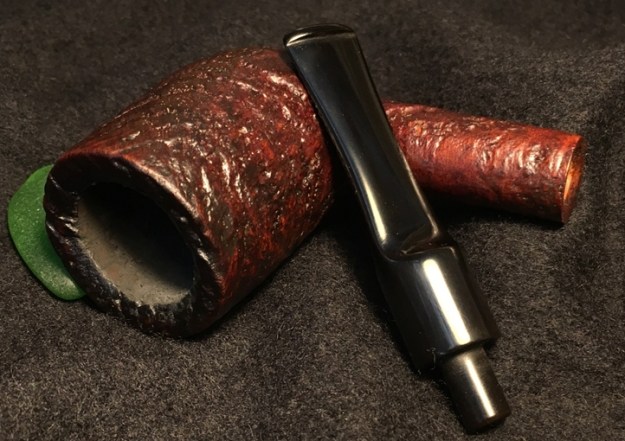
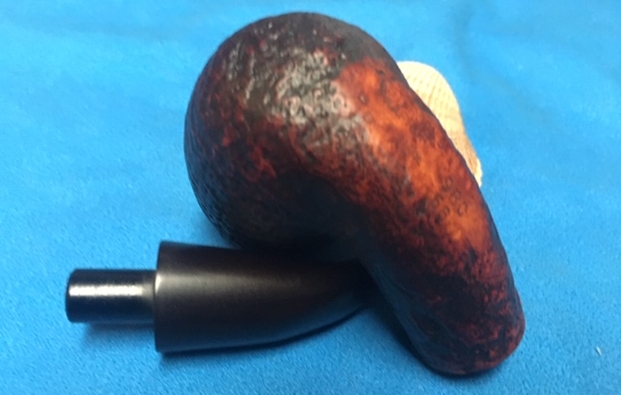
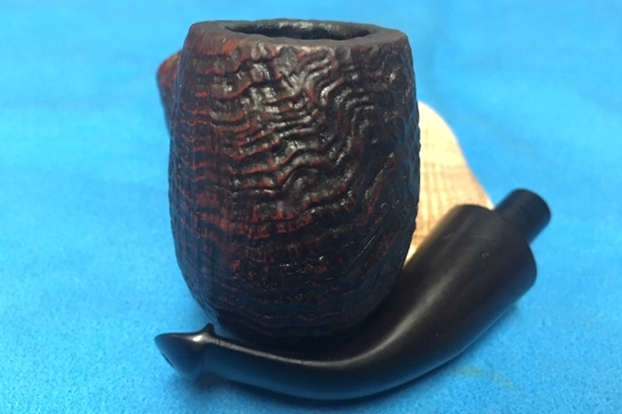
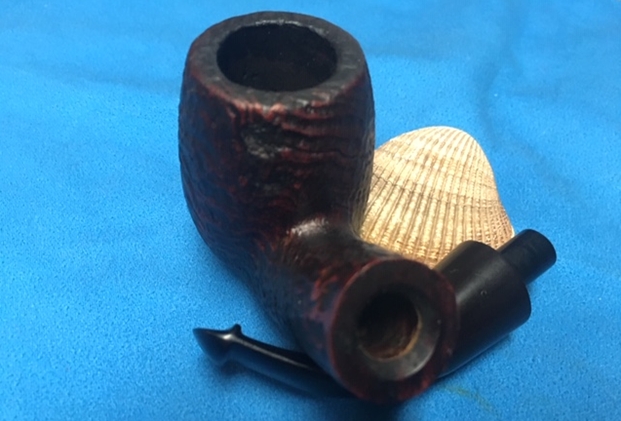
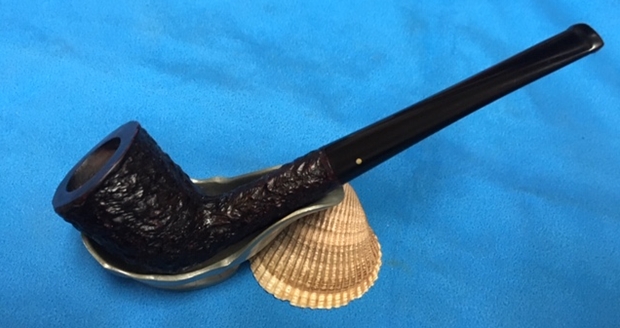
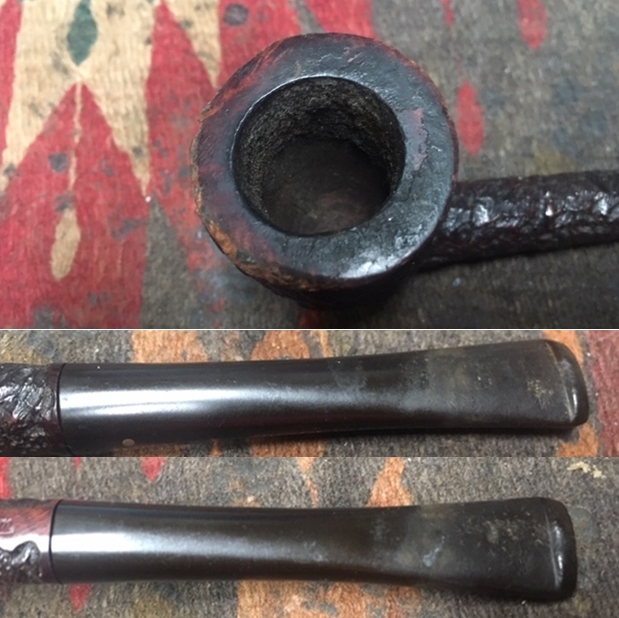
I finished the restoration of all the pipes in the box of Calich pipes and the BBB Calabash that Pat had sent. She had included a Brigham as noted above. This Brigham Dublin one dot pipe was a classic Brigham shape and rusticated finish. The rim top was dirty and pretty beat up. There were nicks out of the outer edge of the rim around the bowl. The front outer edge was rough from knocking the pipe out again hard surfaces. The rusticated finish was in decent condition. The bowl had a cake in it and there was a lava overflow onto the rim top and darkening the finish. The inner edge of the bowl looked to be in excellent condition under the lava. The stamping on the underside of the shank was very clear and read Shape 107 on the heel of the bowl followed by Can. Pat. 372982 on the smooth panel on the shank. That was followed by Brigham. There is a long tail coming from the “m” curving under the Brigham stamp. The stem was lightly oxidized as was the single metal dot on the side of the taper. There was oxidation and light tooth chatter on both sides of the stem on both sides near the button. The shank and stem were dirty inside. The tenon was the Brigham metal system that held the hard rock maple filter. It did not look like it had ever been changed. I took a photo of the bowl and rim top to show the damage on the front left outer edge of the bowl, the cake in the bowl and the lava build up on the rim top and inner edge of the rim top. It is quite thick and darkens the natural finish of the rim top. The cake was thick and hard but hopefully it had protected the rim and edges from damage. Otherwise it looks pretty good. I also took photos of the stem to show the oxidation on both sides, damage to the button and the light tooth chatter on both sides near the button. I took a photo of the underside of the shank to show the condition of the stamping. You can see the clear stamping reading as noted above.I wrote to Pat and asked her if she would be willing to write short remembrance of her late husband and her Great Grandfather. She wrote that she would be happy to write about them both. Here are Pat’s words:
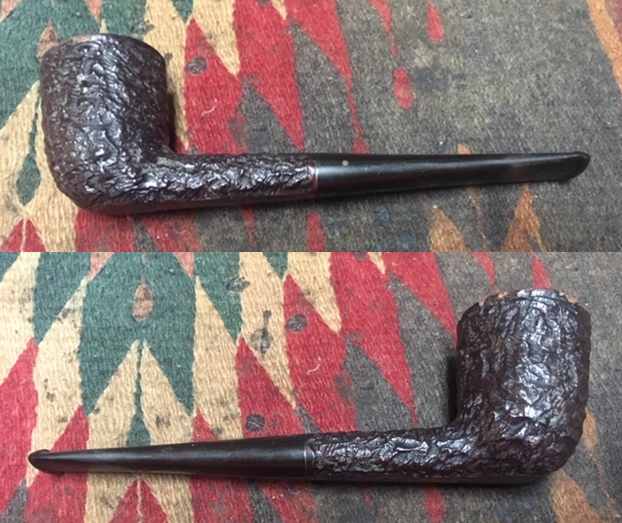
I’d like you know that Ken was an incredibly talented and creative man with a smile and blue eyes that could light up a room. His laugh was pure magic. He could think outside the box and come up with an elegant solution to any problem…

Pat sent me this reflection on her husband Ken’s life. Thanks Pat for taking time to do this. I find that it gives another dimension to the pipes that I restore to know a bit about the previous pipeman. Pat and Ken were artists (Pat still is a Sculptural Weaver) and it was this that connected them to each other and to John Calich. Here are Pat’s words.

Here is the write up for Ken. We meet in University and it was love at first sight. I consider myself blessed to have shared a life together for 37 years.

Ken graduated from Ryerson University with Bachelor of Applied Arts in Design in 1975.

Ken lived his life with joy.  Each day was a leap of faith in the creative process. His smile would light up the room and the hearts of the people he loved.

He combined the skilled hands of a master craftsman, with the problem solving mind of an engineer, and the heart and soul of an artist. He used his talents to create unique and innovative wood sculptures. Using precious hardwoods, he incorporated the techniques of multiple lamination and three dimensional contouring to create sculptural pieces that captivate the eye and entice the hand to explore.

His career was highlighted by numerous corporate commissions, awards and public recognition in Canada and abroad.

A quote from Frank Lloyd Wright sums up Ken’s approach to design.  “Form follows function – that has been misunderstood. Form and function should be joined as one in a spiritual union.” 

A friendship with John Calich developed over years of exhibiting their work at exhibitions. How could a wood sculptor resist some of John’s finest creations…

I wrote Charles Lemon to get some background information on the pipe. Charles knows Brigham pipes like no one else I know besides he is a great guy. Here is his response

Nice find! The stamps are really nice & clear on that one.

Date-wise, this pipe was made between 1938 and 1955 while the patent for the Brigham System was in force, thus the CAN PAT #. The underlined script logo is another indication of age – that logo was phased out sometime in the early 60s.

Shapes 05, 06 & 07 are classic Straight Dublin shapes from the earliest Brigham lineup, with Shape 05 being the smallest and 07 the largest. There are also Bent Dublin shapes but they are much higher shape numbers and presumably were added to the lineup perhaps decades later.

Hope that helps! Ironically, I was looking at the shape chart just today with an eye to doing an update, so most of this was top of mind! — Charles

I summarize the dating information from Charles now: The pipe is an older one with a Canadian Patent Number. That and the underlined script logo date it between 1938 and 1955. The shape 107 refers to the largest of the classic Straight Dublin pipes in the Brigham line up.

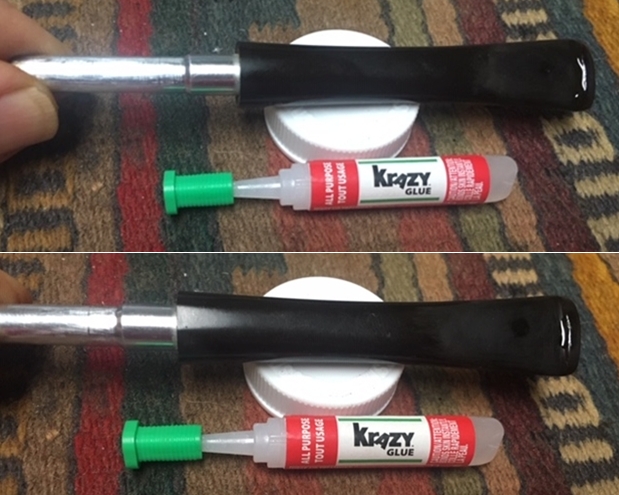
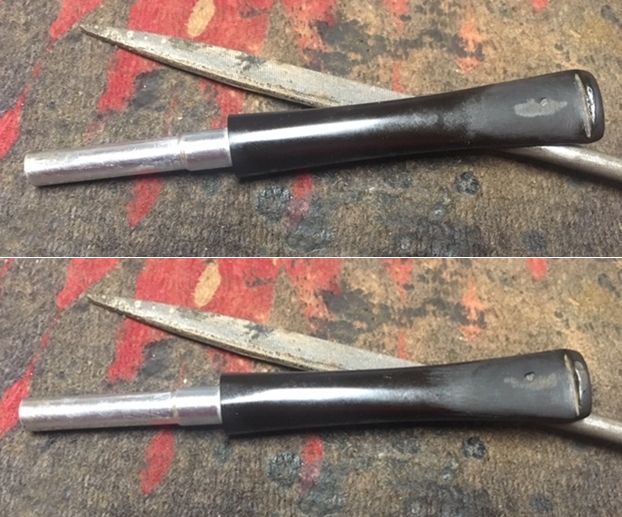
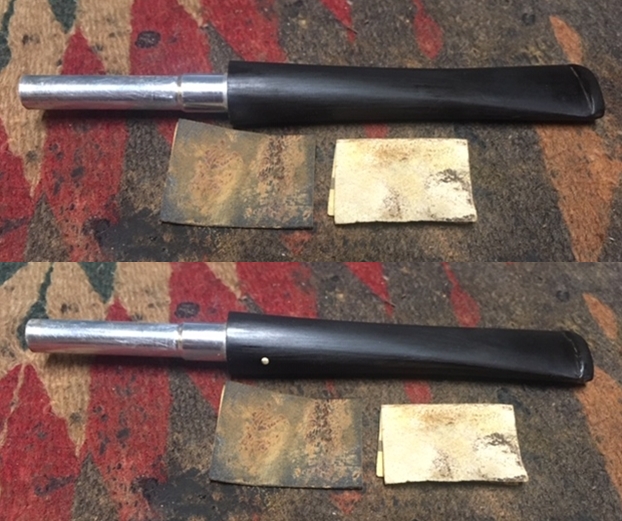
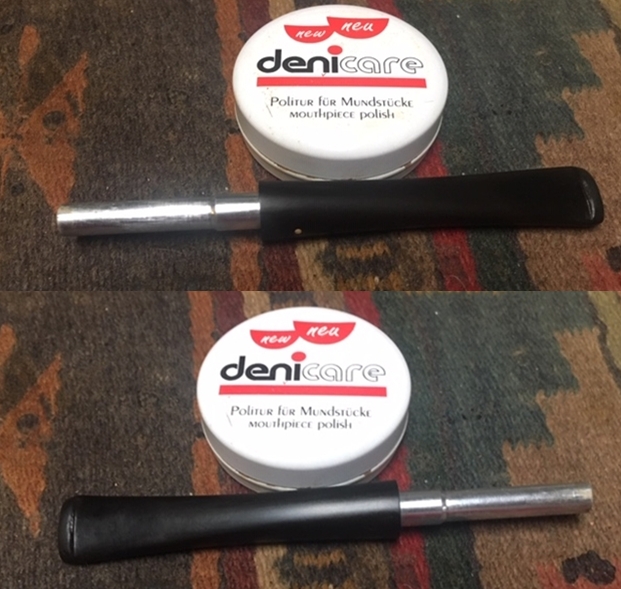
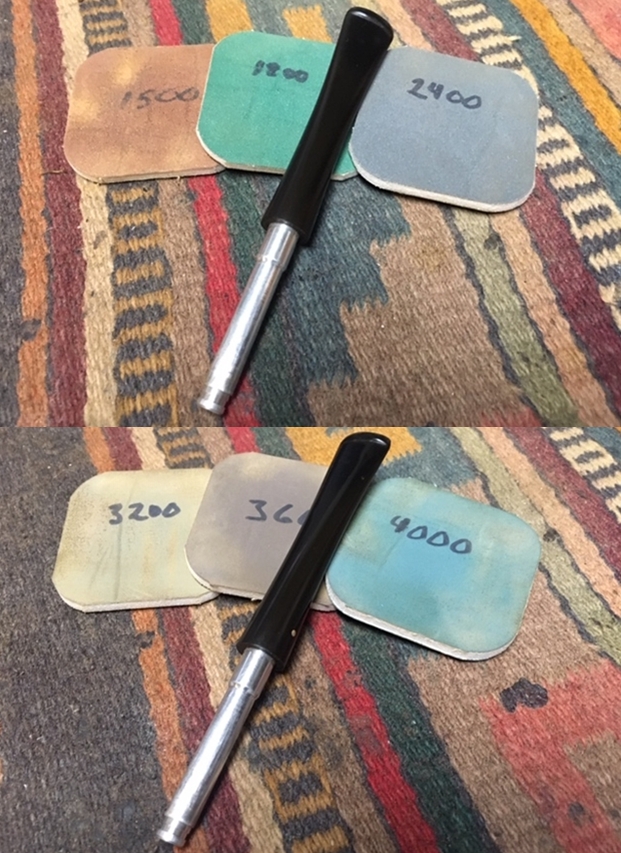
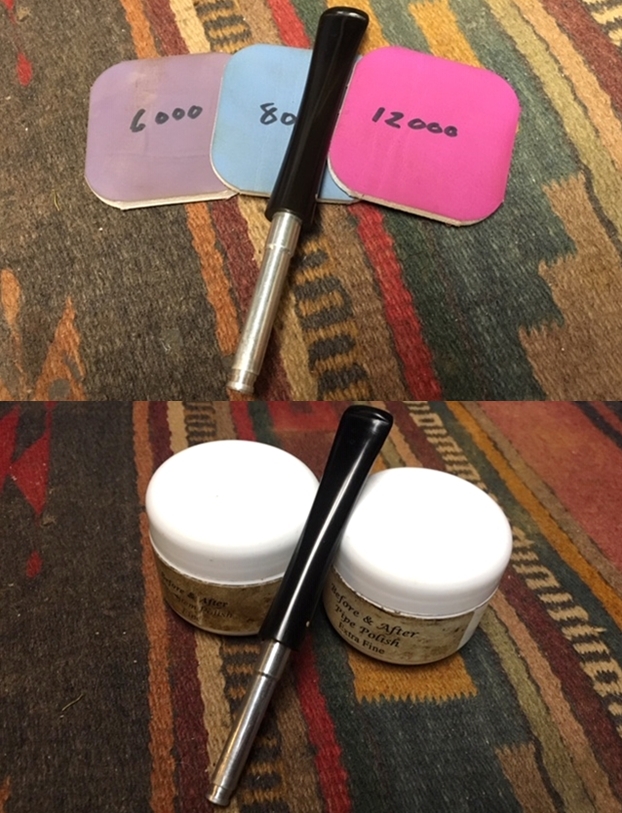
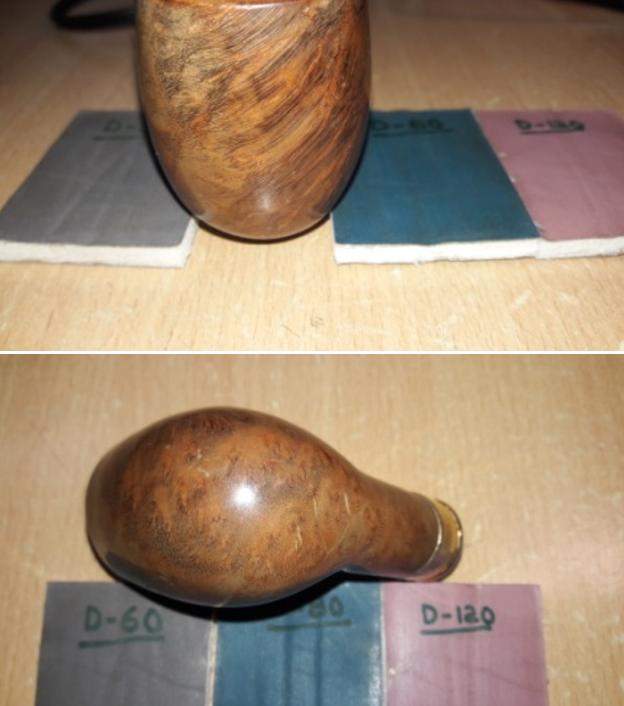
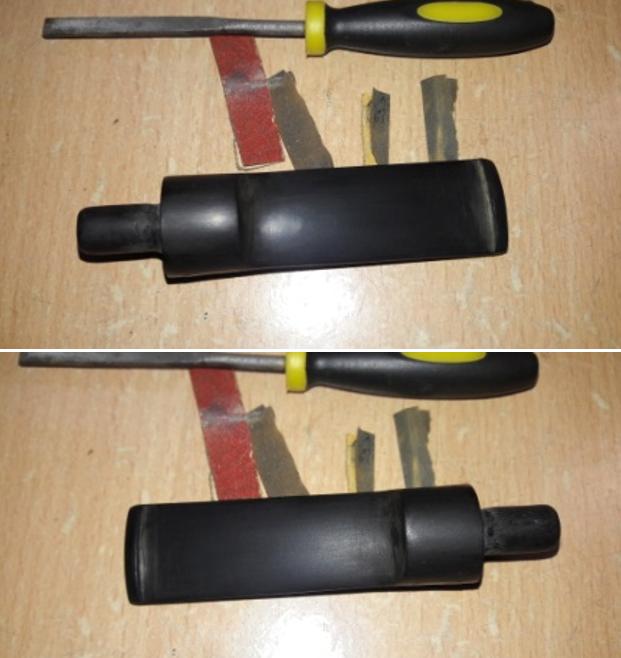
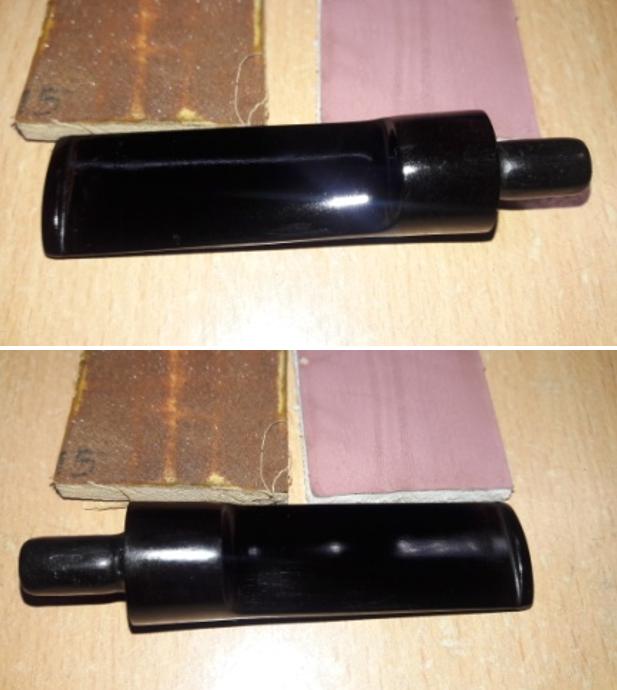
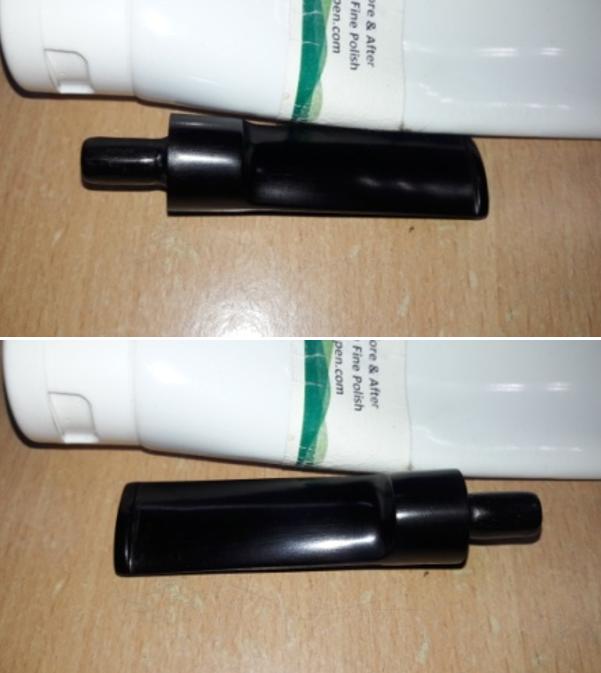
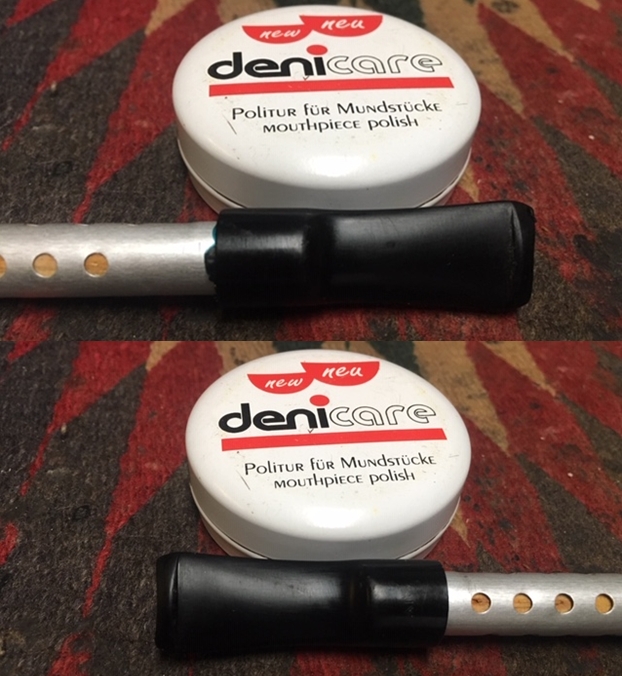
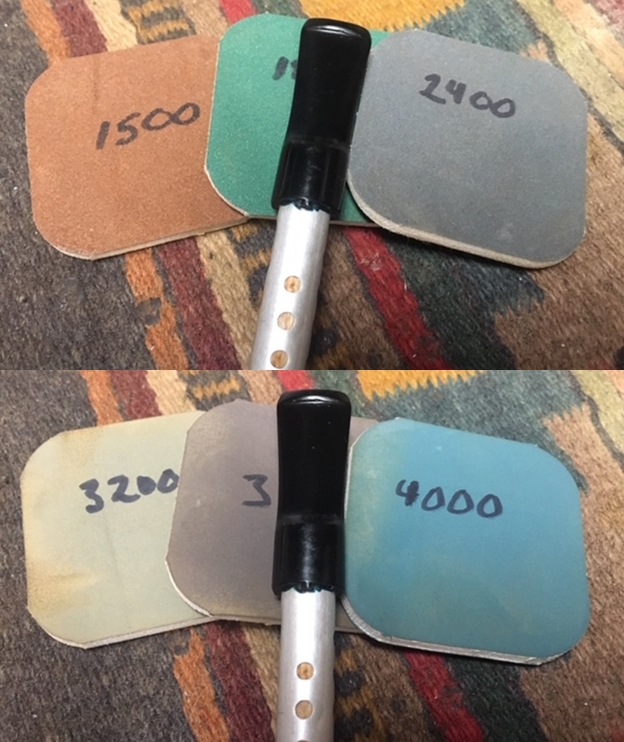
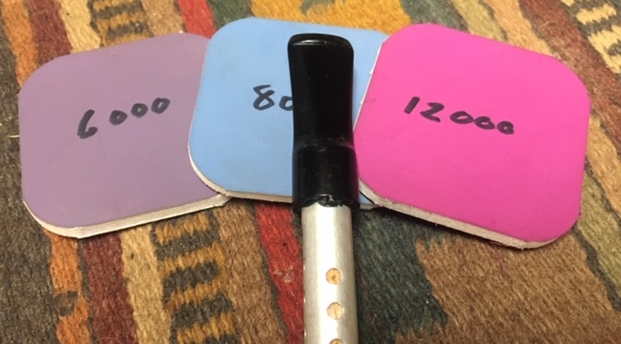
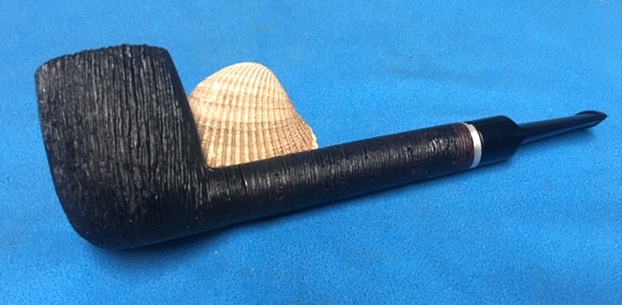
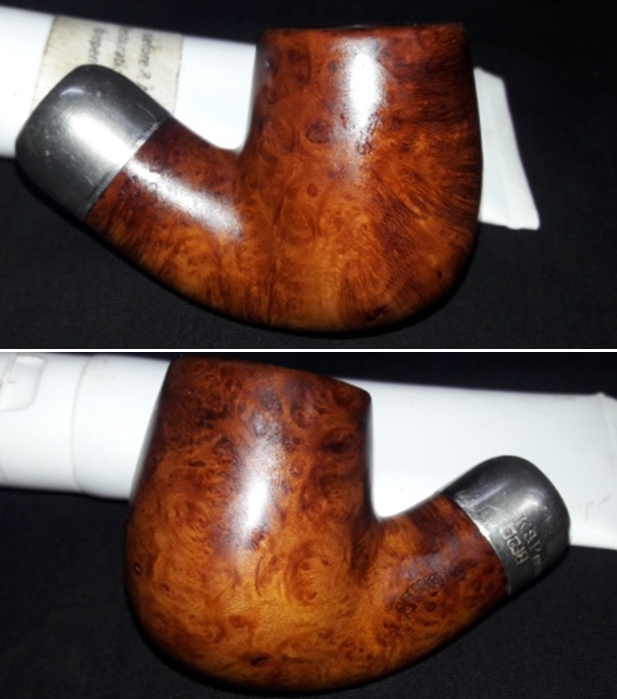
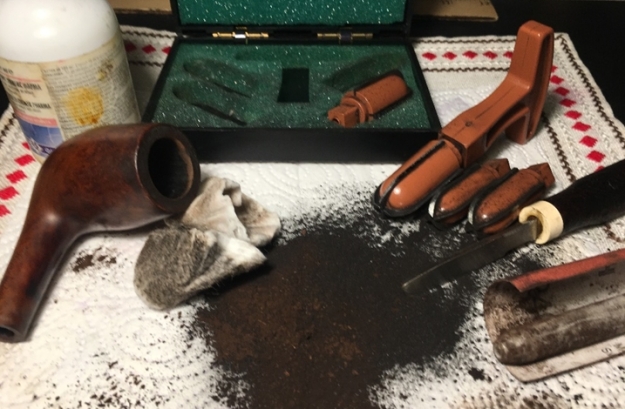
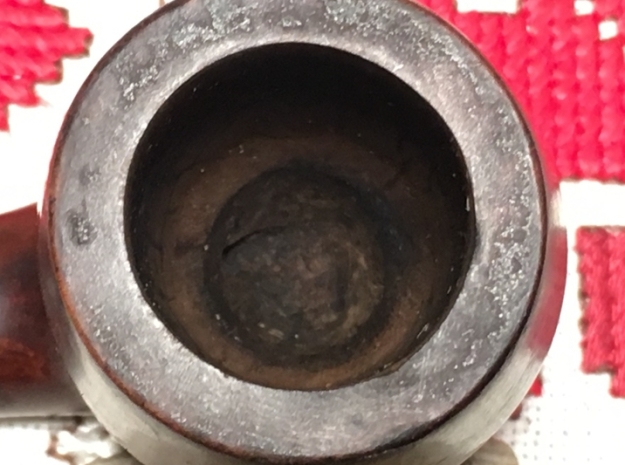
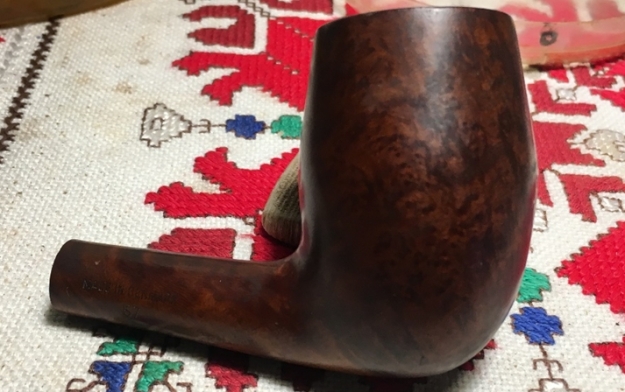
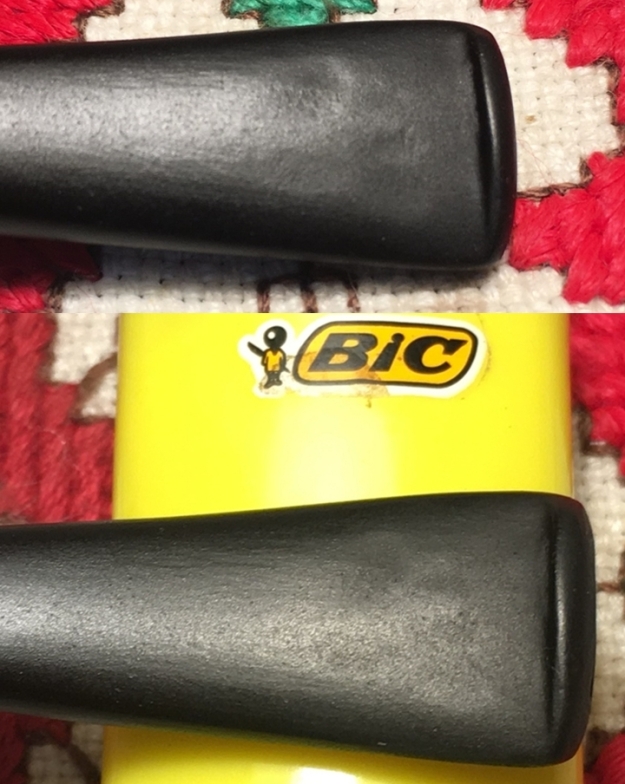
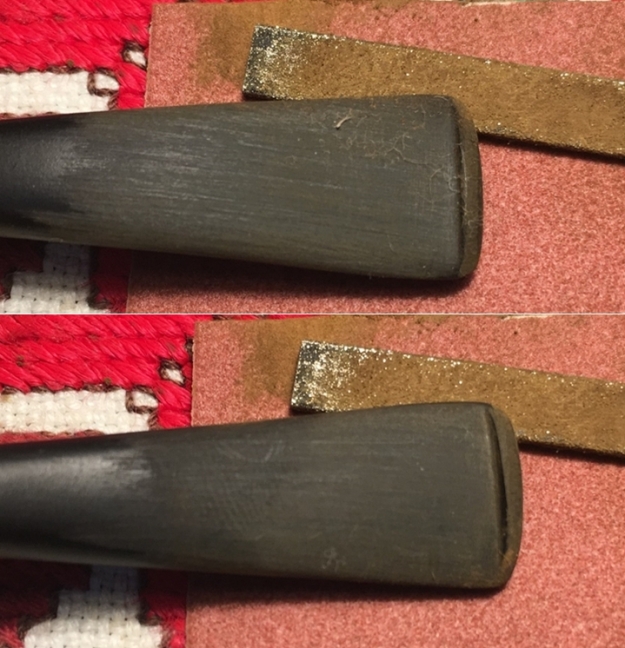
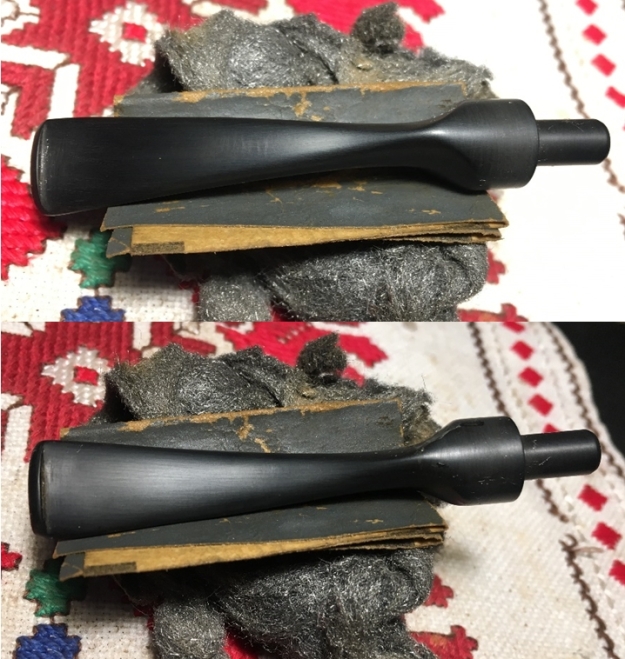
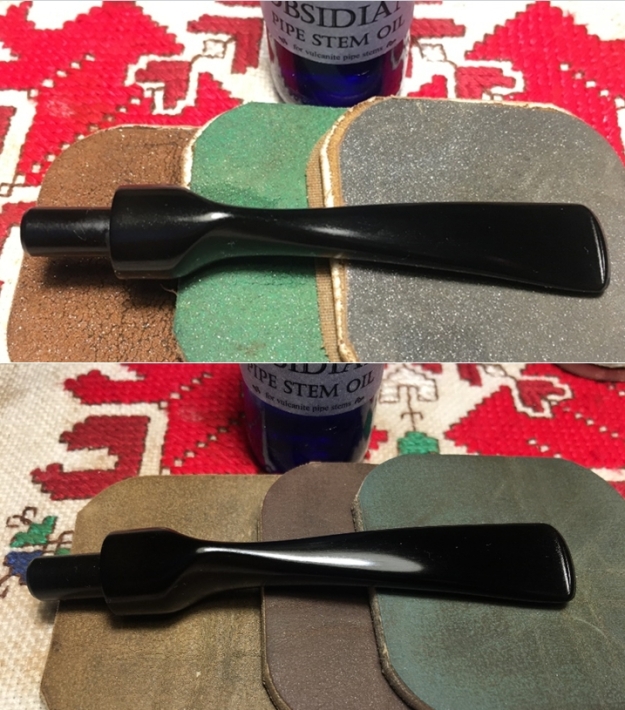
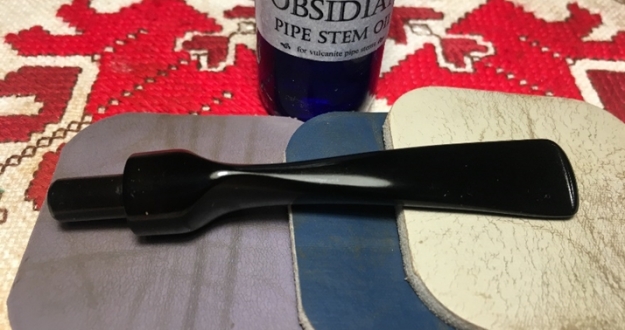
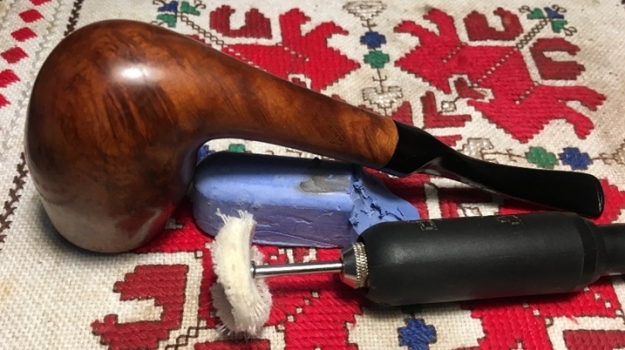
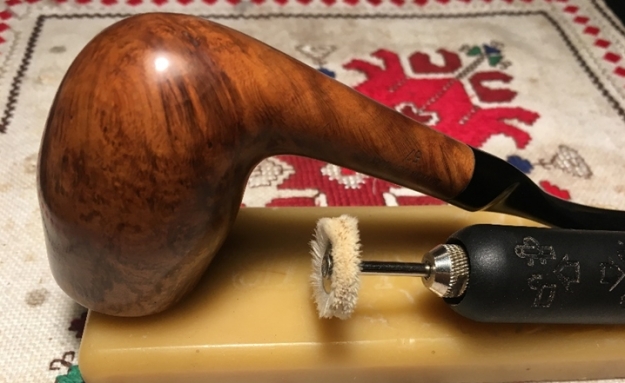
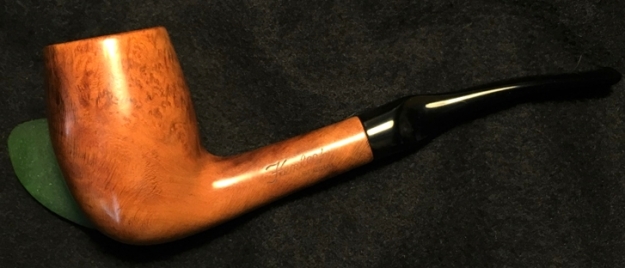
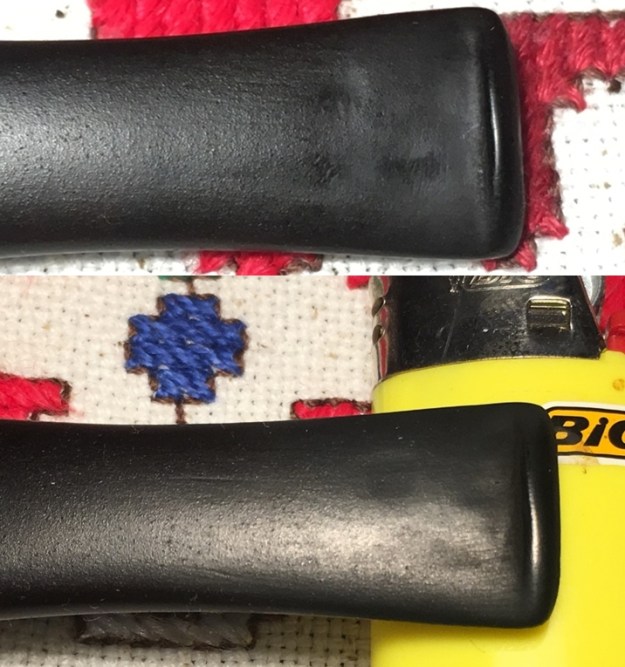
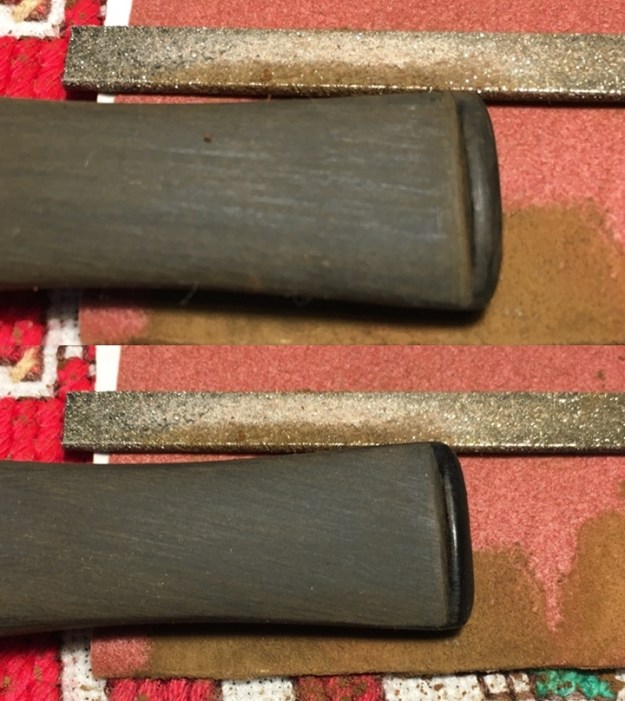
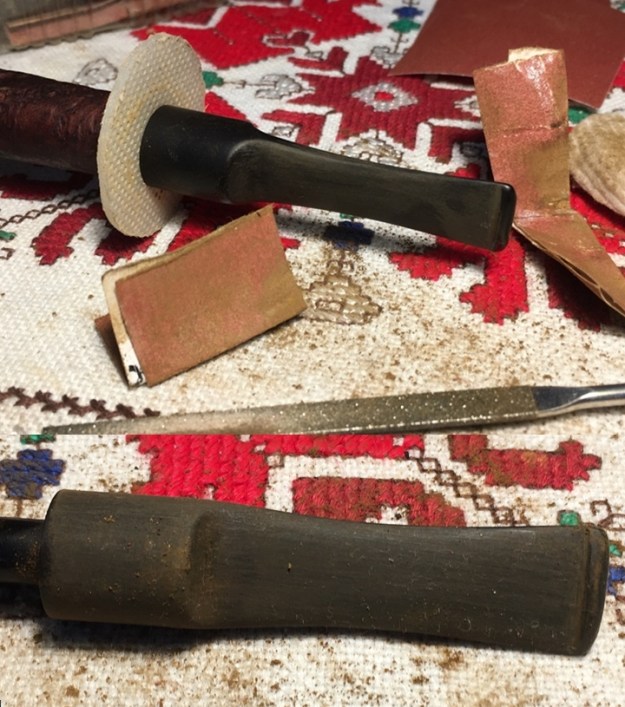
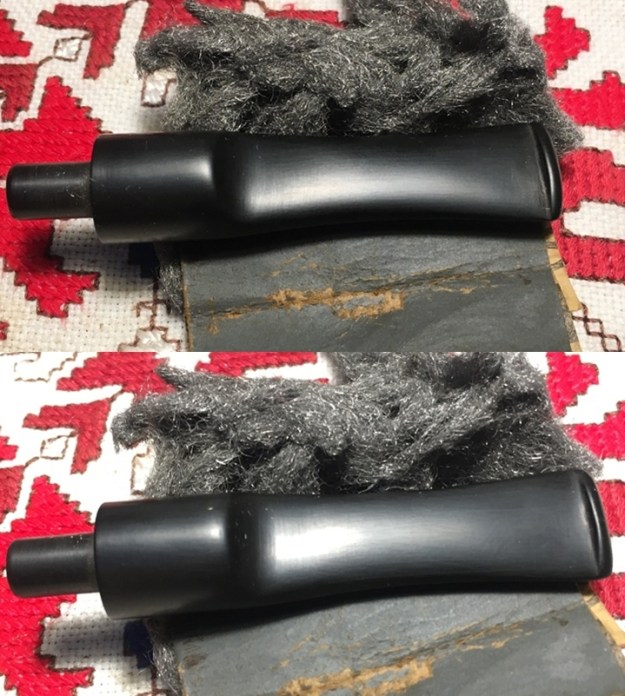
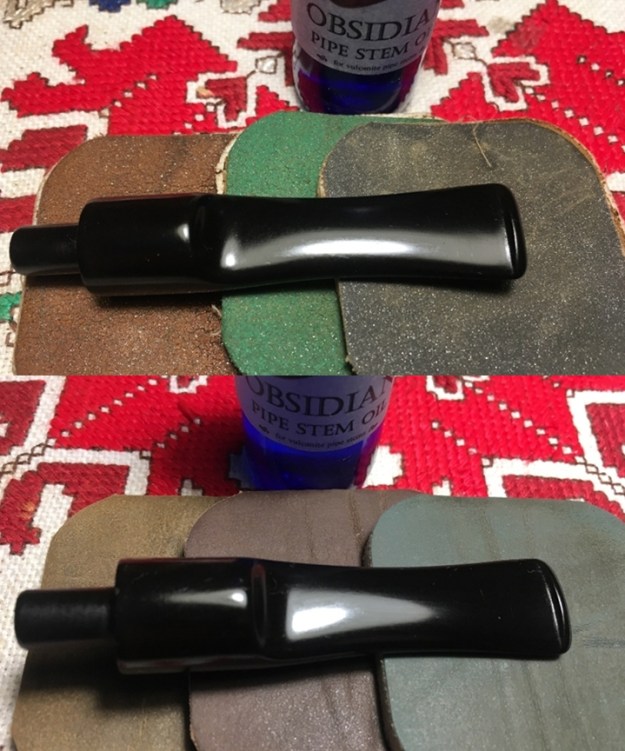
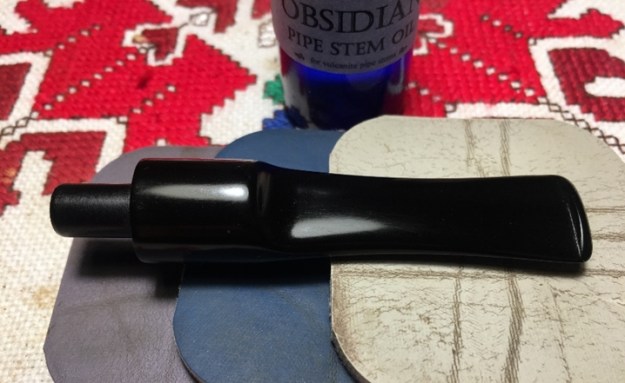
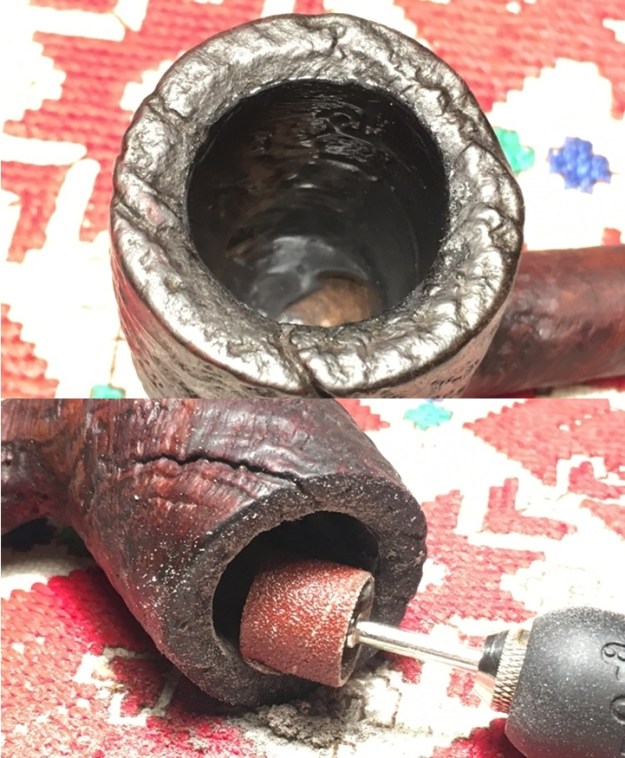
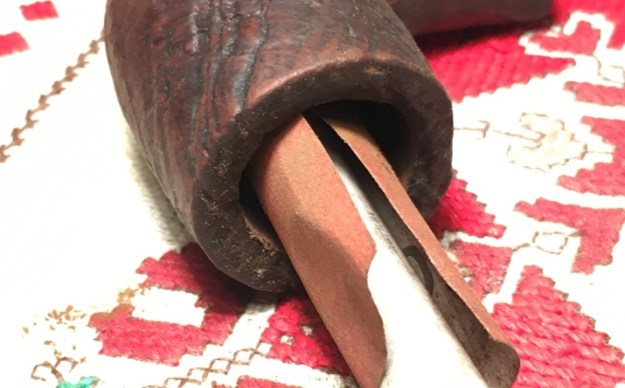
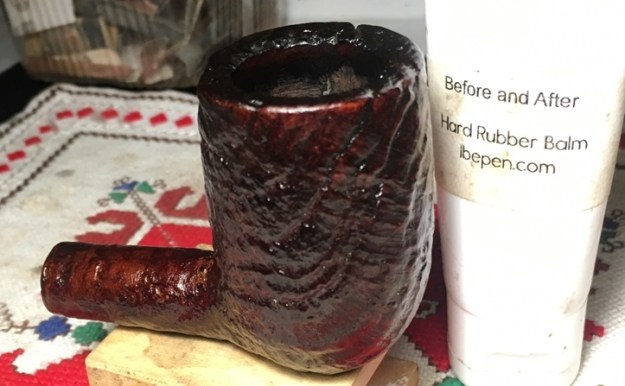
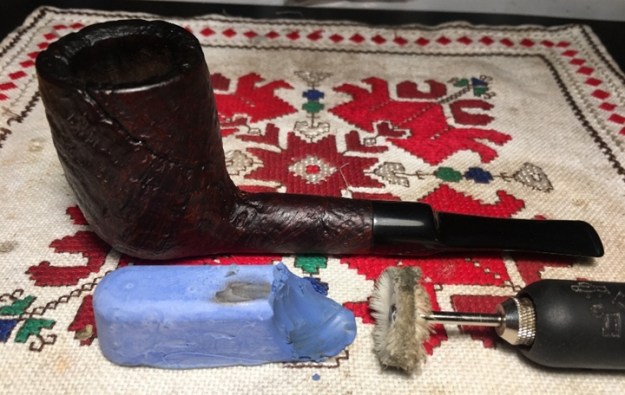
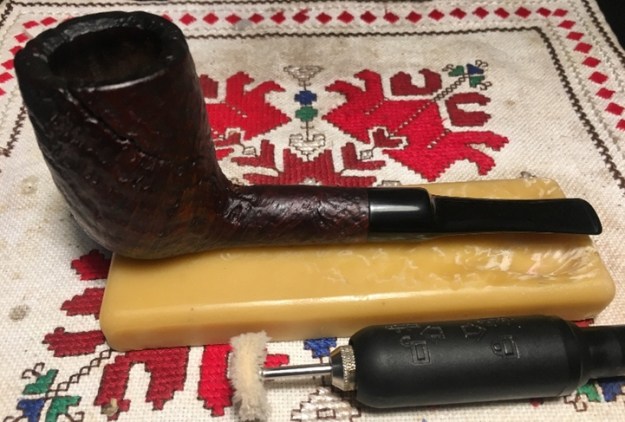
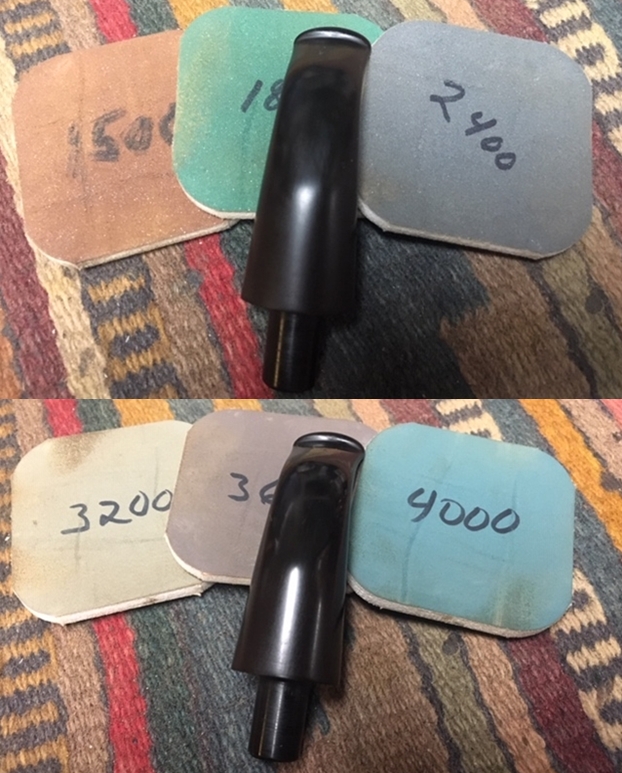
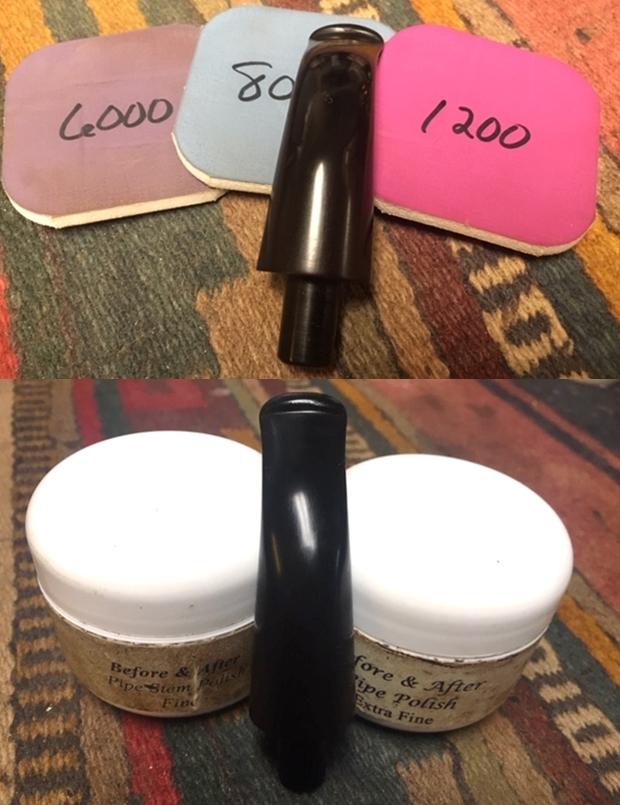
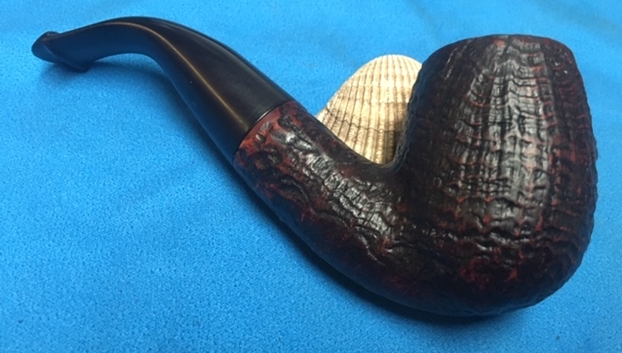
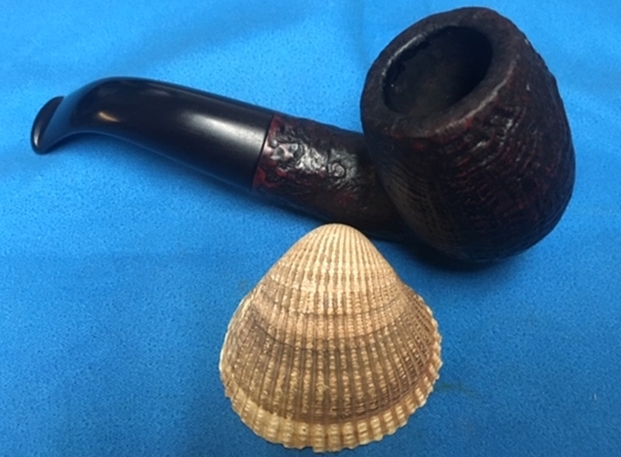
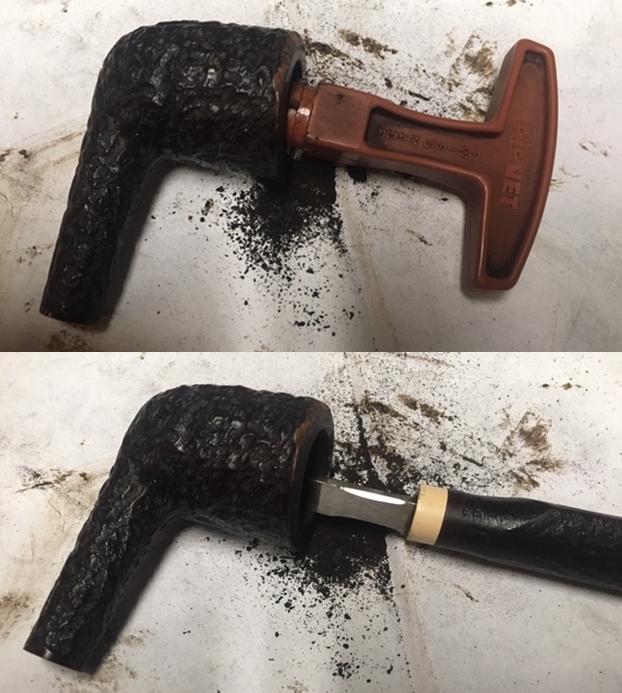
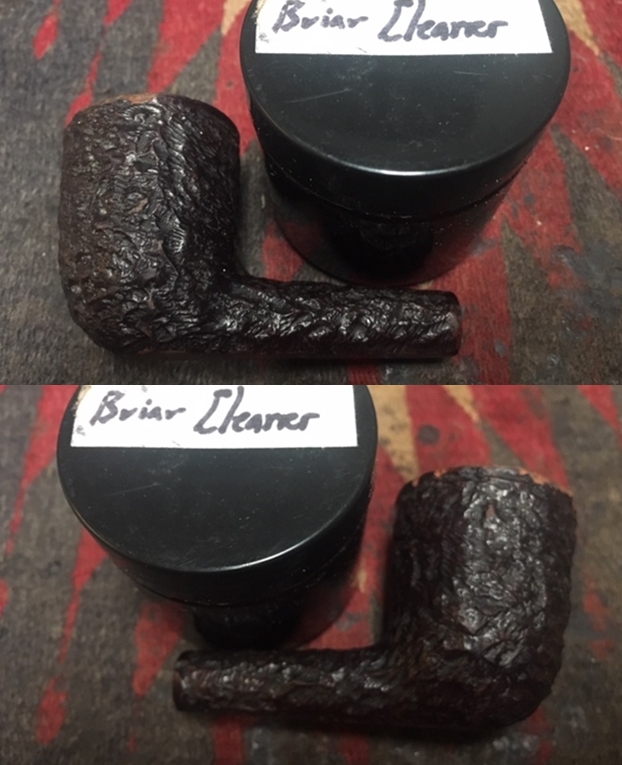
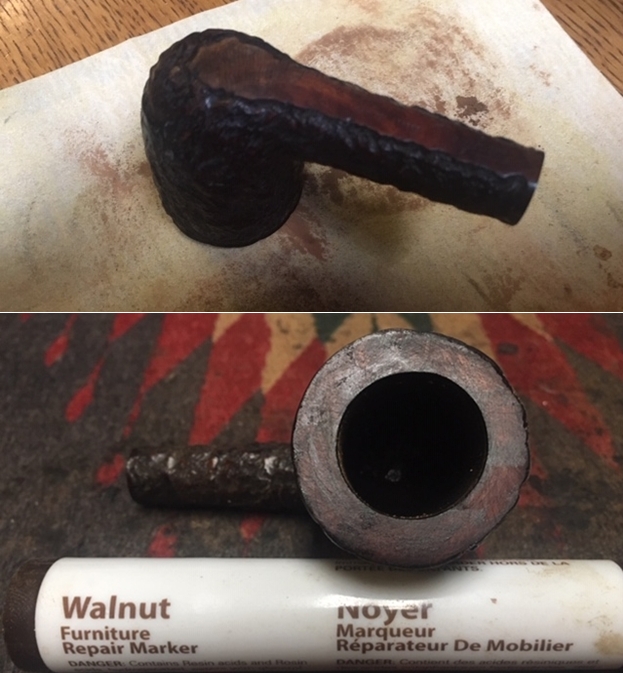
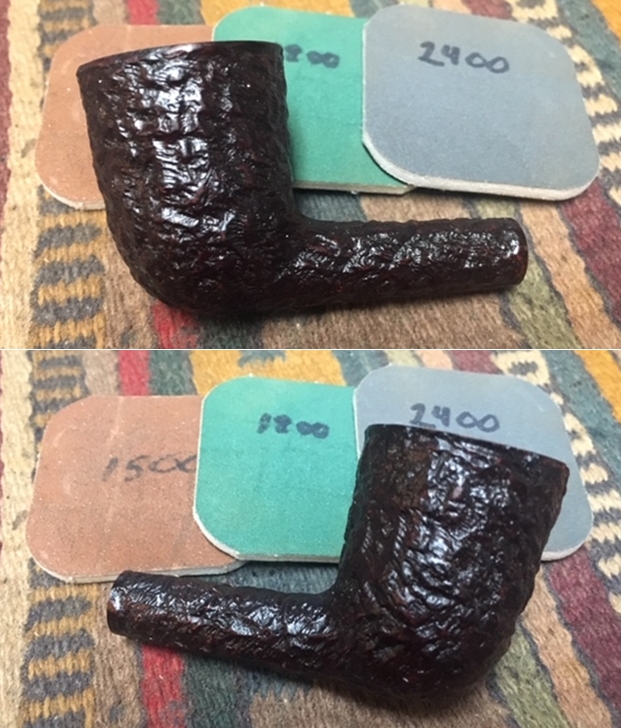
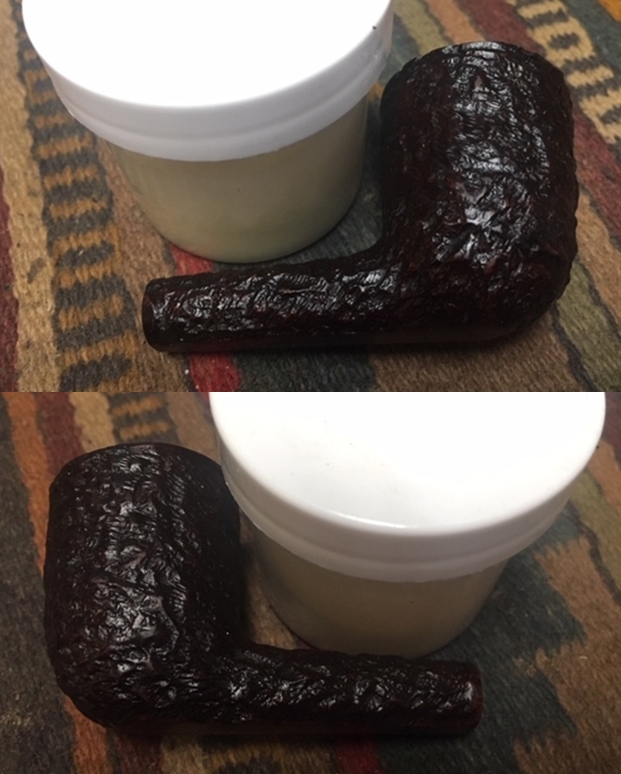
Armed with Pat’s stories of John and her husband Ken and the information from Charles on the background of the pipe it was time to work on the pipe. I reamed the bowl with a PipNet Pipe reamer using the third cutting head. I took the cake back to bare briar so that I could check out the inside walls. I used a Savinelli Fitsall Pipe Knife to scrape back the remaining cake. I finished my cleanup of the walls by sanding it with 220 grit sandpaper wrapped around a piece of dowel.       I scraped the rim top lava with the edge of the Savinelli Fitsall Pipe Knife. I was able to remove much of the lava. It also helped me to see the damage to the front edge better. It really was a mess.I scrubbed the briar with Before & After Briar Cleaner and rinsed it off with warm running water. I scrubbed the rim top with a tooth brush and warm running water at the same time. I dried the bowl off with a soft microfiber cloth and gave it a light buffing. The photos show the cleaned briar and the damaged areas are very clear.   Once the rim top was clean I could see the extent of the damage to the surface of the rim. The damage was quite extensive and gave the rim the appearance of being out of round. There was also a downward slant to the front edge of the bowl. I topped it on a topping board with 220 grit sandpaper. I worked to flatten out the profile of the rim. I polished the rim surface with 1500-2400 grit micromesh sanding pads. I wiped the top down with alcohol on a cotton pad. I restained it to match the rest of the bowl with three different stain pens – Walnut, Maple and Mahogany. I polished the rim top with micromesh sanding pads – wet sanding with 1500-12000 grit sanding pads. I wiped it down with a damp cloth after each pad. I rubbed the bowl and rim top down with Before & After Restoration Balm. I worked it into the surface of the briar with my fingertips and a horsehair shoe brush to clean, enliven and protect it. I let the balm sit for a little while and then buffed with a cotton cloth to raise the shine. Mark Hoover’s Balm is a product that I have come to appreciate and one I use on every pipe I have been working on.     I rubbed the bowl and rim down with Conservator’s Wax and buffed the bowl with a shoe brush. I worked on the internals. I scraped the inside of the mortise with a dental spatula to remove the hardened tars and oils that lined the walls of the metal shank. Once I had that done I cleaned out the airway to the bowl, the mortise and the airway in the stem with pipe cleaners, cotton swabs and alcohol. When I finished the pipe smelled very clean.Before I cleaned the shank I removed the hard rock maple filter. I took a new filter out of the box and set it aside for use once I finished the clean up.I wiped down the surface of the vulcanite stem with alcohol. I filled in the deep tooth marks with clear super glue.Once the repairs had cured I used a needle file to reshape and recut the edge of the button and flatten the repaired area.   I sanded the stem with 220 grit sandpaper to break up the oxidation. I started the polishing with 400 grit wet dry sandpaper to remove the scratching. It is starting to look good.I have one more tin of Denicare Mouthpiece Polish left from a few that I have picked up over the years. It is a coarse red pasted that serves to help remove oxidation. I polished the stem with that to further smooth out the surface of the vulcanite (and to be honest – to use it up).  I polished the stem with micromesh sanding pads – wet sanding with 1500-12000 grit pads. I wiped the stem down after each sanding pad with Obsidian Oil. I polished it with Before & After Pipe Stem Polish – both Fine and Extra Fine. Once I had finished the polishing I gave it final coat of oil and set it aside to dry.     This is the sixth and final pipe that I am restoring from Ken’s Estate. It is another a classic Brigham Patent era Large Dublin shaped 107. With the completion of this Brigham I am on the homestretch with Ken’s estate. This is the part I look forward to when each pipe comes back together, polished and waxed. I put the bowl and stem back together. I polished the bowl and stem with Blue Diamond to polish out the scratches in the briar and the vulcanite. I gave the bowl and the stem multiple coats of carnauba wax. I buffed the pipe with a clean buffing pad to raise the shine. I hand buffed it with a microfiber cloth to deepen the shine. The pipe polished up pretty nicely. The classic Brigham rustication and smooth rim top is very nice. The smooth, refinished the rim top, polished and waxed rustication on the bowl look really good with the black vulcanite. This Brigham Patent Era Dublin was a fun and challenging pipe to bring back to life because of the damaged rim top. It is another comfortable pipe to hold in the hand. The finished pipe is shown in the photos below. The dimensions of the pipe are Length: 6 inches, Height: 1 ¾ inches, Outside diameter of the bowl: 1 3/8 inch, Chamber diameter: ¾ of an inch. Thanks for reading this blog and my reflections on the pipe while I worked on it. This entire estate was interesting to bring back to life.
An Interesting Pipe to Work On- “Ropp Reporter”


Blog by Paresh Deshpande

Even though the work on my last project which I had mentioned in all my previous couple of blogs as one that I was keen to work on, has been more or less completed, the write up is pending for one simple reason, there was an issue which was pointed out by Steve when I shared pictures of the finished pipe with him. To address the issue, I need to travel back to my home town where services of a very special artisan are needed to be sought. Well, unraveling of this mysterious pipe will happen only in October 2019 and in the meanwhile I move ahead with my other restorations!!

The next pipe on my work table is a French pipe, makers of which trace back their history to 1870s!! Most of the learned readers would have guessed it right, it’s indeed a ROPP!

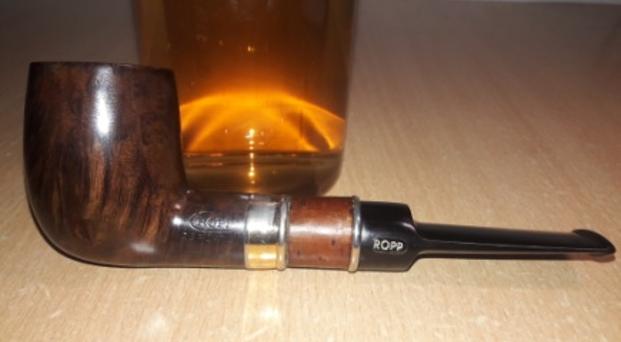
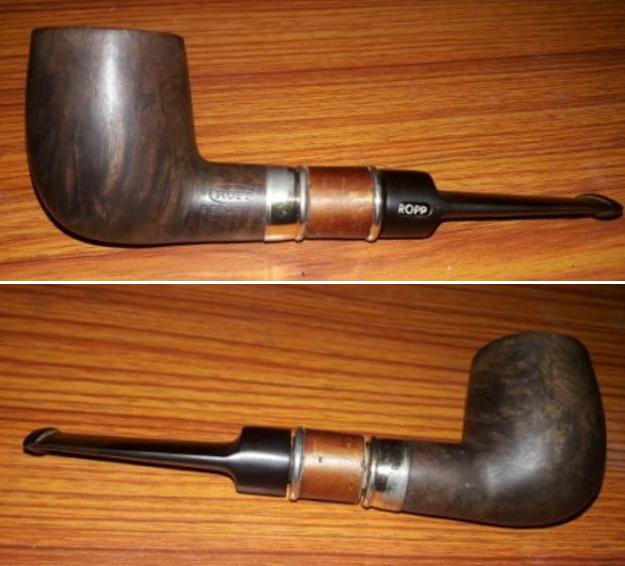
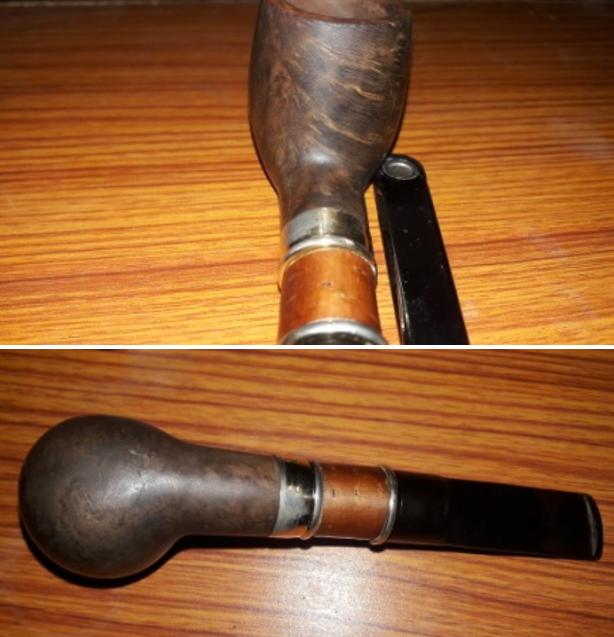
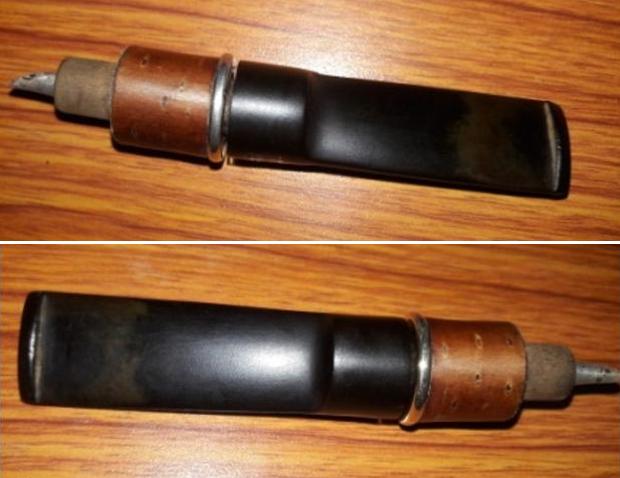
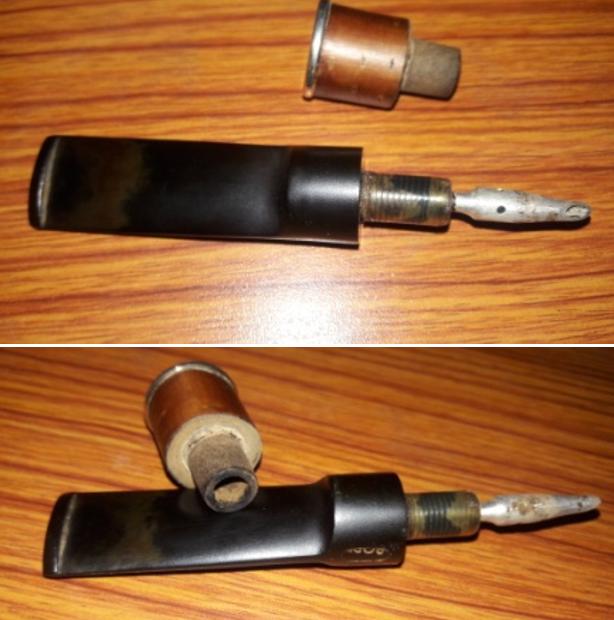
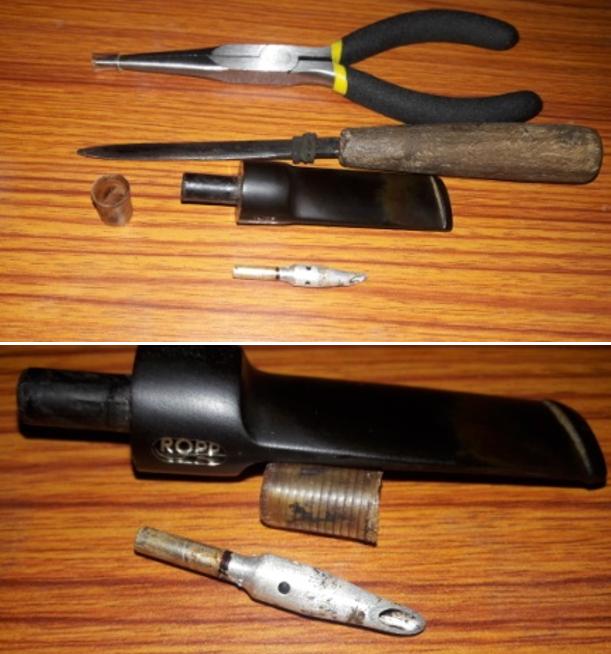
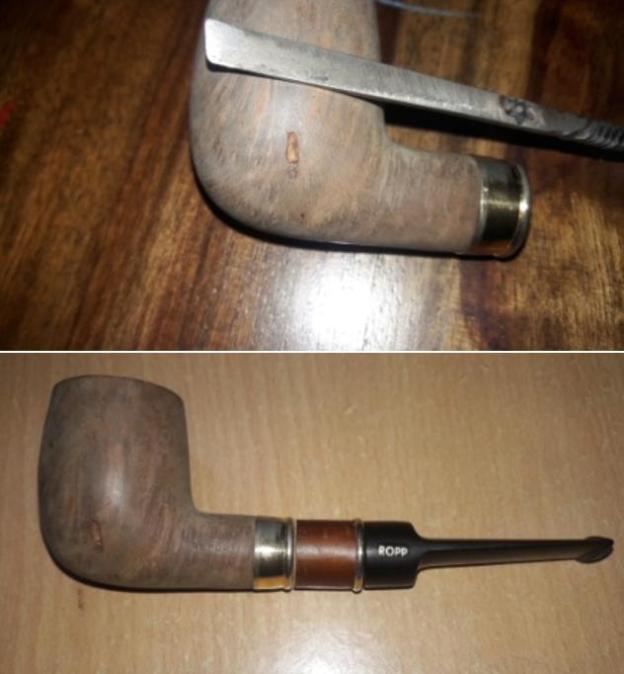
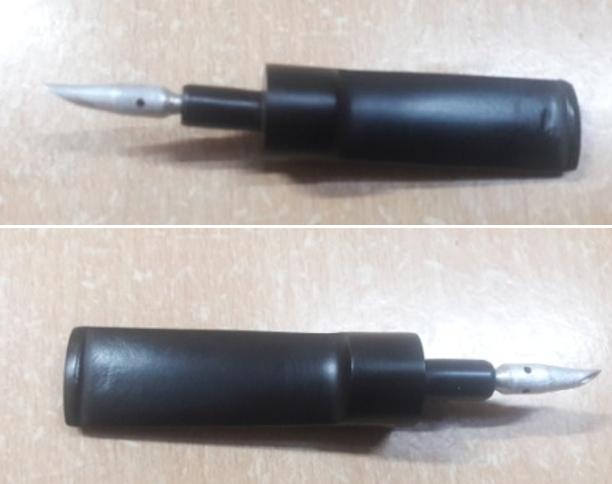
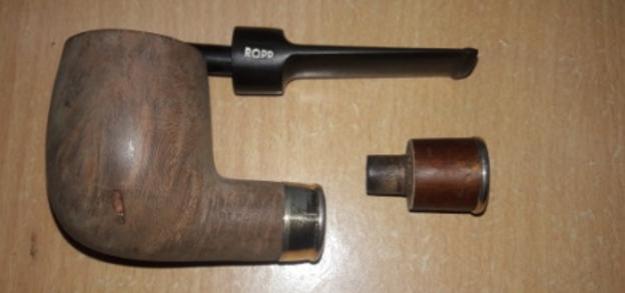
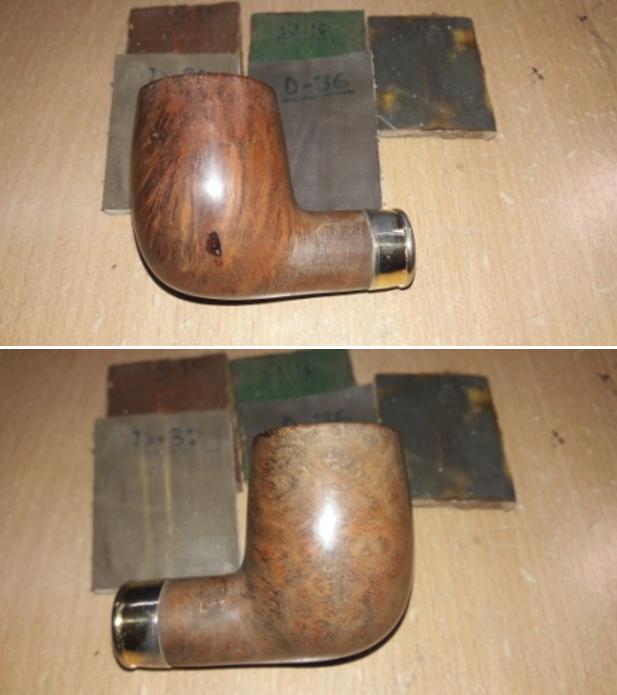
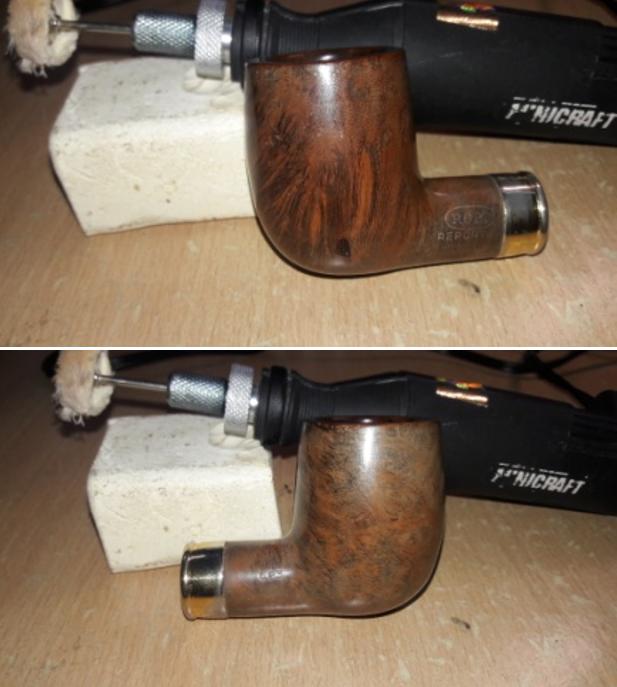
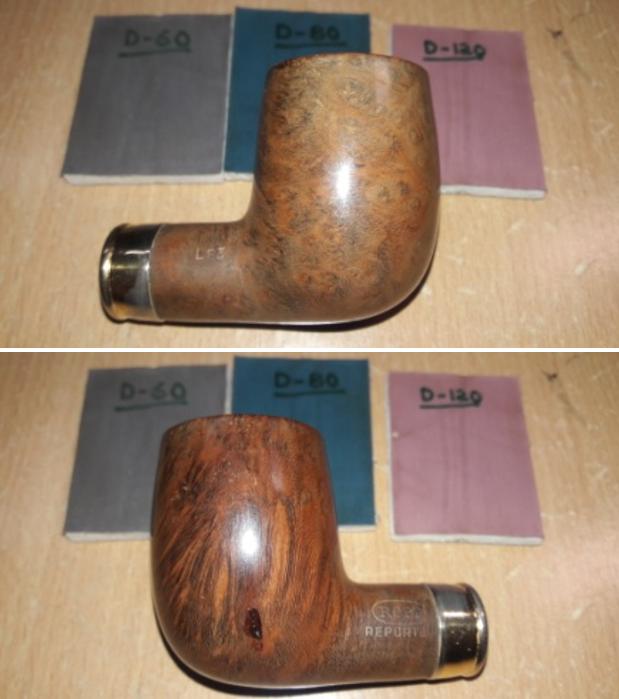
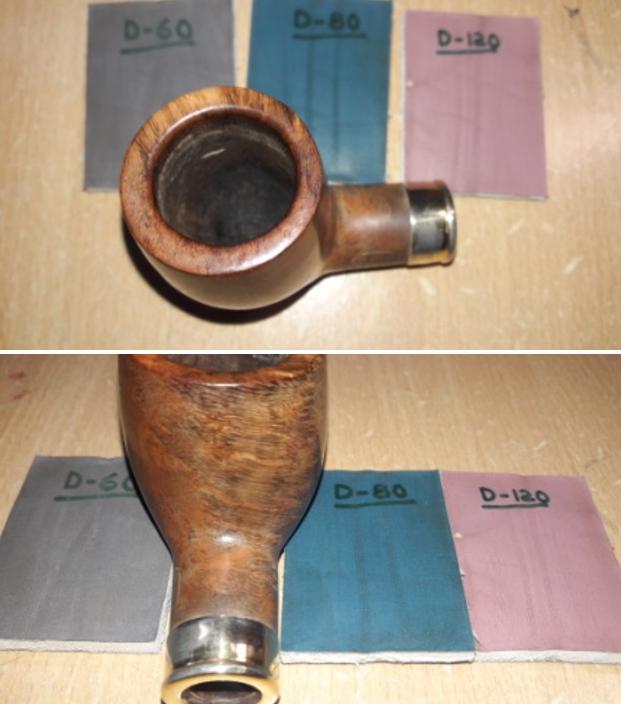
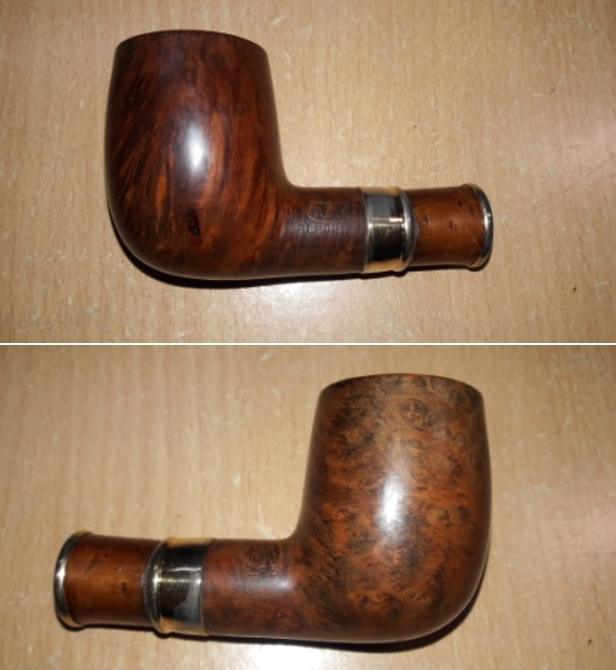
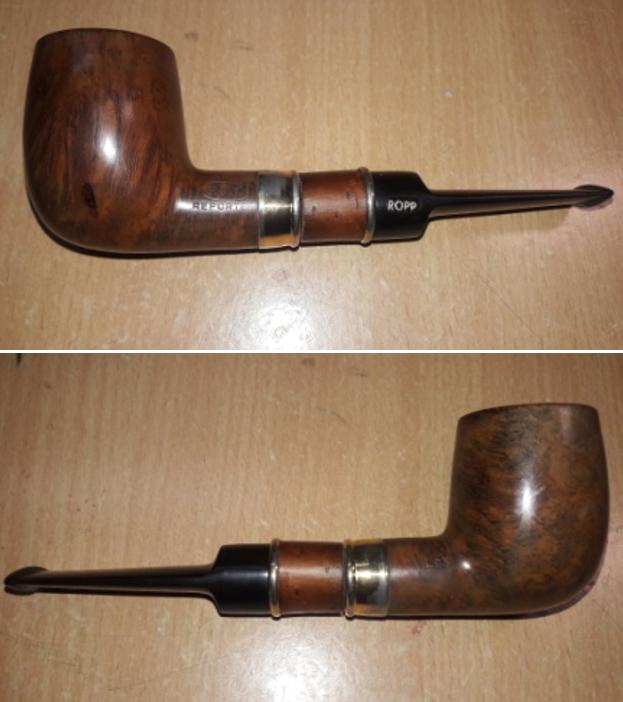
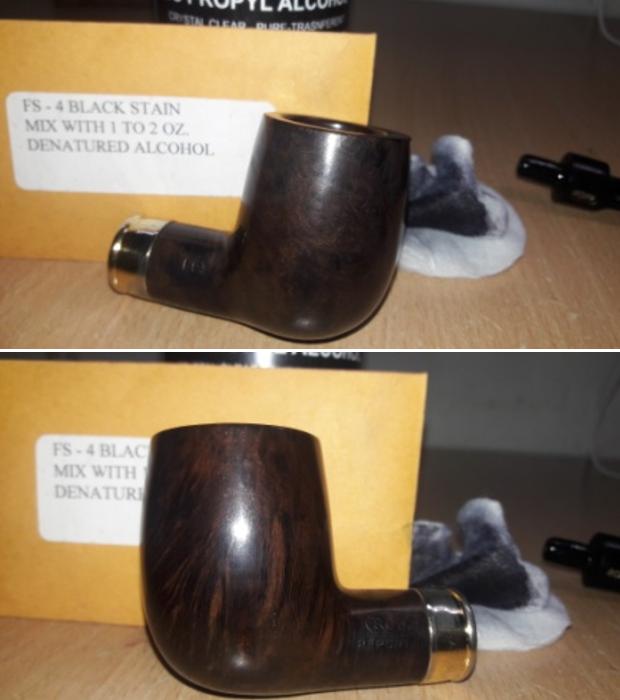
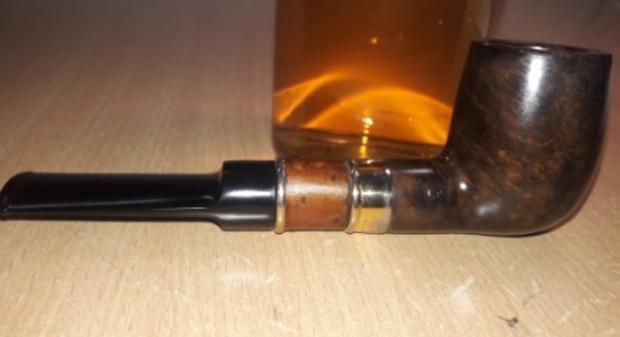
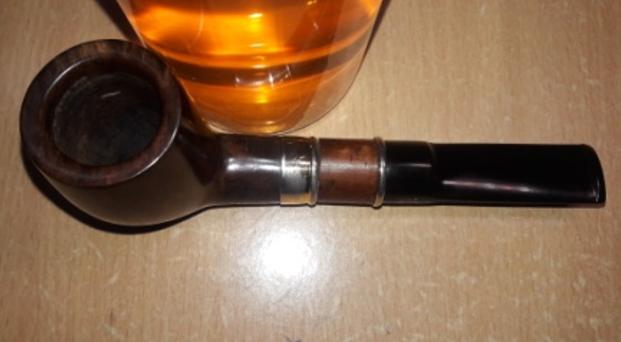
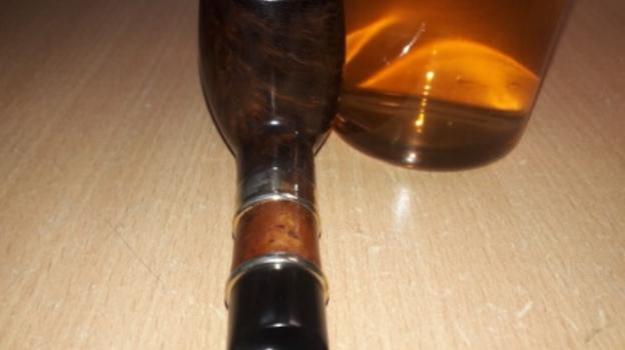
The pipe is a large bowl straight billiards with shiny golden colored shank end band with a bright burnt orange cherry wood (?) shank extension. The stem end of this extension too has the golden colored thin metal ring. The vulcanite stem has a corn cob shaped aluminum stinger. The pipe is stamped on the left side of the shank as “ROPP” in an oval over “REPORTER”, all in block capital letters. The right side of the shank bears the stamp “L 83” probably denotes the size (L- large) with shape code # 83. The vulcanite saddle stem has the logo “ROPP” in white letters, embedded deep in to the saddle and covered in a transparent high quality plastic cover.I searched pipedia.org to know about the brand as it is a first for me. The site has very scant information about the brand, but what is available makes it an interesting read (https://pipedia.org/wiki/Ropp)

Eugène-Léon Ropp (1830 – 1907) had acquired a patent for a cherrywood pipe (wild cherry, lat.: Prunus avium) in 1869. In 1870 he established a workshop to manufacture such pipes in Büssingen (Bussang, Vosges mountains). Around 1893 the business moved into the former mill of Sicard (part of the community of Baume-les-Dames – Département Doubs, Upper Burgundy – from 1895 on).

The pipes were a big success in the export as well. Shortly before 1914 Ropp designated A. Frankau & Co. (BBB) in to be the exclusive distributor in the UK and it’s colonies.

Probably in 1917 a workshop in Saint-Claude in the Rue du Plan du Moulin 8 was acquired to start the fabrication of briar pipes. In 1923 a small building in the environment of Saint-Claude, serving as a workshop for polishing, was added.

Even though cherrywood pipes were the mainstay of Ropp until the company finally closed down in September 1991. The company was taken over by Cuty-Fort Entreprises (Chacom, Jeantet, Vuillard, Jean Lacroix…) in 1994.

There are some nice old flyers advertising these pipes which are always interesting to go through, but unfortunately my understanding of French is as good as that of the readers who can read, write and understand Devnagiri script (origins of which is Sanskrit), my mother tongue!! Admiring the pictures (but not understanding the text…LoL!!), the only conclusion I could draw was that this pipe is certainly post 1994 as it is more contemporary looking. The complete appearance of the pipe is that of desiring/ seeking attention! It really has that kind of appearance and bling.

INITIAL VISUAL INSPECTION
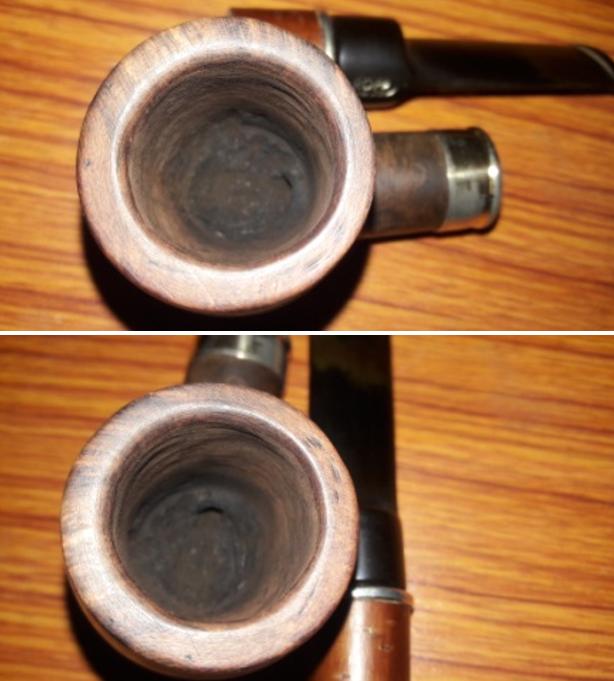
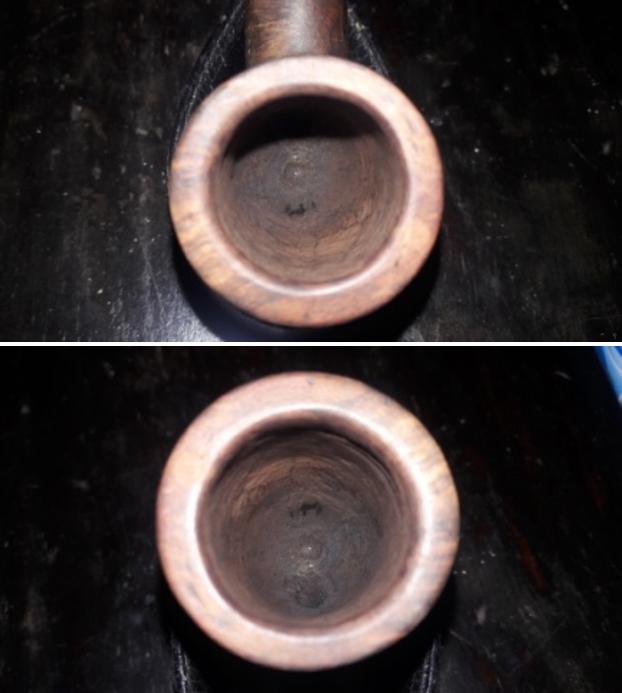
This pipe was received by Abha, my wife, and she liked the funky and bright looks of it. The first thing she noticed was the fit of both the stem tenon in to the shank extension and that of the shank extension in to the mortise was extremely loose. The stummel shows some nice mixed straight, cross and bird’s eye grains all across. The stummel had dirt and grime accumulated over the surface and appeared dull and lifeless. A couple of dents/ dings are visible on the foot of the stummel. I shall address this by steaming out these dents followed by sanding and micromesh polishing. The chamber had a thin even layer of cake in the lower half of the chamber and appeared to have been well looked after. The rim top surface is without any serious damage, save for some minor (and could have been ignored!!!) dents. The inner rim edge has a nice delicate bevel which has been made uneven with reaming with a knife. However, the outer edge has a few very minor dents and dings. The broad vulcanite saddle stem is oxidized and had a couple of minor tooth indentations and chatter on both the surfaces in the bite zone. The corn cob shaped aluminum stinger is covered in dried oils and tars. The button edges showed very slight deformation from tooth marks. The tenon was covered in a hard plastic cap to tighten the fit of the stem in to the shank extension. The burnt orange cherry wood (?) extension is in very good condition except that the ring has discolored in patches but not corroded. The fit of all these pieces of pipes in to each other was extremely loose and would be the biggest challenge to address on this pipe. INITIAL CLEANING BY ABHA…
The initial cleaning on this pipe was done by Abha, my wife (she has cleaned up around 40-50 pipes and these have now reached me for further restoration). She reamed out the complete cake and further smoothed out the chamber walls with a folded piece of 220 grit sand paper. She further cleaned out the internals of the shank with pipe cleaners and alcohol and cotton buds. She followed the internal cleaning of the shank with external cleaning of the stummel using Murphy’s Oil soap and hard bristled tooth brush and dried it with paper napkins and cotton cloth.

Next she cleaned out the internals of the stem air way and immersed it in “Before and After Deoxidizer” solution along with the stem of other pipes in line for restoration. Once the stem had soaked overnight, she cleaned the stem under running warm water and scrubbed the raised oxidation from the stem surface using Scotch Brite pad. She further removed the oxidation by scrubbing the stem with 0000 grade steel wool and applied a little olive oil to rehydrate the stem. She had removed the stinger from the tenon and cleaned it with cotton swabs, pipe cleaners and alcohol.

ONCE THE PIPE IS ON MY WORK TABLE…
Now that the cleaned pipe is on my work table, I proceed to carry out my appreciation of the work that needs to be done on this pipe to restore it.

The chamber show very minor and superficial heat lines all along the walls, however, the stummel appears to be solid to the feel. The rim top surface is in decent condition with the inner rim edge bevel in slightly worn out condition. The outer rim edge does show very minor dents and dings. I could either top the rim top to address this issue or let them be since these dents and dings are very minor and hardly noticeable. The stummel was clean and free of any accumulated grime. One fill that Abha had noticed, was picked clean with a thin sharp edged knife and would need to be filled. After I have polished the stummel with micromesh pads, would I be able to decide if I would stain it or let it be in its natural finish.The stem has only one deeper bite mark which would need to be repaired with a fill of activated charcoal and superglue mix. Whatever, little oxidation remains, will need to be removed by sanding with a folded piece of 220 grit sand paper and follow it up with polishing with micromesh pads. The aluminum stinger is clean.The one major issue I need to sort out at the outset is to make the 3 pieces of this pipe stick together to be called a pipe!! The stummel, shank extension and the stem tenon are so loose that it does not fit in to each other and cleaning of all these parts has not helped the matters either.THE PROCESS
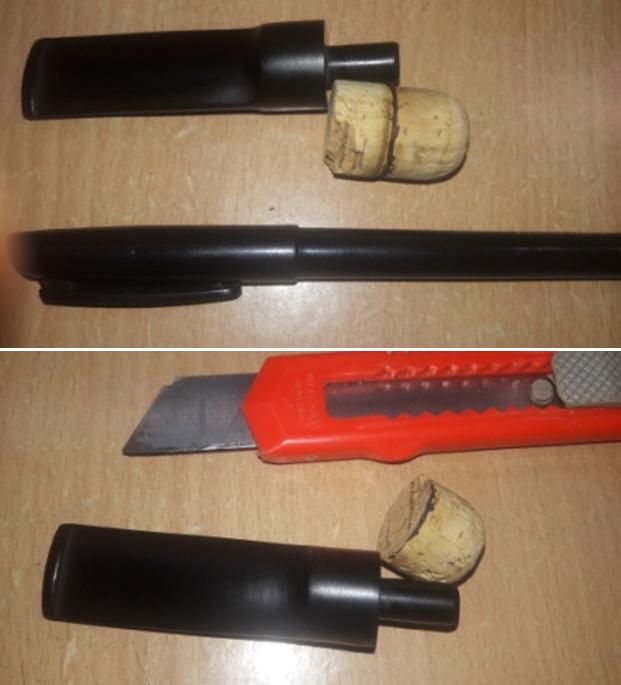
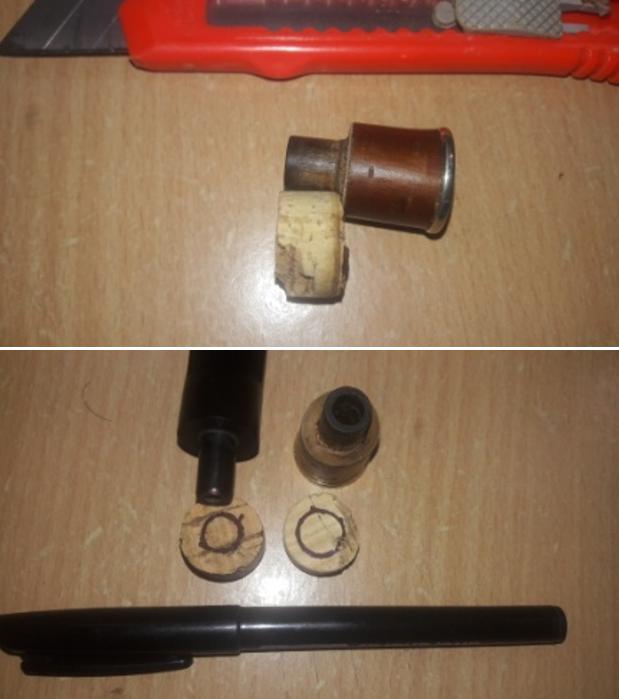
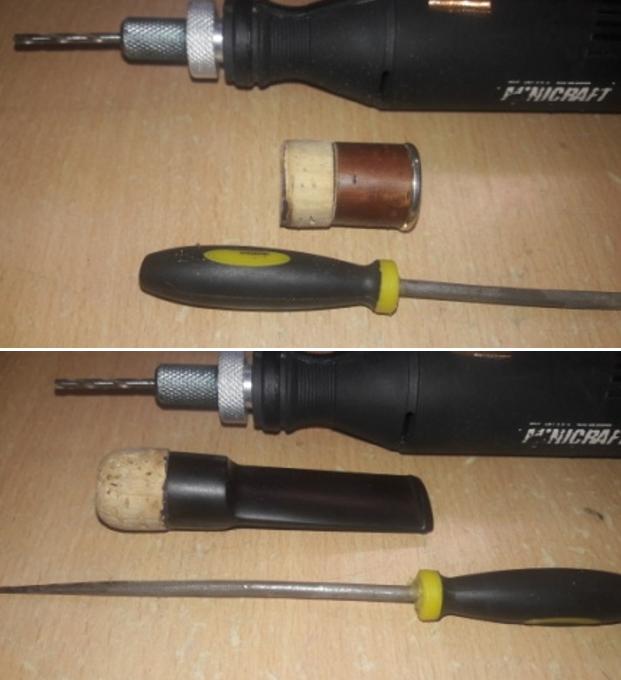
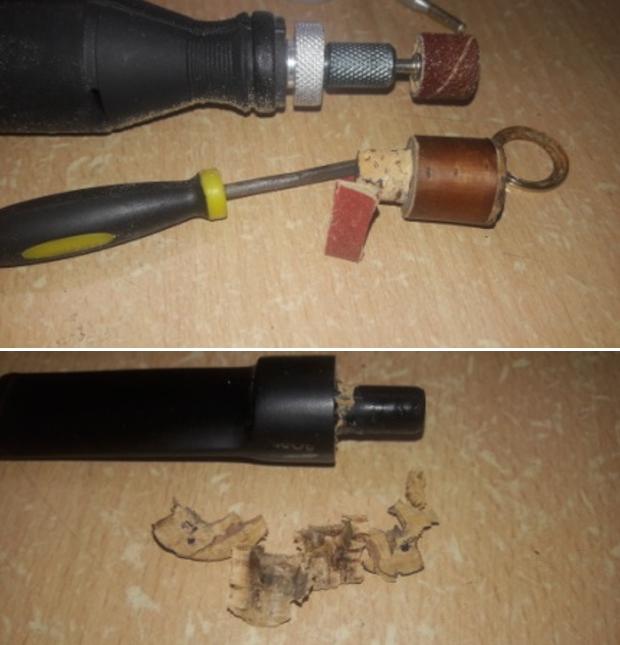
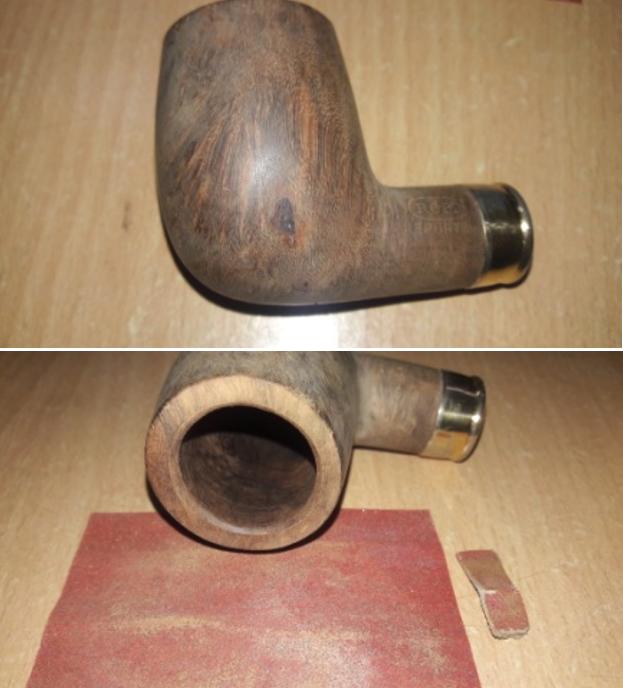
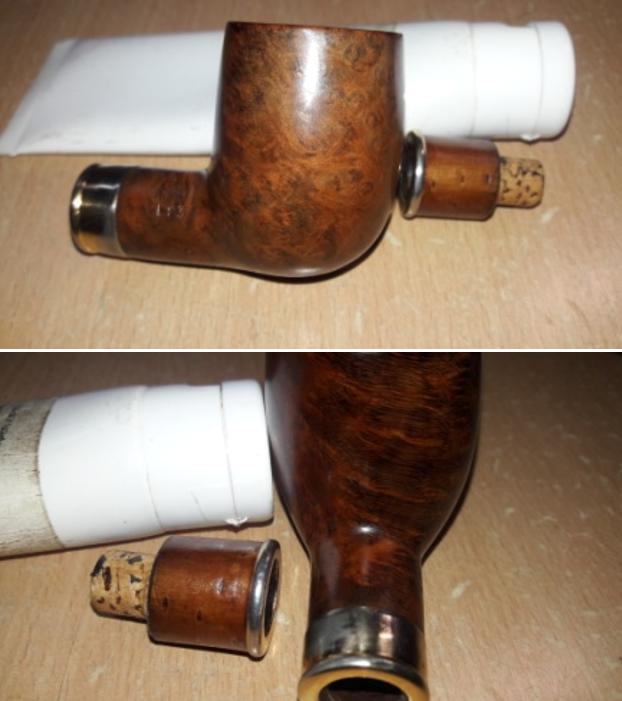
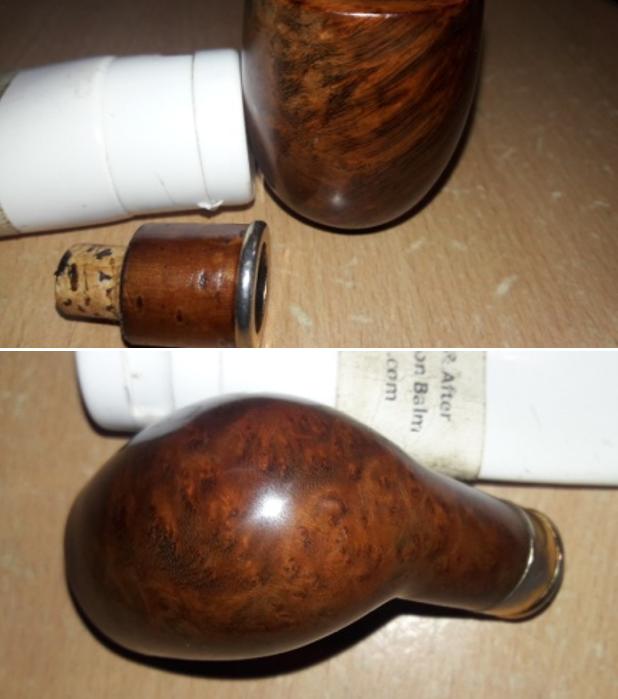
The first issue on the agenda that I decided to tackle was to get the pipe together by making the three parts of this pipe to affix firmly in their designated places. For the stem tenon fit, I had an option to either increase the tenon size by heating and thereafter enlarging it with a larger diameter drill bit and coating it with a clear nail polish. I decided against this process since firstly, this would make the seating of the stinger in to the tenon too loose and secondly, the gap between the tenon and shank extension seat was so large that it would not be possible to expand the tenon to this extent. Similarly, there was no way that I could ensure a snug fit of the shank extension in to the mortise other than by making a packing insert. This brought me to the only option of creating a packing insert using a cork and this is exactly what I proceed to do. Theoretically, I would measure the length that needed to be cut off from the cork to fit the stem tenon and the tenon of the shank extension and sand it down to achieve a snug fit, simple. Well, theoretically it sounds easy, practically not so much.I decided that I would address the shank extension first. I pried out a couple of corks from wine bottle caps (Oh my, I have plenty of them!!!) and measured the length that needed to be cut off from the cork to fit the tenon of the shank extension. With my hand held drilling tool and a smaller drill bit, I drilled a through hole. I progressively increased the diameter using progressively bigger drill bits till I had achieved a snug fit of the cork piece on the tenon. Once I was satisfied with the fit, I fixed the cork packing with superglue on to the tenon. I replaced the drill bit on my tool and mounted a sanding drum. Next, I sand the drilled cork with the sanding drum till I had achieved a rough fit of the shank extension tenon in to the mortise. I fine tuned the fit by hand sanding it with a piece of 220 grit sand paper. I decided on fixing this packing on to the tenon so that it will be easier to clean the mortise and shank extension in future after each use. It required a great deal of patience and diligent work to achieve a perfectly snug fit of the shank extension tenon in to the mortise.

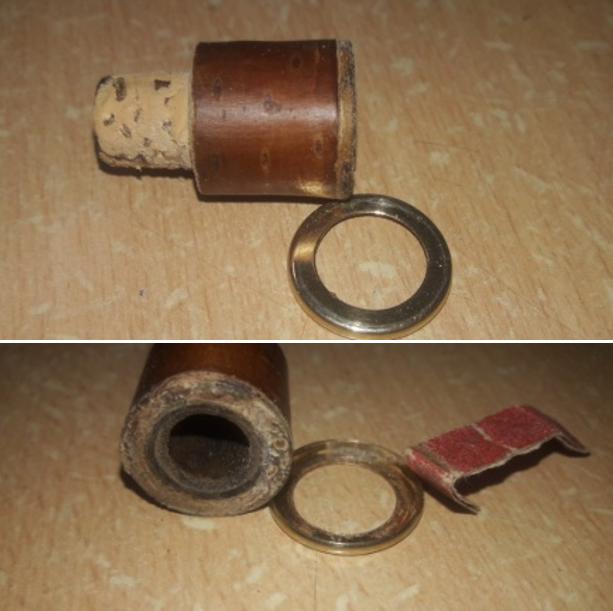
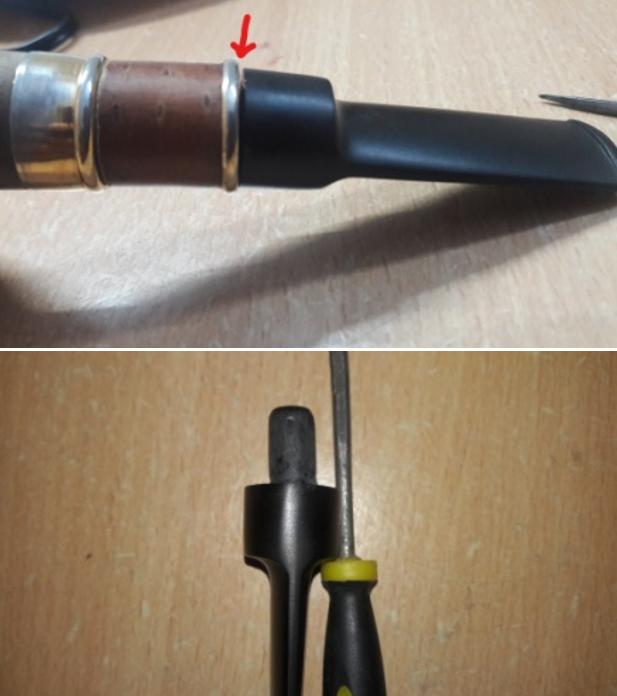
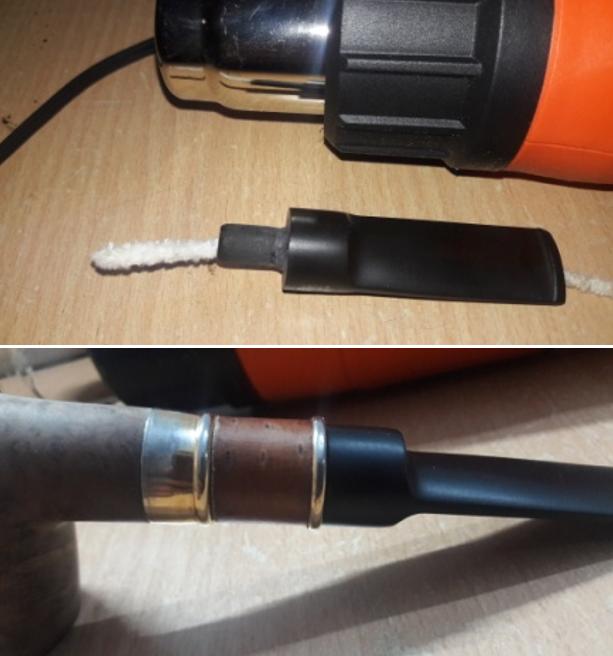
However, the moment I started to fit the drilled out cork for the stem tenon, I noticed that the cork had started to split along the fault lines. I tried to stick them together with CA superglue, but to no avail. The more I tried to push, the more the cork disintegrated!! Finally I had to shelve this idea of a cork packing for the stem tenon. The following pictures will give a clearer picture of the steps, results and the failures of this process. While working on the shank extension, the metal band came loose and revealed all the corrosion on the insides of the band and patches of old glue on the shank extension itself. With a folded piece of 220 grit sand paper, I removed all the corrosion from the metal band and evened out the shank extension surface which seated the metal band. I stuck this band flushed with the shank extension stem end surface with CA superglue and set it aside.To address the fit of the stem tenon in to the shank extension, I decided to go the tried and tested path of increasing the girth of the tenon by using a mix of activated charcoal and superglue. I applied the same in layers, till I had achieved a snug fit. I had to set the stem aside after each layer for the mix to cure.In between all the layering and curing process on the stem tenon, I simultaneously worked on the stummel surface. The one fill which was seen and readied for a fresh fill was patched up with a mix of briar dust and superglue and set aside to cure.While, the stummel fill was set aside to cure, I started work on the stem tenon. Using a flat heat needle file, I lightly sand the rebuild tenon surface. As I started to sand with a piece of 220 grit sand paper, I frequently checked the seating of the tenon in to the shank extension. It was at this point in time that I observed that the seating was skewed. There was a prominent gap (indicated by a red arrow) towards the right side between the edges of the stem and the shank extension. On careful observation, I noticed that the fit of the tenon itself in the stem is not aligned straight!! It was this misaligned tenon that caused the stem to seat incorrectly in to the shank extension. To straighten the stem tenon, I inserted a pipe cleaner through the stem and heated the tenon with my heat gun till pliable. Pulling the tenon end of the pipe cleaner, I achieved a straight alignment of the tenon with the stem and cooled the tenon by holding it under cold running tap water. I checked the seating of the stem in to the shank extension and it was perfect. Turning my attention back to the stummel, I matched the fill with the rest of the stummel surface by sanding the fill with a flat head needle file followed by sanding the fill with a folded piece of 220 grit sand paper. For a perfectly smooth rim top surface, I top it on a piece of 220 grit sand paper. This also addressed the minor dings on the outer rim edge.  I sharpened the inner bevel with a folded piece of 220 grit sand paper, pinched between my fingers. It was at this stage that a colleague of mine saw the pipe and wanted it for himself. He liked the grains and the overall aesthetics of this pipe. I explained to him the amount of work remaining that was required to restore this pipe, including the steaming out of the dents and dings at the foot of the stummel. He did not like the idea of steaming out the dents from the foot and vehemently opposed this process. No amount of persuasion on my part that this process will not cause any damage but on the contrary repair it, could convince him. Since he is the new owner of this pipe, with great reluctance, I gave in to his request.

The stem tenon had completely cooled off by now and was perfectly straight. I flamed both the stem surfaces with a lighter to raise the deep bite mark and followed it up with sanding the surface with a 220 grit sand paper followed by 0000 grade steel wool. This helps to remove what little oxidation remained on the stem surface and at the same time addresses minor tooth chatter in the bite zone. I fill the deeper bite area and the button edges with a mix of superglue and activated charcoal powder and set it aside to cure. While the stem fill was curing, I moved ahead with micromesh polishing of the stummel surface. Now, here is a slight departure from the usual polishing process that I have followed on all previous restorations. I had read that White diamond polish falls between 3400 to 4000 grit micromesh pads and so to experiment, I polished the stummel with white diamond after wet sanding with 1500 to 3400 micromesh pads. I finished the polishing cycle by wet sanding with remaining grit micromesh pads. In all honesty, I found the finish not much different from the routine polishing of wet sanding with 1500 to 12000 micromesh pads. I shall continue with this experiment on a few more pipes and then decide to continue with this process or revert back to only micromesh pads. I followed up the polishing by applying “Before and After Restoration” balm. This balm protects and enriches the briar surface and is highly recommended for use in any restoration of briar pipe. I rubbed it deep in to the stummel surface and also in to the shank extension and set it aside to be absorbed for 20 minutes. I also applied petroleum jelly to the cork on the tenon of the shank extension to hydrate and moisten it. I am pleased by the appearance of the stummel (less the dents and dings on the foot of the stummel) and the deep burnt orange hue of the shank extension. At this point in restoration the only other issue, other than the dents and dings on the foot of the stummel, that I need to address is that the burnt orange color of the shank extension merges with the coloration of the stummel. I would love to impart a bit of a contrast between the stummel, shank extension and the shining black of the vulcanite. Well, I shall see to it when I get there!! The following pictures will bring better clarity to what I am commenting on.With the stummel nice and clean and attractive, I worked the stem of the pipe. The fill on the stem had cured nicely and I sand it down with a flat head needle file. I sharpened the lip edges using a needle file and sand the entire stem with 220 followed by 400, 800 and 1000 grit sand paper. This helps to reduce the sanding marks left behind by the more abrasive 220 grit paper. To bring a deep shine to the vulcanite stem and the tenon, I went through the complete set of micromesh pads, wet sanding with 1500 to 12000 grit pads. I wiped the stem with a moist cloth after each pad and rubbed it down with Extra Virgin Olive oil. The pictures of the final results are shown below. I applied a small quantity of “Before and After Extra Fine” stem polish and rubbed it deep in to the vulcanite stem. This polish, purportedly, is supposed to remove the fine sanding marks left behind by the abrasive grit papers.This is how the pipe appears at this stage. The shank extension completely merges with the stummel and looks out of sync with the overall appearance of the pipe. The shank extension was most likely meant to provide a contrast between the stummel and in the process, add some bling to it. At this stage my colleague again interfered and wanted the natural finish. He is one person who loves natural finish of the briar with the grains being seen. However, I was not ready to compromise this time around. We struck an understanding between us that if the finished pipe is not liked by him, I would get it back to the natural finish. Now with this stalemate sorted out, I contemplated my next step.

I felt that the burnt orange of the shank extension would provide a nice contrast between the shining black vulcanite and a light black stained stummel. I shared this thought with Steve, my mentor, and he concurred with my view. He suggested that I should give the stummel a light black stain wash and thereafter bring it up to a nice high gloss finish. I mixed a small quantity of black stain powder with isopropyl alcohol to a very watery consistency and applied it to the stummel with a cotton swab. I let this stain wash set for a minute and vigorously wiped it down with a clean cotton swab. I repeated this process a couple of times till I was satisfied with coloration of the stummel. Here are the pictures and the end result of this stain wash. I liked it immensely. To complete the restoration, I mount a cotton cloth buffing wheel on to my hand held rotary tool and apply a coat of Blue Diamond to the stummel, shank extension and the stem to polish out the minor scratches. With a cotton buffing wheel that I use for carnauba wax, I apply a coat of carnauba wax and continue to work on it till the complete coat of wax had been polished out. I finished the restoration by giving the entire pipe a rigorous hand buffing using a microfiber cloth to raise the shine further. I buffed the gold colored band/ ring at the shank end and at the stem end of the shank extension with a jeweler’s cloth and bring it to a nice shine. I mount a clean cotton cloth buffing wheel and give the entire pipe a once over buff. Boy, am I happy with the look of this pipe. The burnt orange provides a striking contrast with the darker hues of the stummel and shining black of the highly polished vulcanite stem. The finished pipe is shown below. Cheers!! P.S. The completed pipe actually looks more stunning in person than in pictures. Even my colleague loved the finished pipe and he is all set to enjoy this beauty with his favorite tobacco, Autumn Evening, from 4noggins!! Thank you all for walking with me through this restoration which was a combination of some new processes and experiments.


Breathing New Life into a BBB Gourd Calabash with an Ambroid Stem


Blog by Steve Laug

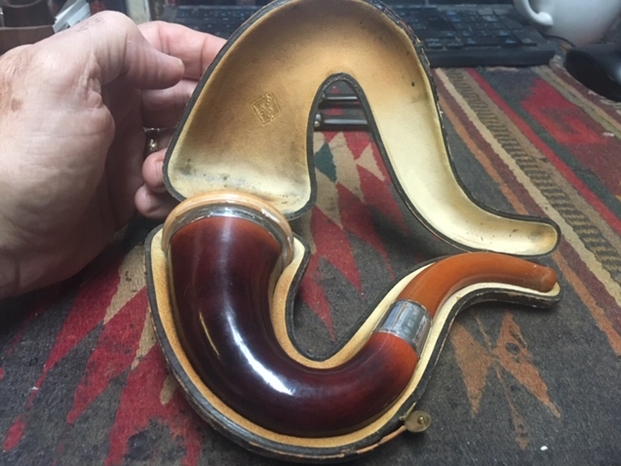
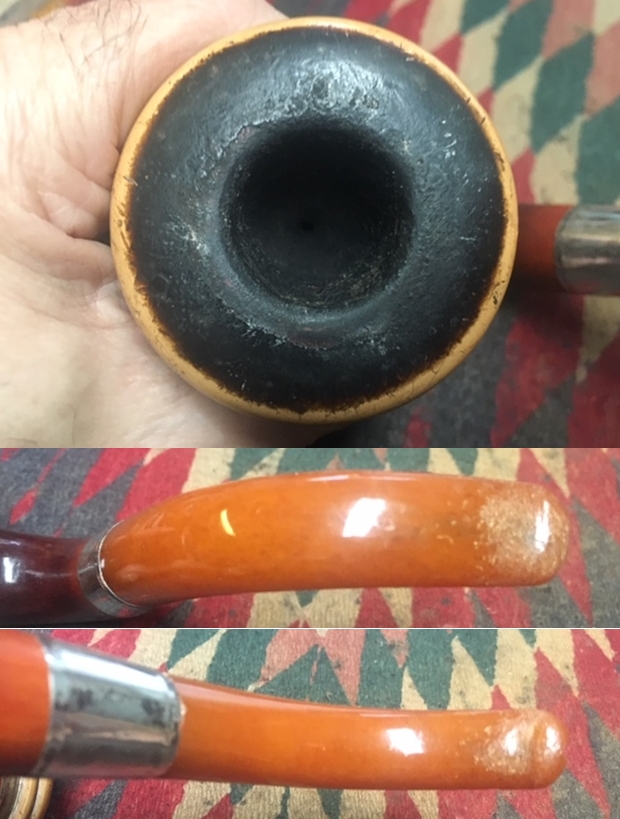
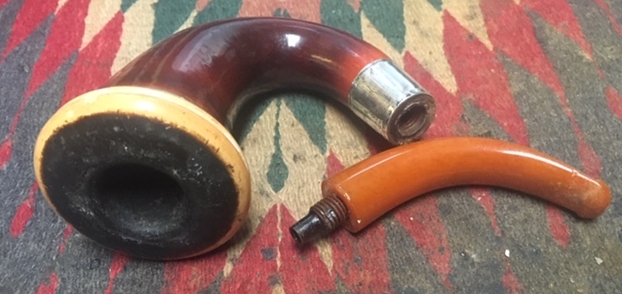
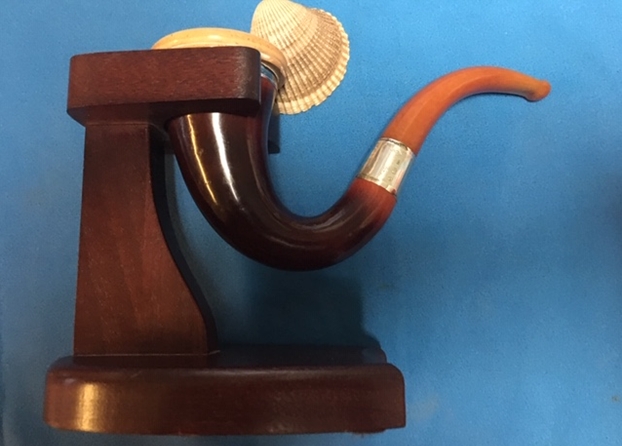
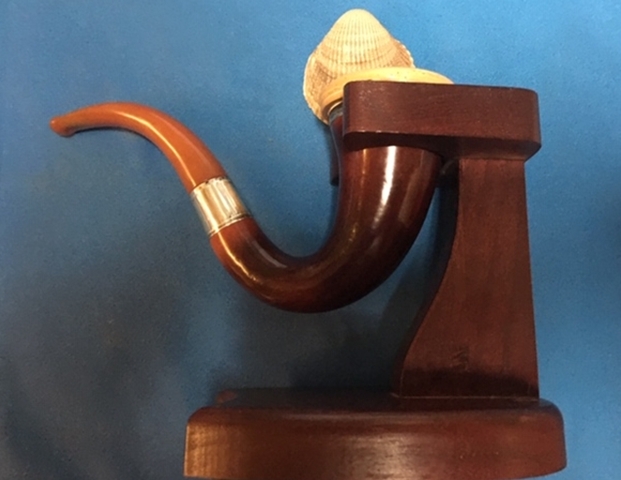
Not long ago I received an email from a lady named Pat on Vancouver Island about some pipes that she had that had belonged to her late husband as well as an old Gourd Calabash with a Meerschaum bowl that had belonged to her Great Grandfather. She sent me photos of the pipes and they were definitely interesting to me. There were some John Calich pipes and three other lower end pipes from her late husband and the cased Gourd Calabash. I was hooked and ready to be reeled in! After a few email exchanges we made a deal that was acceptable to us both. The payment was e-transferred to Pat and the pipes were shipped to me in Vancouver. Pat sent me two photos of the pipe before she shipped them to me.

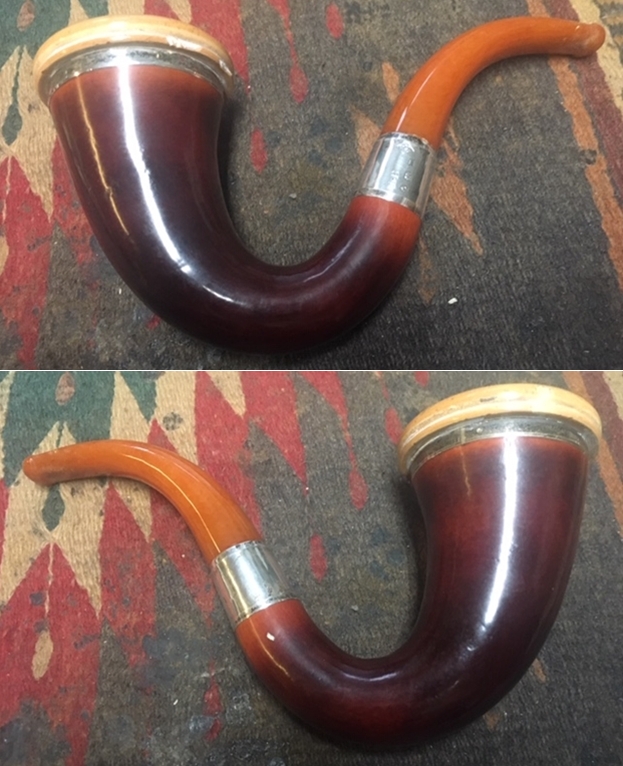
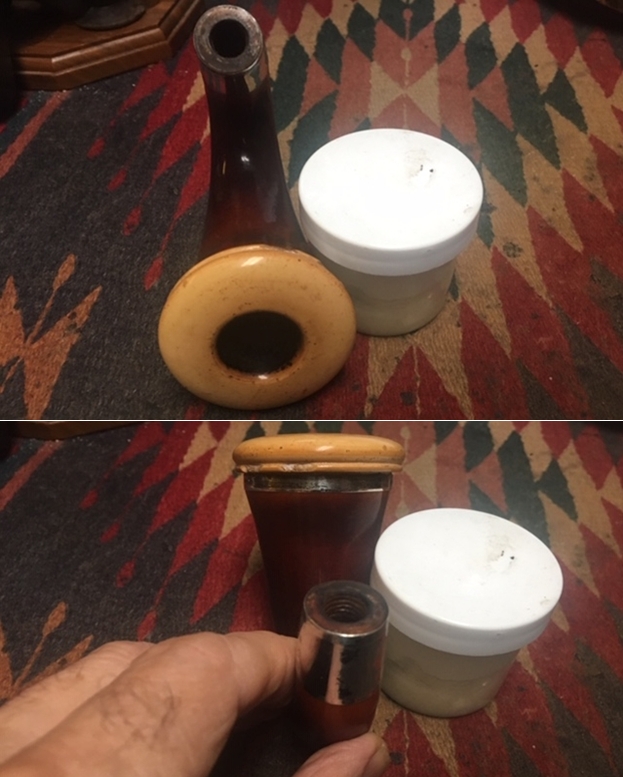
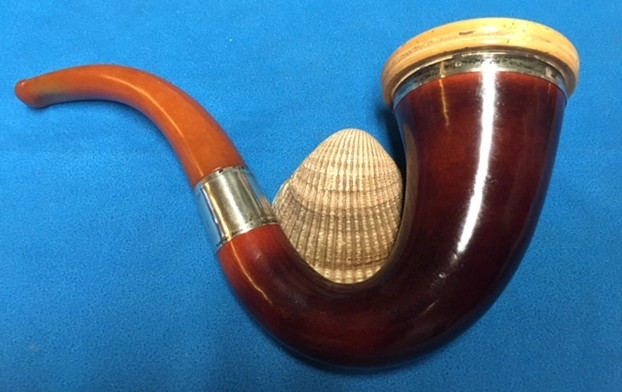
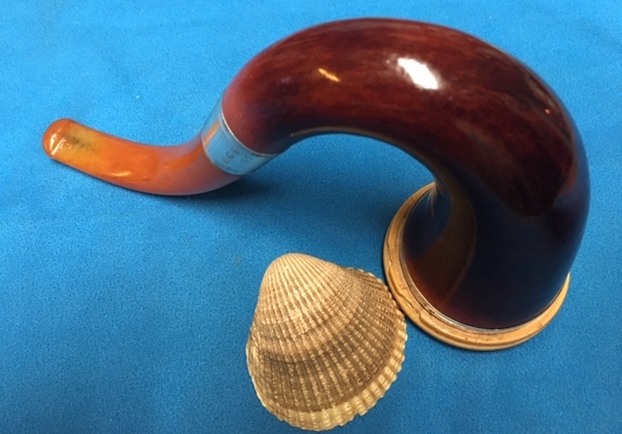
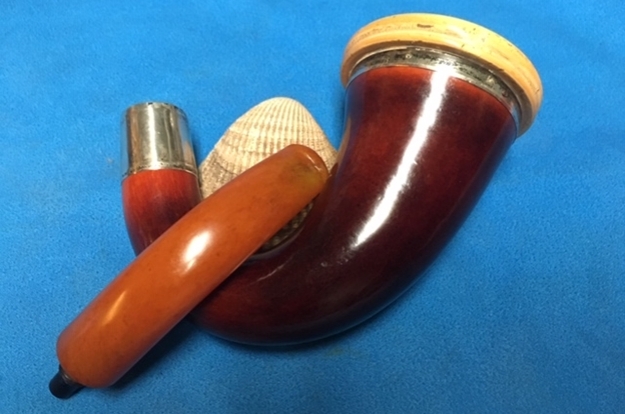
The first photo shows the cased pipe. The Gourd Calabash was a BBB as can be seen by the triangle stamped in gold on the cover of the case and the silver band in the photos below. The Gourd had some beautiful patina and had turned a rich reddish brown colour. There was a silver band on the shank with what looked like hallmarks. There was also a silver band around the top of the gourd under the meerschaum bowl insert. The bowl had a lot of colour and it had a ring around the meerschaum bowl. There were a couple of chipped areas on the lower ring of the bowl. The amber coloured stem looks intact and does not show any obvious damage. The colour of the stem and the cloudiness of the material makes me wonder if it truly amber or some form of ambroid. I will know soon enough.

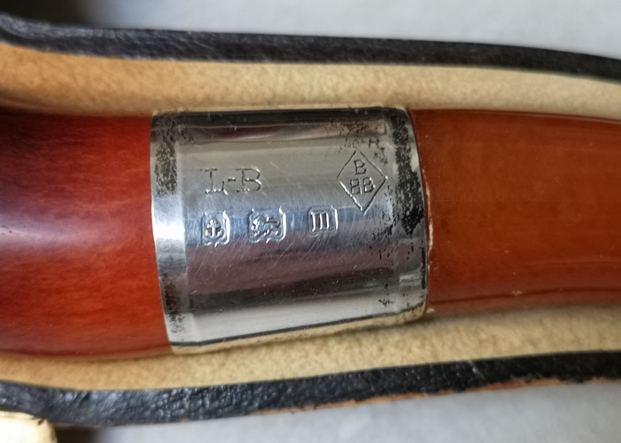
The second photo is a close up that shows the silver band on the shank of the pipe. It is in good condition and lightly tarnished. The stamping is very readable and it clearly showed the following marks: L-B and BBB in a triangle. There were also three hallmarks on the band. The first was an Anchor (which is the symbol for the Birmingham Assay Office). The second was a rampant lion (which is the symbol for .925 silver). The third one was the lower case letter “m” (which is the date letter that I would use to date the pipe as I worked on it). I did some searching through the British Silver Hallmark Charts that are online. I went through them comparing them to the “m” stamp on the band. I found two possible dates for the stamp. On the shape charts that I use most of the time when I am looking for information on the date stamps there was a lack of clarity as to whether the “m” stamp pointed to 1853 or to 1911. I wanted to see if I could get any clarity from others who were familiar with silver bands on BBB pipes.

I sent a quick message to a Facebook Messenger Group that I am part of that includes others who collect BBB pipes. I posted a picture of the band with the hallmarks that I included above on the group. Both Paresh Deshpande and Victor Nadeo immediately answered that the pipe was from 1911 from the charts that they use. I responded with my question as to the shape of the cartouche (the frame) around the “m”. Pretty quickly after that Victor sent me the link to the chart that he uses and included a screen capture of the list from 1900-1917 shown to the left (http://www.silvercollection.it/englishsilverhallmarksBIR.html).

I quote Victor’s response: I think the frame (cartouche) is only slightly erased. But I’m pretty sure it’s really 1911. They’d hardly miss anything like that, as they passed an Assay Office, such a serious government agency. And in view of the frame around the other hallmarks, I think they leave no doubt that it’s a 1911.

That set the date for me. It also worked well with the L-B stamp which stood for Louis Blumfeld. That L-B stamp fits that time frame perfectly. Now I knew that the pipe was hallmarked to 1911 and that it was an old timer. I could not wait to see it once it arrived in Vancouver.

While I waited for Canada Post to deliver it I did a bit of reviewing on the history of the brand from Pipedia (https://pipedia.org/wiki/BBB). I quote some of the pertinent parts of the article below:

The initials once stood for Blumfeld’s Best Briars after Louis Blumfeld, who took over the management of the Adolph Frankau Company in 1856. After his death, the BBB gradually became known as Britain’s Best Briars. Soon to be the oldest English trademark in current use and the first pipe ever to have a registered trade mark. “Britain’s Best Briars”, often called BBB, is one of the oldest brands still in production and has always been the most popular foreign brand in Denmark. Earlier pipes included a metal rondel with a diamond shape including BBB imbedded in the stem top, and later post-Cadogan went to a stamped on logo, similar to the GBD pipes…

…Adolph Frankau & Co Ltd In 1847, Adolph Frankau arrived in London and quickly understood opportunities that the market of tobacco presented, in full expansion. He created the company “Adolph Frankau & Co” and became an importer of meerschaum pipes and supplies in connection with the tobacco. It takes under its wing young a 14 year old boy, Louis Blumfeld. The business thrives quickly until the death of Adolph Frankau in 1856. His widow prepares to sell the company.

Enter in scene Thomas Carlyle (1795-1881), author of “Hero and worship of the heroes”. This last advises with Mrs. Frankau not to sell, but to entrust the future of the company to the hands of the young person Louis Blumfeld, then 18 years old. Carlyle was to have a very high opinion of the Louis young person, and this confidence was justified by its assumption of responsibility of the business, its enthusiasm and its inexhaustible energy. Louis realizes quickly, like others, great potential of briar, from which the interest comes to be recognized.

Louis Blumfeld develops from the very start of important international trade, with a particular success in Canada, in Australia, in Zealand News, India and in the extrème Is Europe, in Switzerland and, with a special mention, in Denmark…

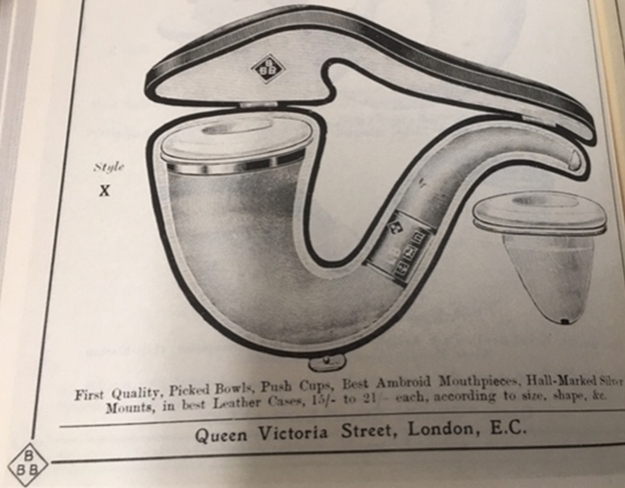
I took out my Briar Books Press reproduction of the Adolph Frankau & Co. BBB Catalogue XX from 1912 and did a bit of reading to see what I could find out from the source. Sure enough I found the pipe in the catalogue. It is marked as a Style X Genuine South African Calabash Pipe. Underneath the print of the pipe it reads First Quality, Picked Bowls, Push Cups, Best Ambroid Mouthpieces, Hall-Marked Silver Mounts in best Leather Case. You can see the two rings around the bowl insert, the silver band around top of the gourd and the silver band on the shank. It is also clear that the stem is marked as an Ambroid mouthpiece. The leather case is the same one as the one I am working on with the BBB logo on the top side of the case and the same latch setup as the case I have.I now had a verification that the L-B stamp stood for Louis Blumfeld as I expected. He took over the company at the death of Adolph Frankau in 1856. He took the brand to its zenith as BBB (Blumfeld’s Best Briars and later Britain’s Best Briars). That time table fit the dating of this pipe very well. The 1912 Pipe Catalogue has the same pipe for sale. Now it was time to work on the pipe itself.

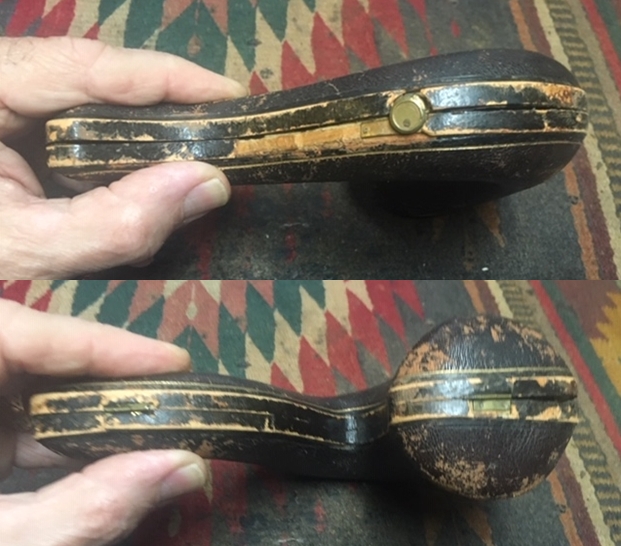
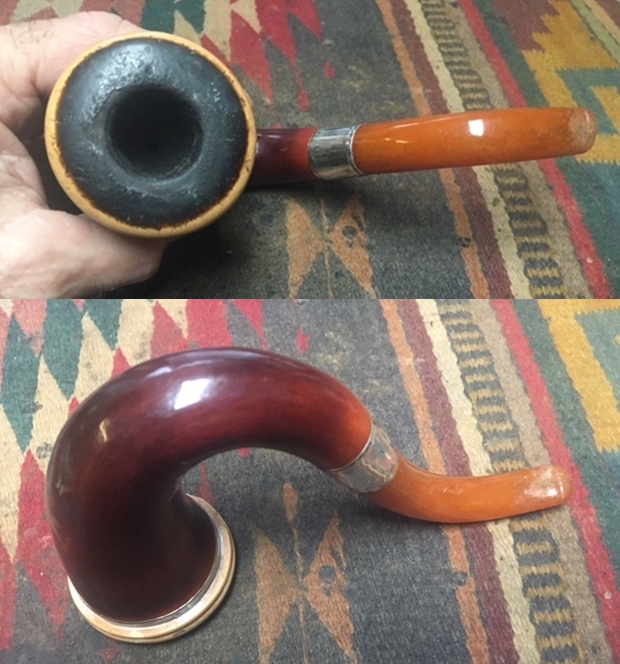
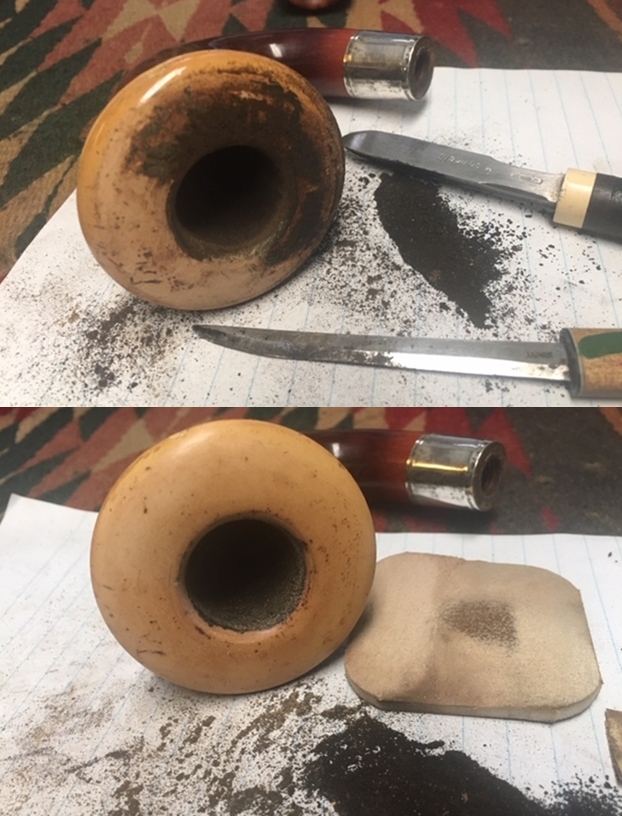
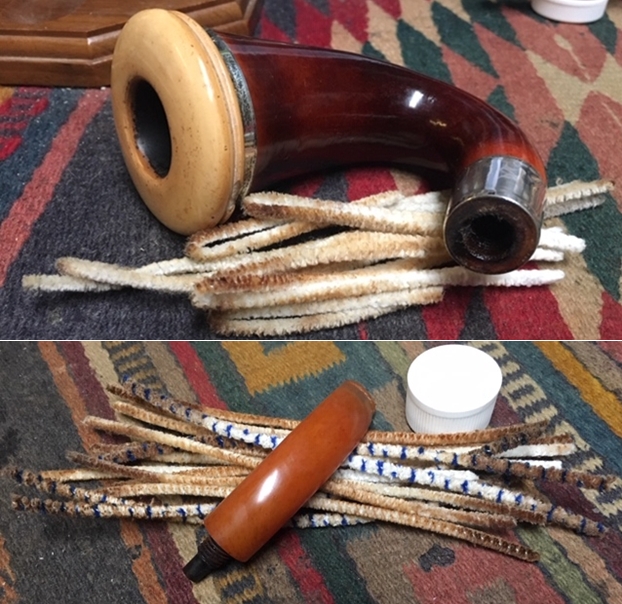
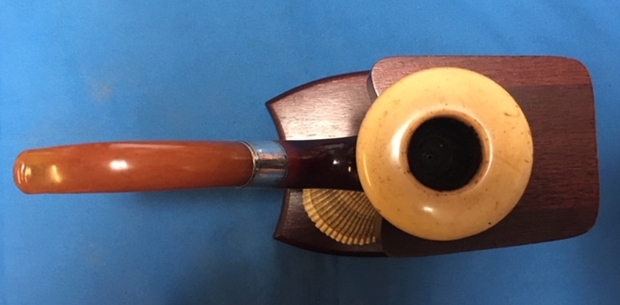
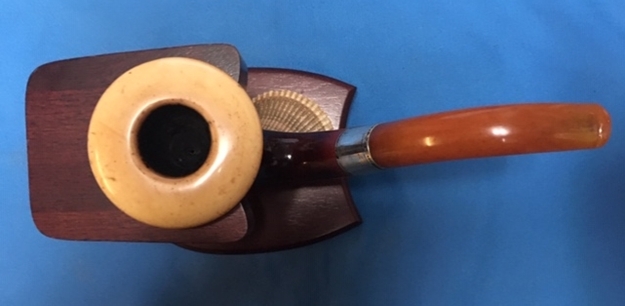
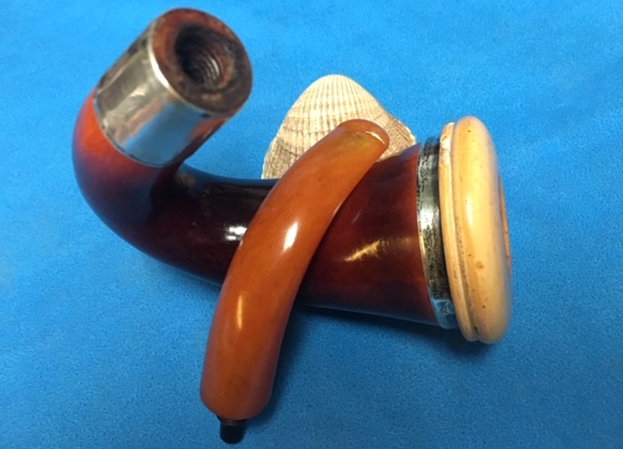
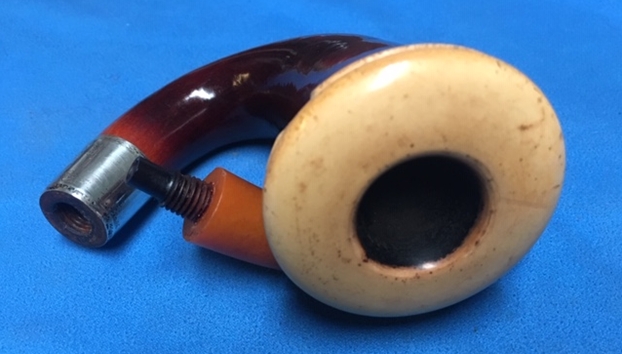
I brought the worn leather clad case to my work table and took some photos of it before I opened it and took out the pipe. It was worn but well made. Some of the leather was peeling but the brass hinges on the back edge and the flip clasp on the front were all in good order. I took photo of the unopened case to give you a sense of my own expectancy. I opened the case and took a photo of the pipe in the case. You can see the gold embossed stamp on the inside of the case – a triangle with BBB against the cream coloured lining.I took the pipe out of the case and did a quick assessment of the condition of the pipe. The gourd calabash was in excellent condition and showed a patina of solid use for the 100+ years that it has been in Pat’s family. The silver band around the top of the gourd and the band on the shank are clean but oxidized. The one around the rim top is more oxidized than the shank band. I think the shank band was polished for the photo that Pat sent me. The edges of the meerschaum cup looked very good except for two chipped areas on the bottom ring of the bowl. The upper edges of the bowl appeared to be in very good condition. The stem is in good condition other than tooth marks and chatter on the top and underside near the button. The rest of the stem is in excellent condition. As I examine the stem I am becoming convinced that it may not be amber.    I took photos of the top of the bowl. There was a thick cake in the bowl that overflowed onto the rim top. It appears to me that the bowl was never cleaned during life of the pipeman who held in trust. The buildup of lava on the rim top was very thick and extended to the downward curve of meer cup on the edges. You can also see the tooth marks on the top and underside of the stem.I took some close up photos of the bowl and rim to show the thickness of the cake and the lava on the rim top. The lava top was thick and you can see the layers and flakes on the top photo below. I also took close up photos of the stem to show the tooth marks and chatter in the surface of the stem. There is also some serious wear on the button edge. The look of the damage on the stem surface made me more uncertain that it was amber. I unscrewed the stem from the shank and took a photo. The threaded bone tenon was anchored in the stem and screwed into the shank. The threads tenon was in excellent condition even though they were darkened from the tars of the tobacco.Once I had the date figured out and had a chance to look the pipe over I wrote a quick note to Pat and asked her if she would be willing to write a brief piece on her Great Grandfather. She was quick with her answer and sent me brief sketch, a photo and an article about her Great Grandfather. I include those now.

Hi Steve,

My great grandfather’s pipe was always a mystery. No one ever smoked it after he died, yet it got passed down through the generations. I always imagined it had magical powers like Sherlock Holmes’s pipe. When I was young, it sat beside my bed as I read The Hound of the Baskervilles. It has journeyed with me until your received it.

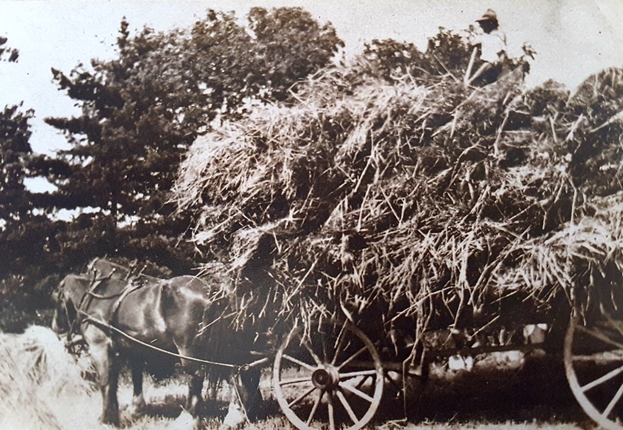
My great grandfather, John Milne Senior, immigrated to Canada from Scotland around 1875. He had a good sized farm on the edge of Toronto, Ontario in Weston (now a suburb), where he farmed and raised prize winning livestock, and raised 6 children. He was generous with extended family and neighbours supplying food during hard times in depression, and fresh garden produce for the local hospital during Second World War.

Attached is the only photo I have of him on top of his hay wagon on the farm. Also attaching an article written during the Second World War with details about the air show beside his farm, and his and my grandmother’s first flights in their 80’s. From all accounts he was a good hearted man that didn’t shy away from adventure.

Cheers,

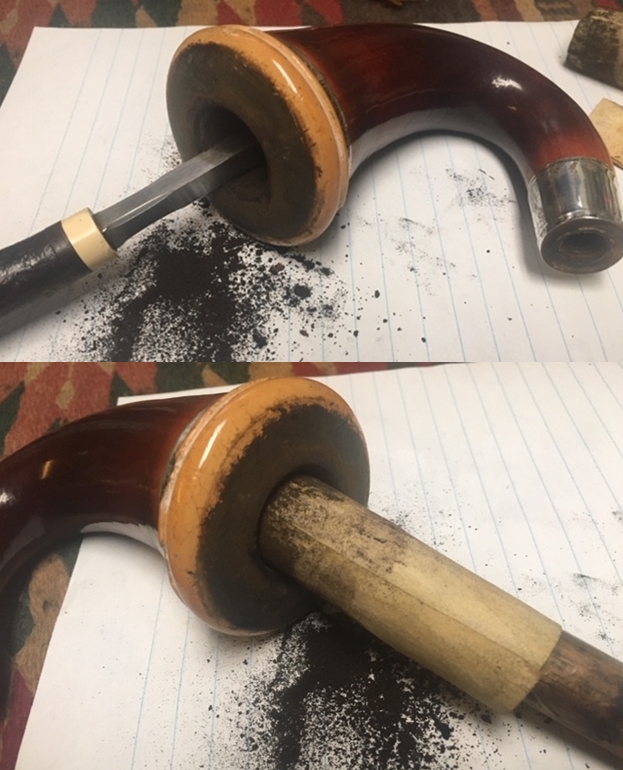
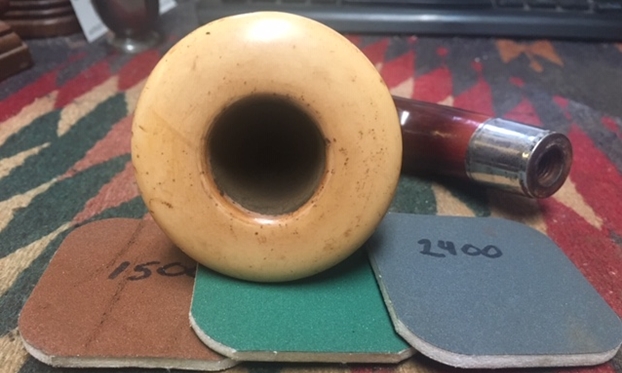
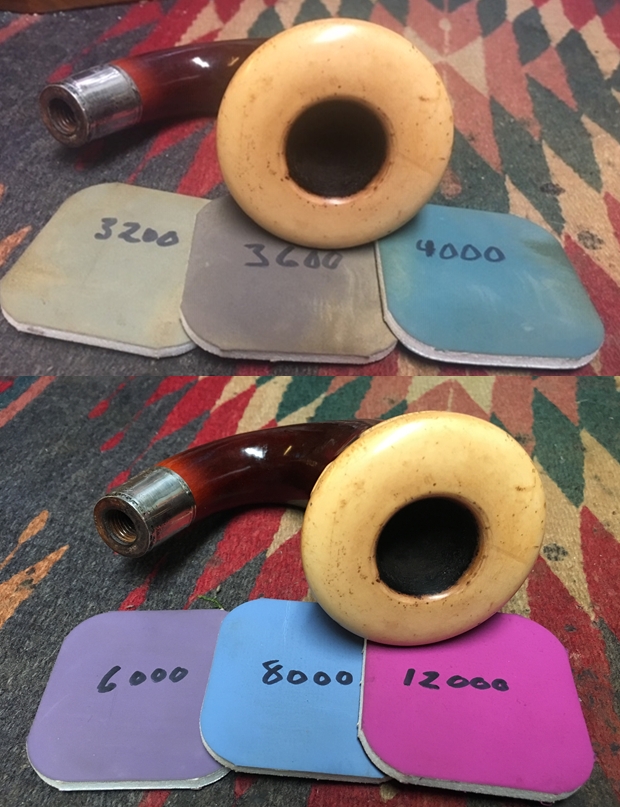
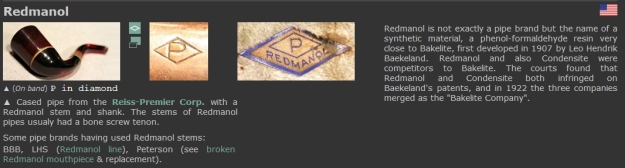
Pat Now that I had a pretty clear picture of John Milne Senior I was ready to start working on his pipe. As noted above in Pat’s email the pipe had been sitting unsmoked since his death. It was time to bring it back to life. I carefully reamed the bowl with a Savinelli Fitsall Pipe Knife. I scraped the cake back to the bare walls. I sanded the walls with a piece of dowel wrapped with 220 grit sandpaper to smooth out the interior of the bowl.I carefully scraped the rim top with the edge of the Savinelli Fitsall Pipe Knife and a sharp pen knife. It took a while to scrape back the cake until I got to the meerschaum cap. I followed that up with a 1500 grit micromesh sanding pad to remove the remaining bits that were left on the top of the rim.  I scrubbed the cap of the bowl with Before & After Briar Cleaner. I have used it in the past on meerschaum and found that it does a great job removing the grime but leaving the patina in good condition. I polished the cap and edges of the meerschaum bowl with micromesh sanding pads – wet sanding it with 1500-12000 grit pads. Each successive grit pad gave the meerschaum finish more of a shine. There were some nicks and scratches in the meer that I decided to leave as they are fitting of a pipe of this age. I rubbed the Gourd Calabash bowl down with Before & After Restoration Balm. I worked it into the surface of the gourd with my fingertips to clean, enliven and protect it. I let the balm sit for a little while and then buffed with a cotton cloth to raise the shine. Mark Hoover’s Balm is a product that I have come to appreciate on a variety of bowls – briar, meer and gourd. I polished the silver on the rim of the gourd and the silver band on the shank with a jeweler’s polishing cloth until it removed the black tarnish that had built up around the silver. There are small silver brads holding the band around the top of the gourd.   With the externals cleaned it was time to work on the internals. I was not able to remove the meerschaum bowl so I left it in place and cleaned the gourd through the hole in the bottom of the bowl and up the shank. I used alcohol and pipe cleaners to remove the grime that was built up and worked on it until the cleaners came out clean and the gourd smelled fresh.The more I handled and worked on the stem the more I was certain that I was dealing with something other than amber. From the BBB Catalogue from 1912 I knew that I was dealing with Ambroid which is in essence manmade amber. My first thought was that the Ambroid was Redmanol so I turned Pipephil to have a look at that product to see if they made material for BBB (http://www.pipephil.eu/logos/en/logo-r3.html). I found in a note below the photos said that BBB used Redmanol stems. I have included a screen capture of the section on pipephil’s site.I also noted there that L&H Stern used Redmanol as well. I turned to an article on Pipedia about about LHS pipes (https://pipedia.org/wiki/LHS). I found a picture of the exact stem colour as the BBB that I was working on. I quote:

LH Stern is known to every important wholesaler and jobber in the country. LHS manufactures a complete line of briar pipes. Ginmetto wood pipes are also made, as well as Redmanol goods, the man-made amber. The first substitute for amber. Everything, even down to the sterling silver and other metal trimmings are made under one roof.

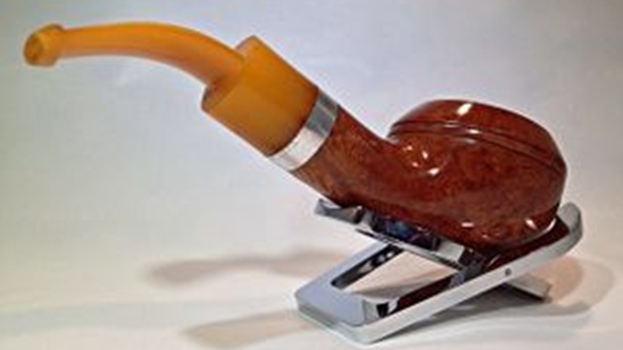
Example with Redmanol Stem (man-made amber)

I checked the dates on Redmanol and it was developed and was linked to an article on Bakelite on Wikipedia (https://en.wikipedia.org/wiki/Bakelite).

Bakelite (/ˈbeɪkəlaɪt/ BAY-kəl-eyet; sometimes spelled Baekelite) or polyoxybenzylmethylenglycolanhydride was the first plastic made from synthetic components. It is a thermosetting phenol formaldehyde resin, formed from a condensation reaction of phenol with formaldehyde. It was developed by the Belgian-American chemist Leo Baekeland in Yonkers, New York, in 1907.

Bakelite was patented on December 7, 1909. The creation of a synthetic plastic was revolutionary for its electrical nonconductivity and heat-resistant properties in electrical insulators, radio and telephone casings and such diverse products as kitchenware, jewelry, pipe stems, children’s toys, and firearms.

It seems that the inventor of Bakelite ended up merging his company with Redmanol who developed a similar product. I now knew that the stem I was working on was Redmanol/Bakelite. The more I worked on it the more apparent it became that I was dealing with a manmade product rather than natural amber.

Armed with that information I turned my attention to the stem. I wiped the stem surface down with soap and water to remove any oils on the stem surface. I filled in the tooth marks with clear super glue and set the stem aside until the repairs had cured.When the repairs had cured I sanded them smooth to blend them into the surface with 220 grit sandpaper and polished it with 400 grit wet dry sandpaper.     You can see the discolouration of the stem material from the sanding. It is pretty typical of Redmanol and Bakelite stem… I went on to polish the stem with micromesh sanding pads – wet sanding 1500-12000 grit sanding pads. I wiped the stem down after each sanding pad with Obsidian Oil. I gave it a final coat of Obsidian Oil after the last sanding pad.  BBB pipes have always been a favourite of mine. I love firing up a bowl in one and I love feel and craftsmanship that went into each of them. This 1911 Gourd Calabash is a beautiful example of the craftsmanship that went into each of the pipes that came out of Louis Blumfeld’s BBB factory. These calabash pipes put together the gourd from South Africa with a meerschaum cup from Turkey and a stem supplied by Redmanol. It is truly an international pipe that ended up in Canada on the farm of a Scottish immigrant and lived far beyond his life time in the hands of his granddaughter who cherished it and cared for it. I am honoured to carry on the trust of this noble calabash. I put the bowl and stem back together.

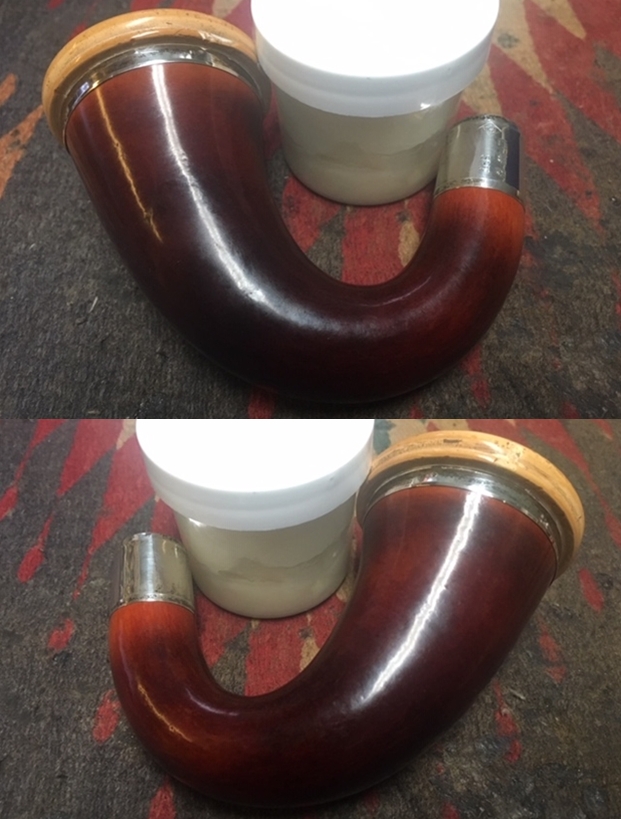
I carefully polished the bowl, the meer cap and stem with Blue Diamond to polish out the scratches in the briar and the vulcanite. I gave the gourd and stem multiple coats of carnauba wax. I buffed the pipe with a clean buffing pad to raise the shine. I hand buffed it with a microfiber cloth to deepen the shine. The pipe polished up pretty nicely. The rich reddish brown patina of the gourd, the shine of the aging meer, the silver band and ring and the Redmanol stem really popped with buffing showing the contrast colours of the pipe. The polished Redmanol stem went really well with the colours of the bowl. The rim top, though slightly damaged looked very good. This old BBB Gourd Calabash was another fun pipe to work on. It is an old timer that will hold a place in my BBB collection. The finished pipe is shown in the photos below. The dimensions of the pipe are Length: 7 inches, Height: 4 inches, Outside diameter of the bowl: 2 ¼ inches, Chamber diameter: ¾ of an inch. Thanks to John Milne Senior for his care of his pipe. Thanks to Pat for her care of it through the years and for passing it on to me to hold in trust as the next pipeman to own it. Thanks for reading this blog and my reflections on the pipe while I worked on it. This is an interesting estate to bring back to life. 

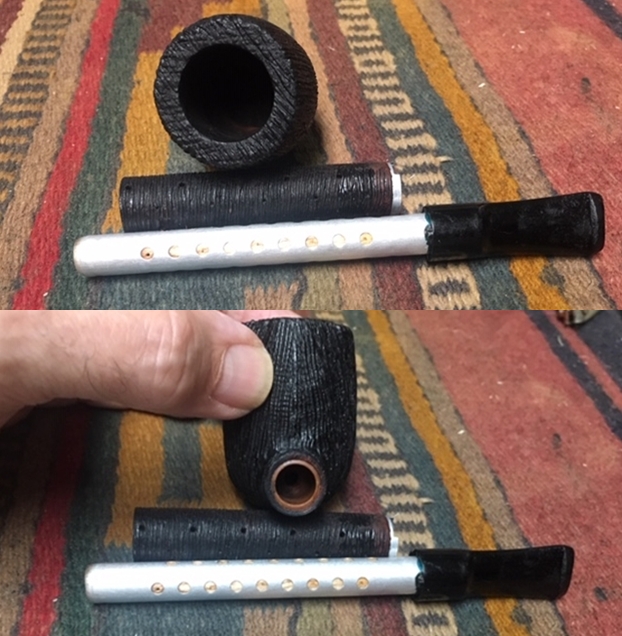
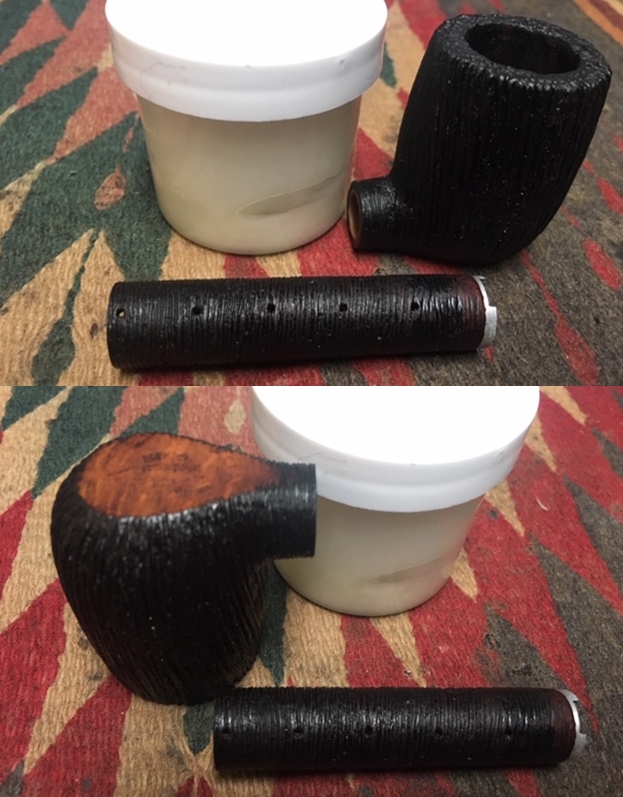
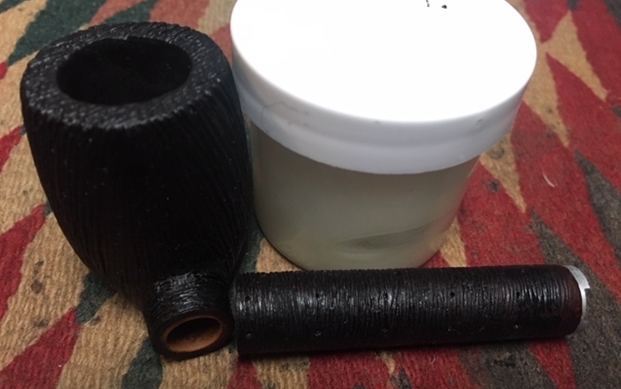
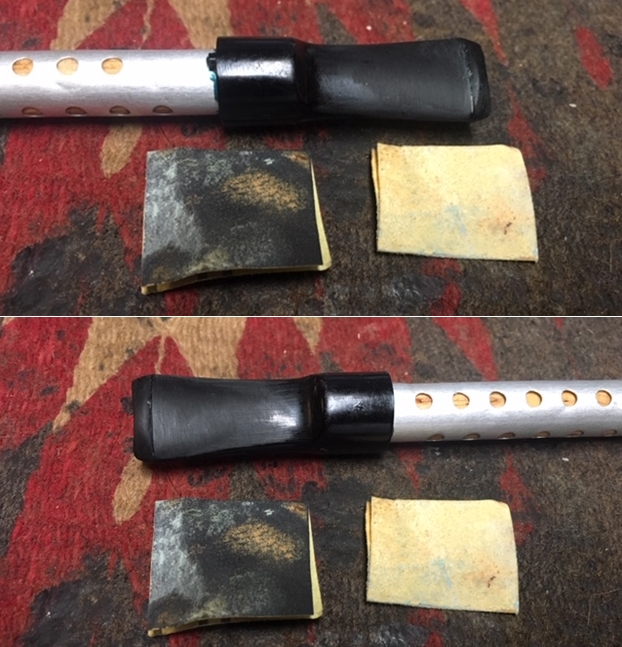
I knew I had seen this brand before – another Bing Crosby Thermostatic Filtration System Pipe


Blog by Steve Laug

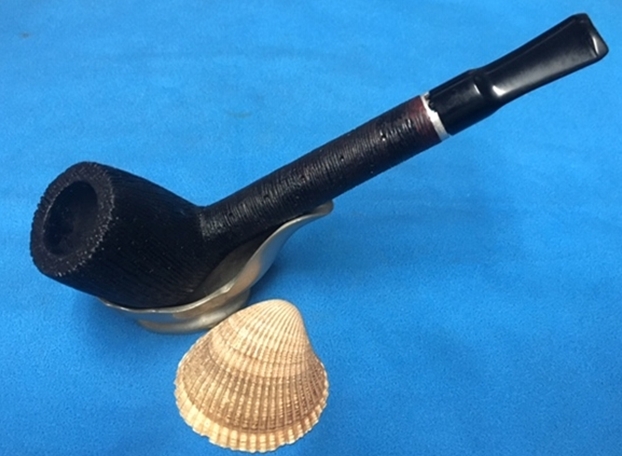
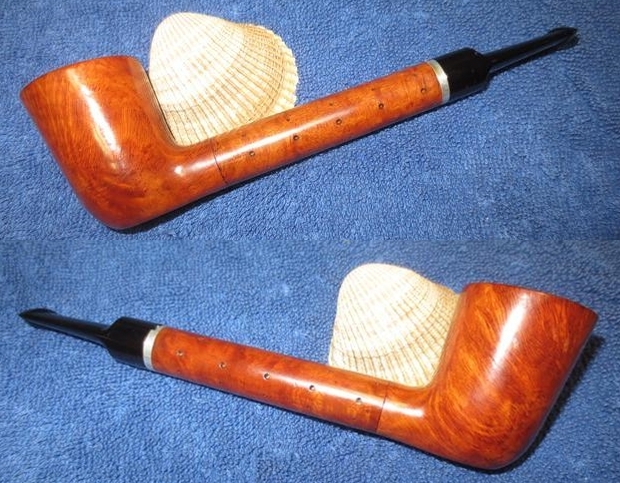
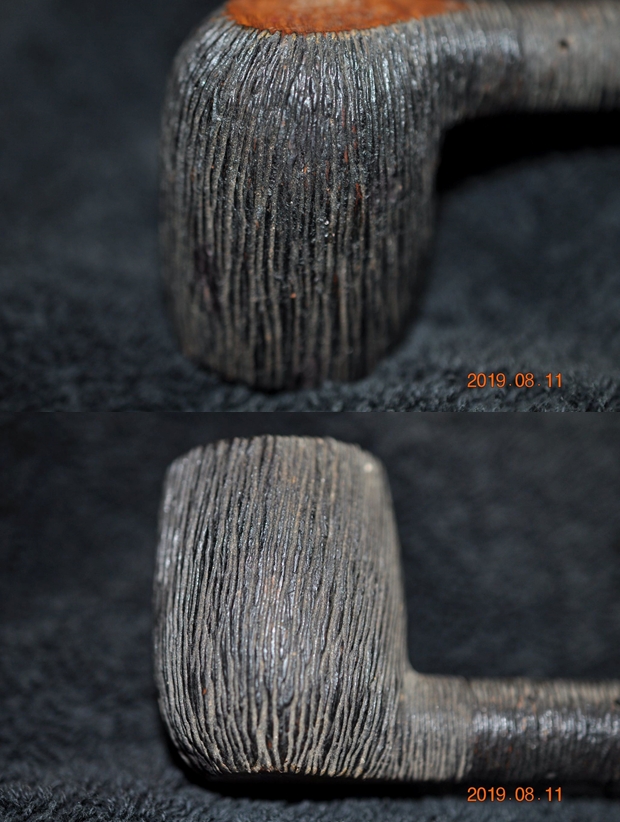
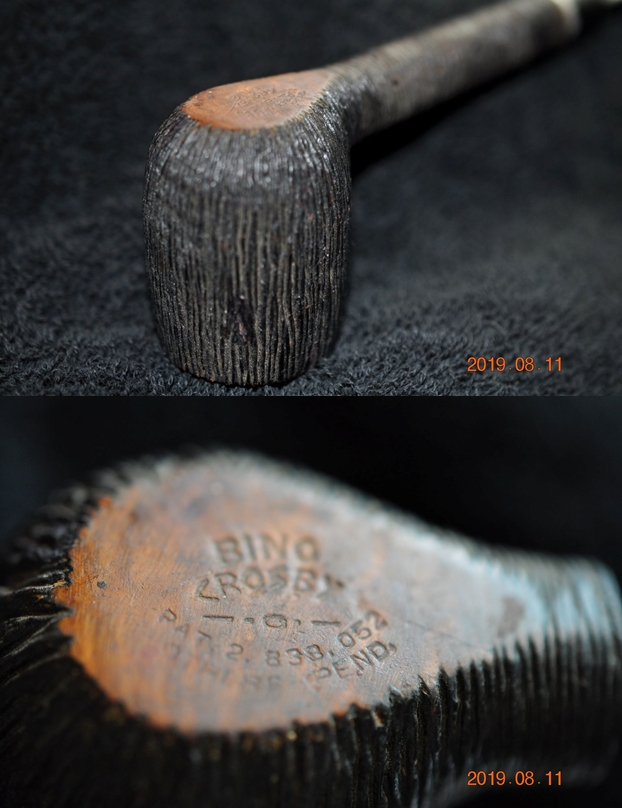
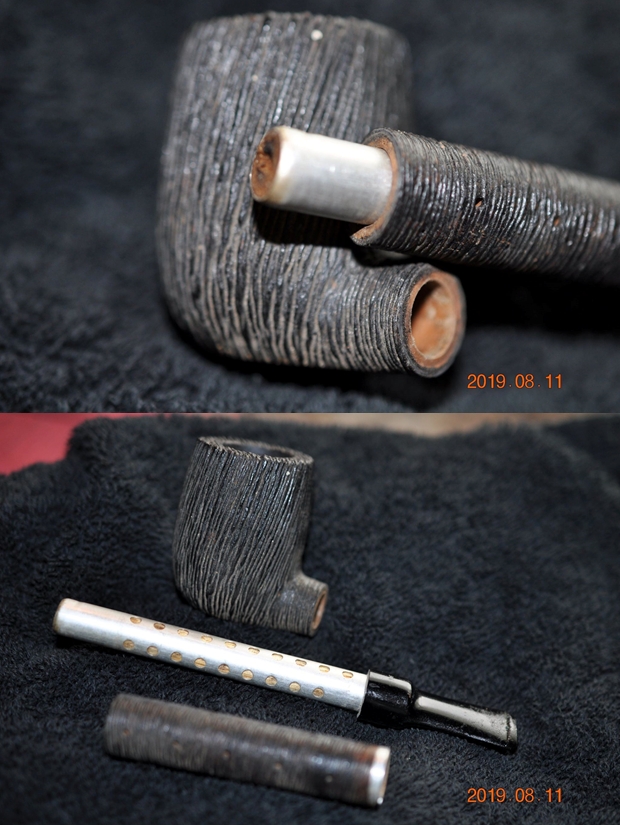
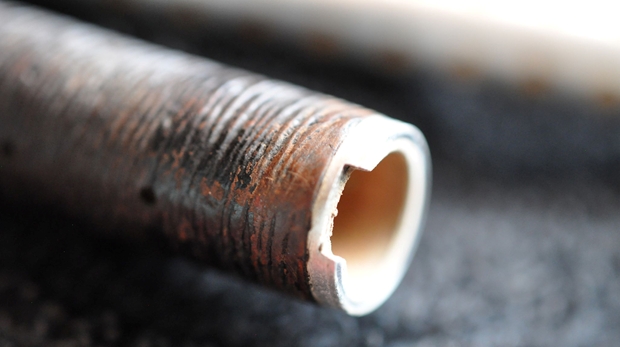
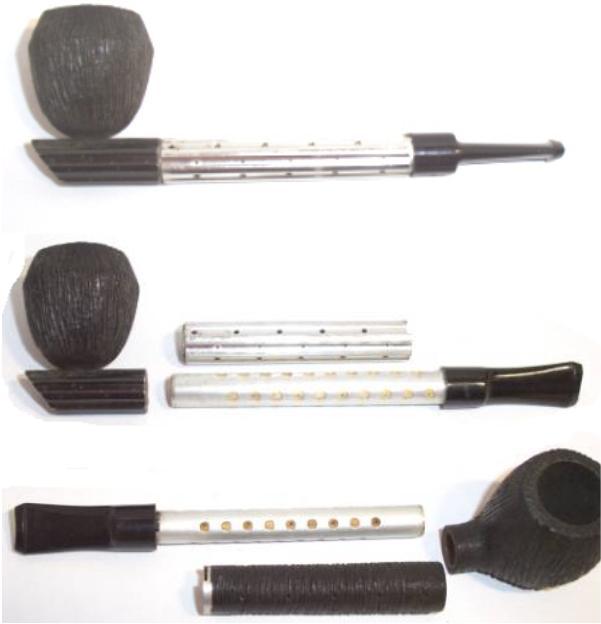
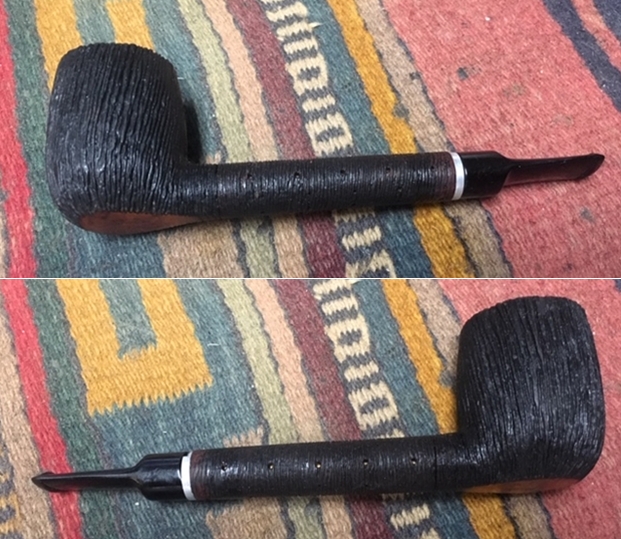
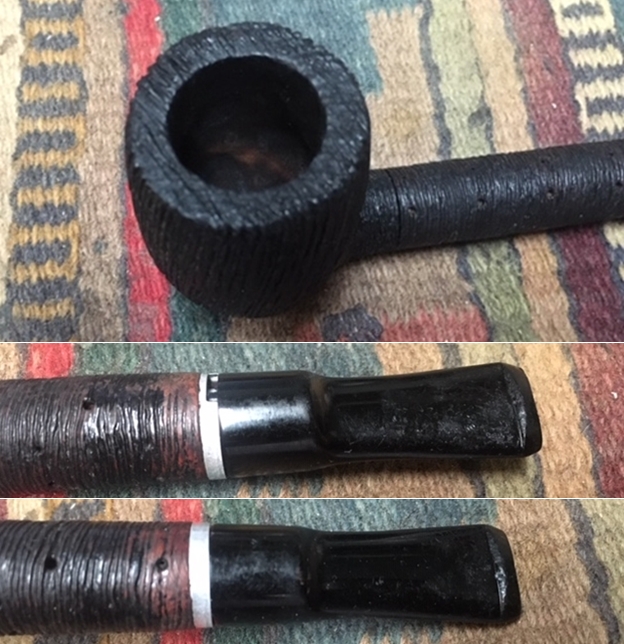
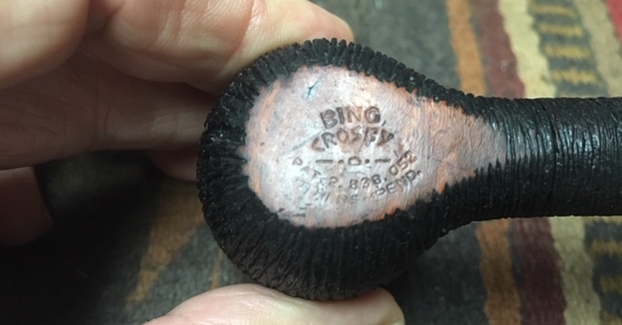
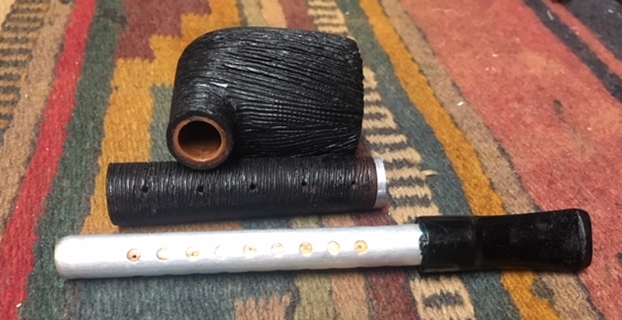
Jeff’s pipe package arrived last evening and I opened it and went through the pipes in the package. There were a lot of interesting pipes but it is hard to set them aside and keep working on Bob’s pipes. There was one that Jeff showed me on Facetime that had my attention and I wanted to work on it. The deal was clinched when I saw this pipe in person for the first time. There was something very familiar about it. I recognized both the style of the pipe and the Bing Crosby Thermostatic Filtration System. A quick search of rebornpipes revealed why it was familiar (https://rebornpipes.com/2017/07/18/a-unique-bing-crosby-thermostatic-filtration-system-pipe/). Here is a photo of the pipe I had restored before – it is an interesting Dublin. I reread the blog to remind myself of the history and background on the brand before I started work on it.Jeff took the following photos before he cleaned it up. The wire rusticated finish on the bowl and shank were filthy and filled in with grime and dust. The bowl had a thick cake lining the walls and there was some tobacco stuck in the cake. The rim top also had some lava overflow into the grooves of the rustication. The finish on the shank was also very dirty and some of the varnish was peeling off the wood. Many of the air holes in the shank were plugged. The aluminum end to the shank was in good condition. The shank slides off the stem and tube that is inside the shank. The internals were dirty but they were a Balsa wood filter that was connected to the stem. Surrounding the filter was an aluminum tube. The stem was oxidized with tooth chatter on both sides. The stem twists from side to side allowing the pipe smoker to adjust the airflow. With some clean up this rusticated Lovat will make a great partner to the long shank Dublin shown above.Jeff took photos of the bowl and rim top to show the cake in the bowl and the lava build up on the edges of the bowl. The grime and grit in the wire rusticated finish were heavily built up but even so the inner and outer edges looked very good.    Jeff took photos of the sides and heel of the bowl to show the condition of the rusticated finish. There is a lot of dust and grime on the surface of the briar but it looks pretty interesting.  Jeff took a long view photo of the smooth heel on the bowl to give a feel for the overall look of the stamped area. He also took a photo of the stamping on the heel. It reads Bing Crosby over -0- over PAT.2.838.052 over Other Pats. Pend.   Jeff took the pipe apart and took pictures of the pipe. You can see the debris in the end of the filter in the first photo. The photos that follow show different shots of the pipe parts.   Jeff took photos of the top and underside of the stem showing the tooth chatter and marks on the stem surface and wear on the edges of the button. The stem is not vulcanite if it is like the other. It seems like a mixture of rubber and plastic of some kind. Before I picked up my part of the restoration I went back and reread the pertinent parts of the blog mentioned above. I was particularly interested in the background information I had previously found on the brand and on the patent number itself.

I had found that one of my favourite go to sites, SmokingMetals had information on the brand during my previous research (http://www.smokingmetal.co.uk/pipe.php?page=114). I have included the information from the site and some photos from there as well.

Several variants, but basically the inner stem consists of a filtering device integral with the bit. The outer sleeve comes in several designs. Twisting the perforated outer stem alters the smoke flow/air mixture. These examples here under the Bing Crosby name, but another derivative came under the name of Trailblazer, by “Pipes by Lee Inc.”. The Medico Ventilator appears to incorporate the same principle.In the previous blog I dug a little deeper in the web and found that there was a thread on the Pipesmokers Forum. Here is the link if you would like to follow the entire discussion on the thread. https://pipesmokersforum.com/community/threads/a-bing-crosby.45689/.  I quote two of the respondents regarding the pipe.

It’s my understanding that the “Swiss cheese stem” was designed to give the pipe a cooler smoke. When you twist the pipe shank it either closes the holes or opens them – thus providing a cooler or warmer smoke. I am more interested in knowing if Bing really had a hand in its design or if the whole thing was a gimmick

…SO – the filtration system is called “thermostatic” – and the wood inside the aluminum sleeve on mine definitely looks to be balsa wood. Now if I could just get one of those magnetic drying chamber thingies.

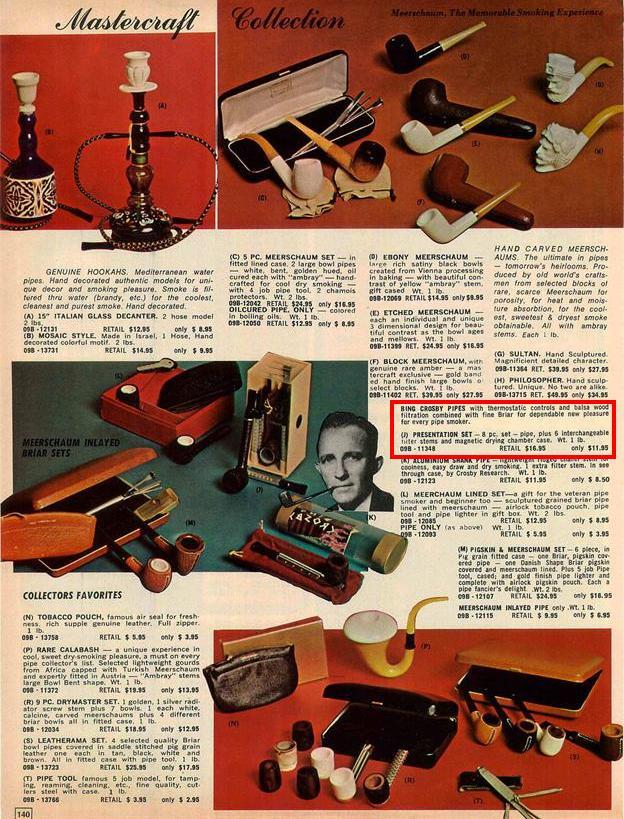
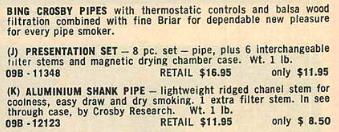
I was excited again with this pipe. In the thread quote above there were several links in the thread referring to articles and information on Bing Crosby himself and one that took me to an advertisement that appears to come from a Mastercraft Pipe Catalogue or from a magazine that included this pipe along with a selection of Mastercraft pipes. http://www.ebay.ca/itm/1971-ADVERTISEMENT-Bing-Crosby-Smoking-Pipes-Rolls-Royce-Bank-Tie-Rack-/151568646383?rmvSB=true. I have included the catalogue page and highlighted specific pipe with a red box. I included a blow up of that portion of the page so you can read it more clearly.You can see it to the left. It reads: Bing Crosby pipes with thermostatic controls and balsa wood filtration combined with fine Briar for dependable new pleasure for every pipe smoker. In the photo item (J) and (K) show variations on the Crosby Pipe. The first is a presentation set with a pipe and 6 interchangeable filter stems and a magnetic drying chamber case where the stems and filters can be stored. Interestingly both sets bear the designation that the pipes are offered by Crosby Research.

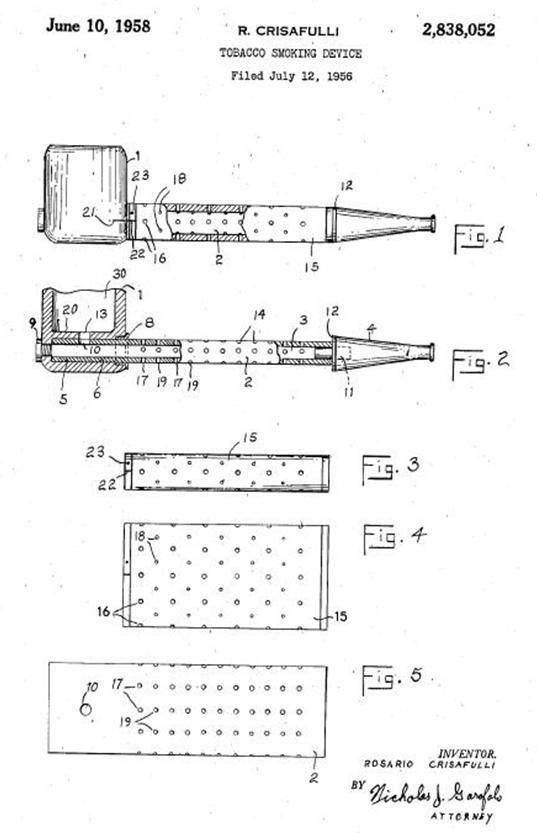
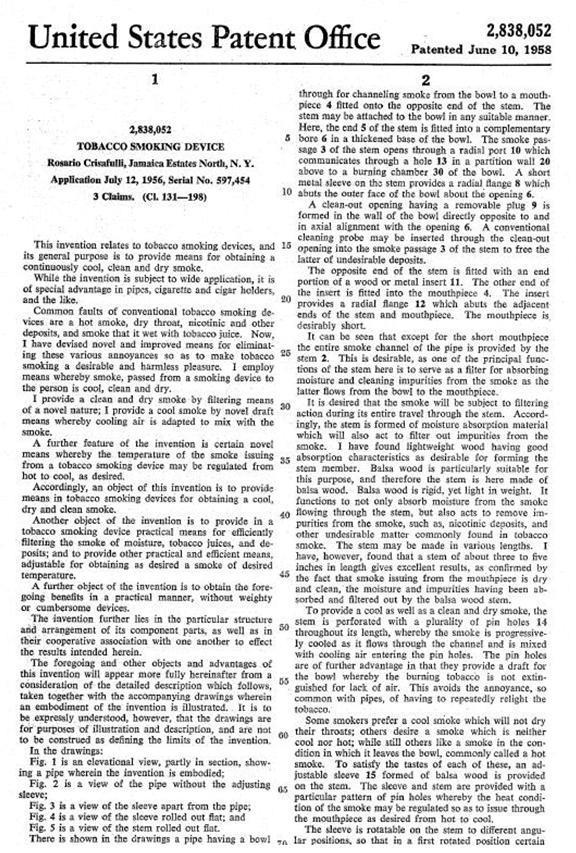
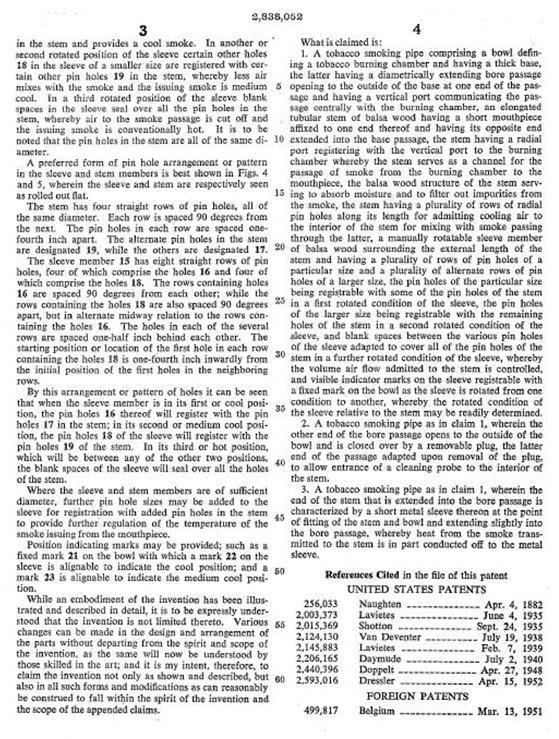
I had also previously used the patent number on the bottom of the bowl to hunt down the patent on the US Patent website. I have included the patent drawing and documentation that was submitted with the descriptions of the innovations of this pipe. The pipe was invented by Rosario Crisafulli of Jamaica Estates North, New York and was filed with the US Patent Office on July 12, 1956. The patent was granted almost two years later on June 10, 1958. Having reread the above information and more I moved on to work on the pipe. I took some close up photos to confirm the condition of the pipe. The first shows the bowl, rim top and edges. They were in pretty good shape. There was some minor denting on the rim top. The second shows the stamping on the bottom of the bowl, confirming the information that was given above. Jeff cleaned the pipe with his usual penchant for thoroughness that I really appreciate. This one was a real mess and I did not know what to expect when I unwrapped it from his box. He reamed it with a PipNet pipe reamer and cleaned up the reaming with a Savinelli Fitsall Pipe Knife. He scrubbed out the internals with alcohol, pipe cleaners and cotton swabs until the pipe was clean. He scrubbed the exterior of the bowl with Murphy’s Oil Soap and a tooth brush to remove the grime and grit on the briar and the lava on the rim top. The finish looks very good with good looking grain around the bowl and shank. Jeff soaked the stem in Before & After Deoxidizer to remove the oxidation on the stem. When the pipe arrived here in Vancouver for the second stop of its restoration tour it looked very good. I took photos before I started my part of the work. The next photos show the rim top and the stem surfaces. The rim top cleaned up amazingly and looks very new with no damage to inner or outer edges. The stem cleaned up well but the tooth chatter and marks cover both surfaces and the button. It will need to be cleaned and reshaped.One of the things I appreciate about Jeff’s cleanup is that he works to protect and preserve the nomenclature on the shank of the pipes that he works on. The stamping on this one was very faint to start with so I was worried that it would disappear altogether with the cleanup. He was not only able to preserve it but it is clearer than shown in the earlier photos. I took some photos to show the clarity of the stamping. I have noticed that many restorers are not careful to protect the stamping in their cleaning process and often by the end of the restoration the nomenclature is almost destroyed. I would like to encourage all of us to be careful in our work to preserve this as it is a critical piece of pipe restoration!The shank encloses an aluminum tube with matching perforations to the shank. It is an integral part of the stem. Inside of the tube is a hollow balsa wood filter much like the hard maple filter found in Brigham pipes. In this case the smoke is drawn through the shank and air from outside is mixed with the smoke to either keep it warm or cool it so a clean dry smoke is enjoyed by the pipe smoker. In the earlier noted advertisement the stem and filter unit were one unit and were sold with replacements. The next photos show the pipe taken apart. I rubbed the bowl down with Before & After Restoration Balm. I worked it into the surface of the briar with my fingertips and a horsehair to clean, enliven and protect it. I let the balm sit for a little while and then buffed with a cotton cloth to raise the shine. Mark Hoover’s Balm is a product that I have come to appreciate and one I use on every pipe I have been working on. I set the bowl aside and turned my attention to the stem. I sanded the stem with 220 grit sandpaper to break up the oxidation. I started the polishing with 400 grit wet dry sandpaper to remove the scratching. It is starting to look good. I rubbed the stem down with Denicare Mouthpiece Polish. I have a few tins of this laying around so I am trying to use them up. It does a pretty good job polishing the stem.I polished the stem with micromesh sanding pads – wet sanding with 1500-12000 grit pads. I wiped the stem down with Obsidian Oil after each pad and set the stem aside to dry after the final wipe down with oil.    I put the bowl, shank and stem back together. I polished the bowl and stem with Blue Diamond to polish out the scratches in the briar and the stem. I gave the bowl and the stem multiple coats of carnauba wax. I buffed the pipe with a clean buffing pad to raise the shine. I hand buffed it with a microfiber cloth to deepen the shine. The pipe polished up pretty nicely. The wire rustication on the bowl and shank looked really good with the polished black stem. This Bing Crosby Thermostatic Filtration Lovat was another fun pipe to work on thanks to Jeff’s cleanup work. It really has an interesting and unique look that catches the eye. The combination of various brown stains really makes the pipe look attractive. It is another comfortable pipe to hold in the hand. The finished pipe is shown in the photos below. The dimensions of the pipe are Length: 6 inches, Height: 2 inches, Outside diameter of the bowl: 1 ¼ inches, Chamber diameter: ¾ of an inch. This pipe is joining the Bing Crosby Dublin in my own collection. Thanks for reading this blog and my reflections on the pipe while I worked on it.
Restoring a “Made in England” Peterson’s System 3 # 357 from the Mumbai Bonanza Lot


Blog by Paresh Deshpande

I have quite a few inherited Peterson’s System pipes ranging from the period 1915 to 1947 to present!!! I also have these pipes in System Standard, System 0 and System 3. So when Abha, my wife, sent me pictures of pipes that I had purchased from a Mumbai trash collector, I saw two distinct Peterson’s System pipes, one large and the other very small!! When Abha confirmed the COM stamping on both these pipes, I knew that I had Peterson’s System pipes from the 1930s-40s. Another two vintage Peterson’s System pipes added to my collection, I say. And I am not complaining, mind you readers!!

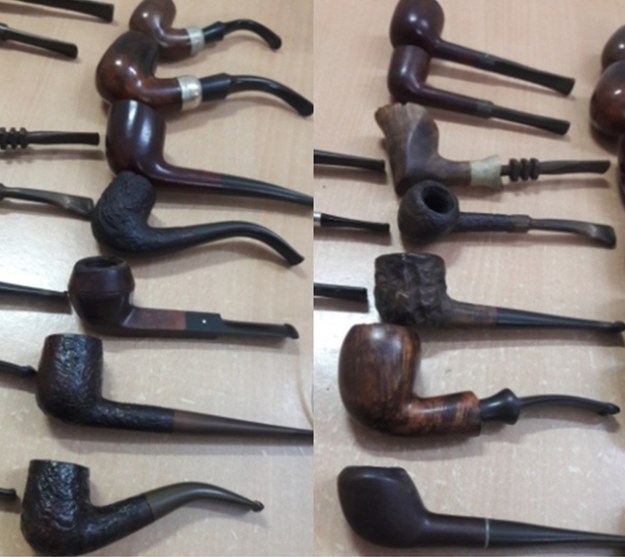
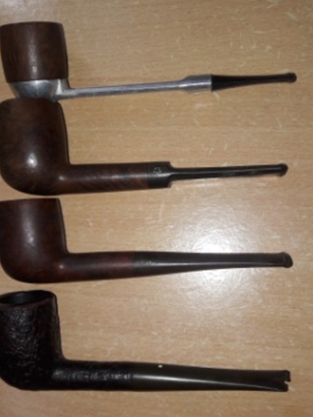
I was fortunate enough to have heeded the advice of my dear friend and mentor, Steve, and struck a deal with a junk collector from Mumbai. He did not know what he was selling and I did not know what I was buying as we reside in different cities!!!!! The argument that Mr. Steve presented was that if not anything, I shall at least have some spares and this was logical. I struck a deal and here are pictures of the pipes that I received in this lot.       This lot contains some very nice collectible pipes, a few well known brands and some mediocre brands. Overall, with seven Dunhill pipes, a Preben Holm #1 FH, a couple of “Made in England” Pete System pipes, a couple of  Charatan’s Belvedere, Custom-Bilt, Stanwell and other assorted pipes, I would say that I had struck a decent haul!!! This is indeed my “Mumbai Bonanza”.

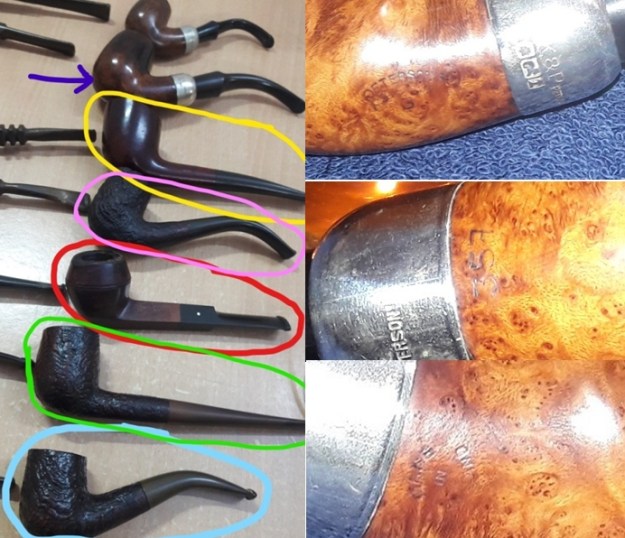
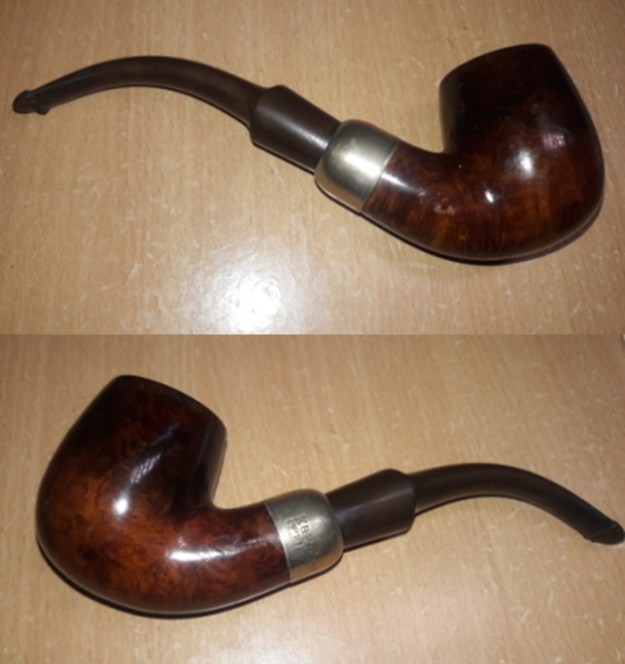
This 15th pipe that I decided to work on from this find is a large Peterson’s System 3 pipe with a nickel ferrule and is indicated in indigo color arrow. It is stamped on the left of the shank towards the shank end as “PETERSON’S” in an arch in block capital letters over arched “SYSTEM” in block capital over “# 3”. The tail of the P in Peterson’s is forked. The right side of the shank is stamped with COM stamp “MADE IN ENGLAND” in a circle format with “Made” and “England” in a circle with the “in” located in the center of the circle. Stamped at the bottom of the shank, very close to the ferrule is the shape number “357”. All the stampings are crisp and easily readable. The ferrule has the usual three cartouche with first having Shamrock, the second a Prone Fox and lastly a Stone Tower. Stamped above the cartouche are the letters “K & P” followed by “PETERSON’S” all in a straight line. The stem is devoid of any logo.In my earlier restoration of my inherited Peterson’s System 31, I had extensively researched the dating of these old Peterson’s and I can say with certainty that this pipe is from the period 1938 to 1940/ 41. Also the forked tail of “P” in Peterson’s with the inward coiling upper part corroborates the vintage of this pipe.

I reconfirmed and refreshed my learning by visiting pipedia.org and my memory has served me right. Here is the link to dating Peterson’s pipes: https://pipedia.org/wiki/A_Peterson_Dating_Guide;_A_Rule_of_Thumb

For further understanding of System Standard/ 0/ 3 etc, I referred to the main article on Peterson’s, but came out cropper. There is nothing substantive and clear information about this grading of these System pipes. Any source of information may please be shared with us on rebornpipes.com.

But nonetheless this is a Peterson’s System pipe from the 1938-40/41 vintage and sure is staying with me.

INITIAL VISUAL INSPECTION
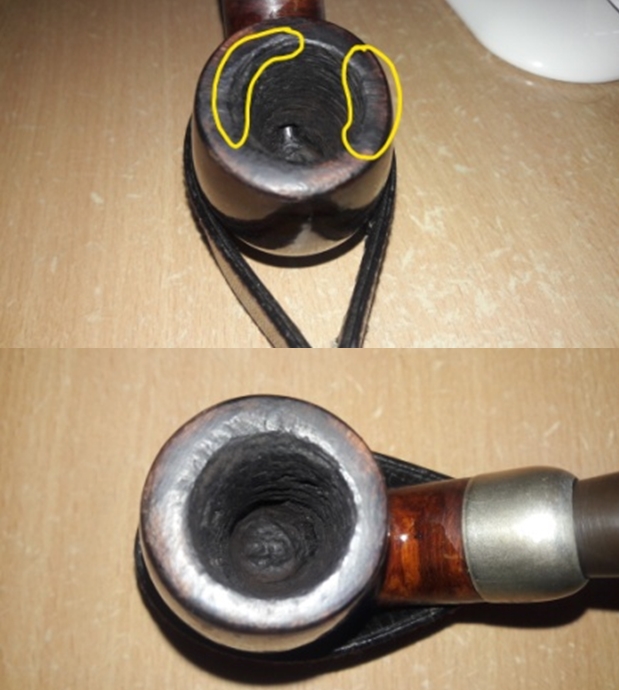
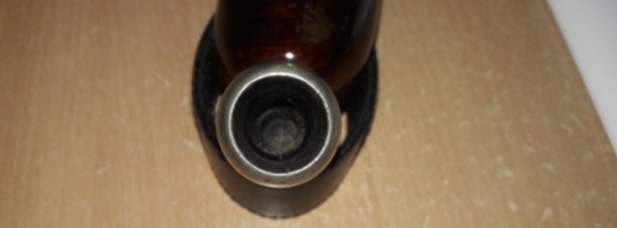
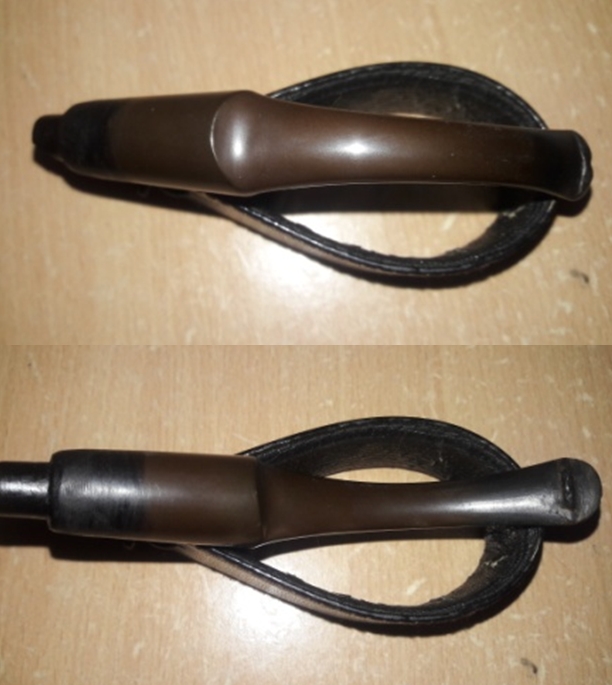
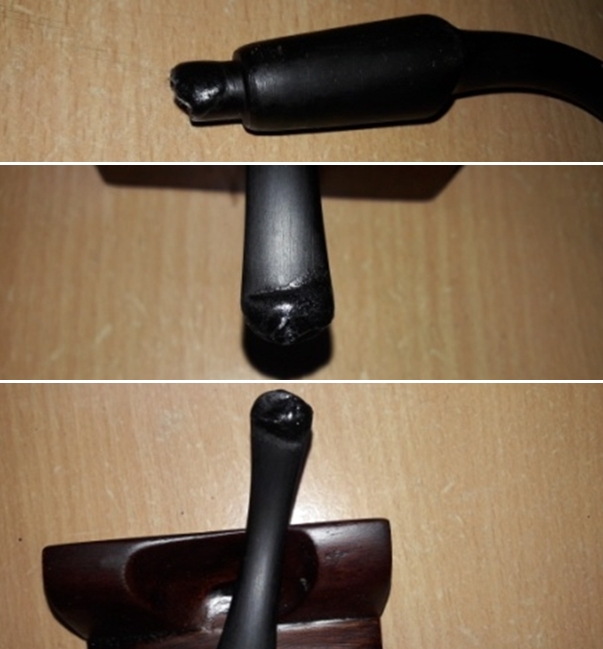
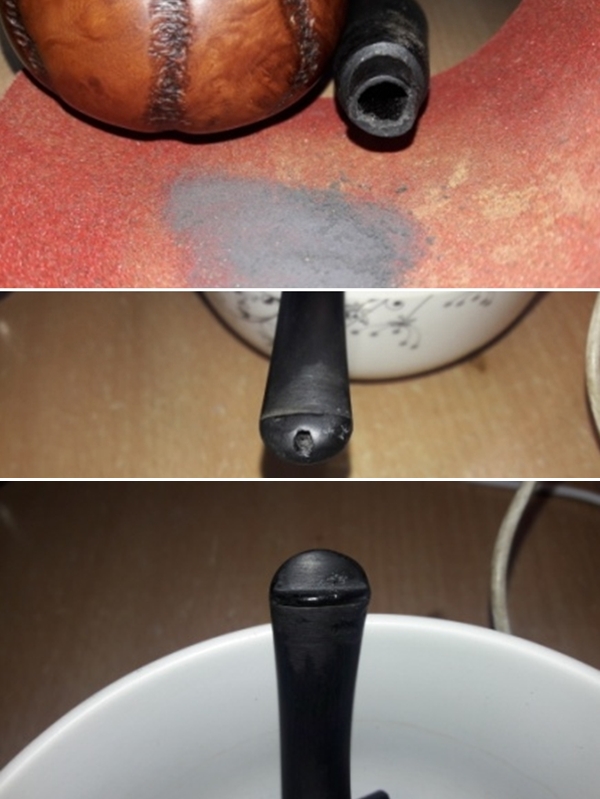
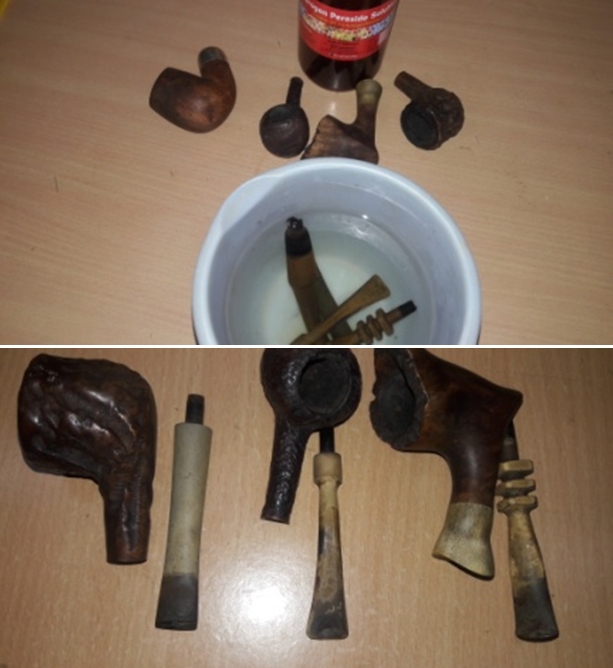
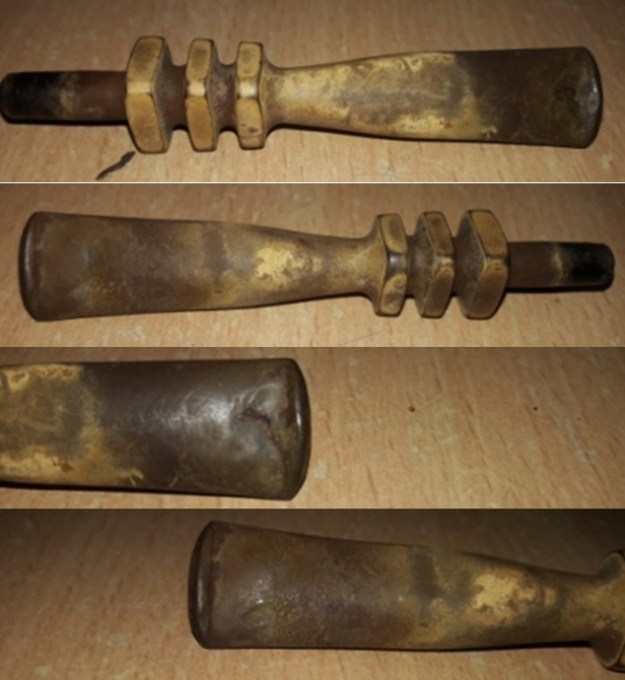
The first and foremost thing that struck me as awful was that the smooth stummel is coated with a coat of lacquer!!! To top it, the coat has disintegrated in patches giving it a very sorry appearance. The icing on the cake is that half way up towards the rim, the stummel is stained black!! Why would they do that?  Well, the long and short of the above is that both the lacquer and the black stain will be removed and whether the finish is to be kept natural or be stained will be decided later. To be honest with you, being a grade 3 System pipe, there is nothing much to boast about the grains on the stummel. It has a smattering of cross grains and swirls all around the shank and stummel. The stummel surface is covered in grime giving the stummel a dirty appearance which is further accentuated by the patches of peeled lacquer coat. The stummel surface is peppered with a number of dents and ding on the foot and front of the stummel. A couple of fills are noticeable on either side near the shank and stummel junction and shown with yellow arrows. These will be clear when the stummel is cleaned of all the grime. In spite of all these flaws, the pipe has a nice size, heft and feel in the hand. It does have a quality which is seen on vintage pipes, but difficult to explain in words. And not to forget, this is nearly an 80 year old pipe!! A thick and uneven layer of cake can be seen in the chamber. The rim top surface has suffered the maximum damage and is uneven. It is covered in thick overflow of lava, dirt, dust and grime. The condition of the inner walls of the chamber and rim top surface will be known once the cake has been taken down to bare briar and the rim top crud has been scraped off completely. The bowl is out of round with the left half being thinner than the rest of the rim top. The inner rim is uneven with suspected burn/ charred surfaces in 9 o’clock and 3 o’clock direction (marked in yellow circle). Only once the stummel has been thoroughly cleaned that I can be sure of my initial appreciation. The outer rim edge too has dents, chips and dings, but not very severe, likely caused due to knocking against the hard surface. In spite of the thick cake, the chamber odor is, surprisingly, not strong and should be addressed once the cake has been taken down to the bare briar and the shank internals have been thoroughly cleaned The shank end is adorned with a nickel ferrule. The ferrule has oxidized a fair bit but should polish up nicely. The sump shows a heavy deposition of accumulated dried gunk, adversely affecting the airflow.The P-lip vulcanite stem is heavily oxidized and has calcification deposits towards the button end. There are deep tooth marks on the lower and upper stem surface in the bite zone and appears that the previous owner has literally chomped on the bite zone of the stem. The button edges also have bite marks, in fact, they are badly worn out. The tenon end has a major chunk missing and shows heavy accumulation of oils and tars. The part of the stem that seats in to the mortise is heavily scratched. Along with the stems of other pipes in line for restoration, I immersed the stem of this Peterson’s System 3 pipe in a mix of one part Hydrogen Peroxide 20% with one part hot water after I ran a couple of pipe cleaners dipped in alcohol through the stem air way. A couple of hours later, the stem oxidation on all these stems were raised to the surface.After I had fished out the stem from the Hydrogen Peroxide bath, I scrubbed it with Magiclean sponge and followed it up with a wipe of cotton swab and alcohol. I further scrubbed the stem surface with 0000 grade steel wool. The loosened and superficial layer of oxidation was easily removed and revealed the condition of the stem. There are deep bite marks in both the upper and lower bite zone. The bite marks are deep enough to cause significant thinning of the surface and complete disfigurement of the button edges. The deeper oxidation that was pulled to the surface would require more abrasive techniques.

THE PROCESS
I started the restoration with the stem repairs as this would take the maximum of my time to clean, repair and spruce up the stem. I flamed the damaged button edge and the nicks and dents with the flame of a lighter. This helps the vulcanite to rise to the surface as it has an inherent property to regain its original shape when heated. At this stage, I could clearly make out the extent of damage to the lower surface and the extent of the crack in the bite zone. This was further accentuated due to heating with the flame of a lighter. The upper surface too has a couple of deep tooth marks. I cleaned the internals of the stem using hard and normal bristled pipe cleaners and isopropyl alcohol. The heap of pipe cleaners tells the sordid tale of the stem condition. With a pointed dental tool, I scraped out the entire dried gunk from the tenon end. I addressed the deeper oxidation by sanding the entire stem with a folded piece of 150 and followed by 220 grit sand paper. This also helps to address minor tooth chatter and prevents the fills turning brown once polished. Once the oxidation was completely removed, I wiped the surface clean with a cotton swab and alcohol and rubbed a little Extra Virgin Olive oil to hydrate the stem. Just for the information of statistically oriented reader, to get the stem to this stage it took better part of the afternoon and well past mid night!! Continuing with the stem repair, I tightly wrapped a scotch tape around one end of a pipe cleaner so that I had achieved a snug fit of the pipe cleaner in the small rounded slot of the P-lip stem. At the tenon end, I folded a pipe cleaner till the fit was snug in to the wide tenon and after applying generous coat of petroleum jelly, I inserted it in to the tenon end of the stem. Both the scotch tape and petroleum jelly prevents the mix of charcoal and superglue from sticking over the pipe cleaners and keeps the slot and tenon open. Thereafter, I mixed superglue and activated charcoal powder and generously applied it over the bite zone on either side, including over the button, over the chipped tenon end and set it aside to cure.  With the stem fill set aside to cure, I started with cleaning of the stummel as I was keen to know the condition of the walls of the chamber. With size 1 head followed by head size 2 and 3 of a PipNet pipe reamer, I took the cake down to bare briar. With my sharp fabricated knife, I removed the cake from the chamber where the reamer head could not reach and thereafter, using a folded piece of 180 grit sand paper, I sand out the last traces of cake and expose the walls of the chamber. I wiped the chamber with a cotton pad dipped in isopropyl alcohol to remove the carbon dust left behind by all the reaming and sanding process. Once the chamber walls were cleaned out, I was pleased to note a pristine chamber with no signs of heat fissures/ lines/ pits. With the same sharp knife, I gently scraped off the lava overflow from the rim top surface. The charred and uneven rim surface and damaged inner and outer rim edges is now clearly seen and should be addressed with simple topping of the bowl. Next, I cleaned out the internals of the shank and mortise. Using my dental tool, I scraped out all the dried oils, tars and gunk that had accumulated in the draught hole, airway and sump. The amount of crud that was scrapped out and the condition of the pipe cleaners that were used leaves no surprise why air flow through it was restricted. I finished the cleaning by running a few pipe cleaners dipped in isopropyl alcohol. I also wiped the sump with cotton buds and alcohol. I gave a final cleaning to the sump with a paper napkin moistened with isopropyl alcohol. With this cleaning, all old smells in the pipe are history. The pipe now smells clean and fresh.  All this time that I was handling cleaning of the internals of this pipe, the patchy lacquer coating and the black stain to the upper half of the stummel was irritating me no end. The more I looked at it, the more convinced I was that this needs to be removed completely. Using cotton balls dipped in pure acetone; I worked the entire stummel and got rid of the lacquer as well as the black stain. The cleaned stummel revealed a couple of more flaws in the briar, but that is fine by me. I was prepared to handle a couple of fills and a couple more does not perturb me.  Next, I cleaned the external surface using a hard bristled toothbrush and Murphy’s Oil Soap. With a soft bristled brass wired brush, I removed the overflowing lava from the rim top surface and cleaned the internals of the shank with a shank brush and dish washing soap to remove what little crud remained in the shank. I rinsed it under running tap water and wiped the stummel dry with an absorbent soft cotton cloth.   Once I had wiped the stummel dry with paper towels and soft cotton cloth, the exact extent of damage to the rim top and edges could be clearly gauged. Now I had a fair idea of the extent of topping the rim surface. I top the rim on a piece of 220 grit sand paper to even out the rim surface dents and dings and also to reduce the charred rim surface. I addressed the out of round inner edge by creating a light bevel to inner edge with a folded piece of 220 grit sand paper pinched between my thumb and index finger. With a folded piece of 220 grit sand paper, I sand the entire stummel surface and addressed the minor pits and flaws that were revealed when the lacquer coat was removed. To further smooth out the scratches left behind by the abrasive 220 girt sand paper, I top the rim surface on a piece of 400 grit sand paper. I had hoped that further sanding with a 400 grit paper will address the minor dings that remained on the outer edge, but that was not to be. Thus, with a folded piece of 220 grit sand paper pinched between my thumb and index finger, I created a light bevel over the outer edge. I am very happy at the way the chamber and rim top surface appears at this in restoration. The old fills observed earlier during initial inspection and those revealed once the lacquer coat was removed, were next that I addressed. Very carefully and painstakingly, I completely removed the old fill with a pointed dental pick. I cleaned the fill of all the debris of old fill material, wiped it with alcohol and refreshed the fill with a mix of briar dust and CA superglue in each fill and set it aside to cure overnight.By next day, the fill was nice, hard and well set. Using a flat head needle file, I sand these fills to achieve a rough match with the stummel surface. With a folded piece of 220 grit sand paper, I worked the fill till I had achieved a nice blend with the rest of the stummel surface. At this stage, the dreaded air pockets revealed itself (marked with red arrows) in one of the fills. I spot fill these air pockets with CA superglue. I repeated the sanding with a piece of 220 grit sand paper again once the glue had hardened. It turned out much better than I had anticipated. I further sand the entire stummel surface again with the same grit sand paper to further smooth the stummel surface in preparation for a polish by micromesh pads. I subjected the stummel to a complete cycle of micromesh polish, wet sanding with 1500 to 12000 grit pads. I paid greater attention to polish the rim top surface and the bevels created on the inner and outer rim edges. I wiped the stummel with a moist cloth after every grit pad to remove the sanding dust left behind by the pads. This also helps in monitoring the progress being made and provides an opportunity to take early corrective action, if required. I am happy with the progress being made till now. Next, I rub a small quantity of “Before and After Restoration Balm” in to the briar with my finger tips and worked it deep in to the surface and let it rest for a few minutes. The balm almost immediately works its magic and the briar now has a nice vibrant appearance with the beautiful swirl grain patterns on full display. The contrast of the dark browns of the grain with the light hues of the rest of the stummel adds an interesting dimension to the appearance of the stummel. I further buffed it with a horse hair brush to further deepen the shine. Turning my attention to the stem repairs in my home stretch, using a flat head needle file, I reshaped the button and roughly matched the fills with the rest of the stem surface. I sand the tenon end on a piece of I sand the fill with a piece of folded 220 grit sandpaper to even it out. With a round needle file, I smooth out the jagged tenon opening. A sanding with a flat head needle file of the buttons and bite zone to achieve a rough match, revealed air pockets on the upper and lower portions of the P-lip. I painted these air pockets with a permanent marker and spot filled it with clear superglue. Once the fill had cured, I sand the fills with a piece of folded 220 grit sand paper and followed it up by further sanding the stem with 320, 600 and 800 grit sand papers to achieve a perfect blending of the fills with the stem surface and a build a crisp button edge on either side of the P-lip. The repairs look good and the stem should polish up nicely. In my exuberance to cross the finish line and start on the new project, I completely missed out on taking pictures of this last step in stem restoration. My sincere apologies for this miss…. Using the micromesh pads, I completed the polishing cycle by wet sanding the surface with 1500 to 3200 girt pads. I had read that White diamond polish is between 3600 and 4000 grit of micromesh pads and best used between these two. I decided to give this a try to see if there is any difference in the final stem finish. I mount a fresh cotton buffing wheel on to my hand held rotary tool and apply white diamond polish and buffed the stem. I wiped the stem with microfiber cloth and go through the remaining pads, dry sanding with 4000 to 12000 grit pads. The stem looks great with the fills nicely matched with the rest of the surface. I gave a final rub with “Before and After Extra Fine” stem polish compound from Mark to remove fine scratches from the stem surface. I rub a little quantity of Extra Virgin Olive oil in to the stem surface and set it aside to be absorbed by the vulcanite. The stem polished up nicely and appears as good as when new. To complete the restoration, I mount a cotton cloth buffing wheel on to my hand held rotary tool and applied several coats of carnauba wax. I finished the restoration by giving the entire pipe a rigorous hand buffing using a microfiber cloth to raise the shine further. I vigorously buff the nickel ferrule with a jeweler’s cloth and bring it to a nice shine.I mount a clean cotton cloth buffing wheel and give the entire pipe a once over buff. The finished pipe with a natural finish to the briar looks amazingly beautiful and is now ready for its long second innings with me. The dark spots of the fills, though visible, are not addressed as the pipe looks beautiful as it is. I only wish it could share with me its life story of the past years while I enjoy smoking my favorite Virginia blend in it or maybe an English blend!! P.S. I earnestly would like to request all the readers to help me with information as to what does Standard/ 0/ 3 on these System pipes denote/ signify. The only thing that is confirmed is that this is definitely not one of the high grade System pipes from Peterson’s what with the fills that were seen on the stummel, but nevertheless, it’s a vintage Peterson’s!!

With this write up, I am through with all my pending works and look forward to work on my next project to restore a pipe which my dear friend and mentor, Steve, had sent me about a year back with the intention of providing me an opportunity to test my own skills. This pipe is close to my heart for other reasons too which I shall bring out in the write up after I have completed the restoration. Suffice to say at this point that this pipe is in a very very sad state and that it’s a DUNHILL!! I wish to thank each one for sparing their valuable time to read through this write up and sharing this journey with me.


A Black Sea Beach Pipe Project: The Third Stanwell Henley Special, Made in Denmark 57 Chimney


Blog by Dal Stanton

This Stanwell Henley Special Chimney is the last of the 3 Stanwell Henley Specials that I obtained off the eBay auction block.  Jim saw the Henley on the online ‘For “Pipe Dreamers” Only!’ and he commissioned the Oval Shank Billiard that I restored some time ago (see LINK) pictured in the middle below.  I had also taken notice of the solid craftsmanship of these 3 Danish made pipes, so I just restored the second, the Blasted Saddle Stem Billiard and put it in the Store to also benefit the Daughters of Bulgaria.   Then, I’ve claimed the third, a Chimney, to keep in my personal collection.  But I’ve thrown down the gauntlet on the Henley Chimney – I’ve developed a tradition of restoring a pipe in my personal ‘Help Me!’ basket collection to take with me to the beach on the Black Sea coast where my wife and I enjoy our summer holiday😊.

To review what I know about this Stanwell Henley line, I start with the seller’s information on eBay:

This auction is for three vintage Stanwell, Henley Line estate pipes from the 1950’s-60’s era. All are in good pre-owned condition. The stems are primarily free from teeth marks. The stems do have some fading. All of the stems fit snug and the wooden bowls are free from outstanding blemishes. As seen from top to bottom, the first pipe reads Henley Special #57, the second and third read Henley Special without any numbers seen. All of the pipes read Made in Denmark.

Here are the three Stanwell Henley Specials as I saw them on the eBay auction block.Pictured are the first and second Henley Specials after each was restored are pictured below. The transformation in these beautiful Danish pipes is unbelievable! As I expressed in the previous Stanwell Henley Special restorations, since I started collecting and restoring pipes, I’ve grown in my appreciation for Danish made pipes.  They tend to be stout, well-made pipes.  In my research on the Henley pipes, I have found no conclusive information dating them, but anecdotal information and a the feel of these pipes, I’m confident placing them in the 1950s and 60s. Pipedia’s article on Stanwell pipes simply places the Henley Special line in the list of Stanwell second brands.  The Chimney bound for my collection is identical with what Pipephil.eu provided.   It shows a Henley Chimney with the Fishtail stem slightly bent, along with the distinctive characteristic of a bulging midsection, which attracted me to this pipe!  The difference with the Pipephil listing is that it is blasted – nice.  It also shows an ‘H’ stem stamping.  The Chimney now on my worktable has no stamping on the stem – or it has worn off over time.The dating of the Henleys and this Chimney is elusive.  The only information I found in my initial research that gave any reference to dating isn’t conclusive. I found the following picture on Google images but the link to pipesmokersforum.com.  “Who made this pipe?”   I went to the pipesmokersforum site and searched ‘Henley’ and no reference or article emerged.  Having added this discussion to my research would have been helpful!  The picture I found puts a question mark in the late 50s.  Added to this the eBay seller’s description placing the pipes in the 50s or 60s and I do not know where this information originates.  Even though this information is anecdotal, the dating seems accurate to me based upon the appearance, craftmanship and feel of these pipes. I really like the Chimney stacked shape with a very nice feel in the hand.  I’m attracted to the tall Chimney and the interesting bulging of the bowl about midway.  The other thing that I like is the unique, pinched saddle fishtail stem.  Coupled with the tall bowl, the fishtail gives the pipe an overall sleekness – I like it a lot!

The dimensions of the Henley Chimney are: Length: 6 inches, Height: 2 3/16 inches, Rim width: 1 1/4 inches, Chamber width: 13/16 inches, Chamber depth: 2 inches. With the third Stanwell Henley Special Chimney on the worktable, I take some pictures to get a closer look. Of the 3 Stanwell Henleys I acquired, the nomenclature on this pipe is the clearest.  The left shank flank is stamped in cursive ‘Henley’ [over] SPECIAL.  The right shank side is stamped, MADE IN DENMARK [over] 57.  I assume this to be the shape number.The general condition of the Henley Chimney is good.  The chamber has thick cake buildup – but not has heavy as the other Henleys.  The rim has caked gunk and the smooth briar surface has grime and dirt and needs cleaning.  The one aspect of the stummel that is strange,  are the dark areas on the upper and lower shank.  These spots look like they’ve been scorched, but a shank usually isn’t the source of high temperatures.  I’ll have to wait to see what the cleaning does with these spots.  I take a few pictures to show what I see.The Pinched Saddle Fishtail stem has oxidation and some tooth compression – mainly on the lower bit.  To begin the restoration of the Stanwell Henley Special Chimney, I add it to a bath of Before & After Deoxidizer along with other pipes in the queue to deal with the oxidation in the vulcanite stem.  To keep the Deoxidizer as clean as possible, I first clean the airway using pipe cleaners dipped in isopropyl 95%.I then put the stem in the bath and allow it to soak for several hours.When I fish out the Pinched Fishtail stem, I run another pipe cleaner dipped in alcohol through the stem to clear away the excess Deoxidizer.  I then wipe down the stem with a cotton pad also wet with isopropyl 95% to remove the raised oxidation.  The B&A Deoxidizer does a good job.To begin the process of revitalizing the stem, I apply a coat of paraffin oil and rub it into the vulcanite.  I set the stem aside for the oil to absorb.Turning back to the stummel, I begin the cleaning process by reaming the chamber.  I take a starting picture and the last unsmoked baccy is seen on the floor of the chamber. Like the other Henleys, this one has thick cake.  I’m wondering if this Henley will have as much heating damage as the Blasted Saddle Stem Billiard I just restored.  I use the Pipnet Reaming Kit to ream starting with the smallest blade head.  The cake is hard, but the blade eventually works through.  I then use 2 more of the blade heads and then switch to the Savinelli Fitsall Tool to do the fine tuning by scraping the chamber walls.  Finally, after wrapping a piece of 240 grit paper around a Sharpie Pen, I sand the chamber walls.  Then, after wiping the chamber with a cotton pad wetted with isopropyl 95%, I inspect the chamber and I see some minor cracks in the chamber, but nothing requiring major attention. Transitioning now to the external surface, I take a few pictures to mark the start and then using undiluted Murphy’s Oil Soap, I begin scrubbing.  I’m anxious to see what the cleaning does! I use a cotton pad to scrub the stummel using Murphy’s.  I also use a pocketknife blade to scrape the rim and then I apply a brass wire brush to the rim.  I work on the dark spots on the shank and nothing subdues the discoloration.  I continue the cleaning by taking the stummel to the sink and rinsing it with warm water.  I continue to scrub the briar surface with a bristled toothbrush and using anti-oil liquid dish soap.  I transition to the internals using a shank brush with the liquid dish soap.  I look at the shank and the dark spots are holding on, but they have changed – the spot has roughened in texture.  This gave me the idea – I used the anti-oil dish soap and put a plastic dish scrubby and I apply it to the shank and voila!I’m not sure what the substance was, but it dissolved for which I’m thankful!  I finish by fully rinsing the stummel and bringing it back to the worktable.  I take some ‘after’ pictures showing the cleaned stummel and the areas of the shank.  There still appears to be a discoloration after the stummel dries, but this should dissipate through the further stages of the restoration. I continue the cleaning procedure using cotton buds and pipe cleaners wetted with isopropyl 95% to clean the internals of the Henley.  I also use a small dental spoon to scrape the mortise walls to remove old tars and oils.  Through the narrowing of the airway, I also hand turn a drill bit to aid in the excavation of gunk.  After some time, the buds and pipe cleaners are lightening, and I halt this phase of cleaning.To further clean the internals, I use a soak with kosher salt and isopropyl 95%.  I like utilizing this soak as it freshens the stummel and removes old odors.  I begin by pulling and twisting a cotton ball to serve as a ‘wick’ to draw out the old tars and oils that are further expunged from the internal briar.  I insert it into the mortise with a straight wire and then fill the bowl with kosher salt and place the stummel in an egg crate for stability.  I then fill the bowl with isopropyl 95% until it surfaces over the salt.  I wait several minutes and after the alcohol has receded, I then top off the alcohol.  Turning off the lights I let the soak work through the night. The next morning, I remove the wick and it has soiled through the night absorbing the tars and oils.  The salt is also discolored showing it has done the job.  I thump the expended salt into the waste basket and clean the salt out of the stummel by wiping with paper towel and blowing through the mortise.  To make sure the cleaning is thorough; I follow by using cotton buds and pipe cleaners again.  After two pipe cleaners and one bud, it is clear the soak did the job.  I move on.Looking now at the rim, there remains a darkened discoloration as a remnant of the lava.  I do not want to top the stummel in order to retain the original patina.  Using a piece of 240 grade I lightly sand the rim, more to clean than to remove briar.  I also lightly sand the inside rim edge to remove darkened briar on the edge. Looking at the stummel, there are very small scratches expected with normal wear. To address this, I use sanding sponges.  A start with a coarse grade sponge, follow with medium grade, and then with the light grade.  Sanding sponges are effective in cleaning the surface in a less invasive way.After the sanding sponges, I move straight away to the full regimen of micromesh pads.  I first wet sand with pads 1500 to 2400, then dry sand with pads 3200 to 4000 and 6000 to 12000.  The grain emerges very nicely through the process. Next, I apply Before & After Restoration Balm to the Henley Chimney stummel. I’ve been looking forward to this part of the process.  The Restoration Balm does a great job bringing out the subtle tones of the natural briar grain hues. I put some of the Balm on my finger and I rub it in to the briar surface.  It starts with a creamy consistency andthen thickens like a wax.  After applying it thoroughly, I put the stummel aside for about 20 minutes to allow the Balm to do what it does then I use a cloth to wipe the excess Balm and buff up the stummel with a microfiber cloth.The Pinched saddle fishtail stem is waiting to catch up with the stummel.  There are some tooth compressions on the bit, one on the upper and a few on the lower.  I take a fresh picture of these to mark the start.  I will first use the heating method to raise these compressions by painting them with the flame of a Bic lighter.  When heated, the vulcanite expands to reclaim its original shape or closer to it.  After applying the flame, there is a difference that I’ve pictured, before and after of the upper and lower bit. The heating minimized the compressions but did not fully erase them.  I dispatch what is left by sanding the bit with 240 grade paper and I use a needle file on the bit and button.  I refresh the button as well with the file.I wet sand the entire stem with 600 grade paper followed by applying 000 steel wool.Next, the micromesh process.  Using first pads 1500 to 2400, I wet sand followed by dry sanding with pads 3200 to 4000 and 6000 go 12000.  Between each set of 3 I apply Obsidian Oil to the pinched saddle fishtail stem.  The stem looks great! After reuniting stem and stummel, I mount a cotton cloth buffing wheel to the Dremel set at 40% of full power and apply Blue Diamond compound to the pipe.  When completed, using a felt cloth, I hand buff the pipe to remove the leftover compound dust in preparation for applying the wax.Again, after changing to another buffing wheel and maintaining the same speed, I apply a few coats of carnauba wax to the Henley.  I finish the restoration after applying the wax with a rigorous hand buffing with a microfiber cloth to raise the shine and to blend any excess wax into the surface.The butterscotch hue of this Chimney shaped stummel has a very warm draw to it.  I’m pleased with the plethora of grain movement that provides the kind of visual beauty that I appreciate in a pipe that I add to my collection.  I especially like the Chimney’s midriff bulge that is unique bringing attention to the shape.  The Pinched Saddle Fishtail stem also is a sleek and classy touch that completes the ensemble.  My goal was to finish this Stanwell Henley Special to take with me to the Black Sea Coast for our time of R&R enjoying the beach as well as the cuisine in the evenings. A little respite from our work with the Daughters of Bulgaria.  The Stanwell Henley Special performed well on the beach as well as in a classy, relaxed evening meal – the pictures tell the story.  I tell people that, I believe I’m living the dream – some would agree!  Thanks for joining me!  (www.ThePipeSteward.com)

Refurbishing a Tired Preben Holm #1 from the Mumbai Bonanza Lot


Blog by Paresh Deshpande

I am a big fan of Free Hand pipes!!! I love the way these pipes fit in to the hand and the creativity of the carver can be really appreciated in these pipes. And a freehand pipe made by the renowned Danish pipe carver, Preben Holm, is my dream come true. To be very honest to you all, the PH estate pipes that are available nowadays on eBay are very expensive and well nigh out of my reach. So when Abha, my wife, sent me pictures of the Mumbai Bonanza lot, I was immediately attracted to one free hand pipe that screamed PREBEN HOLM and when she confirmed that it was indeed one, I knew I was lucky. I say lucky because of the circumstances in which I made a purchase of this lot of 30 pipes and thereafter, the pipes that I received in this lot. I have given a gist of this purchase in the paragraph below. Well, the PREBEN HOLM is finally on my work table now!

I was fortunate enough to have heeded the advice of my dear friend and mentor, Steve, and struck a deal with a junk collector from Mumbai. He did not know what he was selling and I did not know what I was buying as we reside in different cities!! The argument that Mr. Steve presented was that if not anything, I shall at least have some spares and this was logical. I struck a deal and here are pictures of the pipes that I received in this lot. This lot contains some very nice collectible pipes, a few well known brands and some mediocre brands. Overall, with seven Dunhill pipes, a Preben Holm #1 FH, a couple of “Made in England” Pete System pipes, a couple of  Charatan’s Belvedere, Custom-Bilt, Stanwell and other assorted pipes, I would say that I had struck a decent haul!!! This is indeed my “Mumbai Bonanza”.

This 14th pipe that I decided to work on from this find, is a smallish Free Hand pipe with a bone shank extension and is indicated in yellow colored arrow in the picture below. It is stamped on the bottom of the shank towards the shank end as “PREBEN HOLM” in block capital letters over “HAND CUT” in a fancy script over “COPENHAGEN” over “DENMARK” again in block capital letters. The left side of the shank is stamped with an encircled numeral “1”. All the stampings are crisp and easily readable. The stem is devoid of any logo.To research this brand and line/ model in specific, I referred to pipedia.org in an attempt to date this pipe and understand the significance of the numeral # 1, if it was a shape code or grading code. However, there is nothing on this numbering system, except on Preben Holm “Private Collection” where the grading system starts with 101, 202 up to 808 in ascending order. And this is definitely not from “Private Collection” line!! I even visited rebornpipes.com in the hope that I would be able to unravel the mystery shrouding this pipe, but to no avail.

But nonetheless this is a PREBEN HOLM and is staying with me. Any reader who has any information or knowledge about this pipe is earnestly requested to share it with us on rebornpipes!

INITIAL VISUAL INSPECTION
The smooth stummel has some beautiful straight grains on the front, back and sides of the stummel. On either side of the stummel, is an elegantly contoured elevation which makes for a nice and comfortable hold with the thumb and the middle finger while smoking. The front of the stummel rises above the back making for a downward sloping rim top surface. The upper portion of the rim top flares out in a typical PH design and adds a distinct feature to the appearance of the pipe. The stummel surface is covered in dirt and grime giving the stummel a dull and lackluster appearance. There are a one/ two likely fills, noticeably on either side near the shank and stummel junction and another couple near the foot. These will be clear when the stummel is cleaned of all the grime. A thick layer of cake can be seen in the chamber. The backwards sloping plateau rim top surface has nice knobby raised portions and the portion of crevices formed, is covered in thick overflow of lava, dirt, dust and grime. The condition of the inner walls of the chamber and rim top surface will be known once the cake has been taken down to bare briar and the rim top crud has been scraped off completely. The inner rim condition appears to be in good condition with no burn/ charred surfaces. Only once the stummel has been thoroughly cleaned that I can be sure of my initial appreciation. In spite of the thick cake, the chamber odor is, surprisingly, not strong and should be addressed once the cake has been taken down to the bare briar and the shank internals have been thoroughly cleaned. The draught hole is dead center at the bottom of the chamber and should be a great smoker. The shank end is adorned with a horn shank end extension which is pinched in the middle and then flares outwards matching in profile with the rim top. The shank extension is dry and has darkened nicely due to absorption of all the oils over the years of smoking. This will add a nice classy touch to the overall appearance of the pipe once cleaned and hydrated. The shank extension end and mortise are blocked with accumulated dried gunk, adversely affecting the airflow. The fancy vulcanite stem is heavily oxidized and has calcification deposits towards the button end. There are deep tooth marks on the lower and upper stem surface in the bite zone and appears that the previous owner has literally chomped on the bite zone of the stem. The lower stem surface is cracked near the button edge and is circled in red. The button edges also have bite marks, in fact, they are badly worn out. The tenon and horizontal slot shows accumulated oils and tars. The oxidation in the space between the three squares, in descending size from the tenon end to slot end, is going to be a bear to get rid of but once nice and shiny will elevate the appearance of the overall pipe manifold times. Along with the stems of other pipes in line for restoration, I immersed the stem of this Preben Holm in a mix of one part Hydrogen Peroxide 20% with one part hot water after I ran a couple of pipe cleaners dipped in alcohol through the stem air way. A couple of hours later, the stem oxidation on all these stems were raised to the surface. The pictures below show the stem after it was removed from this bath. The appearance is definitely not for the fainthearted, to say the least!!After I had fished out the stem from the Hydrogen Peroxide bath, I scrubbed it with Magiclean sponge and followed it up with a wipe of cotton swab and alcohol. I further scrubbed the stem surface with 0000 grade steel wool. The loosened and superficial layer of oxidation was easily removed and revealed the condition of the stem.. There are deep bite marks in both the upper and lower bite zone. The bite marks are deep enough to cause significant thinning of the surface and complete disfigurement of the button edges. The deeper oxidation that was pulled to the surface would require more abrasive techniques.

THE PROCESS
I started the restoration with the stem repairs as this would take the maximum of my time to clean, repair and spruce up the stem. I cleaned the internals of the stem using hard and normal bristled pipe cleaners and isopropyl alcohol. The heap of pipe cleaners tells the sordid tale of the stem condition. With a pointed dental tool, I scraped out the entire dried gunk from the slot. I addressed the deeper oxidation by sanding the entire stem with a folded piece of 150 and followed by 220 grit sand paper. Once the oxidation was completely removed, I wiped the surface clean with a cotton swab and alcohol and rubbed a little Extra Virigin Olive oil to hydrate the stem. I flamed the damaged button edge and the nicks and dents with the flame of a lighter. This helps the vulcanite to rise to the surface as it has an inherent property to regain its original shape when heated. At this stage, I could clearly make out the extent of damage to the lower surface and the extent of the crack in the bite zone. This was further accentuated due to heating with the flame of a lighter. The upper surface too has a couple of deep tooth marks. Just for the information of statistically oriented reader, to get the stem to this stage it took better part of the afternoon and well past mid night!! Continuing with the stem repair, with a dental spatula, I probed the area around crack from inside the slot end with the aim of dislodging only the thin and loosened stem surface. Once the thin and loose stem surface was removed, I was certain that the rest of the stem surface around the crack was solid. I inserted a triangulated index card covered in transparent tape in to the slot. The tape prevents the mix of superglue and charcoal from sticking to the index card. I mixed superglue and activated charcoal powder and generously applied it over the bite zone on either side, including over the button and set it aside to cure.While the stem fill was set aside to cure, I started with cleaning of the stummel as I was keen to know the condition of the walls of the chamber. With size 1 head followed by head size 2 of a PipNet pipe reamer, I took the cake down to bare briar. Using a folded piece of 180 grit sand paper, I sand out the last traces of cake and expose the walls of the chamber. I wiped the chamber with a cotton pad dipped in isopropyl alcohol to remove the carbon dust left behind by all the reaming and sanding process. Once the chamber walls were cleaned out, I was pleased to note a pristine chamber with no signs of heat fissures/lines/pits. Next, I cleaned out the internals of the shank and mortise. Using my dental tool, I scraped out all the dried oils, tars and gunk that had accumulated in the shank airway and mortise. The amount of crud that was scrapped out and the condition of the pipe cleaners that were used leaves no surprise why air flow through it was restricted. I finished the cleaning by running a few pipe cleaners dipped in isopropyl alcohol. I also wiped the shank with cotton buds and alcohol. With this cleaning, all old smells in the pipe are history. The pipe now smells clean and fresh.With the internals of the stummel now clean, I cleaned the external surface using a hard bristled toothbrush and Murphy’s Oil Soap. I diligently scrubbed the rim top surface to remove the entire dust, dirt and lava overflow that was embedded in the crevices of the plateau rim top surface. With a soft bristled brass wired brush, I removed the overflowing lava from the rim top surface and cleaned the internals of the shank with a shank brush and dish washing soap to remove what little crud remained in the shank. I rinsed it under running tap water and wiped the stummel dry with an absorbent soft cotton cloth. Once I had wiped the stummel dry with paper towels and soft cotton cloth, I saw a couple of small and superficial fills on the left side of the bowl, near the bowl and shank joint and one at the foot of the stummel. These fills are marked in yellow circle. Very carefully and painstakingly, I completely removed the old fill with a pointed dental pick. I cleaned the fill of all the debris of old fill material, wiped it with alcohol and refreshed the fill with a drop of clear CA superglue in each fill and set it aside to cure overnight. By next day, the fill was nice, hard and well set. With a folded piece of 220 grit sand paper, I worked the fill till I had achieved a nice blend with the rest of the stummel surface. It turned out much better than I had anticipated. I further sand the entire stummel surface with the same grit sand paper to address the minor scratches and further smooth the stummel surface in preparation for a polish by micromesh pads. The plateau rim top surface still did show areas where the overflow of lava was still embedded in the crevices. With a dental pick, I diligently scraped each and every spot to remove the deposit of lava. I am now pleased with the cleaning of the rim top surface.I subjected the stummel, including the bone shank extension, to a complete cycle of micromesh polish, wet sanding with 1500 to 12000 grit pads. I wiped the stummel with a moist cloth after every grit pad to remove the sanding dust left behind by the pads. This also helps in monitoring the progress being made and ensures early corrective action. I am happy with the progress being made till now. Next, I rub a small quantity of “Before and After Restoration Balm” in to the briar, the bone shank extension and the plateau rim top surface with my finger tips and work it deep in to the surface and let it rest for a few minutes. The balm almost immediately works its magic and the briar now has a nice vibrant appearance with the beautiful straight grain patterns on full display. The contrast of the dark browns of the grain with the light hues of the rest of the stummel adds an interesting dimension to the appearance of the stummel. I further buffed it with a horse hair brush to further deepen the shine. I was slightly perturbed by the dark coloration taken on by the bone shank extension and shared pictures of the same with my mentor, Steve, who reassured me that this phenomenon is normal and should be good when the balm has been completely absorbed and polished subsequently. With this assurance, I move ahead with the stem repairs.

Using a flat head needle file, I reshaped the button and roughly matched the fills with the rest of the stem surface. I sanded the fills with a folded piece of 180 grit sand paper and followed it up by further sanding the stem with 320, 600 and 800 grit sand papers to achieve a perfect blending of the fills with the stem surface and a crisp button edge on either side of the stem. In my exuberance to cross the finish line, I completely missed out on taking pictures of this stage in restoration. My sincere apologies for this miss….

Using the micromesh pads, I completed the polishing cycle by wet sanding the surface with 1500 to 3200 girt pads. I had read that White diamond polish is between 3600 and 4000 grit of micromesh pads and best used between these two. I decided to give this a try to see if there is any difference in the final stem finish. I mount a fresh cotton buffing wheel on to my hand held rotary tool and apply white diamond polish and buffed the stem. I wiped the stem with microfiber cloth and go through the remaining pads, dry sanding with 4000 to 12000 grit pads. The stem looks great with the fills nicely matched with the rest of the surface. I rub a little quantity of Extra Virgin Olive oil in to the stem surface and set it aside to be absorbed by the vulcanite.To complete the restoration, I mount a cotton cloth buffing wheel on to my hand held rotary tool and applied several coats of carnauba wax. I finished the restoration by giving the entire pipe a rigorous hand buffing using a microfiber cloth to raise the shine further and remove any residual wax from in between the plateaus of the rim top surface. The finished pipe looks amazingly beautiful and is now ready for its long second innings with me. I only wish it could share with me its life story of the past years while I enjoy smoking my favorite Virginia blend in it or maybe an English blend!! P.S. I earnestly would like to request all the readers to help me with the grading and dating this pipe. The only thing that is confirmed is that this is definitely not one of the high grade pipes from Preben Holm what with the fills that were seen on the stummel, but nevertheless, it’s a PH!!!!

There is only one more pending write ups which I shall be tackling before I undertake to restore a pipe which my dear friend and mentor, Steve, had sent me about a year back with the intention of providing me an opportunity to test my own skills. I wish to thank each one for sparing their valuable time to read through this write up and sharing this journey with me.

Restoring an Interesting Acorn # 7472 from Stanwell


Blog by Paresh Deshpande

One of the pipes in my Mumbai Bonanza lot which intrigued me no end was a small Acorn shaped pipe from the Danish pipe maker, Stanwell. I prefer large pipes and so this pipe was always being relegated to the next-in-line project status. Finally I decided to break the shackles of resistance and brought it to my work table as the next project. It’s a Stanwell pipe with shape code # 7472.

I was fortunate enough to have heeded the advice of my dear friend and mentor, Steve, and struck a deal with a junk collector from Mumbai. He did not know what he was selling and I did not know what I was buying as we reside in different cities!! The argument that Mr. Steve presented was that if not anything, I shall at least have some spares and this was logical. I struck a deal and here are pictures of the pipes that I received in this lot. This lot contains some very nice collectible pipes, a few well known brands and some mediocre brands. Overall, with seven Dunhill pipes, a Preben Holm #1 FH, a couple of “Made in England” Pete System pipes, a couple of  Charatan’s Belvedere, Custom-Bilt, Stanwell and other assorted pipes, I would say that I had struck a decent haul!!! This is indeed my “Mumbai Bonanza”.

This, then, is the 13th pipe that I decided to work on from this find and is an Acorn shaped pipe indicated in blue colored arrow in the picture below. It is stamped on the bottom middle half of the smooth surface of the shank as “# 7472” over “MADE IN DENMARK”. Towards the shank end, it is stamped as “STANWELL” in its trademark inverted arch in block capital letters. The stem bears a plain “S” logo on the left side of the stem.Now coming to the research of this brand and line/ model in specific, I referred to pipedia.org and as expected there is an extensive research on this pipe and even has a separate page on Stanwell Shape numbers and Designers, a study compiled by Stanwell collector and an undisputed authority on these pipes, Basil Stevens. However, there is nothing on this particular shape and number, in fact, this shape and number does not find any mention. I even visited rebornpipes.com in the hope that I would be able to unravel the mystery shrouding this pipe, but to no avail.

The only input I received was from Steve was that this is most likely a Sixten Ivarsson carved pipe, but nothing to date and confirm. Any reader who has any information or knowledge about this pipe is earnestly requested to share it with us on rebornpipes!

INITIAL VISUAL INSPECTION
The stummel has beautiful sandblast patterns on the uniquely shaped stummel with a short neck and a nice flow to the shape profile of the pipe. The sandblasted stummel is covered in dirt and grime of yesteryear. This should clean up nicely. The stummel surface is solid with no damage to the external surface. The dark browns of the raised sandblast contrast beautifully with the black stain of rest of the stummel. A thick layer of cake can be seen in the chamber. The sandblasted thin and inward curving rim top surface is covered in thick overflow of lava, dirt, dust and grime. The condition of the inner walls of the chamber and rim top surface will be known once the cake has been taken down to bare briar and the rim top crud has been scraped off completely. The inner rim condition appears to be in good condition with no burn/ charred surfaces. Even the outer rim edge appears to be in a decent condition. Only once the stummel has been thoroughly cleaned that I can be sure of my initial appreciation. In spite of the thick cake, the chamber odor is, surprisingly, not strong and should be addressed once the cake has been taken down to the bare briar and the shank internals have been thoroughly cleaned. The draught hole is dead center at the bottom of the chamber and should be a great smoker. The shank end and the mortise are blocked with dried gunk, adversely affecting the airflow.The delicate vulcanite saddle stem is heavily oxidized and has calcification deposits towards the button end. There are deep tooth marks on the lower and upper stem surface and appears that the previous owner has literally chomped on the bite zone of the stem. The button edges also have bite marks, in fact, they are badly worn out. The horizontal slot shows accumulated oils and tars.Along with the stems of other pipes in line for restoration, I immersed the stem of this Stanwell #7472 in a mix of one part Hydrogen Peroxide 20% with one part hot water after I ran a couple of pipe cleaners dipped in alcohol through the stem air way. A couple of hours later, the stem oxidation on all these stems were raised to the surface. After I had fished out the stem from the Hydrogen Peroxide bath, I scrubbed it with Magiclean sponge and followed it up with a wipe of cotton swab and alcohol. I further scrubbed the stem surface with 0000 grade steel wool. The loosened and superficial layer of oxidation was easily removed and revealed the condition of the stem. It was not as horrifying as I had imagined it to be during the initial inspection. There are deep bite marks in both the upper and lower bite zone. The bite marks are deep enough to cause significant thinning of the surface and complete disfigurement of the button edges. The deeper oxidation that was pulled to the surface would require more abrasive techniques.THE PROCESS
I started with cleaning of the stummel as I was keen to know the condition of the walls of the chamber. With size 1 head followed by head size 2 of a PipNet pipe reamer, I took the cake down to bare briar. Using a folded piece of 180 grit sand paper, I sand out the last traces of cake and expose the walls of the chamber. I wiped the chamber with a cotton pad dipped in isopropyl alcohol to remove the carbon dust left behind by all the reaming and sanding process. Once the chamber walls were cleaned out, I saw very minor and superficial beginnings of heat fissures/ pits all along the chamber walls. I shall address this issue by a simple bowl coat. I used my smaller of the two fabricated knife to gently scrap away at the overflow over the rim top surface while being careful not to damage the sandblast on the rim top. I was pleased to find the inner and outer edge of the rim intact and without any burn or char marks. Next, I cleaned out the internals of the shank and mortise. Using my dental tool, I scraped out all the dried oils, tars and gunk that had accumulated in the shank airway and mortise. The amount of crud that was scrapped out and the condition of the pipe cleaners that were used leaves no surprise why air flow through it was restricted. I finished the cleaning by running a few pipe cleaners dipped in isopropyl alcohol. I also wiped the shank with cotton buds and alcohol. With this cleaning, all old smells in the pipe are history. The pipe now smells clean and fresh.With the internals of the stummel now clean, I cleaned the external surface using a hard bristled toothbrush and Murphy’s Oil Soap. I diligently scrubbed the stummel to remove all the dust and dirt that was embedded in the crevices of the sandblast. With a soft bristled brass wired brush, I removed the overflowing lava from the rim top surface and cleaned the internals of the shank with a shank brush and dish washing soap to remove what little crud remained in the shank. I rinsed it under running tap water and wiped the stummel dry with an absorbent soft cotton cloth. Once I had wiped the stummel dry with paper towels and soft cotton cloth, I thought I saw a fill on the left side of the bowl, near the bowl and shank joint. It was perfectly matched and blended with the sandblast on the stummel and stained in dark as seen on other surfaces of the stummel. It is marked in yellow circle. My fears were confirmed when I probed it with a dental pick. Very carefully and painstakingly, I completely removed the old fill with a pointed dental pick. I cleaned the fill of all the debris of old fill material, wiped it with alcohol and refreshed the fill with a mix of clear CA superglue and briar dust and set it aside to cure overnight.By next day, the fill was hard and well set. With a folded piece of 220 grit sand paper, I worked the fill till I had achieved a nice blend with the shape and contours of the stummel. It turned out much better than I had anticipated. With a soft wire brass brush, I again cleaned out all the debris that lodged itself in the sandblast surface as a result of all the sanding and use of briar dust.Next, I rub a small quantity of “Before and After Restoration Balm” in to the briar with my finger tips, work it deep in to the sandblasts and let it rest for a few minutes. The balm almost immediately works its magic and the briar now has a nice vibrant appearance with the beautiful sandblast patterns on full display. The contrast of the dark browns of the raised sandblast with the dark black of the rest of the stummel adds an interesting dimension to the appearance of the stummel. I further buffed it with a horse hair brush. The last picture is of the side that had the refreshed fill and even the most discerning reader will be hard pressed to accurately pin point the fill. With the stummel nearly completed, I turned my attention to the stem repairs. I masked the stem logo “S” with a whitener pen to protect it during the sanding process. I cleaned the internals of the stem using hard and normal bristled pipe cleaners and isopropyl alcohol. With a pointed dental tool, I scraped out the entire dried gunk from the slot. I addressed the deeper oxidation by sanding the entire stem with a folded piece of 220 grit sand paper. Once the oxidation was completely removed, I wiped the surface clean with a cotton swab and alcohol. I flamed the damaged button edge and the nicks and dents with the flame of a lighter. This helps the vulcanite to rise to the surface as it has an inherent property to regain its original shape when heated. At this stage, I noticed that the bite zone on the upper stem surface has a crack which extends over to the button. This was further accentuated due to heating with the flame of a lighter. Continuing with the stem repair, I inserted a triangulated index card covered in transparent tape in to the slot. The tape prevents the mix of superglue and charcoal from sticking to the index card. I mixed superglue and activated charcoal powder and generously applied it over the bite zone, including over the button and set it aside to cure. Once the mix had cured, I removed the index card from the slot.Using a flat head needle file, I reshaped the button and roughly matched the fills with the rest of the stem surface. However, things rarely happen as you want them to happen and in this case, a few air pockets were revealed. With a permanent black marker I darkened the air pockets and spot filled them with clear superglue. Once the superglue had cured (I had set it aside overnight), I sanded the fills with a folded piece of 180 grit sand paper. I followed it up by further sanding the stem with 320, 600 and 800 grit sand papers to achieve a perfect blending of the fills with the stem surface and a crisp button edge on either side of the stem.Using the micromesh pads, I completed the polishing cycle by wet sanding the surface with 1500 to 3200 girt pads. I had read that White diamond polish is between 3600 and 4000 grit of micromesh pads and best used between these two. I decided to give this a try to see if there is any difference in the final stem finish. I mount a fresh cotton buffing wheel on to my hand held rotary tool and apply white diamond polish and buffed the stem. I wiped the stem with microfiber cloth and go through the remaining pads, dry sanding with 4000 to 12000 grit pads. The stem looks great with the fills nicely matched with the rest of the surface. I rub a little quantity of Extra Virgin Olive oil in to the stem surface and set it aside to be absorbed by the vulcanite. To complete the restoration, I mount a cotton cloth buffing wheel on to my hand held rotary tool and applied several coats of carnauba wax. I finished the restoration by giving the entire pipe a rigorous hand buffing using a microfiber cloth to raise the shine further and remove any residual wax from in between the sandblasts.The finished pipe looks amazingly beautiful and is now ready for its long second innings with me. I only wish it could share with me its life story of the past years while I enjoy smoking my favorite Virginia blend in it or maybe an English blend!! P.S. There was only one more issue that needed to be addressed and one that could not be ignored, being a functional issue. After I had reamed and sanded the chamber walls, I had observed very minor and superficial beginnings of heat fissures/ pits all along the chamber walls. I addressed this by mixing activated charcoal and plain yogurt to a thicker consistency, just enough that I would spread easily and applied it evenly all along the chamber walls after inserting a folded pipe cleaner through the draught hole to keep it open. Once dry and set, this will not only protect the walls but also aid in faster build up of cake.There are two more pending write ups which I shall be tackling before I undertake to restore a pipe which my dear friend and mentor, Steve, had sent me about a year back with the intention of providing me an opportunity to test my own skills. I wish to thank each one for sparing their valuable time to read through and once again request you for any inputs or advice on dating and designer of this pipe.

Resurrecting a Second Stately Stanwell Henley Special, Made in Denmark, Blasted Saddle Stem Billiard


Blog by Dal Stanton

Jim was the recipient of the first Stanwell Henley Special, Oval Shank Billiard, that I restored some time ago (see LINK).  Jim saw it on the online ‘For “Pipe Dreamers” Only!’ collection benefiting the Daughters of Bulgaria – our work here in Bulgaria helping women and girls who have been trafficked and sexually exploited.  The second Stanwell Henley Special on the worktable is the Blasted Saddle Stem Billiard on the bottom in the picture below.  This pipe has not been commissioned and will be heading to The Pipe Steward Store and this beautiful stout Danish will also benefit the Daughters when a new steward brings it home.  I have also taken notice of the solid craftsmanship of these 3 Danish made pipes and decided that the third, a Stanwell Henley Special Chimney (on top in the picture below), would find a home in my personal collection.  The eBay seller gave this helpful information about this Lot of 3 Stanwell Henley Special pipes:

This auction is for three vintage Stanwell, Henley Line estate pipes from the 1950’s-60’s era. All are in good pre-owned condition. The stems are primarily free from teeth marks. The stems do have some fading. All of the stems fit snug and the wooden bowls are free from outstanding blemishes. As seen from top to bottom, the first pipe reads Henley Special #57, the second and third read Henley Special without any numbers seen. All of the pipes read Made in Denmark.

Here are the three Stanwell Henley Specials that I acquired on the eBay auction block from a seller in Maryland.  The Henley Jim commissioned is pictured in the center above and below is the restored pipe now in Jim’s collection – an unbelievable transformation!As I expressed before, since I started collecting and restoring pipes, I’ve grown in my appreciation for Danish made pipes.  They tend to be stout, well-made pipes and just fit the hand wonderfully.  Unfortunately, my original research did not uncover much online regarding the Henley line.  Pipedia’s article on Stanwell pipes simply places the Henley Special line in the list of Stanwell second brands.  Pipephil.eu provided more information with a Henley much like the slightly bent Chimney above which I’m claiming for my collection, with the interesting characteristic bulging midsection, but with a blasted finish.  It also shows an ‘H’ stem stamp.  None of the 3 Henleys of my acquisition have stem stampings – or they wore off long ago.The only information I found in my initial research that gave any reference to dating isn’t conclusive. I found the following picture on Google images with the link to pipesmokersforum.com, “Who made this pipe?”   I went to the pipesmokersforum site and searched ‘Henley’ and no reference or article emerged. I would have loved to read the thread that discussed the dating of the discontinued Stanwell second, Henley Special.  The picture puts a question mark in the late 50s and the eBay seller’s description placing the pipes in the 50s or 60s are anecdotal but seem to me to be accurate.  I will keep searching but based upon the look and feel of these Danish made pipes, I think the 50s/60s is on target.With the second Stanwell Henley Special on the worktable, I take some pictures to get a closer look. He’s a large bowled pipe with dimensions: Length: 5 1/2 inches, Height: 2 1/4 inches, Rim width: 1 7/16 inches, Chamber width: 7/8 inches, Chamber depth: 2 inches. The nomenclature on the blasted stummel is on the lower side of the pipe.  There is a flat panel running the length of the heel and shank allowing this Billiard to sit on the table – nice feature!  On the shank side of the panel in cursive is stamped a thin ‘Henley’ [over] SPECIAL.  To the right of this is stamped MADE IN [over] DENMARK.The condition of this Henley resembles the others in that they are very dark and dirty from grime over the stummel.  The blasted surface of this Henley will need much scrubbing with a brush.  One crevasse is so large/deep that when I first saw it, I thought that the bowl had cracked.  However, it is the result of the blasting process.  The blasted surface is amazing on this pipe. The chamber is choked with carbon cake buildup – this needs to be removed to give the briar a fresh start and to examine the chamber walls.  With the cake as thick as it is, there is concern for heating damage.  The rim is inundated with lava flow – it’s thick!  The saddle stem has also seen better days!  The oxidation is thick, and the bit has been chewed – or more accurate, clenched.  There are several compressions on both upper and lower bit – the former steward loved this pipe, but he was a hands-free clincher which would be no small feat for a pipe with a bowl this big!

This doesn’t happen often.  My wife got into The Pipe Steward activities to picture me cleaning stems of pipes in queue – two Henleys included – this second one and the third staying with me.  Yep, this is what my worktable looks like!  I clean each airway with pipe cleaners dipped in isopropyl 95% as well as employing shank brushes.  I clean the stems before placing them in the soak of Before & After Deoxidizer. The stems soak for several hours to work on removing the oxidation.  The oxidation on the Henley is pretty think.  We’ll see how the Deoxidizer works.When I fish out the Henley’s saddle stem, I rub/wipe the stem with cotton pads wetted with isopropyl 95% to remove the raised oxidation.  I also run a few pipe cleaners wetted with isopropyl 95% through the airway to clear the Deoxidizer.I also apply paraffin oil, a mineral oil, to the stem to begin the conditioning process.  The B&A Deoxidizer did a fair job on the stem.Turning now to the Henley stummel, I take a picture to show the condition of the chamber. The cake closes as it moves down the chamber.  I’m hopeful that the chamber walls are not suffering from heating damage.  To address the thick cake, I use the Pipnet Reaming Kit.  After putting down paper towel to save time on cleaning, I begin with the smallest of the 4 blade heads available.  With a chamber width of 7/8 inches and depth of 2 inches, he took all 4 blade heads that the Pipnet Reaming Kit had to offer.  The cake is hard and crusty, and it takes patience to work the blades and not overdo it.  I follow the reaming using the Savinelli Fitsall tool to continue to scrape the chamber walls clearing more carbon. Finally, I sand the chamber using 240 grade paper wrapped around a Sharpie Pen.  The sanding is very helpful in cleaning the walls to allow inspection.  After cleaning the chamber with a cotton pad wetted with isopropyl 95%, I’m able to get a good view of the chamber and the damage from heating is evident.I take pictures going around the chamber from different angles.  With the thickness of the cake that I removed, I’m not surprised to find heating damage.  I’m sure that the cracks and fissures that I’ve pictured are a result of the heat build-up caused by the thick cake and not allowing proper heating expansion and contraction.  This puts more stress on the briar and these results occur.  As I continue the cleaning, my mind will be processing the question of how to address this. Switching from the wall issues of the chamber, I move to cleaning the external surface.  Without a doubt, this stummel is the King of Cragginess.  I love the deeply hewn valleys and ridges of this large stummel created by a very thorough sandblasting process.  I take pictures to show the various angles.  The stummel is very dark and I’m anxious to see what cleaning does. I begin the cleaning by using undiluted Murphy’s Oil Soap and scrub with a cotton pad.  With the craggy landscape, the process graduates very quick to scrubbing with a bristled tooth brush as well as a brass wire brush on the rim.Taking the stummel to the sink, warm water continues the cleaning rinsing off the Murphy’s Soap and scrubbing the surface of the crags with the toothbrush.  I also attack the internals using shank brushes and anti-oil dish soap.  I scrub the internals well and rinse the stummel thoroughly.  The result of the cleaning is a considerably lightened stummel.  Another round of pictures show the cleaned briar landscape on the Henley stummel. The rim still appears to have some lava residue on it, and I continue to clean it using a dental probe to break up the carbon in the crags as well as apply the brass bristle brush to the rim. I like the results and I love how the crevassed valley rises and bisects the rim!  This blasted stummel has a lot of expression going on!I continue to clean the internals using cotton buds and pipe cleaners dipped in isopropyl 95%. Joining the cleaning process was a small dental spoon that allowed me to reach into the mortise and airway and scrape the wall, helping to clean the old tars and oils.  I also utilize drill bits to help excavate tars and oils deeper in the airway.  I insert the bit into the airway carefully and hand-rotate into the airway. The rotation helps to remove the gunk.  After a good bit of cleaning, the buds and pipe cleaners start coming out lighter.  I called a halt to the cleaning transitioning to a kosher salt and alcohol soak to continue the cleaning in stealth mode through the night.Before I set up the kosher salt and alcohol soak, I look at the stummel and it is a very dry piece of wood.  I decide to apply a coat of paraffin oil to the stummel allowing the oil to hydrate the briar while it’s sitting through the night with the soak.  Paraffin oil is a mineral oil available here in Bulgaria in the pharmacy.  I apply the oil over the surface with a cotton pad and take a few pictures.  Man, it looks good.  This gives me a sneak peek at what the finished pipe will look like left in its present state.  The rich dark burgundy tones are peeking out.Next, for the kosher salt and alcohol soak, I pull and twist a cotton ball to form a ‘wick’ that is inserted into the mortise with the help of a firm straight wire.  The wick serves to draw the tars and oils that are released further from the internal wood.  I then fill the bowl with kosher salt which will not leave an after taste as does an iodized salt. I then set the stummel in an egg crate for stability, tip the stummel so the salt surface is generally level with the end of the shank.  Then with the use of a large eyedropper, I fill the bowl with isopropyl 95% until it surfaces over the salt.  After a few minutes when the alcohol has been absorbed, I top off with more isopropyl 95%.  I then put the stummel aside for the night and turn off the lights! The next morning the soak had done the job evidenced by the soiled salt and cotton wick.  After tossing the expended salt in the waste, and wiping the chamber out with paper towel, and blowing through the mortise to dislodge salt crystals, I used a few more cotton buds and pipe cleaners wetted with isopropyl 95% to make sure all was clean.  The soak did the job and the stummel will be much fresher for the new steward of this Stanwell Henley Special.Before moving further, I need to address the heating issues in the chamber.  There are cracks and fissures which undoubtedly developed over time because the cake buildup became too much.  With the cake so thick, it hinders proper expansion and contraction when the pipe is used. The result is what we now see in this chamber.  To address this, I mix a batch of J-B KWIK Weld using the two components, Steel and Hardener.  I use a plastic disc as a mixing pallet with scotch tape over it to aid in clean up. After mixing the two components on the pallet, about 4 minutes is available to apply the Weld before it begins to harden. I mix the components thoroughly with a toothpick, then using my finger (with a surgical glove on!), I scoop a bit of Weld and apply it to the chamber wall.  I do this uniformly around the chamber and applying pressure to make sure the Weld is filling the cracks and fissures.  I’m VERY careful to avoid dripping Weld on the rim during the application.  Later, after the Weld thoroughly cures, I’ll sand the chamber removing all the excess Weld leaving behind only what filled the cracks and fissures – or that is the theory! I usually insert a pipe cleaner to guard the airway from the Weld, but this time I forgot and thankfully, no problems result.  After completing the application, I put the stummel aside for several hours allowing the Weld to cure.  Cleanup is quick – I simply peel the tape up and discard.Turning now to the saddle stem, the Before & After Deoxidizer did a good job, but I see residual oxidation yet remaining in the vulcanite.  I take a few pictures with an opened aperture to show what I can see with the naked eye.  The bit does not have tooth chatter as much as compressions – it appears the molars were engaged by the former steward to smoke the Henley hands-free.  To address the bit compressions, I first use the heating method.  Using a Bic lighter, I paint the compressions with flame and as the vulcanite heats, it expands to reclaim the original stem shape or at least the compressions are minimized.  After heating several times, the compressions have lessened but are still visible.   The before and after pictures tell the story – in fact, I had a hard time pairing the correct photos after the heating! I believe the compressions have been minimized enough that sanding will be all that is necessary to repair the bit.  Using 240 grade paper, I sand not only the bit and button, but I expand it to the entire stem to address residual oxidation as well.  I employ a flat needle file to freshen the button lips and to assist with the tooth compressions next to the lip.  In the sanding of the saddle, I use a plastic disc I fashioned and with the disc separating the stem and stummel, I reunite the two.  The disc acts as a shield to shouldering the stem shank facing.  The sanding removed all the compressions. The pictures show the progress. With the major sanding with 240 paper complete, I continue by wet sanding the entire stem using 600 grade paper.  I then follow the wet sanding by applying 000 grade steel wool to the stem.  I’ve lost track of which is the upper and lower stem.  The stem is looking great!I move directly to applying the full regimen of 9 micromesh pads starting by wet sanding with pads 1500 to 2400 then dry sanding with pads 3200 to 4000 and 6000 to 12000.  Between each set of three pads I apply a coat of Obsidian Oil to assist in rejuvenating the vulcanite.  The saddle stem has that glassy pop! I turn back to the stummel and the J-B Weld has had time to cure.  I begin to sand off the excess J-B Weld by using the Dremel with a sanding drum.  I set the Dremel to the slowest speed and gently, without much pressure, sand off the upper layer of the J-B Weld – the excess.  With the drum, as I’m working patiently around the entire chamber, I also sand out a reaming step that had developed near the floor of the chamber.  The Dremel shortens the work amazingly.  I then switch by wrapping 240 grade paper around a Sharpie Pen. I fine tune the sanding in the chamber so that eventually, the cracks and fissures are revealed now having been filled.  I love it when theory and practice come together!  I clean out the chamber of the dust and it looks and feels great! I run my finger over the formerly cavern-filled chamber and it is smooth.  I take finish pictures and move on. I’ve been looking forward to applying the Before & After Restoration Balm to this Stanwell Henley Special’s stummel to tease out the older patina of this vintage blasted briar surface.  I make sure the surface is clean from all the chamber sanding and I take a few pictures to mark the start.  I then apply the Balm to my fingers and rub it in to the surface.  The surface practically drinks the Balm as I work the Balm into the craggy landscape.  After it’s worked in well, I put the stummel aside for 20 minutes to allow the Balm to do what it does. I take a picture in this state. After about 20 minutes I wipe off the excess Balm and buff the blasted Henley Special stummel with a microfiber cloth.  The hues are deeper and richer.  I mount a cotton cloth buffing wheel onto the stummel and set the speed at 40% full power and after reuniting the stem and stummel, I apply Blue Diamond compound to the stem.  As I go along, I experiment with the Blue Diamond on the stummel.  I don’t want to gum up the craggy surface with Blue Diamond, but what I see, with a light application of the compound, is that the briar is sprucing up and I move the wheel along with the grain of the blasted briar.  I like the results.  When I complete the application of Blue Diamond, I give the pipe a good hand-wiping with a felt cloth to remove the carbon dust before application of the wax.  I like the results.Straightaway, I load another cotton cloth buffing wheel onto the Dremel, increasing the speed of the Dremel to about 60% full power – faster than normal on smooth briar, I first apply carnauba wax to the stummel.  I increase the speed for the blasted stummel to increase the heat of the application.  I’ve found that using the Dremel on the craggy surface allows me to get up and close with the application of wax on the rough surface.  Heating the wax more helps guard against it gunking up on the rough surface.  The added speed helps dissolve the wax over the rough surface.  I’m liking what I’m seeing!  When I apply carnauba to the stem, I slow the speed of the Dremel back down to the normal 40% full power.After applying the wax, I give the pipe a rigorous hand buffing with a microfiber cloth.  This not only raises the shine but also help disseminate any excess wax on the surface.  There is one last project left to do.  The chamber was riddled with heating cracks and fissures and I used heat resistant J-B Kwik Weld to fill in the cracks.  I coated the entire chamber with the Weld mixture then sanded it after the Weld cured.  After sanding, as the theory hoped, the results were, that the only Weld remaining was that which filled the cracks and the chamber wall is smooth and again usable to put this pipe back into service.  Beautiful!  I love it when theory and practice come together so well. To help provide a protective coat over the repairs and to encourage a new cake to develop, I apply to the chamber walls a coating mixture of natural yogurt (sour cream works, too) and activated charcoal.  I mix a small amount of yogurt and charcoal in a bowl and when the consistency of the mixure will not drip off the spoon its ready to go.  After putting a pipe cleaner through the draft hole, I use my index finger to reach into the chamber and apply the mixture.  I make sure that the chamber walls are thoroughly covered, and I put the stummel aside for a time to allow the coating to cure.  It dries into an amazingly hard surface.  It’s important for the new steward to use a folded pipe cleaner to clean the bowl initially after putting the Henley into service – not to scrape the bowl! I’m very pleased with the results of this second of the 3 1950/60s Stanwell Henley Specials I acquired.  I appreciate the Danish craftmanship that is evident in all three pipes and this Blasted Billiard is no exception.  The blasting amazes me with the craggy surface showing the 3-dimensional movement of the briar grain.  One ravine is cut so drastically, at first, I thought it was a cracked bowl when I first acquired the pipes, but it remains as part of a very expressive, deep hued blasted briar landscape.  With a chamber width of 7/8 inches and depth of 2 inches, the amount of blend one can pack into this bowl is pretty impressive and with the size of the stummel and the blasting – well, I’m tempted to keep it for myself, but the third Stanwell Henley Special next on the table will be staying with me.  This Henley is heading for ThePipeSteward Store benefitting the Daughters of Bulgaria – our work here in Bulgaria helping women and girls who have been trafficked and sexually exploited.  Thanks for joining me!

Back to Bob Kerr’s Estate – Linking Peterson’s “Kapruf” 9BC with the 56 shape number


Blog by Steve Laug

With this Peterson’s “Kapruf” 9BC I am turning again to work on a few more pipes from Bob Kerr’s estate. This is the first of the Peterson’s that I am working on. I am cleaning them for the family and moving them out into the hands of pipemen and women who will carry on the trust that began with Bob and in some pipes was carried on by Bob. In the collection there were 19 Peterson’s pipes along with a bevy of Dunhills, some Comoy’s and Barlings as well as a lot of other pipes – a total of 125 pipes along with a box of parts. This is the largest estate that I have had the opportunity to work on. I put together a spread sheet of the pipes and stamping to create an invoice. I was taking on what would take me a fair amount of time to clean up. I could not pass up the opportunity to work on these pipes though. They were just too tempting. I decided to take a break from working on his Dunhills to work on a few of the other pipes. The first of them is a really nice Peterson. It is a shape that is one of my favourites so this one will probably stay with me.

I love these older Peterson’s 9BC shapes and find that the sandblast versions really are a favourite of mine. This one has a rugged sandblast finish with lots of nooks and crannies in the briar. It is a beauty! The pipe is stamped Peterson’s “Kapruf” over London Made England. That is followed by the shape number 9BC over 56. The valleys and ridges of the sandblasted grain showing through the grime and dirt are a mixture that leaves a rich texture. It had a rich reddish brown stain that does not look too bad. There was a thick cake in the bowl and lava overflow filling in the blast on the rim. The edges of the rim and top are dirty but look pretty pristine under the grime. It was a beautiful pipe that was dirty and tired looking. The stem was lightly oxidized with the typical tooth marks and chatter on both sides that I have come to expect from Bob’s pipes. He obviously loved the Peterson’s as much as he did his Dunhills. The P-lip button had some light damage to the top surface. Jeff took photos of the pipe before he started his cleanup work on it.Jeff took photos of the bowl and rim top to show the cake in the bowl and the lava build up on the edges of the bowl. It was thick and hard but hopefully it had protected the rim and edges from damage. The edges look pretty good. Jeff took photos of the sides and heel of the bowl to show the condition of the finish. You can see the beautiful undulations of the sandblast. There is a lot of dust and grime filling in the valleys. Jeff took photos of the stamping on the smooth panel on the underside of the bowl and shank. The stamping was readable as you can see from the photos. The London Made over England stamp is faint but readable under a light. The pipe also bears the same 9BC over 56 stamp that Al Jones (upshallfan) noted on the on his previous blog and had called a mystery pipe (https://rebornpipes.com/2019/07/25/peterson-shape-56-mystery/).Jeff took photos of the top and underside of the stem showing the deep tooth marks and scratching, oxidation on the stem surface and wear on the edges of the button. The “P” logo on the stem is long gone but the robust p-lip button is in very good condition.Al Jones had written a couple of blogs on the Peterson’s Kapruf 9BC so I turned to rebornpipes to refresh my memory through Al’s blogs (https://rebornpipes.com/2015/06/03/peterson-9bc-kapruf-pre-59/). I quote from there and also include some of the catalogue pages from the blog.

I didn’t know much about the Kapruf line. It is described in a 1960’s catalog as: “A fine sandblast finish distinguishes this range of light natural grained pipes with their distinctive red colouring. Very popular with sportsmen.”

The second page shows the 9BC shape.  I have boxed the shape in with a red box for quick reference. Al had also written a blog about another “Kapruf” 9BC he had picked up that was not stamped with the 9BC stamp but with a shape number 56. Interestingly the one I am working on is stamped with both numbers. I quote from a pertinent section of that blog on the shape number (https://rebornpipes.com/2019/07/25/peterson-shape-56-mystery/).

Well, the Shape 56 mystery is now resolved…Well, further sleuthing from the world’s foremost Peterson authority yielded an answer – which came directly from a blog entry here on rebornpipes, by our very own Steven Laug. In 2015, Steve posted a catalog from Canadian importer, Genin, Trudeau & Co. which shows their unique numbering system. I even comment that the Shape 56 looks like a 9BC! So, all the while, the answer was hiding on this blog! Below is that brochure page showing the Shape 56. Steve comments that the postal code used in the address dates the brochure to between 1962 and 1969. I guess not many Canadians appreciated the shape, so they are pretty uncommon. Thanks to Mark Irwin for his superior memory and to Steve for making this type of ephemera available, you never know when it will come in handy.

I have included both the link to the document for you to check out and a page from it that shows the 9BC/56 connection Al noted above (https://rebornpipes.com/2016/09/13/petersons-pipes-brochure-from-genin-trudeau-co-montreal-quebec/). I have put a red box around the shape number to make identifying it simpler. Be sure to check out the document as it is very informative.I turned to an article on Pipedia by a good friend, the late Mike Leverette entitled A Peterson Dating Guide (https://pipedia.org/wiki/A_Peterson_Dating_Guide;_A_Rule_of_Thumb). While the one I have in hand is slightly different in terms of stamping it is an English made Peterson that bears the stamp London Made England. I quote from the section by Mike on the English pipes.

English made Peterson pipes actually spans between the pre-Republic and Republic eras. In 1895, Peterson opened a shop in London England that lasted until the late 1950s or early 1960s. So the English Era, for a simplified date, will be from 1895 through 1959. The stamps Peterson used in London and that we have seen are:

  • Made in England – block format
  • Made in England – circle format
  • Made in London
  • Made in London England
  • Simply, London England.
  • Great Britain

I went to the full article on Peterson pipes after this to try to pin things down a bit more clearly (https://pipedia.org/wiki/Peterson). I believe the pipe is from the Republic Era – 1950 – 1989. I quote the pertinent section of that article below:

1969/70 – The ‘Made in England’ stamp was discontinued with the closing down of the London based factory. Although Peterson has always prided itself in being an Irish made pipe, Peterson had also maintained a pipe factory in London since 1899.

English made Peterson pipes actually spanned the period between the pre Republic and Republic eras.

In 1899, Peterson opened the first in a series of several successive shops in London, England, that lasted until the late 1960’s/70s.

1899 – 53, New Broad St. E.C.

1910 – 7, Hills Pl., Oxford St. W.

1915 – 21, Mortimer St. W.

Finally moving to 74/77 White Lion Street until 1970.

So the English Era, for a simplified date, will be from 1899 through to around 1970. The stamps Peterson used in London are:

    • Made in England block format
    • Made in England circle format
    • Made in London
    • Made in London England
    • Simply, London England
    • London Made over England block format
    • Great Britain

With that information in hand I knew what I was dealing with in terms of the stamping and the age of this pipe. I knew from the information from both Mike’s Pipedia article and the longer article that the pipe was made during the Republic Era prior to the closer of the London based factory. My thinking is that it came from the final factory location on 74/77 White Lion Street which closed down in 1970. That fits the time frame of many of the pipes from Bob Kerr’s estate.  I also knew that the pipe was brought into Canada by the Canadian importer, Genin, Trudeau & Co. in Montreal, Quebec. Noting above that the catalogue postal code puts it in the late 60s early 70s which also fits the story. Now it was time to work on the pipe.

With over 125 pipes to clean from Bob’s estate I took a batch of them to the states with me on a recent visit and left them with Jeff so he could help me out. Jeff cleaned the pipe with his usual penchant for thoroughness that I really appreciate. This one was a real mess and I did not know what to expect when I unwrapped it from his box. He reamed it with a PipNet pipe reamer and cleaned up the reaming with a Savinelli Fitsall Pipe Knife. He scrubbed out the internals with alcohol, pipe cleaners and cotton swabs until the pipe was clean. He scrubbed the exterior of the bowl with Murphy’s Oil Soap and a tooth brush to remove the grime and grit on the briar and the lava on the rim top. The finish looks very good with good looking grain around the bowl and shank. Jeff soaked the stem in Before & After Deoxidizer to remove the oxidation on the rubber. When the pipe arrived here in Vancouver for the second stop of its restoration tour it looked very good. I took photos before I started my part of the work. I took some close up photos of the rim top and also of the stem surface. I wanted to show what an amazing job Jeff did in the cleanup of the rim top. The rim top looks very good. The sandblast finish is very nice. The bowl looked very good. I also took close up photos of the stem to show the deep tooth marks on the top and underside. The “P” logo on the stem was long gone though I could see a faint ghost of it on the left side. I took a photo of the stamping and was able to capture all of it. Even the illusive London Made over England portion shows up. Since this is another pipe Bob’s estate I am sure that some of you have read at least some of the other restoration work that has been done on the previous pipes. You have also read what I have included about Bob Kerr, the pipeman who held these pipes in trust before I came to work on them (see photo to the left). Also, if you have followed the blog for long you will already know that I like to include background information on the pipeman whose pipes I am restoring. For me, when I am working on an estate I really like to have a sense of the person who held the pipes in trust before I worked on them. It gives me another dimension of the restoration work. I asked Brian if he or his wife would like to write a brief biographical tribute to her father, Bob. His daughter worked on it and I received the following short write up on him and some pictures to go along with the words including one of Bob’s carvings. Once again I thank you Brian and tell your wife thank you as well.

I am delighted to pass on these beloved pipes of my father’s. I hope each user gets many hours of contemplative pleasure as he did. I remember the aroma of tobacco in the rec room, as he put up his feet on his lazy boy. He’d be first at the paper then, no one could touch it before him. Maybe there would be a movie on with an actor smoking a pipe. He would have very definite opinions on whether the performer was a ‘real’ smoker or not, a distinction which I could never see but it would be very clear to him. He worked by day as a sales manager of a paper products company, a job he hated. What he longed for was the life of an artist, so on the weekends and sometimes mid-week evenings he would journey to his workshop and come out with wood sculptures, all of which he declared as crap but every one of them treasured by my sister and myself. Enjoy the pipes, and maybe a little of his creative spirit will enter you!

Now on to the rest of the restoration on this pipe that links the two shape numbers that Al referred to – the 9BC and the 56. Since Jeff had done such an amazing clean up job on the bowl it was very easy for me. I only had to rub the bowl down with Before & After Restoration Balm. I worked it into the surface of the briar with my fingertips and a horsehair shoe brush to clean, enliven and protect it. I let the balm sit for a little while and then buffed with a cotton cloth and shoe brush to raise the shine. Mark Hoover’s Balm is a product that I have come to appreciate and one I use on every pipe I have been working on. I set the bowl aside and turned my attention to the tooth marks in the stem. I painted the surface of the stem with the flame of a Bic style lighter. Since vulcanite has “memory” heat will lift much of the tooth damage. The photos show the marks that remain after the heat treatment.To repair these deeper tooth marks, I filled them in with clear super glue and set the stem aside to dry. Once the glue cured it would be a matter of blending the repairs into the surface of the stem with sandpaper.Once the repairs had hardened I also sanded them to blend them into the surrounding vulcanite with a folded piece of 220 grit sandpaper. I followed the 220 grit sandpaper with 400 grit wet dry sandpaper to minimize the scratching. The two papers combined do a great job in blending the repairs. I wiped the stem down with Obsidian Oil and set it aside to dry.  I polished out the scratches with micromesh sanding pads – wet sanding with 1500-12000 grit pads. I wiped the stem down after each sanding pad with Obsidian Oil. I polished it with Before & After Pipe Stem Polish – both Fine and Extra Fine. Once I had finished the polishing I gave it final coat of oil and set it aside to dry. I am on the homestretch with this pipe and I really look forward to the final look when it is put back together and polished and waxed. I put the bowl and stem back together. I polished the bowl and stem with Blue Diamond to polish out the scratches in the briar and the vulcanite. I gave the bowl multiple coats of Conservator’s Wax and the stem multiple coats of carnauba wax. I buffed the pipe with a clean buffing pad to raise the shine. I hand buffed it with a microfiber cloth to deepen the shine. The pipe polished up pretty nicely. The valleys and ridges of the sandblast looked good with the polished black vulcanite. This 1969/70 Peterson’s “Kapruf” 9BC/56 Bent billiard was a fun pipe to work on thanks to Jeff’s cleanup work. It really has that classic Peterson look in a sandblast “Kapruf” finish that catches the eye. The combination of various brown stains really makes the pipe look attractive. It is a comfortable pipe to hold in the hand and I think that as it heats with smoking that over time the finish will darken and look even better. The finished pipe is shown in the photos below. The dimensions of the pipe are Length: 5 ½ inches, Height: 2 inches, Outside diameter of the bowl: 1 3/8 inches, Chamber diameter: ¾ of an inch. This one is staying with me as I carry on Bob’s legacy each time I fire up a bowl. I have a lot more to work on include 18 more Petersons. Perhaps one of those will catch your attention. Thanks for reading this blog and my reflections on the pipe while I worked on it. This is an interesting estate to bring back to life.