Blog by Paresh Deshpande
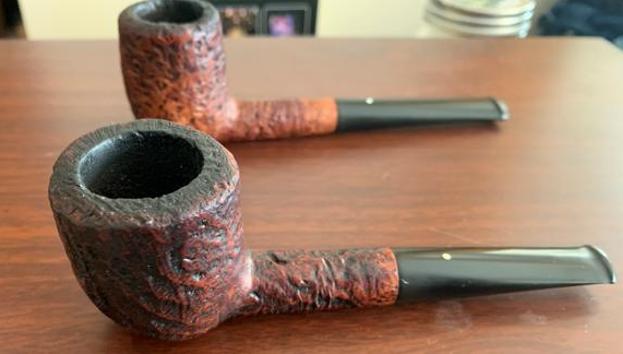
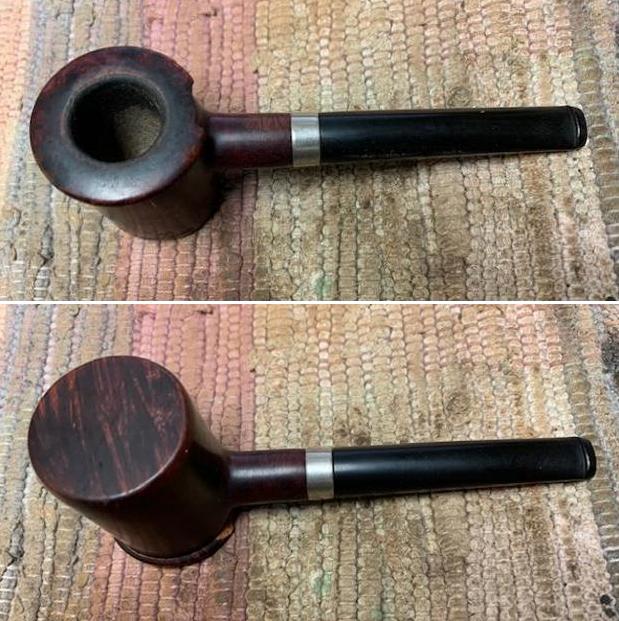
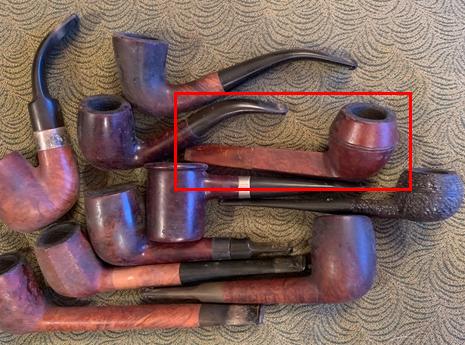
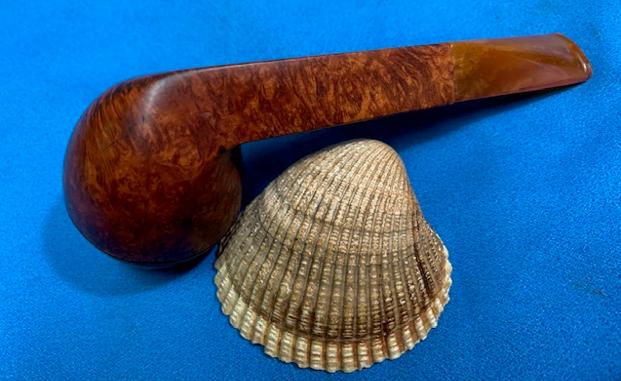
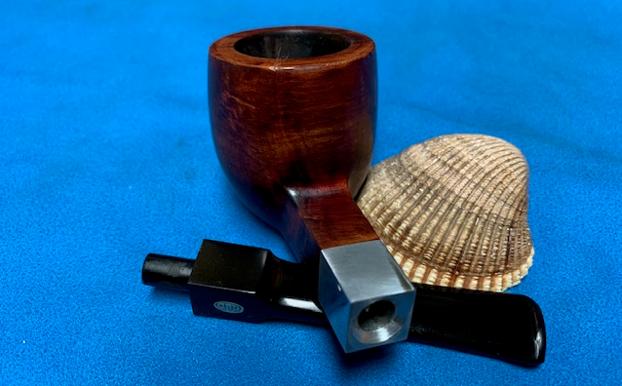
As I was winding up my stay at the old duty station, I came across a neatly packed zip-lock pouch that was stowed away in to the deepest part of the cupboard. In that pouch were three pipes; two Comoys and one Drury Lane # 484. I remembered that the Comoy’s had stingers that needed leather gaskets and one needed a top nut for the stinger. Steve had sent me the leather gaskets while a replacement for the stinger that required top nut, was in post that was delayed for more than a year due to the prevalent worldwide pandemic situation. I decided to work on the Drury Lane and the one Comoy’s that just needed the leather gasket to be replaced.
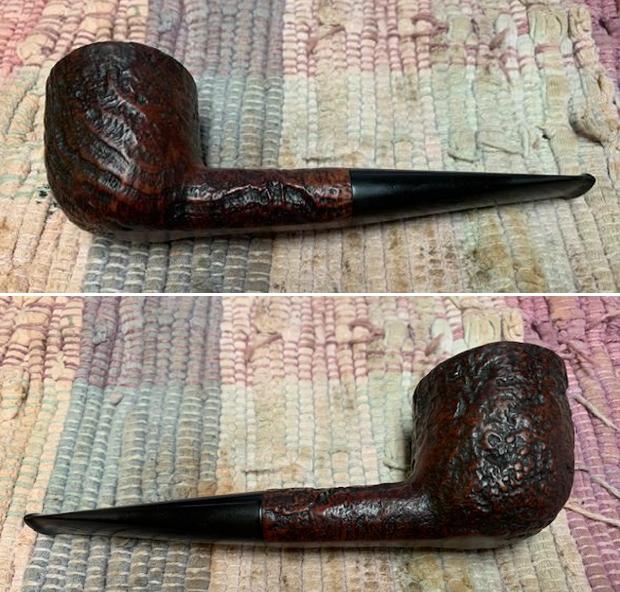
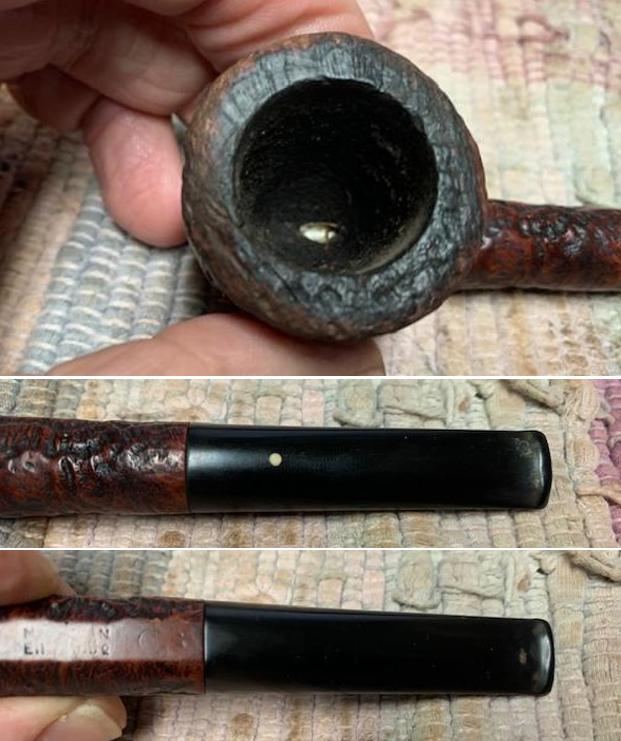
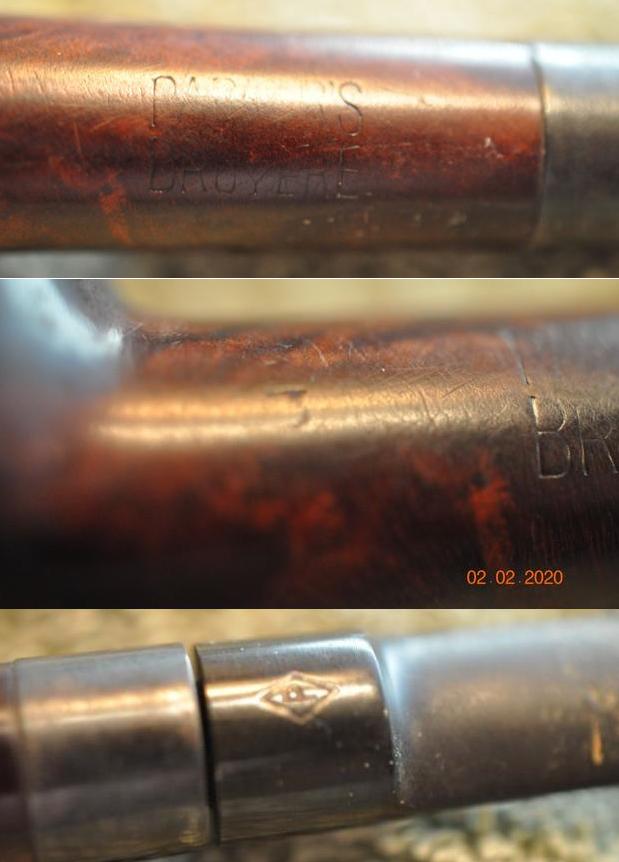
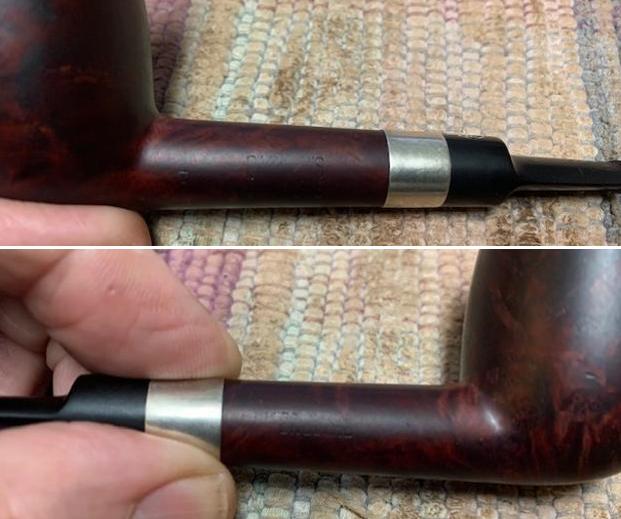
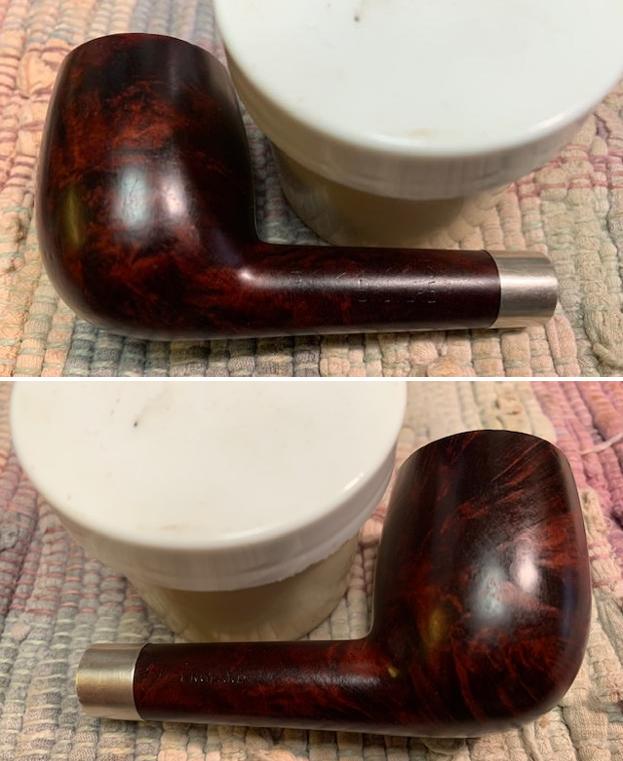
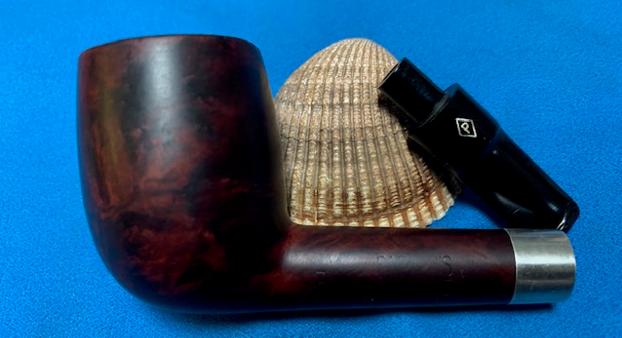
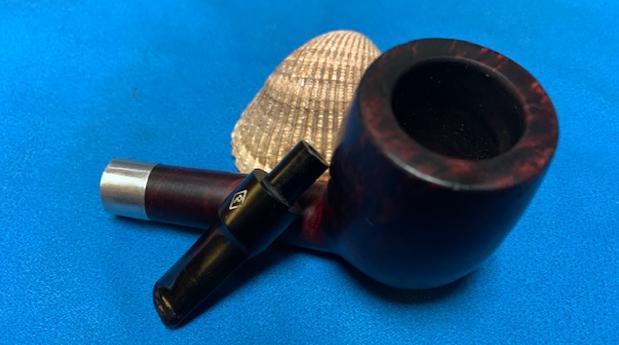
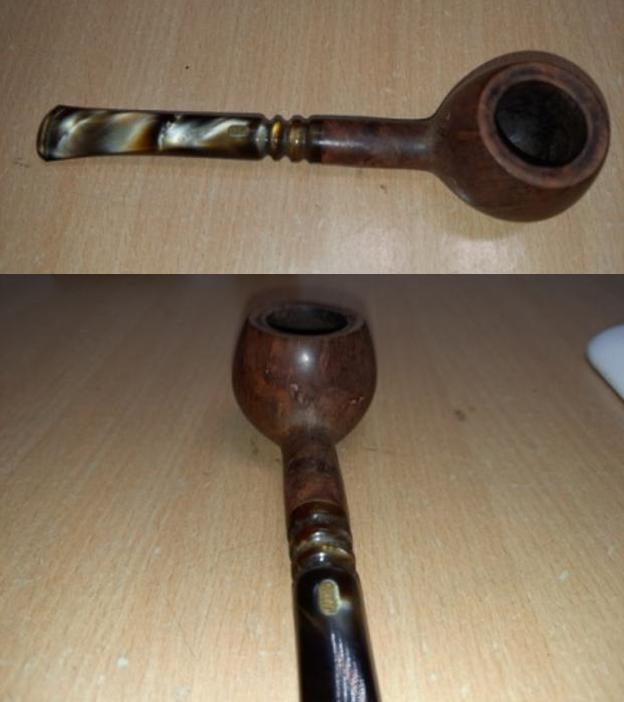
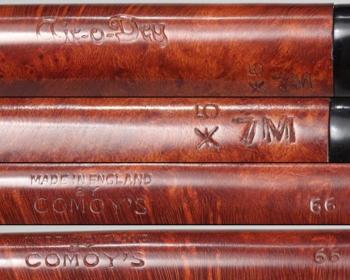
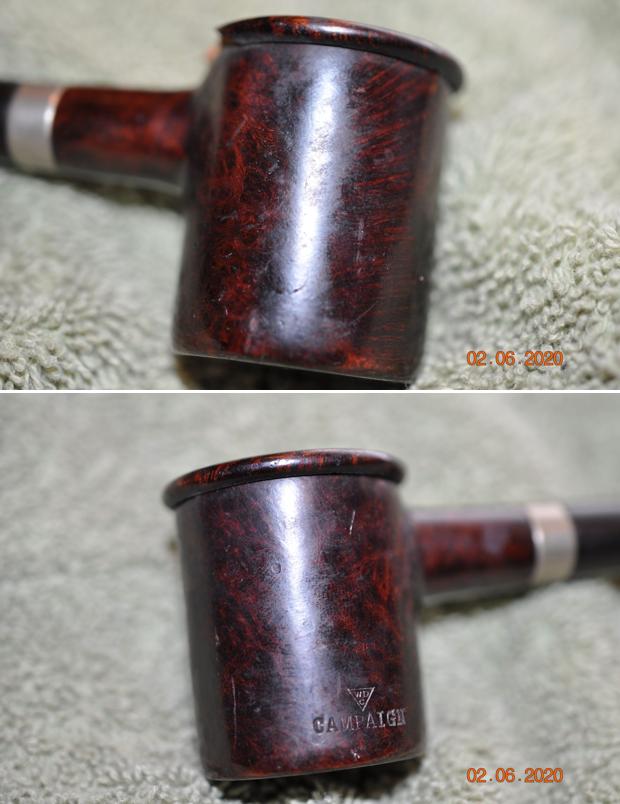
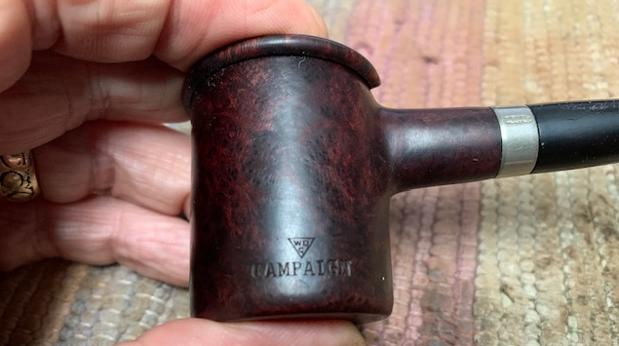
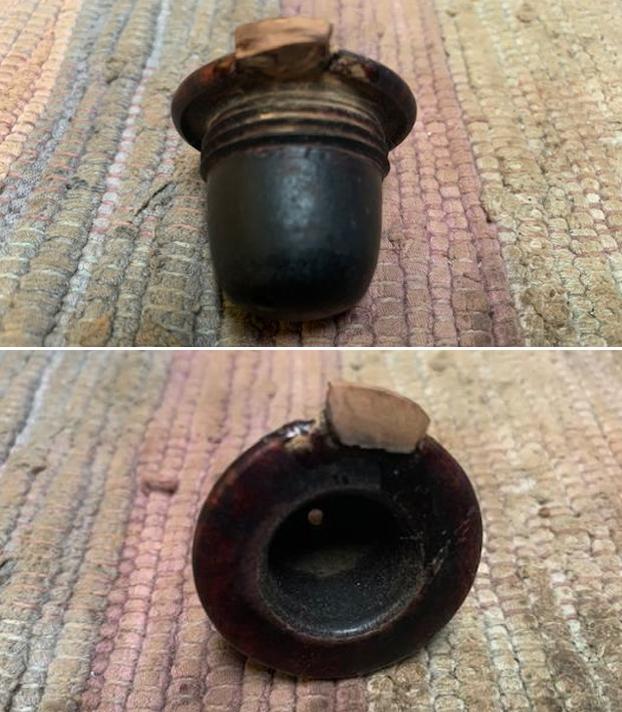
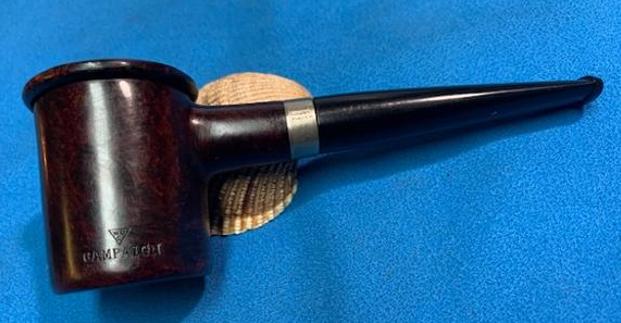
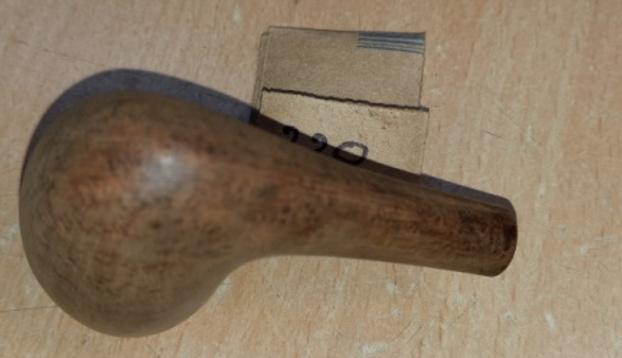
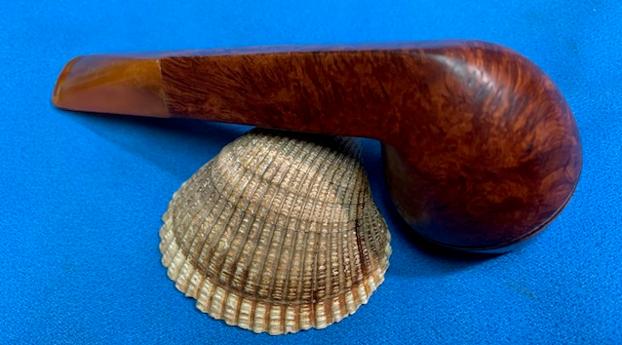
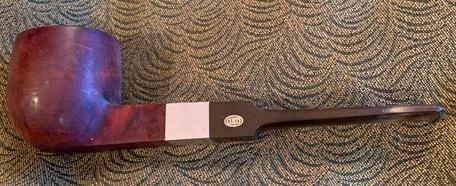
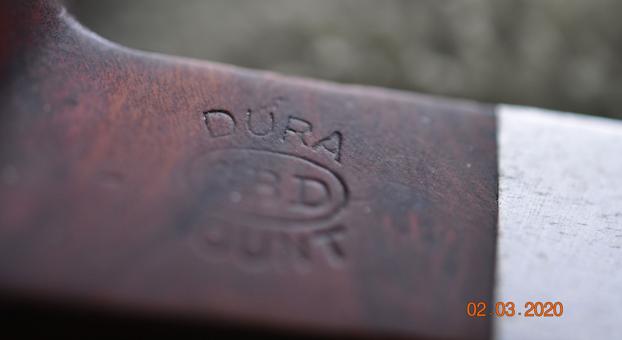
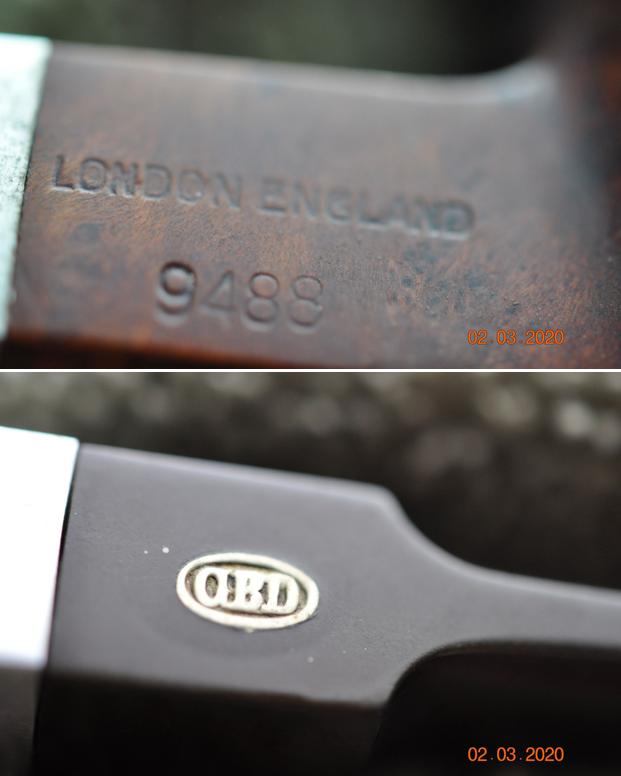
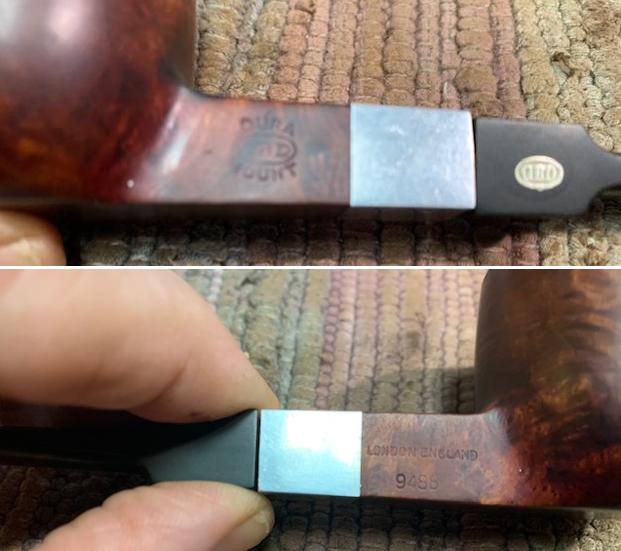
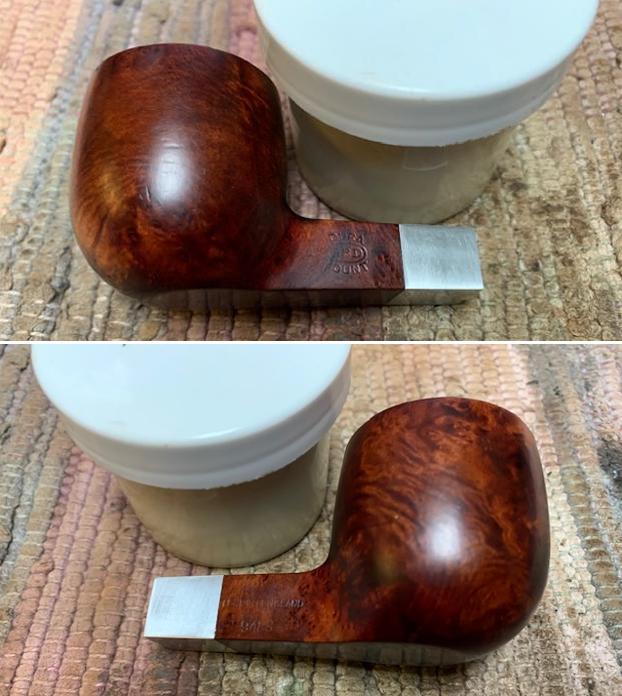
The Drury Lane pipe is stamped on the left of the shank as “DRURY LANE” in an arch over “LONDON”, all in block capital letters. The right side of the shank surface bears the shape number “484” towards the chamber end with the COM stamp “MADE IN ENGLAND” with “MADE” at the top, “IN” in the middle, and “ENGLAND” forming the bottom of the circle (Football shaped stamping). The high quality twin bore vulcanite saddle stem bears the stamping “BITE” over “PROOF”. All the stampings are crisp and easily readable save for the stem logo which has a faint and the worn out letter P in the word PROOF.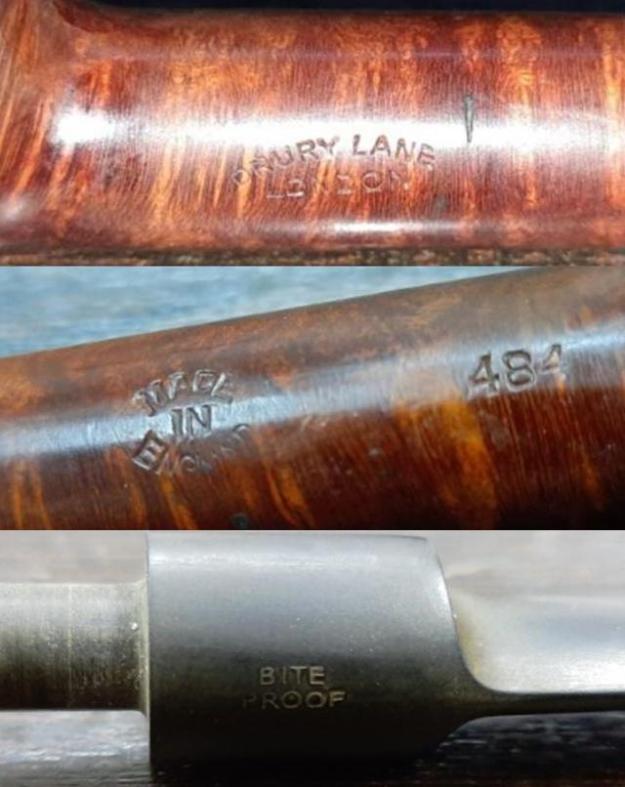 The stampings on the pipe were categorical in pointing out that the pipe is an English made and the way Drury Lane is stamped in an arch helped me narrow down the connection to early production of either Barling’s or Comoy’s brands as both had an arched stamp. To be sure of my assumptions, I visited pipephil.eu which confirmed my assumption; this brand is indeed linked with Comoy’s. Here is the link: Dra-Duk — Pipes : Logos & Markings (pipephil.eu)
Next, I visited pipedia.org for detailed information on the brand Comoy’s in general and this line of pipes in particular. The information that is given on the website makes for an interesting read and should anyone be interested in referencing the brand, the link is given below. Comoy’s – Pipedia
Further down under on the same web page, under the sub head “SECONDs MADE BY COMOY’S” is the complete list of seconds and I reproduce the same for ease of reference. The pipe on my work table finds a mention here and is highlighted in red.
Seconds made by Comoy’s
Academy Award, Ace of spades, Ancestor, Astor, Ayres, Britannia, Carlyle, Charles Cross, Claridge, Coronet?, Cromwell, Damman?, Dorchester, Dunbar, Drury Lane, Emerson, Everyman, Festival of Britain, Golden Arrow, Grand Master, Gresham, Guildhall, Hamilton (according to Who Made That Pipe), Kingsway, Lion’s Head, Lord Clive, Lumberman, Hyde Park, Lloyds, Mc Gahey, Moorgate, Newcastle, Oxford, O’Gorman, Rosebery Extra, Royal Falcon, Royal Guard, Royal Lane, Scotland Yard, St James, Sunrise, Super Sports, Sussex, The Academy Award, The Golden Arrow, The Mansion House, The Exmoor Pipe, Throgmorton, Tinder Box Royal Coachman, Townhall, Trident, Trocadero, Westminster, Wilshire.
Next, I was keen to research and link the shape code with Comoy’s pipes and at the bottom of the page is the link to Comoy’s Shape Number Chart (Comoy’s Shape Number Chart – Pipedia)
Comoy’s pipes were given shape numbers in the 1909 catalogue and also names for each shape, but it would seem that these numbers were NOT stamped on the pipes until sometime in the 1920’s. The earliest known is from 1925. The shape numbers are all 3 digits until after the Cadogan acquisition of Comoy’s in 1979, when some shapes were introduced with 4 digit numbers. However, they may have been introduced earlier in 1976, 1977 or 1978. On pre- Cadogan pipes additional letters can be found after the three numbers:
- M on Meerschaum lined pipes.
- P on Panel shaped bowls. ( This may not always be the case as I have now seen a photograph of a non panel Shape 309 with a P)
- C on some shapes with curved bits. This does not seem to be universal for all curved bits and it would appear to be mainly on Princes and Bulldogs.
- F believed to indicate a “Fishtail” bit. Verified on an early 1930’s Virgin Briar with the shape number 206F and a fishtail bit exactly like the Dunhill F/T, that was not introduced until 1950.
(S)=saddle bit – A/M=army mount – sq=squat – sq.shank=square shank
S=small – M=medium – L=large – XL=extraordinare shape – LW=lightweight shape
Circa 1975 (Pre-Cadogan) Shape Charts, courtesy Dough Valitchka which have been uploaded, finds a mention of the exact shape code seen on the Drury Lane that I am working on and is indicated with a red arrow. It is a Large Billiard with saddle stem.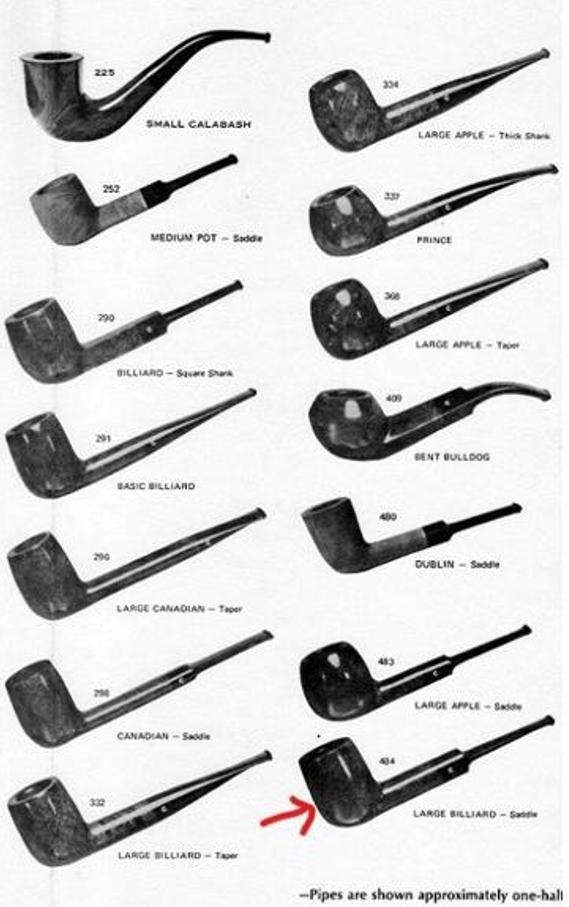 Here is another link from the same page which takes the readers to an absolutely well researched page on Dating of Comoy’s;
Comoy’s Dating Guide – Pipedia
Though the pipe currently on my work table is a Comoy’s second, I have attempted to date this pipe based on the stampings, particularly the COM stamp and have reproduced the relevant portions which have helped me in dating this pipe.
Made in England
This is stamped in a circle with “MADE” at the top, “IN” in the middle, and “ENGLAND” forming the bottom of the circle. This can be seen on a Cecil as early as 1910 and on an Old Bruyere of 1921 and more frequent from the 1930s. It can also appear as “MADE” arched, “IN” below, and “ENGLAND” arched the other way. These stamps are in an oval rugby-ball shape rather than a circle round shape.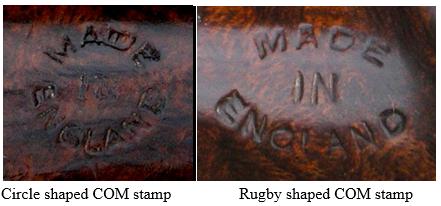 Thus I can conclusively say that the DRURY LANE pipe on my work table is from the period 1910 to 1930s
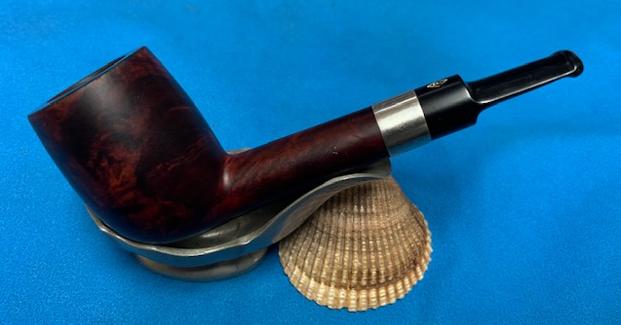
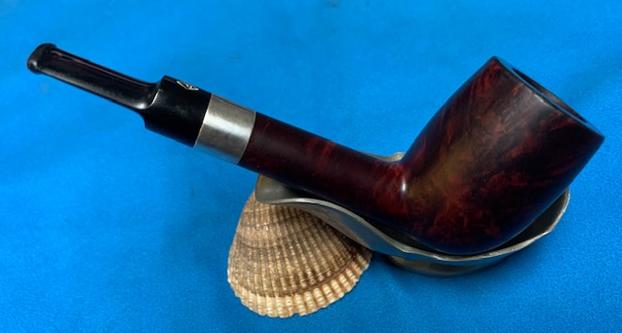
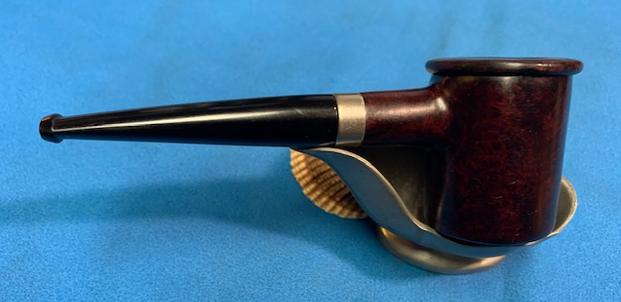
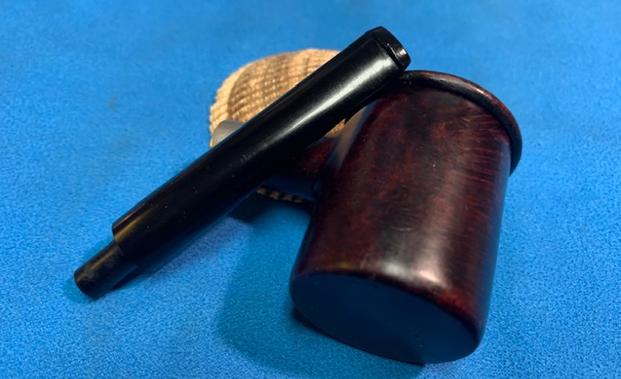
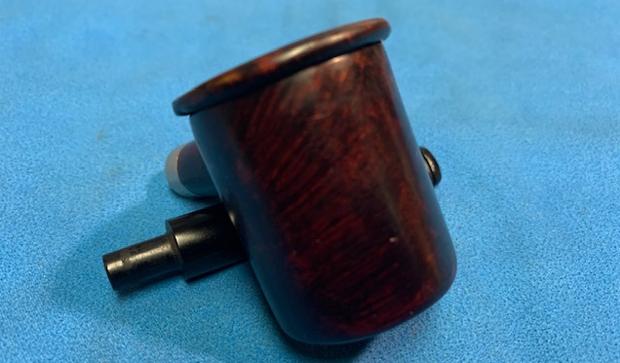
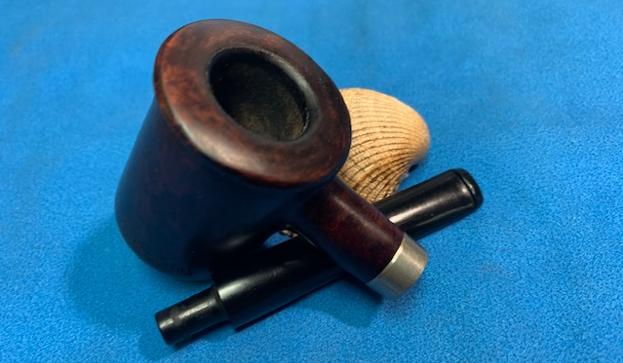
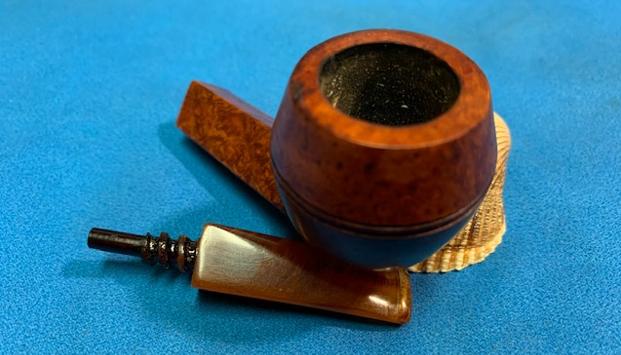
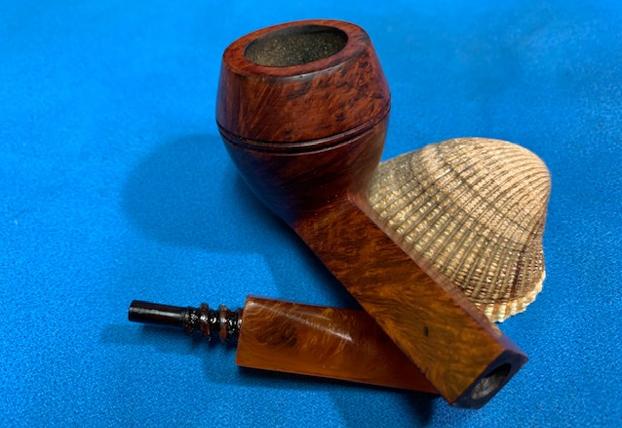
Initial Visual Inspection
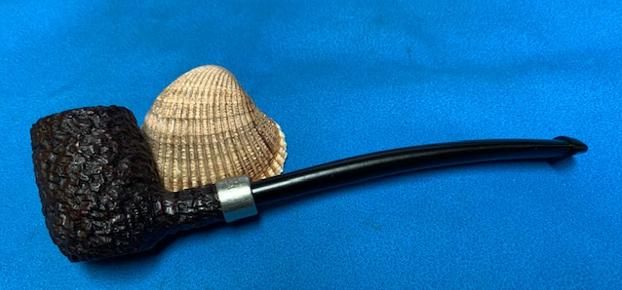
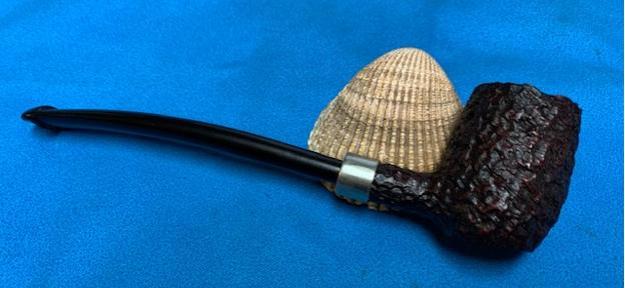
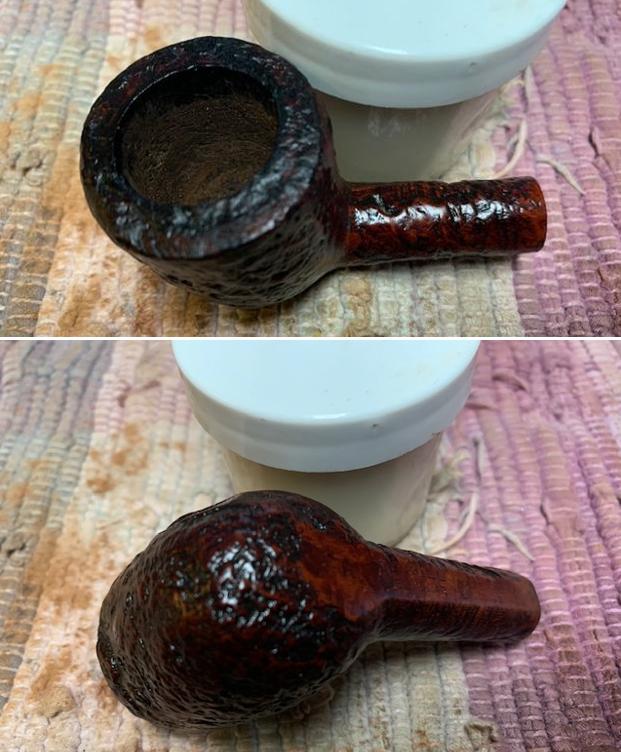
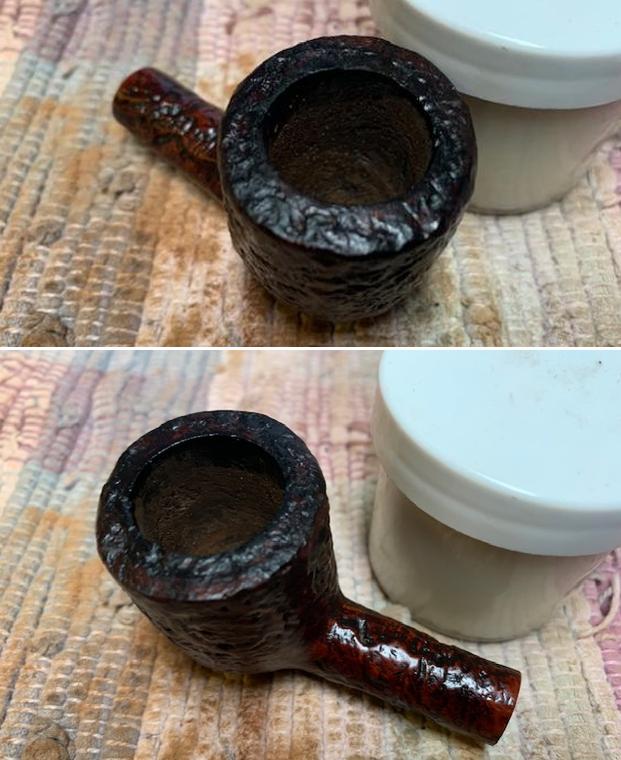
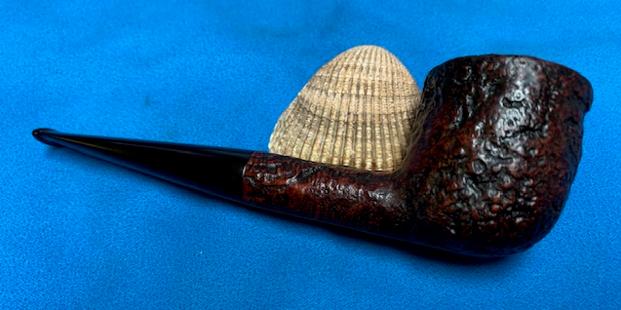
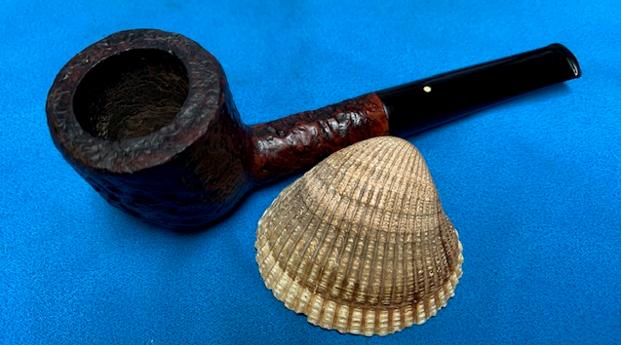
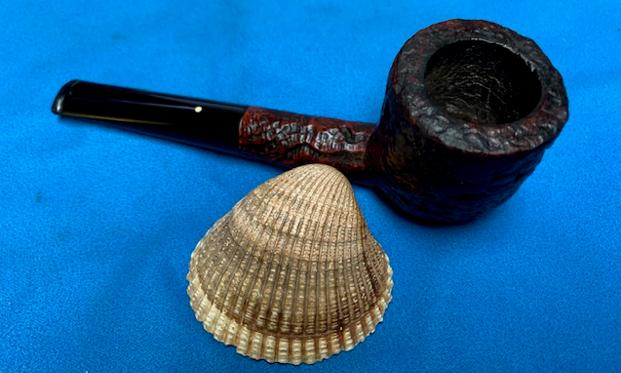
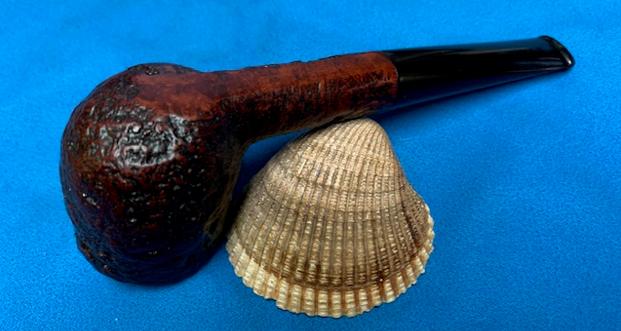
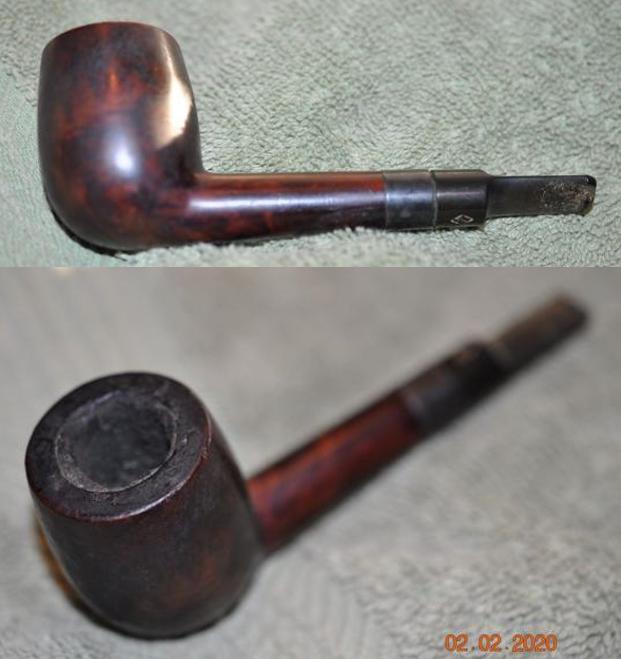
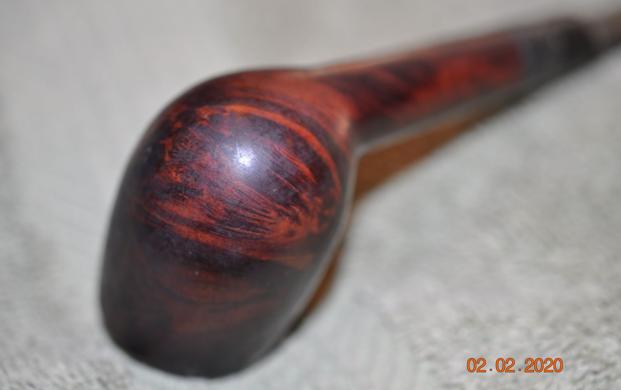
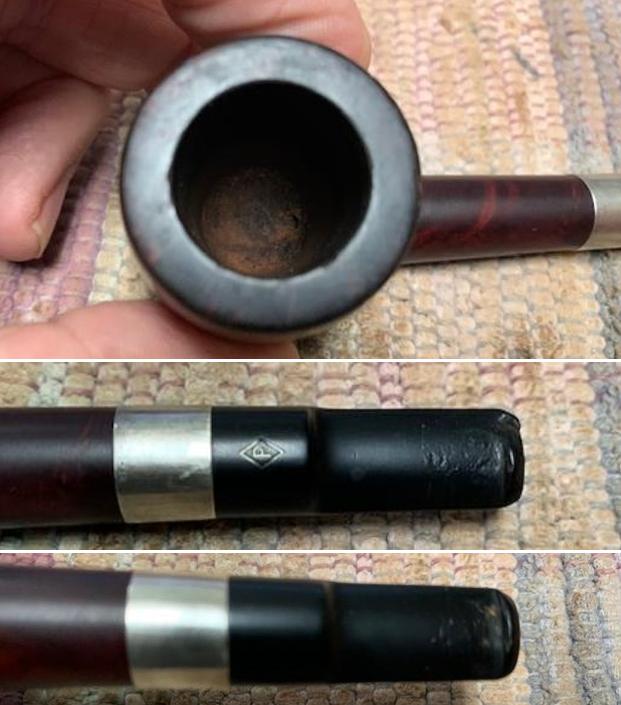
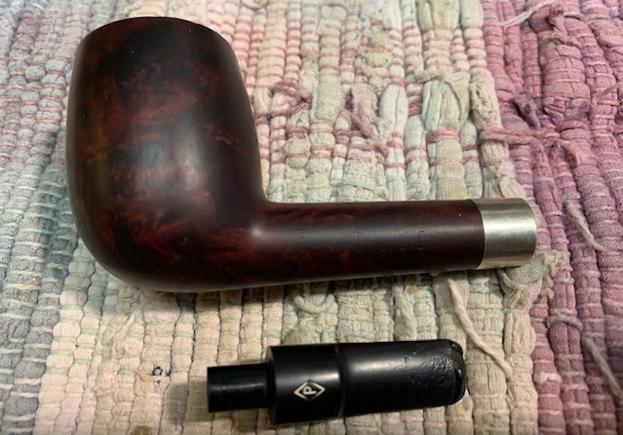
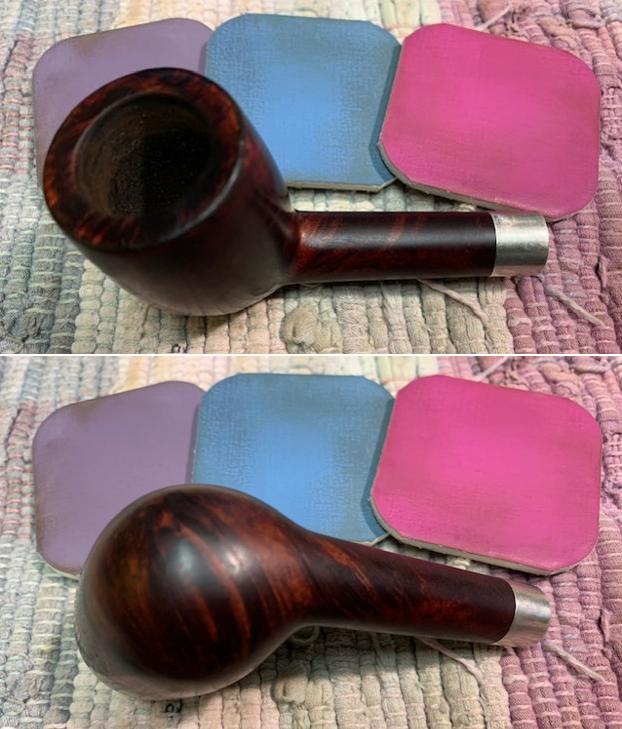
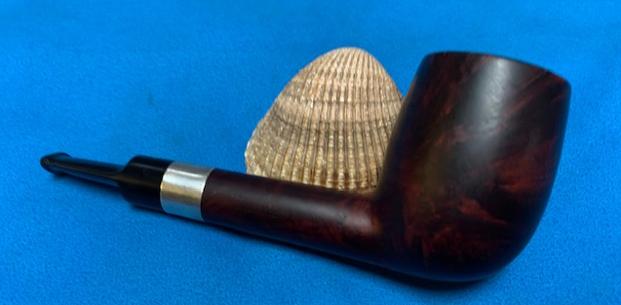
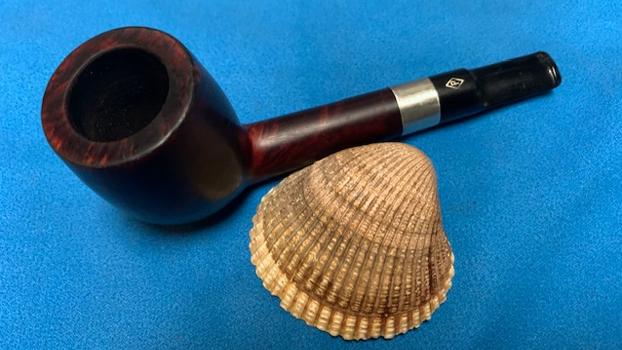
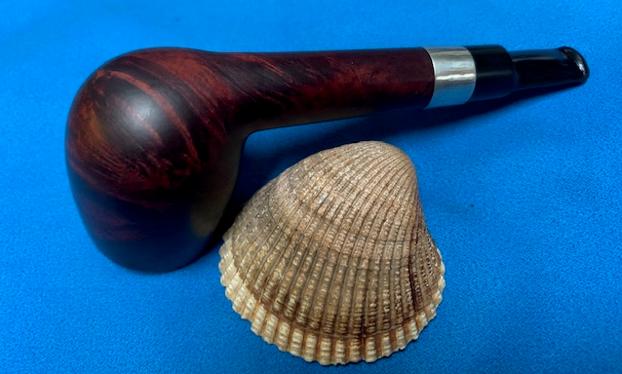
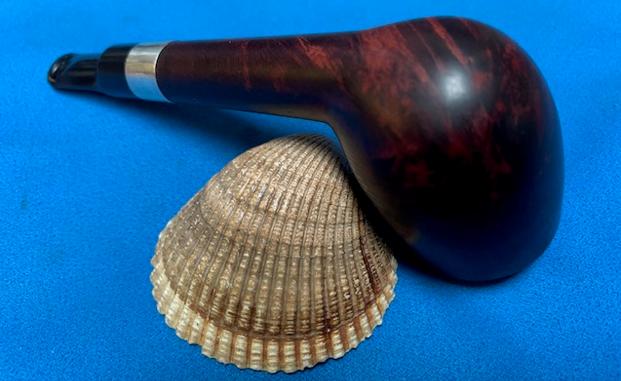
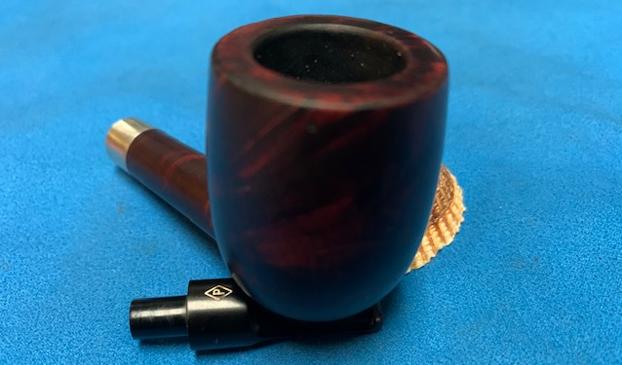
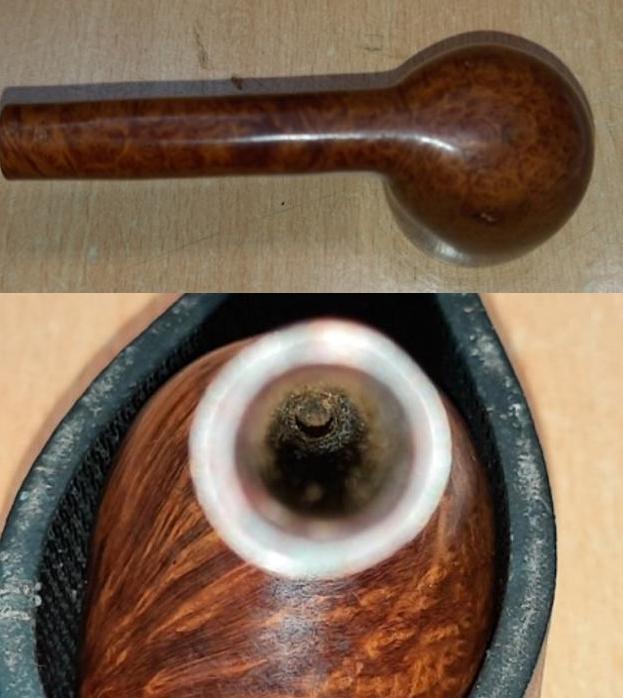
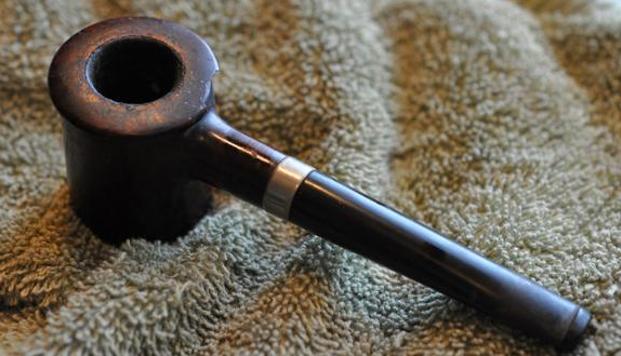
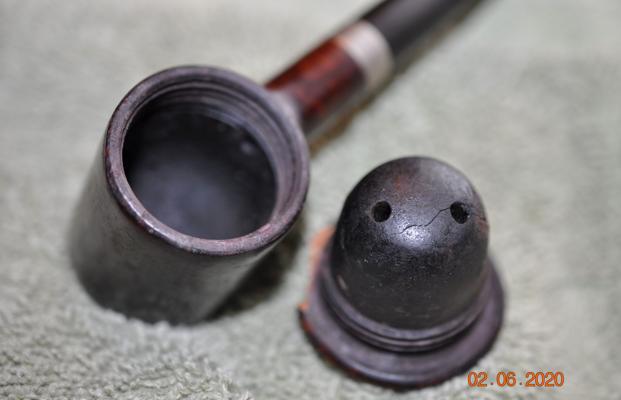
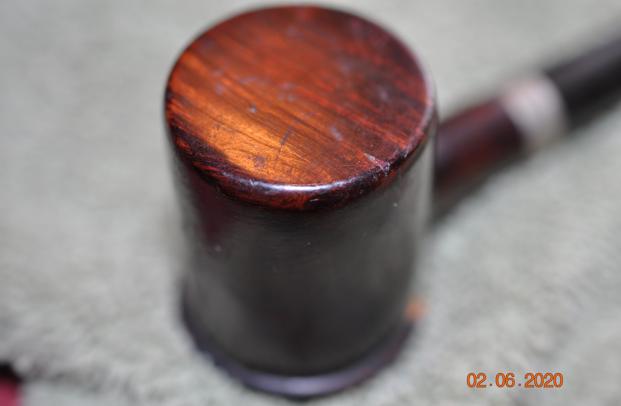
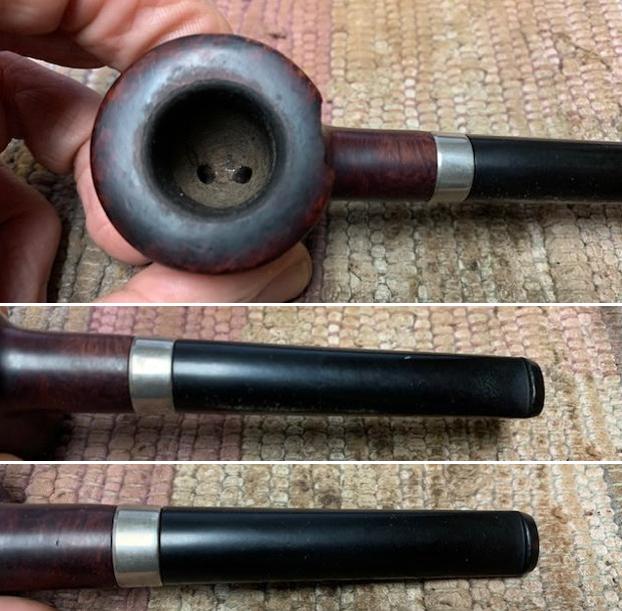
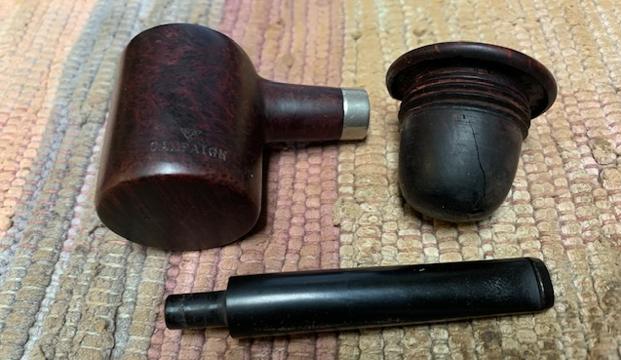
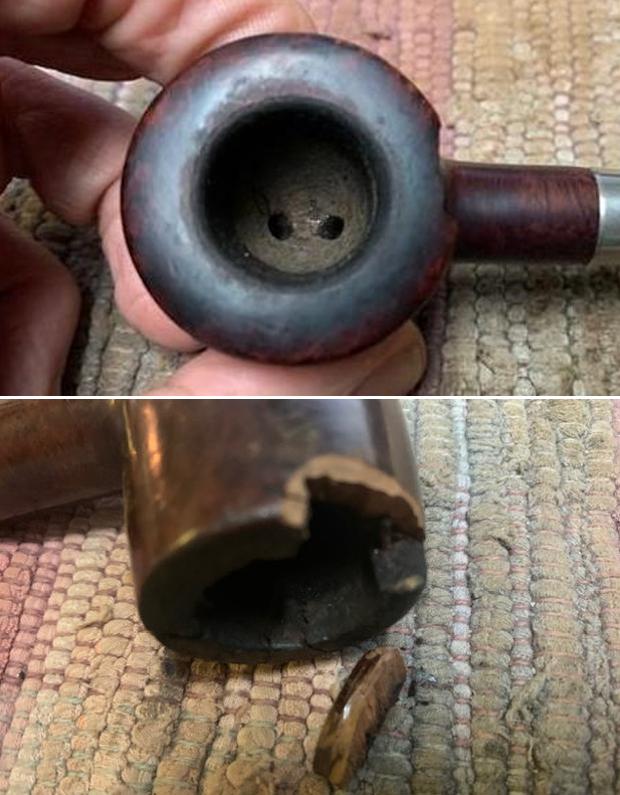
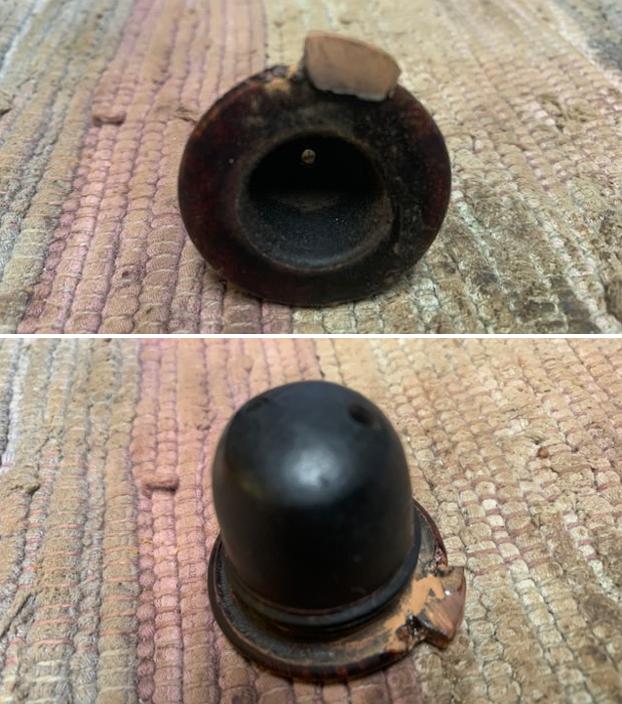
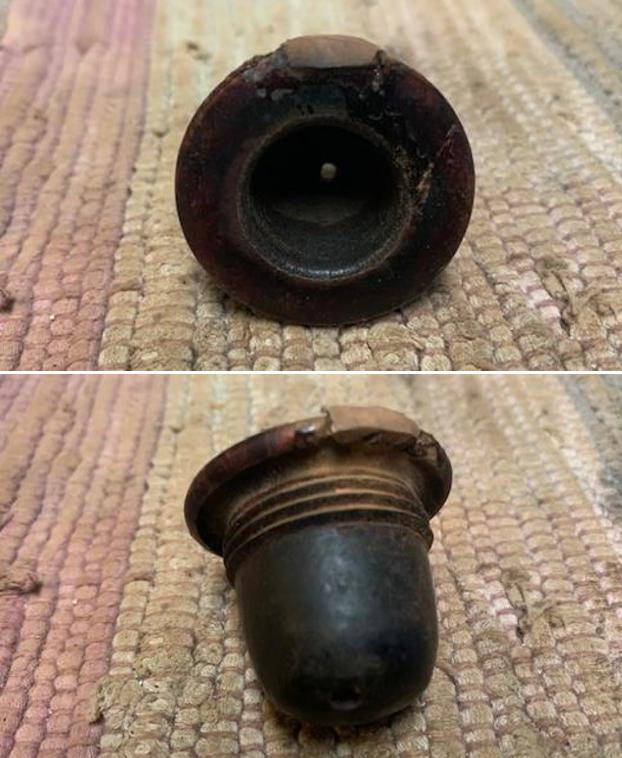
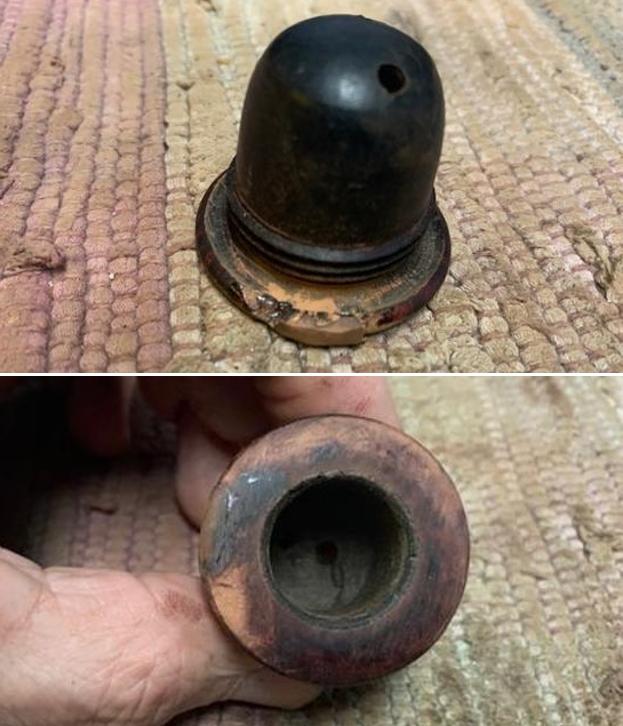
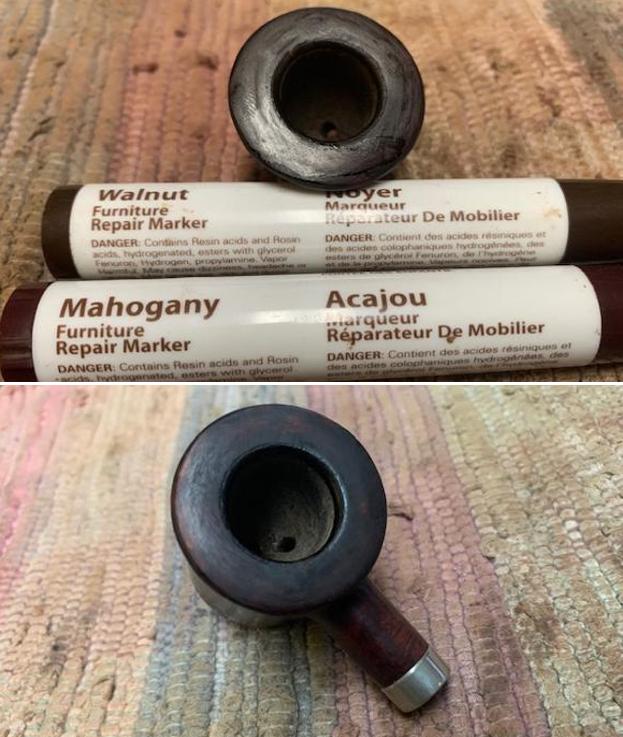
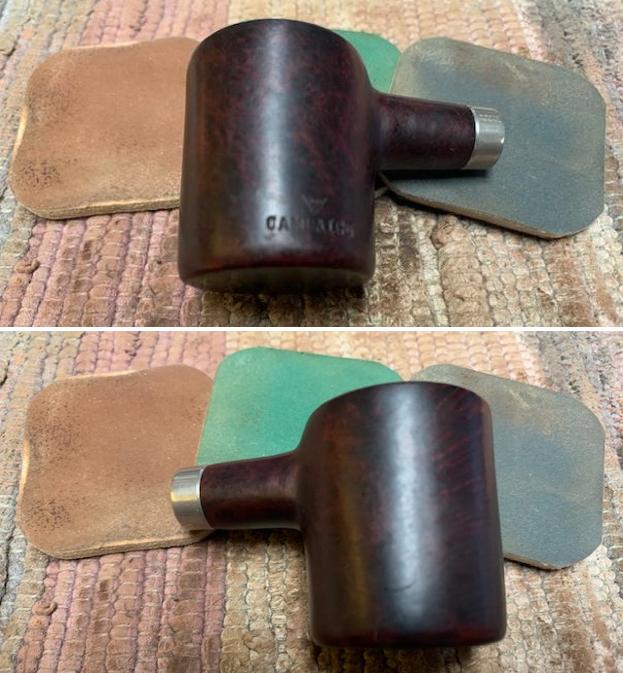
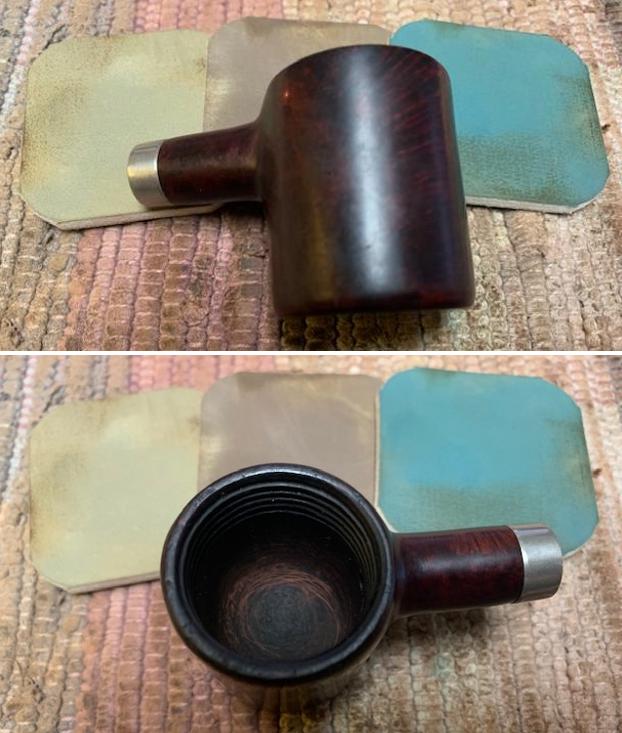
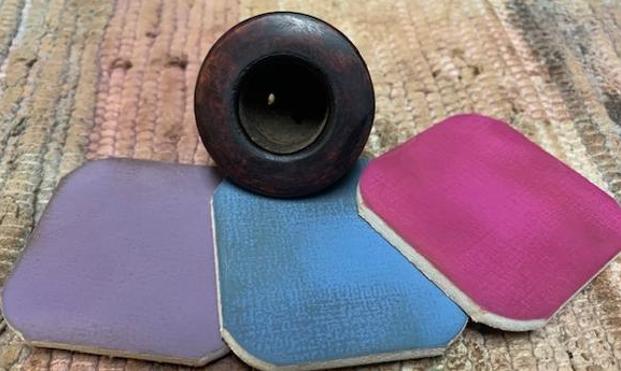
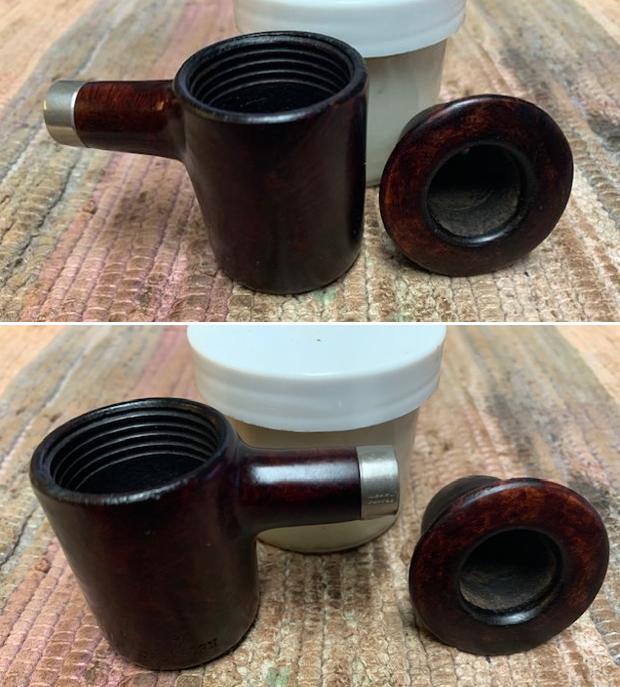
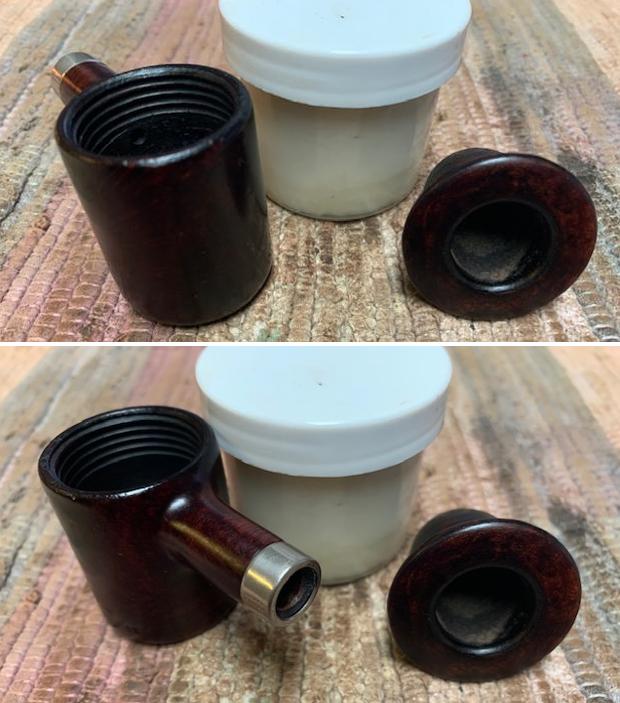
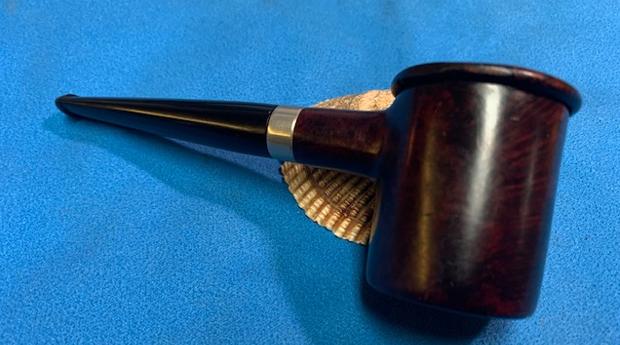
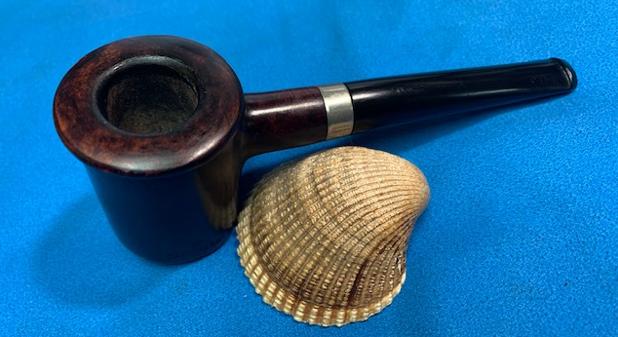
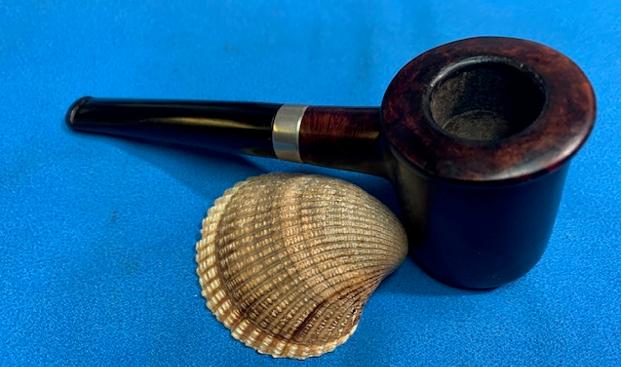
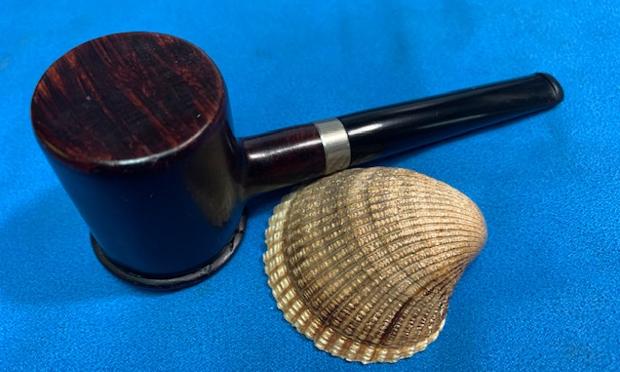
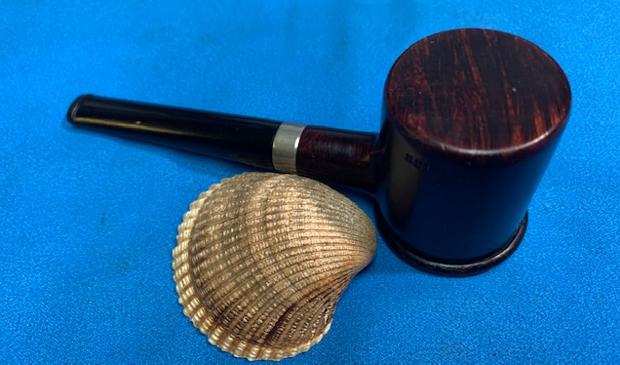
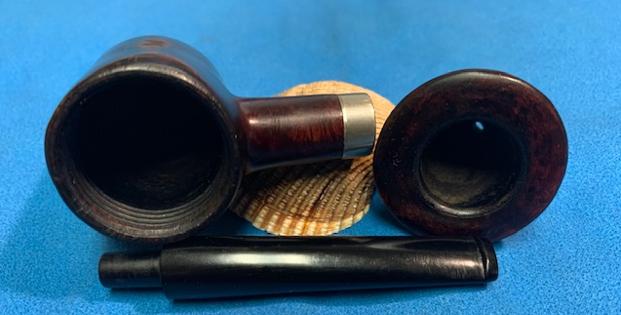
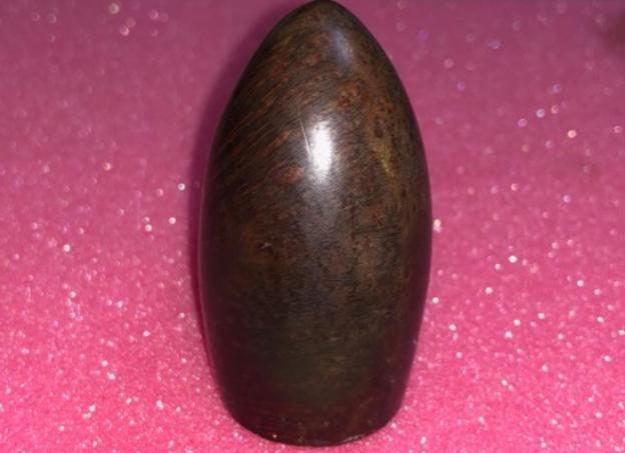
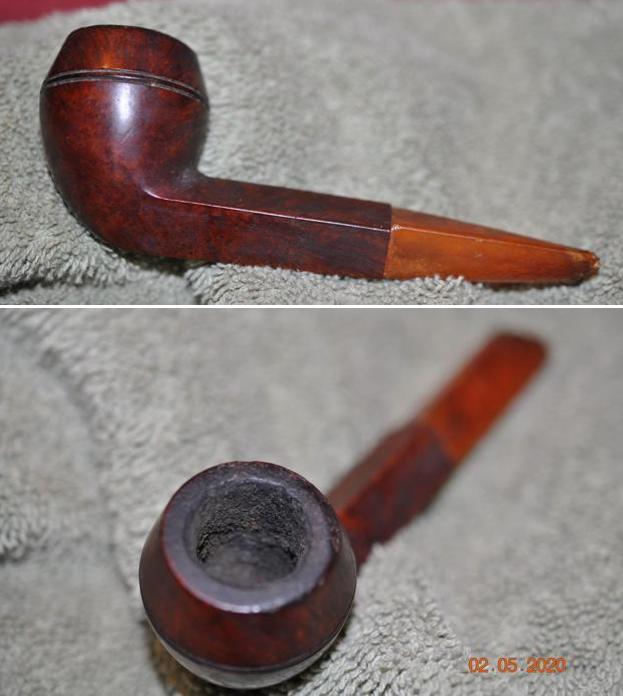
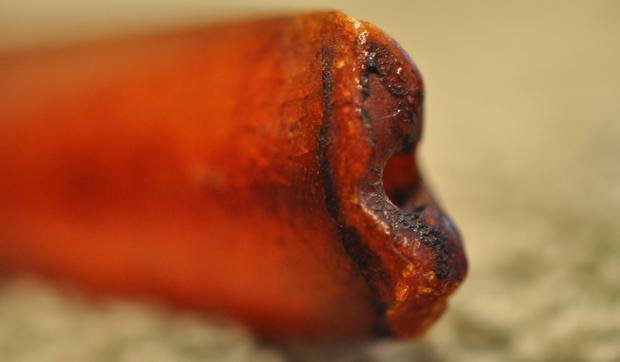
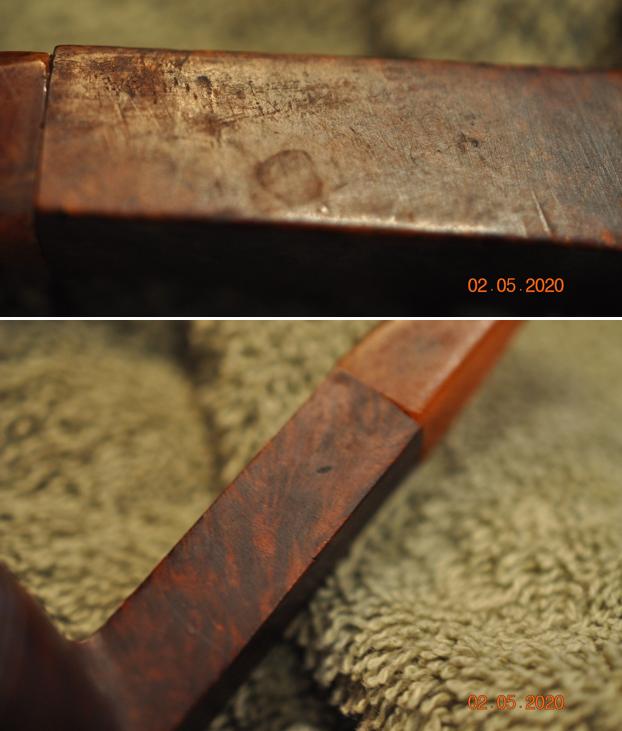
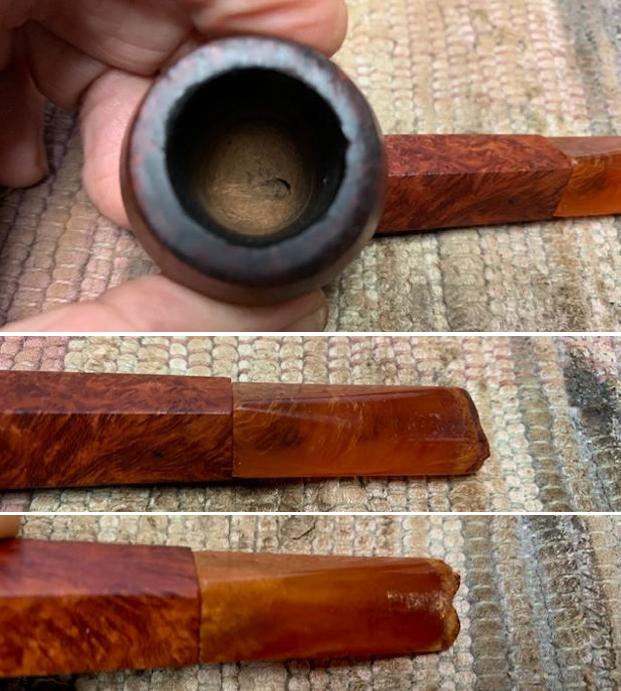
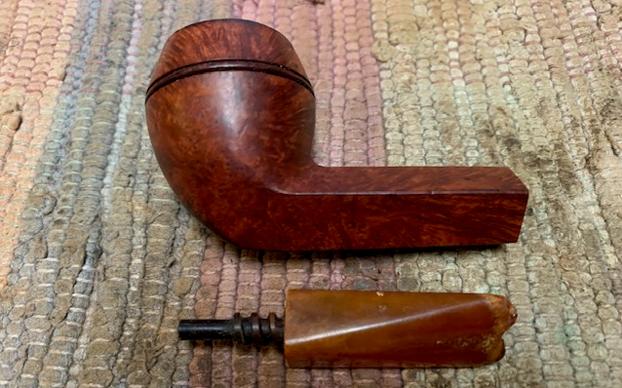
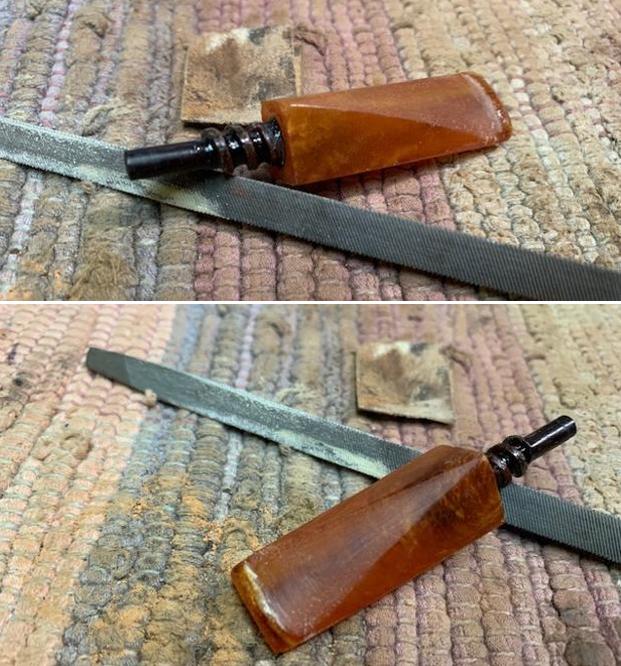
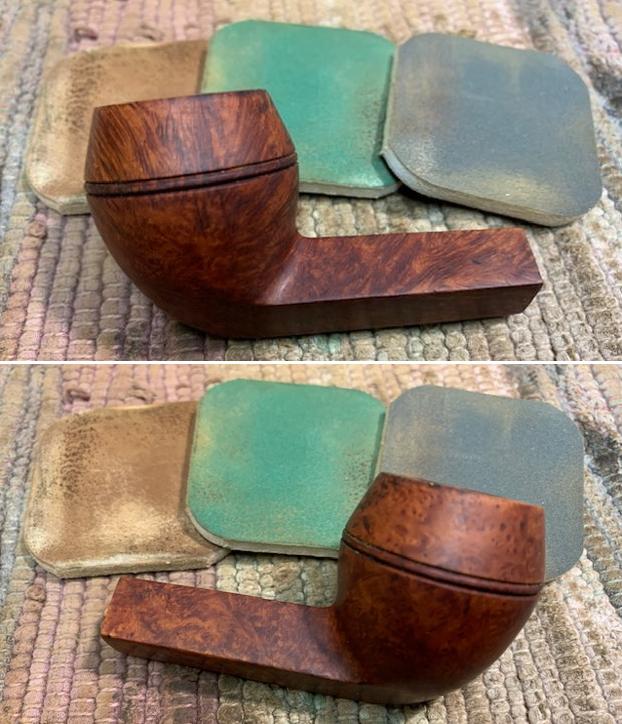
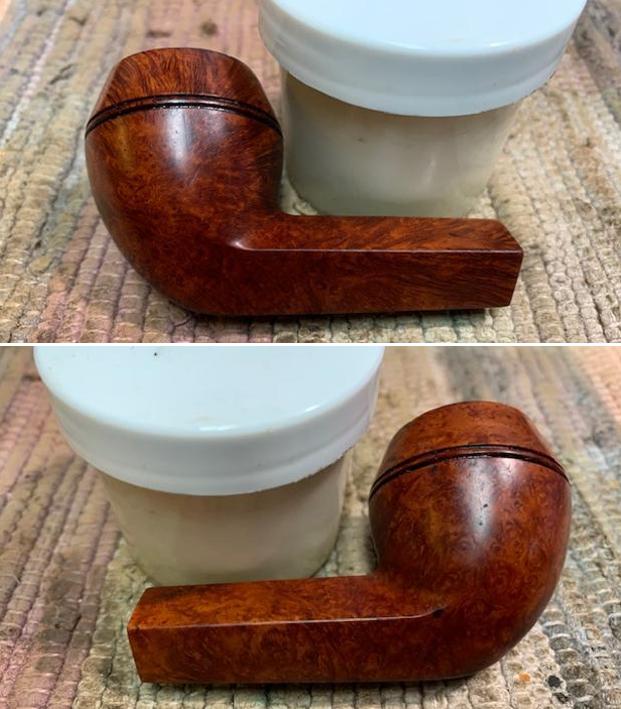
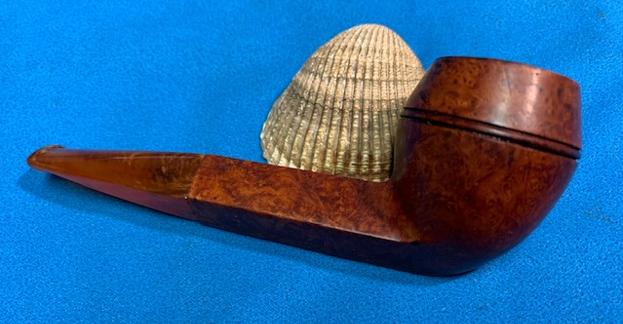
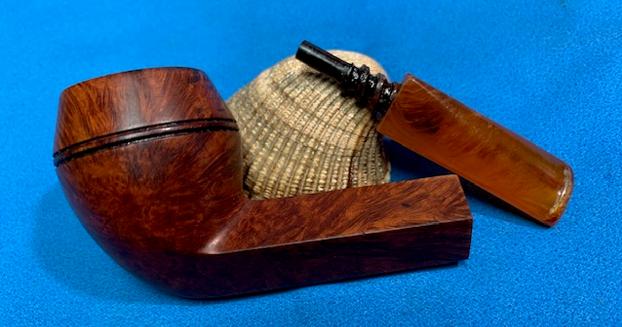
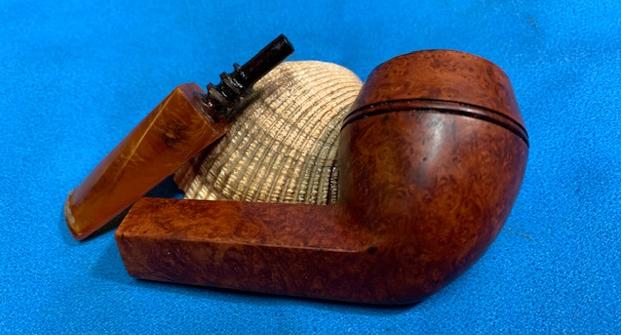
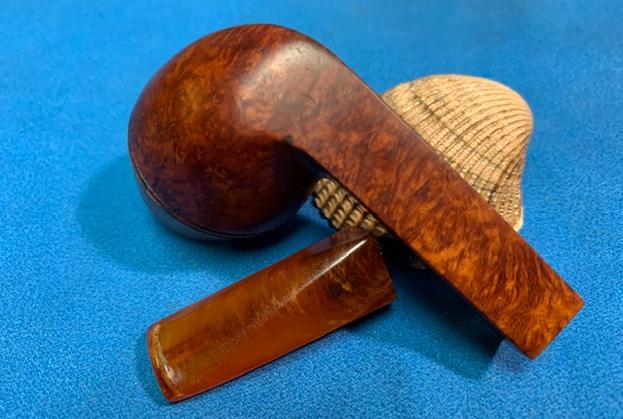
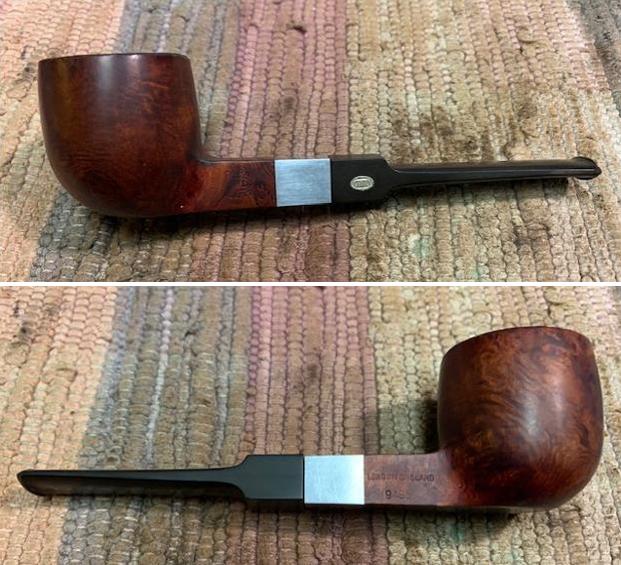
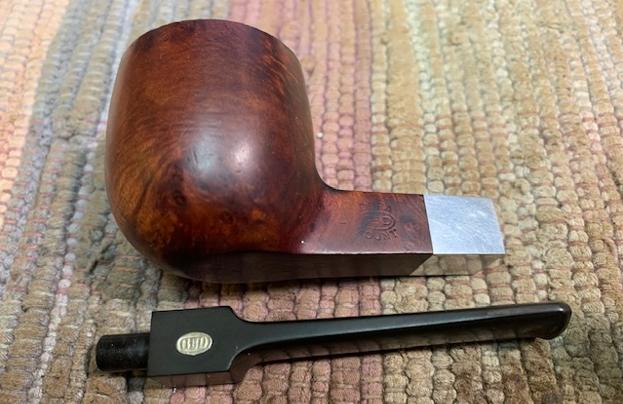
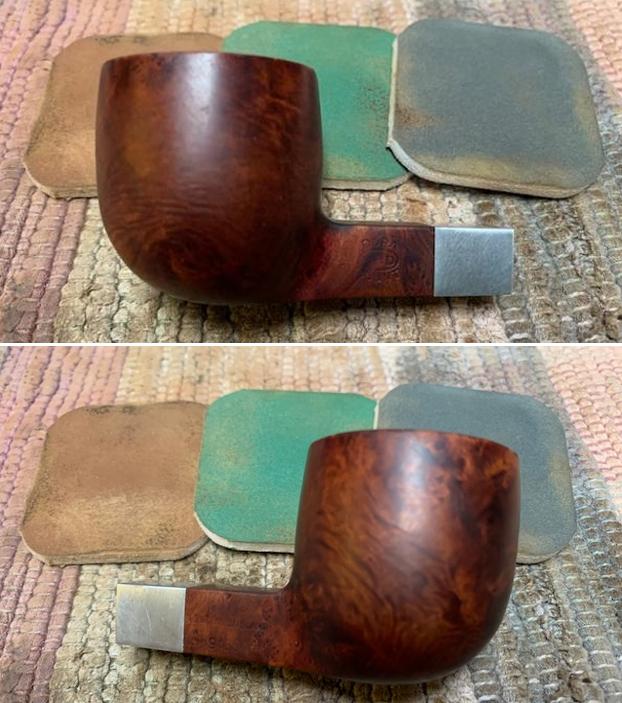
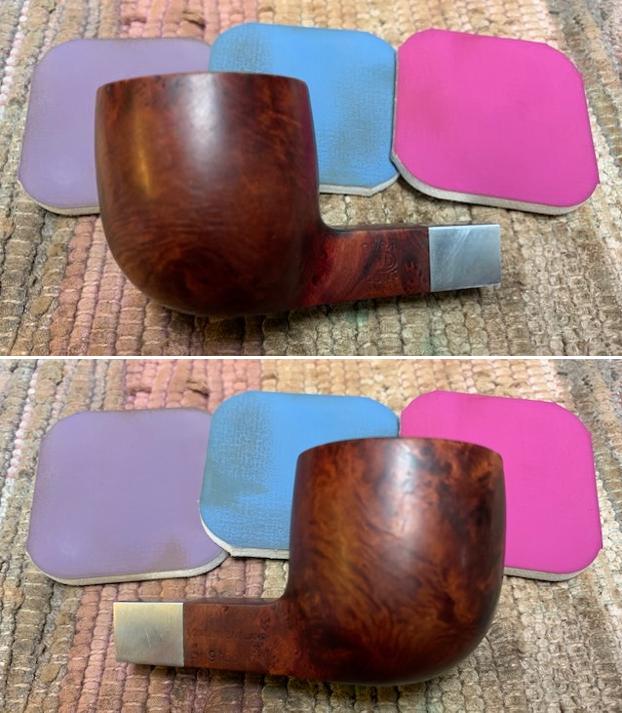
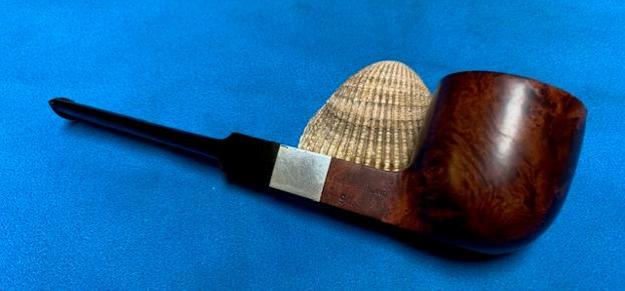
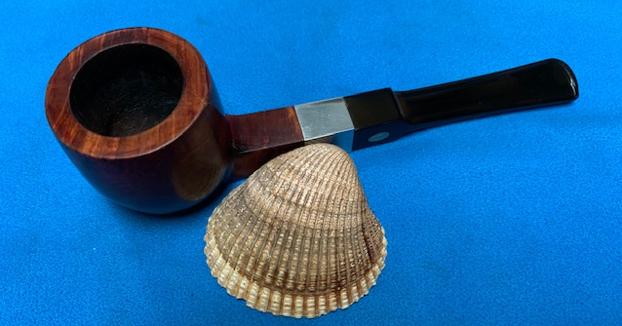
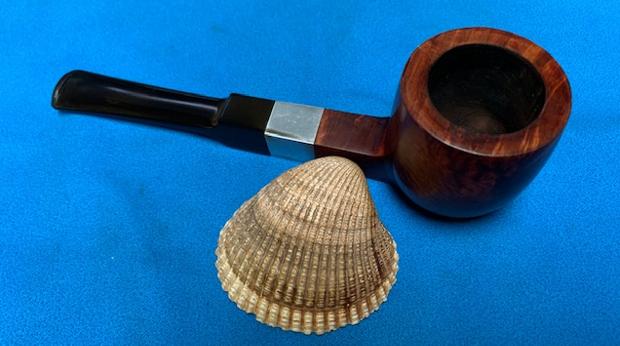
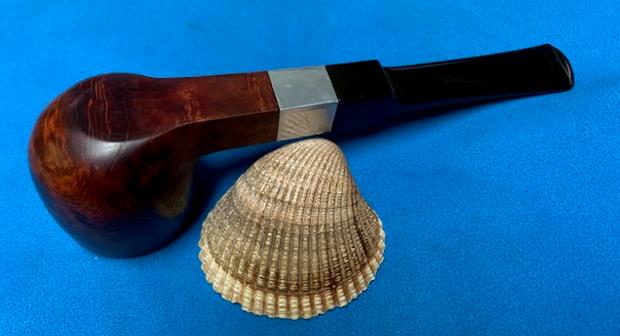
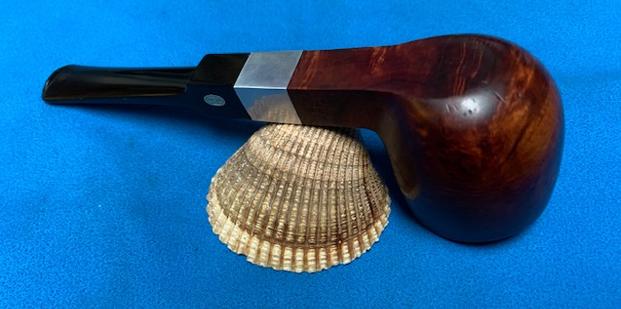
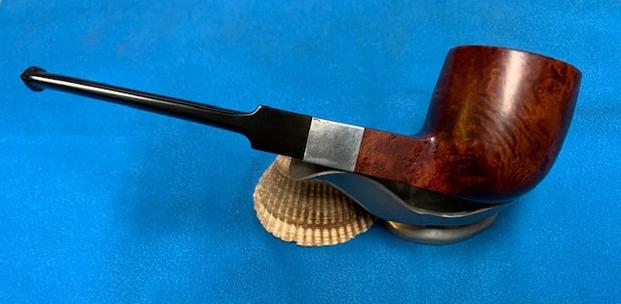
The pipe that is currently on my work table has a classic Billiard shape with thick walls. The stummel has rich medium brown stain and is covered in dirt and grime through which flame grains can be seen around the sides of the stummel and over the shank surface while Bird’s eye adorns the front, aft, rim top and the foot of the stummel. There is a well maintained layer of cake in the chamber with heavy lava overflow over the rim top surface. The inner rim edge has a nice bevel that is covered in lava overflow. The twin bore vulcanite saddle stem is heavily oxidized with minor damage to the bite zone on either surface. The buttons on both surfaces show bite marks. The following pictures will give readers an idea of the overall condition of the pipe as it sits on my work table. Overall, the thin layer of cake and excellent condition of the stem are pointers to the fact that the pipe seems to be well looked after. It should be an easy restoration project, unless some gremlins pop up during the process.

 Detailed Visual Inspection
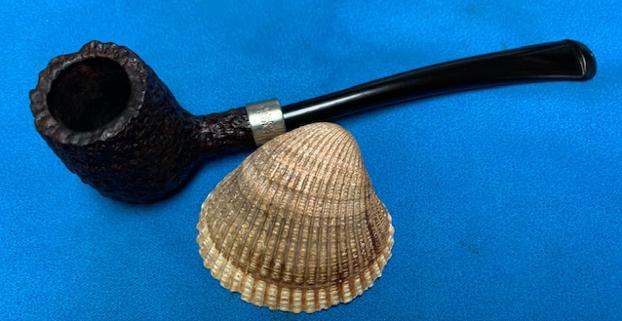
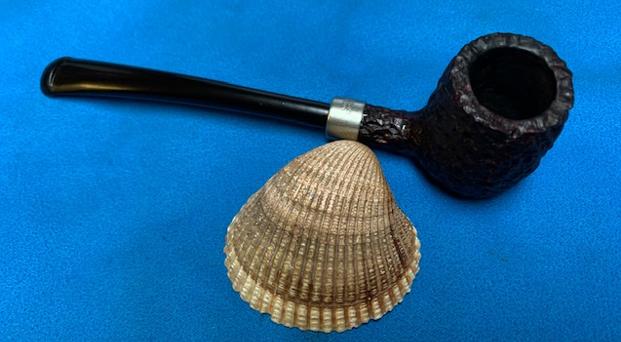
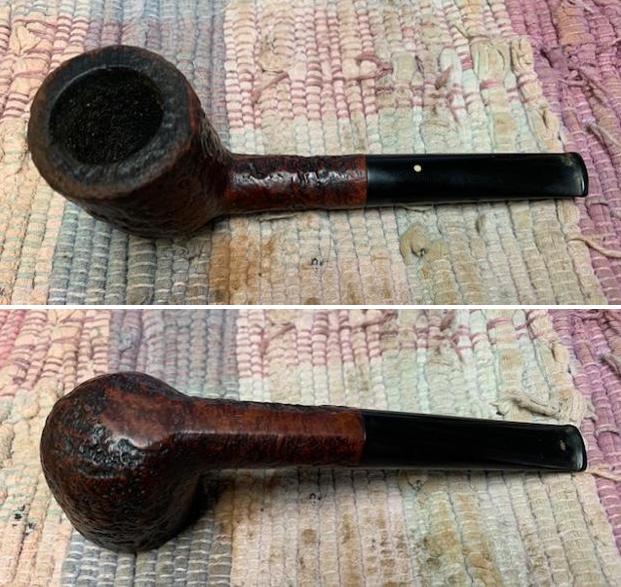
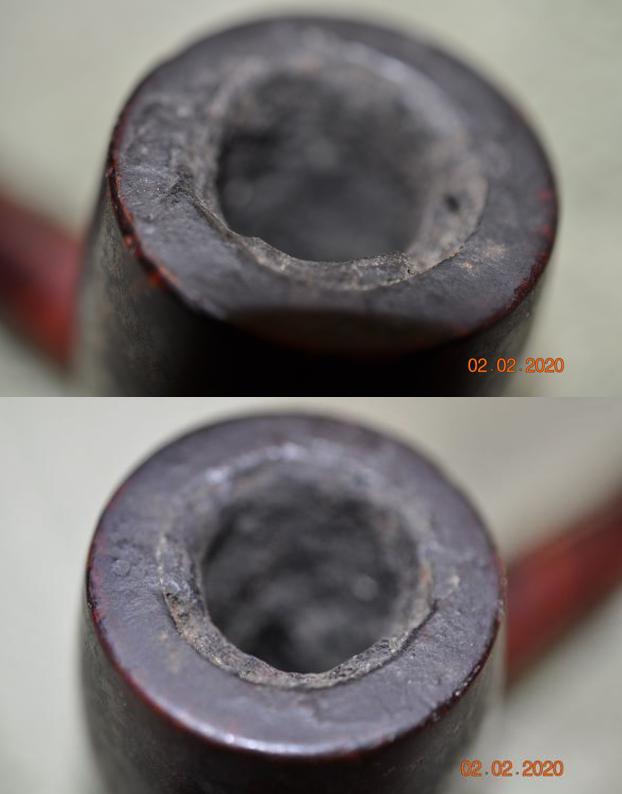
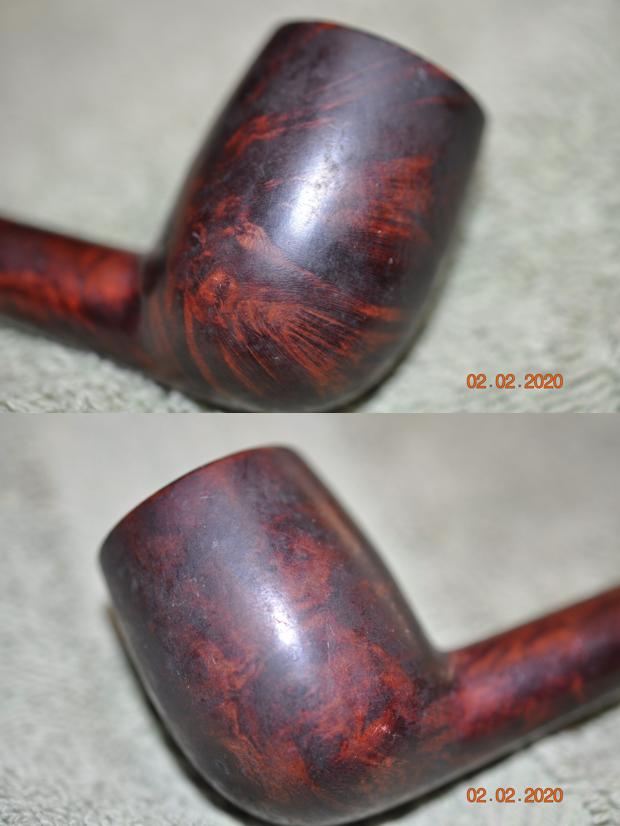
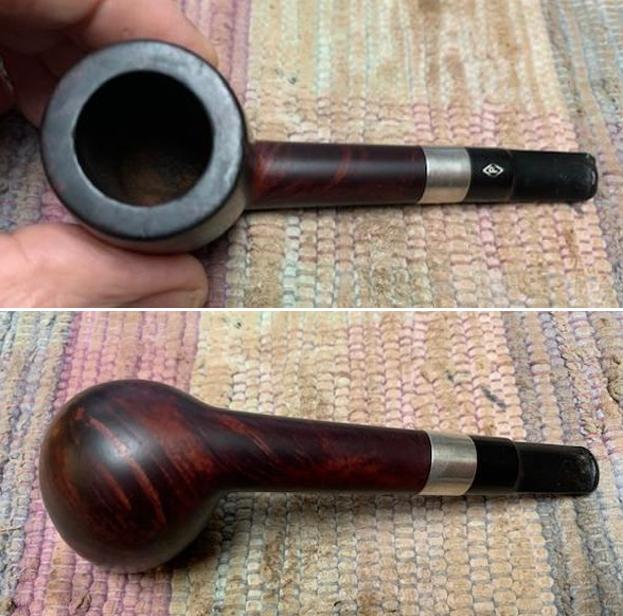
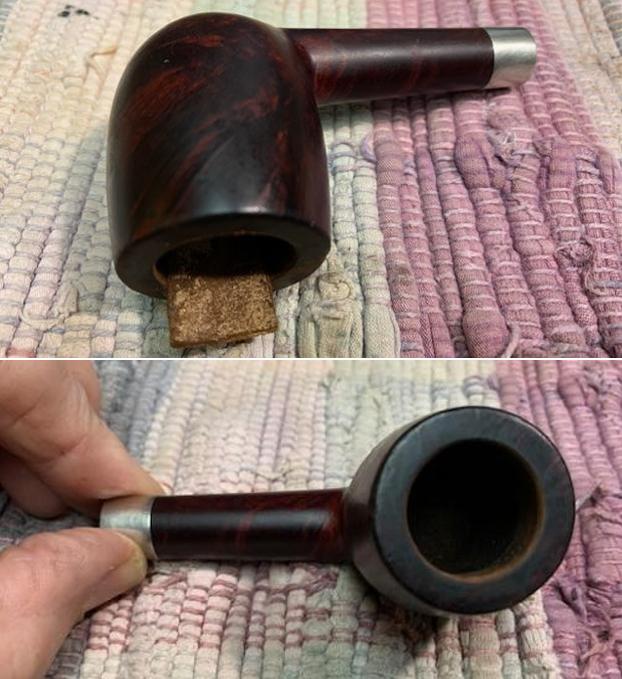
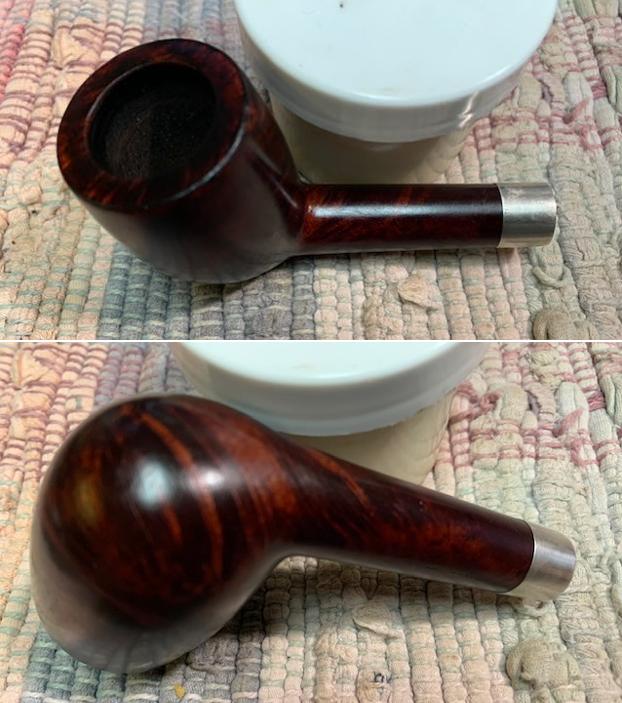
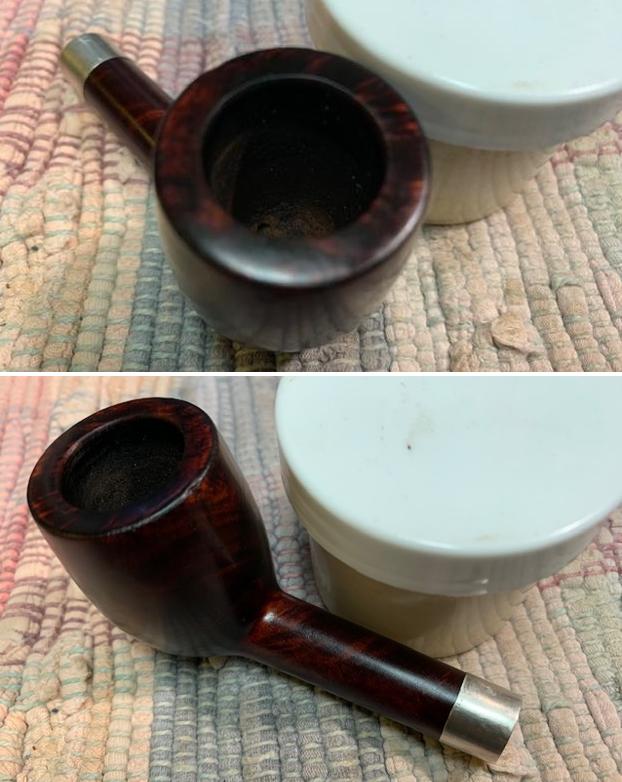
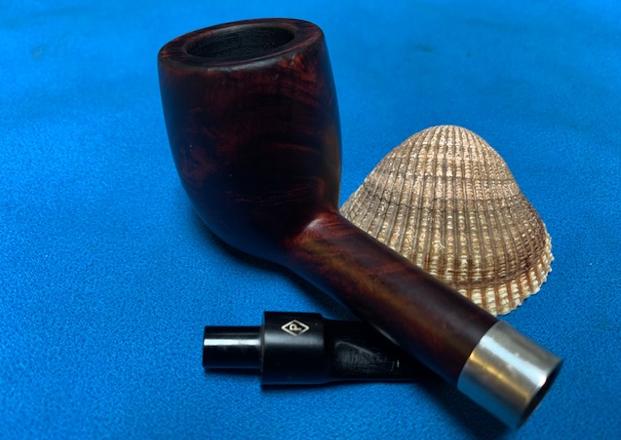
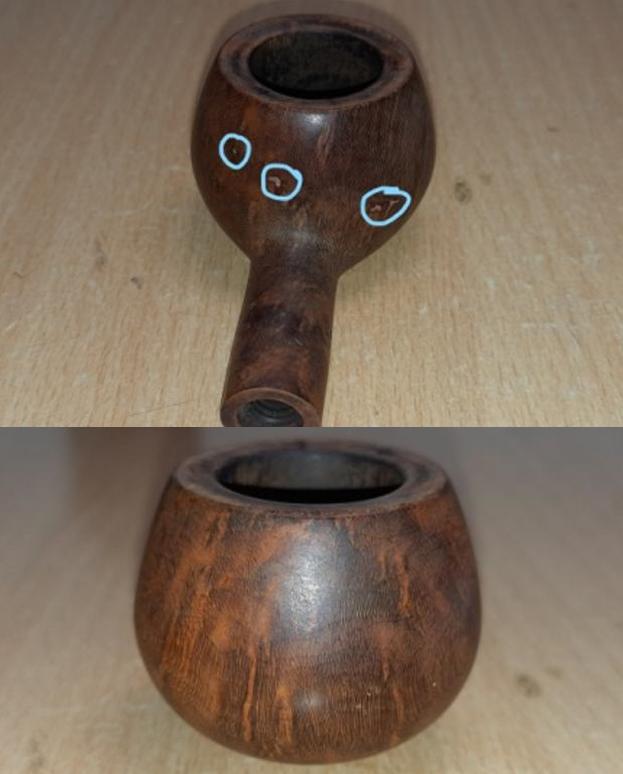
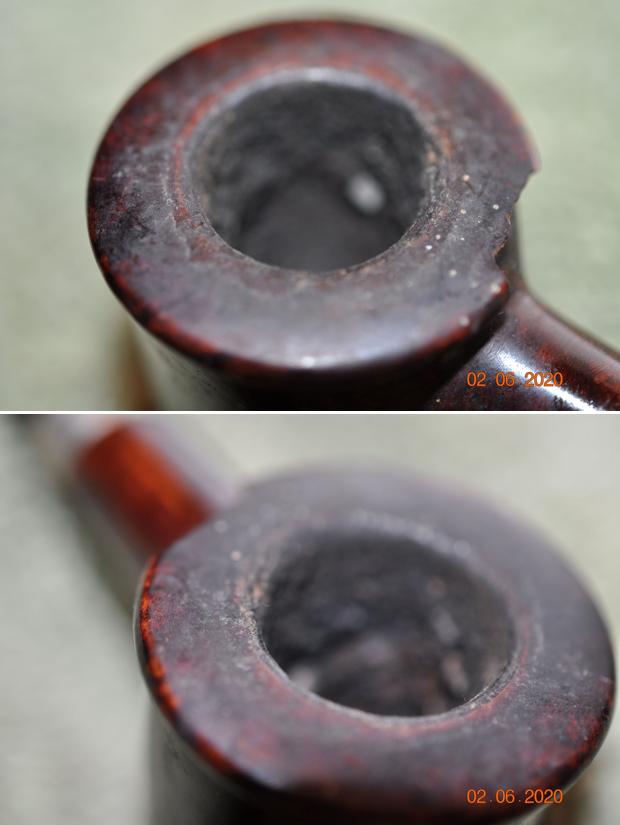
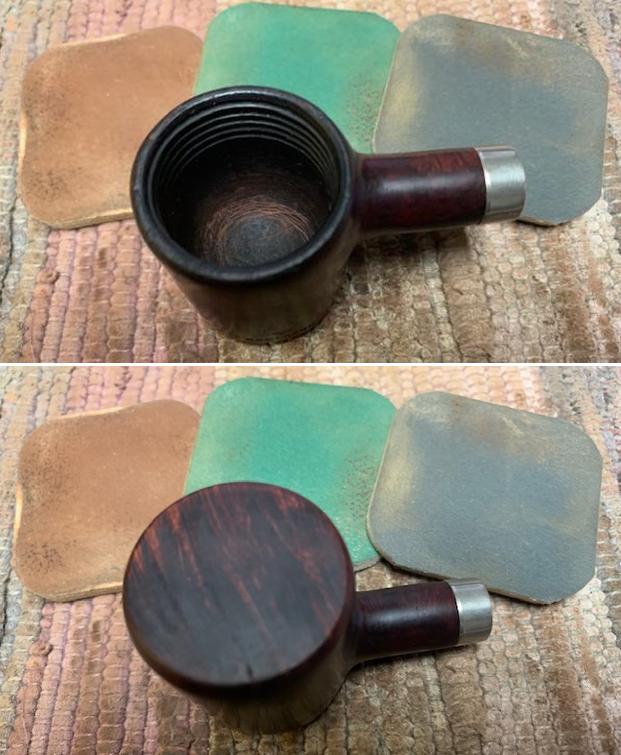
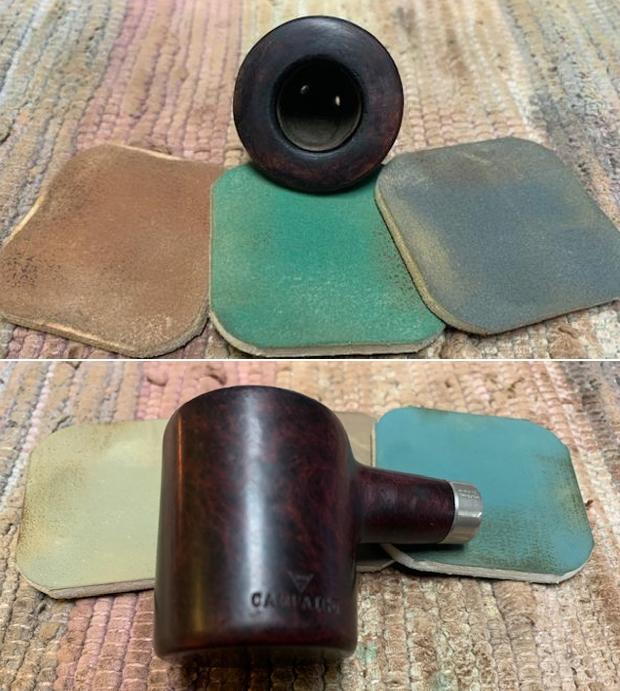
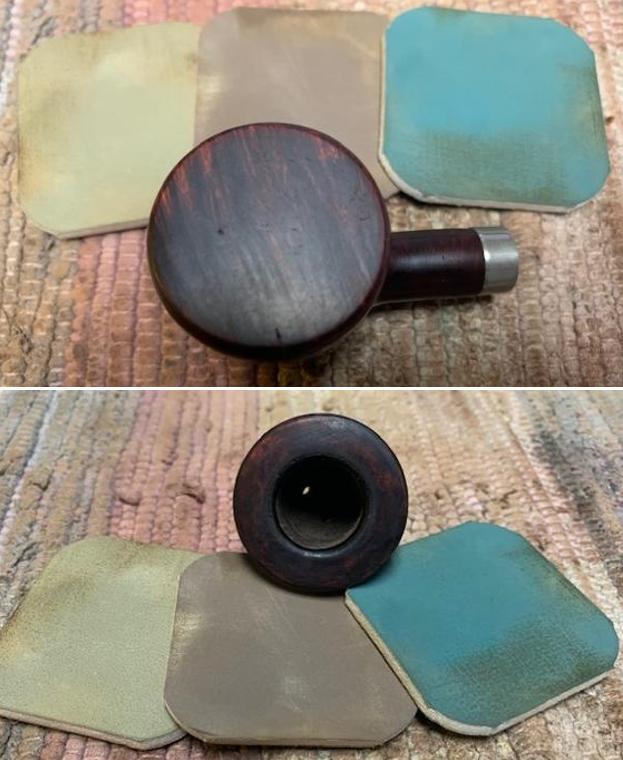
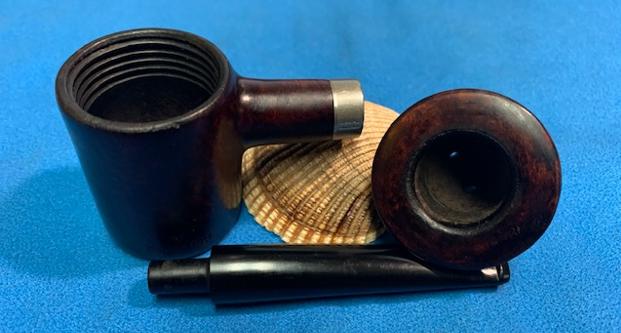
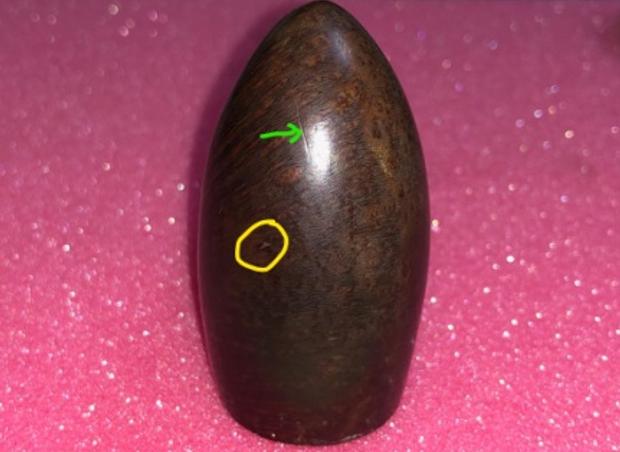
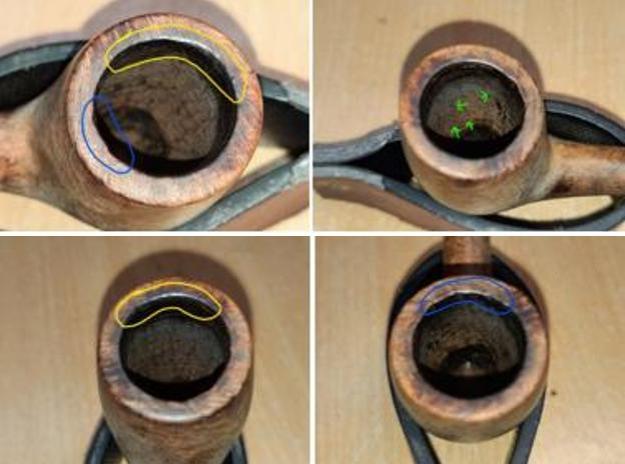
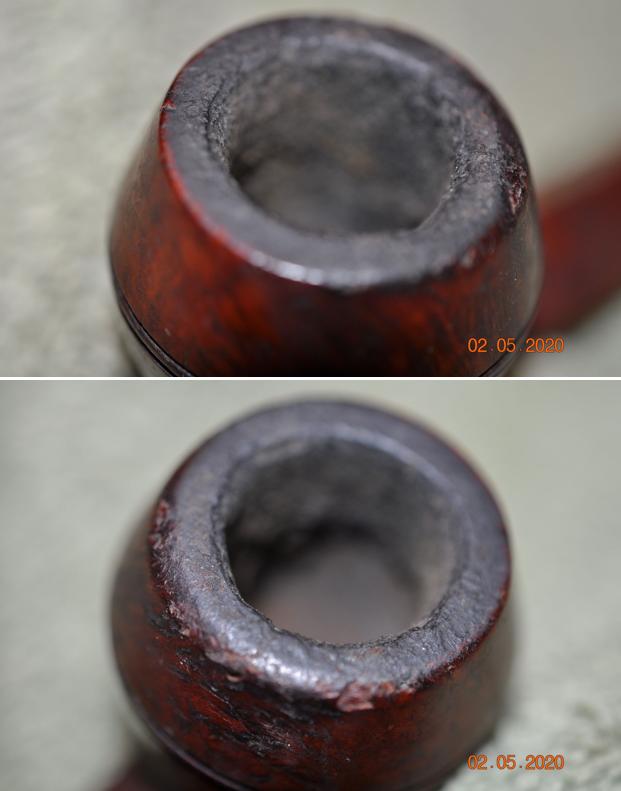
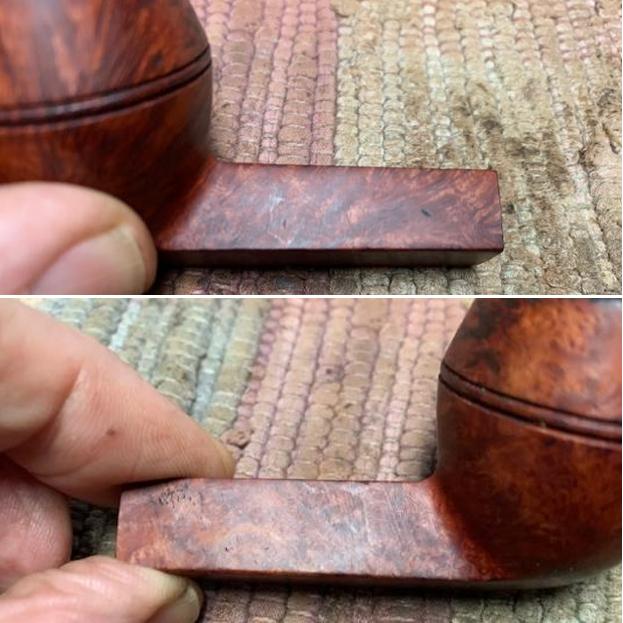
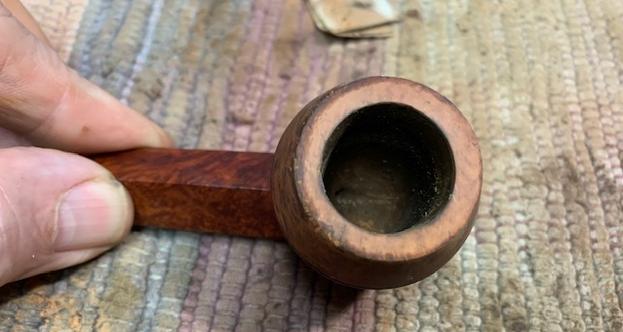
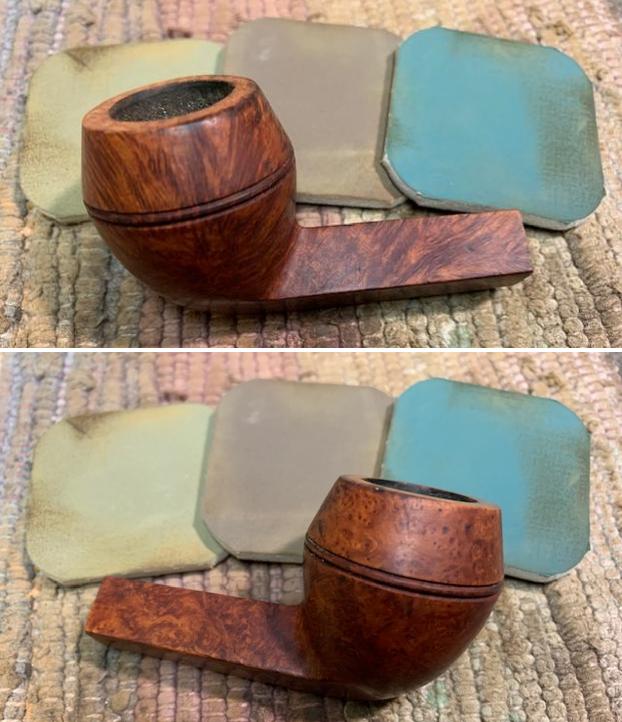
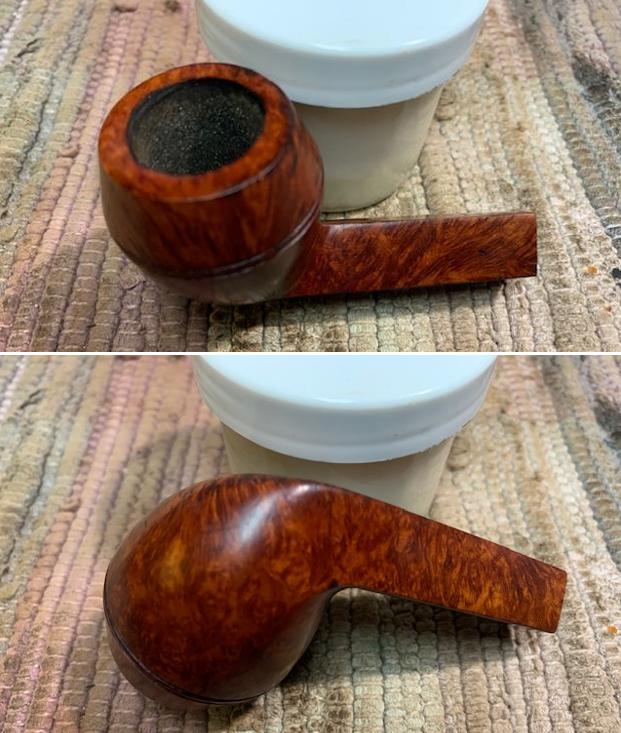
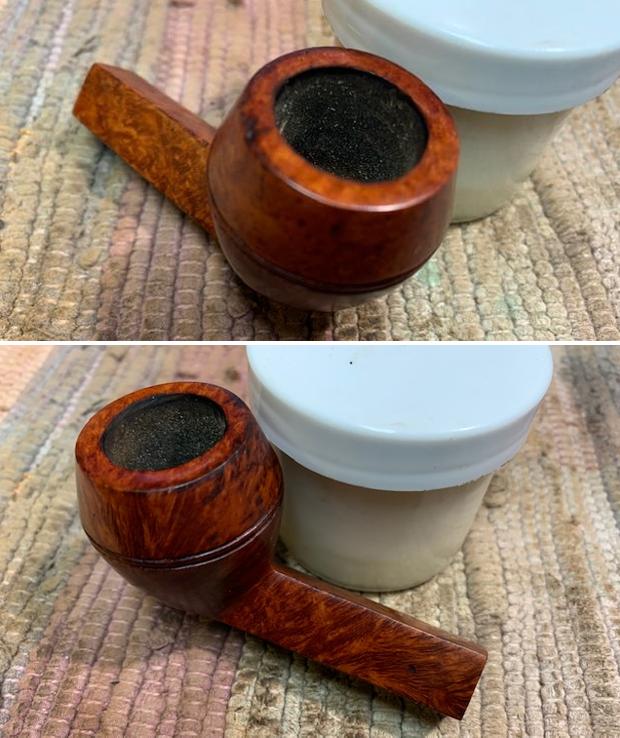
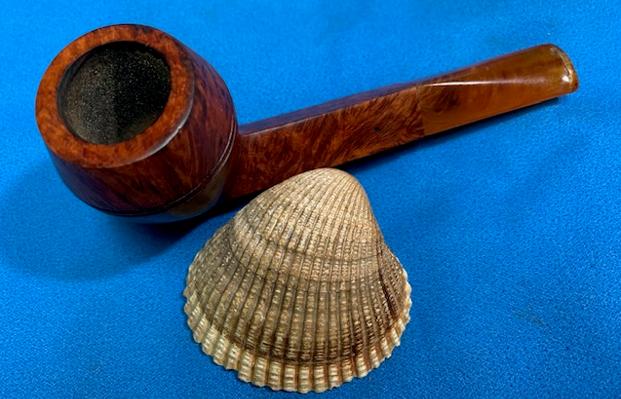
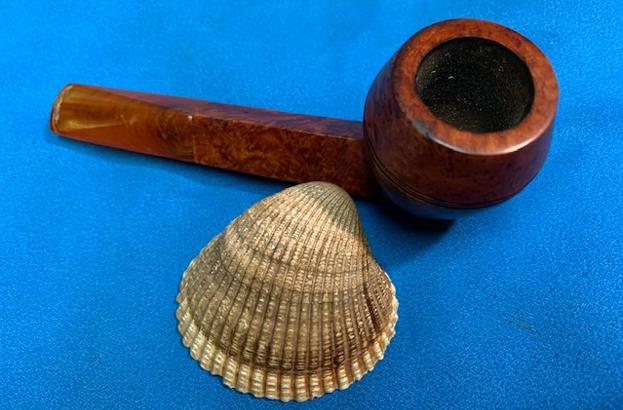
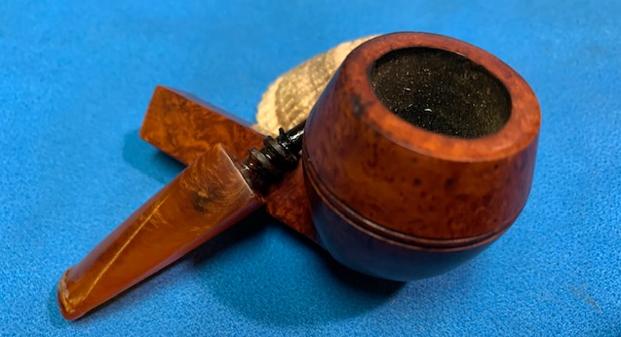
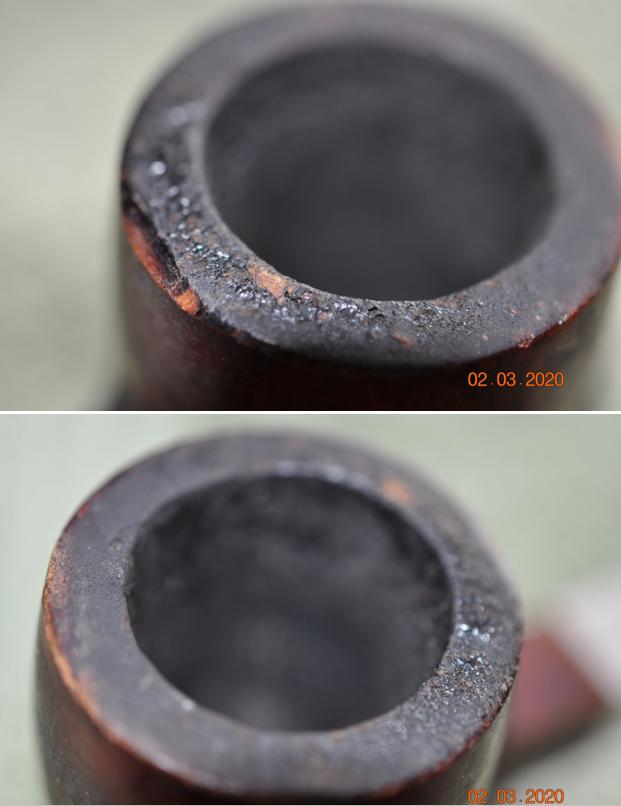
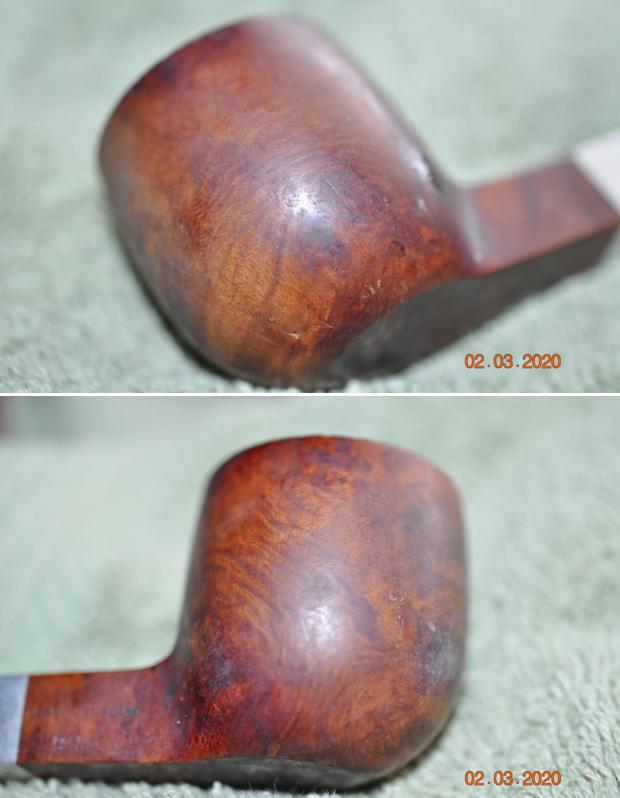
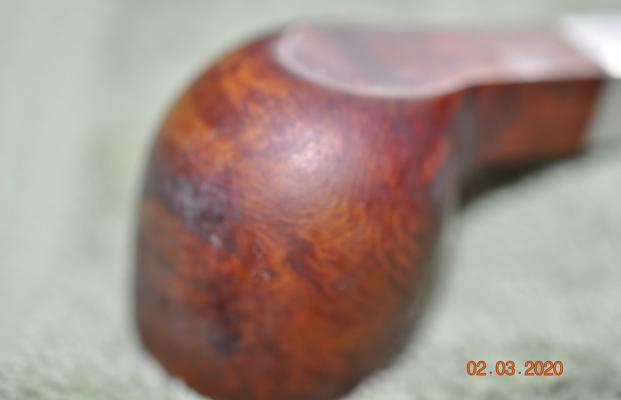
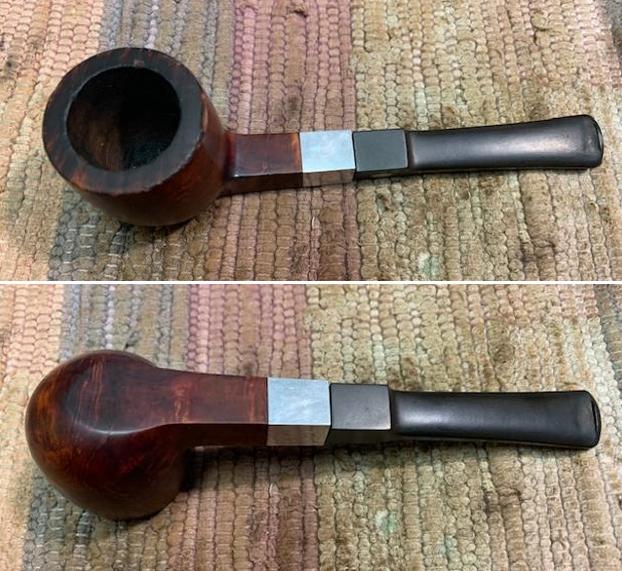
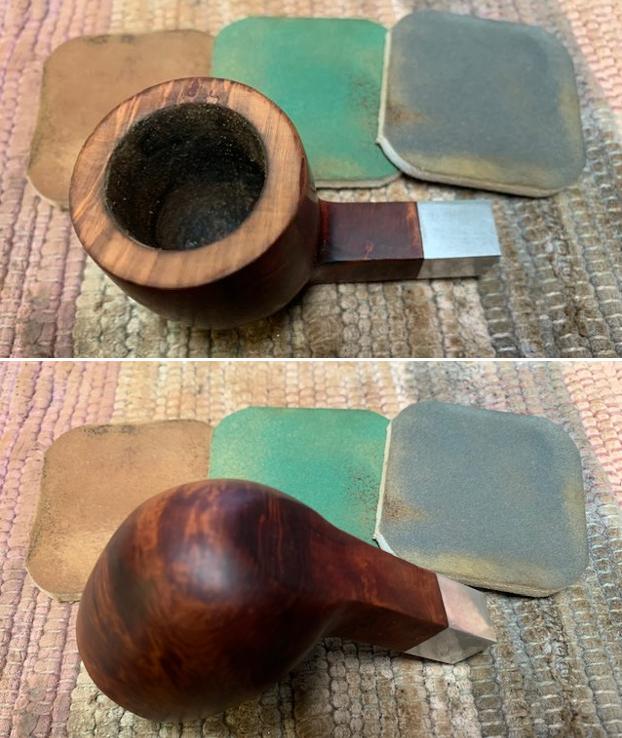
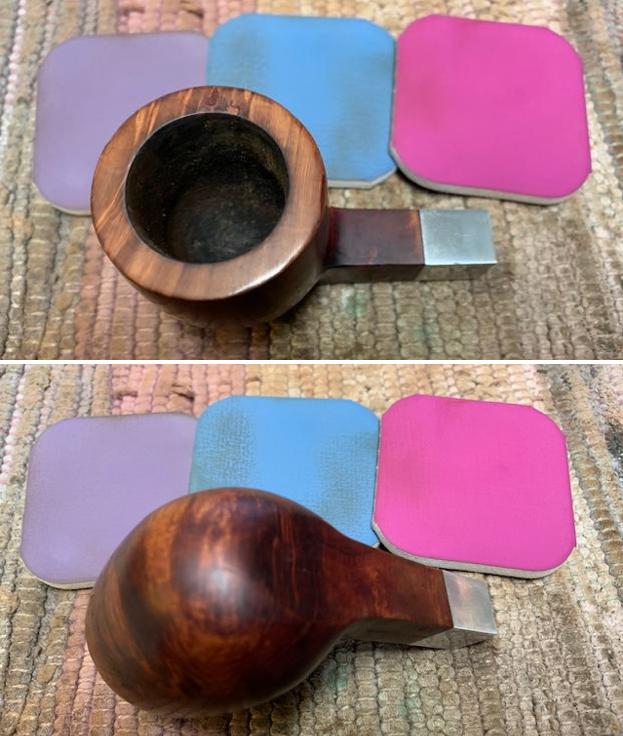
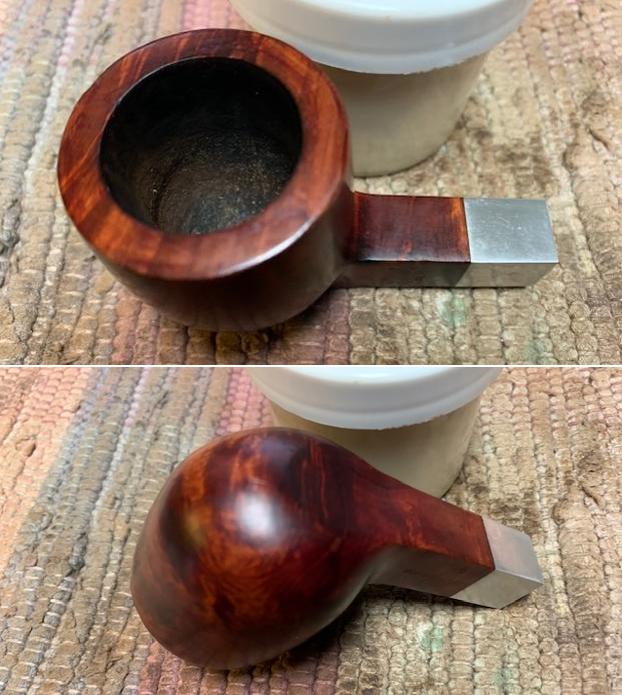
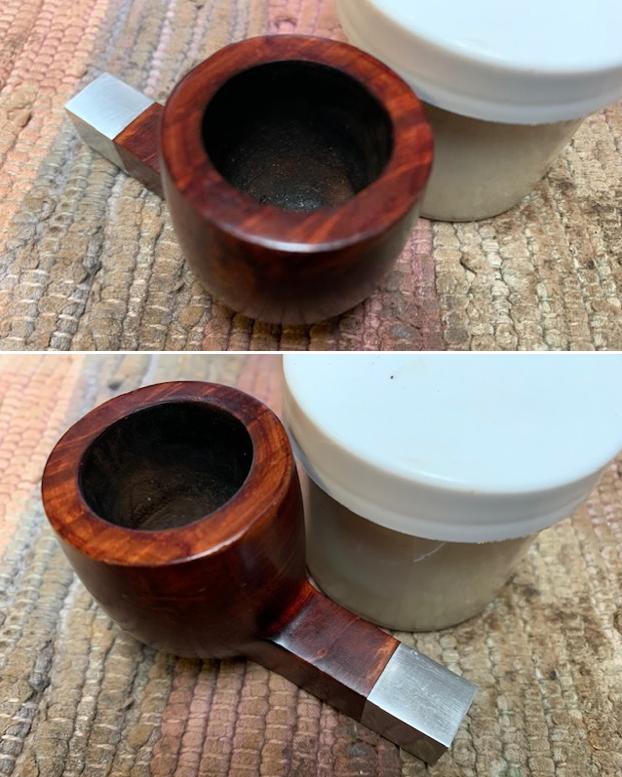
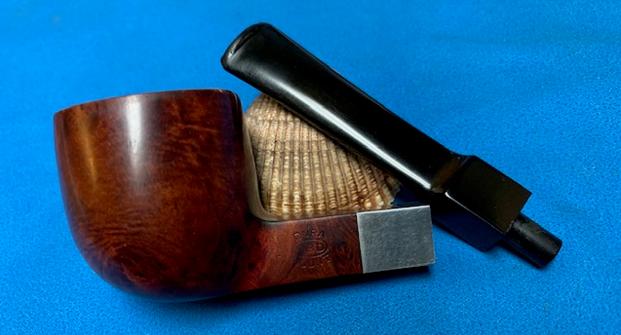
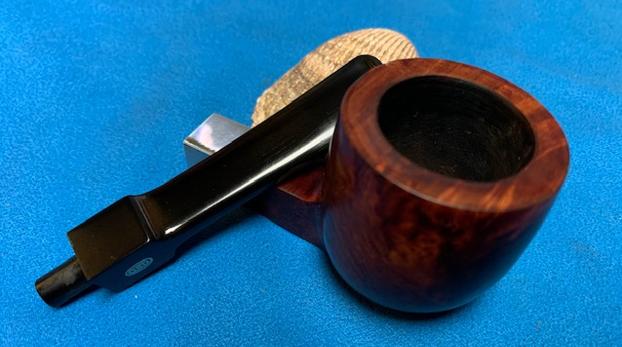
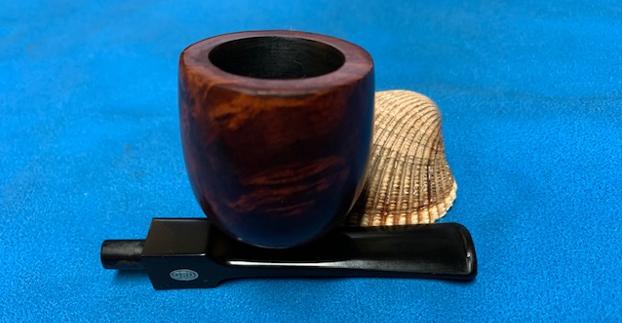
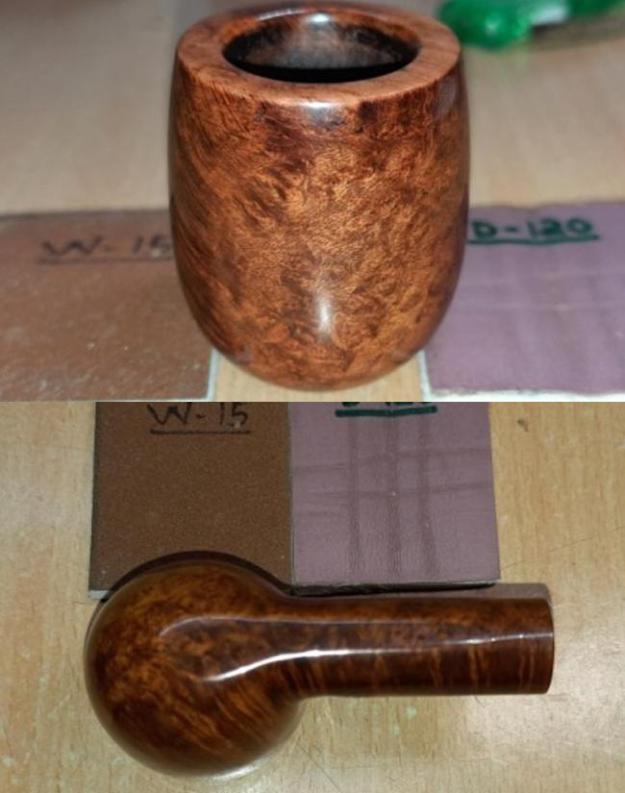
A thin and even layer of cake is seen in the chamber. The rim top surface is covered in overflow of lava, dirt, dust and grime through which a number of dents and dings can be seen. The exact condition of the inner walls of the chamber and rim top surface will be known once the cake has been taken down to bare briar and the rim top crud has been scraped off completely. The outer rim is uneven with a couple of dents/ chipped surface in 2 ‘O’ clock and 6 ‘O’ clock directions (marked in yellow circle). Only once the stummel has been thoroughly cleaned that I can be sure of my initial appreciation. The beveled inner rim edge is covered in lava overflow, masking the real condition of the rim edge. The chamber odor is strong and should be addressed to some extent once the cake has been taken down to the bare briar and the shank internals have been thoroughly cleaned. The stummel feels solid to the touch and I do not foresee any major issues with the condition of the chamber walls.  To be honest with you, this being a Comoy’s seconds pipe, I had expected to find a few fills and some non-descript grain on the stummel briar. However, I was surprised to note that there are only four very minute fills (encircled in yellow) in the stummel surface and the surface boasts of some beautiful cross grains around the sides and over the shank surface while beautiful packed Bird’s eye adorns the front, aft and foot of the stummel. The stummel surface is covered in dirt and grime giving the stummel a dull and dirty appearance. The stummel surface shows a few dents and dings. It does have a quality which is seen on vintage pipes, not to forget, this is nearly an 80 plus year old pipe, but difficult to explain in words. The mortise shows minor accumulation of old oils and tars which would need to be cleaned. The fills over the stummel surface is one issue that I am not sure about dealing with since I absolutely love the old dark brown color and the patina that has developed over time that needs to be preserved and also since these fills are too minor to be noticed. A nice polish with micromesh grit pads will bring a nice shine to the stummel and highlight the grains.
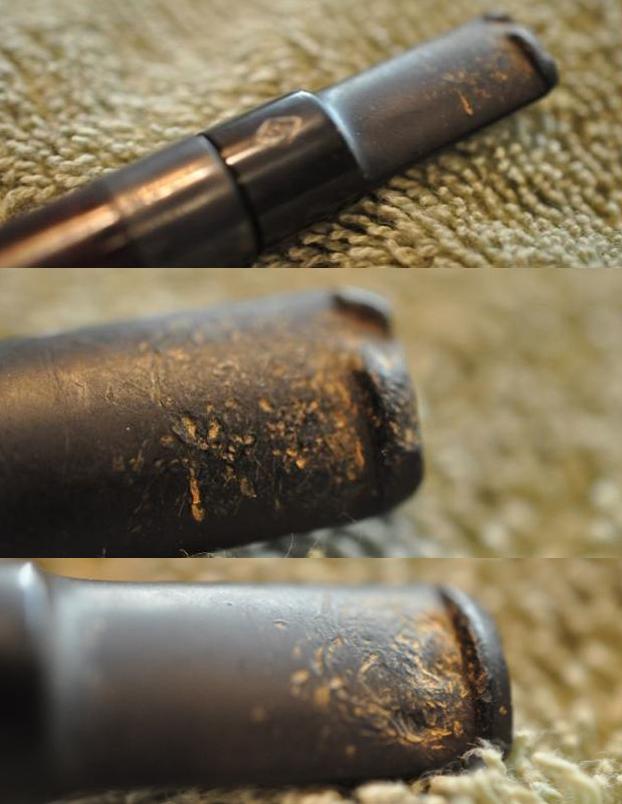
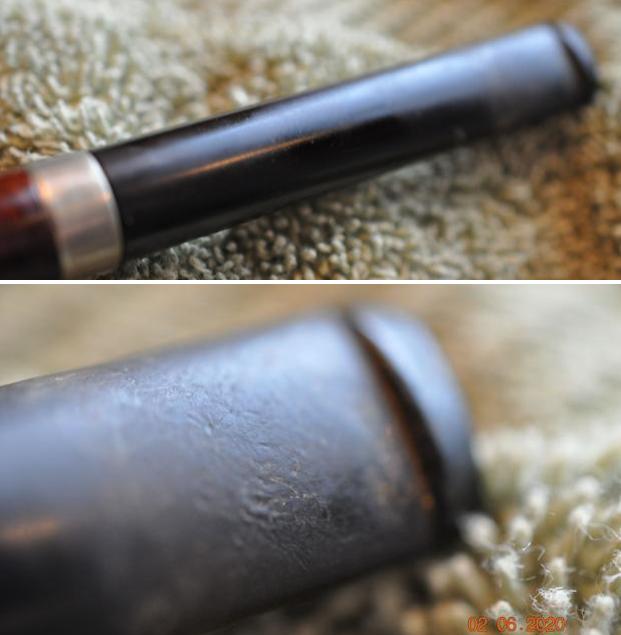
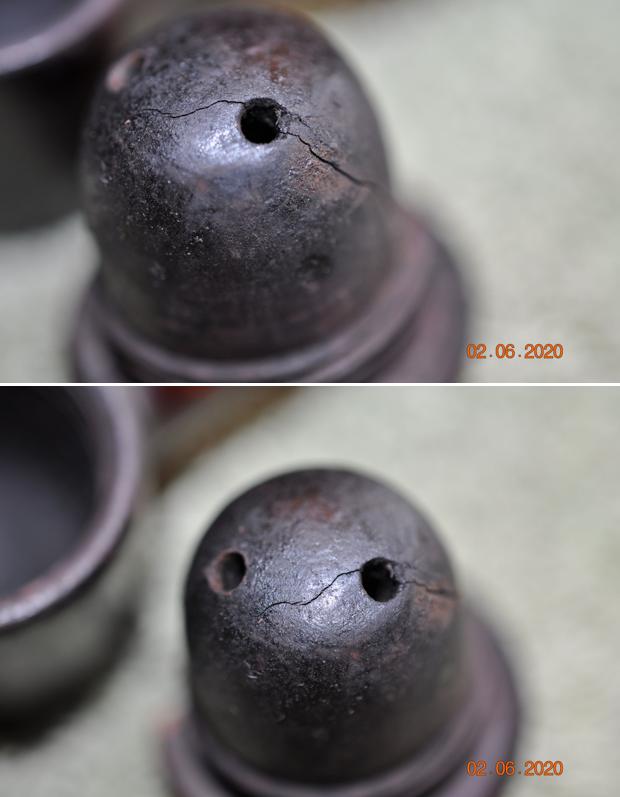
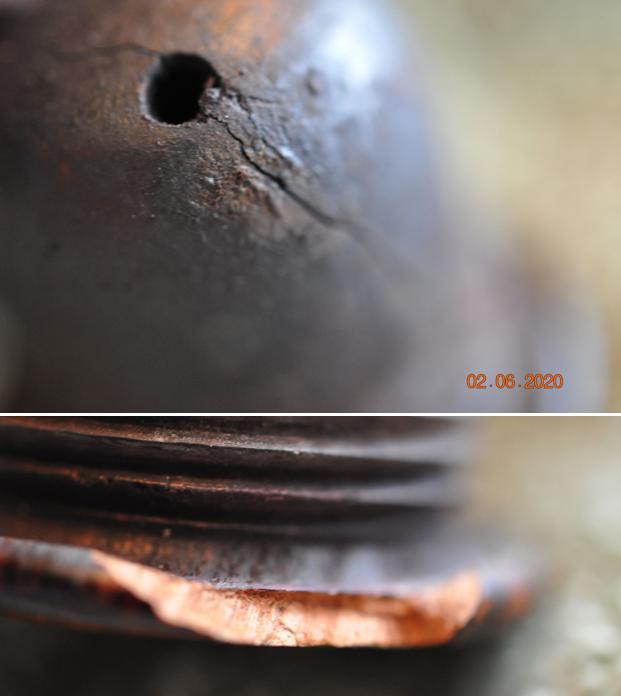
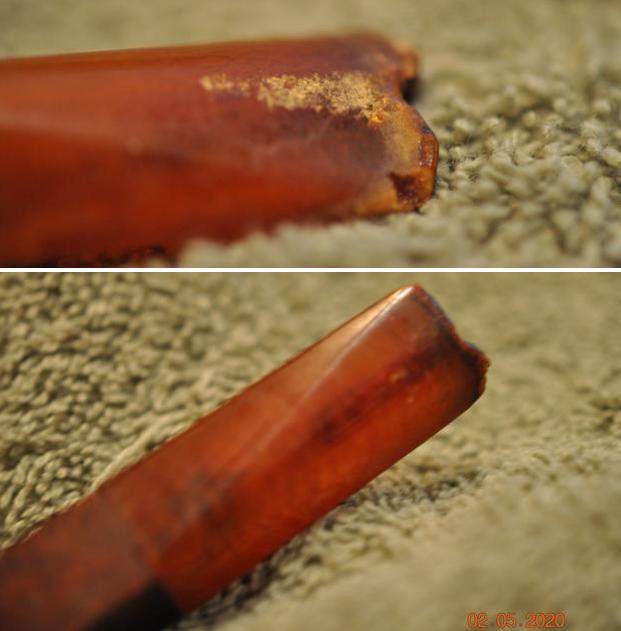
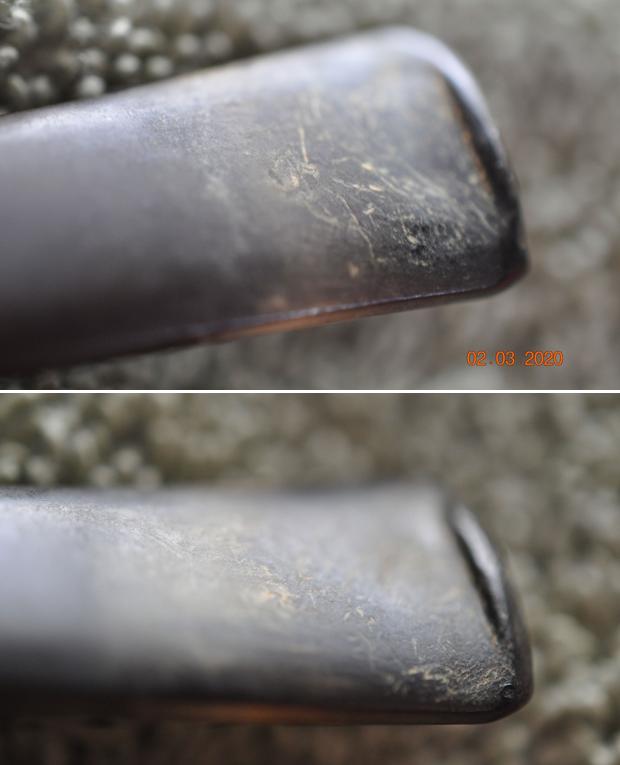
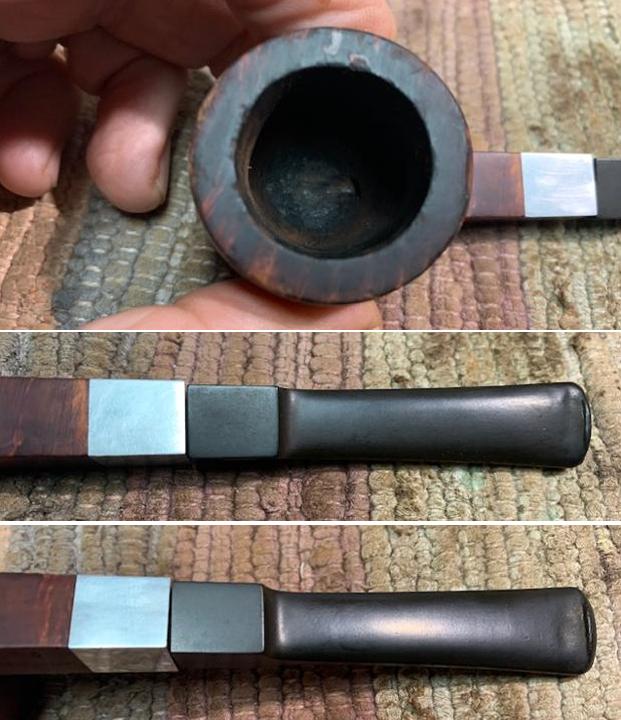
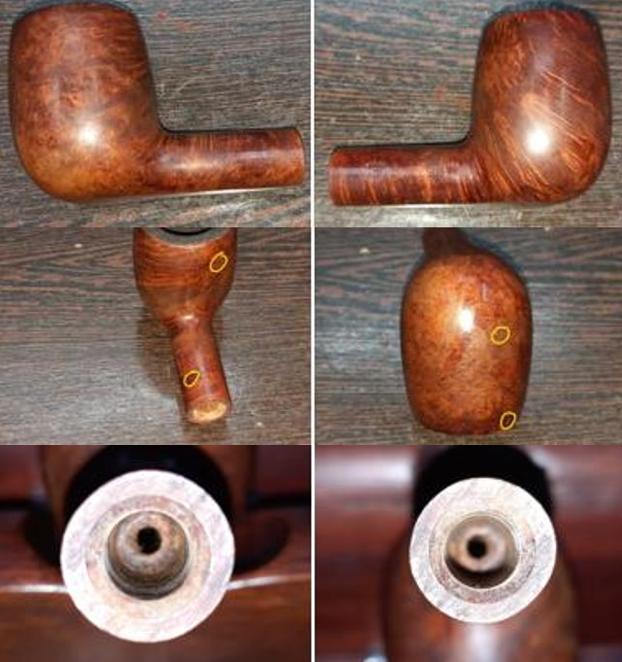 The twin bore vulcanite saddle stem is heavily oxidized, but otherwise in a decent condition. The bite zone on either surface shows some minor tooth indentations with a small amount of calcification at the base of the button edge. The twin holed slot and tenon opening shows accumulation of dried oils and tars. All in all, the stem presents no major damage and should be an easy clean up.
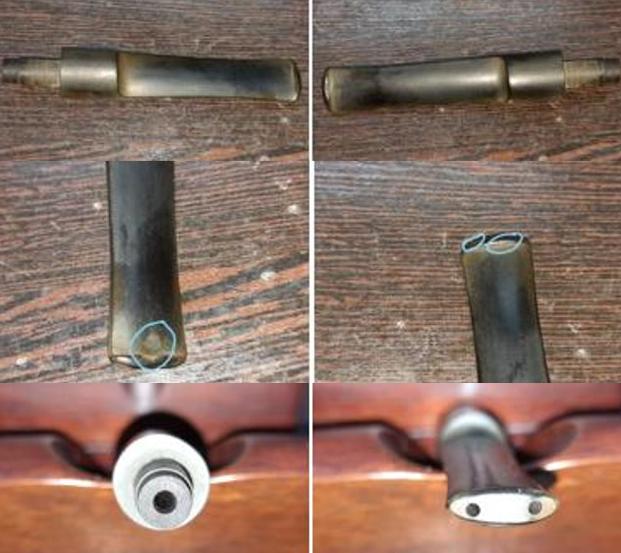 The Process
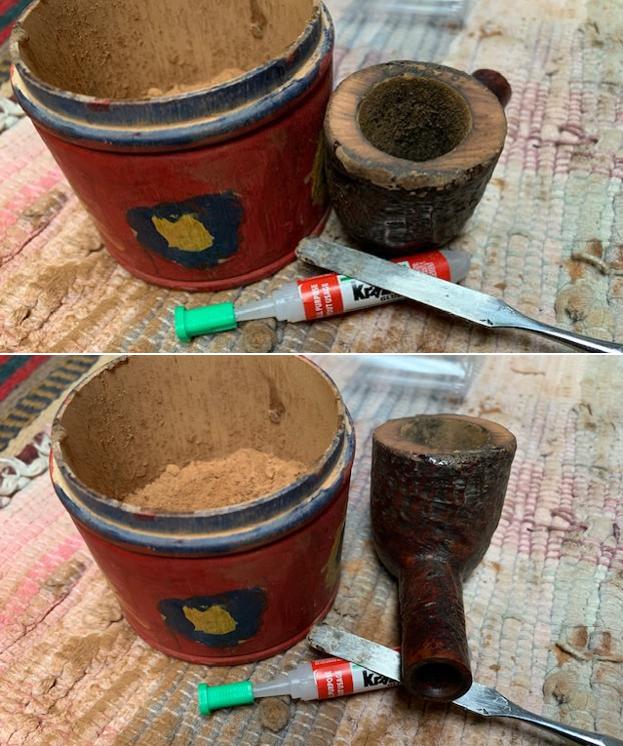
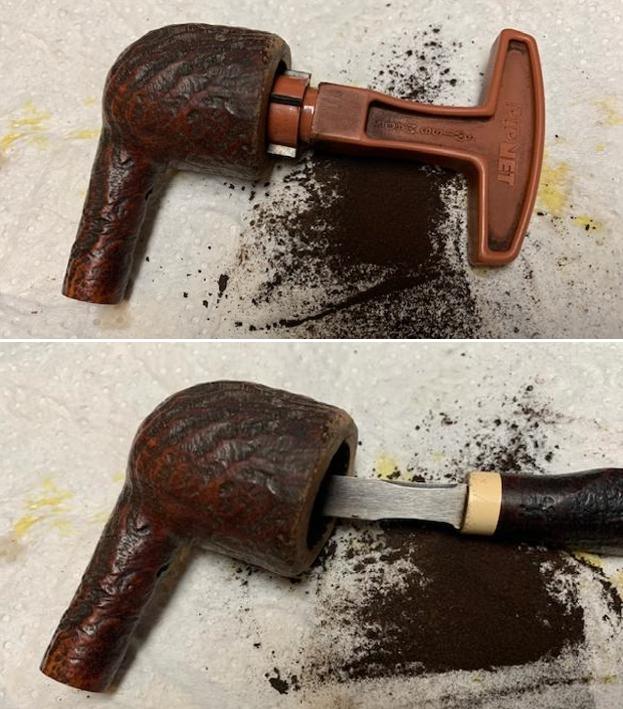
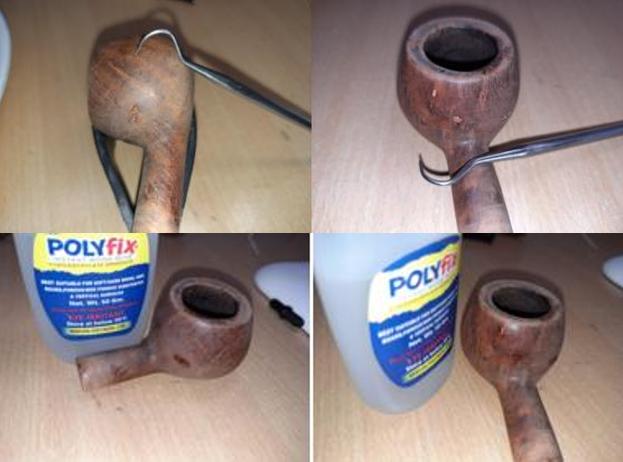
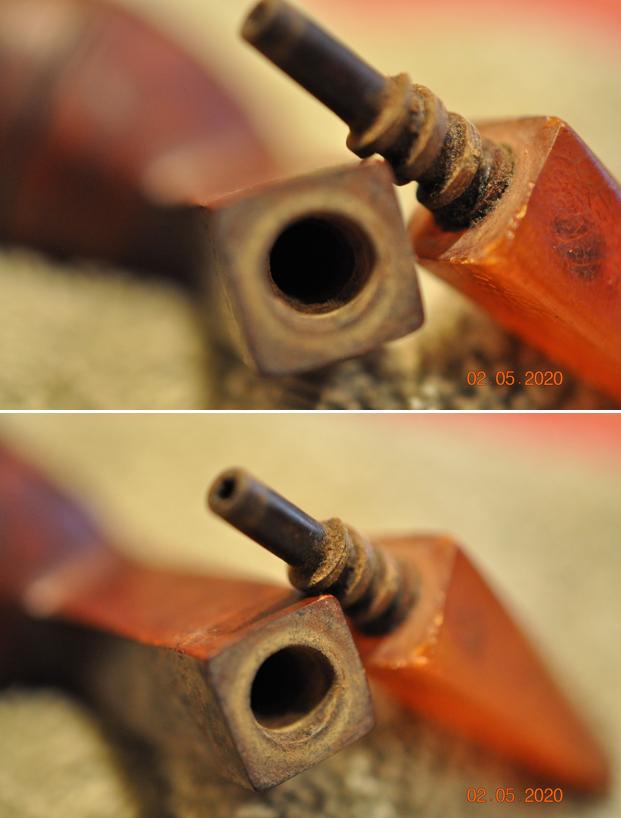
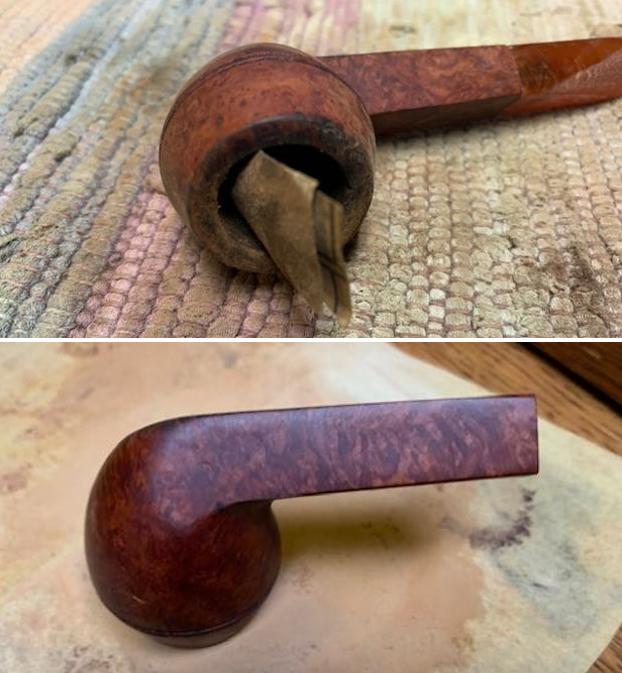
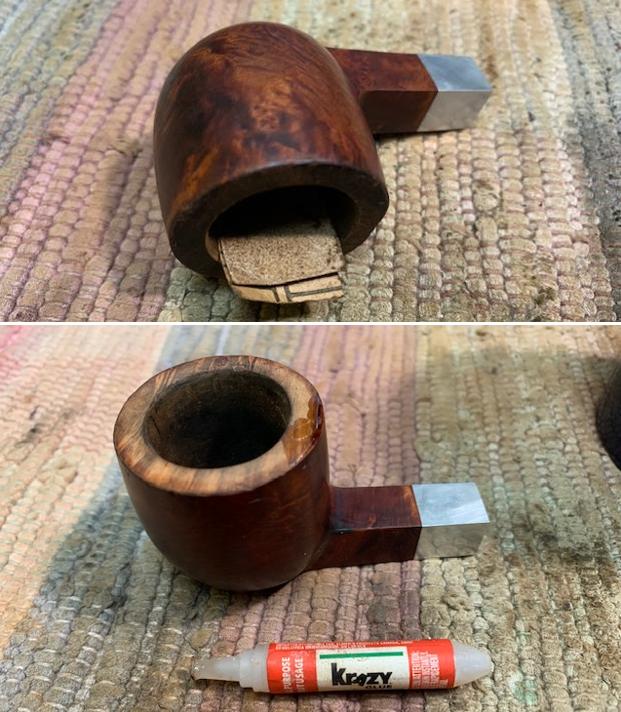
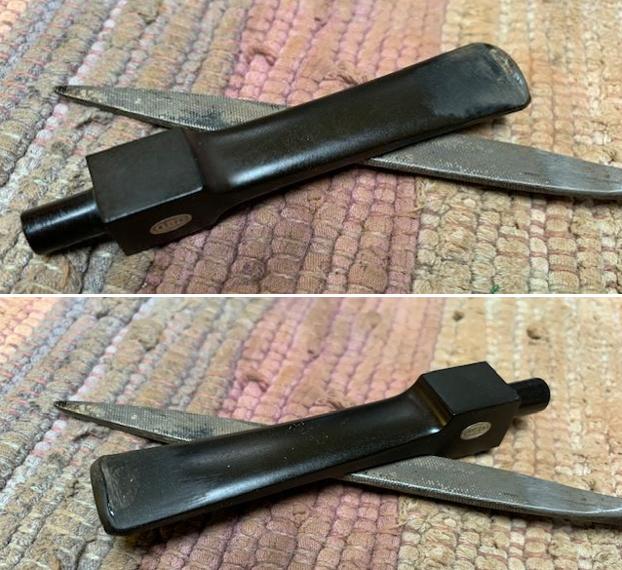
I started the restoration with cleaning of the stummel as I was keen to know the condition of the walls of the chamber. I worked on the stummel by first reaming the chamber with size 3 PipNet reamer head. With my fabricated knife, I further scraped the chamber walls to remove the remaining carbon deposits and also scraped out the lava overflow from the rim top surface. Once the cake was reamed back to the bare briar, I used a 150 grit sand paper followed by 220 grit sand paper to remove all the traces of remaining cake and also to smoothen out the inner walls of the chamber surface. Finally, to remove the residual carbon dust, I wiped the chamber with a cotton pad wetted with 99.9% pure isopropyl alcohol. Few very minor webs of heat lines can be seen along the heel and walls of the chamber. I am not sure if these are heat lines or remnants of old cake over the wall surface. With the same sharp knife, I gently scraped off the lava overflow from the rim top surface. The inner rim edge bevel has darkened, but I don’t think it is charred. Gently running a folded piece of 220 grit sandpaper along the inner edge should suffice to clean up the bevel. The issue of dents and dings over the rim top surface will be addressed by topping it over a 220 grit sandpaper.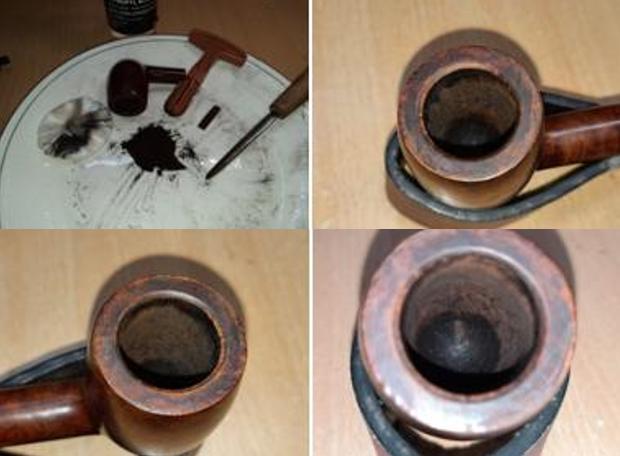 Next, I cleaned out the internals of the shank and mortise. Using my dental tool, I scraped out all the dried oils, tars and gunk that had accumulated in the draught hole and on the walls of the mortise. I finished the cleaning by running a few pipe cleaners dipped in isopropyl alcohol through the mortise. I shall continue with further cleaning of the shank internals when I clean the external stummel surface.
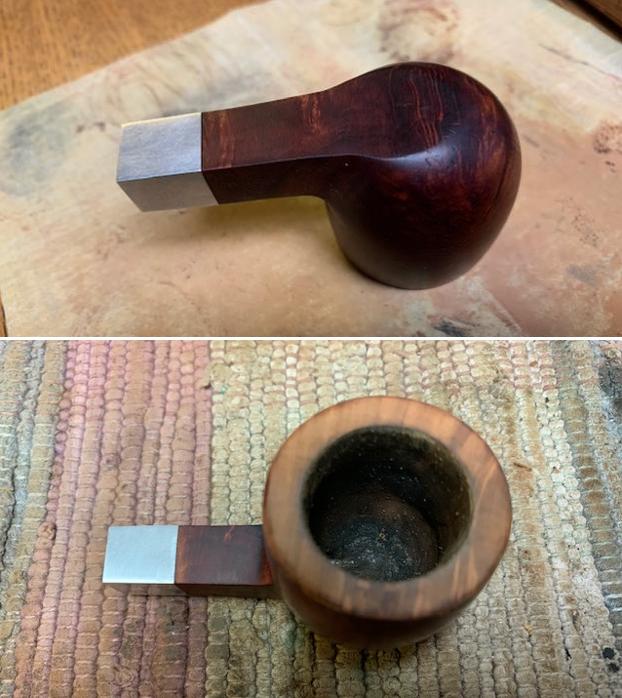
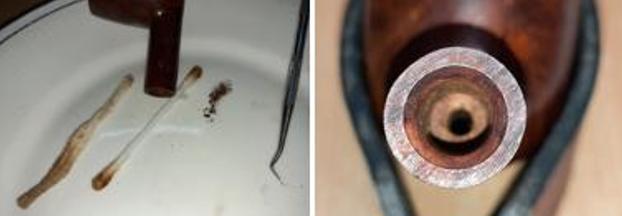 With the bowl internals clean, I moved to clean the exterior of the stummel. I used a hard bristled tooth brush and Murphy’s Oil Soap to scrub the stummel and rim top. I rinsed the stummel under running warm water with anti oil dish washing detergent till the stummel surface was clean and dried it using paper towels and soft cotton cloth. I simultaneously cleaned the shank internals with the detergent and hard bristled shank brush and set the stummel aside to dry out naturally. The stummel surface has cleaned up nicely and the beautiful grain patterns are now on full display.
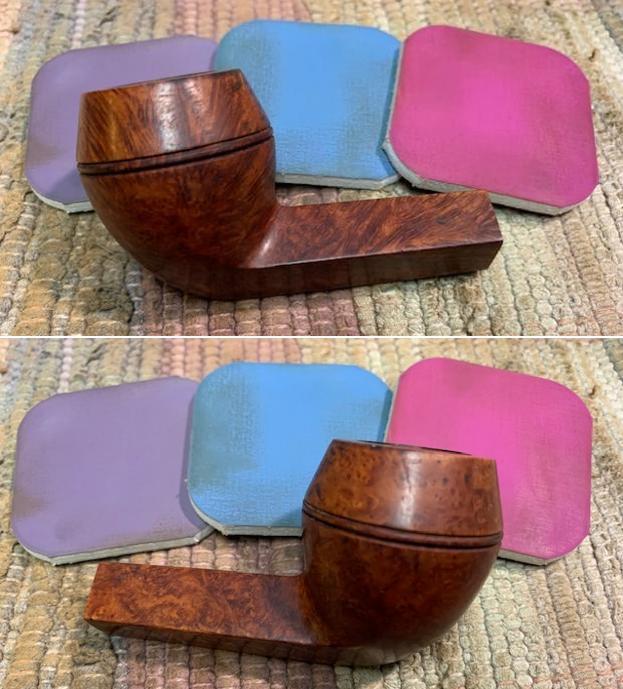
 With the stummel internals and externals cleaned and spruced up, I turned to address the stem issues. I cleaned the internals of the stem using hard and normal bristled pipe cleaners and isopropyl alcohol. I addressed the deeper oxidation by sanding the entire stem with a folded piece of 220 grit sand paper. Once the oxidation was completely removed, I wiped the surface clean with Murphy’s oil soap on a cotton swab. I rubbed a little Extra Virgin Olive oil to hydrate the stem and kept it aside. The stem at this point in restoration is shown below.
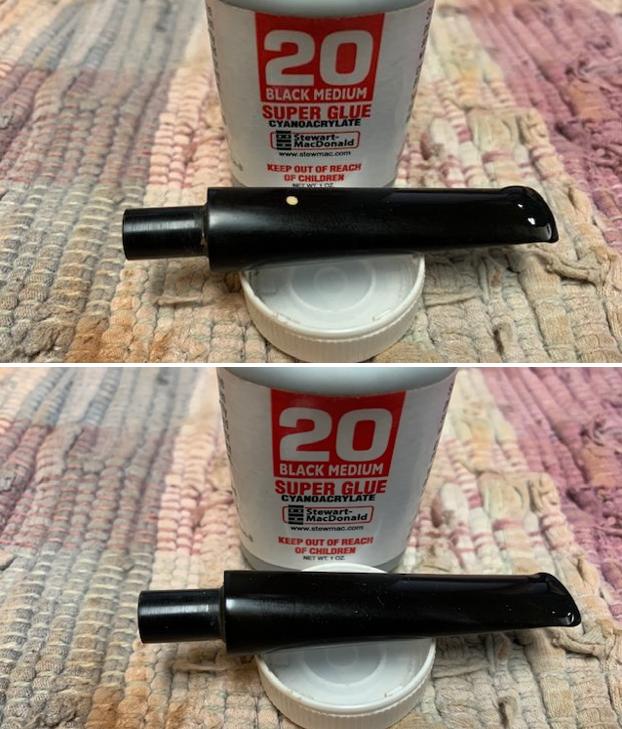
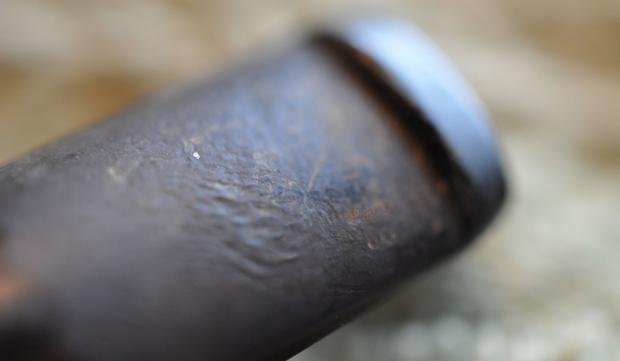
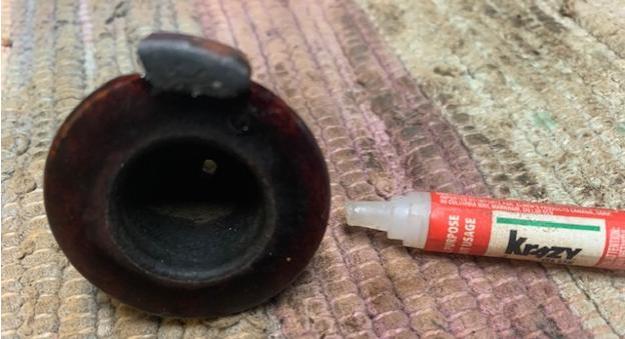
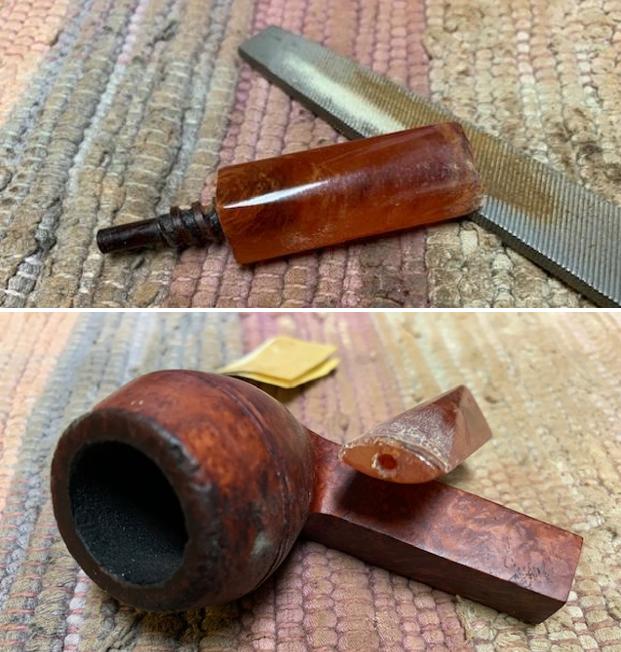
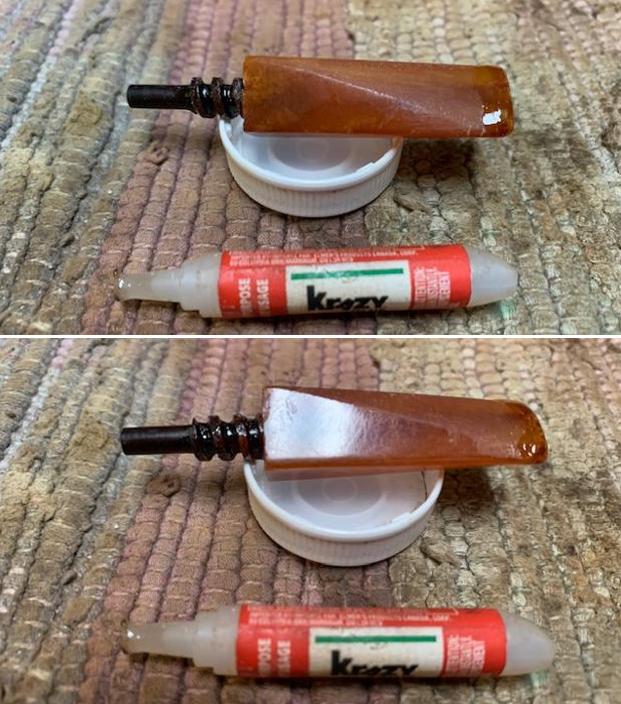
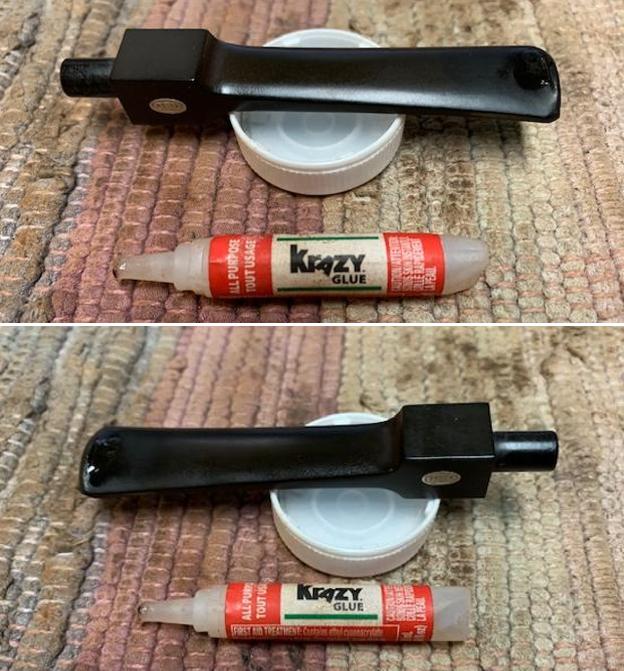
 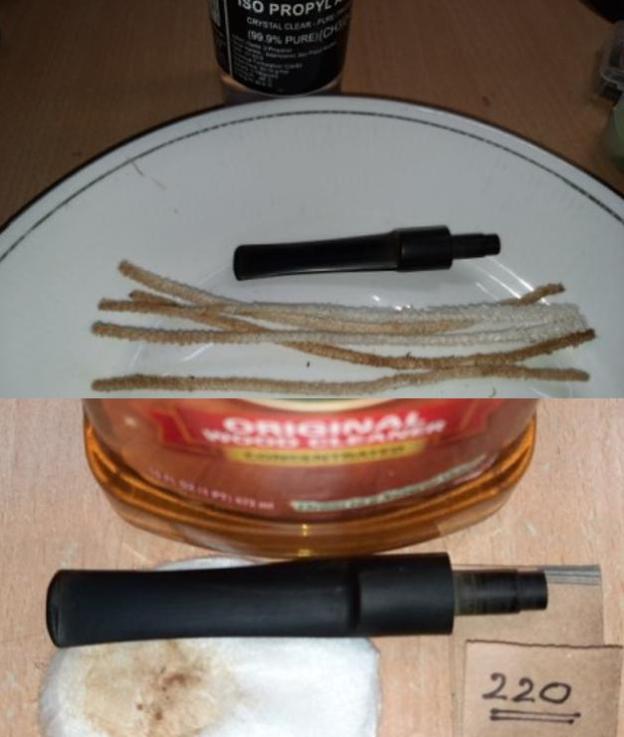 The deeper tooth indentations on either surface of the stem were filled with a mix of CA superglue and activated charcoal powder and set aside for the fill to cure.
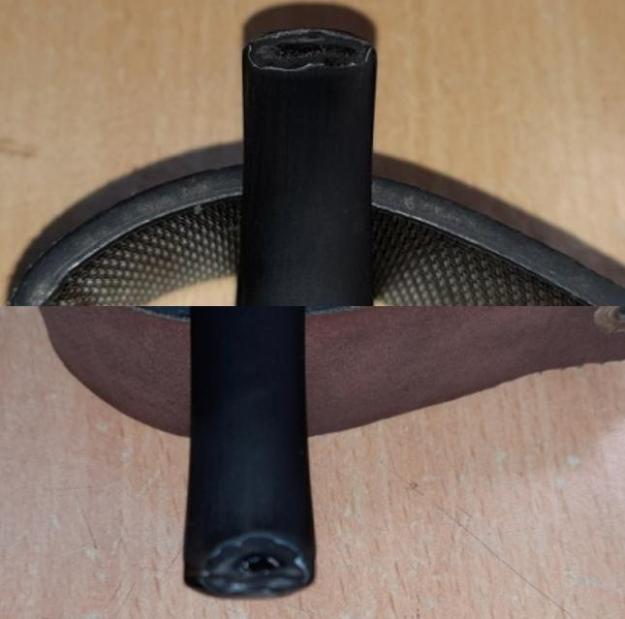 Now that the rim top surface is clean and free of the entire lava overflow, the extent of the darkening to the inner bevel and dents and dings over the rim top surface are fairly apparent. I addressed the darkened inner edge by running a folded piece of 220 grit sand paper pinched between my thumb and index finger along the beveled surface and polished the freshly cleaned inner rim edge bevel with a piece of 600 grit sandpaper. I am very happy with the way inner rim edge bevel appears at this stage in restoration.
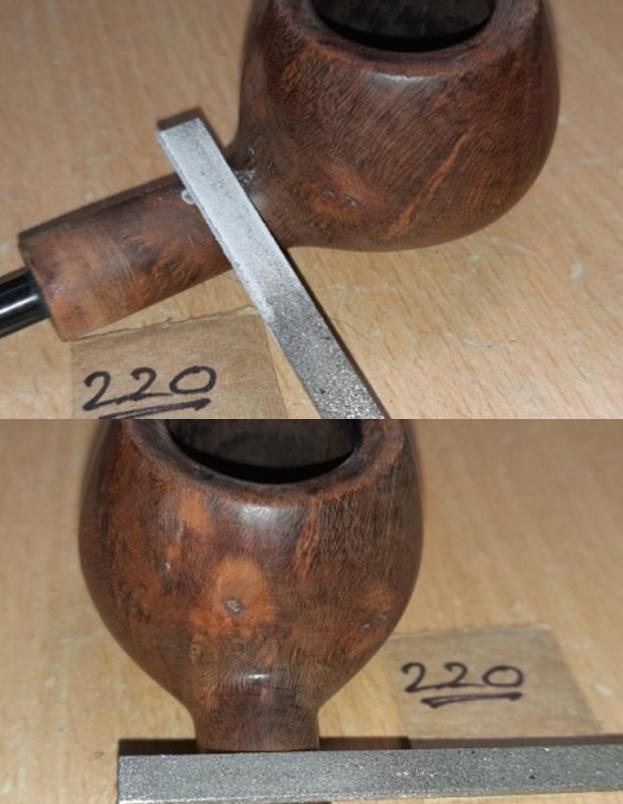
 I addressed the dents and dings over the rim top surface by topping it over a piece of 220 grit sandpaper. I checked the progress frequently to ensure that the topping is just adequate. This also addressed the issue of damage to the outer rim edge at 2 o’clock and 6 o’clock directions.
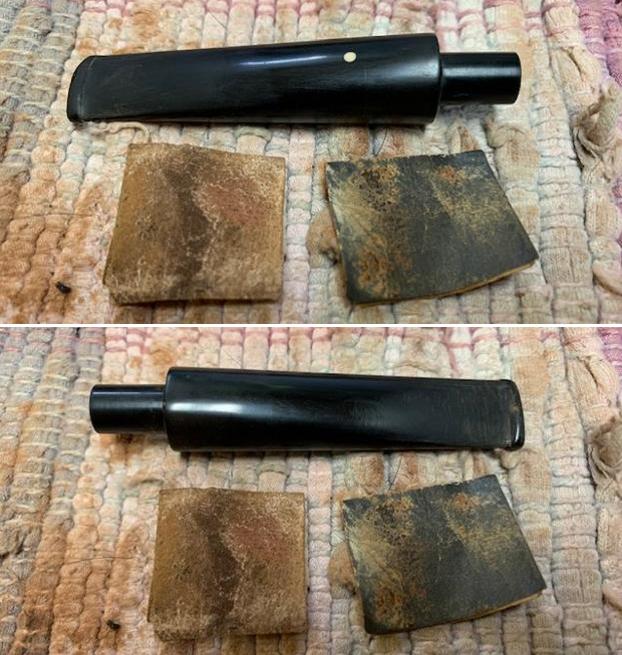
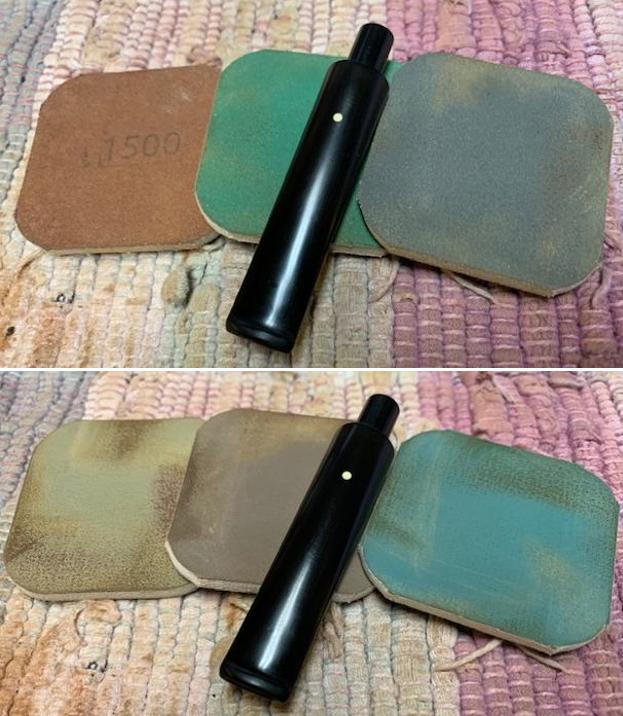
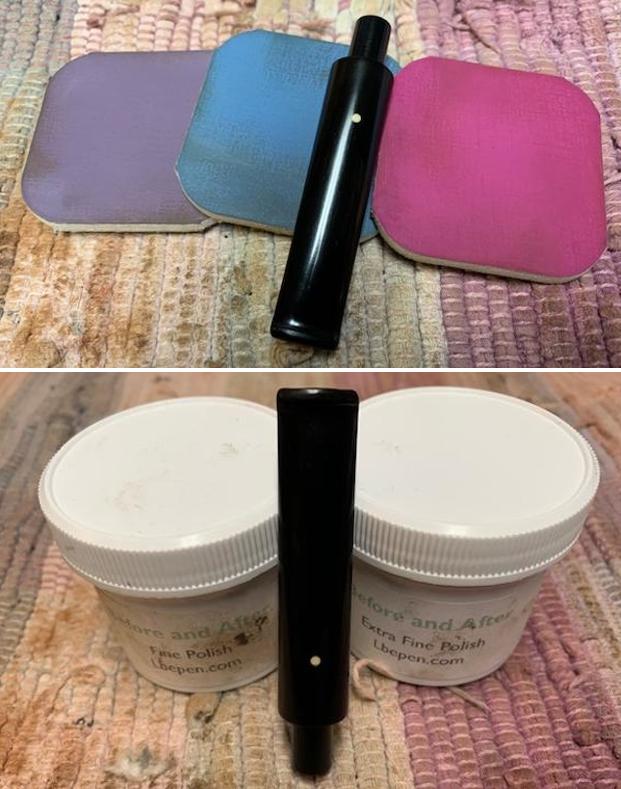
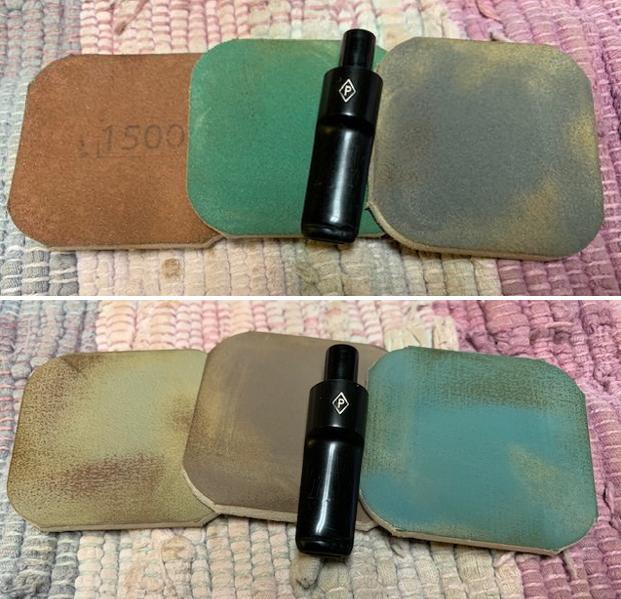
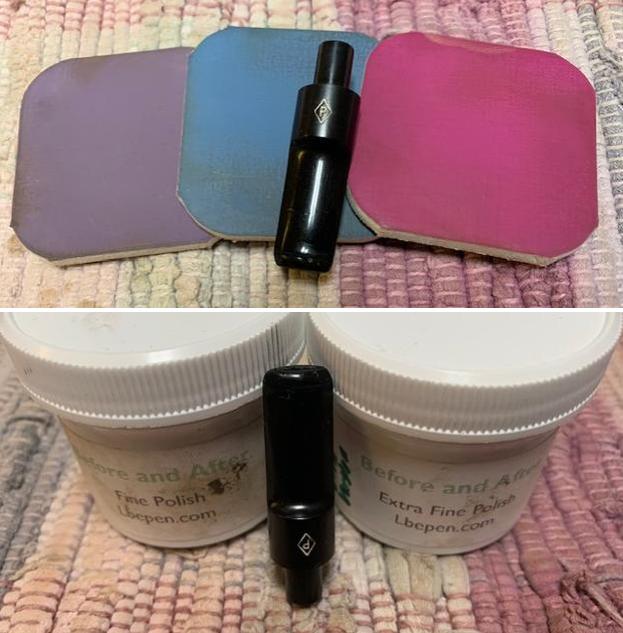
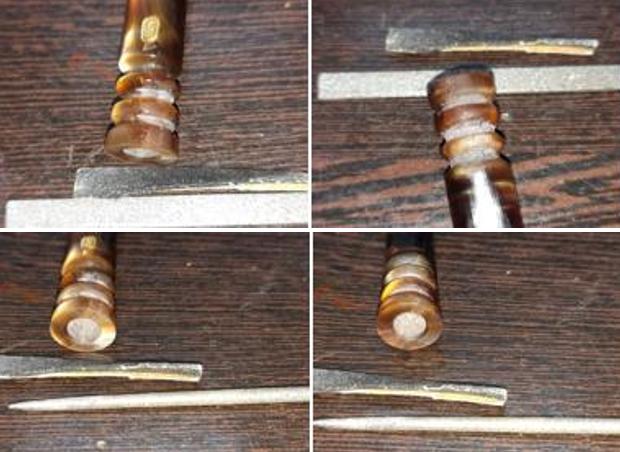
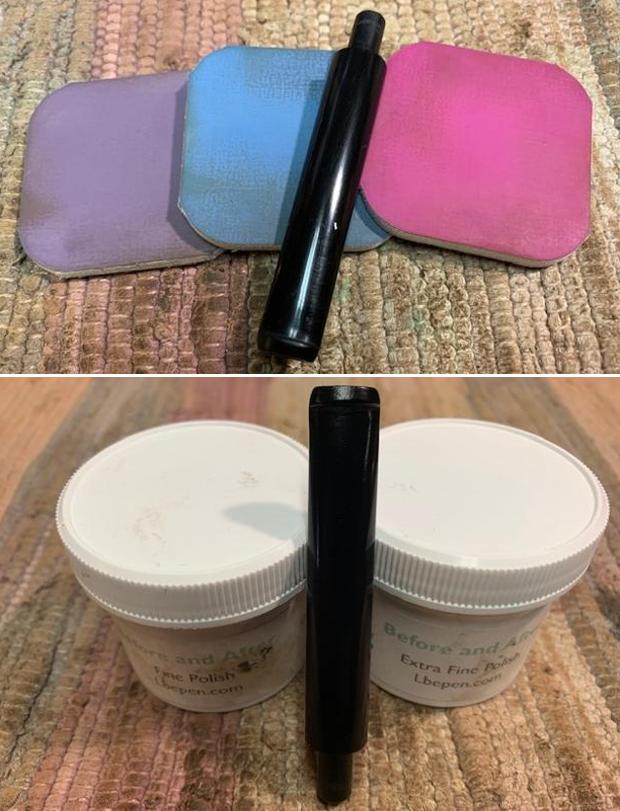
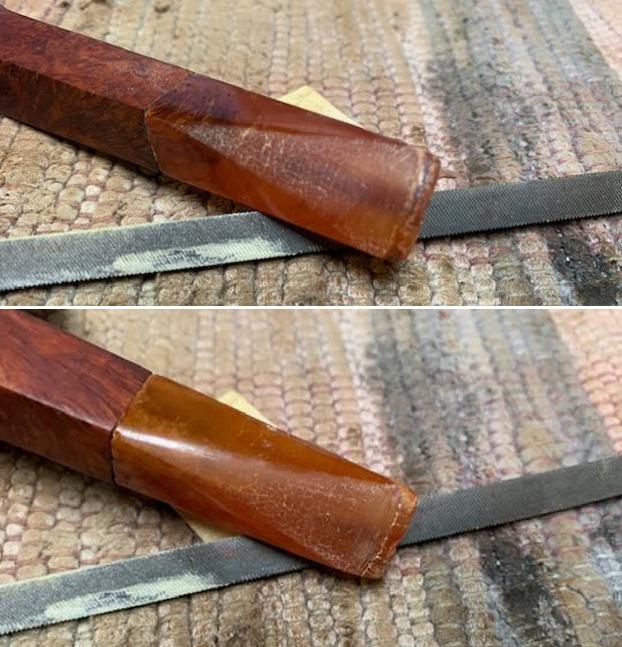
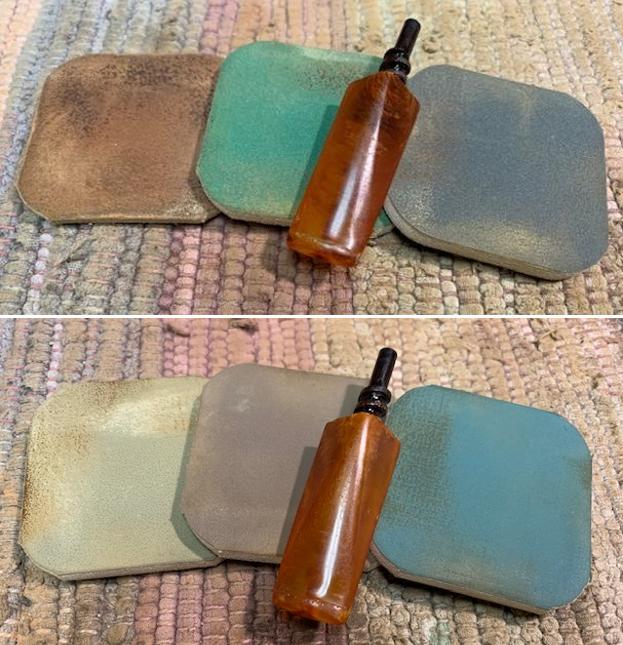
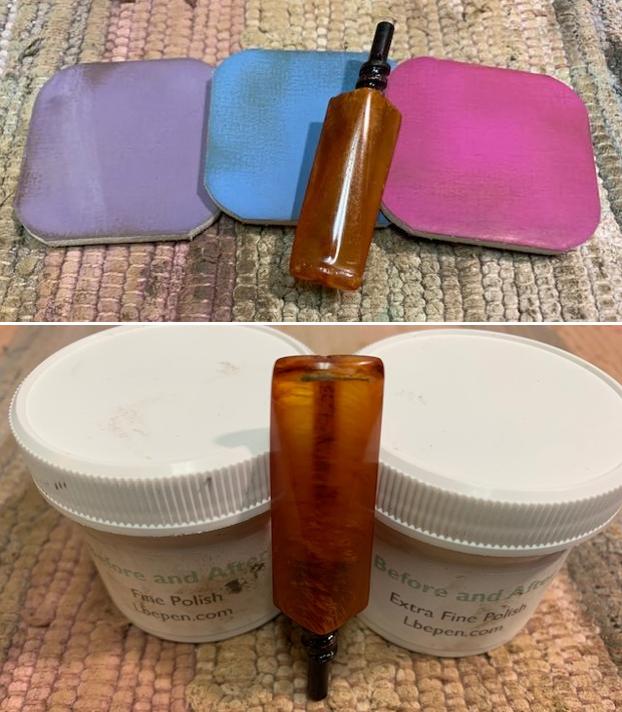
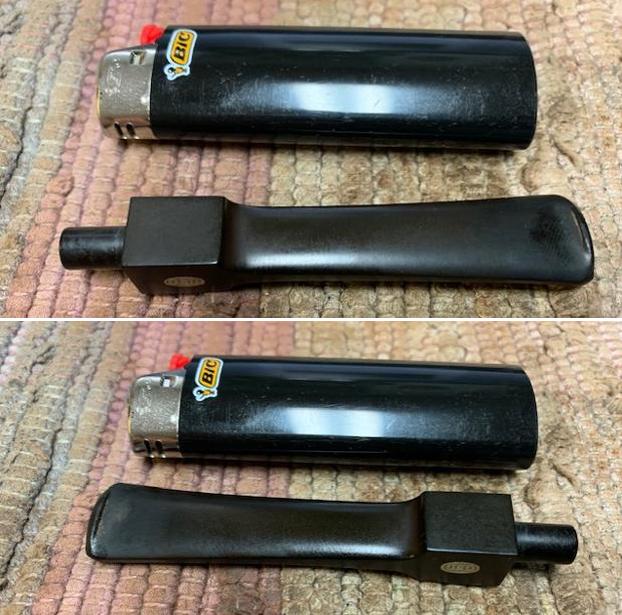
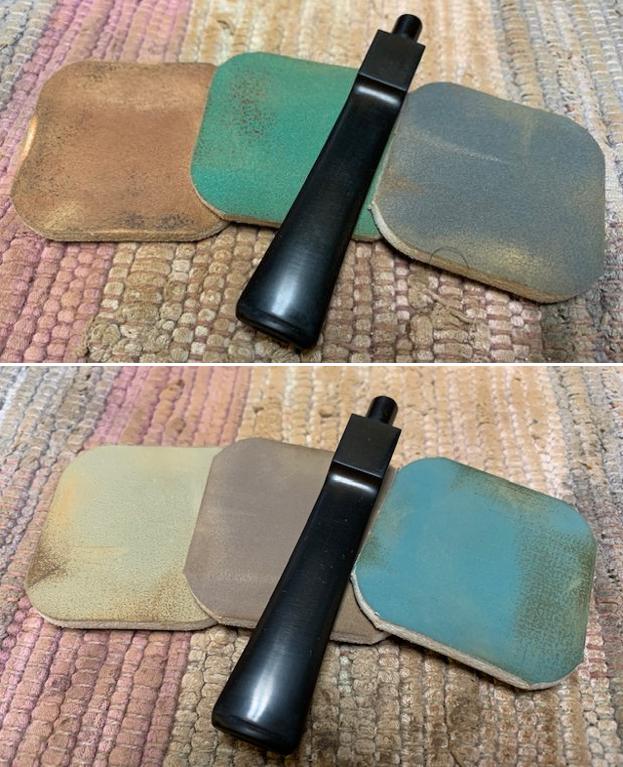
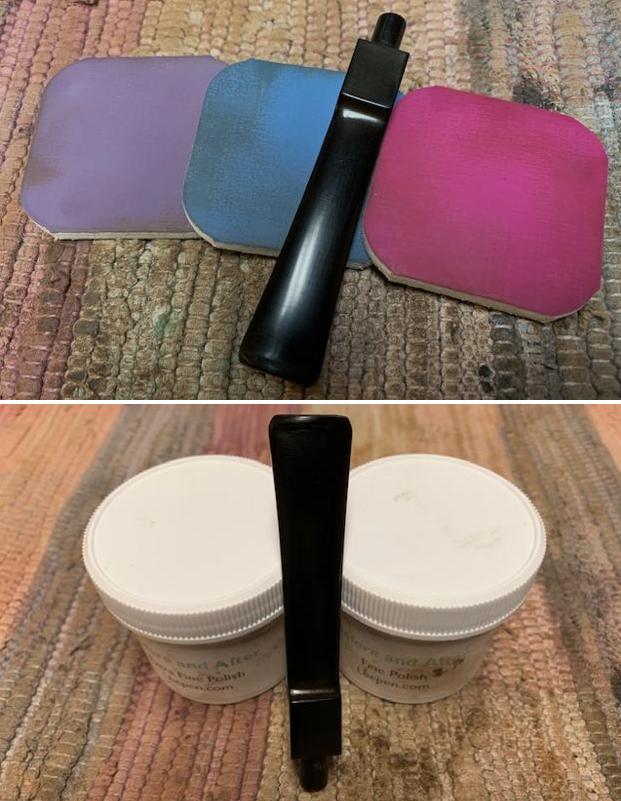
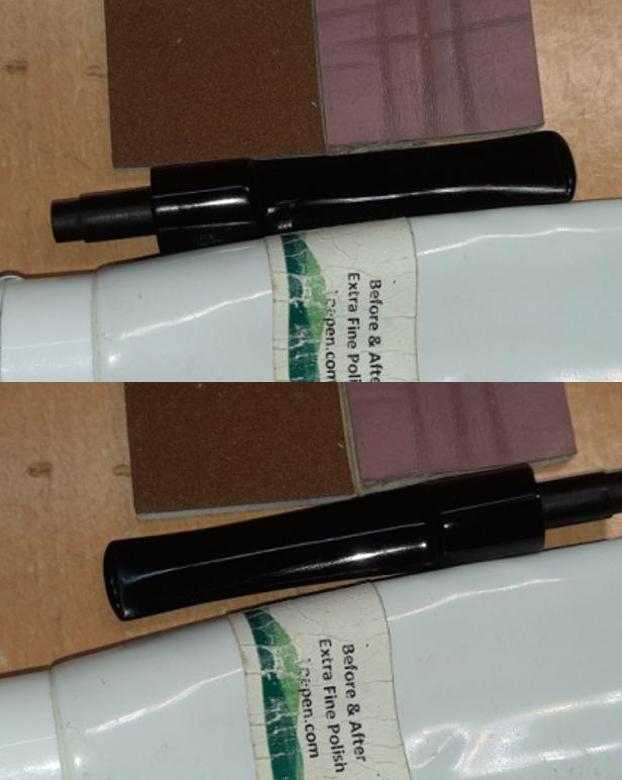
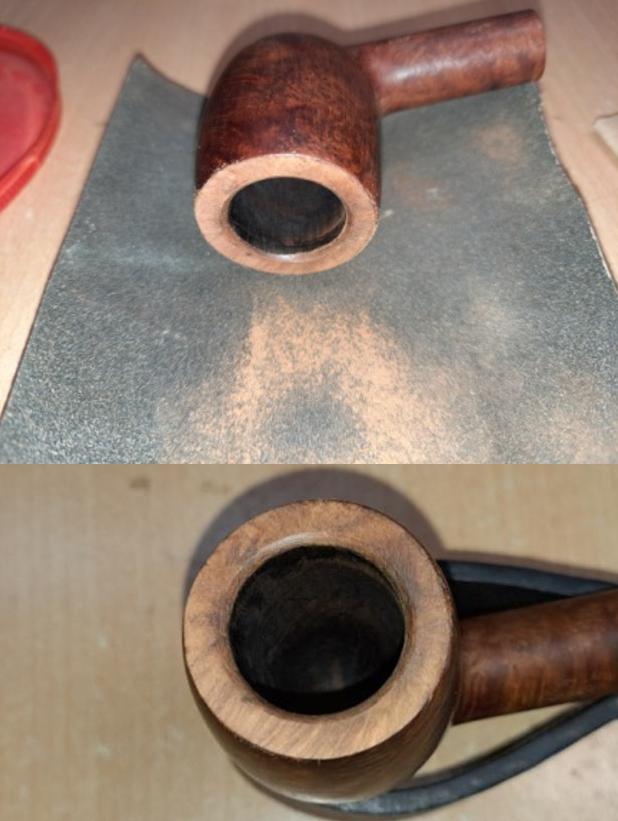 The stem repairs had hardened considerably and I decided to complete the stem refurbishing. Using a flat head needle file, I reshaped the button and followed it up by sanding the stem with a folded piece of 220 grit sand paper to achieve a rough match with the rest of the stem surface. I further dry sanded the stem with 400, 600 and 800 grit sand papers. This helps to fine tune the matching of the fill with the stem surface while removing the deep rooted oxidation from the stem surface. I followed it up by wet sanding with a piece of 1000 grit sand paper to completely rid the surface of the oxidation and bring out the shine in the vulcanite. Once I was satisfied that the fills had perfectly matched with the rest of the stem surface and oxidation has been eliminated, using micromesh pads, I completed the polishing cycle by wet sanding the surface with 1500 to 12000 grit pads. The stem looks great with the fills nicely matched with the rest of the surface. I rubbed a little quantity of Extra Virgin Olive oil into the stem surface. I gave a final rub with “Before and After Extra Fine” stem polish compound from Mark to remove fine scratches from the stem surface. Then I rubbed a little quantity of Extra Virgin Olive oil in to the stem surface and set it aside to be absorbed by the vulcanite. The stem polished up nicely and appears as good as new.
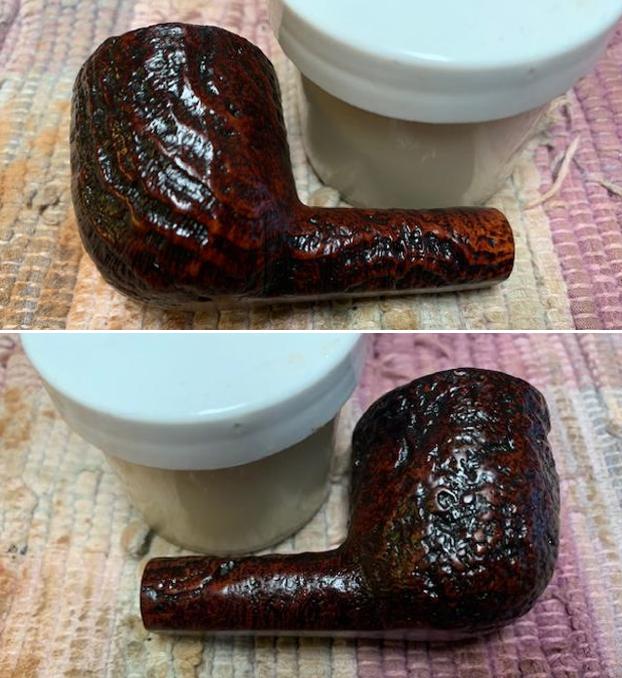
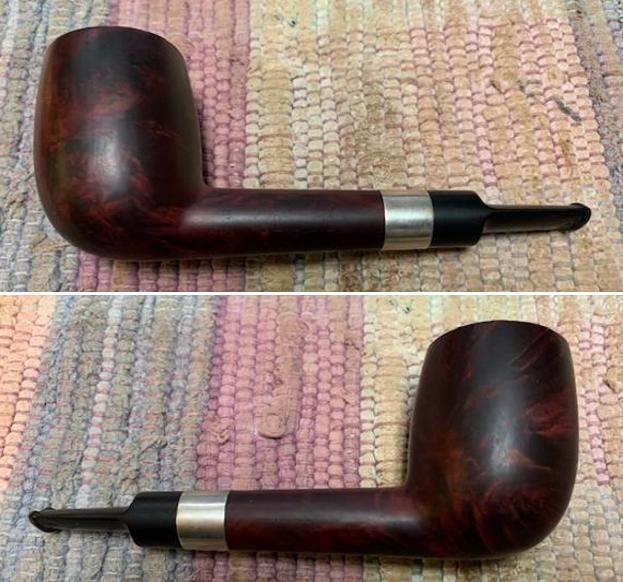
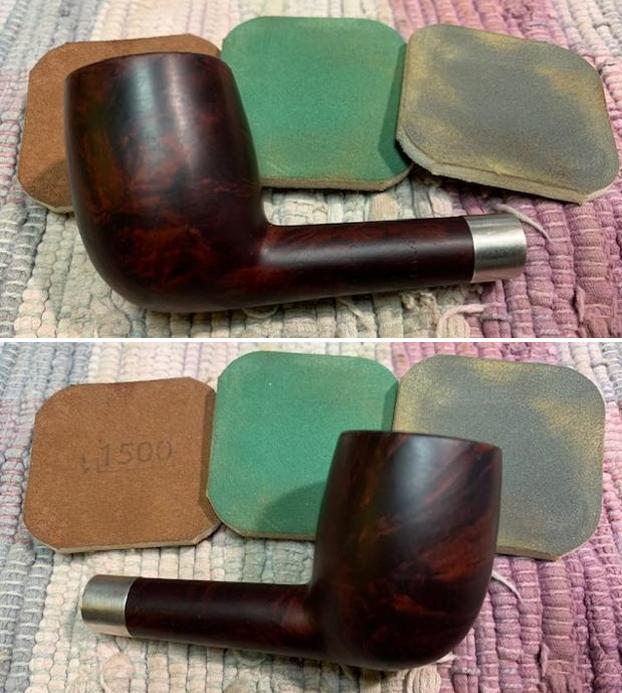
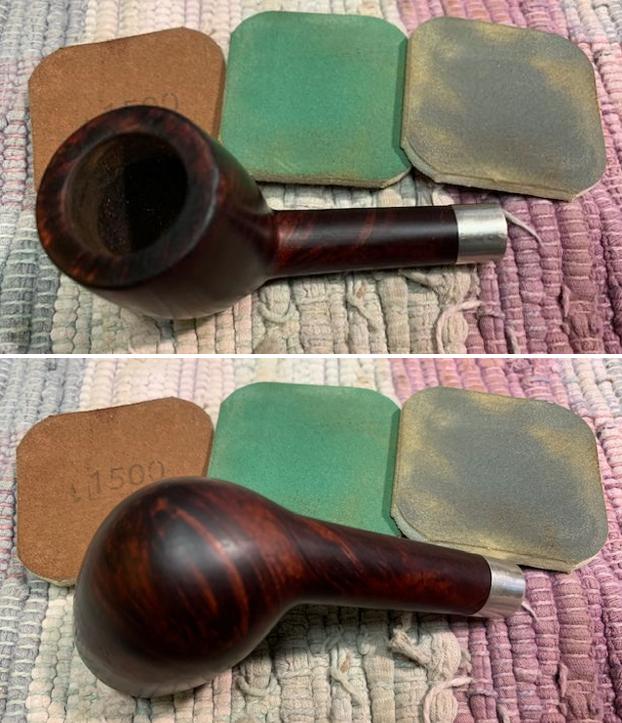
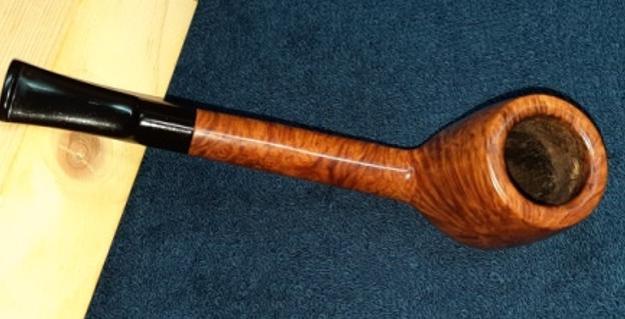
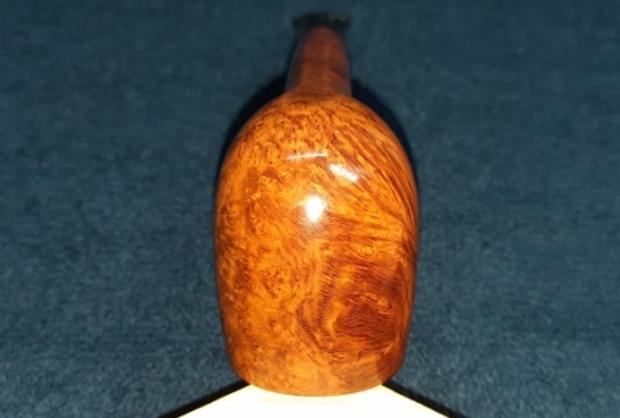
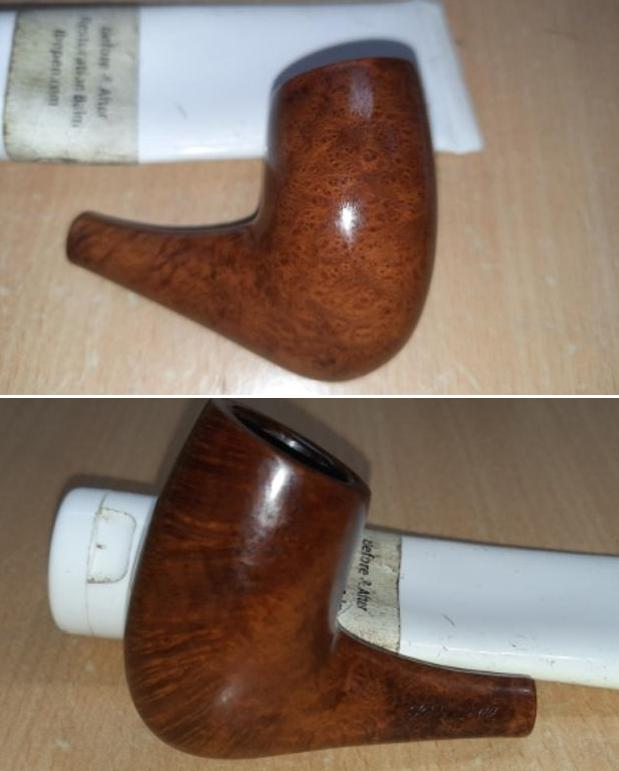
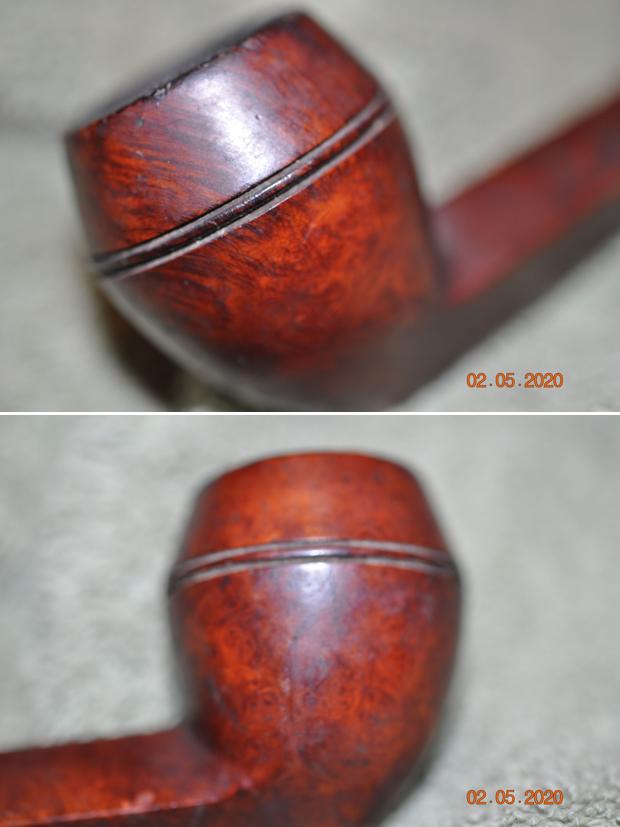
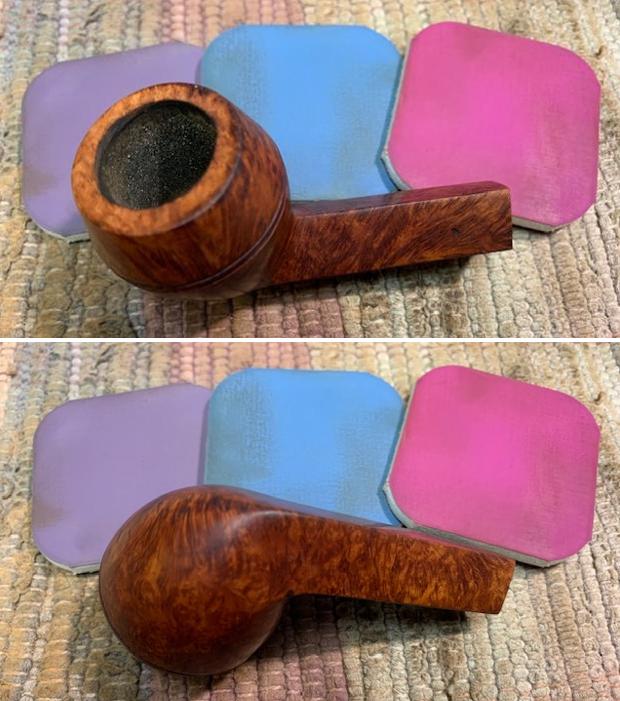
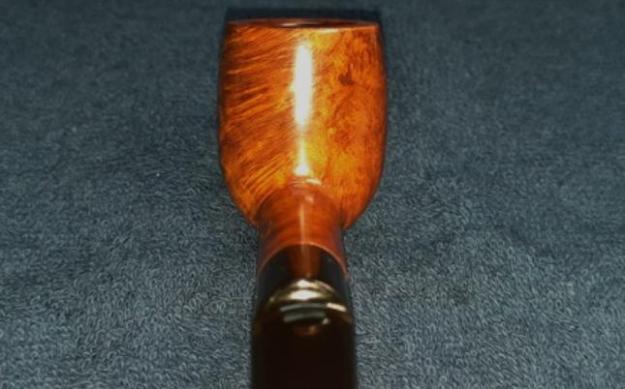
 Turning my attention back to the stummel, I subjected the stummel to a complete cycle of micromesh polish, dry sanding with 1500 to 12000 grit pads. I paid greater attention to polish the rim top surface and the bevel created on the inner rim edge. I wiped the stummel with a moist cloth after every grit pad to remove the sanding dust left behind by the pads. This also helps in monitoring the progress being made and provides an opportunity to take early corrective action, if required. I am happy with the progress being made till now. The briar has taken on a nice deep shine with the original medium brown of the stummel and the darker brown stains to the grains contrasting beautifully. I really like the dark brown coloration and the patina that is seen over the stummel surface.
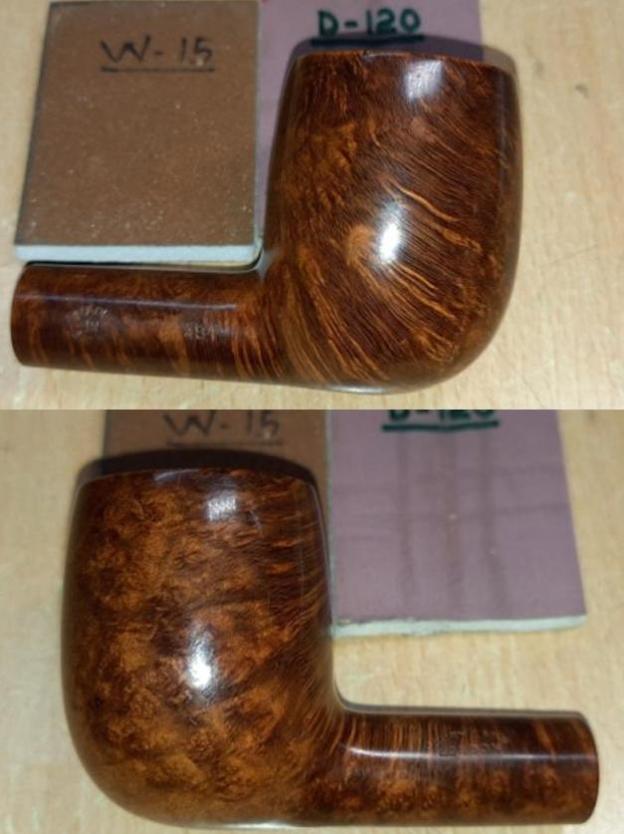

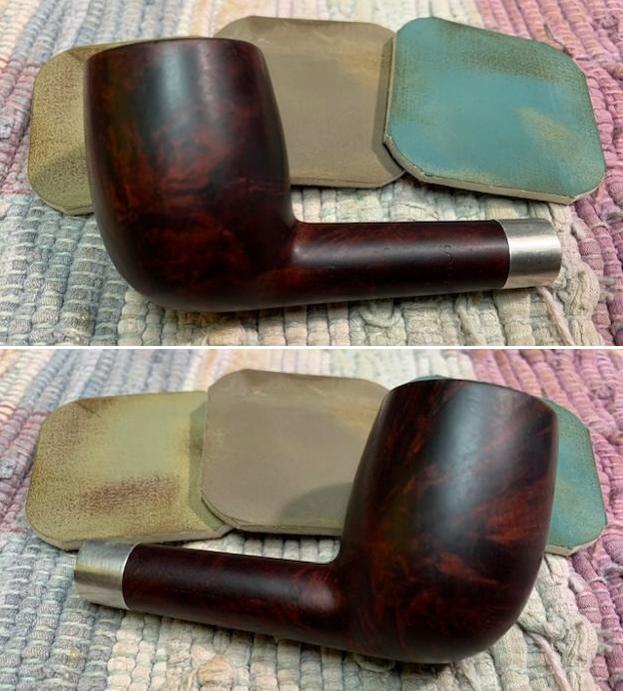
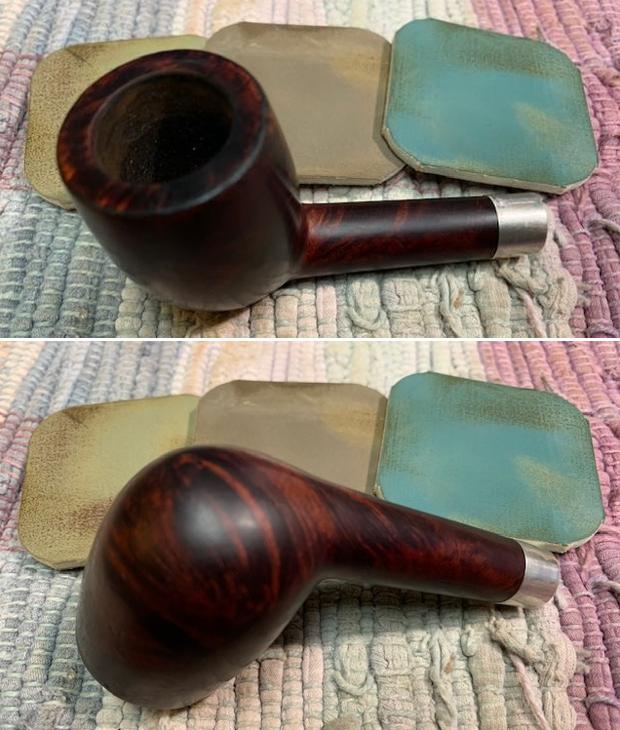
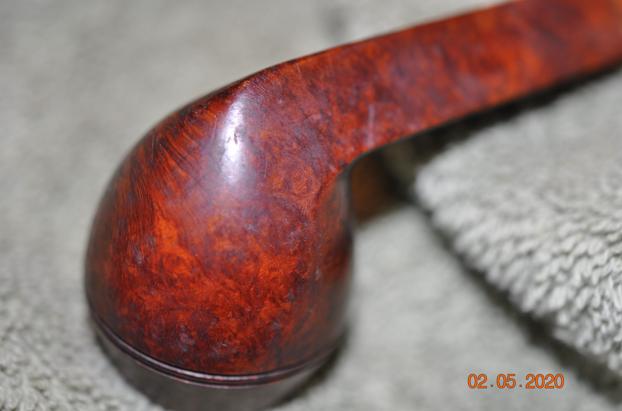
 Next, I rubbed a small quantity of “Before and After Restoration Balm” into the briar with my finger tips and worked it deep in to the surface and let it rest for a few minutes. The balm almost immediately works it’s magic and the briar now has a nice vibrant appearance with the beautiful cross and Bird’s eye grain patterns on full display. The contrast of the dark browns of the grain with the light brown hues of the rest of the stummel adds an interesting dimension to the appearance of the stummel. I further buffed it with a horse hair brush to further deepen the shine.
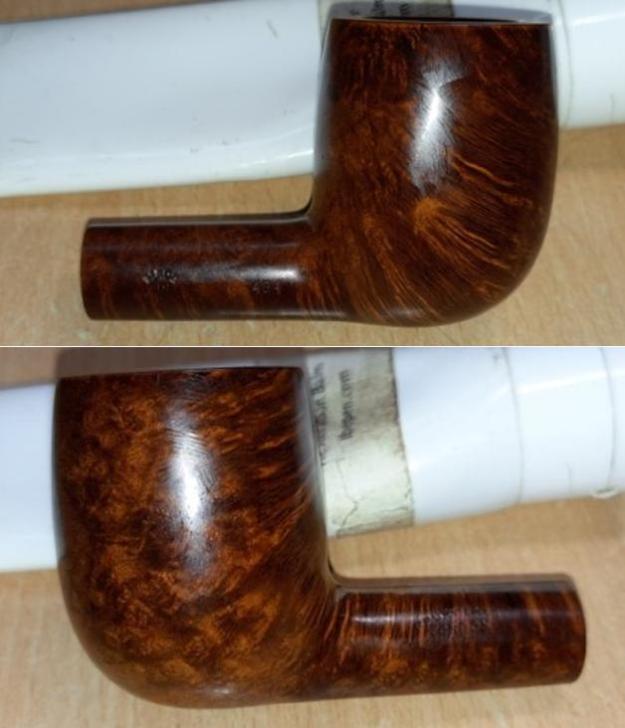

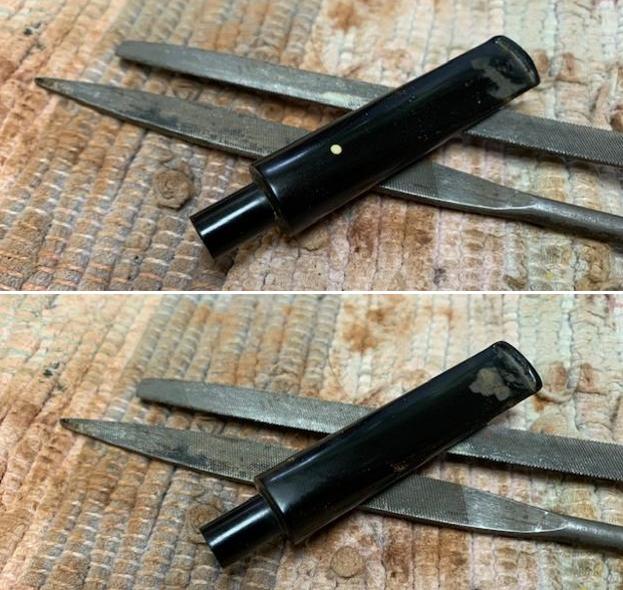
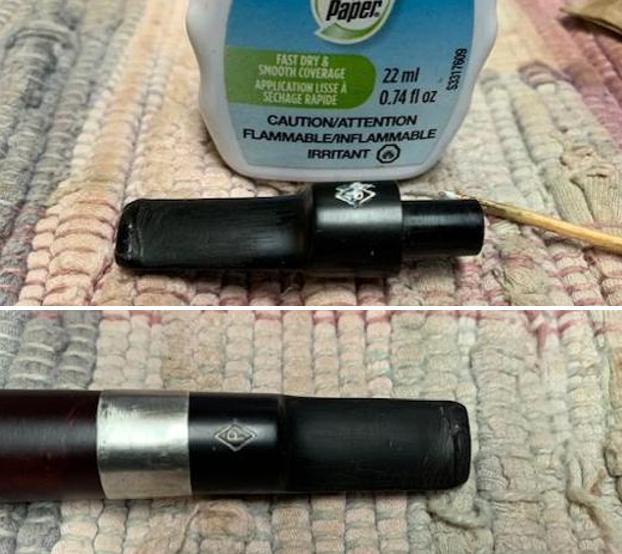
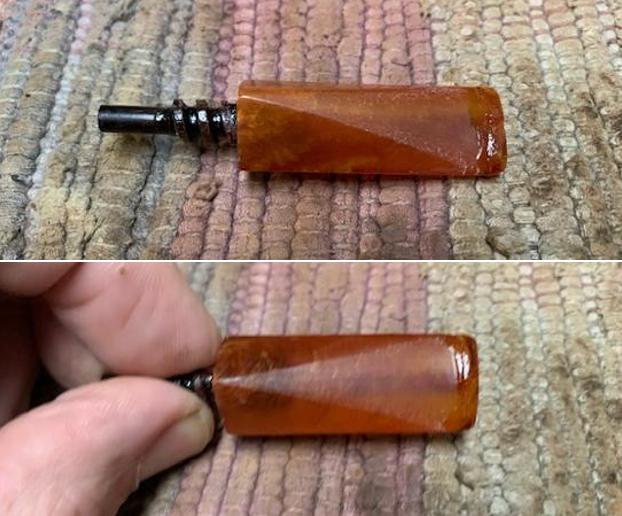
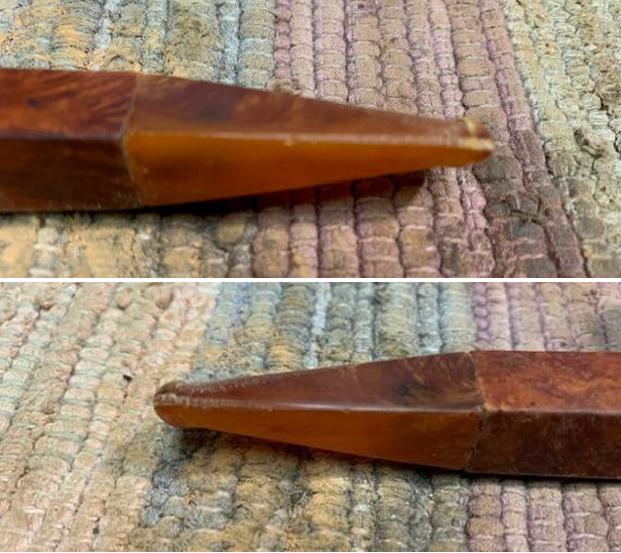
 To refresh the stem logo, I coated the stem logo with white correction ink and let it dry out completely. Once the ink had dried out, with a toothpick, I gently removed the excess ink from the surrounding surface. I am happy with the crisp stem stamp, even though the alphabet “P” is a bit worn out.
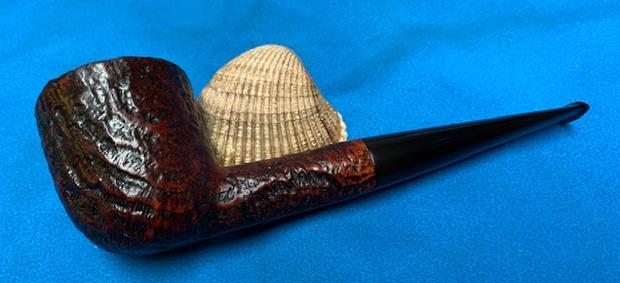
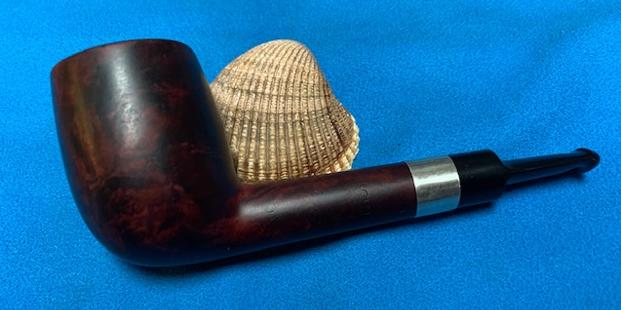
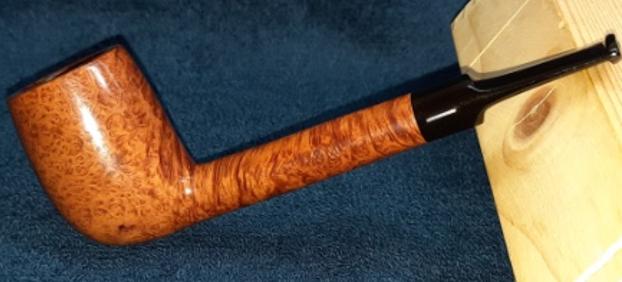
 To put the finishing touches, I mounted a cotton cloth buffing wheel on to my hand held rotary tool and polished the stummel and stem with Blue Diamond compound. This compound helps to remove the minor scratch marks that remain from the sanding. Next, I mounted another cotton buffing wheel that I have earmarked for carnauba wax and applied several coats of the wax. I mounted a clean cotton cloth buffing wheel and gave the entire pipe a once over buff. I finished the restoration by giving the entire pipe a rigorous hand buffing using a microfiber cloth to raise the shine further. The finished pipe with the aged patina to the briar looks amazingly beautiful and is now ready for its long second inning with me.


 P.S. I have attempted to preserve the aged patina which has developed over the stummel surface with the passage of time. I did accept the minor fills that were seen over the stummel surface and let them be as they had blended in perfectly with the rest of the stummel surface.
Even though this old vintage pipe is a seconds from the Comoy’s brand, it has the same high quality feel and geometry as one expects from the top of the line Comoy’s.
Praying for the health and safety of all the readers and their loved ones in these troubled times…
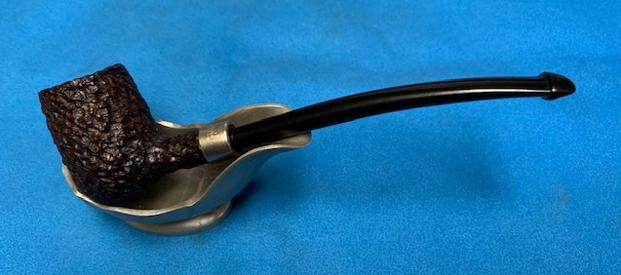
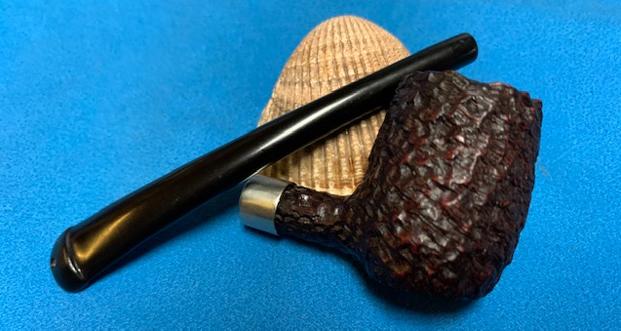
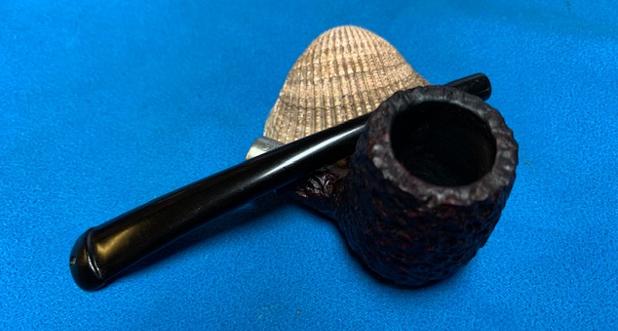
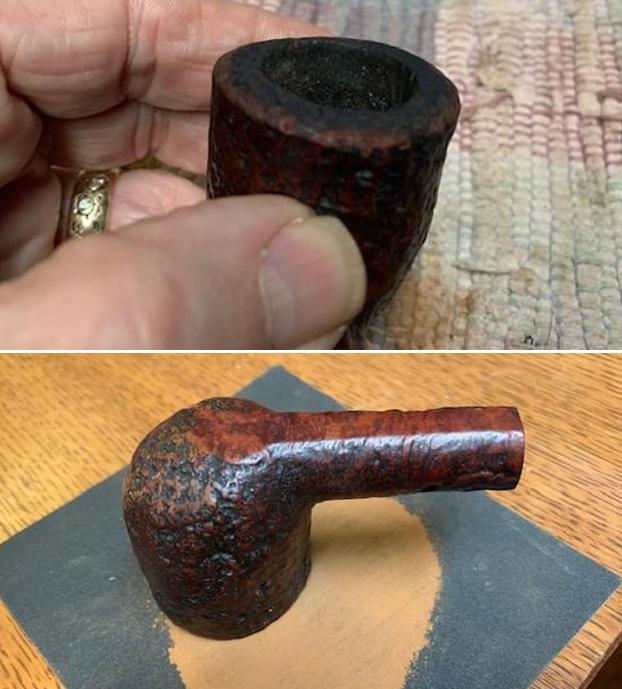
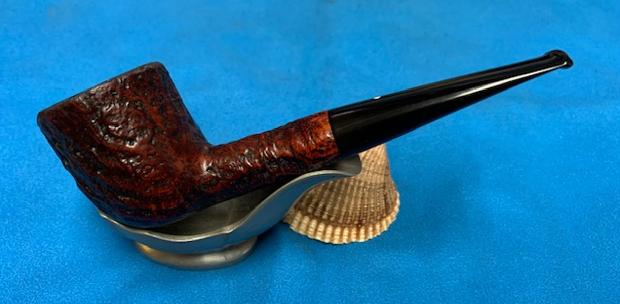
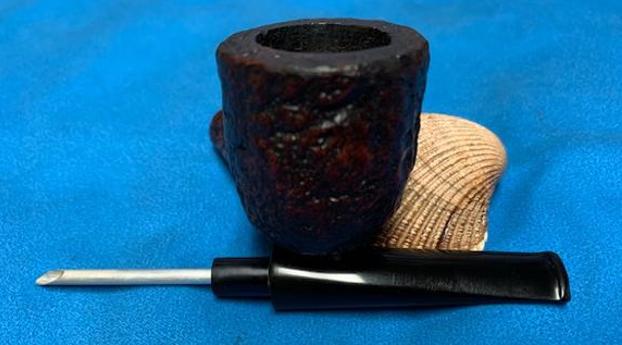
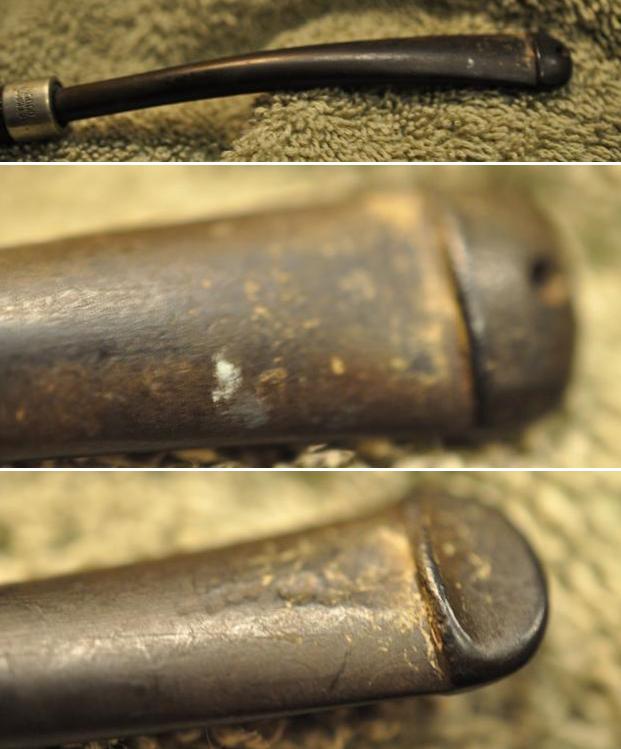
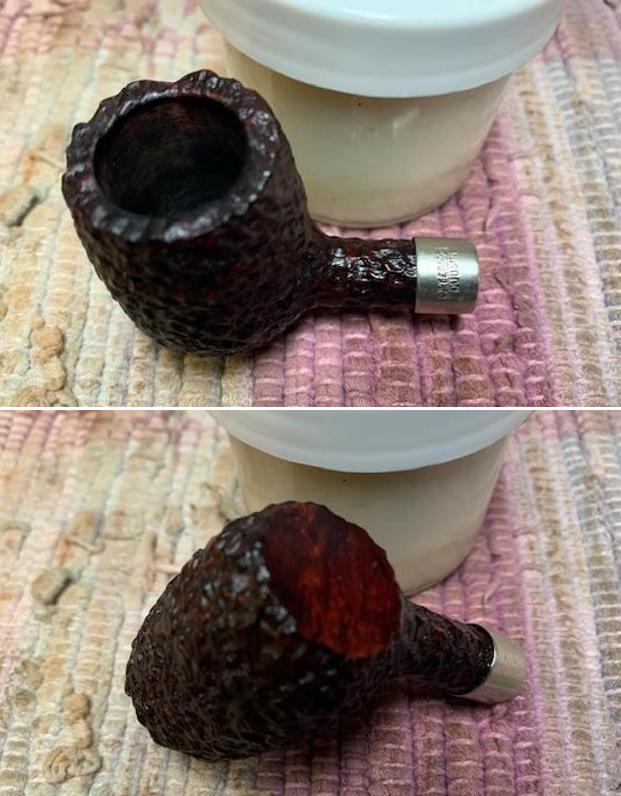
 Jeff took photos of the rim top and stem to show the general condition of the pipe. The bowl is lightly caked and the rim top and edges have some light lava overflow. The stem is lightly oxidized and has light tooth marks on the top and underside near the button.
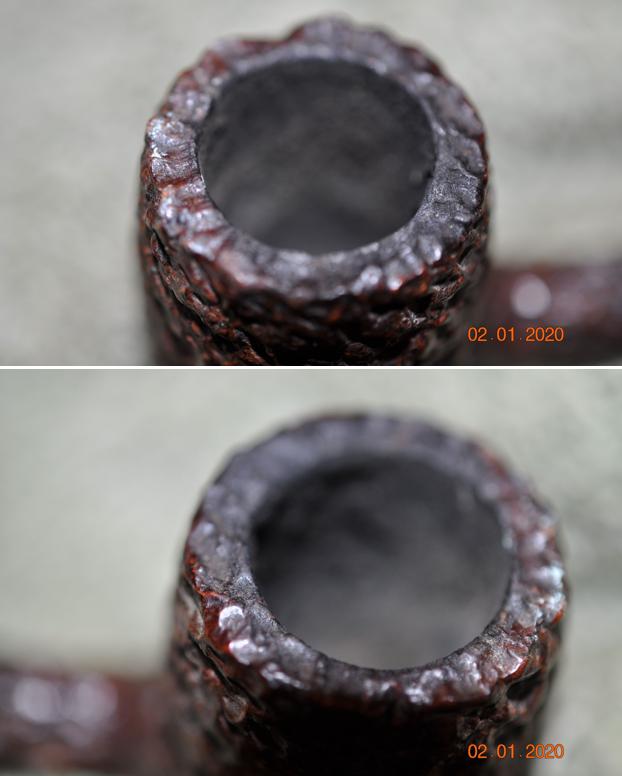
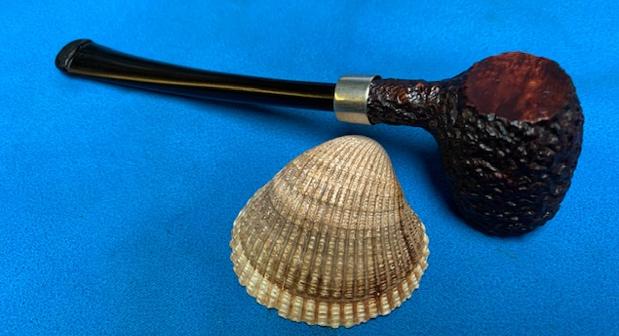
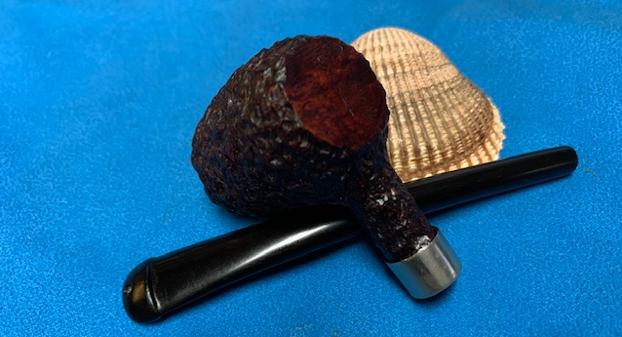
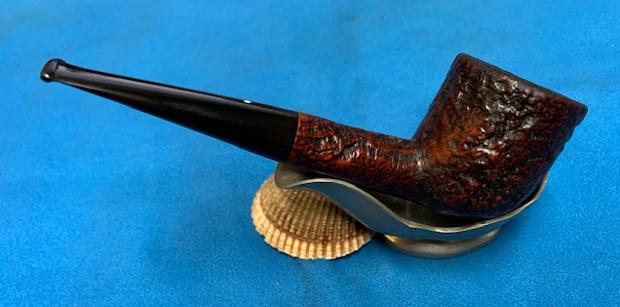
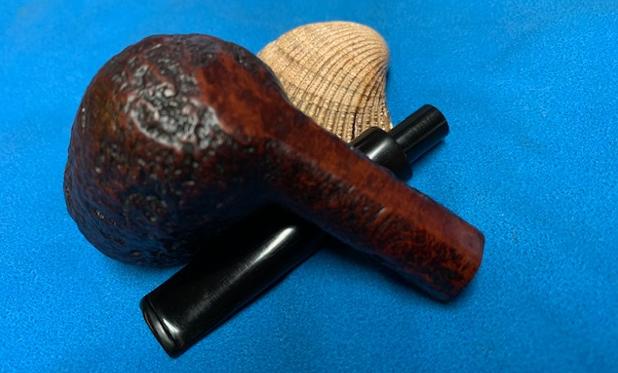
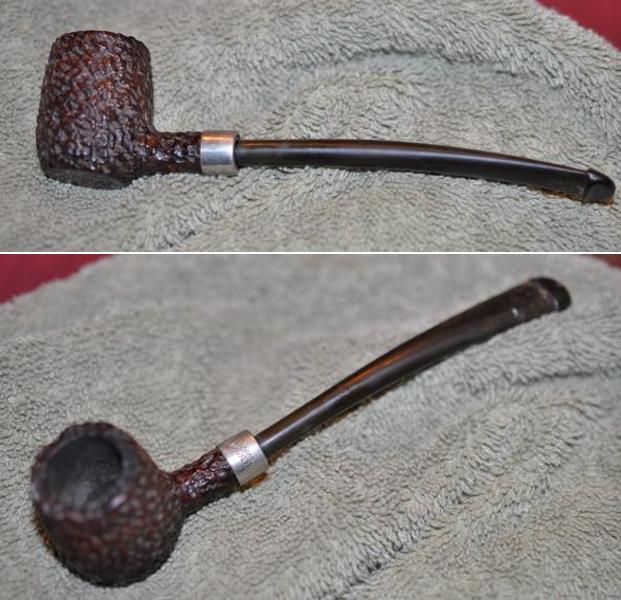
 Jeff took some photos of the bowl sides and heel to show the amazing grain that was around this bowl. It is a nice looking pipe.
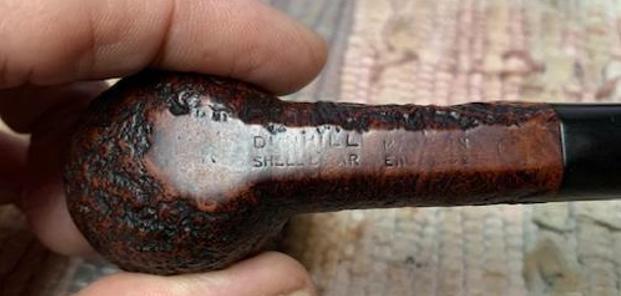
 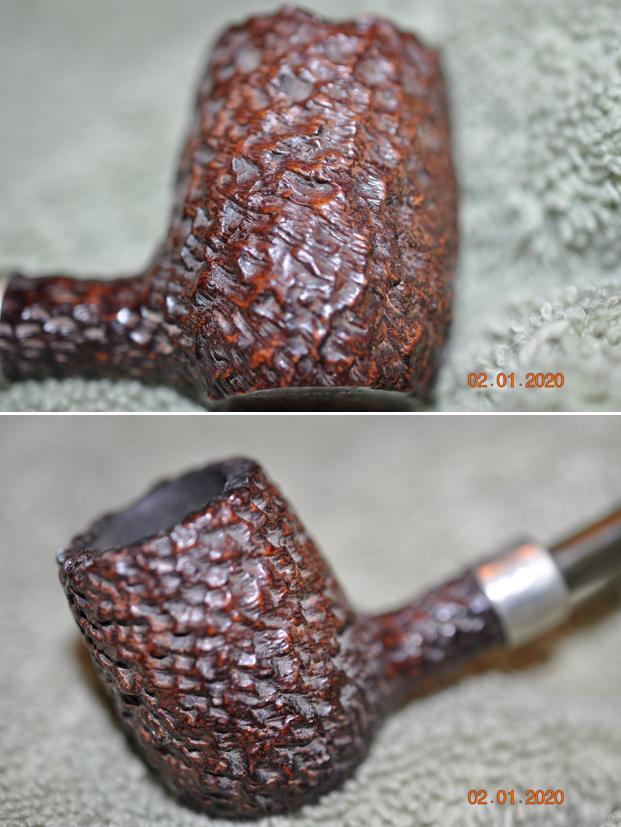 He took a photo of the underside of the shank to show the stamping. The stamping reads as noted above. He also took a photo of the stamping on the ferrule.
 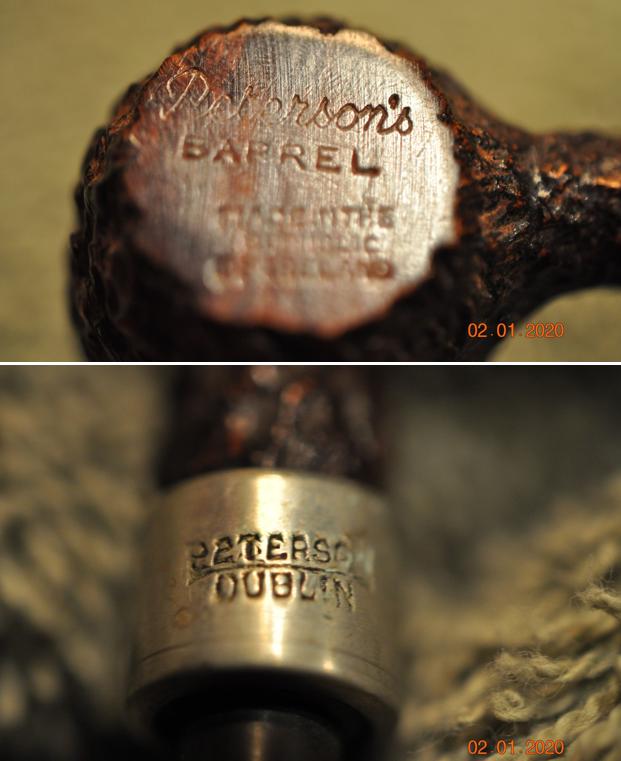 I am including the information from Pipedia’s article on Peterson pipes. It is a great read in terms of the history of the brand (https://pipedia.org/wiki/Peterson). I have included a bit of the pertinent history here.
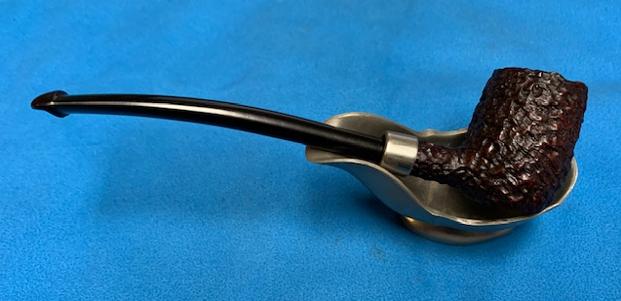
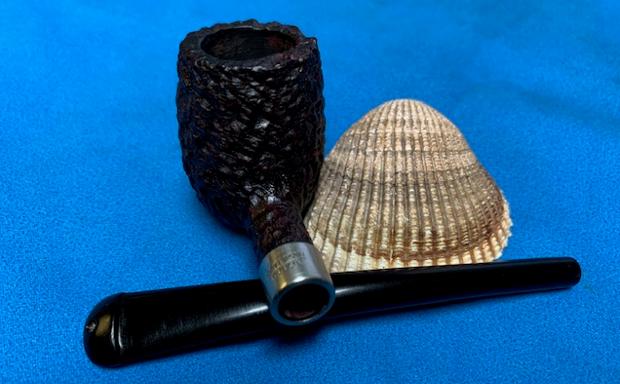
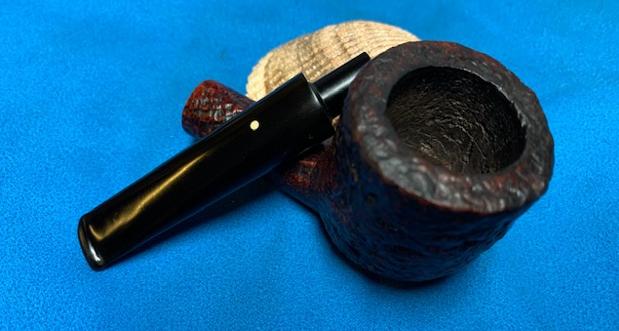
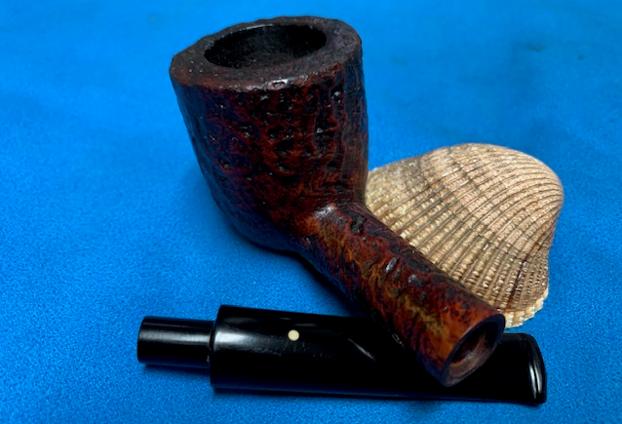
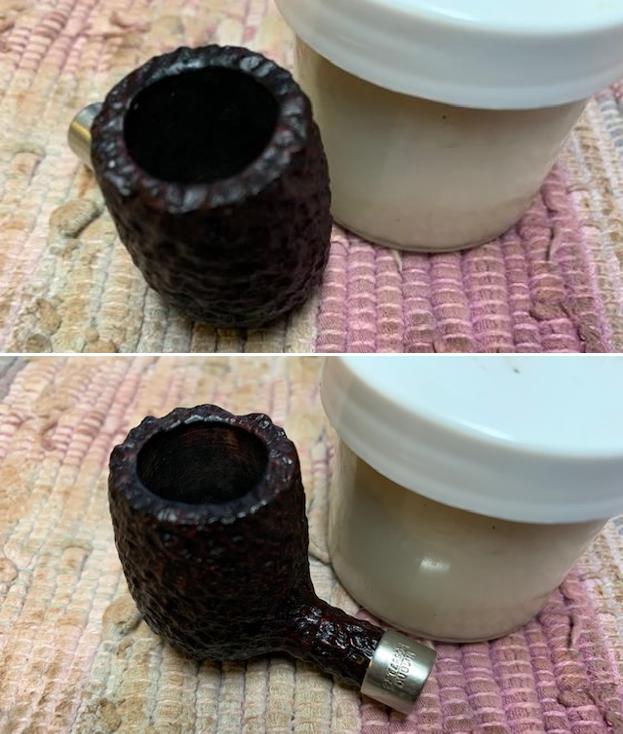
 I took some close up photos of the rim top and also of the stem surface. I wanted to show how well it had cleaned up. The rim top looked very good. I also took close up photos of the stem to show the tooth marks on the surface of the underside near the button.
 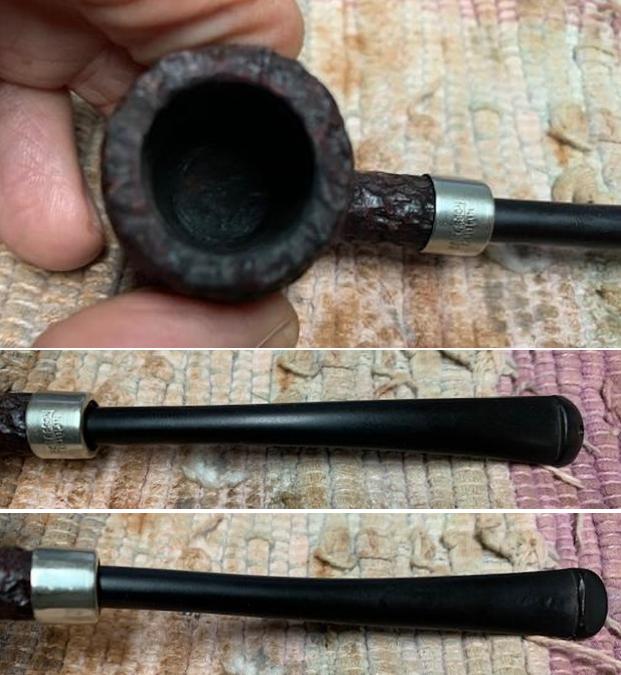 I took a photo of the stamping on the heel of the bowl. You can see that it is stamped as noted above. It is clear and readable.
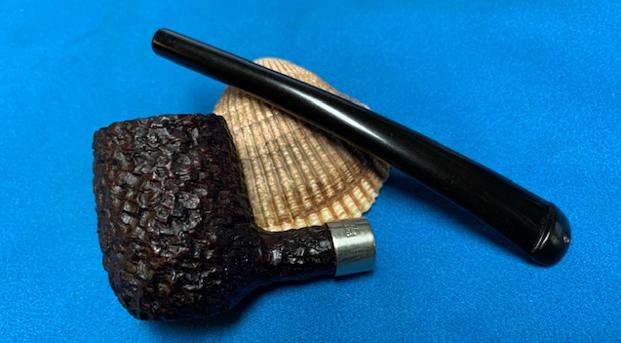
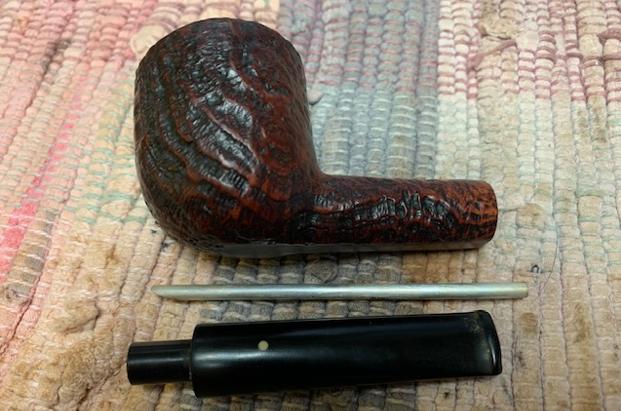
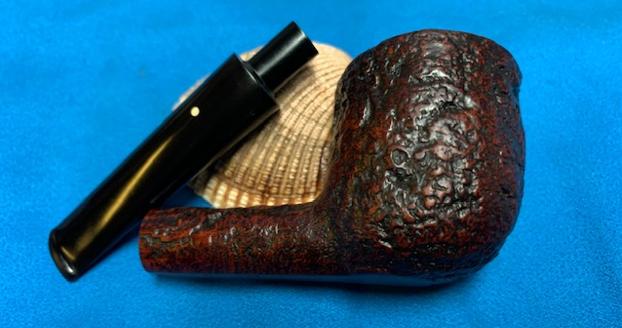
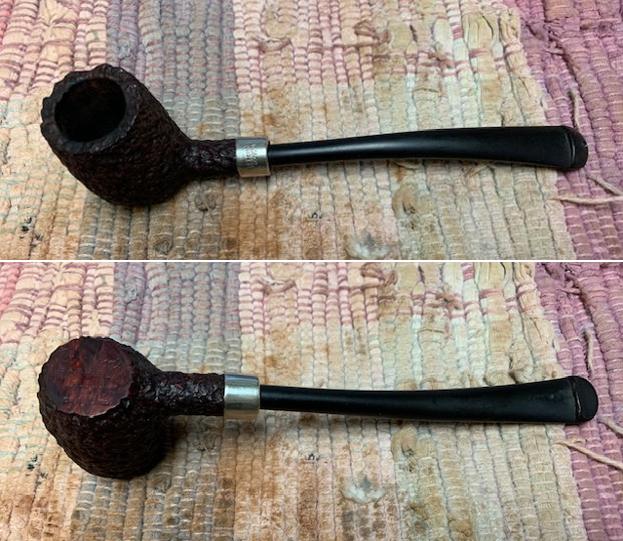
 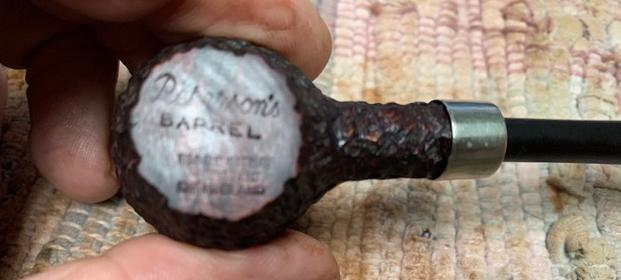 I took the pipe apart and took a photo of the pipe. It is a good looking pipe and has a rugged rustication around the bowl.
 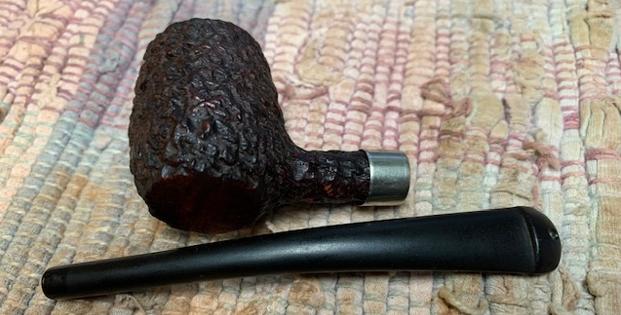 I worked some Before & After Restoration Balm into the surface of the briar with my fingertips and a horsehair shoe brush to clean, enliven and protect the briar. I let the balm sit for 15 minutes and then buffed with a cotton cloth to raise the shine. The photos show the bowl at this point in the restoration process.
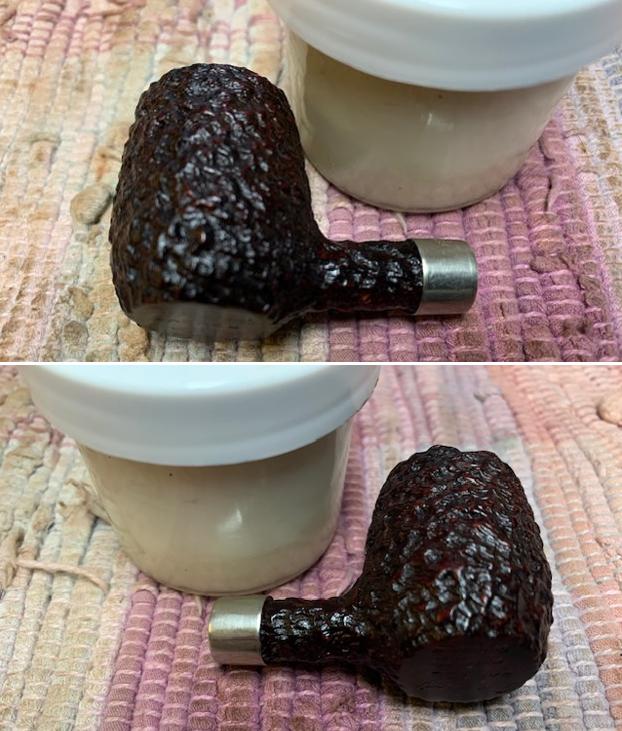
 I “painted” the stem with the flame of a Bic lighter to lift the tooth marks on the underside of the stem. I filled in the remaining marks with clear CA glue. Once the glue cured I sanded the stem smooth with 220 grit sandpaper and started the polishing the stem with 400 grit wet dry sandpaper.

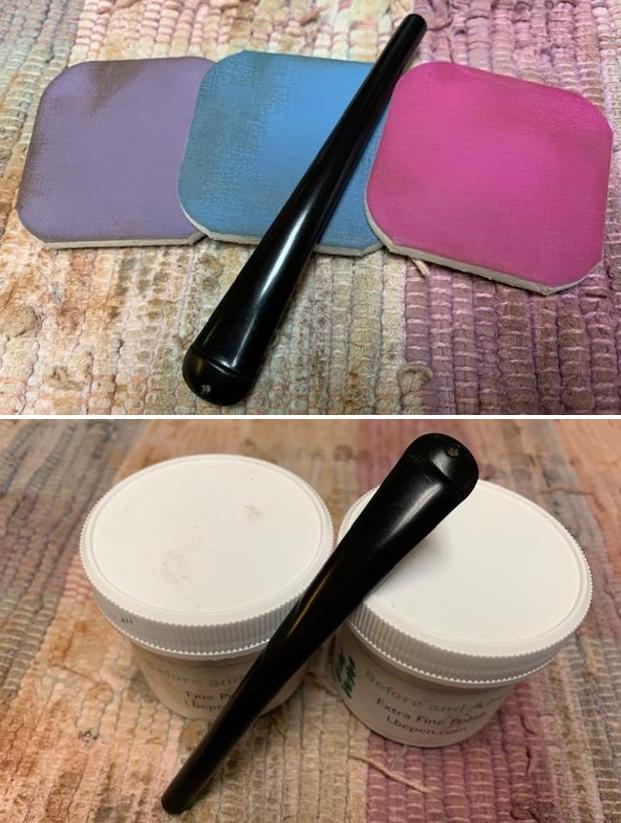
 I polished out the light tooth marks on the stem with micromesh sanding pads – wet sanding with 1500-12000 grit sanding pads. I wiped it down after each sanding pad with Obsidian Oil. I polished it with Before & After Pipe Stem Polish – both Fine and Extra Fine.
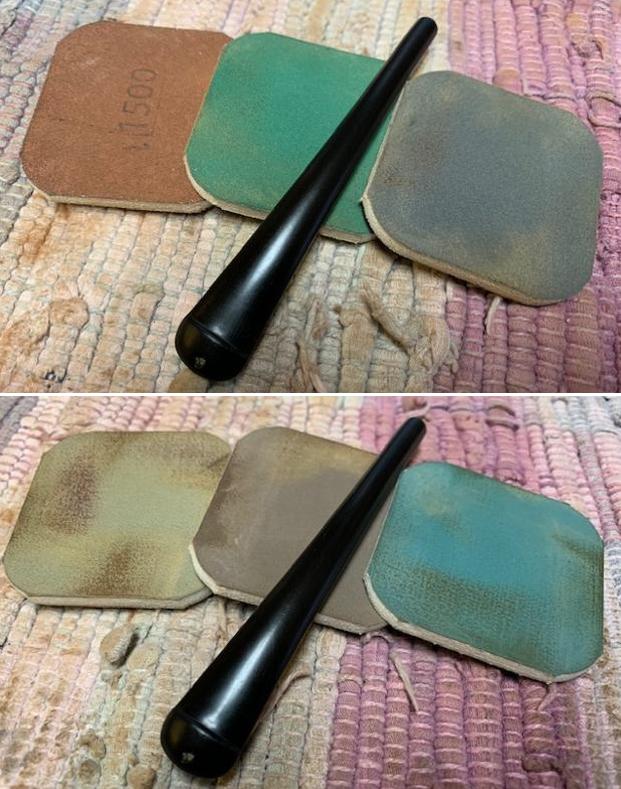
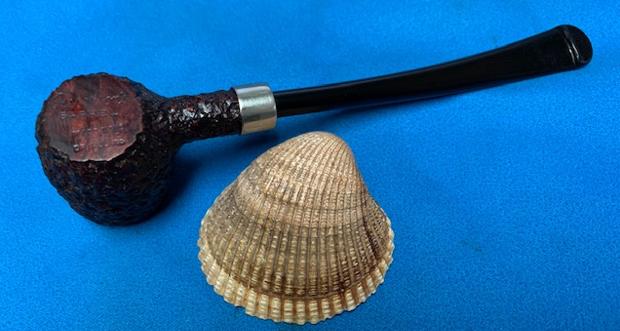
 I am excited to finish this Peterson’s of Dublin Special Series Rusticated Barrel with a Military Bit Stem. I put the pipe back together and buffed it with Blue Diamond on the buffing wheel. I gave the bowl multiple coats of Conservator’s Wax and the stem multiple coats of carnauba wax. I buffed the pipe with a clean buffing pad to raise the shine. I also hand buffed it with a microfibre cloth to deepen the shine. It is fun to see what the polished bowl looks like with the rugged rustication all around it. Added to that the polished nickel ferrule and the black vulcanite stem was beautiful. This rugged Classic Peterson’s Rusticated Barrel is nice looking and the pipe feels great in my hand. It is light and well balanced. Have a look at it with the photos below. The dimensions are Length: 5 ¾ inches, Height: 1 ½ inches, Outside diameter of the bowl: 1 inch, Chamber diameter: 5/8 of an inch. The weight of the pipe is 21grams/ .74oz. It is a beautiful pipe and one that I am going to hold on to in memory of my good friend and smoke in his memory. Thanks for walking through the restoration with me as I worked over this pipe. Thanks to each of you who are reading this blog. This is another beautiful pipe that will be put on the rebornpipes store. If you are interested in adding it to your collection let me know.