Comoy’s 168 Tradition Restored


By Al Jones

This little Comoy’s billiard caught my eye as it was stamped “Tradition” but is a sandblasted pipe. The shape is the 168, a tapered stem billiard. The COM (Country of Manufacture) mark is also the circular “Made in London”/England that is used on smooth Comoy’ spipes. This COM mark with the 3 piece drilled “C” stem logo was used in the early 1950’s onward to the merger point in 1981-1982.

The pipe had a heavily oxidized stem but otherwise appeared undamaged. The dark area near the button shows that a bit guard was used. The bowl had a very thick cake build-up.

comoys_168_tradition_before-1

comoys_168_tradition_before-2

comoys_168_tradition_before-3

comoys_168_tradition_before-4

Upon receipt, I found the stem impossibly stuck in place. It was so tight that I feared it may have been glued in place. Freezing didn’t work, so I filled the bowl with alcohol and stuck a cleaner thru to soak some alcohol into the shank/tenon area. After several hours, I was relieved to find the stem released, with a perfect tenon.

The bowl was reamed and I found the interior to be in perfect condition, protected no doubt by the cake. The bowl was soaked with alcohol and sea salt. While it was soaking, I put a dab of grease on the C logo and soaked the stem in a mild solution of Oxy-Clean to loosen the oxidation.

I used Halycon II wax applied by hand to shine the bowl. The mild build-up on the bowl top was removed using a combination of a cloth and worn scotchbrite pad. The shank was cleaned with a series of brushes and alcohol. A thorough cleaning of the shank is necessary to avoid tobacco ghosts.

The stem was mounted and oxidation removed with 400, 800, 1000 and 2000 grade wet sandpaper. Next, 8000 and 12000 micromesh sheets were used. The stem was then machine buffed with White Diamond and Meguiars Plastic Polish.

Below is the completed pipe.

comoys_168_tradition_finish-1

comoys_168_tradition_finish-4

comoys_168_tradition_finish-2

comoys_168_tradition_finish-5

comoys_168_tradition_finish-6

comoys_168_tradition_finish-3

comoys_168_tradition_finish-7

?

?

?

?

comoys_168_tradition_finish-10

The Last of 4 ‘Hole in the Wall’ finds – a Savinelli Capitol Prince with a secret


Blog by Dal Stanton

I purchased the Savinelli Capitol in June of this year, at the Hole in the Wall antique store near Zhenski Pazar (Women’s Market) located in downtown Sofia.  Steve was visiting Bulgaria from Vancouver in the context of our work and we went to the Hole in the Wall for a mini pipe hunting sortie.  I’d remembered on other occasions the vendor producing a 4-pipe pouch that he kept behind the counter and I asked about it and he still had it with pipes intact.  The leather bag itself was a find.  The 4 pipes revealed after unzipping the bag were a Savinelli Tortuga 628, Danske Club Vario 85 (both occupying a place in my rotation), a Butz-Choquin Rocamar (which became a wedding gift for my new son-in-law), and the Capitol (that I learned was a Savinelli second) now before me.  Above, I linked the restorations of the Tortuga and BC Rocamar to their respective postings.cap1Honestly, when I first acquired the Bag of Four, my sights were fixed on the 3 big brothers of the Capitol which I identified as a Prince shape from Pipedia’s shapes chart.  Per Bill Burney’s description,

The prince, named after the Prince of Wales (Prince Albert, later King Edward VII), has a squat, rounded bowl with a long, usually very slightly bent stem and a short shank.  Compared to other pipes, the shank and stem are thin and delicate, though not necessarily fragile.  This makes for a light and comfortable pipe (Link).

On the internet, I searched high and low through images of Prince Albert (1819-1861) and found no images among the 100s visually linking the prince with the shape now associated with him.  The photo below, one could imagine, has his pipe waiting for him just to his right, reluctantly removing it from the eventual public view of the old ‘sit-still’ camera recording the moments.  Yet, in my search on the internet, one can find 100s of pictures of happy, confident men smoking their pipes with adoring women looking on. How is this possible? – a man would be quick to ask.  Well of course, their pipes are packed with Prince Albert’s tobacco!  So, the secret is out – PA not only stands for Prince Albert but also, and more importantly, Pipe Appeal!  Good to know as Christmas gift lists are being created for this holiday season!cap2With Christmas music playing in the background the ambiance is perfect. The CAPITOL is stamped on the left side of the shank with no other markings.  When I search Pipedia, I discover that Capitol is listed among a robust inventory of other Savinelli made sub-brands, seconds and order productions. At Pipes Website store, I found several Savinelli Capitol shapes for sale.  At The Danish Pipe Shop I discovered several Savinelli Capitols listed and a bit pricy at that!  So, it would seem, the Capitol line of Savinelli has some depth and quality to it.  Unfortunately, I could find no Savinelli listing that brought the entire Capitol line inventory together.  This Capitol Prince has an elegant, slim appearance, boasting a length of 5½ inches, a petite bowl width of 1½ inches and a fire chamber diameter of ¾ of an inch.  The rim has some clunk dents along the edge and the backside shows darkening from oils and perhaps rear-end tobacco lighting over the edge.  The fire chamber has a light cake build up but I will bring it to the briar for a clean, fresh start.  I detect a larger fill on the heel of the bowl near the left junction of the shank. The stem is in great shape with minor teeth chatter on the bit.  I detect a dent in the vulcanite at the shank junction and note that there is day-light between the junction of shank and stem – the mating is not flush, but a good cleaning may take care of this.  Interestingly, I also notice that the stummel is encased in what I call a ‘Candy Apple wrapper’ which I also saw in the Savinelli Tortuga restoration acquired at the same time as the Savinelli Capitol.  I didn’t like the Candy Apple wrapper around the Tortuga then and this Capitol Prince’s natural briar will be liberated as was his big brother’s!  The following pictures on my work table here in Sofia, Bulgaria, show these areas of need and a very handsome pipe.cap3 cap4 cap5 cap6With the stem showing no oxidation, I skip the Oxiclean bath which may be a first for me!  The twisty stinger extending from the tenon is extracted unceremoniously and added to the Lonely Stingers Bottle and is officially retired from active service.  I give my initial focus to the stummel clean-up starting with reaming the bowl.  I use the Pipnet reaming kit camped over a paper towel which enables me to quickly catch and dispose of the powdered carbon – this makes my wife happier as my work table shares our bedroom space in our 10th floor flat!  Often, I go out onto the balcony to do this dirty work but winter has come in Bulgaria.  I use the two smallest reaming blades and I do not use them aggressively – I do not want to dig into the briar.  I follow the reaming blades with the Savinelli pipe knife to scrape and fine tune the cleaning of the cake residue.  I remove what appears as dried dottle at the floor of the bowl.  I finish by using 240 grit paper wrapped around a dowel rod and my index finger to clean and smooth the wall.  Finally, I take a cotton pad with alcohol and wipe the bowl removing the carbon dust.  The pictures show the progress.cap7 cap8 cap9With the isopropyl 95% on the work table, I clean the internals of the stummel.  Using pipe cleaners (bristled and smooth) and Q-tips I go to work.  Dental probes are also helpful to reach into the mortise and scrape the surface dislodging muck.  It was dirtier than I expected, but finally Q-tips start re-emerging ever whiter from the mortise plunges.  Done.  Now, I take the stem and go to work on its airway with pipe cleaners.  I discover very quickly that a reason for lack of cleaning on this stem is that I am not able to move a pipe cleaner through the airway.  The button airhole is too tight and needs to be enlarged to accommodate pipe cleaners.  No one likes fighting with pipe cleaners that refuse to pass through cramped quarters.  I take a round, pointed needle file and begin gradually to enlarge the button airhole.  My method is to insert the file point into the airhole but only as far as the expanding file diameter will allow to enable me to move the file back and forth easily, gradually removing the upper and lower button airhole surfaces.  If I jam the needle file down the airhole too aggressively, not only will it get jammed, it will also damage the vulcanite contours around the airhole.  After some time, the airhole gradually expands allowing the needle file to file more deeply opening the airway.  After some time and testing, pipe cleaners are able successfully to navigate the passage and the stem airway cleans up very quickly.  When I work on the teeth chatter later, I’ll smooth out this work with 240 grit paper.  The pictures show the cleaning and button airhole enlargement processes.cap10 cap11 cap12 cap13 cap14I love working on clean pipes!  With internals clean I know shift my attention to the stummel surface.  I first attack the Candy Apple varnish-like surface.  I start conservatively by first using cotton pads with undiluted Murphy’s Oil Soap to work on the rim and bowl surface.  With the aid of a brass brush, the Murphy’s Soap does a good job cleaning the rim, but it is probable that the surface is an acrylic finish which is difficult to remove.  Next, I use acetone with cotton pads to attack the Candy Apple surface.  As I scrub, and I scrub a good while, it gives me time to study the briar grain on this stummel and on the heel, I find what looks like a spider pattern – beautiful.  I’m ever amazed at God’s gift to us in the design and intricacy of this piece of briar – a ragged bush of a plant that would be called scrub if you saw it on the side of the road as you passed.  As the pictures below reveal, even after acetone scrubbing the shine of the acrylic is still very visible.  To see if I can soften it, I plop the stummel into an acetone bath.  The pictures show the progress.cap15 cap16With the stummel in the acetone bath, I return to the stem and take 240 grit sanding paper and work on the teeth chatter on the lower and upper bit. I also sand the button airhole to remove file markings and to smooth the surface.  Then I apply a dot of Hot Stuff “T” CA glue to the small dent on the shank-side edge of the stem.  I like to use the “T” for thicker, because it beads up on the divot and doesn’t run.  I wait for the superglue to cure before proceeding with more work on the stem.  The pictures show the progress. cap17 cap18 cap19Taking the stummel out of the acetone bath after about 6 hours, I place it on the desk and as the acetone evaporates I can see that the bath will need help.  With the surface softened by the acetone bath, I take 0000 steel wool and dip a small portion in the acetone and rub the steel wool over the shiny surfaces.  This finally does the job of bringing the natural briar to the surface.  Now I can see the true condition of the surface and where I may need to sand and repair.cap20I examine the stummel and invert it looking more closely at the large fill I identified earlier.  I picked at it with a sharp dental probe and dig out the loose fill.  I will need to mix a briar dust and superglue putty to refill this pitting as well as ‘top-off’ some smaller pits around the area.  The heel of the stummel is banged up good and I need to sand those out after applying the briar dust putty patches and after they cure.  I flip the stummel and study the rim.  The briar in this Capitol Prince will be beautiful at the end of the restoration because it already is!  I decide to first take a coarse 120 grit paper rolled up tightly to cut a bevel on the inner rim.  I do this to remove the damaged areas along the edge but also the Prince will look even classier with a gentle bevel enhancing an already handsome bowl.  I follow this initial cut of the bevel with 240 grit paper to smooth the surface further.  I want to apply a very gentle topping to the rim with 600 grit paper.  I take the chopping block out and place a sheet of 600 grit paper, with rim down, in a circular motion, gently I rotate the stummel over the surface.  I check the rim as I proceed to make sure I only take enough surface off to give a clean fresh look and remove minor nicks.  I follow the topping by using rolled up 600 grit paper to finish the bevel matching the smoothness of the rim.  The pictures show the progress.  I’m pleased with the look of the rim.cap21 cap22 cap23 cap24 cap25Time to mix briarwood dust and superglue to make a putty to apply patches to the hole and pits on heel of the stummel.  I take my briar dust can and with a pipe nail, scoop out some dust placing it in a little pile. Using regular clear super glue, I put a little puddle next to the briar dust.  Using a toothpick, I start adding some briar dust to the glue until it gradually reaches a putty/toothpaste-like consistency and then I apply a small dollop over the fill area.  I mash it down to make a tight patch and I leave some excess over the areas to sand down later. cap26With the stummel now out of action for the night, I turn to the stem again taking the flat needle file and freshen the button – upper and lower. I then flip the stem and again taking the flat needle file I remove the excess superglue from the patch I did on the edge of the stem – shank-side.  When the filing brings the excess superglue nearly to the surface level of the vulcanite, I use 240 grit sanding paper to blend the patch further with the vulcanite.  I follow the 240 with 600 grit paper doing the same.  I complete the patch repair by using 0000 steel wool to smooth the patch area as well as the entire stem in preparation of the micromesh polishing process.  The pictures show the progress. cap27 cap28Now for the micromesh phase, using pads 1500 to 2400 I wet sand the stem and follow with an application of Obsidian Oil to rejuvenate the vulcanite.  Following this, I dry sand using pad 3200 to 4000, followed by pads 6000 to 12000.  After each set of 3, I apply an additional coat of Obsidian Oil.  The stem looks good.  I put it aside to dry and call it a day.  The pictures show the micromesh phase.cap29 cap30 cap31Early the next morning before heading to work, I want to work on the briar dust patch applied the night before.  The superglue dust putty has cured.  I take a flat needle file and start filing on the excess mound of cured putty.  I’m careful to file down on the patch footprint only and not wander.  I take a picture illustrating the idea (#2 below).  The idea is that I gradually file the putty excess and ‘sneak up’ on the briar below the patch.  I take the filing down to the briar surface, within the patch footprint.  At this stage, I apply much less pressure to the file, moving the flat file more in a circular motion lightly over the patch footprint.  I want to blend the patched area now with the uncovered briar surface.  The aim is to remove the putty excess not take away briar.  Picture #3 shows the completion of the flat needle file’s service.  I then continue the blending with 240 grit paper expanding the area a bit outside the footprint area (picture #4).  I’m not too concerned about this because I know I have sanding to do to eradicate the numerous dents next to the patch.cap32 cap33As my wife was admiring the stummel and the briar patterns over my shoulder as I worked, she exclaimed about the face of the kitty revealed in the briar!  Raising my eyebrows to refocus my attention to the area captivating her, I see the pattern which is recorded in the picture immediately below.  She describes the two eyes, the whiskers and the forehead, probably in need of a little scratch, I thought!  So, the Savinelli Capitol Prince has a kitty, too.  Then my wife said, with not as much excitement, isn’t that a crack in the middle of the kitty’s face?  I had seen it before but it was small and it followed the contours of the grain pattern.  Yet, her question raised questions in my mind.  I believe the crack is not growing but I elect to apply Hot Stuff CA Glue to the crack just to be on the safe side.  This CA glue’s viscosity is extremely thin and perfect for shoring up cracks as it seeps into to a crack’s crevice in a way that thicker glue is unable.  However, the problem with this thin glue is that it can absolutely take off like a rabbit scampering over the briar surface not in need of CA glue.  To minimize this, I only dabble a bit on a toothpick trying to hold only a small drop at the point of the toothpick.  Then, strategically apply it to the center of the crack which spokes outwardly in four separate veins.  I find that the glue is running off the end of the toothpick because of its liquidity.  I’m finally able to capture a droplet on the toothpick and apply it to the center.  The glue spreads a bit, but I change the pitch of the stummel and use gravity to my favor.  I also use the tip of the toothpick and paint the glue over the spoking cracks by drawing the glue from the center.   The pictures show the progress of shoring up kitty’s nose and whiskers.cap34 cap35 cap36 cap37After the CA Glue cures, I take a small piece of 240 grit paper rolled so that it presents a more solid surface.  I then take the 240 roll and strategically sand the crack fix.  I keep the roll within the shiny patch footprint with a view of removing glue off the surface and to avoid losing briar as collateral activity.  I then take a medium grade sanding sponge and work the patch areas (crack and fill) as well as the multitude of dents on the stummel, but especially on the heel of the stummel.  As I work on bringing out the imperfections set in the briar, the thought surfaces in my mind that I had adopted an approach to this pipe, it’s shape and demeanor, going for of a more pristine look – the look of a pipe that is the favorite of royals.  A pipe having a quietly, self-confident posture, but elegant and humble.  It has a kitty, too!  Some pipes seem more of a rugged disposition and seem to beg for some imperfections as badges of past challenges in life – this Savinelli Capitol Prince says, “Please, put a crease in my trousers” –  or, as it seems to me! The pictures show the progress.cap38 cap39 cap40With the primary patches completed and dents smoothed and blended, I take micromesh pads 1500 to 2400 and wet sand the stummel.  I wet sand with the first set of three because it seems the effect of the water on the briar would soften it a bit, and it seems to give the micromesh pads more bite.  This helps removing any imperfections/dents left over from all the previous sanding.  The latter pads serve to polish what is there more than address imperfections.  Well, I was just thinking about smartly pressed trousers when I finish sanding with the first set of micromesh pads, set to take a picture, when I see that the kitty’s eye had changed.  He appears to be winking at me!  I discover whatever was in the eye before (a small fill?) was no longer there and I am looking at a new royal pit. The latter micromesh cycles must wait as I apply a new ‘T’ Glue patch on the new pit and wait for it to cure and sand and blend it.  So, now the kitty has a black eye.  The pictures show the pause in progress.cap41 cap42When the CA Thick glue cured, I filed it down with a half-circle needle file to the surface and fine-tuned it with 240 grit paper.  I follow this by addressing the patch area with 600 grit paper then 0000 steel wool. cap43 cap44To catch up this patch area with the rest of the stummel, I use micromesh pads 1500-2400.  At this point I return to the micromesh process with pads 3200 to 4000.  I notice the initial fill patch on the heel of the stummel with the micromesh polishing had lightened a bit.  I take a dark walnut stain stick and dab it in the fill patches then I use a cotton pad with some alcohol and press it a few times to blend and lighten the stain stick application.  It looks better now.  I finish with micromesh pads 6000-12000 to further blend the stain stick patch as well as the micromesh phase.  The pictures show the progress.  The grain is looking very good.cap45 cap46 cap47Time to decide.  I have yet to decide upon the next steps – whether to move forward with the natural briar or to apply a stain.  This question I put off to the conclusion of the micromesh phase so I can evaluate the briar’s presentation and the pipe’s personality.  I rejoin the stummel and stem to get a look at the big picture.  Decision made.  Using Fiebing’s Light Brown Leather Dye I mix 1 part dye to about 4 parts isopropyl 95% in a shot glass – aiming for a lighter cast.  I detach the stem and mount the stummel on a cork to handle the stummel.  After wiping the stummel with a cotton pad and alcohol, I heat the stummel with my wife’s hair dryer to expand and open the briar to the dye application.  Using a folded over soft pipe cleaner I coat the stummel with the 1 to 4 dye mixture liberally and immediately flame it with a lit candle waiting for that use.  The alcohol burns off very quickly setting the dye in the grain.  In about 4 or 5 minutes, I repeat the process and set the stummel aside for the night to rest – I as well as the newly stained stummel.  The pictures show the progress.cap48The next morning, anxious to see the results of the newly stained stummel.  Taking the Dremel with the attached hand-held extender, I mount a new felt wheel on the extender, set the Dremel on the lowest RPM setting, and apply Tripoli compound to remove the flamed dye crust to expose the surface.  I’m liking the color a lot and the grain has responded very well.  As I move through the Tripoli process I identify an eye-sore – at least to me.  Circling the outer rim edge is a black ring which the felt wheel charged with Tripoli is not removing.  The second picture I take after focusing the Tripoli wheel for some time on the ring itself, hoping to lighten and blend the black ring.  To me, the ring is unattractive and detracts from the overall appearance of the pipe.  The thoughts floating in my mind at this point are, that it is simply darkened stain at that point that a wipe of alcohol might lighten.  Another, less appealing thought is that this ring was produced by the flaming and perhaps scorched this most vulnerable part of the rim.  I’m thinking that it wasn’t the dye on the rim itself which burned off, but the overflow of dye on the cork that also had burned off did the deed.  I’ll need to check into this with Steve!  My methodology needs a revamp if this is the case.   The pictures show the issue.  The final picture shows the beginning of my corrective approach.  With an approach moving from conservative to less so, I spend more time focusing on the rim with the Tripoli felt wheel buff.  When this did not achieve the desired results, I take a cotton pad with some alcohol in it and wipe strategically around the outer edge of the rim, hanging over the outside slightly.  I do a few cycles around the circumference of the rim with the alcohol then follow again with the Tripoli buff to do a follow-up blending.  When this did not achieve the desired results, I tightly roll a piece of 240 grit paper and lightly make a quasi-bevel cut on the outer edge of the rim to remove the scorched briar.  The results of this are pictured below.  Not pictured is the rest of the process.  I followed the 240 grit with a rolled piece of 600 grit paper – as with 240 bevel, staying directly on the edge.  Then, I jump to mid-range micromesh pads 4000 to 12000, and smooth, polish and blend the outer rim area.  While the tendency for perfectionism would have me try something else, the rim looks much, much better and if I didn’t record this excursion here, 99% of onlookers would not see an issue!  cap49 cap50I move on to complete the polishing process by attaching the Blue Diamond felt wheel to the Dremel hand-extender and working this lesser abrasive compound over the briar surface.  Completing the compounds, I wipe/buff the stummel with a cotton cloth to remove left-over compound dust before moving to apply the wax.  I reunite the stem and stummel of the Savinelli Capitol Prince.  After mounting a cotton wheel to the Dremel, I increase the RPMs to the next number and apply several coats of carnauba wax to the stummel and stem.  After the carnauba wax application, I mount a clean cotton wheel with the same RPM setting on the Dremel as with the carnauba and provide a clean wheel buff to the entire pipe.  Finally, I give the pipe a rigorous hand-buffing with a micro-fiber cloth to deepen the 3-dimensional-appearing gloss already shining through this happy piece of briar.

The grain on this small Prince bowl is captivating with larger bird’s eye on the front, splaying fans on the heel, and of course, a kitty with whiskers fanning out as he gazes up the shank and stem at his steward – or should I add, stewardess!  The diminutive size of the bowl along with the longer-than-expected sleek shank and stem, would make this Savinelli Capitol Prince – a preferred shape to at least one royal, a wonderful addition to any pipeman’s or pipelady’s collection.  Thank you for joining me!cap51 cap52 cap53 cap54 cap55 cap56 cap57

A Shape You Gotta Love – A Stanwell Majestic 180


Blog by Steve Laug

There are certain shapes that Stanwell just nails – they get them absolutely perfect. There is nothing that could be done to make the shape even more stunning than it is. The shape 180 is one of those shapes for me. It is a Dublinesque freehand with a conical bowl, an oval shank and stem that has a short saddle before flowing into the blade. According to a chart by the late Bas Stevens this shape was designed by Tom Eltang (https://rebornpipes.com/tag/shape-numbers-and-designers-of-stanwell-pipes/). It has the appearance of some of the Eltang’s that I have seen. In a write up for a Stanwell 180 sandblast pipe on smokingpipes.com Adam Davidson says this about the shape: “I would bet that this Stanwell shape was designed by Tom Eltang, who has designed quite a few for the company over the years.” So having known Bas Stevens personally I can confirm that it is definitively an Eltang designed pipe. (https://www.smokingpipes.com/pipes/estate/denmark/moreinfo.cfm?product_id=101503)

My brother Jeff found this Stanwell in an antique shop in Astoria, Oregon. It was on consignment by a widow who was selling her pipe collector husband’s collection. He bought a few of the pipes from her consignment and this is the first I have worked on. He took the following photos of the pipe to show what it looked like when he found it. It was truly a mess but looking beneath the grime he had found a gem that only needed some TLC. The grain on this pipe is truly stunning and the lay out of the pipe follows the grain amazingly well.eltang1 eltang2He took some close up photos of the rim and the underside of the bowl to show what it looked like up close. The rim was pretty tarred with overflow from the cake in the bowl. The bowl had a cake but obviously it had been trimmed back somewhere along the way. The pipe smelled strongly of aromatic vanilla tobacco and would take some serious cleaning to bring the briar back to neutral.eltang3The cross grain on the underside of the bowl is quite stunning. It would only stand out more once the pipe was cleaned and polished.eltang4The stamping on the pipe was on the underside of the shank near the stem and was sharp and clear. It reads Stanwell over Made in Denmark over the script of Majestic. Further up the shank toward the bowl it was stamped with the 180 shape number.eltang5The stem was oxidized and had tooth chatter on both sides. It seemed to have some calcification around the button. None of the marks looked to deep so it had some promise. The Crown S Stanwell logo on the topside of the small saddle portion of the stem was in excellent condition.eltang6My brother reamed the bowl and cleaned the internals of the shank and stem with pipe cleaners, cotton swabs and alcohol. He scrubbed the exterior of the pipe and stem with Murphy’s Oil Soap and was able to remove the build up on the rim and also on the stem. The finish was in very good shape under the grime on the bowl. There appeared to be a dark spot on the left side of the bowl. The next four photos show the condition of the pipe when I received it from my brother.eltang7 eltang8He was able remove the build up and calcification on the stem. You can see from the photos below that other than oxidation the stem was very clean.eltang9I worked on the stem with 220 grit sandpaper to remove the oxidation and reshape the button edges. It did not take too much work to get the oxidation that was on the surface of the stem.eltang10I polished the stem with micromesh sanding pads – wet sanding with 1500-2400 grit pads and dry sanding with 3200-12000 grit pads. I rubbed the stem down with Obsidian Oil after each set of three pads. After the third set of pads I gave it another coat of oil and set it aside to dry.eltang11 eltang12 eltang13I used a dental pick to clean out the slot in the end of the button. There was some build up in that area that had hardened. I ran a pipe cleaner through the stem and used cotton swabs and alcohol to clean out the inside of the shank and the airway to the bowl. I polished the exterior of the rim, bowl and shank with micromesh sanding pads using 1500-12000 grit pads.eltang14I buffed the bowl and stem with Blue Diamond on the buffing wheel to polish the vulcanite and the briar. I gave them both several coats of carnauba wax and buffed with a clean buffing pad to raise a shine. I hand buffed the pipe with a microfibre cloth to deepen the shine. The finished pipe is shown in the photos below. You can see from the photos of the left side of the bowl that I was able to remove the darkened spot on upper portion of the bowl. The rich finish and the comfortable shape of the pipe give the Majestic stamping on the shank a well-chosen appellation. Thanks for walking with me through the restoration.eltang16 eltang17 eltang18 eltang19 eltang20 eltang21 eltang22 eltang23

Finishing Touches on an Interesting Bambu Egg


Blog by Steve Laug

This pipe came up for sale on the Gentleman’s Pipe Smoking Society on Facebook. It was being sold by a friend of Dal’s and I liked the shape and the look of it. I honestly was thinking it was a smaller Stanwell like egg even though I knew it was not a Stanwell pipe. The pipe is stamped Bambu on the left side of the shank and on the underside it is stamped Israel which leads me to believe that it was crafted by the Shalom Pipe Factory. There is nothing online that I can find regarding the stamping or the brand but it is similar in stamping to my early Alpha Israel pipes. That is all the information that I can surmise from the pipe itself. I paid for the pipe and had it shipped to my brother instead of to Canada over a month ago and he received it really quickly. I told him to hold onto it and ship it up when he sent another box of pipes to me.

This week it arrived and I expectantly took it out of the box of other pipes. I unwrapped it from the bubble wrap to have a look at it. My brother had sent along a few photos of the pipe to show me what I was in for once it arrived so I was kind of excited to see it up close. In the next two photos he shows the overall look of the pipe. It was really quite nice.bamboo2 bamboo3Whenever I buy an estate pipe, no matter who has done the restoration, I always add my own touches to the restoration to make it mine and to remove the things that will bug me as I use the pipe. I don’t know if you all do that but it is part of my own pathology that I have to go over every estate I get with a fine tooth comb before I even load a bowl and fire it up. This was no exception to my habit. I took the bowl and turned it over in my hands to examine it closely. As usual I noted a few issues that I knew would bug me unless I addressed them. (No criticism of the seller as I am sure many folks would have been absolutely fine with the as it was when I got it.)

  1. The finish on the bowl was spotty. The left side of the bowl appeared to have been stripped of its varnish or shellac coat and there were shiny spots left on the bowl side toward the top edge of the rim. The front, back and right side of the bowl still had the shiny finish coat. I knew I would need to remove the finish and smooth things out. Call me anal but that kind of thing bugs me.
  2. The rim still had some residual lava spots from the bowl that would need to be cleaned off and the darkening of the rim appeared to be on top of the shiny top coat. I was pretty sure that I could remove much of the issue by removing the shiny coat.
  3. The underside and sides of the bowl had some dents and nicks in the finish that needed to be steamed out.
  4. The transition between the briar, the black insert and the bamboo was rough to the touch and there was debris collected in the rough edges of the transition.
  5. There was a red mark in the groove of the bamboo on the top side of the shank. It stood out and it bugged me – kind of like lipstick on the collar of a good shirt.
  6. The bamboo also had a thick seal coat that seemed to have brush marks in the finish and I could feel them with my thumb as I ran it over the bamboo.
  7. The stem had a lot of pits and small tooth chatter that had been polished but was still present on both the top and the bottom sides.
  8. The stamped B logo on the stem was in great shape but I wanted to paint it and make it stand out a bit more on the saddle portion.
  9. The stem also did not sit correctly in the shank leaving a gap on the underside of the joint when it was properly aligned.

My brother included some close up photos of the bowl, the underside, the shank and the stem that highlight some of the issues I raised above.bamboo4 bamboo5 bamboo6The next photos show the stamping on the left side of the shank and on the underside. It reads Bambu as noted above and Israel on the underside.bamboo7In the next two close up photos of the stem you can see the tooth chatter and scratches on the vulcanite stem.bamboo8The final photo shows the B stamp on the side of the saddle portion of the stem. It is in decent shape and would be easily filled in. The fit of the stem against the bamboo was a bit off as well. I would need to adjust this fit.bamboo9In adding my own touches to the restoration of the pipe I decided to work through remedying each of the issues noted above individually. You can be the judge if the finished pipe is better than when I started. The first four photos show the pipe as it appeared when I unwrapped it. You can see the shiny spots on the left side of the bowl near the top and toward the bottom of the bowl. You can also see the dents in the bowl sides.bamboo10 bamboo11The issue raised above in number 1 involved the spotty finish on the bowl. The above photos highlight that issue clearly. The left side of the bowl appeared to have been stripped of its varnish or shellac coat and there were shiny spots left on the bowl side toward the top edge of the rim. The front, back and right side of the bowl still had the shiny finish coat. I scrubbed the finish on the bowl with acetone on cotton pads to remove the shiny topcoat. I was pretty sure it was a varnish or shellac coat and that it had been partially removed somewhere along the way. It did not take too much effort to remove it from the surface of the bowl.

I also addressed issues number 2 and 3 noted above. To take care of the second issue of the rim surface I scrubbed the rim of the bowl with the acetone on the cotton pad and the bits of lava came off along with the shiny coat. The rim was smooth to the touch and some of the darkening also was removed in the process. To take care of the dents and nicks in the finish I steamed them out with a hot knife and wet cloth to raise them. I was able to remove all of the dents and nicks leaving the bowl smooth.bamboo12 bamboo13The next photo is a close up of the rim after the scrubbing with acetone.bamboo14Next I decided to address issue number 9 noted above – the improper alignment of the stem in the shank. When it was correctly aligned in the shank it left a gap on the underside of the joint. It is visible at the bottom of the stem in the photo below.bamboo15I removed the stem from the shank and faced the end of the shank on the topping board using 220 grit sandpaper. You can see from the second photo below where the topping at removed high spots on the end of the shank leaving the center unsanded. This was only the first step in the process of this repair.bamboo16When I put the stem back in the shank it was clear that the angle of the tenon was incorrect in terms of the drilling in the bamboo. I heated the tenon with a Bic lighter to soften the vulcanite of the tenon and then pushed it back into the mortise in the bamboo. Because the tenon was pliable I was able to align the stem edge with the edge of the bamboo to remove the gap in the fit. I held the stem in place while the tenon cooled. Once finished the alignment remained and the gap was gone.bamboo17Once I got the stem alignment corrected I decided to touch up the B stamp on the side of the stem to address issue number 8 noted above. I use some white acrylic paint and applied it with a fine bristle paint brush to fill in the stamping on the stem. Once the paint dried I scraped it off with a soft cloth and sanded it with a 2400 grit micromesh sanding pad.bamboo18To address the issues noted in numbers 4-6 above – all dealing with the bamboo shank extension I worked specifically to deal with the varnish coat on the bamboo. I wiped it down with a cotton pad and acetone to remove the buildup and brush marks on the surface of the bamboo. I cleaned out the “lipstick” that was in the groove in the bamboo using a cotton swab and acetone. There is just one small spot left next to the spacer between the bamboo and the briar. I sanded the transition between the briar, the insert and the bamboo to smooth it out and to also clean up some of the debris that seemed to have collected at that point on the shank. With the removal of the thick varnish the bamboo began to take on its natural patina and the stress marks stood out giving an aged look.bamboo19 bamboo20The final issue, number 7 above, to be addressed was the stem. It had some tooth chatter and marks on the top and underside that needed some attention. They were not too bad but they stood out and bugged me. I sanded the stem with 220 grit sandpaper to remove the tooth chatter and smooth out the tooth marks. I polished the stem with micromesh sanding pads – wet sanding with 1500-2400 grit pads and dry sanding with 3200-12000 grit pads. I rubbed the stem down with Obsidian Oil after each set of three pads. After the final set I gave it a final coat of oil and set it aside to dry.bamboo21 bamboo22 bamboo23I polished the bowl and the bamboo with micromesh sanding pads as well – all grits 1500-12000 to remove any remaining scratches or small nicks in the finish.bamboo24 bamboo25I buffed bowl and stem with Blue Diamond on the buffing wheel to further polish the pipe and then gave the entire pipe several coats of carnauba wax. I buffed it with a clean buffing pad to polish the wax and then hand buffed it with a microfibre cloth to deepen the shine. The finished pipe is shown in the photos below. The rich finish now highlights the beautiful grain on the pipe and the smooth feel in the hand satisfies my desire for that in a pipe. It is now ready to fire up a bowl of some Christmas tobacco and the distractions that irritated me when I received the pipe are taken care off and all the distractions removed. So goes the life of a pipe refurbisher – never finished and rarely satisfied with the end product – I always see more imperfections that need to be addressed. Thanks for humouring me as I took you through this journey I appreciate it!bamboo26 bamboo27 bamboo28 bamboo29 bamboo30 bamboo31 bamboo32 bamboo33

Short Snorter Imported Briar


Blog by Dal Stanton

When I landed this little pipe last March, I rolled together 3 other pipes from the same seller, reducing postage costs – I’m always happy when I can save!  The eBay seller listed the pipe as a ‘Short Norter’ stamped on the left side of the shank.  The right side was stamped, Imported Briar.  The pipe’s petite size listed was 5 1/4″ long 1 1/4″ tall and 3/4″ bowl opening.  Even though she was so small, the shape was what drew me in.  This is what I saw.short1 short2Poor quality of photography notwithstanding, all the potential was there – the unique shape that I had yet to identify or collect, the rich briar grain peeking out here and there and the petite demeanor – perhaps this is a ladies’ pipe?  But then, the name?  Short Norter – the eBay nomenclature.  Despite the less than feminine name, I liked the pipe.  With a quick trip to Pipedia’s shape chart, I found what I believed matched the Short Norter – the Horn shape.short3When I took the Short ‘Norter’ Imported Briar out of the ‘Help me!’ basket now months later, I am still struck by the size and I really like the sleek contour of this Horn shape.  When I started research on the pipe in preparation for her restoring, I ran into a brick wall trying to find Short ‘Norter’ in all the usual places, but I did run across other references which were close.  One was, ‘Short Snorter’ and it was a pipe.  After taking another close look at the stamping, I discovered that the ‘S’ was almost totally obliterated by a divot in the briar.  Only a small peek remained of the top of the ‘S’. Finally, my beautifully shaped Horn ladies’ pipe is officially christened, Short Snorter – a pipe any high classed pipe woman would covet, or it would seem!  Here are pictures filling in the gaps from my work table here in Sofia, Bulgaria.short4 short5 short6 short7 short8 short9In the little I found on the internet about the Short Snorter, it is described as a nose burner or as a pocket pipe, but most often with other shapes than the horn.  Steve looked up the Short Snorter in the book, Who Made That Pipe, and it indicates that it was made by Weber or Wally Frank.  With that information, I looked at old Wally Frank catalogues, but did not see the Short Snorter.  I suppose the name is apropos, but I think a lady pipe smoker would give this pipe a look see.

The stummel surface is generally in very good shape and the briar grain has much appeal for a smaller pipe.  The rim has an attractive oval bevel but a moderate burn area covers a portion where I presume the flame was drawn over the briar in lighting the tobacco.  The one troubling spot is the burn mark on the front of the bowl.  The last steward appears to have been a heavy puffer heating up the briar enough to cause the burn.  I’ll need to check the internal front fire chamber area to detect possible thinness and potential for a burn through.  To remove the scorched area the old finish needs to come off.  The stem is heavily oxidized but there is not much tooth chatter to speak of on the bit.  The button appears to be in good condition.

The first order of business in the rebirth of this Short Snorter Imported Briar Horn is to plop the stem into a bath of Oxiclean to begin the process of raising the oxidation out of the vulcanite.  Before I do this I try to remove the stinger, resembling the cupola of a Russian Orthodox Church.  I don’t much like stingers in general, but I’m not able to coax a pipe cleaner through it to help retrieve the stem from the Oxiclean bath.  I try pulling on the stinger but it doesn’t budge.  After a few failed attempts, I light a candle and warm the stinger which expands the stingy vulcanite holding it in place.  Whoa!  When I finally extract the stinger, it’s the longest stinger I’ve seen to date – especially in such a small pipe!  I’m not sure why it’s so long but I wonder if it has anything to do with the small design and the intent to restrict the airflow?   Perhaps, the burn was a result of poor movement of air and the steward had to puff harder therefore more heat???  Speculation, but the stem is now in the bath working on the oxidation and the stinger is official retired to the stinger bottle.short10 short11With the stem in the bath, I want to ream the fire chamber to bring it down to the briar for a fresh start but also to examine the front of the chamber corresponding to the external burn area.  Since there was almost no cake build up on the wall, I use the Savinelli Pipe Knife to clean what remains.  I then take 240 grit sanding paper rolled around a dowel rod to sand the fire chamber wall and to clean the remaining residue.  I finished with a quick wipe of the cotton pad with a bit of alcohol on it to remove the carbon dust.  The pictures show the progress.short12 short13With the fire chamber cleaned I take a few close-ups looking specifically at the integrity of the wall.  The second picture below is oriented to the front where the burn would be.  Using my pinky finger, I feel the texture of the wall and I don’t detect any internal burns or soft spots but there is a bit of a rounded area toward the external burn area – thinning wall?  The natural ‘horn’ curvature could potentially lean toward a thinning of the front of the stummel if the fire chamber expands – burns or excessive reaming?  I will need to add a protective layer with either Pipe Mud or a Sour Cream/Yogurt Charcoal mix to coat the fire chamber wall – especially in the front area. This will be necessary if this little pipe tends to overheat.  short14Cleaning the stummel’s external surface, I take a cotton pad with Murphy’s Oil Soap undiluted and scrub the stem surface. I also employ a brass brush to work on the tar deposit on the backside of the rim.  Following the scrub, I rinse the stummel with warm tap water, careful to not allow water in the enter the stummel.  The rim cleans up very nicely.  To address the burn blotch on the front of the stummel and I use a medium grade sanding sponge to remove the dark area.  After a time of working on the burn spot, a troubling question starts to dog me:  Does this burn spot go through to the fire chamber?  Or is it only on the external…  If it goes all the way through, then all I’m doing is further thinning an already thin patch of briar with sanding.  Steve confirmed that I was indeed making things worse.  The last picture in the set below I sent to Steve and it was he who identifies in that photo the crack crossing laterally in the middle of the burn spot.  Ugh.short15 short16 short17Another opportunity to hone in on the various skills necessary in restoring pipes!  I had the opportunity to fix a crack previously and it is necessary to drill holes on the far ends of the crack to stop the crack creep.  Armed with a magnifying glass to see the crack clearly, I use the sharp dental probe to mark the ends of the crack hopefully to provide a guide for the drill.  I use a 1.5mm bit in the Dremel and I need to drill the holes without going through into the fire chamber.  Well, it was going so well, until it wasn’t.  I suppose it was the combination of the texture of the briar being more crusty feeling, drilling free-hand, or the thin wall that I already suspected – one or any combination of all three….  The first hole is successful, but the second finds day-light.  The briar is much thinner than I had guessed.  The question now is the extent of the burn impact. Is this Short Snorter’s life about to be cut shorter than we all thought!  I use the dental probe to scratch around the holes and pressing to find soft charred briar to reveal more weakness.  I do not find anything other than the hole that I created. short18 short19So, the worst that can happen is that this beautiful little Short Snorter becomes a ‘technique pipe’.  I decide to proceed with filling the drill holes with a mixture of briar dust and super glue.  For the external surface, I’ll need to sand down the hole patch areas during the finishing process, then dark staining the stummel to blend and mask the burned area.  For the internal wall, I will mix a batch of the Charcoal and Sour Cream lining paste and apply it to the firewall.  Hopefully, this will provide enough additional heat buffer to protect the thin condition of the briar in the front.  The protective coating will also provide a basis for a protective cake to develop.

With the stummel on the mat, I need a change of scenery to think things through.  I retrieve the stem from the Oxiclean bath and take 600 grit paper, wet sanding the stem to remove the raised oxidation on the vulcanite stem.  I follow this with 0000 steel wool preparing the surface for moving to the micromesh polishing later.  Then I take pipe cleaners dipped in isopropyl 95% and clean the internal airway of the stem.  It was not very dirty.short20Ok, back to the stummel.  I use a cotton pad with isopropyl 95% to clean both the external surface as well as the fire chamber.  I take briar dust and mix it with super glue to form a putty.  I use a dental spatula and tooth pick to scoop some of the putty and apply it to the holes.  I’m not concerned that the putty goes through to the internal wall – I want to build a little protective mound of hardened briar putty.  Later it will be covered by the Charcoal/Sour Cream layer of insulation.  The pictures show the progress with the regress!short21 short22With the briar dust putty curing, I take up the stem and begin the micromesh process first by wet sanding the stem with pads 1500 to 2400.  When complete I apply a coat of Obsidian Oil to the stem to rejuvenate the vulcanite.  I follow this dry sanding with pads 3200 to 4000 and then 6000 to 12000 and I follow each set with an additional application of Obsidian Oil.  I put the stem aside to dry. I never tire witnessing the shiny pop of vulcanite after the micromesh process.  The pictures show the progress.short23 short24 short25With the briar dust superglue cured after a full 24 hours, I take another close-up of the work areas and then take a flat needle file and file strategically the fills in the two crack holes that were drilled – one well, the other one breaking through the firewall.  After bringing both fills almost to the briar surface level, I use 240 grit paper, rolling it into a very tight tube, I remove all the excess fill bringing the patch to the surface.  Then, turning to the Briar dust putty in the fire chamber, I use the flat needle file and reach into the bowl and take off most the overflow.  Then, with the 240 grit paper I smooth the patch but I leave a small briar dust patch over the internal wall breach.  I hope this adds protection underneath the insulation layer that I will do later.  The pictures tell the story.short26 short27 short28 short29With all the attention with the crack repair, I realize I have yet to clean the internals of the stummel.  I do that with Q-tips and pipe cleaners dipped in isopropyl 95%.  Thankfully, there was very little work to do.short30At this point the question that presents itself is, do I proceed with mixing up a charcoal and sour cream (or yogurt) insulation paste and coat the chamber or do I proceed with working on the external briar of the Short Snorter.  Since I will need to have a thumb and cork in fire chamber for all the external briar projects, I need to wait to do the fire chamber work near the end – probably before the final polishing phases.

I take a close look at the stummel surface and detect some shiny spots revealing the presence of the old finish.   I want to remove all the old finish left behind by the Murphy Oil Soap cleaning.  Using the light sponge sand I sand down the surface followed by wet sanding with micromesh pads 1500 to 2400, then 3200 to 4000 and finishing with pads 6000 to 12000.  The pictures show the progress.short31 short32To mask and blend the burn spot on the front of the stummel, I use aniline-based Dark Brown Leather Dye hopefully to accomplish this.  With a cork stuck snuggly in the fire chamber to serve as a handle to rotate the stummel, using a bent non-bristled pipe cleaner, I apply the dye liberally around the stummel, rotating it to be sure the dye reaches the inverted rim.  After the application, I flame it using a lit candle waiting for that purpose. The alcohol in the dye burns off quickly setting the hue in the grain.  When cooled, I apply a second coat of dye to the stummel surface and again I flame it.  I let the dye set overnight.  The picture shows the flamed crusted state.short33The next morning, anxious to see the ‘unwrapped’ stummel and the results of Fiebing’s Dark Brown Leather Dye, I take the Dremel and mount the hand-held extender with a felt wheel and apply Tripoli to the stummel surface to remove the dye crust.  The dark stain did well in blending the burn spot on the stummel.  That is looking good.  Two problem areas emerge – the rim showed a gap in the coverage of the dye on the inner rim.  It must have been the overhang of the cork I was using….  An easy patch worked well as I use a dark walnut stain stick and paint the rim. short34 short35After the Tripoli buff with the Dremel felt wheel, I also detect pits in the briar surface in the upper left joint of the shank and stummel – not sure how I missed these but I see them now and I don’t like seeing them now.  Of course, it would have been easier addressing these during an earlier stage of restoration, but I’ll make a go at a patch now.  I take Hot Stuff Special ‘T’ CA Glue, a bit thicker than regular CA glue, and apply a dribble on the end of a toothpick then I dab a bit of the glue from the toothpick strategically on a pit.  The thicker glue beads up nicely on the pit and doesn’t run over the surface.  Using the toothpick, instead of applying glue straight from the bottle spout, allows a better control of the amount of glue in play.  I put the stummel aside to let the ‘T’ CA Glue cure and then later I’ll strategically sand these patches – hopefully keeping the patch area to a minimum. I didn’t do anything with the crevice obliterating the ‘S’NORTER’.  The pictures show the progress.short36 short37After the ‘T’ CA Glue cures, I use 240 grit paper to sand tightly on the glue mounds – trying to keep the patch area to a minimum.  After the 240 I use 600 grit paper on the area and then a very quick run through the complete set of 9 micromesh pads, 1500 to 12000.  I then apply Dark Walnut with a stain stick to the sanded areas.  After drying a bit, I use a cotton pad with isopropyl 95% to wipe down the stummel to blend the stain of the entire surface along with the patch area.  This helps but I’m wishing I would have done this earlier and not missed them!!!  The pictures show the progress.short38 short39 short40I want to apply one final coat of stain to the stummel to blend further the patches but also to tweak the hue toward the red ranges.  I mix Fiebing’s Dark Brown Leather Dye 1 part to 2 parts of Fiebing’s Oxblood.  As before, I apply the dye mixture with a folded pipe cleaner to the surface liberally and flame it.  After the surface is cool to the touch, I apply a second coat of Dark Brown Oxblood and flame it.  I set the stummel aside for the night and the next day clear the flamed crust with the Dremel felt wheel using Tripoli compound.  To blend the stained surface and give an even effect, I lightly wipe down the surface with a cotton pad with isopropyl 95%.  I’m pleased with the hue that is emerging.  The pictures show the progress!short41 short42Rejoining stummel and stem I use the Dremel with a felt wheel to buff them with Blue Diamond compound.  Following this, I mount the cotton wheel on the Dremel and increase the speed of the Dremel from the slowest RPM for the felt wheels and compounds, to the next higher speed.  I apply carnauba wax over stem and stummel several times to build up a shine as well as a protective layer.  I’m pleased with the transformation of this pipe.

After consulting with Steve, I decided that this Short Snorter’s one last challenge would be better addressed in the US.  The front fire chamber wall needs a better solution than what I can provide here in Bulgaria.  Steve recommended I consider the solution that Charles Lemon, of DadsPipes.com, has used with good success – applying JB Weld to the area in need of greater reinforcement.  Since JB Weld is not on the shelves here (yet!) and I can’t find a satisfactory alternative, this little pipe is going for a long ride in about a week to Denver, where my wife and I will be celebrating Christmas with our family!  I’ll add a Christmas Addendum later!

When I look at this Short Snorter Imported Briar Horn before me, I still think this is a beautiful ladies’ pipe!  Of course, with a name like ‘Short Snorter’, the pipe lady smoking this elegant, petite horn shaped pipe, packed with her preferred aromatic blend, will undoubtedly have a bit of attitude and spunk!  Or, at least as it would seem to me.  Thank you for joining me!short43 short44 short45 short46 short47 short48 short49

Replacing a Stem on a Stanwell Antique 156 Bulldog


Blog by Steve Laug

The next pipe I brought to my work table is another Stanwell Antique. This one is stamped on the underside of the shank with the words Stanwell over the script Antique and over the top of them both is the number 156 which is the shape number. This one came in the same lot as the two victims of Jaws that I have already written about on the blog – the Estella and the GBD Midnight (https://rebornpipes.com/2016/12/06/jaws-and-an-estella-non-pareil-%c2%bc-bent-9606-stack-by-savinelli/ and https://rebornpipes.com/2016/12/09/another-jaws-victim-a-gbd-midnight-788-oval-shank-apple/). This Stanwell Antique Bulldog had a poorly fit replacement stem – a diamond shaped stem from a classic bulldog shape. The stem had many deep tooth marks on both the top and the underside of the stem. anti1The finish on the bowl was in decent shape though the rim had some tarry buildup and there was a thick cake in the bowl. The first photo shows the mixture of sandblast and smooth on this pipe was a nice contrast. The front of the pipe was smooth and joined the smooth rim. The second photo shows that the front outer edge had nicks and dents in it as did the surface of the rim. The close up photo of the rim shows the condition of the pipe when my brother received it.anti2The Lucite shank extension is amber coloured. The thickness of the extension makes it hard for the light to shine through it. The mortise had been damaged – it is my thought that whoever put the new stem in place redrilled the mortise and damaged the inner edge and the bottom of the mortise. anti3The stamping on the underside of the shank is better than the stamping on the previous Antique I just finished. The shape number is very clear and sharp. The Stanwell logo is lighter on the left side and the Antique stamping is also very clear and sharp.anti4The next photo shows the transition from the smooth front of the bowl to the sandblast on the rest of the bowl. You can see some of the grit in the grooves and crevices of the blast and the grime on the smooth portion.anti5The last photo that my brother sent me shows the bite marks on the diamond stem. They are identical in pattern to the ones on the previous two “Jaws” pipes.anti6My brother cleaned up the pipe with his usual thoroughness. When the pipe arrived in Vancouver the finish was clean and the grooves and crevices clean. The rim was better though it show the damage to the front edge and the dents to the top of the rim. He had reamed and cleaned the mortise and the airway in the replacement stem so the pipe was very clean and ready for me to work on.

I cleaned up the shank extension end and used clear super glue to rebuild the damage portion of the Lucite. I sanded it with 180 grit sandpaper and also with 220 grit sandpaper to smooth out the repairs. I cleaned out the shank with a cotton swab and warm water to remove the debris in the shank. I took photos of the bowl after I cleaned it up and scrubbed it with Murphy’s Oil Soap.anti7 anti8The rim shows some damage to the top and the back edge in the photo below.anti9The stem was an obvious replacement so I put it in my can of stems and looked for a stem that would be a good candidate for a replacement. I had one in a lot of stems that my brother sent me. It was a Danish looking freehand stem that had a long tenon and a step up toward the ring in the middle. I forgot to take a photo of the stem before I worked on it but I had another example of one that was similarly shaped that is shown in the next photo.anti10I sanded the stem with a Dremel and sanding drum to shorten and remove the step down area. I wanted to have a smooth transition from the tenon end to the mid ring. I also wanted to make the slope to the ring more abrupt that it was in the one above. The stem was in pretty rough shape. There was deep tooth mark on the topside of the stem from the damaged button forward. There was also some tooth damage on the underside of the stem in the middle and on one side. The button was also damaged on the underside. There was a missing chunk of vulcanite on the button edge. I filled in the damaged areas with black superglue to build them up. I let the glue dry and once it was dry I sanded it smooth to match the surface of the rest of the stem. I filled in the damaged button and built up the edge on the top and bottom sides. I sanded the button as well once it had cured and reshaped it.anti11I sanded the diameter of the tenon area on the new stem until the fit in the mortise was correct. The stem still looked a little long but I would take care of that shortly. I put it in the mortise and took photos of the pipe with the new stem.anti12 anti13I sanded the stem with 180 grit and 220 grit sandpaper to smooth out the repairs and reshape the stem to match the rest of the stem.anti14I polished the stem with micromesh sanding pads – wet sanding with 1500-2400 grit sanding pads and rubbed it down with Obsidian Oil and dry sanding with 3200-12000 grit sanding pads and rubbing it down with the oil after each set of three pads. After the final set I gave it a final coat of the oil and set the stem aside to dry.anti15 anti16 anti17To remove the damage to the front edge and the top of the rim I topped the bowl with 220 grit sandpaper on the topping board. I sanded it with 1500-6000 grit micromesh sanding pads to sand out the scratches in the rim surface. I restained the rim to match the front of the bowl using a dark brown stain pen. I buffed it lightly with a microfibre cloth.anti18I sanded the smooth portions of the bowl face and the rim with 1500-6000 grit micromesh sanding pads to polish them.anti19 anti20I buffed the rim and smooth part of the bowl and the stem with Blue Diamond polish on the wheel. I gave the stem multiple coats of carnauba wax and gave the bowl several coats of Conservator’s Wax. I buffed the pipe with a clean buffing pad and hand buffed it with a microfibre cloth to deepen the shine. The finished pipe is shown in the photos below. The repairs on the stem show under the bright lights of the flash but in person they are pretty well blended into the surface of the stem. Thanks for walking through the restoration with me.anti21 anti22 anti23 anti24 anti25 anti26 anti27 anti28

A Stanwell Antique 127 with an Amber Shank Extension


Blog by Steve Laug

The next pipe on the work table is a beautiful little Stanwell Acorn. The finish on the pipe was in excellent condition. There were some tars and oil that had overflowed the bowl onto the rim but it was pretty clean. The cake was not too thick. The inner and outer edge of the rim was in excellent shape. The amber Lucite shank extension was in excellent shape and the mortise hole was in perfect condition. The underside of the shank is stamped with the Stanwell logo over the word Antique in script. To the right of it was stamped 127 which is the shape number. The stem was clean with some tooth chatter and quite a bit of oxidation on the top and the underside. The white Stanwell Crowned S logo was stamped on the left side of the stem.

The next series of photos were taken by my brother before he cleaned up the pipe. He did his usual thorough job of cleaning the inside and the outside of the pipe. He reamed the bowl and cleaned out the airways in the shank and stem with alcohol, cotton swabs and pipe cleaners.antique1The next two photos show the two sides of the bowl. The left side of the bowl is a beautiful tight sandblast finish. The rim is also sandblasted as is the entire shank. The right side of the bowl is a smooth medium brown patch of briar that is on all of the Antique line of Stanwell pipes that I have seen.antique2The photo of the rim shows the condition and the thin cake in the bowl. The pipe was well cared for and did not need to have a lot of work done to bring it back.antique3The next photo shows the underside of the shank and the stamping. You can read the Stanwell stamping even though it is a bit faint on the left side. The Antique stamping is also light but the shape number is clear and deep.antique4The last two photos show the condition of the stem and the light oxidation and tooth chatter on the top side near the button. The Crown S stamping on the stem is in perfect condition.antique5The next four photos show the condition of the pipe when it arrived in Vancouver. I took the photos to show what the pipe looked like before I began the cleanup.antique6 antique7I took a close-up photo of the rim and the shank extension to show the contrast in colours and the condition of the rim at the point I received the pipe.antique8I also took some close up photos of the stem to show the oxidation and the light tooth chatter on both sides of the stem.antique9I gave the bowl and shank several coats of Conservator’s Wax and hand buffed the pipe with a shoe brush and then a microfibre cloth to raise and deepen the shine on the briar. I ran a pipe cleaner through the airway and the mortise and it came out clean.antique10 antique11The stem was lightly oxidized so I decided to only use micromesh sanding pads to clean it up. I wet sanded it with 1500-2400 grit sanding pads and gave it a coat of Obsidian Oil. I dry sanded it with 3200-12000 grit pads and gave it a rub down with Obsidian Oil after each set of three pads. I set it aside after the final set of pads to dry.antique12 antique13 antique14I buffed the pipe with Blue Diamond on the buffing wheel to polish it. I gave the bowl several coats of Conservator’s Wax and buffed it with a clean buffing pad. I gave the stem multiple coats of carnauba wax and buffed it with a clean buffing pad. I hand buffed the pipe with a microfibre cloth to deepen the shine. The finished pipe is shown in the photos below. The complexity of the contrast of dark and medium browns as well as a hint of black gives a dimensionality to this pipe that is quite stunning. It did not take a lot of work to bring it back but it was a pleasure to work on it. Thanks for walking with me through the process.antique15 antique16 antique17 antique18 antique19 antique20 antique21 antique22 antique23

A Pre-Republic Peterson System Standard Reborn


A month or so ago I was trolling eBay and ran across what I thought might be a Pre-Republic Peterson System 313.  I am not very learned in the different eras of many pipe companies but was fairly certain if I read the no-so-clear nomenclature right this was indeed a Pre-Republic era Peterson. Here are the photos the seller provided:

The pipe looked to be in pretty good shape so I thought I would take a shot at it. The seller had a Buy It Now or best offer price on it so I submitted my offer and went to do some research on the nomenclature in case my offer was accepted.After searching on Pipepedia and Pipephil I was sure that the pipe was indeed a Pre-Republic model. (The following photo shows the nomenclature and the small defect in the briar that probably kept it from being a higher grade pipe. The stamping reads “Made” on the top of the circle, “Ireland” in the bottom, and “in” in the center. These photos were taken by me after the restoration.)

A few hours later I received a counteroffer from the seller which I accepted. The seller was in Peru so now it was time for the dreaded wait.

When the pipe finally arrived I was eager to tear into the box to see what I had! When I took the pipe out of the protective wrapping my first thought was “Wow, this thing is tiny!”. I have one over System pipe that is an XL315, a pretty large pipe. I didn’t realize the 313 was going to be comparatively diminutive in size! I was pleased to see that the nomenclature was stronger than I expected it to be and that the pipe was in pretty well as-shown condition; there was a deep burn on the front, inside of the bowl that I didn’t make out in the photos. Here are a few pictures I took upon getting the pipe unpacked.

I dropped the stem in a warm Oxiclean bath while I began to clean the dirt and grime from the stummel. As I removed years worth of crud with cotton pads and both alcohol and acetone I began to really like what I was seeing! There were a few issues showing up now, but not anything too major: the rim cleaned up well but was burned worse than I thought, the nickle band had loosened over time and move up a little and was stained with tars (I think). All of these things were in my mind a good trade-off for the better than expected stamping though.

When I took the stem from the Oxiclean bath I scrubbed it down with a magic eraser to take off the loosened oxidation. Here’s what the pipe looked like at his stage; you can see the line where the band has moved over time.img_0207It was now time to start cleaning the internals of both the stem and stummel.

As I mentioned, this pipe has a rather small bowl; my smallest cutter on my PipNet set wouldn’t fit inside the bowl to ream it! The cake was hard but not terribly thick so I used the blade on my Sheffield pipe tool and some 320 wet/dry paper to ream back to bare briar. while I was doing the reaming I found was the burn on the rim was soft and would require more than just topping it. I decided to finish the internals before turning my attention to this problem.

I took a cotton swab soaked in alcohol and ran it through the stem; the P-Lip stem has a graduated airway, starting out very open and narrowing as it get closer to the button. As I turned the stem over to scrub the inside with the cotton swab a horrible goo ran out of the P-Lip!img_0200Needless to say, the pile of cotton swabs and pipe cleaners were only a representative sample of what it took to get the stem clean. And the well/mortise and airway of the pipe was equally nasty’ I really hadn’t expected this given the maintained cake in the bowl. I stuffed a cotton ball in the bowl and a cotton swab in the air hole, filled the bowl with alcohol and left it to sit over night. I completed cleaning inside the stem before going to bed.

The next day I removed the tar-stained cotton ball and swab from the stummel and  began to work on the burned rim issue after the pipe had dried an hour or two. I began by topping the bowl with 320 wet/dry sandpaper, checking my progress often. There was another smaller darkened area I wanted to remove, too, if I could, but I didn’t want to remove more briar than I had to.When the smaller spot was gone and the worse spot was improved I wiped the bowl down with alcohol to clean any remaining dust from it’s surface and began to polish it with micro mesh. I got up to about 2400, I think, and decided the burn was still too noticeable. I went back to work on the rim with a folded piece of 320 grit paper and worked a bevel on the inner edge of the bowl, then repeated polishing with micro mesh as before. The results were much better to my eye.

I moved on to the stem now, setting the bowl aside for later. The stem wasn’t in particularly bad shape, mostly just oxidized, as some of the previous photos show.There was a couple of deeper tooth marks on the bottom and top near the button that had to be filled. I sanded the oxidation off using 320 grit paper then cleaned the stem well with alcohol on a cotton pad. I picked at the deepest dents and the button “steps” with a small “toothpick” knife I have to make sure all the oxidation was out of the dents and grooves. After giving the areas a spray of CA glue accelerator I applied clear CA glue to both spots, gave it another spray and then let it sit a few hours to cure well; I didn’t want the glue to run while it cured or I might have skipped the accelerator altogether. (I didn’t remember to take many photos during this process.) After the glue cured I used needle files and sandpaper to smooth and better blend the patches, after which I polished the stem with the full range of micro mesh pads, 1500-12000.

Now that the stem and stummel were fully ready, I moved to the downstairs workshop for the finishing touches on everything. I began with my heat gun, warming the band to expand it and press it back in place; I pressed it into an old buffing wheel, using the center hole to help fix the slight out-or-roundness that had gotten in the band, too.

Next I used a dark brown stain pen to re-stain the bowl. I covered it entirely, as evenly as possible, twice and let it dry for a little while before using another alcohol dampened cotton pad to wipe off some of the excess to allow the grain to shine through. Next up was buffing with the Dremel. I used brown Tripoli on the stummel and nickle band first and then white diamond and blue compound on both the stummel and stem. I finished up with a few coats of carnauba wax on the entire pipe and a hand buff with a micro fiber clothe to raise a nice shine. I am really pleased with how the pipe came out overall and think the beveled rim idea to fix the burned area blended in very well. Before you see the finished pipe I must confess the first bowl I smoked in it was horrid! I had to go back and do a second alcohol treatment and I soaked the stem in alcohol and cleaned it again, too. The second cotton ball was even more tar-stained than the first! I had to re-wax and buff the whole pipe, too. But the next bowls proved it was well worth the effort as the pipe now smokes dry and sweet!

Another Jaws Victim – A GBD Midnight 788 Oval Shank Apple


Blog by Steve Laug

I love old GBD pipes no matter what era they come from. I gave my brother a list of pipes to keep an eye open for in his treasure hunts as he travels and on his eBay forays as well. GBD has been at the top of that list. He found a newer generation GBD recently and sent it my way. It is a nicely grained apple that is stamped GBD in the oval over MIDNIGHT on the top of the shank. On the underside it is stamped London England over 788 which is the shape number for an oval shank apple. The stem is a green swirled Lucite saddle shape with the GBD Oval stamped on the top of the saddle portion. The pipe was in decent shape. The finish was dirty and there was a buildup of cake in the bowl that had overflowed onto the rim. There were some dents in the outer edge of the rim on the back left side and some nicks and scratches on the left side of the bowl. The stem was another one that Jaws had gotten a hold of just like the Estella Non Pareil that I just finished and wrote about (https://rebornpipes.com/2016/12/06/jaws-and-an-estella-non-pareil-%c2%bc-bent-9606-stack-by-savinelli/). The top side had some deep dents and the underside had them as well. There were better situated in that they were in the blacker portion of the stem so blending in the repairs would be simpler.jaws1The photos my brother Jeff sent me really show the grain on the pipe. It has some stunning swirls of grain on the sides and some stunning birdseye on the top and the bottom of the shank and bowl.jaws2 jaws3The next photos show some close ups of the rim and the bowl bottom. The top of the rim was thickly coated with the overflowing cake in the bowl. The birdseye on the bowl bottom is stunning.jaws4The stamping on the shank and the stem was clear though lighter to the right edge on the topside of the shank. The fit of the stem to the shank was messy due to the build up of tars and oils in the shank and the mortise. I was pretty certain that once the pipe was cleaned up the fit would be back to normal.jaws5The next two photos show the work of Jaws on the Lucite. I can only say that I am thankful that the stem was not vulcanite or it would have been destroyed!jaws6My brother did his usual thorough clean up and was able to remove all of the tars and oils from the rim and the cake from the bowl. He scrubbed the grime and oils from the finish with Murphy’s Oil Soap and cleaned out the internals with alcohol, cotton swabs and pipe cleaners. The next four photos show the pipe when it arrived on my work table in Vancouver. I am getting spoiled by him doing all the grunt work of reaming and scrubbing. The pipes I get are all cleaned and reamed and ready to be restored. It is a great arrangement!jaws7 jaws8I took a close up photo of the bowl and rim to show how clean it was when it got to me.jaws9The tooth dents in the stem are shown in the next two photos. After the stem had been cleaned up they did not look as daunting as the ones in the Estella. The button had been worn down some as well by the chomper.jaws10I “painted” the dents in the stem with the flame from a Bic lighter. I was able to raise them quite a bit on this stem. On the top side only one deep tooth mark remained and on the underside there were three left.jaws11I sanded the dented areas with 220 grit sandpaper to smooth out the surface around the dents. I washed it down with alcohol on a cotton swab to make sure I did not leave any of the white sanding dust in the tooth marks. I decided to use black superglue to fill in the tooth dents as they were in the darker portion of the stem. I filled them in and let the glue dry.jaws12Once the glue had dried I sanded the patches smooth with 220 grit sandpaper to blend them into the surface of the stem. The patch on the topside disappeared into the dark green/black of the rest of the stem. The ones on the underside were a little more temperamental and showed some light areas on some small parts of the patches.jaws13I polished the stem with micromesh sanding pads – wet sanding with 1500-2400 grit pads and dry sanding with 3200-12000 grit pads. I wiped the stem down with a damp cotton pad after each set of three pads.jaws14 jaws15 jaws16I set the stem aside and worked on the bowl. I used 1500-2400 grit micromesh sanding pads to work over the nicks in the rim and on the left side of the bowl. I was able to minimise them so that they blended into the briar better. I stained the bowl with a dark brown aniline stain cut 50/50 with isopropyl alcohol and flamed it with a lighter. I repeated the process until the coverage was even on all sides of the bowl.jaws17I buffed the bowl and stem with Blue Diamond on the buffing wheel and gave the pipe multiple coats of carnauba wax to protect it. I buffed it with a clean buffing pad to polish the carnauba and give it a shine. I hand buffed the pipe with a microfibre cloth to deepen the shine. The finished pipe is shown in the photos below. The rich brown of the stain is a great contrast to the green of the Lucite stem. The overall look of the pipe is rich and the feel in the hand is perfect. This one will be available on the store in the days ahead. Thanks for journeying with me in this refurb.jaws18 jaws19 jaws20 jaws21 jaws22 jaws23 jaws24 jaws25

An Amazing Birthday Gift: 1907 McLardy Gourd Calabash with Silver Cap and Ferrule


Blog by Dal Stanton

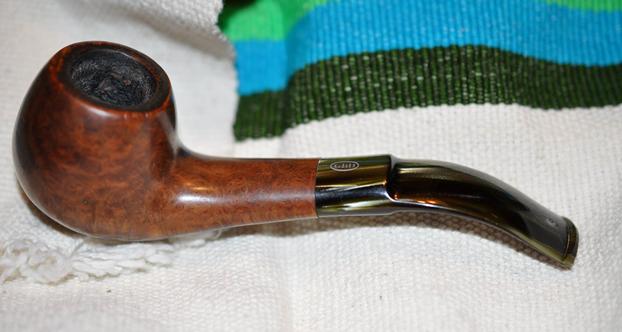
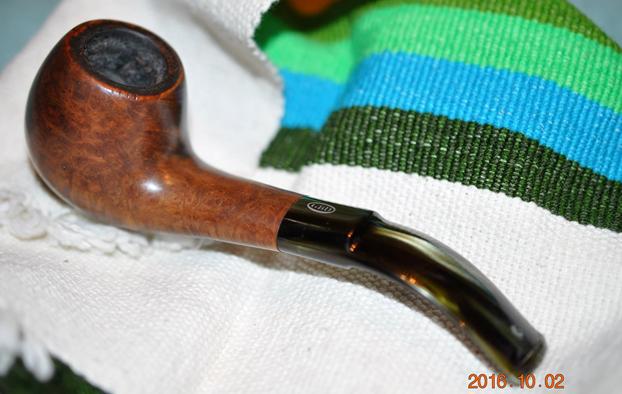
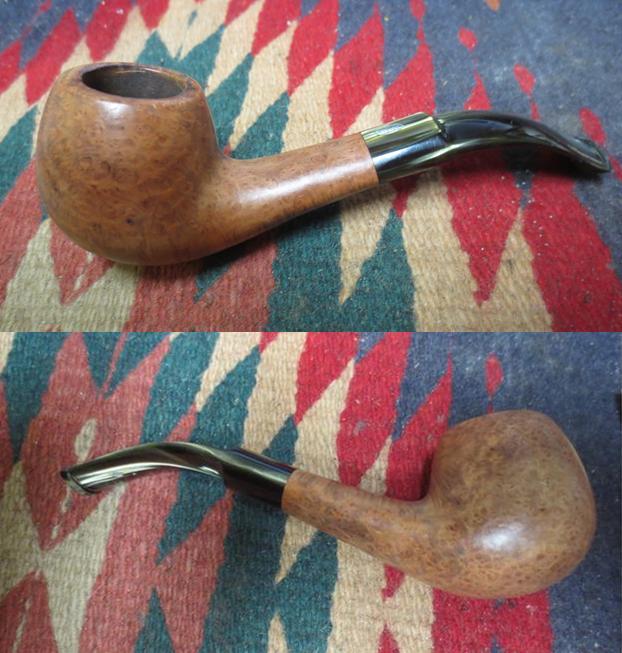
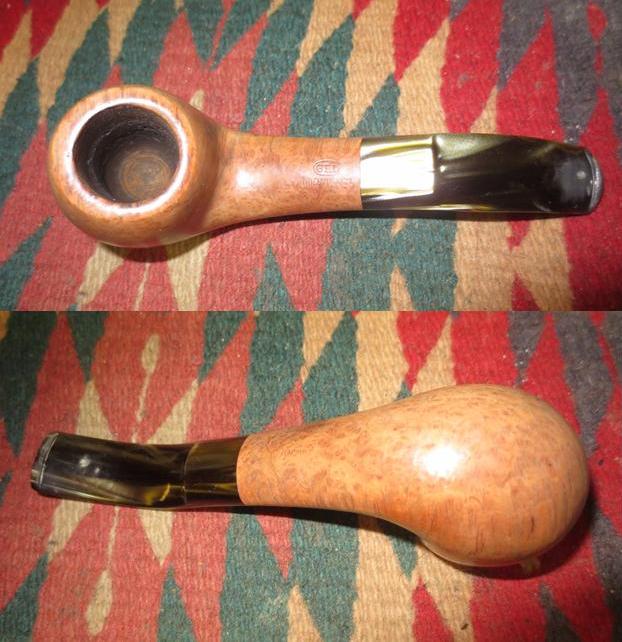
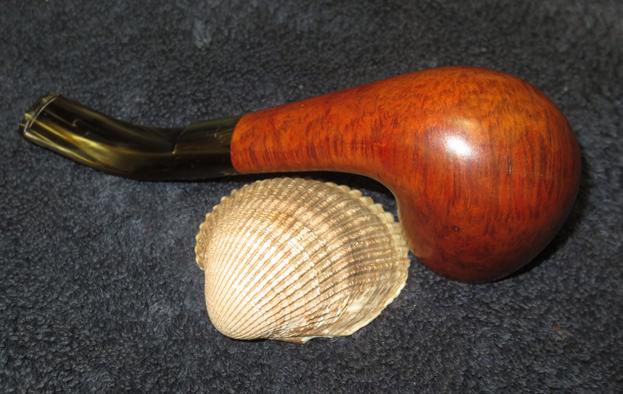
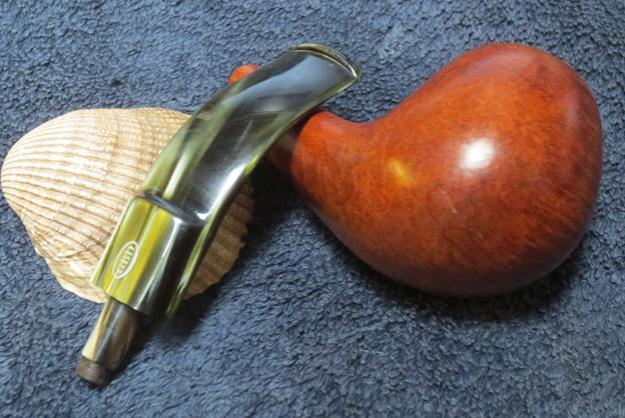
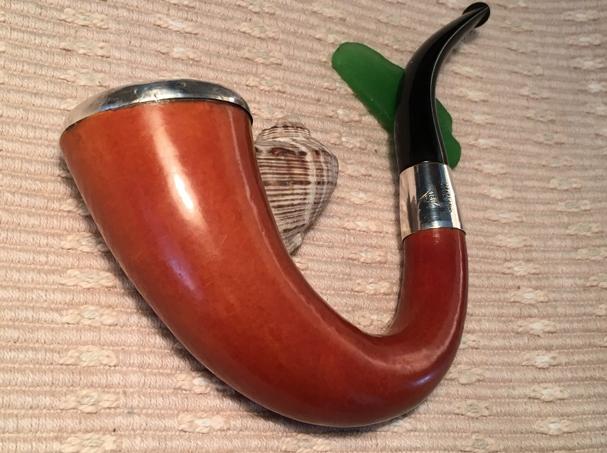
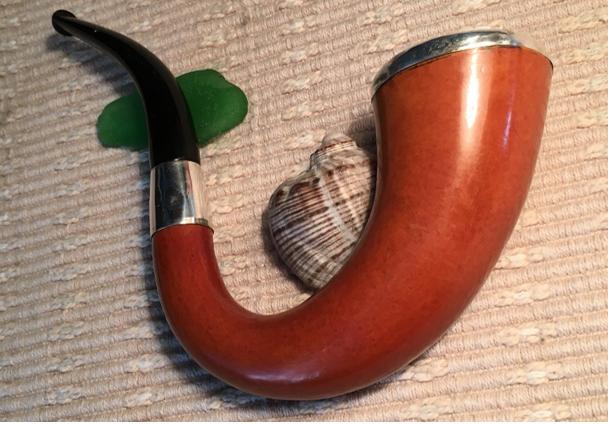
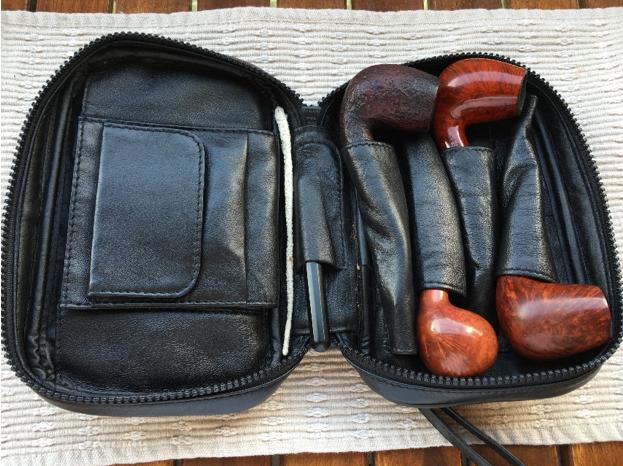
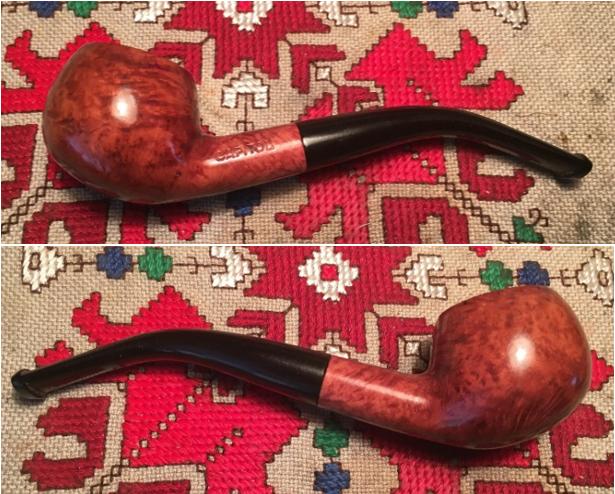
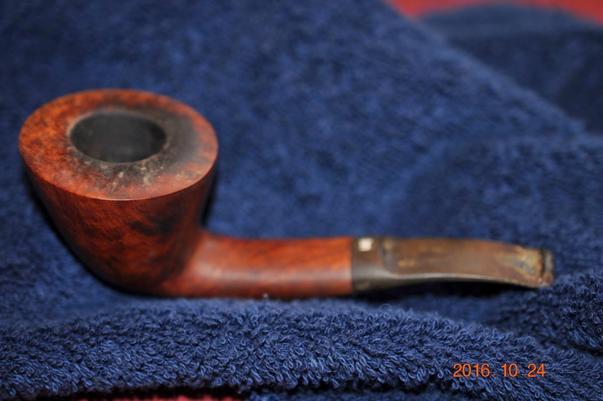
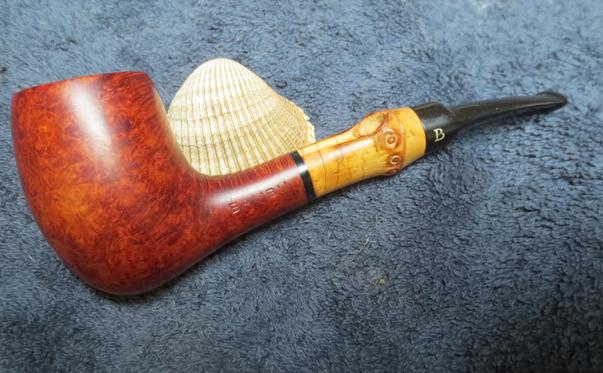
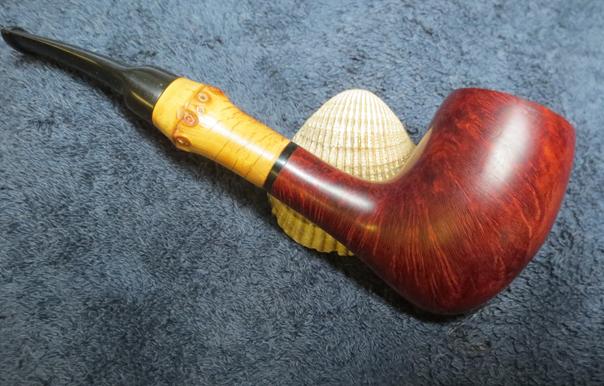
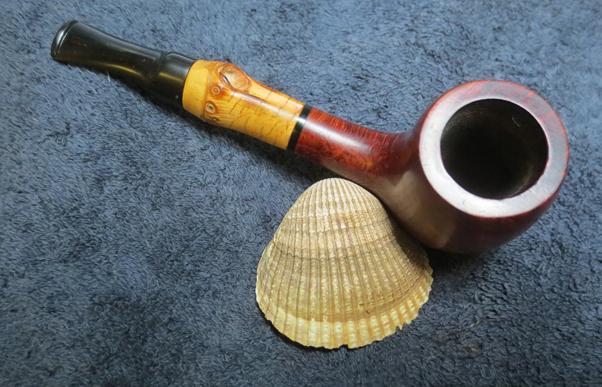
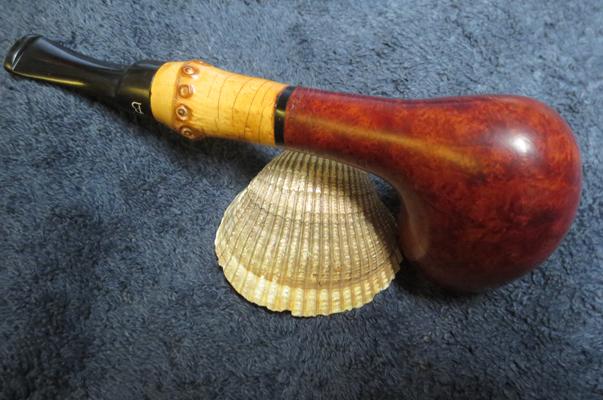
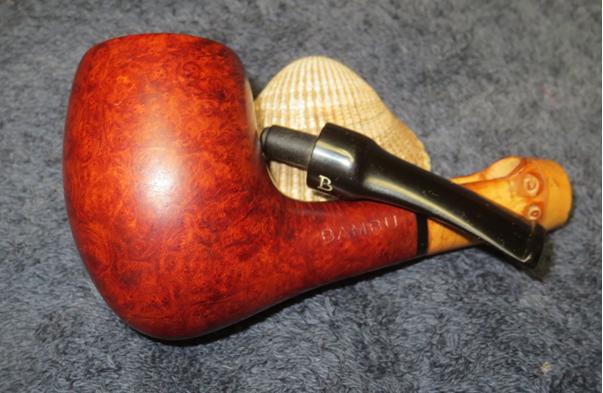
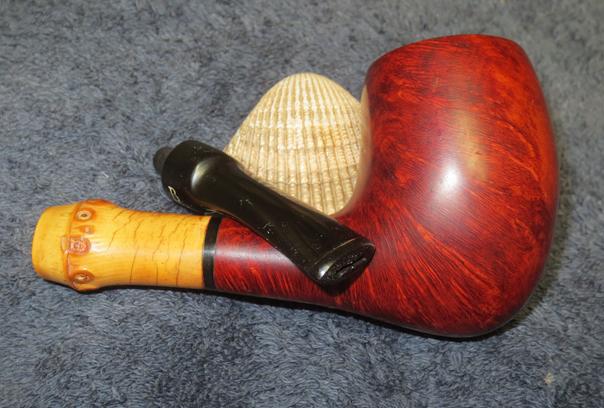
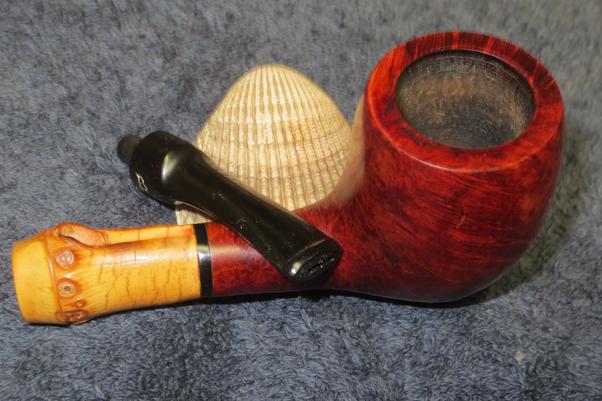
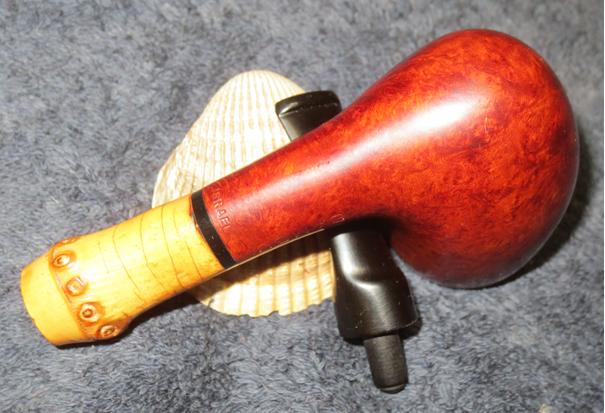
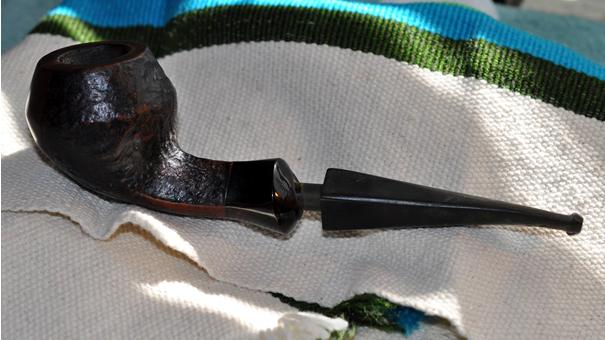
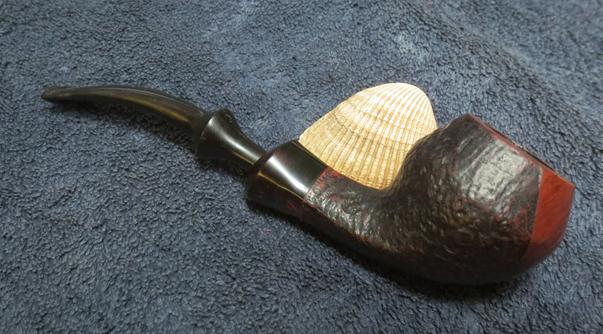
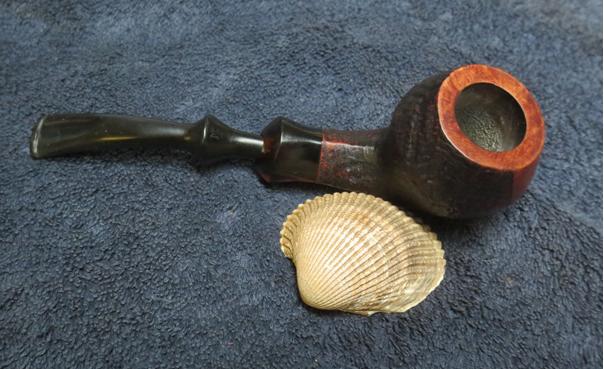
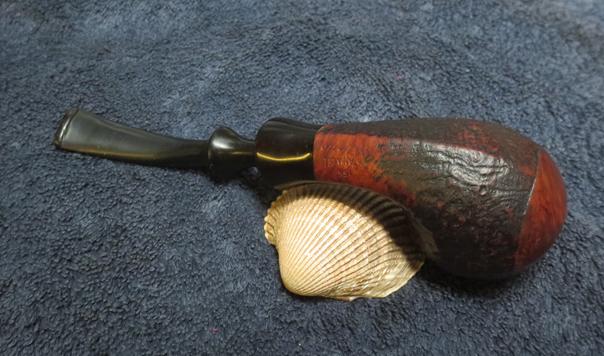
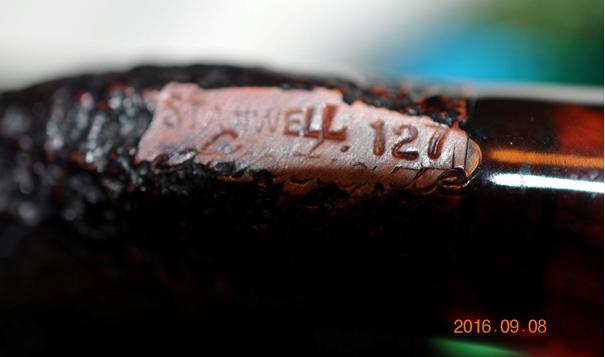
A pipe man’s dream scenario: His daughter and son-in-law, who live in Denver, give him the perfect birthday gift – a budget enabling him to land a special, coveted pipe on eBay!  It doesn’t get much better than that – there is the hunt, the find, the anticipation, the bid, the stress, and finally, the victory (hopefully)!  I started the hunt looking for a meerschaum to add to my growing briar collection, but when I saw the McLardy Calabash and it’s perfectly shaped and colored gourd – the quint-essential Sherlock Holmes pipe, decked out with silver cap and ferrule, it cried out to me and resistance was futile.  The eBay seller was in Manchester, UK, and his description of the Calabash was very helpful with silver hallmarks which dated the pipe in 1907 – the first year that the Chicago Cubs won the World Series followed by a second series win in 1908 over the Tigers.  They would not win again until this year, 2016.  1907 also saw Theodore Roosevelt as the 26th president of the US, the first electric washing machine, Albert Einstein beginning to apply laws of gravity to the Theory of Relativity, and Ford’s Model R is produced.  My grandmother, who died at 102, would not be cradled for another 3 years, in 1910.  1907 also gave us the pipe in these eBay pictures of the birthday gift now with me in Sofia, Bulgaria.cal1 cal2 cal3 cal4 cal5 cal6 cal7
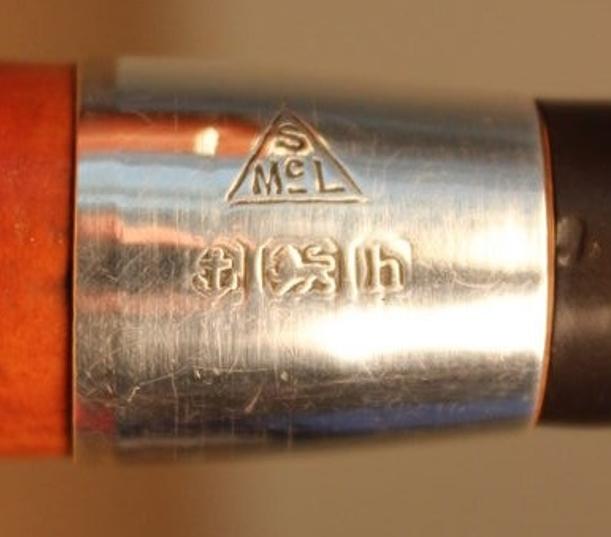
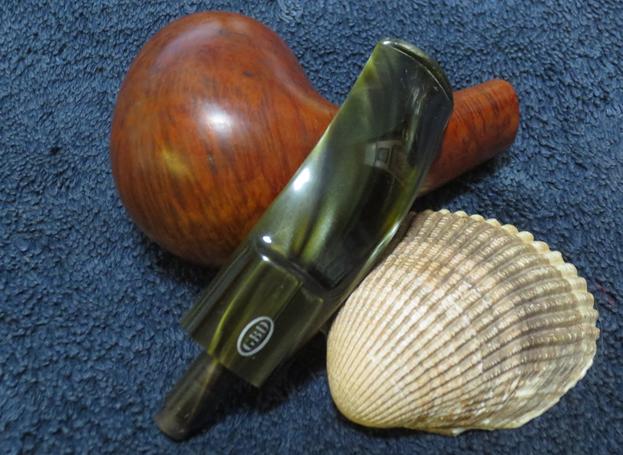
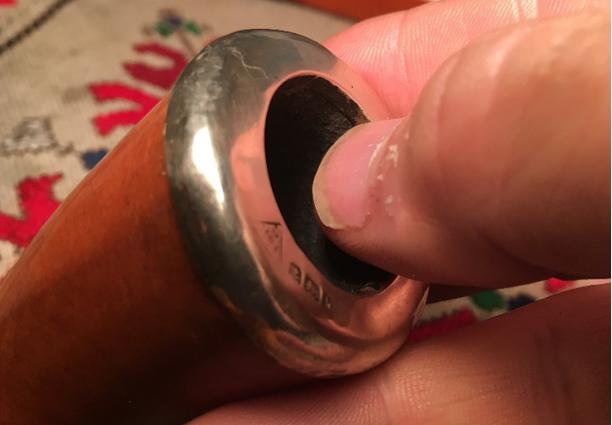
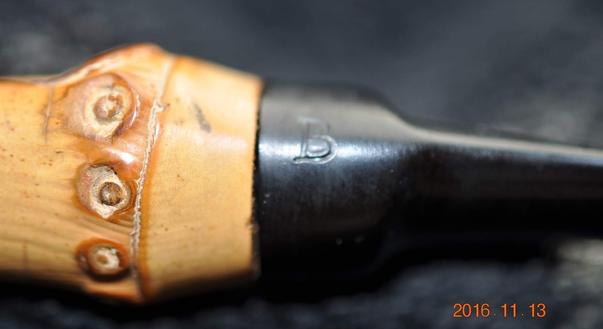
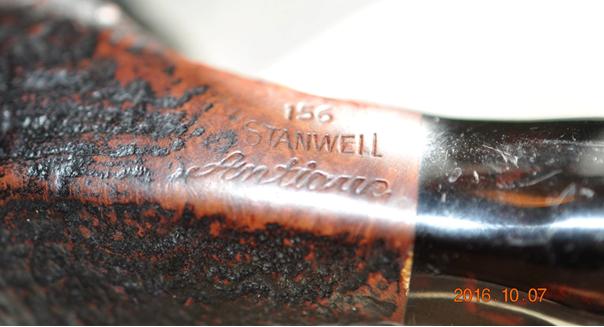
Truly an antique, I was anxious to explore the silver hallmarks and to verify the seller’s information – not that I doubted it, but this Gourd Calabash afforded me the opportunity to learn about the age-old practice of marking silver, not only to establish its authenticity, but also the provenance of the pipe that has been adorned with the sterling.  The ferrule and cap hallmarks were identical except that the triangular ‘Maker’s Mark’ was over the hallmarks on the ferrule and to the left on the cap (compared above).cal8The Maker’s Mark points to Samuel McLardy & Co. as referenced here at HALLMARKS OF ENGLISH SILVER MAKER’S MARK IDENTIFICATION – ILLUSTRATED LISTING.  The story is fascinating.

cal9In January of 2015, The Dutch Pipe Smoker wrote a blog regarding the Samuel McLardy & Co. summarizing an extensive article by Don Duco called, Pipes Samuel McLardy from Manchester – an excellent article helping me to grasp the geo-political realities of the time.

From The Dutch Pipe Smoker:

The McLardy company thanks its existence to the entrepreneurial spirit of 1 person: Samuel McLardy, born in Glasgow in 1842. He was the son of a tobacconist who also produced his own clay pipes. In the paternal shop he must have learned the profession of pipe-maker. Shortly after his 20th birthday he decided to move to Manchester to start his own company. There is remarkably little known about the history of the factory. On an old advertisement it says “established 1865” so since then there must have been a steady growth. Within a couple of decades there was a massive production of clay pipes. Around 1895 the factory owned over 500 moulds which meant yearly production was around 5 million pipes! Similar to that of Dutch factory P. Goedewaagen & Zoon in that period. Over time we find Samuel McLardy at different locations. Before 1880 that was Miller Street number 16 in Manchester and it is there where the shop grew to the size of a factory. In 1890 the company moved to Shudehill number 67 where it remained active until after 1910.

The production of clay pipes was a large part of the McLardy operation and this interesting  Pipe Manufacturers Catalogue shows several clay models displayed for sale.  Duco’s article, referenced above, examines the historical realities impacting the Samuel McLardy Co., (typical of other UK pipe companies) by navigating through relatively prosperous years leading up to the turn of the century, the decline of interest in clay pipes, diversification of other product lines to cope with falling revenues, WWI, the growing economic bubble of the 20s leading ultimately to the collapse of the McLardy, Co., soon after the stock market crashes in September (for UK) and October (for US), 1929.   I found this last statement regarding the Samuel McLardy, Co., as a matter of public record published in archives of The London Gazette regarding the liquidation of the company.  Reflective of the times, there were several companies listed in the Gazette which were being “wound up”:

The Companies Act, 1929.

Special Resolution of SAMUEL McLARDY & CO. Limited.

Passed 13th January, 1930.

AT an Extraordinary General Meeting of the Members of the above named Company, duly convened, and held at No. 20, Swan-street, Manchester, on the 13th day of January, 1930, the following Resolution was duly passed as a Special Resolution: –

” That the Company be wound up voluntarily; and that Mr. George Elder, Chartered Accountant, of Edwin Collier & Co., 3, York-street, Manchester, be appointed Liquidator for the purposes of such winding-up.”

Dated this day 13th January 1930

SAMUEL McLARDY

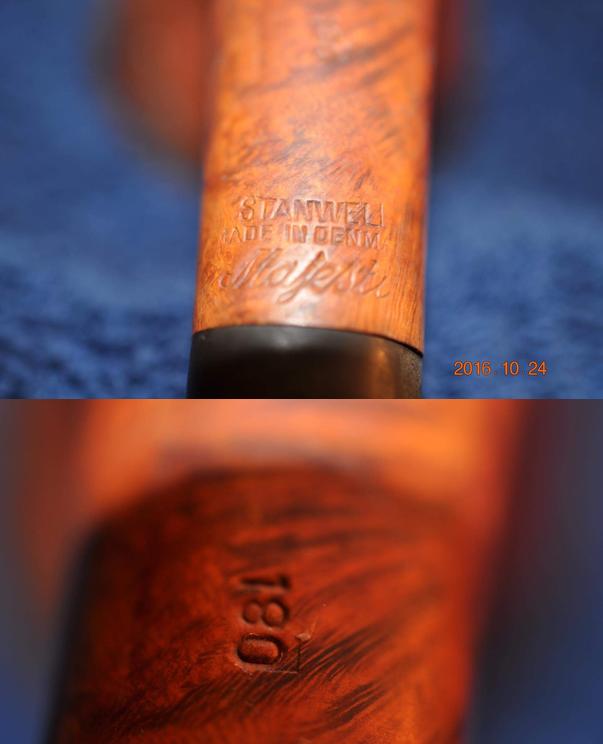
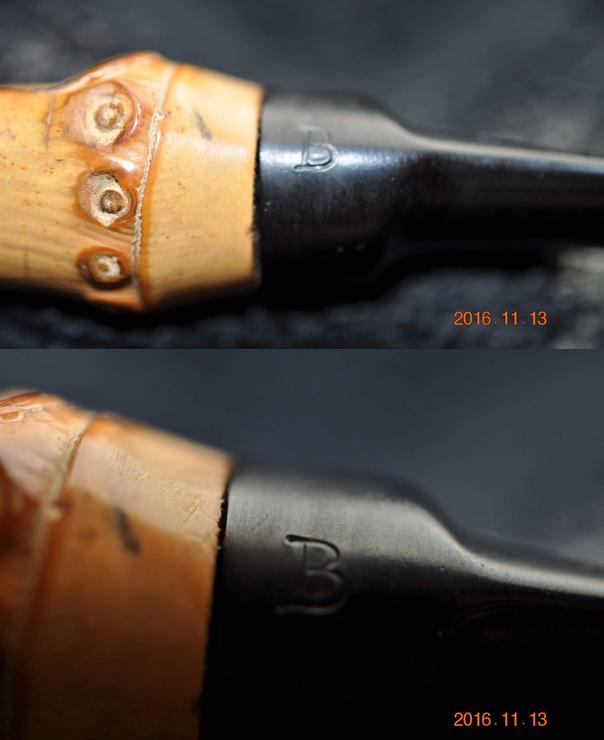
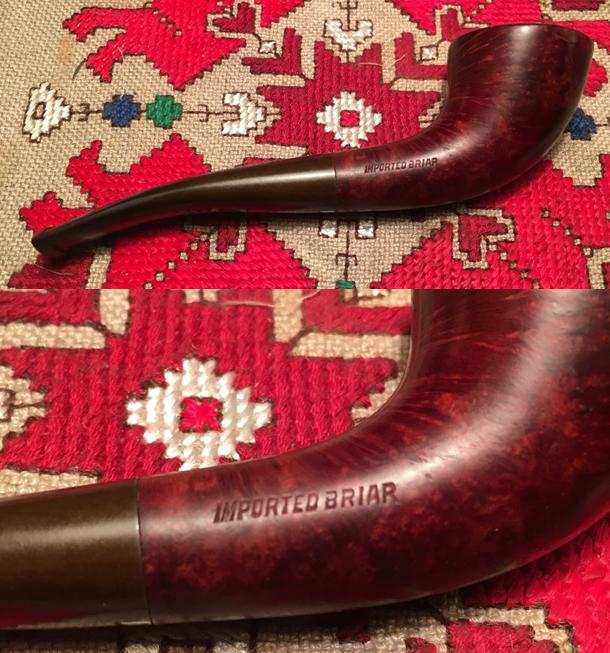
Source: The London Gazette – 17th January 1930cal10With a greater appreciation for the man and his company in time, I turn again to the hallmarks on the McLardy Calabash’s ferrule (above) which reveal the pipe’s origins.  The hallmark to the left is the city mark for cities of United Kingdom.  The anchor is the mark of Birmingham from 1773 to the present (See: Online Encyclopedia of Silver Marks, Hallmarks & Makers’ Marks – British Marks) referenced below. cal11The Lion hallmark in the middle ferrule stamping above is the Standard mark indicating the quality or purity of the silver.  As referenced below from the same helpful website, ‘A’ represents a sterling rating of .925.cal12
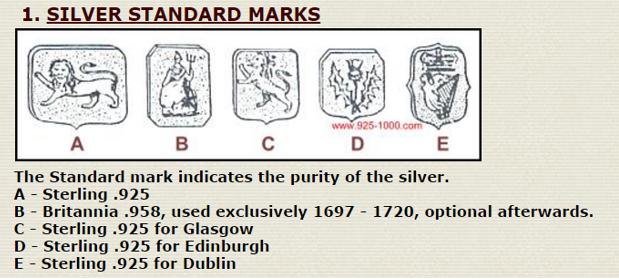
Finally, the hallmark on the far right, the ‘h’ ensconced in a scroll-like cartouche, represents the dating letter. The Birmingham Date Letters on Silver 1773-1924 chart below references the letter system specifically for Birmingham, England.  The far-right column points to the dating of this McLardy Gourd Calabash which stands at a ripe old age of 109 years, coming out of the Manchester factory located on Shudehill number 67 – the factory depicted on the cover above (Today, on Google maps street view, the address continues but appears to be a parking garage.).  It has not gone unnoticed by me that the eBay seller of the Calabash also resides in Manchester.  The question that comes to mind is whether this McLardy vestige has wandered away from home at all?  If he could only tell his story….  cal13
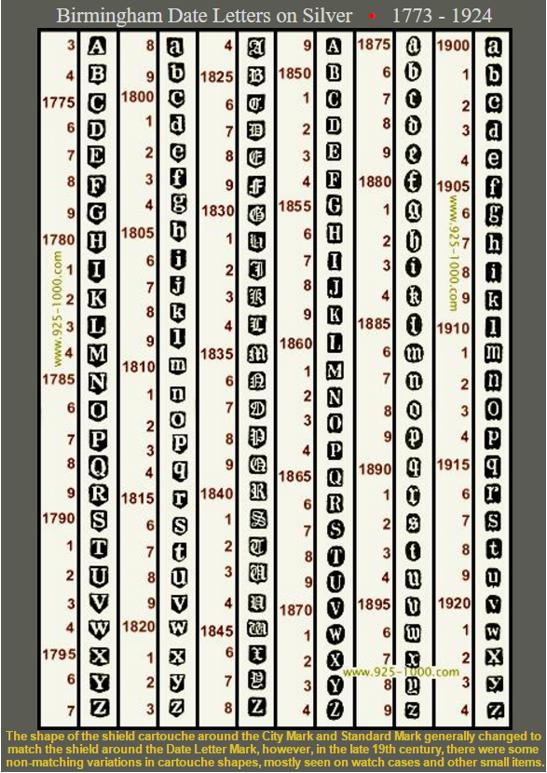
There is but one more bit my curious mind wishes to discover – from whence comes the gourd that has become the cherished Calabash, made famous by Arthur Conan Doyle’s Sherlock Holmes?  As quaint as it may sound, it is likely the gourd which became the McLardy Calabash before me did not come from a cozy English garden on the outskirts of Manchester – images of Downton Abbey.  Most likely, the gourd came from southern Africa.  In his newsletter, ‘Save the Calabash’, Thomas Martin provides some good research regarding this question of the Calabash gourd.  He wrote:

Calabash has come to represent a shape not a gourd

Nobody would expect an apple shaped pipe to be made from an apple. Like “calabash” the name represents the shape not the material. The Calabash pipe used to actually be made from a gourd (Lageneria vulgaris). To my knowledge, there are no makers of real Calabash pipes in the United States and so I decided to make it my goal to give it a try. Having made a handful or two of briar pipes, I learned that finding good briar is the challenge that Rainer Barbi calls “the dance.” I can tell you, finding a Calabash gourd although not impossible, is far more difficult.

Current wisdom suggests that acceptable gourds can only be grown in the Ladismith region of South Africa. When Calabash proliferated they were cultivated for the specific purpose of becoming a pipe. Presently, if you can find a farmer that grows the gourd he doesn’t grow it or shape it to be a pipe. In North America they are grown mostly for crafters. In Africa they are grown for crafters and for more utilitarian use.

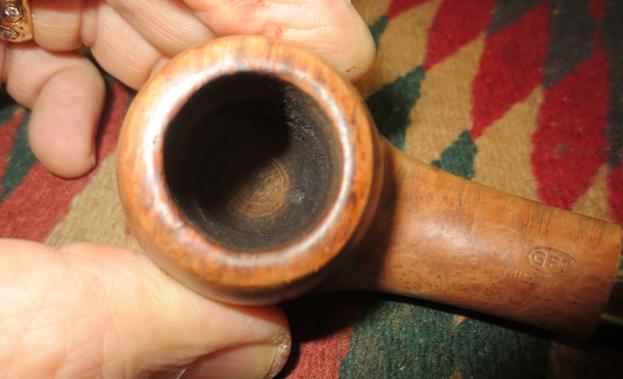
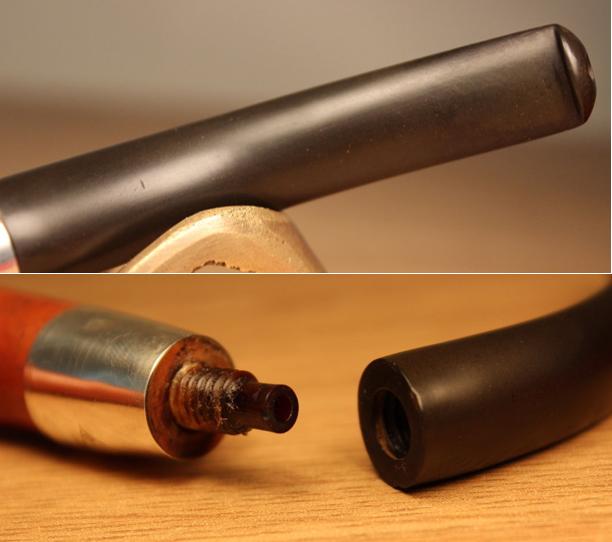
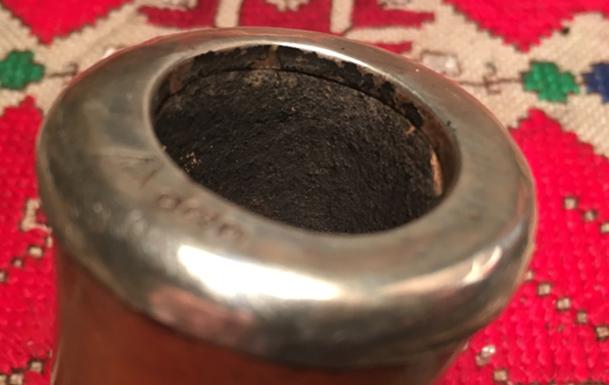
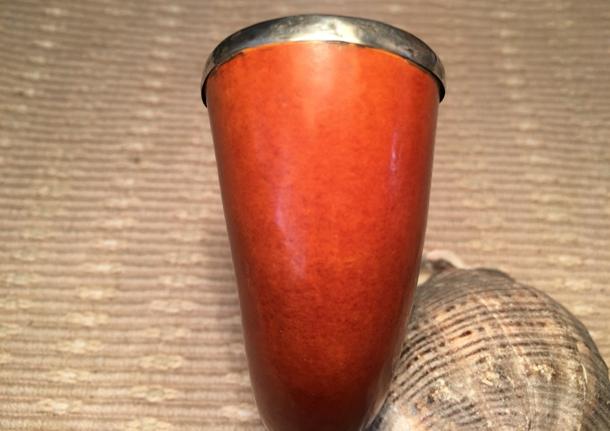
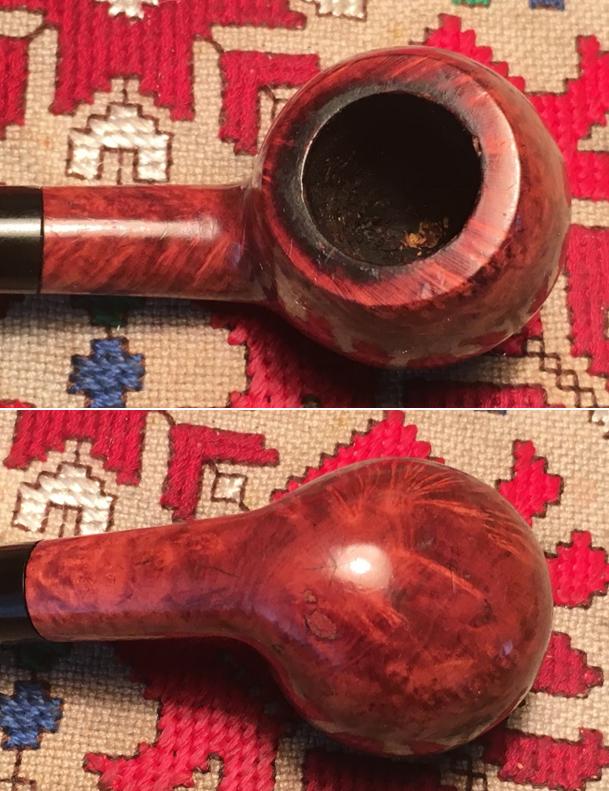
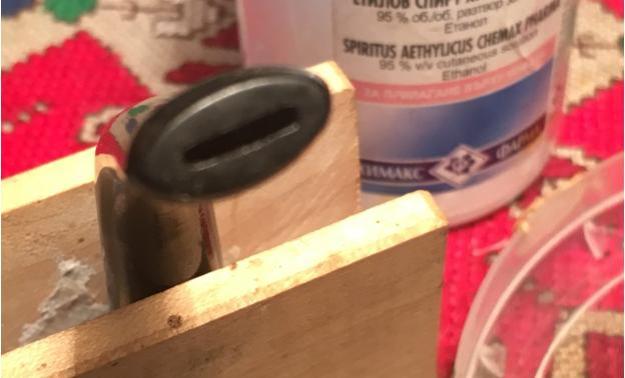
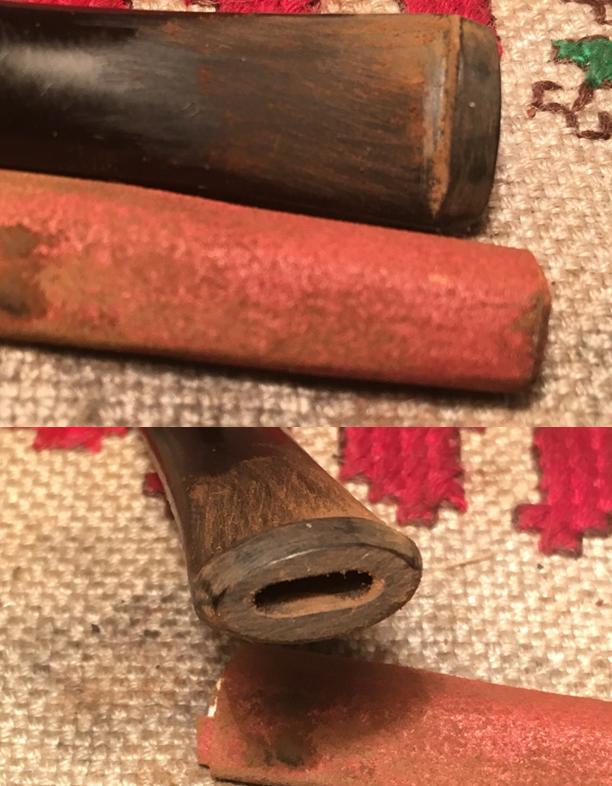
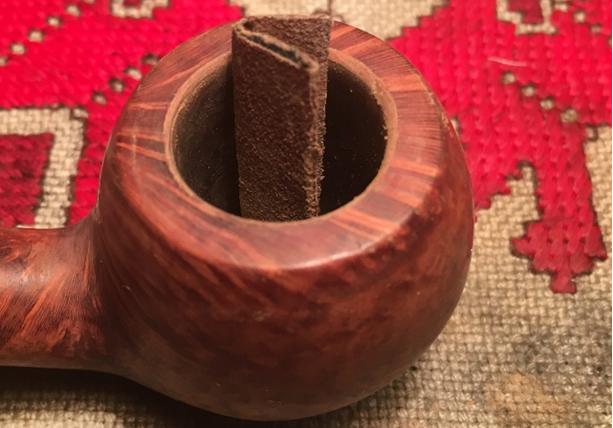
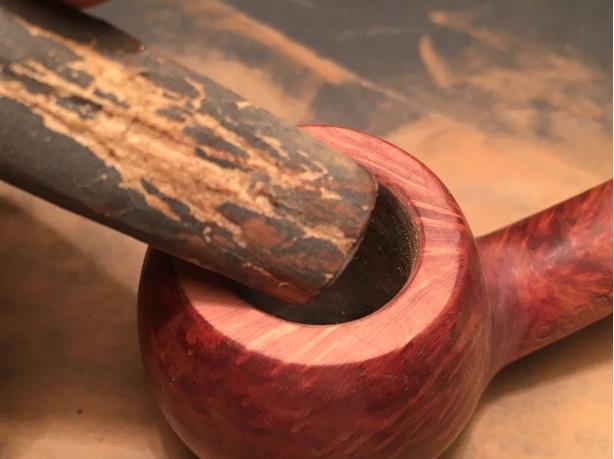
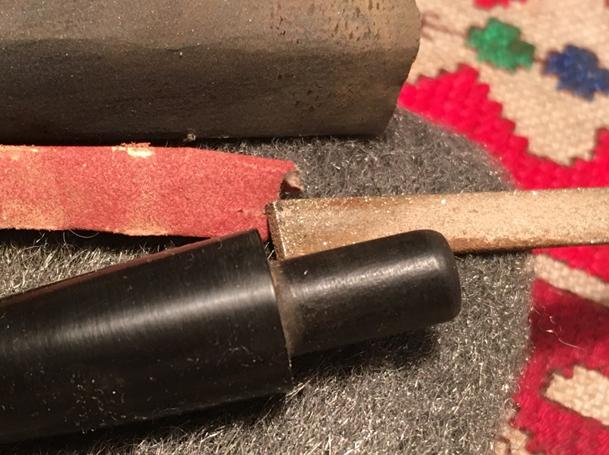
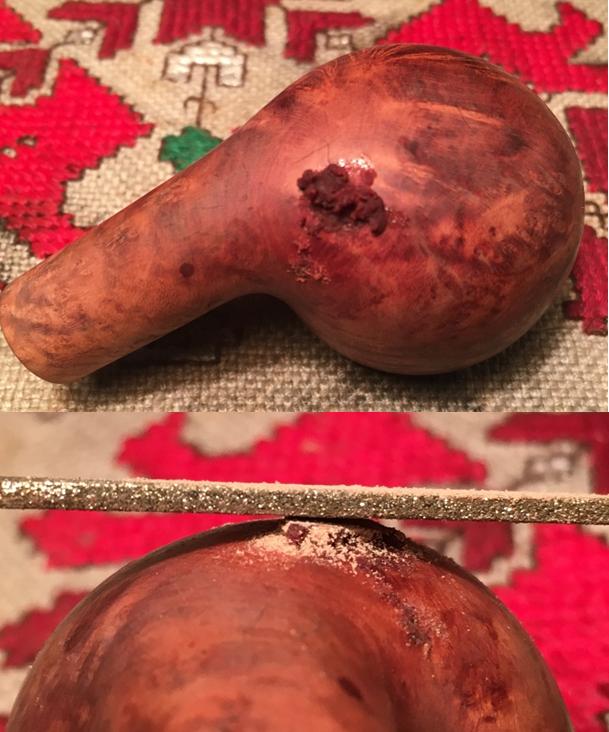
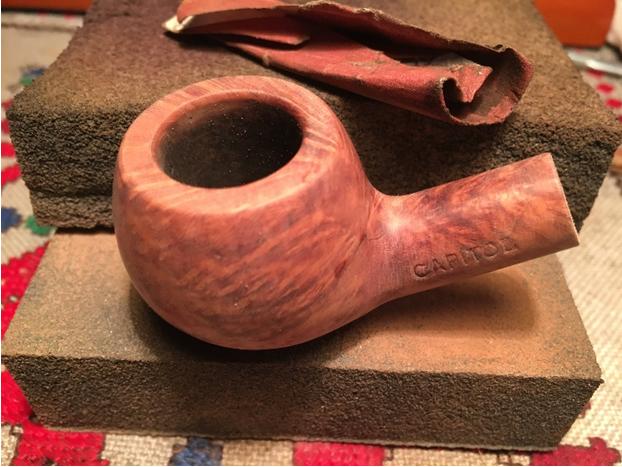
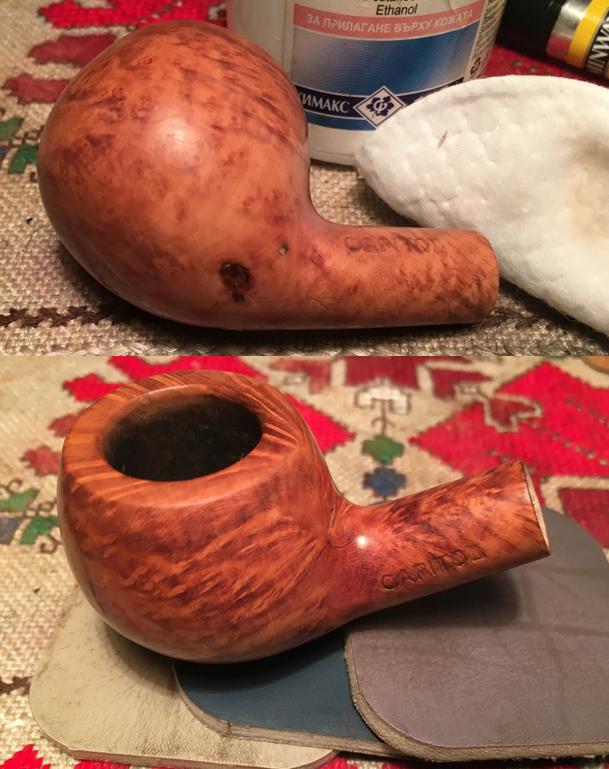
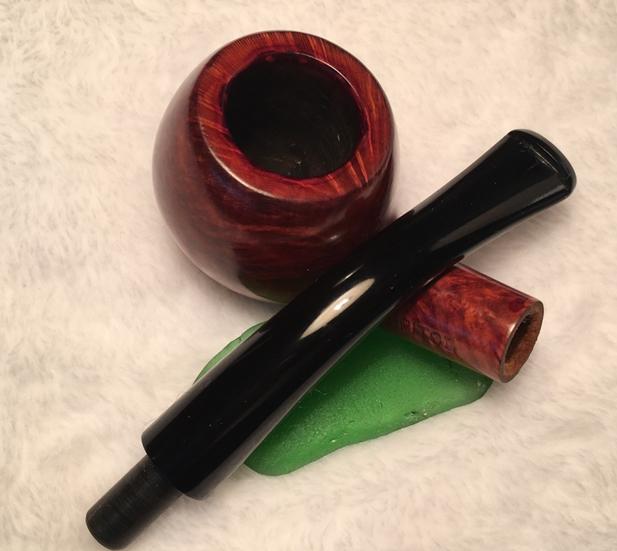
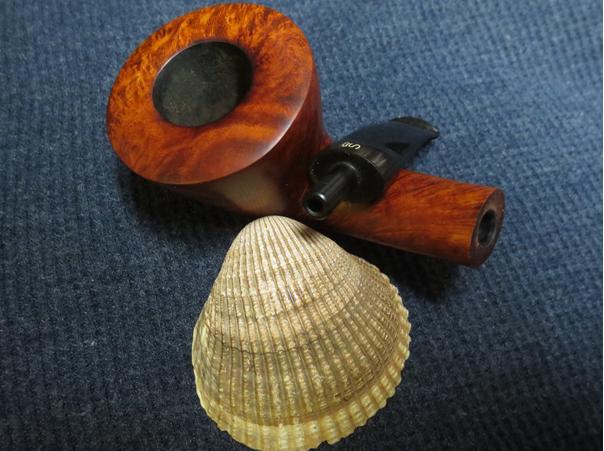
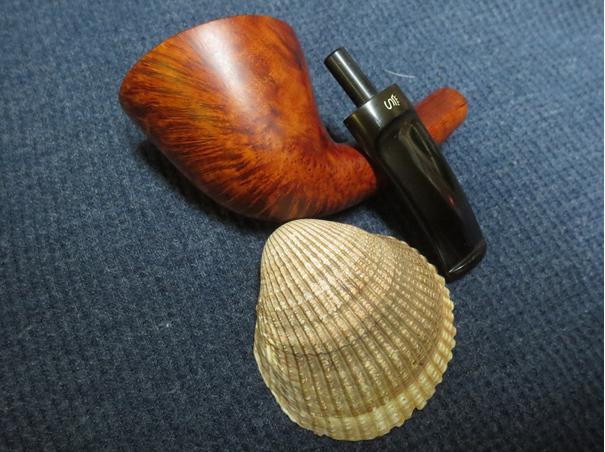
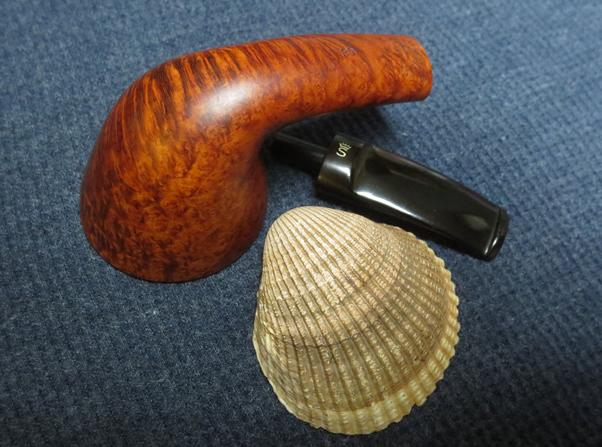
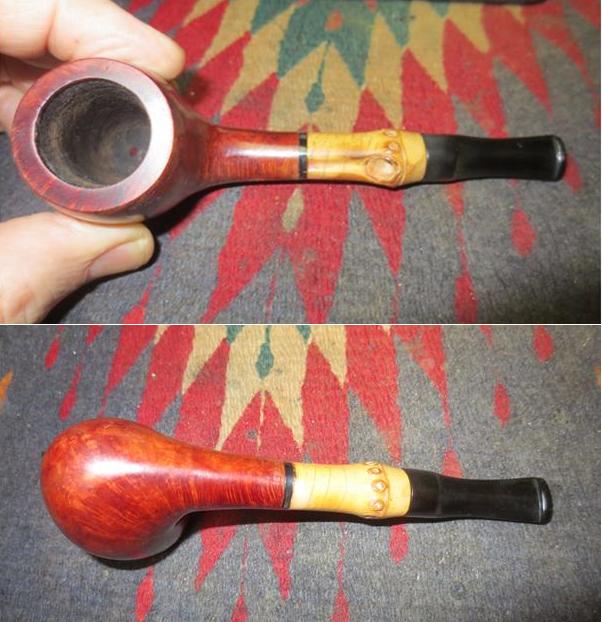
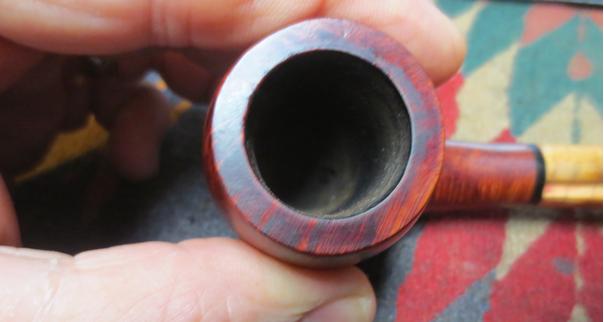
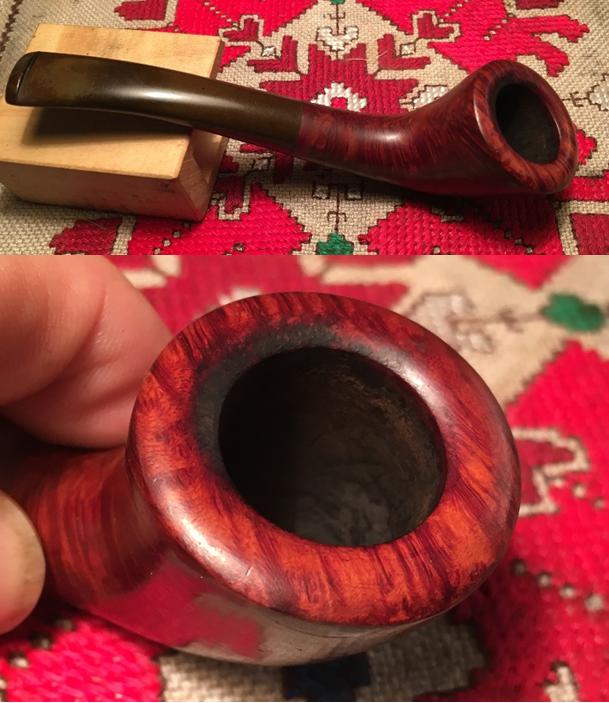
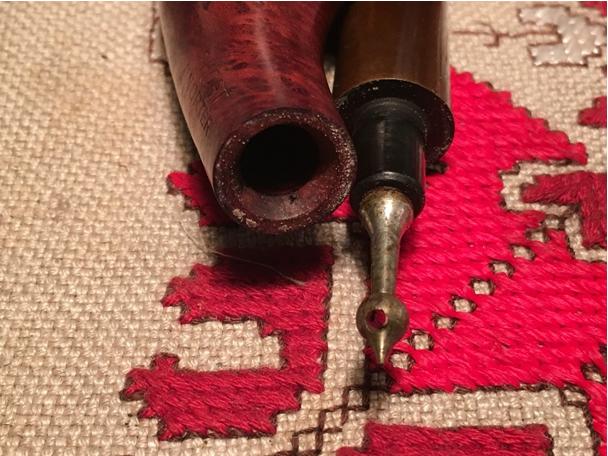
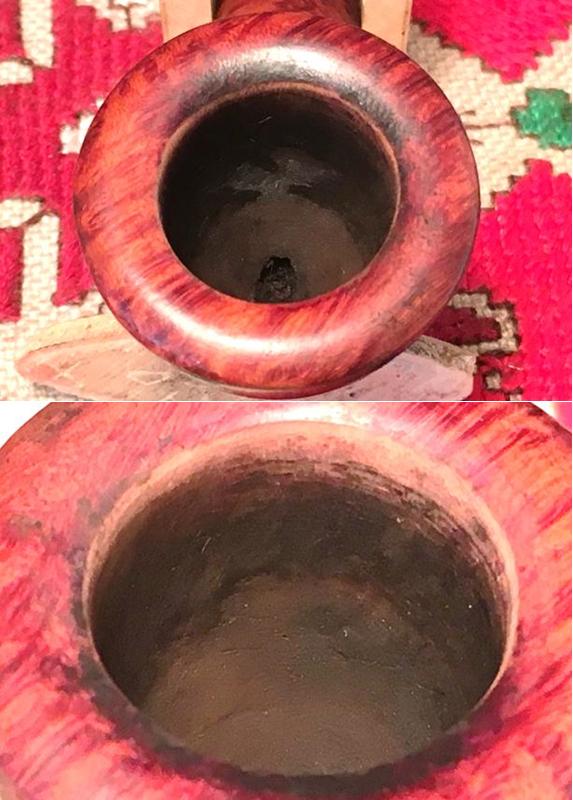
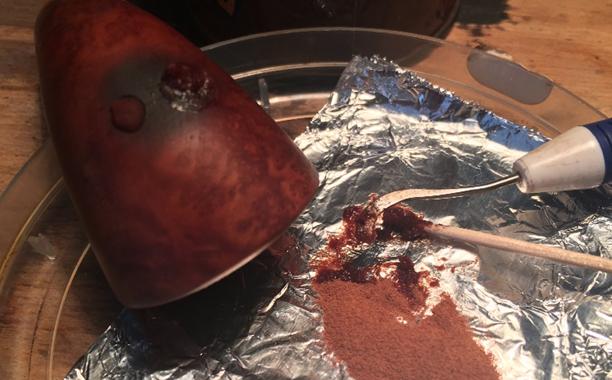
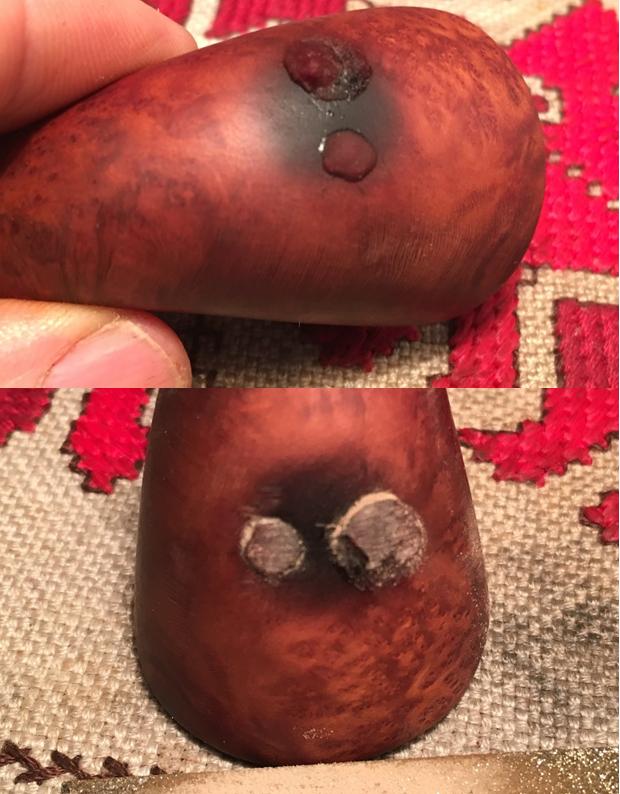
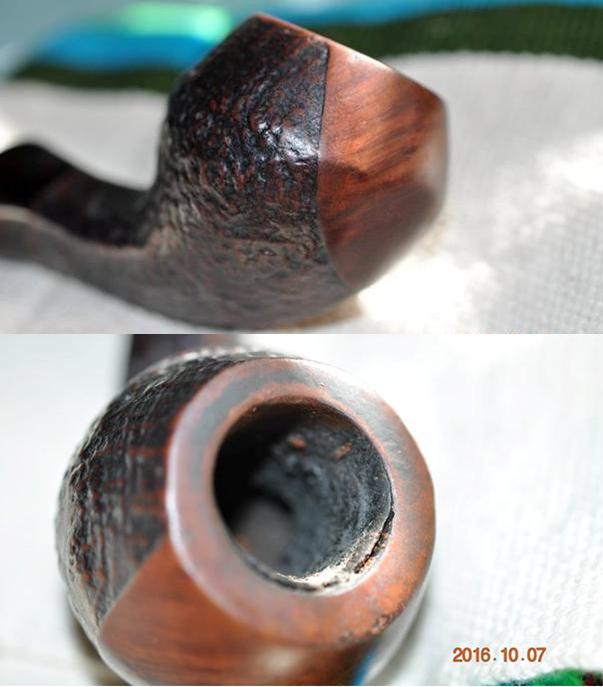
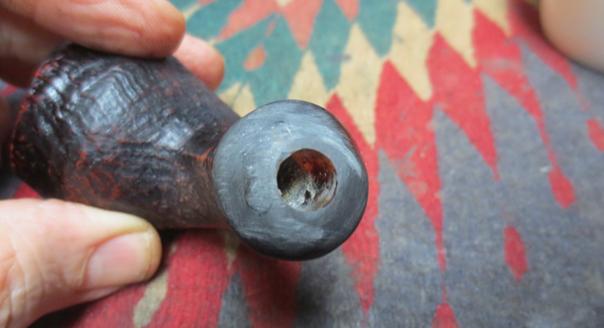
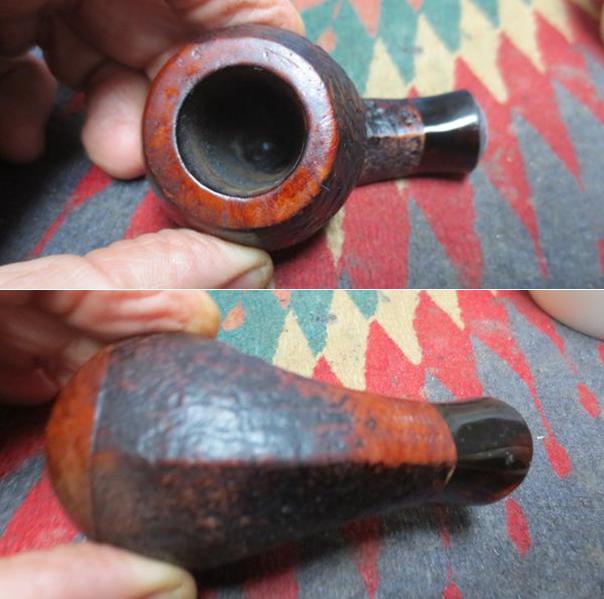
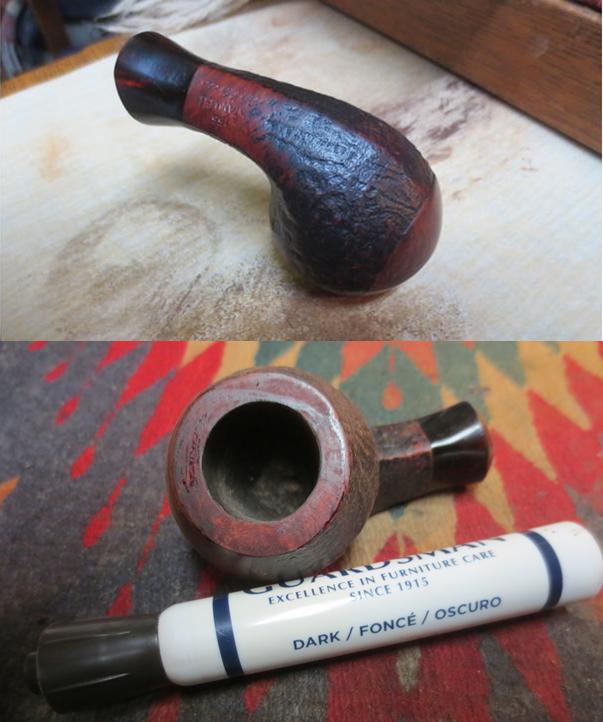
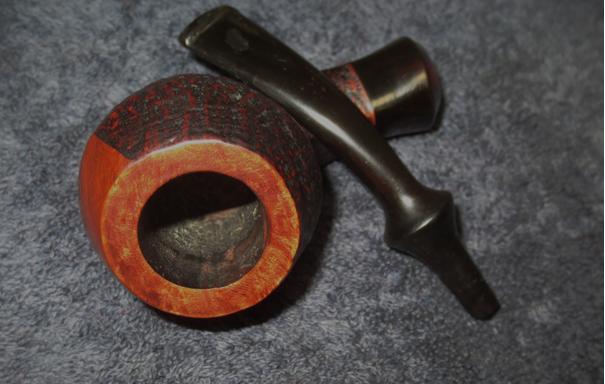
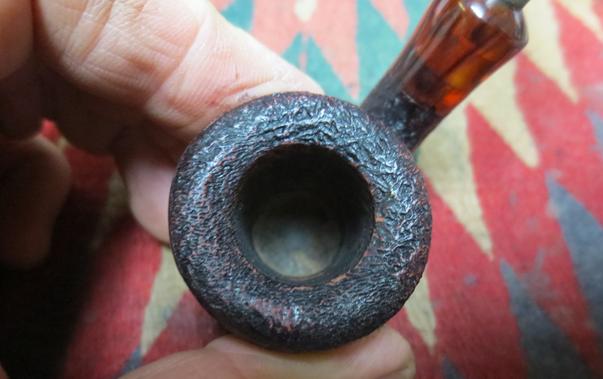
If you want to know more about gourds, the making of a Calabash, different kinds of Calabash pipes and Hollywood’s contribution to the mystique, take a look at http://calabashpipe.com/.cal14I make no apologies admitting that I approach the clean-up and restoration of the 1907 McLardy Gourd Calabash with a bit of fear and trepidation.  I have read the blogs of several former restorations of gourd Calabashes and I have assimilated various practices – it’s difficult to say “best” practices because compared to briar pipe restorations, gourd Calabash restorations are far and few between.  I’m thankful for Steve’s consultations via email mainly regarding how to approach the bowl which the eBay seller maintained is Meerschaum, but Steve’s counsel to tread carefully is well-taken – he indicated that he has seen Calabashes this age with bowls made of clay or asbestos as well.  With the Samuel McLardy Co. doing so much trade with clay pipes, I’m wondering if the bowl capped in this gourd might just be clay.  We’ll see.  This question, became the ‘pre-restoration’ question that had to be resolved.  I sent these pictures to Steve after his counsel to take a real close look at the gaps just below the silver bowl cap that reveal the bowl material.  Is it meerschaum as advertised by the seller?  Is it clay? Or, is it asbestos material?  Steve’s email described that if it was an asbestos material, it would be better not to smoke this pipe, but to turn it into a display icon – better this than sucking down airborne asbestos!  His instructions were to examine the scraped area at the rim and see if it was fibrous.  If so, then it probably was made of an asbestos material.  If clay, it would be more porous.  Thankfully, with a sharp dental probe in hand under a large magnifying glass, I scraped the light material pictured below to discover that it was pretty solid – no fibers detected.  We’re in agreement that the material is most likely clay, but I’m not sure how to conclusively determine one or the other at this point.   Can anyone tell by looking at this?cal15 cal16
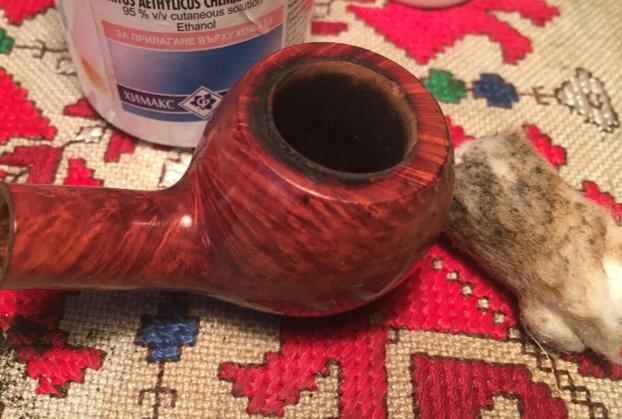
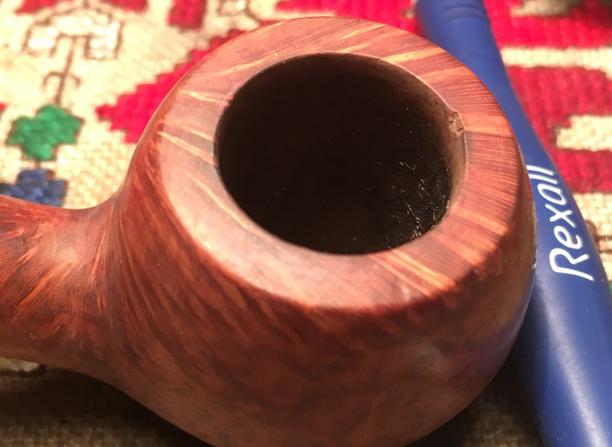
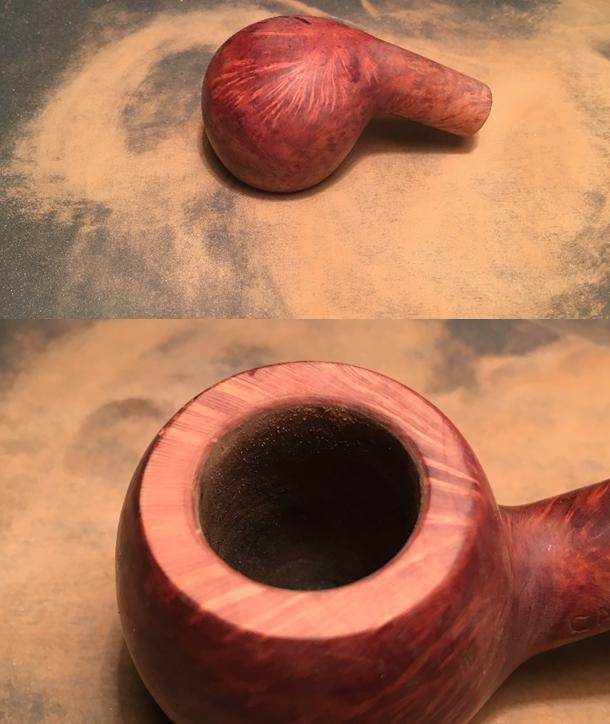
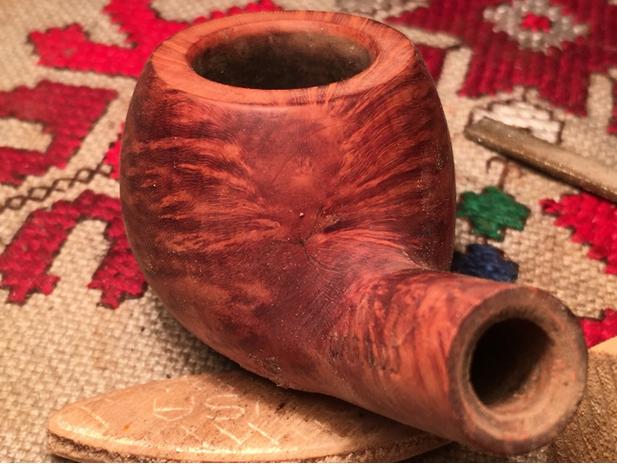
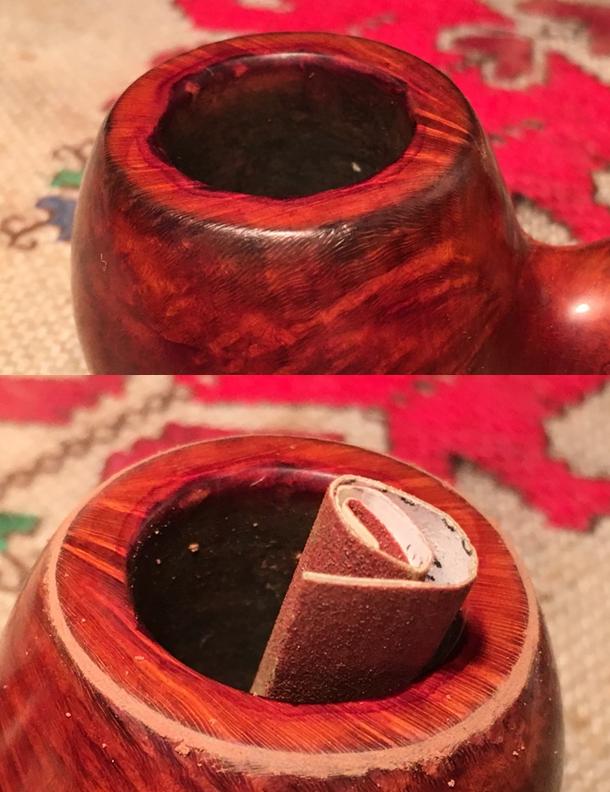
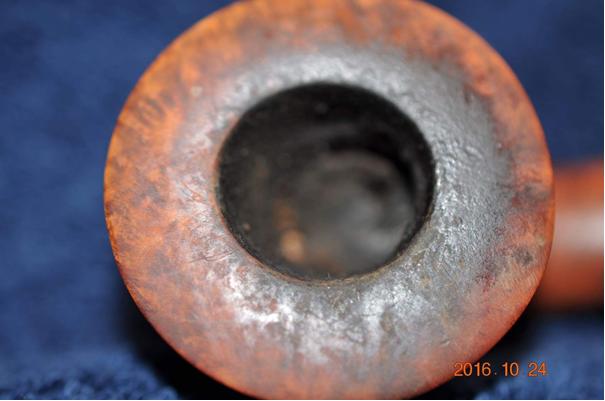
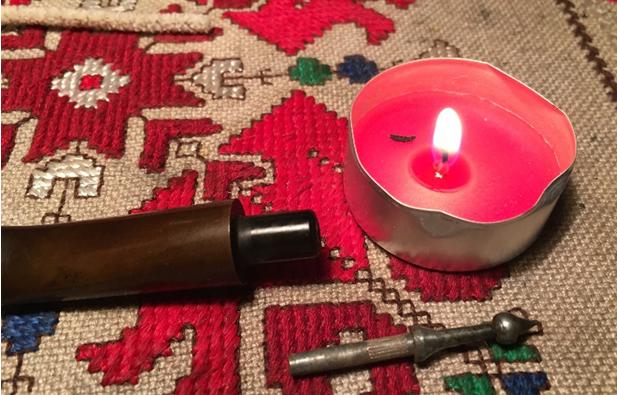
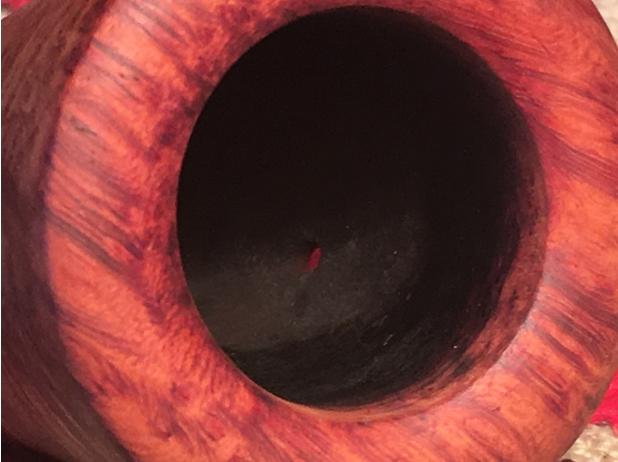
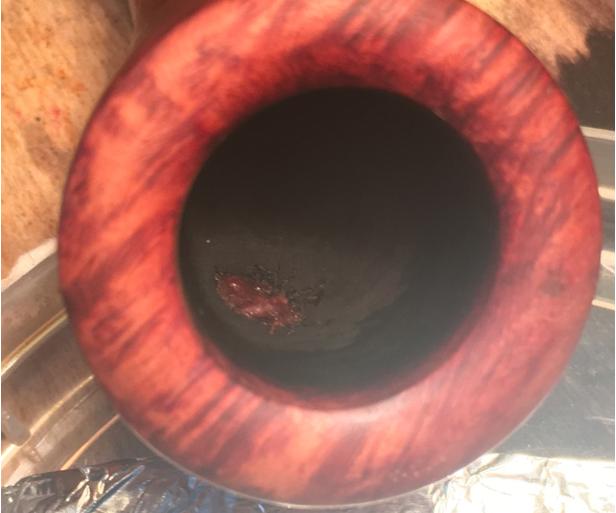
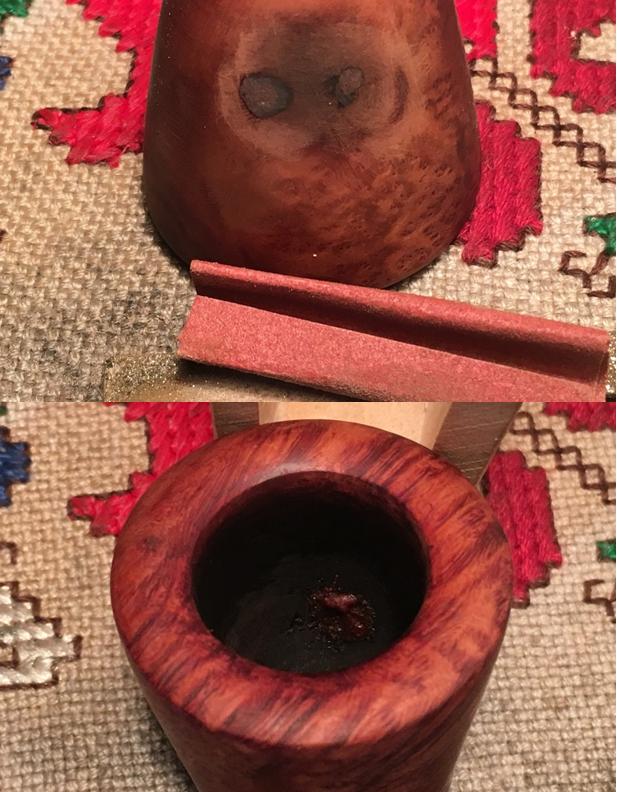
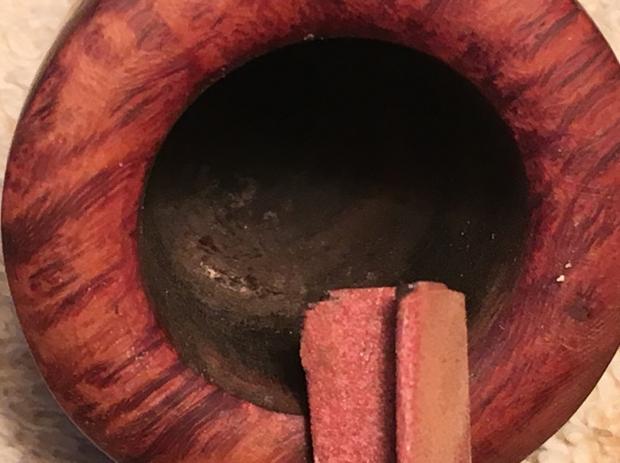
The next ‘pre-restoration’ question that had to be answered as well was, what was the dark material in the bowl?  One of the normal restoration practices is to clean out the fire chamber and at first I was thinking that the bowl of the Calabash would need to be sanded, but it became clear that it was not carbon cake staring up at me, but it looked more like a pipe mud coating over the clay/meerschaum bowl.  In the next picture, angling the light I capture the view down to the draft hole showing the coating material and it appears pretty thin.  With a pipe this age, the resulting plan is to be conservative – if it’s not too broken, why fix it?   I decide to leave well enough alone – I will make more pipe mud and close the gaps around the upper chamber next to the silver cap.  I will not sand the bowl, nor will I attempt to take the cap off to gain greater access to the interior of the gourd for cleaning. cal17
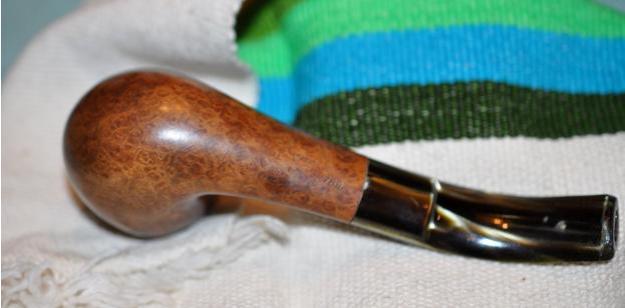
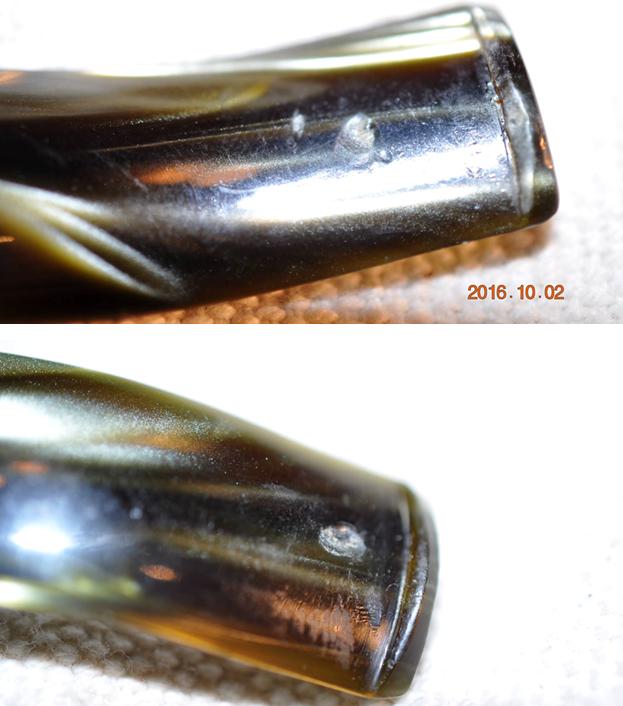
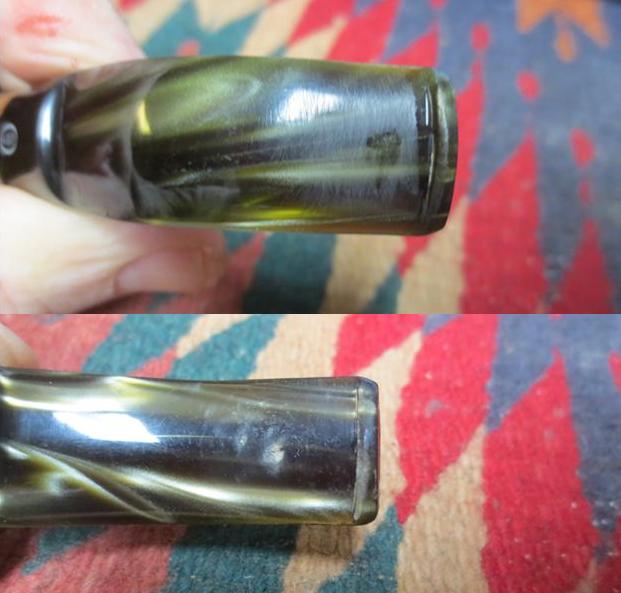
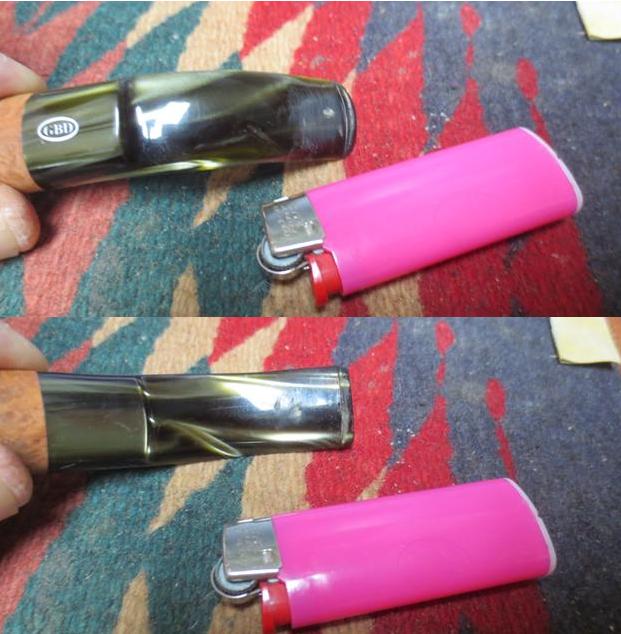
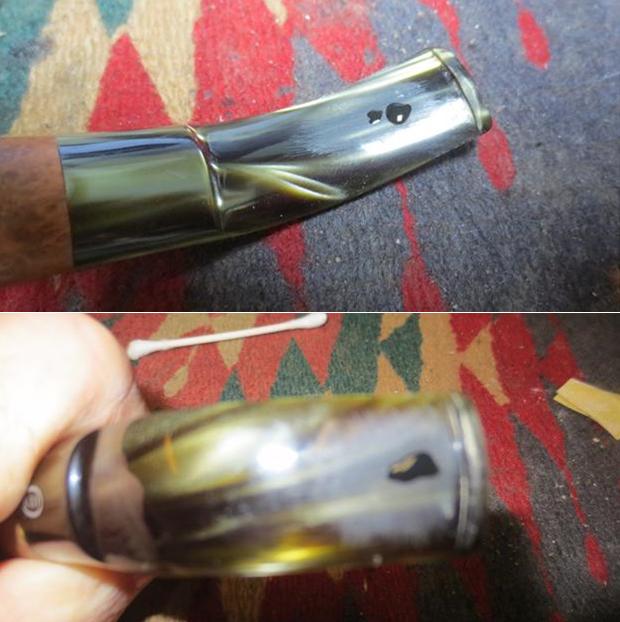
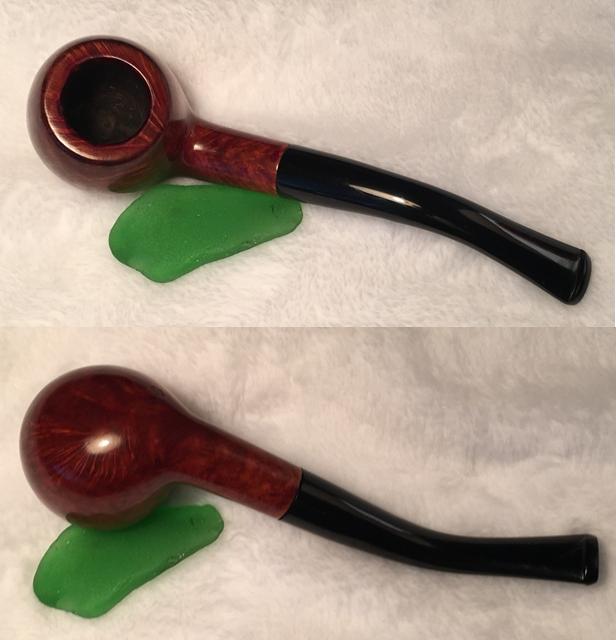
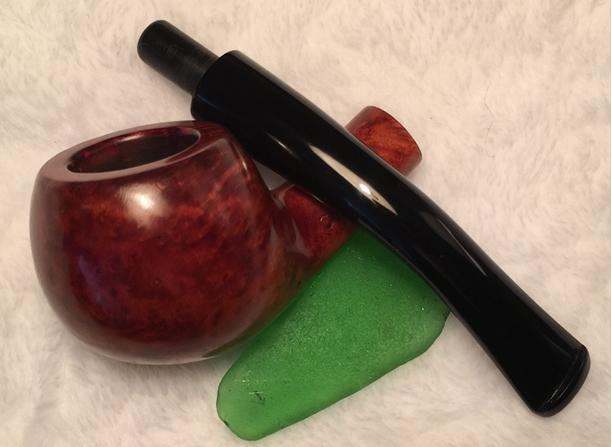
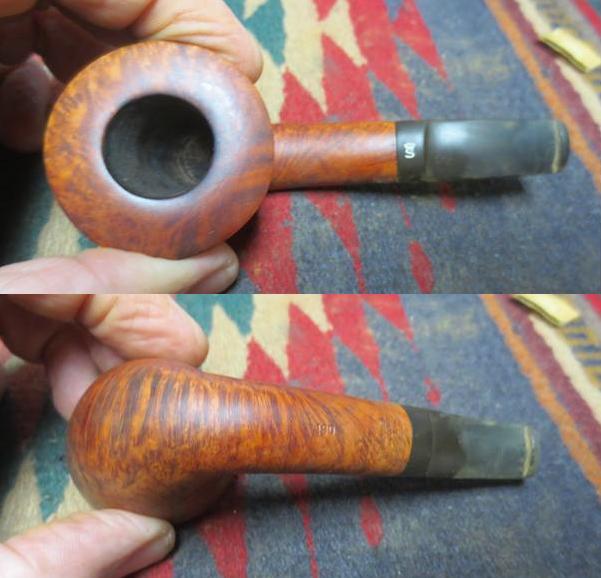
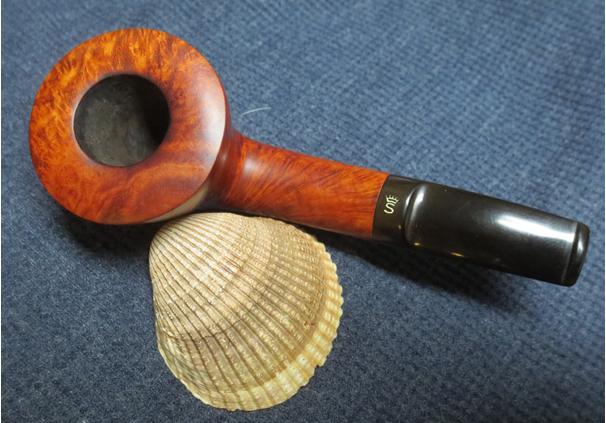
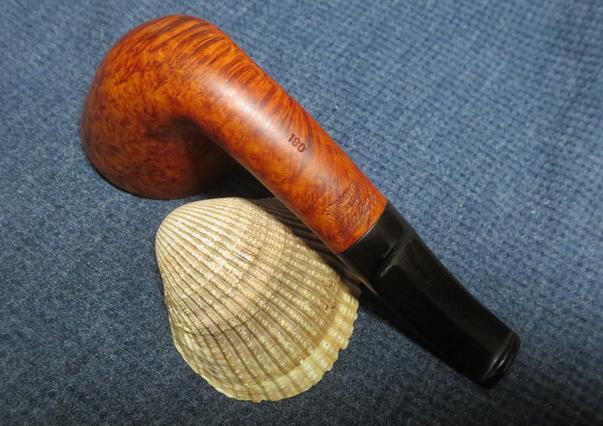
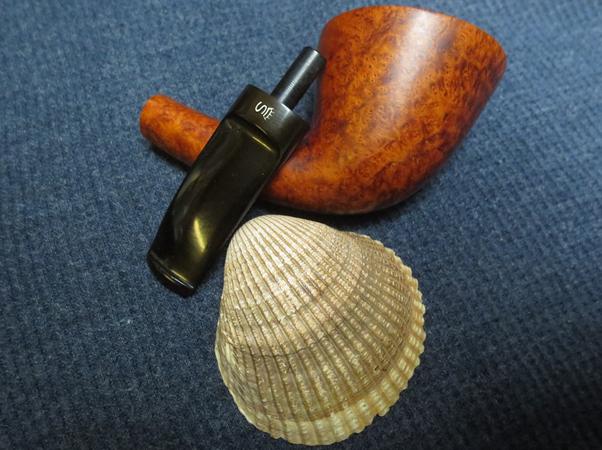
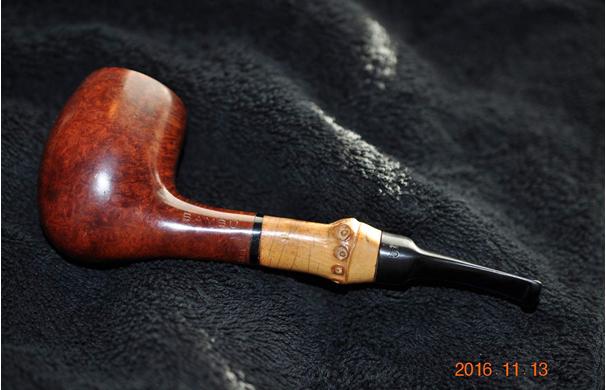
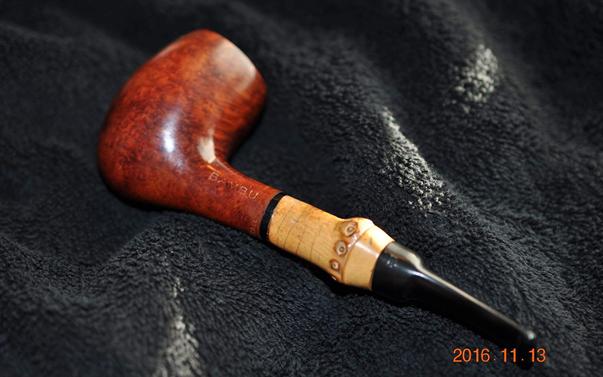
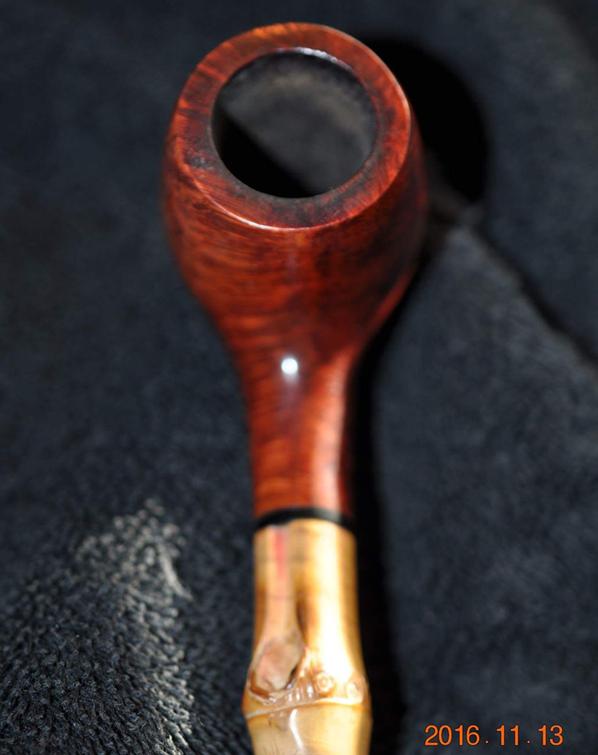
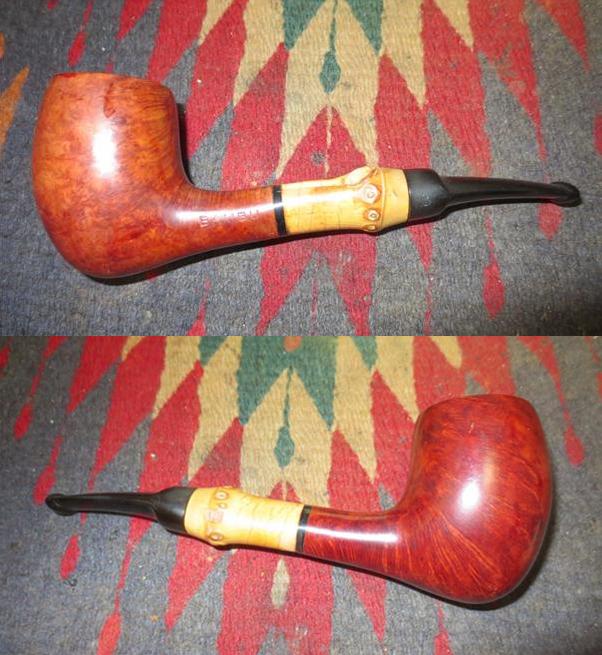
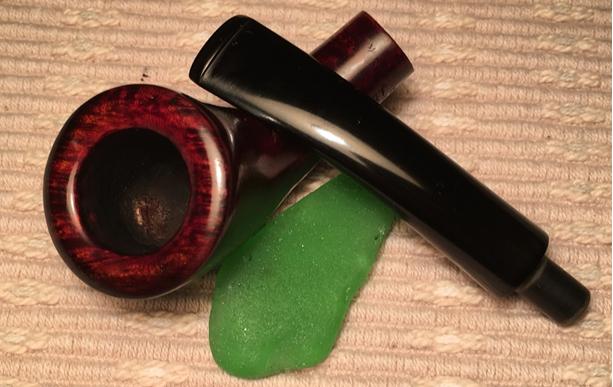
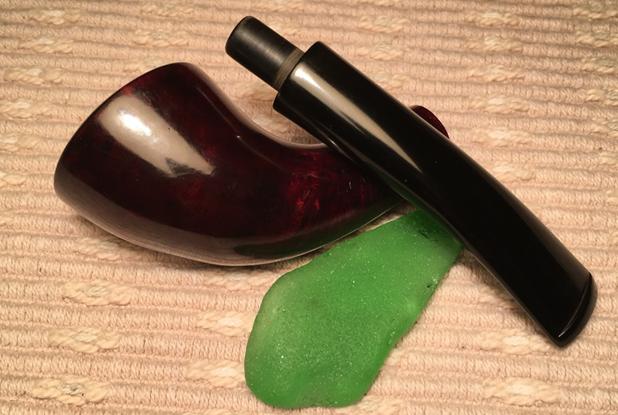
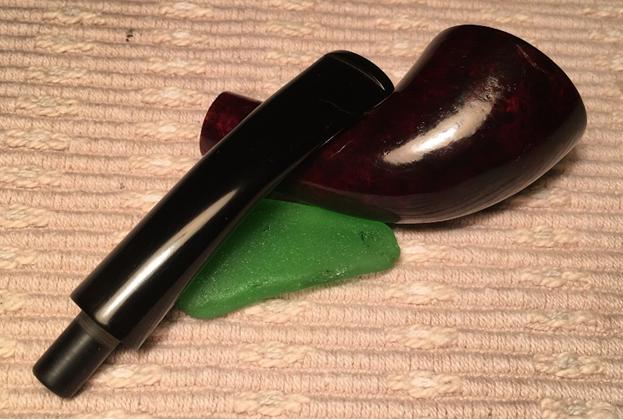
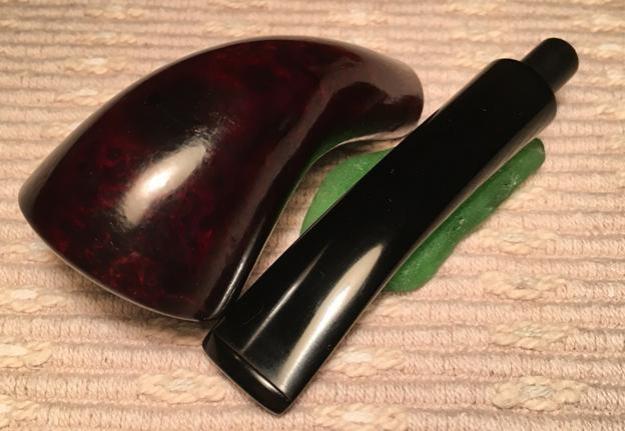
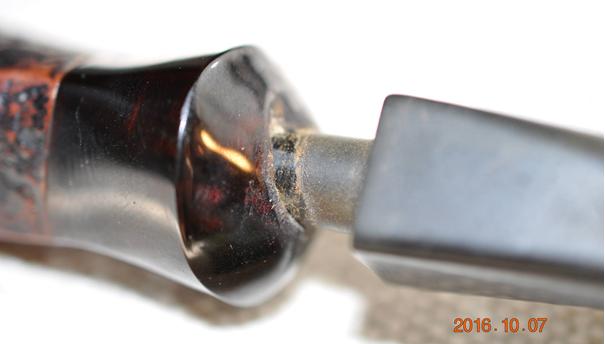
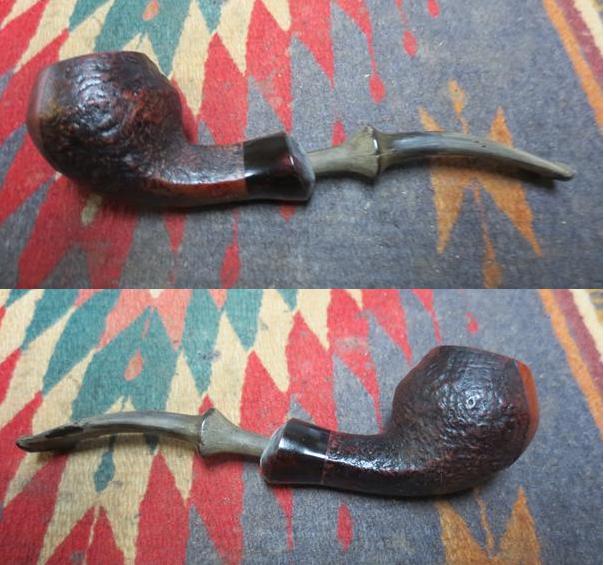
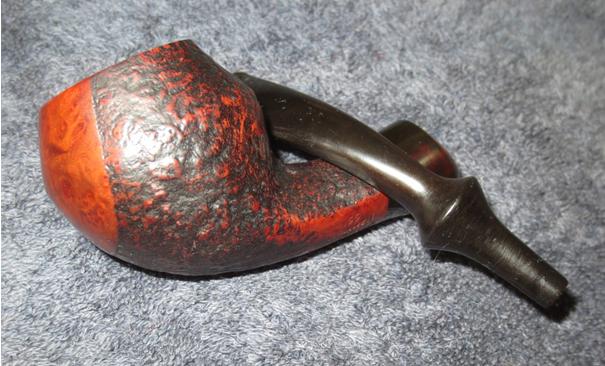
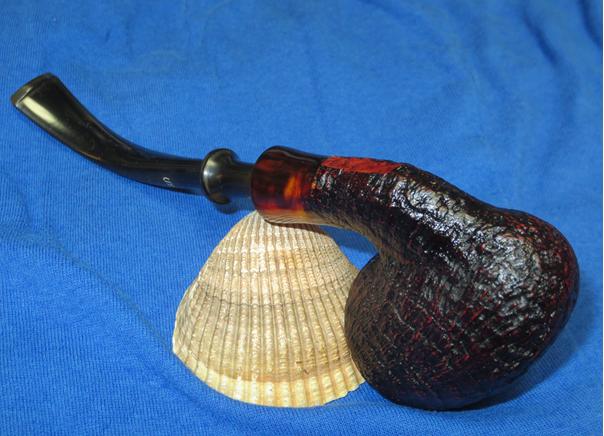
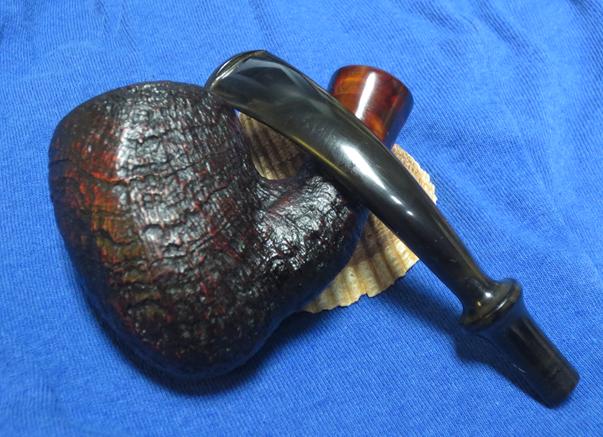
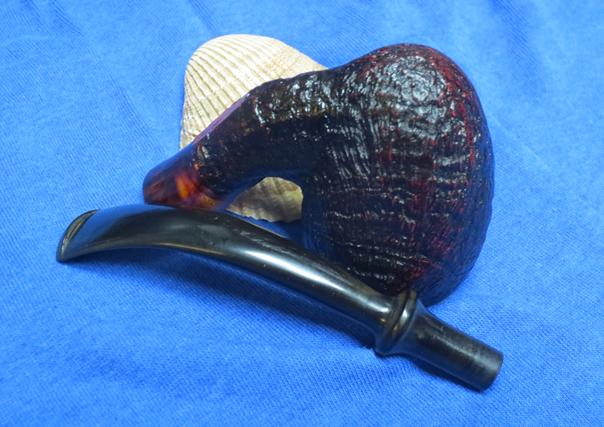
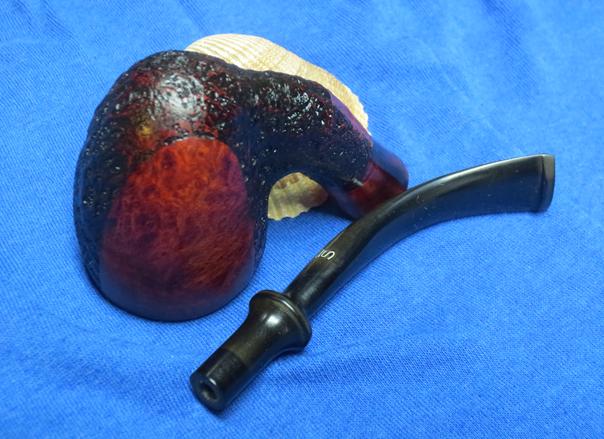
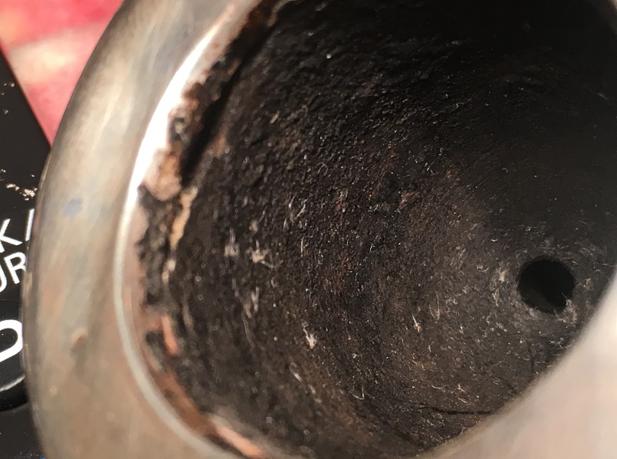
With the 1907 McLardy Gourd Calabash on my work table, I take additional pictures of the areas in need and to get a better look at things – moving from ‘pre-restoration’ questions to cleaning up this Calabash and recommissioning him for service!  Preparing for a new application of pipe mud in the gaps around the rim, below the cap, I want to clean the overflow black coating on the inside rim of the silver cap.  The gourd is in good shape but there are some residue marks on the upper front side of the gourd – at this point, I don’t know if it has irrevocably stained the gourd or if it can be removed with a general cleaning.  Both silver cap and ferule have dents and bumps from years of use and being passed from hand to hand.  I won’t deal with the dents, but bringing a new shine to the sterling silver is a priority.  The stem is in very good condition with mild oxidation and almost non-existent tooth chatter, but I do detect a dent in the upper button.   There is also a divot in the vulcanite on the shank-side of the stem that needs attention.  The bone tenon needs to be cleaned – it is the only access point to the interior of the gourd – I’ll clean what I can from that angle, but my assumption is that the interior of the gourd is dry and possibly somewhat fragile.  I’ll be satisfied with a gentle clean in and around the bone tenon.  One last thing that has caught my attention – the stem is a bit overclocked or rotated.  I’m not sure now if it’s something to be concerned about.cal18 cal19 cal20 cal21 cal22 cal23
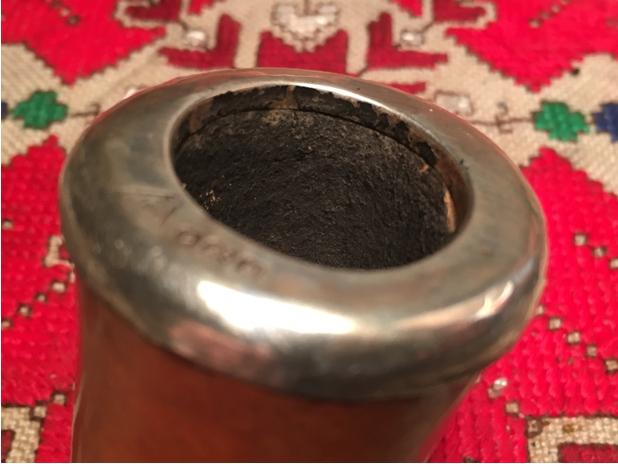
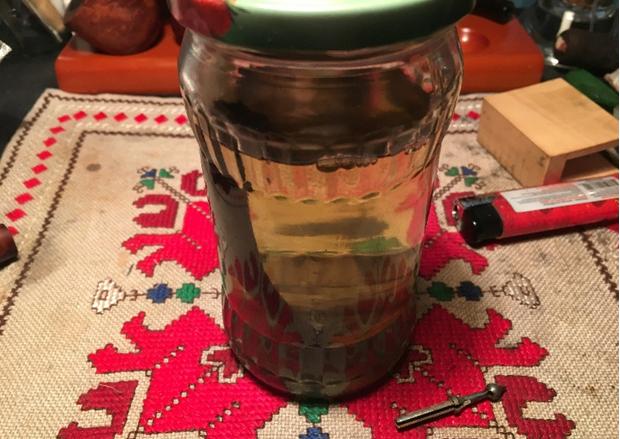
Well, I put the word out to my friend and colleague, Gary, who lives in Plovdiv, Bulgaria, for some fresh cigar ash to make a fresh mixture of ash and water for pipe mud.  While I wait for his reply, I remove the stem from the Calabash, stick a pipe cleaner in the airway and plop it in Oxyclean to raise the light oxidation from the stem.  I also want to clean the inside of the silver cap in anticipation of a final shine but also to provide a clean line to apply the needed pipe mud in the gaps.  I use God’s provided tools in fingernails and a bit of spittle – not much!  I slowly and carefully, move around the inside of the silver cap with my index finger, scraping the old, perhaps ancient, not sure, pipe mud from the silver-plated surface.  I don’t want to use a metal tool on the silver surface because I definitely don’t want a new scratch to add blemish.  I then drag my thumb nail over the edge, with a bit of spittle, and hang it over the inner edge of silver cap and scrape additional hard caked stuff off.  That actually worked really well!cal24 cal25 cal26 cal27
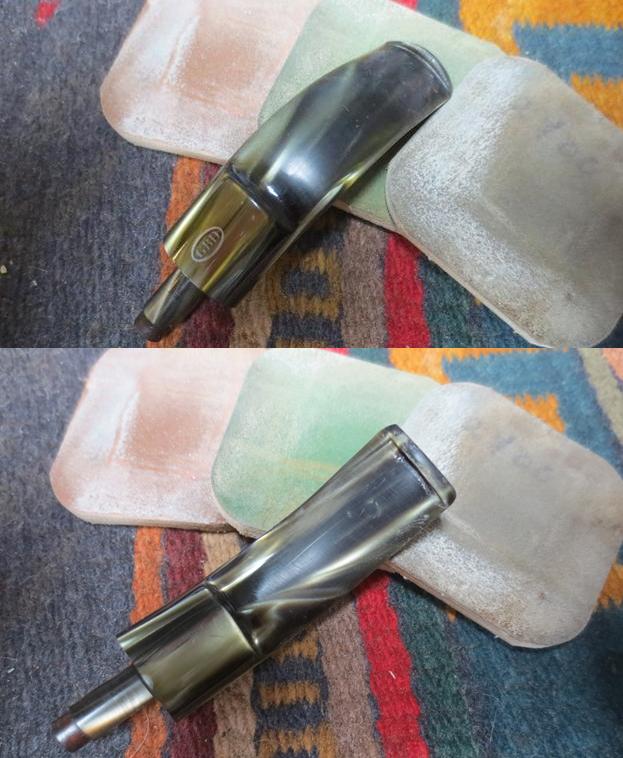
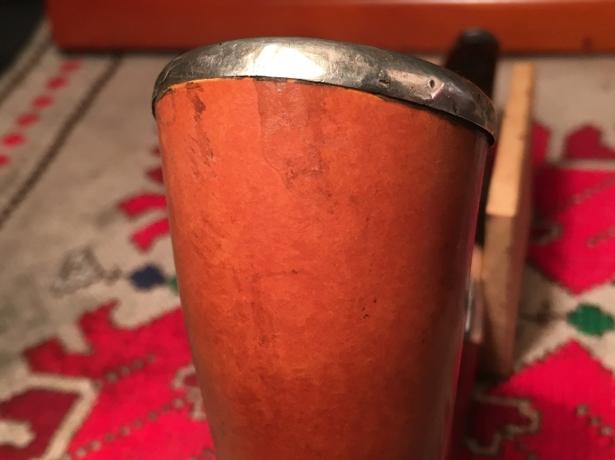
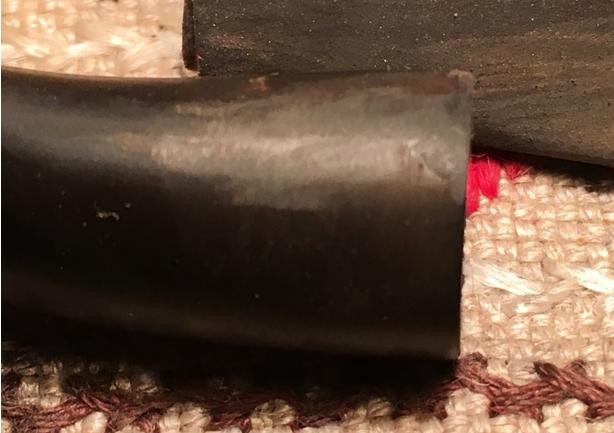
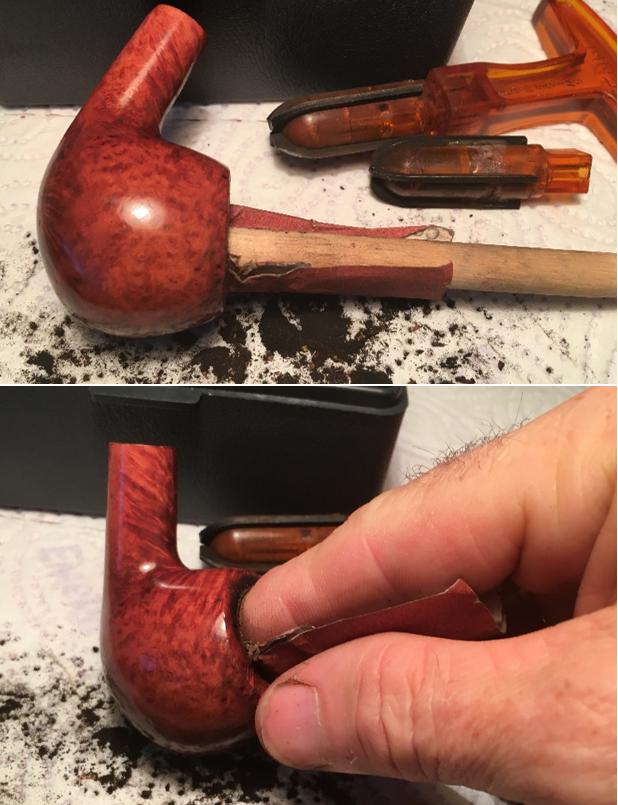
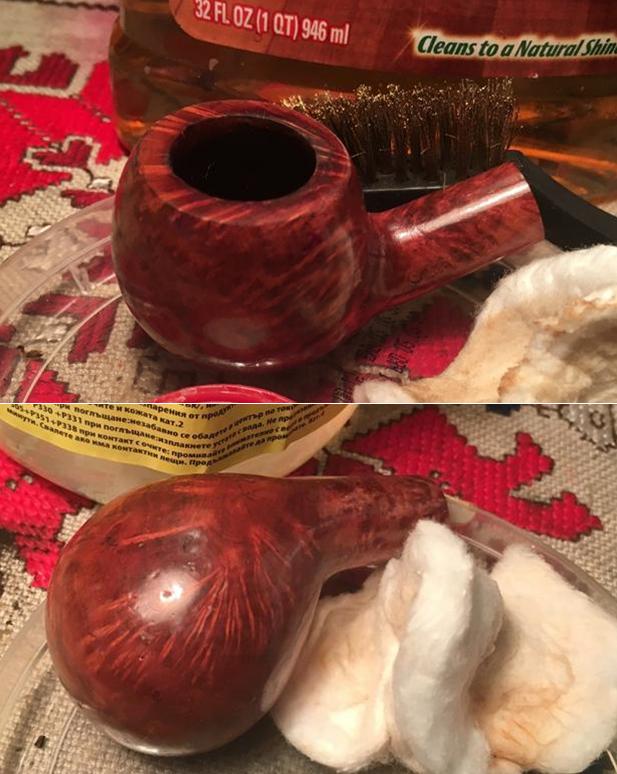
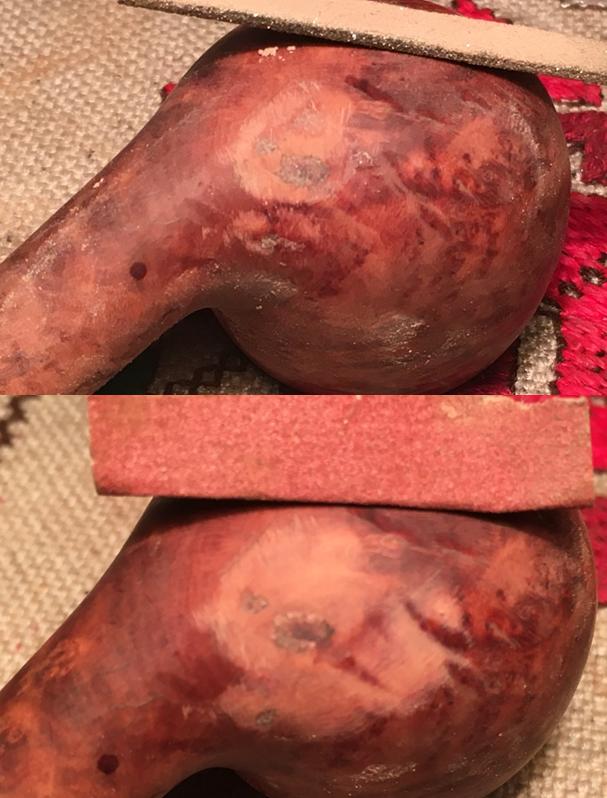
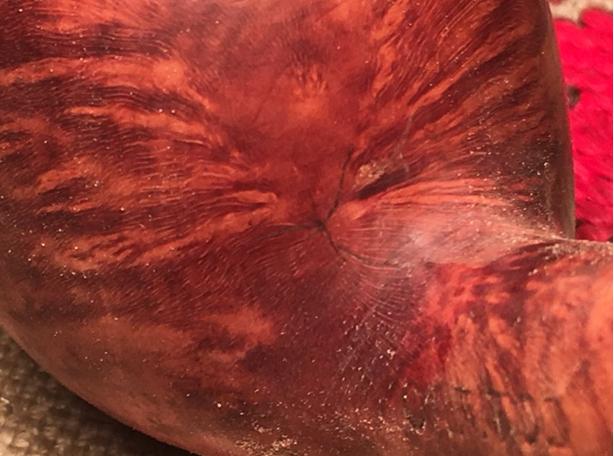
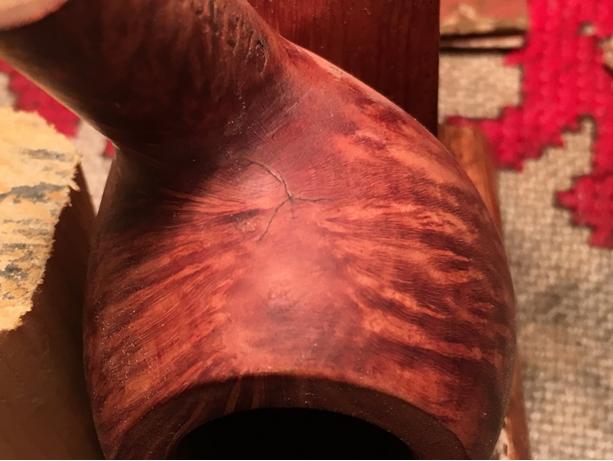
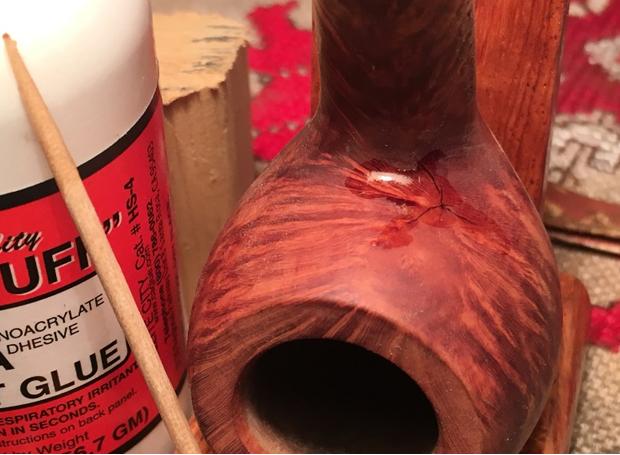
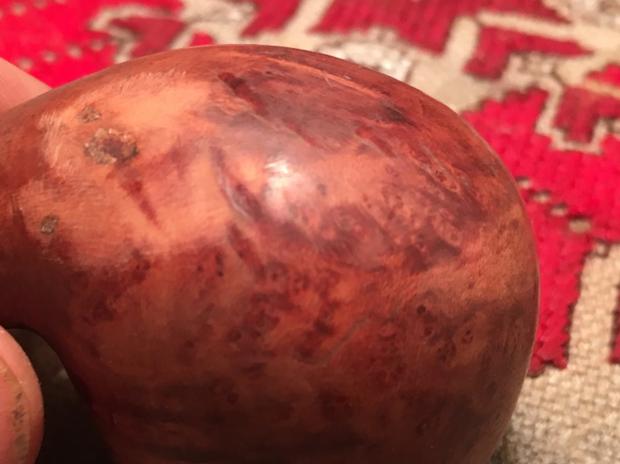
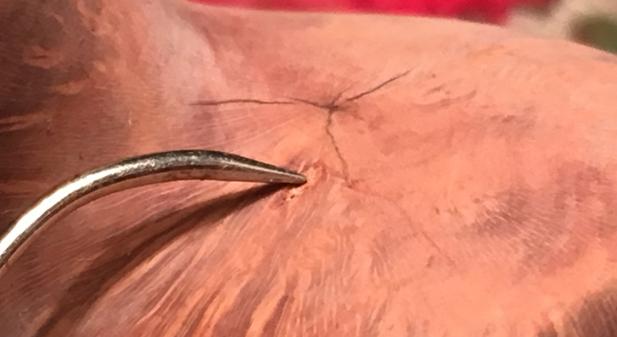
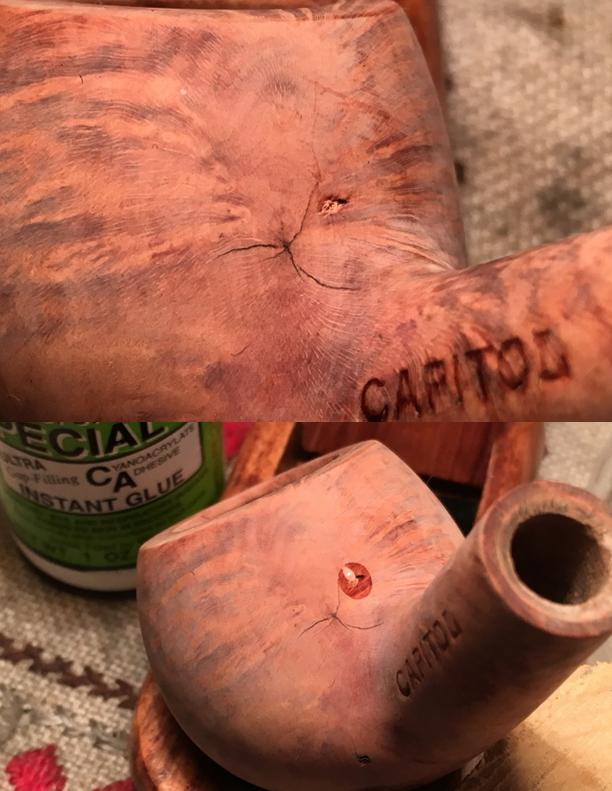
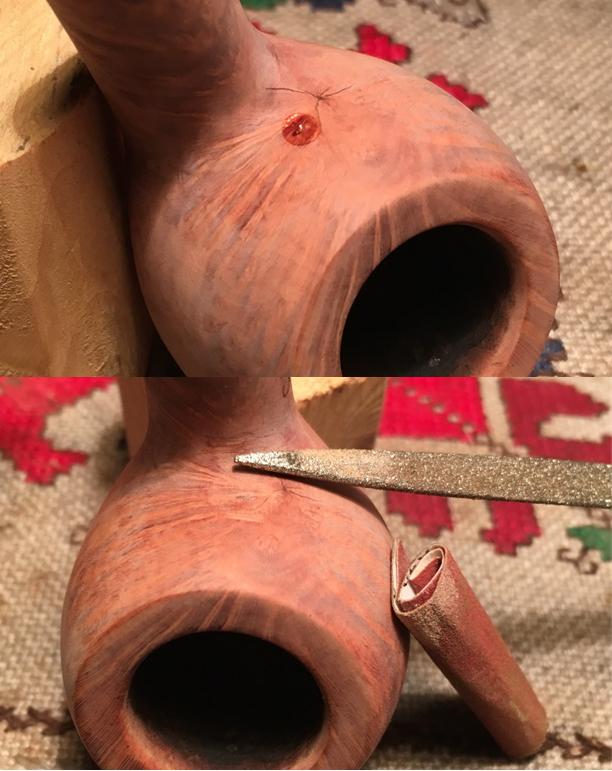
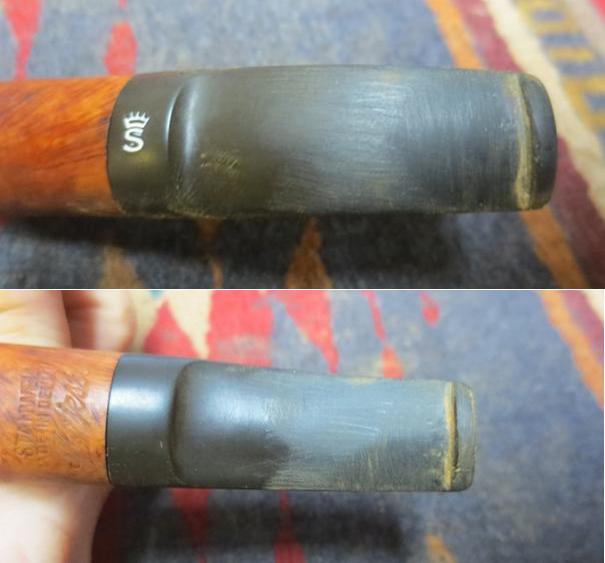
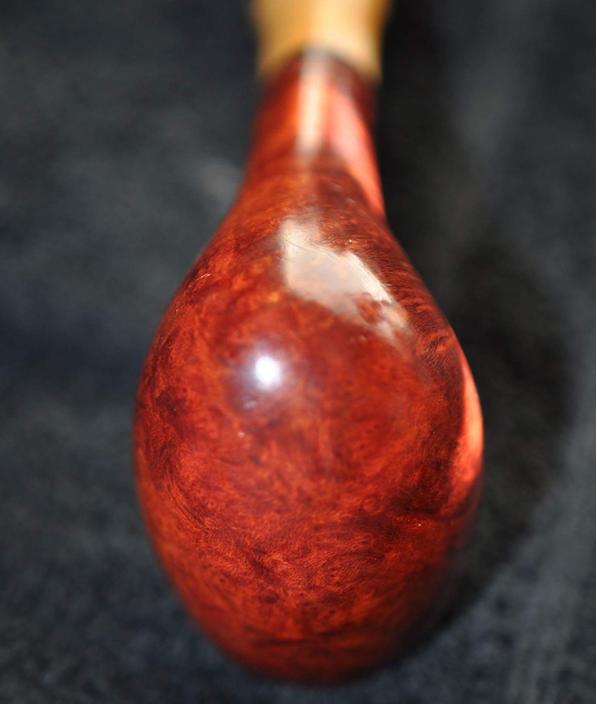
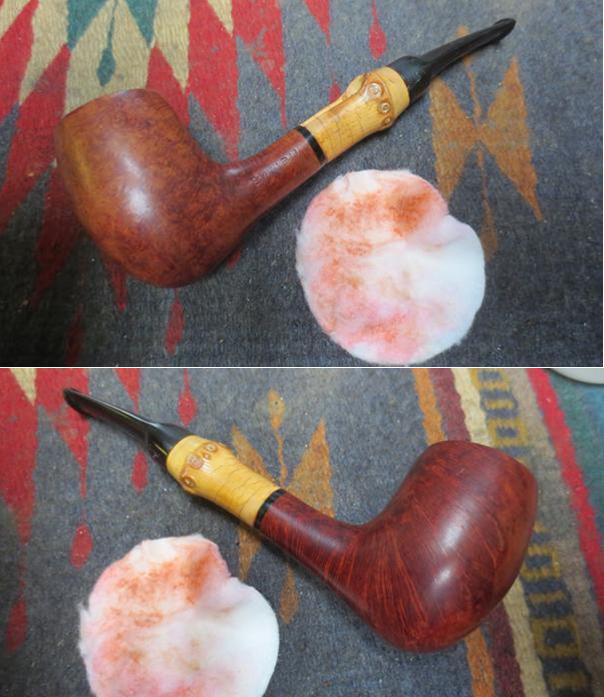
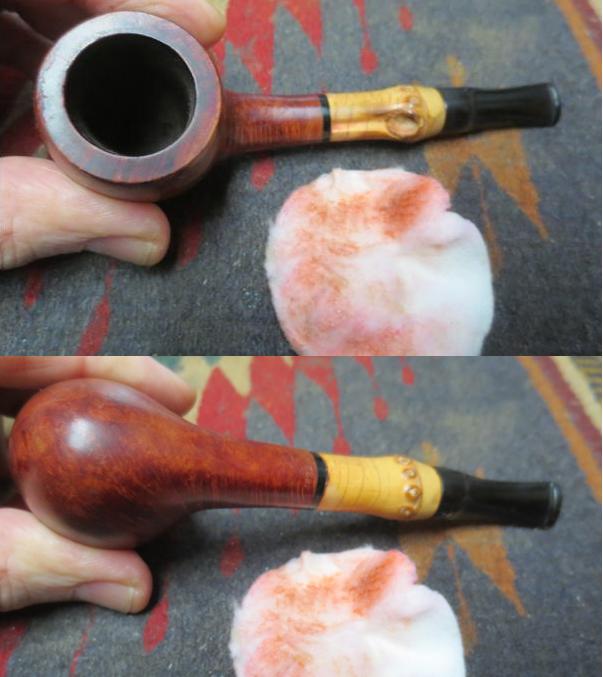
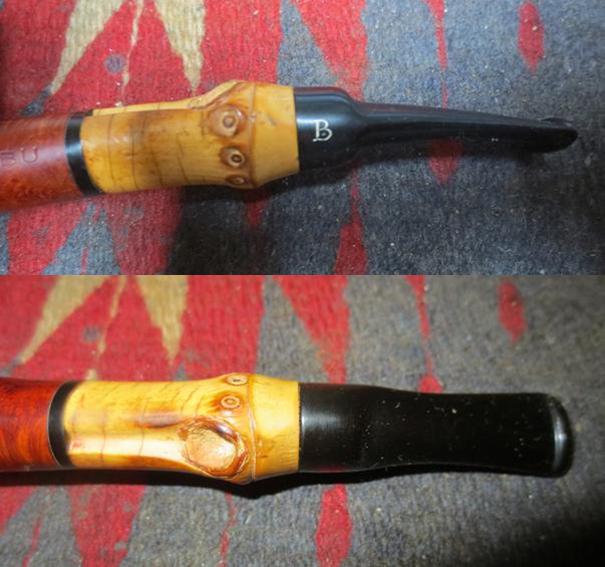
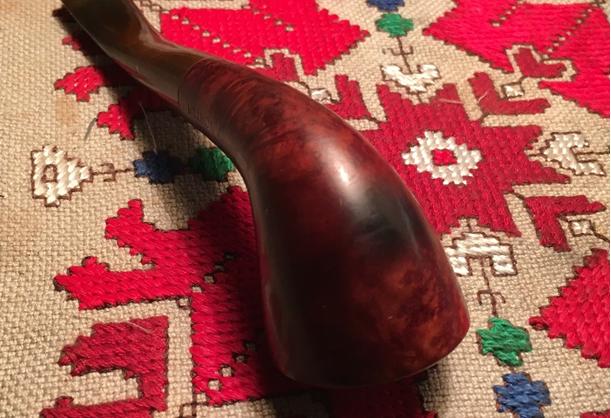
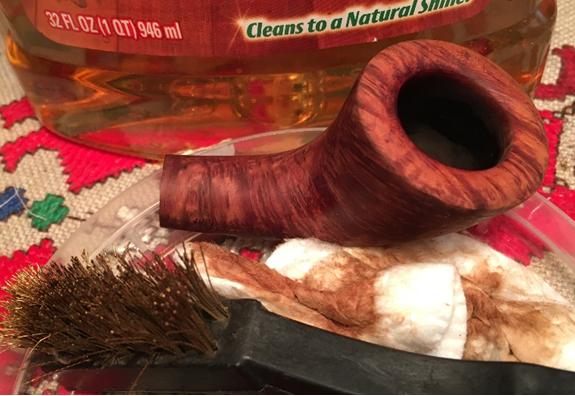
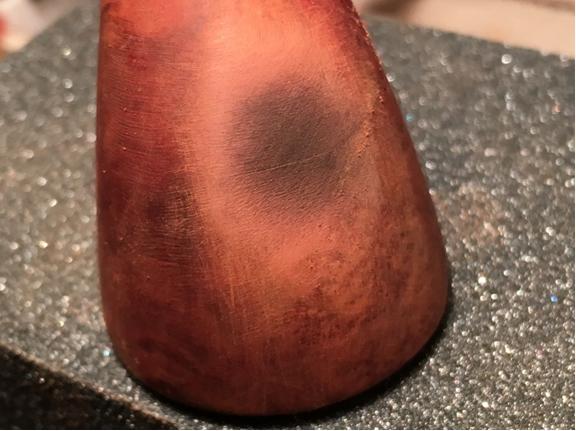
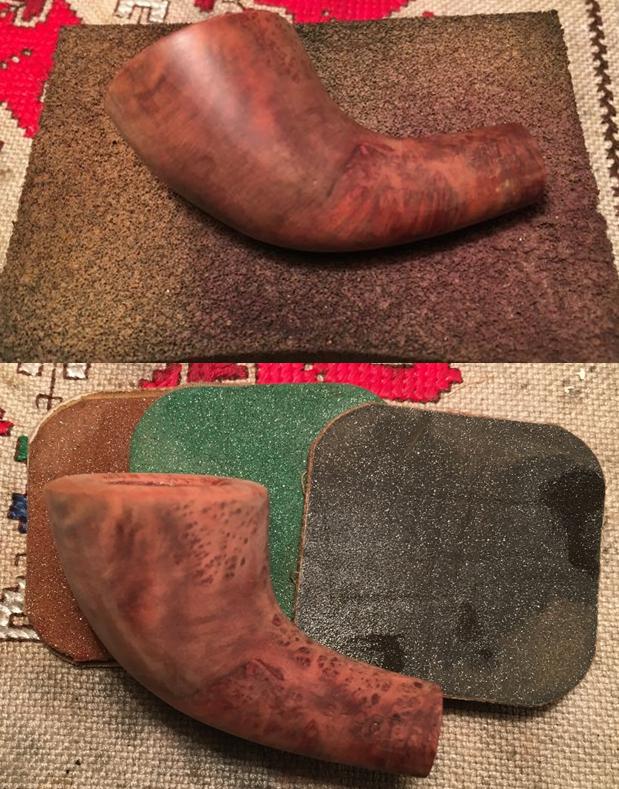
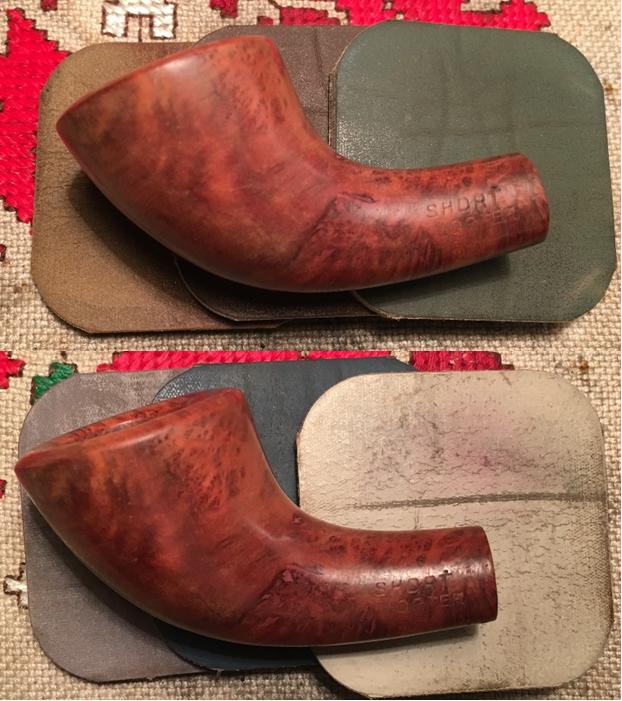
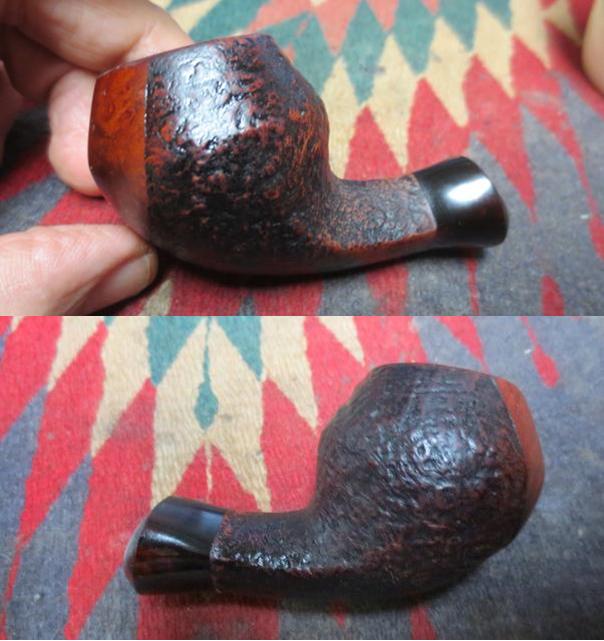
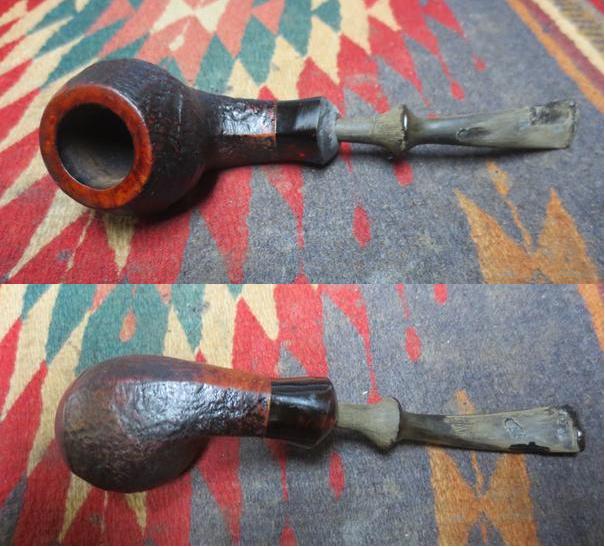
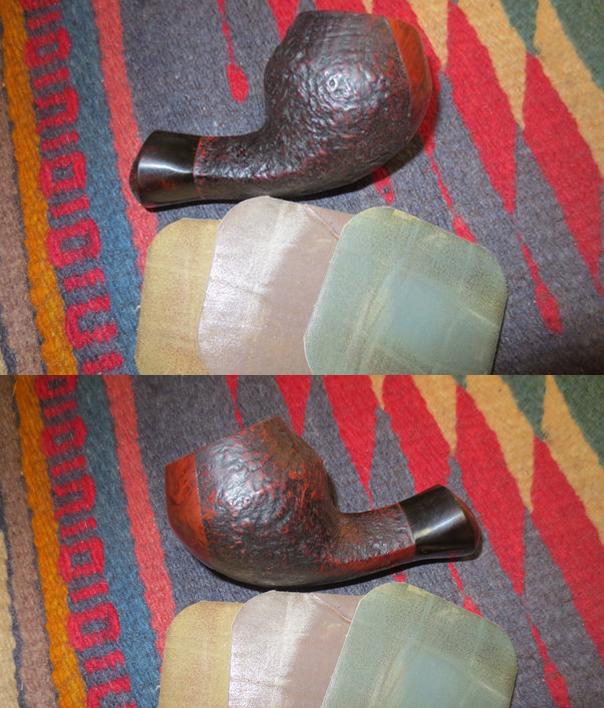
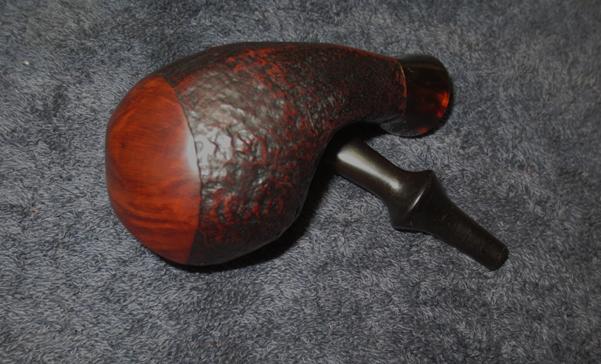
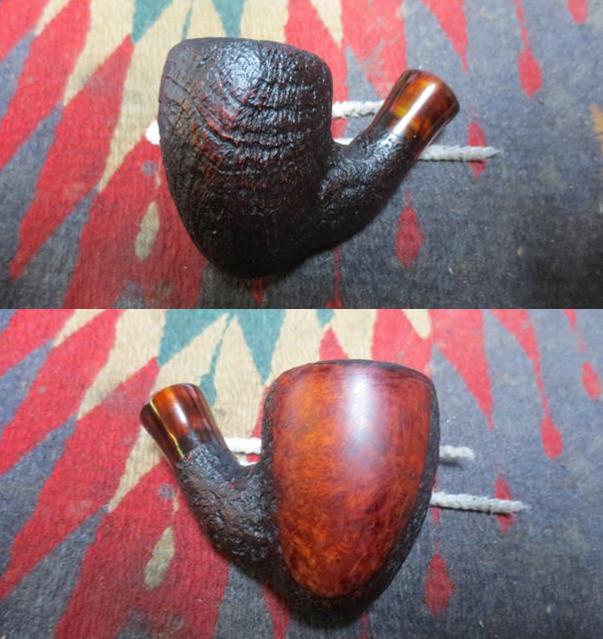
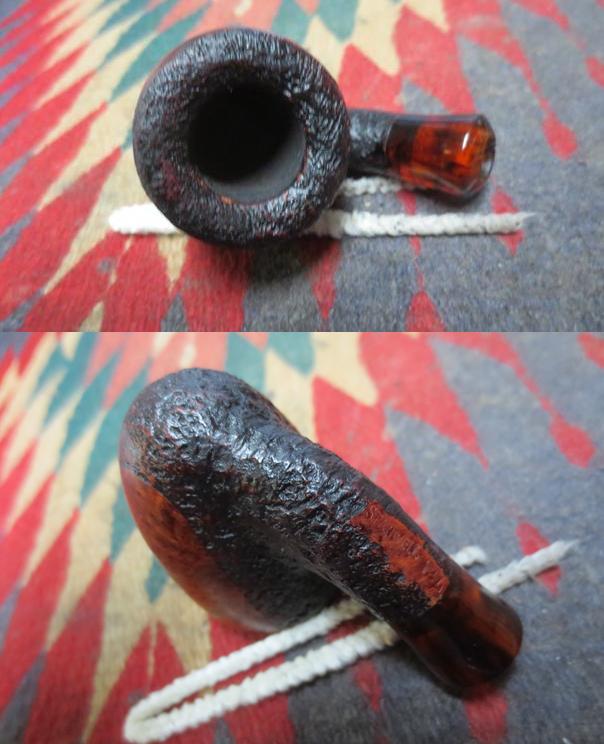
Earlier I mentioned that I have read several posts dealing with cleaning up Gourd Calabashes with questions about the gourd surface itself.  Steve’s post was helpful (See: Restoring an old CPF Gourd Calabash Pipe).  To clean the gourd surface getting rid of the oils and dirt that collects on the gourd surface, I use undiluted Murphy’s Oil Soap on a cotton pad and scrub the surface, then remove it with another cotton pad – not using water which may wet the gourd surface too much.  The gourd below the cap shows what appear to be residue from what I’m guessing was someone’s attempt to reattach the cap to the gourd – it appears to be glue runovers.  I can’t tell if it has damaged the gourd surface or if the old glue is resting on the surface.  As I scrub the gourd with undiluted Murphy’s Oil Soap, I concentrate on these areas.  I take a 2400 grade micromesh pad and lightly sand the area – just testing very gently what effect the pad would have on the gourd surface – I’ve not worked with gourd before so easy does it!  I discover that the gourd surface is resilient and the combination of Murphy’s Oil Soap and the micromesh pad lightly addressing the trouble areas proves to work very well!  The glue was on the surface and very gradually, I clean the gourd surface.  Nice!  The pictures show the progress.cal28 cal29 cal30 cal31
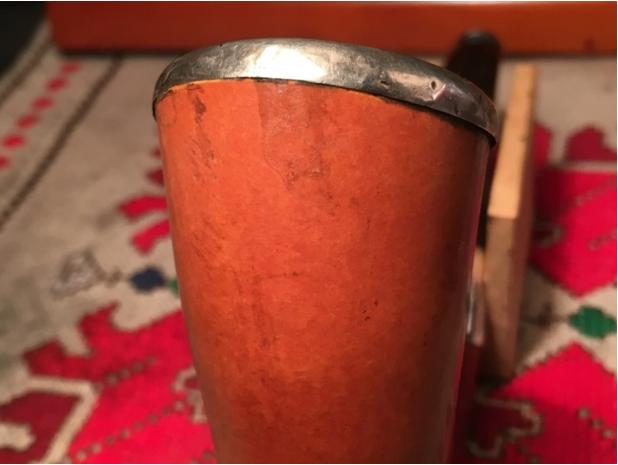
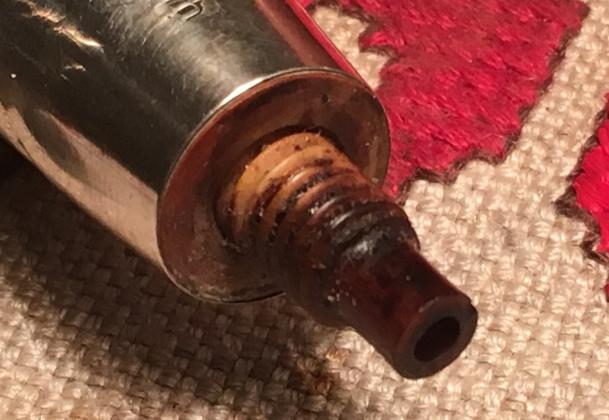
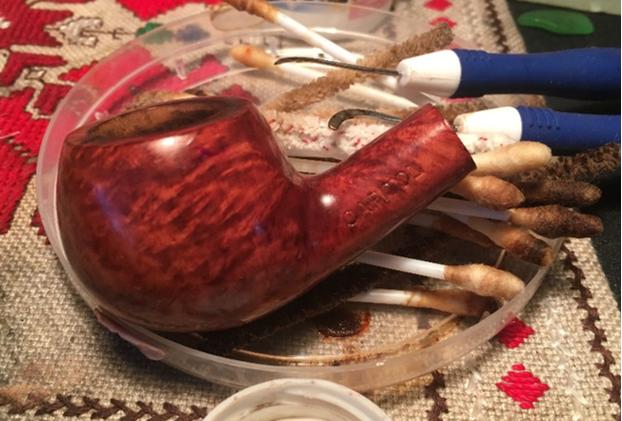
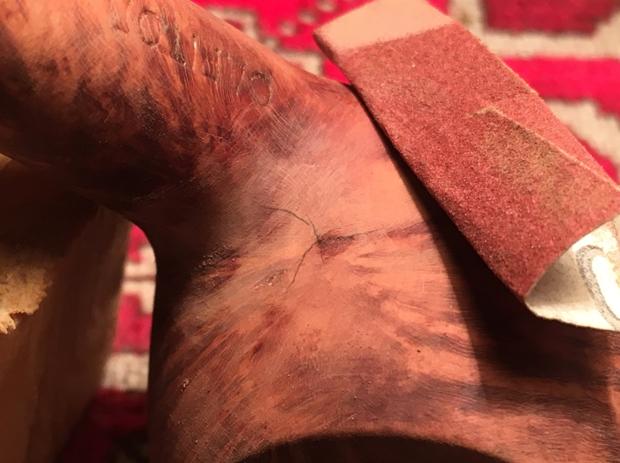
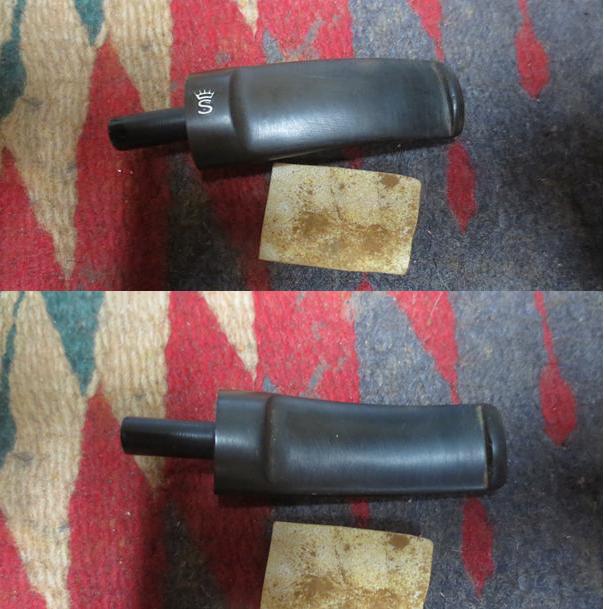
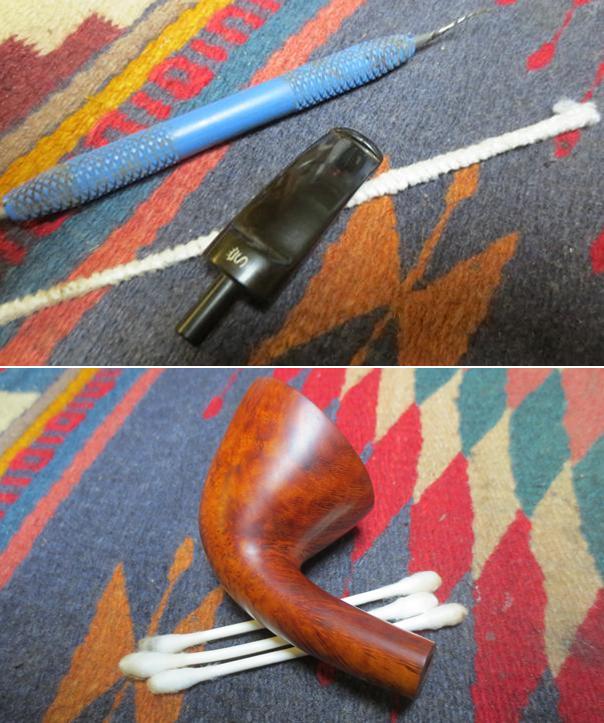
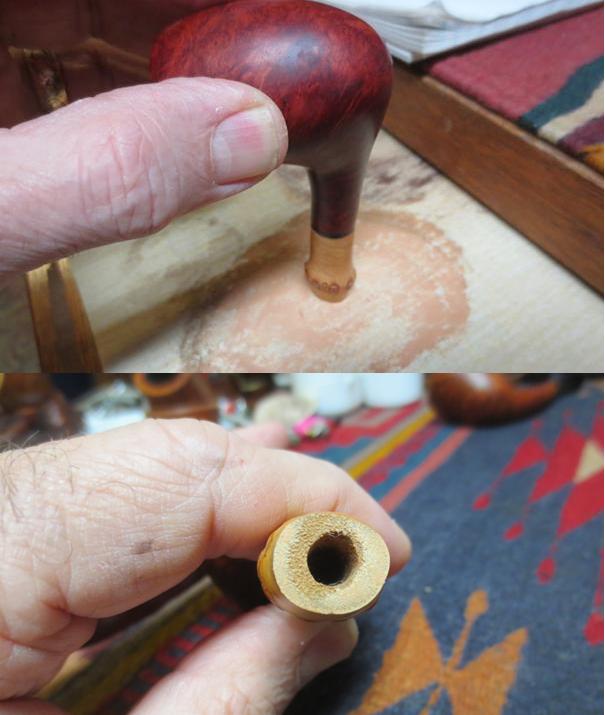
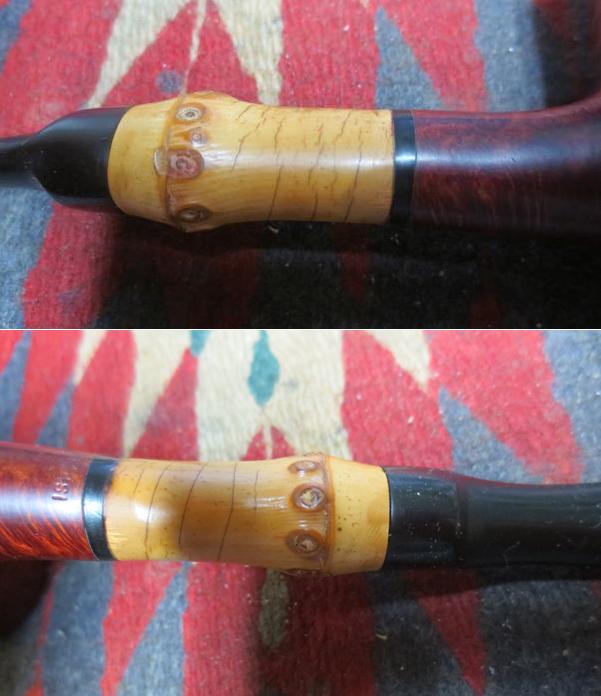
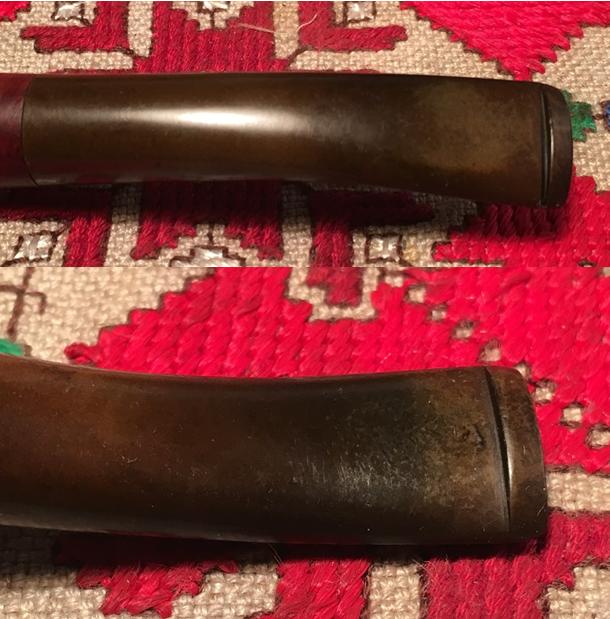
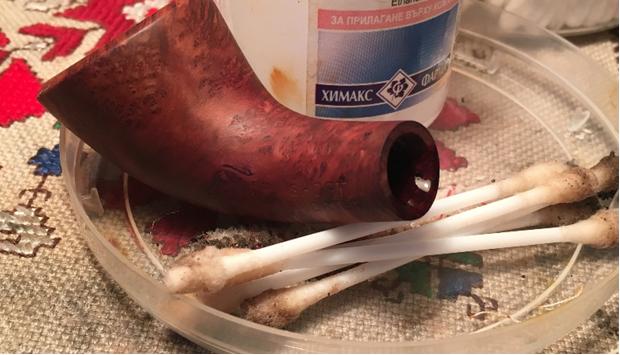
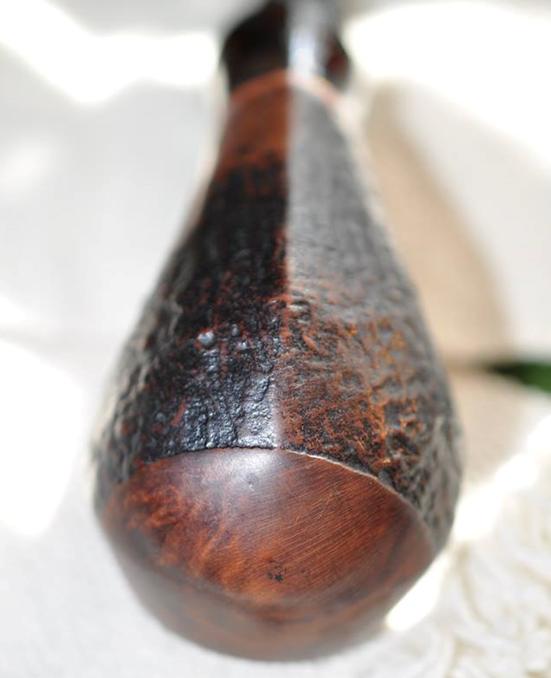
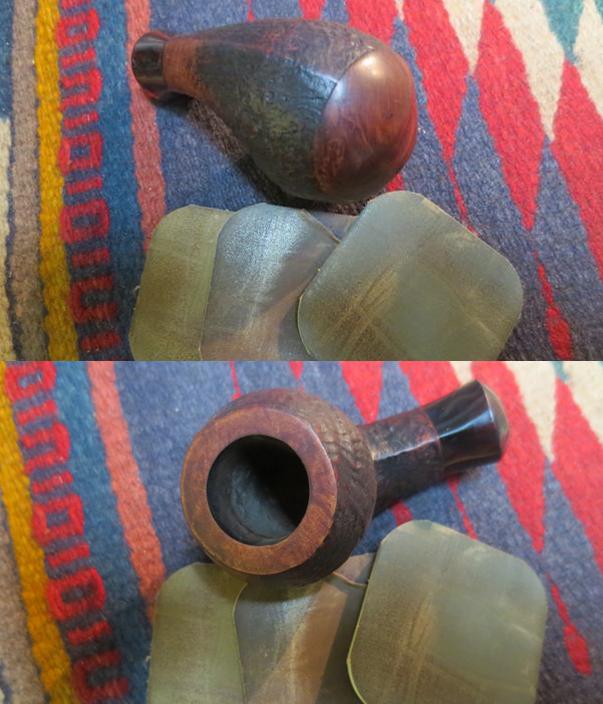
With the gourd clean and looking better than I expected, I move down to the bone tenon extending from the mortise of the 1907 McLardy Calabash and clean the externals with Q-tips dipped in isopropyl 95%.  I use the dental probe to dig into the threads of the tenon where compacted crud awaits.  The bone tenon cleans up without too much effort.  The pictures show the progress.cal32I set the gourd aside and fish the stem out of the Oxiclean bath.  I wet sand the stem using 600 grit sand paper to address the oxidation that the Oxiclean bath raised from the vulcanite stem.  Following the 600 grit paper I use steel wool 0000 over the stem to complete the initial stage of cleaning the stem externals.  From the externals, I dive into cleaning the internal airway and stem threads using pipe cleaners and Q-tips dipped in isopropyl 95%.  There was more gunk in the screw-in area than I expected and it put up some resistance.  The pictures show the progress.cal33 cal34
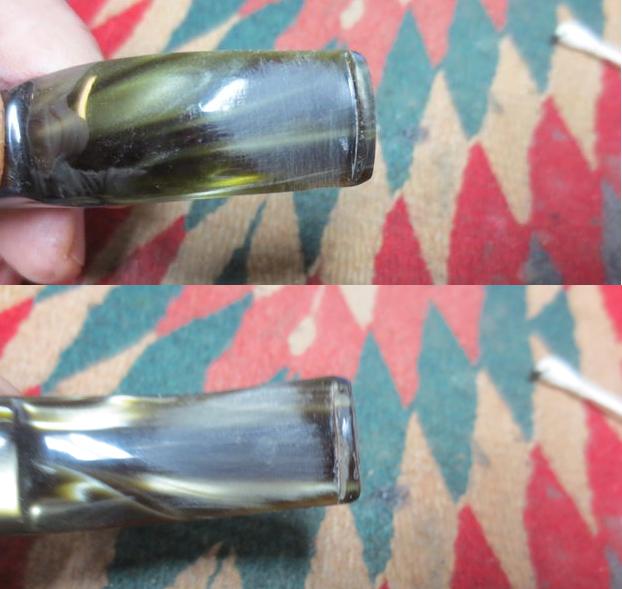
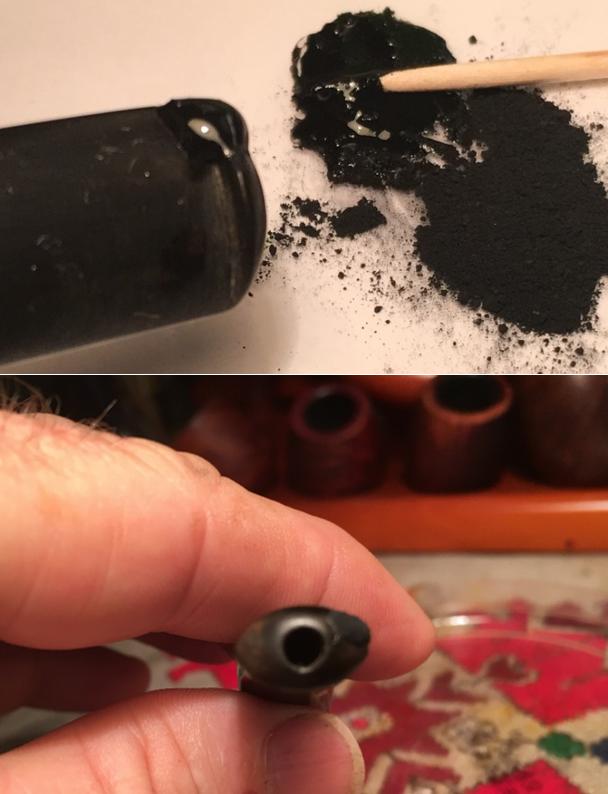
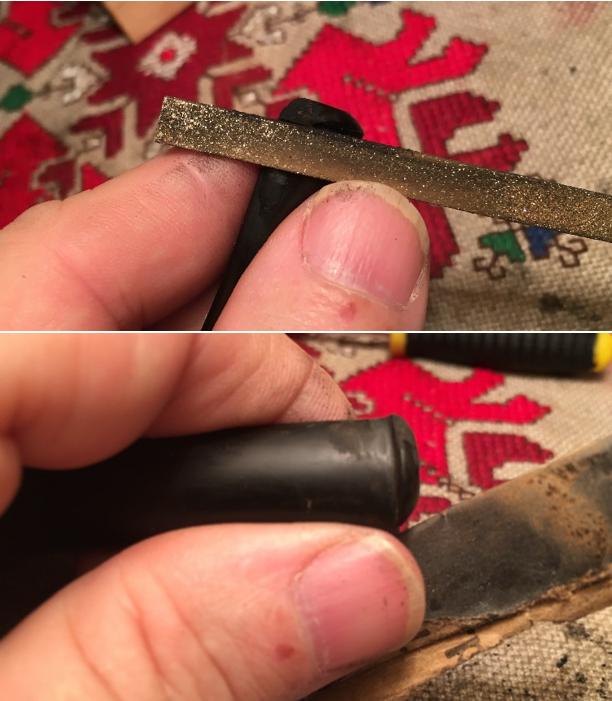
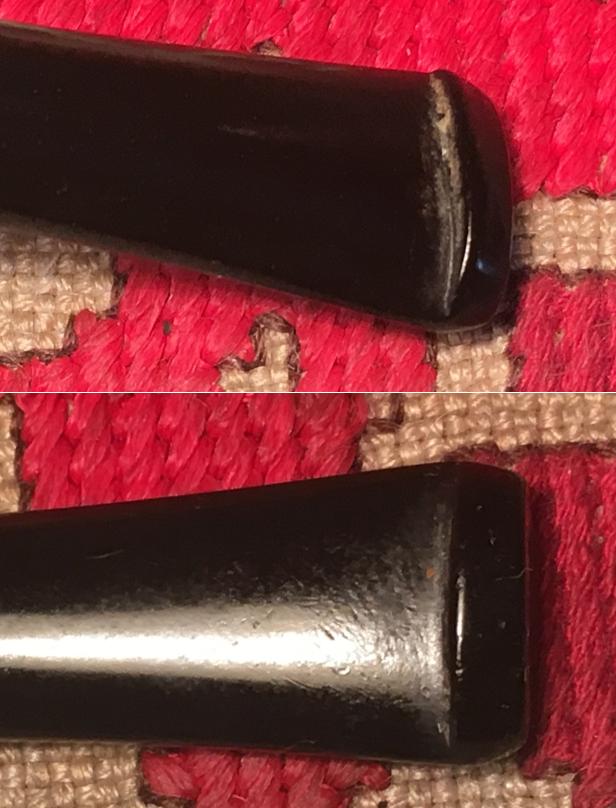
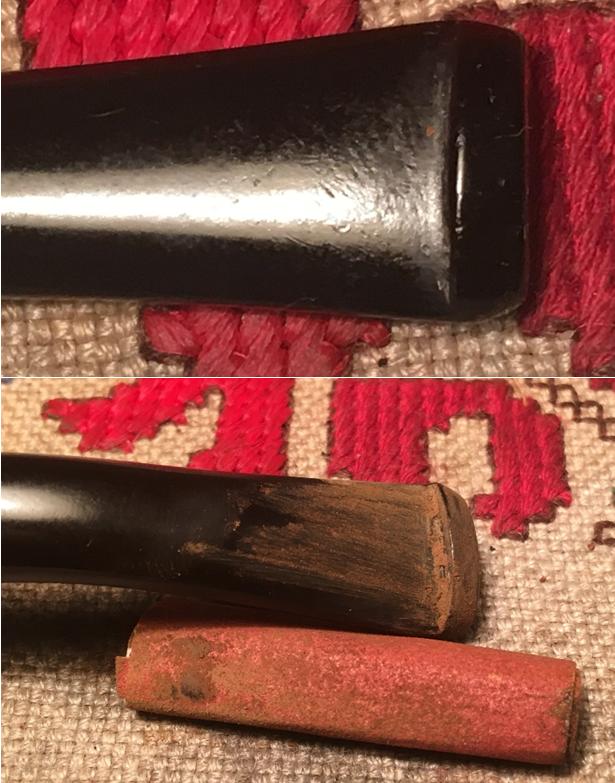
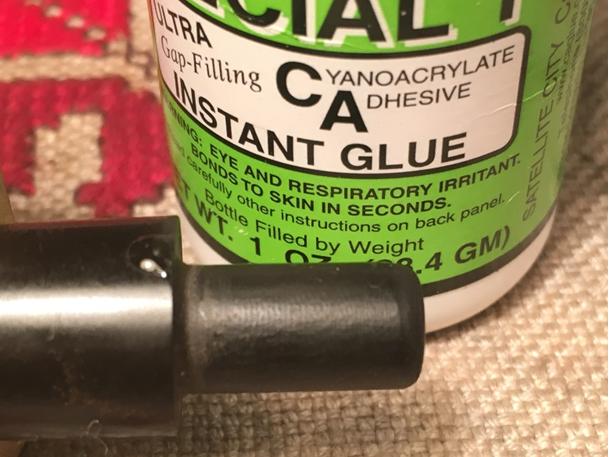
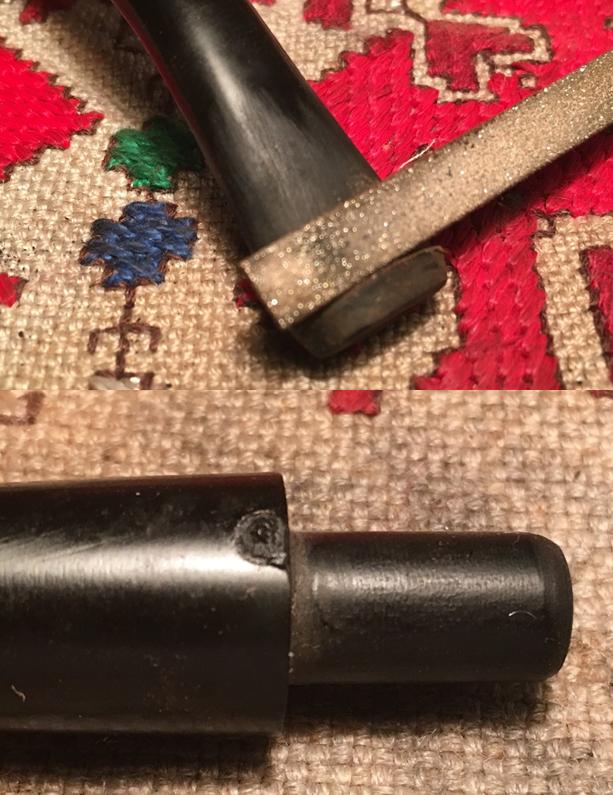
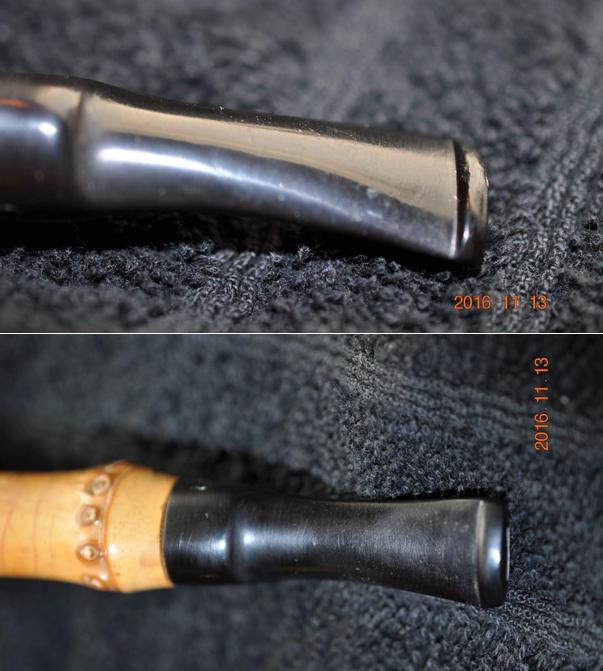
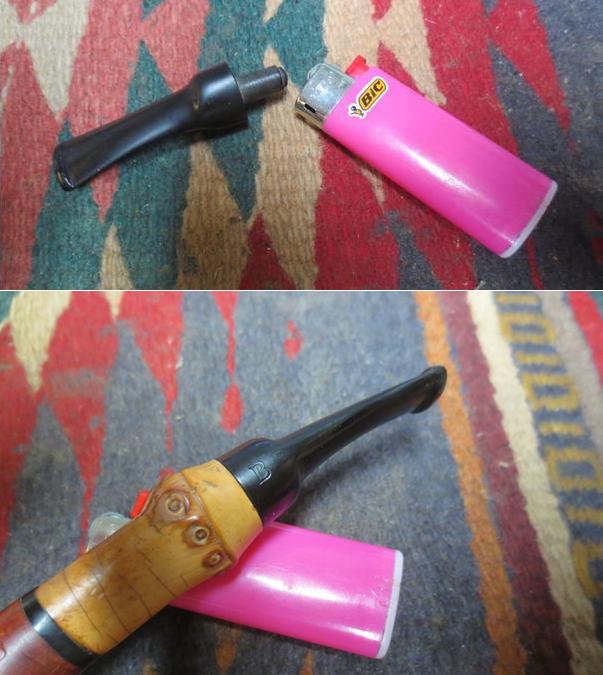
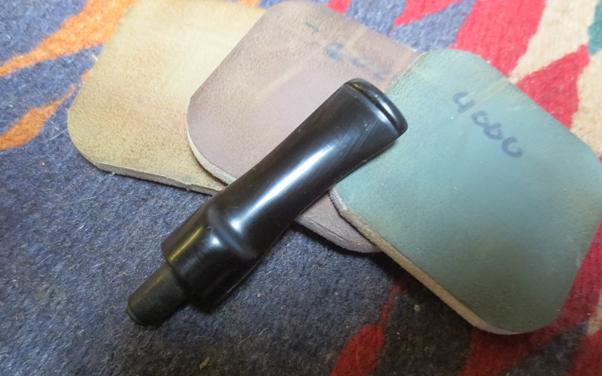
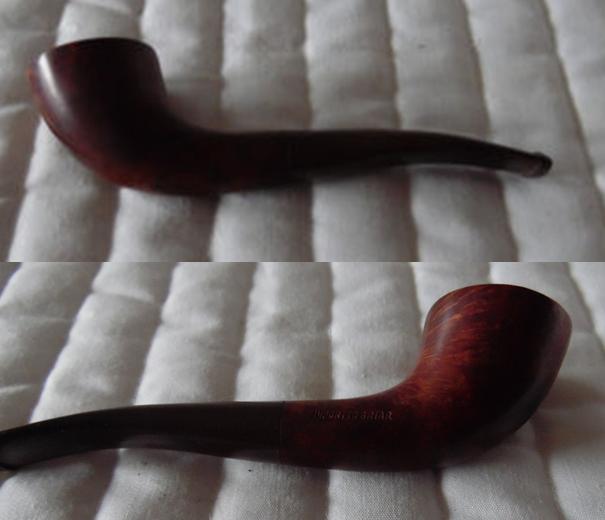
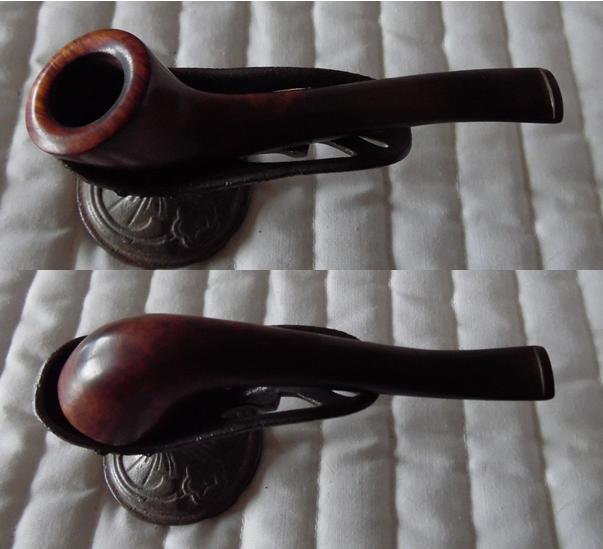
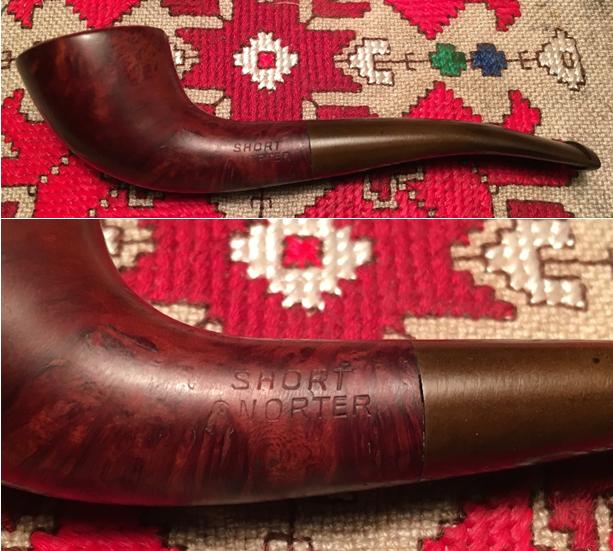
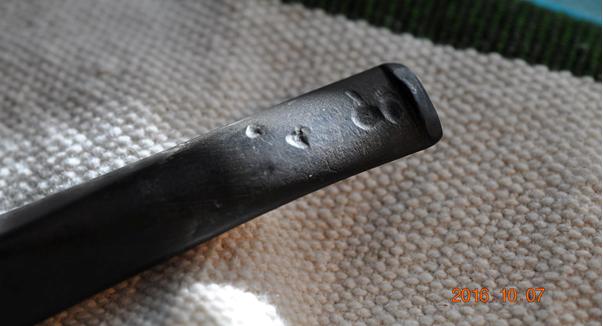
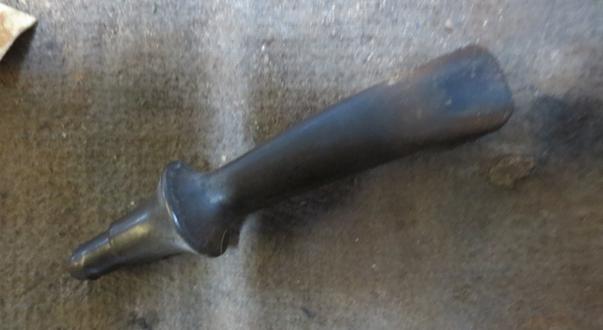
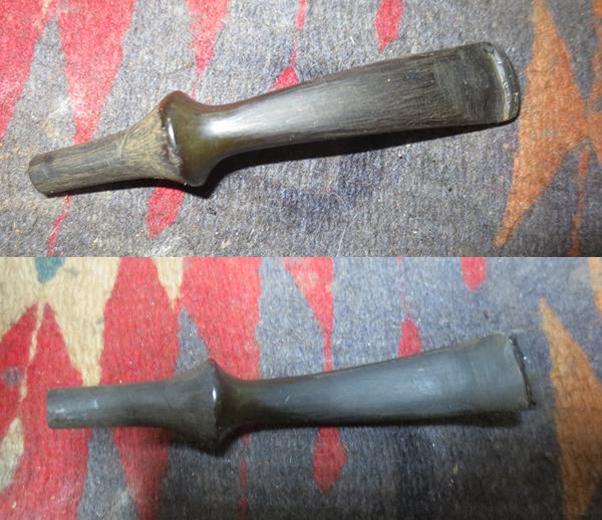
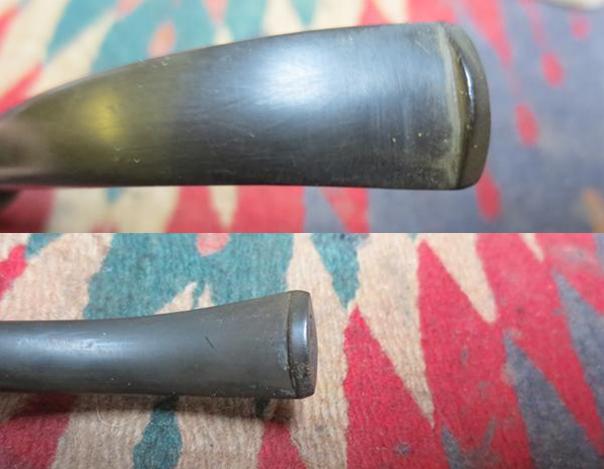
I turn my attention to the upper button in need of repair for a bite or dent that took out the right corner of the button lip.  As I’m looking at this button, I suddenly realize that in my small, but growing collection of pipes, I have no other pipes with this style of button – and I know that it has a specific name which takes a few minutes of searching to recall –  orific button meaning round.  Another novice was asking about orific stems in a thread on Pipesmagazine.com called Orific/orifice button/stem query where I quickly learned that this button was used primarily at the end of the 1800s and beginning of the 1900s.  By the 1920s the design pretty much had become a thing of the past.  I also found an interesting reflection on buttons that Steve did a few years back called, A View from the End of Stem.  There was also a divot on the edge of the stem next to the shank that needed attention.  Taking activated charcoal and Special ‘T’ CA Glue (‘T’ for ‘thick’) I mix them together gradually creating a charcoal putty that I apply to the button with a toothpick acting as a trowel.  I put more than needed to allow later sanding and shaping with a file and paper after the charcoal glue cures.  I also apply a dab of the mix on the divot on the other end of the stem.  I’m making progress on this orific stem!  The pictures show the progress.cal35 cal36
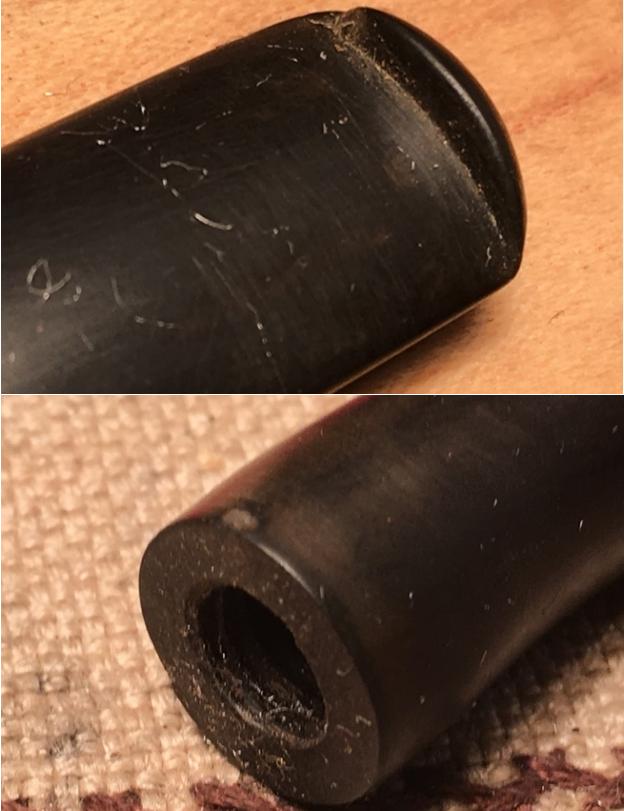
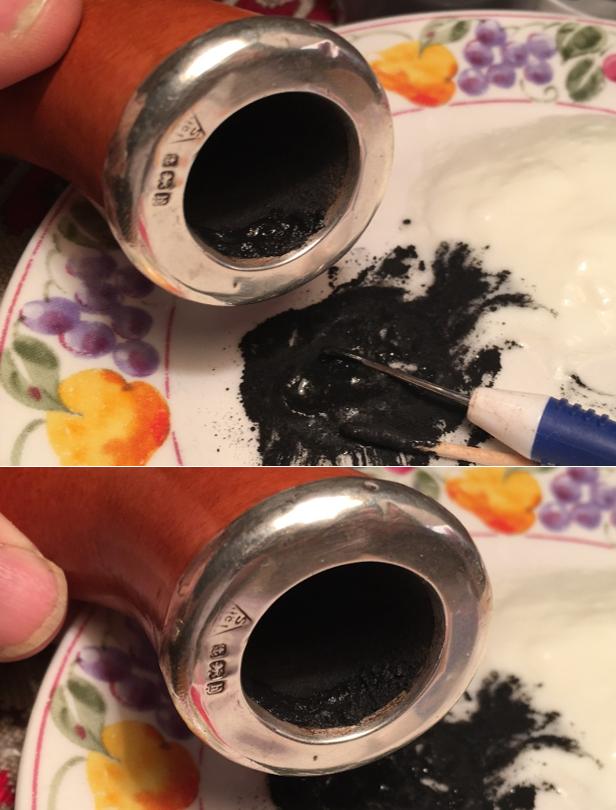
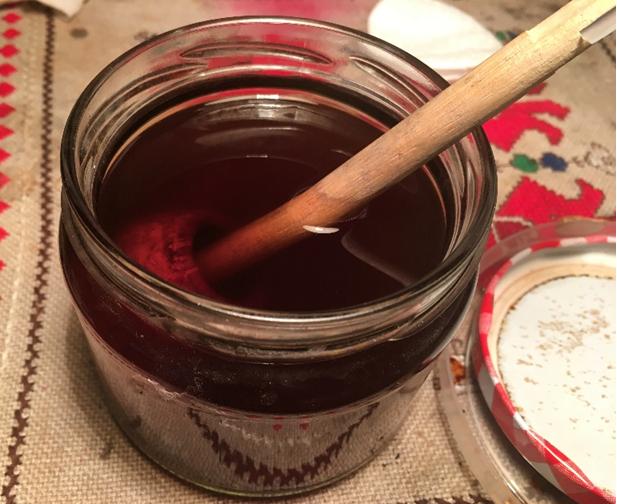
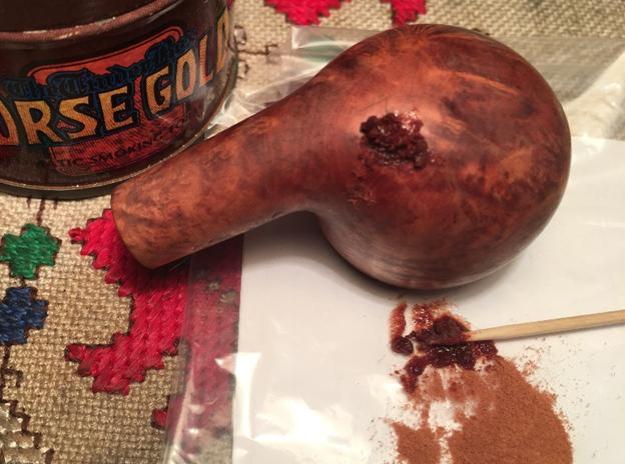
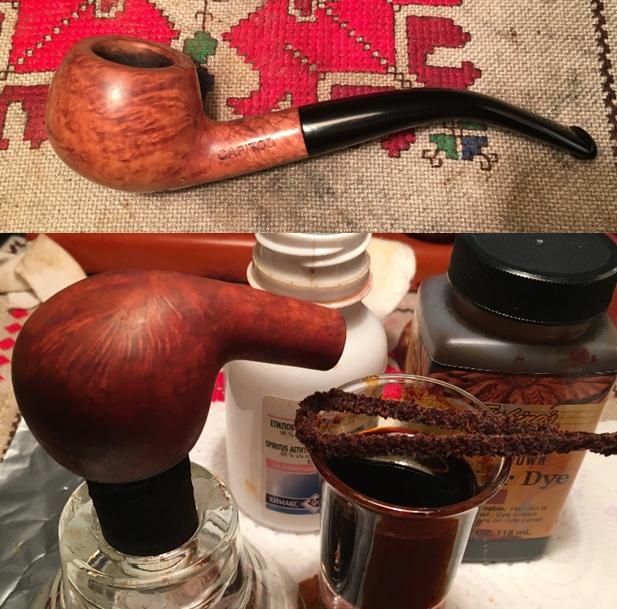
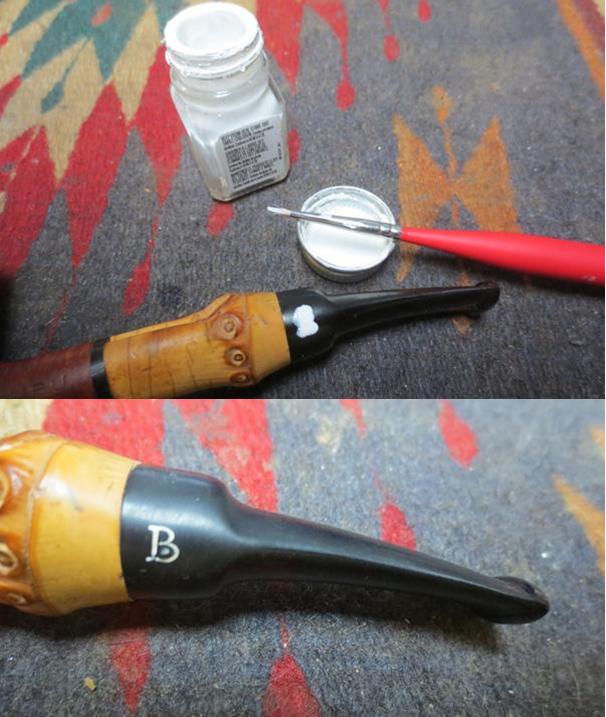
I received word from Gary that cigar ash is not in stock, but another recipe like Pipe Mud (a bowl coating mixture) arrived from Steve – taking powdered charcoal and mixing it with either plain yogurt or sour cream will create a paste to apply for the bowl gaps as planned.  Steve assured me that this brew would turn dark and not stand out.  So, with Bulgarian kiselo mlyako (sour crème) in hand I mix with activated charcoal gradually forming a paste.  It turns black immediately with the charcoal and it thickens.  I use a dental spatula and take small dollops and apply it to the gaps under the silver cap where the clay bowl is exposed – I’m going with clay and not meerschaum.  While the paste is still wet and malleable, I scrape the edge to clean the cap and create a bowl line.  I agree with Steve – this stuff looks like the protective layer covering the rest of the bowl.  The patch looks good.  The pictures show the progress.cal37 cal38
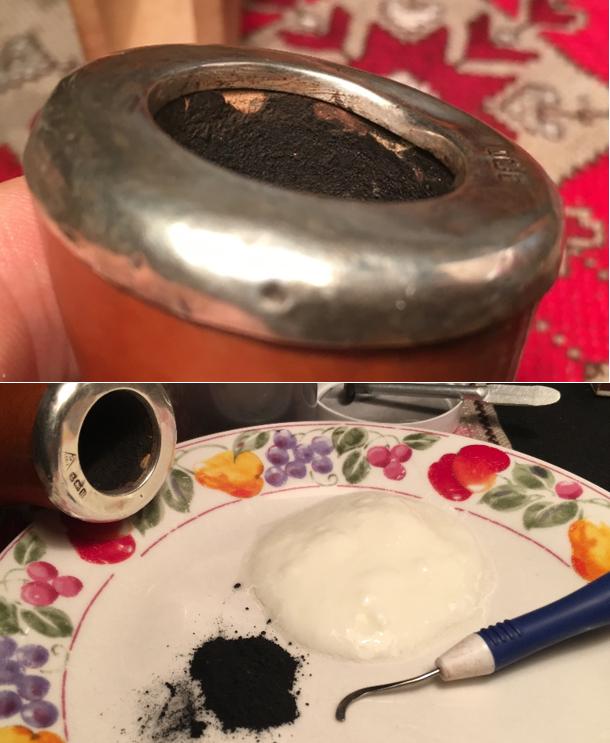
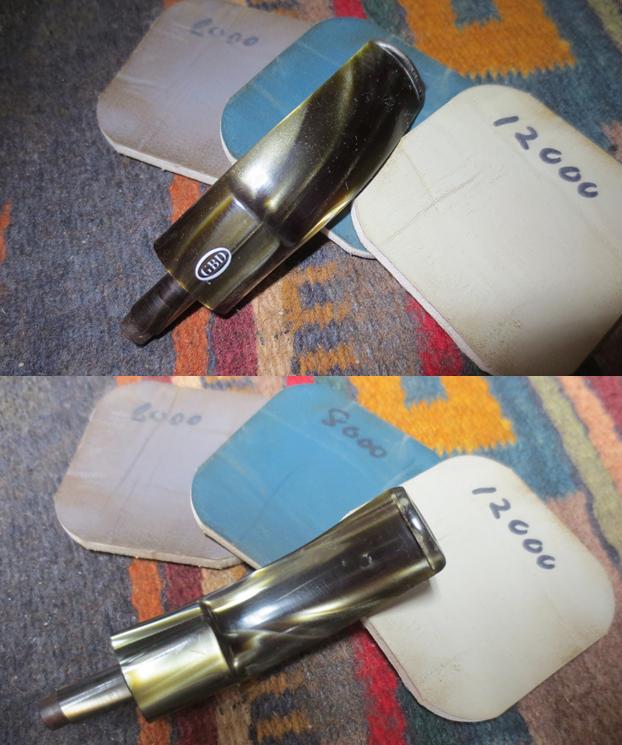
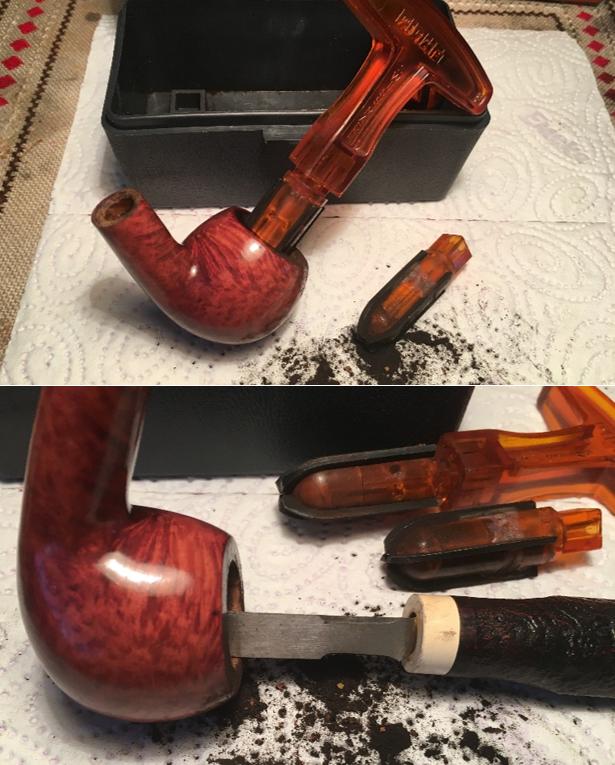
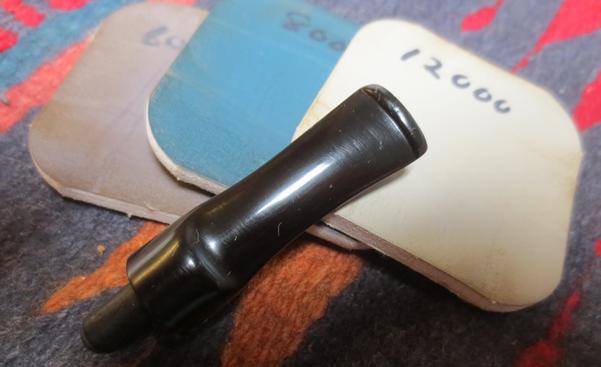
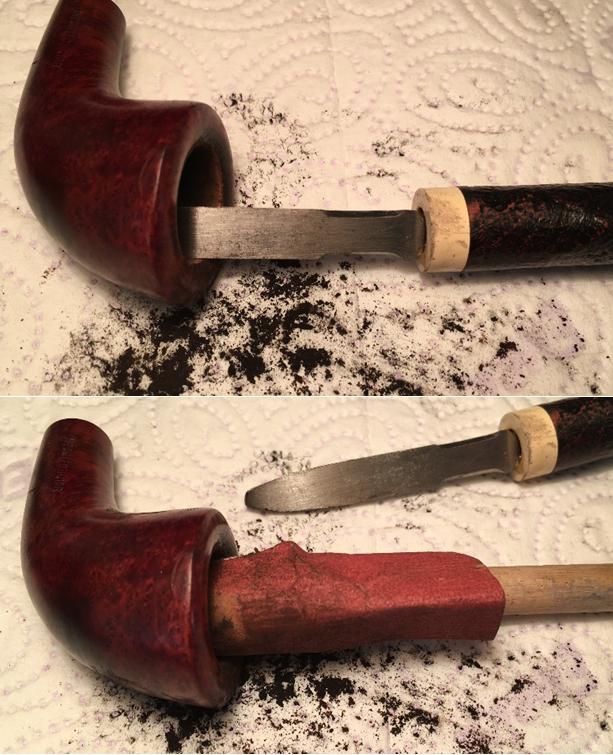
With the Charcoal/Sour Cream Patch curing, I put the gourd aside and retrieve the orific stem.  Using a flat needle file I sand down and shape the now cured, charcoal superglue to rebuild the missing hunk of lip.  I use the flat edge of the needle file first working on the backside or bowl side of the lip to establish a flush surface with the patch and native lip.  I take a picture with the file in place to illustrate this – it’s not easy taking pictures when you need both hands to hold things!  After the flat lip edge is established, I round off the patch to match the orific pattern.  I use 600 grit paper to do this (rather than the file or 240 grit) because I want to remove the excess patch slowly – almost allowing it to sneak up on the native vulcanite surrounding the patch.  After some slow, intentionally patient effort, the new button is looking very good.  I use 240 grit paper on the bit to erase file marks left over.  I also use 600 grit paper on the small patch on the other end of the stem.  I finish the patch and button rebuild by working the entire stem with 0000 steel wool, prepping the stem for the micromesh process that follows.  I’m pleased with the rebuild I see!  The pictures tell the story!cal39 cal40 cal41 cal42
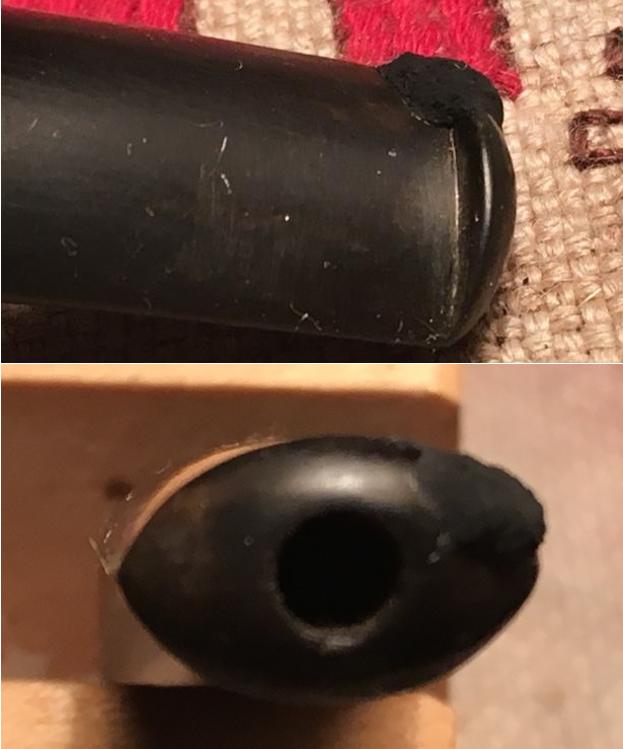
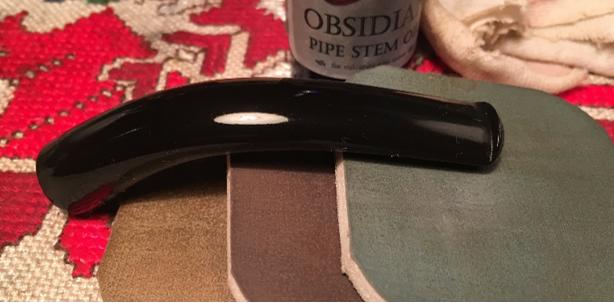
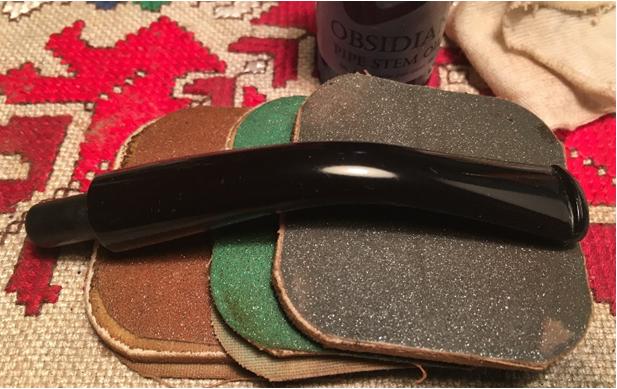
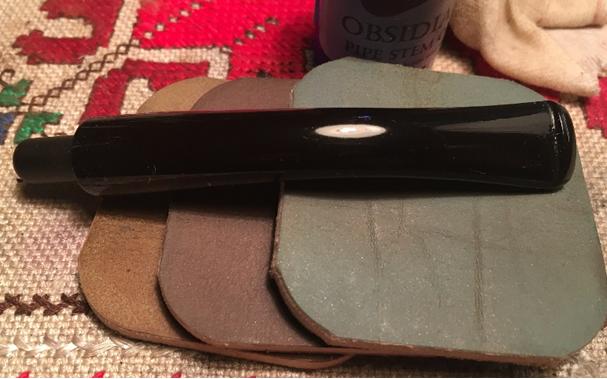
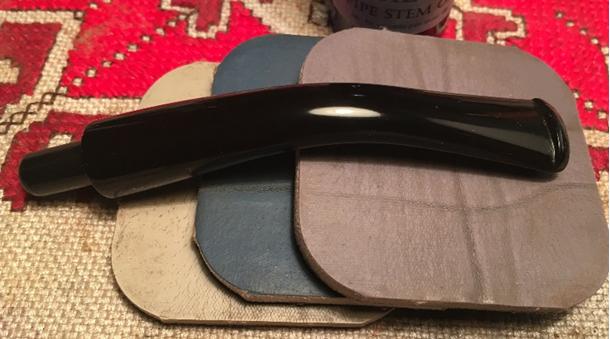
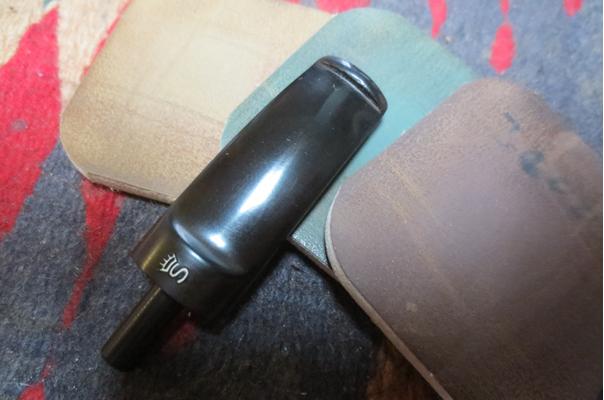
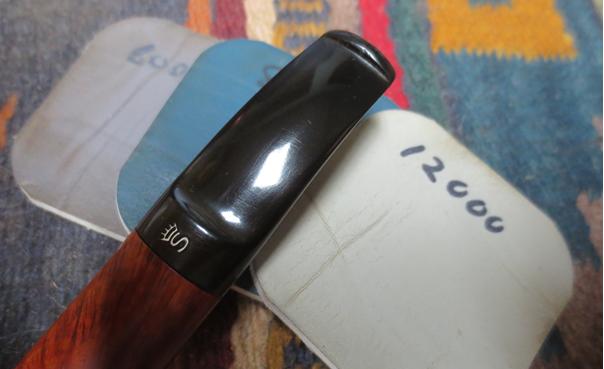
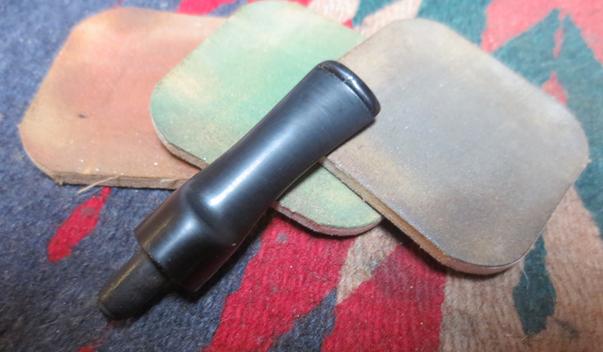
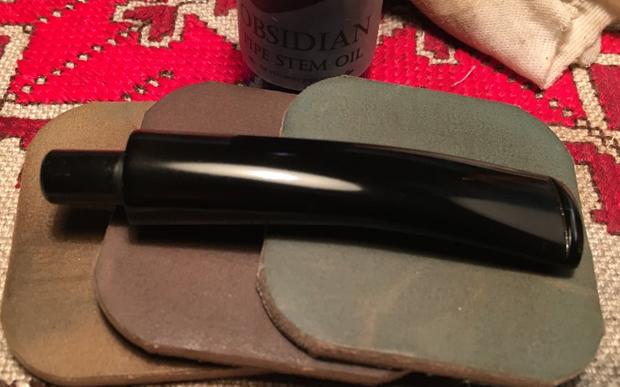
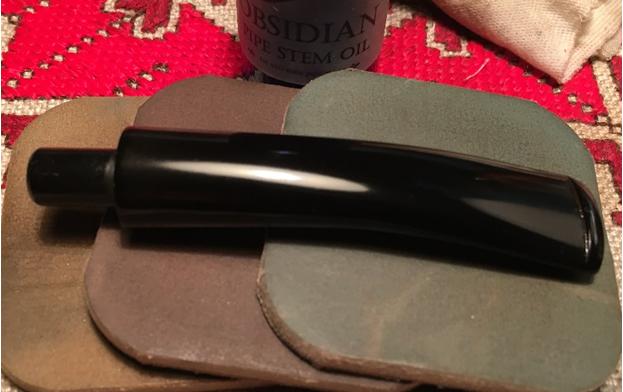
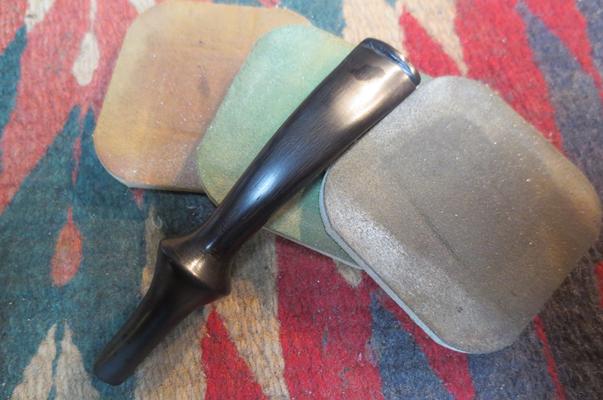
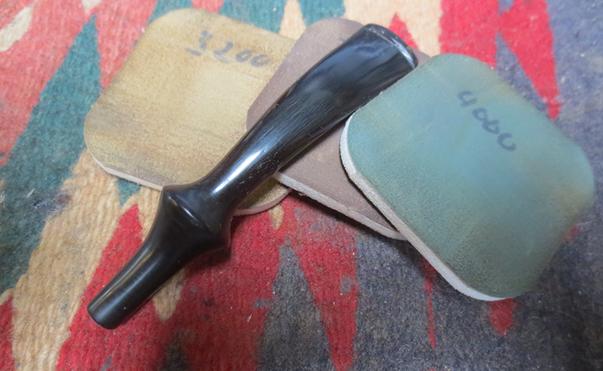
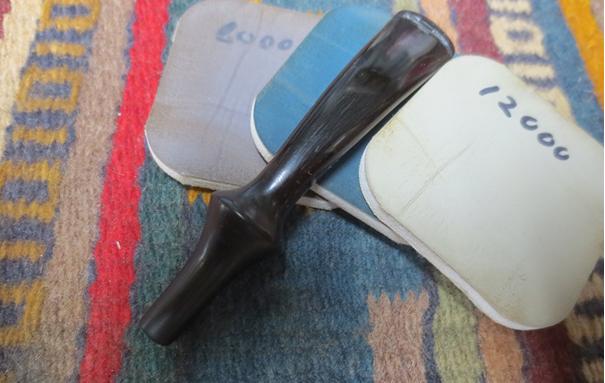
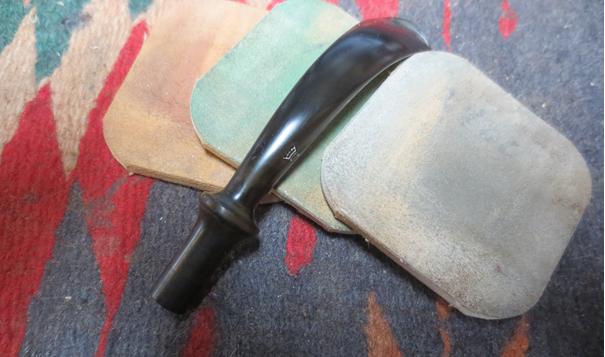
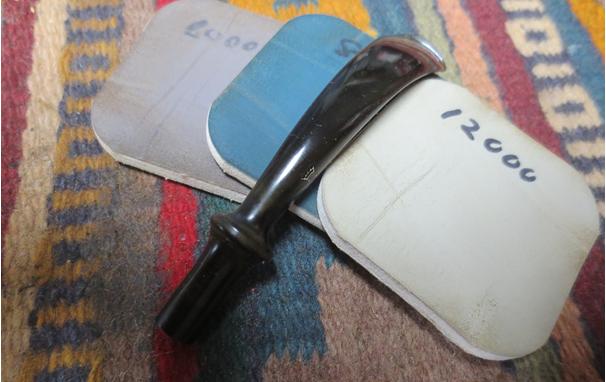
Continuing with the stem restoration, with micromesh pads 1500 to 2400 I wet sand followed by an application of Obsidian Oil.  With micromesh pads 3200 to 4000 and 6000 to 12000 I dry sand and follow each set with an additional coating of Obsidian Oil to rejuvenate the vulcanite stem.  The pictures show the progress.cal43 cal44 cal45
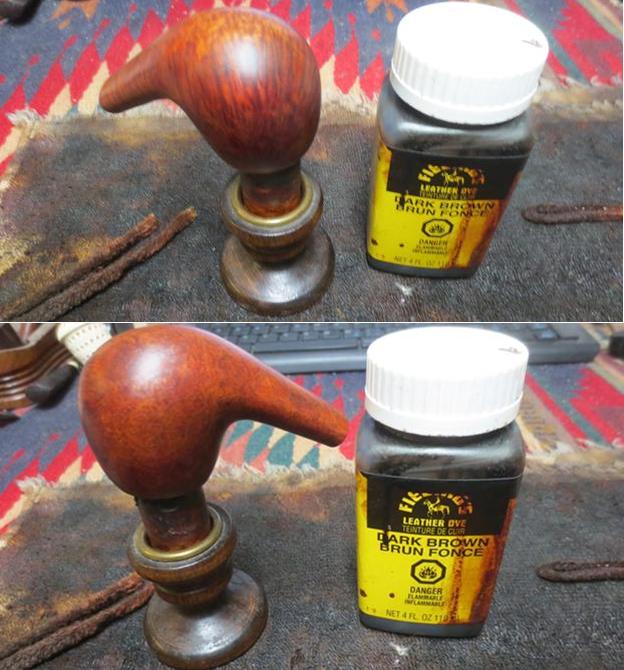
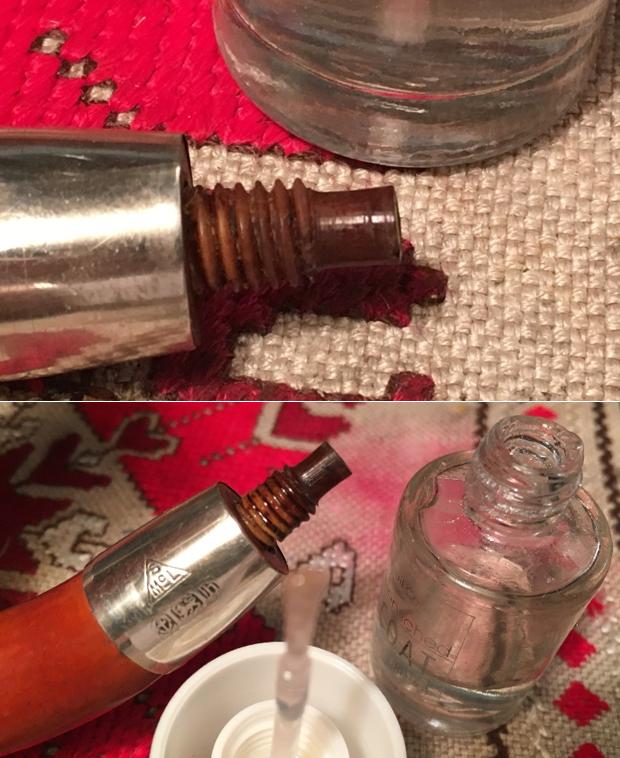
I reattach the stem to the gourd to get a fresh look at the stem alignment. Over time the bone tenon has worn down a bit.  Earlier I noted that the old stem was over-clocked a few degrees and I didn’t know yet if I would try to correct it.  I experimented with the feel and placement of the stem as I drew it to my mouth – giving me a sense of what would be most comfortable.  After all, it is my birthday gift!  I decide to attempt to reestablish alignment – or at least give it a shot.  Steve’s earlier email described painting the tenon with clear finger nail polish or super glue, allowing it to cure about 24 hours and then gently rethreading the stem.  Emphasis on the ‘gently’ because too much torque applied could break the tenon.  Borrowing my wife’s polish, I paint a thin layer on the tenon and put it aside to cure.   cal46 cal47
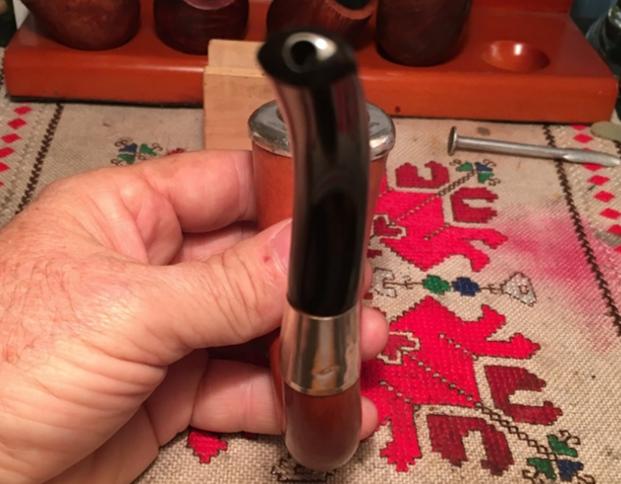
A day later arriving home from work, I’m anxious to reattach the stem to the bone tenon to find out if the fingernail polish works to tighten the stem – to ‘unclock’ the turn of the stem only a few degrees.  I screwed the stem slowly on to the bone tenon and at first, I detected no difference in the pressure.  When the stem started to arrive at the critical point I felt the tightening – requiring a bit more torque.  I did not force the stem but reverse the turn a bit, then re-torque a bit more, then back off again, re-torque, then finally it tightened sufficiently.  Steve’s warning about not forcing things came from his own experience of unexpectedly cracking a brittle bone tenon in a Gourd Calabash restortation.  I could not believe it – it actually worked!  The stem is now perfectly lined up with the gourd stummel.  Amazing!  The picture tells the story!cal48
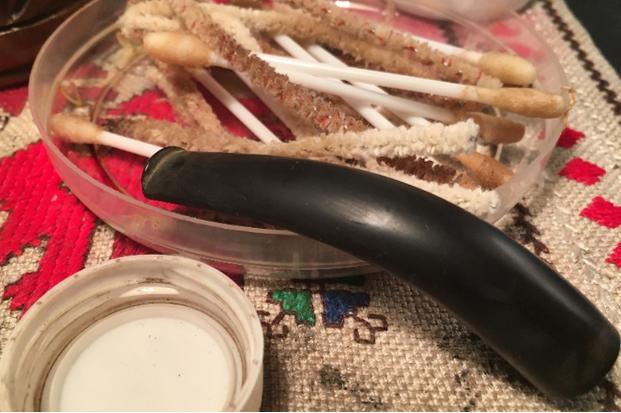
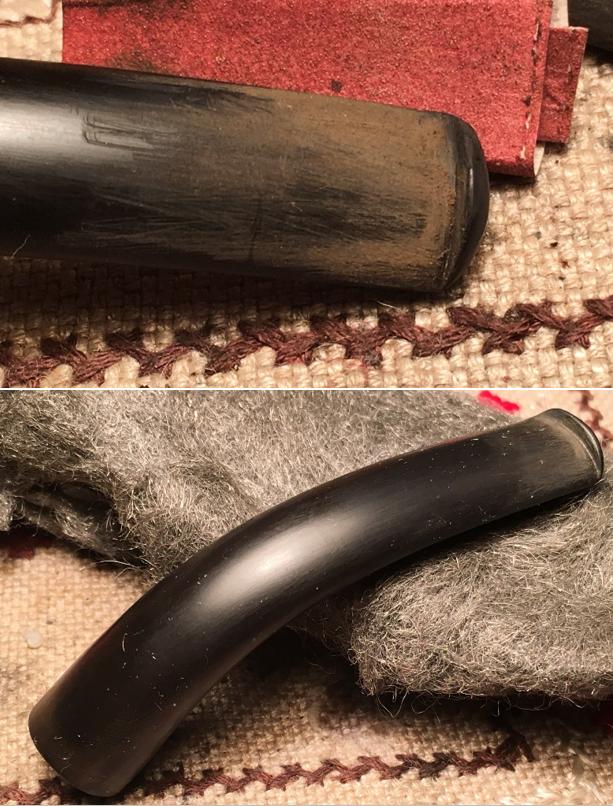
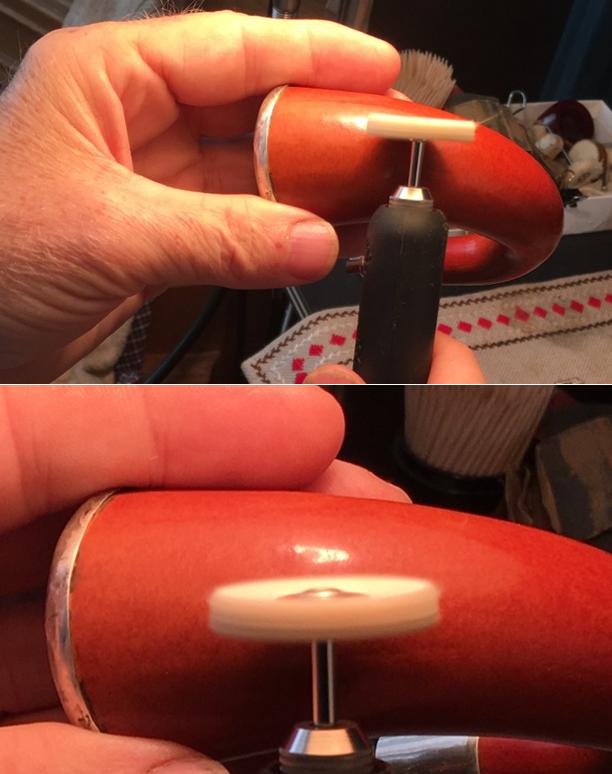
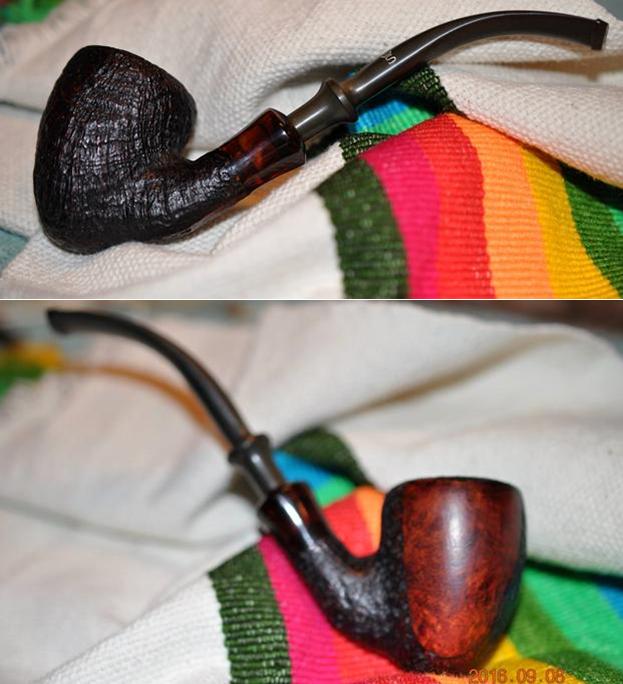
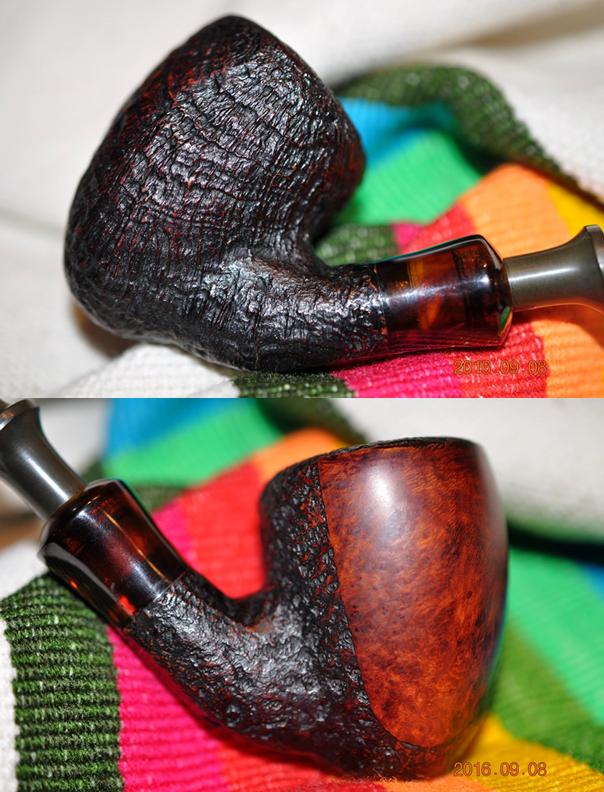
We’re now in the home-stretch and my mind has started wondering about which tobacco I will use to inaugurate the next life of this venerable 109-year-old Gourd Calabash.  Suggestions??  Taking cues from Charles Lemon’s post, Freshening an Andreas Bauer gourd Calabash, I take three unused Chinese purchased Dremel cotton wheels for use on the Calabash’s gourd and stem.  I use the first to lightly apply White Diamond to the gourd surface.  For you who use a Dremel for polishing, I discover that the Dremel techniques I use (See Dremel Tutorial) with briar works quite well with the gourd.  Putting the Dremel on the lowest RPM setting, I apply the White Diamond, keeping the cotton (not felt!) wheel moving over the surface while I rotate the gourd keeping the sheen of the lamp in focus on the gourd surface.  This sheen acts as my ‘headlight’ enabling me to see the rippling movement of the compound across the gourd’s surface – the same way as with briar.  As I methodically move over the gourd surface in this way, I also catch blemishes or marks in the surface that I address directly, yet lightly with the Dremel’s cotton wheel.  With my wife’s help, after the first picture showing the tools employed, pictures 2 and 3 illustrate the ‘sheen technique’ that has worked very well for me.  I am careful to avoid the silver cap and ferrule as I apply the compound.cal49 cal50
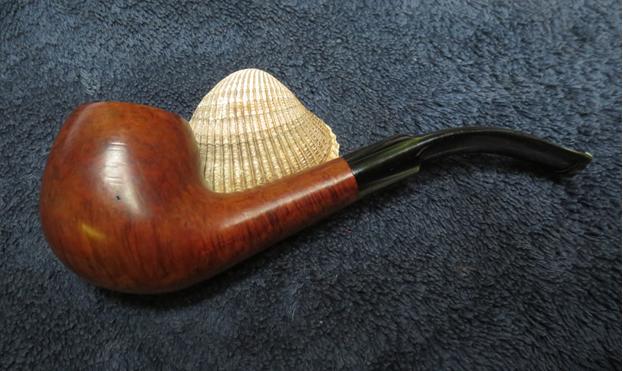
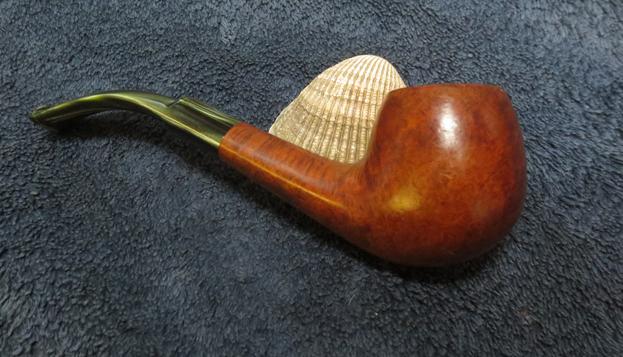
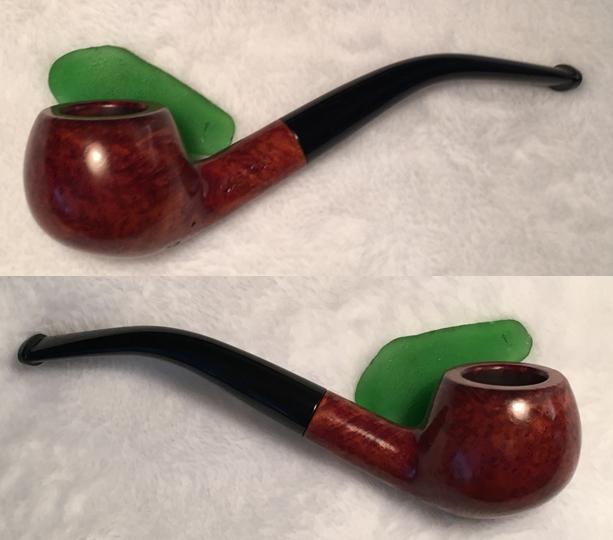
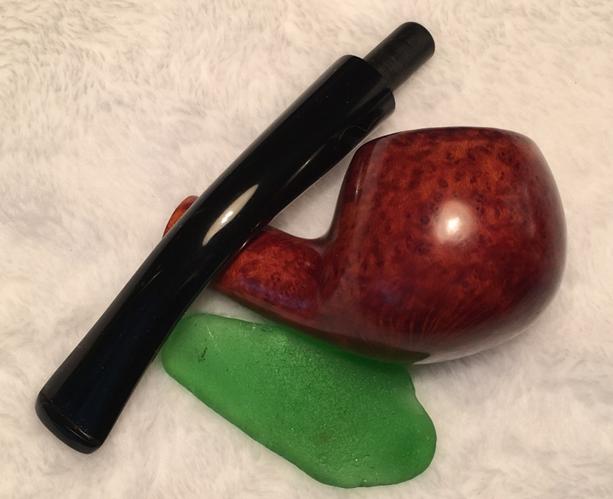
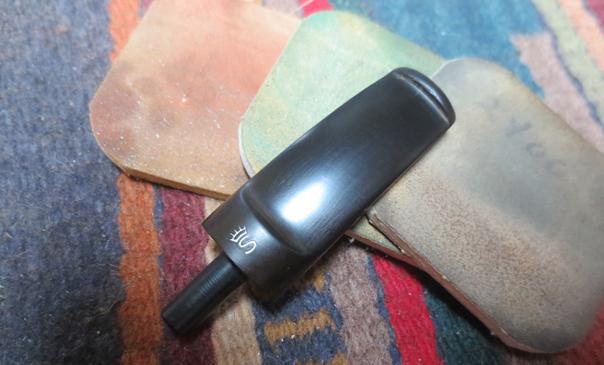
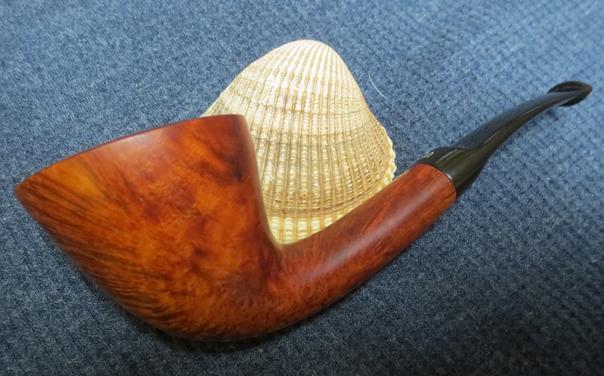
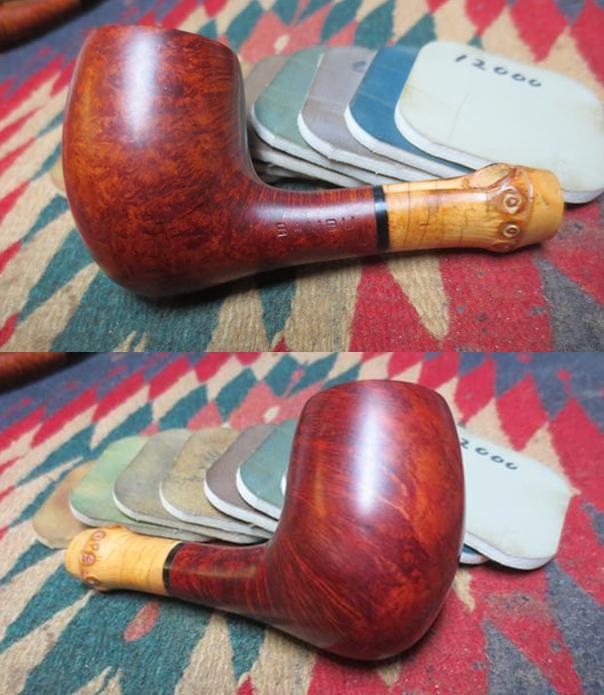
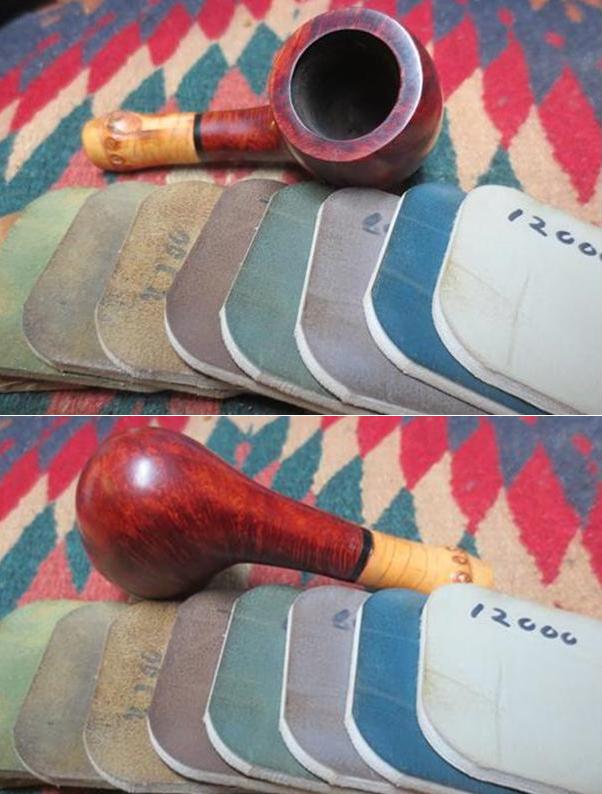
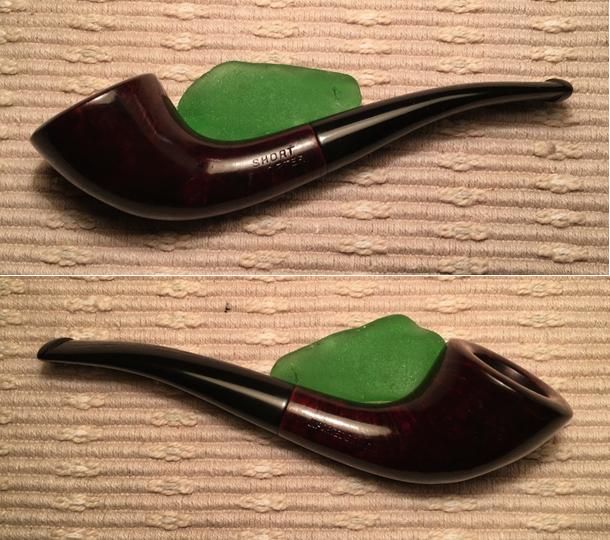
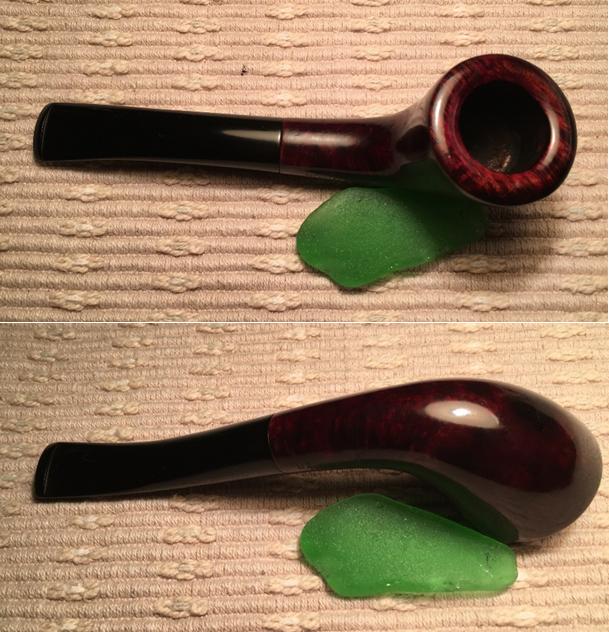
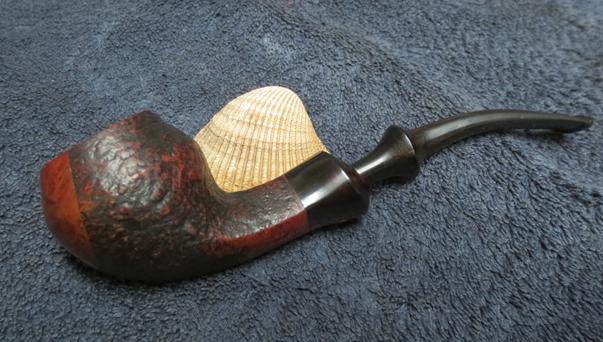
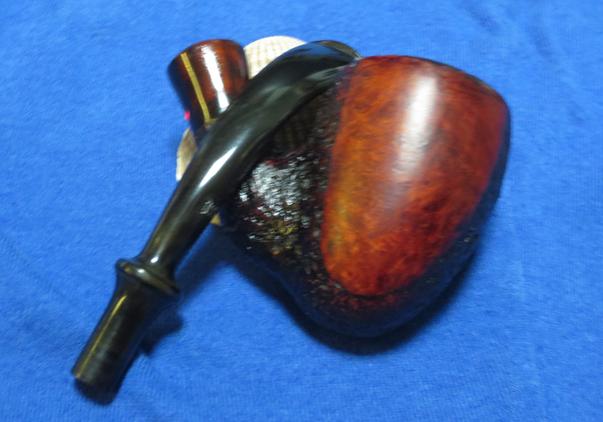
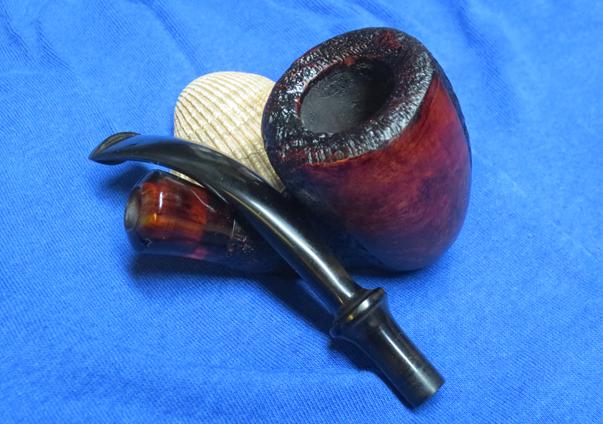
After completing the White Diamond application, I wipe down the gourd with a clean cotton cloth to remove the left-over compound powder.  I now mount in the Dremel’s hand-held extender another clean cotton wheel and apply a number of coats (3) of carnauba wax to both the gourd and stem surfaces.  With briar, I increase the RPM’s of the Dremel by one number to assist in liquefying the wax and spreading it over the surface.  I’ll try this on the gourd to see how it behaves.  It went well.  In fact, the gourd seems to ‘drink up’ the carnauba wax and I find that I am reloading the wheel more often than with briar.  And, “Oh my!”  I didn’t expect the luster that gradually reflects back at me as the wheel travels over the surface!  What struck me was that the Calabash almost started taking on the appearance of a porcelain display piece.   Completing the carnauba wax for both gourd and stem, I carefully shine the silver cap and ferrule with my wife’s Weinman Silver Polish – not spreading it to the other surfaces.  I completed this restoration with a brisk buffing of the entire pipe using a microfiber cloth carefully!  I had images of the pipe slipping out of my grasp and skidding along the floor…. Thankfully, this did not happen!  This buff brings out the depth of the shine by blending the gourd, silver and orific vulcanite stem.

Since my wife and I will be going to the home of our daughter and son-in-law in Denver for Christmas, the benefactors of this amazing birthday gift, I will hold off the inaugural smoke of this restored 1907 McLardy Gourd Calabash treasure until I can share it with them.  Indeed, he is a venerable, distinguished pipe and I’m privileged to be entrusted as the current steward, but of course, not the last.  My next project is to figure out an adequate stand that will handle this calabash!  Thank you for joining me!cal51 cal52 cal53 cal54 cal55 cal56 cal57 cal58 cal59