Tag Archives: beveling the inner edge of the rim

A Pre-Republic Peterson System Standard Reborn


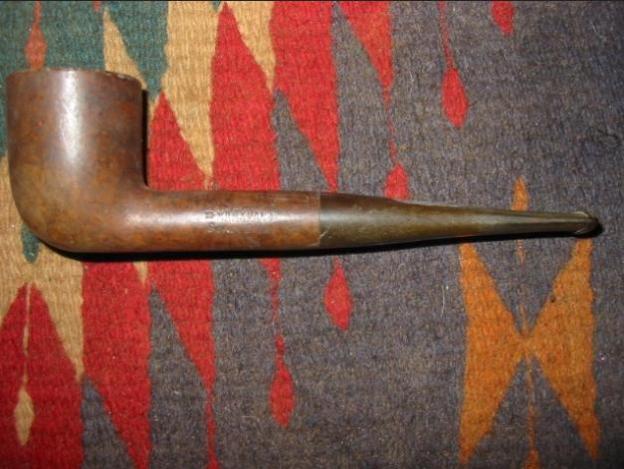
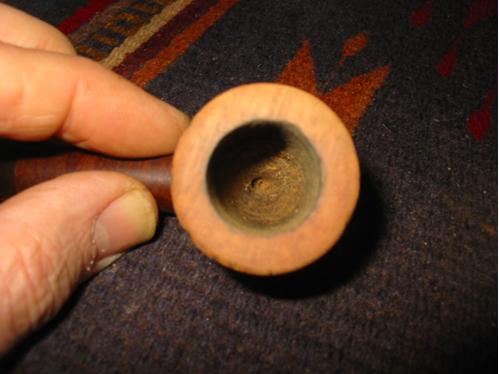
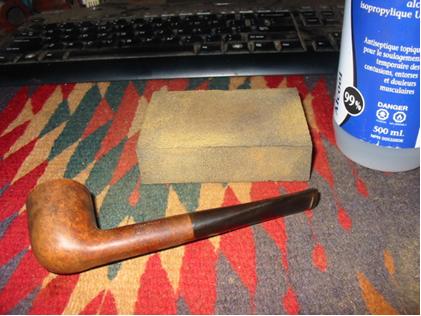
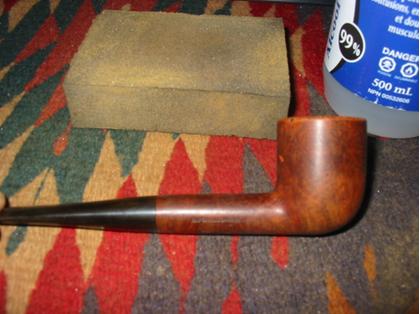
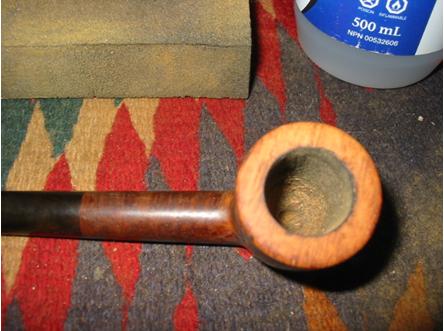
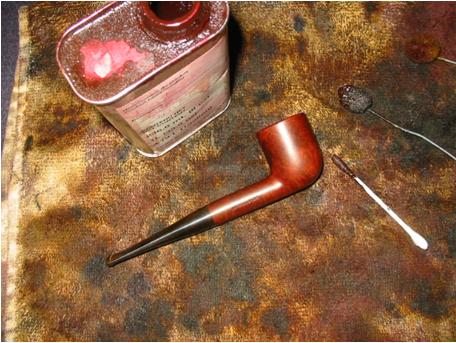
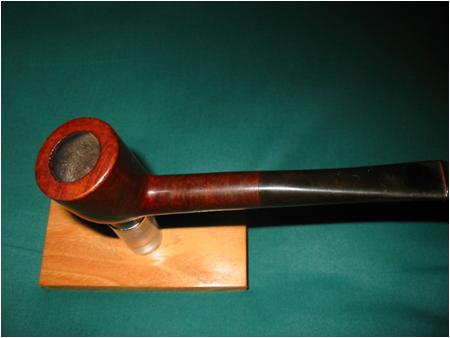
A month or so ago I was trolling eBay and ran across what I thought might be a Pre-Republic Peterson System 313.  I am not very learned in the different eras of many pipe companies but was fairly certain if I read the no-so-clear nomenclature right this was indeed a Pre-Republic era Peterson. Here are the photos the seller provided:

The pipe looked to be in pretty good shape so I thought I would take a shot at it. The seller had a Buy It Now or best offer price on it so I submitted my offer and went to do some research on the nomenclature in case my offer was accepted.After searching on Pipepedia and Pipephil I was sure that the pipe was indeed a Pre-Republic model. (The following photo shows the nomenclature and the small defect in the briar that probably kept it from being a higher grade pipe. The stamping reads “Made” on the top of the circle, “Ireland” in the bottom, and “in” in the center. These photos were taken by me after the restoration.)

A few hours later I received a counteroffer from the seller which I accepted. The seller was in Peru so now it was time for the dreaded wait.

When the pipe finally arrived I was eager to tear into the box to see what I had! When I took the pipe out of the protective wrapping my first thought was “Wow, this thing is tiny!”. I have one over System pipe that is an XL315, a pretty large pipe. I didn’t realize the 313 was going to be comparatively diminutive in size! I was pleased to see that the nomenclature was stronger than I expected it to be and that the pipe was in pretty well as-shown condition; there was a deep burn on the front, inside of the bowl that I didn’t make out in the photos. Here are a few pictures I took upon getting the pipe unpacked.

I dropped the stem in a warm Oxiclean bath while I began to clean the dirt and grime from the stummel. As I removed years worth of crud with cotton pads and both alcohol and acetone I began to really like what I was seeing! There were a few issues showing up now, but not anything too major: the rim cleaned up well but was burned worse than I thought, the nickle band had loosened over time and move up a little and was stained with tars (I think). All of these things were in my mind a good trade-off for the better than expected stamping though.

When I took the stem from the Oxiclean bath I scrubbed it down with a magic eraser to take off the loosened oxidation. Here’s what the pipe looked like at his stage; you can see the line where the band has moved over time.img_0207It was now time to start cleaning the internals of both the stem and stummel.

As I mentioned, this pipe has a rather small bowl; my smallest cutter on my PipNet set wouldn’t fit inside the bowl to ream it! The cake was hard but not terribly thick so I used the blade on my Sheffield pipe tool and some 320 wet/dry paper to ream back to bare briar. while I was doing the reaming I found was the burn on the rim was soft and would require more than just topping it. I decided to finish the internals before turning my attention to this problem.

I took a cotton swab soaked in alcohol and ran it through the stem; the P-Lip stem has a graduated airway, starting out very open and narrowing as it get closer to the button. As I turned the stem over to scrub the inside with the cotton swab a horrible goo ran out of the P-Lip!img_0200Needless to say, the pile of cotton swabs and pipe cleaners were only a representative sample of what it took to get the stem clean. And the well/mortise and airway of the pipe was equally nasty’ I really hadn’t expected this given the maintained cake in the bowl. I stuffed a cotton ball in the bowl and a cotton swab in the air hole, filled the bowl with alcohol and left it to sit over night. I completed cleaning inside the stem before going to bed.

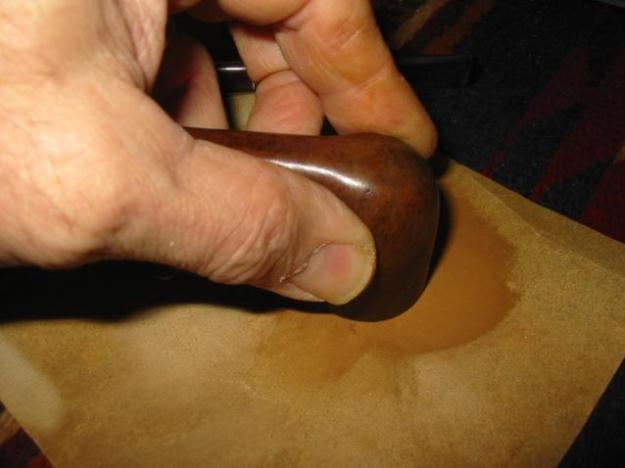
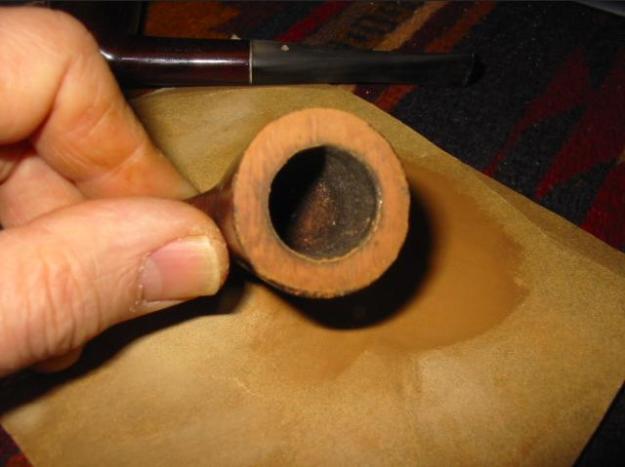
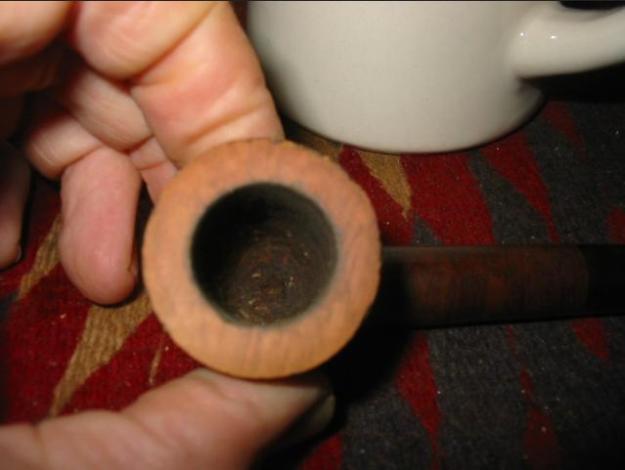
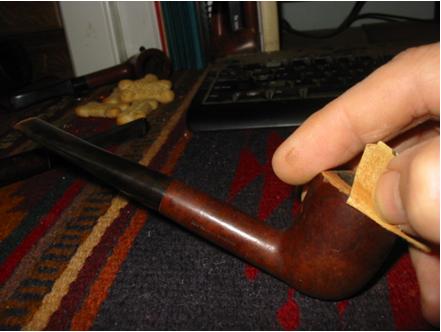
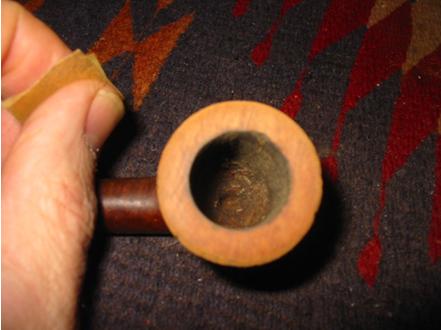
The next day I removed the tar-stained cotton ball and swab from the stummel and  began to work on the burned rim issue after the pipe had dried an hour or two. I began by topping the bowl with 320 wet/dry sandpaper, checking my progress often. There was another smaller darkened area I wanted to remove, too, if I could, but I didn’t want to remove more briar than I had to.When the smaller spot was gone and the worse spot was improved I wiped the bowl down with alcohol to clean any remaining dust from it’s surface and began to polish it with micro mesh. I got up to about 2400, I think, and decided the burn was still too noticeable. I went back to work on the rim with a folded piece of 320 grit paper and worked a bevel on the inner edge of the bowl, then repeated polishing with micro mesh as before. The results were much better to my eye.

I moved on to the stem now, setting the bowl aside for later. The stem wasn’t in particularly bad shape, mostly just oxidized, as some of the previous photos show.There was a couple of deeper tooth marks on the bottom and top near the button that had to be filled. I sanded the oxidation off using 320 grit paper then cleaned the stem well with alcohol on a cotton pad. I picked at the deepest dents and the button “steps” with a small “toothpick” knife I have to make sure all the oxidation was out of the dents and grooves. After giving the areas a spray of CA glue accelerator I applied clear CA glue to both spots, gave it another spray and then let it sit a few hours to cure well; I didn’t want the glue to run while it cured or I might have skipped the accelerator altogether. (I didn’t remember to take many photos during this process.) After the glue cured I used needle files and sandpaper to smooth and better blend the patches, after which I polished the stem with the full range of micro mesh pads, 1500-12000.

Now that the stem and stummel were fully ready, I moved to the downstairs workshop for the finishing touches on everything. I began with my heat gun, warming the band to expand it and press it back in place; I pressed it into an old buffing wheel, using the center hole to help fix the slight out-or-roundness that had gotten in the band, too.

Next I used a dark brown stain pen to re-stain the bowl. I covered it entirely, as evenly as possible, twice and let it dry for a little while before using another alcohol dampened cotton pad to wipe off some of the excess to allow the grain to shine through. Next up was buffing with the Dremel. I used brown Tripoli on the stummel and nickle band first and then white diamond and blue compound on both the stummel and stem. I finished up with a few coats of carnauba wax on the entire pipe and a hand buff with a micro fiber clothe to raise a nice shine. I am really pleased with how the pipe came out overall and think the beveled rim idea to fix the burned area blended in very well. Before you see the finished pipe I must confess the first bowl I smoked in it was horrid! I had to go back and do a second alcohol treatment and I soaked the stem in alcohol and cleaned it again, too. The second cotton ball was even more tar-stained than the first! I had to re-wax and buff the whole pipe, too. But the next bowls proved it was well worth the effort as the pipe now smokes dry and sweet!

Reworking a Burned Rim on a Savinelli Oscar Lucite Prince


Blog by Steve Laug

My brother bought me a beautiful little Savinelli Prince when I was visiting. It is stamped Oscar Lucite on the left side of the shank and has the Savinelli shield and shape 313 over Italy on the right side of the shank. On the underside it is stamped Savinelli Product. The stem bears the embossed shooting star logo that is a familiar mark on the Oscar line. We had looked at it several hours earlier and I had passed on it because of the rim damage. I just did not feel like dealing with that as I looked at it and I felt the seller was asking too much for the condition it was in. But throughout the day it nagged at me and I kept thinking I should take another look at it and make an offer just to see if I could get the price down.Prince1

Prince2 So we went back late in the afternoon and I picked up a few other pipes there and my brother got the shopkeeper to take the pipe out of the case so we could look at it again. I examined it and could see that not only the top of the rim was damaged but the inner edge had significant damage from the burn. It seemed that the previous owner had not smoked the pipe much as it was in great shape other than that damage. The bowl was not even caked or darkened from mid bowl to the bottom. I removed the stem and checked out the mortise to see what it looked like. It was actually very clean. I examined the airway and slot in the stem to see what they looked like in terms of use. The stem was in great shape with no tooth marks or damage. All those things made me wonder if he used a torch lighter, fired it up once or twice – just enough to char the rim and damage it and then decided that either this particular pipe or pipes in general were not his cup of tea. Either way the pipe was in decent shape except for the burn on the back right side of the rim.Prince3

Prince4 I put it back but my brother said he would buy it for me so it came back to Canada with me. I have been home for over a week now and have cleaned up several of the pipes that came back with me. I picked the Savinelli up several times over the weeks and always put it back as I just did not feel any push to work on it. On Sunday I talked with my brother on Face Time and he asked if I had worked on it yet. I said no but it would be next on the agenda so last evening I took it from the box of refurbs to deal with it. I sat at the work table for a while examining it and looking at how deep the burn mark went into the briar. It was deep but I knew that topping it could remove much of the rim damage on the surface. I was concerned about the inner edge of the rim and wondering how I could bring that edge back into round with the rest of the bowl. I scraped out the bowl with a pen knife to remove the tobacco debris from the surface and then removed the stem to prepare it for topping.Prince5 To begin with I used a worn piece of 220 grit sandpaper to work on the rim. I faced it into the sandpaper and turned it until I removed a lot of the surface damage. I continued to work it until the sandpaper did not remove any more. I then changed the topping paper for a new piece of 220 grit sandpaper to finish the process. I sanded it until the surface was smooth and the slope of the burn from the surface to the inside of the bowl was minimized. I should have measured how much material I removed from the surface but I just kept sanding until most of the burn mark was gone. I am still surprised that it did not change the shape dramatically – such is the mercy that the burned rim was on a prince.Prince6 I sanded the rim with a medium and a fine grit sanding sponge and then with micromesh sanding pads using 1500-4000 grit pads to remove the scratch marks left behind by the sandpaper. Once the rim was smooth I stained the rim with a light brown stain touch up pen and blended it to match the colour of the rest of the bowl. I buffed it with red Tripoli and then White Diamond to smooth it out.Prince7 I then folded a piece of 220 grit sandpaper and worked on the inner edge of the rim. I wanted to bevel like it had been originally. A gentle slope on the rim toward the bowl would work to hide the burned edge and bring the rim into round once again. I sanded it with the sand paper at the same angle the entire way around the bowl edge. I repeated the circuit around the bowl repeatedly to keep the angle consistent the entire circumference of the inner edge. I sanded it until it was canted to the angle that had originally been present on the bowl.Prince8 Once the sanding was done I used a dark brown stain touch up pen to darken the bevel on the rim. I figured that by darkening the entire bevel I could mask the effect of the burn mark. I cleaned out the shank and the inside of the bowl with alcohol and cotton swabs to remove the debris and to blend the darkening of the bowl with the dark brown stain of the rim. I wanted the transition between the rim edge and the dark of the bowl to flow together.Prince9

Prince10

Prince11 I restained the rim with a light brown stain and then buffed the bowl. I gave it a light coat of olive oil and then buffed it with carnauba wax. The repaired rim is shown after all of the polishing and buffing in the next photos. The darkening of the bevel on the rim does a pretty decent job hiding the burn mark.Prince12

Prince13

Prince14 I cleaned up the stem with cotton swabs, pipe cleaners and alcohol to sanitize and refresh it. I used the micromesh sanding pads – wet sanding with 1500-2400 grit and dry sanding with 3200-12000 grit pads. I buffed the stem with Blue Diamond on the wheel to raise a final shine. I gave the bowl and stem several coats of carnauba wax and buffed them with a clean flannel buff. I finished by hand buffing the pipe with a microfibre cloth. The finished pipe is shown in the photos below. I was able to minimize the burn mark and its effects on the rim top and edge. The pipe looks great and is ready for a real pipeman to take care of it and enjoy it.Prince15

Prince16

Prince17

Prince18

Topping a Bowl – A Pictorial Essay


I finally used my camera to take photos of the process I use when I top a pipe. I decided to put together this pictorial essay to show the steps on topping a pipe bowl. It is an easy process and can return an otherwise beat up pipe bowl top to new or at least a cleaner vintage look. In the following essay I will take pictures throughout the process from beginning to the finished product with the bowl restored to an acceptable look for me.

The pipe is a Marxman Super Briar billiard. The bowl overall is in pretty rough shape, but the top looks like it was used for a hammer. All the outer edges of the bowl are chipped and rough. To clean and polish it as it stands would leave a very rough looking bowl top and no one clean edge. It was a perfect candidate to benefit from a slight topping.

Before taking it to the sand paper I reamed the bowl and cleaned up the inside so I was working with something a bit cleaner. I also did a quick buff with Tripoli to remove the external chunks of dirt and stickiness that were on the bowl. A clean surface gives me a clearer picture of what I have to work with and how far I will be able to go in the topping process.

Below are three pictures of the pipe when I picked it out of the box. Note the grime that needs to be removed before cleaning and the rough edges around the top and the deep chunks missing on it. Many of these go to a depth of about 1/8th to 1/16th of an inch so it is in need of topping to clean it up. The decision that needs to be made is how far to go without changing the profile of the pipe too much. I will decide that as I work with the bowl sanding off the roughness. It is hard to say how much will need to come off without actually starting the process. I may have to stop at some point and bevel the outer edge a bit to keep the profile in tact but time will tell.
topping1

topping2

topping3

When you are topping a bowl it is important to maintain the flat and straight profile of the bowl top. It is easy to change the angle if care is not exercised. I use a flat desk top or a piece of wood to ensure that the flatness is maintained. I put a piece of sand paper, usually 240 grit, on the board or desk top. Others use a piece of glass to provide the hard surface. Sometimes I sand it on a desk pad like the one pictured below. I hold the sand paper with one hand to make sure it does not move. The desk pad helps keep it from slipping as I work the bowl on it. The bowl is held top down and tightly placed on the surface of the sand paper. I move the bowl in a rotating pattern, turning clockwise, always applying equal pressure on all points to keep it flat on the paper. The process is pictured below.
topping4

As I sand the top, I repeatedly check to see if it is staying level and to see progress in removing the rough edges. I have found that as I work the process the rough edges are highlighted by the freshly sanded bowl top. They really are clearly visible as most of the time they are either blackened or at least more stained than the fresh wood. I give me a constant picture of what needs to come off on each edge of the top. The picture below clearly shows the rough edges on the outside of the bowl. I continue to sand until I have minimized those and the outer edge begins to return to round. I sand until the top is smooth and round. I generally have to make a decision regarding when to stop based on the depth of the chips and rough edges and whether I should bevel the edge to finish the work.
topping5

In the next two pictures the bowl is at the point of decision. Either I continue to sand and take out more of the roughness or I will do a slight bevel on the outer edge of the pipe. I take the overall look of the pipe into consideration in this decision. How much will more sanding change the profile of the pipe? How much will a slight bevel change or maintain that integral look and flow? Those are considerations that I make at this point in the topping process. I check the depth of the remaining spots on the bowl and from there come to a decision.
topping6

topping7

This bowl is finished with the topping and I have decided to bevel the edge to minimize the remaining chips on the edge. To do that I take a small piece of sandpaper and fold it in half and place it at an angle to the bowl edge between my fingers. I am aiming for an even bevel at this point and must be careful to maintain the angle the entire circumference of the bowl. To facilitate this I work the entire circumference each time I go around the bowl. Between each time around I check to see that the angle is maintained and to see what remains to be removed in order to give a new smooth surface to the bowl. The two pictures below show that angle and the general work of the beveling.
topping8

topping9

The four pictures below show the first turn of the beveling. You can see from the first picture that the roundness of the bowl top is coming into shape. The other three pictures show the two sides and the front of the bowl from the side to show the angle of the bevel – it is subtle as I do not want it to look to rounded. I am aiming for the roundness that comes with age and wear on a pipe.
topping10

topping11

topping12

topping13

The four pictures below show the beveling process completed. You will note that a few deep chips still remain on the edge of the bowl. The stain will hide most of these and those that remain give character to the old pipe in my opinion.
topping14

topping15

topping16

topping17

When I have finished beveling the pipe I will often sand the entire bowl with 1200 grit sand paper to even out the rough spots from the bowl sides, front and back. It also allows me to better match the new stain that will be applied to the entire bowl. After sanding I wipe the bowl down with 99% isopropyl alcohol (less water content with more percentage). The wipe down removes a bit of the colour of the original stain which aids the match on the restain. It also highlights areas that I need to give more attention to with sanding. The pictures below show the pipe after sanding and the alcohol wipe down.
topping18

topping19

topping20

topping21

The prepped bowl provides a few challenges to a good restain. The very visible pink fill on the back of the bowl will need to be blended in with stain. I will also have to blend the edges that have been beveled with the colour of the bowl sides and top. My goal is to make that transition look natural and original. Before staining it I wipe the entirety of the bowl with isopropyl alcohol one final time. This wipe will take off any remaining dust on the wood and ready it for the stain. I will be using a black cherry aniline stain on the bowl as I hope it will blend in the fill and make it a bit less noticeable. I apply the stain with a q-tip and then light it on fire with a match or lighter to set the stain. This process is called flaming the bowl and burns off the alcohol but does not harm the briar. Once it has been flamed I wipe the bowl off with a soft cloth and completing the staining process. Further application of stain is an option that will darken the bowl. I applied the stain a second and third time to the fill and surrounding areas to see if I could blend it a bit more. The fifth picture below shows the fill. It still shows in the picture but in hand it looks more subtle and subdued. From the pictures you can see the effect of beveling the edge very clearly. The top shows some nice grain and a gentle curve to the sides of the bowl. The overall effect is to restore the clean and well broken in look of the pipe. The colour brings out the natural patina in the briar and blends the older and the newly stained freshly sanded briar. Here are pictures of this step in the process.
topping22

topping23

topping24

topping25

topping26

Once the stain is well dried the pipe is taken to the buffer and given a good buff with white diamond. The idea is to polish and give a bit of depth to the pipe bowl. Carnuaba wax is then applied for a final shine to both pipe and the stem. For the sake of this essay I have not done much with the stem. I still need to sand and clean off the remaining oxidation. But I wanted to show the flow of the entire pipe in its topped, finished and stained form. The stem still needs work at this point but that will come next.
topping27

topping28

topping29

topping30

topping31