I finally used my camera to take photos of the process I use when I top a pipe. I decided to put together this pictorial essay to show the steps on topping a pipe bowl. It is an easy process and can return an otherwise beat up pipe bowl top to new or at least a cleaner vintage look. In the following essay I will take pictures throughout the process from beginning to the finished product with the bowl restored to an acceptable look for me.
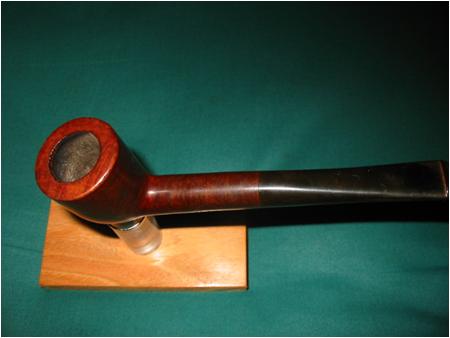
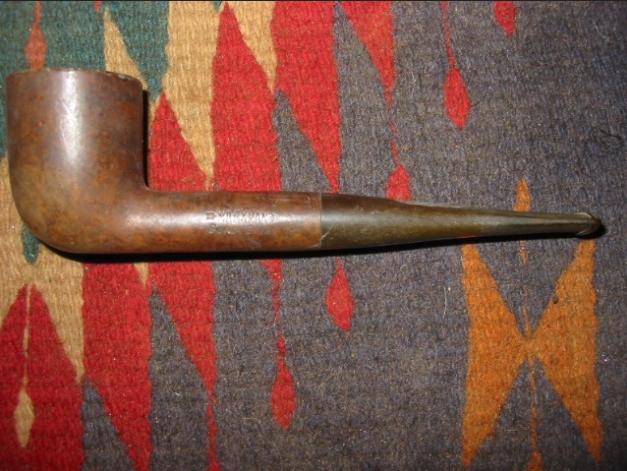
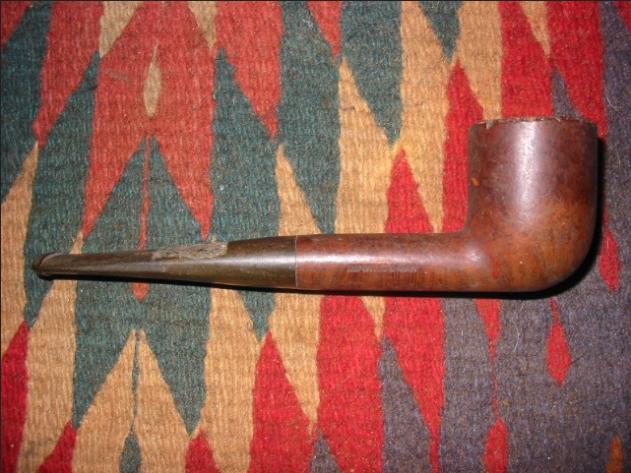
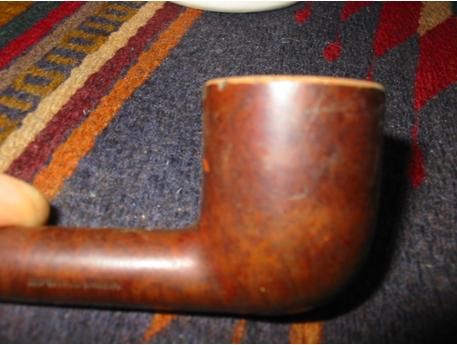
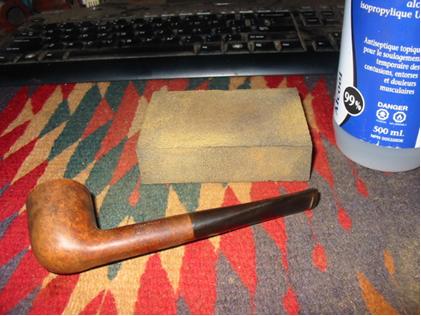
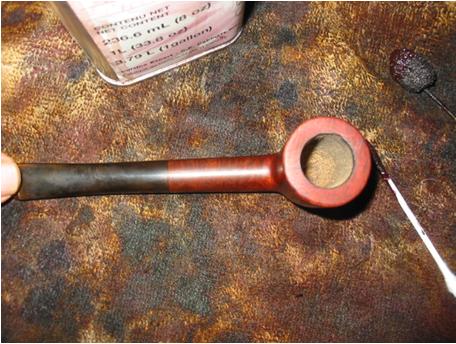
The pipe is a Marxman Super Briar billiard. The bowl overall is in pretty rough shape, but the top looks like it was used for a hammer. All the outer edges of the bowl are chipped and rough. To clean and polish it as it stands would leave a very rough looking bowl top and no one clean edge. It was a perfect candidate to benefit from a slight topping.
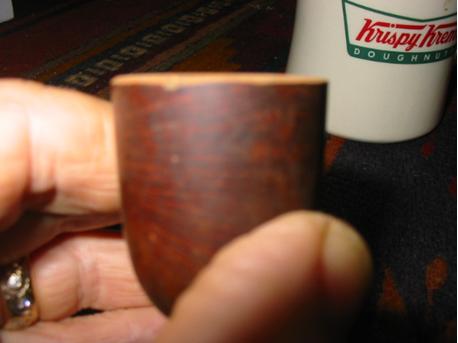
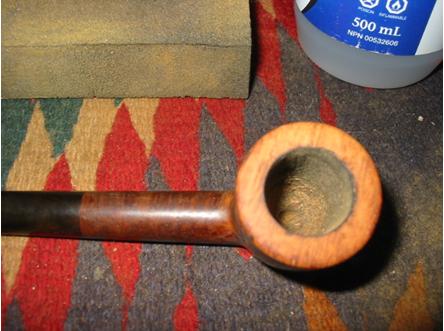
Before taking it to the sand paper I reamed the bowl and cleaned up the inside so I was working with something a bit cleaner. I also did a quick buff with Tripoli to remove the external chunks of dirt and stickiness that were on the bowl. A clean surface gives me a clearer picture of what I have to work with and how far I will be able to go in the topping process.
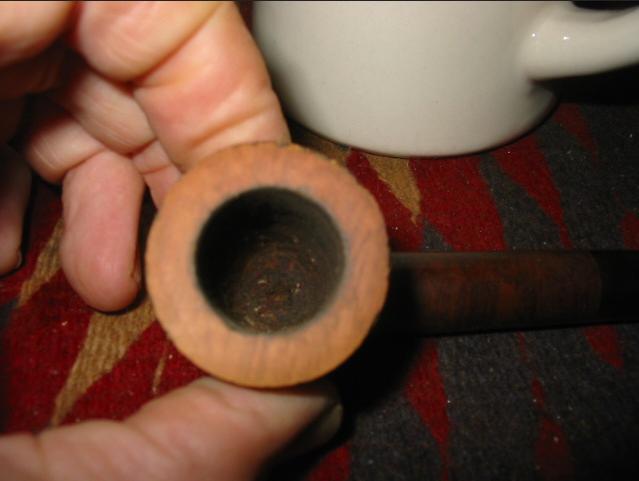
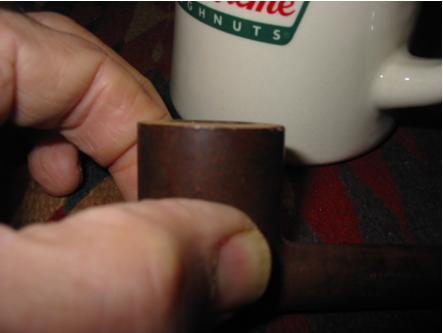
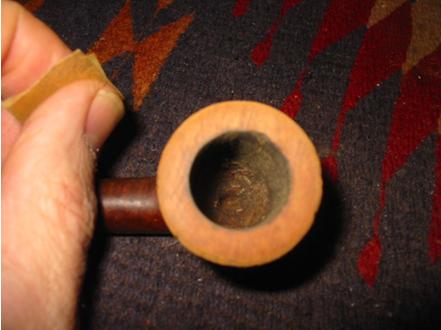
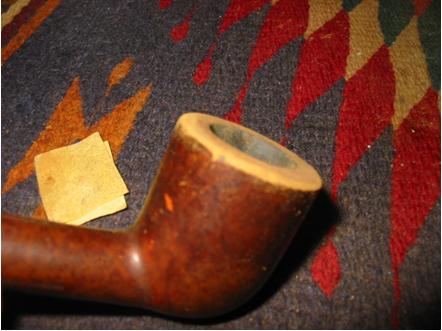
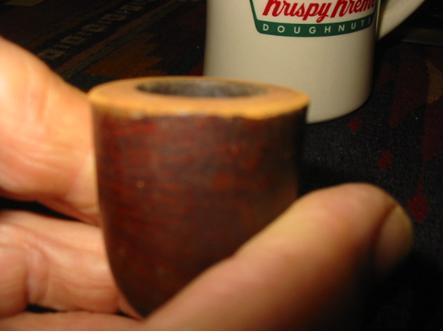
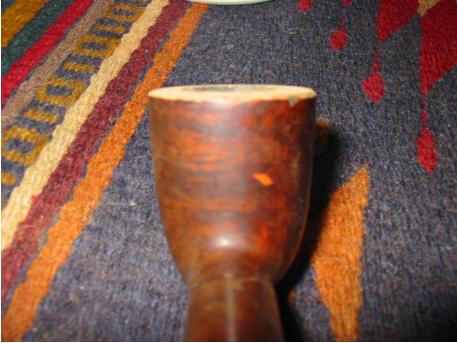
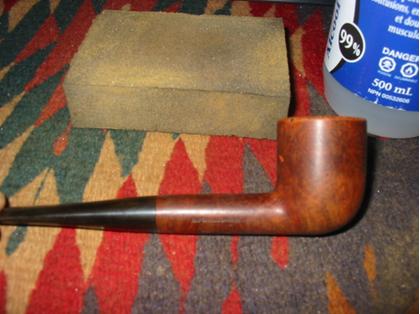
Below are three pictures of the pipe when I picked it out of the box. Note the grime that needs to be removed before cleaning and the rough edges around the top and the deep chunks missing on it. Many of these go to a depth of about 1/8th to 1/16th of an inch so it is in need of topping to clean it up. The decision that needs to be made is how far to go without changing the profile of the pipe too much. I will decide that as I work with the bowl sanding off the roughness. It is hard to say how much will need to come off without actually starting the process. I may have to stop at some point and bevel the outer edge a bit to keep the profile in tact but time will tell.

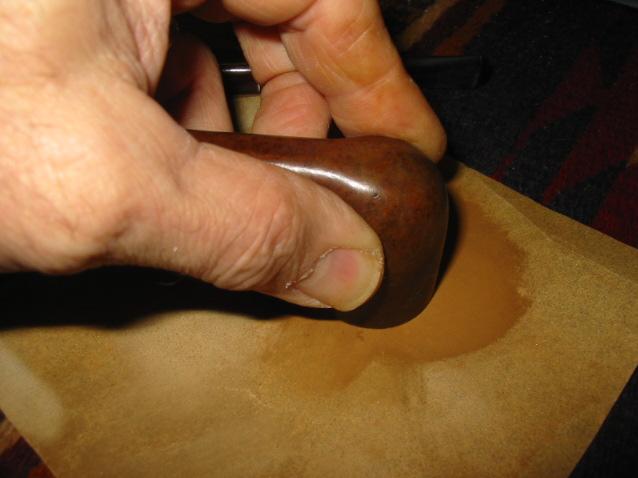
When you are topping a bowl it is important to maintain the flat and straight profile of the bowl top. It is easy to change the angle if care is not exercised. I use a flat desk top or a piece of wood to ensure that the flatness is maintained. I put a piece of sand paper, usually 240 grit, on the board or desk top. Others use a piece of glass to provide the hard surface. Sometimes I sand it on a desk pad like the one pictured below. I hold the sand paper with one hand to make sure it does not move. The desk pad helps keep it from slipping as I work the bowl on it. The bowl is held top down and tightly placed on the surface of the sand paper. I move the bowl in a rotating pattern, turning clockwise, always applying equal pressure on all points to keep it flat on the paper. The process is pictured below.
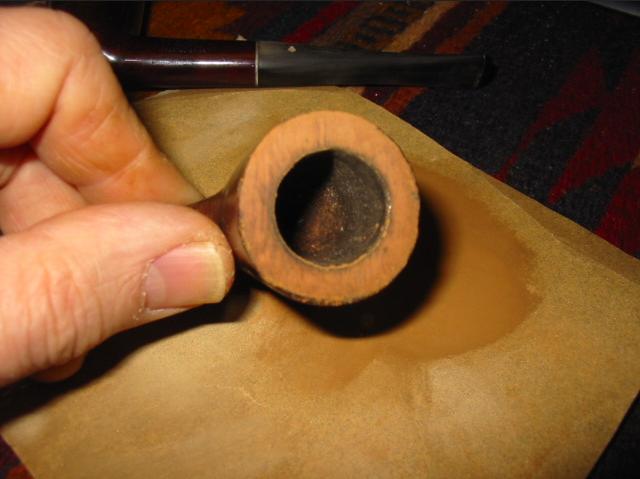
As I sand the top, I repeatedly check to see if it is staying level and to see progress in removing the rough edges. I have found that as I work the process the rough edges are highlighted by the freshly sanded bowl top. They really are clearly visible as most of the time they are either blackened or at least more stained than the fresh wood. I give me a constant picture of what needs to come off on each edge of the top. The picture below clearly shows the rough edges on the outside of the bowl. I continue to sand until I have minimized those and the outer edge begins to return to round. I sand until the top is smooth and round. I generally have to make a decision regarding when to stop based on the depth of the chips and rough edges and whether I should bevel the edge to finish the work.
In the next two pictures the bowl is at the point of decision. Either I continue to sand and take out more of the roughness or I will do a slight bevel on the outer edge of the pipe. I take the overall look of the pipe into consideration in this decision. How much will more sanding change the profile of the pipe? How much will a slight bevel change or maintain that integral look and flow? Those are considerations that I make at this point in the topping process. I check the depth of the remaining spots on the bowl and from there come to a decision.
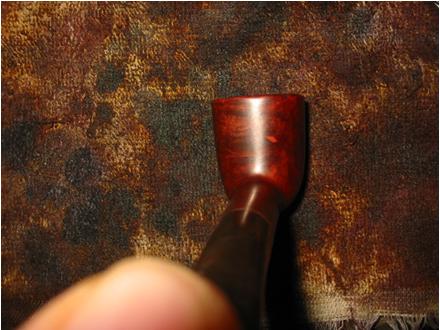
This bowl is finished with the topping and I have decided to bevel the edge to minimize the remaining chips on the edge. To do that I take a small piece of sandpaper and fold it in half and place it at an angle to the bowl edge between my fingers. I am aiming for an even bevel at this point and must be careful to maintain the angle the entire circumference of the bowl. To facilitate this I work the entire circumference each time I go around the bowl. Between each time around I check to see that the angle is maintained and to see what remains to be removed in order to give a new smooth surface to the bowl. The two pictures below show that angle and the general work of the beveling.
The four pictures below show the first turn of the beveling. You can see from the first picture that the roundness of the bowl top is coming into shape. The other three pictures show the two sides and the front of the bowl from the side to show the angle of the bevel – it is subtle as I do not want it to look to rounded. I am aiming for the roundness that comes with age and wear on a pipe.

The four pictures below show the beveling process completed. You will note that a few deep chips still remain on the edge of the bowl. The stain will hide most of these and those that remain give character to the old pipe in my opinion.
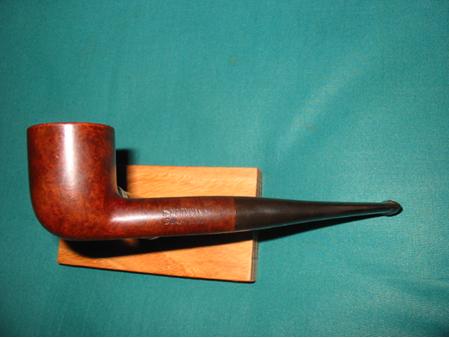
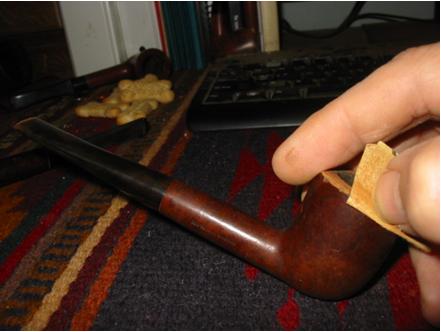
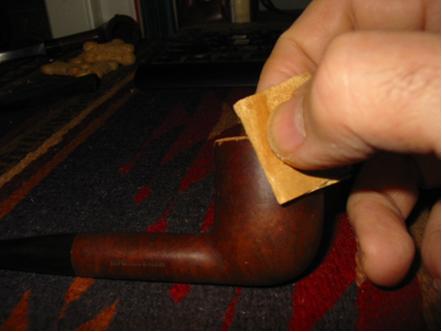
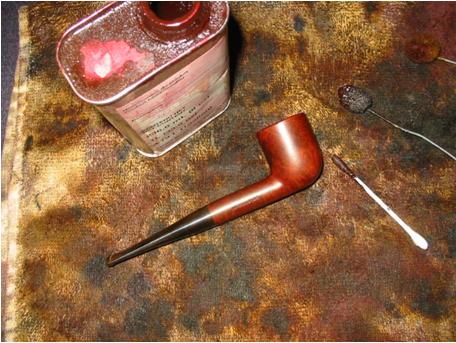
When I have finished beveling the pipe I will often sand the entire bowl with 1200 grit sand paper to even out the rough spots from the bowl sides, front and back. It also allows me to better match the new stain that will be applied to the entire bowl. After sanding I wipe the bowl down with 99% isopropyl alcohol (less water content with more percentage). The wipe down removes a bit of the colour of the original stain which aids the match on the restain. It also highlights areas that I need to give more attention to with sanding. The pictures below show the pipe after sanding and the alcohol wipe down.
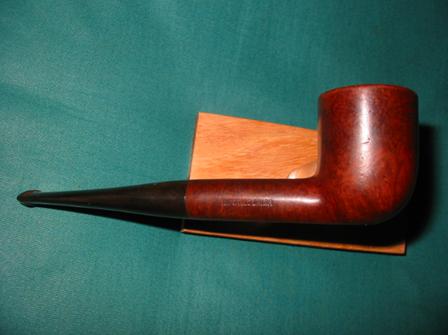
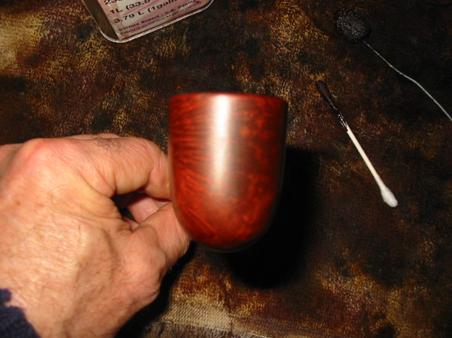
The prepped bowl provides a few challenges to a good restain. The very visible pink fill on the back of the bowl will need to be blended in with stain. I will also have to blend the edges that have been beveled with the colour of the bowl sides and top. My goal is to make that transition look natural and original. Before staining it I wipe the entirety of the bowl with isopropyl alcohol one final time. This wipe will take off any remaining dust on the wood and ready it for the stain. I will be using a black cherry aniline stain on the bowl as I hope it will blend in the fill and make it a bit less noticeable. I apply the stain with a q-tip and then light it on fire with a match or lighter to set the stain. This process is called flaming the bowl and burns off the alcohol but does not harm the briar. Once it has been flamed I wipe the bowl off with a soft cloth and completing the staining process. Further application of stain is an option that will darken the bowl. I applied the stain a second and third time to the fill and surrounding areas to see if I could blend it a bit more. The fifth picture below shows the fill. It still shows in the picture but in hand it looks more subtle and subdued. From the pictures you can see the effect of beveling the edge very clearly. The top shows some nice grain and a gentle curve to the sides of the bowl. The overall effect is to restore the clean and well broken in look of the pipe. The colour brings out the natural patina in the briar and blends the older and the newly stained freshly sanded briar. Here are pictures of this step in the process.
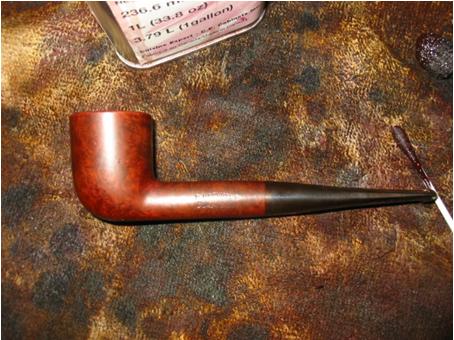
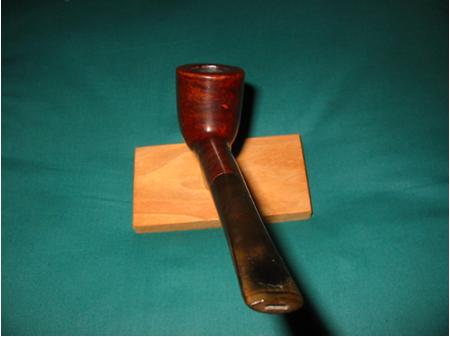
Once the stain is well dried the pipe is taken to the buffer and given a good buff with white diamond. The idea is to polish and give a bit of depth to the pipe bowl. Carnuaba wax is then applied for a final shine to both pipe and the stem. For the sake of this essay I have not done much with the stem. I still need to sand and clean off the remaining oxidation. But I wanted to show the flow of the entire pipe in its topped, finished and stained form. The stem still needs work at this point but that will come next.