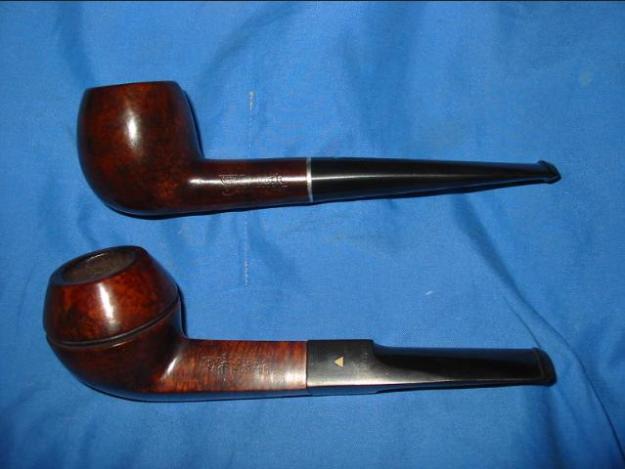
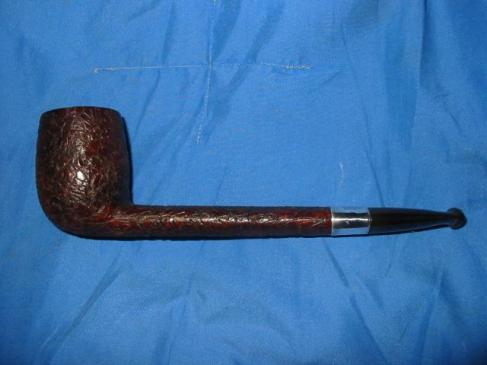
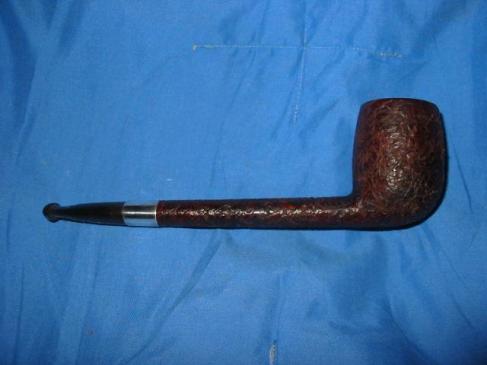
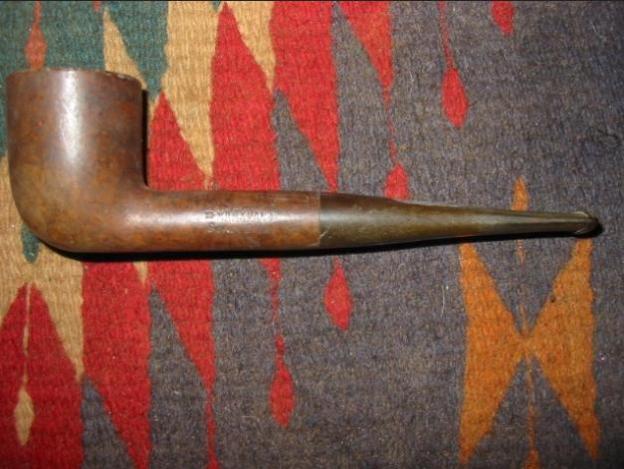
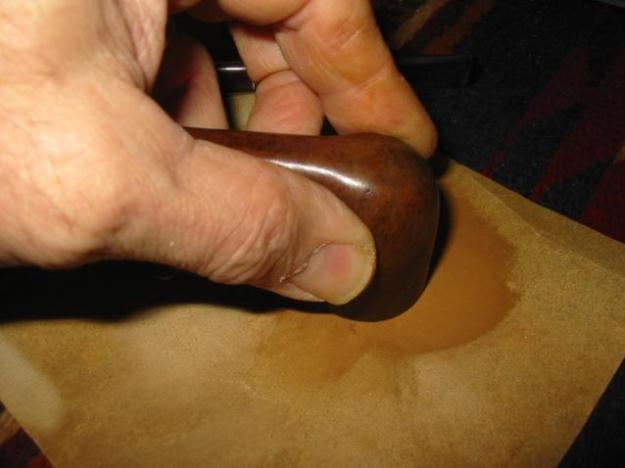
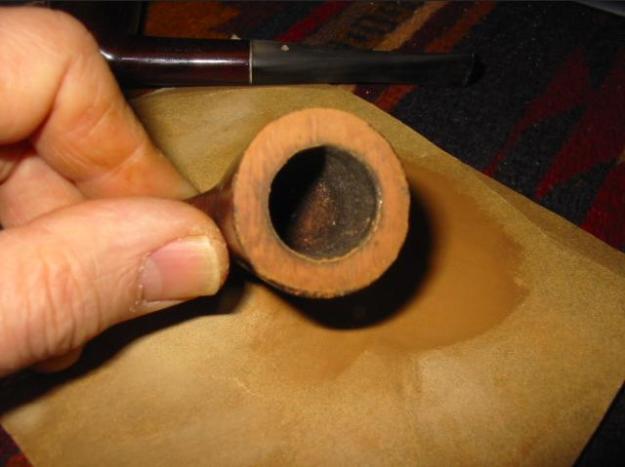
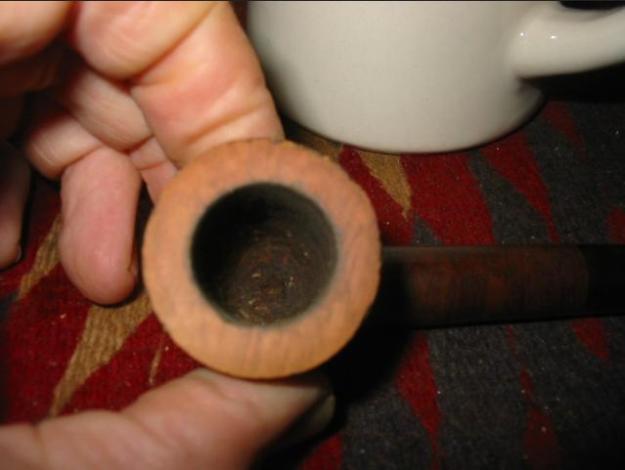
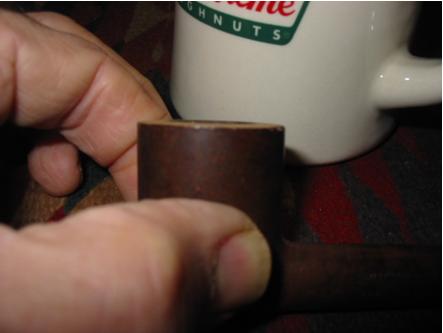
Daily Archives: May 29, 2012

Journal of a Stem Patch


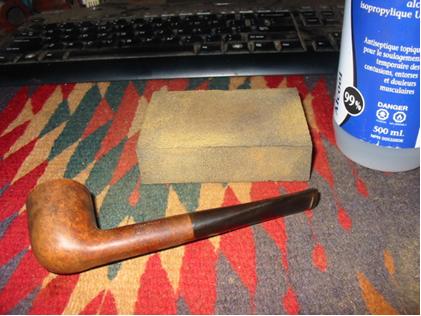
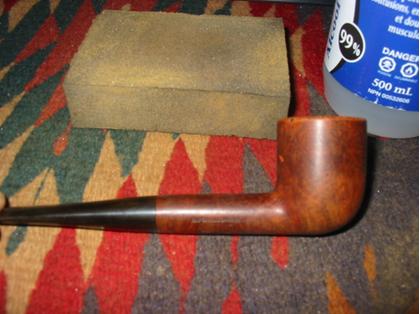
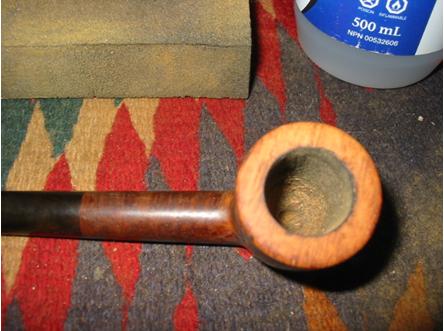
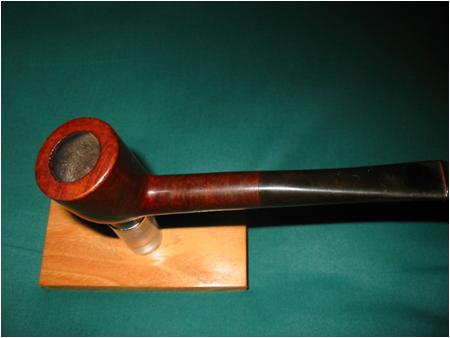
I had this old four hole stinger Kaywoodie Drinkless Canadian that came to me in great shape other than a fairly large bite through on the top of the stem. It was in great shape otherwise, barely smoked and very clean. No other tooth marks no dents, and no chatter – just the big old hole in the centre on the top of the stem. I thought I would take pics of the process I go through to patch it. So here it is from start to finish.

Step 1: I cleaned the hole and picked out any bits of stuff with a dental pick and wiped it down with an alcohol rag. Once it was dry, I put some soft wax on a finger nail file and inserted it in the button under the hole. The wax or grease keeps the glue from sticking to the file and permanently binding it to the stem. Here is a picture:


Step 2: I drip Super Glue on the hole and build up the edges a bit. This one is a large hole so I want to make sure that there are no bits that break free around the edges of the hole.


Step 3: The next two photos show the addition of vulcanite dust to the mix. I sanded down an old clean stem that was in my box and that I use for mixing with the glue on these larger holes. I had about a 1/2 teaspoon of dust. I dripped glue into the hole and then added the dust to the mix. After the dust I added a few drops more of glue and then dust again until the hole was filled with the vulcanite dust and glue mixture.


Step 4: I left it to dry for a half hour while I worked on another pipe that I was cleaning. Once it was dry, I removed the file and tested to make sure it was dry. I sanded the first bit with 220 grit sand paper and then a sanding block with medium grit. Here is the next shot.


Step 5: Once I had the majority of the patch smooth I moved on to 400 wet dry sandpaper to keep working at the patch and blending it into the stem.


Step 6: Once it was smooth to the touch I moved on to 600 wet dry and sanded some more in a vertical and a horizontal pattern with a small folded piece of sand paper as I worked to blend the patch.


Step 7: When it got to the point of blending that can be seen in the next photo I switched to the 1800 micromesh pads and used a spot of water on the patch to assist the blending with the pads.


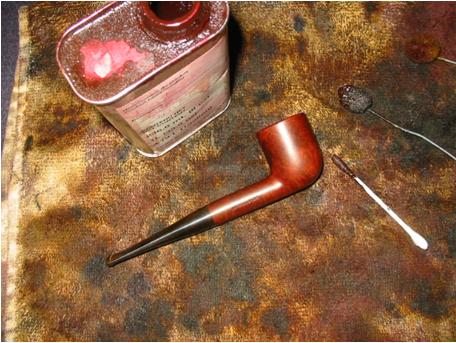
Step 8: When it was smooth to touch I used the buffer and hit it with Tripoli and white diamond and then brought it back to the desk to use the 2400 and 4000 micromesh pads. Here is the finished product, waxed and ready to smoke.


A Pipeful of reflection


Yesterday I had an appointment with the old Doctor for some problems I am having with blood pressure. I have this inordinate white coat syndrome that sends my blood pressure soaring when I go to see him. So when I woke up and throughout the morning wait for the doc I was reflecting on all of the things I was “sure” he would tell me to give up in light of the impending visit. I don’t know about you, but when I am in those settings I always jump to the worst possible scenario and my mind works overtime on what is “certainly” going to happen. Not the best strategy for high blood pressure folks to be sure, but it is my way. After deleting wine and beer, red meat, adding more exercise, I was certain my pipes would have to go according to the new regimen he was going to give me. That caused me to pause and reflect for moment on my pipes and pipe smoking. I gave it some thought as to whether he would tell me to say good bye to this piece of my life in which I have come to take a lot of delight. As I thought about the possibility of quitting, I asked myself what my pipes and pipe smoking do for me. I mused for awhile and then I wrote this:

My racks of pipes are in the cabinet next to my desk in my study and a few on top of the desk and behind me. I can with a quick glance look at and enjoy them all. From my desk I can swivel my chair and look through my pipes for the one that is going to take the tobacco choice of the moment. It hit me that this for me is the point when the actual pleasure of a smoke begins. It doesn’t wait for the fire to hit the tobacco or the first puff. The entirety of the process is pleasurable and my particular restful time. The tactile experience of handling the pipes, moving through my racks and choosing just the one for the moment is a big part of the pleasure. Once the pipe is chosen I pick up a soft pipe cleaner, another tactile pleasure and run it through the stem and then place the stem between my teeth and blow any dust or fuzz from the bowl. The sounds of the air through the bowl, the slick feel of the stem, the smooth or rough or blast of the briar, all combine for a fine moment of quiet and pleasure. Often before I fill the pipe and put the match or lighter to it I just sit with the bowl in hand and reflect.

Then the tobacco of the moment is cracked open – the jar or the tin – I run the tobacco through my fingers and enjoy the feel of the flake or the ribbon or the cube cut as it drops between my fingers. As the tobacco is picked up there is a sweet aroma that slips into the room around my desk – the scent of fine Virginias, the aroma of a clean but smoked pipe. All of these combine in the moment before I pack the pipe. The tobacco goes into the bowl pinched between the fingers or rubbed out on a paper on the desk. The tobacco springs in the bowl, the feel of just the right pack, the quick flick of the flint on the steel or the match across the striker to get the light, the momentary spark and then the flame as it licks the tobacco and then the first puff of smoke. All these intersect with the just the right place to take my mind off of my troubles or my work and transport to a tranquil zone.

The amazing thing to me is that all of this occurs for me before the smoke begins to calm my soul. Before the bowl begins to warm to the touch as the fire in its belly consumes the tobacco the earnest smoke has begun. The rhythm of the puff and the exhalation of the smoke all build on the previous time to add to the pleasure of the restful thing we call pipe smoking. As the tobacco continues to burn and the smoke is blowing and snaking upward, the room fills with an aroma that surrounds the pipe and me. The aroma is sweet and satisfying. The cloud of smoke that fills the room adds to the mystique of the moment. I close my eyes and enjoy the quiet that this alone time brings to me. I guess at heart I am a solitary, an introvert and I need the retreat and the quiet to rejuvenate me in order to take on the rest of the day’s work.

The tamper and the lighter work together to bring the bowl to its maximum pack and burn. Just a bit of a tamp around the outer edge of the bowl, tilting the tamper just so to leave a crown in the center of the bowl, are part of the mystique of the smoke. Another light, with match or lighter, and the renewed cloud of smoke after the initial light has died down. The fiddling with the bowl to get it just so is part of the ritual for me that disengages my brain from all other concerns and sends me to a quiet spot. The tools of the piper are just as much a part of the ritual of the smoke as the pipe itself. It is no wonder that over the years I have collected an odd assortment of tampers, from the ordinary and utilitarian shape of the pipe nail to some beautiful sculpted tampers by a variety of tamper makers. For me the fussing with the pipe is all part of the process of the enjoyment.

When the smoke comes to an end, the pleasure continues for a bit. The taste of the tobacco is still on the lips and gums. The room note still lingers with memories of the taste in my mouth. The bowl of the pipe smells of it as well. The pipe itself is warm to the touch and worth a few minutes extra in the hand. The ash is tapped into the ash tray, or if I am on the porch into one of my plants. A pipe cleaner plunges into the bowl through the button and down the stem and shank and takes care of any ash or moisture in the airway. Folded in half it works well to swab out the bowl of any remaining ash or bits of tobacco. All of this ritual is still part of the pleasure. Once cleaned and wiped off the pipe is returned to the rack and I sit.

What is it about pipes and pipe smoking that relaxes me? The entirety of the ritual from the choice of pipe through the smoke itself and to the restoration of the pipe to its place on the rack is all part of the restfulness of the pipe to me. From start to finish and everything in between all are part of the pleasure.

Oh and the good news… the doc told me that he does not even consider me a smoker and that the pipe was not a problem for my BP… All my fretting was for nothing… or was it? At least I got to think about why I like my pipes! Now I am off to fire up another bowl, sip a good glass of red wine, and enjoy a good steak!

The Solitary Pipe Smoker


I know, a lot of pipe smokers love the comradeship of a gathering of pipe smokers who sit together and jaw away time as they chat about their hobby and the solve the crises of the world from the comfort of a wreath of smoke. But me, I need the quiet reflective time of being by myself. The rest of my life is full of people around me all the time making demands either implicitly or explicitly on my time and attention. I come home each evening tired of people and the demands of a day of work. To me at that moment the last thing I need is to sit and talk with anyone… pipe smoker or not. What I long for and seek is a quiet solace that is created by my pipe and a bit of time to disconnect from the day that has past.

I find a corner in the house, on the porch or under a tree in the yard whose only requirement is that it must be quiet – maybe the hum of passing traffic, maybe a dog barking or some other external noise that is non human is present as ambient noise, a white noise. That kind of noise is acceptable and a welcome addition to help quiet the noise in my head. In that quiet space I settle into a comfortable chair from which I can observe the life of the neighbourhood around me. The twittering of birds, the squabbles of the squirrels over the walnuts in my yard are a pleasant change. I take out a trusted and well broken in pipe and handle it carefully. I rub it down and feel the gentle curves and the variety of textures that make up stem and bowl. I sniff the warm memories of bowls that had been smoked in the past and just take time to savour the moment. Life is good. There is no rush to pack the bowl. No frantic need to get to the point. No sense of having to pack the bowl and smoke pressing upon me. I can move at my own pace in my own time with no one defining the time.

I take a deep breath and exhale slowly and just enjoy the pleasure of being for a moment. Far removed by time, space and mental thought from the demands of doing. I take out my pouch or tin of a good tobacco that I know will deliver a good smoke and begin the process. I remove a couple of flakes of sweet smelling Virginia and smell the sweet grassiness of the tobacco. I rub them out to the texture I love or I roll them into a ball in my palms and enjoy the feel of the tobacco as it is readied for packing. This ritual in itself is a moment of solitude that is hard to find in the norm of my life. Once the tobacco is just right I begin to load the bowl of my pipe. I want to make sure it is loaded just right, but I am not anal about it – that would wreck the moment. I take the tobacco and begin to tamp it into the bowl. I feel the springiness beneath my fingers and know from the years of the process that it is just right. I put the pipe in my mouth and feel the draw. While doing that I clean up the remnants of tobacco and roll the pouch or close the tin and set it aside. I sit like that for an immeasurable moment and just taste the tobacco – unlit in my pipe. There is freshness and expectancy in the taste. There is a promise of good flavour that will be released by fire. But I want to just take the time to enjoy the moment before striking the fire.

Then without knowing why, the moment of fire has arrived. I take my Zippo or a match – no reason for the choice, just what happens to be at hand. I circle the bowl with the flame drawing deeply on the pipe as the fire is drawn into the tobacco. I can feel the warmth in my mouth as it begins to catch fire. The tobacco begins to smoulder and the smoke curls out of the top of bowl and around the edges of my mouth. Ah the tastes and the sensations of that moment as the smoke rises from the bowl and I gaze at the world through the haze of a good smoke. I cannot quite explain the sensation of the moment for you – you just have to be there. There is no one talking. There is no demand on the time. There is no pressure to converse or respond to the need of another. There is no pressure from inside or outside to act. It is just the quiet moment of solitary time when my pipe delivers me to that place where I can be alone and unencumbered by anything or anyone. That is what I love about time with my pipe. It is time I cannot get in a group of pipe smokers. It is time I cannot get with another piper next to me. It is that sweet alone time that slows my life down and gives me renewed perspective to enter into the next moments of my life.

All too soon the embers smoulder out and the bowl is finished. The pipe is warm to the touch and the air around me is full of the smell of the smoke. Time begins to once again move forward. I can hear my wife and daughters moving around in the house working on dinner. I can hear their laughter and their bickering that is all a part of my life and I chuckle to myself. It is good! I can now fully enter into that piece of my life and be engaged with them. I have been able to lay aside the encumbrances of my day and become free to re-enter my family and enjoy them. Those private moments, those solitary times give me the space to disconnect from one moment and enter the next more fully. This is not to say I don’t enjoy the energy of a group of pipers together but it is these moments that energize me and keep me smoking my pipes. They have an uncanny ability to calm me and grant me serenity.

Re-staining Estate Pipes – A Pictorial Essay


Blog by Steve Laug

I am often asked by other hobbyist pipe refurbishers how I go about re-staining the pipes that I refurbish. I have answered the question in different ways over the years as I have worked out my own process. This past weekend I had some time and a box of pipes to work on so I decided to document the process I use. I took photos of four old pipes that I was reworking; these photos take you through my methods from start to finish. I have added written commentary to explain what I have done. The method I describe is how I work with estate bowls like these. I am certain that there are other methods that can be used with equal success. This is the one I have arrived at over the past ten years as I have been reworking estate pipes. I am sure that it will continue to evolve in the years ahead as it has over the past years. Here it is for your perusal and use. Feel free to use it, enjoy the process of rejuvenating the finish of an old pipe, adapt it and modify it as you will. Email your modifications and additions to the method to as we work to keep the fire alive in the home based pipe restoring hobby – slaug@uniserve.com.

I need to make a final confession before I jump ahead to describe and document the process. I totally forgot to take pictures of the state these old pipes were in when I received them. As is often the case for me, the cleaning process took on a life of its own and once it is moving along I find it hard to slow it down. So, with that out of the way, I begin with pictures of the pipes after I removed them from an hour soak in an alcohol bath.

Out of the alcohol bath
Once I have chosen the pipes to restore I remove the stems and place them in a soak of Oxyclean and water while I work on the bowls. I place the bowls in an alcohol bath. I use a plastic jar with a screw on lid to hold the 99% isopropyl alcohol for the bath. It is roughly a large mouthed quart sized jar and will hold four bowls. The size also allows me to reach in and retrieve them when they are finished. I reuse the alcohol in the bath for a long time. I find that it turns dark from the stains and the sediment settles to the bottom of the jar. I pour off the alcohol regularly and wash the jar so that there is no sediment remaining. I also top up the jar with fresh alcohol to keep the levels high enough to cover the bowls.

The first two pictures below show the four bowls after they have been removed from the bath and have been dried. (In each photo the bowls will be in the same order for ease of recognition.) Starting at the top left and working left to right you will see the effects of alcohol bath in removing finish. I have found that it does not remove all the stain but it removes the finish, waxes and oils that are over the stain. When the bowls are removed they have a flat finish look to them. The top left bowl has a slightly yellow stain once the varnish coat was removed. The top right bowl has a reddish stain that was also under a coat of varnish. The bottom left is a prehistoric GBD finish/sand blast with a dark red/brown stain. The pipe on the bottom right has a dark brown stain and had a coat of shellac or varnish over it. The varnish on the last pipe had turned milky white even before I put it in the bath and increased when I took it out of the alcohol bath. The fourth bowl will take the most work to remove the finish. All will need more hand work with an alcohol soaked soft cloth and a soft bristle tooth brush to remove the residual finish. The smooth bowls will be sanded and further cleaned.
restaining-1

restaining-2

Washed and sanded
The pictures below show the bowls after they have been washed in alcohol and sanded and rewashed and re-sanded repeatedly. The stain colour is removed as much as it will be at this point in the process. There is still a lot of work to do on each bowl before staining can be done. The top coat of varnish, wax and the grit and grime have all been removed at this point. From the pictures you can see that there is still some varnish on the bottom right pipe but the majority has been removed and the others are getting ready to go to the next step in the process. Once I finished this stage of sanding I washed them a final time with a tack (soft cotton material) cloth to remove dust and such and also let me see any remaining shiny spots on the finish.
restaining-3

restaining-4

Two of my favourite tools are shown in the following pictures (I use both constantly in the process of refurbishing and always have them near at hand) – a tooth brush and a dental pick. The dental pick allows me access to the rings on the bulldogs. I carefully use it to follow the rings around the bulldogs and clean out the grit that gets stuck in them. I follow that up with the tooth brush which allows me to rub the alcohol into the rings and to scrub other places in the blast on the prehistoric and stubborn shiny spots on the smooth pipes. They both are used in cleaning rims and the dental pick also precedes my pipe cleaners in the shank. I have straightened one end to make access to the shank easier. These pictures show the bowls after the third sanding and alcohol wash. I also sand the rims with 400, 600 and then finally with 1200 to remove any grit or rough spots on the finish. All the bowls have been sanded with 1200 grit sand paper. I sand them one more time with the 1200 grit sandpaper and then I use micromesh pads to get a good smooth surface on the bowl. If you choose to go for a scratch-free finish you can examine the bowls with a jewellers loop under a bright light and re-sand as necessary to remove any noted scratches. For the majority of the old timers that I refurbish, I sand until they are scratch free to the naked eye in a bright light. To my mind some of the deeper nicks and such lend character to the old pipe and contribute to the look of age. My main requirement is that they are smokeable when I am finished and that they look good for their age. Should you choose to go further with the finish the choice is yours as you re-work them.
restaining-5

restaining-6

The next picture shows the foursome after all the smooth pipe bowls and smooth rim on the sand blast have been sanded with 1800/2400/4000 micromesh pads. They are smooth to the touch and have a rich shine to them. This is a good time to give them an inspection for any marks or scratches that you want deal with further. After I inspect them this last time, I wipe them down with an alcohol damp cloth to get any residual grit or dust off the bowls and set them aside. The bowls are ready to be re-stained.
restaining-7

Re-staining the bowl
In preparation for staining each pipe bowl, I insert folded pipe cleaners in the shanks to enable me to manipulate them with ease while I am applying the stain. This gives me some flexibility in turning the bowl at different angles to apply the stain coat. You will note the Fiebing’s stain in the previous picture – that is the stain I use. It comes in a variety of colours and is an aniline (alcohol based) stain. It works extremely well on wood. All of these bowls were given a first coat of Fiebing’s Dark Brown stain applied heavily. While it is still wet I use a match to light the stain to set it in the grain. It does not light the bowl on fire at all but only burns off the alcohol in the stain coat. For these four bowls, I started with the blast and liberally applied the stain to the bowl. I start with the bowl held bottom up and let the stain flow toward the tops. I follow the flow of the stain to ensure that I have thoroughly and evenly covered the entire bowl surface. I finish the first coat using the dauber pictured in the lid below to stain the rim. I reapply the stain to make sure the coat is even and not streaked.
restaining-8

The picture below was taken after the second application and flaming of the stain. After the first coat of stain is dry to touch, I give each bowl a second coat of stain and set it aflame with a match or lighter. After flaming the stain the bowls are basically dry to the touch and I set them aside until they are thoroughly dry. (I often let the bowls sit over night to dry.) The next day (or later the same evening if I get impatient or curious) I take them to my buffers and see what they will look like with a light touch on the buffing wheel. I generally use the Tripoli buff with a light touch, though I have also used the White Diamond buff as well. For those who do not have a buffer I have also sanded the bowls at this point with 1200 grit sand paper or higher. If the stain is too dark to my liking I wipe the bowls with an alcohol damp cloth until I get the colour the way I want it on each pipe. That is one of the beauties of aniline stain! The briar in each pipe bowl will make them quite unique looking once the stain is buffed.
restaining-9

While the bowls are drying I turn to work on the stems. Throughout the process described above, the stems have been soaking in an OxyClean bath. I put a mixture of once scoop of OxyClean into a one quart plastic covered jar and mix it with hot tap water. I shake it until the powder is all dissolved and the liquid is a milky white. Then I place the stems in the bath to soak. Generally I soak them a minimum of two hours but often will leave them in the wash over night. They remain in the bath the entire time I am working on the bowls.

With this foursome I grew impatient and was curious to see the finished product once I buffed the stain off the bowls. The bowls were dry so I took them to the buffer. The following pictures show the bowls – stained, buffed and polished. At this point in the process, I still need to wax them with carnauba but the pictures give you the idea of what they look like. Each pipe bowl took the dark brown stain in its own way. To me one of the joys of the process is arriving at this step and seeing the freshly stained bowls. I love the contrasting colours and grain that comes through in the pipes.
restaining-10

restaining-11

restaining-12

restaining-13

The final pictures in this essay show the finished product using two of the pipes. I finished working on the stems while the stain was drying. They are both WDC pipes. The apple is an Aristocrat shape 11. The bulldog is a Royal Demuth shape 79. Both are screw mount stems with interesting diffusing apparatus in them.
restaining-15

restaining-14

Rustication – A Pictoral Essay


Over the years I have been developing a process for rusticating pipes. I have used it on old estates that I have been given or purchased where the finish did not work for me or it had too many fills or pits. The tools I use are pictured below. The one on the left is a variation of a tool that I made from plans on Tyler Lane’s Pipe making site. It is made of a piece of black 1 inch pipe. I packed it with galvanized nails and then a cap is put on the end of it. The cap is packed with steel wool to keep the nails from shifting. I plan to make another variation on this and use a T union that will serve as a handle. The current cap is hard on the palm of the hand as I twist it into the surface of the pipe. I also want to weld the nails in place to avoid any shifting of them as I use the tool. The second tool is a florist’s frog – it has a lead base with sharp spikes (watch your hands and fingers on this one) that is used in floral arrangements. I got this at an antique shop. I want to create a wooden handle for this one to give me a bit more distance from the surface of the briar when I am working it over the wood.

I start rusticating the briar with the large tool on the left and then finish with the smaller one on the right should I want to achieve a bit different pattern or rustication. Either individually or together they provide an interesting rustication. The larger tool does the gross work and the smaller one adds finesse to the rustication.

ImageImage 

For the sake of showing the process I have chosen the following old timer – a Dr. Plumb carved apple that had a finish that I did not like. It had a carved finish of lines around the bowl and then horizontally on the shank. The original pipe is pictured below in the first two pictures to give an idea of the original state of the pipe. I also include pictures of a Canadian that is riddled with fills. It smoked great but just looked awful in my opinion. I wanted to show pictures of both a previously carved finish and one with fills to show what I see as an improvement in both of these pipes after rustication. Each one has a slightly different rustication pattern to it as I was trying to achieve something different in each case. The pictures that follow will give you an idea of how the process works from start to finish. I conclude the essay with two added pipes that I rusticated to give a broad sampling of the finished look of my rustication method.

ImageImage 

To begin the process I want to work with clean pipes that do not have any finish on them other than the stain. I put the bowls in an alcohol bath for an hour to remove all the waxes, finishes and grime that is on the outside of the bowl. I also ream and clean the pipe as I will handle it pretty roughly as I rusticate it. I don’t want added grime on my work table and hands so for me a clean pipe is what I like to work with. On the Canadian I removed the band and set it aside so that it would not be damaged in the rustication process.

ImageImage 

For the purpose of this essay I will begin with the Dr. Plumb apple. I worked the rustication tool into the wood, twisting it back and forth until it had the rough look to it as can be seen below in the picture on the left. Once that was done I gave it a coat of black aniline stain. I find that the stain facilitates seeing any part of the wood that still needed to be worked or showed a pattern that was to uniform. I reworked the rustication with the larger tool to get it a bit more rough and random looking. Once I had the rustication the way I wanted it I stained the pipe a second time using a medium brown stain. This was to be the finish coat. I stained it, flamed it to set the stain, restained and set it a second time. The result was the matte finish pictured below on the right. In the light it showed some depth and variation in colour coming through from the earlier black stain that I put on after the first rustication. The third picture from taken from above shows the finished rustication before I buffed the stem and gave the entire pipe a light buff with white diamond.

ImageImageImage    


The next step is to take the pipe to my buffer. I buffed the stem with red Tripoli and then white diamond. I buffed the bowl with white diamond to knock off some of the rough edges and to soften the edges of the rustication a bit and polish the smooth areas to highlight them. From pictures below the effect of the buff can be seen. It helps to differentiate the smooth areas from the rusticated ones and give a nice contrast to the finished look. The smooth areas have been polished and have a sheen. The rough areas have a softer glow that highlights the depth of the rustication and the pebbled finish of the pipe. The tactile surface of the “new” pipe is pleasant to the hand. It also has a better look than the pipe that existed before with the carved finish.

ImageImageImageImage 


I have included the remaining pictures to show several other pipes that I have rusticated. These will give you an idea of the variety of finishes that can be achieved with the tools. It also shows a unique texture finish that I have developed that I like and repeat. The key here is to work the process repeatedly to develop your own distinctive look and feel. Rustication is an individual process as can be seen by the wide variety in rusticated pipes seen on the market. I continue to develop my method and try different patterns and also try to repeat the ones I like.

The first set of pictures show the finished Canadian that was pictured above before rustication. I used only the larger tool on this pipe. When I had finished rusticating it to my satisfaction I used a brass whitewall brush to smooth out the rustication. I took it to the buffer and used white diamond to soften and flatten out the roughness. I wanted to have a different look with this pipe which explains the process variations. I stained it with a medium brown aniline stain and was aiming for the look of old leather. The flaws and fills on this old Canadian are now hidden and a pipe that is much more pleasing to the eye is the result.

ImageImageImage Image


The second pipe is a John Bessai bent apple. I cannot find the pictures of the pipe before rustication but I remember it well. It had many fills and flaws in the wood and was a light tan colour. The pink putty fills stood out against this nice tan backdrop. They made me always bypass this pipe in my rotation. It smoked well but it was just ugly. I would pick it up and then put it down and take another one in hand. I was going to sell it but thought I would rusticate the bowl and see what it would look like. Again I was going for a leathery look. I used only the larger tool on this one as well. Once I finished the rustication I again used the brass whitewall brush to soften the rustication and buffed it with white diamond. The final rustication before staining looked much as it does in the finished pipe. The colour of the pipe is achieved by a combination of an oxblood undercoat stain and then a buff followed by a medium brown topcoat. I left the shank smooth with the stampings still visible. To me the much improved look draws me to it and the tactile nature of the pipe in hand is a bonus. As it heats up the feel is very pleasant.    

 ImageImage

The final pipe pictured below is one I carved. It was a kit I picked up from eBay. It was a small block and stem stamped Caveman pipes. I carved the shape I saw in the block. As I did, the flaws and sand pits became visible. It became clear that once more rustication was the solution yet again. I used the larger tool followed by the brass whitewall brush to soften the rustication and give the pipe my favourite old leather look. The first two pictures below show the unstained pipe after rustication. Note that I wrapped the shank with electrical tape at the stem/shank junction to protect the stem and to give a band of smooth briar. The third two pictures show the pipe after the undercoat of black stain. The final colour (seen in the last two pictures) was achieved by a combination of a black undercoat of aniline stain and a top coat of medium brown. I buffed between coats of stain. All of the above pipes were then polished with Halcyon wax and buffed with a flannel buff.

ImageImageImageImageImageImage 


The above process is demonstrated in the four pipes pictured. It is very simple. I stained each of the pipes before I rusticated them so that I could easily see where I was working. I used the larger rustication tool on all of the pipes. For the first one I used the second tool to change the rustication and then applied stain. In the last three I used a brass whitewall brush to soften the rustication and give it a leathery texture. Once I got the desire rustication I stained the pipe again for the finished colouring. The first was merely buffed with a soft touch on a white diamond buff. The remaining three were polished by hand with Halcyon wax and then buffed with a flannel buff to give it a polished look.

Give the process a try and see what you can come up with. It is a creative outlet and a means of exercising some creativity. Let us know what the finished product looks like.


The Pleasure of Playing with the Mud


One of my simple pleasures in an otherwise busy life is to refurbish pipes that I pick up on eBay and in different junk and thrift shops I frequent on my travels. As I refurbish and restore old pipes I enjoy a sense of fulfillment from not only bringing an old pipe back to life but in improving its smoke-ability. One of the tricks I have learned (I am sure I got it somewhere online) is that of raising the bottom of the bowl in a pipe that has been drilled too high. It is done with a concoction called pipe mud and given a bit of curing time can dry to a very hard surface that imparts no residual taste to my favourite tobaccos smoked in the “newly” reconditioned pipe.

Last weekend I had to mix up a batch of pipe mud to raise the floor on a pipe I was refurbishing. When I need to mix a batch of pipe mud it is a pleasure because it gives me an excuse to smoke a good cigar. Some of you don’t need an excuse to do so, but I do! My wife hates the smell of them and gives me grief over smoking them. She relegates me to the porch, which in the summer is a great place to relax and enjoy the parade of life that goes by on the sidewalk and street in front of my home. In the winter that is an altogether different matter as it is cold and damp here in Vancouver. So this excuse is a good one and works well for me. I look her straight in the eye and say, “I need to smoke it to make a batch of mud for my pipe”. Now, she likes the pipe (“likes” may be too strong a word to use but let’s just say she indulges me). So you can see the excuse works well.

I opened my humidor and looked through the cigars I have until one caught my fancy. This process is also part of the pleasure for me as I only smoke cigars that I like and none of the nasty ones that are so cheap here – Poms and Colts and the like. All of my cigars are Cubans (a perk of living in Canada and not having an embargo in place) so it is a process of finding one that I will be able to enjoy in the time I can stand being out in the cold on the porch. I picked out a nice little Romeo y Julietta and got out my punch, punched the end of the cigar and took an ash tray in which to collect the precious ash. I bundled up in my big coat, scarf and a toque (stocking cap for the non-Canadians among us) and went out on the front porch. I rolled the cigar under my nose and enjoyed the grassy smell of good tobacco. I double checked the punched hole in the end of the cigar to make sure it was perfect! Then I fired it up with my lighter. I rolled it as I lit it and drew the smoke into my mouth. I rolled it around to get the full taste of the tobacco. It had been awhile since I had a good cigar but this one quickly made me forget the damp cold of a rainy Wet Coast day in Vancouver. A good R&J cigar is a thing of wonder to me… the many dimensions to the flavour and the fullness of the taste that they deliver are excellent.

Throughout the smoke I collected the ash in my ashtray. I always make a bit of a game out of smoking my cigar and try to see how long I can keep the ash on the front before it falls off. I keep the ashtray in my lap just in case. I learned that from way to many ashes falling down the front of my coat or sweater. Besides I wanted to keep these ashes for their deeper and more “profound” purpose!

I sat and enjoyed a good cigar and the quiet afternoon with the steady drip of the rain and swish of cars going by on the street in front of the house. Too quickly the cigar was at its end and the time was over. What a great afternoon smoke and a restful break. Once the cigar was finished I use the remaining butt as food for my Rhododendrons. I crush it, break it up and sprinkle it on around the base with the remnants of coffee grounds that my Rhodies love. I carried the ash tray into the house and hung up my coat and scarf. The toque went back to its place in the secretary by the door. I kicked off my shoes and scooted into my slippers and carried the ash tray to my basement desk and work table.

I have a small cup of water at the desk and an ear syringe that gives me more control over the amount of water I add to the ashes. I want to add just enough to make a paste. I give it a few drops to start with and stir it up with a folded pipe cleaner. I continue to add water to the mixture until I get it to be the consistency that I want. One convenience of the mix is that if I add to much water I can leave it and the water will evaporate.

While the mix is sitting I prepare the pipe for the work. I remove the stem and insert a fluffy pipe cleaner into the shank with the end just extending into the bowl. I do not want to clog the airway with the mud when I put it in. This keeps that from happening. I folded a pipe cleaner in half to use as a brush to apply the mud to the bowl of the pipe. I usually put it into the bottom of the chamber and use a pipe nail to tamp it solidly in place. I fill the bottom until it is at the level I want. Tamping it down assures that I don’t get much shrinkage in the ash mixture as it dries out. I also apply the mud to the walls of the pipe where I see any cracks in the cake and around the air hole to make for a good clean entry way.

Once the mud has been applied the pipe goes into a stand to sit for two days. I want the mud to dry solidly and cure well. Once that is done I carefully load a bowl with a favourite tobacco and smoke it letting the heat do a final cure on the mud. When I am emptying the pipe I am careful. Generally I have found that after several smokes the mud is very solid and I can smoke it and clean the pipe as usual.

Hopefully by this point in this piece you can appreciate the pleasure of playing with pipe mud. I will talk with you later, right now I am going to go have a look on eBay and see if I can find a few more pipes to refurbish. In the lot of them I am sure that there will be at least one that needs a good application of pipe mud. Then I can enjoy another good cigar.

Pipe Refurbishing or Pipe Carving?


Over the past few years I have carved more than 30 pipes and then re-carved many of them several times over as I grew to understand more of what I should be looking for in a pipe. It was also during this time period that I lost my apprehension of removing too much briar and the reworked pipes became more streamlined and lighter in weight. Much of what I have learned about what makes a good pipe has come from having worked on 400-500 pipes during the same time period. Some of these remain in my own collection, many have been given away to new pipe smokers and more recently some have been sold. I may have worked on more than 400-500 pipes over the years but I’ve not kept any records. I only have the pictures of some of them and a cupboard full of the ones I have kept for my collection by which to estimate. Since I’ve had experience with these different aspects of working with briar I thought it would be good to take some time to consider and write about which of the two draws most of my attention and interest and why that is so.

I can honestly say that I enjoy the creativity involved in designing and carving a new pipe. Taking a block of briar and drawing out a pipe shape on the block before drilling it is enjoyable. The scent of fresh briar as the drill cuts the chamber and airway has a wonderful room note to me. I enjoy the sweet scent of the briar dust. It is an amazing process to bring out the shape that was hidden within the briar as layer after layer of briar becomes chips and dust under the saw and the sanding drum. The fine repetitive details of sanding and shaping with papers, sanders, files and knives is part of the mystique for me in bringing a shape out of the block. The progressive use of increasing grits of sandpaper and micromesh pads to remove the scratches and marks of the carving is pleasing in that it has a very specific end in sight. The mixing of stains, staining and the buffing/polishing process is also something that feeds my sense of creativity and lends itself to experiments and fine-tuning. The final pleasure is that incredible first bowl of tobacco in a pipe of your own creation. In my normal daytime job of working with people I rarely see things completed so this is one of the reasons that carving a new pipe intrigues and gives me pleasure. Those are just a few of the things about pipe carving that I enjoy. I will continue to putter away at the process for the rest of my life.

As a novice at carving a pipe I have to say that when I’ve finished carving a pipe, I feel a lot like I did when I was a young kindergarten student bringing home my masterpieces for the admiration of my parents. I expectantly waited to hear them declare me a modern day Rembrandt or Picasso (of course that never happened but I kept bringing them home to be displayed on the gallery of the refrigerator). I want to hear how great they are to assuage my own sense of seeing that there is still something lacking in them. I look back at some of those early pipes and blush at the primitive sense of craftsmanship that went into them, even after the second or third reshaping. I know I am not there yet in making that truly beautiful pipe that causes me to know that I am a carver! But I am finally getting to where I like the look of what I make. I know that I still have a long way to go. I am not even close to Mr. Medico let alone the likes of a Bo Nordh.

Even as I re-read what I have written about the carving of a new pipe, I know that I still would much rather repair or refurbish old pipes than create new ones. I have been thinking about it a lot while I work on pipes and go through my pipe cupboard. I have talked with other folks who make their living doing pipe repair and others who, like me, do it as a hobby. I have asked them about their repair and refurbishing work. We have batted around a lot of different ideas and topics from methods to processes and tools, but the conversation always comes back to these central questions: what is it about repairing pipes that keeps us intrigued and continuously working on old briar?; what is it about the process that attracts us to that particular hobby and practice?; and why do we enjoy reworking, refurbishing, re-stemming old briar more than we do carving new briar?

When I have an old pipe in my hand to repair or refurbish it presents a variety of challenges in that one project. Contrary to when it was crafted as a unit I now have the task of matching new work to old. To make a new stem that matches what appears to be a round shank that in reality is not round is generally the case with every pipe I re-stem. The minute shaping and cutting away of the diameter of the tenon and stem to fit a shank that is not truly round is one of those challenges. It really cannot be done on a centre point lathe as nothing truly is round. For example, I re-stemmed an old English pipe that to the naked eye appeared to have a round cylindrical shank. In examining it more carefully I found that it was not round. One side was heavier than the other. The measurements of the radius to different points on the circumference of the shank are all different. To craft a stem for this old pipe was all hand work. It can be shaped to a point with tools but all the fitting had to be done by hand. I love that challenge. I always am working for that seamless looking junction of stem and shank. Honestly, there are times I’ve achieved it better than others.

Once the stem is fit to the shank there is still much work that needs to be done to the stem before it is finished. The shaping of the angles of the plane of the stem needs to be done to reflect the flow of the shank and bowl. The button has to be shaped and thinned for comfort. The slot in the end of the stem needs to be opened to give a better airflow. If I am trying to match an original stem then research needs to be done online to find a pattern of the stem to try to duplicate. When that pattern is not available then I am free to creatively shape the stem. All of this is done before the sanding and polishing of the stem to get a glossy smooth surface. To me this is also a challenge.  I am always seeking new tools, papers and micromesh products that will facilitate the work. There are always minute scratches that have to be worked over, seams on precast stems that need to be removed, and shaping that needs to be done with rod stock and hand cut stems. Whether working with Vulcanite, Lucite or Horn I have found that many of the same tools and products are used but different tactics are employed to get the final look that is desired.

With the stem work finished, I turn my attention to the bowl and shank as there are repairs that must be done to them. I find that on these old timers the rim has often been damaged and is very rough. None of the sharp edges of the surface remain and it looks as if the pipe had been used to drive in nails or hang pictures. When deciding how to best handle the rim damage it is important to study the angle and surface of the rim. Only then can you decide regarding the need for topping or not, how much to top, how to maintain the integrity of the original shape or how to create a new shape out of the ghost that remains. Each of these steps contributes to the pleasure I derive from refurbishing these old timers.

Another aspect of the draw of rejuvenating old pipes is the creative use of tools and papers and wedges. It always seems that necessity is the motivation for crafting new and different ways to use a tool or a process. This keeps the work incredibly interesting to me. I have reworked drill bits and screw drivers, sanding blocks and pads, all to the purpose of allowing more intricate access to the nooks and crannies of the pipes. I have employed dental picks and bent them at different angles to use in the stem and button as well as in the mortise itself. I have worked old doweling to use as sanding blocks inside of bowls. I have learned to maneuver the sanding drums on my hand held Dremel to work down the diameters of the stems and tenons as well as using them inside a pipe bowl to smooth out the cake. I have been able to experiment with the speeds to arrive at the optimal speeds to use for various aspects of the work.

The parts of the refurbishing picture include all the hidden and not so hidden stories that are attached to these old timers. Some of the ones I work on I know something of the history behind, but with others it is only an educated guess based on care of the pipe or lack of it, smells of the tobacco smoked in the bowl or the remnants still in the pipe. Yet each one belonged to some pipe smoker who took delight in firing up a bowl in his pipe. These all come together for me and cause to me visit the bench more frequently as a refurbisher rather than a carver. Refurbishing old briar involves a very different set of skills and abilities than those used in carving a new pipe from a fresh block of briar. While both take skill and patience, to me refurbishing and restoring an old pipe is more engaging. While all the pipes I work on take the same basic skills each presents unique challenges that push my abilities and skills in new ways.

Those are my thoughts for now… I am sure that the longer I work on old pipes the more these thoughts will mature and grow. Now off for a bowl of some good Virginia in an old restored Sasieni Liverpool.

Topping a Bowl – A Pictorial Essay


I finally used my camera to take photos of the process I use when I top a pipe. I decided to put together this pictorial essay to show the steps on topping a pipe bowl. It is an easy process and can return an otherwise beat up pipe bowl top to new or at least a cleaner vintage look. In the following essay I will take pictures throughout the process from beginning to the finished product with the bowl restored to an acceptable look for me.

The pipe is a Marxman Super Briar billiard. The bowl overall is in pretty rough shape, but the top looks like it was used for a hammer. All the outer edges of the bowl are chipped and rough. To clean and polish it as it stands would leave a very rough looking bowl top and no one clean edge. It was a perfect candidate to benefit from a slight topping.

Before taking it to the sand paper I reamed the bowl and cleaned up the inside so I was working with something a bit cleaner. I also did a quick buff with Tripoli to remove the external chunks of dirt and stickiness that were on the bowl. A clean surface gives me a clearer picture of what I have to work with and how far I will be able to go in the topping process.

Below are three pictures of the pipe when I picked it out of the box. Note the grime that needs to be removed before cleaning and the rough edges around the top and the deep chunks missing on it. Many of these go to a depth of about 1/8th to 1/16th of an inch so it is in need of topping to clean it up. The decision that needs to be made is how far to go without changing the profile of the pipe too much. I will decide that as I work with the bowl sanding off the roughness. It is hard to say how much will need to come off without actually starting the process. I may have to stop at some point and bevel the outer edge a bit to keep the profile in tact but time will tell.
topping1

topping2

topping3

When you are topping a bowl it is important to maintain the flat and straight profile of the bowl top. It is easy to change the angle if care is not exercised. I use a flat desk top or a piece of wood to ensure that the flatness is maintained. I put a piece of sand paper, usually 240 grit, on the board or desk top. Others use a piece of glass to provide the hard surface. Sometimes I sand it on a desk pad like the one pictured below. I hold the sand paper with one hand to make sure it does not move. The desk pad helps keep it from slipping as I work the bowl on it. The bowl is held top down and tightly placed on the surface of the sand paper. I move the bowl in a rotating pattern, turning clockwise, always applying equal pressure on all points to keep it flat on the paper. The process is pictured below.
topping4

As I sand the top, I repeatedly check to see if it is staying level and to see progress in removing the rough edges. I have found that as I work the process the rough edges are highlighted by the freshly sanded bowl top. They really are clearly visible as most of the time they are either blackened or at least more stained than the fresh wood. I give me a constant picture of what needs to come off on each edge of the top. The picture below clearly shows the rough edges on the outside of the bowl. I continue to sand until I have minimized those and the outer edge begins to return to round. I sand until the top is smooth and round. I generally have to make a decision regarding when to stop based on the depth of the chips and rough edges and whether I should bevel the edge to finish the work.
topping5

In the next two pictures the bowl is at the point of decision. Either I continue to sand and take out more of the roughness or I will do a slight bevel on the outer edge of the pipe. I take the overall look of the pipe into consideration in this decision. How much will more sanding change the profile of the pipe? How much will a slight bevel change or maintain that integral look and flow? Those are considerations that I make at this point in the topping process. I check the depth of the remaining spots on the bowl and from there come to a decision.
topping6

topping7

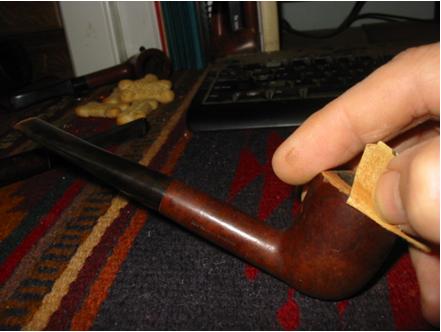
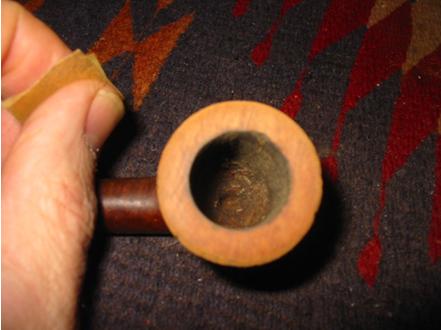
This bowl is finished with the topping and I have decided to bevel the edge to minimize the remaining chips on the edge. To do that I take a small piece of sandpaper and fold it in half and place it at an angle to the bowl edge between my fingers. I am aiming for an even bevel at this point and must be careful to maintain the angle the entire circumference of the bowl. To facilitate this I work the entire circumference each time I go around the bowl. Between each time around I check to see that the angle is maintained and to see what remains to be removed in order to give a new smooth surface to the bowl. The two pictures below show that angle and the general work of the beveling.
topping8

topping9

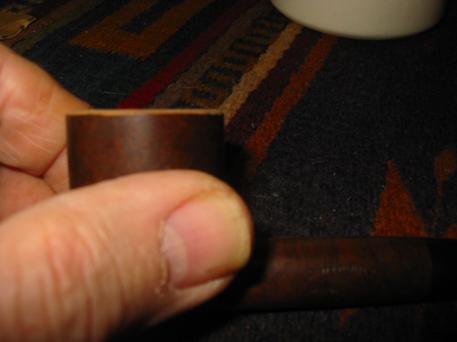
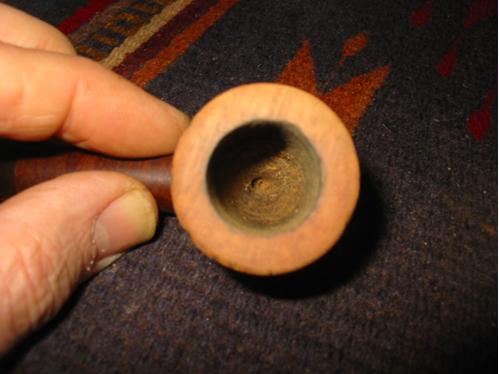
The four pictures below show the first turn of the beveling. You can see from the first picture that the roundness of the bowl top is coming into shape. The other three pictures show the two sides and the front of the bowl from the side to show the angle of the bevel – it is subtle as I do not want it to look to rounded. I am aiming for the roundness that comes with age and wear on a pipe.
topping10

topping11

topping12

topping13

The four pictures below show the beveling process completed. You will note that a few deep chips still remain on the edge of the bowl. The stain will hide most of these and those that remain give character to the old pipe in my opinion.
topping14

topping15

topping16

topping17

When I have finished beveling the pipe I will often sand the entire bowl with 1200 grit sand paper to even out the rough spots from the bowl sides, front and back. It also allows me to better match the new stain that will be applied to the entire bowl. After sanding I wipe the bowl down with 99% isopropyl alcohol (less water content with more percentage). The wipe down removes a bit of the colour of the original stain which aids the match on the restain. It also highlights areas that I need to give more attention to with sanding. The pictures below show the pipe after sanding and the alcohol wipe down.
topping18

topping19

topping20

topping21

The prepped bowl provides a few challenges to a good restain. The very visible pink fill on the back of the bowl will need to be blended in with stain. I will also have to blend the edges that have been beveled with the colour of the bowl sides and top. My goal is to make that transition look natural and original. Before staining it I wipe the entirety of the bowl with isopropyl alcohol one final time. This wipe will take off any remaining dust on the wood and ready it for the stain. I will be using a black cherry aniline stain on the bowl as I hope it will blend in the fill and make it a bit less noticeable. I apply the stain with a q-tip and then light it on fire with a match or lighter to set the stain. This process is called flaming the bowl and burns off the alcohol but does not harm the briar. Once it has been flamed I wipe the bowl off with a soft cloth and completing the staining process. Further application of stain is an option that will darken the bowl. I applied the stain a second and third time to the fill and surrounding areas to see if I could blend it a bit more. The fifth picture below shows the fill. It still shows in the picture but in hand it looks more subtle and subdued. From the pictures you can see the effect of beveling the edge very clearly. The top shows some nice grain and a gentle curve to the sides of the bowl. The overall effect is to restore the clean and well broken in look of the pipe. The colour brings out the natural patina in the briar and blends the older and the newly stained freshly sanded briar. Here are pictures of this step in the process.
topping22

topping23

topping24

topping25

topping26

Once the stain is well dried the pipe is taken to the buffer and given a good buff with white diamond. The idea is to polish and give a bit of depth to the pipe bowl. Carnuaba wax is then applied for a final shine to both pipe and the stem. For the sake of this essay I have not done much with the stem. I still need to sand and clean off the remaining oxidation. But I wanted to show the flow of the entire pipe in its topped, finished and stained form. The stem still needs work at this point but that will come next.
topping27

topping28

topping29

topping30

topping31