Monthly Archives: July 2021

A New Solution to an Old Problem


Blog by Kenneth Lieblich

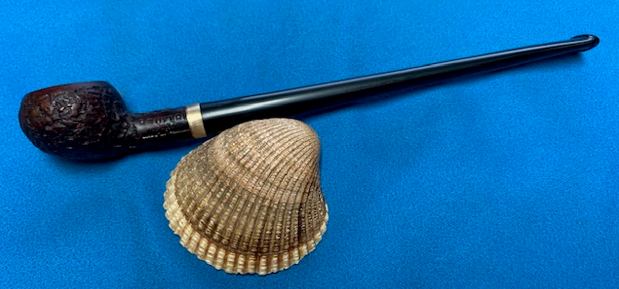
Welcome to my first meerschaum restoration! In fact, it is not just a meerschaum pipe, but it is also a Peterson pipe. This came out of lot of pipes from eBay some months ago, but it took me a while to get to it – I was a bit daunted. Even though it looked rough to start, it ended up as a very handsome pipe. Please read on… 
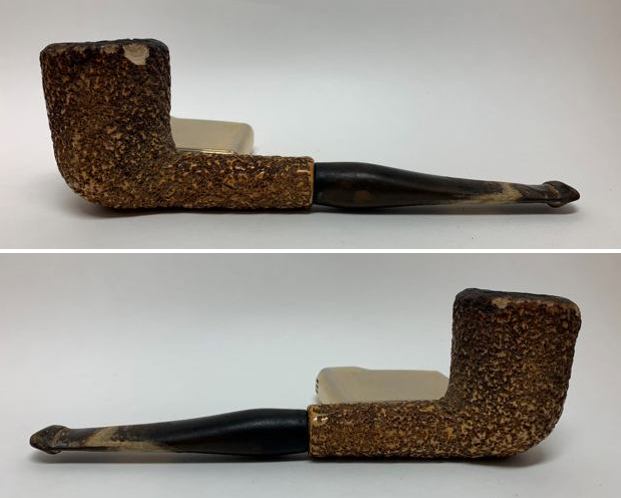
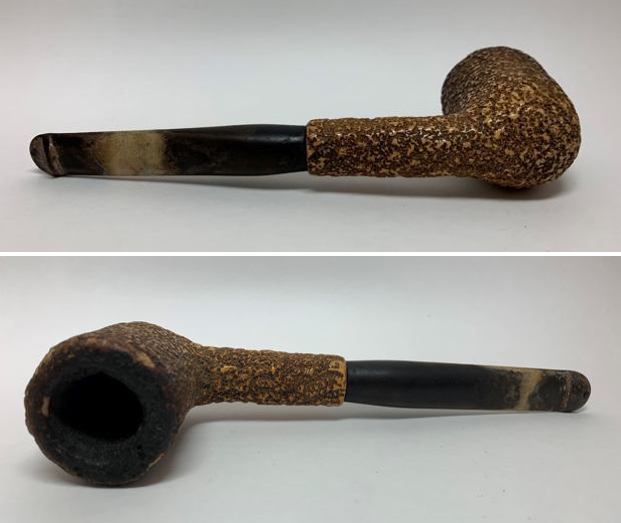
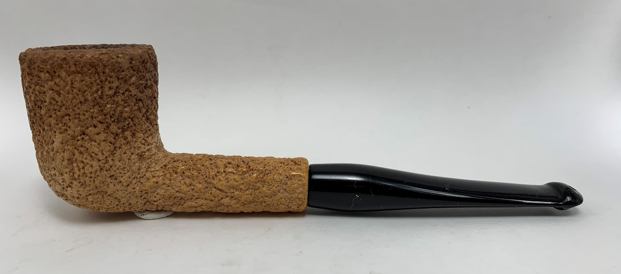
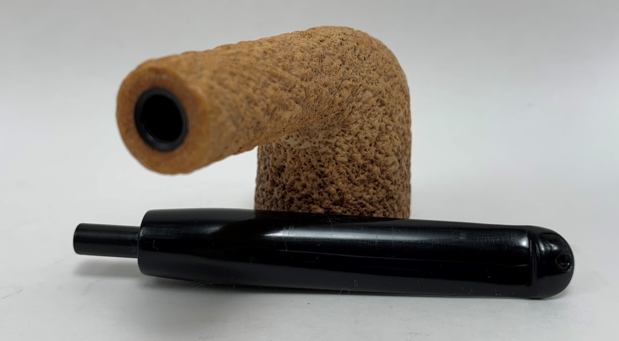
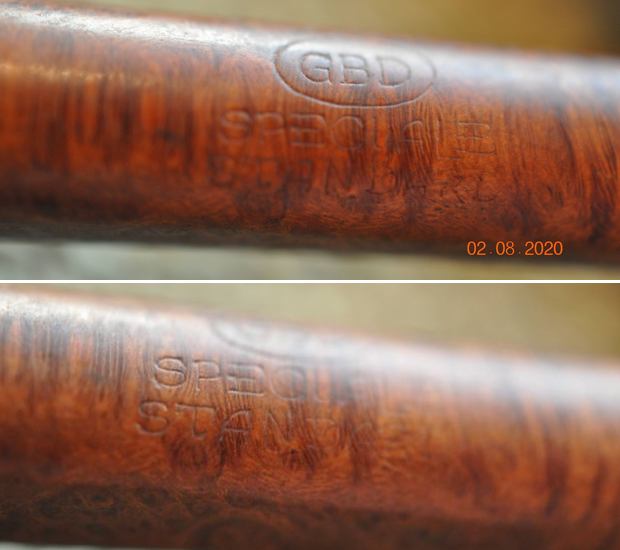
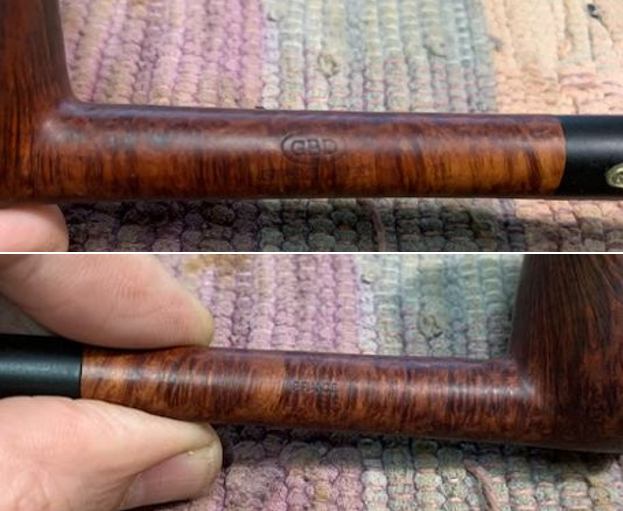
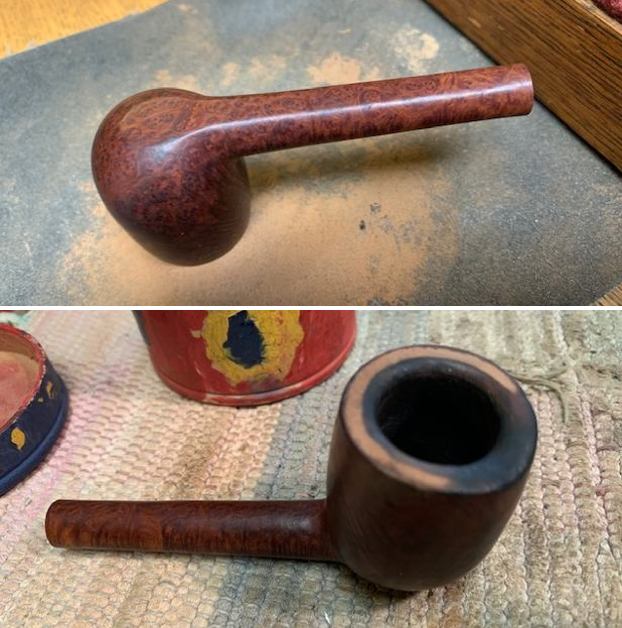
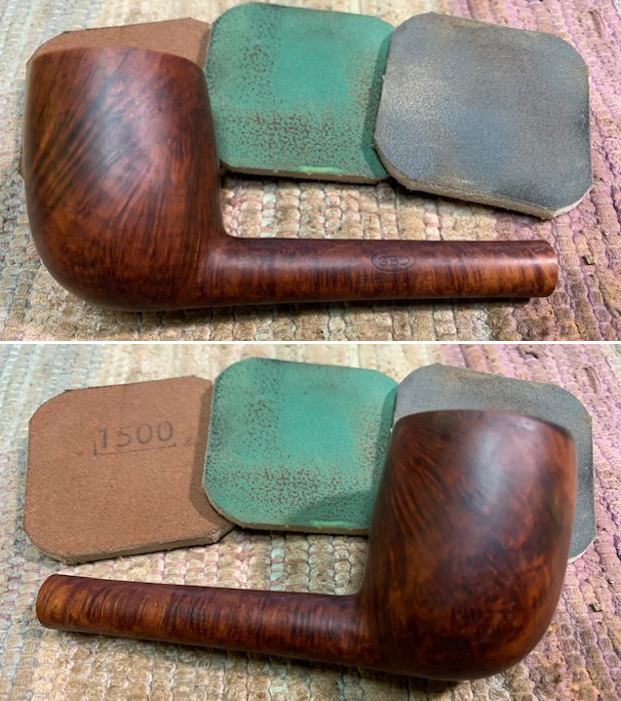
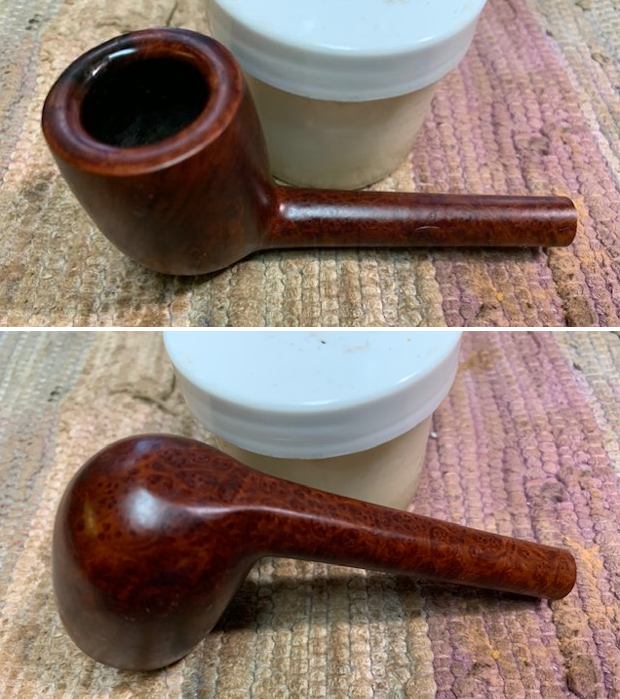
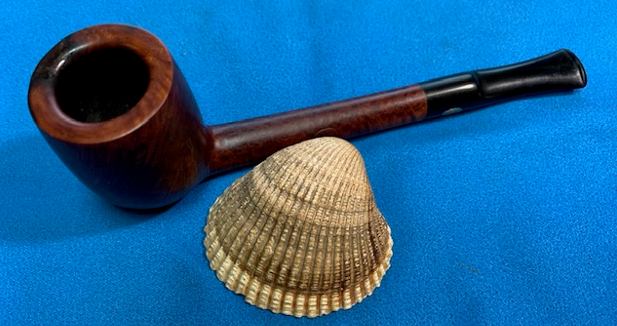
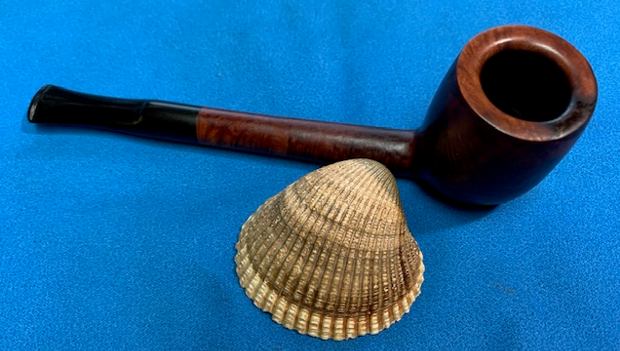
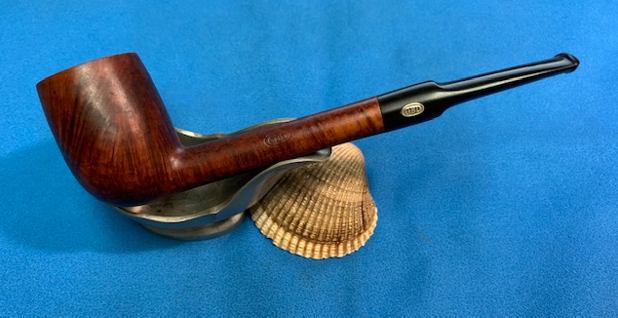
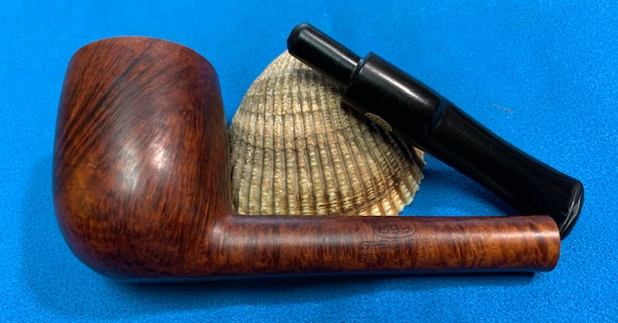
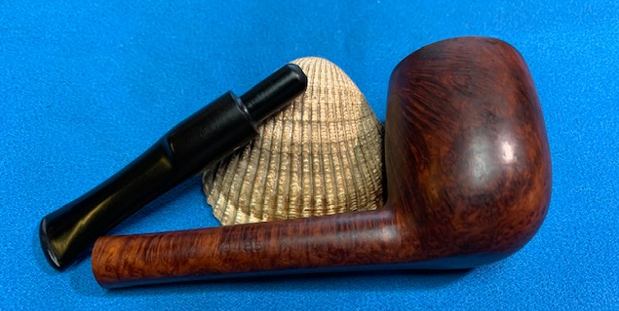
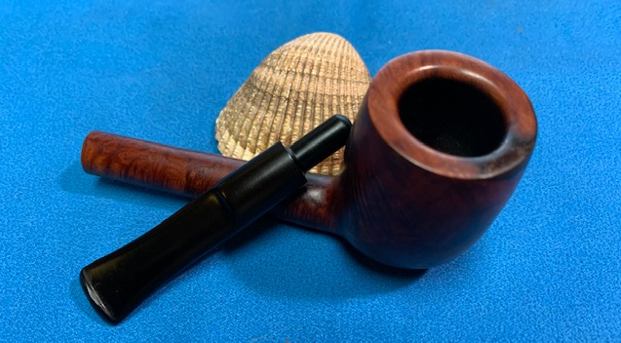
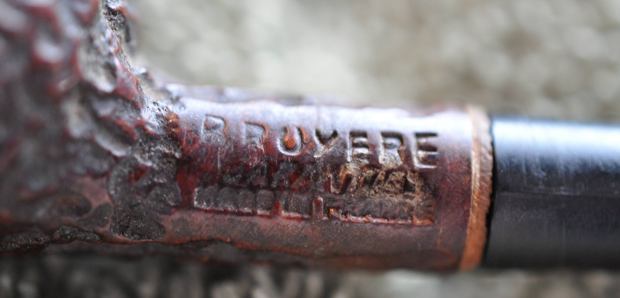
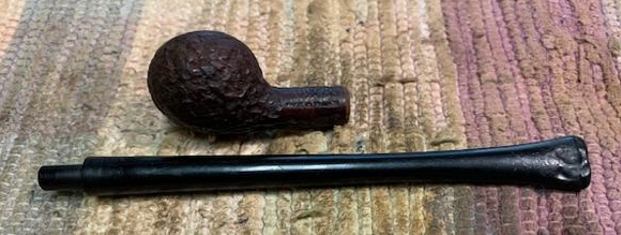
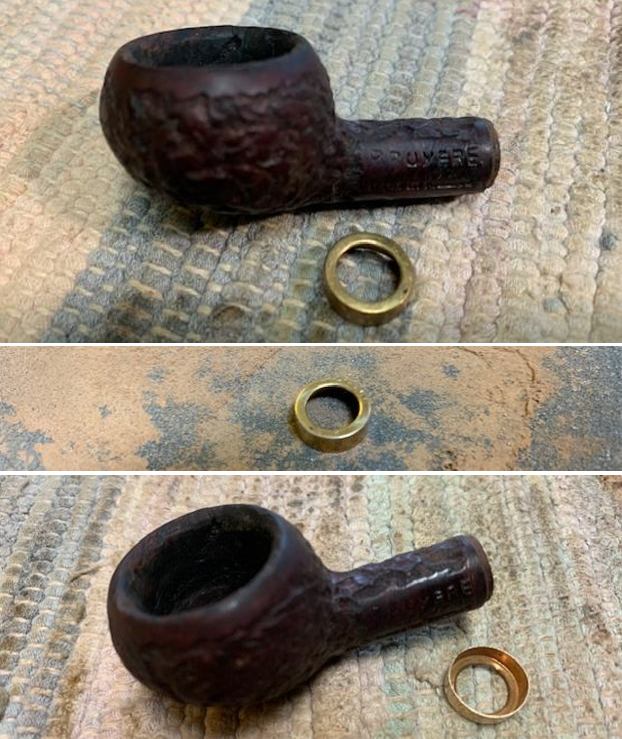
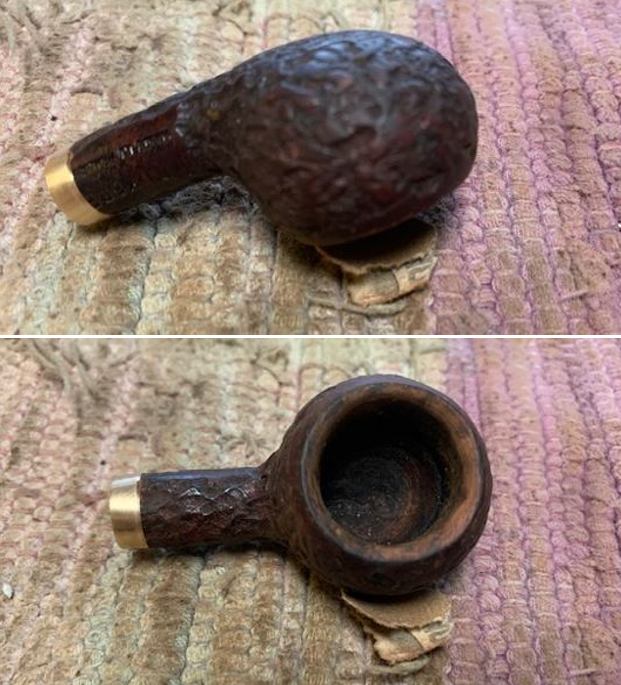
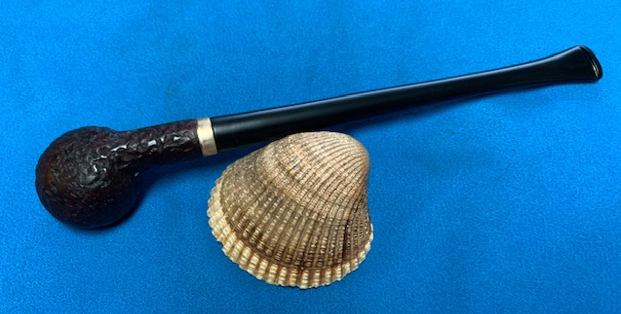
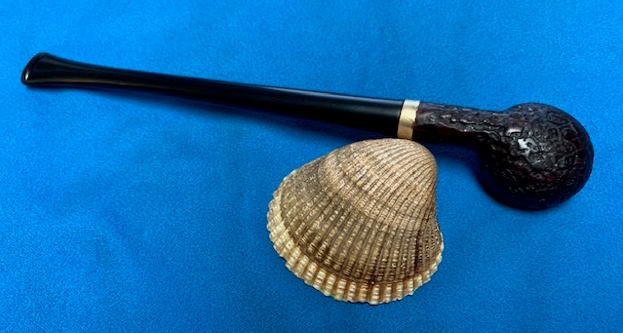
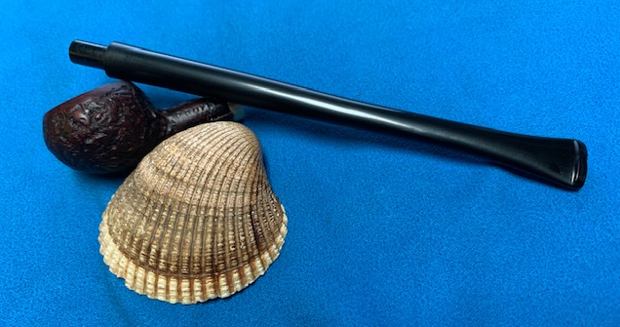
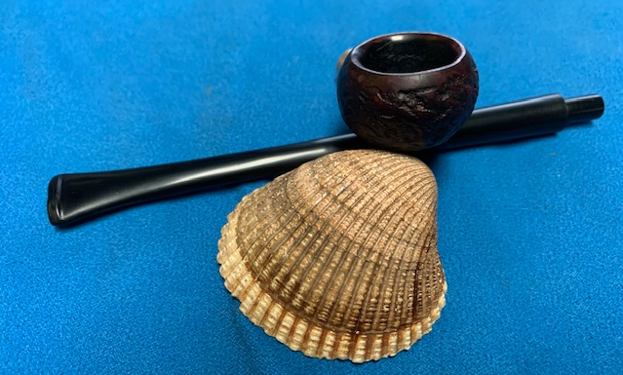
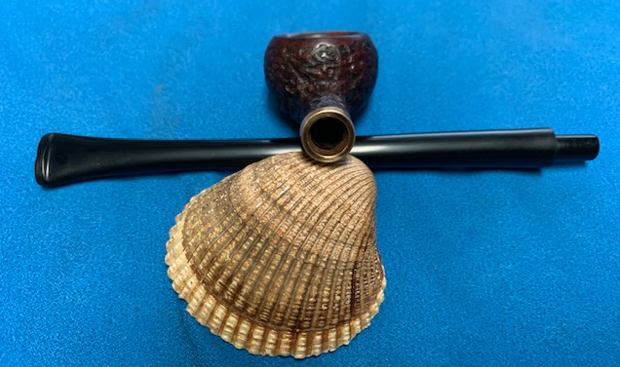
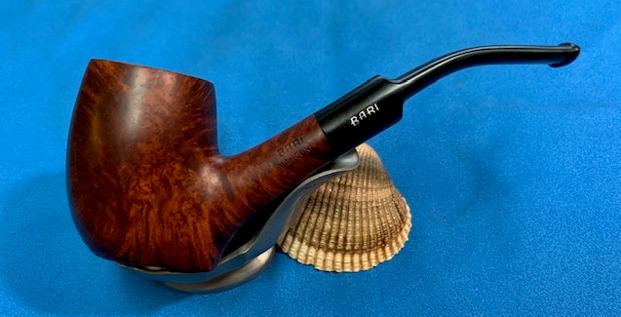
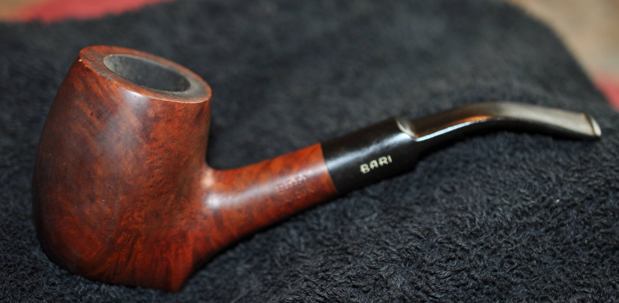
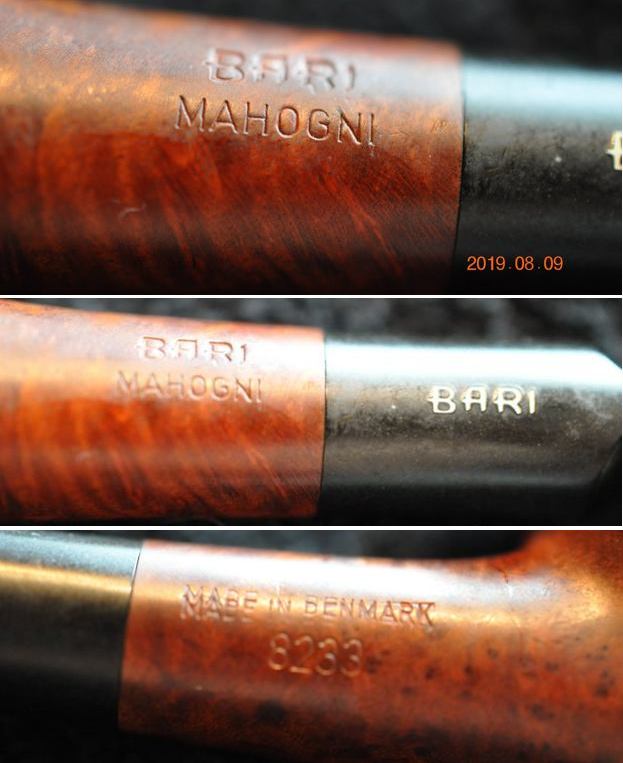
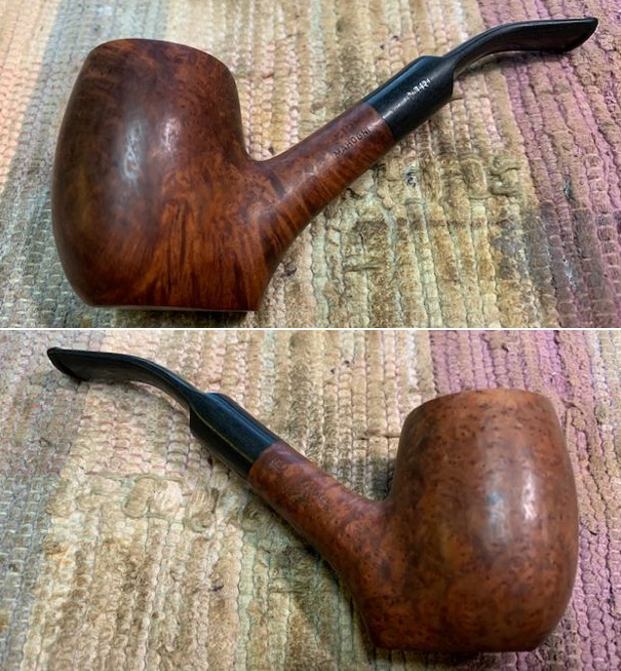
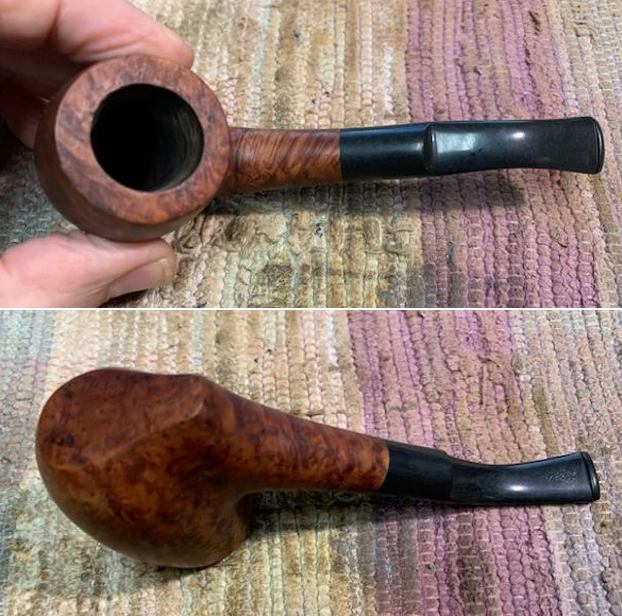
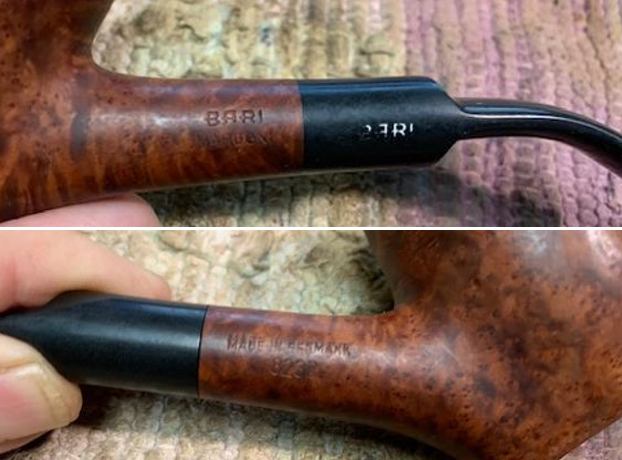
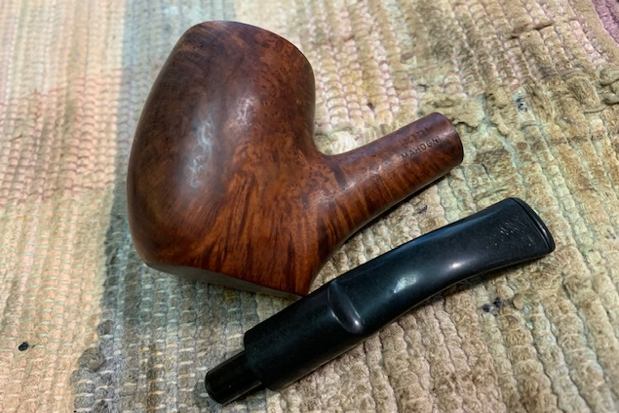
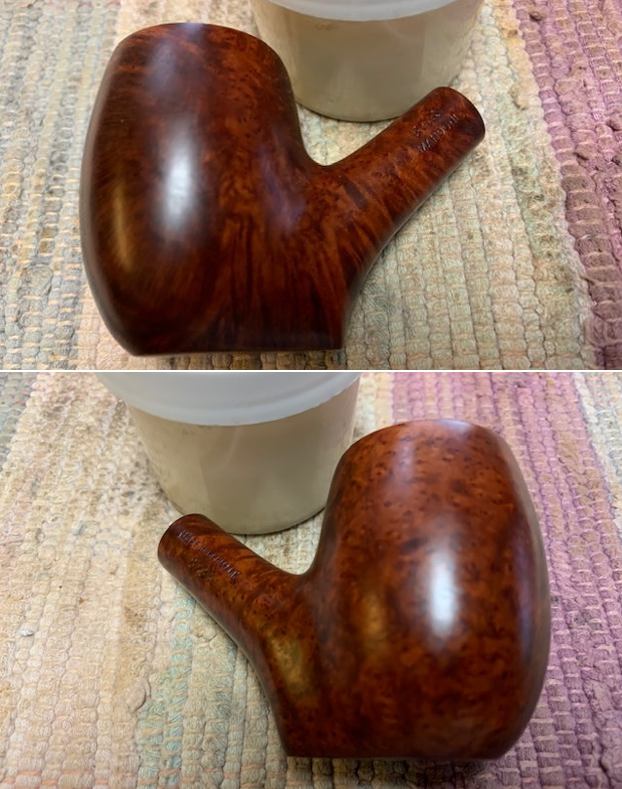
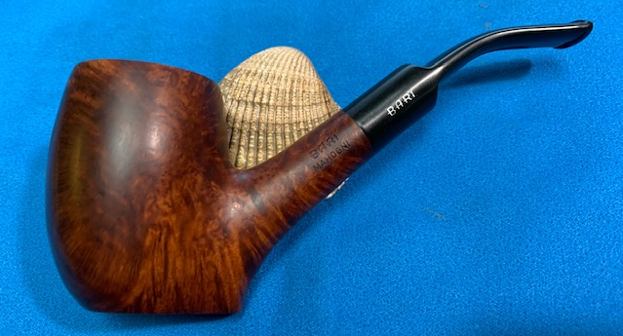
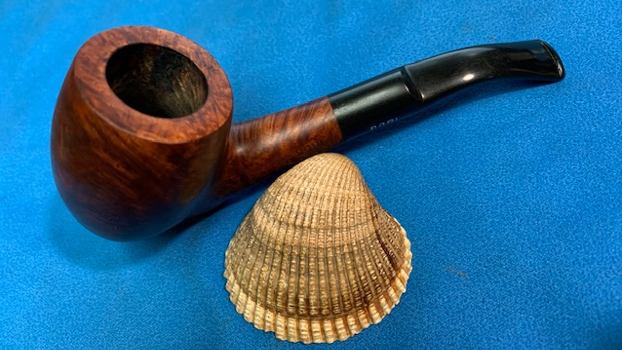
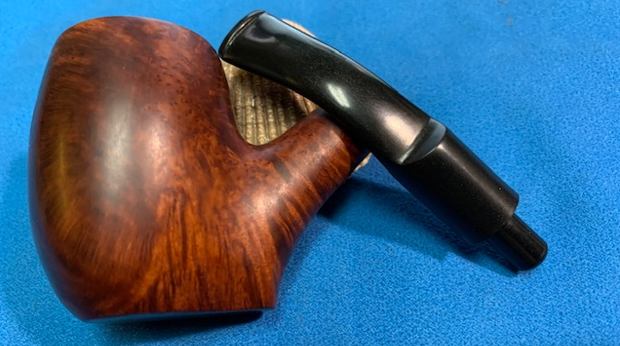
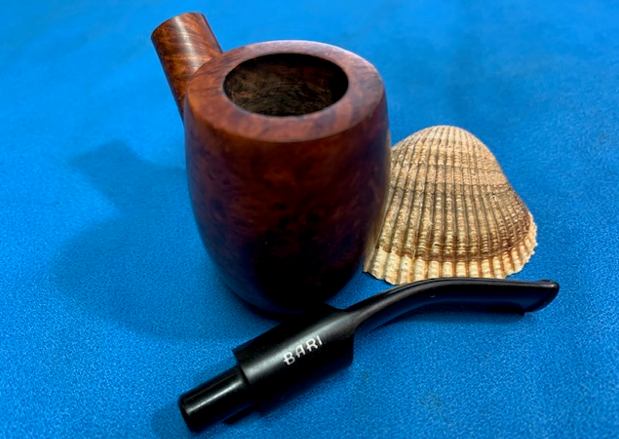
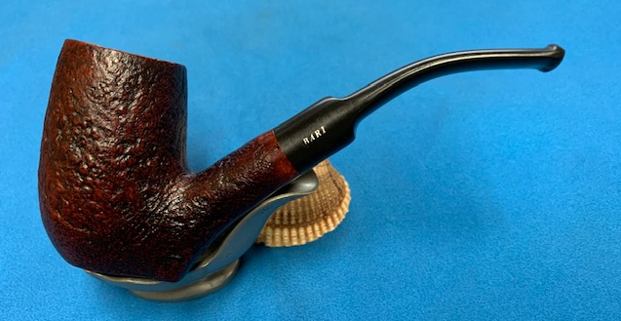
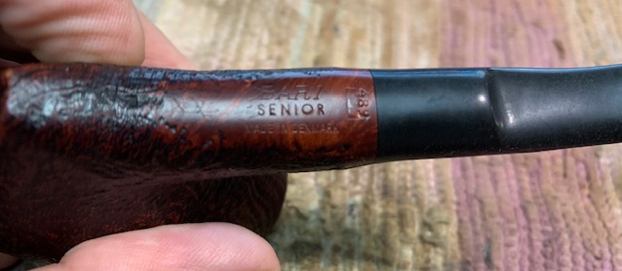
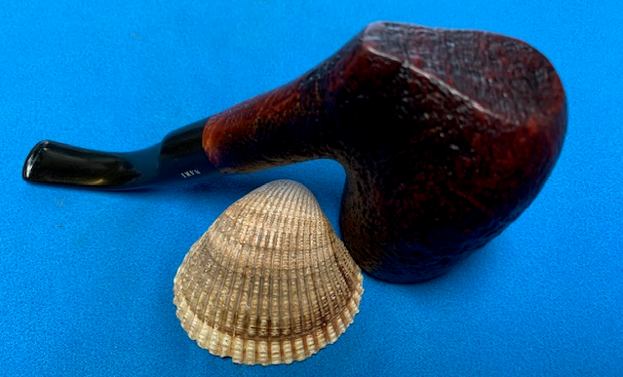
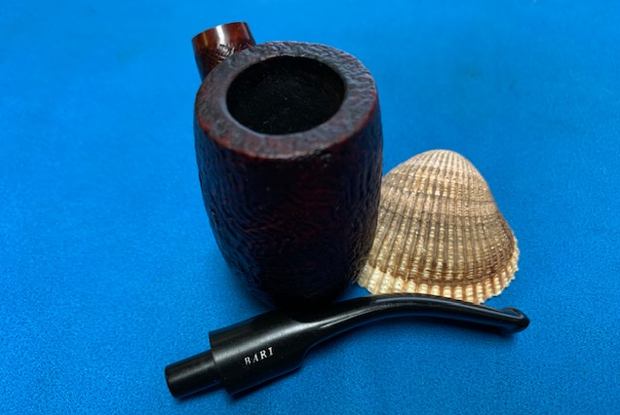
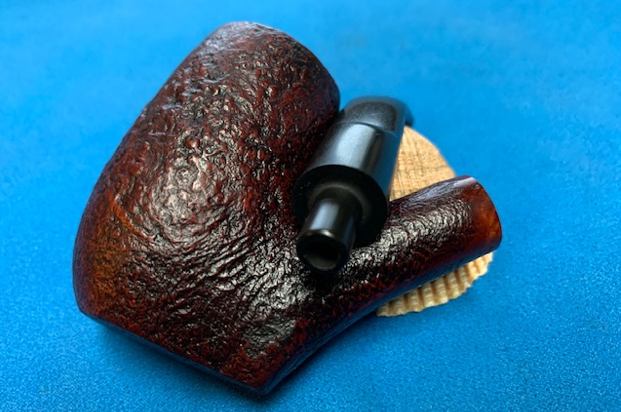
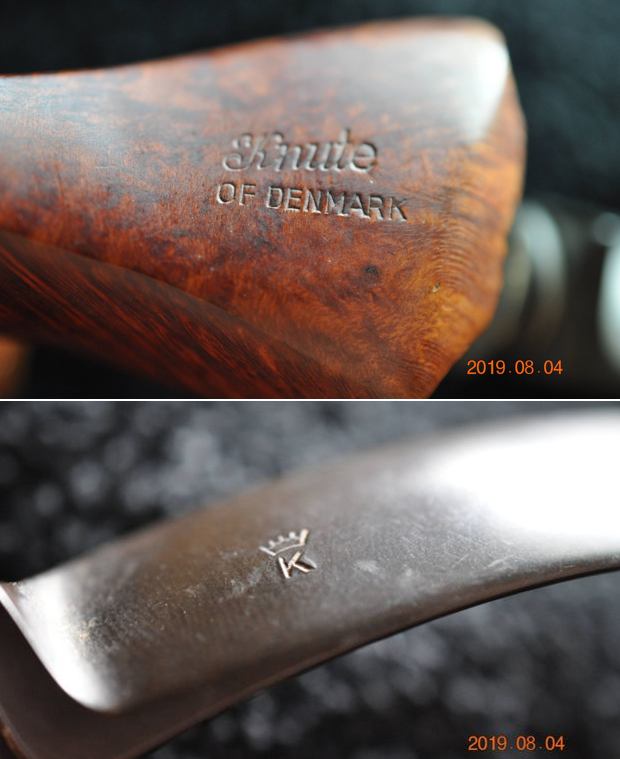
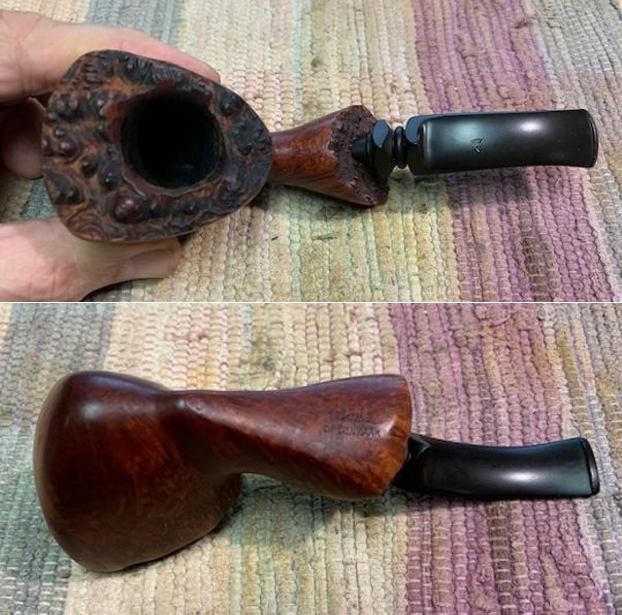
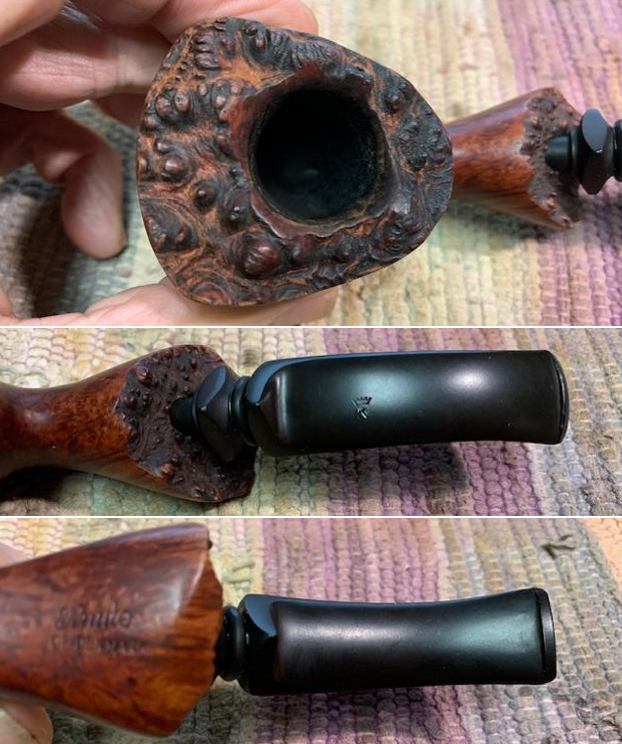
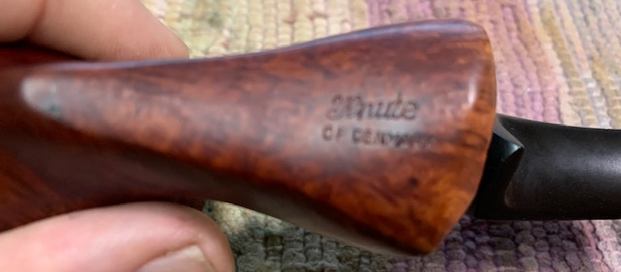
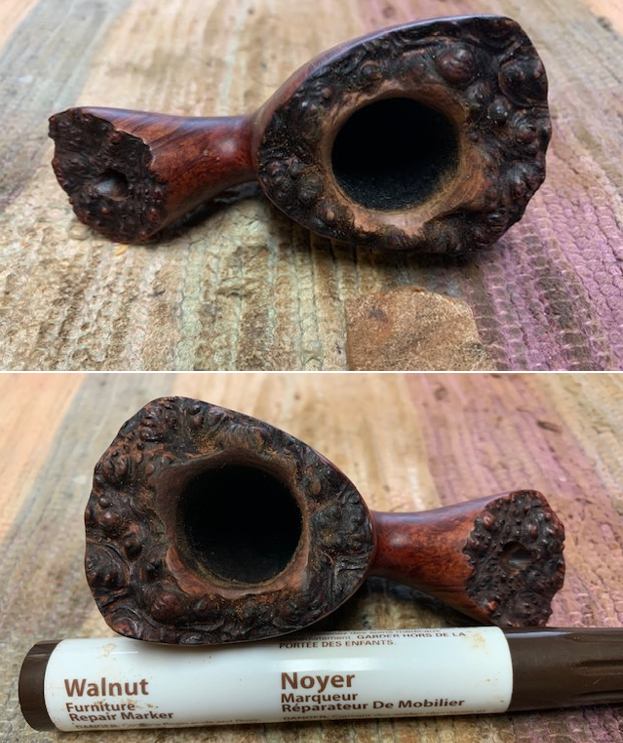
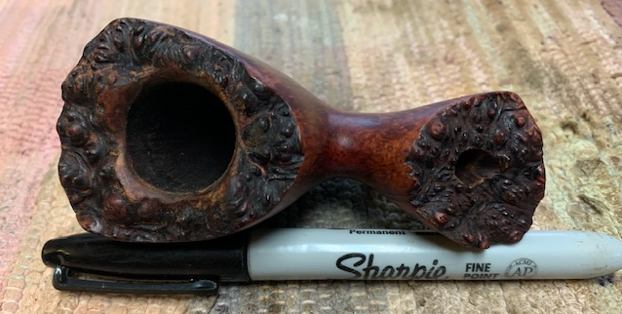
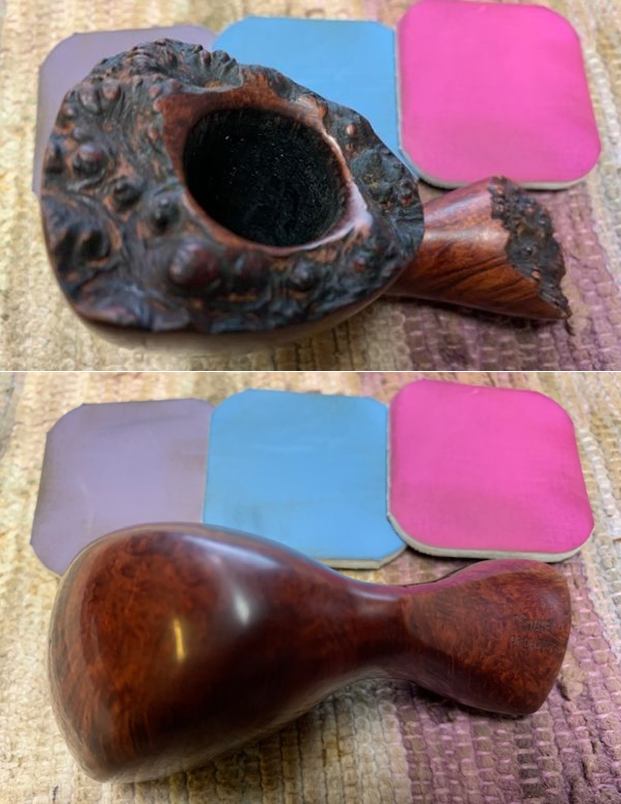
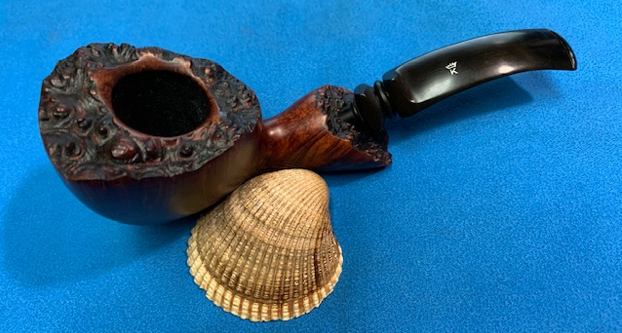
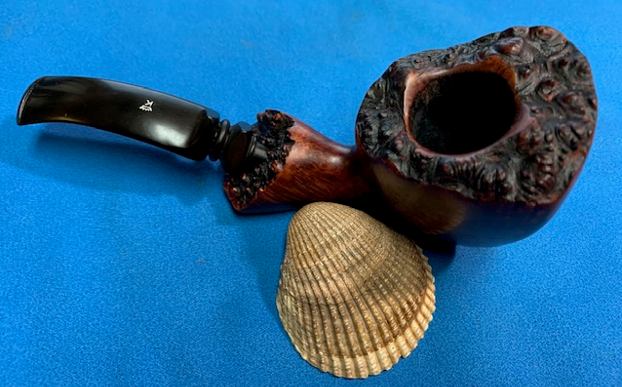
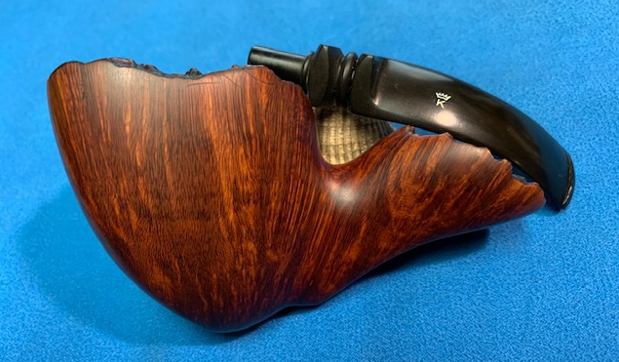
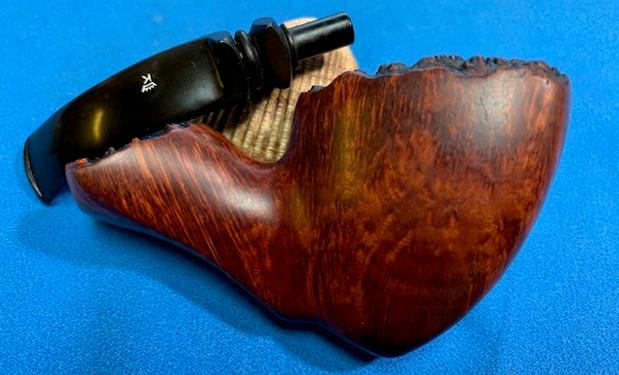
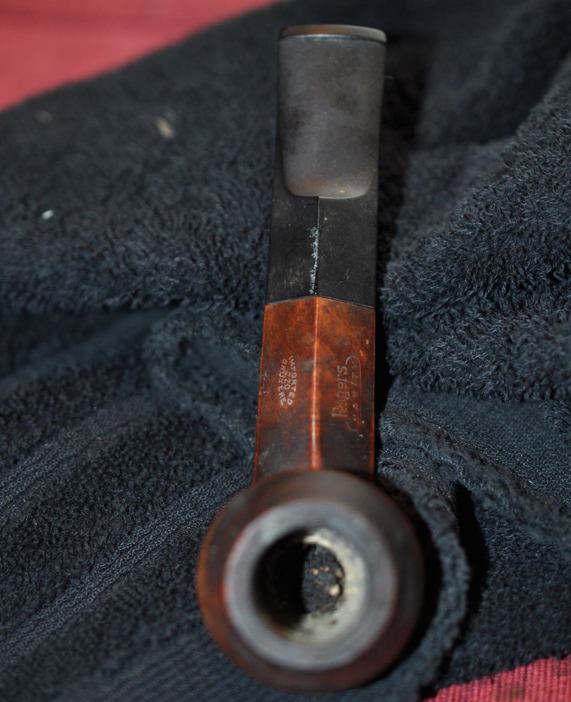
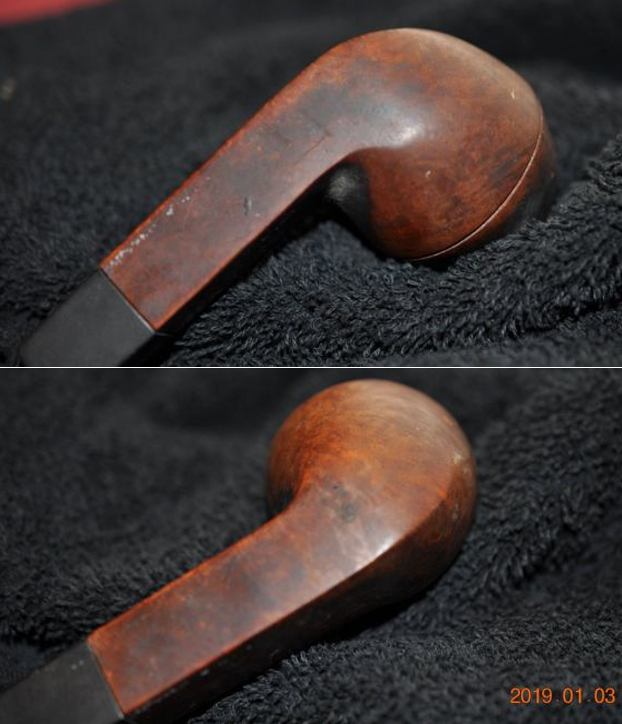
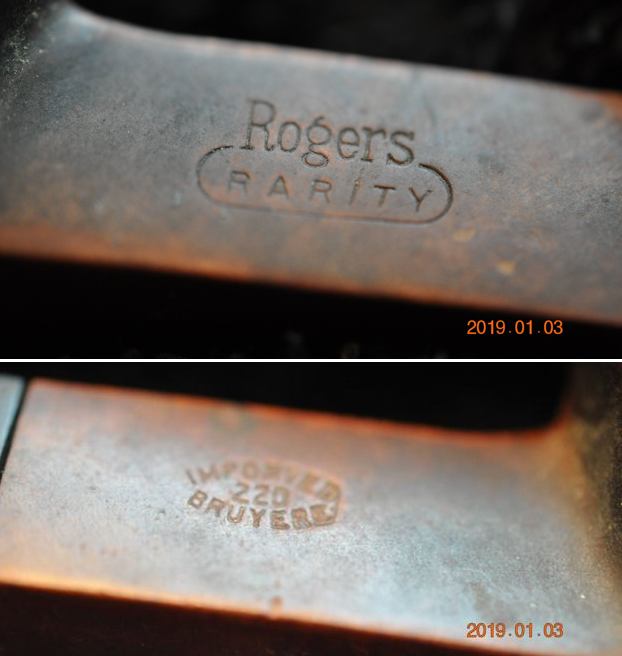
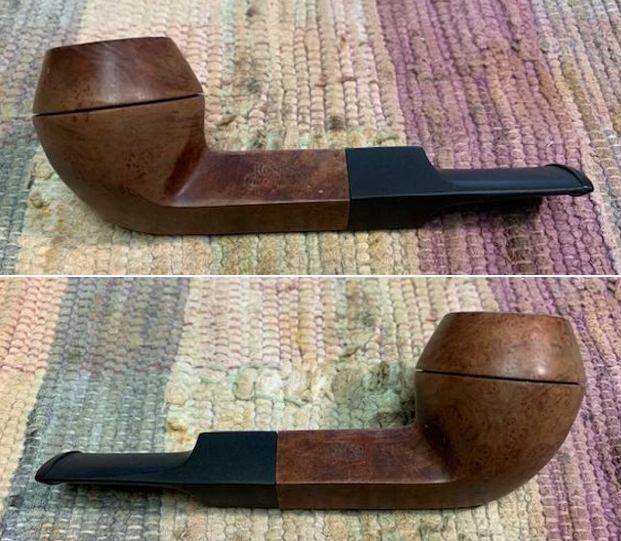
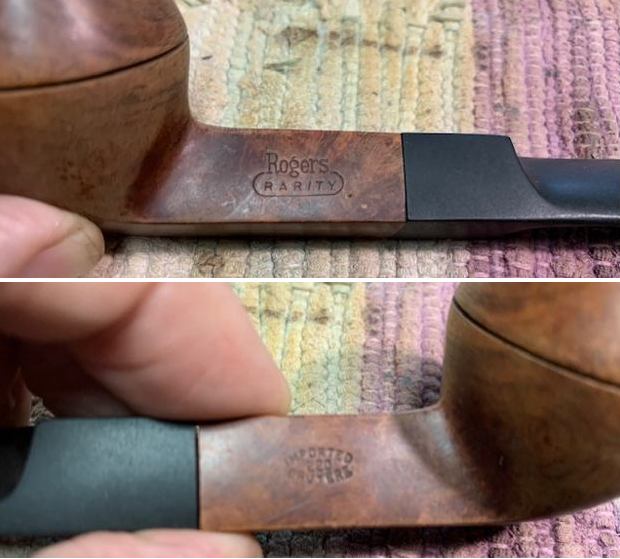
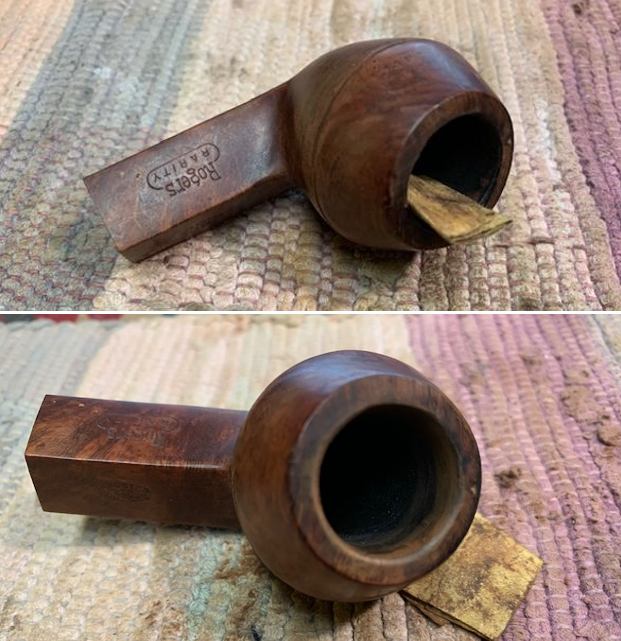
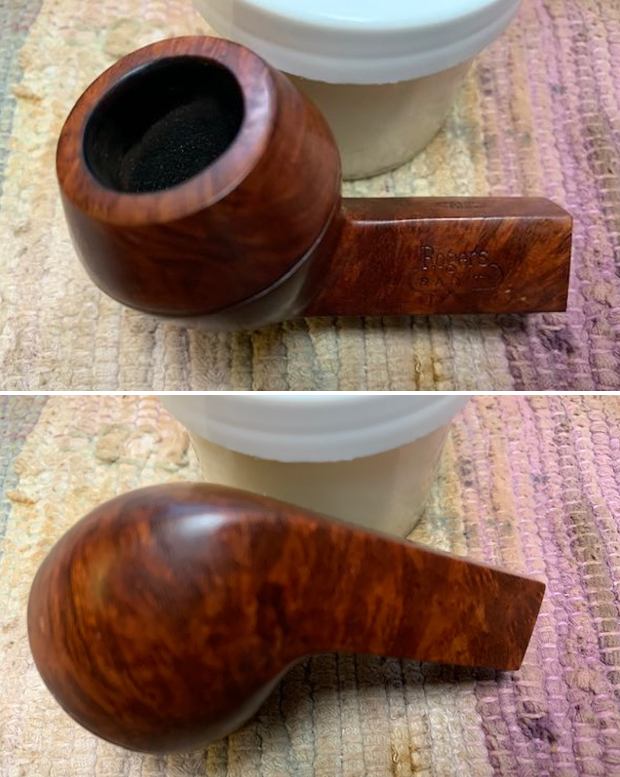
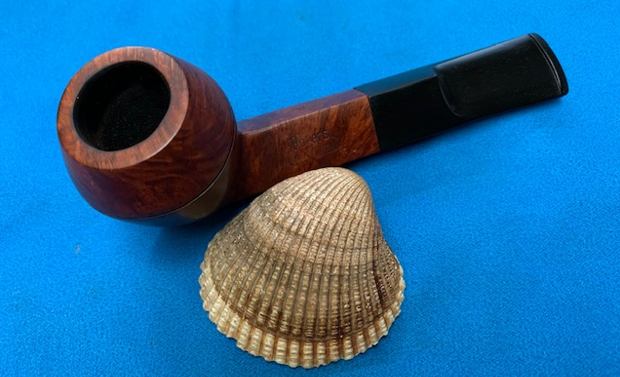
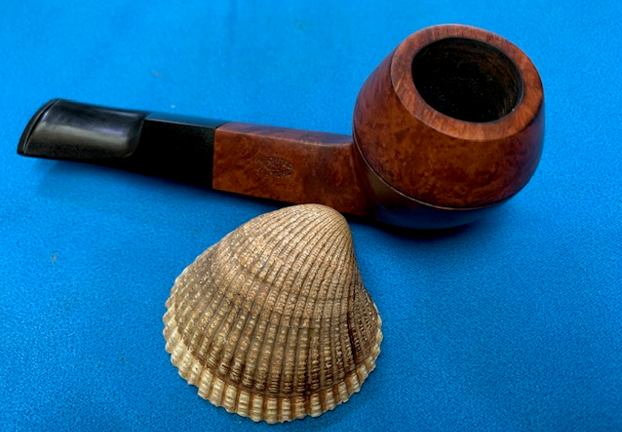
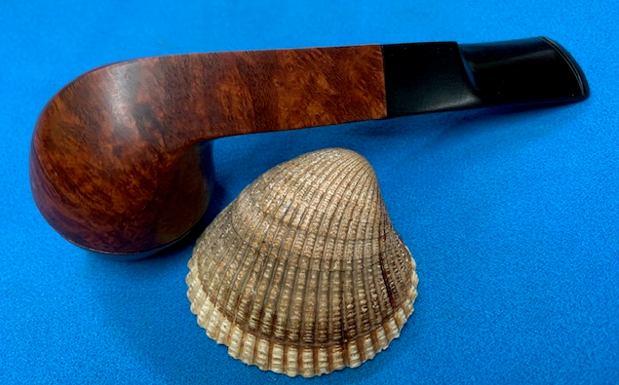
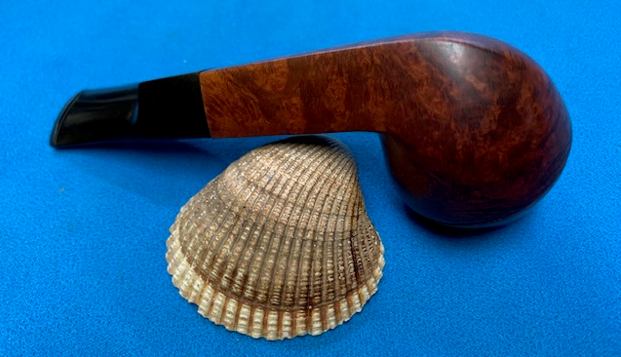
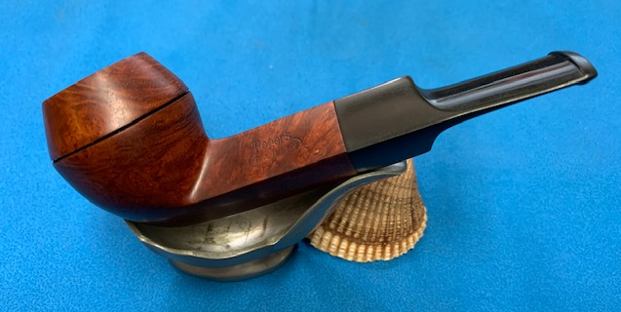
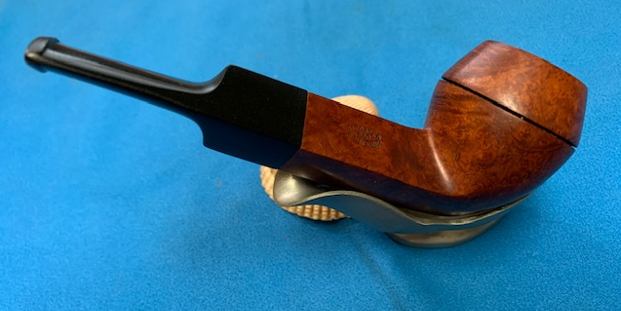
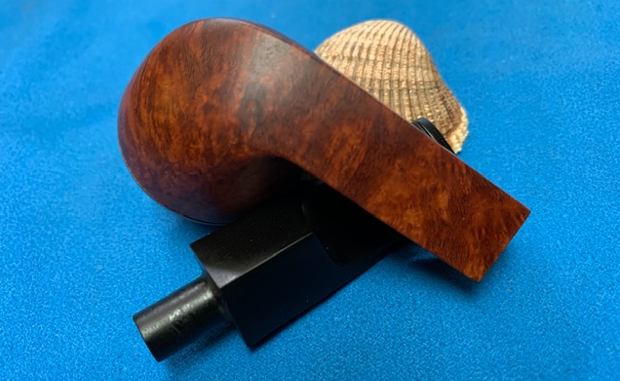
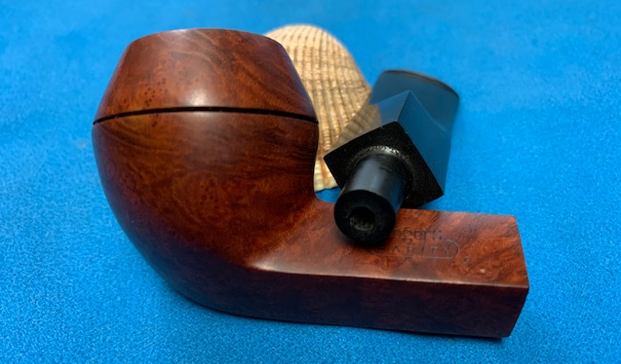
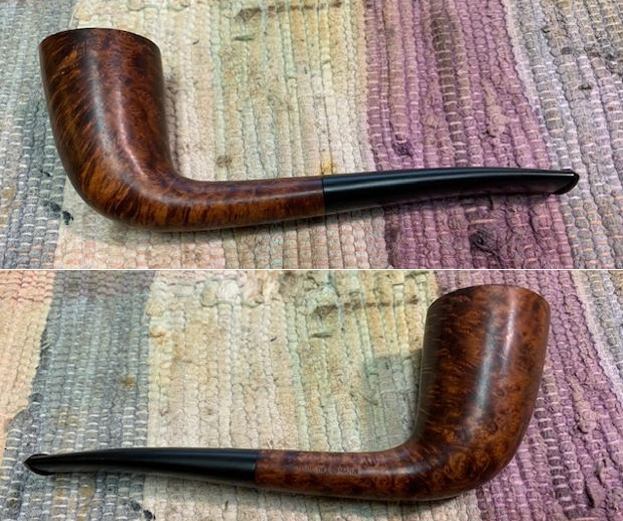
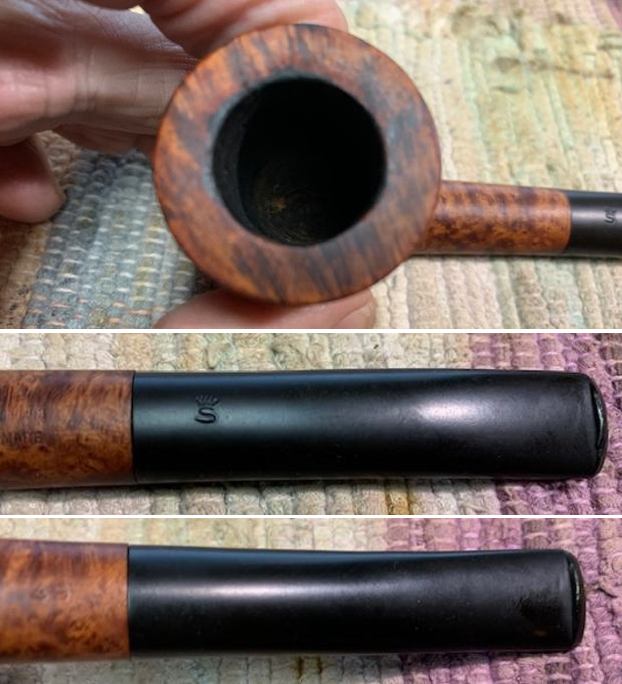
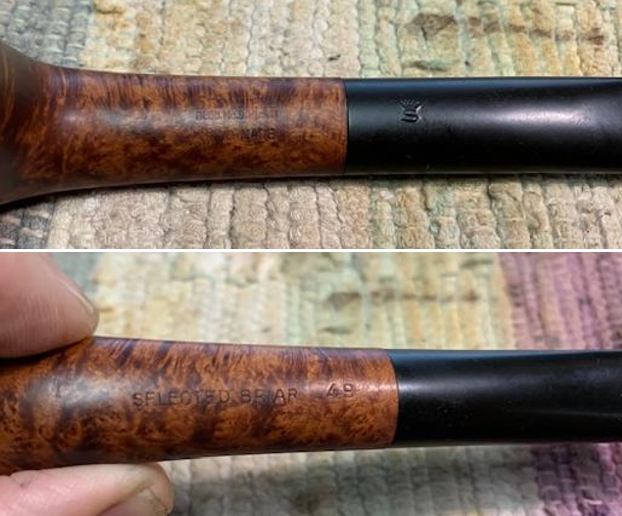
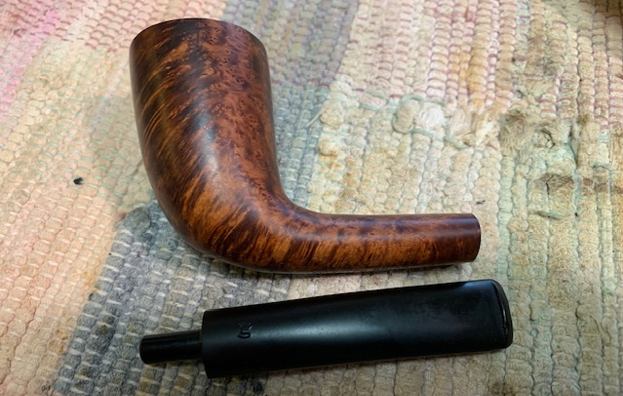
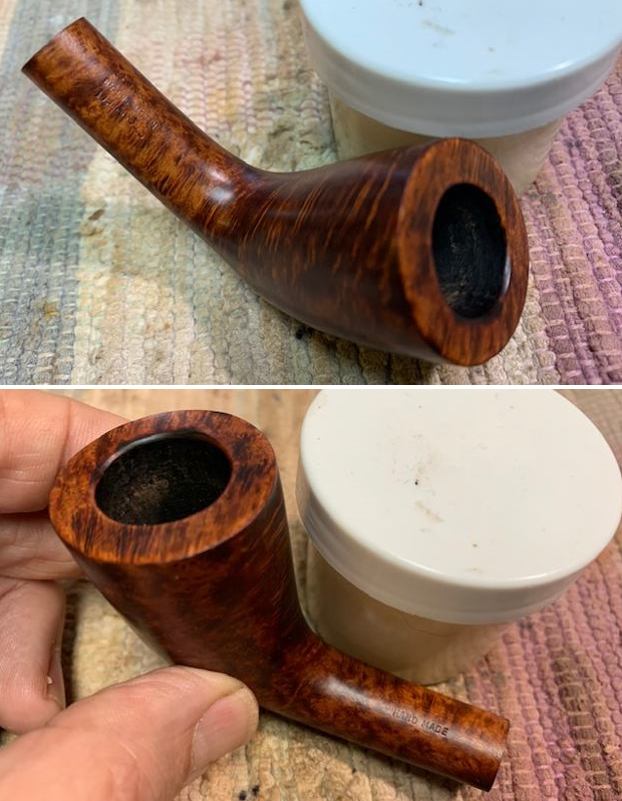
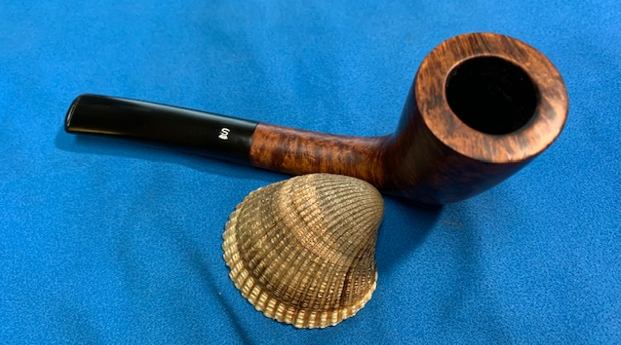
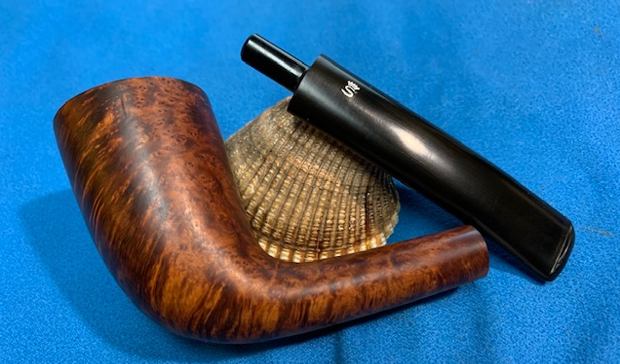
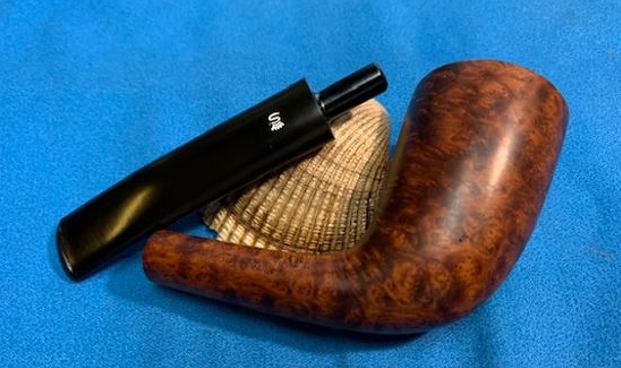
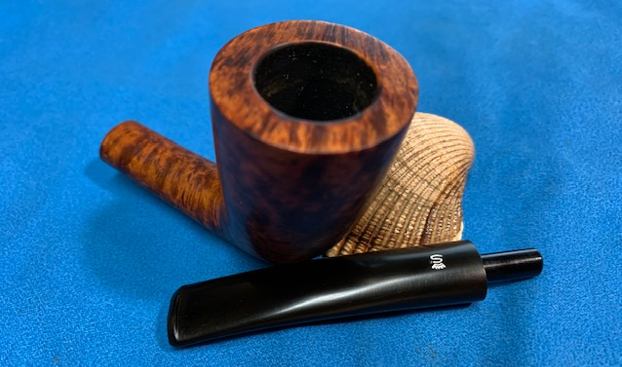
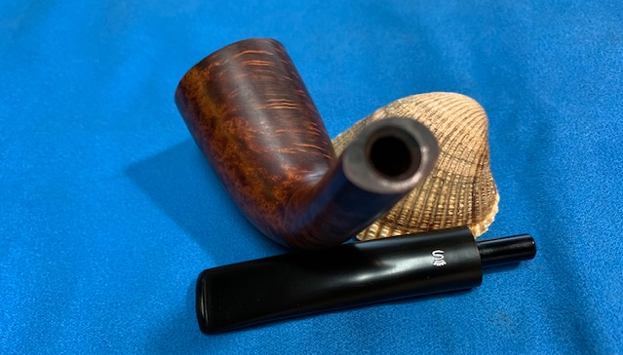
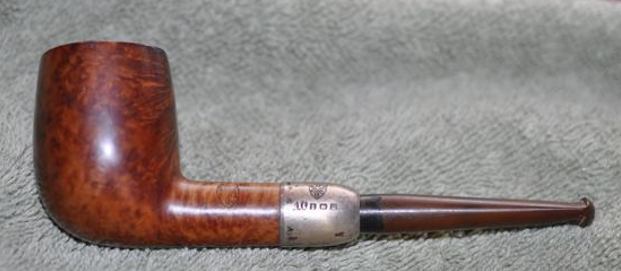
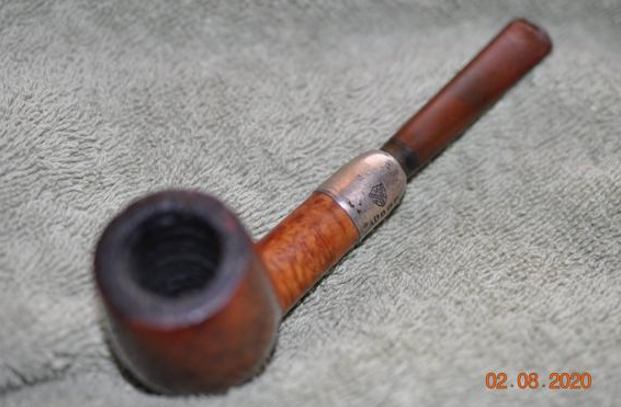
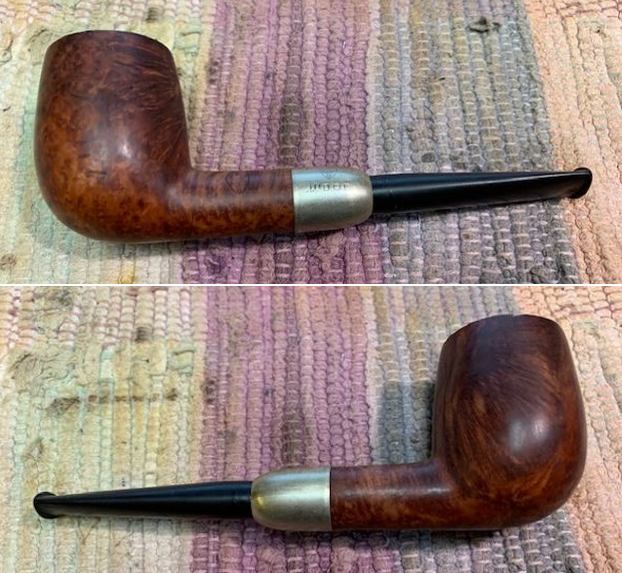
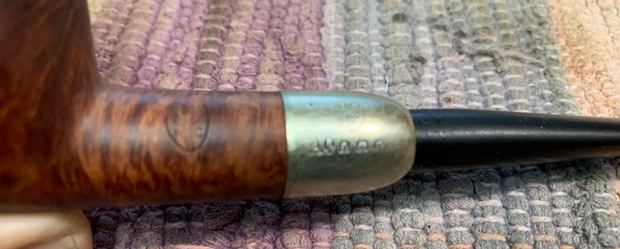
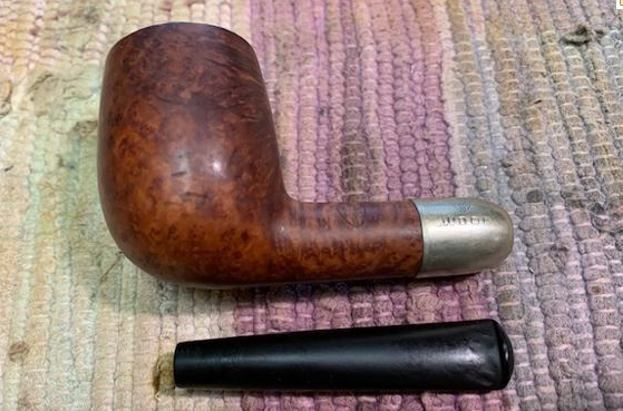
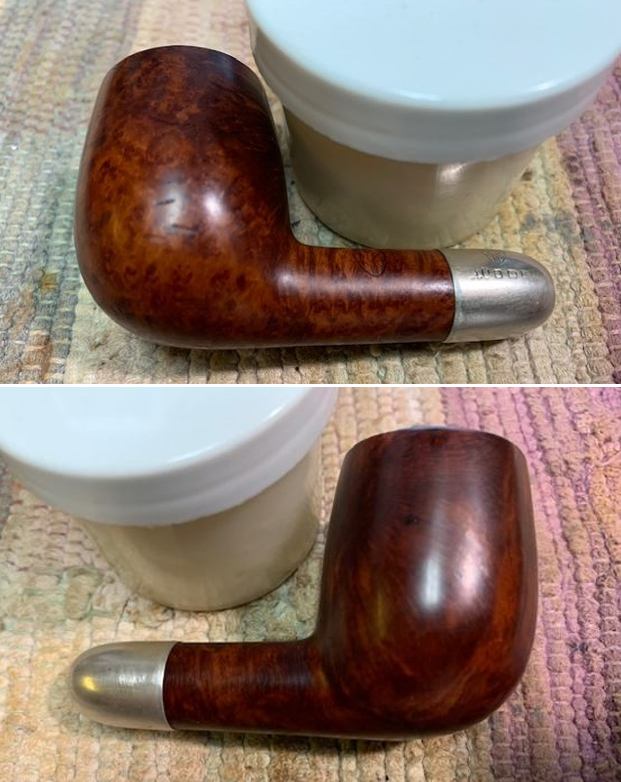
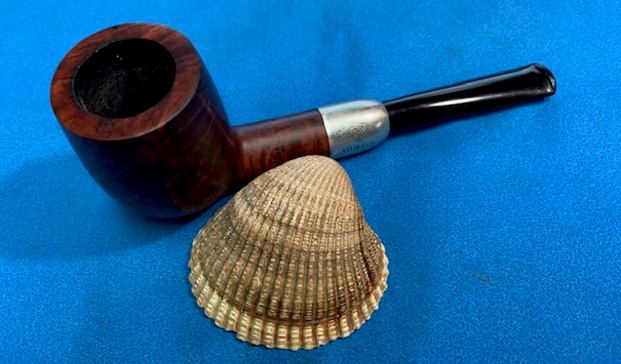
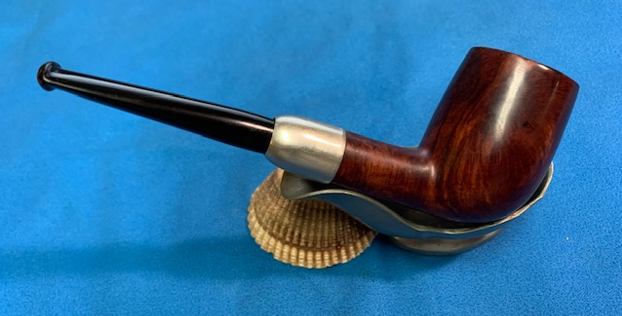
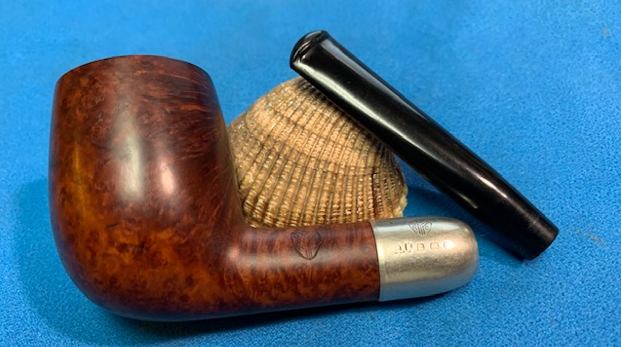
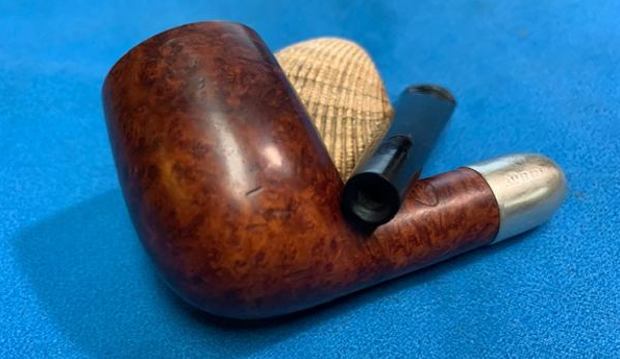
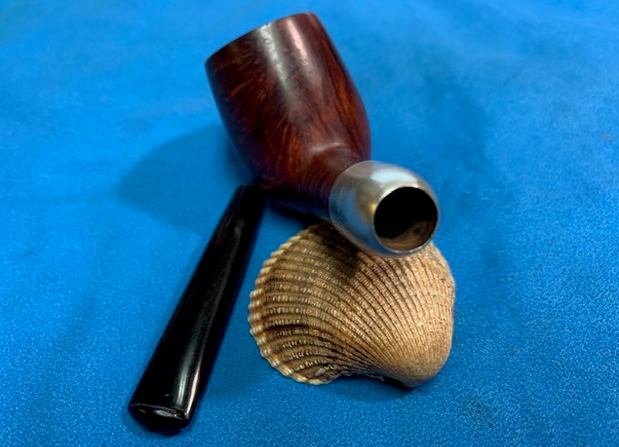
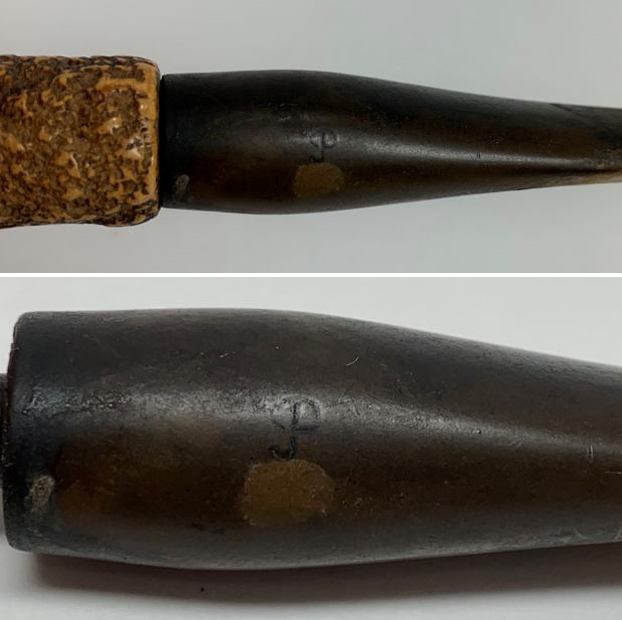
This is a rusticated, African block meerschaum, made on the Isle of Man. The stem has a push-style tenon. Like many of the meerschaum pipes of this era, this one has a factory-stained rim – to give it that sort of ‘broken in’ look. How do I know it is a Peterson? Because it has the distinctive, stylized ‘P’ on the left side of the stem, near the shank. Similar to other pipes that Steve has restored, this one seems likely to have been produced by Laxey Pipes Ltd. on the Isle of Man for Peterson Pipes. Here is the Pipedia article about them (I hasten to add that the various errors below are in the original text and are not mine):

Laxey Pipes Ltd. resided in a historical 19th century four-storey Man stone building at The Quay, Old Laxey, Isle of Man, which thankfully has been preserved.

The company specialised in the production of meerschaum pipes using the Meerschaum mined by the Tanganyika Meerschaum Corporation in the Amboseli basin in Tanganyika (since 1964 part of the United Republic of Tanzania). 

Please note: you may often find names like “Manx Pipes Ltd.”, “Man Pipe Co.” and others more, but there is no indication of another Isle of Man pipe producer other than Laxey Pipe Ltd. at any time! 

Laxey Pipes Ltd. marketed own brands like “Manxpipe”, “Manxman”, “Manxland” e.c. Names like “John Bull”, “White Knight” (unwaxed), “Domino” (black, or lined) indicated some shapes / colours of Laxey’s own series. The stems either showed the astronomical sign for “male” or “man” (circle + arrow), or the crest of the Isle of Man, the 3-legged X in a circle. Manxpipes and Laxey’s other brands were available through pipe retailers in general, but also were sold (mainly) to tourists through their own shop in Laxey. 

Furthermore Laxey Pipes Ltd. manufactured the meer bowls for Peterson, Barling, Nørding and others from the later 1960’s until 2001. Man Pipe e.g. was a brand distibuted by Comoy’s. The bowls usually showed no nomenclature indicating the orderer. “Genuine Block Meerschaum” was engraved frequently. Often, just the stems were different, while bowls were the same.

Supply of meerschaum from East Africa run out (Kenya / Tanzania exhausted, Somalia inaccessible), and thus the last Laxey meers were supplied to trade in May, 2001. Laxey Pipes Ltd. tried to survive continuing with briar pipes – mainly in the Danish style -, but to no success. It closed down business in July, 2002.

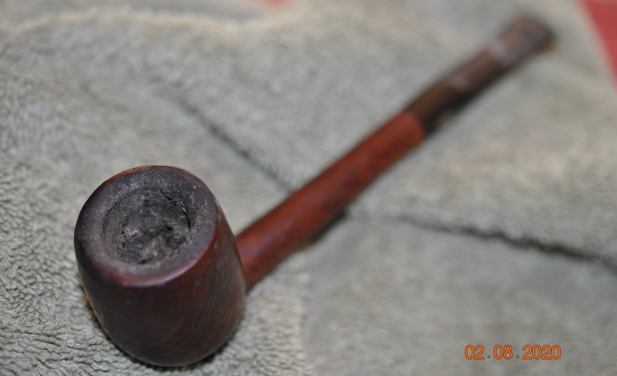
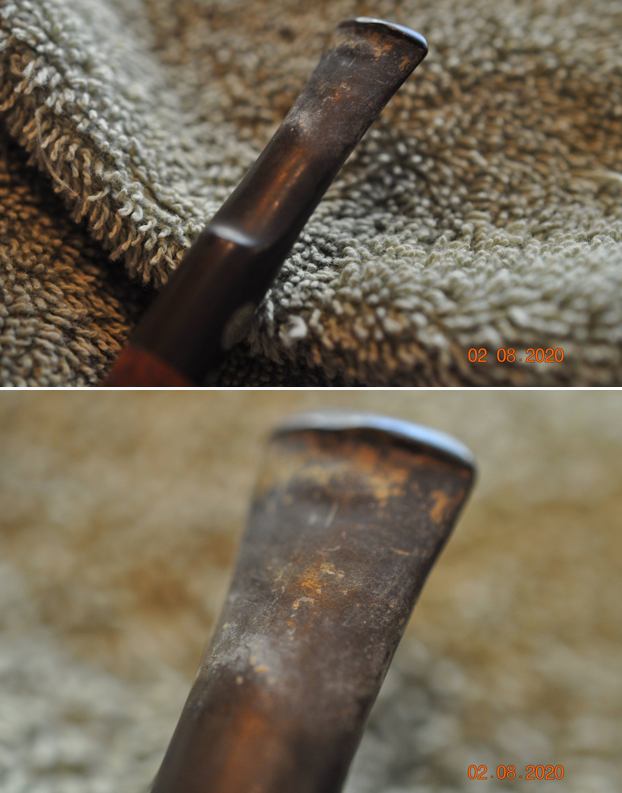
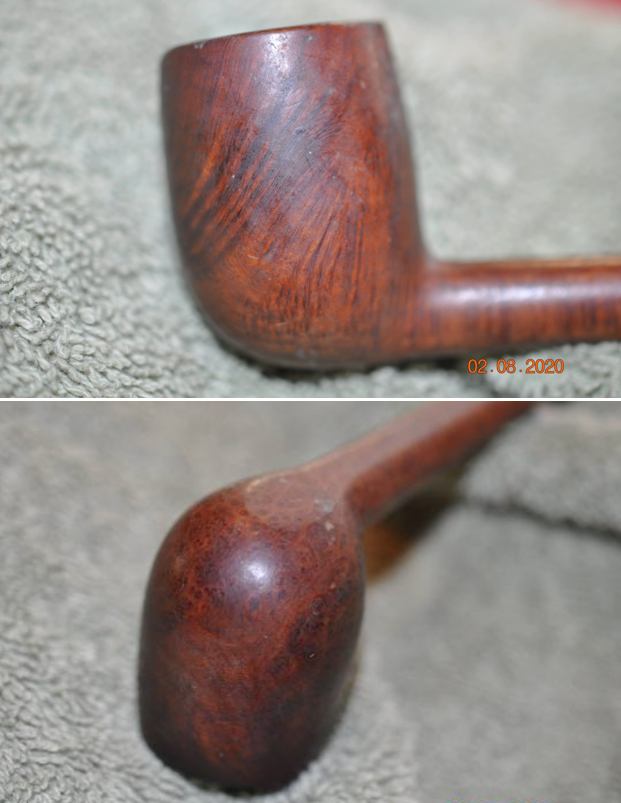
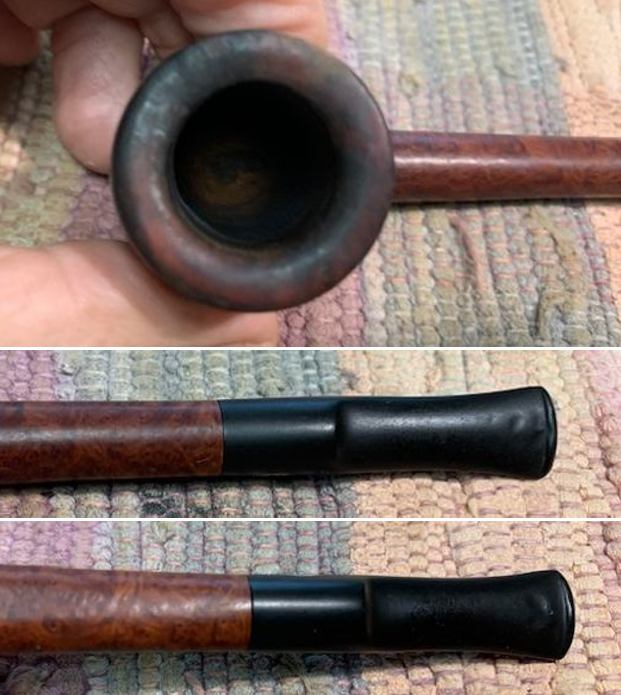
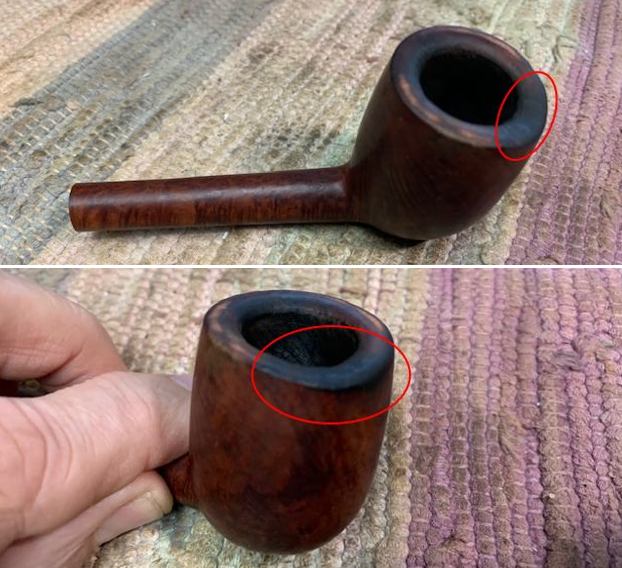
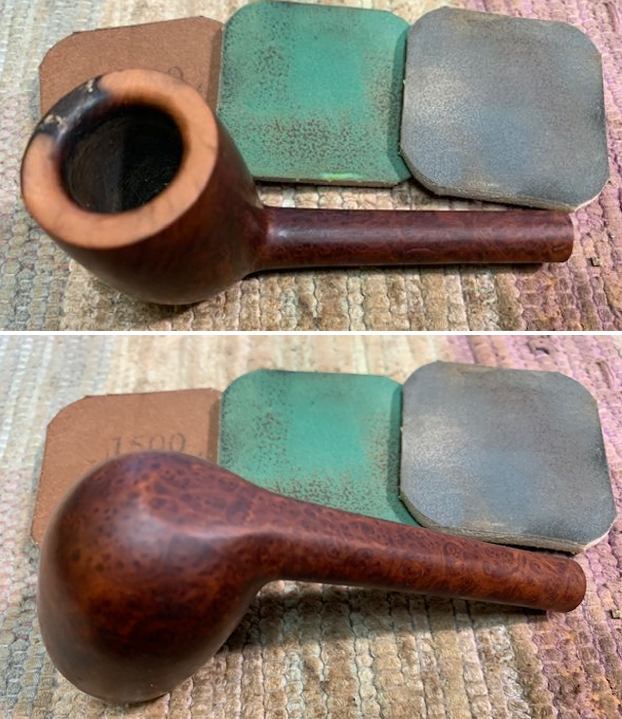
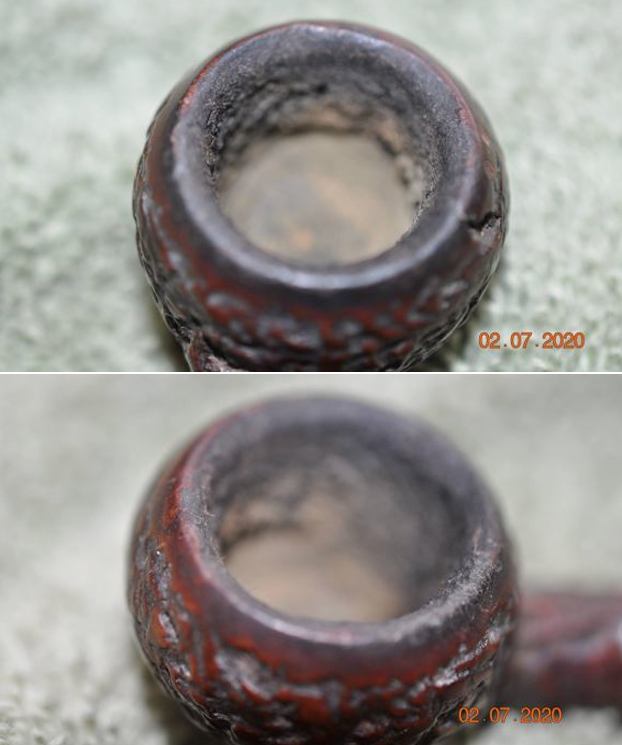
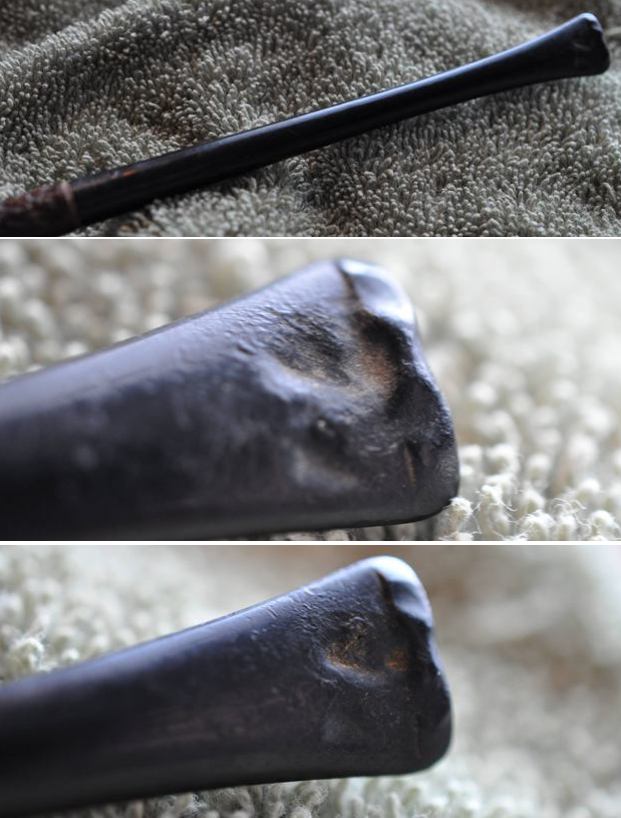
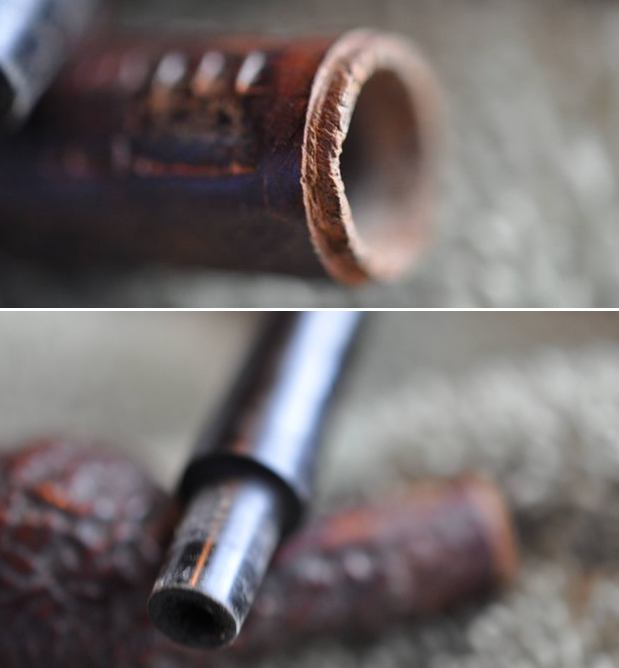
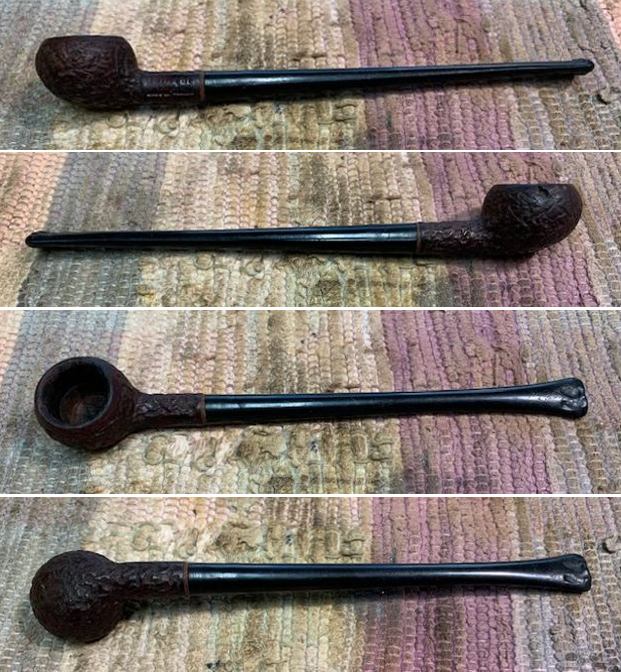
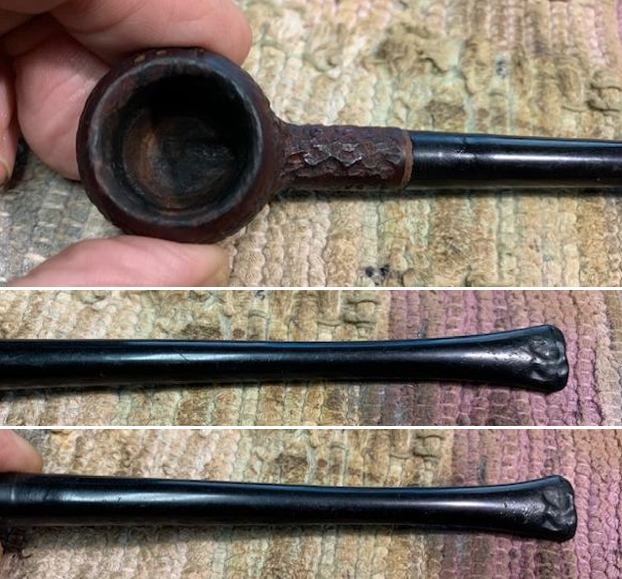
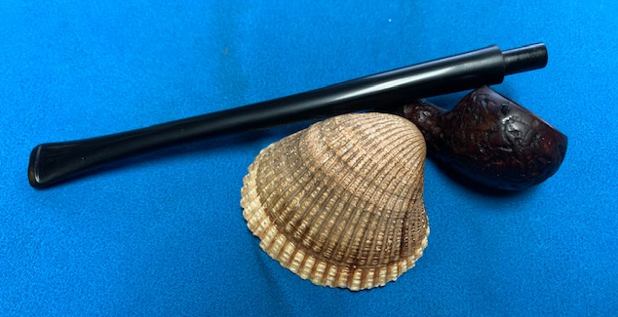
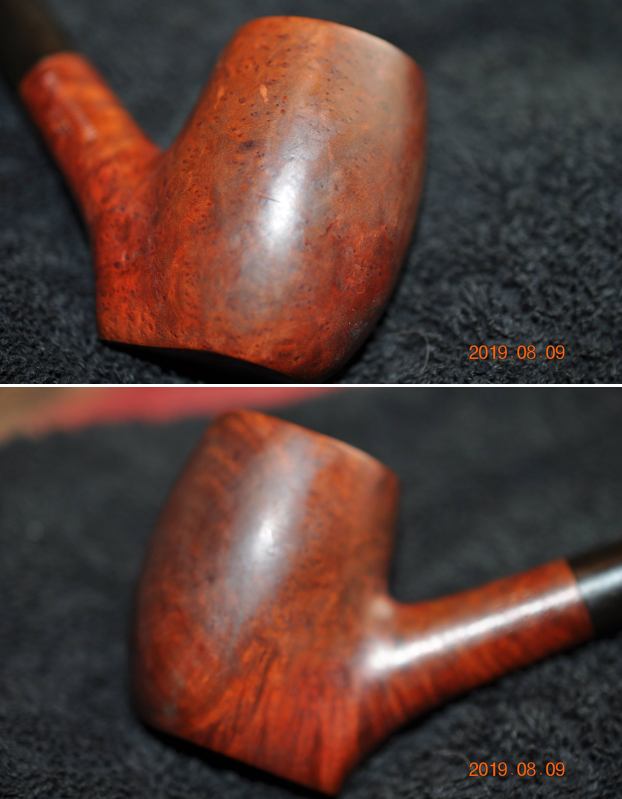
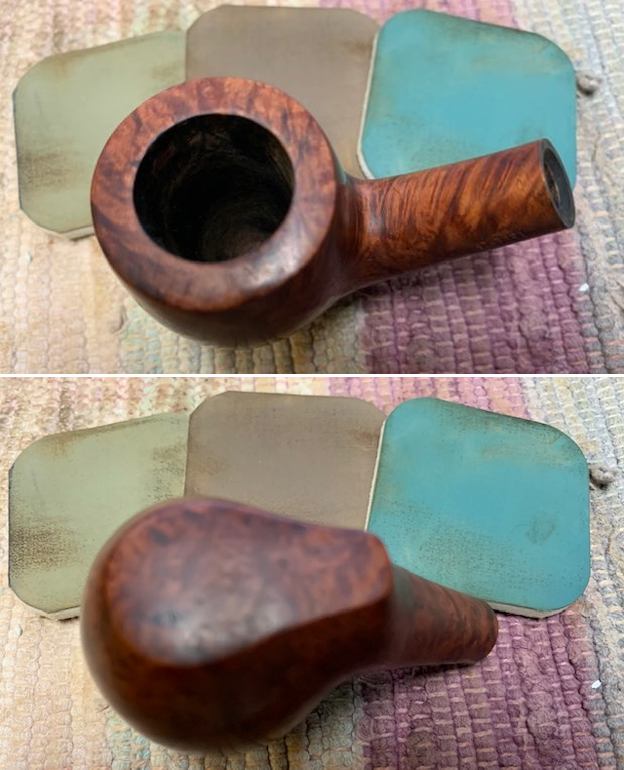
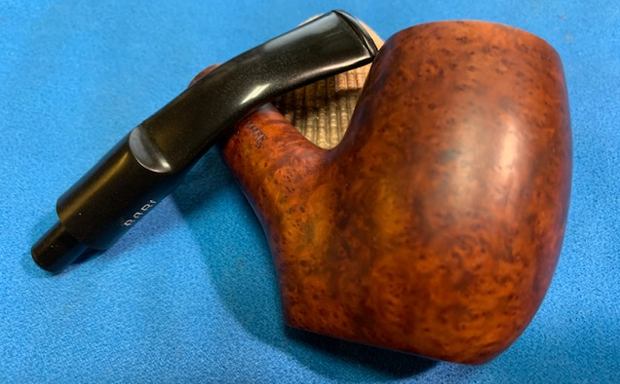
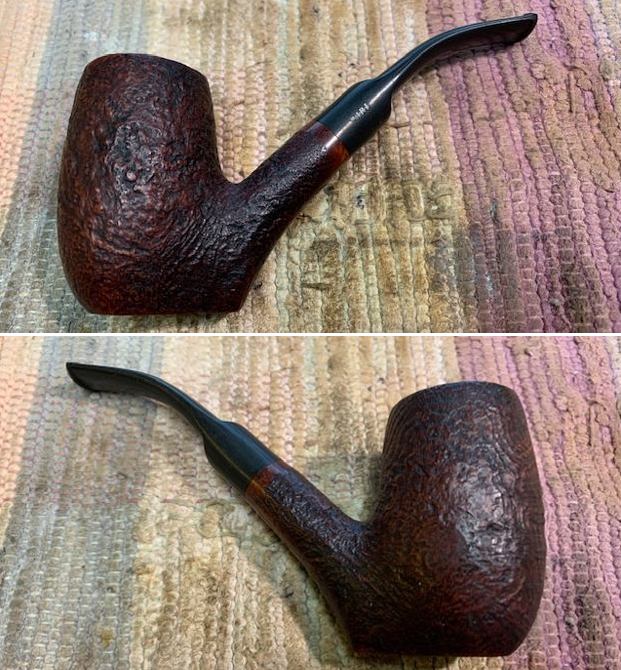
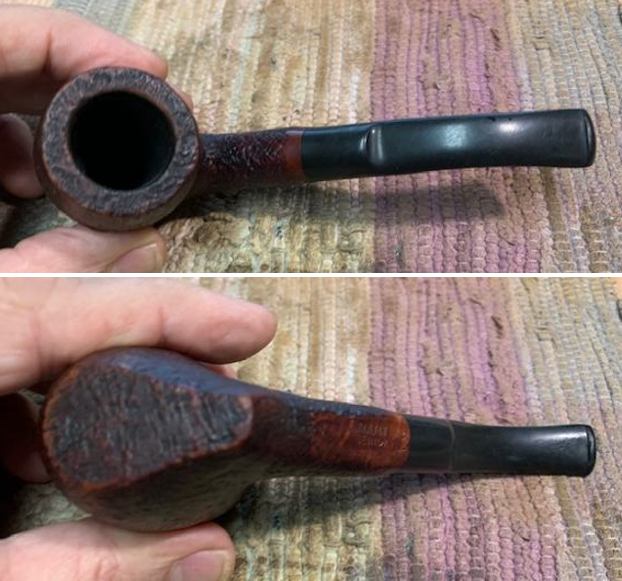
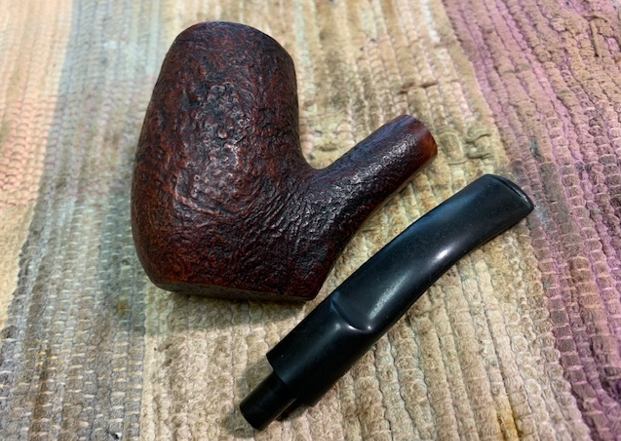
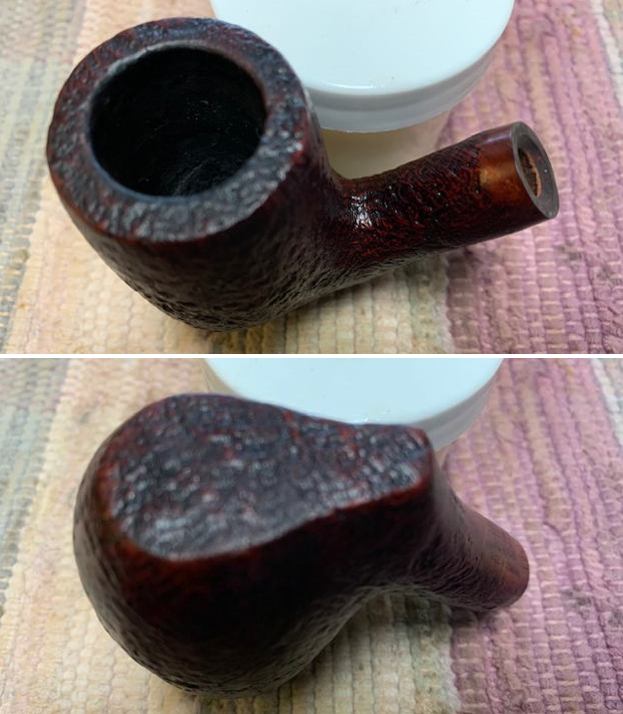
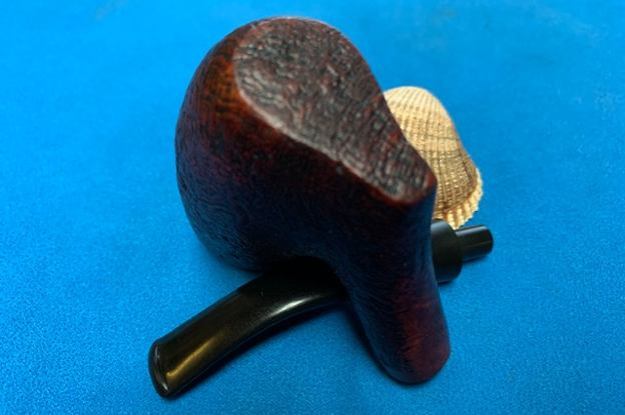
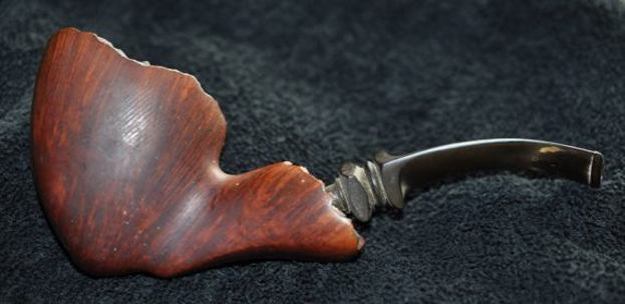
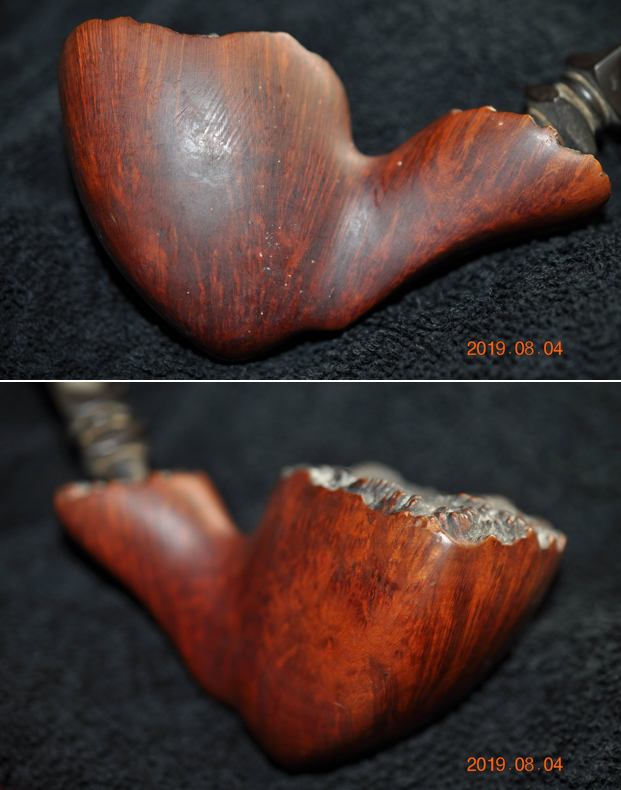
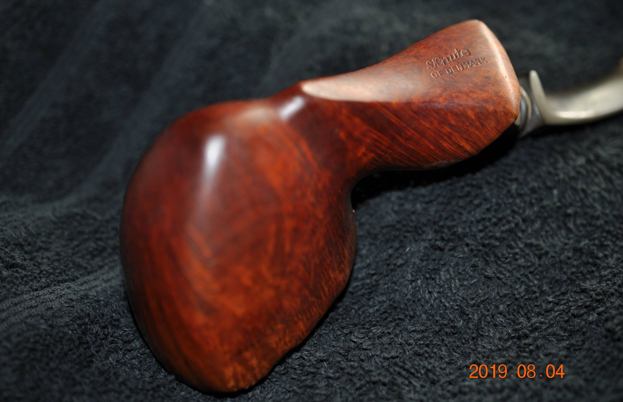
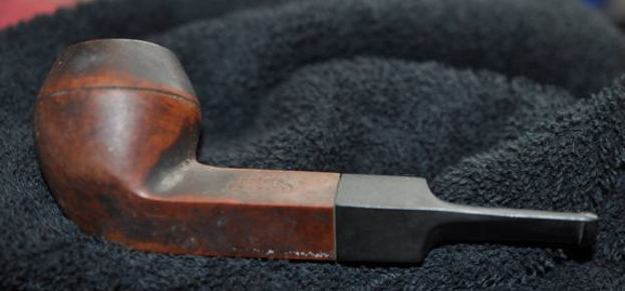
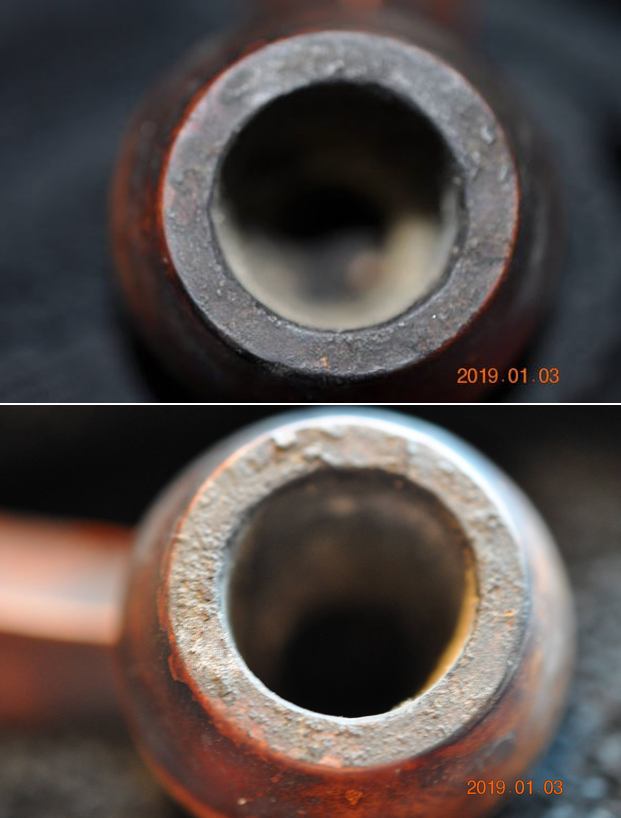
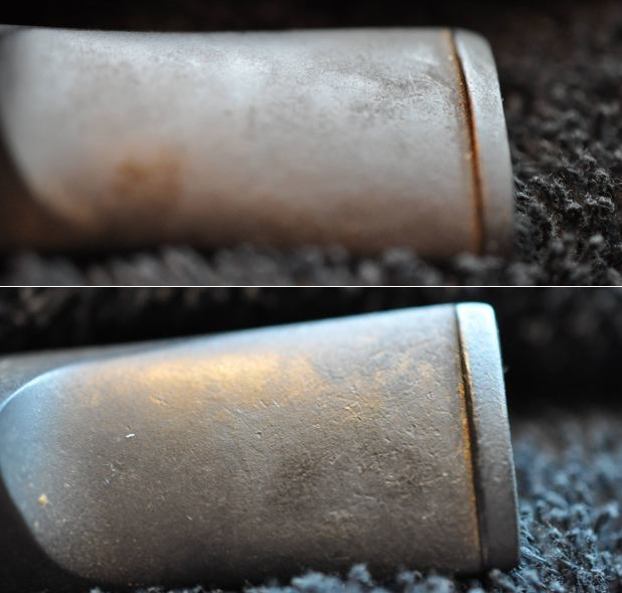
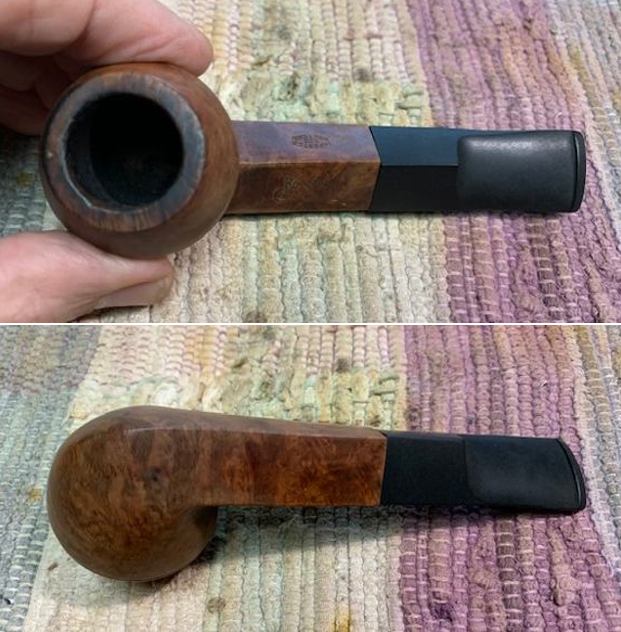
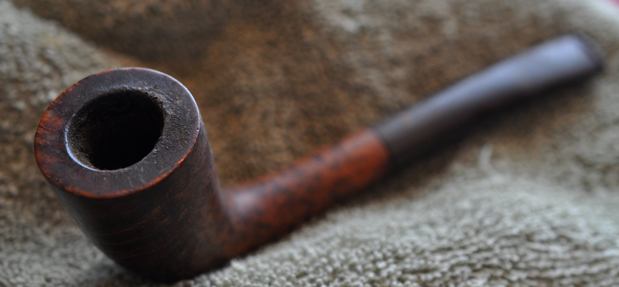
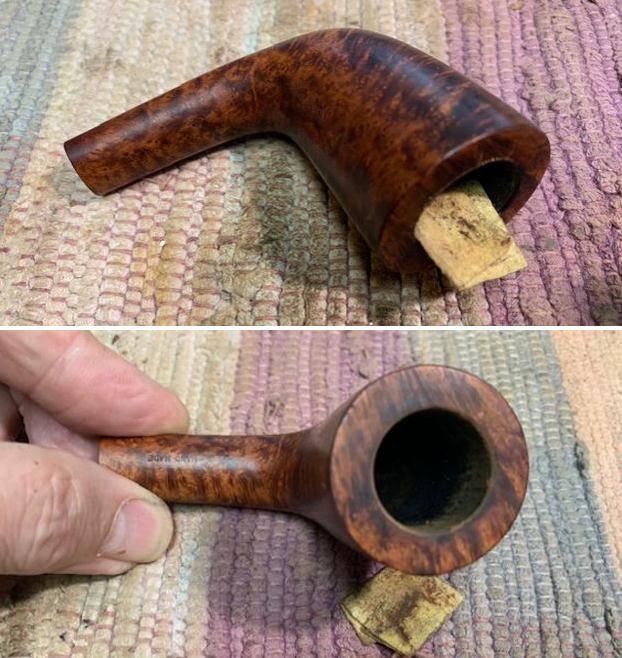
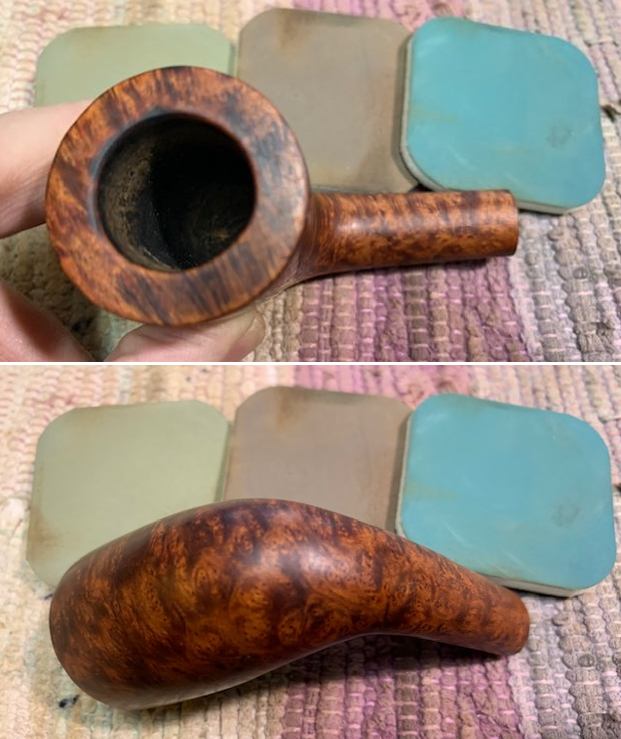
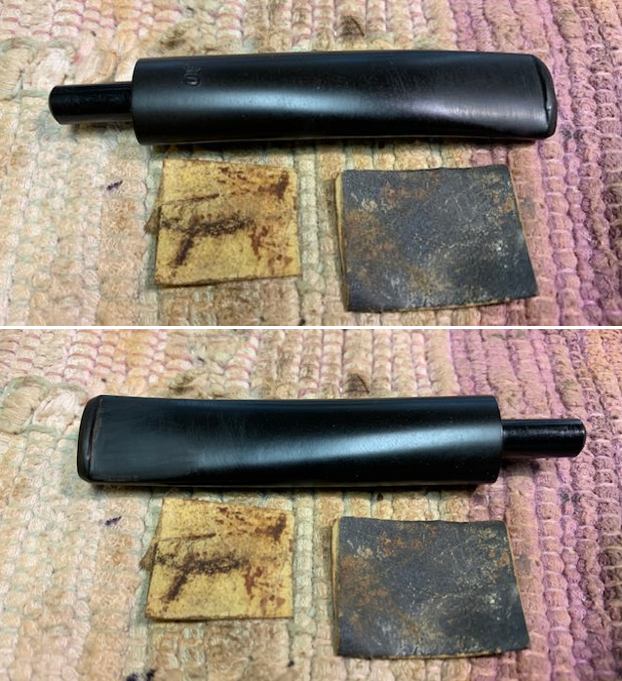
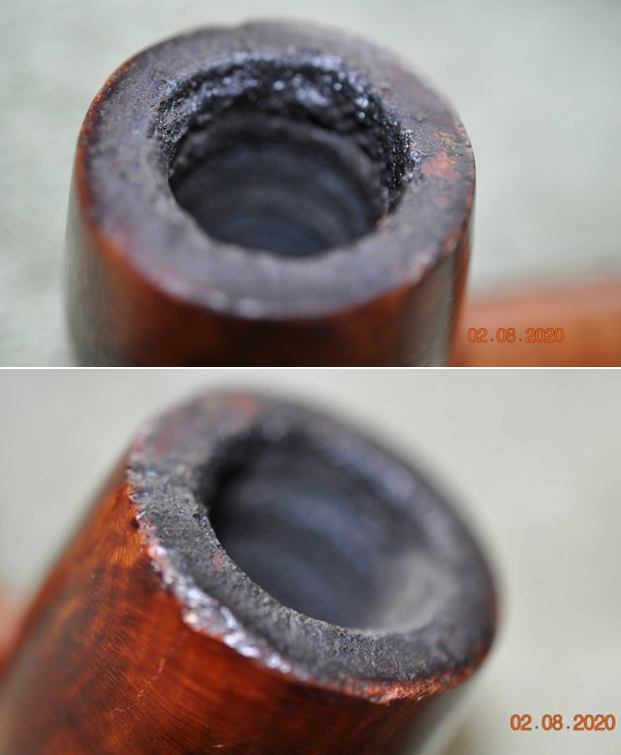
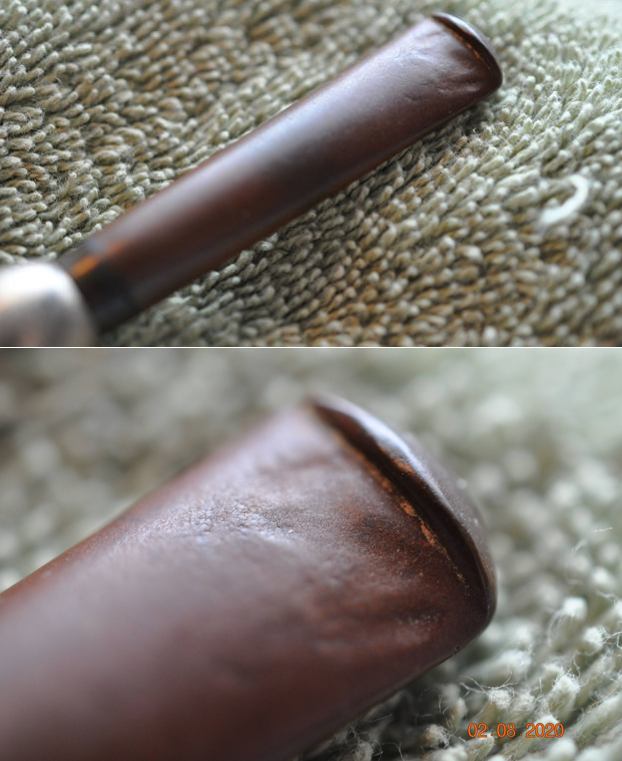
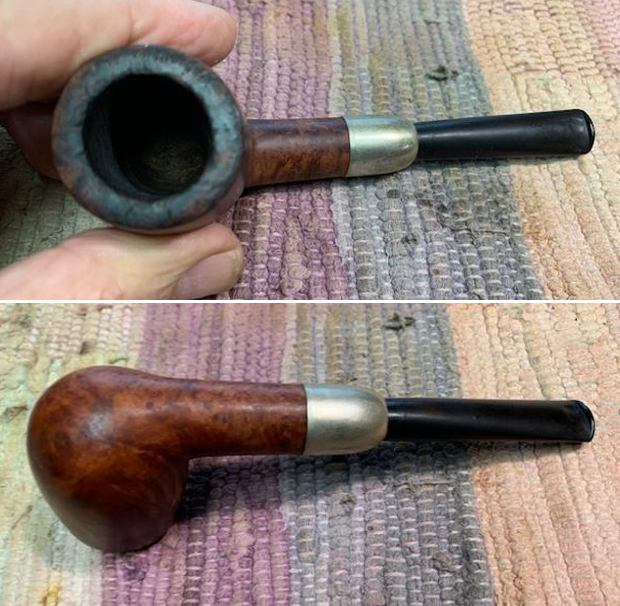
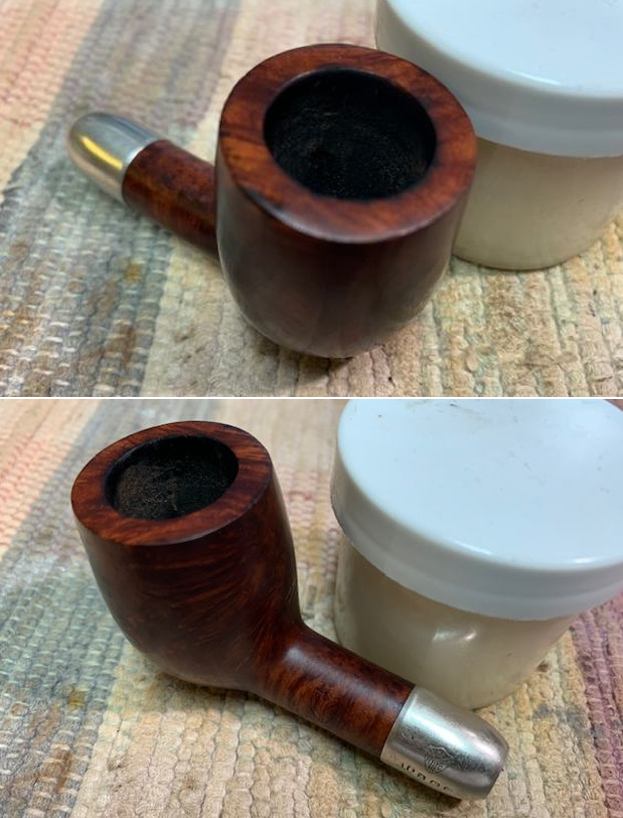
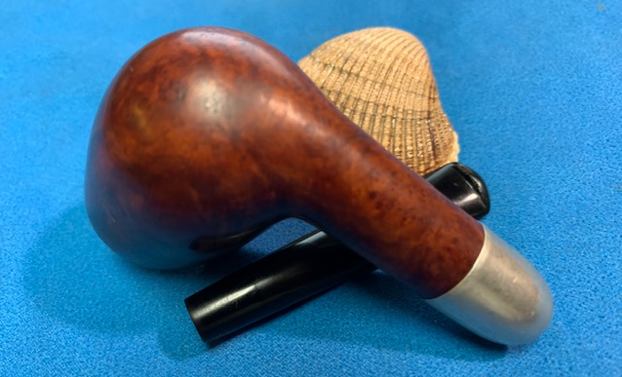
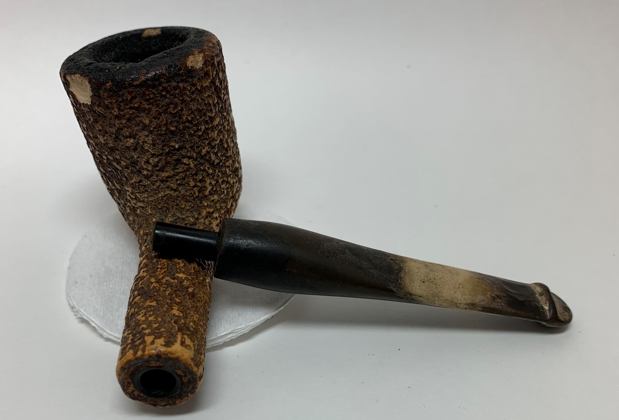
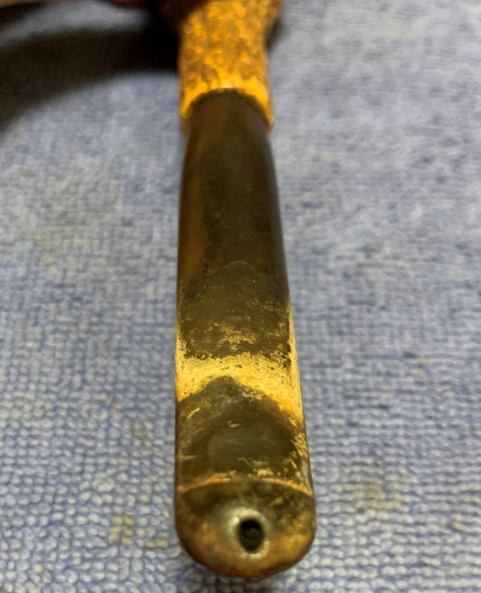
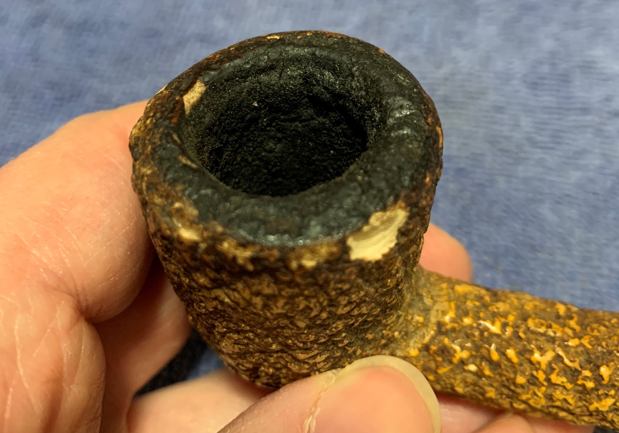
Anyway, on to the pipe – and what a mess it was. The stummel had the following problems: a nasty ghost, filth embedded in the rustication, a creepy and unnatural yellow tinge to the meerschaum, lots of lava on the rim, lots of cake in the bowl, and – worst of all – chunks missing from the rim. Meanwhile, the stem had its own set of problems: the ‘P’ logo was nearly obliterated, heavy oxidation and calcification, and tooth marks and dents. In fact, even my wife commented that this pipe might be the proverbial ‘bridge too far’ – but, like the stereotypical, stubborn husband, I was not to be deterred! 
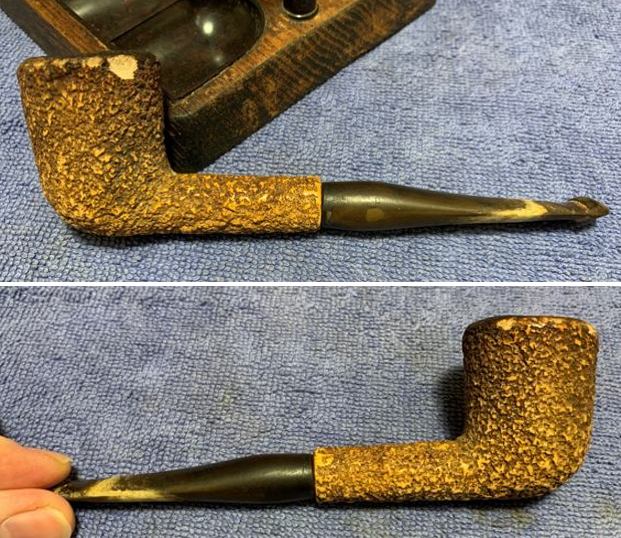
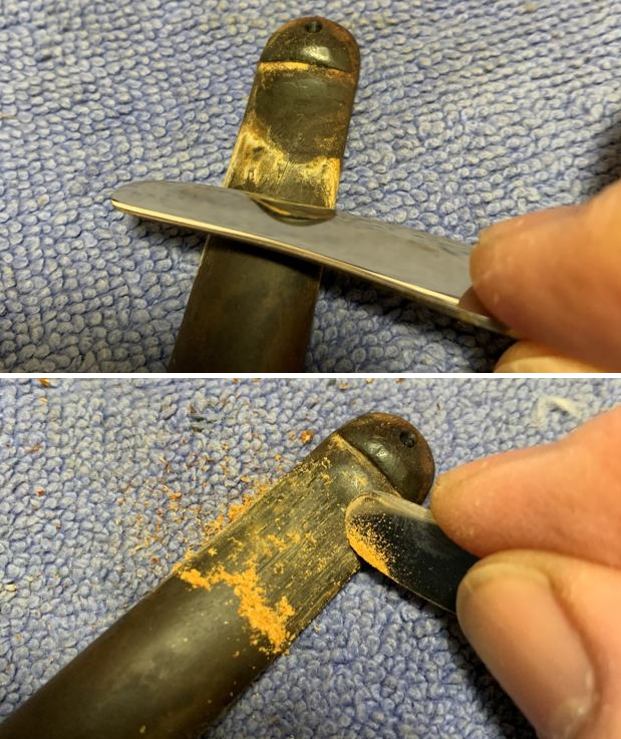
I decided to start on them stem, as I still was not sure how to resolve the chunks missing from the rim. I broke out the isopropyl alcohol and pipe cleaners, and got to work on the inside of the stem. Predictably, it was pretty dirty and I went through a good number of pipe cleaners in order to clean it up. Then I had to tackle the overwhelming oxidation and calcification – yuck. I took a blade (an old butter knife, actually) and began gently scraping at all that build-up. Obviously, I took it easy, as I did not want to damage the stem’s vulcanite any further. The butter knife worked quite well and I got a good amount loose. I followed that up with some lemon-infused isopropyl alcohol on some cotton rounds to try and scrub the rest away. This worked quite well and I noted some improvement. 
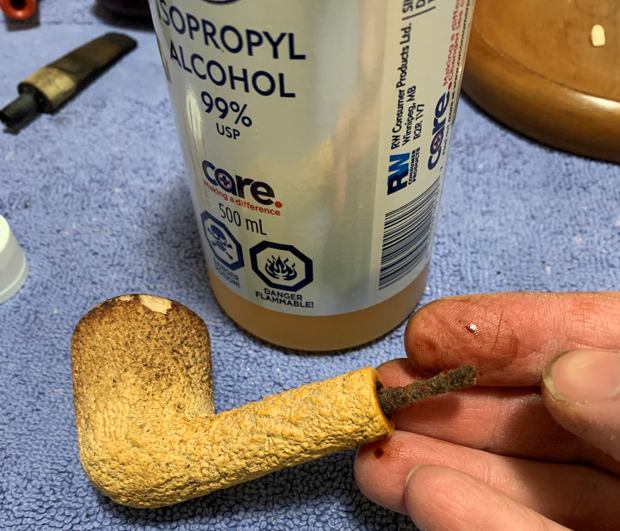
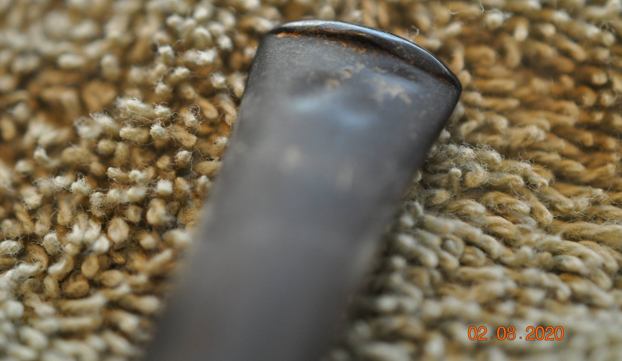
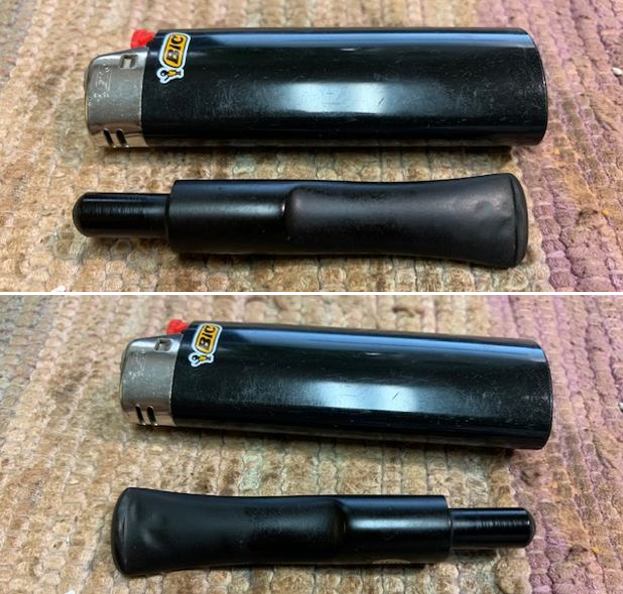
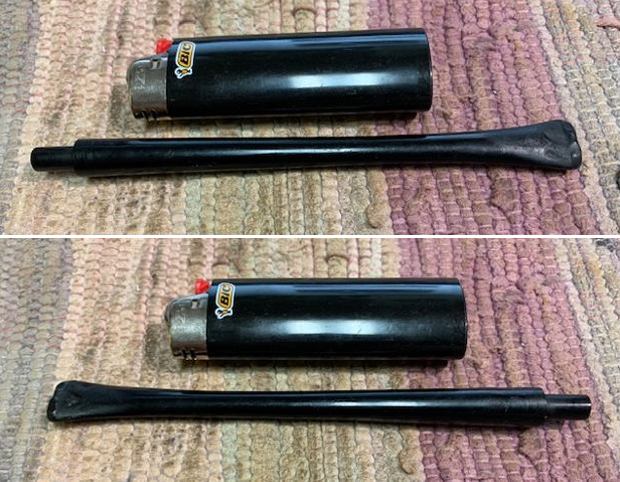
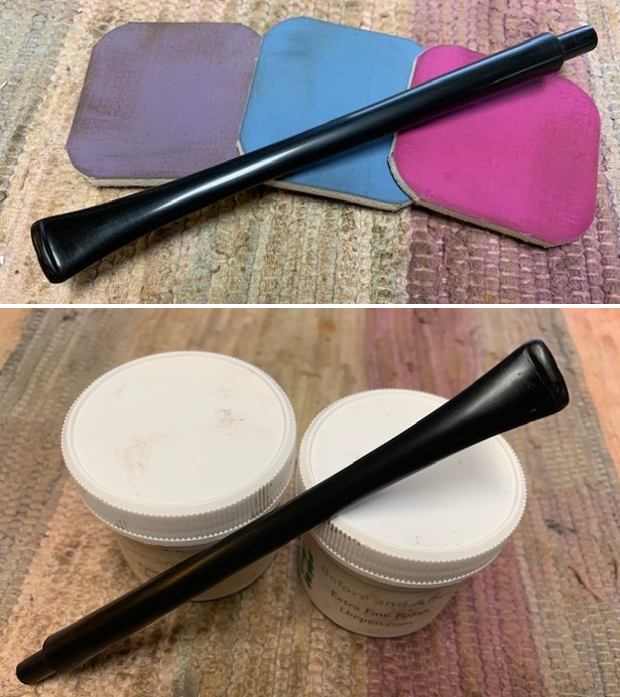
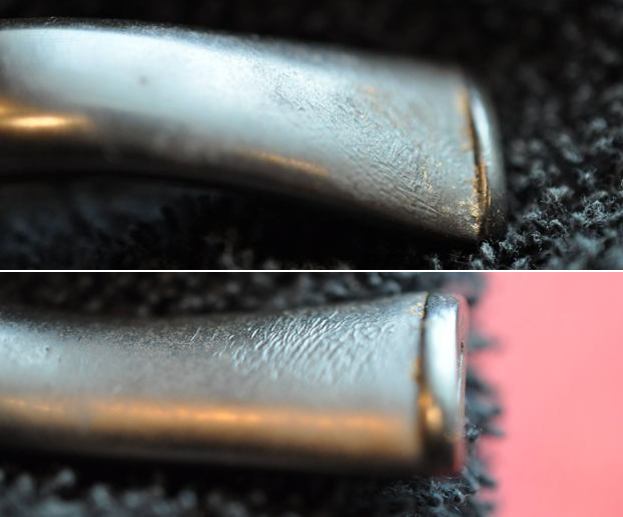
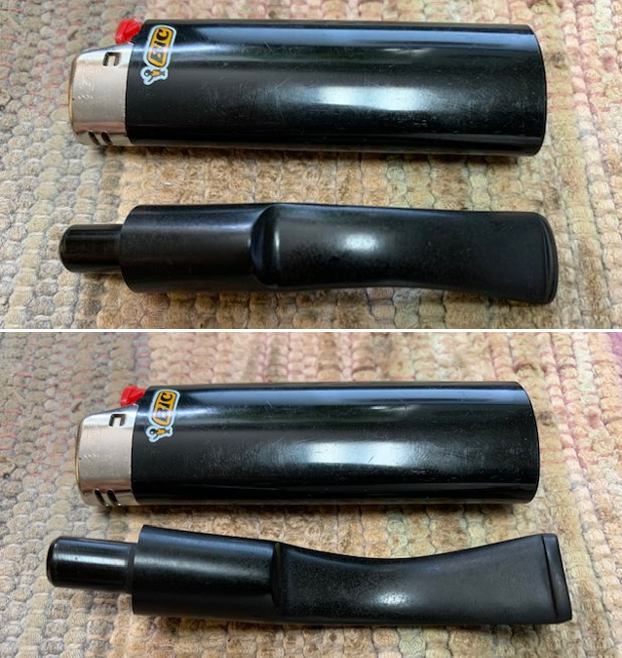
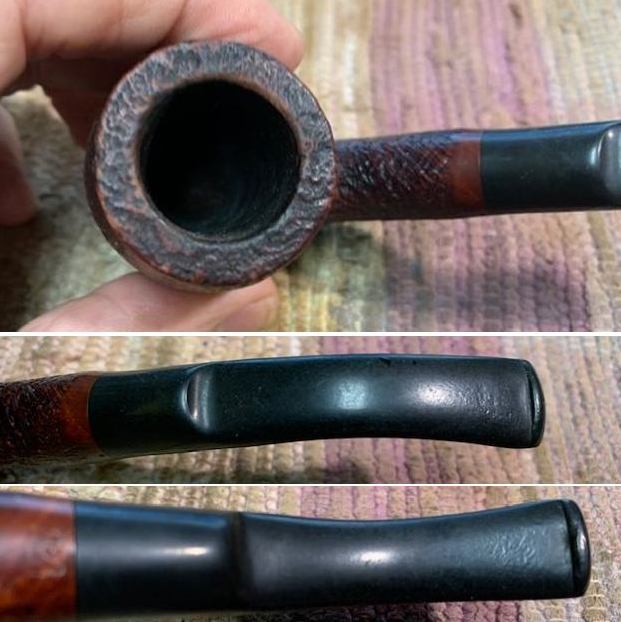
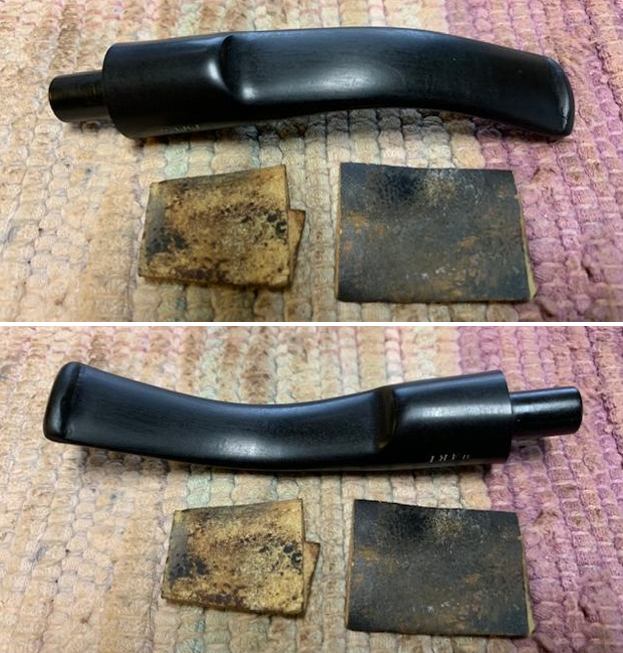
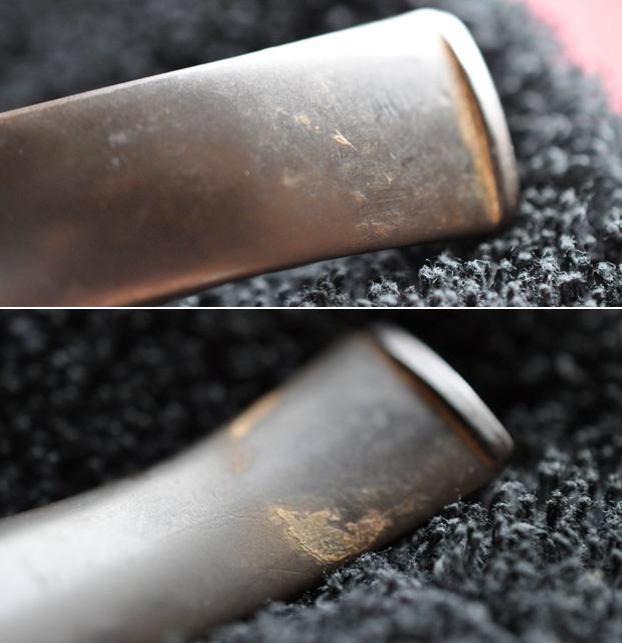
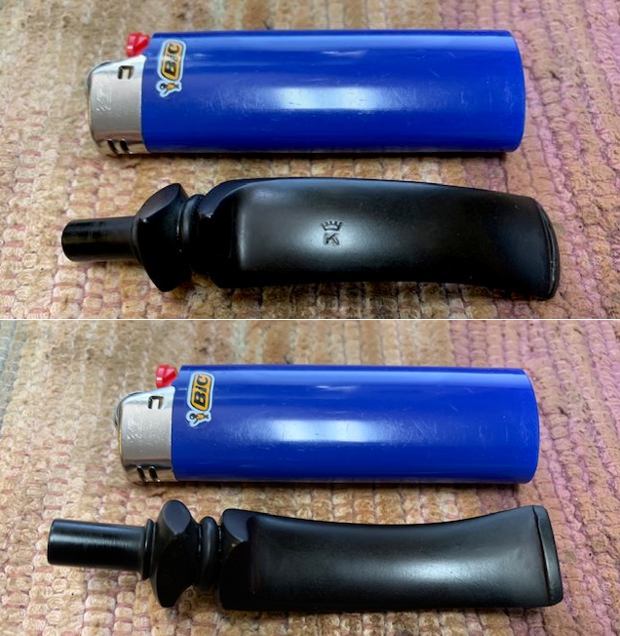
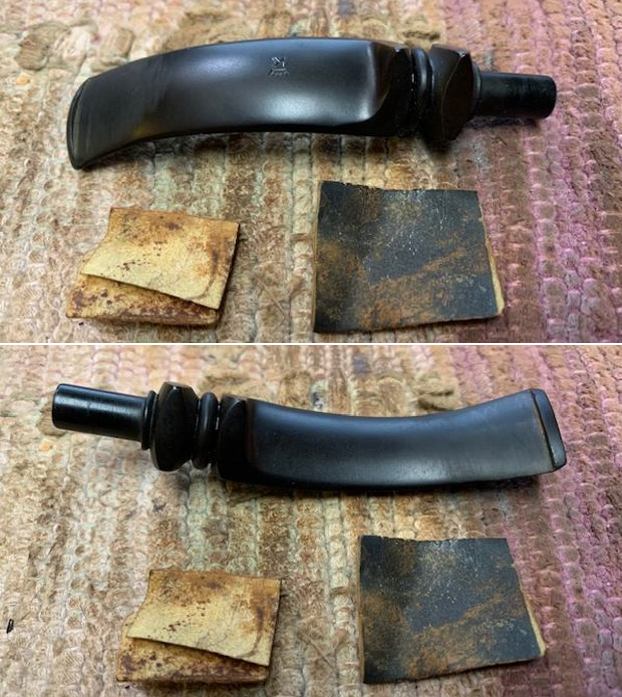
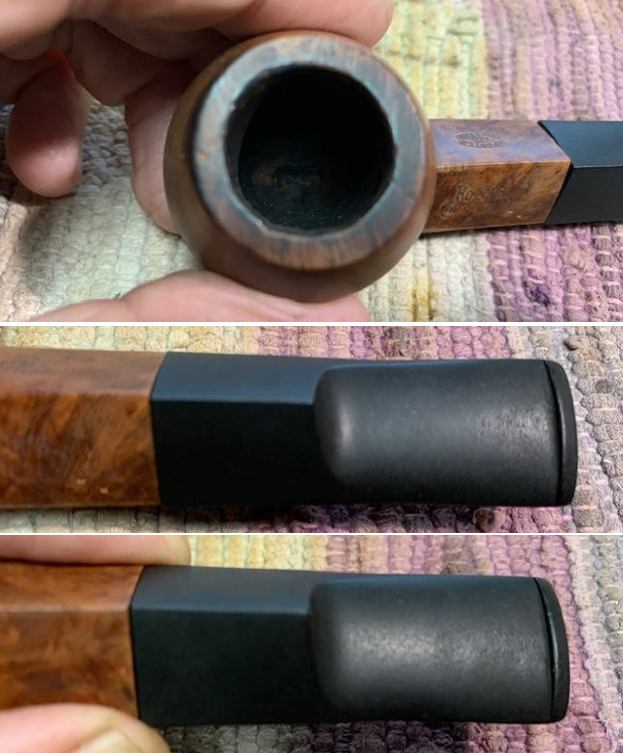
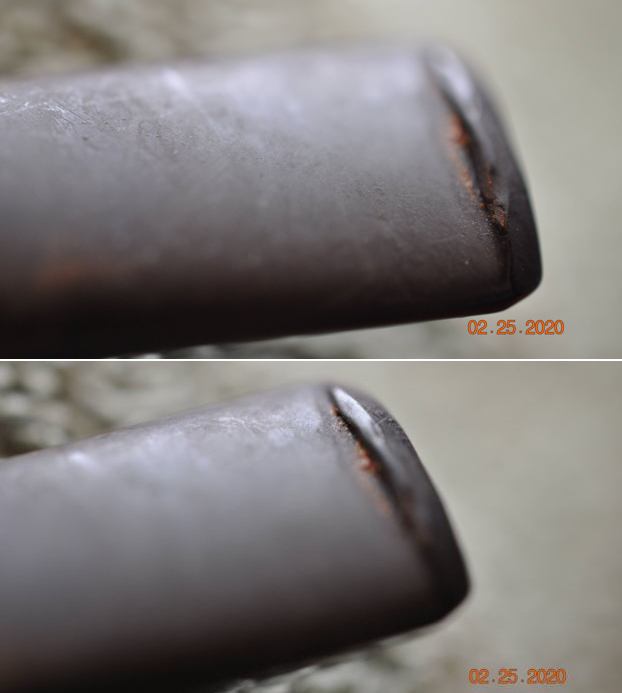
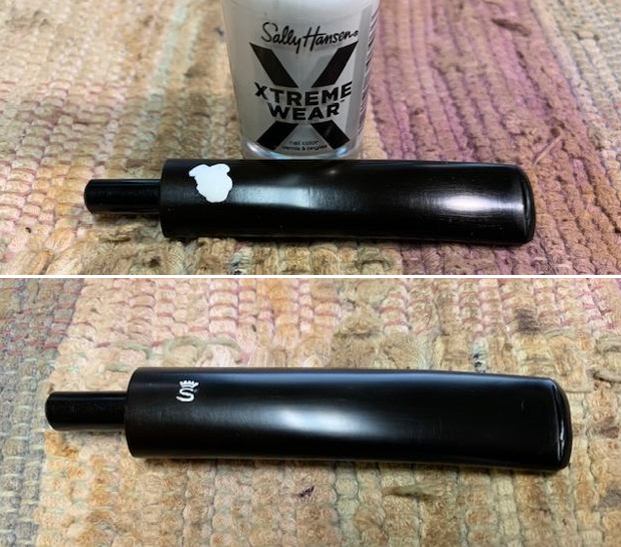
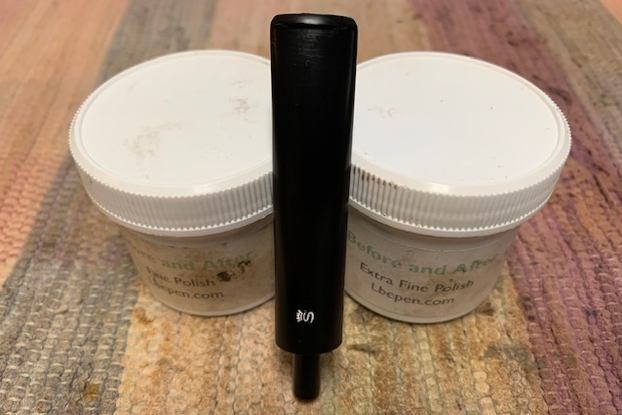
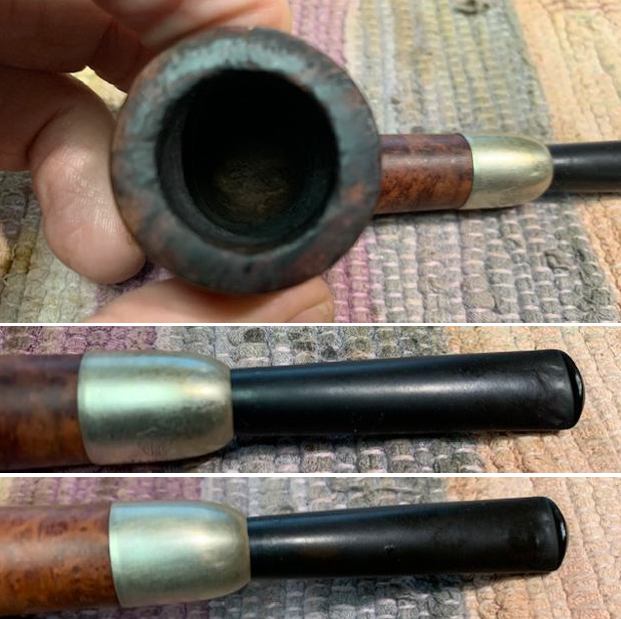
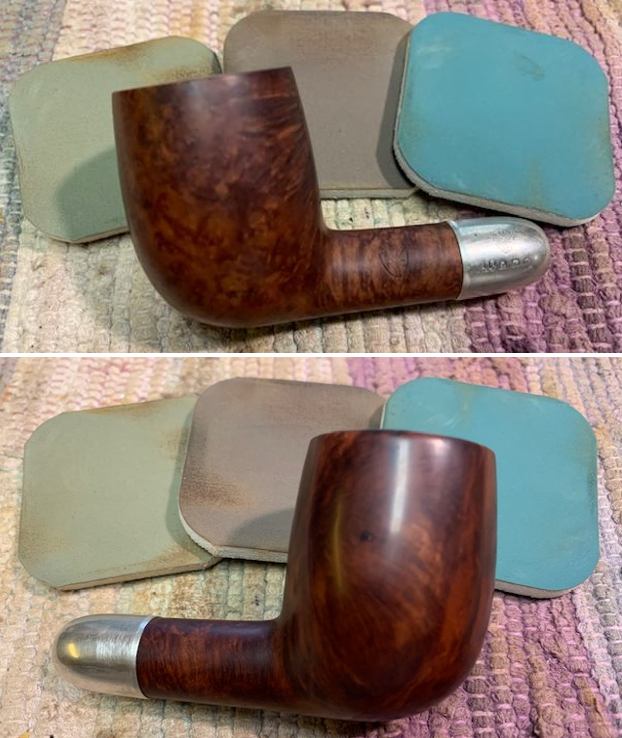
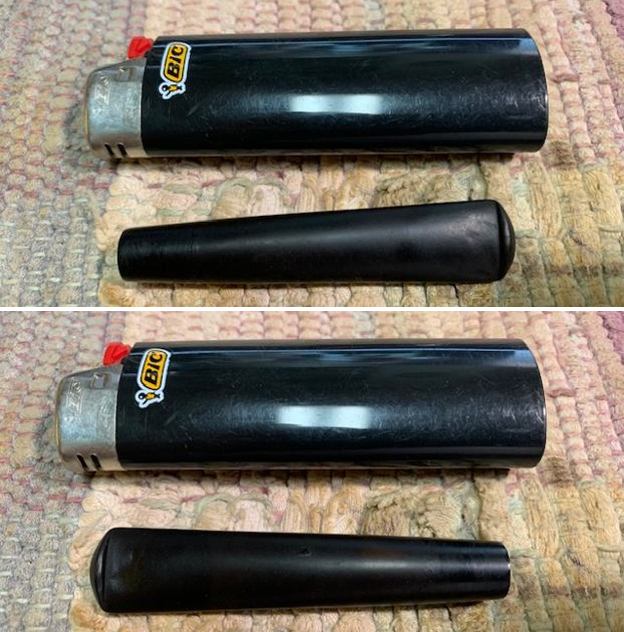
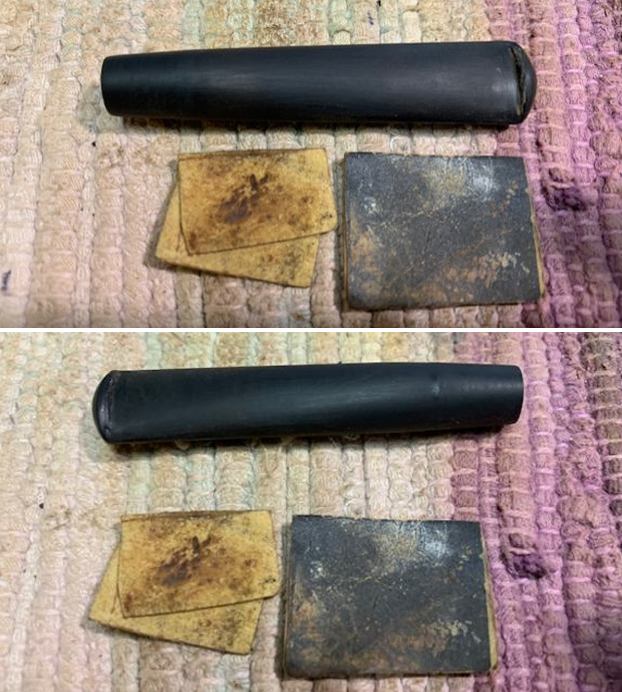
There were quite a few dents in the stem. Some were obviously tooth marks, but other dents looked like blunt force trauma! Time to break out the BIC lighter to see if it could raise some of these dents. Quite frankly, it did not do much – this repair was going to require some considerable sanding etc. Before that, however, the stem went for an overnight soak in the Before & After Hard Rubber Deoxidizer. The following day, I cleaned all of the de-oxidizing sludge off with alcohol, pipe cleaners, et cetera. The oxidation had migrated to the surface and would be fairly straightforward to remove. I scrubbed vigorously with SoftScrub to remove the leftover oxidation.
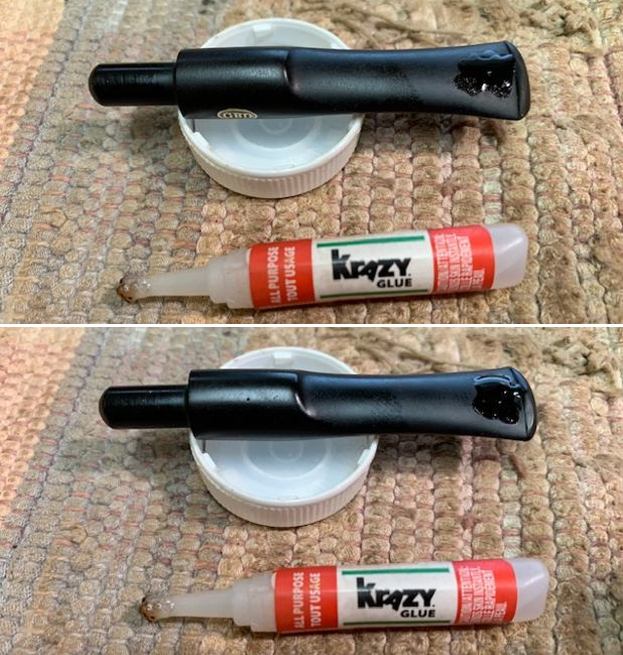
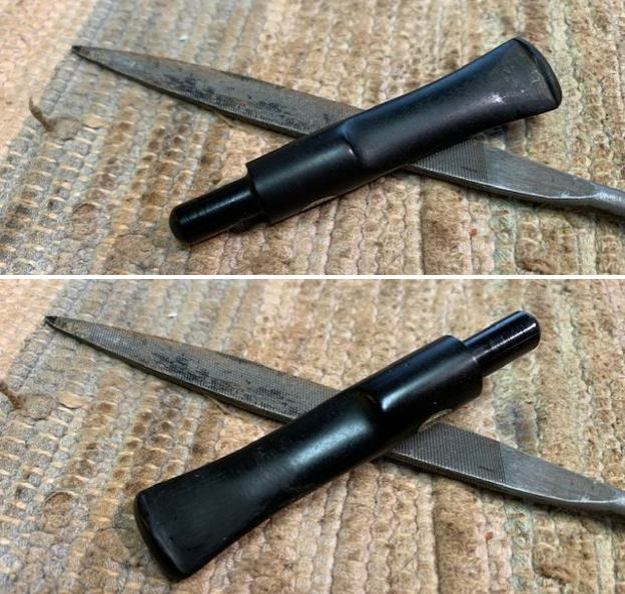
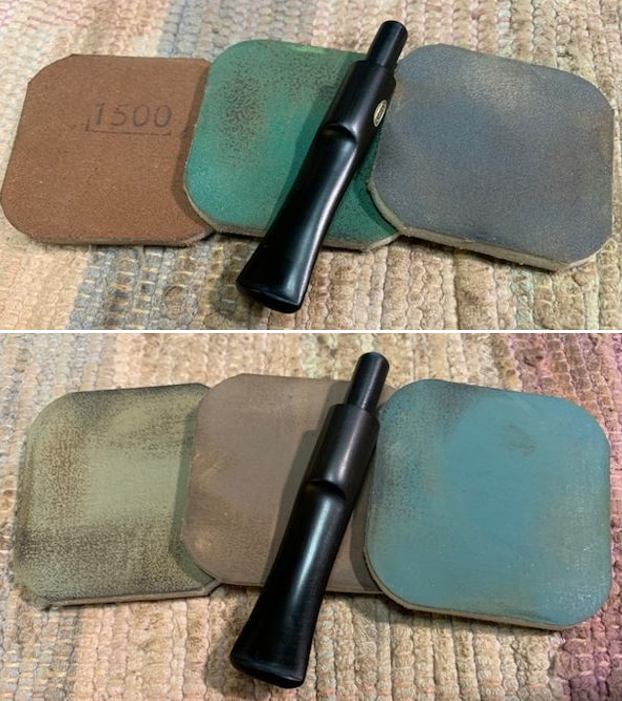
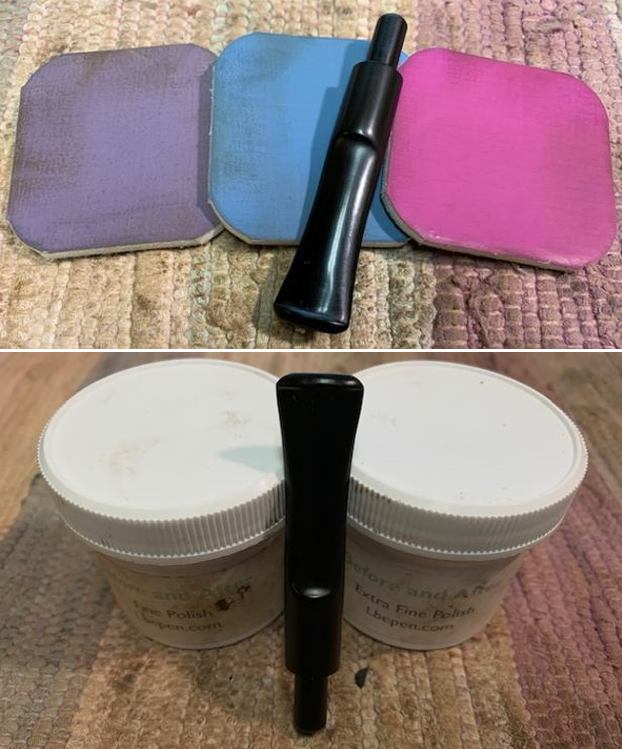
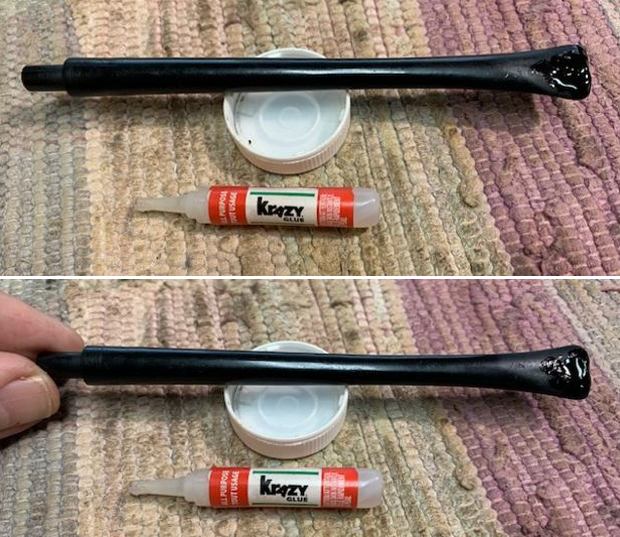
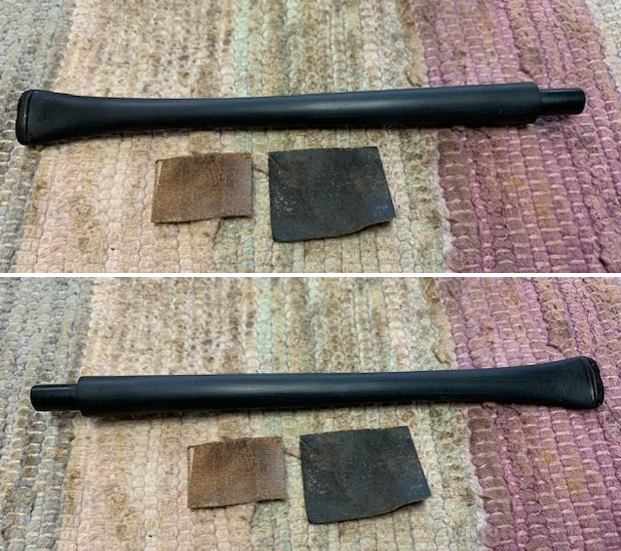
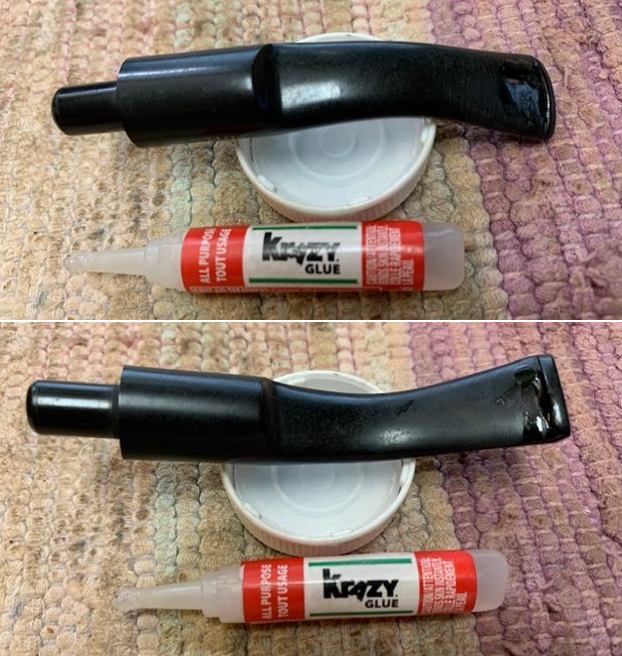
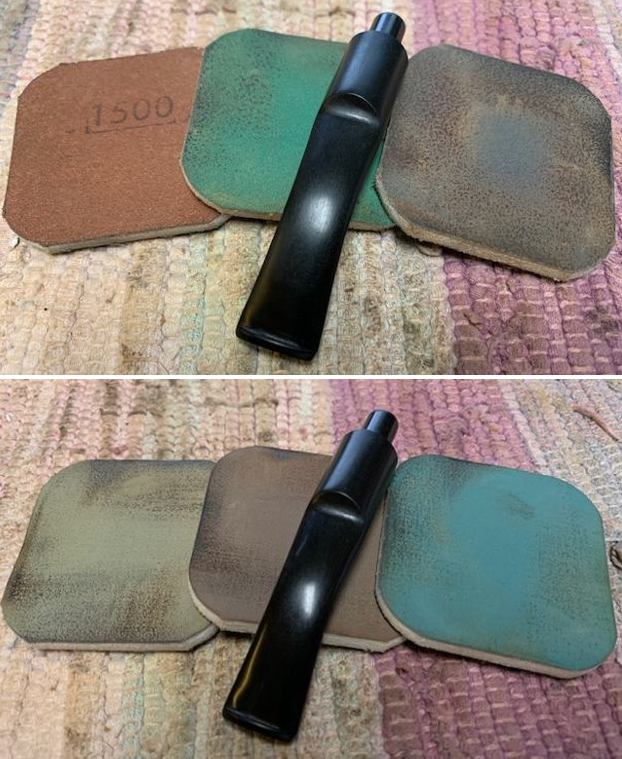
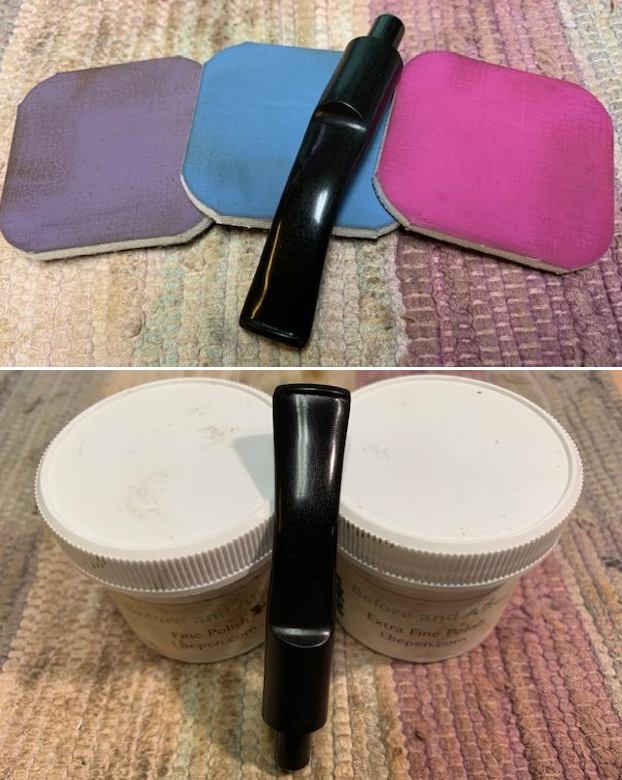
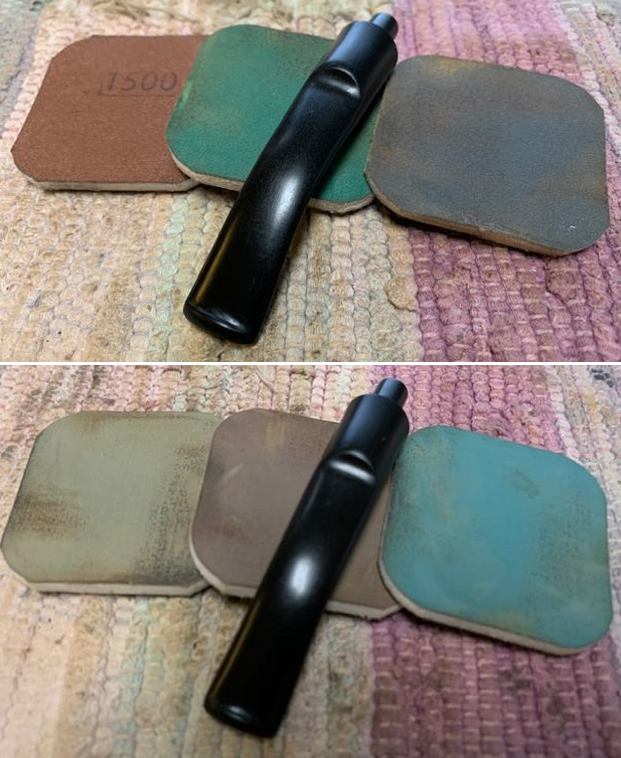
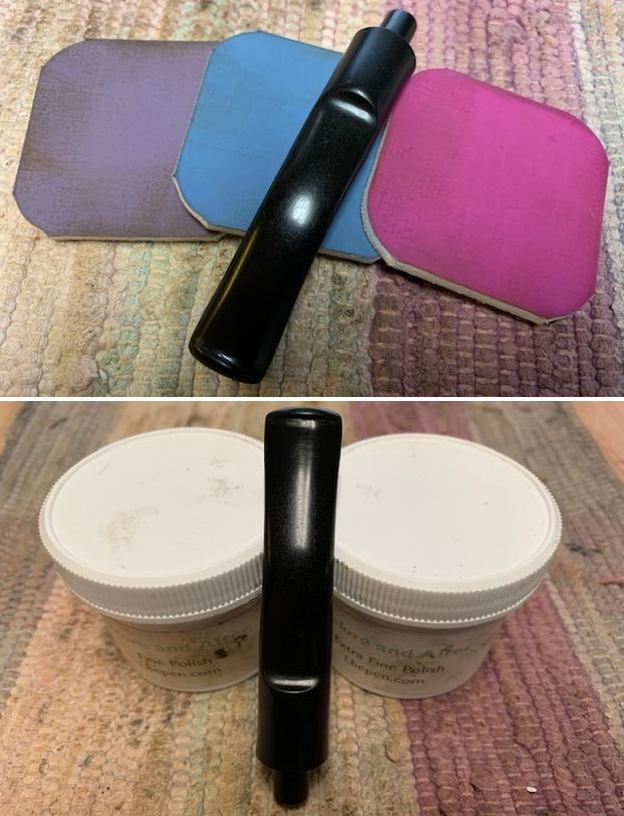
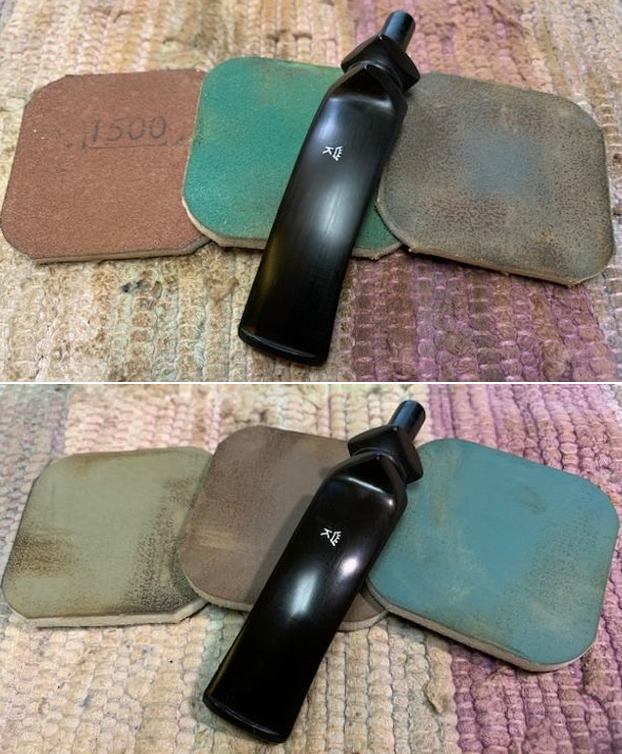
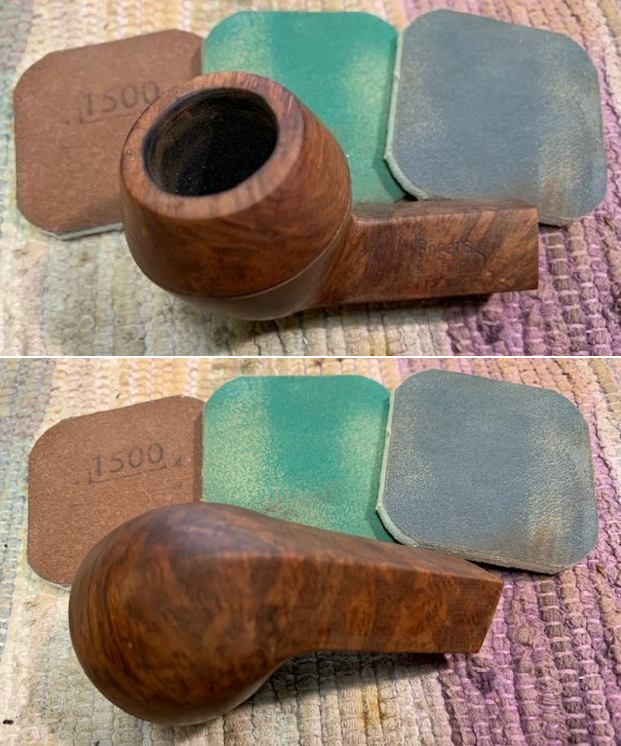
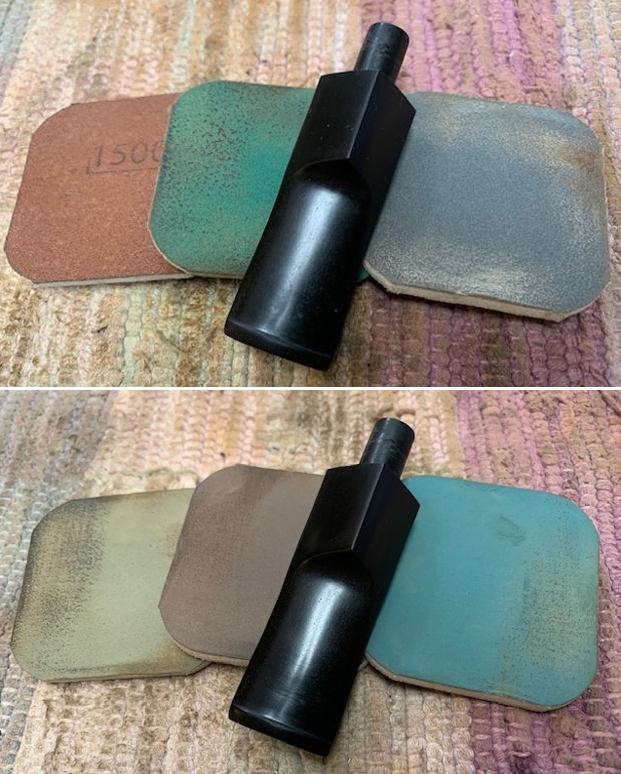
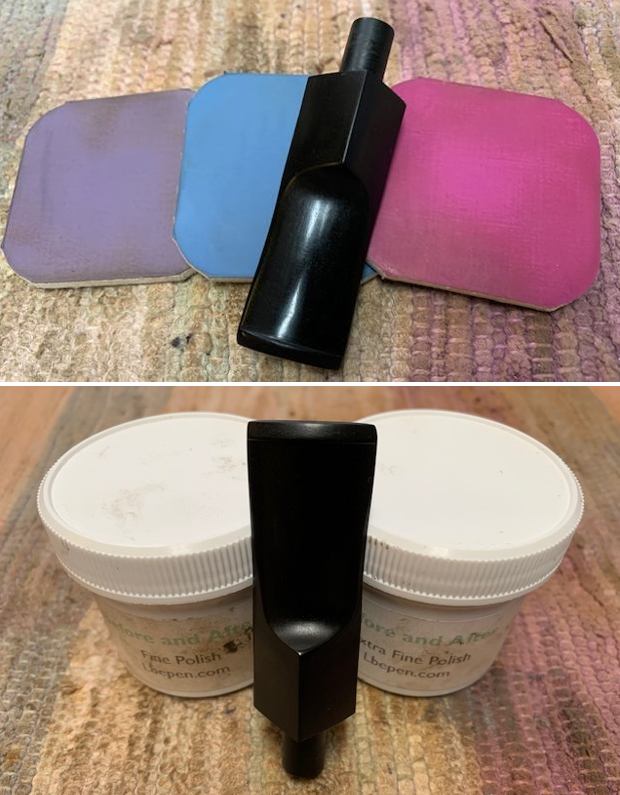
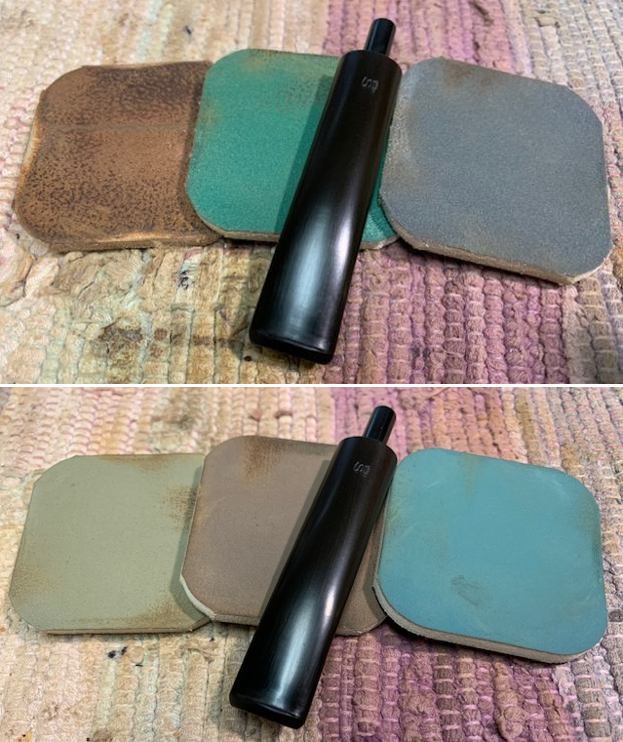
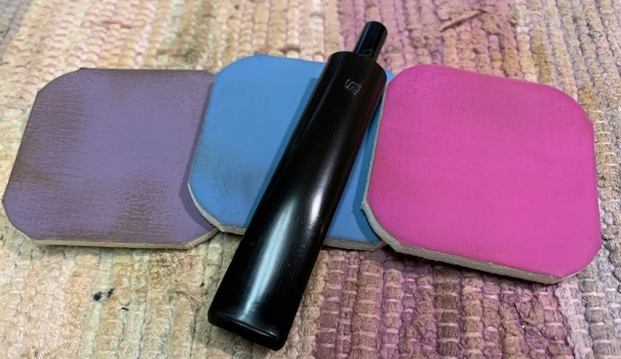
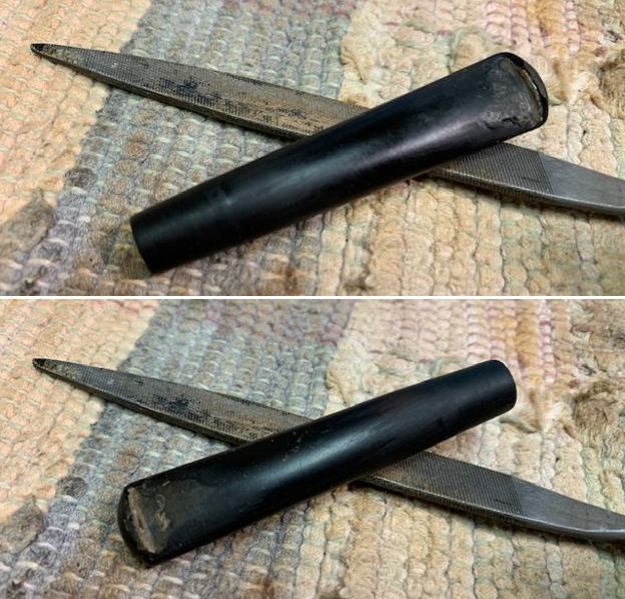
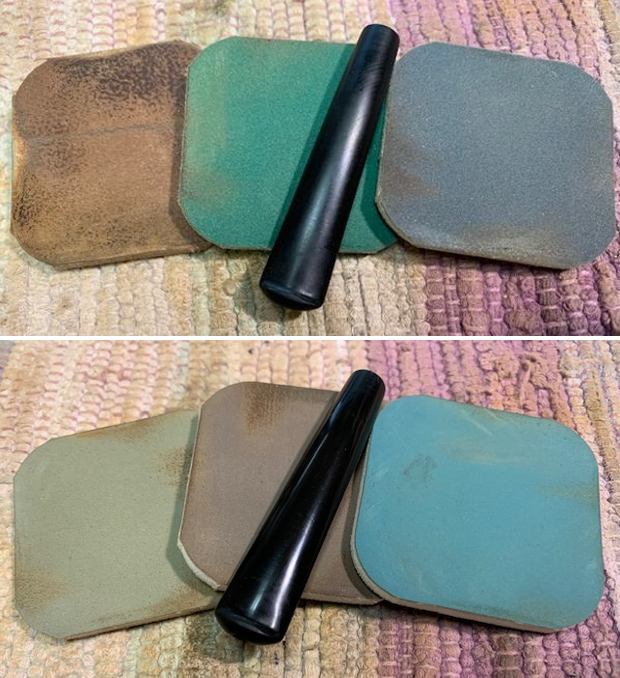
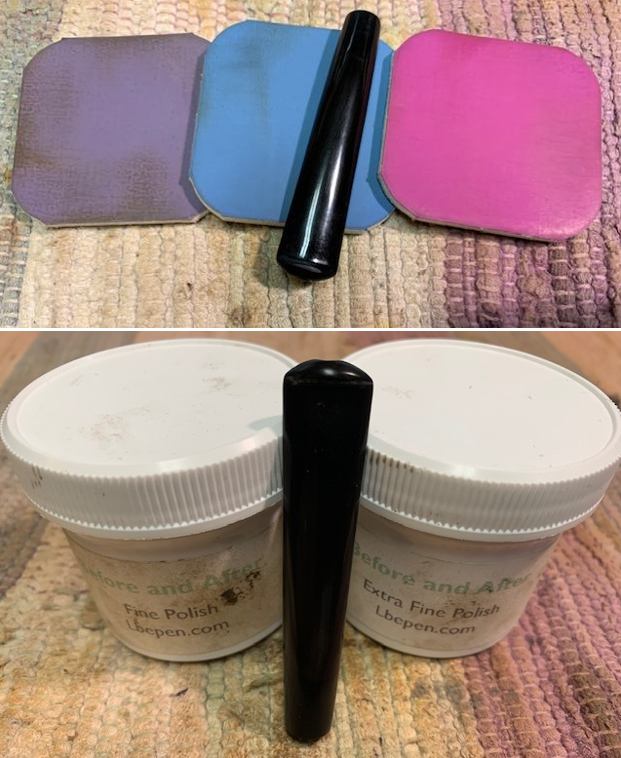
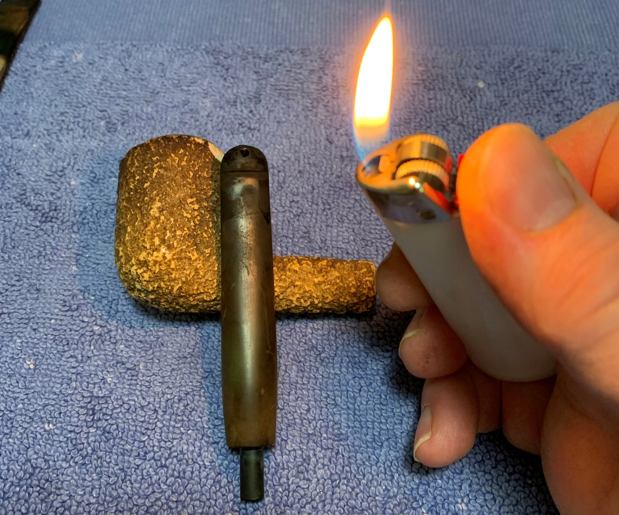
Before I moved on to the Micromesh pads, I built up the dent damage on the stem with cyanoacrylate adhesive and let it fully cure. It turned out that this was not as straightforward as I had hoped. It took more than one application of adhesive to sort this problem out. I then sanded it down with 220-, 400-, and 600-grit sandpapers to make the stem look normal. I then used all nine Micromesh pads (1,500 through 12,000 grit) to bring out the lovely black lustre on the stem. I also used Obsidian Pipe Stem Oil in between each pad scrubbing.

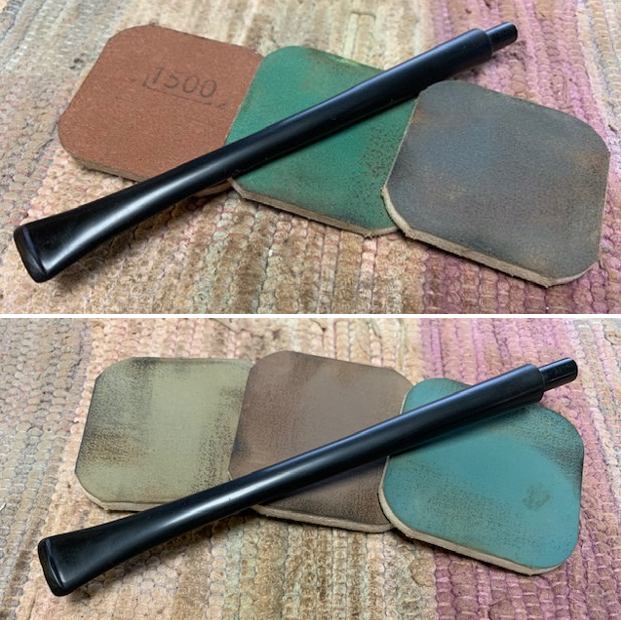
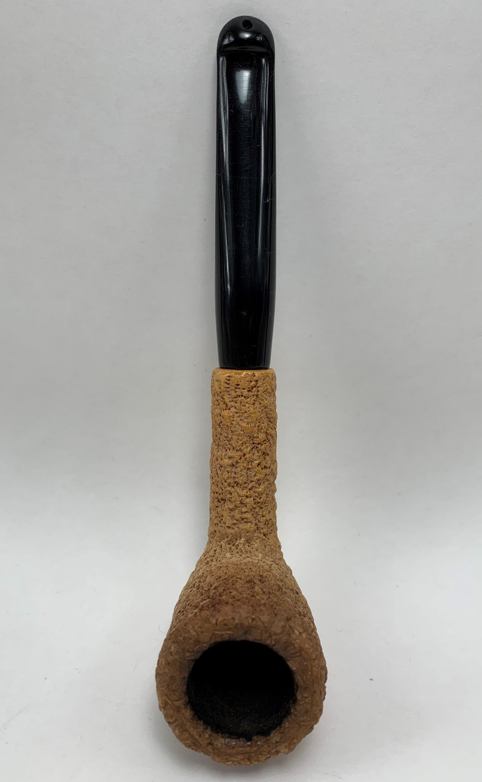
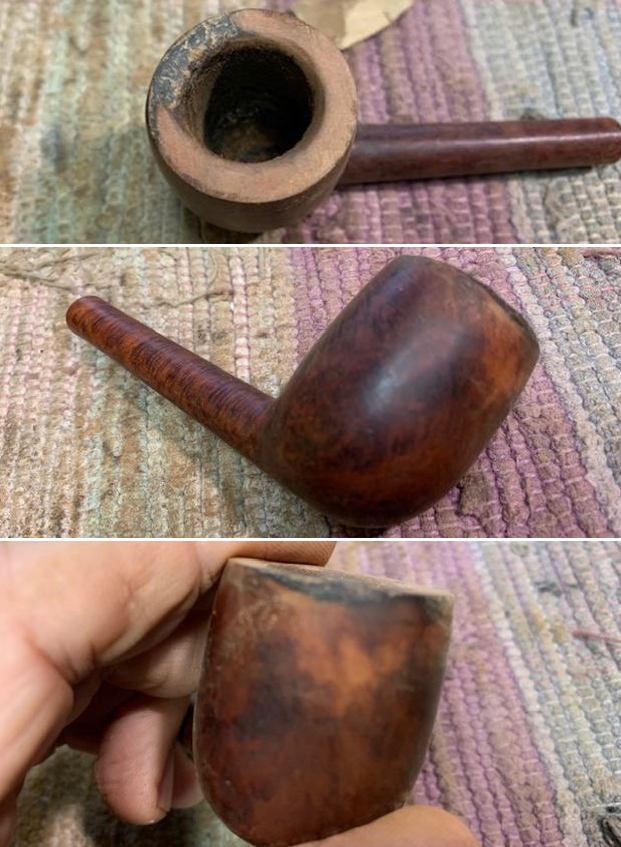
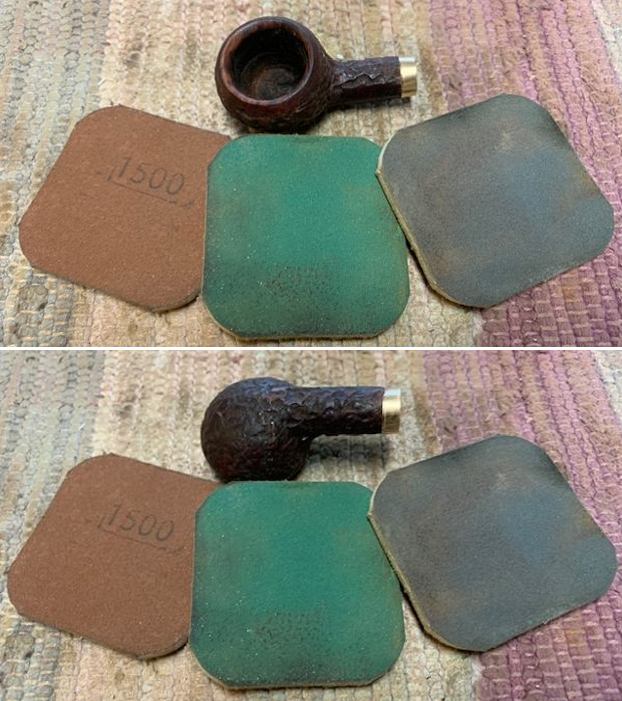
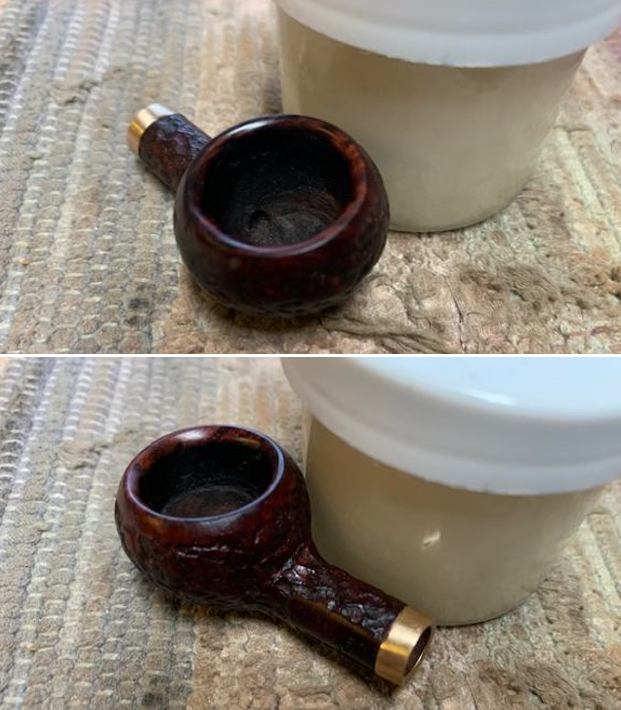
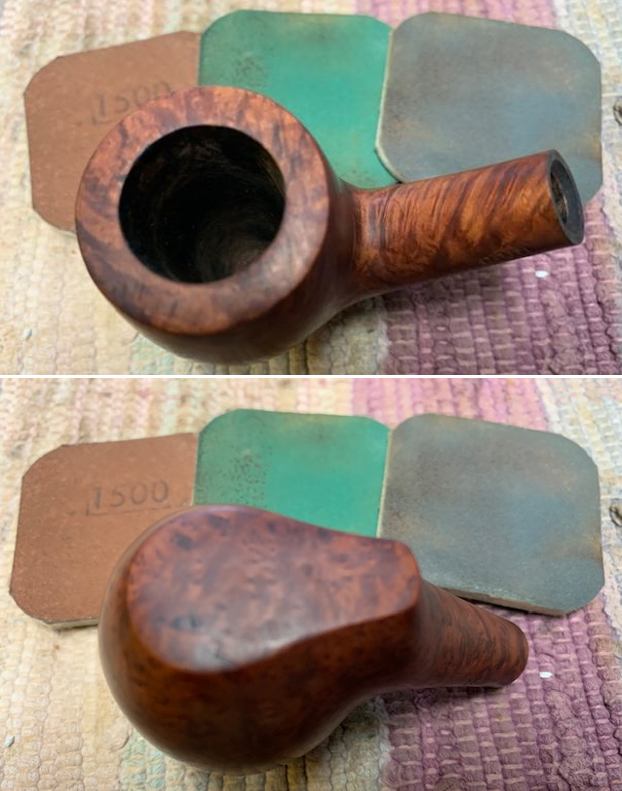
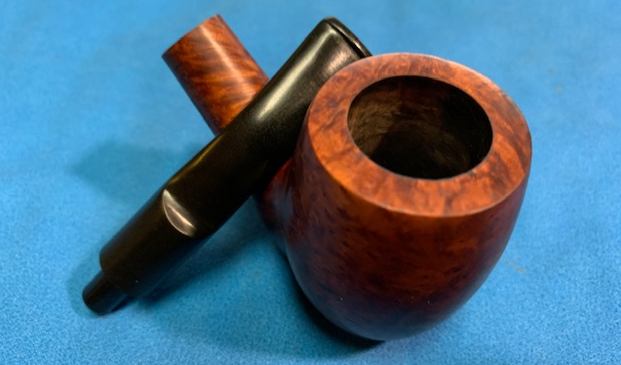
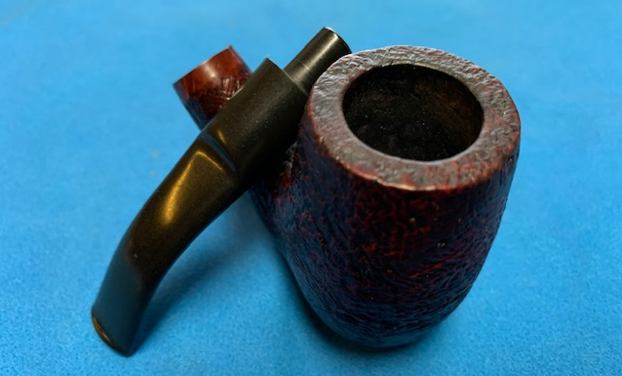
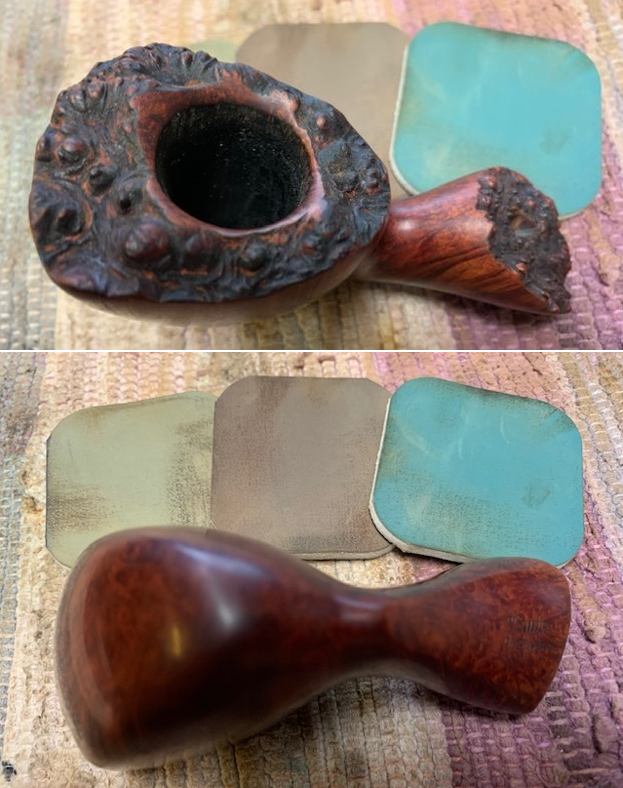
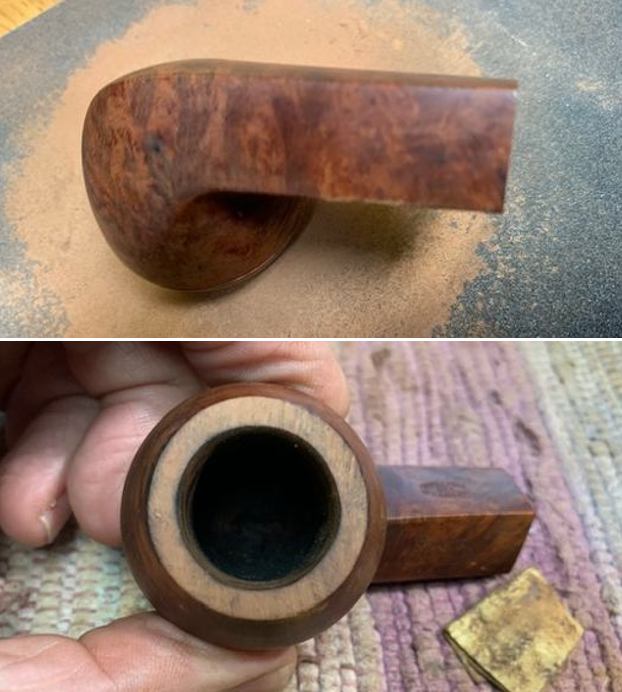
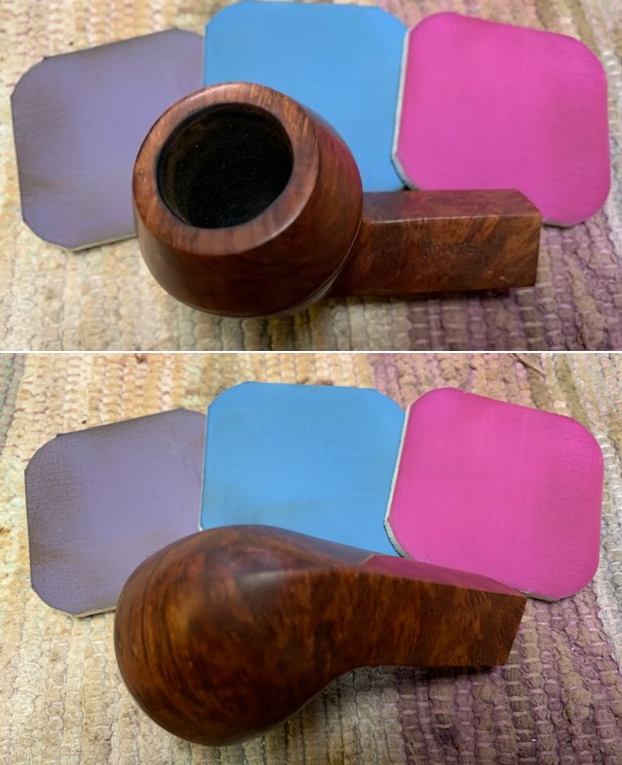
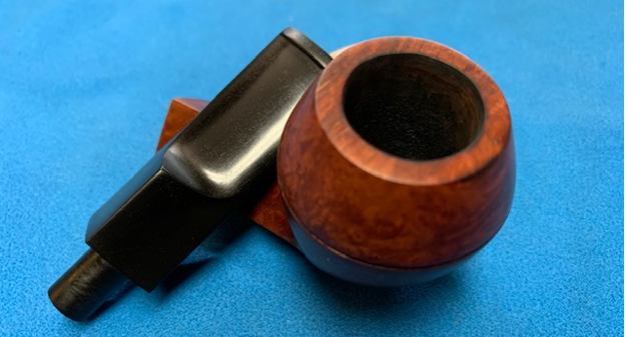
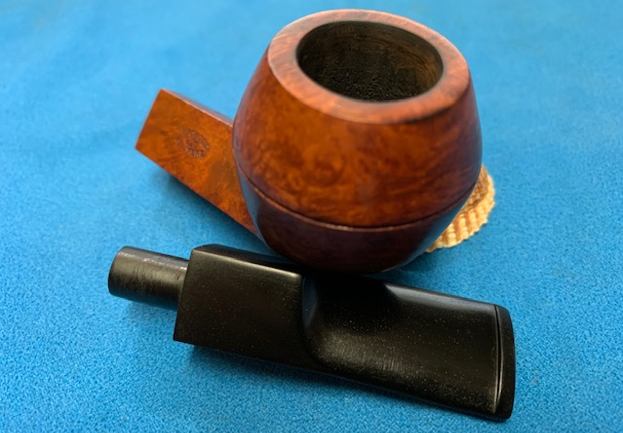
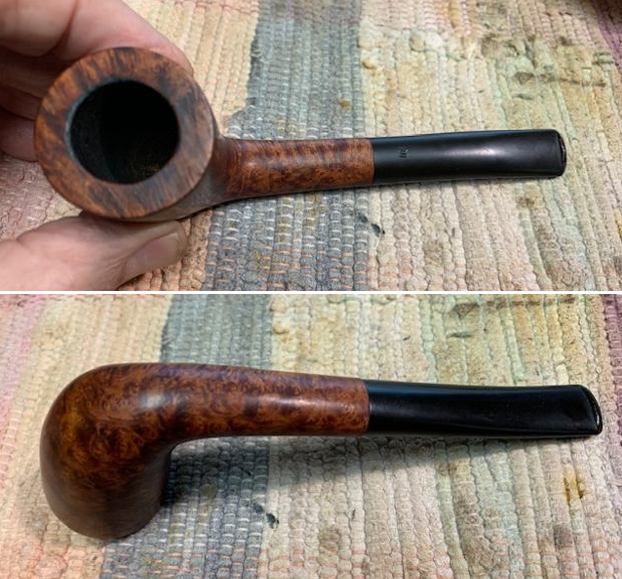
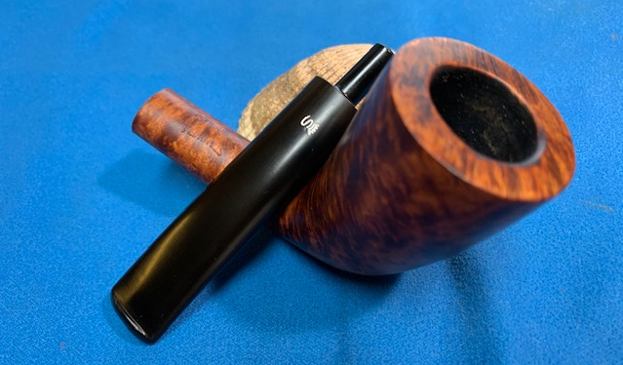
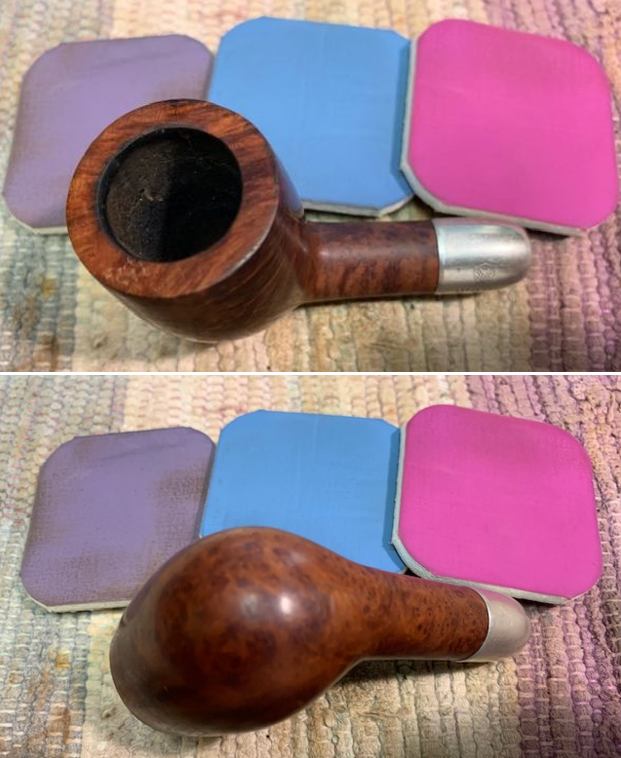
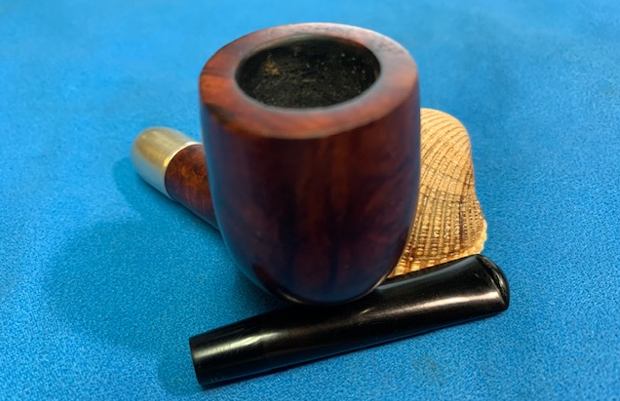
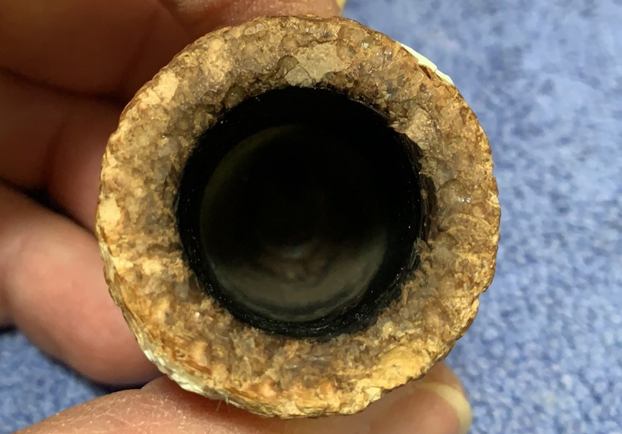
The stummel was next, and the usual cleaning procedures were in order for this pipe. I used both the PipNet Reamer and the KleenReem to remove the built-up cake and followed that with 220-grit sandpaper to remove as much as I could. The meerschaum cannot take the usual de-ghosting process of soaking cotton balls in isopropyl alcohol, so sanding was a way to reduce the old ghost in the pipe. I also wanted to ensure there were no hidden flaws in the interior walls of the meerschaum. Fortunately, there were none. Truth be told, I actually also tried to use a bit of ground coffee in the bowl to remove the ghost, but that was not very successful.
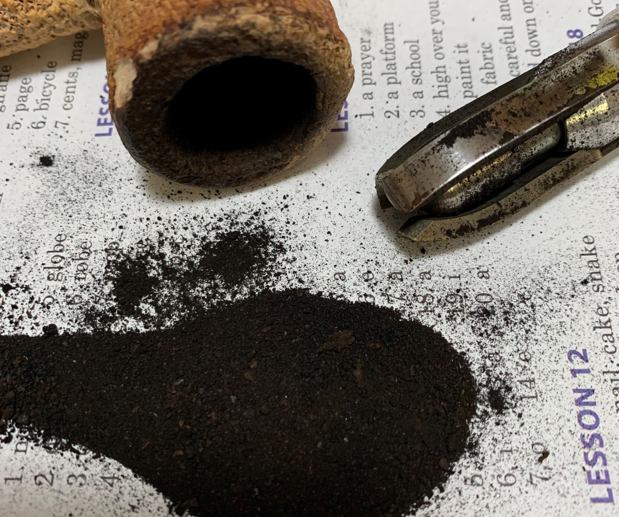
I then proceeded to clean out the insides of the shank with Q-tips, pipe cleaners, and isopropyl alcohol. There was quite a bit of nastiness inside this stummel – it took a lot of pipe cleaners etc. to sort that out. I then moved on to cleaning the outside of the stummel with Murphy’s Oil Soap and some cotton pads. That worked very well at removing any latent dirt and that weird yellow tinge that I mentioned earlier. I followed that up by quickly cleaning the insides with some dish soap and tube brushes. The meerschaum cannot be left wet for long – it will turn to mush otherwise. Before & After Restoration Balm does not make the same kind of difference on meerschaum as it does on briar, but it still works – so light coating was applied, followed by my horsehair shoe-brush. 
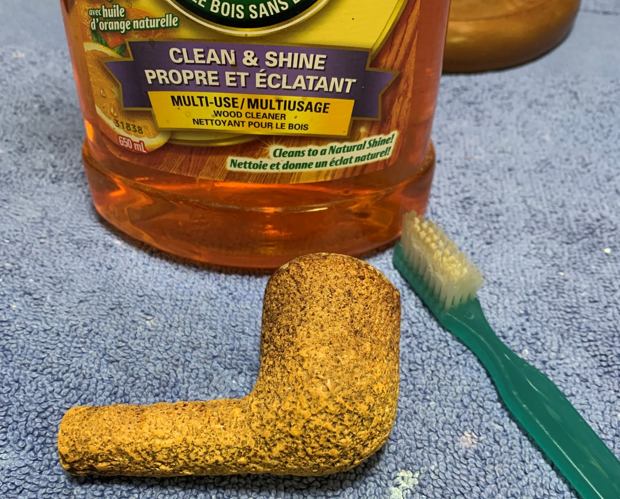
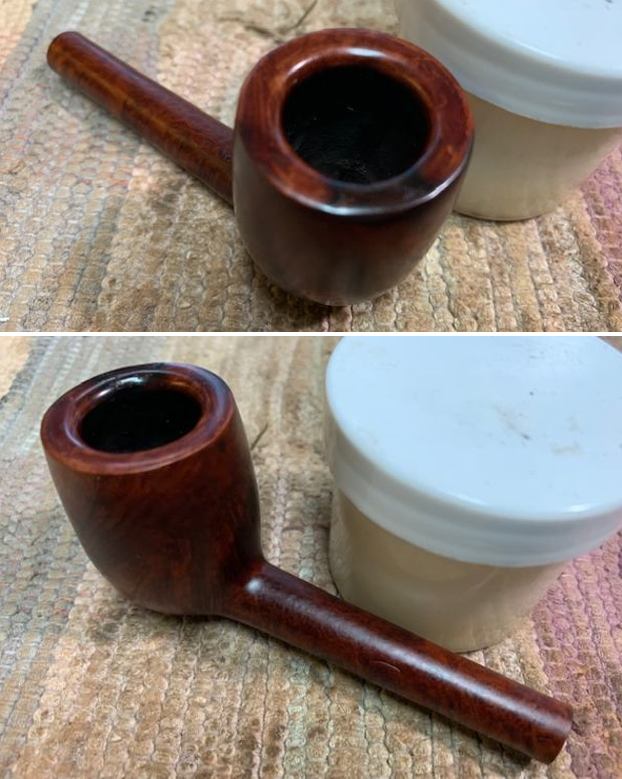
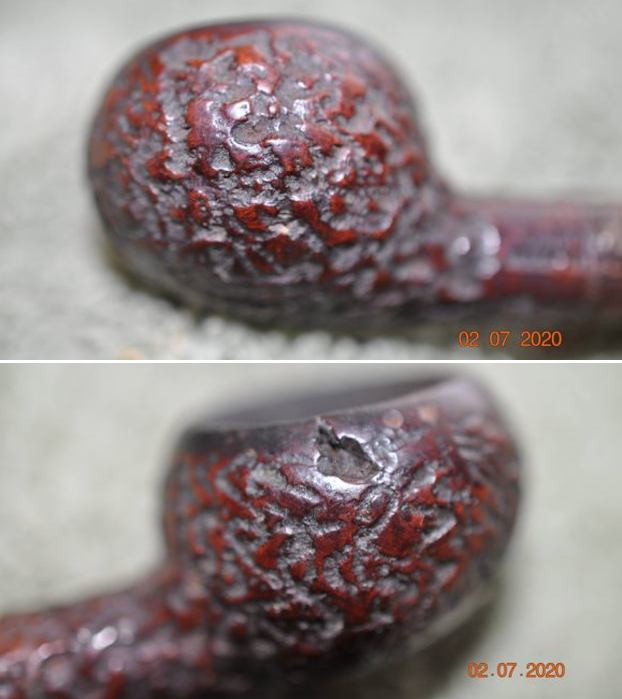
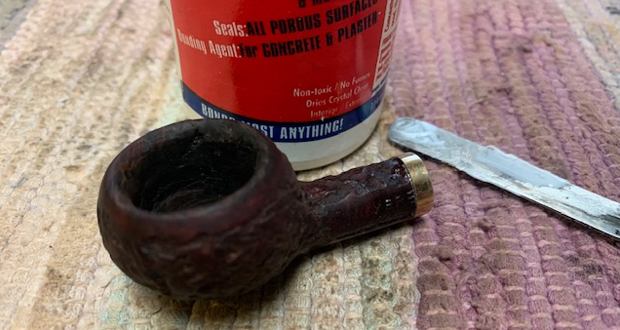
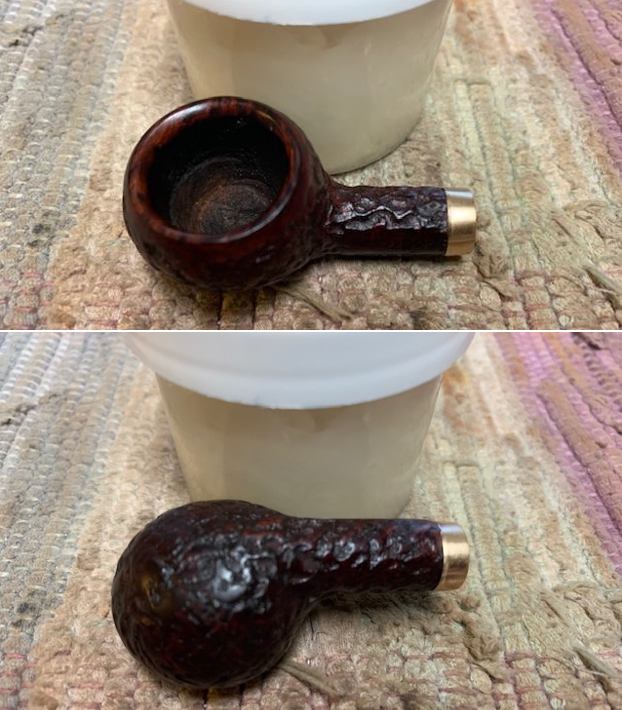
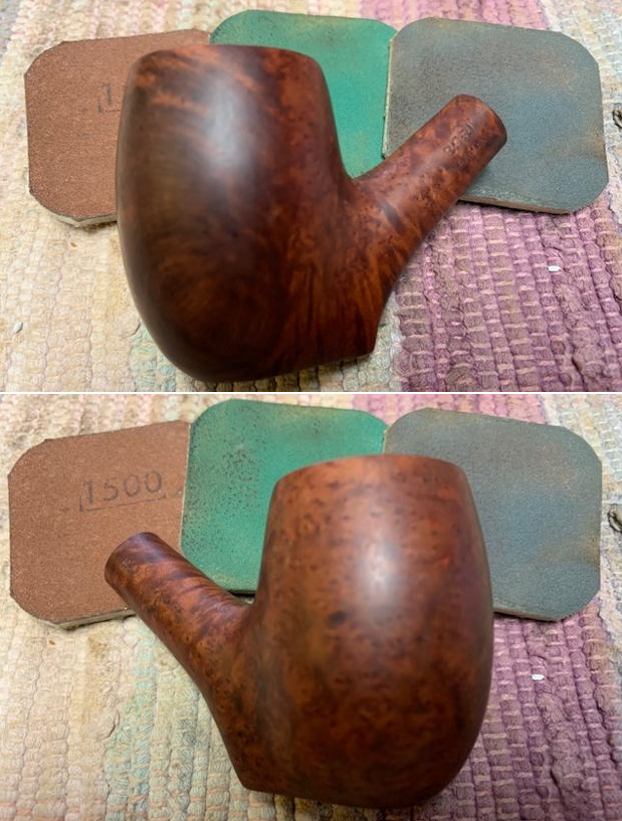
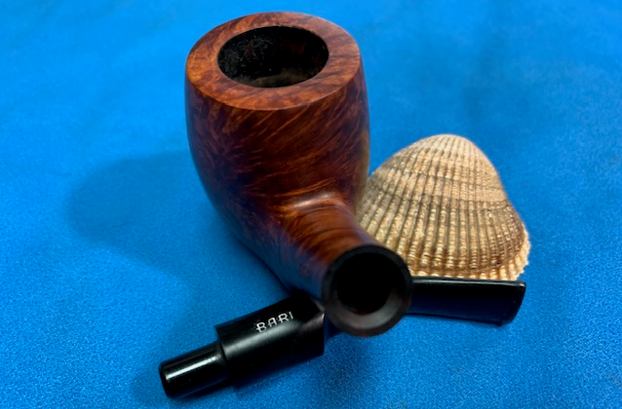
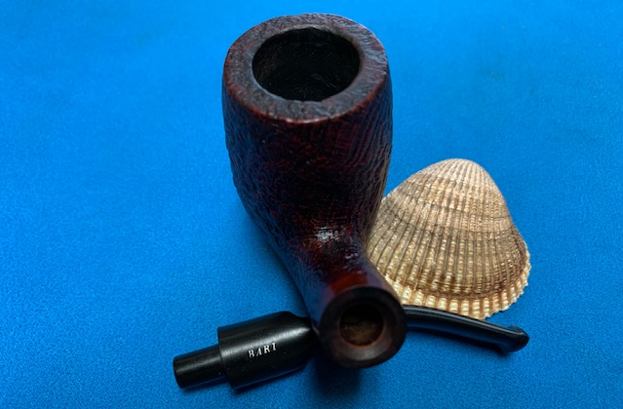
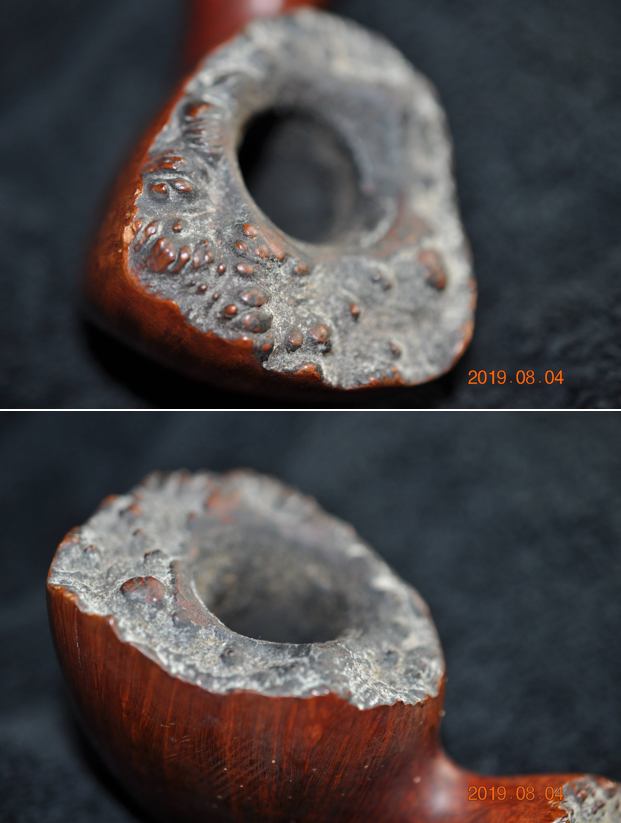
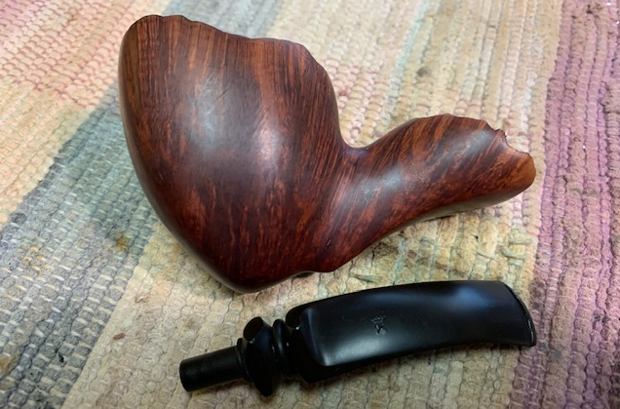
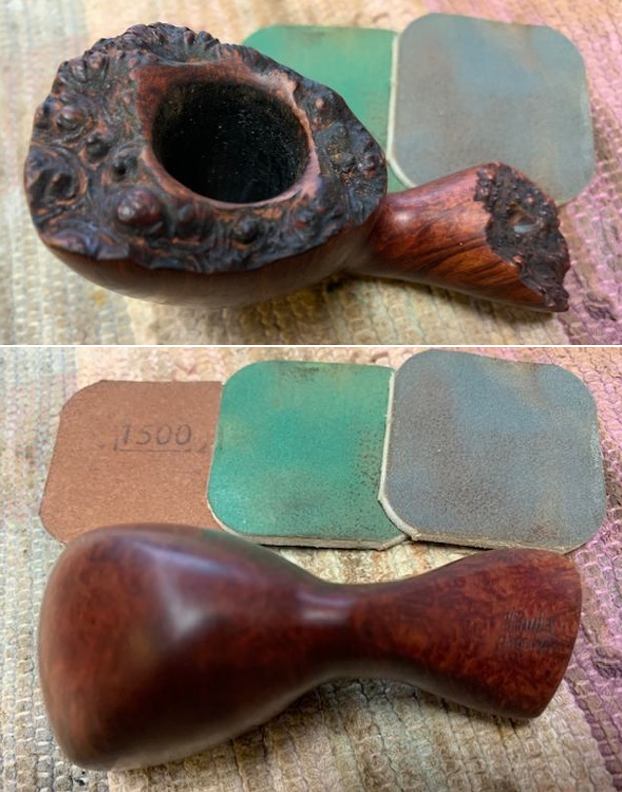
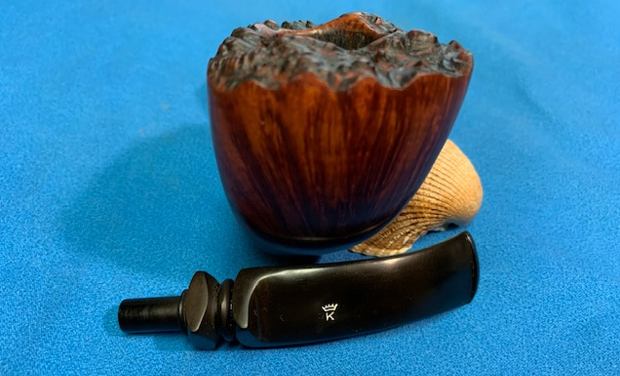
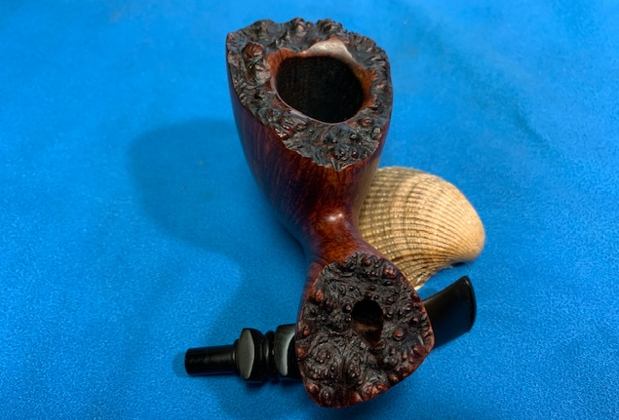
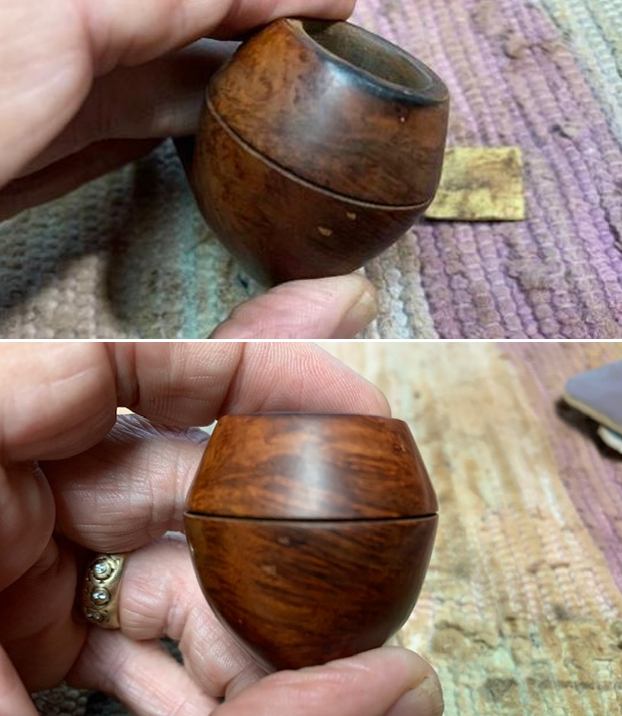
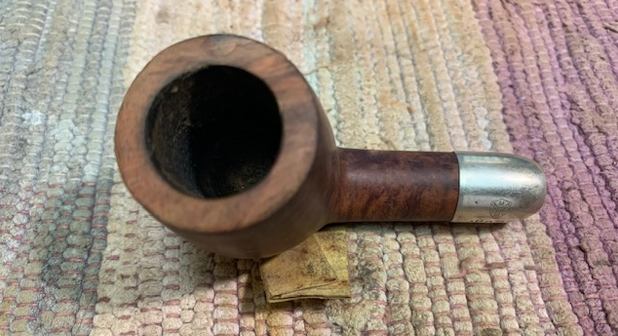
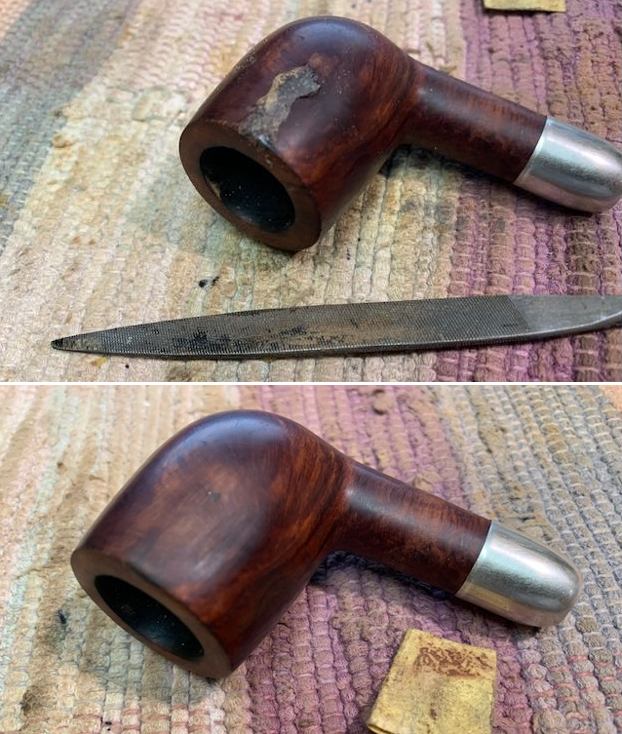
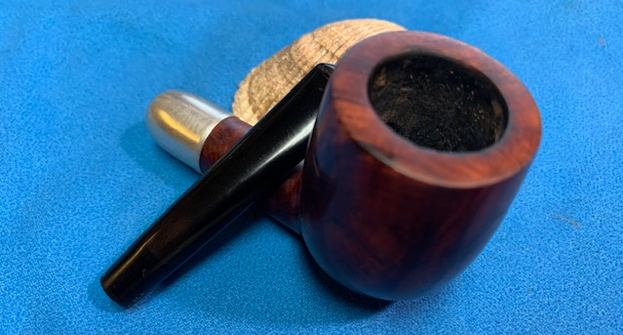
On to the inevitable repairs: this is where the nightmares begin. Honestly, it was not immediately clear to me how I was going to make the stummel look decent. Sure, I had cleaned it, etc., but what about the obvious chunks missing from the side? I considered sanding it all down, but I feared this would alter the shape of the pipe beyond reason and repair. I figured that, at very least, this pipe needed to be topped. That is to say, the rim had to be inverted and sanded down on a piece of 220-grit sandpaper. By doing this, it would remove some of the lighter damage altogether and would improve the state of the heavier damage. But the old problem remained: how was I going to repair the chunks of missing meerschaum on this pipe?
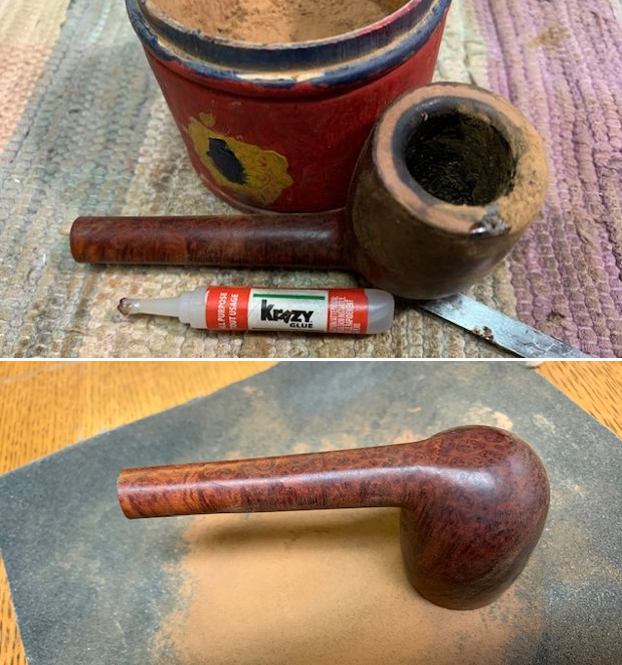
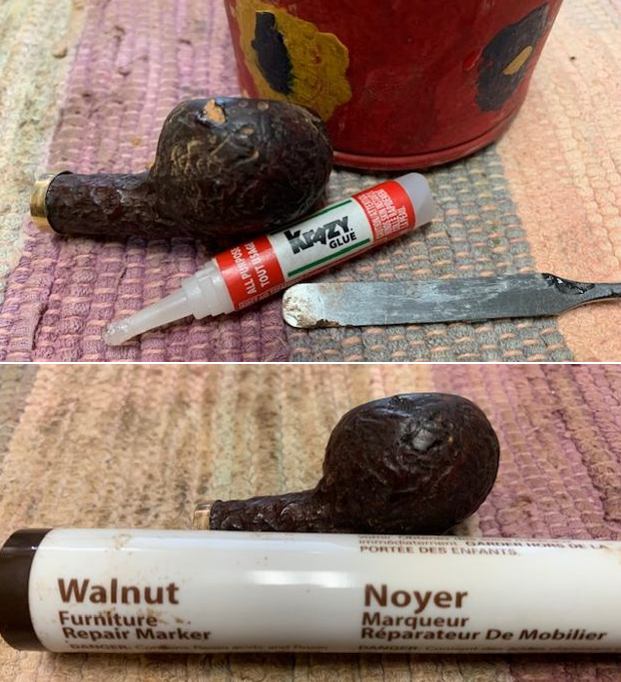
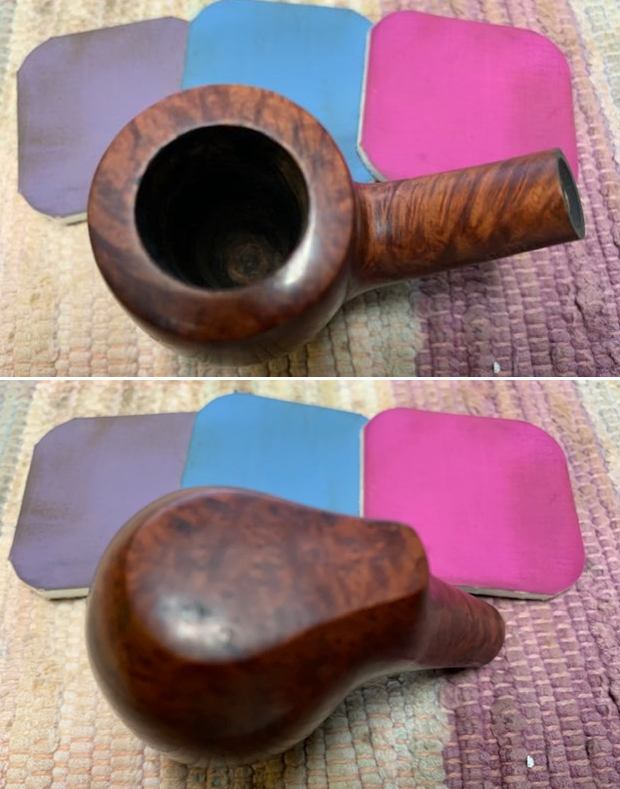
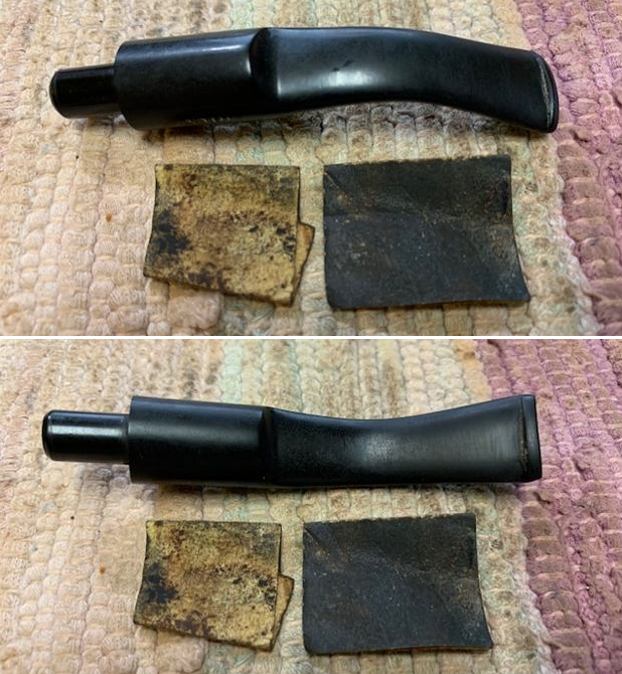
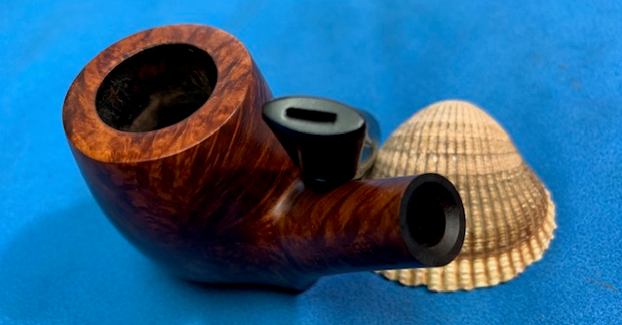
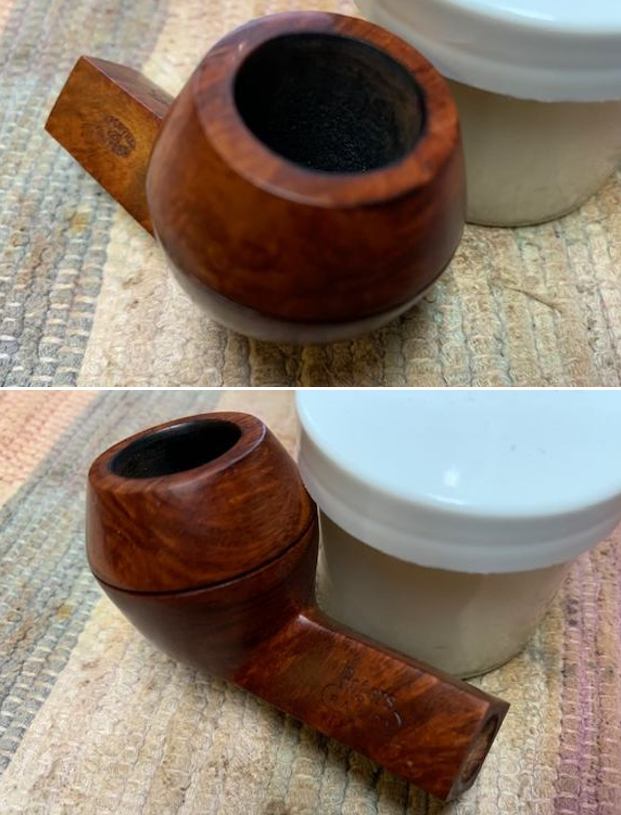
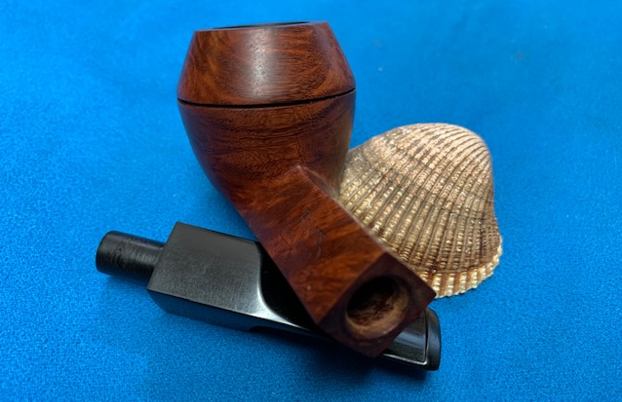
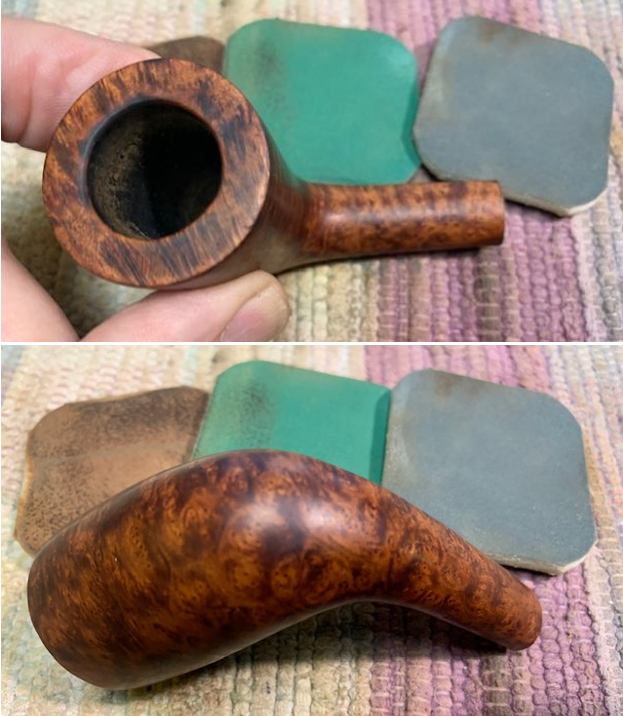
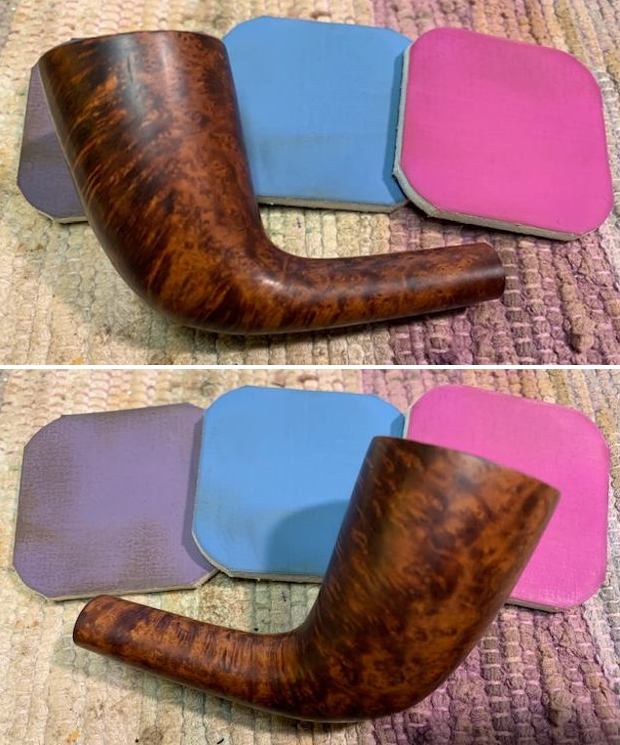
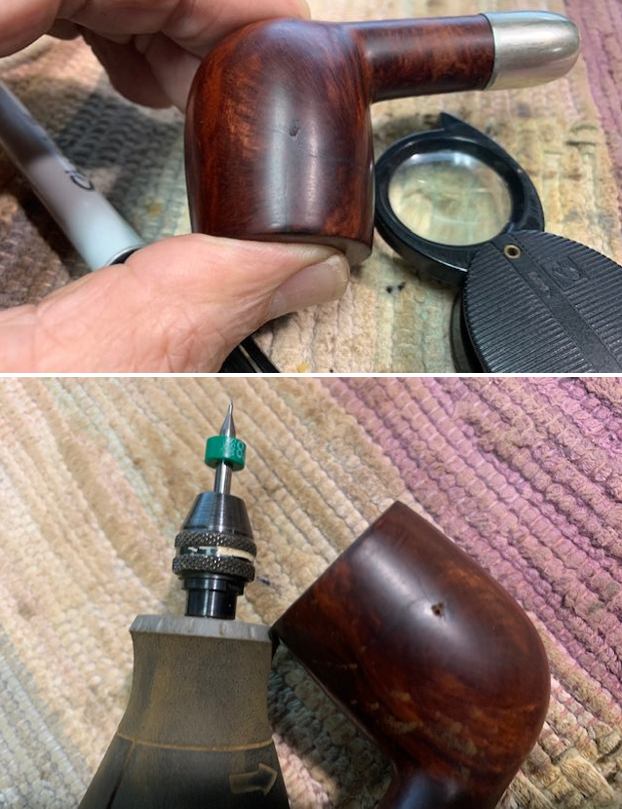
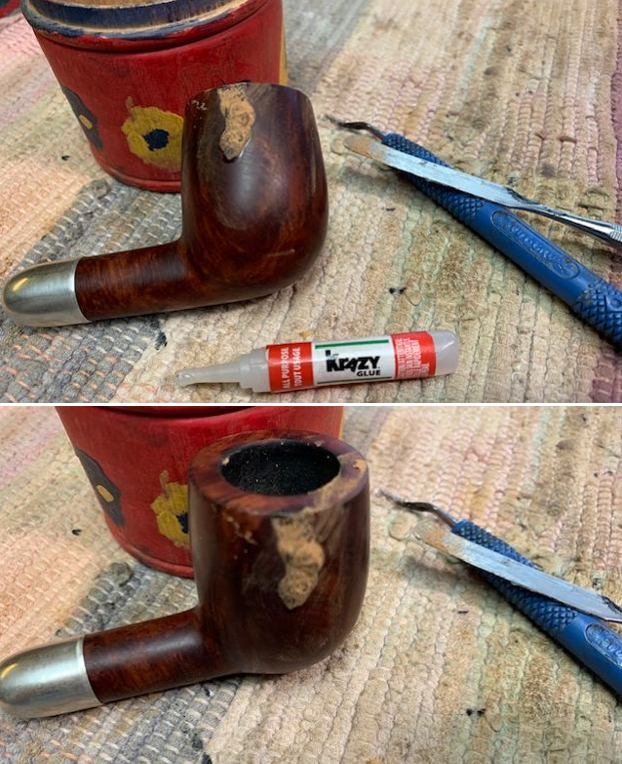
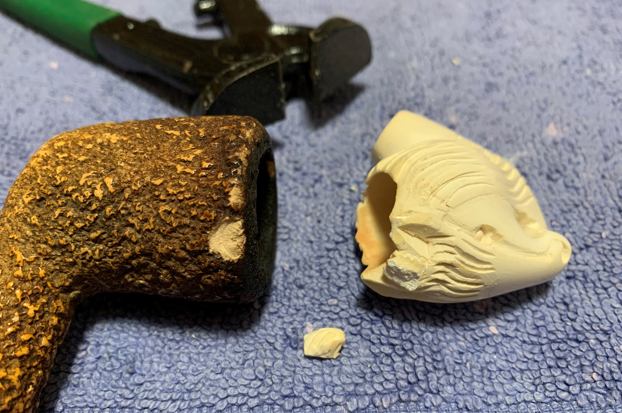
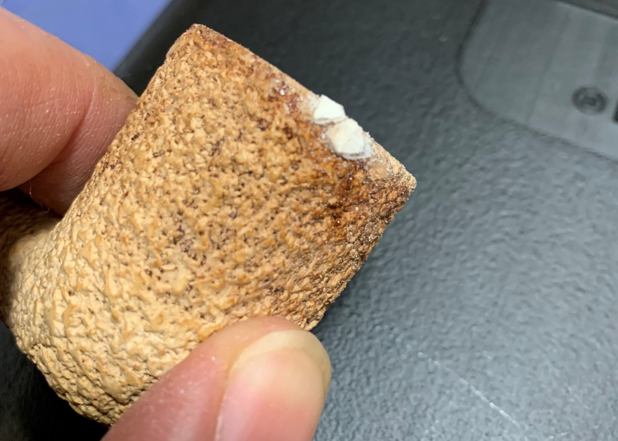
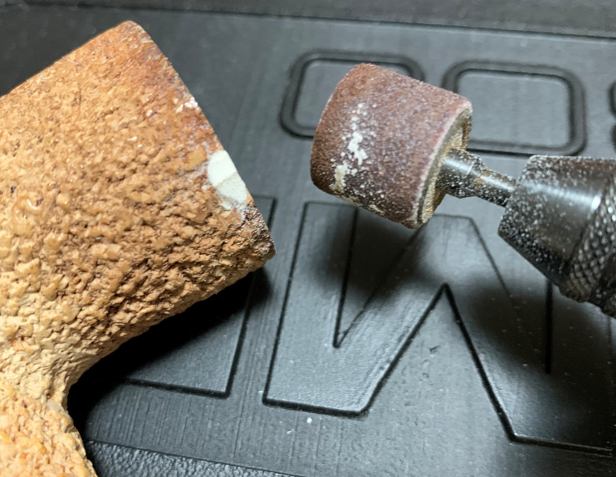
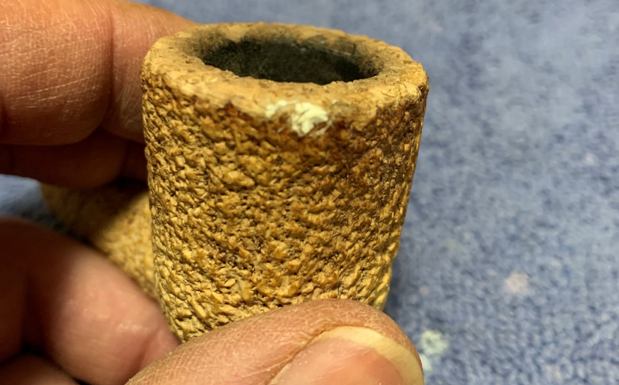
I then realized that the solution was as obvious as the nose on my face: I would take a piece of meerschaum from another pipe and fashion a repair. I grabbed one of my sacrificial meerschaum pipes (a dreadfully ugly horse’s head) and used a pair of end-cutting nippers to break off a couple of pieces. Having done that, I used cyanoacrylate adhesive to fix them in place on the stummel. I was feeling pretty good about this solution, but knew that there was still a long row to hoe. Obviously, I needed to sand down and shape the new pieces of meerschaum, but I also needed to make the rim as rusticated as the rest of the stummel. Enter the Dremel (with accompanying angelic voices). Yes, I first used a sanding drum on the Dremel to remove excess material from the repair (but not too much), then I used a high-speed engraving cutter to rough up the surface of both the rim and the repair. 
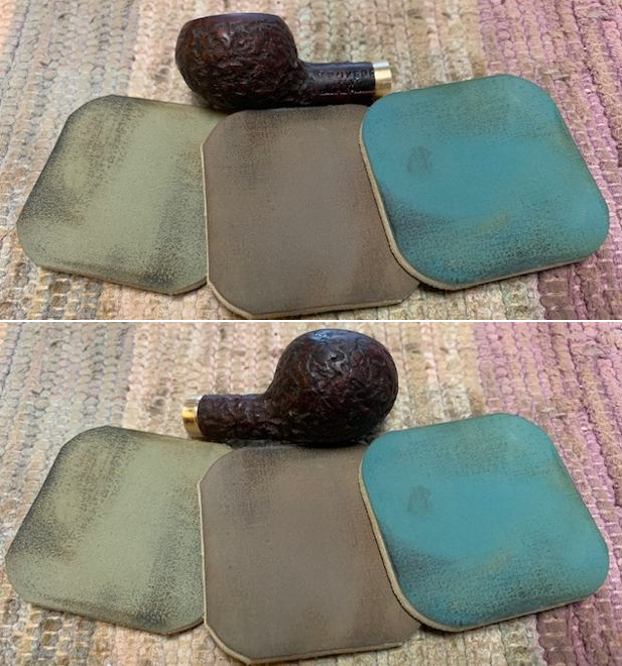
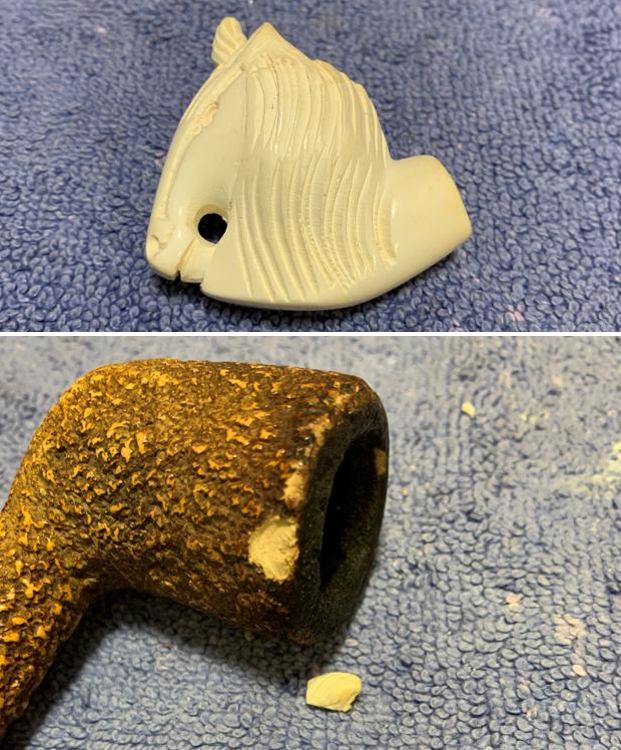
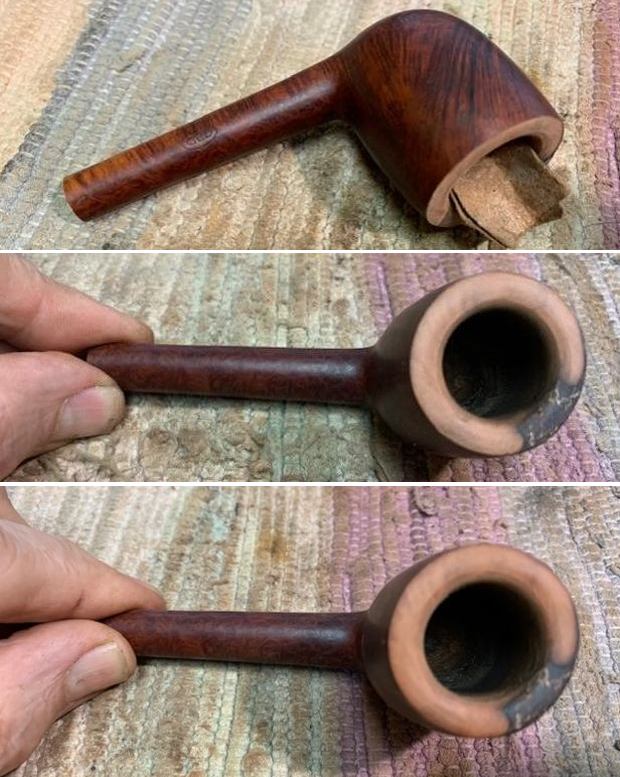
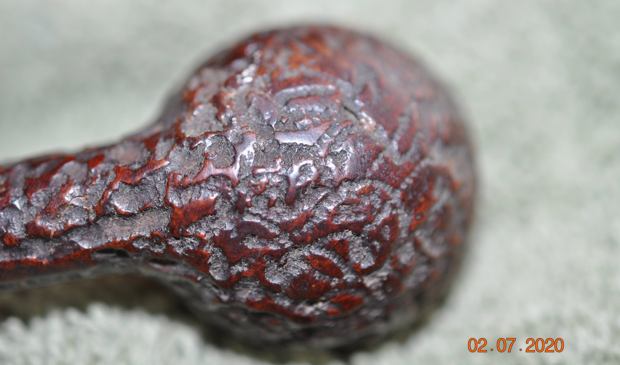
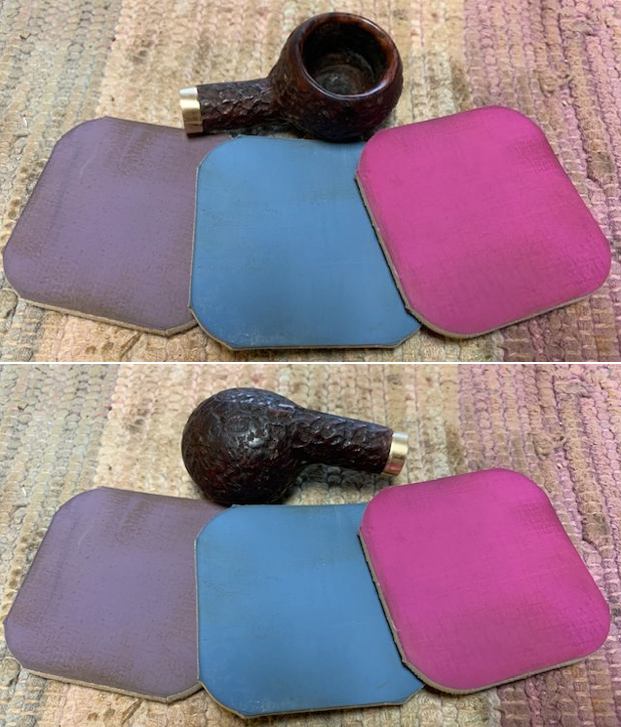
So far, so good. The engraving cutter had worked – to a point – but it had not really resulted in the sort of rustication I was looking for. My solution came from the Dremel again, but only indirectly. Steve reminded me of his trick of using an old Philips-head screwdriver as a rustication device (you can read about that here). Whereas Steve used Dremel grinding stones to make his rustication device, I used a metal cutting disc on the Dremel. As you can see, my screwdriver came out looking quite good and the stummel came out looking even better. 
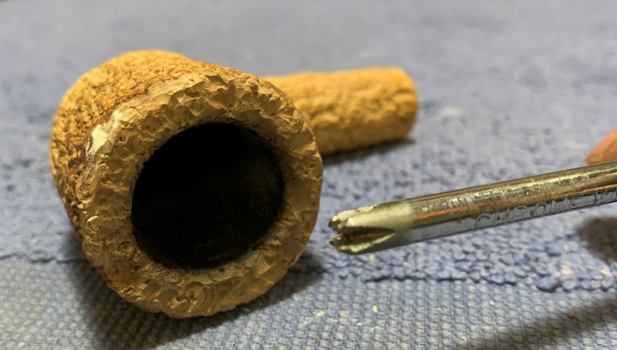
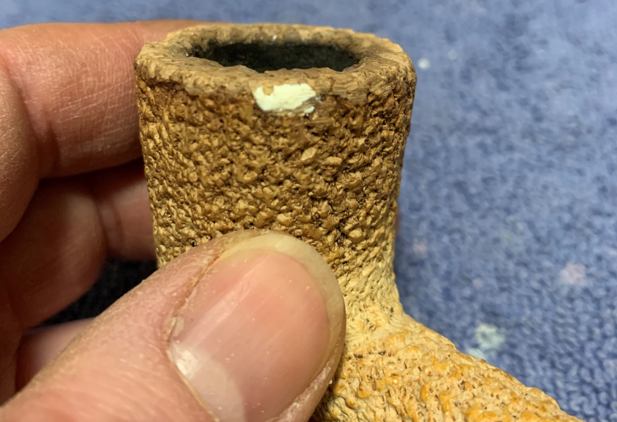
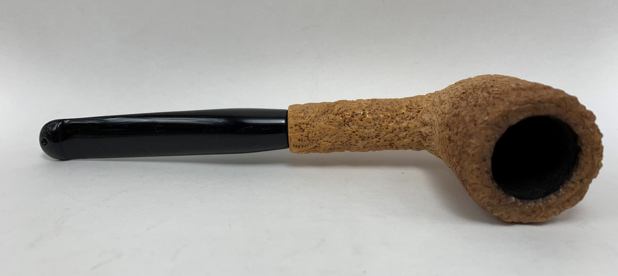
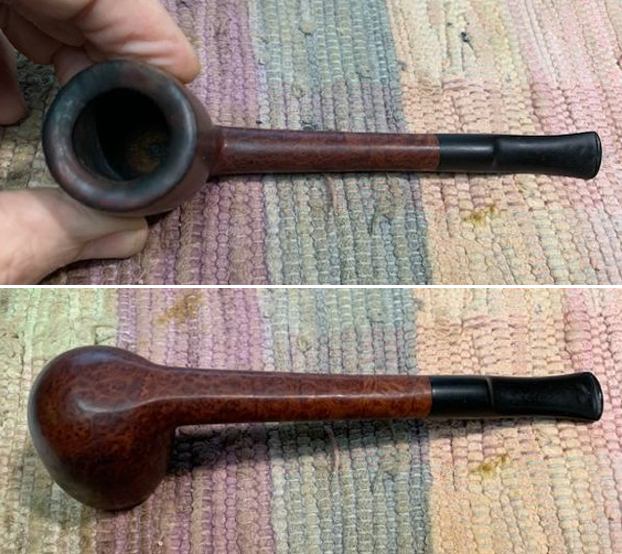
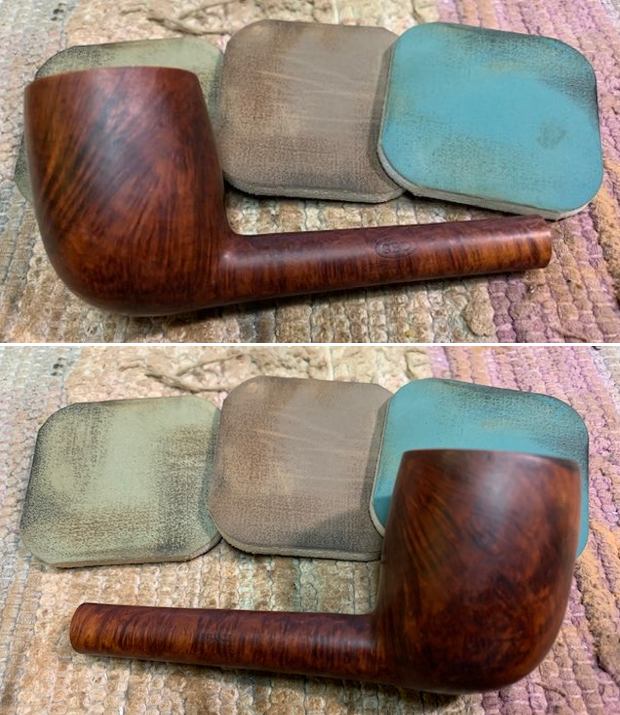
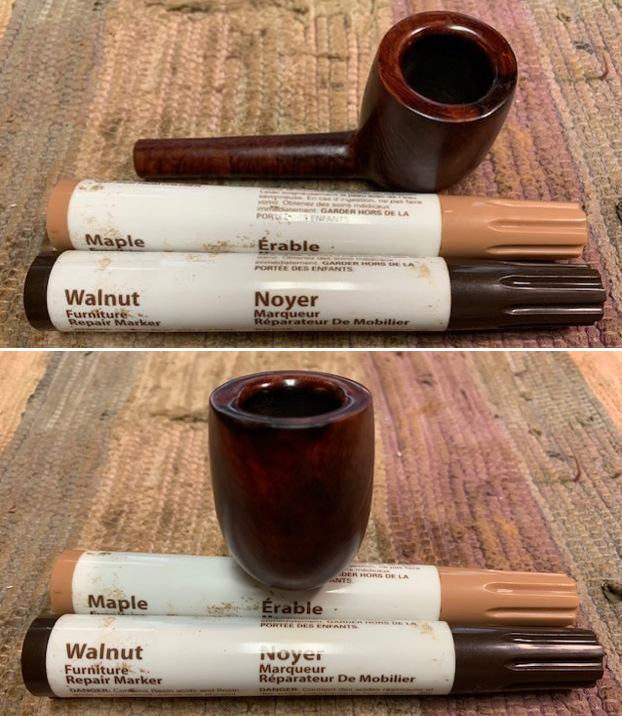
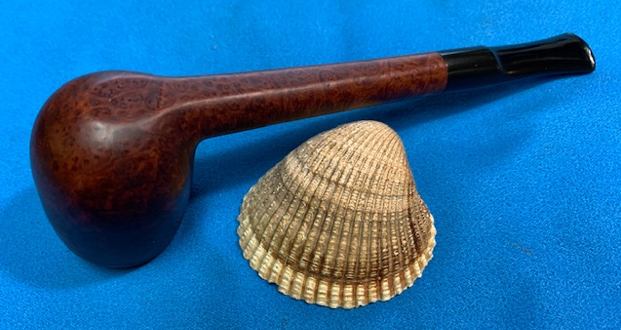
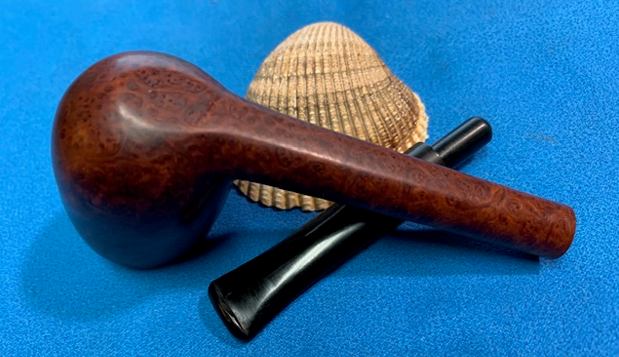
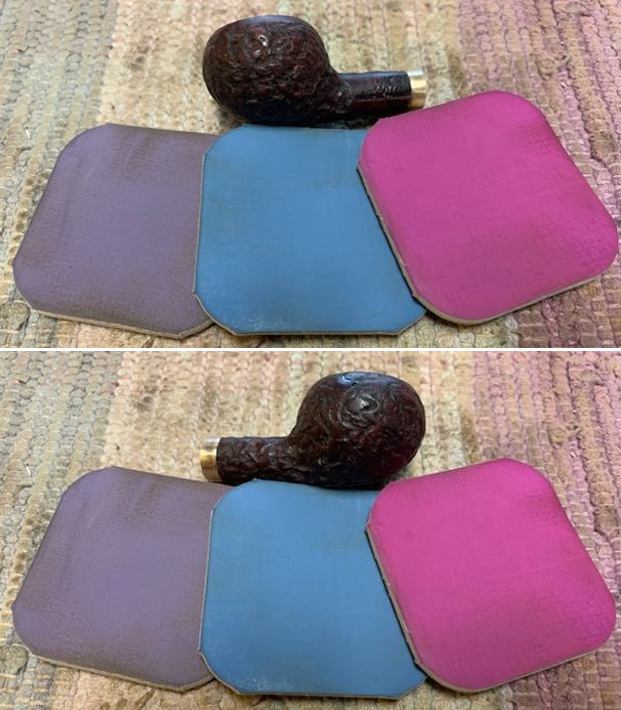
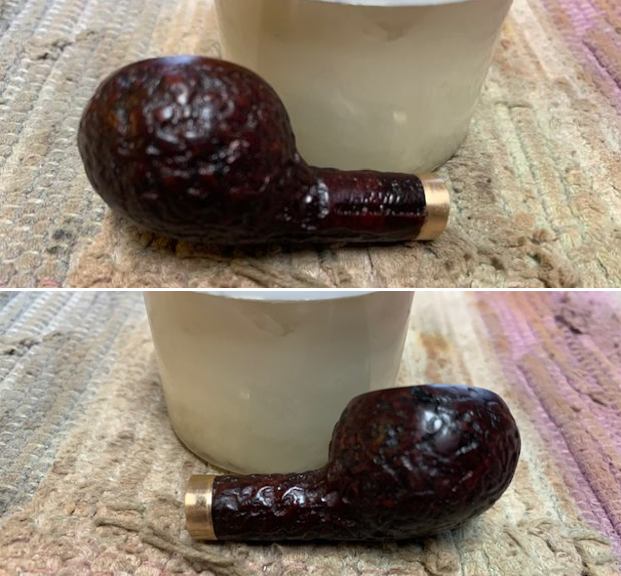
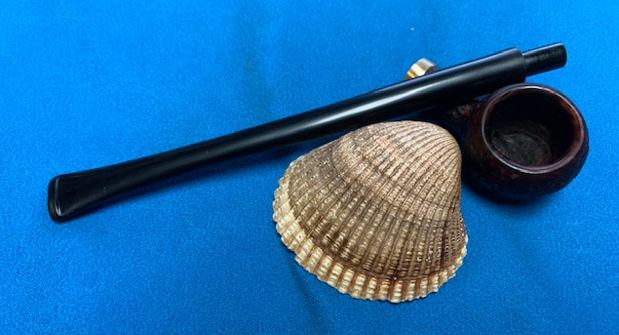
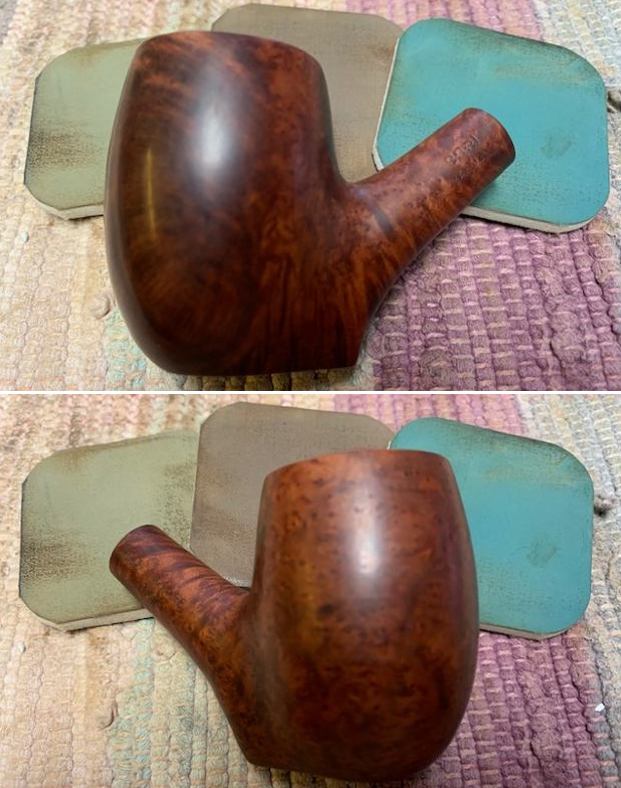
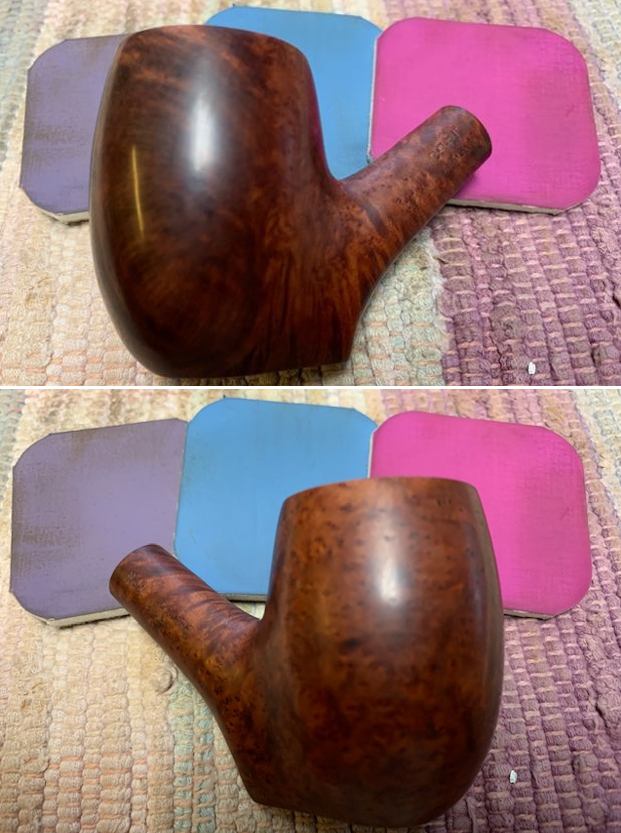
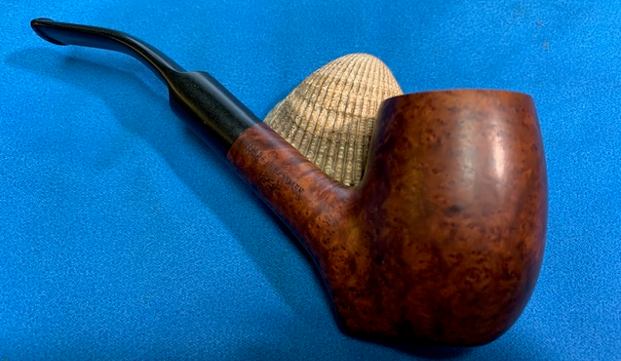
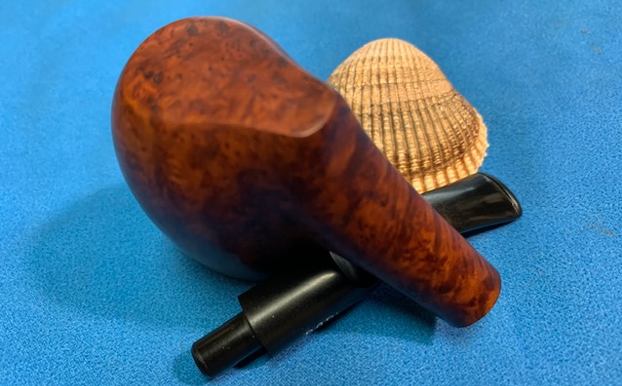
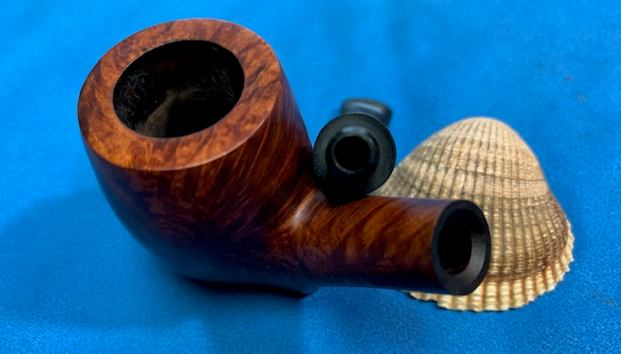
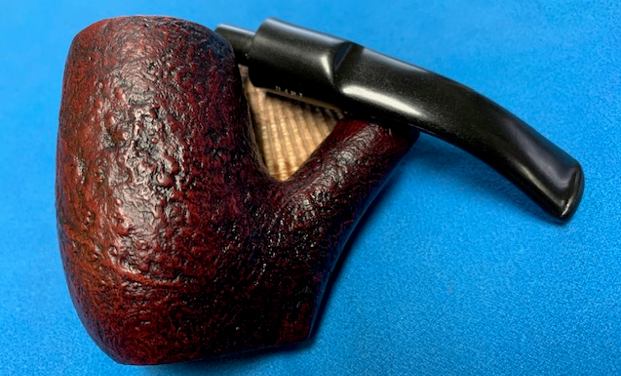
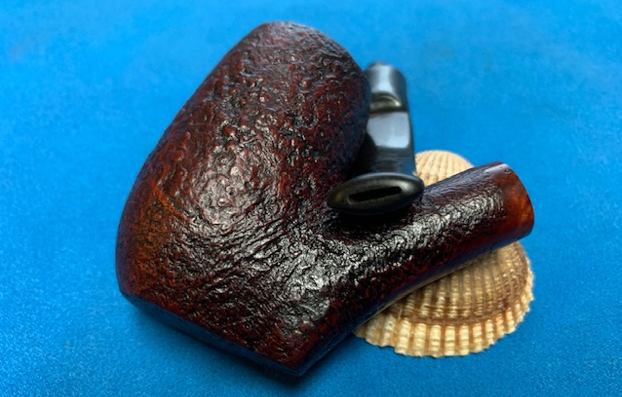
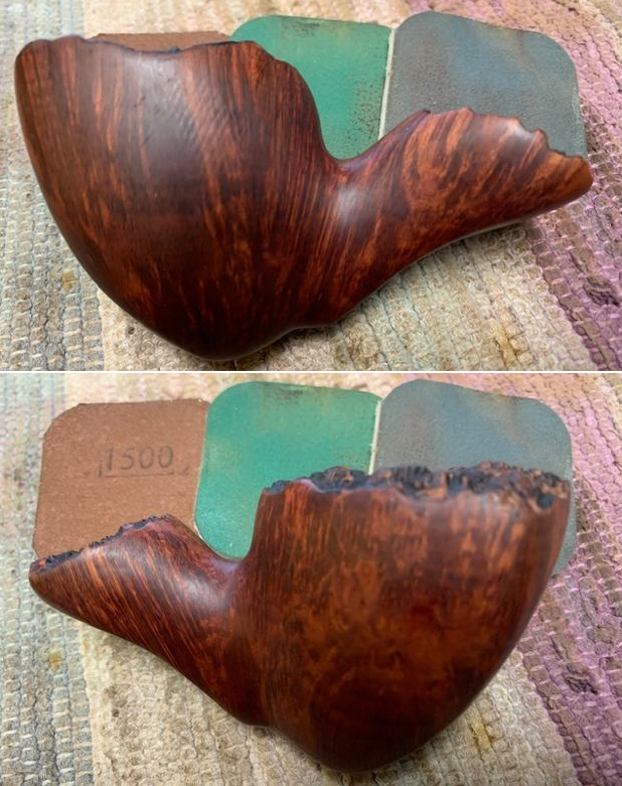
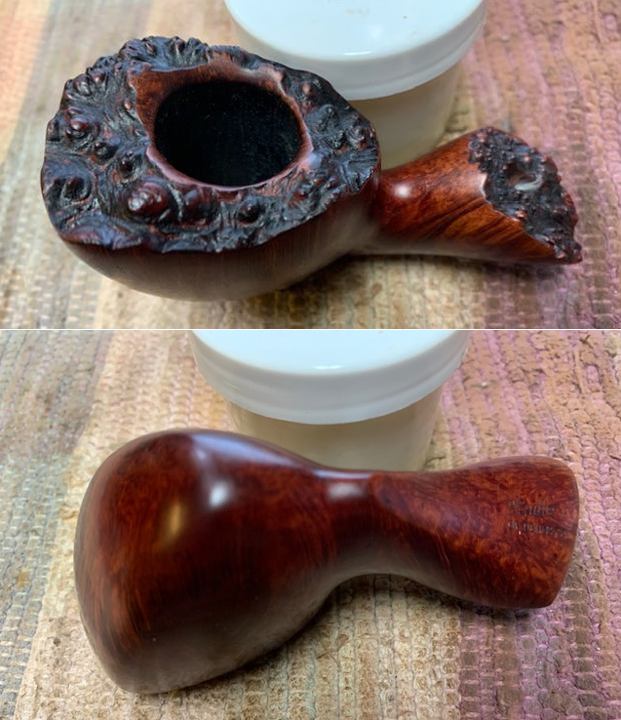
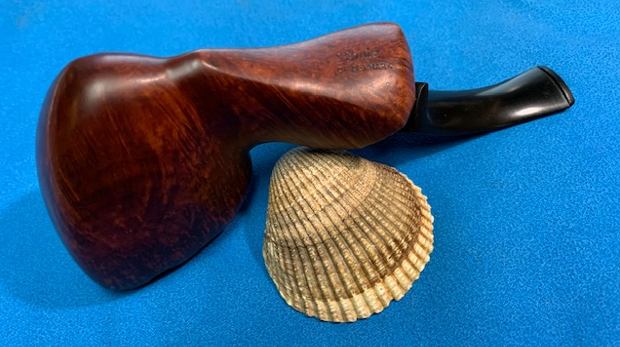
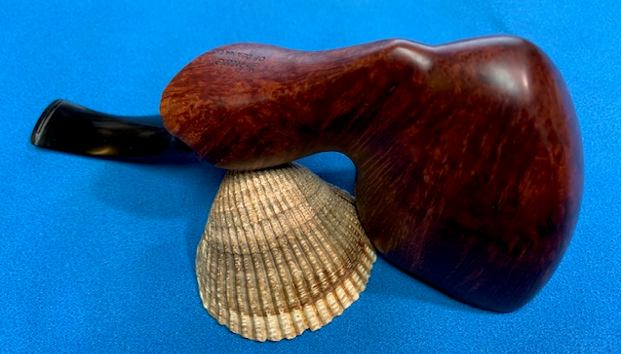
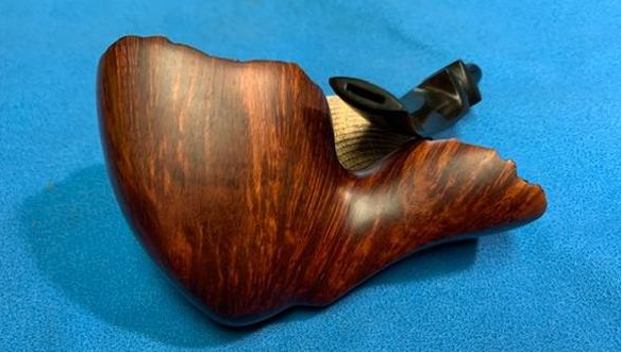
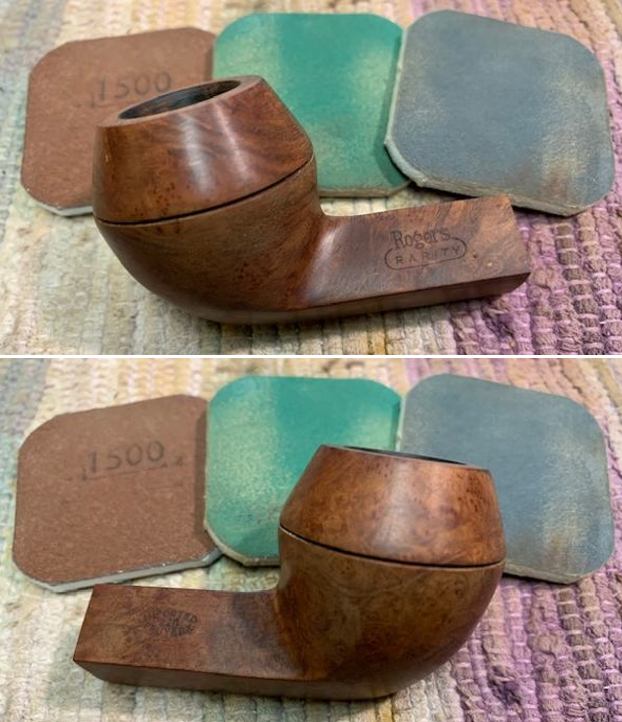
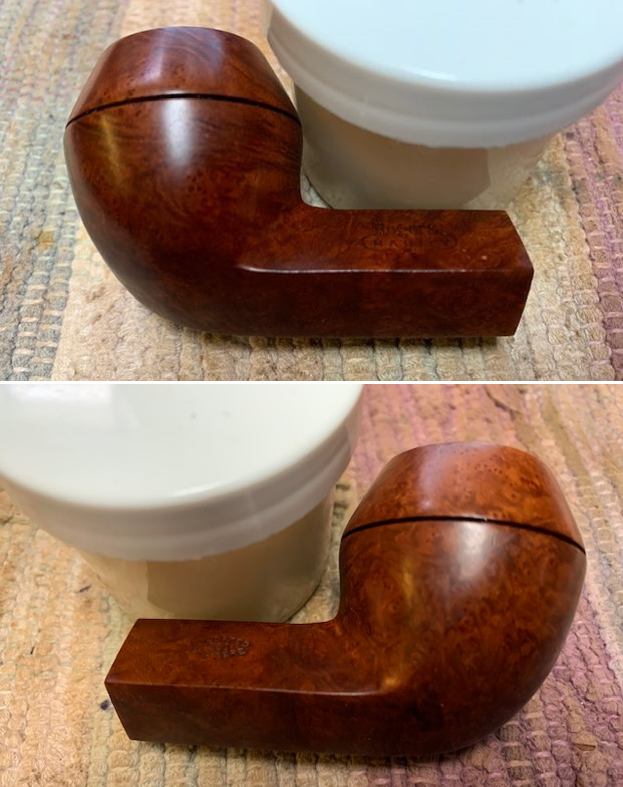
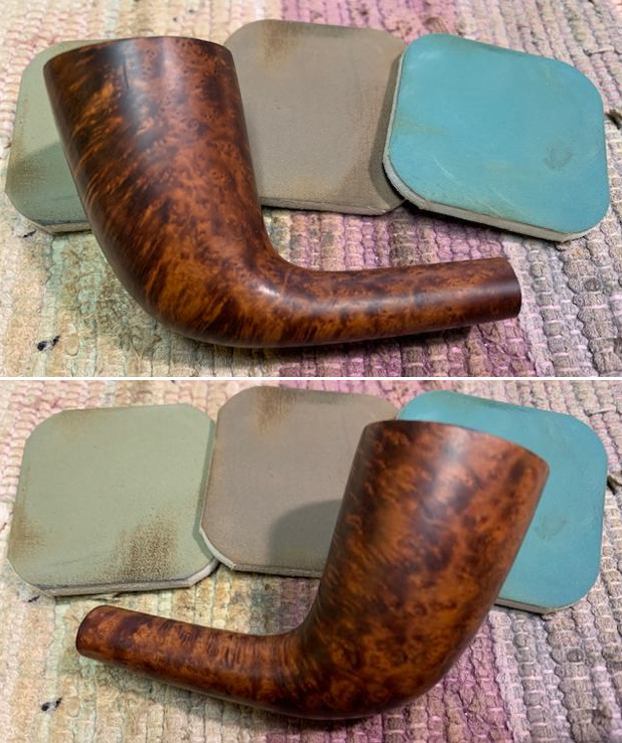
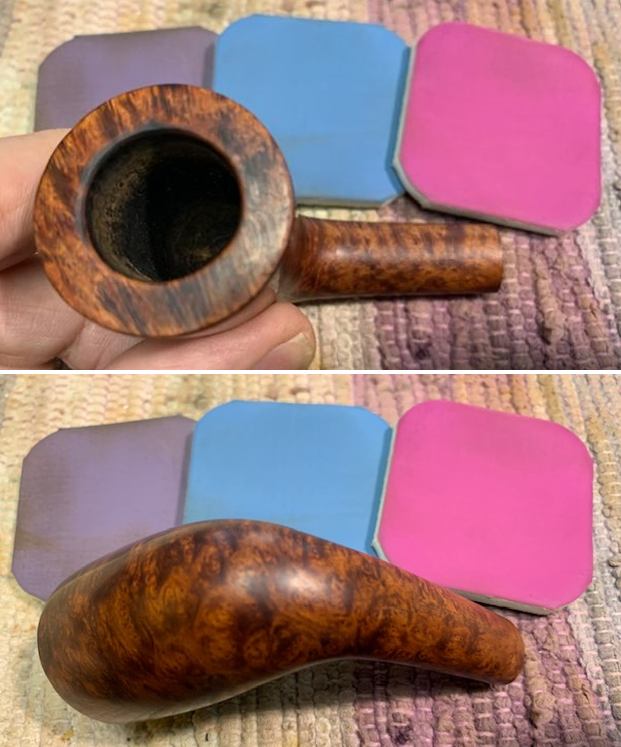
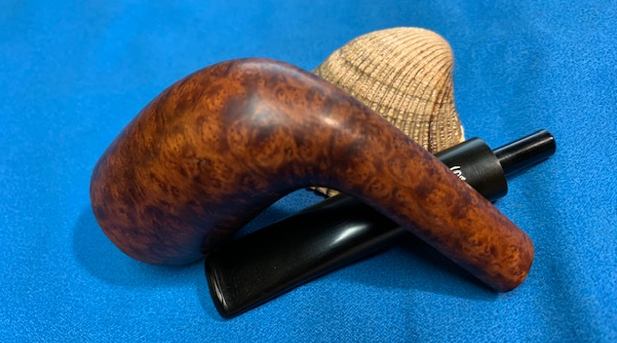
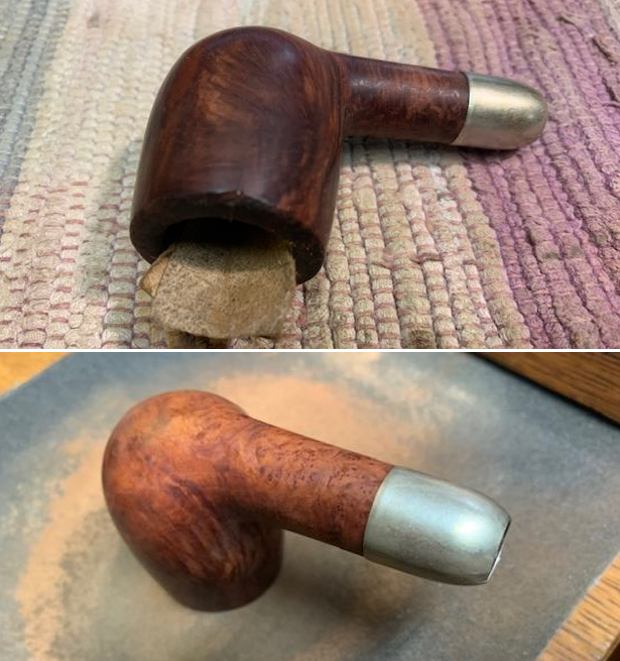
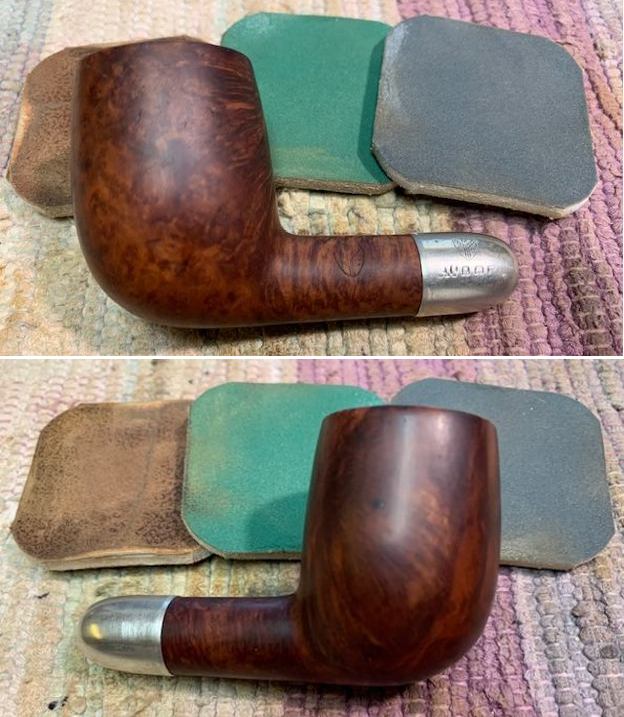
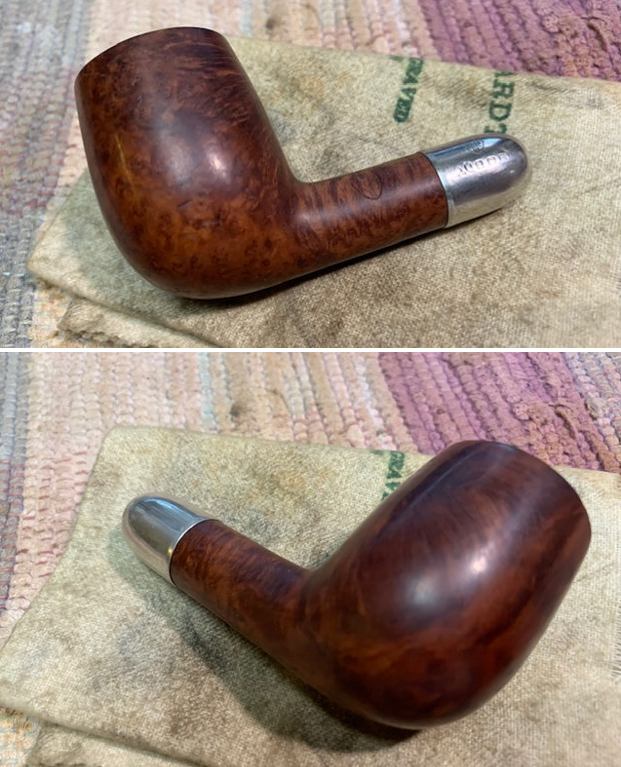
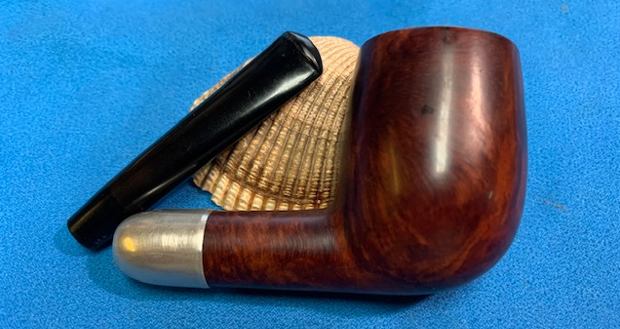
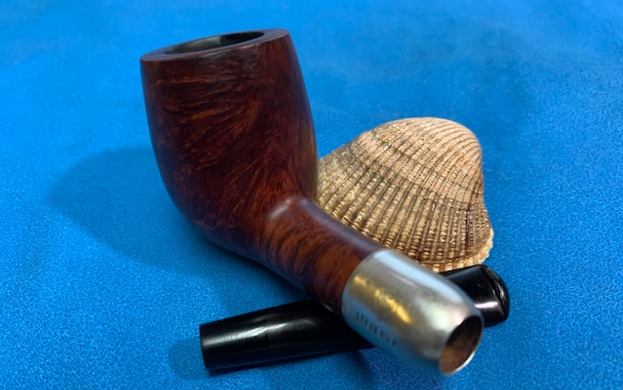
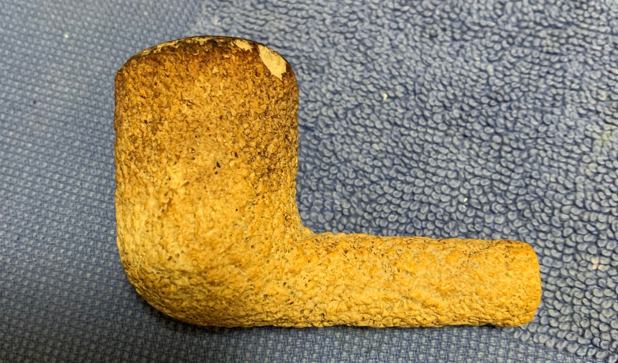
I was definitely pleased with the roughened surface of the stummel, but I next needed to address the lack of colour. This, of course, was a direct result of my topping of the rim – it removed the patina. The solution must have come to me in the mid-afternoon: tea. Yes, I used black tea to provide a beautiful stain to the meerschaum that gave it a really good look. I went and added some more Before & After Restoration Balm and, once again, used my horsehair shoe-brush to work it in.
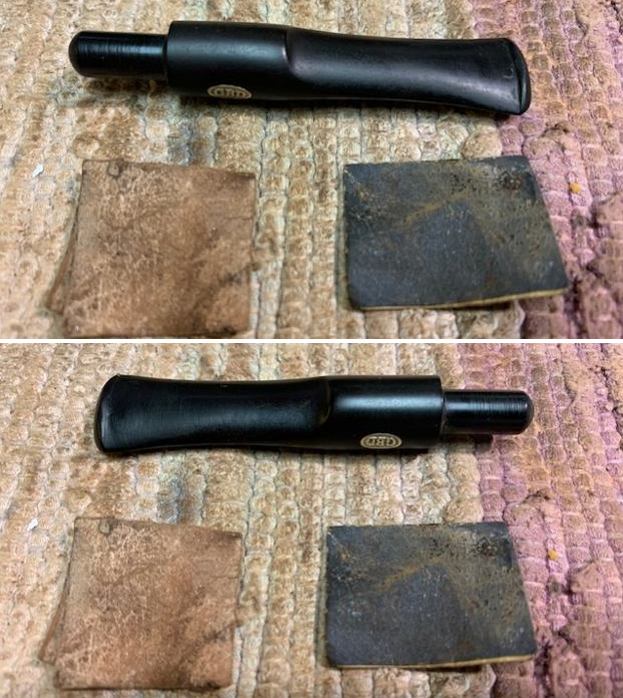
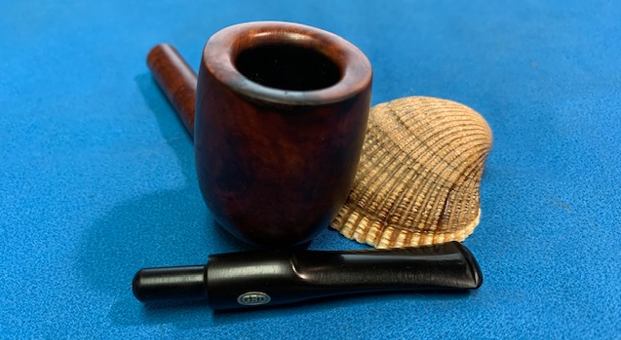
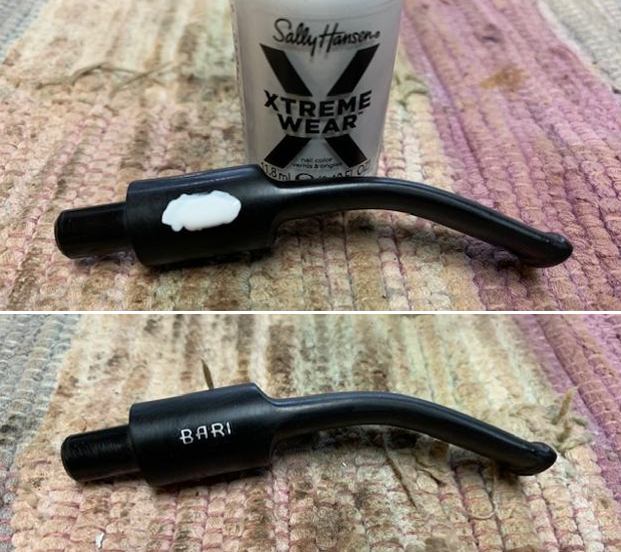
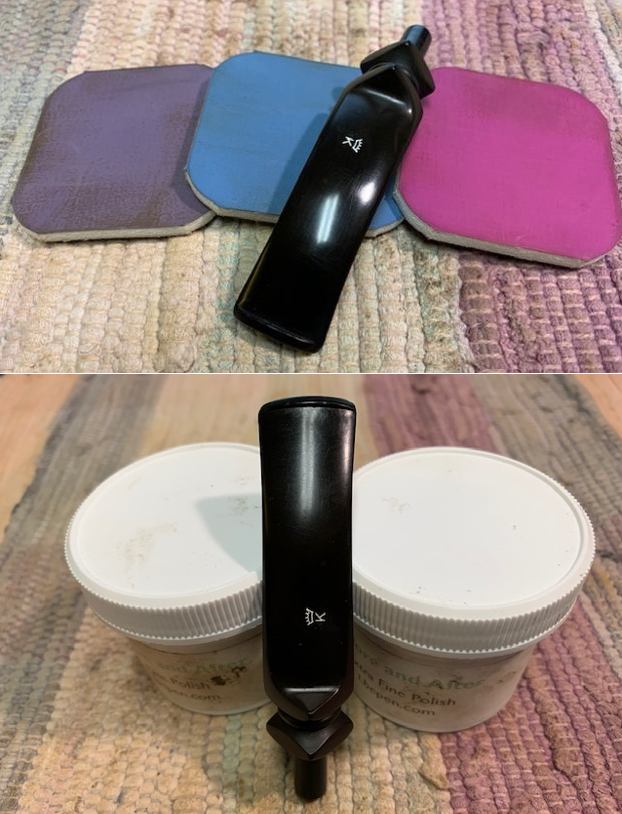
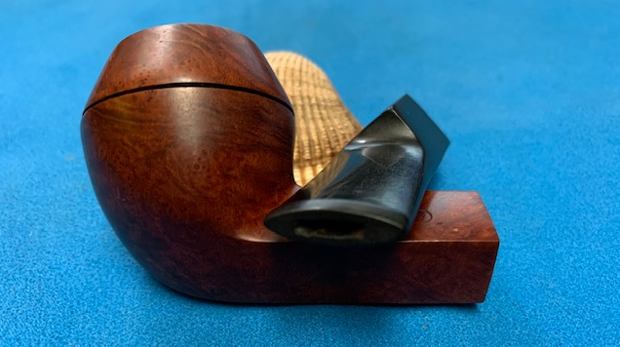
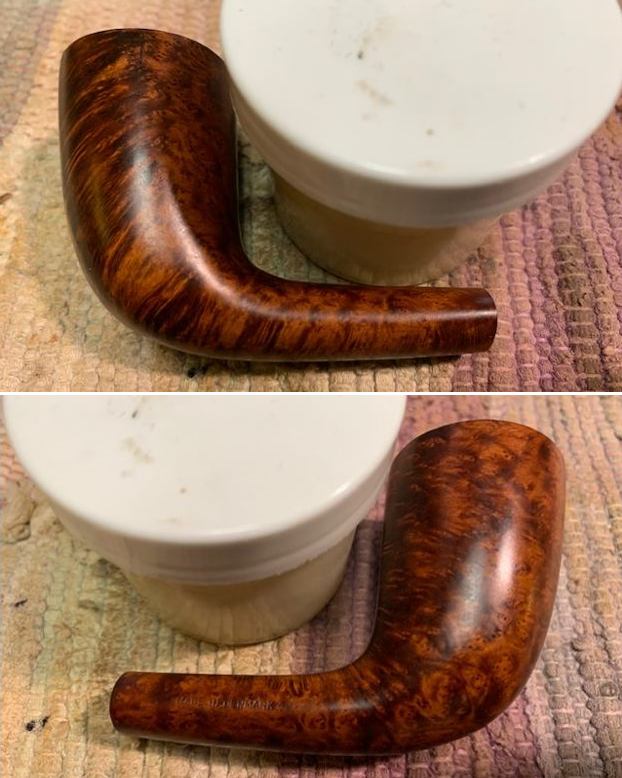
Meerschaum does not really do well on a high-speed buffer, so I used a microfibre cloth to achieve the same effect. I did, however, take the stem to the buffer, where I applied White Diamond and some wax to give it that lovely shine.

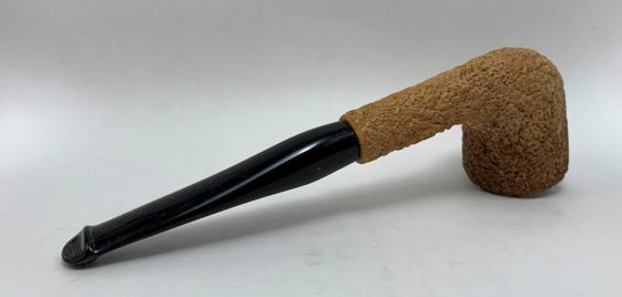
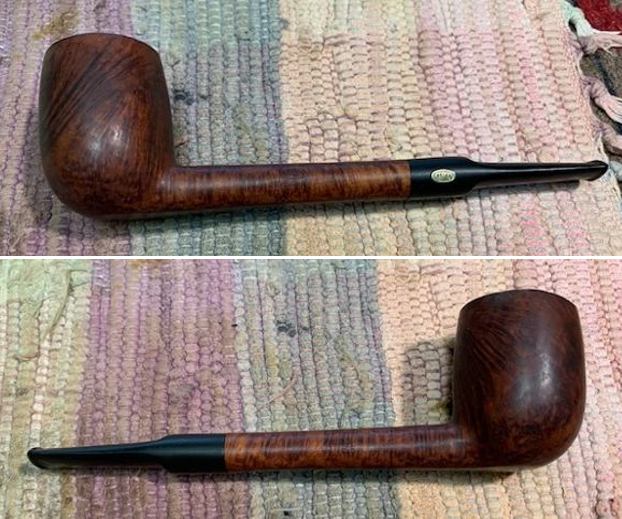
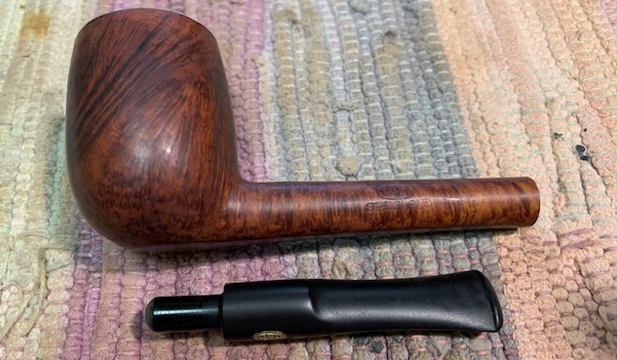
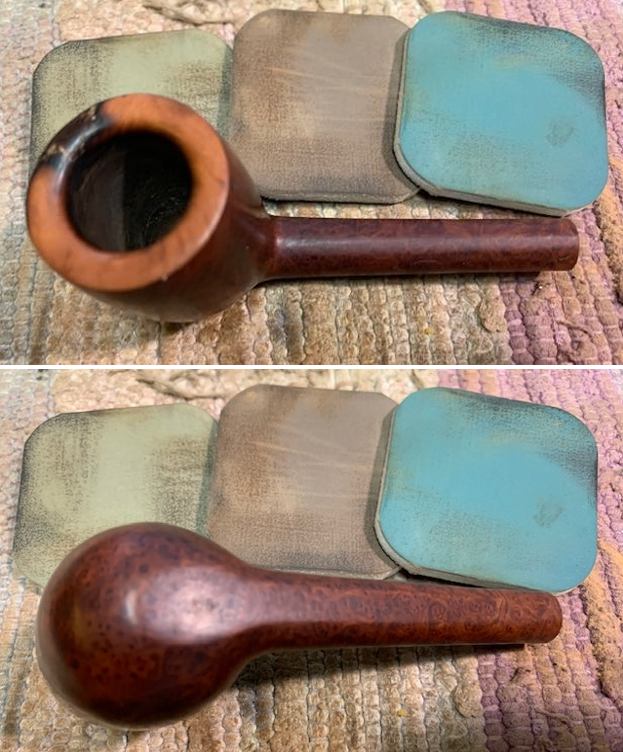
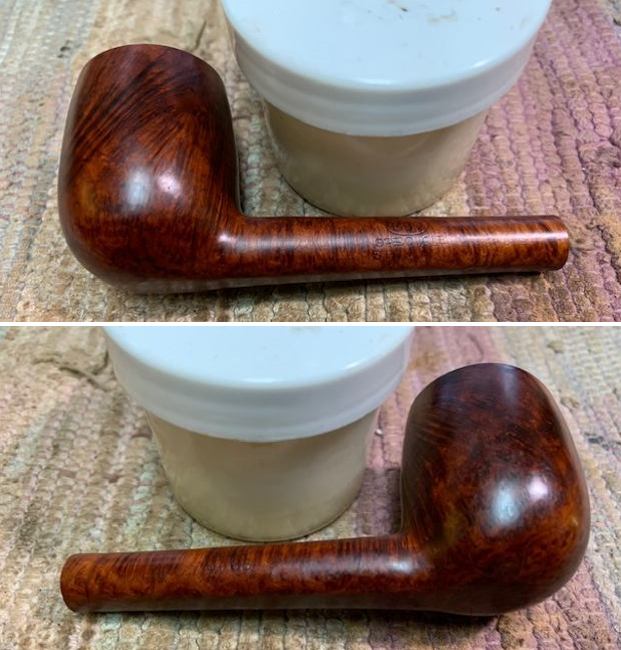
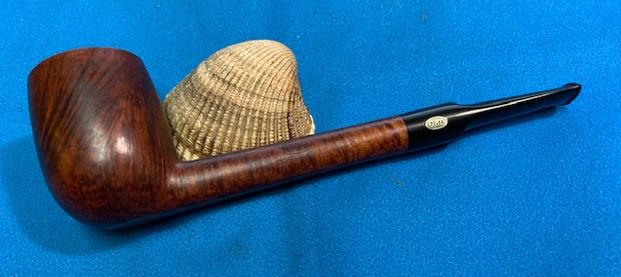
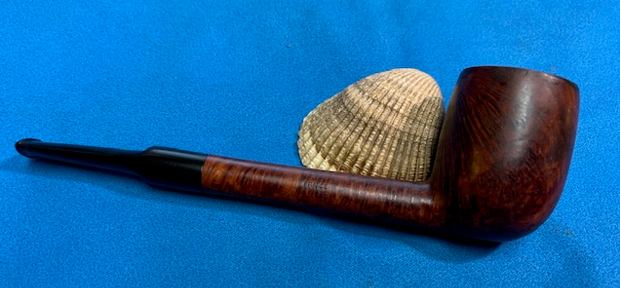
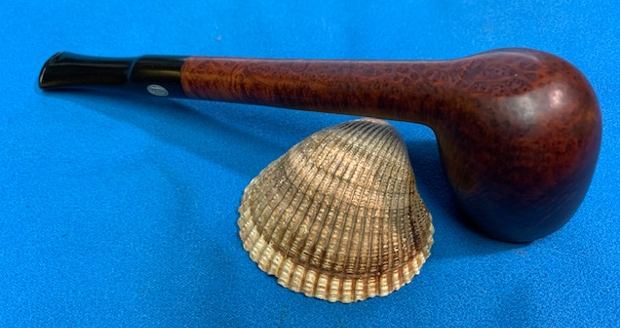
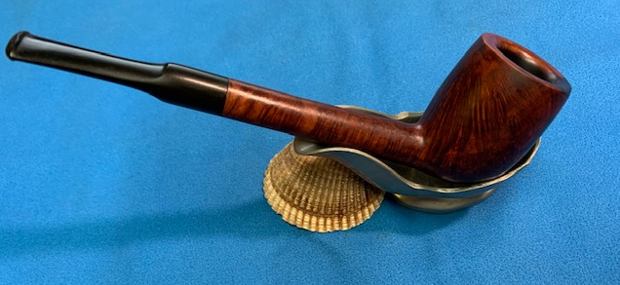
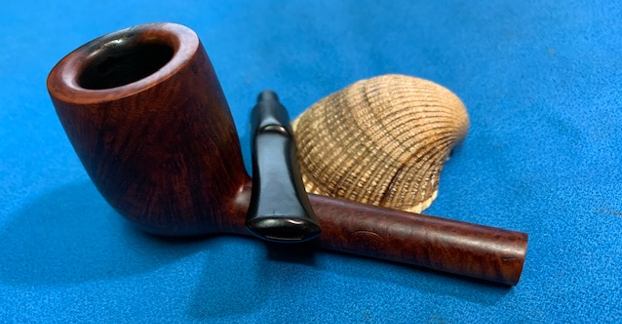
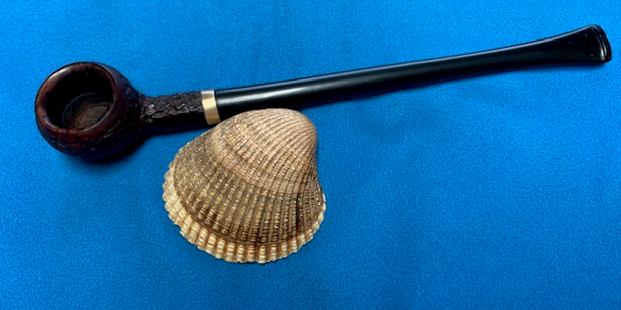
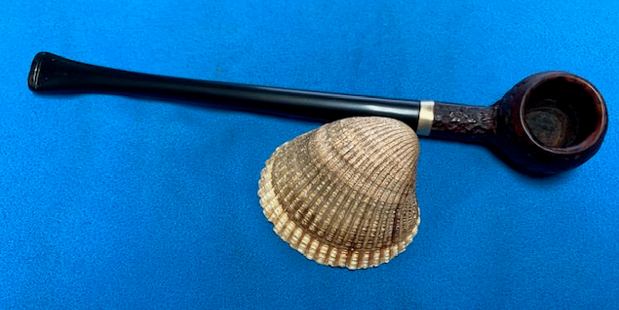
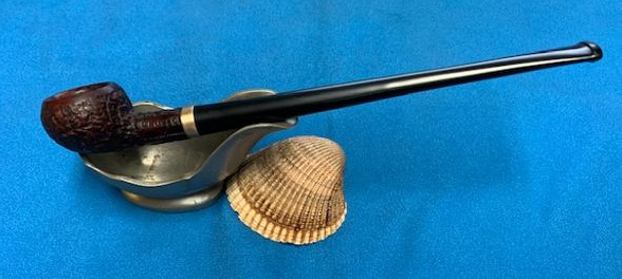
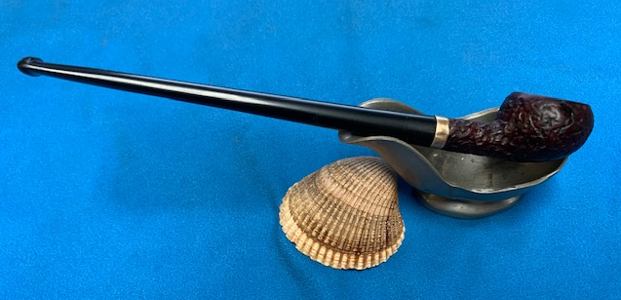
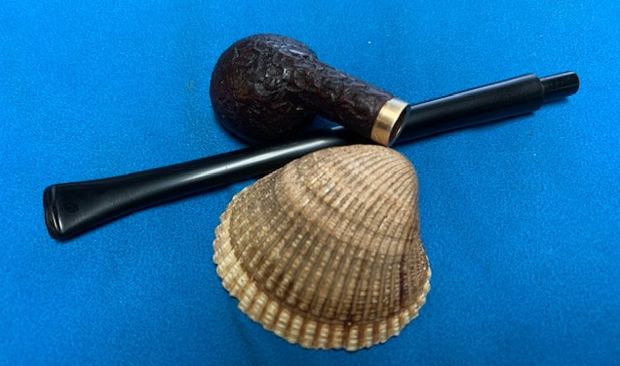
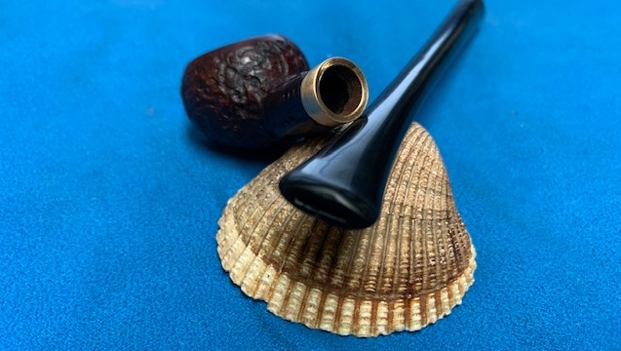
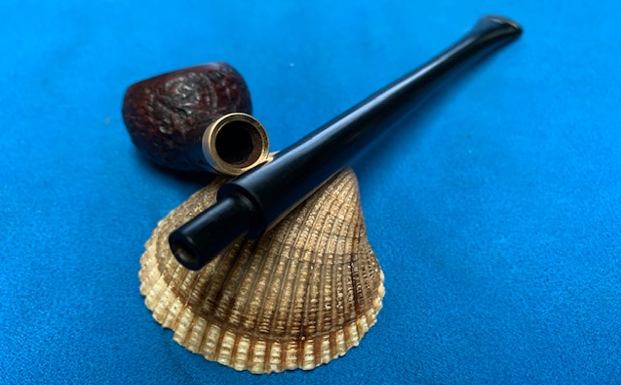
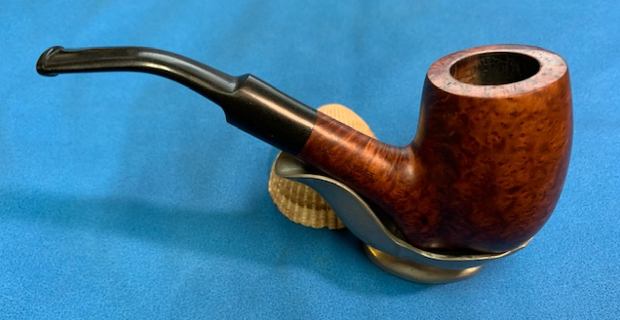
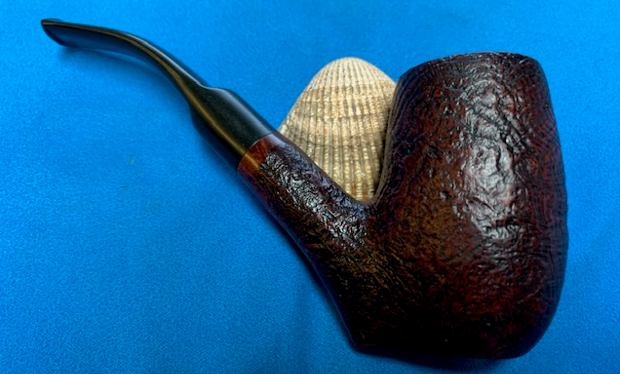
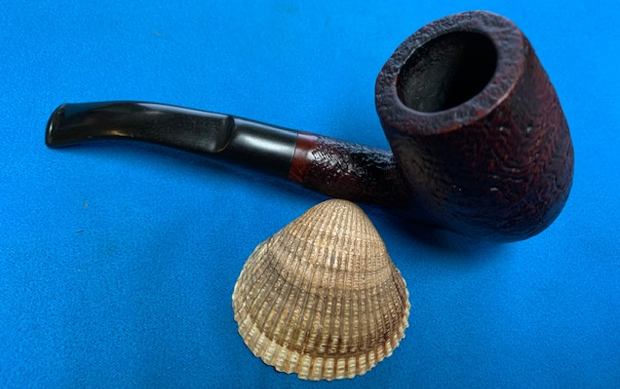
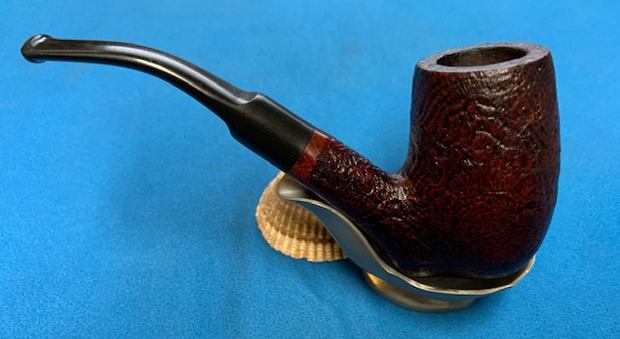
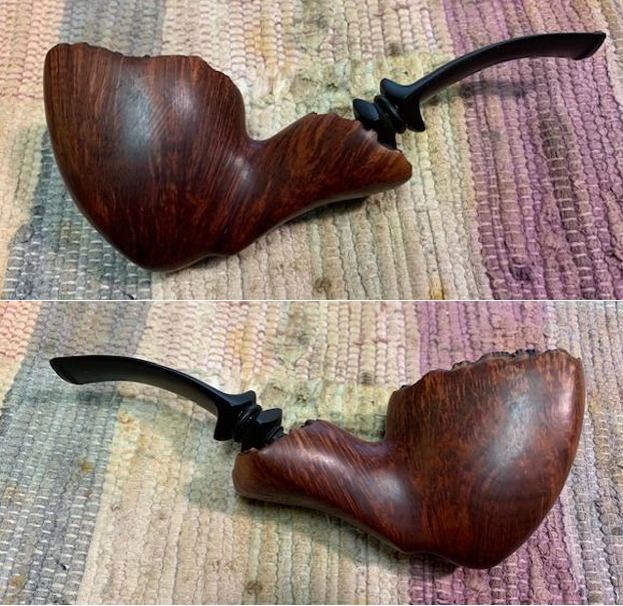
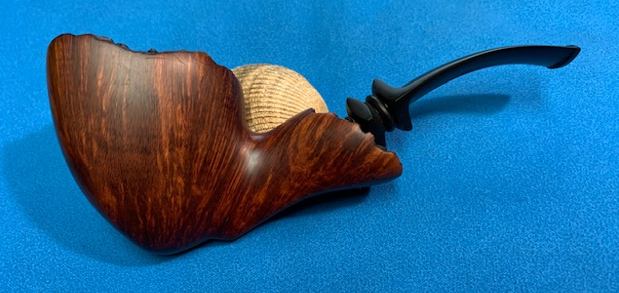
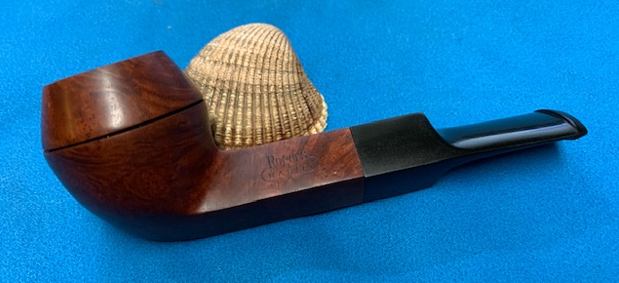
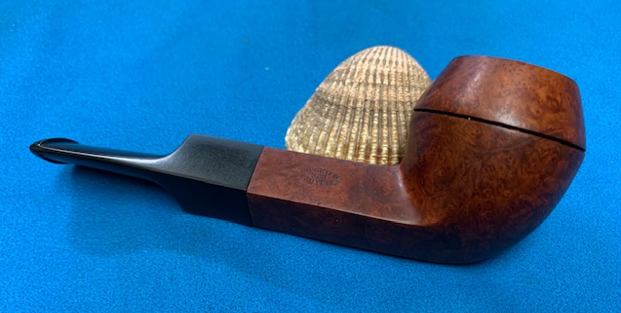
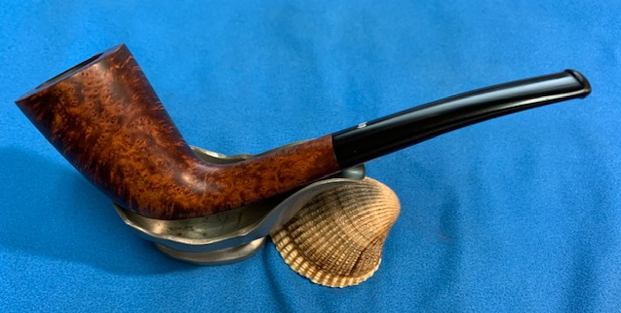
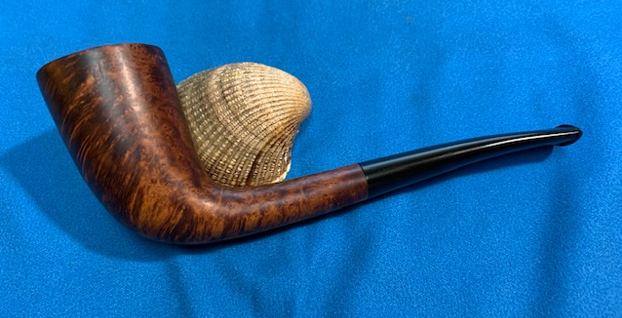
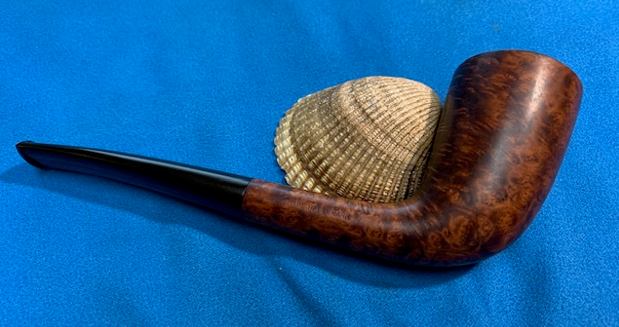
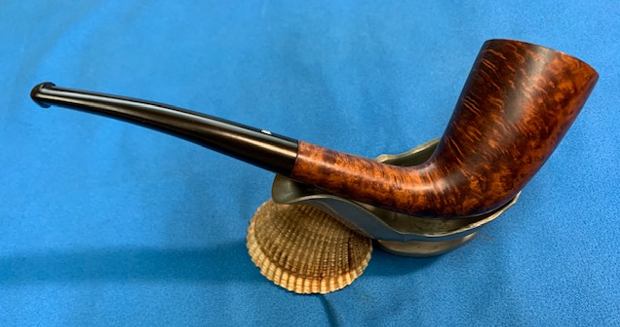
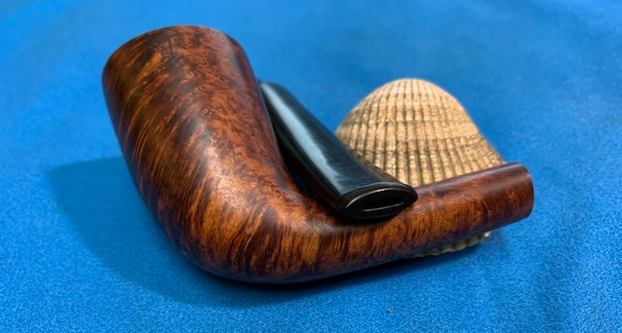
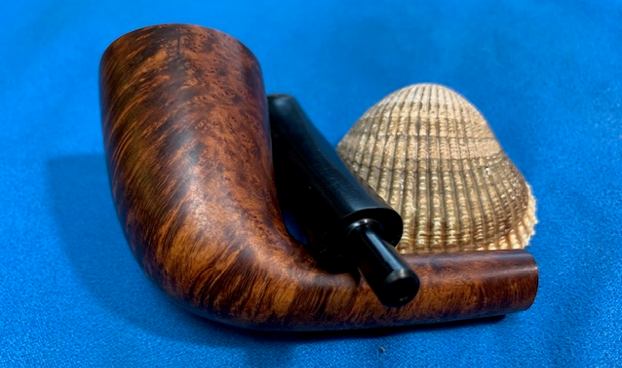
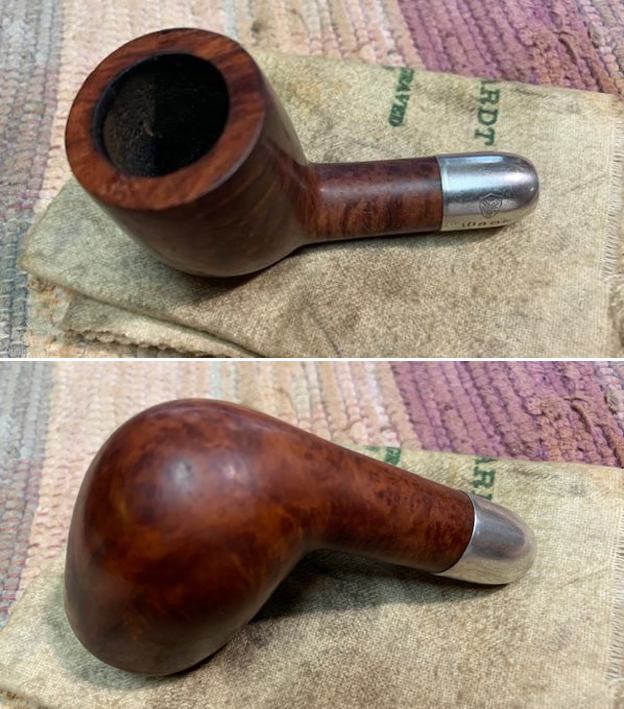
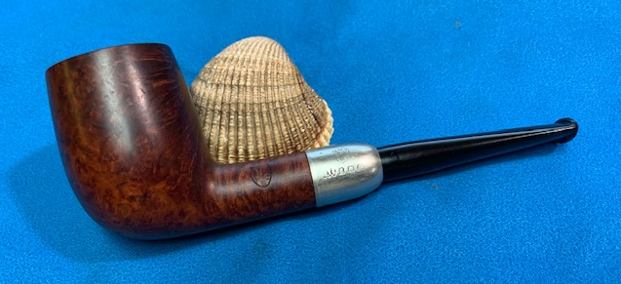
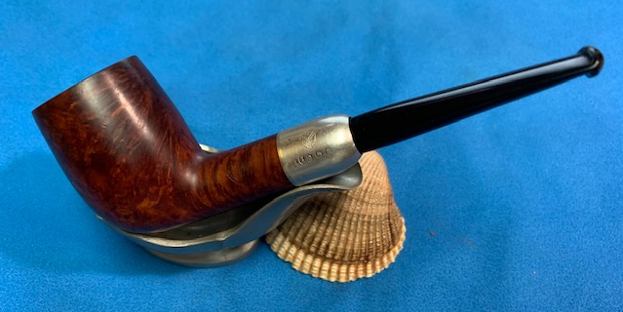
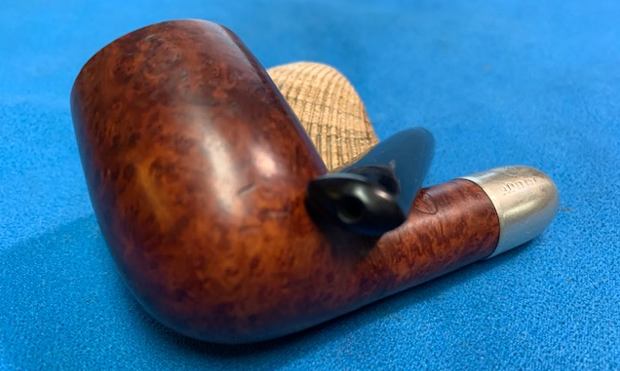
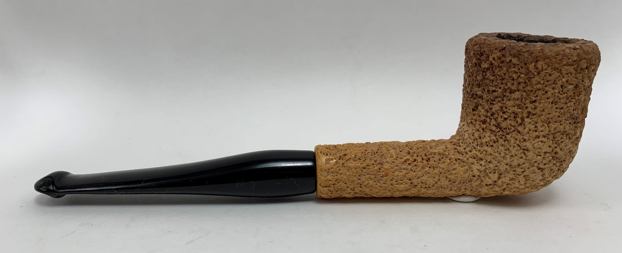
In the end, what a beauty this pipe is! It is back to its old glory and ready to be enjoyed again by the next owner. I am pleased to announce that this pipe is for sale! If you are interested in acquiring it for your collection, please have a look in the ‘Irish’ pipe section of the store here on Steve’s website. You can also email me directly at kenneth@knightsofthepipe.com. The approximate dimensions of the pipe are as follows: length 154 mm; height 47 mm; bowl diameter 34 mm; chamber diameter 20 mm. The mass of the pipe is 40 grams. Thank you very much for reading and, as always, I welcome and encourage your comments.

Reworking a Damaged French Made GBD Speciale Standard 9465 Liverpool


Blog by Steve Laug

Jeff and I purchased the lovely long shank GBD Liverpool from a fellow in Brazil, Indiana, USA. The grain on the pipe is a nice mix of flame, swirled and birdseye that works well with the brown stains of the briar and the black of the saddle stem. The rim top is crowned with a bevel inward and has some significant damage on the front right outer edge and top. The repeated burning of that area with a lighter flame has left behind a deep dip and burn that will need to be dealt with. It was hard to see with the thick cake in the bowl and the veritable eruption of lava over the top of the rim but it was very present. The finish was quite dirty with grit, grime and oils ground into the surface of the bowl and shank. The shank is stamped on both sides and on the left it reads GBD in an oval [over] Speciale [over] Standard. On the right side it reads France [over] the shape number 9465. The vulcanite stem was lightly oxidized and well dented with tooth marks and chatter on both sides near the button. The button area was worn as well. There is a GBD brass oval roundel on the left side of the saddle stem. Jeff took photos of the pipe to capture its condition when it arrived at his place. It was going to take some work to bring this one back to life. But both of us thought that it would be worth it. Jeff took photos of the rim top and bowl that show the cake and overflowing lava on the top and edges of the bowl. It is really hard to know what it looks like under all of that. We have learned that it with either be badly damaged or it will have been well protected. Only cleaning it off would reveal which result was on this pipe. You can also see the burn damage on the right front outer edge. The stem had a lot of tooth chatter and marks that are clear in the photos that follow. There is some oxidation and the calcification on the stem surface. He took photos of the sides and heel of the bowl to show condition of the briar. You can see the dust and debris ground into the bowl. The burn damage on the outer rim edge of the right front is more apparent from the side view in the first photo. The grain is still quite nice. He took photos of the stamping on the sides of the shank. It was faint but was still was clear and readable as noted above. The brass GBD roundel looked good as well. I always like to be able to set the pipe I am working on in its historical setting so I turn to Pipedia (https://pipedia.org/wiki/GBD) and read through the brand history. Toward the middle of the article I found what I was looking for. I quote below:

The Paris factory moved to Saint-Claude in 1952. Since 1981 the majority of GBD pipes come from the English factory.

The premium lines of GBD offered very good values, and are considered amongst the most affordable high end pipe of the 1960’s and earlier and a rival in quality, design, and price to Dunhill. Smokers’ Haven was the main retail supplier for GBD’s in the US until the early 1980’s.

GBD produced consistently well made pipes, almost entirely of Algerian or Grecian briar. In the late 1960’s to late 1970’s, they introduced the “Collector” and “Unique” lines, made primarily by Horry Jamieson, who had carved for Barling for many years, and was skilled in freehand design. Older GBD pieces are excellent smokers and unique in design. They did an excellent executions of classic pipe shapes, as well as some beautiful freehands in the “Unique” line. [2]

The following list comprises the better grades in descending order:

Pedigree, Pedigree I, Pedigree II, Straight Grain, Prodigy, Bronze Velvet, Virgin, Varichrome, Prestige, Jubilee, New Era, Prehistoric, International, Universe, Speciale Standard, Ebony, Tapestry, New Standard, Granitan, Sauvage, Sierra, Penthouse, Legacy, Concorde.

Since the pipe I was working on was made in France I knew that it was made either in Paris before 1952 or in St. Claude after that date and before 1981 when production moved to England. I also new that I was dealing with one of the better grade pipes with the Speciale Standard stamp.

I then followed the links included to a listing of the shapes and numbers on the GBD pipes (https://pipedia.org/wiki/GBD_Shapes/Numbers). The pipe I was working on was labeled by GBD as a 9465 which is a Liverpool with a round shank. Now it was time to work on the pipe itself. Jeff had cleaned up the pipe with his usual focus on detail. He reamed the pipe with a PipNet pipe reamer and removed the rest of the cake with a Savinelli Fitsall Pipe Knife. He scrubbed the exterior of the bowl with undiluted Murphy’s Oil Soap with a tooth brush and was able to remove the thick lava build up on the rim top. He rinsed it under running warm water to remove the soap and grime. He cleaned out the inside of the shank and the airway in the stem with alcohol, cotton swabs and pipe cleaners. He soaked the stem in Briarville’s Stem Deoxidizer and rinsed it off with warm water. I took photos of the pipe once I received it. The rim top cleaned up really well. The rim top, inner and outer edges of the bowl other than the burn damage on the front right were in good condition. The crowned inner edge also has some rim darkening and burn damage on the front right as well. The stem surface looked good with some large and deep tooth marks and chatter on both sides near the button.  He took photos of the stamping on the sides of the shank. It was faint but readable as noted above.I removed the stem and took a photo of the pipe to give a sense of the whole.  Now it was time to do my work on the pipe. I decided to begin by dealing with the damage on the front of the rim top and bowl. I sanded it slightly to give a clear picture of the damage in the photo below. I have marked it in red to help identify the damaged area.Now I had a decision to make on this repair. I could top the bowl and shorten the height of the entire bowl to accommodate the damage on the front of the rim. To me this would look awkward as the dip is quite deep. The other option to me was to build up the dip in the rim top and edge with briar dust and clear CA glue (super glue) to the same height as the rest of the bowl. I decided to build up the bowl top. To begin the process I topped the bowl to give me a flat surface and to remove the other damage to the rim top.I wiped off the burned area with alcohol on a cotton pad to clean off any debris. I layered on the first batch of CA glue and then used a dental spatula to put briar dust on top of the glue. I repeated the process until I had the rim top level. Once the repair cured I topped it once again to make sure that the repaired area matched the rest of the rim top. I used a topping board and 220 grit sandpaper.I took photos of the rim top and bowl front to show the repair. It is dark and still needs a lot of work but it is at least the right height and is smooth. You can also see the slight bevel that was on the inner edge of the rim on the rest of the bowl. I would need to continue that on the repaired area to match.I worked on the inner beveled edge with a folded piece of 220 grit sandpaper to give it a deep bevel. I also sanded the rim top repair to further smooth it out. The repair is starting to look good at this point.  I polished the briar with micromesh sanding pads – dry sanding with 1500-12000 grit sanding pads. I wiped it down after each pad with a damp cloth to remove the sanding debris and dust.   I restained the rim edge and top with a combination of Maple and Walnut stain pens to blend the colour to the rest of the bowl. The rim top looked darker but it looked much better than when I started the repair.I rubbed the bowl and shank down with Before & After Restoration Balm. I worked it into the surface of the bowl sides and shank with my fingertips to clean, enliven and protect the briar. I let the balm sit for a little while and then buffed with a cotton cloth to raise the shine.    I set the bowl aside and turned my attention to the stem. I “painted” the surface of the stem with the flame of a lighter to lift the tooth marks. It worked very well and many of the marks lifted. I filled in the remaining marks with clear CA glue and let the repairs cure. I used a small file to flatten out the repairs. I sanded the stem with 220 grit sandpaper to blend the repairs into the stem surface. I started the polishing with 400 grit sandpaper.     I polished the vulcanite stem with micromesh sanding pads – 1500-12000 grit pads. I wiped it down with Obsidian Oil after each sanding pad. I used Before & After Pipe Polish – both Fine and Extra Fine to further polish the stem.  This French Made GBD Speciale Standard 9465 Liverpool is a great looking pipe now that it has been restored. The rich contrasting brown stained finish around the bowl is quite beautiful and highlights the a finish that works well with the polished vulcanite stem. I put the stem back on the bowl and carefully buffed the pipe with Blue Diamond on the buffing wheel using a light touch on the briar. I gave the bowl and the stem multiple coats of Conservator’s Wax and buffed the entire pipe with a clean buffing pad. I hand buffed the pipe with a microfiber cloth to deepen the shine. The finished GBD Speciale Standard Liverpool sits nicely on the desk top and in the hand. Give the finished pipe a look in the photos below. The dimensions of the pipe are Length: 6 inches, Height: 1 ¾ of an inch, Outside diameter of the bowl: 1 ¼ inch, Chamber diameter: ¾ of an inch. The weight of the pipe is 35 grams/1.23 ounces. I will be putting it on the French Pipe Maker section of the rebornpipes store shortly. If you are interested in adding this pipe to your collection send me a message or an email. Thanks for reading this blog and my reflections on the pipe while I worked on it. There are many more to come!

Reworking a French Made Bruyere Garantie Mini-Churchwarden


Blog by Steve Laug

The next pipe on the worktable has been here awhile. Jeff picked up the pipe from an online auction in 2019 in Harrisburg, Pennsylvania, USA. Jeff cleaned it in 2020 and I am starting work on it now in 2021. It is a mini-churchwarden that had a low profile and a fairly long stem. The finish was rusticated with deep rustication around the bowl and shank. There was a flaw in the briar on the right side toward the top of the bowl. The bowl is stamped on the left side and reads Bruyere [over] Garantie [over] Made in France. The bowl had a thick cake with an overflow of lava on the inwardly beveled thin rim top. The finish was worn and dirty with grime in the grooves of the rustication. It appeared that the shank had originally had a band that had long since disappeared before it came to us. The stem has a lot of damage toward the shank end. There were grooves and scratches all the way around the stem. The button end had some deep tooth marks and grooves from the edge of the button forward about 1 inch. The stem was calcified and oxidized along the length. Jeff took photos of the pipe before he did his work on it. Jeff took photos of the rim top to show the cake in the bowl and the lava overflow on the rim top. You can also see the nicks in the outer edge of the bowl toward the front side. The stem had a lot of tooth chatter and marks that are clear in the photos that follow. There is some oxidation and the calcification on the stem surface. He took photos of the sides of the bowl to show condition of the briar. You can see the dust and debris ground into the bowl. The flaw on the right of the bowl is also visible in the second photo. He also took a photo of the shank end and tenon on the stem to show the condition. In the photo of the shank end you can see where the missing band was. I appeared to be a narrow band that was missing. By the time we had it the band was missing. I would need to replace the band on the shank.He took a photo of the stamping on the left side of the shank. It was clogged with debris that filled in some of the letters. Underneath it was clear and readable as noted above.Jeff had cleaned up the pipe with his usual focus on detail. He reamed the pipe with a PipNet pipe reamer and removed the rest of it with a Savinelli Fitsall Pipe Knife. He scrubbed the exterior of the bowl with undiluted Murphy’s Oil Soap with a tooth brush. He rinsed it under running warm water to remove the soap and grime. He cleaned out the inside of the shank and the airway in the stem with alcohol, cotton swabs and pipe cleaners. He soaked the stem in Briarville’s Stem Deoxidizer and rinsed it off with warm water. I took photos of the pipe once I received it. The rim top cleaned up really well. The rim top, inner and outer edges of the bowl were in good condition. The beveled inner edge also has some rim darkening and burn damage. The stem surface looked good with some large and deep tooth marks and chatter on both sides near the button.  The stamping on the left side of the shank is clear and readable and reads as noted above. I removed the stem and took a photo of the pipe to give a sense of the whole.Now it was time to do my work on the pipe. I decided to replace the band on the shank end first. I chose a band from my collection of bands to fit the shank. I reduced the depth of the band on a topping board and glued it in place on the shank end with all purpose glue. I repaired the deep flaw on the right side of the bowl with clear CA glue and briar dust. I rusticated the repair with a wire brush. I restained the spot on the bowl with a Walnut stain pen and set it aside to dry.I used a folded piece of 220 grit sandpaper to clean up the darkened inner edge bevel on the bowl. I polished the briar with micromesh sanding pads – dry sanding with 1500-12000 grit sanding pads. I wiped it down after each pad with a damp cloth to remove the sanding debris and dust.   I rubbed the bowl and shank down with Before & After Restoration Balm. I worked it into the surface of the bowl sides and shank with my fingertips to clean, enliven and protect the briar. I let the balm sit for a little while and then buffed with a cotton cloth to raise the shine. I set the bowl aside and turned my attention to the stem. I “painted” the surface of the stem with the flame of a lighter to lift the tooth marks. It worked very well and many of the marks lifted. I filled in the remaining marks with clear CA glue and let the repairs cure. I used a small file to flatten out the repairs. I sanded the stem with 220 grit sandpaper to blend the repairs into the stem surface. I started the polishing with 400 grit sandpaper.    I polished the vulcanite stem with micromesh sanding pads – 1500-12000 grit pads. I wiped it down with Obsidian Oil after each sanding pad. I used Before & After Pipe Polish – both Fine and Extra Fine to further polish the stem. This French Made Bruyere Garantie Churchwarden is a great looking pipe now that it has been restored. The sandblasted brown stained finish around the bowl is quite beautiful and highlights the a finish that works well with the brass band and the polished vulcanite stem. I put the stem back on the bowl and carefully buffed the pipe with Blue Diamond on the buffing wheel using a light touch on the briar. I gave the bowl and the stem multiple coats of Conservator’s Wax and buffed the entire pipe with a clean buffing pad. I hand buffed the pipe with a microfiber cloth to deepen the shine. The finished Bruyere Garantie Churchwarden sits nicely on the desk top and in the hand. Give the finished pipe a look in the photos below. The dimensions of the pipe are Length: 7 inches, Height: 7/8 of an inch, Outside diameter of the bowl: 1 inch, Chamber diameter: ¾ of an inch. The weight of the pipe is 15 grams/.53 ounces. I will be putting it on the French Pipe Maker section of the rebornpipes store shortly. If you are interested in adding this pipe to your collection send me a message or an email. Thanks for reading this blog and my reflections on the pipe while I worked on it. There are many more to come!

New Life for another Bari – A Mahogni Bent Sitter 8233


Blog by Steve Laug

The next pipe on the work table is a bit of another mystery to both Jeff and me. We really have no memory about where we picked this pipe up or where we bought it. It is not in the spread sheet and there seemingly is no way to check where we got it. It is another Bent Sitter like the Bari Senior 489 I just completed. It has a deep and rich smooth finish with a mix of brown stains that highlight the grain. The pipe is stamped on the left side of the shank and reads BARI [over] Mahogni. On the right side it is stamped Made in Denmark [over] the shape number 8233. The left side of the saddle stem it is stamped and reads BARI. The briar is exceptionally filthy with grime ground into the surface of the bowl and shank. There is a thick cake in the bowl and an overflow of lava on the rim top. There are some nicks in the outer edges of the bowl. The stem is lightly oxidized and the there were a lot of tooth marks and chatter on both sides ahead of the button. While we had no details about the pipe Jeff did find these photos of the pipe before he did his clean up work on it.Jeff took photos of the rim top to show the cake in the bowl and the lava overflow on the rim top. You can also see the nicks in the outer edge of the bowl toward the front side. The stem had a lot of tooth chatter and marks that are clear in the photos that follow. There is some oxidation and the calcification on the stem surface. He took photos of the sides of the bowl to show condition of the briar. You can see the grain through the grime ground into the bowl.He captured the stamping on the shank sides. It reads as noted above. The stamping is clear and readable. The stamping on the right side of the shank is double stamped and a bit blurry from the stamping.Jeff had cleaned up the pipe with his usual focus on detail. He reamed the pipe with a PipNet pipe reamer and removed the rest of it with a Savinelli Fitsall Pipe Knife.  He scrubbed the exterior of the bowl with undiluted Murphy’s Oil Soap with a tooth brush. He rinsed it under running warm water to remove the soap and grime. He cleaned out the inside of the shank and the airway in the stem with alcohol, cotton swabs and pipe cleaners. He soaked the stem in Briarville’s Stem Deoxidizer and rinsed it off with warm water. I took photos of the pipe once I received it.  The rim top cleaned up really well. The rim top, inner and outer edges of the bowl were in excellent condition. The stem surface looked good with a few small tooth marks and chatter on both sides near the button. The stamping on the sides of the shank is clear and readable and reads as noted above. I removed the stem and took a photo of the pipe to give a sense of the whole. I turned to Pipephil’s site (http://www.pipephil.eu/logos/en/logo-b1.html) to see if I could find a listing for the Bari Mahogni. There was nothing specifically listed for this line of Bari pipes. There was also good info on the brand as a whole and that it was founded by Viggo Nielsen in 1950 and he ran it until 1978 when Age Bogelund managed the production for them. In 1993 it was sold to Helmer Thomsen.Pipedia gives a great history of the brand (https://pipedia.org/wiki/Bari) that is well worth reading. There were also examples of the Bari Selected Nature Old Briar pipes showing their stamping.

Now it was time to do my work on the pipe. I polished the briar with micromesh sanding pads – dry sanding with 1500-12000 grit sanding pads. I wiped it down after each pad with a damp cloth to remove the sanding debris and dust.     I rubbed the bowl and shank down with Before & After Restoration Balm. I worked it into the surface of the bowl sides and shank with my fingertips to clean, enliven and protect the briar. I let the balm sit for a little while and then buffed with a cotton cloth to raise the shine. I set the bowl aside and turned my attention to the stem. I “painted” the surface of the stem with the flame of a lighter to lift the tooth marks. It worked very well and many of the marks lifted. I filled in the remaining marks with clear CA glue and let the repairs cure. I sanded out the remnants of tooth marks with 220 grit sandpaper. I started the polishing with 400 grit sandpaper. I touched up the BARI stamp on the left side of the saddle with white acrylic nail polish. Once it dried I scraped off the excess and left the white in the stamping. While not perfect it looked better.    I set the bowl aside and turned to work on the stem. It was in good condition and the tooth marks were light so I figured they would polish out fairly easily. I polished the vulcanite stem with micromesh sanding pads – 1500-12000 grit pads. I wiped it down with Obsidian Oil after each sanding pad. I used Before & After Pipe Polish – both Fine and Extra Fine to further polish the stem.   This Bari Mahogni 8233 Bent Sitter is a great looking pipe now that it has been restored. The sandblasted oxblood and brown stained finish around the bowl is quite beautiful and highlights the a finish that works well with the polished vulcanite saddle stem. I put the stem back on the bowl and carefully buffed the pipe with Blue Diamond on the buffing wheel using a light touch on the briar. I gave the bowl and the stem multiple coats of Conservator’s Wax and buffed the entire pipe with a clean buffing pad. I hand buffed the pipe with a microfiber cloth to deepen the shine. The finished Bari Mahogni Sitter sits nicely on the desk top and in the hand. Give the finished pipe a look in the photos below. The dimensions of the pipe are Length: 5 inches, Height: 2 inches, Outside diameter of the bowl: 1 ¼ inches, Chamber diameter: ¾ of an inch. The weight of the pipe is 58 grams/2.01 ounces. I will be putting it on the Danish Pipe Maker section of the rebornpipes store shortly. If you are interested in adding this pipe to your collection send me a message or an email. Thanks for reading this blog and my reflections on the pipe while I worked on it. There are many more to come!

New Life for a Bari Senior Bent Sitter 489


Blog by Steve Laug

The next pipe on the work table is a bit of a mystery to both Jeff and me. We really have no memory about where we picked this pipe up or where we bought it. It is not in the spread sheet and there seemingly is no way to check where we got it. It has a deep and rich sandblast finish with a mix of black and brown stains. The pipe is stamped on the underside of the shank and reads BARI [over] Senior[over] Made in Denmark. Next to the shank/stem junction it is stamped with the shape number 489. The left side of the saddle stem it is stamped and reads BARI. Jeff had cleaned up the pipe with his usual focus on detail. He reamed the pipe with a PipNet pipe reamer and removed the rest of it with a Savinelli Fitsall Pipe Knife.  He scrubbed the exterior of the bowl with undiluted Murphy’s Oil Soap with a tooth brush. He rinsed it under running warm water to remove the soap and grime. He cleaned out the inside of the shank and the airway in the stem with alcohol, cotton swabs and pipe cleaners. He soaked the stem in Briarville’s Stem Deoxidizer and rinsed it off with warm water. I took photos of the pipe once I received it.   The rim top cleaned up really well. The rim top, inner and outer edges of the bowl were in excellent condition. The stem surface looked good with a few small tooth marks and chatter on both sides near the button.The stamping on the underside of the shank is clear and readable and reads as noted above. I removed the stem and took a photo of the pipe to give a sense of the whole. I turned to Pipephil’s site (http://www.pipephil.eu/logos/en/logo-b1.html) to see if I could find a listing for the Bari Senior. There was one picture specifically listed for this line of Bari pipes. There was also good info on the brand as a whole and that it was founded by Viggo Nielsen in 1950 and he ran it until 1978 when Age Bogelund managed the production for them. In 1993 it was sold to Helmer Thomsen.Pipedia gives a great history of the brand (https://pipedia.org/wiki/Bari) that is well worth reading. There were also examples of the Bari Selected Nature Old Briar pipes showing their stamping.

Now it was time to do my work on the pipe. The bowl was in such good condition that I rubbed the bowl and shank down with Before & After Restoration Balm. I worked it into the surface of the bowl sides and shank with my fingertips to clean, enliven and protect the briar. I let the balm sit for a little while and then buffed with a cotton cloth to raise the shine.     I set the bowl aside and turned my attention to the stem. I “painted” the surface of the stem with the flame of a lighter to lift the tooth marks. It worked very well and many of the marks lifted. I filled in the remaining marks with clear CA glue and let the repairs cure. I sanded out the remnants of tooth marks with 220 grit sandpaper. I started the polishing with 400 grit sandpaper.   I touched up the BARI stamp on the left side of the saddle with white acrylic nail polish. Once it dried I scraped off the excess and left the white in the stamping. While not perfect it looked better.I set the bowl aside and turned to work on the stem. It was in good condition and the tooth marks were light so I figured they would polish out fairly easily. I polished the vulcanite stem with micromesh sanding pads – 1500-12000 grit pads. I wiped it down with Obsidian Oil after each sanding pad. I used Before & After Pipe Polish – both Fine and Extra Fine to further polish the stem. This Bari Senior 489 Bent Sitter is a great looking pipe now that it has been restored. The sandblasted oxblood and brown stained finish around the bowl is quite beautiful and highlights the a finish that works well with the polished vulcanite saddle stem. I put the stem back on the bowl and carefully buffed the pipe with Blue Diamond on the buffing wheel using a light touch on the briar. I gave the bowl and the stem multiple coats of Conservator’s Wax and buffed the entire pipe with a clean buffing pad. I hand buffed the pipe with a microfiber cloth to deepen the shine. The finished Bari Senior Sitter sits nicely on the desk top and in the hand. Give the finished pipe a look in the photos below. The dimensions of the pipe are Length: 5 ¼ inches, Height: 2 ½ inches, Outside diameter of the bowl: 1 ¼ inches, Chamber diameter: ¾ of an inch. The weight of the pipe is 62 grams/2.19 ounces. I will be putting it on the Danish Pipe Maker section of the rebornpipes store shortly. If you are interested in adding this pipe to your collection send me a message or an email. Thanks for reading this blog and my reflections on the pipe while I worked on it. There are many more to come!

One Among A Batch of 4 Knute of Denmark Freehand Pipes


Blog by Steve Laug

The next pipe is a really is one of four Knute Freehand pipes that we picked up in 2019. Because of that we are not sure where exactly this one came from – whether an auction, a sale or an antique store. Jeff cleaned the pipe in 2019 and now I am working on it in 2021. It is stamped on the underside of the shank and reads Knute [over] of Denmark. The exterior of the bowl was filthy with grime on the surface of the briar and there were paint flicks on the briar all the way around. There was a heavy cake in the bowl and an eruption of thick lava on the rim top that filled in most of the plateau on the rim top. Along with that there was dust and debris on both the rim top plateau and the shank end plateau. It was hard to know the condition of the rim top and rim edges because of the grime and thickness of the cake and lava. The cleaning would make it very clear! The fancy turned stem was dirty, oxidized, calcified with light tooth marks and chatter on both sides but nothing like what I was expecting from the condition of the bowl. Jeff took photos of the pipe to give a clear picture of what we were up against with this pipe. He captured the cake in the bowl and the thick eruption of lava on the rim top plateau in all of the grooves and valleys exceptionally well in the next photos. It was very clear that it was someone’s favourite pipe! The stem is oxidized, calcified and shows the tooth marks and chatter on both sides ahead of the button. Jeff captured some of the beauty of the shape and the grain in the next photo. It is quite stunning. He took photos of the plateau shank end to show how filthy it was too. The grime, dust and grit filled in most of the valleys and grooves of the finish.He took photos of the stamping on the underside of the shank. It is clear and readable as noted above. He also took a photo of the Crown K stamp on the top of the stem.I turned to Pipephil’s site (http://pipephil.eu/logos/en/logo-k3.html) to confirm what I knew about the brand being made by Karl Erik. It did but did not give a whole lot of other information. I turned then to Pipedia (https://pipedia.org/wiki/Knute). I quote the article in full below.

Knute of Denmark pipes are said to be made by Karl Erik, see his listing herein.

Karl Erik Ottendahl was born in Aalborg in 1942, just a few miles from the very northernmost tip of Denmark. He began his career as a Lithographer as an apprentice in the craft at the age of 16. While working as an apprentice he began hand carving pipes as a hobby and to give as gifts to his more senior colleagues. He began his career making pipes for various labels in Denmark and the United States. Often he would make the higher grade pipes for a well known brand that was known for their midrange or low end pieces such as Wally Frank. While doing this he administered a factory of fifteen craftsmen. During this period he did make of some of his own handmade pipes, but he felt that the responsibility of managing the factory did not give him the freedom he wished he had.

Other brands confirmed to be from Karl Erik are: Champ of Denmark, HTL, Jobey Dansk, Knute, Golden Danish, Lars of Denmark, Larsen & Stigart (Copenhagen pipe shop), Shelburne, Sven Eghold and Wenhall (for Wenhall Pipes, New York), some Ben Wade and pipes marked IS and IIS.

Now it was time to work on the pipe. It is really a beautiful piece. Jeff had done a great cleanup on the pipe. He reamed the bowl with a PipNet pipe reamer and followed up with a Savinelli Fitsall pipe knife to remove the cake. He scrubbed out the mortise and the airway in the shank and the stem with alcohol, cotton swabs and pipe cleaners. He scrubbed the bowl exterior with a tooth brush and Murphy’s Oil Soap to remove the grime on the finish of the bowl and the lava from the rim top. He rinsed it under running water. One of the benefits of this scrub is that it also tends to lift some of the scratches and nicks in the surface of the briar. He dried it off with a soft cloth. He cleaned the internals and externals of the stem with alcohol, pipe cleaners and cotton swabs. He soaked the stem in Briarville’s Pipe Stem Deoxidizer and rinsed it off with warm water and cleaned out the airway in the stem with alcohol, pipe cleaners and cotton swabs. I took photos of the pipe as I saw it when I put it on the table.  I took photos of the plateau rim top and stem to show the condition. The rim top and inner bevel looked very good. The smooth bevel has some darkening but is clean. The stem was vulcanite and there were light tooth marks and chatter on both sides ahead of the button. The stamping on the underside of the shank is clear and readable. It reads as noted above. I removed the stem from the shank and took a photo of the pipe to give a sense of the proportions of the bowl and stem.I started my work on it by sanding the smooth inner beveled rim top to remove the darkening on the edge. I used a folded piece of 220 grit sandpaper to clean it up. I stained it with a Walnut Stain pen and wiped it down. I filled in the valleys in the plateau with a Black Sharpie Pen. The contrast of the the bevel and the plateau is very nice. I polished the briar with micromesh sanding pads – dry sanding with 1500-12000 grit sanding pads. I wiped the briar down with a damp cloth to remove the sanding dust and debris on the briar. The pipe began to take on a shine. I rubbed the bowl and shank down with Before & After Restoration Balm. I worked it into the surface of the bowl sides and shank with my fingertips to clean, enliven and protect the briar. I let the balm sit for 10 minutes, then buffed with a cotton cloth to raise the shine. The Balm did its magic and the grain stood out on the briar. I set the bowl aside and turned to the stem. I “painted” the stem surface with the flame of a Bic lighter to lift the tooth marks. I was able to lift them all enough that sanding them would remove what remained. I sanded out the remaining tooth marks and chatter with  200 grit sandpaper and started the polishing with 400 grit wet dry sandpaper.   I touched up the Crown K stamp on the stem top with white acrylic nail polish. Once it cured I scraped it off with my fingernail and then sanded the stem surface with a 1500 grit micromesh sanding pad.I polished the stem with micromesh sanding pads – 1500-12000 grit pads. I wiped it down with Obsidian Oil after each sanding pad. I finished the polishing with Before & After Polishes – both Fine and Extra Fine. I gave it a final rub down with Obsidian Oil and set it aside to dry. This Knute of Denmark Freehand with a fancy turned vulcanite saddle stem is a beautifully grained pipe with a flowing shape that looks great . The rich browns and black on the plateau areas of the bowl makes the grain come alive with the polishing and waxing. I put the stem back on the bowl and carefully buffed the pipe with Blue Diamond on the buffing wheel using a light touch on the briar. I gave the bowl and the stem multiple coats of carnauba wax on the buffing wheel and followed that by buffing the entire pipe with a clean buffing pad. I hand buffed the pipe with a microfiber cloth to deepen the shine. The finished Knute of Denmark really is a beauty and fits nicely in the hand and looks very good. Give the finished pipe a look in the photos below. The dimensions of the pipe are Length: 6 inches, Height: 2 ½ inches, Outside diameter of the bowl: 1 ¾ inches wide X 2 ¼ inches long, Chamber diameter: 7/8 of an inch. The weight of the pipe is 2.68oz./76grams. This pipe will soon be on the Danish Pipe Makers section of the rebornpipes store if you would like to add it to your collection. Thanks for reading this blog and my reflections on the pipe while I worked on it. There are many more to come!

A Truly Stunning Comoy’s Made The Everyman London Pipe 188 Stack


Blog by Steve Laug

The next pipe is a really neat looking tall Comoy’s Made Stack with a vulcanite taper stem. The tall bowl and chunky looking shank was made to hold in your hand. It is quite light weight for its size and the blade on the stem is thin and looks comfortable. We picked up this pipe from an antique dealer in 2018 from Naples, Florida, USA. Jeff cleaned the pipe in 2019 and now I am working on it in 2021. It is stamped on the left side of the shank and reads The [over] Everyman [over] London Pipe. On the right side it is stamped with the Comoys circular COM Stamp – Made in London[over] England, followed by the shape number 188. The exterior of the bowl looked amazingly clean and shiny. There was a heavy cake in the bowl and an eruption of thick lava on the rim top and beveled inner edge of the bowl. It was hard to know the condition of the rim top and rim edges because of the grime and thickness of the cake and lava. The cleaning would make it very clear! The stem was dirty and lightly oxidized with light tooth marks and chatter on both sides but nothing like what I was expecting from the condition of the bowl. Jeff took photos of the pipe to give a clear picture of what we were up against with this pipe. He captured the cake in the bowl and the thick eruption of lava on the rim top and edges exceptionally well in the next photos. It was very clear that it was an exceptional smoker! The stem is lightly oxidized and shows the tooth marks and chatter on both sides ahead of the button. Jeff captured some of the beauty of the shape and the grain in the next photo. It is quite stunning.He took photos of the stamping on the left and right sides of the shank. It is clear and readable as noted above.I turned to Pipephil’s site (http://pipephil.eu/logos/en/logo-e4.html) to confirm what I knew about the brand being made by Comoy’s. It did but did not give a whole lot of other information.I turned then to Pipedia (https://pipedia.org/wiki/Comoy%27s). I found a catalogue page there that listed the Everyman. It reads: “This wonderful moderate priced pipe is the largest selling branded English pipe in the world.”I turned to the shape chart that was also linked on the Comoy’s article to see how they describe a 188 (https://pipedia.org/index.php?title=Comoy%27s_Shape_Number_Chart). I have included the line from the chart below. It reads 188 – Stack – Straight – XL.Now it was time to work on the pipe. It is really a beautiful piece. Jeff had done a great cleanup on the pipe. He reamed the bowl with a PipNet pipe reamer and followed up with a Savinelli Fitsall pipe knife to remove the cake. He scrubbed out the mortise and the airway in the shank and the stem with alcohol, cotton swabs and pipe cleaners. He scrubbed the bowl exterior with a tooth brush and Murphy’s Oil Soap to remove the grime on the finish of the bowl and the lava from the rim top. He rinsed it under running water. One of the benefits of this scrub is that it also tends to lift some of the scratches and nicks in the surface of the briar. He dried it off with a soft cloth. He cleaned the internals and externals of the stem with alcohol, pipe cleaners and cotton swabs. He soaked the stem in Briarville’s Pipe Stem Deoxidizer and rinsed it off with warm water and cleaned out the airway in the stem with alcohol, pipe cleaners and cotton swabs. I took photos of the pipe as I saw it when I put it on the table. I took photos of the rim top and stem to show the condition. The rim top and beveled edge looked amazing. The stem was vulcanite and there were light tooth marks and chatter on both sides ahead of the button.The stamping on the left and right sides of the shank are clear and readable. It reads as noted above. The three silver coloured inset bars on the left side of the taper stem are also visible.I removed the stem from the shank and took a photo of the pipe to give a sense of the proportions of the bowl and stem.Because the pipe was in such amazing condition after the clean up I started my work on it by rubbing the bowl and shank down with Before & After Restoration Balm. I worked it into the surface of the bowl sides and shank with my fingertips to clean, enliven and protect the briar. I let the balm sit for 10 minutes, then buffed with a cotton cloth to raise the shine. The Balm did its magic and the grain stood out on the briar. I set the bowl aside and turned to the stem. I sanded out the tooth marks and chatter with  200 grit sandpaper and started the polishing with 400 grit wet dry sandpaper.I polished the stem with micromesh sanding pads – 1500-12000 grit pads. I wiped it down with Obsidian Oil after each sanding pad. I finished the polishing with Before & After Polishes – both Fine and Extra Fine. I gave it a final rub down with Obsidian Oil and set it aside to dry. This Comoy’s Made The Everyman London Pipe 188 Stack with a vulcanite taper stem is a beautifully grained pipe with a flowing shape that looks great . The rich browns of the contrasting stain makes the grain come alive with the polishing and waxing. I put the stem back on the bowl and carefully buffed the pipe with Blue Diamond on the buffing wheel using a light touch on the briar. I gave the bowl and the stem multiple coats of carnauba wax on the buffing wheel and followed that by buffing the entire pipe with a clean buffing pad. I hand buffed the pipe with a microfiber cloth to deepen the shine. The finished The Everyman London Pipe Stack really is a beauty and fits nicely in the hand and looks very good. Give the finished pipe a look in the photos below. The dimensions of the pipe are Length: 5 ¾ inches, Height: 2 ¼ inches, Outside diameter of the bowl: 1 ¼ inches, Chamber diameter: ¾ of an inch. The weight of the pipe is 1.66oz./46grams. This pipe will soon be on the British Pipe Makers section of the rebornpipes store if you would like to add it to your collection. Thanks for reading this blog and my reflections on the pipe while I worked on it. There are many more to come!

A Well Done Rogers Rarity 220 Bulldog


Blog by Steve Laug

The next pipe is a really neat looking chubby Bulldog with a vulcanite saddle stem. The thick shank and stubby looking pipe was made to hold in your hand. It is quite light weight for its size and the blade on the stem is thin and looks comfortable. We picked up this pipe from an auction back 2018 in Beaumont, California, USA. He cleaned the pipe in 2019 and now I am working on it in 2021. It is stamped on the top left side of the shank and reads Rogers [over] Rarity in an oval. On the top right side it is stamped Imported [arched over] 220 [over] Bruyere. The title of the blog is a play on the term rarity as this particular pipe came to us extremely well done – tired and worn. The exterior of the bowl had a thick coat of dark heavy grime ground into the finish. It was oily and dark looking. The single ring around the cap on the bowl was filled in with grime. There was a heavy cake in the bowl and an eruption of thick lava on the rim top. It was hard to know the condition of the rim top and rim edges because of the grime and thickness of the cake and lava. The cleaning would make it very clear! The stem was dirty and lightly oxidized with light tooth marks and chatter on both sides but nothing like what I was expecting from the condition of the bowl. Jeff took photos of the pipe to give a clear picture of what we were up against with this pipe. He captured the cake in the bowl and the thick eruption of lava on the rim top and edges exceptionally well in the next photos. It was very clear that the pipe had not been seriously cleaned since the first smoke. But it is also very clear that it was an exceptional smoker! The stem is oxidized, calcified and shows the took marks on the button surface and chatter on both sides ahead of the button. Jeff somehow captured some of the beauty of the shape and the grain in the next photos. You can certainly see what lies beneath the grime and even paint on the briar.He took photos of the stamping on the top left and right of the shank. It is clear and readable as noted above.From reading Bill Unger’s book on Custom-Bilt Pipes I remember “Rogers Rarity” was made by the same company as one of it non-sculptured or rusticated pipes. I did a Google search to see if I could confirm that online. I found a pipe labeled Rogers Rarity for sale on Worthpoint, an online sales site (https://www.worthpoint.com/worthopedia/rogers-rarity-custombilt-large-briar-1821532853). In the description they made the link to Custombilt. I quote:

Rogers Rarity briar pipes were made by Custombilt, and show all the beauty and originality of the brand.

I searched further and found a conversation asking about the brand on Pipesmagazine online forum. There was a great conversation about the brand.

(https://pipesmagazine.com/forums/threads/help-with-dating-a-pipe.62314/). I found a particular response by Jon Guss of the Seattle Pipe Club particularly helpful. I quote from Jon in full.

First, “Rodgers” is a misspelling; it was always spelled “Rogers”. Three generations of the Rogers family ran one of the leading importers of pipes (including Petersons for a number of years) and resellers of pipes and smokers articles; they also did a bit of manufacturing. The name of the company was Rogers Imports, Inc.

Second, for several reasons I also believe that Rogers Rarity pipes were made for Rogers Imports by CustomBilt.

The Rogers Rarity line was introduced by the company in late 1945. The advertising copy from the spring of 1946 described Rogers Rarity pipes as “The height of pipe luxury and enjoyment”, and claimed that they were “Carved by hand of Algerian bruyere over 150 years old”. Was it true? I would guess not, but age fabrication regarding the briar from which pipes were made was a kind of industry trope for generations. While most of the Rarity pipes apparently sold for $5, the listed price range stated various models cost from $5-25. The $5 pipes were available in natural and grain finishes; there was also a $10 version called the Rogers Rarity Deluxe that was sterling banded and meerschaum lined.

I can’t be sure when the line ceased production, but believe it was by the end of 1949. Certainly Rogers Rarity pipes are no longer listed in the RTDA Almanac from 1950 on, and mentions of the pipe in advertisements to consumers become thin on the ground. More tellingly newspaper ads from 1951 show the pipe heavily discounted, suggesting that excess inventory of an obsolete line was being flushed through the channel…

Now I knew that my memory was correct. The pipe was made by CustomBilt for Rogers Imports. I also knew that it was made between 1945-1949 when the line was no longer made. It was a bit of an old timer… Now it was time to work on the pipe.

I was amazed at how clean and new the pipe looked when I took it out of the box. It is really a beautiful piece. Jeff had done a great cleanup on the pipe. He reamed the bowl with a PipNet pipe reamer and followed up with a Savinelli Fitsall pipe knife to remove the cake. He scrubbed out the mortise and the airway in the shank and the stem with alcohol, cotton swabs and pipe cleaners. He scrubbed the bowl exterior with a tooth brush and Murphy’s Oil Soap to remove the grime on the finish of the bowl and the lava from the rim top. He rinsed it under running water. One of the benefits of this scrub is that it also tends to lift some of the scratches and nicks in the surface of the briar. He dried it off with a soft cloth. He cleaned the internals and externals of the stem with alcohol, pipe cleaners and cotton swabs. He soaked the stem in Briarville’s Pipe Stem Deoxidizer and rinsed it off with warm water and cleaned out the airway in the stem with alcohol. I took photos of the pipe as I saw it when I put it on the table. I took photos of the rim top and stem to show the condition. The rim top looked pretty good but the inner edge of the bowl showed some damage and was out of round. There was also some burn damage to the outer edge of the bowl on the front. The stem was vulcanite and there were light tooth marks on the button and some light marks and chatter on both sides ahead of the button. The stamping on the top left and right sides of the diamond shaped shank are clear and readable. It reads as noted above.I started my work on this pipe by dealing with the damage to the inner edge of the bowl. I used a folded piece of 220 grit sandpaper to smooth out the inner edge and give it form once again. The cleaned up rim edge looked very good. I sanded the darkening/burn damage on the front outer edge of the bowl with 220 grit sandpaper as well. I finished the cleanup of the rim top by gently topping it on a topping board to smooth out the damage and minimize it on the edges. The result was actually quite good. I polished the briar with 1200-1500 micromesh sanding pads and wiping it down with damp cloth after each sanding pad. As I worked through the cycle of pads the shine developed with each change of pad. The pipe looks very good. I rubbed the bowl and shank down with Before & After Restoration Balm. I worked it into the surface of the bowl sides and shank with my fingertips to clean, enliven and protect the briar. I let the balm sit for 10 minutes, then buffed with a cotton cloth to raise the shine. The Balm did its magic and the grain stood out on the briar. I polished it with micromesh sanding pads – 1500-12000 grit pads. I wiped it down with Obsidian Oil after each sanding pad. This Chubby 1945-49 Rogers Rarity 220 Straight Bulldog with a vulcanite saddle stem is a well grained pipe with a flowing shape that looks great . The rich browns of the darkened natural finish makes the grain come alive with the polishing and waxing. I put the stem back on the bowl and carefully buffed the pipe with Blue Diamond on the buffing wheel using a light touch on the briar. I gave the bowl and the stem multiple coats of carnauba wax on the buffing wheel and followed that by buffing the entire pipe with a clean buffing pad. I hand buffed the pipe with a microfiber cloth to deepen the shine. The finished Rogers Rarity Bulldog really is a beauty and fits nicely in the hand and looks very good. Give the finished pipe a look in the photos below. The dimensions of the pipe are Length: 5 inches, Height: 2 inches, Outside diameter of the bowl: 1 1/8 inches, Chamber diameter: ¾ of an inch. The weight of the pipe is 1.52oz./43grams. This old timer will soon be on the American Pipe Makers section of the rebornpipes store if you would like to add it to your collection. Thanks for reading this blog and my reflections on the pipe while I worked on it. There are many more to come!

Found and reclaimed – A Vintage Stanwell Selected Grain 49 Zulu


Blog by Steve Laug

The next pipe is a vintage Stanwell that is quite exceptional. It is a well executed Zulu made between 1948-1960s. Some think the shape was designed by Sixten Ivarrson but I am not sure we will know for sure. Jeff and I picked up this pipe in a batch of pipes we purchased from a fellow in Los Angeles, California, USA. The pipe is stamped on the top side of the shank and reads Stanwell [over] Regd. No. 969-48 [over] Hand Made. On the underside of the shank it is stamped Selected Briar. The stamping is clear and readable. The briar was dark with tars and oils that almost obscured the amazing grain around the bowl  and shank. There was a thick hard cake in the bowl with an eruption of lava on the rim top that made it hard to know what the condition of the rim top and edges was underneath. The truth would be revealed once it was cleaned. The stem was oxidized, calcified and had tooth marks on the button surface and tooth chatter on both sides of the stem. It really was mess that had glimmers of promises peeking through the grime of time. Jeff took photos of the pipe to give you a sense of what it looked like before cleanup. He captured the cake in the bowl and the thick eruption of lava on the rim top and edges exceptionally well in the next photos. It was very clear that the pipe had not been seriously cleaned since the first smoke. But it is also very clear that it was an exceptional smoker! The stem shows the took marks on the button surface and chatter on both sides ahead of the button. Jeff somehow captured some of the beauty of the shape and the grain in the next photos. You can certainly see what lies beneath the grime on the briar. He captured the stamping on the top and underside of the shank. It is readable but the topside is definitely more worn than the underside. The Crown S stamp on the stem is deep and workable but has a lot of corrosion and grime in the stamping.I have worked on a lot of Stanwell pipes over the years and have found the Pipedia site very helpful in terms of giving background and an historical overview of the company from its founding to the present day. Here is the link to the article on the site on Stanwell pipes (https://pipedia.org/wiki/Stanwell).

I also scanned through the catalogues in the margins and in the links on the site and found a page that included the shape #49 Oval stem large sized Zulu pipe that I am working on. I have done a screen capture of the page below and encircled the shape in red. I then turned to a linked page on the article to the section on Shape Number and Designers that was primarily the work of a friend of mine named Bas Stevens. Bas initially had this article on the rebornpipes site so I am familiar with it. I include the link here if you want to check it out (https://pipedia.org/wiki/Stanwell_Shape_Numbers_and_Designers). I was hoping that Bas had a clue to who designed the shape 49 but alas he did not seem to. What was there though was that there were two versions of this shape. The first was what he calls a Dublin and others call a Zulu and the second was a freehand. I am working on shape “a” from the chart below. It is described there as a Dublin, slightly bent, oval stem and mouth piece.Armed with the information that I had gleaned from my research, I turned my attention to the pipe itself. I was amazed at how clean and new the pipe looked when I took it out of the box. It is really a beautiful piece. Jeff had done a great cleanup on the pipe. He reamed the bowl with a PipNet pipe reamer and followed up with a Savinelli Fitsall pipe knife to remove the cake. He scrubbed out the mortise and the airway in the shank and the stem with alcohol, cotton swabs and pipe cleaners. He scrubbed the bowl exterior with a tooth brush and Murphy’s Oil Soap to remove the grime on the finish of the bowl and the lava from the rim top. He rinsed it under running water. One of the benefits of this scrub is that it also tends to lift some of the scratches and nicks in the surface of the briar. He dried it off with a soft cloth. He cleaned the internals and externals of the stem with alcohol, pipe cleaners and cotton swabs. He soaked the stem in Briarville’s Pipe Stem Deoxidizer and rinsed it off with warm water and cleaned out the airway in the stem with alcohol. I took photos of the pipe as I saw it when I put it on the table. I took a photo of the rim top and stem to show the condition. The rim top looked pretty good and there was some darkening on the inner edge at the front of the bowl. The stem was vulcanite and there were tooth marks on the button and some light marks and chatter on both sides ahead of the button.The stamping on the top and underside of the stem are clear and readable. The stamp on the top side is more worn but it is still readable. The stamped Crown S on the stem is very clear and should retain the new white acrylic very well.I removed the stem from the shank and took a photo of the pipe to give a sense of the whole. I started my work on this pipe by dealing with the darkening on the inner edge of the bowl. I used a folded piece of 220 grit sandpaper to smooth out the inner edge and give it form once again. The cleaned up rim edge looked very good.     I polished the briar with 1200-1500 micromesh sanding pads and wiping it down with damp cloth after each sanding pad. As I worked through the cycle of pads the shine developed with each change of pad. The pipe looks very good.           I rubbed the bowl and shank down with Before & After Restoration Balm. I worked it into the surface of the bowl sides and shank with my fingertips to clean, enliven and protect the briar. I let the balm sit for 10 minutes, then buffed with a cotton cloth to raise the shine. The Balm did its magic and the grain stood out on the briar. I set the bowl aside and turned my attention to the stem. I sanded the stem with 220 grit sandpaper and started the polishing with 400 grit wet dry sandpaper.I polished it with micromesh sanding pads – 1500-12000 grit pads. I wiped it down with Obsidian Oil after each sanding pad. I paused the polishing to touch up the Crown S stamp on the top of the oval stem. I have been using an acrylic white fingernail polish and find that it works well and is long lasting. I painted it on the stamp and worked it into the stamp with a tooth pick. Once it had hardened I scraped and sanded the excess off with a 1500 grit micromesh sanding pad. It came out looking very good.I picked up the polishing once again. I used Before & After Pipe Polish – both Fine and Extra Fine to further polish the stem. The photos below show the polished stem.This Vintage Stanwell Regd. No. 969-48 Selected Grain 49 Zulu with a vulcanite stem is a beautifully grained pipe with a flowing shape that is stunning . The rich browns of the stain made the grain come alive with the polishing and waxing. I put the stem back on the bowl and carefully buffed the pipe with Blue Diamond on the buffing wheel using a light touch on the briar. I gave the bowl and the stem multiple coats of carnauba wax on the buffing wheel and followed that by buffing the entire pipe with a clean buffing pad. I hand buffed the pipe with a microfiber cloth to deepen the shine. The finished Stanwell Selected Grain Zulu really is a beauty and fits nicely in the hand and looks very good. Give the finished pipe a look in the photos below. The dimensions of the pipe are Length: 5 ½ inches, Height: 2 inches, Outside diameter of the bowl: 1 ¼ inches, Chamber diameter: ¾ of an inch. The weight of the pipe is 1.31oz./37grams. This one will soon be on the Danish Pipe Makers section of the rebornpipes store if you would like to add it to your collection. Thanks for reading this blog and my reflections on the pipe while I worked on it. There are many more to come!

Restoring a Cracked 1911 MRC (Marechal, Ruchon & Cie) Military Bit Billiard


Blog by Steve Laug

Every so often Jeff and I make an effort to meet somewhere and do a bit of pipe hunting. Back in October of 2019 we met in Southern Alberta and drove along the Queen Elizabeth Highway up to Edmonton. We stopped a lot of different antique shops and malls along the way to see what kind of luck we would have finding estate pipes. We picked up this pipe along with a few others at several Antique Malls in Edmonton. This one was a real mess with a very thick cake and heavy lava pouring from the bowl over the rim top. The was a crack in the right side of the bowl from the rim top down about 1/3 of the depth of the bowl. It was a hairline crack but it was visible even in the filthy condition we found the pipe in. However even with the grime ground in to the briar and the tarnished silver I knew that we were dealing with an old timer. I knew that MRC was related to GBD pipes so I was hooked. The stem was heavily oxidized and had tooth grooves on both side of the stem ahead of the button. There was wear on the button edges as well. The button itself also spoke of the pipe being an old timer because it was an orific button with a hole instead of a slot. Jeff took photos early in 2020 when he got to cleaning it up for us. The photos of what he saw are included below. There was a lot of damage to the outer edge of the rim and it was not clear what the rim top or inner edge truly looked like because of the thick cake and lava overflow. There was also a crack on the right side of the bowl about 1/3 of the depth of the bowl. It was hard to know at this point if it went through the bowl and on the rim top. Cleaning would reveal all! The stem was oxidized, calcified and had some deep tooth grooves on both sides from the button forward. There was also some damage on the top and under edge of the button itself. Jeff took photos of the sides and heel of the bowl to show the overall look of the grain and the condition of the bowl. In the first photo below I have encircled the crack in red on the right side so you can see it clearly. He took photos of the stamping on the shank and on the sterling silver ferrule. It is clear and readable. The MRC logo in the shield is on the left side of the shank and it is also on the ferrule. There is also an AO stamp followed by three hallmarks on the ferrule – an anchor, a rampant lion and an “m”. These help to date the pipe and identify the maker and city.I turned to Pipedia to help date the MRC (Marechal Ruchon & Cie) and connect the dots with GBD pipes (https://pipedia.org/wiki/Marechal_Ruchon_%26_Cie). I quote the section below that is pertinent form the site.

Marechal Ruchon & Cie. was a company owned by Auguste Marechal and Ferdinand Ruchon (“& Cie” is the French equivalent of “& Co”) which owned the GBD brand from the end of the 19th century until 1902 when they sold Marechal, Ruchon & Cie. to Oppenheimer Pipe, which in turn changed the name of the company to Marechal, Ruchon & Co., Ltd.. Upon the creation of Cadogan, however, the brand was no more, remembered only in the name of the GBD Marcee pipes made until just after the Second World War.

I then turned to the Pipedia article on GBD history to further the connection information I had above (https://pipedia.org/wiki/GBD). I quote:

…August Marechal and Ferdinand Ruchon led the firm into the 20th century. They were in charge of the company for more than 50 years…

…There is a very simple explanation for GBD’s program to turn more “British”: GBD became a British company soon after the turn of the century! In 1902 Marechal and Ruchon sold GBD to A. Oppenheimer & Co. in London. Charles Oppenheimer had founded this successful trade business in 1860 as an import-/export house. His brothers David and Adolphe and brother-in-law Louis Adler soon joined him. Adolphe took over when Charles went to Germany as British ambassador. Briar pipes were among the first products traded. The business relation to GBD in Paris began as early as 1870. Being the most important customer in the English speaking world, Oppenheimer & Co. were designated as sole distributor for Great Britain, the USA and Canada in 1897. Especially Adolphe Oppenheimer had a burning interest in the pipe business, and Louis’ son James Adler shared that. He should play the most important role in the amicable merger of GBD. A. Marechal, Ruchon and Cie. in Paris was now Marechal, Ruchon & Co. Ltd. (see Marechal Ruchon & Cie. page) – a British firm with four directors: Adolphe Oppenheimer and James Adler had their seat in the head office in London while Auguste Marechal and Ferdinand Ruchon went on leading the GBD factory in the Rue des Balkan in Paris, which was considerably extended and modernised. Ruchon acted as CEO.

I knew that the pipe I was working on came out after the sale MRC to Oppenheimer and it became a British Company. It ceased to be Marechal, Ruchon & Cie and became Marechal, Ruchon & Co. Ltd. The principals (Marechal & Ruchon) continued to lead the GBD factory. I would need to do a bit of work on the Silver Hallmarks to pin down the date but I know the rough time frame.

The hallmarks on the silver ferrule were as follows:

  1. An anchor – a symbol for the city of Birmingham, England
  2. A rampant lion – a symbol for .925 Sterling Silver
  3. A lower case “m” in a squarish cartouche which was the year of manufacture.
  4. An AO which was the maker’s mark. I link that to Aldophe Oppenheimer as noted above. He played an important role in the merged GBD British Company.

I turned to the British Silver Hallmark page to try and pin down the date for this silverwork (https://www.925-1000.com/british_marks.html). I have marked it with a red box on the chart that is below. The lower case “m” in the cartouche on the silver matches the one for 1911. So now I knew that I was working on a 1911 MRC pipe that was made for sale in England and bore the Birmingham silver. It really is a crossover pipe – French made by Marechal, Ruchon and Company Ltd. in Paris with British silver work made in Birmingham!Armed with the information that I had gleaned from my research, I turned my attention to the pipe itself. Jeff had done a great cleanup on the pipe. He reamed the bowl with a PipNet pipe reamer and followed up with a Savinelli Fitsall pipe knife to remove the cake. He scrubbed out the mortise and the airway in the shank and the stem with alcohol, cotton swabs and pipe cleaners. He scrubbed the bowl exterior with a tooth brush and Murphy’s Oil Soap to remove the grime on the finish of the bowl and the lava from the rim top. He rinsed it under running water. One of the benefits of this scrub is that it also tends to lift some of the scratches and nicks in the surface of the briar. He dried it off with a soft cloth. The damage on the rim top and inner and outer edges is very visible in the photos below. He cleaned the internals and externals of the stem with alcohol, pipe cleaners and cotton swabs. He soaked the stem in Briarville’s Pipe Stem Deoxidizer and rinsed it off with warm water and cleaned out the airway in the stem with alcohol. When I received it the pipe looked very good. I took a photo of the rim top and stem to show the condition. The rim top and the inner edge of the bowl were in rough condition. The top of the rim was beat up pretty badly with nicks and chips. The inner and outer edges were rough and the bowl was out of round. It was also clear that the crack on the right side of the bowl went onto the top. The stem was vulcanite and there were deep tooth marks and chatter on both sides ahead of the button.The stamping on the pipe and the silver ferrule is clear and readable as noted above. I removed the stem from the shank and took a photo of the pipe to give a sense of the whole.I started my work on this pipe by dealing with the damaged rim top and inner edge of the bowl. I used a folded piece of 220 grit sandpaper to smooth out the inner edge and bring it back to round. I topped the bowl to smooth out the damage on the rim top. I did not remove much of the briar but conservatively dealt with the damage. The cleaned up rim top looked very good.         Now it was time to deal with the crack in the bowl on the right side. I marked the end of the crack on the briar with a Sharpie pen as I viewed it through a lens. I used the mark to guide me when I drilled the end of the crack with a microdrill bit on the Dremel. I filled in the drilled hole with briar dust and clear CA glue. I spread it over the entirety of the crack on the side and the rim top. Once the repair had cured I used a small flat file to flatten out the repair and bring it down to the surface of the briar. I blended it into the surface of the briar with a folded piece of 220 grit sandpaper. I was happy with the look of the repair.I polished the briar with 1200-1500 micromesh sanding pads and wiping it down with damp cloth after each sanding pad. As I worked through the cycle of pads the shine developed with each change of pad. The pipe looks very good.      I polished the silver ferrule with a jewelers cloth to give it a sheen and protect it from further tarnishing. I rubbed the bowl and shank down with Before & After Restoration Balm. I worked it into the surface of the bowl sides and shank with my fingertips to clean, enliven and protect the briar. I let the balm sit for 10 minutes, then buffed with a cotton cloth to raise the shine. The Balm did its magic and the grain stood out on the briar. I set the bowl aside and turned my attention to the stem. I “painted” the tooth marks/grooves with the flame of a lighter. I was able to lift them considerably. I filled in the remaining marks with clear CA glue. Once the repair cured I used a small file to flatten it out and begin the blending process to make it disappear into the surrounding vulcanite. I followed that by sanding the stem with 220 grit sandpaper and started the polishing with 400 grit wet dry sandpaper. I polished it with micromesh sanding pads – 1500-12000 grit pads. I wiped it down with Obsidian Oil after each sanding pad. I used Before & After Pipe Polish – both Fine and Extra Fine to further polish the stem. The photos below show the polished stem. This 1911 MRC (Marechal, Ruchon & Cie) Military Bit Billiard with a vulcanite stem is a great looking pipe now that it has been restored. The rich browns of the stain made the grain come alive with the polishing and waxing. I put the stem back on the bowl and carefully buffed the pipe with Blue Diamond on the buffing wheel using a light touch on the briar. I gave the bowl and the stem multiple coats of carnauba wax on the buffing wheel and followed that by buffing the entire pipe with a clean buffing pad. I hand buffed the pipe with a microfiber cloth to deepen the shine. The finished 1911 MRC Billiard really is a beauty and fits nicely in the hand and looks very good. Give the finished pipe a look in the photos below. The dimensions of the pipe are Length: 5 ¼ inches, Height: 2 inches, Outside diameter of the bowl: 1 ¼ inches, Chamber diameter: ¾ of an inch. The weight of the pipe is 1.34oz./38grams. I am still debating on whether to keep this one or sell it… It fits nicely in my collection of older pipes. Thanks for reading this blog and my reflections on the pipe while I worked on it. There are many more to come!