Blog by Henry Ramirez
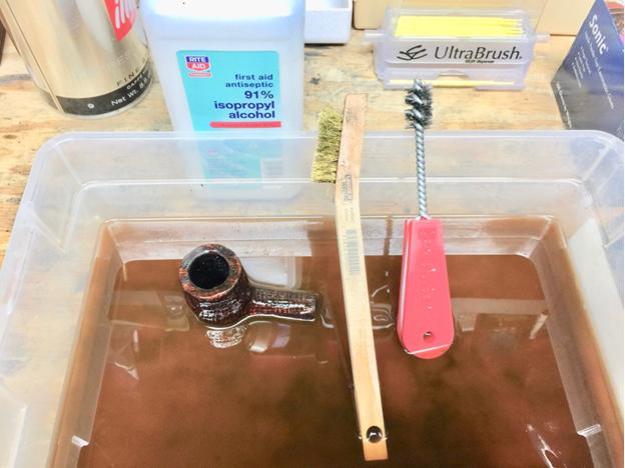
I was ghosting through Ebay listings looking for a cracked shank to experiment with when this old classic appeared. The auction was won for a song because in addition to a cracked shank, the year stamping had been buffed off the shank. The usual whole lotta cake and dented stem story. I started with the stem, which was really in great shape. I have come to love the stumpy profile of the patent LB’s with their constricted contour button. An Oxyclean bath was followed by an isopropyl alcohol scrubbing with a shank brush and pipe cleaners.
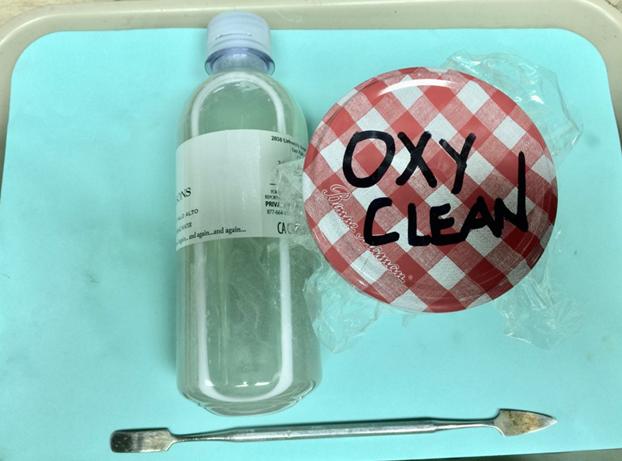
 I wanted to use heat to raise the bite marks as much as possible to not only decrease my work load but to minimize the inclusion of foreign filler. To this end I also wanted to learn the proper temperature needed to reproduce my results consistently.
Using a heat gun, I took my time and warmed up the vulcanite until my nose told me it was getting close to burning. If that happens the surface becomes a porous charred stinky mess! I quickly used a laser temperature gun to obtain a surface reading of 275 degrees F. Amazing how quickly the surface cooled off once the heat was removed.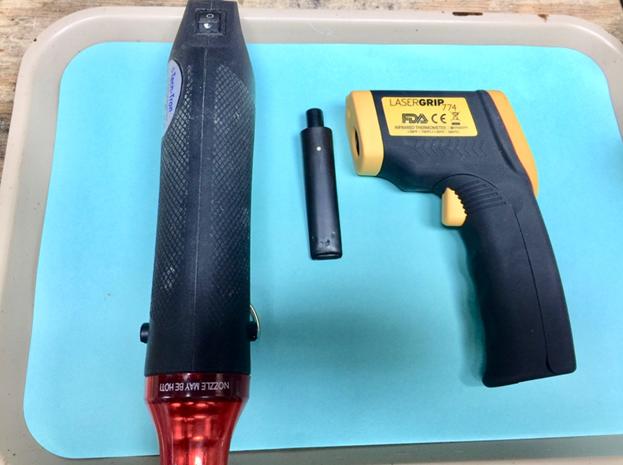 I was not impressed by the amount of rebound and it looked like filling and filing was in my future.
Having nothing to lose, I pressed my wife’s oven into service, knowing that I could set the temperature substantially higher than previous attempts without fear of ruination. I set the oven temperature at 265 degrees F to have a 10 degree safety zone and watched as the whole stem “stretched out”. This was more like it! The dents were now depressions that needed the light to shine just so to be seen. Little CA and polishing was needed.
I should mention that these values are for older Dunhill vulcanite only. The composition of vulcanite has changed over the years, according to some posts I’ve read, and I’ve noticed it in the depth of polish ability. Now it was the time to clean and evaluate the briar. While I ream the mortise and bowl I am wishing that I had Steve’s magical Savinelli Pipe knife. Boy, those things are rarer than hen’s teeth and this old cake is super hard. That is followed by total immersion in an isopropyl bath with various scrub brushes stripping the briar. I couldn’t save the original finish because the shank crack needed to be clean and open as much as possible for the bonding.
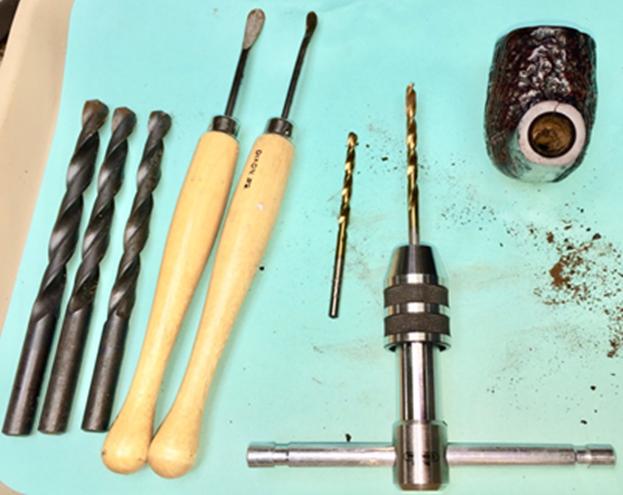
 One of the perks of the alcohol bath is that after the bowl dries out, if there is any residual cake stuck to the chamber walls, it shrivels up and is easily removed.
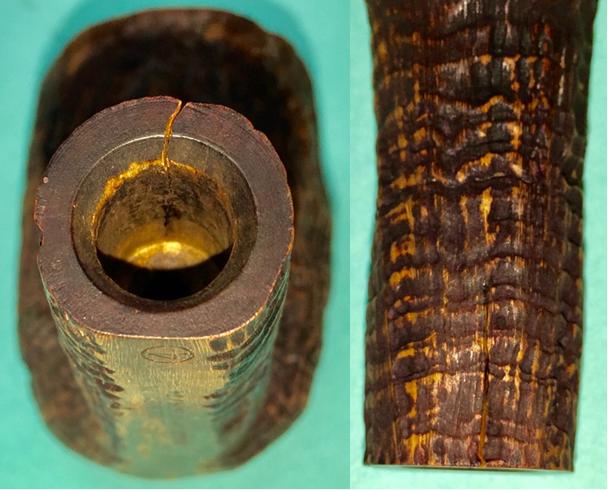 The shank crack was now very evident but the year stamping was not.
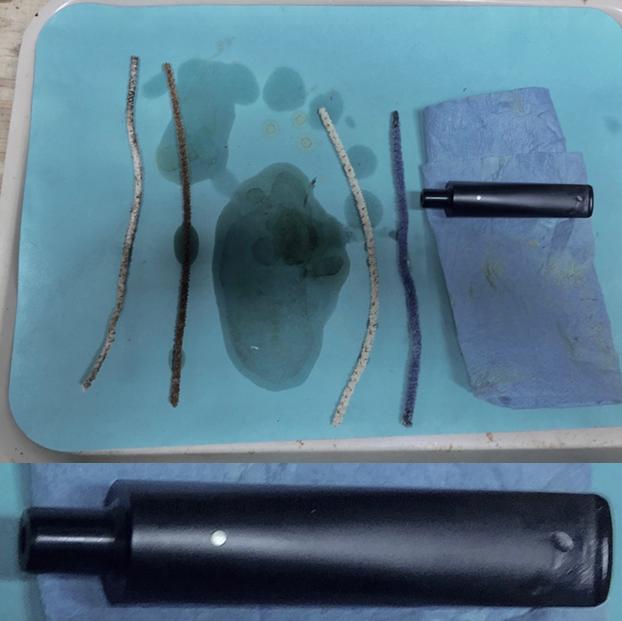
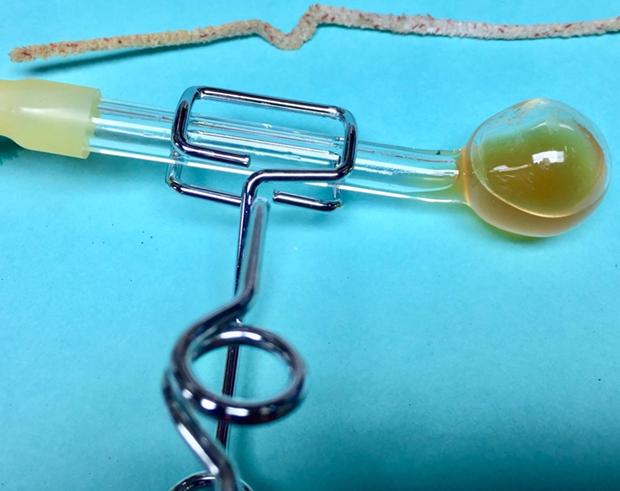
 Getting back to the stem, I wanted to know if the alcohol retort was worth the hassle. I had been as meticulous as possible with the pipe cleaners and cold alcohol. The color of the used alcohol in the distillation flask tells the story, close but no banana!
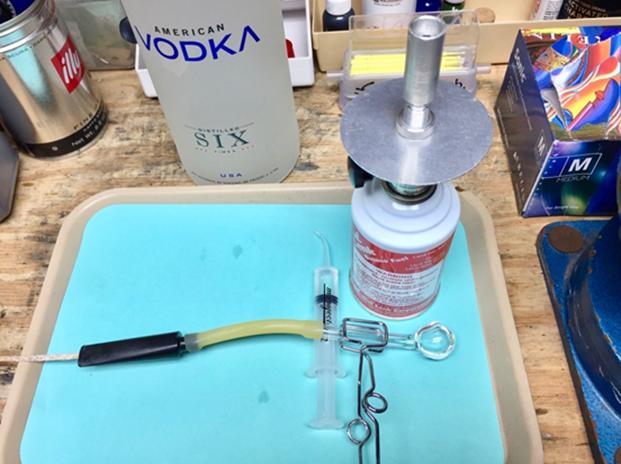
 I could now address the cracked shank. I had previously repaired such a problem using a micro-screw and bonded dental composite resin. I was concerned that threading the screw into old dry briar could start micro-fractures and crazing.
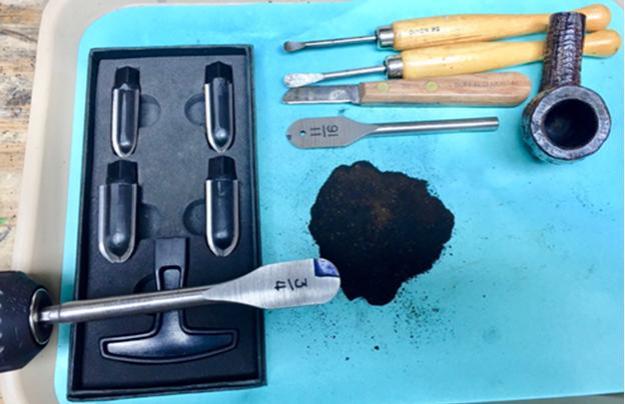
This time I elected to drill a channel spanning the crack and passively bond a post fabricated from longitudinal glass fibers encompassed in a strong composite resin matrix. This would also provide some flex in the repair to accommodate the dimensional changes that briar goes through because of temperature changes during smoking.
At this time I also drilled a post hole at the end of the crack to prevent further spidering. Because the crack was significantly wide I made sure to introduce my resin with a size 06 endodontic file. I had planned to use a C clamp to close the gap but I chickened out when finger pressure did nothing. Not sure how to make briar temporarily more flexible….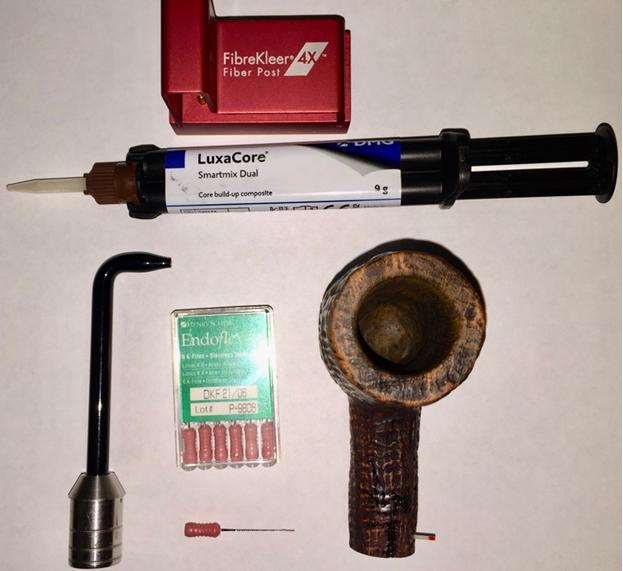

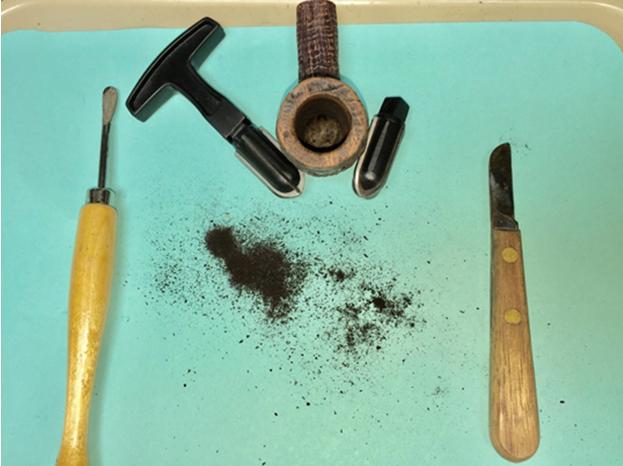
After filling the post hole and cementing the fiber post with dual cure composite resin, I trimmed off the post and blacked out the white resin with black CA.
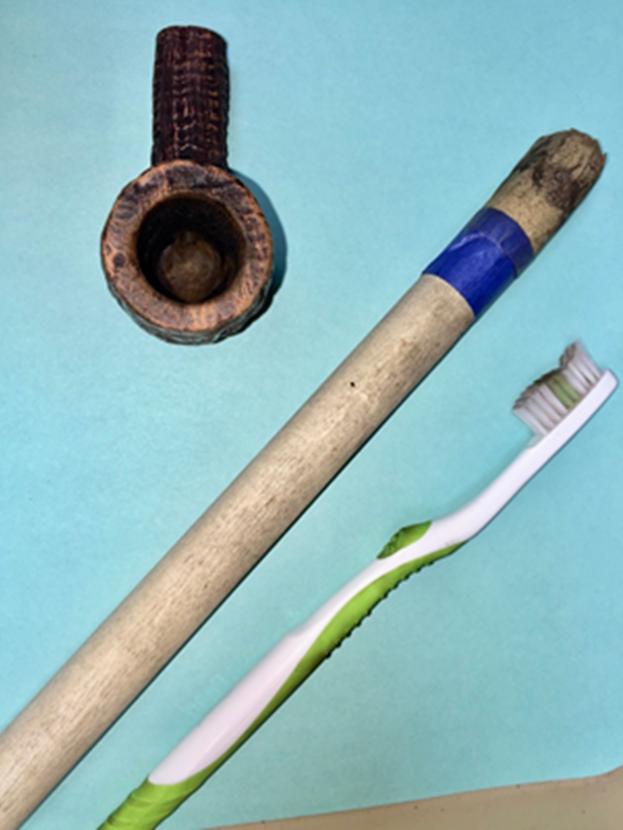
Before beginning to start the staining process I wanted to open the pores of the cellulose to not only gain greater absorption of the dye but also improve the briar’s capacity to absorb tars for a sweeter smoke. I had noticed such a phenomenon with the Missouri Meerschaum corn cob pipes.
I found that this particular wheel had already been invented by the folks who refinish wooden decks. I tracked down some relatively non-toxic materials which did the job and whose run off wouldn’t hurt plants.
Sodium percarbonate does the cleaning and oxalic acid removes the smear layer, thus opening up the wood’s pores. Looking around online for a source I realized that I already had both chemicals in the laundry room! Oxyclean is the percarbonate and states on the container that it’s great for wood decks, siding and lawn furniture. Bar Keeper’s Friend has oxalic acid as its active ingredient and states on the container that it works on teak wood.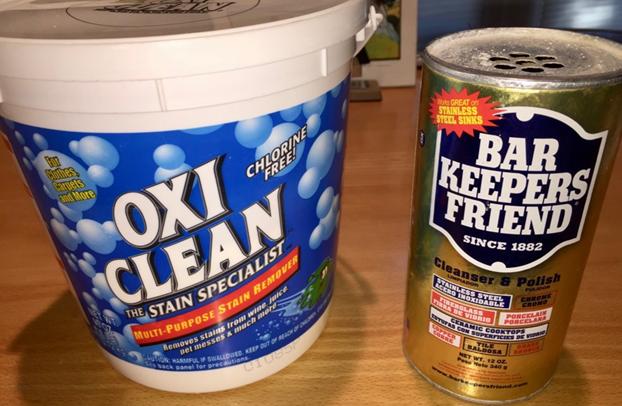 Indeed after scrubbing with both and rinsing with water, I noticed that the chamber’s surface looked and felt less dense.
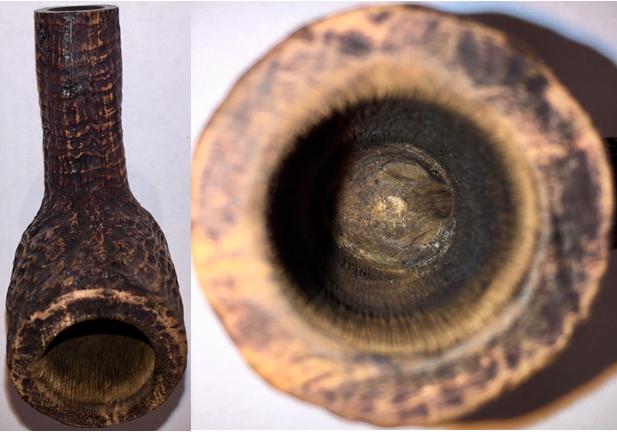 Now it was time to stain the briar with Oxblood diluted 50% with isopropyl alcohol in two coats, both flamed with the micro-torch.
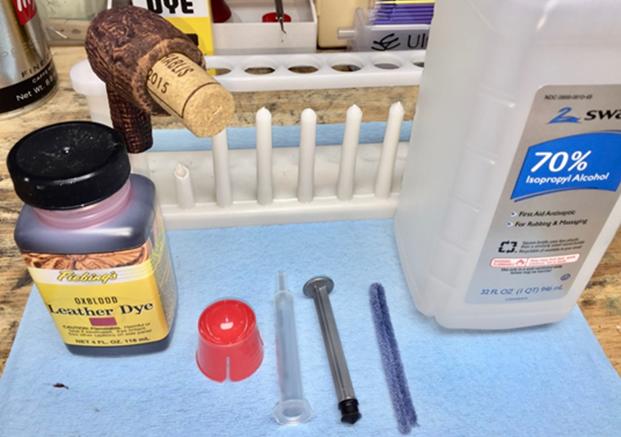 I was lucky that the original black stain in the depths of the blast remained.
 An overlay stain of light brown was applied in 2 coats.
 After a rub down with an old t-shirt to remove any xs dye, I applied 2 coats of Halcyon wax. A quick buff on the lathe and then a hand strapping with a shoe bristle brush brought the shine up. I want to mention that my wife gifted me her silver brush which is narrow and has long soft bristles which easily accesses the crotch of the pipe without fear of collision. This has proved most useful on bent pipes.
 Another very helpful tip came from a pipe maker’s blog about dead-faced files to add crispness to the button area. They are the dead faced nut seating file by Stewart MacDonald, a luthier’s supply house and the pillar files which have the dead side on the edge from OttoFrei, a clock makers source.
 Well I’m now satisfied with the pipe but not finished. They say we abandon these projects because we reach a point where better becomes an enemy of good.
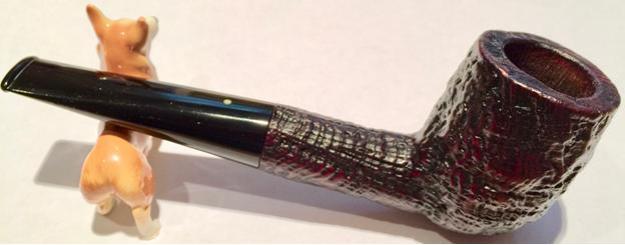
 Boy that was fun and I hope to share more adventures with these fabulous old pipes! Regards, Henry

Fascinating, as always. Do you think that pinning the shank crack will hold up to repeated stem insertions? (vs the traditional band) For button work, I have some small, flat needle files. I wrap 2000 grit paper or perhaps 1500 around the file for cleaning up buttons. Using the paper doesn’t create as deep scratches, as made by the needle file alone.
LikeLike
I have no doubt this fix will be fully supportive, especially because this briar is so tough! Unfortunately, I no longer smoke so that is pure opinion but the material is made to flex repeatedly during mastication (6-800 lbs/sq inch psi). The bonding agent is made to lock into the spaces present in the cellulose which have be cleaned out by the oxalic acid.
I like that idea of wrapping your needle files, the video I viewed had the sand paper wrapped around plastic finger nail files after they’d had the edges trued up on an abrasive wheel. Thanks for your reply, regards, Henry
LikeLike
It’s fascinating to watch your approach Henry and unfortunately I’m in a rush but noted you mentioned the Savinelli Pipe knife. I have also only seen a couple and they sold for more than I could spend. I did though learn of the “Ebonite bevel knife” readily purchased at Amazon for a fraction of the price. It seems to be quite similar. Have to run. Thank you for sharing I can’t wait to read more thoroughly later.
LikeLike
Hot Dog! Thanks for the head’s up William. I’d never come across cake that resembled granite before and my reamers were barely scratching it! I used a dental lab knife regularly used for trimming plaster models but the tip is not the right shape. I should have taken it to our local farmer’s market where there a super craftsman knife sharpener but I had my shorts in a knot to get going on that pipe stat. regards, Henry
LikeLike