Daily Archives: June 17, 2017

Refurbishing an Yves St. Claude Glacier 80 Bent Billiard


Blog by Steve Laug

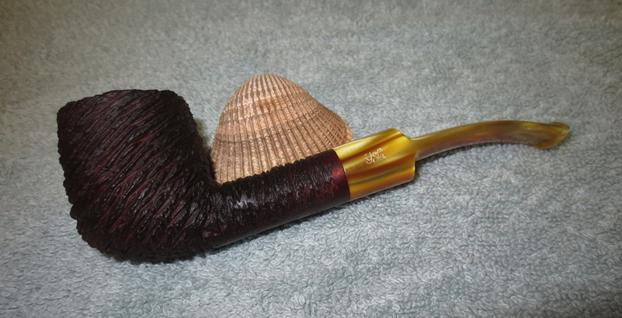
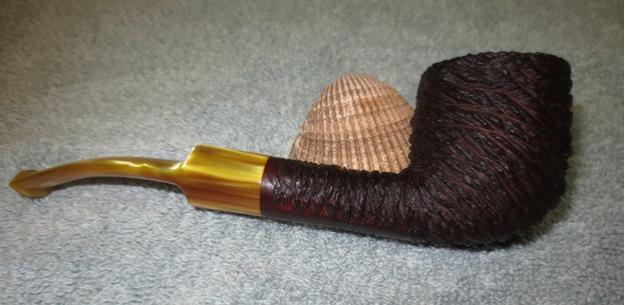
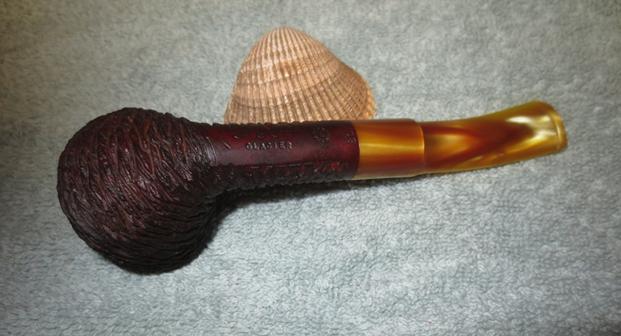
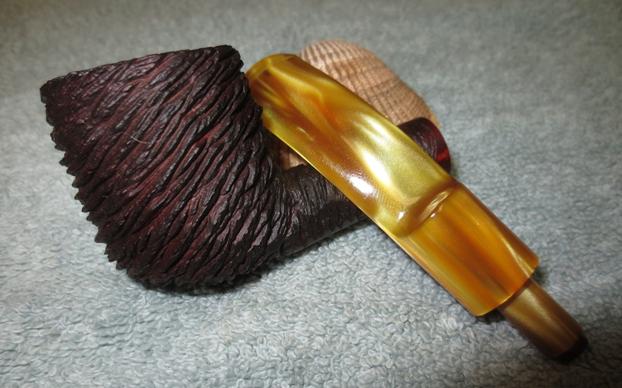
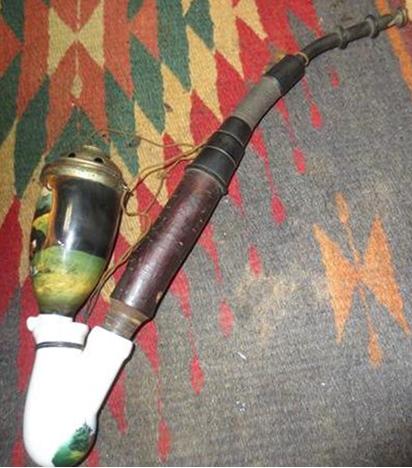
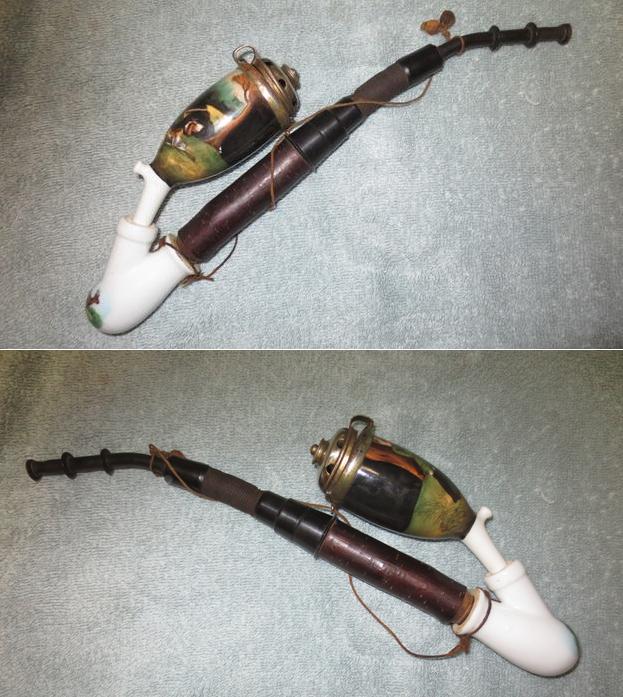
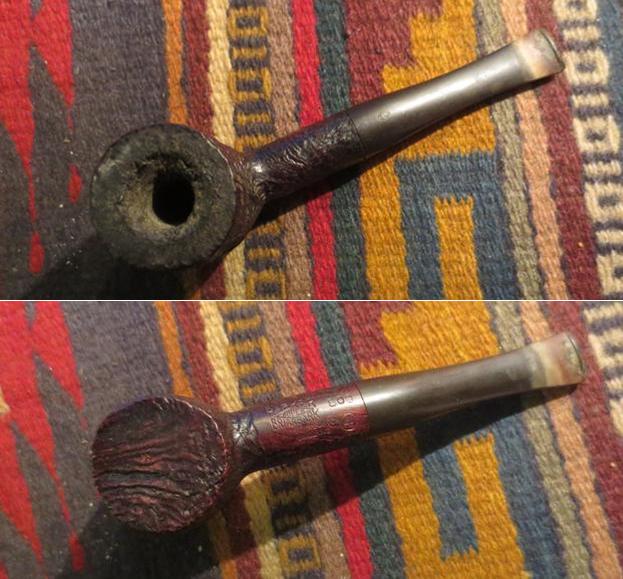
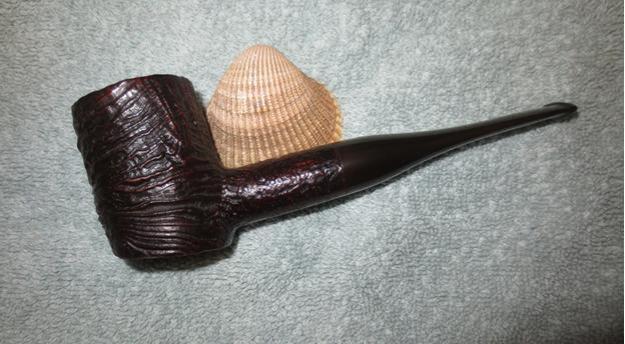
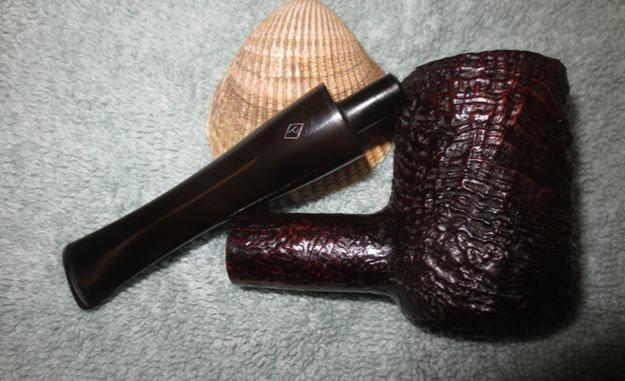
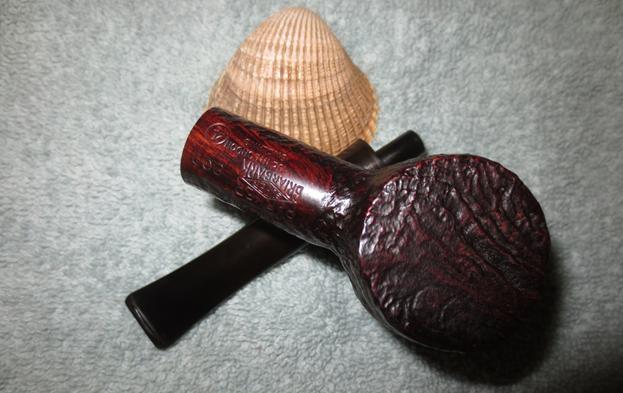
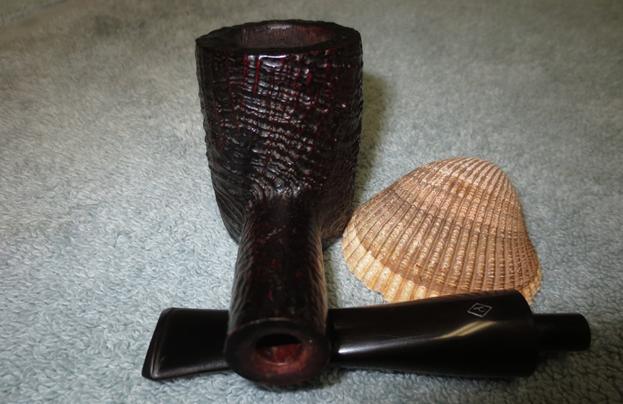
The next pipe I chose to work on today was one that came from the friend of mine who has the pipe shop. He had been given a large number of pipes from a customer’s estate to sell and he had given them to me to clean up. This one is a rusticated billiard that has a slight upward bend to the shank and a Lucite stem with a ¼ bend. It was stamped on the underside of the shank Yves St. Claude in script over Glacier. Next to that it was stamped with a COM circle that read Made in France. At the end of the shank near the stem/shank junction it is stamped with the shape number 80. The finish was very dirty and almost lifeless looking. The striated rustication was well done but the grooves were all filled with grit and grime. The bowl had a light cake and the rim had some darkening and tar on the back side. The stem had some light tooth chatter but no deep tooth marks. The variegated yellow/gold stem went well with the rustication.
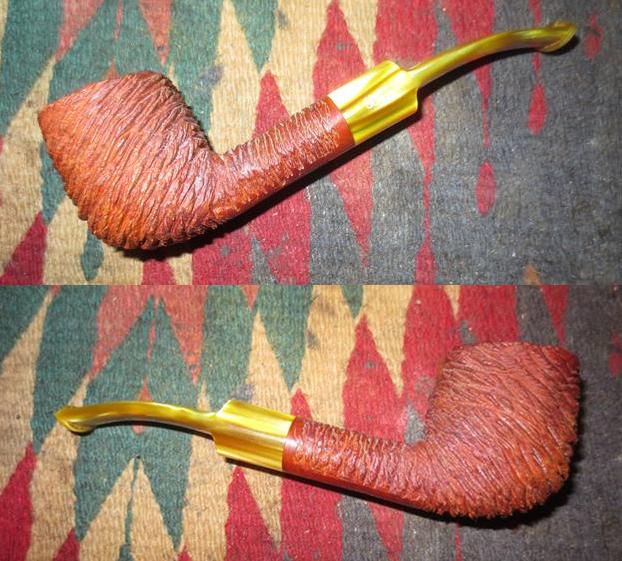
In searching the web I found several references to Yves Grenard, trained in Comoy’s England factory, purchasing the Chacom plant in St. Claude. He managed the factory and it passed on to his son afterward. I am pretty certain that this Yves St. Claude pipes was made by Chacom in France with the stamping bearing Yves name.
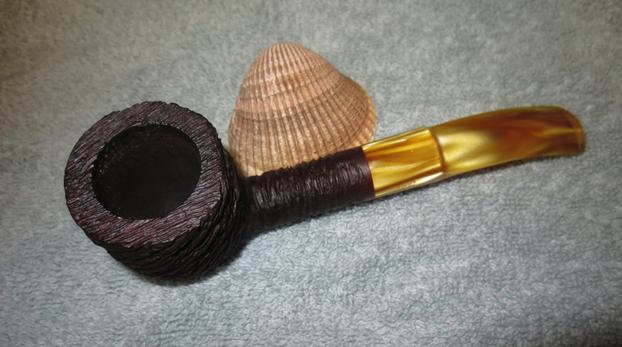
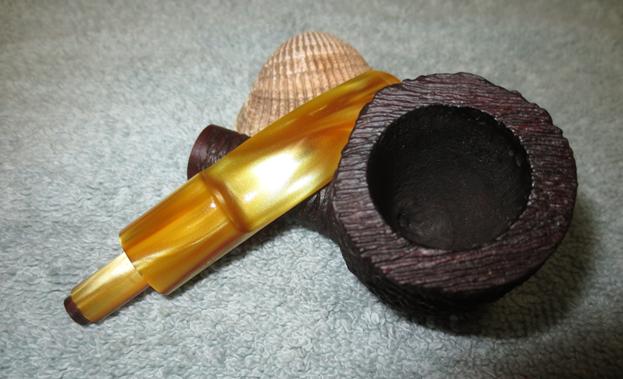
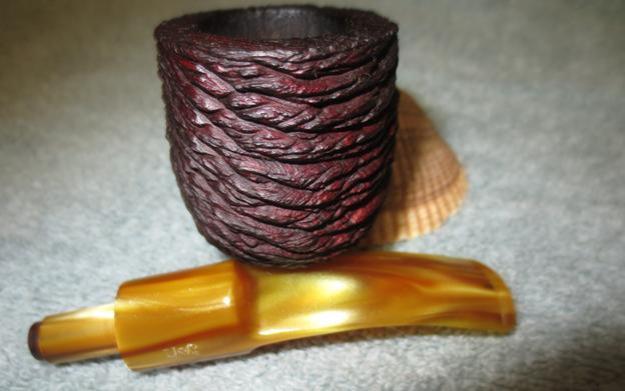
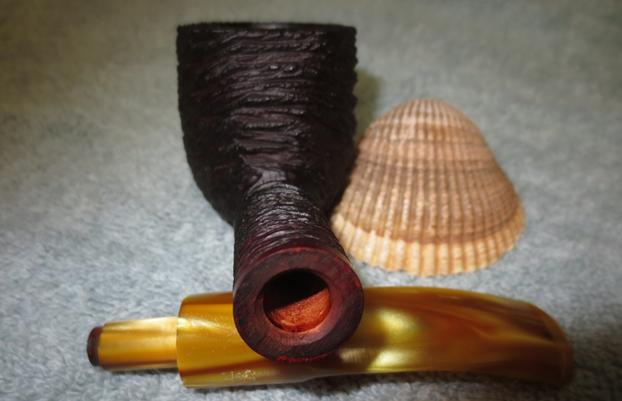
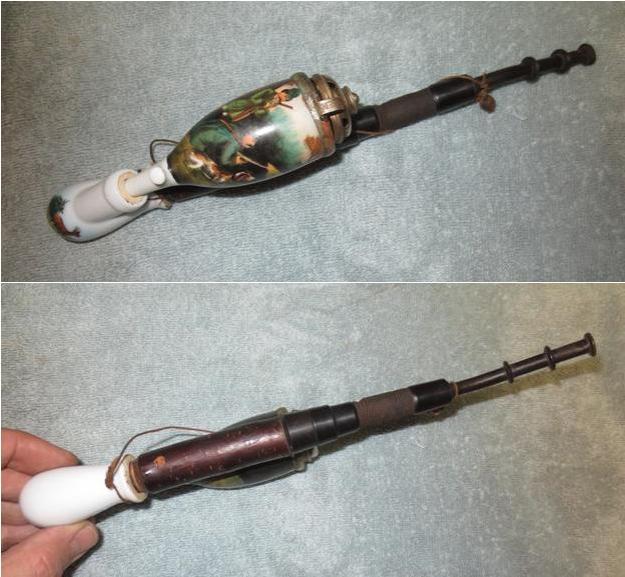
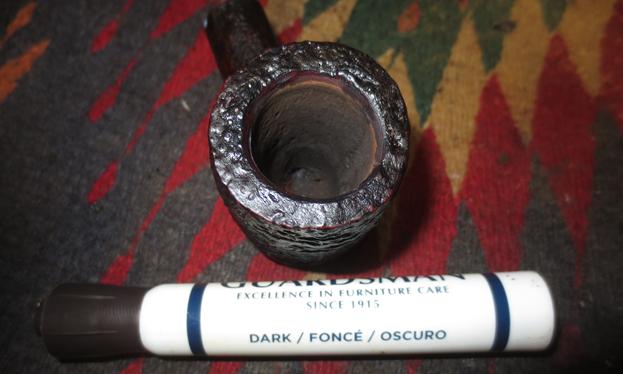
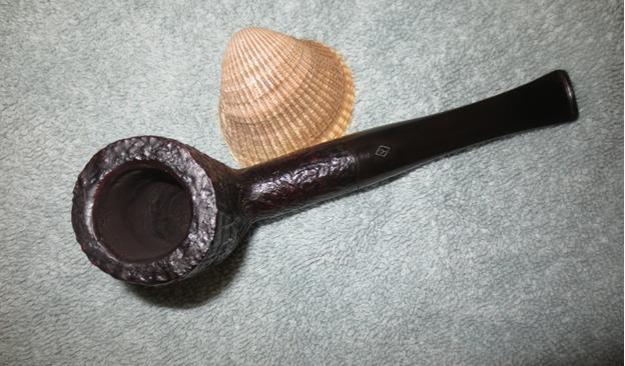
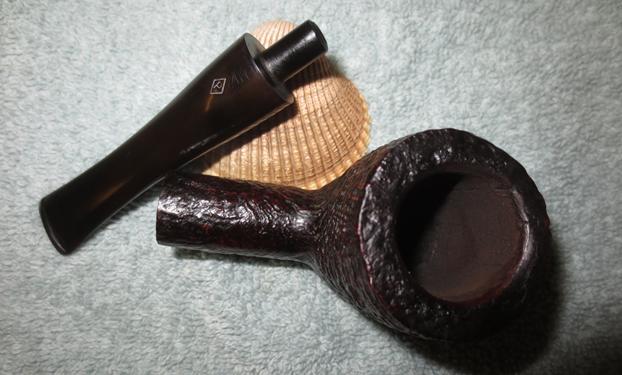
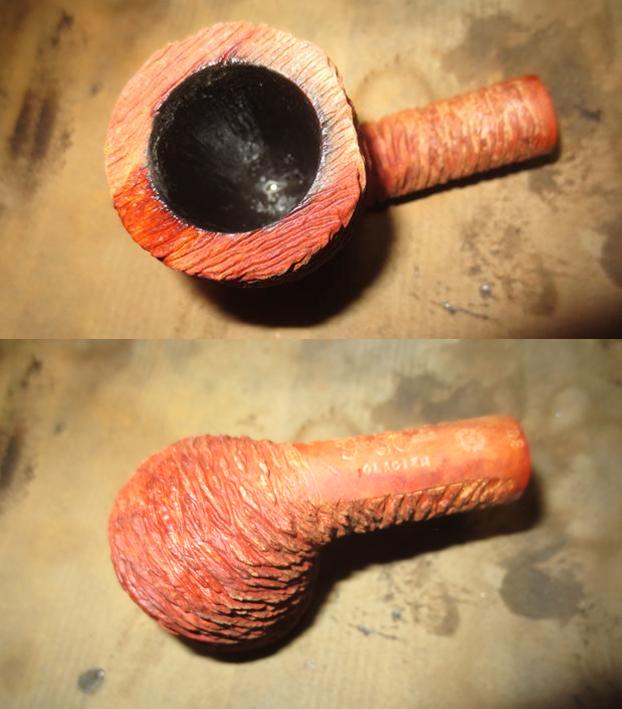
I took a close up photo from the top looking into the bowl to show the light cake in the bowl and the darkening to the back side of the rim. The rim top is a bit oddly shaped in that the back outer edge of the bowl slightly flattened and then rusticated over the top of the shape. I also took photos of the chatter on both sides of the stem at the button. 
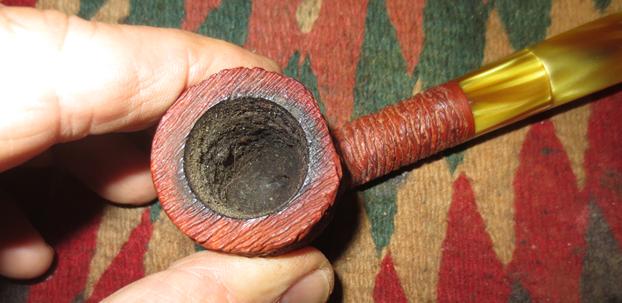
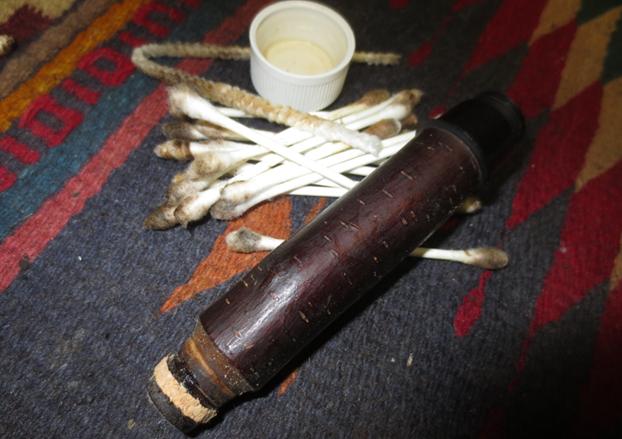
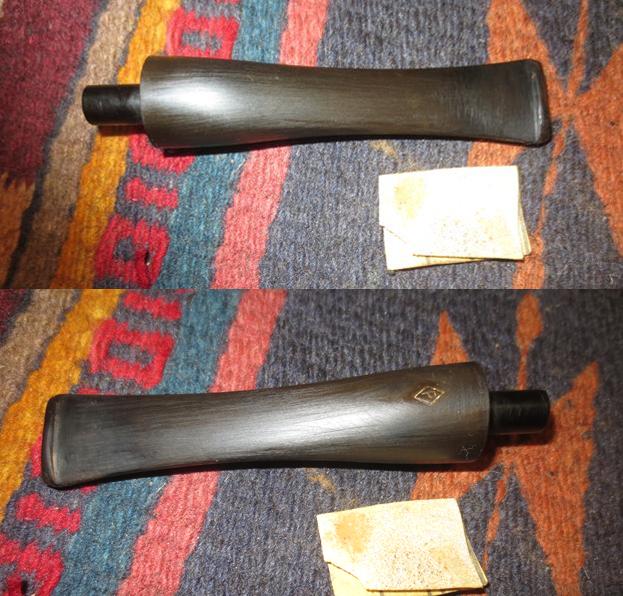
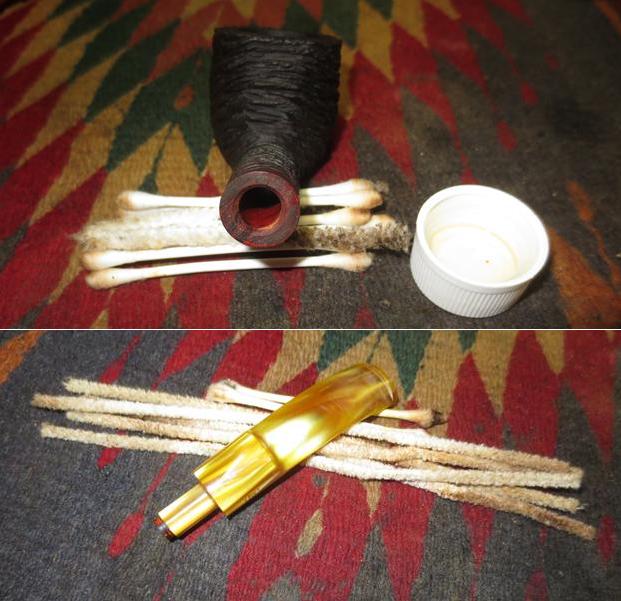
I sanded out the tooth chatter with 220 grit sandpaper and it did not take much to smooth out the marks. There were also some marks left behind from when the stem had originally been bent that sanded out quite easily.
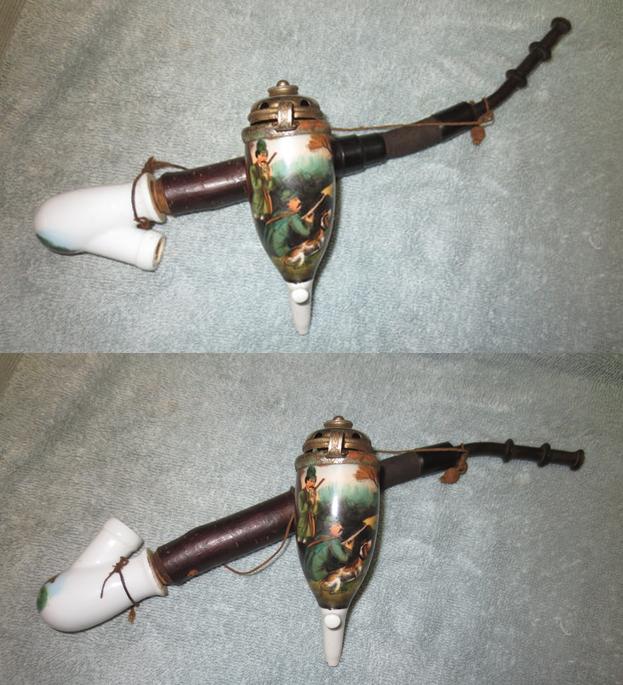
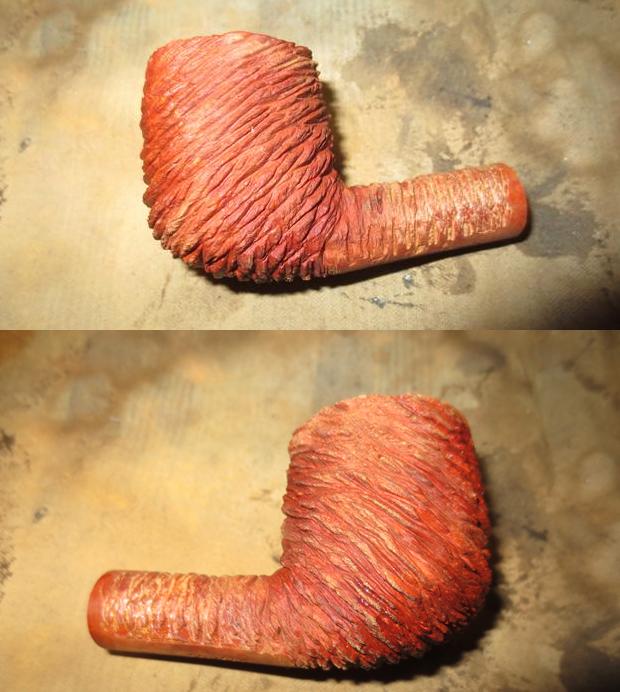
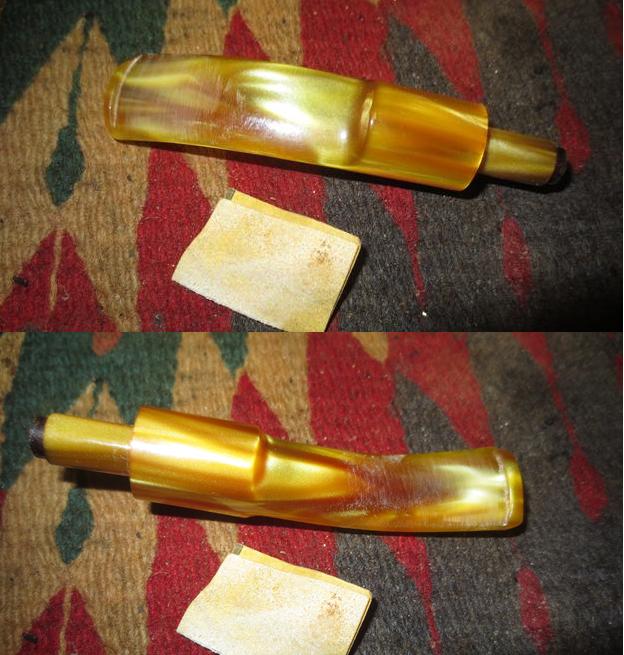
I scrubbed the bowl with undiluted Murphy’s Oil Soap and a tooth brush to remove the grime. I used a brass bristle brush with the soap on the rim surface to remove the darkening and tars. I rinsed the bowl under warm water to remove the soap and grime. I took photos of the cleaned bowl and included them below. 
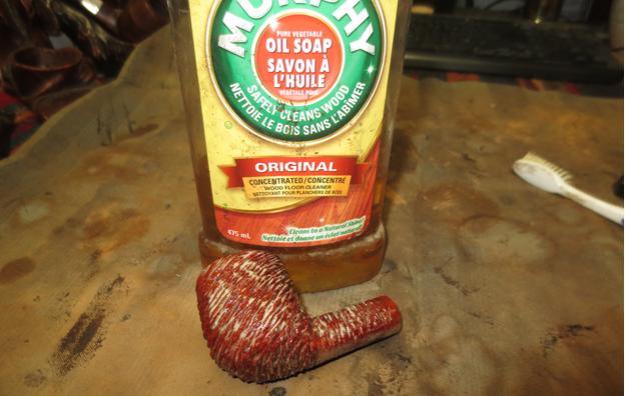
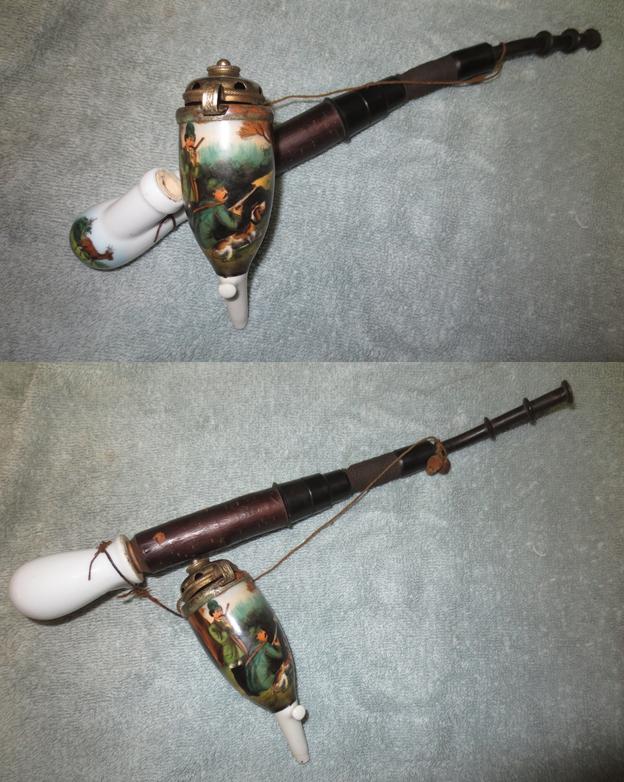
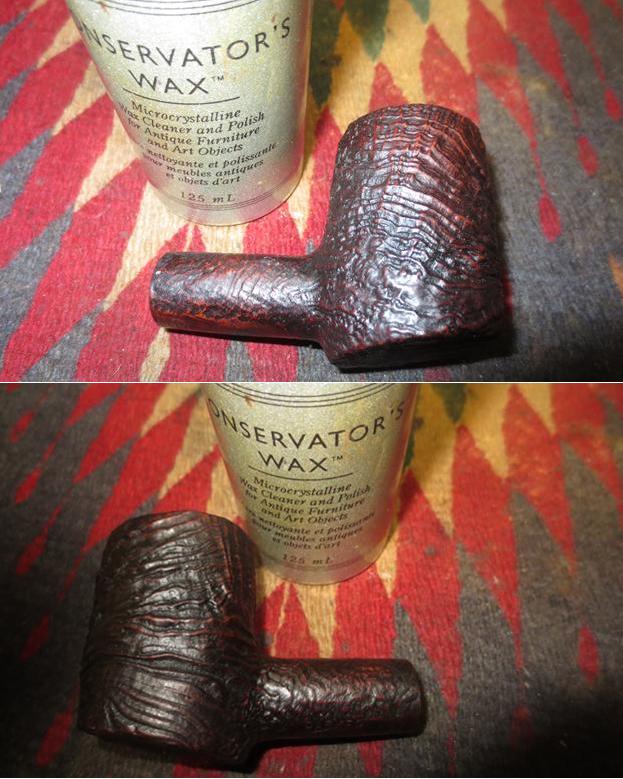
I decided to use a dark brown aniline stain thinned with isopropyl by 50% to make it more of a translucent medium brown. The colour once it was dried, buffed and polished would really look good with the yellow stem. I applied the stain, flamed it and repeated the process until I was happy with the coverage.
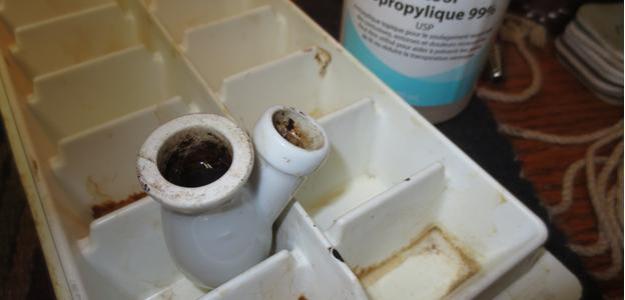
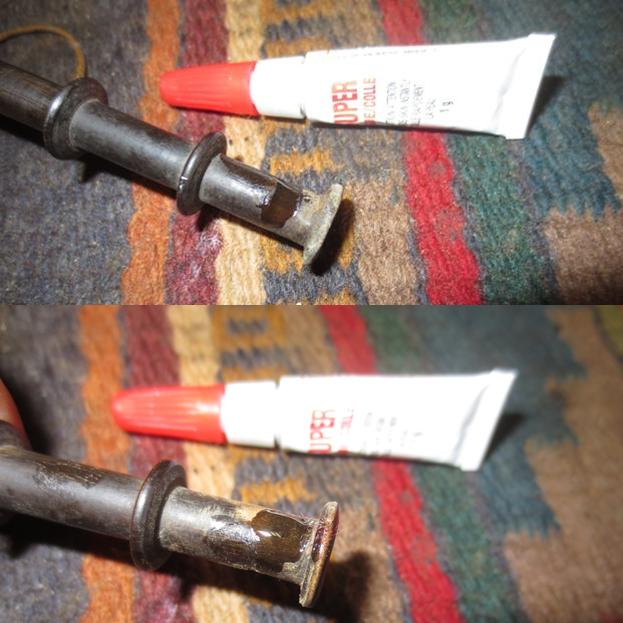
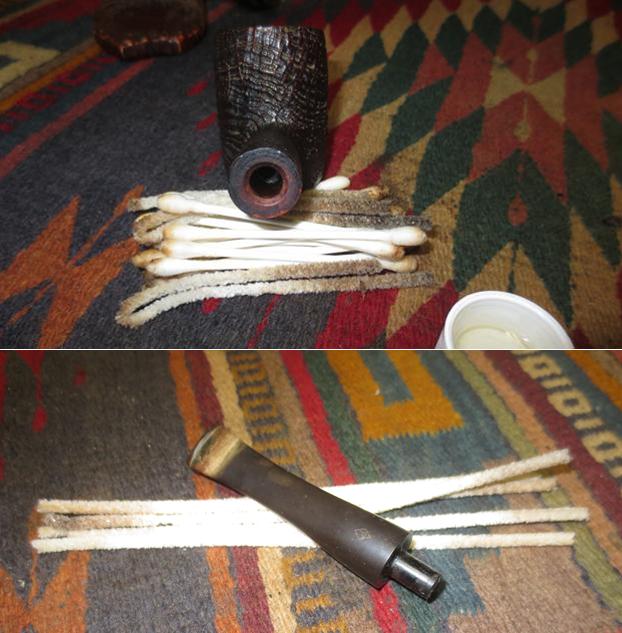
There were some thick, hard tars on the inside of the mortise walls so I scraped them out with a dental spatula. Afterwards I cleaned out the mortise and the airway in the shank and stem with alcohol, cotton swabs and pipe cleaners. I worked on the stepped tenon with alcohol and cotton swabs to remove the darkening at that point. 
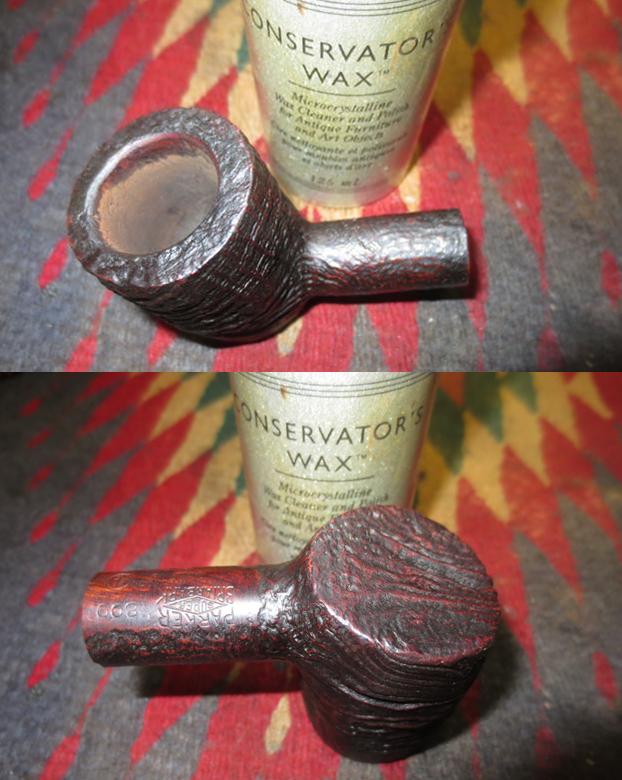
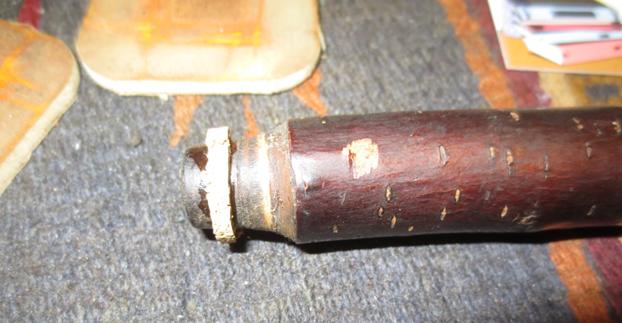
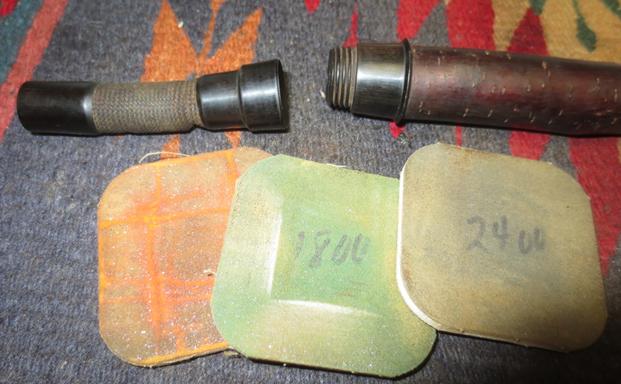
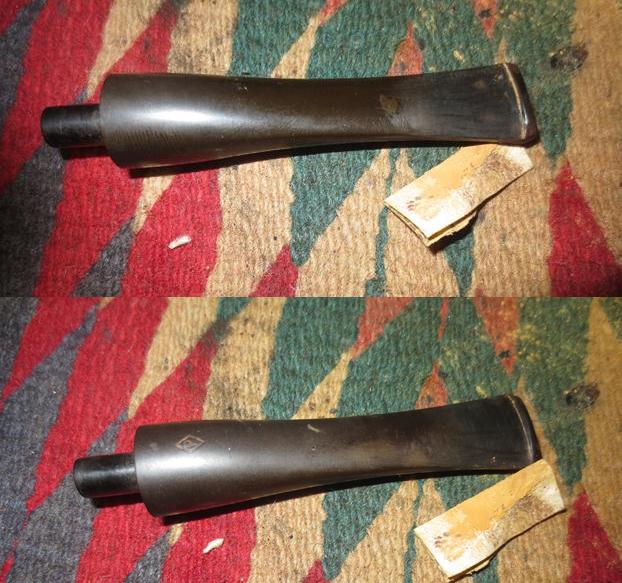
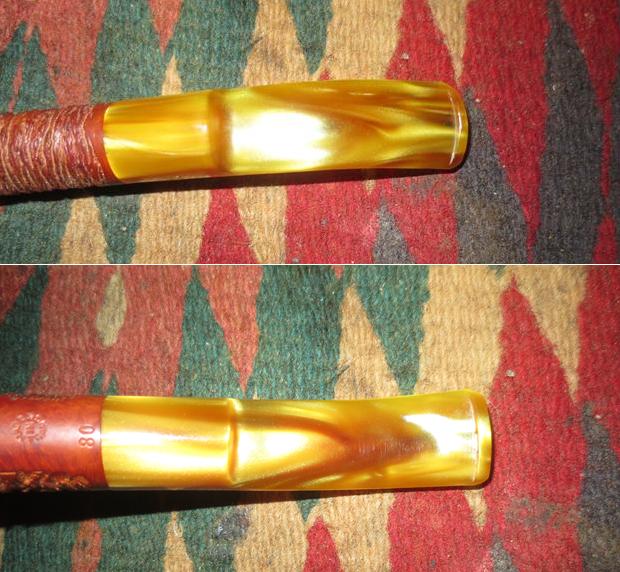
I wiped down the outside of the stem with a damp pad. I used white acrylic paint to fill in the YSC stamp on the left side of the saddle. Once the paint dried I scraped the excess off and polished it with 1500-2400 grit micromesh sanding pads.
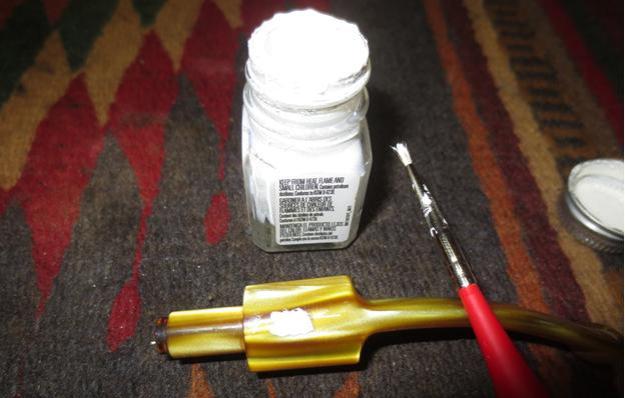
I polished the Lucite stem with micromesh sanding pads – wet sanding with 1500-2400 grit pads and dry sanding with 3200-12000 grit pads. I wiped the stem down with the damp pad between each set of three pads. 
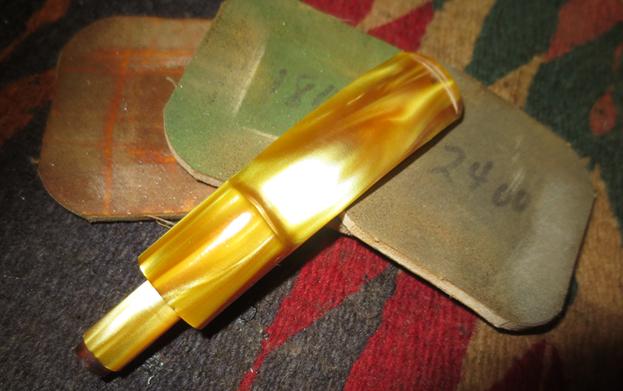
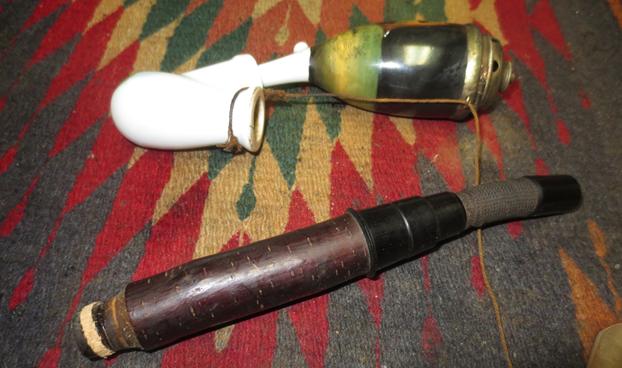
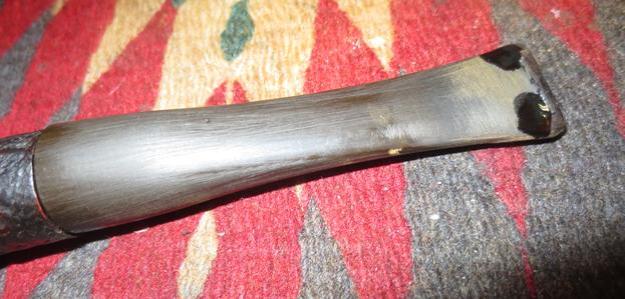
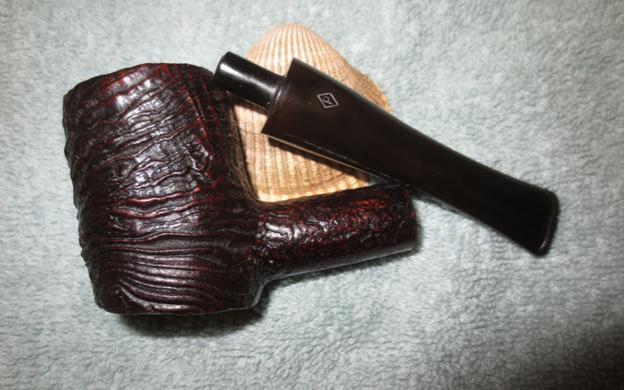
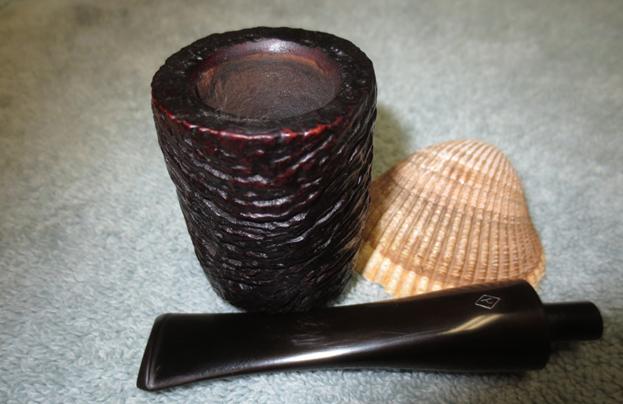
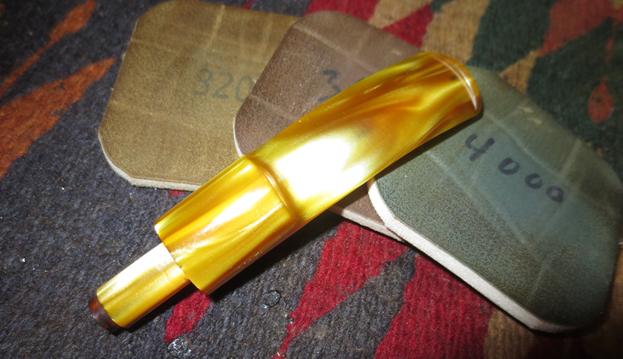
I put the stem on the pipe before taking the photo of the stem after I had finished sanding with the last three pads. The new stain looked really good with the yellow Lucite stem. The contrast worked really well on my opinion.
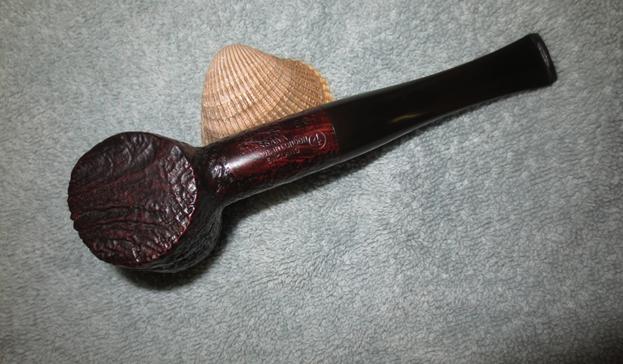
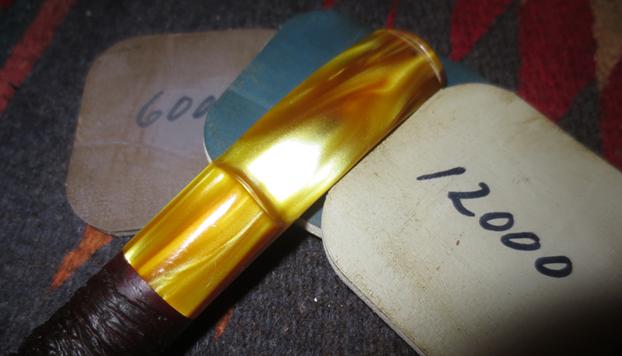
I buffed the stem and bowl lightly with Blue Diamond polish on the buffer. I gave the bowl multiple coats of Conservator’s Wax and buffed it with a shoe brush. I gave the stem multiple coats of carnauba wax. I buffed the entire pipe with a clean buffing pad to raise a shine and finished by hand buffing it with a microfibre cloth to deepen the shine. The finished pipe is shown in the photos below. The dimensions of the pipe are, Length: 5 ½ inches, Height: 1 5/8 inches, Outer bowl diameter: 1 3/8 inches, Chamber diameter: 7/8 inches. The pipe has been thoroughly cleaned and prepared for the next pipeman who wants to add it to their rack. I will be putting on the rebornpipes store shortly but if you want it email me at slaug@uniserve.com or send me a message on Facebook. Thanks for looking.


Recorking and Refurbishing a Ceramic German Wine Pipe


Blog by Steve Laug

This is the second old German style hunters pipe that I was asked to refurbish for a fellow who dropped them by. I wrote about the first restoration – Swiss Walnut Hunters Pipe Marked Lucerne at this link: https://rebornpipes.com/2017/06/03/restoring-and-repairing-a-walnut-lucerne-hunters-pipe/. This one was ceramic and German. It was a pretty pipe. The ceramic bowl was in great shape – dirty inside but undamaged. The silver rim cap and wind cap were tarnished but not damaged. The cherry wood shank extension was in good shape but the end had shrunk and would not stay in place in the base reservoir. There was no cork in the base to keep the bowl in place. In essence the pipe was three unconnected parts held together by a piece of string. The horn stem was worn and had tooth damage.

The scene on the front of the pipe is a hunt scene. It shows two men and a dog poised in the sunlight on the edge of a dark forest. The painting on the ceramic shows the fear on the faces of the hunters and in the hesitancy of the dog at the edge. These old scenes tell a story and leave a lot of room for the pipe man to fill in the details of the story.

When the pipe arrived the bowl and the cherry wood shank were in the wrong portion of the base unit. The rubber portion and horn sections were oxidized and worn. The ceramic was dirty on the surface of the finish, though the painting on the base and the bowl were in excellent condition. The strings that held the parts together were tangled and dirty. I took photos of the pipe before I did any work on it. I photographed it from front, back and side angles to give a clear picture of how the pipe looked when I received it.I took the part apart and photographed all of the parts. The base of the cherry wood shank had been tapered and carved to give it a better fit in the base. It was still too big for the portion that it had been shoved into. The base itself had a deer painted on the surface of the ceramic. From the perspective of the deer the forest was not dark but beautiful and pastoral. The base unit is what makes up the filtering portion of the hunter or wine pipe. A small portion of wine was poured into the bulb at the bottom of the pipe and it acted as a filter for the smoke that was drawn through the airway on the bottom of the bowl and up the shank and into the mouthpiece. Generally these are very dirty with dried debris composed of dried wine and tobacco juices. This base was no exception. I scraped out the bulb with a sharp pen knife and remove the majority of the tars and build up. The photo below shows the results of that work.I filled the bulb with isopropyl alcohol and placed it upright in an old ice-cube tray to soak overnight. I hoped to soften the remaining material in the bulb and finish cleaning it in the morning. The next morning I scrubbed out the remaining grime with pipe cleaners, cotton swabs and more alcohol. When I finished it was clean but stained. The inside of these bulbs is raw ceramic so it discolours easily.While the base soaked in the tray and before I called it a night I decided to prep a wine cork that I had here to use in the bowl side of the base once it was cleaned. I cut off the top portion of the cork and shortened the length to match the depth of the base. I shaped that portion of the cork with a Dremel and sanding drum. I drilled out the centre of the cork with a burr on the Dremel to the size of the bowl end that fit there. The photos below show the progress in the shaping of the cork.When I had finished cleaning out the base the next morning I tried the freshly cut cork in the end where the bowl sat. I sanded off more of the excess until it fit snuggly in the ceramic.I cut off the excess length of the cork and pressed it into place. I cleaned up the drilled opening in the cork with a burr on the Dremel. I shaped it until the opening in the cork was even. I inserted the end of the bowl in the cork and took two photos. While I worked on the stem I found that I was able to take the stem apart a bit more. I cleaned out the inside of the shank parts with alcohol, pipe cleaners and cotton swabs. When I worked on the cherry wood part I was surprised. I cleaned a ridge of tar out of the inside of the cherry and a filter fell out. It was a fascinating piece of work. There was a roll of parchment style paper with a cap on each end and pin through the middle. Each end cap was slotted so that the air could be drawn through the inside of the shank. I was quite surprised to find a double filter system on this pipe – the wine cup on the bottom of the base and the filter in the shank. I scrubbed the paper filter with a cotton swab and alcohol and sanded the brass end caps.I cut a slice of cork and glued it to the end of the cherry wood with clear super glue. I let it dry and then used a Dremel and sanding drum to smooth out the cork and reduce the diameter around the carved end of the cherry wood shank.I cleaned out the cherry wood with alcohol, pipe cleaners and cotton swabs. I took a photo of the parts showing the filter. I polished the horn and rubber end caps on the cherry and the fabric tube. I rubbed them down with Obsidian Oil to raise a shine.I polished the horn and rubber portions of the shank with micromesh sanding pads – wet sanding with 1500-2400 grit pads and dry sanding with 3200-12000 grit pads.I put the filter in the shank and screwed the two parts together. The pipe was beginning to look very good.Now it was time to work on the tooth marks on the top and underside of the stem. I filled the tooth marks in with clear super glue and set the stem aside to dry.I sanded the repair smooth with 220 grit sandpaper and polished the horn stem with micromesh sanding pads – wet sanding with 1500-2400 grit pads and dry sanding with 3200-12000 grit pads. I buffed the horn stem on the buffing wheel to raise the shine and hand buffed it with a microfibre cloth. I polished the silver cap and rim cap with a jeweler’s polishing cloth and wiped down the painted scene on the porcelain. I hand buffed the entire pipe with a microfibre cloth. The finished pipe is shown in the photos below. It is a solid pipe now and it will smoke very well for its owner once he picks it up. I can’t wait to hear what he thinks of his pipes once he has them in hand. Thanks for walking through the restoration with me.

Parker Super Briarbark Cherrywood 809


Blog by Steve Laug

The grain on this Parker is absolutely stunning. The sandblast follows the cross grain around the bowl with a deep, craggy blast. The shape is a classic poker or Cherrywood. It is stamped on underside of the shank with the brand name Parker over Super in a Diamond over Briarbark over Made in London England. Next to the shank/stem union it’s stamped with the shape no. 809 and a circled 4 designating the bowl size. There is a Diamond P on top of the stem. The finish is in decent shape with a medium to dark brown stain. When I received the pipe it had a thick cake in the bowl and the lava had overflowed onto the rim filling in the grooves of the sandblast. It is hard to tell if there was rim damage as it is so caked and encrusted on the rim. The stem had calcification from a softee bit on the first inch from the button forward. There were deep tooth marks on top & bottom side of the stem near the button. The following four pictures show the general condition of the pipe when I brought it to my work table. The next photo shows the rim top and the thickness of the cake. The cake was very hard and it would take some serious work to remove it from the bowl. It also looked to me like there was rim edge and bowl damage on the front left side. Once I had reamed it I would know for sure. (Just a side note – this is where I really appreciate my brother’s clean up work. I really like working on pre-cleaned pipes.)The cake was very hard. I have found that on some of these older pipes the tobacco must have been significantly different as the cake is like concrete whereas on the newer tobaccos it is never this hard. Could it be just the fact that the pipe has been sitting for a long time? I reamed it with the PipNet reamer starting with the smallest cutting head and working my way up to the third head. I used the Savinelli Fitsall Pipe Knife to work on the cake as well. It took a lot of time to get the pipe cleaned out. I probably spent over 45 minutes just reaming this bowl. The second photo below shows the bowl at the end of the 45 minutes of work. Still work to do on it as you can see the remnants of the cake on the walls. I used the Savinelli Fitsall to clean it up further.I picked at the lava on the rim with a dental pick to loosen the rock hard buildup and a brass bristle brush to clean off the debris once I had it loosened. The photo below shows the cleaned out bowl and the cleaned rim. Notice the damage to the front left inner edge of the rim.With the bowl cleaned and reamed I turned my attention to the internals. I scrubbed out the mortise and the airway in the shank and the stem with pipe cleaners, cotton swabs and alcohol. It took some coaxing with the swabs and cleaners to finally get the internals free of buildup and debris.The stem had a thick calcified buildup on the first inch from the button forward on both sides. This too was rock hard. I sanded the calcification off the surface of the vulcanite. Doing so revealed the tooth dents on the surface of the both sides of the stem near the button.I “painted” the stem with a Bic lighter flame to raise the tooth dents as much as possible. While they came up significantly some of the edges were sharp and the dents would rise no more. I wiped the stem down with some alcohol to clean out the dents and filled them in with black super glue. I set the stem aside so that the repairs would cure and headed off to work.When I returned in the evening the patches had cured. I sanded the repairs with 220 grit sandpaper and sharpened the 90 degree angle of the button with needle files. I sanded the stem surface some more to remove the oxidation.I decided to take a bit of time and work on the bowl so I set the stem aside for a while. I touched up the worn spots on the rim and on the shank end with a dark brown stain pen. The colour was a perfect match to the rest of the bowl and it blended in very well. I waxed the briar with Conservator’s Wax. It is a soft rub on past that work well with sandblast and rusticated finishes. I buff it with a shoe brush and I am able to polish even the deep grooves in the grain so that no wax sits in those and hardens, dulling the finish. I lightly buffed the bowl with a soft microfibre cloth to raise the shine. The photos below show the bowl at this point in the process. I decided to polish the stem using a different method than my normal routine. I sanded it with 1500-2400 grit micromesh sanding pads to remove the scratching in the vulcanite. I use a product that I have used before called Before & After Pipe Stem Deoxidizer to work over the remaining oxidation. I repeated the process until the vulcanite was clean. I polished it with the Before & After Pipe Polish in both Fine and Extra Fine grits. I rubbed the stem down with a soft cotton pad to remove the polishing compound and buffed it with Blue Diamond on the buffing wheel. I rubbed it down with a coat of Obsidian Oil and set it aside to dry.I used an artist’s fine bristle brush and white acrylic paint to fill in the Parker Diamond P stamp on the stem. I wiped it down afterwards and lightly buffed it with Blue Diamond to remove the excess paint.I buffed the pipe and stem with Blue Diamond on the buffing wheel – with a light touch on the bowl. The finish shows up beautifully, the sandblasted ring grain standing out front. It is one of those rugged blasts that are a tactile wonder as it heats up during a smoke. I gave the bowl another coat of Conservator’s Wax and the stem multiple coats of carnauba followed by a buff with a clean buffing pad. I hand buffed the bowl with a shoe brush and then with a microfibre cloth to deepen the shine. The finished pipe is shown in the photos below. The dimensions of the pipe are Length: 6 inches, Height: 2 inches, Outer diameter of the bowl: 1 1/2 inches, Chamber diameter: 7/8 inches. The contrast of the dark brown and a medium brown that shines through give the finish a rich patina. The bowl has been cleaned and the entire pipe is ready to smoke. The stem is in great shape. The tooth marks have been removed though there is slight scratching on the vulcanite. It is a beautiful pipe, just a little big for my liking or I would hang on to it. I will be putting it on the rebornpipes store soon. If you are interested in adding it to your collection email me at slaug@uniserve.com or send me a message on Facebook. Thanks for looking.