Blog by Steve Laug
Not too long ago, I wrote a blog about a virtual pipe hunt that my brother and I went on. He was visiting an antique mall in Montana and I was at home in Vancouver, Canada. We met at the mall via Apple Facetime and he was the hands and feet of the exercise. He happened upon a large consignment of CPF pipes as well as others from around the same vintage – late 1880s through early 1900s. Here is the link to that blog, https://rebornpipes.com/2017/04/26/a-virtual-pipe-hunt-a-new-way-to-experience-the-joy-of-a-pipe-hunt/.
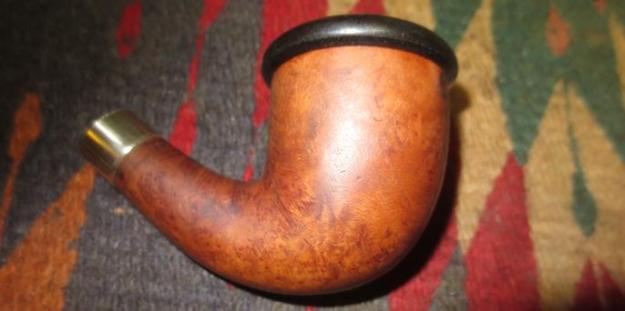
I worked on the older alternative wood pipe with a spiral shank and horn stem. It was the first pipe I worked on from the lot we found that day. I wrote about the restoration of the pipe in an earlier blog; https://rebornpipes.com/2017/06/24/bringing-an-older-1890s-era-spiral-shank-horn-stem-billiard-back-to-life/. The next pipe on the worktable was a CPF that was different from any others that I had ever seen or worked on before. It was a briar calabash with a black Bakelite screw bowl/cup. The shank was darkened and appeared to have originally had a band that had been lost somewhere along the way. That is pretty common on these old CPF pipes. The stem was amber and needed some work to bring it back to usefulness. The pipe is stamped on the left side of the shank with the words COLON in an arch over the CPF logo in an oval. Underneath that, is stamped French Briar in a reverse arch thus encircling the CPF logo. There was no other stamping on the right side or underside of the shank. There were two sandpits/flaws in the briar that I would need to address but it was a beautiful little pipe.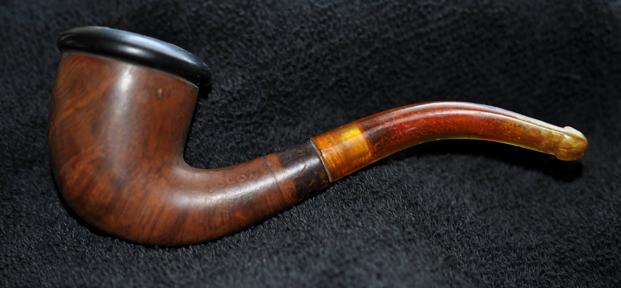 I did a bit of research on Google to see if I could find any information on this particular CPF pipe. There was not much information on that brand and some of the info was almost comical in that the key word in every listing was “COLON”. You don’t need me to spell out what kind of listings were found. The one thing I did find was a photo that someone pinned on Pinterest. Here is the link; https://www.pinterest.com/pin/495255290248000765/ . I have included the photo below that was posted there. The label on the pinned photo read: TOBACCO PIPE, CIRCA 1915, “COLON” BOWL, French Briar, C.P.F. It is the same pipe as the one on my table but mine has better grain in the briar bowl. Mine also came with a stem.
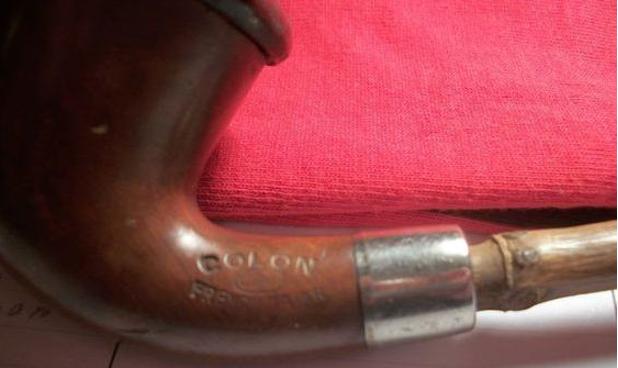 My brother took photos of the pipe (including the first one above) before he started to work on it and clean it up. When he sent me these photos, I was really interested in getting my hands on it and cleaning it up. I could not wait to see it up close.
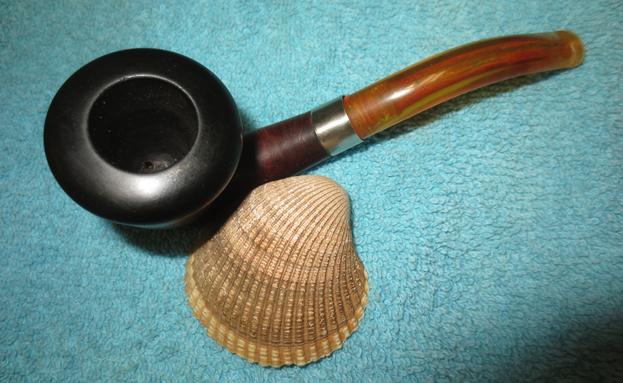
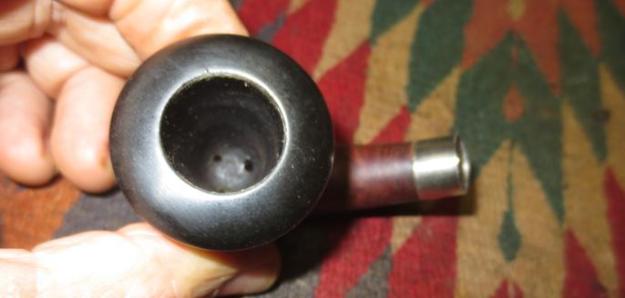
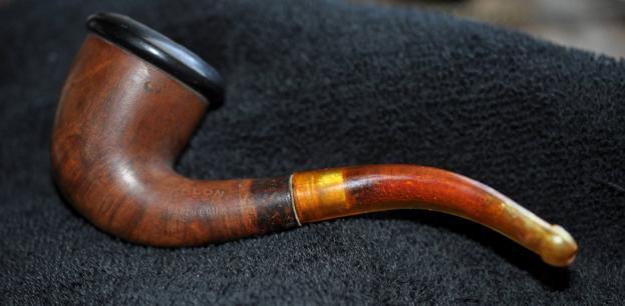 Jeff’s photos showed the condition of the pipe really well and gave the reader some idea of what it looked like from a variety of angles. The top view of the bowl showed the thick cake that had formed in the Bakelite bowl and the lava that overflowed on to the rim top.
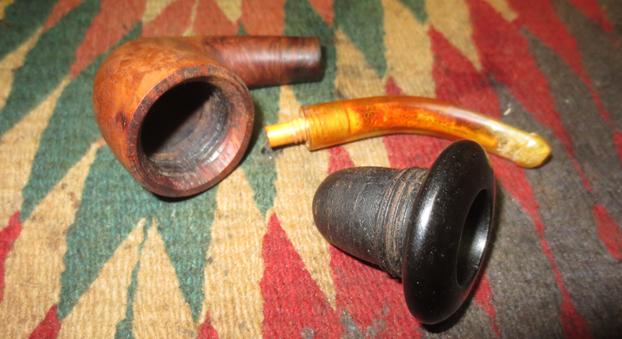
 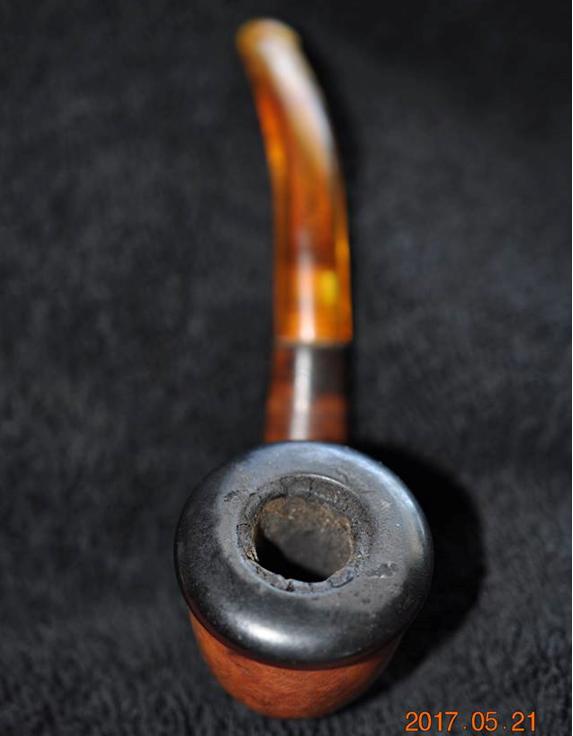 The next three photos show the Bakelite bowl and rim top, the bowl unscrewed from the briar bowl and the underside of the Bakelite bowl. The cake is very thick and looks hard. Once the bowl is out of the base it is amazingly clean considering the condition of the Bakelite bowl. The underside of the Bakelite bowl is also clean. It has three holes that carry the smoke from the bowl into the base, shank and stem to the mouth of the smoker. The threads in both are intact.
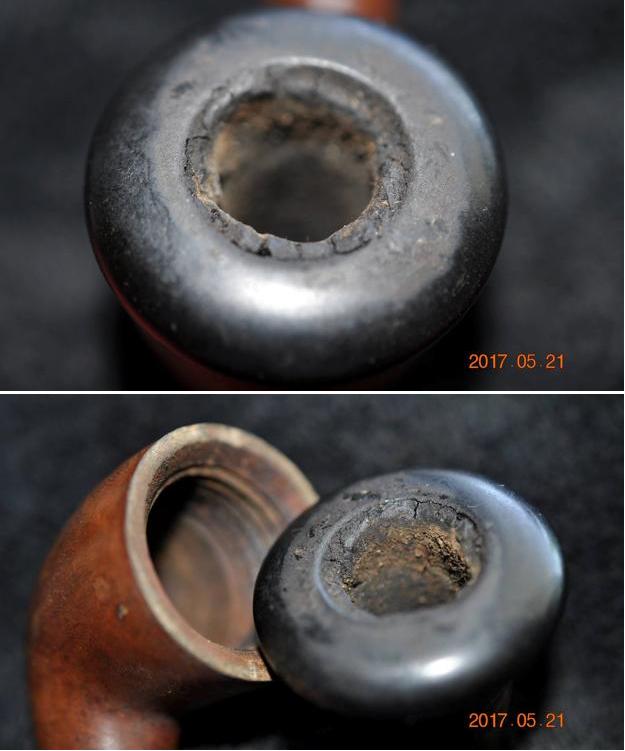
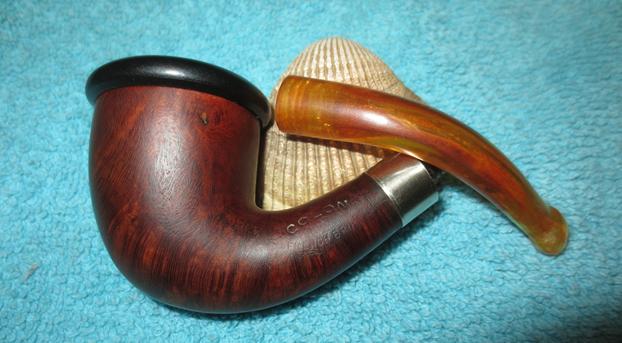
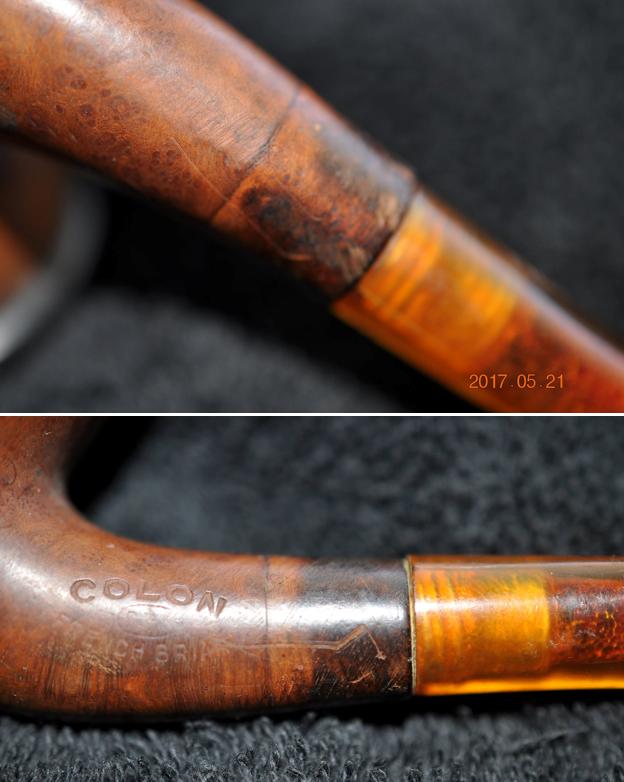
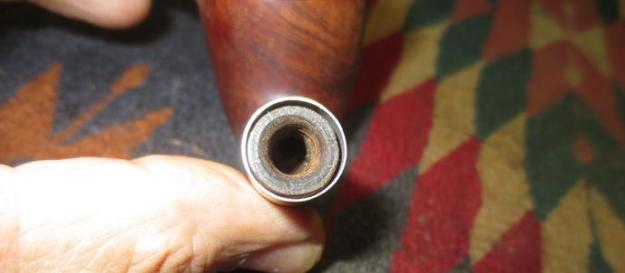
 He also included some close up photos of the shank and the stamping. He has a much better camera than I do so the stamping photos clearly show the condition of the stamps – they are worn but readable with a lens and a light. The marks on the shank appear to be from the time that the band was pried off the shank. Looking at it under a lens there are no cracks in the shank.
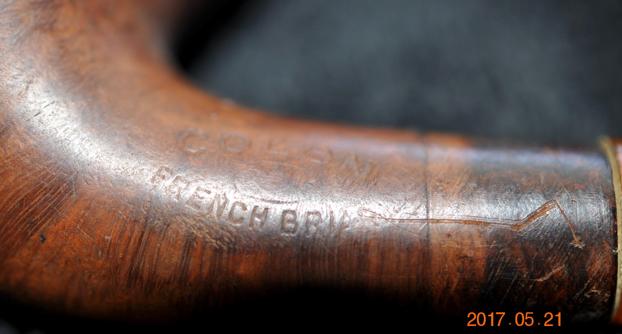
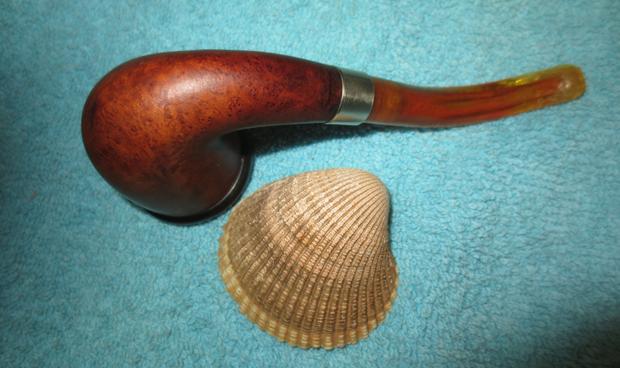
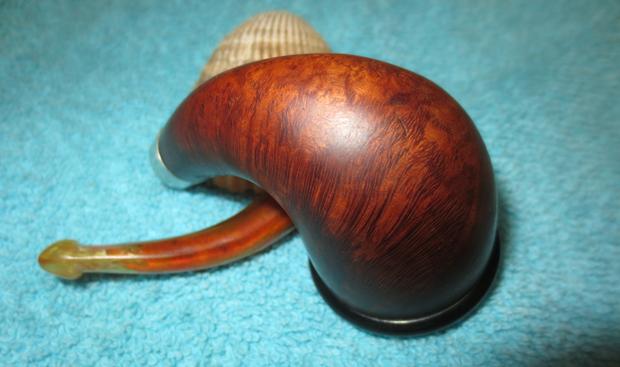
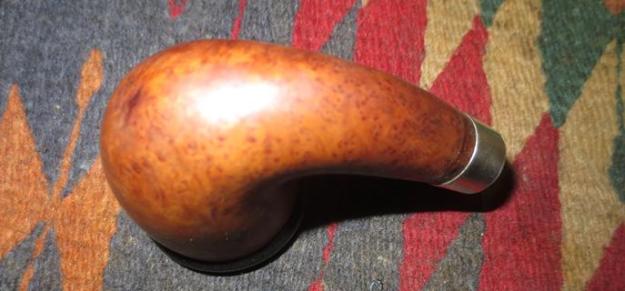
 He sent along a photo of the underside of the bowl as well. It is a pretty piece of briar.
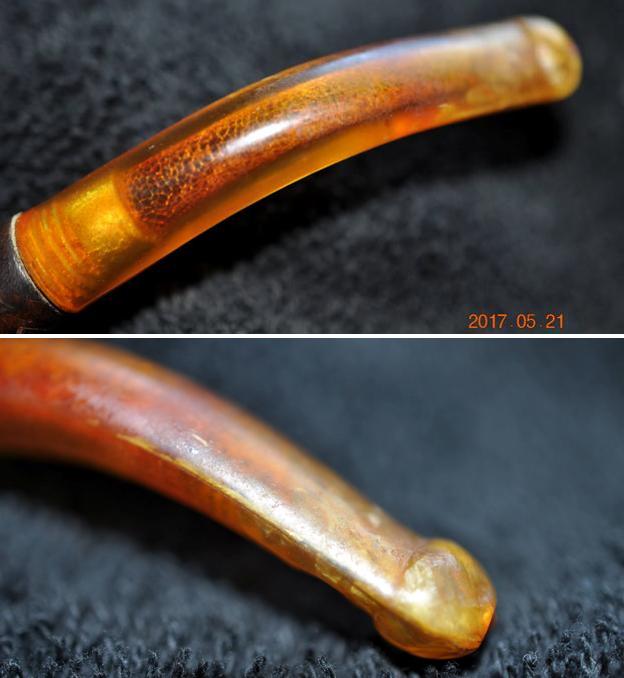
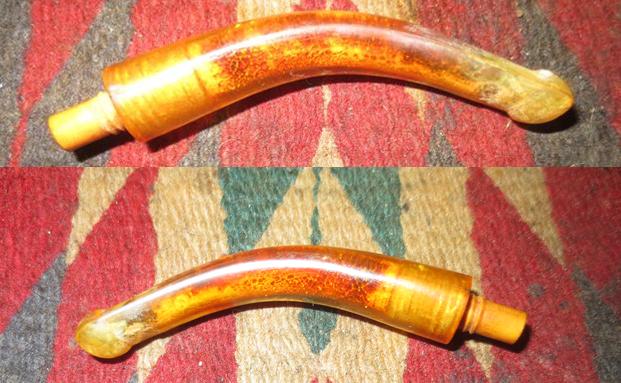
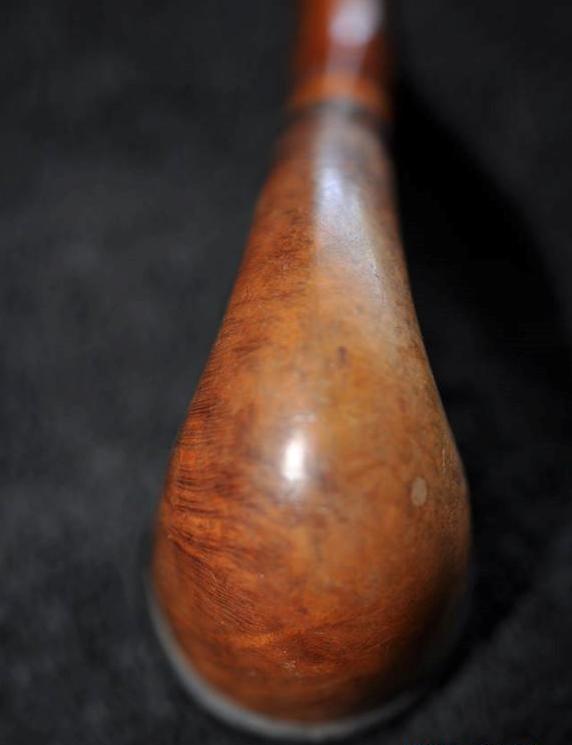 The photos of the condition of the stem were telling in many ways. There was a lot of tooth chatter and tooth marks on both the top and underside of the stem near the button. There were also fracturing and splintering along the edges that helped me conclude that the stem was amber. The next photos show the stem from a variety of angles including a photo of the orific airway in the button. The stem had a buildup of tars and oils on the inside of the airway that would need to be removed.
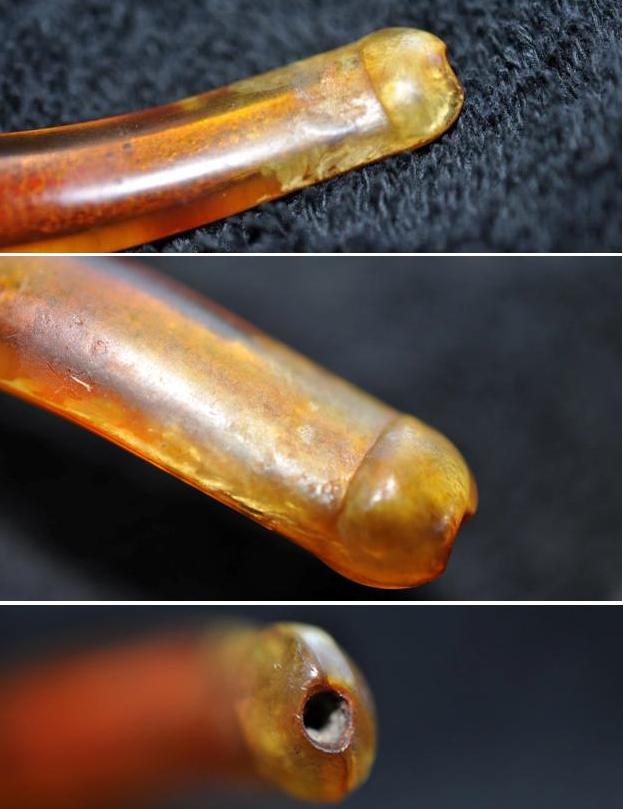
 I reread what I had written regarding the history of the CPF or Colossus Pipe Factory brand before I started the restoration work on this pipe. I am glad I collected the data in one place because I would otherwise have had to redo the work each time I work on a CPF pipe. Here is the link to the history of the brand. https://rebornpipes.com/2013/04/14/some-reflection-on-the-historical-background-on-cpf-pipes/ I have included a few choice paragraphs that help with the identification and the dating of the brand. You can read the entirety at the above link but here is a summary to connect this pipe to the history of the brand.
“One of the secondary hobbies to pipe refurbishing that I enjoy doing is to research the history of a particular brand or make. In a recent EBay lot I bought there were 3 pipes that were stamped with the CPF logo – CPF in an oval with the word FRENCH stamped in an arch above the oval and the word BRIAR stamped in an arch below the oval. I had heard that the CPF stood for a variety of names from Consolidated Pipe Factory to Colossus Pipe Factory and even Chesterfield Pipe Company. There was a wide range of conflicting information available on the websites and forums that I read while looking into the brand…”
“…CPF in the logo stands for Colossus Pipe Factory. The brand was purchased by KB&B sometime between 1884 and 1898 and it continued until 1915. That time frame gives help in dating some of the older CPF pipes you or I might find. It can be said that prior to the dual stamping it is fairly certain that the pipe is pre-1884 to 1898. After the dual stamping it can be placed post 1898 until the closure of the brand line in 1915. CPF made beautiful pipes. I believe Sam Goldberger was correct in his assertion that the carvers who made the pipes were of European training and used the classic shapes and well-aged briar.”
Armed with that information I was able to narrow down the period that this was made. Since the pipe bears only the CPF logo, I think that it is safe to say it was made before the time of the buyout by KB&B in 1898. That would mean that it is dated somewhere between 1884 and 1898. From 1898-1915 all of the pipes that came out of the factory bore a dual CPF/KB&B stamp. The fact that this one does not have the dual stamp further solidifies the date of manufacture as being from the 1880s to the late 1890s. This information goes against the information I included with the Pinterest photo above which identified the pipe as being made in 1915. Like I thought when I took when I first saw it – this is an old pipe.
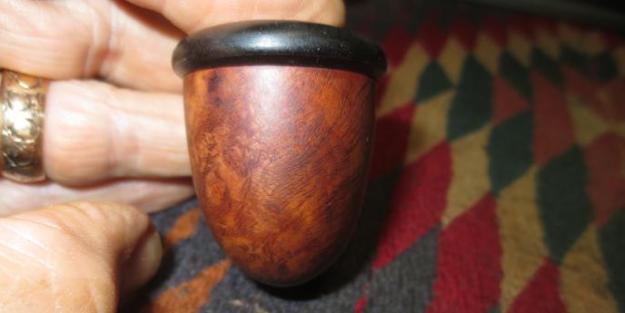
My brother did a great job cleaning up the pipe – bowl, base and stem. He reamed the bowl with a PipNet pipe reamer and a Savinelli Fitsall Reaming Knife and removed all of the cake. He cleaned the Bakelite with soap and water and scrubbed it with a tooth brush. He scrubbed the briar exterior with Murphy’s Oil Soap to remove the grime and grit. He cleaned the interior of the briar bowl and the mortise and shank with pipe cleaners, cotton swabs and alcohol. The stem was harder. He cleaned out the majority of the oils and tar build up with pipe cleaners and a little alcohol. He sent it to me to finish up but it was pretty decent. I took the next four photos of the pipe to show what it looked like when it arrived in Vancouver.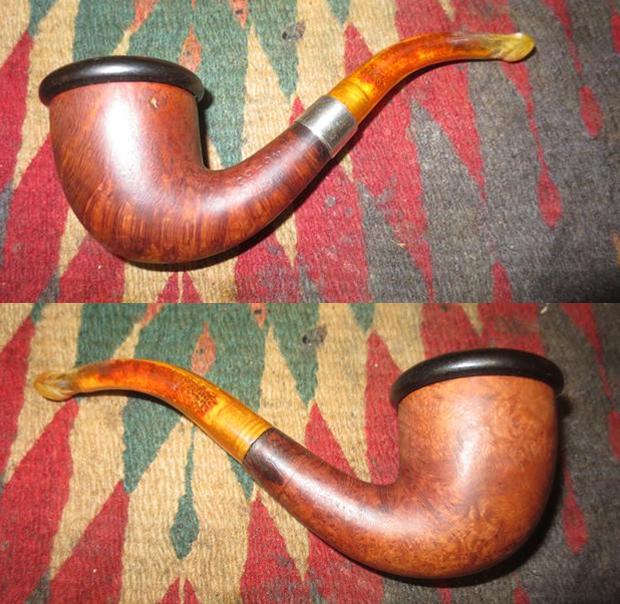
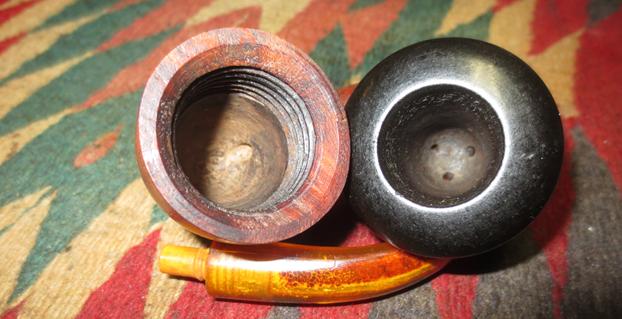
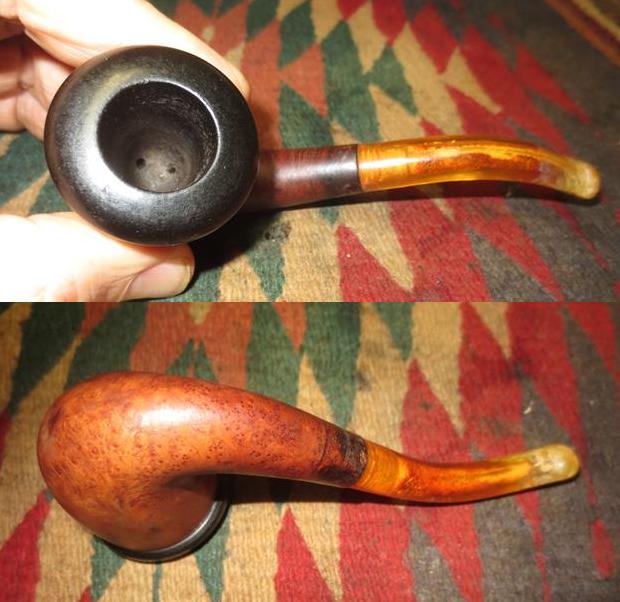 I took a close up photo of the bowl and the rim top to show the difference between what it looked when he brought it home and what it looked like when I got it. I also took the bowl apart and took two photos of the parts.
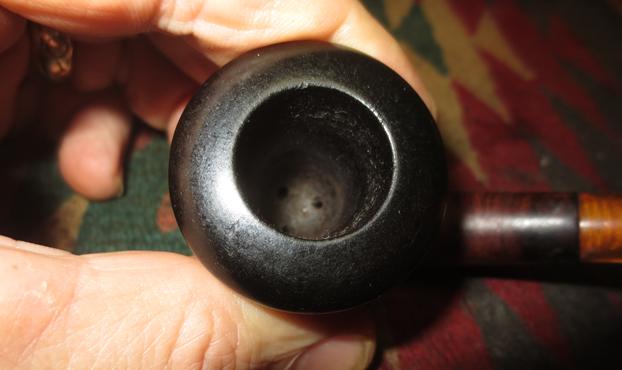
 I took photos of the stem to show the condition from all angles. He got a lot of the grime out of the airway but there was still a lot there that needed to be cleaned out. I would need to remove the threaded tenon to do justice to the airway cleaning.
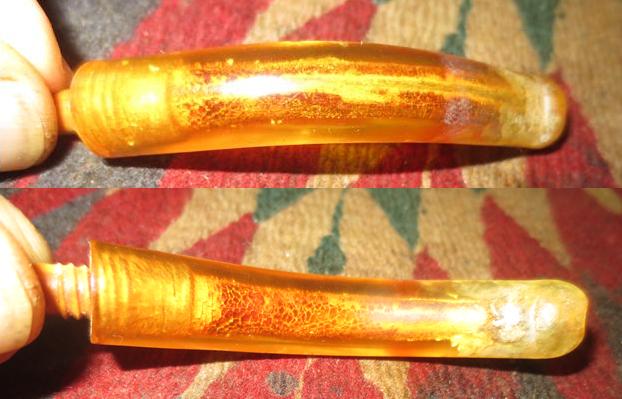
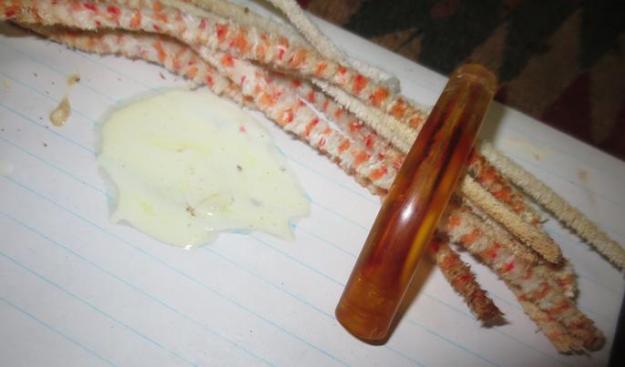
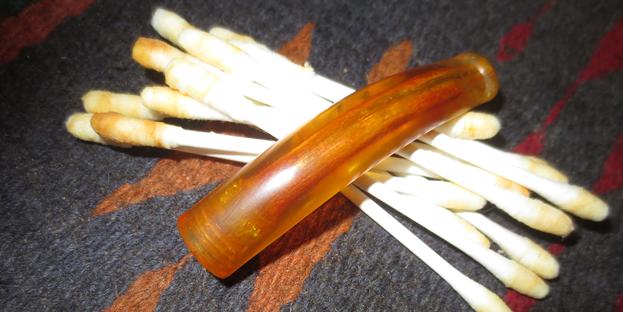
 I ran some alcohol, pipe cleaners and cotton swabs through the shank and the bowl to double check on the cleaning and it was really well done. The inner beveled edge of the bowl looked really good. I removed the tenon and scrubbed the stem with pipe cleaners, cotton swabs and Soft Scrub Cleanser. I rinsed it with warm water to remove the soap. I was able to get much more of the tars and oils out with the Soft Scrub.
 I used a needle file to define the edge of the button and make the angle sharp once again. I used the file on both sides.
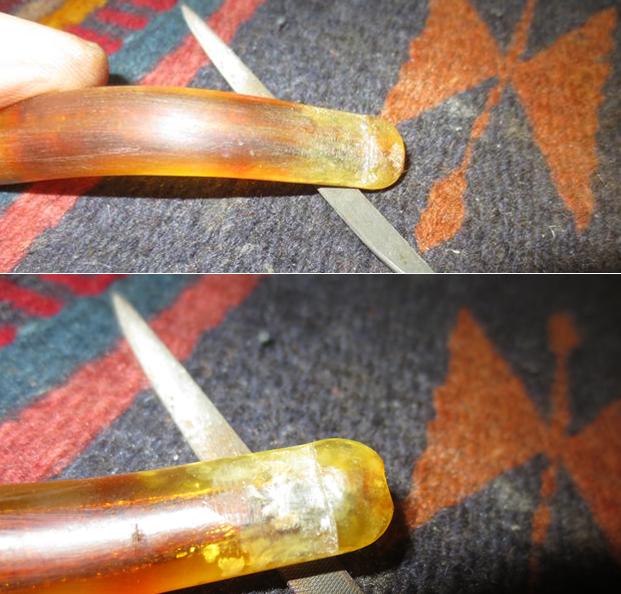 I lightly screwed the bone tenon in place in the stem. I would adjust it once I was ready to put the pipe back together again.
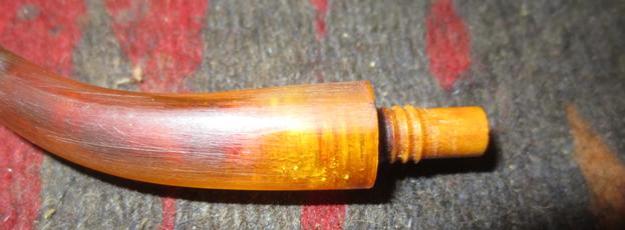 I went through my bands and found a nickel band that would fit the shank. I sanded the shank to remove the darkening, nicks and dents and prepped the surface for pressure fitting the band. I used a Dremel and sanding drum to grind back the band width to make it fit the depth of the shank that I wanted to cover. I did not want the band to extend over any of the stamping.
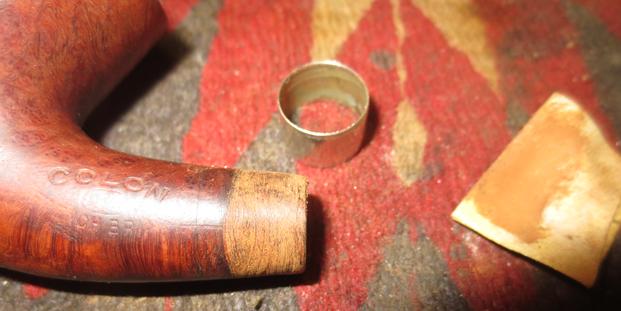 I heated the band and pressed in place on the shank. I used the Dremel to grind the band down further and sanded the edge with 1200-2400 grit micromesh to smooth out the sharp edge. I filled in the sand pits on the bowl with clear super glue and briar dust and sanded it in to blend with the rest of the briar. I filled in the nicks on the top of the Bakelite with clear super glue and sanded it smooth once it dried. I needed to buff both bowl and cup but it definitely looked better. I screwed the bowl in place on the base and took the following photos.
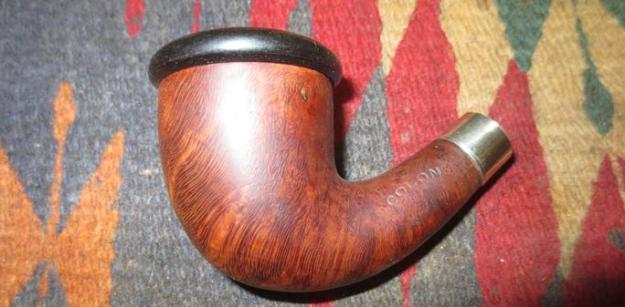
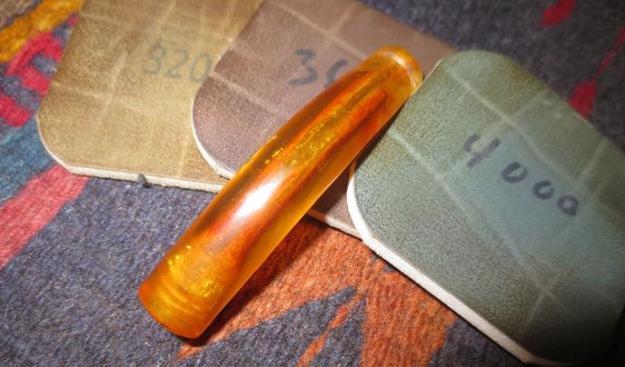
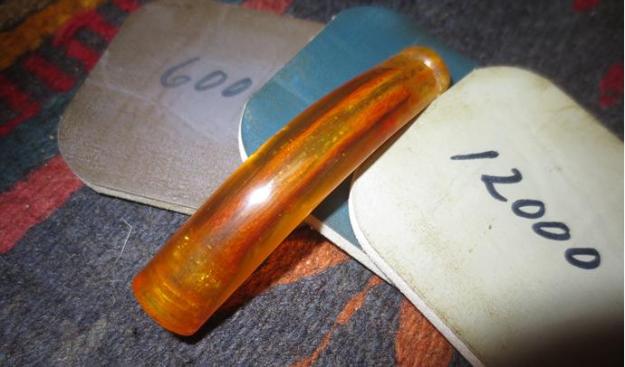
 I polished the stem with micromesh sanding pads – wet sanding it with 1500-2400 grit pads and dry sanding with 3200-12000 grit pads. I rubbed the stem down with Obsidian Oil after each grit to remove the sanding dust and give me some more bite when I sanded it with the next grit of pads.
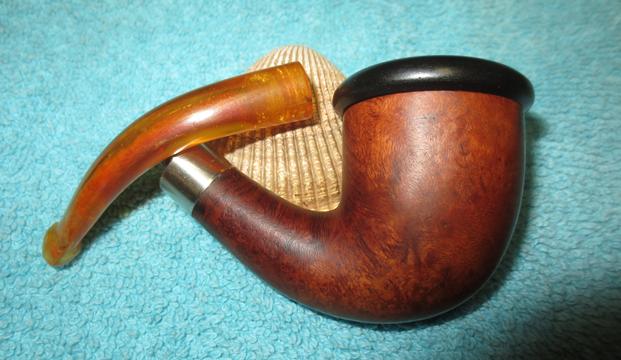
 I polished the briar bowl and the Bakelite insert cup with micromesh sanding pads – wet sanding with 1500-2400 grit pads and wiping it down with a dab of olive oil after each pad. I touched upt the gold leaf in the stamping with some European Gold Rub’n Buff. Once I finished I buffed the bowl and insert with Blue Diamond on the buffing wheel to polish it and buffing the stem separately. I waxed them separately as well with Carnauba wax. I buffed them with a clean buffing pad and hand buffed them with a microfiber cloth. The finished pipe is shown in the photos below. I really like the finished look of the pipe.