Blog by Steve Laug
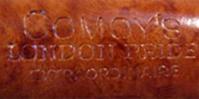
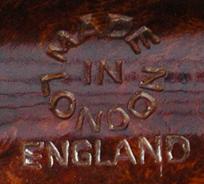
Late in the summer of 2017 I received an email on rebornpipes blog from Barry in Portland, Oregon. He wanted to know if I would be interested in purchasing his Dad’s pipes. I have finished three of them so far, a 1939 Dunhill Patent Shell Bulldog, a Comoy’s Grand Slam Zulu and a Comoy’s London Pride Liverpool. After I finished the second pipe Barry wrote me an email that gave me a little more information on his Dad and incidentally on himself as this pipe was one of his own. Here is what he wrote me.
Steve, — Another great restoration and writing to go with it. I appreciate these pipes more watching the work it takes to get them in good condition.
Your (mine?) floral words about my father are perhaps a little deceptive. Inside that man was a lifelong Bolshevik. Who yearned for the revolution and settled for the party of Roosevelt. His parents were born in the Russian Empire (Ukraine), his father having escaped after brief detention during the 1905 failed uprising and to avoid conscription. His father was gruff, a bit crude and all politics. Given those origins he made the best of himself, had tons of friends and would have been a great social worker.
I misled you on the origin of his pipe conversion. It seems clear based on the 1939 pipe that he smoked a pipe in college, returning to them after the 1964 Surgeon General ‘s report on the danger of cigarettes. After that he only reverted to cigarettes at moments of great stress, a death, business setback or a fight with his wife.
He gave me two pipes in college – the GBD bulldog and a “Parker”. The latter I used to smoke a few times but found I was allergic to it, fortunately. The GBD was to get girls with an MGB, a Harris Tweed sport coat with leather elbow patches and jug wine. Didn’t work. Stanford women were in revolt and saw through the pretense. I put both pipes away for nearly fifty years and now they are in your good hands. — Barry
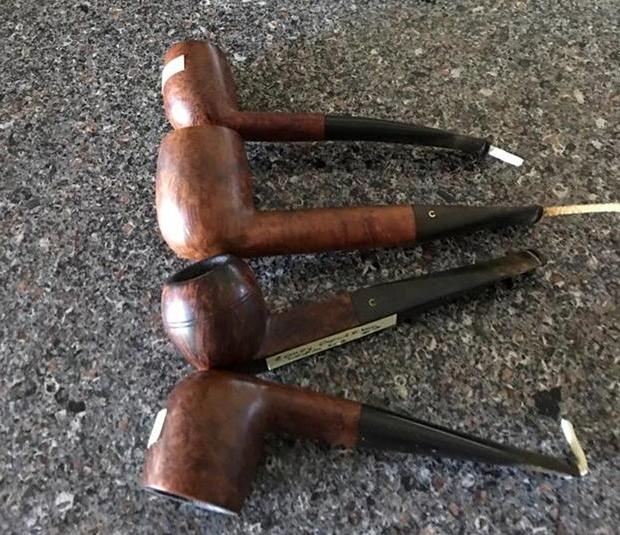
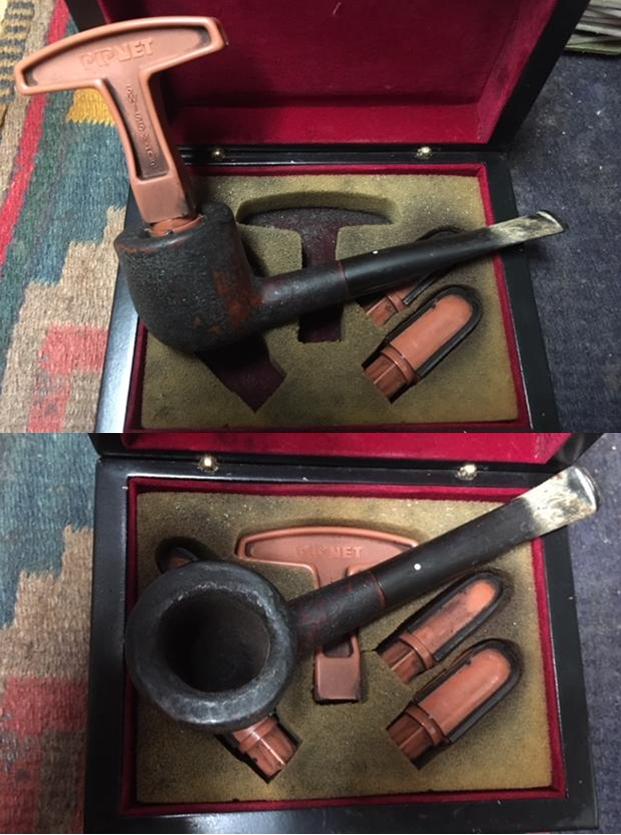
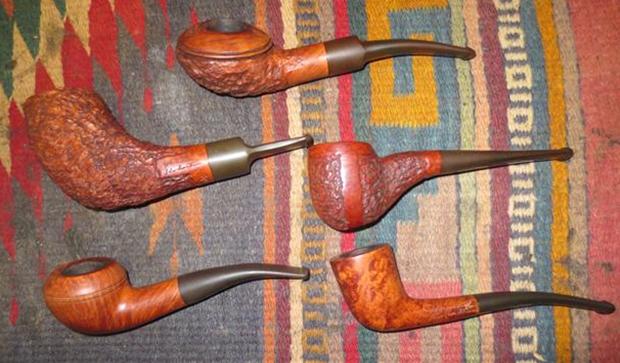
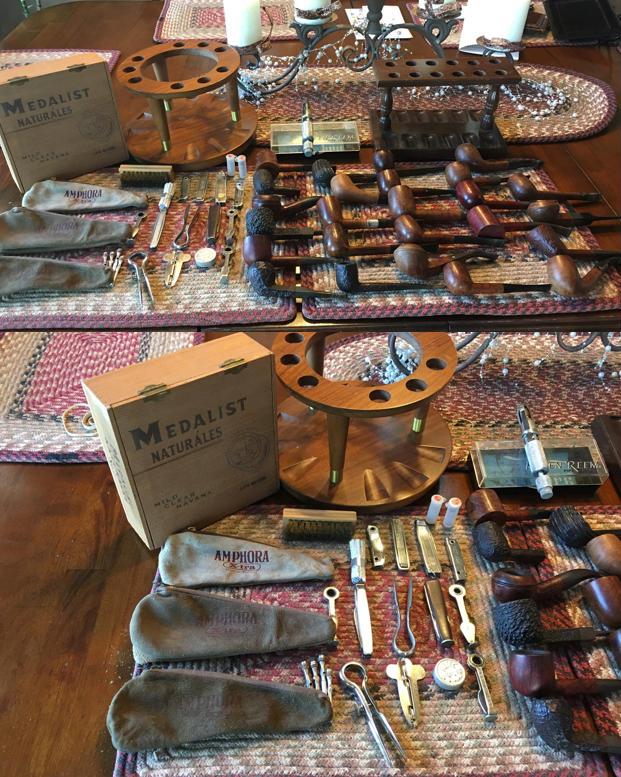
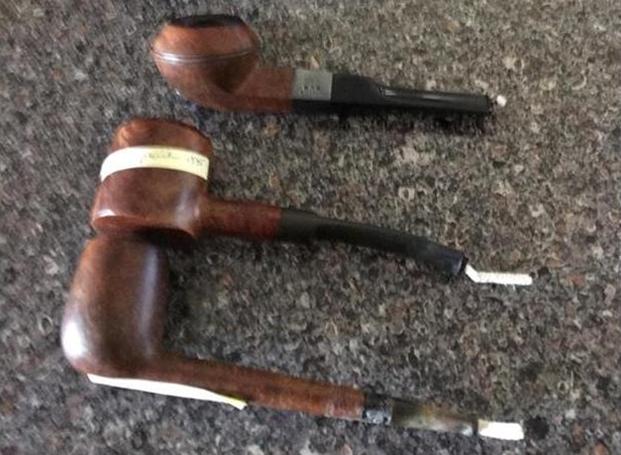
Barry and I corresponded back and forth and concluded our deal. I became the proud owner of his Dad’s pipes. The inventory of the pipes he would be sending included some real beauties – Comoy’s, Parkers, Dunhills and some no name brands. They were beautiful and I could not wait to see them. I had him send them to Jeff where he would clean them up before I received them. Jeff took some photos of the lot as he opened the box. Each pipe was individually wrapped with bubble wrap and taped to protect them. There were 25 bubble wrapped packages and a lot of pipe accessories included – pipe racks, reamers, scrapers and Comoy’s filters and washers. There were pipe pouches and a wooden cigar box that held all of the accessories and reamers. There was a boxed KleenReem pipe reamer that was virtually unused. Jeff unwrapped the pipes and took pictures of the estate showing both the pipes and the accessories. Barry had labeled each pipe with a sticky note. It was an amazing addition to my pipe and tool collection. 


 The next pipe I chose to work on from the collection was GBD Squat Bulldog, the first of three GBD pipes. This pipe had the original stem and was in good condition. It was stamped on the left side of the shank GBD in an oval. On the right side of the shank it read London over England with shape number R9019. I was unfamiliar with the / shape number designation so I looked it up on a GBD Shape Number Chart and found that it was not listed on the charts that I could access on the web. I would call it a squat Bulldog.
I wrote an email to Al Jones (upshallfan) to see if he could throw any light on the shape number on the pipe. Al loves GBD pipes as much as I do and is compiling a shape chart so I thought he might give some insight on the R shape and potentially on the 9019. Here is what he wrote back.
…The R code pipes are oddballs with shape numbers I’ve never seen duplicated elsewhere. Like my 1937 R9249. It’s clearly the 9242 shape, who knows what the R code means. I’ve never seen R code shapes in any literature, so they may have been one-off’s. They all seem to have silver hallmarked bands. I speculate that perhaps the R shapes were given to special pipes pulled from the production line for silver work. Sadly, that is all lost to time… – Al
It seems that the information on the shape and R code is not to be found at this time so I decided to move ahead with the shank band. It was a Sterling Silver Band with the GBD oval logo over three hallmarks over MR&Cie. I looked up the history of GBD pipes on Pipedia and found this (https://pipedia.org/wiki/GBD) information.
In 1850 three gentlemen got together in Paris to establish a firm dedicated to the fabrication of Meerschaum pipes – a courageous step in politically restless times. Ganneval probably came from the area of Saint-Claude where he had learned making wooden pipes. Bondier’s family obviously came from Paris and had immigrated in 1789 to Geneva. He himself had worked as a wood turner in the clay and china pipe industry in and around Saint-Claude making stem extensions etc. Donninger was an Austrian or Swiss and had worked in Vienna, the world’s center of the Meerschaum pipe. They agreed on the acronym GBD selecting the initials of their surnames. Bondier survived his partners for nearly 30 years. Their places were taken by others. Hence the property of GBD and therewith the company’s official name changed several times.
Ganneval, Bondier & Donninger
Bondier, Ulrich & Cie.
Bine, Marechal & Cie. and finally
A. Marechal, Ruchon & Cie.
Meanwhile the GBD name was well established and thus retained. August Marechal and Ferdinand Ruchon led the firm into the 20th century. They were in charge of the company for more than 50 years…
GBD became a British company soon after the turn of the century! In 1902 Marechal and Ruchon sold GBD to A. Oppenheimer & Co. in London. Charles Oppenheimer had founded this successful trade business in 1860 as an import-/export house. His brothers David and Adolphe and brother-in-law Louis Adler soon joined him. Adolphe took over when Charles went to Germany as British ambassador. Briar pipes were among the first products traded. The business relation to GBD in Paris began as early as 1870. Being the most important customer in the English speaking world, Oppenheimer & Co. were designated as sole distributor for Great Britain, the USA and Canada in 1897. Especially Adolphe Oppenheimer had a burning interest in the pipe business, and Louis’ son James Adler shared that. He should play the most important role in the amicable merger of GBD. A. Marechal, Ruchon and Cie. in Paris was now Marechal, Ruchon & Co. Ltd. (see Marechal Ruchon & Cie. page) – a British firm with four directors: Adolphe Oppenheimer and James Adler had their seat in the head office in London while Auguste Marechal and Ferdinand Ruchon went on leading the GBD factory in the Rue des Balkan in Paris, which was considerably extended and modernised. Ruchon acted as CEO.
I knew from the above history that the pipe was made before 1902 in that Marechal and Ruchon sold GBD to Oppenheimer & Co. in London at that time (I have marked that part of the text in bold Red above). Now I needed to see if I could narrow down the date on the pipe. Since there was a Sterling Silver Band on the shank I figured that close examination would give me clues in the form of hallmarks in the silver. This particular band had three hallmarks that helped to identify the city of manufacture, the composition of the band and the date of the pipe. From left to right the hallmarks are as follows: the first is an “A”, followed by a prancing Lion, and the final one is what looks like the head of leopard. Here is a closeup photo of the hallmarks.
I did some research on the British Silver Hallmarks website to see if I could pin down a date and information on the meaning of the hallmarks (http://www.925-1000.com/british_marks.html). The first thing I learned was that the Lion (the second hallmark) indicated that the band was .925 Sterling Silver (See A in the photo below).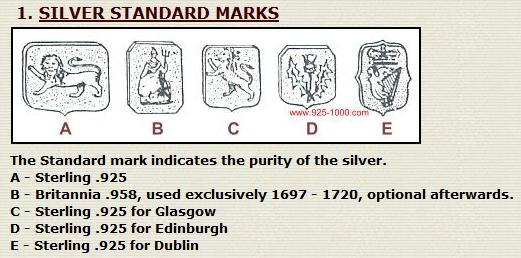 The last hallmark is a city mark and in this case is identical to the second leopard’s head in the photo below. That told me that the band was made in London and since it was the crownless leopard’s head I knew that the pipe was made between 1822- and the present.
 Now I knew that the band identified the pipe as made in London and the band was .925 Sterling Silver. I still needed to identify the date from the first hallmark – the letter “A”. I clicked on the link in the above photo that took me to a chart with the date letters. I have included that here for your use. It appears that the year that the pipe was made was 1876 as the letter “A” looks the most like that particular hallmark. I have put a red box around the date and hallmark in the photo below.
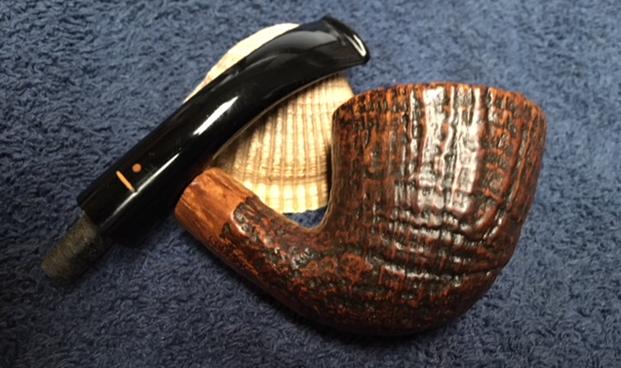
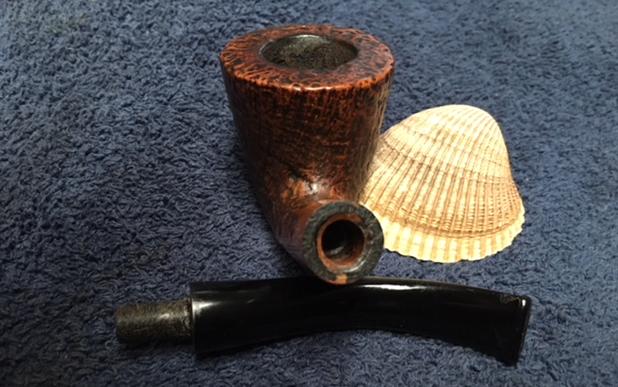
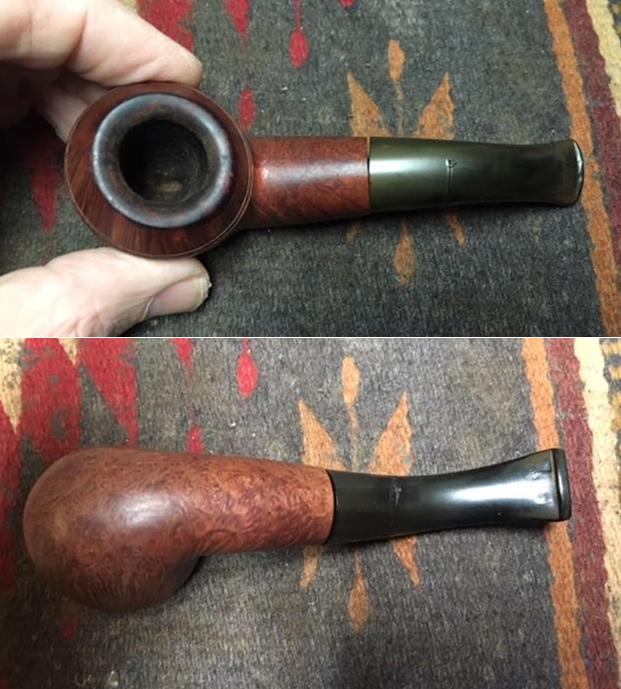
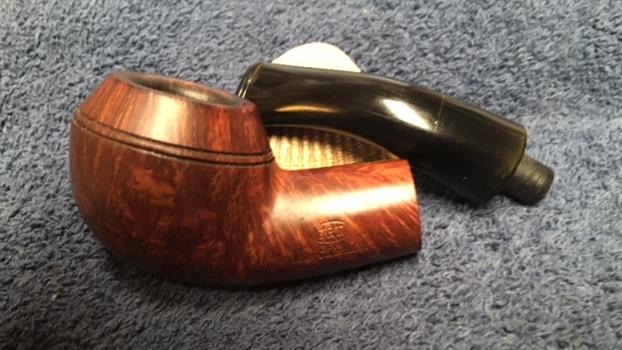
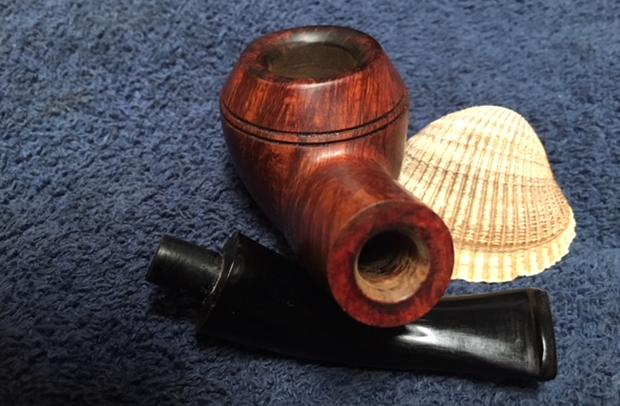
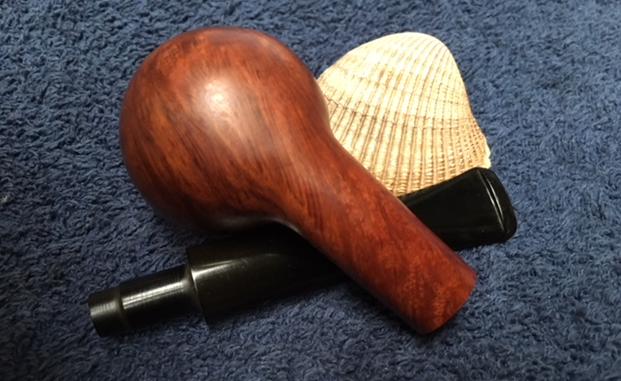
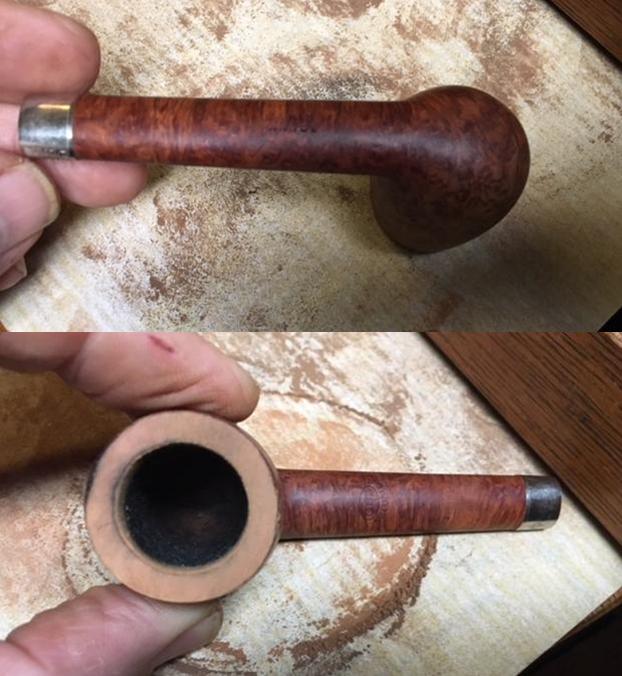
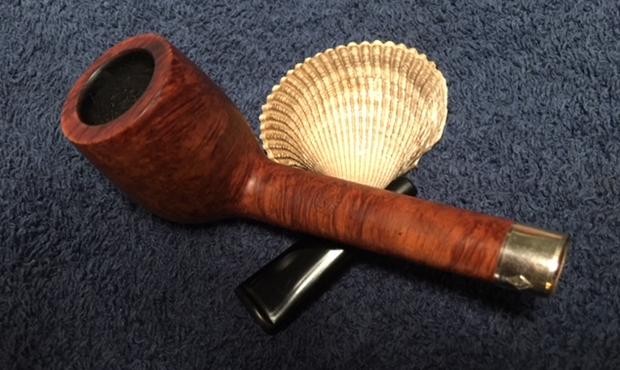
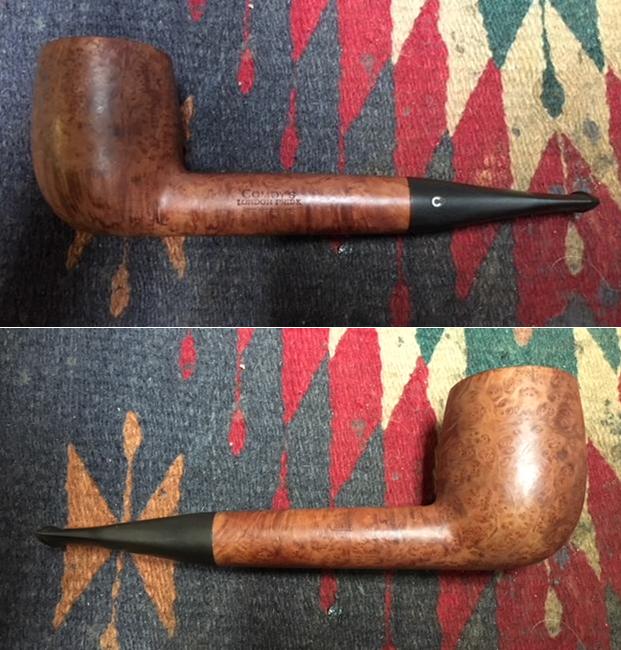
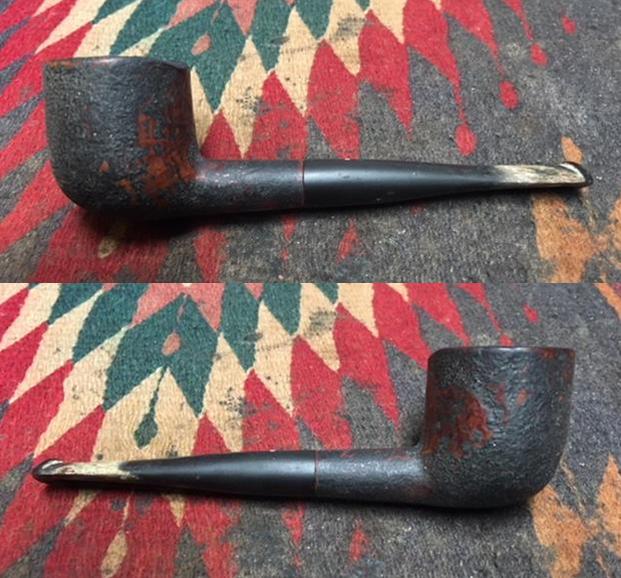
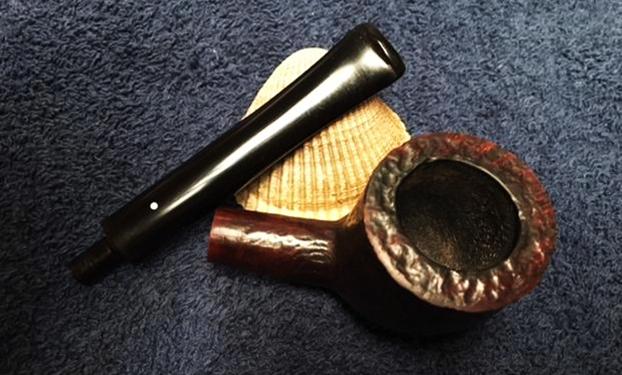
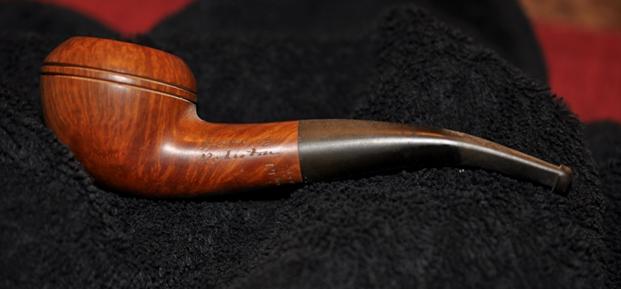
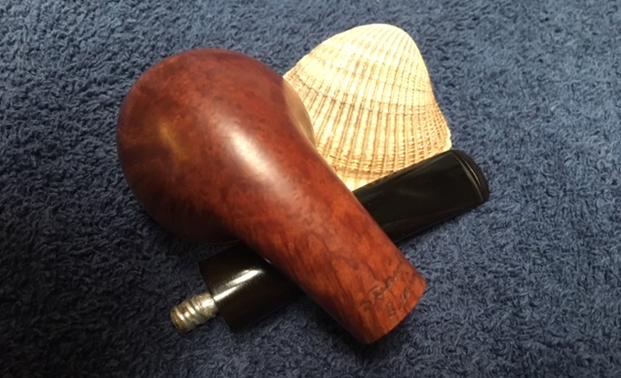
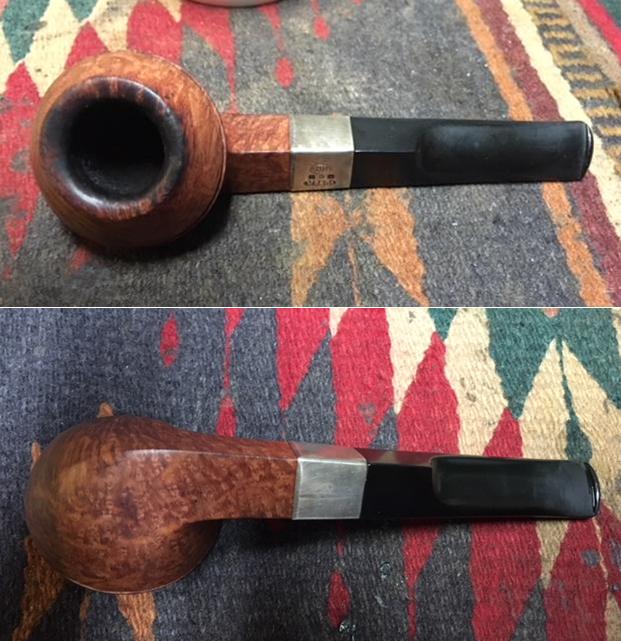
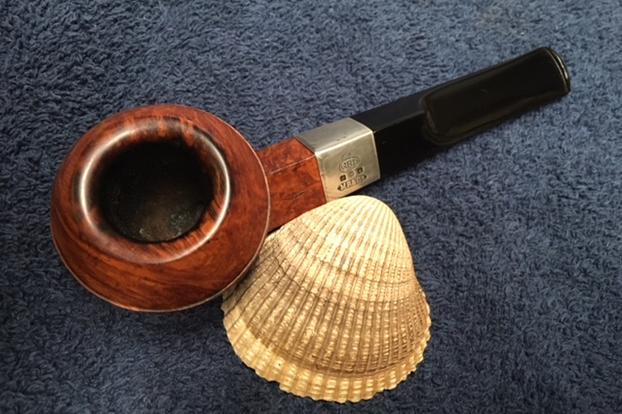
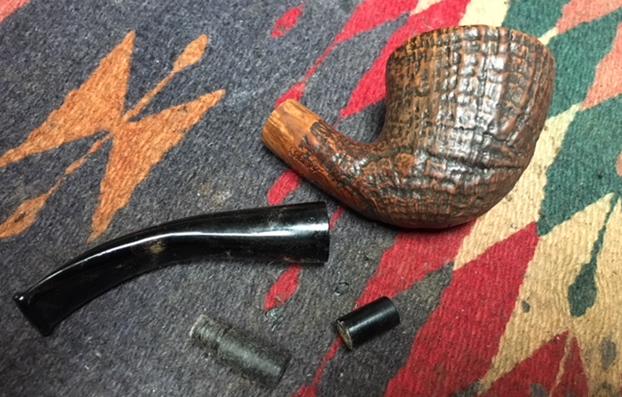
 So Barry’s Dad had given him this little 1876 Squat Bulldog to take to college with him. That is pretty remarkable. This beautiful little Bulldog has a double ring below the cap. There is a small piece missing between the rings on the front of the bowl. The pipe has a diamond shaped shank. The finish was dirty and filled with the detritus of years of use followed by sitting unused. The bowl was thickly caked and had an overflow of lava on the rounded rim top. Even through the grime and grit you can still see the amazing birdseye on the sides and cross grain on the front and back of the bowl. The Sterling Silver was oxidized and almost black but the marking was readable. The stem is a diamond shanked saddle with an older style button and slot. It is most likely the original stem but does not have a brass rondel on the side. (Although it could also certainly be a well-made replacement stem that his father had paid a great craftsman to make for the pipe as he had for several of the Comoy’s pipes.) It was lightly oxidized and had tooth chatter and marks on both sides of the stem at the button. Jeff took photos of the pipe before he cleaned it up. The photos tell the story better than my words can.
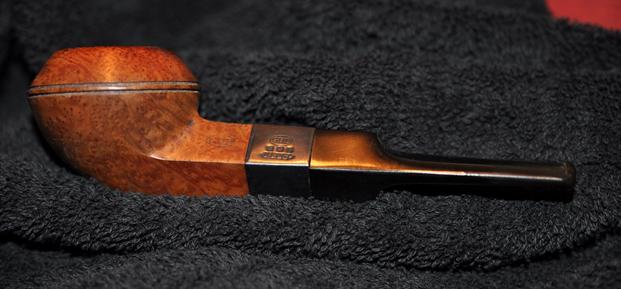
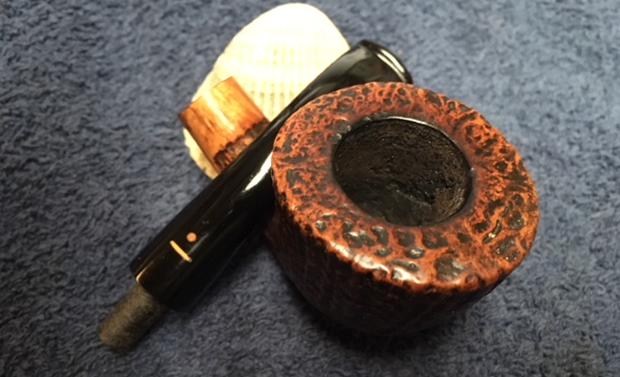
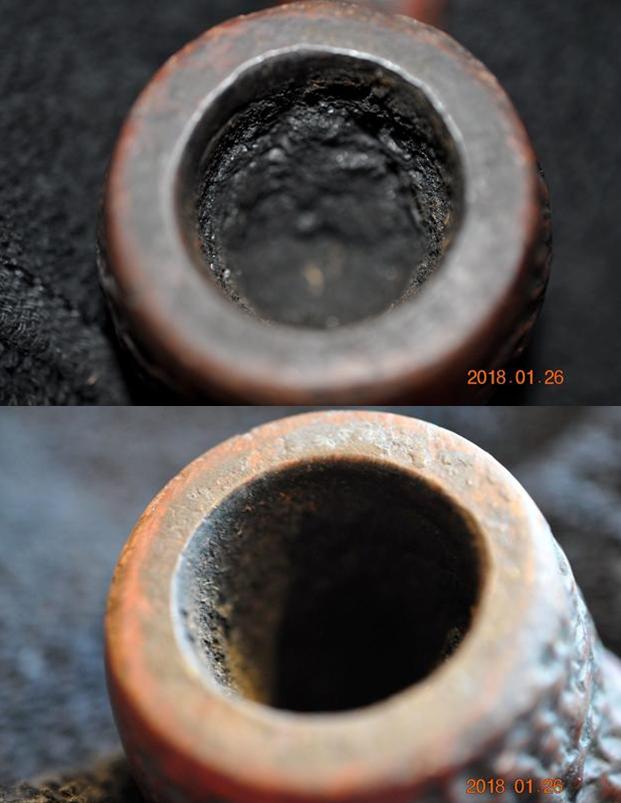
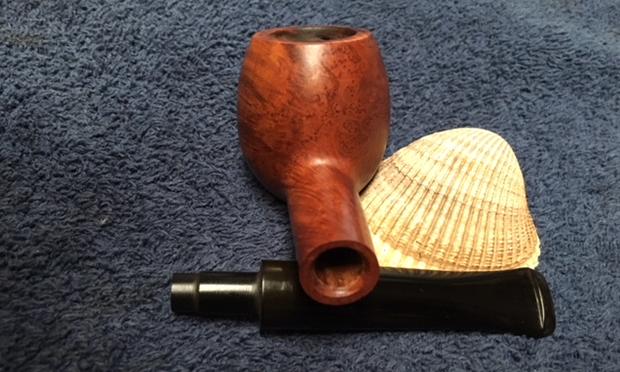
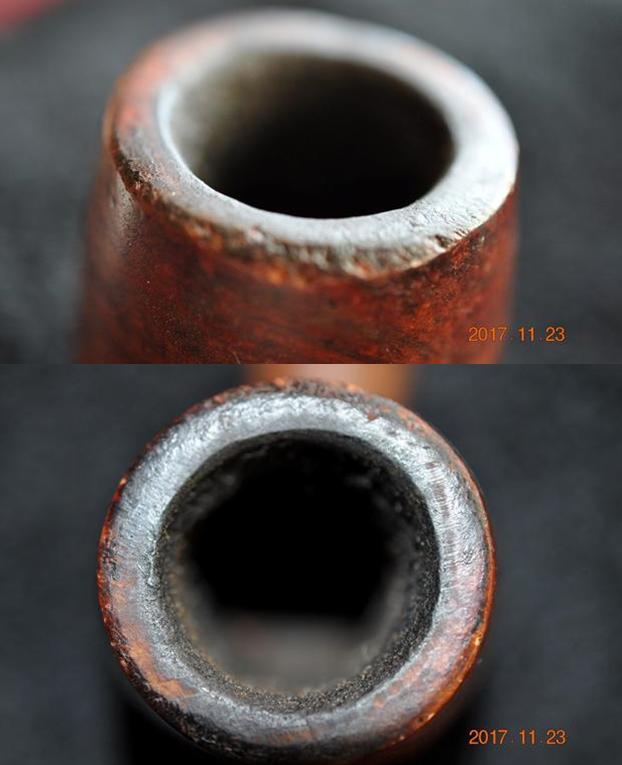
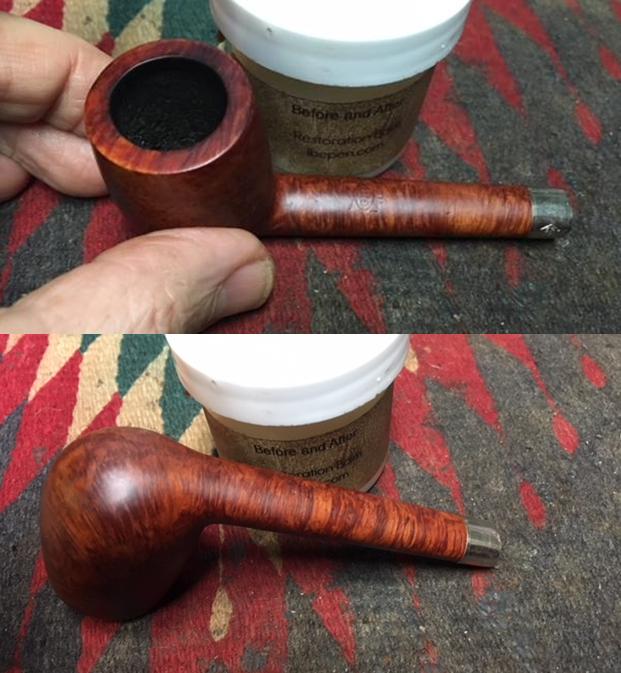
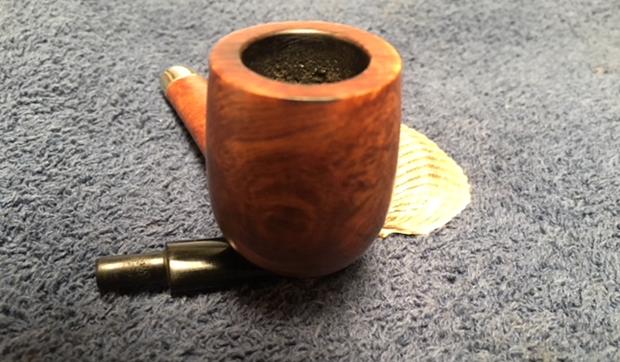
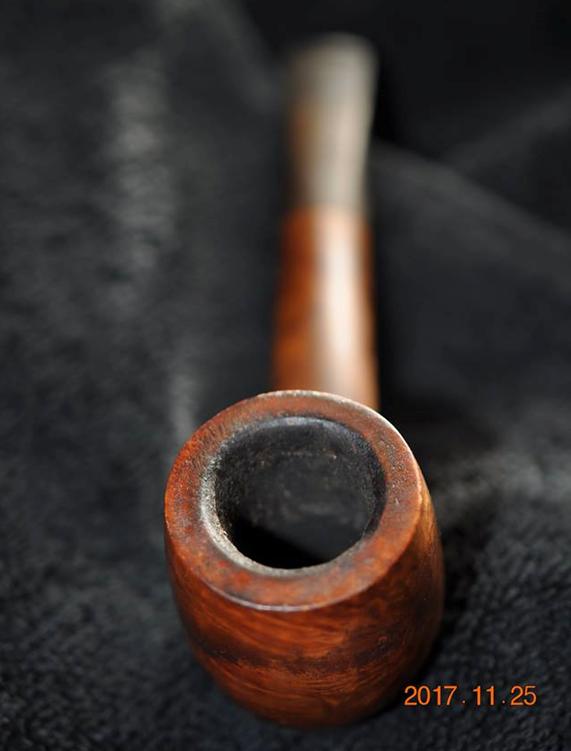
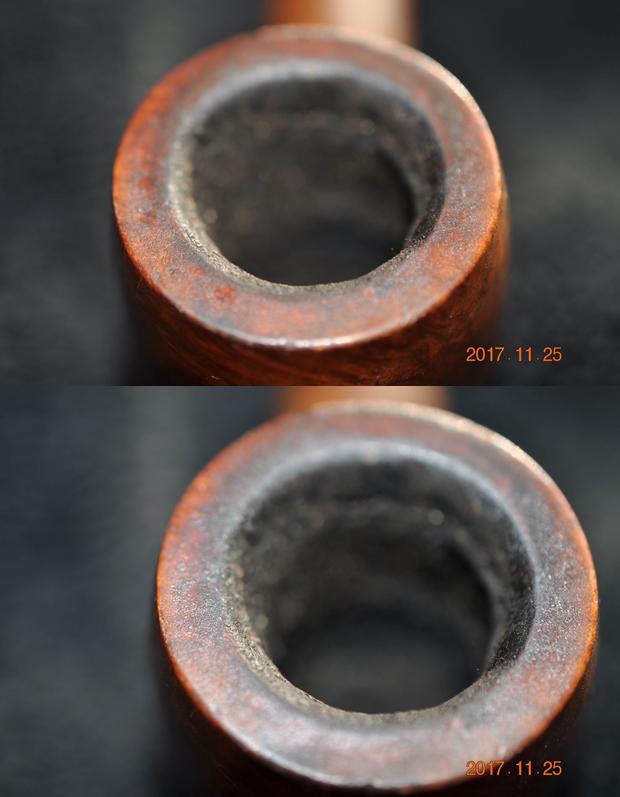
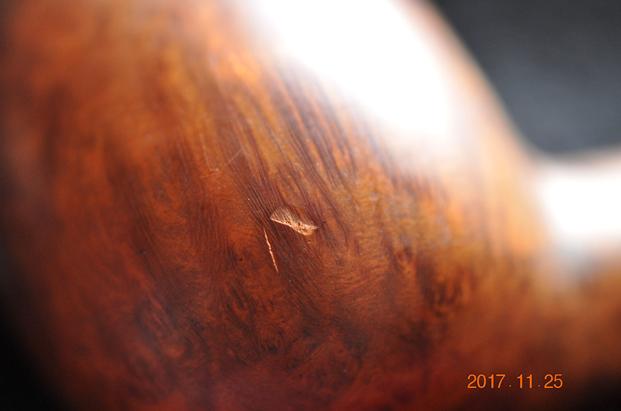
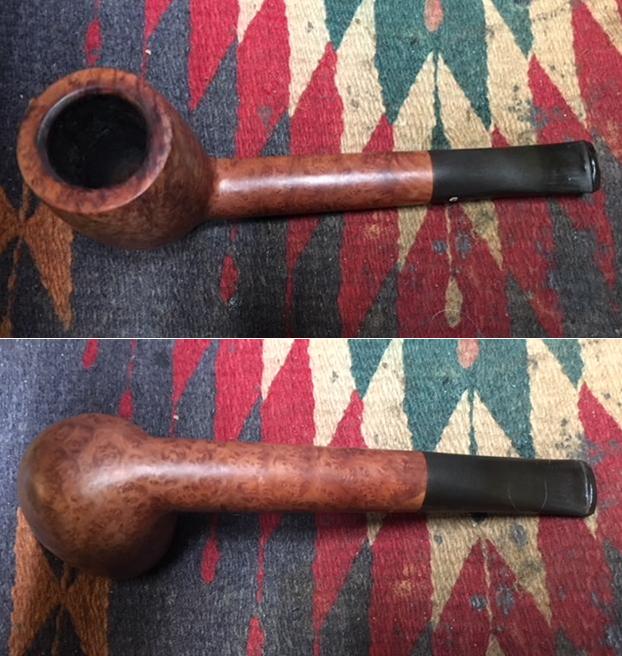
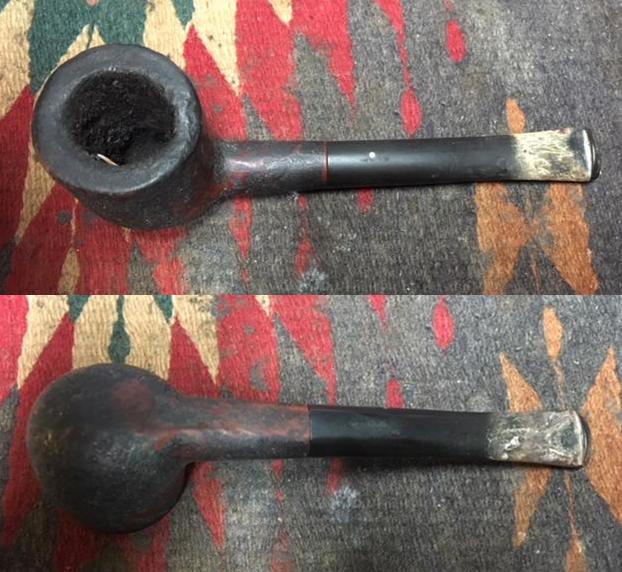
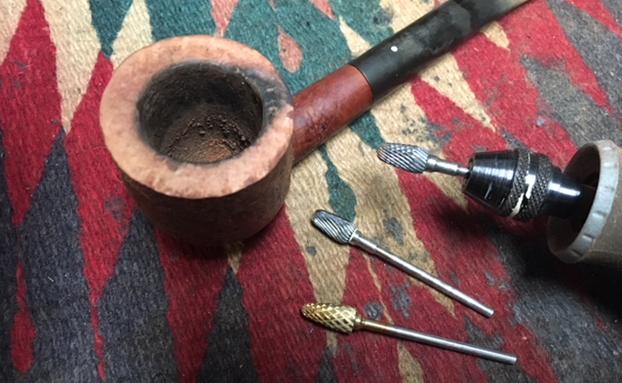
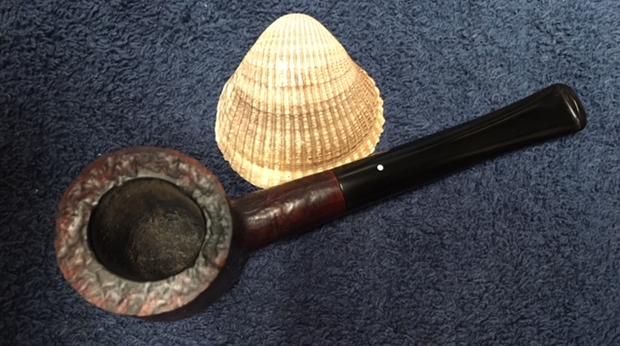
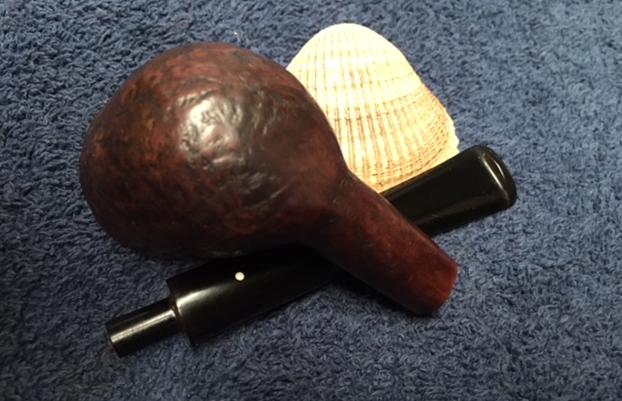
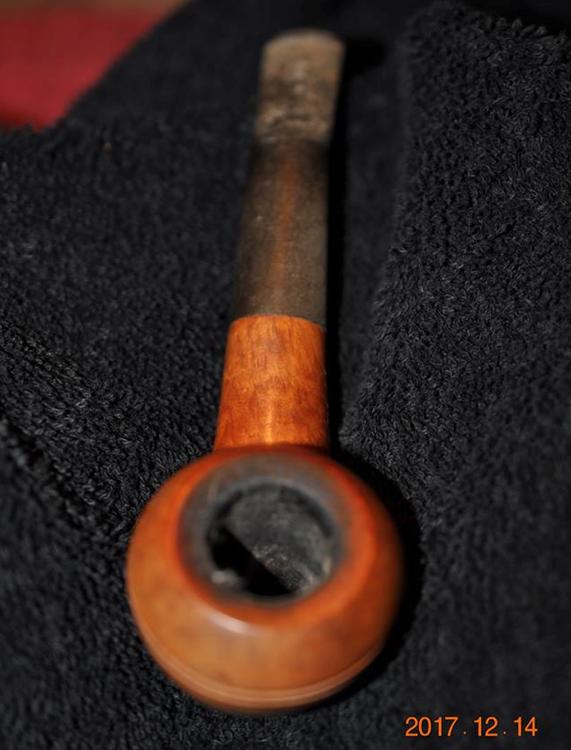
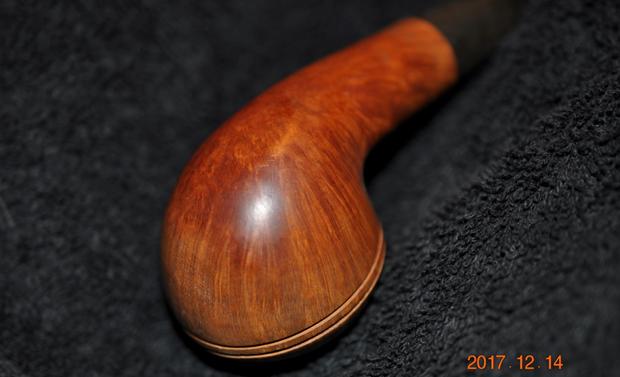
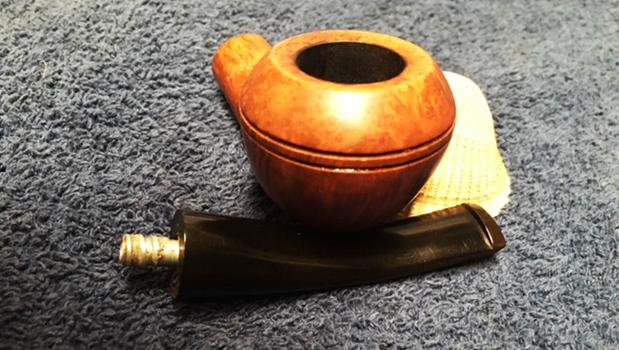
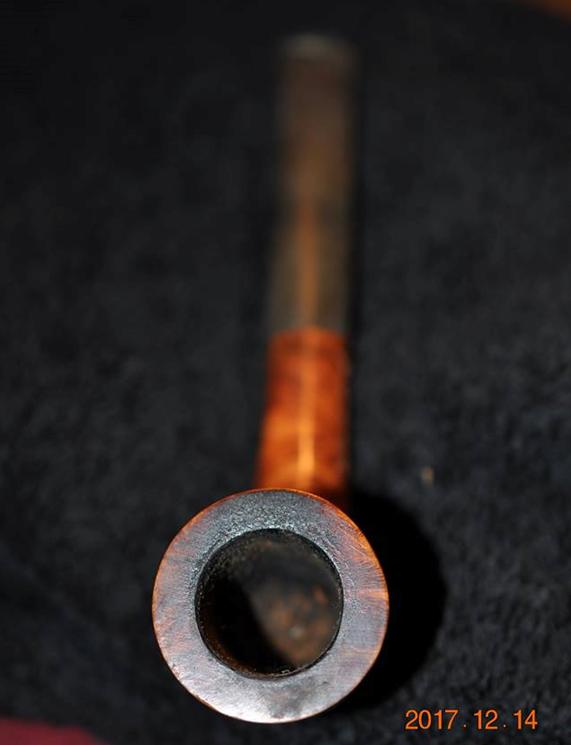
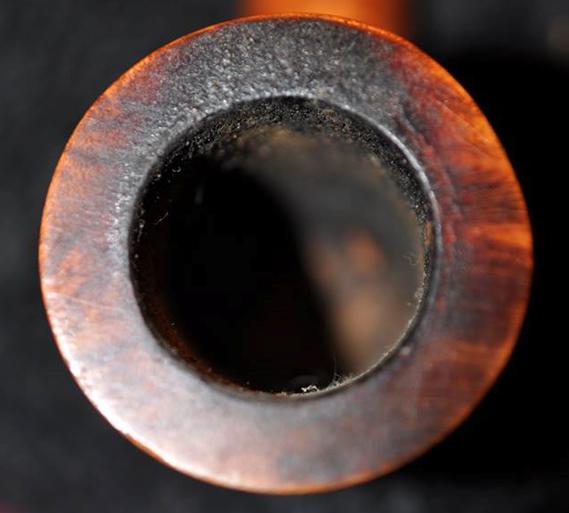
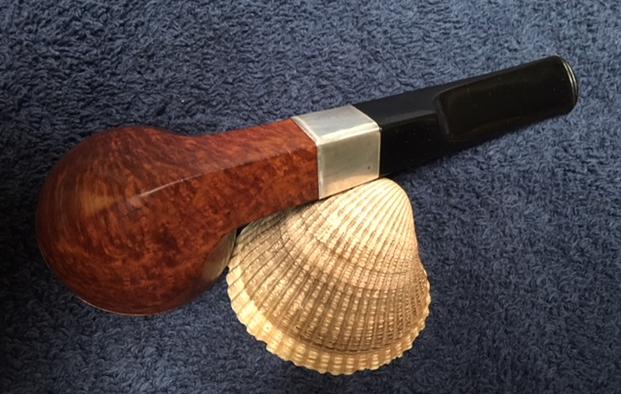
 He took some close up photos of the bowl and rim top to show the cake and the condition. He also took photos to show the grain on the side, front and underside of the bowl. There was a fairly large piece of briar missing on the ring between the two bands toward the front of the bowl (seen in the second photo below). The third photo shows some road rash on the cap at the front of the bowl above the missing piece of briar. I would need to make a decision about how far to go in restoring this one. Did I remove the marks on the rim cap? Did I repair the chip out of the spacer between the two rings? That would need to be decided.
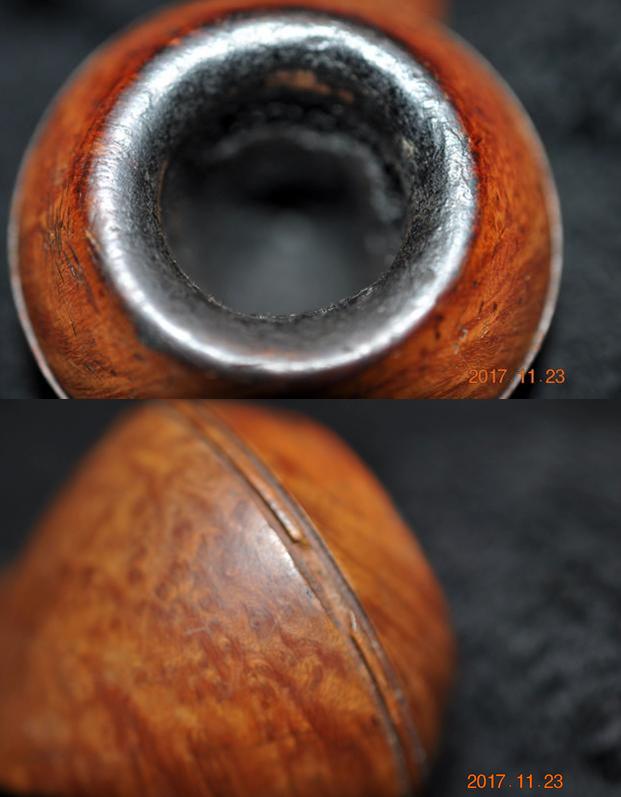
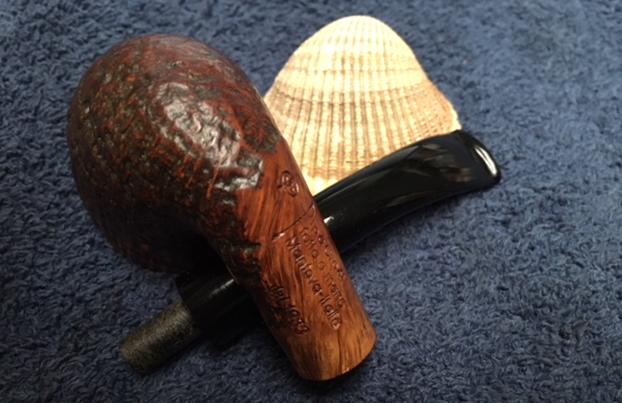
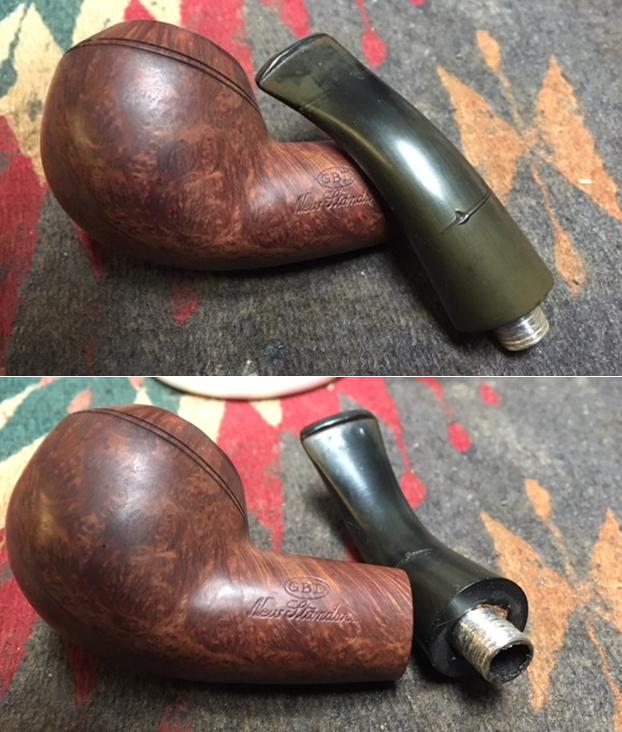
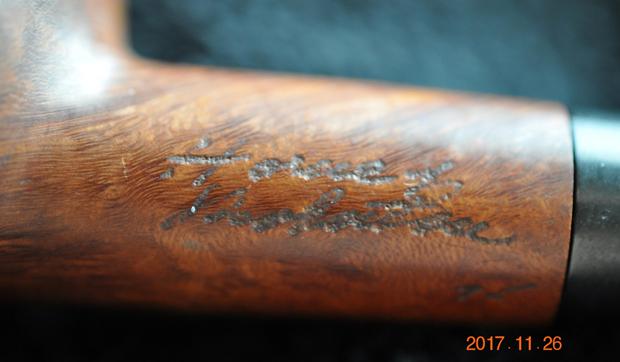
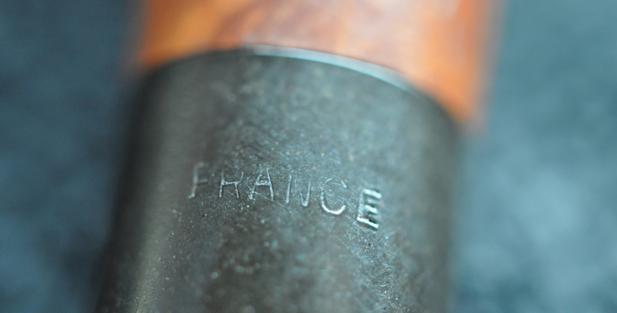
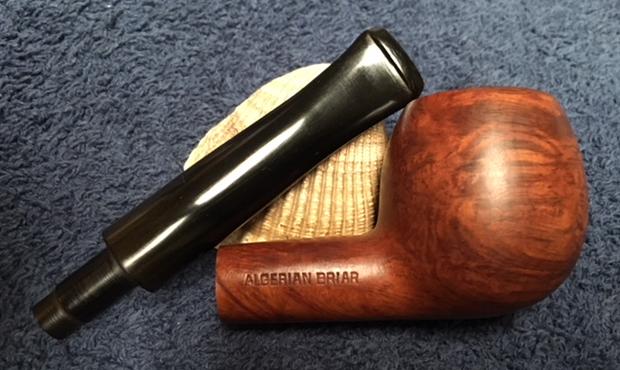
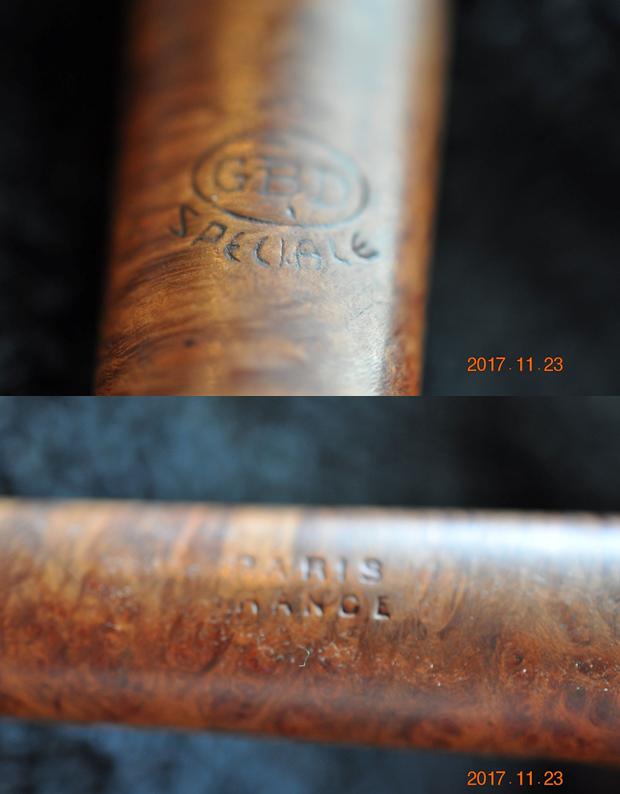
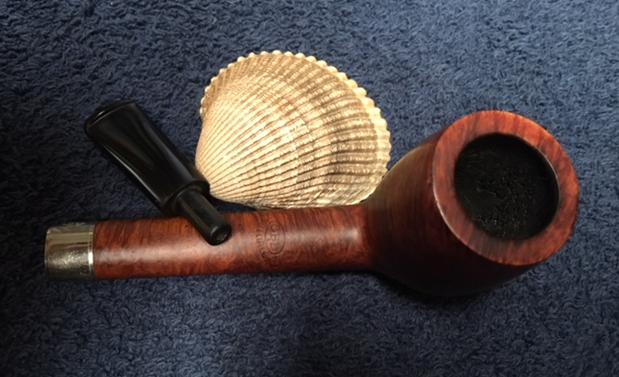
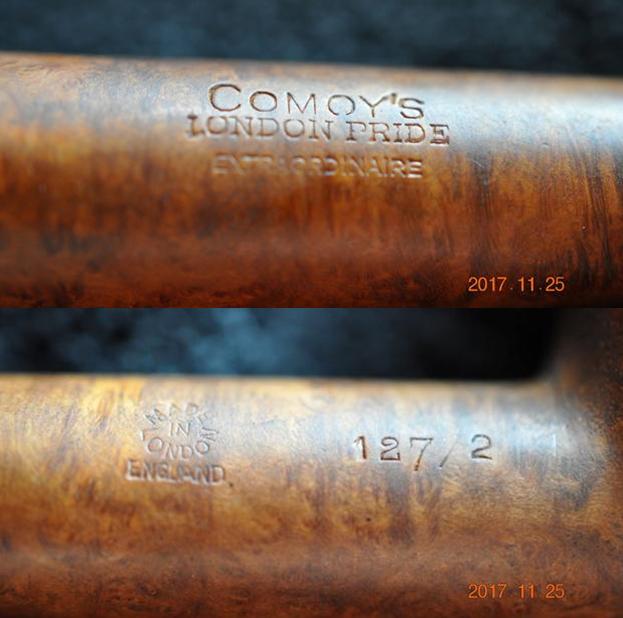
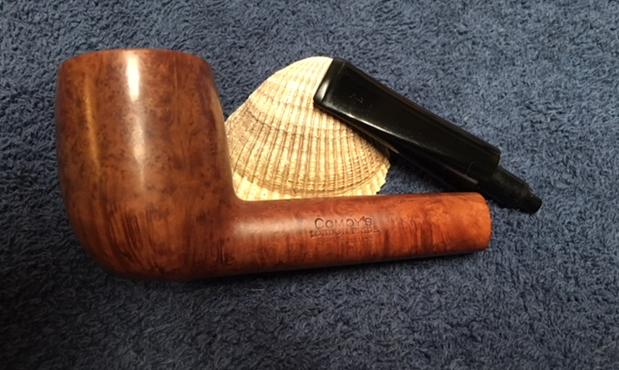
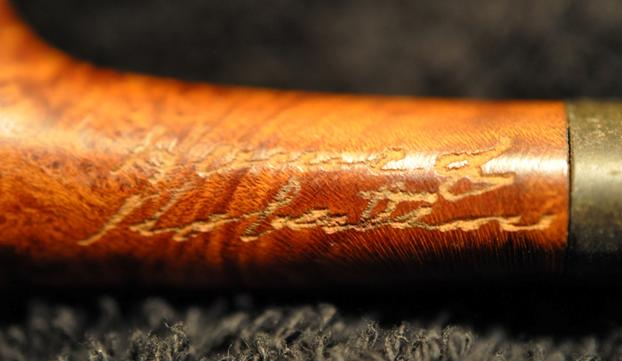
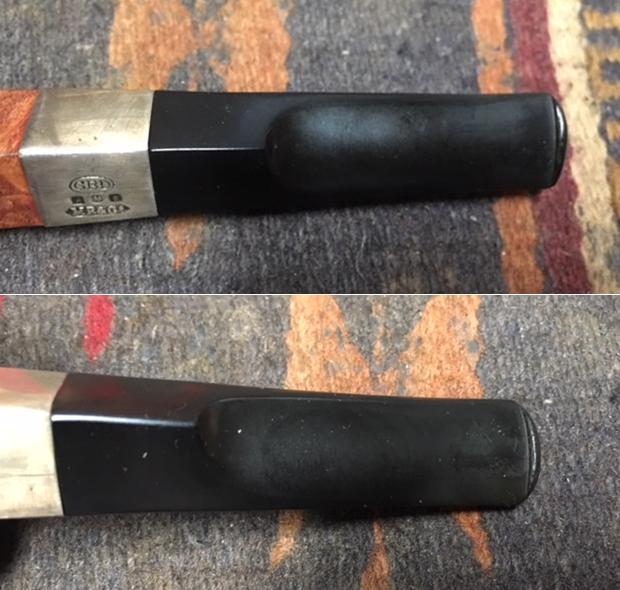
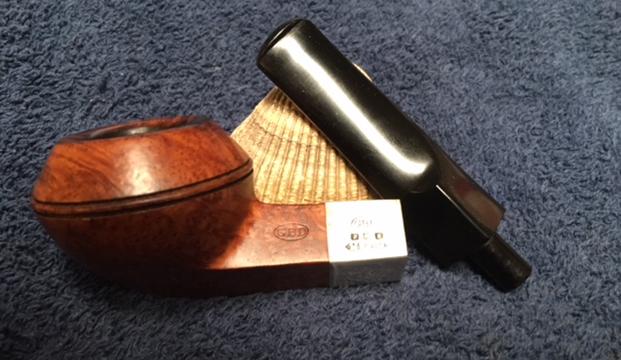
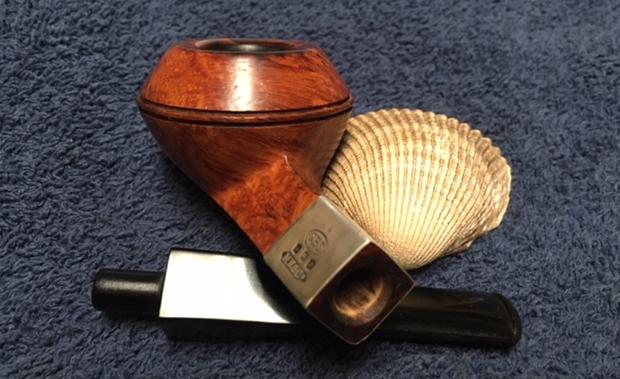
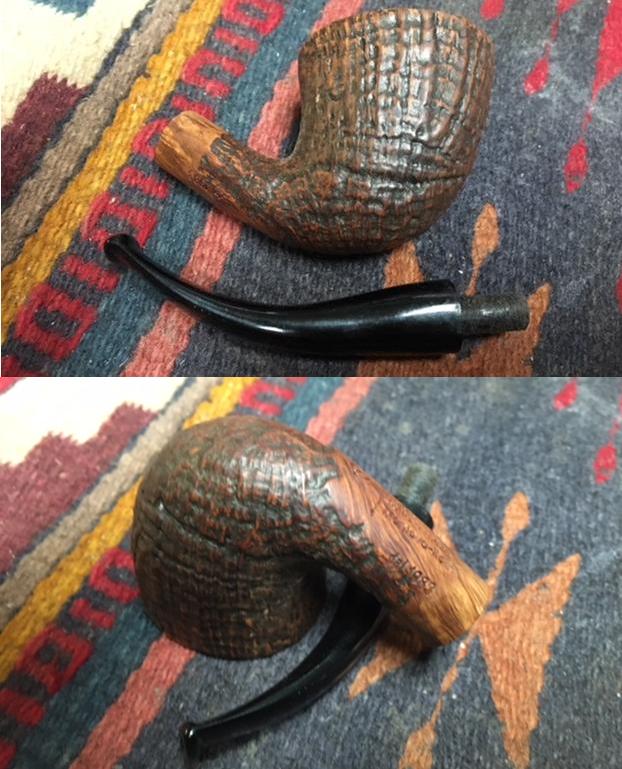
 He also photographed the stamping on both sides of the shank to show what it read and the condition of the stamping. The left side of the shank is stamped with the GBD oval and on the silver band the same oval is over the three hallmarks as spoken of above and underneath that is stamped MR&Cie. On the right side it is stamped London over England with the shape number R9019.
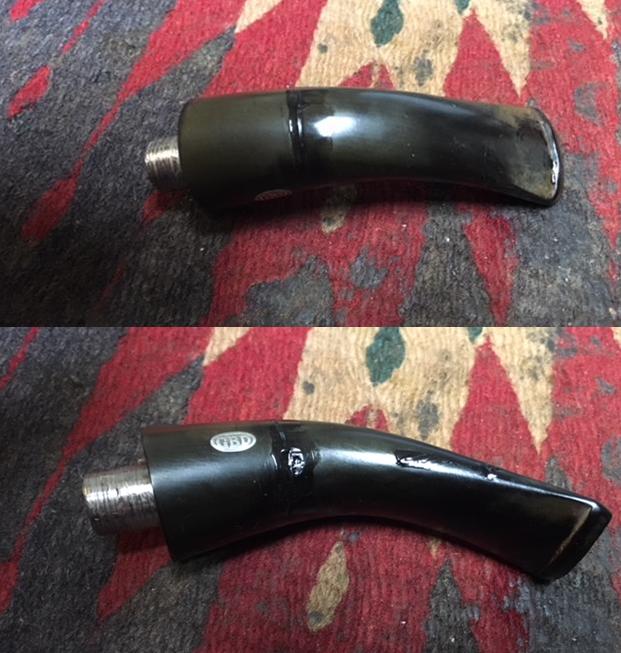
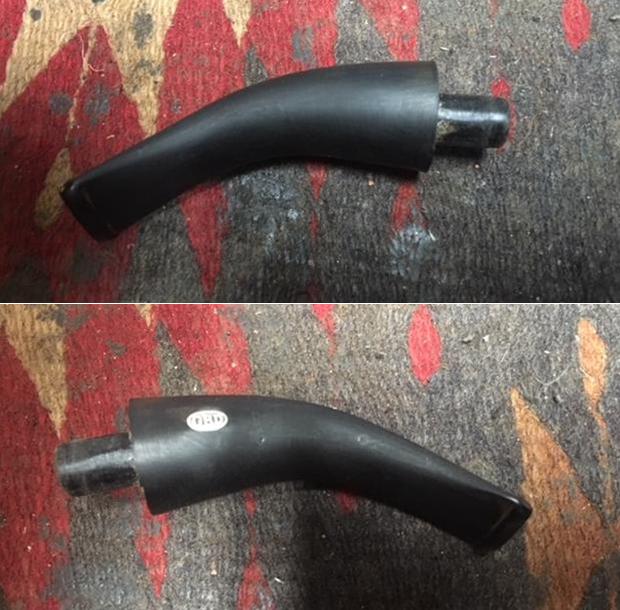
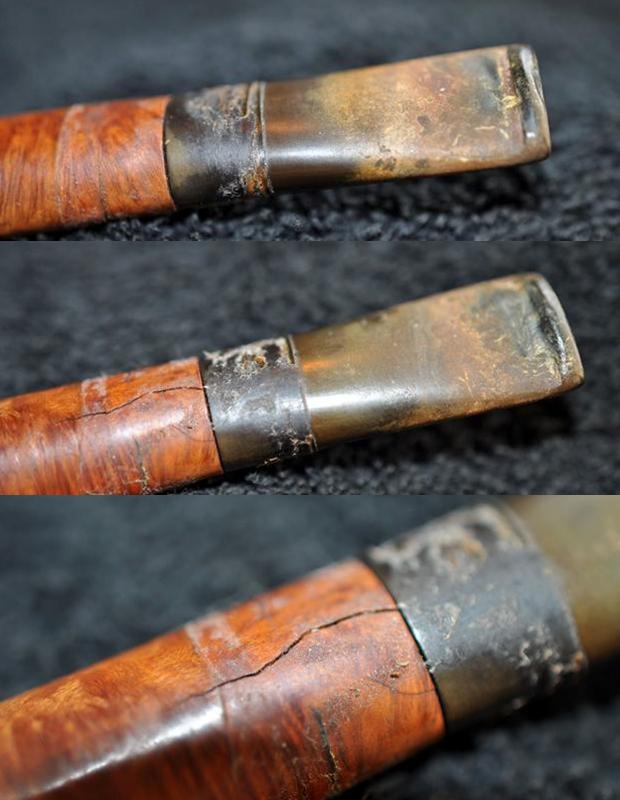
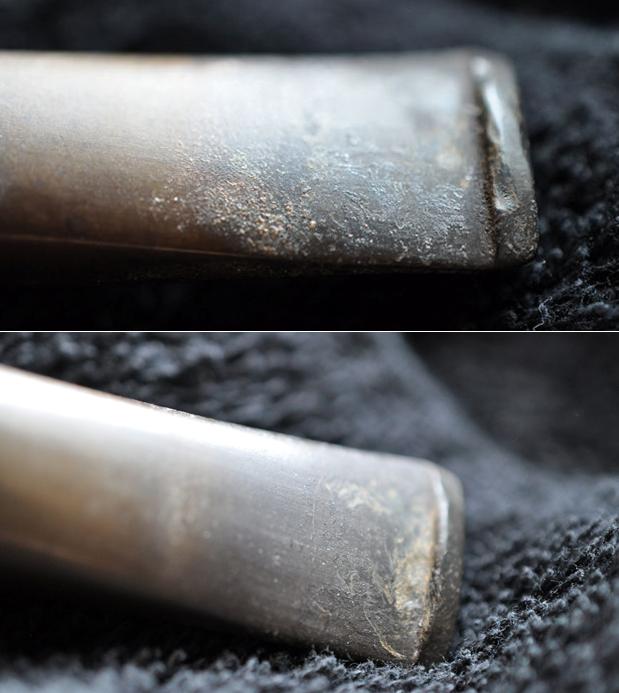
 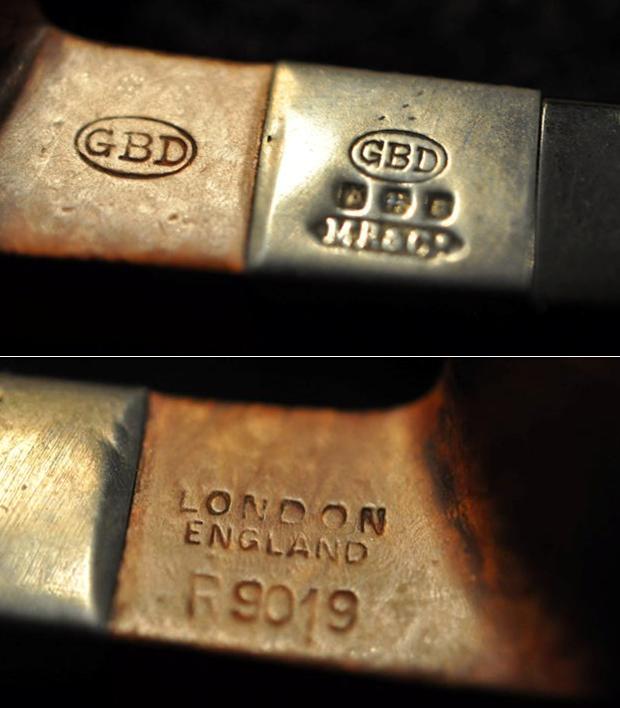 The stem was made of hard rubber and was oxidized as mentioned above and had tooth chatter and marks. Jeff took photos of both sides of the stem to capture their condition before he cleaned the pipe.
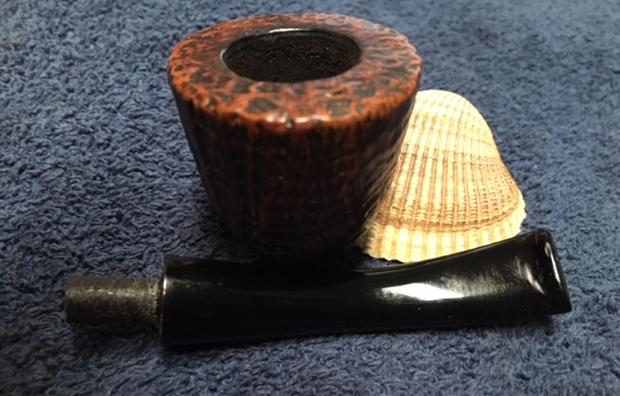
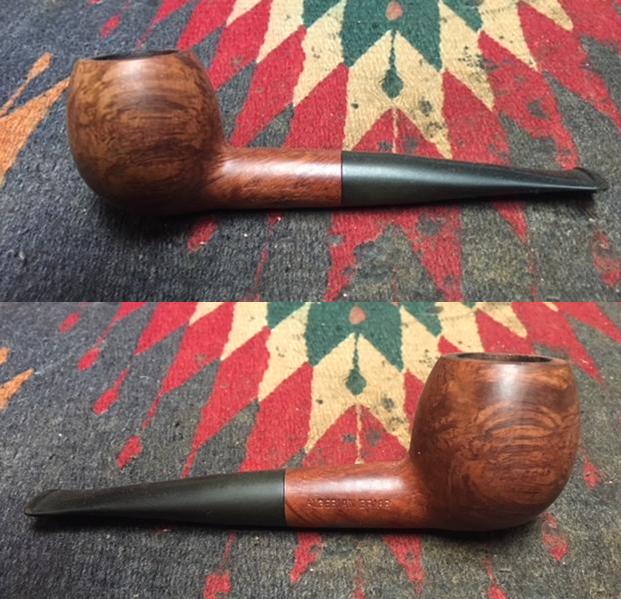
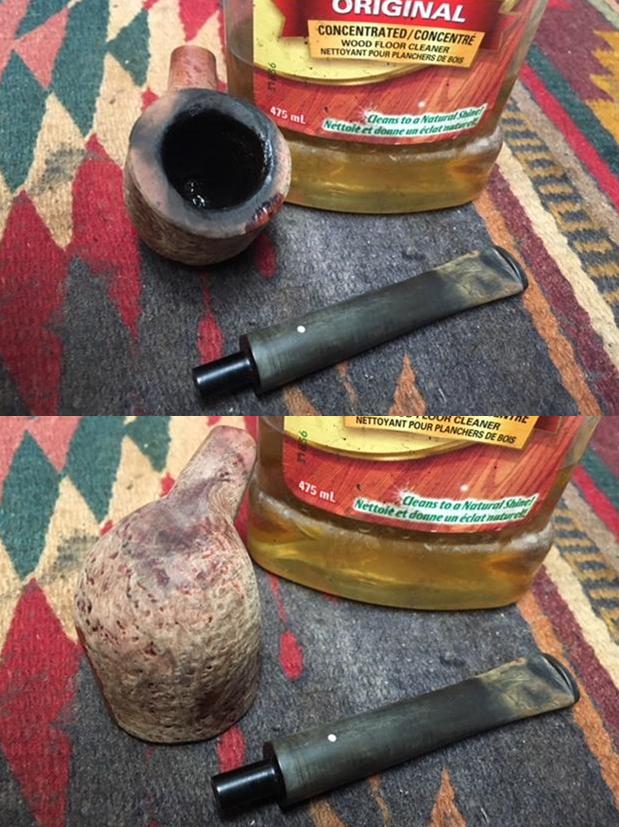
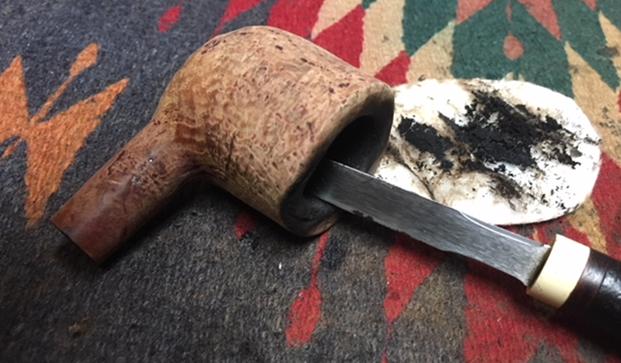
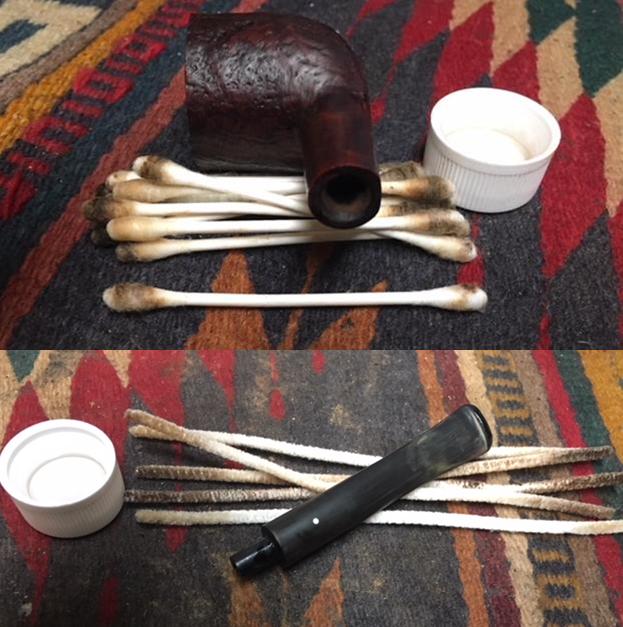
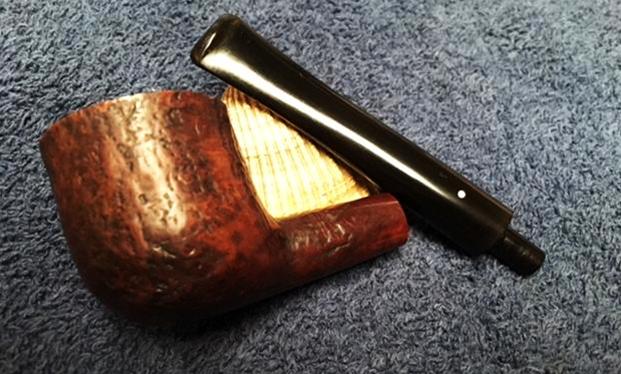
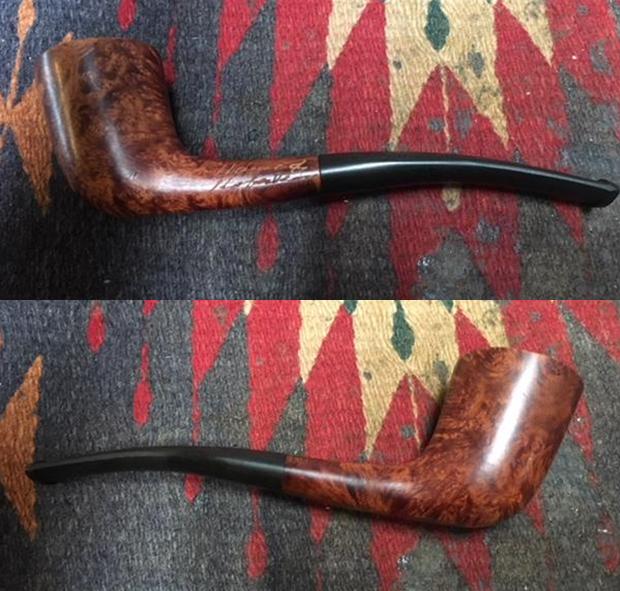
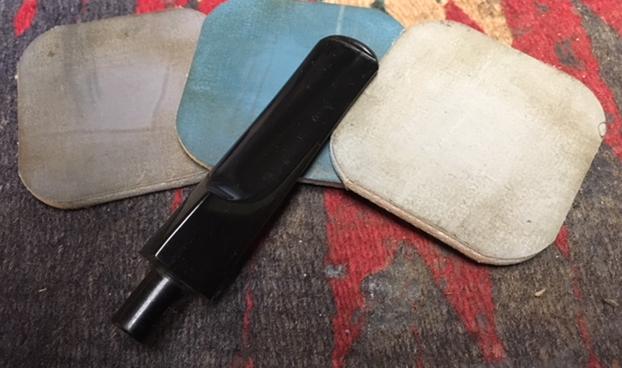
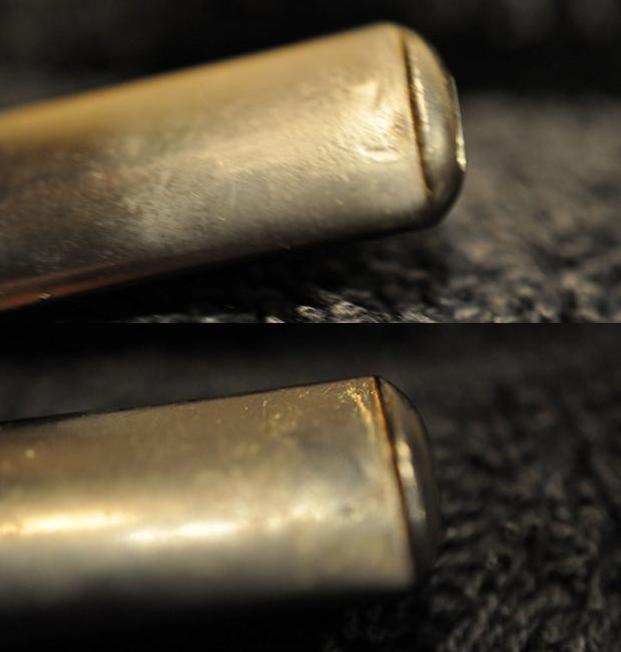 Jeff once again did his usual great job on cleaning this pipe, leaving it pristine and without damage to the finish. He reamed the bowl with a PipNet pipe reamer and cleaned up the remnants with the Savinelli Fitsall Pipe Knife. He scrubbed out the mortise and the airway in the shank and the stem with alcohol, cotton swabs and pipe cleaners. He scrubbed the exterior of the bowl, rim and shank with a tooth brush and Murphy’s Oil Soap to remove the grime of the smooth finish on the bowl and shank. He rinsed it under running water. He dried it off with a soft cloth. Once the dust and debris were removed the finish looked very good. He soaked the stem in Before & After Pipe Stem Deoxidizer to remove the light oxidation, rinsed it with warm water and dried it off. I took photos of the pipe to show its condition before I started my work on it.
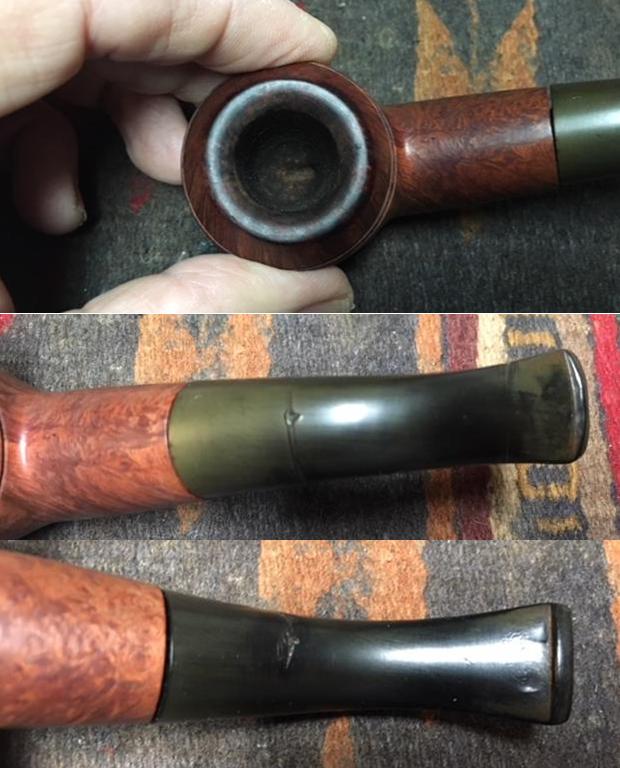
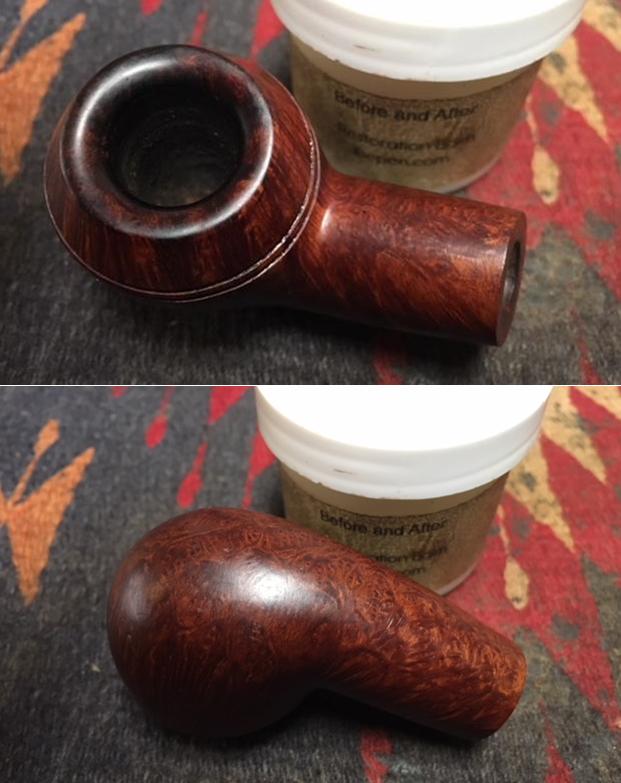
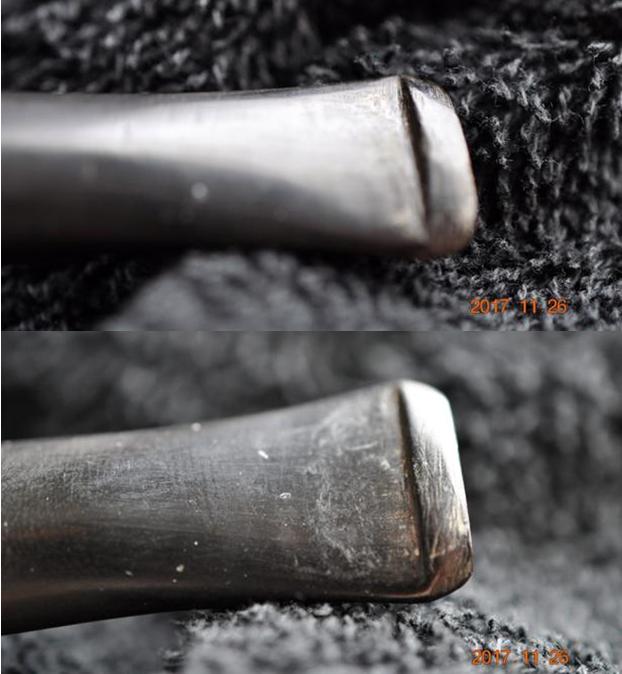
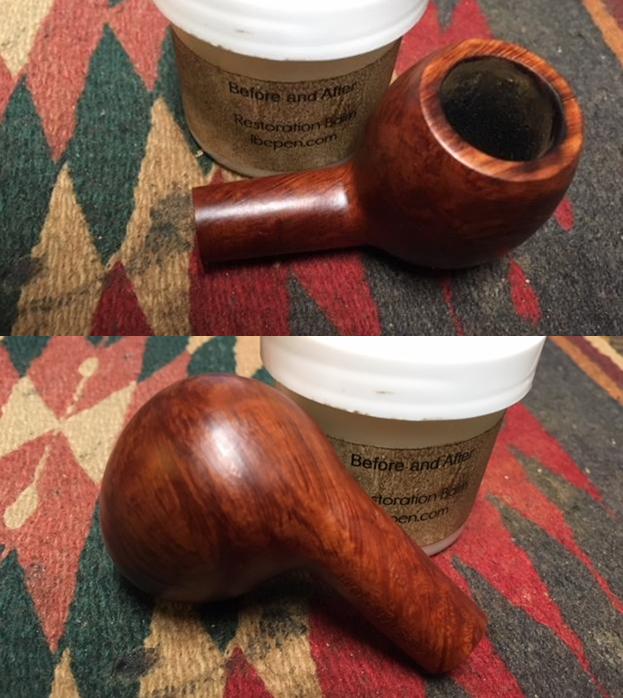
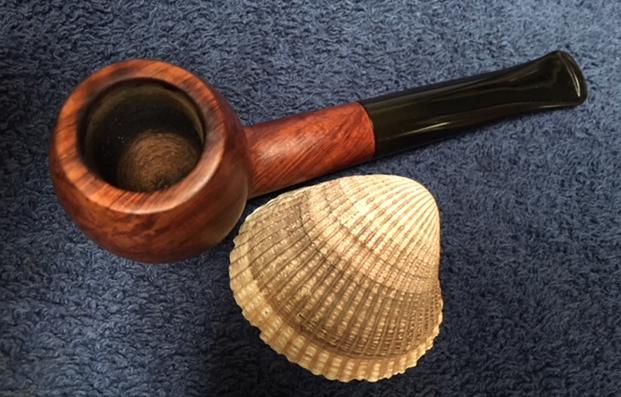
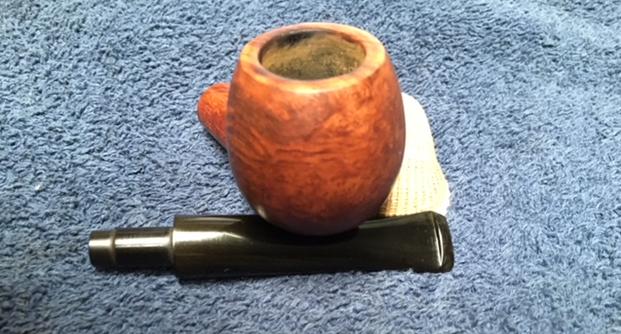
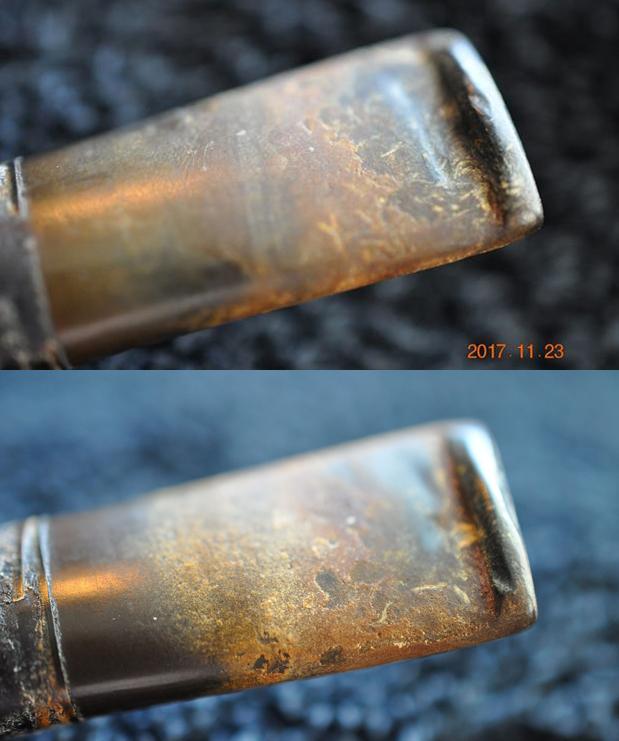
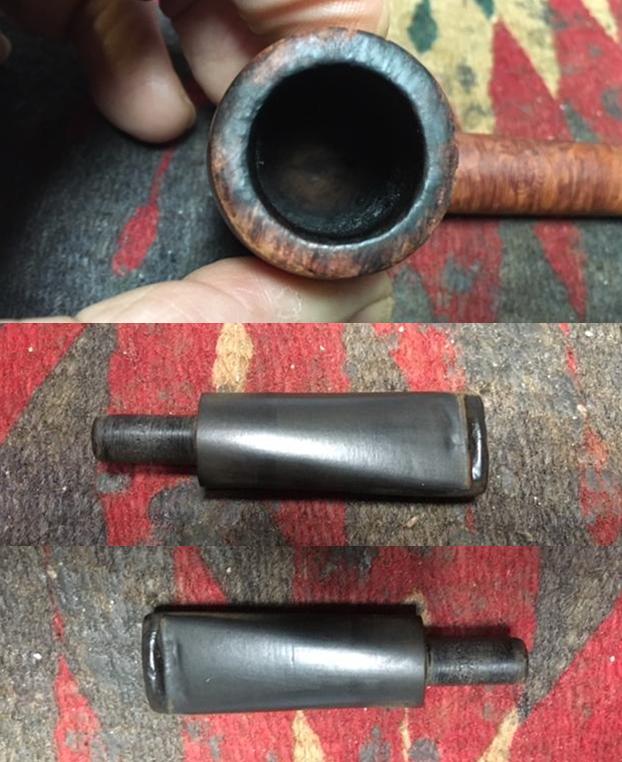
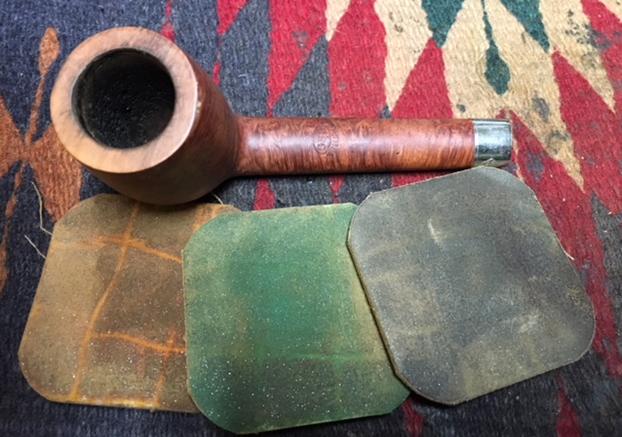
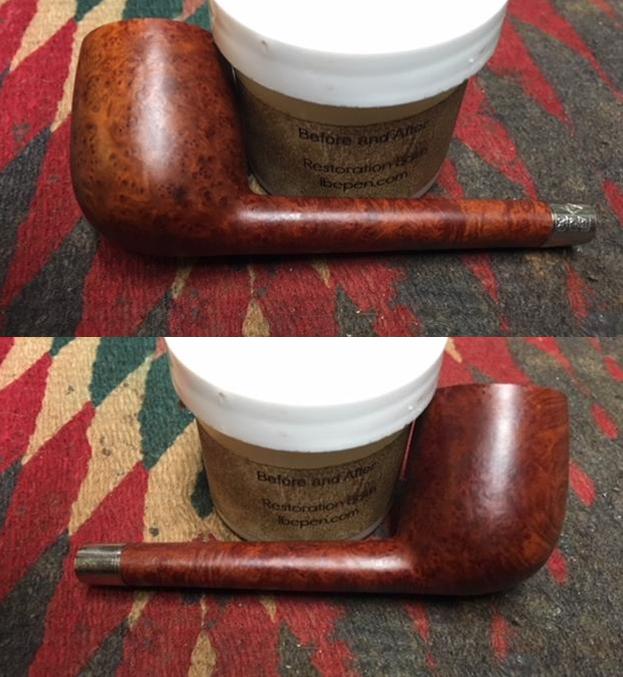
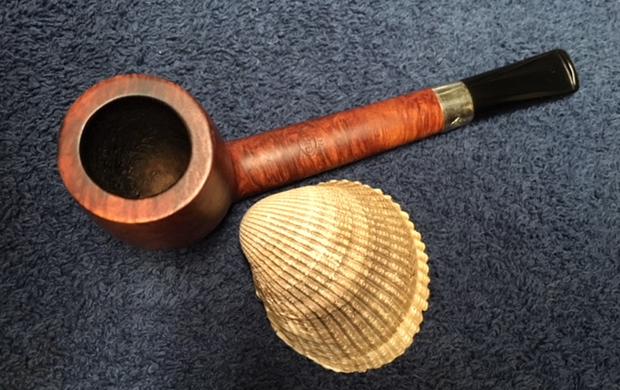
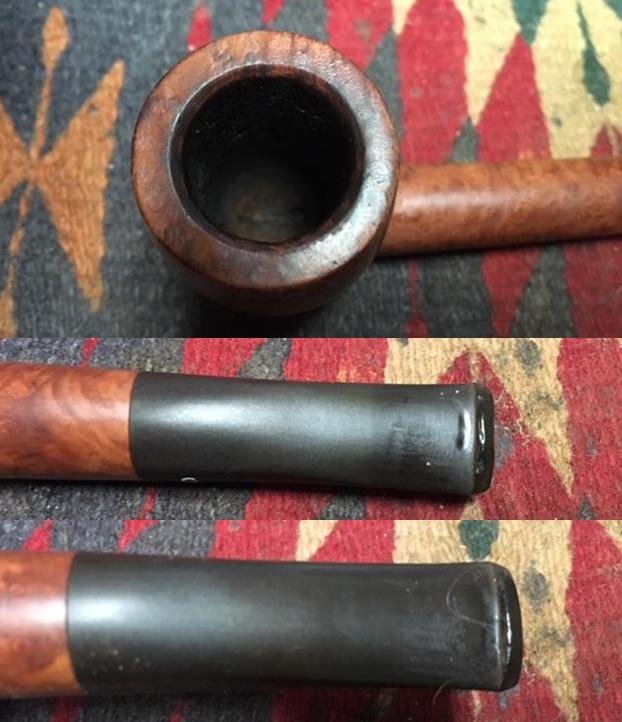
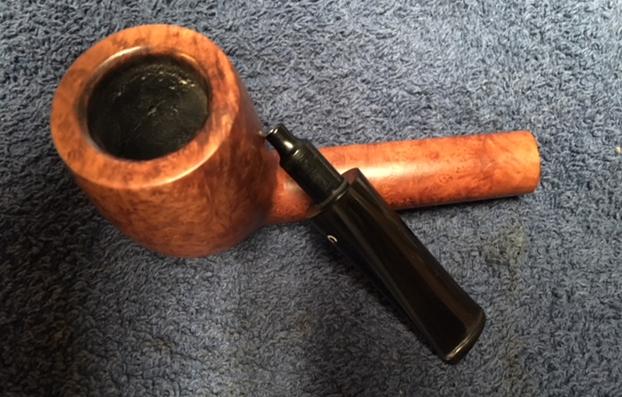
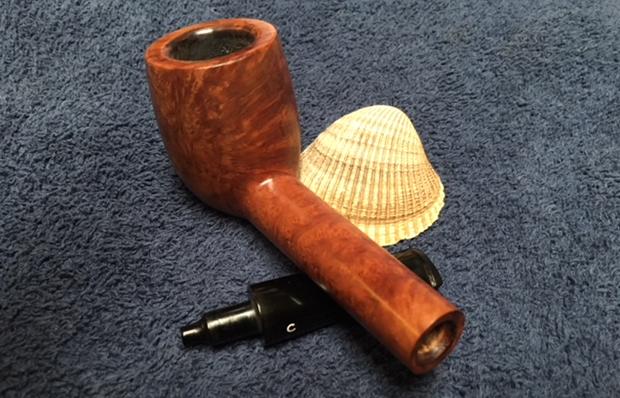
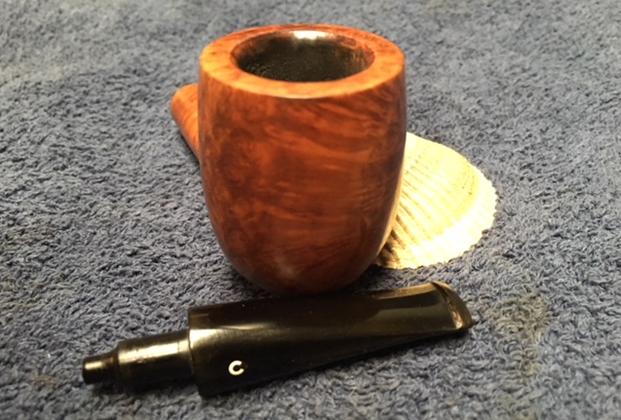
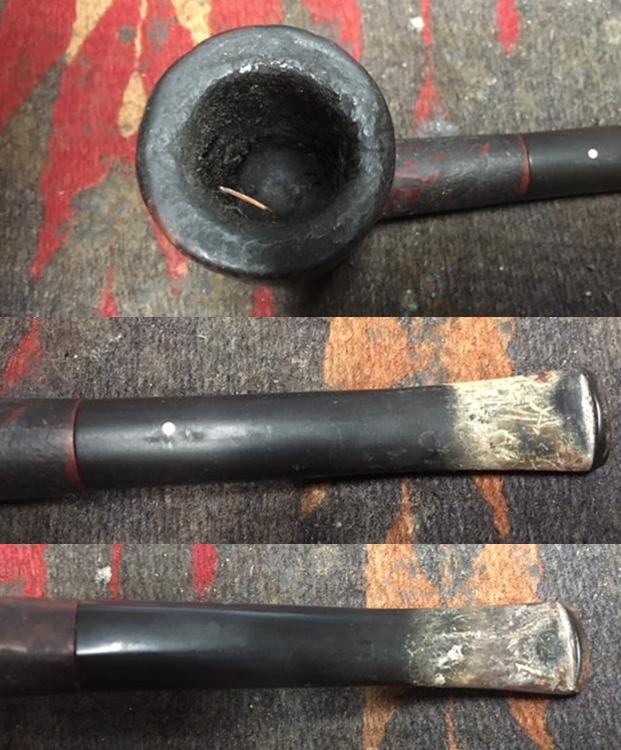
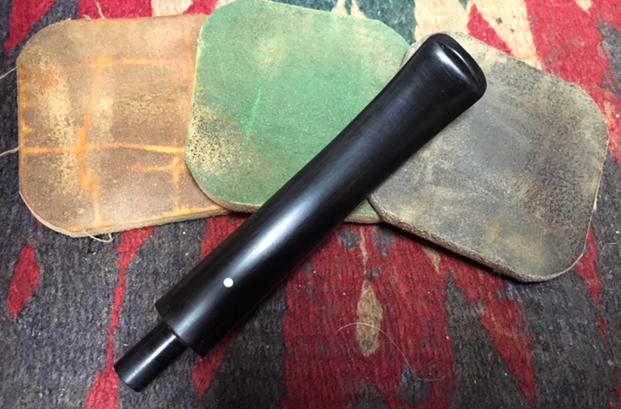
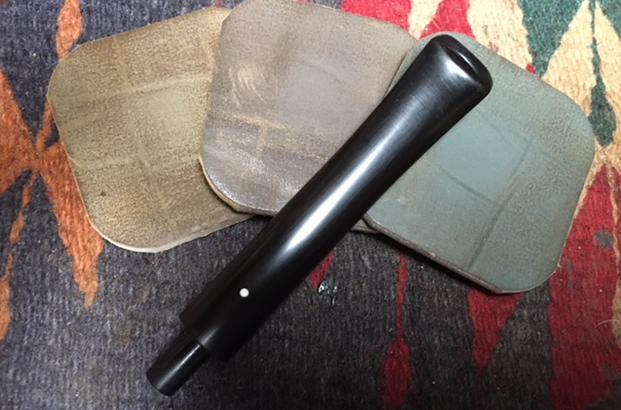
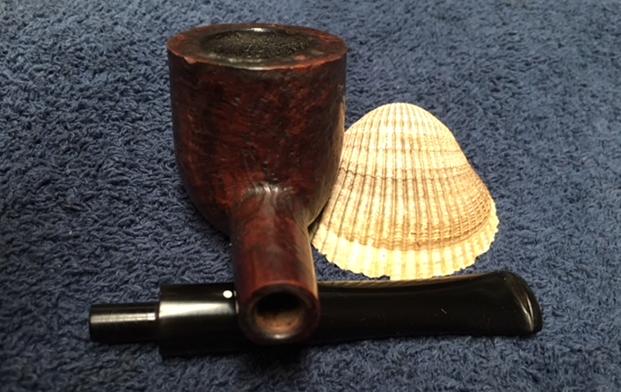
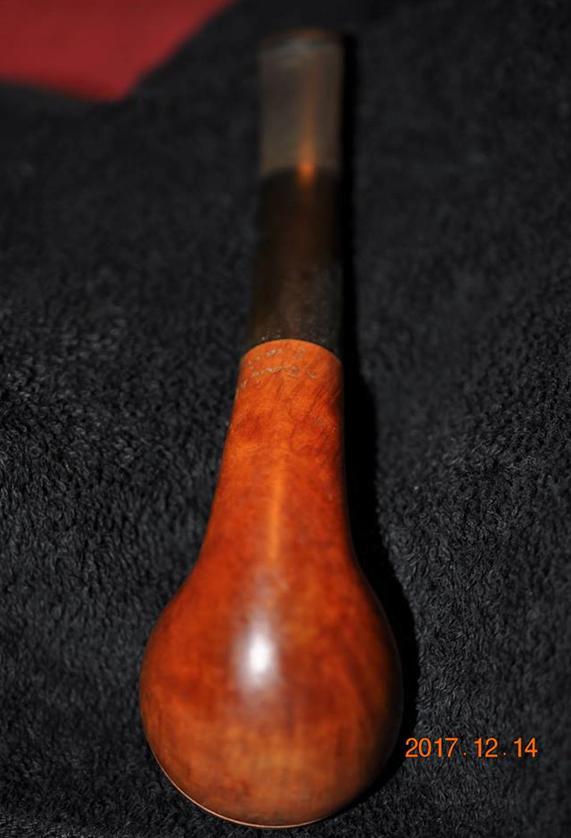
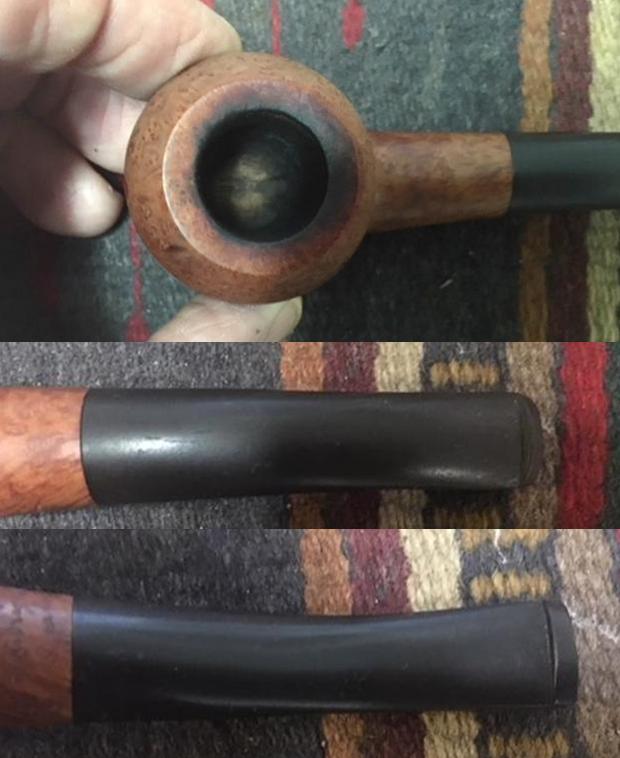
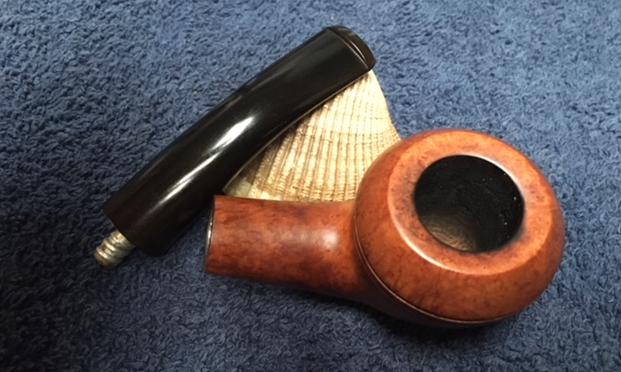
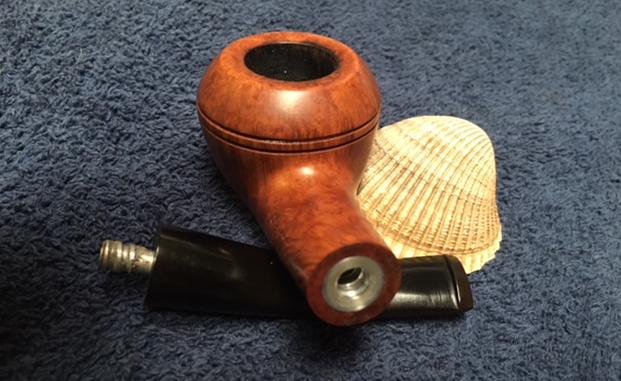
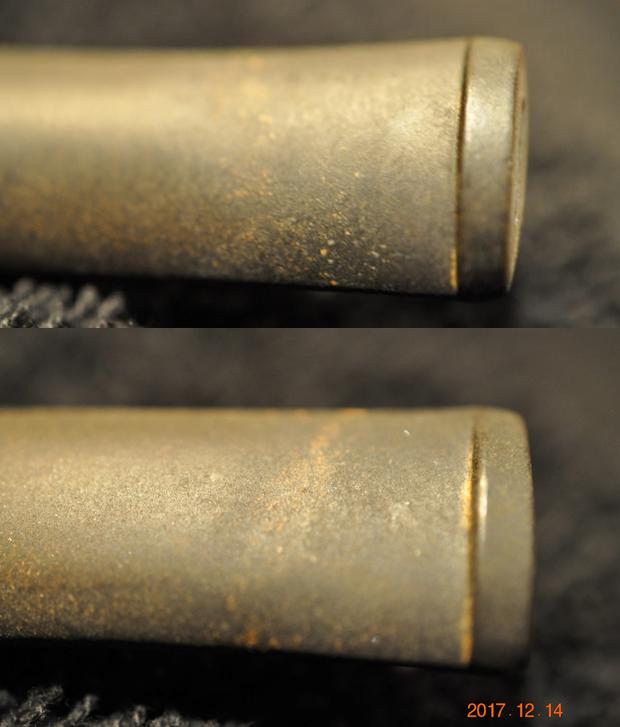
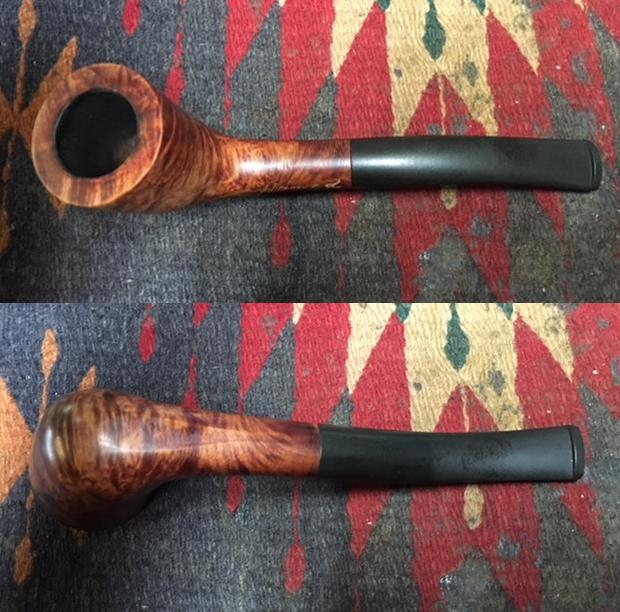
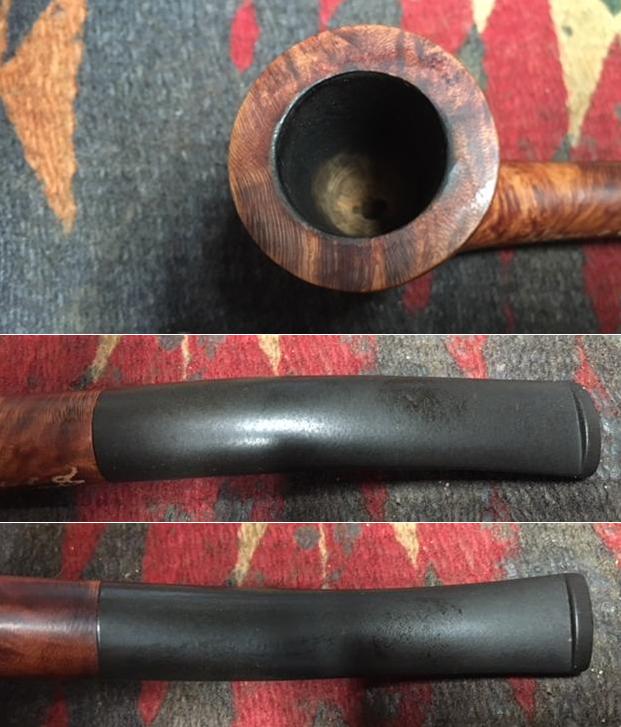
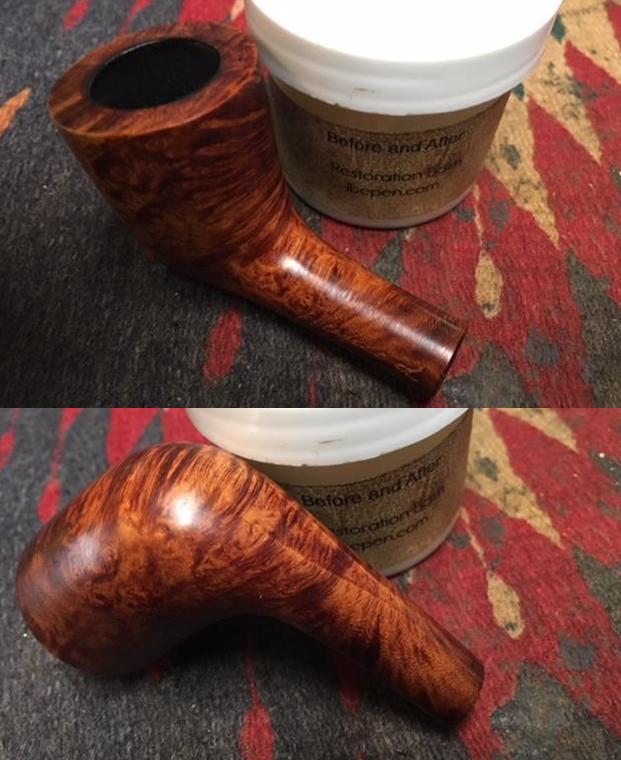
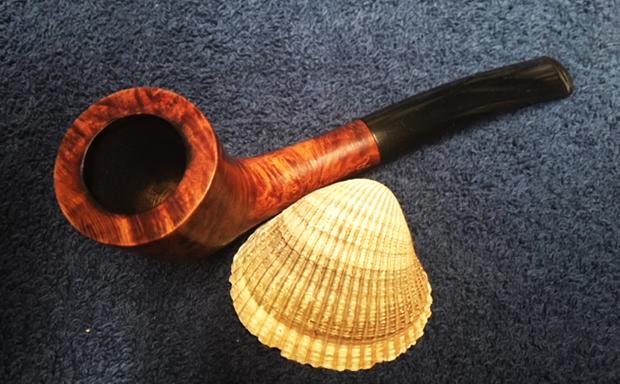
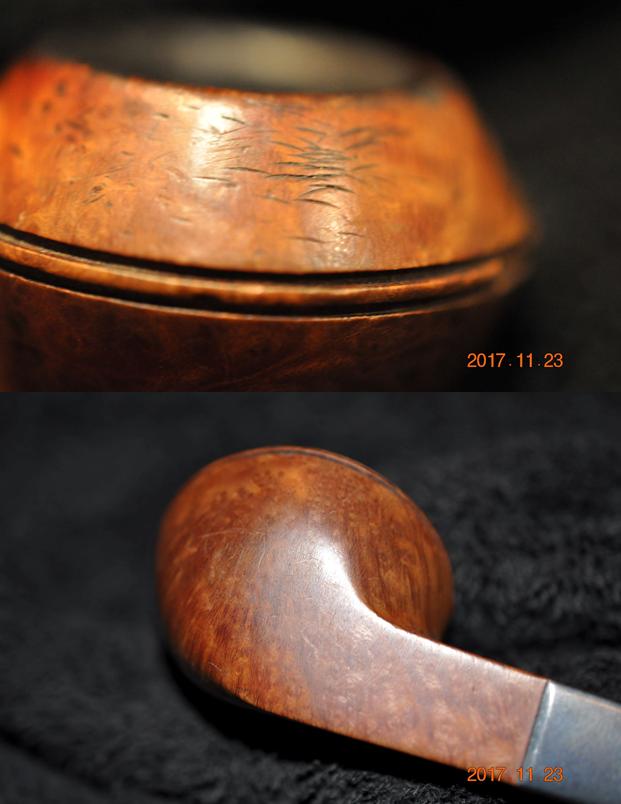
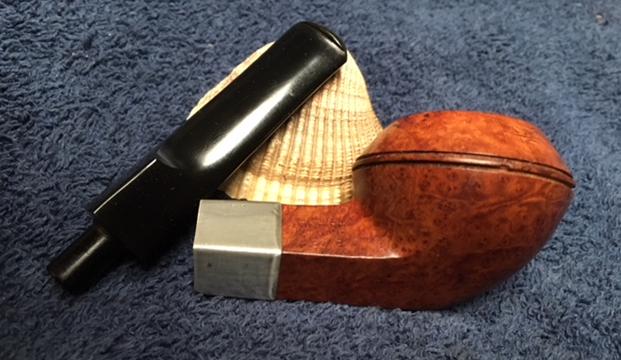
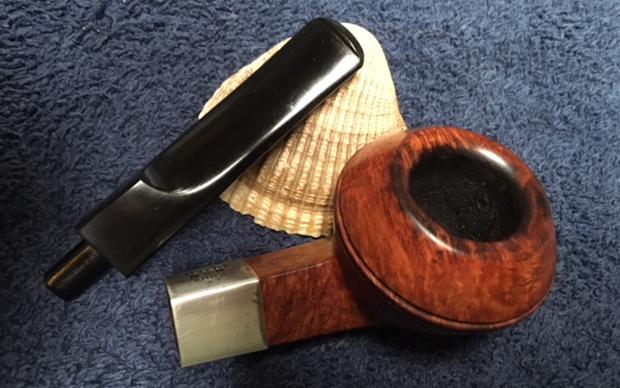
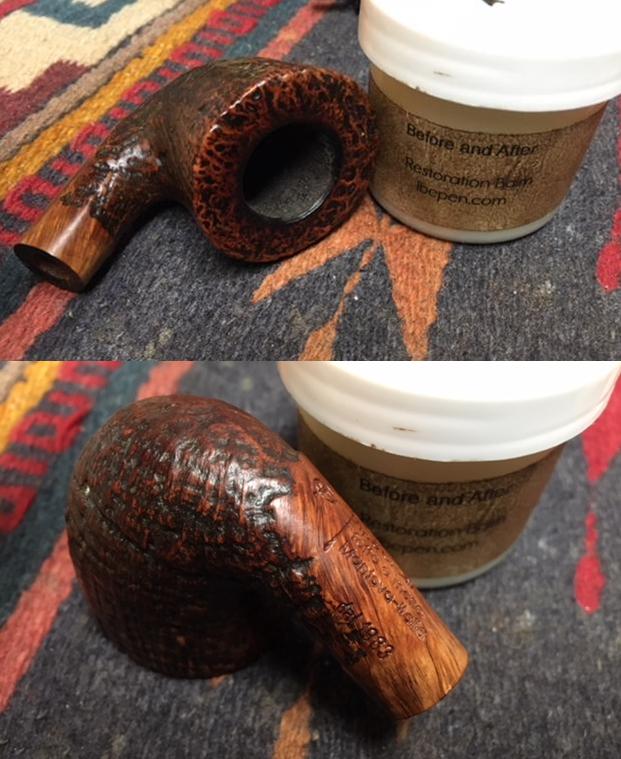
 I took some close up photos of the bowl, rim top and damaged area on the front as well as both sides of the stem to show their condition. The bowl was very clean and the rim top had some nicks on both the inner and outer, some scorching and general darkening. He had been able to remove the lava from the finish. The inner edge was in excellent condition and the roughness of the outer edge was visible. I also took a photo of the damaged area between the double rings toward the front right side of the bowl. The stem is lightly oxidized as can be seen in the photos and has small tooth marks near the button on both sides.
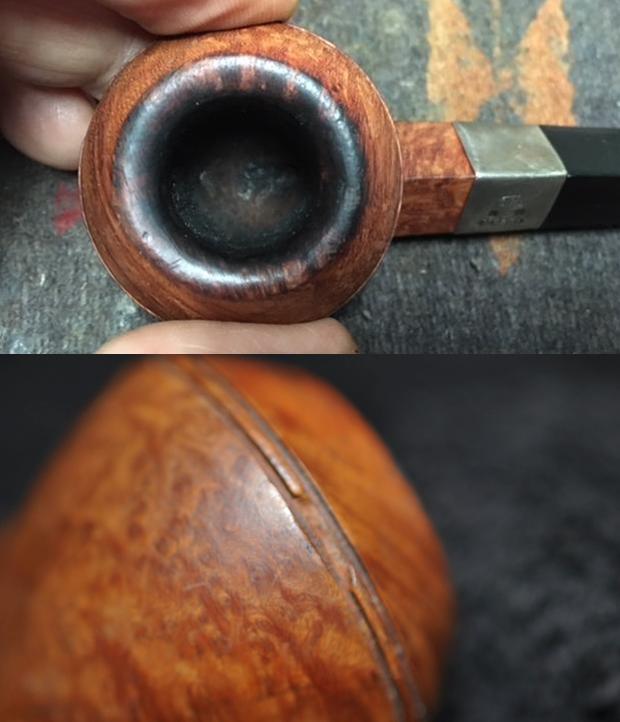
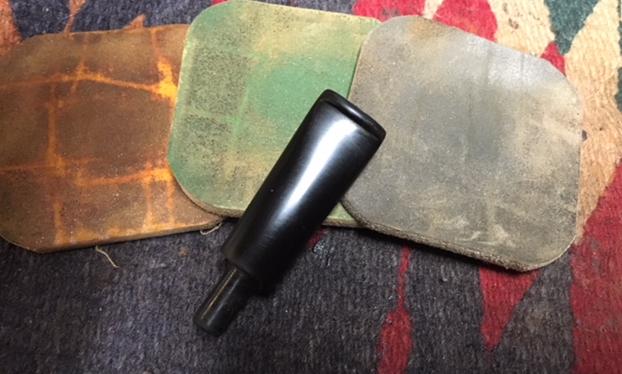
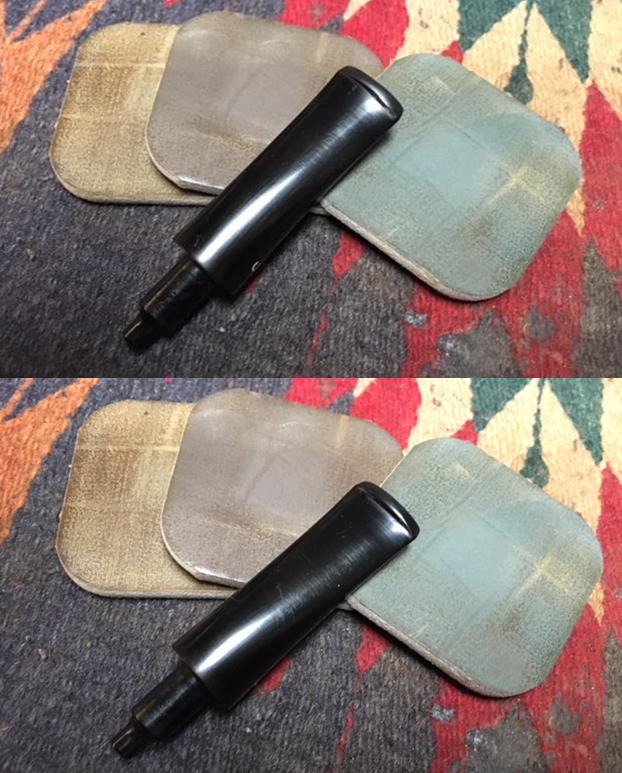
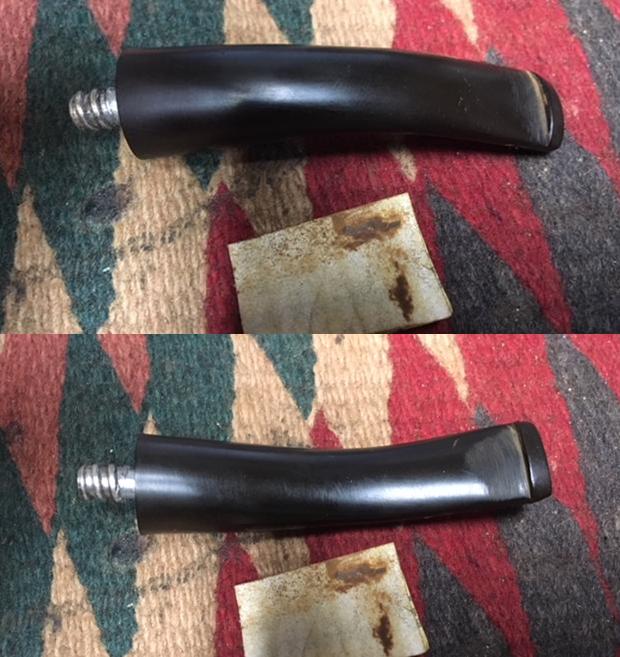
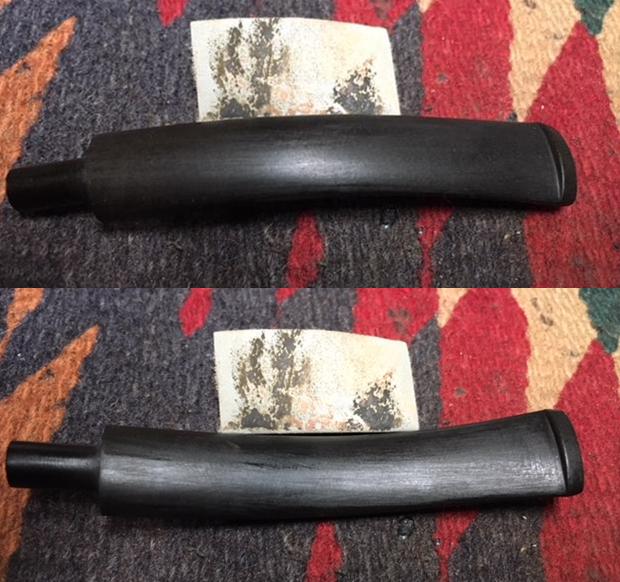
 I started with the stem on this one. I sanded out the tooth chatter and the tooth marks next to the button on both sides and the repair on the top of the button with 220 grit sandpaper followed by 400 grit wet dry sandpaper.
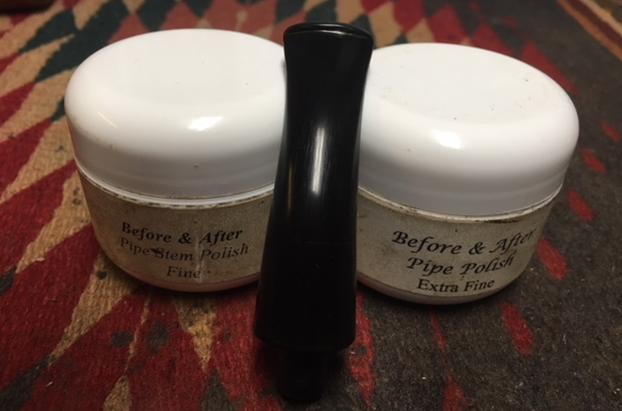
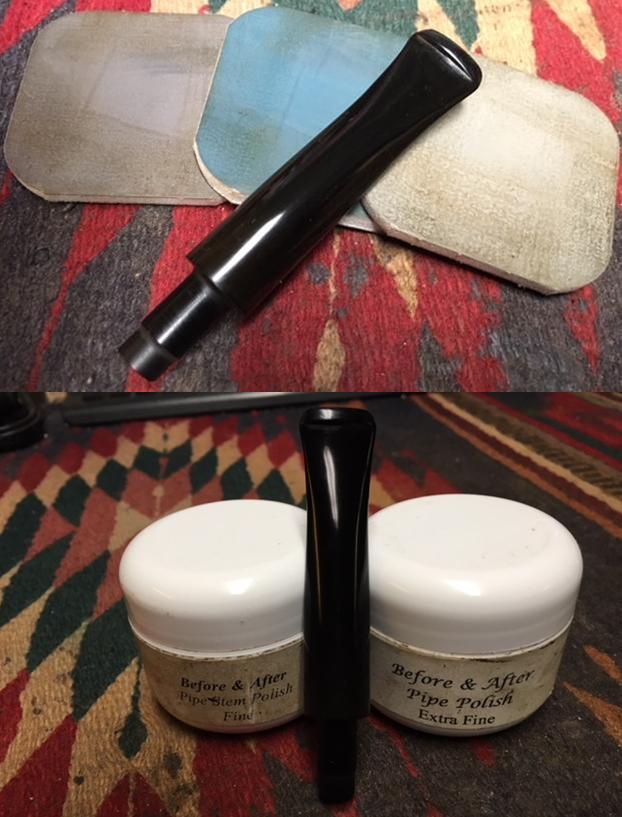
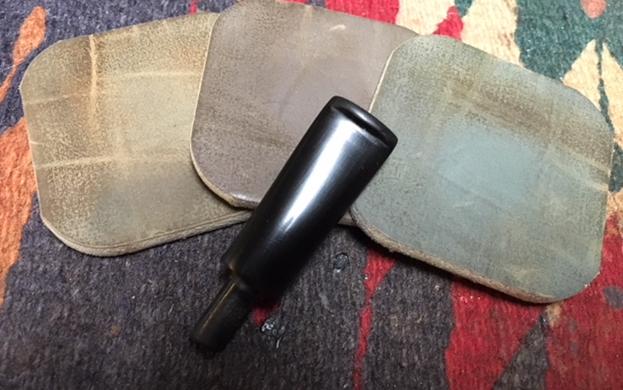
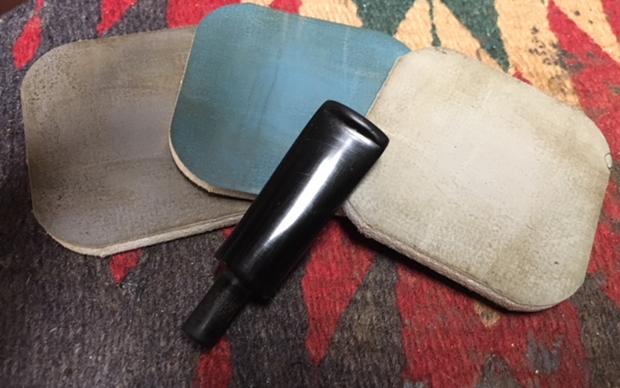
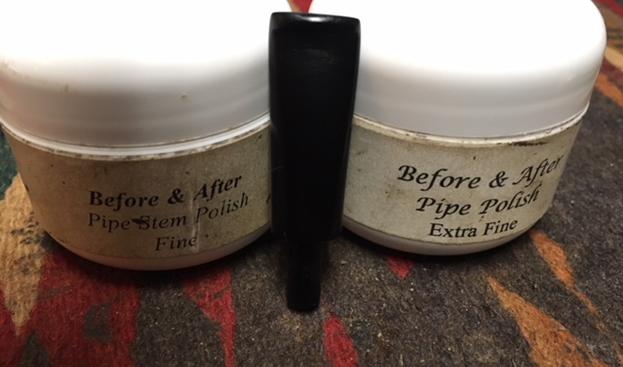
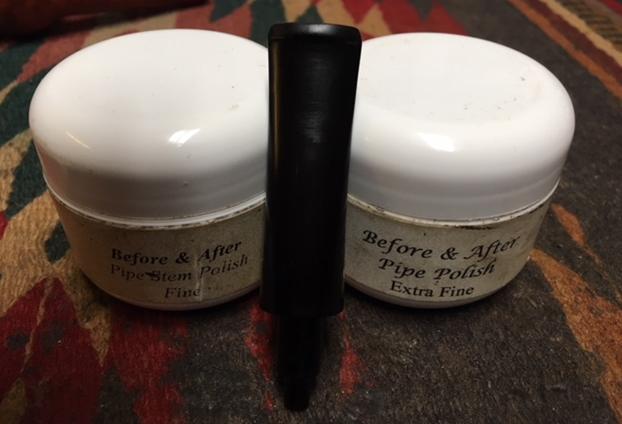
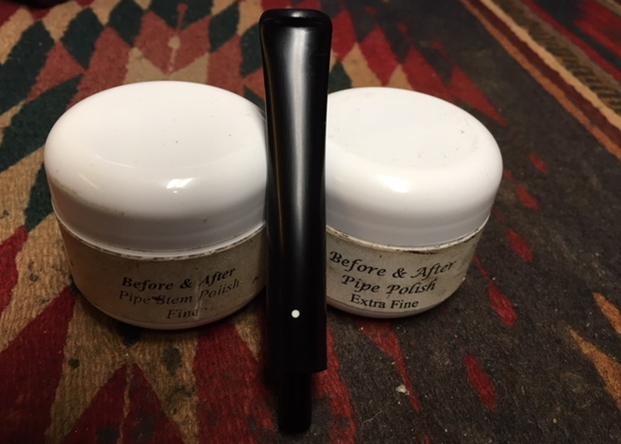
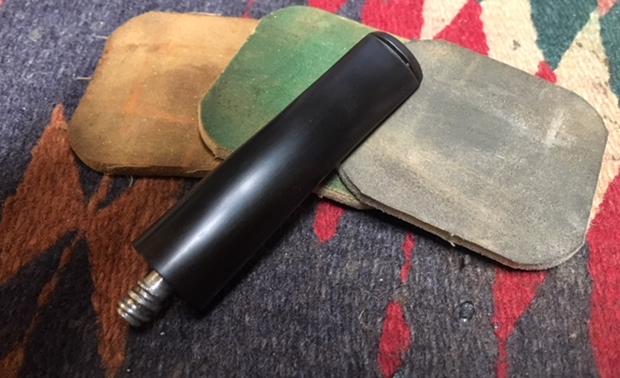
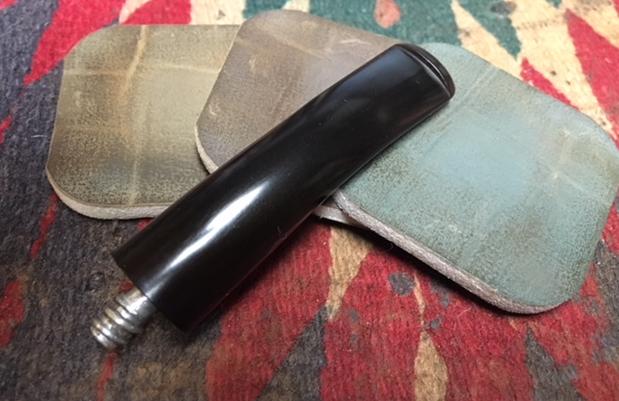
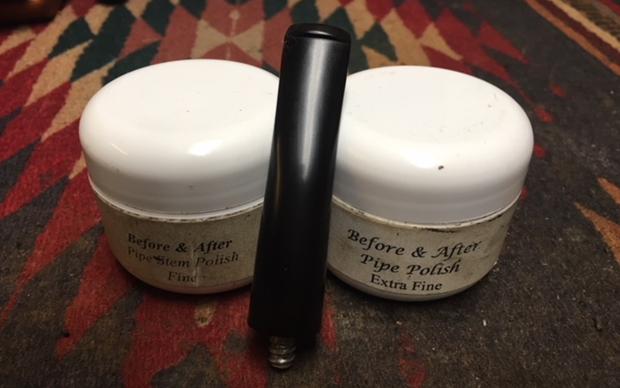
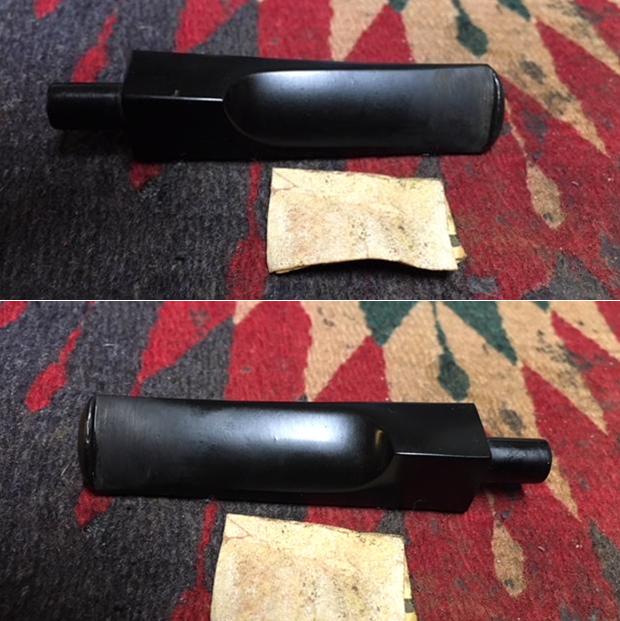 I polished stem with micromesh sanding pads – wet sanding with 1500-2400 grit pads and dry sanding with 3200-12000 grit pads. I wiped the stem down with Obsidian Oil after each pad. I polished it with Before & After Pipe Stem Polish, both Fine and Extra Fine. I gave it a final coat of Obsidian Oil and set it aside to dry.
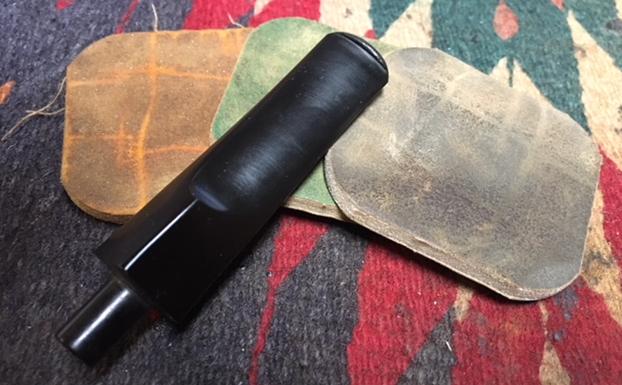
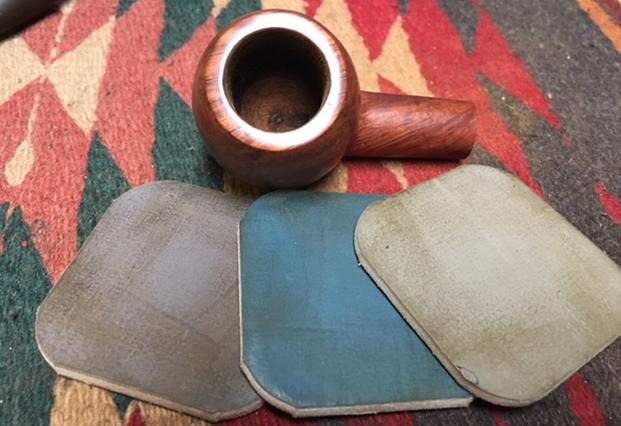
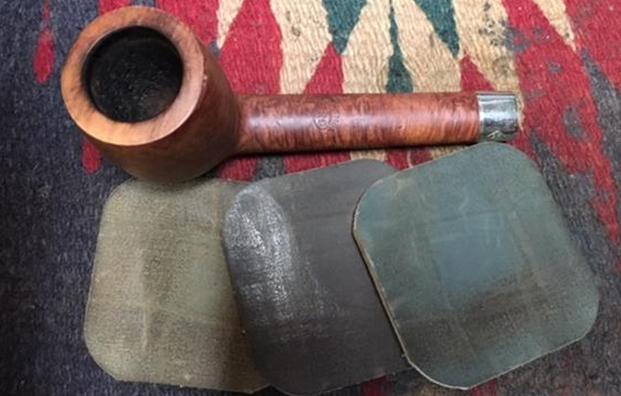
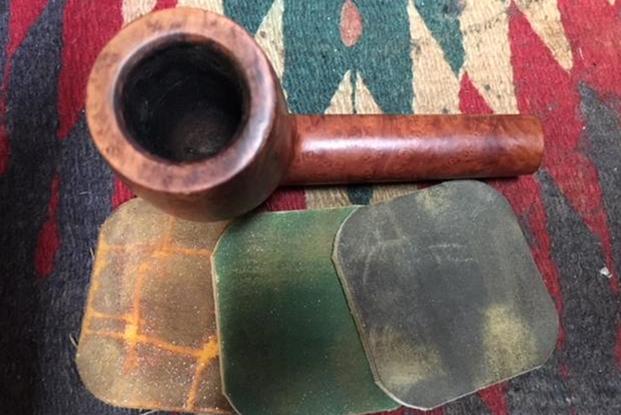
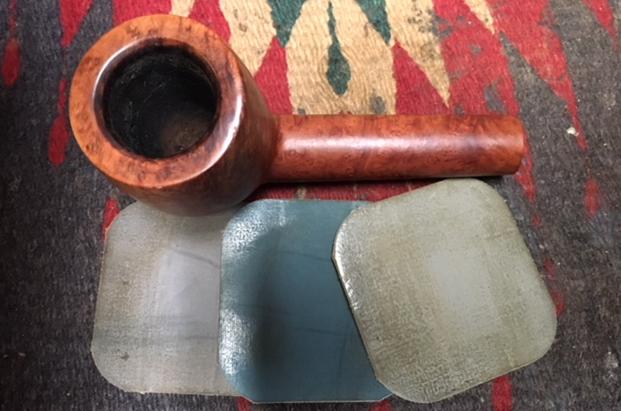
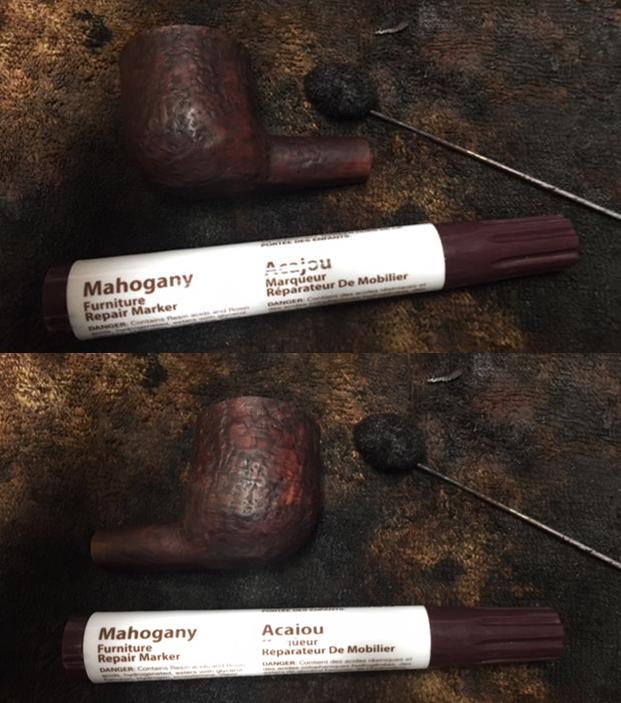
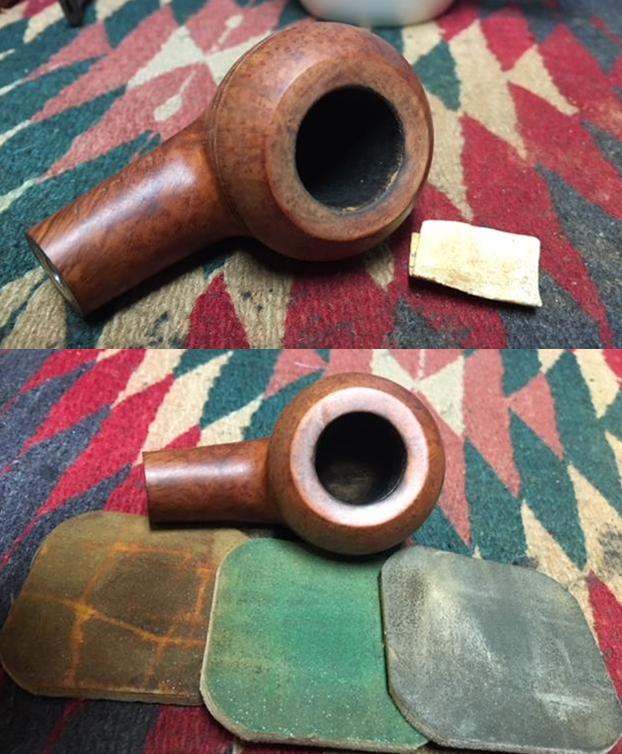
 I worked on the damaged rim top, edges, bevel and the small marks and nicks on it 200 grit sandpaper to smooth out the damage and blend it with the rest of the rim. The rounded edges of the rim cap needed to be cleaned up. I polished the rim with micromesh sanding pads – 1500-12000 grit micromesh sanding pads. I wiped it down after each pad to check on the progress.
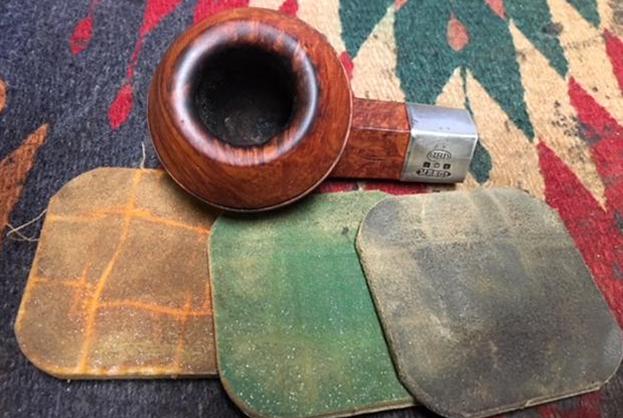
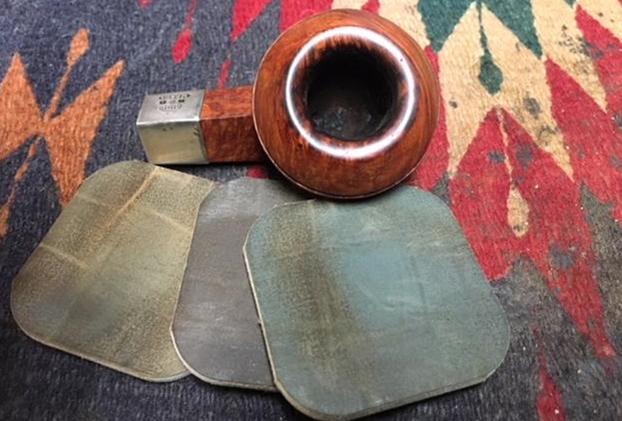
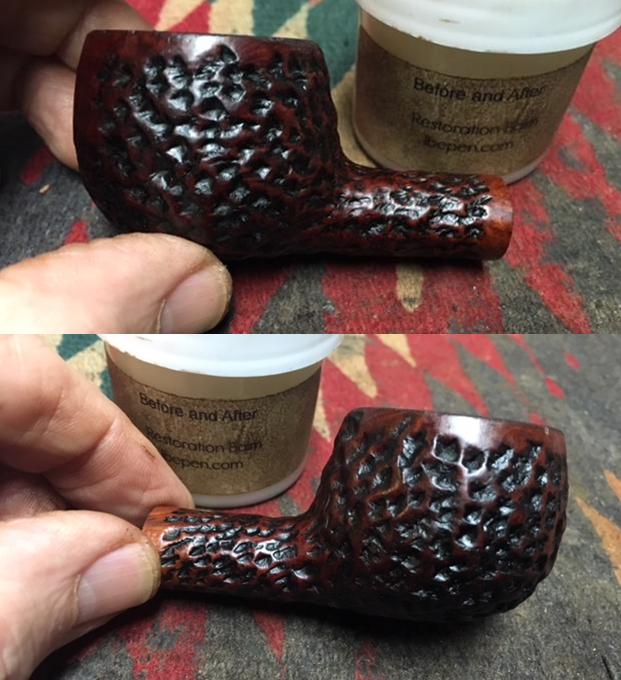
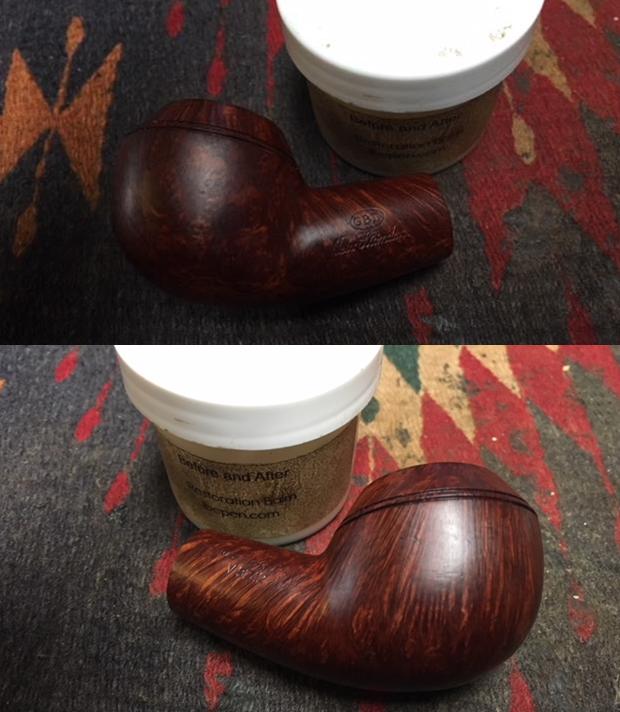
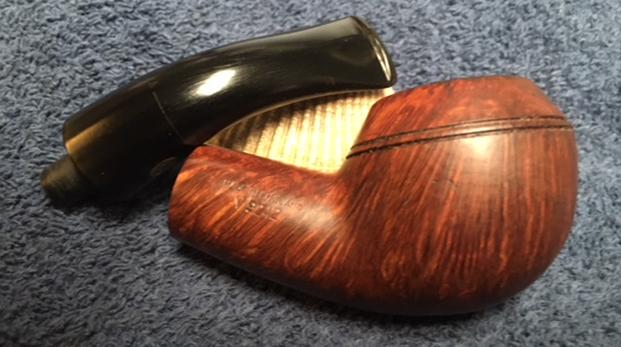
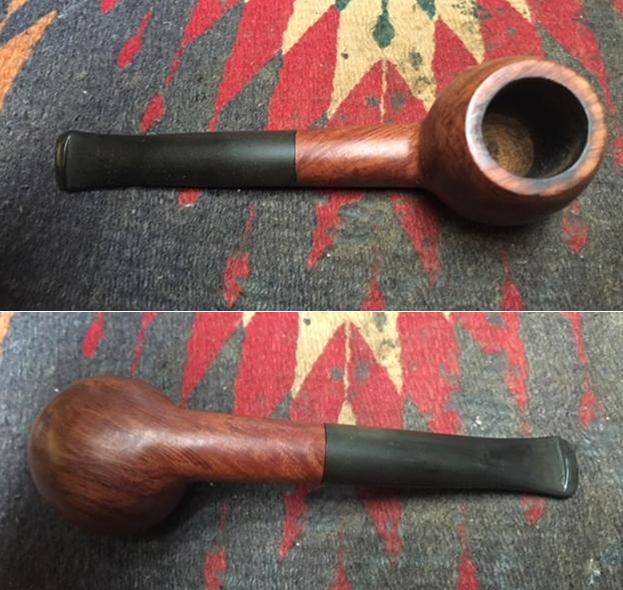
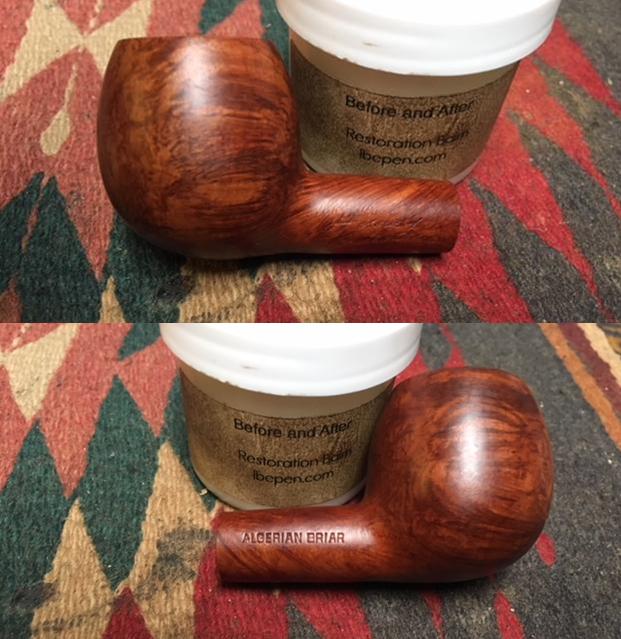
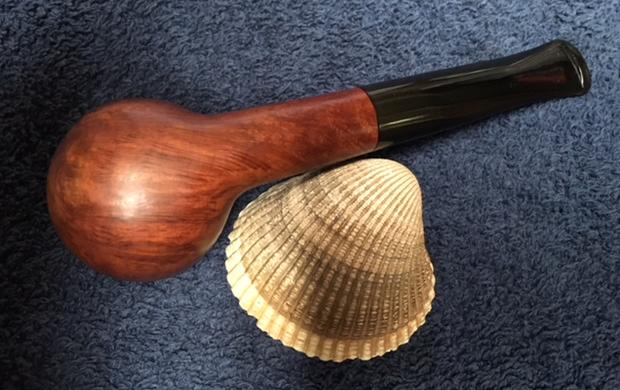
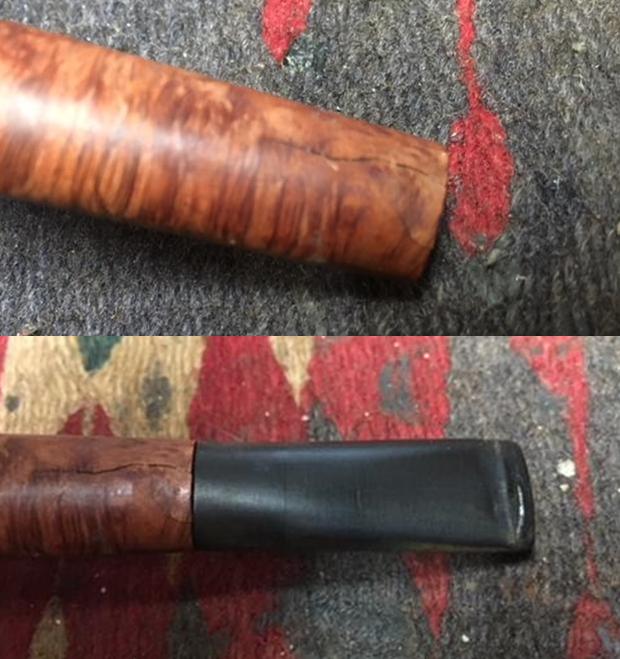
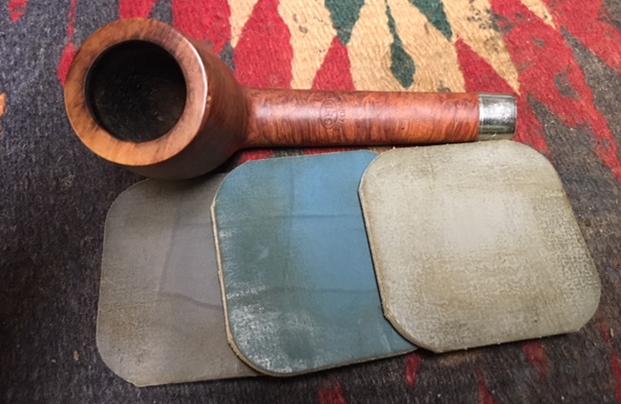
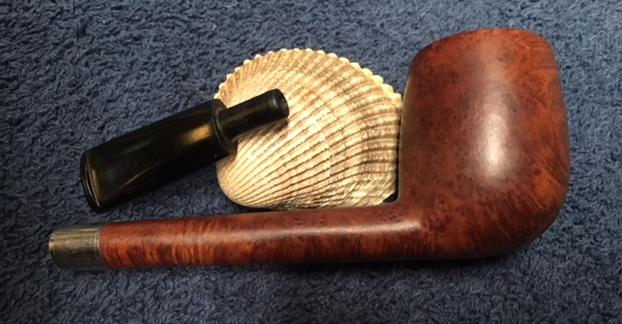
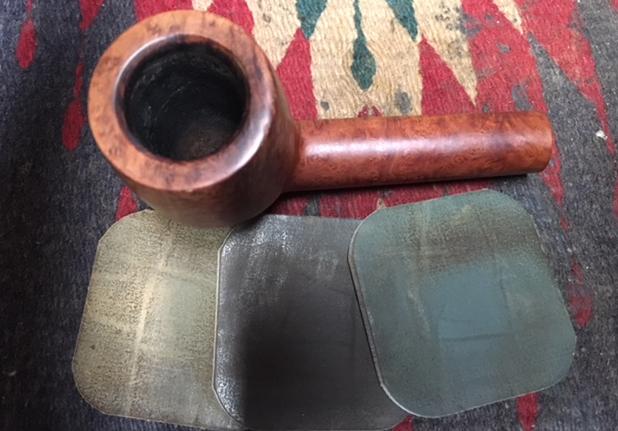
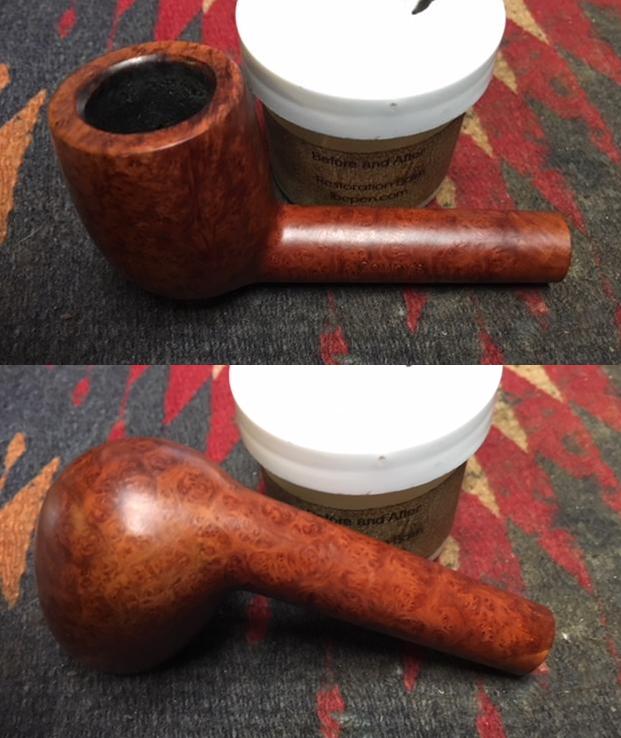
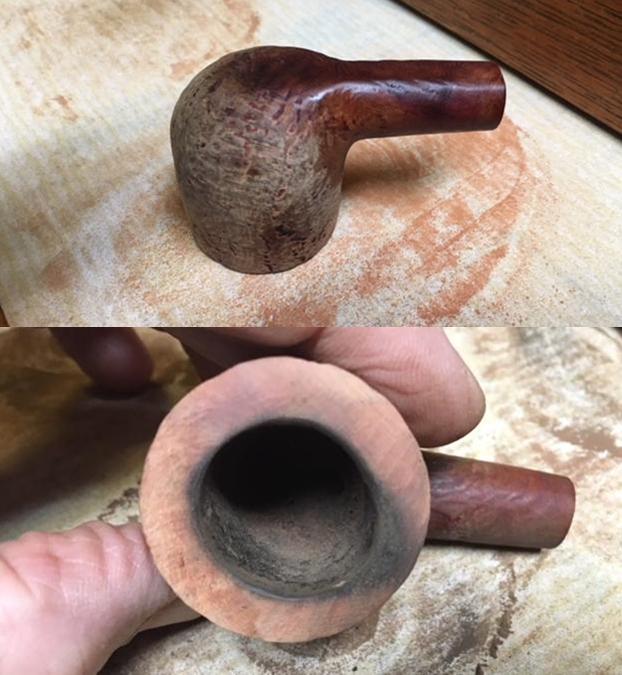
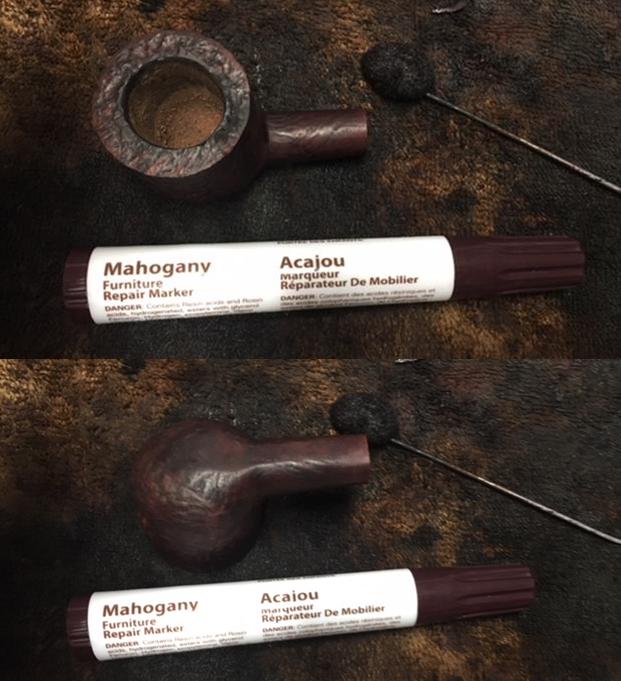
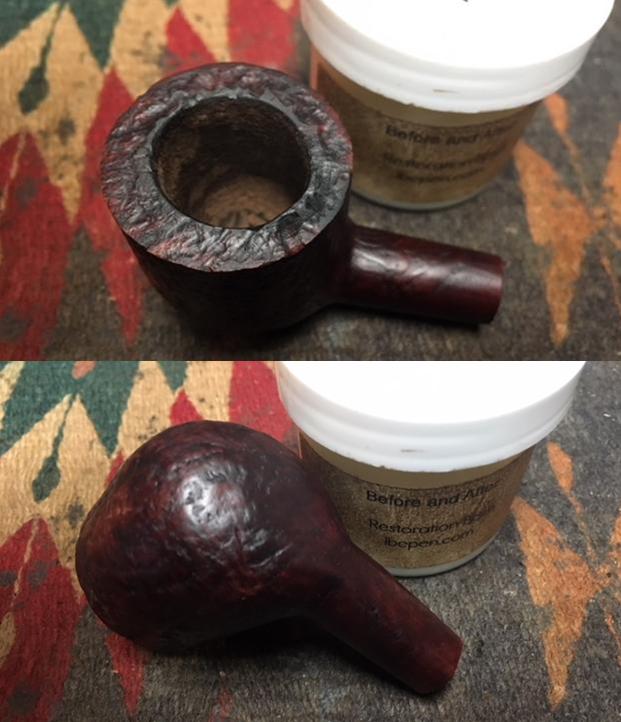
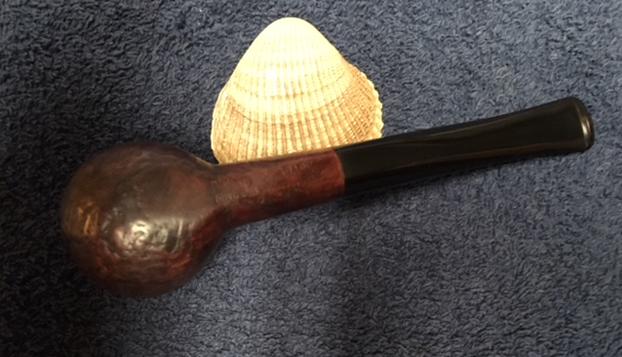
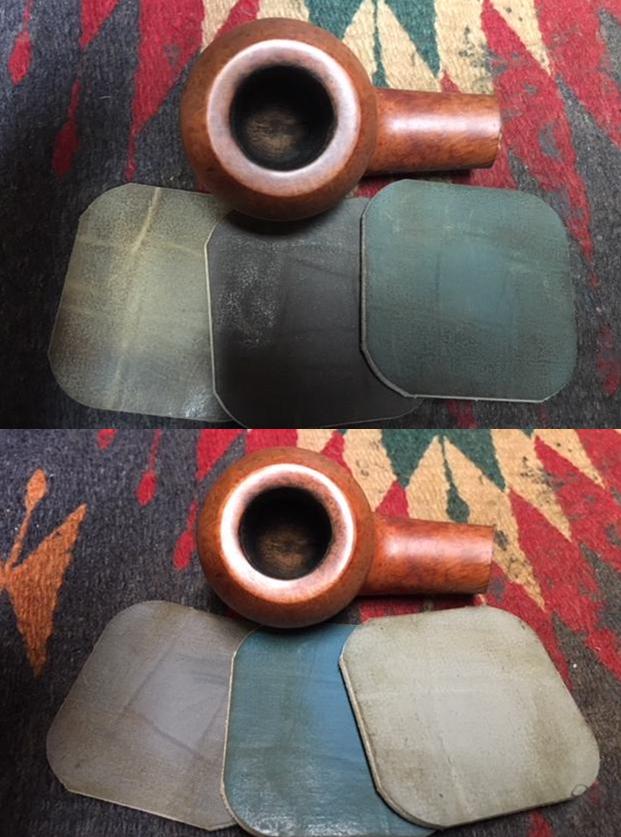
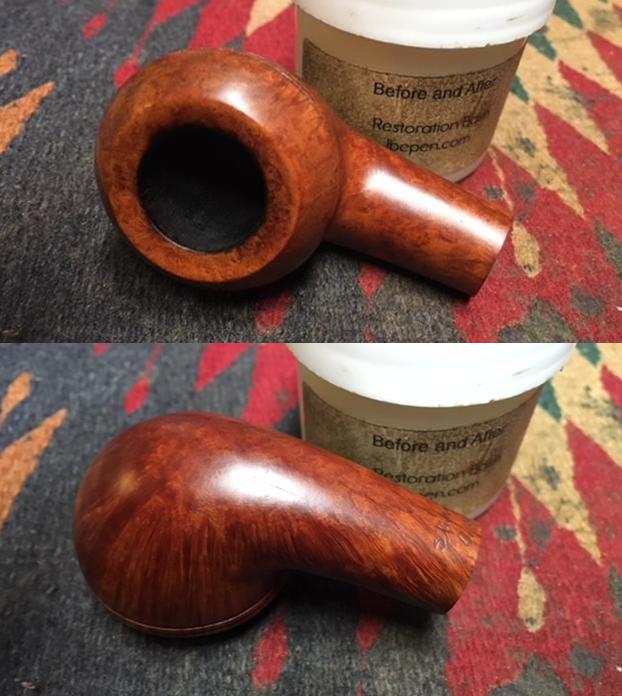
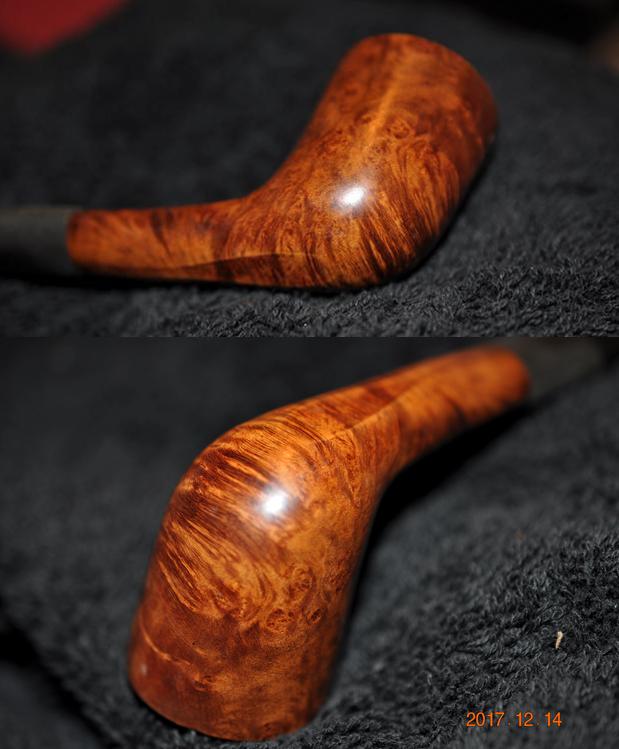
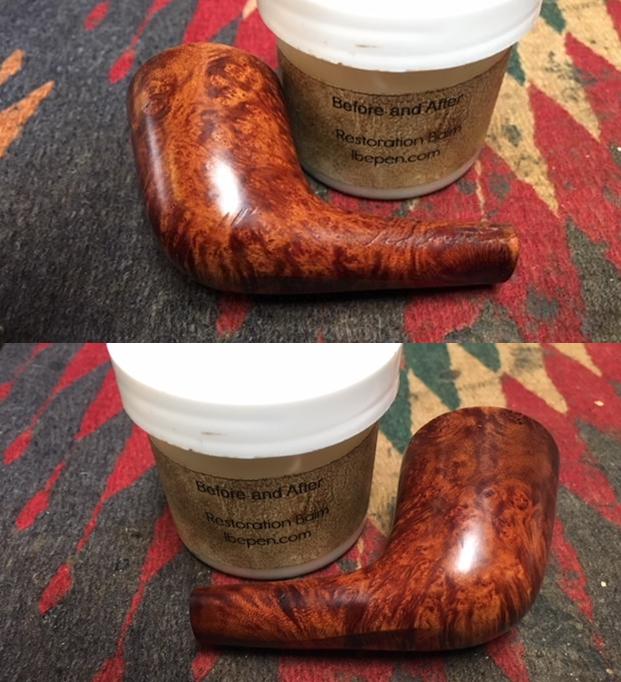
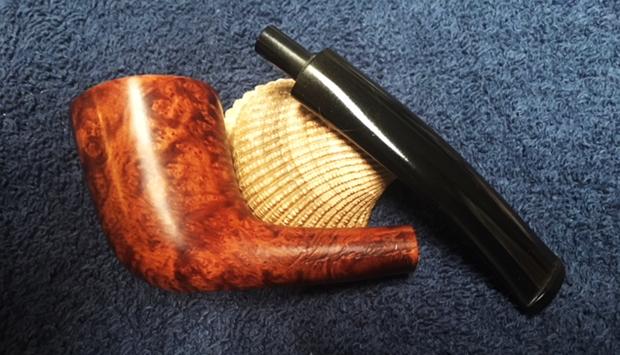
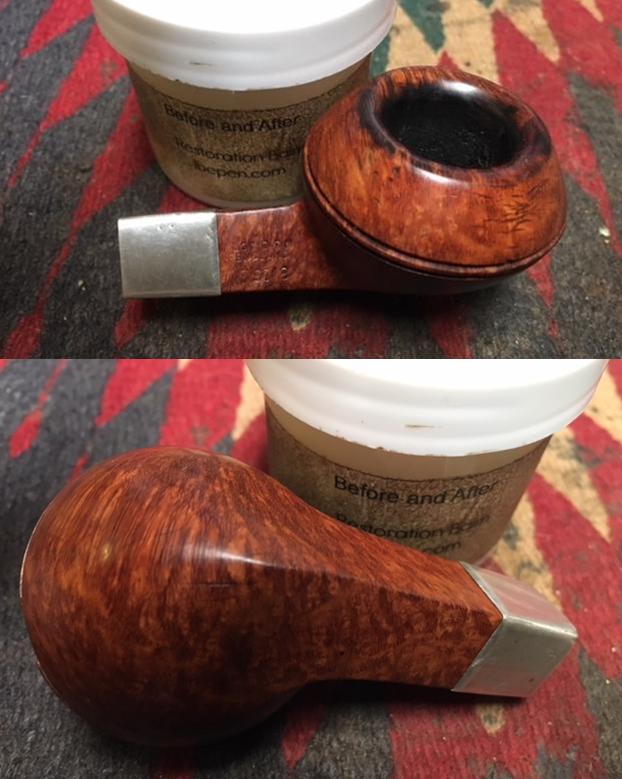
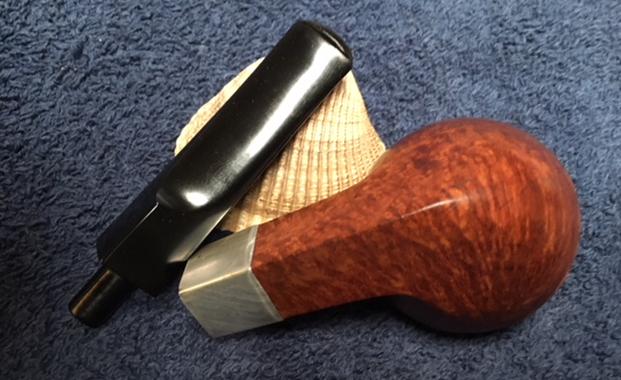
 I worked Before & After Restoration Balm deep into the briar on the smooth finish to clean, enliven and protect it. I wiped it off with a soft cloth. I buffed the bowl with a cotton cloth to polish it. It really began to have a deep shine in the briar. I took some photos of the bowl at this point to mark the progress in the restoration. The grain on the bowl is really beginning to stand out and will only do so more as the pipe is waxed.
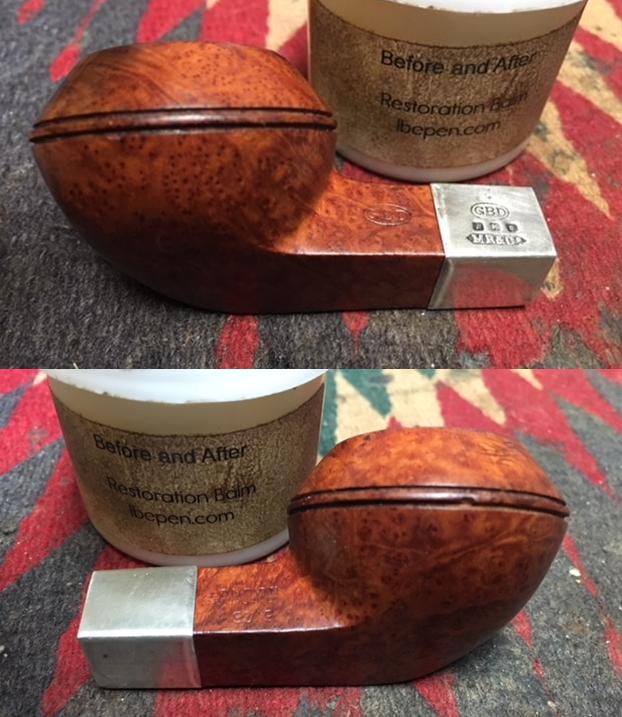
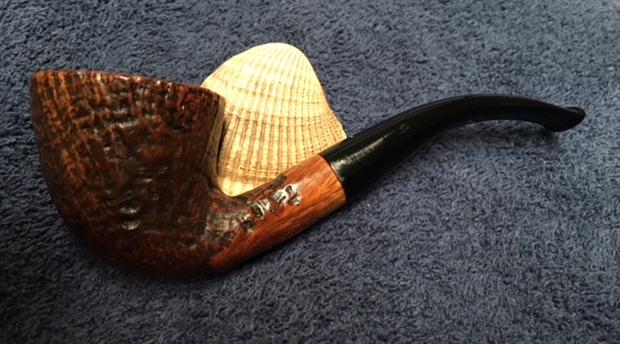
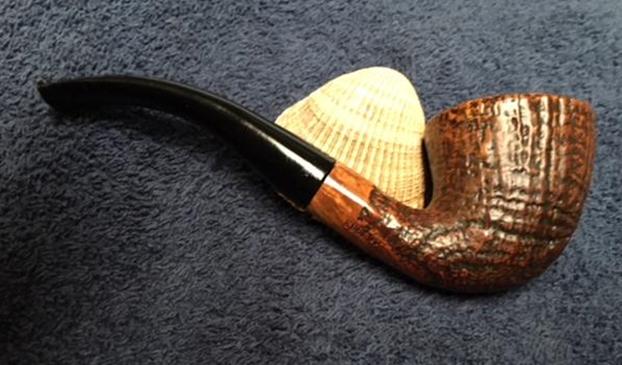
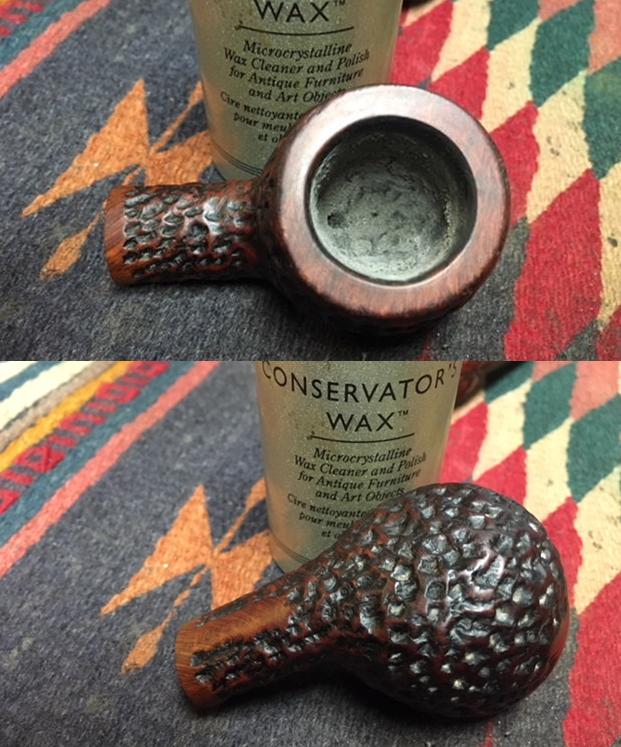
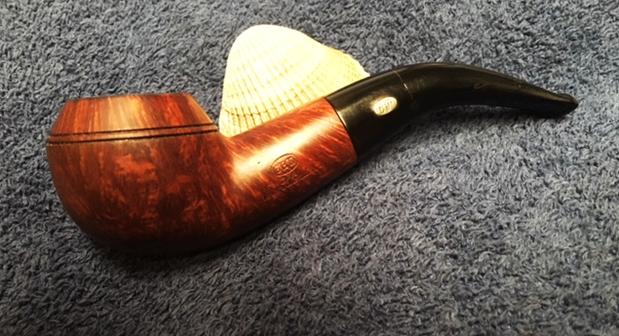
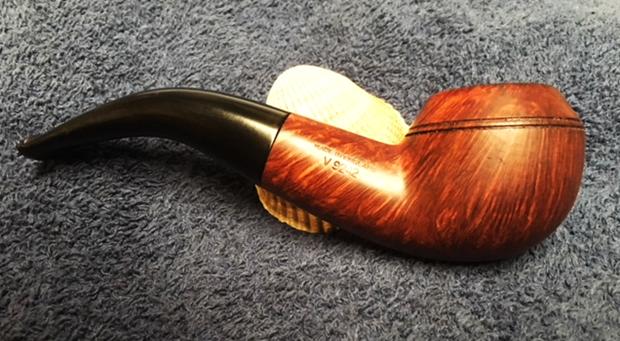
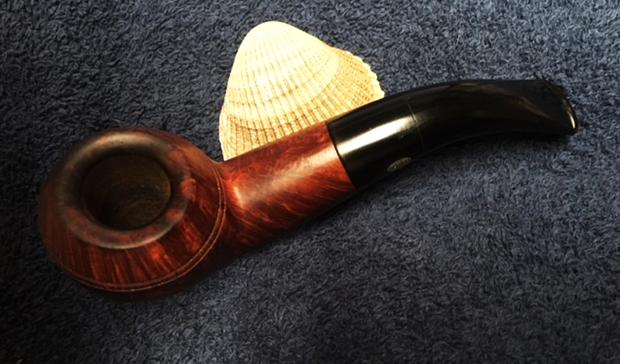
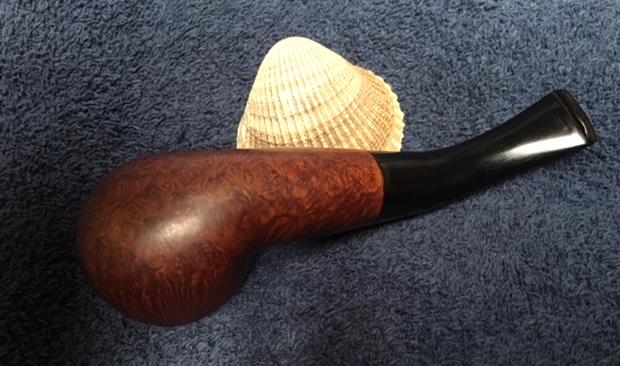
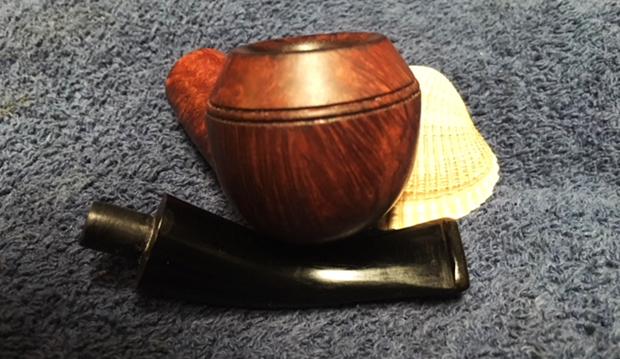
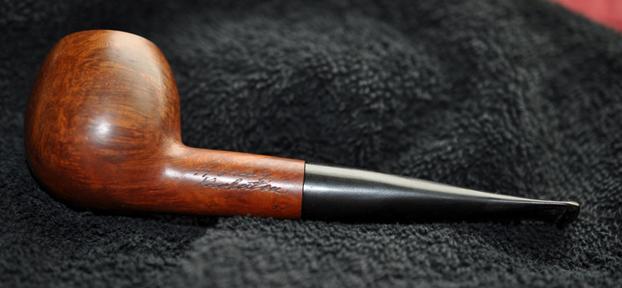
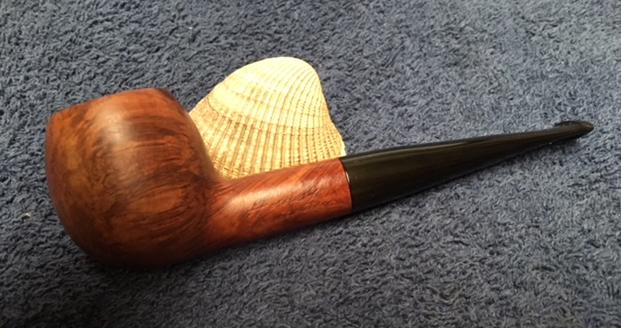
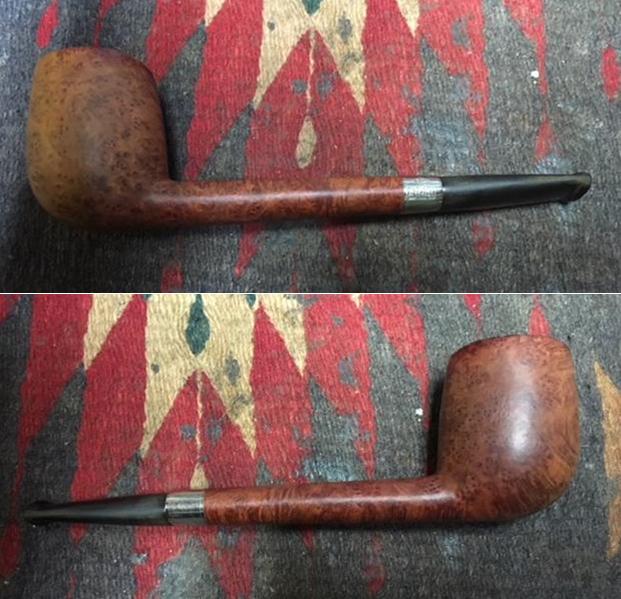
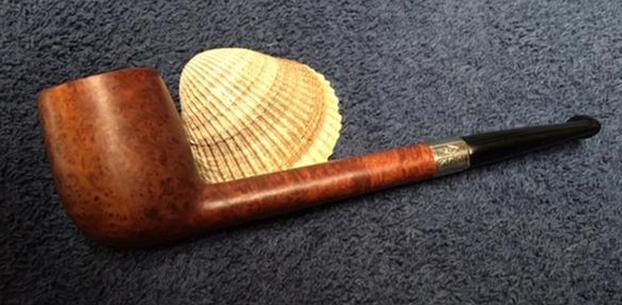
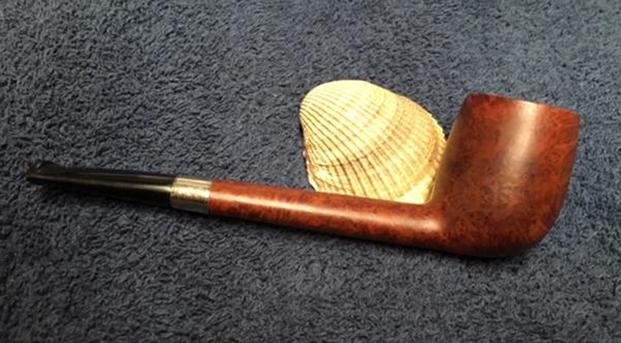
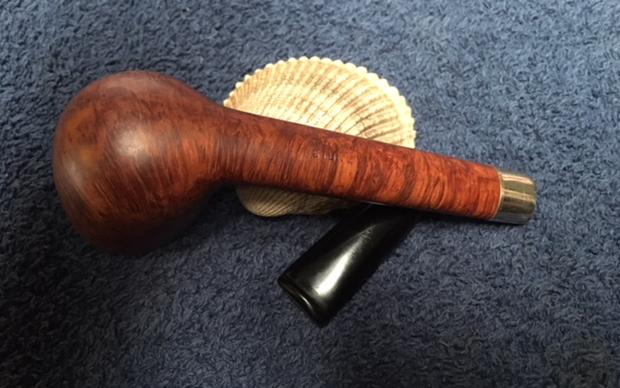
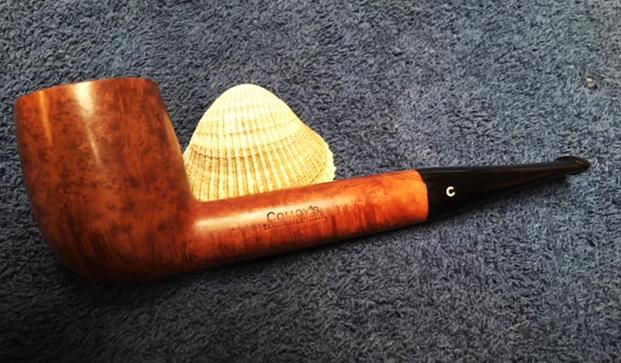
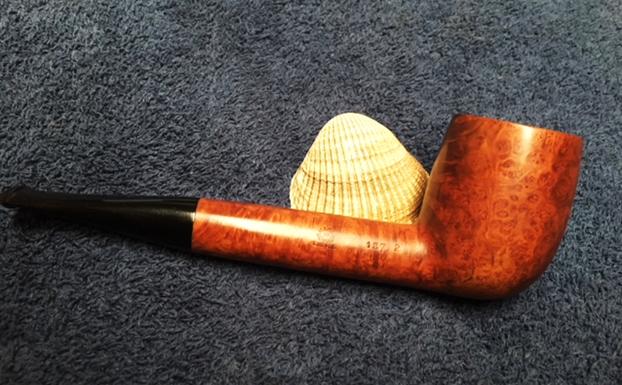
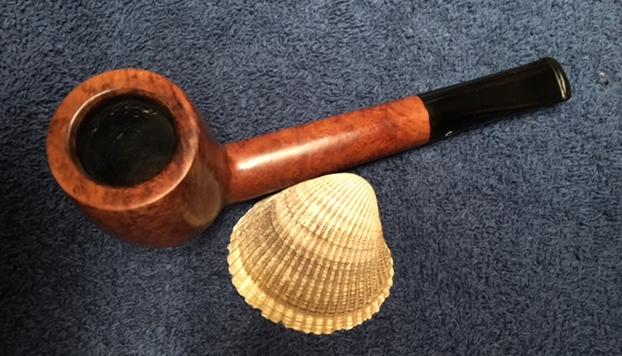
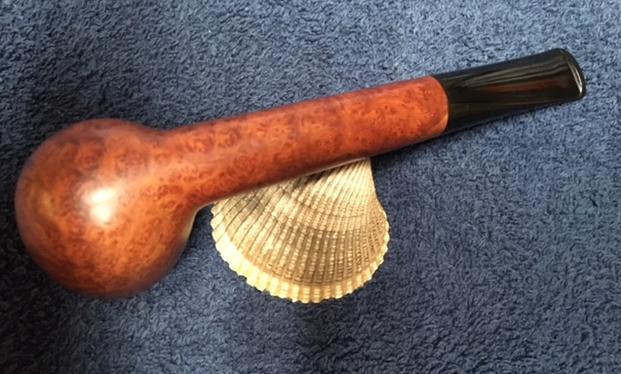
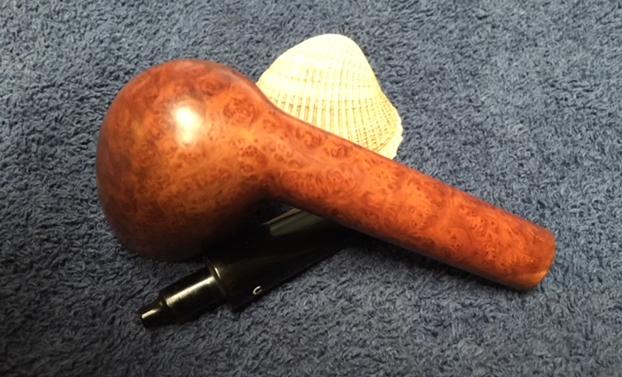
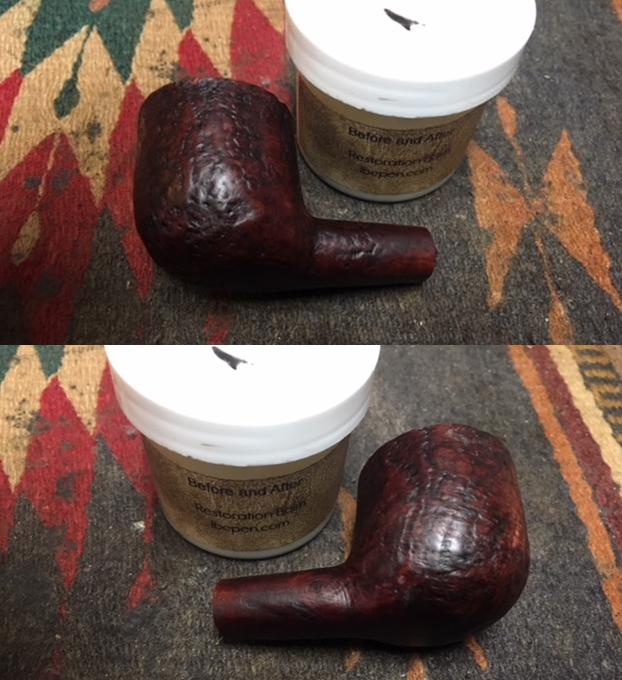
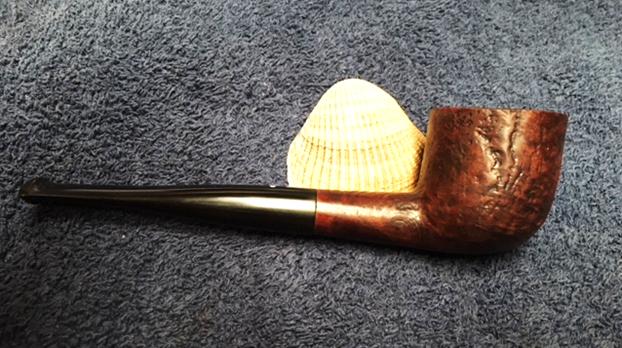
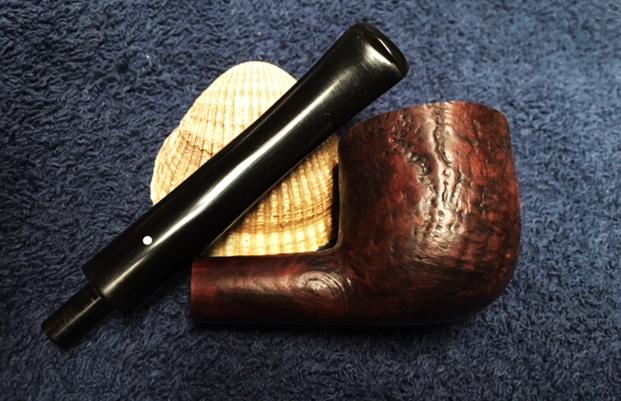
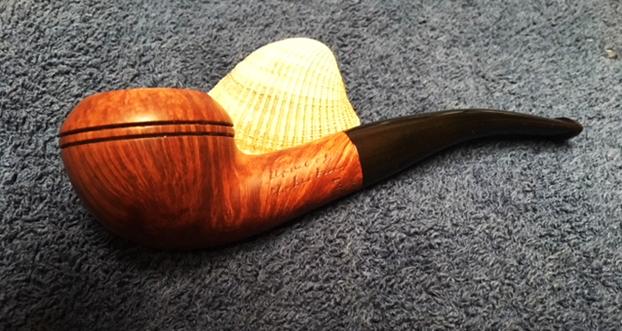
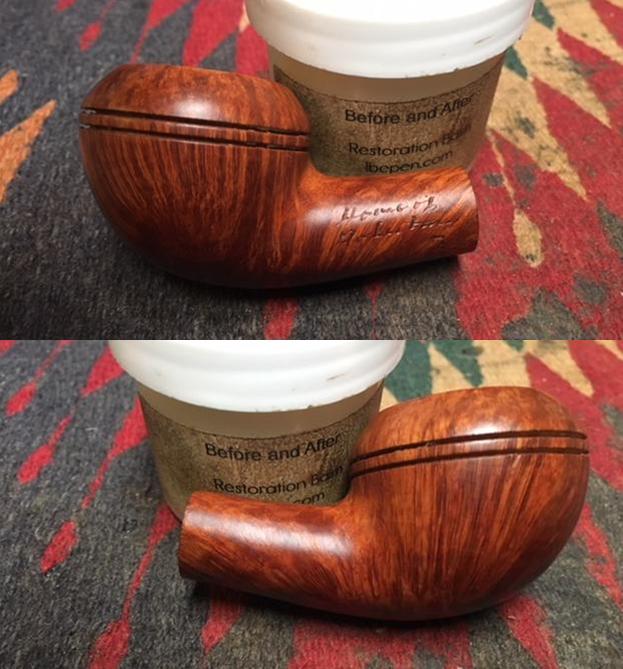
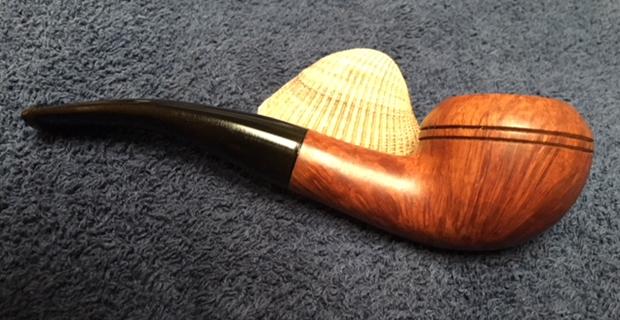
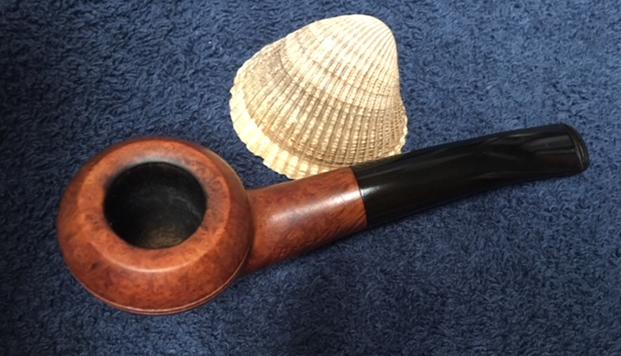
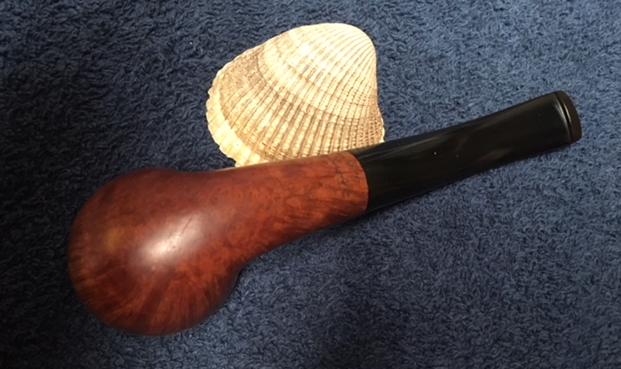
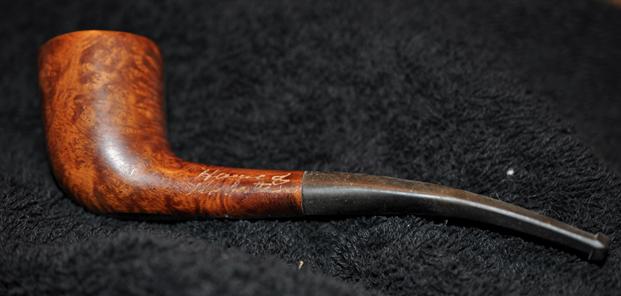
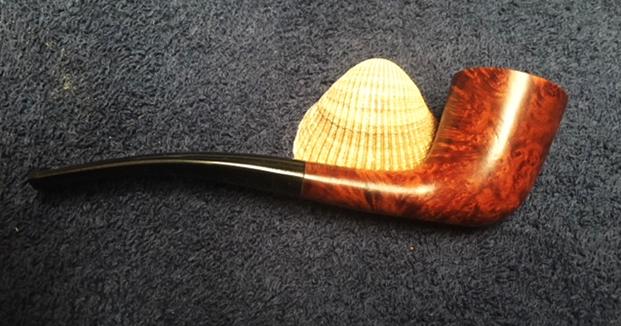
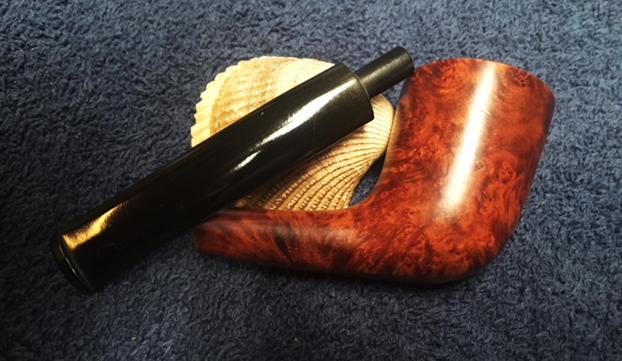
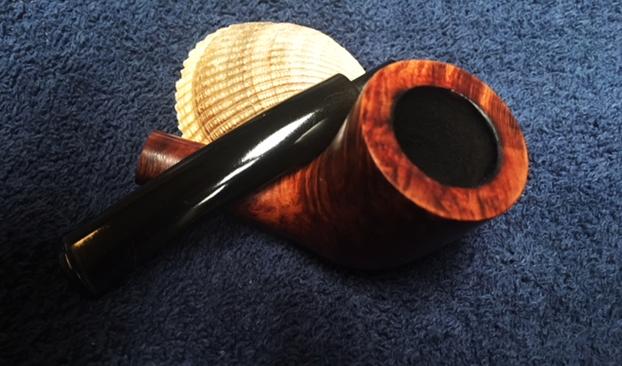
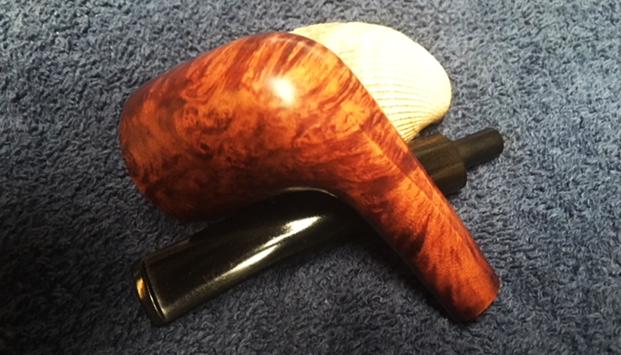
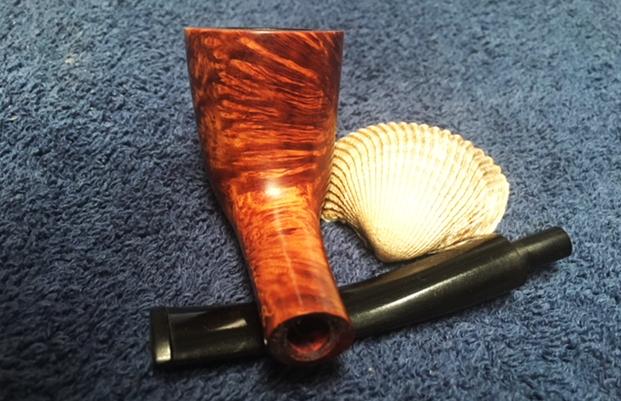
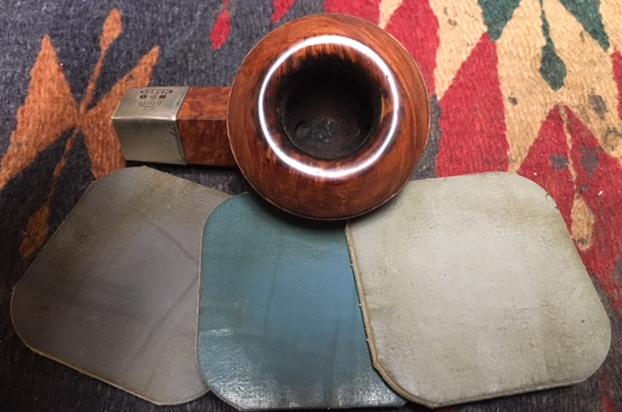
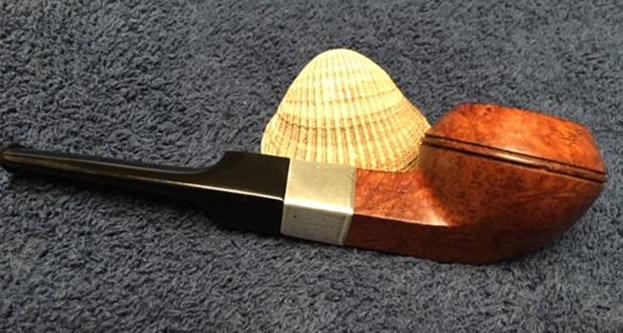
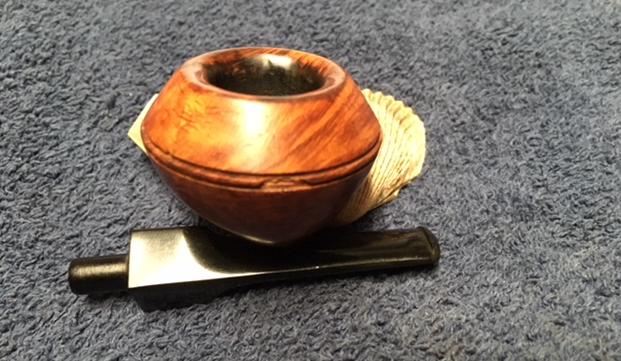
 This is one of the oldest GBD pipes that I have worked on. I am not sure the stem is original or a replacement but it is definitely older. I wonder if Barry’s Dad did not have a replace done for this old pipe the same time he did for the 1939 Dunhill Patent Shell. I suppose we will never know. The vulcanite is high quality and shined up well. I decided to leave the small nicks and the damage to the ring as it tells the story of this old timer. I put the stem back on the bowl and worked the pipe over on the buffing wheel using Blue Diamond to polish the stem. I buffed the bowl and the stem to raise the shine on the briar and the vulcanite. I was careful to not buff the stamping and damage it. I gave the bowl and stem multiple coats of carnauba wax. I buffed the entire pipe with a clean buffing pad to raise the shine. I hand buffed it with a microfiber cloth to deepen the shine. The finished pipe is shown in the photos below. The rich brown stain allows the grain to really stand out on this little pipe and it works well with the rich black of the polished vulcanite stem. This GBD Squat Bulldog is a beautiful looking pipe. The dimensions of the pipe are: Length: 5 1/2 inches, Height: 1 1/2 inches, Outside Diameter: 1 3/4 inches, Diameter of the chamber: 3/4 inches. This 1876 GBD is one that fits well in my collection of older pipes. There is something about these older GBDs that add a touch of real class. Thanks for walking through the restoration with me.
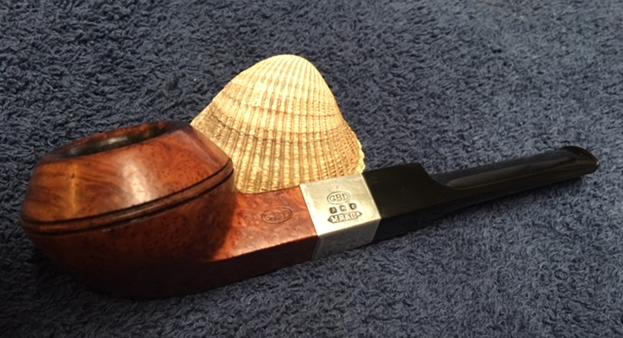

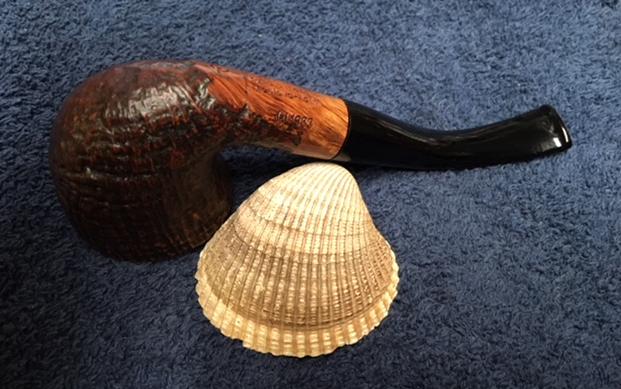
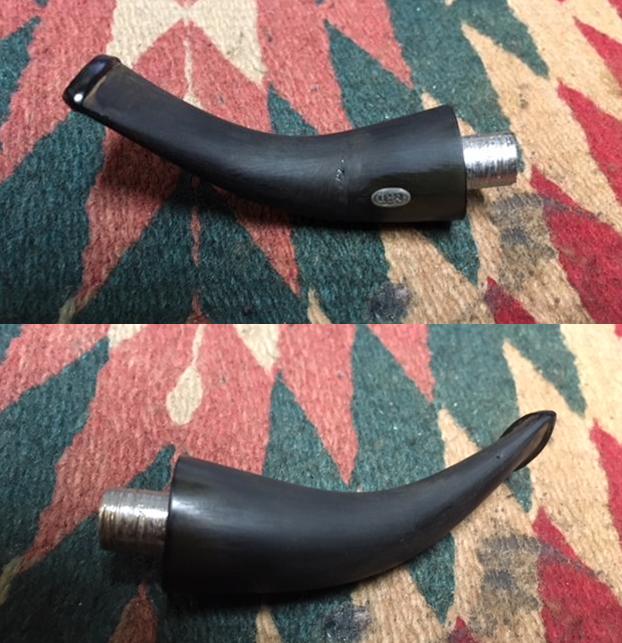
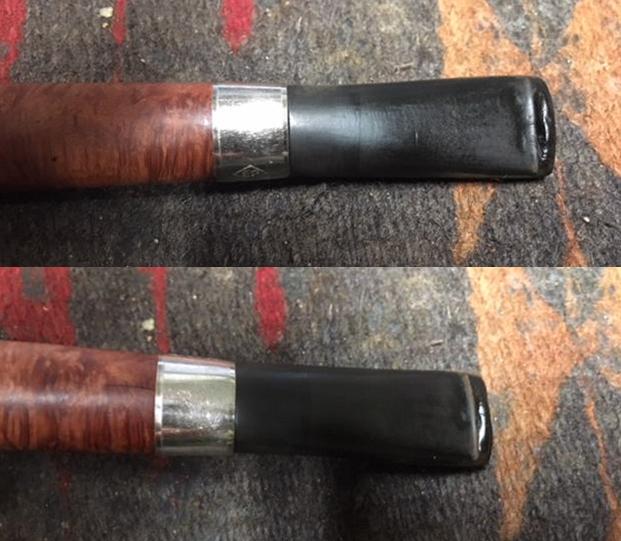
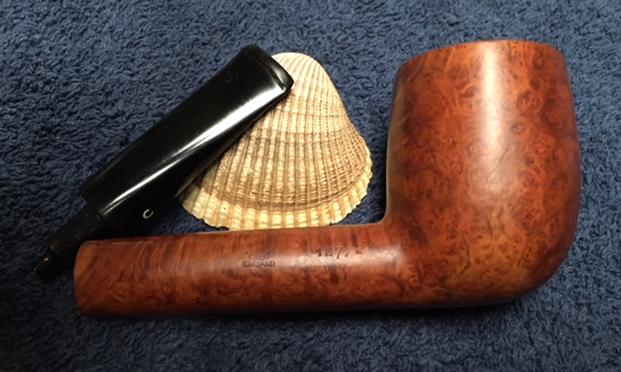
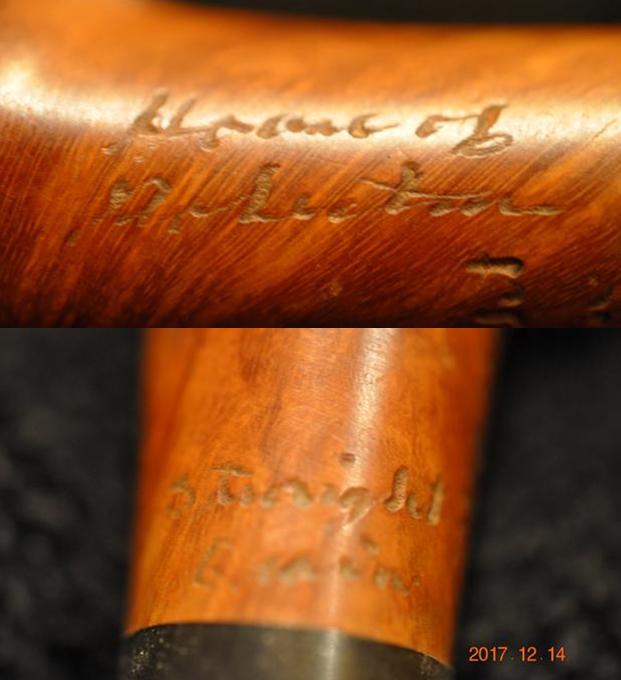
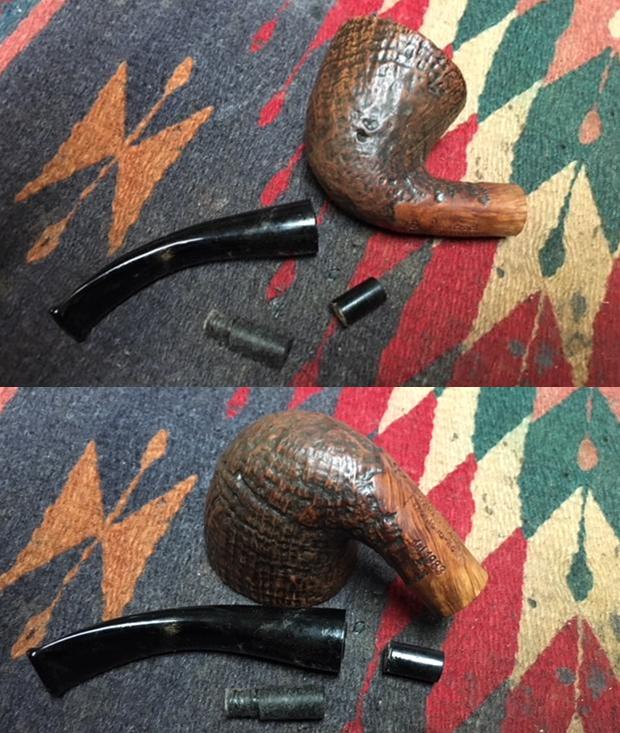 I took a photo of the logo and the stamping on the underside of the shank. I rolled the shank and took a second photo to show the dates stamp.
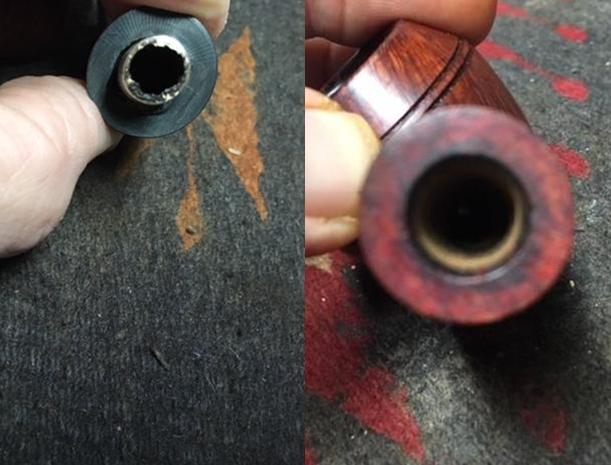
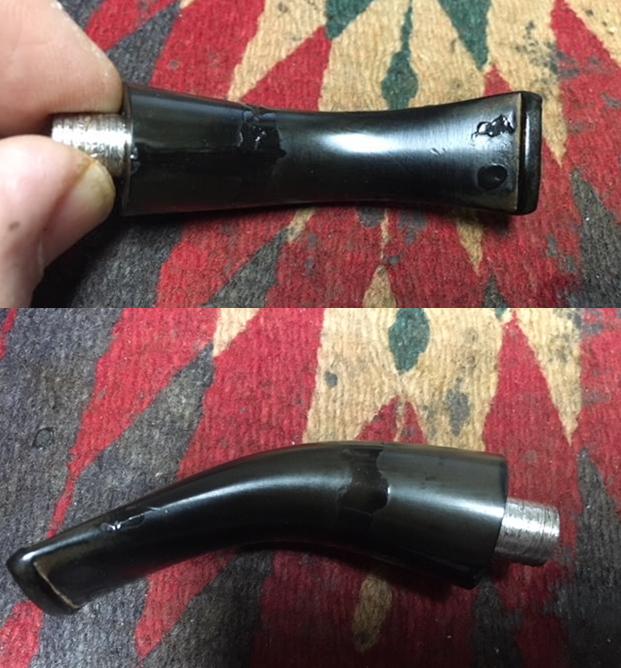
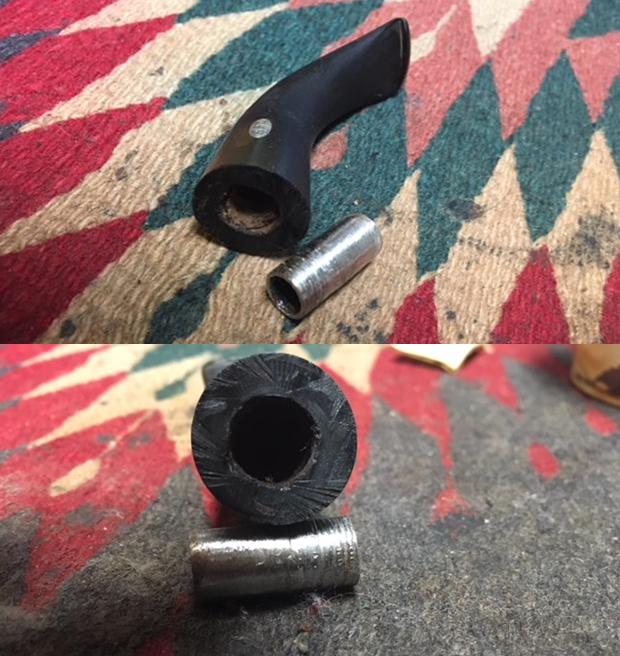
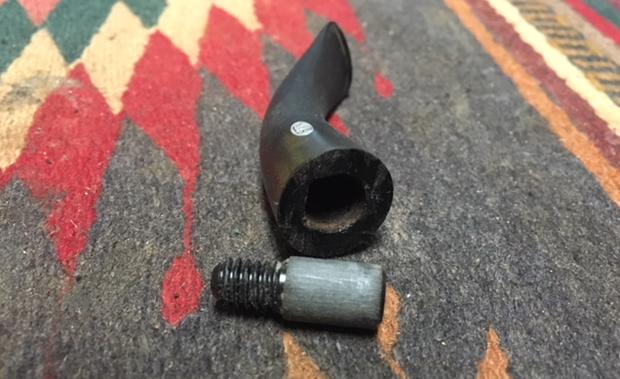
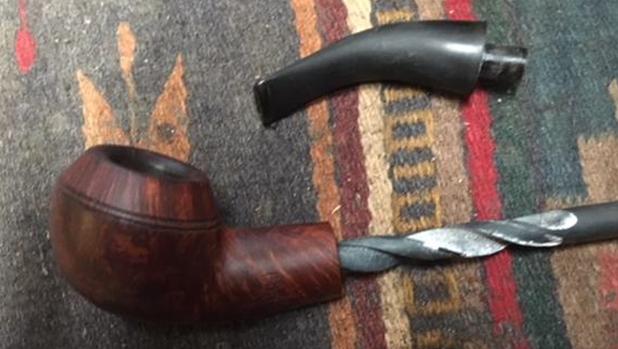
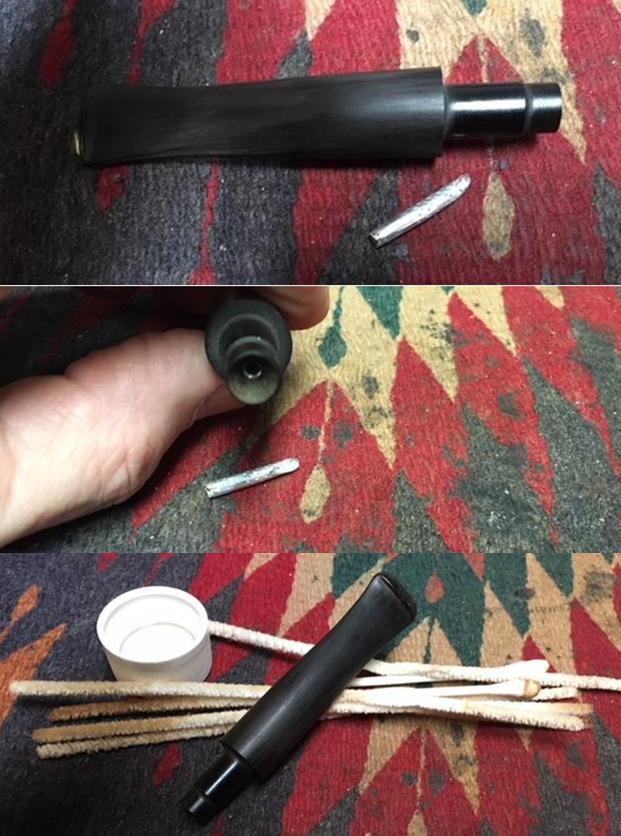
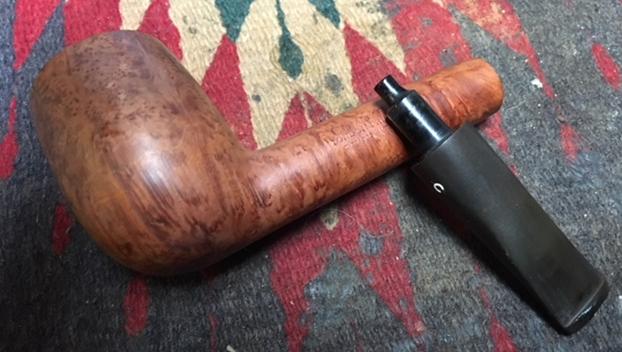
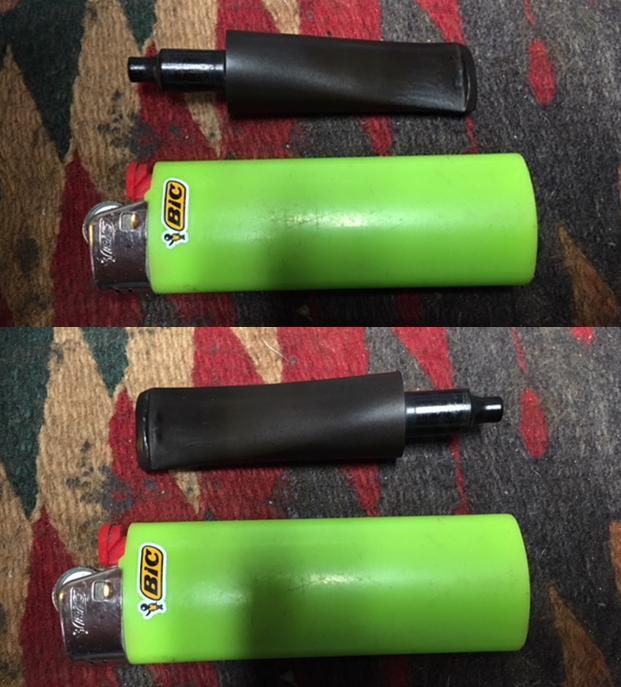
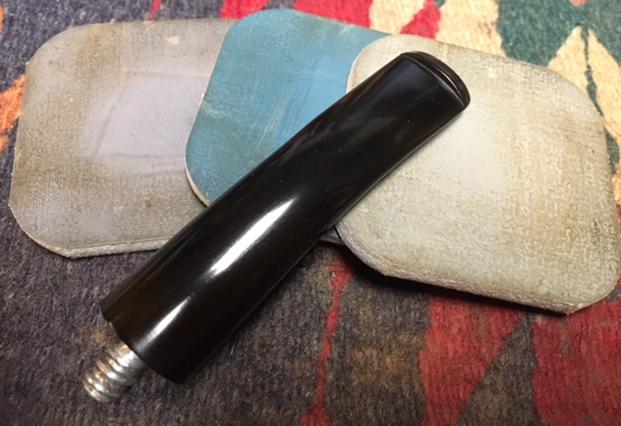
 I flattened the broken remnant of tenon on the end of the stem to give it a smooth face. I drilled the airway with a bit a little larger than the airway. I moved through 3 other drill bits until it was large enough for the threaded tenon.
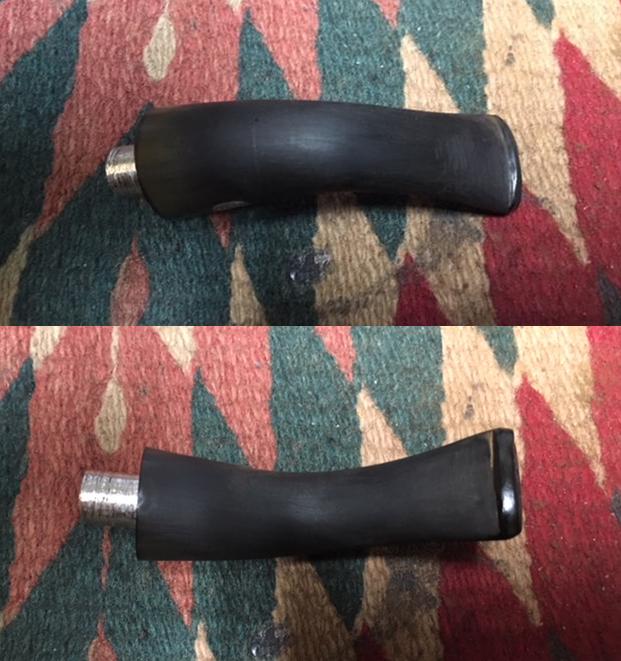
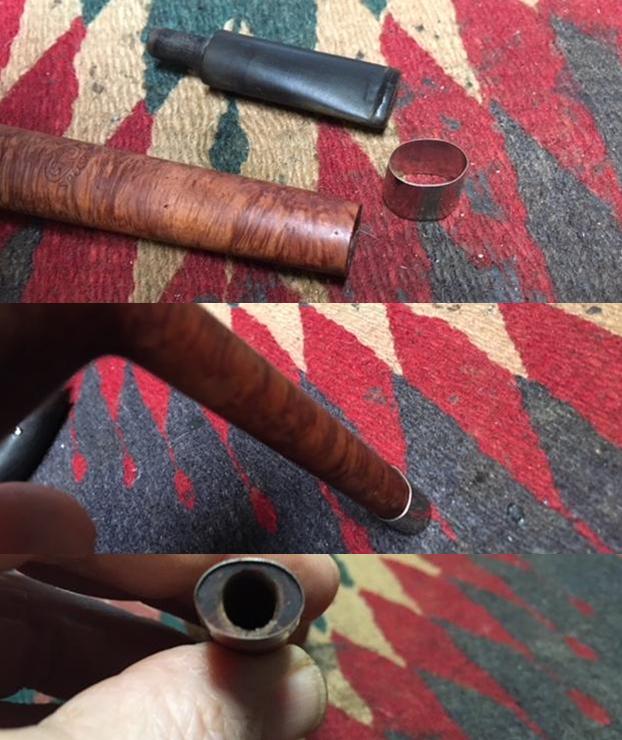
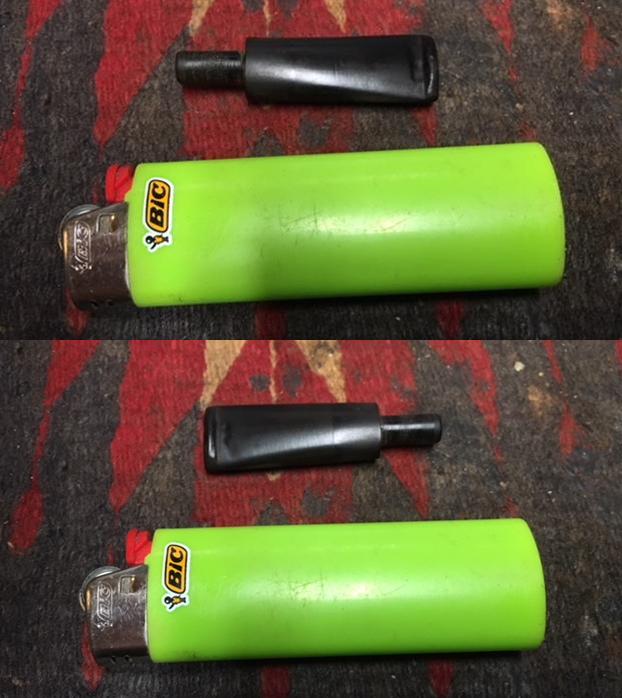
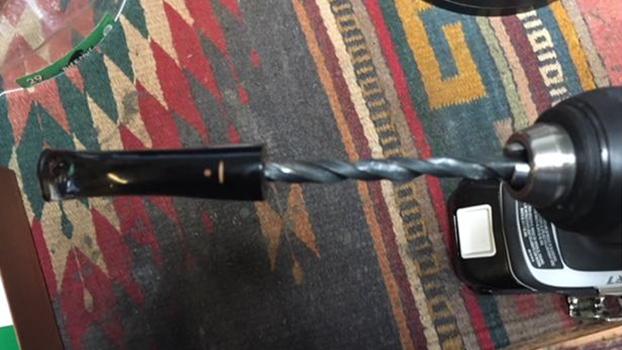 I used a Dremel and sanding drum to reduce the diameter of the tenon to fit the mortise of the pipe. While I was at it I roughed up the threads on the tenon to give the glue something to grip.
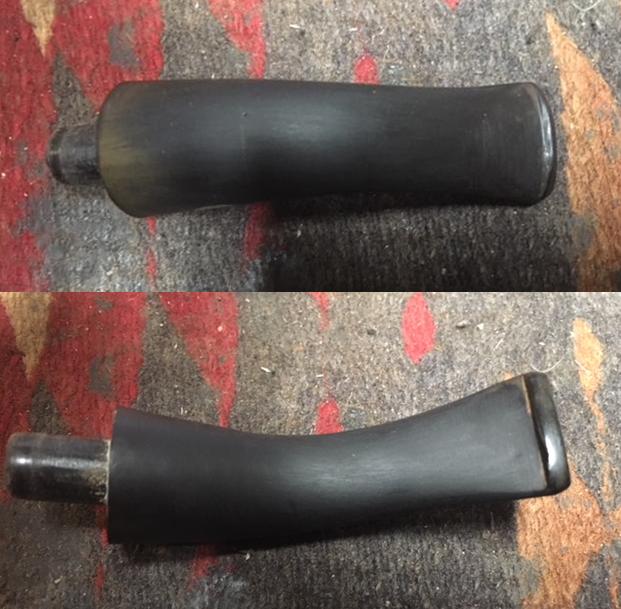
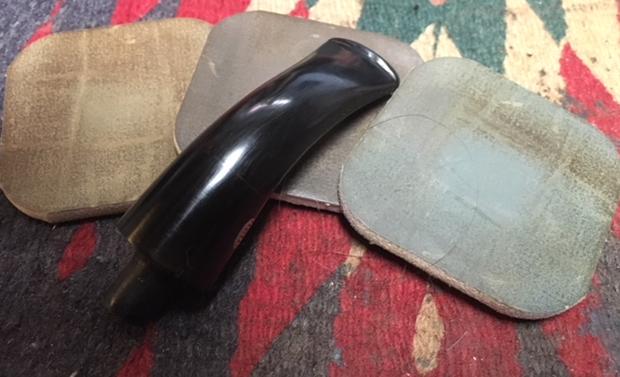
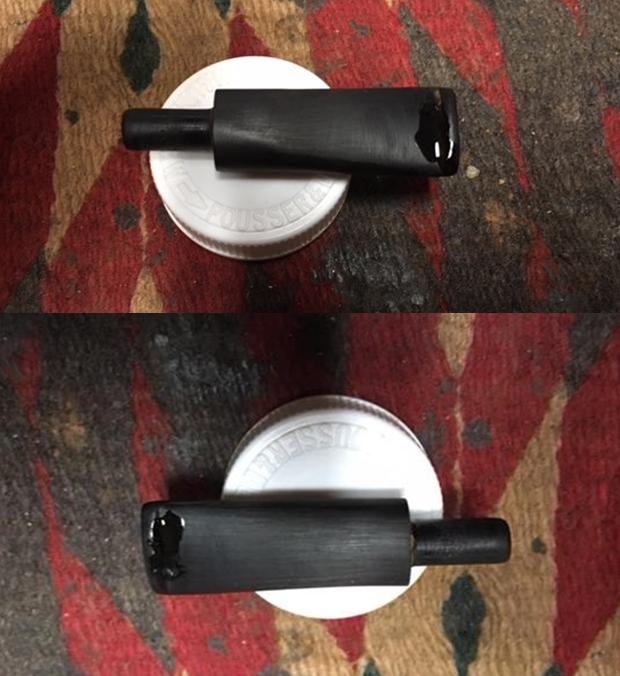
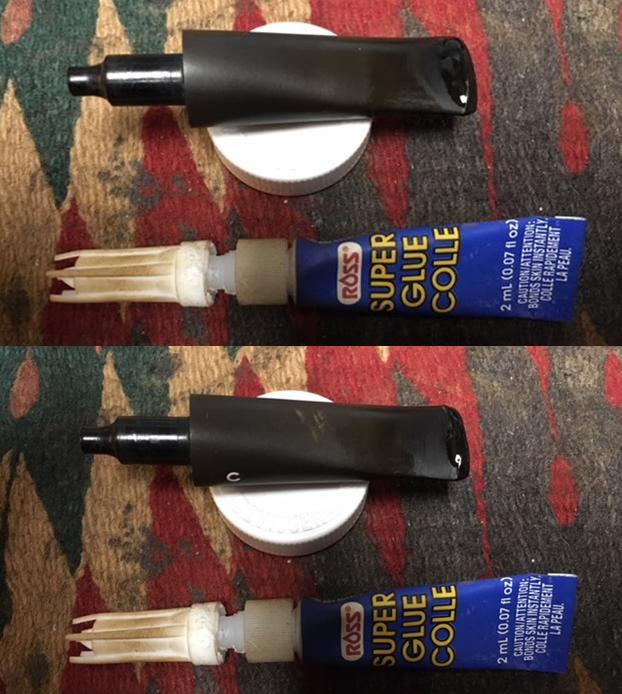
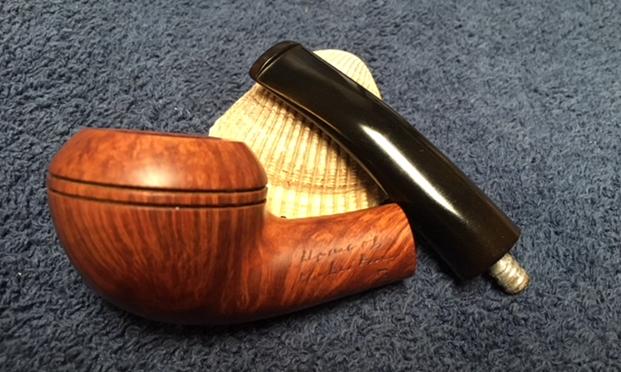
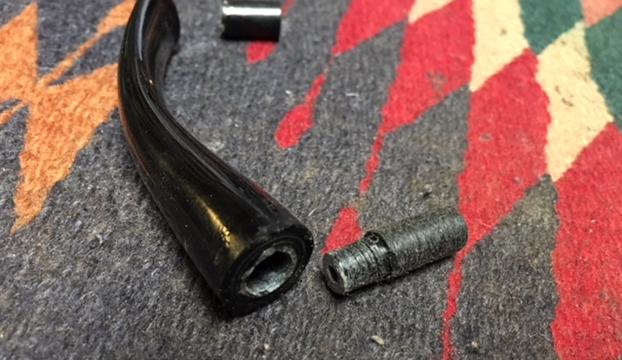 I cleaned up the threads on the tenon and the inside of the drilled out airway and coated the tenon end with black super glue gel. I fit it in the stem and adjusted the stem and tenon for a clean fit against the shank.
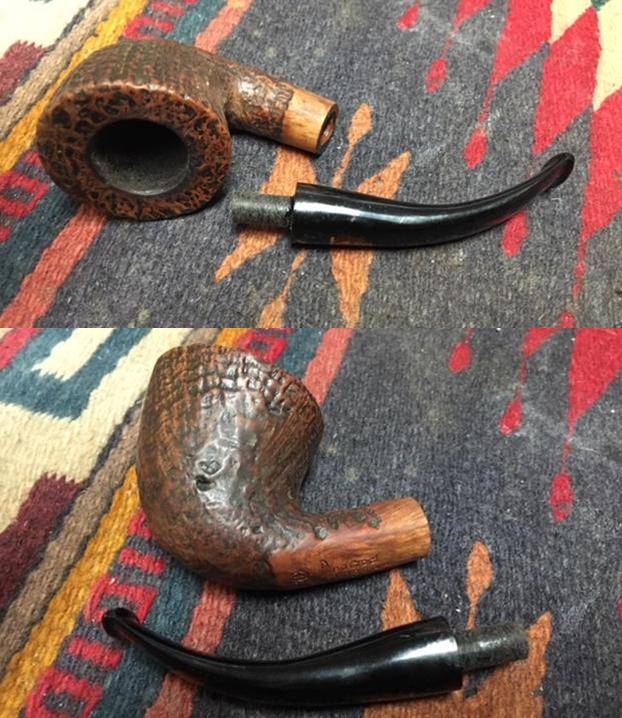
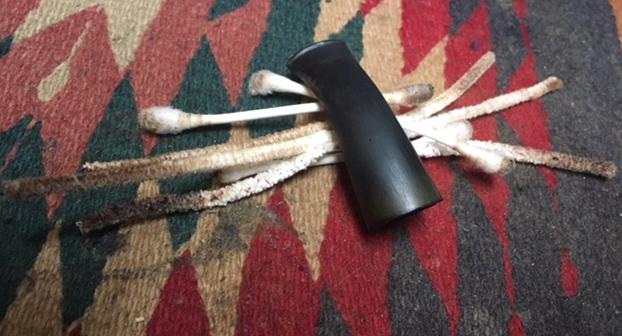
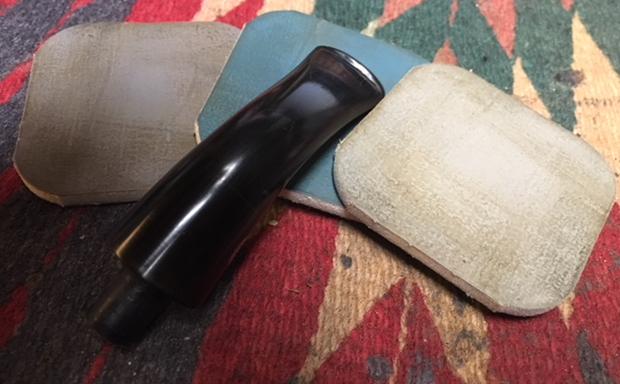
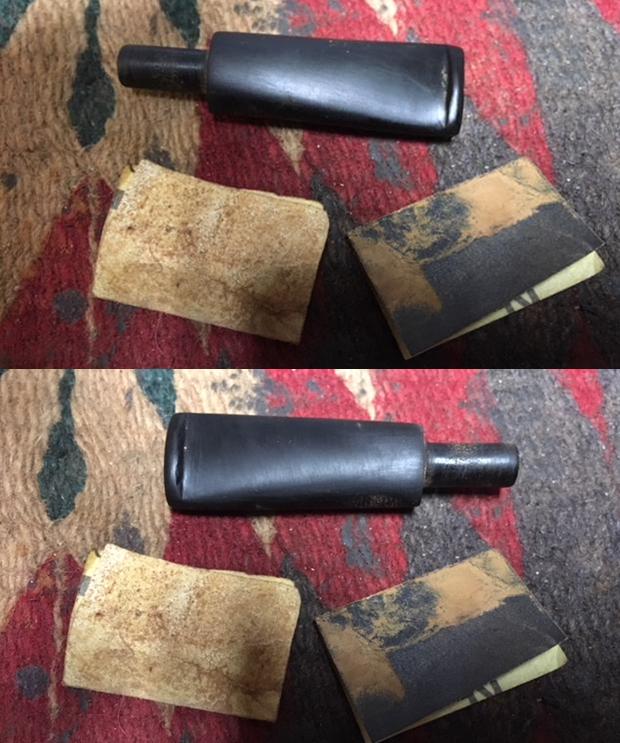
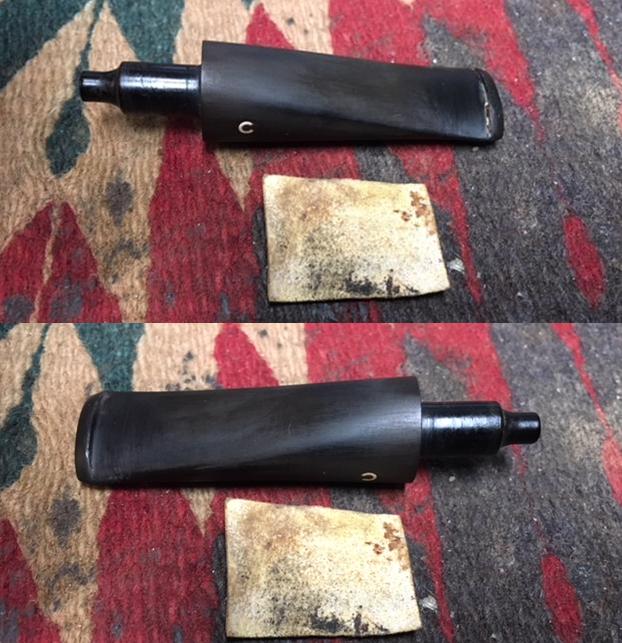
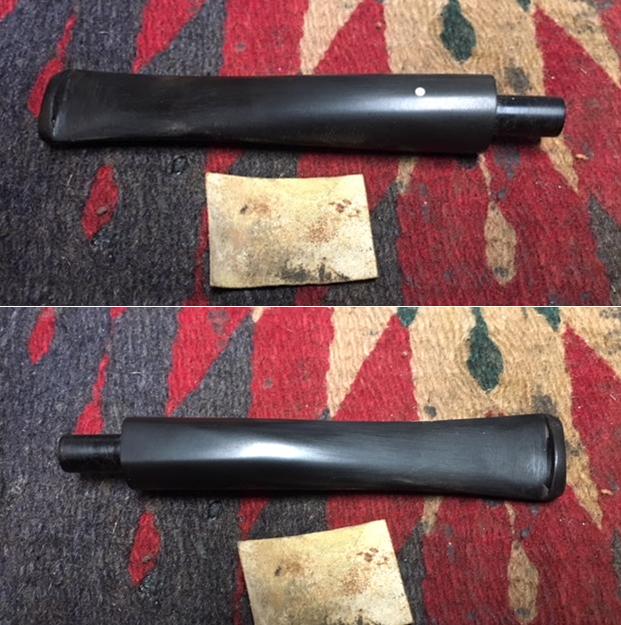
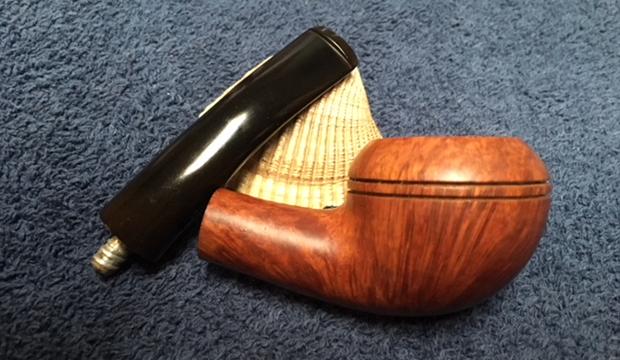
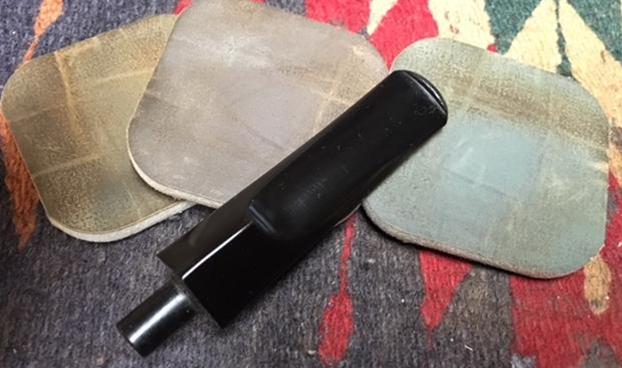
 I set the stem aside to let the glue cure on the new tenon. I scrubbed the briar with Before & After Restoration Balm, working it deep in the grooves and valley of the sandblast. I scrubbed it with a cotton swab to work it into the briar. The balm cleans, protects, restores and enlivens the briar. I buffed it with a horsehair shoe brush and rubbed it to a shine with a cotton cloth.
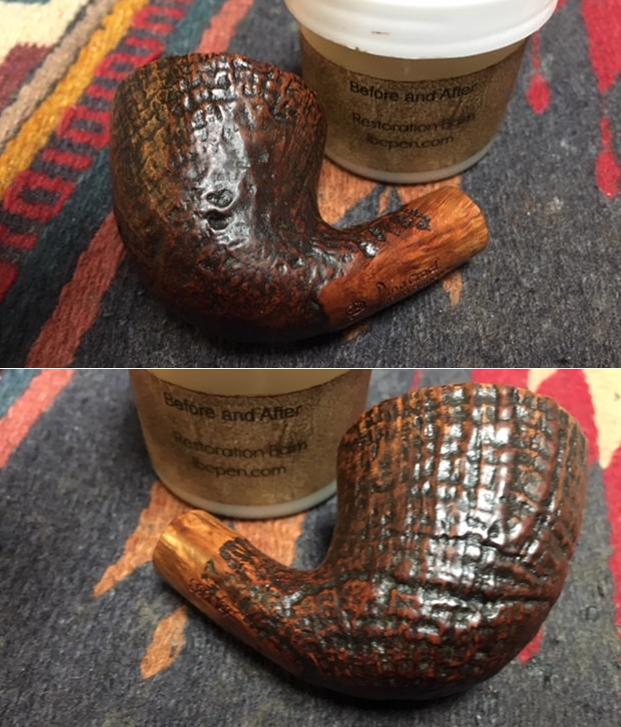
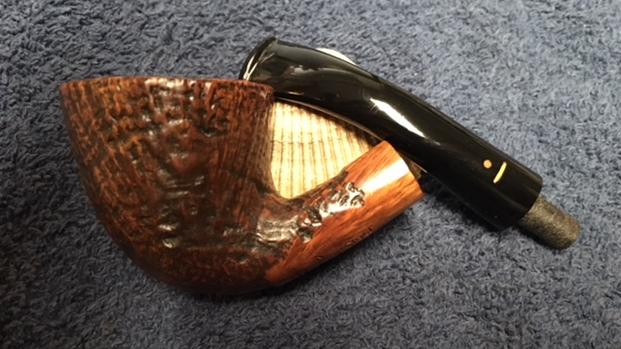
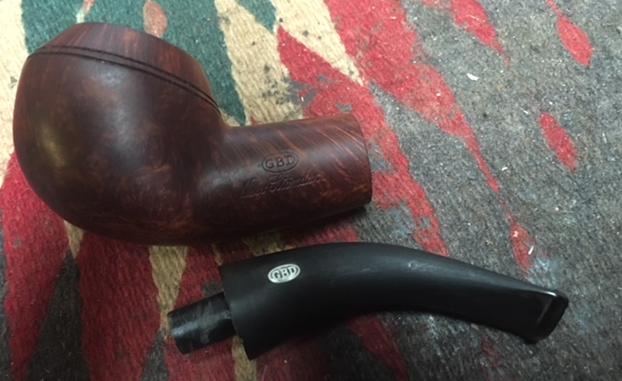
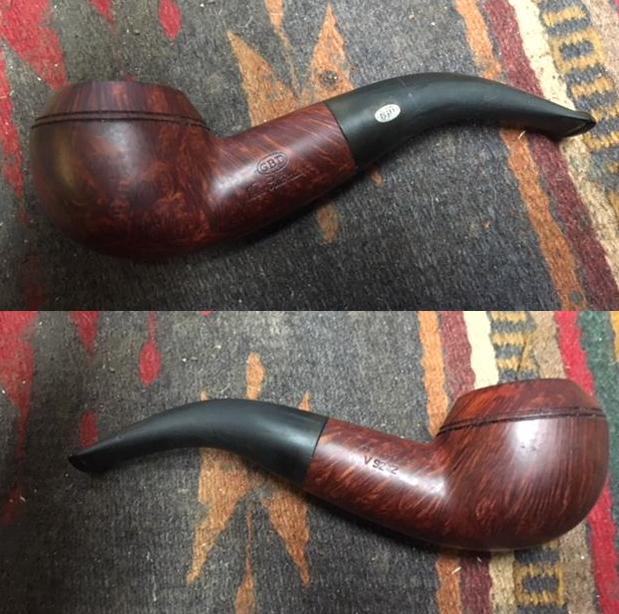
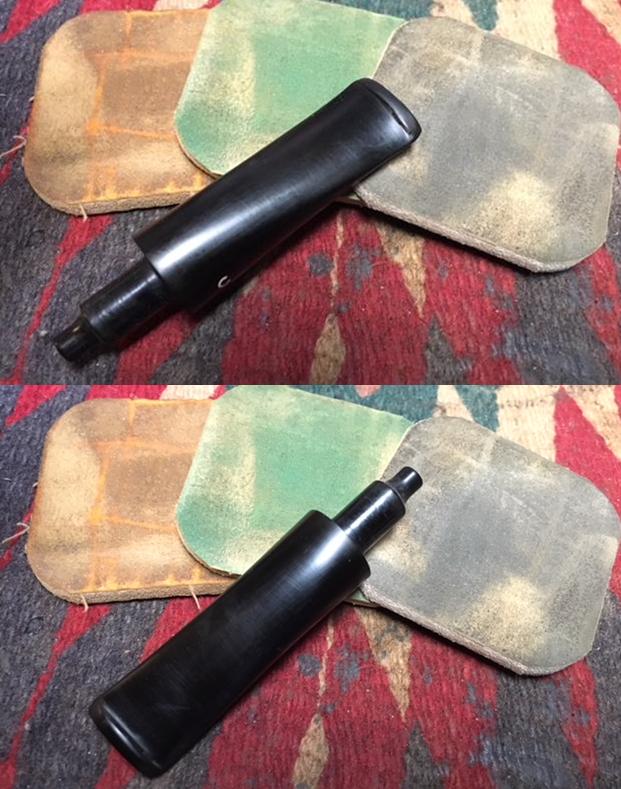
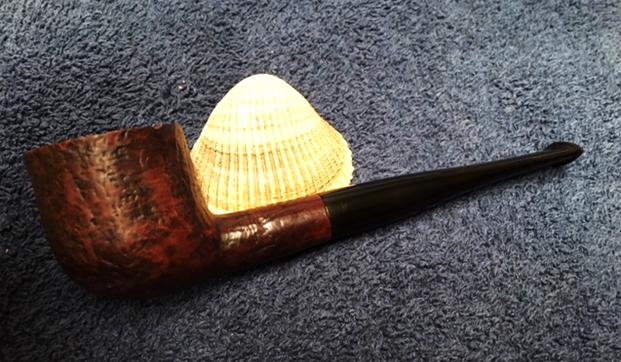
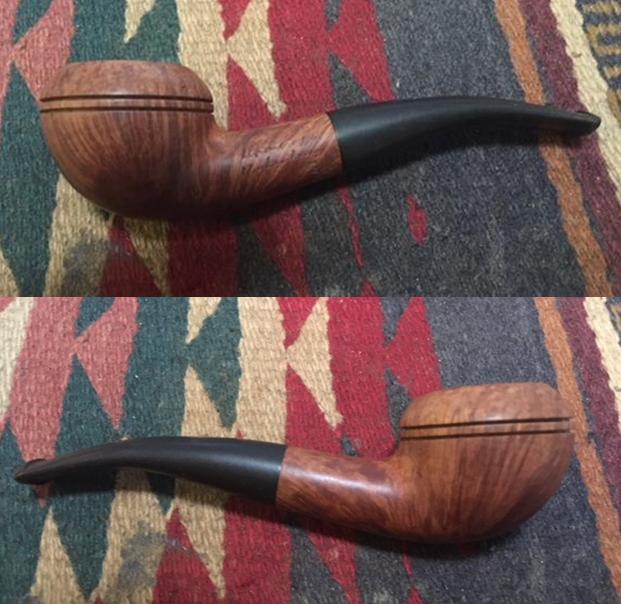
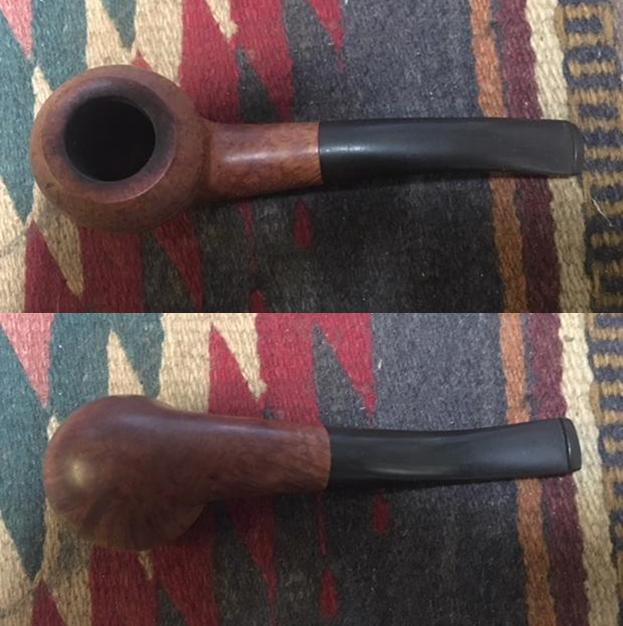
 Once the glue cured I put the stem on the pipe and buffed it with Blue Diamond to polish out the scratches. I gave the bowl several coats of Conservator’s Wax and the stem multiple coats of carnauba wax. I buffed the pipe with a clean buffing pad to raise the shine. I hand buffed it with a microfibre cloth to deepen the shine. The following photos show the finished pipe. It is ready to go back to its owner who I am sure is looking forward to smoking a bowl in it once more.