
Blog by Steve Laug
 The next pipe on the worktable is another “Malaga” – this one is a Pot shaped pipe, or maybe you would call it an author. It is short and rusticated with a smooth rim top, smooth band around the oval shank and a smooth panel on the underside of the shank for the stamp. Jeff has picked up other pipes of this brand since we picked up the ones from Kathy’s Dad’s estate. They are of various shapes and finishes – rusticated, smooth and mixed finish. They are also various sizes from small to very large. They were all made by the Malaga Pipe Shop in Royal Oak, Michigan. They are all from various places around the US. It is interesting to see how far Malaga pipes traveled from one little pipe shop in Michigan. The more I work on the brand the more I am impressed by the quality of the craftsmanship and beauty of the pipes that came from the shop. I wrote a blog to give a little history of the Malaga Brand if you are interested: https://rebornpipes.com/tag/malaga-pipes/. There are also links there to a catalogue and the maker George Khoubesser.)
The bowl is rusticated on the sides, bottom and shank with a pitted pattern in the rustication. The rim top is smooth as is the band around the shank end and the bottom smooth panel where it is stamped. The rim top is smooth but also dirty and damaged. There were nicks in the top of the rim and the outer edges were rough from knocking the bowl out against something hard. There were also some nicks on the inner edge of the rim. The underside of the shank is stamped “Malaga”. The combination of smooth rim and ring along with the rusticated finish around the bowl all work together to create an unusual looking pipe. The bowl had a thick cake and there was a lava overflow on top of the rim. There was some dust and debris in the finish of the bowl and on the top of the rim. The vulcanite stem was oxidized and had tooth chatter and tooth marks on both sides of the stem at the button and on the edges of the button as well. The combination of medium and dark brown stain worked together to create a warm brown finish. Once again it is a light weight pipe for its size. Once more I think it bears testimony to my belief that Malaga pipes were oil cured. 
 Jeff took close up photos of the bowl and rim to show the condition of the pipe before he started to work his magic on it. The bowl had a thick dark cake and some overflow on the rim top. The beveled edge was quite dirty. The inner and outer edges of the bowl showed some damage and nicking. The second photo shows the rim top from a different angle and you can see the tars and oils on the rim top. The third photo shows the underside of the bowl and the rustication.
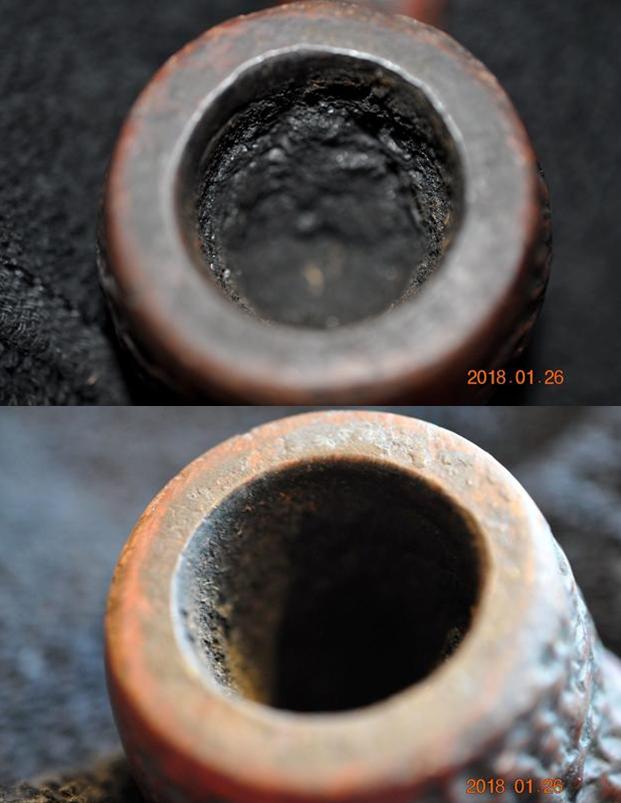
 He took a photo of the underside of the shank to show the stamping. The stamping is readable and is the standard “Malaga” stamp with quotation marks on either side of the word. You can see the dust and grime on the finish of the shank.
 The next photos show that the stem was quite heavily oxidized. There was some light tooth chatter on both surfaces of the stem near the button and on the button edges as well.
  Jeff reamed the bowl with a PipNet pipe reamer and followed up with a Savinelli Fitsall pipe knife to remove the cake. He scrubbed out the mortise and the airway in the shank and the stem with alcohol, cotton swabs and pipe cleaners. He scrubbed the exterior of the bowl, rim, shank and stem with a tooth brush and Murphy’s Oil Soap to remove the oils and tars on the bowl, rim and shank. He rinsed it under running water. He dried it off with a soft cloth. Once more he soaked the stem in Before & After Stem Deoxidizer to remove the oxidation. I took photos of the pipe to show its condition before I started my work on it.
 I took a photo of the rim top to show the condition it was in after the cleanup. Jeff was able to remove the darkening and tars from the rim top and edges. The grain on the top is very nice and the top is clean. There were dents in the surface of the rim and the outer edge was quite rough on the back side from knocking the pipe out against a hard surface. The inner of the bowl is in good condition. It is a nice looking finish. The stem was clean and you can see that the deoxidizer had done a great job removing the oxidation. There were tooth marks and chatter on both sides of the stem and some slight wear on the edges of the button.
 Once Jeff had removed the thick cake in the bowl it revealed some fissures in the bottom and part way up the sides of the bowl.
 I decided to take care of that first as the JB Weld mixture takes time to cure. I mixed the two parts together and pressed the mixture into the fissures in the bowl. I used a dental spatula to spread the mixture into the fissures and around the entry of the airway. It would take time for the mix to cure but I kept working on the bowl.
 Once the mix had set I topped the bowl on a 220 grit topping board to remove the damage to the surface. It did not take too much to remove the damage to the rim. I cleaned up the inner edge of the rim with a folded piece of 220 grit sandpaper.
 I polished the rim top with micromesh sanding pads to remove the scratches and marks in the briar. I wet sanded it with 1500-2400 grit pads and dry sanded it with 3200-12000 grit pads. I wiped the rim down after each pad using a damp cotton pad.

 I used folded sandpaper and a Dremel and sanding drum to sand out the bowl to remove the excess JB Weld and leave it only in the fissures. Once it was sanded it out I wiped the interior down with a damp cotton pad.
 I mixed a batch of pipe mud and coated the bowl with that to cover the bowl sides and bottom.
 I rubbed the bowl down with Before & After Restoration Balm to deep clean the rusticated briar and the smooth rim. The product works to clean, enliven and protect the briar. I hand rubbed it with my fingers and worked it into the rustication with cotton swabs. I wiped it off with a soft cloth. I buffed the bowl with a horsehair shoe brush to polish it. The briar really began to have a rich shine. I took some photos of the bowl at this point to mark the progress in the restoration.
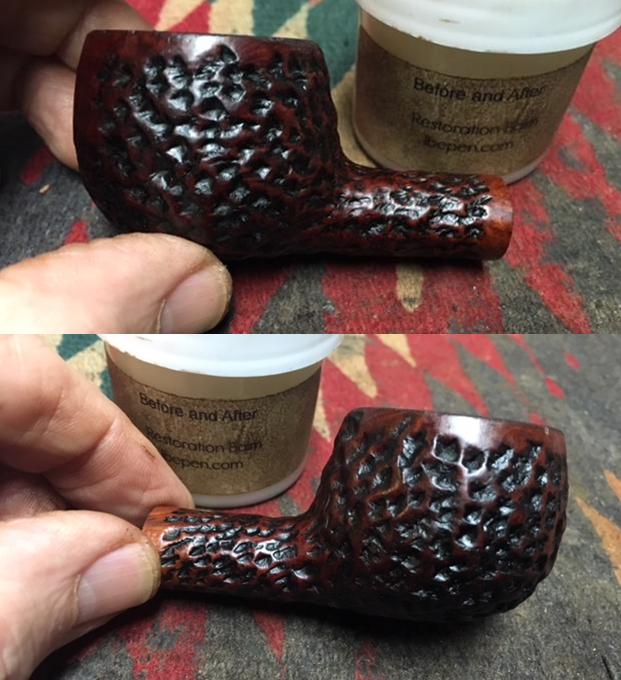
 I “painted” the tooth marks on the stem and button with the flame of a Bic lighter. I moved the flame quickly across the surface of the stem and repeated it until the tooth marks had lifted.
 All the tooth marks lifted except one on the underside of the stem. I filled it in with clear super glue. Once it had cured I sanded the repair smooth with 220 grit sandpaper and blended it into the surface of the rest of the stem. I also shaped the surface of the button on the top and the bottom edges to blend in the marks on the surfaces.
 I polished the stem with micromesh sanding pads – wet sanding with 1500-2400 grit pads and dry sanding with 3200-12000 grit pads. I wiped the stem down after each pad with a damp cloth to remove the sanding dust. I used the Before & After Pipe Polish to remove the small minute scratches left in the vulcanite. I finished by wiping the stem down with a final coat of Obsidian Oil and set it aside to dry.


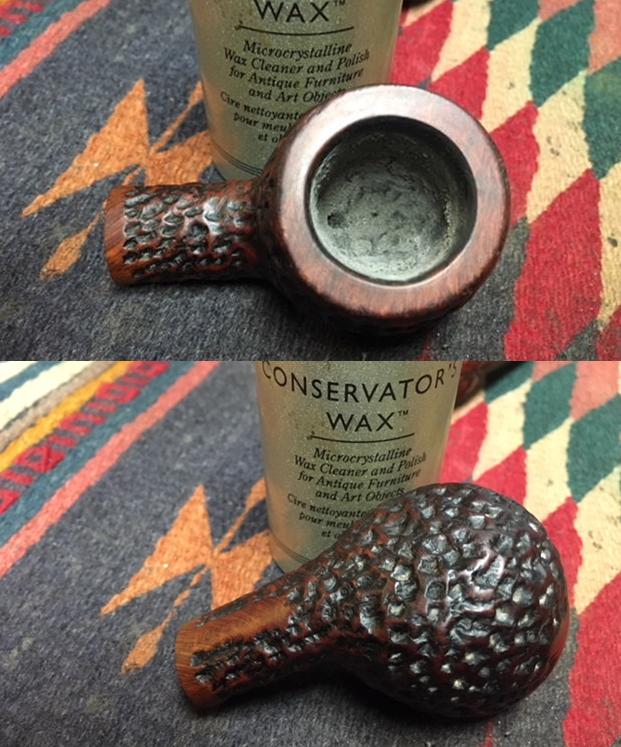
 I gave the bowl several coats of Conservator’s Wax and buffed it with a shoe brush to raise the shine. I used a microfiber cloth to raise the shine on the bowl.
 I put the stem back on the pipe and worked it over with Blue Diamond to polish out the remaining small scratches. I gave the bowl several more coats of Conservator’s Wax and the stem several coats of carnauba wax and buffed the pipe with a clean buffing pad to raise the shine. I hand buffed it with a microfiber cloth to deepen the shine. The pipe polished up pretty nicely. The finished pipe is shown in the photos below. This rusticated “Malaga” has been brought back to life. Still deciding if it is one that I will keep or whether I will sell it on the store. If you are interested let me know and I will keep you in mind. The dimensions of the pipe are Length: 5 1/4 inches, Height: 1 1/2 inches, Outside diameter of the bowl: 1 3/4 inches, Chamber diameter: 1 inches. Thanks for walking through the restoration with me as I worked over this Malaga. I have quite a few more to work on in the days ahead.


