Blog by Steve Laug
I finished the restoration work on Mark’s uncle’s pipes and a few of his own and sent them back to him in late January of this year. I wrote a blog on each of the restorations. They were a fun batch of pipes to restore for him. He sent me another package a few weeks ago that had just three pipes in it – A GBD Classic Straight Bulldog, a GBD 9242 Rhodesian (one of my holy grail pipes) and a long Churchwarden pipe. Each pipe had a different set of issues that would provide a variety of challenges. The Bulldog was in excellent condition other than the first ½ inch of the stem missing in chunks. The Churchwarden had a broken tenon stuck in the shank. By far the worst of the lot was the 9242 pipe. When I saw it in the bag I was excited. When I took it out of the bag I was saddened at the condition of the pipe. The bowl was dirty and there was some lava and rim darkening on the top. There were a few nicks in the edges of the bowl. The finish was dirty but the grain on the pipe was really nice. If I had stopped my observation at this point I would have been quite happy.
But to stop there would not begin to tell the story of the abuse carried out on this pipe. Someone (I cannot call them other than a hacker) had taken upon themselves to do a stem repair for a broken tenon and in doing so almost destroyed an otherwise nice looking stem. I think that it had a broken tenon so the hacker had pulled out the broken tenon from the shank. He had drilled out the end of the stem – so far so good right. If he had quit then it would have been good. But he did not. He found a piece of steel tubing and drilled out the mortise to fit it – but did so at an angle and hacked up the inside of the mortise. The stem itself was not only drilled but had been opened up even more to accommodate the tube. In fitting it in the stem he had cracked the stem on one side. Fortunately it appeared that it did not go all the way through. He then slopped glue – an amber looking goop, all around the sides of the scored tube and shoved it into the airway on the stem. It was not even close to straight. Then he smeared some of the same glue on top of the crack, wiped it off a bit and called it good. This poor pipe really was in awful condition.
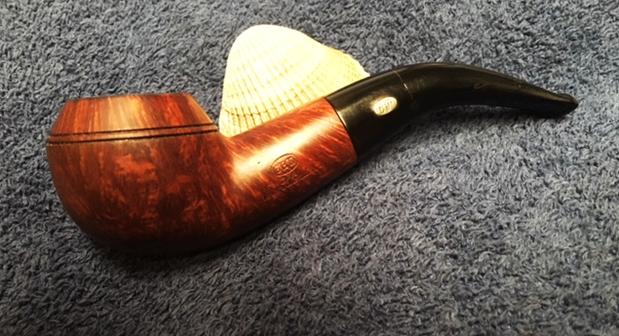
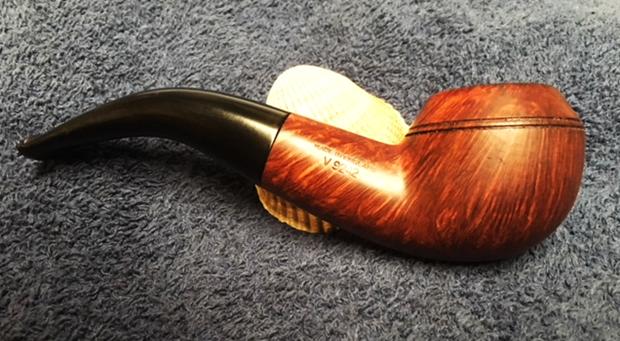
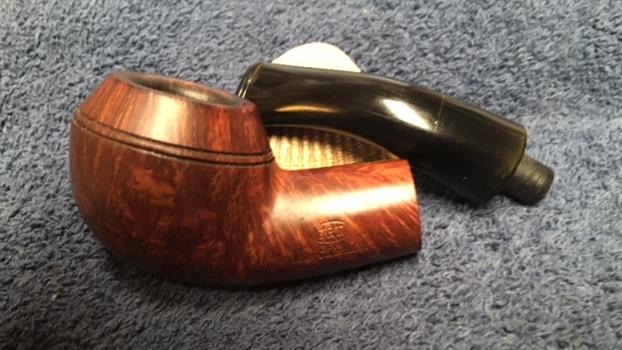
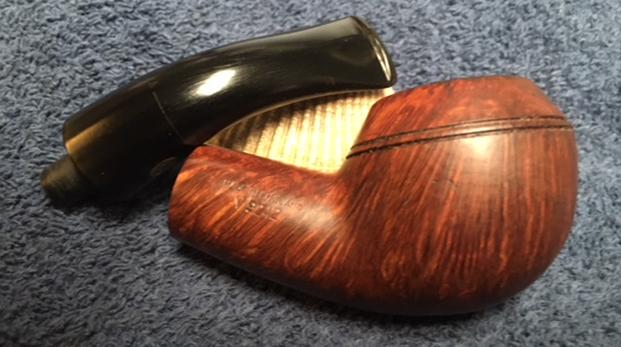
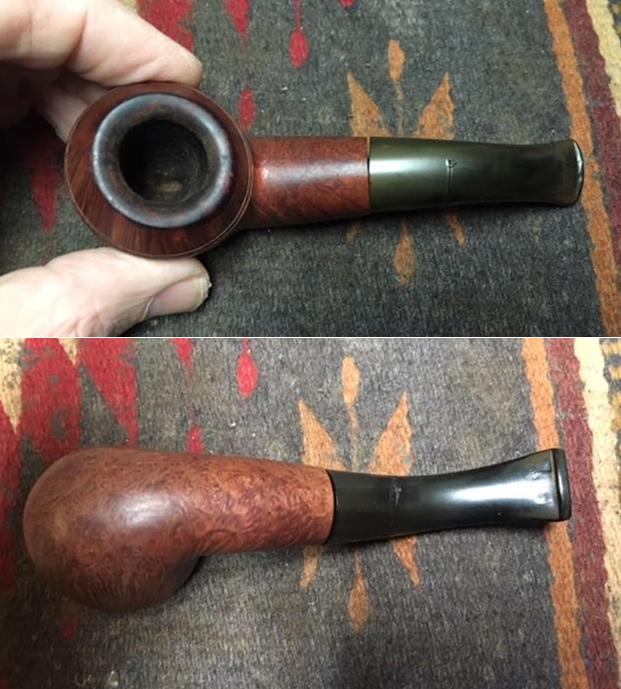
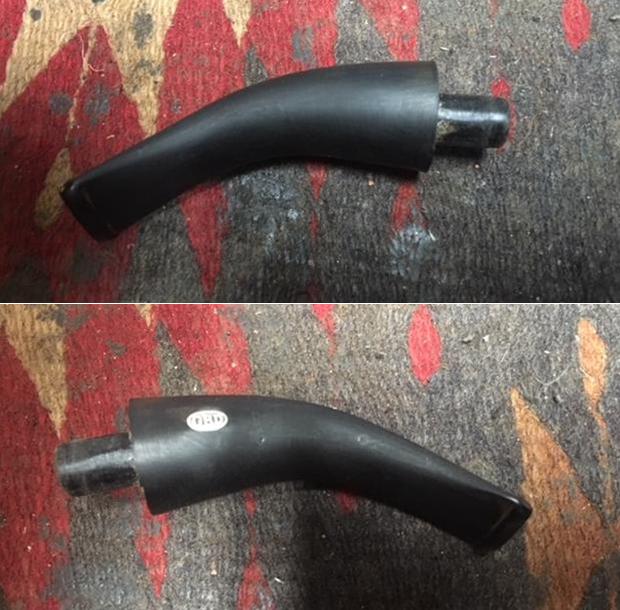
When I wrote Mark to give him my assessment I laid out the issues on this pipe I think he must have laughed. He knew that once I saw it, because it was a shape that is on my hunt list, I would be hooked and have to try to fix it. He as much as said so in his email back to me. Sooo… here we go on that restoration project. The photos show the look of the pipe when it arrived in all of its tattered splendour. Note the beautiful grain on the bowl. It was a beautiful looking piece of briar. Note the stem damage and obvious angle of the stem in the shank. Note the repaired split in the stem. Note the tooth marks on the stem on both the top and underside on and in front of the button. This was a project for certain and I figured I could not really make things worse… but then again who knows.
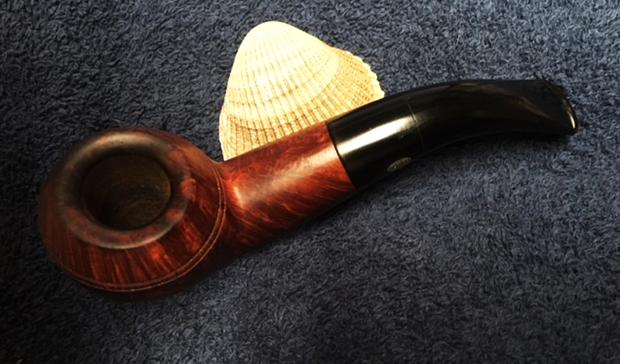
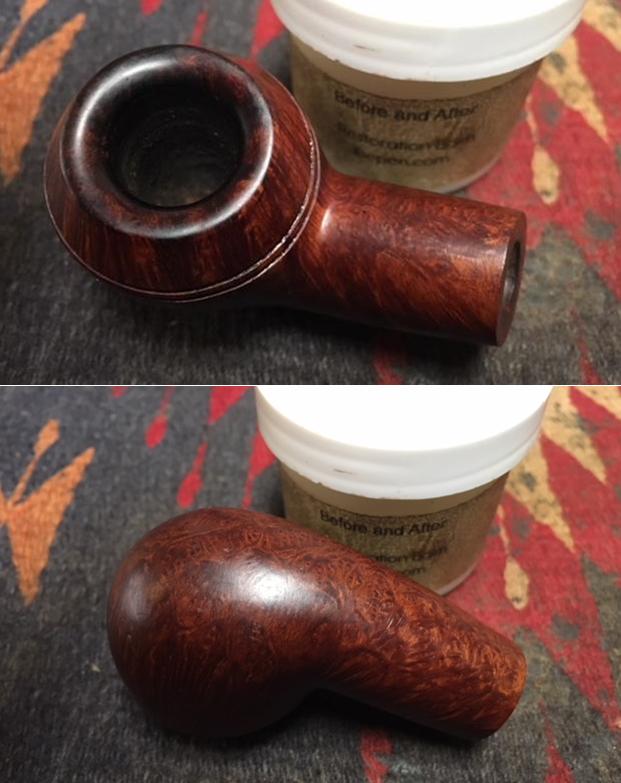
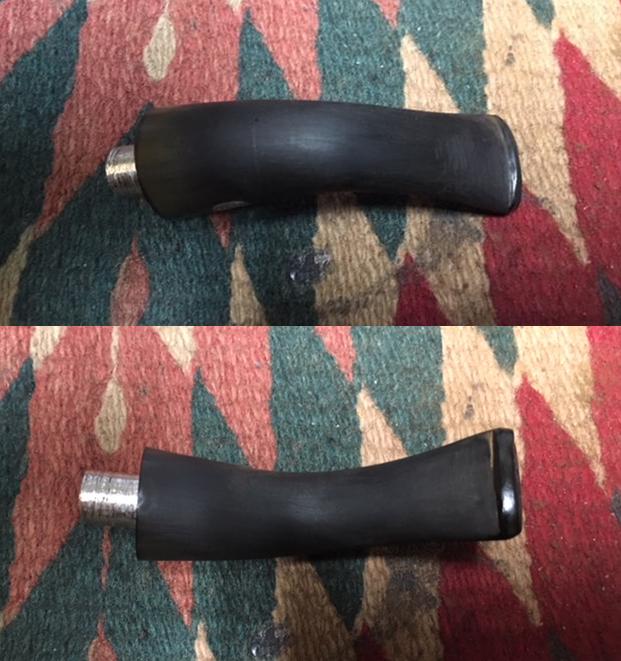
 I took a close up photo of the rim top to show the general condition of the pipe. You can see the nicks in the briar rim top and on the inner edge. You can also see the fit of the stem to the shank as well as the tooth marks and damage to the stem from the “repair” that had been done to the stem.
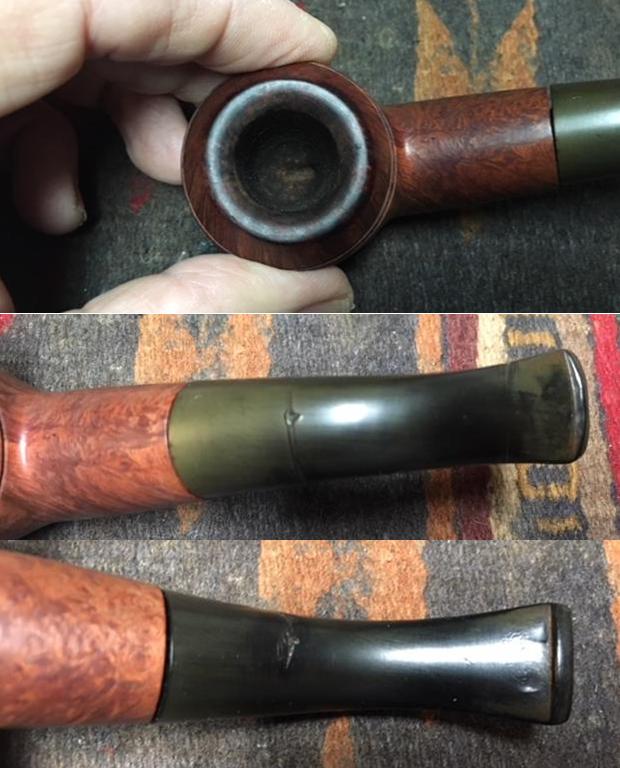 I took the stem off the bowl to show the metal tubular tenon on the stem end. It looks to me that the drilling out of the stem and the moving the tenon around in the stem caused the damage in the stem surface.
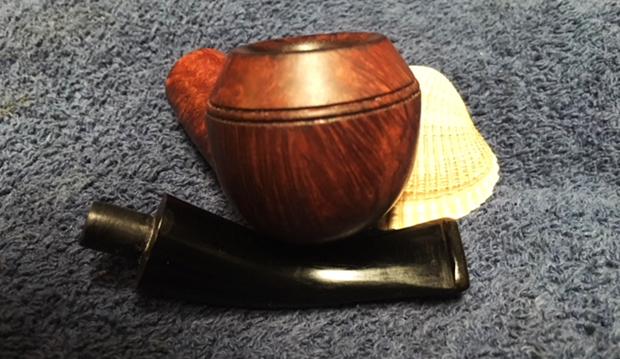
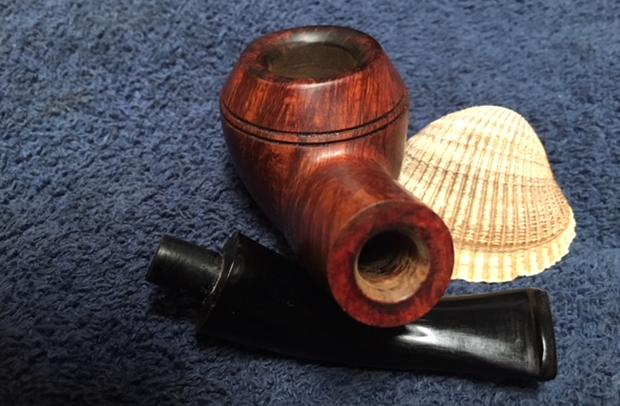
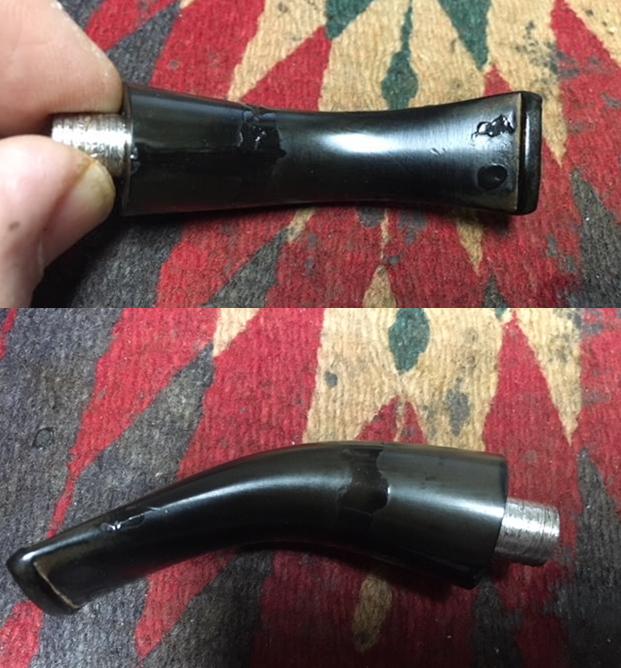
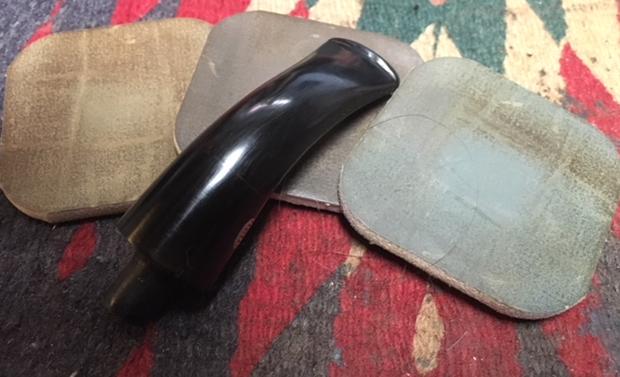
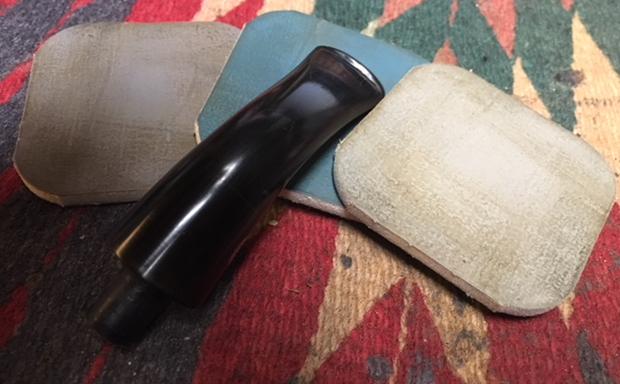
 I took photos of the end of the stem showing the tenon and the drilled out mortise in the shank. You can see the damage to both. The metal tenon is not totally round and it is heavily scored and damaged. The fit in the stem is crooked so there is no way to align the stem and the shank.
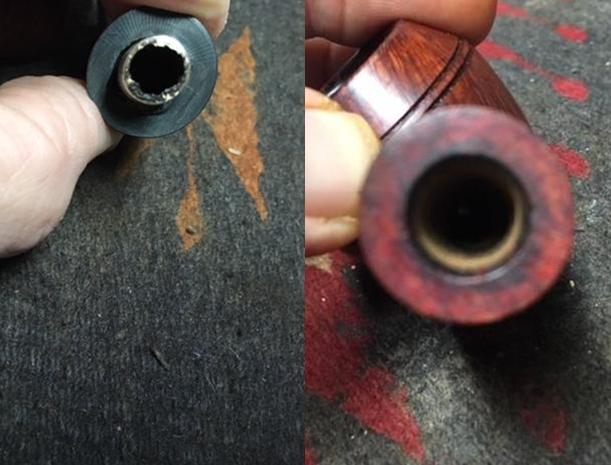 I smoothed out the light damage on the rim top with 220 grit sandpaper and then with 1500-4000 grit micromesh sanding pads. I rubbed the bowl down with Before & After Restoration Balm to deep clean the briar and the smooth rim. The product works to clean, enliven and protect the briar. I hand rubbed it with my fingers and wiped it off with a soft cloth and buffed it with a shoe brush to polish it. The briar really began to have a rich shine. I took some photos of the bowl at this point to mark the progress in the restoration.
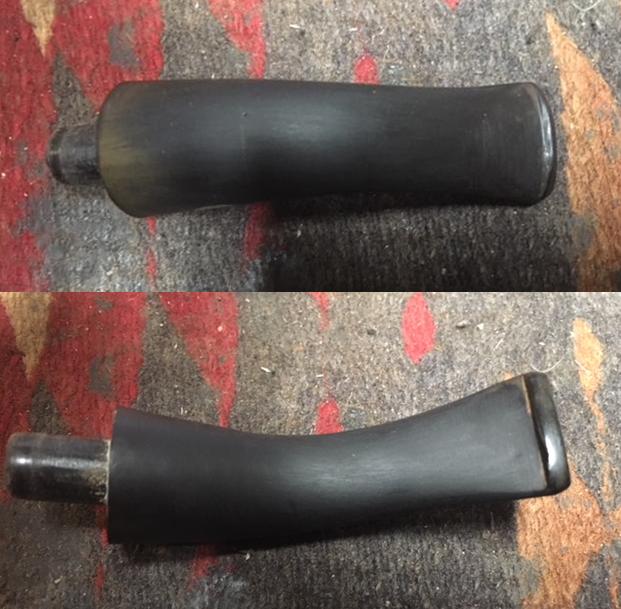
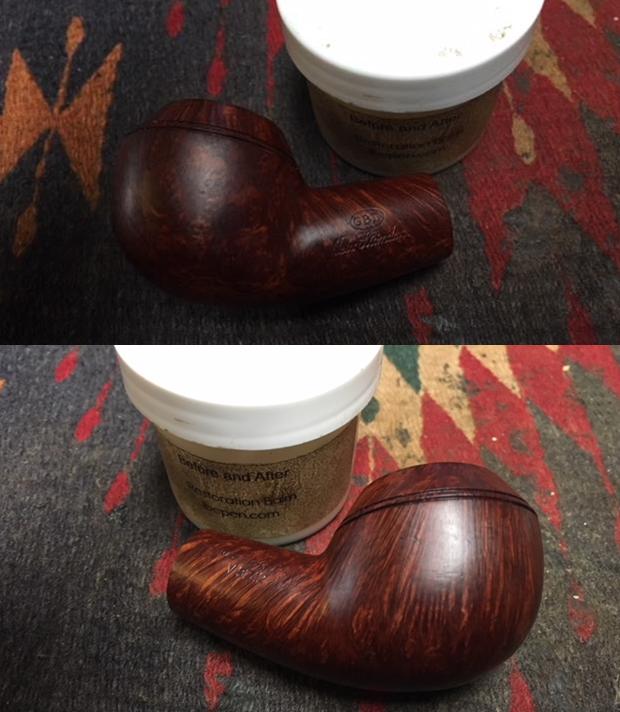
 I set the bowl aside and worked on the stem. I used a cotton swab to dribble acetone around the stem/tenon joint. I repeated that process for several weeks on a daily basis. I wanted to dissolve the epoxy that held the metal tenon in place in the stem. While it sat I filled in the damaged areas on the stem surface and the deep tooth marks in the top and underside of the stem at the button with black super glue and set the stem aside to dry.
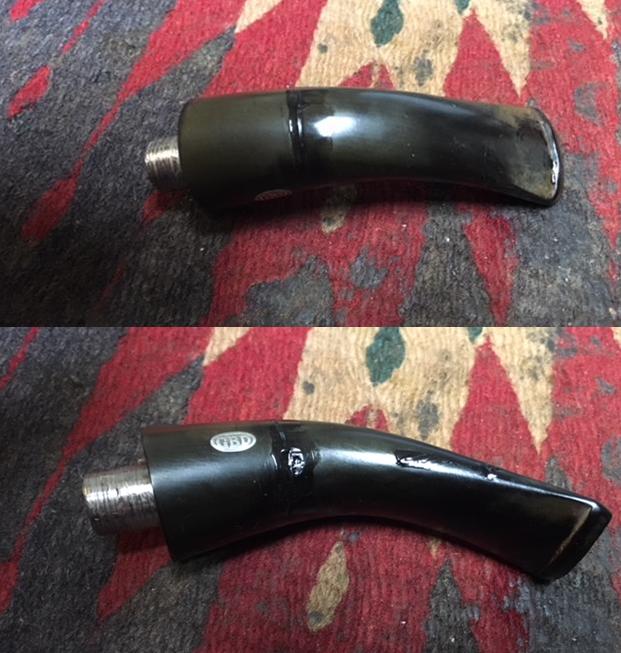
 Once the glue had cured I sanded the repairs smooth with 220 grit sandpaper and blended them into the surface of the stem. There were still some small spots that needed work but overall it was starting to look better.
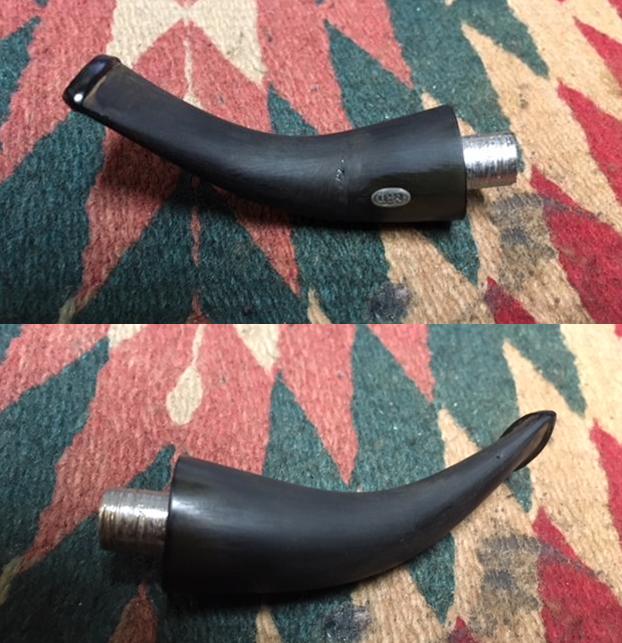
 I dribbled acetone into the area around the metal tenon every morning and evening after work. I was pretty certain that after a matter of time the epoxy would give way and I would be able to remove the tenon. I wiggled it daily with a pair of pliers to loosen it. This afternoon it finally came loose and I was able to remove it from the stem.
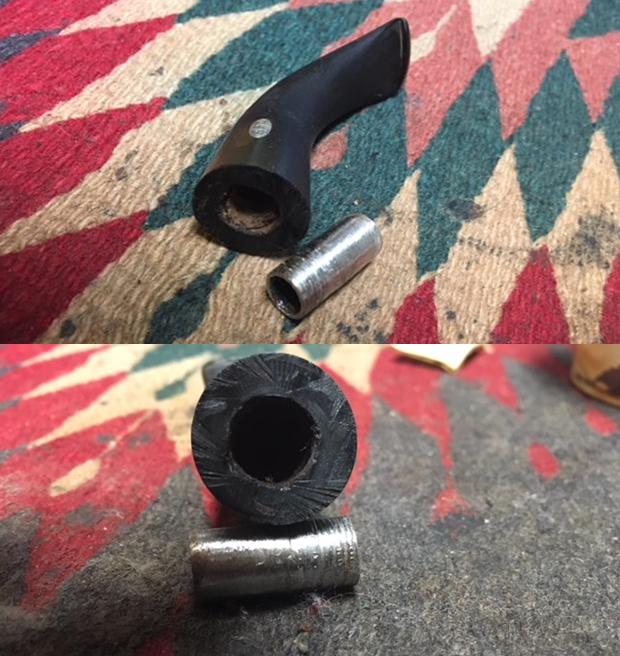 With the metal tenon removed from the stem I was able to clean out the airway in the stem and the drilled out area of the stem. I used pipe cleaners, cotton swabs and alcohol to clean out the debris and tobacco oils.
 The replacement tenon was a little larger than the mortise and needed to be sanded down. I used a Dremel and sanding drum to reduce the diameter of the tenon. I also carefully sanded the face of the stem to smooth out the damage there, Once I had the fit correct in the shank I worked on anchoring it in the drilled out stem. I coated the threaded tenon with some thick gel glue and inserted it in the hole in the stem. I lined things up with a pipe cleaner in the airway and set the stem aside to dry.
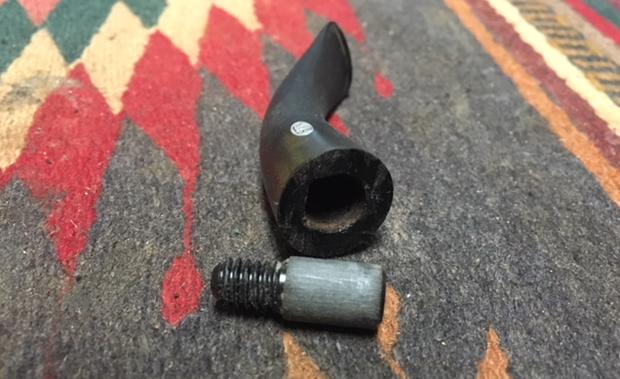
 While the glue on the new tenon cured I cleaned up the inside of the mortise. I hand turned a drill bit that was the same size as the tenon slowly into the mortise to clean up the jagged drilling on the inside of the mortise. I turned it into the mortise to smooth out the misdrilling that had been done to fit the metal tenon. Once I was finished I sanded it lightly and then put the stem in the shank to have a look. The fit was pretty good at this point.
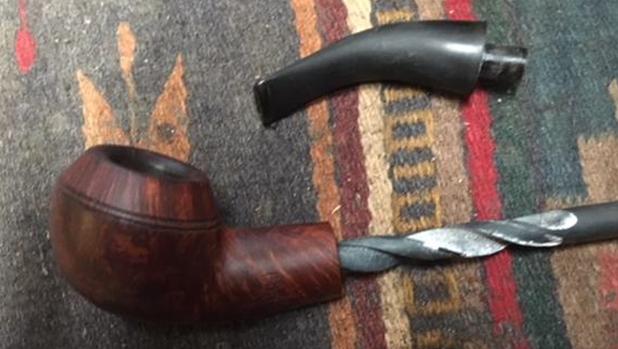
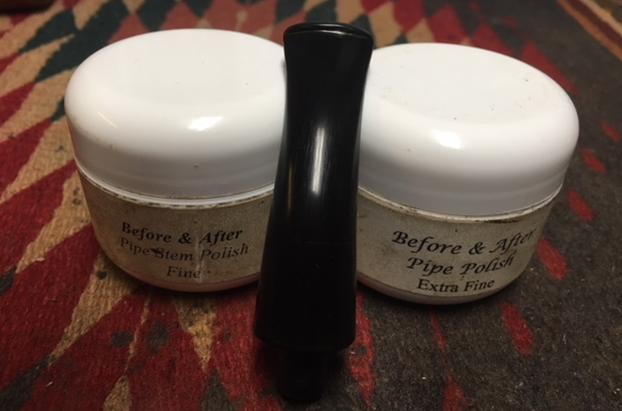
 Once the tenon had cured I worked on the stem with micromesh sanding pads – wet sanding with 1500-2400 grit pads and dry sanding with 3200-12000 grit pads. I wiped it down with Obsidian Oil after each micromesh pad. After I finished with the 12000 grit pad I gave it another coat of oil. I polished the stem down with Before & After Pipe Polish – Fine and Extra Fine. I finished by giving it one more coat of Obsidian Oil and put it aside.
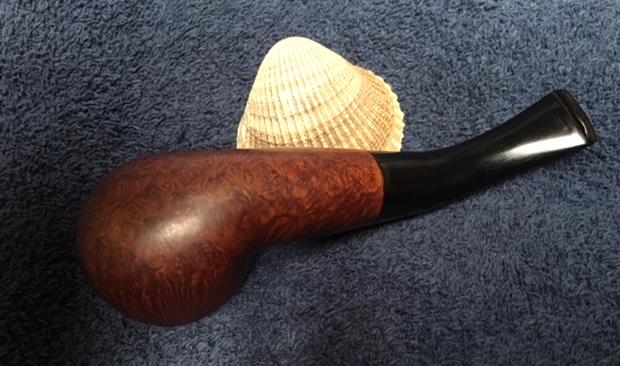
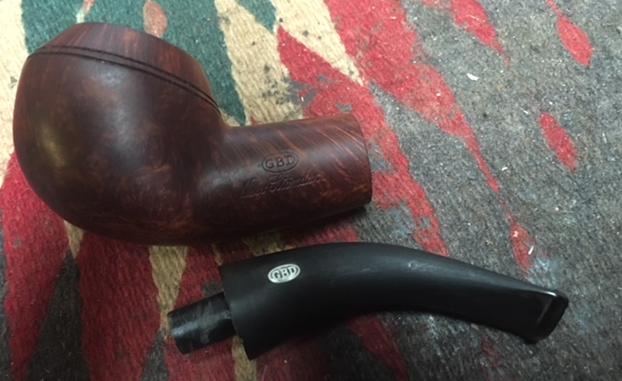
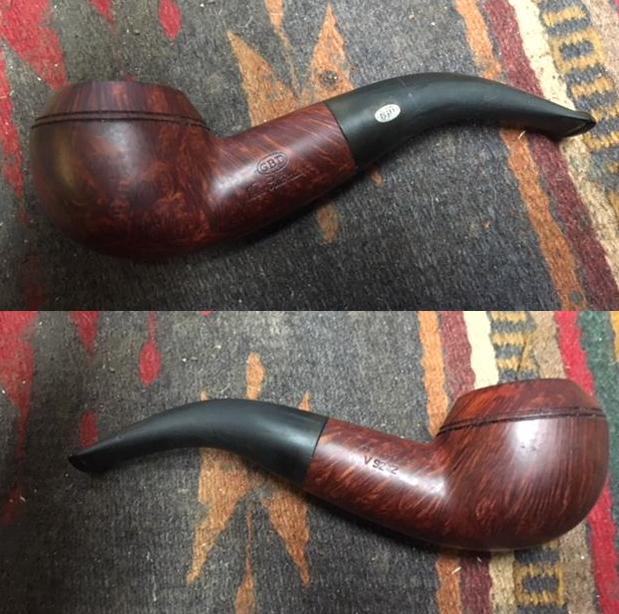
 I put the stem back on the bowl and buffed the pipe with Blue Diamond on the buffing wheel. I gave it several coats of carnauba wax and buffed it with a clean buffing pad to raise a shine. I hand buffed it with a microfiber cloth to deepen the shine. The finished pipe is shown in the photos below. The repair on the right side of the stem is still visible and I will need to work on that a little bit more but the overall look and fit of the stem is far better than when I began on this project. It won’t take too much more work before it is ready to head back to Mark for his smoking pleasure. This is one of those pipes that suffered much at the hands of someone trying to repair something and actually making it worse. I think it is better than it was… thanks for looking.