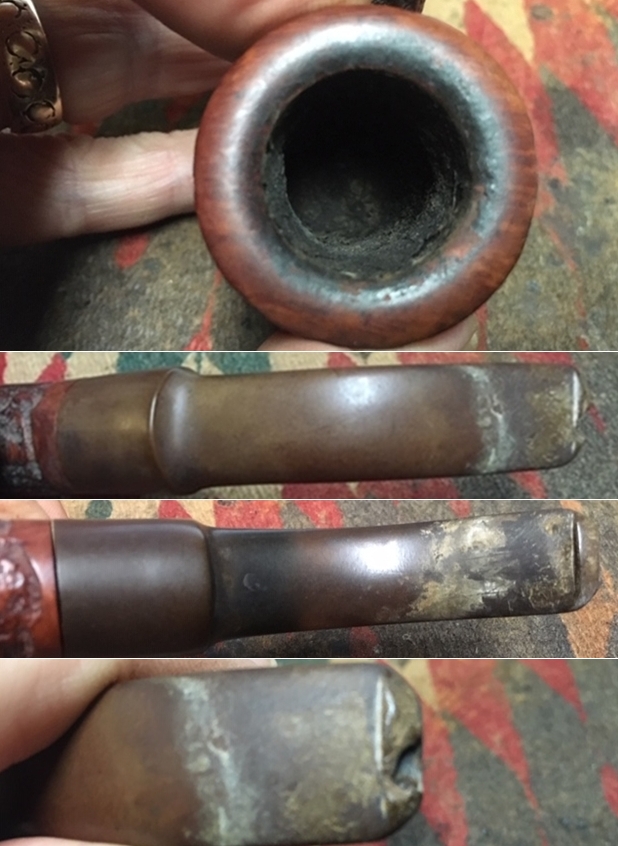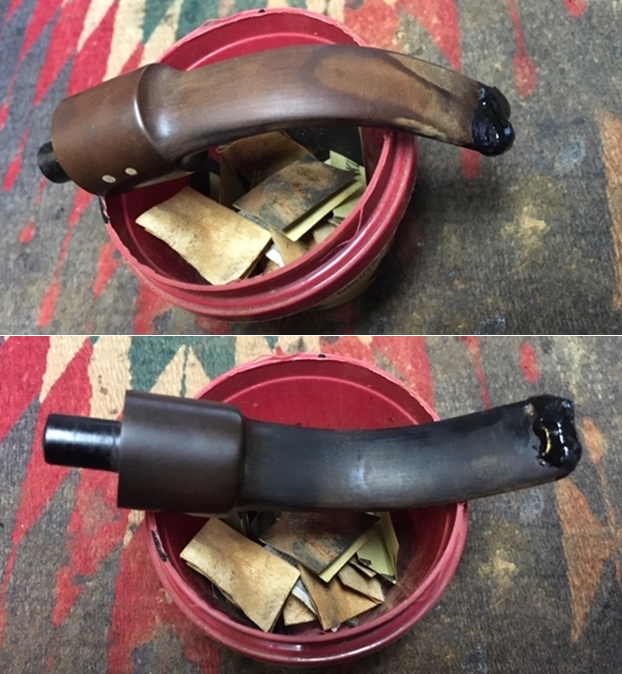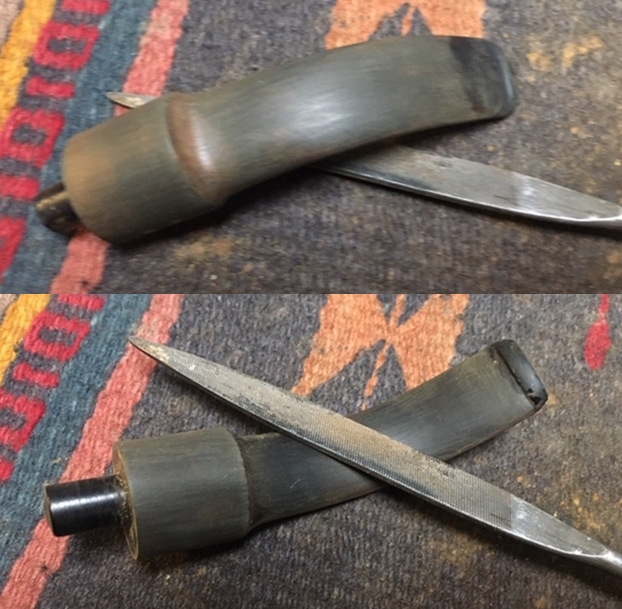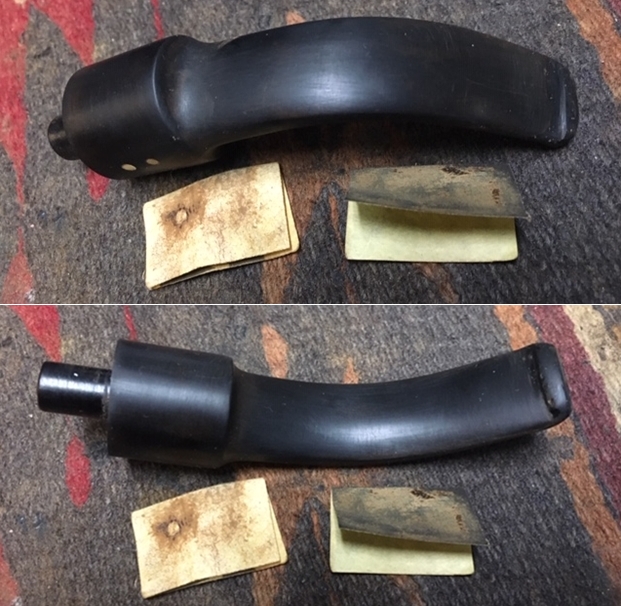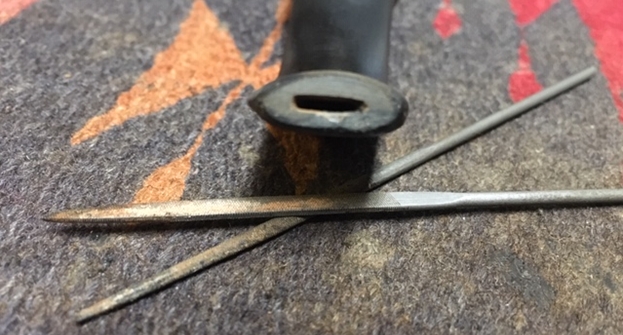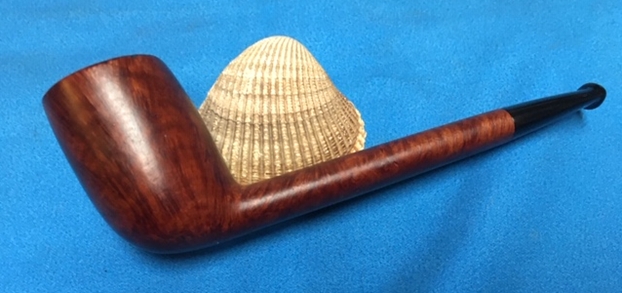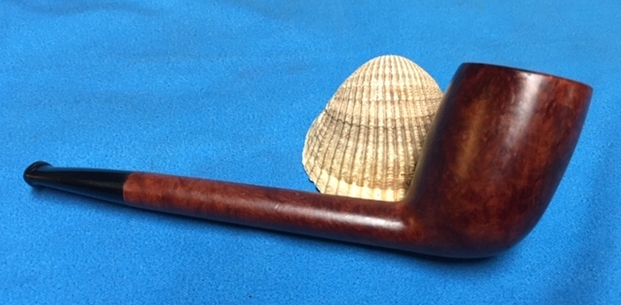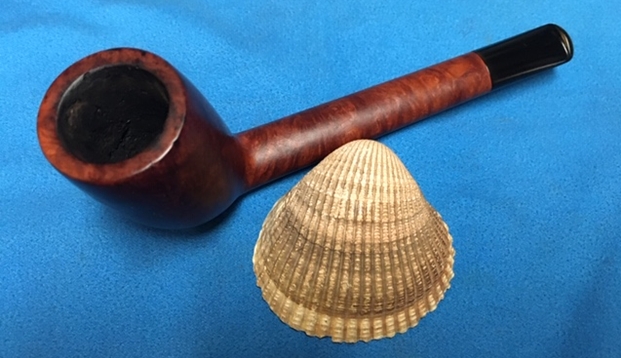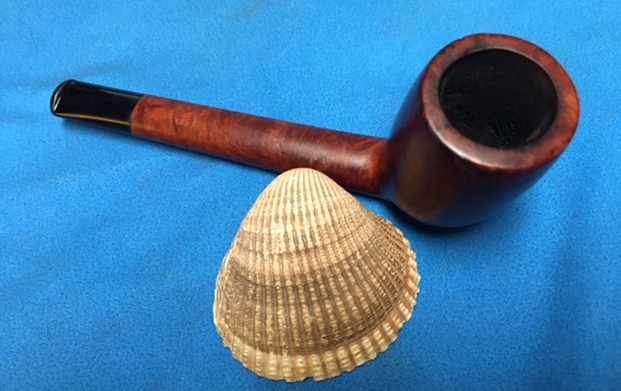
Tag Archives: stem repairs

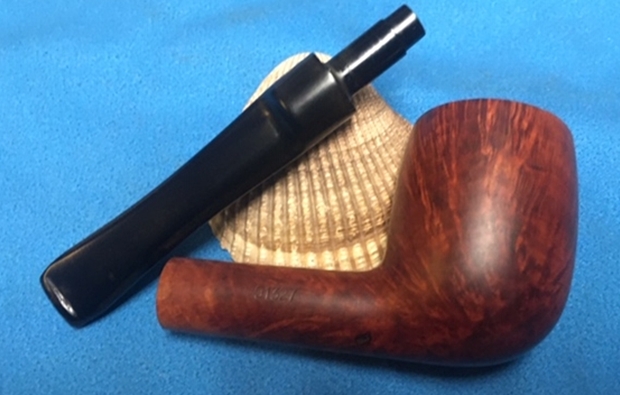
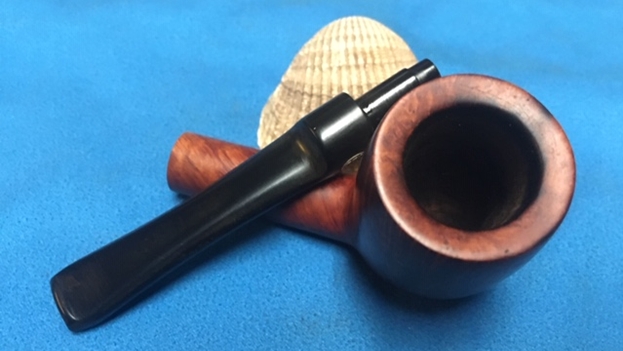
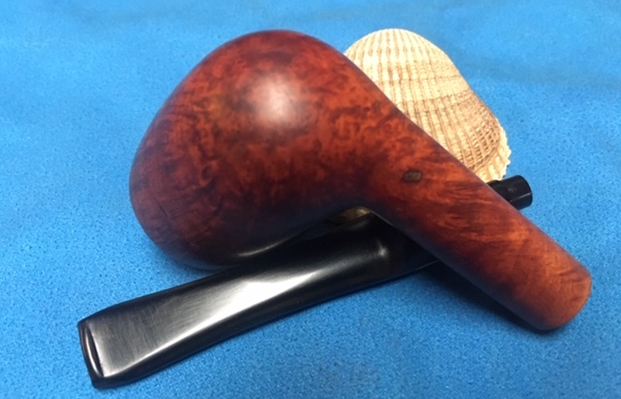
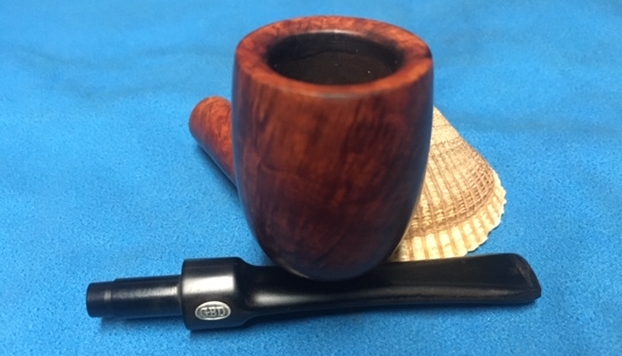
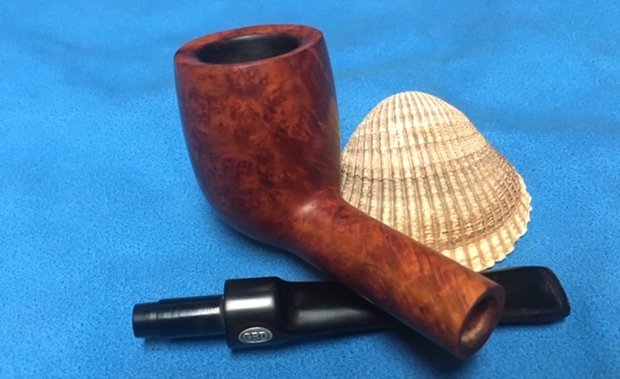
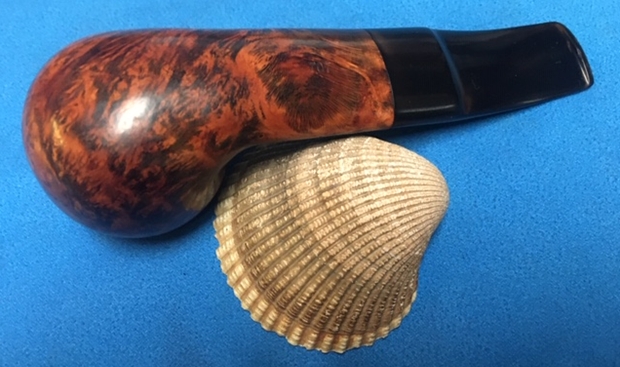
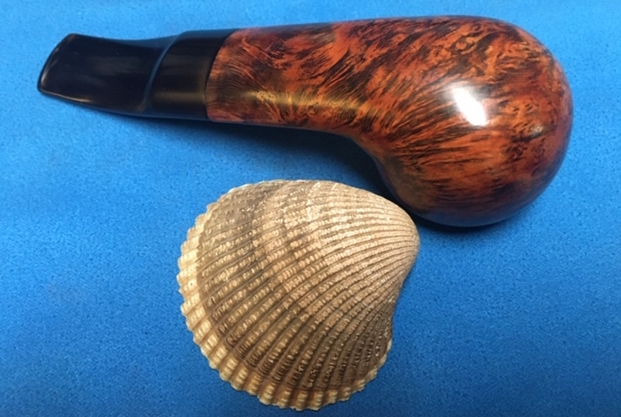
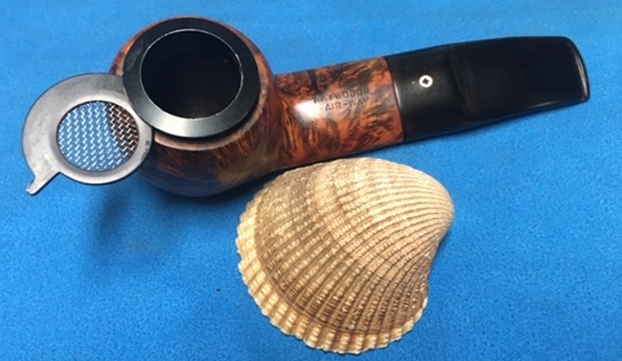
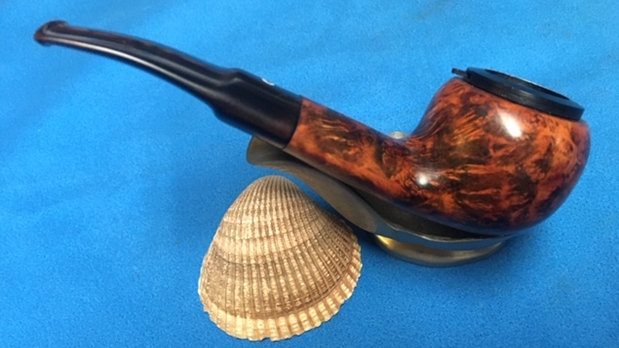
Working on a GBD Original 91327 Smooth Billiard from Bob Kerr’s Estate


Blog by Steve Laug

I am continuing to work through Bob Kerr’s estate. The next pipe on the table is a GBD Original Billiard, smooth bowl and shank a beveled rim top. It is an Original with a black vulcanite stem. I am continuing to cleanup Bob’s estate for his family and moving them out into the hands of pipemen and women who will carry on the trust that began with Bob and in some pipes was carried on by Bob. In the collection there were a total of 125 pipes along with a box of parts. This is the largest estate that I have had the opportunity to work on. I put together a spread sheet of the pipes and stampings to create an invoice. I was taking on what would take me a fair amount of time to clean up. I could not pass up the opportunity to work on these pipes though. They were just too tempting.

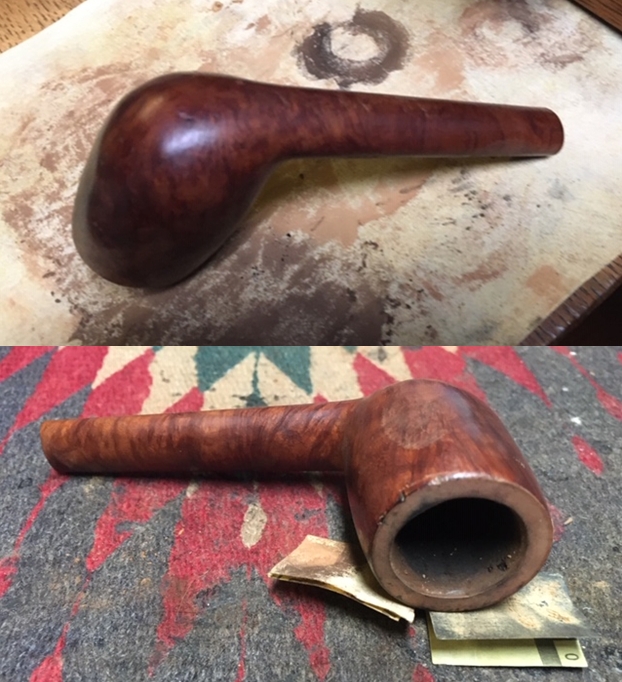
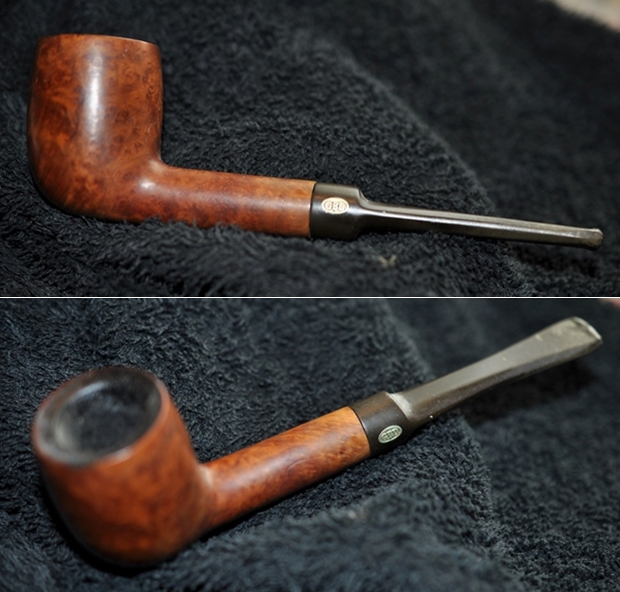
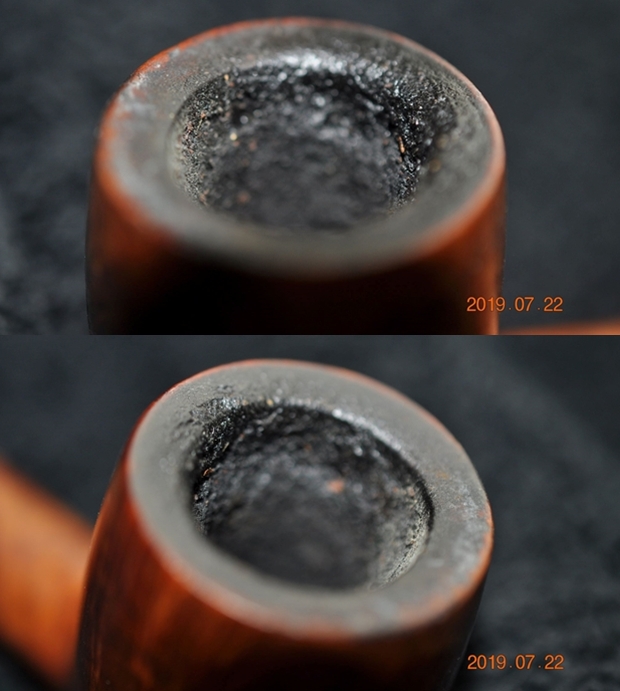
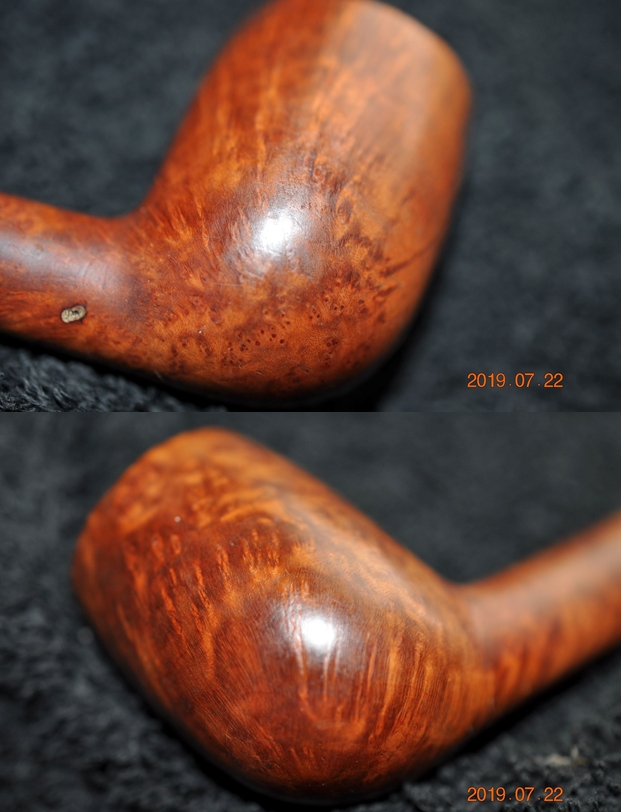
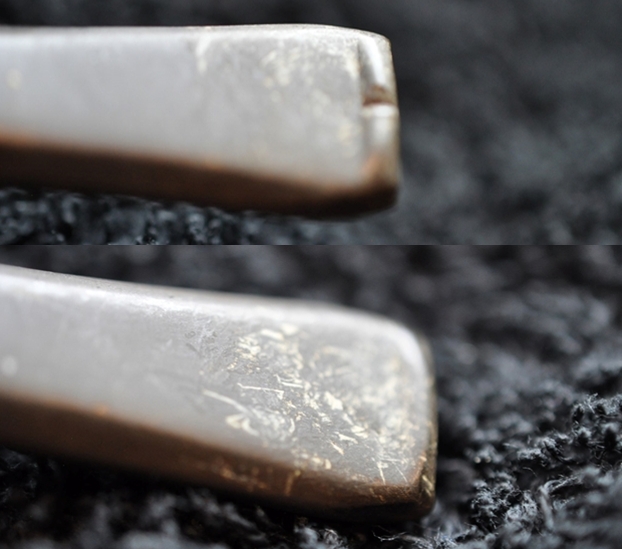
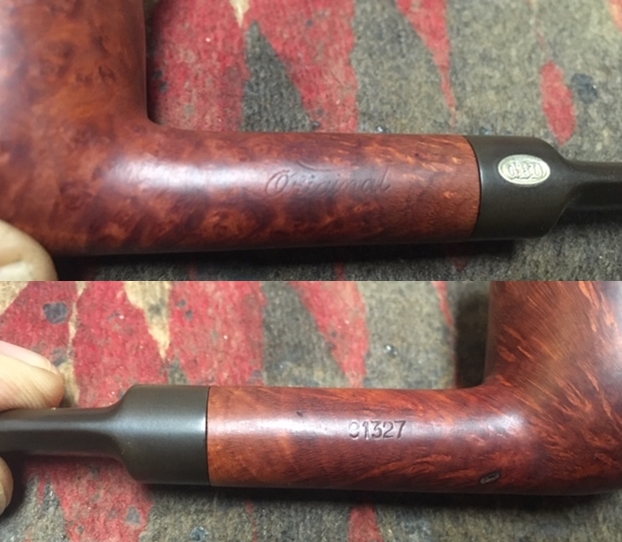
I have been collecting and restoring GBD pipes for as long as I have worked on pipes. This one also has a beautiful mix of grain under the grime on the finish. It is quite beautiful! The pipe is stamped GBD in an oval over Original on the left side of the shank. On the right side it is stamped London, England and the shape number 91327. It had a rich brown stain that does not look too bad. There was a thick cake in the bowl with remnants of tobacco stuck on the walls. There was a lava overflow on the rim. The inner edge of the rim and top are dirty and had a thick lava coat. The edges appear to have a bit of burn damage on the front inner edge and the front outer edge has a bit of wear damage. It was a beautiful pipe that was dirty and tired looking. The stem was oxidized and calcified toward the end. There seemed to be a chip or nick in the middle of the button on the top edge. Again, surprisingly did not have the tooth marks that I have come to expect from Bob’s pipes. Jeff took photos of the pipe before he started his cleanup work on it. Jeff took photos of the bowl and rim top to show the cake in the bowl and the lava build up on the edges of the bowl. It was thick and hard but hopefully it had protected the rim and edges from damage. There appears to be a little damage on the left front inner and outer edges of the bowl. Otherwise it looks pretty good.   Jeff took photos of the sides and heel of the bowl to show the condition of the finish. You can see the beautiful grain through the debris – both birdseye and cross grain. The finish was very dirty. There is a large putty fill on the right side of the shank near the bowl. Jeff took photos of the stamping on the sides of the shank. The stamping was readable as you can see from the photos. On the left side it read GBD in an oval over Original.  On the right side it was stamped London, England over the shape number 91327. On the left side of the saddle stem was an inlaid brass GBD rondel.Jeff took photos of the top and underside of the stem showing the tooth chatter, scratching and oxidation on the stem surface and wear on the edges of the button. There is a deep nick in the topside of the button.I turned to Pipedia’s article on GBD to see if I could find any information on the Historic line. I have heard of Original pipes but I have never seen one stamped with the five digit shape number like this 91327. The Pipedia article identifies the line as a French made pipe however, this one is stamped London, England thus contradicting the article that specifically says that the pipes were not made in England (https://pipedia.org/wiki/GBD_Model_Information).
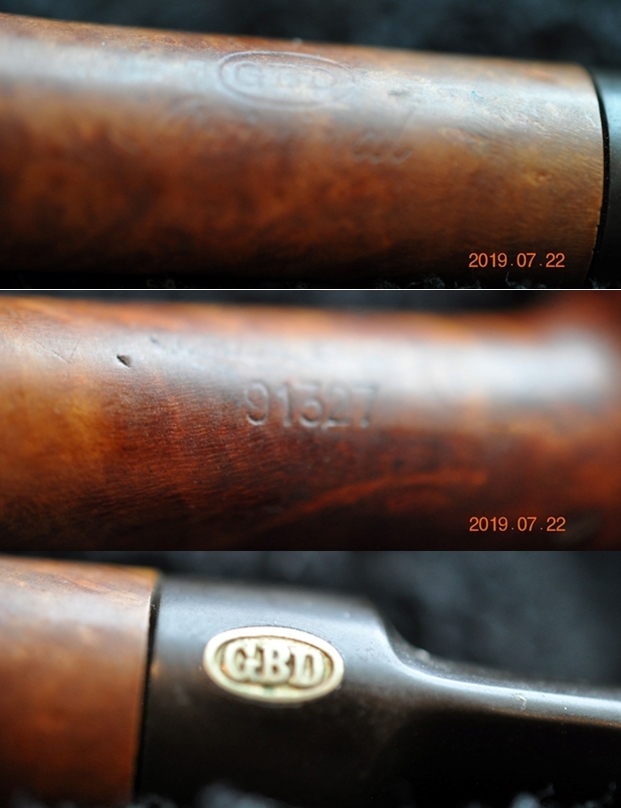
I also turned to the reference page on the site for GBD shapes and numbers and could not find any information on that shape number (https://pipedia.org/wiki/GBD_Shapes/Numbers). There was nothing there with a five digit number so I checked the listing of the last 3 digits, 327 and did not find one. So once again there is a mystery on this one.

All of my research did not really help pin anything down. The shape number was a dead end and the line description was also a contradiction. I was dealing with a bit of anomaly – a French made saddle Billiard stamped London, England with a saddle stem. In terms of dating the pipe I can only guess that it fits in with the late 50s to late 60s of Bob’s other pipes but I cannot know for sure. Now it was time to work on the pipe.

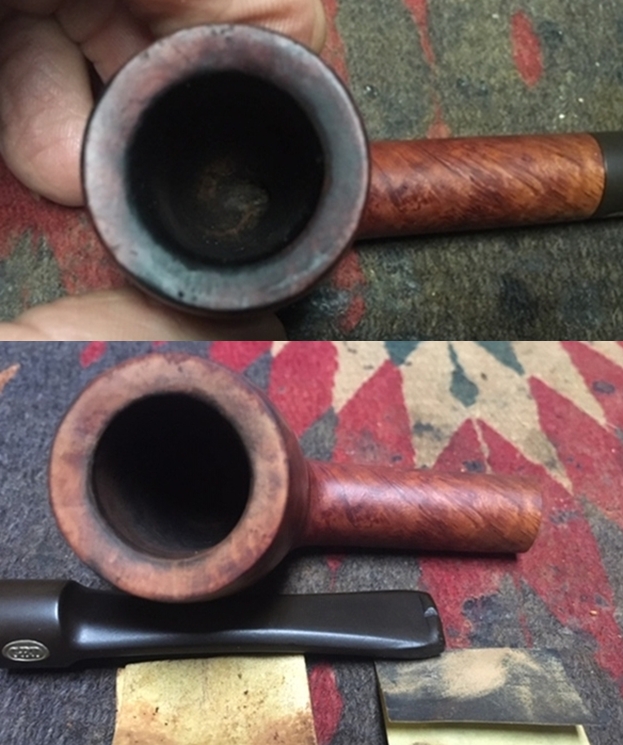
With over 125 pipes to clean from Bob’s estate I am really appreciating Jeff’s help cleaning them up. Jeff cleaned the pipe with his usual penchant for thoroughness that I really appreciate. This one was a real mess and I did not know what to expect when I unwrapped it from his box. He reamed it with a PipNet pipe reamer and cleaned up the reaming with a Savinelli Fitsall Pipe Knife. He scrubbed out the internals with alcohol, pipe cleaners and cotton swabs until the pipe was clean. He scrubbed the exterior of the bowl with Murphy’s Oil Soap and a tooth brush to remove the grime and grit on the briar and the lava on the rim top. The finish looks very good with good looking grain around the bowl and shank. Jeff soaked the stem in Before & After Deoxidizer to remove the oxidation on the rubber. When the pipe arrived here in Vancouver for the second stop of its restoration tour it looked good. The stem still sported some deep oxidation but otherwise it was clean. I took photos before I started my part of the work. I took some close up photos of the rim top and also of the stem surface. I wanted to show what an amazing job Jeff did in the cleanup of the rim top. The rim top looks pretty good. There is some darkening on the top edge and a burn marks on the inner and outer edge. There is also some damage on the outer rim on the rim. The photos show a few small dents on the surface of the stem and the nick out of the top of the button on the topside. You can also see the remaining oxidation on the stem surface.     I am going to keep posting the next paragraph because of the importance of protecting the stamping/nomenclature.
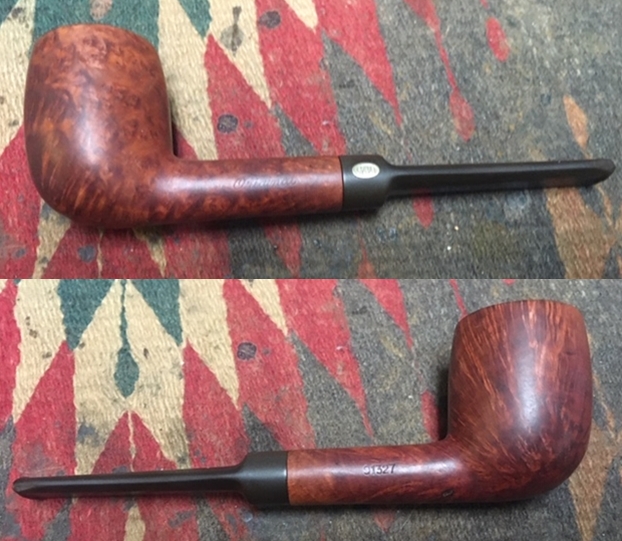
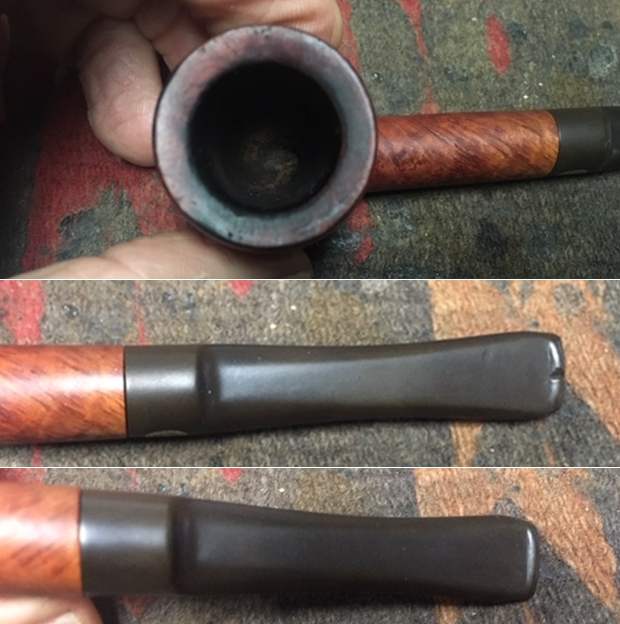
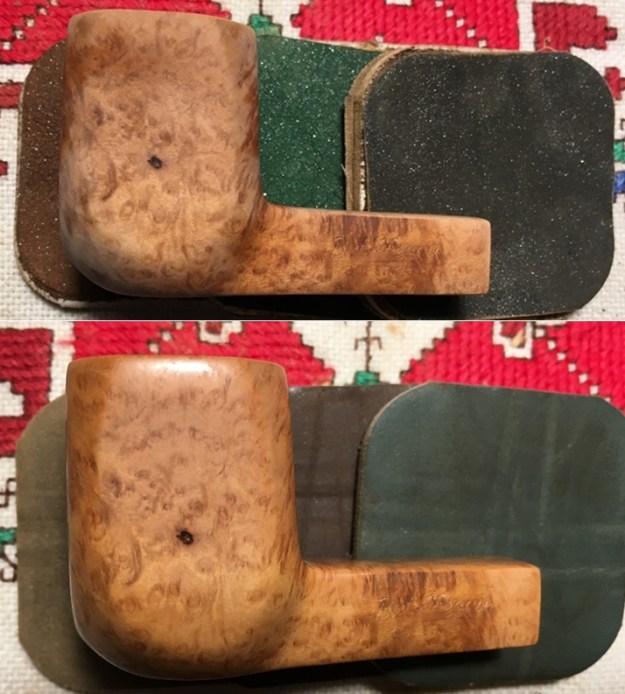
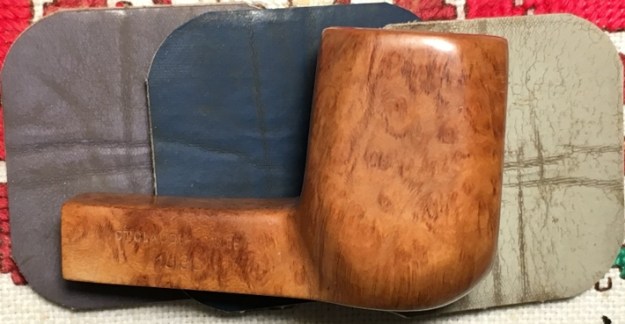
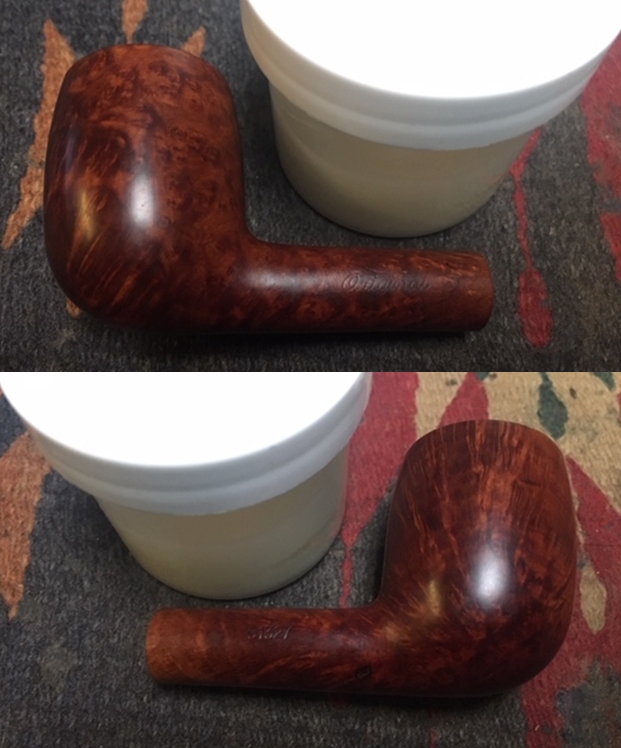
One of the things I appreciate about Jeff’s cleanup is that he works to protect and preserve the nomenclature on the shank of the pipes that he works on. The stamping on this one was very faint to start with so I was worried that it would disappear altogether with the cleanup. He was not only able to preserve it but it is clearer than shown in the earlier photos. I took some photos to show the clarity of the stamping. I have noticed that many restorers are not careful to protect the stamping in their cleaning process and often by the end of the restoration the nomenclature is almost destroyed. I would like to encourage all of us to be careful in our work to preserve this as it is a critical piece of pipe restoration! Since this is another pipe Bob’s estate I am sure that some of you have read at least some of the other restoration work that has been done on the previous pipes. You have also read what I have included about Bob Kerr, the pipeman who held these pipes in trust before I came to work on them (see photo to the left). Also, if you have followed the blog for long you will already know that I like to include background information on the pipeman whose pipes I am restoring. For me, when I am working on an estate I really like to have a sense of the person who held the pipes in trust before I worked on them. It gives me another dimension of the restoration work. I asked Brian if he or his wife would like to write a brief biographical tribute to her father, Bob. His daughter worked on it and I received the following short write up on him and some pictures to go along with the words including one of Bob’s carvings. Once again I thank you Brian and tell your wife thank you as well.
I am delighted to pass on these beloved pipes of my father’s. I hope each user gets many hours of contemplative pleasure as he did. I remember the aroma of tobacco in the rec room, as he put up his feet on his lazy boy. He’d be first at the paper then, no one could touch it before him. Maybe there would be a movie on with an actor smoking a pipe. He would have very definite opinions on whether the performer was a ‘real’ smoker or not, a distinction which I could never see but it would be very clear to him. He worked by day as a sales manager of a paper products company, a job he hated. What he longed for was the life of an artist, so on the weekends and sometimes mid-week evenings he would journey to his workshop and come out with wood sculptures, all of which he declared as crap but every one of them treasured by my sister and myself. Enjoy the pipes, and maybe a little of his creative spirit will enter you!

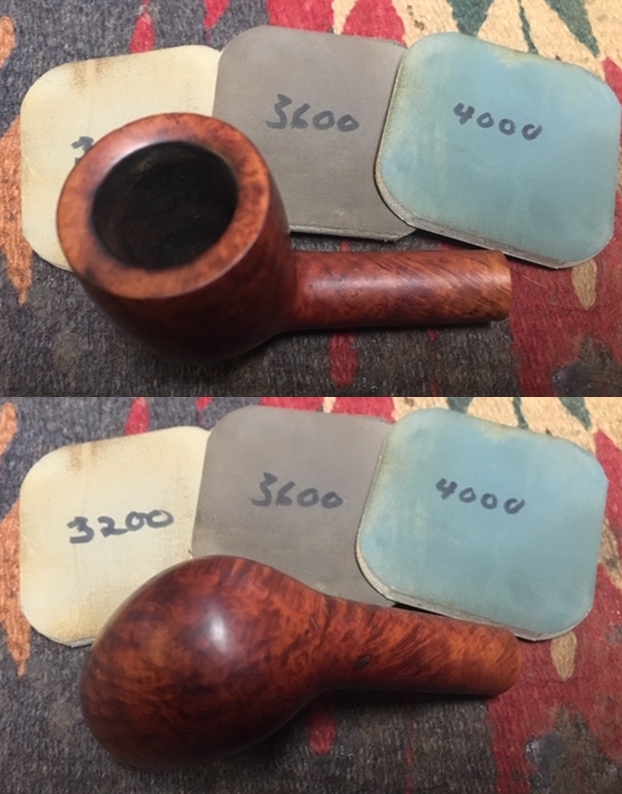
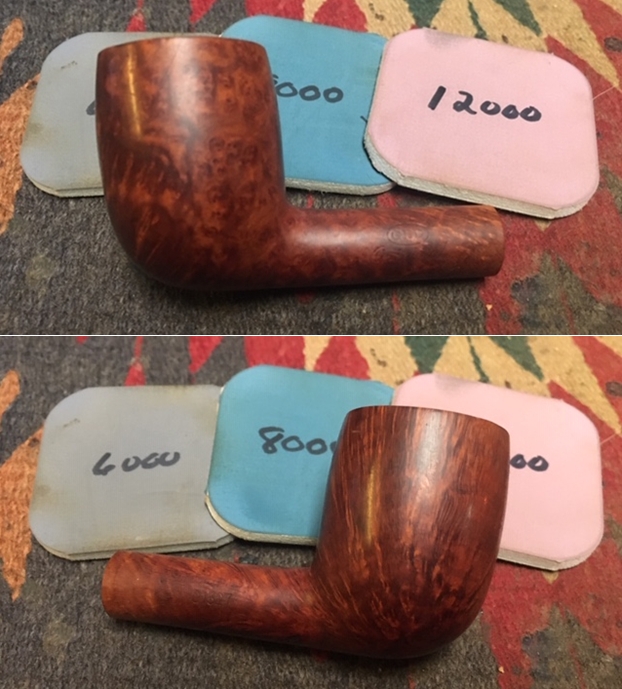
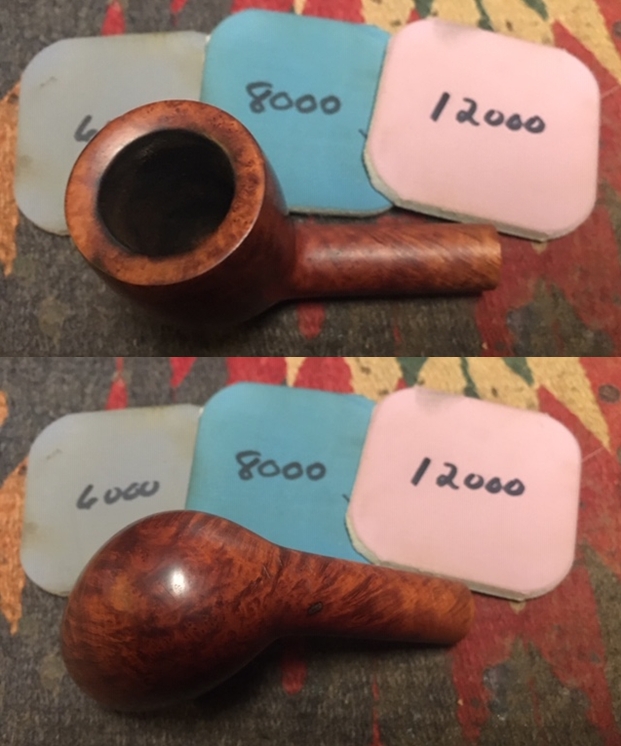
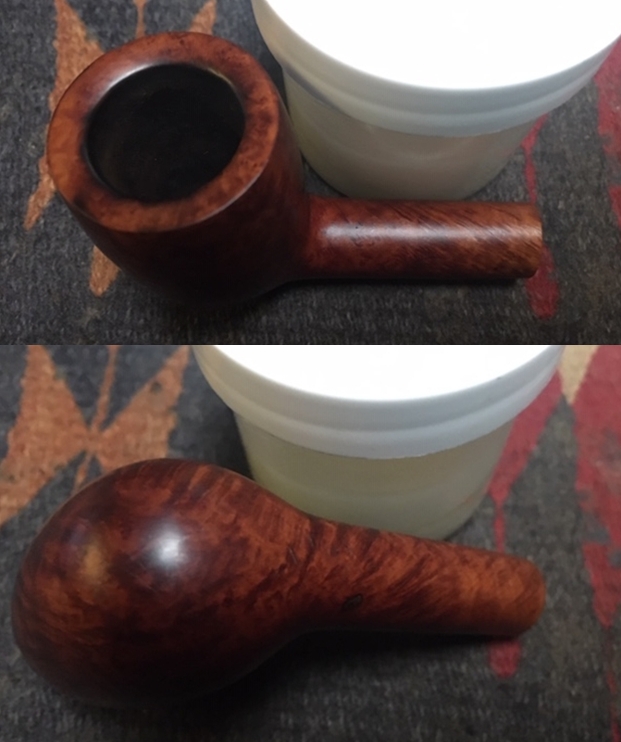
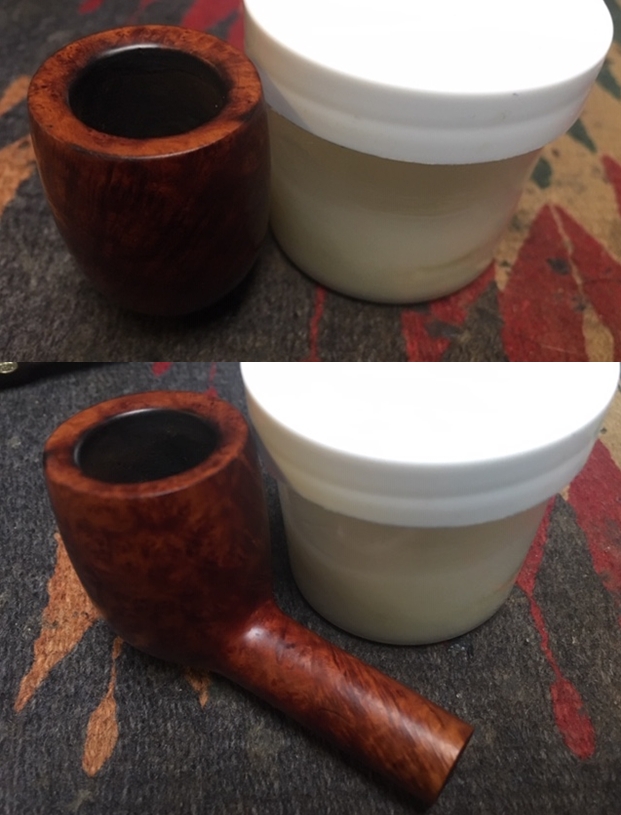
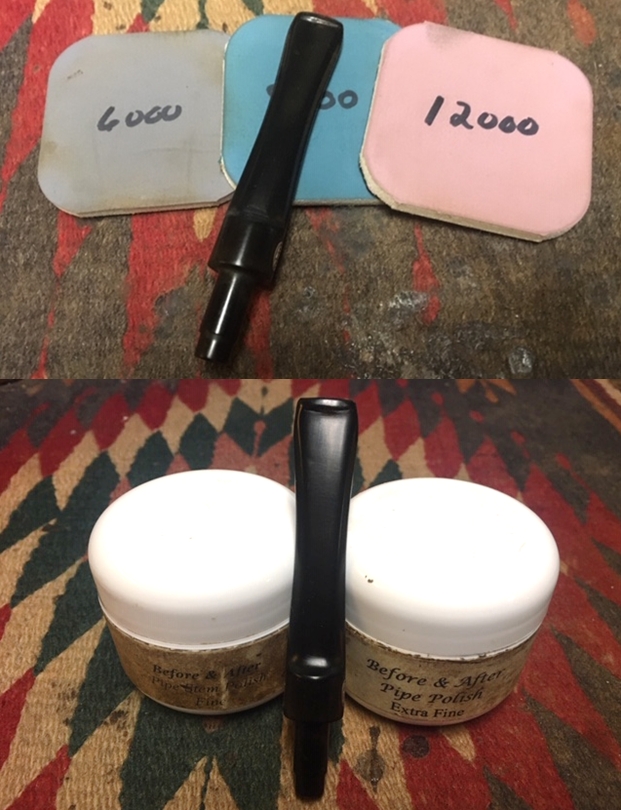
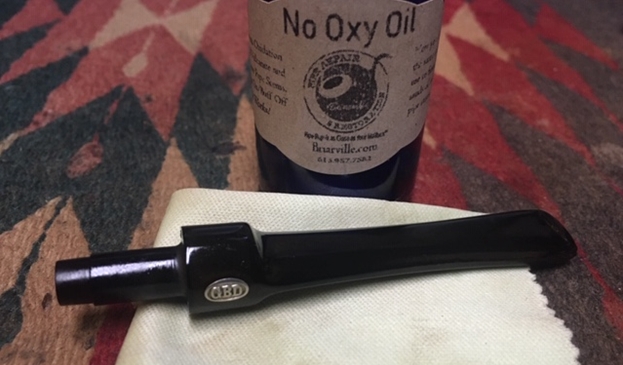
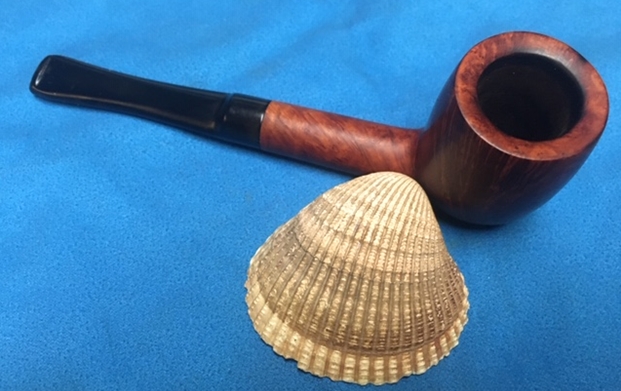
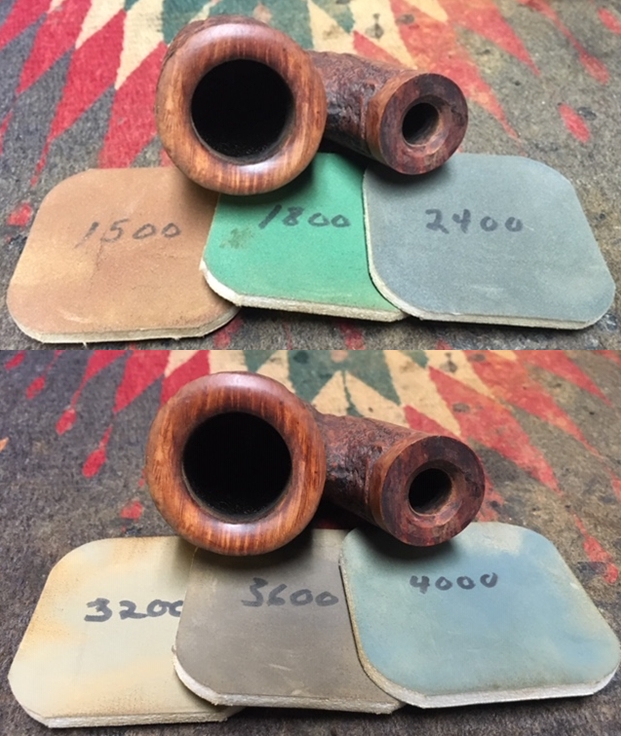
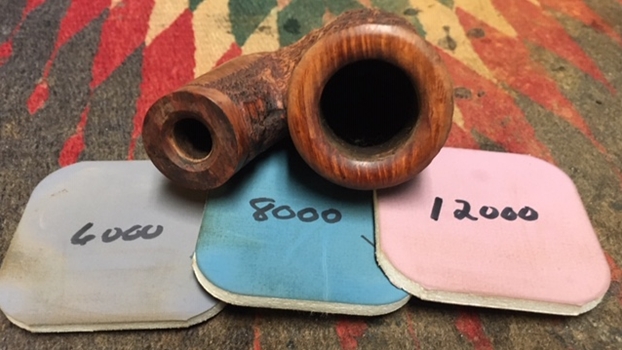
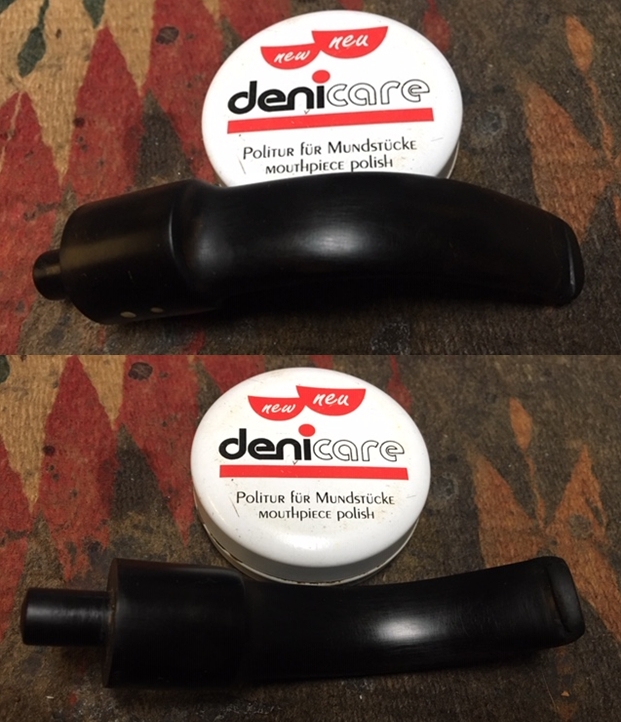
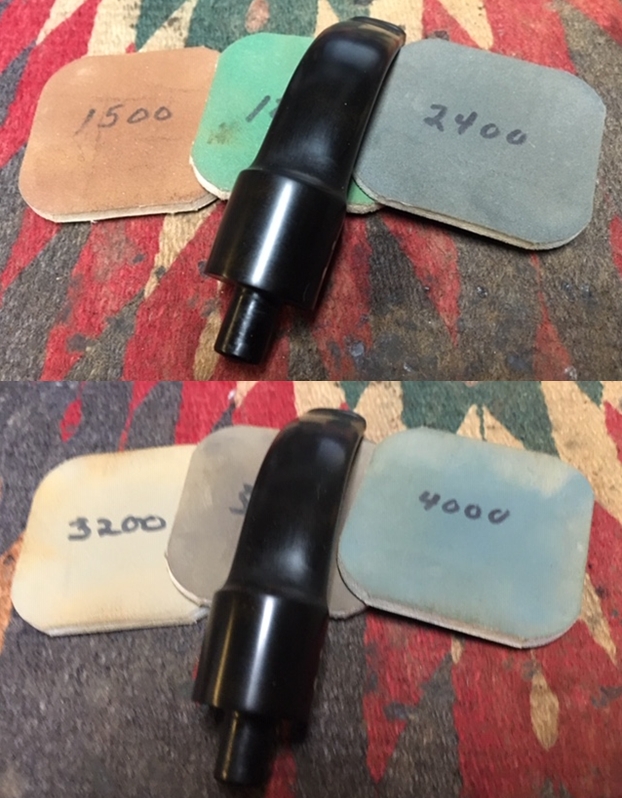
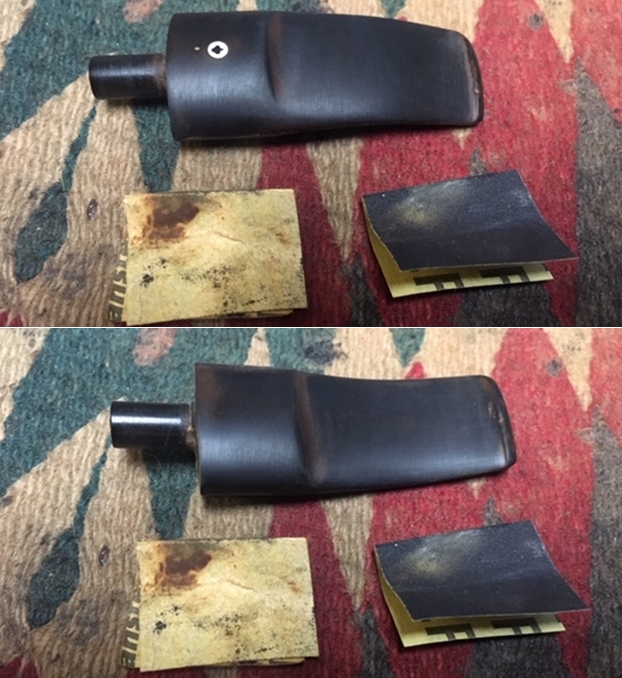
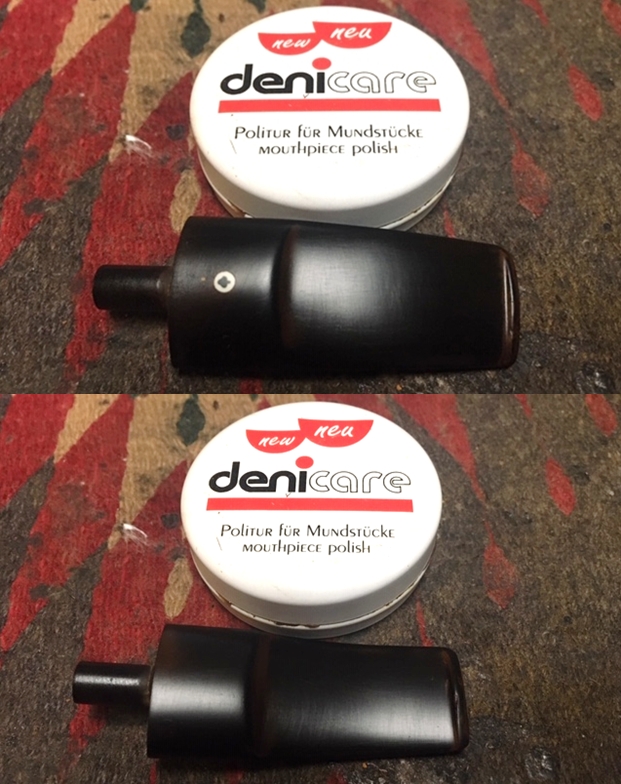
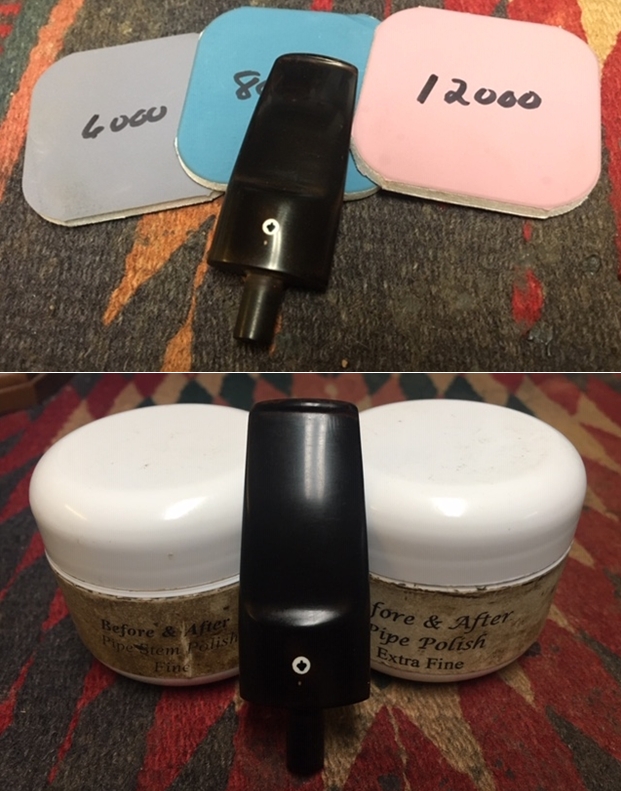
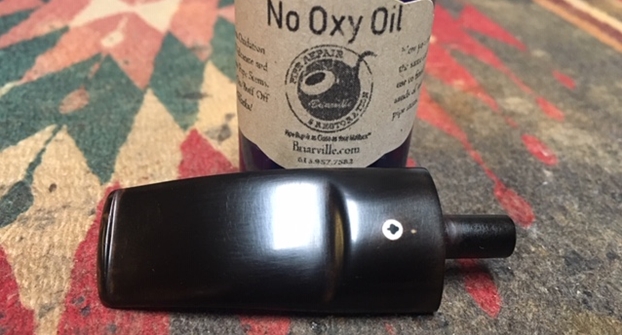
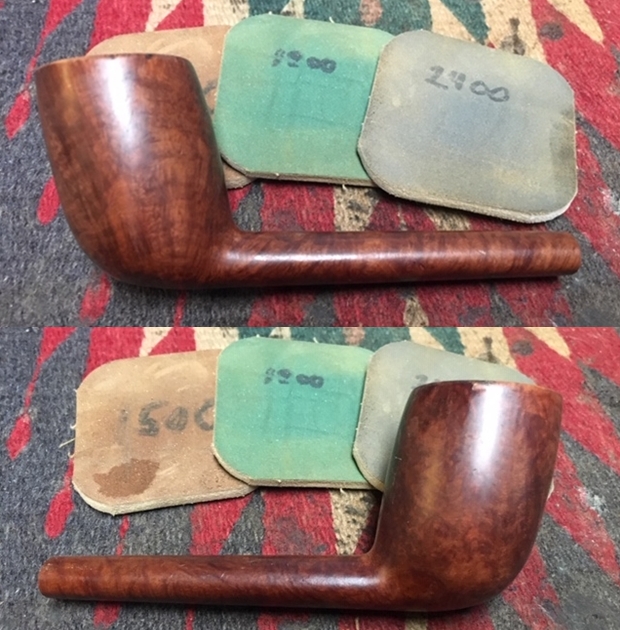
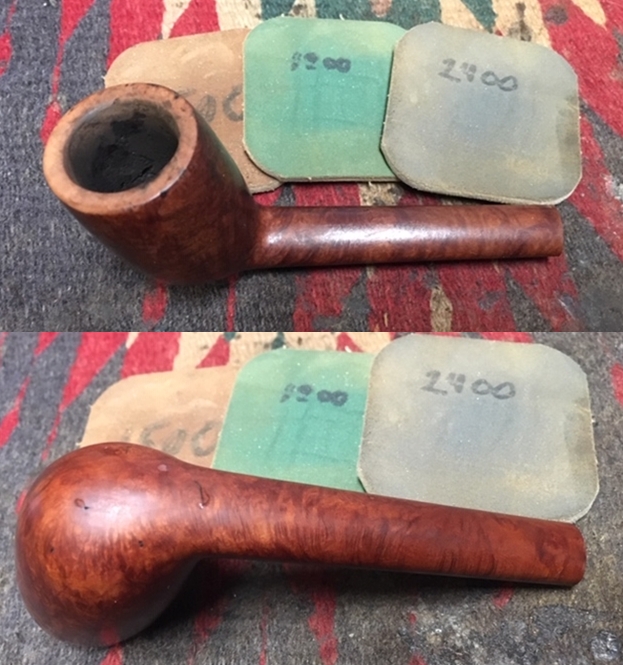
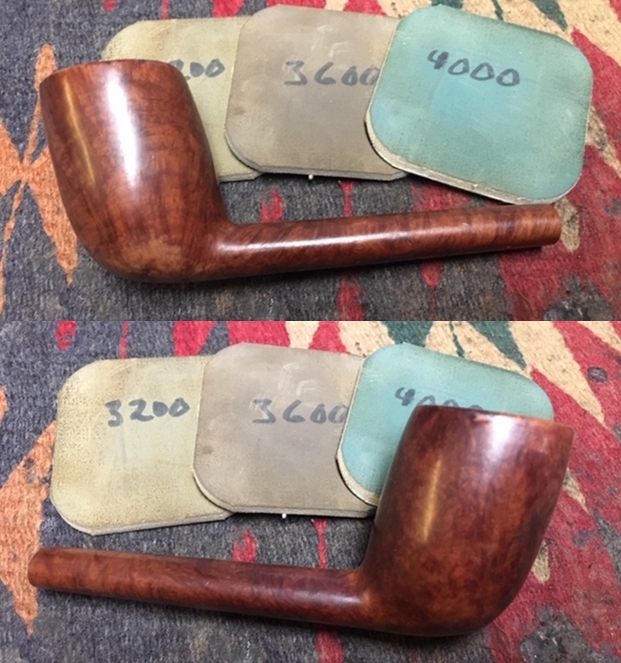
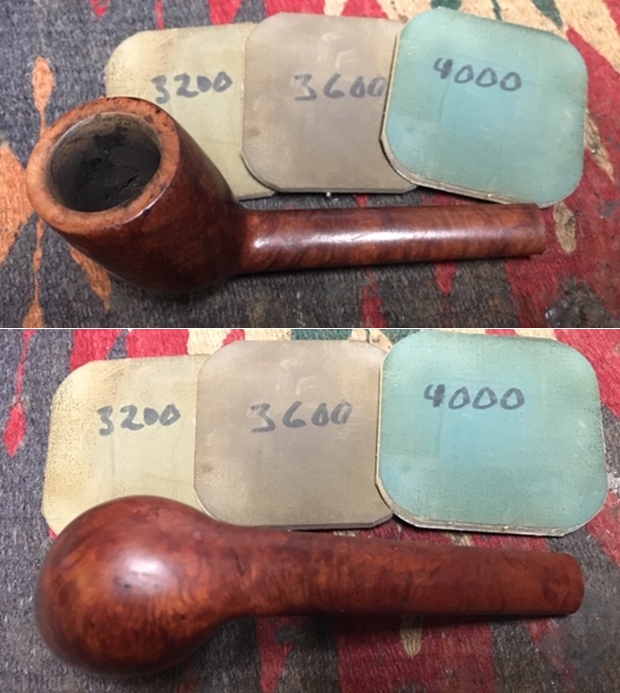
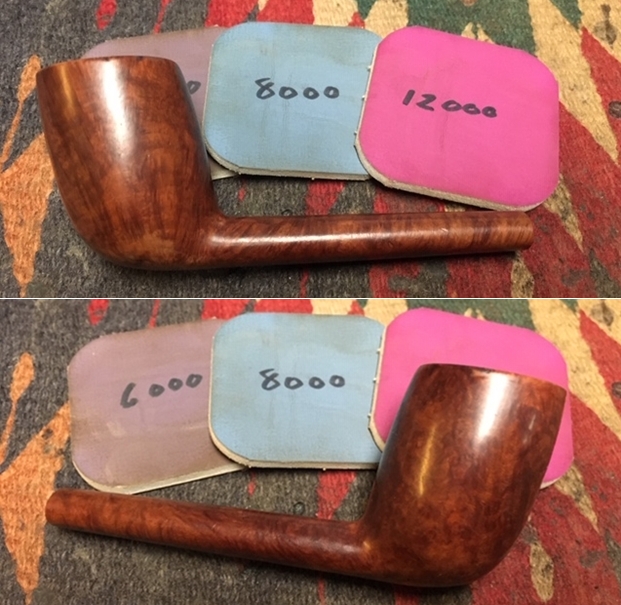
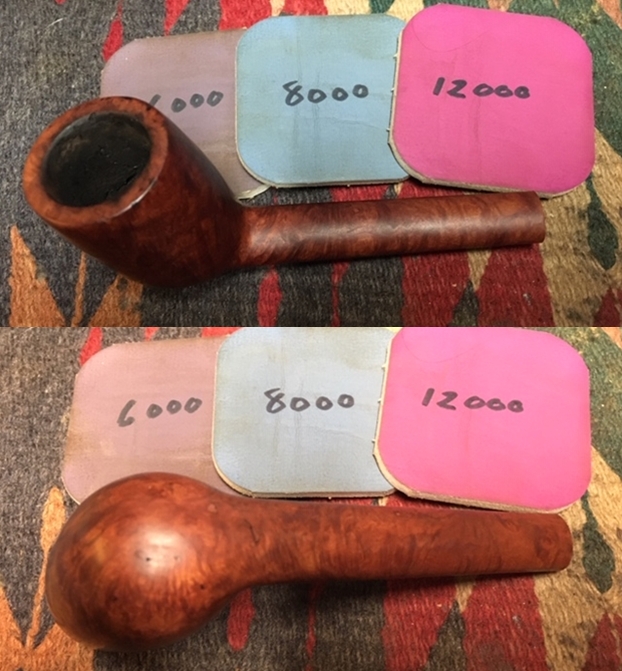
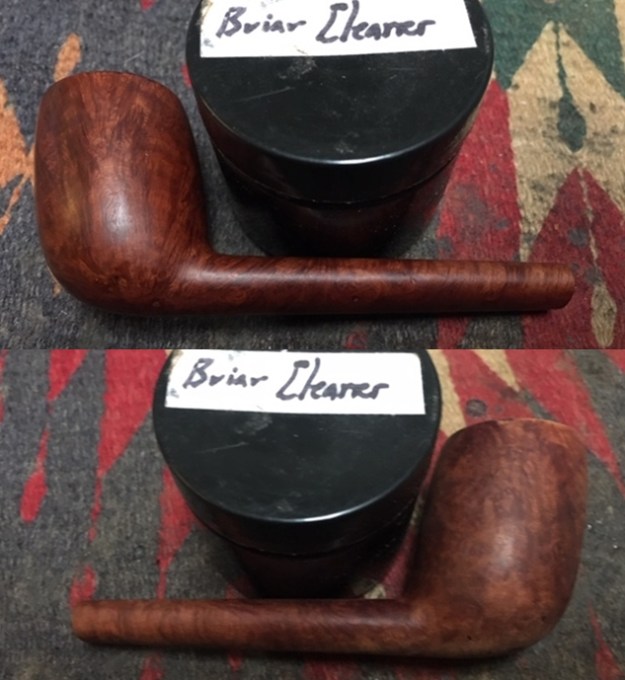
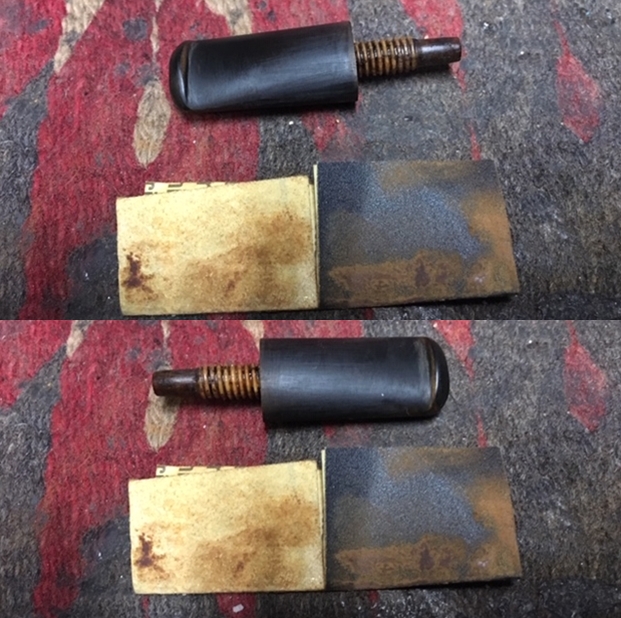
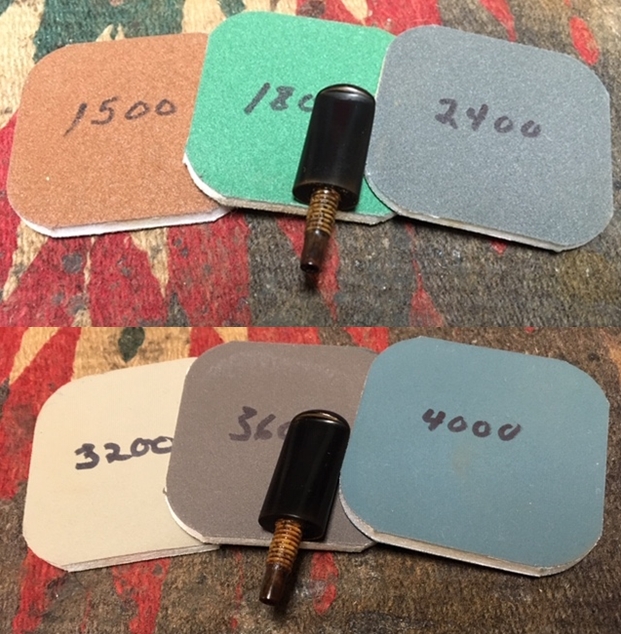
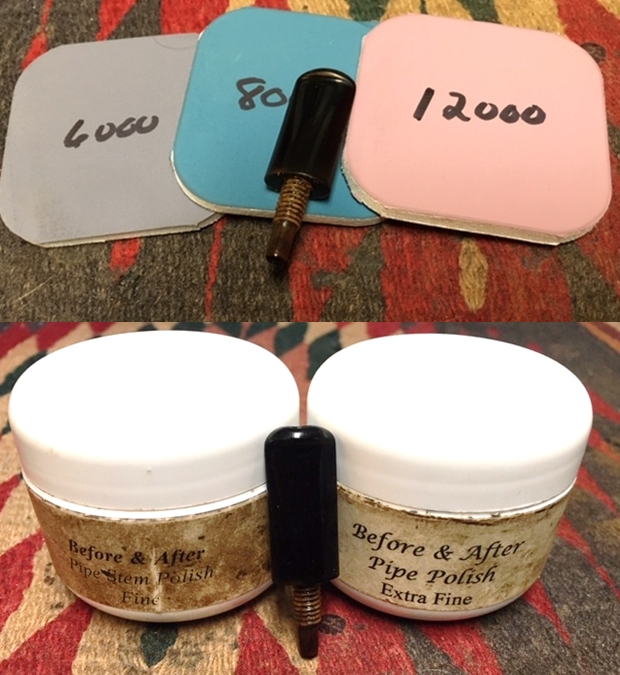
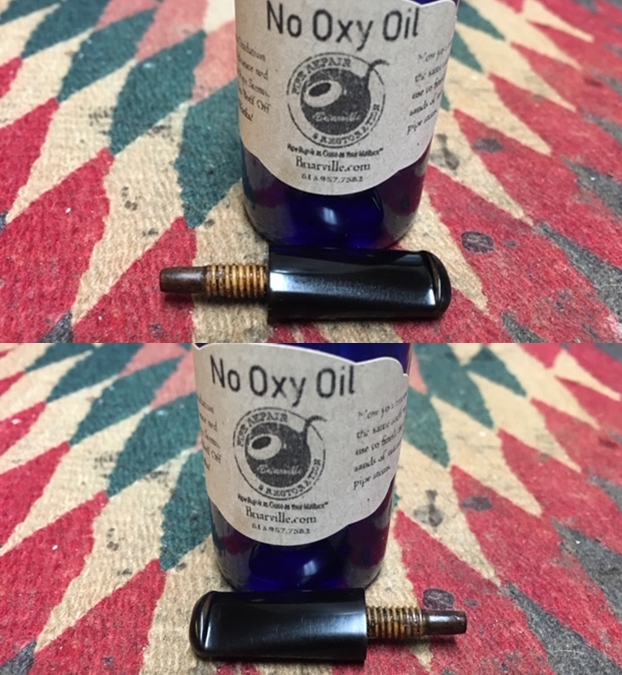
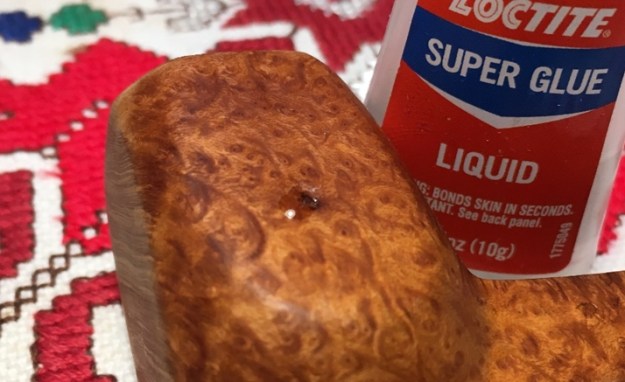
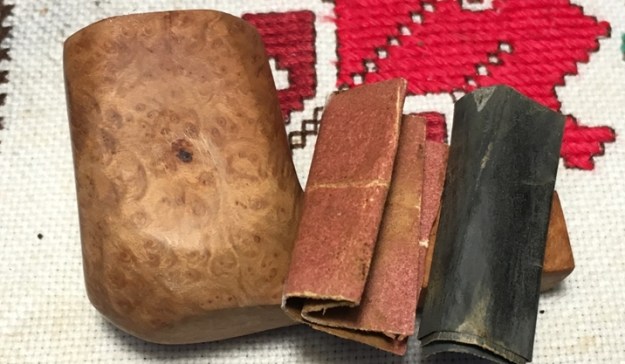
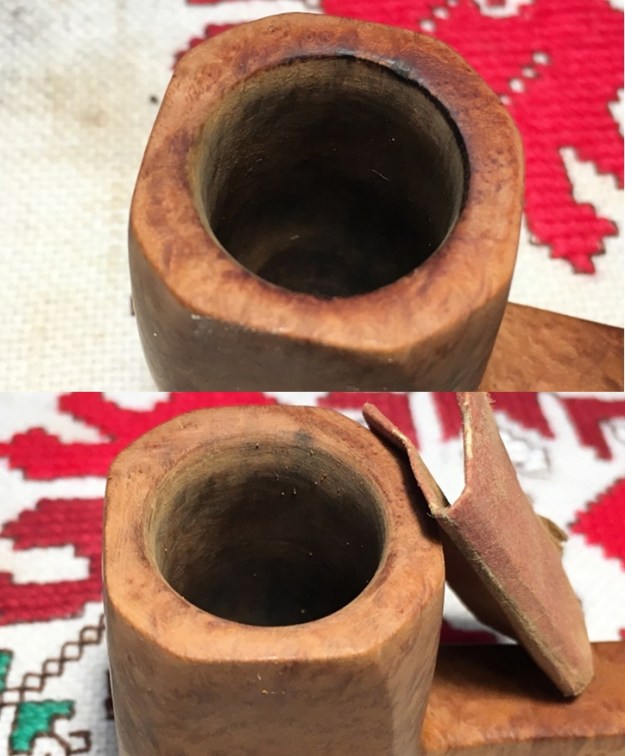
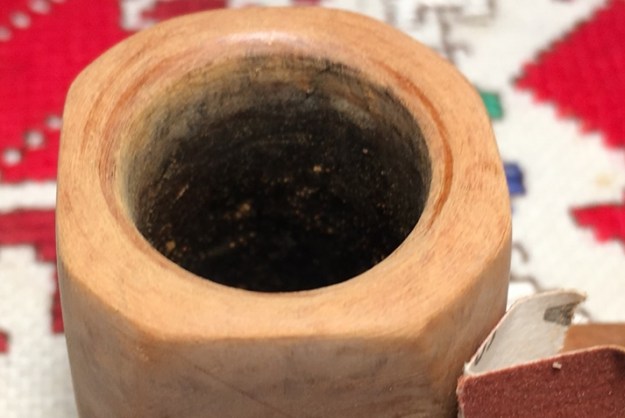
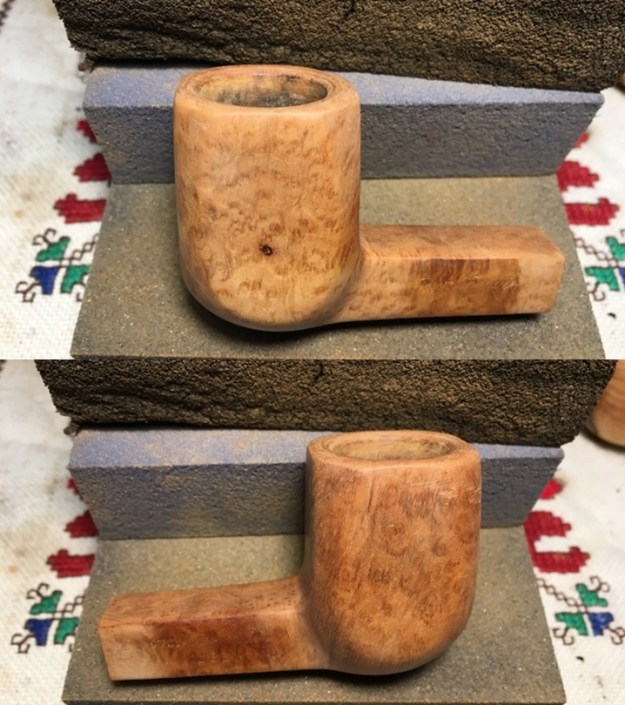
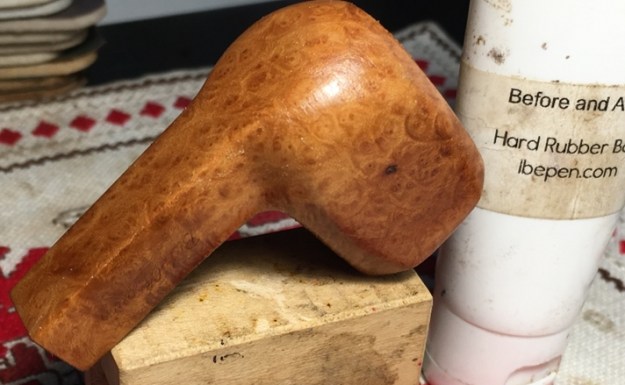
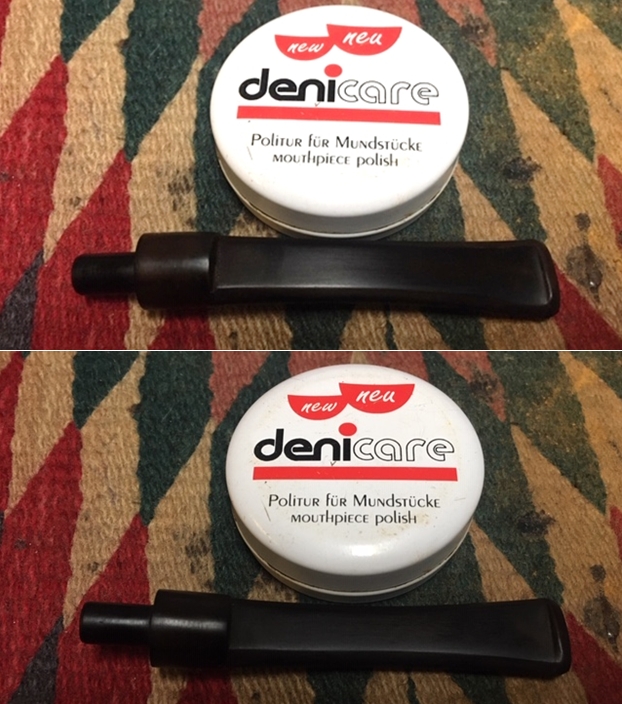
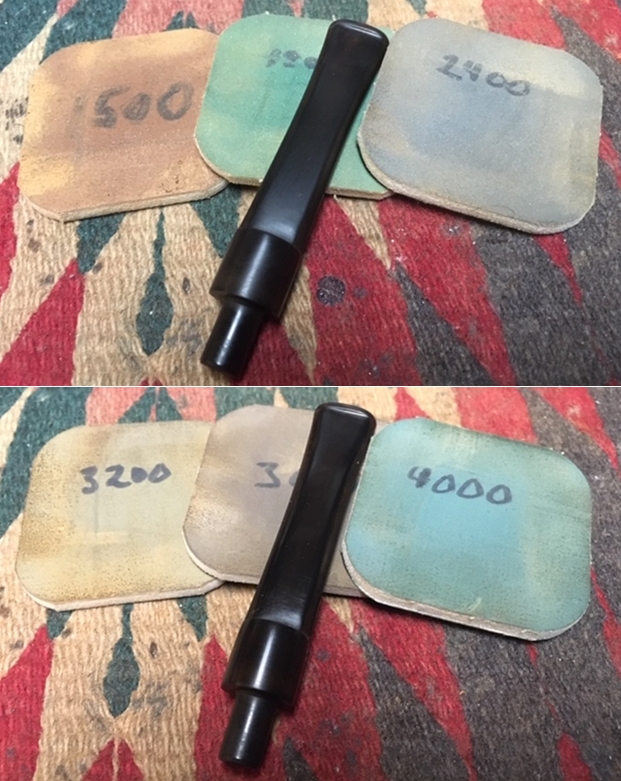
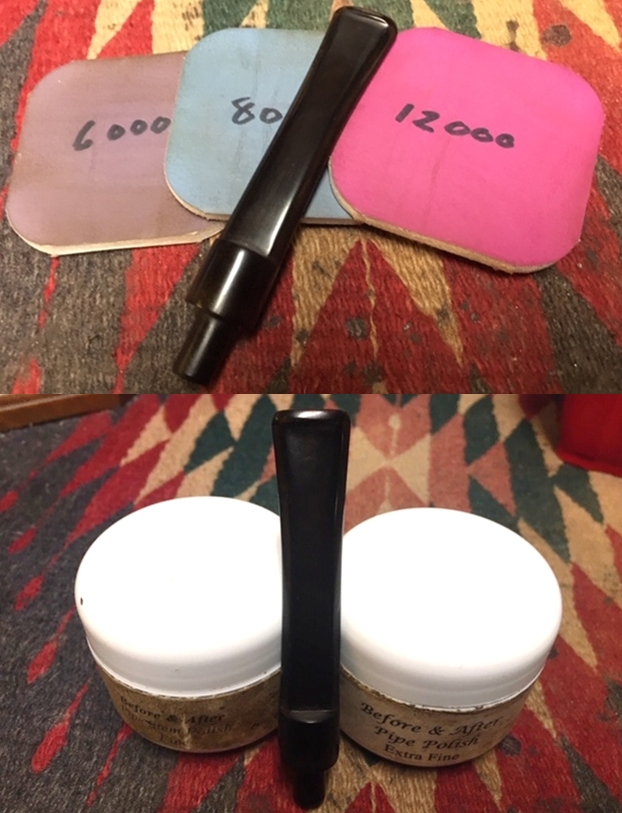
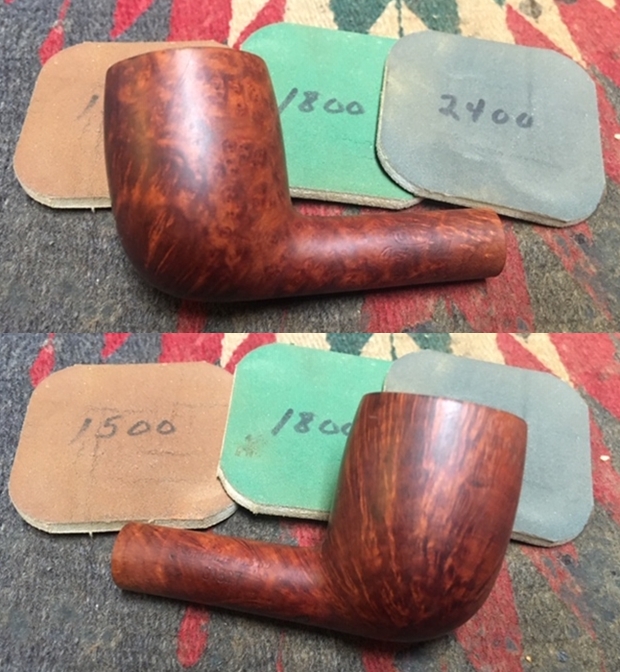
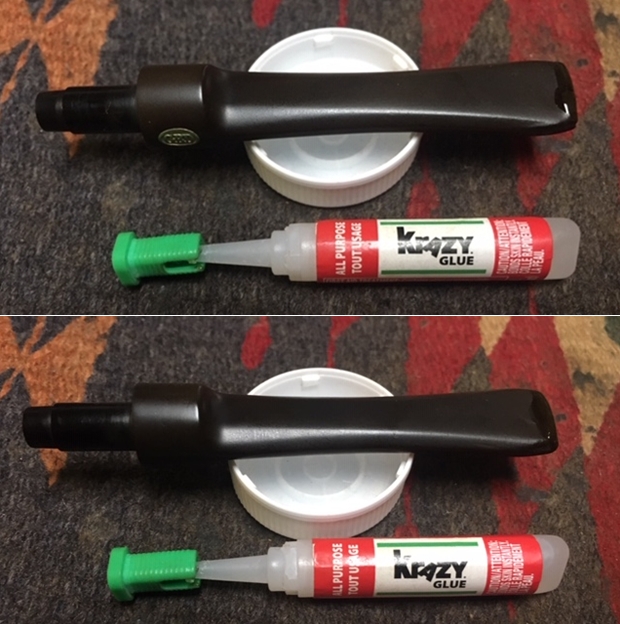
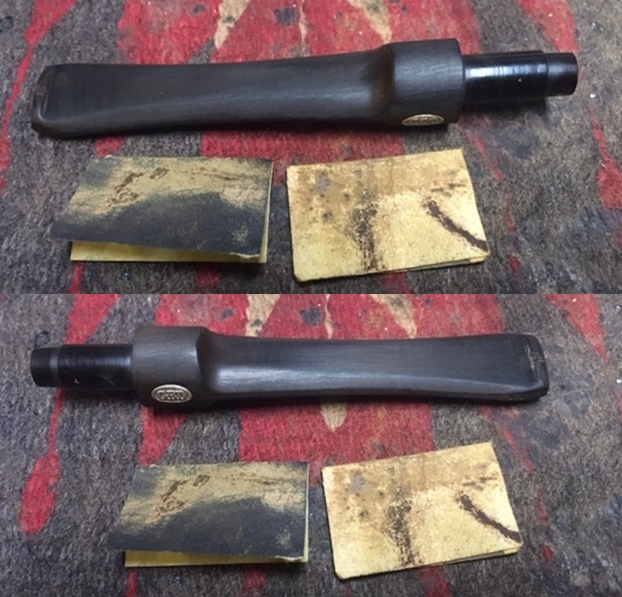
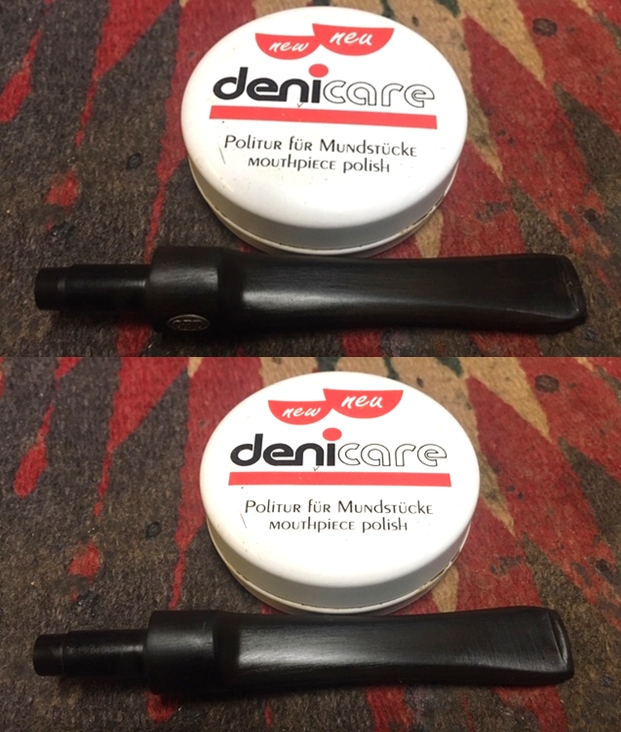
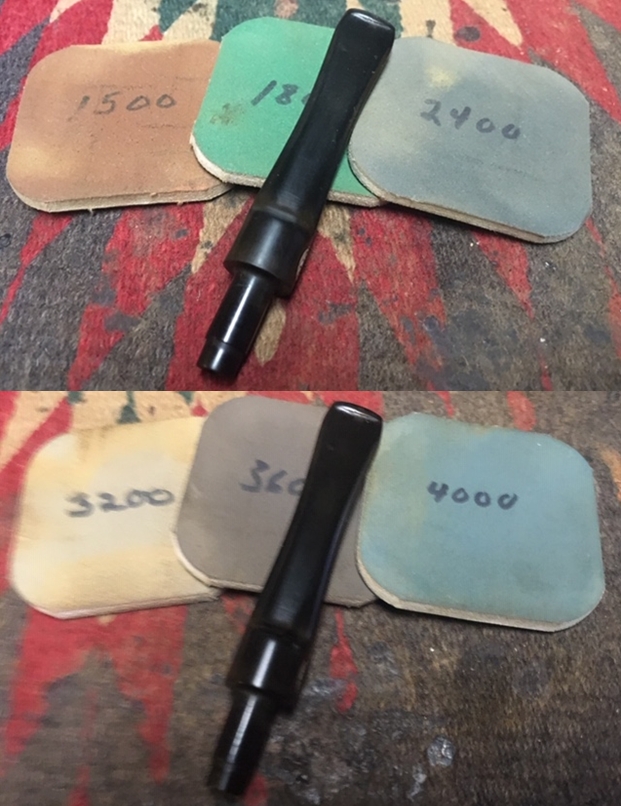
Now, on to the rest of the restoration on this GBD Original 91327 Saddle Stem Billiard. Since Jeff had done such an amazing clean up job on the bowl it was going to be a very easy job for me. There was some darkening and damage on the rim top, the inner and outer edges of the rim that needed to be addressed. I sanded it with a folded piece of 220 grit sandpaper to remove and minimize the damage to the top and the edges. I continued by starting to polish it with 400 grit wet dry sandpaper. I wiped the rim edge down with a damp cloth to remove the sanding dust on the briar. The first photo below shows the rim top when I started and the second one below shows it after the work. The finished rim top looked much better than when I started. I was able to minimize the damage on the front inner edge of the rim. It is still damaged but it looks considerably better. Once I clean it and stain it the rim edge will look better.  Some how the fill that was obvious in the first photos that Jeff took seem to have expanded and filled in and with the polishing and sanding it disappeared. I can see it but it was not worth repairing or replacing. I polished the rim top and sides of the bowl with micromesh sanding pads – wet sanding with 1500-12000 grit pads. I wiped the bowl and rim down with damp cloth after each sanding pad. The more I polished the rim top the more the rim blended in with the rest of the finish. I would not need to stain it.   I rubbed the bowl down with Before & After Restoration Balm. I worked it into the surface of the briar with my fingertips to clean, enliven and protect it. I let the balm sit for a little while and then buffed with a cotton cloth and shoe brush to raise the shine. I set the bowl aside and turned my attention to the stem. I filled in the divot on the top of the button on the top side and built up the edge on the underside with clear Krazy Glue.I sanded the stem with 220 grit sandpaper to break up the oxidation. I started the polishing with 400 grit wet dry sandpaper to remove the scratching. It is starting to look good.    I have one more tin of Denicare Mouthpiece Polish left from a few that I have picked up over the years. It is a coarse red pasted that serves to help remove oxidation. I polished the stem with that to further smooth out the surface of the vulcanite (and to be honest – to use it up).    I polished the stem with micromesh sanding pads – wet sanding with 1500-12000 grit pads. I wiped the stem down after each sanding pad with Obsidian Oil. I polished it with Before & After Pipe Stem Polish – both Fine and Extra Fine. Once I had finished the polishing I rubbed it down with “No Oxy Oil”, a product I am trying out from Briarville Pipe Repair. So far it is an impressive product that is very similar to Obsidian Oil. I will continue to experiment with it.  I can’t begin to tell you how great it feels to be moving through these 125 pipes – about 38 done so far! It is an overwhelming task that can only be achieved one pipe at a time. So each time I finish one of the pipes from Bob Kerr’s Estate I look forward to what it will look like when it is put back together, polished and waxed. I put the bowl and stem back together. I polished the bowl and stem with Blue Diamond to polish out the scratches in the briar and the vulcanite. I gave the bowl and stem multiple coats of carnauba wax. I buffed the pipe with a clean buffing pad to raise the shine. I hand buffed it with a microfiber cloth to deepen the shine. The pipe polished up pretty nicely. The rich medium brown smooth finish really popped with buffing showing the grain on the pipe. The polished thin black vulcanite saddle stem went really well with the colours of the bowl. This old GBD Original 91327 Billiard was another fun pipe to work on thanks to Jeff’s cleanup work. It really has the classic GBD Billiard shape that is very recognizable. The medium brown stain really makes the pipe look attractive. It is another comfortable pipe to hold in the hand. The finished pipe is shown in the photos below. The dimensions of the pipe are Length: 5 ½ inches, Height: 1 ¾ inches, Outside diameter of the bowl: 1 ¼ inches, Chamber diameter: ¾ of an inch. If you are interested in carrying on Bob’s legacy with this pipe send me a message or an email. I have a lot more to work on of various brands. Perhaps one of those will catch your attention. Thanks for reading this blog and my reflections on the pipe while I worked on it. This is an interesting estate to bring back to life.
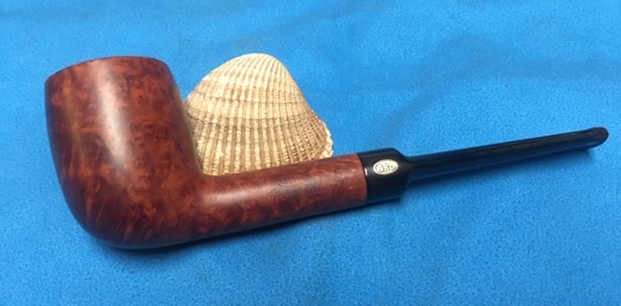
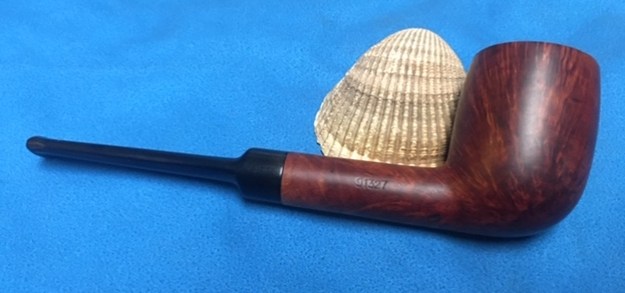
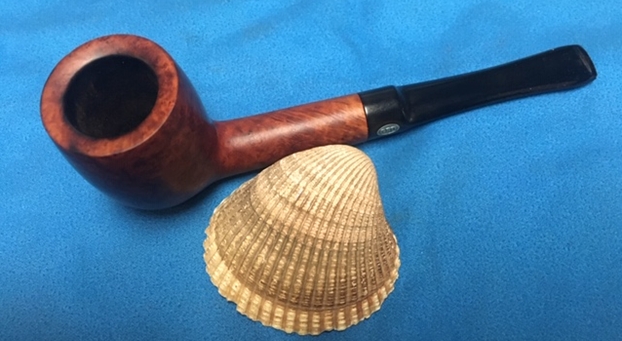
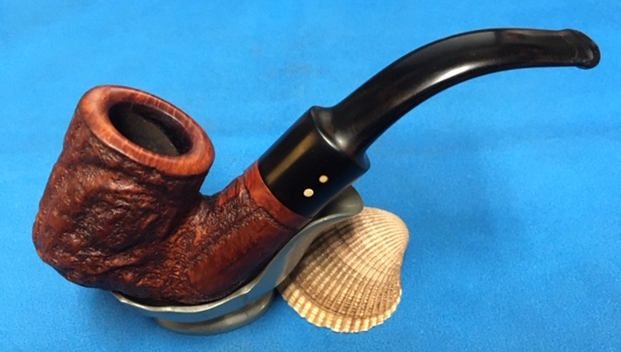
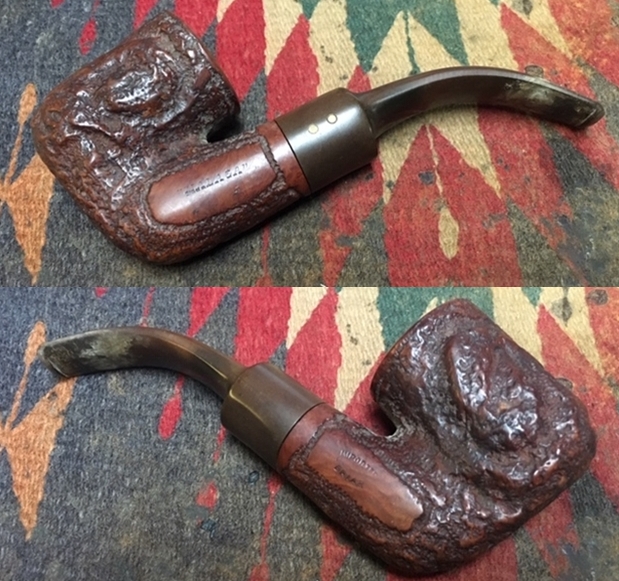
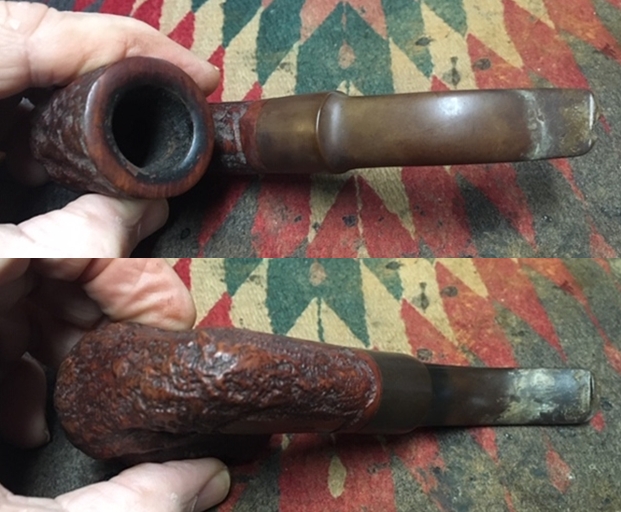
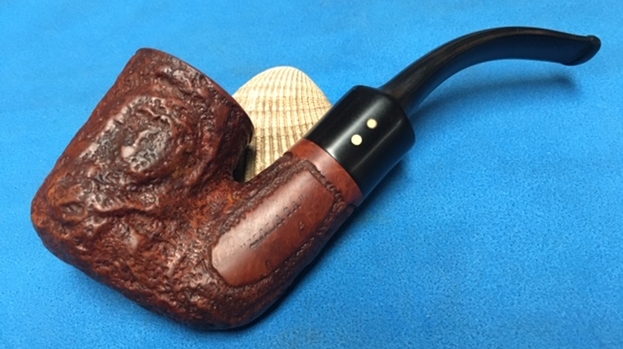
New Life for Alex’s Rusticated “Malaga” Oom Paul


Blog by Steve Laug

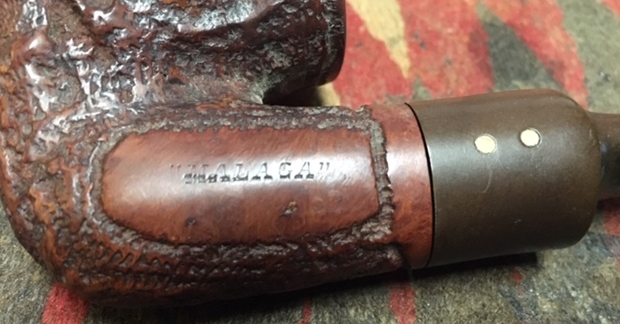
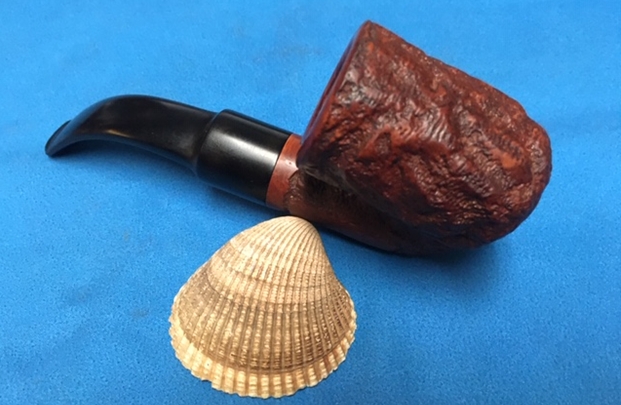
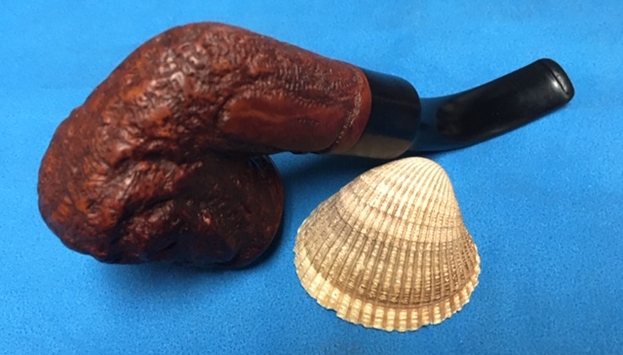
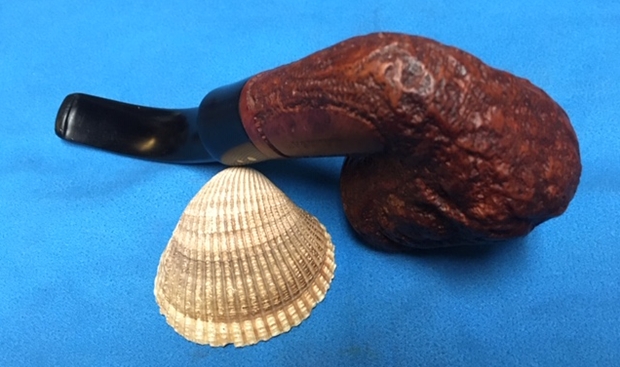
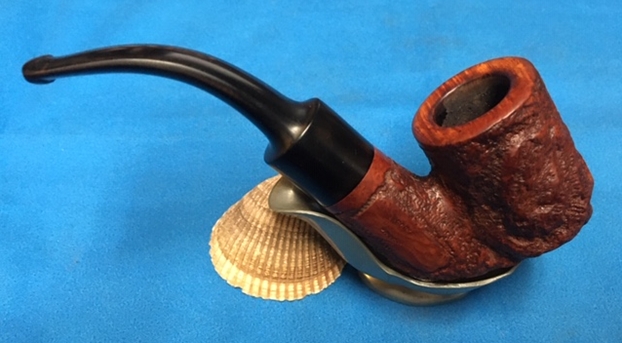
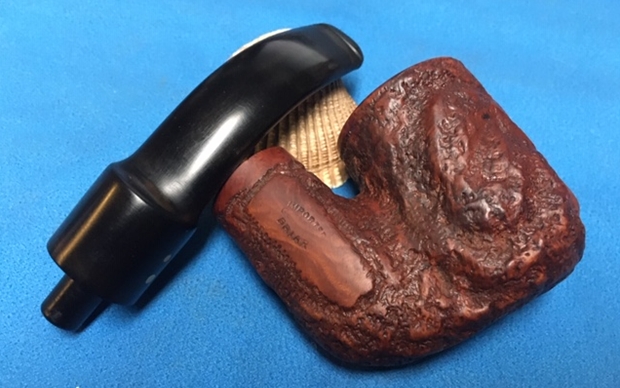
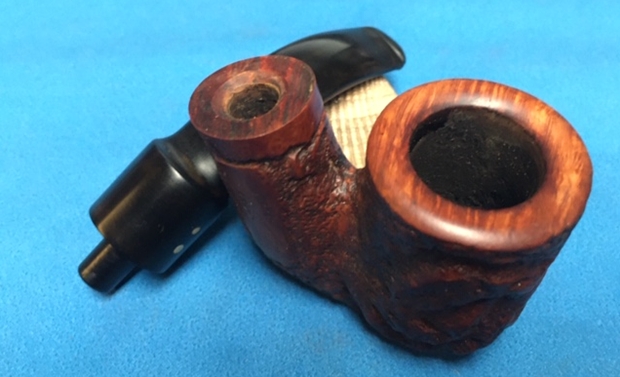
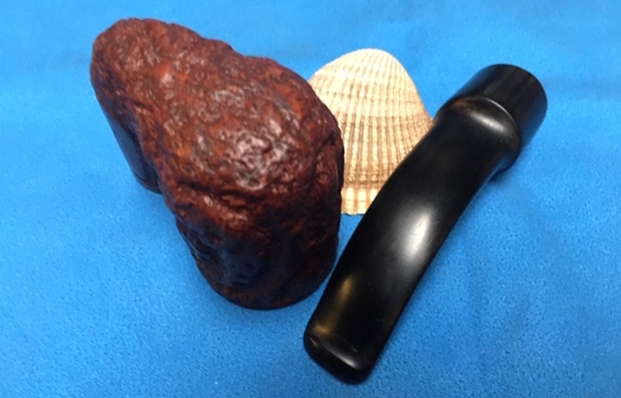
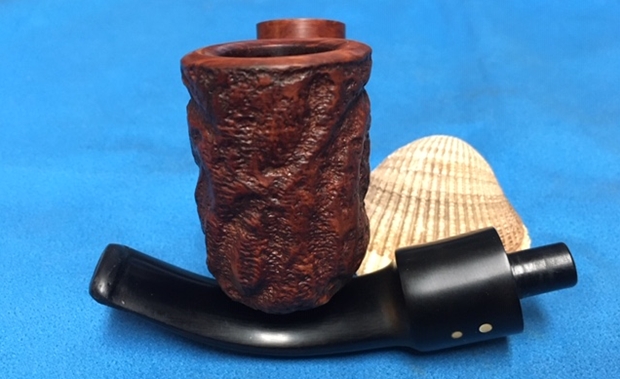
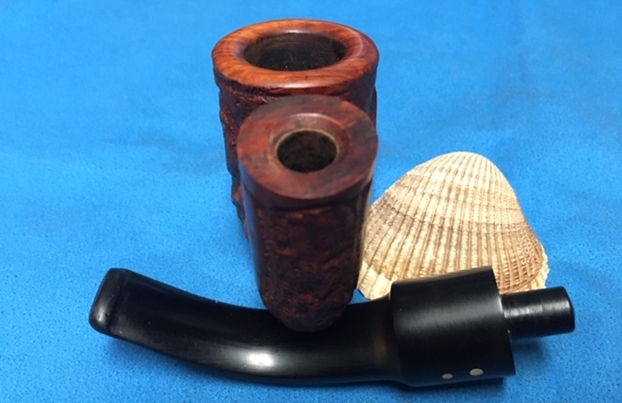
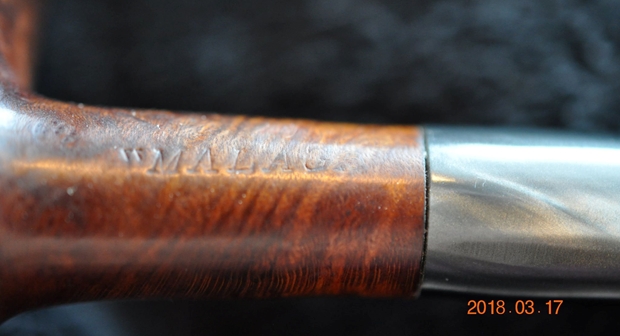
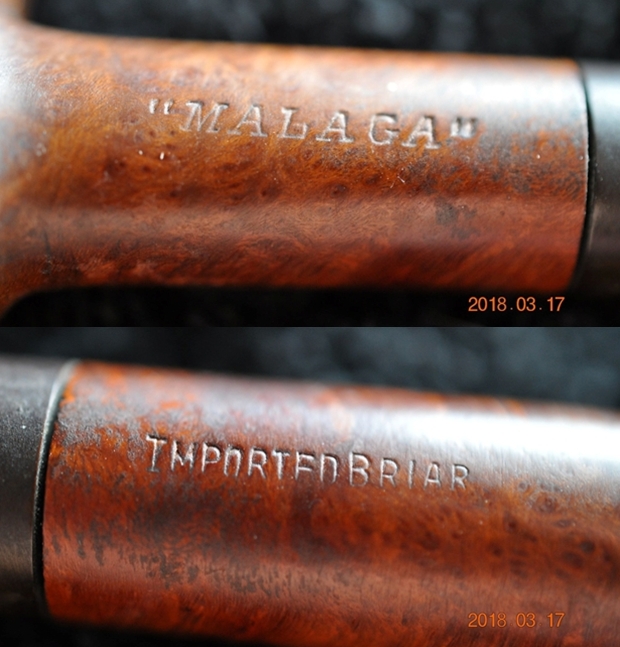
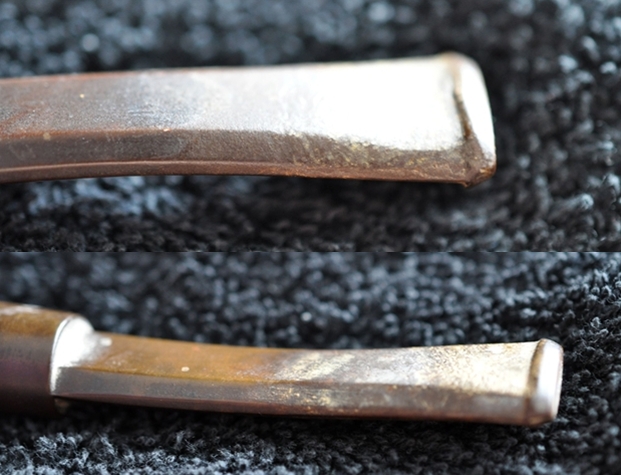
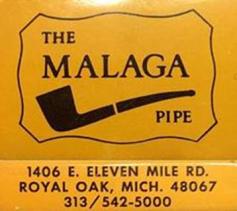
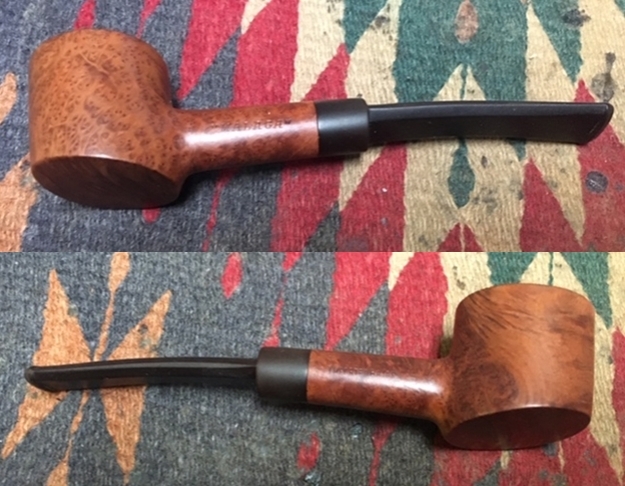
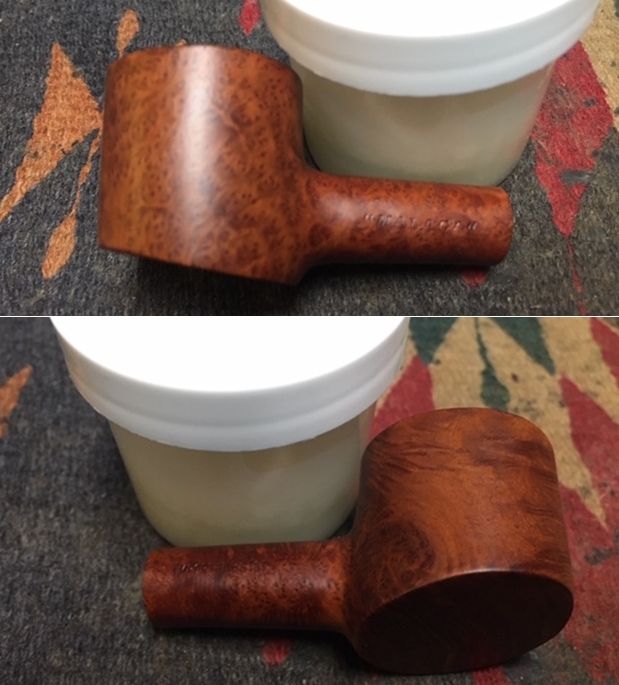
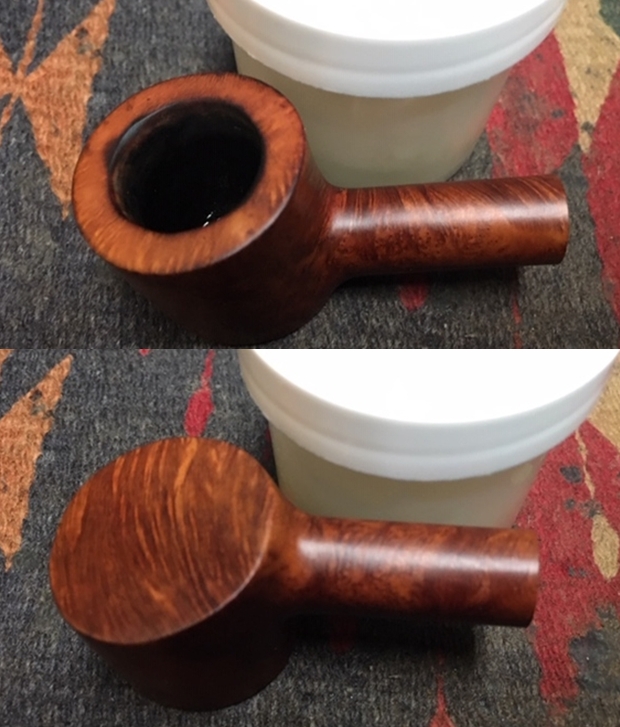
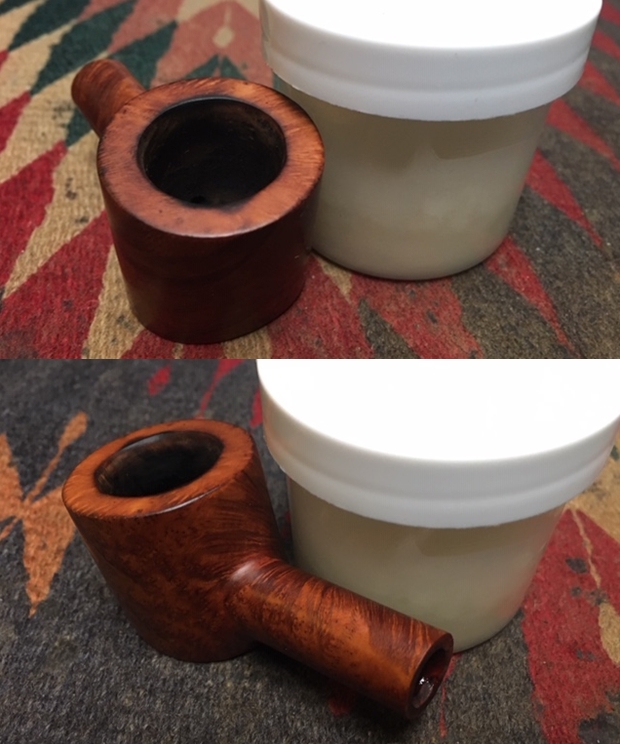
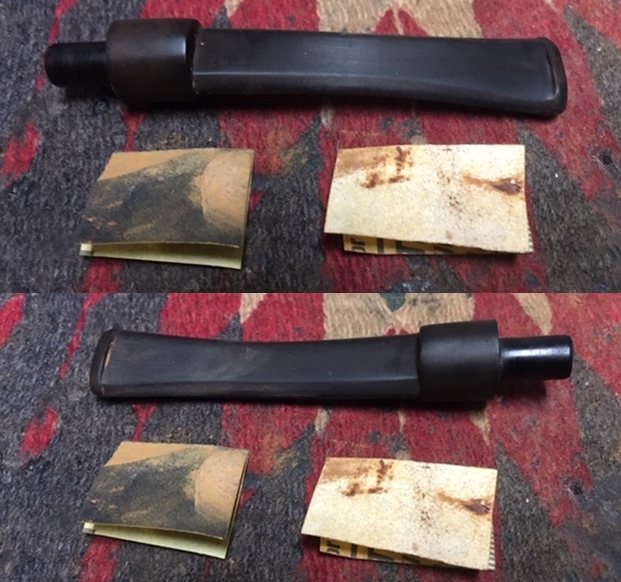
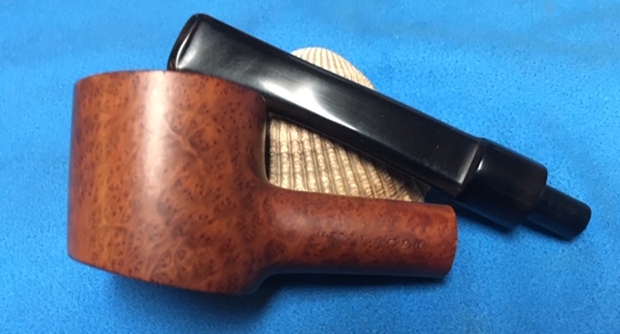
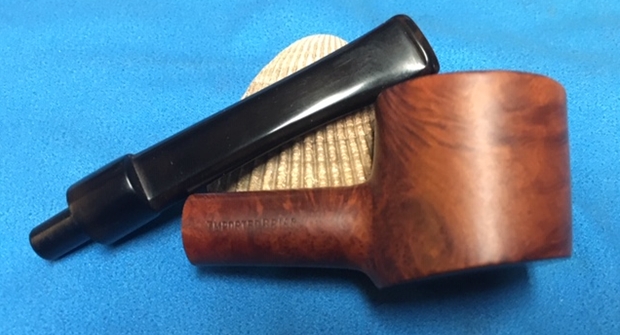
I have another of Alex’s purchases on the table this morning. It is an Oom Paul pipe with a rusticated finish. It is another very unique Malaga that has the same kind of rustication as a lot of the Custom-Bilt pipes had as well. The rim top, the ring around the shank end and a panel on each side of the shank are smooth. The pipe was dirty and caked with few spots of lava and some darkening on the inner edge of the bowl. The bowl had a thick rough surfaced cake. The exterior was dirty with grime and oils in the crevices of the finish. The stamping on the left side of the shank read “MALAGA” and the right side the stamping was in an oval and read Imported Briar. There appears to be something else in the oval but it is worn. The first two letters could be CA the rest are worn away. The vulcanite saddle stem had two dots on the left side of the stem. It was oxidized and had tooth marks and chatter on both sides. There was a chip out of the top edge of the button. I took photos of the pipe before I started the cleanup work. I took close up photos of the bowl and rim to capture the condition of the pipe before I started my cleanup work. The rim top had some lava and it was thick enough that I could not see if there was any darkening or damage on the crowned rim top and the inner edge. There was a thick cake in the bowl. Other than being very dirty the pipe was in great condition. The stem was dirty and oxidized. It was covered with a thick scum on the surfaces. There was tooth chatter on the top and underside near the button and some tooth marks on the button surface itself. There was a large chunk out of the top of the button on the stem. I have included a close up photo of the chipped stem surface below.I took a photo to capture the stamping on the shank. The stamping on the left side of the shank read “MALAGA”. I forgot to take a photo of the stamping on the right side the stamping but it was in an oval and read Imported Briar. There appears to be something in the center of the oval but it is worn. The first two letters could be CA the rest is worn away. It would make sense that this was one of the pipes from the “MALAGA” CARVED line so the rest of the letters may well be RVED. There were also two white dots on the left side of the saddle stem.If this is the first of the Malaga restorations that you have read about then you should know the backstory of the brand. I am including the link to a blog that I wrote that gives some of the history of the Malaga brand and the Malaga Pipe Shop in Royal Oak, Michigan in the USA. I have written an earlier blog to give a little history of the Malaga Brand and the pipemaker, George Khoubesser. Here is the link – https://rebornpipes.com/tag/malaga-pipes/.That blog also includes links to a catalogue and the history of the pipemaker George Khoubesser. Follow the link to get a feel for the brand and the pipemaker.

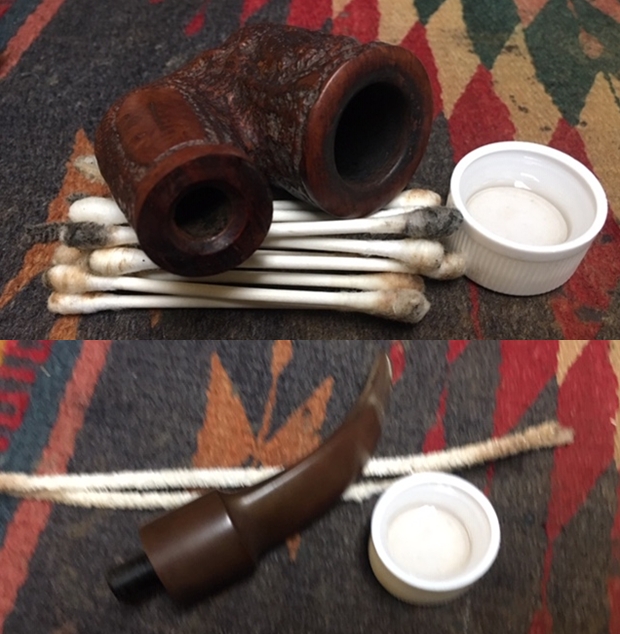
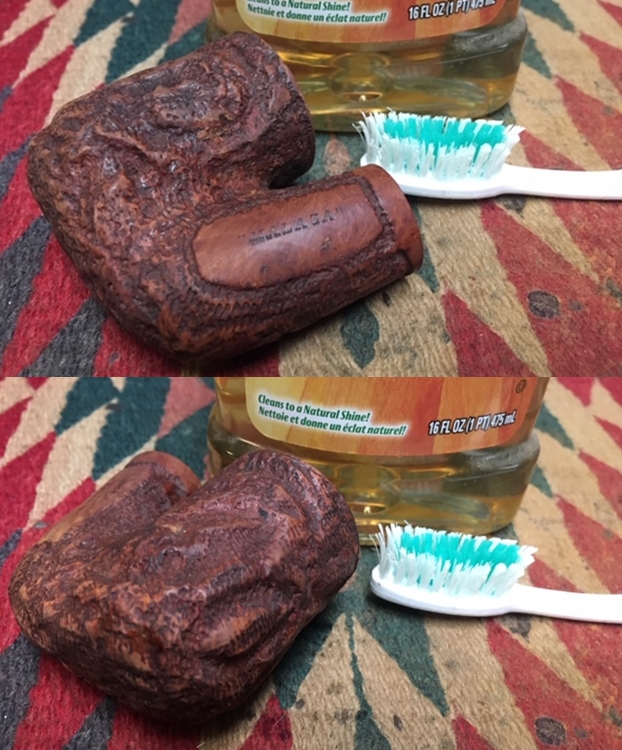
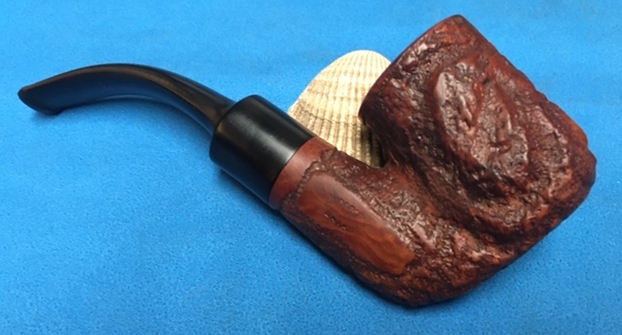
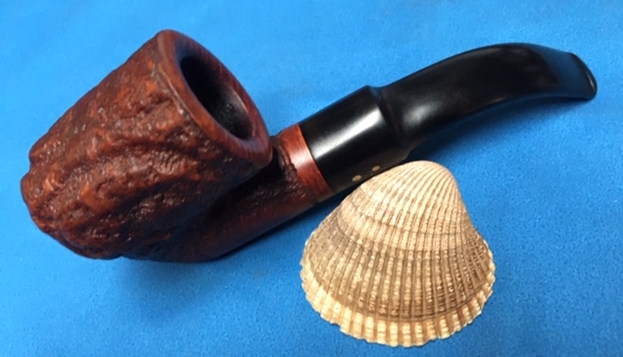
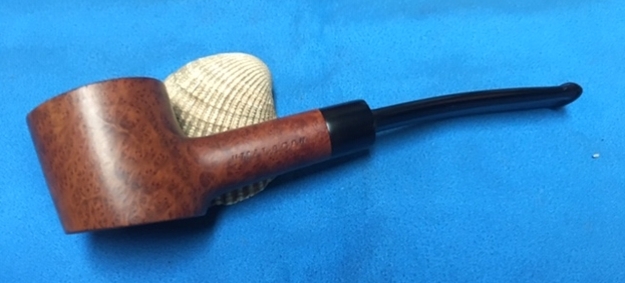
I decided to start with the bowl first. I followed Jeff and my regular regimen for cleaning estates. I reamed the thick cake in the bowl with a PipNet Pipe Reamer using the third size of cutting heads to take the cake back to bare briar. I followed up with a Savinelli Fitsall pipe knife to remove the slight remnants of cake toward the bottom of the bowl. I sanded the bowl with 220 grit sandpaper wrapped around a piece of dowel to smooth out the inside walls of the bowl.The mortise was surprisingly clean but there were some tars and oils on the walls. I scrubbed the mortise and the airway in the shank and the stem with alcohol, cotton swabs and pipe cleaners.I polished the smooth rim top and the ring around the end of the shank with micromesh sanding pads – wet sanding with 1500-12000 grit sanding pads. I wiped down the bowl after each sanding pad with a damp cloth. The polishing took the remainder of the bit of lava that had remained after the cleanup. I scrubbed the briar with Murphy’s Oil Soap with a tooth brush. I scrubbed it off under running water to remove the soap and the grime on the bowl. I dried it off with a soft cloth. I worked some Before & After Restoration Balm into the surface of the briar with my fingertips and a horsehair shoe brush to clean, enliven and protect it. I let the balm sit for a little while and then buffed with a cotton cloth to raise the shine. The photos show the bowl at this point in the restoration process. I set the bowl aside and turned my attention to the stem. I took a photo of the stem before I started my work on it. I cleaned it with alcohol and sanded off the calcification and oxidation on the surface. Once it was cleaned I mixed up a batch of activated charcoal powder and black super glue. I greased a pipe cleaner with Vaseline and inserted it in the button. I used a dental spatula to fill in the missing chunk of vulcanite. Once it had hardened a bit I removed the pipe cleaner and set it aside to cure.I set it on a container to let the repair cure. Once it hardened I would need to reshape the button and the slot on the stem. I had also filled in the damage to the underside of the button. The reshaping would bring it back to the original shape.I shaped the button edges and surface with a needle file to remove the excess material on the repair. I still need to do some more sanding but the stem is shaping up to be quite nice. I still need to remove the oxidation on the surface but it is getting there.I sanded out the tooth chatter with 220 grit sand paper and started to polish it with a folded piece of 400 wet dry sandpaper. Once it was finished it the tooth chatter and oxidation was gone and it began to shine.I reshaped the slot in the button end with needle files to clean up the shape.I polished the stem with Denicare Mouthpiece Polish from a tin of it I have in the drawer here. It is a gritty red paste that I rub on with my finger tips and work into the surface of the stem and button and buff off with a cotton pad. It gives me a bit of a head start on the polishing work plus I have a tin to use up!I polished the stem with micromesh sanding pads – wet sanding with 1500-12000 grit sanding pads. I wiped it down after each sanding pad with Obsidian Oil. I polished it with Before & After Pipe Stem Polish – both Fine and Extra Fine and buffed it off with a final coat of Obsidian Oil. This is another interestingly shaped rusticated pipe in what I would call an Oom Paul shape. It has a black vulcanite saddle stem with two brass dots. The smooth rim top and shank end band look really good against the rustication. Everything about this one says that it was part of the “Malaga” Carved line of pipes. It has a great look and feel. The shape is very tactile and fits well in the hand. I polished stem and the bowl with Blue Diamond polish on the buffing wheel. I gave the bowl multiple coats of Conservator’s Wax and the stem multiple coats of carnauba wax. I buffed the pipe with a clean buffing pad to raise the shine. I hand buffed it with a microfiber cloth to deepen the shine. The pipe polished up pretty nicely. The rich oil cured briar took on life with the buffing. The rich brown colour of the briar works well with the polished vulcanite stem. The finished pipe has a rich look that is quite catching. Have a look at it with the photos below. The shape, finish and flow of the pipe and stem are very well done. The dimensions are Length: 6 inches, Height: 2 inches, Outside diameter of the bowl: 1 ½ inches, Chamber diameter: ¾ of an inch. I will be adding the pipe to the finished Malaga pipes that I have set aside for Alex. This will be a great addition to his collection of Malaga pipes. Thanks for walking through the restoration with me as I worked over another Malaga.

New Life for a Stunning Malaga Bent Billiard from Kathy’s Dad’s Pipes


Blog by Steve Laug

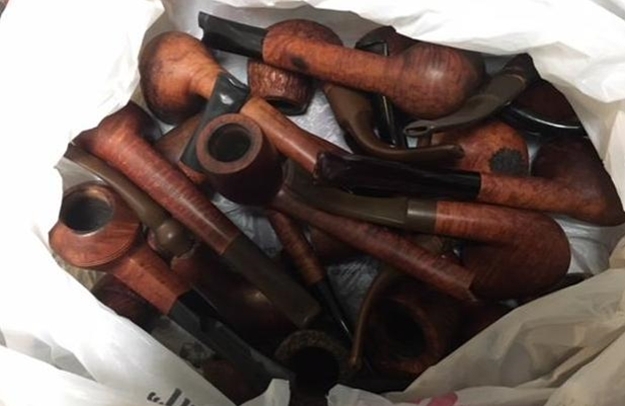
This is another of the Malaga pipes from George Koch’s estate that Alex added to the box of pipes I had set aside for him. There are quite a few of them to work on so I go back to them quite regularly to work on one of them. The next Malaga is a shape I would define as a bent billiard. It has some great cross and birdseye grain and a tapered vulcanite stem. The grain around the bowl and shank combined with the stem make it a stunning pipe. It is one of the many Malaga pipes that came to my brother and me in several shipments of pipes from George’s daughter Kathy. When Jeff got each box the pipes were well wrapped and packed. Jeff unwrapped them and took the following photo to give an idea of the volume of the pipes that we purchased. This Malaga came in mixed in a box of pipes much like the one below.In each of the previous blogs that I have written on the restoration of George’s pipes I have told his story. If you have followed the restorations you will have read the information and the background piece that Kathy did on her father. Here is a link to one of the previous blogs on his Malaga pipes where I included her tribute in full (https://rebornpipes.com/2019/01/26/back-to-kathys-dads-pipes-restoring-a-%c2%bc-bent-malaga-author/). You can also read the bio on her Dad, George Koch. It is an interesting read and one that shows just how far our pipe collecting passion can go when we find a brand of pipes that we enjoy. I am going to only include the portion on the Malagas at this point. If you wish to read the rest follow the link above.

Kathy writes…We lived in Livonia, and that’s where his love for Malaga pipes began. After a few years he returned to Allis Chalmers and we moved back to Springfield. I remember that when we went back to Michigan to visit friends, Dad had to go to the Malaga store and acquire a few new pipes. Many a year I wrote to Malaga and they picked out a pipe for me to purchase that I could give Dad for a Christmas or birthday present. He was always pleased. His favorites were the straight stemmed medium sized bowl pipes, but he liked them all. 

He had some other pipes, but the Malagas were his favorites. I remember him smoking them sitting in his easy chair after work, with feet up on the ledge by the fire burning in the fireplace.  Growing up it was my job to clean them and he liked the inner bowl and stem coated with Watkins vanilla, leaving a little of that liquid in the bowl to soak in when I put them back on the rack…I’m very happy they are being restored by you and your brother and hope they find homes who enjoy them as much as Dad did. Thank-you for your care and interest. — Kathy, the oldest daughter

The next “Malaga” Bent Billiard on the table is another classic bent shape. The carver did a great job of shaping the pipe to follow the grain on the briar. The bowl, round shank and bent tapered vulcanite stem look very good. The bowl had a thick cake that overflowed with lava onto the rim and there was significant burn damage on the top front inner of the bowl. The sides of the bowl and shank are very dirty with grime and oils from prolonged use. The stamping on the left side of the shank read “MALAGA” and on the right side it read Imported Briar. The vulcanite stem had tooth dents and chatter on the top and the underside of the stem. The button was worn almost smooth Jeff took these photos before he started the cleanup work on the pipe. Jeff took a close up photo of the bowl and rim to capture the condition of the pipe before he started his cleanup work. The rim top had some lava overflow and darkening on the back of the bowl and some serious burn damage to the inner edge on the bowl front. The burn marks appeared to be quite deep on the inner edge on the right front side of the grimy pipe.He also took photos of the sides and bottom of the bowl and shank to show the beautiful grain around the bowl. The photos show the general condition of the bowl and wear on the finish. It is very dirty but this is another beautiful pipe.Jeff took a photo to capture the stamping on the shank. The photos show the stamping “MALAGA” on the left side of the shank and Imported Briar on the right side. The stamping is very readable.The next photos show the stem surface. There is oxidation and calcification on the stem. There are tooth marks and chatter on both sides near the button and wear on the button surface and edges. The button surfaces and edges are worn and almost smooth.I am also including the link to a blog that I wrote that gives some of the history of the Malaga brand and the Malaga Pipe Shop in Royal Oak, Michigan in the USA. I have written an earlier blog to give a little history of the Malaga Brand and the pipemaker, George Khoubesser. Here is the link – https://rebornpipes.com/tag/malaga-pipes/.That blog also includes links to a catalogue and the history of the pipemaker George Khoubesser. Follow the link to get a feel for the brand and the pipemaker.

Jeff reamed the bowl with a PipNet pipe reamer and followed up with a Savinelli Fitsall pipe knife to remove the cake. He scrubbed out the mortise and the airway in the shank and the stem with alcohol, cotton swabs and pipe cleaners. He scrubbed the exterior of the bowl, rim, shank and stem with a tooth brush and Murphy’s Oil Soap to remove the oils and tars on the rim and the grime on the finish of the bowl. He rinsed it under running water. He dried it off with a soft cloth. He was able to remove the lava build up on the rim top and the flat surface of the rim looked very good. The inner edge of the rim has some serious burn damage on the front right side. The outer edge looked very good. He soaked the stem in Before & After Deoxidizer and rinsed it with hot water. I took photos of the pipe to show its condition before I started my work on it. I took close up photos of the bowl and rim top as well as the stem. You can see the condition of the rim top and bowl in the first photo. Jeff was able to remove all of the tar and oils but you can now see the damage on the inside rim edge. The edge is out of round. There is a burn mark that extends across the front and the back edge of the rim top at that point. The vulcanite stem had tooth chatter on both sides near and on the button surface there was also a large deep bite mark on the underside of the stem.I took a photo of the stamping on the shank to show how good the condition is. It shows the “MALAGA” stamp on the left side and Imported Briar on the right side. The stamping is very legible.I decided to address the rim top first. I topped the bowl on a topping board with 220 grit sandpaper. I wanted to remove the damage on the top front edge and remove the darkening all the way around the inner edge of the bowl. I took a close up photo the rim top before I started to give a clear picture of the condition of the pipe. I used a folded piece of 220 grit sandpaper to clean up the damage on the right rear inner edge of the bowl. I gave the inner edge a slight bevel to repair the damage. I polished the edge with 400 grit wet dry sandpaper. The rim top and edges really looked better.I polished the rim top and the briar with micromesh sanding pads. I wet sanded the bowl with 1500-12000 grit sanding pads. I wiped the bowl down after each pad with a damp cloth to remove the sanding dust. I restained the rim top and edges with an Oak Stain Pen. I was able to blend it into the rest of the bowl. I scrubbed the briar with Murphy’s Oil Soap and a tooth brush. I rubbed it into the surface of the briar with my finger tips and let it sit for a few minutes then scrubbed it off with a tooth brush and running water. I dried it off with a soft cloth. I worked some Before & After Restoration Balm into the surface of the briar with my fingertips to clean, enliven and protect it. I let the balm sit for a little while and then buffed with a cotton cloth to raise the shine. The following photos show the bowl at this point in the restoration process. I am very happy with the results. I turned to the stem to address the issues on the surface of both sides at the button. I used a needle file to recut the edges of the button. They had been chewed to the point of no edge remaining so I used the file to cut it and sharpen the edges. I smoothed out the top and bottom surfaces of the button on both sides.Once I had the button edge reshaped I decided to address the tooth marks and dents in the button and just ahead of the button. I “painted” the surface of the stem with the flame of a lighter to lift the tooth chatter and marks. The light marks on the top side disappeared quickly and the larger indentation on the underside lifted until the remaining small marks could be dealt with by sanding the stem.I sanded both sides smooth with 220 grit sandpaper to remove the deep oxidation on the surfaces. I finished this initial polishing with 400 grit sandpaper to smooth out the scratches in the stem surface. As I sanded and reshaped the button and stem surface the stem began to look very good. I polished the stem with Denicare Mouthpiece Polish from a tin of it I have in the drawer here. It is a gritty red paste that I rub on with my finger tips and work into the surface of the stem and button and buff off with a cotton pad. It gives me a bit of a head start on the polishing work plus I have a tin to use up!I polished the stem with micromesh sanding pads – wet sanding with 1500-12000 grit sanding pads. I wiped it down after each sanding pad Obsidian Oil. I finished by polishing it with Before & After Pipe Stem Polish both fine and extra Fine and then wiped it down with a final coat of Obsidian Oil. This is another, slightly larger Malaga Bent Billiard with a vulcanite tapered stem. It has a great grain around the bowl and the carver really maximized that with the shape of the pipe. Everything about the pipe – the shape of the bowl, the beveled rim top and the cut of the briar work well to highlight the grain around the bowl sides. I polished stem and the bowl with Blue Diamond polish on the buffing wheel and the grain just popped and came alive. I gave the bowl and the stem multiple coats of carnauba wax. I buffed the pipe with a clean buffing pad to raise the shine. I hand buffed it with a microfiber cloth to deepen the shine. The pipe polished up pretty nicely. The grain took on life with the buffing. The rich oil cured colour works well with the polished vulcanite stem. The finished pipe has a rich look that is quite catching. Have a look at it with the photos below. The shape, finish and flow of the pipe and stem are very well done. The dimensions are Length: 6 inches, Height: 2 inches, Outside diameter of the bowl: 1 ¼ inches, Chamber diameter: ¾ of an inch. I will be adding the pipe to the finished Malaga pipes that I have set aside for Alex. I am glad that he is carrying on the trust for George Koch. Thanks for walking through the restoration with me as I worked over another one of Kathy’s Dad’s Pipes.

Restoring a Stunning Malaga Bent Billiard from Kathy’s Dad’s Pipes


Blog by Steve Laug

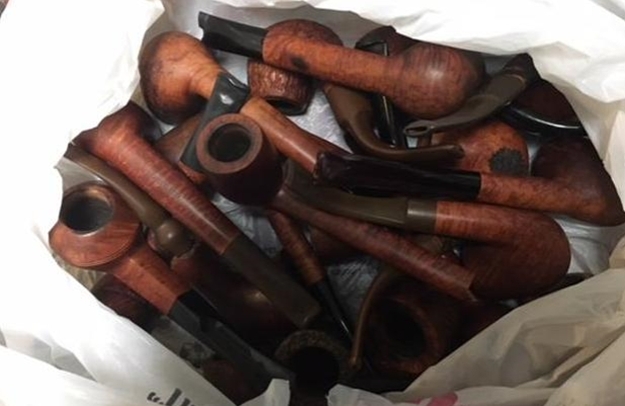
Not long ago Alex came by and went through the Malaga pipes from George Koch’s estate. Alex added the newly chosen pipes to the box of pipes I set aside for him. There are quite a few of them to work on so I decided to go back to work on one of them. The next Malaga is a shape I would define as a bent billiard. It has some great cross and birdseye grain and a saddle vulcanite stem. The grain around the bowl and shank combined with the stem make it a stunning pipe. It is one of the many Malaga pipes that came to my brother and me in several shipments of pipes from George’s daughter Kathy. When Jeff got each box the pipes were well wrapped and packed. Jeff unwrapped them and took the following photo to give an idea of the volume of the pipes that we purchased. This Malaga came in mixed in a box of pipes much like the one below.In each of the previous blogs that I have written on the restoration of George’s pipes I have told his story. If you have followed the restorations you will have read the information and the background piece that Kathy did on her father. Here is a link to one of the previous blogs on his Malaga pipes where I included her tribute in full (https://rebornpipes.com/2019/01/26/back-to-kathys-dads-pipes-restoring-a-%c2%bc-bent-malaga-author/). You can also read the bio on her Dad, George Koch. It is an interesting read and one that shows just how far our pipe collecting passion can go when we find a brand of pipes that we enjoy. I am going to only include the portion on the Malagas at this point. If you wish to read the rest follow the link above.

Kathy writes…We lived in Livonia, and that’s where his love for Malaga pipes began. After a few years he returned to Allis Chalmers and we moved back to Springfield. I remember that when we went back to Michigan to visit friends, Dad had to go to the Malaga store and acquire a few new pipes. Many a year I wrote to Malaga and they picked out a pipe for me to purchase that I could give Dad for a Christmas or birthday present. He was always pleased. His favorites were the straight stemmed medium sized bowl pipes, but he liked them all. 

He had some other pipes, but the Malagas were his favorites. I remember him smoking them sitting in his easy chair after work, with feet up on the ledge by the fire burning in the fireplace.  Growing up it was my job to clean them and he liked the inner bowl and stem coated with Watkins vanilla, leaving a little of that liquid in the bowl to soak in when I put them back on the rack…I’m very happy they are being restored by you and your brother and hope they find homes who enjoy them as much as Dad did. Thank-you for your care and interest. — Kathy, the oldest daughter

The “Malaga” Bent Billiard with the classic bent shape is the next on the table. The carver did a great job of shaping the pipe to follow the grain on the briar. The bowl, round shank and bent tapered vulcanite stem look very good. The bowl had a thick cake that overflowed with lava onto the rim so that it was impossible to see if there was damage on the inner edges. The sides of the bowl and shank are very dirty with grime and oils from prolonged use. The stamping on the left side of the shank read “MALAGA” and on the right side it read Imported Briar. The vulcanite stem had tooth dents and chatter on the top and the underside of the stem. Jeff took these photos before he started the cleanup work on the pipe.Jeff took a close up photo of the bowl and rim to capture the condition of the pipe before he started his cleanup work. The rim top had some lava overflow and darkening on the back of the bowl and some damage to the inner edge of the bowl front. There appeared to be deep burn marks on the inner edge on the right front side of the grimy pipe.He also took photos of the sides and bottom of the bowl and shank to show the beautiful grain around the bowl. The photos show the general condition of the bowl and wear on the finish. It is very dirty but this is another beautiful pipe.Jeff took a photo to capture the stamping on the shank. The photos show the stamping “MALAGA” on the left side of the shank and Imported Briar on the right side. The stamping is very readable.The next photos show the stem surface. There are tooth marks and chatter on both sides near the button and wear on the button surface and edges.I am also including the link to a blog that I wrote that gives some of the history of the Malaga brand and the Malaga Pipe Shop in Royal Oak, Michigan in the USA. I have written an earlier blog to give a little history of the Malaga Brand and the pipemaker, George Khoubesser. Here is the link – https://rebornpipes.com/tag/malaga-pipes/.That blog also includes links to a catalogue and the history of the pipemaker George Khoubesser. Follow the link to get a feel for the brand and the pipemaker.

Jeff reamed the bowl with a PipNet pipe reamer and followed up with a Savinelli Fitsall pipe knife to remove the cake. He scrubbed out the mortise and the airway in the shank and the stem with alcohol, cotton swabs and pipe cleaners. He scrubbed the exterior of the bowl, rim, shank and stem with a tooth brush and Murphy’s Oil Soap to remove the oils and tars on the rim and the grime on the finish of the bowl. He rinsed it under running water. He dried it off with a soft cloth. He was able to remove the lava build up on the rim top and the flat surface of the rim looked very good. The inner edge of the rim has some serious burn damage on the front right side. The outer edge looked very good. I took photos of the pipe to show its condition before I started my work on it. I took close up photos of the bowl and rim top as well as the stem. You can see the condition of the rim top and bowl in the first photo. Jeff was able to remove all of the tar and oils but you can now see the damage on the inside rim edge. The edge is out of round. There is a burn mark that extends across the front and the back edge of the rim top at that point. The vulcanite stem had tooth chatter on both sides near and on the button surface there was also a large deep bite mark on the underside of the stem.I took a photo of the stamping on the shank to show how good the condition is. It shows the “MALAGA” stamp on the left side and Imported Briar on the right side. The stamping is very legible.I decided to address the rim top first. I lightly topped the bowl on a topping board with 220 grit sandpaper. I wanted to minimize the damage on the top, remove the darkening and clean up the damage on the front and rear inner edge of the bowl.I used a folded piece of 220 grit sandpaper to clean up the damage on the right rear inner edge of the bowl. I gave the inner edge a slight bevel to repair the damage. I polished the edge with 400 grit wet dry sandpaper. The rim top and edges really looked better.I polished the rim top and the briar with micromesh sanding pads. I wet sanded the bowl with 1500-12000 grit sanding pads. I wiped the bowl down after each pad with a damp cloth to remove the sanding dust. I scrubbed the briar with Murphy’s Oil Soap and a tooth brush. I rubbed it into the surface of the briar with my finger tips and let it sit for about 10 minutes then rinsed it off with running water. I dried it off with a soft cloth. I restained the rim top and edges with an Oak Stain Pen. I was able to blend it into the rest of the bowl.I worked some Before & After Restoration Balm into the surface of the briar with my fingertips to clean, enliven and protect it. I let the balm sit for a little while and then buffed with a cotton cloth to raise the shine. The following photos show the bowl at this point in the restoration process. I am very happy with the results. I turned to the stem to address the issues on the surface of both sides at the button. I started by “painting” the surface of the stem with the flame of a lighter to lift the tooth chatter and marks. The light marks on the top side disappeared quickly and the larger indentation on the underside lifted until the remaining small marks could be dealt with by sanding the stem.I sanded both sides smooth with 220 grit sandpaper to remove the deep oxidation on the surfaces. I finished this initial polishing with 400 grit sandpaper to smooth out the scratches in the stem surface. As I sanded and reshaped the button and stem surface the stem began to look very good.I polished the stem with Denicare Mouthpiece Polish from a tin of it I have in the drawer here. It is a gritty red paste that I rub on with my finger tips and work into the surface of the stem and button and buff off with a cotton pad. It gives me a bit of a head start on the polishing work plus I have a tin to use up!I polished the stem with micromesh sanding pads – wet sanding with 1500-12000 grit sanding pads. I wiped it down after each sanding pad Obsidian Oil. I finished by polishing it with Before & After Pipe Stem Polish both fine and extra Fine and then wiped it down with a final coat of Obsidian Oil. This is a Malaga Bent Billiard with a vulcanite saddle stem. It has a great grain around the bowl and the carver really maximized that with the shape of the pipe. Everything about the pipe – the shape of the bowl, the beveled rim top and the cut of the briar work well to highlight the grain around the bowl sides. I polished stem and the bowl with Blue Diamond polish on the buffing wheel and the grain just popped and came alive. I gave the bowl and the stem multiple coats of carnauba wax. I buffed the pipe with a clean buffing pad to raise the shine. I hand buffed it with a microfiber cloth to deepen the shine. The pipe polished up pretty nicely. The grain took on life with the buffing. The rich oil cured colour works well with the polished vulcanite stem. The finished pipe has a rich look that is quite catching. Have a look at it with the photos below. The shape, finish and flow of the pipe and stem are very well done. The dimensions are Length: 5 ¾ inches, Height: 1 7/8 inches, Outside diameter of the bowl: 1 ¼ inches, Chamber diameter: ¾ of an inch. I will be adding the pipe to the finished Malaga pipes that I have set aside for Alex. I am glad that he is carrying on the trust for George Koch. Thanks for walking through the restoration with me as I worked over another one of Kathy’s Dad’s Pipes.


Restoring a Faceted “Malaga” Poker from Kathy’s Dad’s Pipes


Blog by Steve Laug

This morning I was looking through the bag of pipes that Alex chose from George Koch’s estate. This one is the first of two interestingly shaped Poker Sitters. The rim was well knocked about and the acrylic stem had some tooth dents and deep gouges in the surface of the variegated silver. The inner and outer edges of the rim top were damaged from knocking the pipe out against a hard surface. The carver had done a great job matching the mixed grain to the flow of the shape of the bowl and shank. Remember that all of these Malaga pipes came to my brother and me in several shipments of pipes from George’s daughter Kathy. Jeff unwrapped the pipes when they came to him and took the following photo to give an idea of the volume of the pipes that we purchased. The carver did a great job of shaping the pipe to follow the grain on the briar. The large bowl, round shank and tapered variegated silver acrylic stem look very good. The bowl had a thick cake that overflowed with lava onto the rim. The inner and outer edges of the rim were in rough shape as was the rim top. The sides of the bowl and shank are very dirty with grime and oils from prolonged use. The stamping on the left side of the shank read “MALAGA”. The right side read Imported Briar. The acrylic stem had tooth dents and chatter on the top and the underside. Jeff took these photos before he started the cleanup work on the pipe. Jeff took close up photos of the bowl and rim to capture the condition of the pipe before he started his cleanup work. The rim top had some lava overflow and darkening and wear under the lava on the rim at the back of the bowl. There appeared to be deep nicks in the outer edge at the front of the grimy pipe. He also took photos of the sides and bottom of the bowl and shank to show the beautiful grain and unique carvings around the bowl. The photos show the general condition of the bowl and wear on the finish. It is very dirty but this is another beautiful pipe. Jeff took a photo to capture the stamping on the top side of the shank. The photos show the stamping “MALAGA” on the left side of the shank. The stamping is very readable. The next photos show the stem surface. There are tooth marks and chatter on both sides near the button and wear on the button surface and edges.In each of the previous blogs that I have written on the restoration of George’s pipes I have told his story. If you have followed the restorations you will have read the information and the background piece that Kathy did on her father. Here is a link to one of the previous blogs on his Malaga pipes where I included her tribute in full (https://rebornpipes.com/2019/01/26/back-to-kathys-dads-pipes-restoring-a-%c2%bc-bent-malaga-author/). You can also read the bio on her Dad, George Koch. It is an interesting read and one that shows just how far our pipe collecting passion can go when we find a brand of pipes that we enjoy. I am going to only include the portion on the Malagas at this point. If you wish to read the rest follow the link above.

Kathy writes…We lived in Livonia, and that’s where his love for Malaga pipes began. After a few years he returned to Allis Chalmers and we moved back to Springfield. I remember that when we went back to Michigan to visit friends, Dad had to go to the Malaga store and acquire a few new pipes. Many a year I wrote to Malaga and they picked out a pipe for me to purchase that I could give Dad for a Christmas or birthday present. He was always pleased. His favorites were the straight stemmed medium sized bowl pipes, but he liked them all. 

He had some other pipes, but the Malagas were his favorites. I remember him smoking them sitting in his easy chair after work, with feet up on the ledge by the fire burning in the fireplace.  Growing up it was my job to clean them and he liked the inner bowl and stem coated with Watkins vanilla, leaving a little of that liquid in the bowl to soak in when I put them back on the rack…I’m very happy they are being restored by you and your brother and hope they find homes who enjoy them as much as Dad did. Thank-you for your care and interest. — Kathy, the oldest daughter

Jeff reamed the bowl with a PipNet pipe reamer and followed up with a Savinelli Fitsall pipe knife to remove the cake. He scrubbed out the mortise and the airway in the shank and the stem with alcohol, cotton swabs and pipe cleaners. He scrubbed the exterior of the bowl, rim, shank and stem with a tooth brush and Murphy’s Oil Soap to remove the oils and tars on the rim and the grime on the finish of the bowl. He rinsed it under running water. He dried it off with a soft cloth. Even after the cleanup it is another on that is in rough condition. But even in its damaged condition you can see the great grain on the bowl. The photos show the damaged rim top. The interesting shape, round shank and chewed acrylic stem give a clear picture of what the pipe must have looked like when George bought it at the shop. The rim top had been knocked hard against rough surfaces to knock out the dottle and left damage. The stamping on the left side of the shank read “MALAGA” and on the right side it read Imported Briar. The acrylic stem had been chewed but could be easily repaired. I took photos of the pipe before I started my work. I took a photo of the  rim top and bowl to show the condition of the pipe. You can see why I said it was used as a hammer. The surface of the rim is very rough and you can see the damage on both the inner and outer edge of the rim. There is some darkening on the back edge and surface of the rim top. I took photos of the stem to show the chewed condition it was in. Remember this is hard acrylic so it took some real gnawing to do this to it!I took photos of the shank to capture the stamping on both sides. The first photo shows the stamping “MALAGA” on the left and the second shows Imported Briar on the right. Both are clear and readable.I am also including the link to a blog that I wrote that gives some of the history of the Malaga brand and the Malaga Pipe Shop in Royal Oak, Michigan in the USA. I have written an earlier blog to give a little history of the Malaga Brand and the pipemaker, George Khoubesser. Here is the link – https://rebornpipes.com/tag/malaga-pipes/.That blog also includes links to a catalogue and the history of the pipemaker George Khoubesser. Follow the link to get a feel for the brand and the pipemaker.

I decided to start the restoration of the pipe by dealing with the rim top. I topped it on a topping board with 220 grit sandpaper and cleaned up the inner edge with a piece of folded 220 grit sandpaper. I used some clear Krazy Glue to fill in the rim damage on the front edge. It was nicked and worn so I filled it in to smooth it out. I sanded the repair after the glue cured. I smoothed out surface of the front edge and rim top until it blended into the surface. I polished the bowl and rim top with micromesh sanding pads to smooth out the rim edge repairs and top. I wet sanded with 1500-12000 grit pads and wiped the bowl down with a damp cloth after each pad. The photos show the progress. I scrubbed the briar with Murphy’s Oil Soap and a tooth brush. I rubbed it into the surface of the briar with my finger tips and let it sit for about 10 minutes then rinsed it off with running water. I dried it off with a soft cloth. I used an Oak Stain Pen to stain the rim top to blend topping and darkening into the bowl colour. I buffed it with a clean buffing pad. You can see from the photo below it blends well.I worked some Before & After Restoration Balm into the surface of the briar with my fingertips to clean, enliven and protect it. I let the balm sit for a little while and then buffed with a cotton cloth to raise the shine. The following photos show the bowl at this point in the restoration process. I am very happy with the results. I turned to the stem and filled in the deep tooth marks on both sides of the stem with clear Krazy Glue. I set it aside to let the repairs cure.I used a needle file to reshape the button edge on both sides. I sanded the surface of the stem with 220 grit sandpaper and 400 grit sandpaper to clean up the stem.I polished the stem with micromesh sanding pads – wet sanding with 1500-12000 grit sanding pads. I wiped it down after each sanding pad with a damp cloth. I finished by polishing it with Before & After Pipe Stem Polish both Fine and Extra Fine and then wiped it down a final time with a damp cloth. This restored “Malaga” Poker with a taper acrylic stem is a beauty. The unique shape of the bowl, the reshaped and repaired rim top and the cut of the briar work well to highlight the grain around the bowl sides. I polished acrylic silver variegated stem and the bowl with Blue Diamond polish on the buffing wheel. I gave the bowl and the stem multiple coats of carnauba wax. I buffed the pipe with a clean buffing pad to raise the shine. I hand buffed it with a microfiber cloth to deepen the shine. The pipe polished up pretty nicely. The grain took on life with the buffing. The rich oil cured colour works well with the polished acrylic stem. The finished pipe has a rich look that is quite catching. Have a look at it with the photos below. The shape, finish and flow of the pipe and stem are very well done. The dimensions are Length: 6 inches, Height: 1 ¾ inches, Outside diameter of the bowl: 1 ¼ inches, Chamber diameter: ¾ of an inch. I will be adding the pipe to the box of finished Malaga pipes that I have completed for Alex. I am looking forward to hearing what he thinks of this beauty and once he fires it up and carries on the trust for George Koch. Thanks for walking through the restoration with me as I worked over another one of Kathy’s Dad’s Pipes.

Cleaning up an English Made Kaywoodie Air-way 707 Diplomat


Blog by Steve Laug

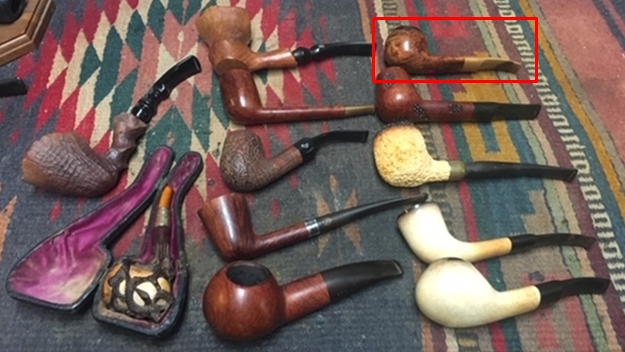
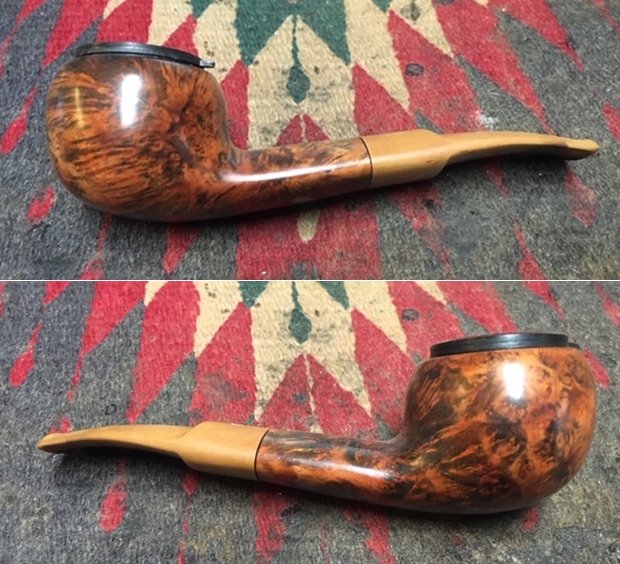
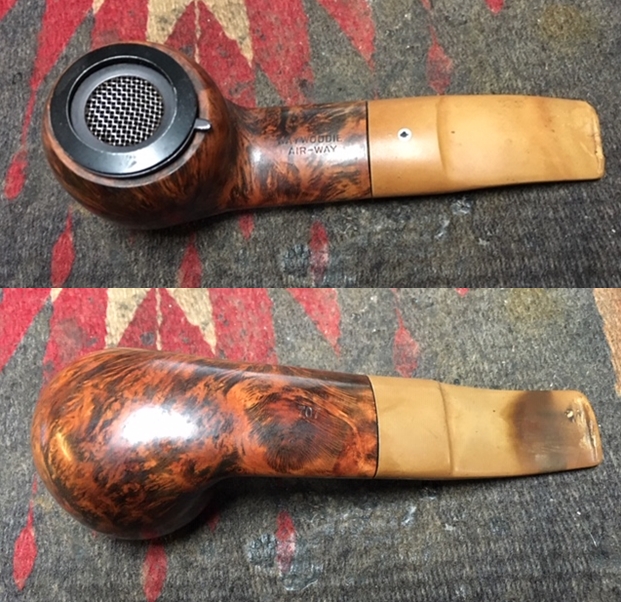
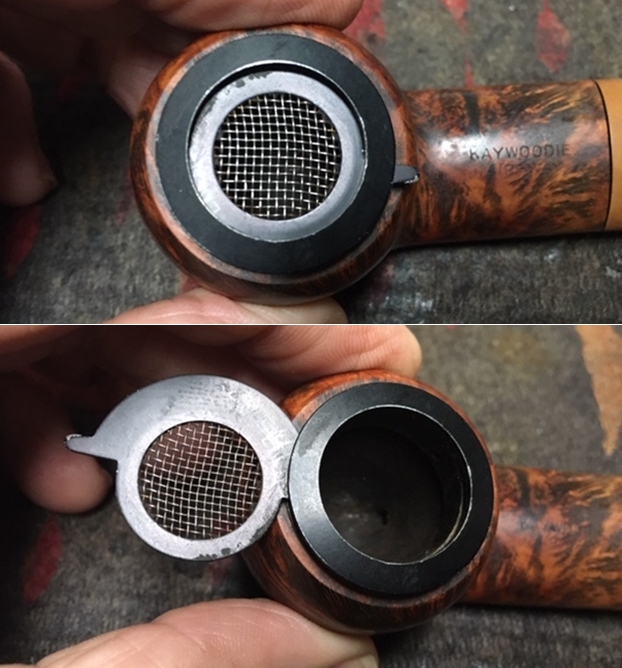
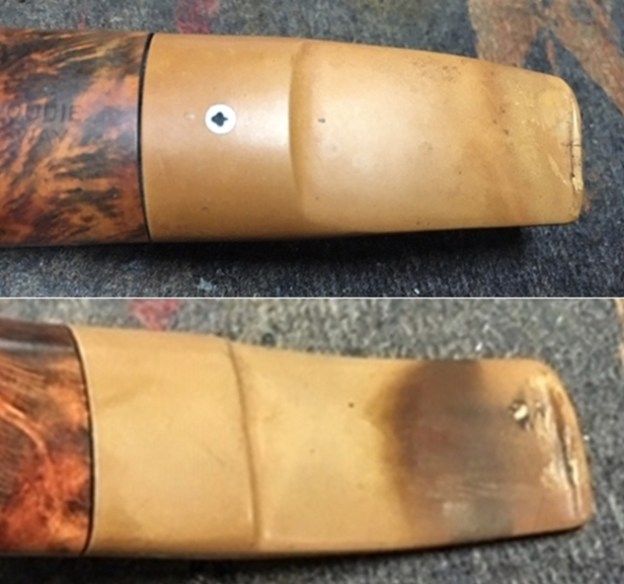
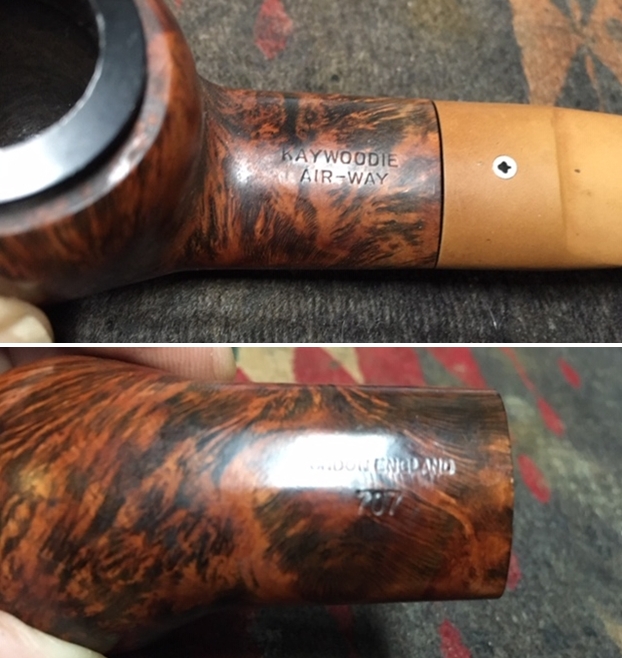
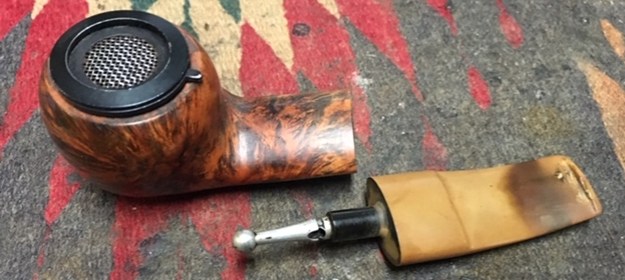
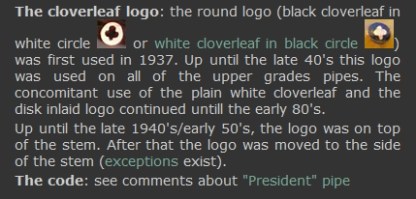
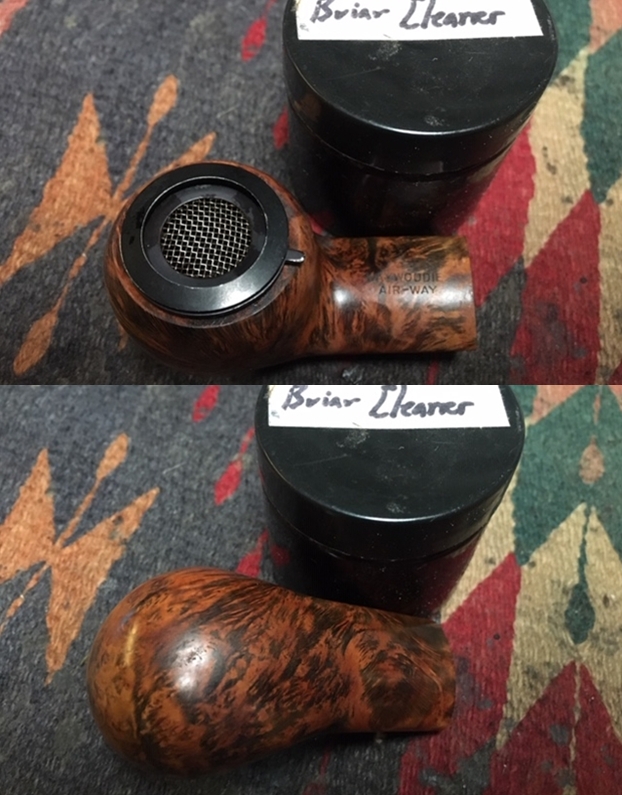
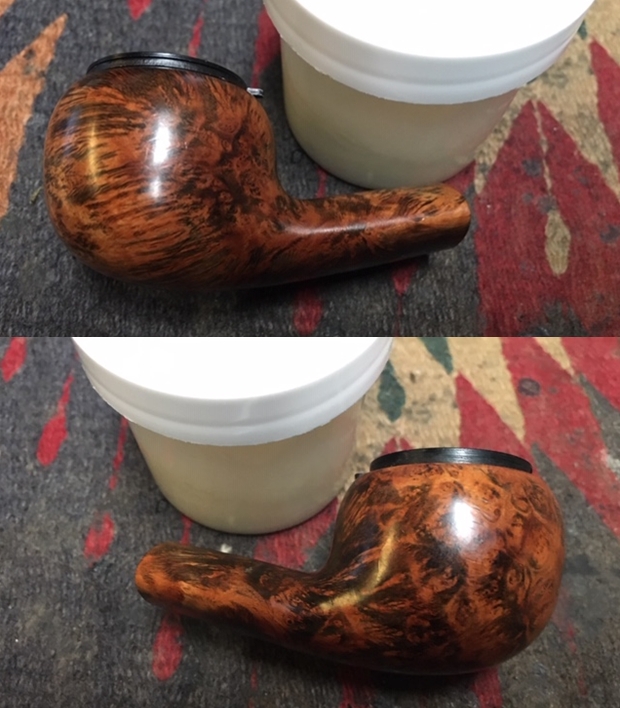
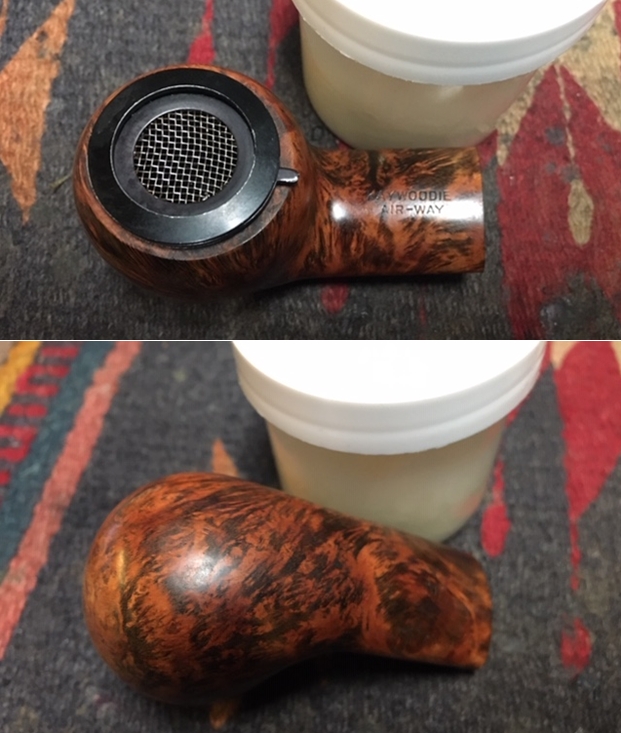
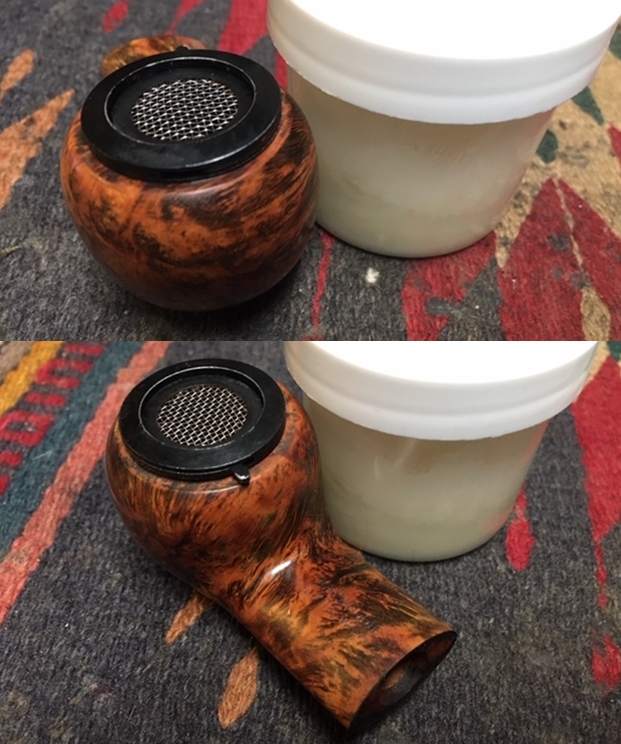
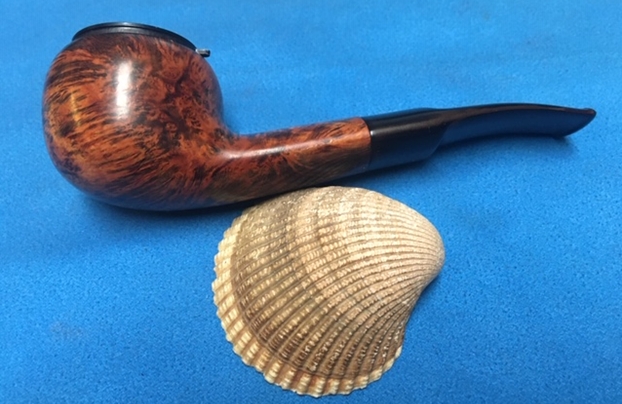
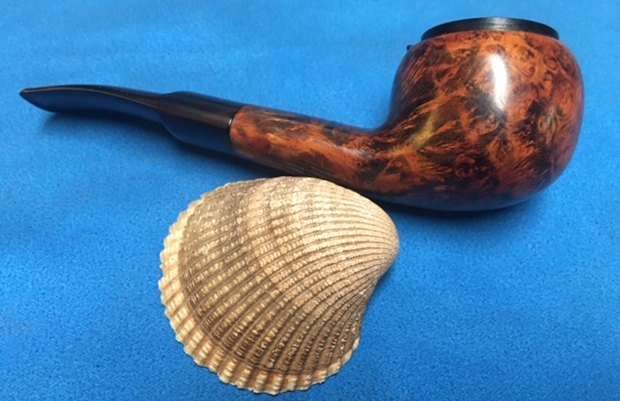
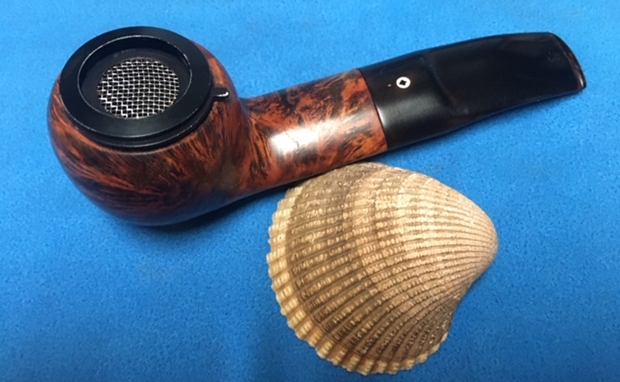
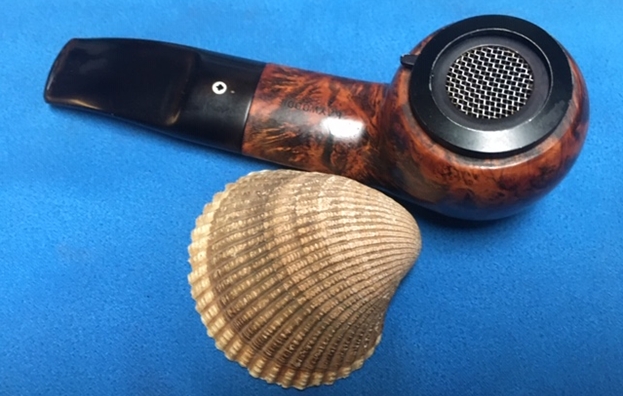
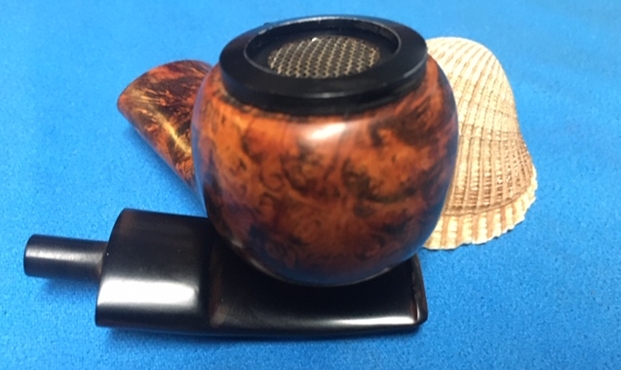
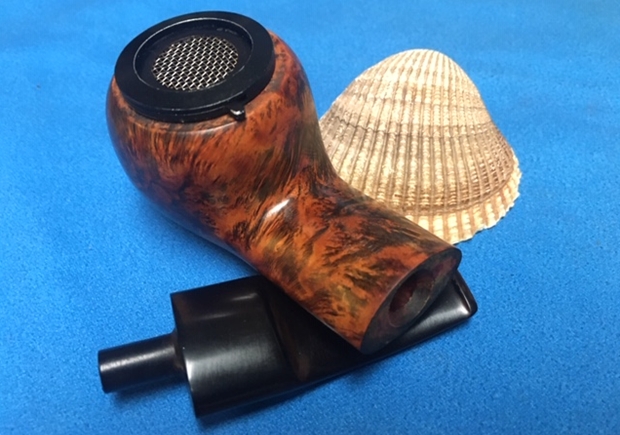
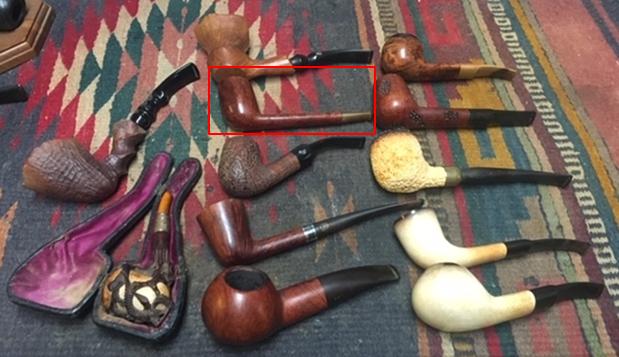
On our recent trip to Alberta we picked up quite a few pipes that were really nice. Some of them were brands we were familiar with and some were pipes that were unknown and unidentifiable. But if you are a pipe hunter you know the feeling when you are holding a particular pipe, no matter what the brand and it just speaks to you. That is what happened with this next pipe. It was in a display case at an antique mall in Edmonton. The shape of the pipe, the wind cap that was an integral part of the rim top and the interesting staining that highlighted some unique grain called my name. The stamping on the top of the shank read Kaywoodie over Air-way and on the underside it was stamped London, England and the shape number 707. It was a shape I had not seen before and the wind cap mechanism was a new one for me as well. The fact that it was an English made Kaywoodie also insure that it was going home with me. I have drawn a red box around the pipe at the top of the column on the right.The grain under the dirty finish was unique and the finish was interesting. The diplomat shape is one that I enjoy smoking and it has a good feel in the hand. The rim top was truly unique. The wind cap was fascinated on the rim top and the screen can be swiveled to the left to open the bowl. The bowl itself had a think cake in the bowl and the inside of the bowl and rim edges looked very good. The finish was dirty but still in good condition under the grime. The vulcanite stem was so heavily oxidized that it was butterscotch colour. It had some tooth marks and chatter on both sides near the button. There were some small cracks and the slot was slightly collapsed on the left side. The Kaywoodie club logo on the top of the saddle stem was a white circle with a black club inside. I took close up photos of the wind screen mechanism on the rim top with it open and closed to show how it worked. You can see the condition of the bowl in the second photo below.I took photos of the stem showing the deep oxidation and tooth chatter on both sides near the button. You can also see the small cracks on the top side of the button. It is thin so it easily was chipped and cracked when clenched.I took some photos of the stamping on the shank. The first photo shows the Kaywoodie Air-Way stamp and the white circle/black club insert on the stem top. The second photo shows the London, England and shape number 707 on the underside of the shank.I took a closer look at the inside of the bowl and took a photo. It was dirty but very lightly caked.I took a photo of the pipe with the push stem removed from the shank. The stinger was different from the usual Kaywoodie stinger. It had a ball on the end of the stinger but no holes in it. There was a ring around the stinger just above the tenon insert and a slotted hole. Before doing cleanup work on the pipe I decided to do some research on the pipe. I looked first on the Pipephil website and found some information on the white circle/black club stamp on the top of the stem. I did a screen capture of the pertinent information on the logo itself (http://www.pipephil.eu/logos/en/logo-kaywoodie.html). From there I learned that the logo was used first in 1937 and up until the late 1940s for the higher grade pipes. Also until the late 40s early 50s the logo was on top of the stem.

There was no other information on the Air-way line on the site and nothing under the section on the London/British made Kaywoodie pipes. That meant I would need to turn elsewhere to find that information. This would be an interesting hunt and restoration.

I turned to Pipedia (https://pipedia.org/wiki/Kaywoodie) and read the section on the rough outline on the history of the brand that links the brand with the English section of the company. I quote:

Again, demand for KBB pipes and especially Kaywoodie prompted another move for both the manufacturing facilities and the corporate offices. In 1930 the corporate office moved into the Empire State Building on Fifth Avenue in New York. By 1935, the manufacturing operations moved from Union City to 6400 Broadway in West New York, New Jersey which, at the time, was touted as the largest pipe making facility in the world. At the height of production, there were 500 employees producing up to 10,000 pipes per day.

The corporate offices were relocated in 1936 to the International Building, Rockefeller Center, 630 Fifth Avenue, New York. The invitation to visit the new office reads, “Kaywoodie is now on display at the world’s most famous address – Rockefeller Center. Here Kaywoodie takes its place among the leaders of industry and commerce.” The move to Rockefeller Center coincided with The Kaywoodie Company’s emergence as a subsidiary of KBB. All of the pipes manufactured by KBB including the Yello-Bole line were also on display here. By 1938 Kaywoodie had opened an office in London to meet worldwide demand. Kaywoodie of London was jointly owned with another famous pipemaker, Comoy’s of London.

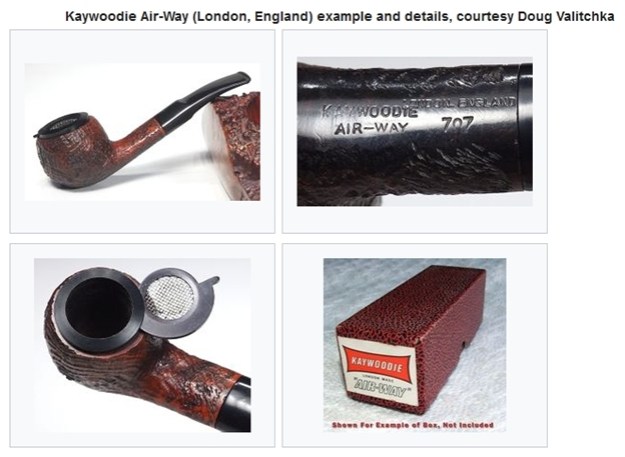
I am also including a screen capture of a picture of a pipe that is the same shape as the one that I am working on. Thanks to Doug Valitchka for the photo.From there I turned to a link on the article to a section called Guide to Kaywoodie Pipes (https://pipedia.org/wiki/Collector%27s_Guide_to_Kaywoodie_Pipes#NOTES_ON_.22OTHER.E2.80.9D_KAYWOODIE_PIPES).  It gave some pertinent information on the Air-way line. I quote two sections from that article below. I have highlighted the Air-way brand name in the second paragraph.

English Kaywoodies. All of the catalogs reviewed in this research contained the following copyright notification: Printed in U.S.A., Kaufmann Bros. and Bondy, Inc., New York and London. Kaywoodie Pipe cases and smoker’s accessories were also marked with “New York and London”. The catalogs, however, do not present any information concerning Kaywoodie’s London operations, or how the English Kaywoodies might have differed from those manufactured and marketed in the U.S. Lowndes notes that he has several English Kaywoodies acquired in

Vaduz and Zurich. English Kaywoodies are now made by Oppenheimer pipes. Lowndes notes that English Kaywoodies with the “screw-in bit” come in Ruby Grain, Custom Grain, Standard, and Relief Grain grades. The traditional push-bit models come in Continental Plain and Relief, London Made, Minaret, Air-way Polished No. 707, and Lightweight grades. Prices in 1985 ranged from 9.50 (pounds) to 26.00 (pounds). Lowndes notes that the Super Star was a special edition English Kaywoodie made of finest briar with a handmade silver band. Lowndes has two: one from Zurich with a large white-outlined logo, and beautifully cased; and one in walnut finish with the black-­in-white logo. A recent catalog shows the Super Star without a band and the ordinary small white logo. A 1985 letter from Oppenheimer states that the black-in-white logo has been discontinued and only the regular white logo is now used.

From that information I now knew that the pipe in hand was made prior to 1985 in London by Oppenheimer. It had a traditional push-bit rather than the threaded screw in bit. After 1985 Oppenheimer discontinued the black in white logo. It was time to work on the pipe now. I scraped the shank with a pen knife to remove the tarry buildup that did not allow the stem to seat properly. I cleaned out the mortise and the airway in the shank and the stem with alcohol, cotton swabs and pipe cleaners. I took some close up photos of the cleaned button and slot to show how it had a crack and had been collapsed slightly on the left side of the top.I scrubbed the exterior of the bowl with Before & After Briar Cleaner. I worked it into the surface of the briar with my finger tips and let it sit for a short time to absorb the grime. I rinsed it down under warm water to remove the grime debris that was collected in the cleaner. At the same time I used a tooth brush to scrub out the inside of the bowl and rinsed it. I dried the bowl off with a soft cotton cloth and lightly polished it. I worked some Before and After Restoration Balm into the surface of the briar. I rubbed it into the briar to restore, preserve and polish the briar. I let it sit on the bowl for about 10 minutes and buffed it off with cotton cloth. It was getting late so I set the polished bowl aside for the night and put the stem into a bath of Before & After Pipe Stem Deoxidizer to soak overnight. In the morning I would take it out and start working on the stem.I took it out of the bath in the morning and wiped it down with a microfiber cloth. Much of the oxidation on the surface came off. I used a Scotch Brite pad to scrub off the oxidation. You can see from the photos that some still remained.I put it back in the bath overnight again to see what would happen. When I took it out it looked better but there was still a lot of work to do with it.I decided to address the damaged button on the top edge. The top edge of the button had collapsed partially into the slot. There were small cracks on the surface. I have used clear super glue in the past to address this but I had an idea for an experiment. I heated the blade of a dental spatula and inserted it into the slot. I repeated the process several times until I had the slot opened and lined up. I touched the heated blade to the cracks on the top of the button and stem and to the tooth mark on the underside. The tooth marks disappeared and the cracks were sealed with the heat welding the pieces together. Whereas before the repair I could not insert a pipe cleaner, I now could slide it in and out with ease.I sanded the stem surface with 220 grit sandpaper to remove the oxidation and tooth chatter. I started polishing it with 400 grit sandpaper to remove the scratches.I polished the stem surface with Denicare Mouthpiece Polish to polish out the scratches left behind by the sandpaper. It also works well to remove stubborn oxidation in the saddle and along the edge of the button. It worked really well to remove the oxidation and leave the stem looking far better.I polished out the remaining scratches in the stem material with micromesh sanding pads. I wet sanded with 1500-12000 grit sanding pads. I wiped down the stem after each pad with some Obsidian Oil. Once I used the last pad – 12000 grit – I polished the stem with Before & After Pipe Stem Polish, both Fine and Extra Fine. I used a new product I am trying for Briarville called No Oxy Oil to give the stem a final wipe down and polish. I put the stem back on the pipe and polished both pipe and stem with Blue Diamond on the buffing wheel. I avoided the wind screen with the buffing wheel. I gave the pipe several coats of Carnauba Wax and buffed it with a clean buffing pad to raise a shine. I hand buffed it with a soft cotton cloth to deepen the shine. The finished pipe is shown in the photos below. The original stain looks really good and the polishing brought the grain back to life. The contrasting rich brown finish highlight the grain and contrasts well with the black vulcanite stem. The Air-way Diplomat is a beautiful pipe that really has the look of an English made pipe. The tie to Oppenheimer is clear in looking at the shape of the pipe and the finish. The black metal wind screen with the flip screen cover is unique and seems very functional. The dimensions of the pipe are – Length: 4 ¾ inches, Height: 1 ½ inches, Outside diameter of the bowl: 1 ½ inches, Chamber diameter: ¾ of an inch. I left the stinger out of the shank because I plan keeping this unique English made Kaywoodie for my own collection. It tics all the boxes for me – shape, finish, grain, etc.  I am looking forward to loading a bowl in it and enjoying a great smoke. I will carry on the legacy! Thanks for reading the blog.
 

Sometimes You Find a Pipe You Know is Old – a No Name Canadian


Blog by Steve Laug

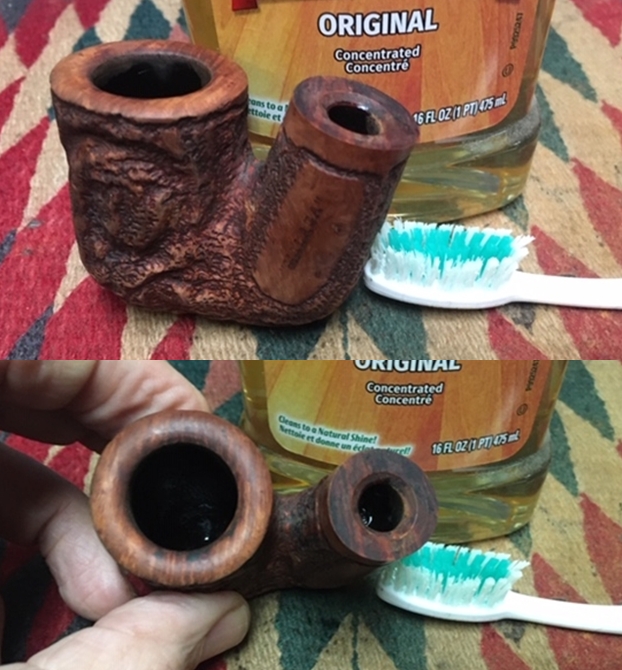
On our recent trip to Alberta we picked up quite a few pipes that were really nice. Some of them were brands we were familiar with and some were pipes that were unknown and unidentifiable. But if you are a pipe hunter you know the feeling when you are holding a particular pipe, no matter what the brand and it just speaks to you. That is what happened with this pipe. It was in a display case at an antique mall in Edmonton. The shape of the pipe, the forward canted bowl, the small short stem, the shape of the button and the single, orific opening on the end of the stem just looked old and I was going to add it to the finds.The grain under the dirty finish was quite nice with straight, flame and birdseye popping through around the bowl and shank. The bowl has a slight forward cant. The rim top had a thick layer of tars and there was sustained damage on the inner and the outer edge. There was a thick cake in the bowl that made it hard to see the extent of the damage to the inner edge. The stem was short vulcanite that had a threaded bone tenon that did not fit tightly against the shank. The stem was also heavily oxidized and had some tooth chatter on both sides near the button. The airway on the end of the stem was a round orific opening. I took a close up photo of the rim top to show the thickness of the cake in the bowl and the overflow of lava on the rim top. The damage to inner edge of the bowl and the nicks on the outer edge are evident in the photo. I took photos of the stem showing the oxidation and tooth chatter on both sides near the button. The third photo of the stem shown below gives a clear view of the orific opening in the stem end.I unscrewed the stem from the shank to show the threaded tenon on the end of the short stem. It has a bone tenon and has a long tube on the end of the threaded that works to funnel the smoke up the stem to the opening at the stem end. Since I had taken the pipe apart I decided to clean the parts. I started by reaming the bowl with a PipNet Pipe Reamer. I used the first two cutting heads to take the cake back to bare briar. I used a Savinelli Fitsall Pipe Knife to clean up the remnants of the cake on the bowl walls. I finished the bowl by sanding it with a length of dowel wrapped with a piece of 220 grit sandpaper. I scrubbed out the mortise, shank and the airway in the shank and stem with pipe cleaners, cotton swabs and alcohol. I worked them over until it was clean. I scrubbed the threads on the tenon with a brass bristle wire brush.To clean up the rim top I topped it lightly with a piece of 220 grit sandpaper on a flat board. I took off the damaged rim top to smooth out the inner and outer edge of the rim. I finished the clean up by reworking the edges of the bowl with folded 220 and 400 grit sandpaper.I used some small drops of clear super glue to fill in the deeper nicks and marks on the bottom of the bowl. I sanded them smooth and then polished the repaired areas on the bottom of the bowl, the outer edge of the bowl and the rest of the bowl and shank with micromesh sanding pads. I wet sanded with 1500-12000 grit sanding pads to smooth out the scratches and nicks in the bowl sides. I wiped the bowl down with a damp cloth to remove the sanding dust. I scrubbed the exterior of the bowl with Before & After Briar Cleaner. I worked it into the surface of the briar with my finger tips and let it sit for a short time to absorb the grime. I rinsed it down under warm water to remove the grime debris that was collected in the cleaner. I dried the bowl off with a soft cotton cloth and lightly polished it. I worked some Before and After Restoration Balm into the surface of the briar. I rubbed it into the briar to restore, preserve and polish the briar. I let it sit on the bowl for about 10 minutes and buffed it off with cotton cloth. I set the polished bowl aside to work on the stem. I sanded the stem surface with 220 grit sandpaper to remove the oxidation and tooth chatter. I started polishing it with 400 grit sandpaper to remove the scratches.I polished out the remaining scratches in the stem material with micromesh sanding pads. I wet sanded with 1500-12000 grit sanding pads. I wiped down the stem after each pad with some Obsidian Oil. Once I used the last pad – 12000 grit – I polished the stem with Before & After Pipe Stem Polish, both Fine and Extra Fine. I used a new product I am trying for Briarville called No Oxy Oil to give the stem a final wipe down and polish. I put the stem back on the pipe and polished both pipe and stem with Blue Diamond on the buffing wheel. I gave the pipe several coats of Carnauba Wax and buffed it with a clean buffing pad to raise a shine. I hand buffed it with a soft cotton cloth to deepen the shine. The finished pipe is shown in the photos below. It is a beautifully grained piece of briar with straight grain around the walls of the bowl and sides of the shank. The undersides of the bowl and shank show a mix of birdseye and swirled, mixed grain. The rich brown finish highlights the grain and contrasts well with the short black vulcanite stem. The shape and style of the button and stem point to an early date for this pipe. I only wish that it had some identifying stamping on the shank to help identify the maker. The threaded bone tenon is in excellent condition and to further protect it, I coated it with some Vaseline. The pipe is a beauty. There are some flaws in the pipe that I wish could help tell the story of this old pipe. The dimensions of the pipe are – Length: 5 ¼ inches, Height: 1 ¾ inches, Outside diameter of the bowl: 1 ¼ inches, Chamber diameter: ¾ of an inch. This is an old timer that I will add to my own collection. I am looking forward to loading a bowl in it and enjoying the taste of this old timer. I will carry on the legacy! Thanks for reading the blog.

I Guess I did not have enough to restore – breaking a tenon on a Ben Wade Spiral


Blog by Steve Laug

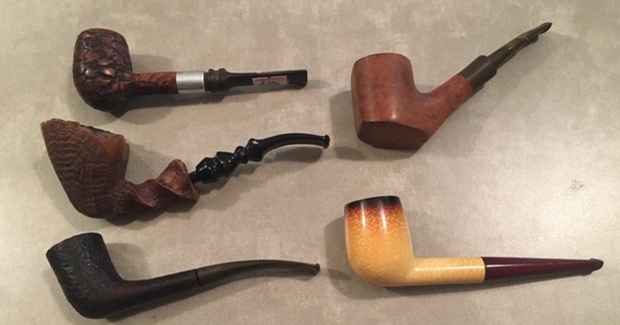
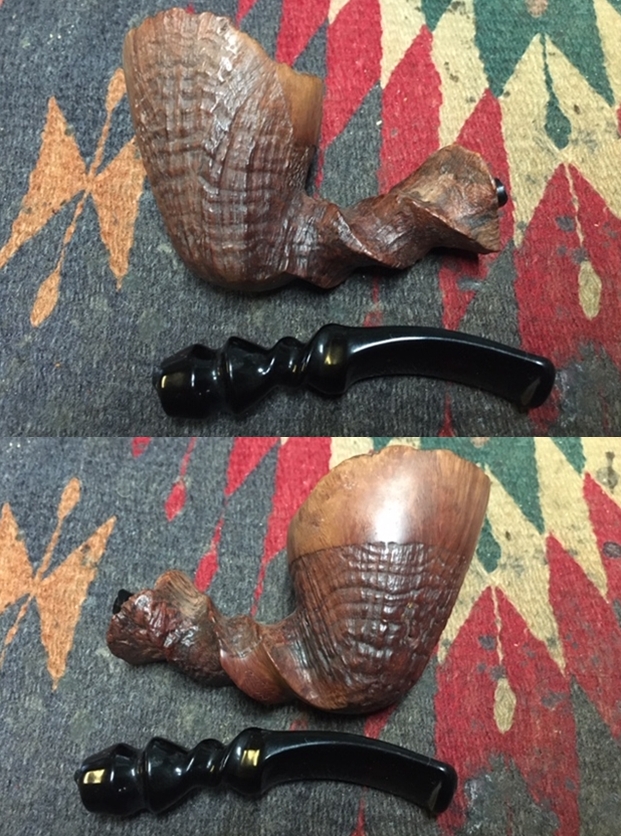
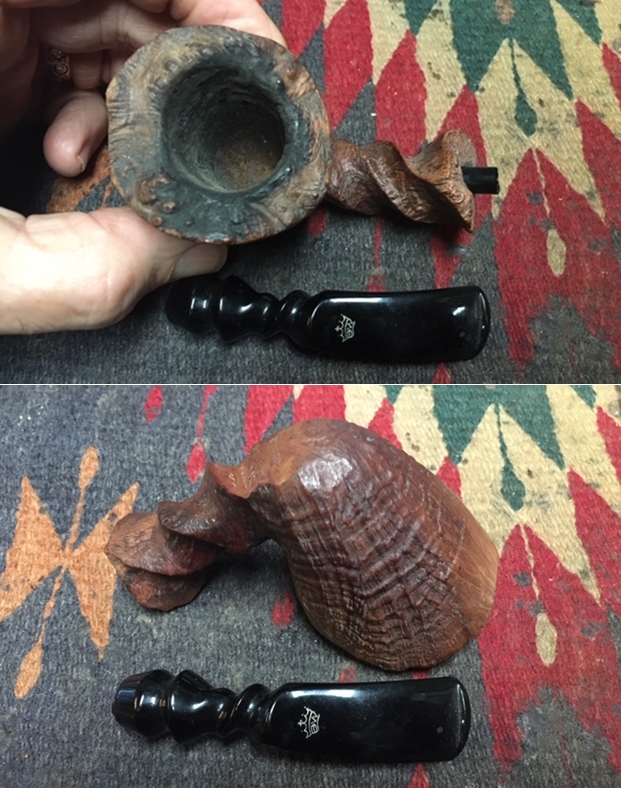
The photo below shows a group of five pipes that Jeff and I picked up at an antique mall near Calgary. There were five different pipes and all were nice, but the best of the lot was a nice looking Ben Wade Spiral Freehand. It had a spiral shank and the fancy turned stem also had a spiral saddle. When we took it out of the display case we already knew it was a Preben Holm made pipe. We had no doubt, as Preben Holm’s pipes are always very recognizable. This one had a great sandblast around the bowl and shank with a smooth portion on the front, right and rear about 1/3 of the way down the bowl from the rim edge. It had a plateau rim and shank end. We examined it and sure enough it was a Ben Wade pipe by Holm. It is stamped on a smooth twist on the underside of the shank and reads Ben Wade over Spiral Sandblast over Hand Made in Denmark. There was a crown with BW inside on the topside of the stem. It was in decent condition and the price was right. The finish on the bowl was dirty and dull. The plateau rim top and shank end were dirty. The plateau rim top had some lava overflow and darkening and there was a thick cake in the bowl. It was a dirty pipe but should clean up well. The stem was acrylic and dirty and had light tooth chatter on both sides. When got back to where we were staying I took photos of the group of pipes to highlight the find. They were some nice looking pipes.We were very excited about the finds from the trip and the last day Jeff and Sherry were with me we divided them up. Jeff would take the ones that needed to have his magic worked on them before I restored them and I would take the ones that were in decent condition. This was probably the first mistake we made. But the gravity of not sending them in Jeff’s car would become evident once I returned home.

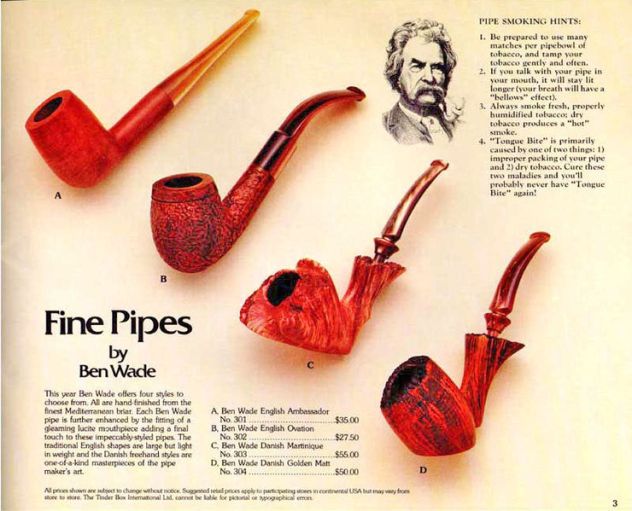
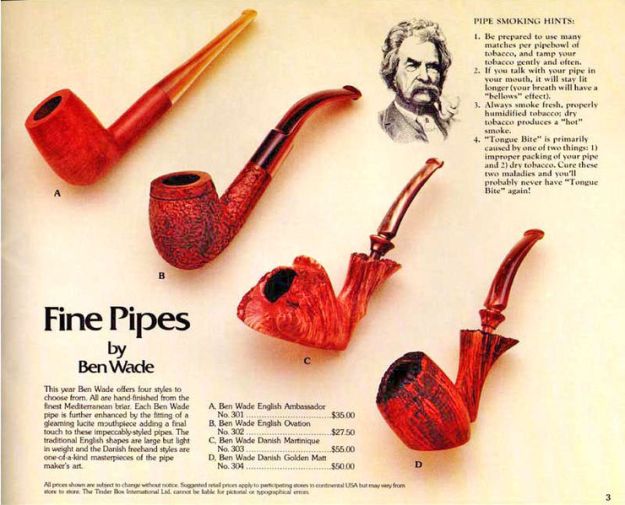
Ben Wade Ad in a Tinder Box catalog, courtesy Doug Valitchka

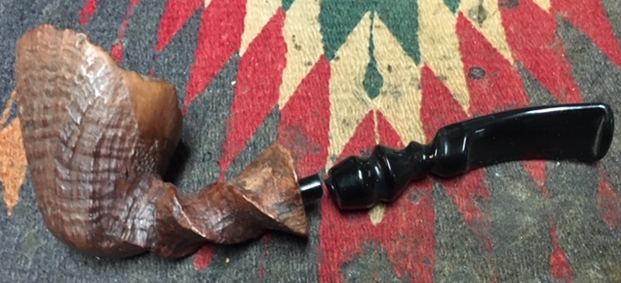
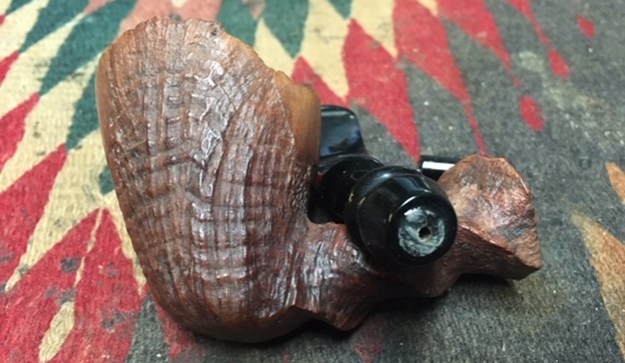
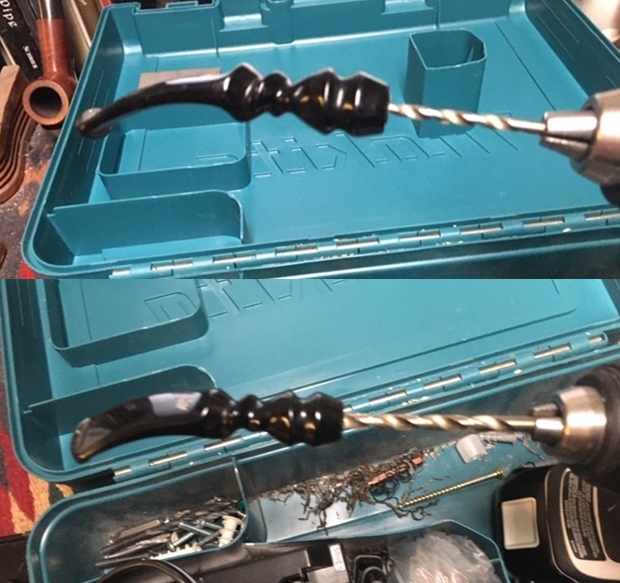
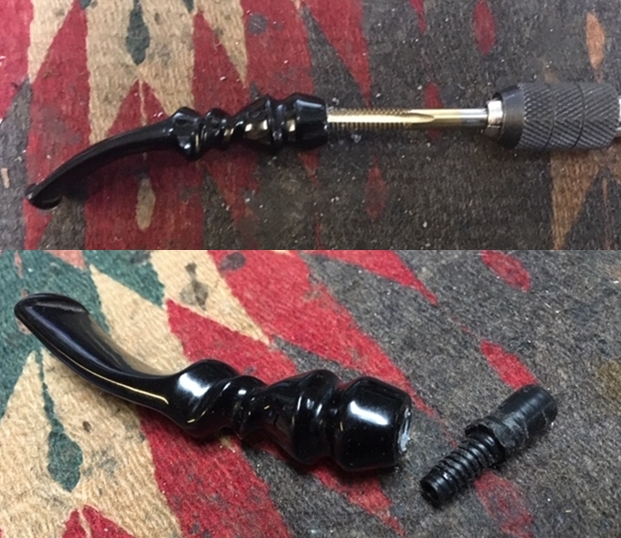
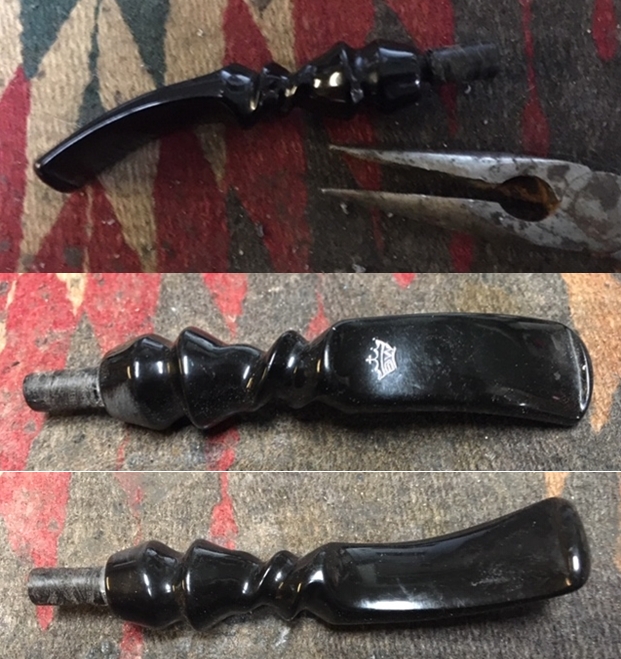
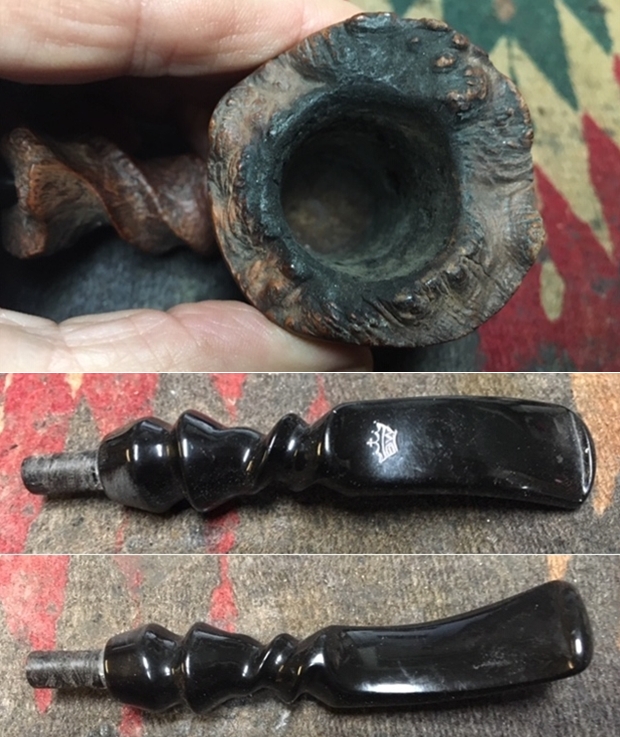
I wrapped all the pipes in packing tissue and rolled them in some of my clothes before packing them in my hard shell carry-on bag. I carefully put it in the overhead bin in the plane and then rolled it out once I was back in Vancouver. I put the bag aside and in the morning opened the suitcase and unpacked the pipes. Each pipe I took out and unwrapped was in excellent condition. No damage at all. I had purposely saved the Ben Wade for last and when I unwrapped it I almost cried. The tenon had snapped and the stem and pipe were apart. I have no idea how it happened but now I had a damaged pipe from the trip and it was truly one of the nicer finds! Here is a photo of what I found.I put the pipe in a baggie and set it aside until I had dealt with the feelings of stupidity for not having sent it with Jeff or at least packing it better. I cleaned up several other pipes before I even looked at this one. Then last evening I finally felt like dealing with it. I took it out of the bag and took photos of the pipe before I started working on it. (You have to agree it truly has a great sandblast!) I decided the first order of business was to pull the broken tenon. I used a pair of needle nose pliers and clamped down on the broken end of the tenon and wiggled it free. Fortunately the snapped tenon was not stuck in the shank and it came out quite easily as you can see from the photo below. Now I needed to drill out the stem and fit it with a replacement tenon.The first step in the process of fitting a replacement tenon is cleaning up the damage on the stem. I smoothed out the broken tenon with my Dremel and a sanding drum. I knocked off the sharp remnants of the broken edges and smooth it out. If you are paying attention you can see that the airway in the stem is not centered. This would make opening the airway and centering a new tenon a challenge to say the least. It could be done but I would need to pay attention and there would be some extra steps that would have to be done to fit it properly.I used a pen knife to chamfer the airway and bring it to a centered position so that when I drilled it I could follow it in and keep it centered. I started with a drill bit that was slightly larger than the airway in the stem. I drilled it as deep as the length of the threaded portion of the replacement tenon. I worked my way up to a drill bit as large in diameter as the tenon end.I used a tap to thread the inside of the stem to receive the new tenon. I twisted it into the stem until it was the depth of the threaded tenon end. I also used the Dremel to take the hip off the replacement stem so that it would fit flush against the stem. Once the stem was threaded I gave the threads on the tenon a light coat of epoxy and twisted it into the opening in the stem with a pair of pliers. I took photos of the stem with the tenon in place and set it aside for the glue to cure. I took close up photos of the bowl and rim top as well as the stem surface. You can see the condition of the rim top and bowl in the first photo. There was some lava overflow on the rim top on the left and rear of the bowl. There was also some darkening around the inner edge of the bowl and some on the rim top. The cake in the bowl was quite thick. The stem showed some tooth chatter on both sides near and on the button surface.I remembered a bit of history on the brand that thought that the Preben Holm pipes were marketed under the Ben Wade label in the US and imported through Lane Ltd. I turned to Pipedia and read the listing on the brand to refresh my memory and flesh out the knowledge of the brand (https://pipedia.org/wiki/Ben_Wade). I have included a photo from that site that was taken from a Tinderbox advertisement.

Ben Wade Ad in a Tinder Box catalog, courtesy Doug Valitchka

I quote the portion of the article that summarizes the Danish period of the history of the brand:

Young Copenhagen master pipemaker Preben Holm had made a meteoric career heading a pipe manufacture employing 45 people at the age of 22! But around the turn of 1970/71 he was in major financial difficulties. His US distributor, Snug Harbour Ltd. in New York City, left him in the lurch. Holm had three unpaid invoices on his desk and another large shipment was ready for the USA, when Snug Harbour’s manager told him on the phone that there was no money at all on the account to pay him.

So the Dane went to New York for an almost desperate search for a new distribution partner. He made contacts with Lane Ltd. and met Herman G. Lane in February 1971. Lane Ltd. had no interest in Holm’s serial pipes produced at that time but so much the more in the hand-carved freehands because the hype for Danish freehands and fancies in the States was still on its way to the climax then. The meeting resulted in an agreement to start a cooperation. Lane insisted to improve the quality considerably and in return he assured to be able to sell essentially larger quantities.

Holm went back home to work on new samples with all-new designs and altered finishes for Lane. Both, Lane and Holm, agreed that it would be unwise to sell the pipes under Preben Holm’s name as long as Snug Harbour had a considerable stock of Preben Holm pipes and might sell them pipes at very low prices just to bring in some money.

So on Mr. Lane’s proposal it was determined to use the name Ben Wade belonging to Lane Ltd. Lane spent considerable amounts of money for advertising the new brand in the big magazines– the centerpiece being whole-page ads showing a very exclusive Seven Day’s Set.

The cooperation with Lane Ltd. proved to be an eminent business success for both partners. Within a very short time Ben Wade Handmade Denmark sold in much larger quantities and at higher prices than they had ever dreamed of. And the hype these freehands and fancy pipes caused went on unbroken long after Herman G. Lane deceased. Preben Holm – obviously much more brilliant in pipe making than in pipe business – was in major troubles again in 1986 and had to sack most of his staff. The Ben Wade production was significantly lowered but continued until his untimely death in June of 1989.

Up to now Preben Holm made Ben Wade pipes are cult and highly sought for on the estate markets.

With that information my initial thoughts were confirmed. This pipe was a Preben Holm made Freehand distributed in the US by Lane Ltd under the name Ben Wade. The freehand rage occurred in the late 70s and the pipes were made until Preben’s death in 1989. My guess would be that this pipe was made sometime during that time period and potentially in the late 70s.

Armed with that information I followed the regular regimen that Jeff and I use for cleaning estates. I reamed the bowl with a PipNet pipe reamer using the largest cutting head as this pipe has a particularly large bowl. I followed up with a Savinelli Fitsall pipe knife to remove the remaining cake and smooth out the walls. I finished the bowl cleanup by sanding the bowl with 220 grit sandpaper wrapped around a piece of dowel to smooth out the inside walls of the bowl. I also scrubbed the rim top plateau with a wire brush to knock of the lava that was built up there. I scrubbed the briar with Murphy’s Oil Soap and a tooth brush. I worked to remove the remaining lava and minimize the darkening. I rinsed it under warm running water. The photos show the rim top after scrubbing. It looked much better at this point. I worked some Before & After Restoration Balm into the surface of the briar with my fingertips and into the plateau rim top and shank end with a horsehair shoe brush to clean, enliven and protect it. I let the balm sit for a little while and then buffed with a cotton cloth to raise the shine. The photos show the bowl at this point in the restoration process. With the outside cleaned and shining I moved on to clean up the inside airways and mortise in the shank and the stem. I scrubbed out the mortise and the airway in the shank and the stem with alcohol, cotton swabs and pipe cleaners.  I set the cleaned bowl aside and turned my attention to the stem. I sanded out the tooth chatter with 220 grit sandpaper and started to polish it with a folded piece of 400 wet dry sandpaper. Once it was finished it began to shine.I used some Denicare Mouthpiece Polish that I have in my kit to start polishing out some of the scratches and remaining oxidation on the stem. I rubbed it in with a cotton pad and my finger tip and buffed it off with a cotton pad.I polished the stem with micromesh sanding pads – wet sanding with 1500-12000 grit sanding pads. I wiped it down after each sanding pad with some Obsidian Oil. I finished polishing it with Before & After Pipe Stem Polish – both Fine and Extra Fine and buffed it off with a cotton cloth. When I finished I gave it another coat of Obsidian Oil. This is a beautiful Preben Holm made Ben Wade Spiral Freehand with a fancy, twisted, black acrylic/Lucite stem. It has a great look and feel. The shape fits well in the hand with the sandblast giving a nice tactile sense when held. I polished stem and the bowl with Blue Diamond polish on the buffing wheel. I gave the bowl multiple coats of Conservator’s Wax and the stem multiple coats of carnauba wax. I buffed the pipe with a clean buffing pad to raise the shine. I hand buffed it with a microfiber cloth to deepen the shine. The pipe polished up pretty nicely. The rich combination of sandblast and smooth finishes took on life with the buffing. The rich colour of the briar works well with the polished stem. I like the grain and finished look of this Preben Holm Ben Wade Spiral pipe. Have a look at it with the photos below. The shape, finish and flow of the pipe and stem are very well done. The dimensions are Length: 6 ¾ inches, Height: 2 ½ inches, Outside diameter of the bowl: 2 inches, Chamber diameter: 1 inch. This Danish Freehand is a real beauty. Thanks for walking through the restoration with me as I worked over another beautiful pipe.


Sprucing Up an Attractive Butz Choquin Supermate 1596 Panel


Blog by Dal Stanton

Without doubt, one of my favorite pastimes is go pipe picking!  My wife and I were on the Black Sea coast in the Bulgarian city of Burgas returning to an antique shop I had visited before on the main walking street very near the Black Sea coast.  I was not disappointed when I spied the copper pot full of pipes waiting for someone like me to come along.  The Butz Choquin Supermate now on my worktable was in the bunch that I pulled out to get a closer look.  To the left of the BC (pictured below) were a Oldo Billiard and Lincoln London Made with the Lindburgh Select Poker to the right.  Not pictured below that also came home with me is a Harvey Meer Lined Rusticated Dublin Rustified LONDON PARIS NEW YORK.  A very nice haul!

Jim saw the BC Supermate in the online ‘For “Pipe Dreamers” ONLY!’ collection along with a ‘Nightmare’ Canadian that was not needing a restoration but a resurrection!  In my communications with Jim, I discovered that he was from Pennsylvania and an engineer who has several hobbies that where he works with his hands and expressed appreciation for the restorations that he had seen posted from my worktable.  It was for that reason he looked at ThePipeSteward website and found two pipes that called his name and he commissioned them.  He also expressed appreciation for our work with the Daughters of Bulgaria – women and girls who have been trafficked and sexually exploited.  All the pipes commissioned by potential stewards benefit this cause. Here are pictures of this nice Paneled Butz Choquin 1596 now on my worktable.  The nomenclature on the left side of the shank is the BC fancy script ‘Butz-Choquin’ [over] ‘SUPERMATE’.  To the right, the stem is stamped with the traditional ‘BC’.  On the right shank side is the COM and shape number: ‘STCLAUDE – FRANCE’ [over] 1596.   I have heard on FB group postings that the long-time French pipe manufacturer is closing its doors.  I went to the main website of Butz Choquin and it was active, and I saw no notifications.  I’ll continue to investigate.  One of my first research projects with a French pipe, Jeantet, connected me with the history of St. Claude, France, the place that most say represent the birthplace of modern pipe manufacturing.  The BC name is among the earliest residents of St. Claude.  Pipedia provides this information about the origins of Butz Choquin:

Jean-Baptiste Choquin of Metz started out as a tobacconist. This enterprise was prosperous; he had several employees. Among those, there was a certain Gustave Butz who was its first workman and who became his son-in-law by marrying Choquin’s daughter Marie in 1858.  In 1858 Jean-Baptiste Choquin created, in collaboration with Gustave Butz, the Choquin pipe. This bent pipe with a flat-bottomed bowl was finished with an albatross-bone mouthpiece, fixed with silver rings.  In 1858, still in Metz, Gustave Butz built an establishment for the manufacture of the Choquin pipe which took the name of [Butz-Chochin]. In 1951, the Berrod-Regad company bought the trademark, continuing manufacture until 2002. Departing from Metz, the workshop was relocated to Saint-Claude, then also called ‘the world capital of the briar pipe,’ under the Berrod-Regad group. The Berrod-Regad group would go on to completely rebuild the network of representatives until finally entering the export market in 1960 and has since won several prizes, as well as the Gold Cup of French good taste.

In a few years, the brand’s collection increased from ten to seventy series. 135 years after it was founded, the pipe is still well-known not only in France but throughout the world. In 2002, the Berrod family, wishing to preserve manufacture of pipes in Saint-Claude, handed over the company to Fabien Guichon, a native of the area, who will continue to develop the brand during the 21st century.

I found this great picture of the Butz Choquin Supermate Panel in an ad on TobaccoPipe.com.  The box is classic, and I wish I had the pipe sock to go along!  I found the text along with the picture to be interesting as well in its description of the finish and the collectibility of this 1596 shape.The condition of the pipe on my table is a far cry from the other pipe that Jim commissioned, the Comoy’s The Lumberman!  While the chamber has moderately thick cake and the rim shows lava flow, the pipe generally is in very good shape. Cleaning and working on the stem’s tooth chatter and oxidation do not appear to offer any surprises.  To begin the sprucing of this BC Supermate, the stem is removed and cleaned with a pipe cleaner wetted with isopropyl 95% and added to a soak of Before & After Deoxidizer with other stems in the queue.After several hours of being in the soak, I take out the BC stem and clean the airway with a pipe cleaner dipped in isopropyl 95% to remove the Deoxidizer.  I also wipe off the raised oxidation using cotton pads also wetted with alcohol.To revitalize the stem, paraffin oil is applied with a cotton pad.Next, I tackle the stummel cleaning.  The cake in the chamber is moderately thick.To remove the cake, I use 2 of the 4 blade heads that come in the Pipnet Reaming Kit.  Following this, using the Savinelli Fitsall Tool to scrape the chamber walls, helps to fine tune the removal of carbon cake. Finally, sanding the chamber walls with 240 grade paper wrapped around a Sharpie Pen provides further cleaning of the chamber and I then wipe the carbon dust remaining with a cotton pad wetted with alcohol.Inspection of the chamber afterwards reveals healthy briar.  I move on.The picture above shows the lava buildup on the rim.  I turn now to cleaning the external briar surface using undiluted Murphy’s Oil Soap and a cotton pad. I also utilize my Winchester pocketknife carefully to scrape the rim. I take the stummel to the sink and continue the cleaning the internals with bristled shank brushes and anti-oil dish liquid soap.  After a thorough rinsing, back to the worktable to continue.  The rim cleaned off well and the stummel surface looks good. Next, targeting the internal cleaning further, pipe cleaners and cotton buds wetted with isopropyl 95% are used.  Tar and oils are excavated from the mortise walls by scraping with a small dental spoon.  After much effort, the pipe cleaners and buds start lightening and I decide to save the rest of the cleaning for later by employing a kosher salt and alcohol soak.After inspecting the briar surface, I find one old fill that I dig out with a dental probe and refill using clear CA glue.  I spot drop the glue on the small pit and use an accelerator to quicken the curing time. With 240 then 600 grade papers, I sand off the excess glue.The rim is still discolored with a dark ring around the inner rim edge.  I use a piece of 240 grade paper very lightly to sand the rim as well as the dark ring.After lightly sanding, it is apparent that there was a bevel on the inside edge of the rim which I decide to fresh. Using 240 grade paper with a hard surface pressing behind helps to form the bevel. The bevel looks classy!  I like it.There are minor nicks and cuts on the stummel surface which I use sanding sponges to address.  Beginning with the coarse sponge and following with the medium and light grade sponges the nicks and cuts are cleaned up.  I like sanding sponges as they are not as invasive as sanding papers but clean up minor problems on the surface.Next, I use micromesh pads to clean and smooth the stummel.  Starting with pads 1500 to 2400, I wet sand followed by dry sanding with pads 3200 to 4000 and 6000 to 12000.  I stay clear of the shank panels holding the nomenclatures.  Using Before & After Restoration Balm brings out the natural hues of the briar with a subtlety that I find attractive.  To apply it to the surface, I put some of the Balm on my fingers and work the Balm into the briar.  The consistency of the Balm starts with a cream-like texture and then thickens into a waxy substance.  After the Balm is fully worked in, I put the stummel aside to allow the Balm to do its things.  I take a picture during this stage.After 20 to 30 minutes, I remove the excess Balm with a cloth and then buff it up some with a microfiber cloth dedicated to the post-Balm buffing.  As hoped and expected, the deepening of the natural hues is very attractive – it looks great.  Moving on.The stem repairs are waiting, and I take a closer look at the tooth chatter and compressions on the upper and lower bit.The first step is to use the heating method by painting the damaged areas with the flame of a Bic lighter.  As the vulcanite heats, physics take over and the rubber expands.  The chatter and indentations hopefully will also expand to regain the original condition, or closer to it.  After using the flame, the upper bit’s tooth chatter all but disappeared.  The lower bit compressions lessened but are still evident.Addressing the remaining compressions on the lower bit, I use Starbond Black Medium-Thick CA glue to fill the indentations.  I first wipe the area with a cotton pad wetted with alcohol to clean the area.  Carefully, I spot drop glue on each compression.  I set the stem aside for the CA glue to cure.After the Black CA glue cures, I go to work removing the excess patch material using a flat needle file.  I also work on the button to refresh the lines.Following the filing, 240 grade sanding paper is employed to erase the file marks and to smooth the lower bit. Also using the file to freshen the button lip and 240 grade paper on the upper bit, tooth chatter sands out with no problems.Next, wet sanding with 600 grade paper followed by 000 grade steel wool smooths further – the upper then the lower bit pictured. I’m careful to avoid sanding the BC stem stamping on the left stem panel.  In the second picture, a close look at the shiny reflection reveals the subtle lines of the patch.  It looks great!Even though the ‘BC’ stem stamp is healthy, which is nice for a change(!), I avoid direct sanding over it.  To clean around the stamping and to remove residual oxidation, I use a Mr. Clean Magic Eraser sponge which is less abrasive than sanding paper.  It helps to darken and clean the vulcanite around the stamping.On a roll, I move forward with the full regimen of 9 micromesh pads.  Starting with pads 1500 to 2400, wet sanding is employed.  Following this, using pads 3200 to 4000 and 6000 to 12000, I dry sand.  Between each set of 3 pads, Obsidian Oil is used to revitalize the vulcanite stem.  The pads and Oil do the job – nice! After attempting to rejoin the stem and the stummel to apply compound, as is the case sometimes, the tenon fit is too tight.  With the cleaning process, the briar expands, and this sometimes results in the fit being too tight.  It is best not to force the fit and risk cracking the shank.  I use a half round needle file to lightly file the mortise surface – very lightly.  After another try and discovering that it is still too tight, I use 470 grade paper wrapped around the tenon and rotate the stem while the paper hugs the tenon.  After a few attempts to fit, the tenon finally seats well.With the stem and stummel rejoined, a cotton cloth buffing wheel is mounted to the Dremel with the speed set at 40% full power.  Blue Diamond is then applied methodically to both stem and stummel.  After finishing with applying the compound, a felt cloth buffing helps to remove the residual compound dust in preparation for applying wax.Before applying the wax, one project awaits: the ‘BC’ stem stamp.  To refresh the ‘BC’ stamping on the stem I dab white acrylic paint on the lettering.  Then the excess paint is absorbed using a cotton pad.  It doesn’t take long for the paint to fully dry.  After it dries, I carefully remove the excess paint using the point of a toothpick.  I also use the flat edge of the toothpick to scrape over the top of the stamp to sharpen the lines.  It looks great! After changing the cotton cloth buffing wheel on the Dremel, maintaining the same speed, carnauba wax is applied to the entire stem.  After applying a few rounds of wax to the pipe, I follow by giving the pipe a serious buffing with a microfiber cloth to raise the shine.Earlier, the ad described this pipe shape as ‘esteemed’. This description fits well.  I have a square shank Peretti Billiard that I like a lot.  This Butz Choquin Supermate 1596’s square shank transitioning to a tapered square stem is very attractive – the lines draw the eye in for a closer look.  Added to this, the Panel shape alignment compliments the flow of the shank and stem to give an overall solid or full look.  The light hues of the briar grain also add to this ensemble.  Jim commissioned this BC Supermate and will have the first opportunity to acquire it in The Pipe Steward Store.  This pipe benefits our work here in Bulgaria with the Daughters of Bulgaria – women and girls who have been trafficked and sexually exploited.  Thanks for joining me!

Redeeming a Malaga Short Cherrywood – a 2nd of 2 pipes going home


Blog by Steve Laug

Yesterday afternoon I received and email from a reader of the rebornpipes blog who was on the hunt for a Malaga pipe or two for a colleague of hers. What made it interesting was that the colleague’s grandfather and family were the original owners of Malaga Pipes. Here is her message to me:

Hi There

I work with Lisa Holloway formerly Saraynian and her grandfather and consecutive family were the original owner of Malaga Pipes

I’d love to be able to purchase one for her for Christmas this year but since they went out of business in 1999 I have no idea where to get one or how much they are

Would you be able to help me find one and purchase it for her?

Please let me know thanks so much

Diane

I read her email at work and when I got home I went through the Malaga pipes from George Koch’s estate. I picked two of them that I thought might interest her and sent her the pictures of the pipes that I had available. The two I chose needed to be restored before I could send them to her but they showed some promise. The first of them was a long shank Canadian that had some mixed grain and vulcanite stem that I restored yesterday and wrote a blog about the process (https://rebornpipes.com/2019/10/26/redeeming-a-malaga-canadian-the-first-of-two-that-are-going-home/). The second one is a short Cherrywood that has a great mix of grain styles around the bowl and shank combined with a saddle stem that makes it an interesting pipe. It is another one of the many Malaga pipes that came to my brother and me in several shipments of pipes from George’s daughter Kathy. When Jeff got each box the pipes were well wrapped and packed. Jeff unwrapped them and took the following photo to give an idea of the volume of the pipes that we purchased. This Malaga came in mixed in a box of pipes much like the one below.In each of the previous blogs that I have written on the restoration of George’s pipes I have told his story. If you have followed the restorations you will have read the information and the background piece that Kathy did on her father. Here is a link to one of the previous blogs on his Malaga pipes where I included her tribute in full (https://rebornpipes.com/2019/01/26/back-to-kathys-dads-pipes-restoring-a-%c2%bc-bent-malaga-author/). You can also read the bio on her Dad, George Koch. It is an interesting read and one that shows just how far our pipe collecting passion can go when we find a brand of pipes that we enjoy. I am going to only include the portion on the Malagas at this point. If you wish to read the rest follow the link above.

Kathy writes…We lived in Livonia, and that’s where his love for Malaga pipes began. After a few years he returned to Allis Chalmers and we moved back to Springfield. I remember that when we went back to Michigan to visit friends, Dad had to go to the Malaga store and acquire a few new pipes. Many a year I wrote to Malaga and they picked out a pipe for me to purchase that I could give Dad for a Christmas or birthday present. He was always pleased. His favorites were the straight stemmed medium sized bowl pipes, but he liked them all. 

He had some other pipes, but the Malagas were his favorites. I remember him smoking them sitting in his easy chair after work, with feet up on the ledge by the fire burning in the fireplace.  Growing up it was my job to clean them and he liked the inner bowl and stem coated with Watkins vanilla, leaving a little of that liquid in the bowl to soak in when I put them back on the rack…I’m very happy they are being restored by you and your brother and hope they find homes who enjoy them as much as Dad did. Thank-you for your care and interest. — Kathy, the oldest daughter

The “Malaga” Short Cherrywood is next pipe on the table. The carver did a great job of shaping the pipe to follow the grain on the briar. The bowl, round shank and straight saddle stem look very good. The bowl had a thick cake that overflowed with lava onto the rim so that it was impossible to see if there was damage on the inner edges. The sides of the bowl and shank are very dirty with grime and oils from prolonged use. The stamping on the right side of the shank read “MALAGA”. On the left side it is stamped IMPORTED BRIAR. The stem had tooth dents and chatter on the top and the underside of the stem. There was some thick calcification and also some oxidation deep in the vulcanite of the stem surface. Jeff took these photos before he started the cleanup work on the pipe. Jeff took close up photos of the bowl and rim to capture the condition of the pipe before he started his cleanup work. The rim top had some lava overflow and darkening on the back of the bowl. There appeared to be some damage to the inner edge of the grimy pipe. The outer edge looked to be in decent condition with perhaps some burn marks on the front.He also took photos of the side and bottom of the bowl and shank to show the beautiful grain around the bowl. The photos show the general condition of the bowl and dirt and wear on the rich oil finish. It is very dirty but this is another beautiful pipe. Jeff took a photo to capture the stamping on the top side of the shank. The photos show the stamping “MALAGA” on the left side of the shank and IMPORTED BRIAR on the right side. The stamping is very readable.The next photos show the stem surface. There are tooth marks and chatter on both sides near the button and wear on the button surface and edges. You can also see the calcification and the oxidation on the stem.I am also including the link to a blog that I wrote that gives some of the history of the Malaga brand and the Malaga Pipe Shop in Royal Oak, Michigan in the USA. I have written an earlier blog to give a little history of the Malaga Brand and the pipemaker, George Khoubesser. Here is the link – https://rebornpipes.com/tag/malaga-pipes/.That blog also includes links to a catalogue and the history of the pipemaker George Khoubesser. Follow the link to get a feel for the brand and the pipemaker.

Jeff reamed the bowl with a PipNet pipe reamer and followed up with a Savinelli Fitsall pipe knife to remove the cake. He scrubbed out the mortise and the airway in the shank and the stem with alcohol, cotton swabs and pipe cleaners. He scrubbed the exterior of the bowl, rim, shank and stem with a tooth brush and Murphy’s Oil Soap to remove the oils and tars on the rim and the grime on the finish of the bowl. He rinsed it under running water. He dried it off with a soft cloth. He was able to remove the lava build up on the rim top and the flat surface of the rim top and the inner edge has some serious burn damage on the front and back side. The outer edge looked very good. I took photos of the pipe to show its condition before I started my work on it. The stem also looked better. I took close up photos of the bowl and rim top as well as the stem. You can see the condition of the rim top and bowl in the first photo. Jeff was able to remove all of the tar and oils but you can now see the damage on the top and inside rim edge. The edge is out of round. There is a burn mark that extends across back and right front edge of the rim top at that point. The stem had tooth marks and chatter on both sides near and on the button surface on both sides.I took a photo of the stamping on the shank to show how good the condition is. It shows the “MALAGA” and the IMPORTED BRIAR stamp and they are very legible.I decided to address the rim top first. I topped the bowl on a topping board with 220 grit sandpaper. I wanted to minimize the damage on the top, remove the darkening and clean up the damage on the inner edges of the bowl. I used a folded piece of 220 grit sandpaper to clean up the damage on the right rear inner edge of the bowl. I gave the inner edge a slight bevel to repair the damage. I polished the edge with 400 grit wet dry sandpaper. The rim top and edges really looked better (I forgot to take photos of the rim top at this point but did so with the micromesh).I polished the rim top and the briar with micromesh sanding pads. I wet sanded the bowl with 1500-12000 grit sanding pads. I wiped the bowl down after each pad with a damp cloth to remove the sanding dust. I scrubbed the briar with Before & After Briar Cleaner and a tooth brush. I rubbed it into the surface of the briar with my finger tips and let it sit for about 10 minutes then rinsed it off with running water. I dried it off with a soft cloth. I worked some Before & After Restoration Balm into the surface of the briar with my fingertips to clean, enliven and protect it. I let the balm sit for a little while and then buffed with a cotton cloth to raise the shine. The following photos show the bowl at this point in the restoration process. I am very happy with the results. I turned to the stem to address the issues on the surface of both sides at the button. I sanded both sides smooth with 220 grit sandpaper and 400 grit sandpaper to blend the tooth chatter into the surface of the stem. As I sanded and reshaped the button and stem surface the tooth chatter disappeared.I used some Denicare Mouthpiece Polish that I have in my kit to start polishing out some of the scratches and remaining oxidation on the stem. I rubbed it in with a cotton pad and my finger tip and buffed it off with a cotton pad.I polished the stem with micromesh sanding pads – wet sanding with 1500-12000 grit sanding pads. I wiped it down after each sanding pad Obsidian Oil. I finished by polishing it with Before & After Pipe Stem Polish both fine and extra Fine and then wiped it down with a final coat of Obsidian Oil. This is a “Malaga” Imported Briar small Cherrywood with a ¼ bent vulcanite saddle stem has a great look and feel. The shape of the bowl, the cut of the rim top and briar work well to highlight the grain around the bowl sides. I polished stem and the bowl with Blue Diamond polish on the buffing wheel. I gave the bowl and the stem multiple coats of carnauba wax. I buffed the pipe with a clean buffing pad to raise the shine. I hand buffed it with a microfiber cloth to deepen the shine. The pipe polished up pretty nicely. The grain took on life with the buffing. The rich oil cured colour works well with the polished vulcanite stem. The finished pipe has a rich look that is quite catching. Have a look at it with the photos below. The shape, finish and flow of the pipe and stem are very well done. The dimensions are Length: 5 ¾ inches, Height: 1 7/8 inches, Outside diameter of the bowl: 1 ¼ inches, Chamber diameter: ¾ of an inch. Now that the second Malaga is finished it is ready to mail off to Diane with the Canadian. I can’t wait to hear what her colleague thinks when she opens her Christmas present! I am glad that she is carrying on both the trust for George Koch and her family. Thanks for walking through the restoration with me as I worked over another one of Kathy’s Dad’s Pipes.