Blog by Dal Stanton
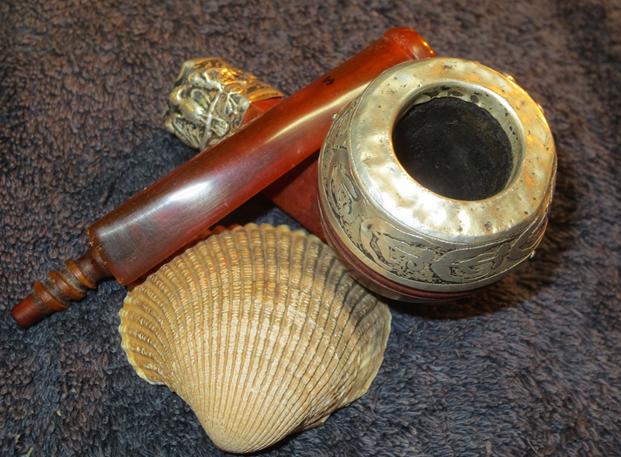
My wife and I were on Interstate 24 nearing Manchester, Tennessee, returning to the Atlanta area after the wedding of our daughter in Nashville. The billboard beckoned and, of course, I responded by taking the next exit! Madeline’s Antiques & Uniques had the look of a classic pipe picker’s paradise and I was not disappointed! I’m thankful for my wife’s patience and her eagle eye. She helped ferret out hidden pipes in need of help and a new home.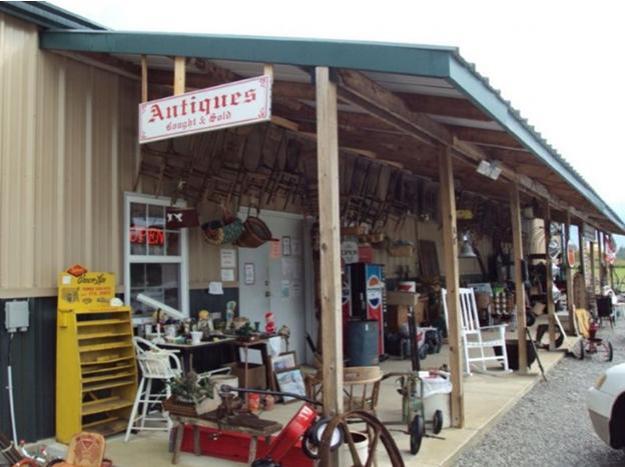

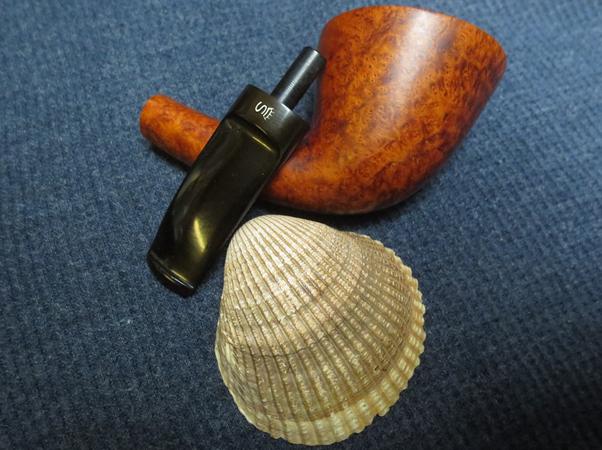
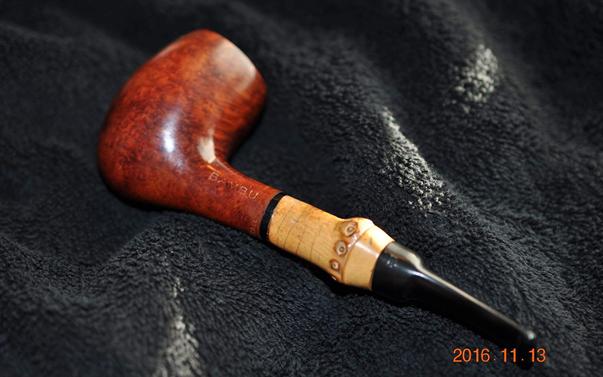
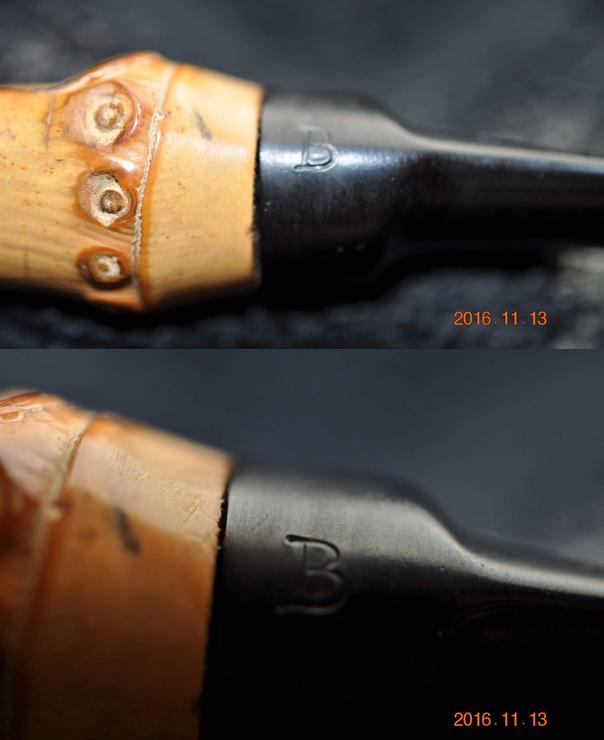
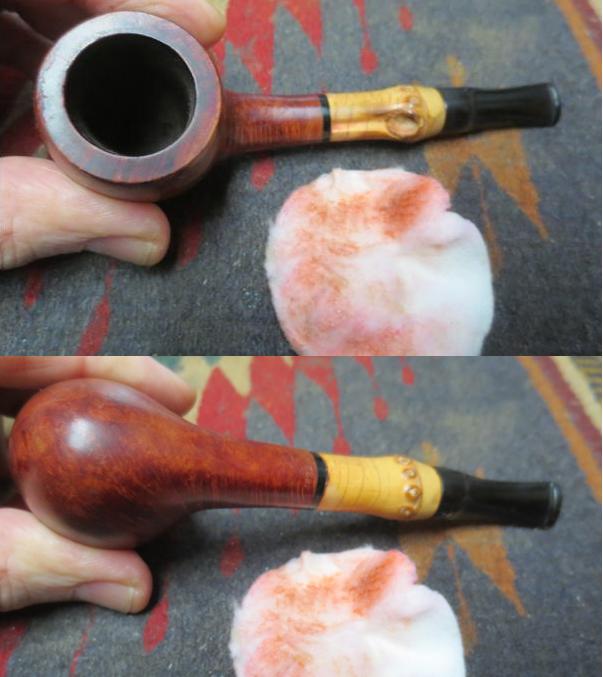
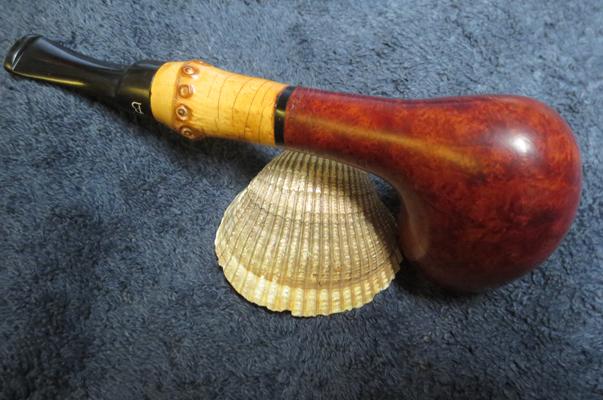
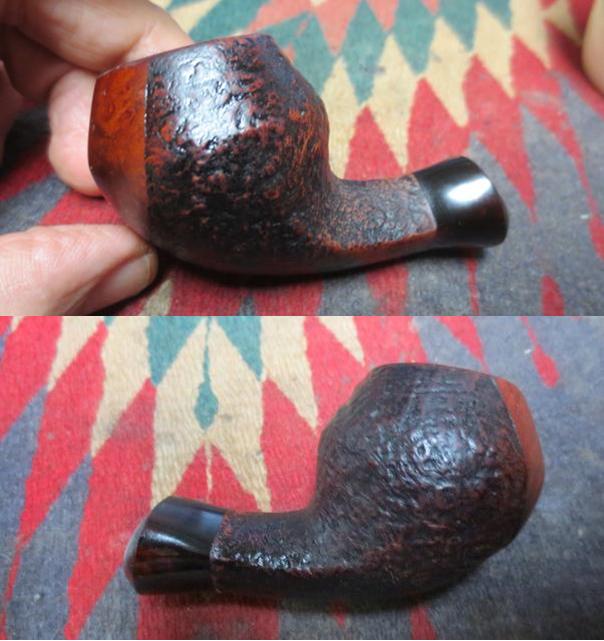
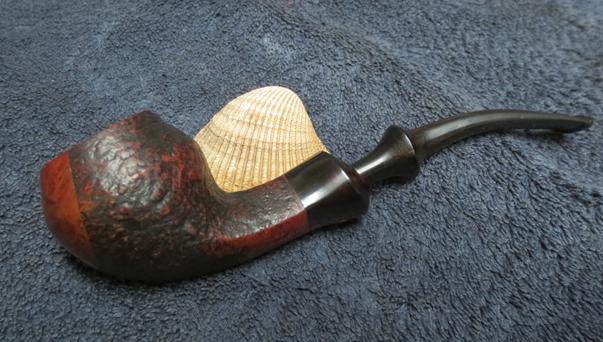
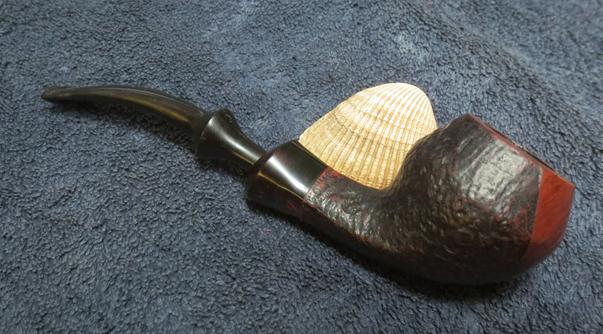
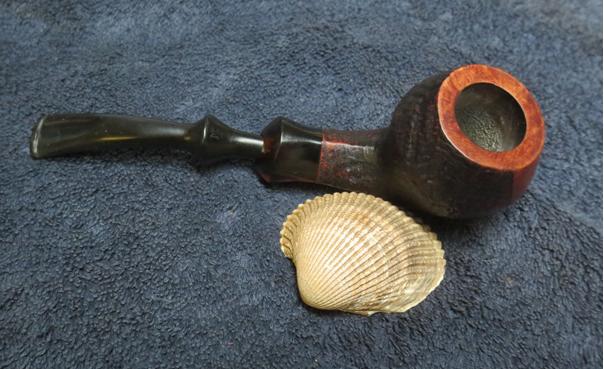
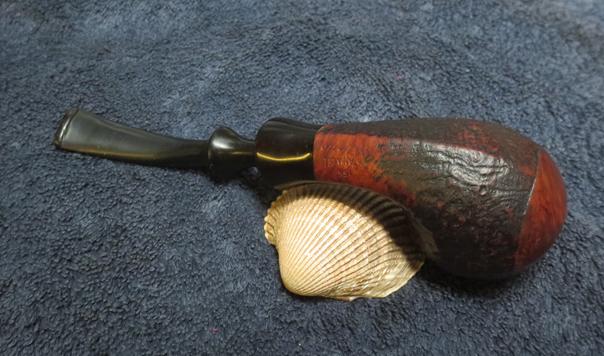
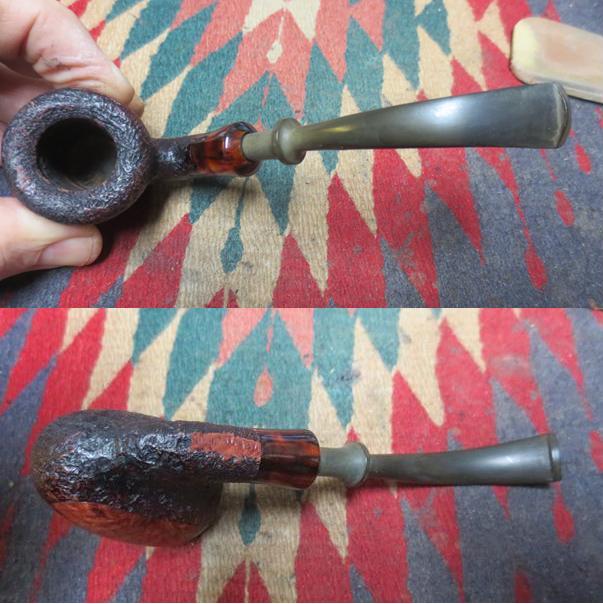
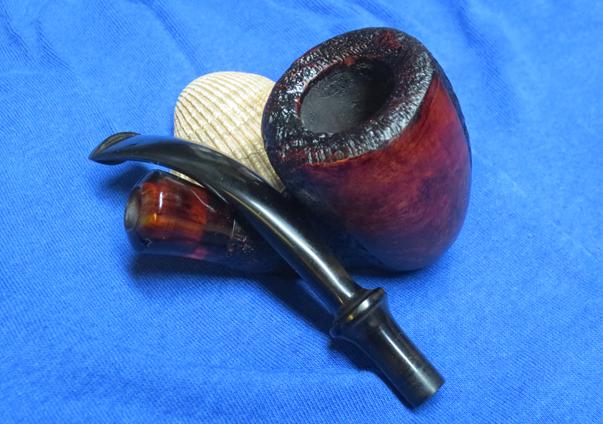
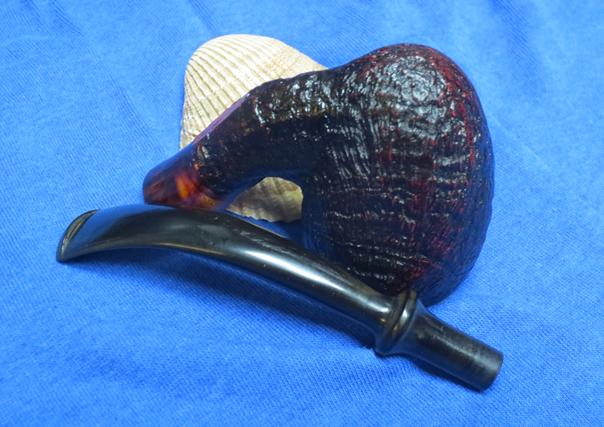
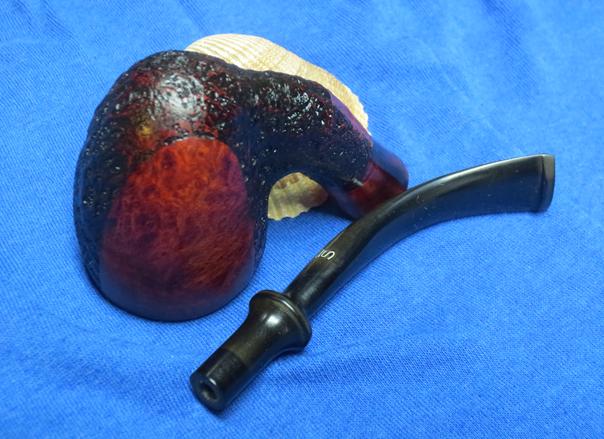
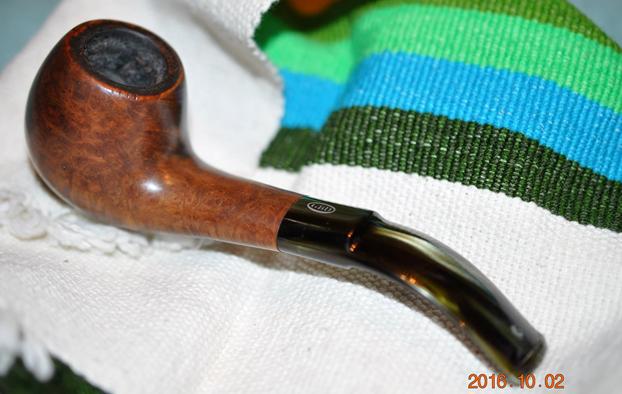
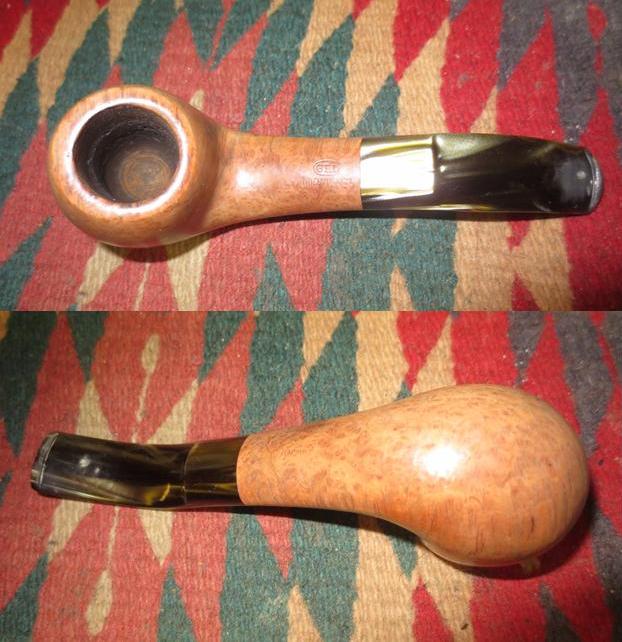
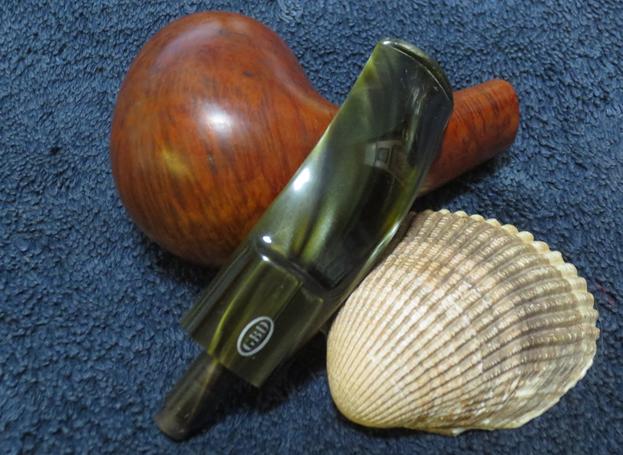
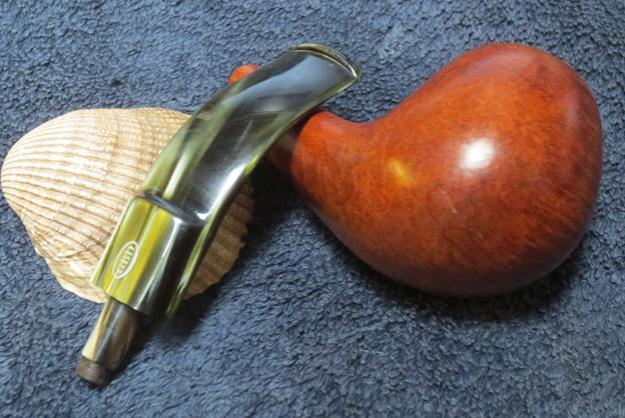
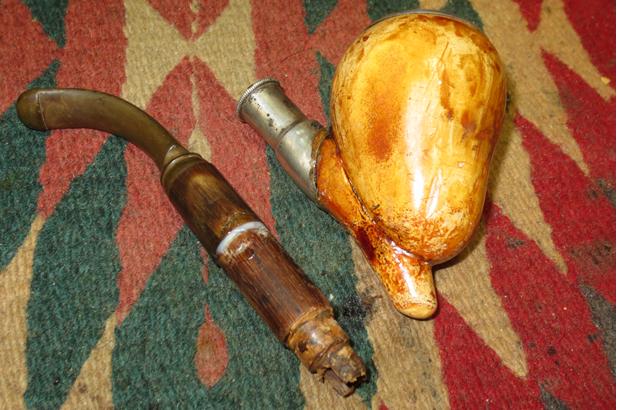
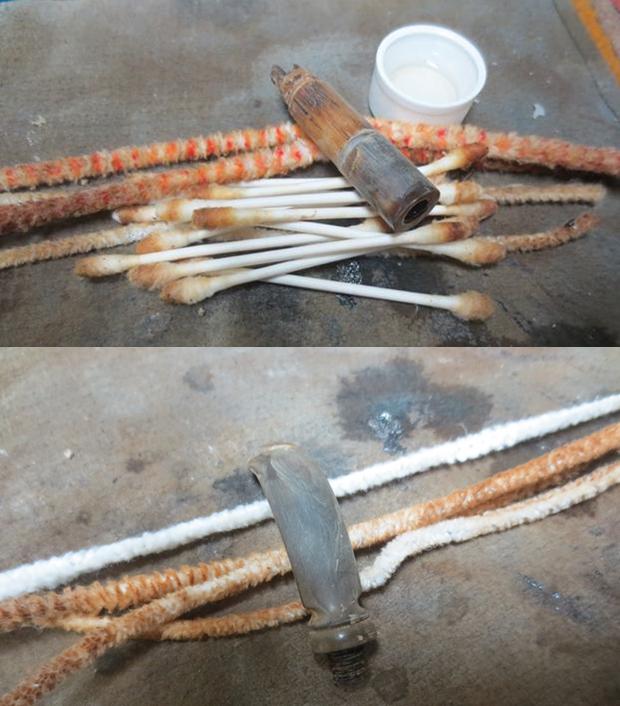
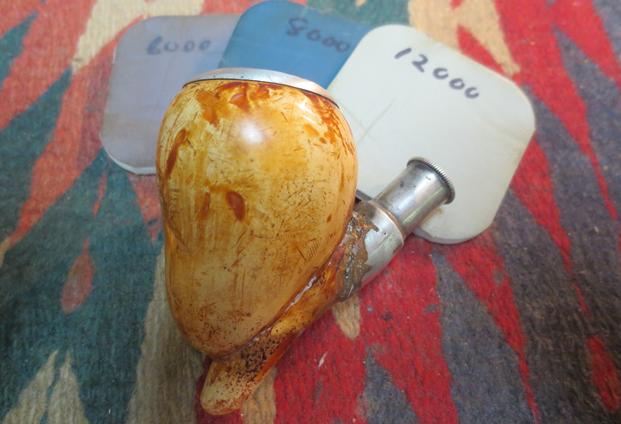
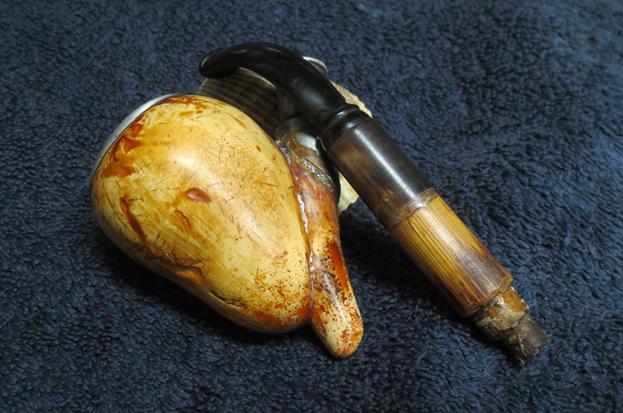
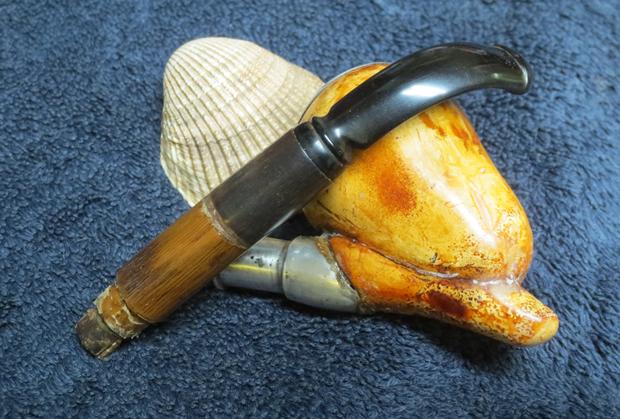
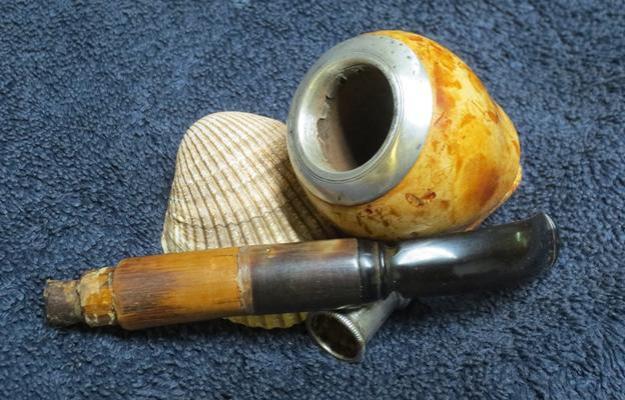
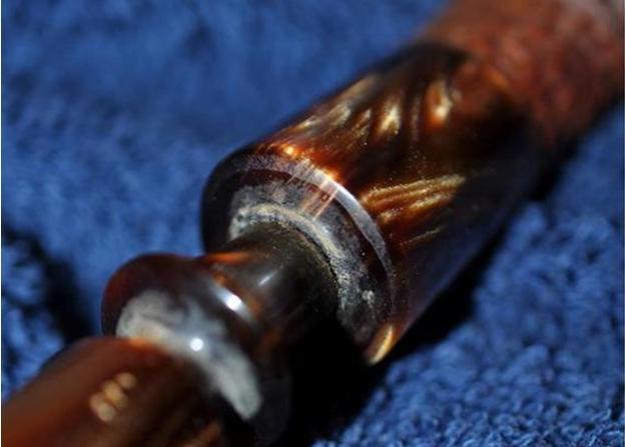
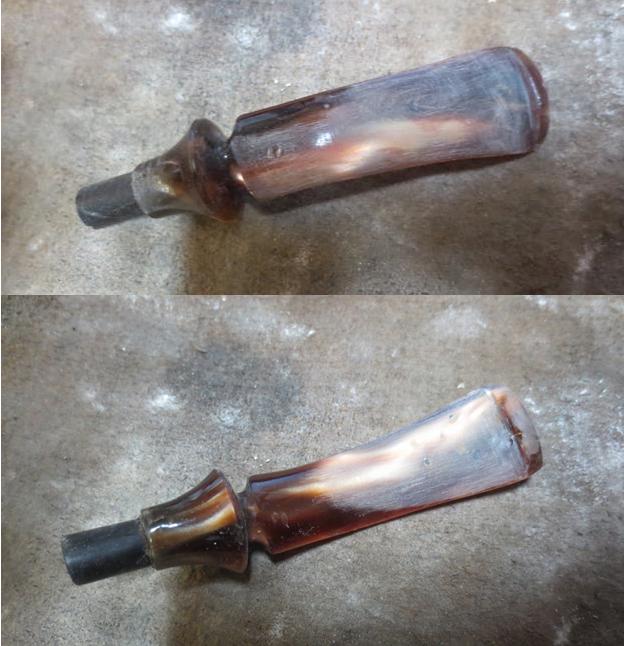
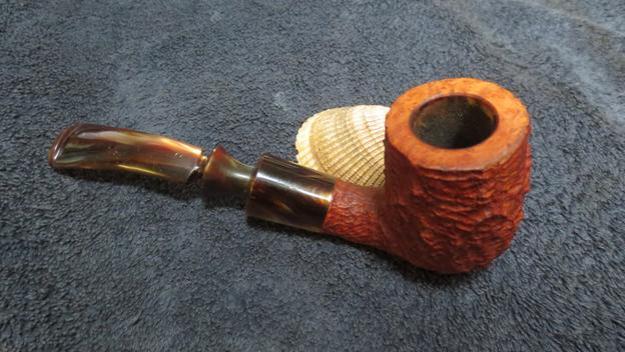
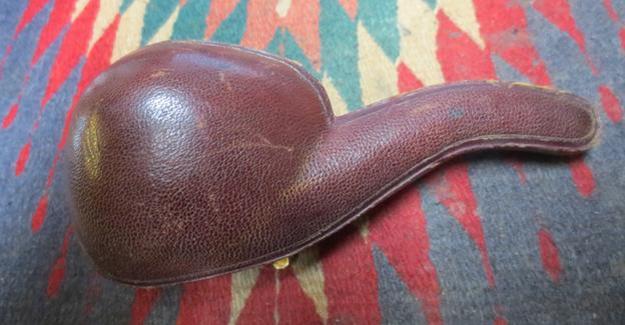
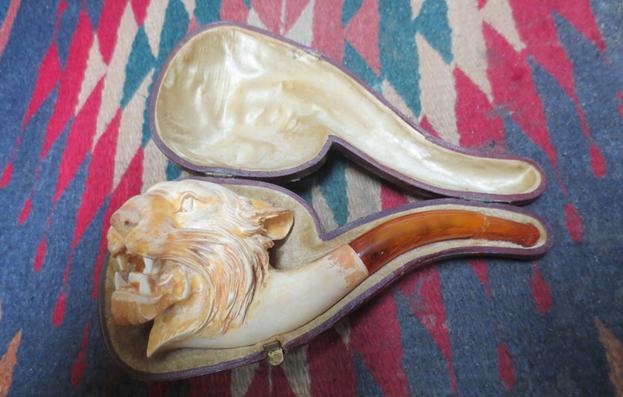
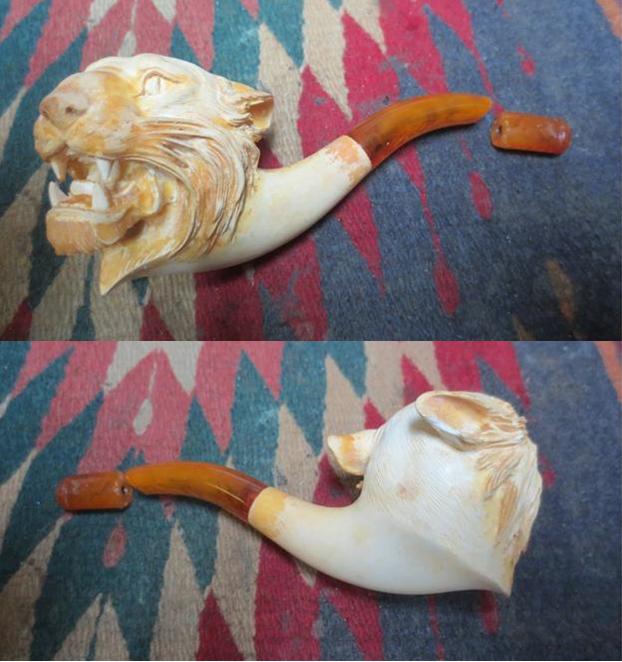
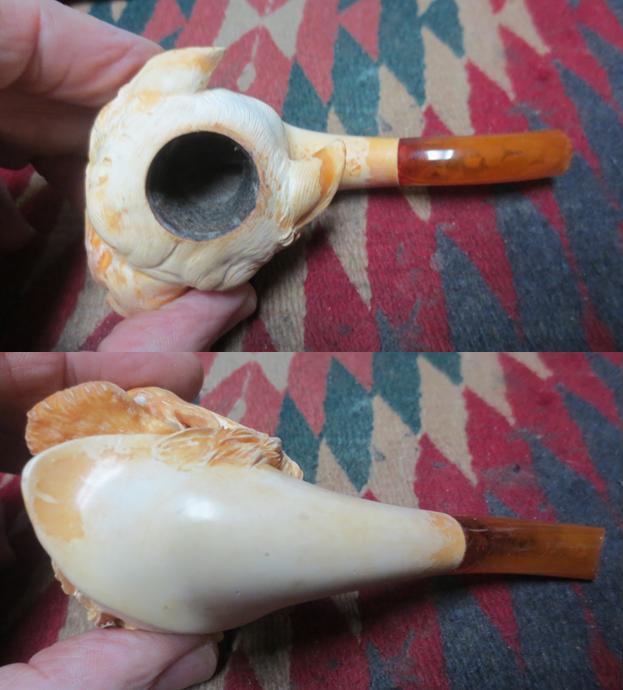
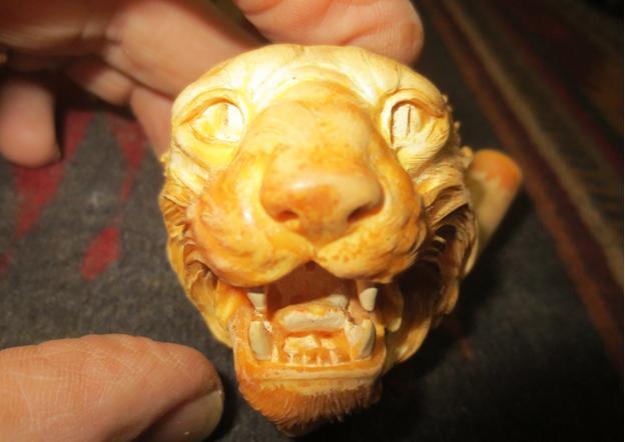
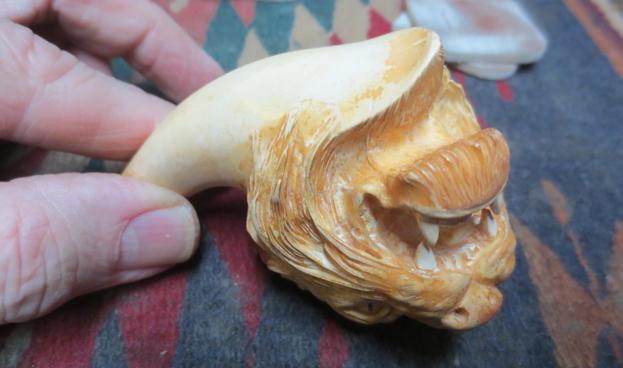
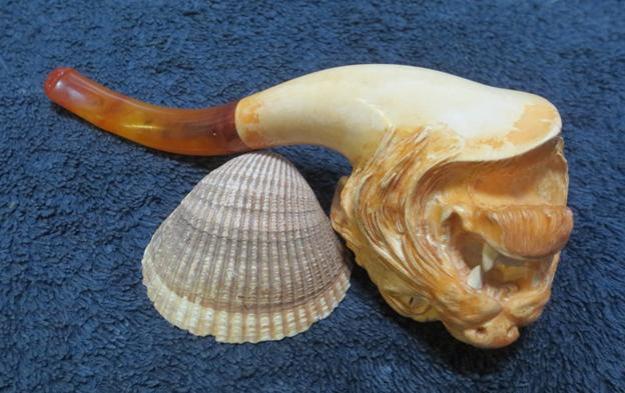
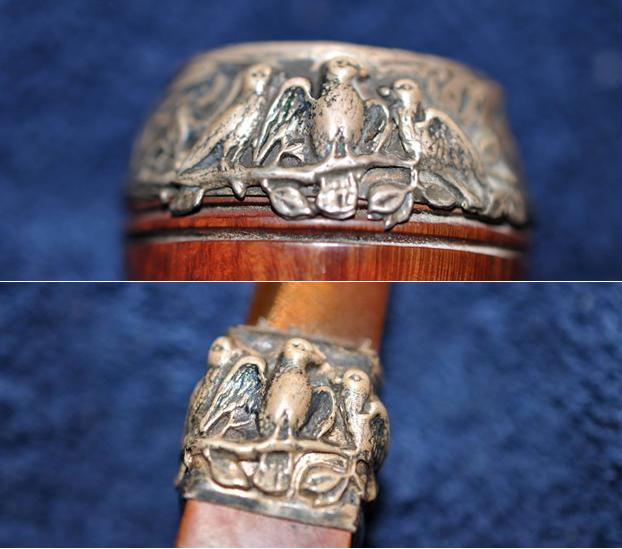
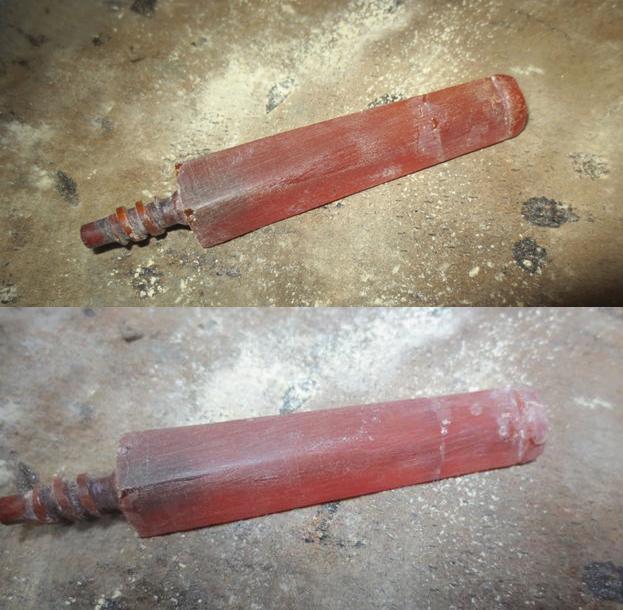
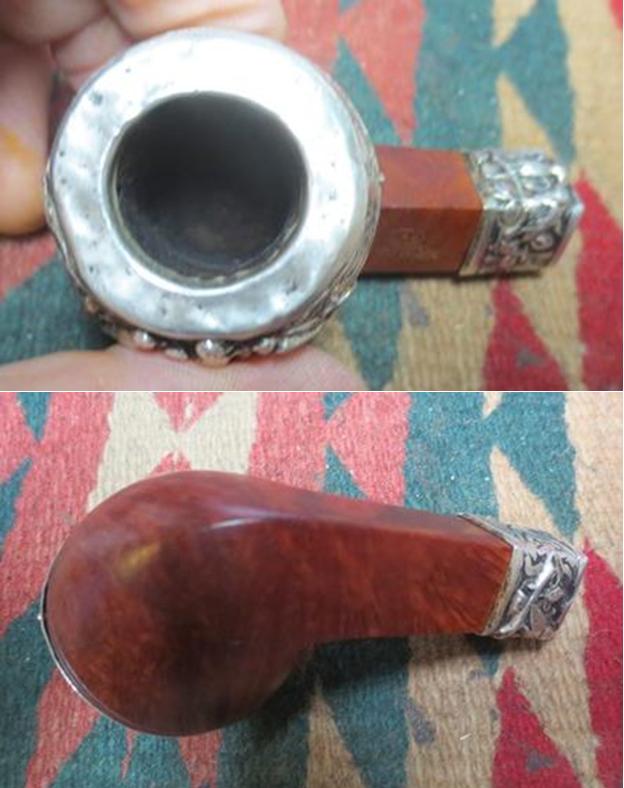
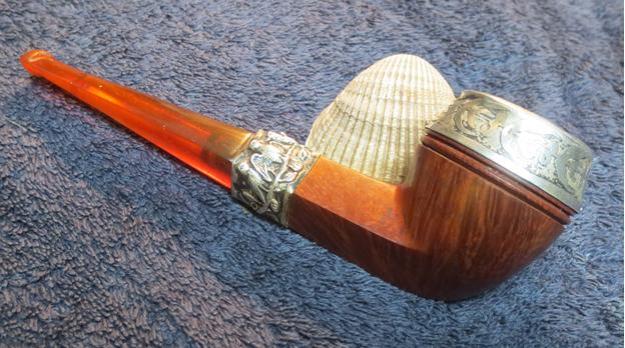
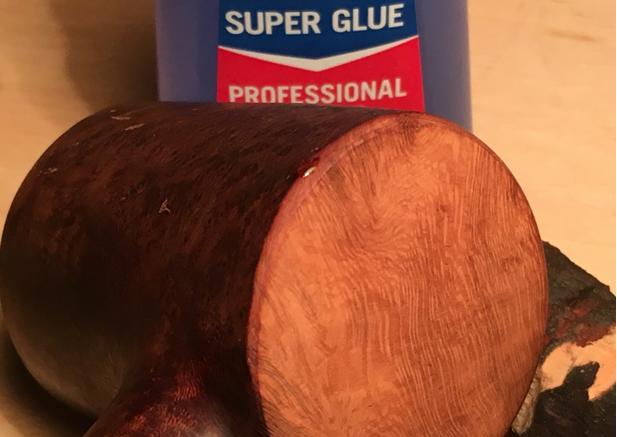
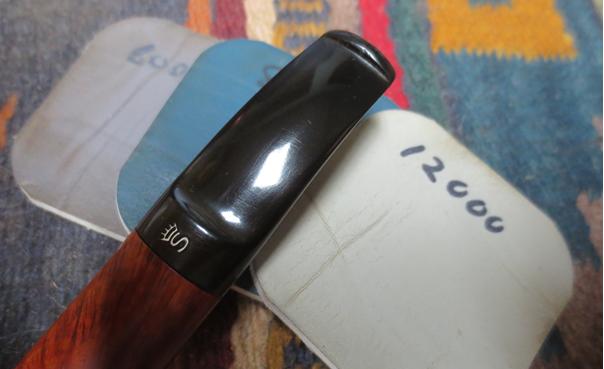
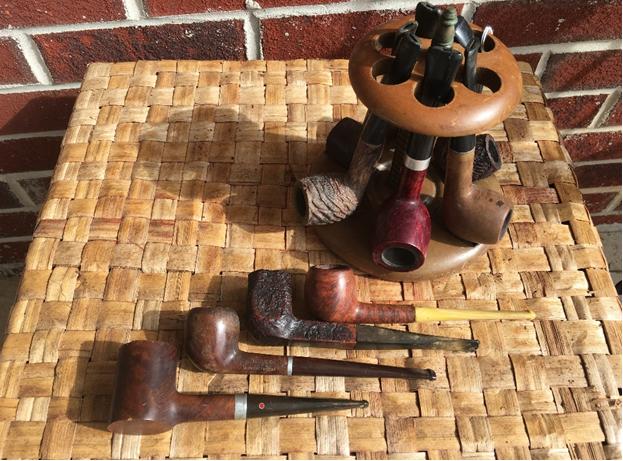 In Palmetto, Georgia, I laid out the haul and recorded the picture above – including the six-pipe pipe stand! The poker on the lower end is before me now on my work table back in Sofia, Bulgaria. The left side of the shank has Aged over Imported Briar in a cursive script. The other remarkable characteristics of this Poker are the red dot on the stem and the screw in tenon with a metal mortise receiver. Always hopeful of identifying a pipe’s heritage I landed on a thread written in 2013 in Pipesmagazine.com (Link) of someone seeking information about a pipe with the exact nomenclature, dot and screw in stem, just a different shape, an Author shape instead of the Poker before me. While pedigree is still inconclusive, one helpful comment in the thread summed up well the possibilities:
The “Aged Imported Briar” stamp suggests this is made in the U.S. The screw-in stem is typical of
Kaywoodie and perhaps Jobey which was made for a few years in the U.S. However the design and
shape of this pipe is not Jobey-like. I don’t know Reiss-Premier, but if it is a U.S. outfit, that could
be it. If I understand correctly, the “imported briar” stamp was typical of U.S. pipes at a certain period
when other woods were being used for pipe bowls and there was some misgiving about some of the
woods used. This was a reassurance that the pipe was good quality and safe.
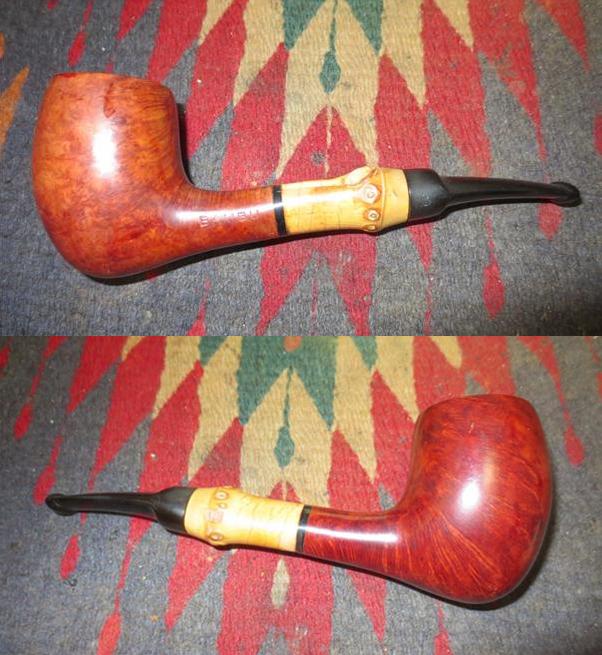
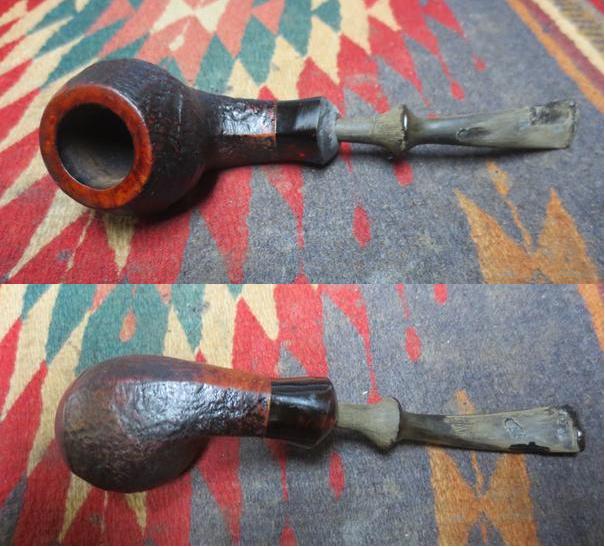
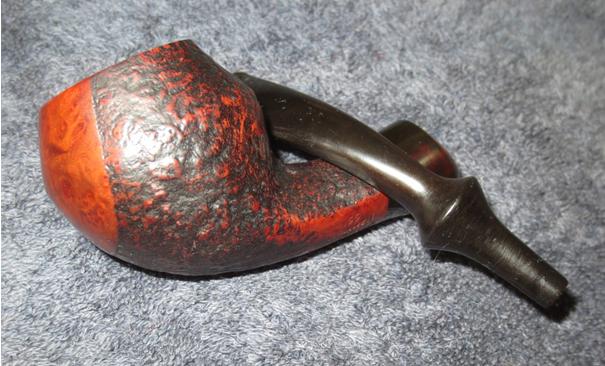
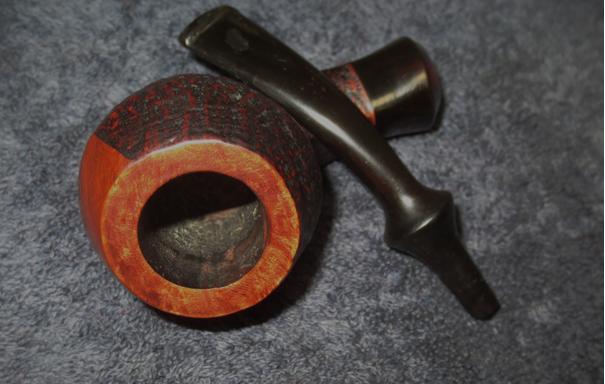
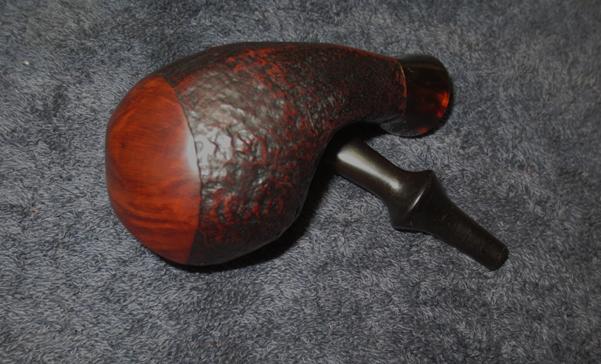
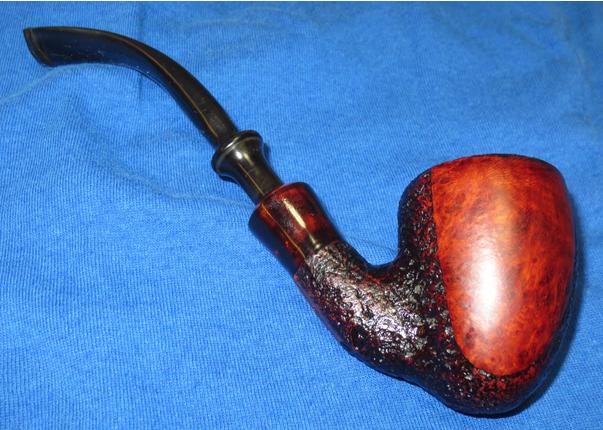
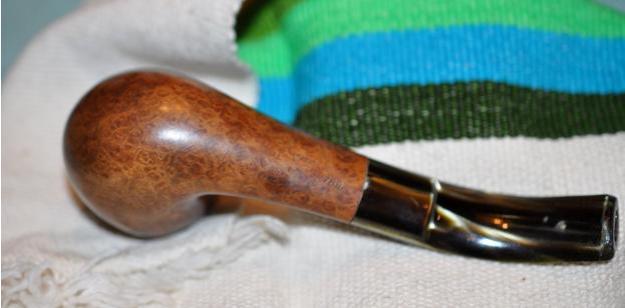
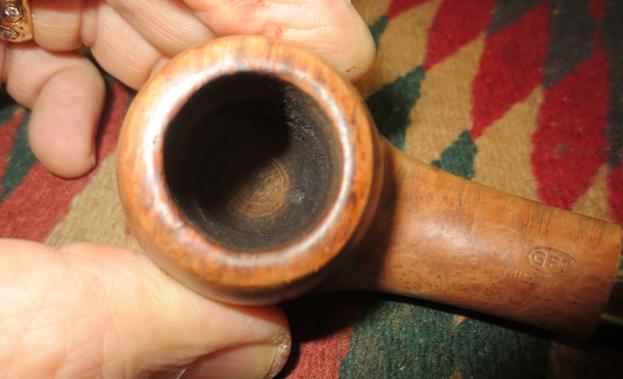
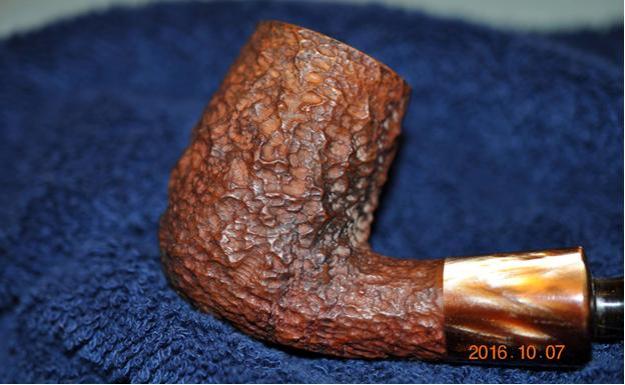
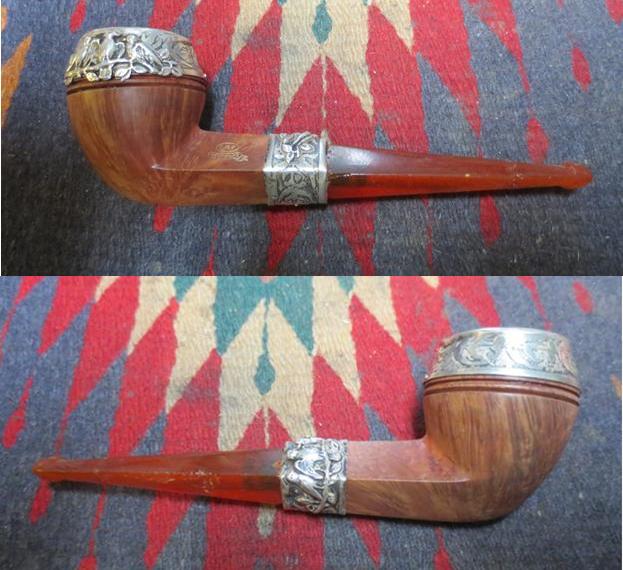
The best guess is the US company, Reiss-Premier, as the source of this Poker because of the dot (See Pipephil.eu) identification. Reiss-Premier had a factory in Chicago from 1930-1959 and was responsible for the term “Drinkless” which was well known with many Kaywoodie pipes (See Pipedia) which Reiss-Premier also produced. If the clue about the authenticity verification of briar stated above is accurate, this Poker possibly dates back to WW II days (40s and 50s) when briar supply from Europe was scarce. Notwithstanding, there is little doubt that this Aged Imported Briar Poker has seen better days and those days are many days ago. On my work table I take some additional pictures to get a better idea of the challenges with this pipe.

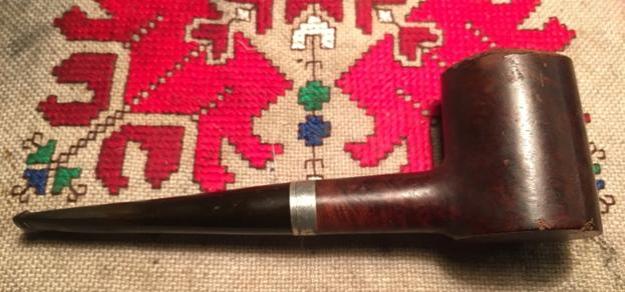
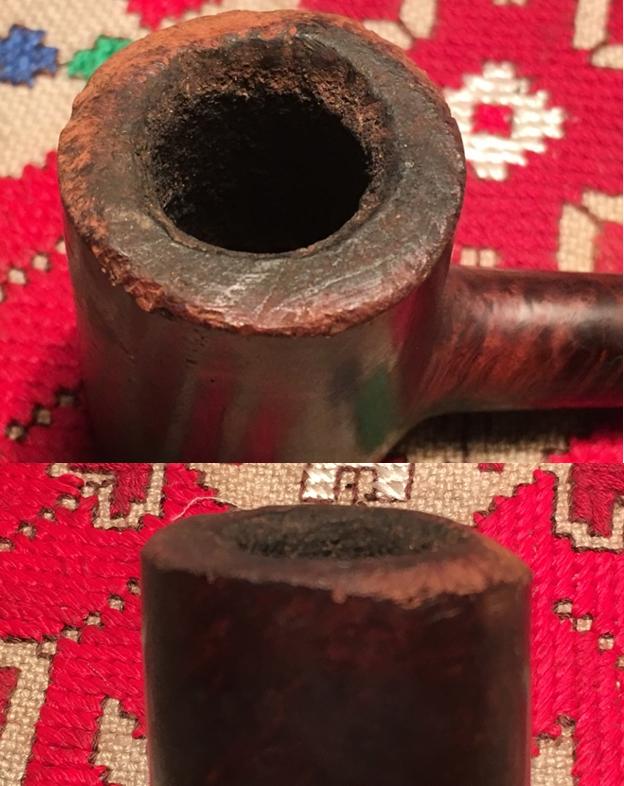
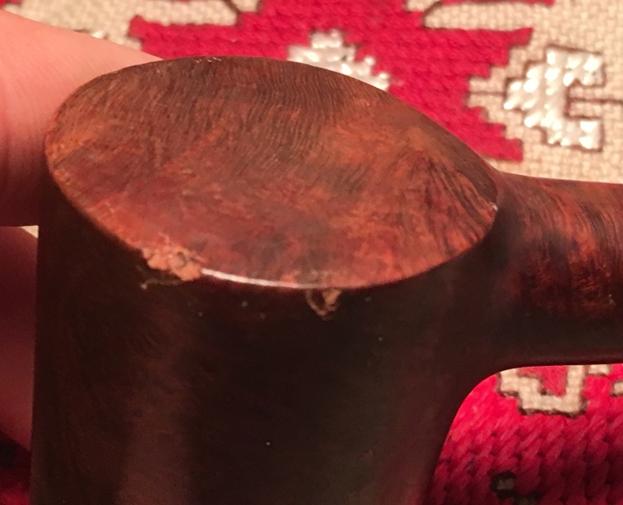
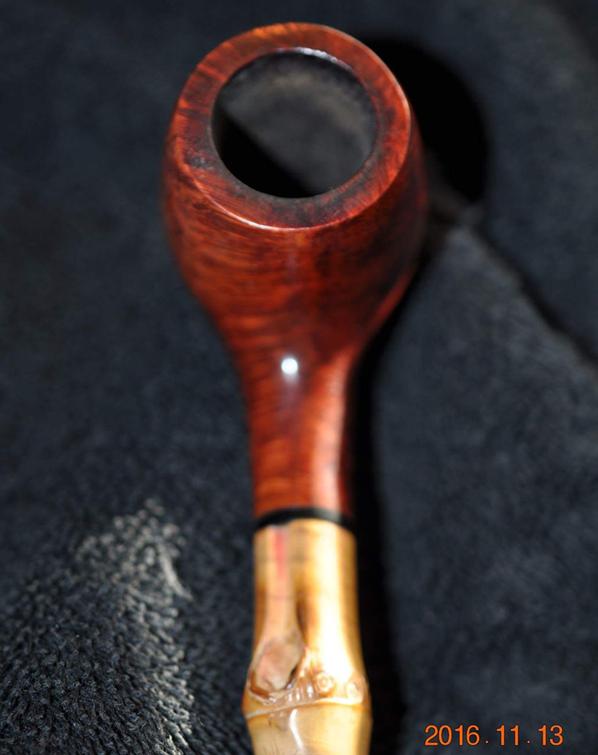
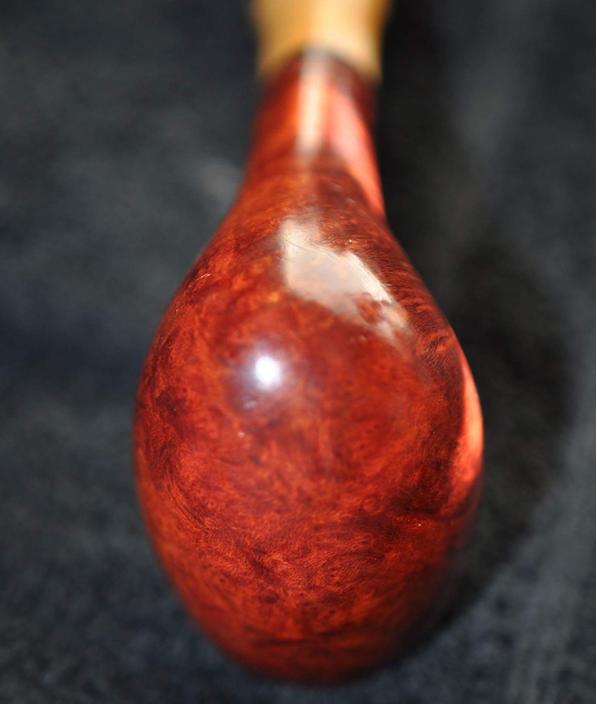
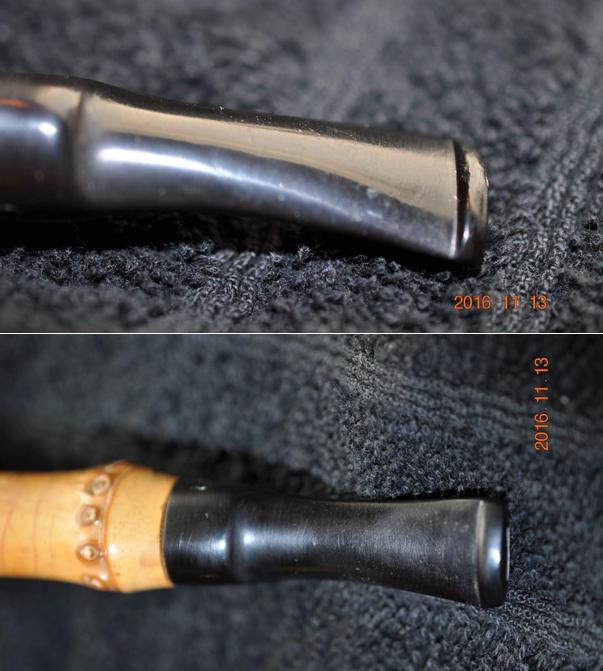
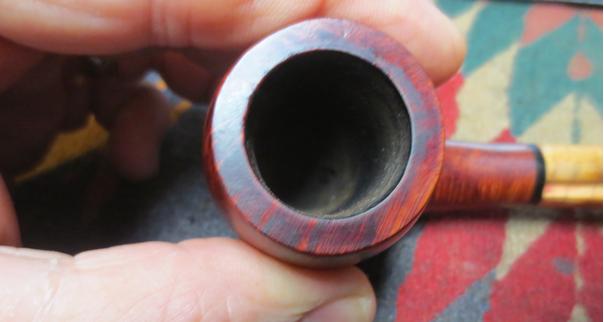
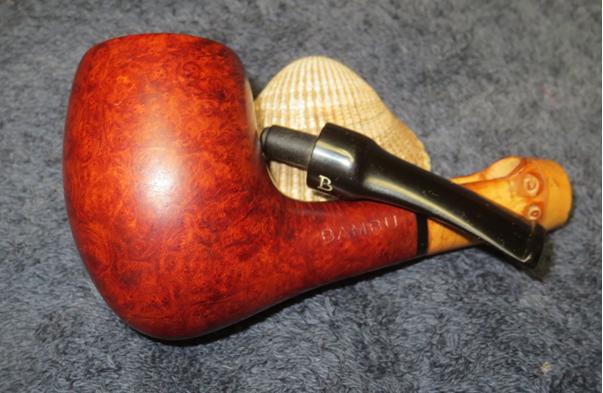
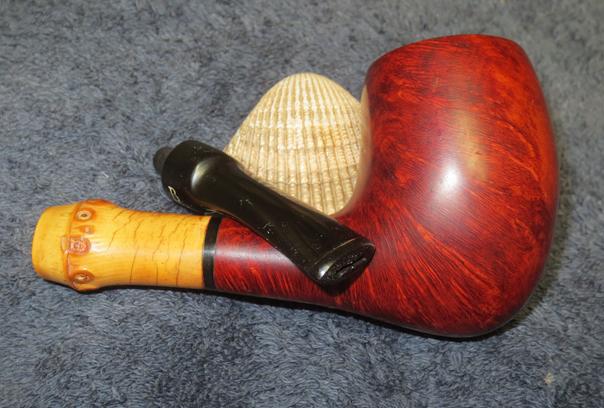
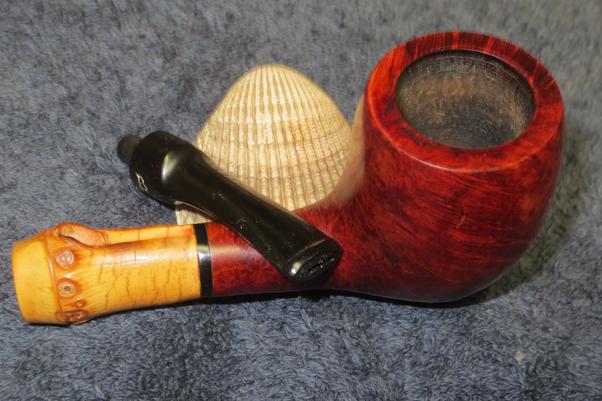
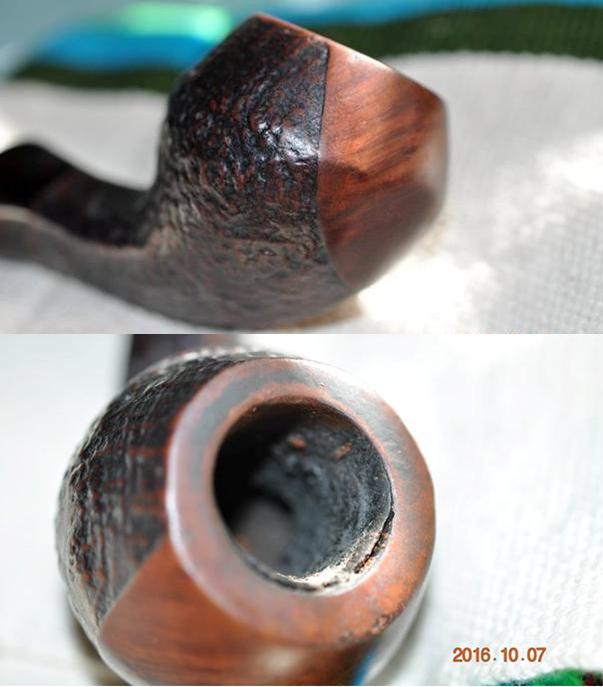
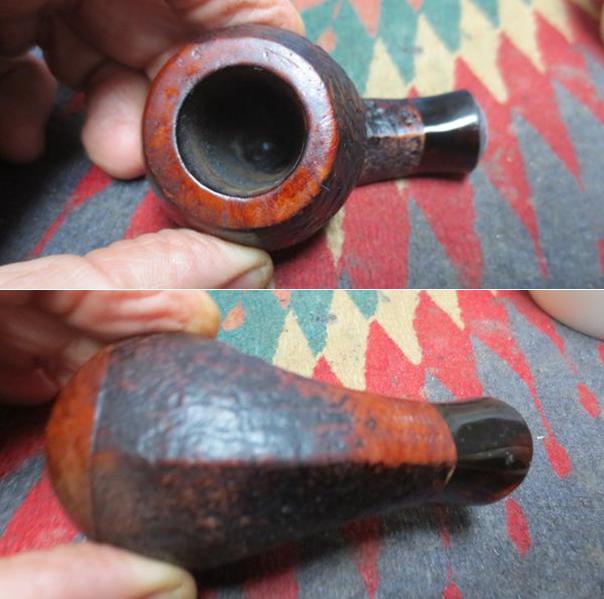
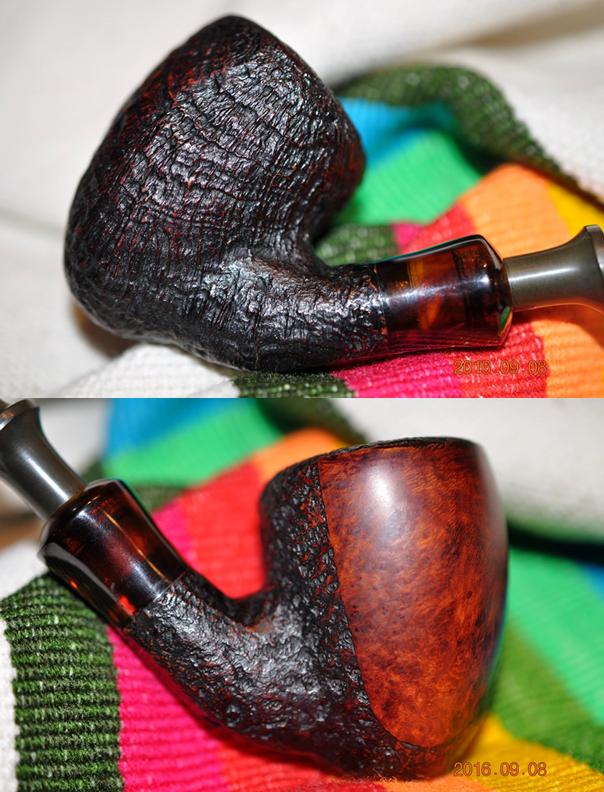
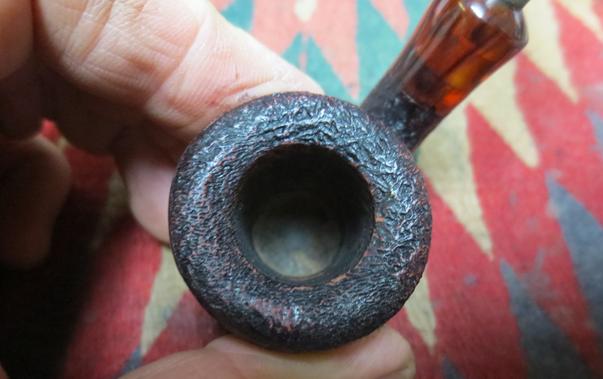
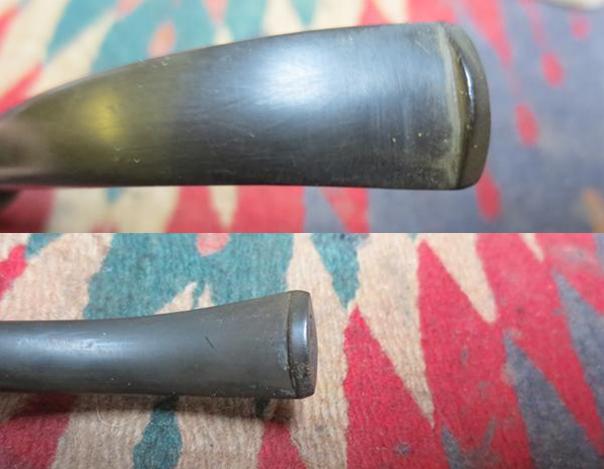
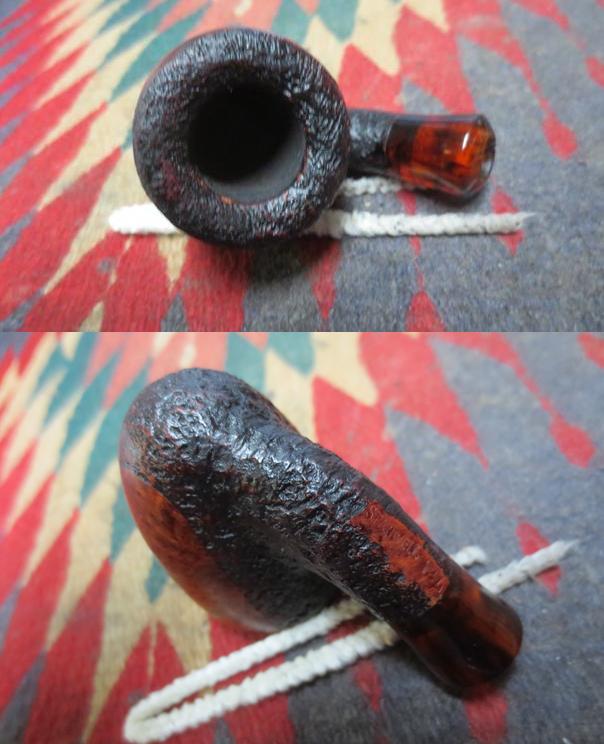
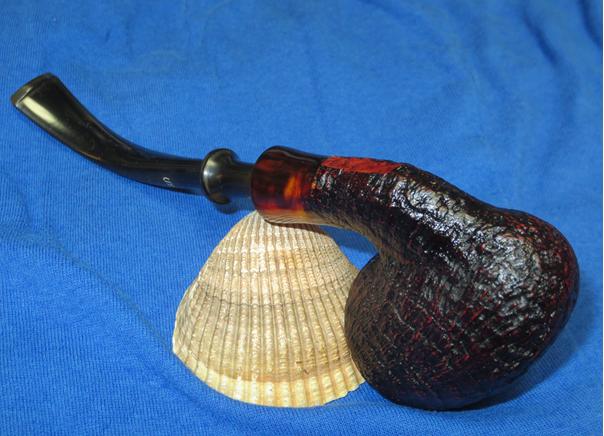
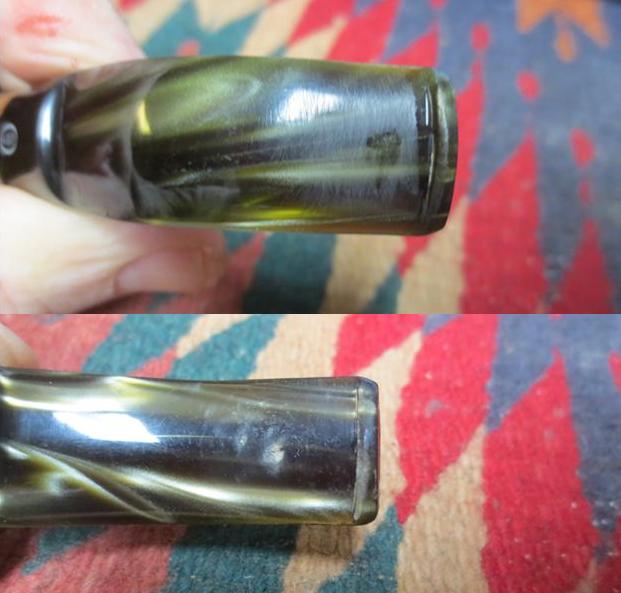
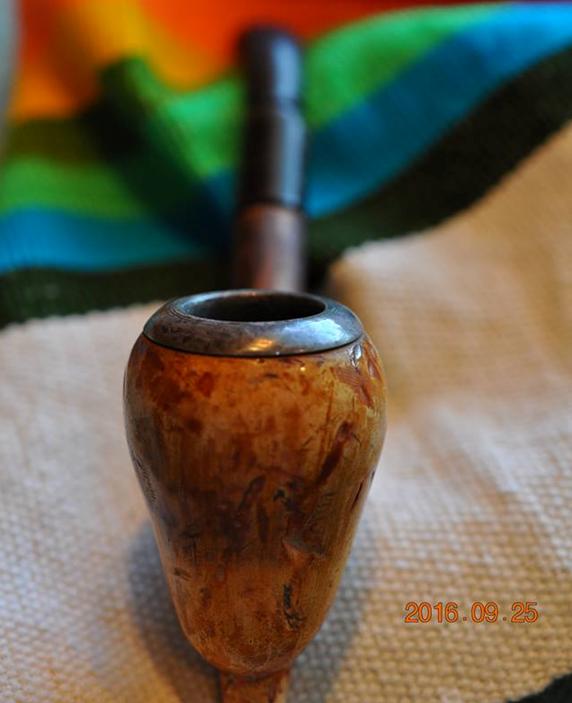
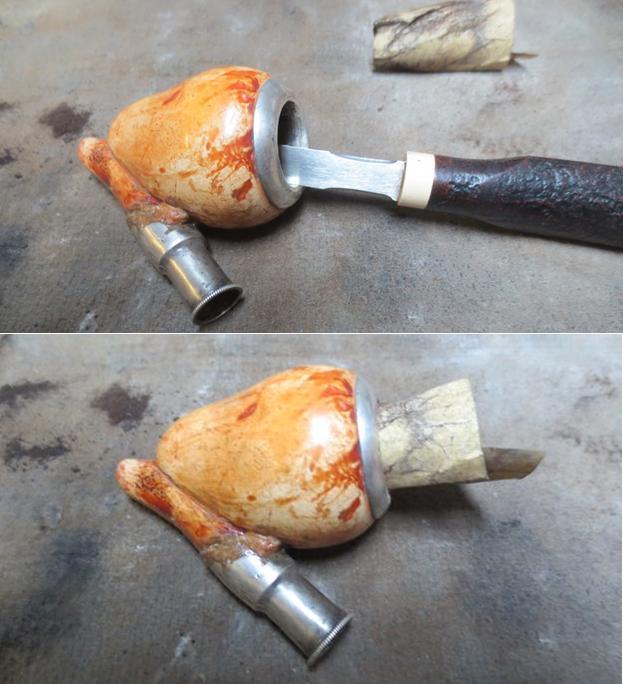
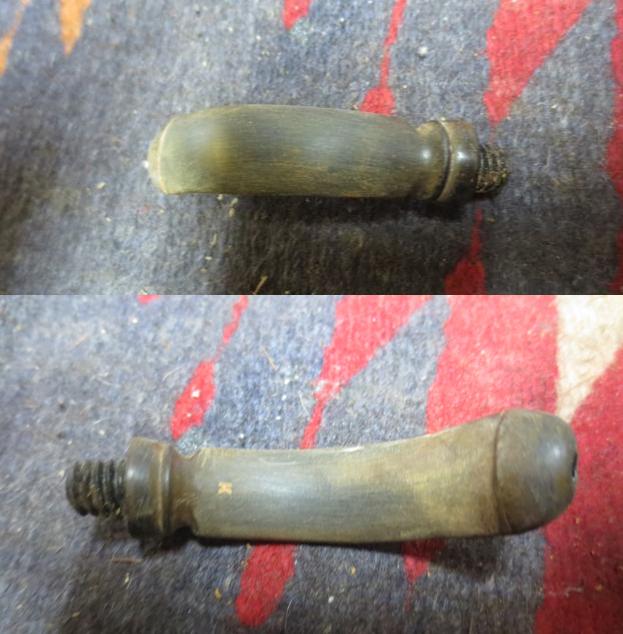
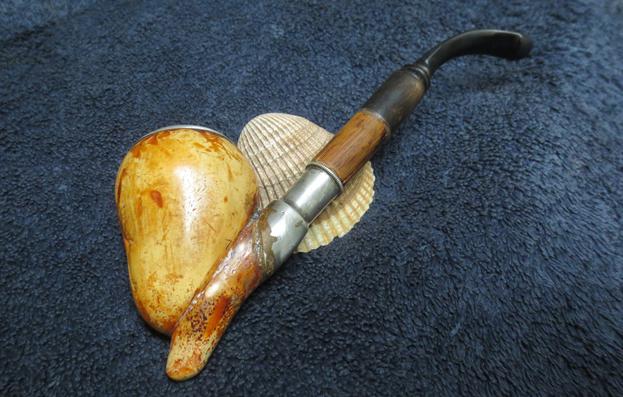
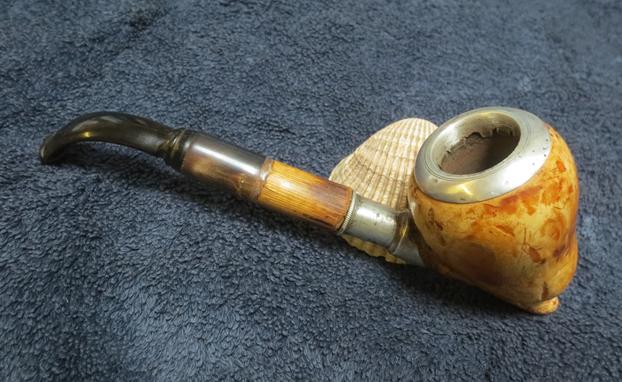
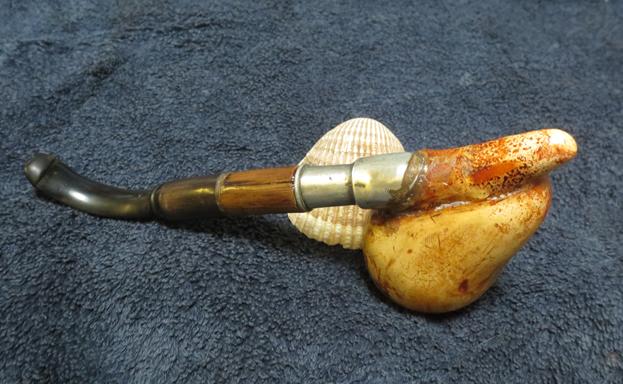
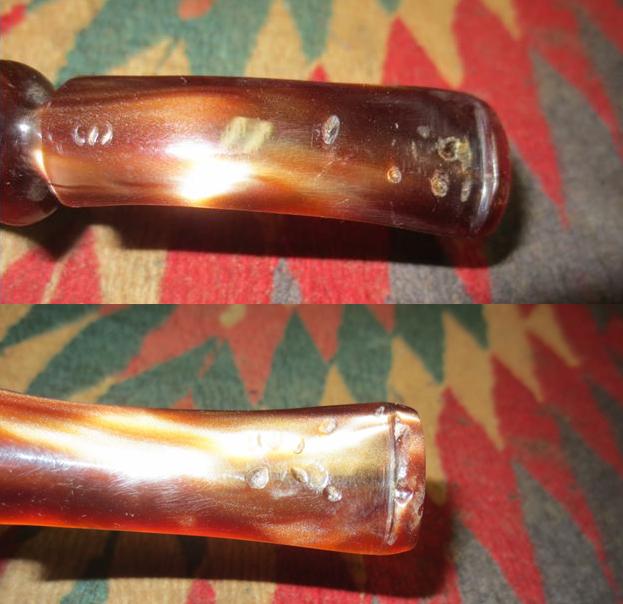
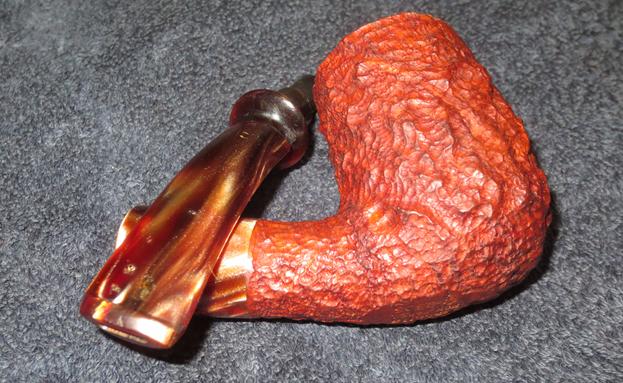
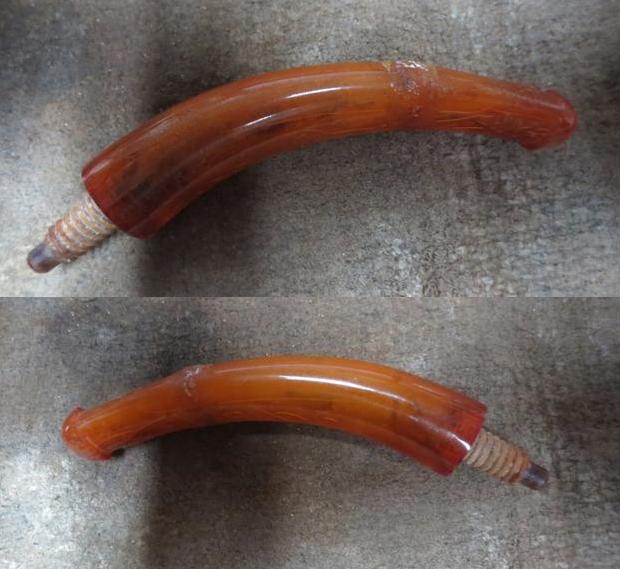
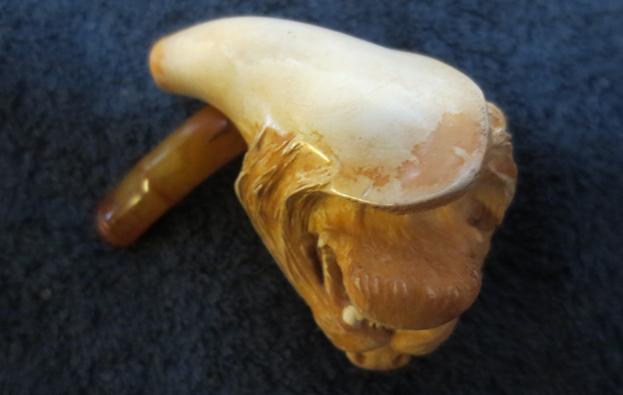
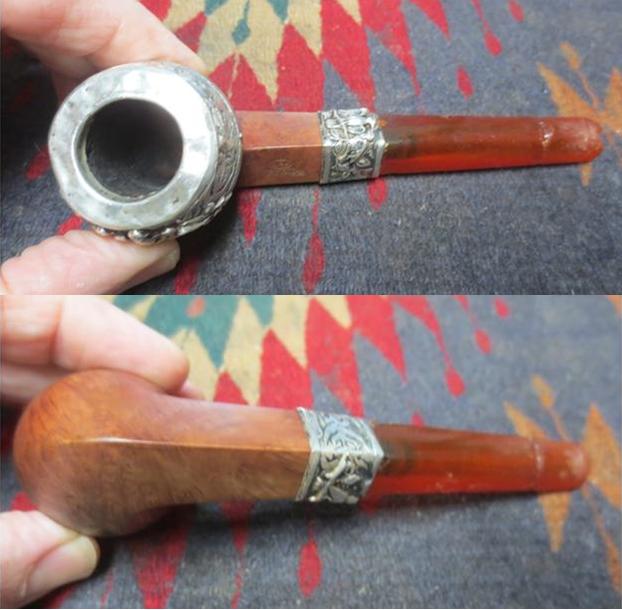
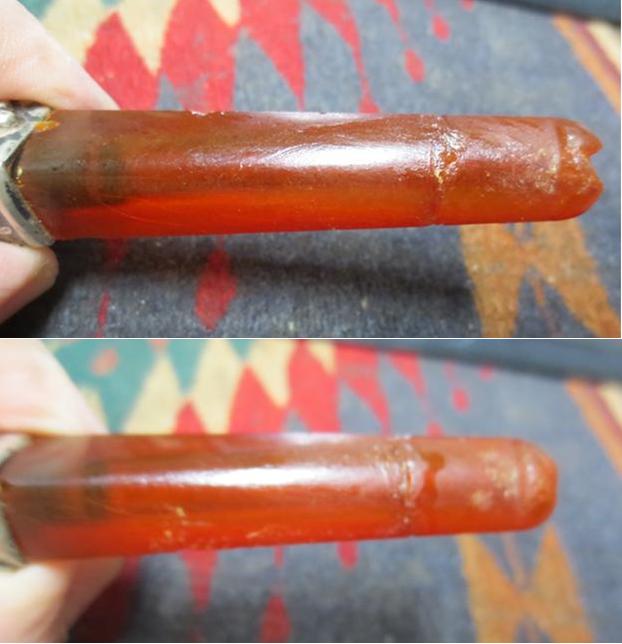
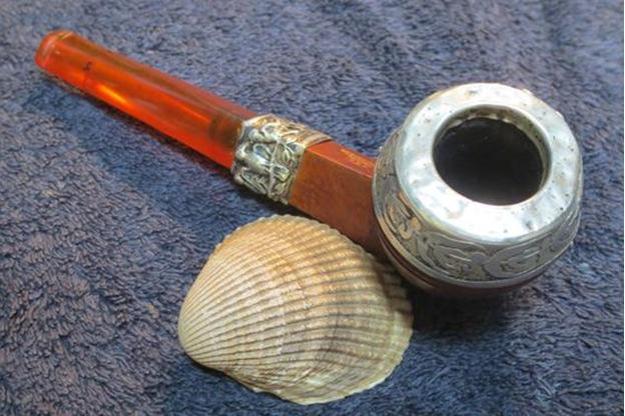
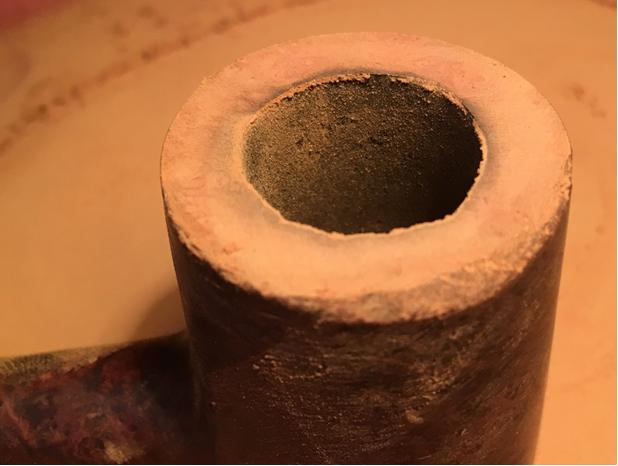
 The poker is an iconic shape – the name comes from the flat bottomed cylindrical shape of the stummel. While men dealt hands of poker they could put their pipes on the table without fear of dumping ash on the winnings. This Poker has heavy cake in the bowl and the rim is in rough shape – I’ll need to remove some valuable briar real estate to reestablish a flat top look, hopefully the Poker won’t turn into a Poker Pot shape in the process! The stummel heel has some dents and scratches from doing what it was intended to do – sit. The briar is all but concealed by the old clouded finish – but there is nice looking briar underneath! I detect a small root branch knot in the grain pattern that will add to the ‘old school’ quaintness of the Poker. There are signs of wear on the stummel, but I’ll not remove them all – signs of the paths and stewards this Poker has served along the way! The stem has oxidation and the upper button lip looks like a 9 iron took a divot out of it. The button will need rebuilding.
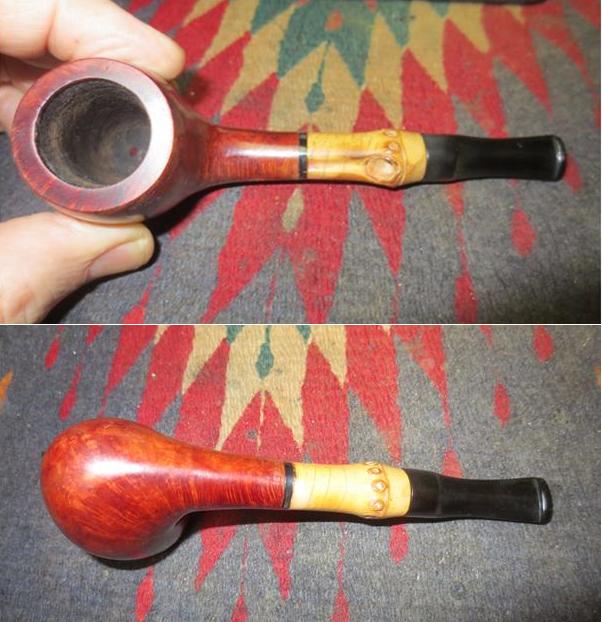
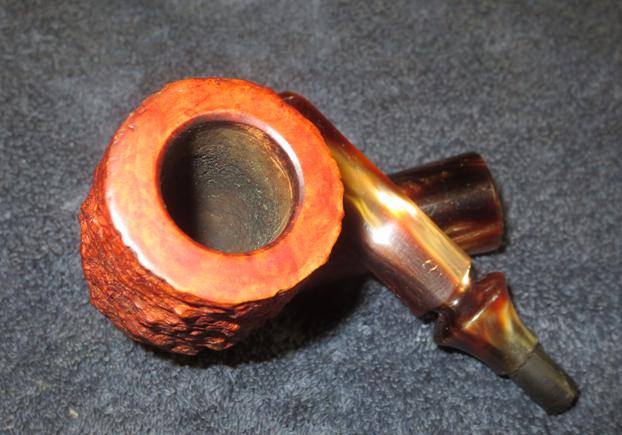
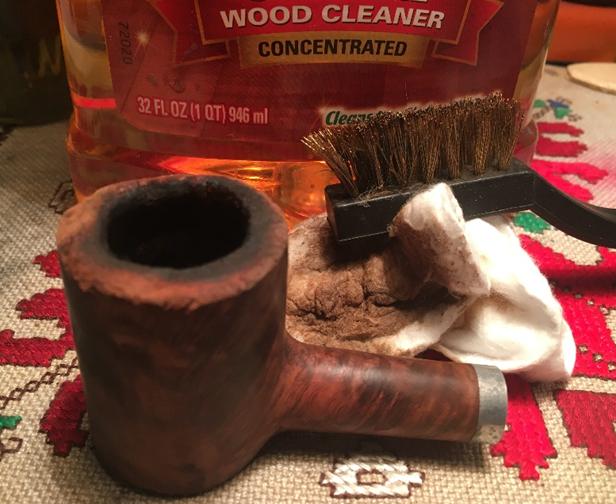
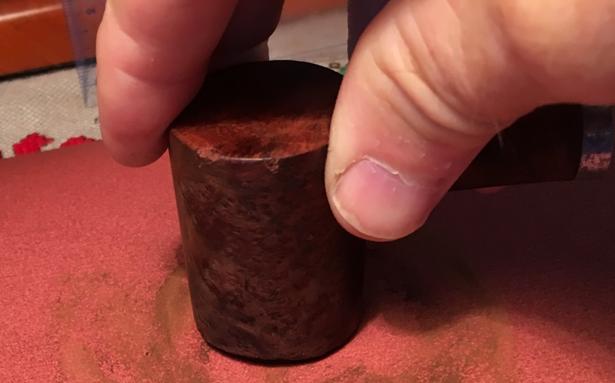
The first order of business is to clean the stummel starting with reaming the bowl and washing down the exterior with Murphy Soap to get a better perspective on the stummel condition. I also plop the stem into an Oxi-Clean bath to start working on the oxidation. I’m not sure what effects the bath will have on the red dot so I cover it with Vaseline before the plunge. I take the Pipnet reaming kit and use 2 smaller of the 4 blades available. I follow the reaming blades with the Savinelli pipe knife to fine-tune the ream and finish with wrapping 240 grit paper around a dowel rod and sand the chamber. Using cotton pads and Murphy Oil Soap I scrub the exterior of the stummel and use a brass wire brush to work on the rim which loosens nicely the lava flow without scratching the wood. The pictures show the progress. 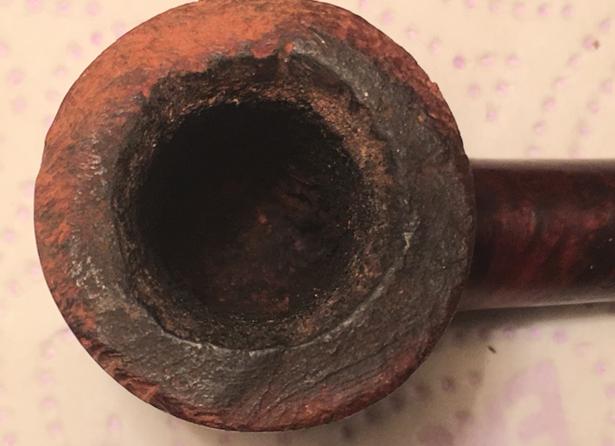
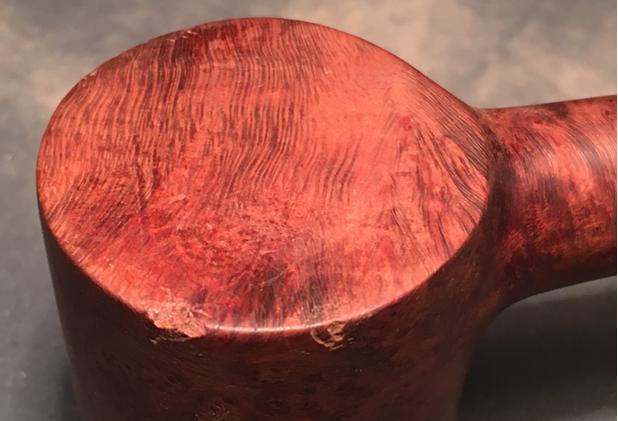
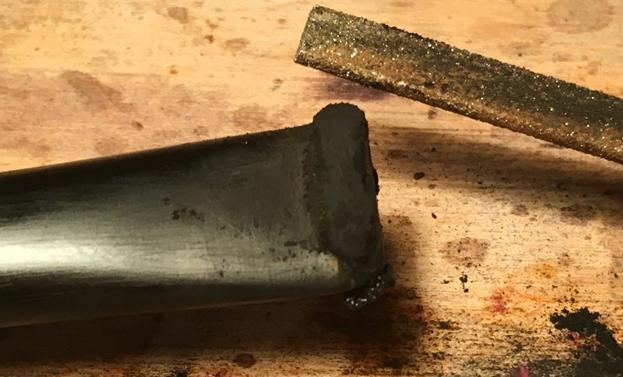
 I take another close-up of the rim damage from a lateral perspective to illustrate how much briar I will need to take off through topping to achieve a level lid to this Poker. A bunch! I take a chopping board covering it with 240 grit paper and carefully rotate the inverted stummel not leaning into the sloping angle of the damaged area. I don’t want a slanted top! I check the progress often and ‘free-stand’ the inverted stummel with the help of a right angle I try to keep things perpendicular. The pictures show the progression of the topping.
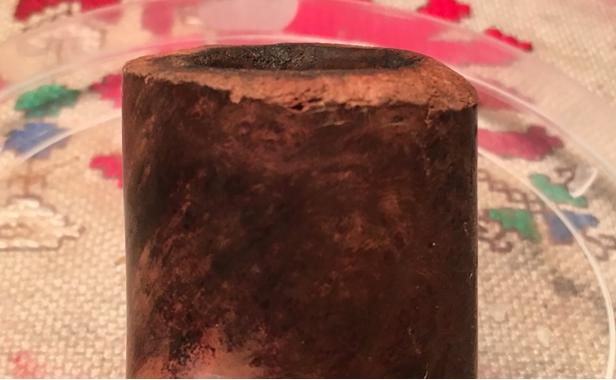
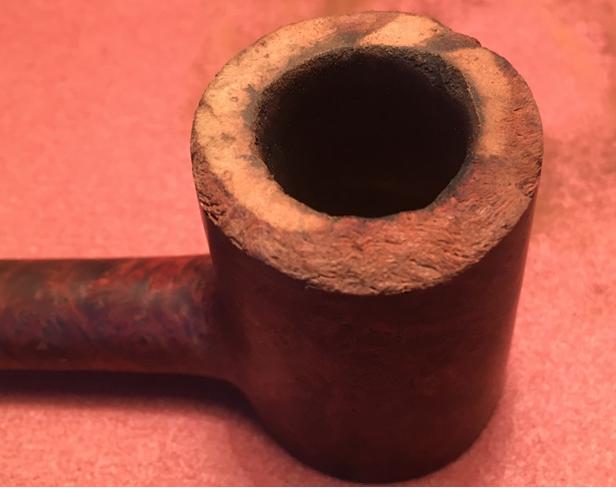
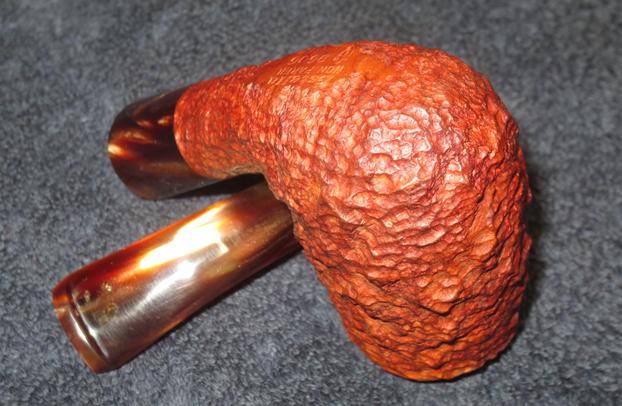
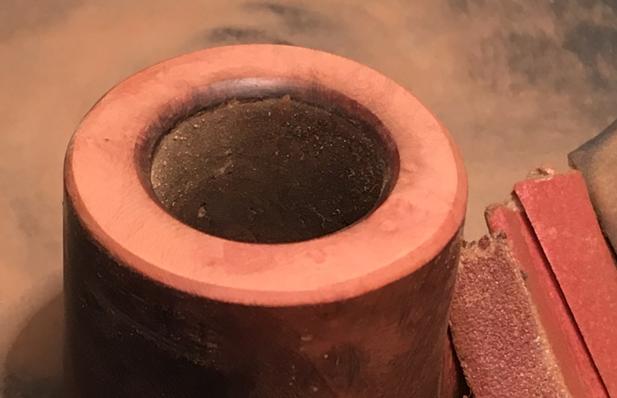
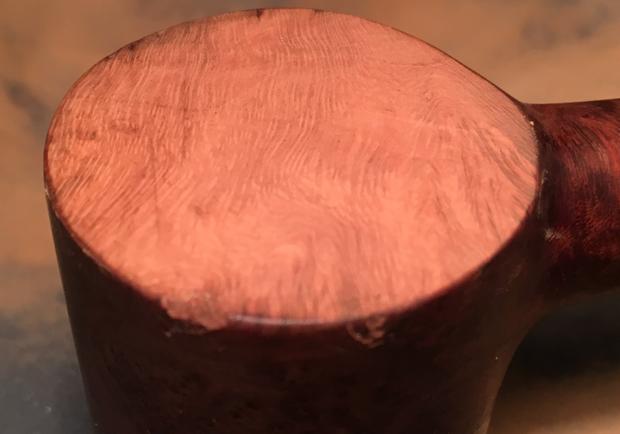
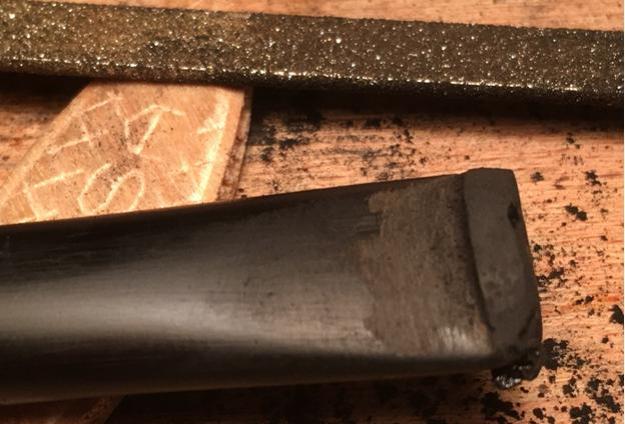
 When I arrive at a point where almost all damage is eradicated, I stop the topping with 240 grit paper and with 120 grit paper rolled up I shape a bevel on the inside and outside of the rim removing the remainder of rim damage. After the 120 grit cuts the initial bevel I follow with 240 and 600 grit paper on the inside and outside of the rim. Finally, I lightly top the stummel again but now with 600 grit paper over the chopping block. I do this not only to smooth the rim surface, but it also serves to sharpen the circular bevel line around the circumference of the rim – inner and outer. It gives the rim a very classy, finished look to me. The pictures show the progress.
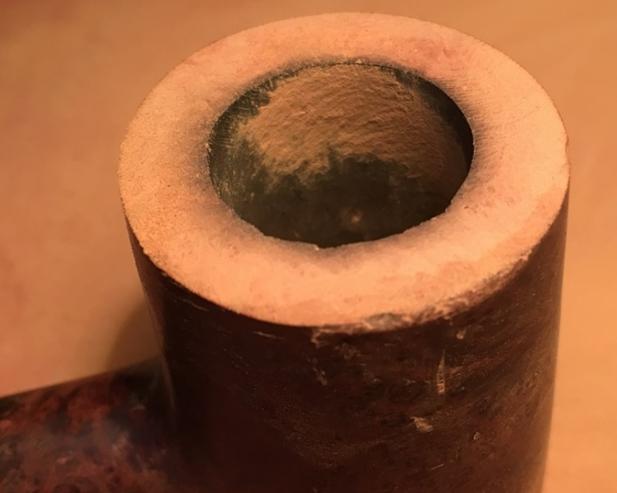
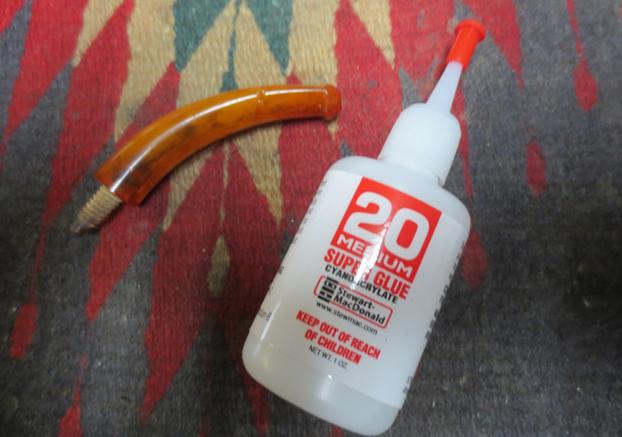
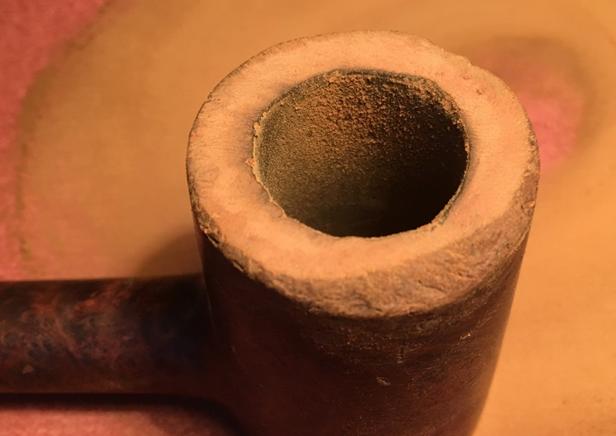
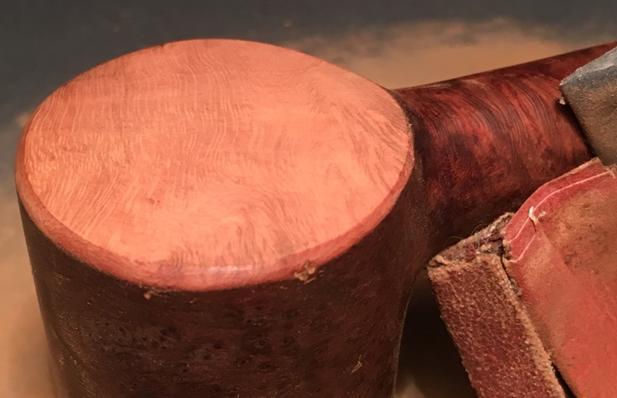
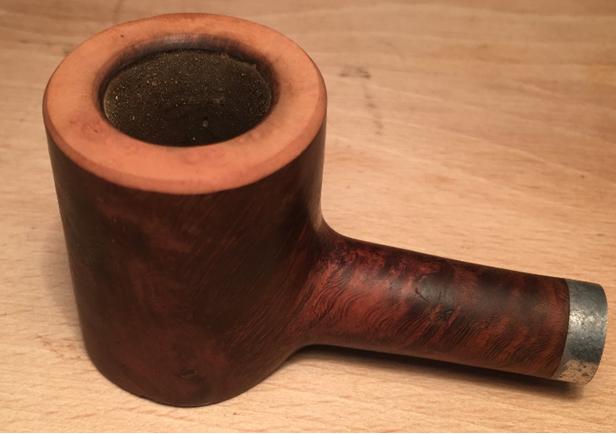 Since the heel of the stummel has scratches and edge damage as well, I repeat the process described above for the heel as well except for using only 600 grit paper to ‘top’ the bottom – not 240. I only needed to clean and smooth the surface layer not remove real estate. The bottom bevel utilized 120 then 240 then finally 600 grit sanding papers. In the last picture of the set below, there remains a small damage spot that I fill with a superglue patch which I will smooth and blend later. This Poker will be ready for any high-class card table! The pictures tell the story!
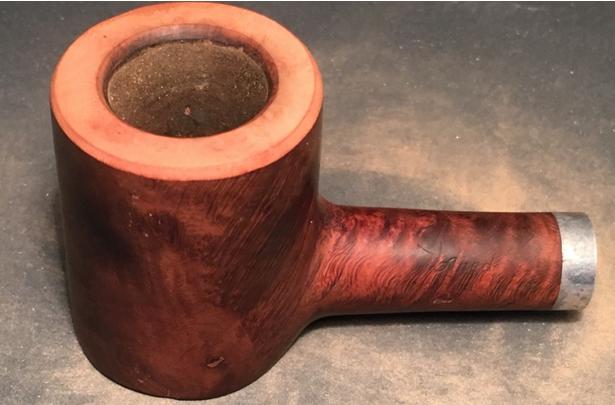
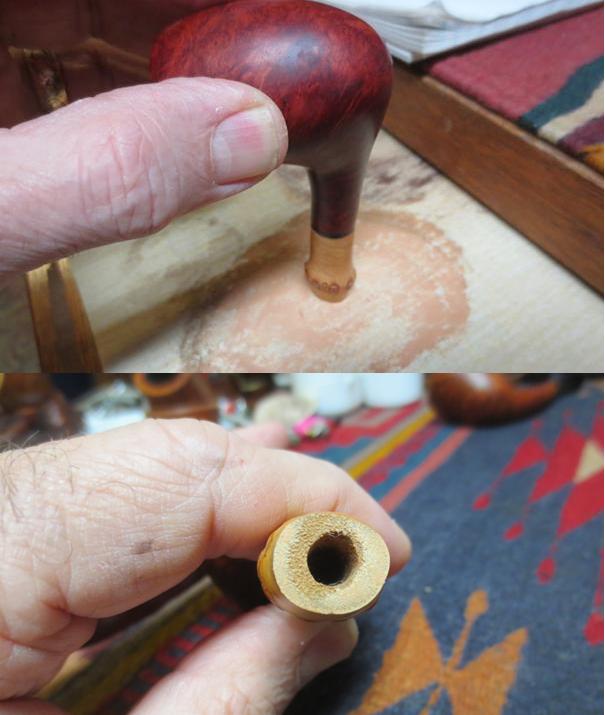
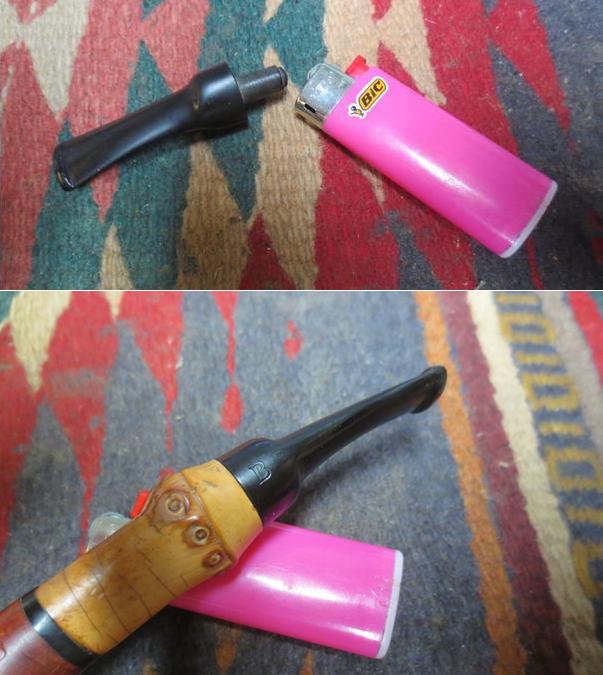
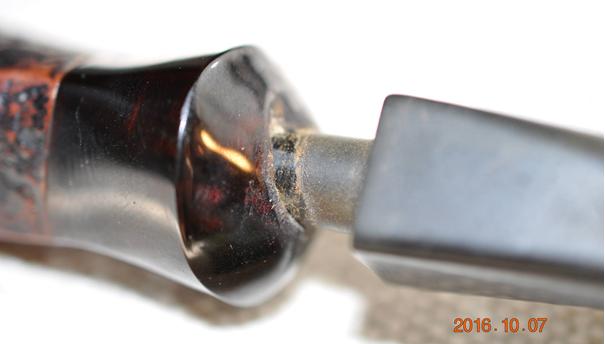
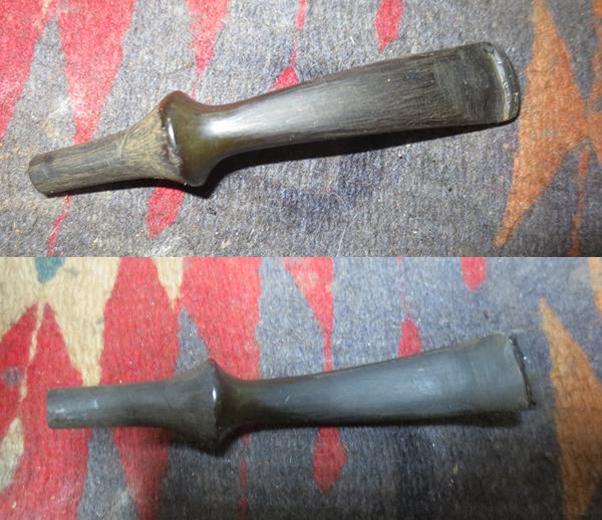
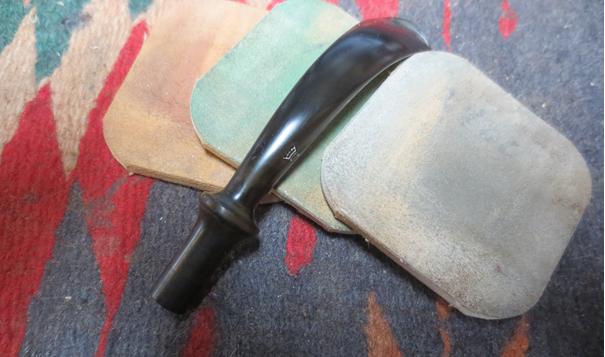
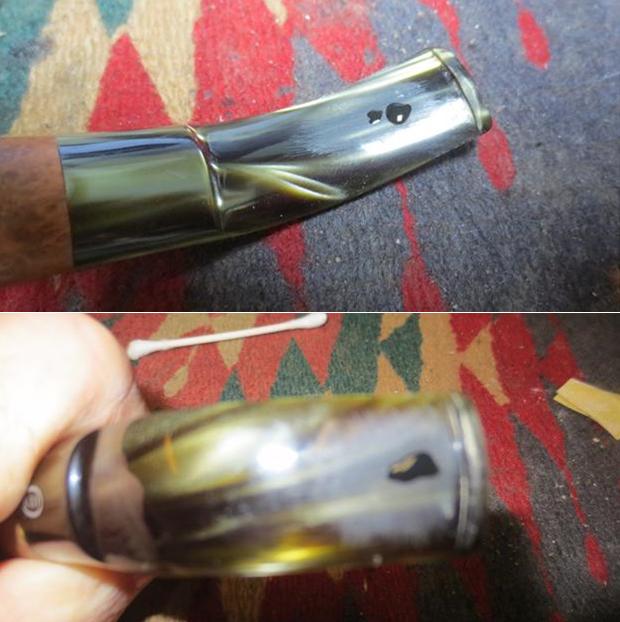
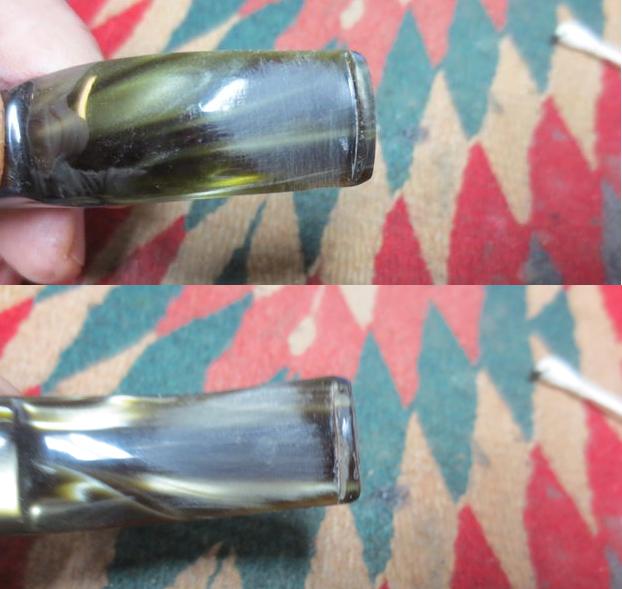
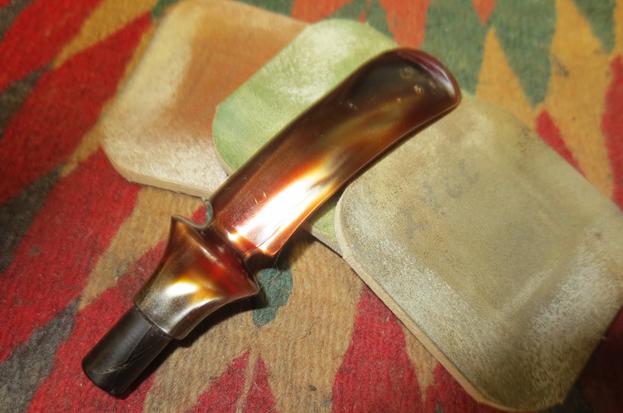
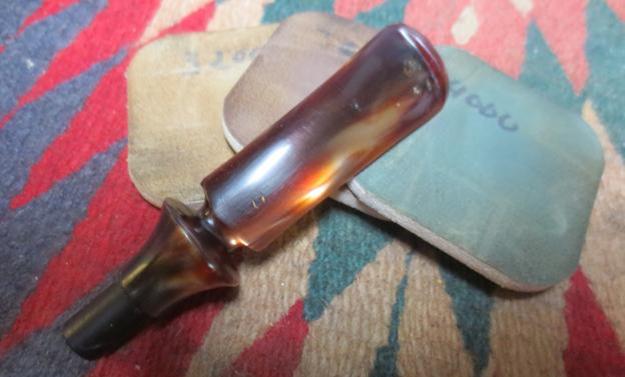
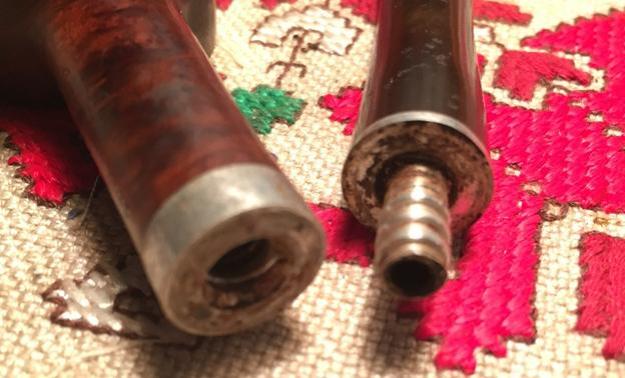
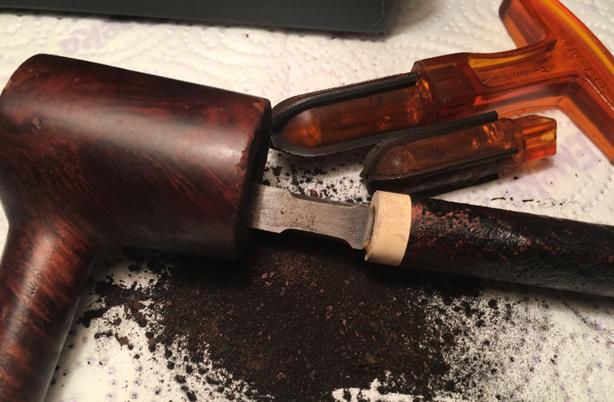
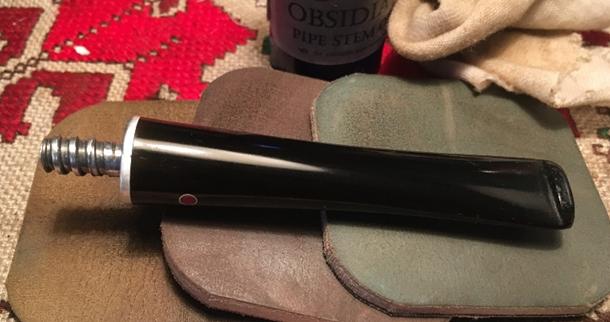
 With rim and heel repairs completed, I fish the stem out of the Oxi-Clean bath and it did the job of raising the oxidation out of the vulcanite. I’ve started inserting a pipe cleaner into the stem before dropping it in the bath making it much easier to fish it out (picture 1 below). I wet sand the stem with 600 grit sanding paper to take off the mother-load layer of oxidation raised on the stem, then I follow with 0000 steel wool. After inspecting the stem, I see more oxidation around the button and shank areas – I use 240 grit paper on those more stubborn areas, then again 600, then 0000 steel wool. In anticipation of doing the button rebuild, I want a clean stem so using pipe cleaners (bristled and non) dipped in isopropyl 95% I clean the stem internals. It did not take much effort and now to the button repair. The pictures show the progress.
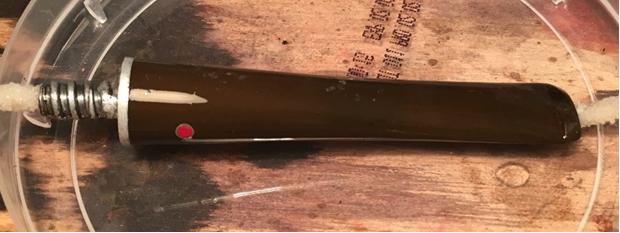

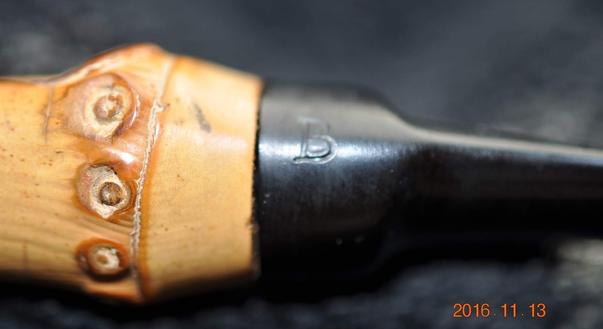
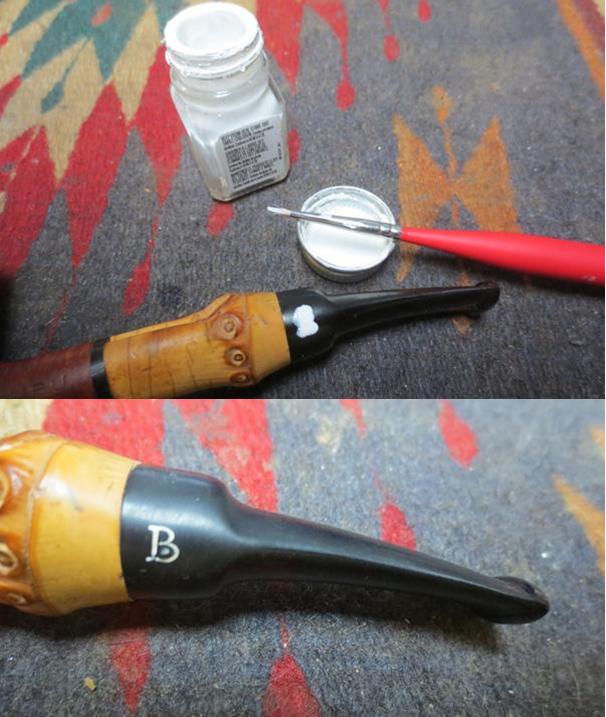
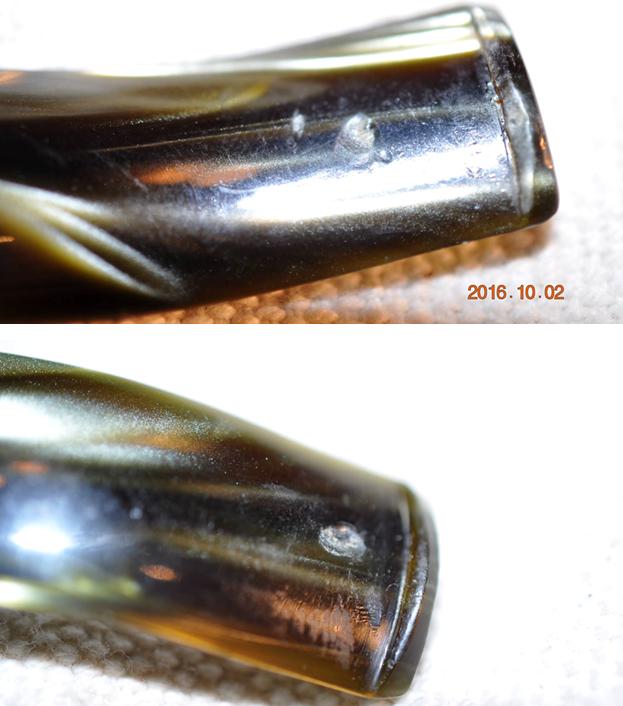
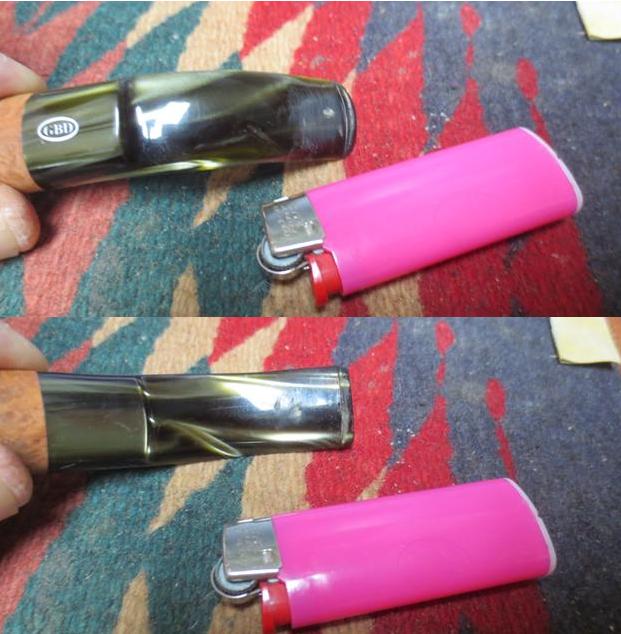
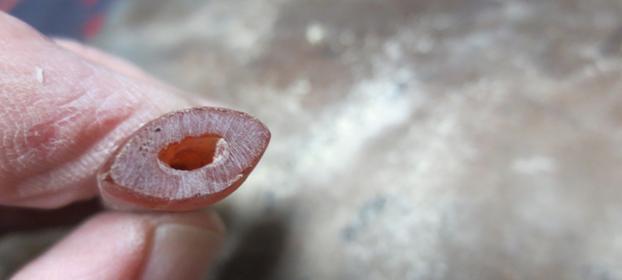
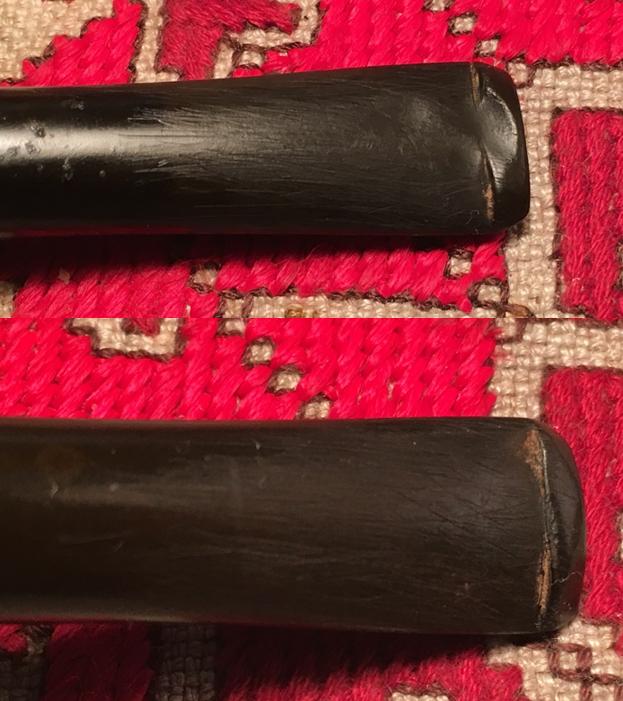
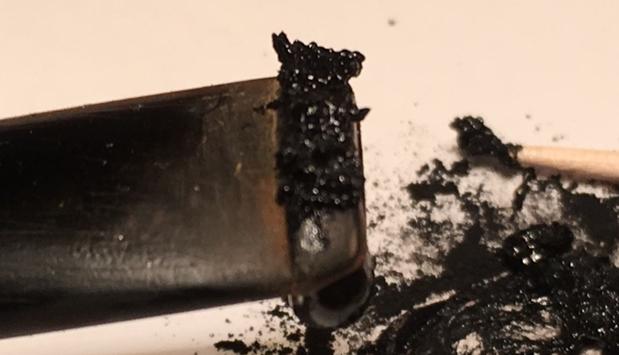
 I take a close-up of the upper button area to get another look. It is apparent that the former steward of this Poker had a favorite hold to keep his (or her J) pipe in place while the cards were dealt and considered. The dent on the button resembles compression damage more than biting or scissor action. You can see just to the left of the button (up the stem) a bite mark. My forensic opinion is that the bite is the eye tooth and the compression represents the work of the molar behind – the pipe being clamped on the side to keep the hands free for gathering new cards and tossing those less desirable aside. I would guess the steward of this Poker was right handed, too – the compression being on the right side leaving most the stem toward the center of the mouth for puffing. Nope, can’t tell how tall he was! Yes, I do believe now it was a ‘he’ because a ‘she’ probably wouldn’t mouth-clamp the pipe but put in down on the table and then deal another round J. Fun and forensics aside, I need to rebuild the upper button area. First, I attempt to raise the ‘eye tooth’ bite with heat – I ‘paint’ the area with a candle flame. It seems to have done the trick. Then, taking 240 grit paper I rough up the button area and then clean the button area with a Q-tip dipped in alcohol. I mix a batch of charcoal powder and ‘Extra Time Control’ super glue into a toothpaste thick consistency. I put a mound of charcoal on an index card (so it can be tossed when done) and place a small puddle of super glue next to it and begin to mix – adding more charcoal a bit at a time until I reach the consistency needed to stay in place on the button. I use a toothpick as a trowel and gradually build and mound over the button that later will be sanded and shaped with a needle file.
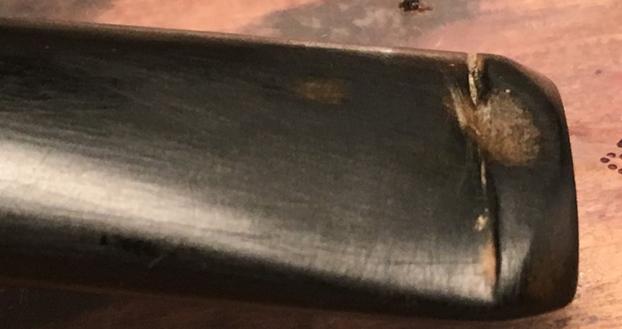


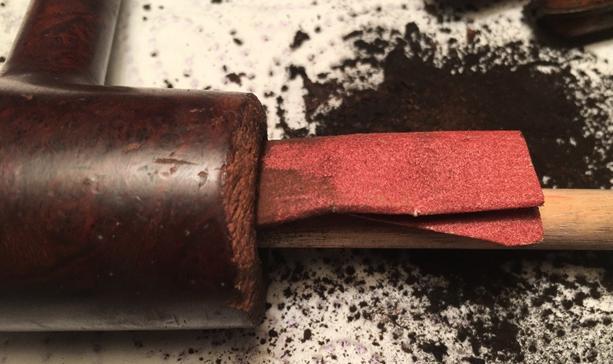
 Setting the stem aside to allow the charcoal super glue putty to cure overnight, I turn back to the stummel. I take medium and light weight sanding sponges and sand the surface, careful to avoid the Aged Imported Briar nomenclature on the shank. The briar is beginning to emerge and the metal band/mortise is shining up nicely. I realize that I was anxious to start on the external briar and forgot about the internal muck. Taking pipe cleaners and Q-tips I clean the internals dipping them in isopropyl 95%. Time to turn out the lights.
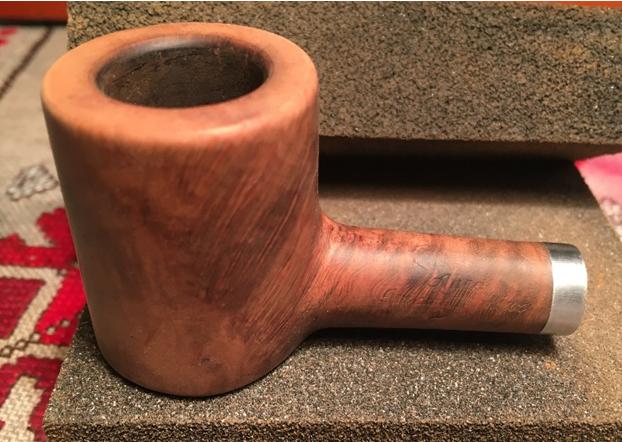
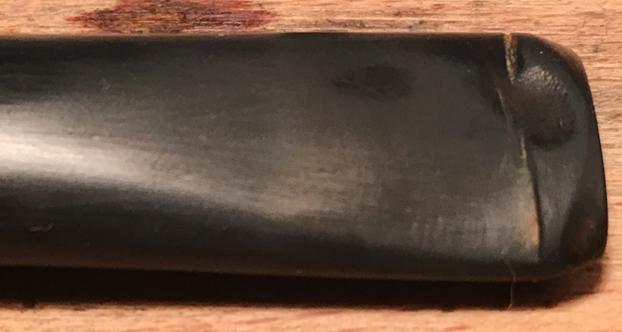
 The next day has arrived and I’m anxious to work on the button rebuild that has cured overnight. I take a picture to mark progress and using a flat needle file I file down the cured charcoal superglue gradually – patience. The following pictures journal the shaping of the restored upper button that had the most compression damage. I use the flat needle file to do the button shaping and then follow with 240 grit paper to fine tune and to remove the file marks from the vulcanite. I’m pleased with the progress.
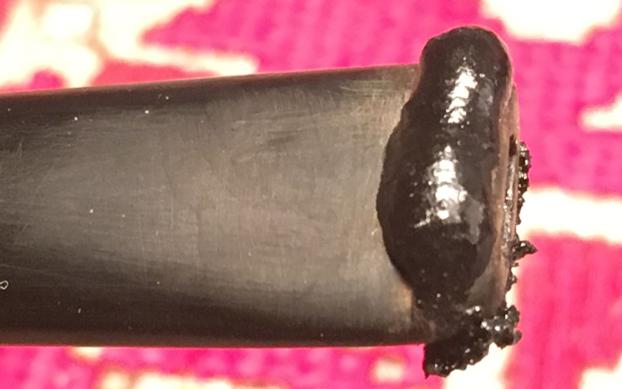
 The lower button presented more challenges. Pictured below I could detect two pockets in the charcoal superglue putty. To avoid filing off too much of the new button build I elect to apply black superglue and charcoal mix to fill the pockets. I’ll let these fills cure before sanding and finishing the button repair and then moving on to the stem restoration.
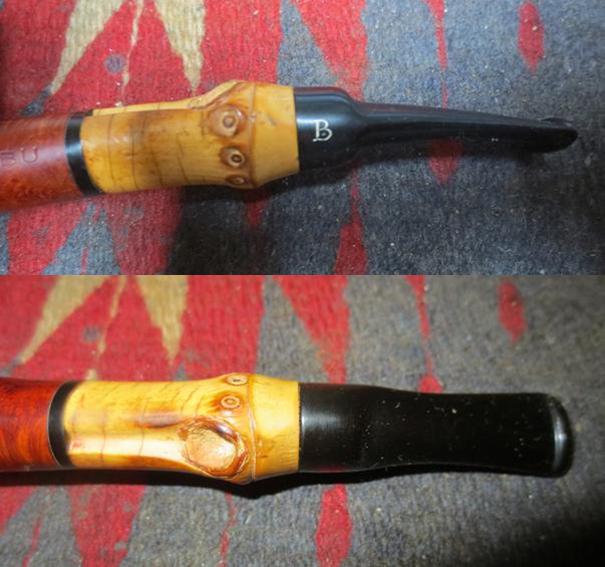
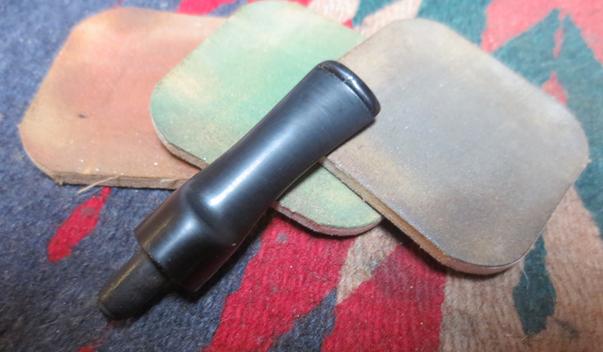
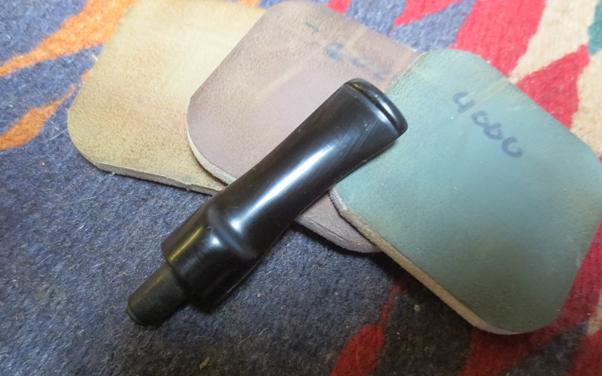
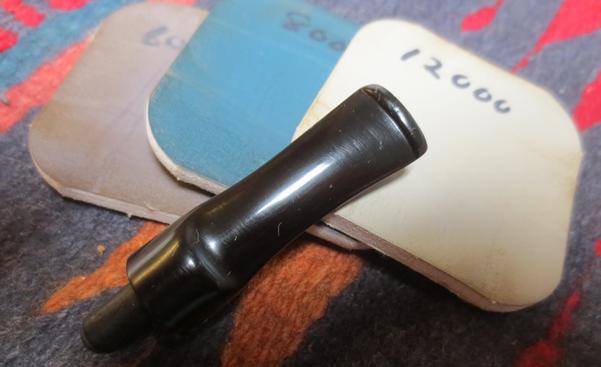
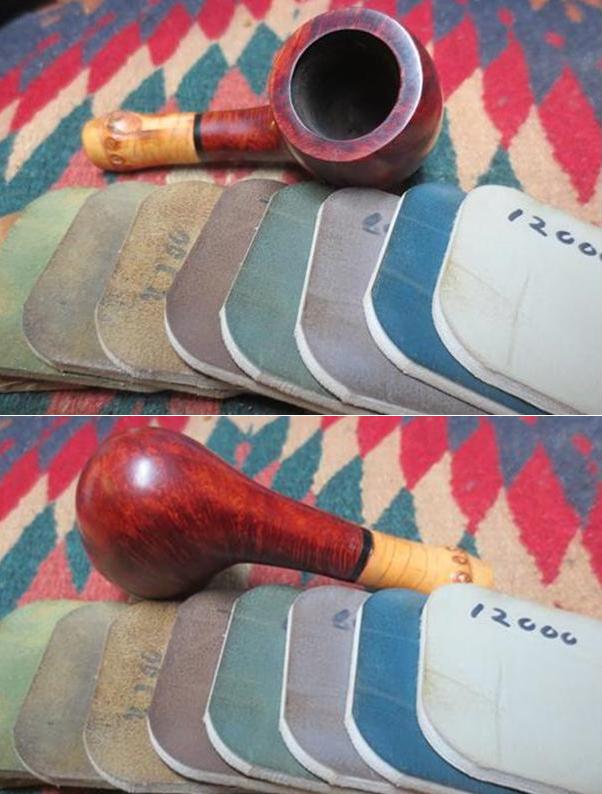
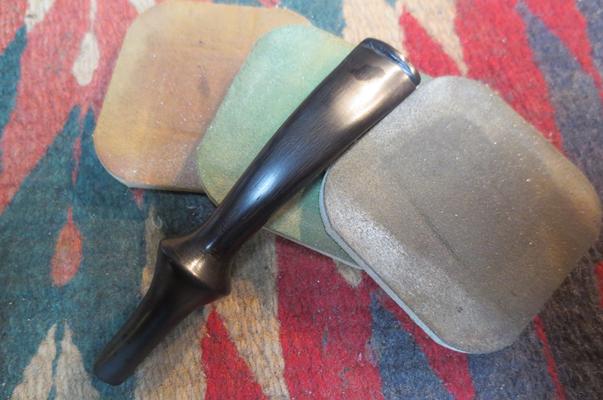
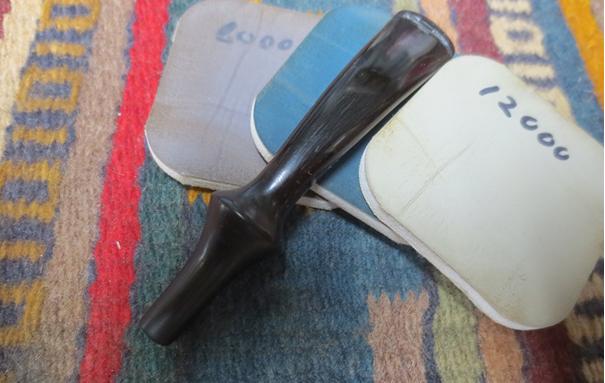
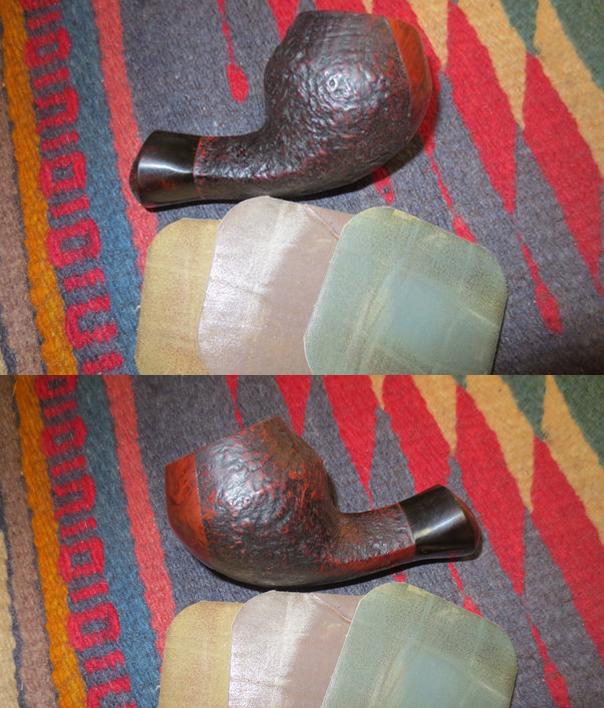
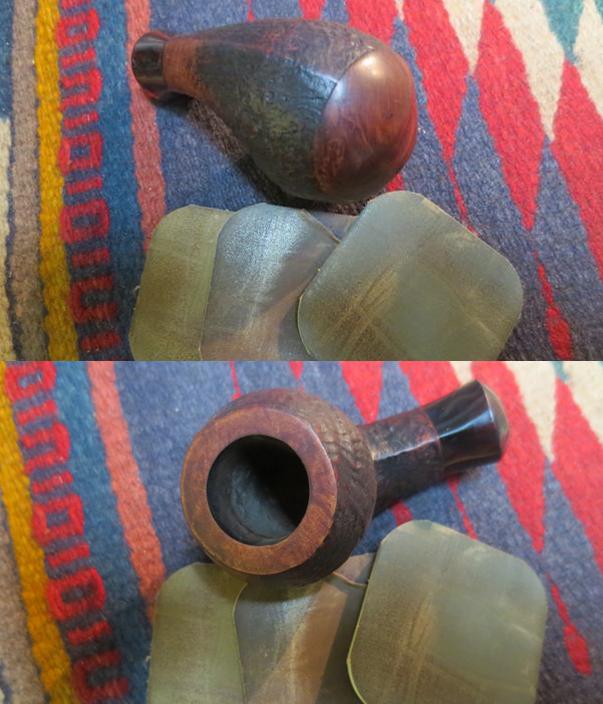
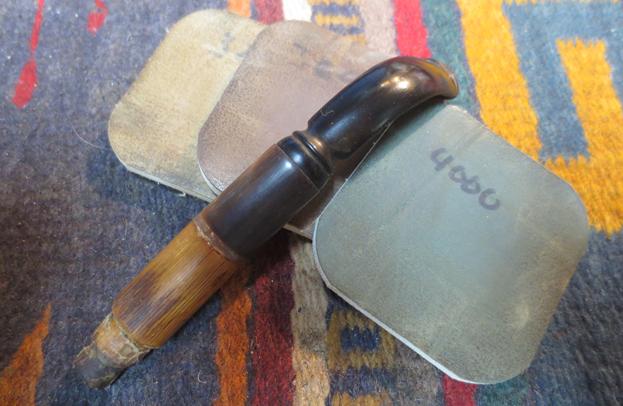
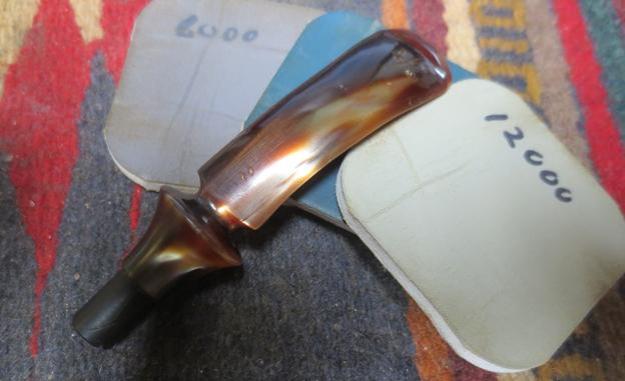
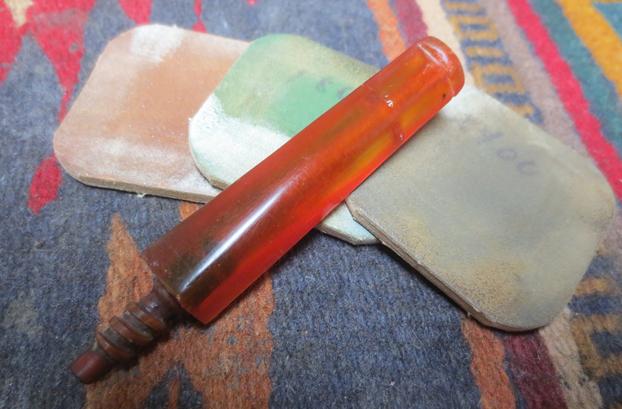
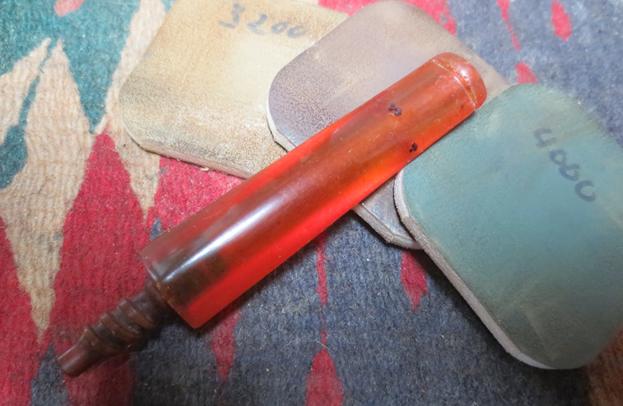
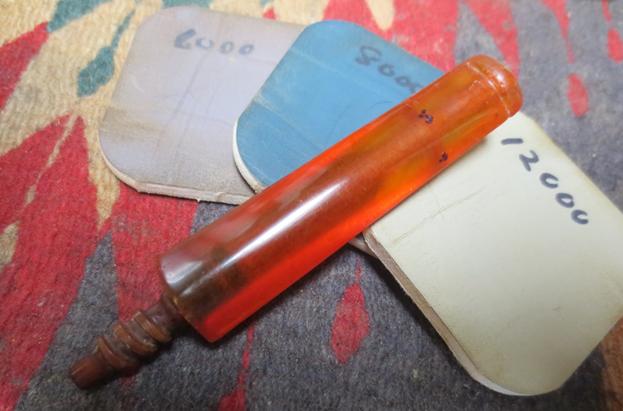
 Putting the stem aside, I begin to micromesh the stummel in anticipation of applying a light brown stain. I begin by wet sanding with micromesh pads 1500 to 2400. I follow this with dry sanding using 3200 to 4000 then 6000 to 12000 – careful to avoid the Poker’s stampings on the side of the shank. I enjoy watching the briar grain emerge. The nickel (I think) band/mortise is shining up very well. The pictures show the progress.

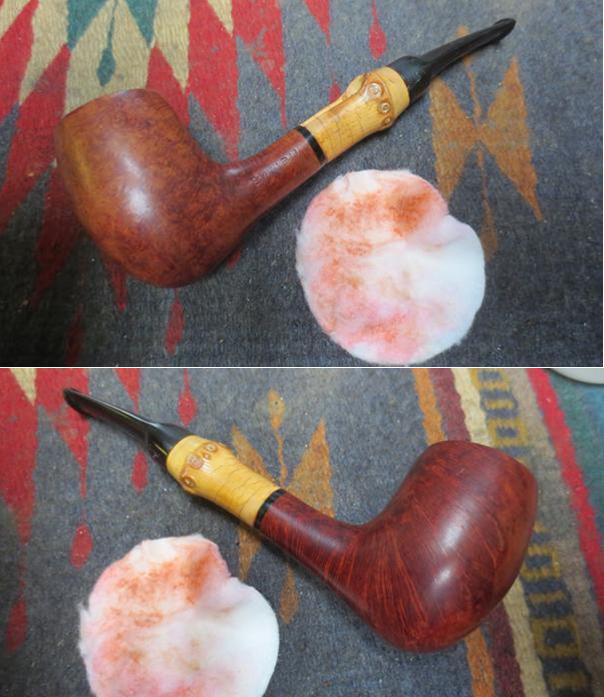
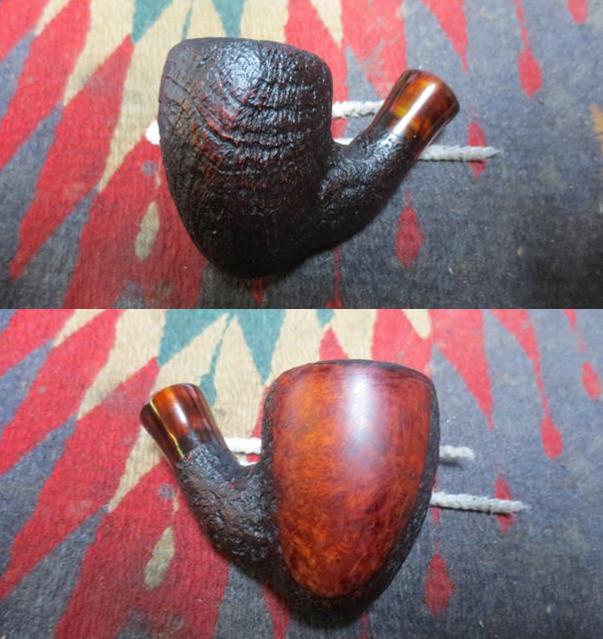
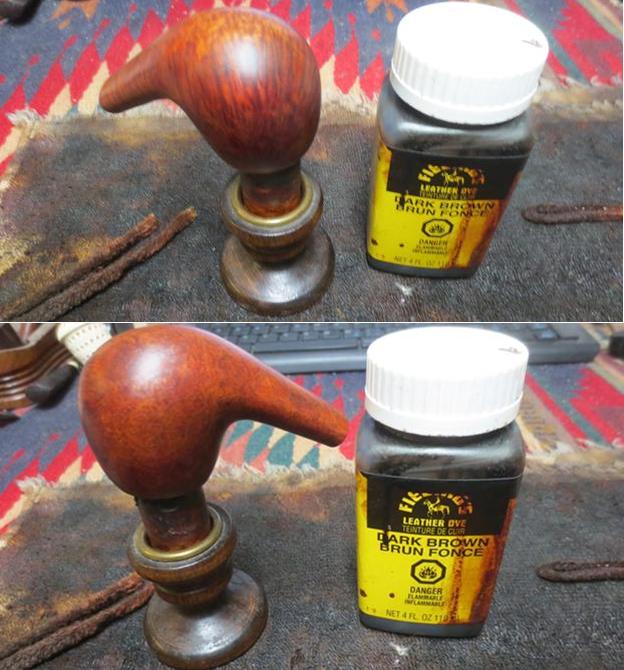
 Oh my…here I go again. I intended to apply Fiebing’s Light Brown Leather Dye to the Poker – I just brought it back to Bulgaria from the US and I wanted to give it a try. The grain of this Poker bowl is very active with a mixture of dark and lighter grains. I mentioned earlier a knot as well…. I’ll be thinking about this…. I thought and I will apply the light brown Leather Dye as originally planned. I will see how it looks and I can use a cotton pad with alcohol to lighten the stain as needed. This is one of the advantages of aniline stains and dyes – these I could not easily find here in Bulgaria. I’m not sure if the staining will impact the metal band, but I decide to wrap it in masking tape just in case. I wipe the stummel with a cotton pad and alcohol just to make sure the surface is clear of saw dust from sanding. I use my air gun to warm the stummel before application of the dye. I apply the dye with a folded pipe cleaner which I saw Steve do – it is much easier to use compared to a dauber that usually carries more dye than is needed and is messier. At least this is my experience. After applying the dye liberally over the entire bowl, I flame it by lighting it with a candle. The alcohol base in the dye burns off very quickly and does not hurt the wood. Then, I repeat the application again and flame it. By doing this I assure that the entire surface has been covered. I’ll wait until morning to unwrap the ‘package’ and look at the grain. The picture shows the aftermath.
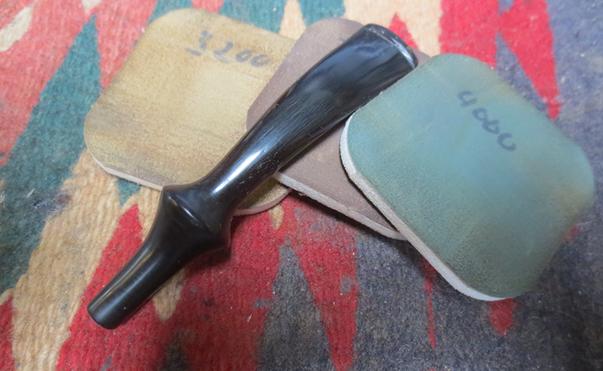
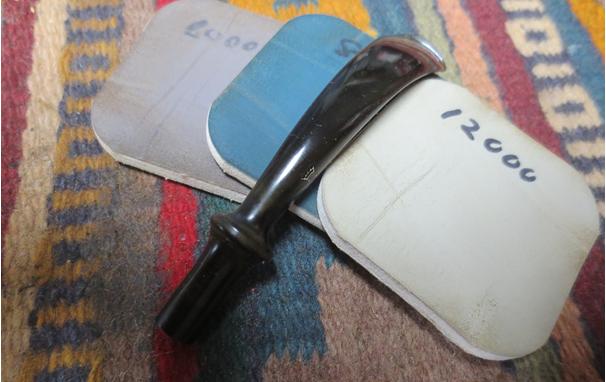
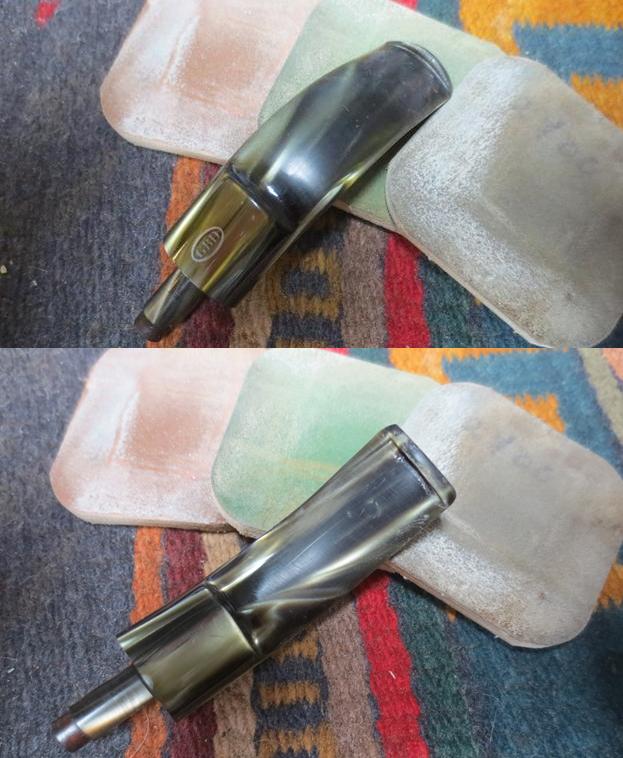
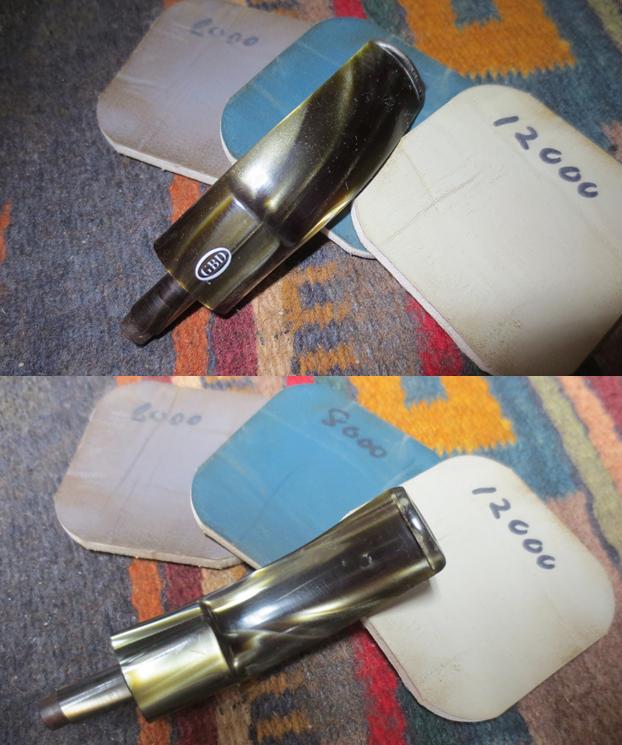
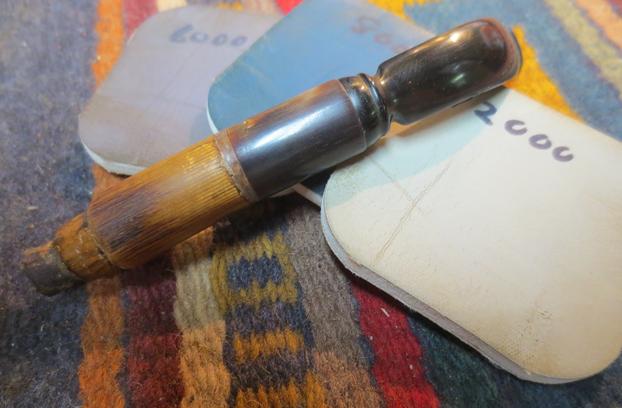
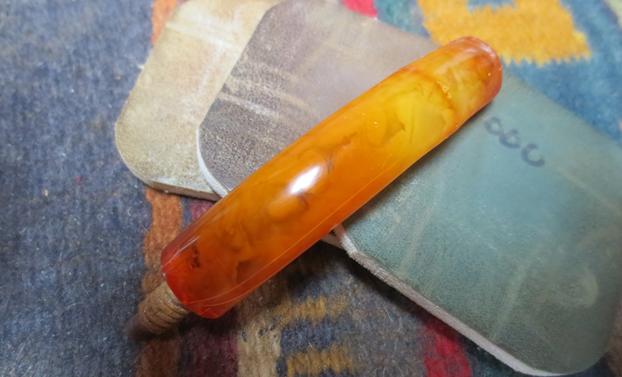
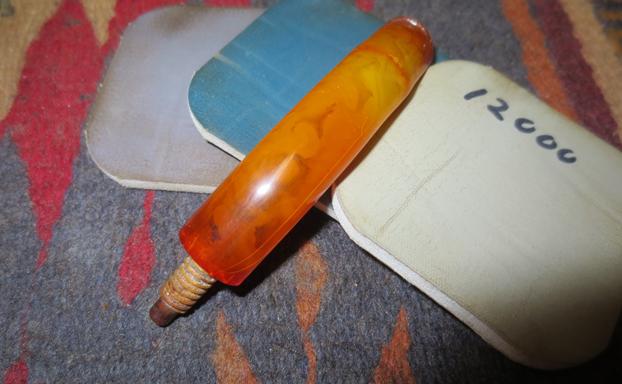
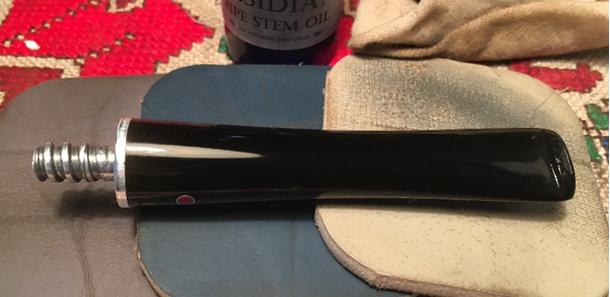
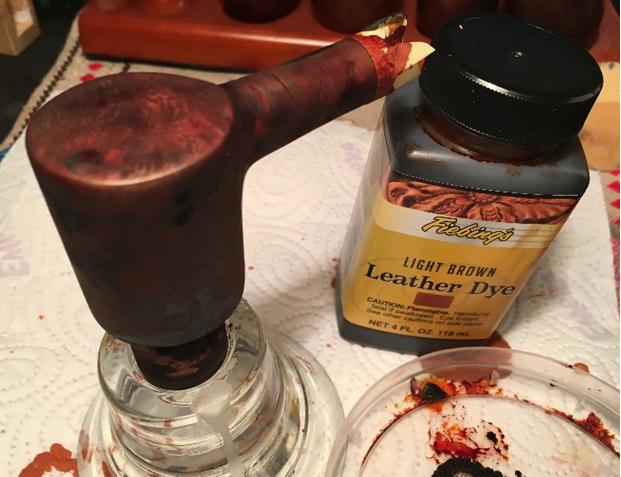 With the stain settling, the stem is ready for the home stretch. The button super glue patch is cured, so I take 240 grip paper and finish smoothing and shaping the button. I follow the 240 with 600 grit paper then 0000 steel wool over the entire surface of the stem. Beginning with micromesh pads 1500 to 2400, I wet sand the stem and follow with an application of Obsidian Oil to the vulcanite. Then with micromesh pads 3200 to 4000 then 6000 to 12000 I dry sand the stem following each set of 3 pads with an application of Obsidian Oil. I like the polished vulcanite pop and the red dot stands out nicely. The pictures show the progress.

 Now to unwrap the stummel! After staining the stummel with Light Brown Leather Dye I take a cotton pad with alcohol on it and wipe down the surface. This smooths the stain and lightens it slightly.
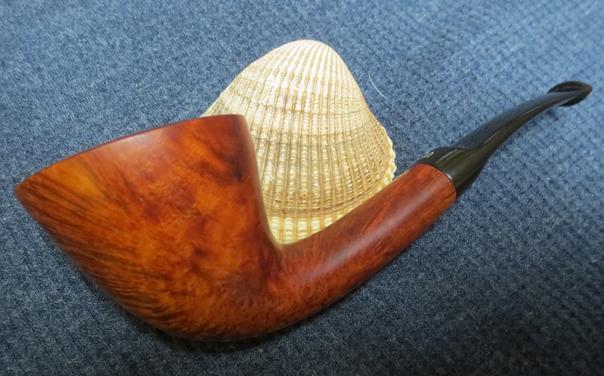
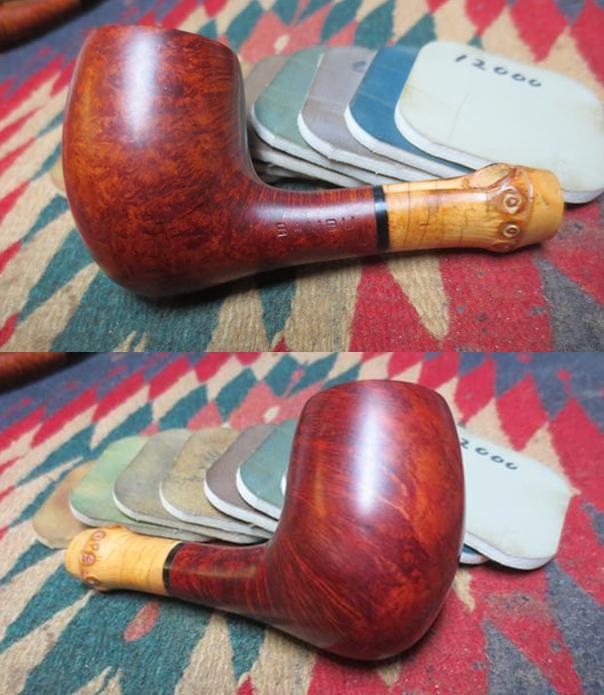
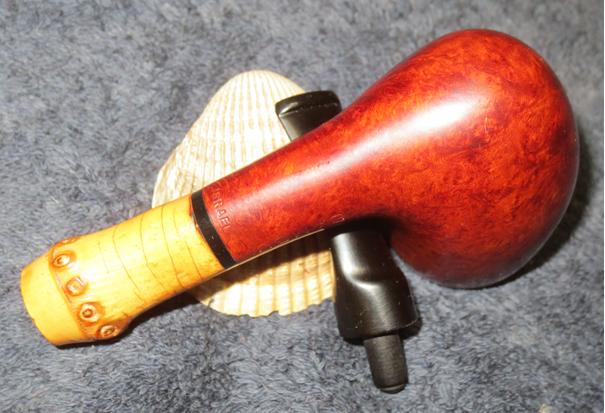
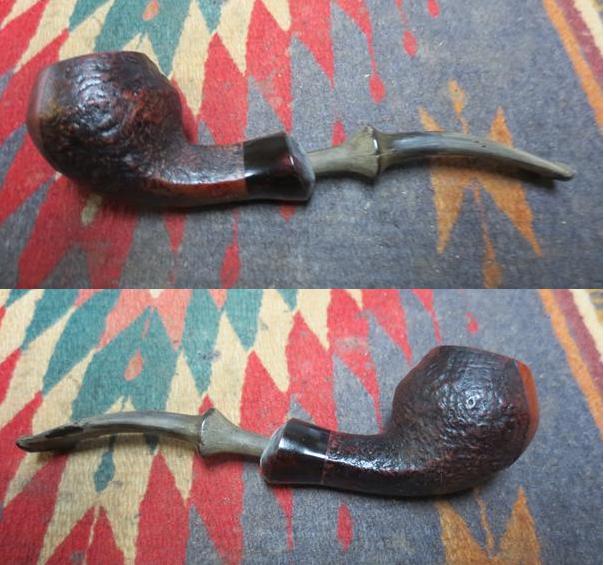
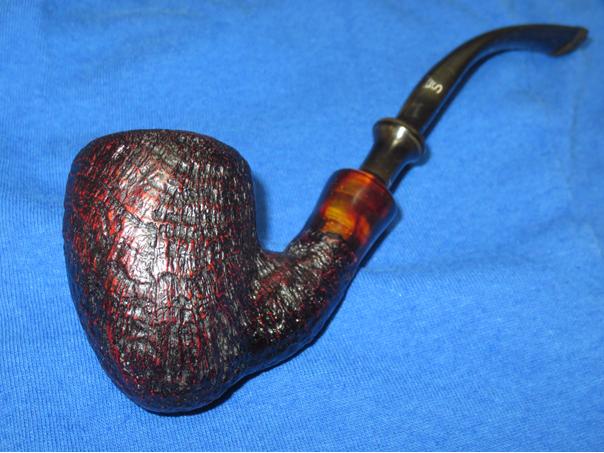
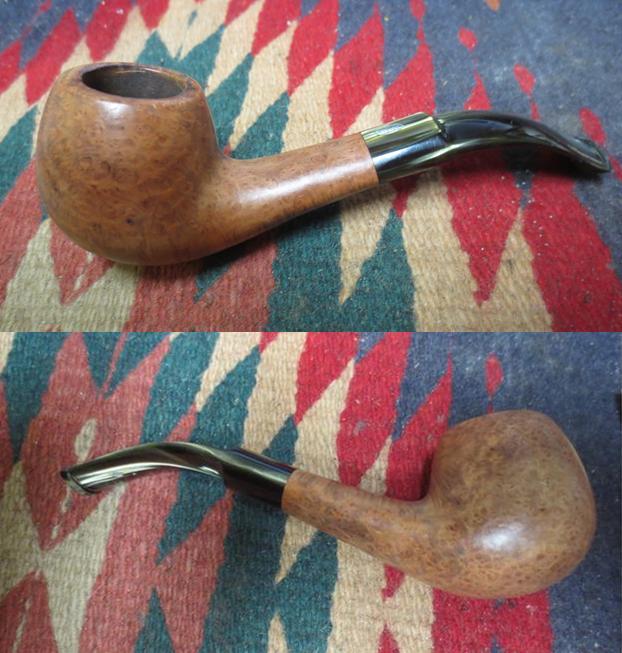
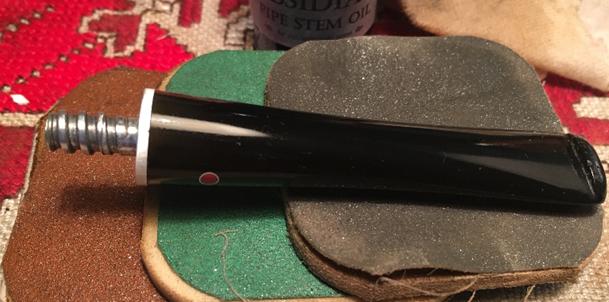
 Reattaching the stem and stummel, with the Dremel felt wheel set at the slowest speed (RPMs) I use Tripoli compound to begin fine tune polishing the surface. I follow Tripoli with applying Blue Diamond with felt wheel, rotating it methodically over the surface, allowing the high speed of the wheel and the compounds to do the work. Following the compounds, I wipe/buff the stummel with a cotton cloth to remove the powder residue from the compounds. Switching to a cotton wheel, and increasing the speed of the Dremel by one number, I apply several coats of carnauba wax to both stummel and stem and finish the restoration of the Aged Imported Briar Poker with a brisk buff with a micromesh cloth. This old Poker is looking great. I’m pleased with the button work and the briar makes me smile – it is very active and I enjoy the root knots here and there. This Poker will again make the card table a more enjoyable experience for some new steward who gives him a home. Thank you for joining me!


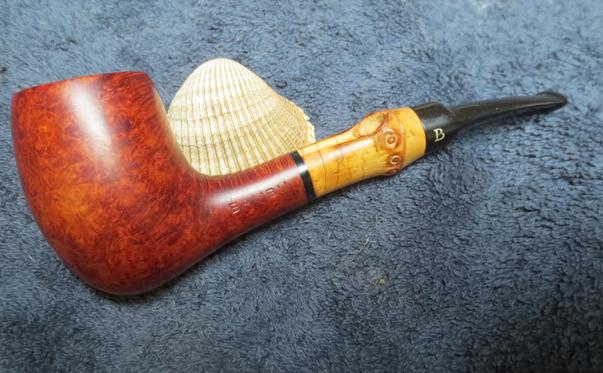
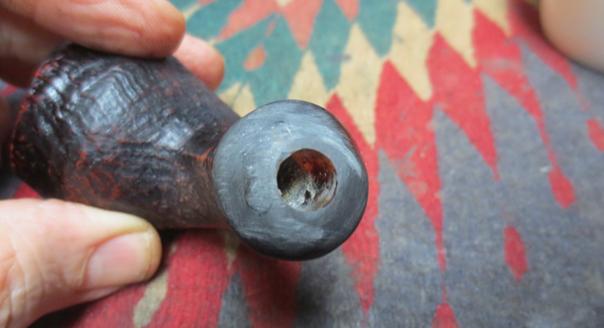
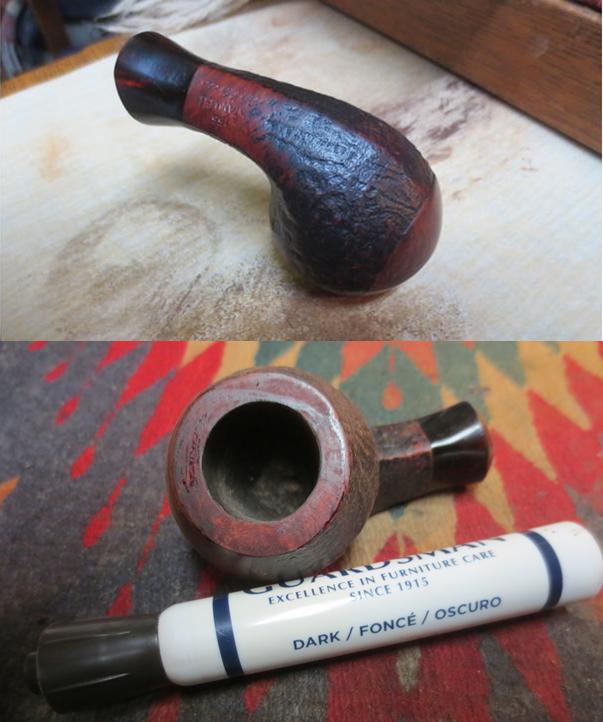
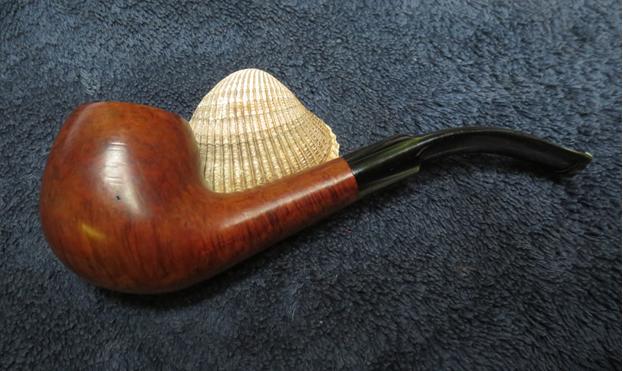
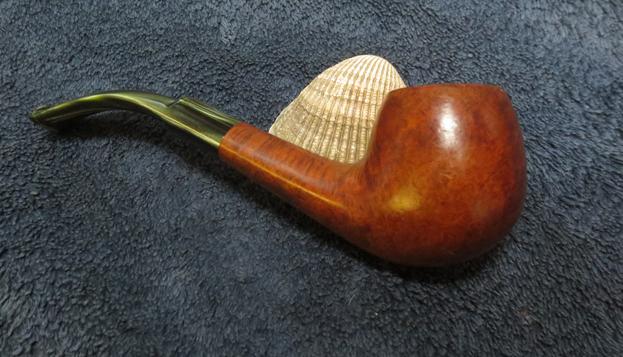
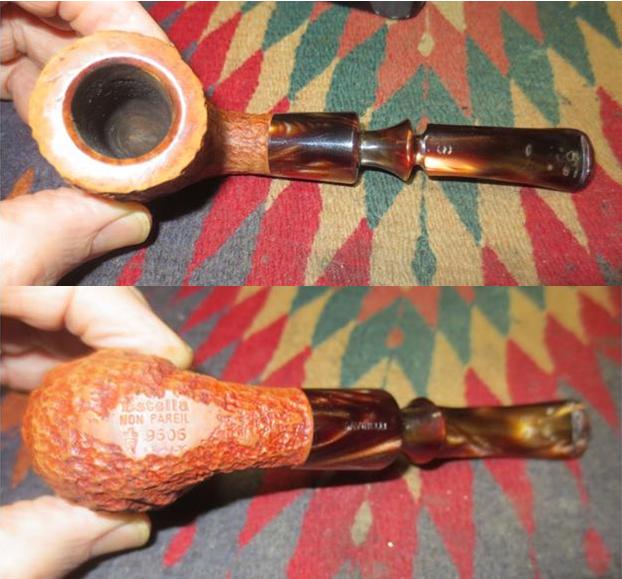
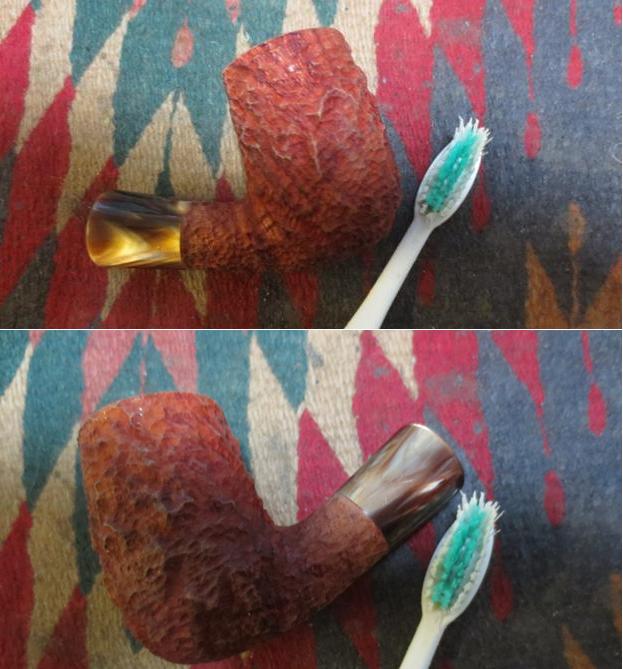
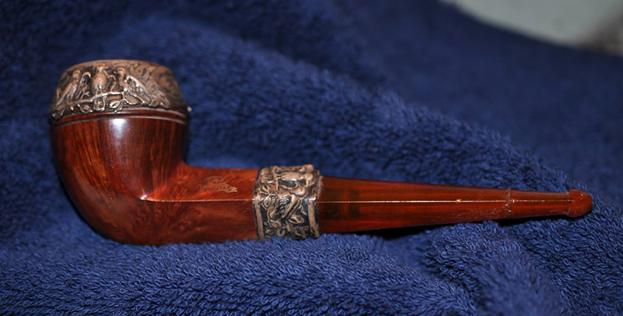
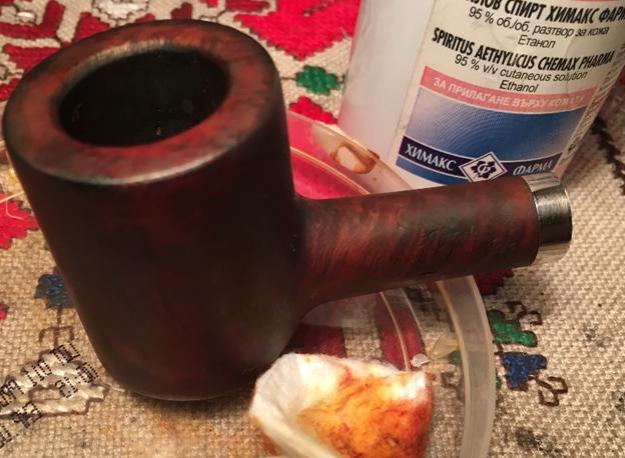
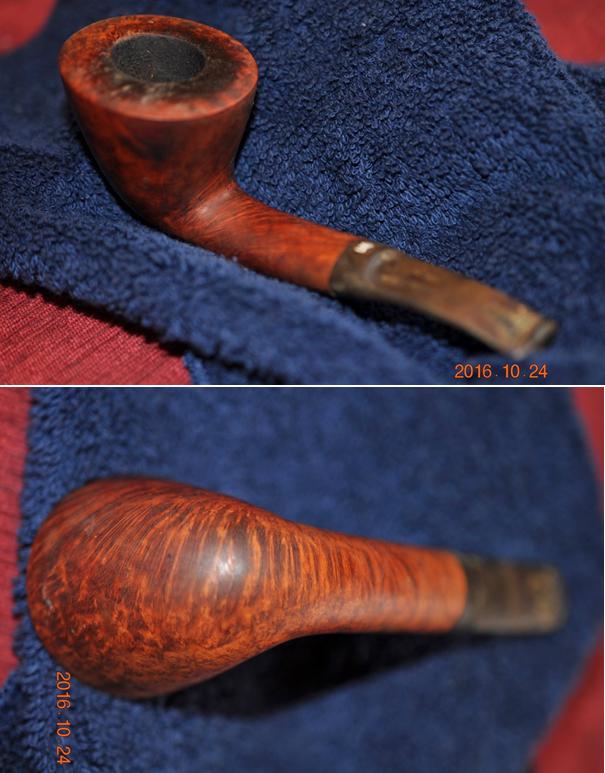 He took some close up photos of the rim and the underside of the bowl to show what it looked like up close. The rim was pretty tarred with overflow from the cake in the bowl. The bowl had a cake but obviously it had been trimmed back somewhere along the way. The pipe smelled strongly of aromatic vanilla tobacco and would take some serious cleaning to bring the briar back to neutral.
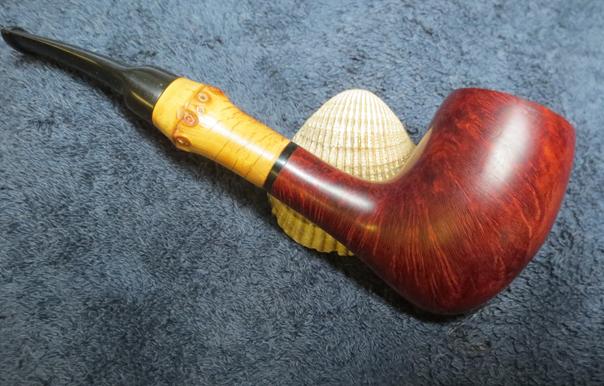
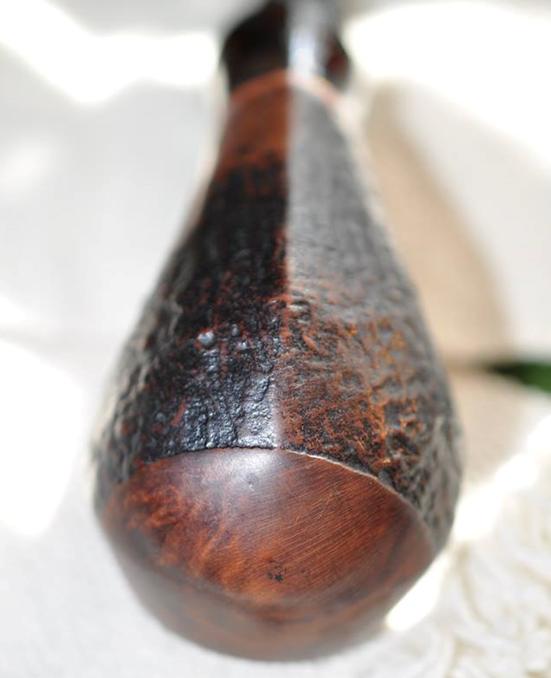
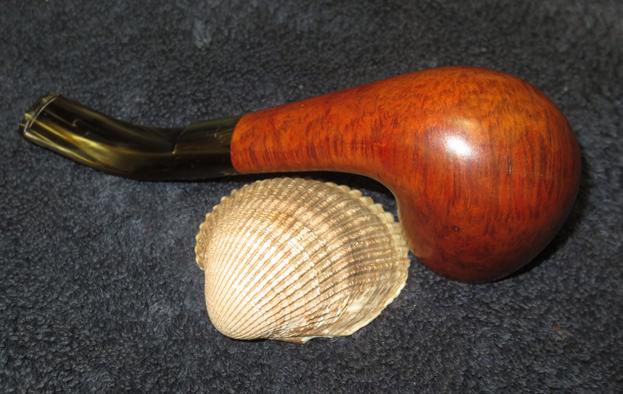
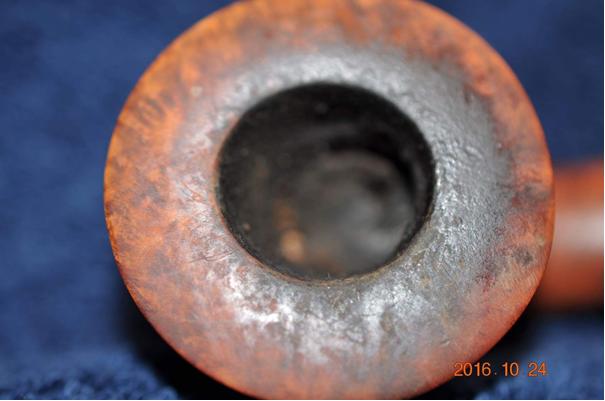 The cross grain on the underside of the bowl is quite stunning. It would only stand out more once the pipe was cleaned and polished.
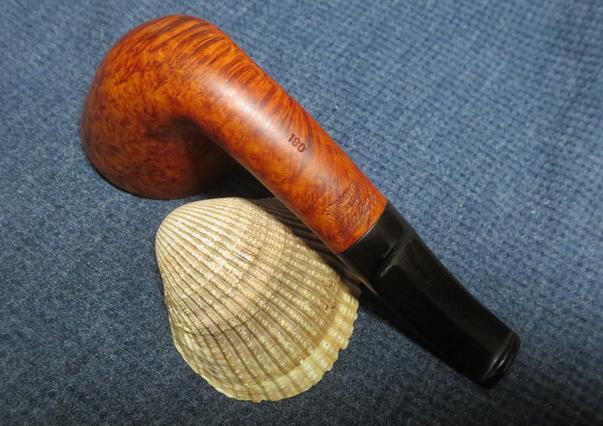
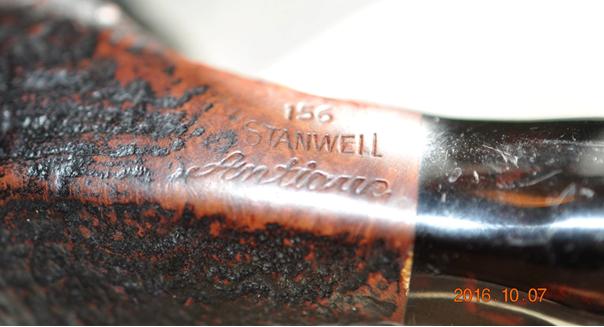
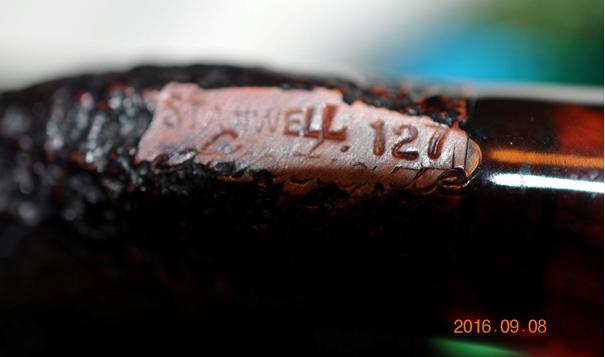
 The stamping on the pipe was on the underside of the shank near the stem and was sharp and clear. It reads Stanwell over Made in Denmark over the script of Majestic. Further up the shank toward the bowl it was stamped with the 180 shape number.
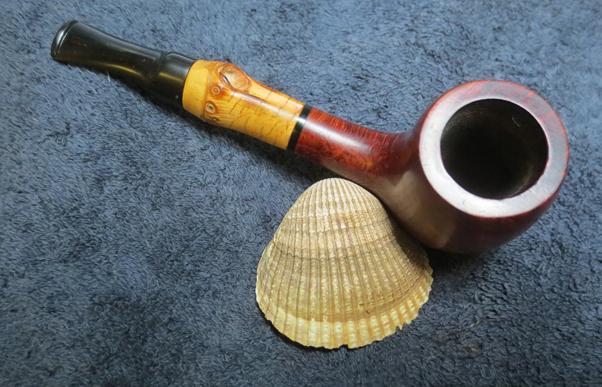
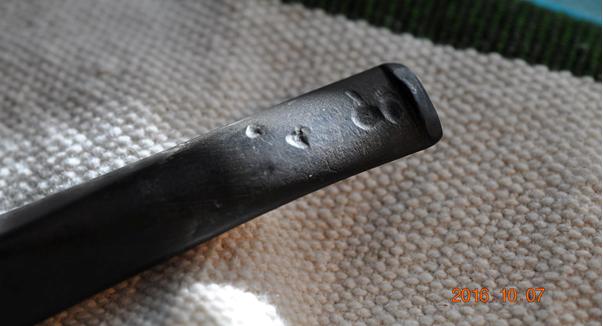
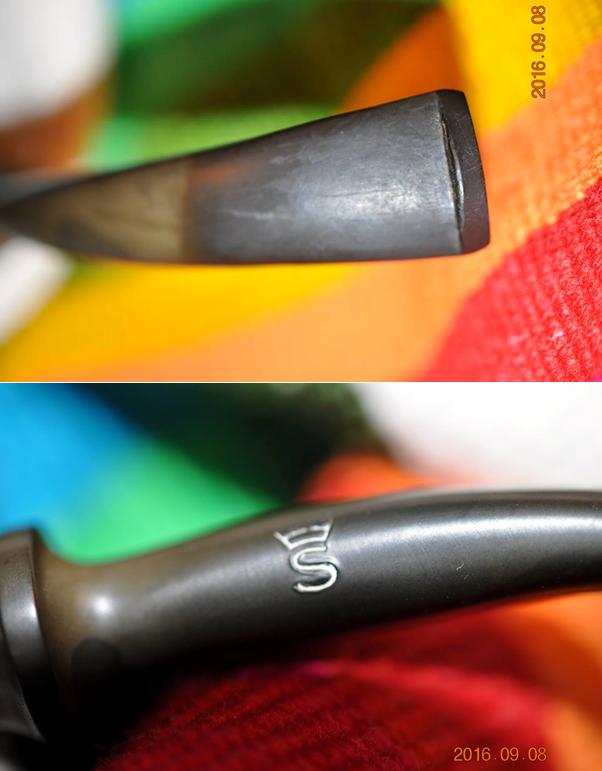
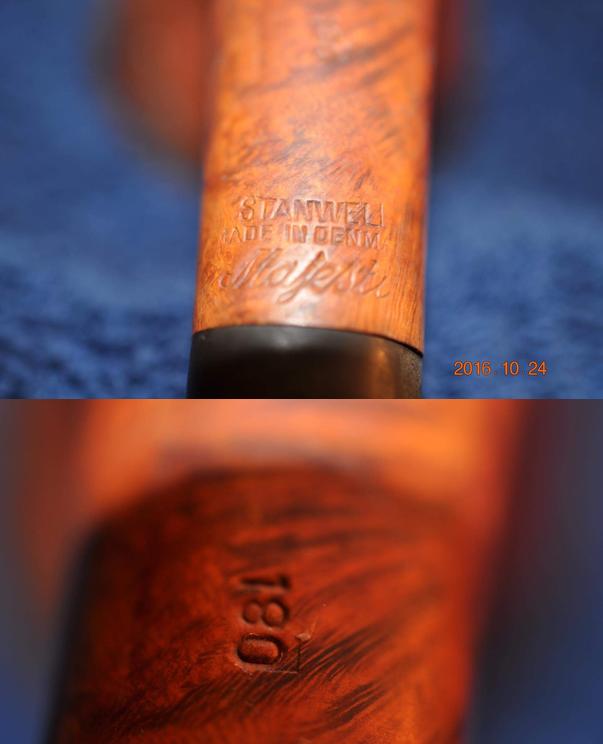 The stem was oxidized and had tooth chatter on both sides. It seemed to have some calcification around the button. None of the marks looked to deep so it had some promise. The Crown S Stanwell logo on the topside of the small saddle portion of the stem was in excellent condition.
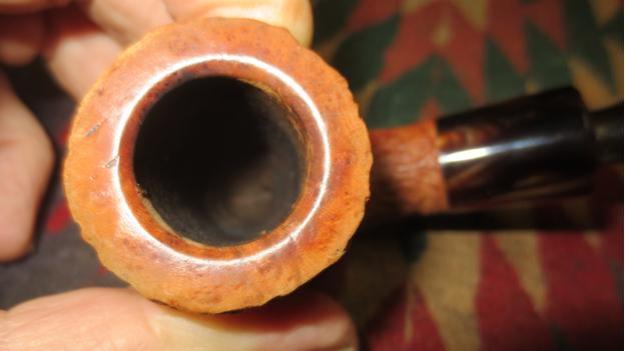
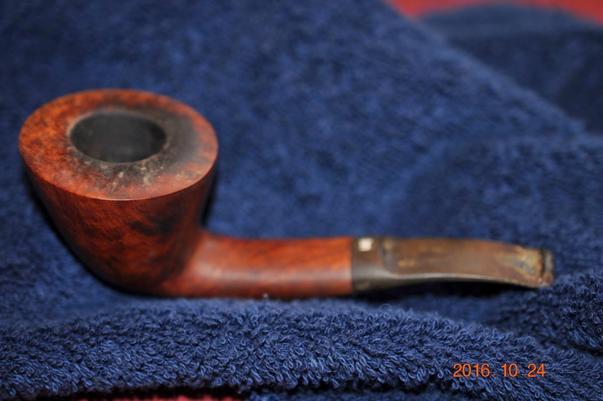
 My brother reamed the bowl and cleaned the internals of the shank and stem with pipe cleaners, cotton swabs and alcohol. He scrubbed the exterior of the pipe and stem with Murphy’s Oil Soap and was able to remove the build up on the rim and also on the stem. The finish was in very good shape under the grime on the bowl. There appeared to be a dark spot on the left side of the bowl. The next four photos show the condition of the pipe when I received it from my brother.
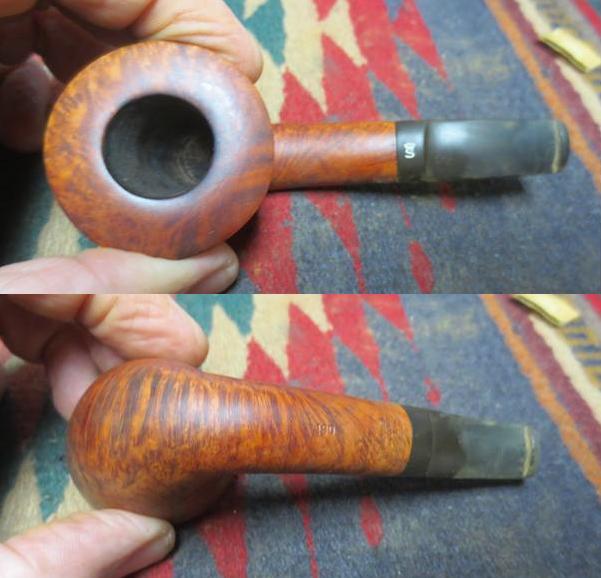 He was able remove the build up and calcification on the stem. You can see from the photos below that other than oxidation the stem was very clean.
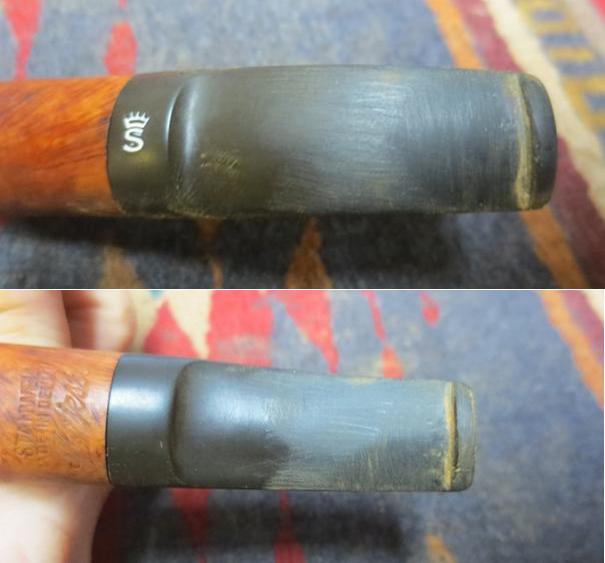 I worked on the stem with 220 grit sandpaper to remove the oxidation and reshape the button edges. It did not take too much work to get the oxidation that was on the surface of the stem.
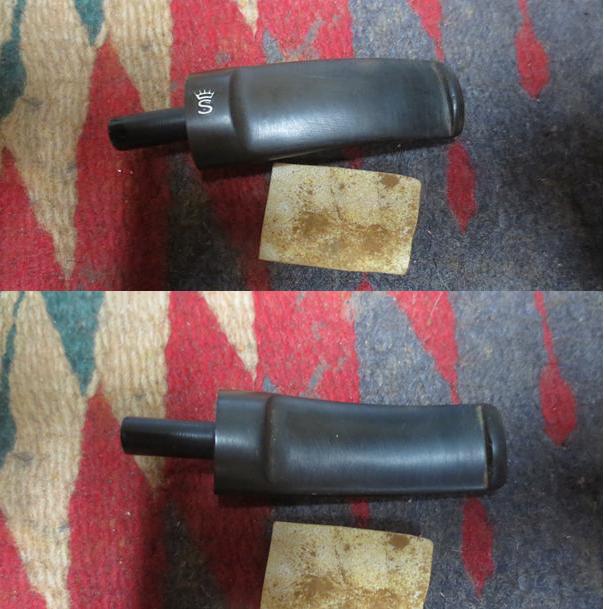 I polished the stem with micromesh sanding pads – wet sanding with 1500-2400 grit pads and dry sanding with 3200-12000 grit pads. I rubbed the stem down with Obsidian Oil after each set of three pads. After the third set of pads I gave it another coat of oil and set it aside to dry.
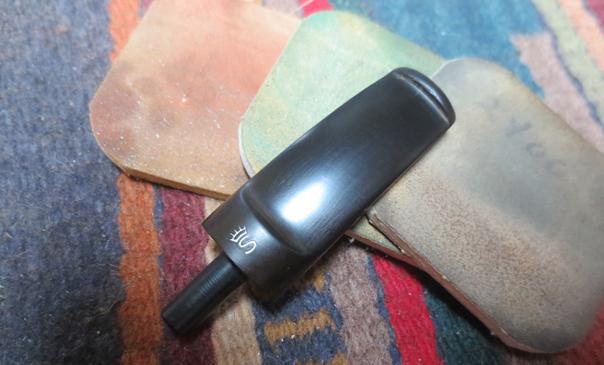
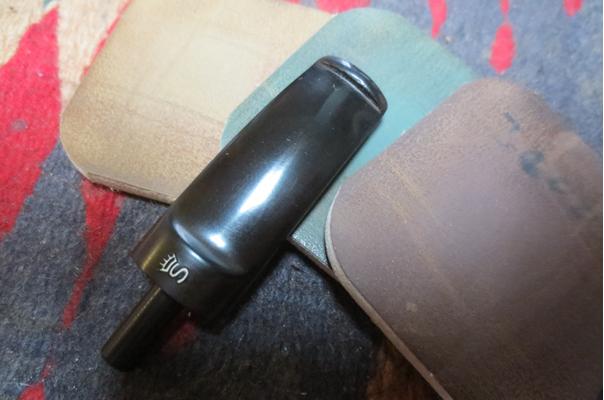
 I used a dental pick to clean out the slot in the end of the button. There was some build up in that area that had hardened. I ran a pipe cleaner through the stem and used cotton swabs and alcohol to clean out the inside of the shank and the airway to the bowl. I polished the exterior of the rim, bowl and shank with micromesh sanding pads using 1500-12000 grit pads.
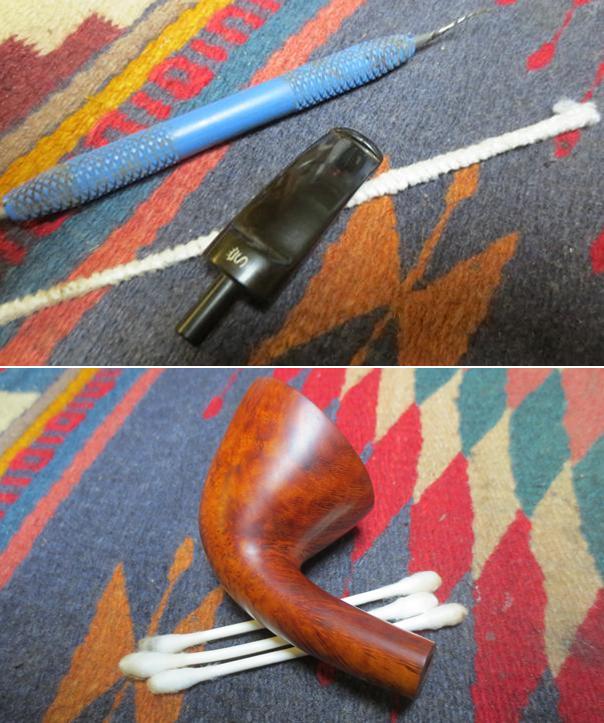 I buffed the bowl and stem with Blue Diamond on the buffing wheel to polish the vulcanite and the briar. I gave them both several coats of carnauba wax and buffed with a clean buffing pad to raise a shine. I hand buffed the pipe with a microfibre cloth to deepen the shine. The finished pipe is shown in the photos below. You can see from the photos of the left side of the bowl that I was able to remove the darkened spot on upper portion of the bowl. The rich finish and the comfortable shape of the pipe give the Majestic stamping on the shank a well-chosen appellation. Thanks for walking with me through the restoration.