Tag Archives: removing tooth marks

Reworking a Couple of Pipes with my Son in Law on a Grey Vancouver Day


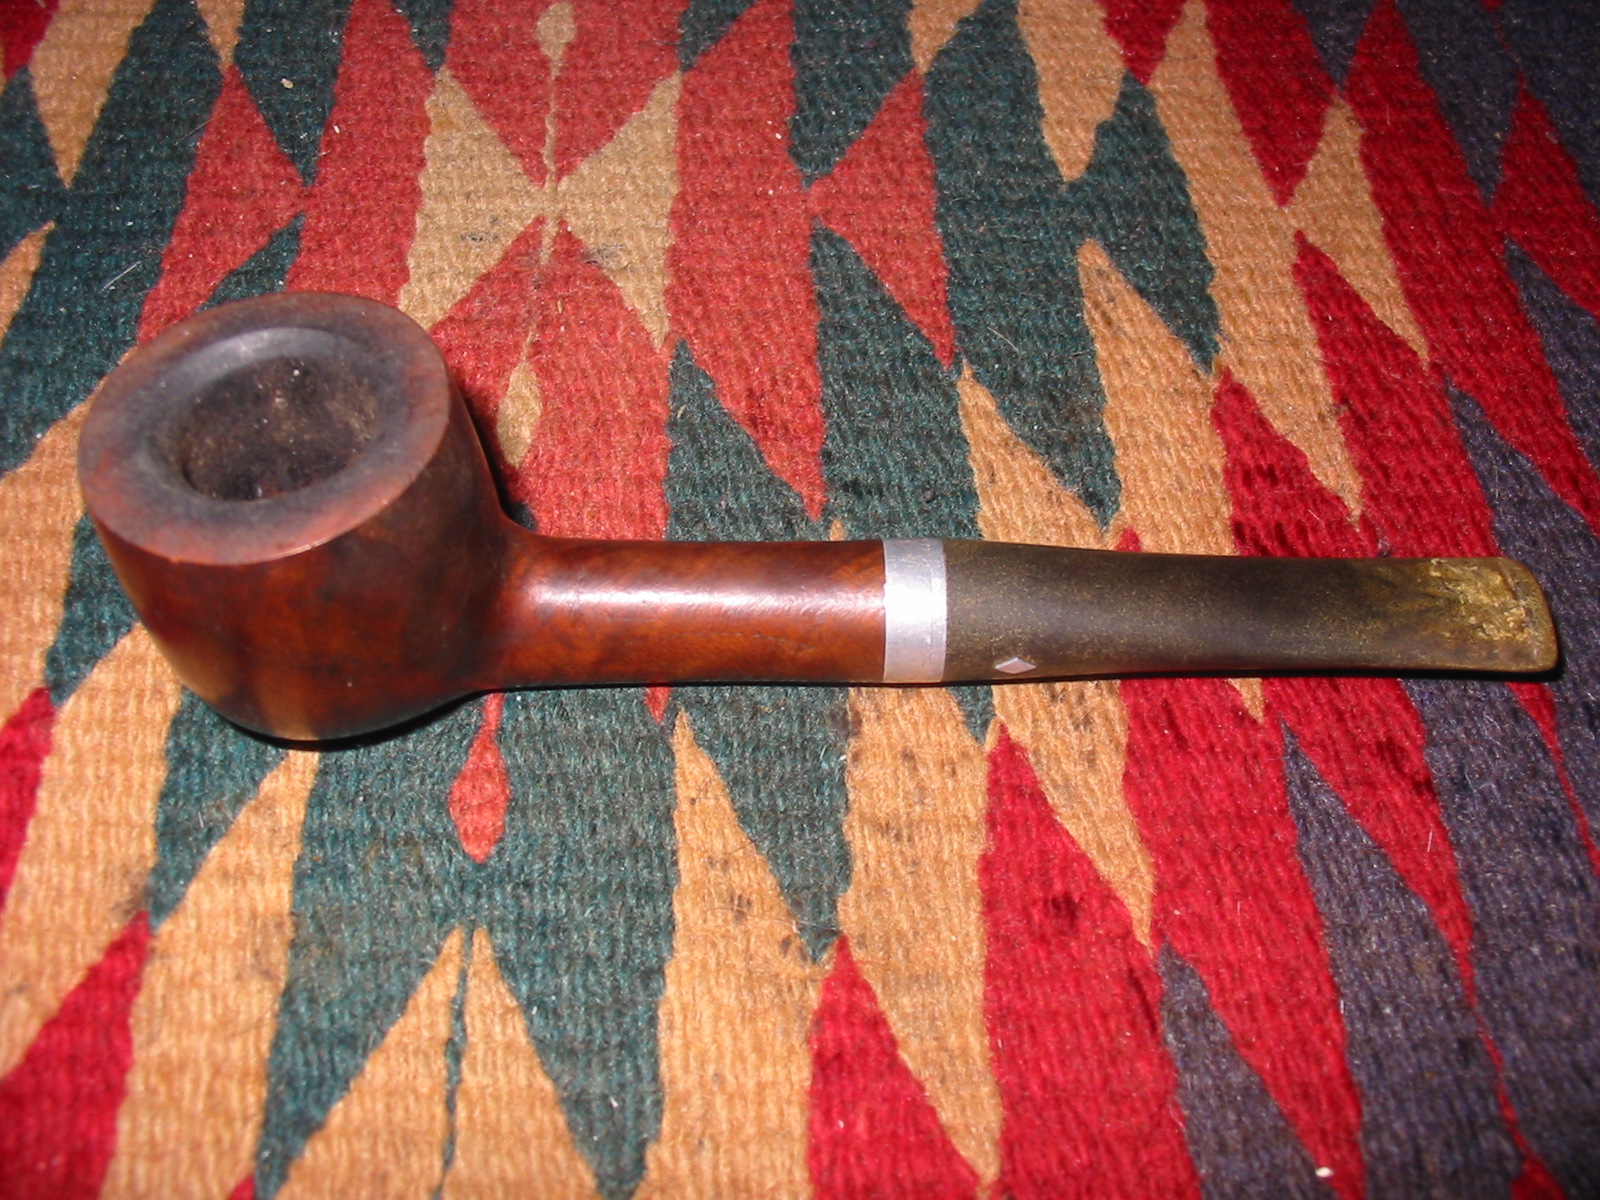
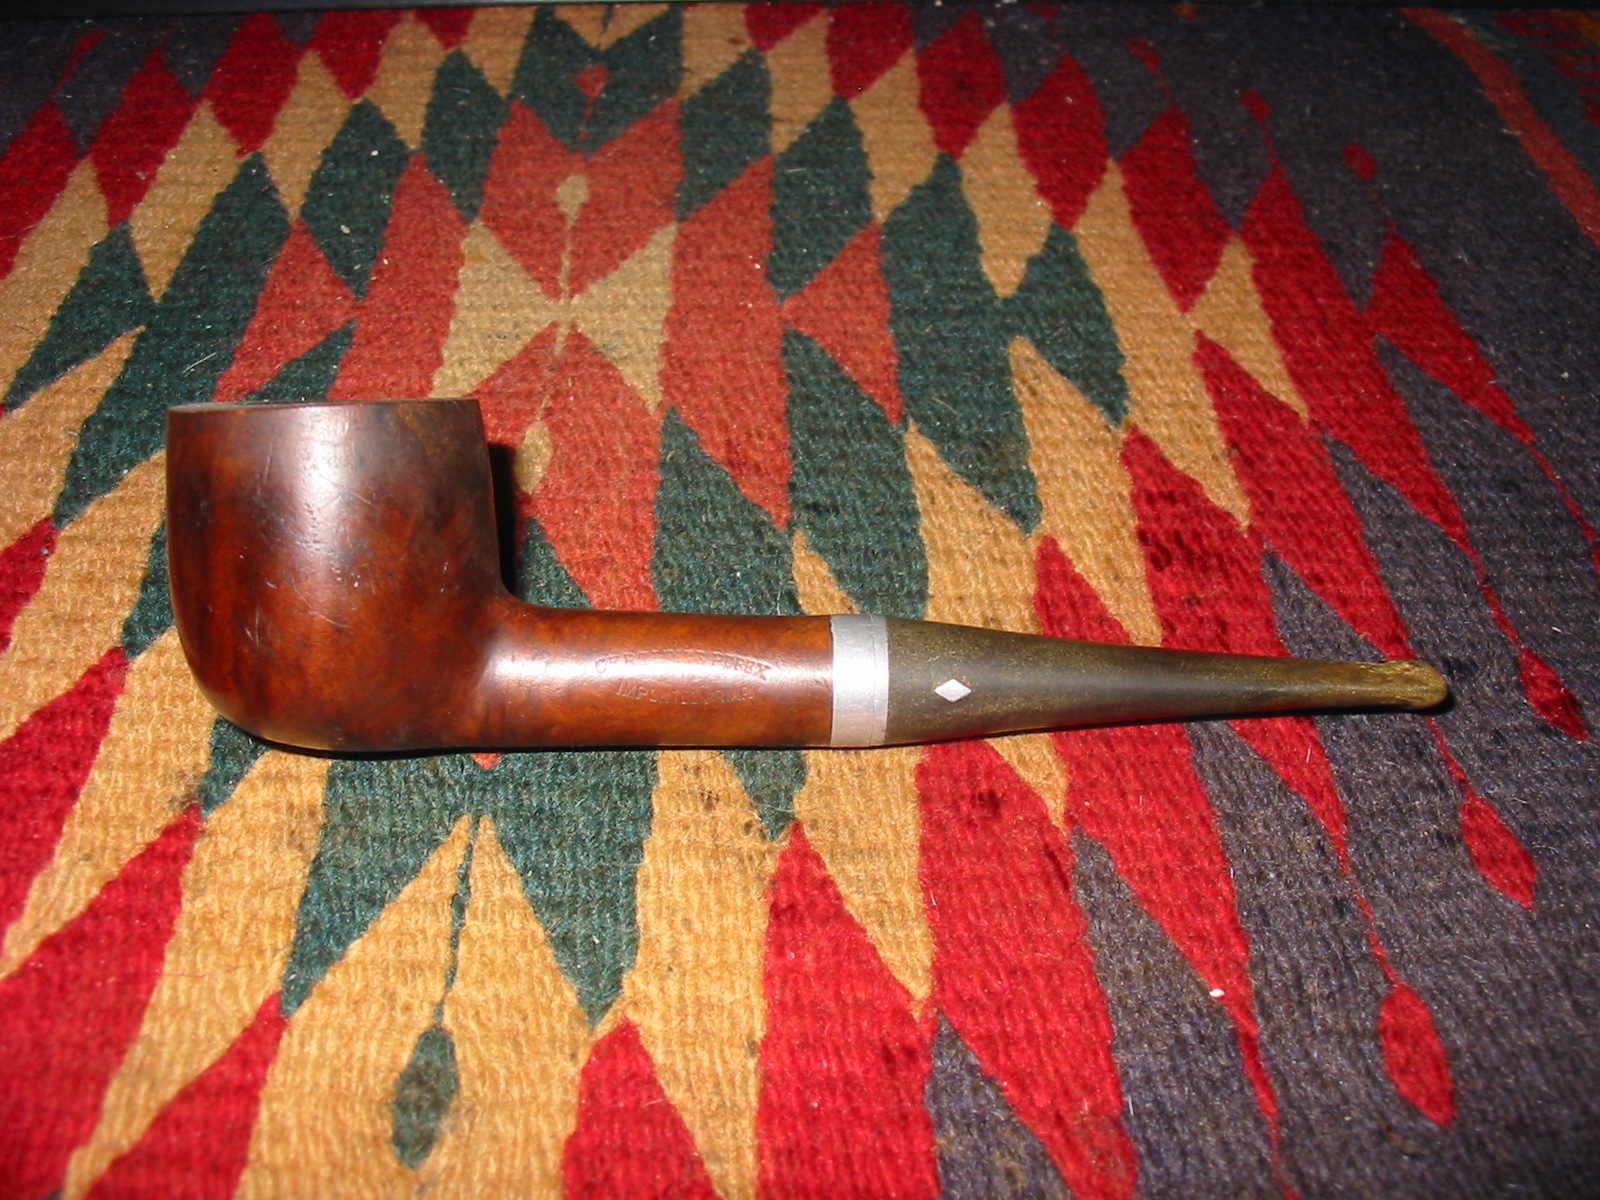
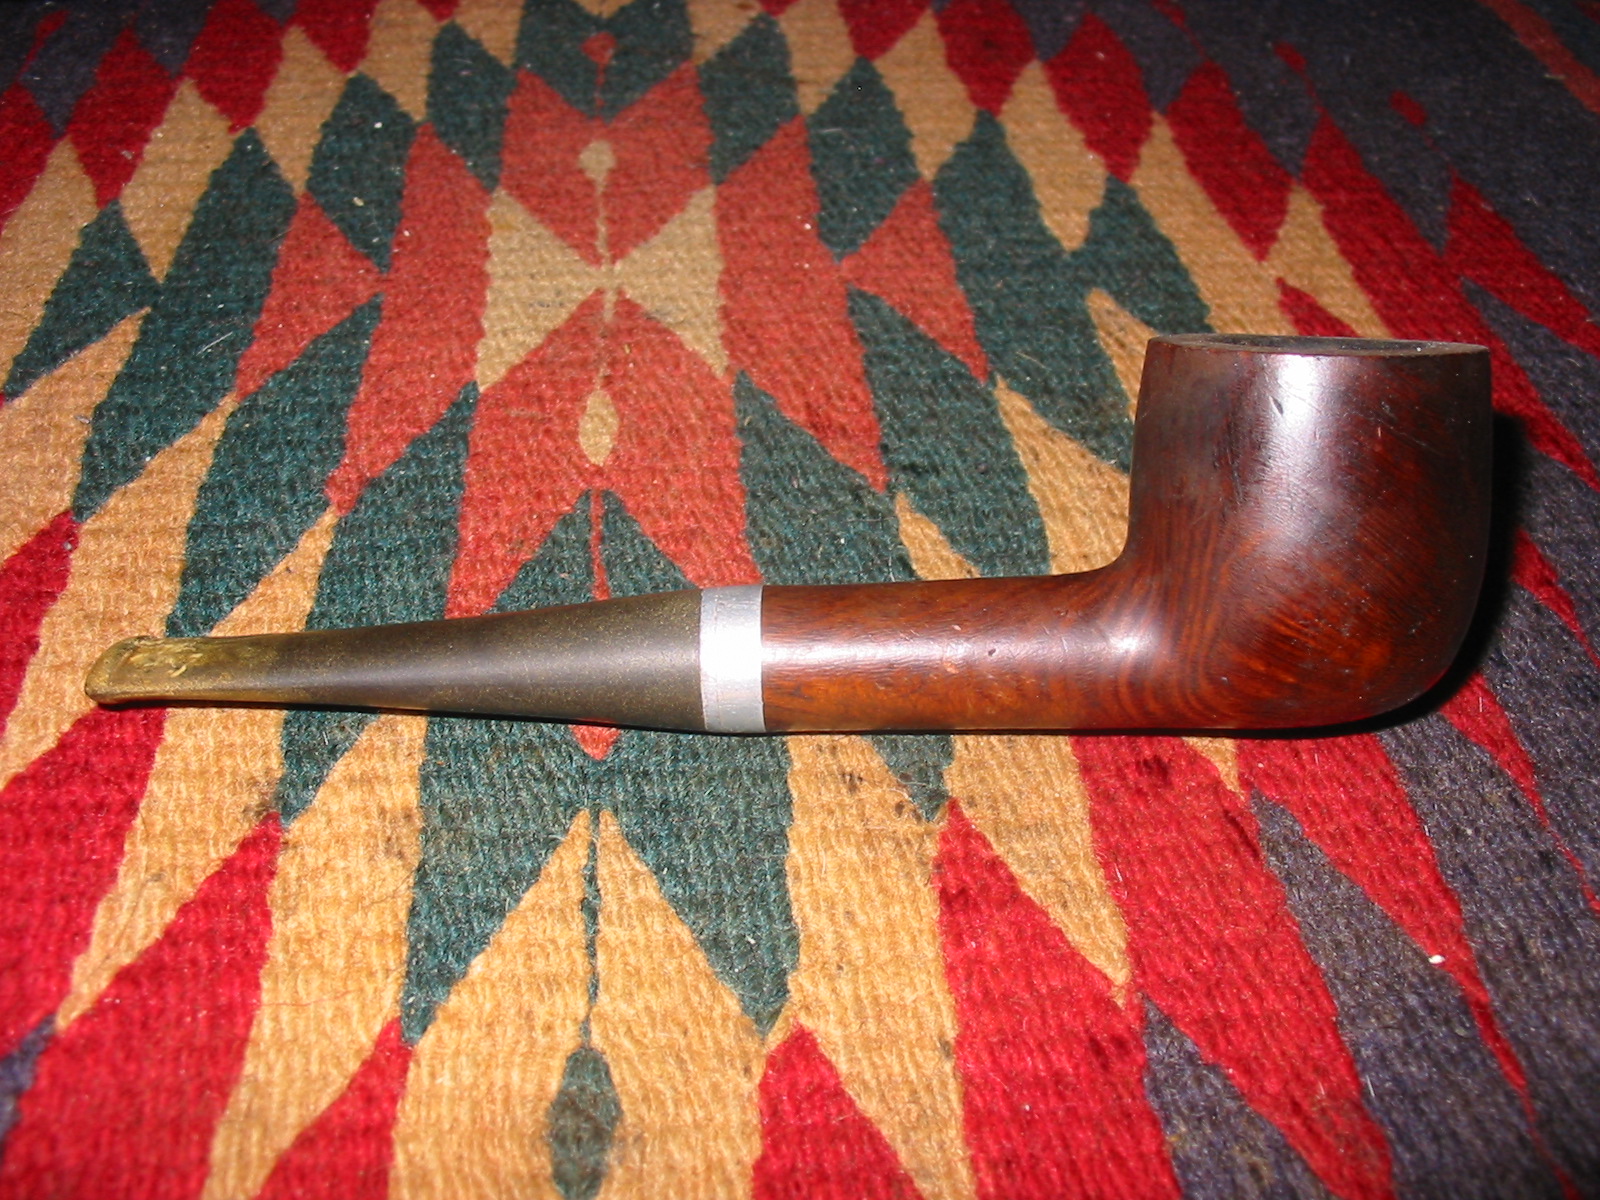
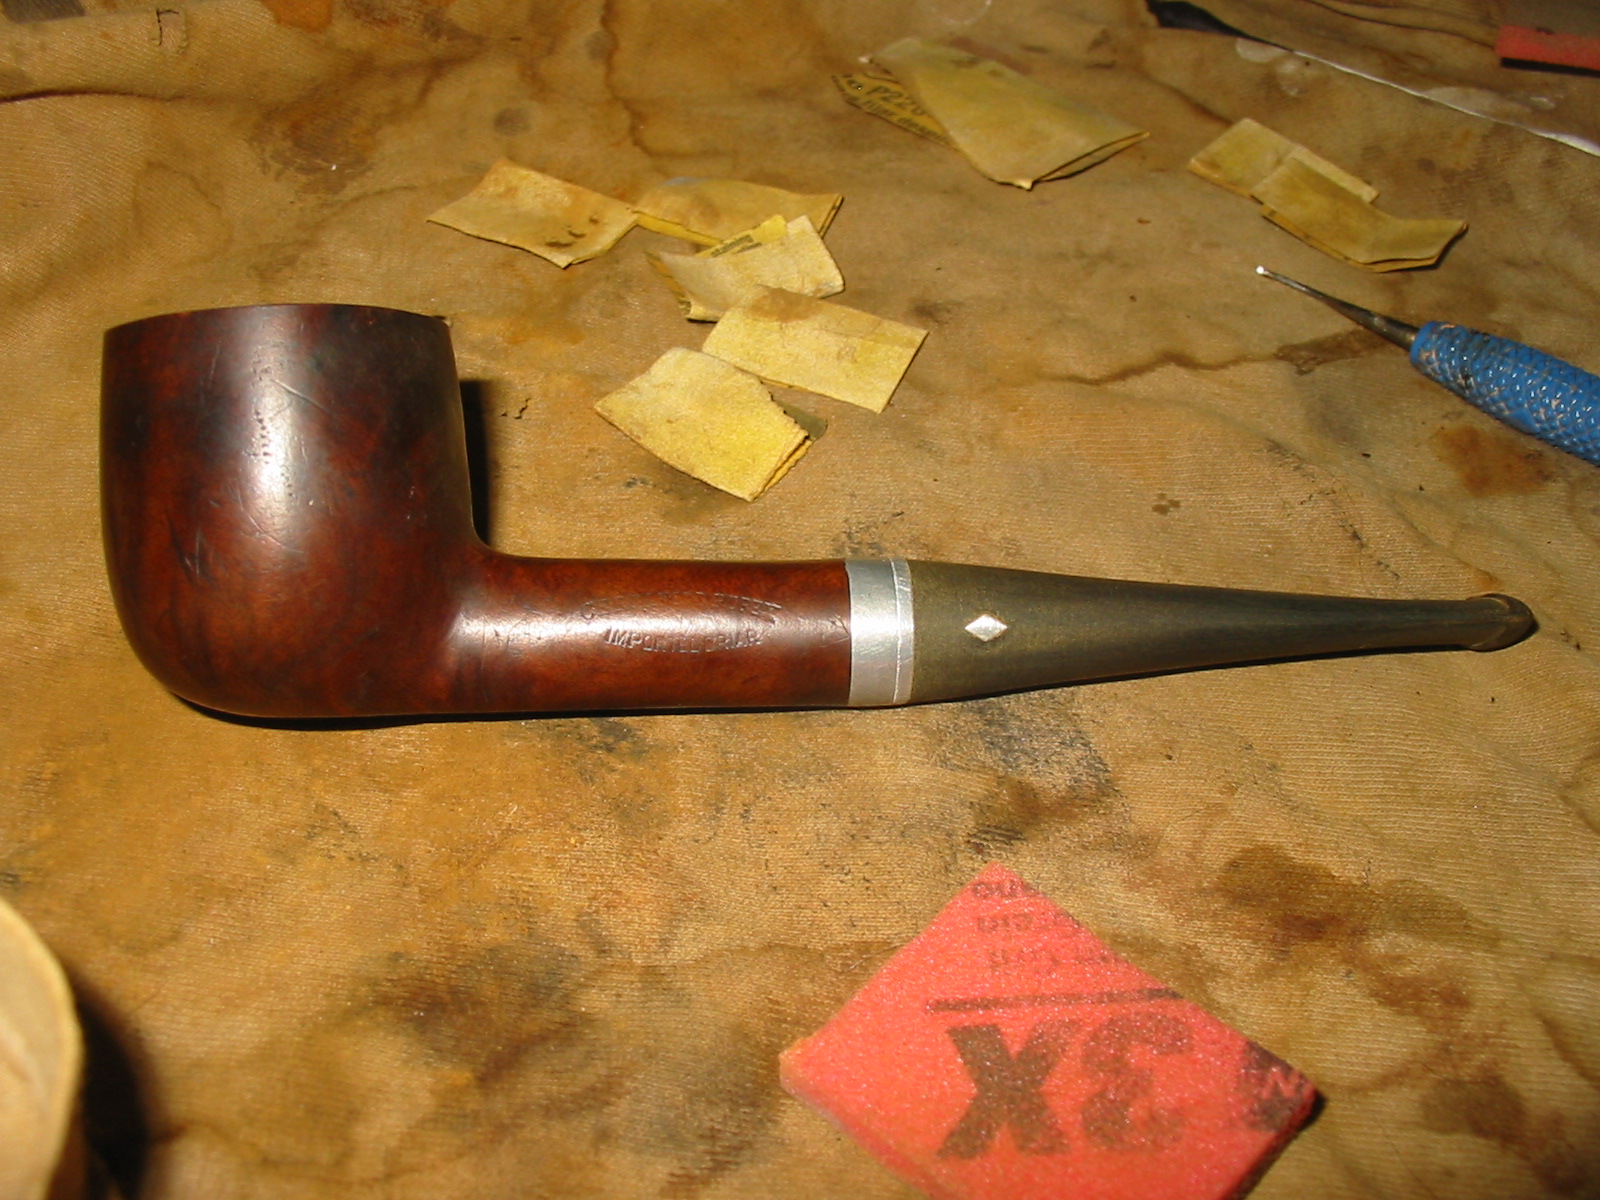
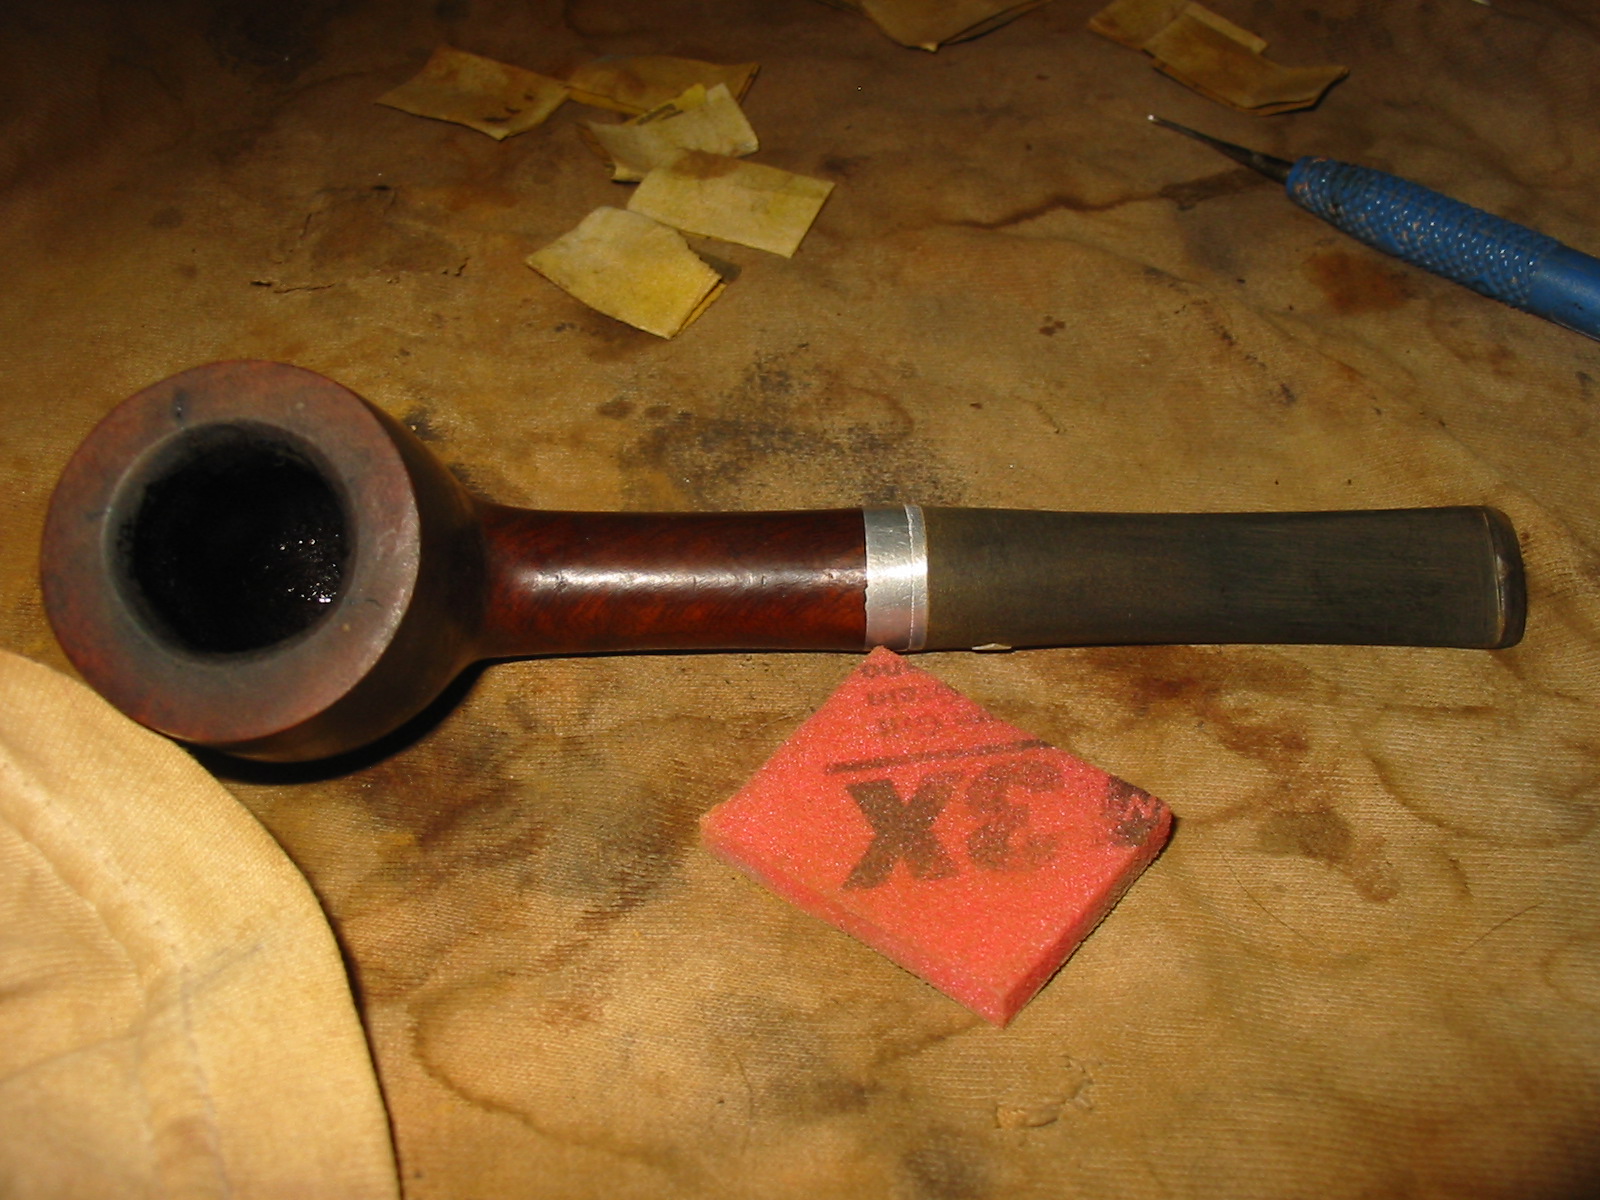
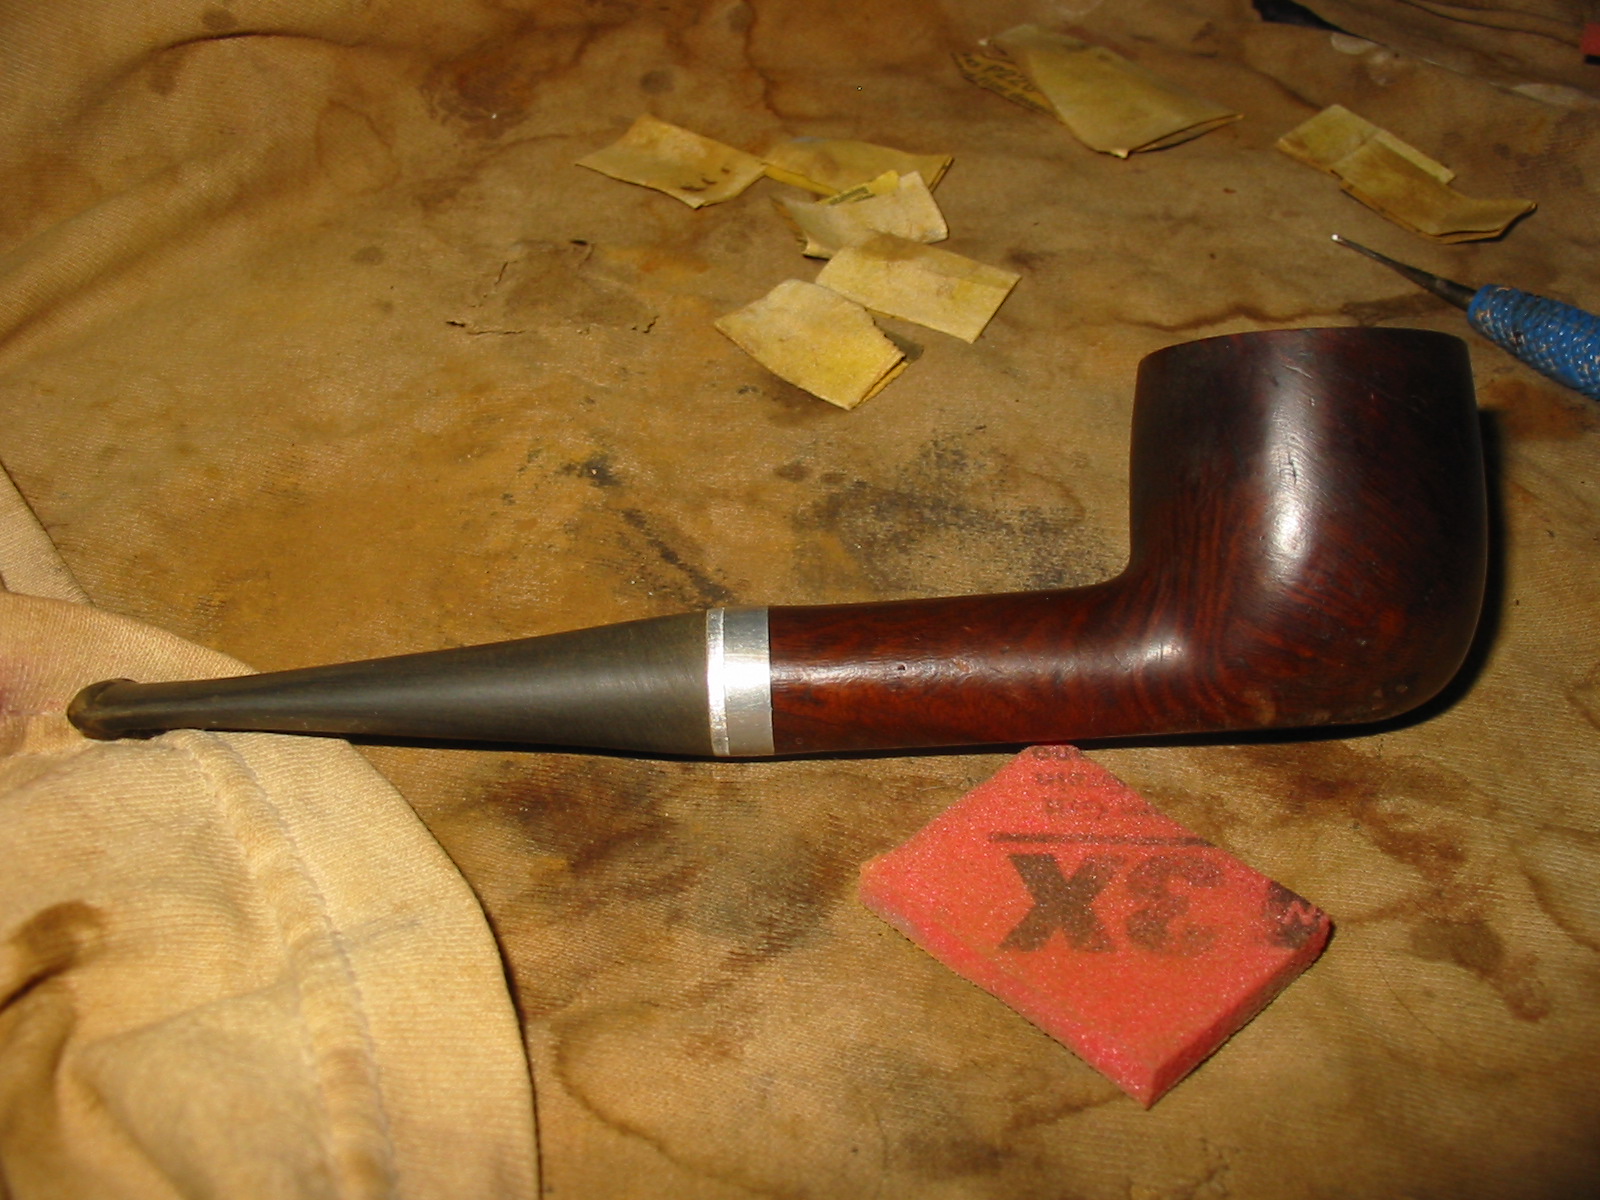
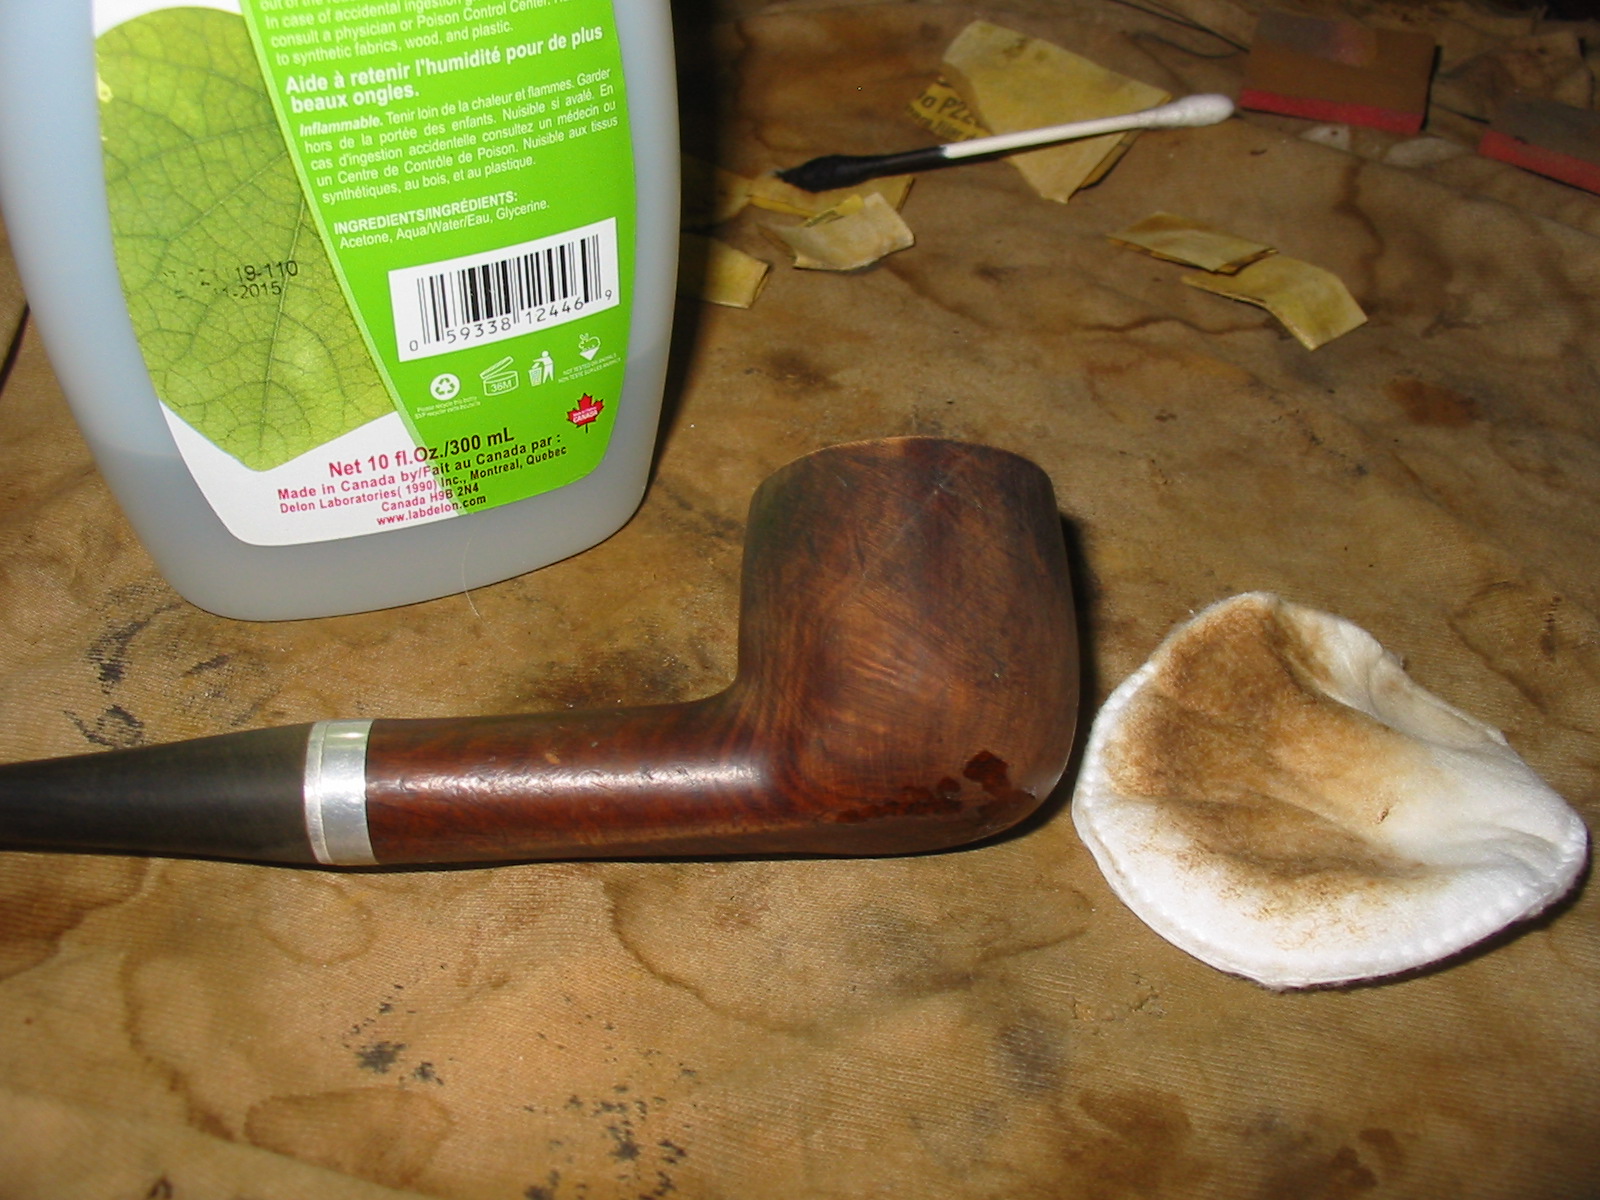
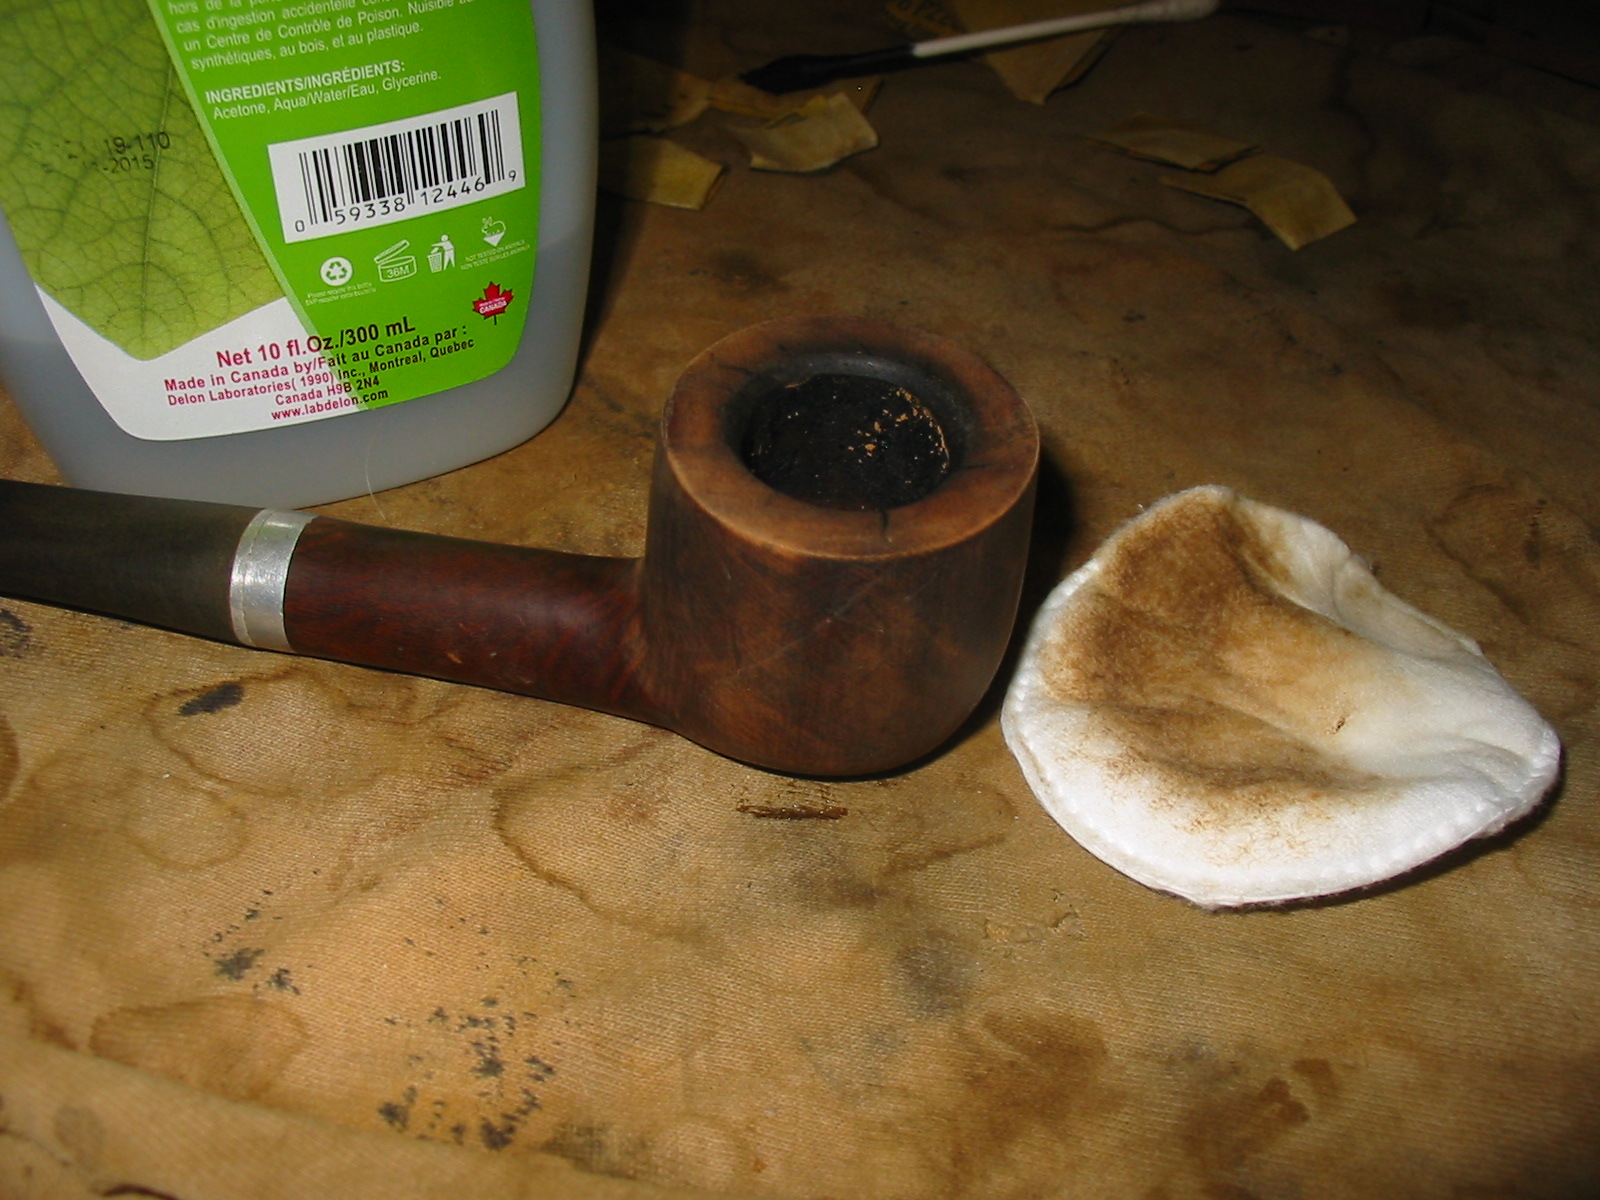
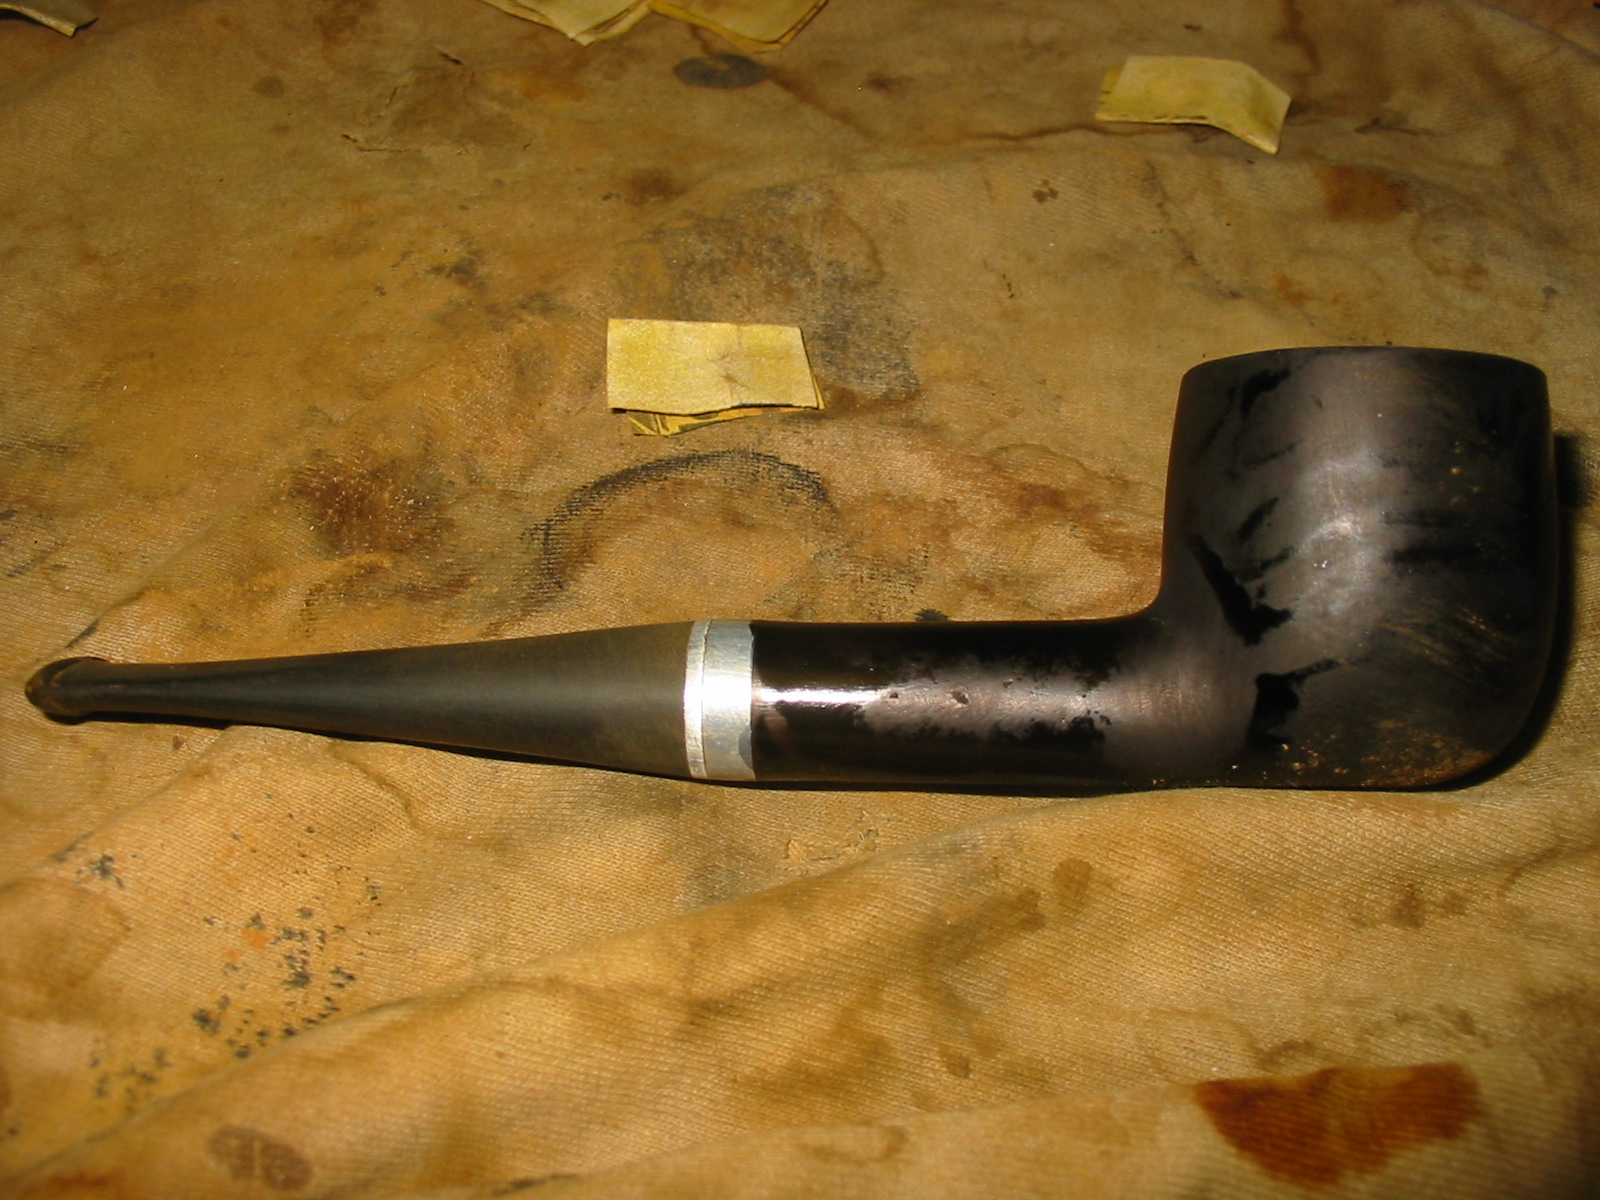
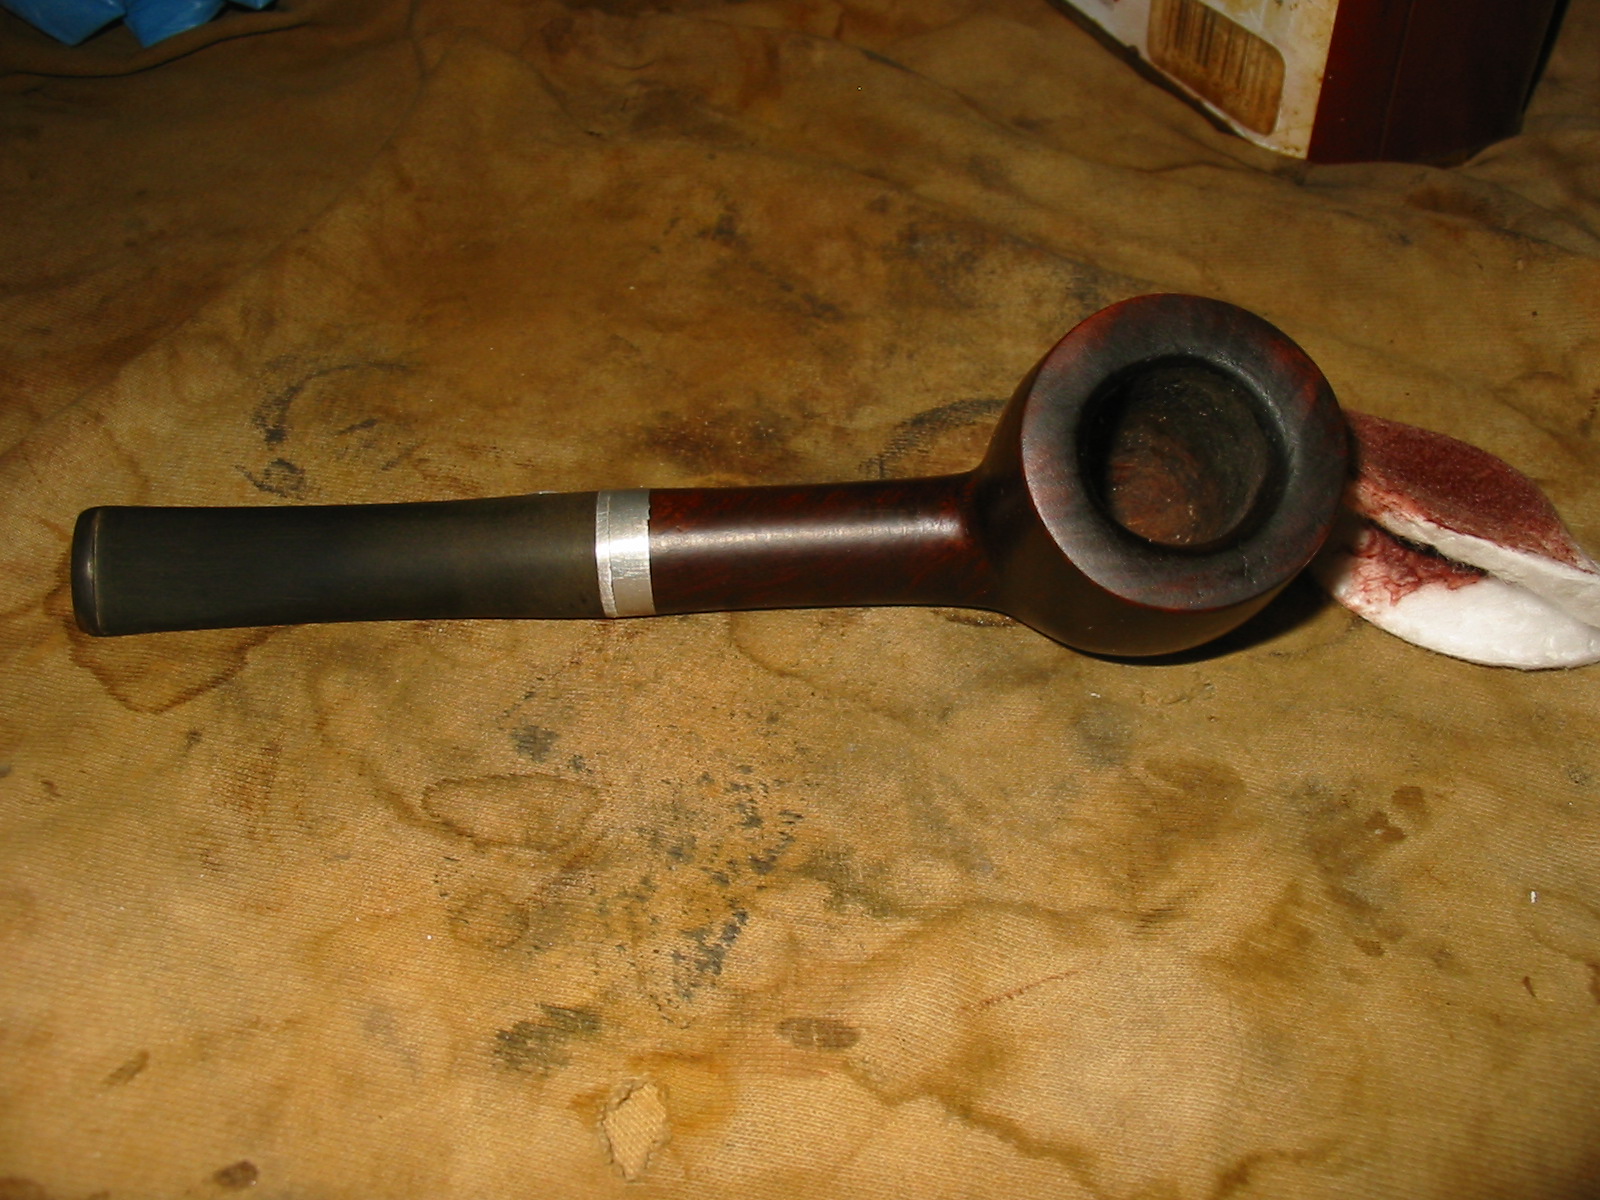
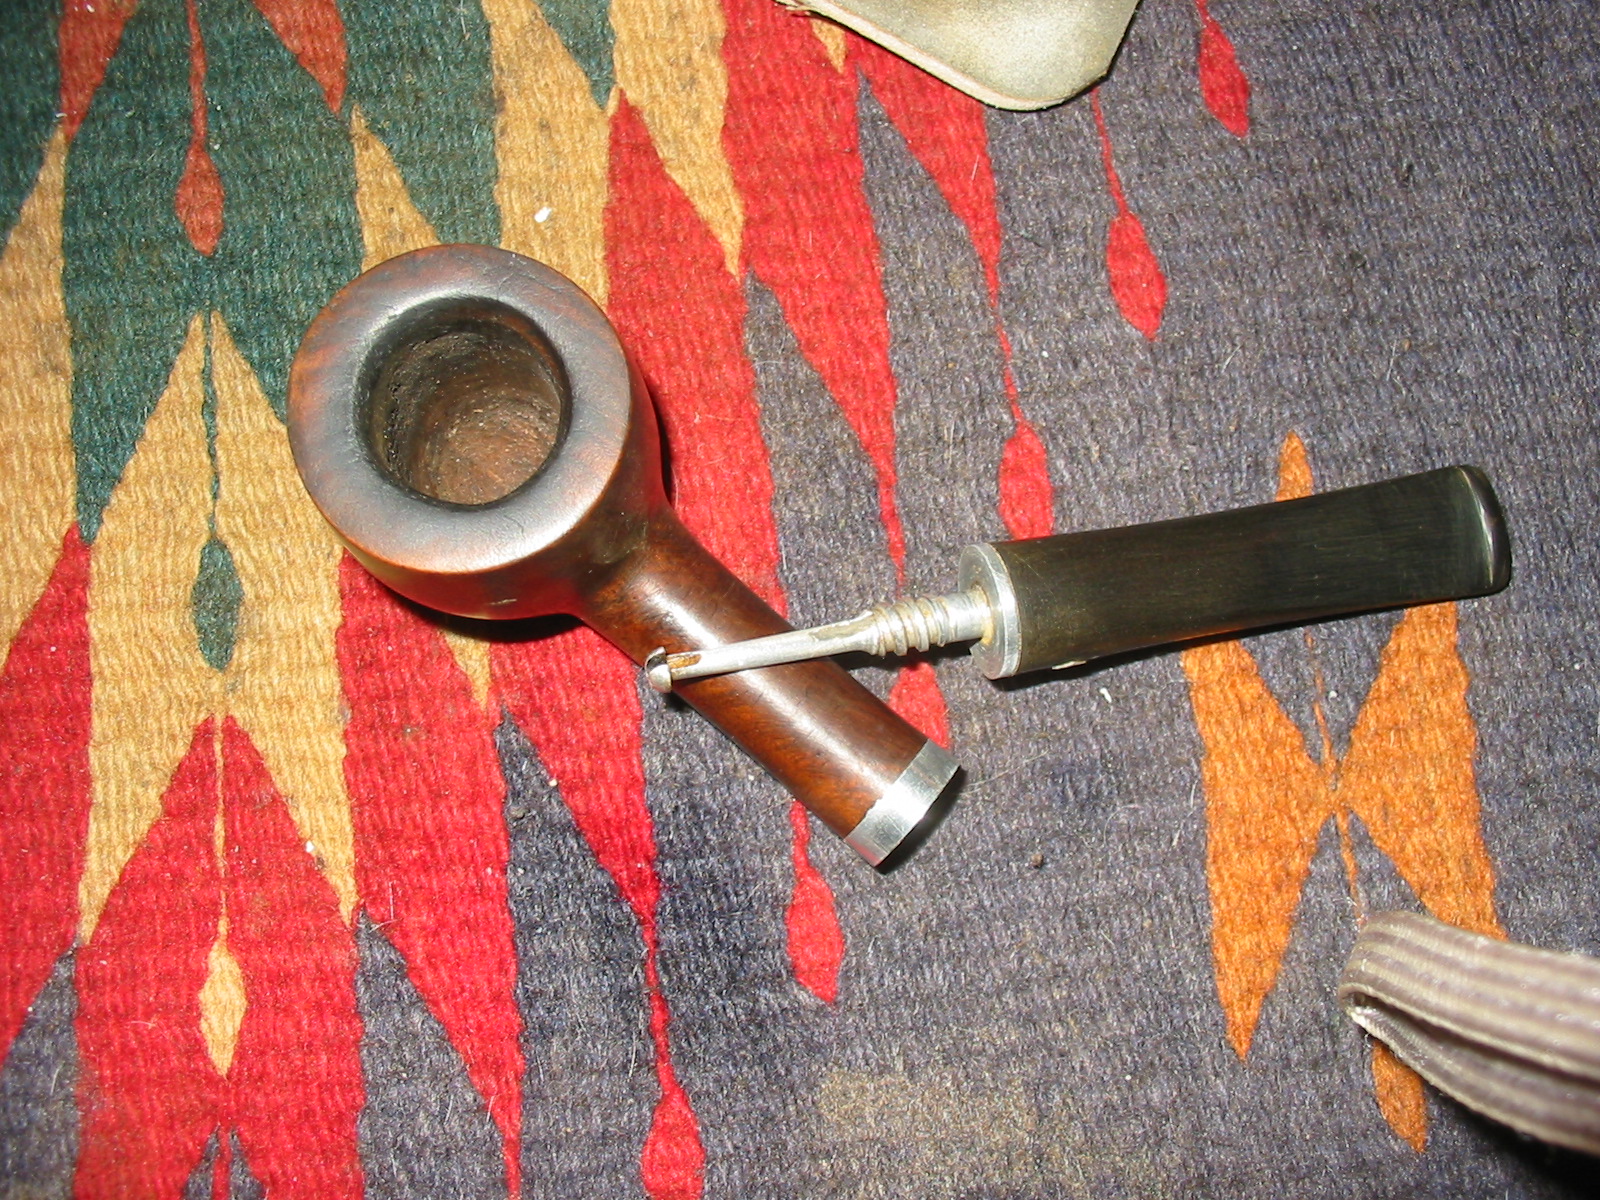
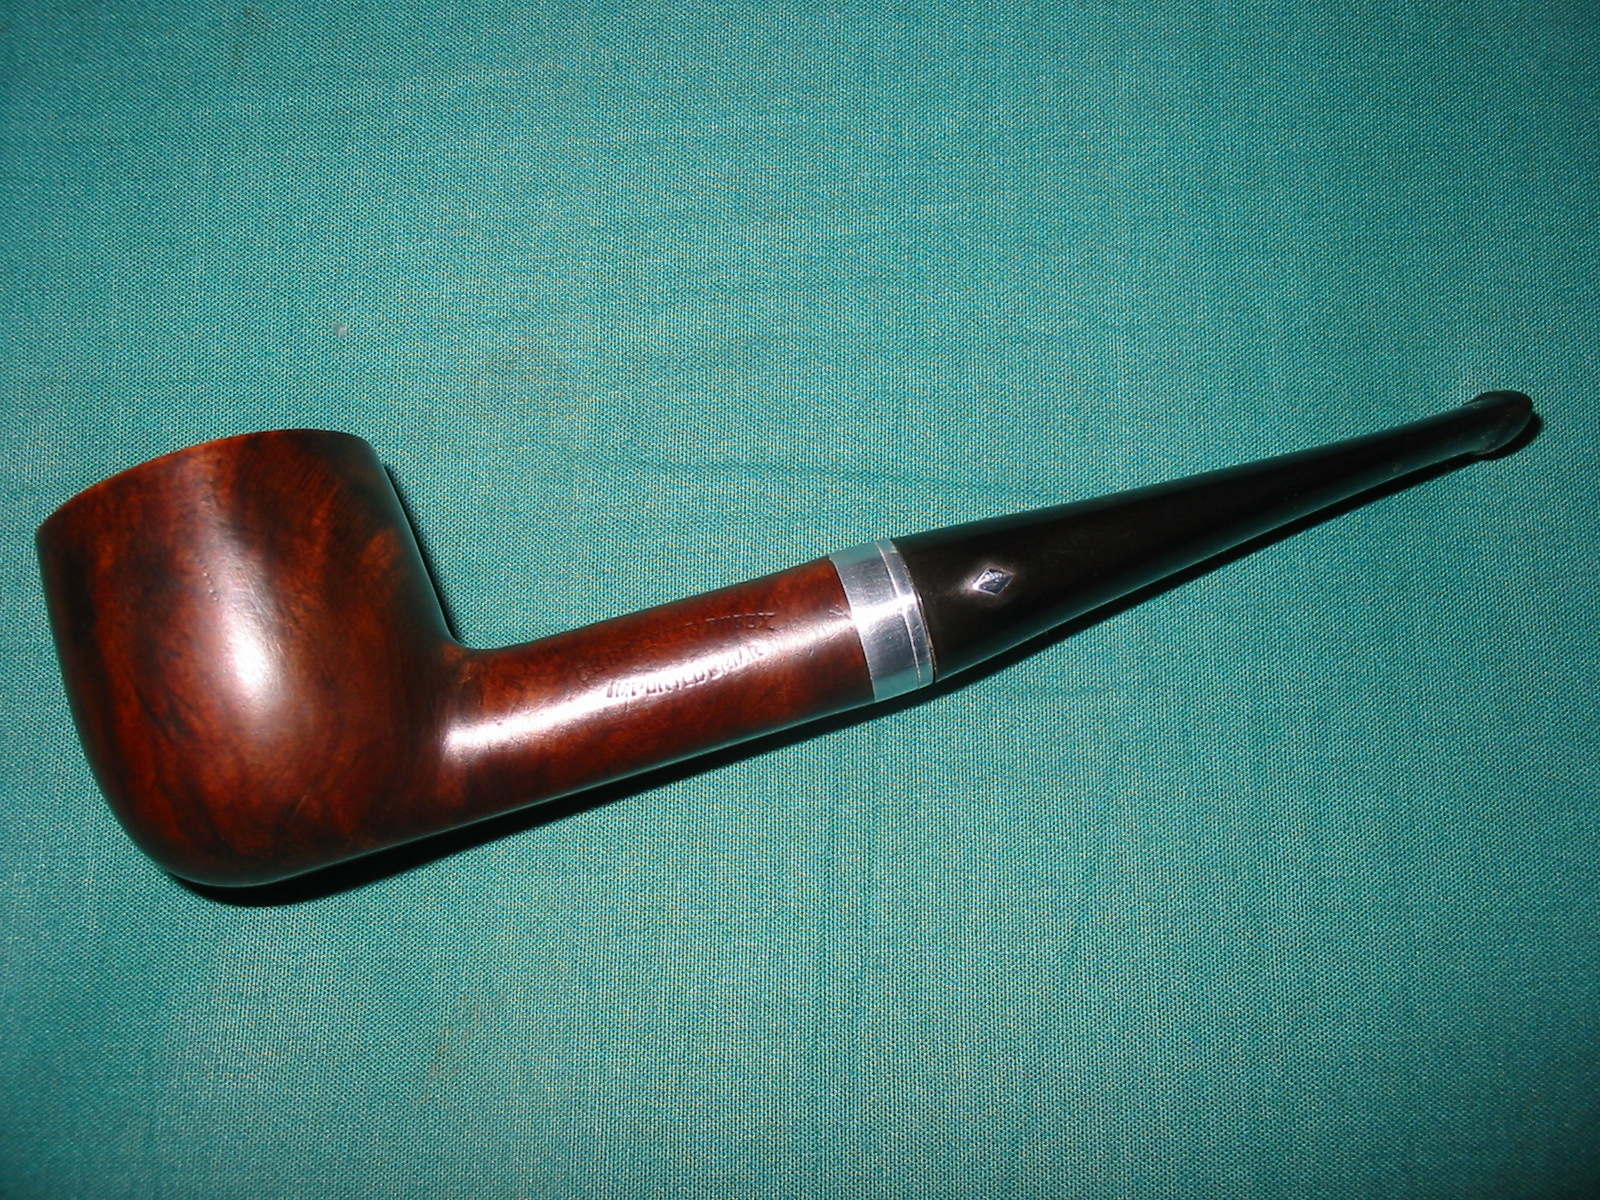
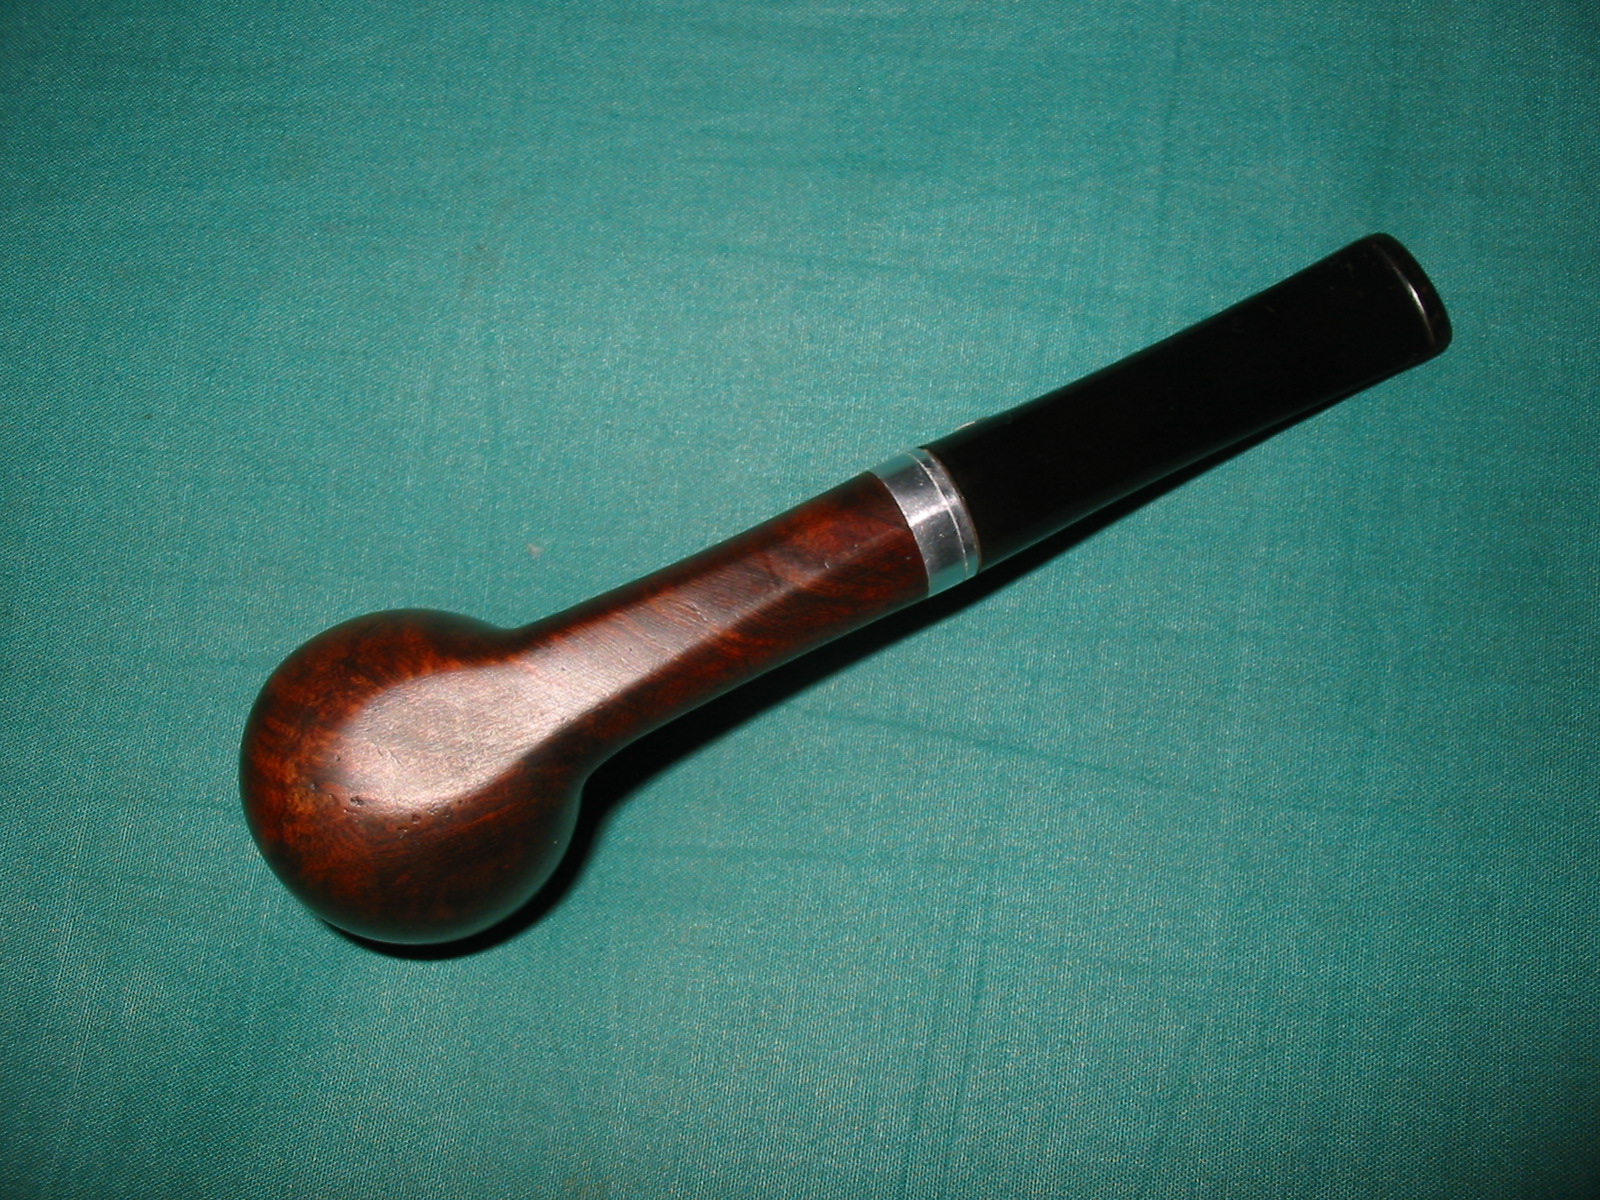
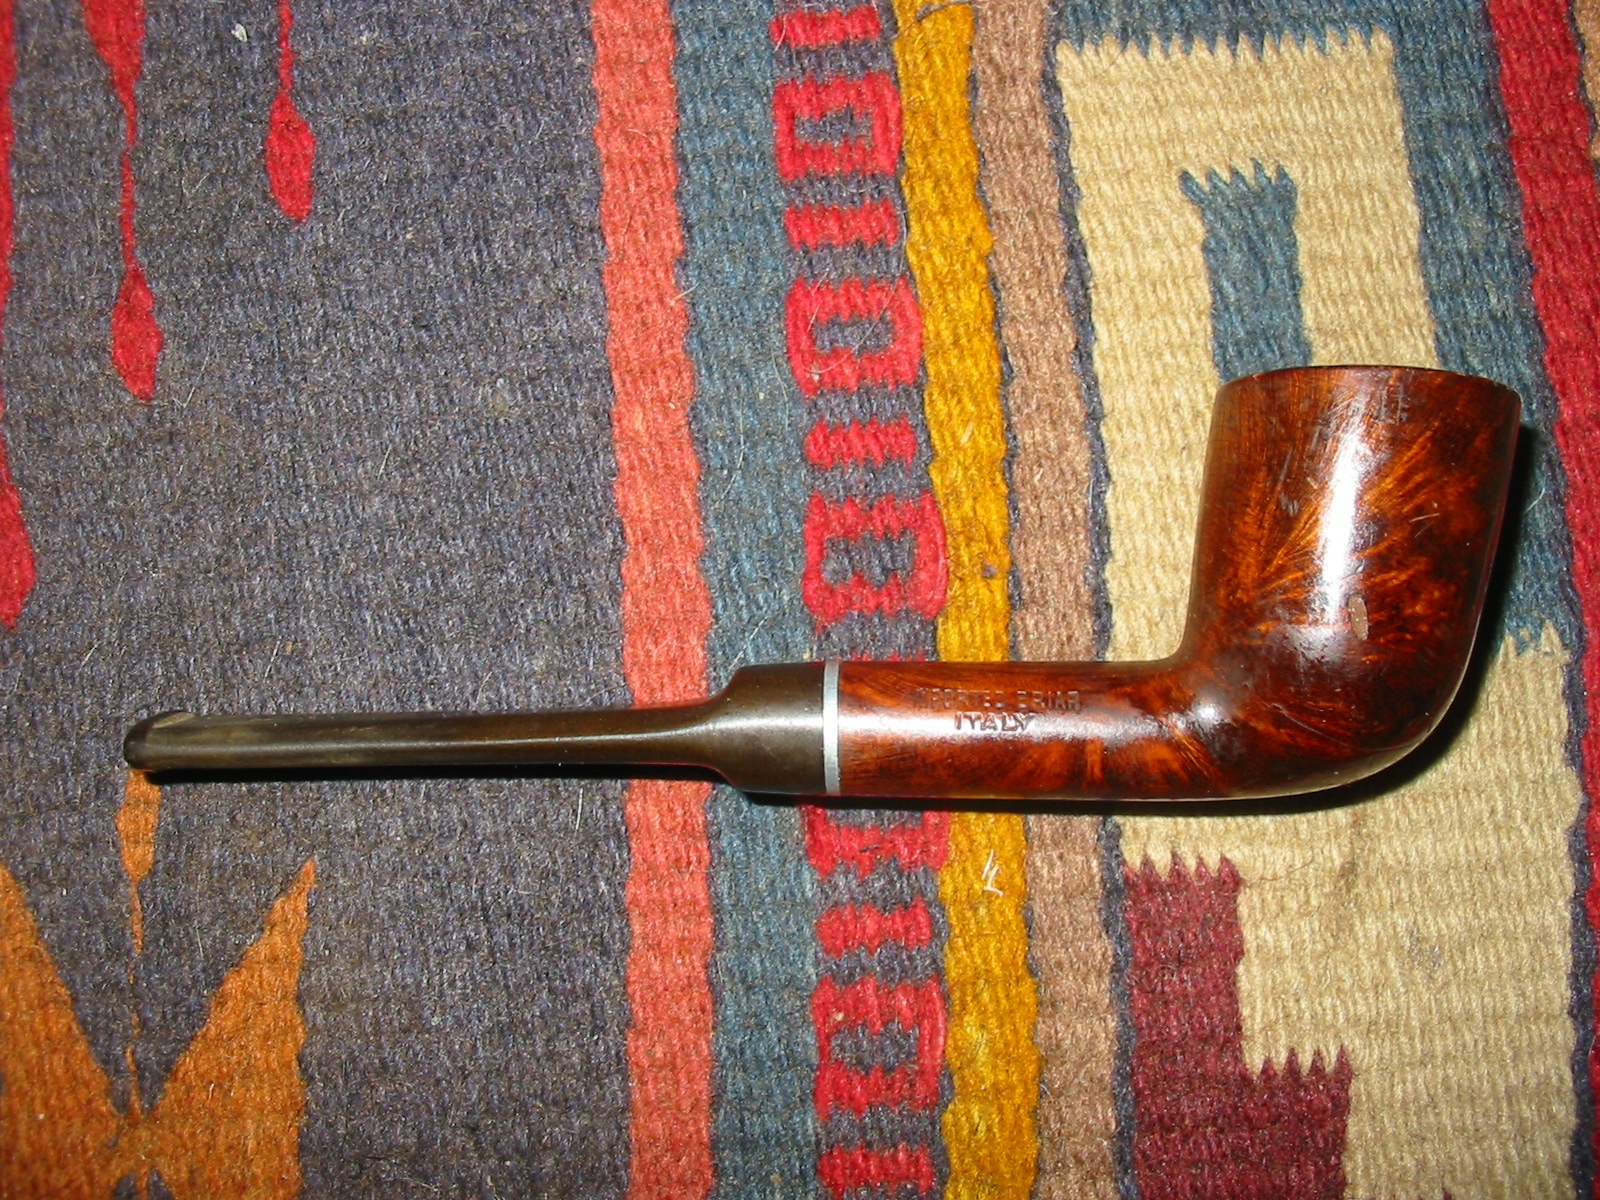
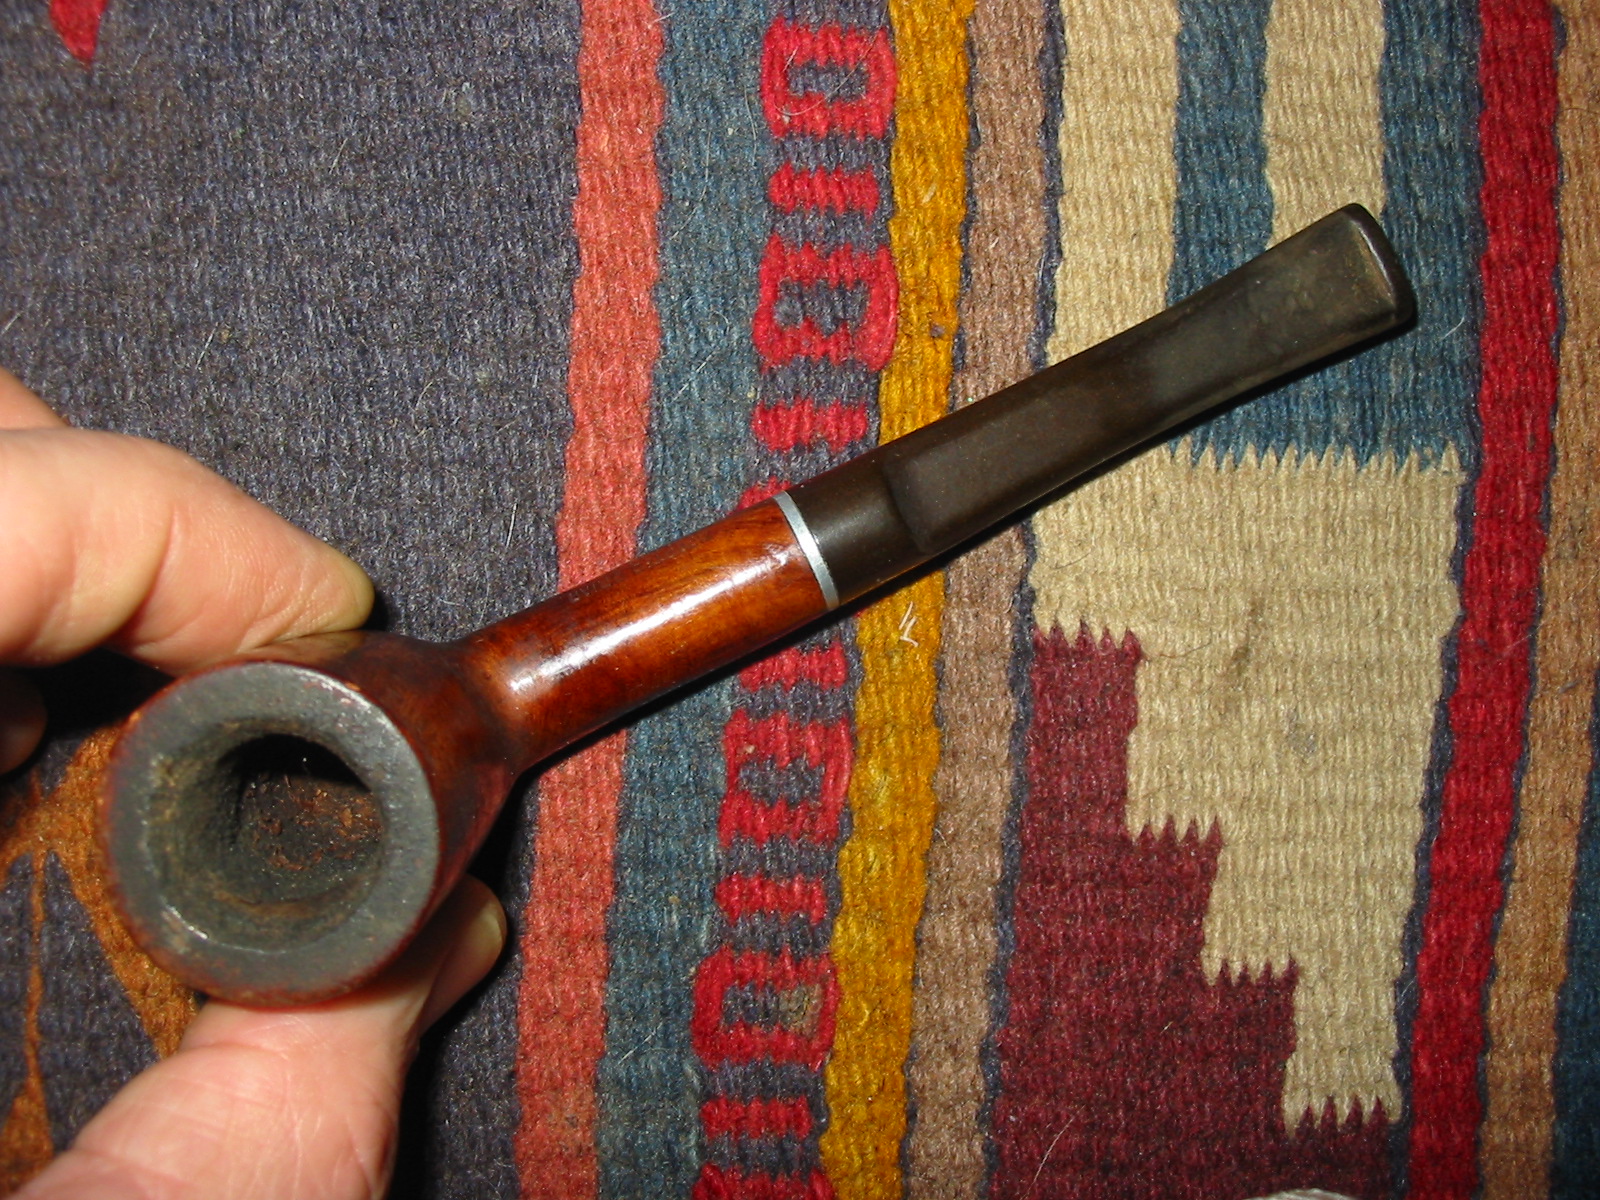
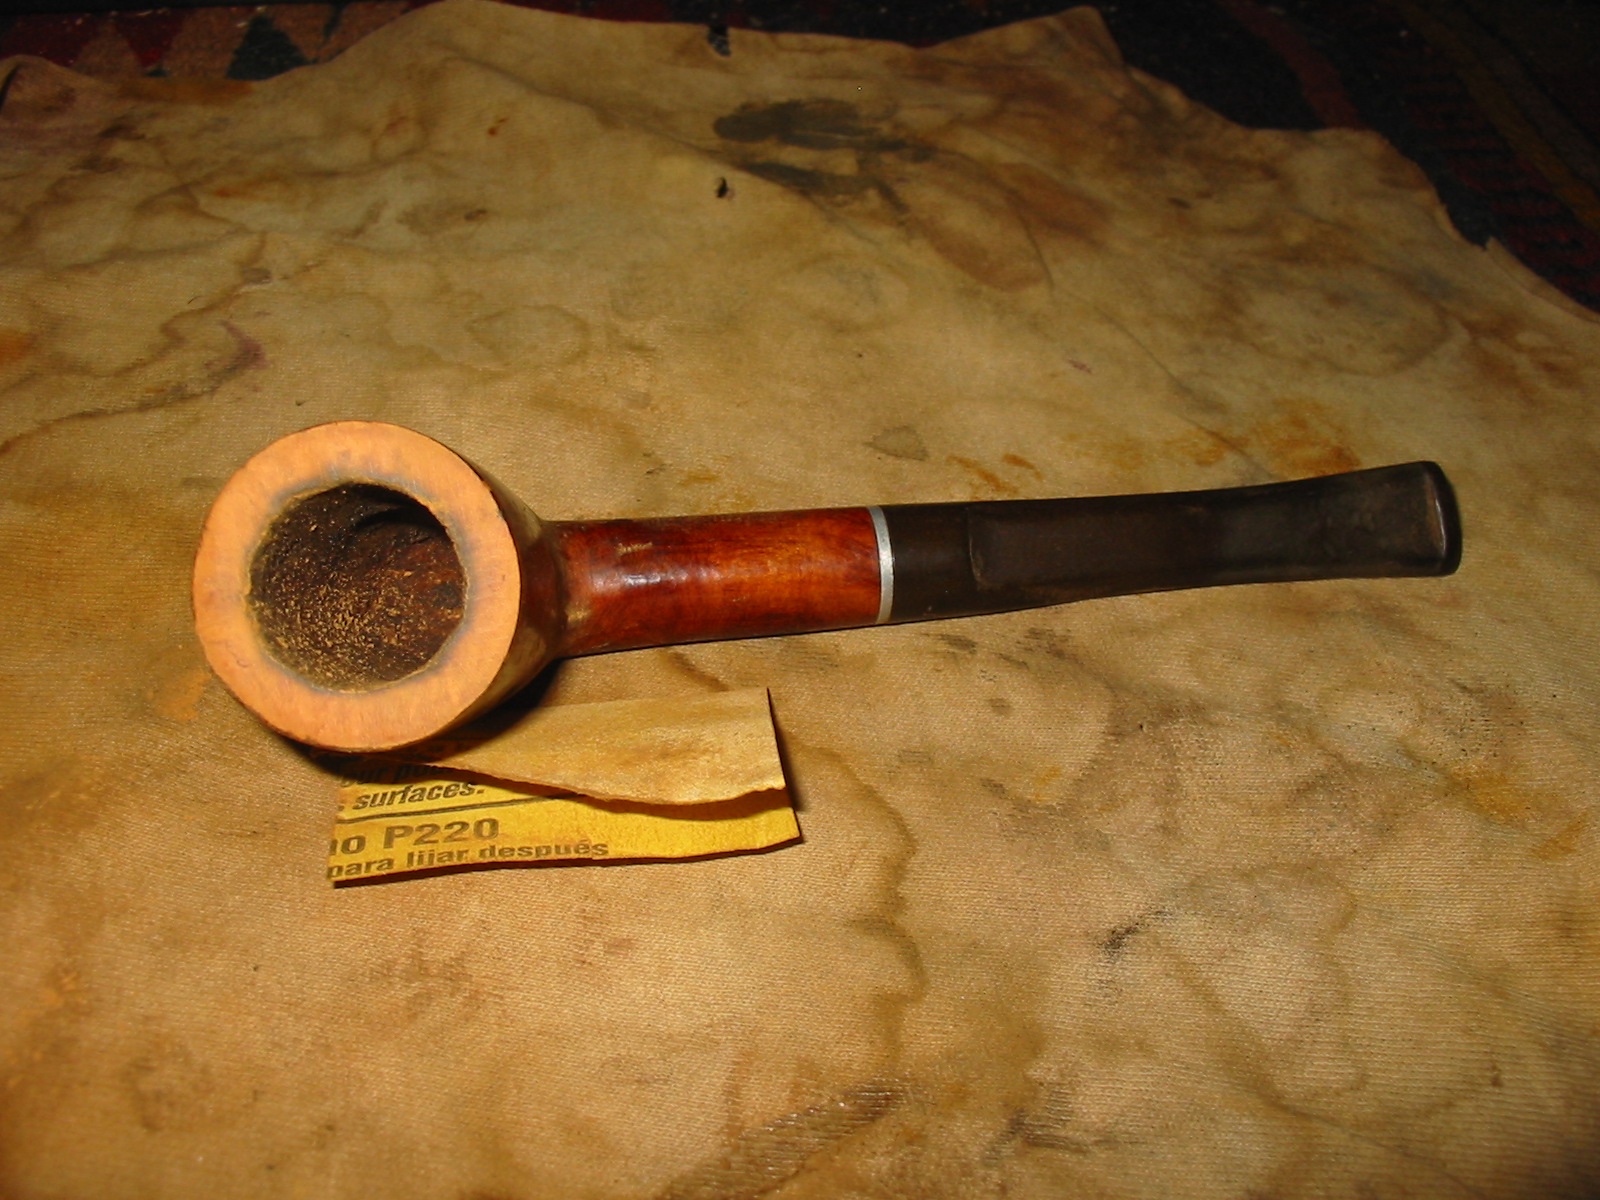
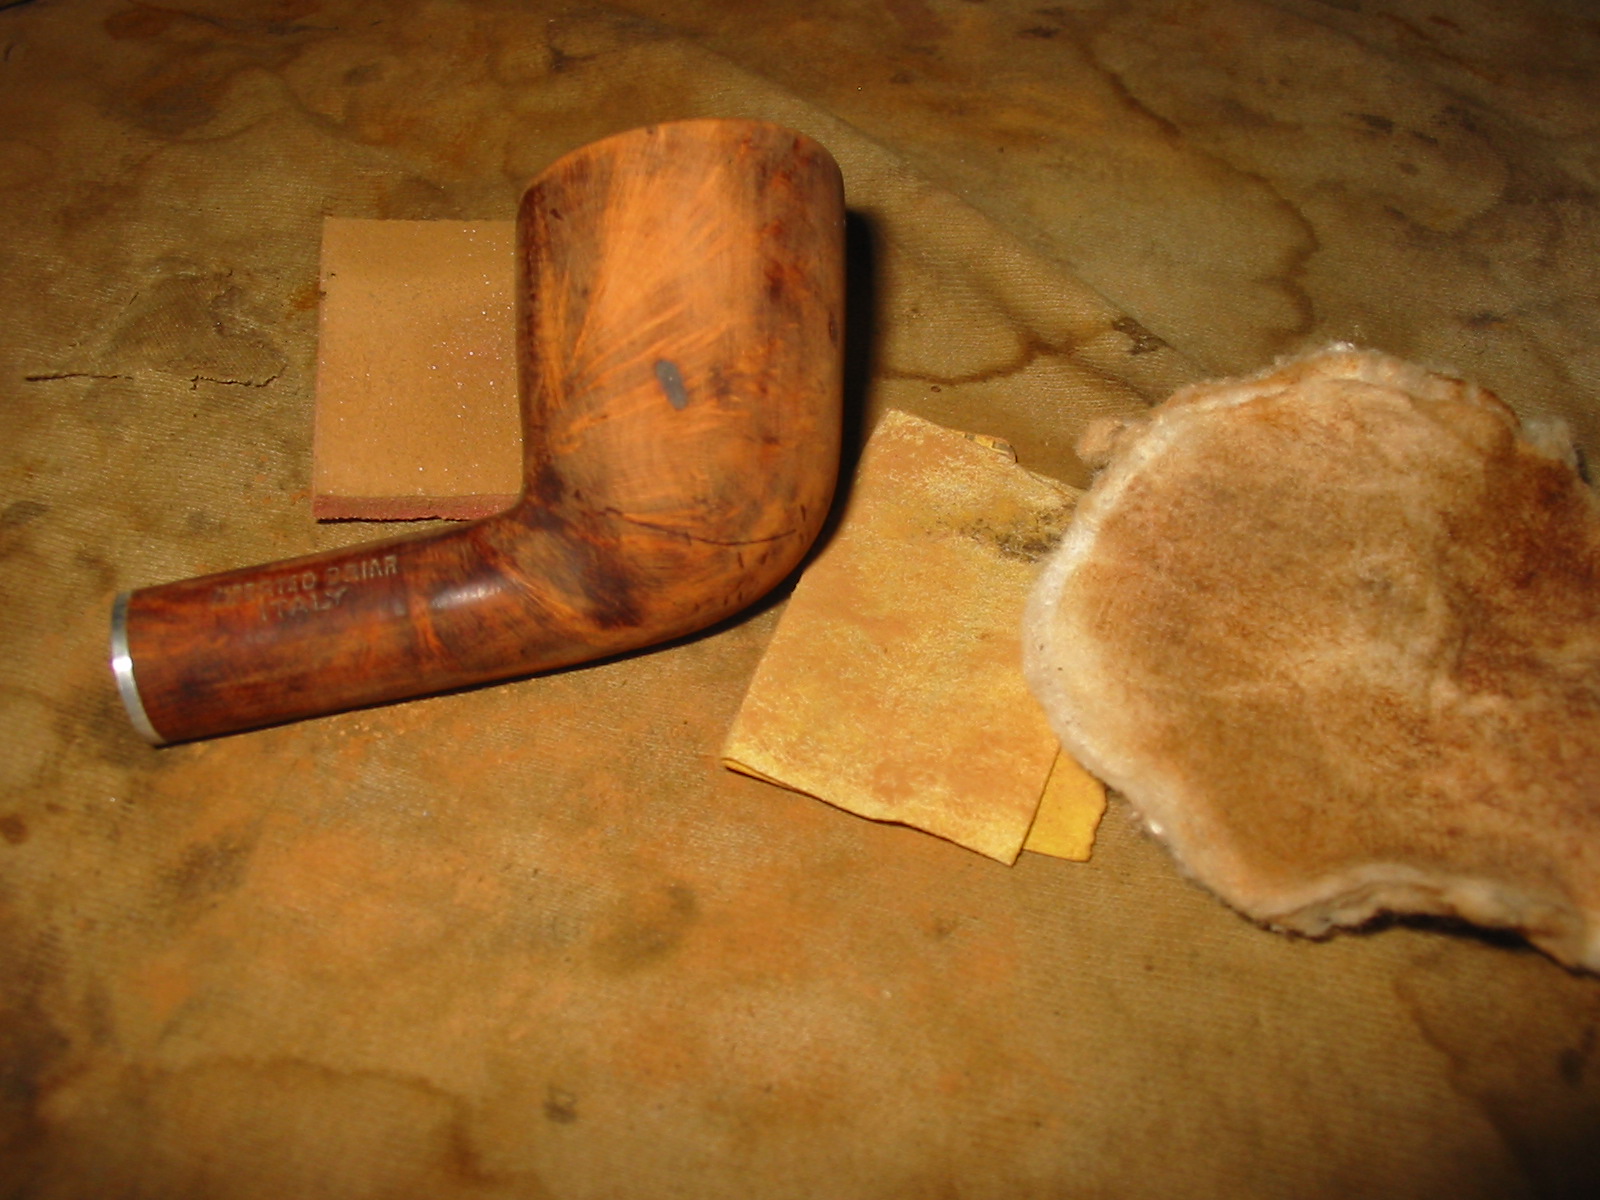
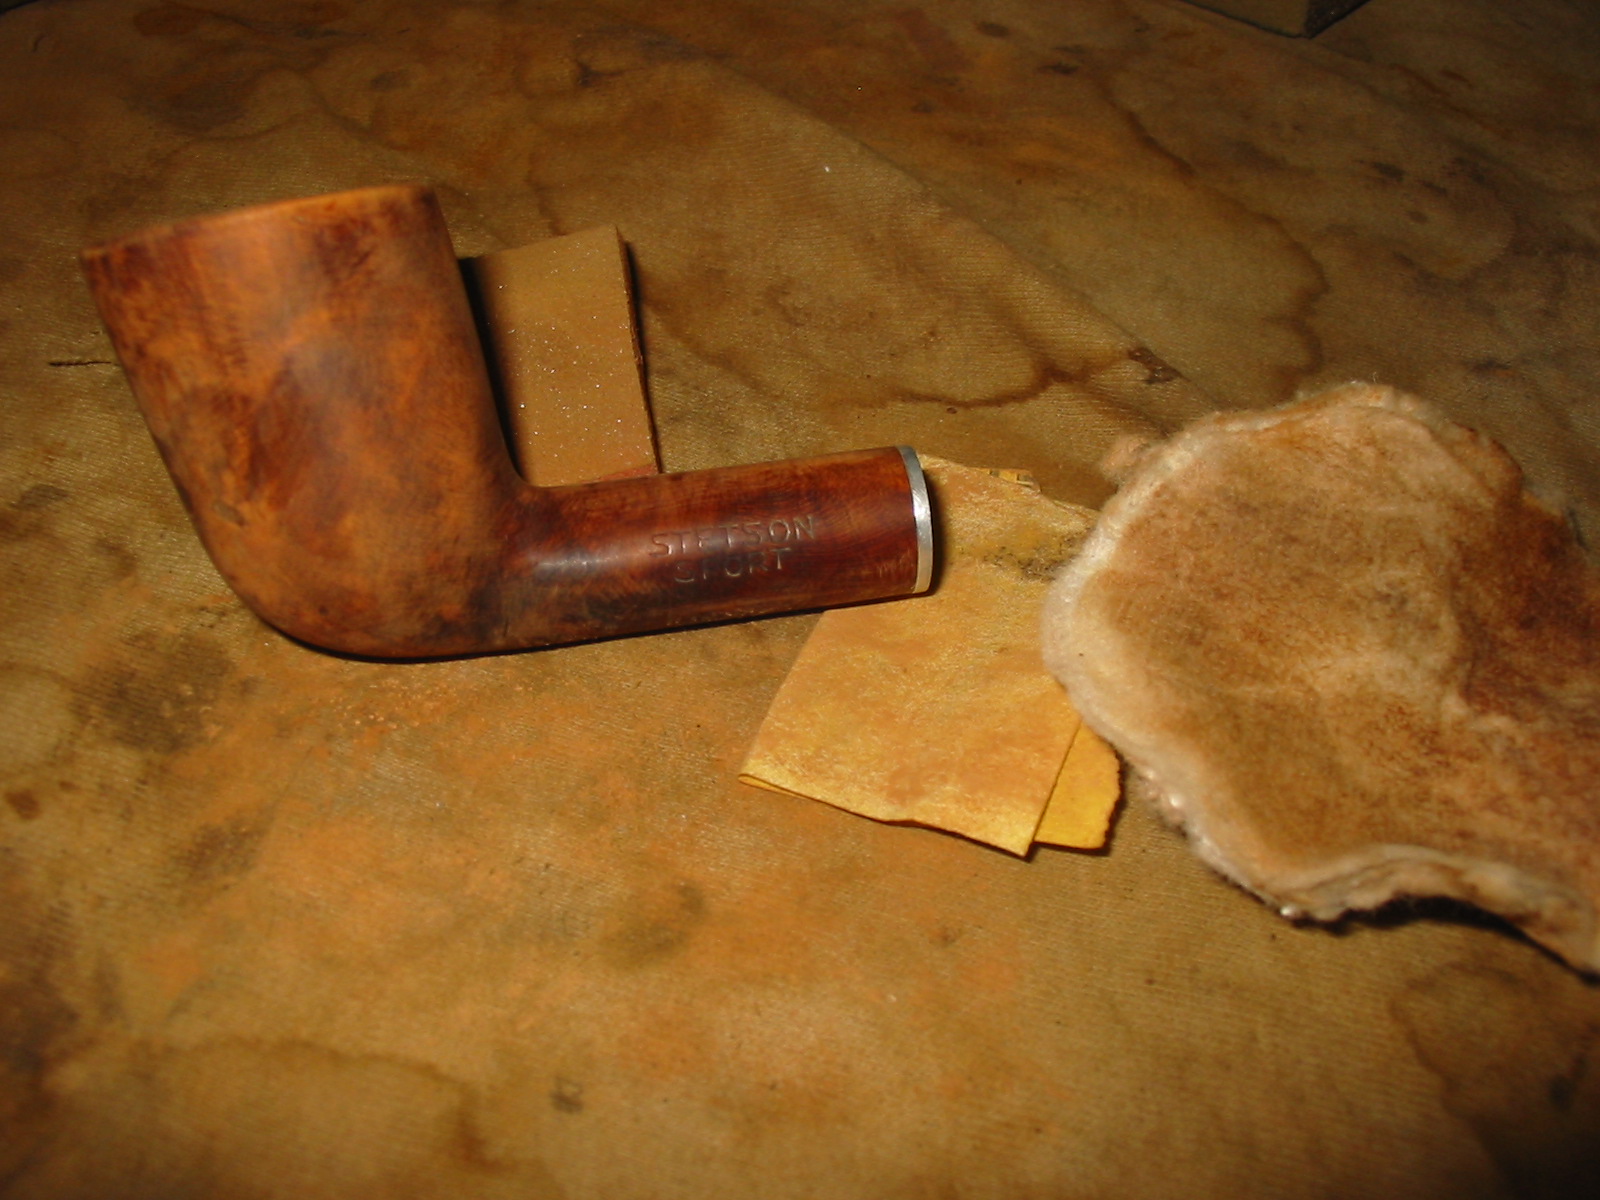
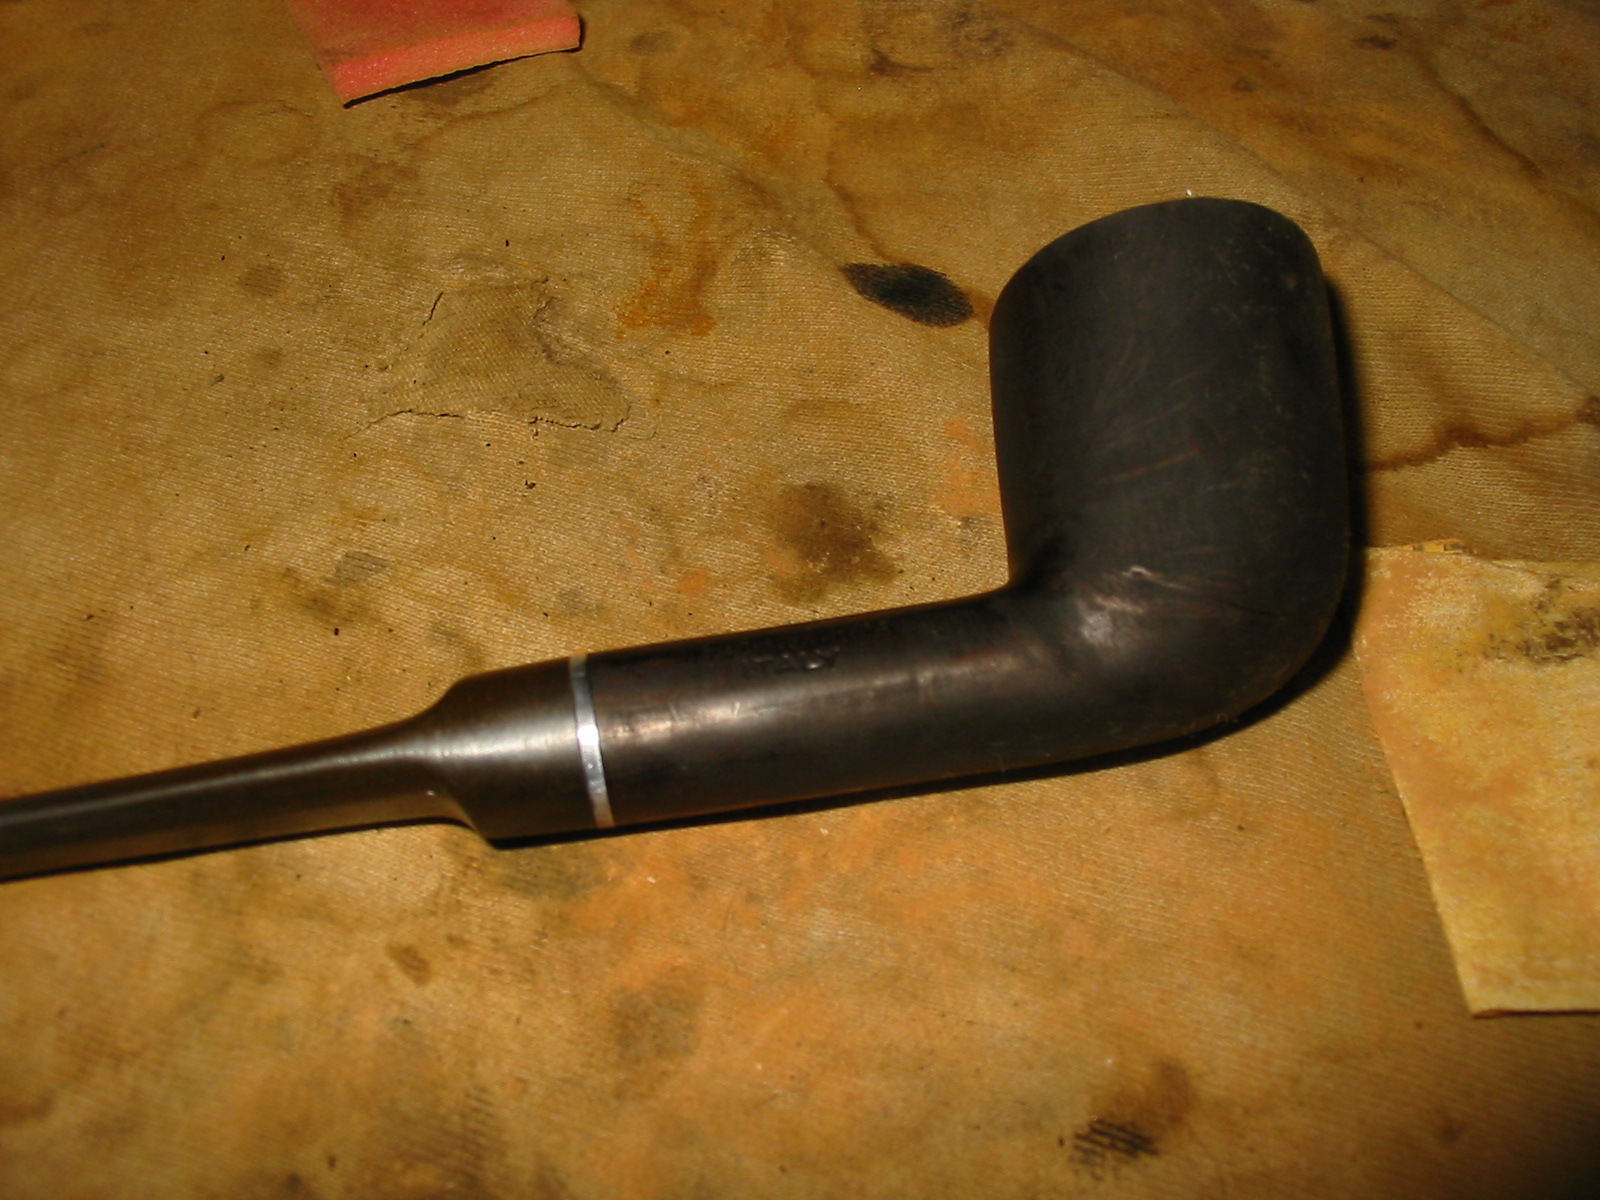
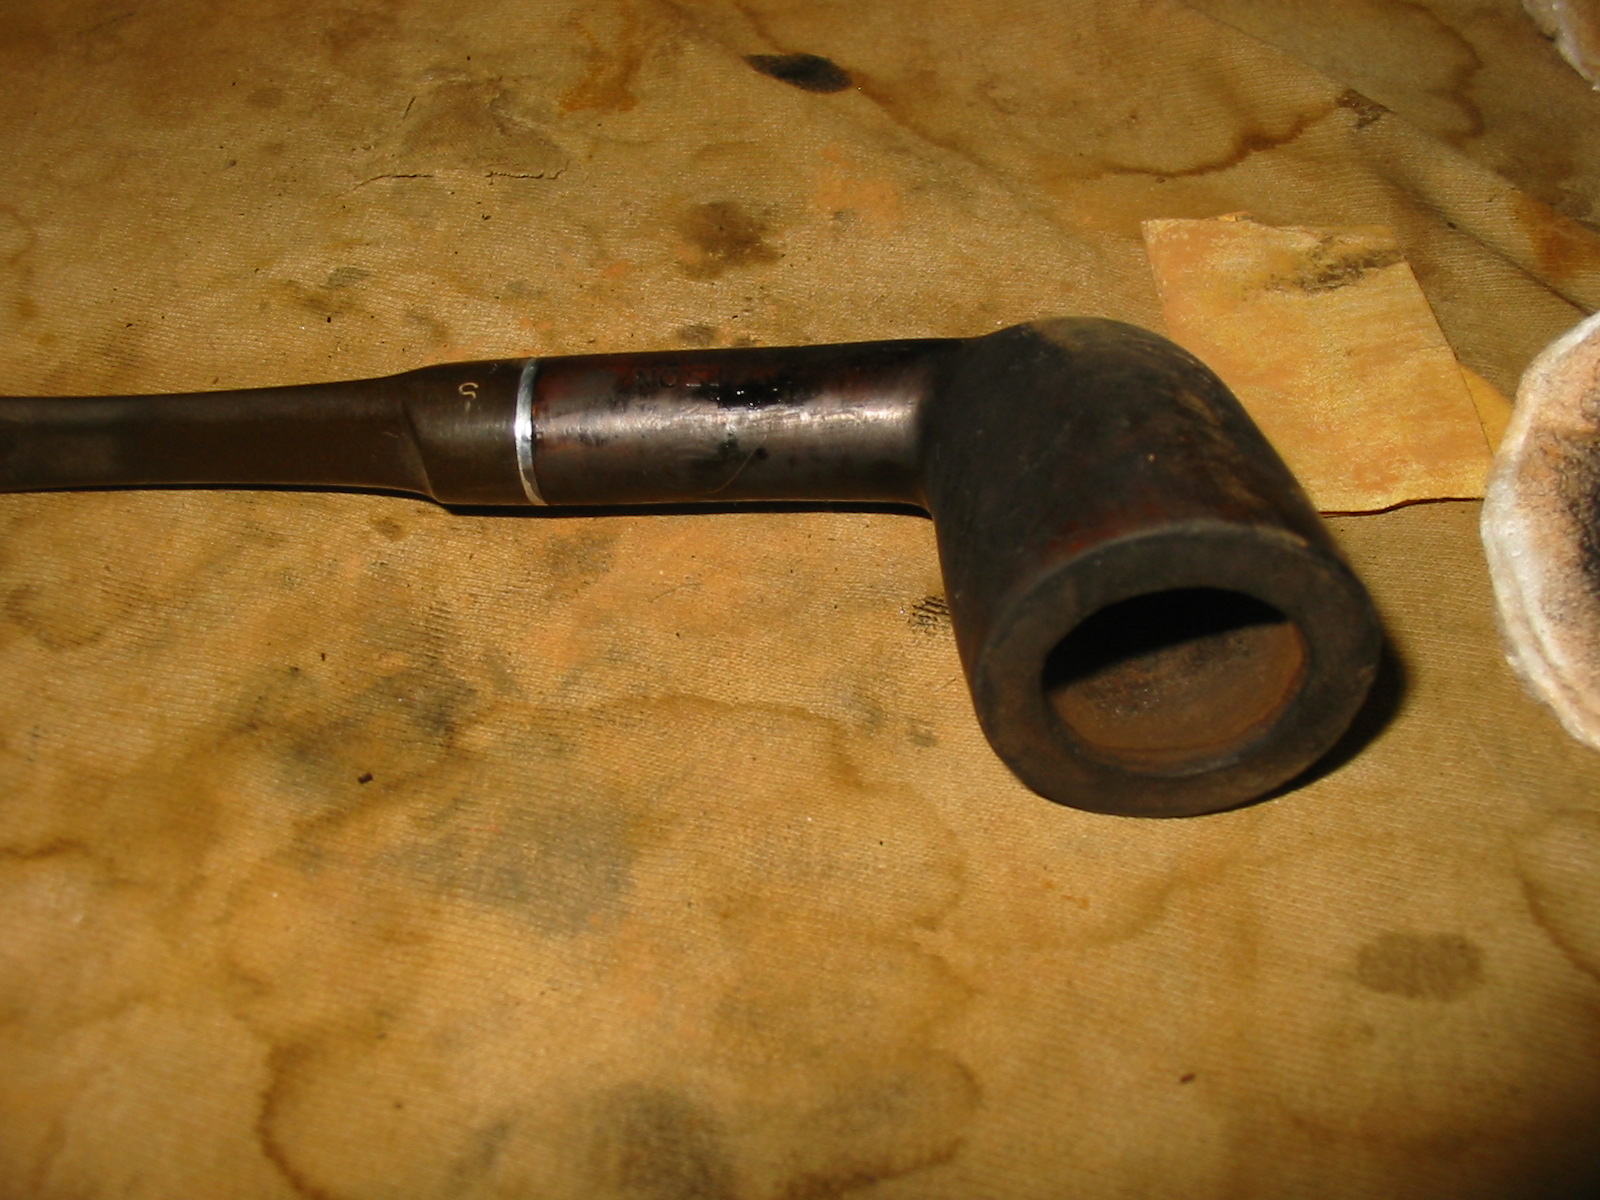
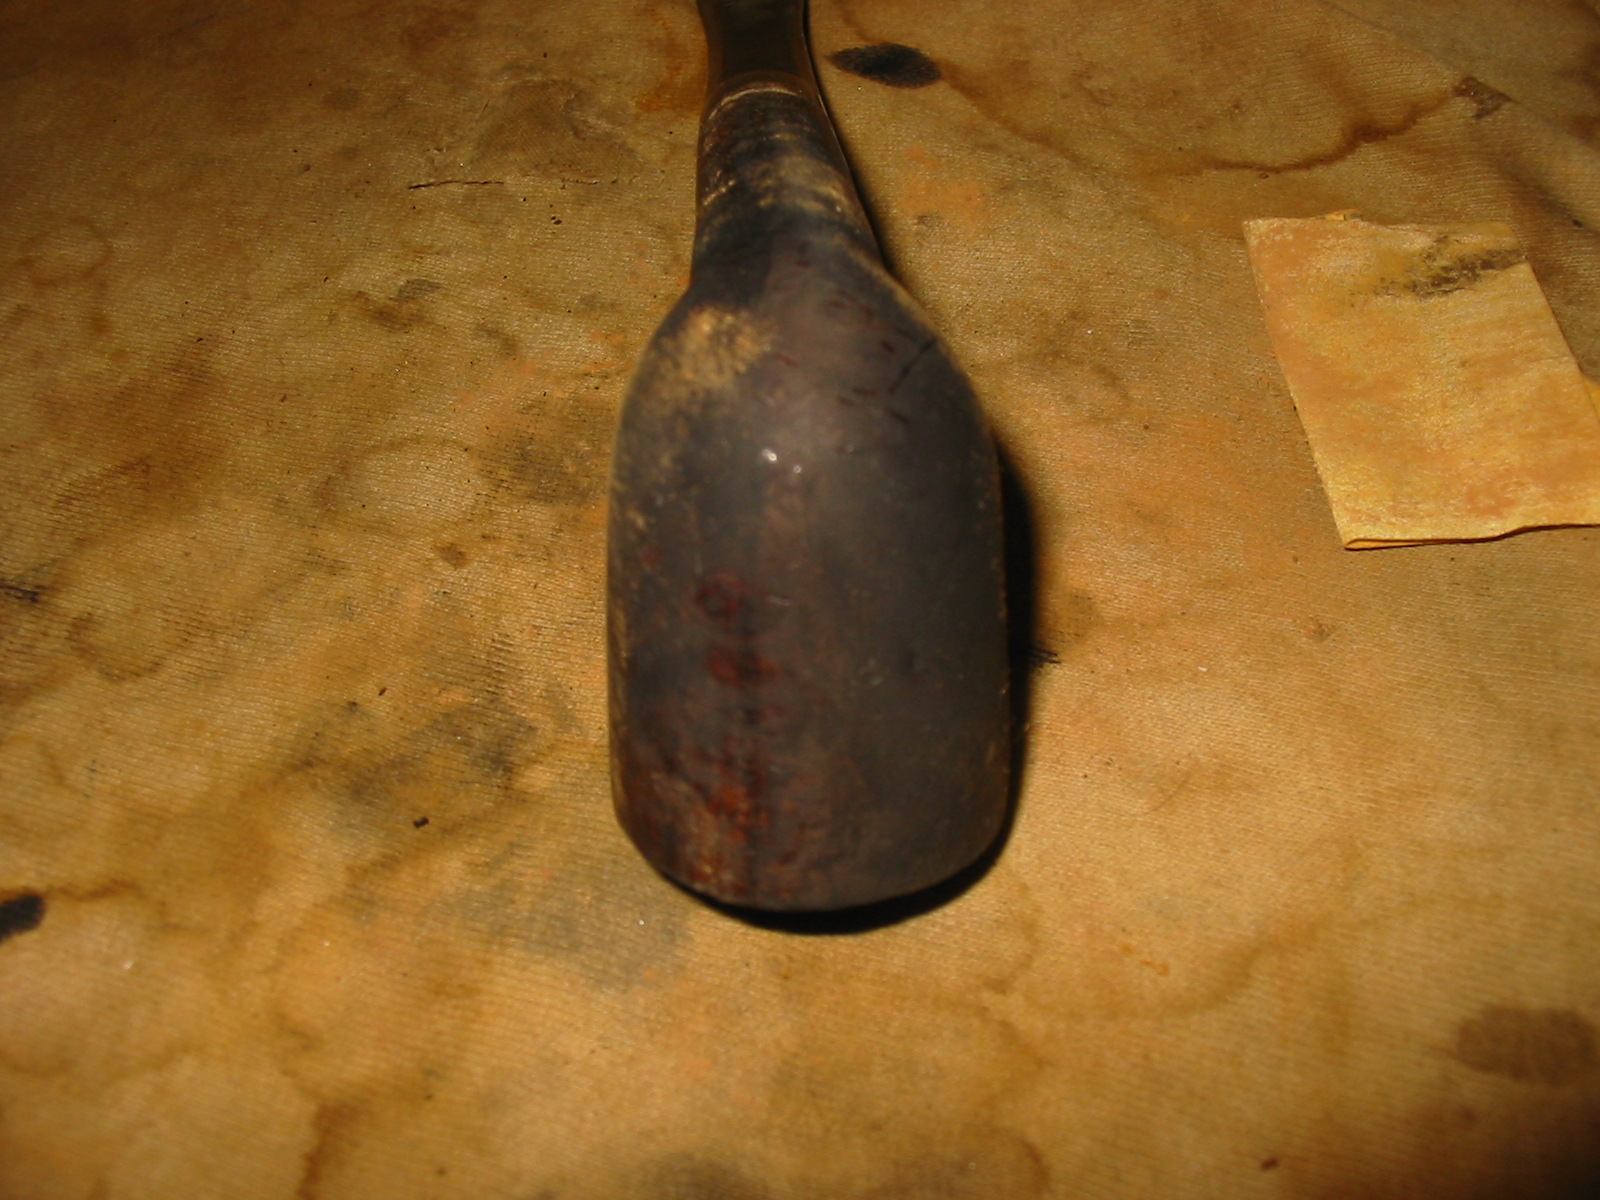
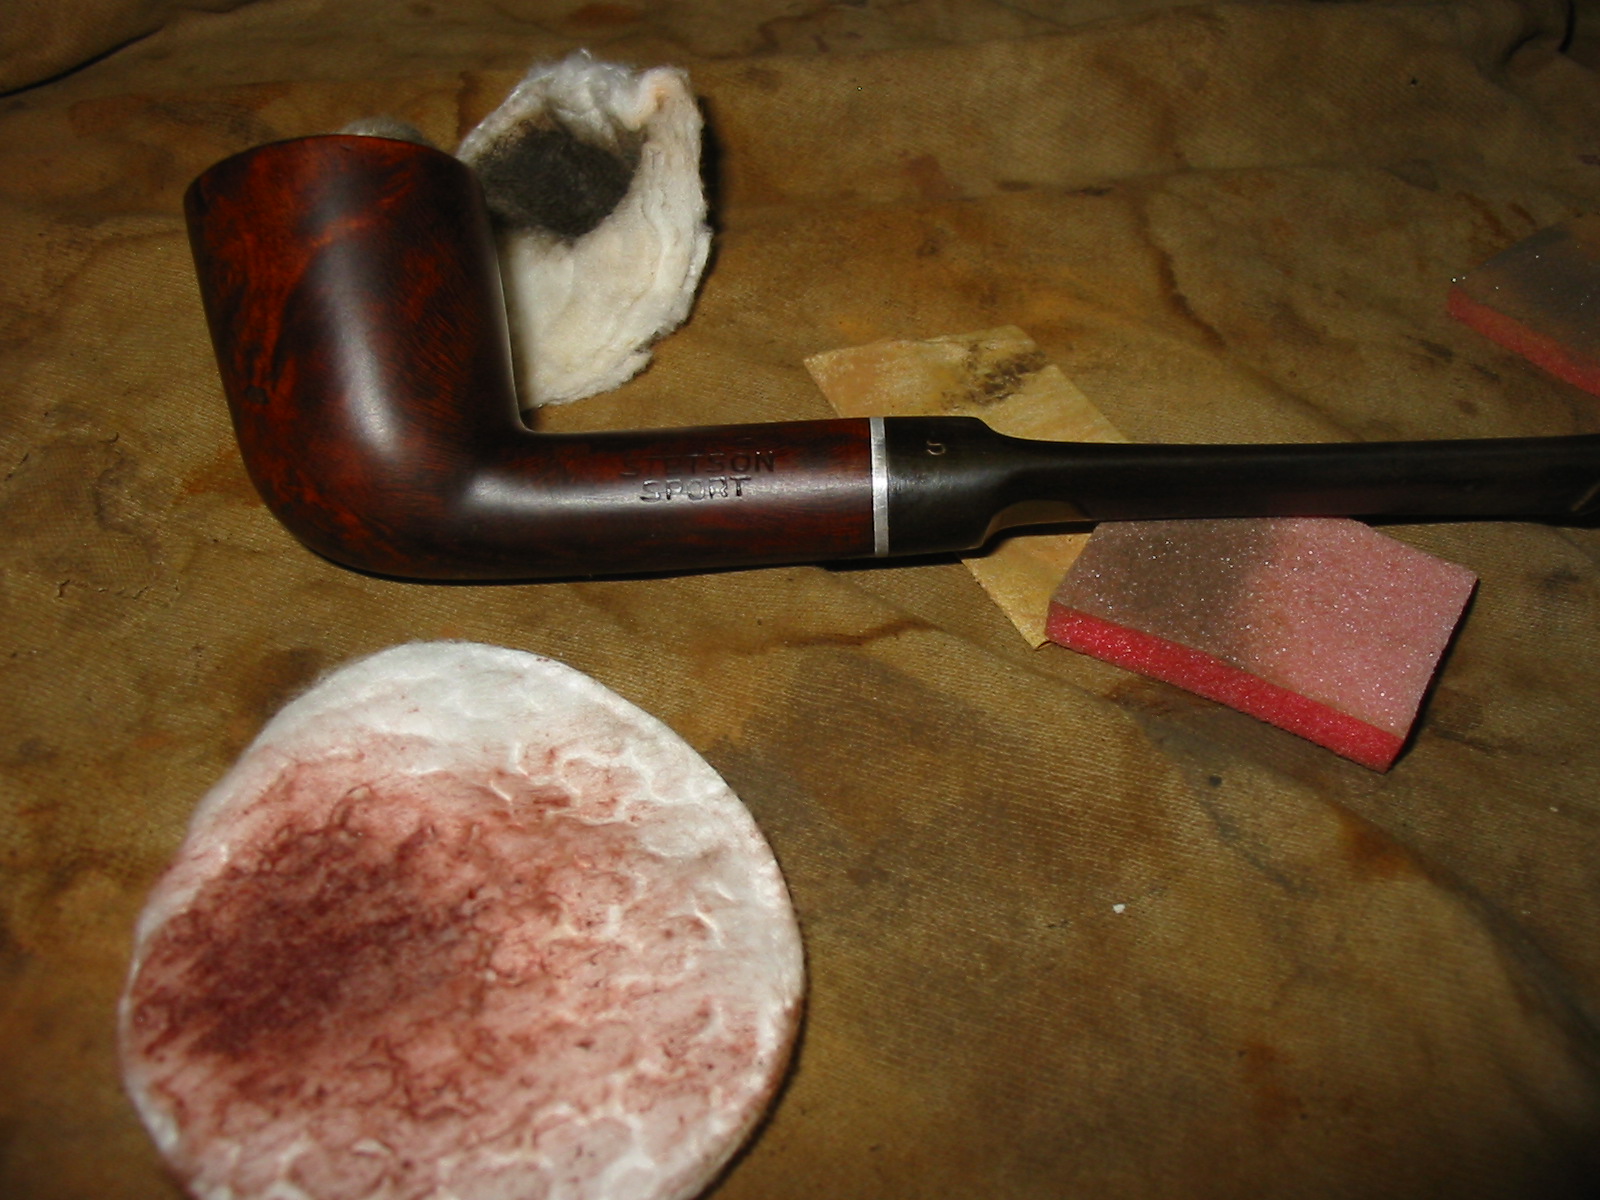
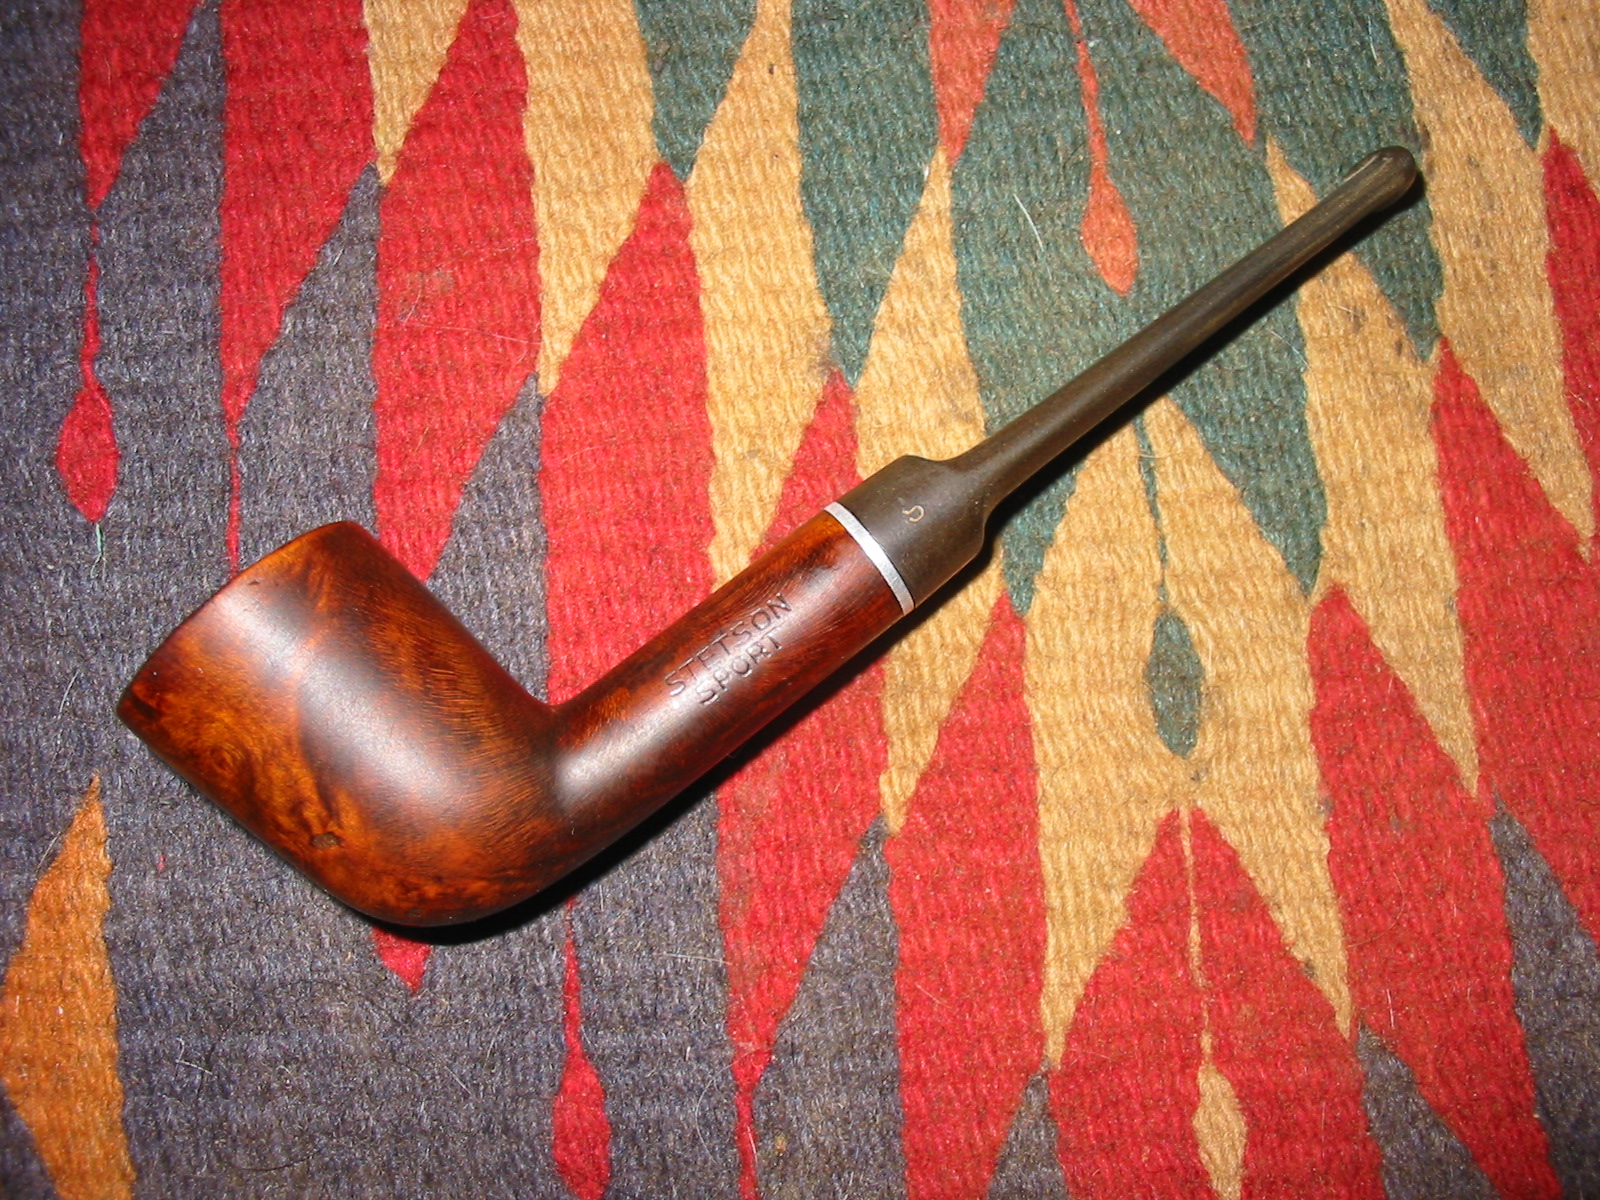
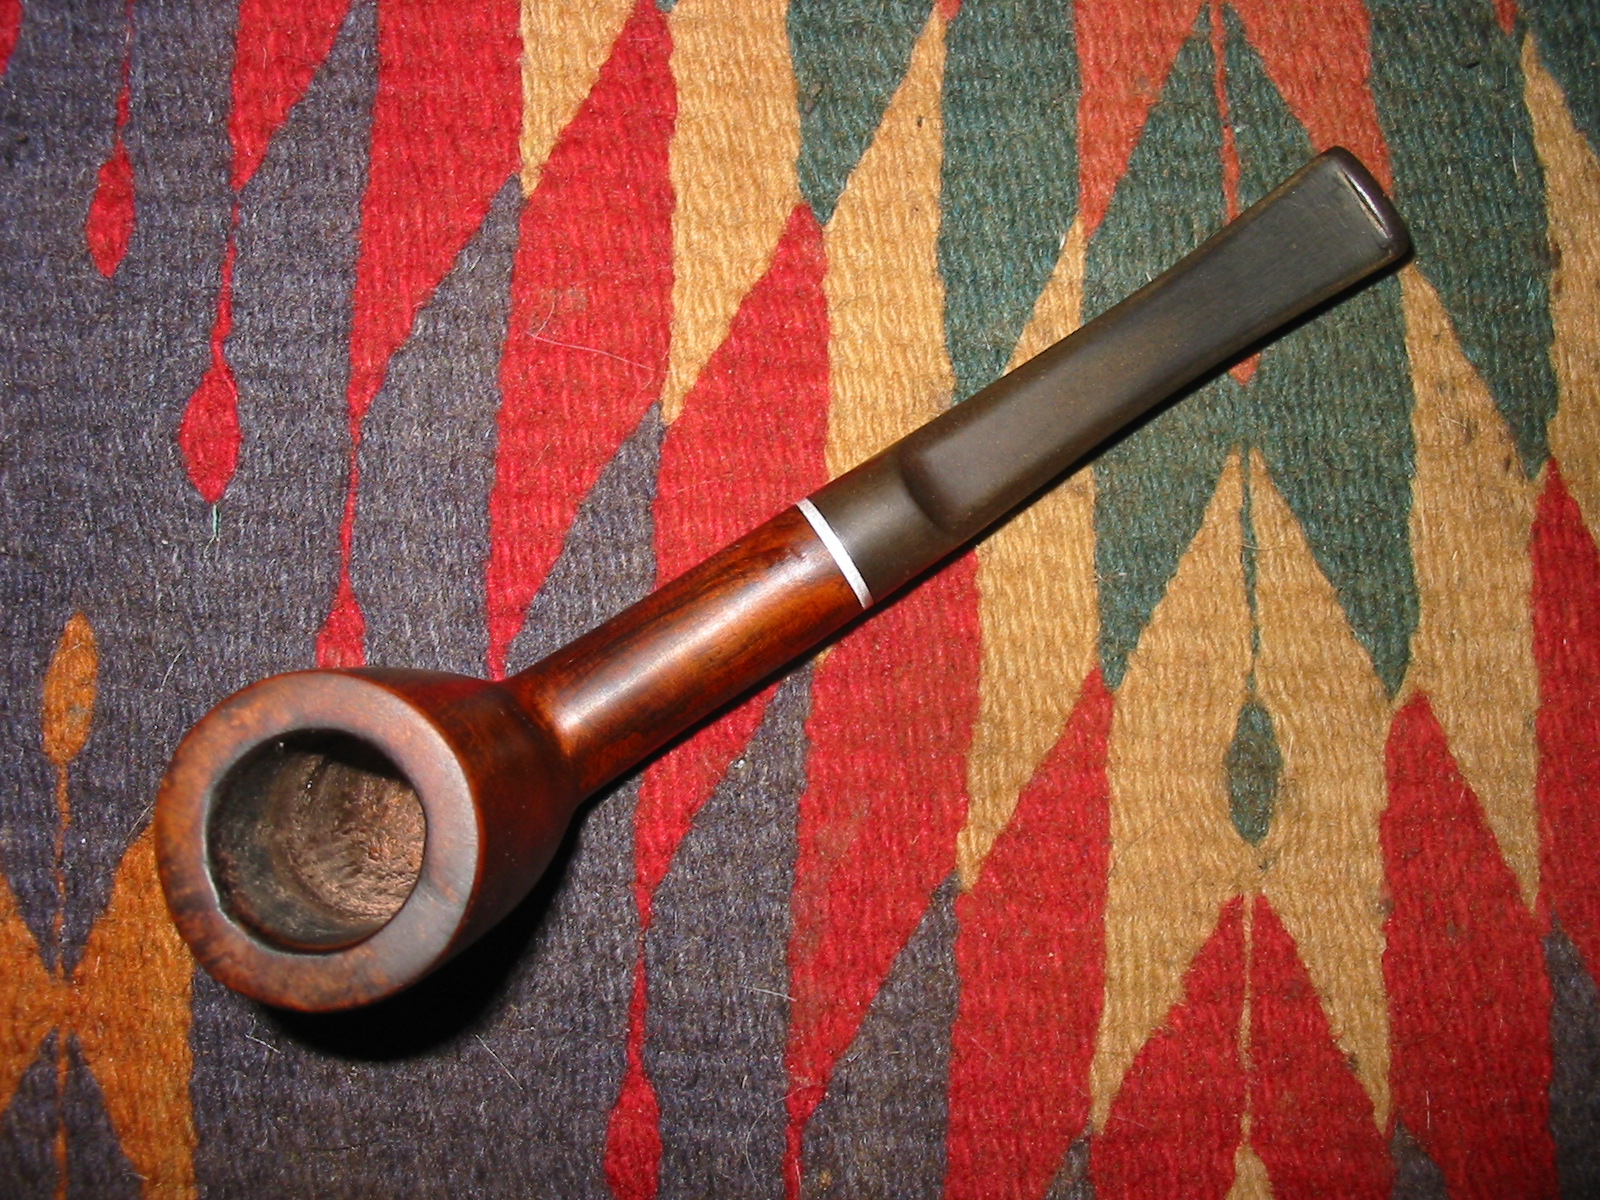
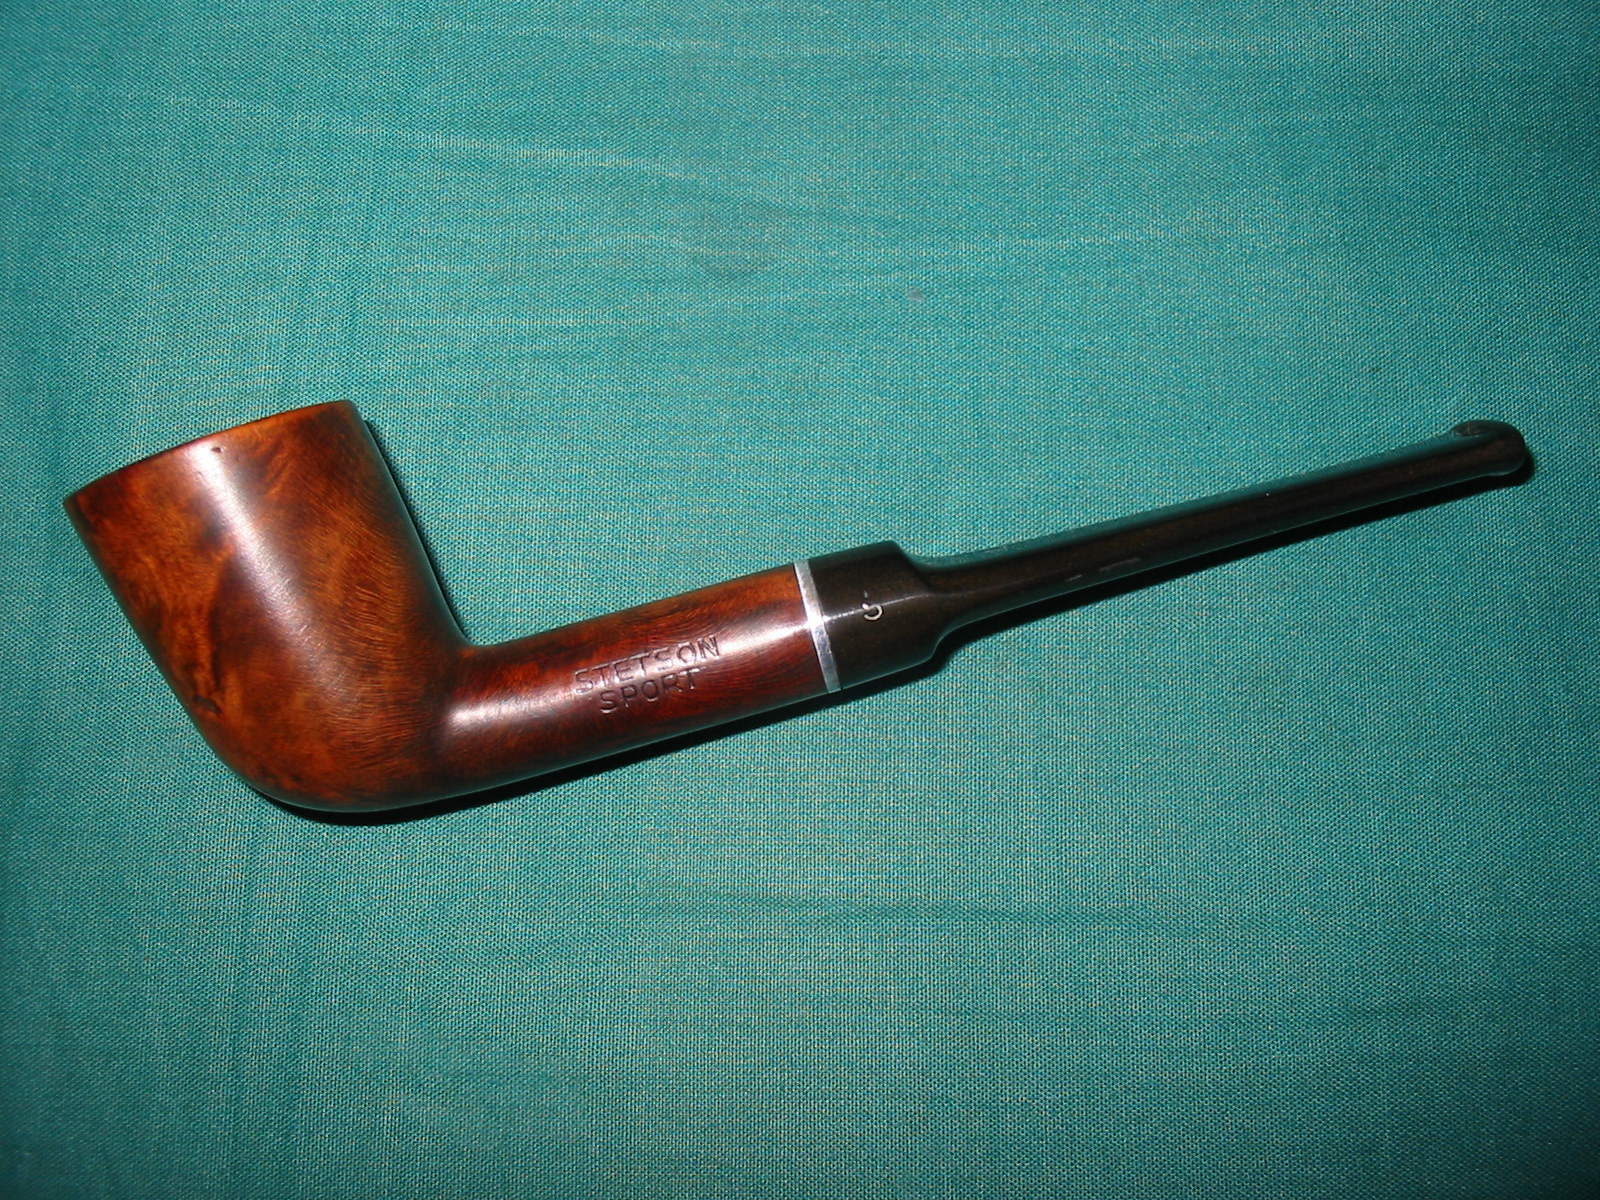
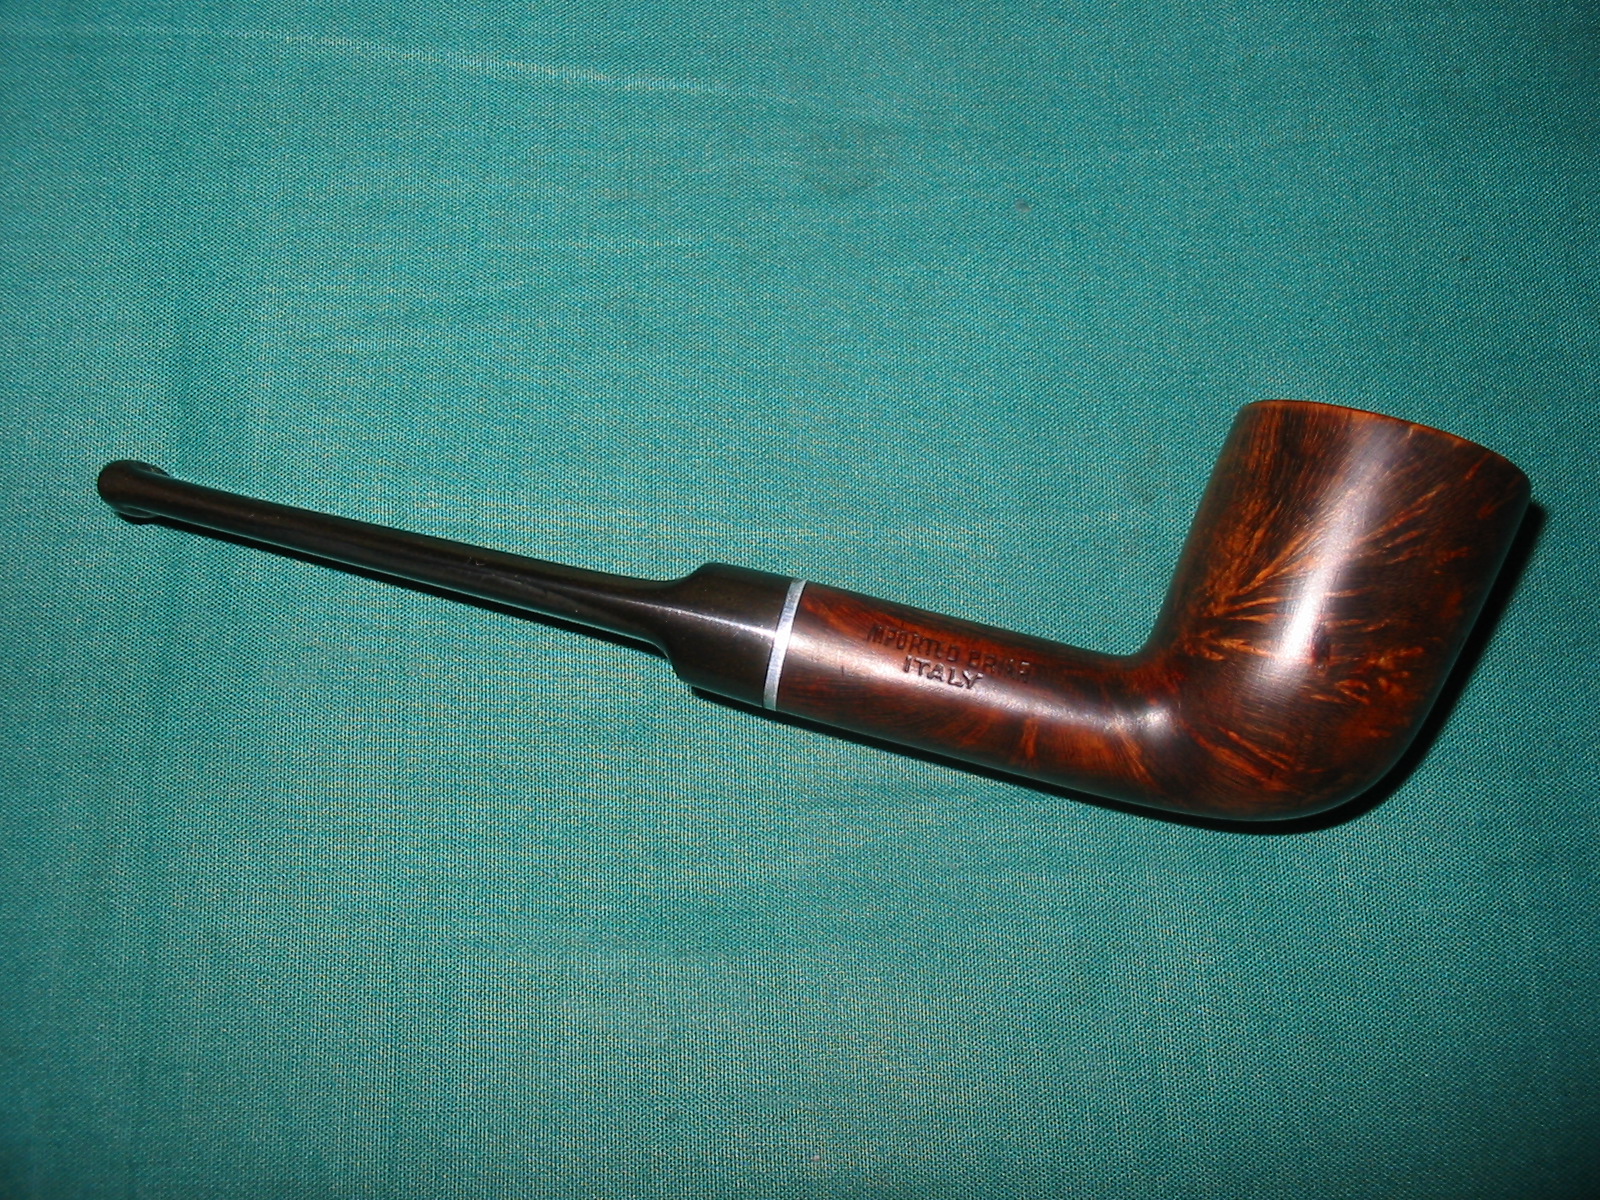
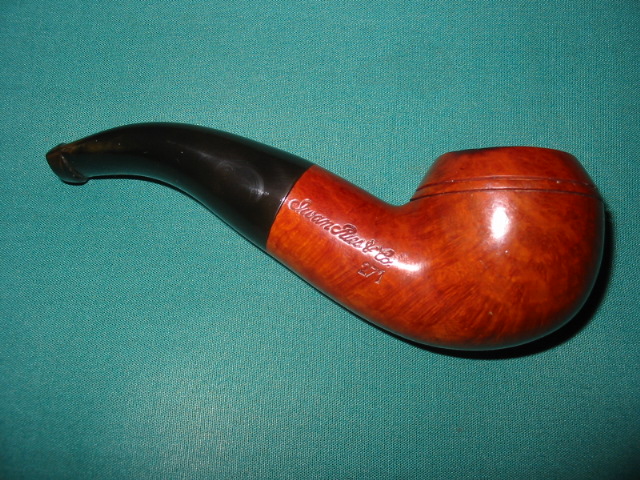
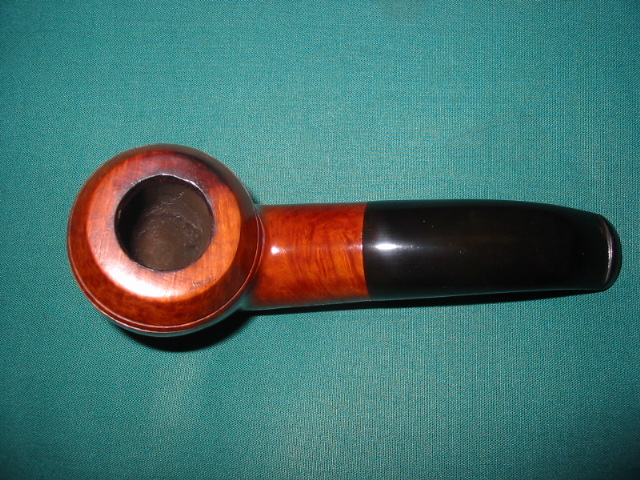
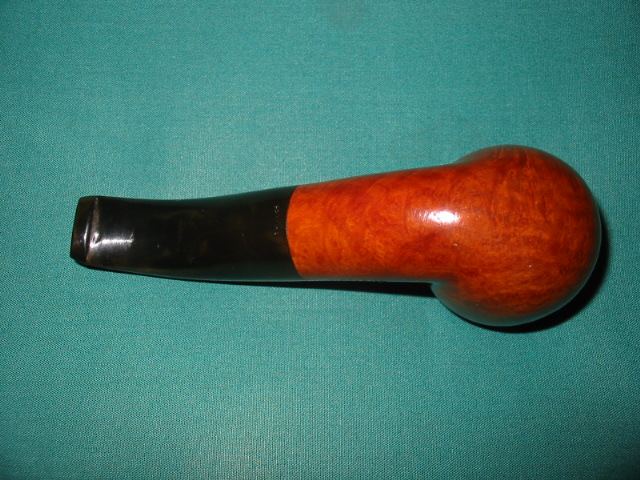
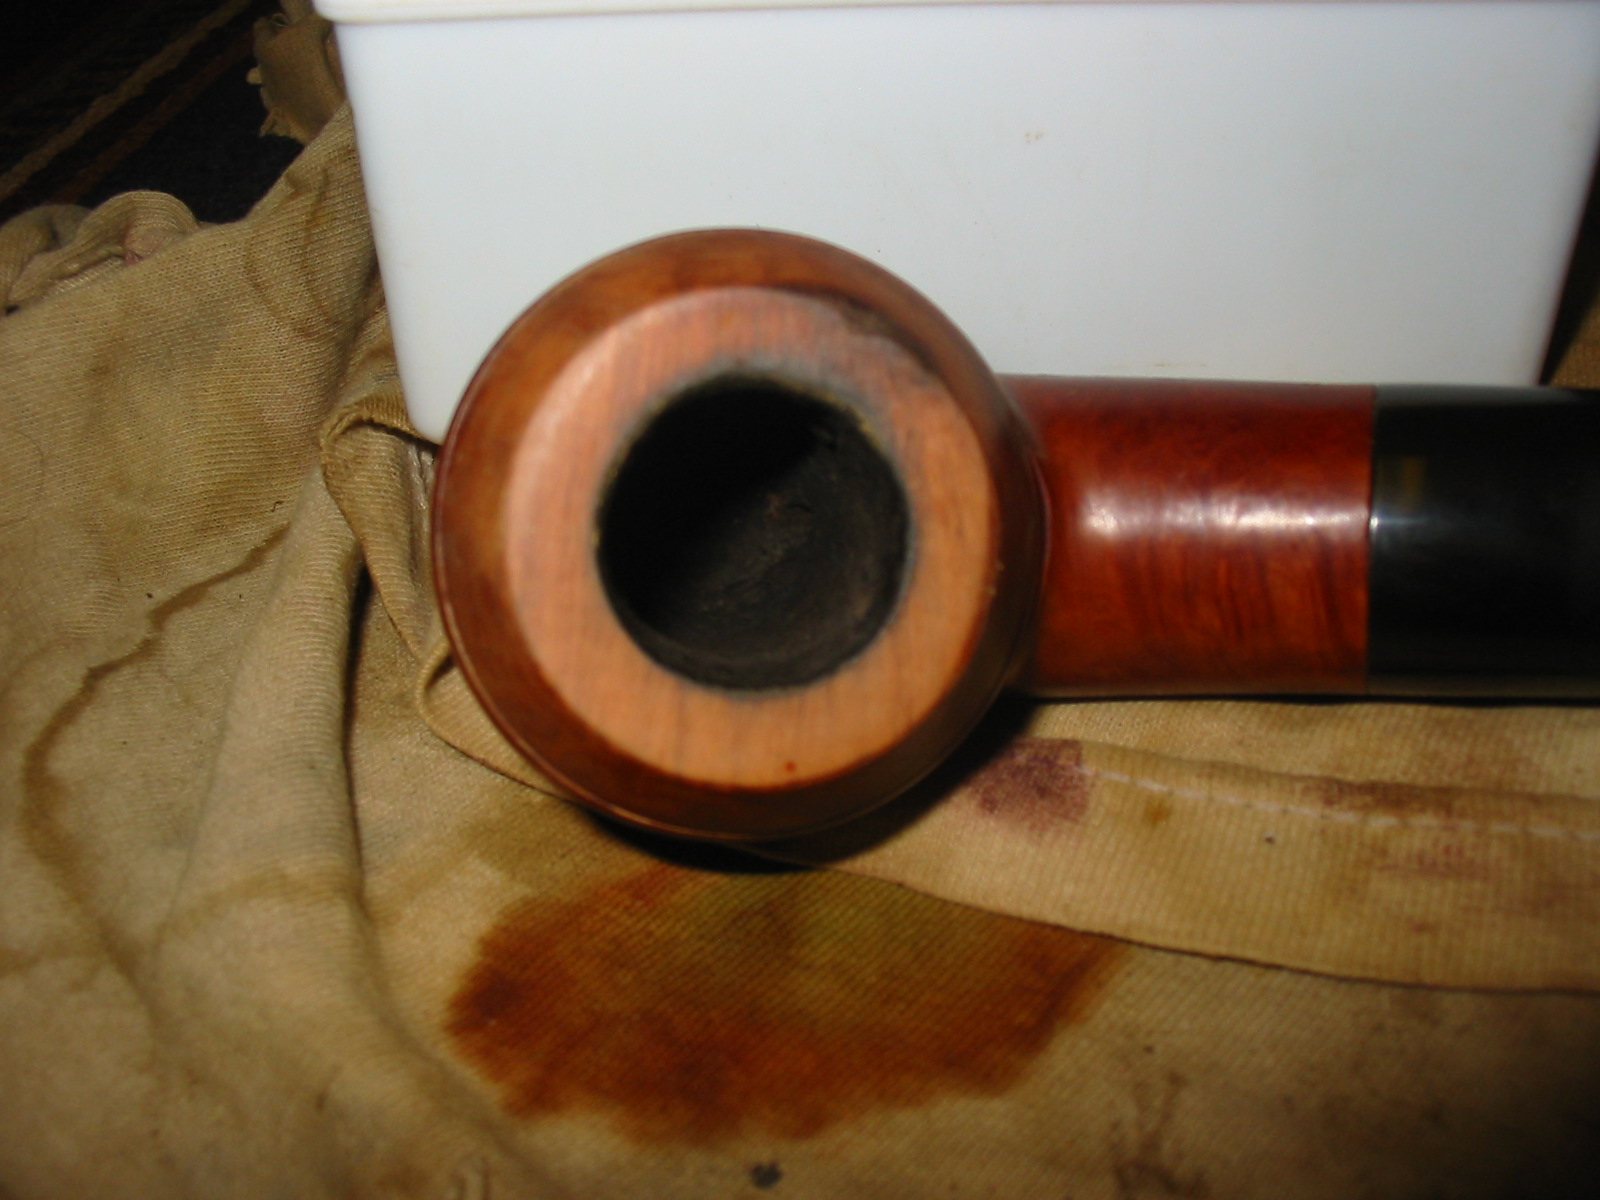
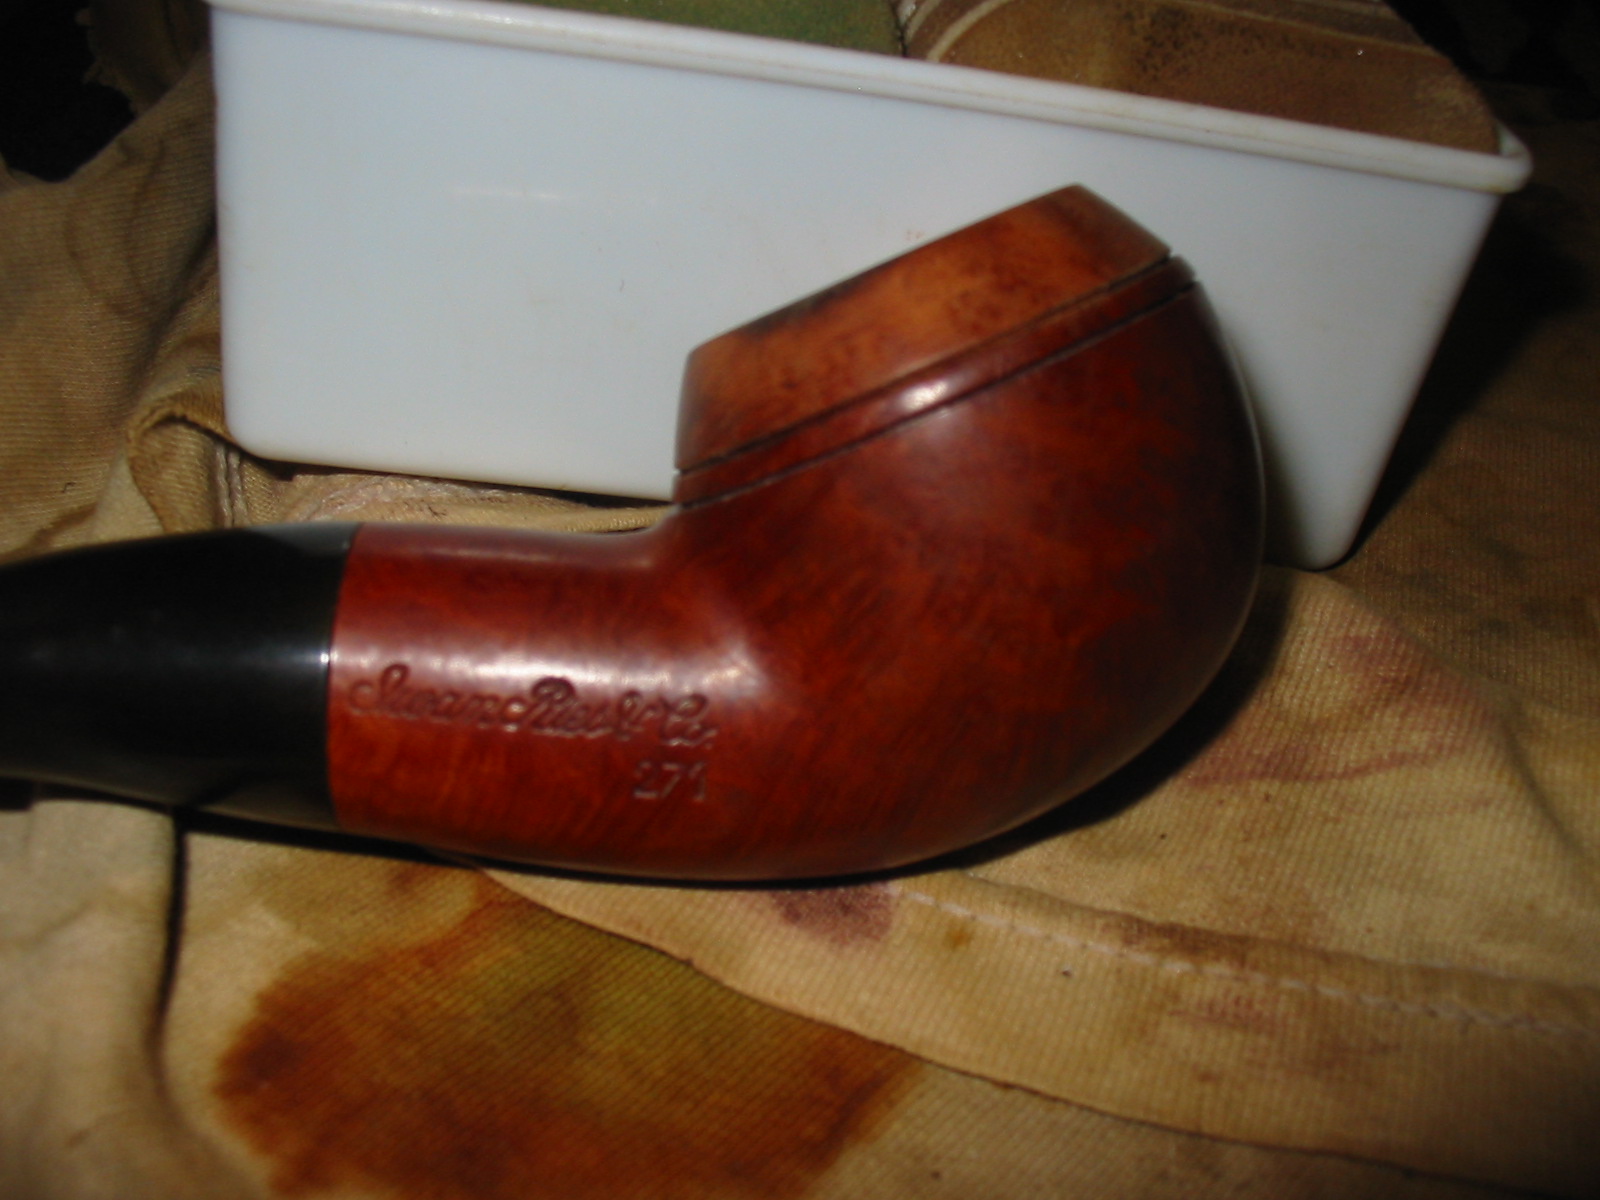
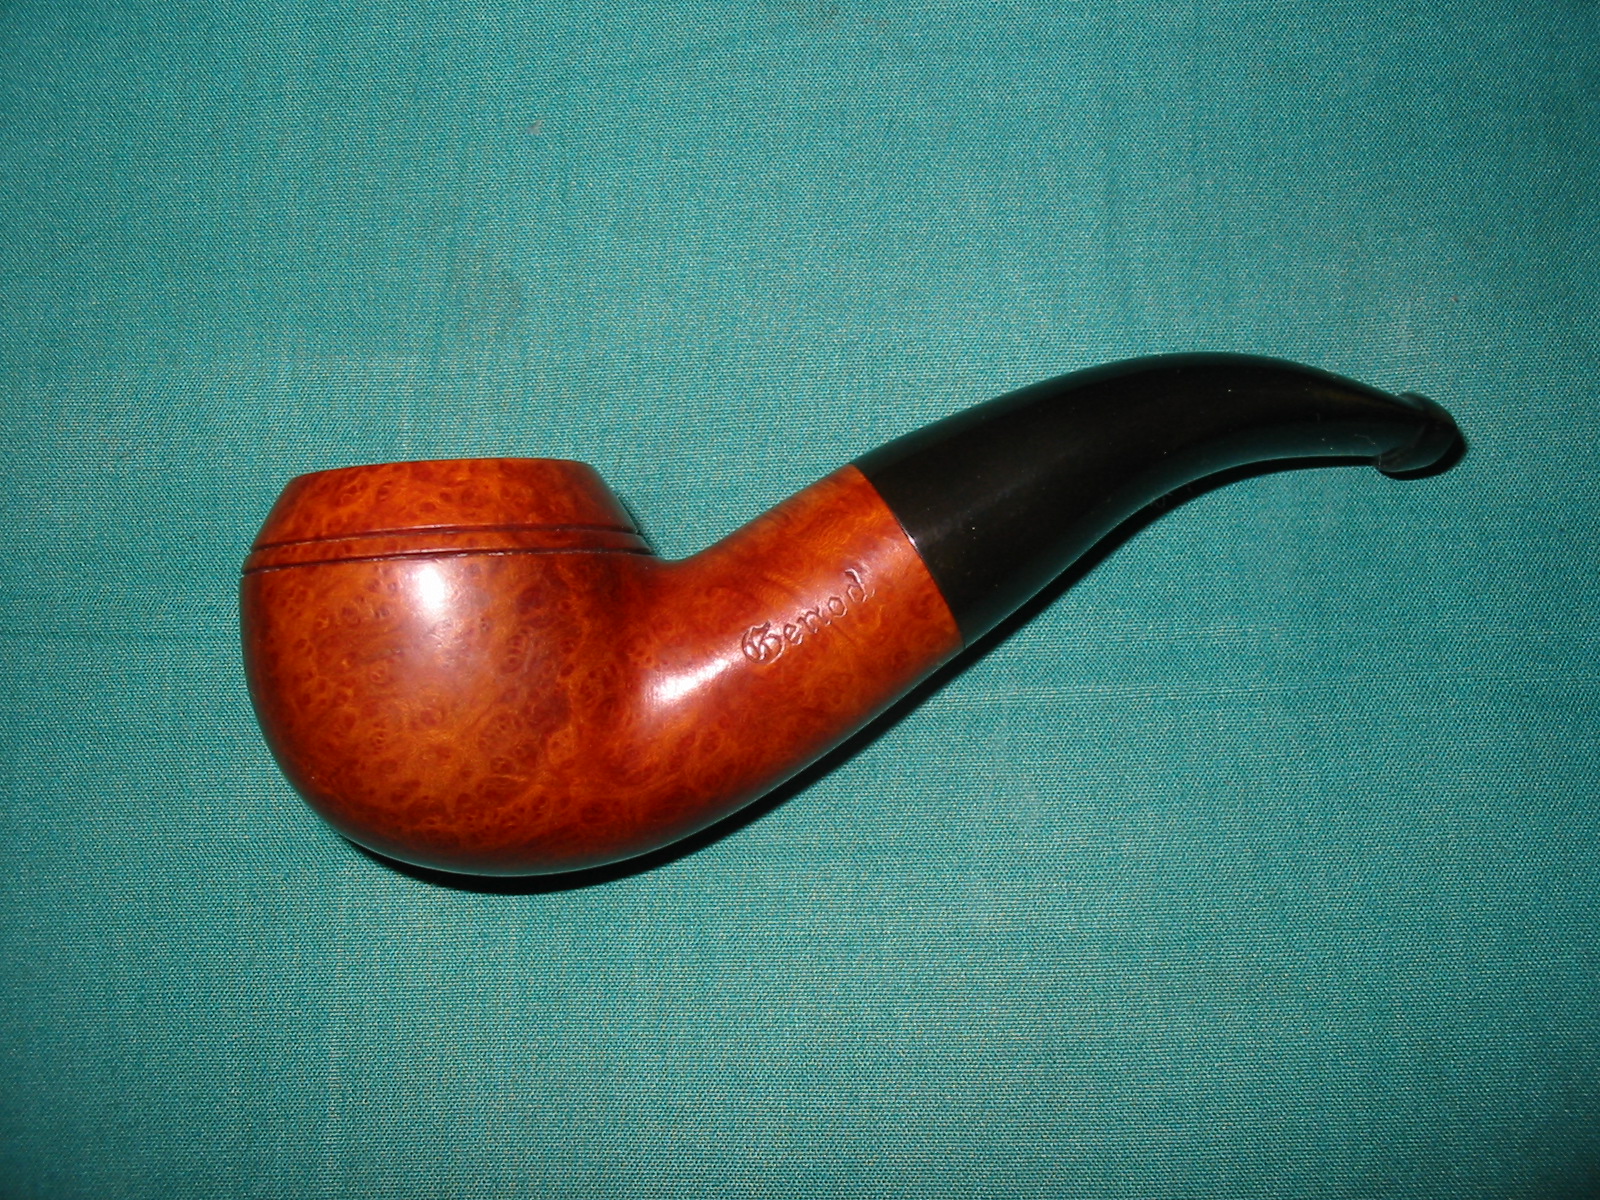
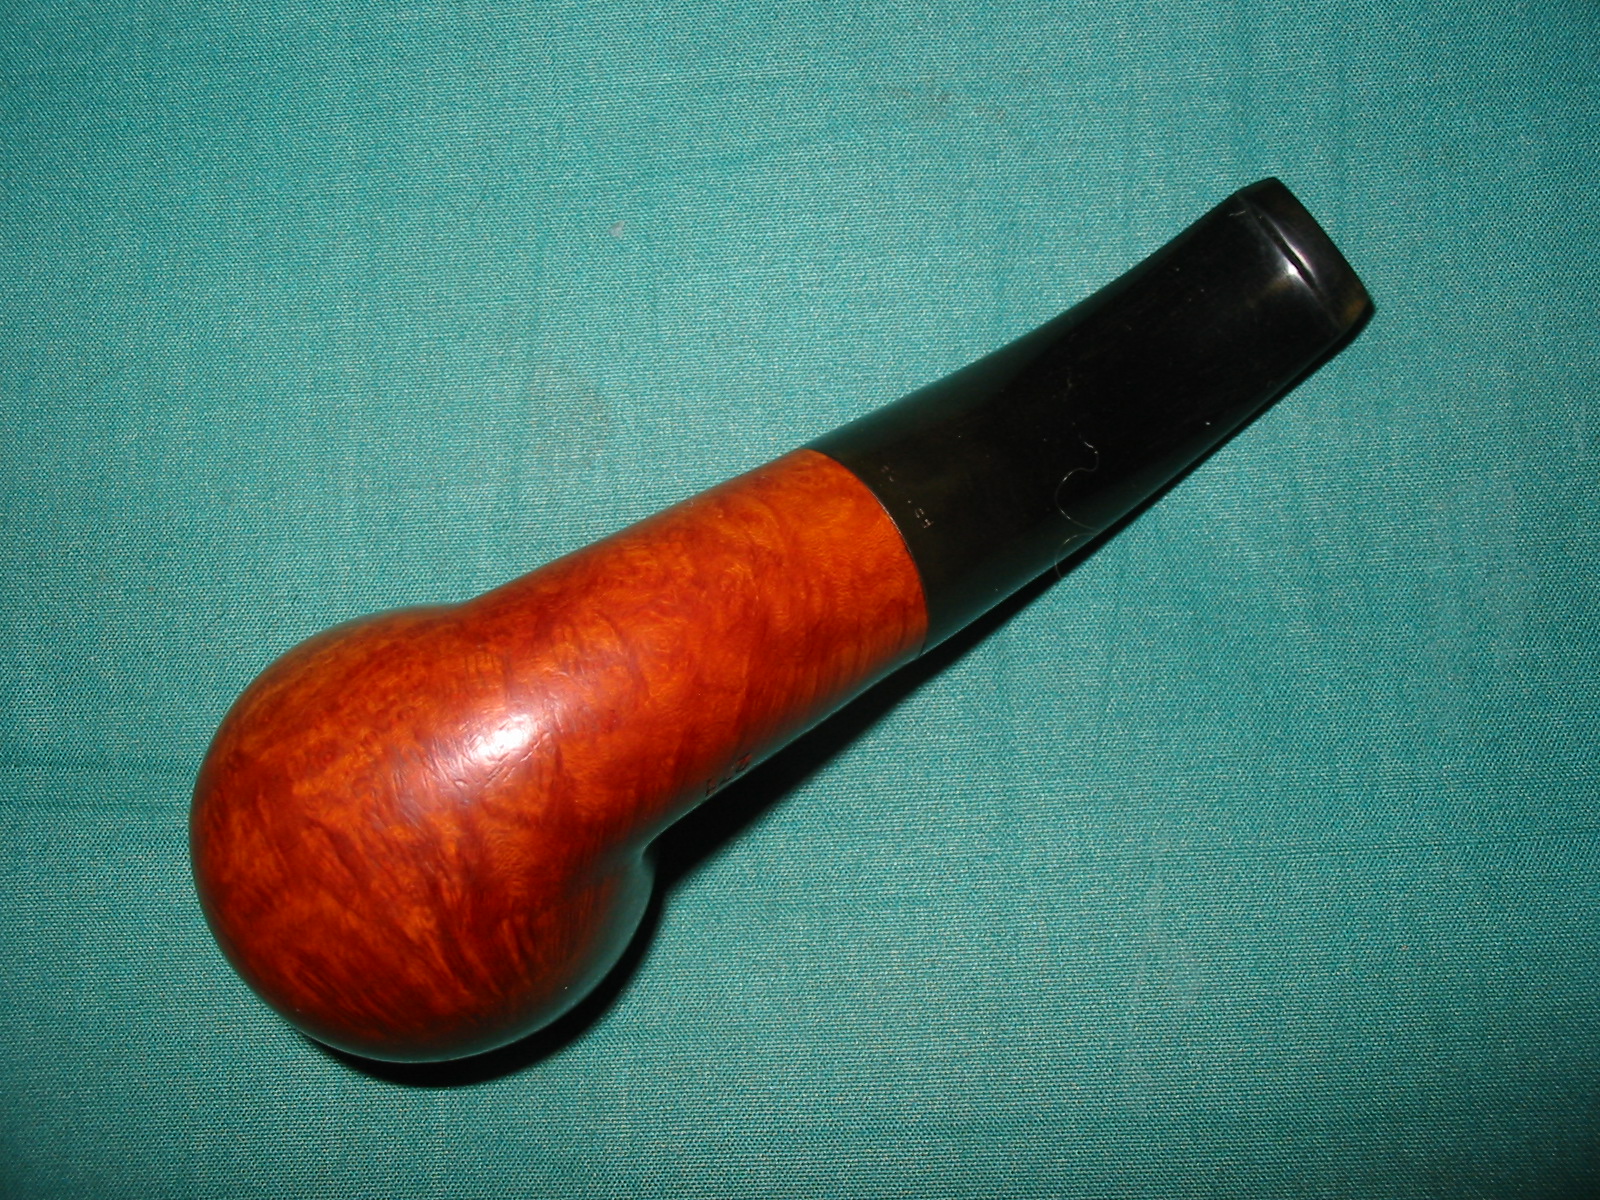
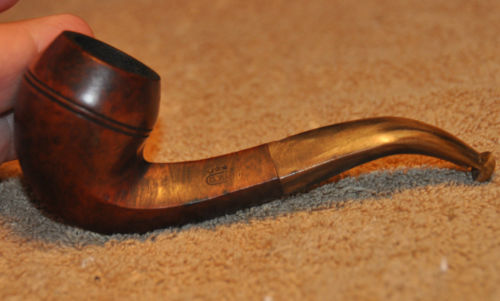
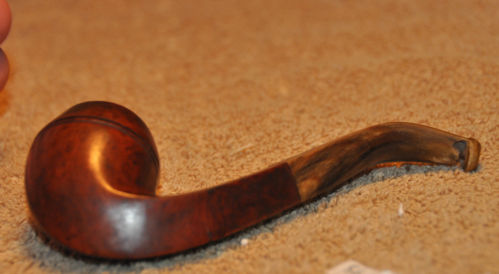
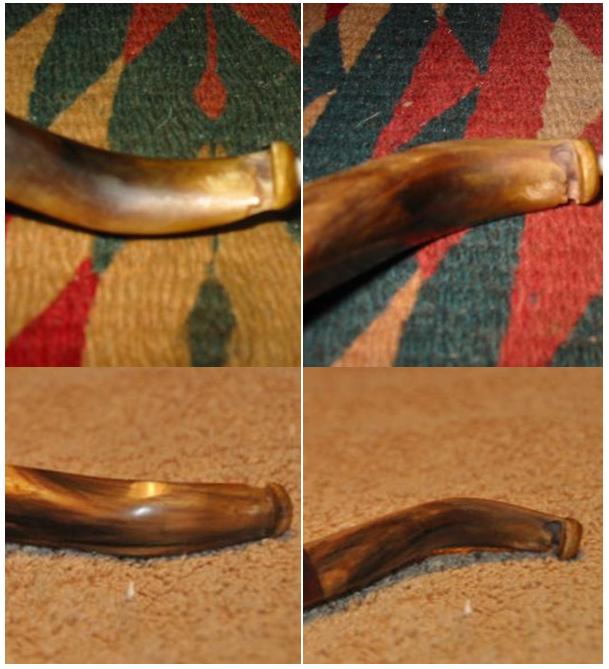
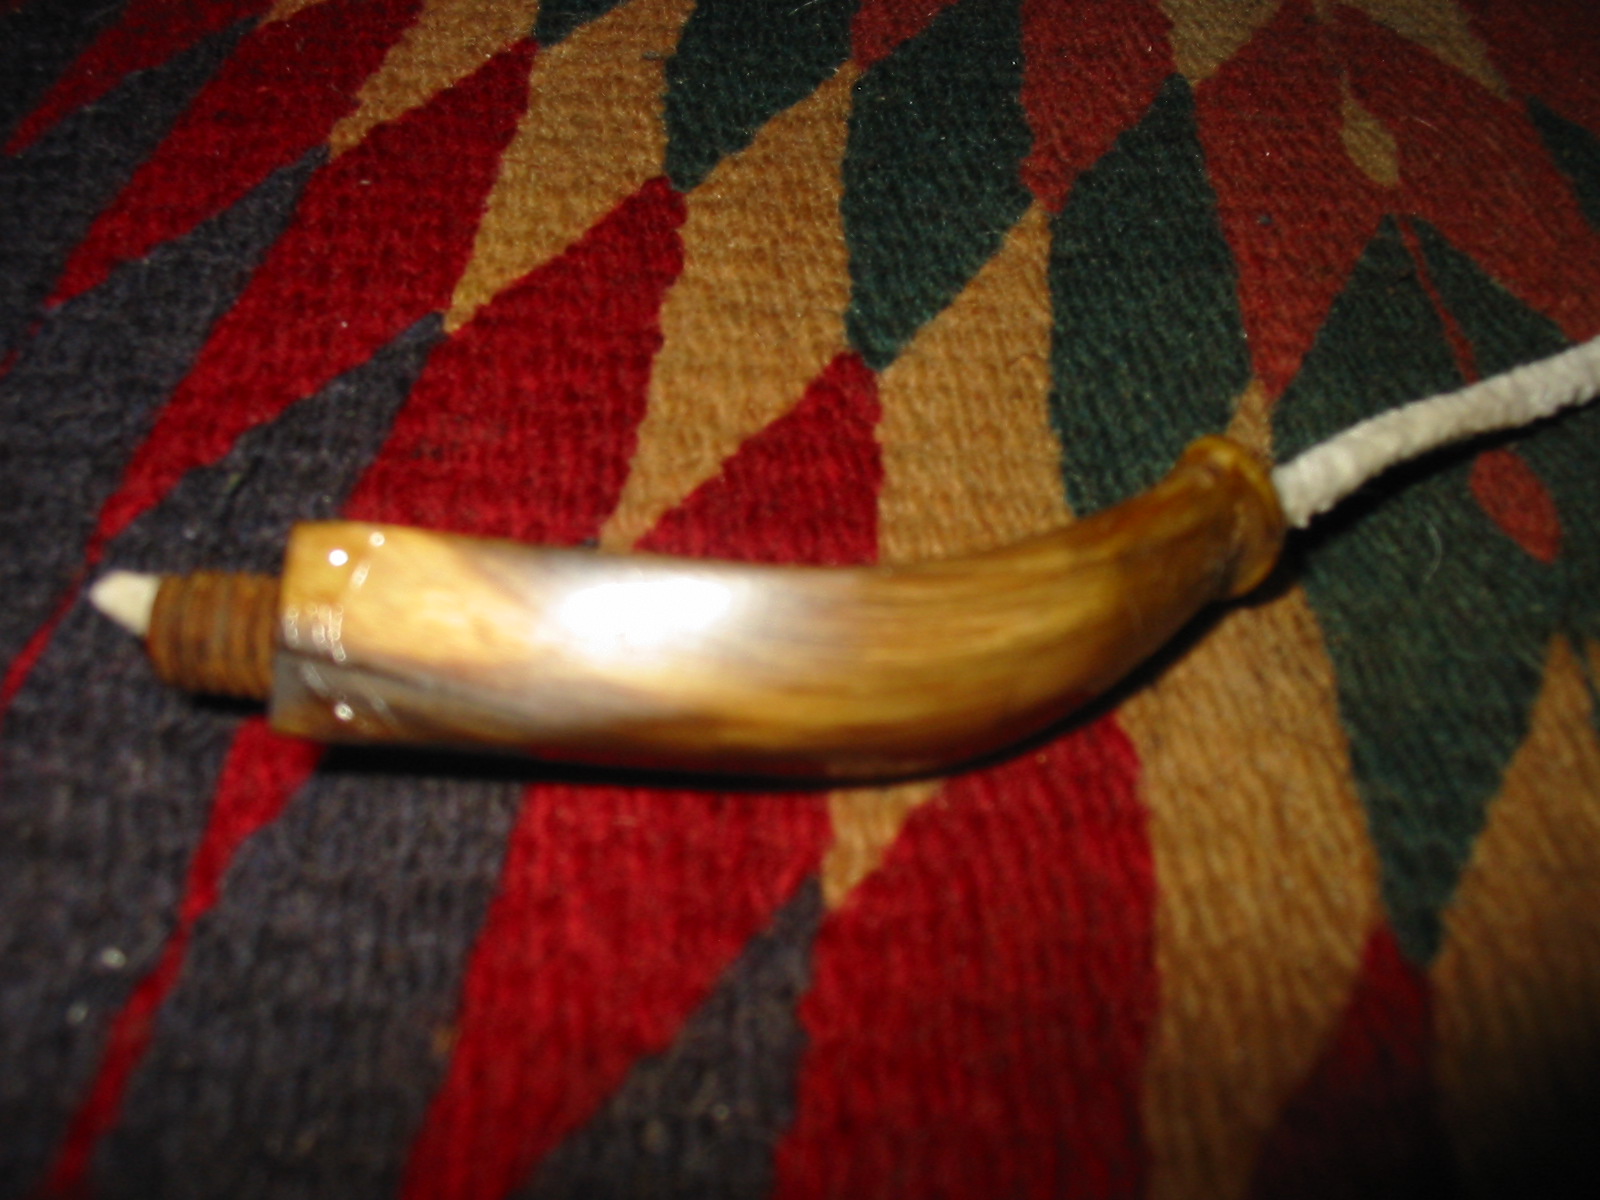
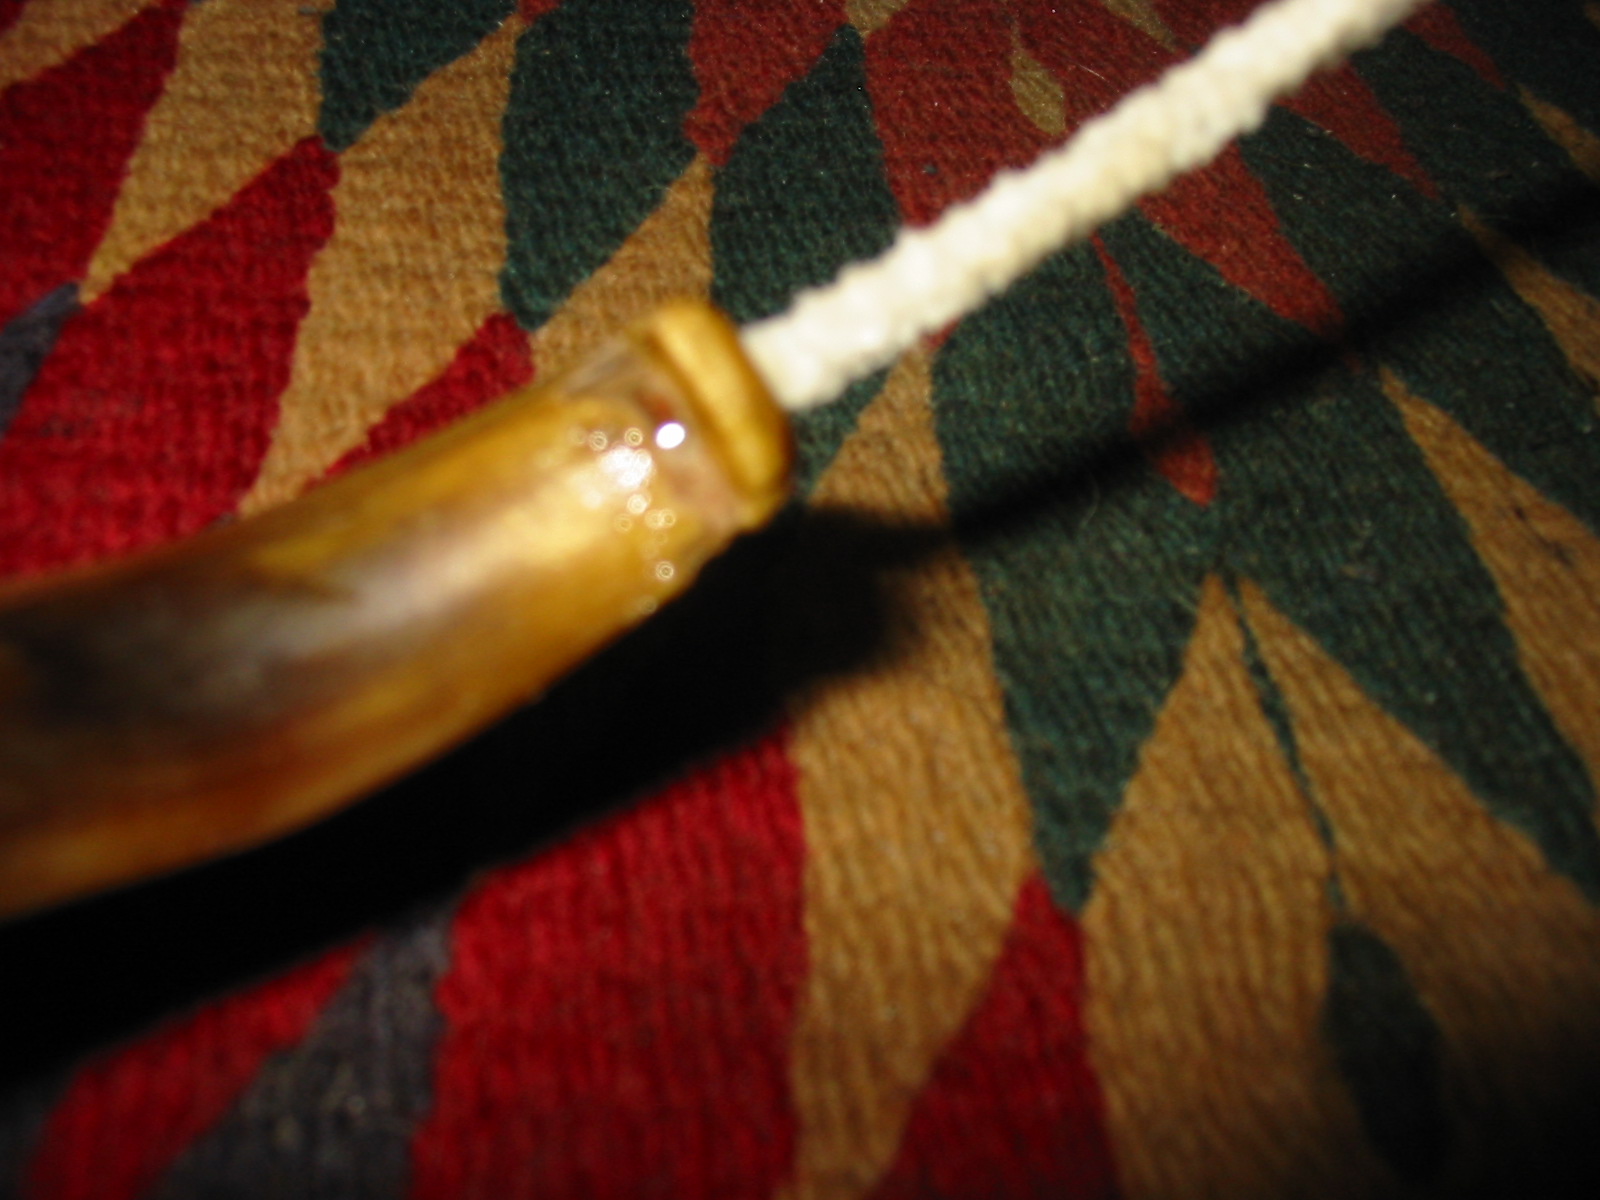
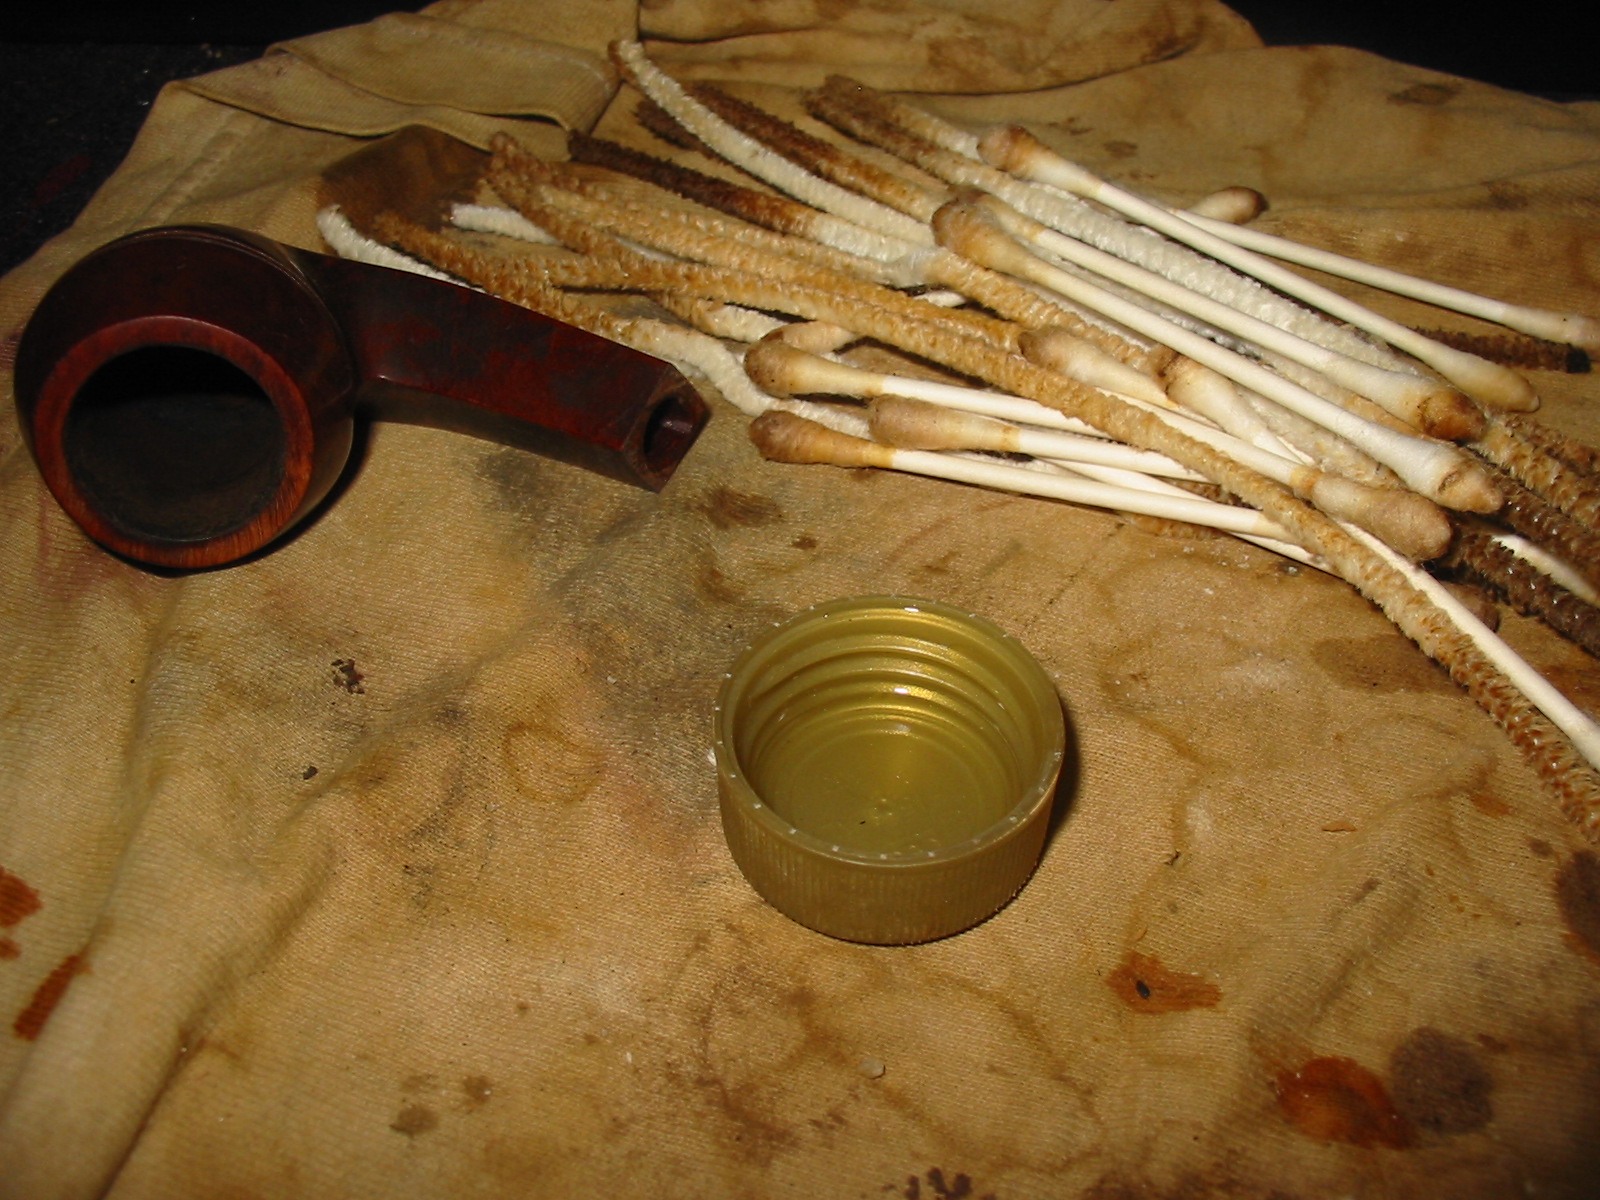
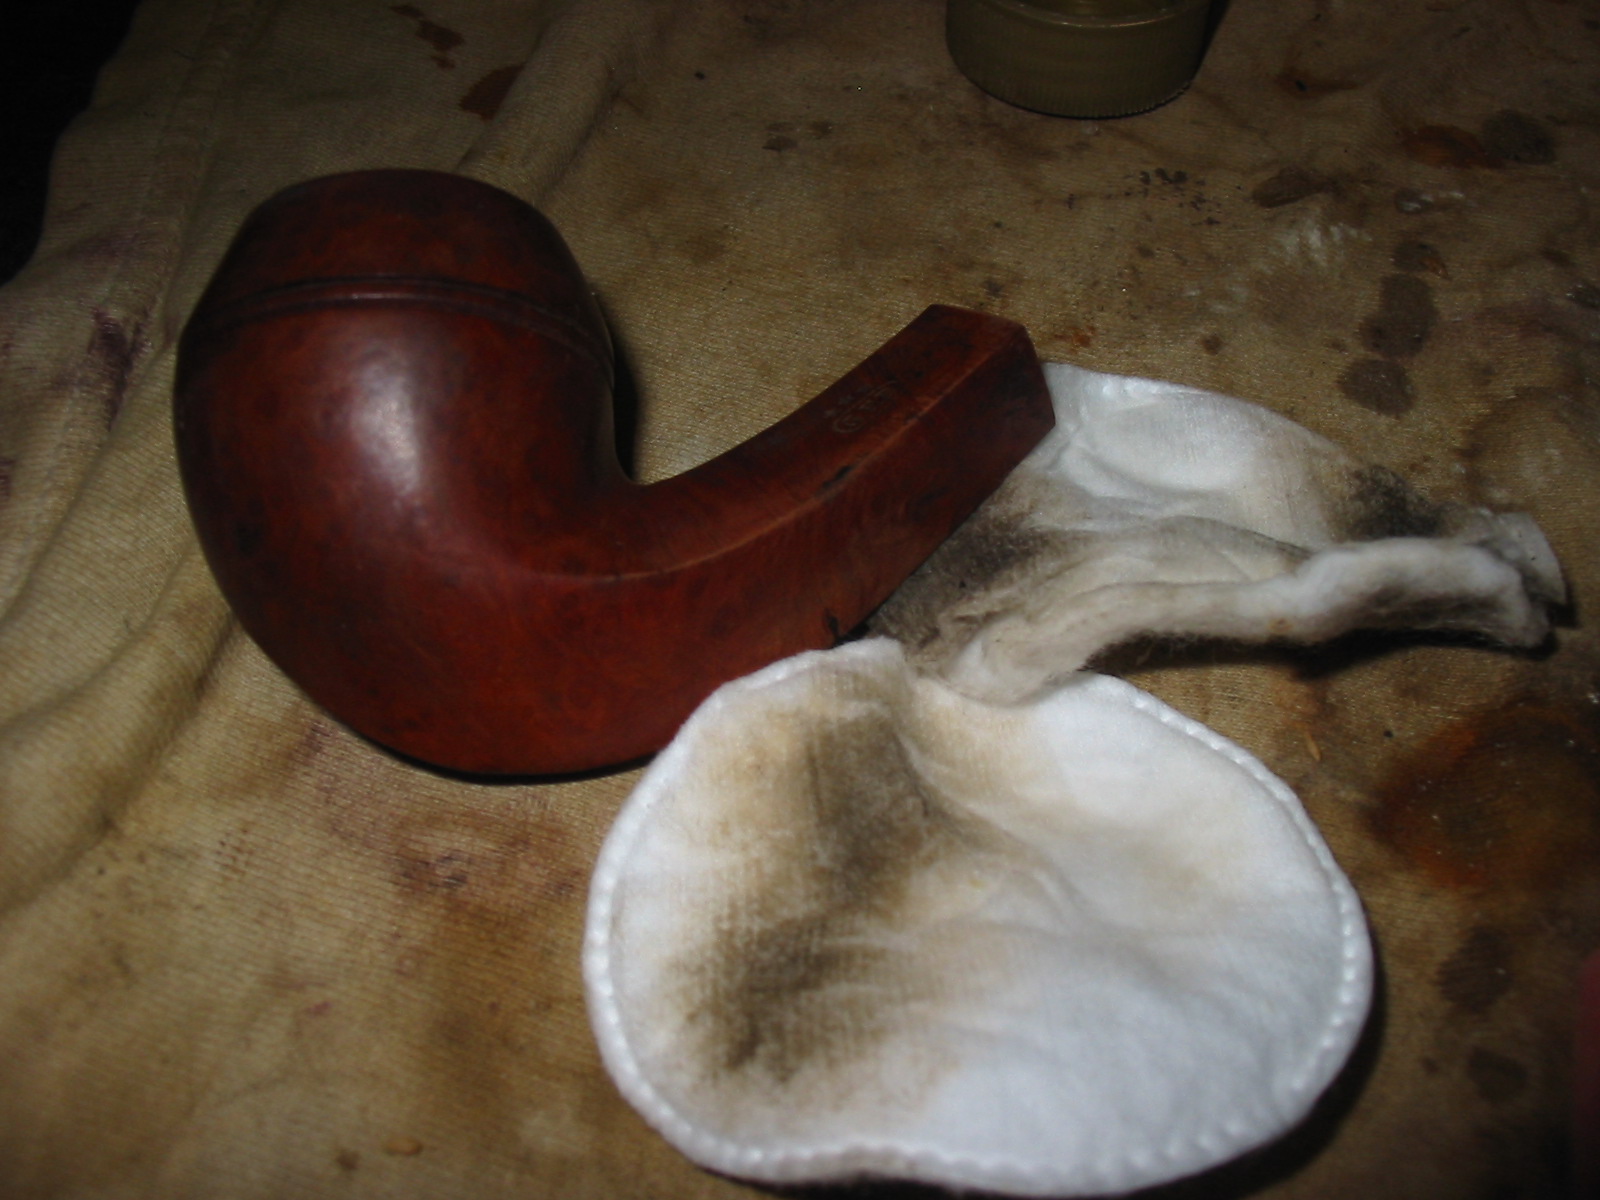
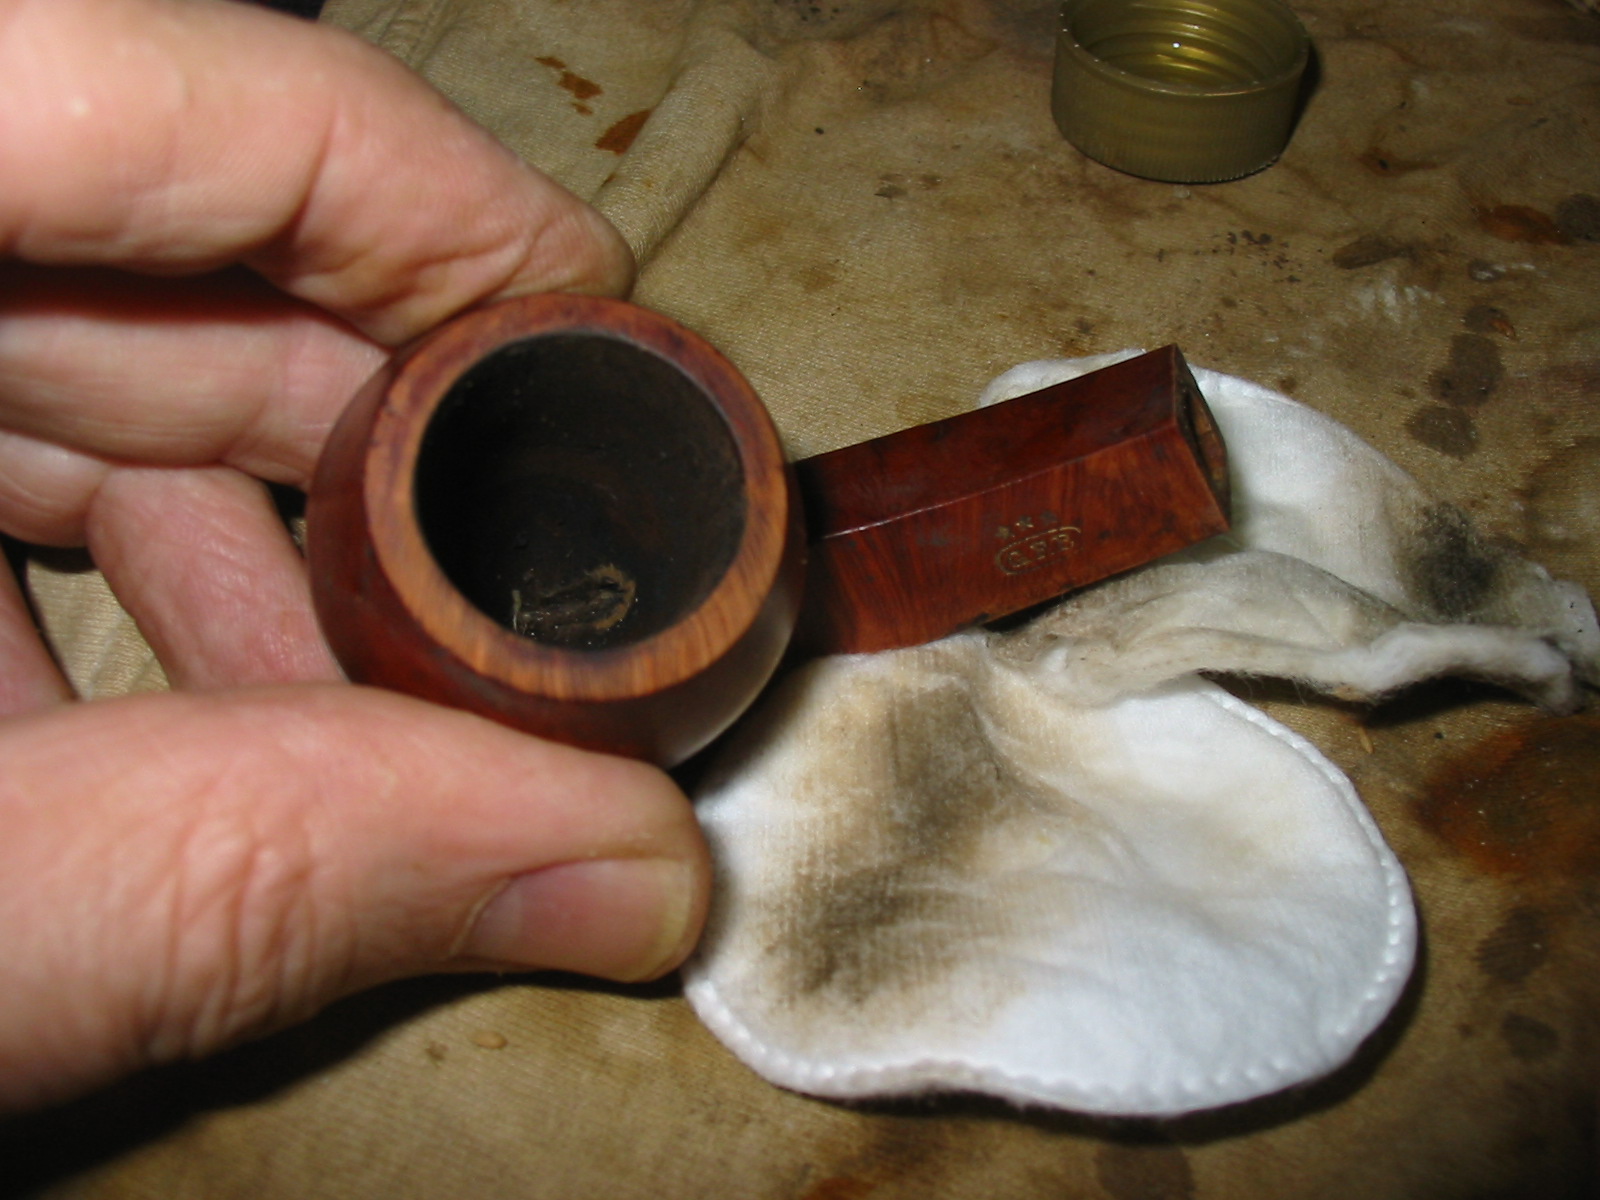
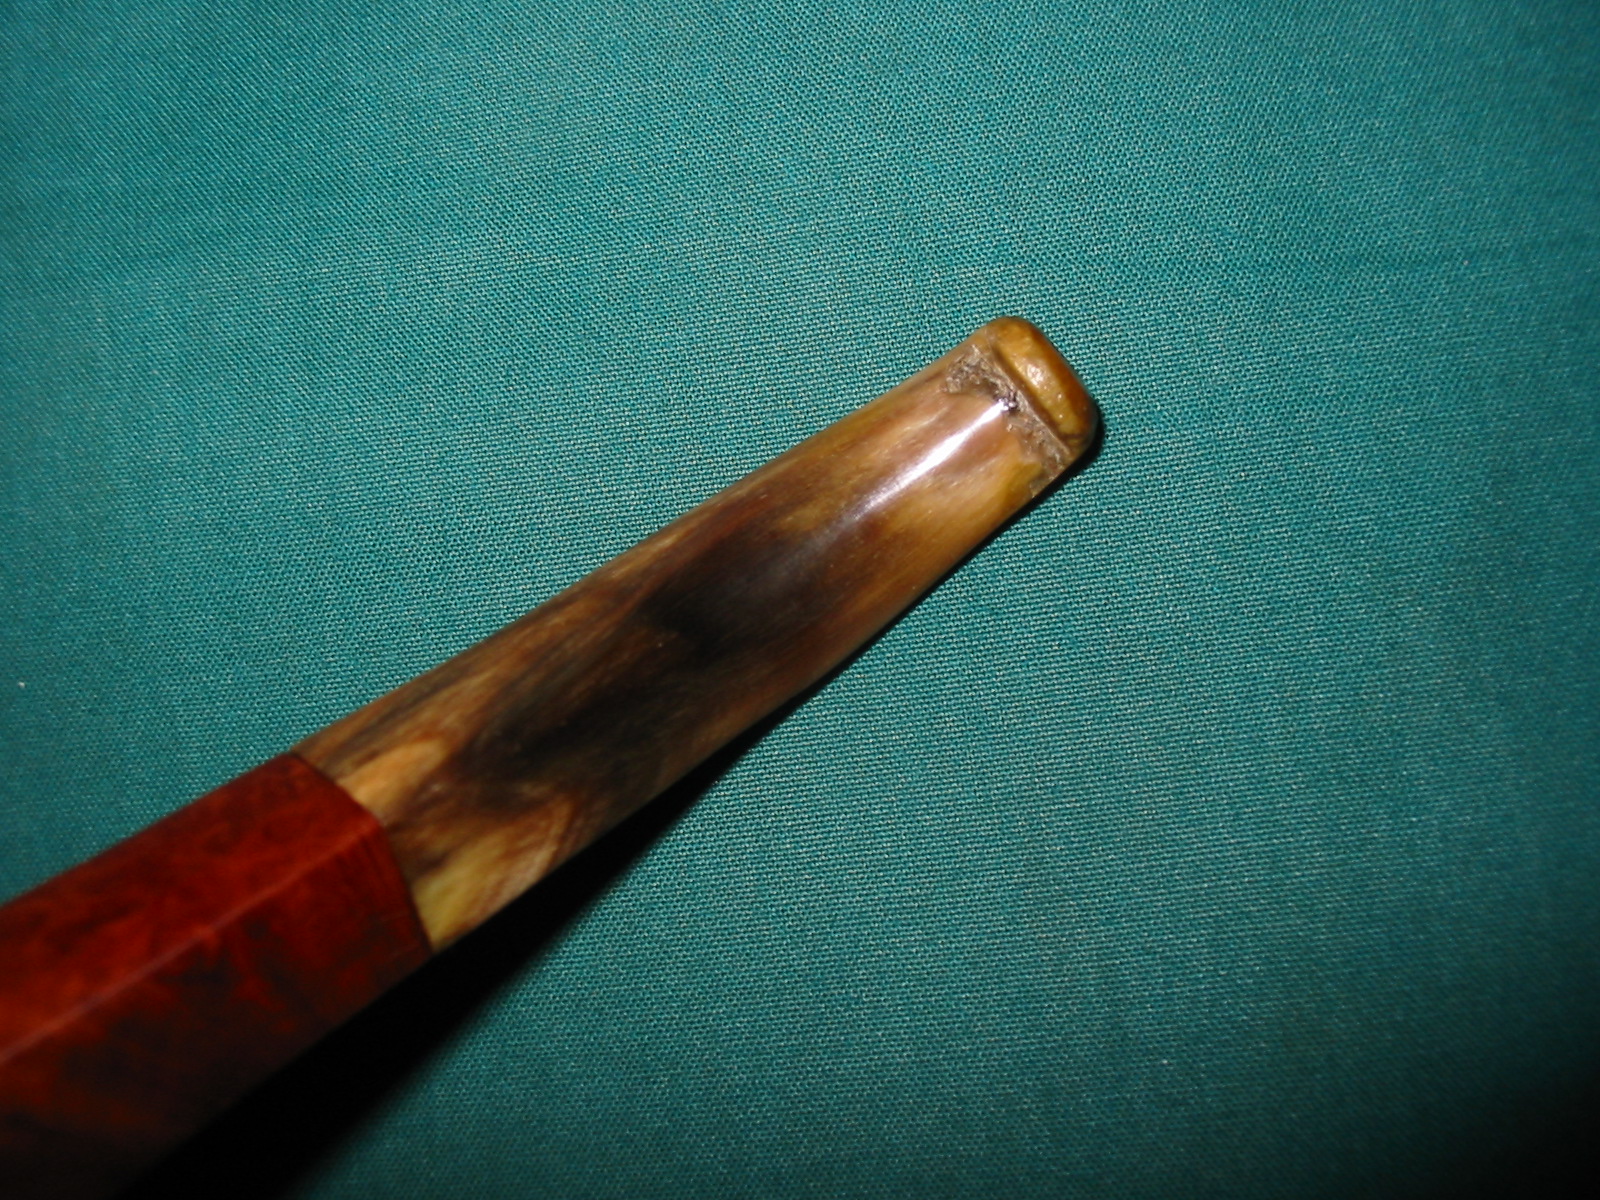
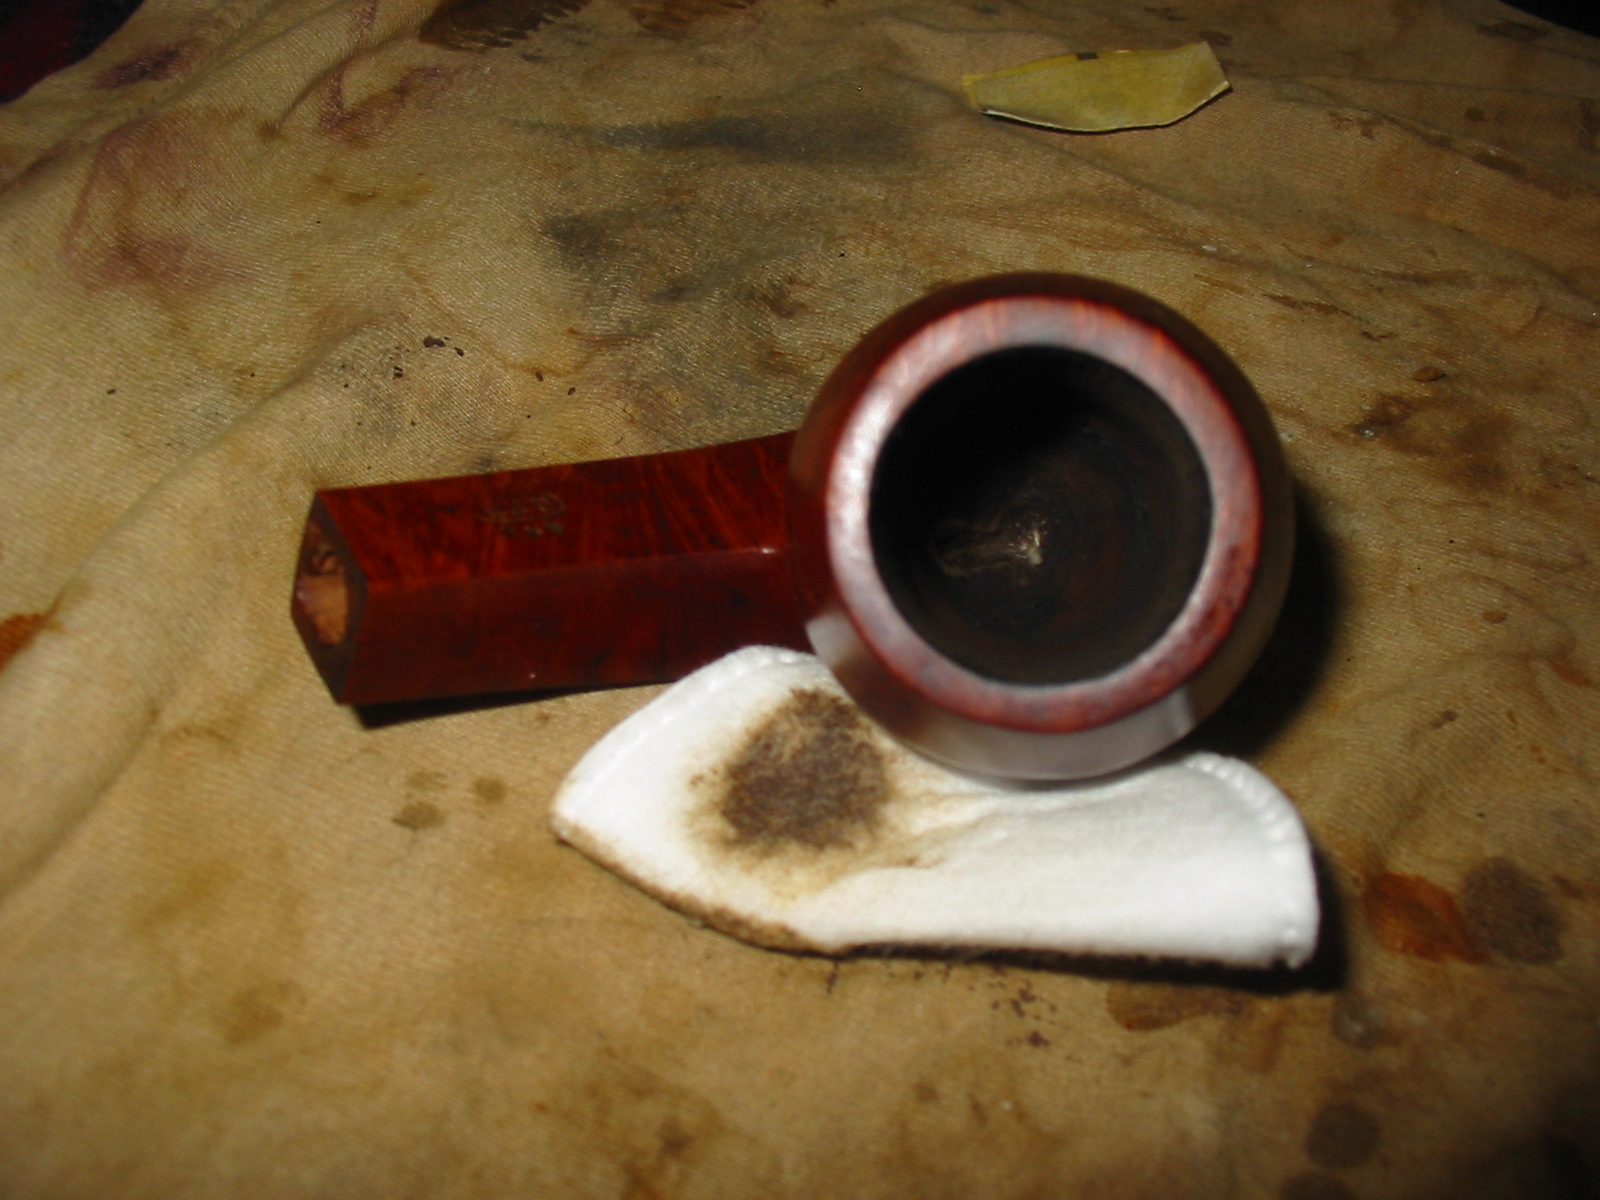
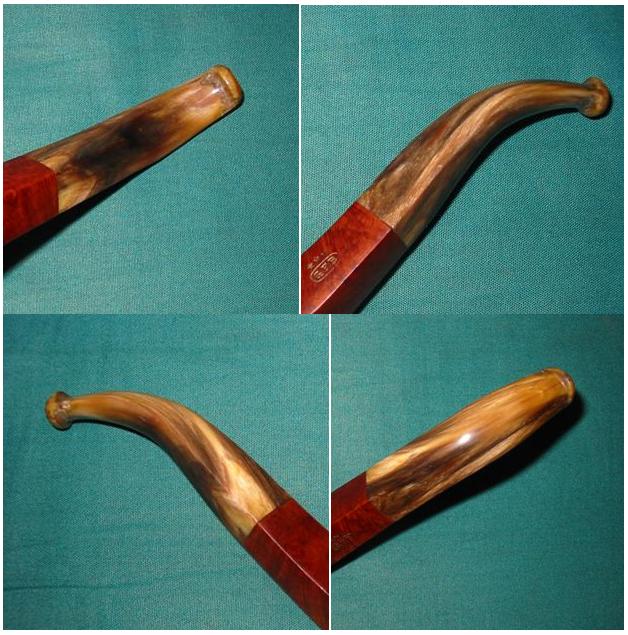
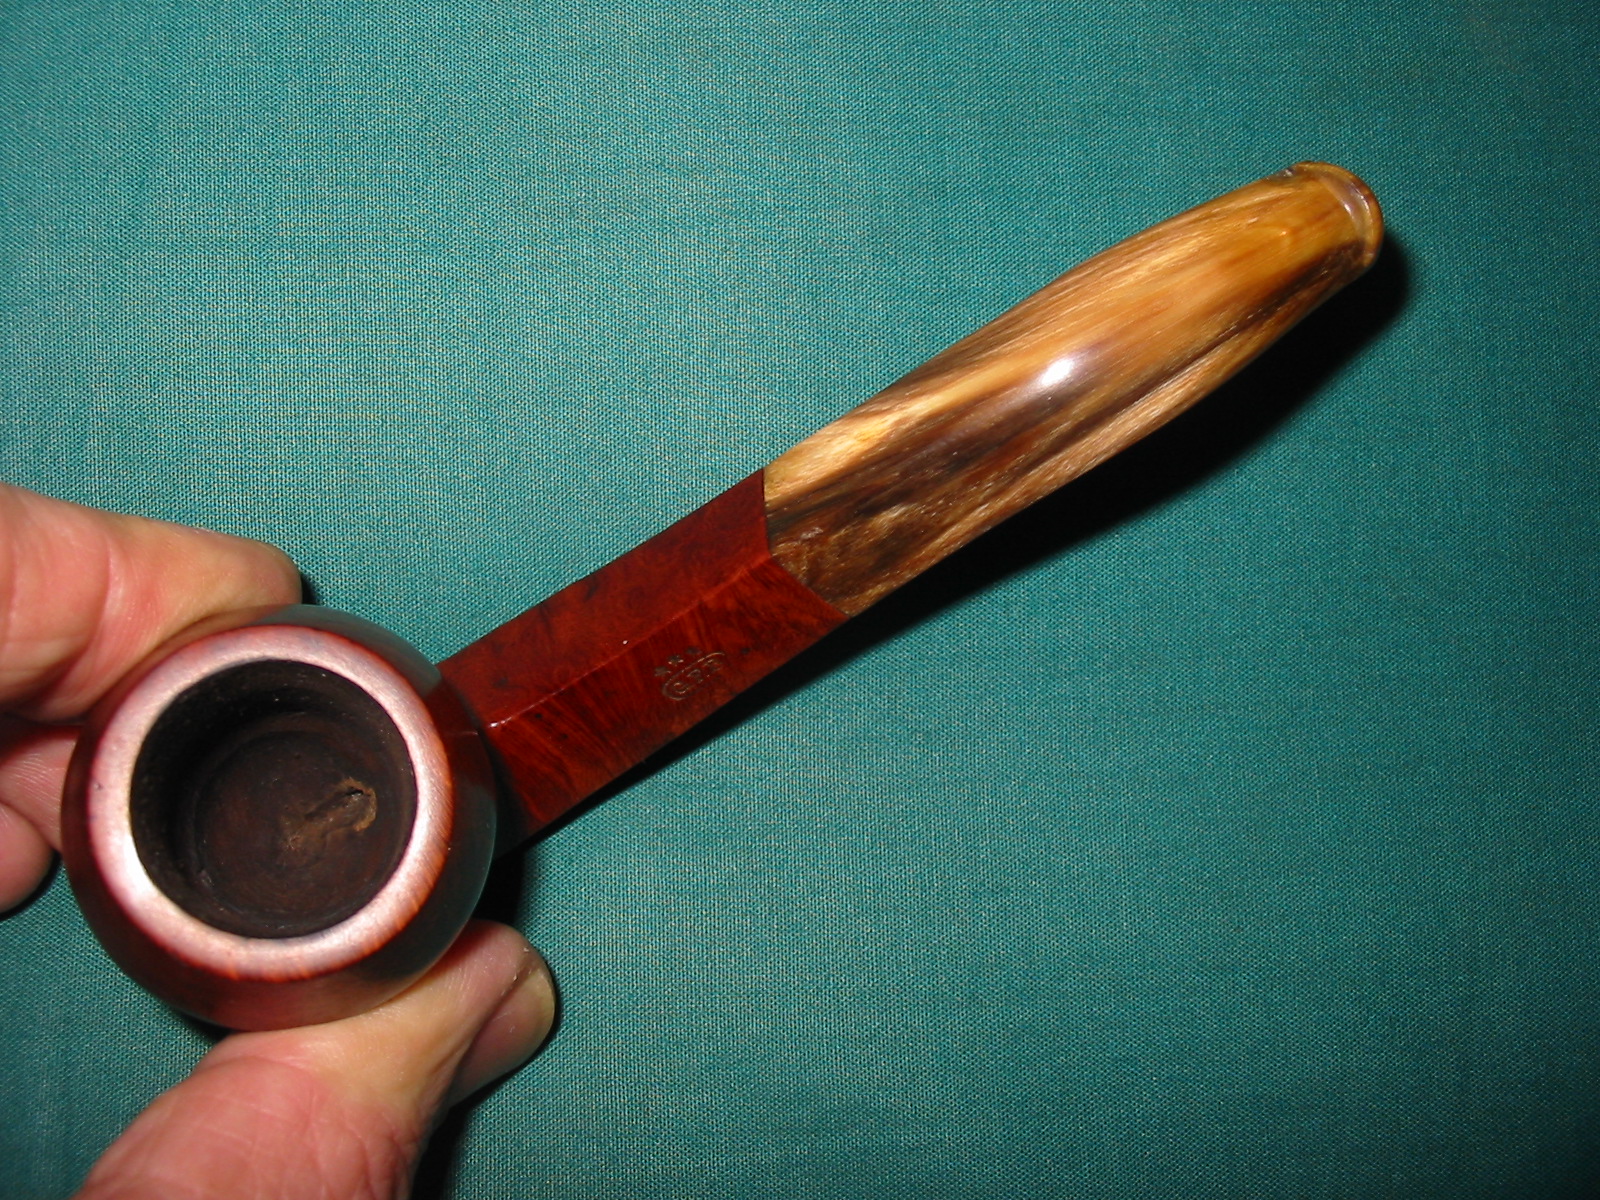
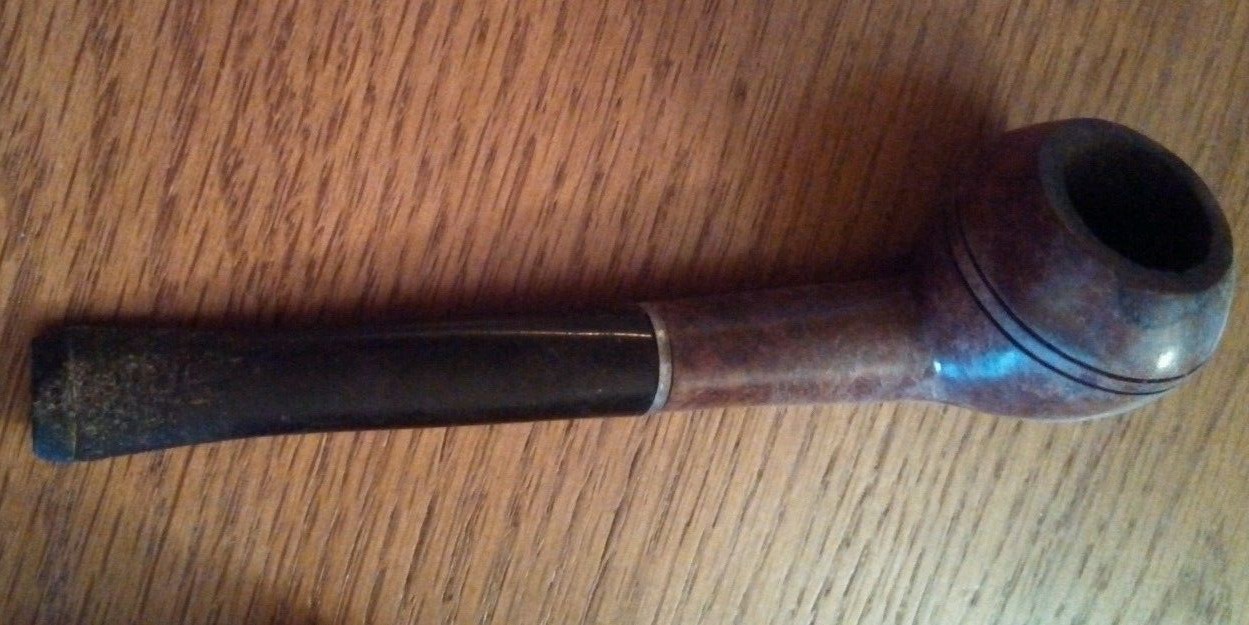
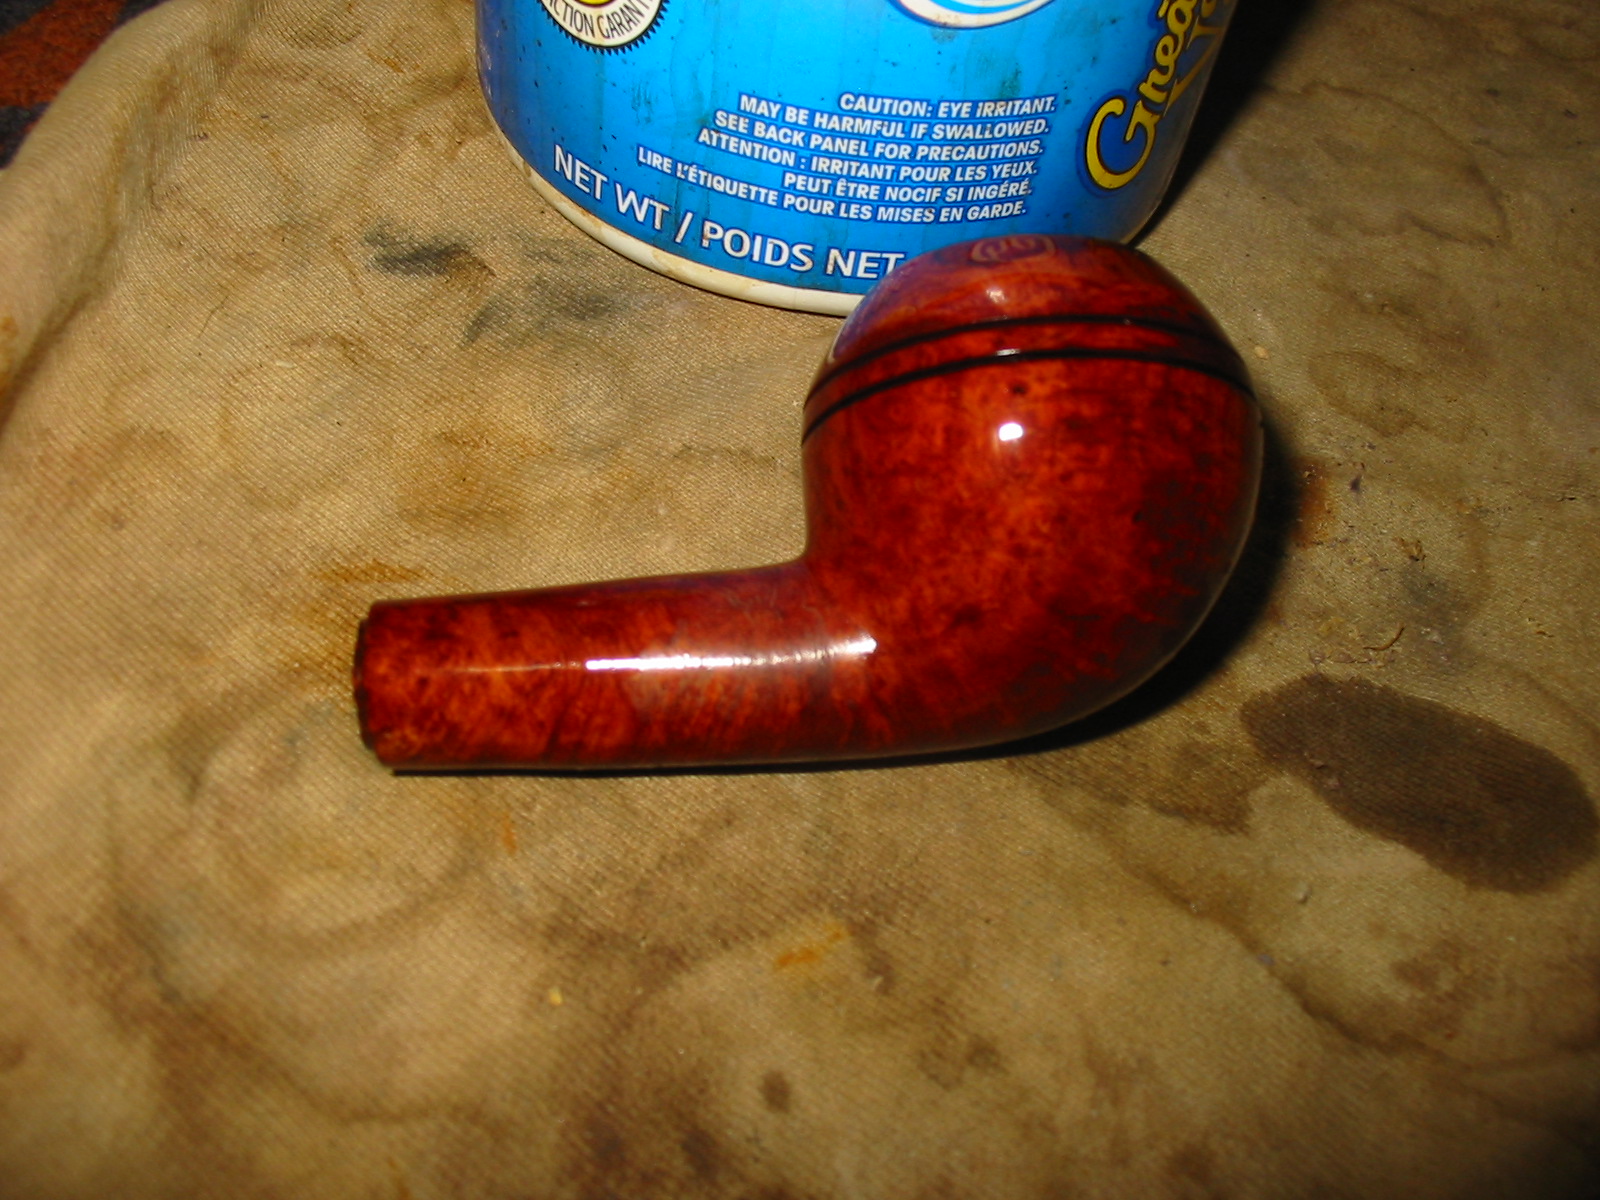
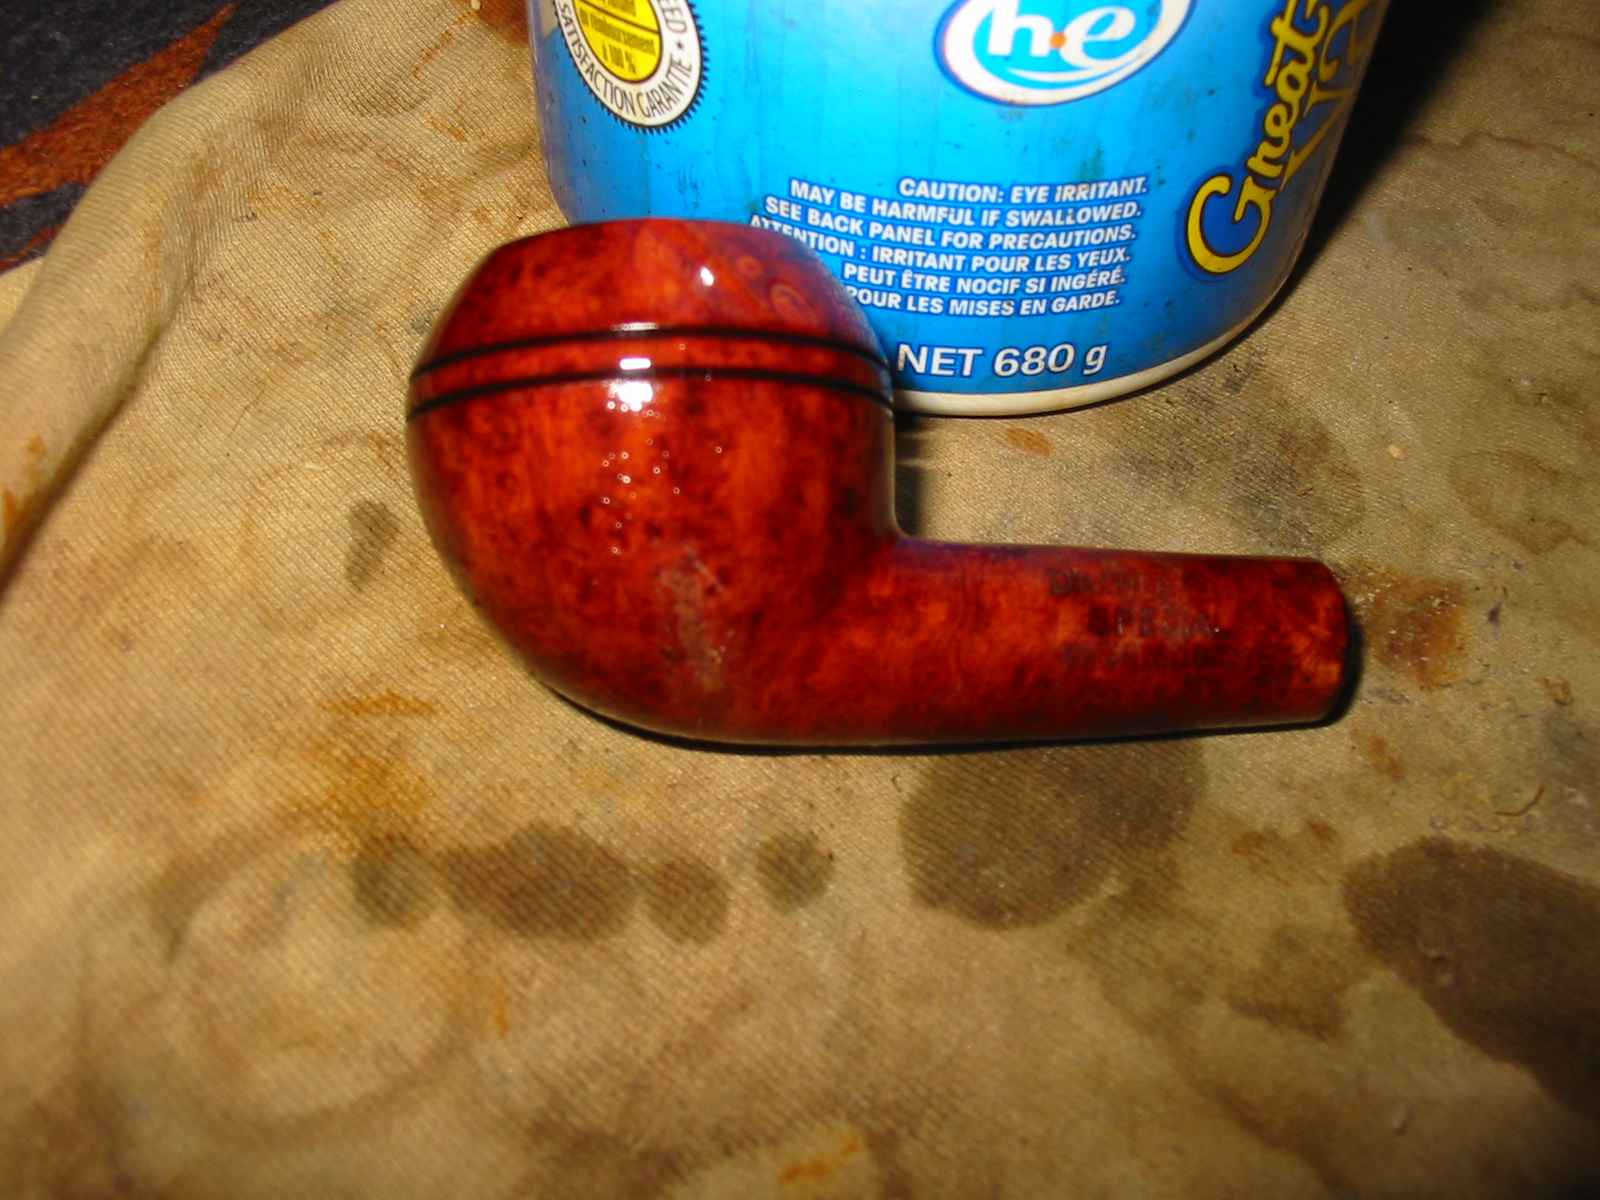
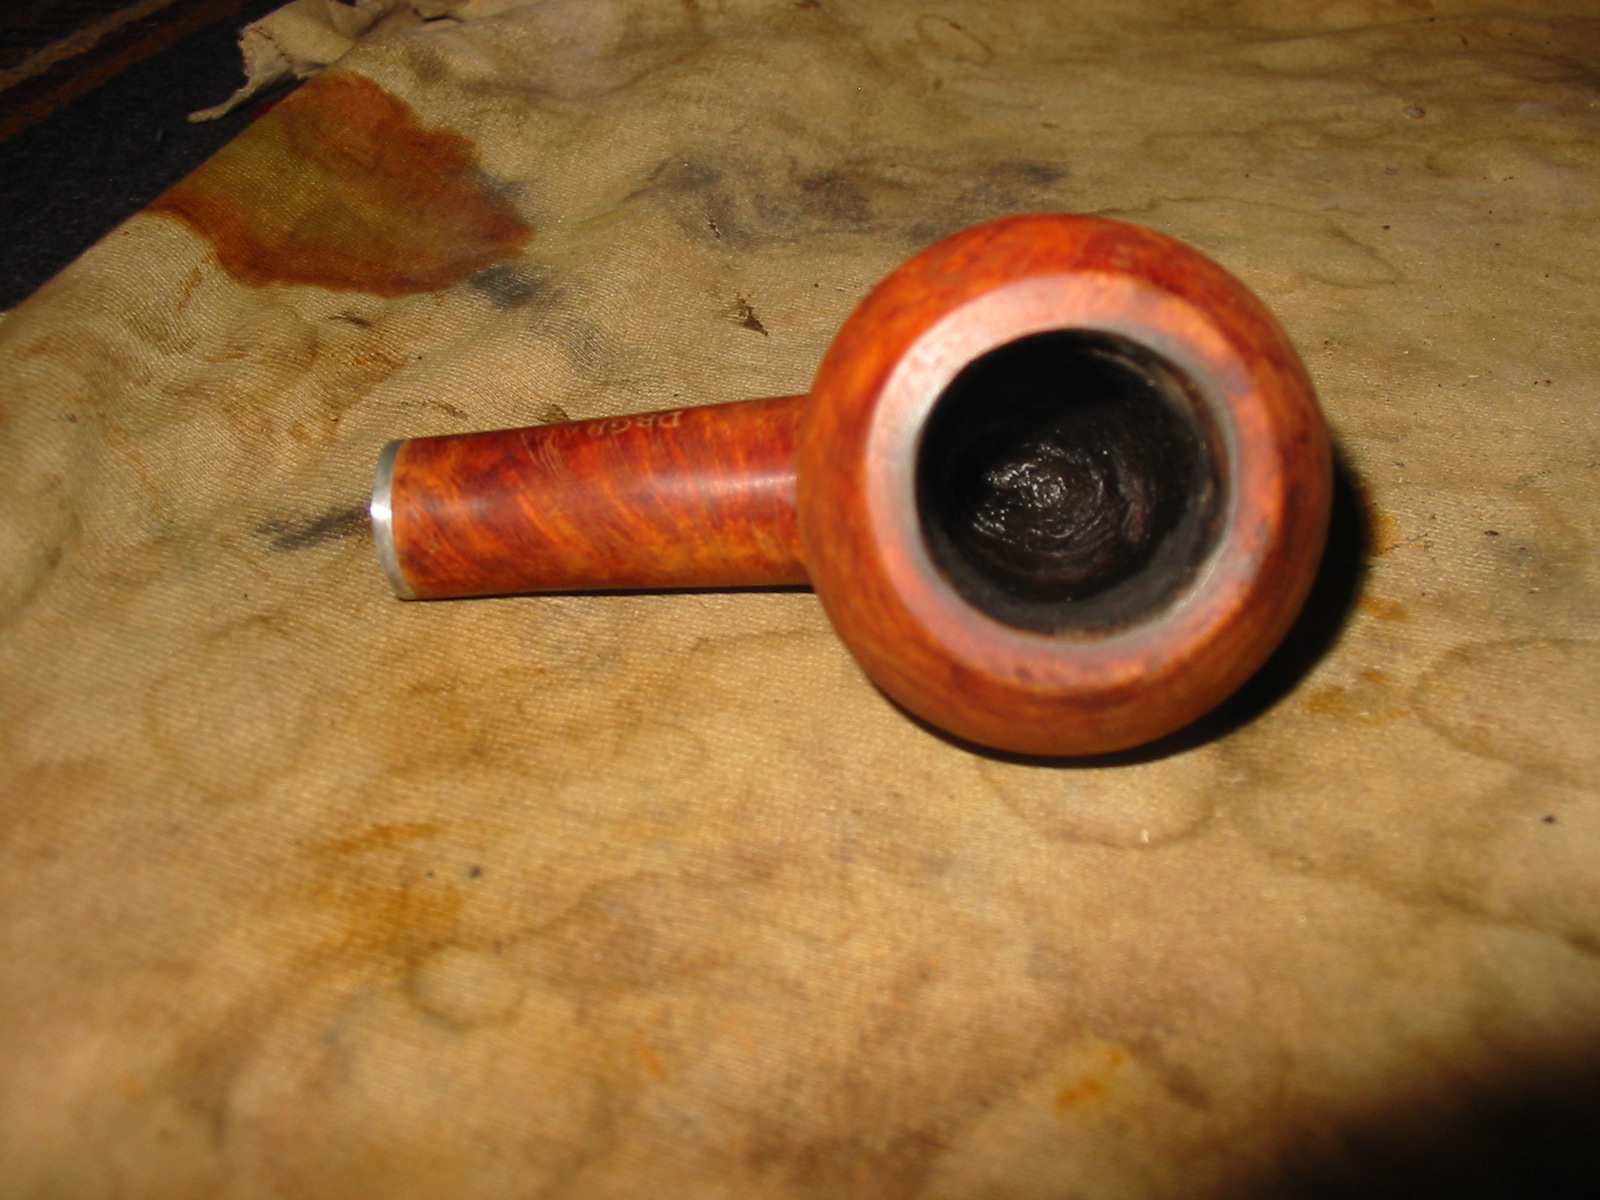
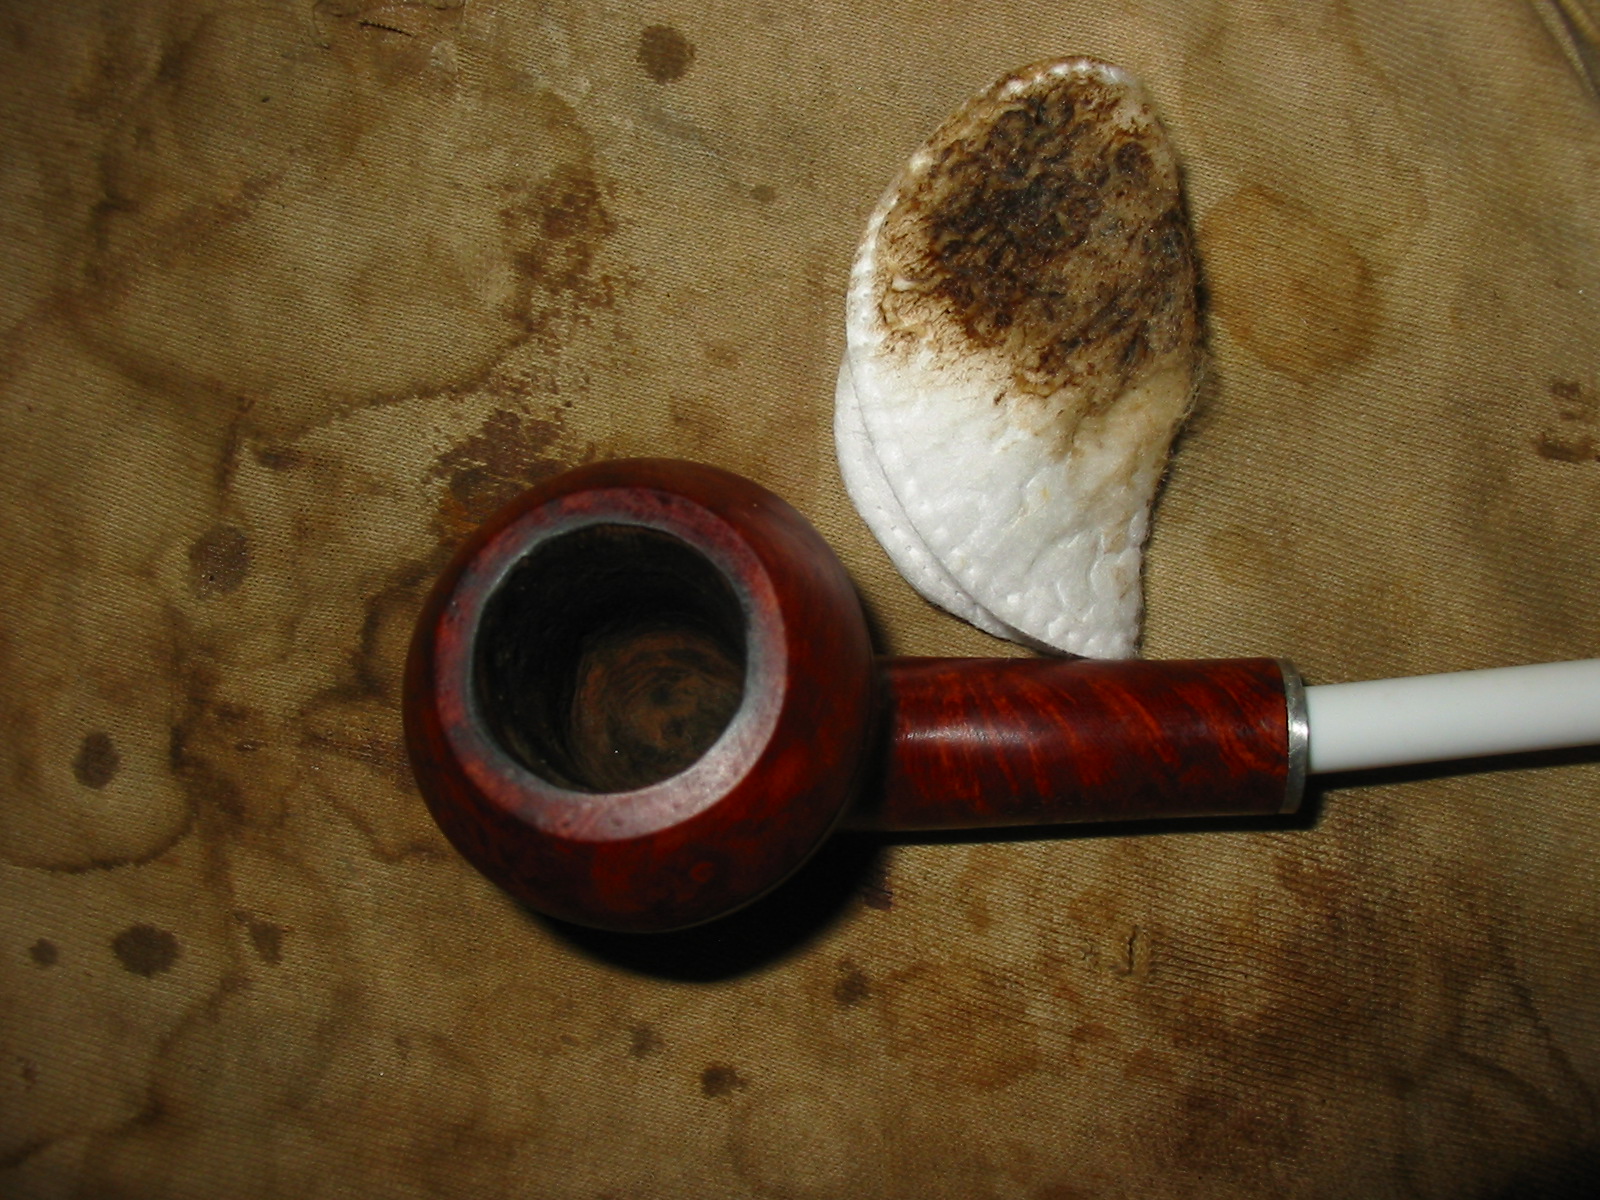
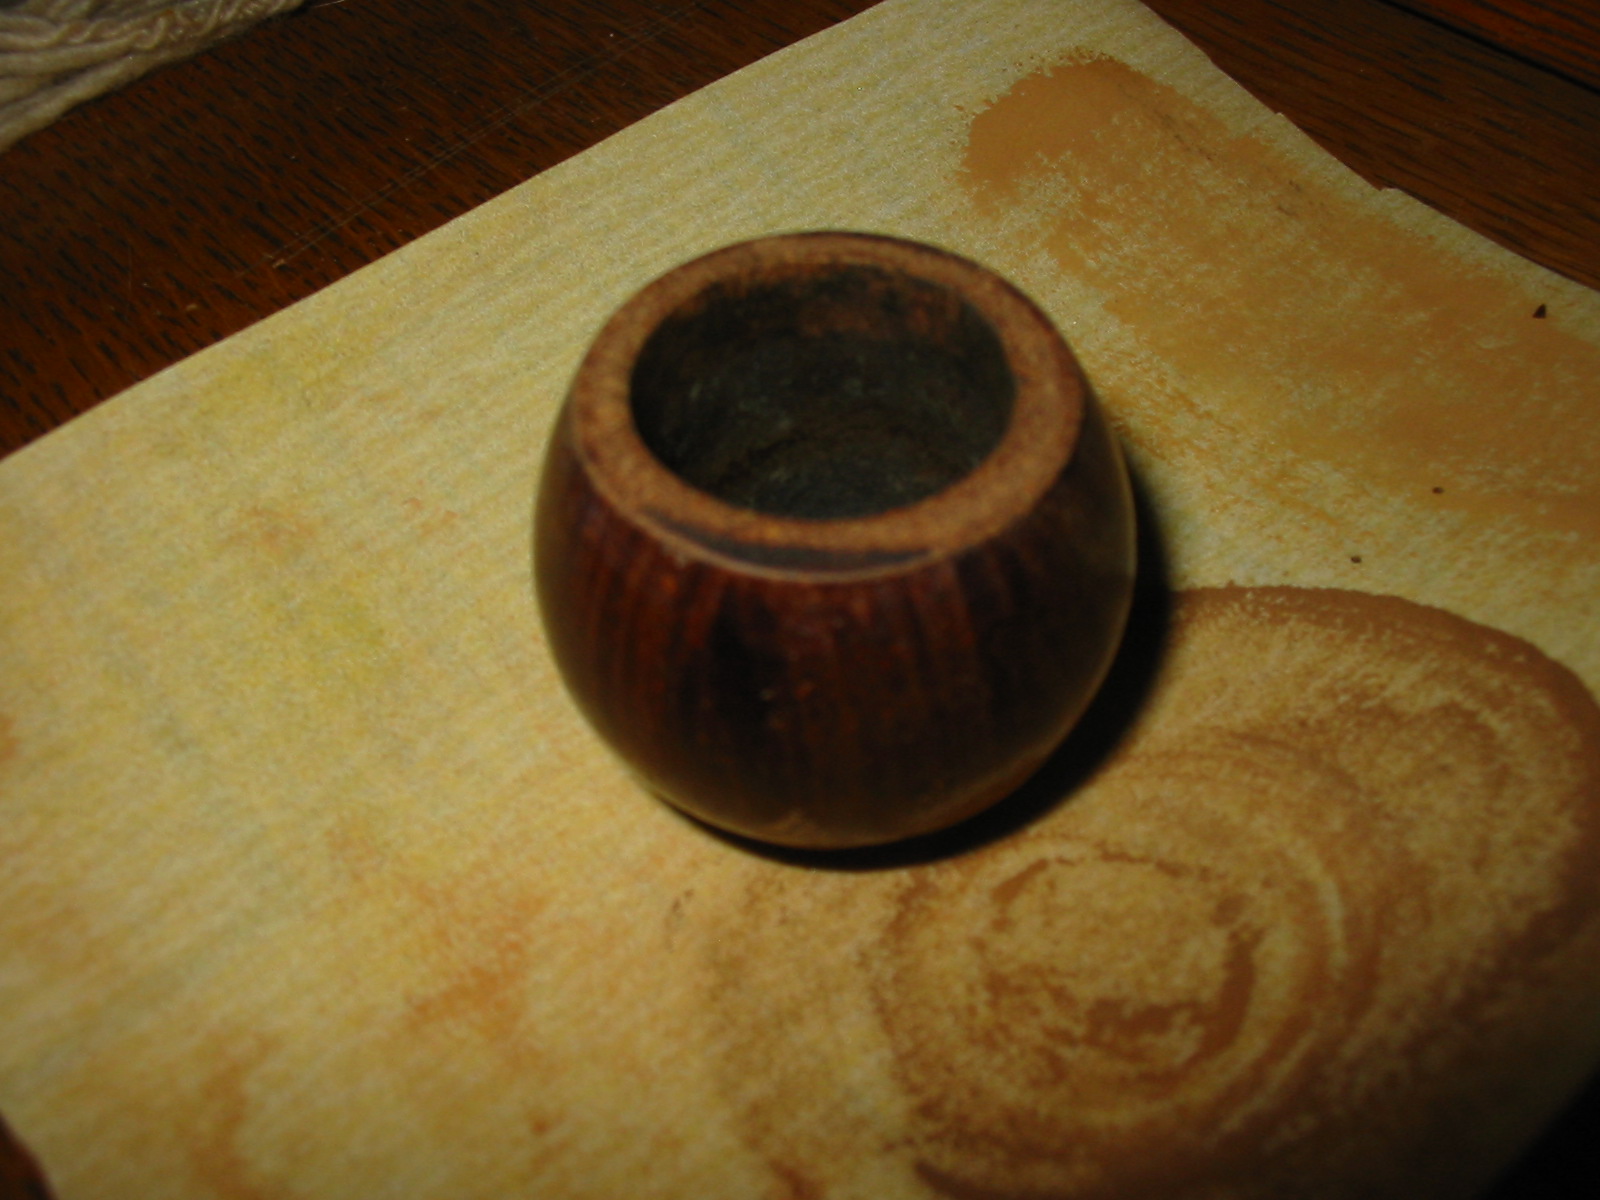
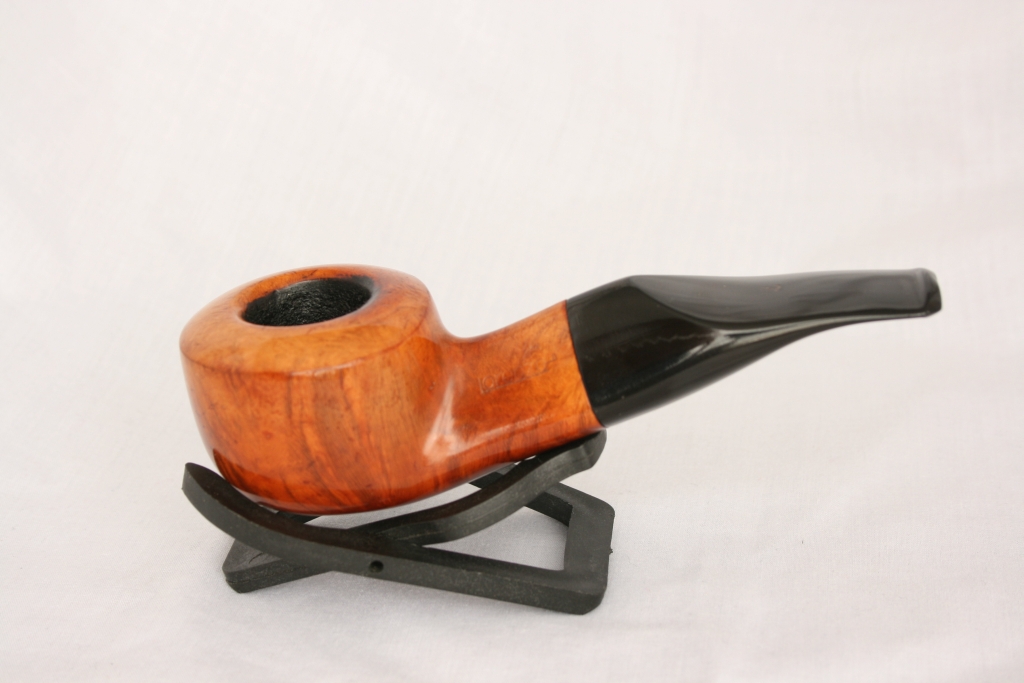
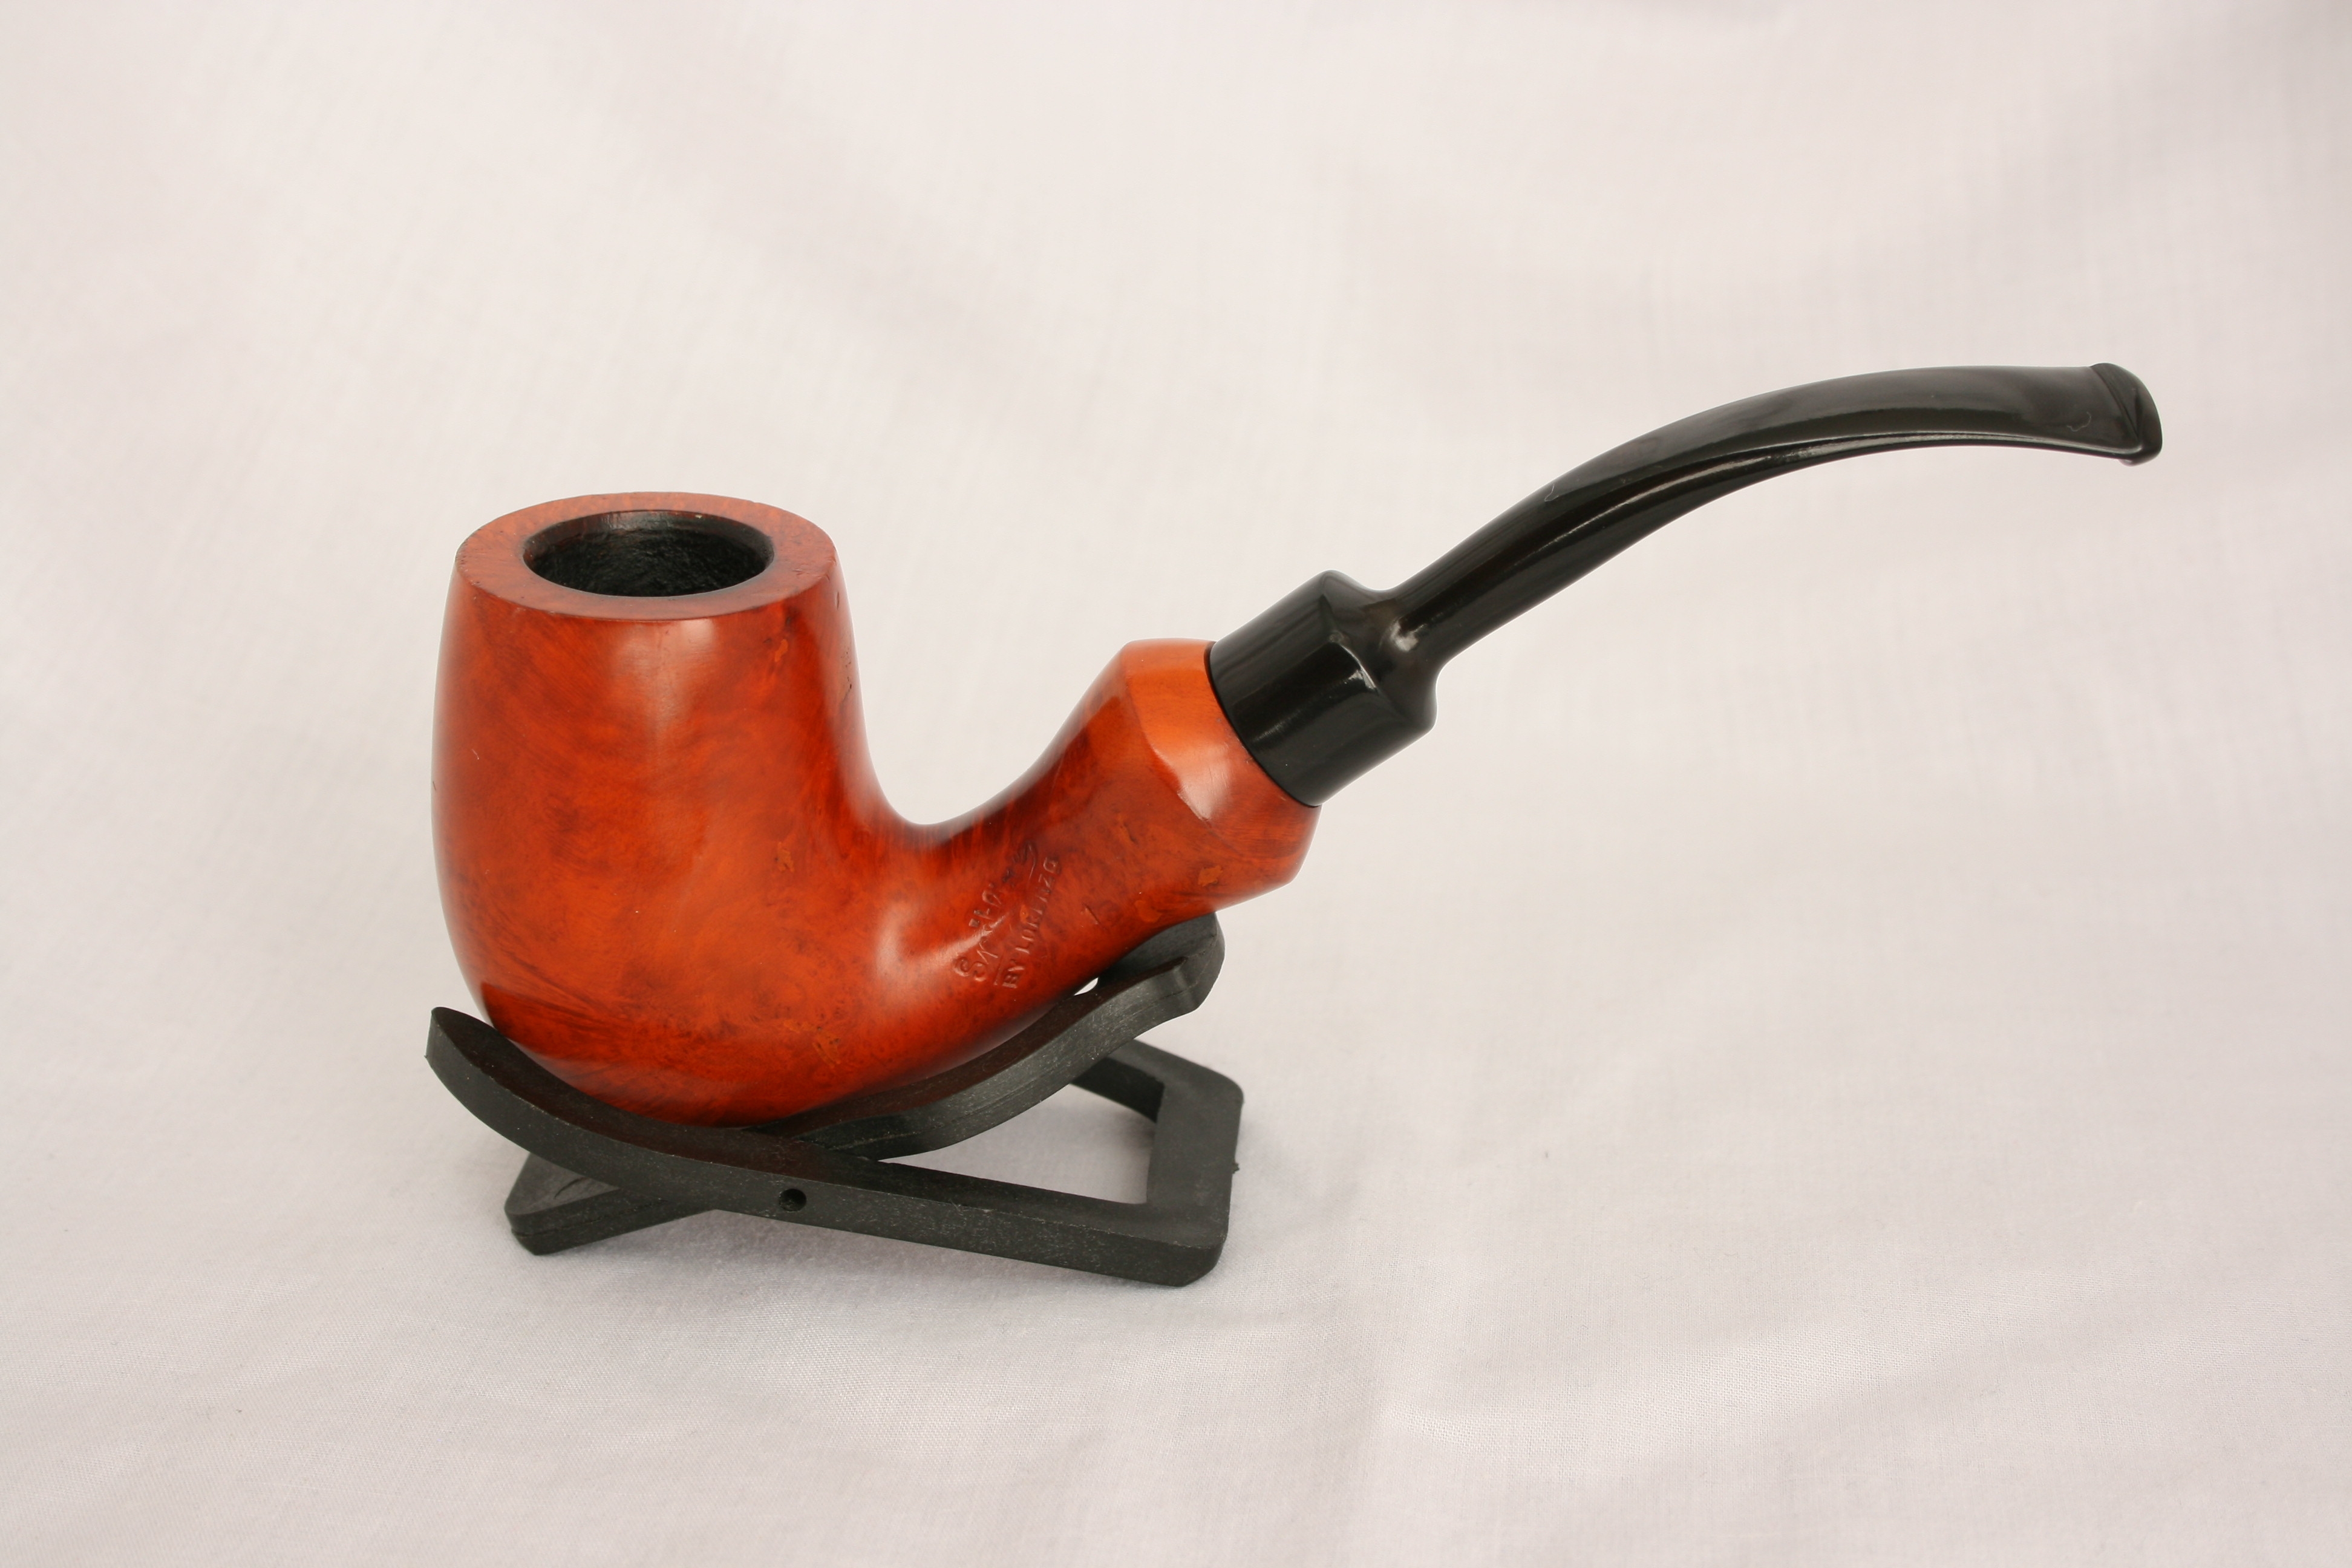
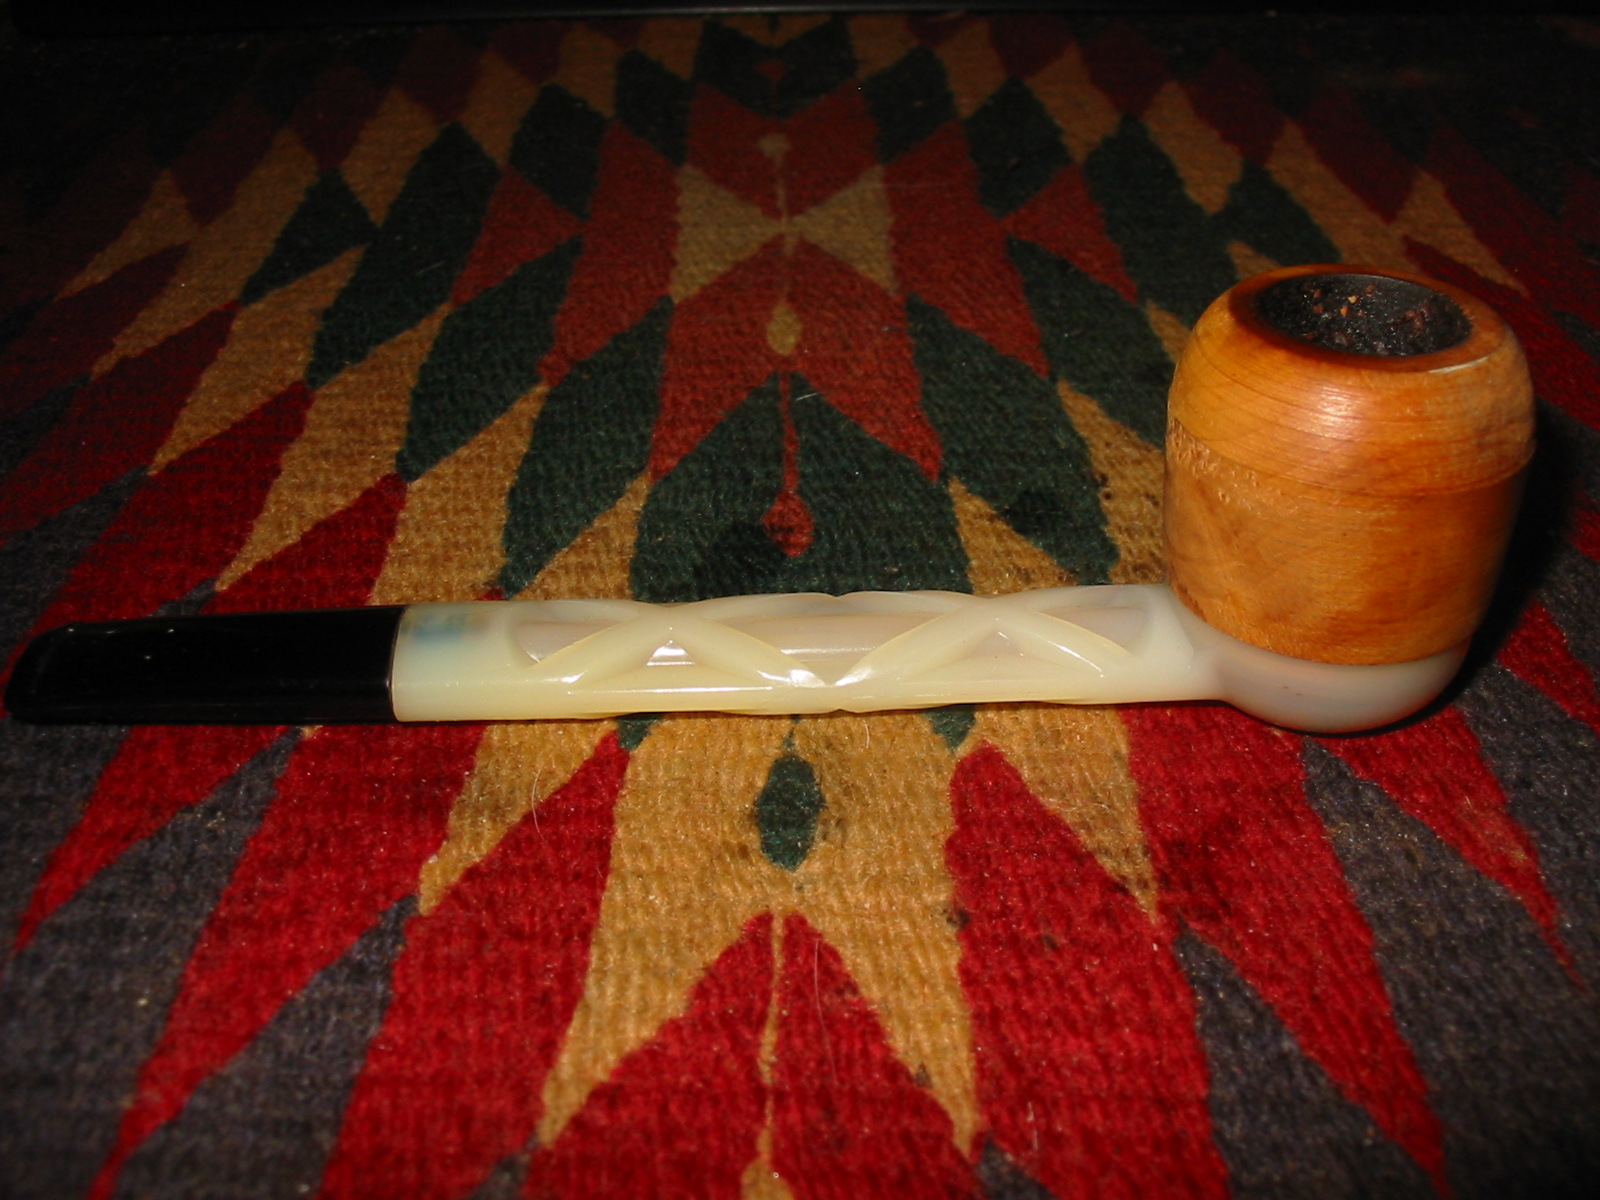
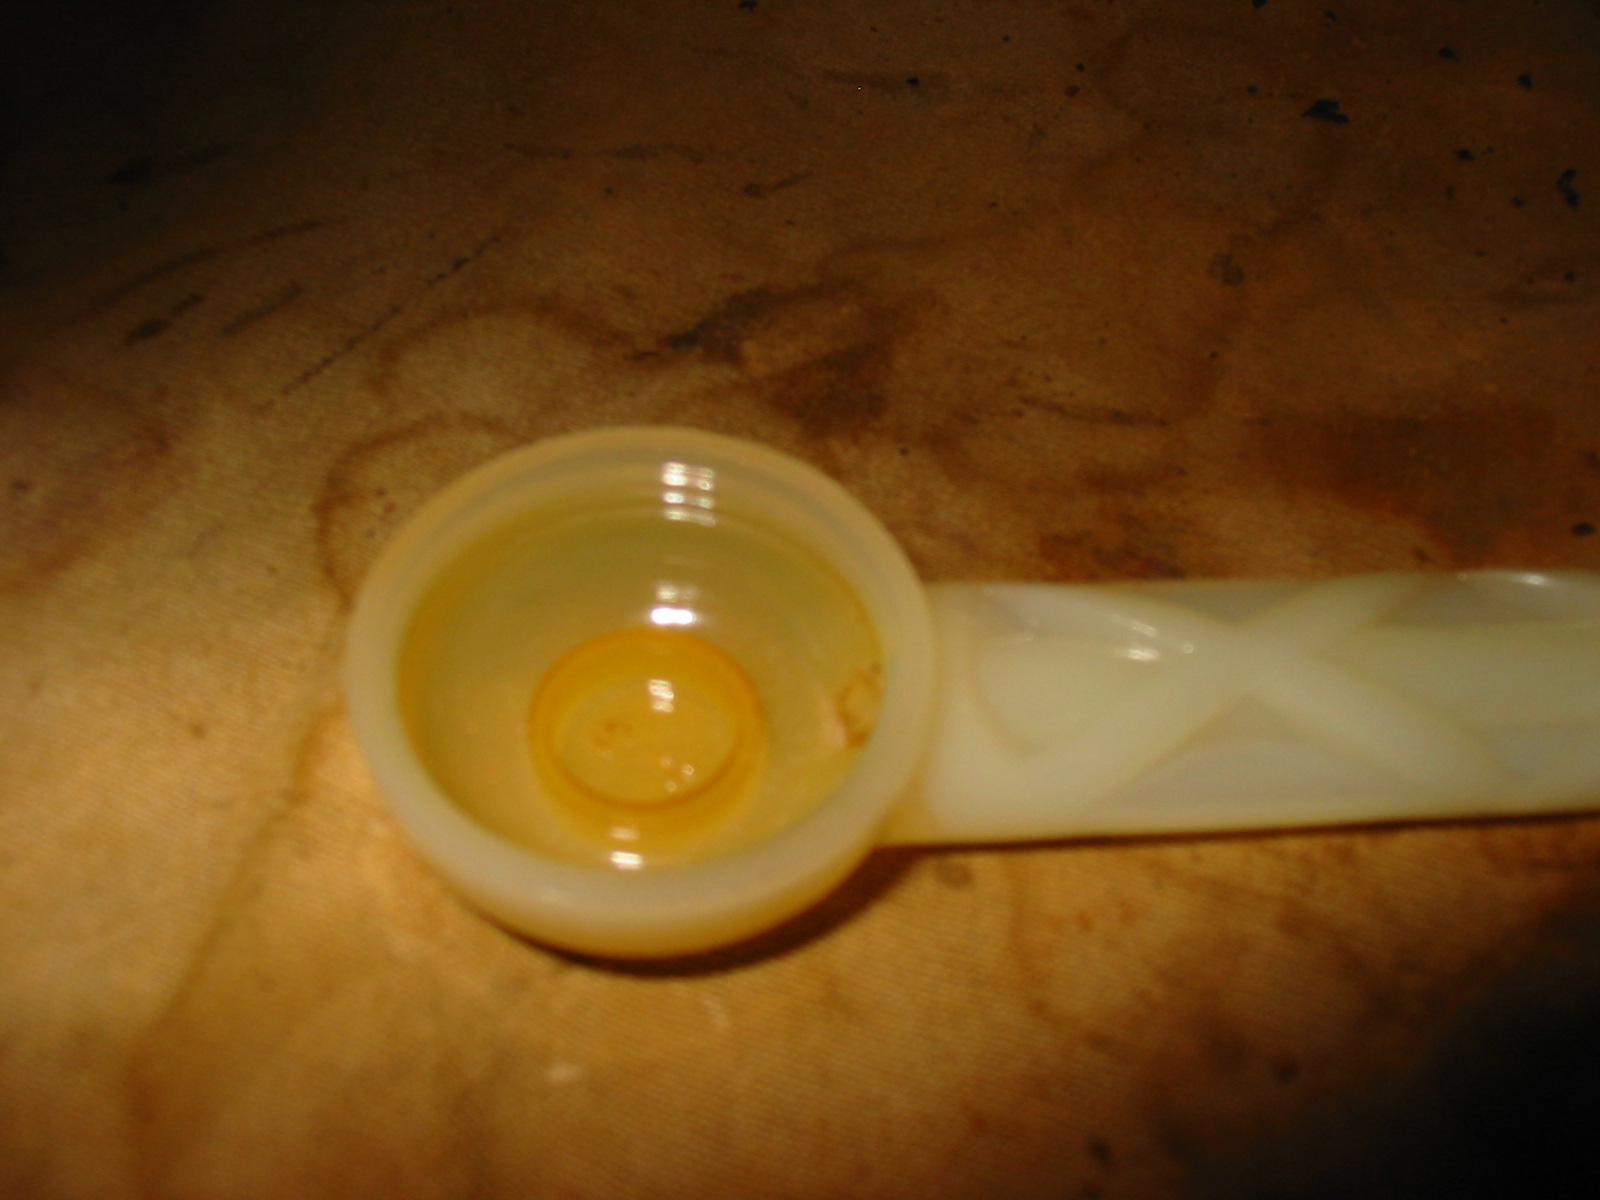
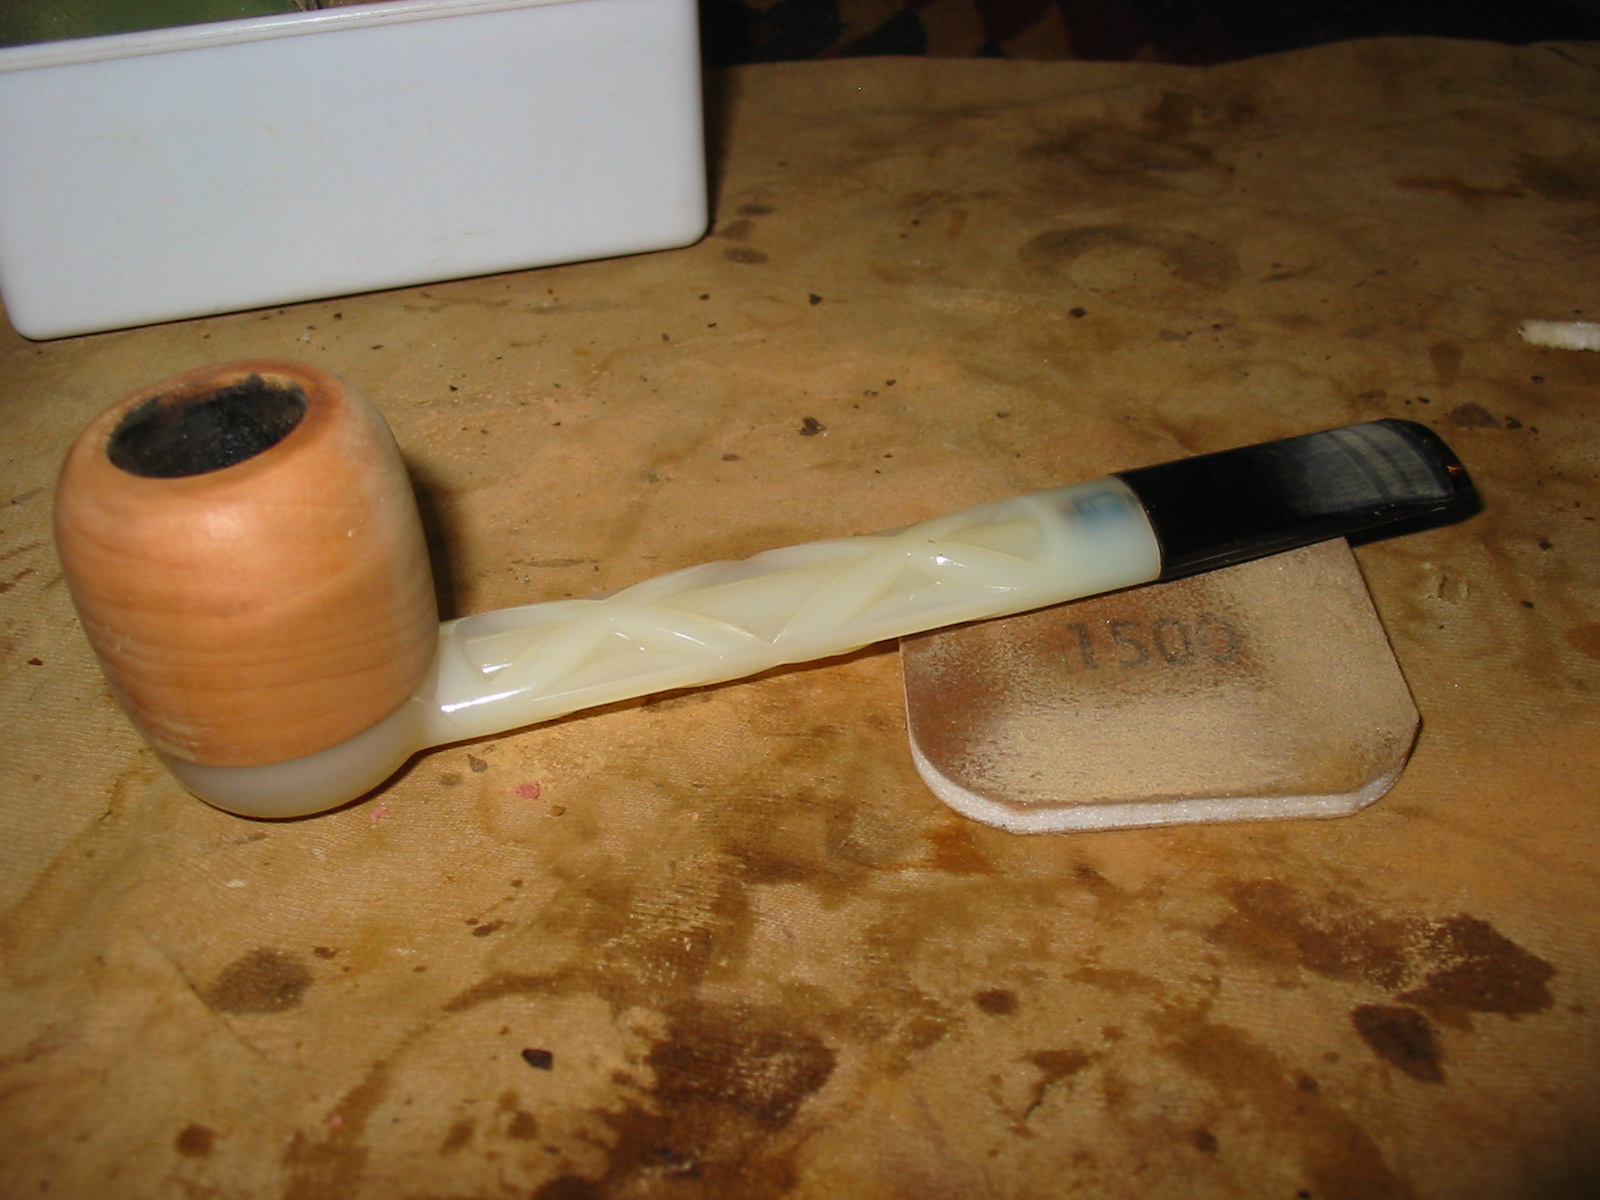
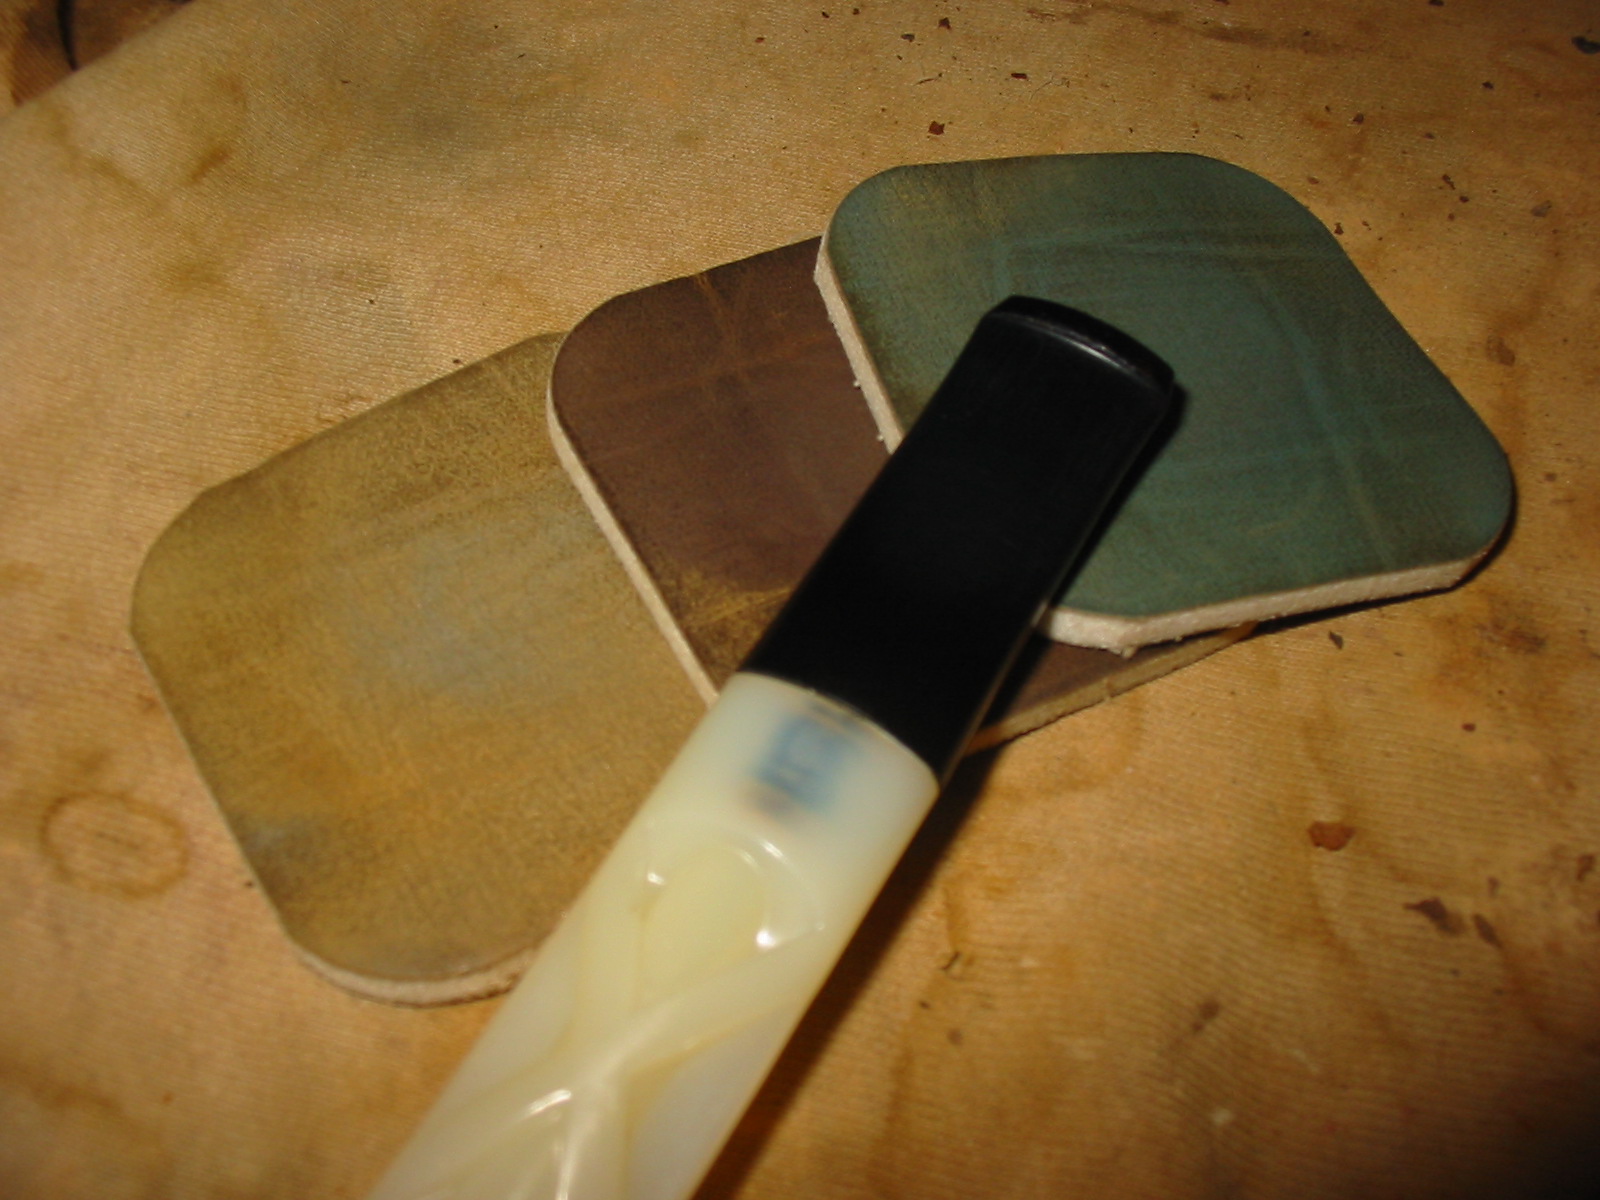
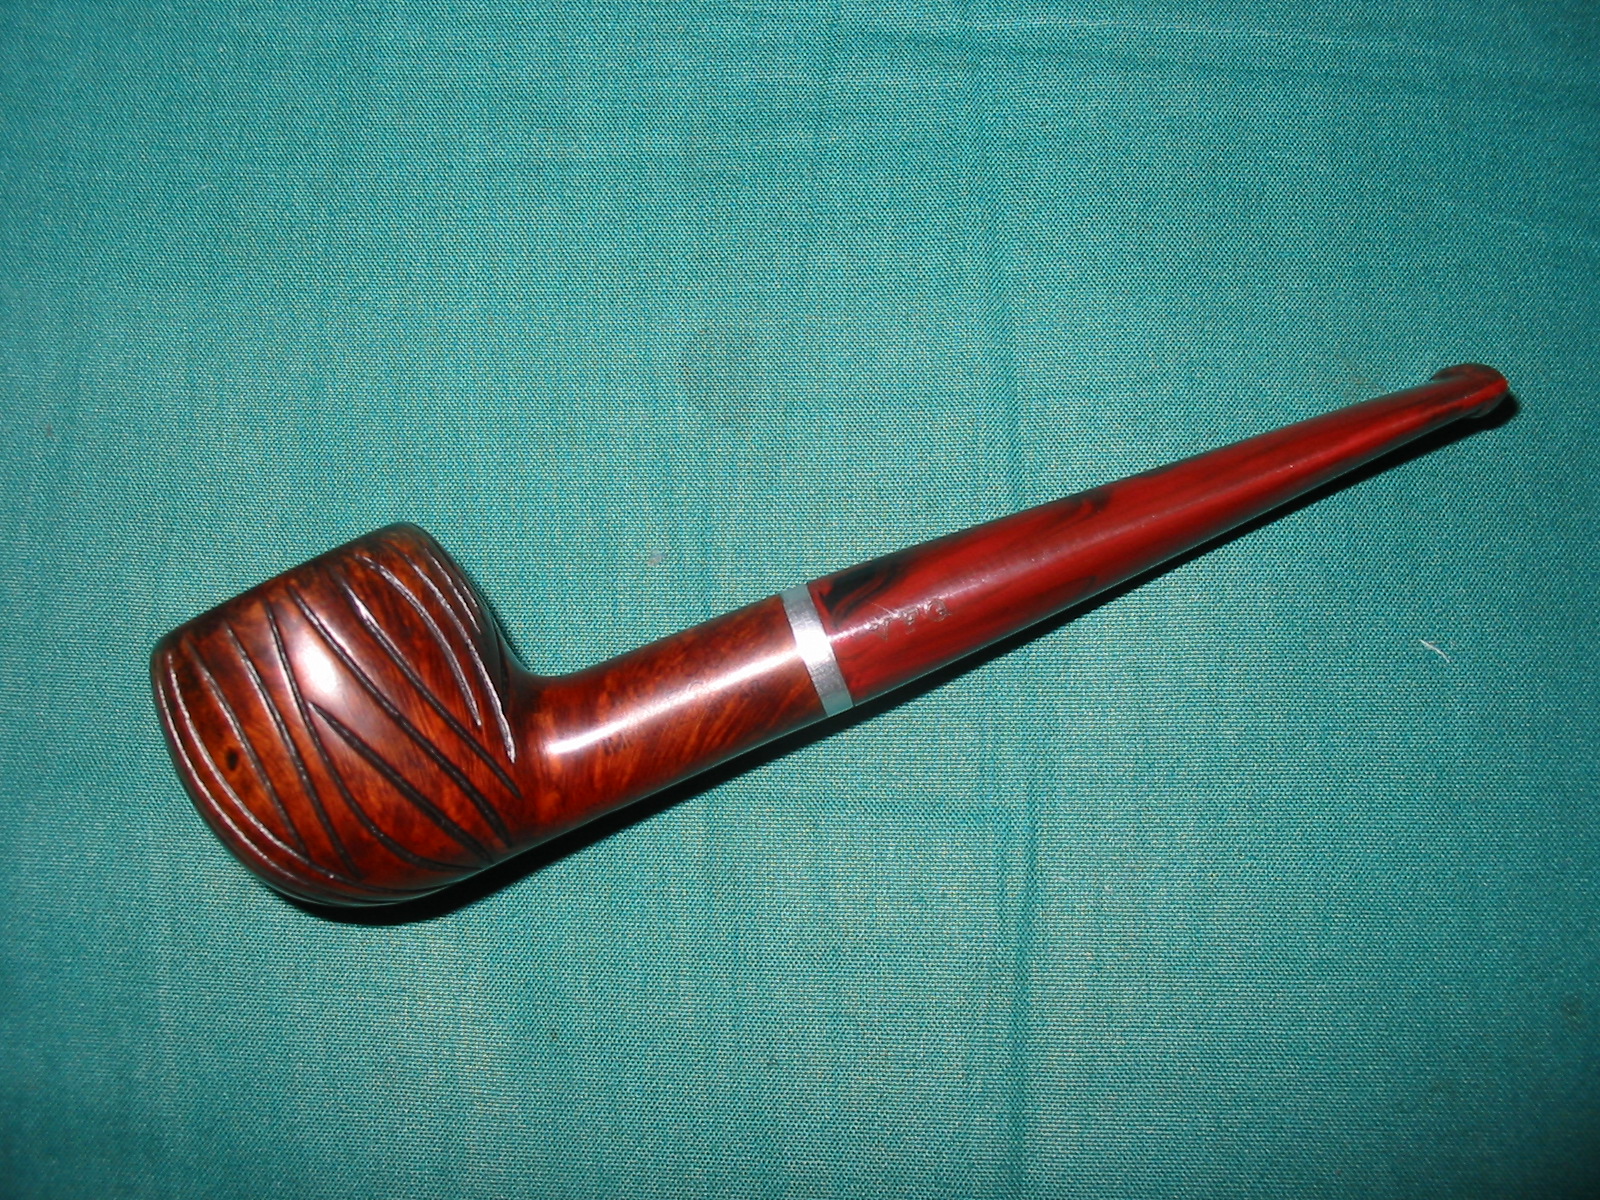
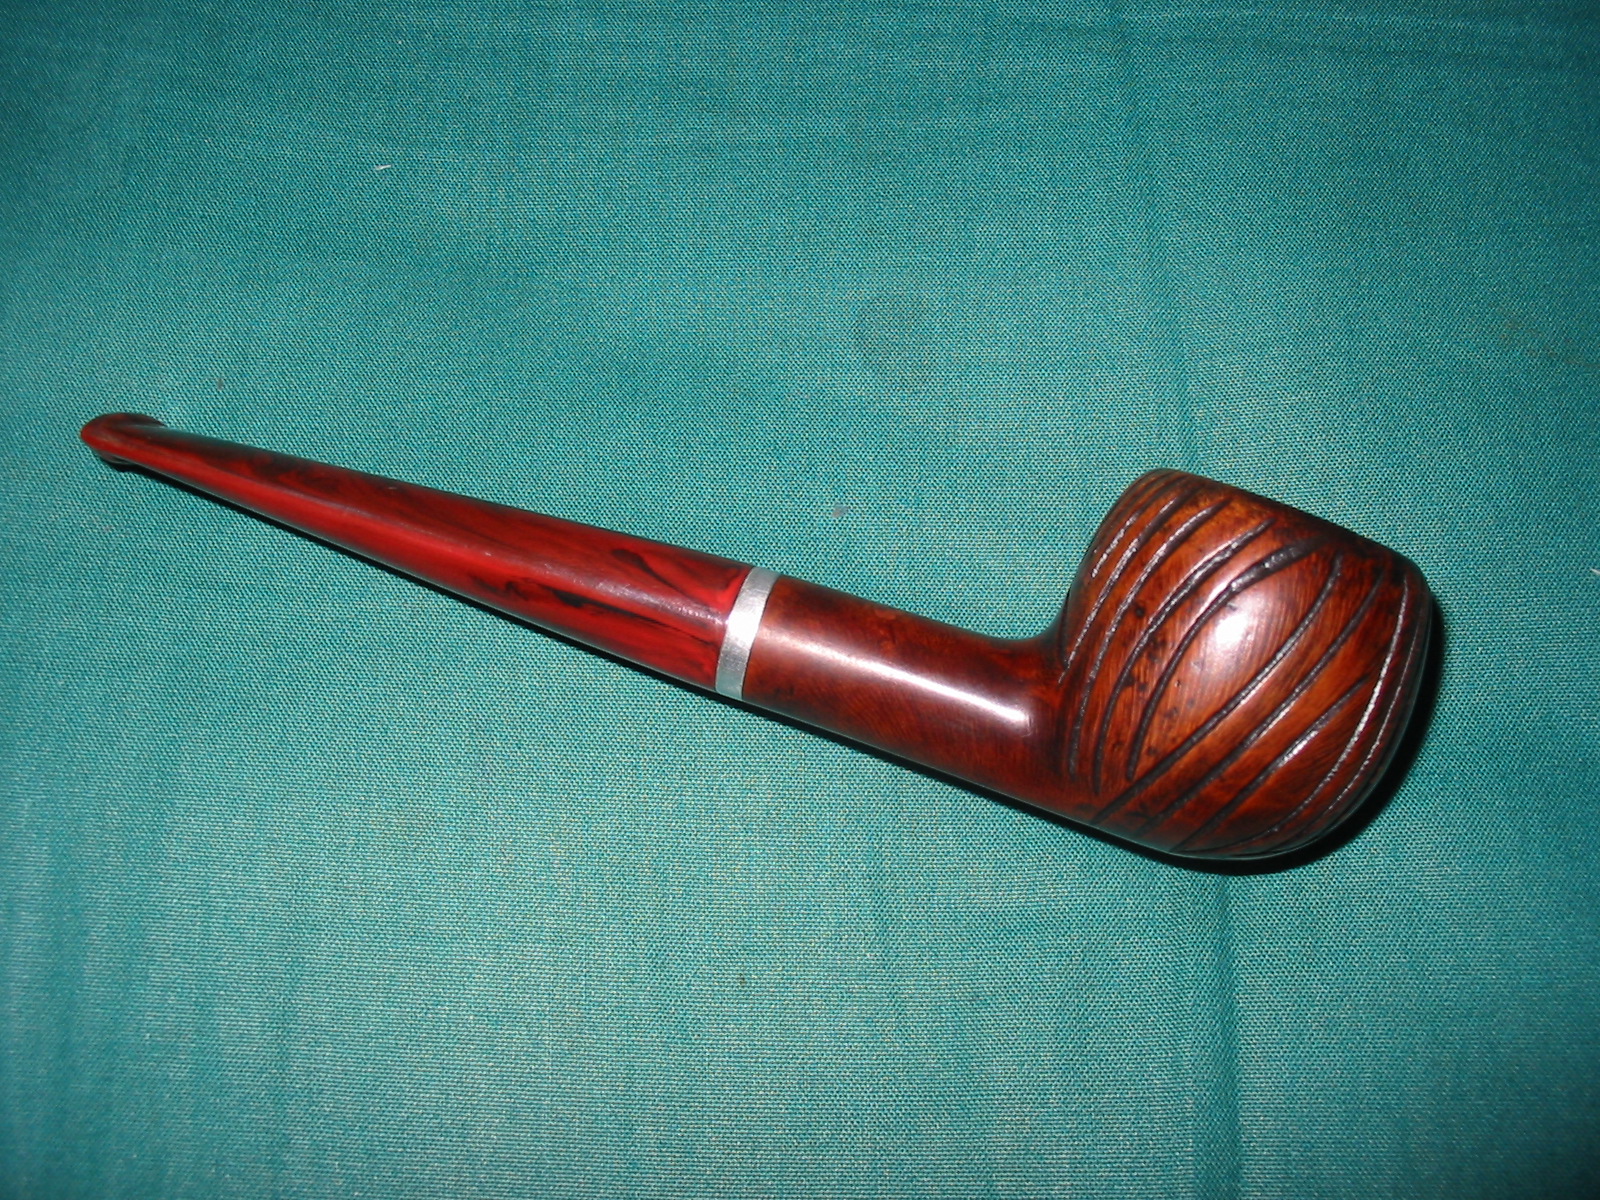
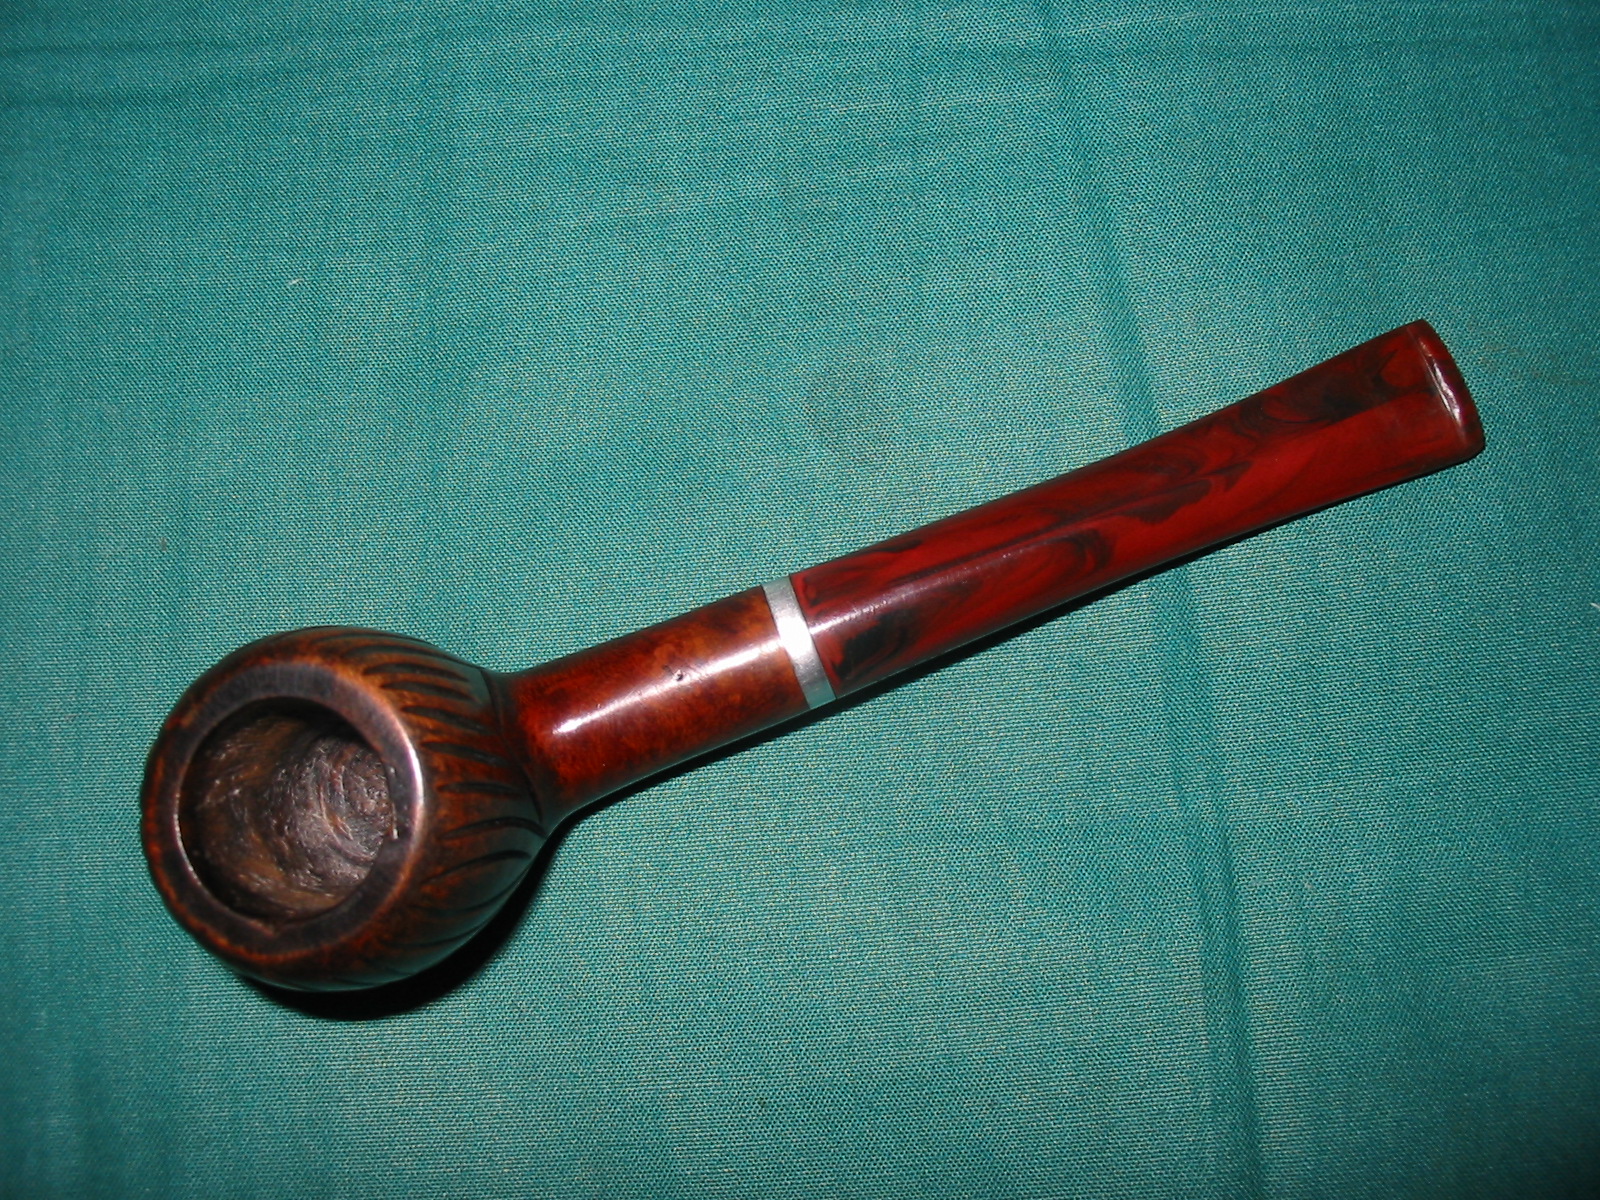
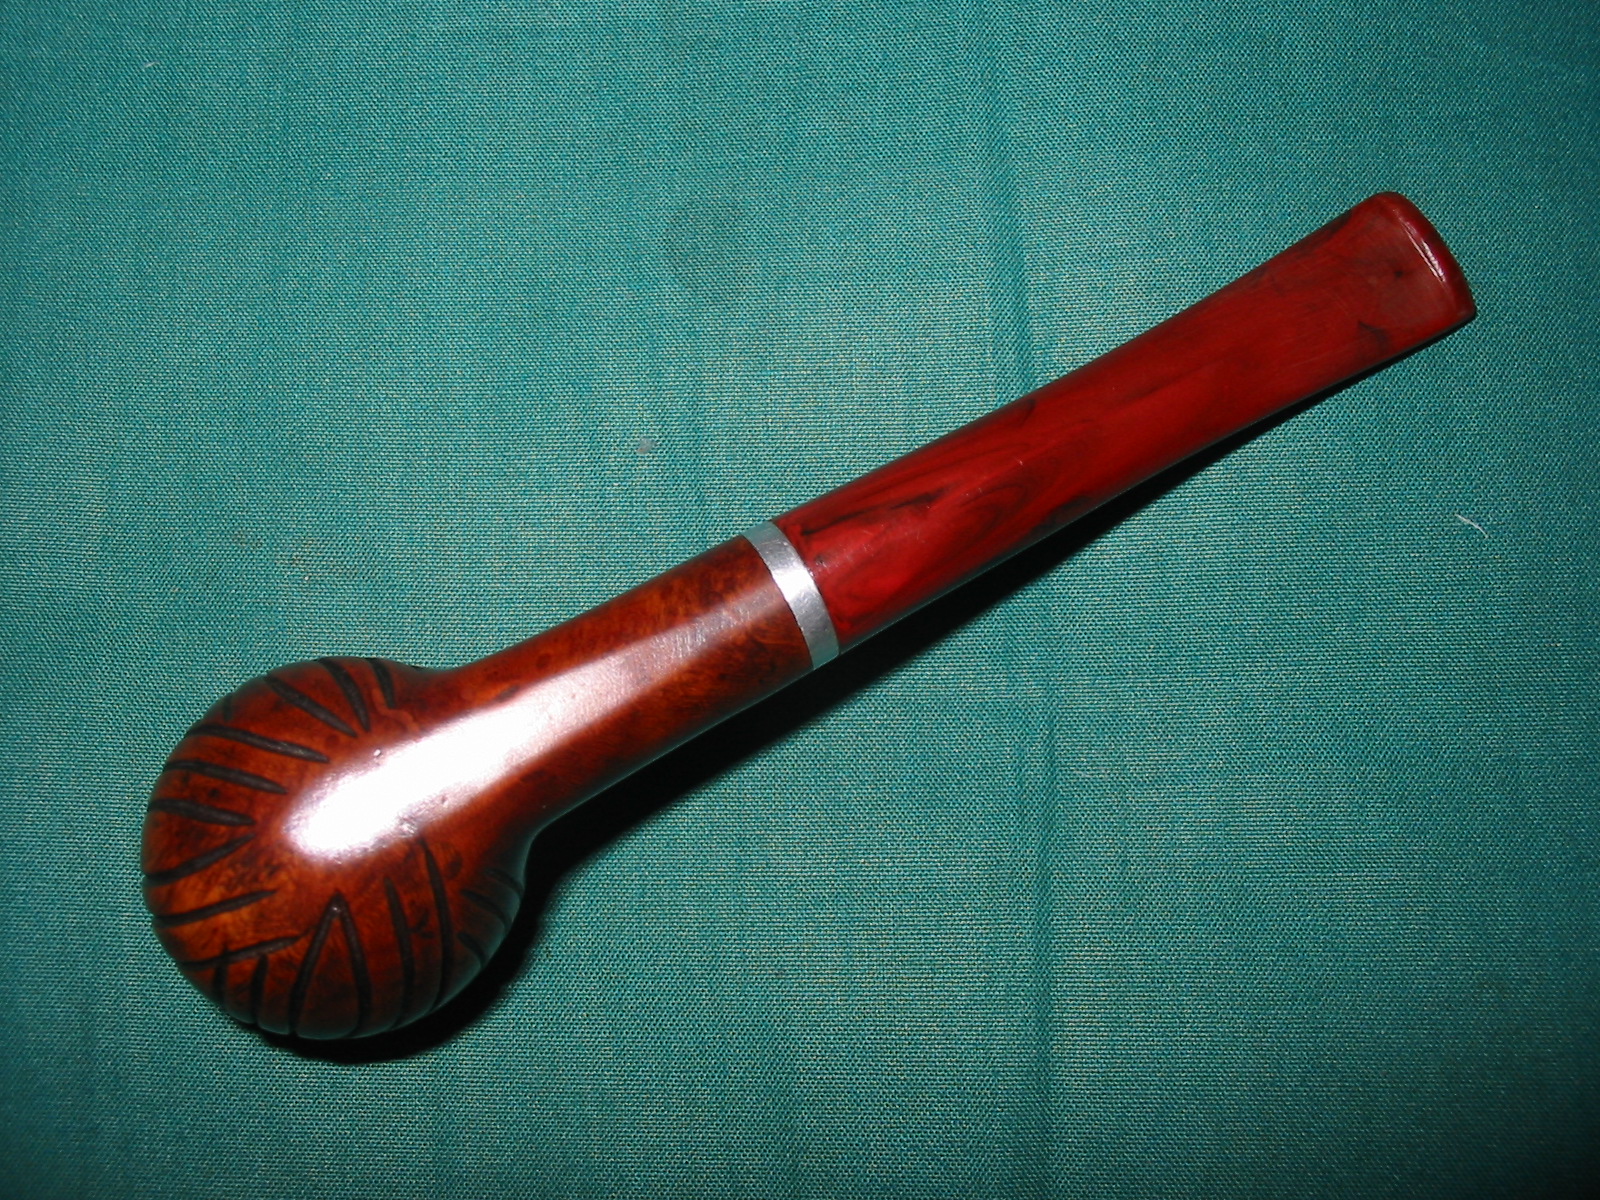
On a recent pipe hunt my son in law went with me and picked up a couple of pipes of his own. The first one was an interesting little Medico VFQ apple with a red stem. The stem was not too badly damaged. It was a filter pipe and still had the old paper Medico tube in the shank. The bowl was a mess. The rim had been burned and chipped and the bowl was badly caked and it looked as if the previous owner had smoked gooey aromatics in it that left behind a heavy residue of tar in the bottom of the bowl. It had hardened into lava like material. He liked the stem colour and the shape of the old pipe so I said to go ahead and pick it up and the two of us could work on it and bring it back for him. So he shelled out the $12.50 for the pipe and it became his first estate purchase of the trip.
IMG_3549

IMG_3551

IMG_3553

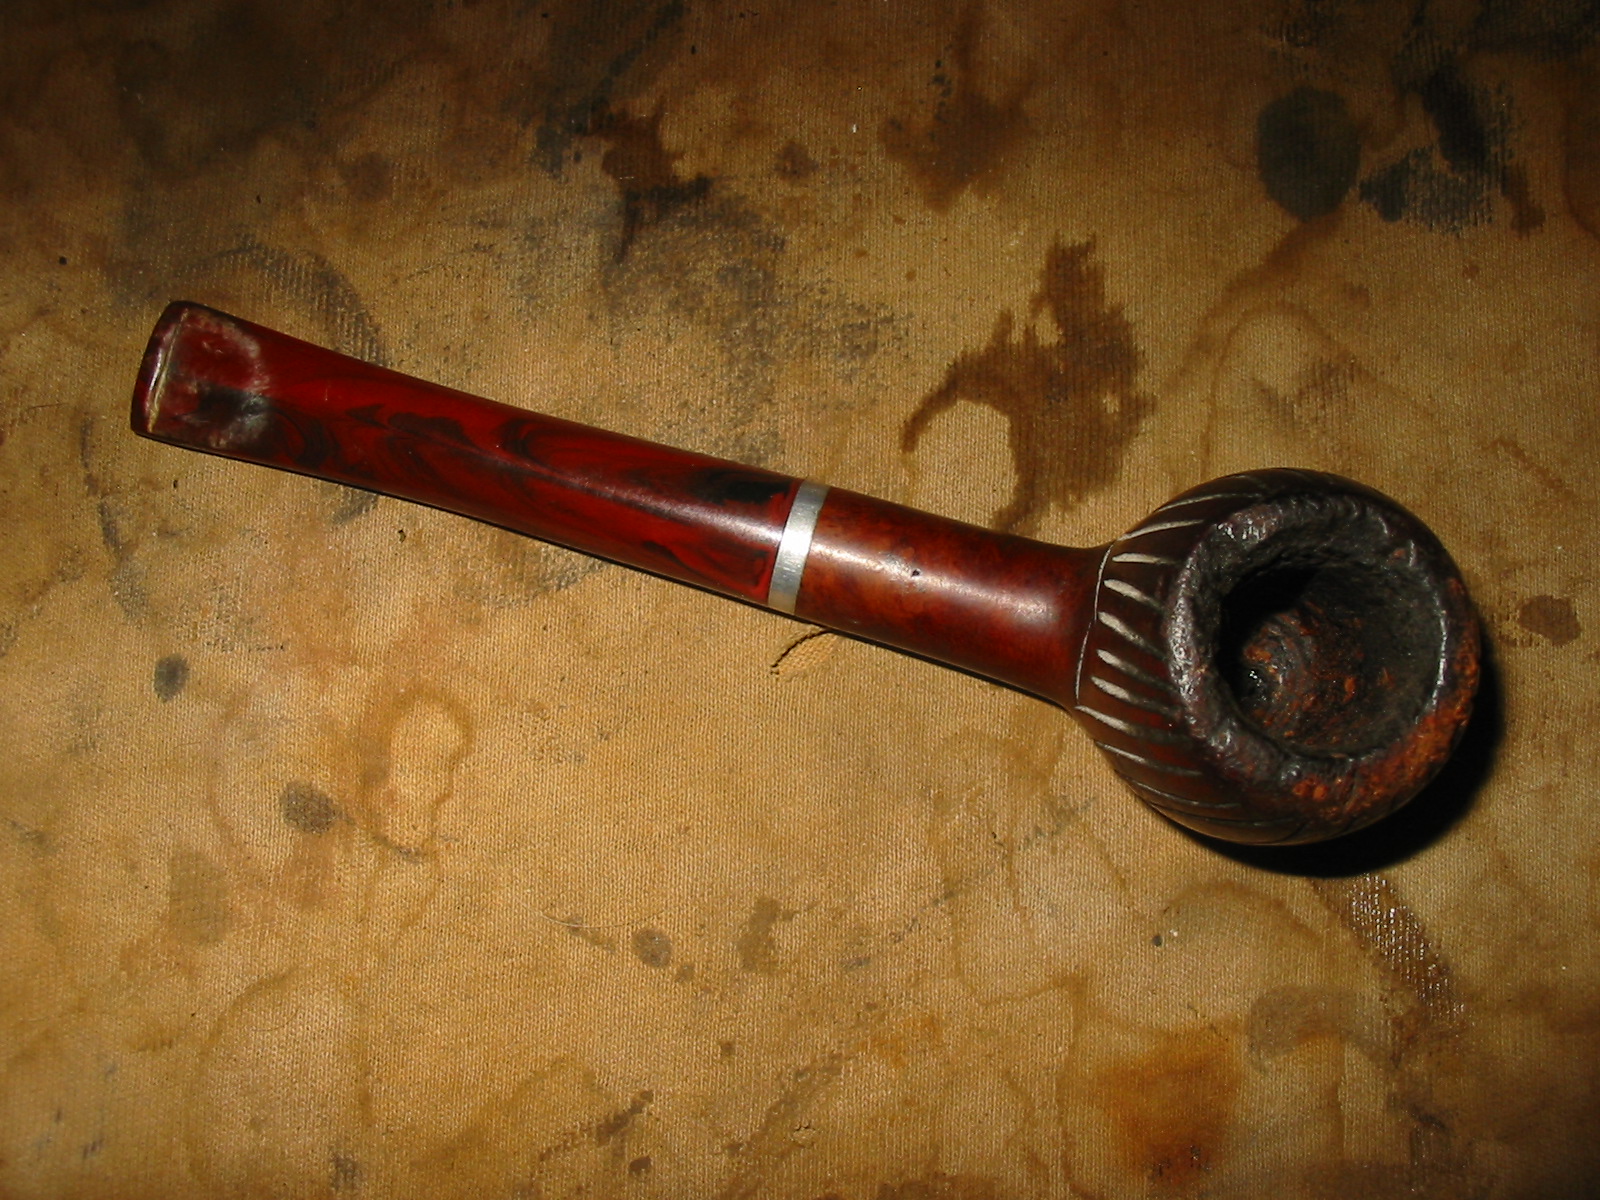
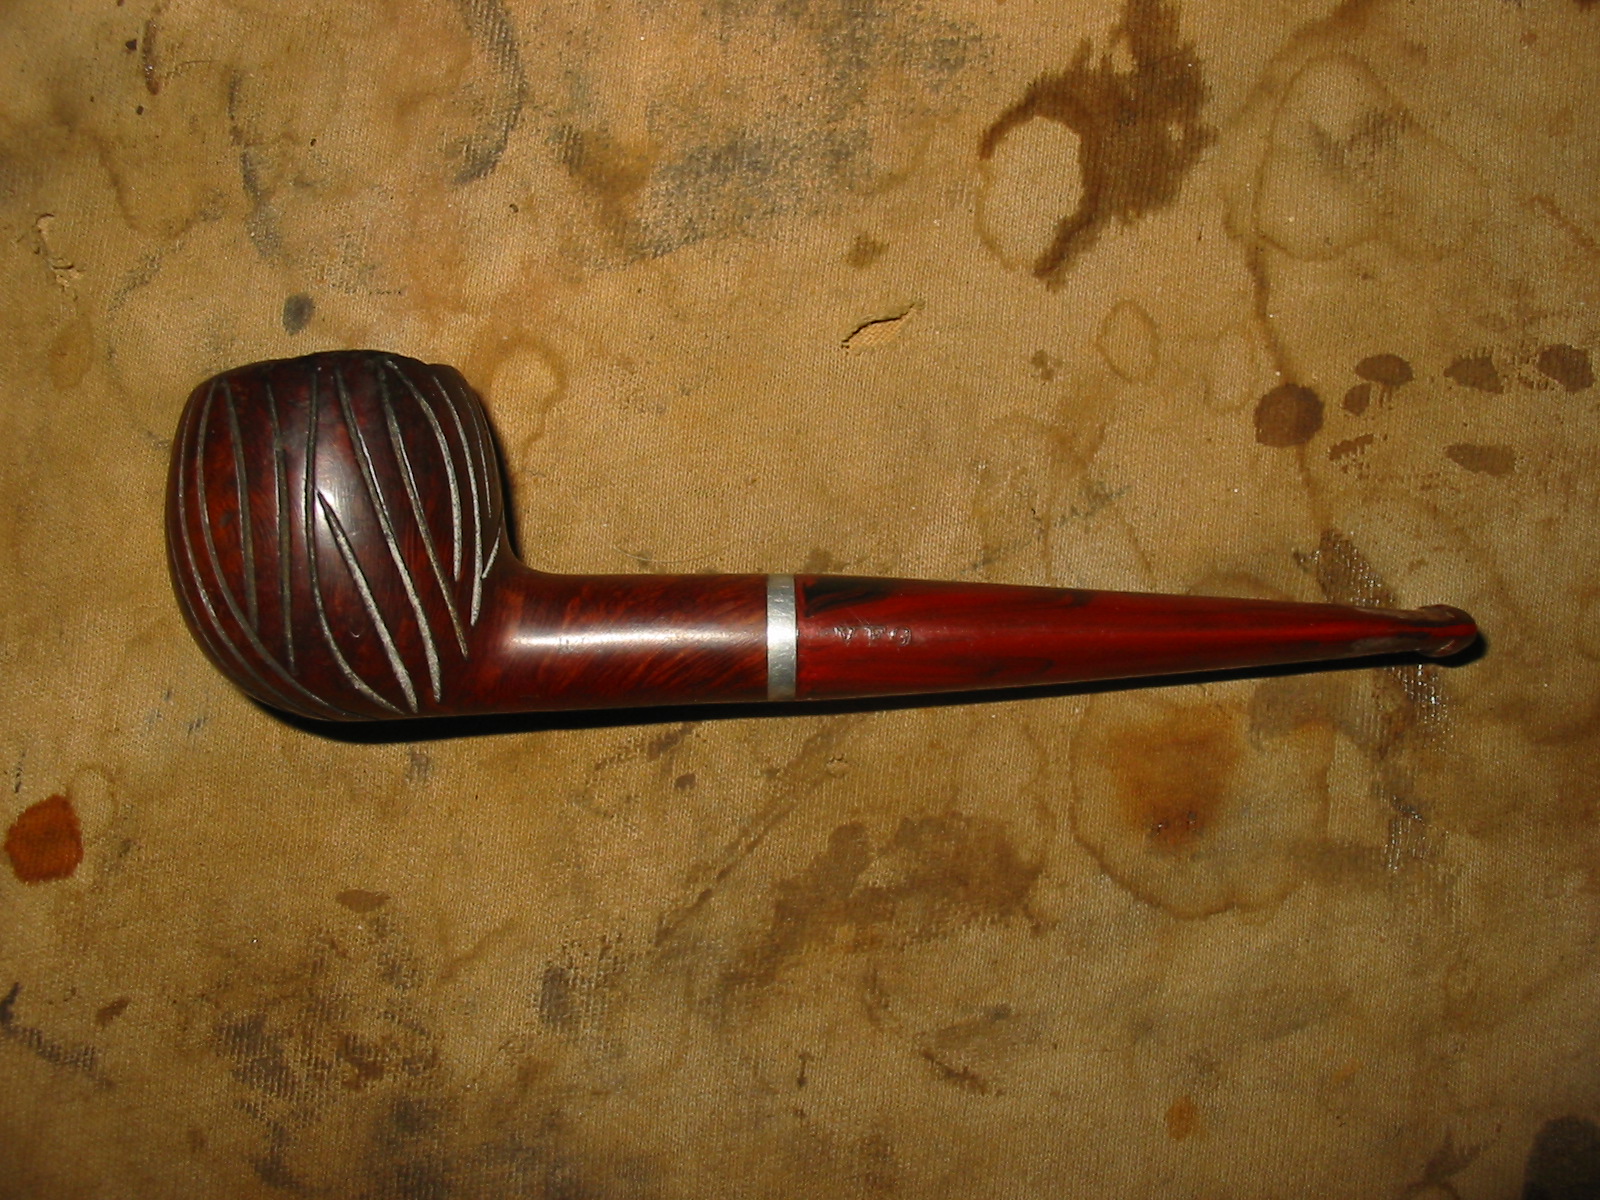
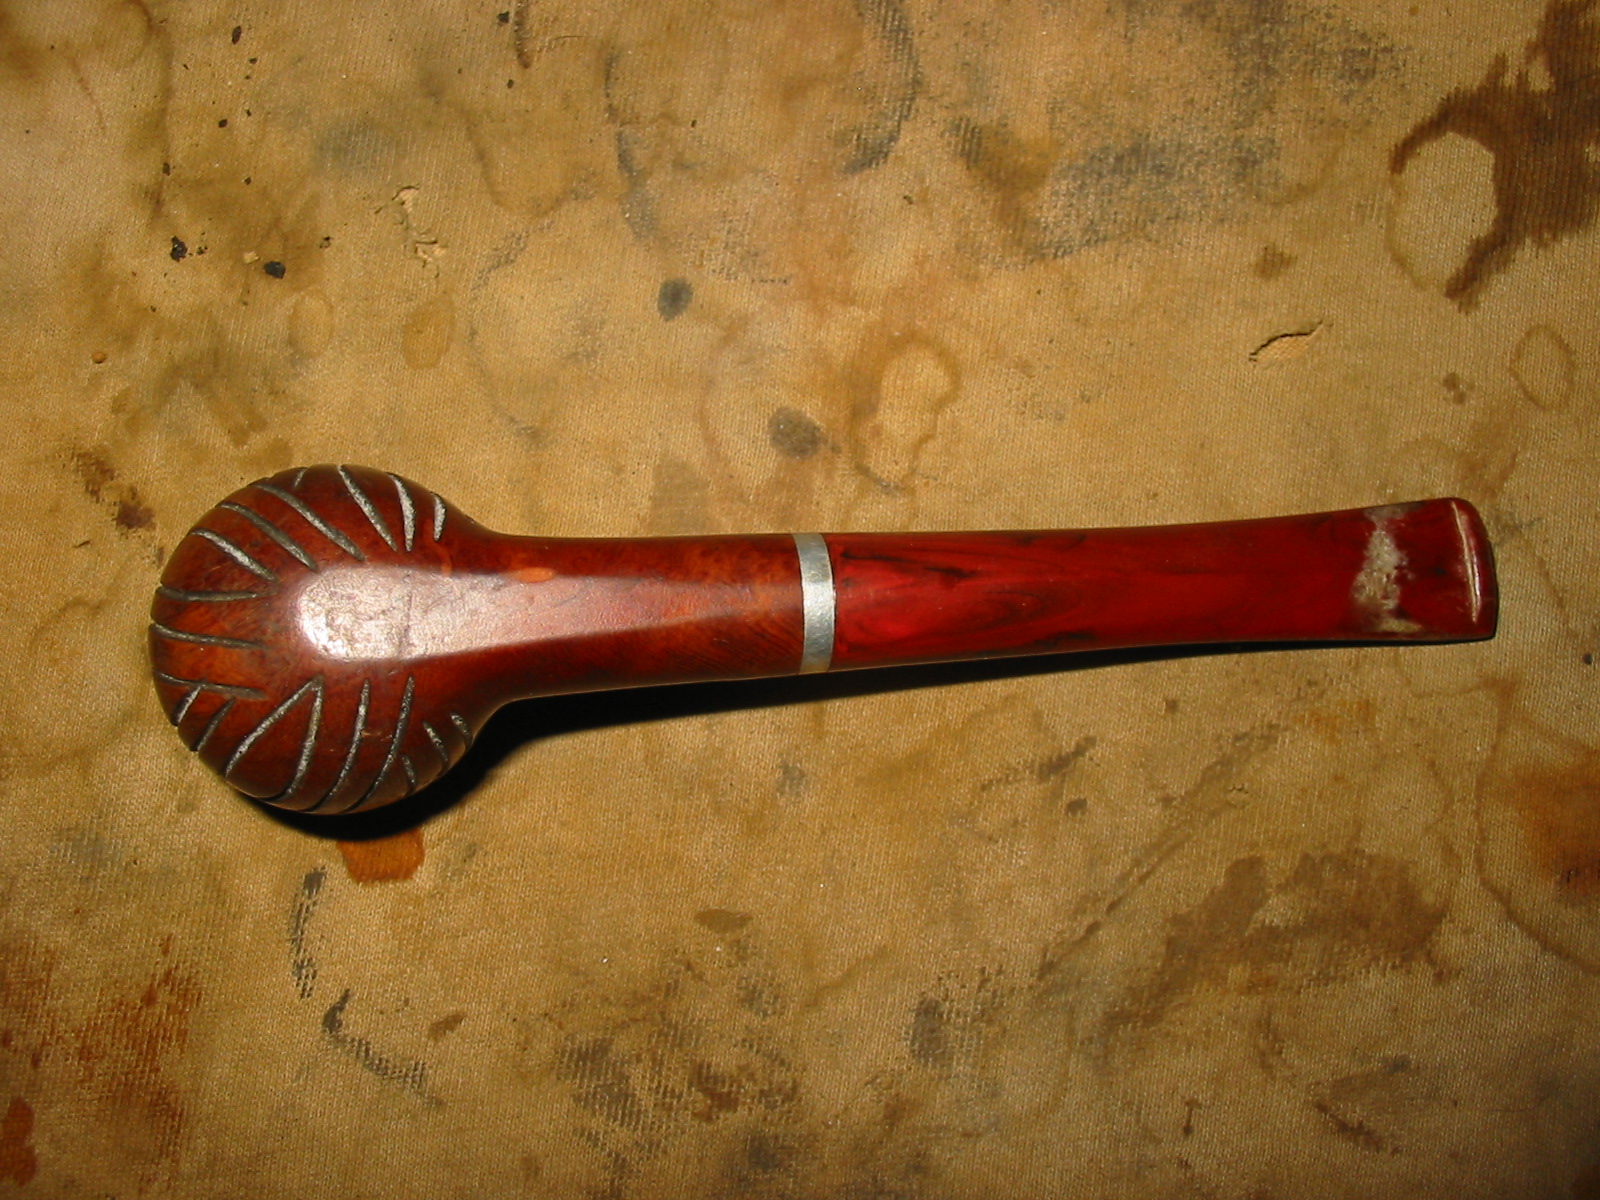
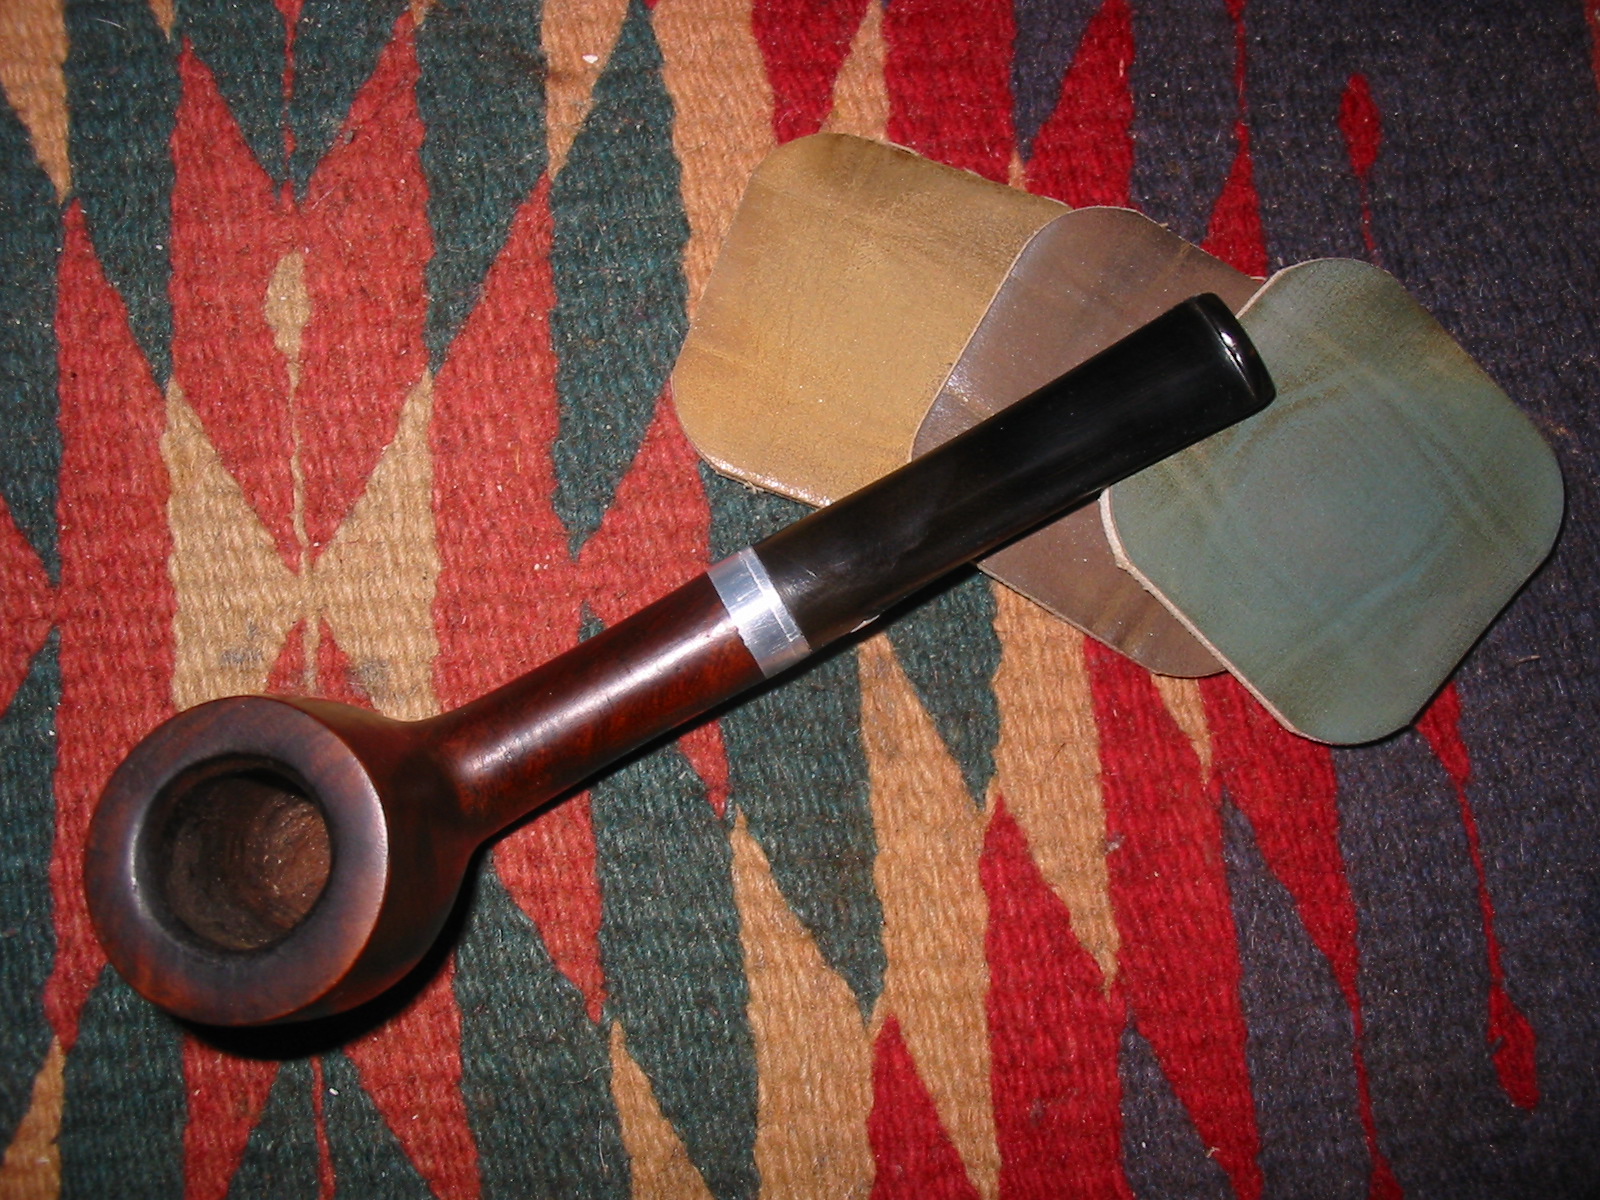
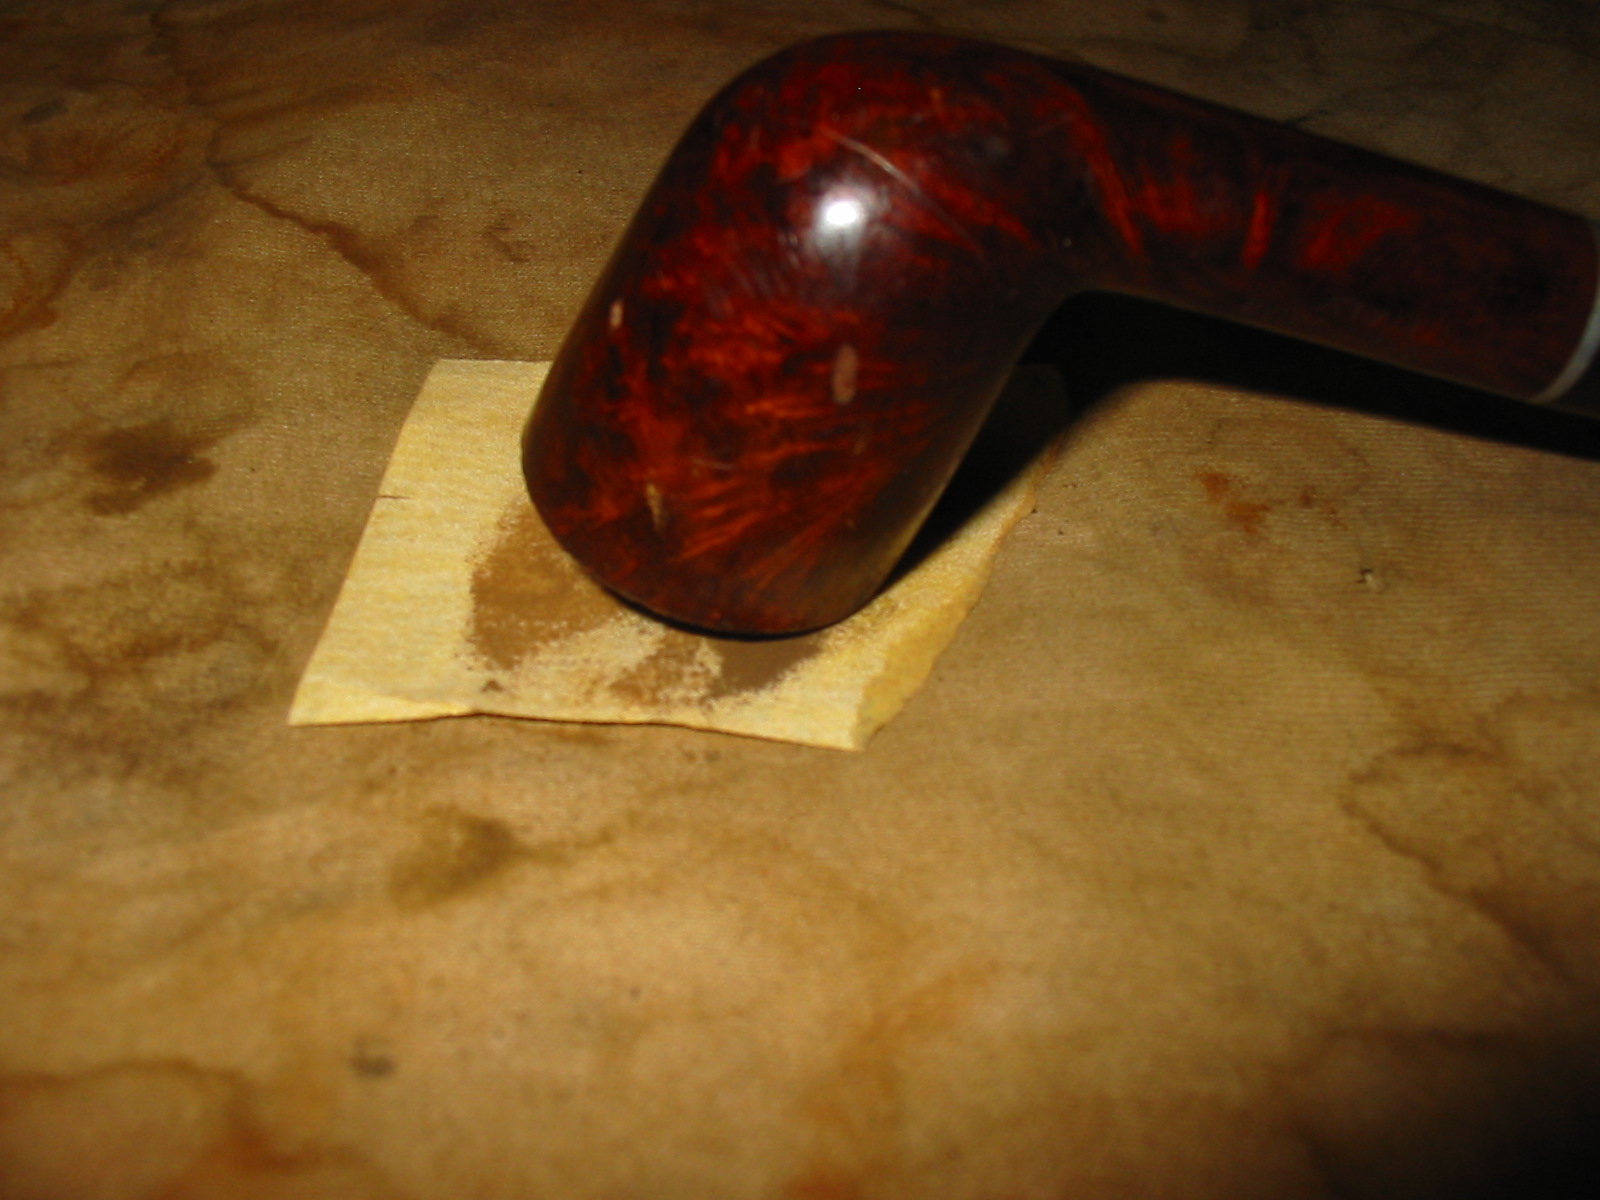
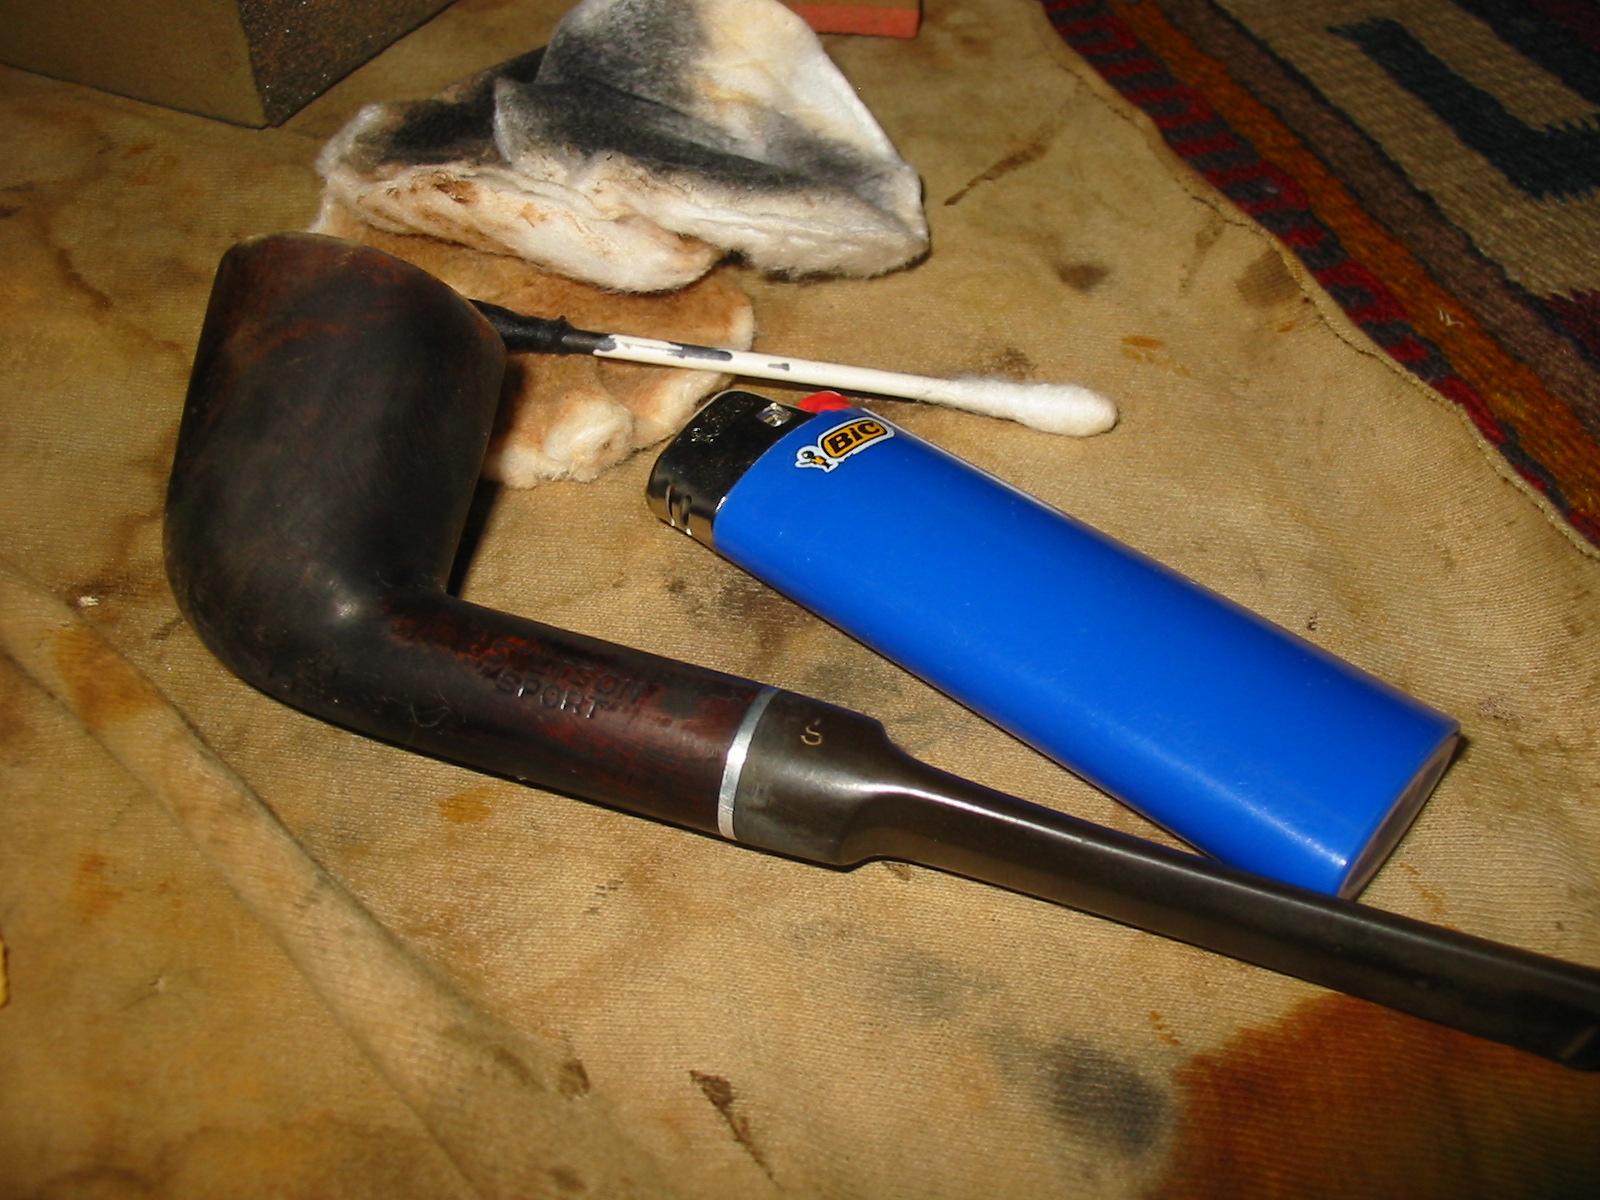
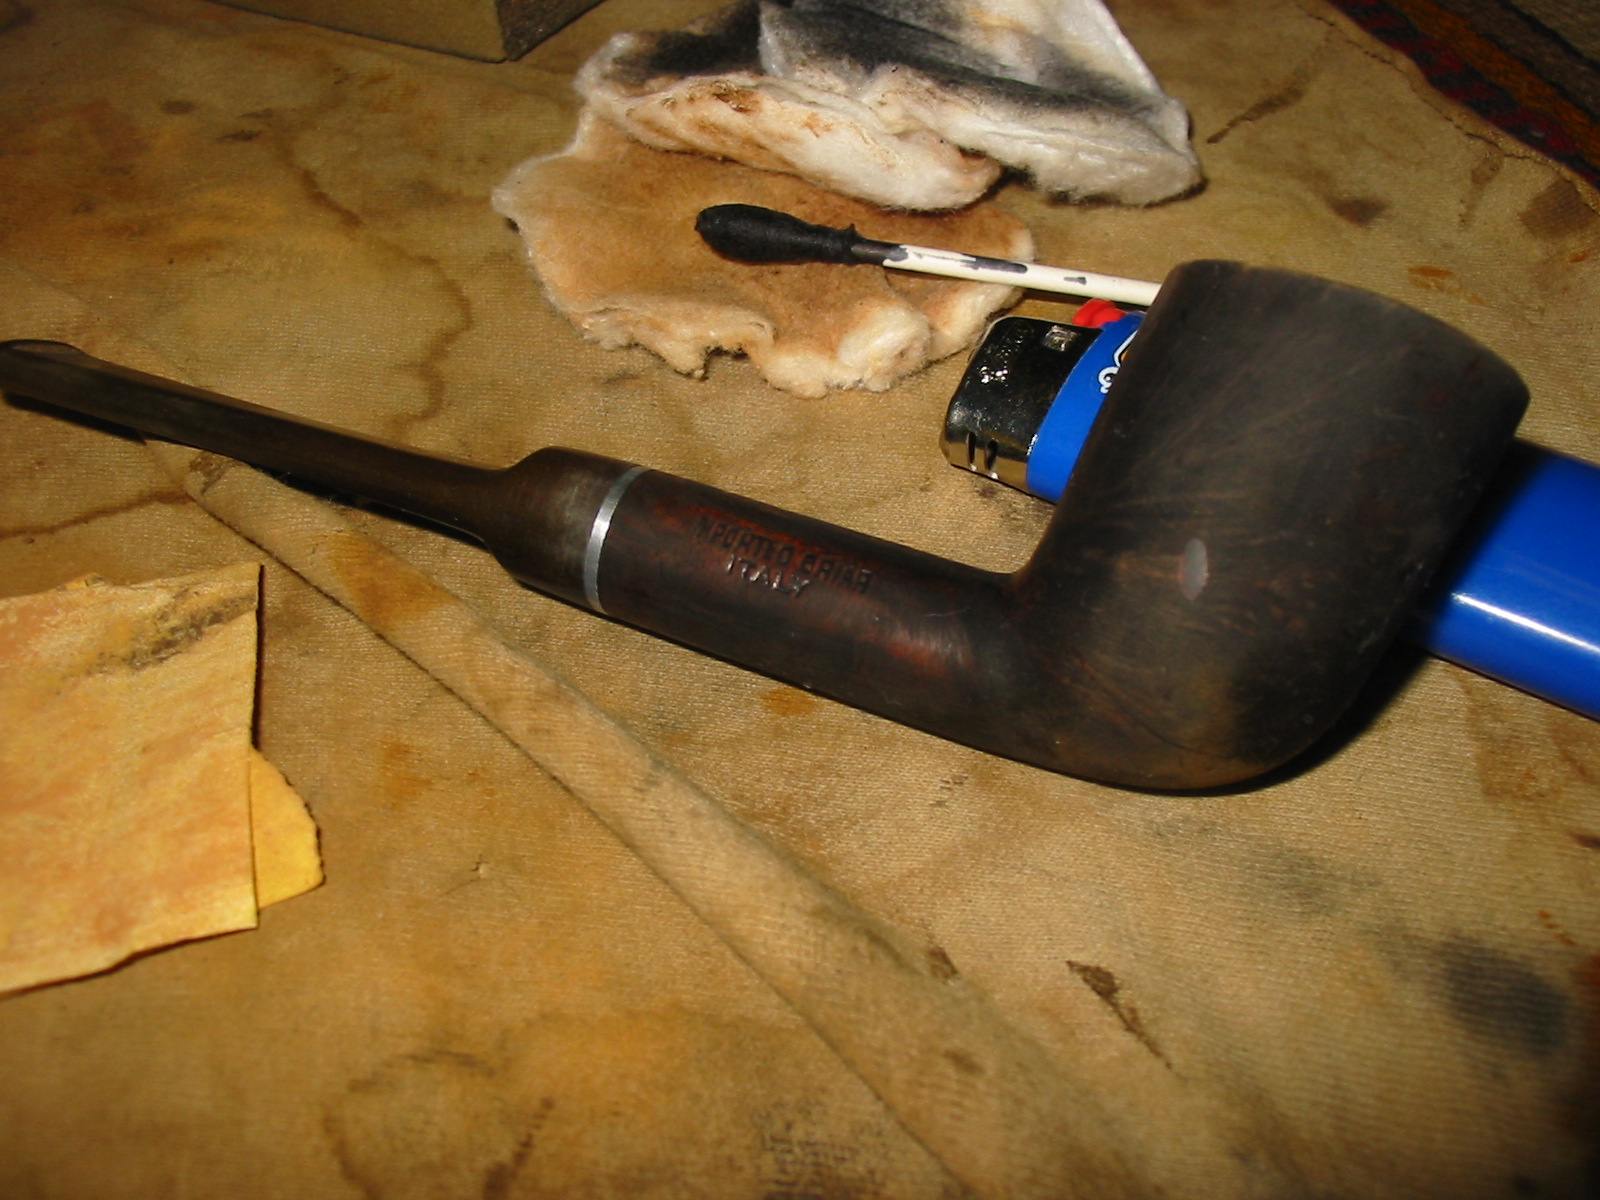
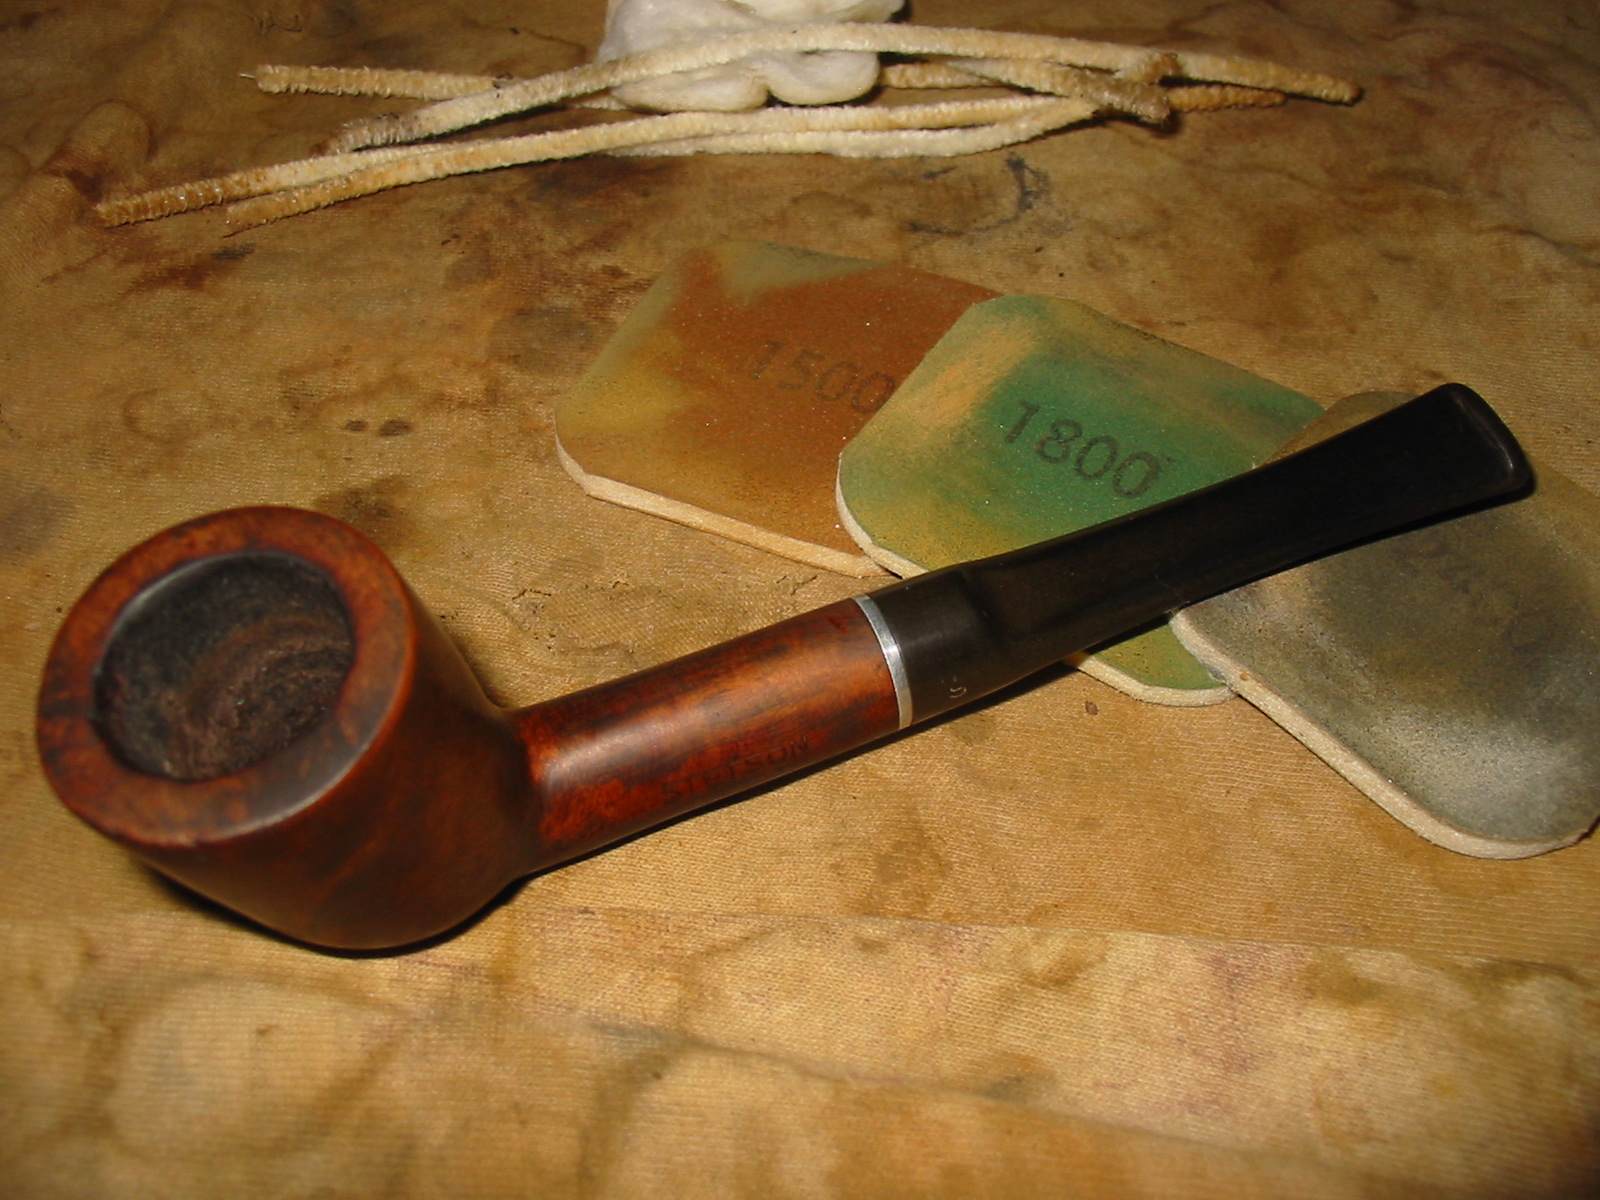
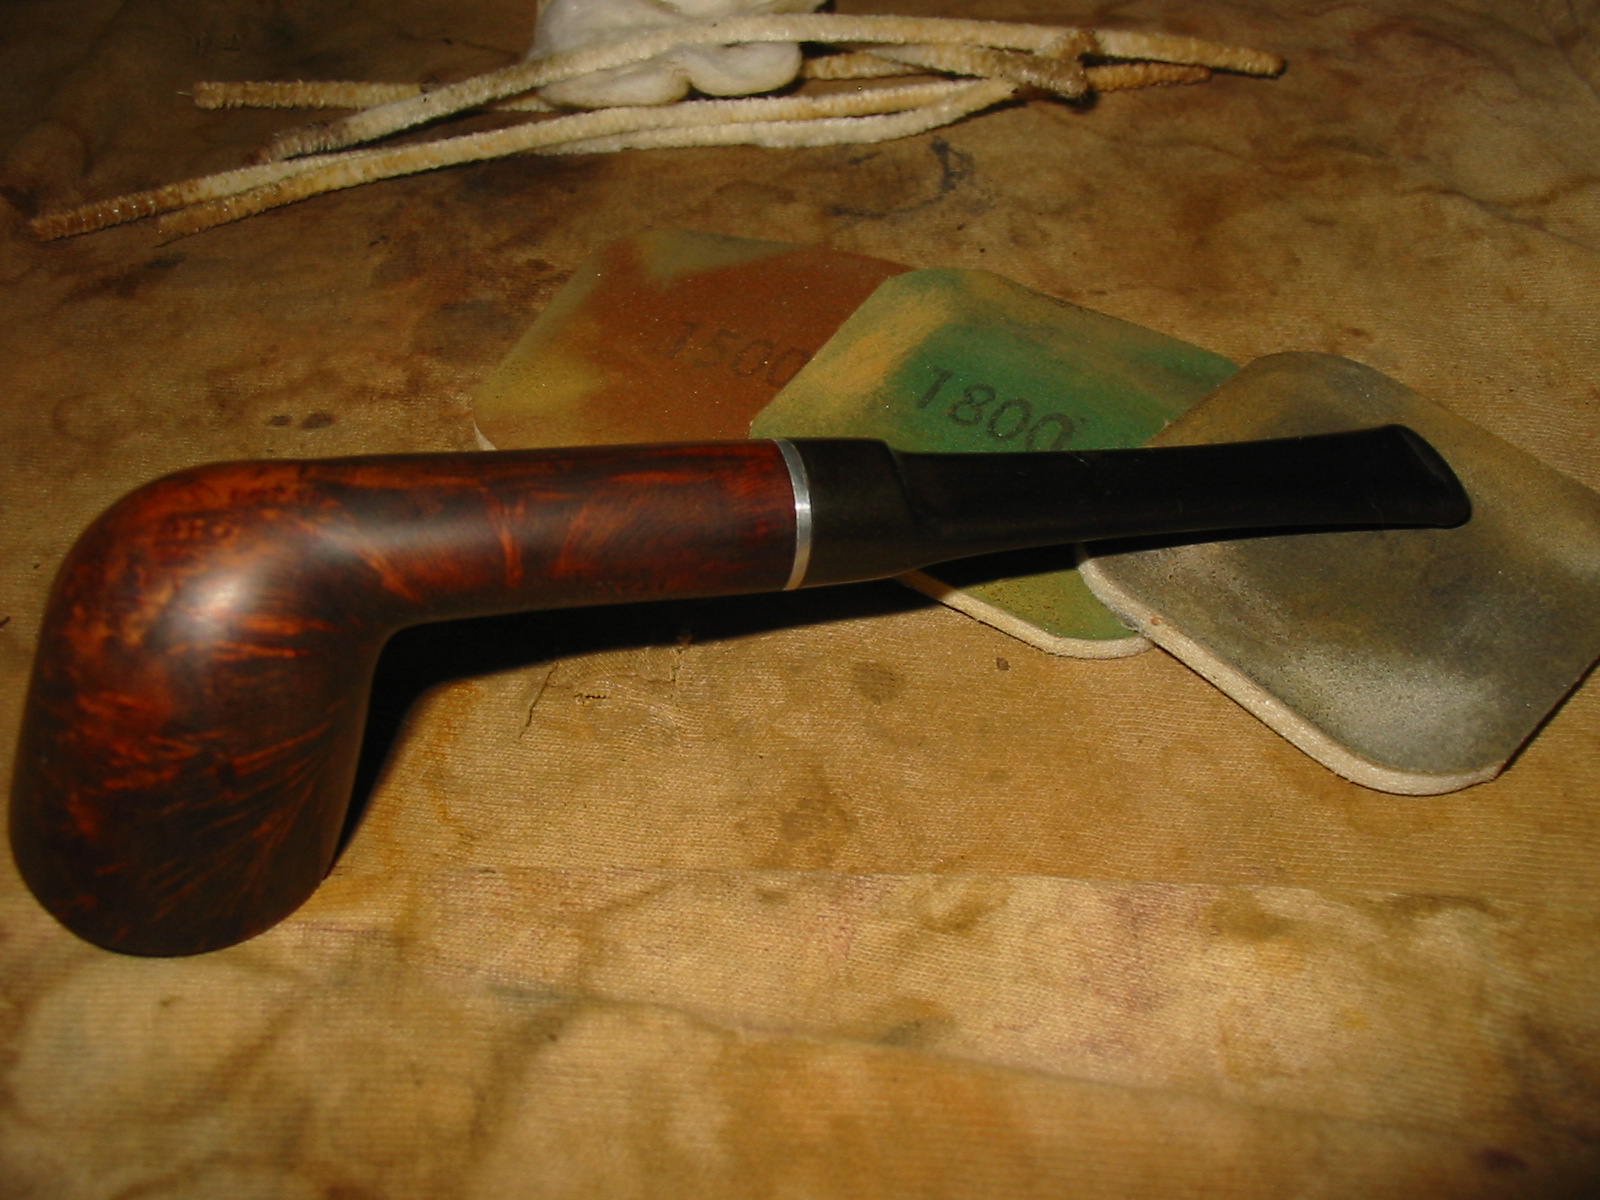
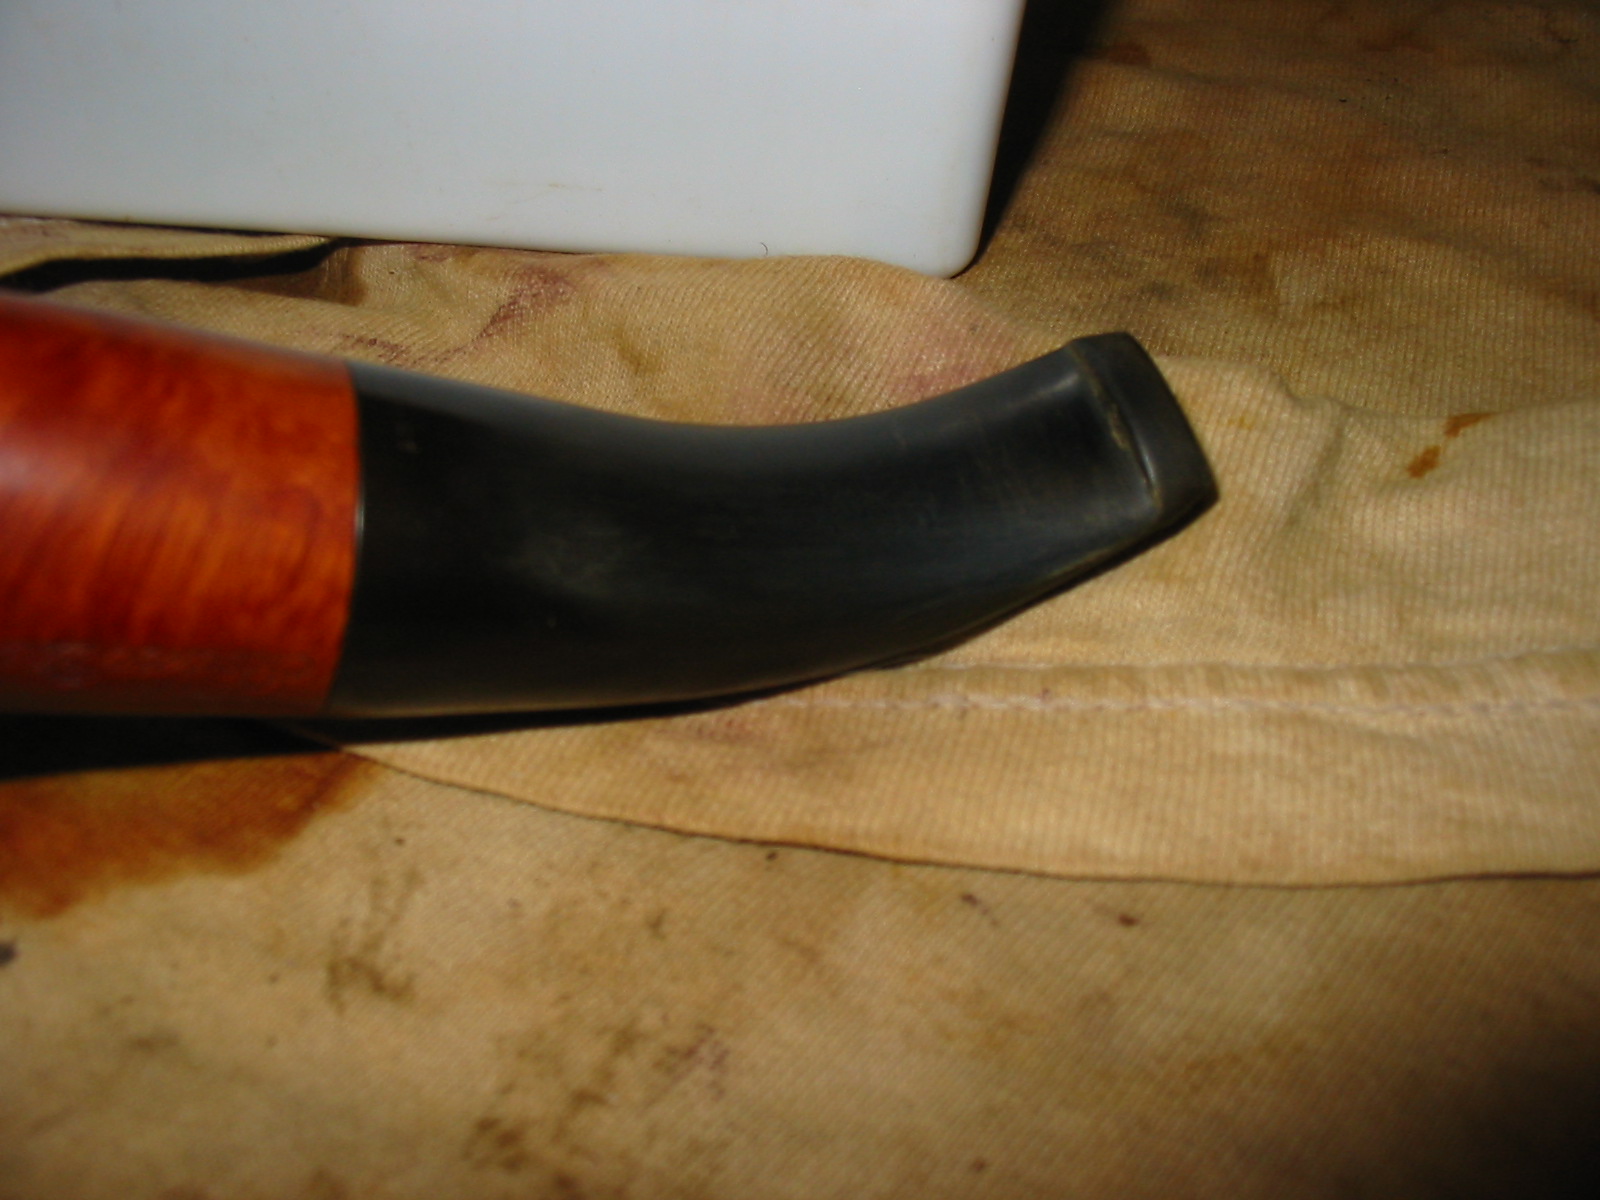
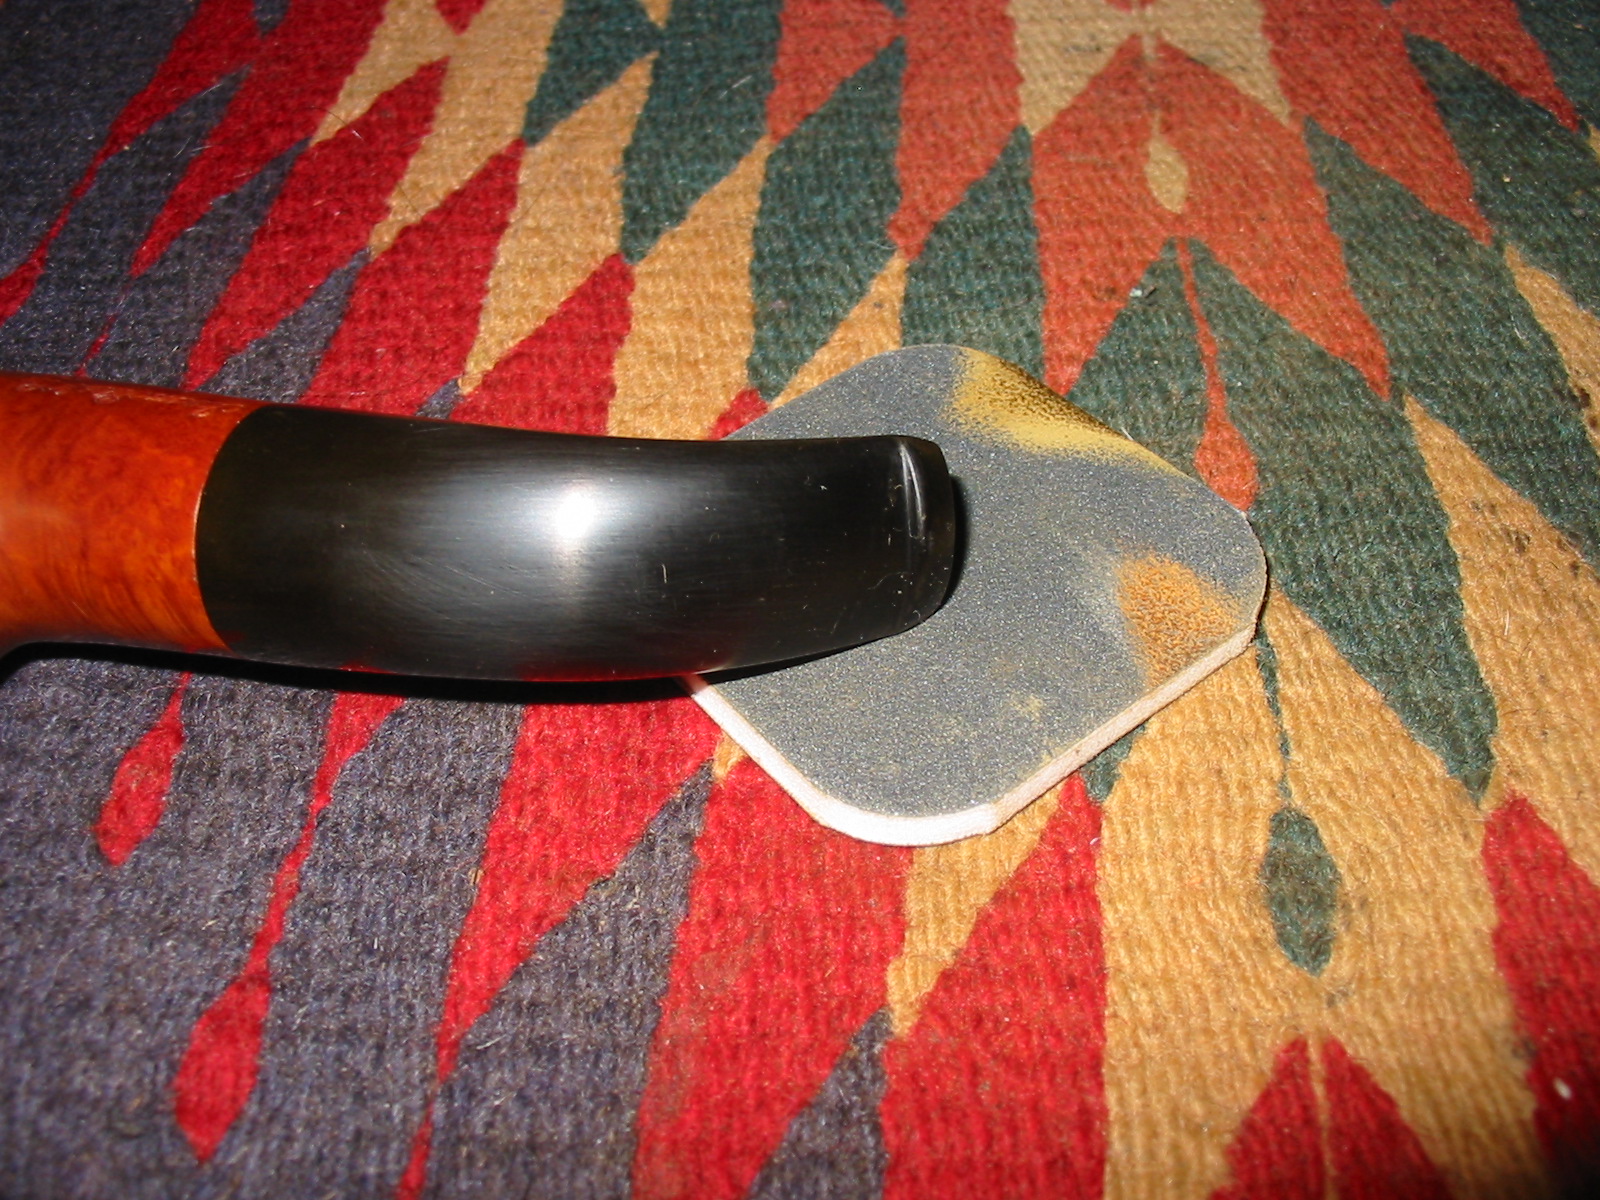
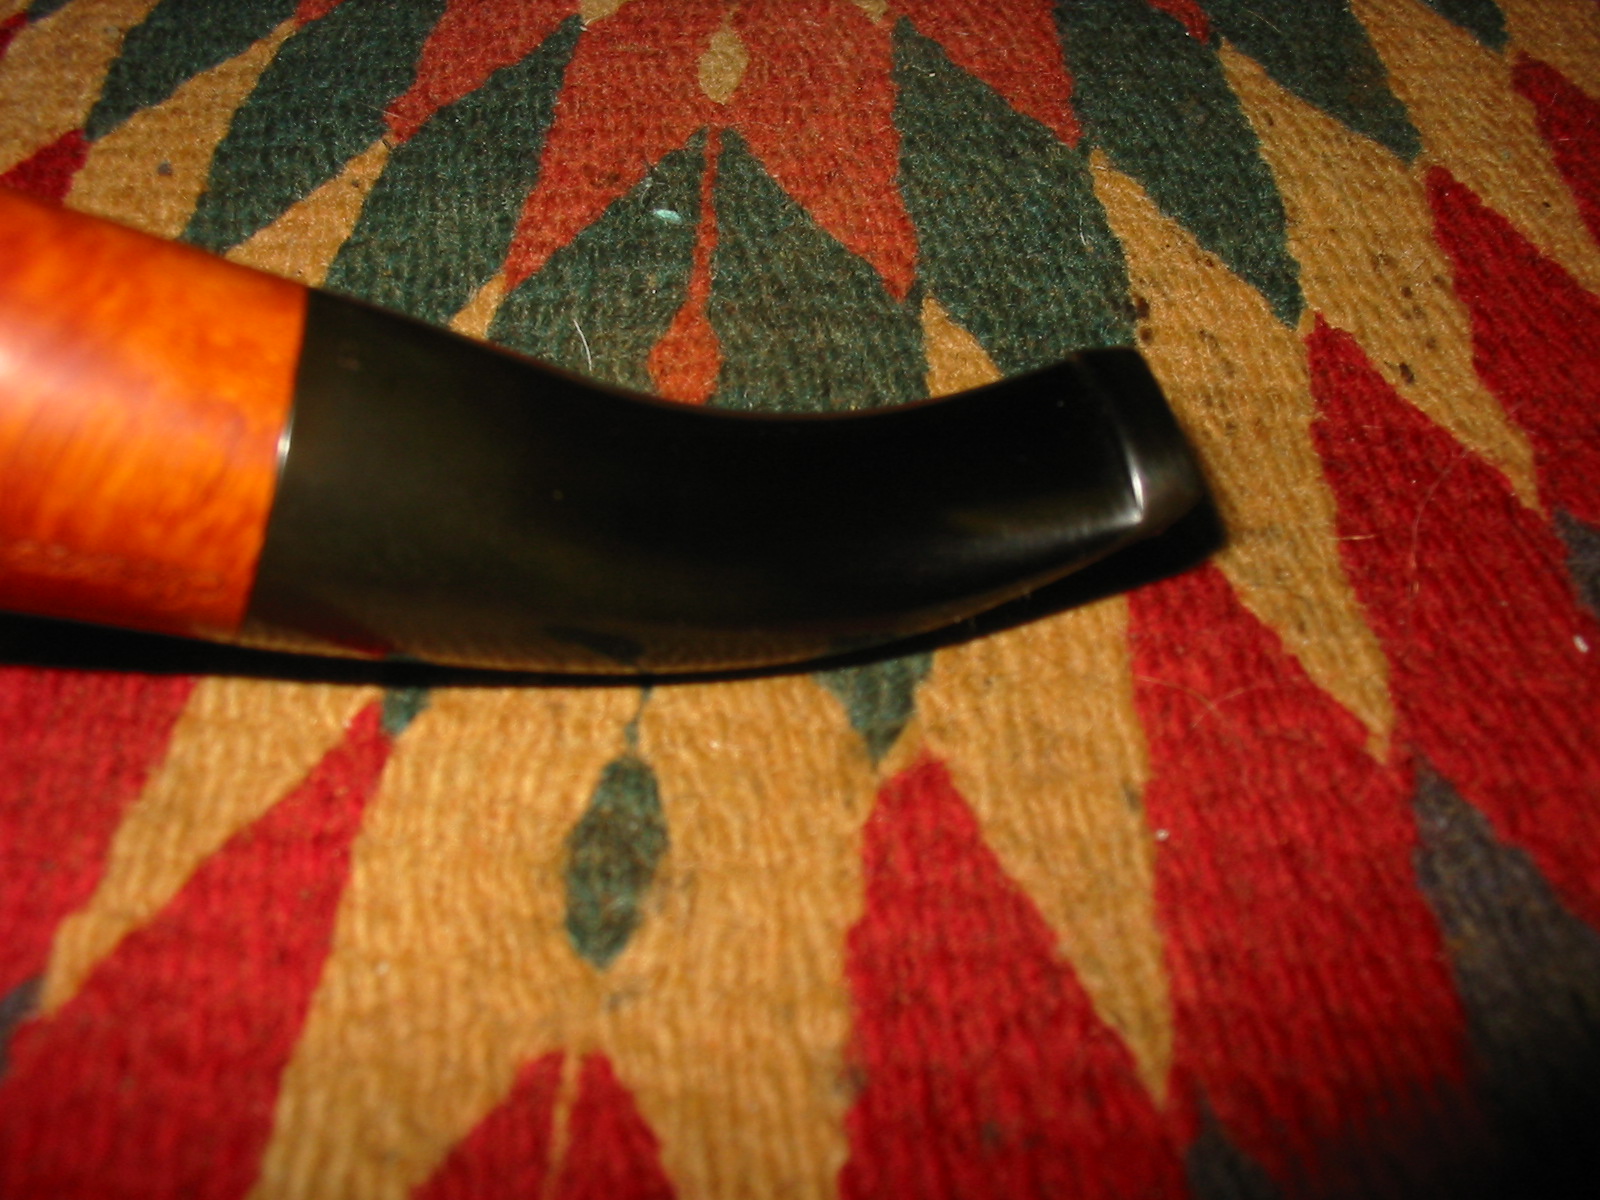
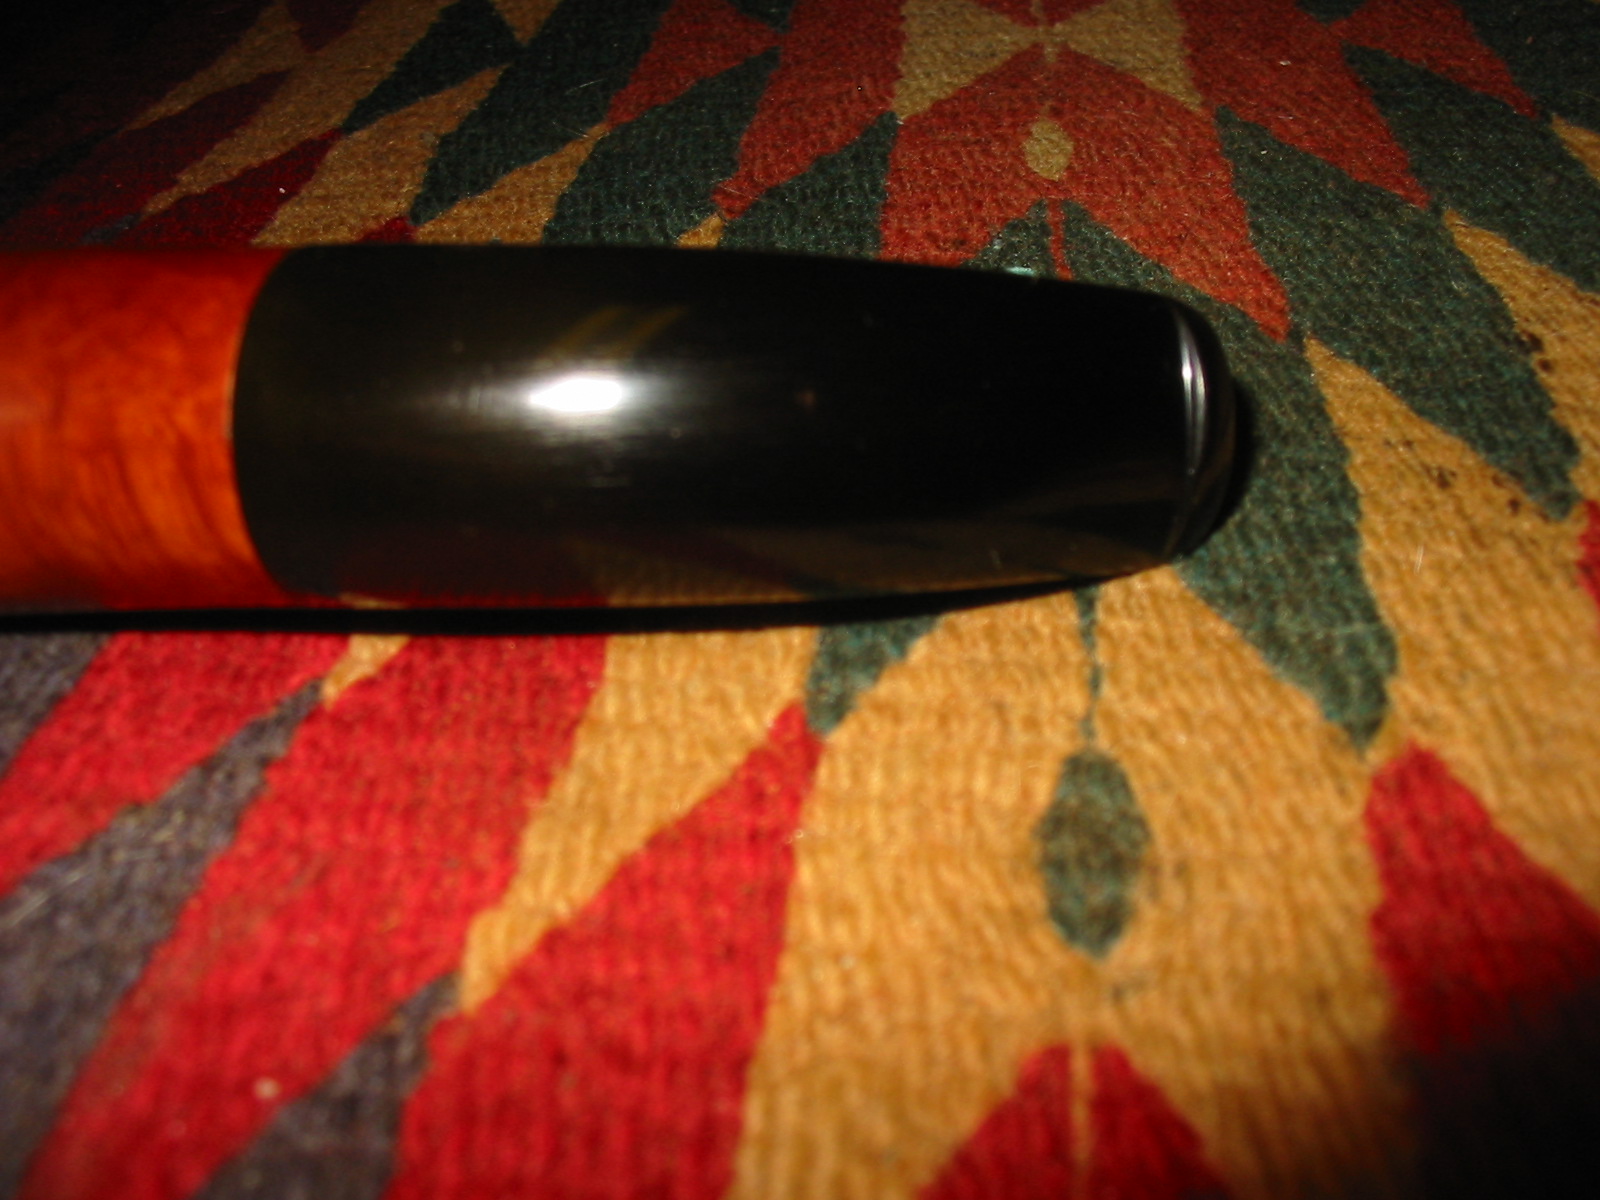
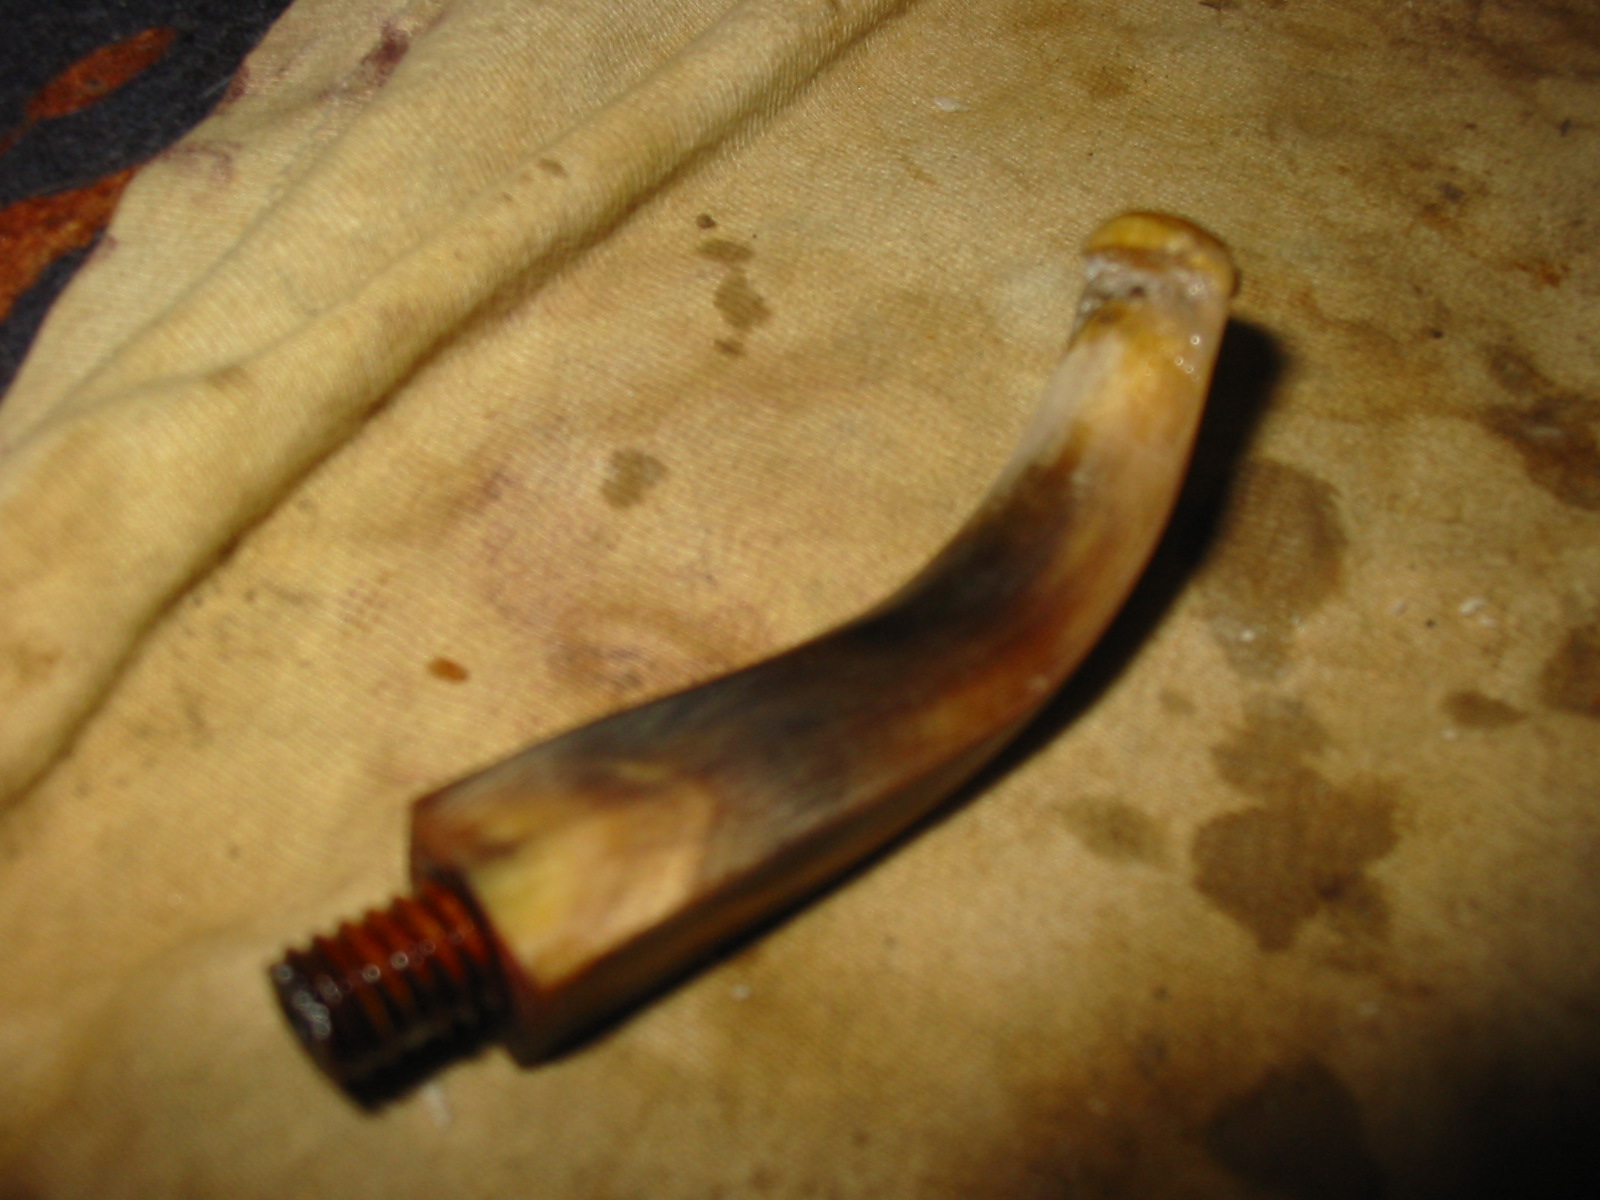
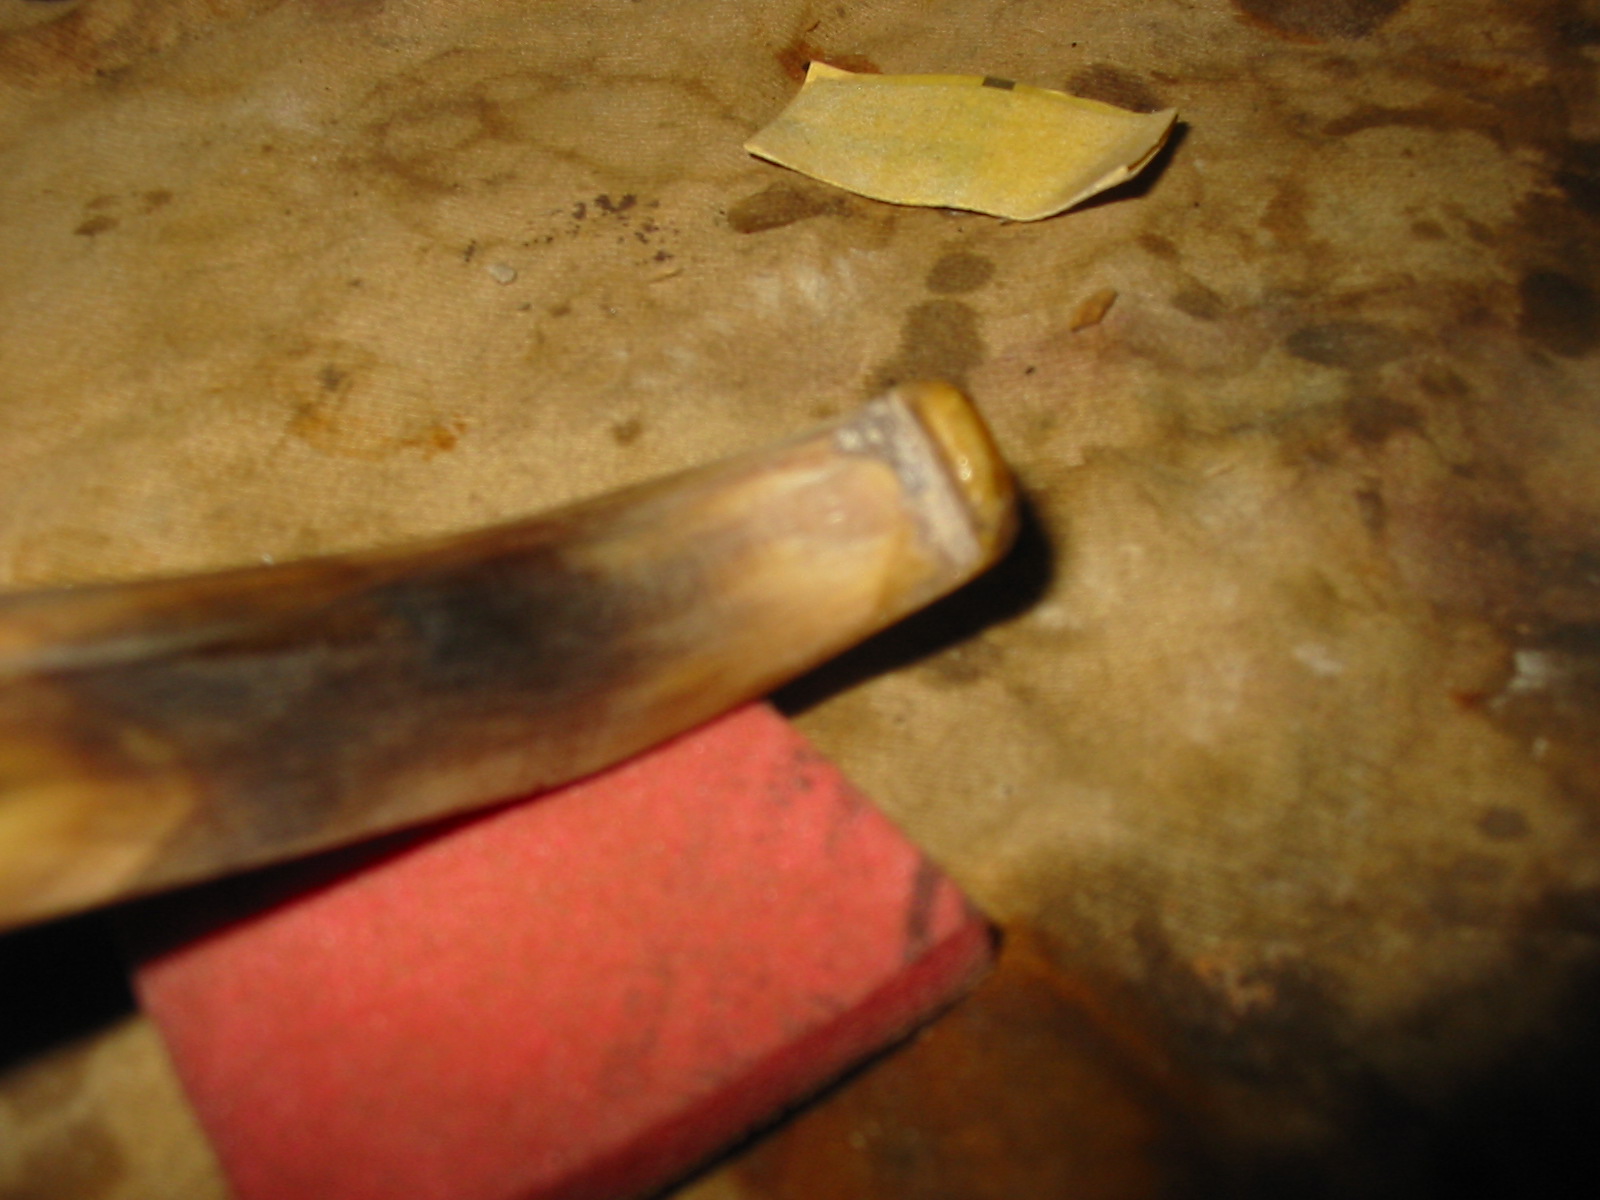
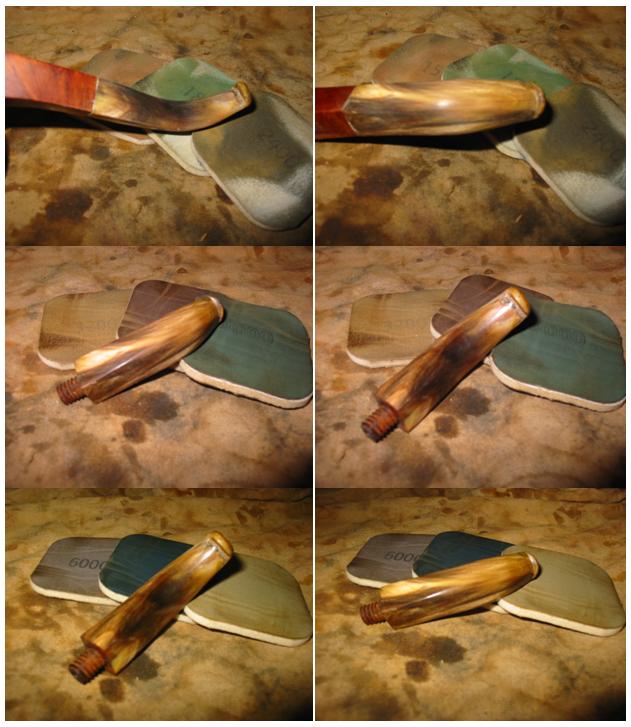
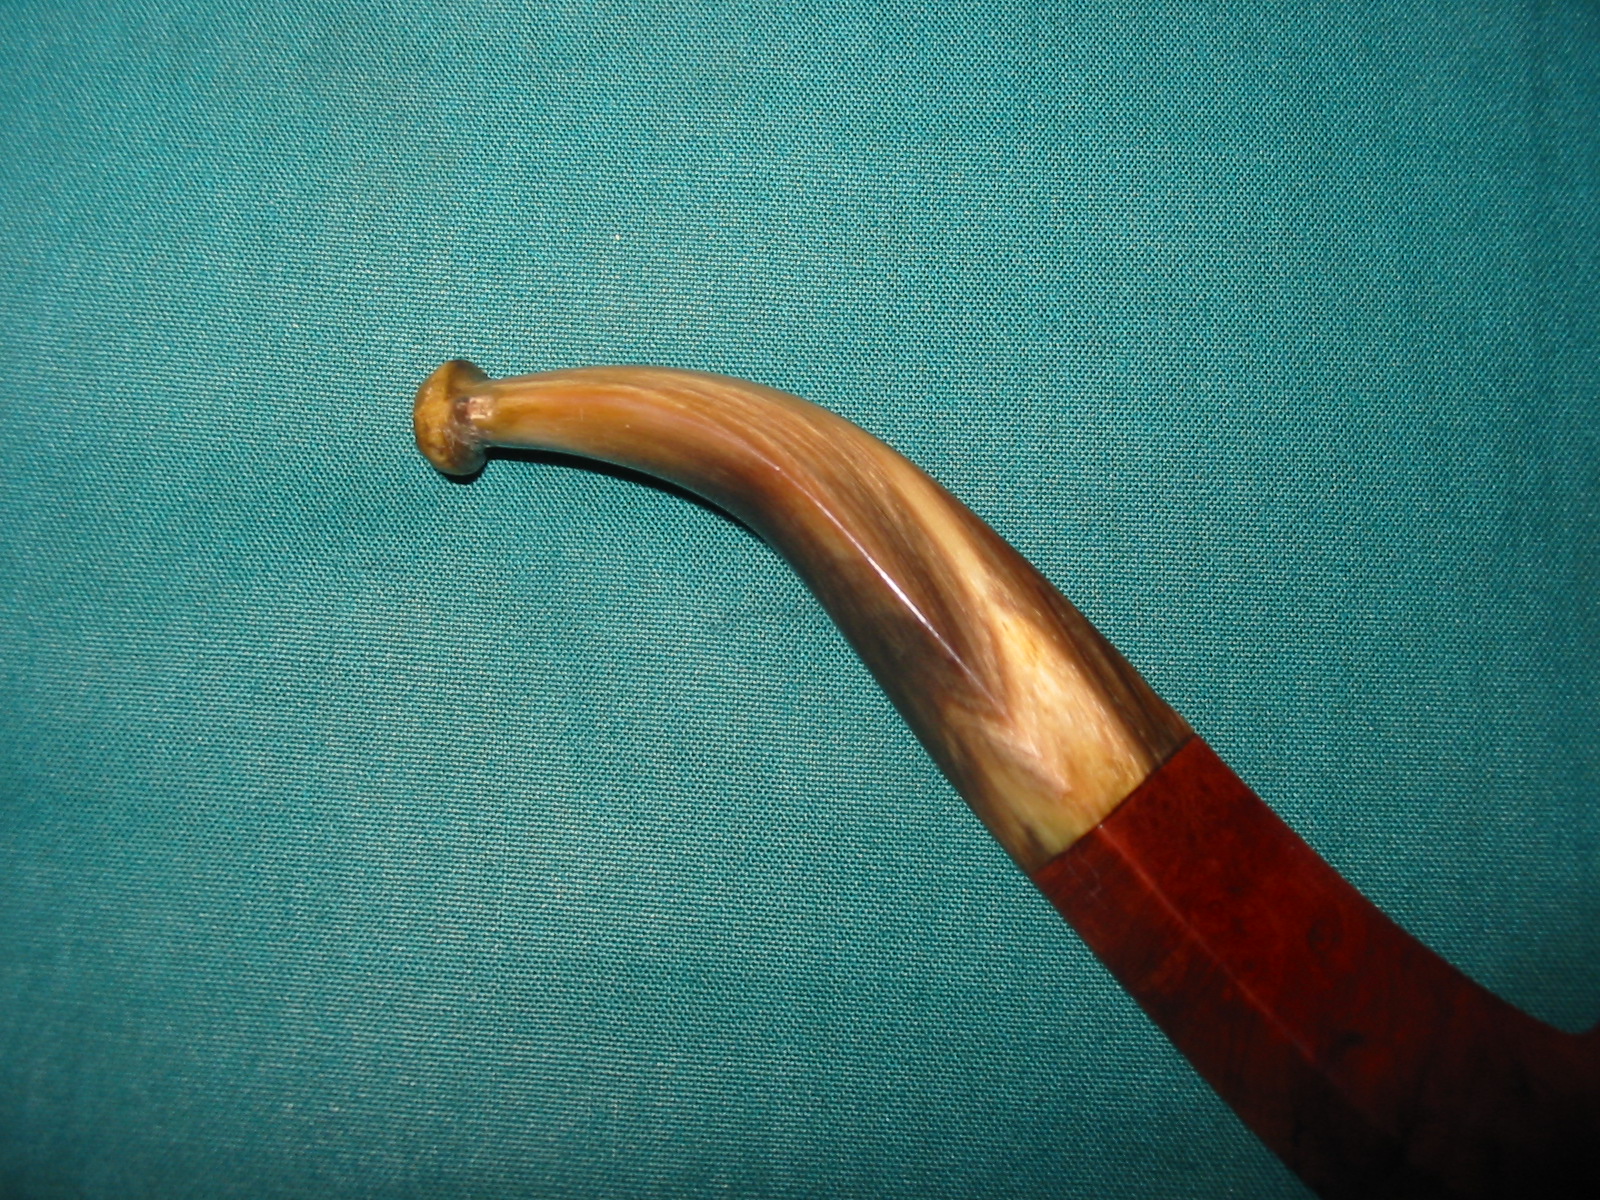
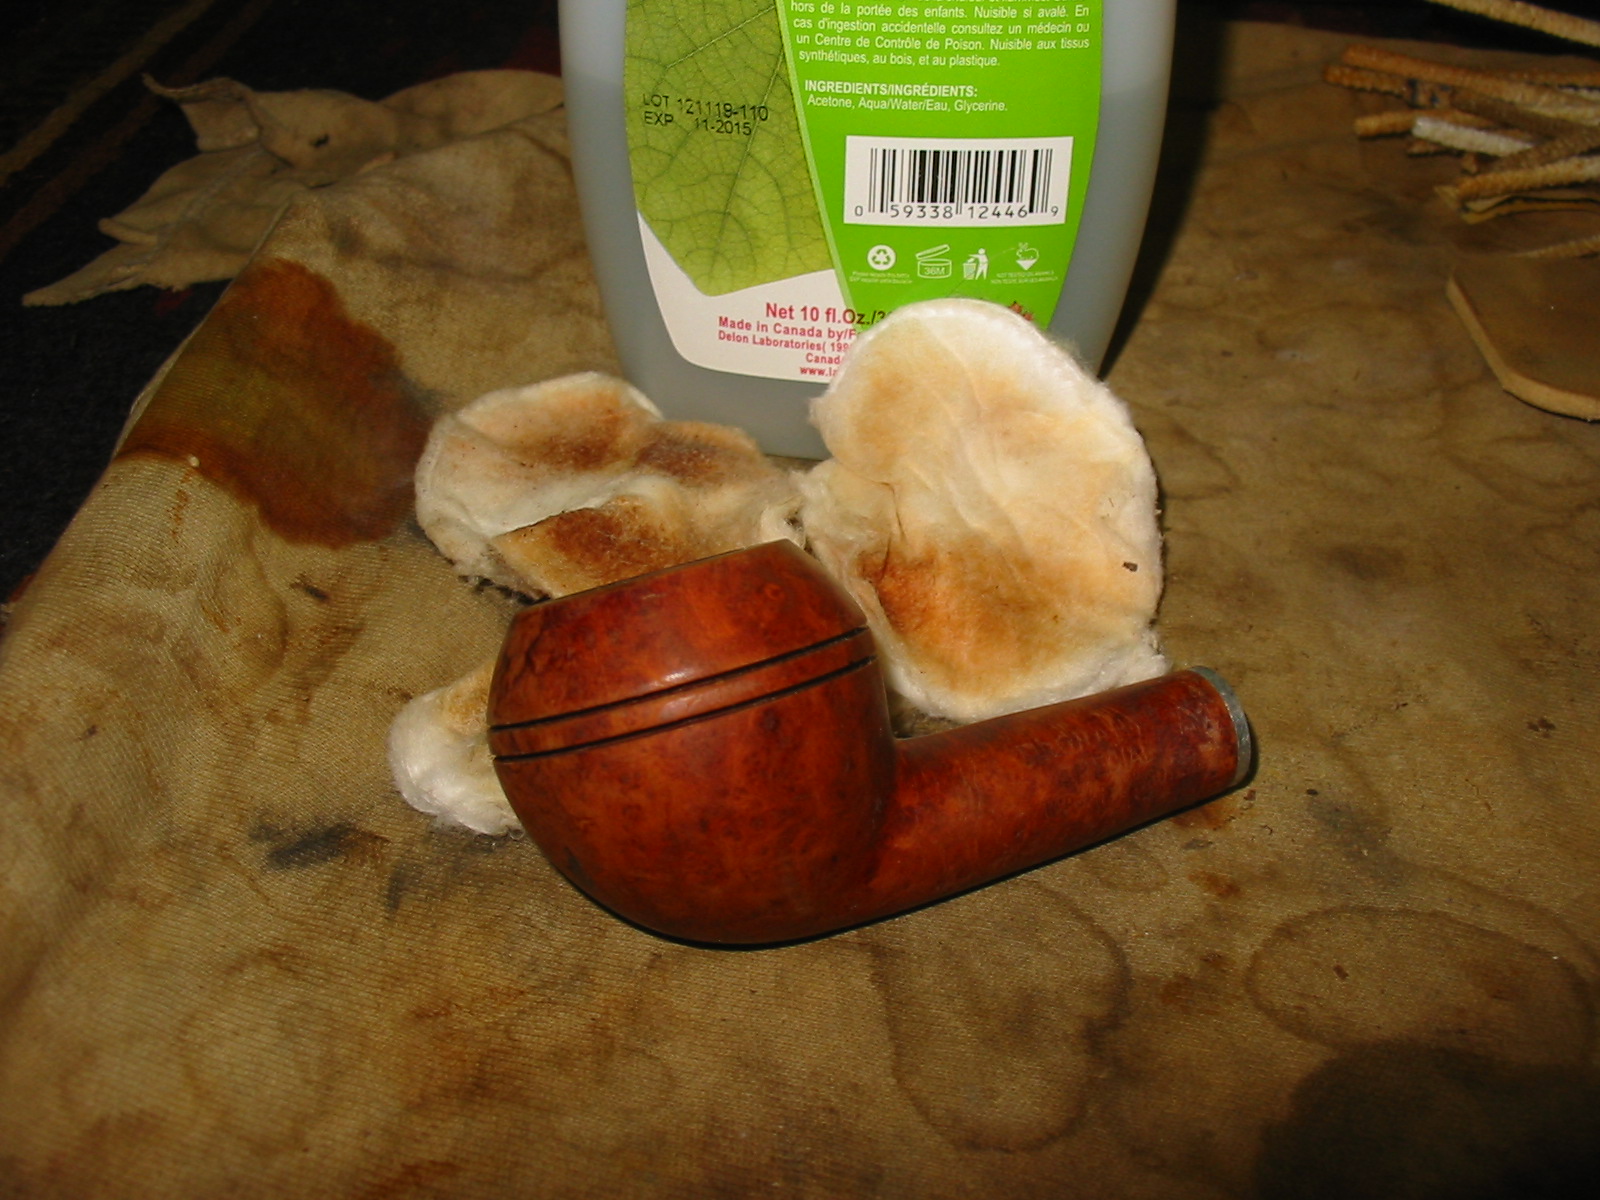
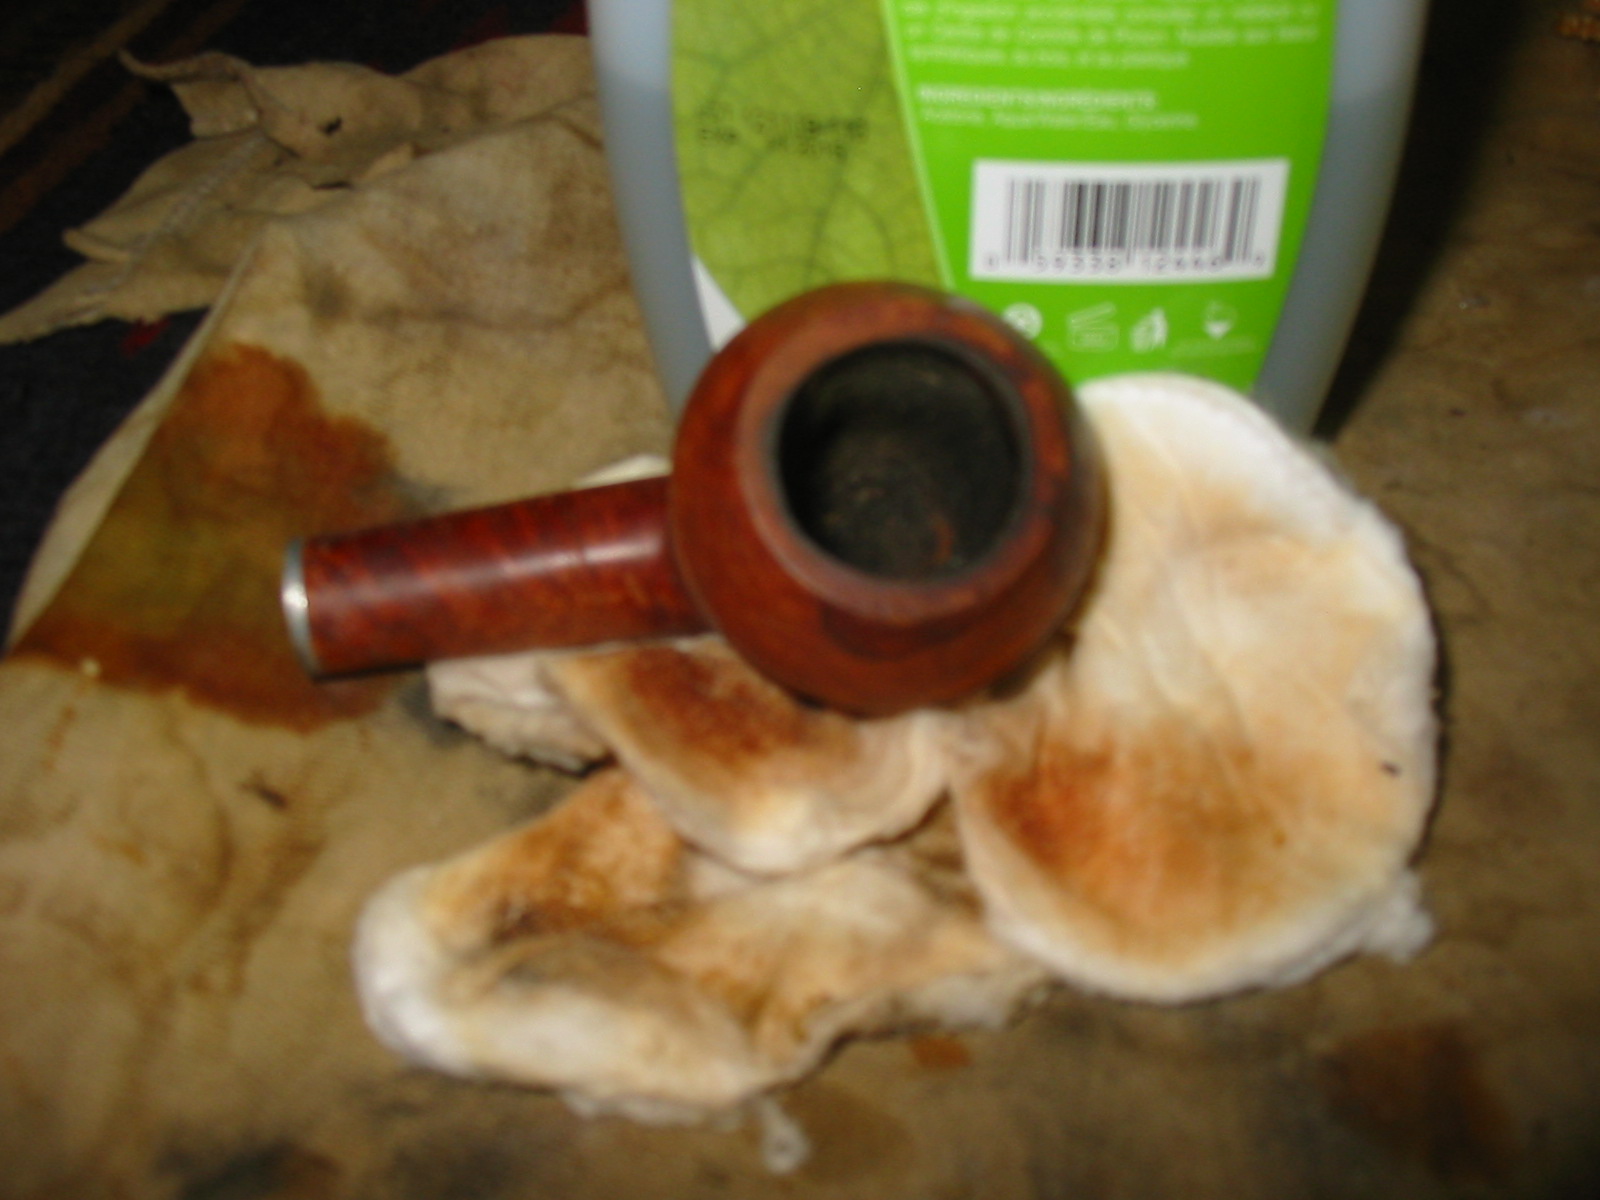
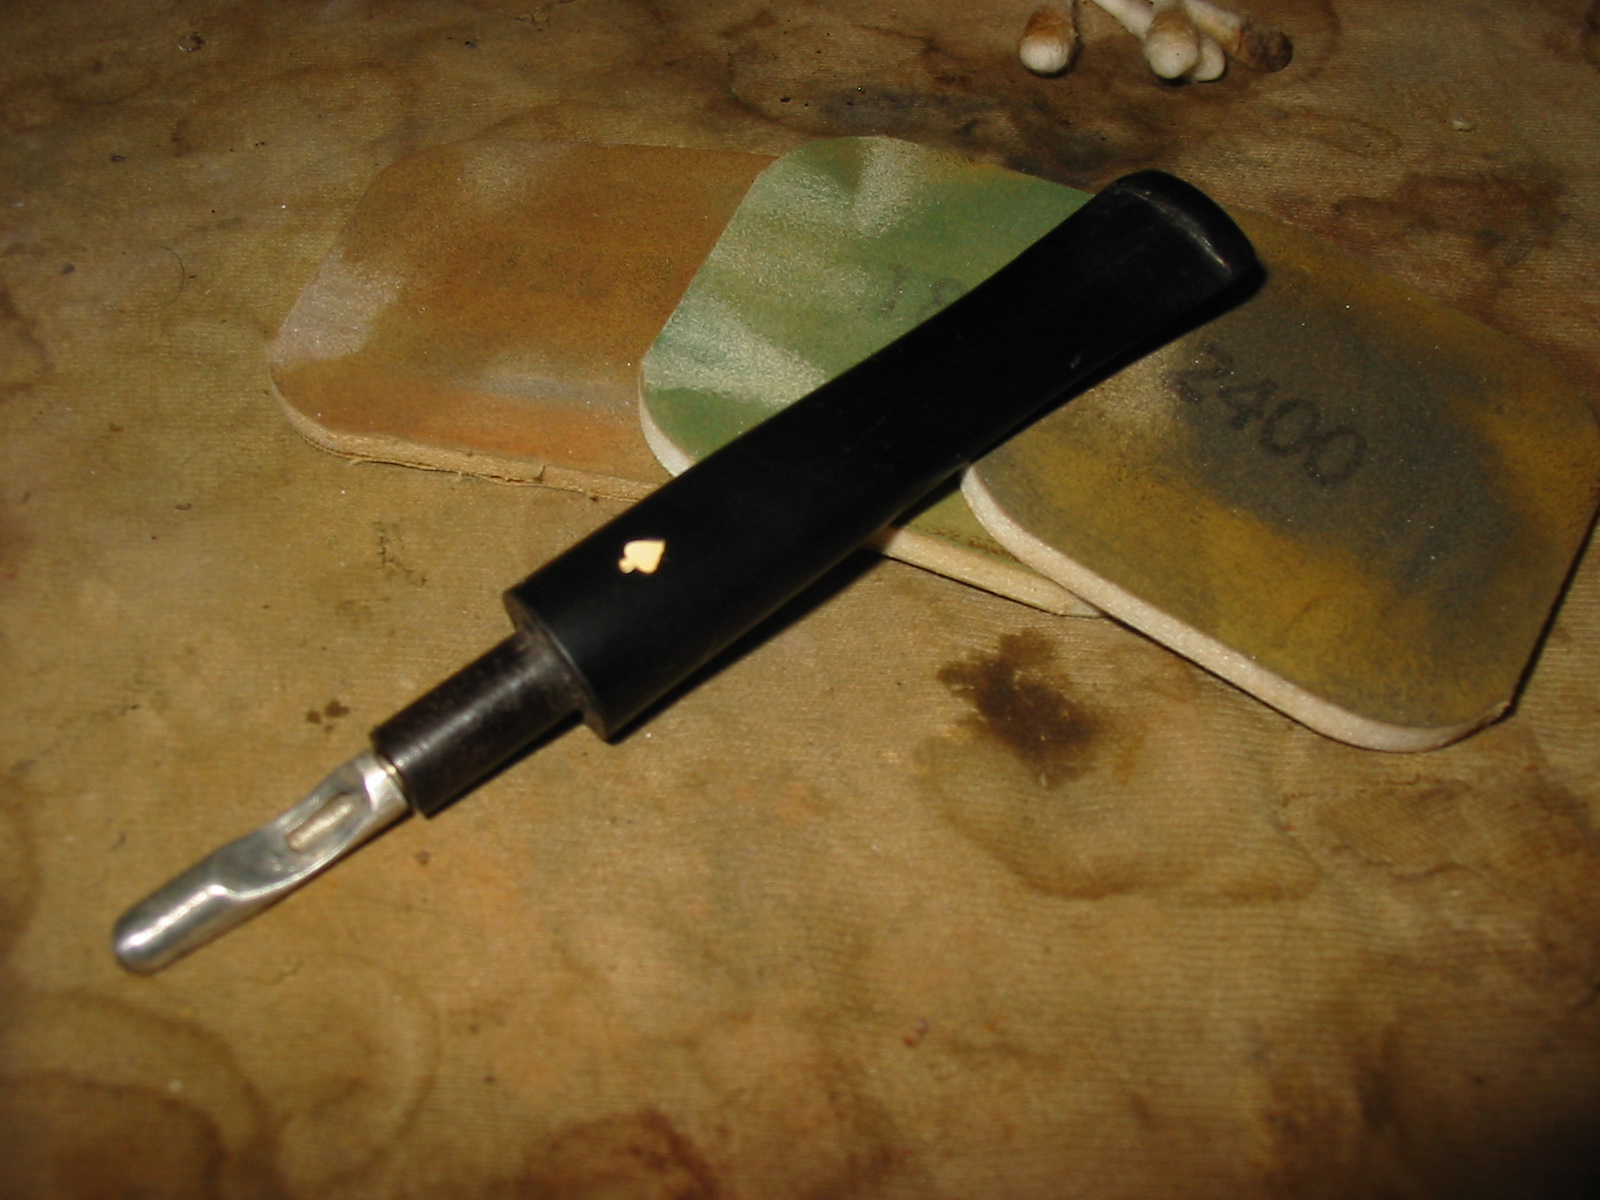
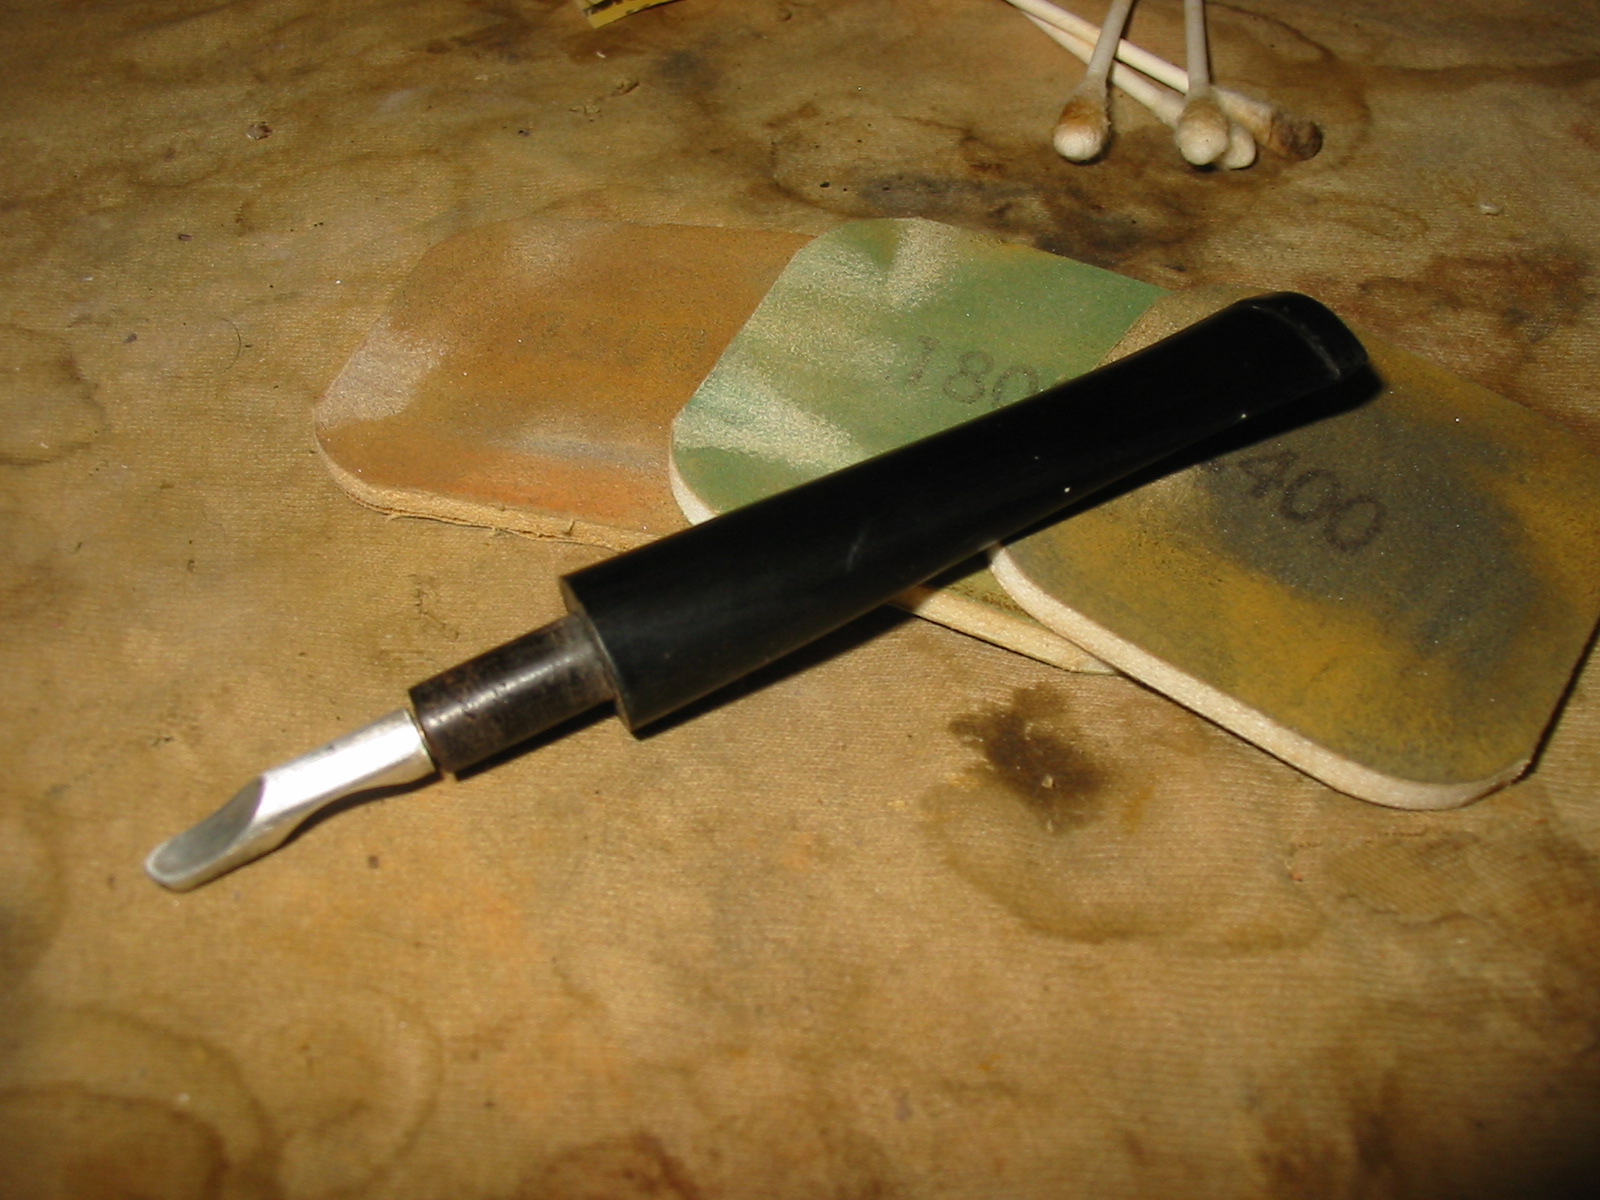
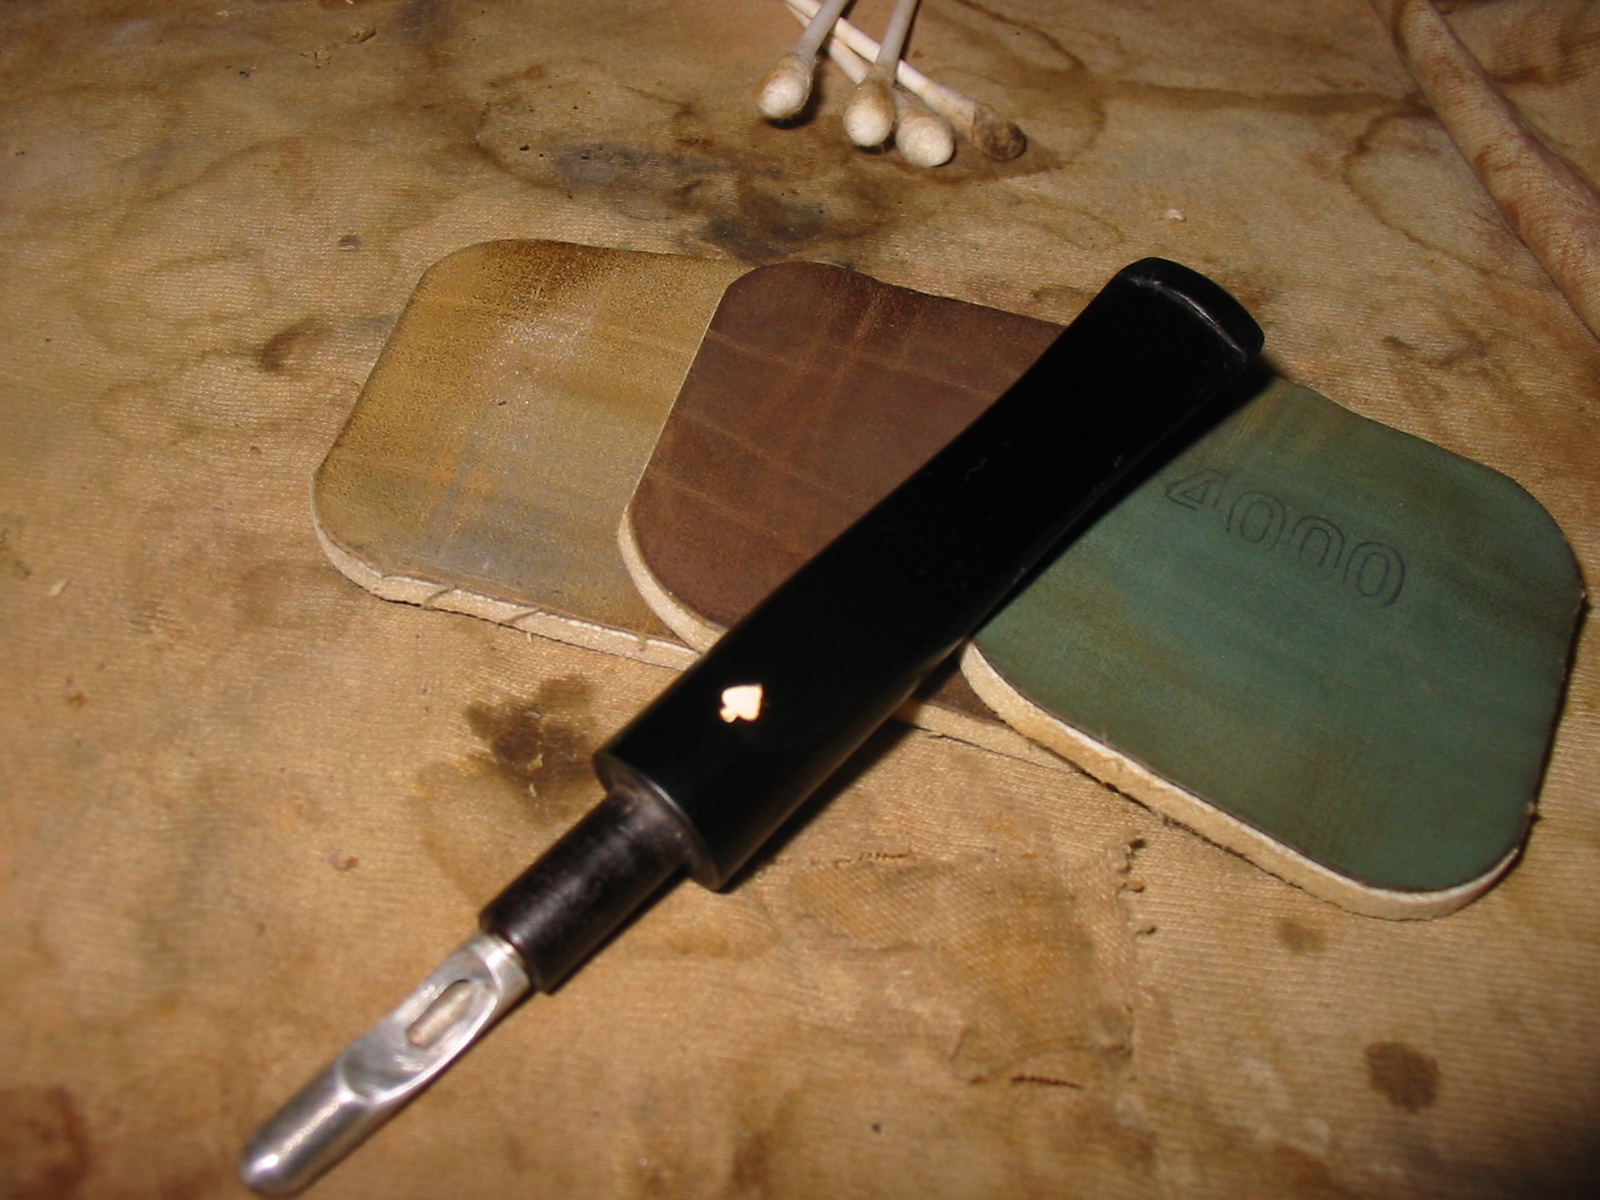
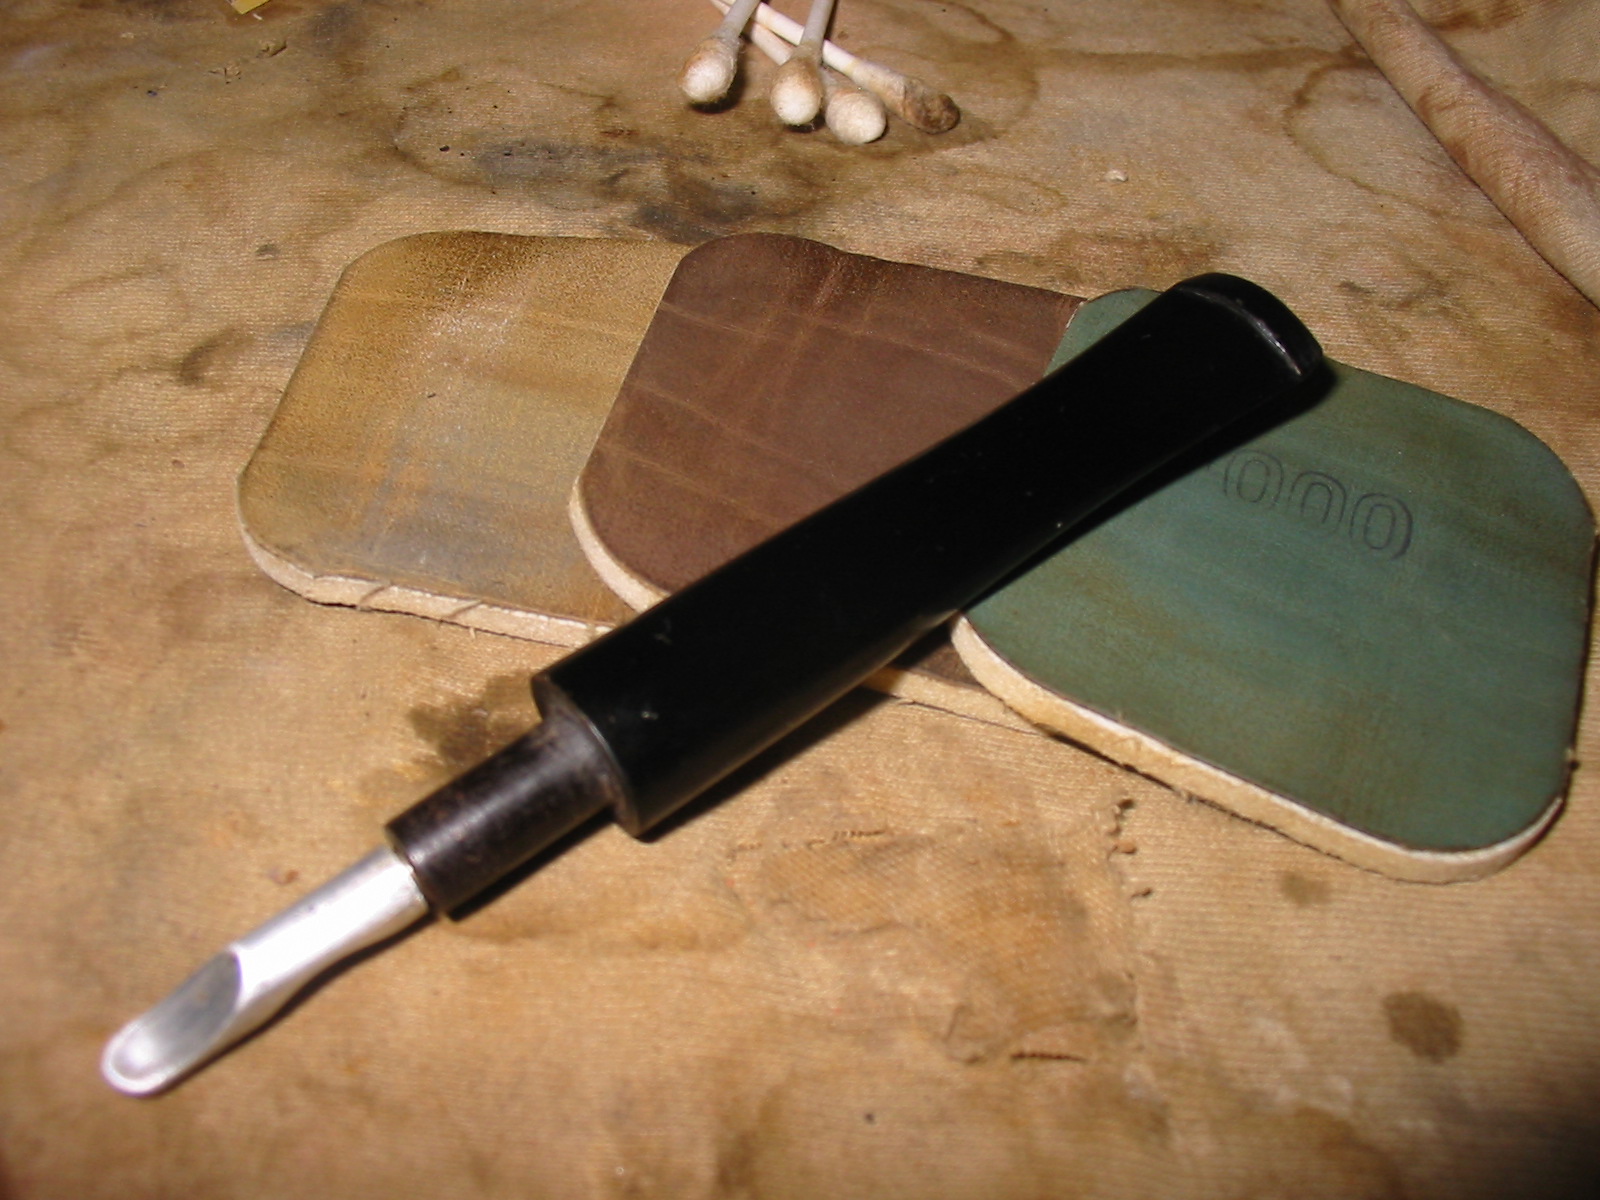
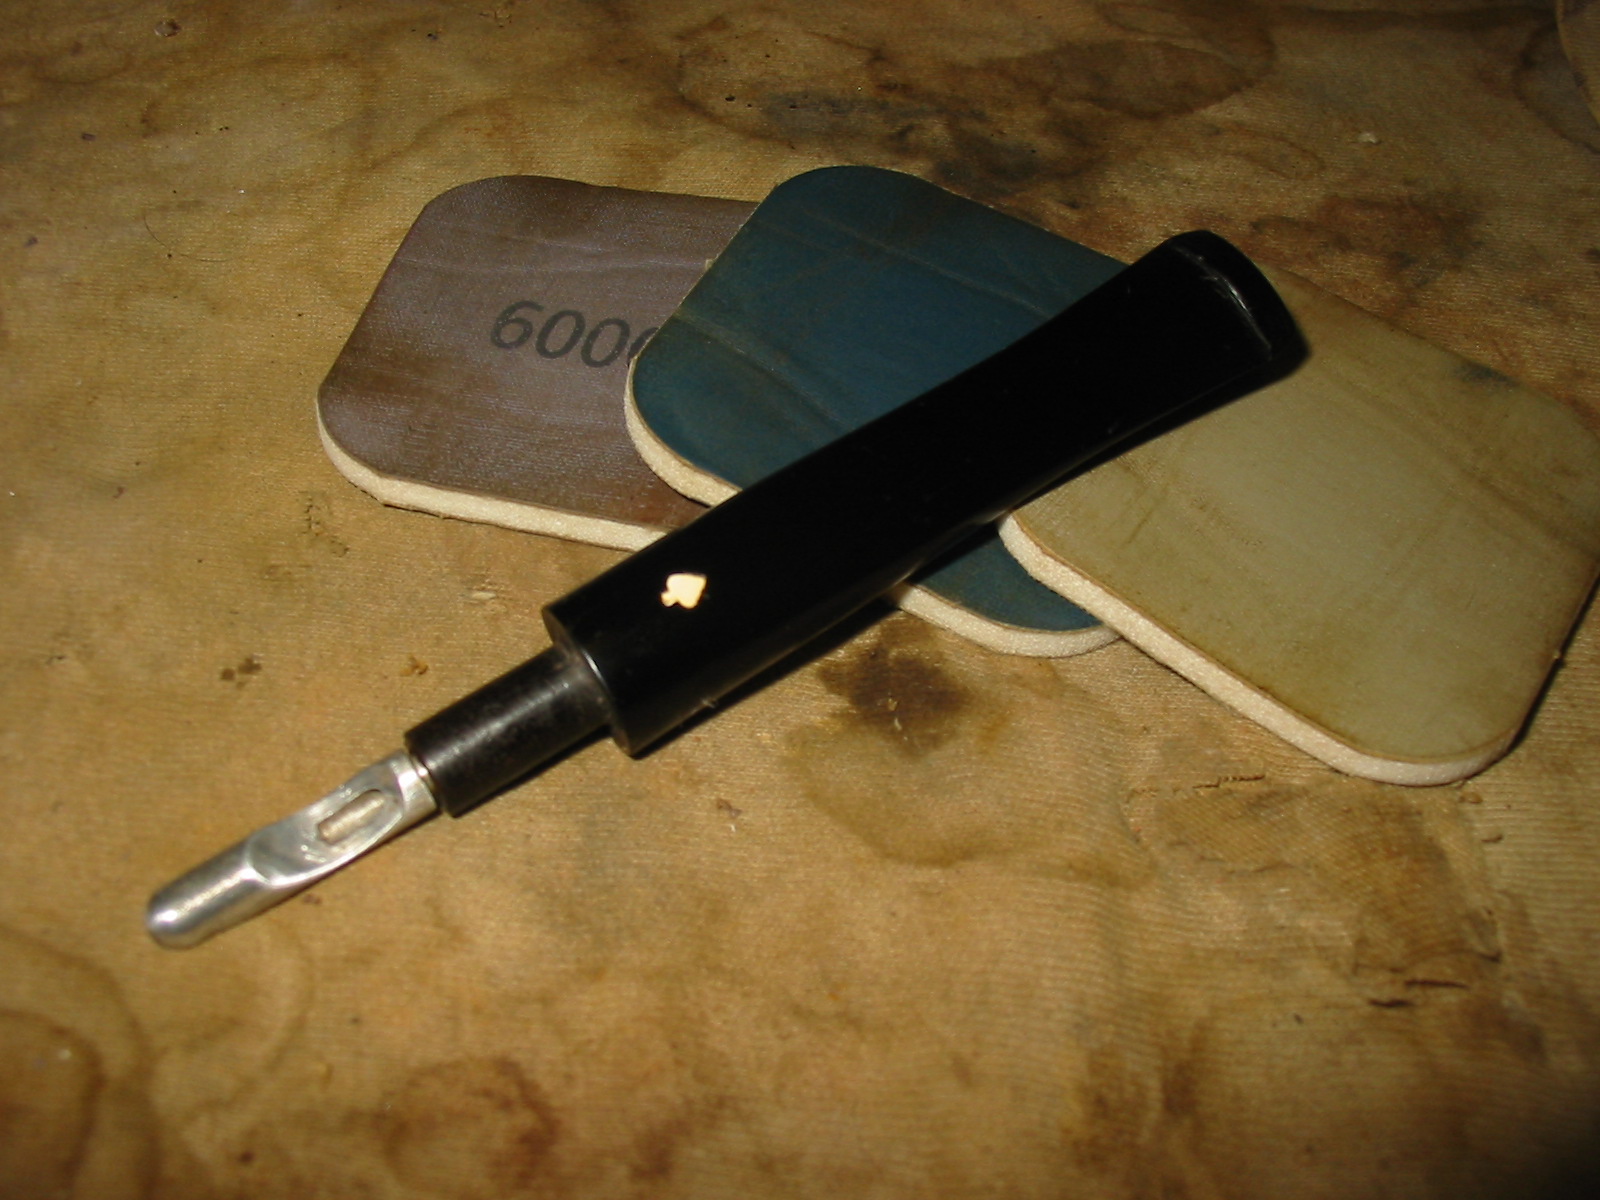
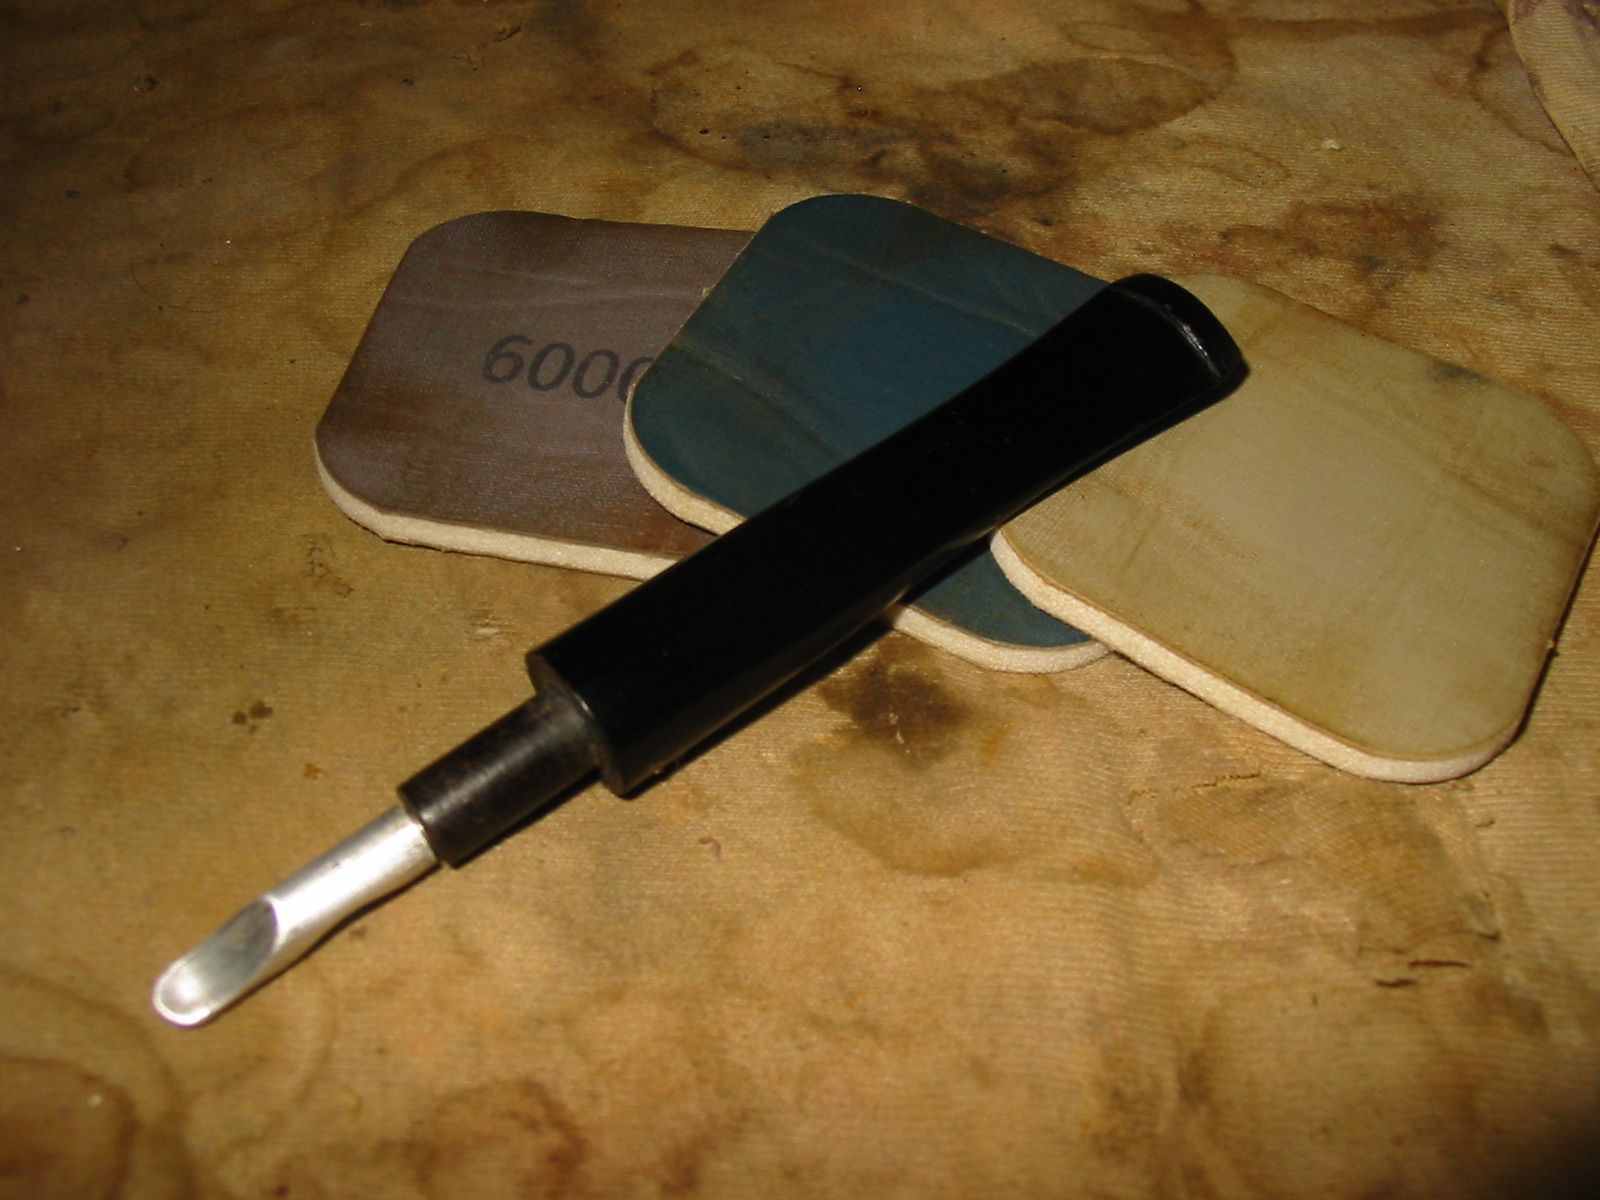
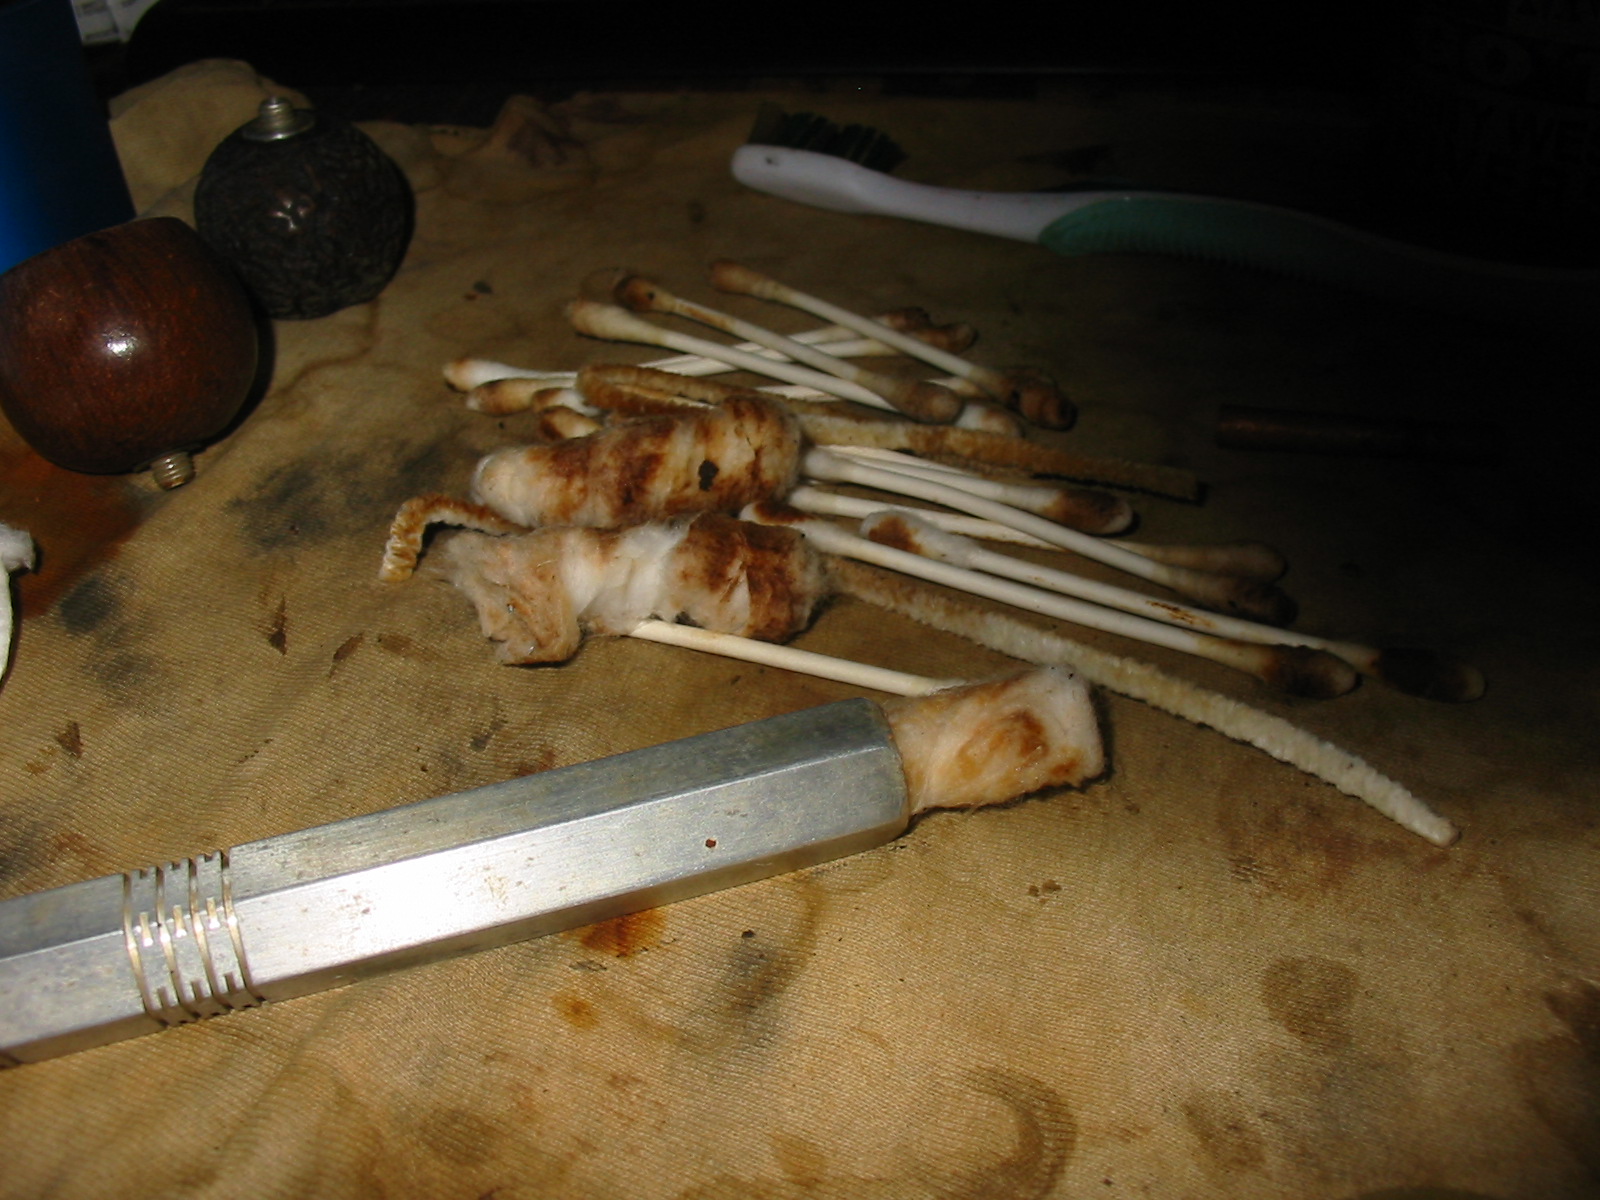
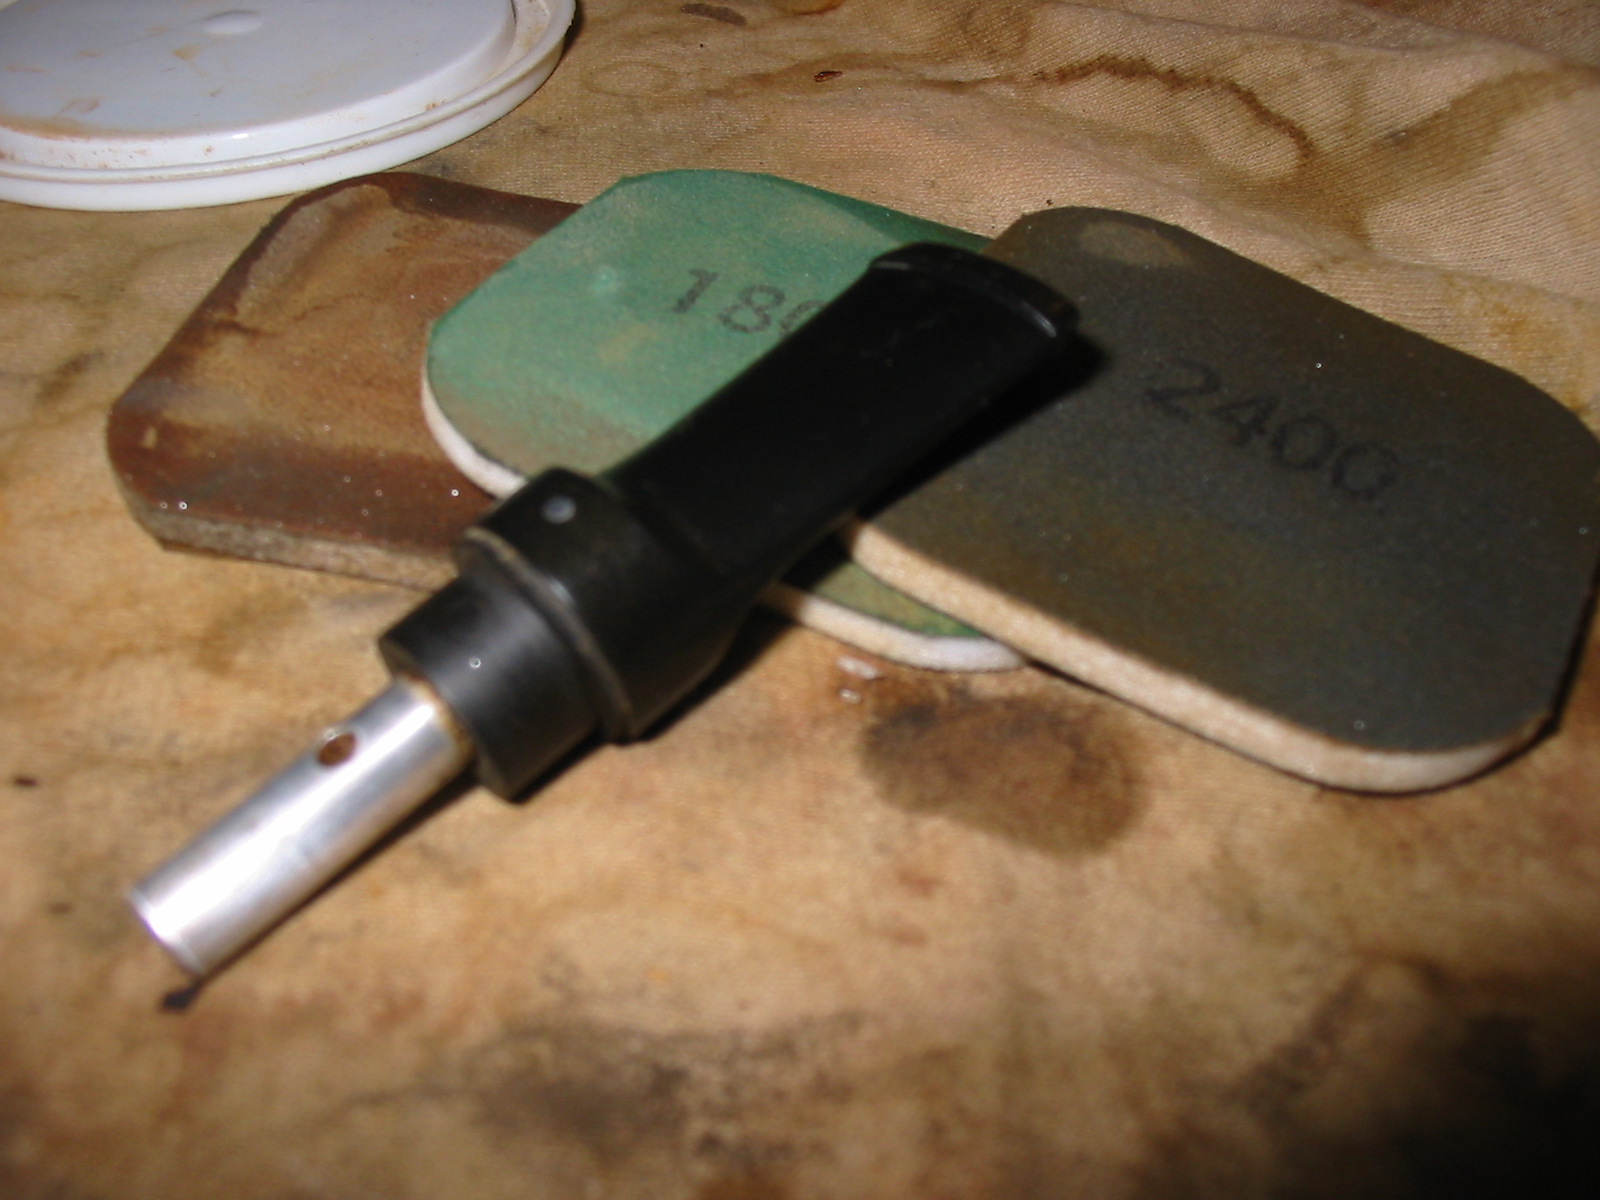
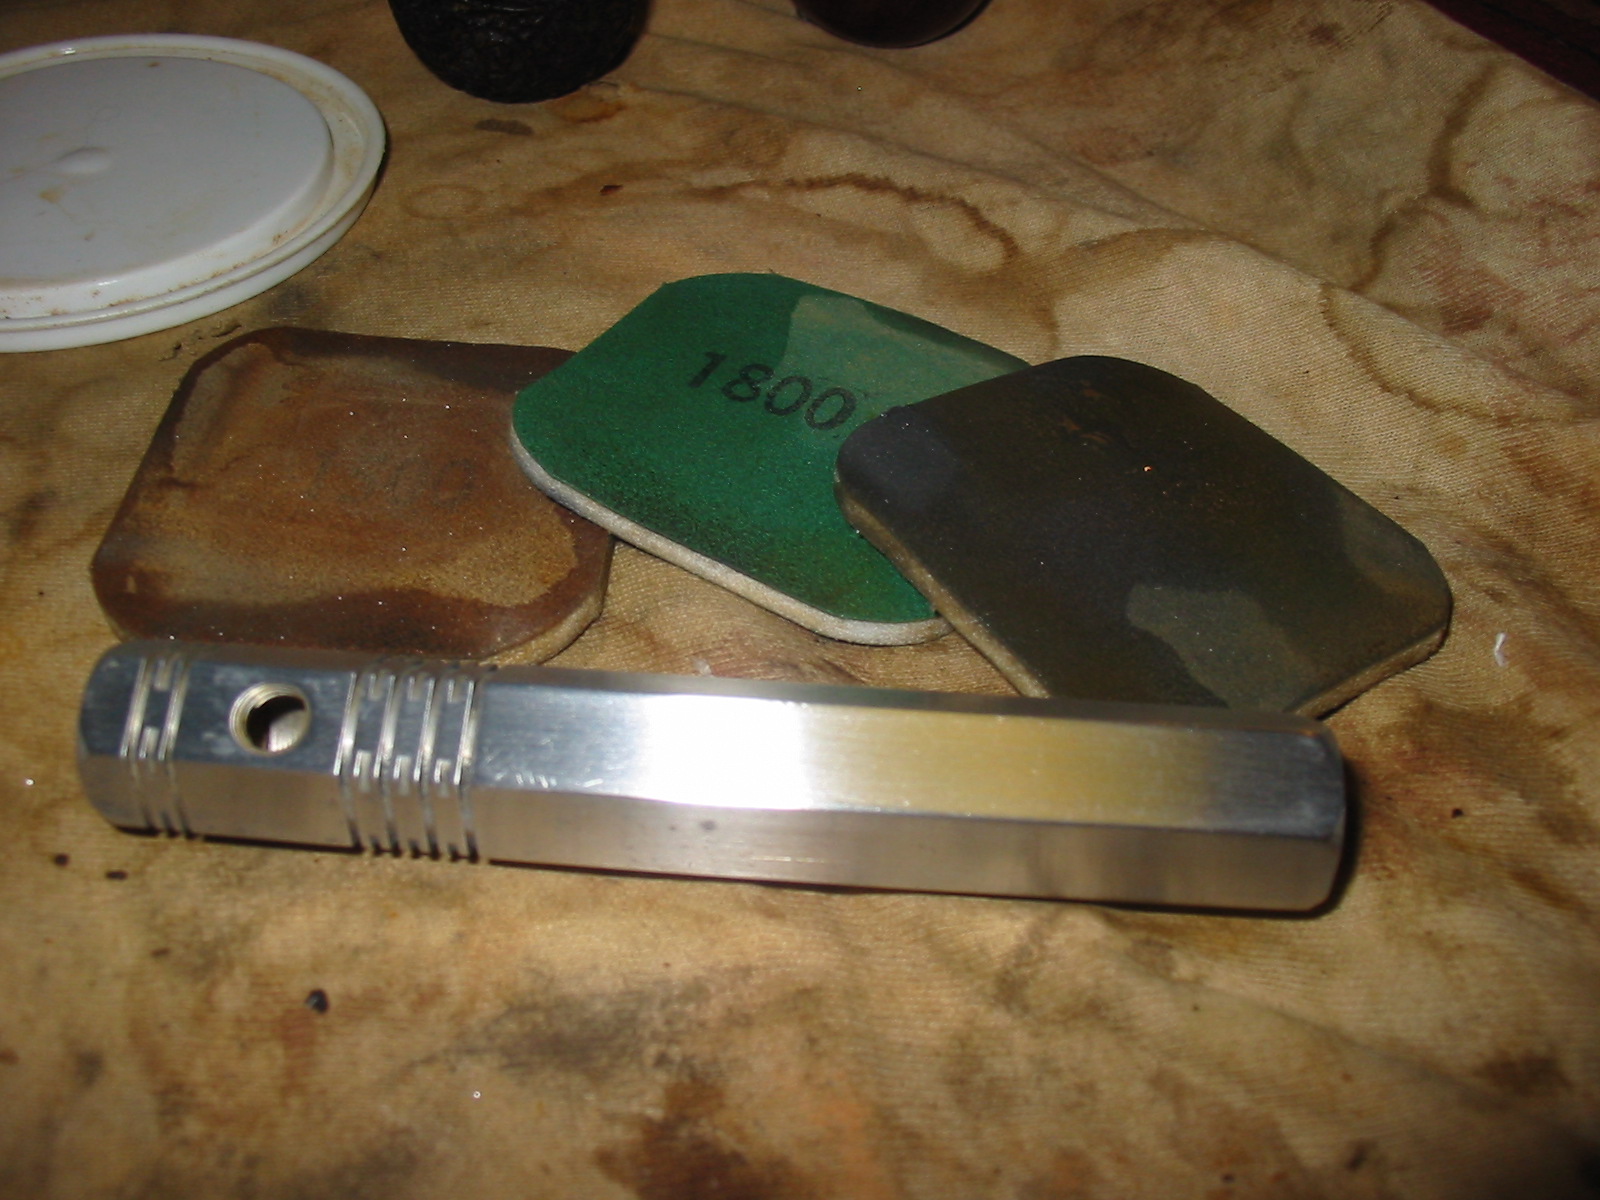
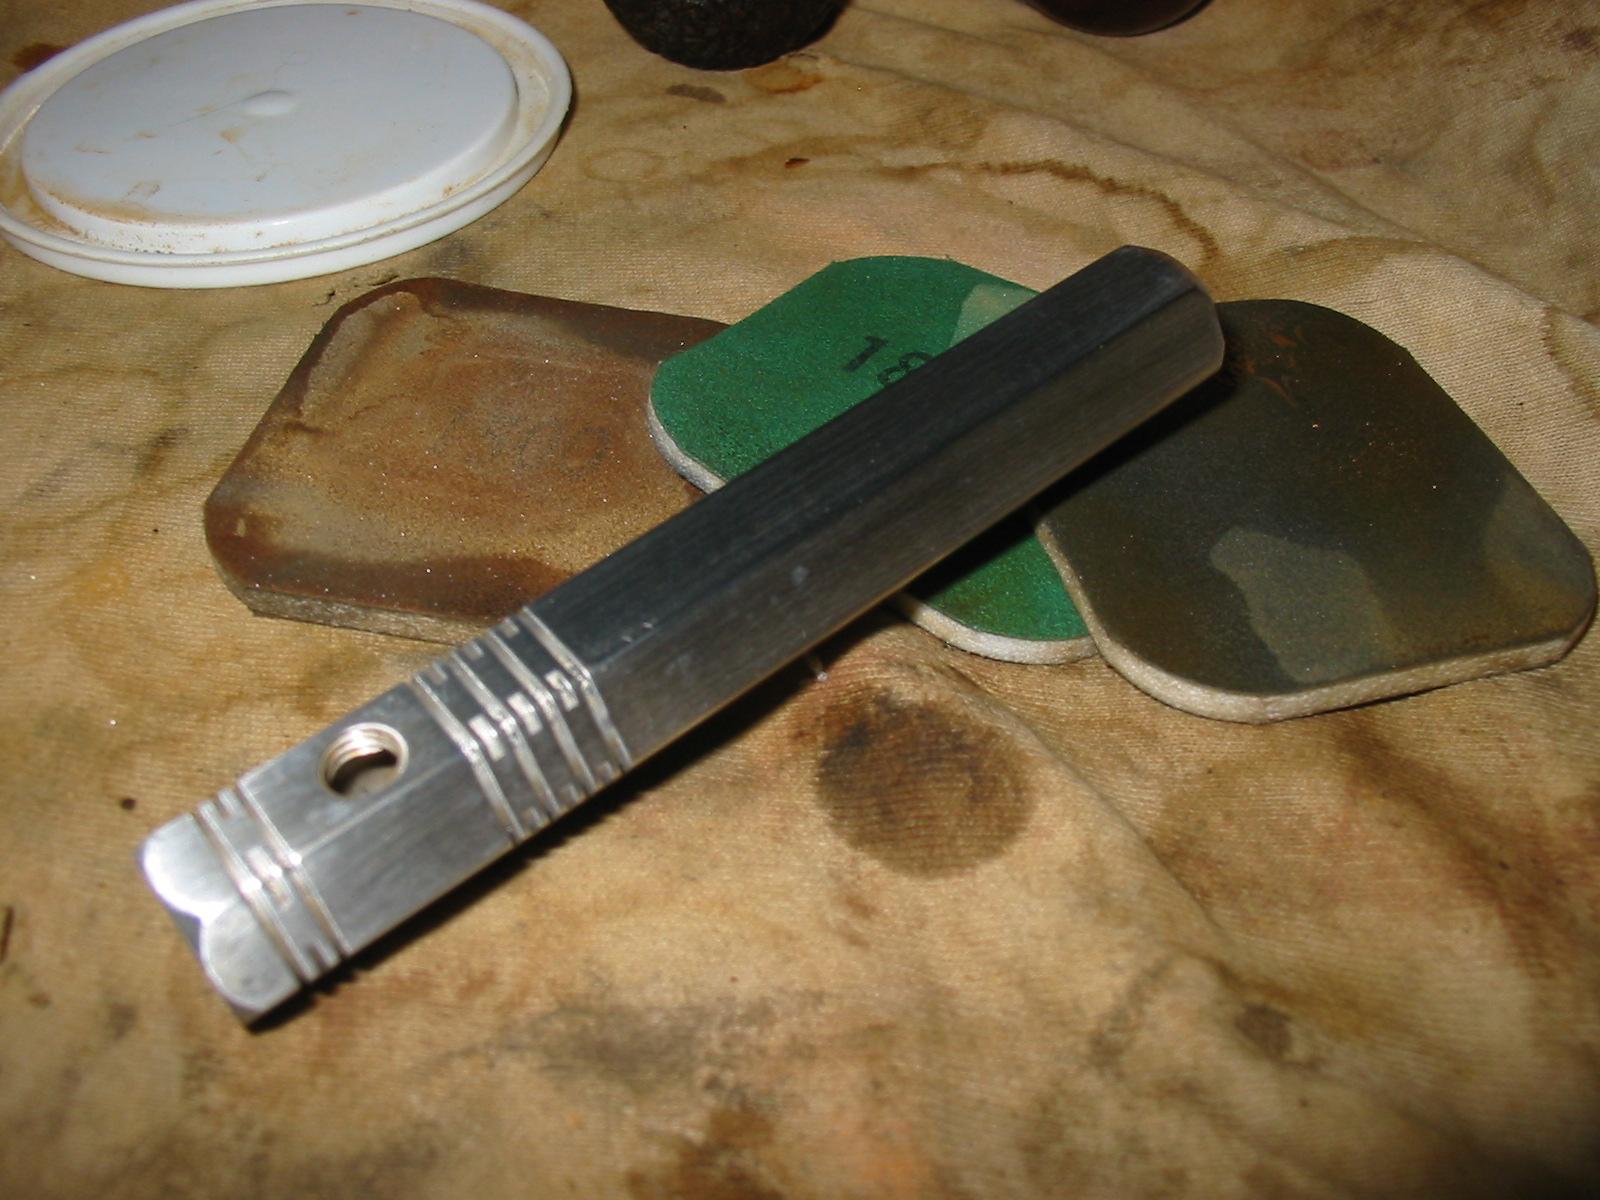
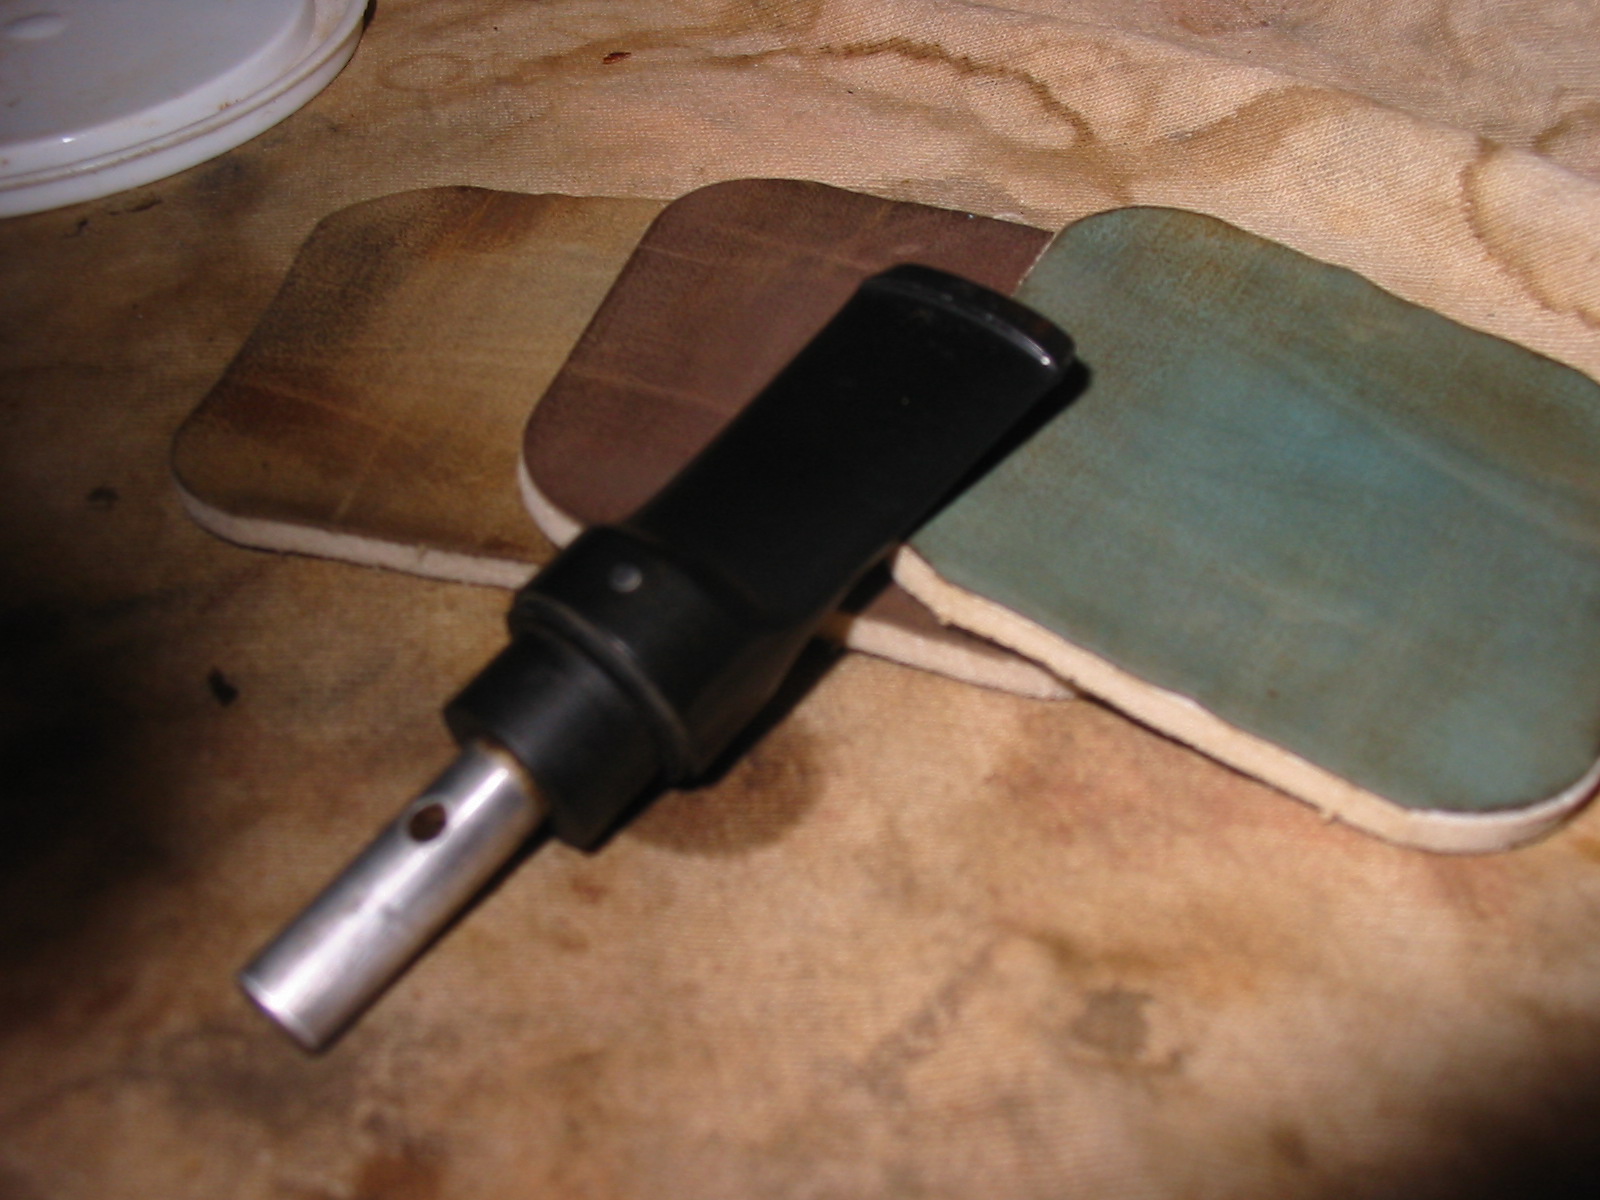
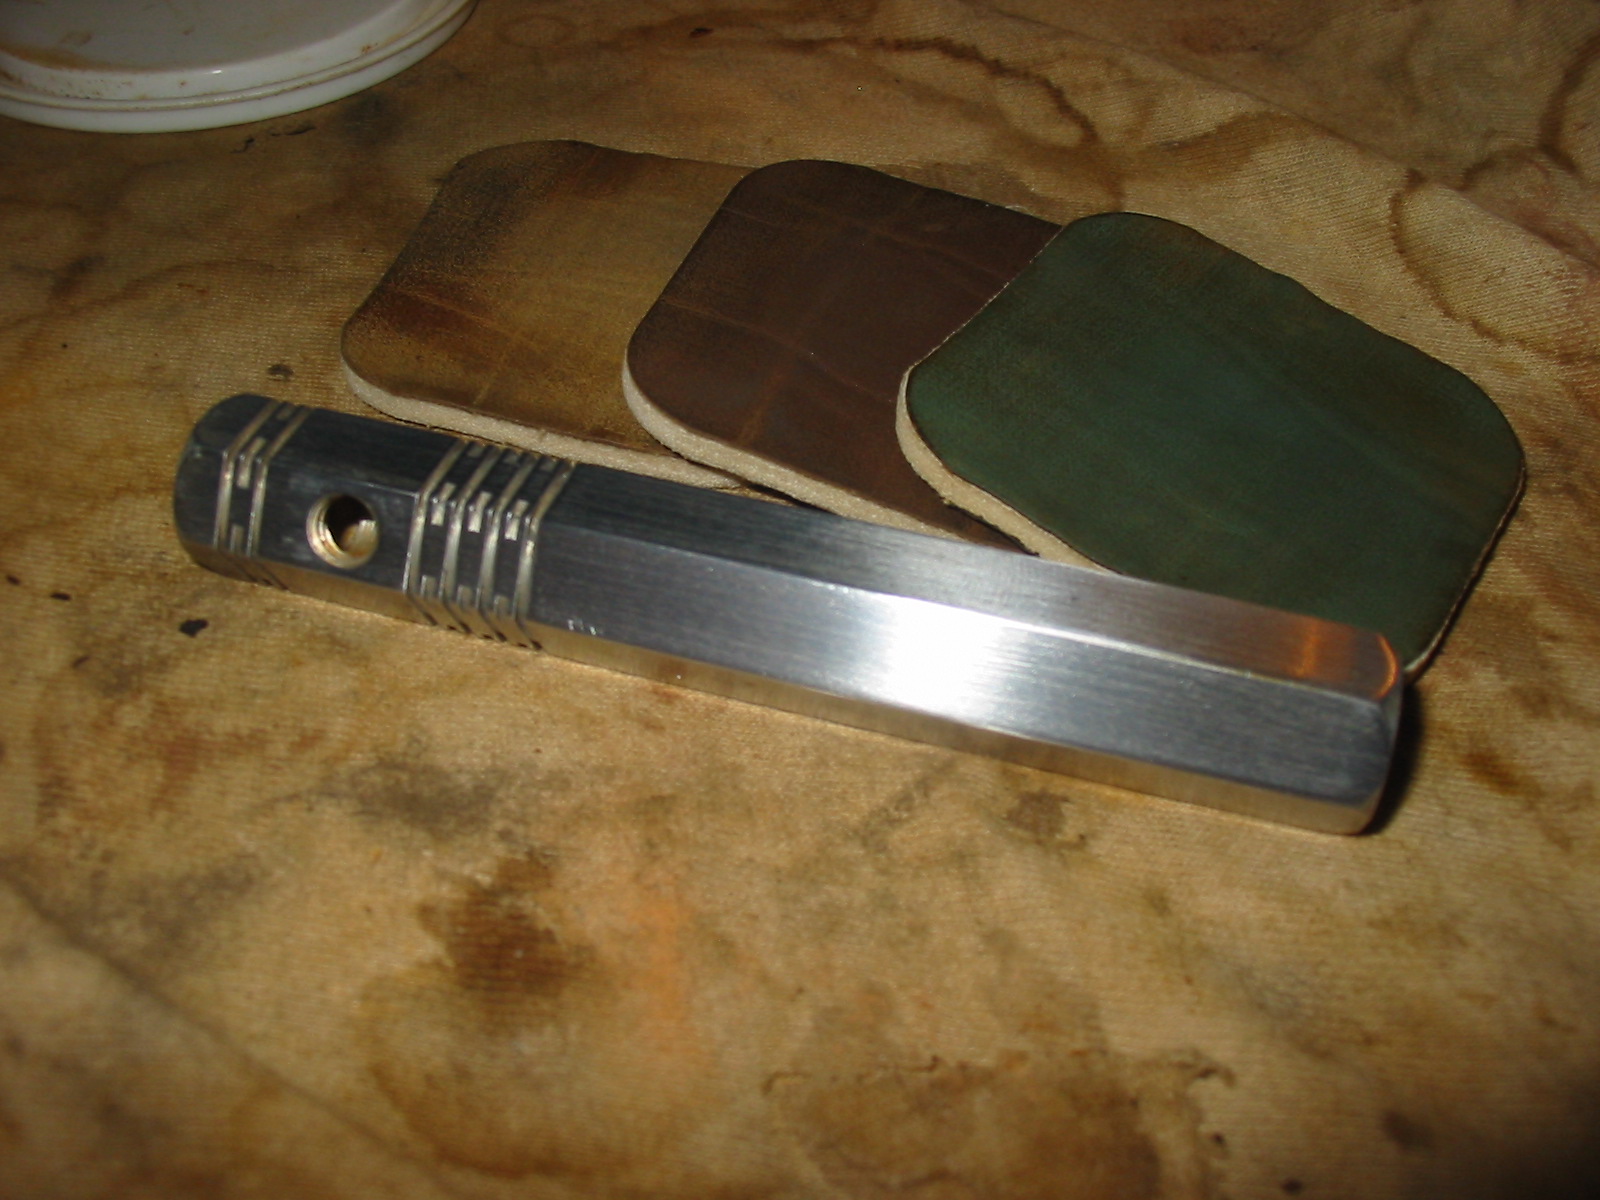
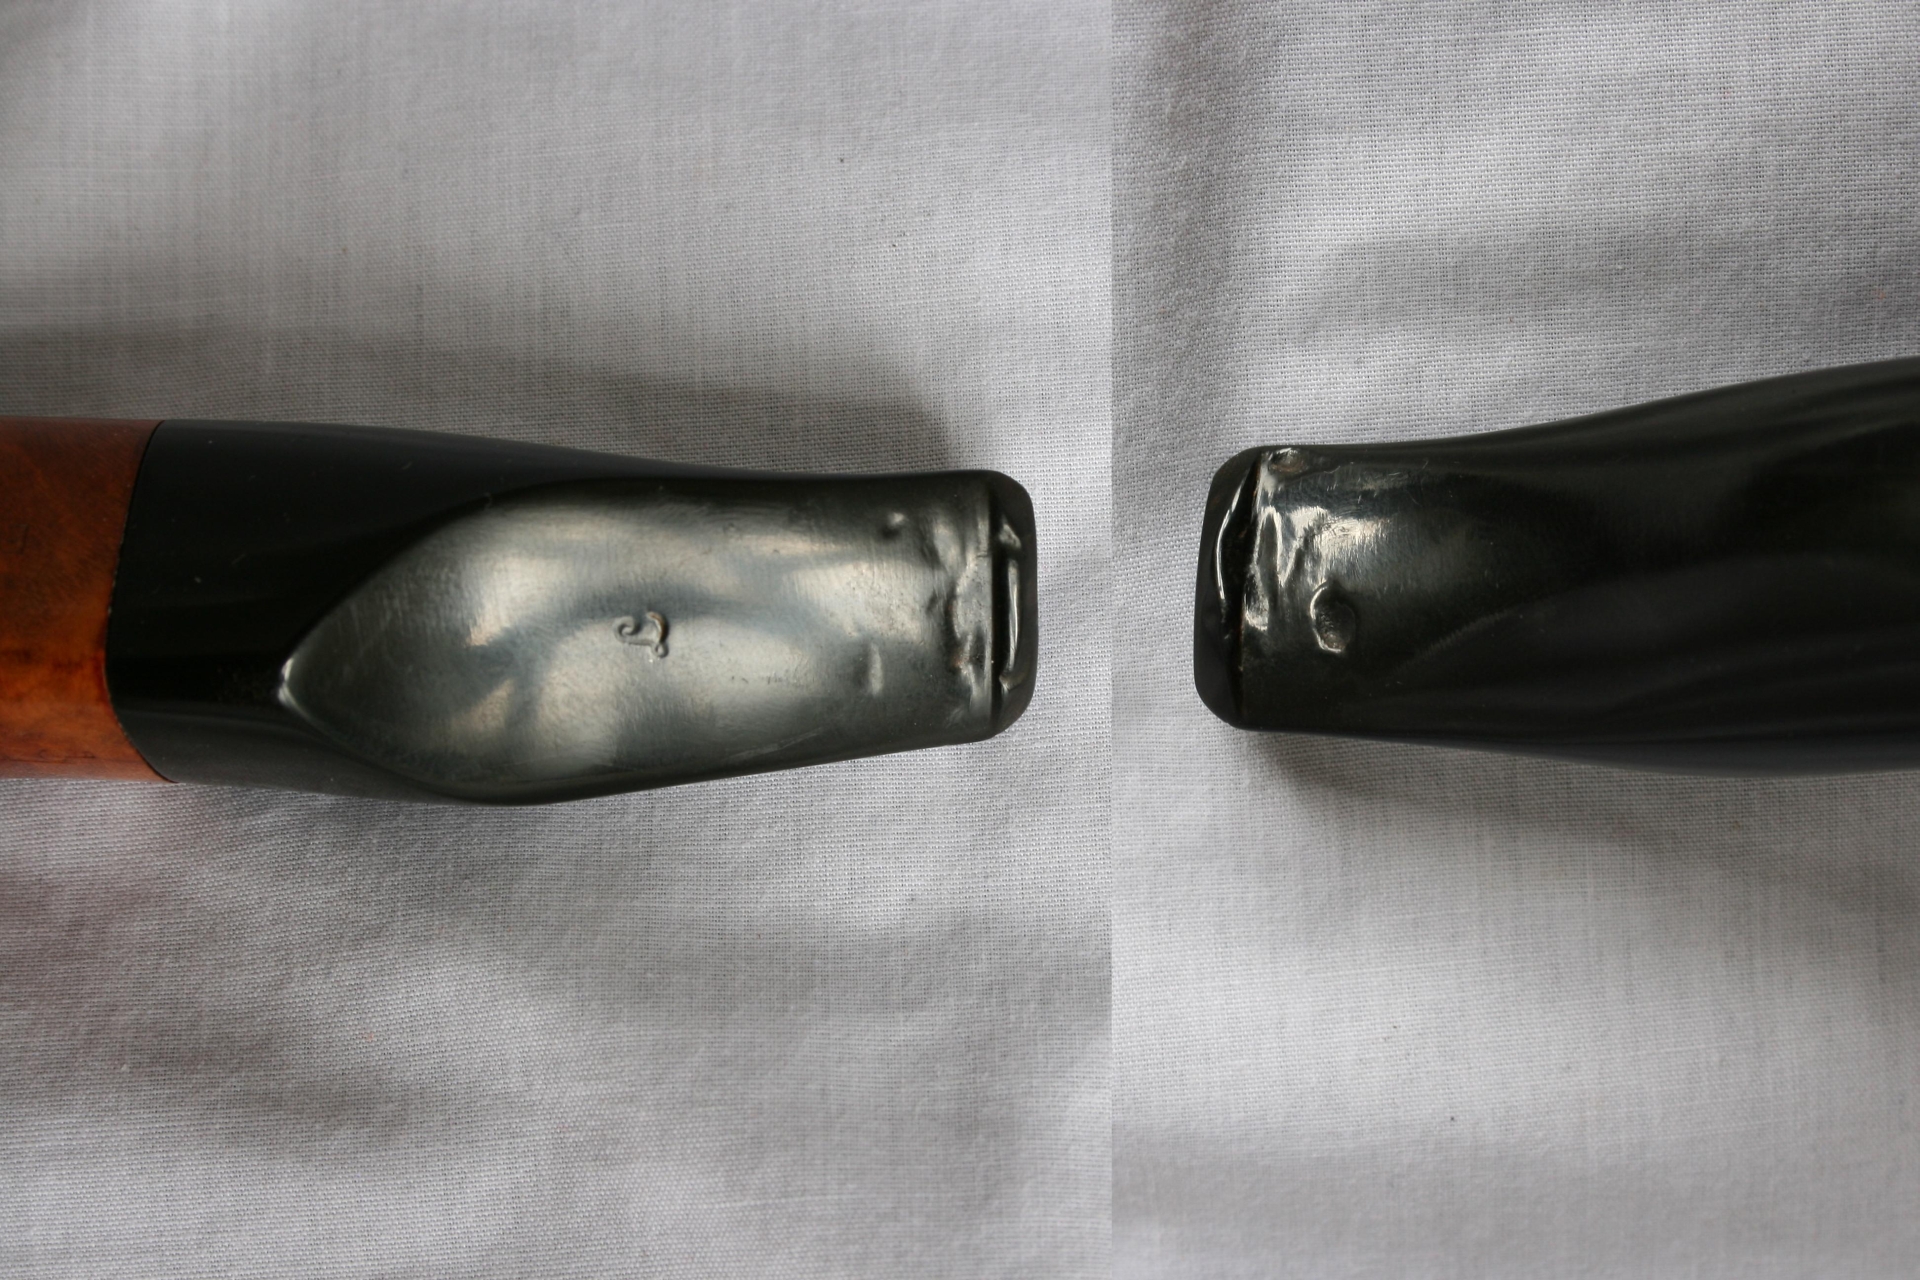
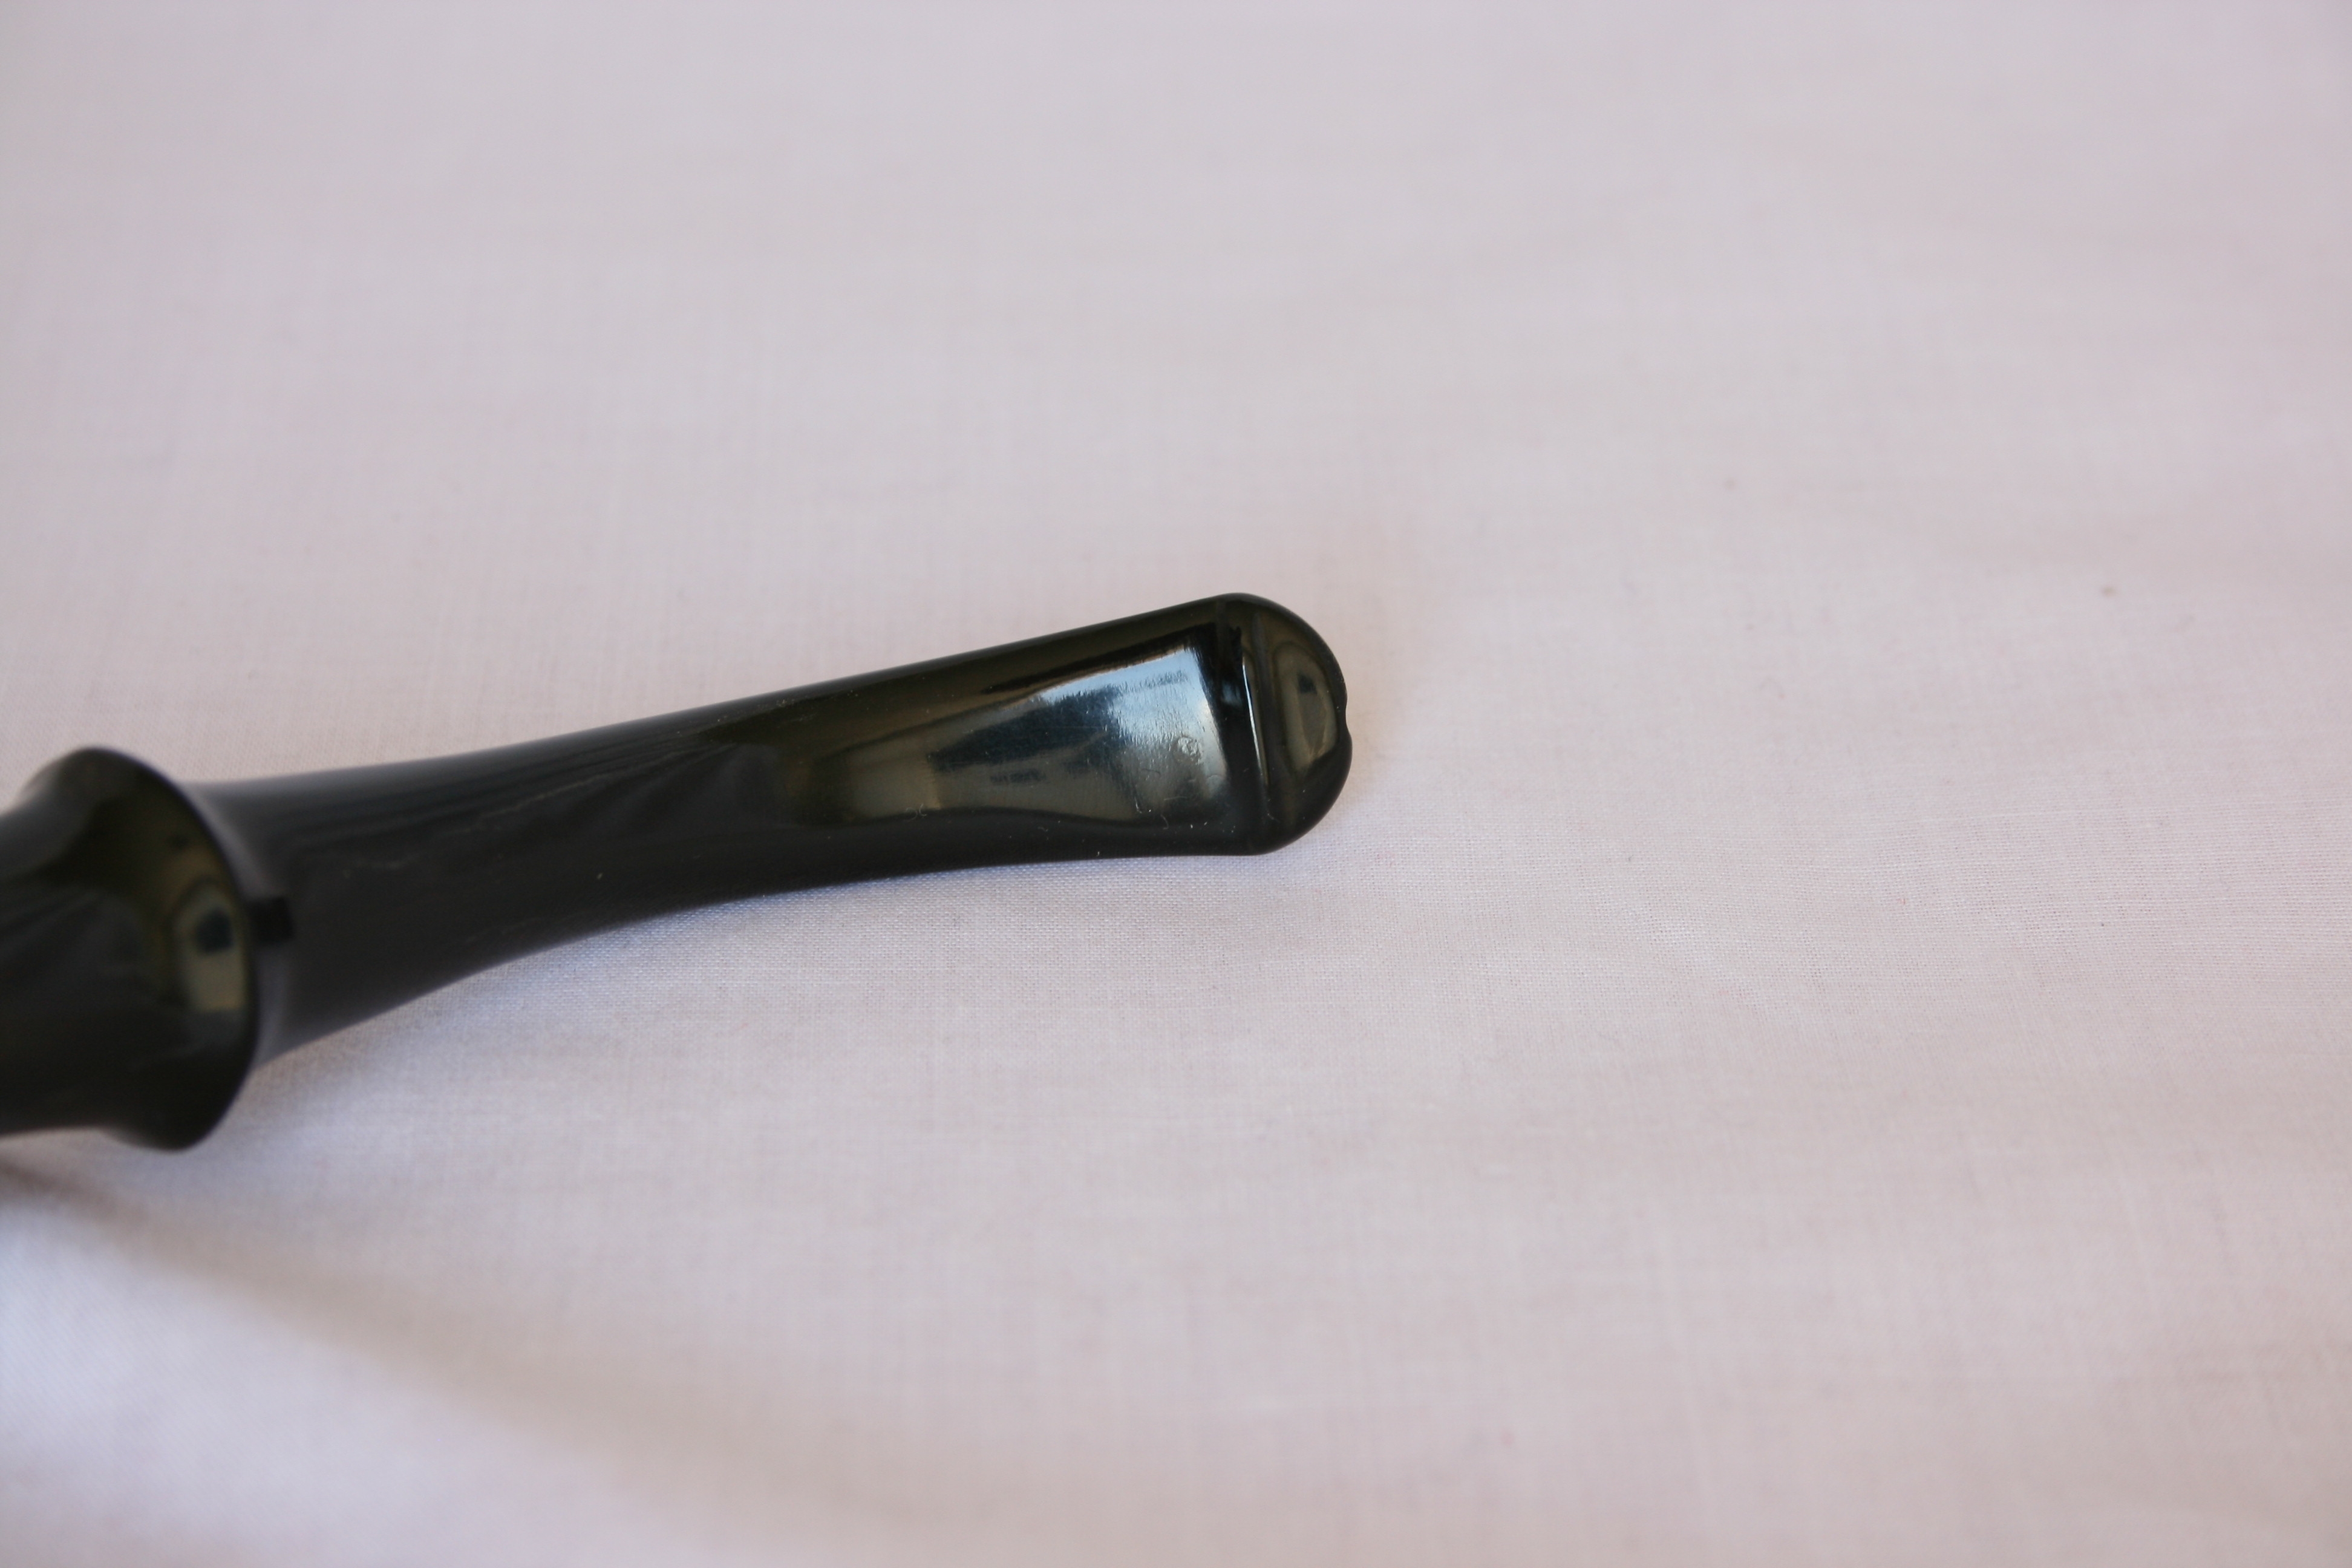
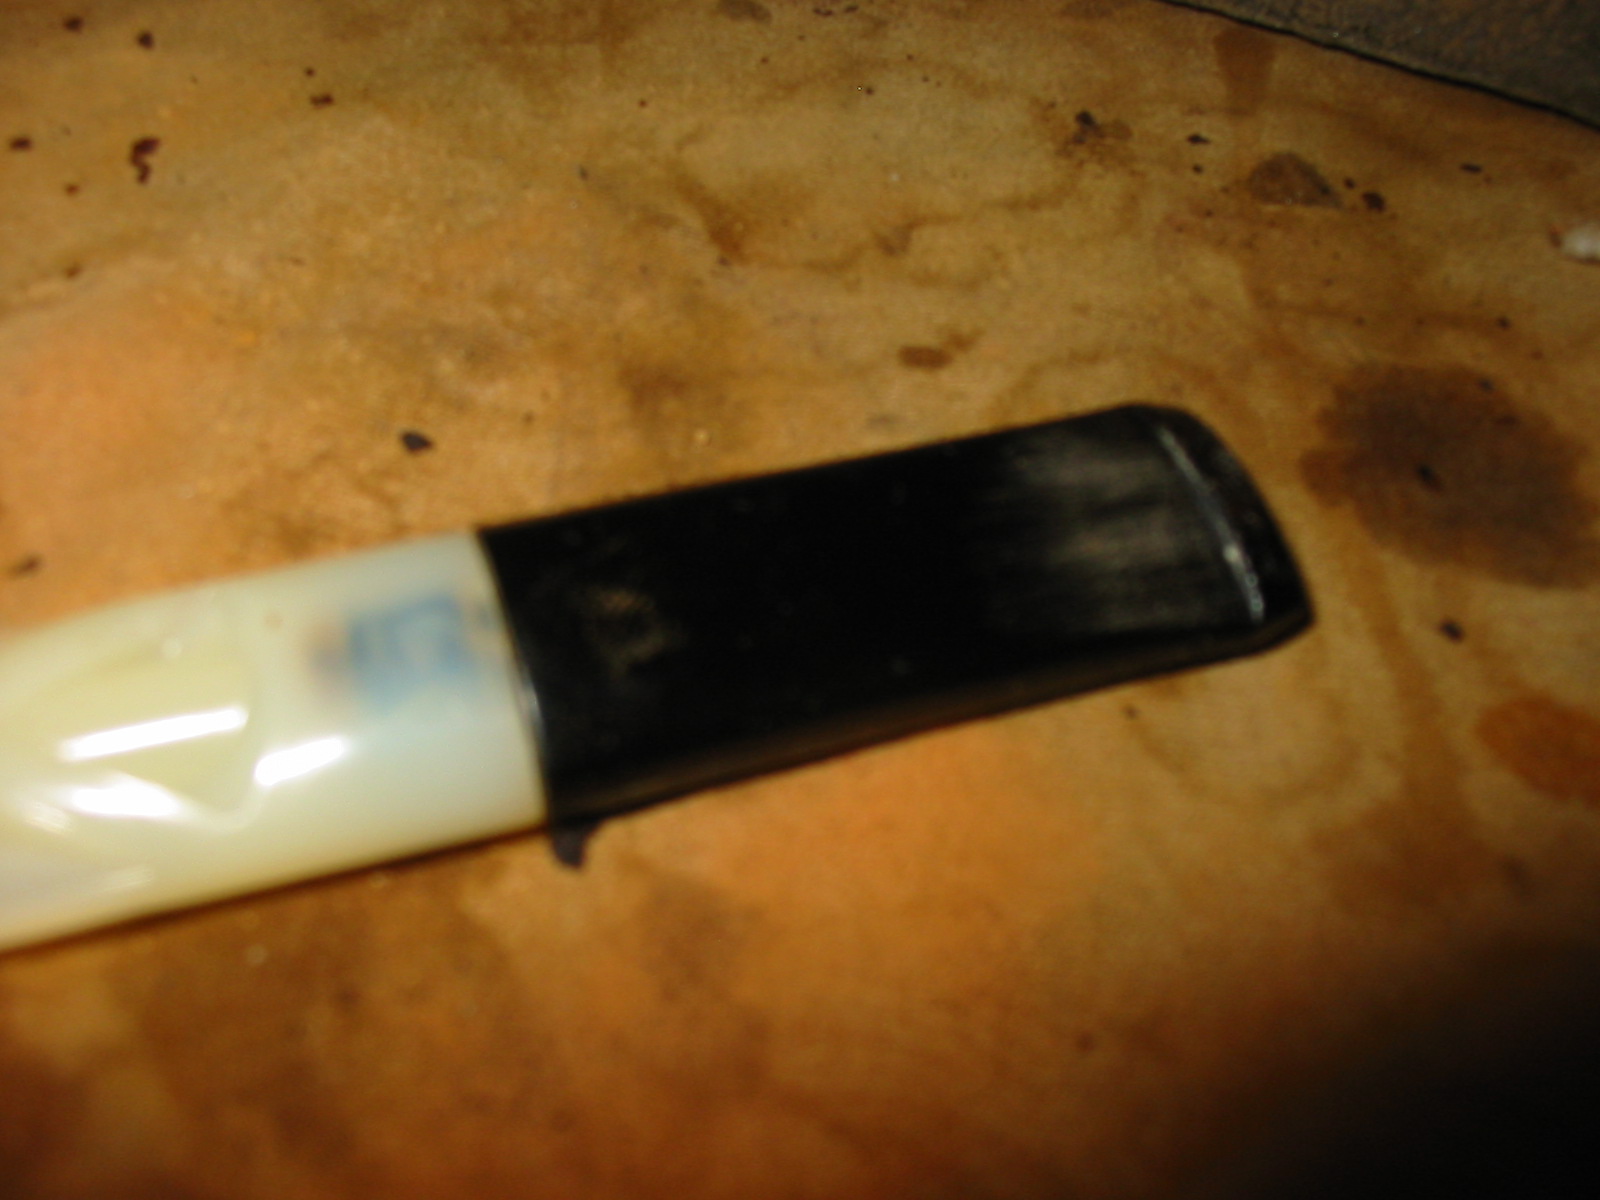
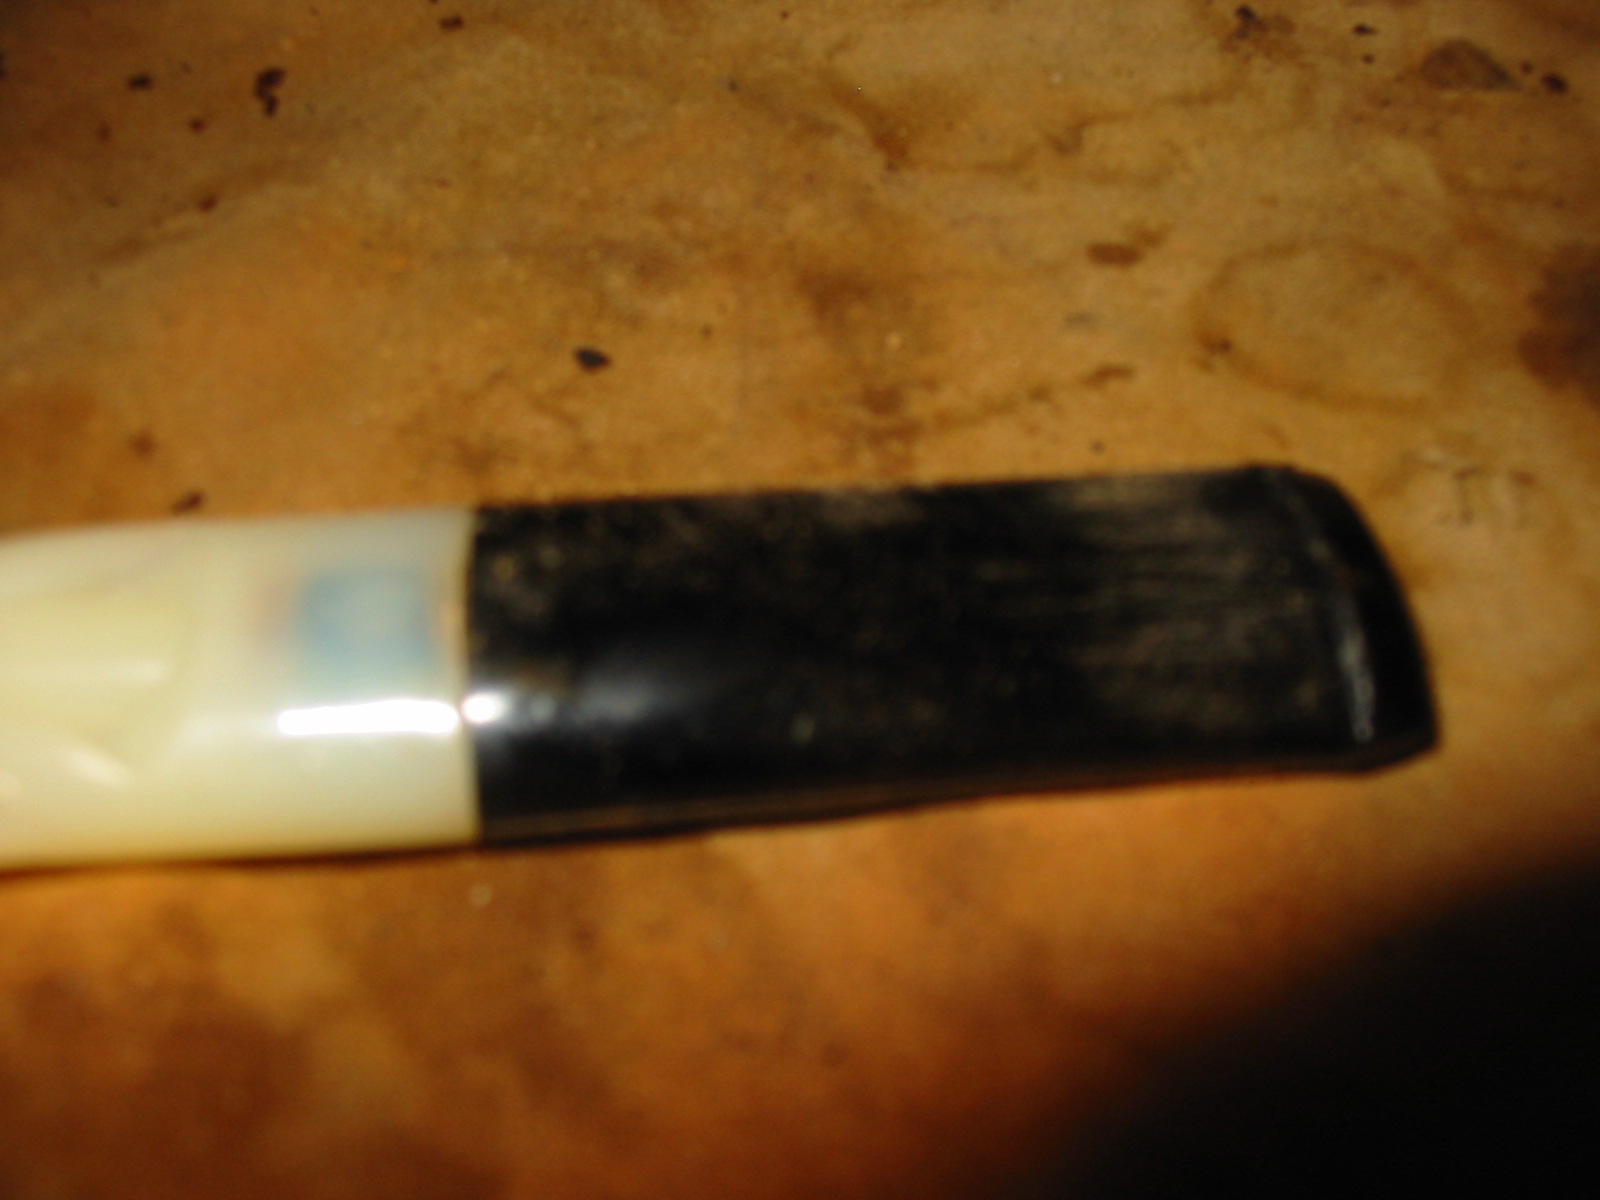
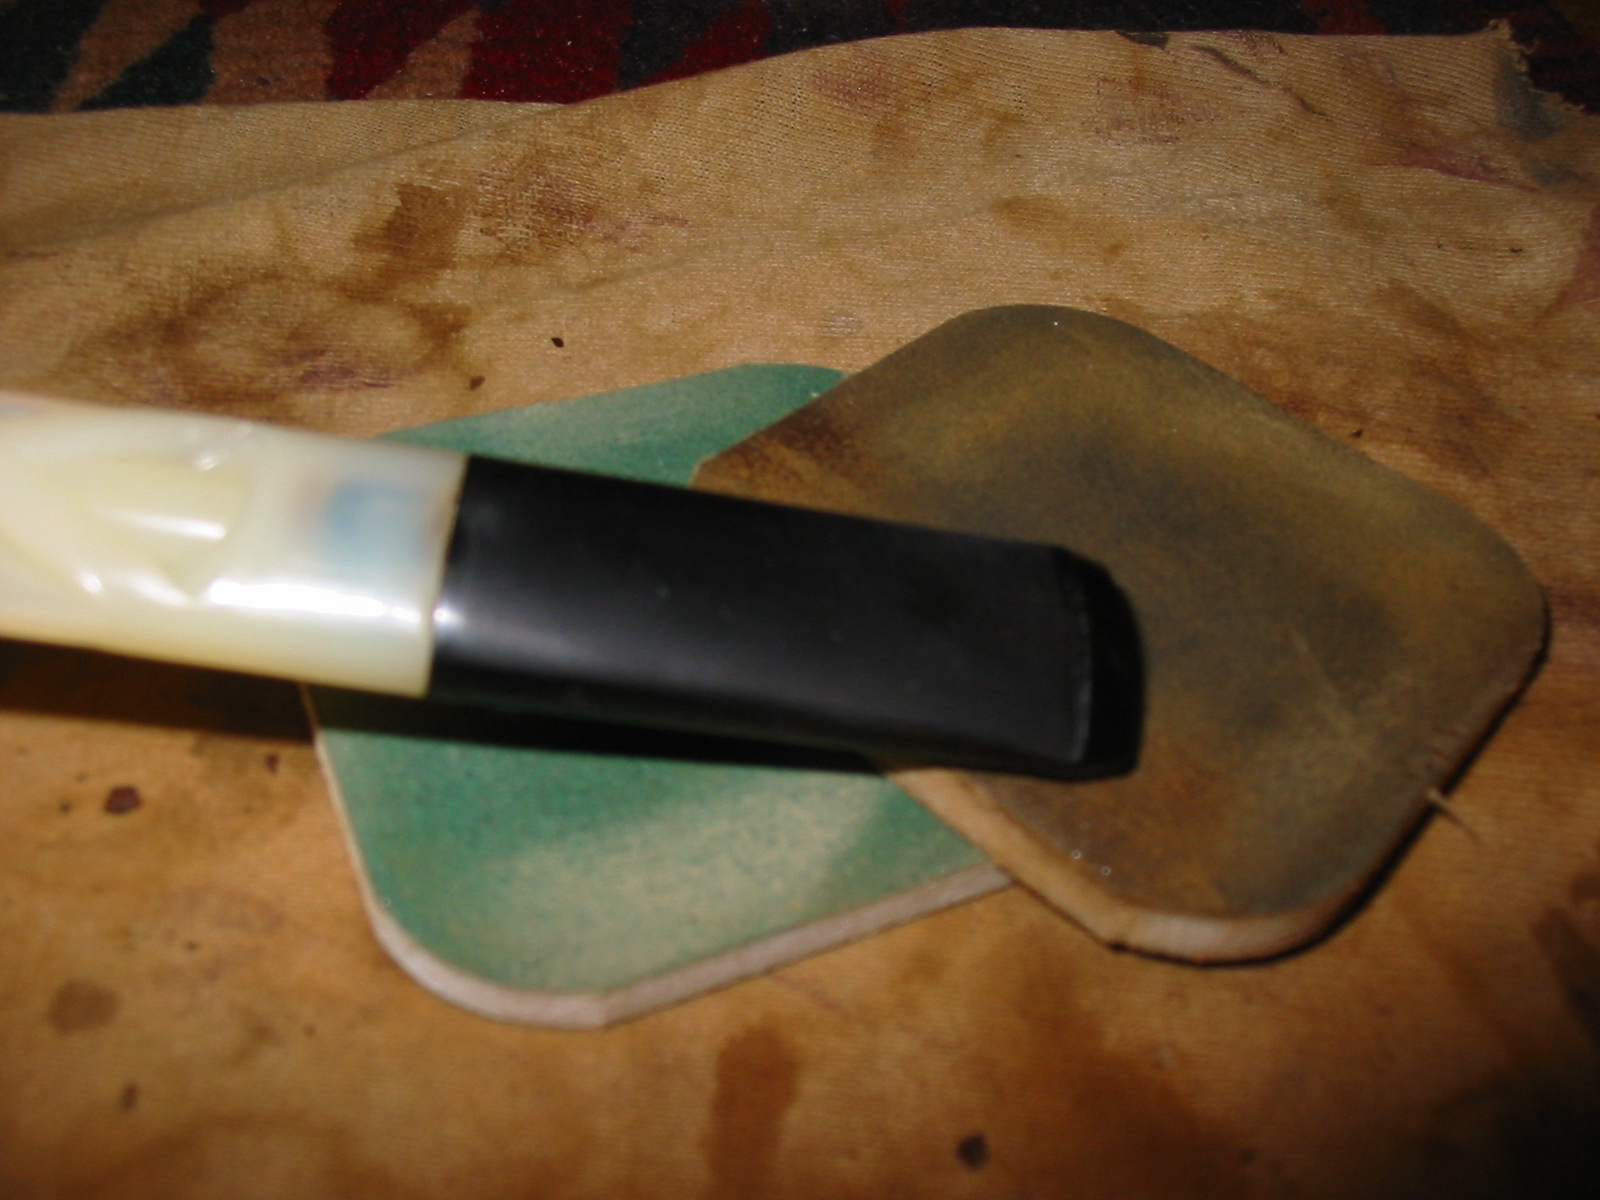
This old pipe took every trick I had up my sleeves to refurbish. The stem was nylon not rubber so it was fussy to clean up. Every scratch shows in nylon and it cannot be buffed except with a very gentle hand. Everything had to be done by hand. I worked on the stem while Lance worked on the bowl. I sanded the stem from the button up the stem for about an inch to remove the calcification on the end and remove the tooth chatter on the top of the stem. On the underside there were a couple of deeper tooth marks that needed attention. I heated the nylon carefully with a lighter to try to raise the dents in the stem. I moved quickly across the surface so as not to melt the nylon. All but one of them lifted nicely – it remained a stubborn part of the sanding process. I sanded the stem with 220 grit sandpaper and then with a medium grit sanding sponge. I finished by sanding the stem with micromesh sanding pads from 1500-12,000 grit – wet sanding with the first three grits and then dry sanding with the remaining grits. I rubbed the stem down with Obsidian Oil. I also sanded the aluminum tenon with the 2400 grit micromesh pad to remove the oxidation on it. I polished it with a silver polishing cloth.

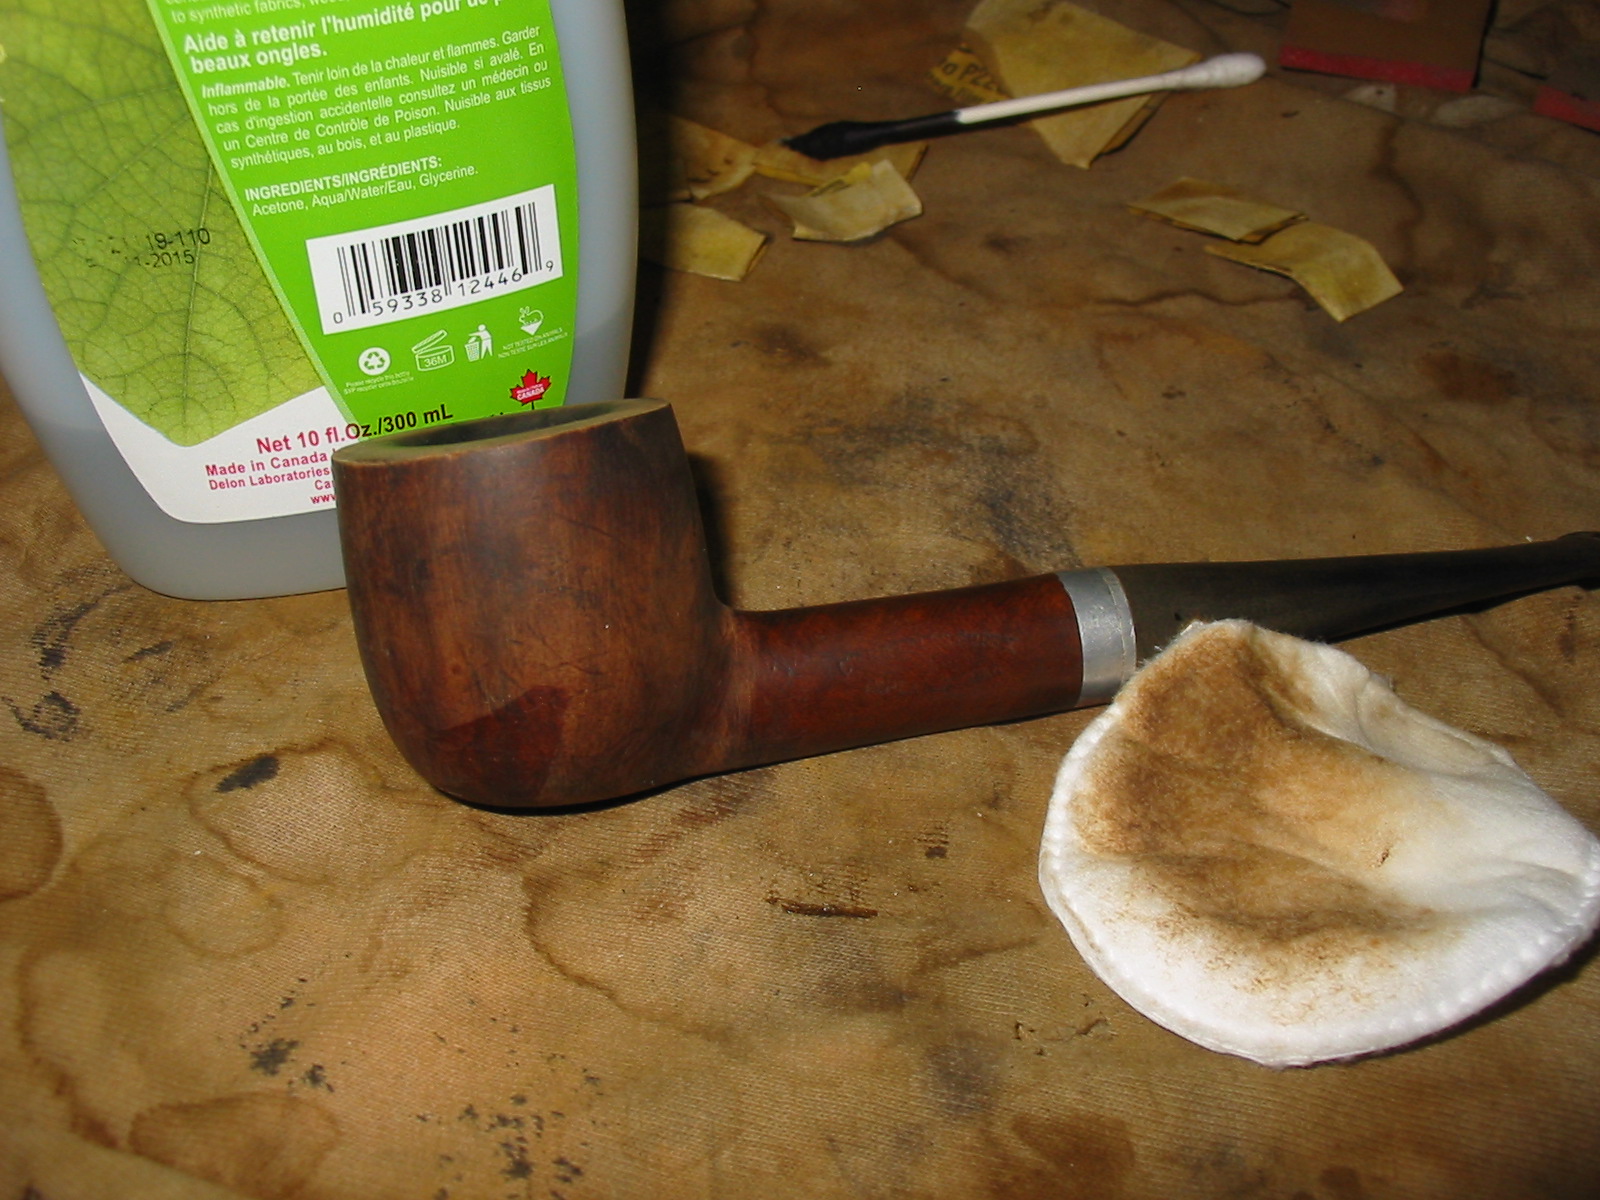
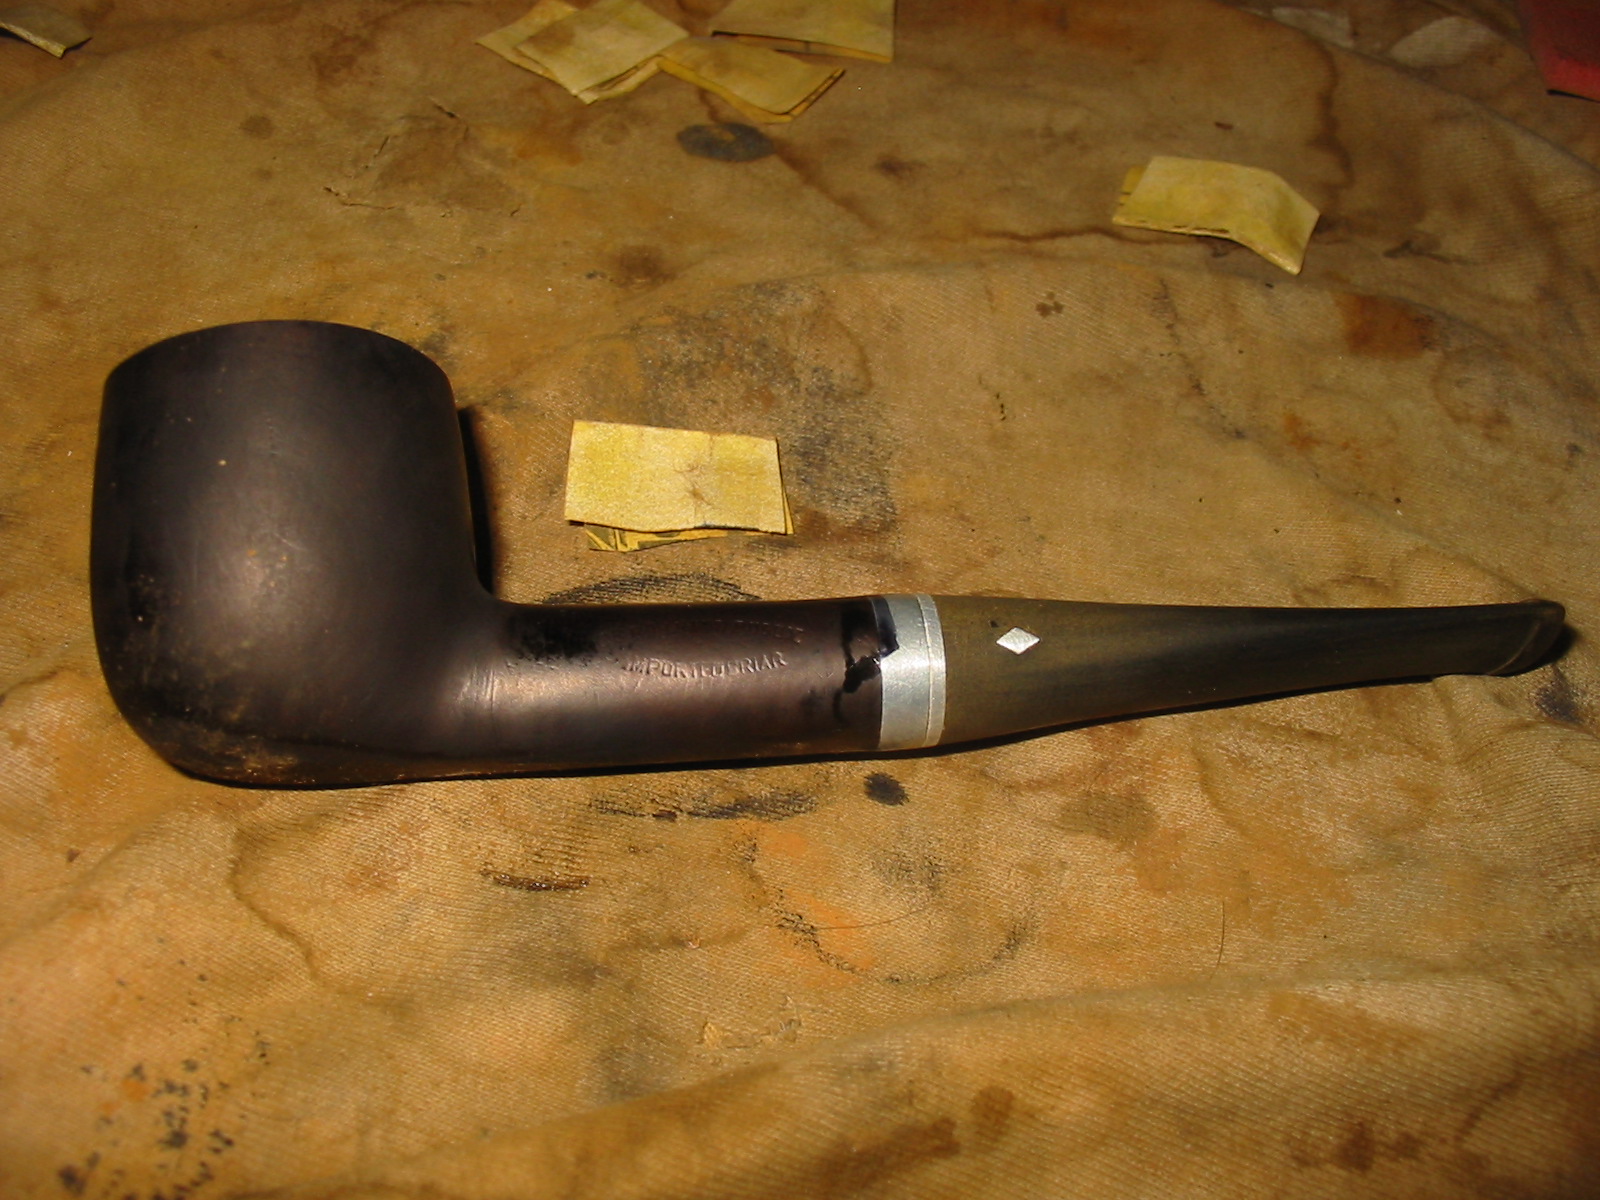
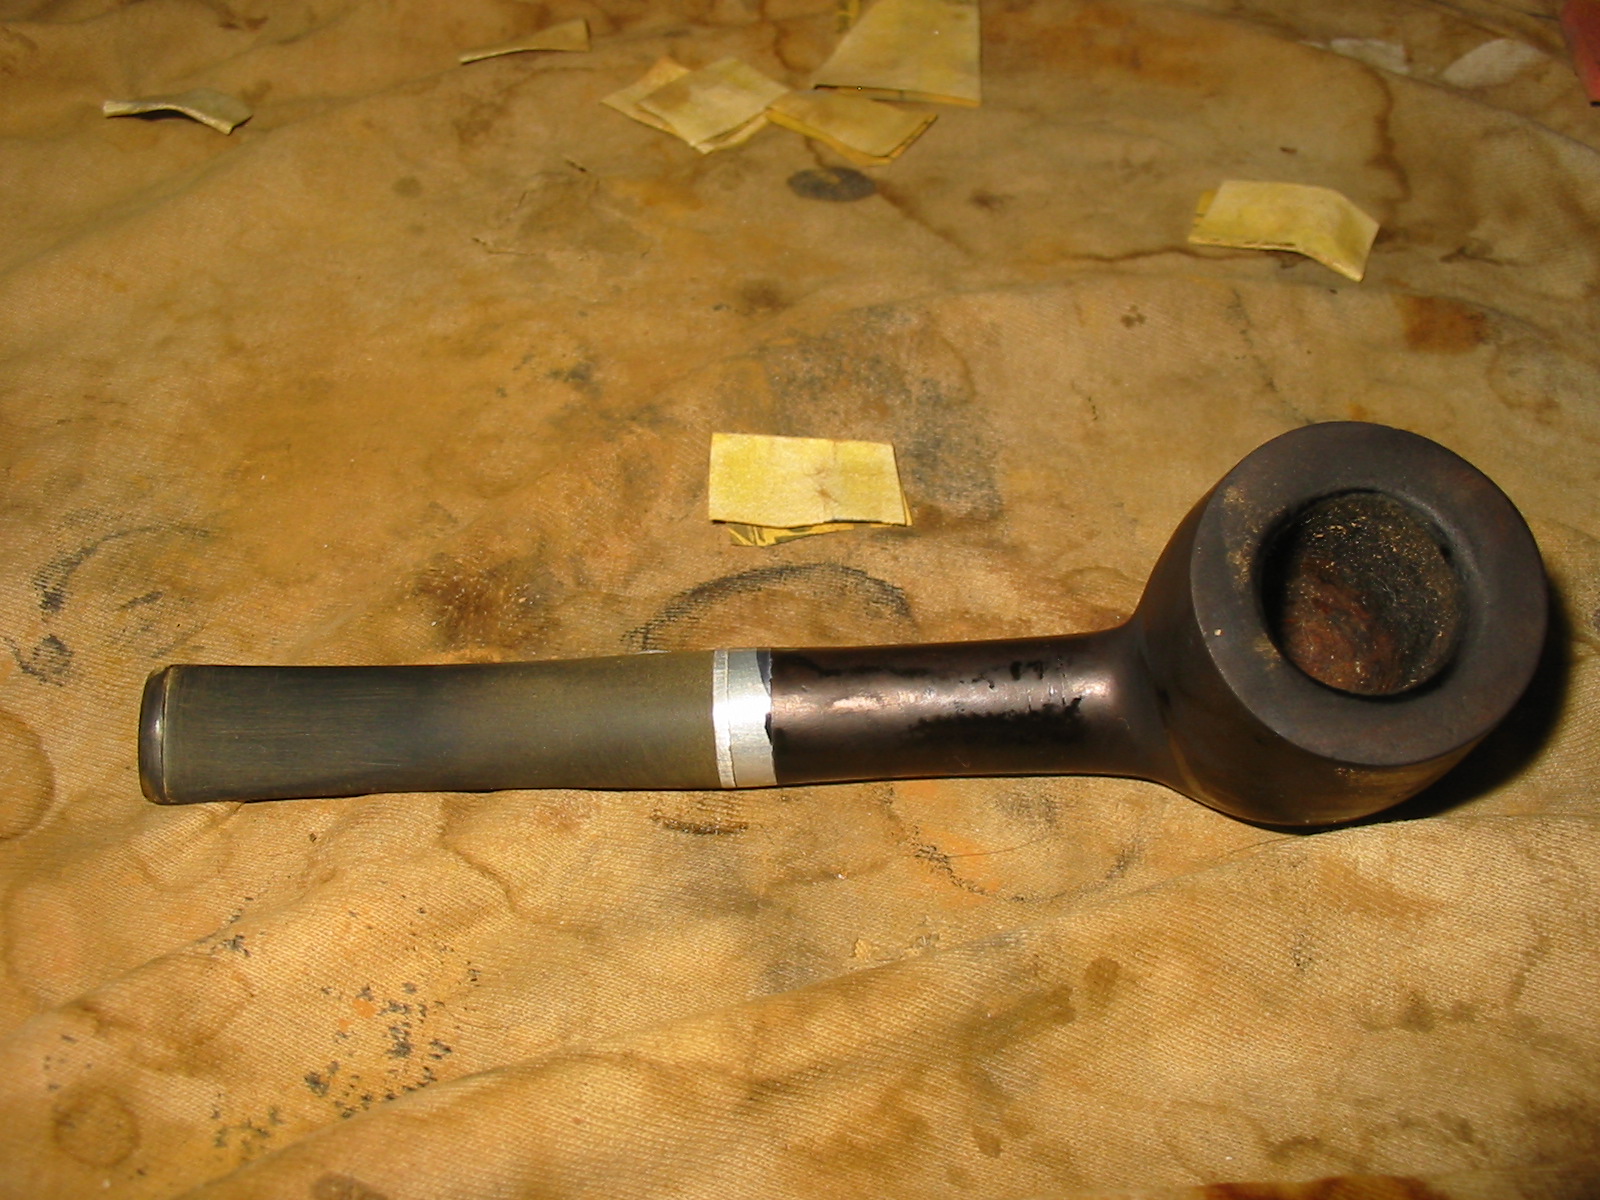
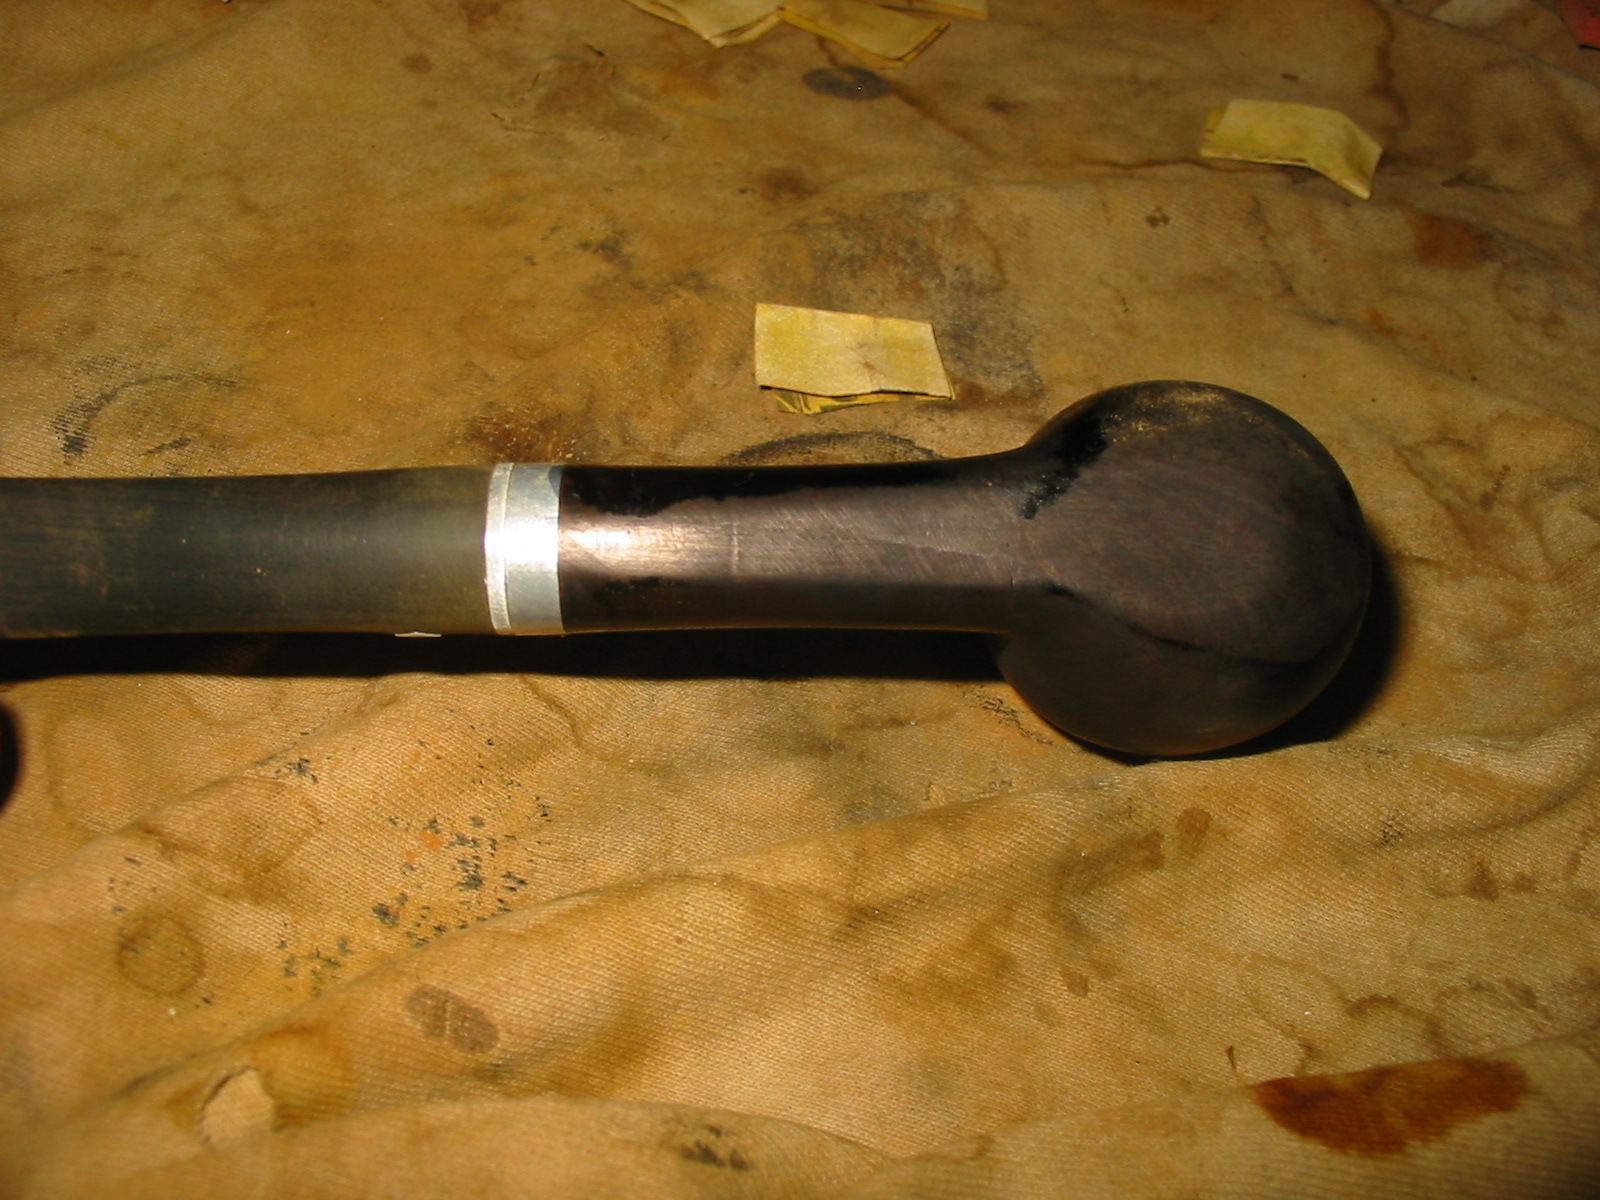
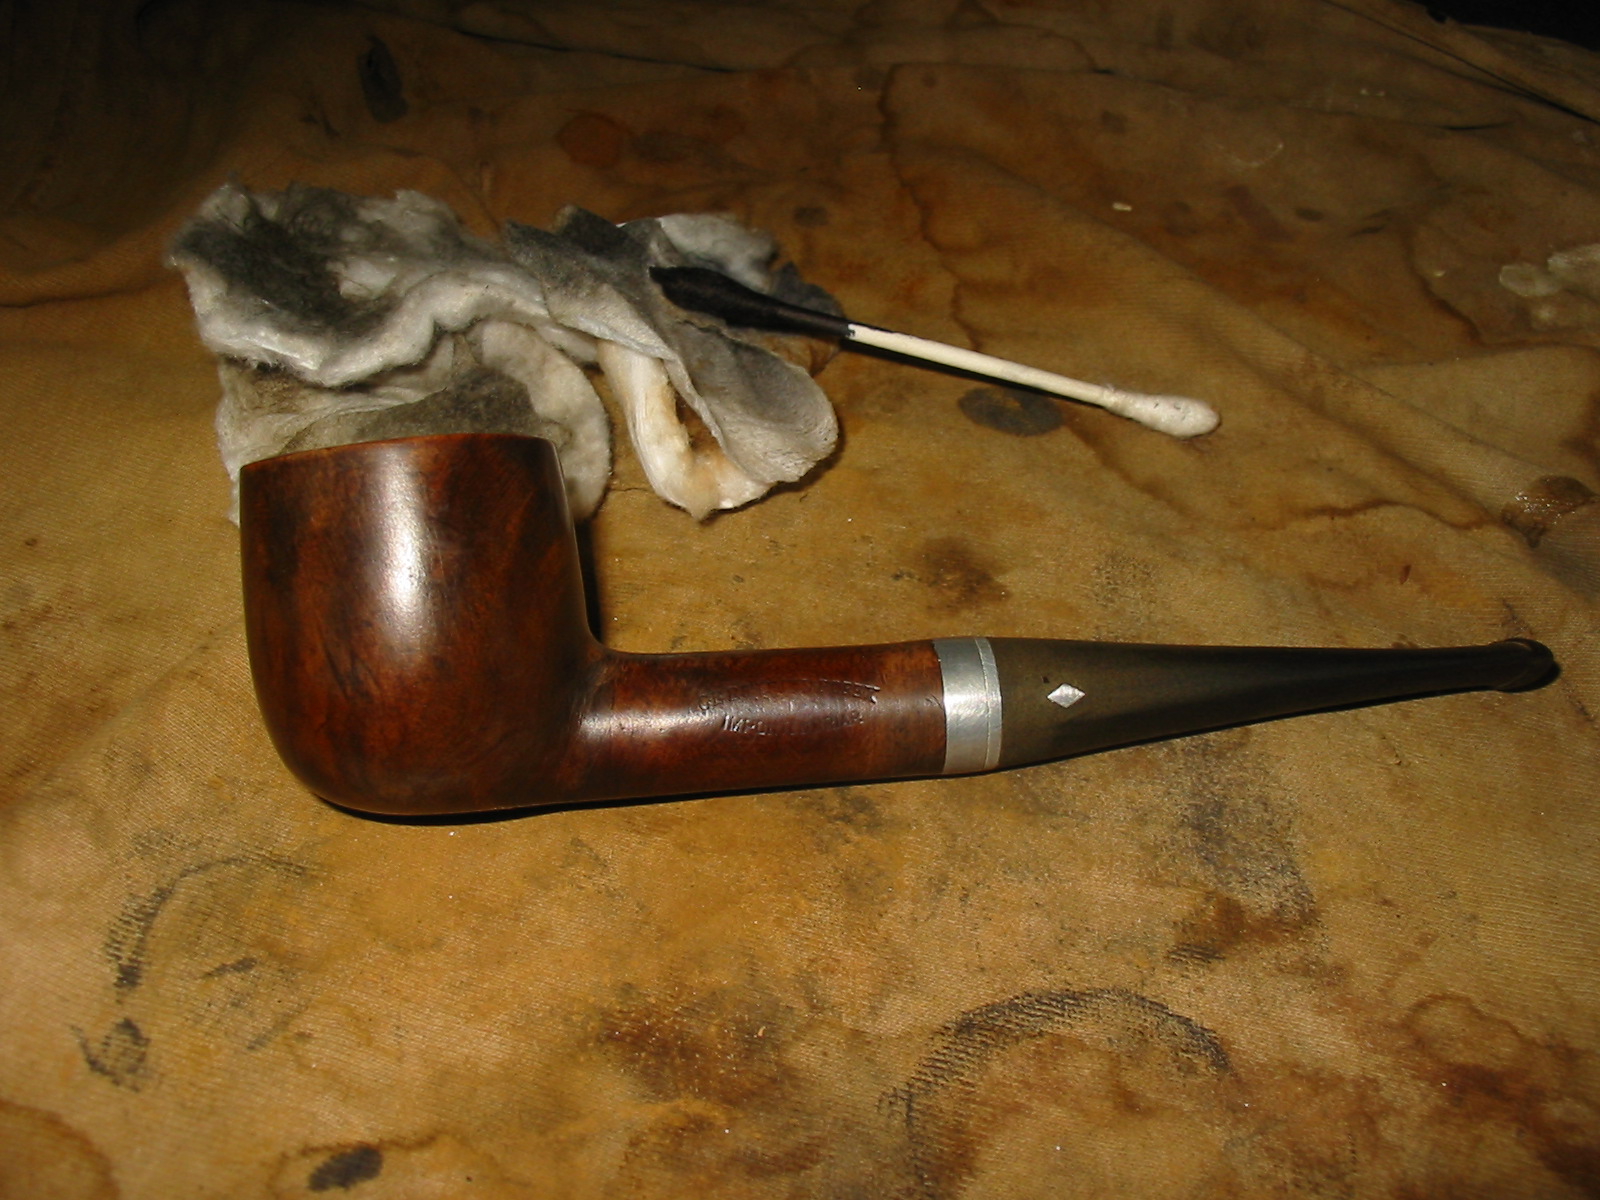
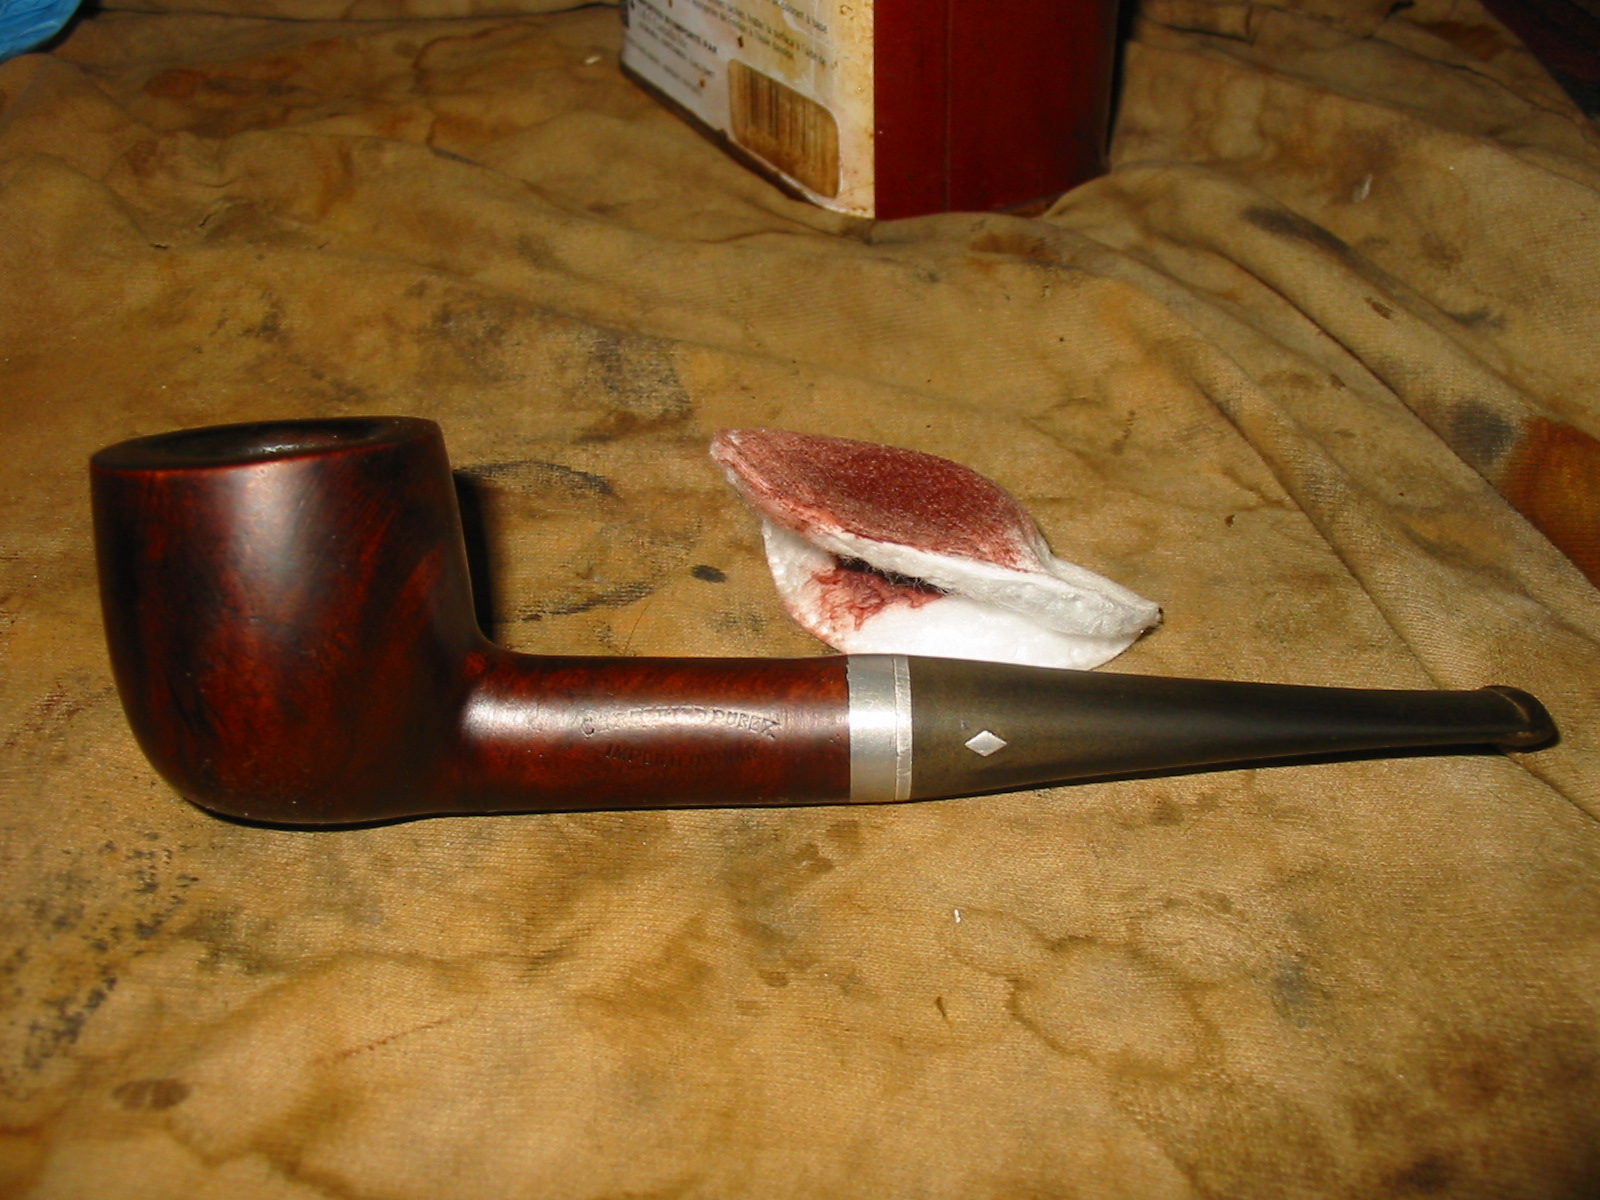
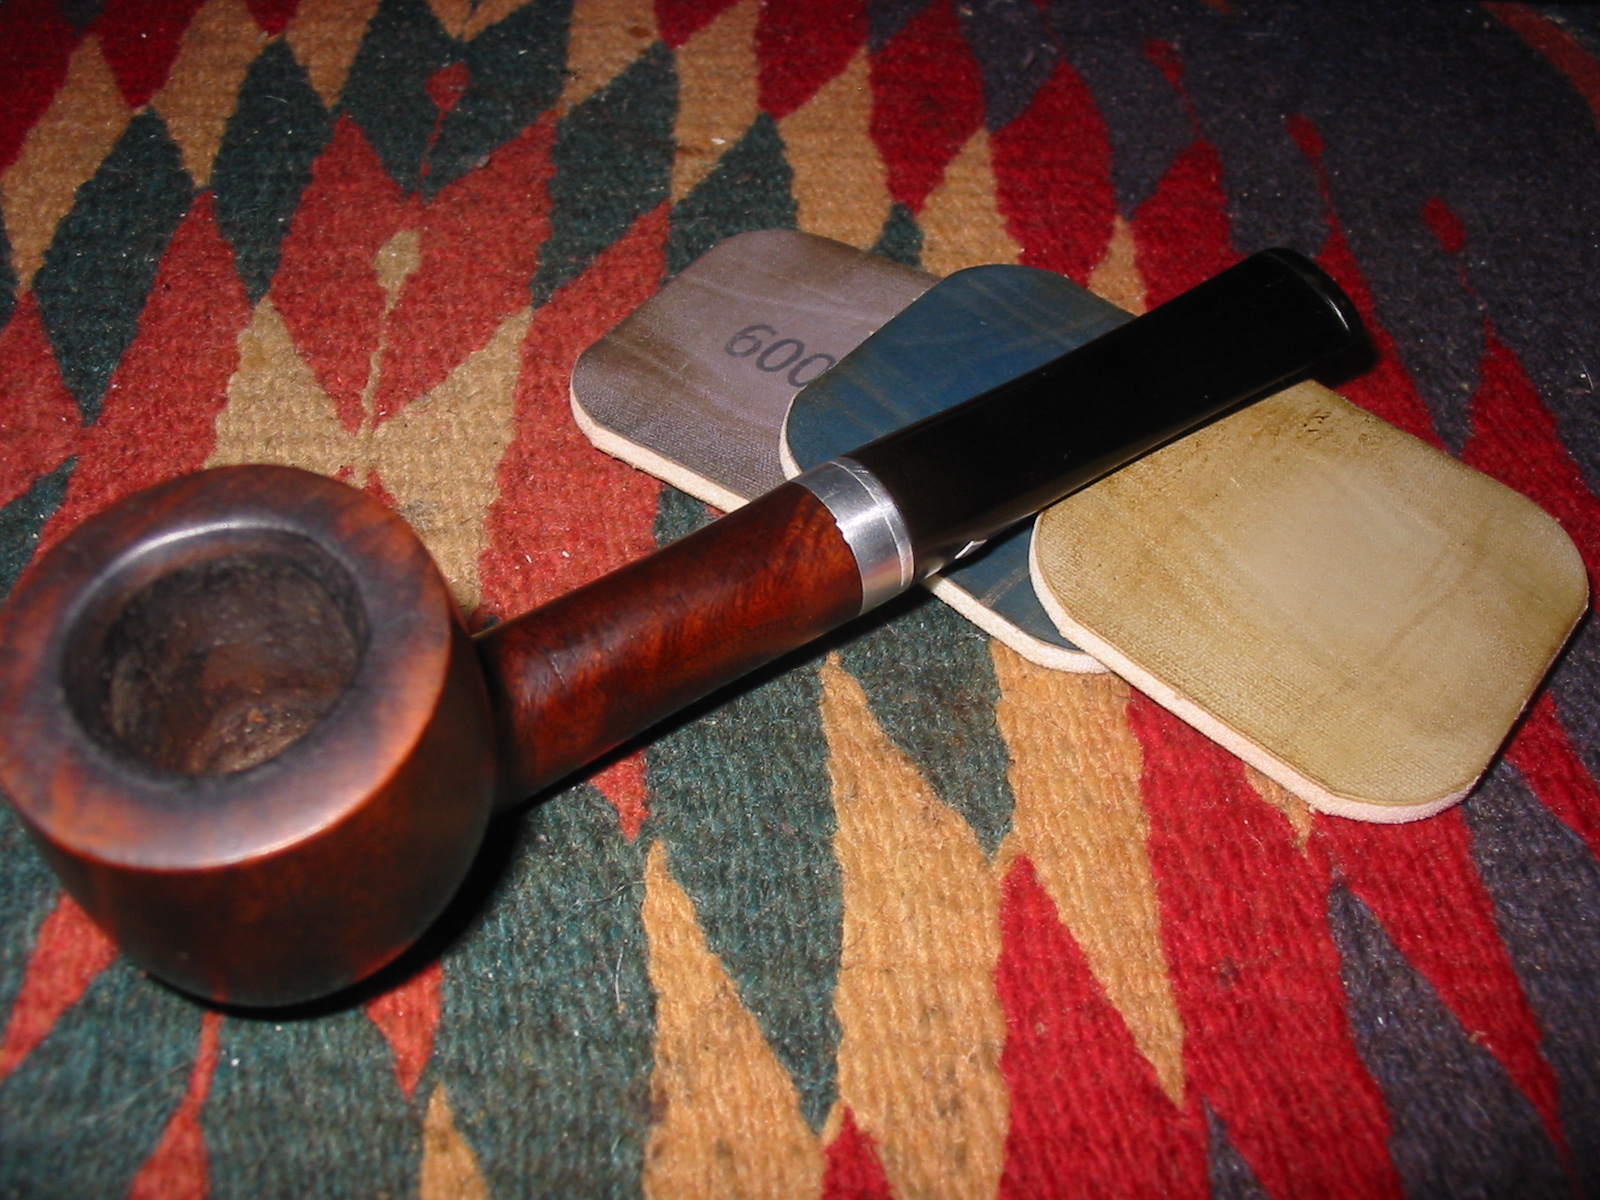
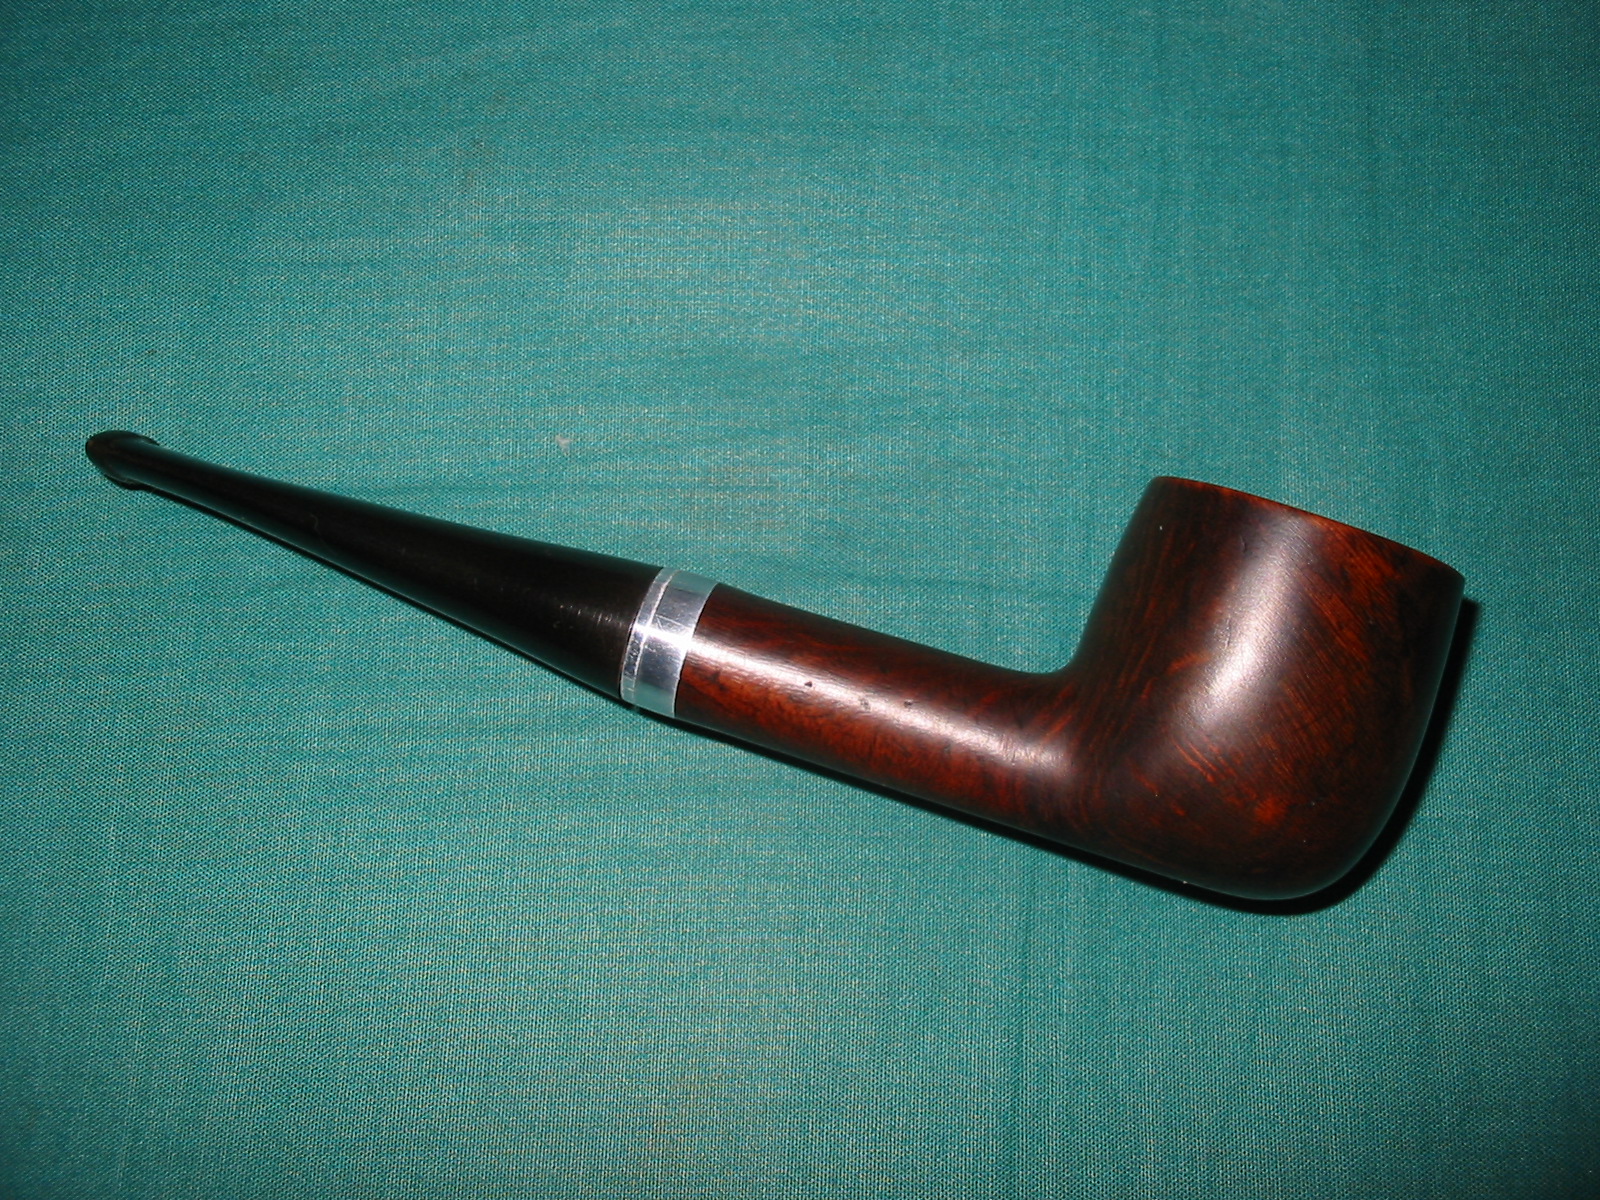
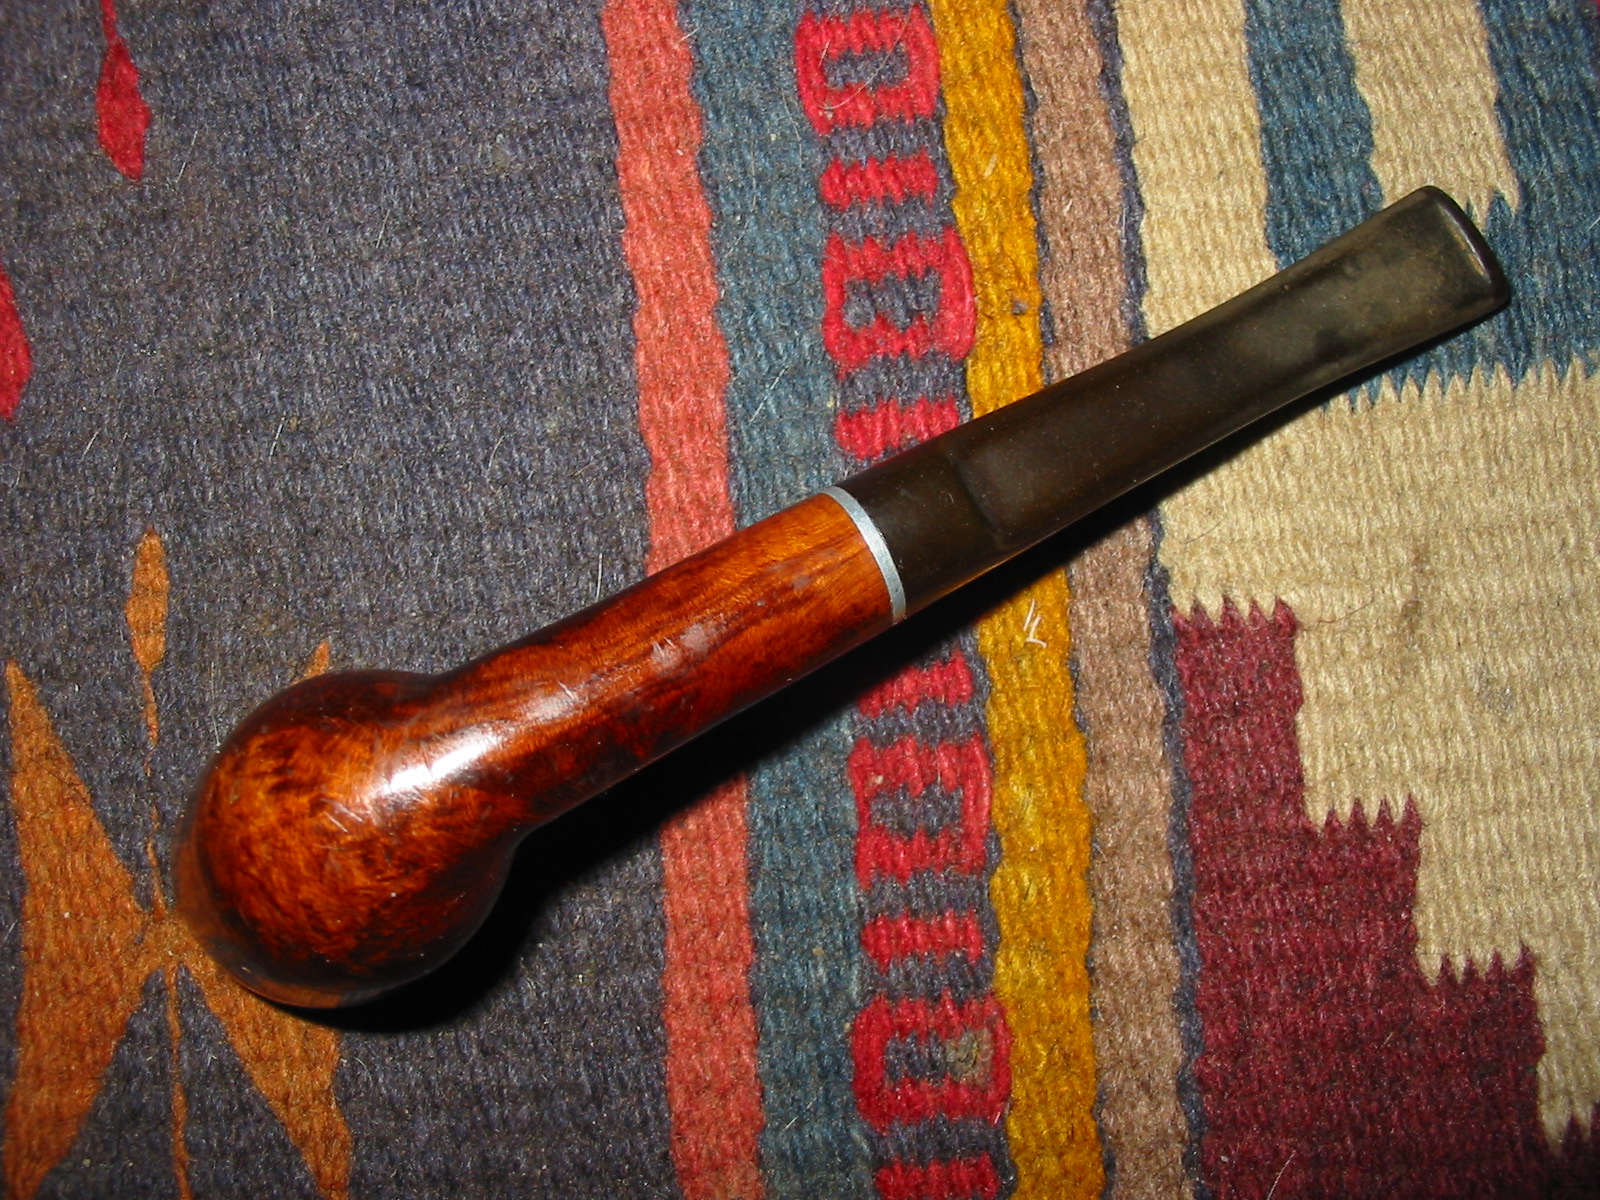
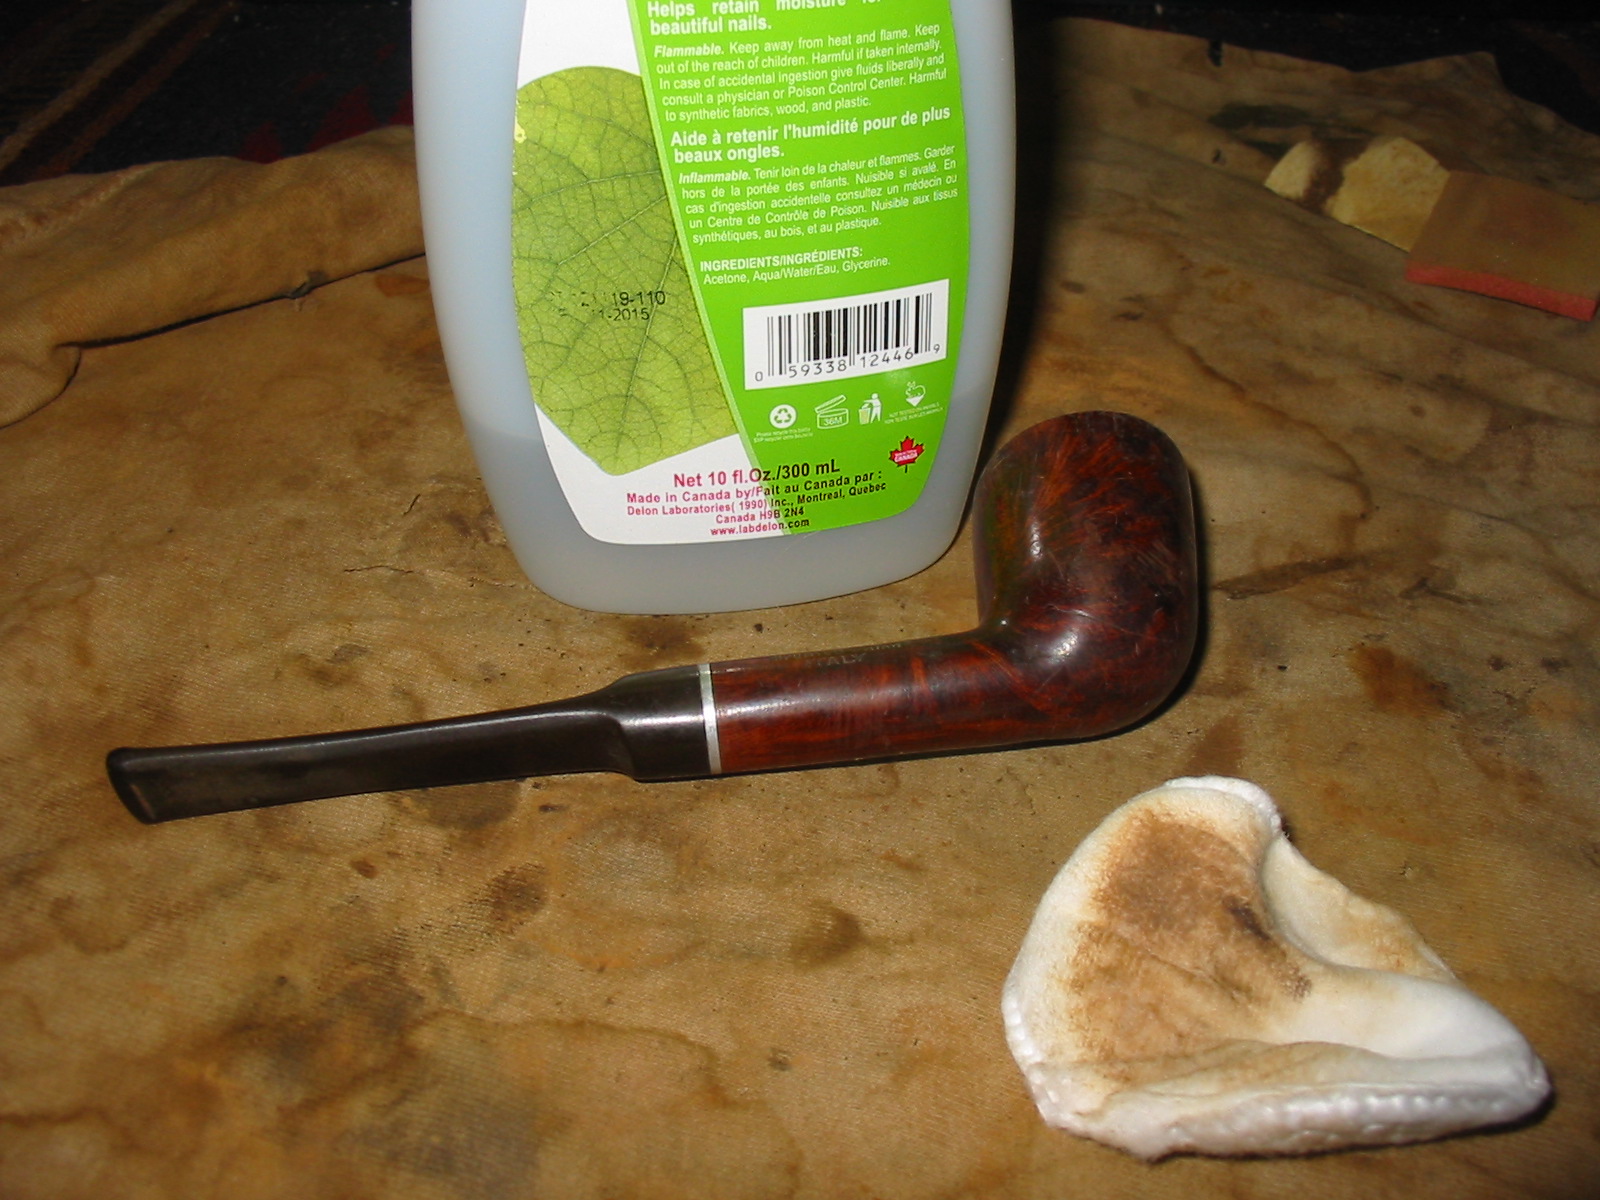
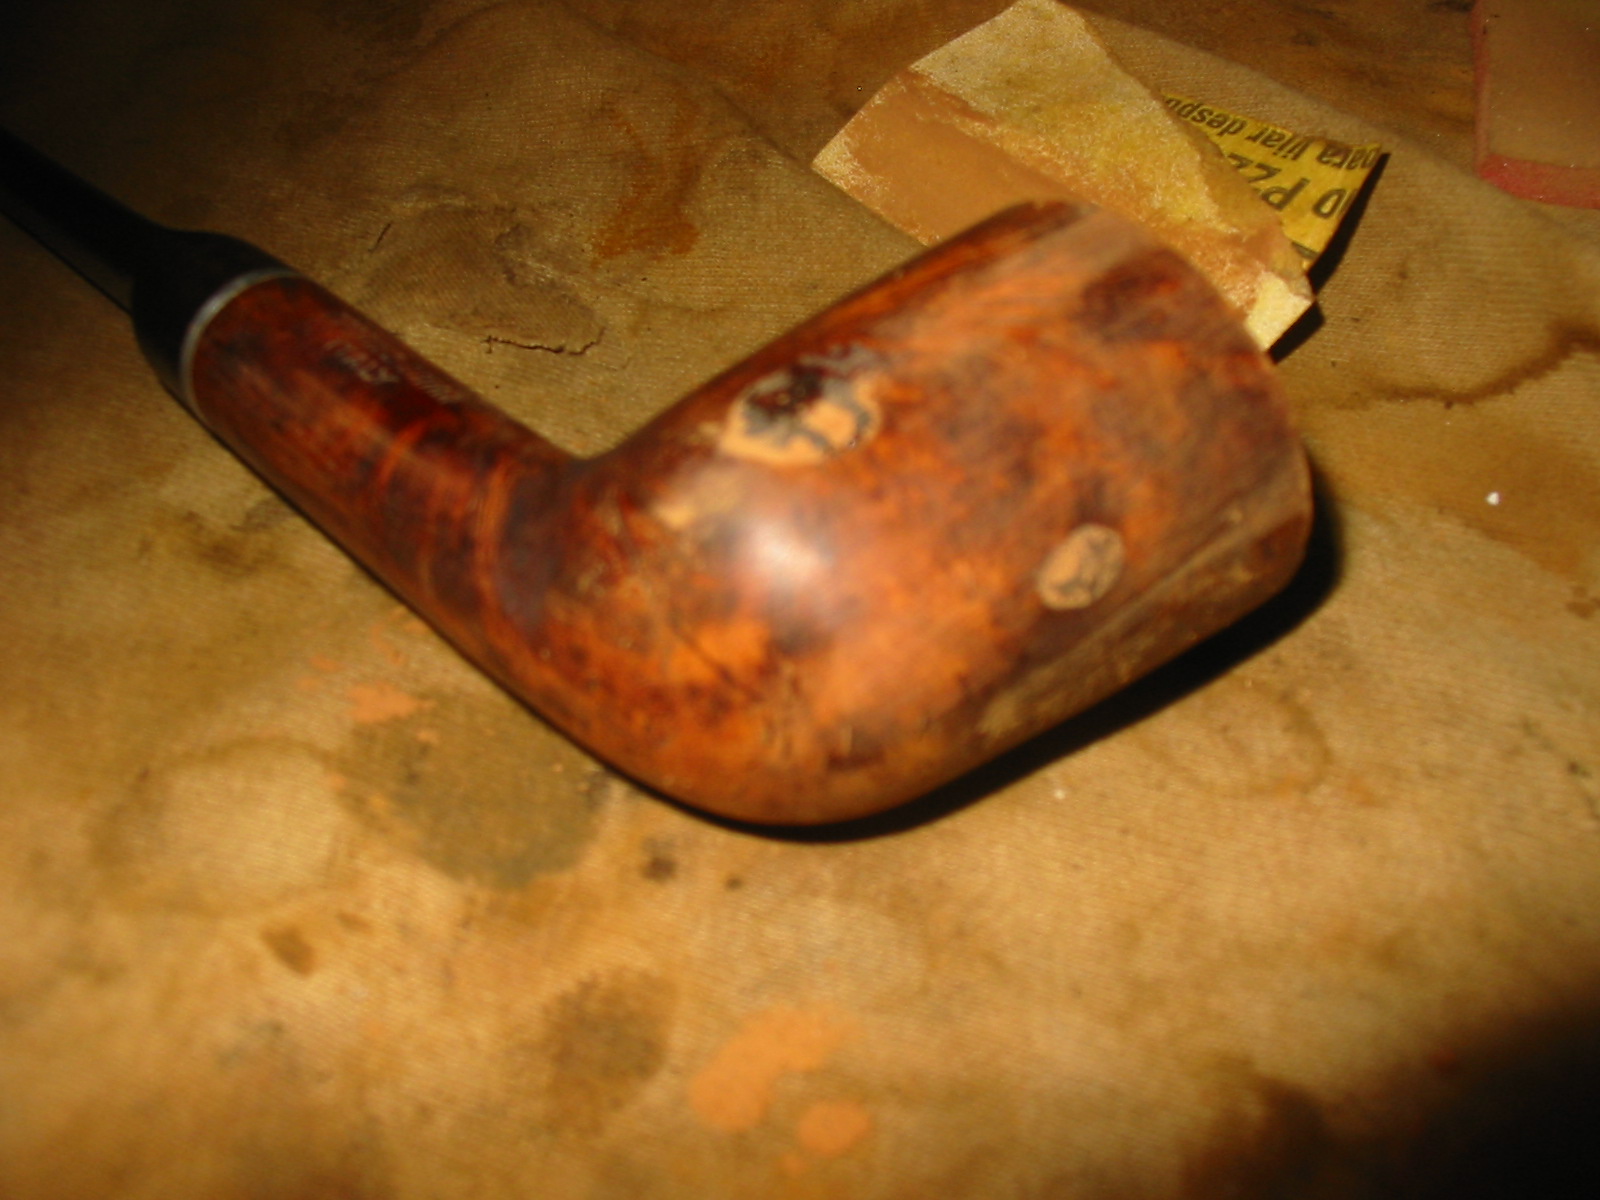
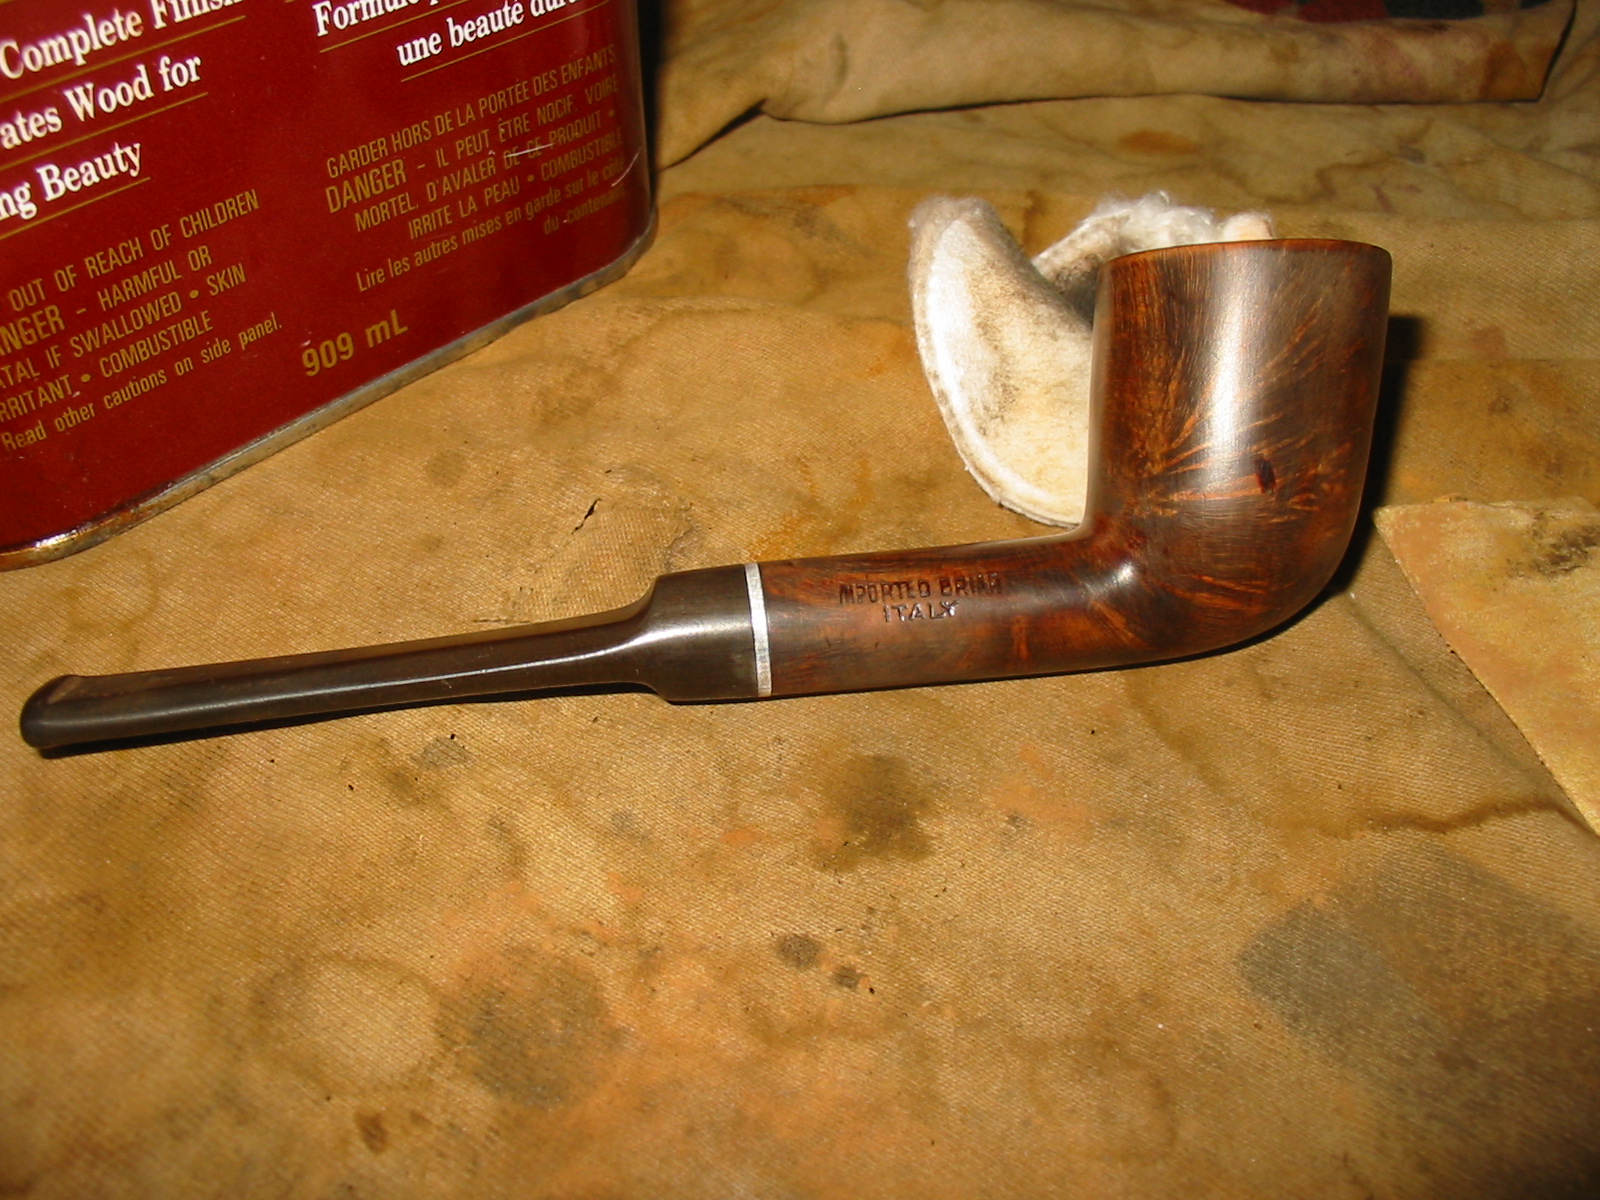
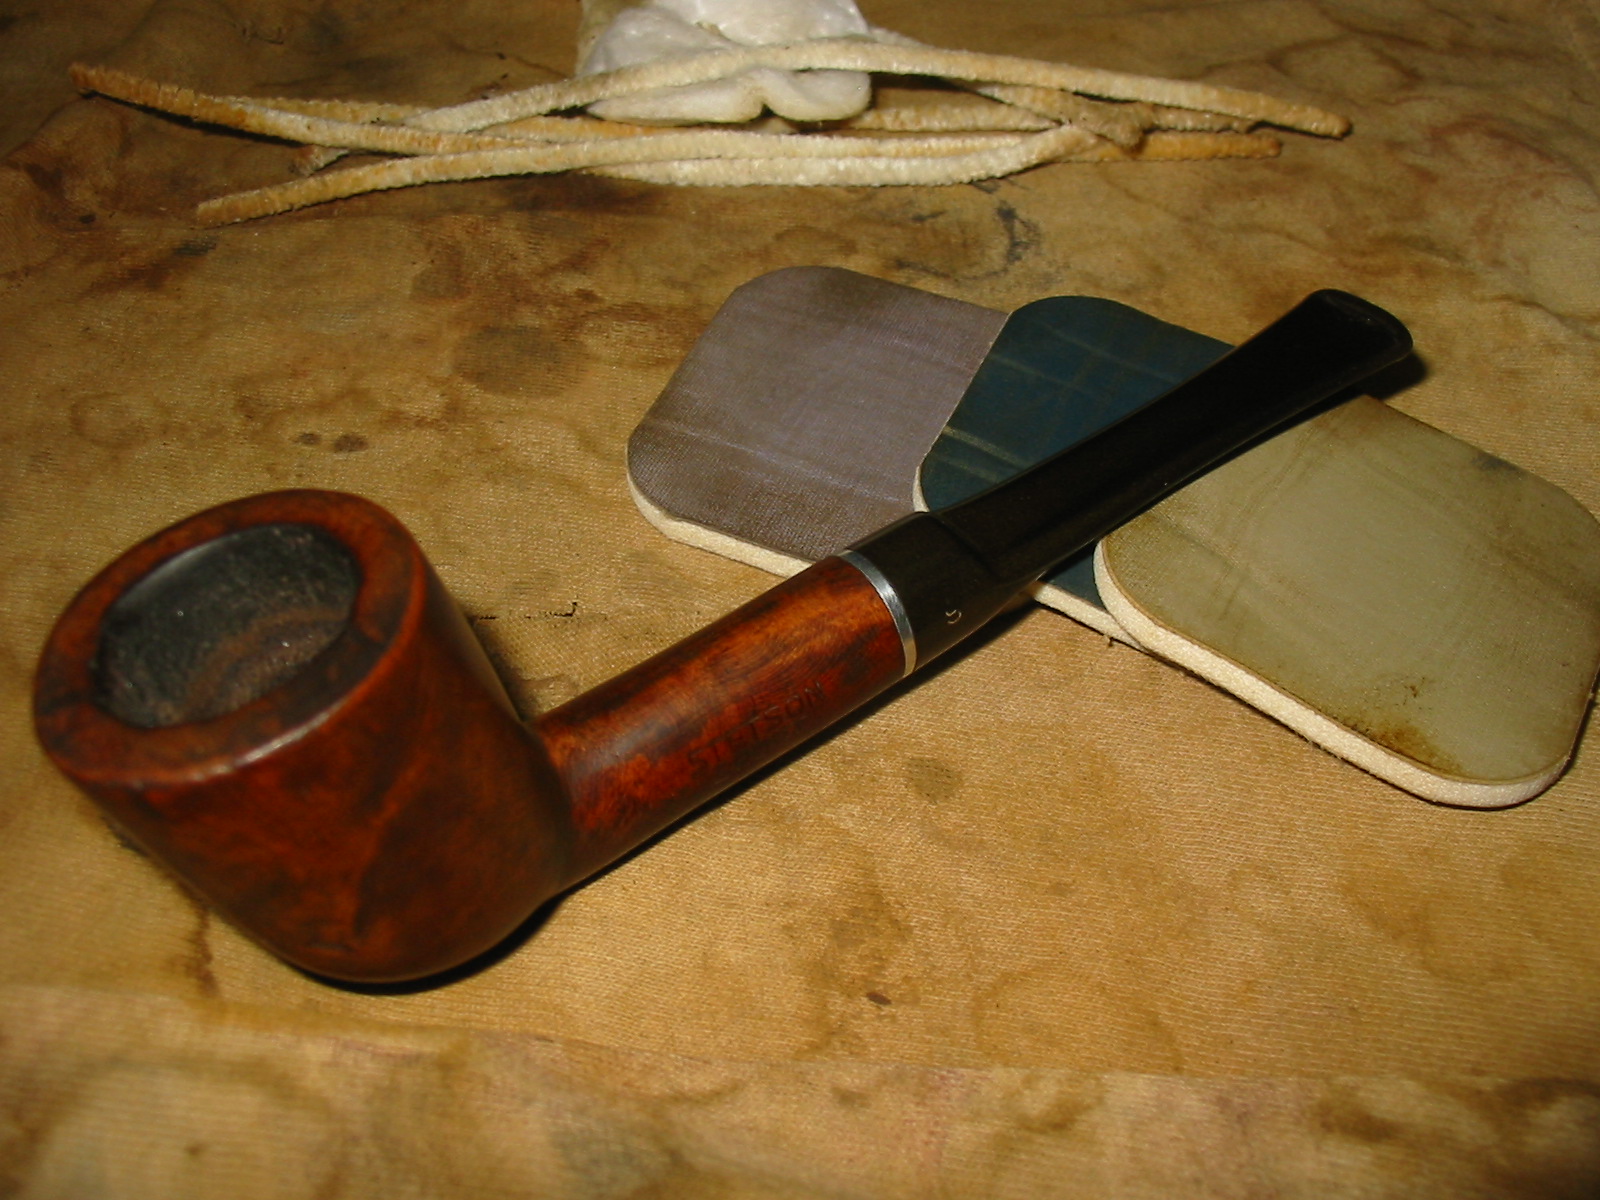
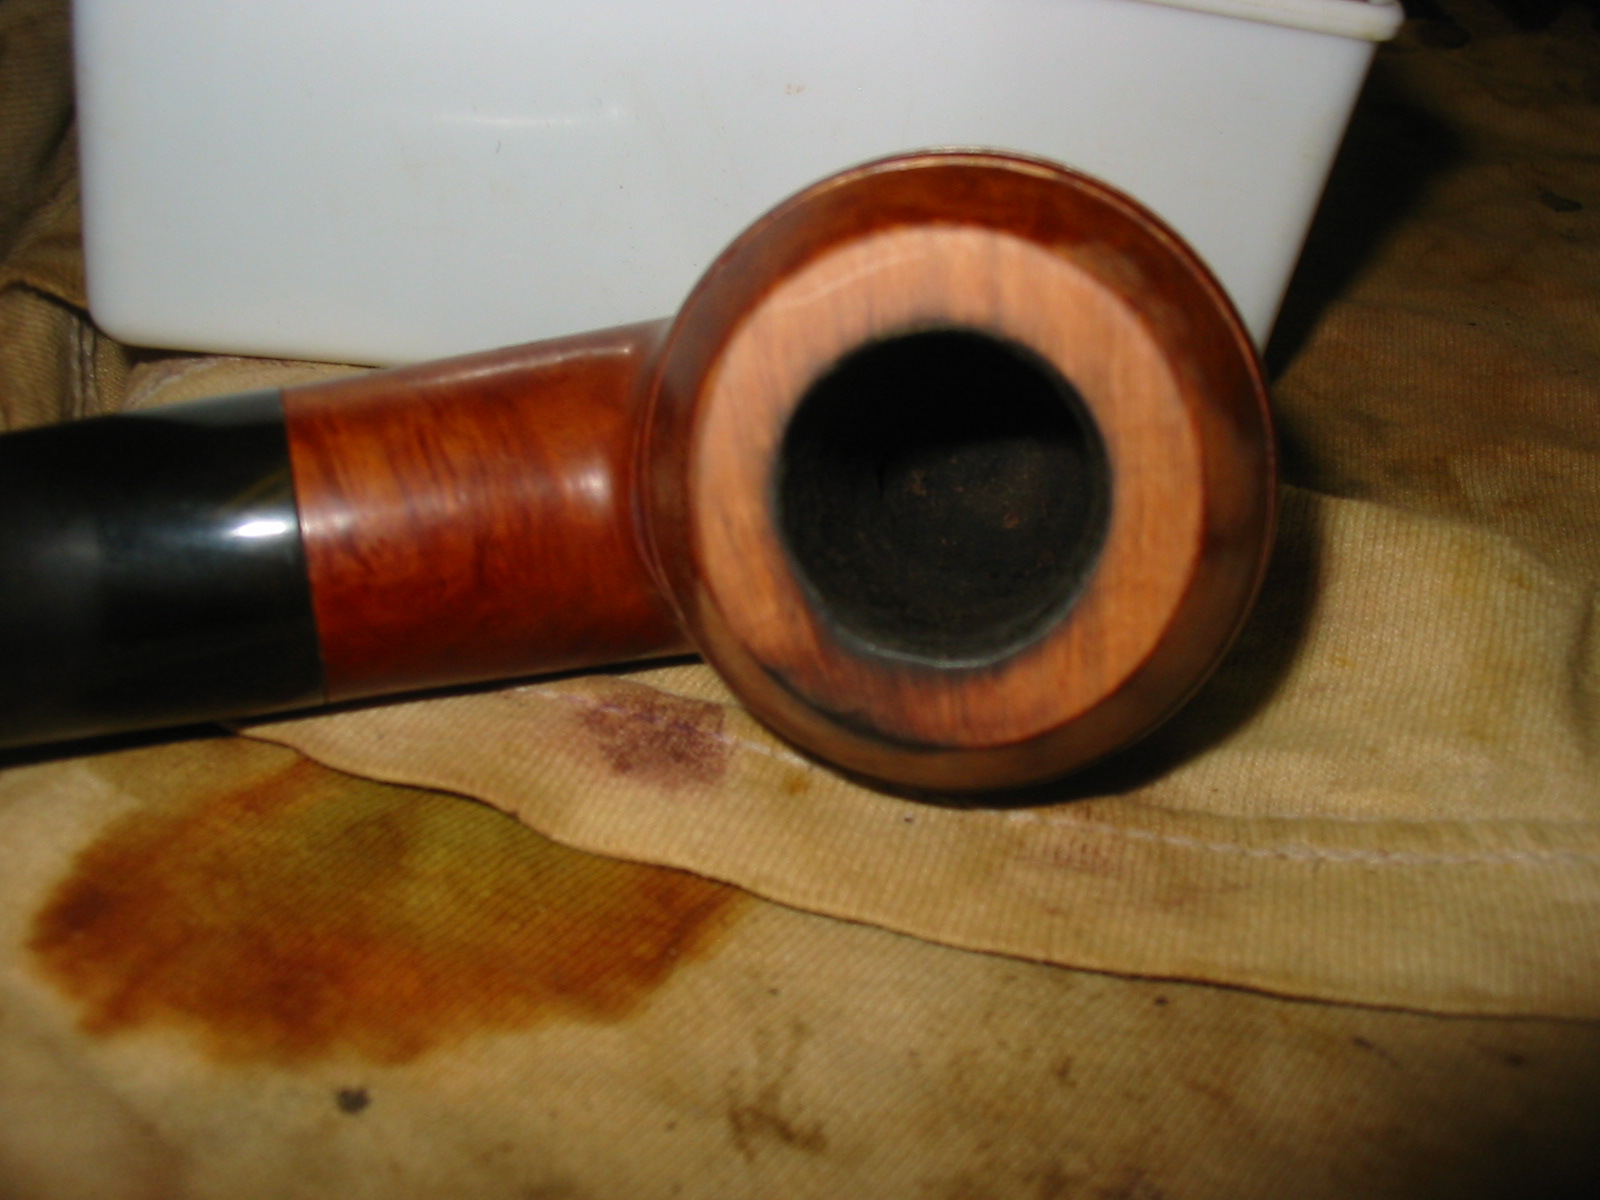
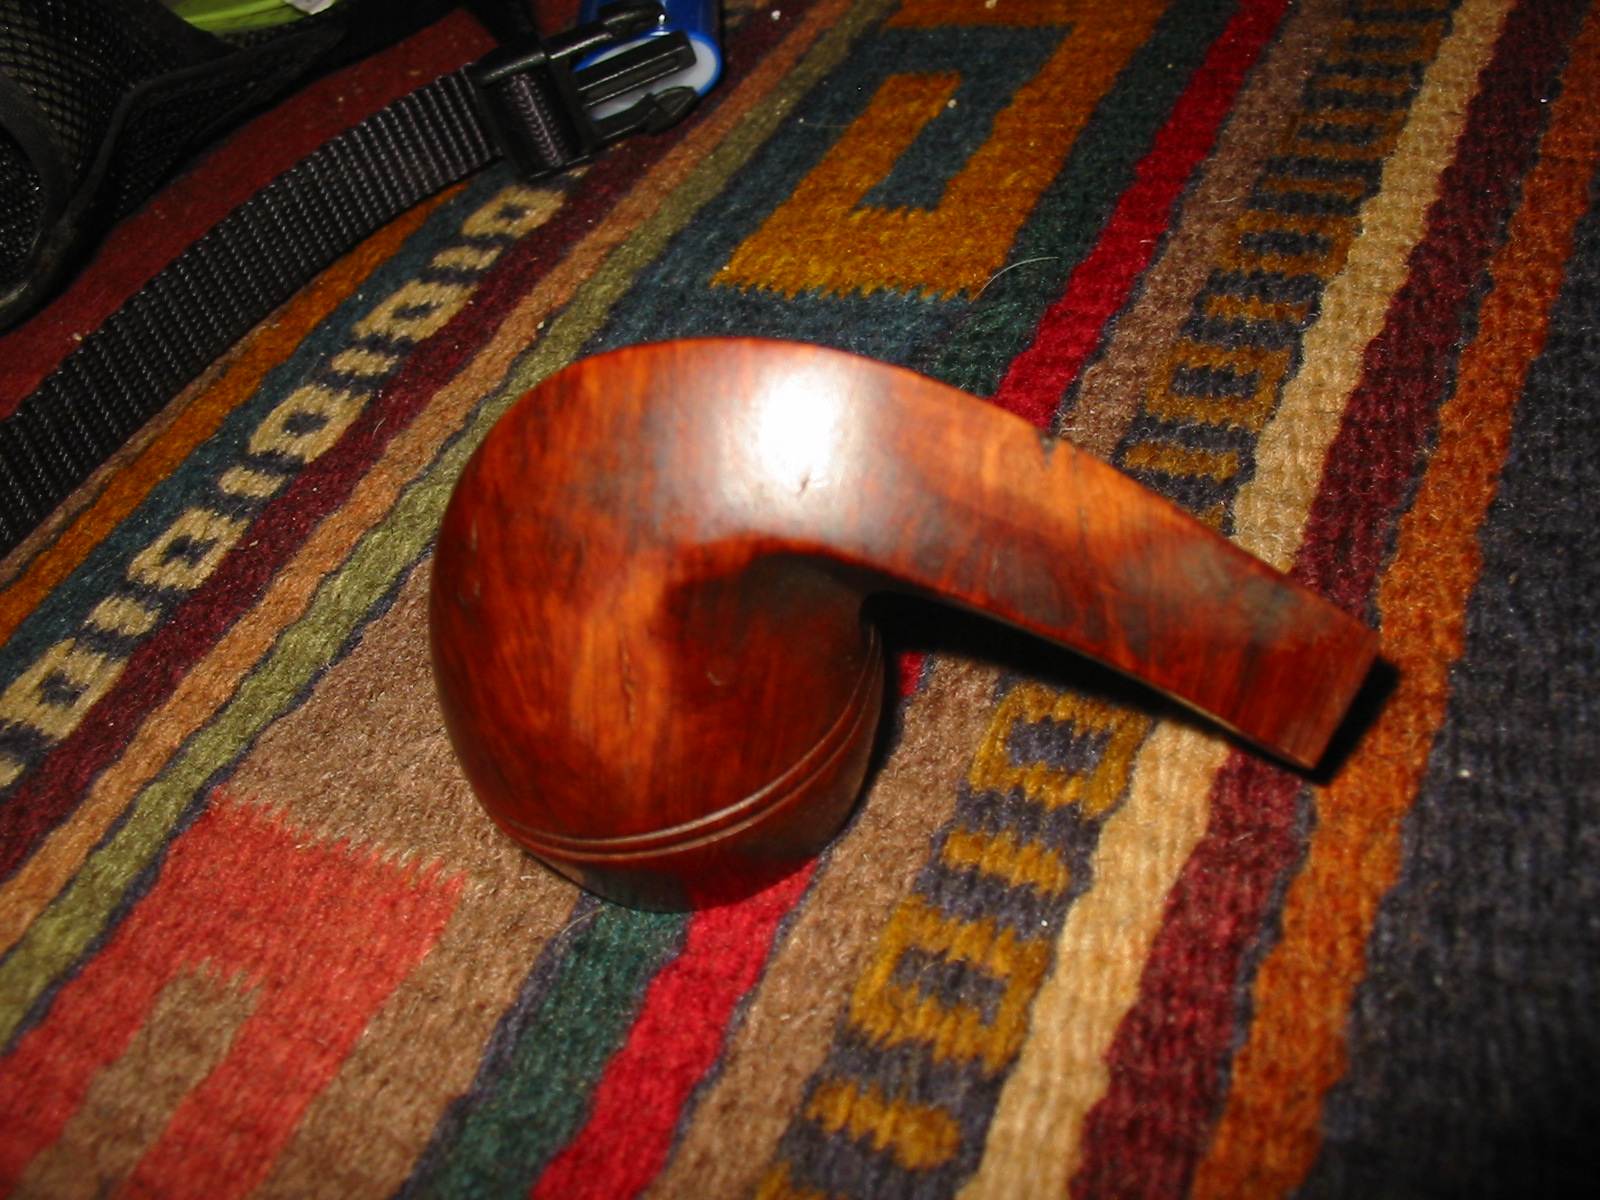
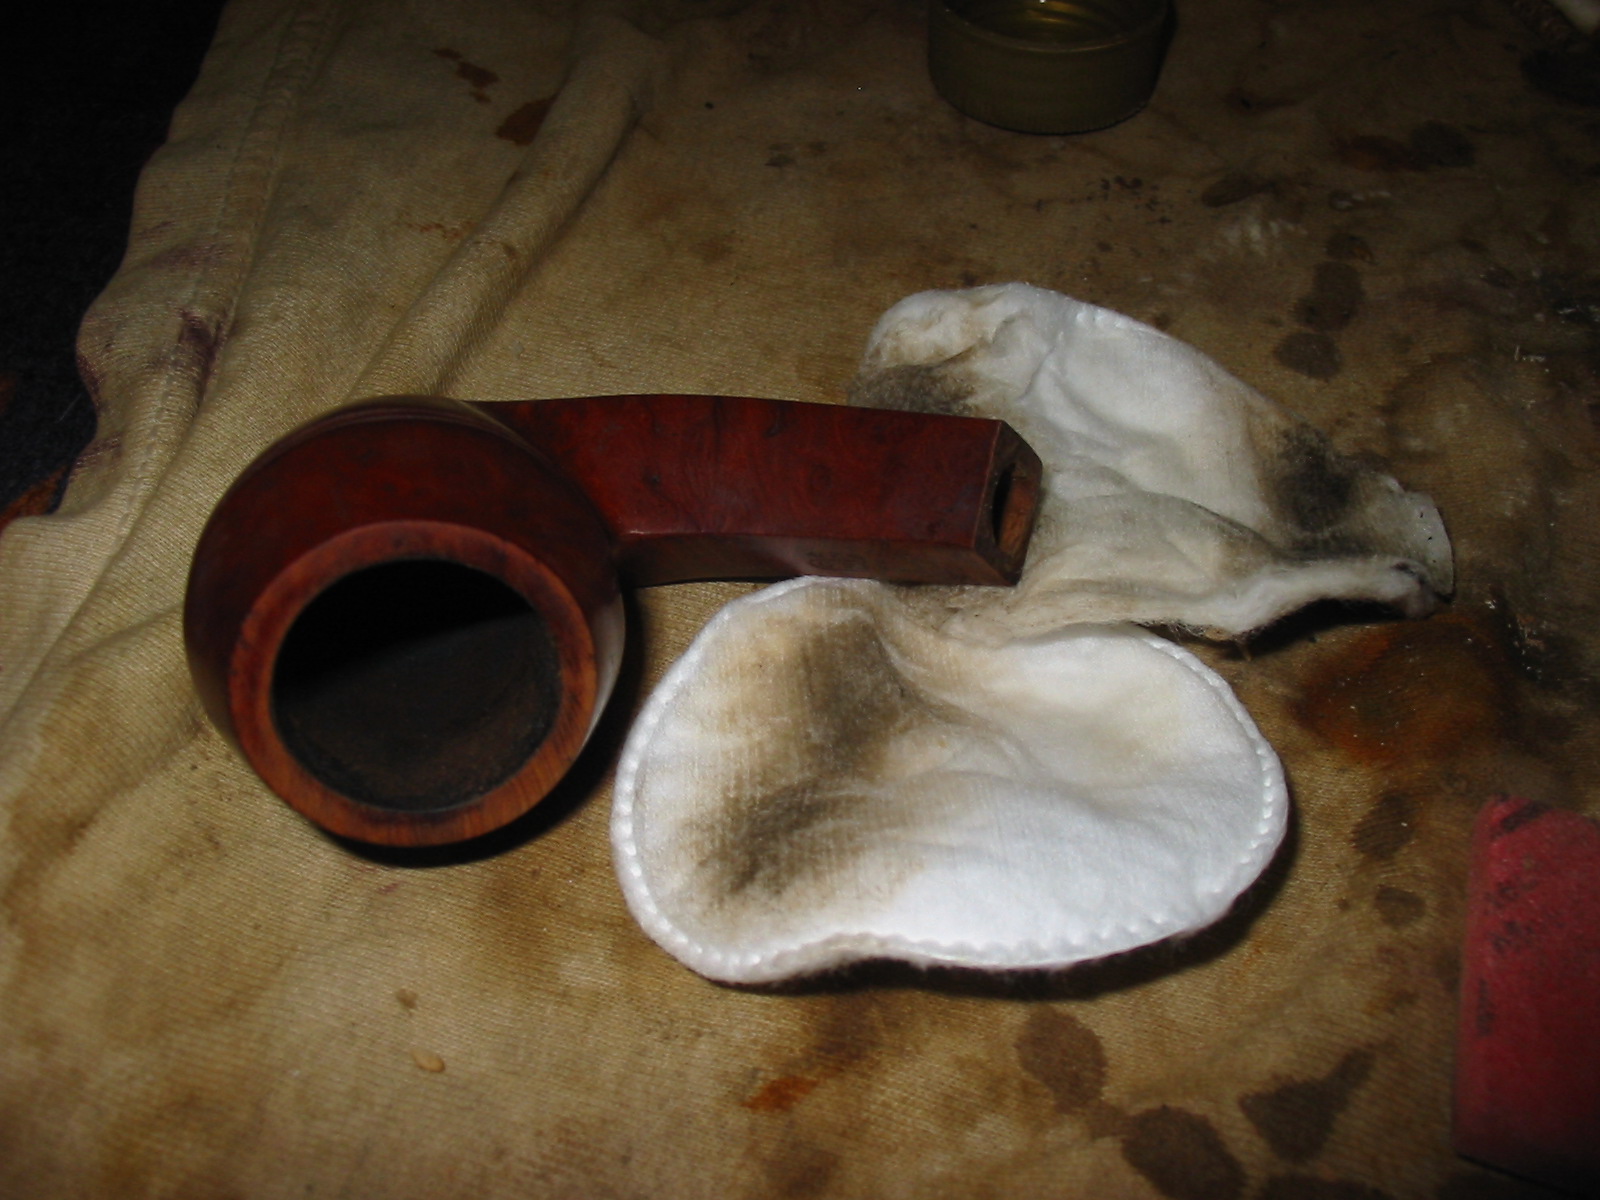
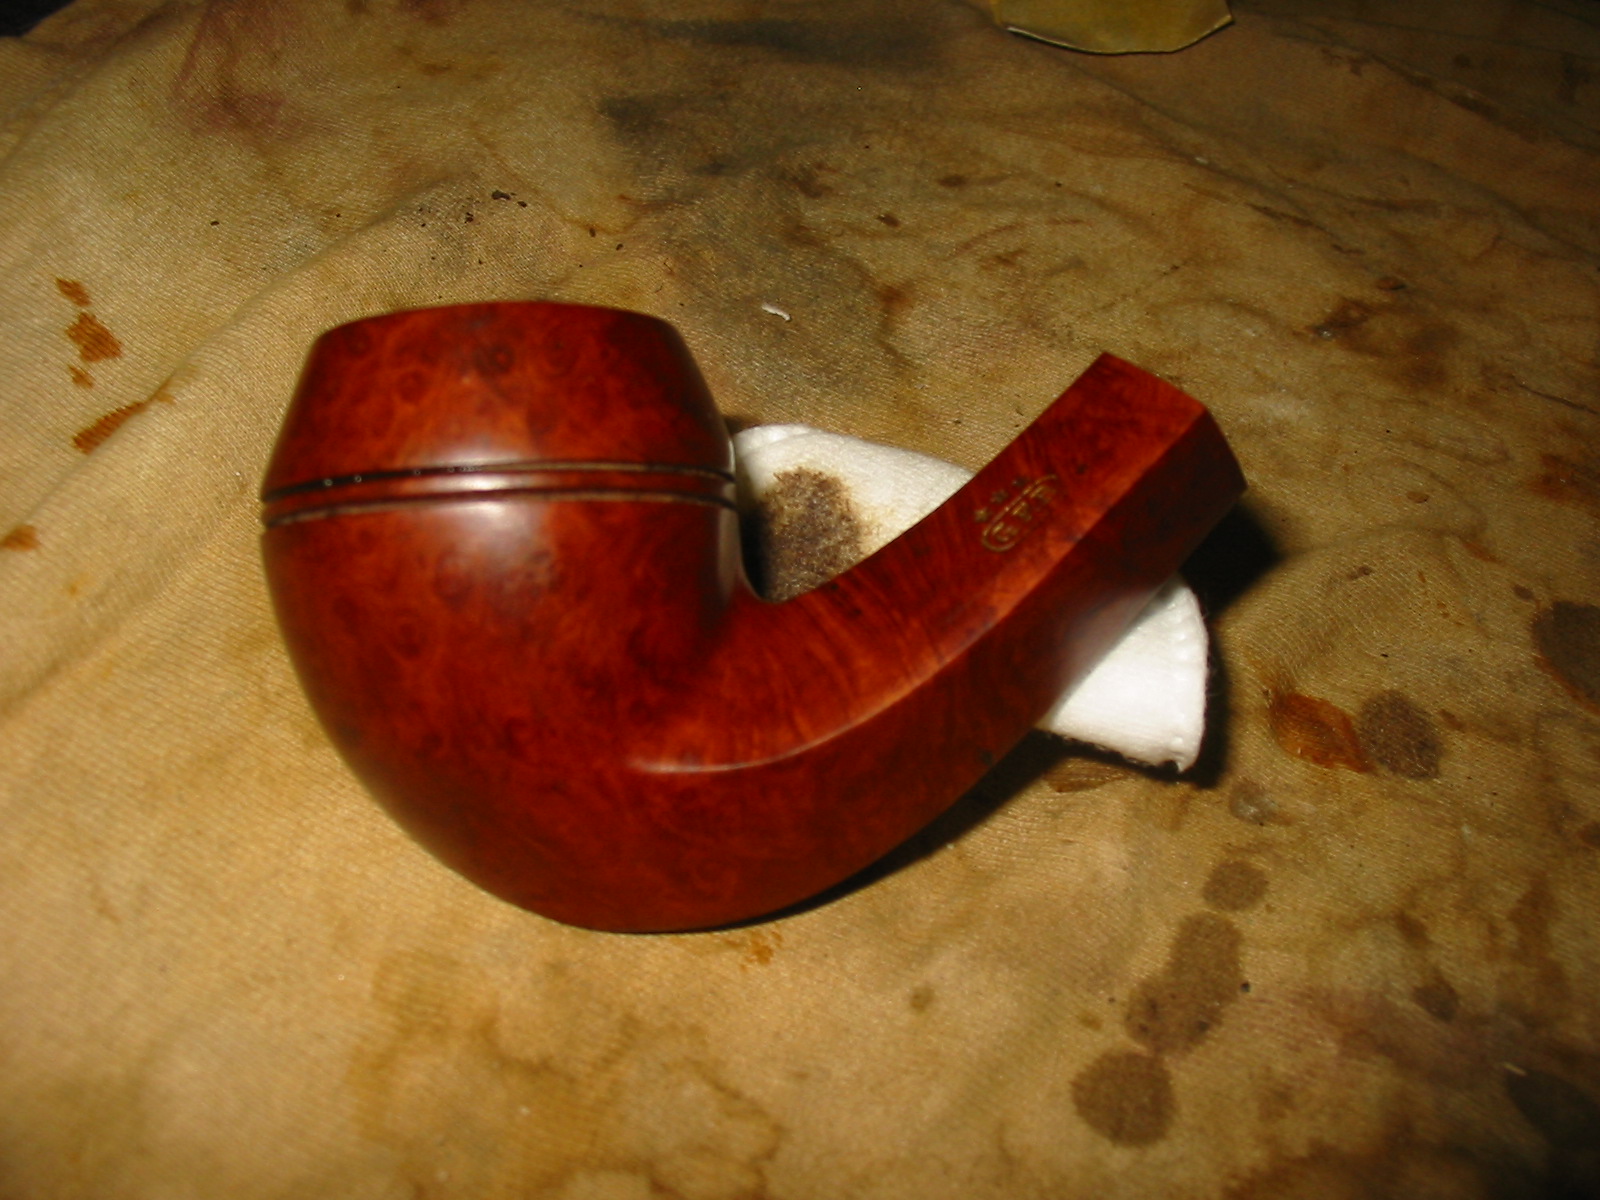
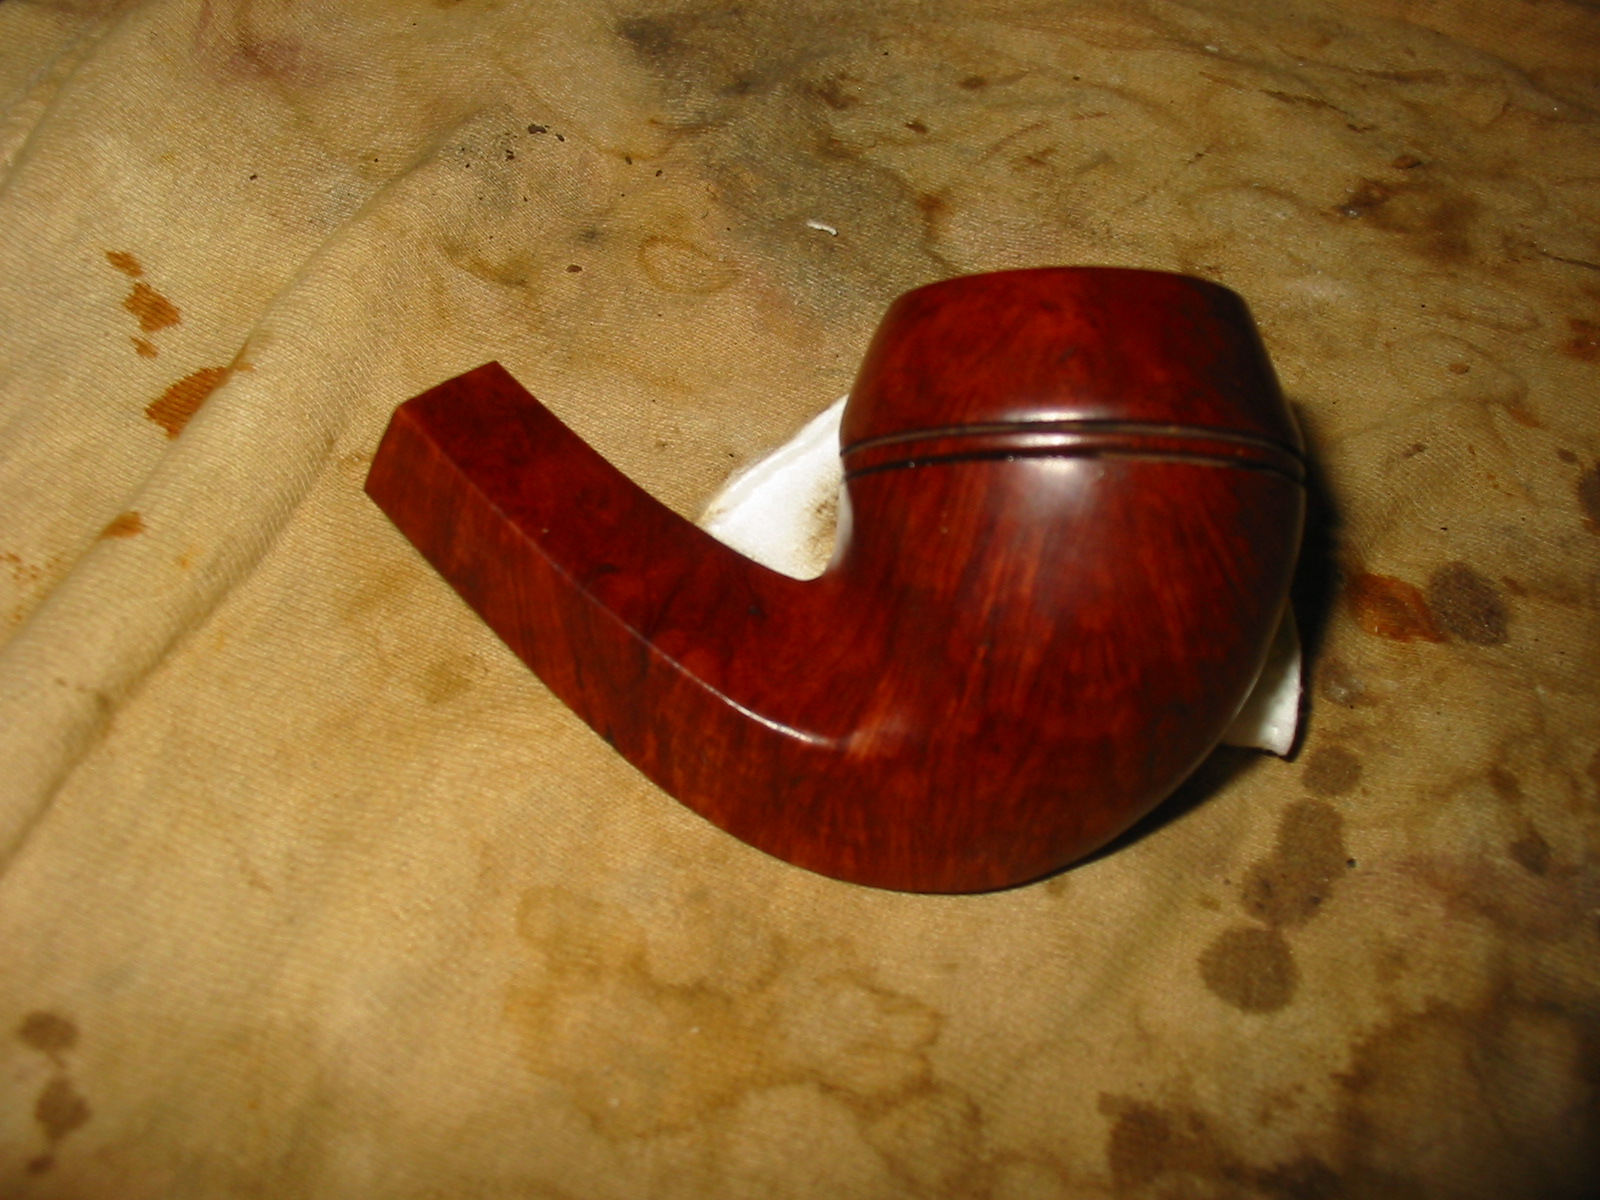
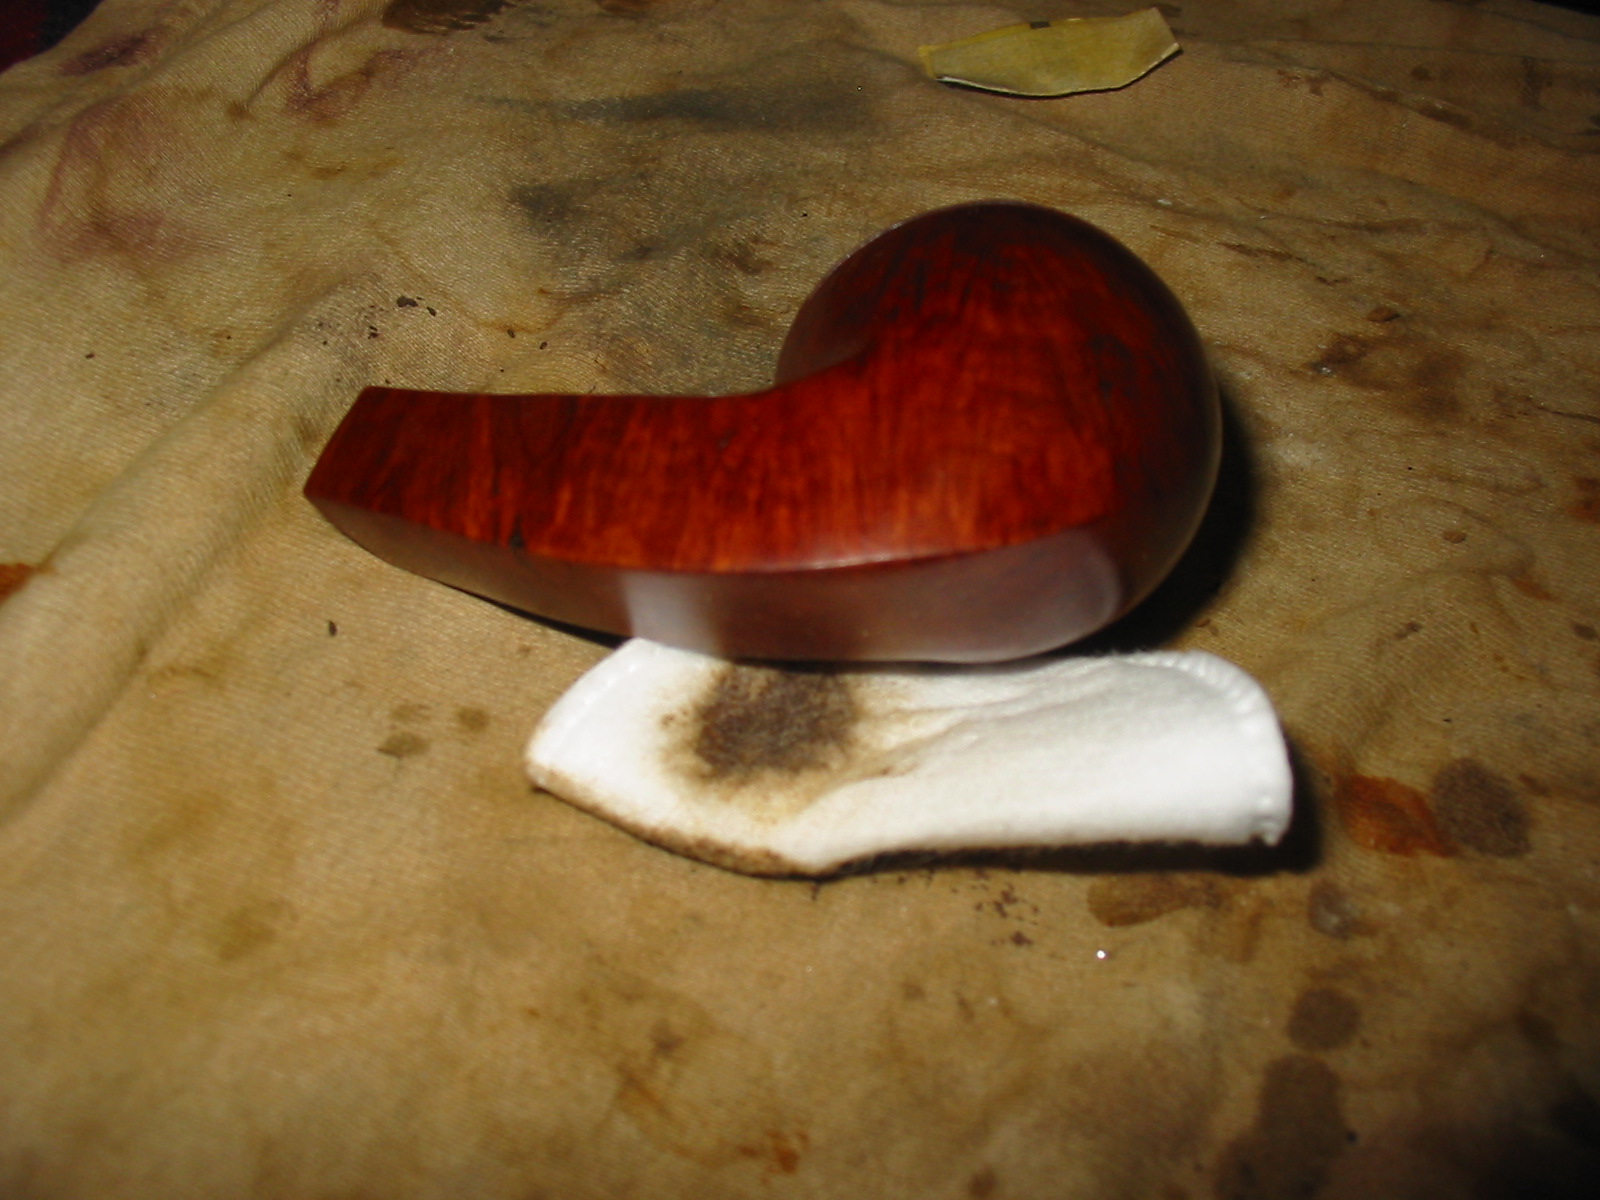
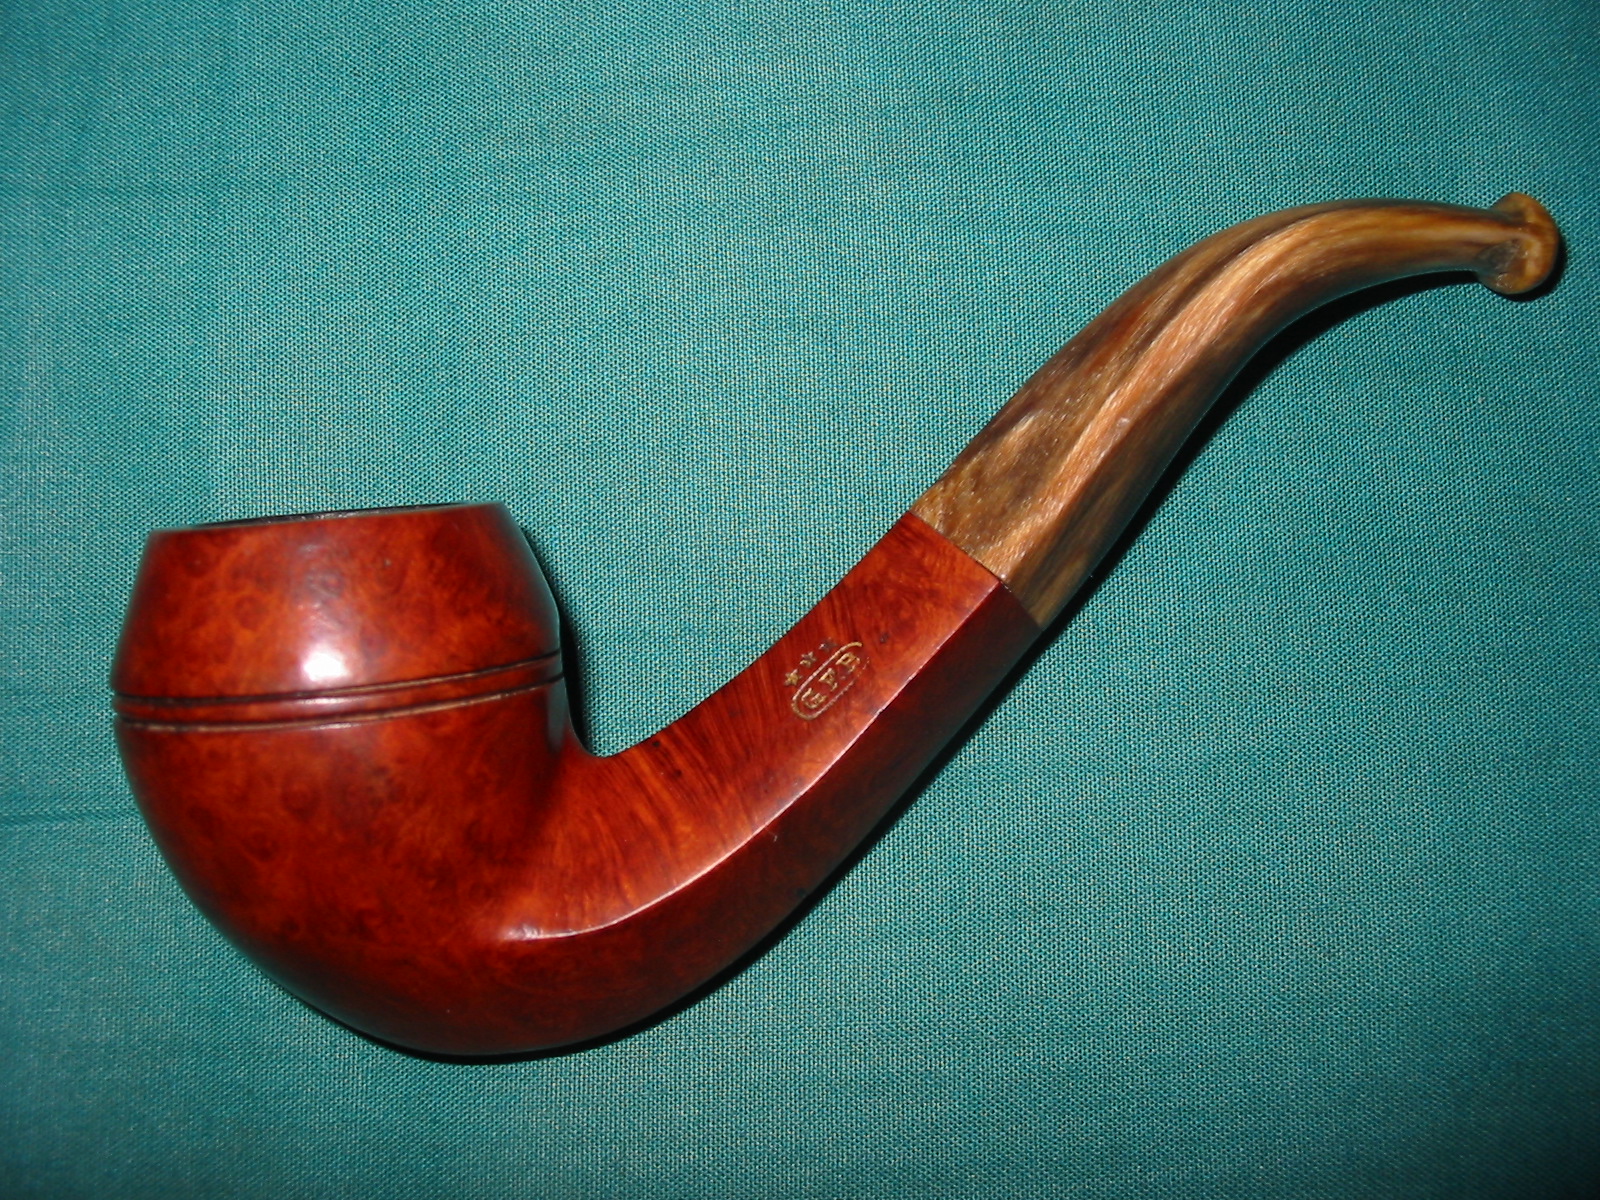
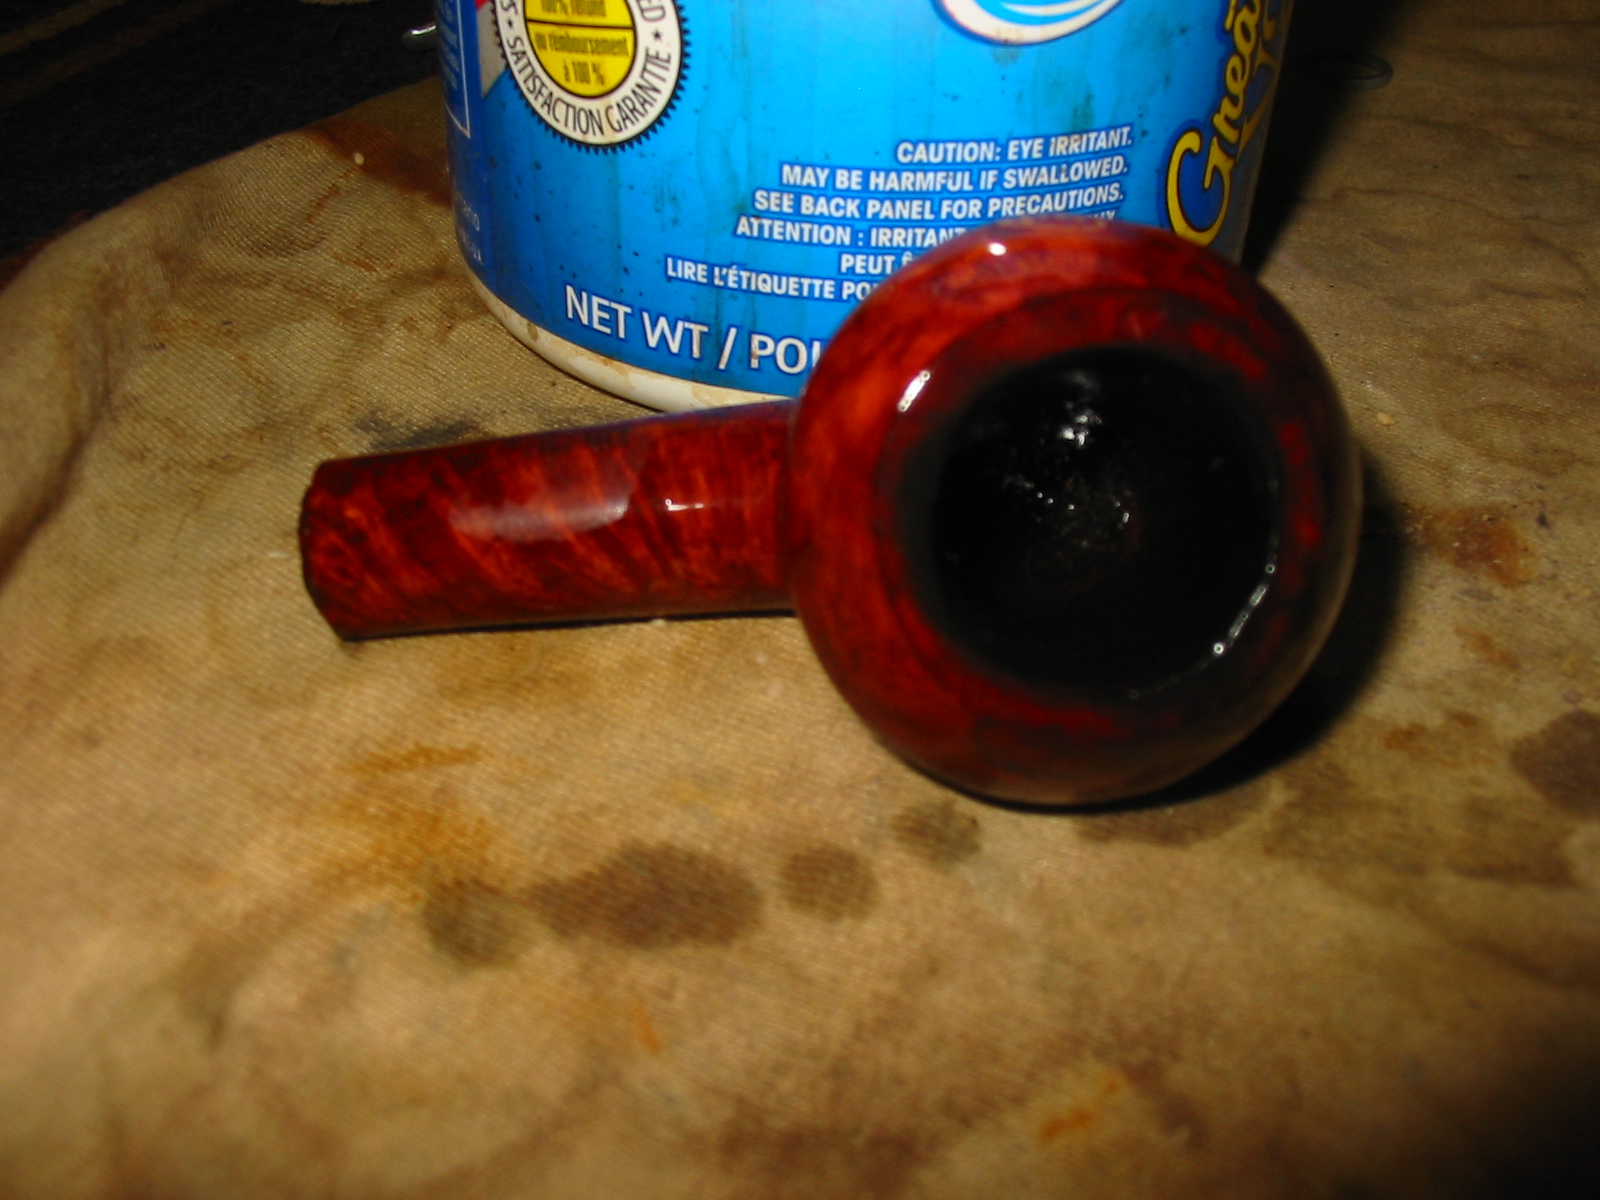
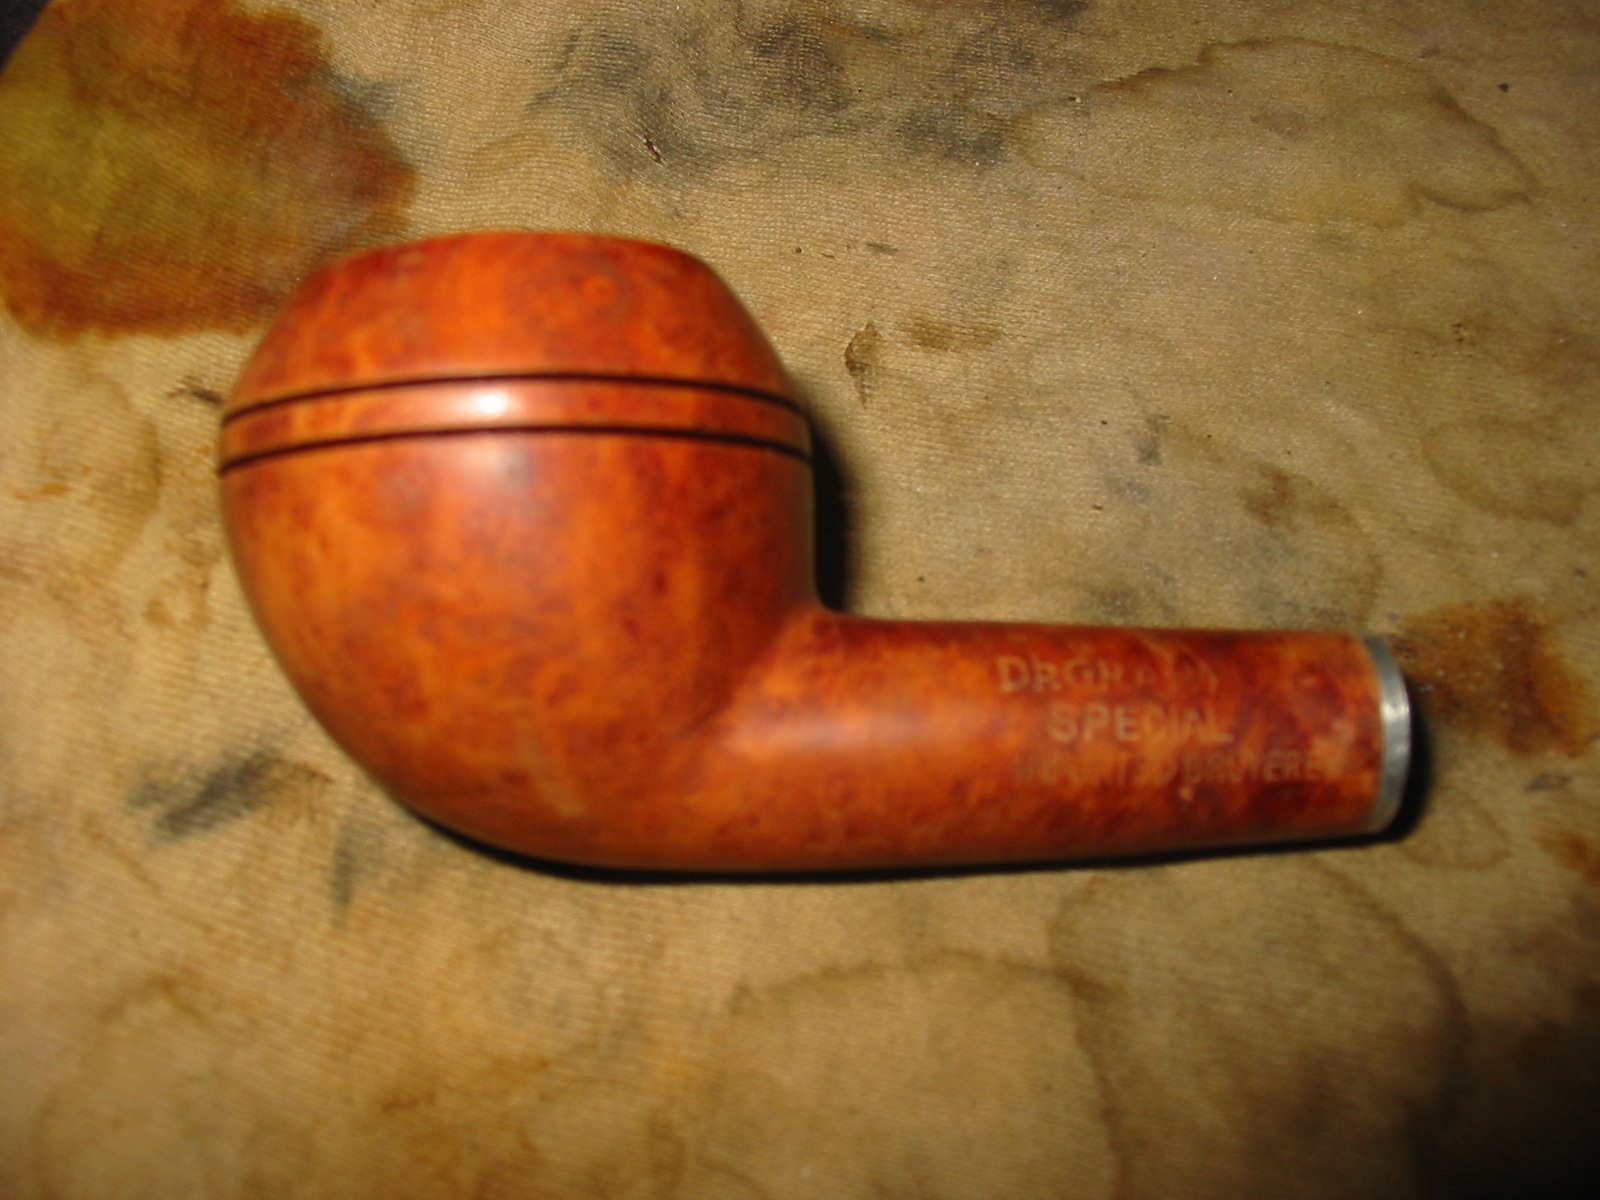
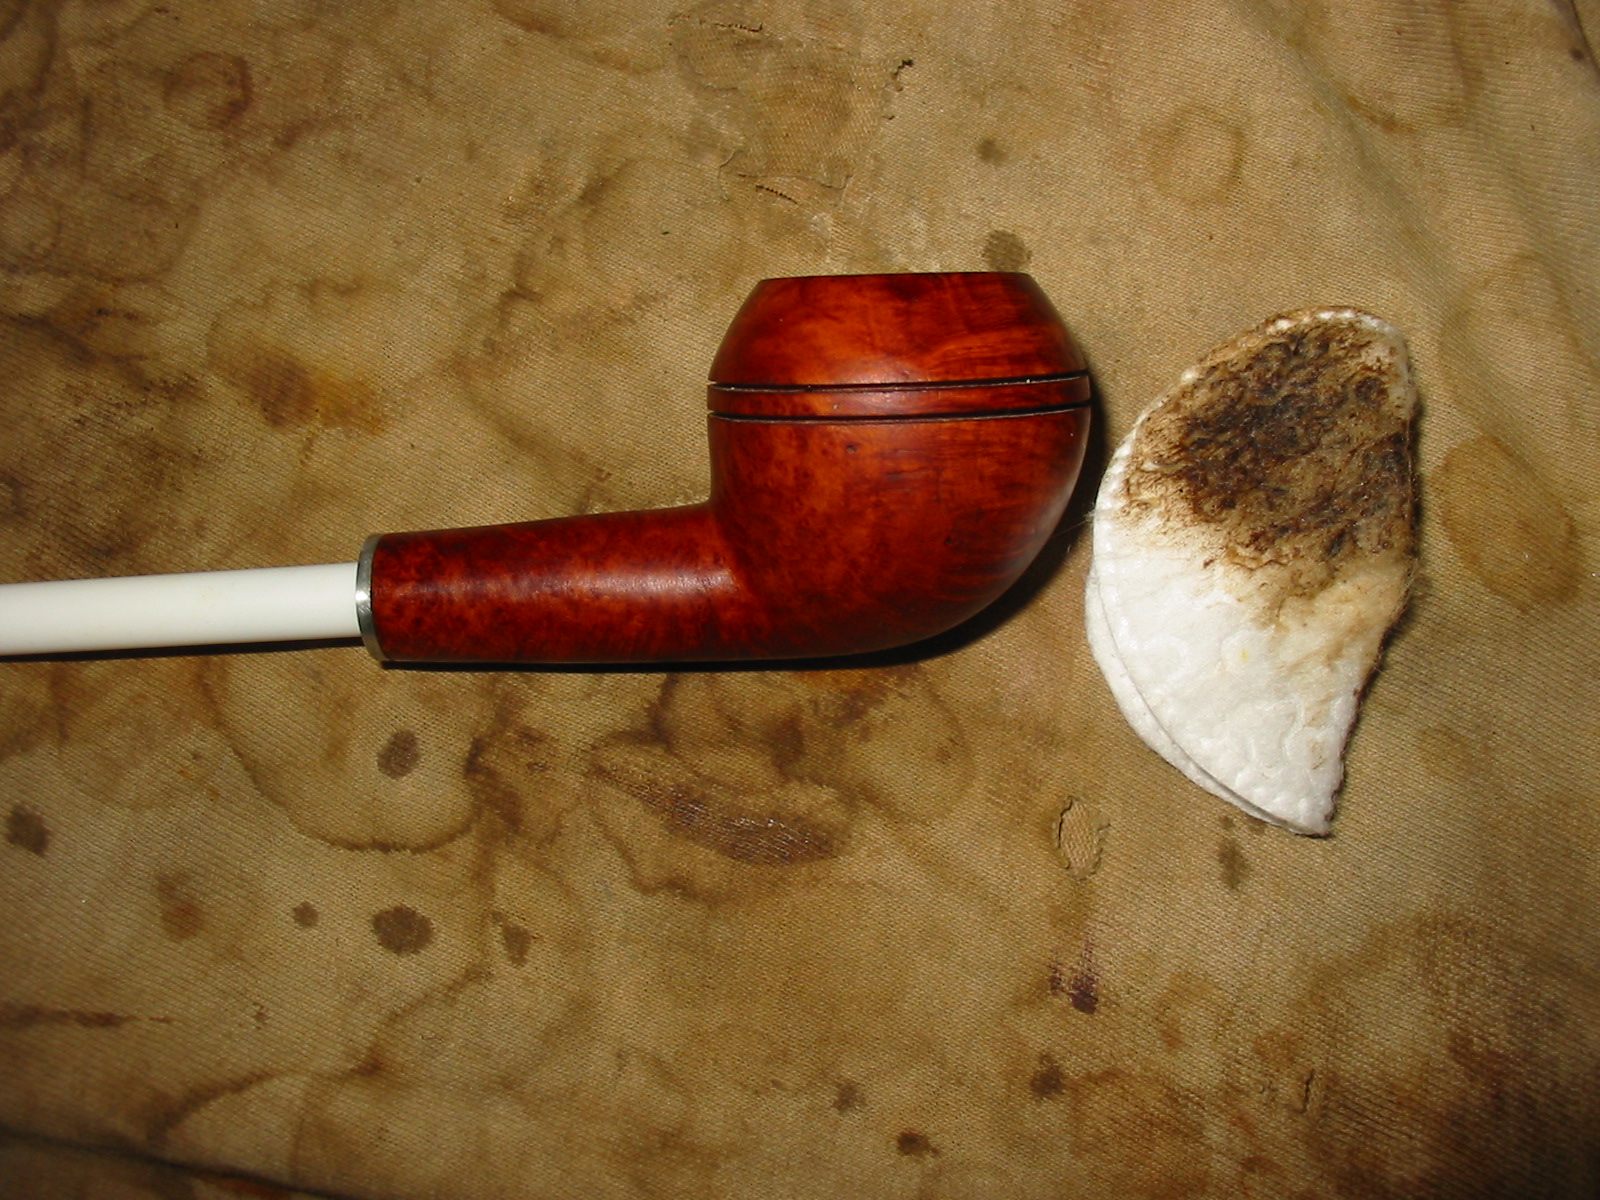
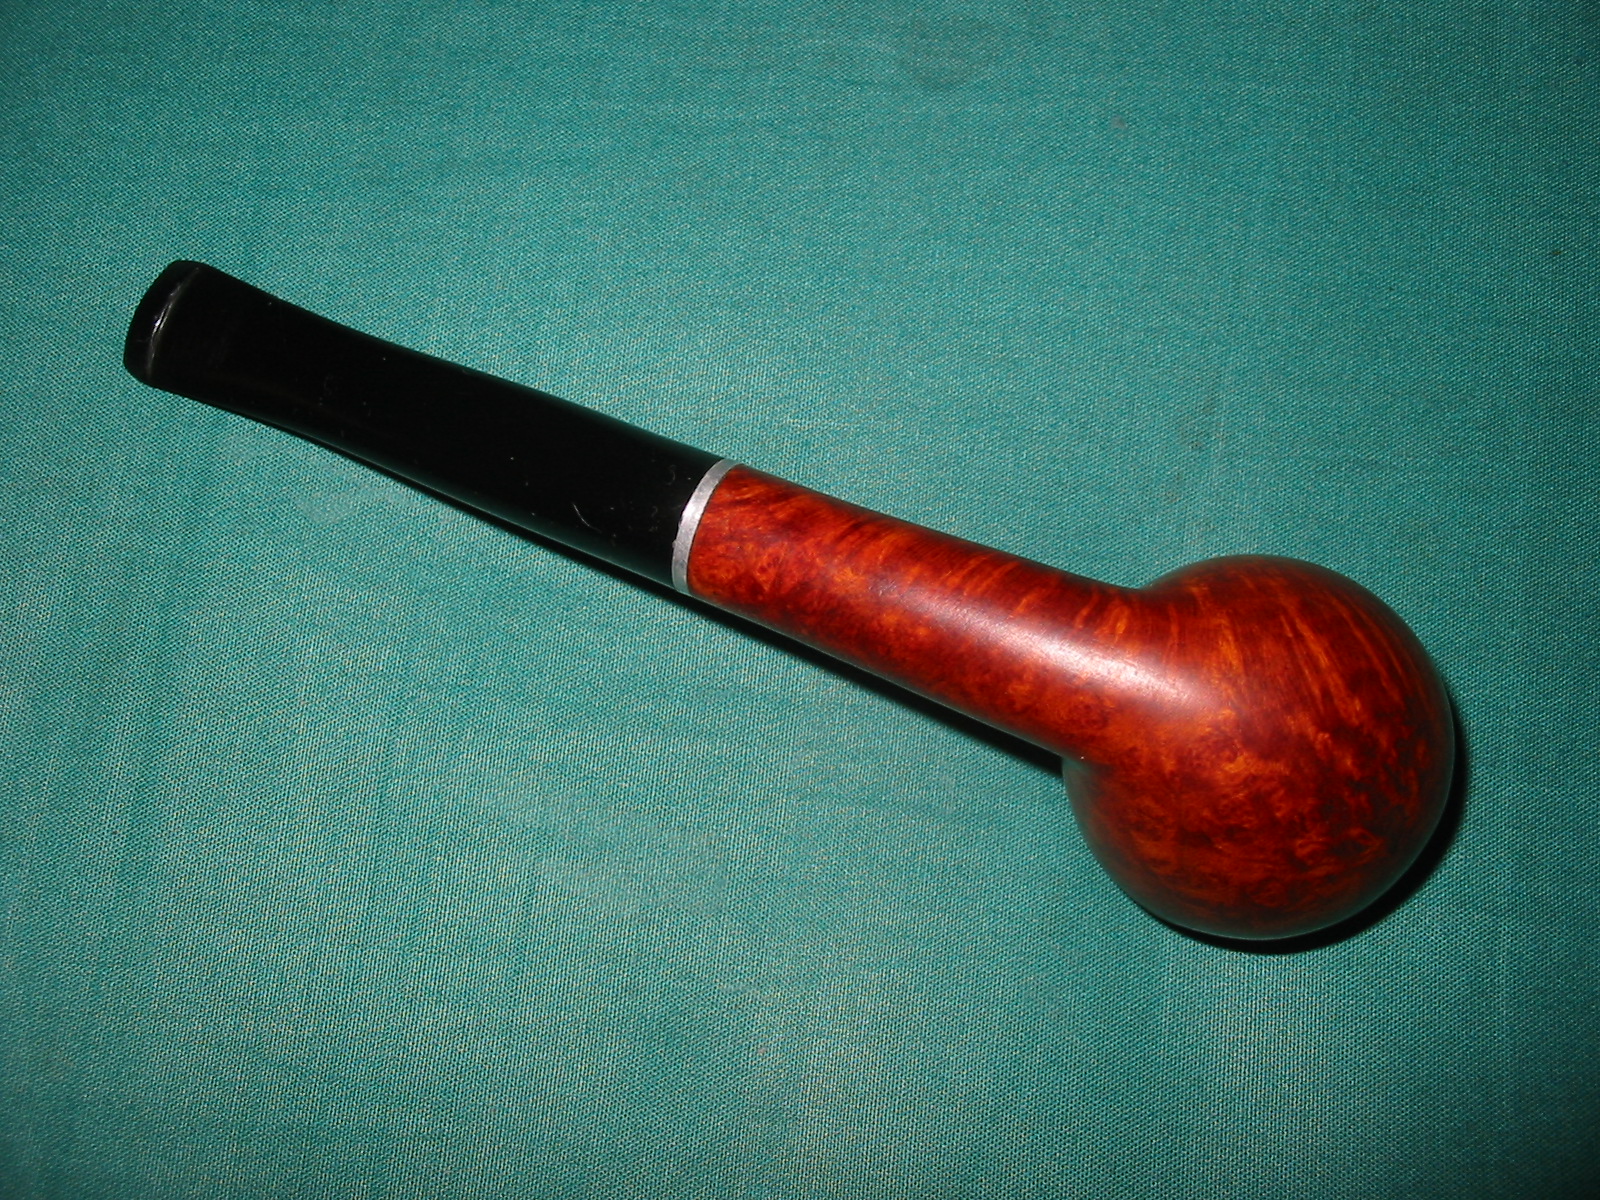
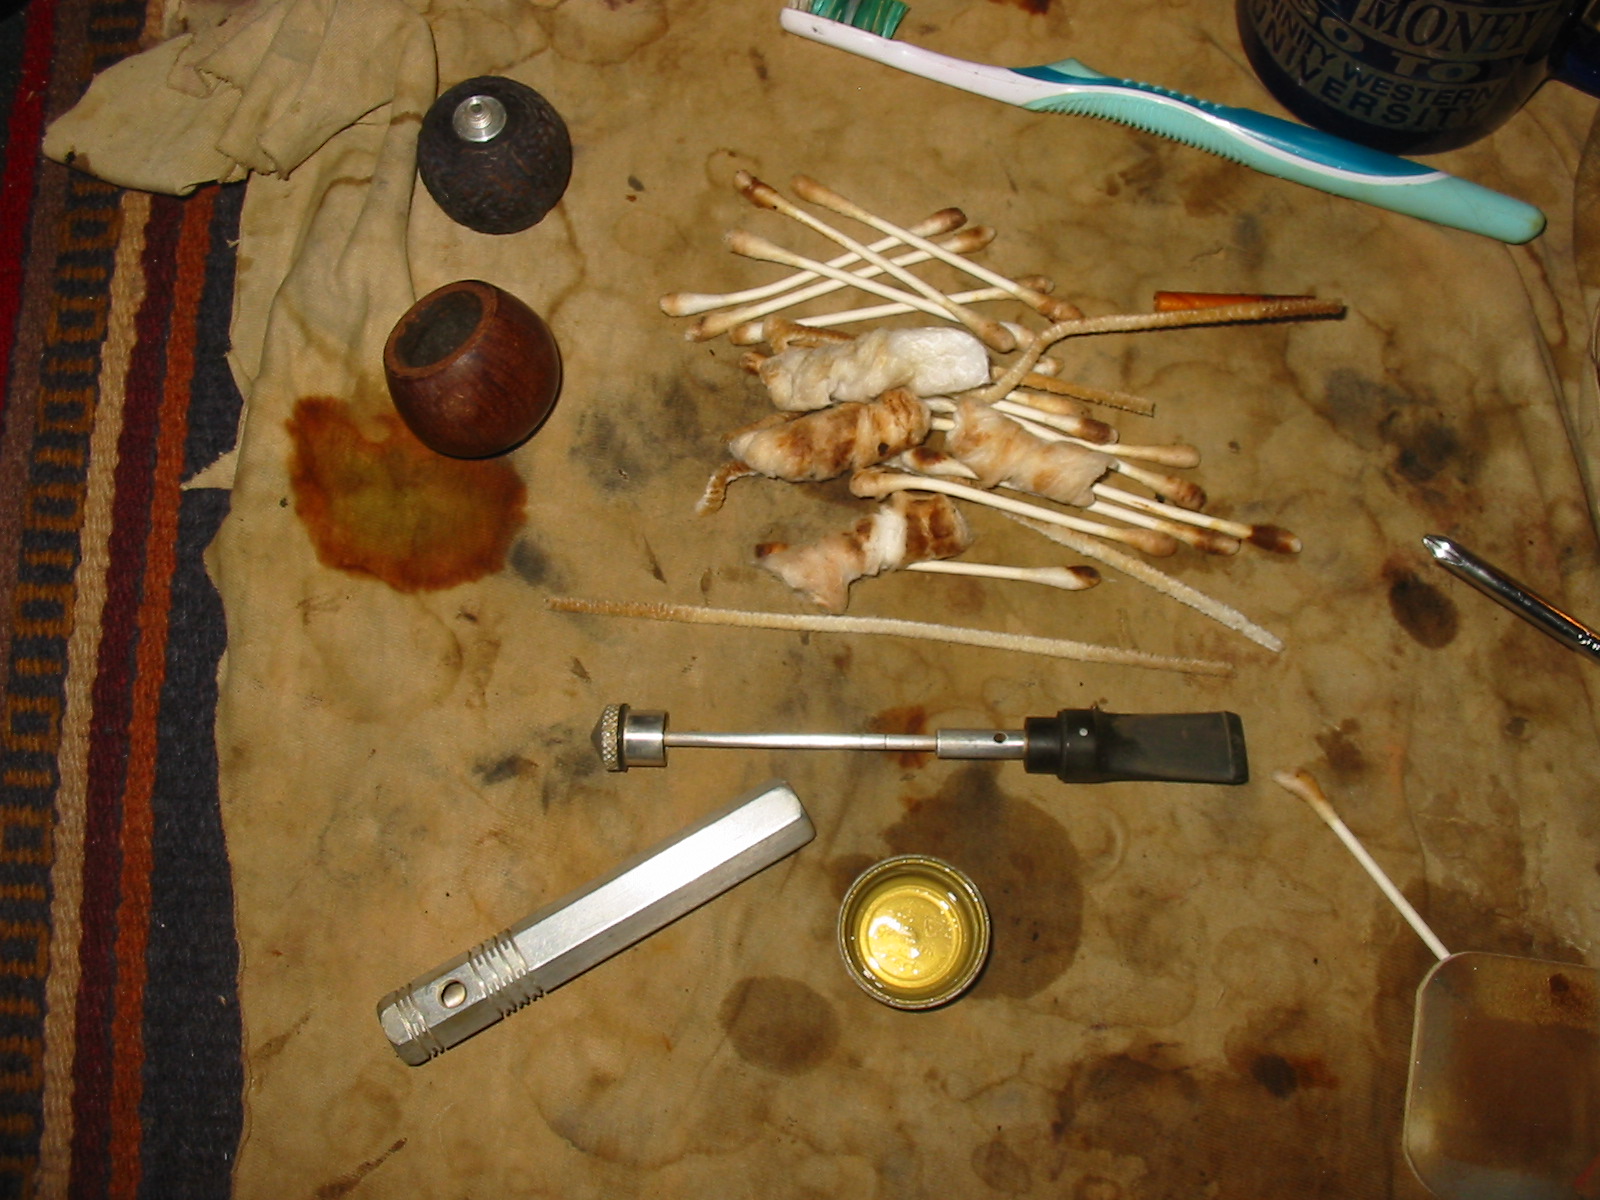
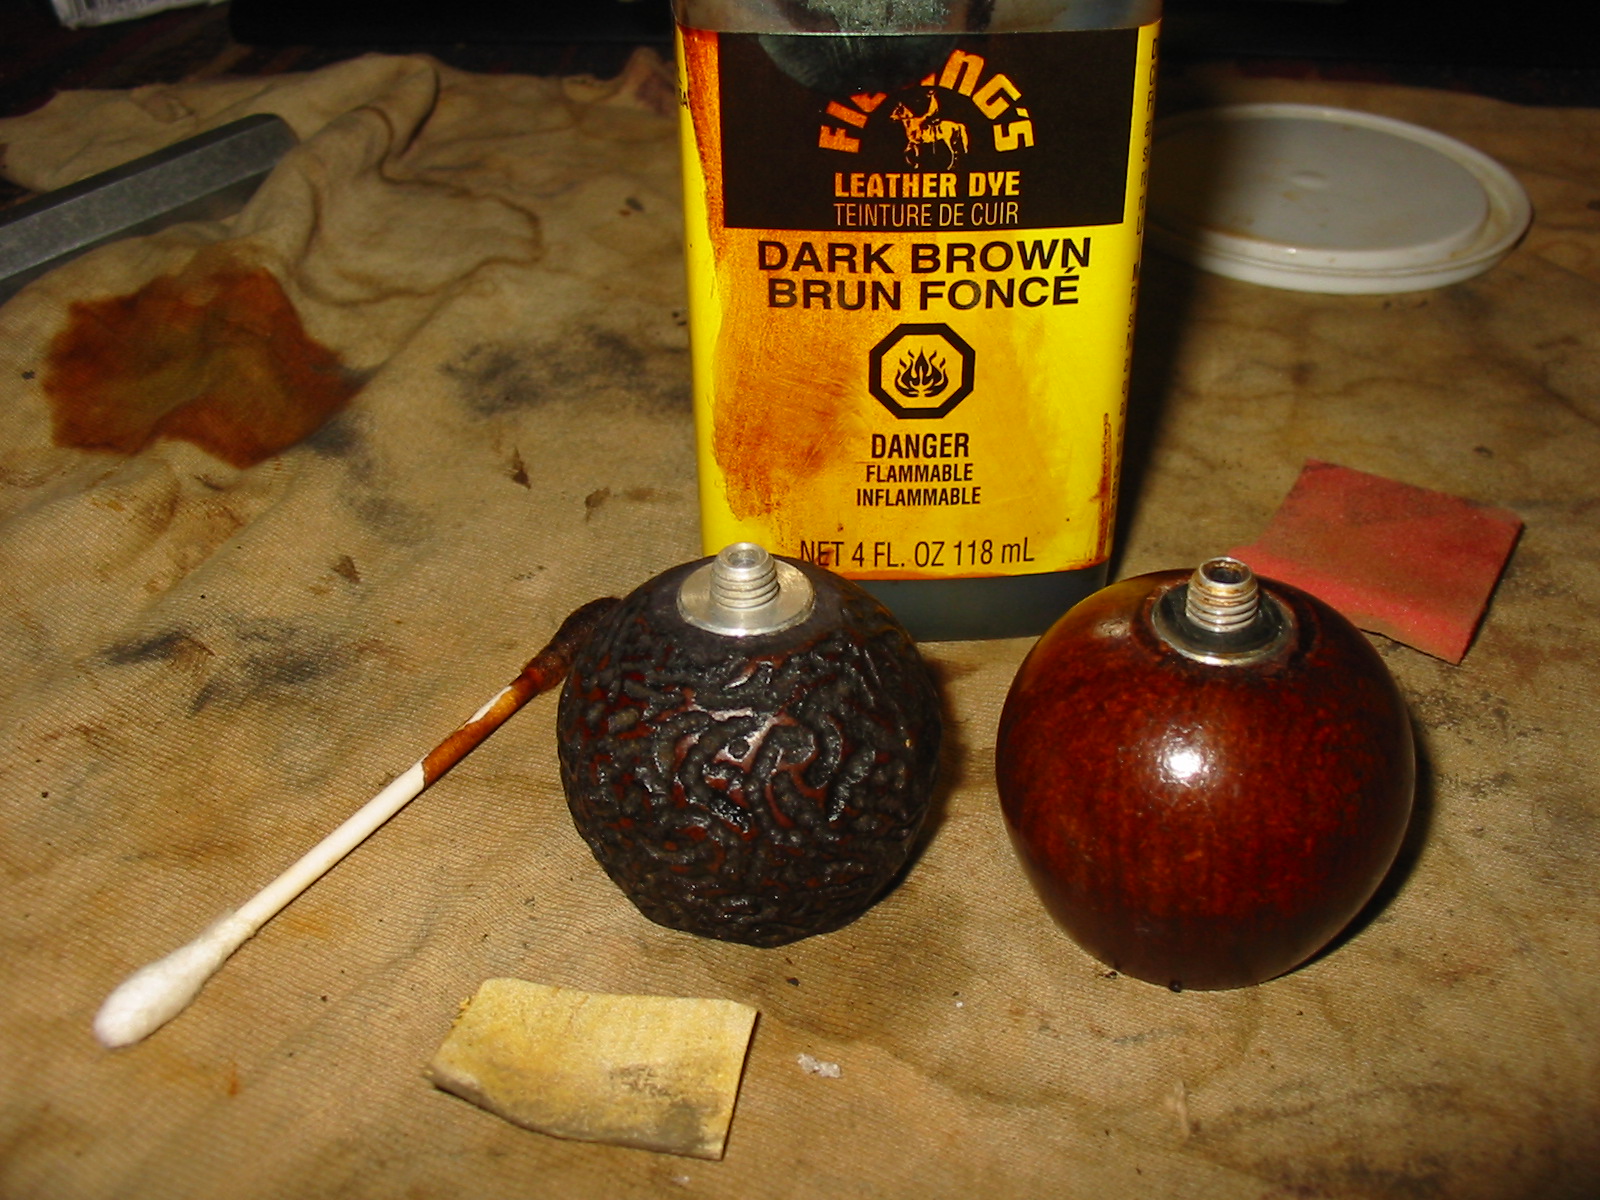
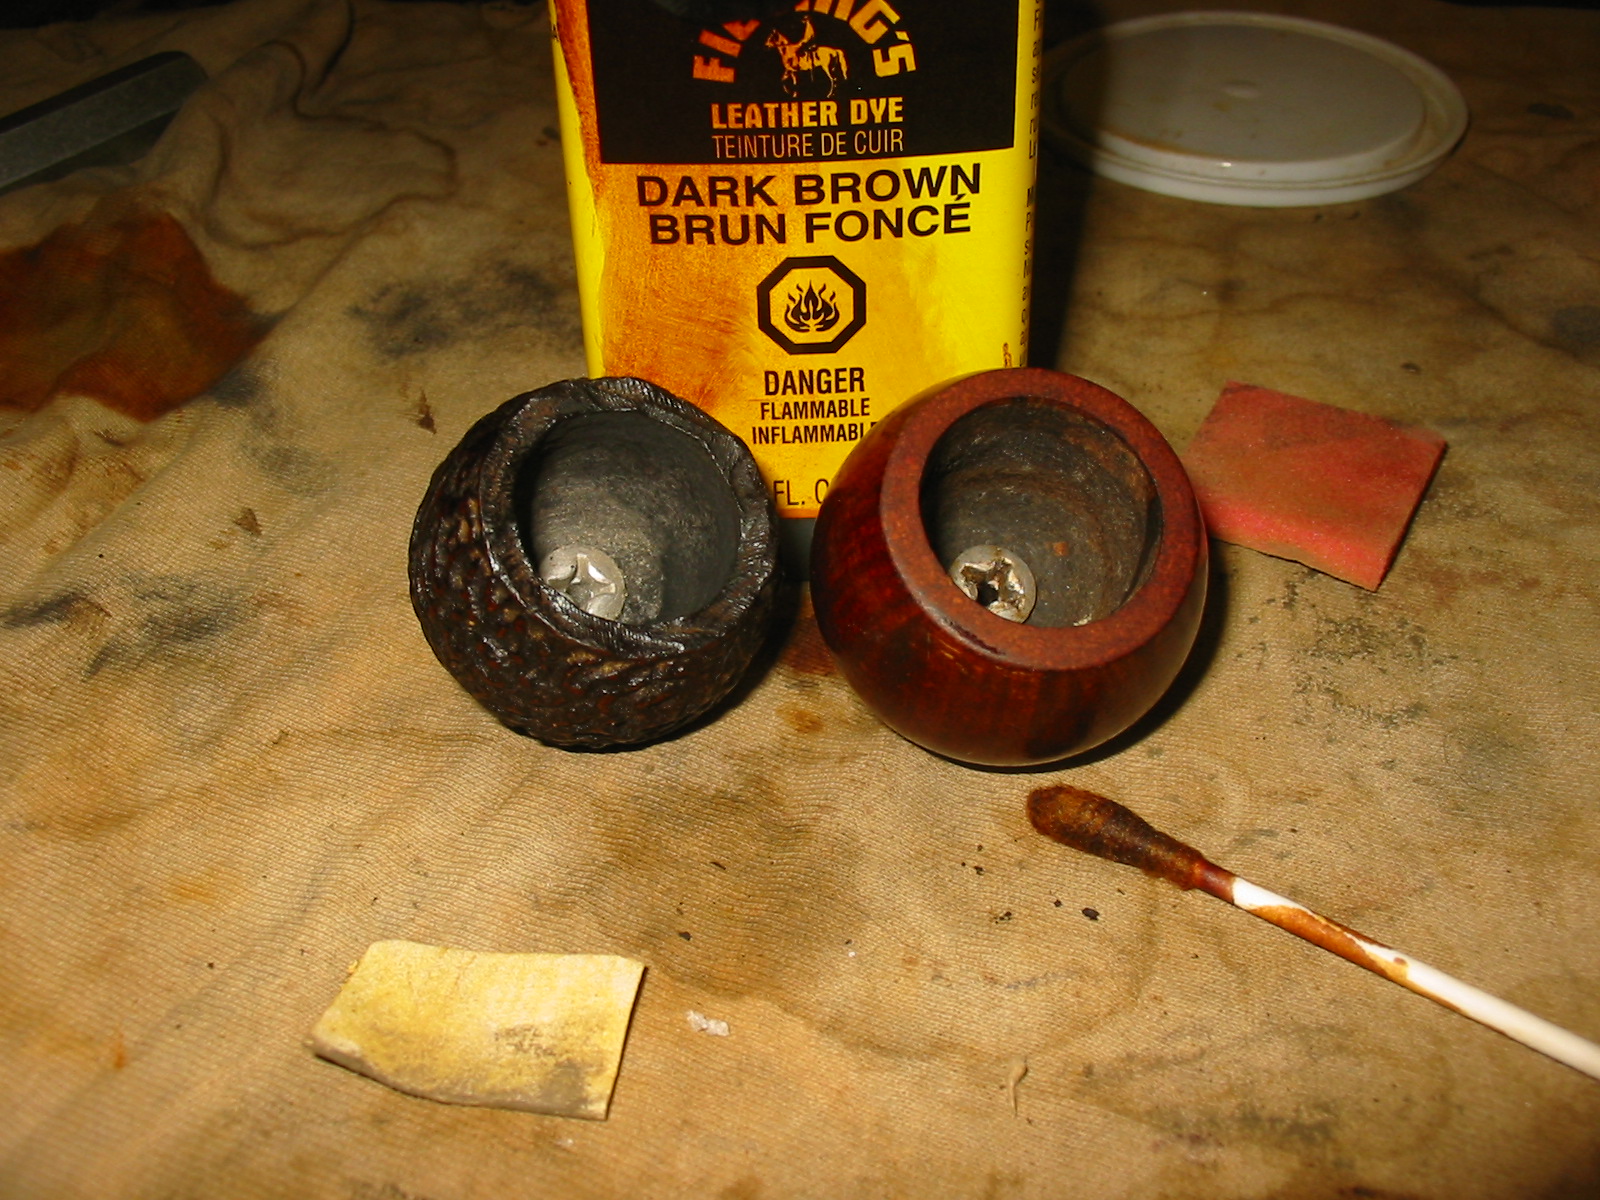
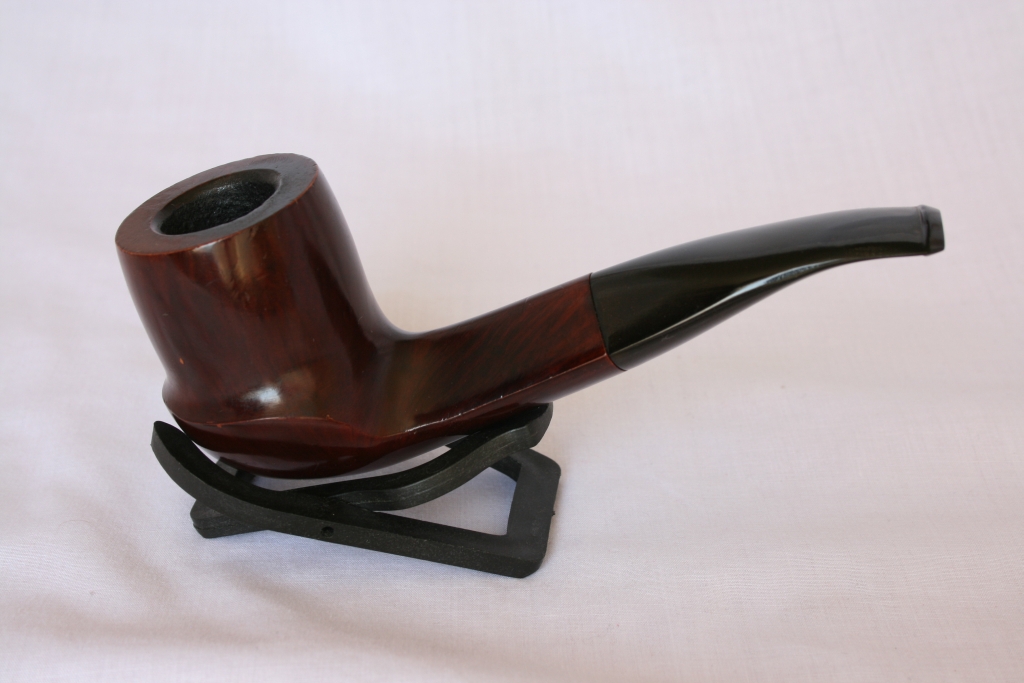
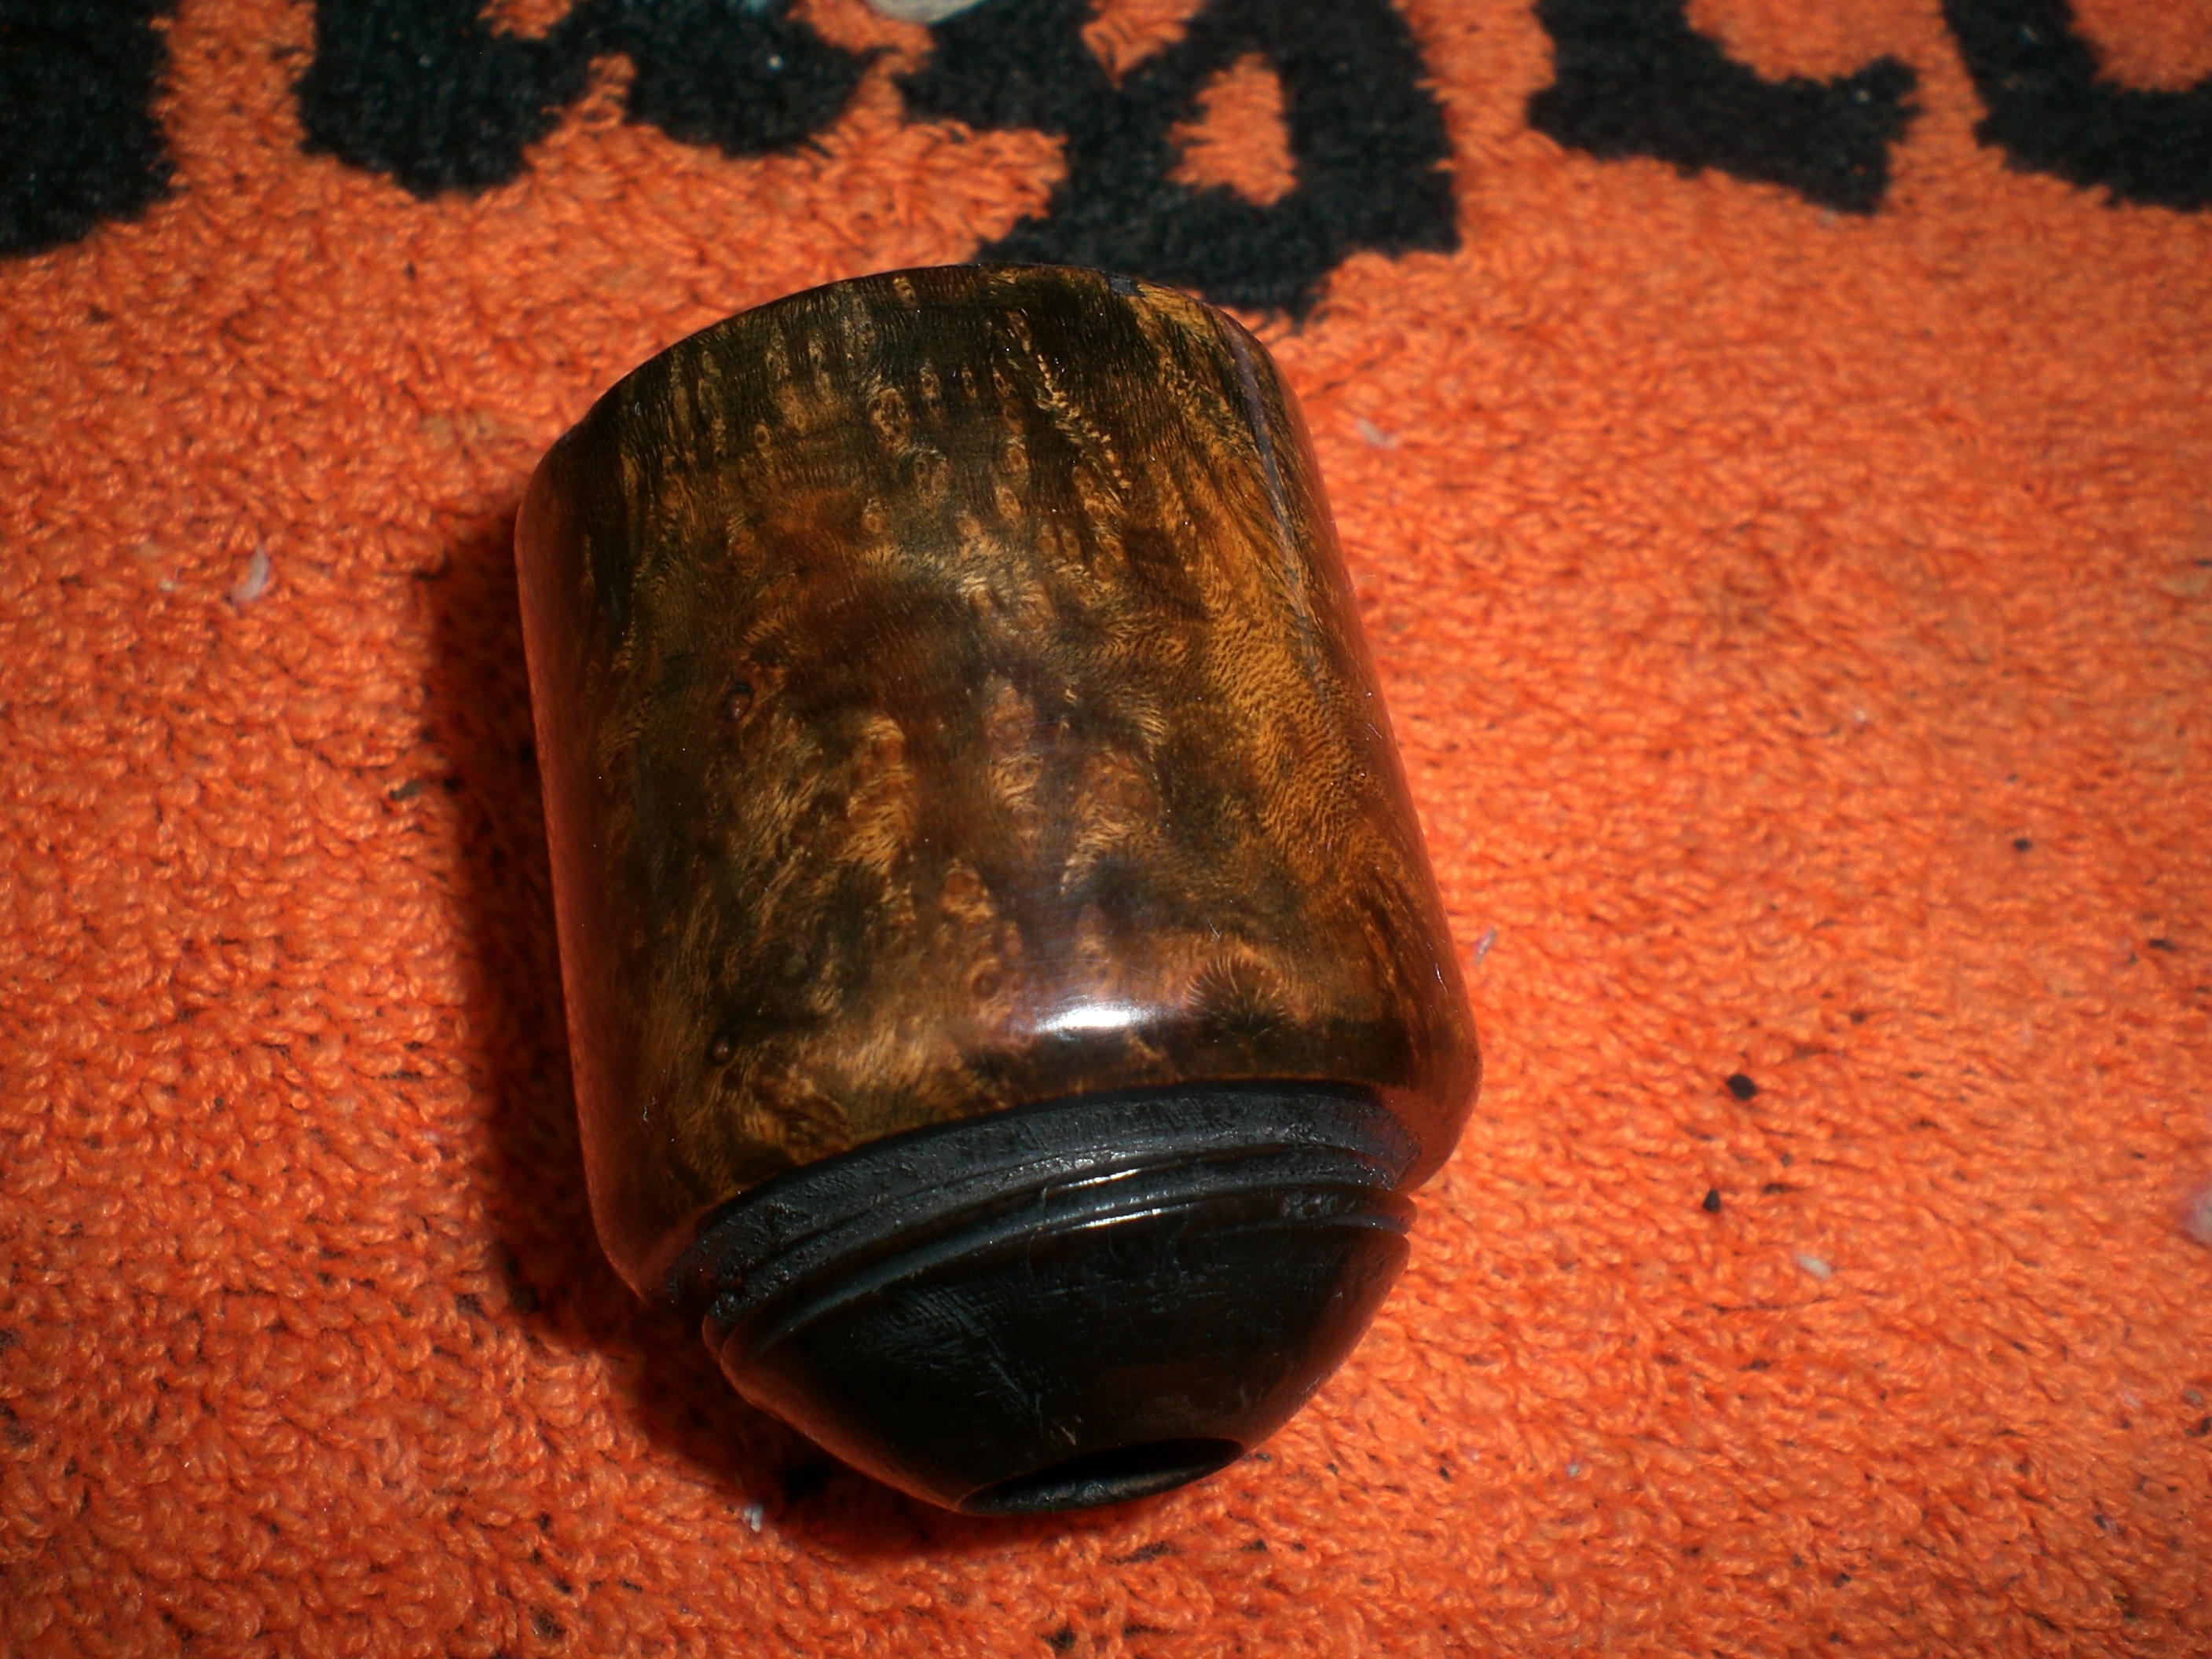
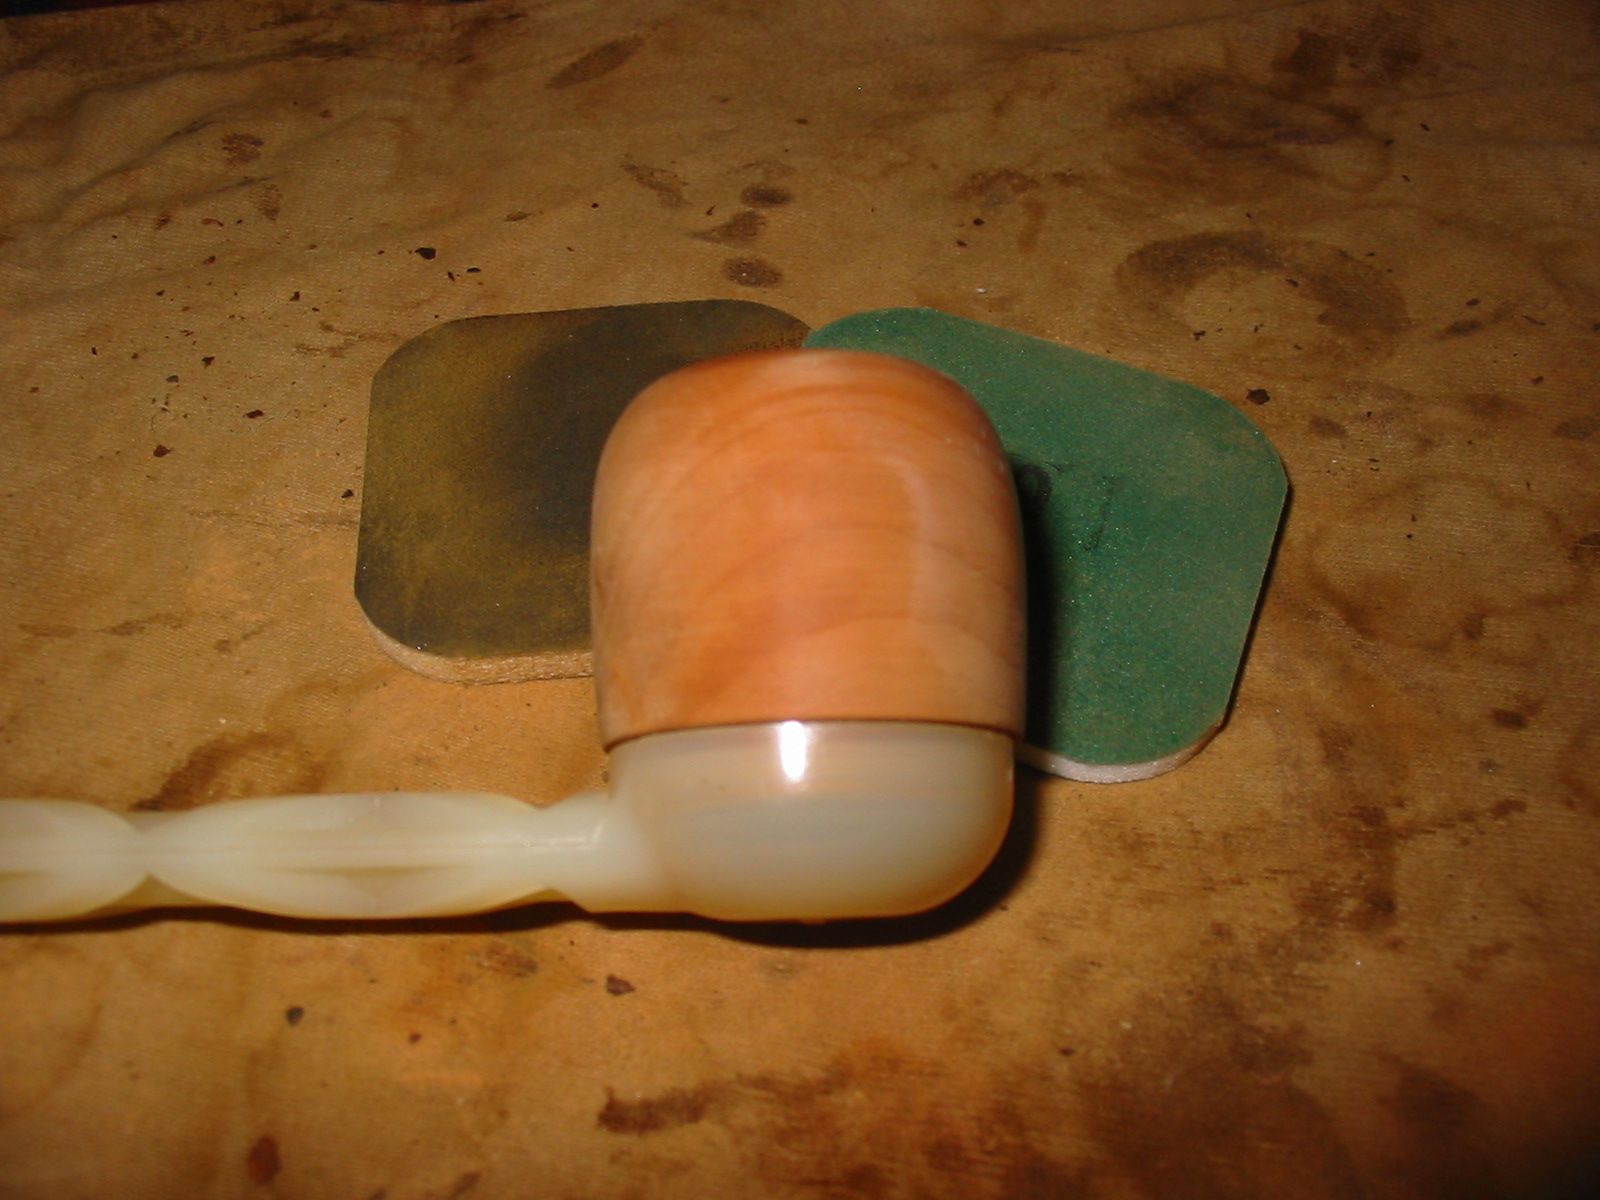
In the mean I had Lance top the bowl and flatten out the rim surface. Then he beveled the outer edge to give the pipe a rounded look like it had previously. He gave the inner edge a slight bevel as well. There were three flaws in the rim surface where the fills were missing. I had him repair these with briar dust and super glue. He then topped the bowl lightly a second time to smooth out the fill repairs. He wiped the bowl down with acetone and sanded it with the sanding sponge. He gave it a quick sand with 1500-2400 grit micromesh as well and then stained it with a black undercoat making sure that the stain went into the grooves that were carved in the bowl surface. He then wiped it down with acetone and sanded it again to remove the black stain from the surface of the bowl leaving it deep in the grooves and around the rim. The black feathered out down the bowl sides and at the tenon shank union. He sanded the aluminum band with a 3200 grit micromesh sanding pad to polish it and then restained the bowl with a red mahogany Miniwax stain. We buffed the pipe with White Diamond and then gave the stem very lightly making sure to not let it heat up. We gave the entirety several coats of carnauba wax. Here is the first pipe he had ever refurbished after it was finished.
IMG_3565

IMG_3566

IMG_3567

IMG_3570

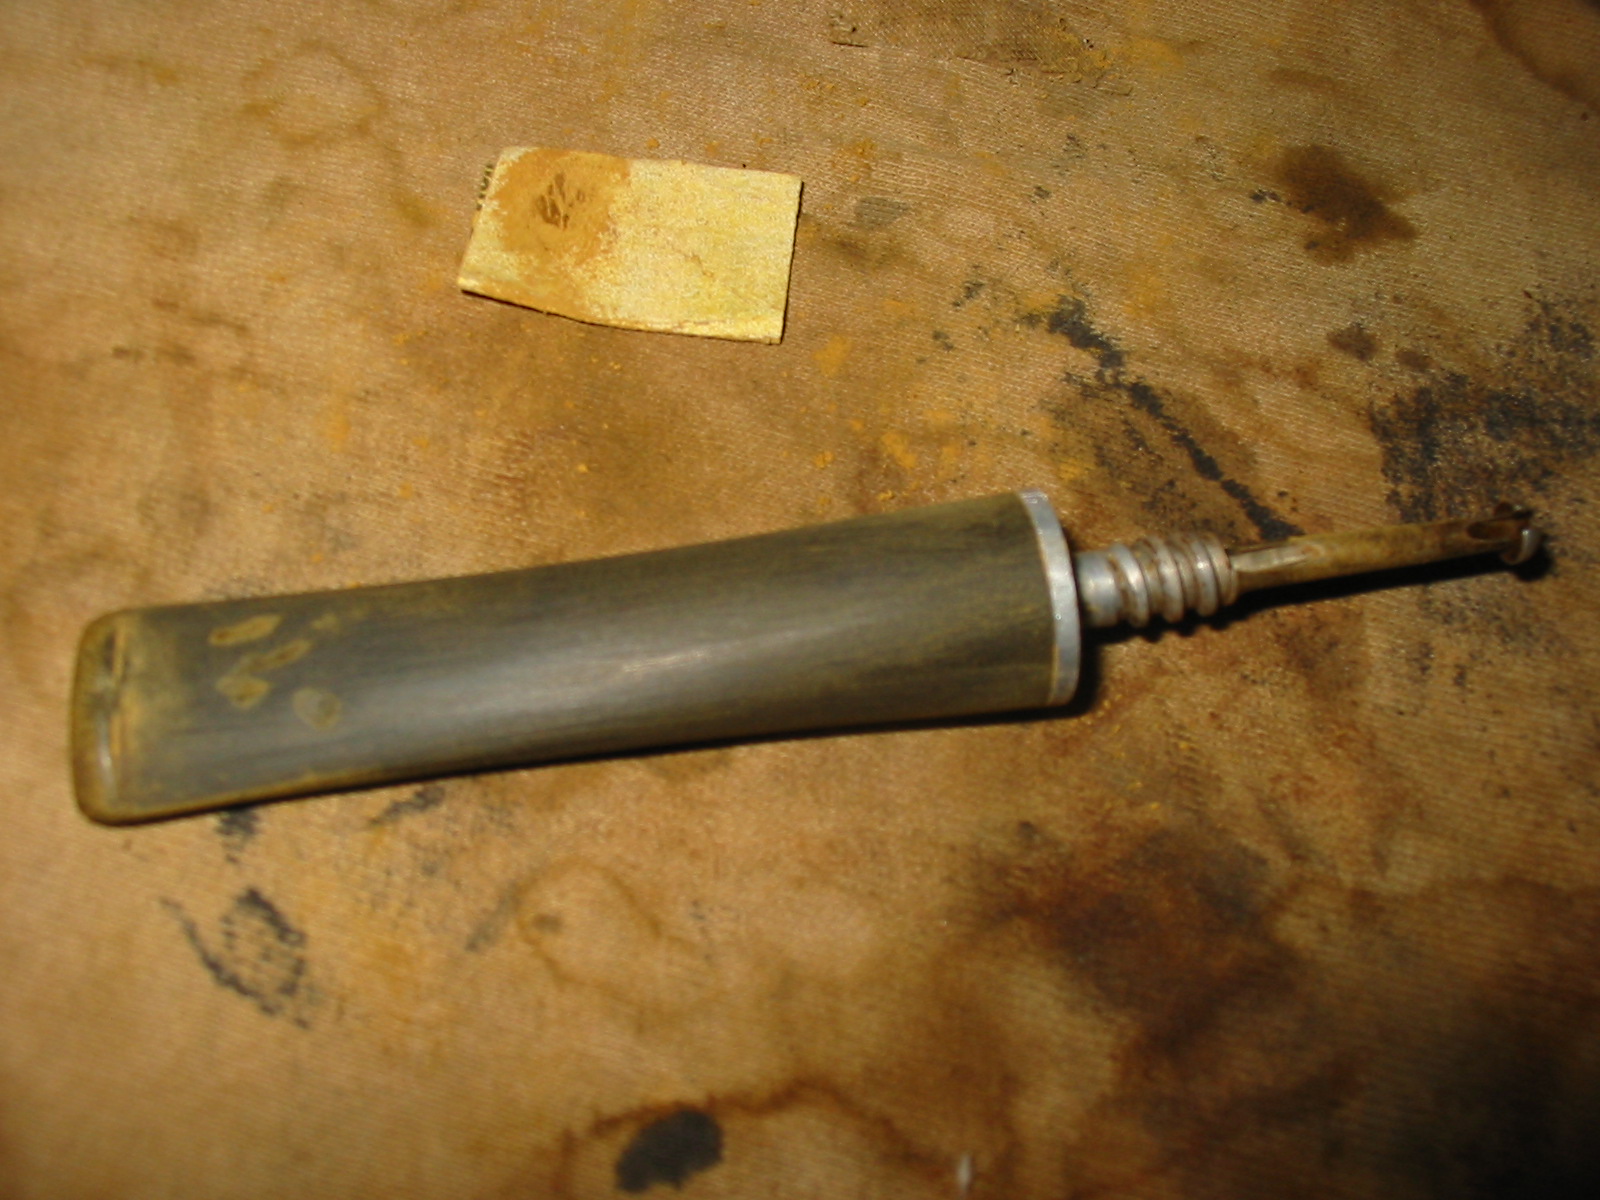
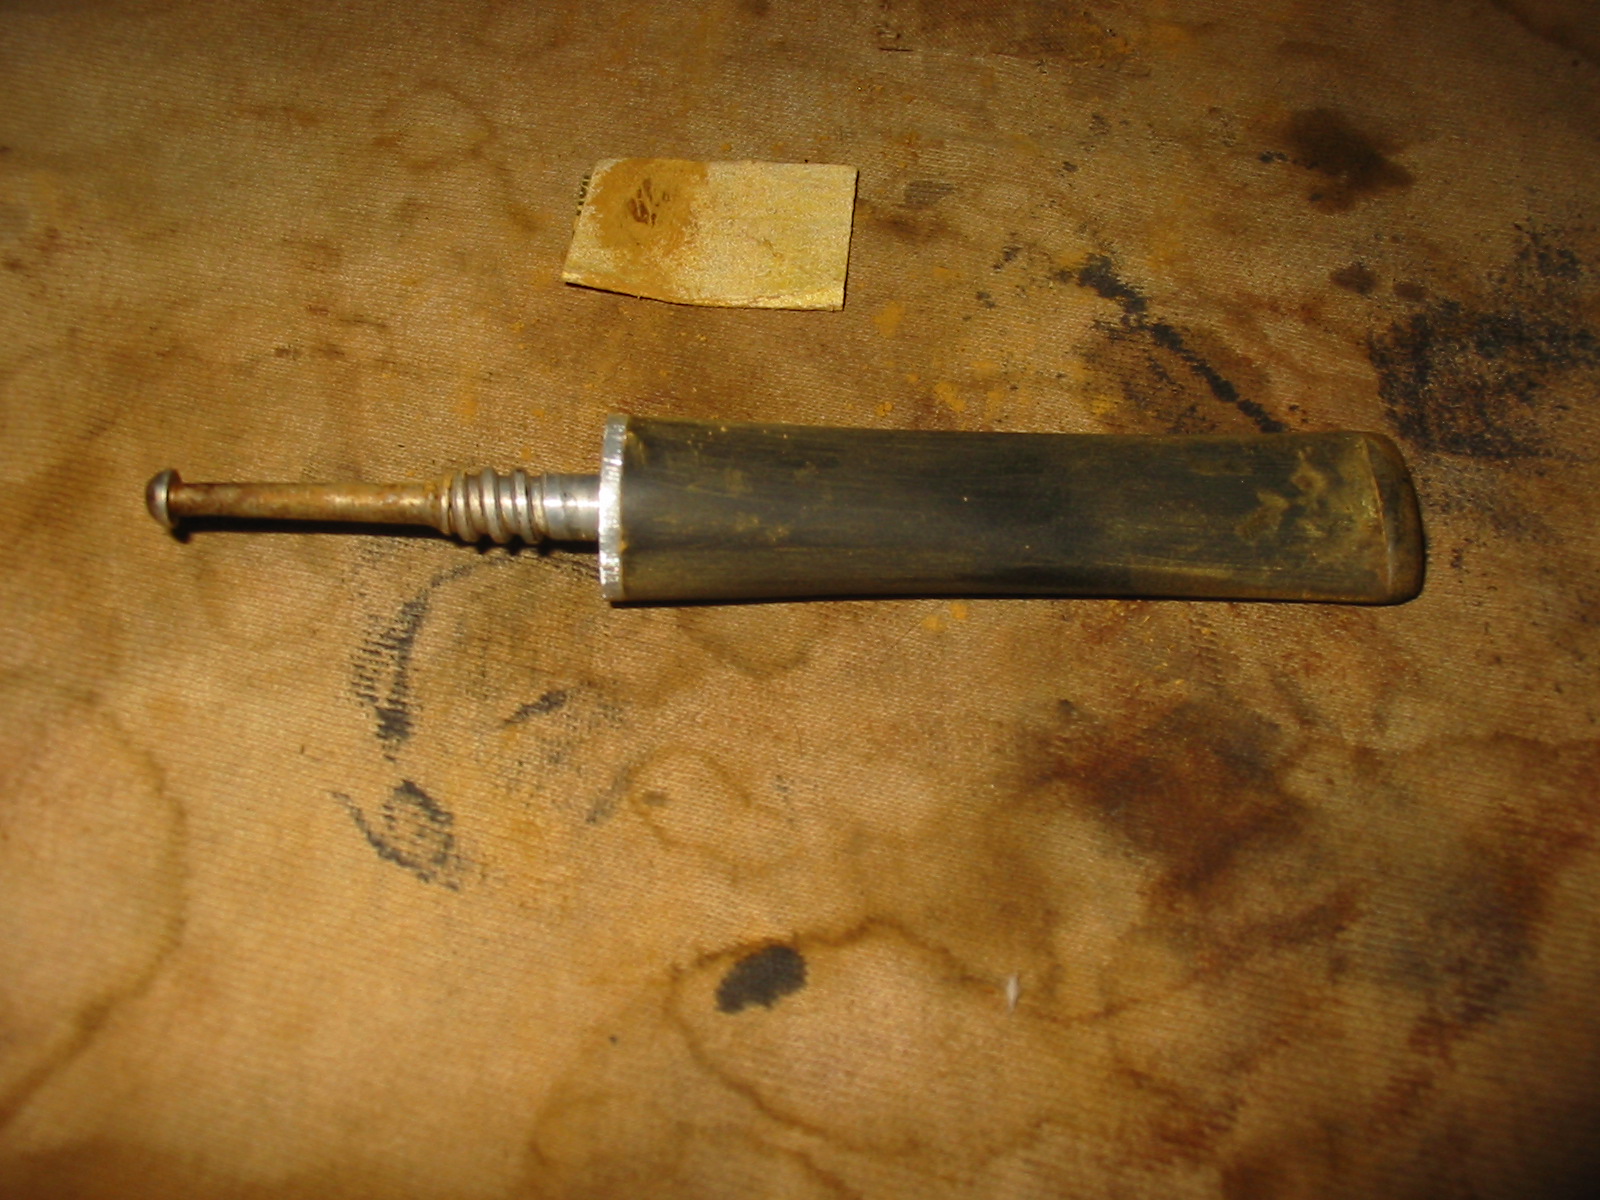
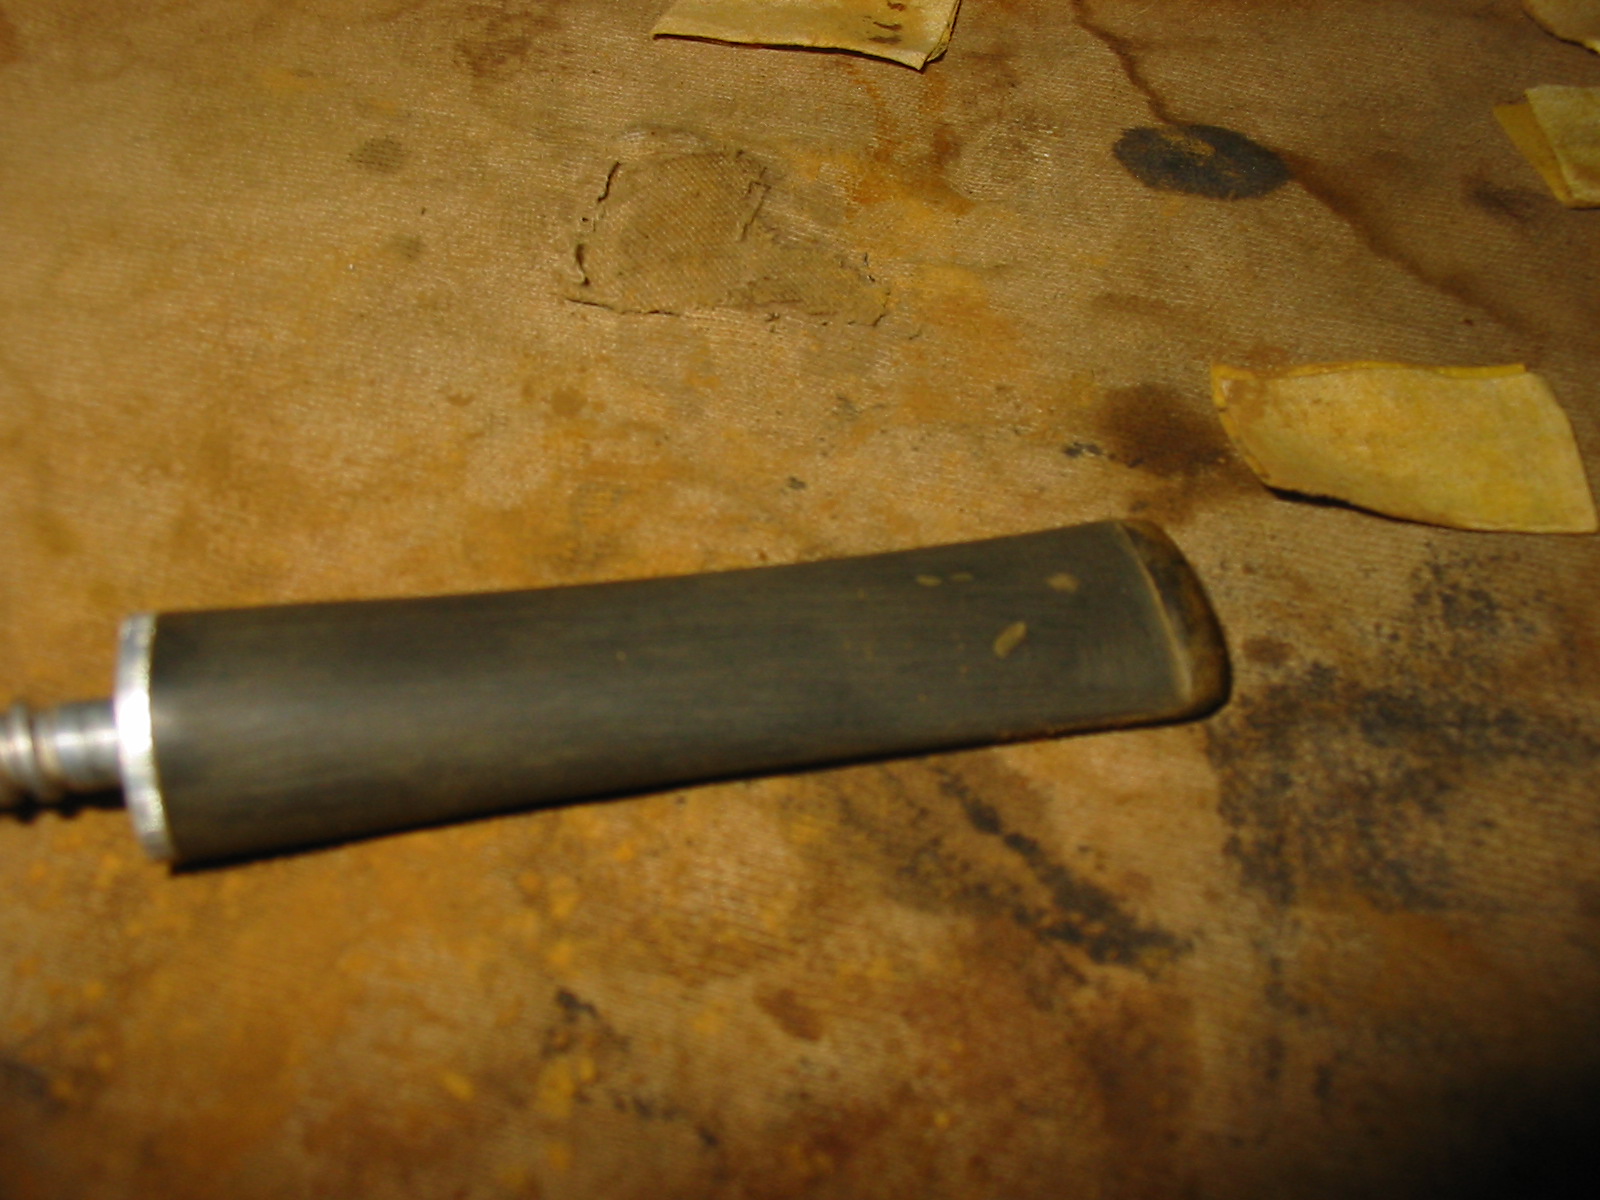
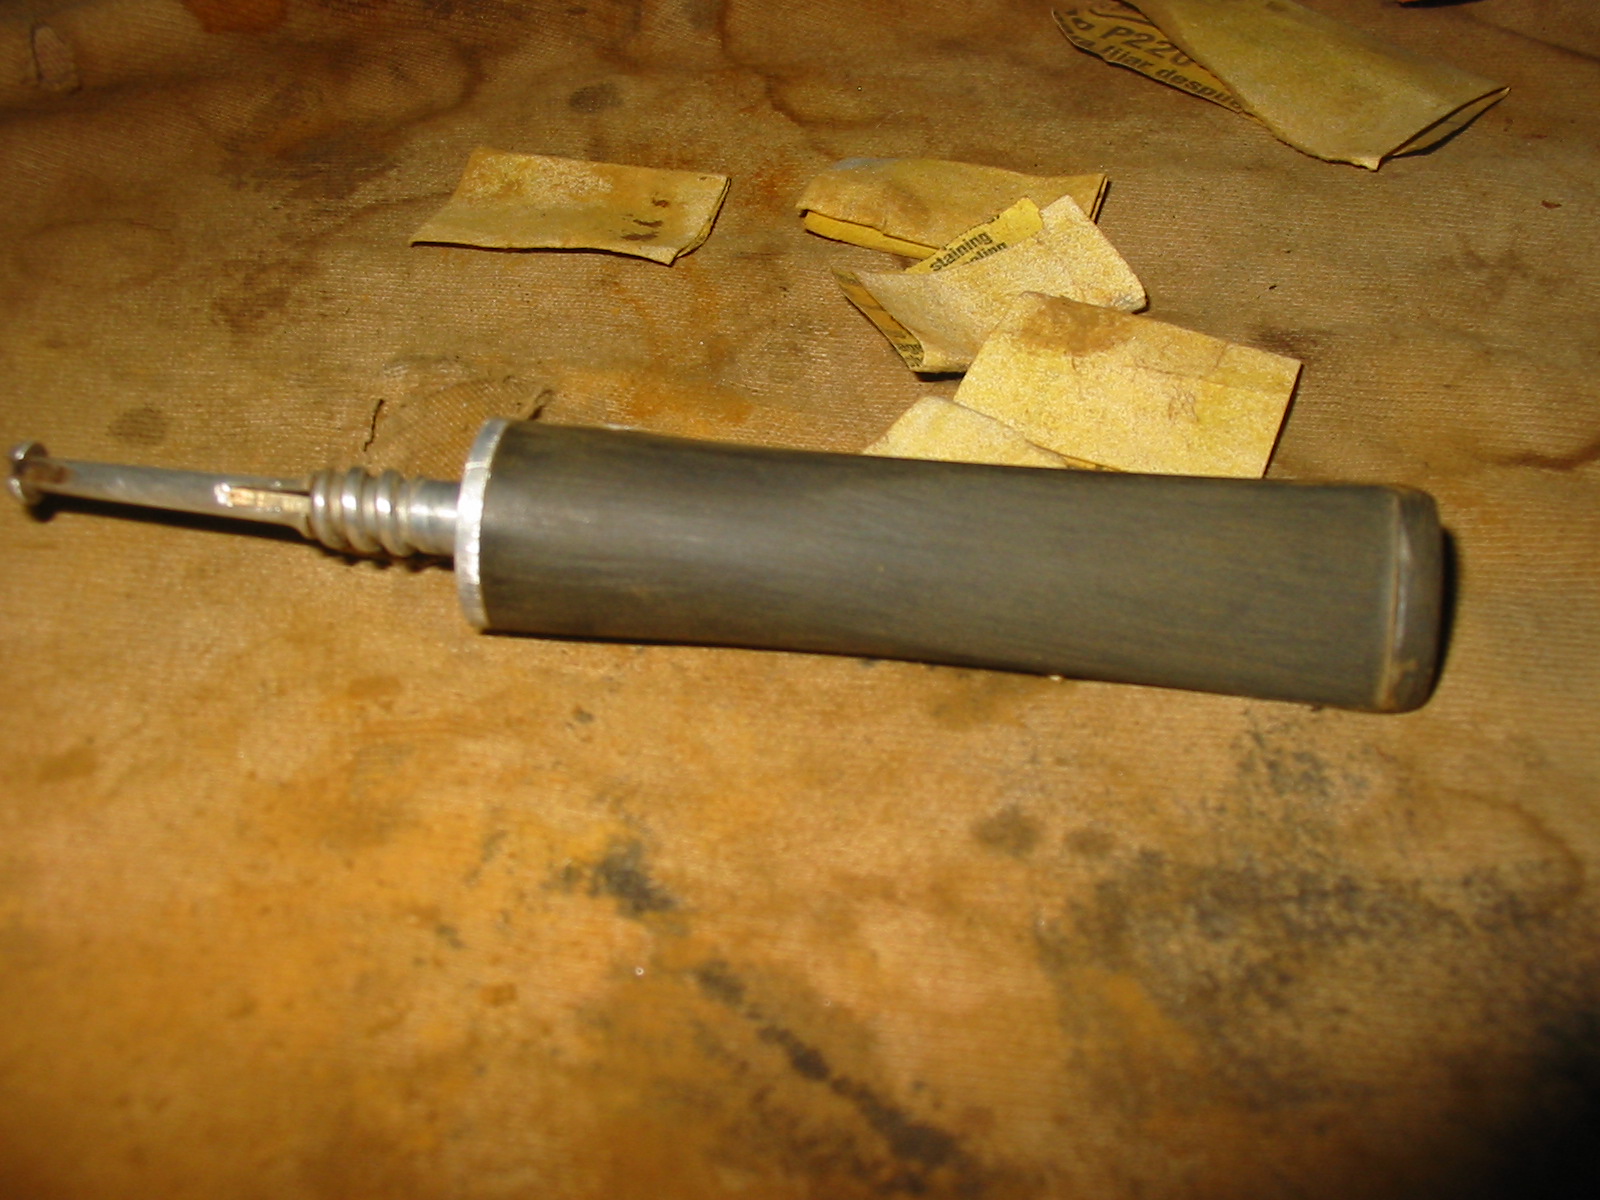
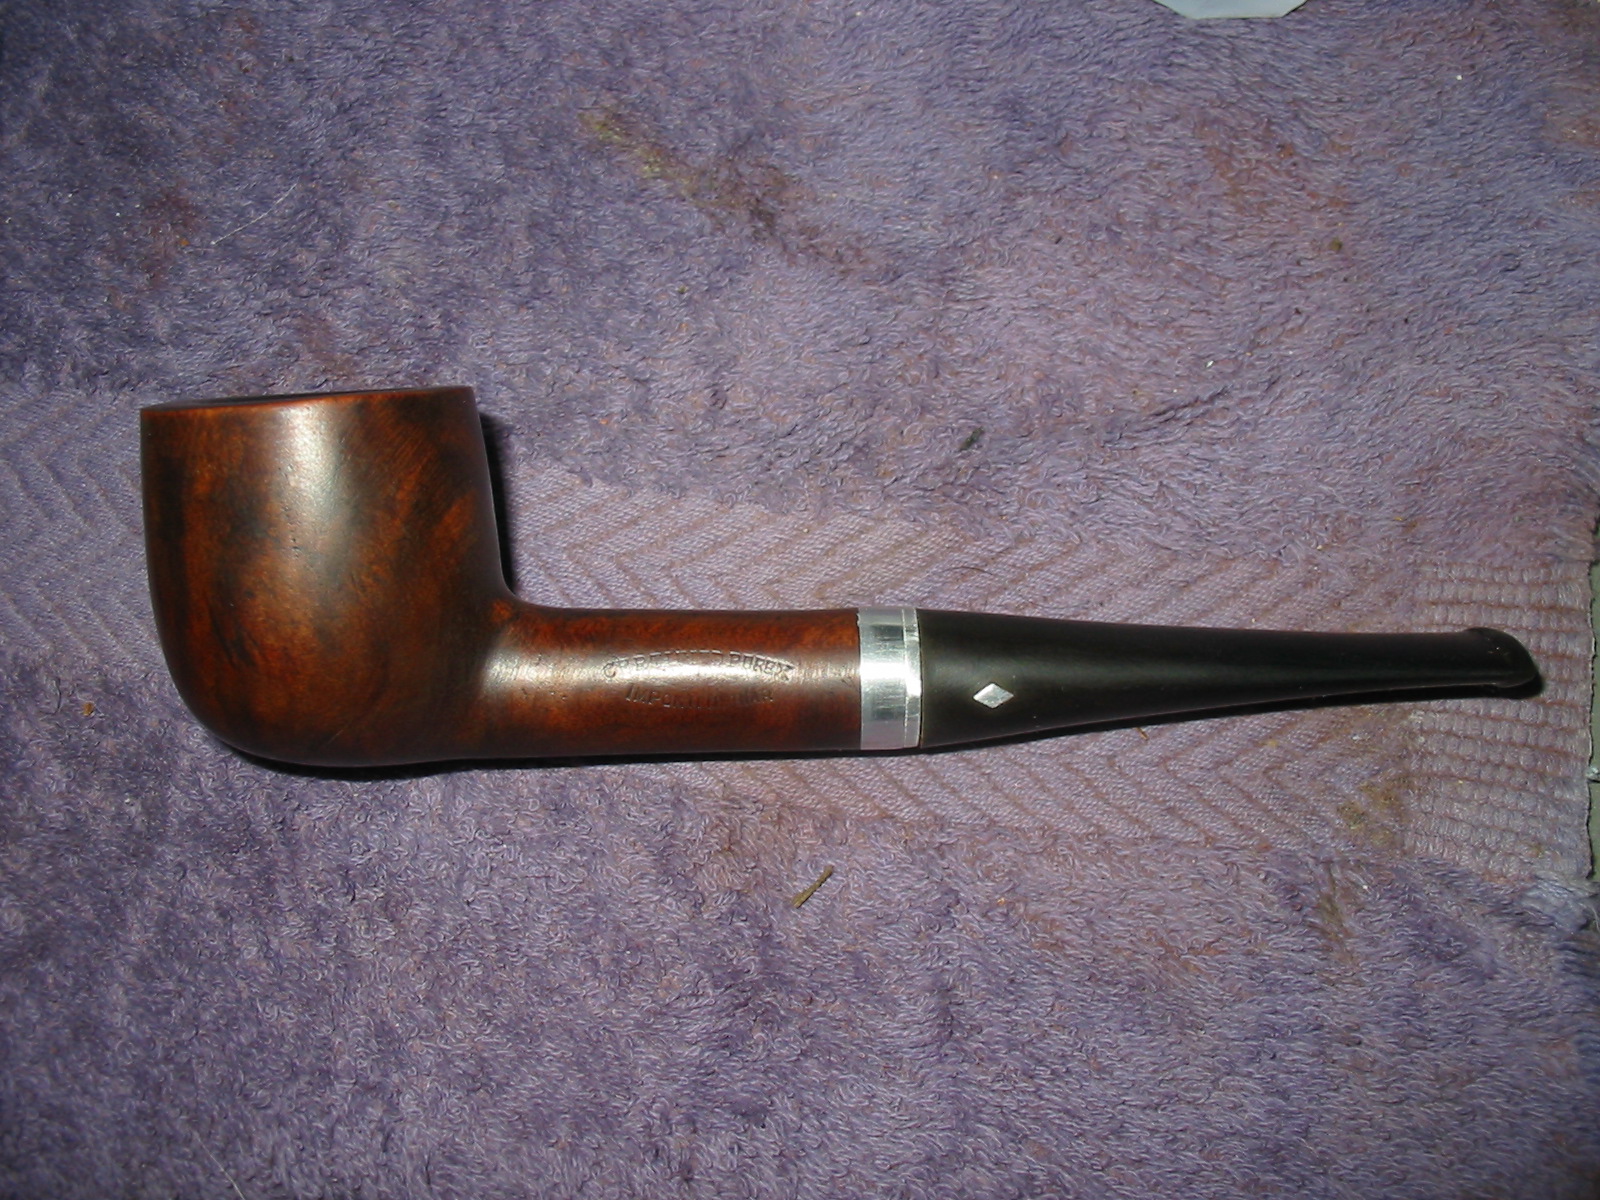
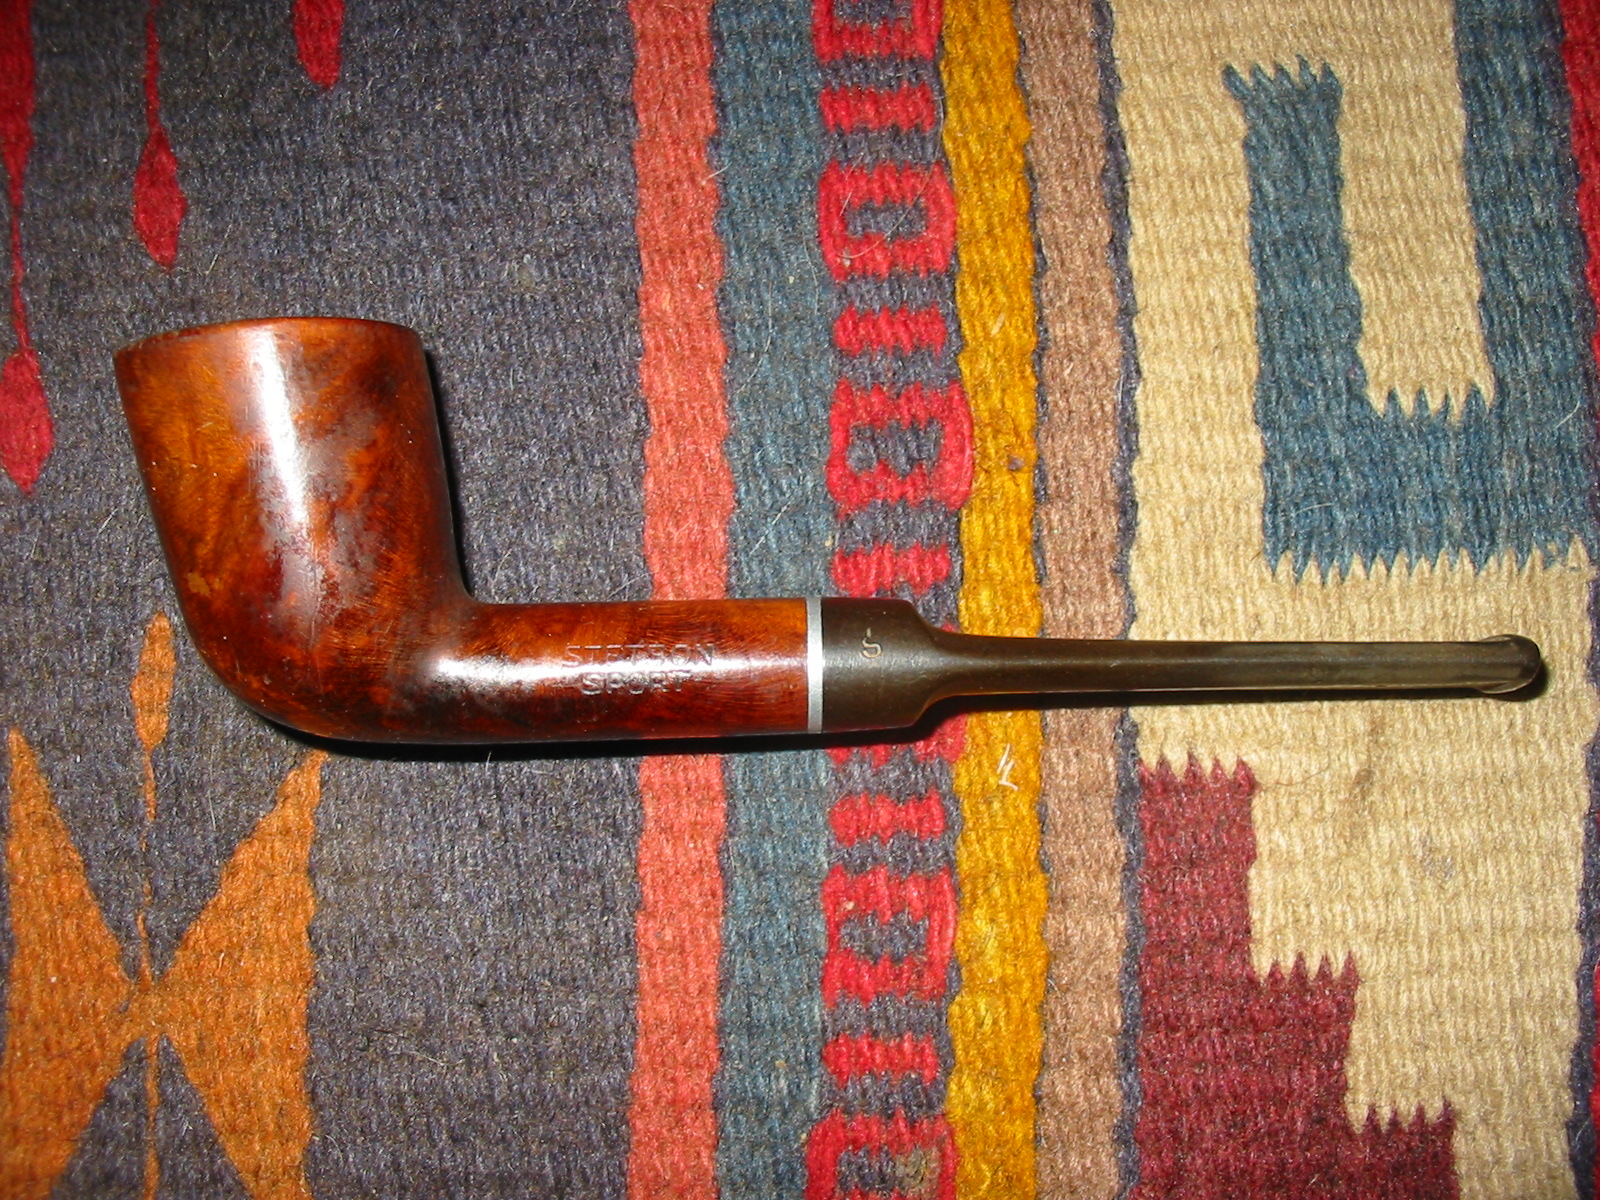
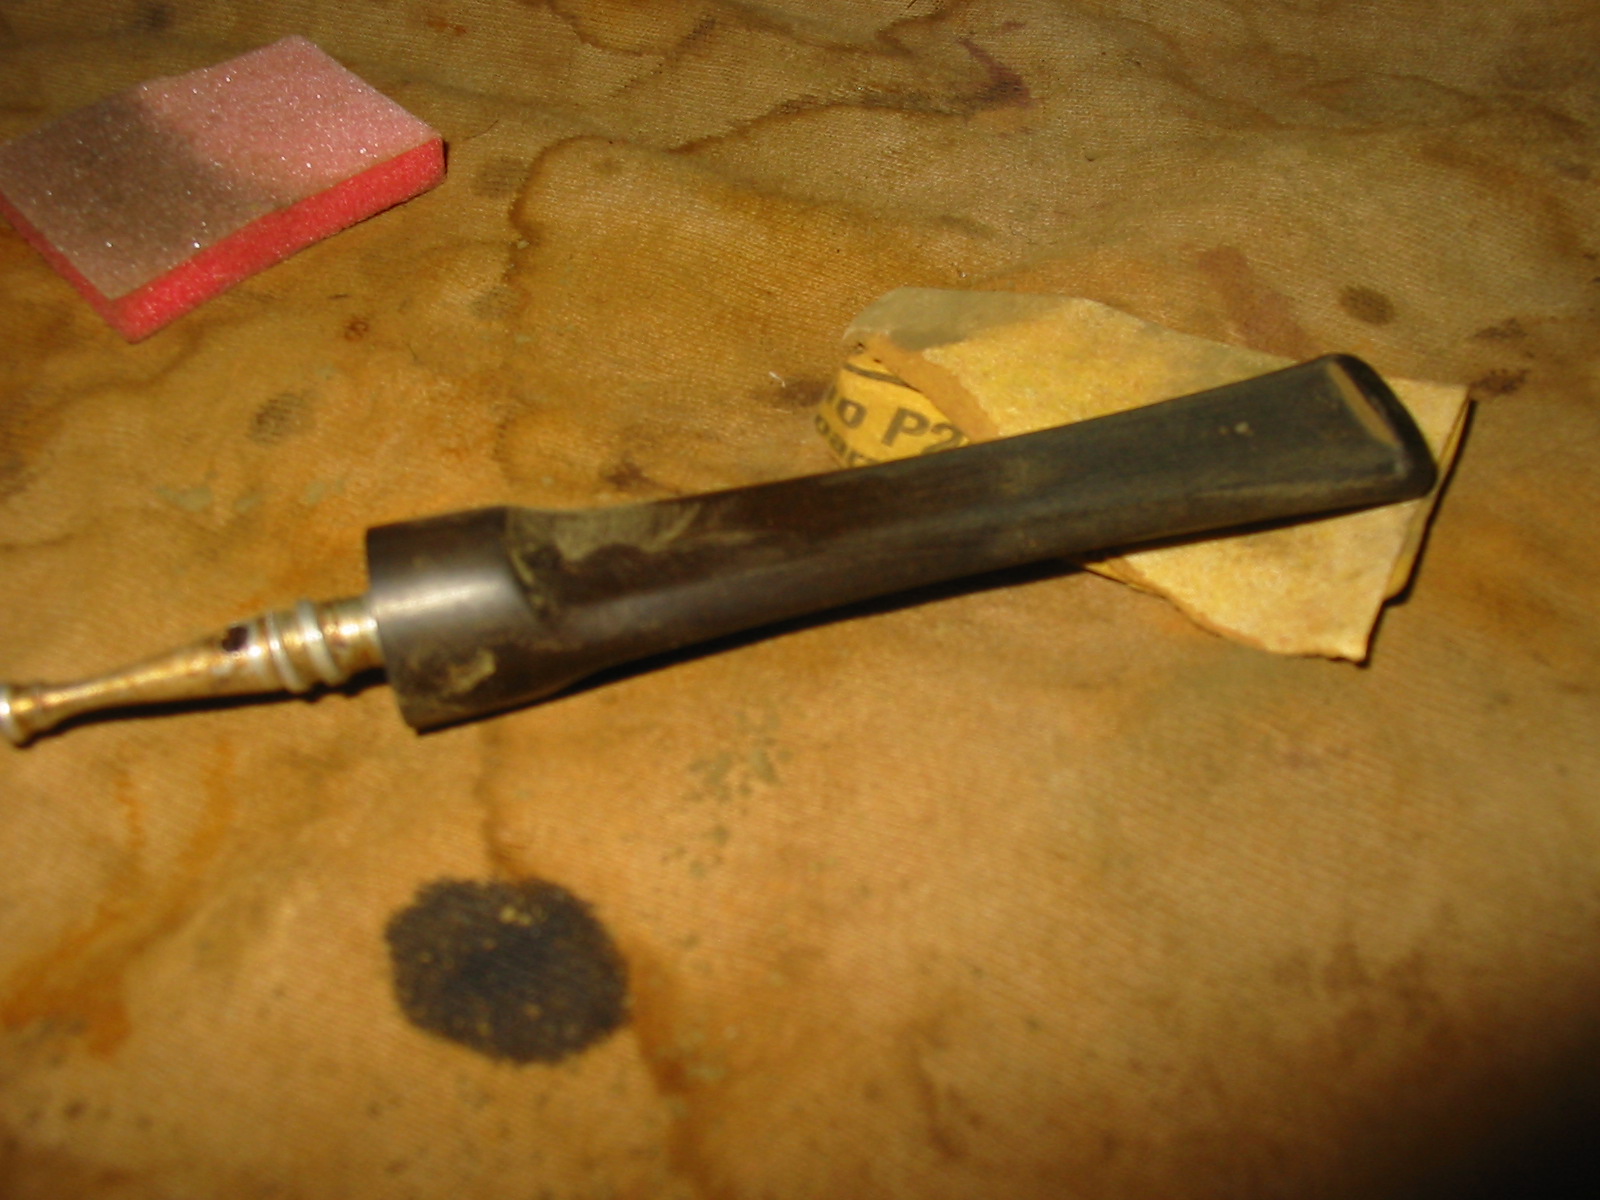
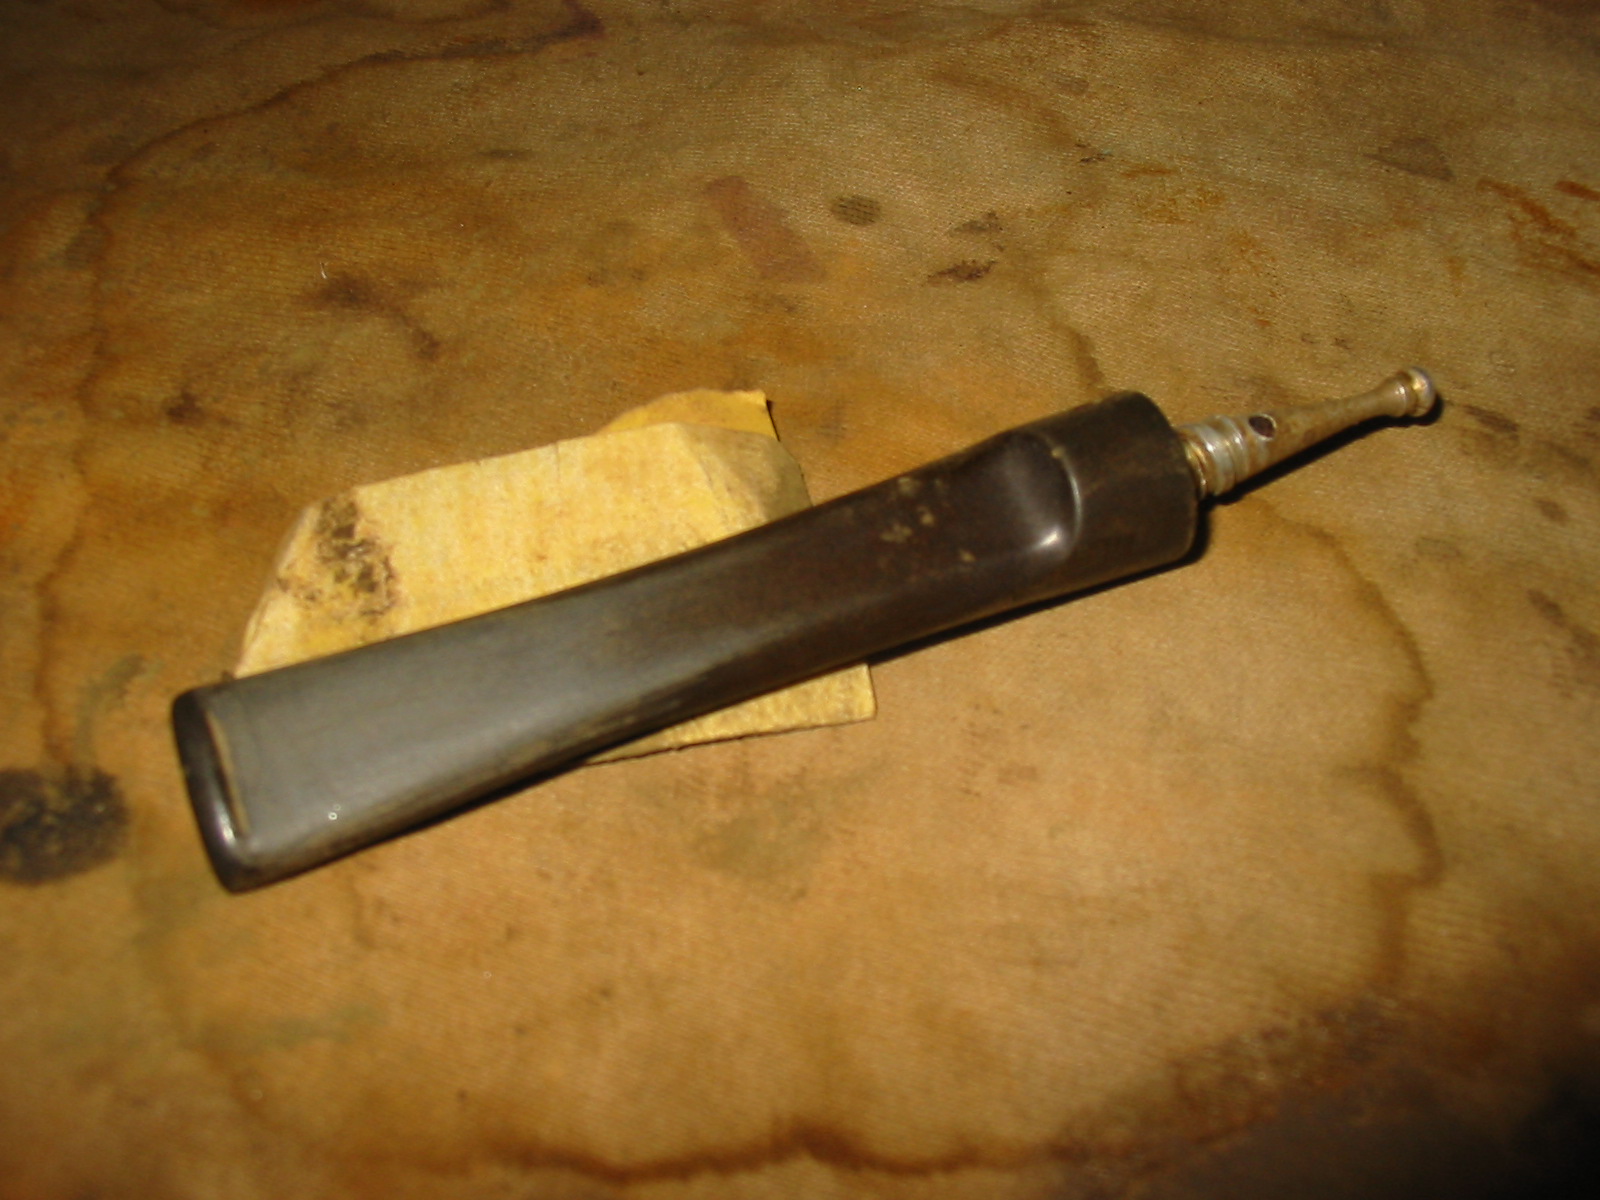
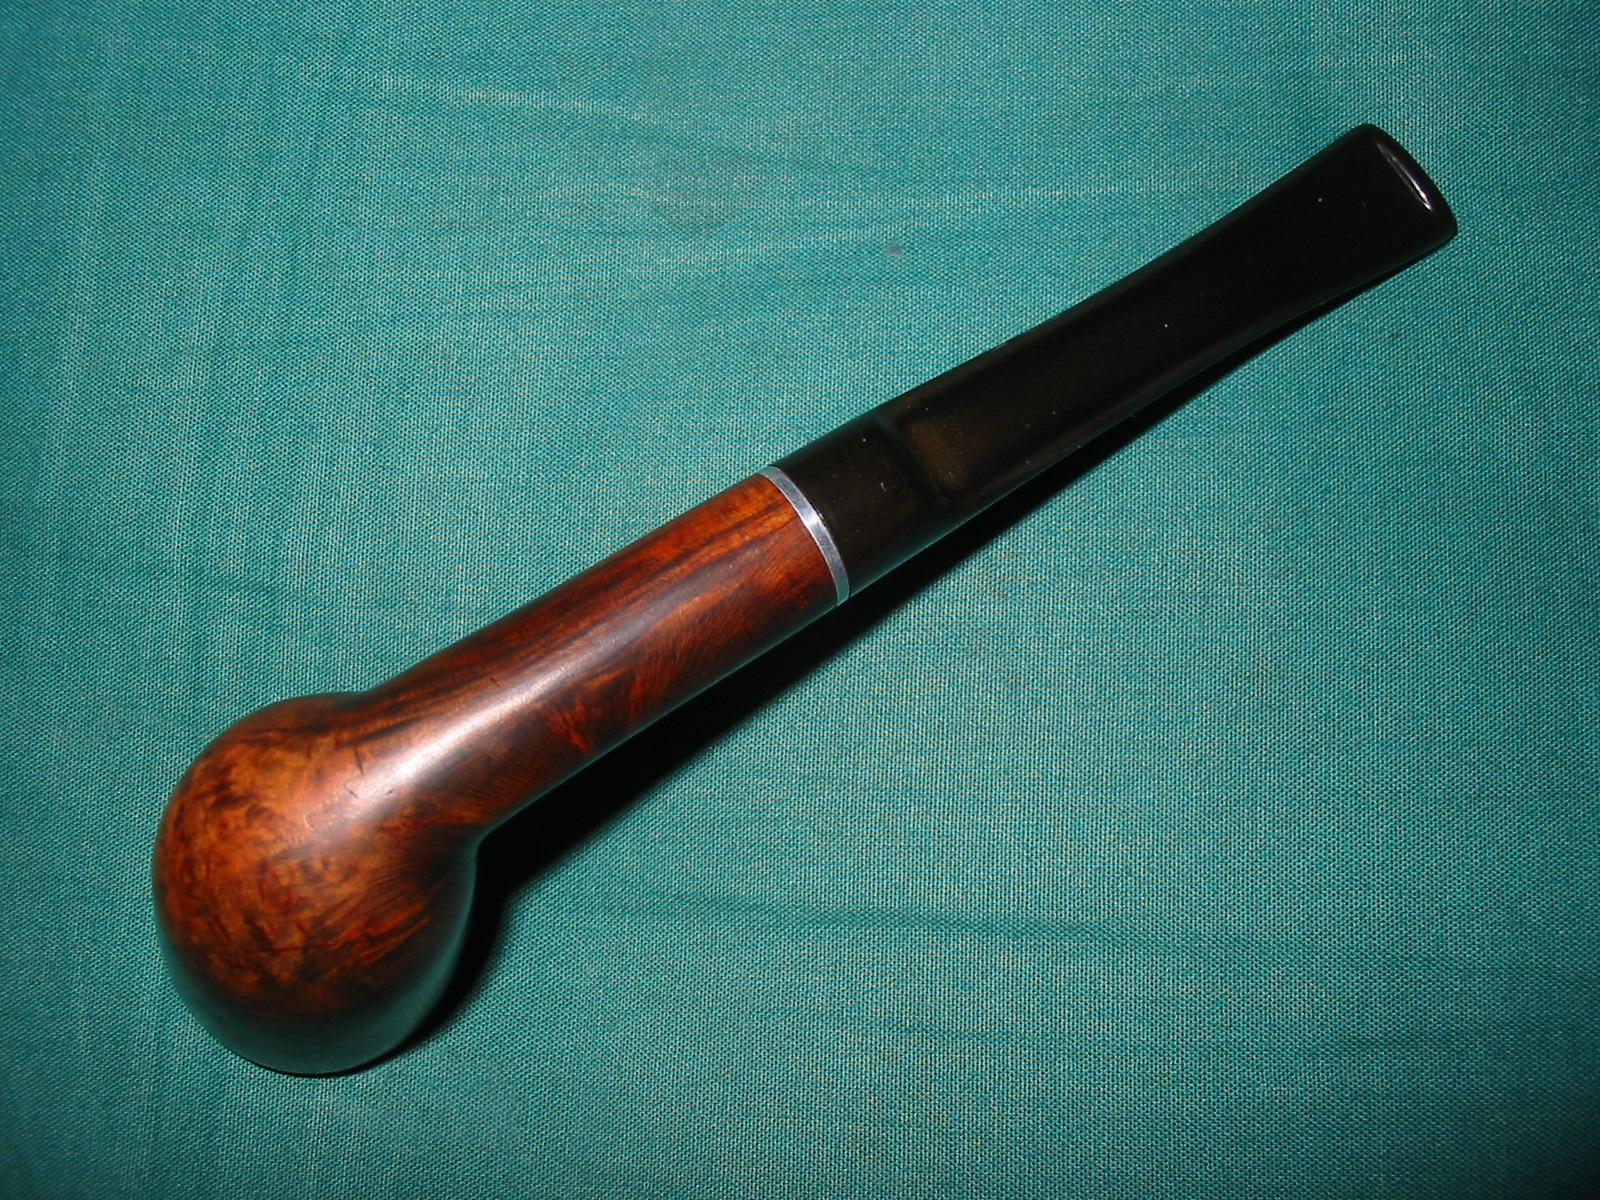
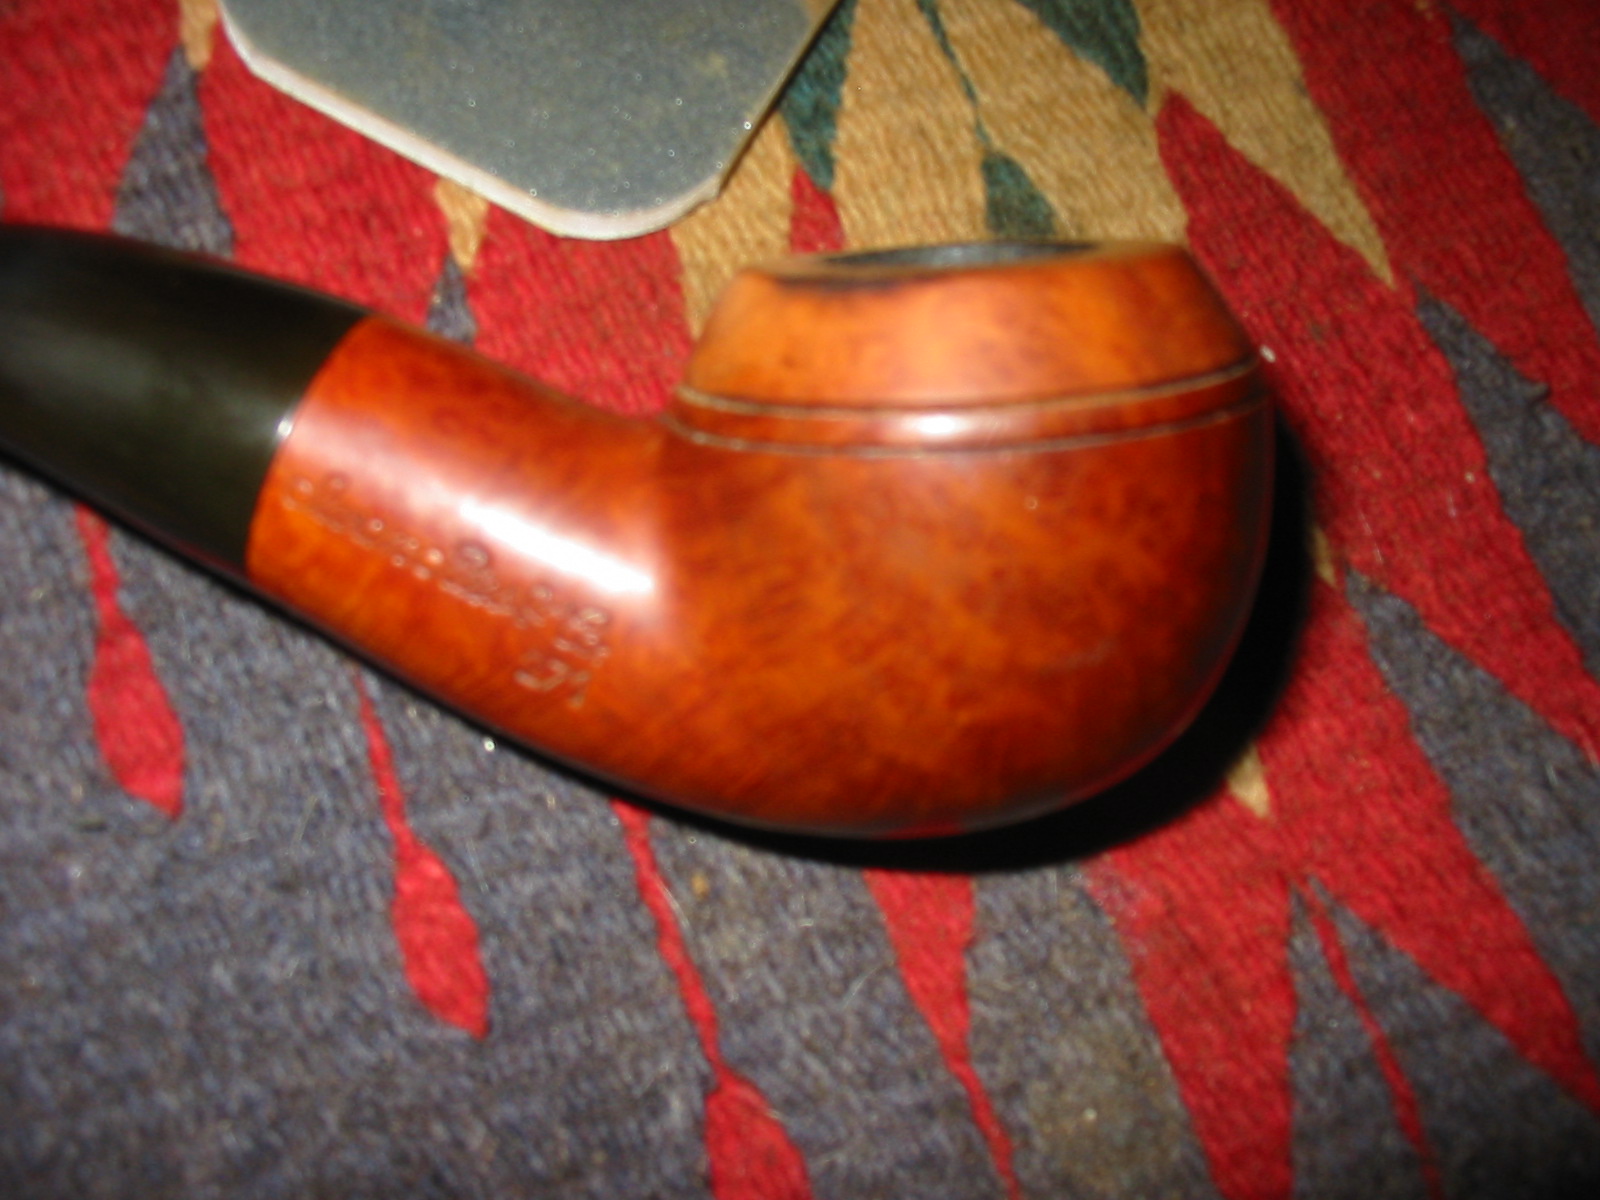
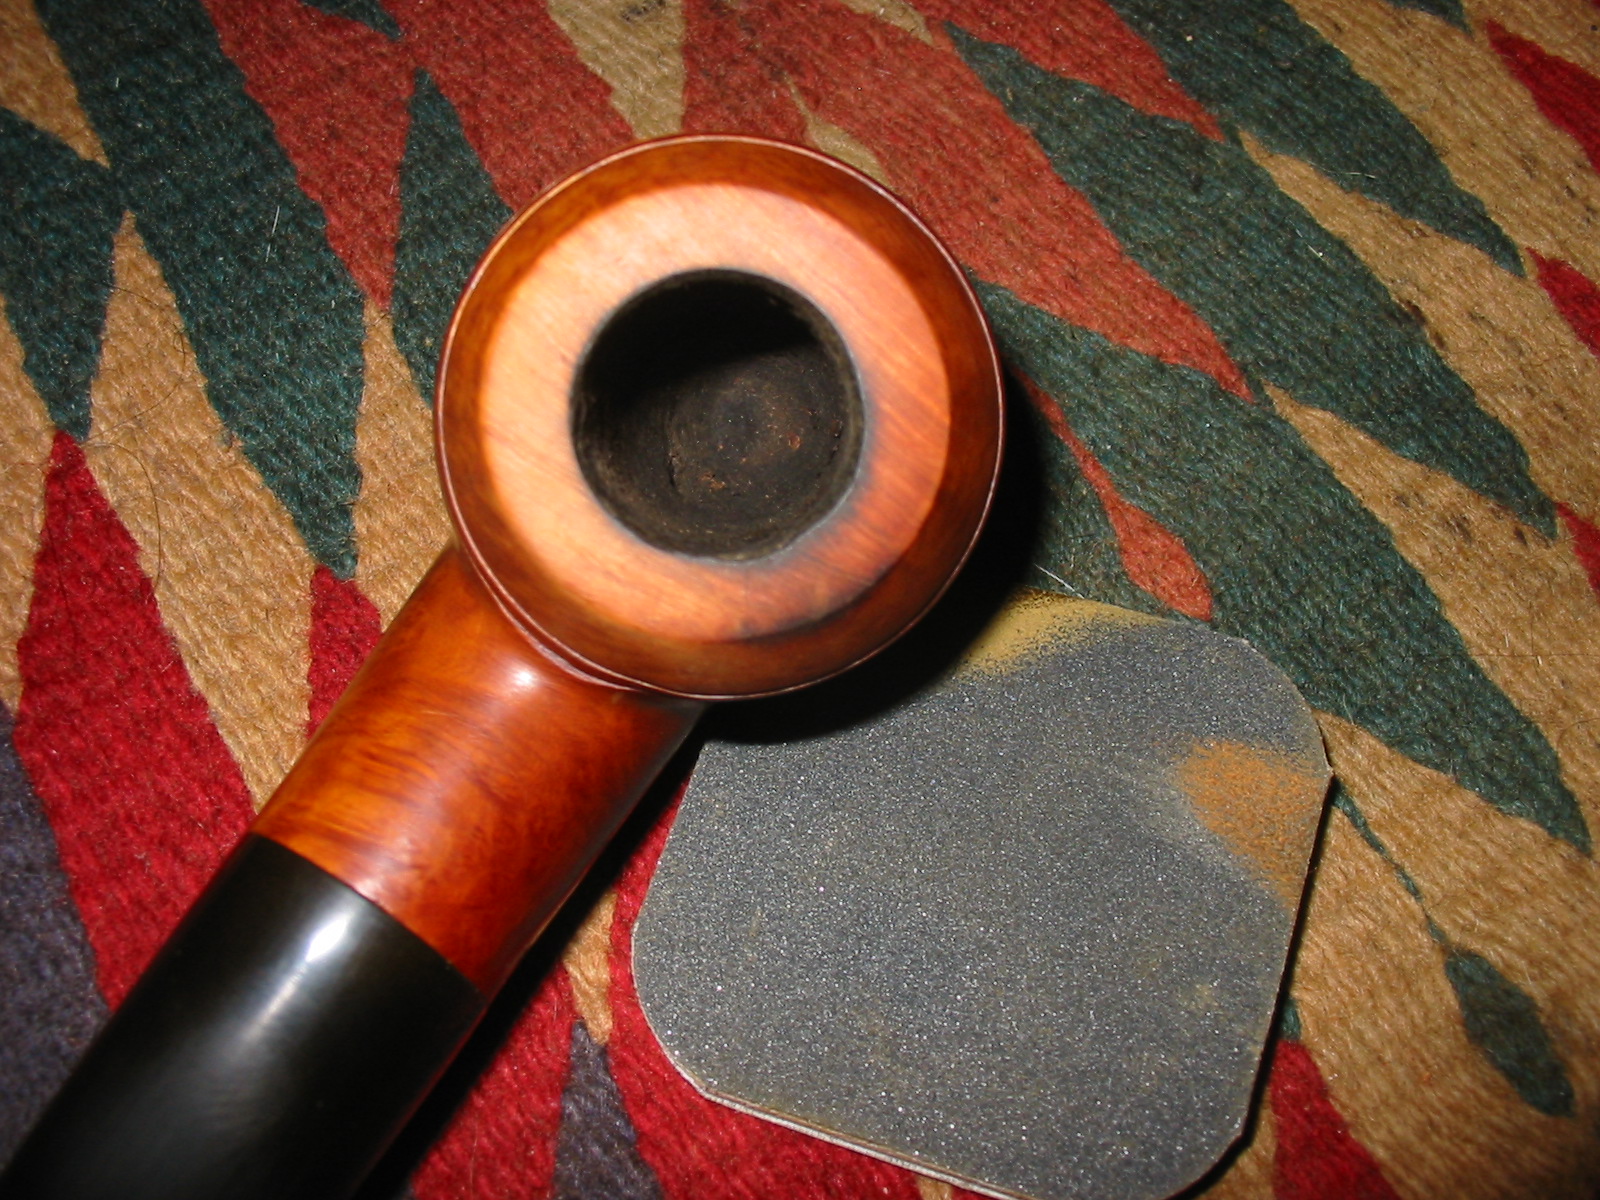
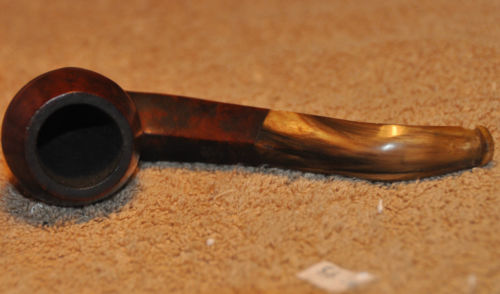
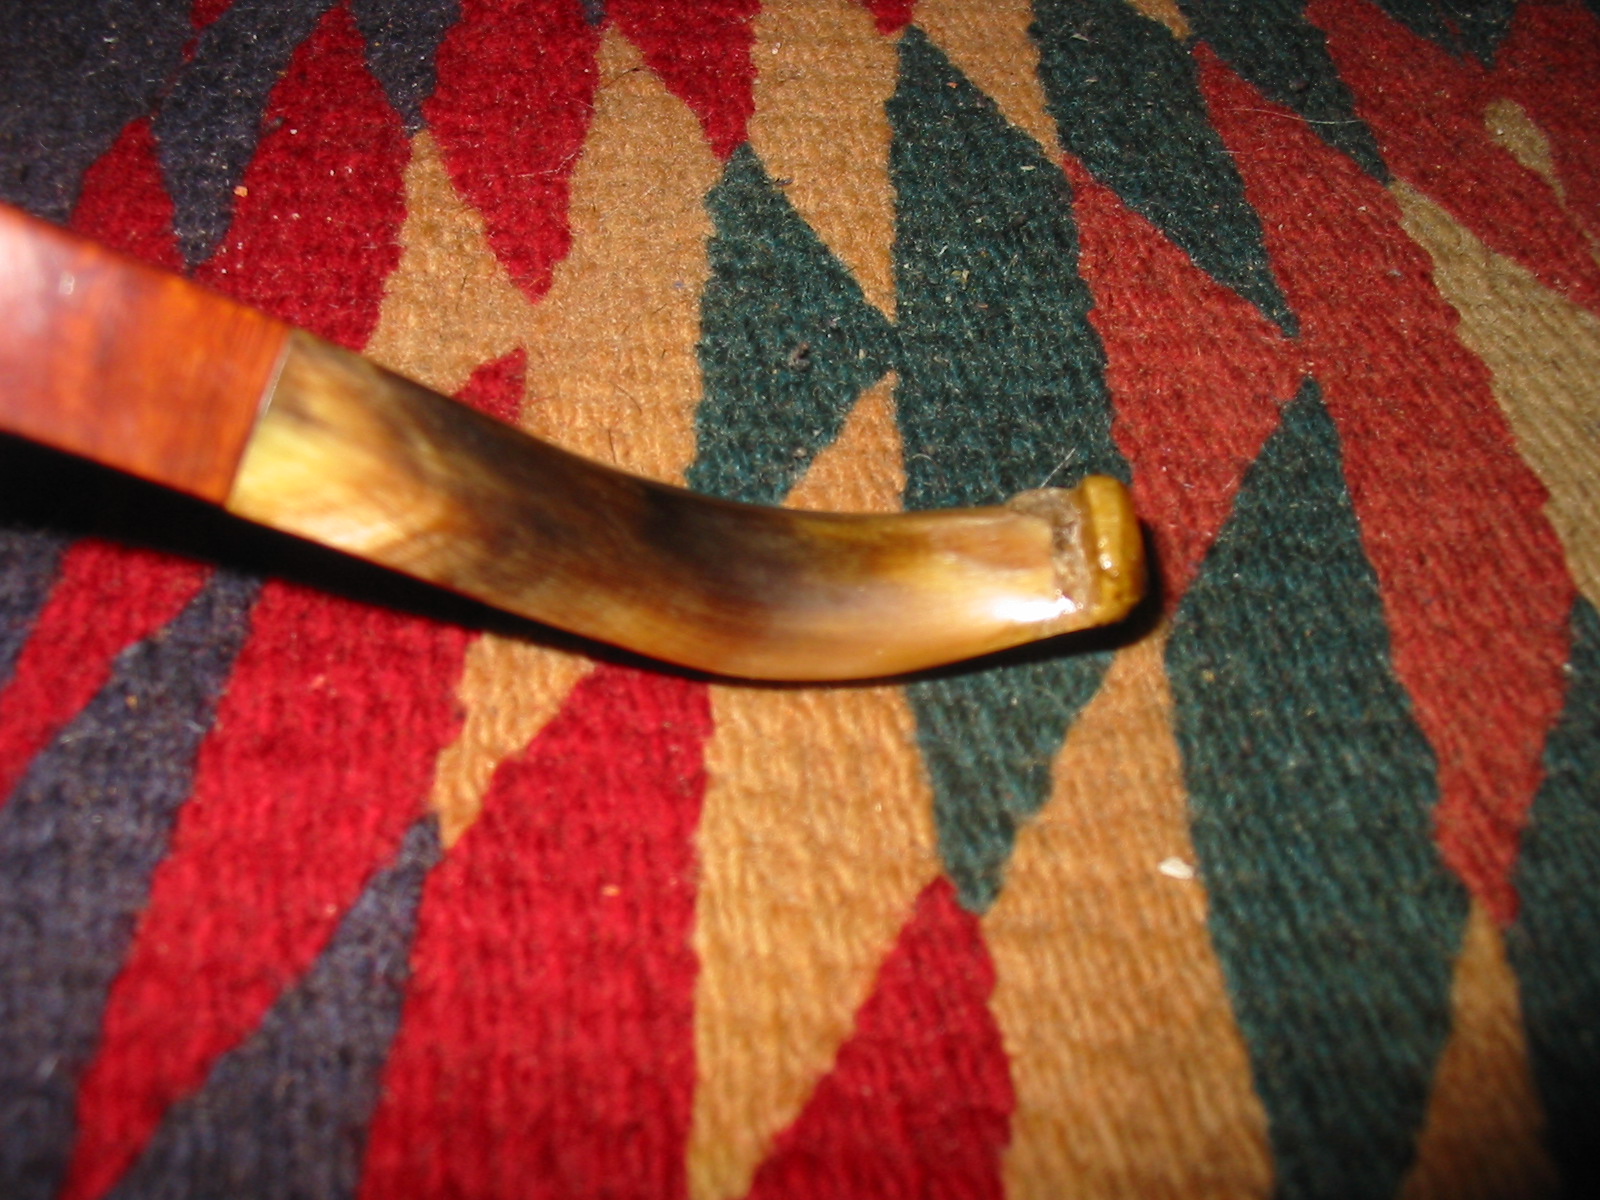
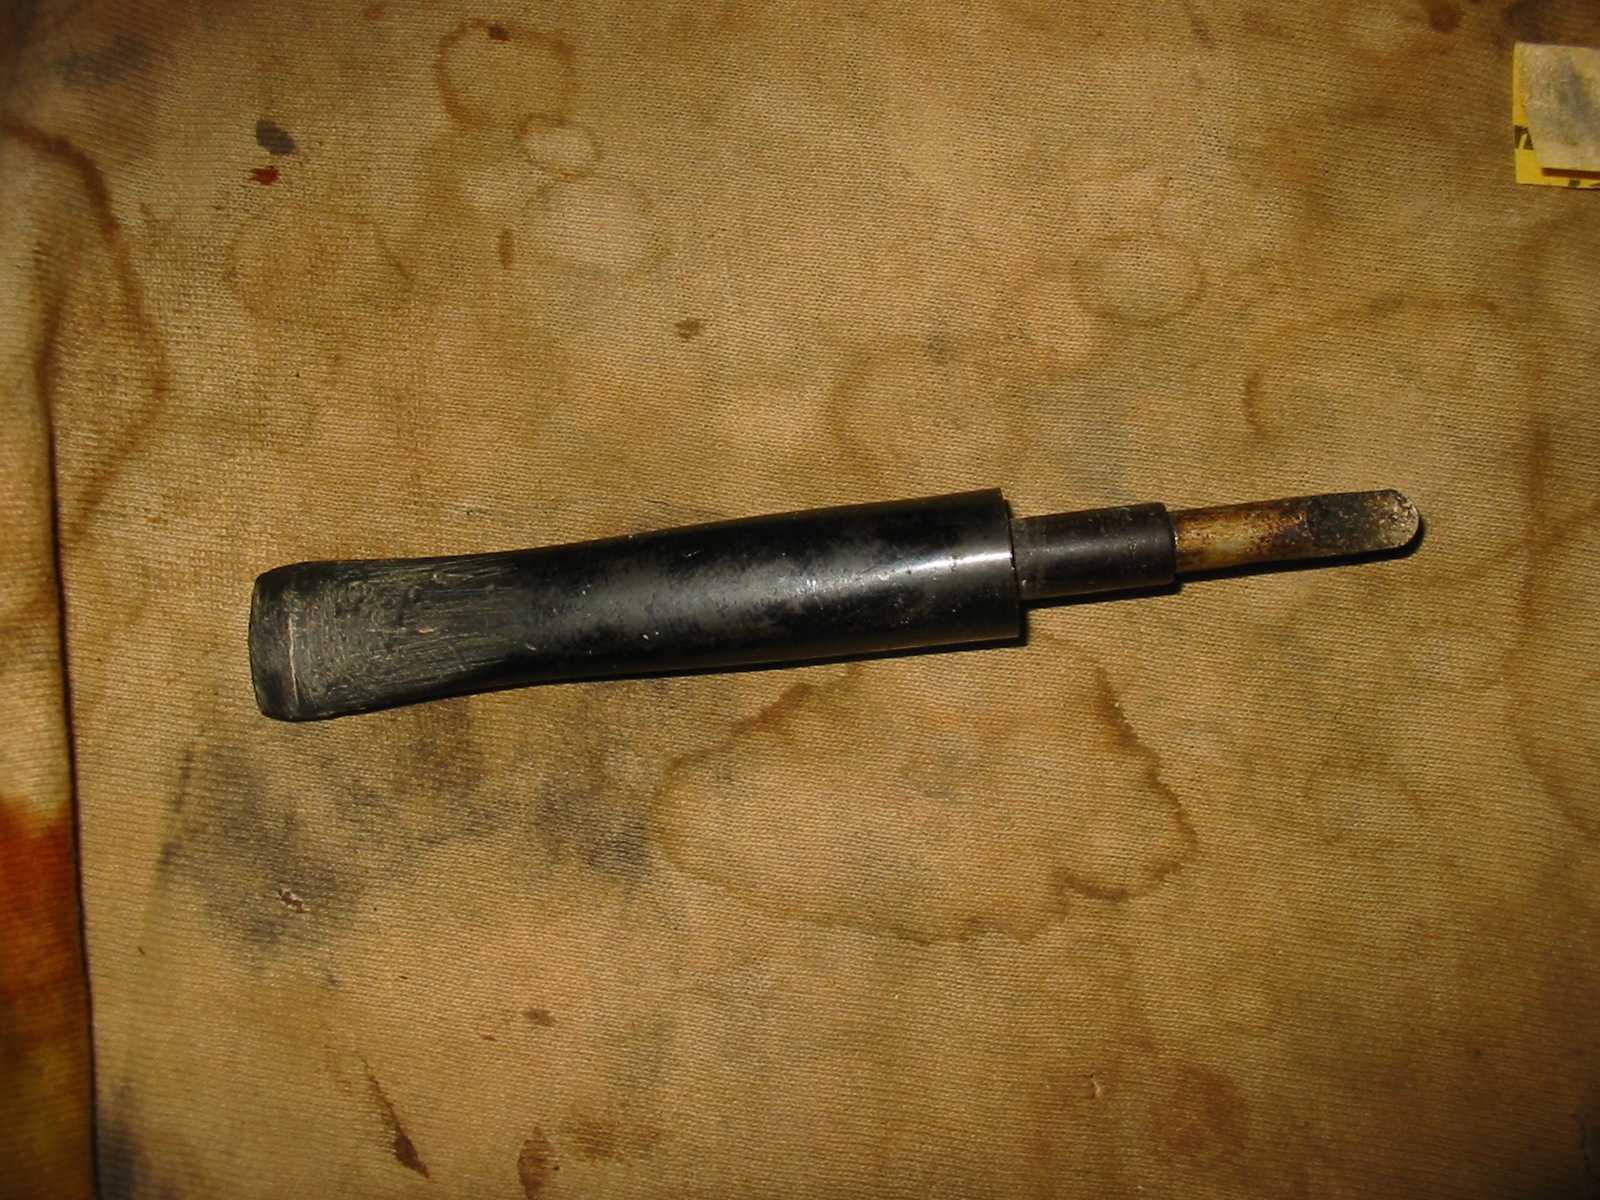
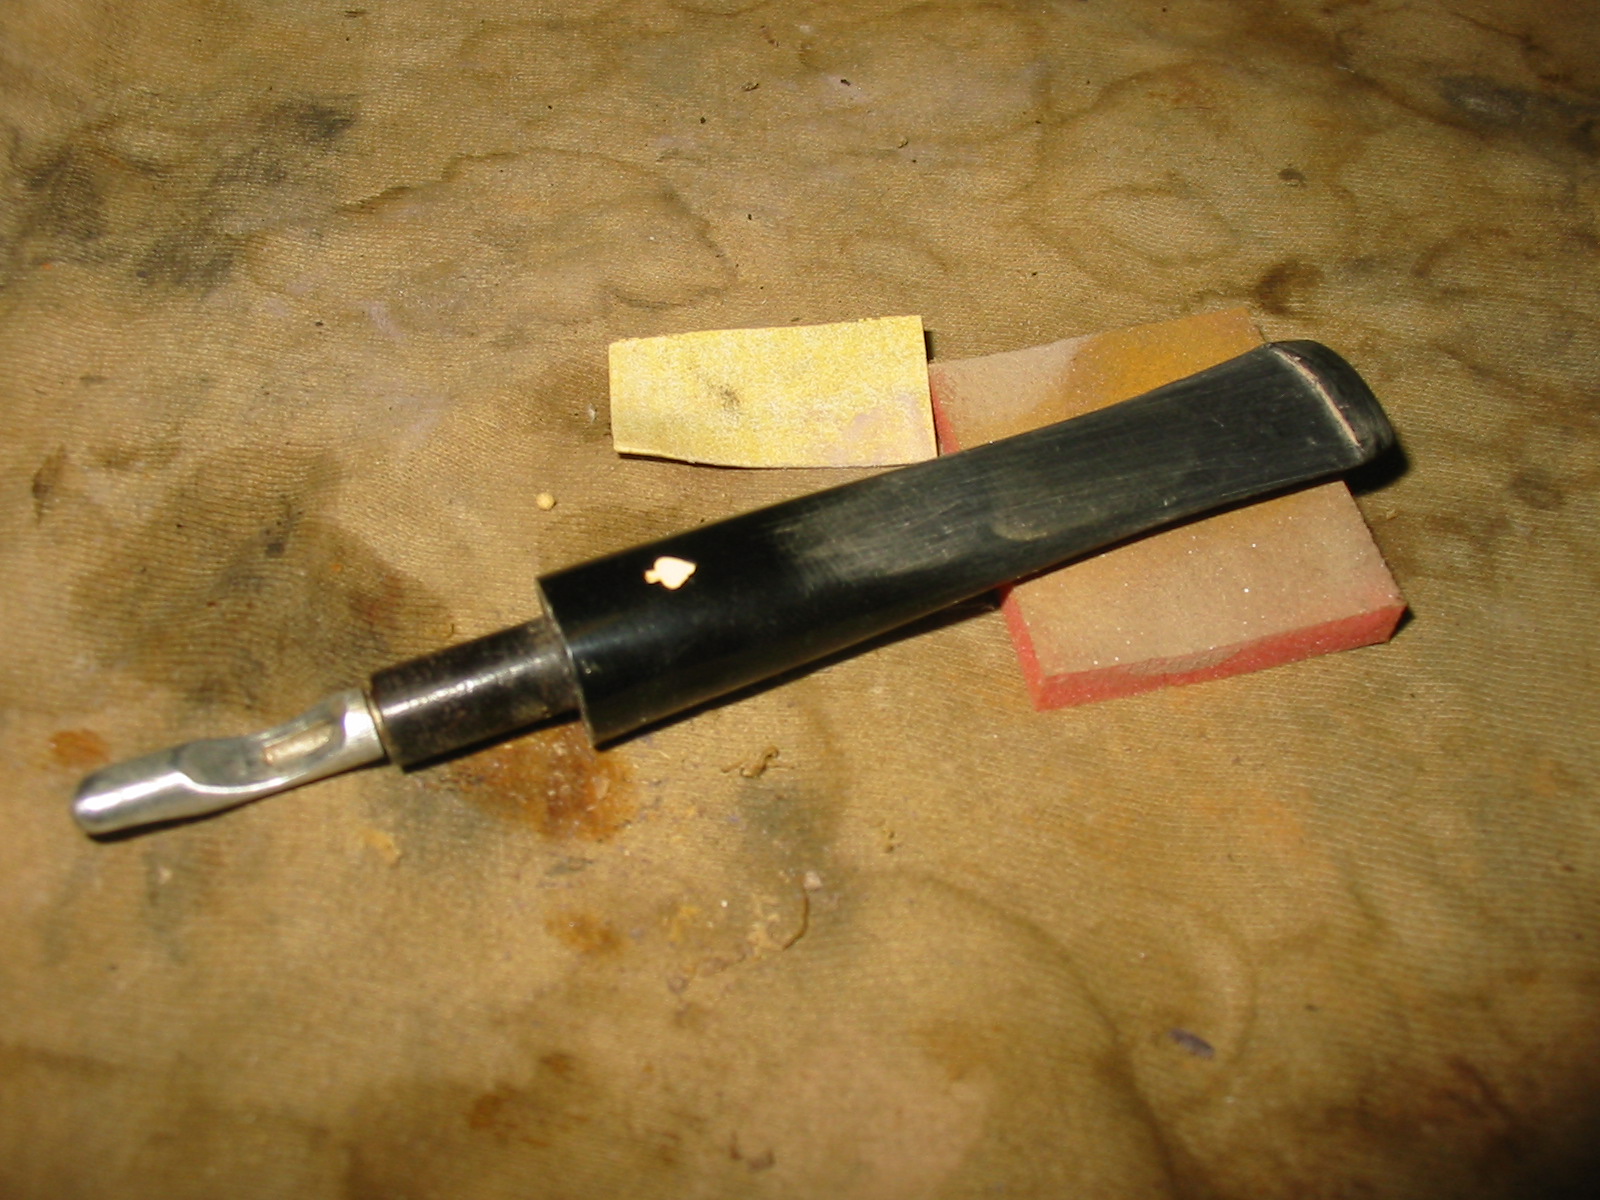
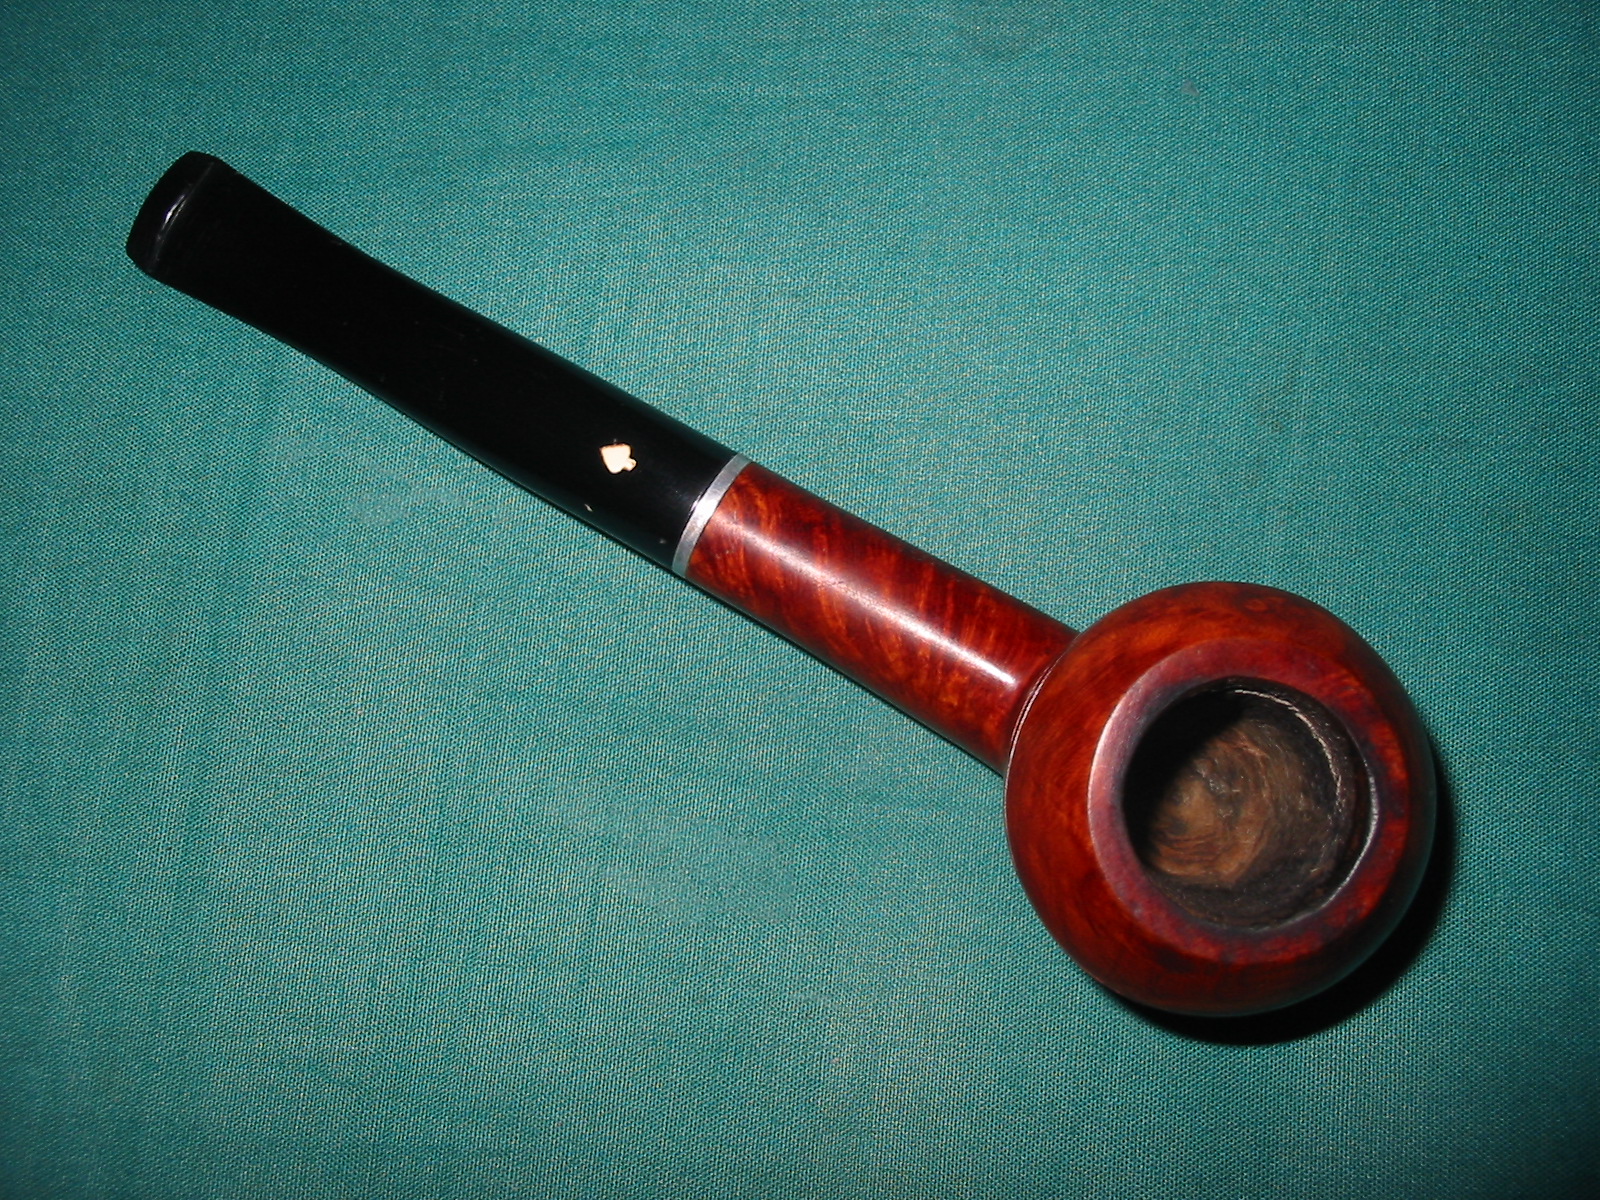
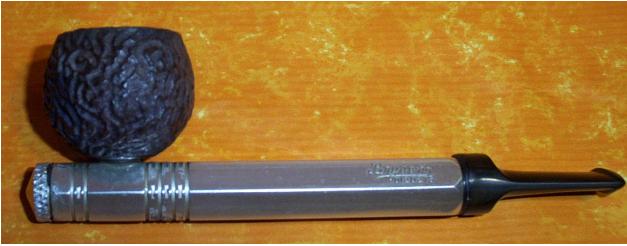
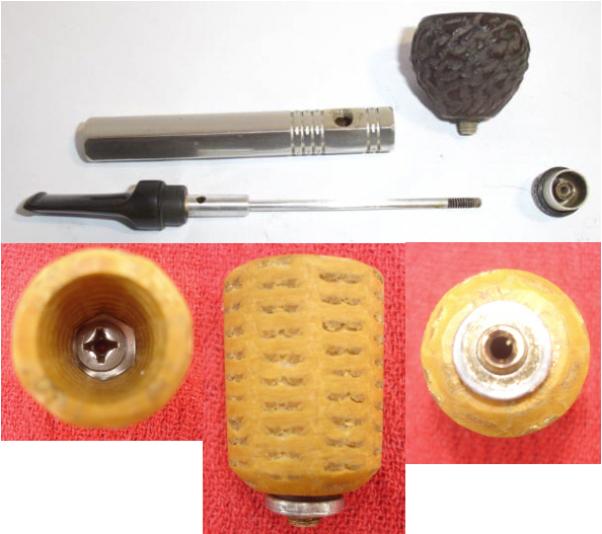
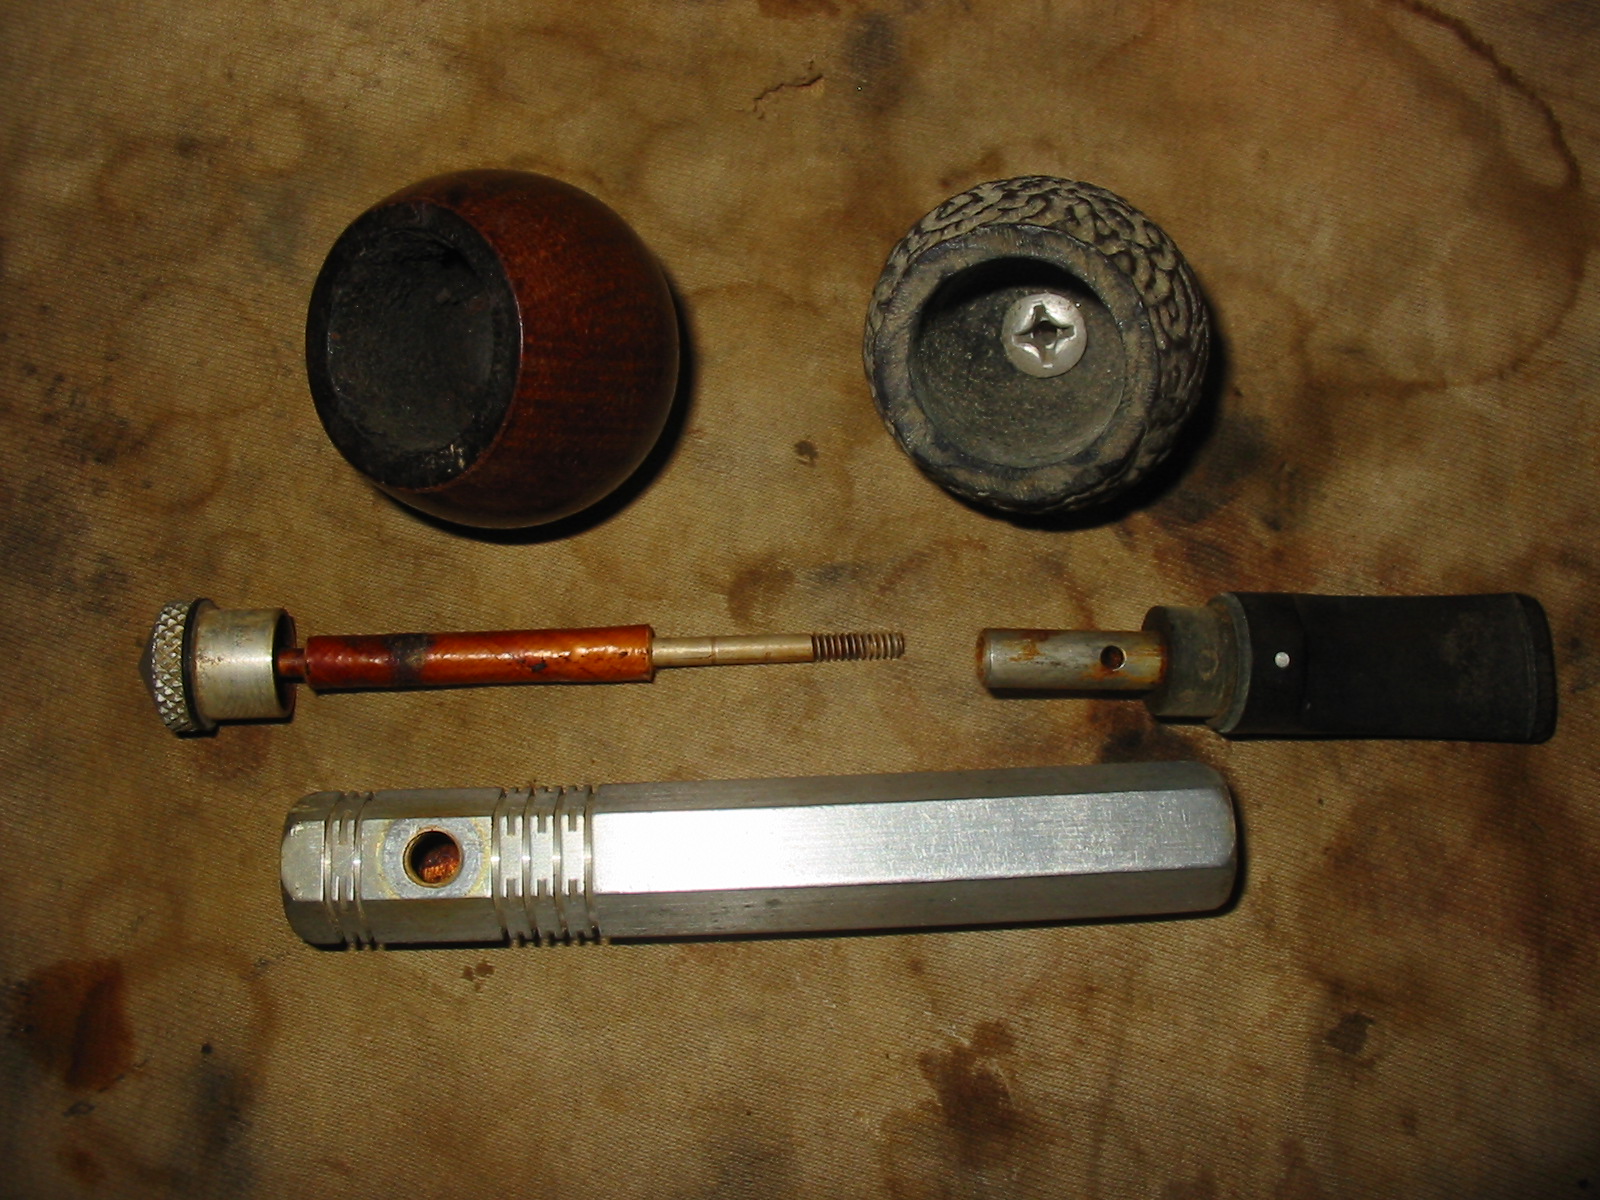
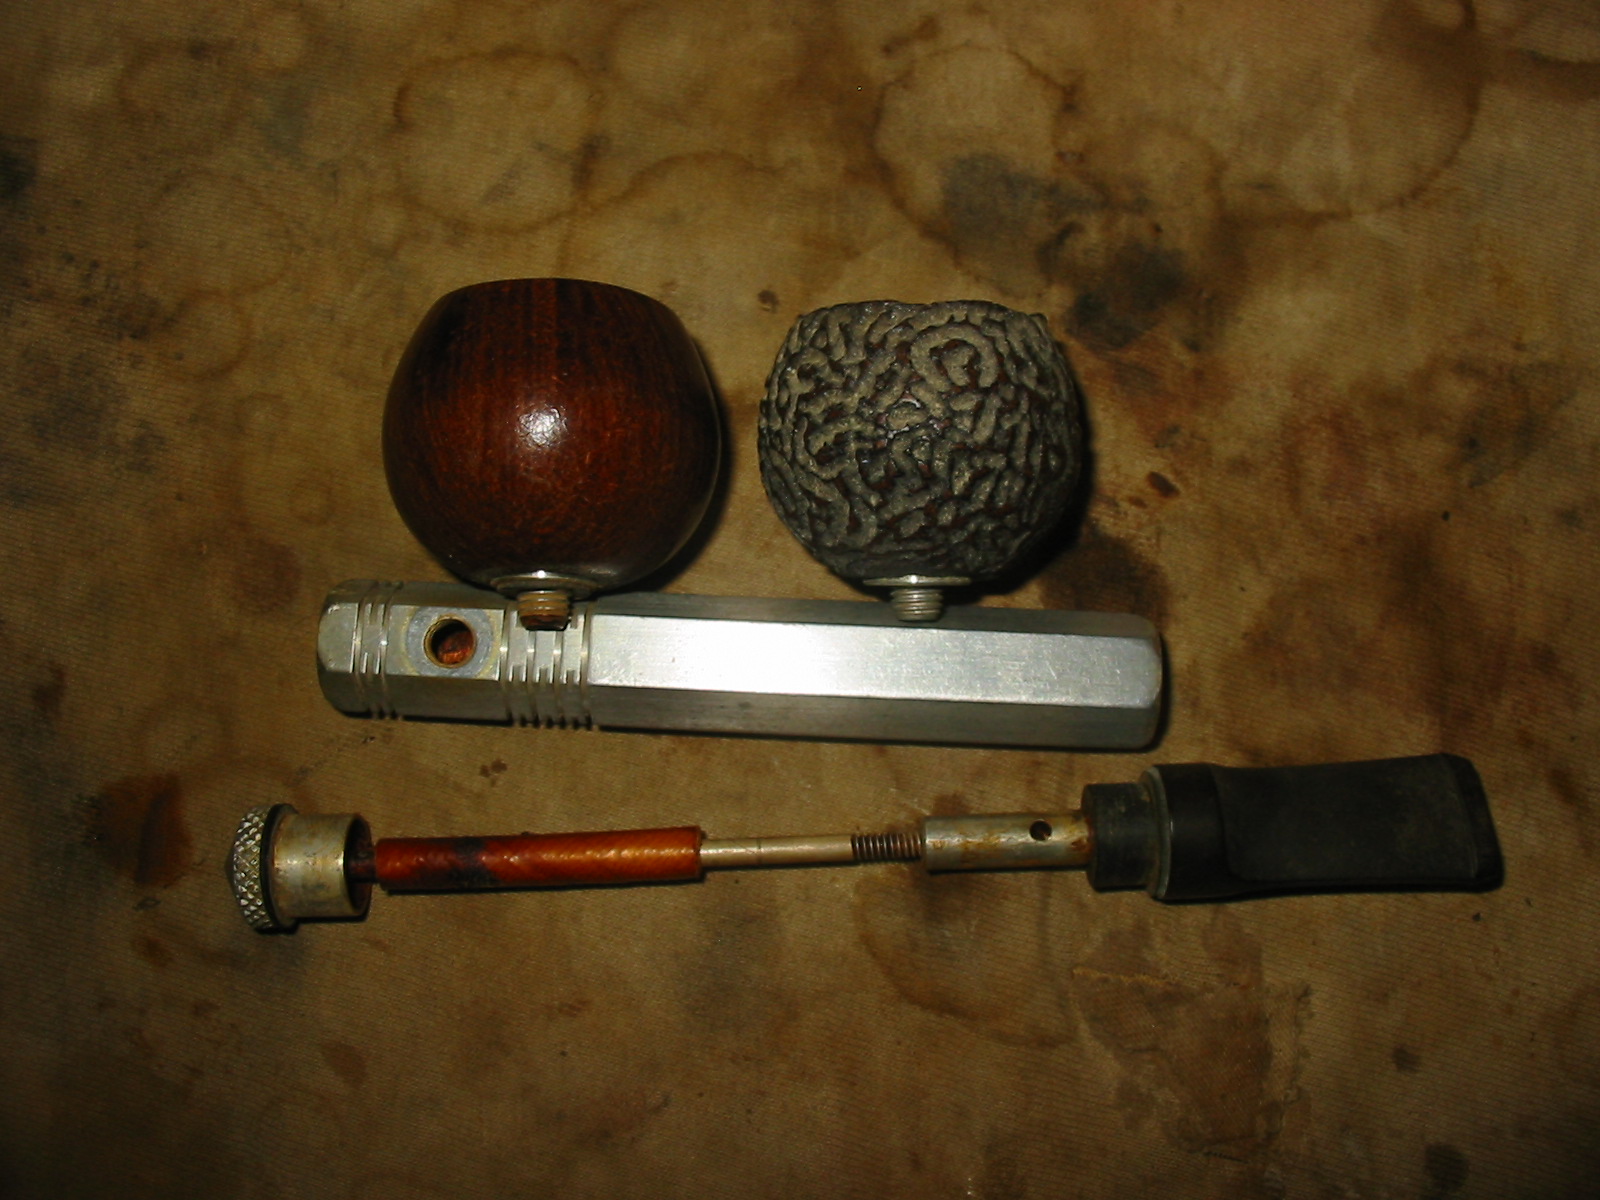
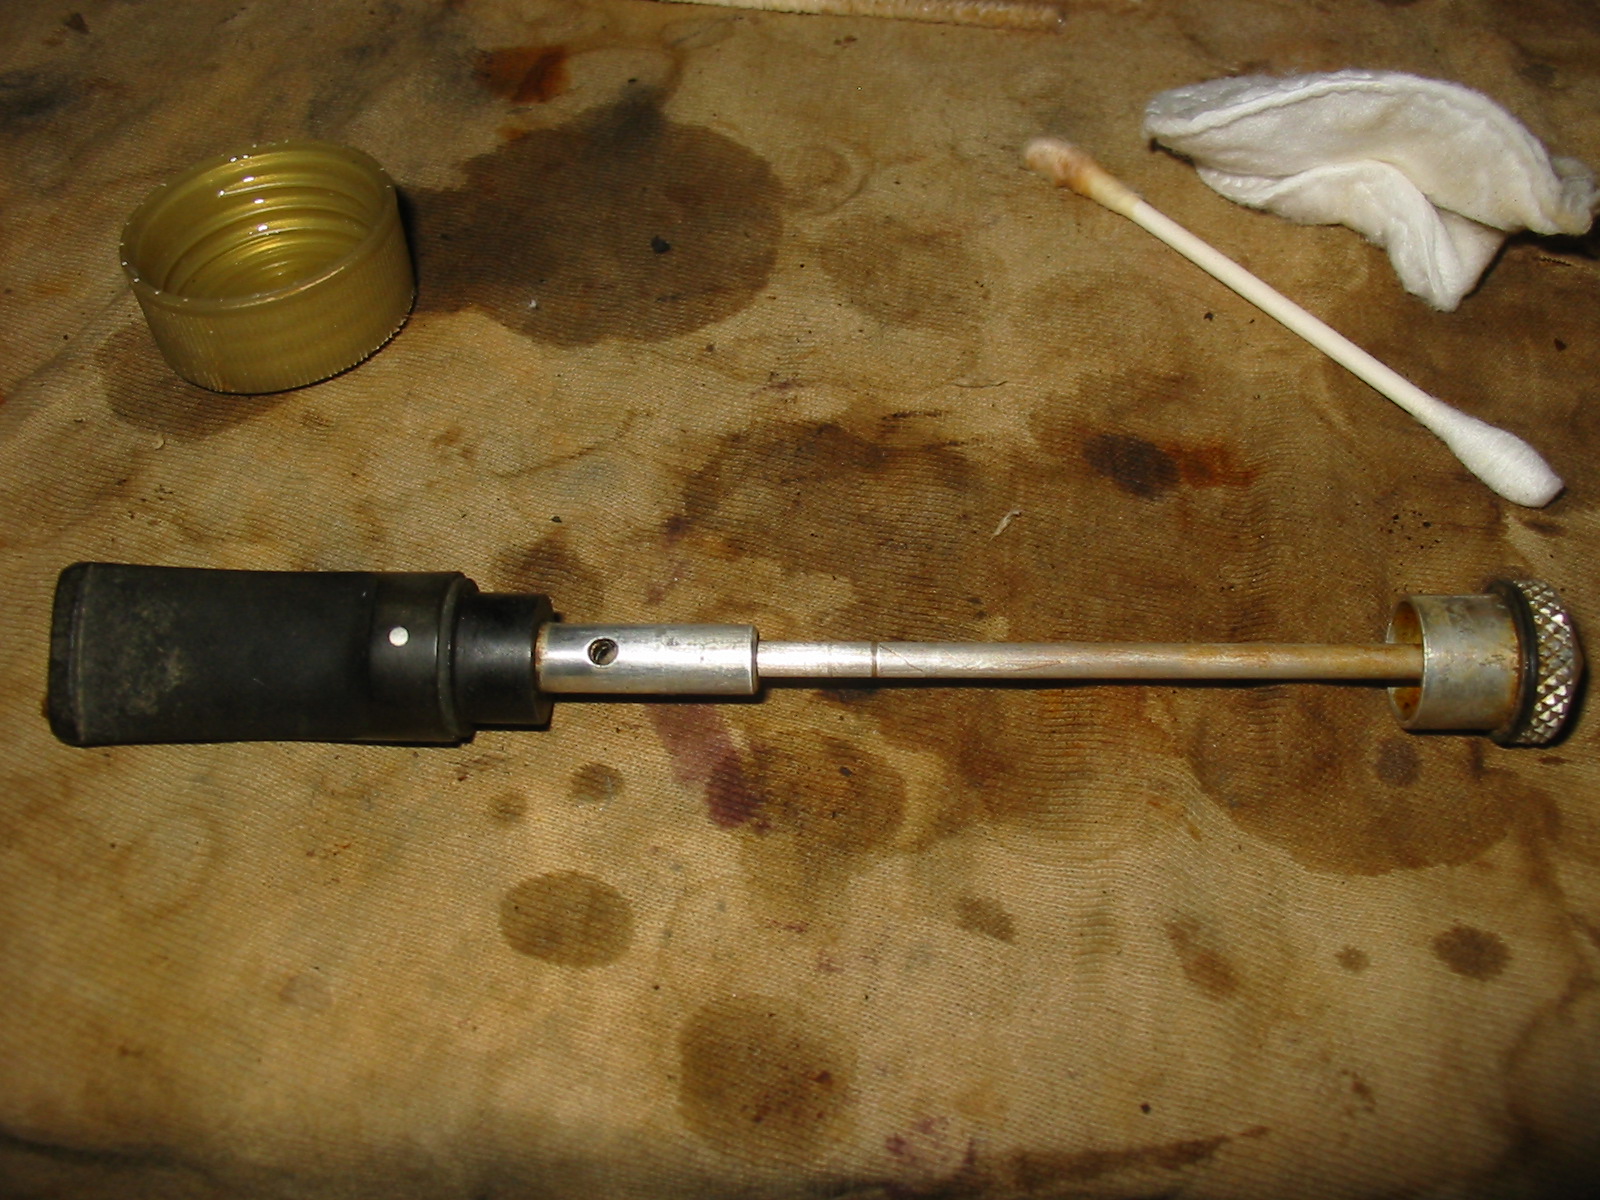
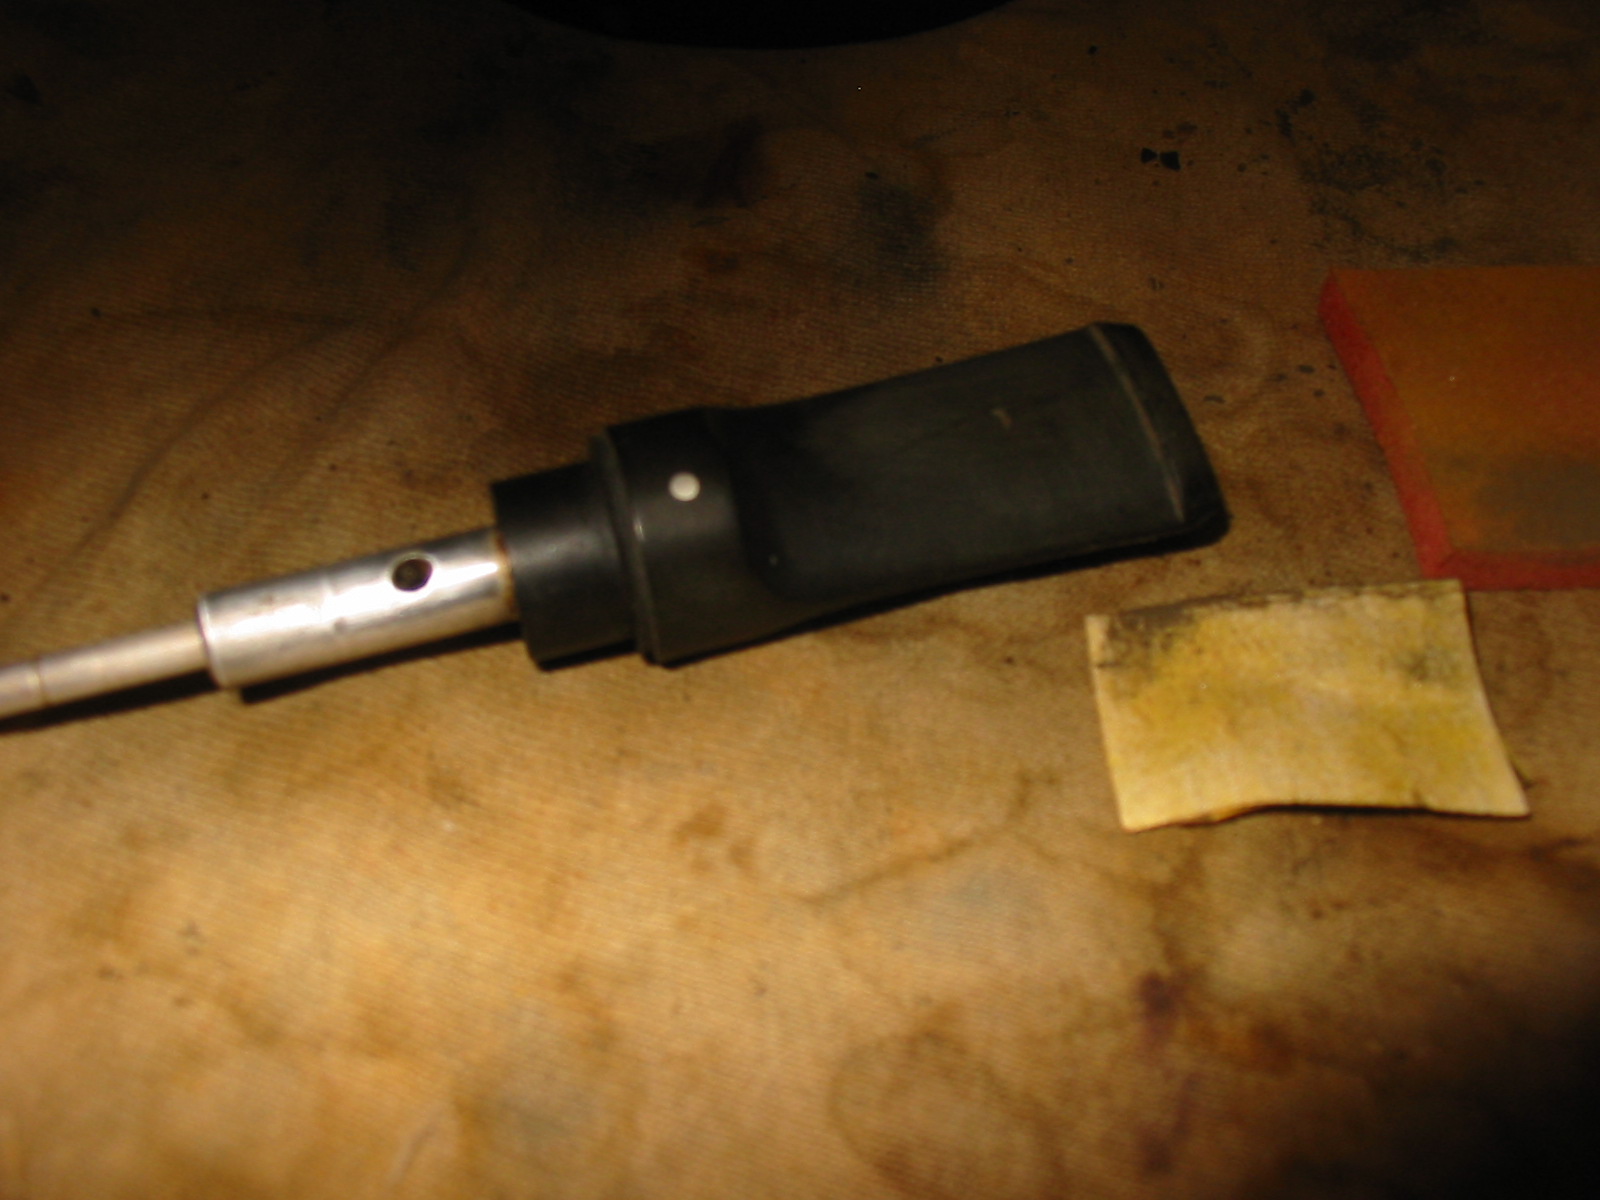
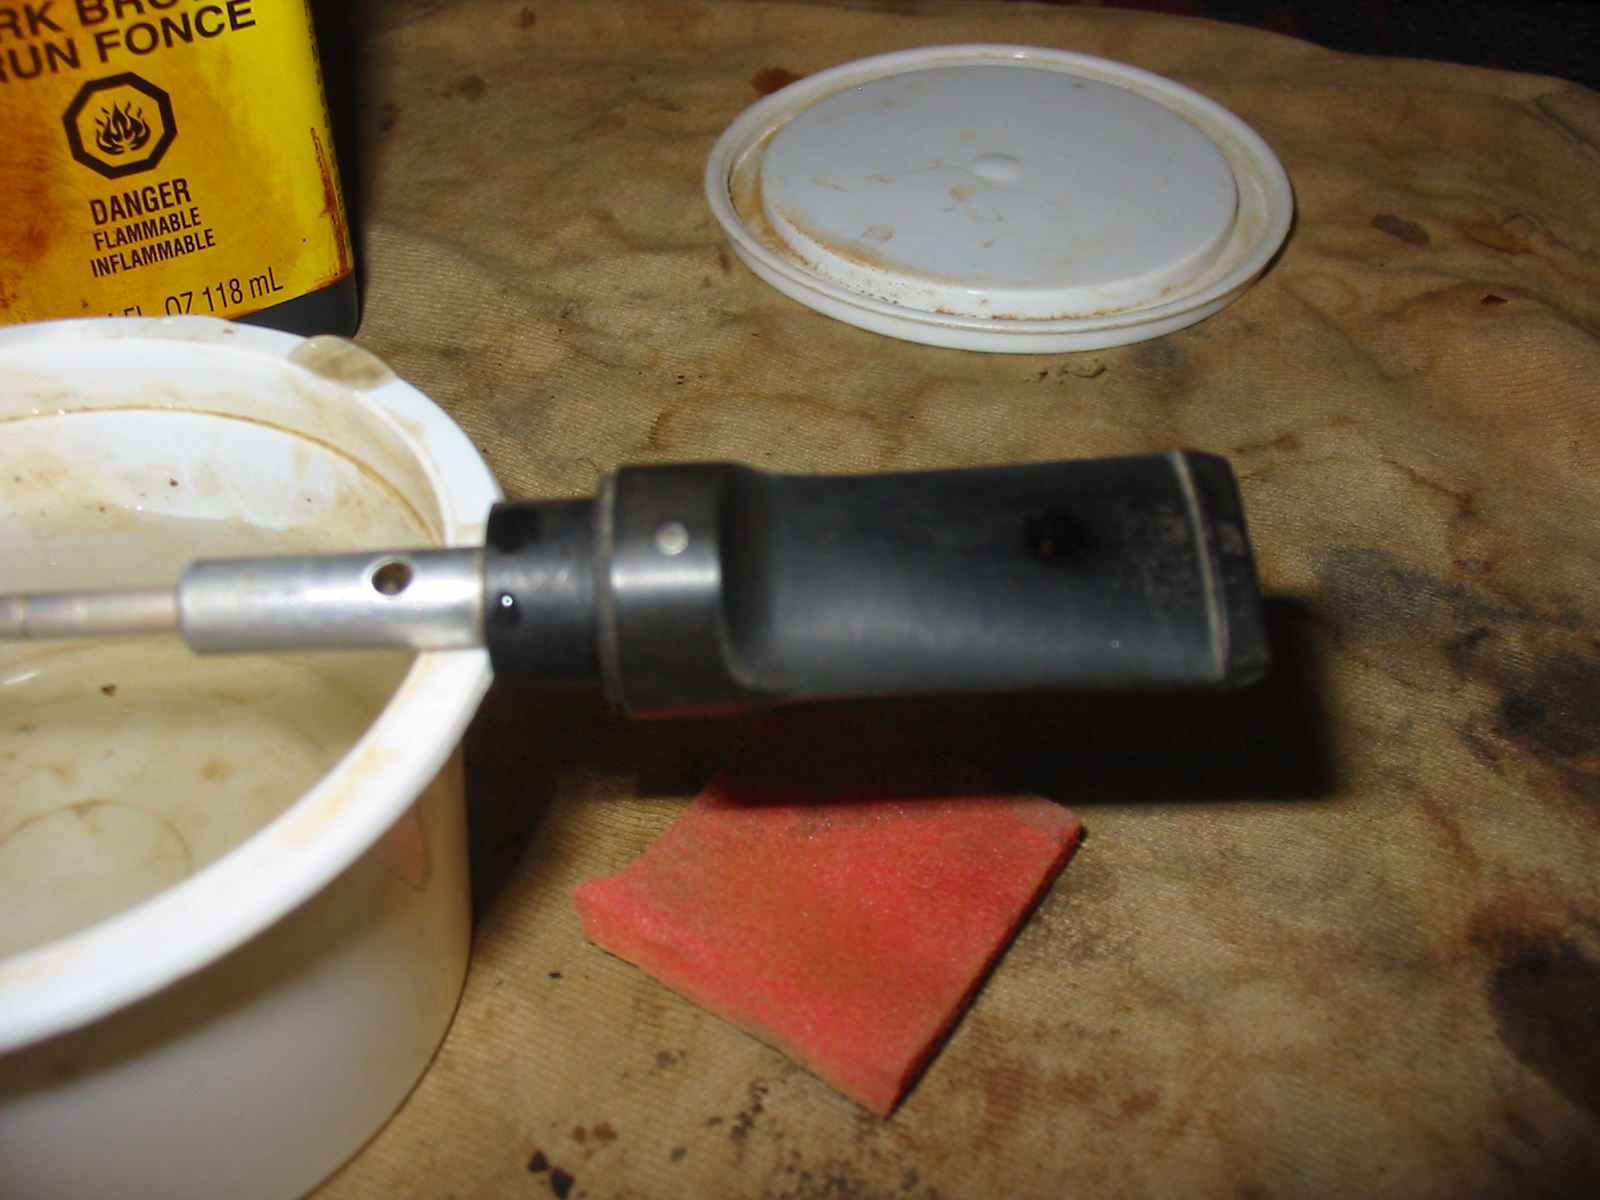
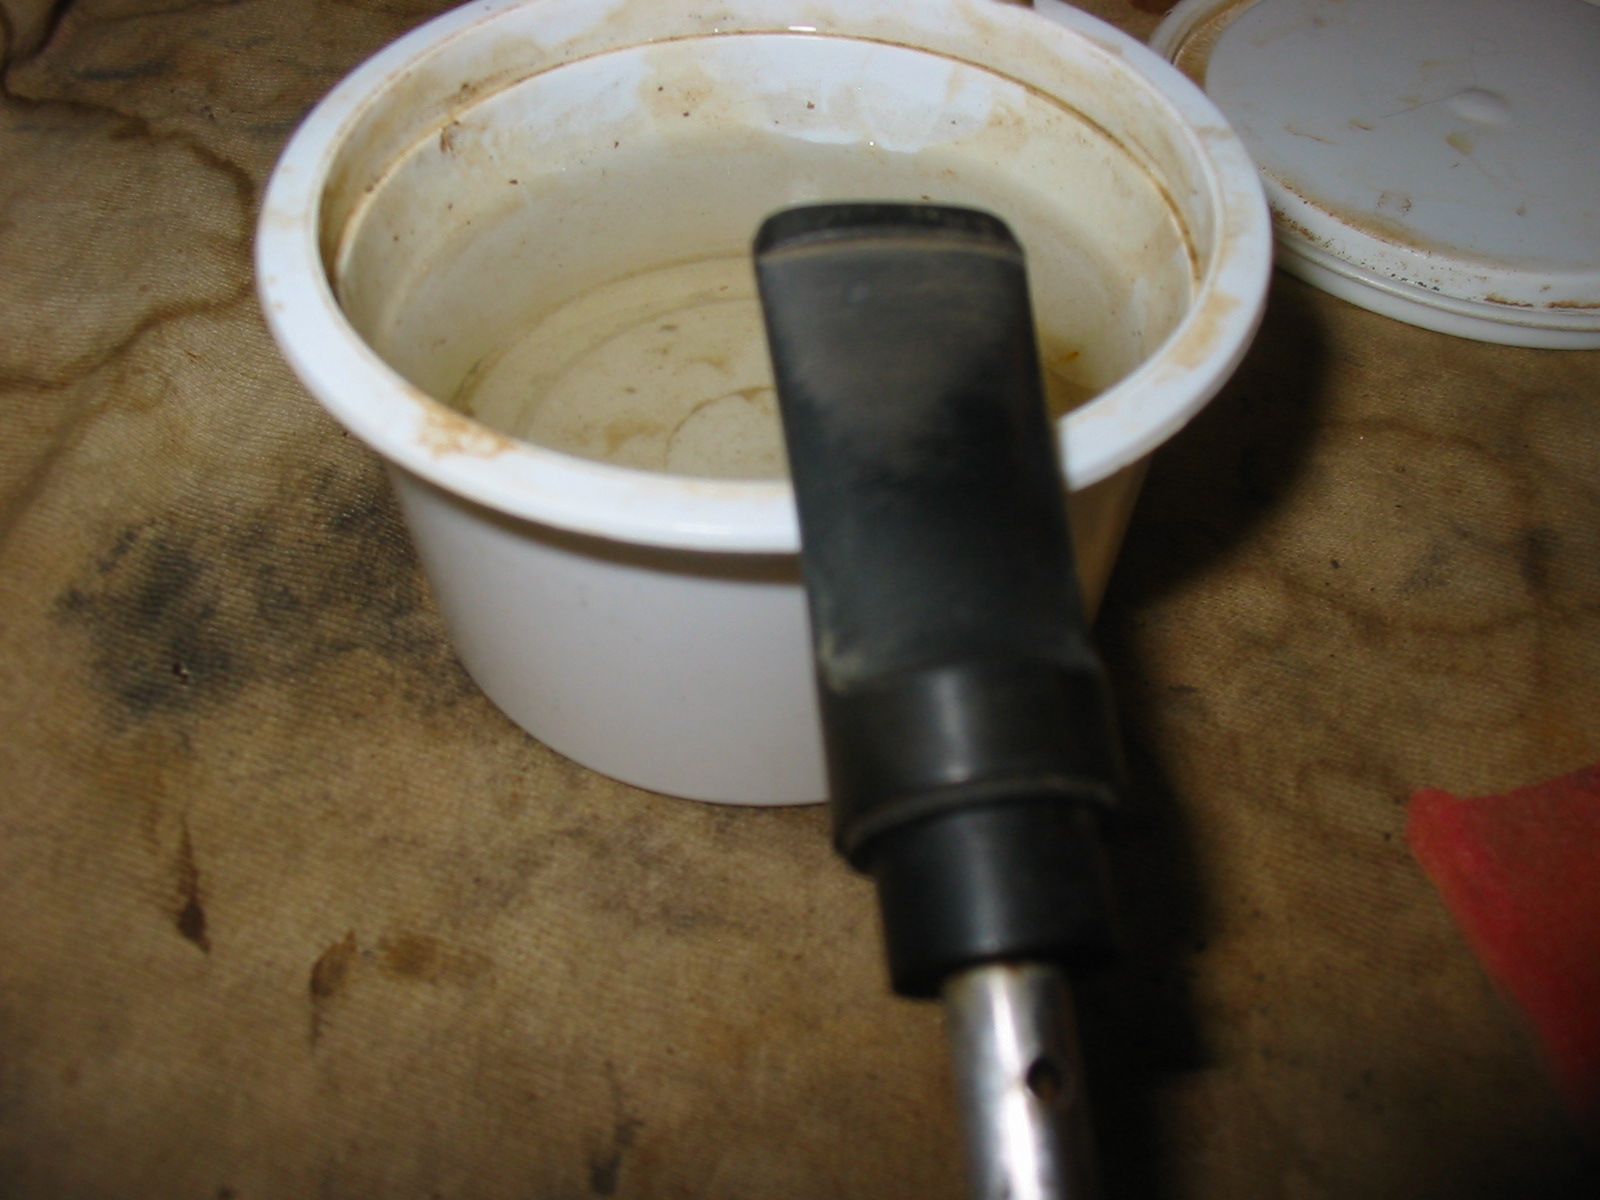
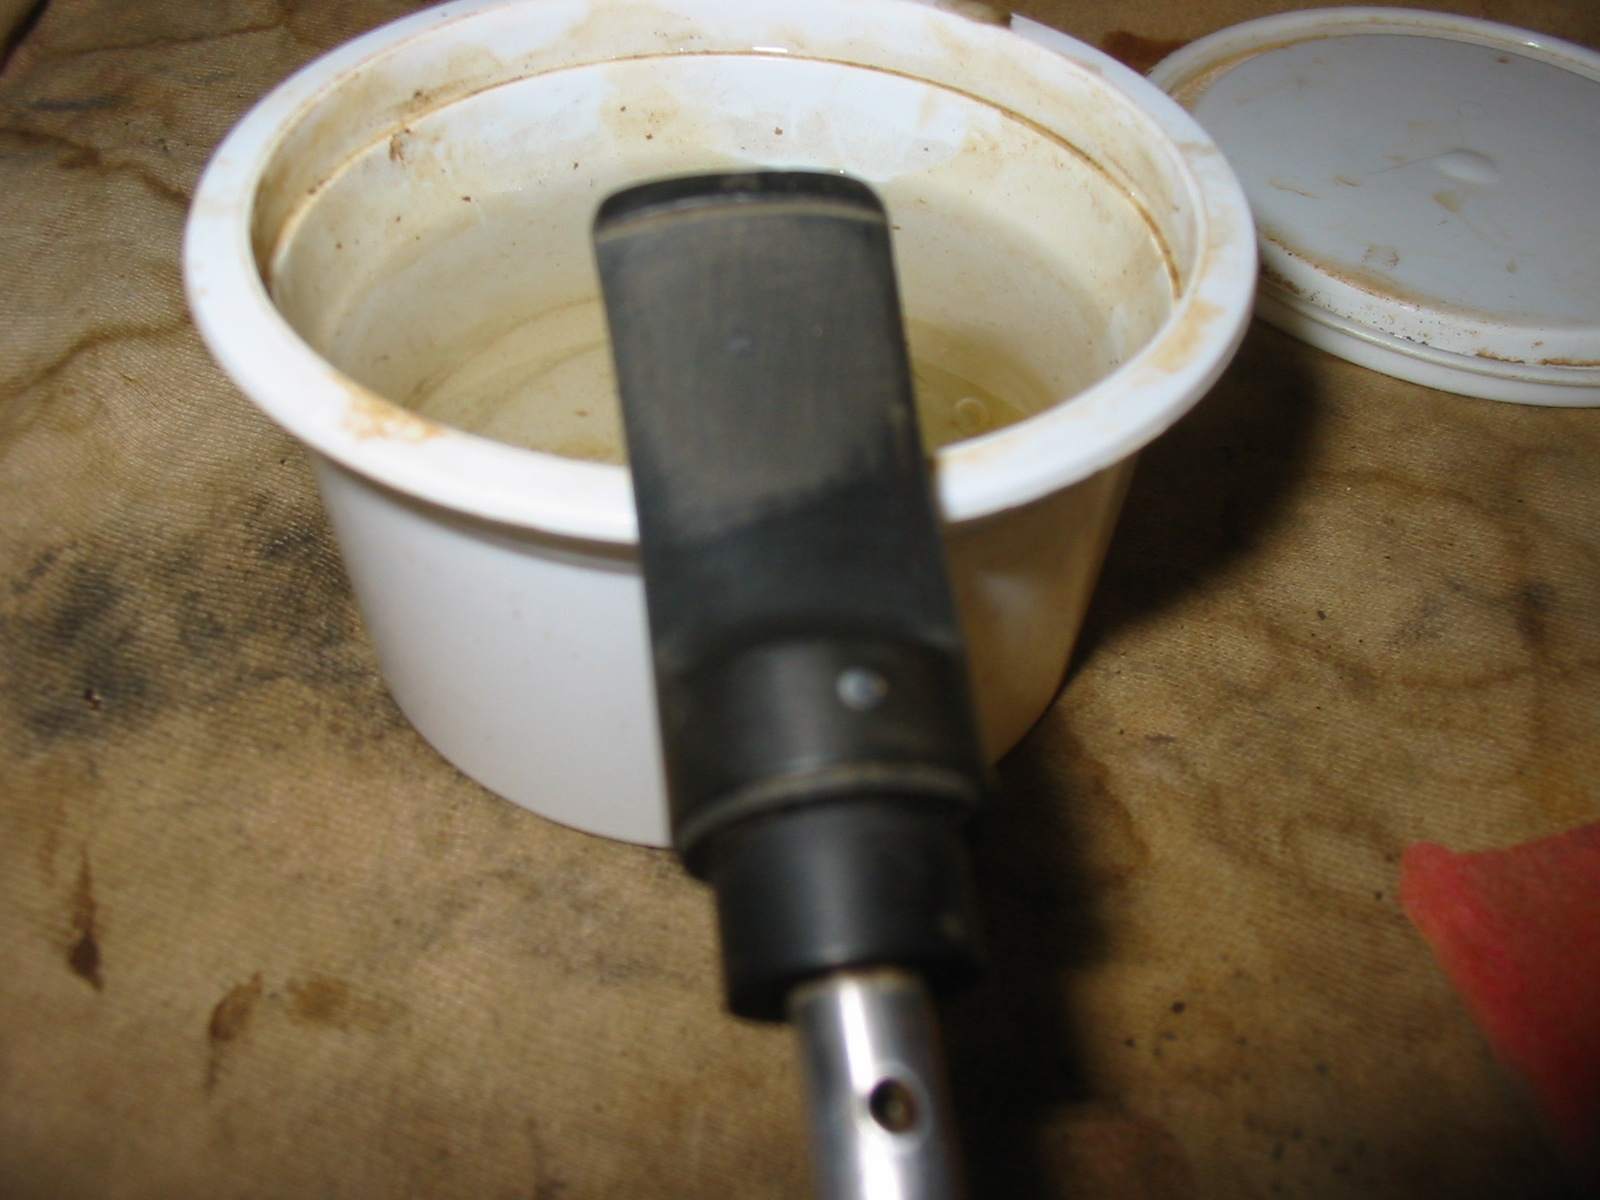
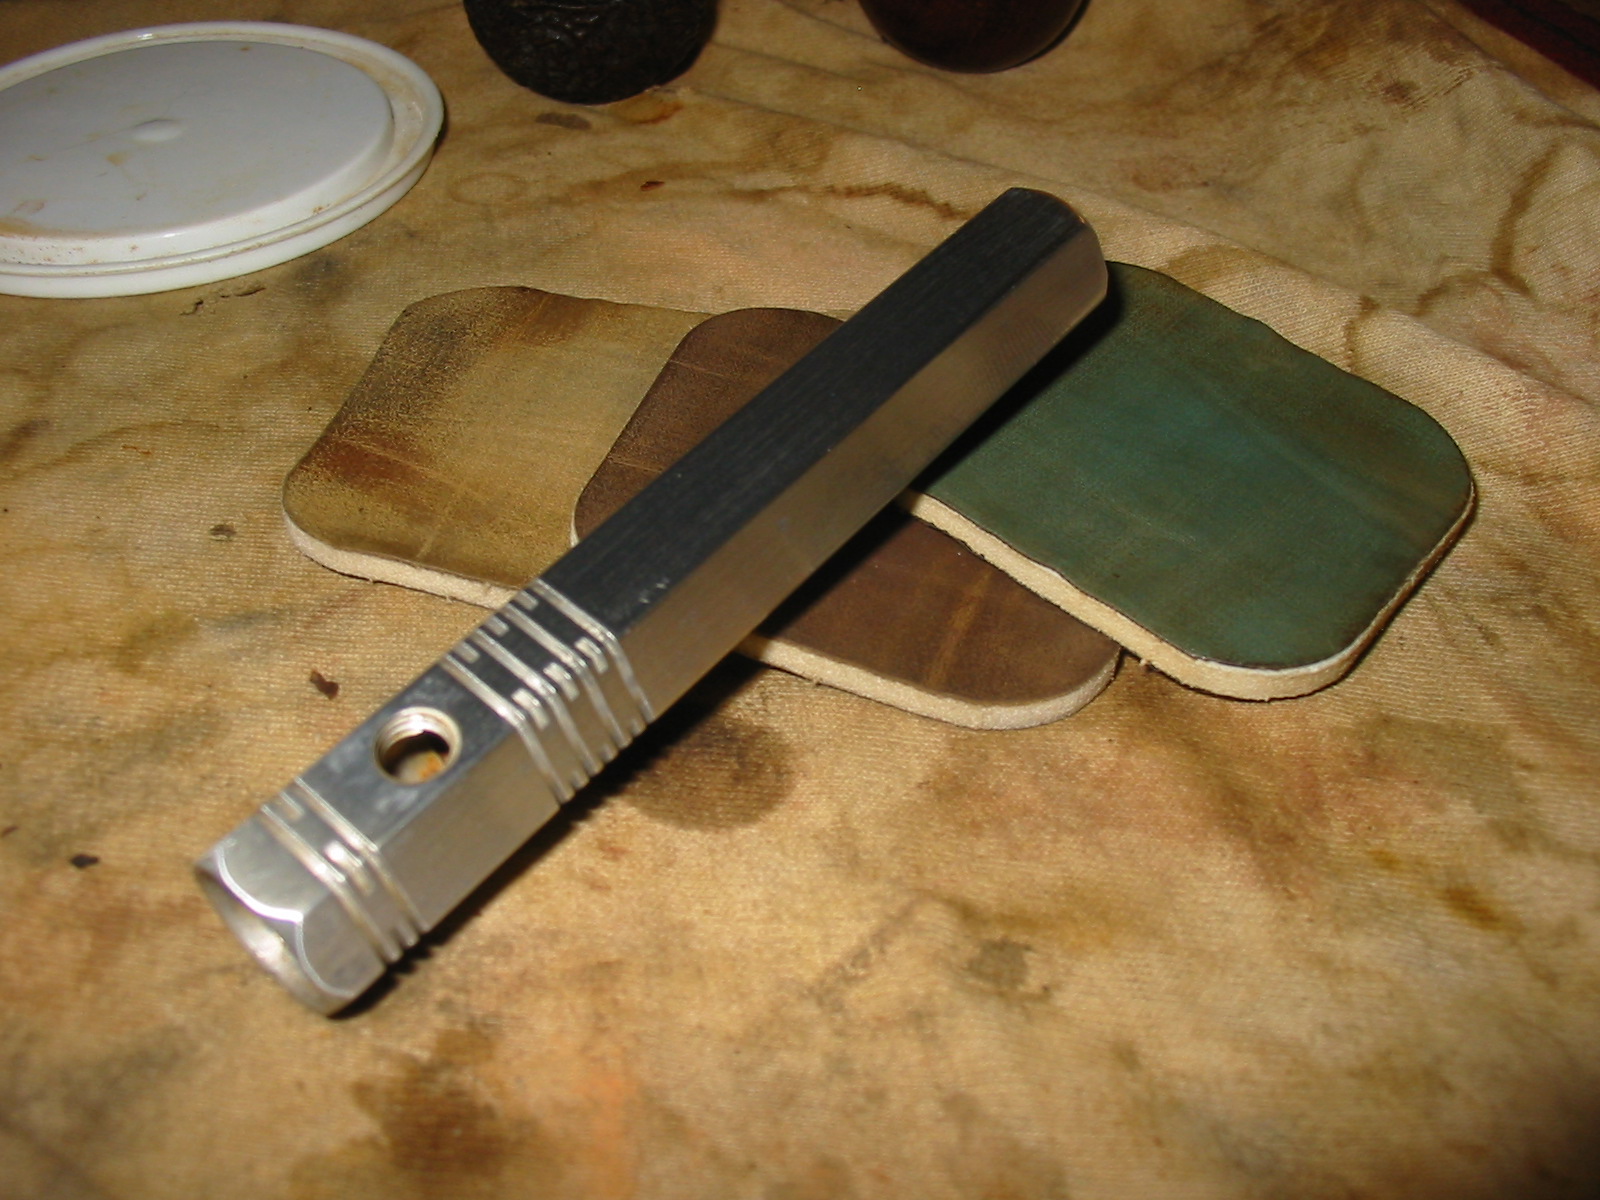
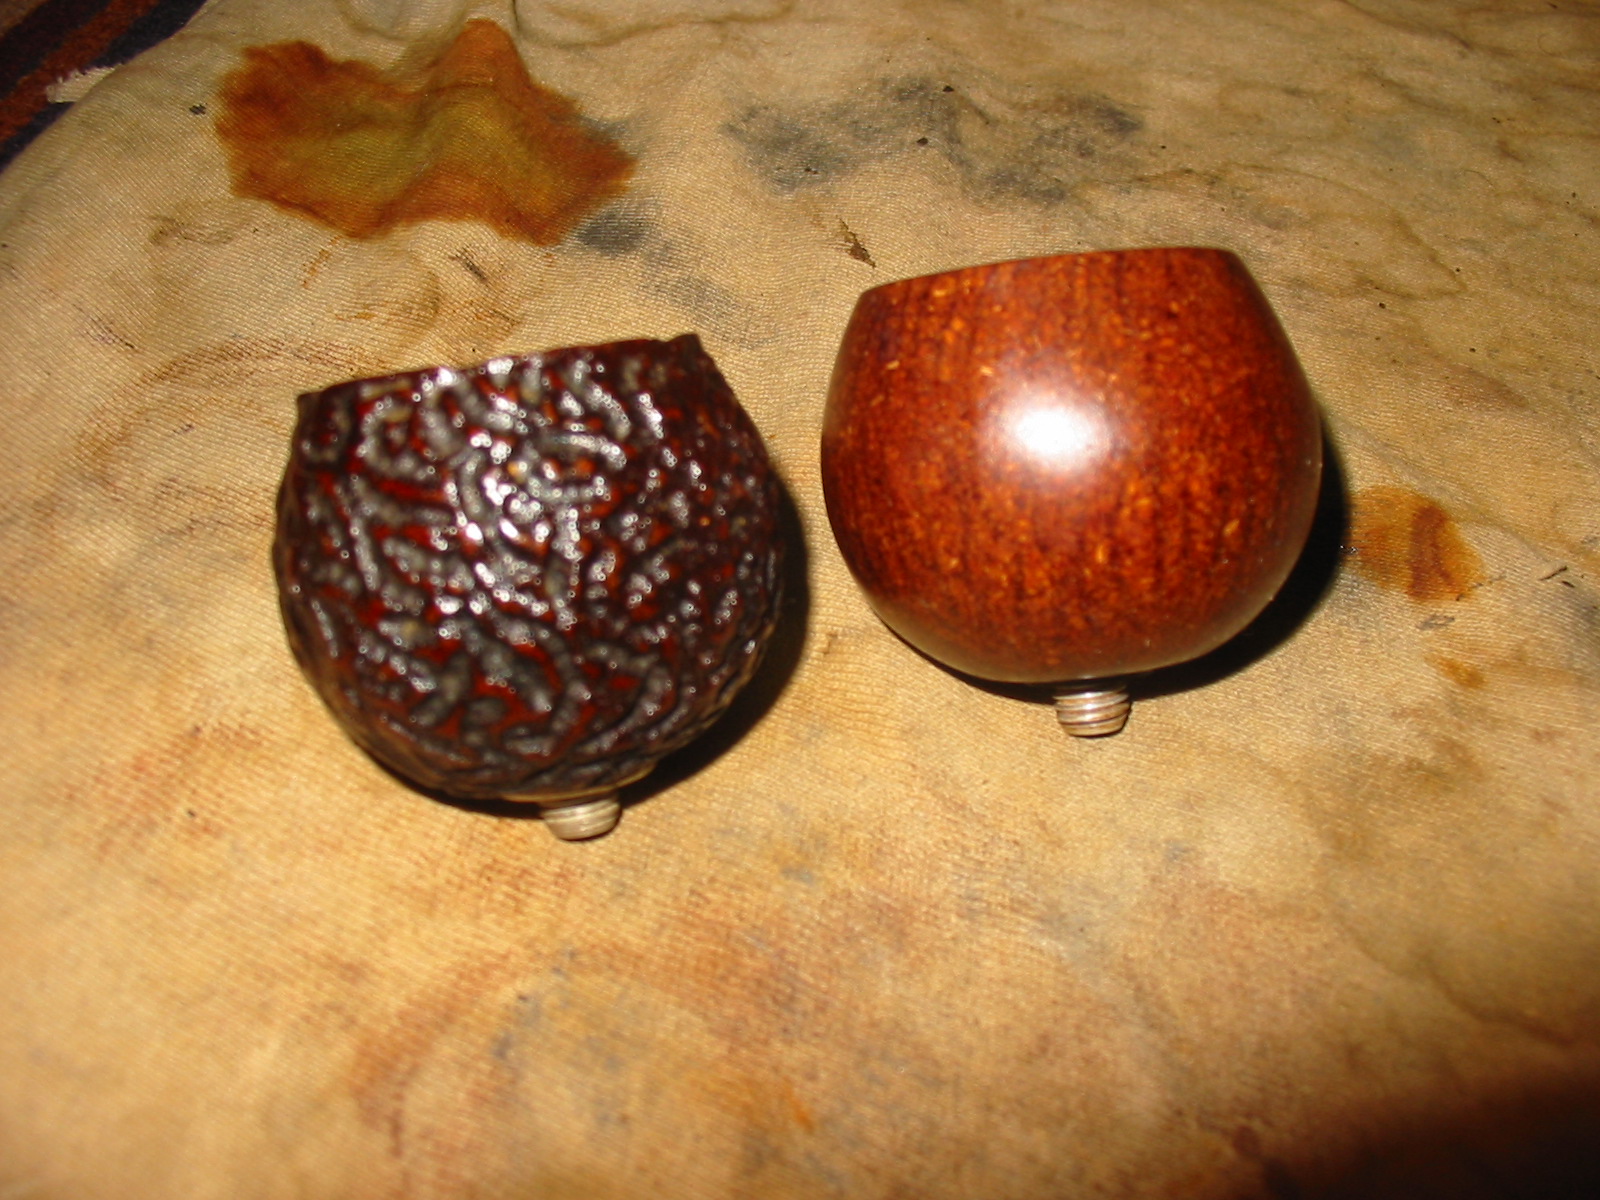
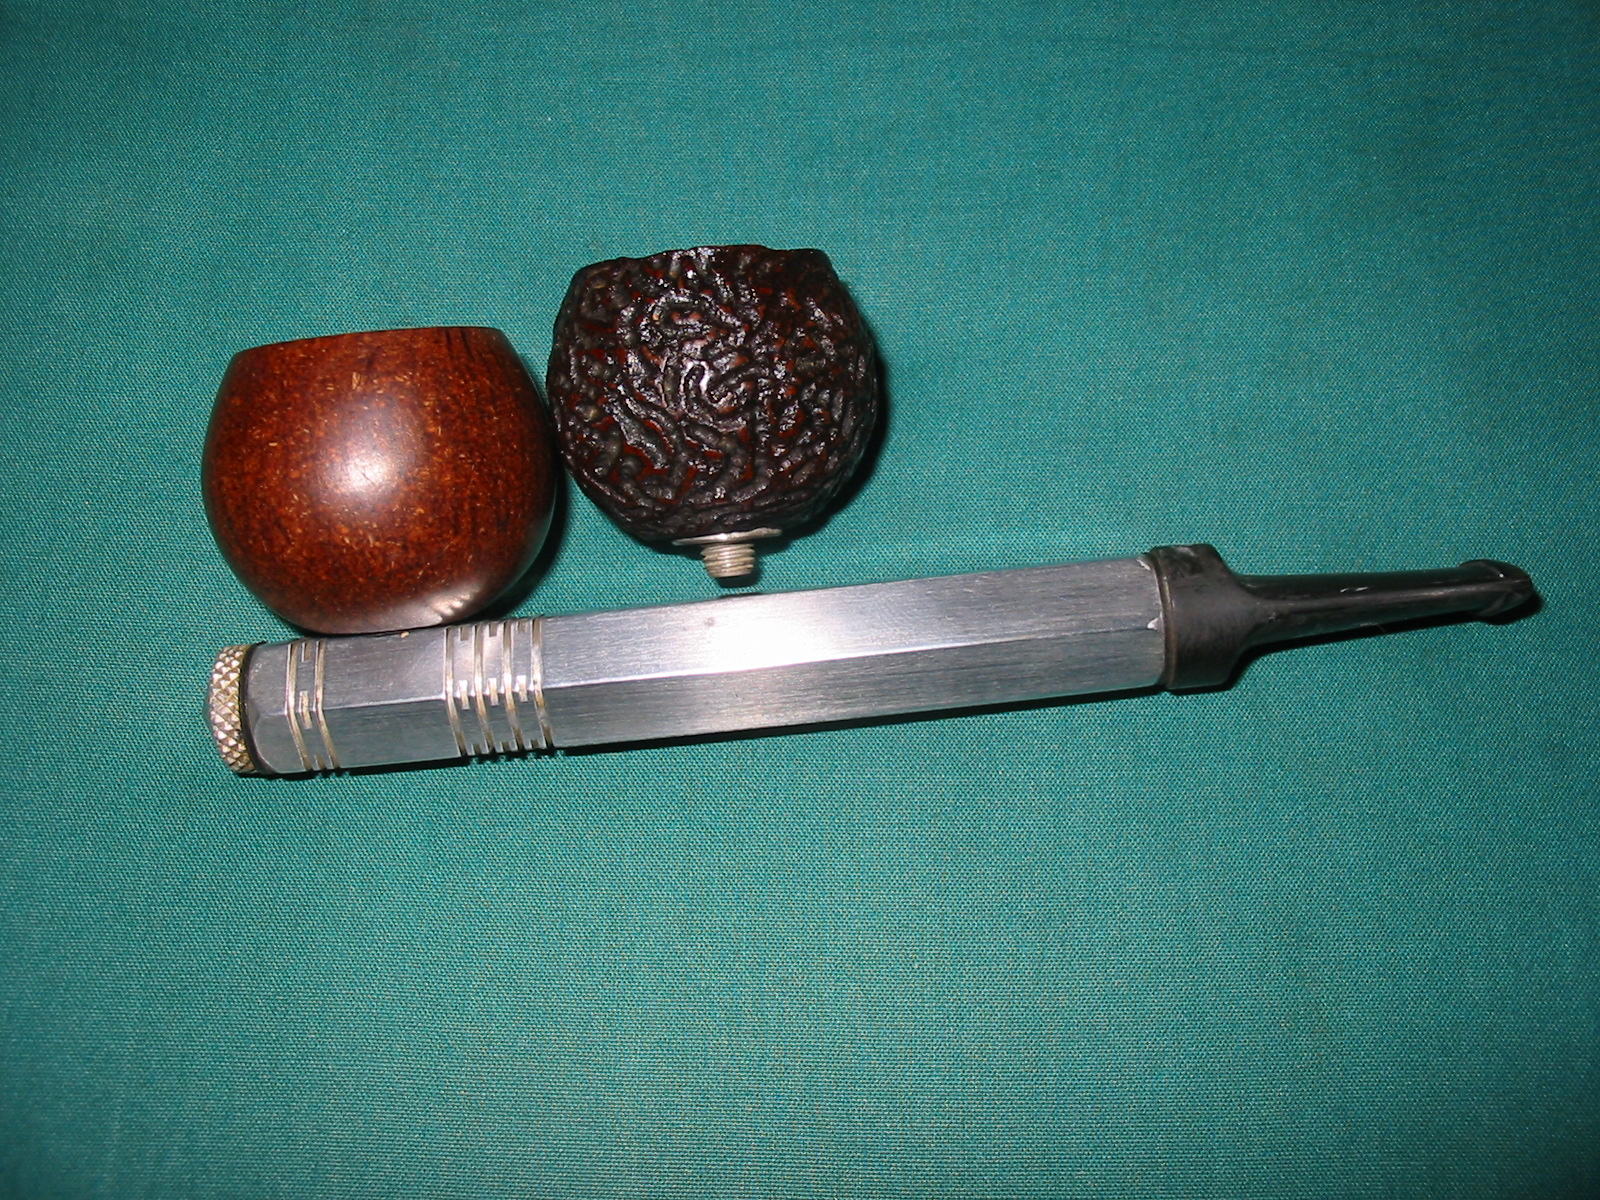
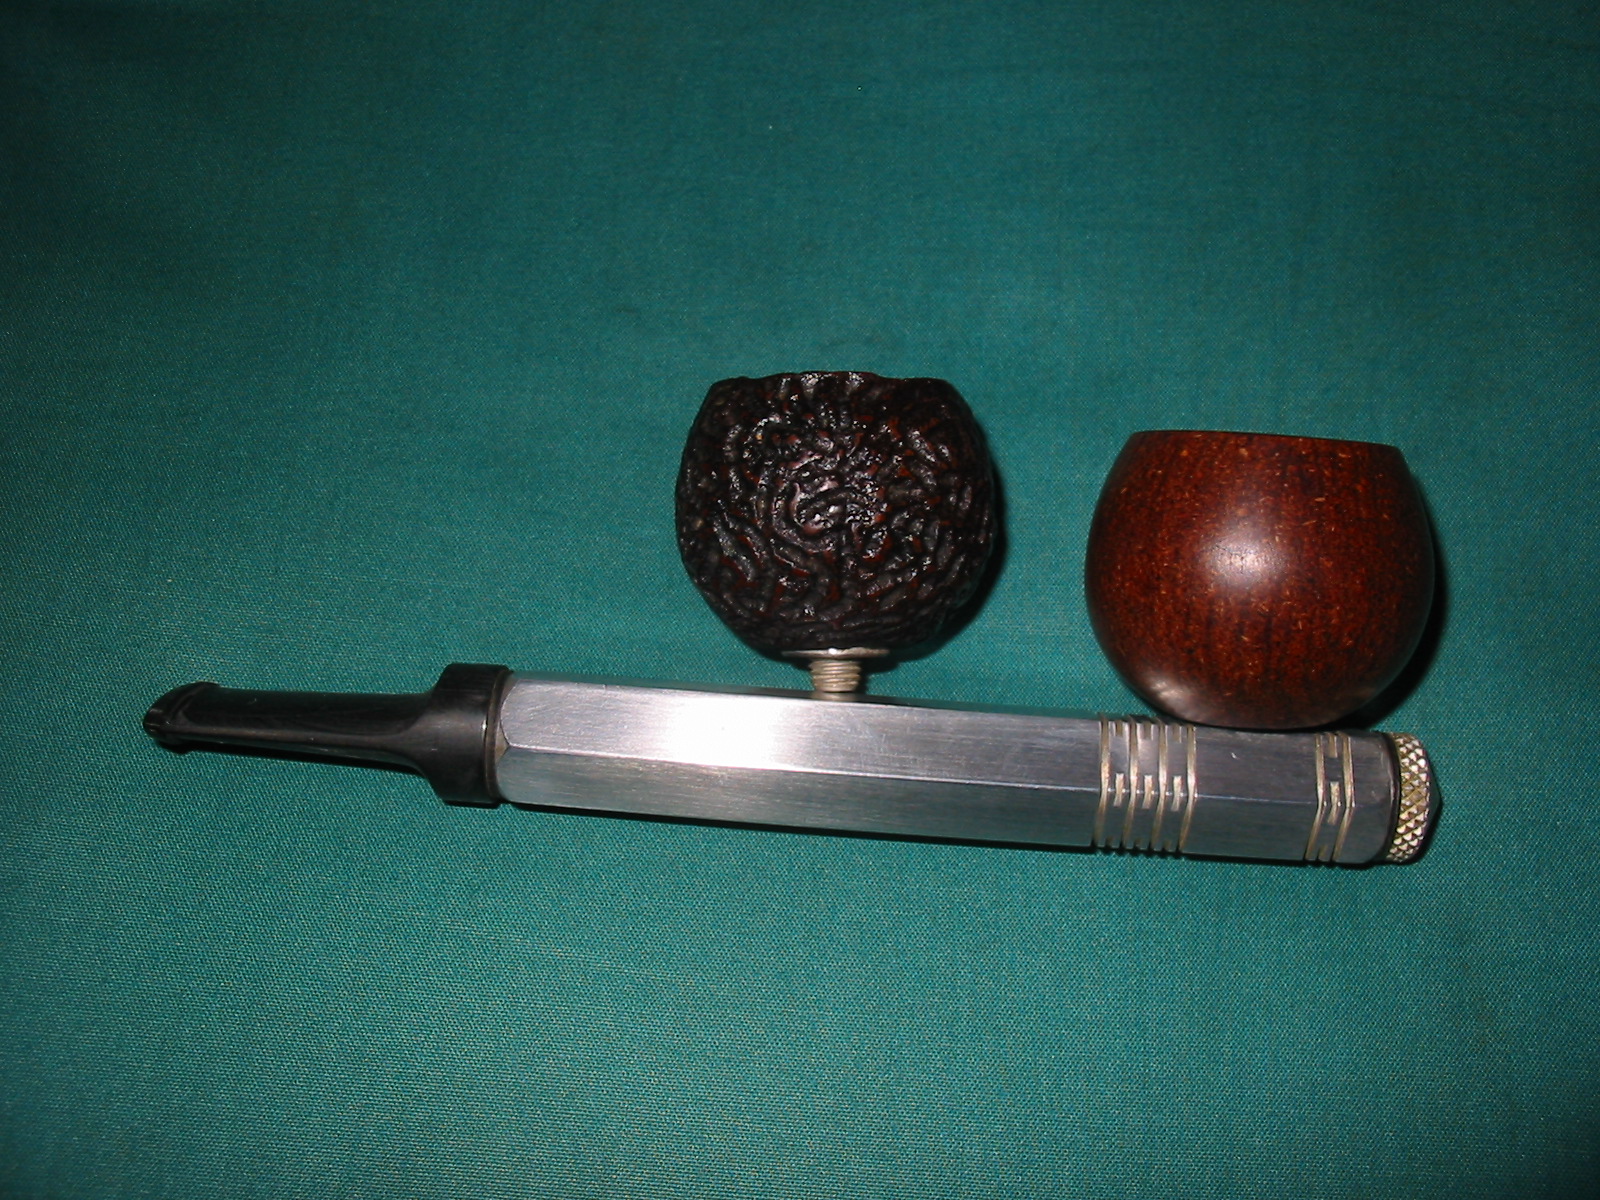
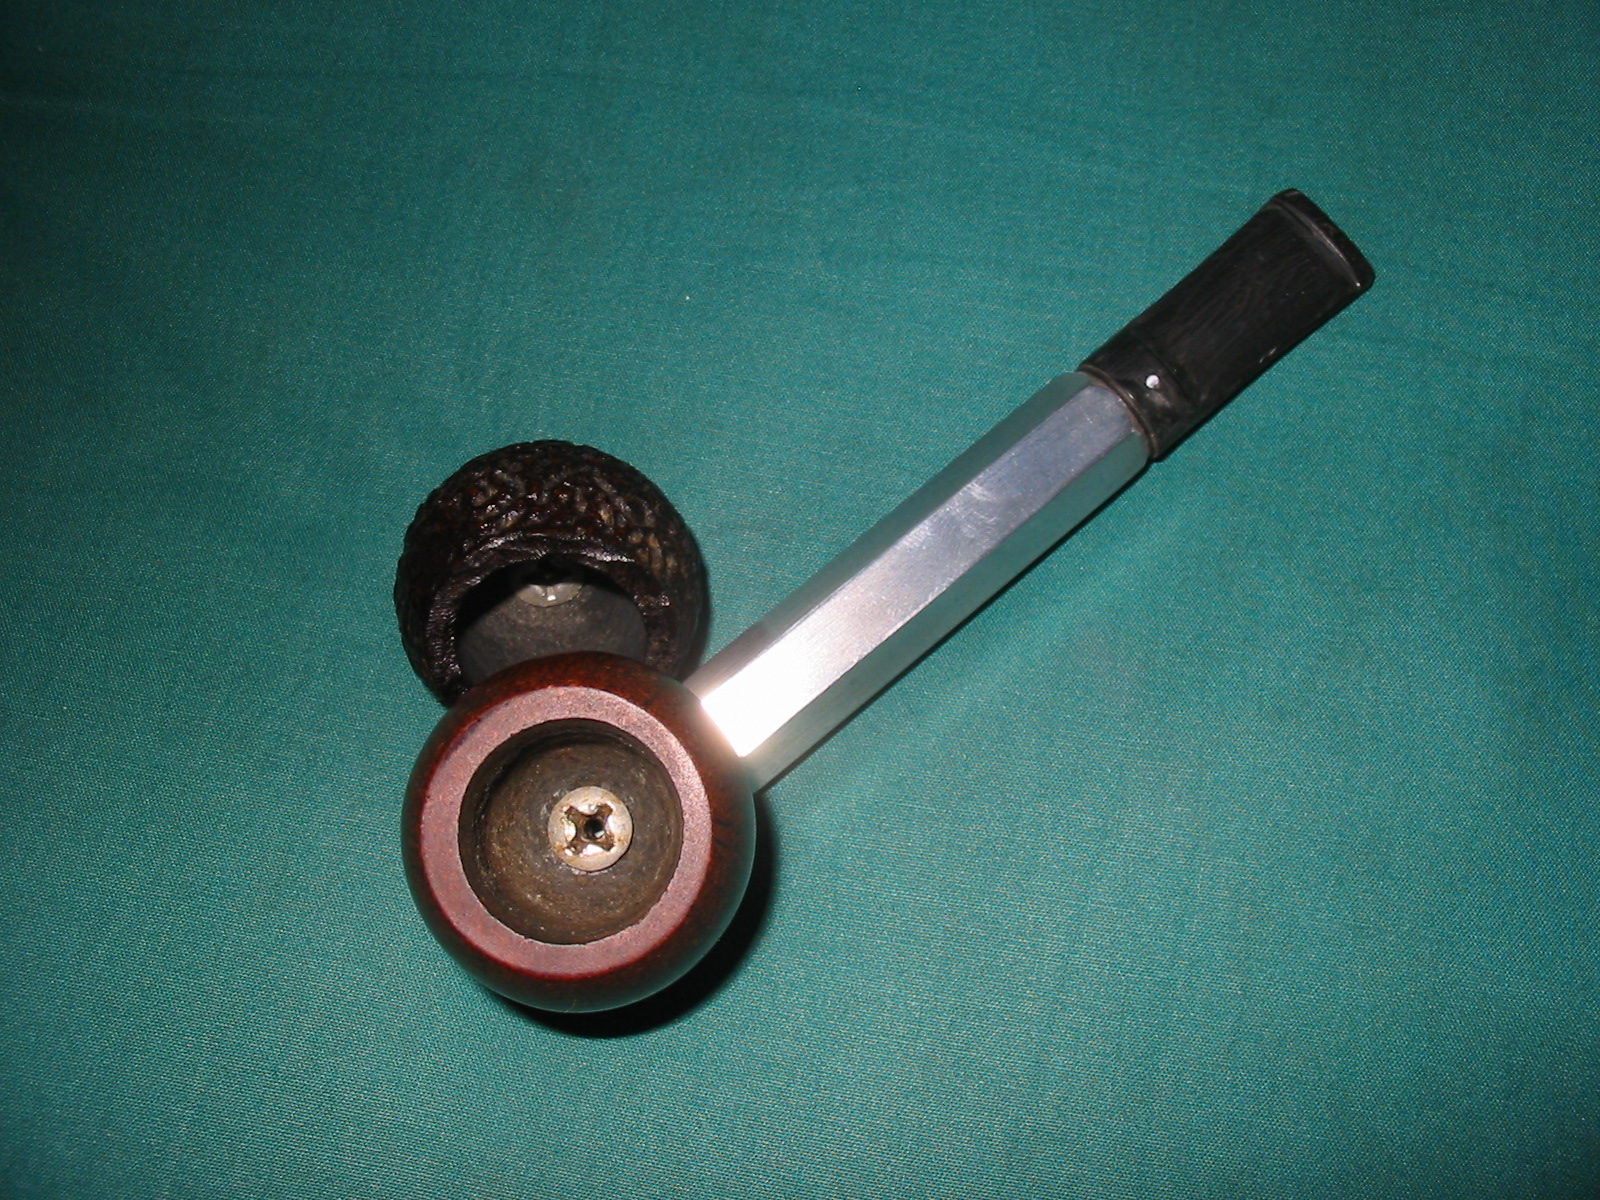
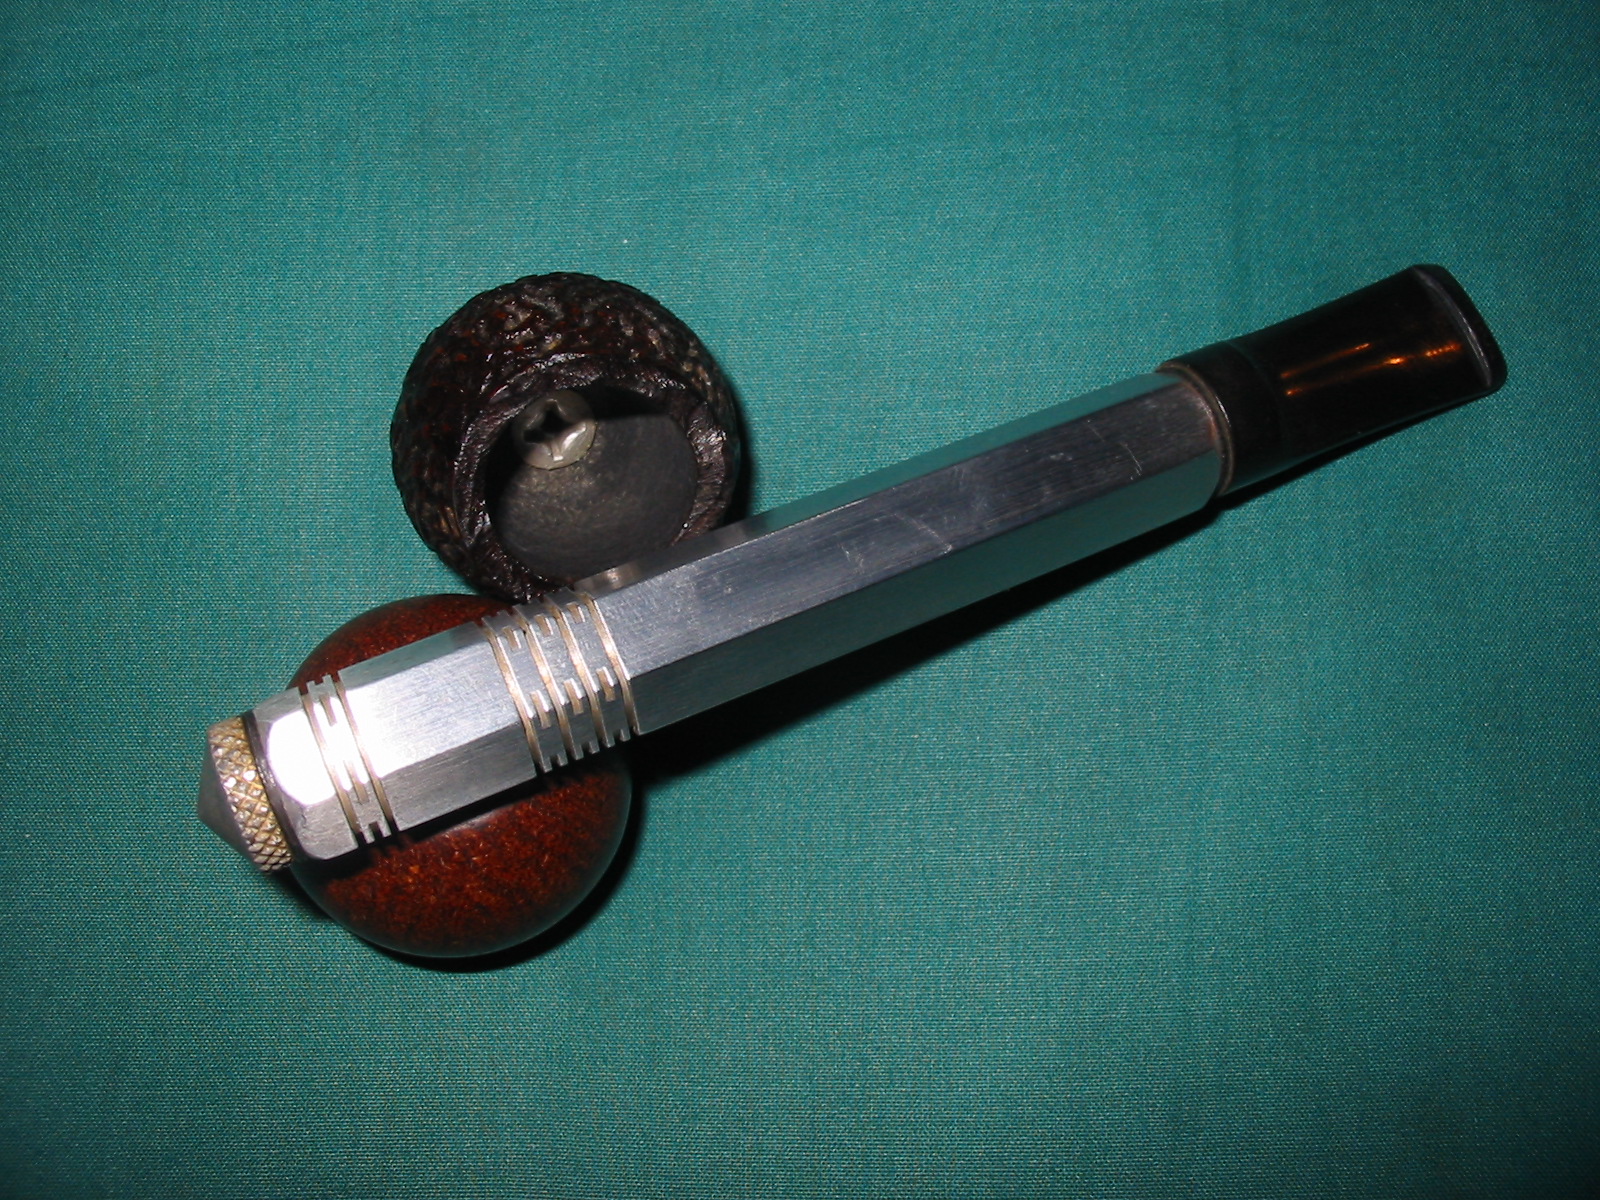
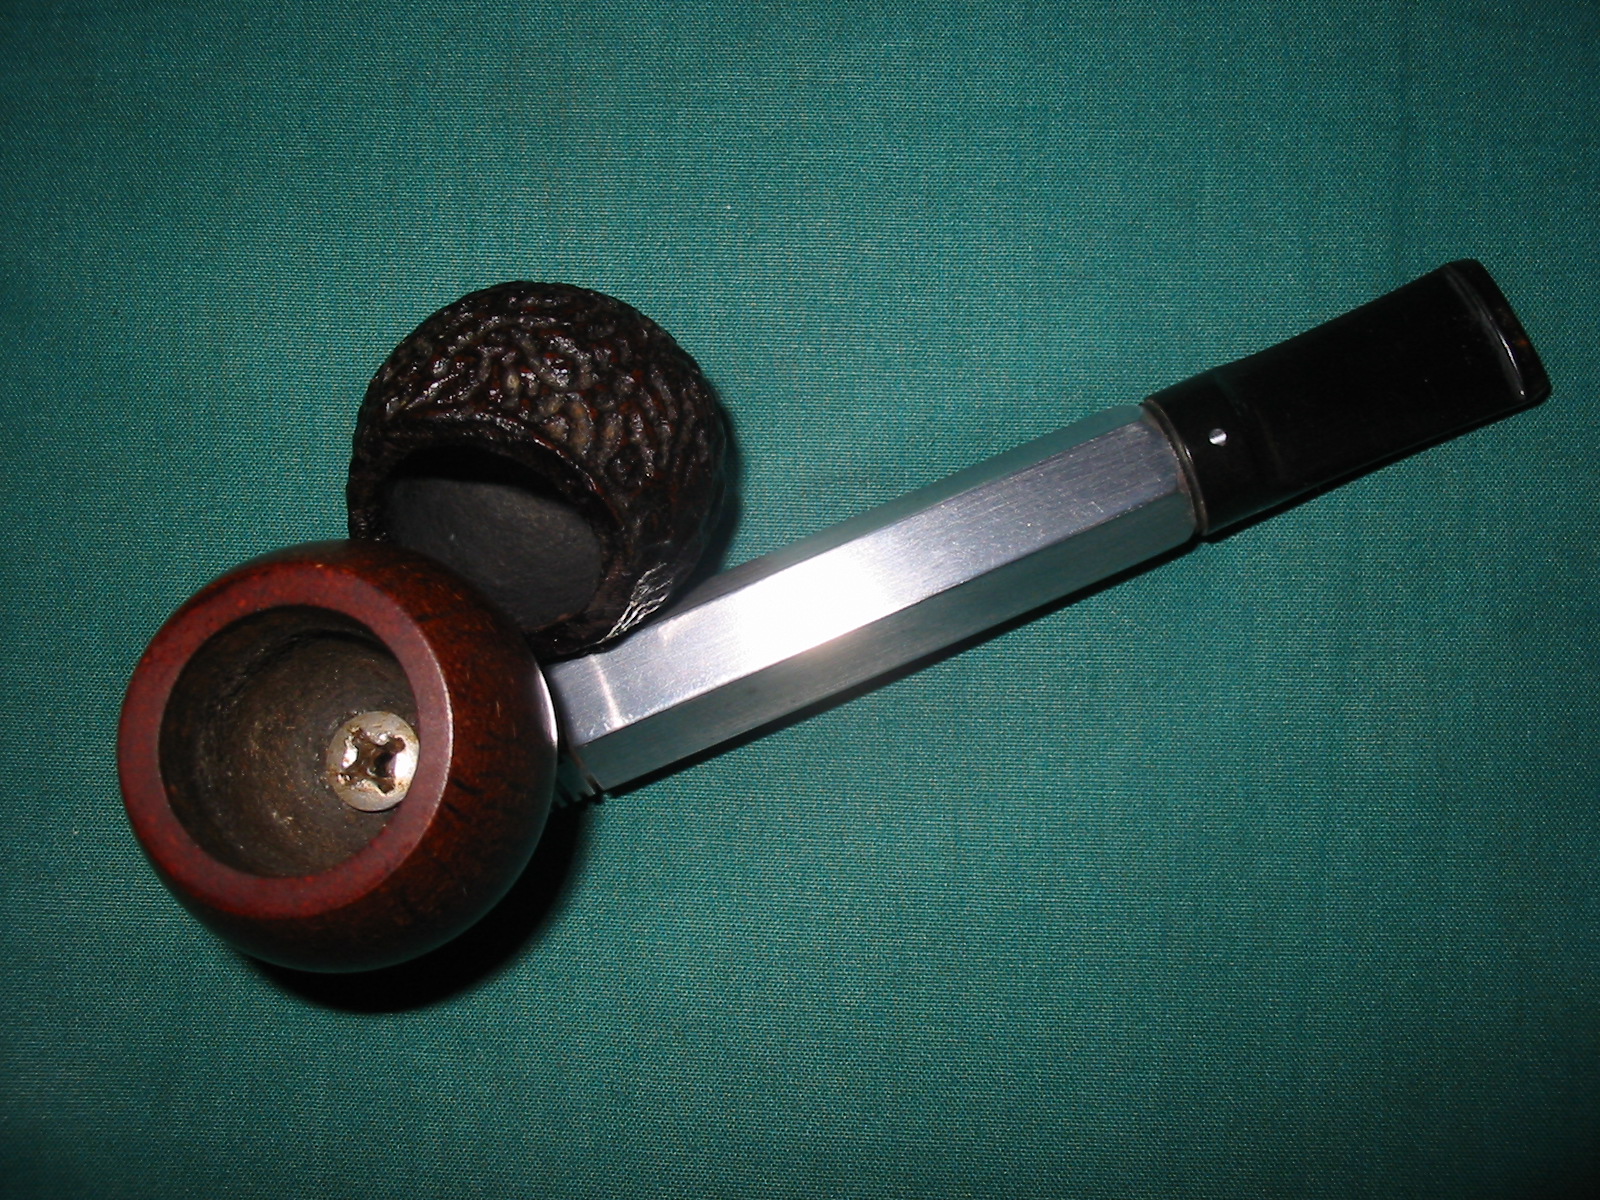
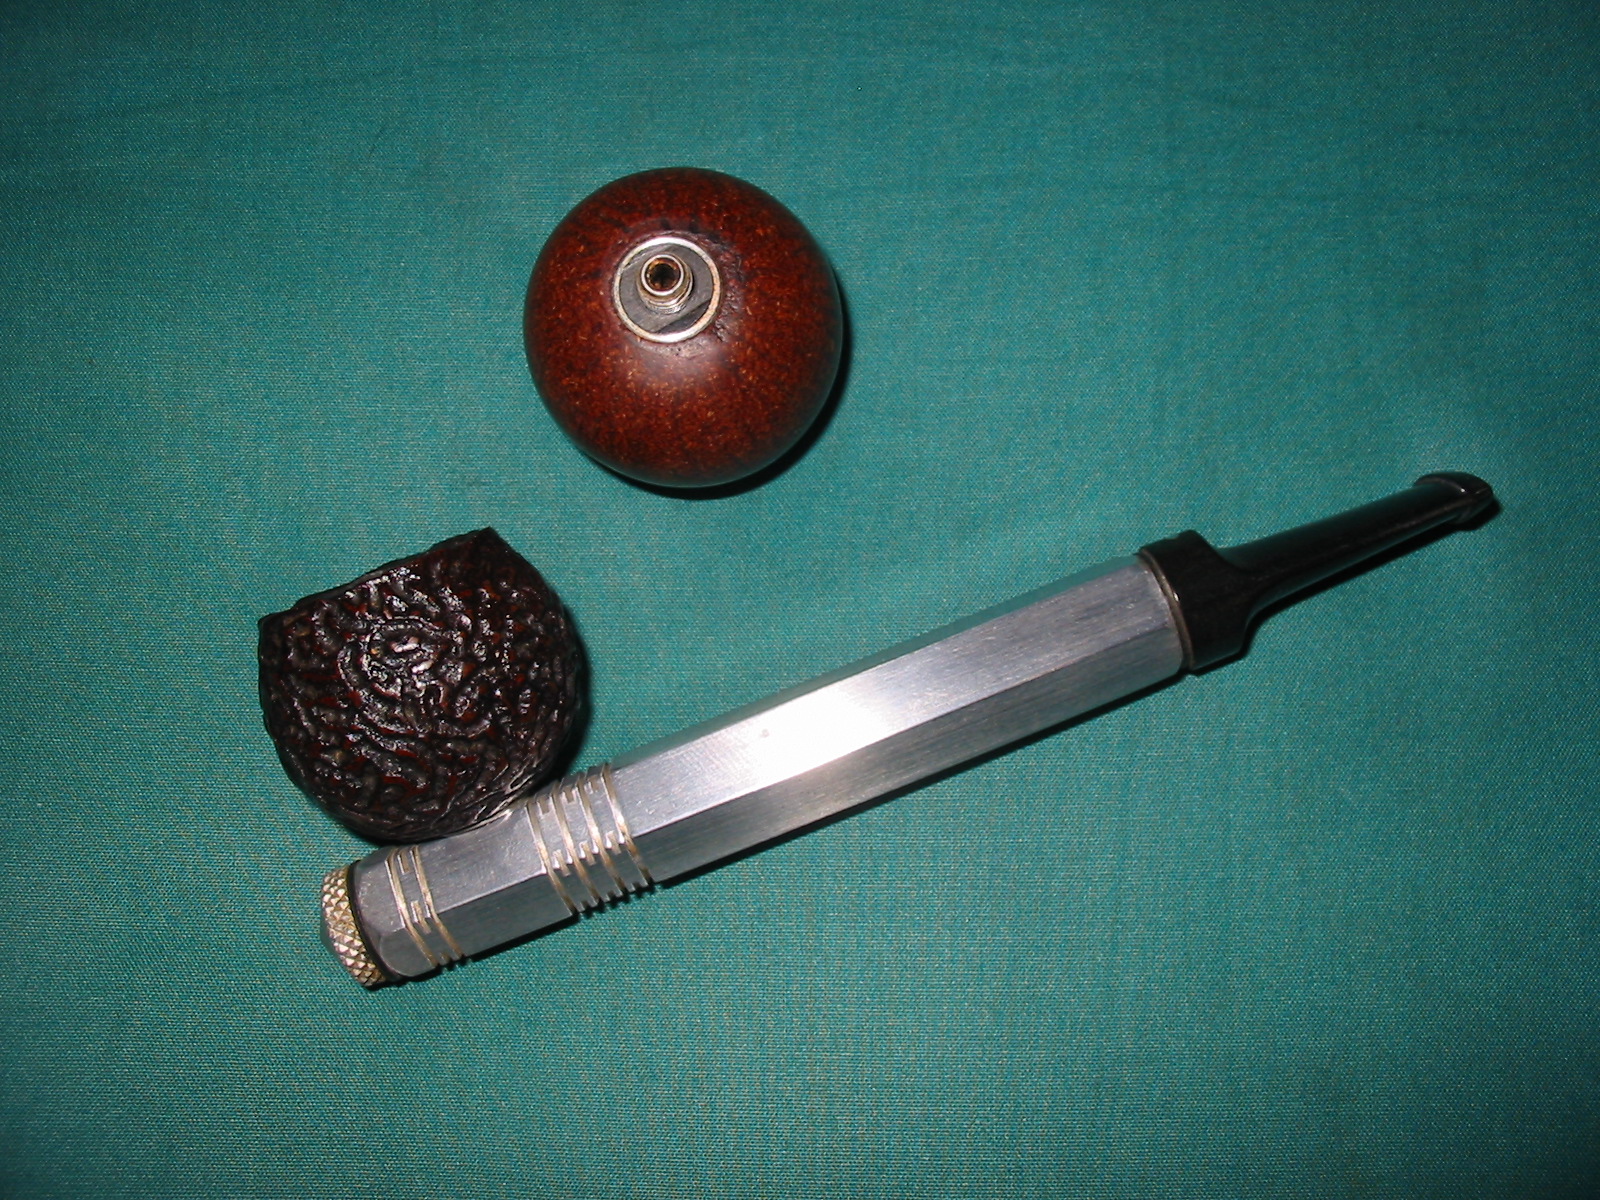
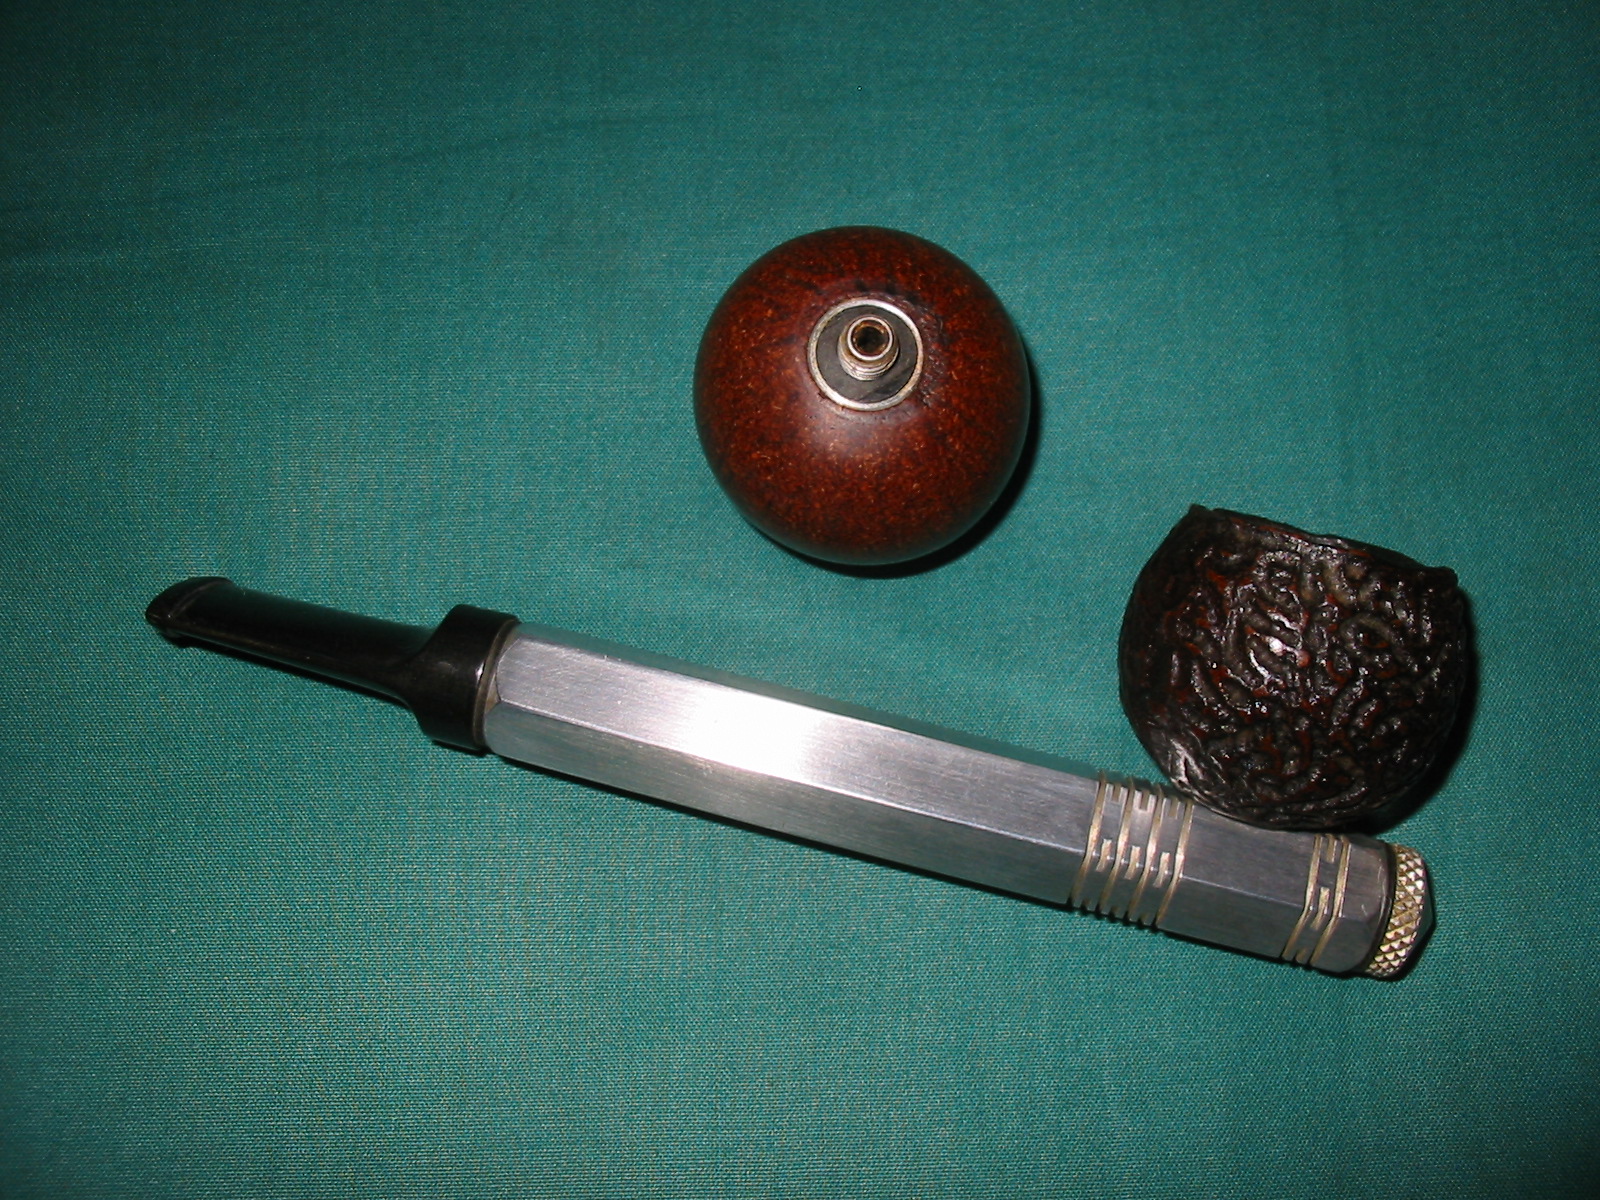
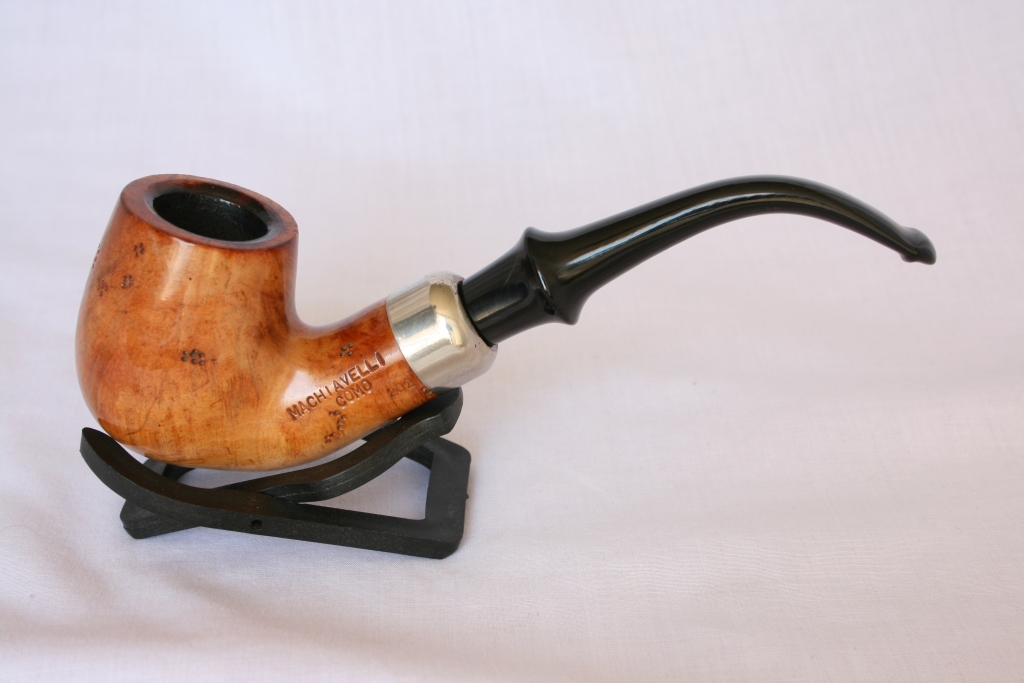
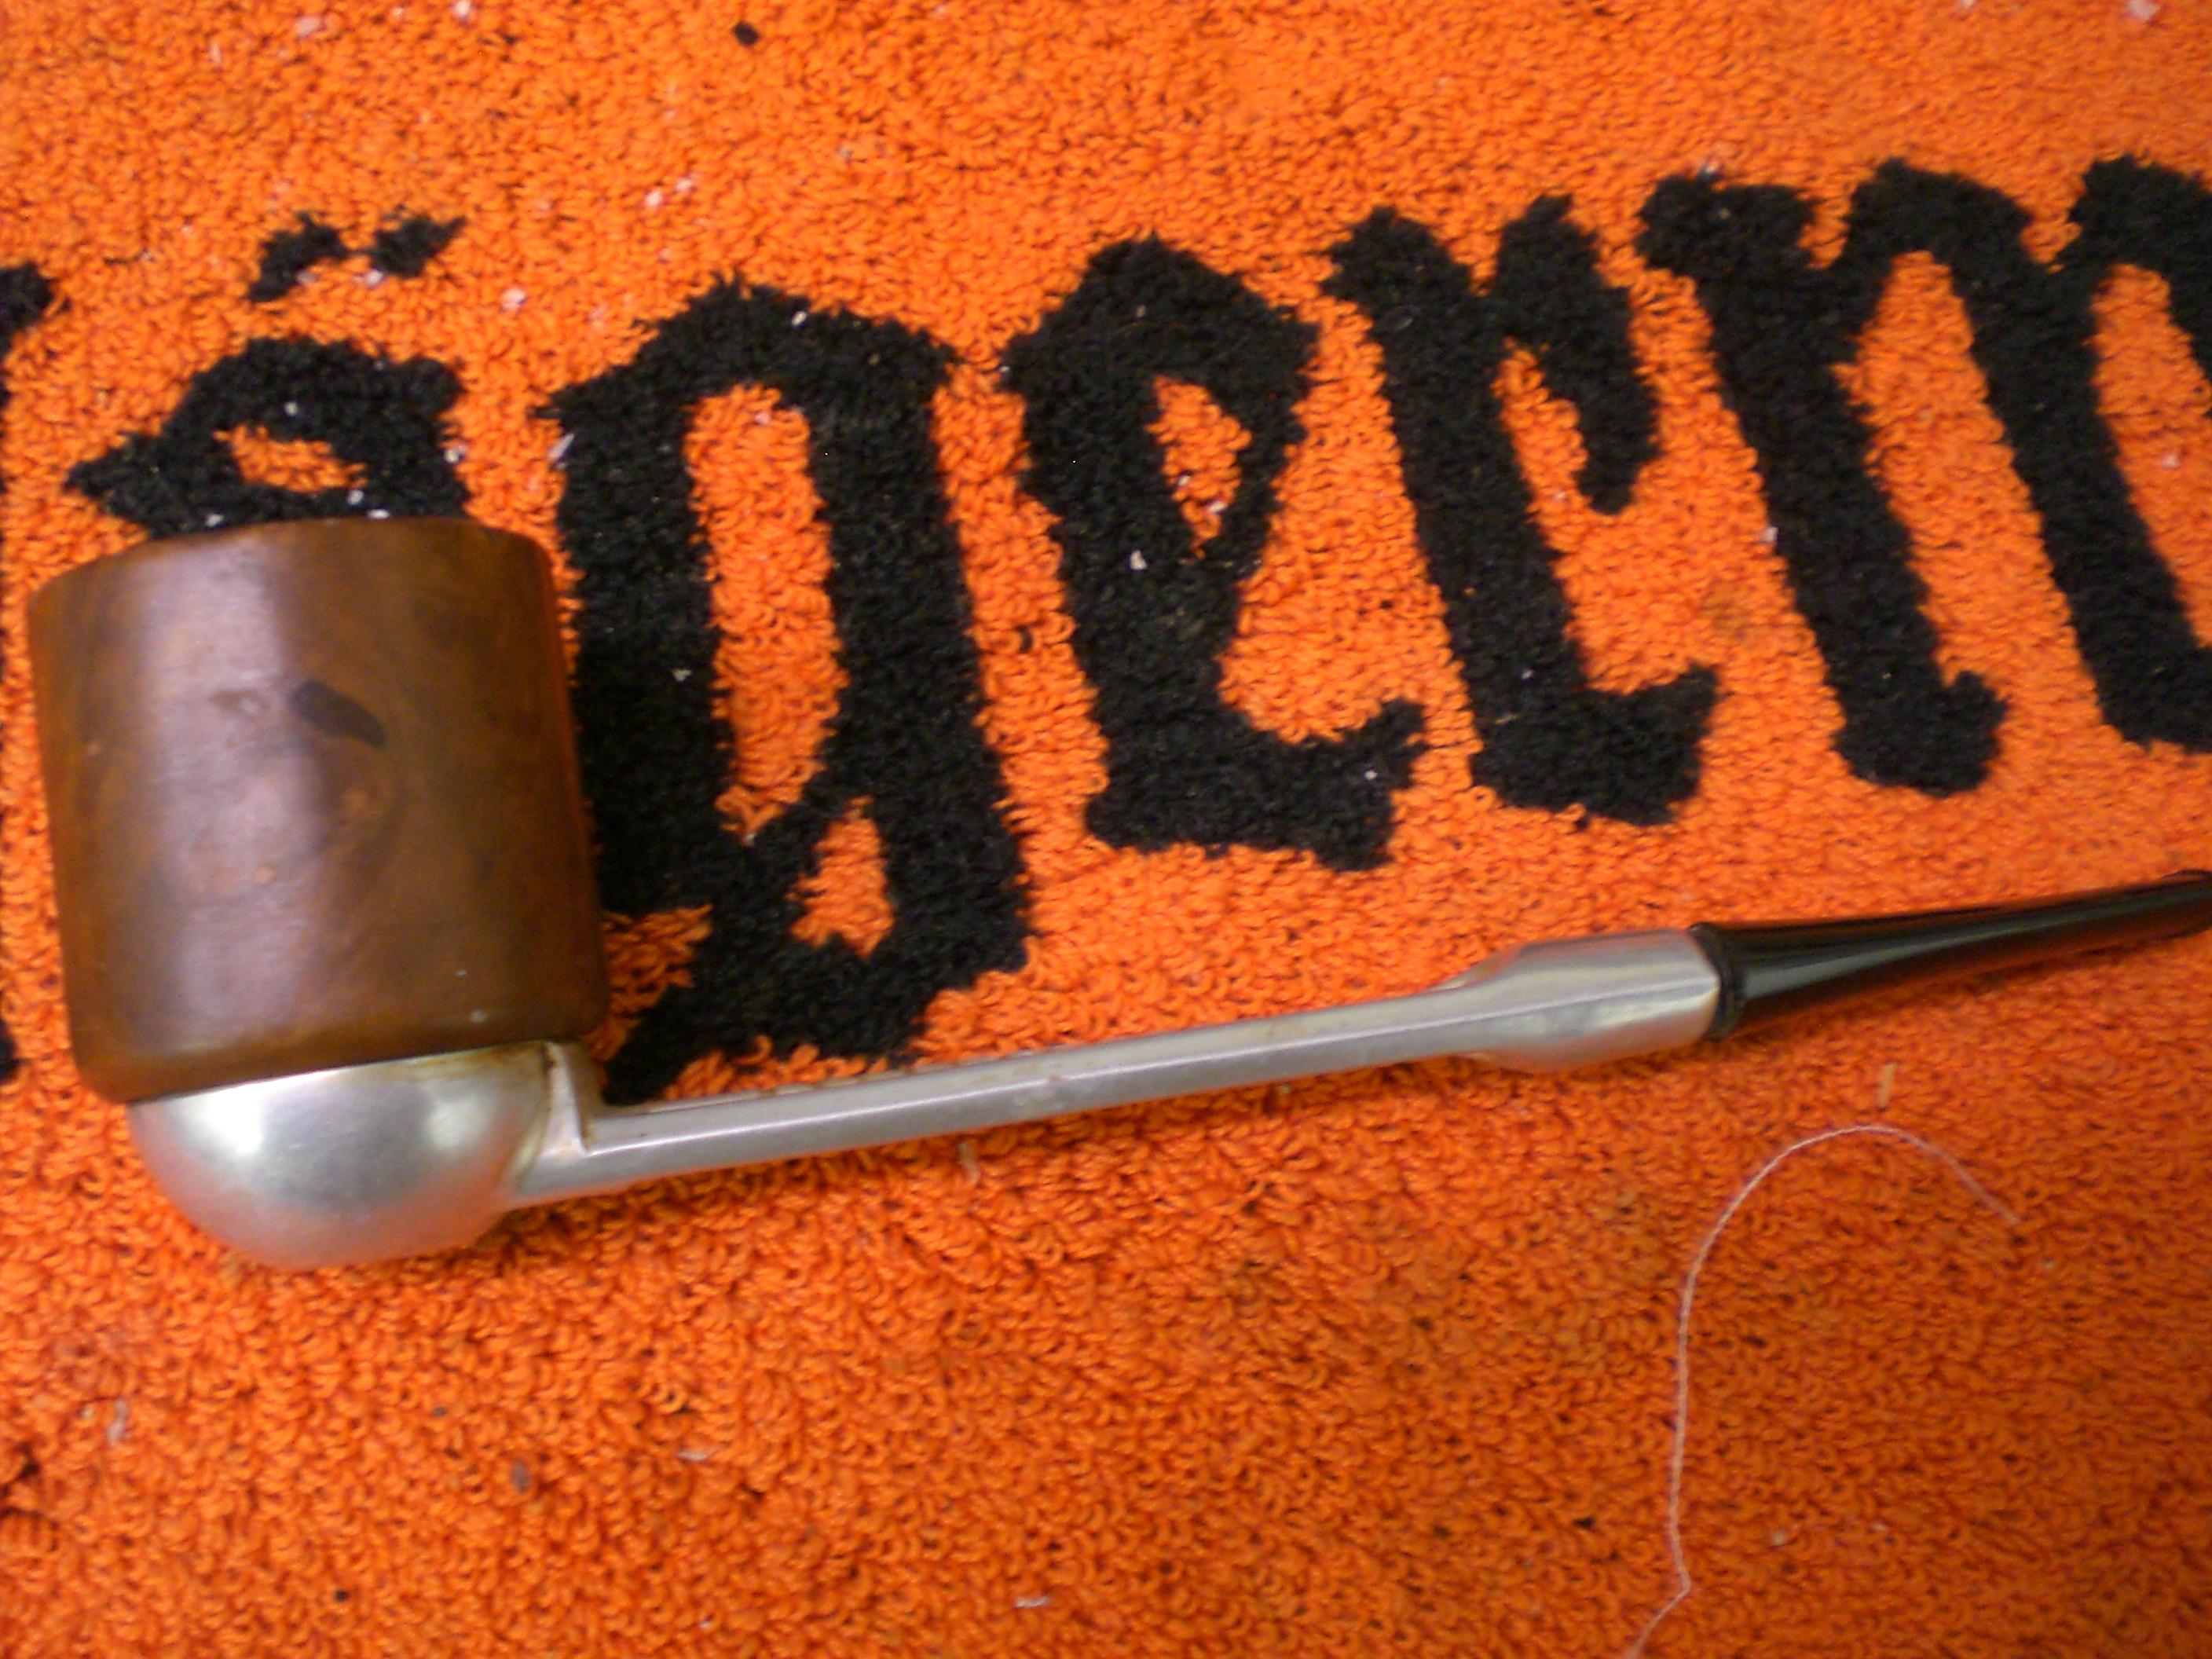
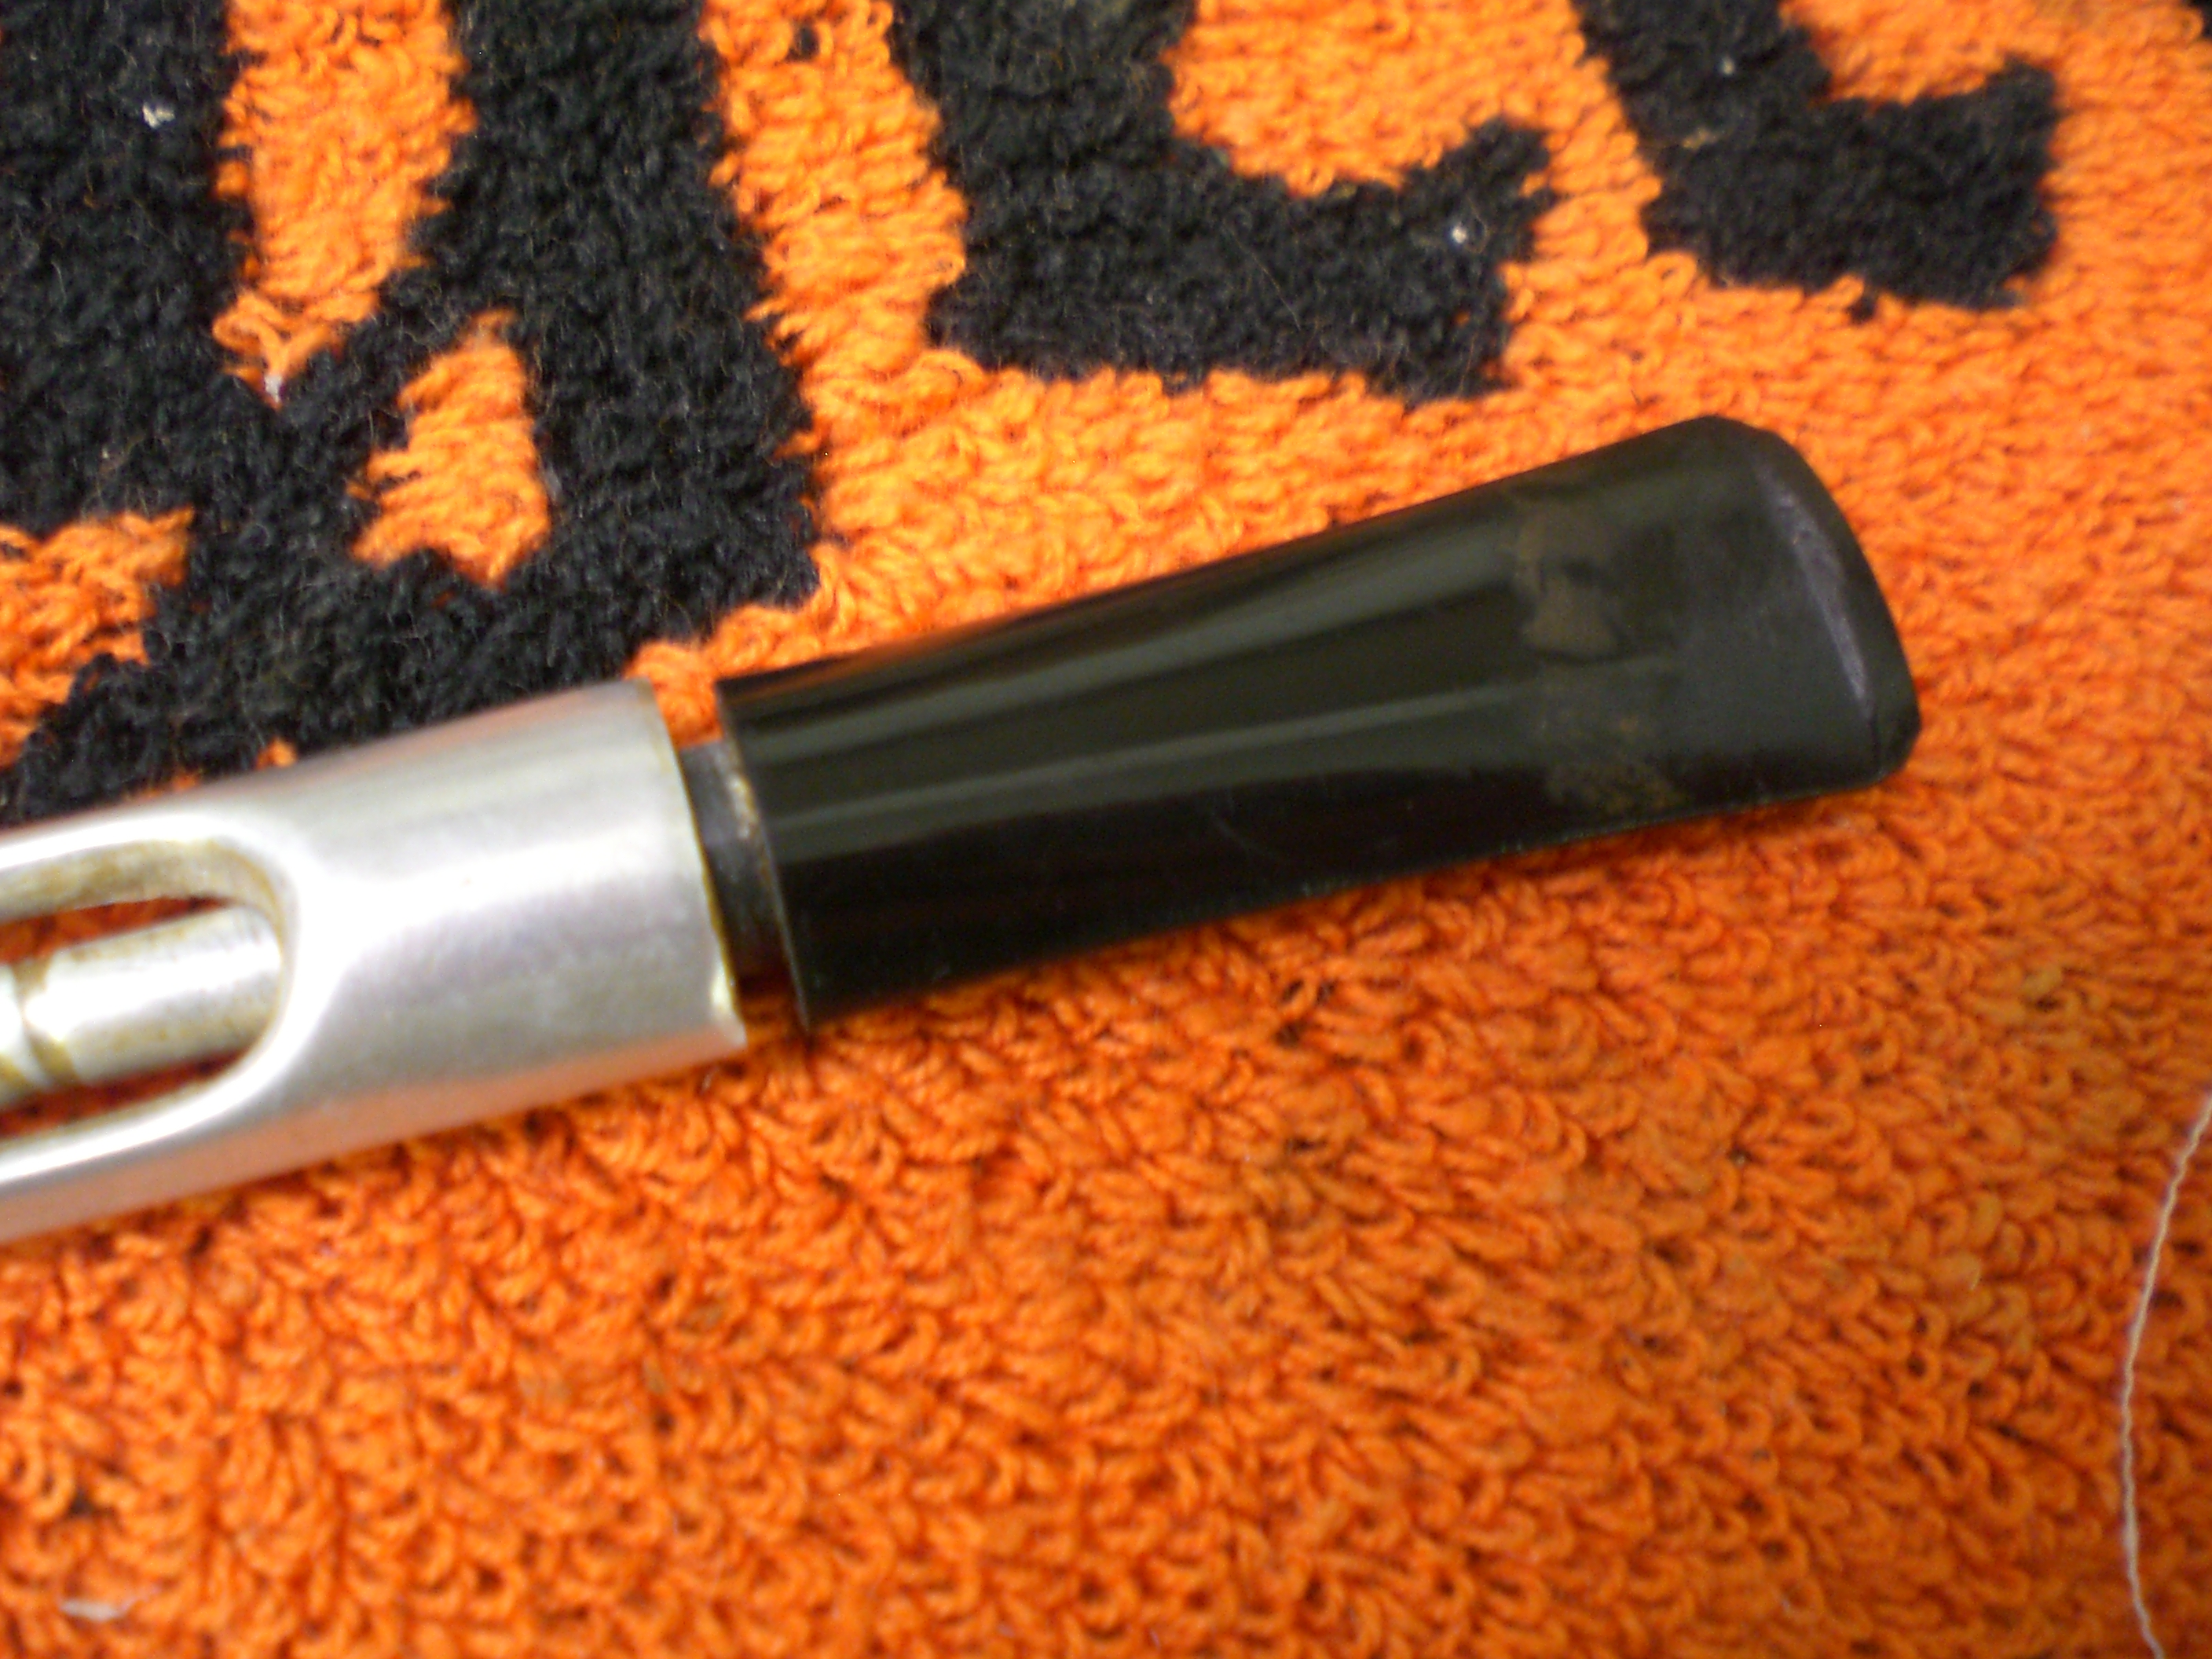
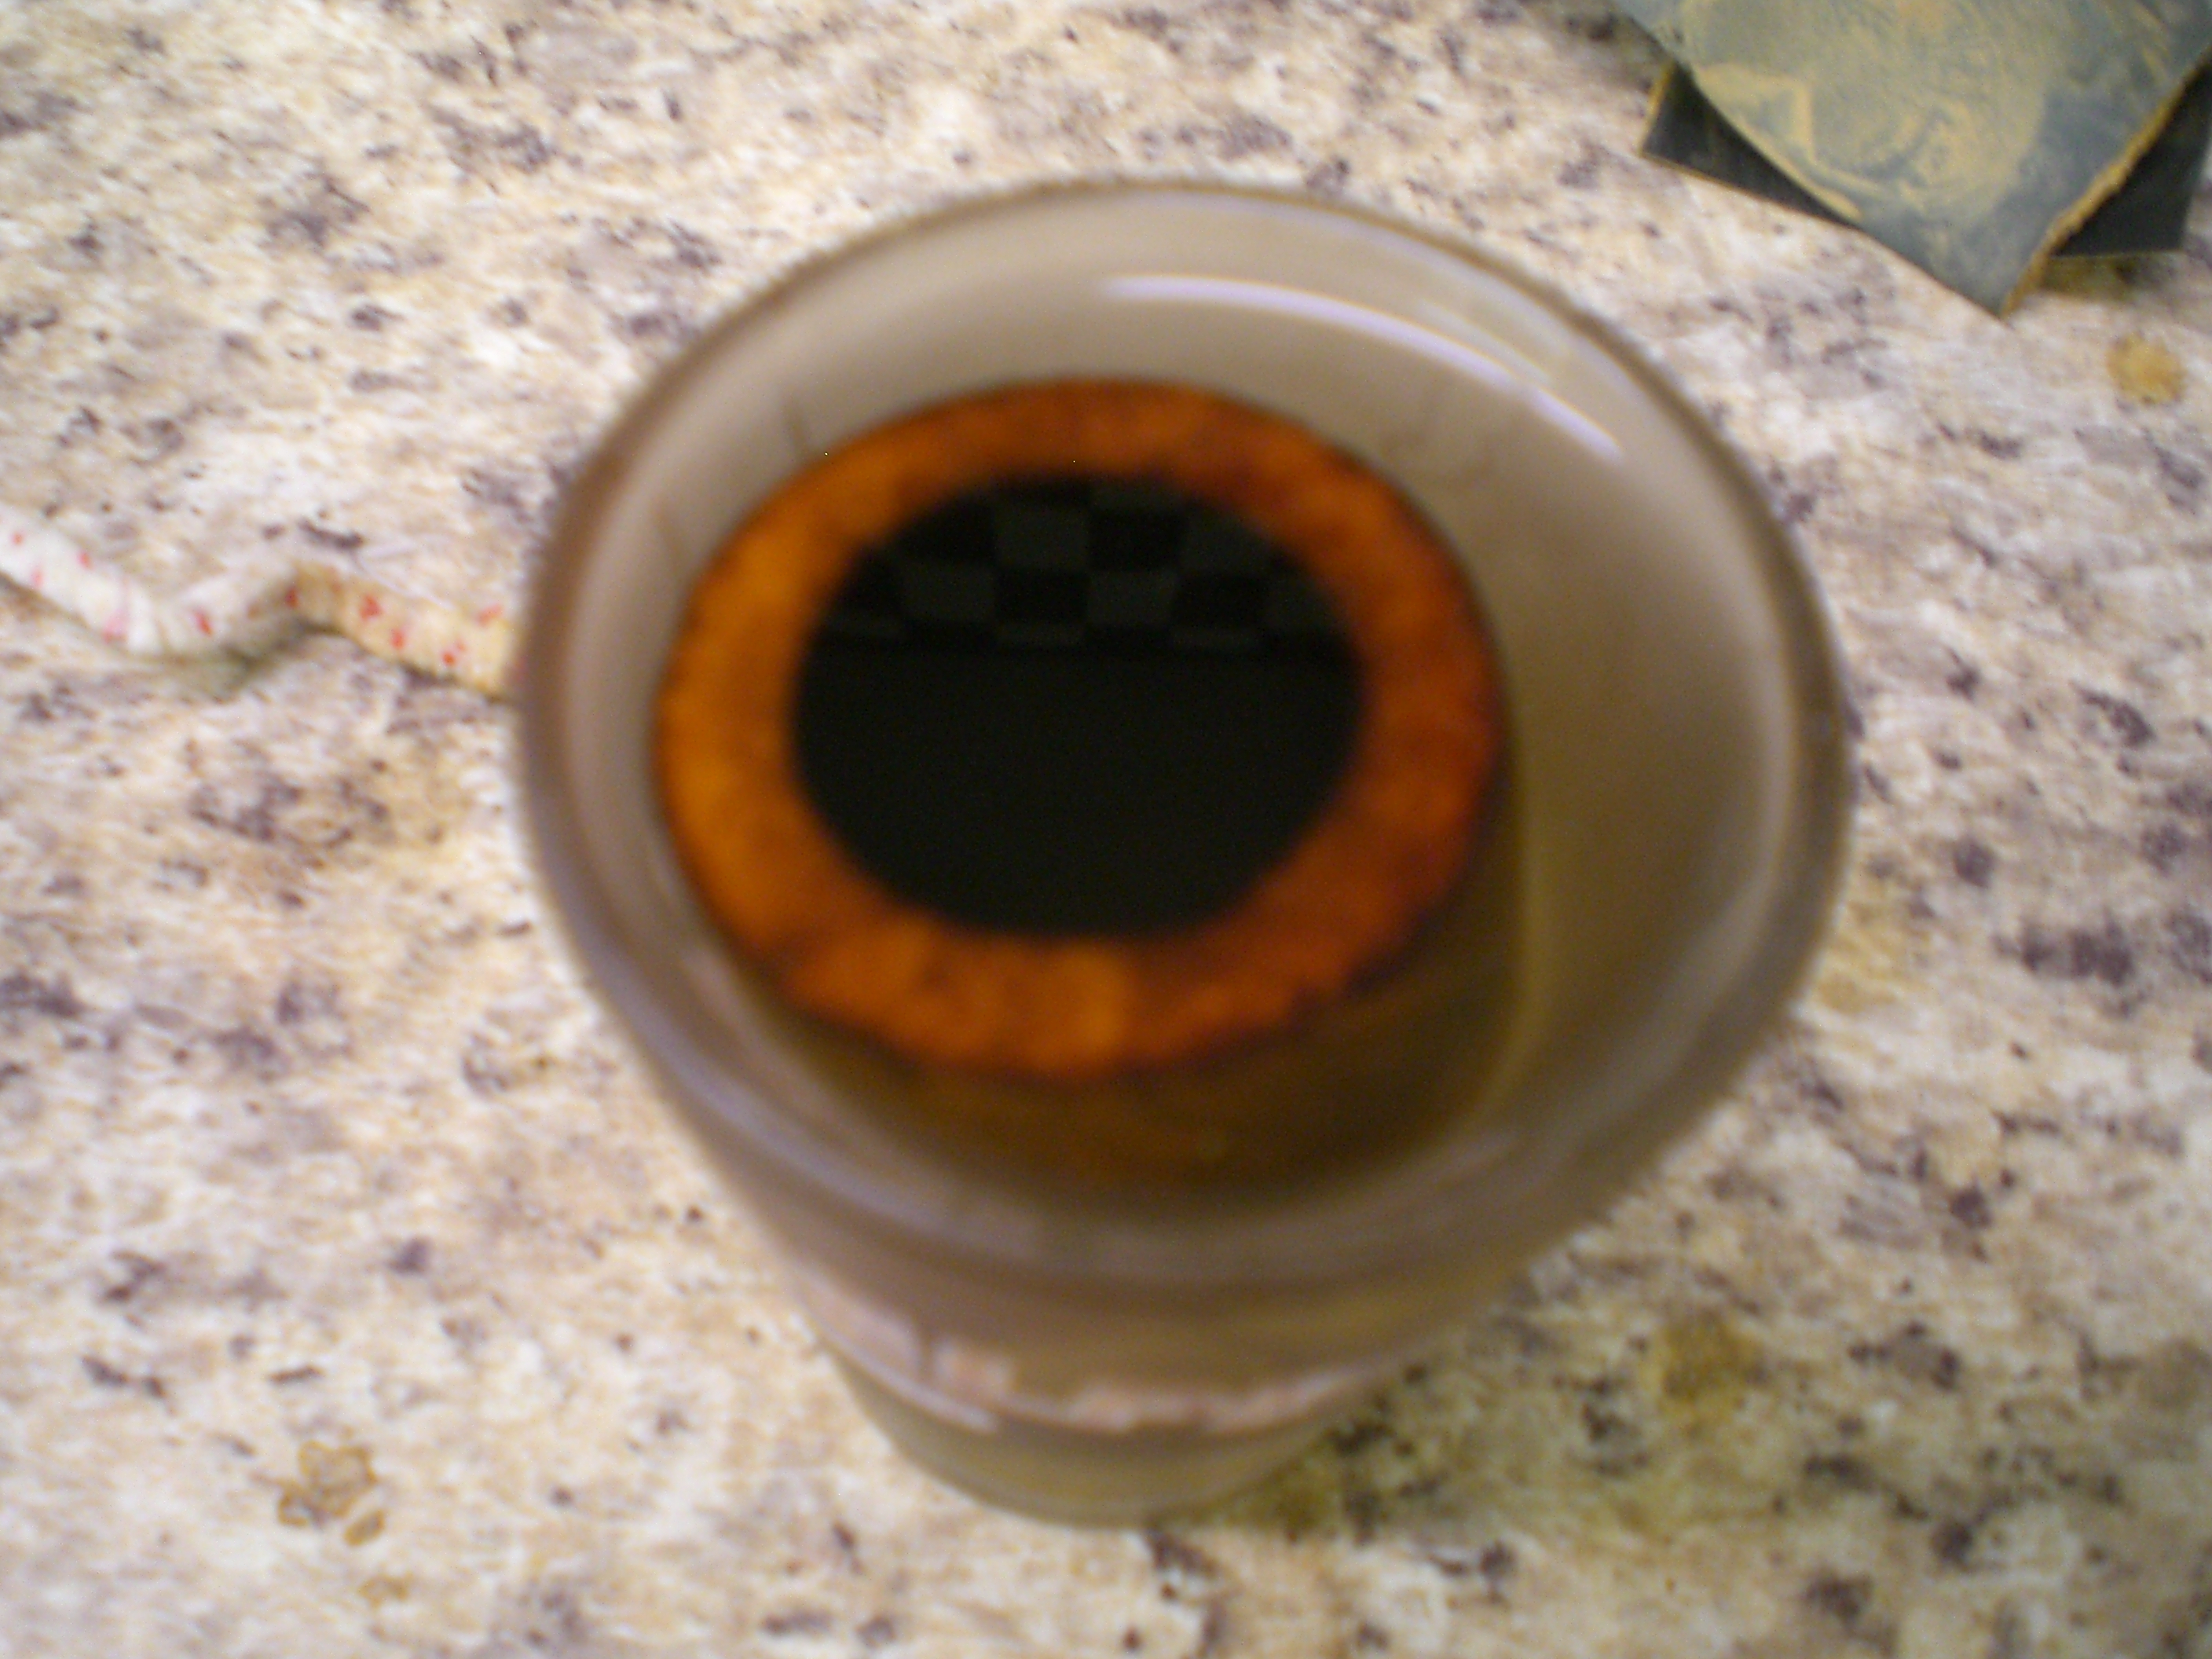
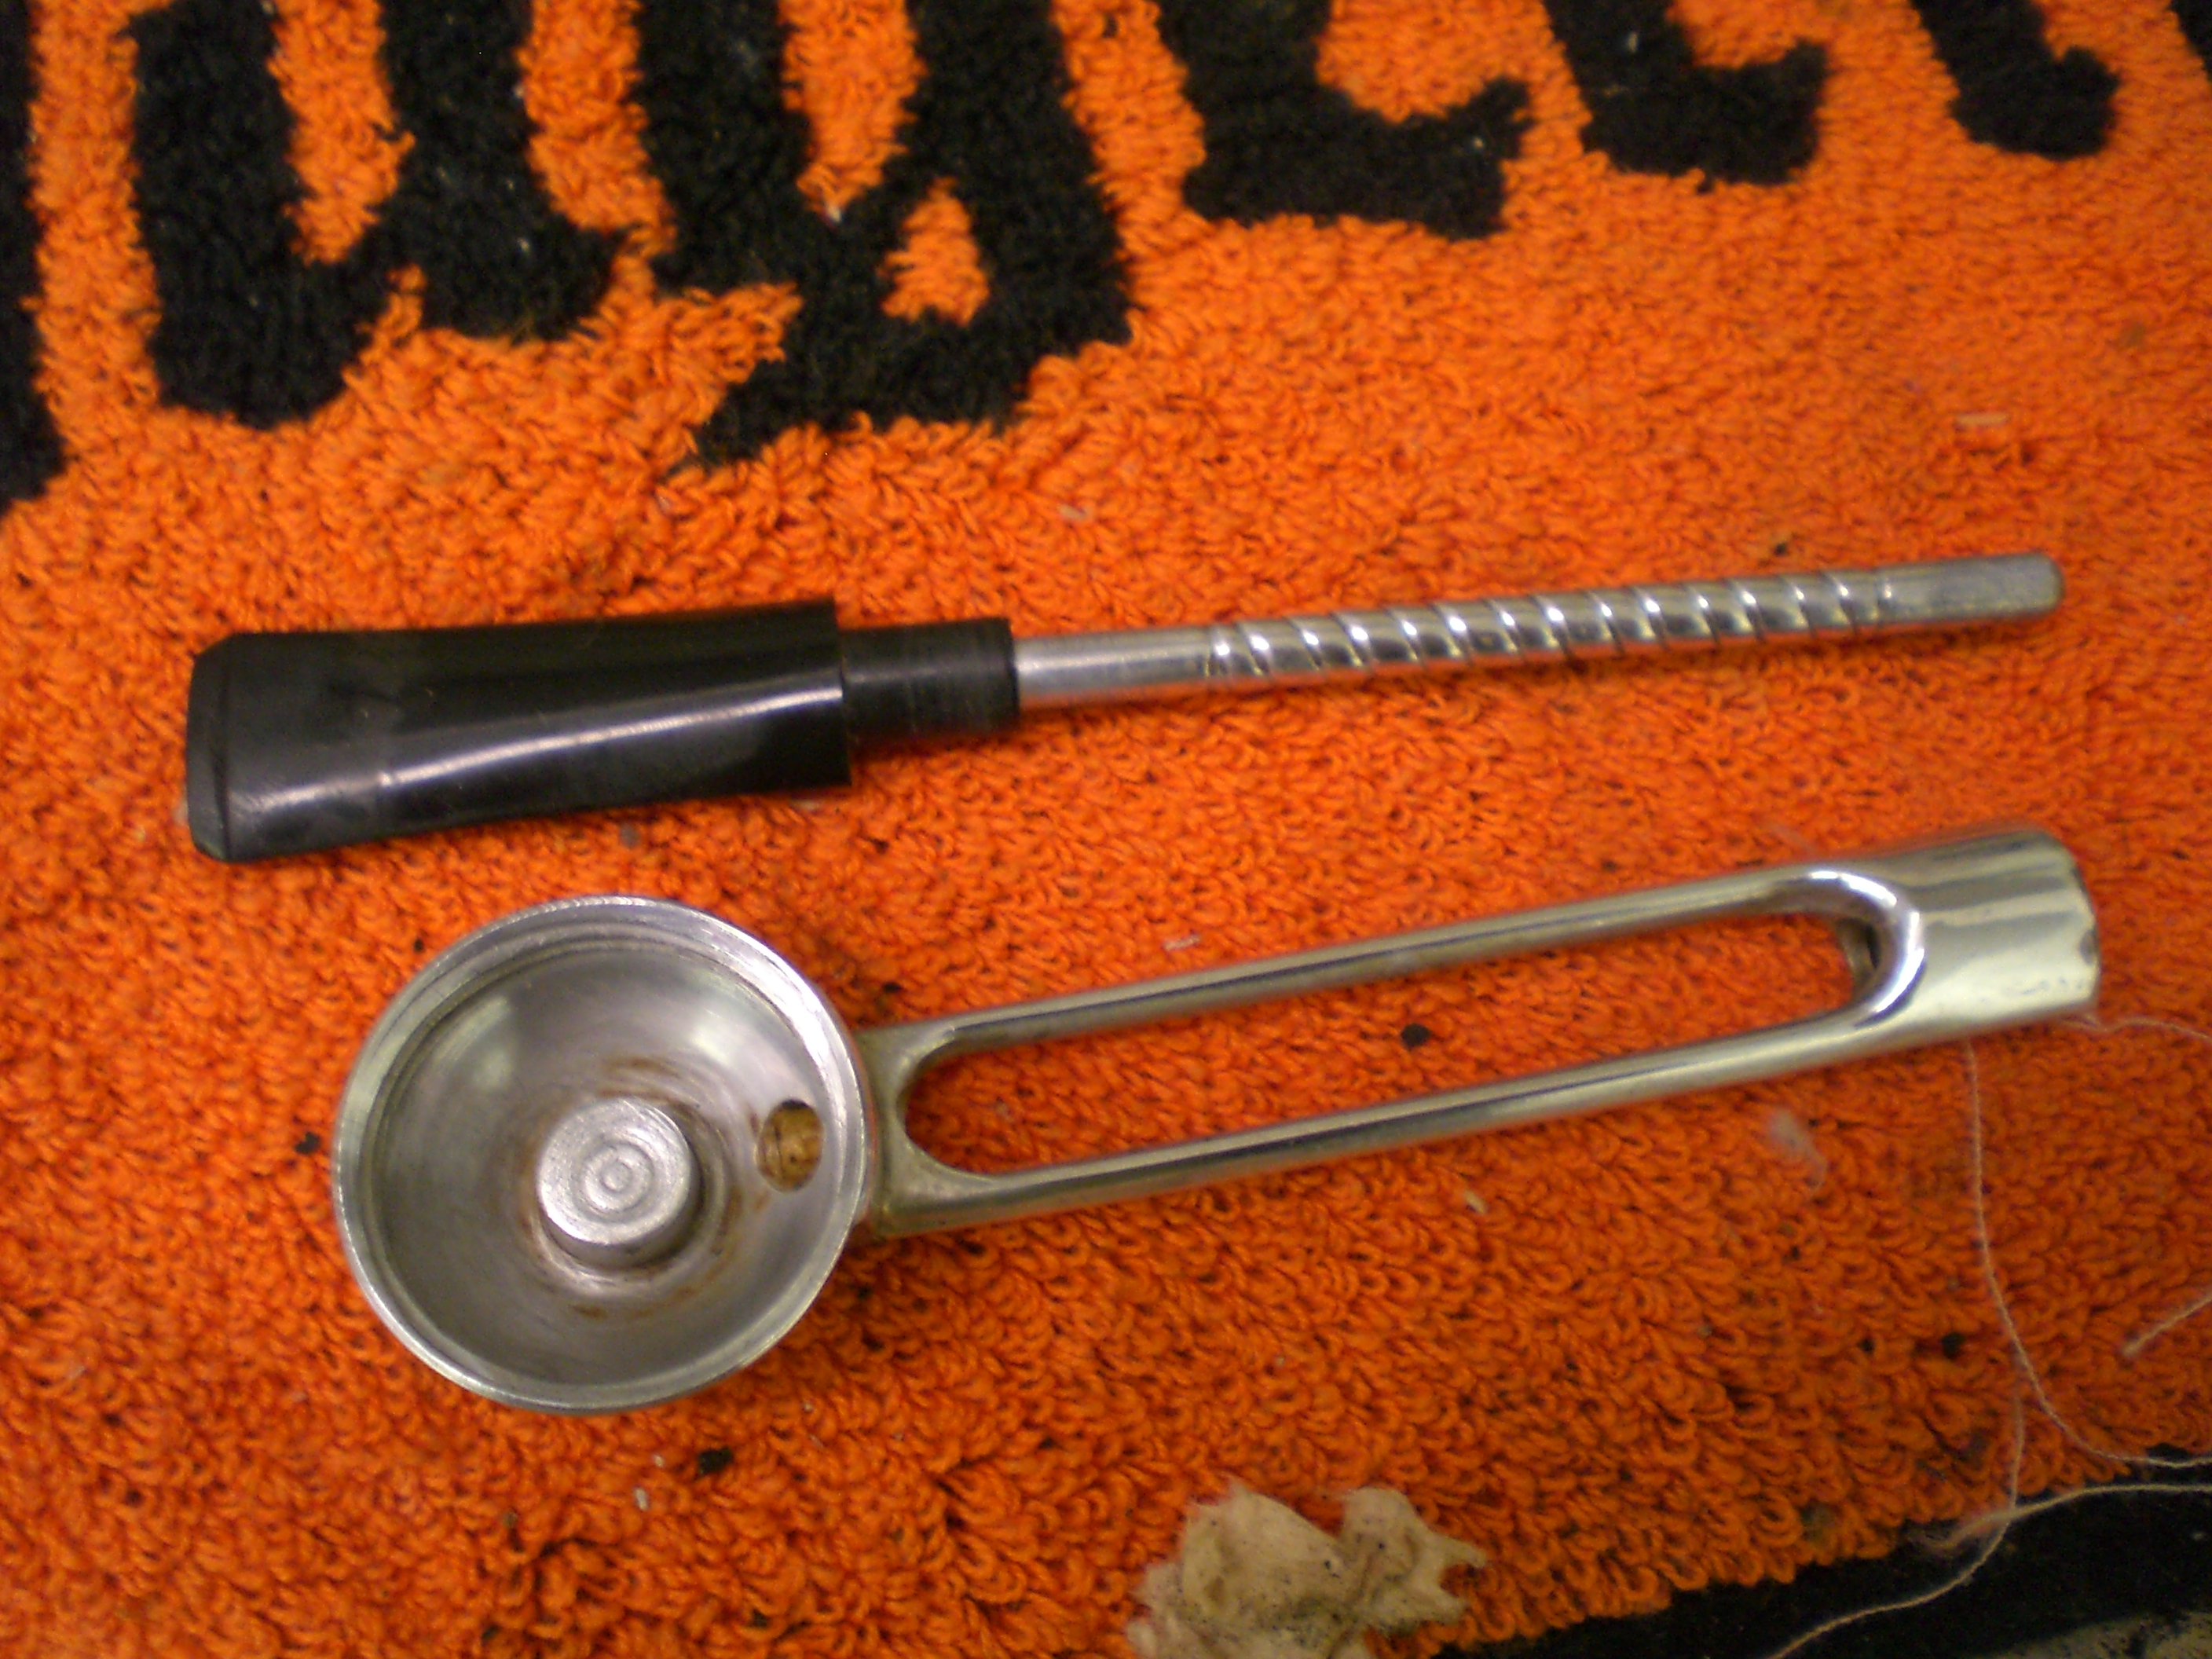
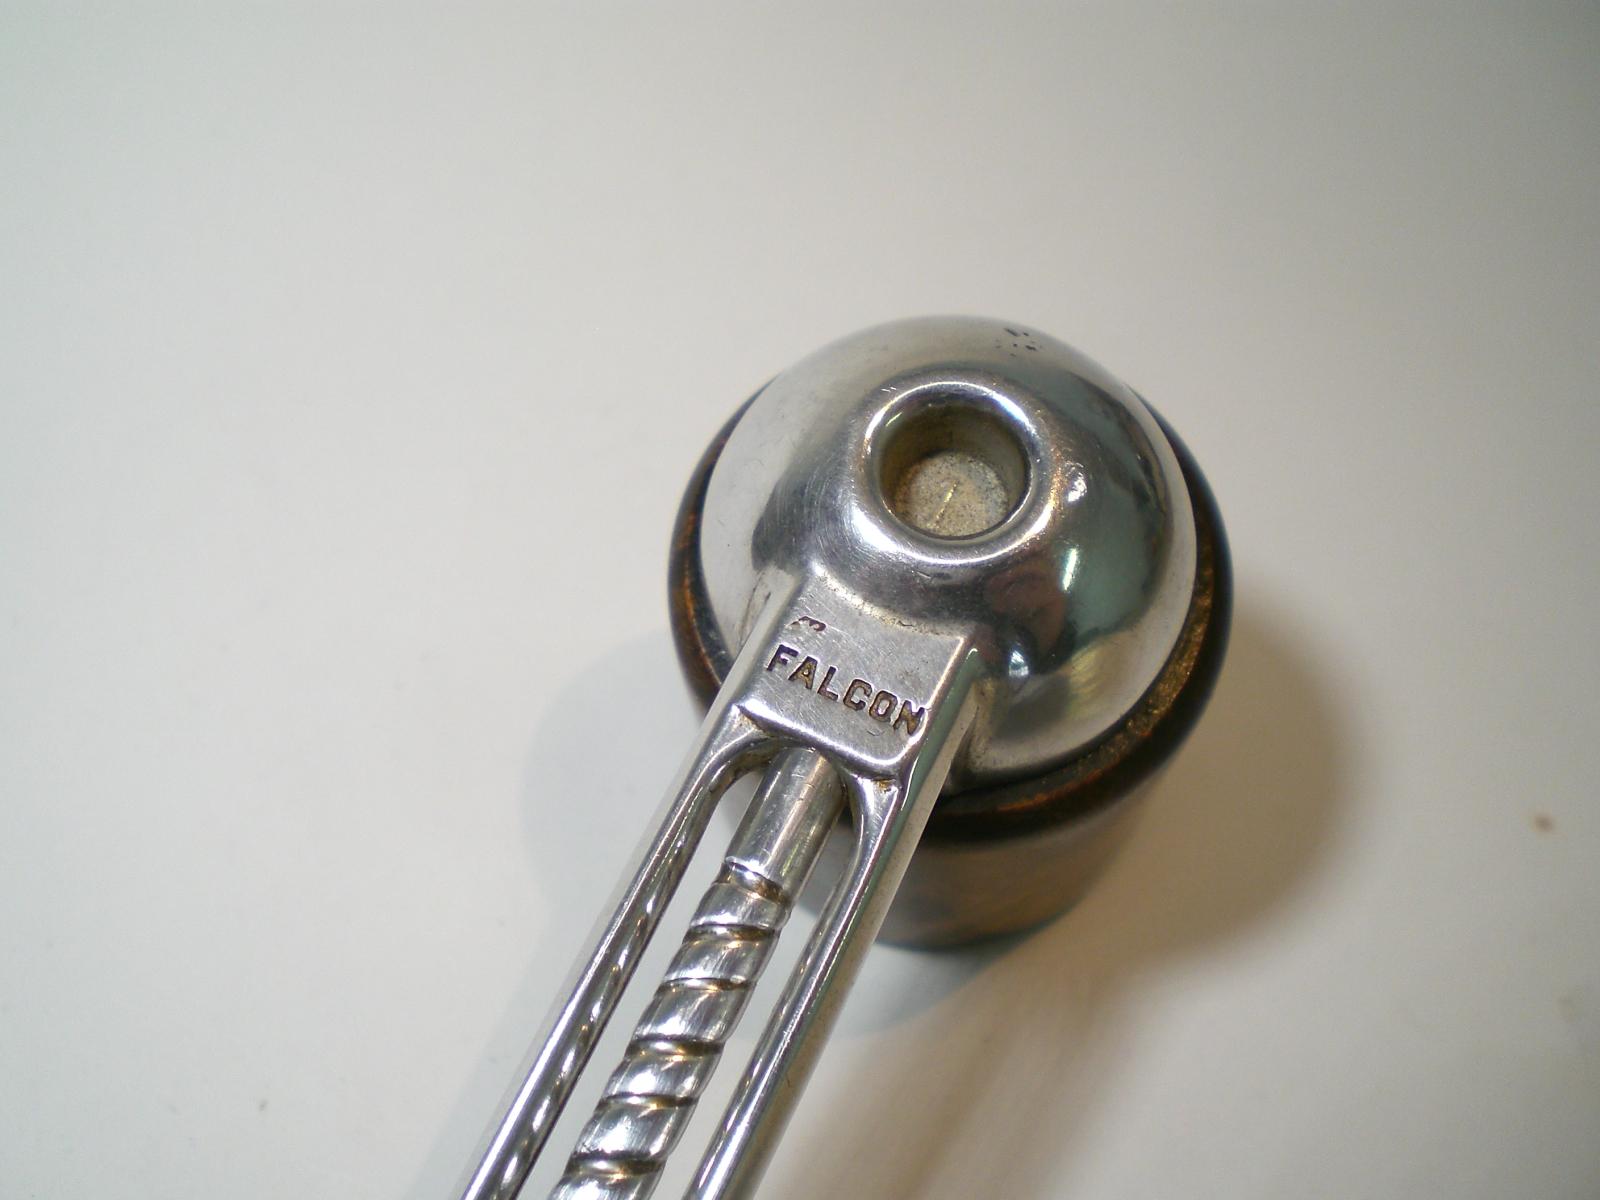
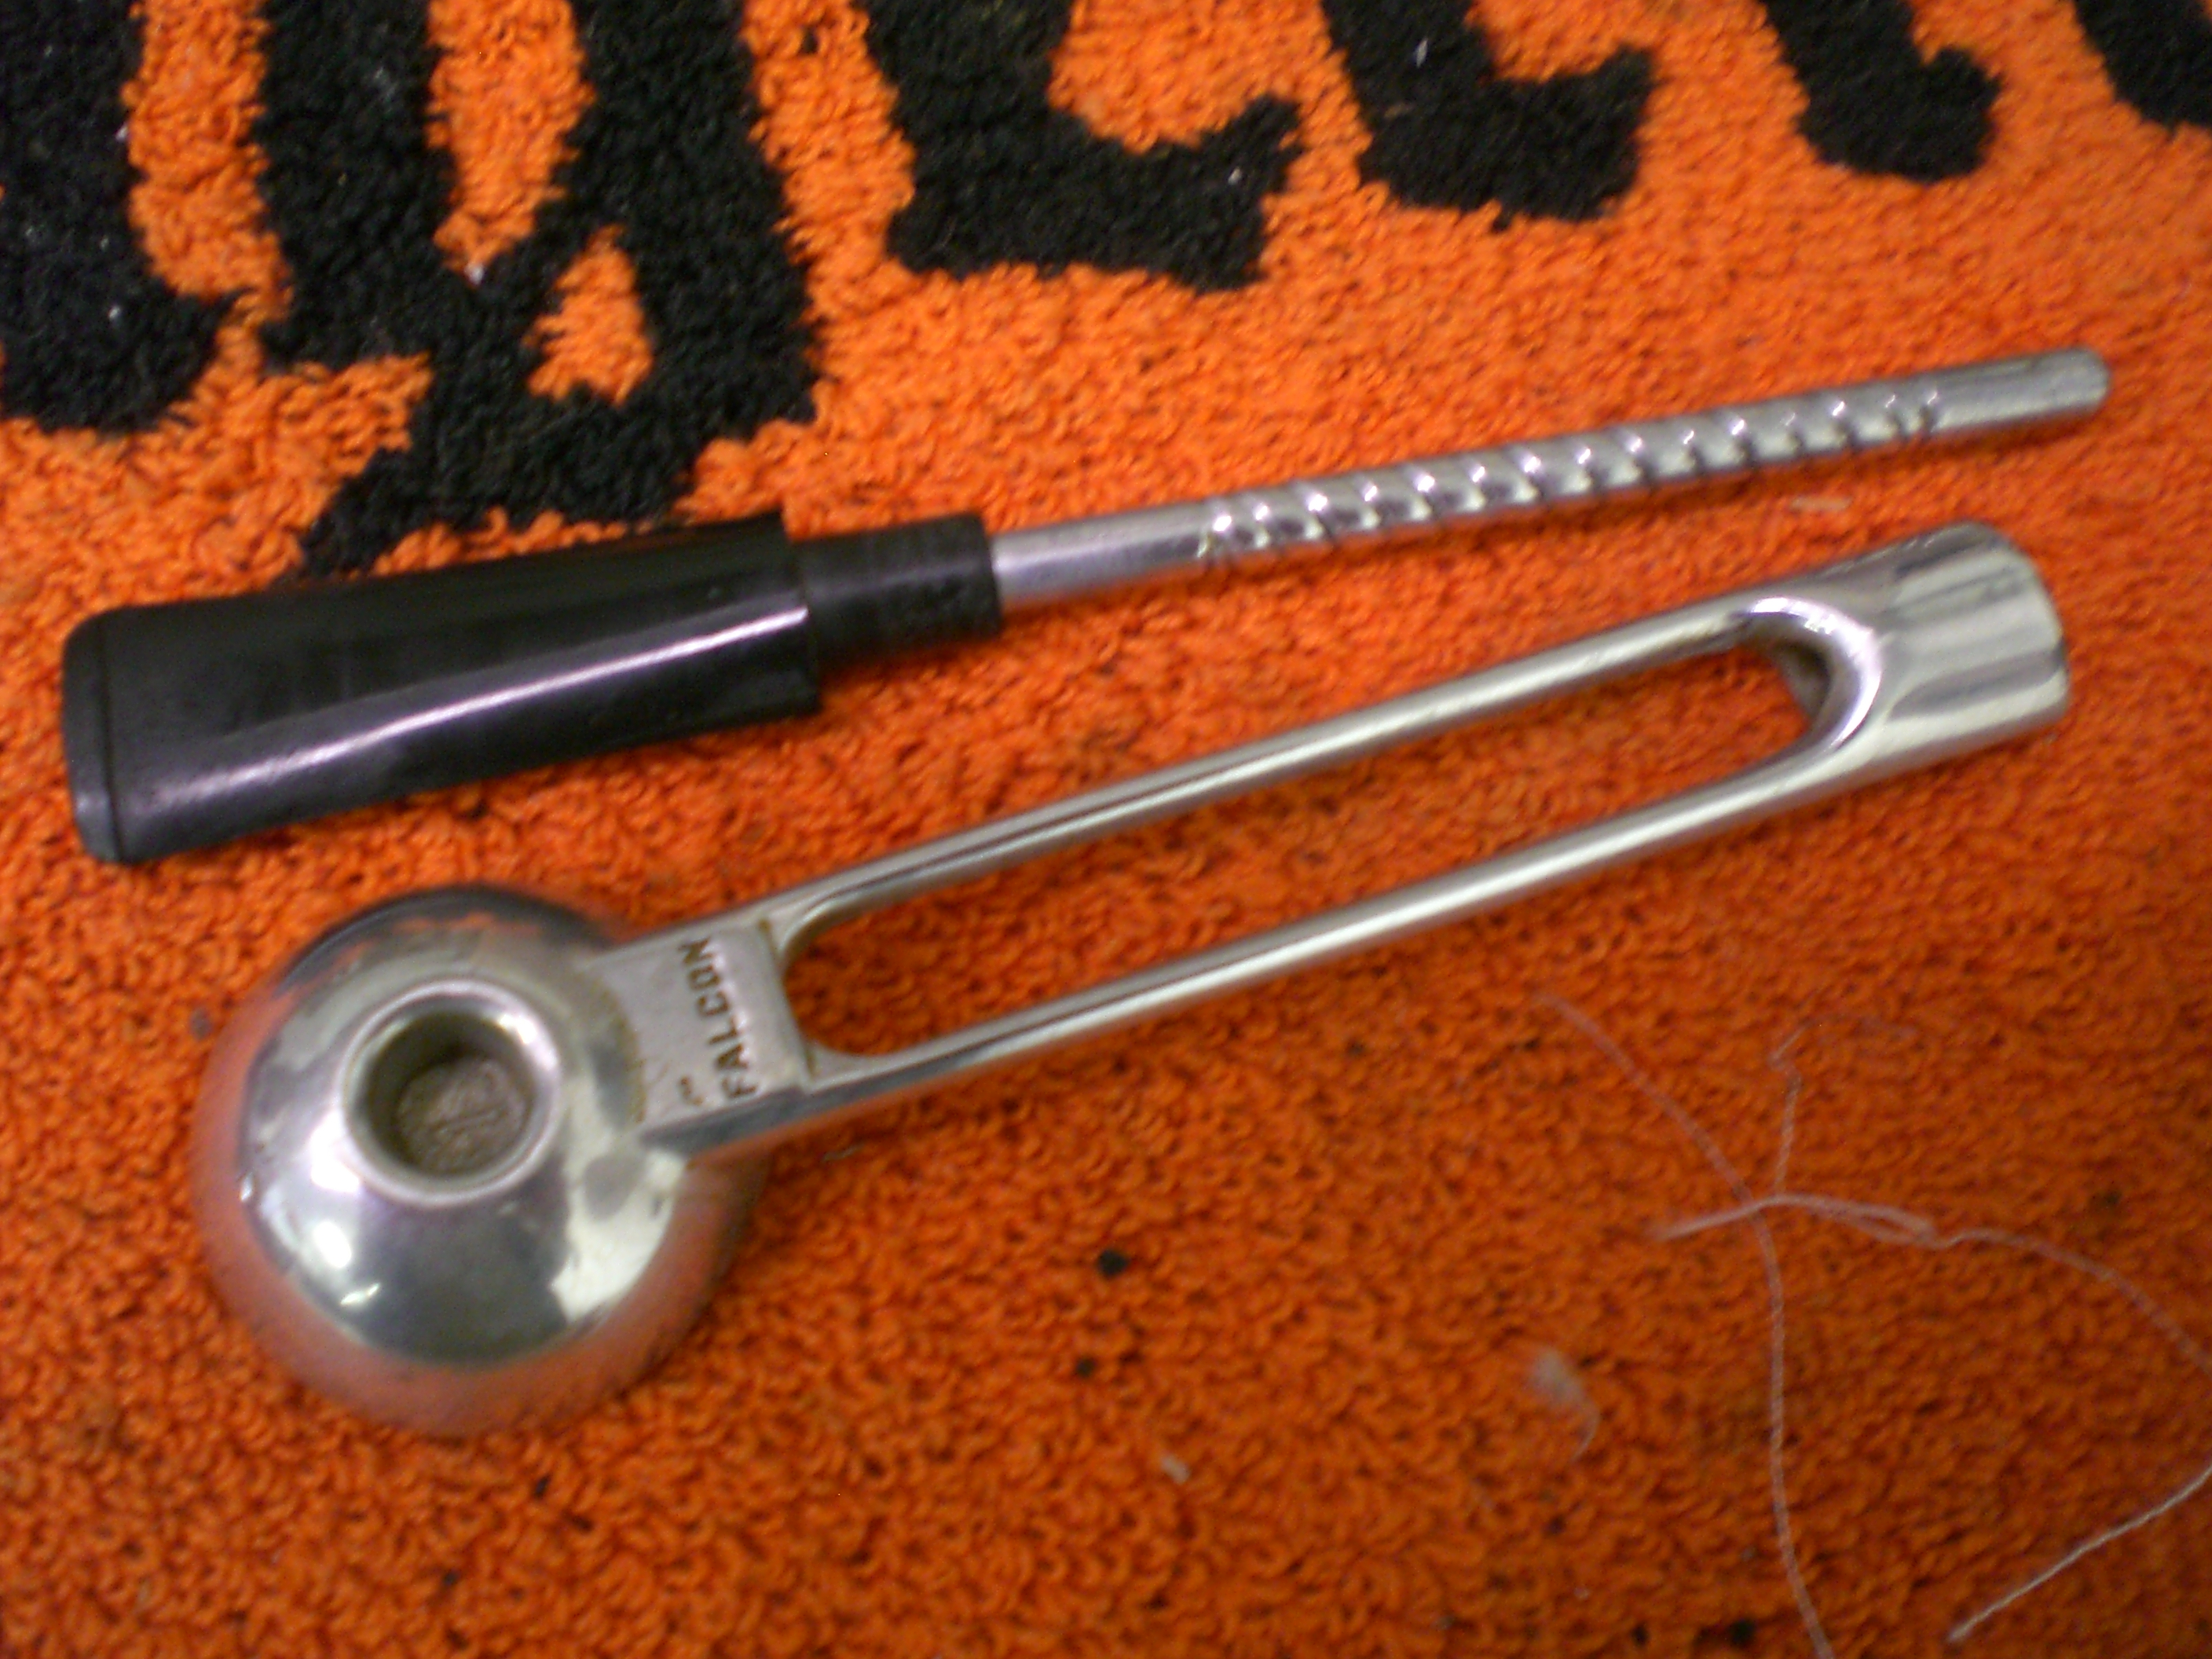
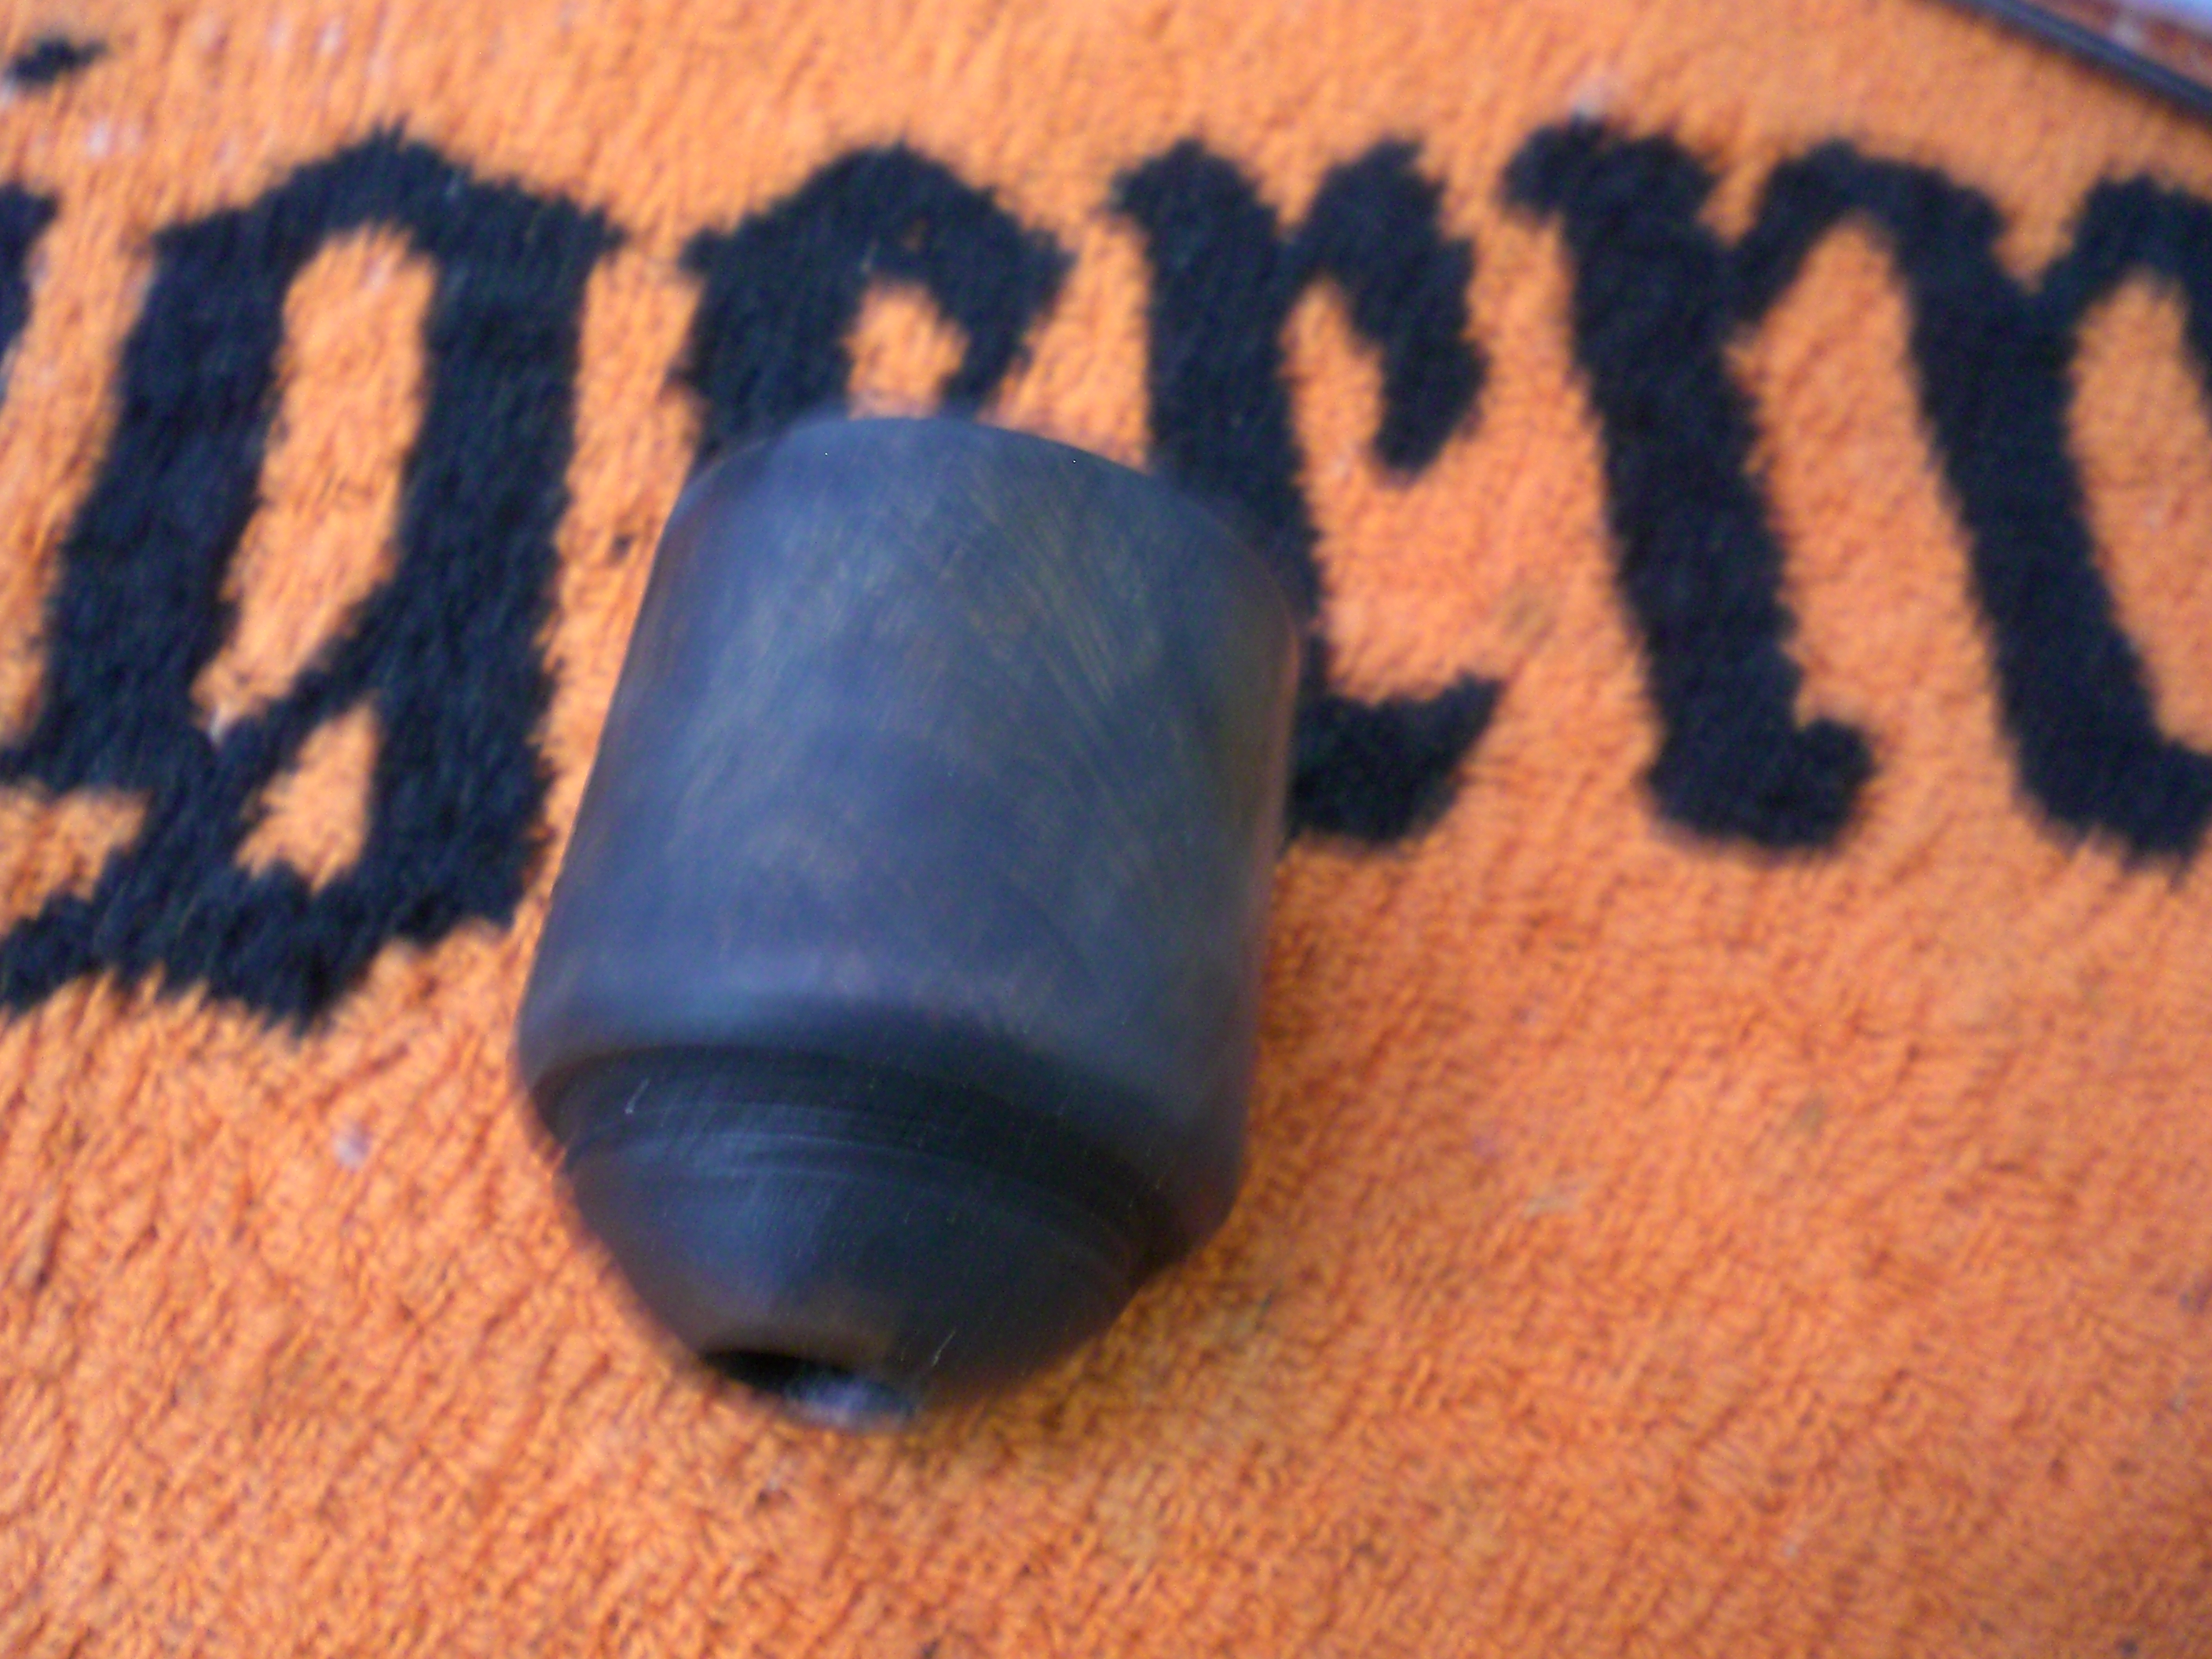
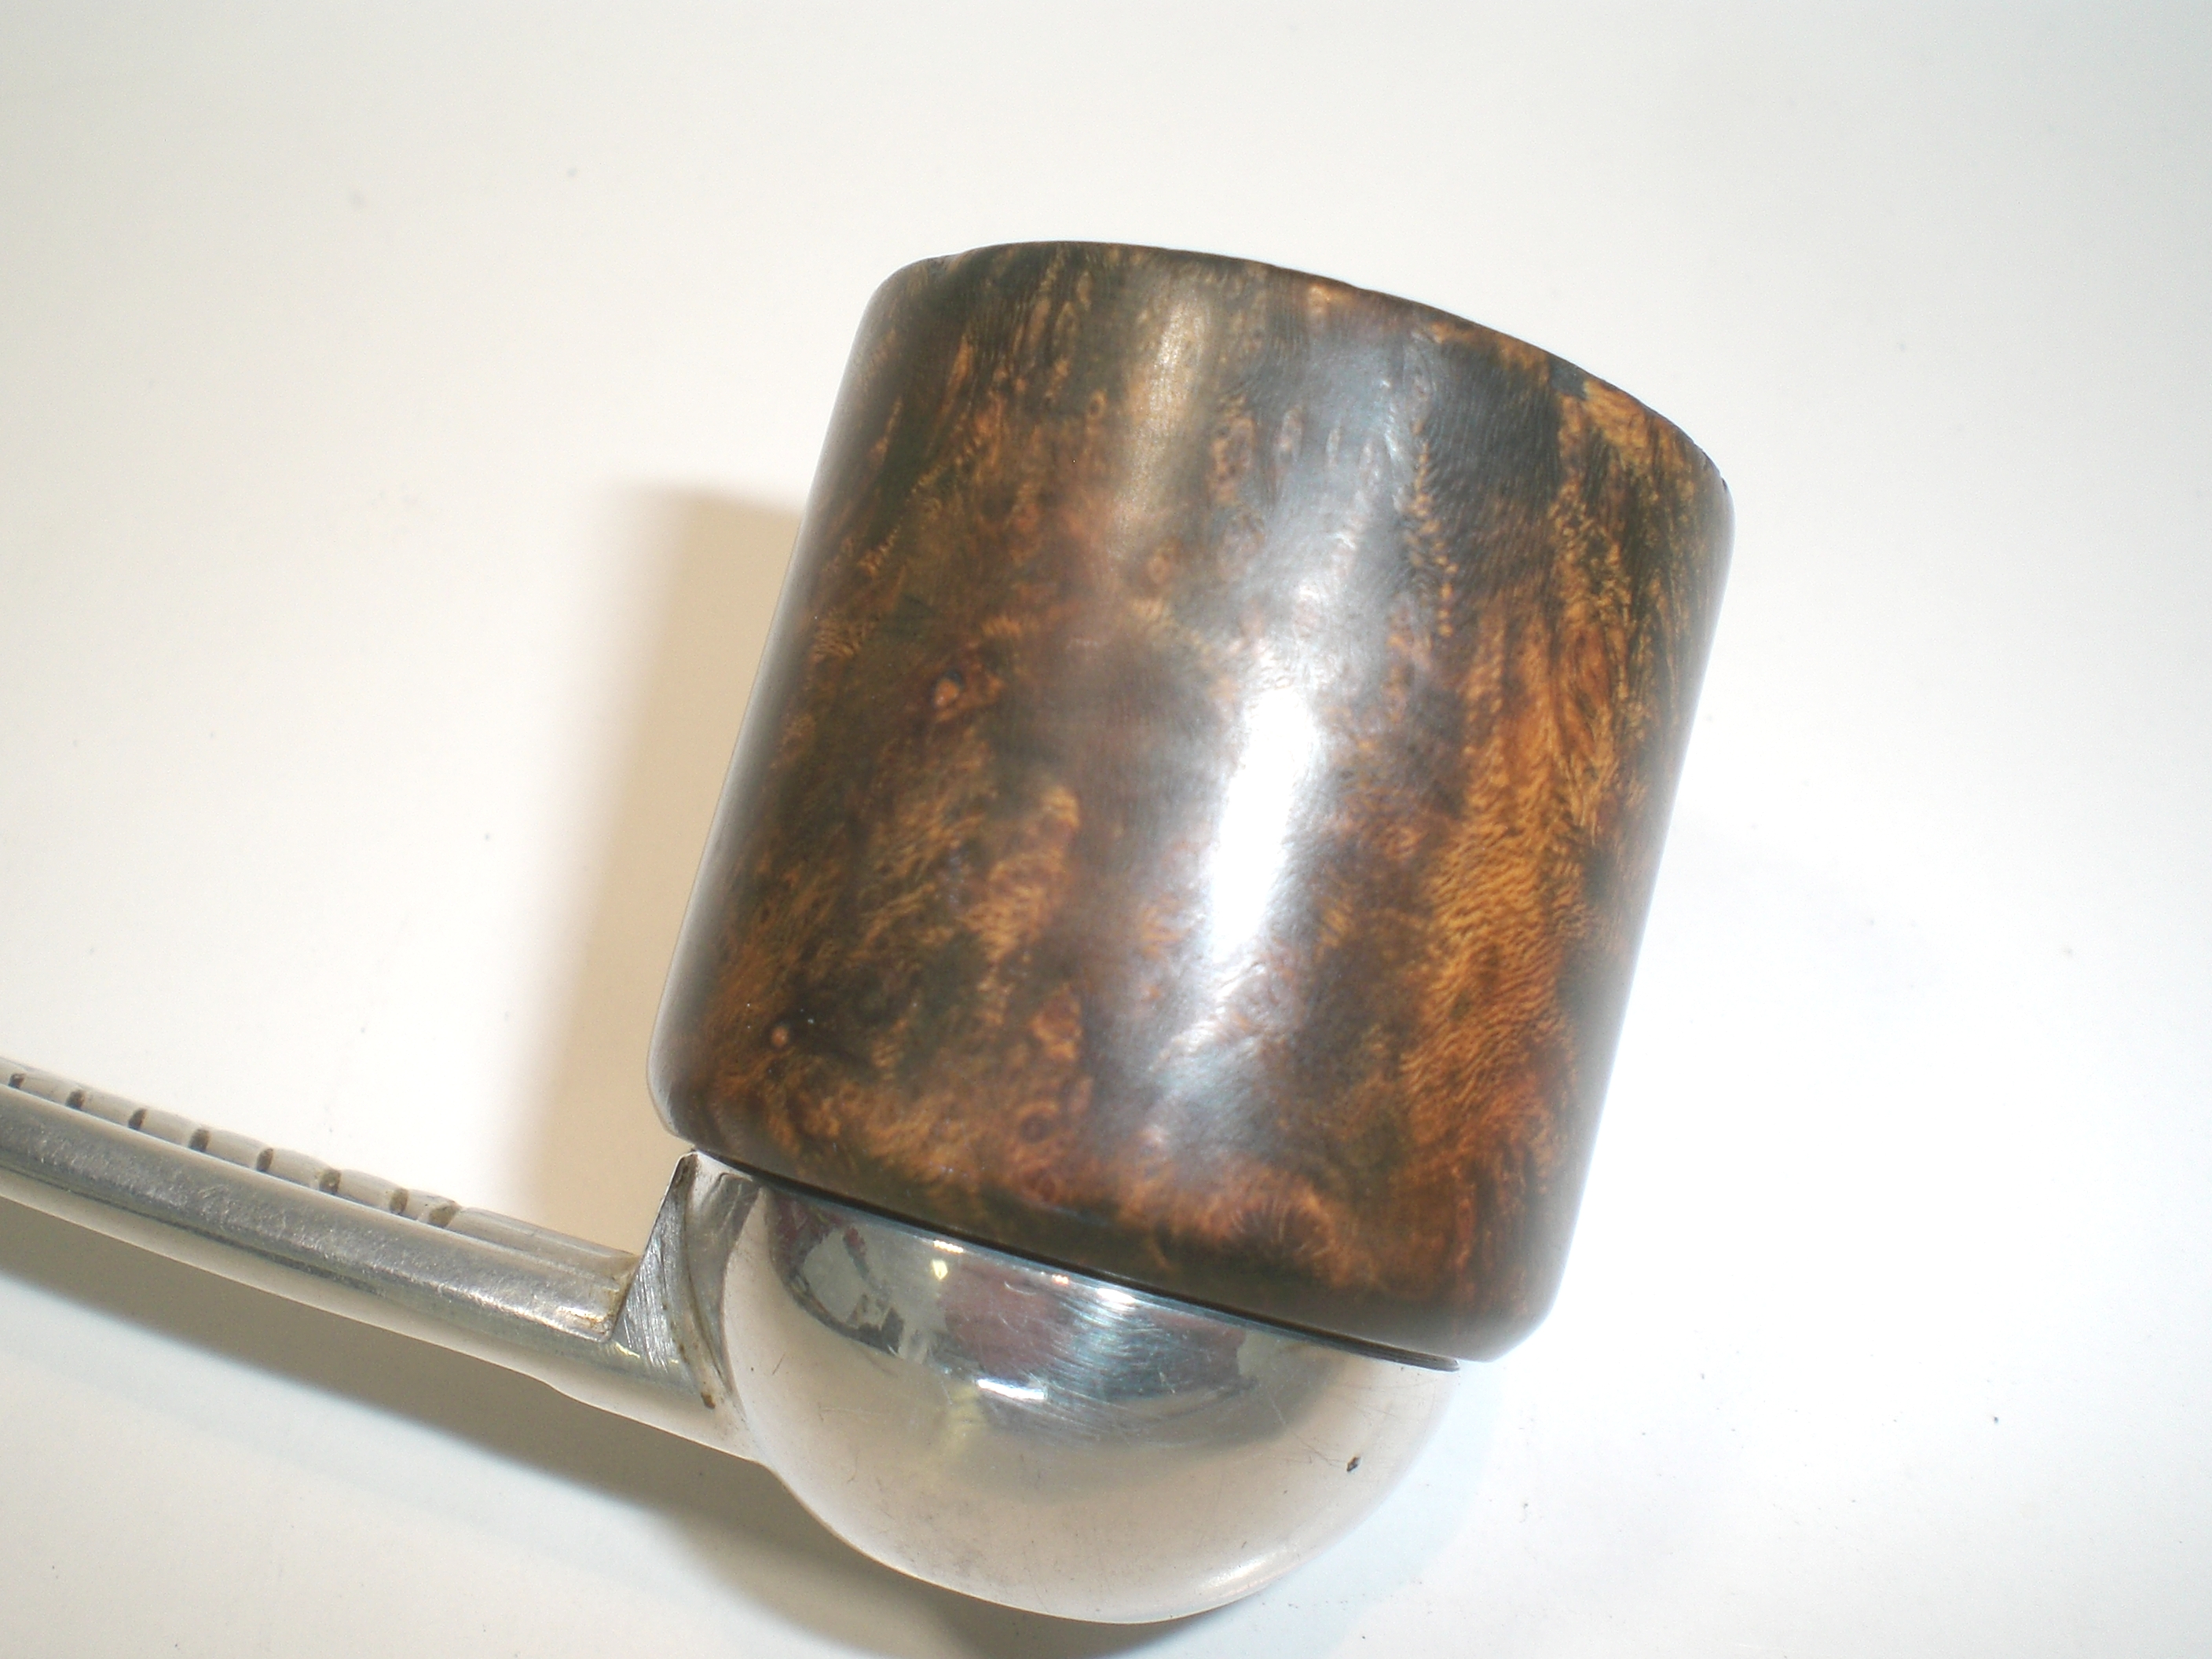
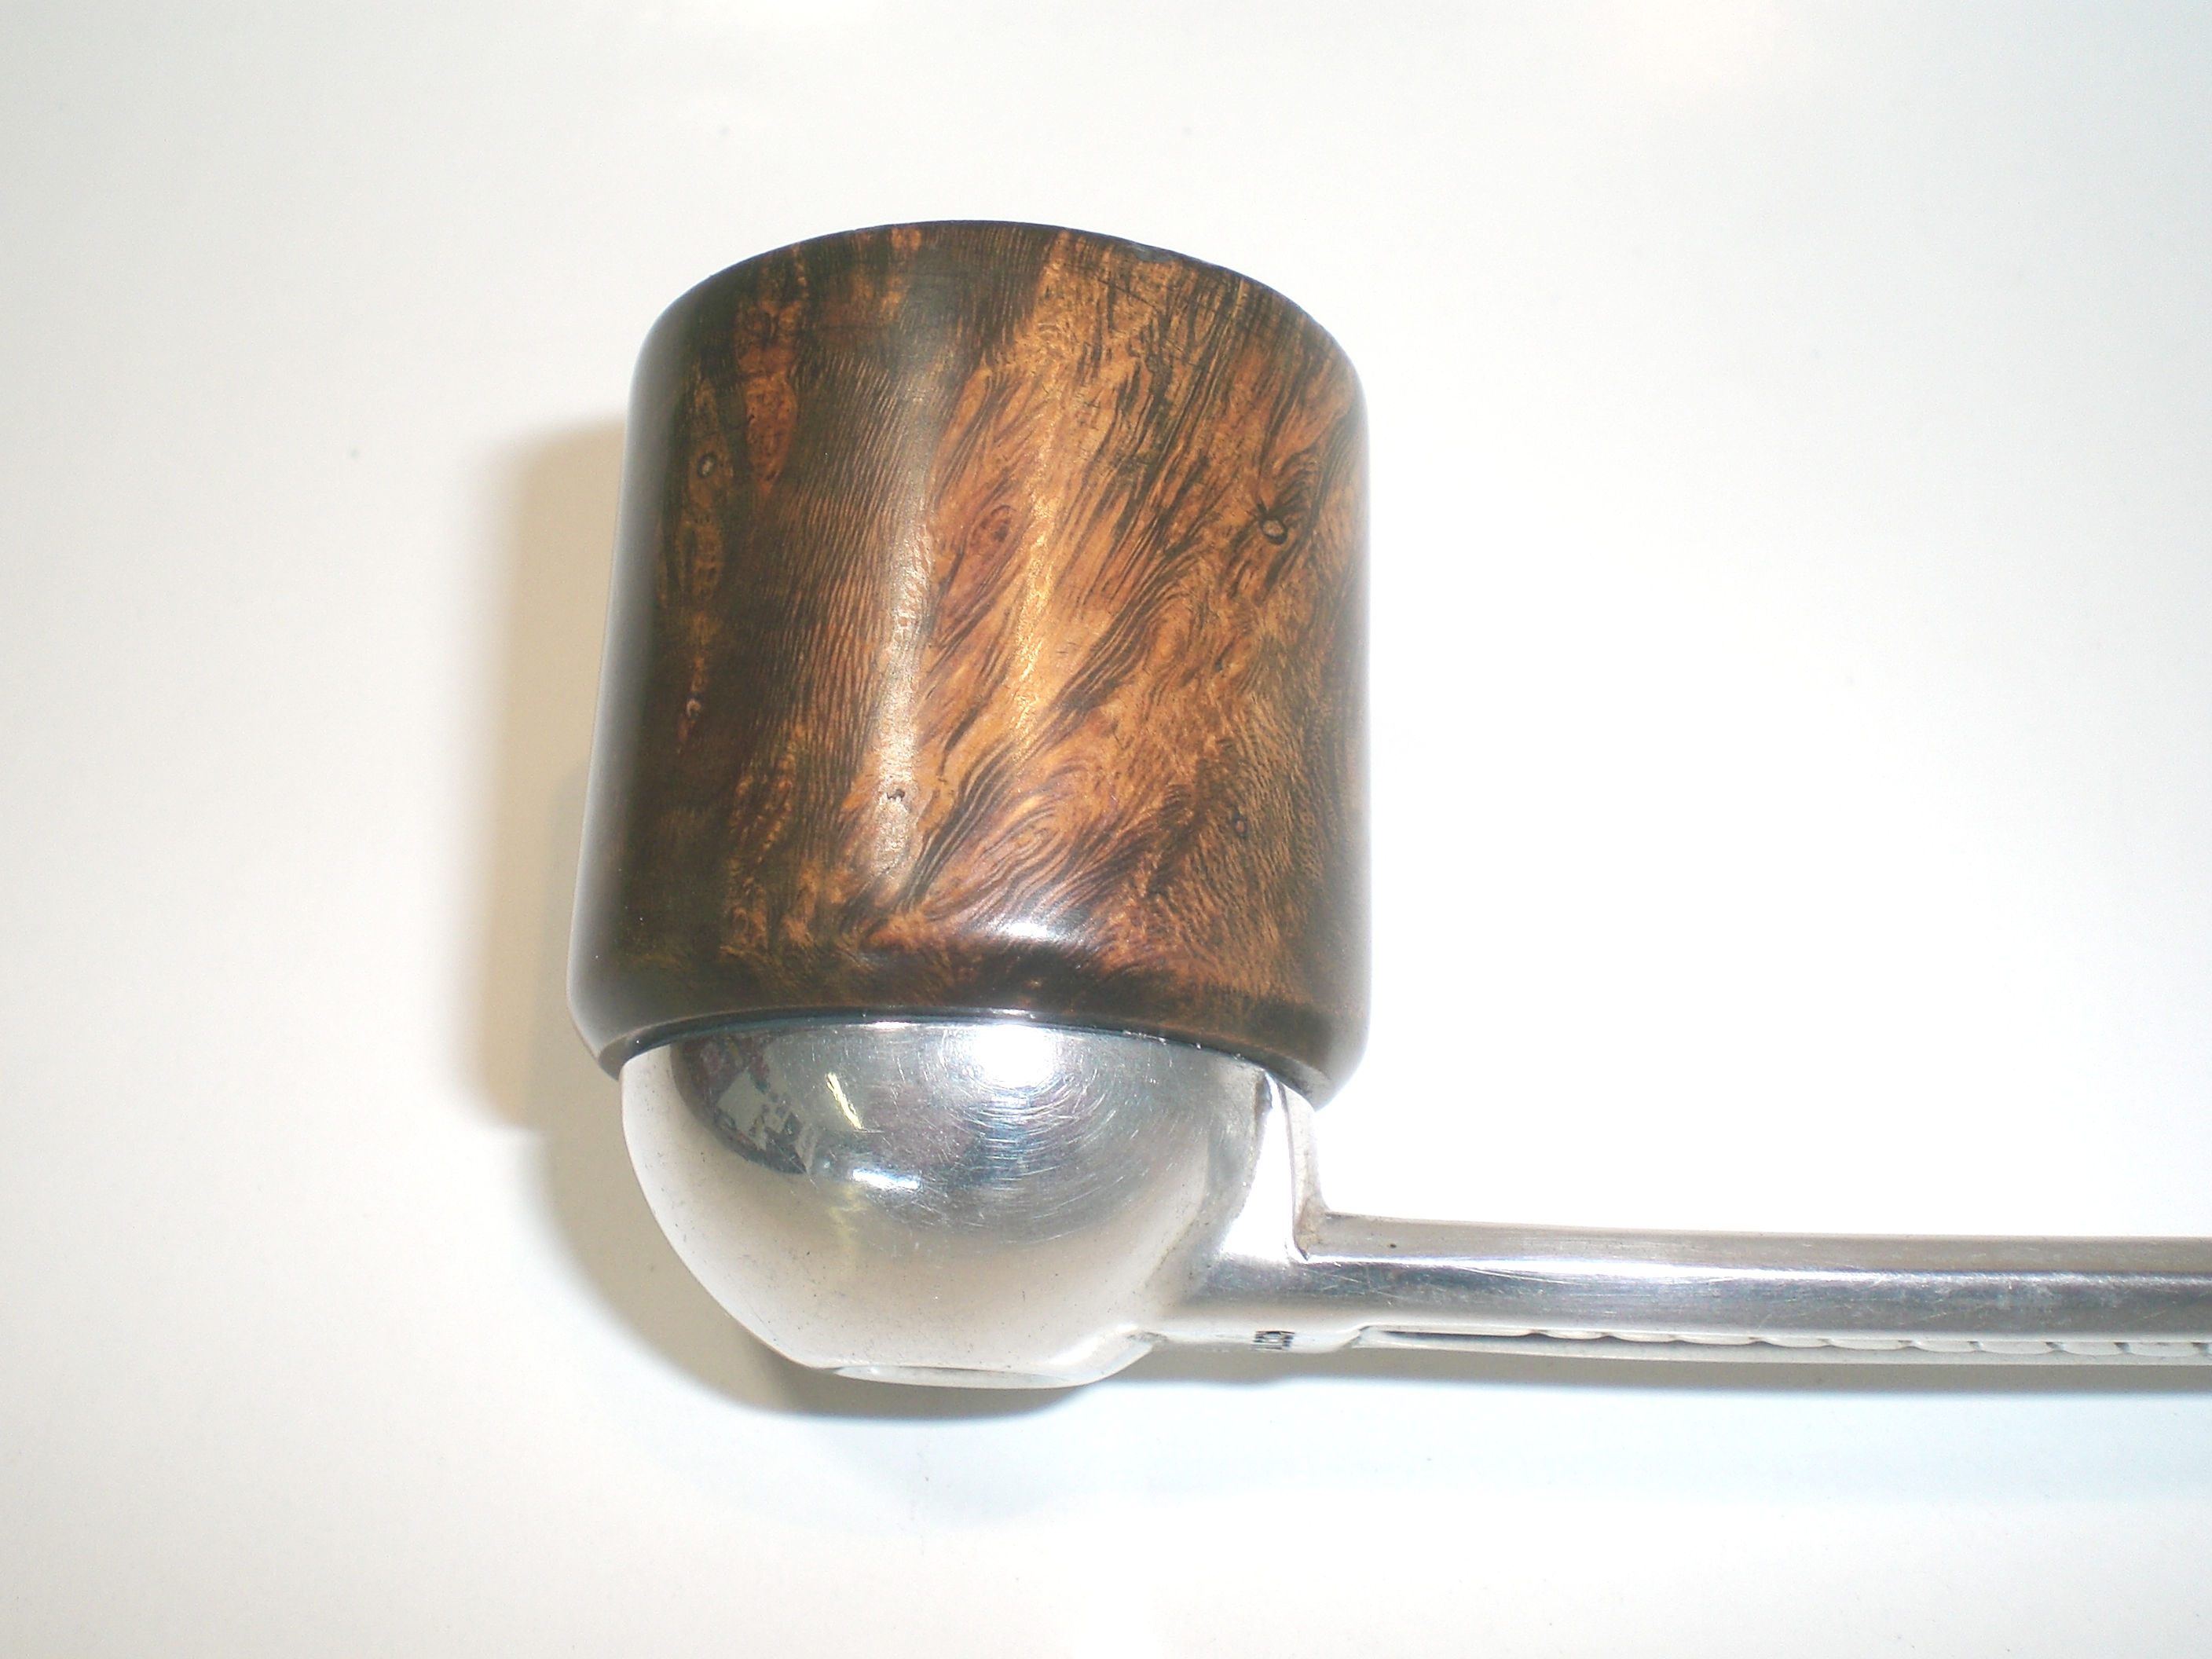
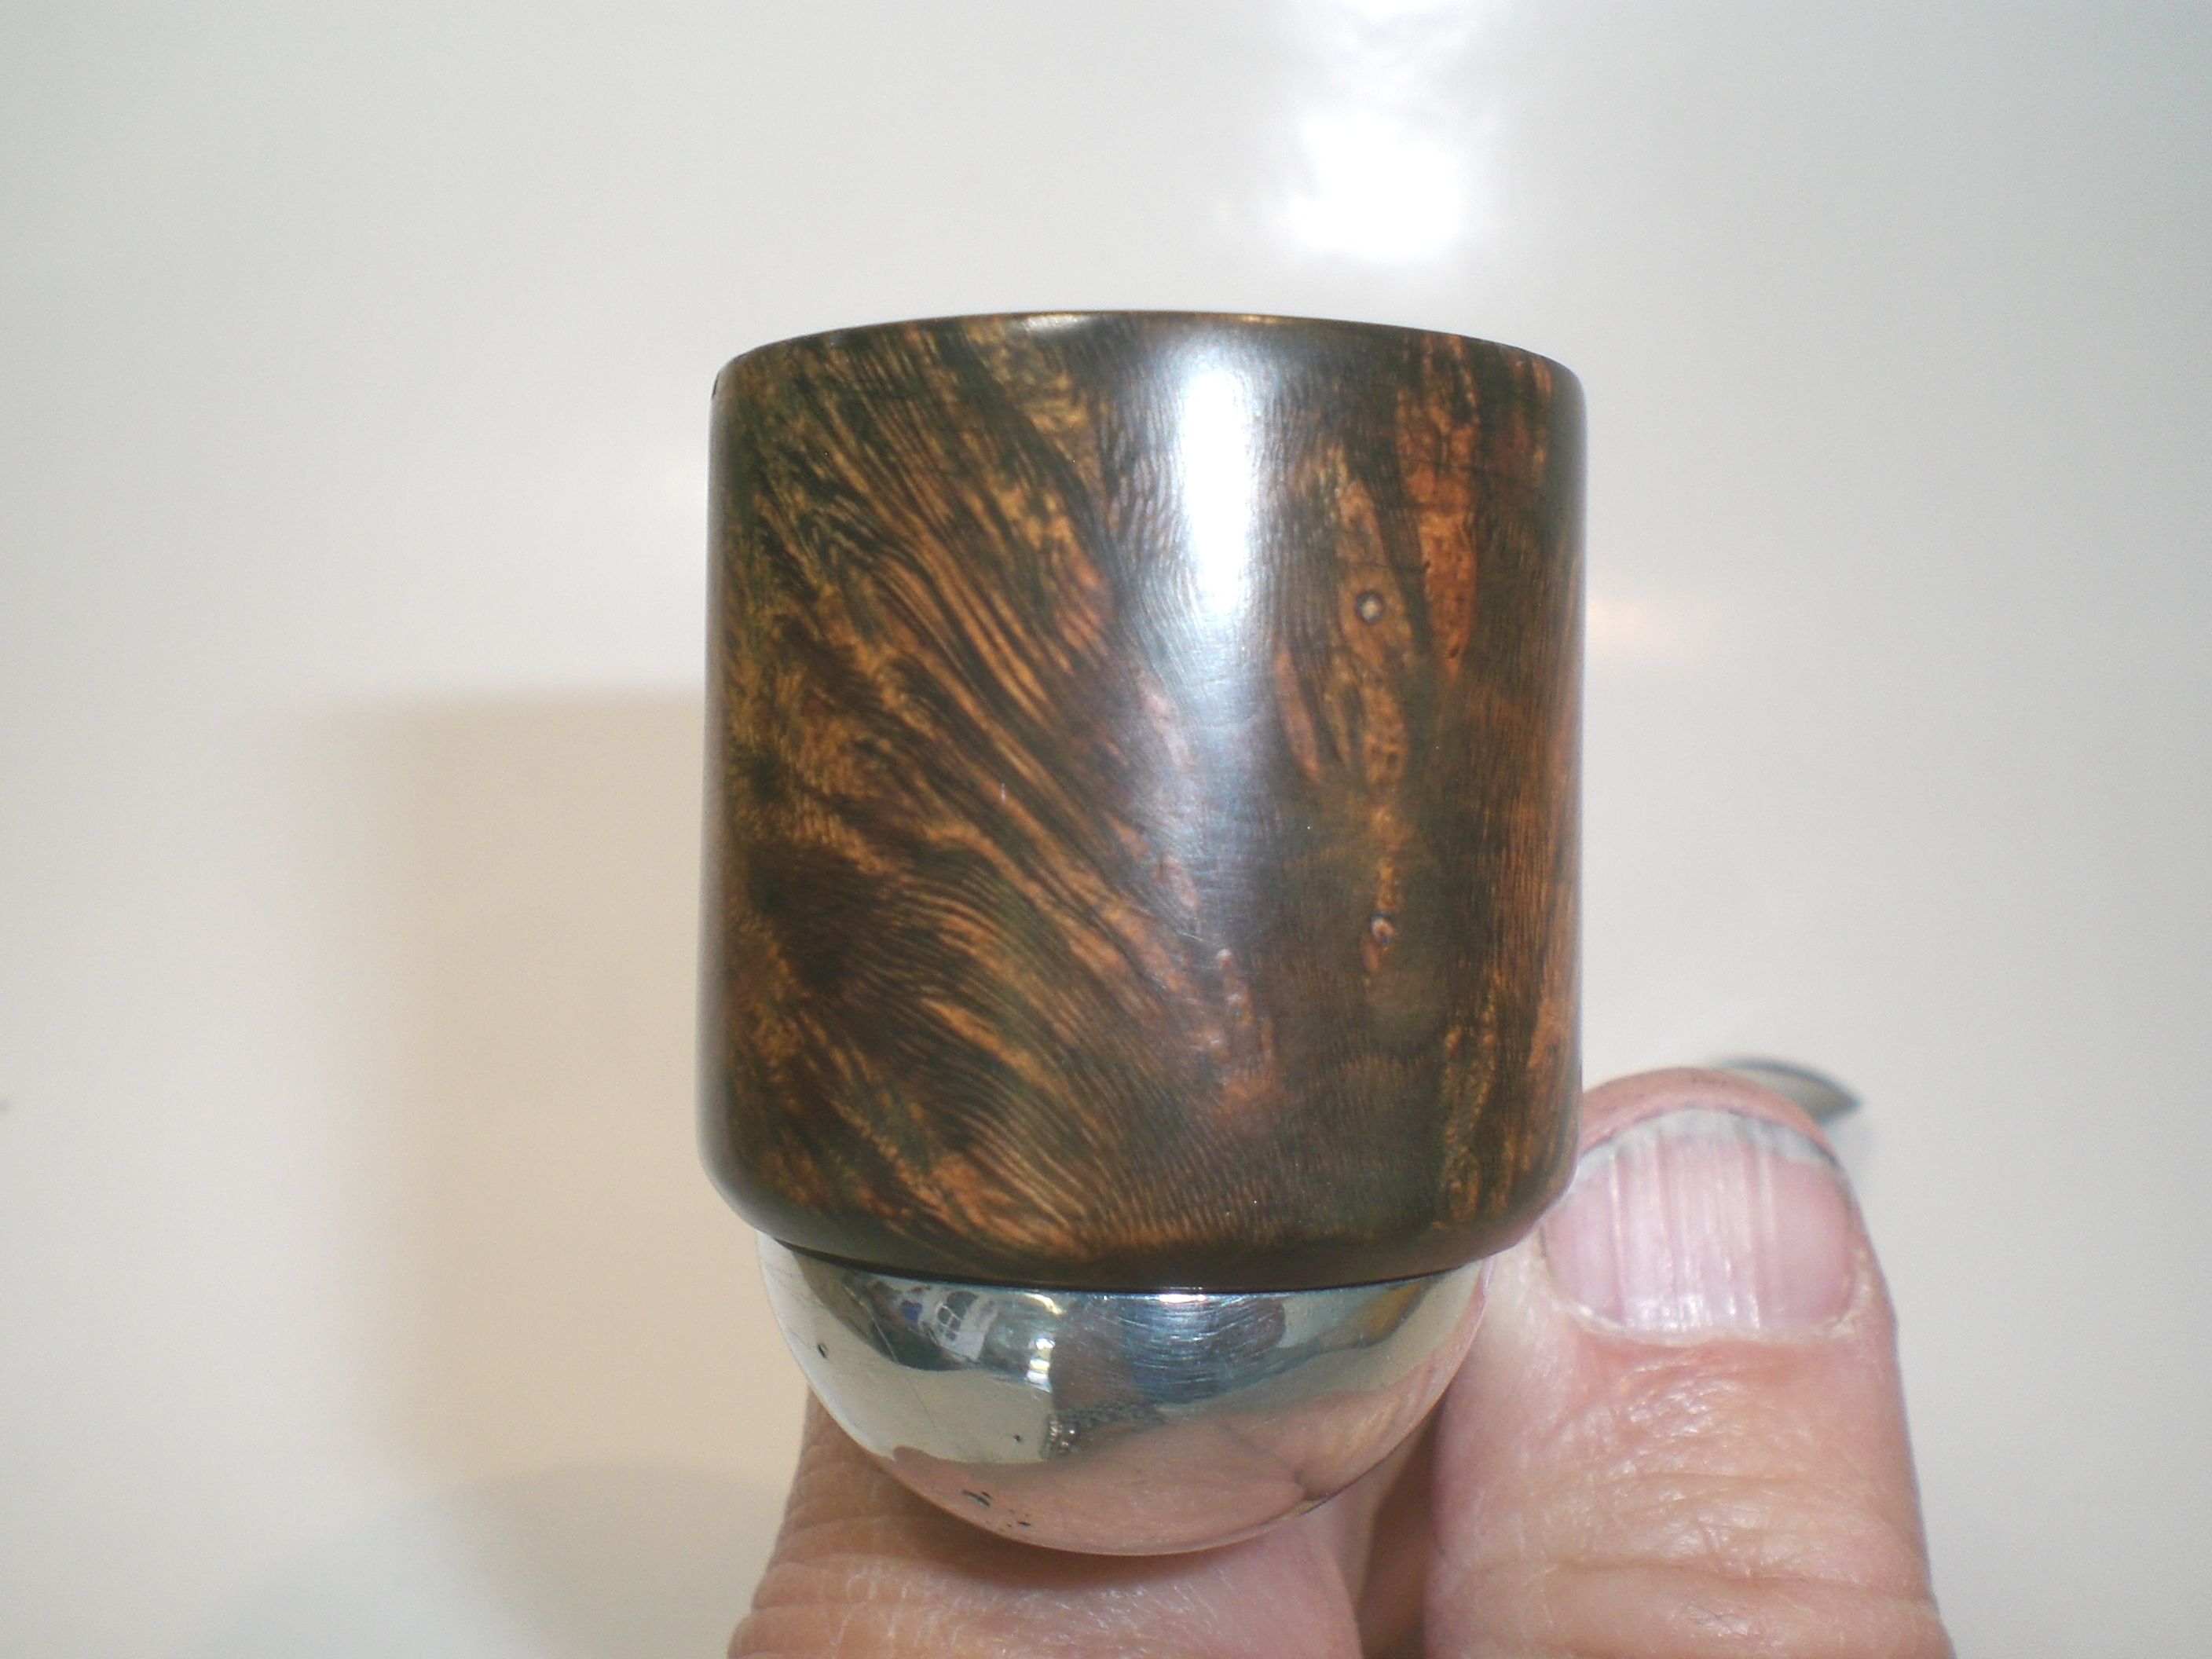
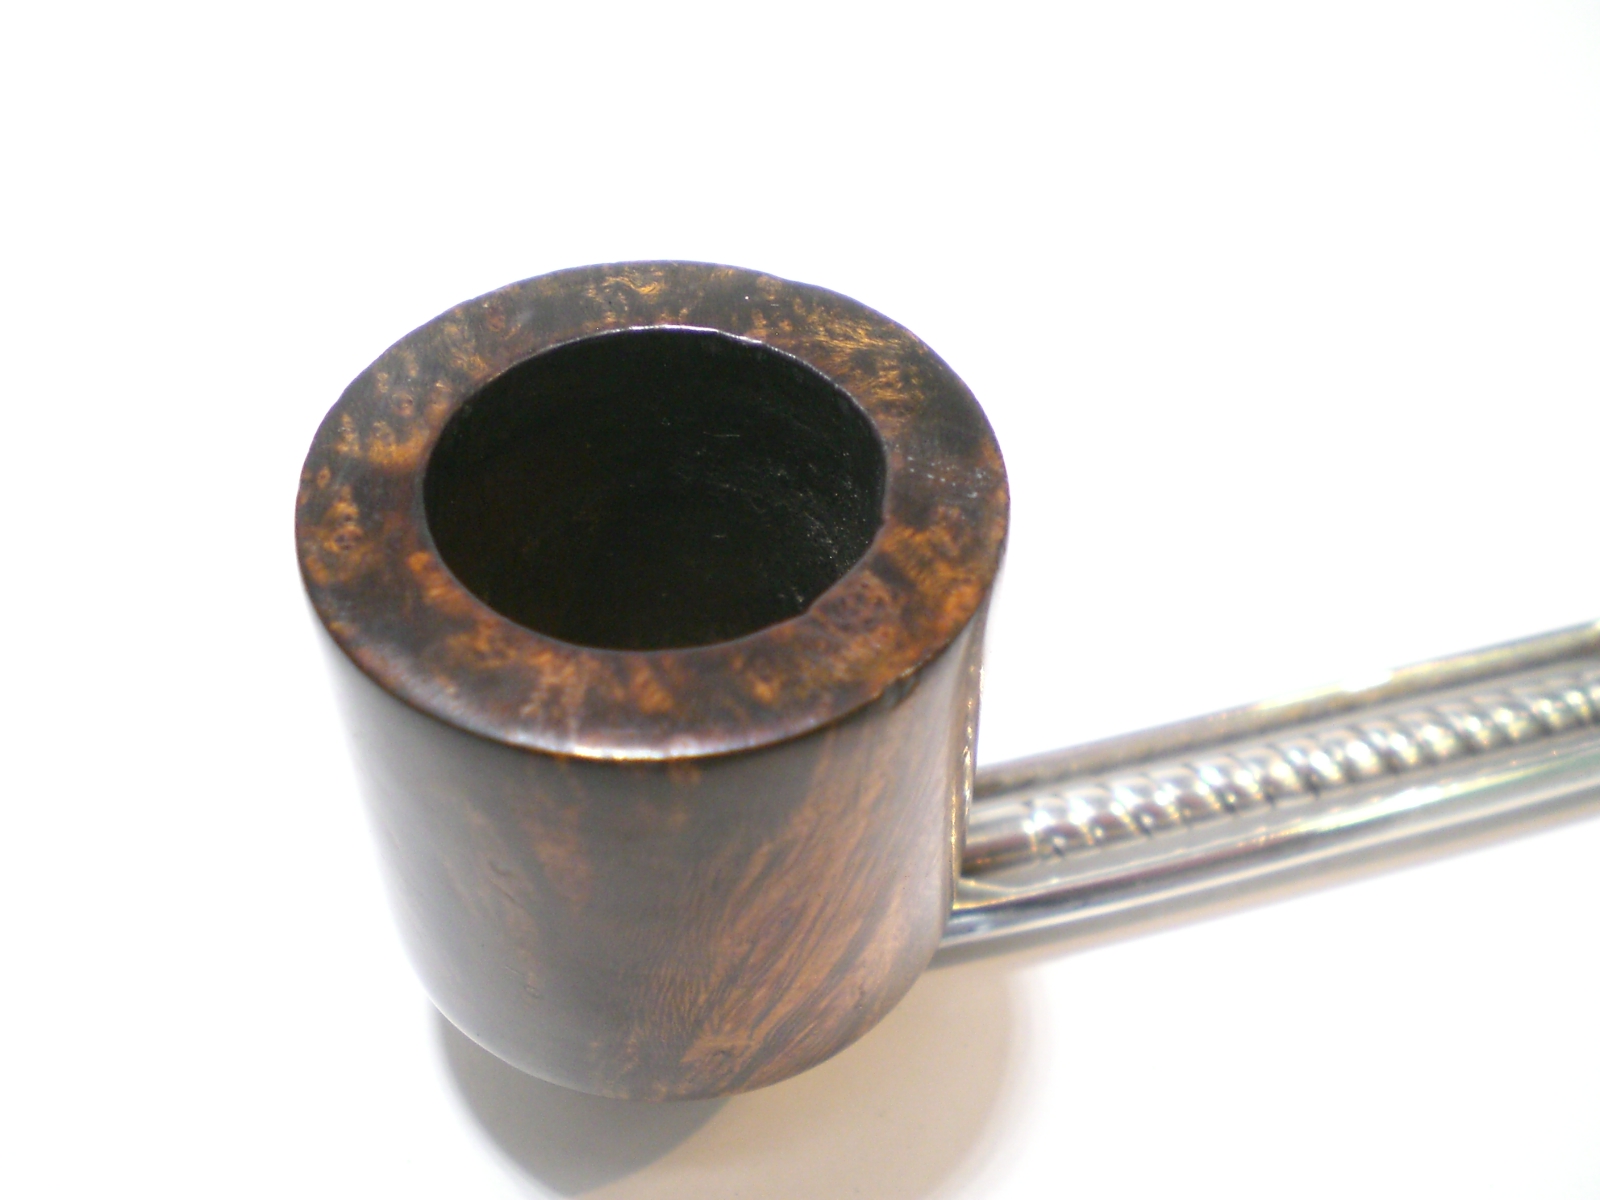
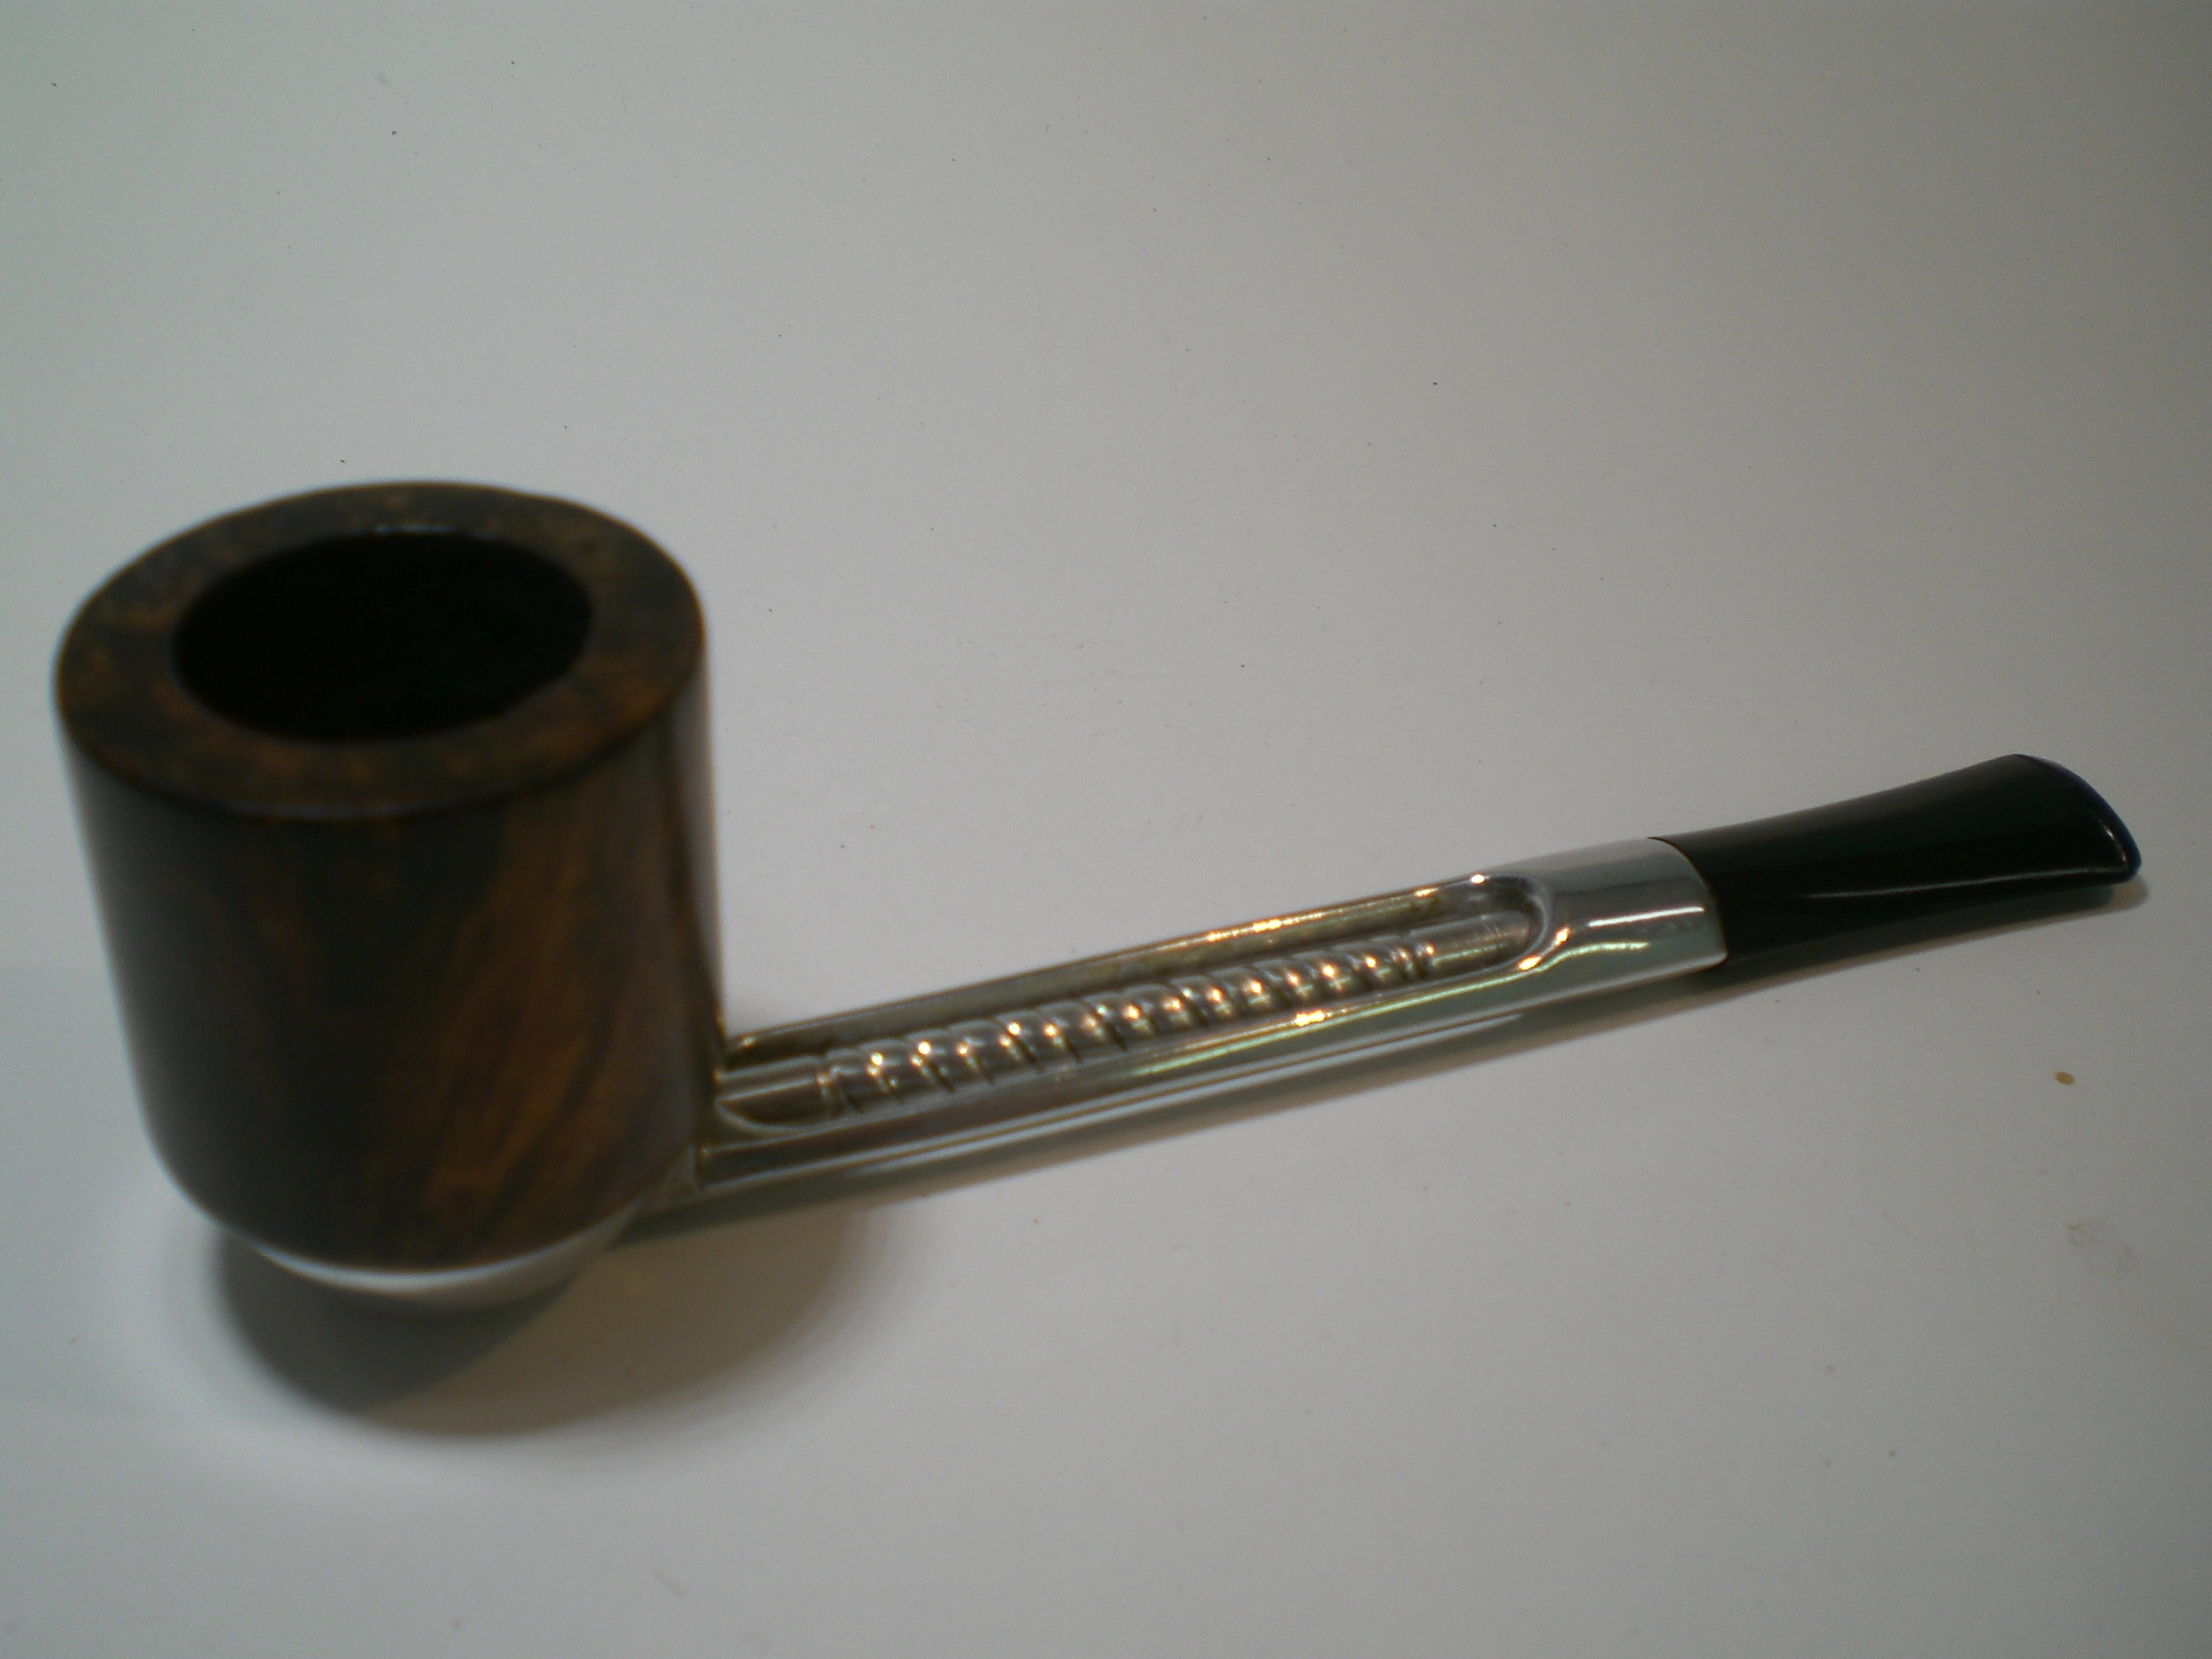
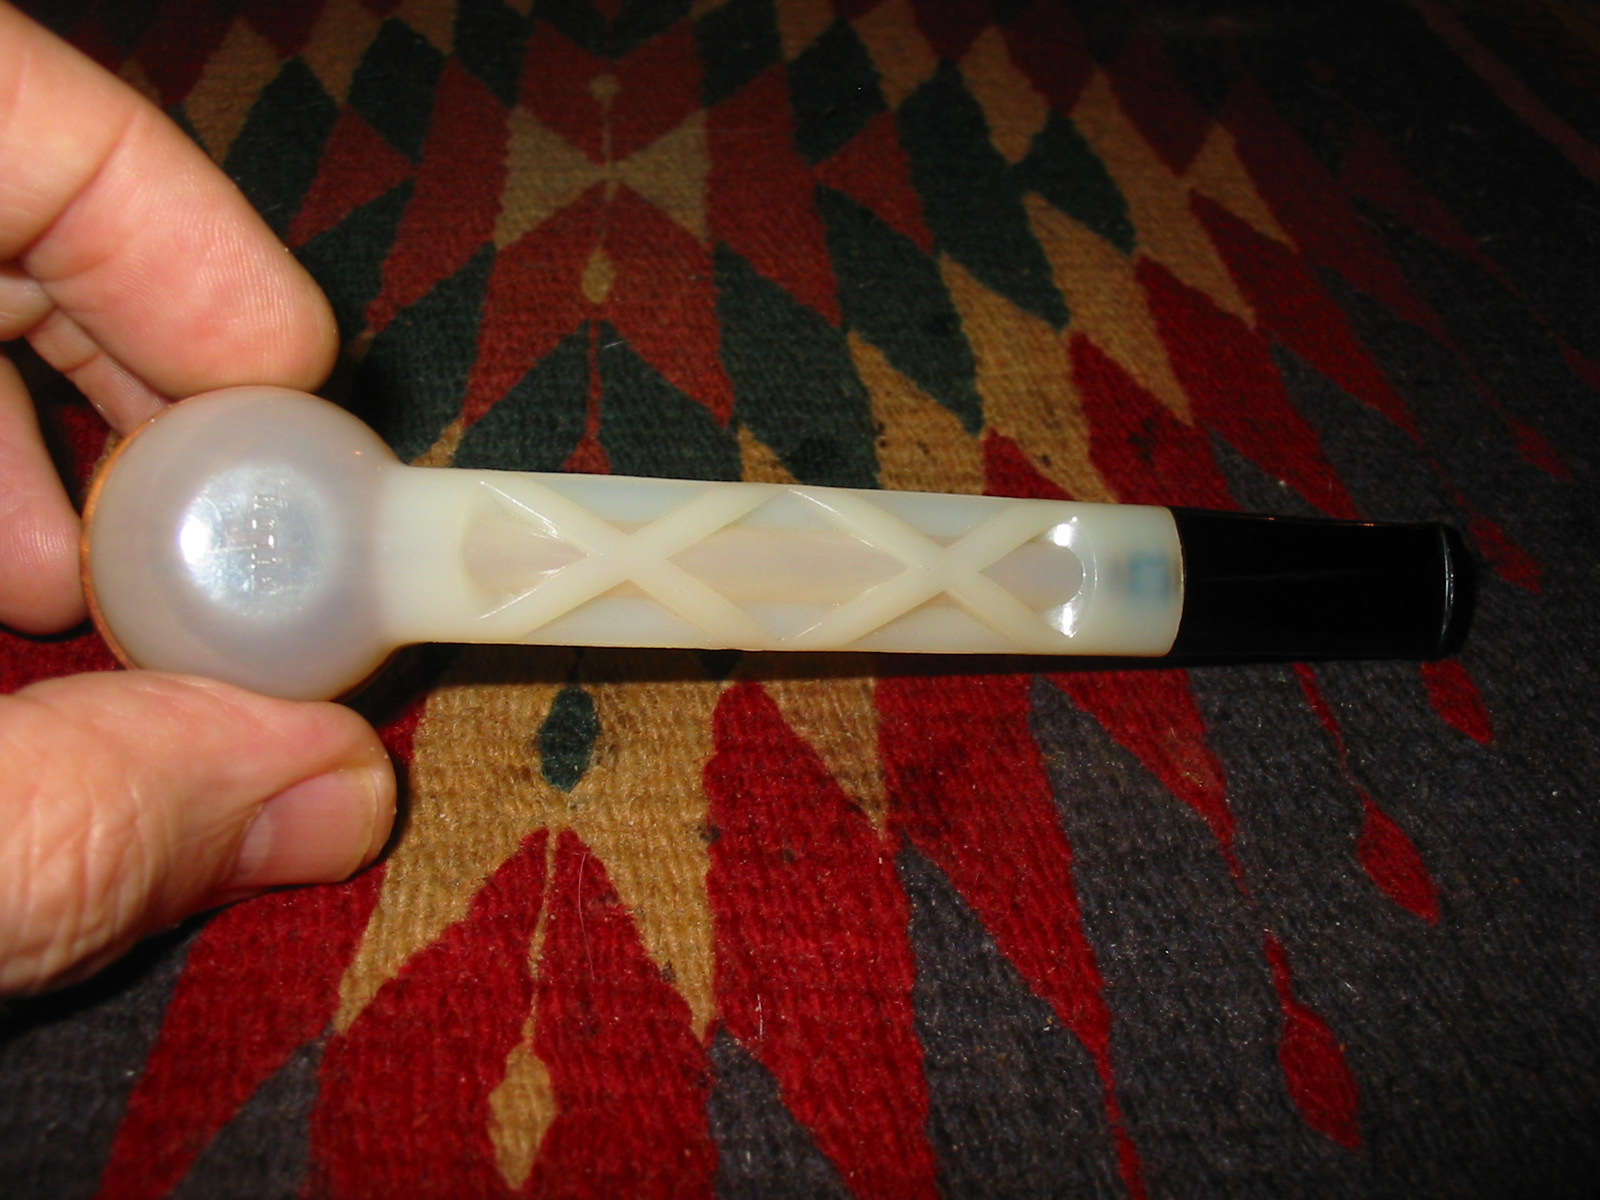
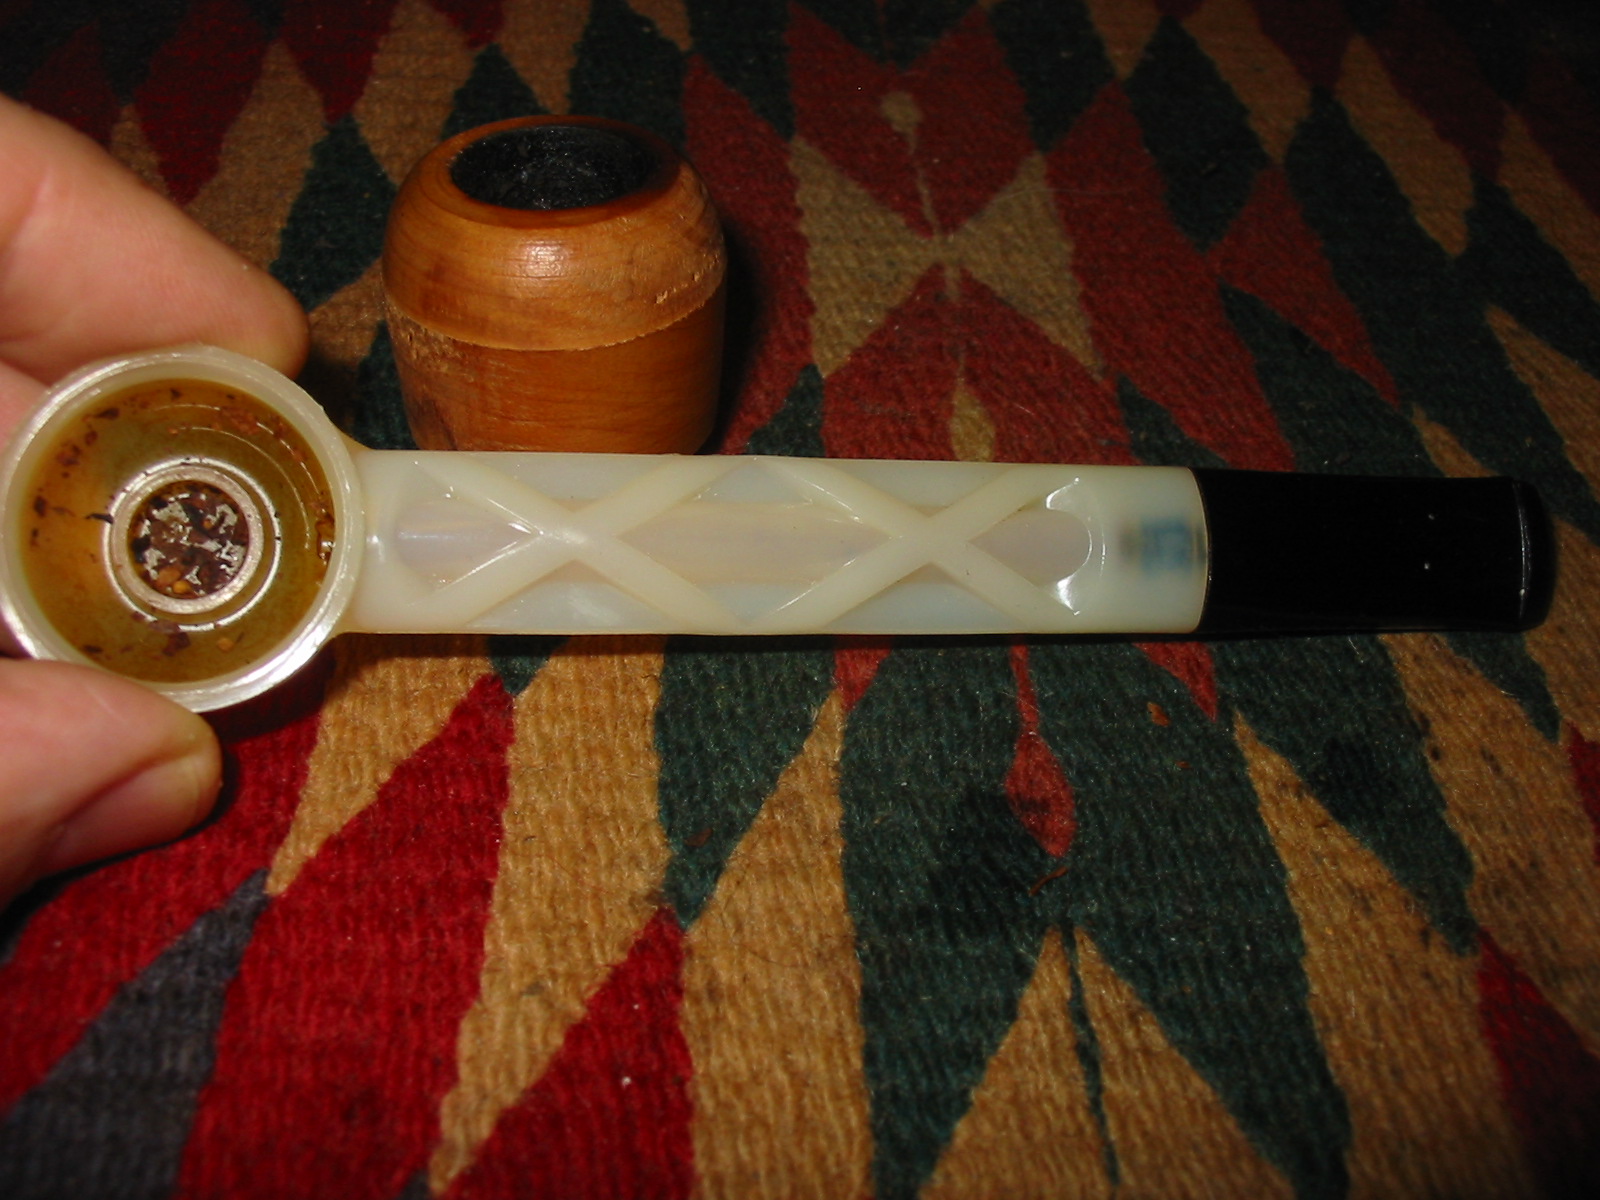
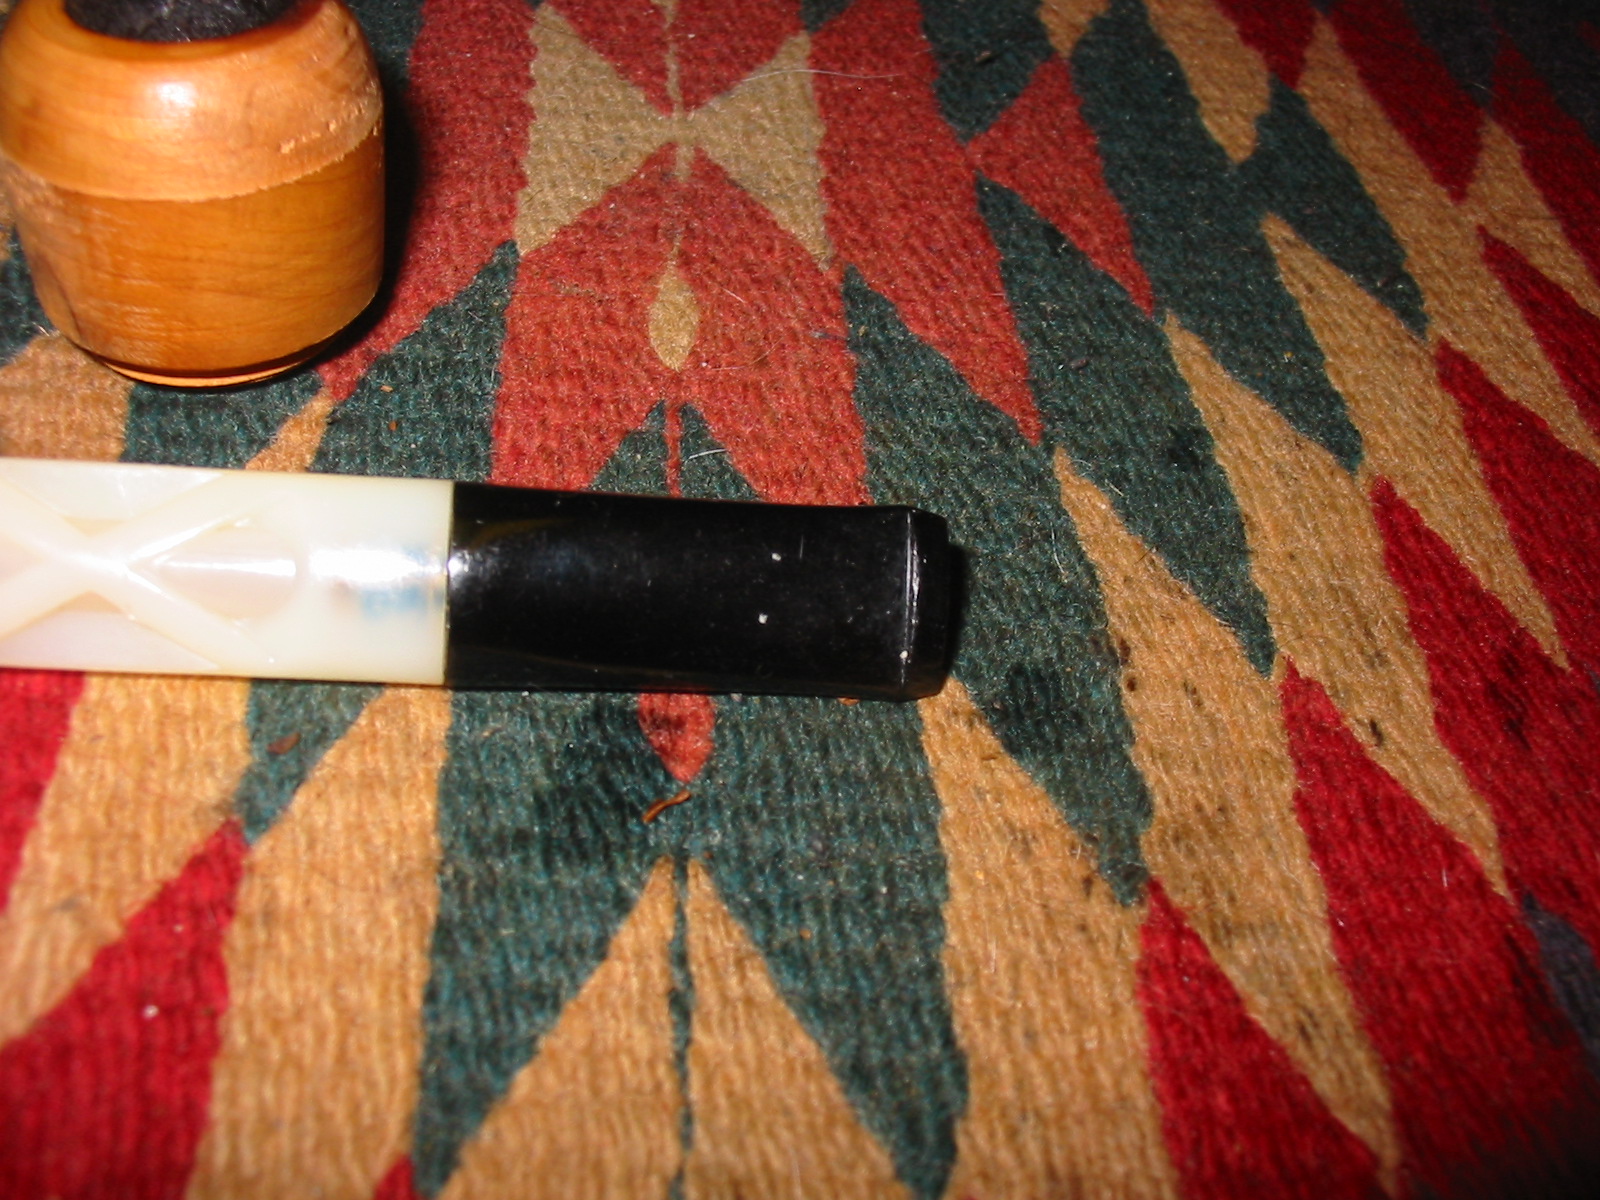
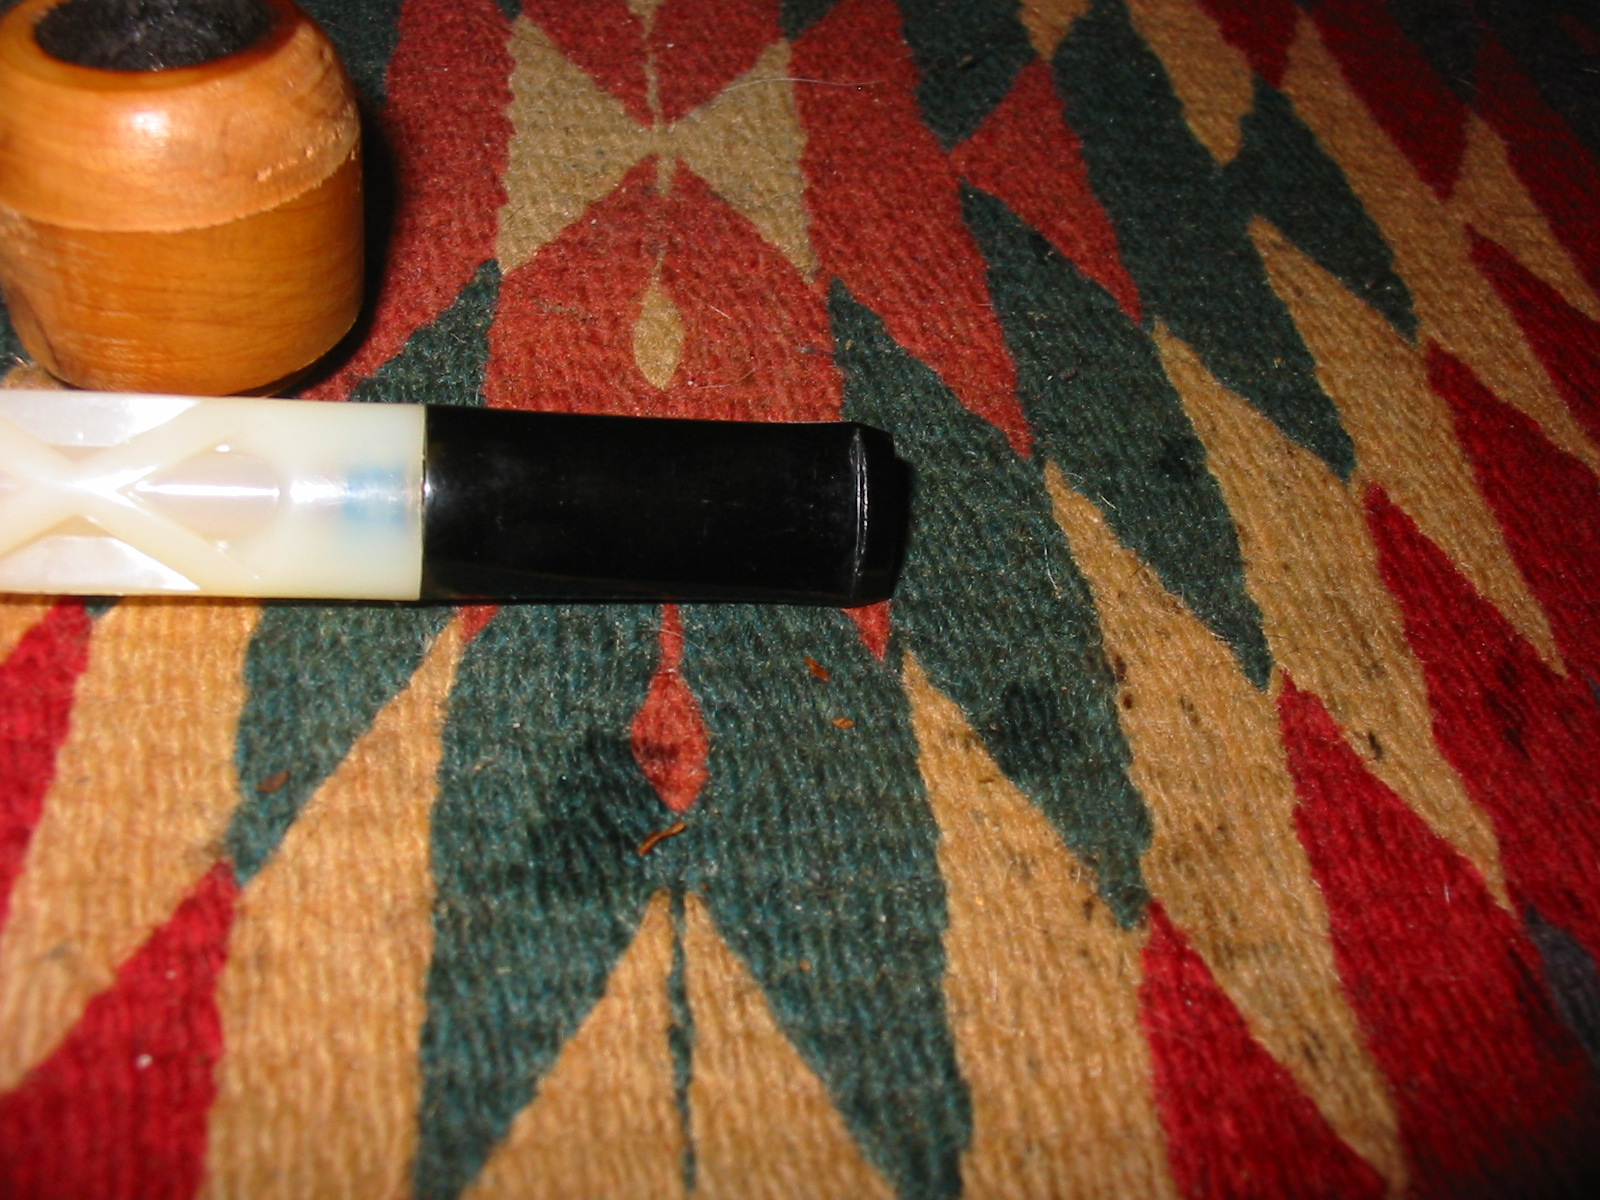
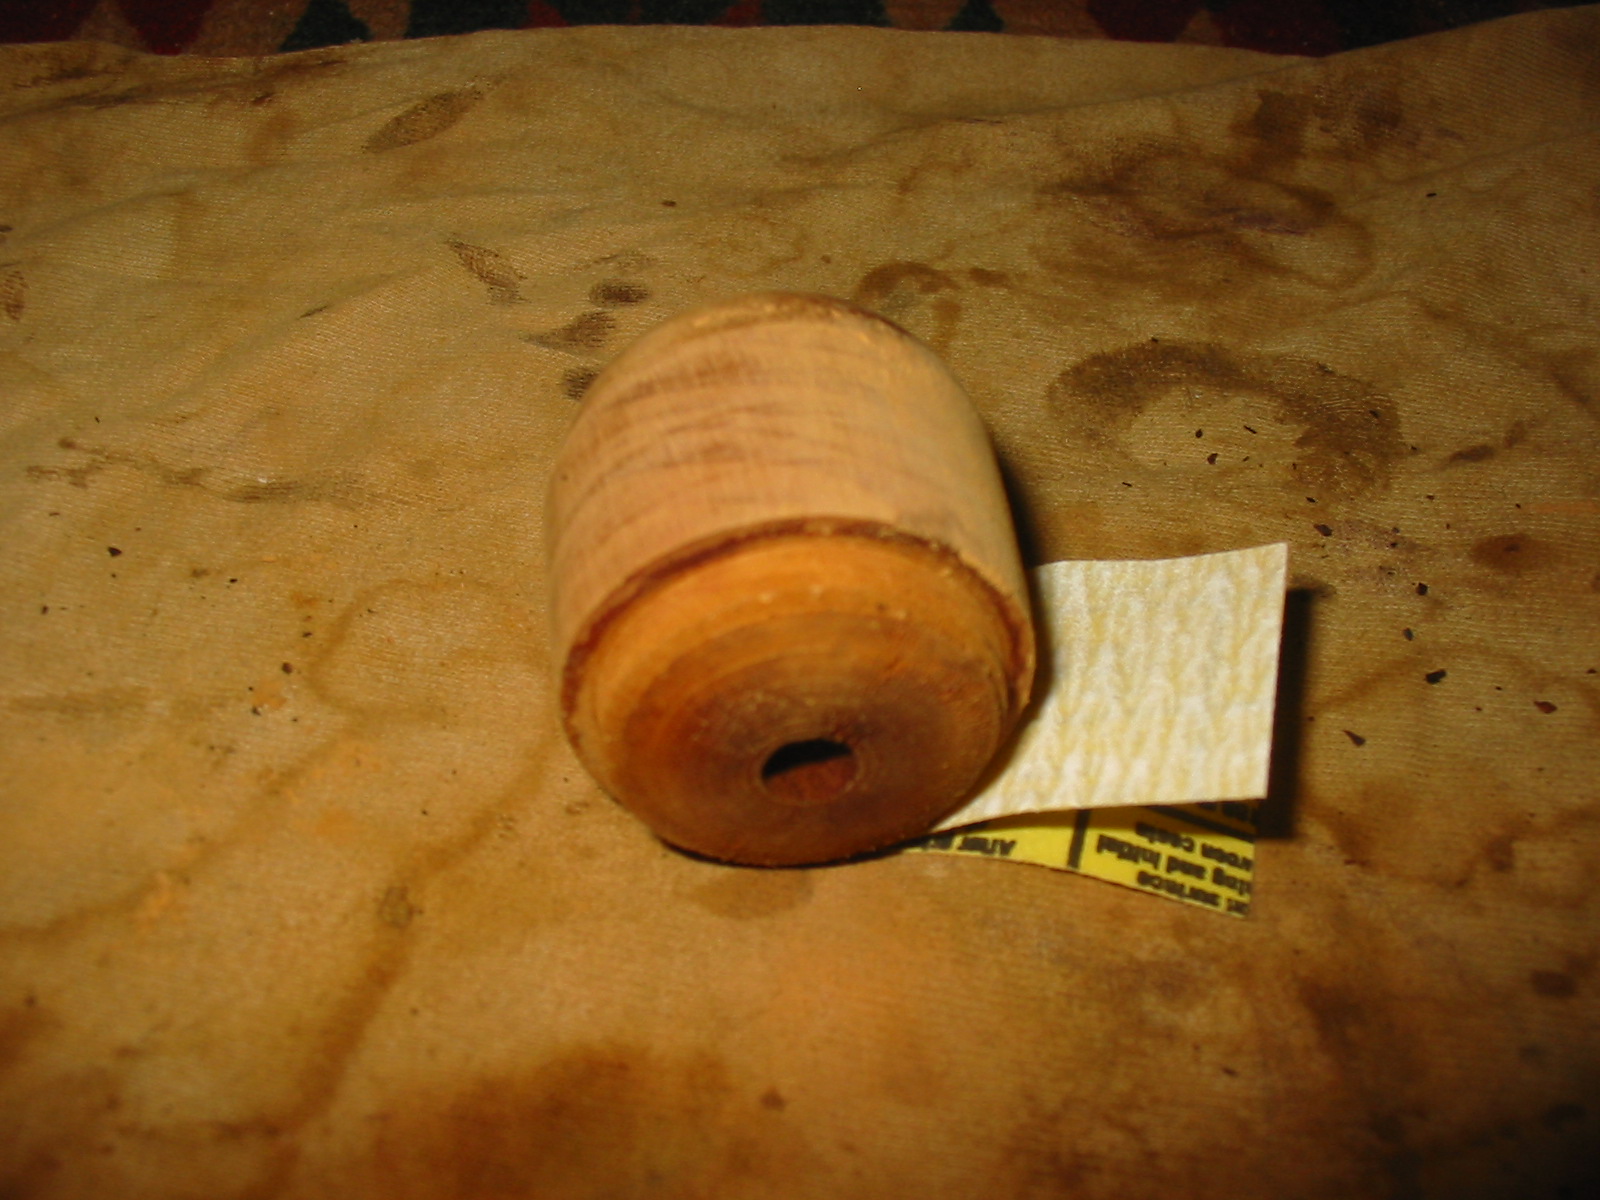
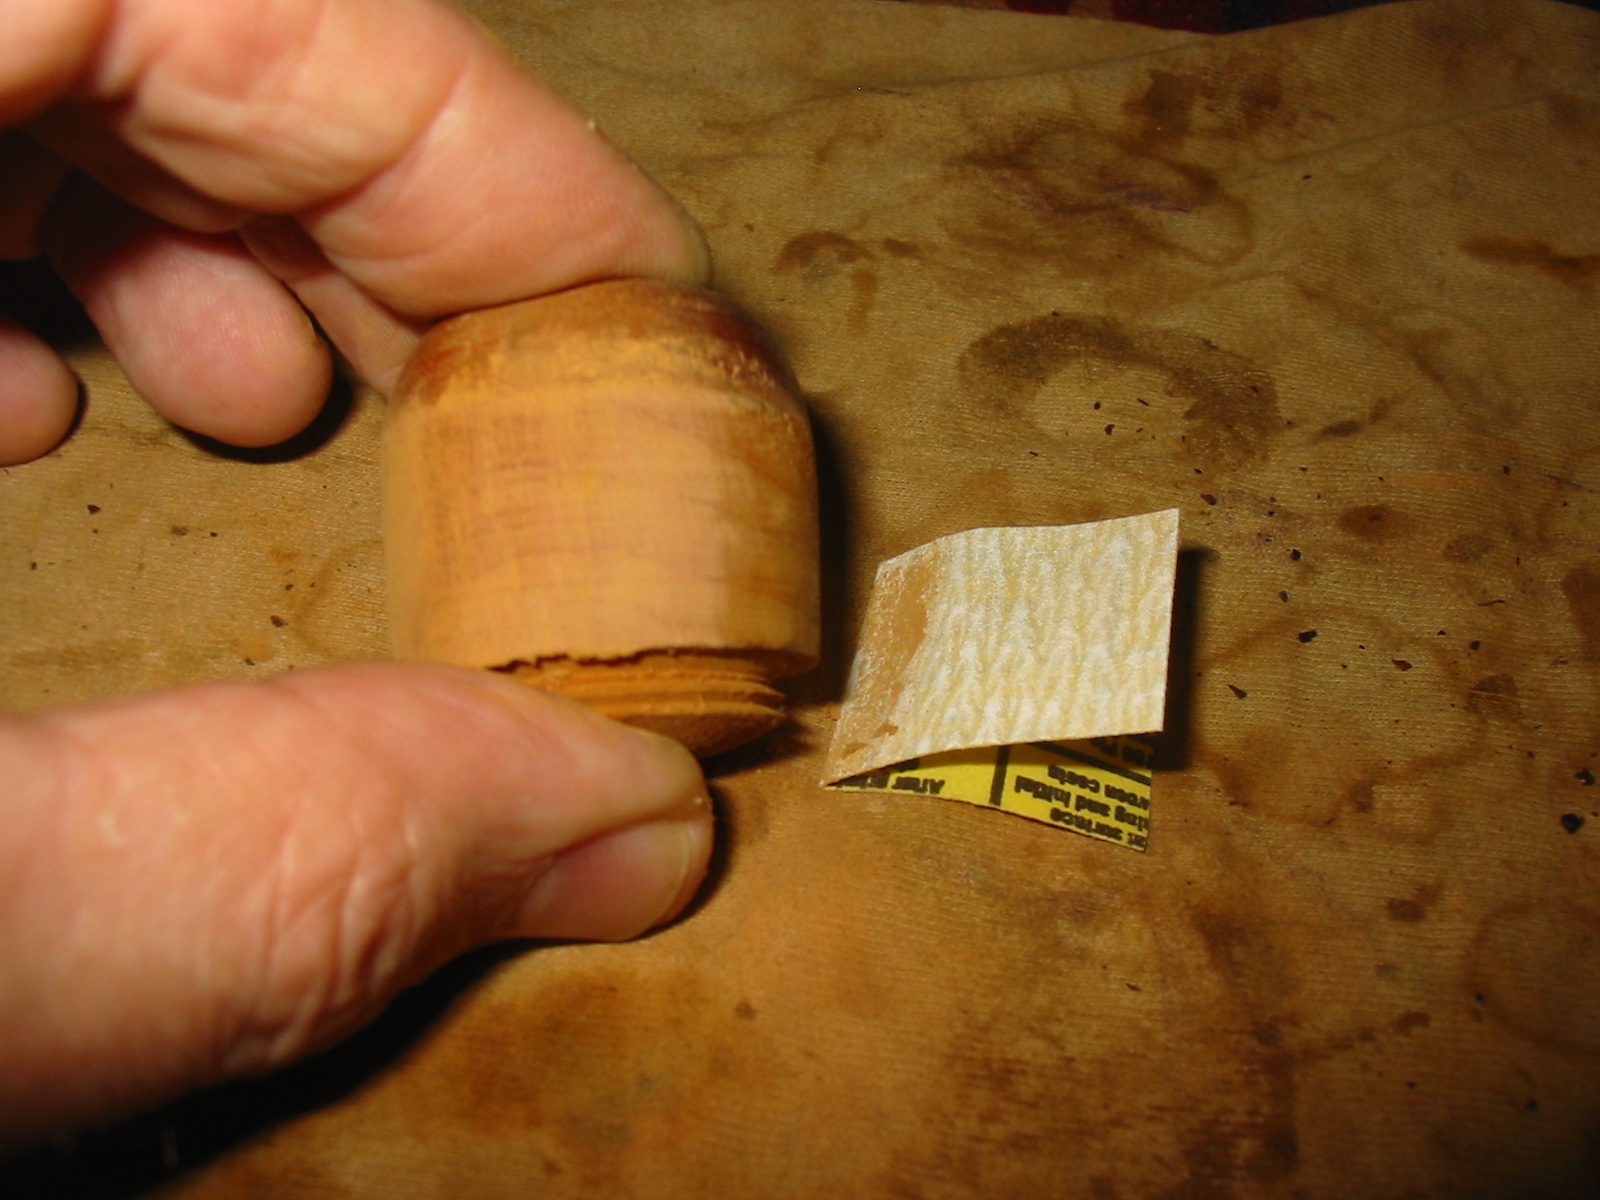
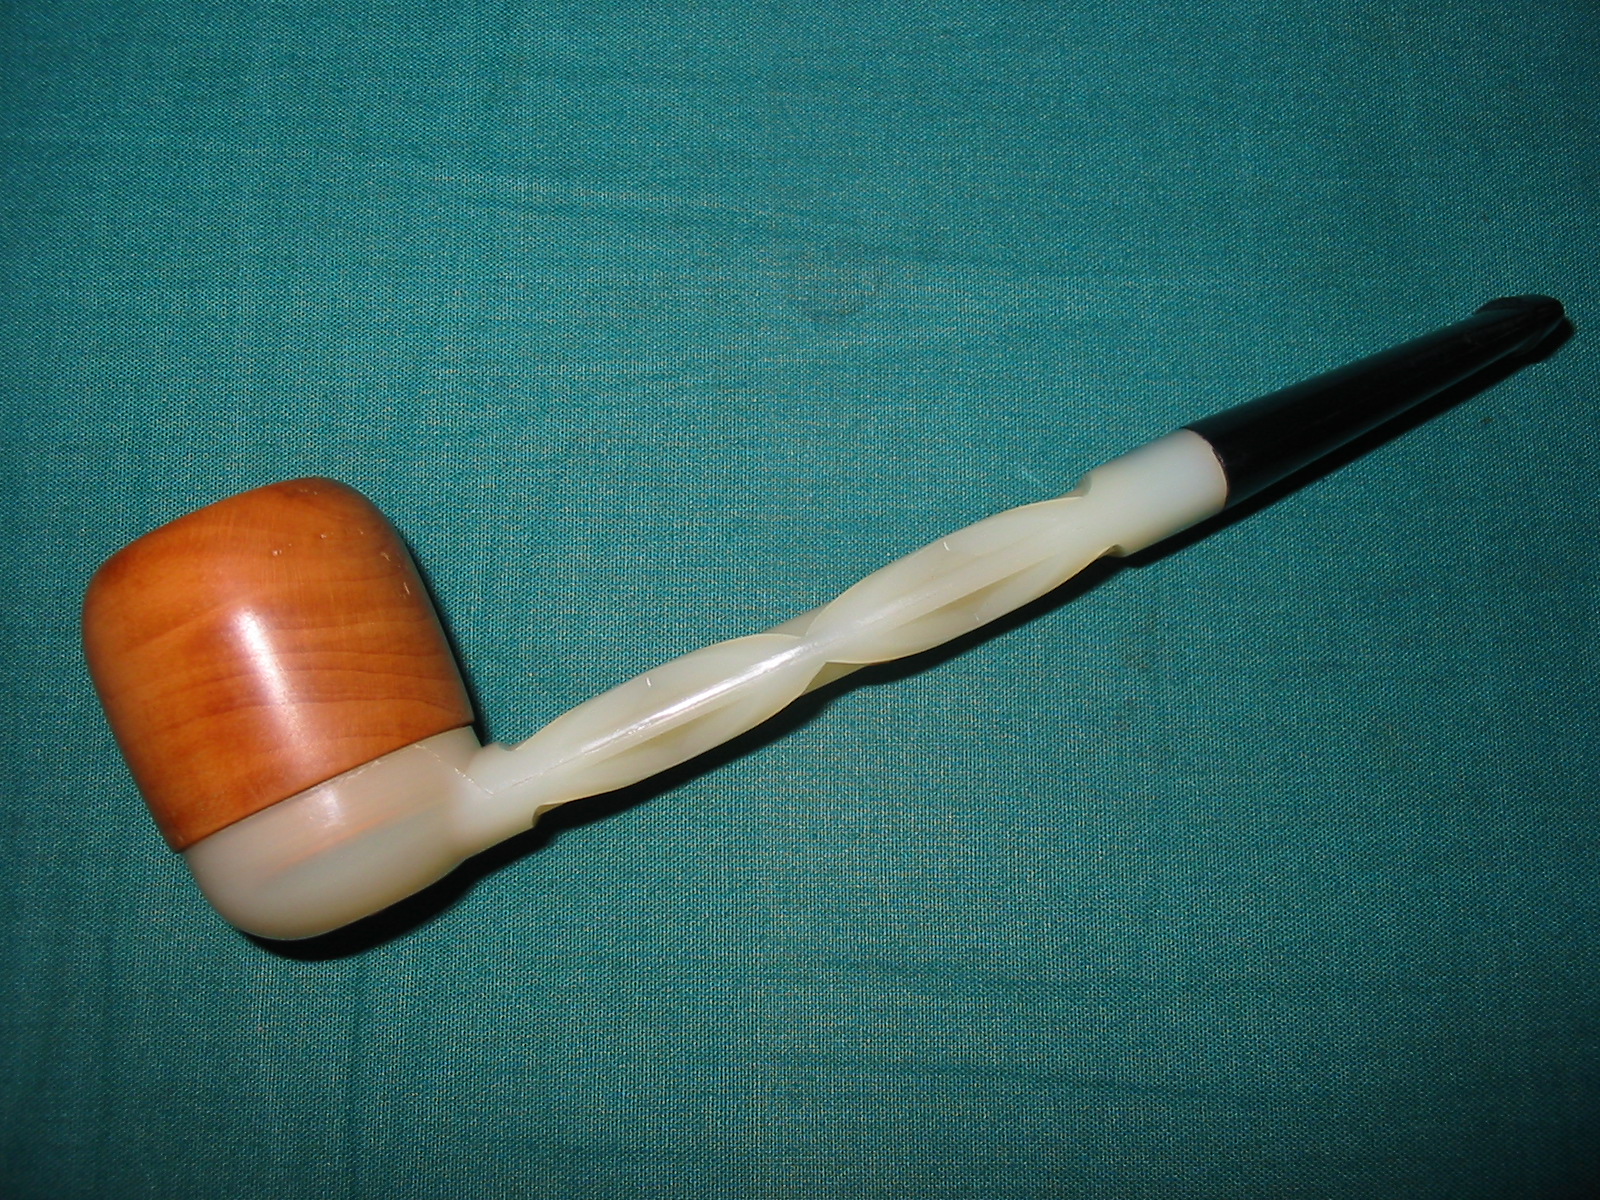
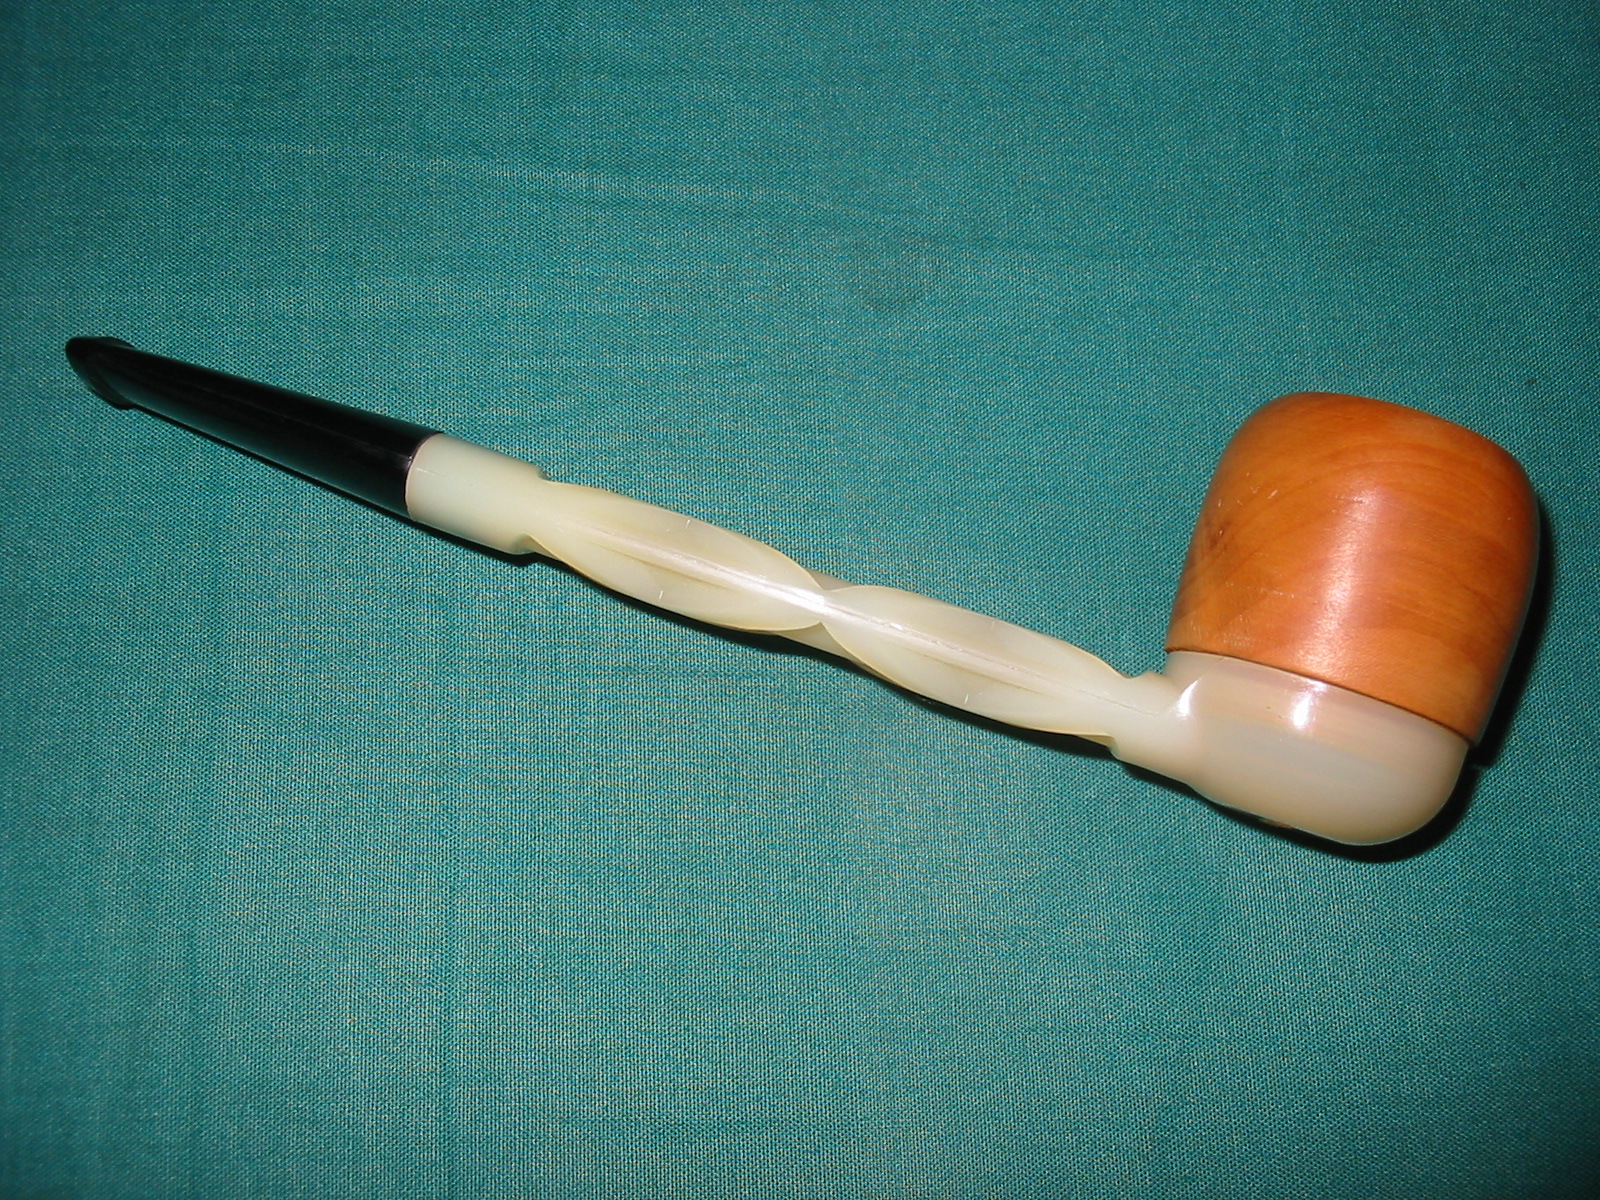
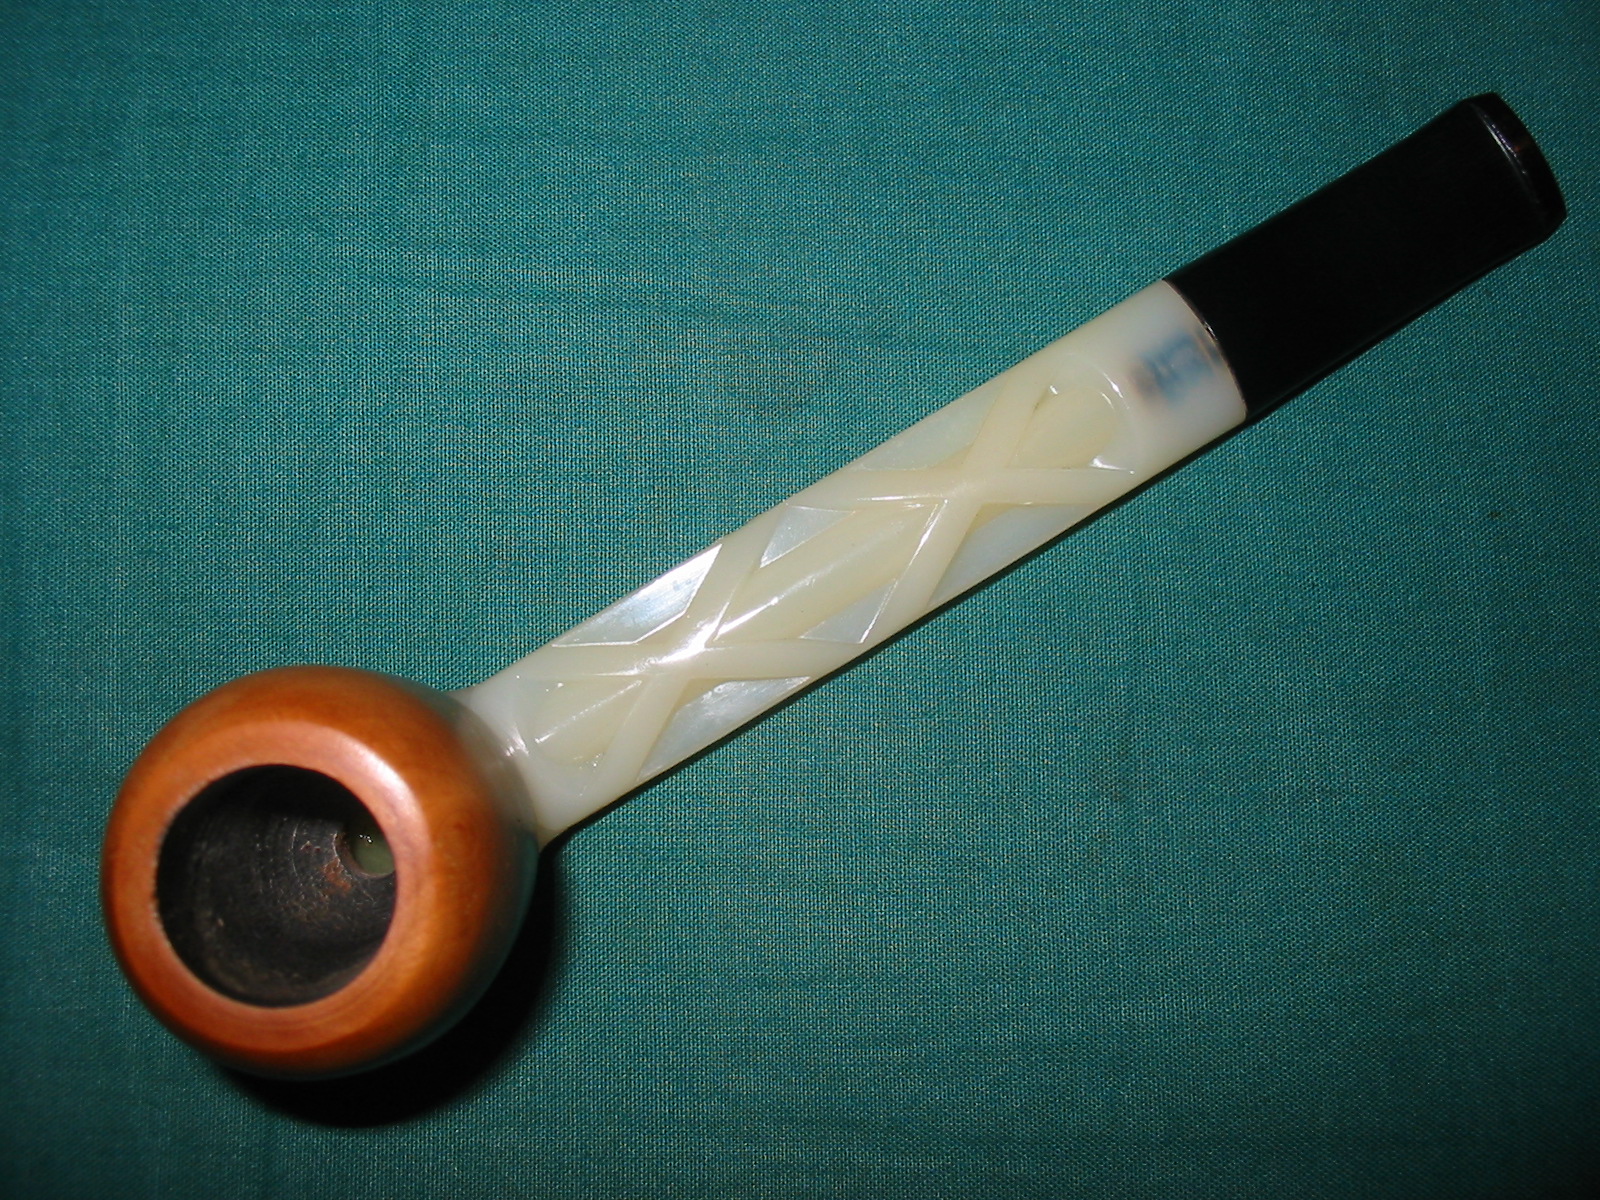
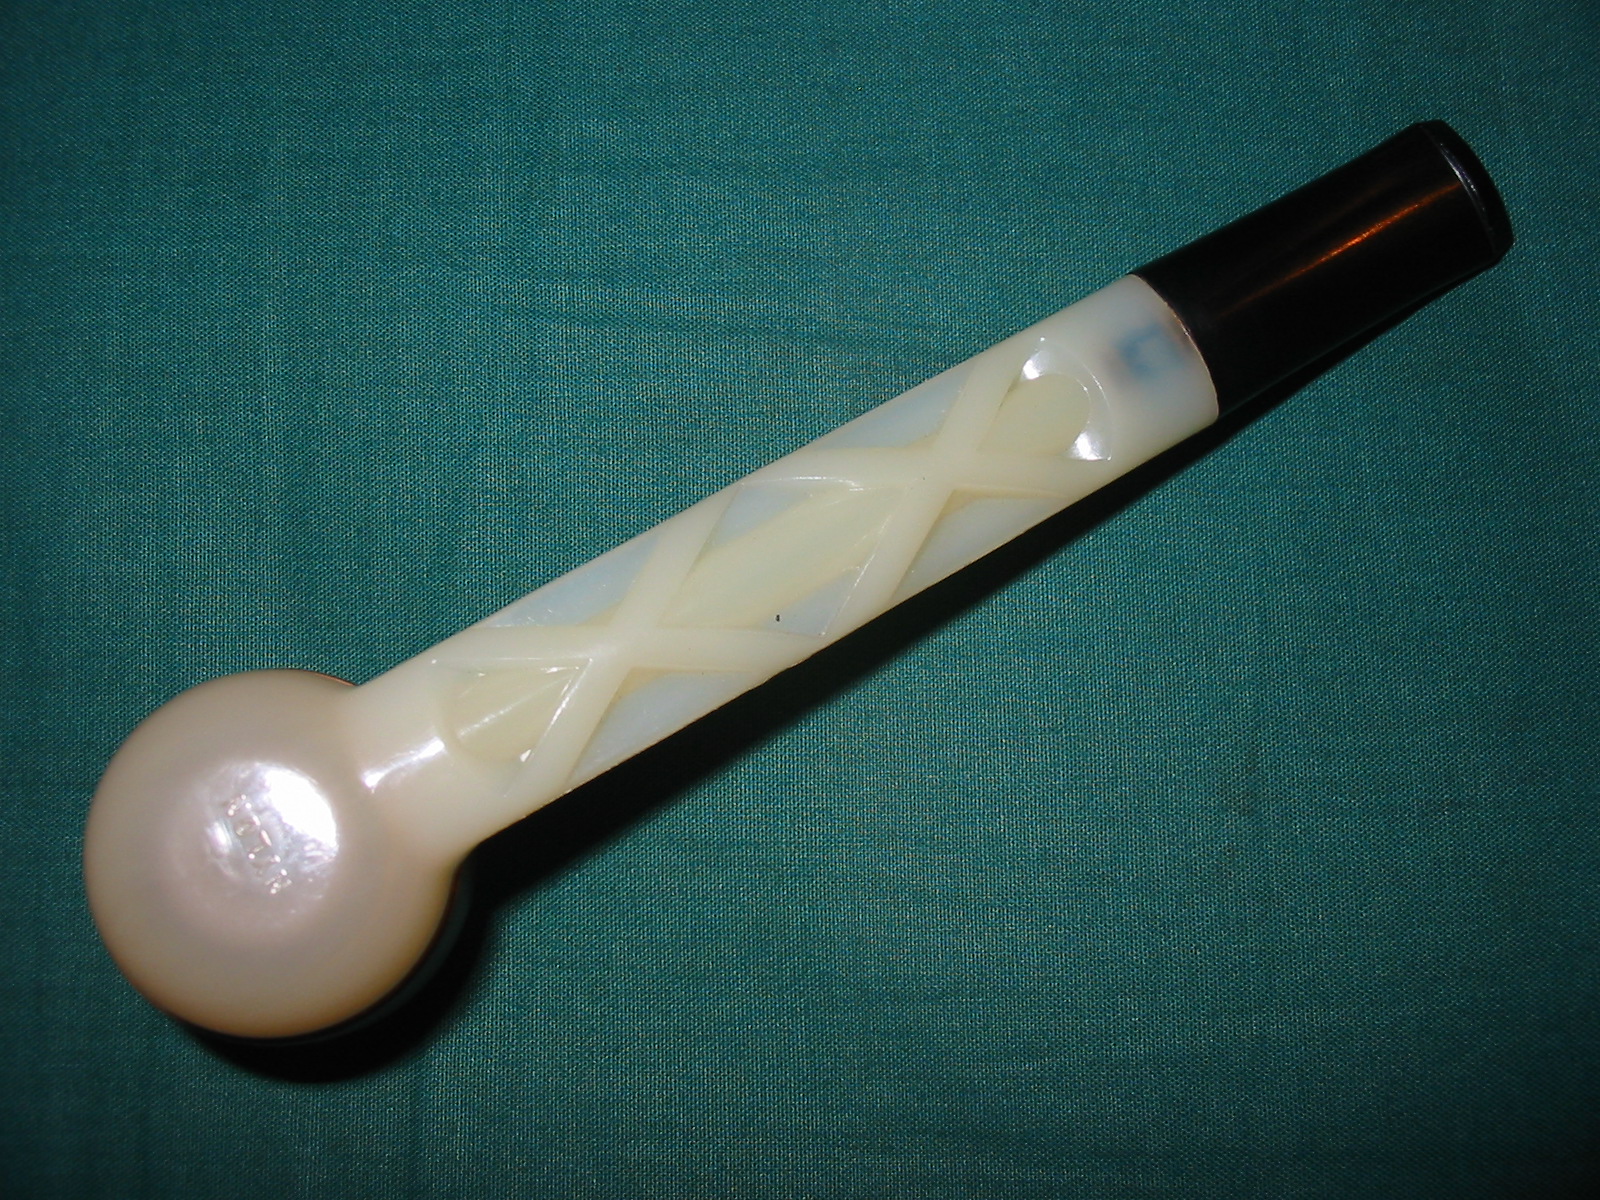
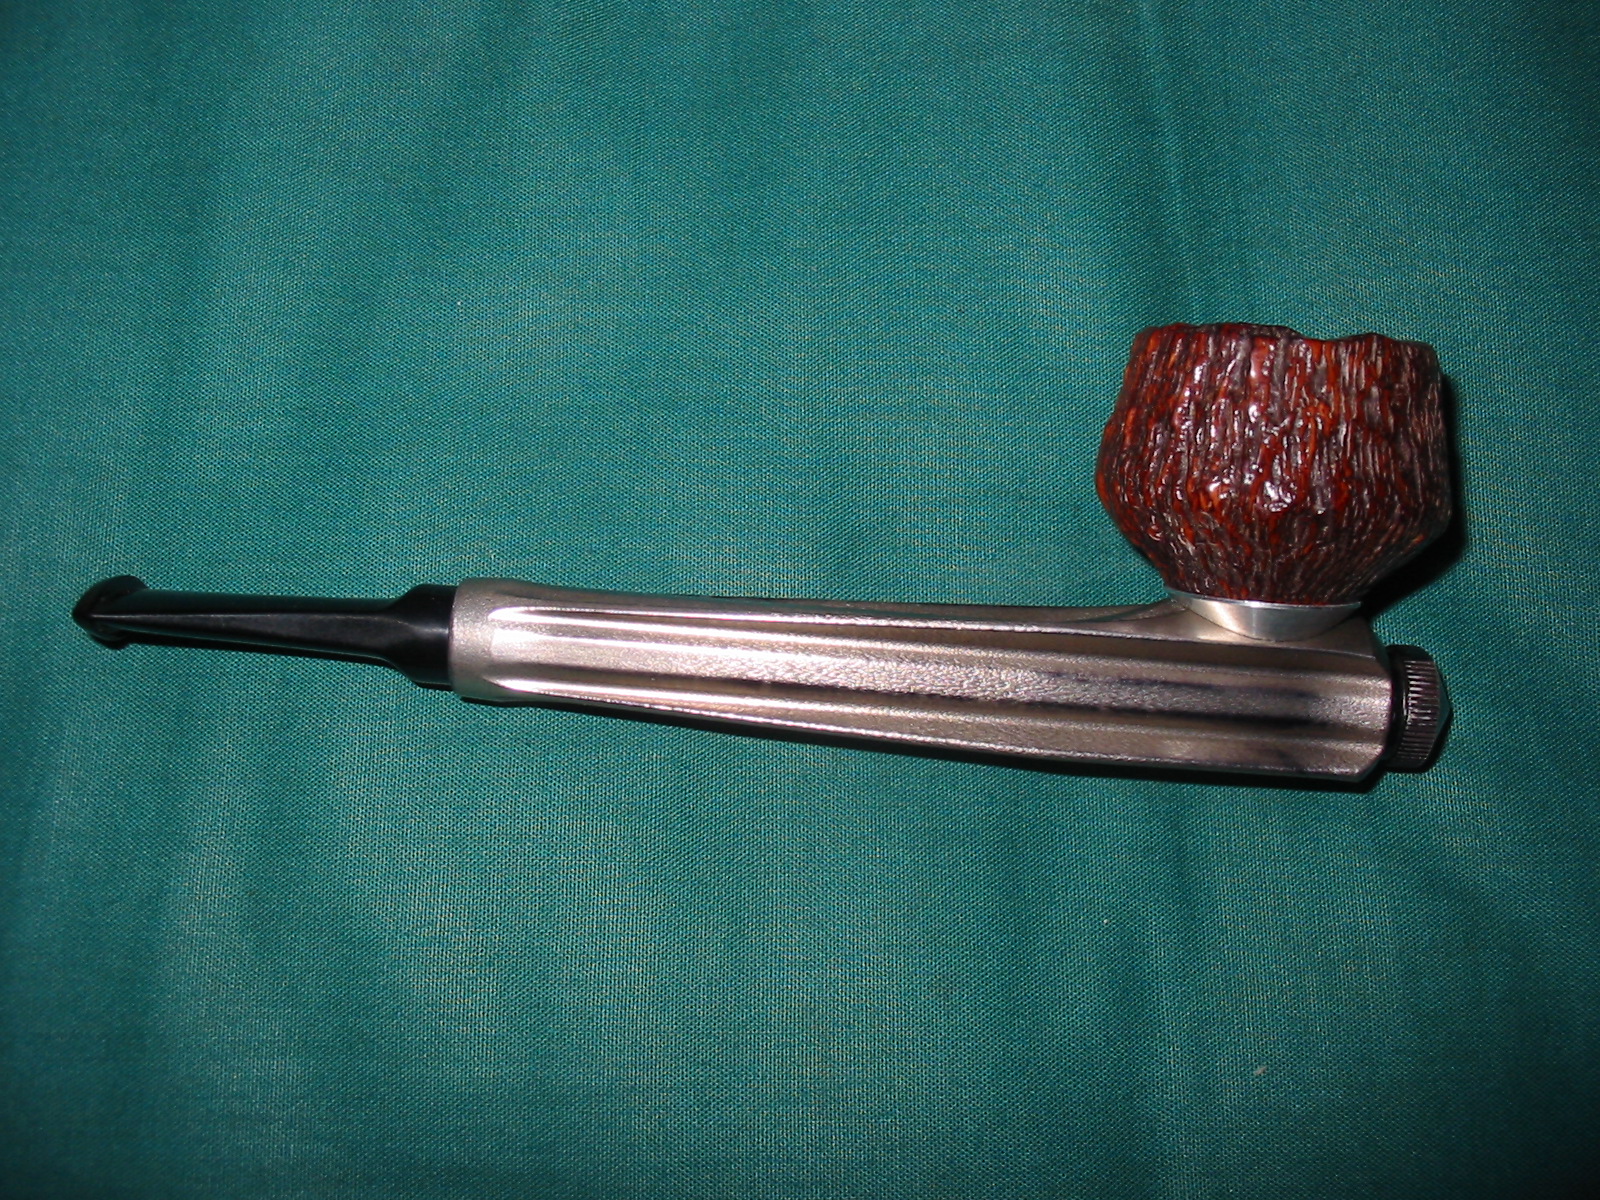
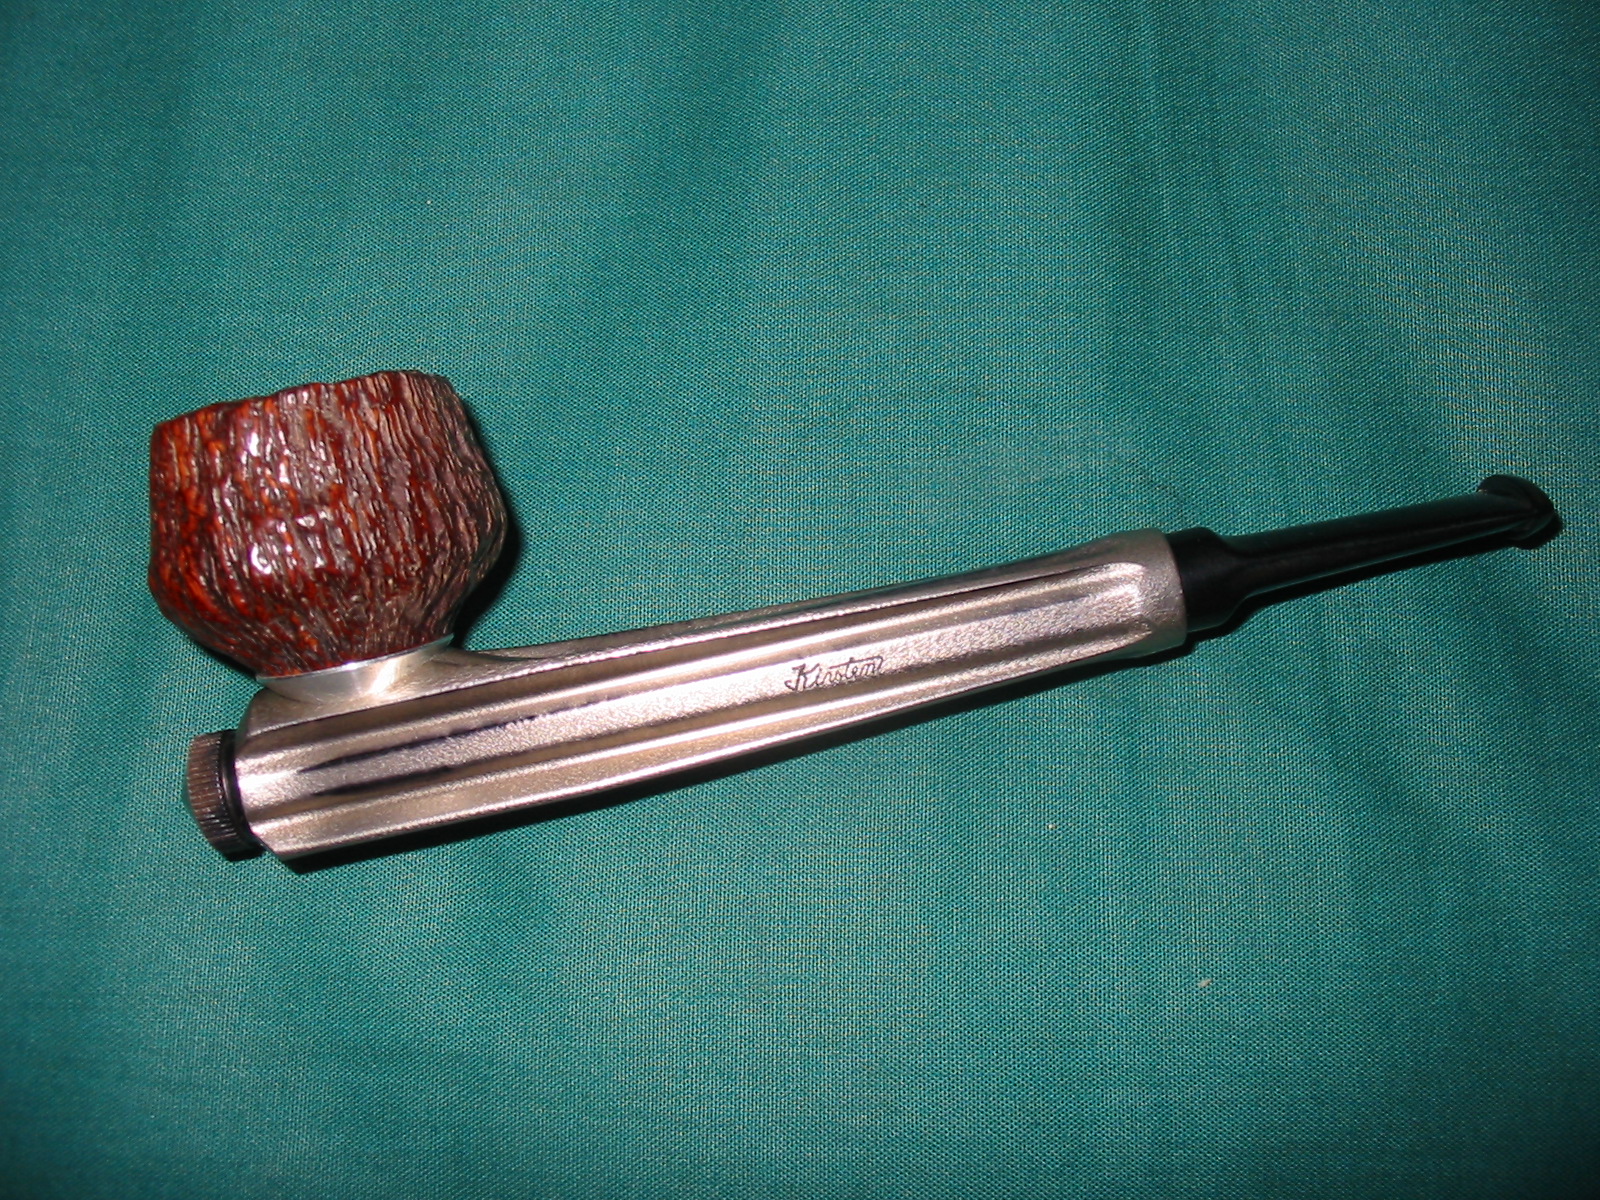
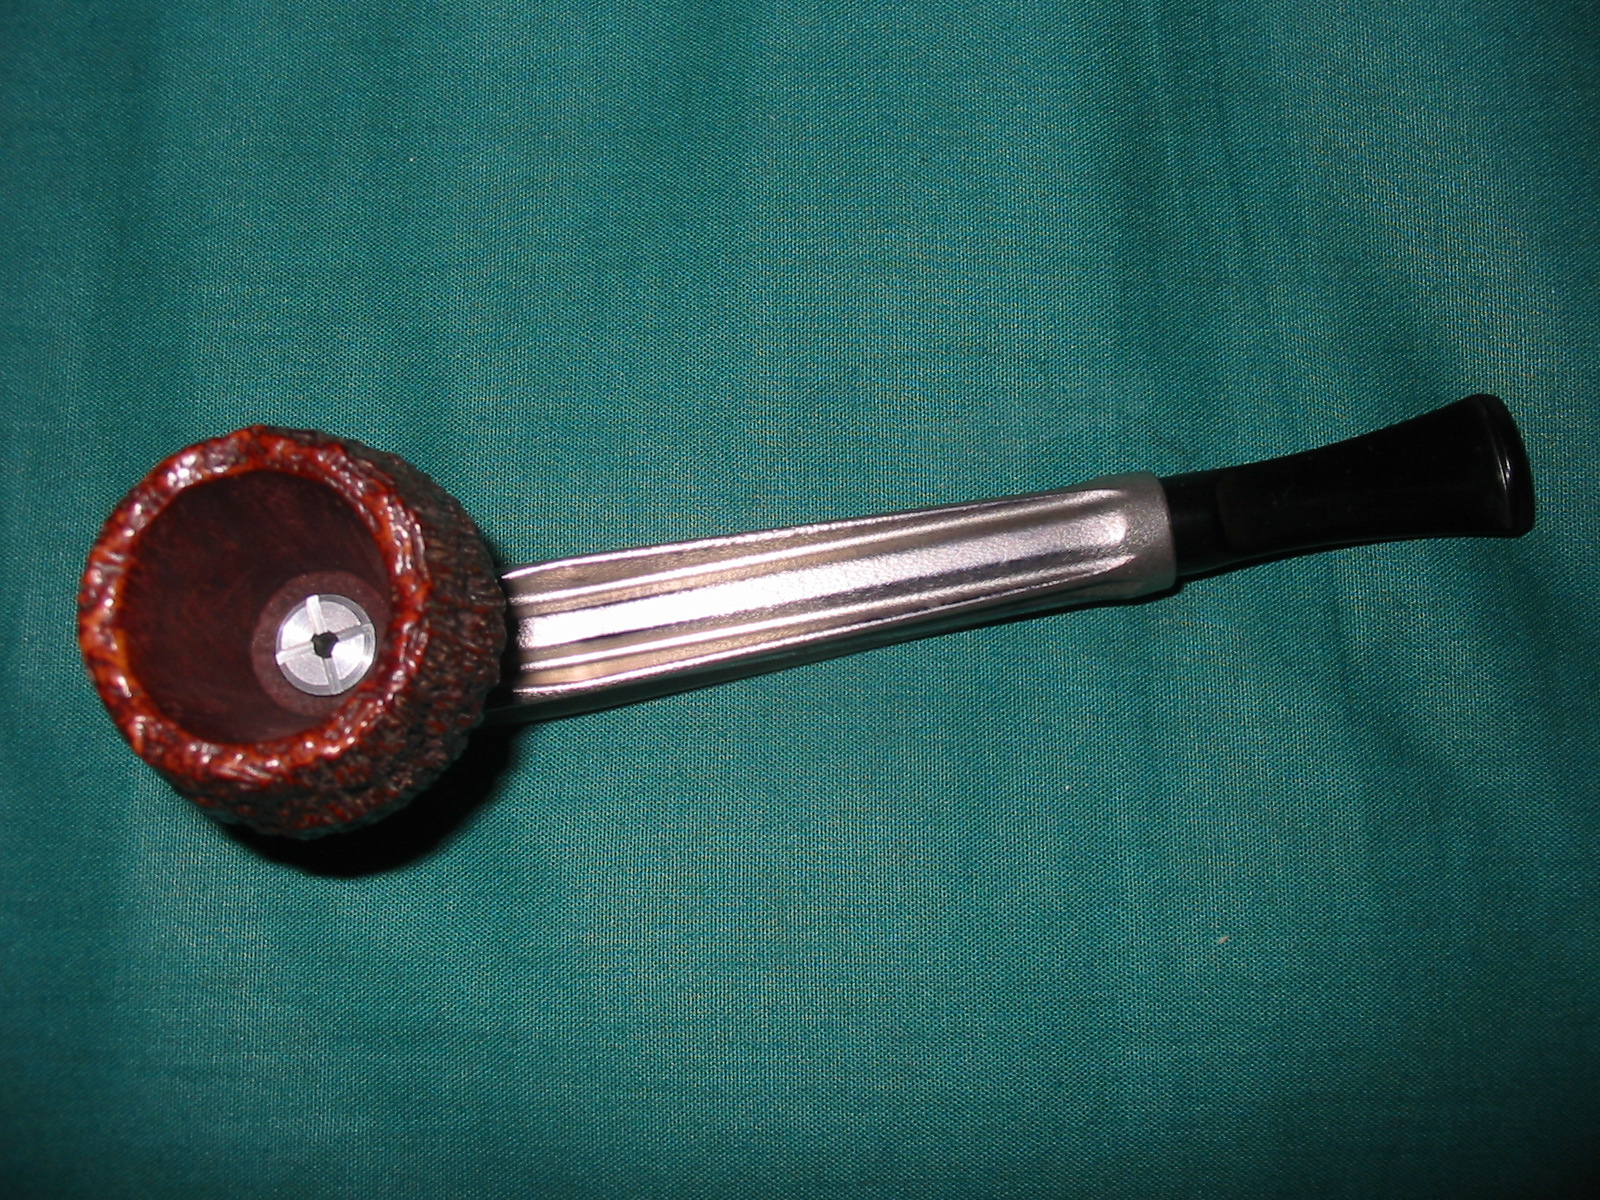
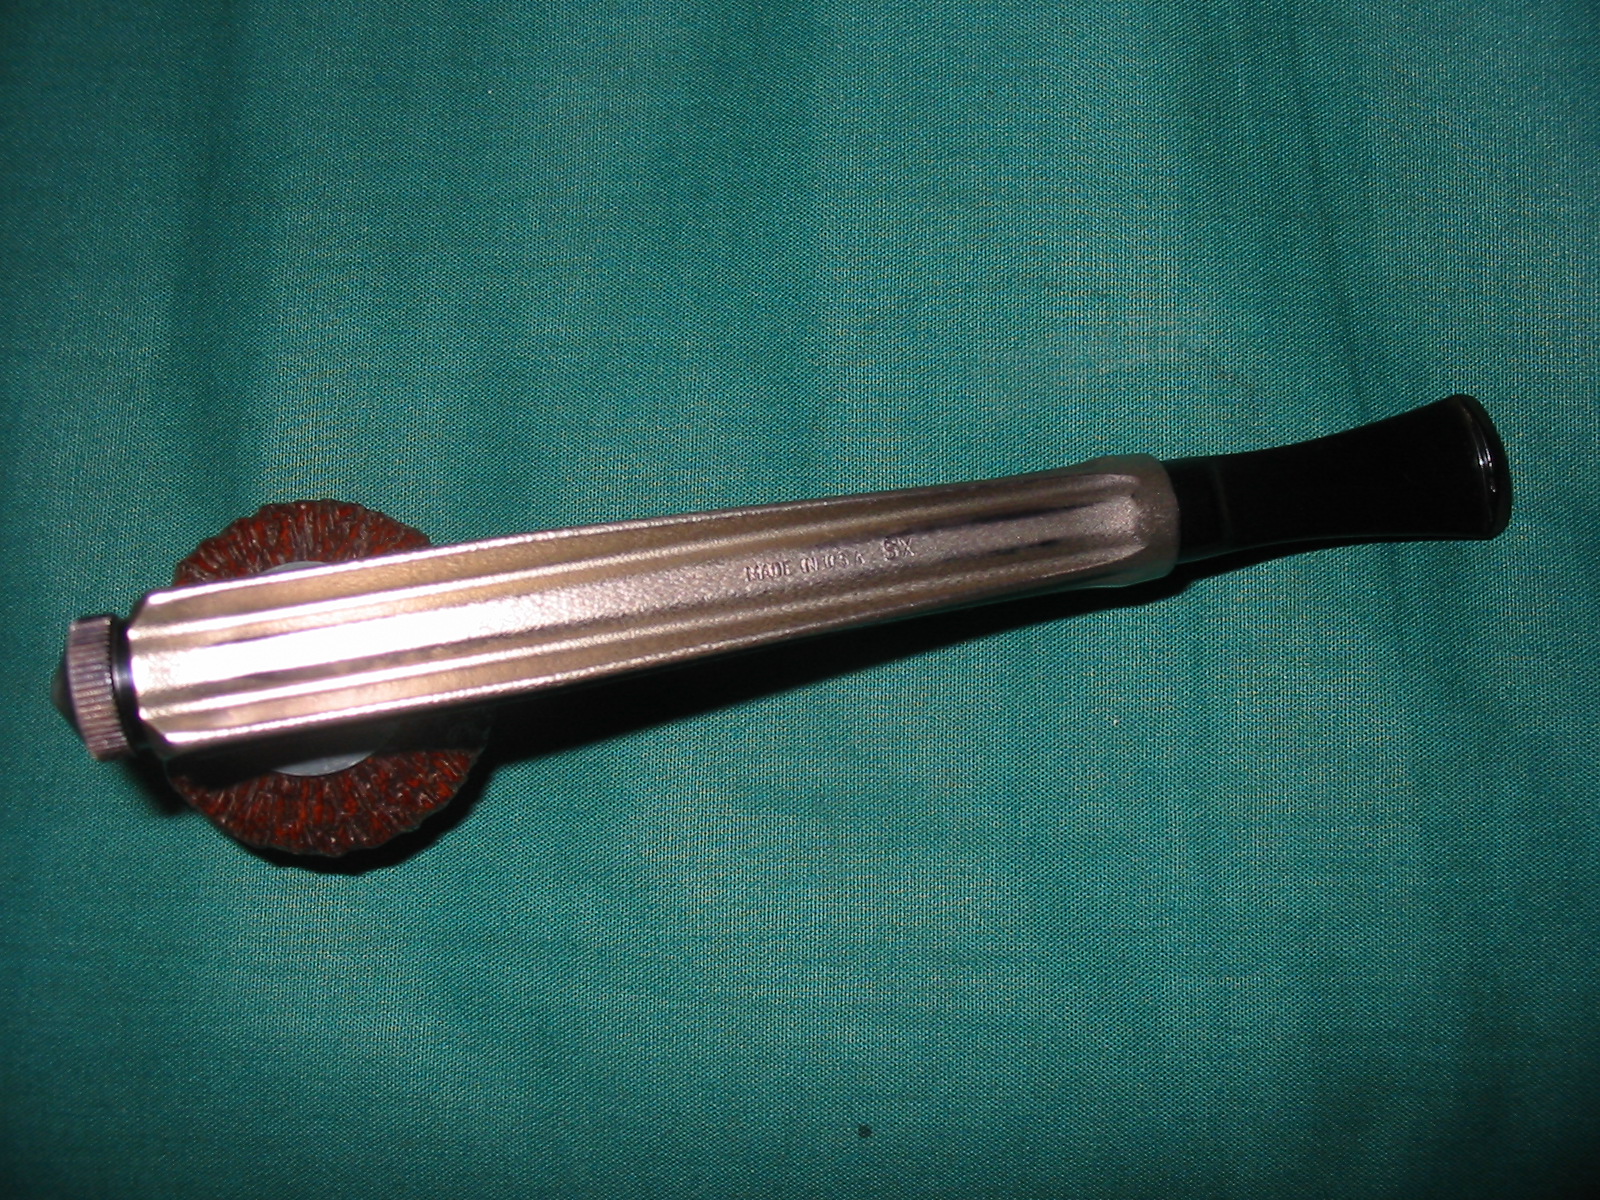
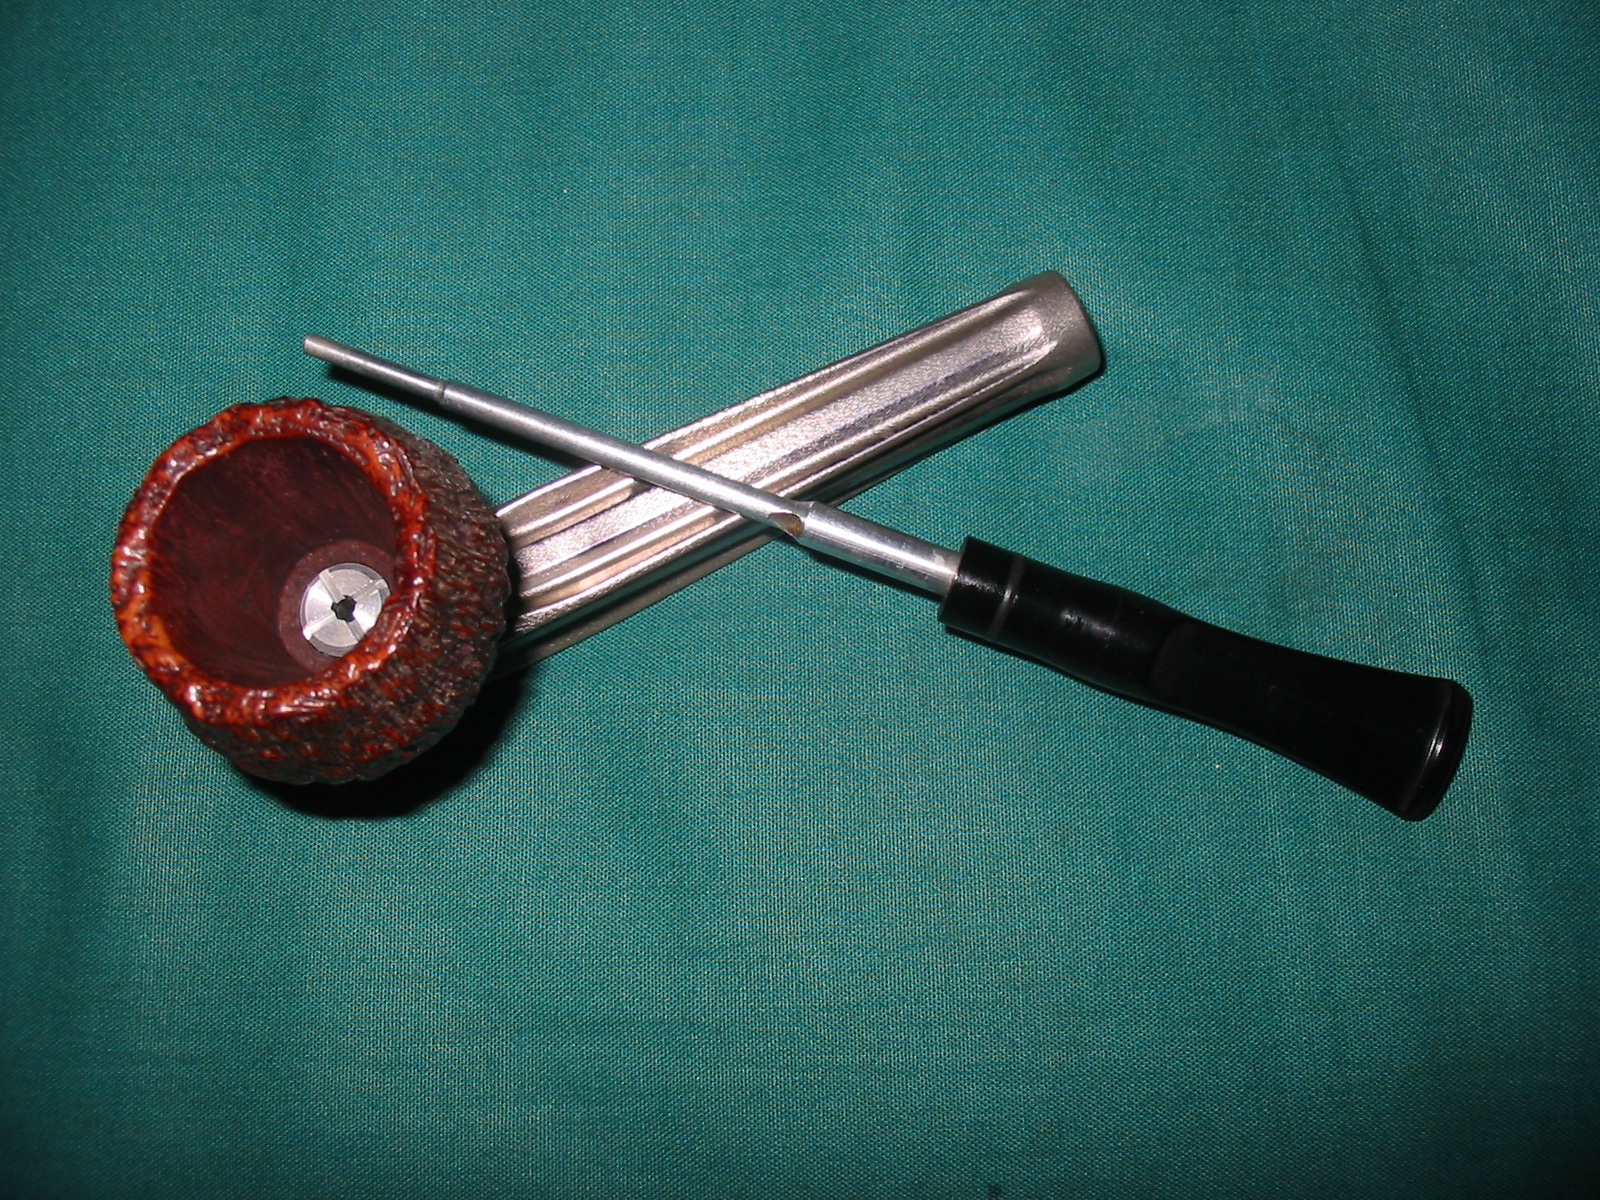
The second pipe was less of a challenge and it was found second on the hunt. It is a Kirsten SX. With a little research we found out that the X designation added to the shape and size S usually meant Brass but that during the 1960’s there was a brief period of time where the SX was an antiqued black and silver finish. That is what he had! Thus we were able to date the pipe a bit for him. The bowl was unsmoked new stock and was probably a replacement. The stem was oxidized and covered with tooth chatter. The barrel was oxidized and much of the antiquing had worn of the finish. The valve at the end was stuck in place. The ramrod was oxidized and dirty. It would be a very easy refurbishing job. Considering the pipe cost him $15 it was well worth the effort.
IMG_3554

IMG_3555

IMG_3556

IMG_3557

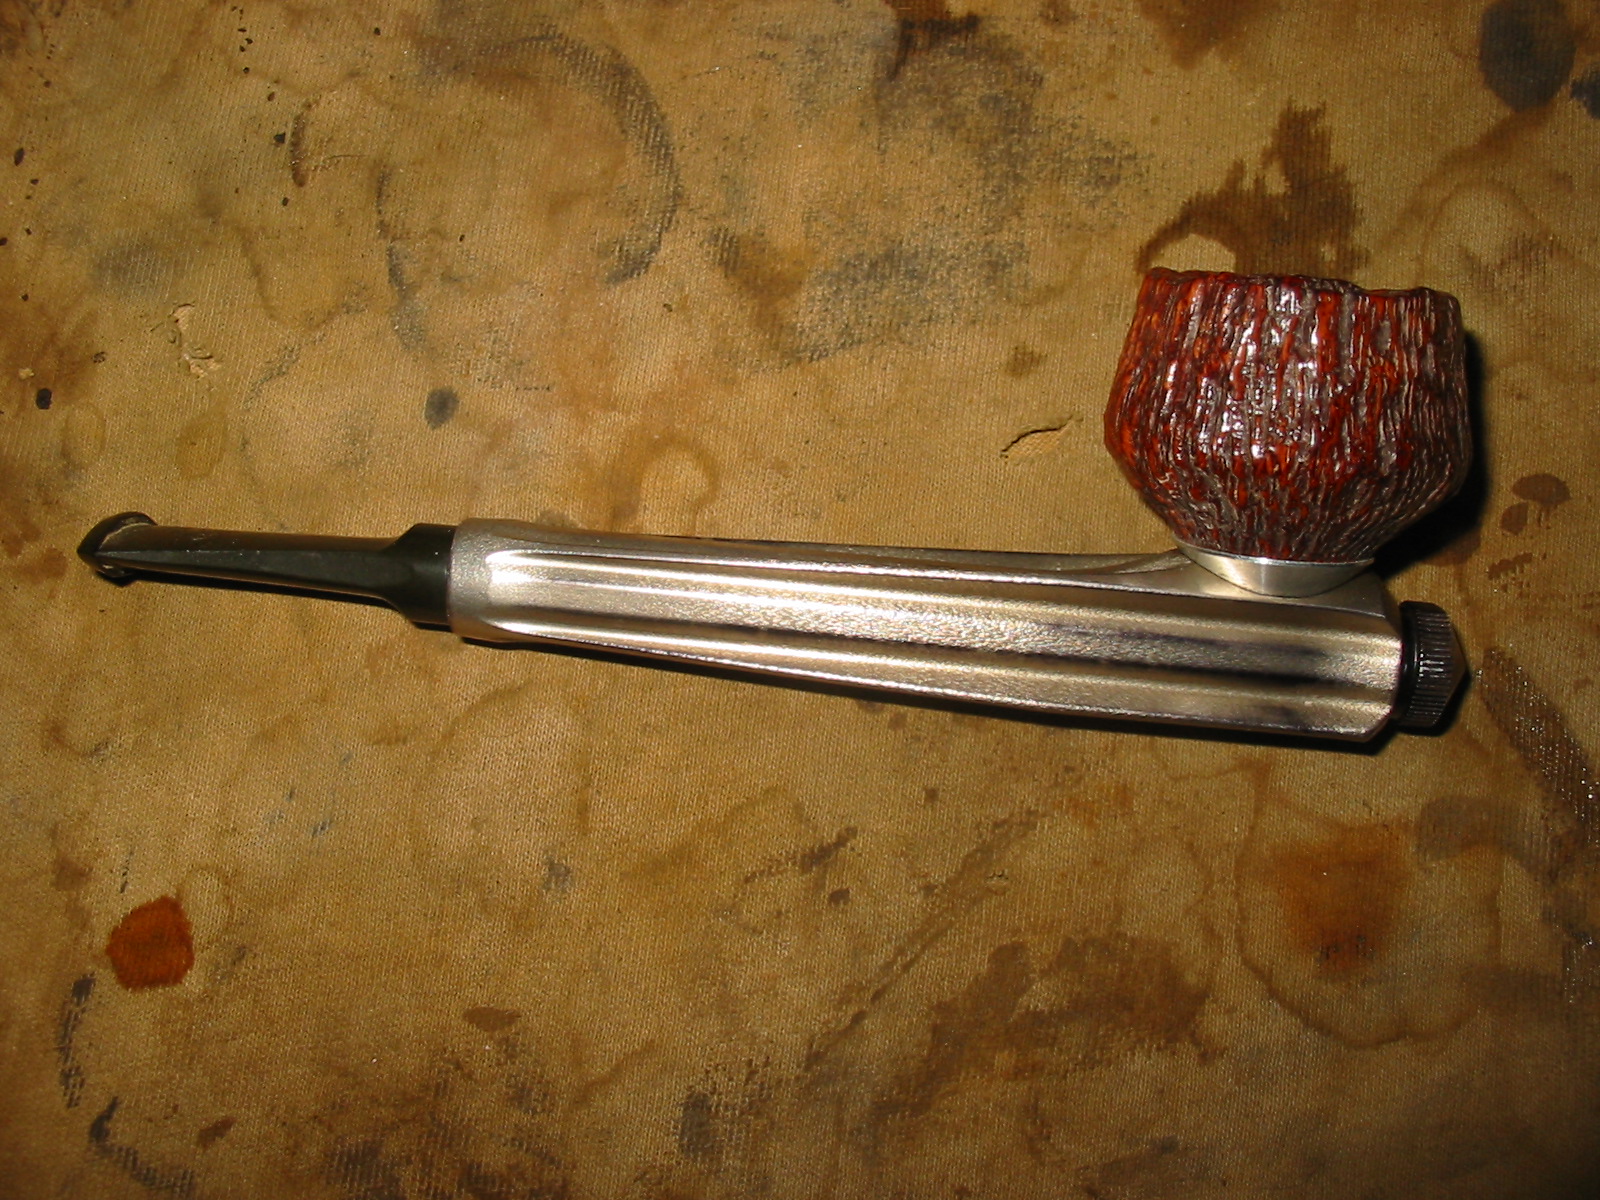
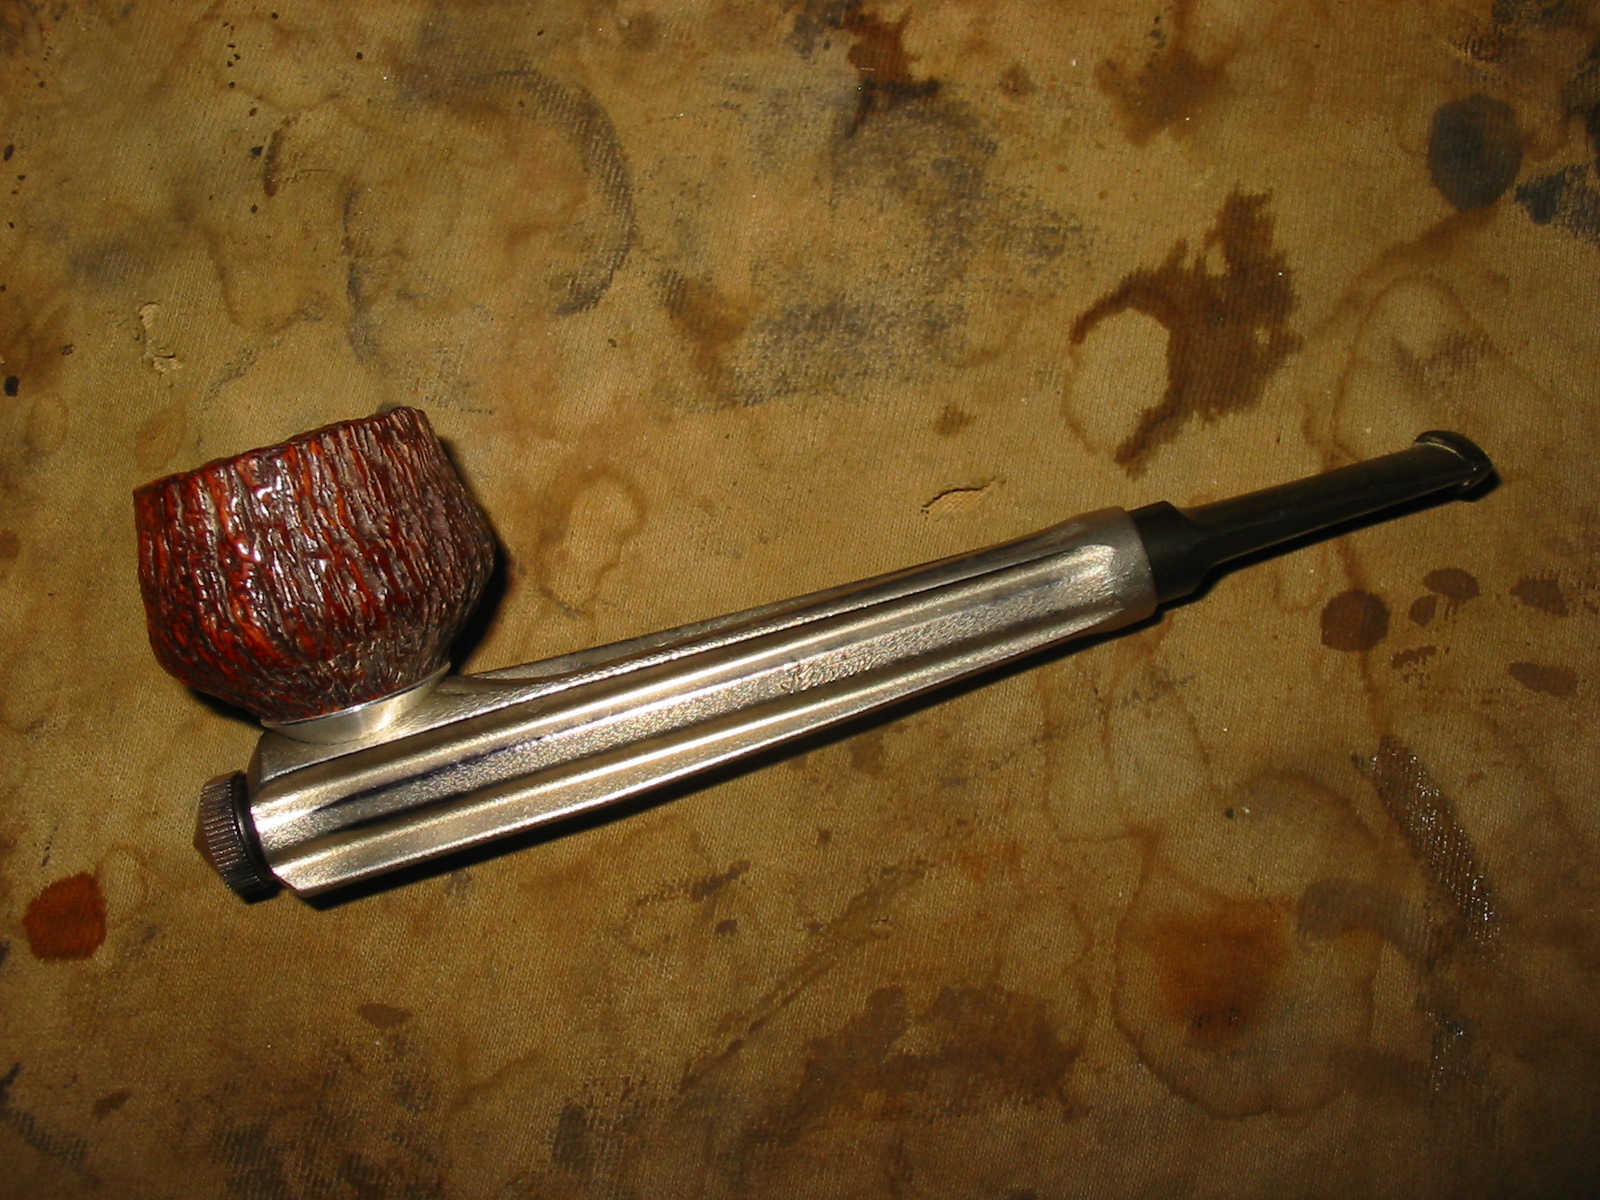
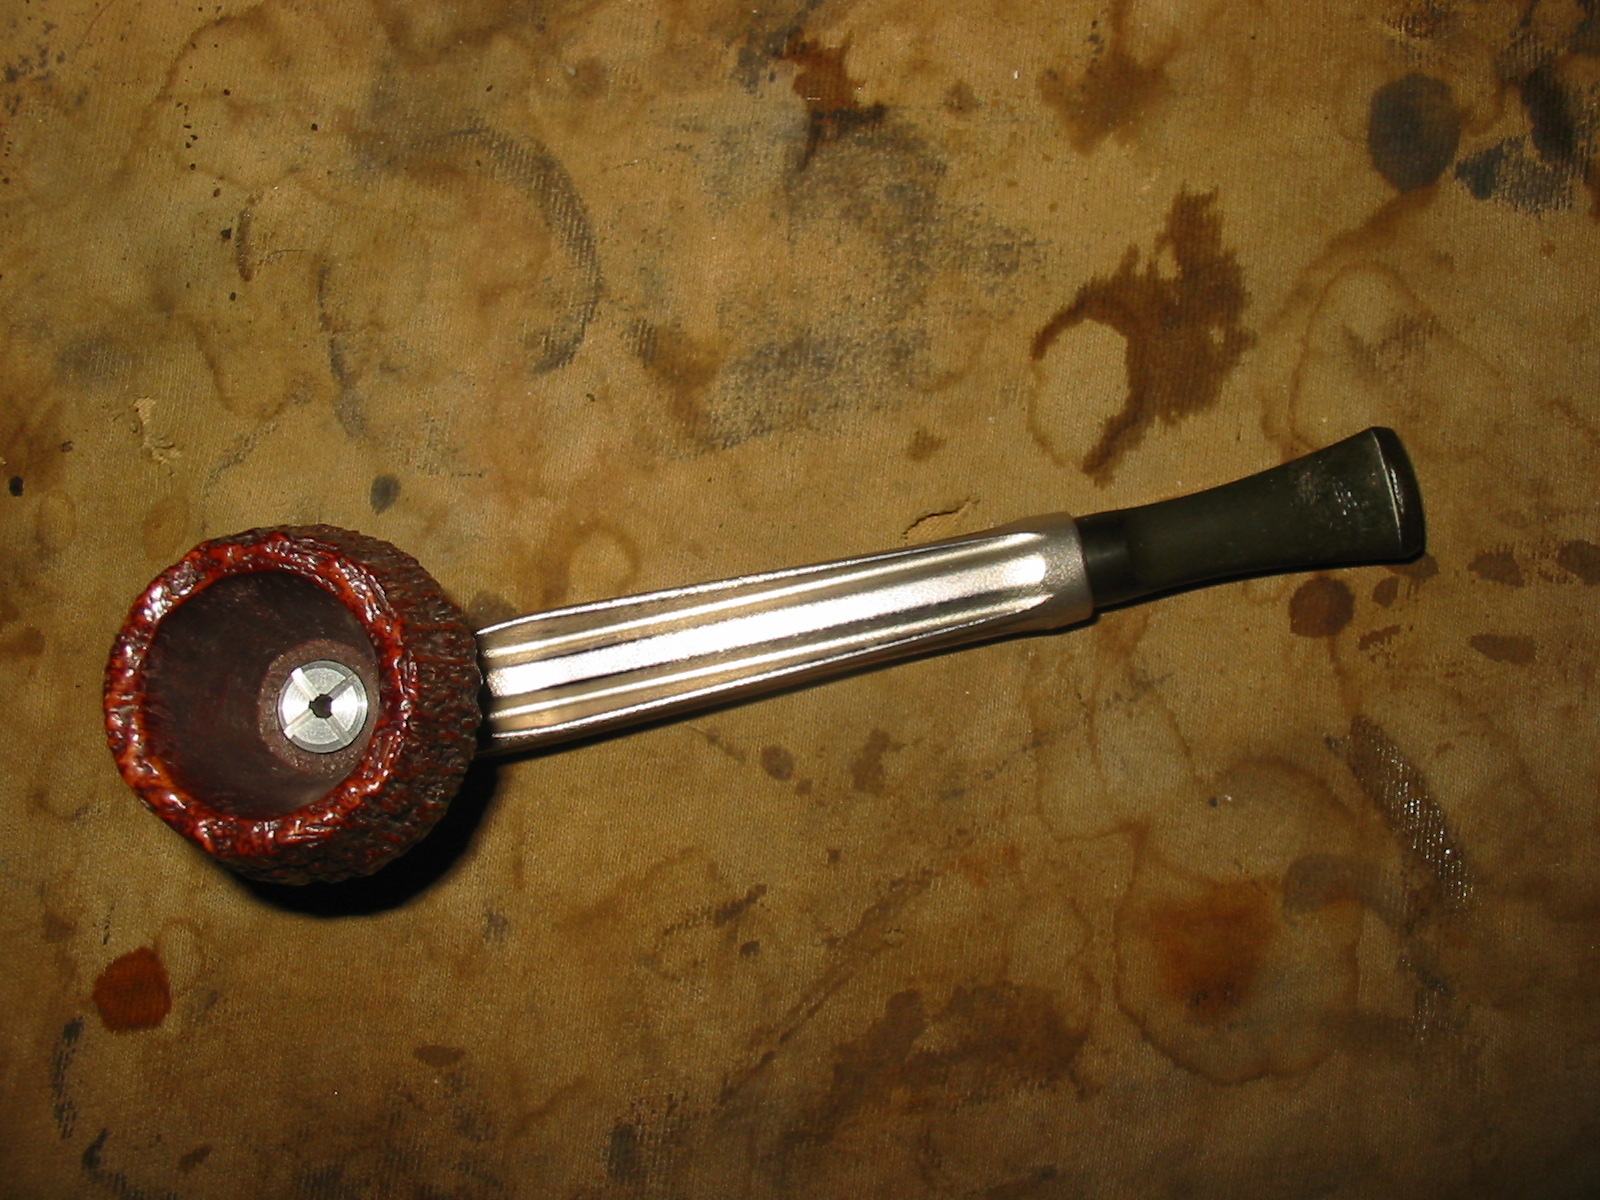
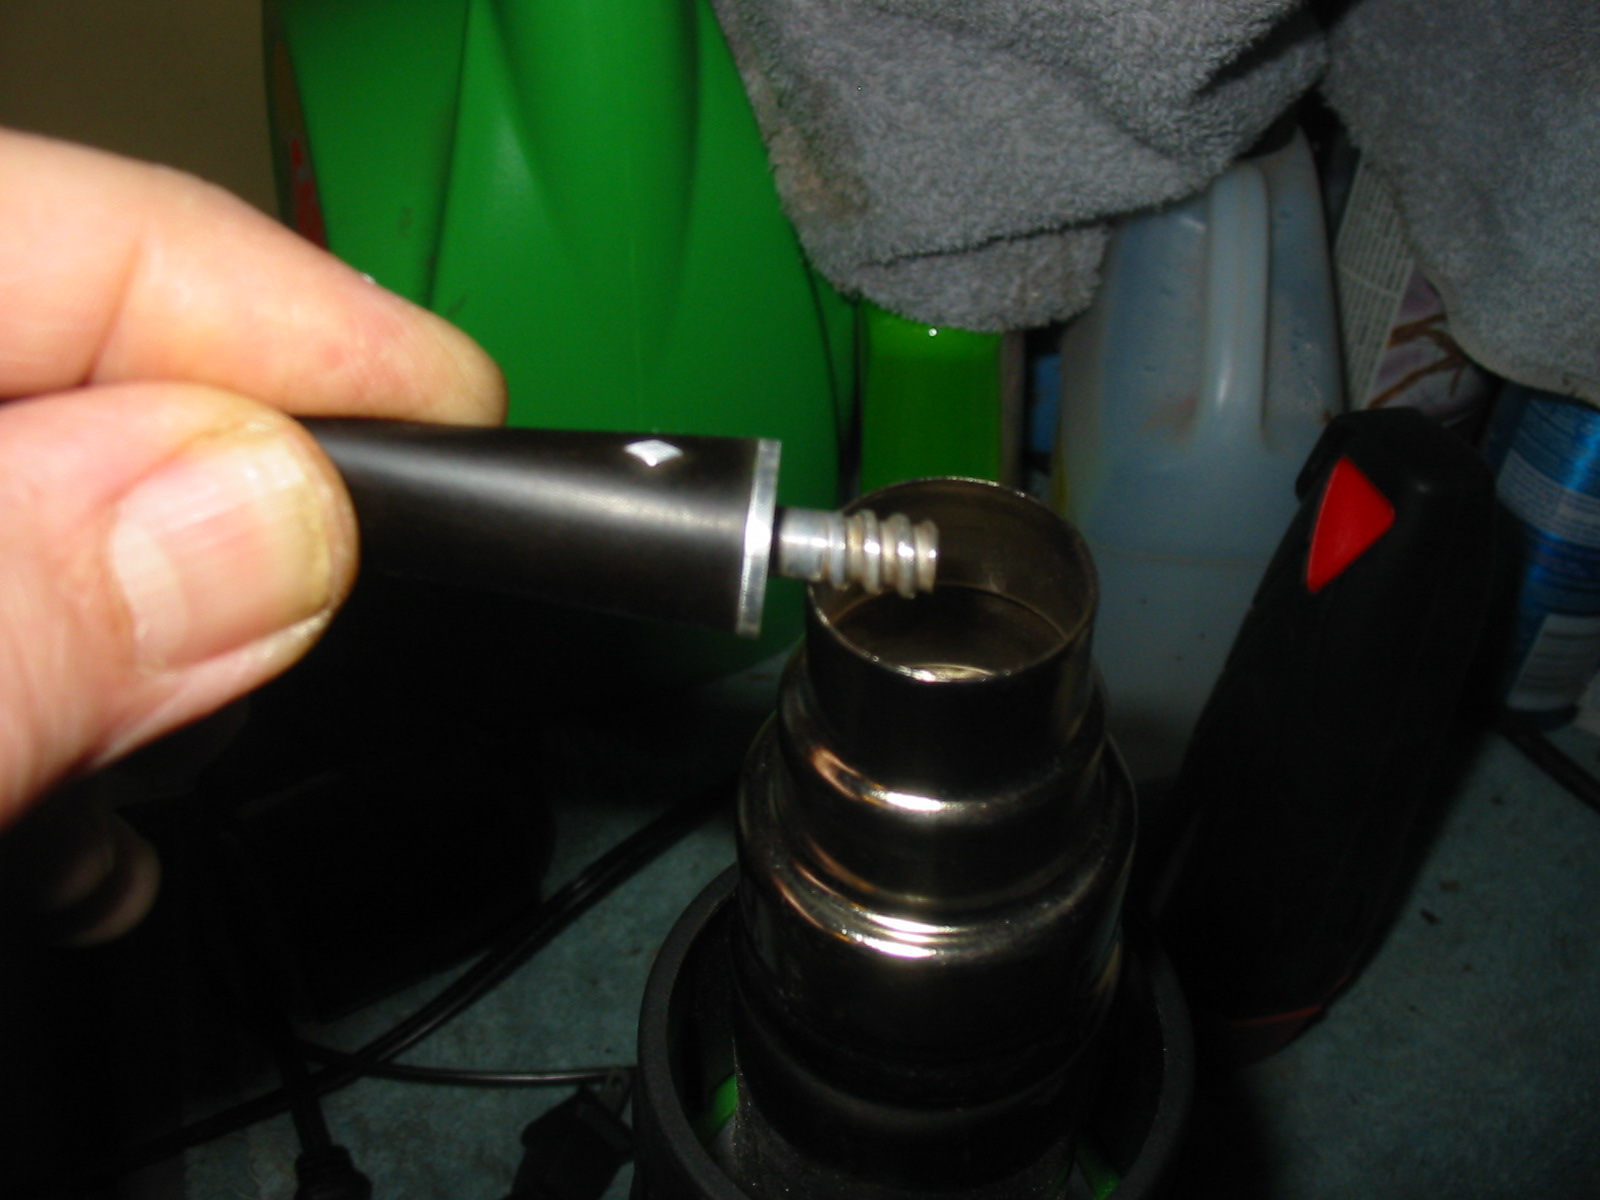
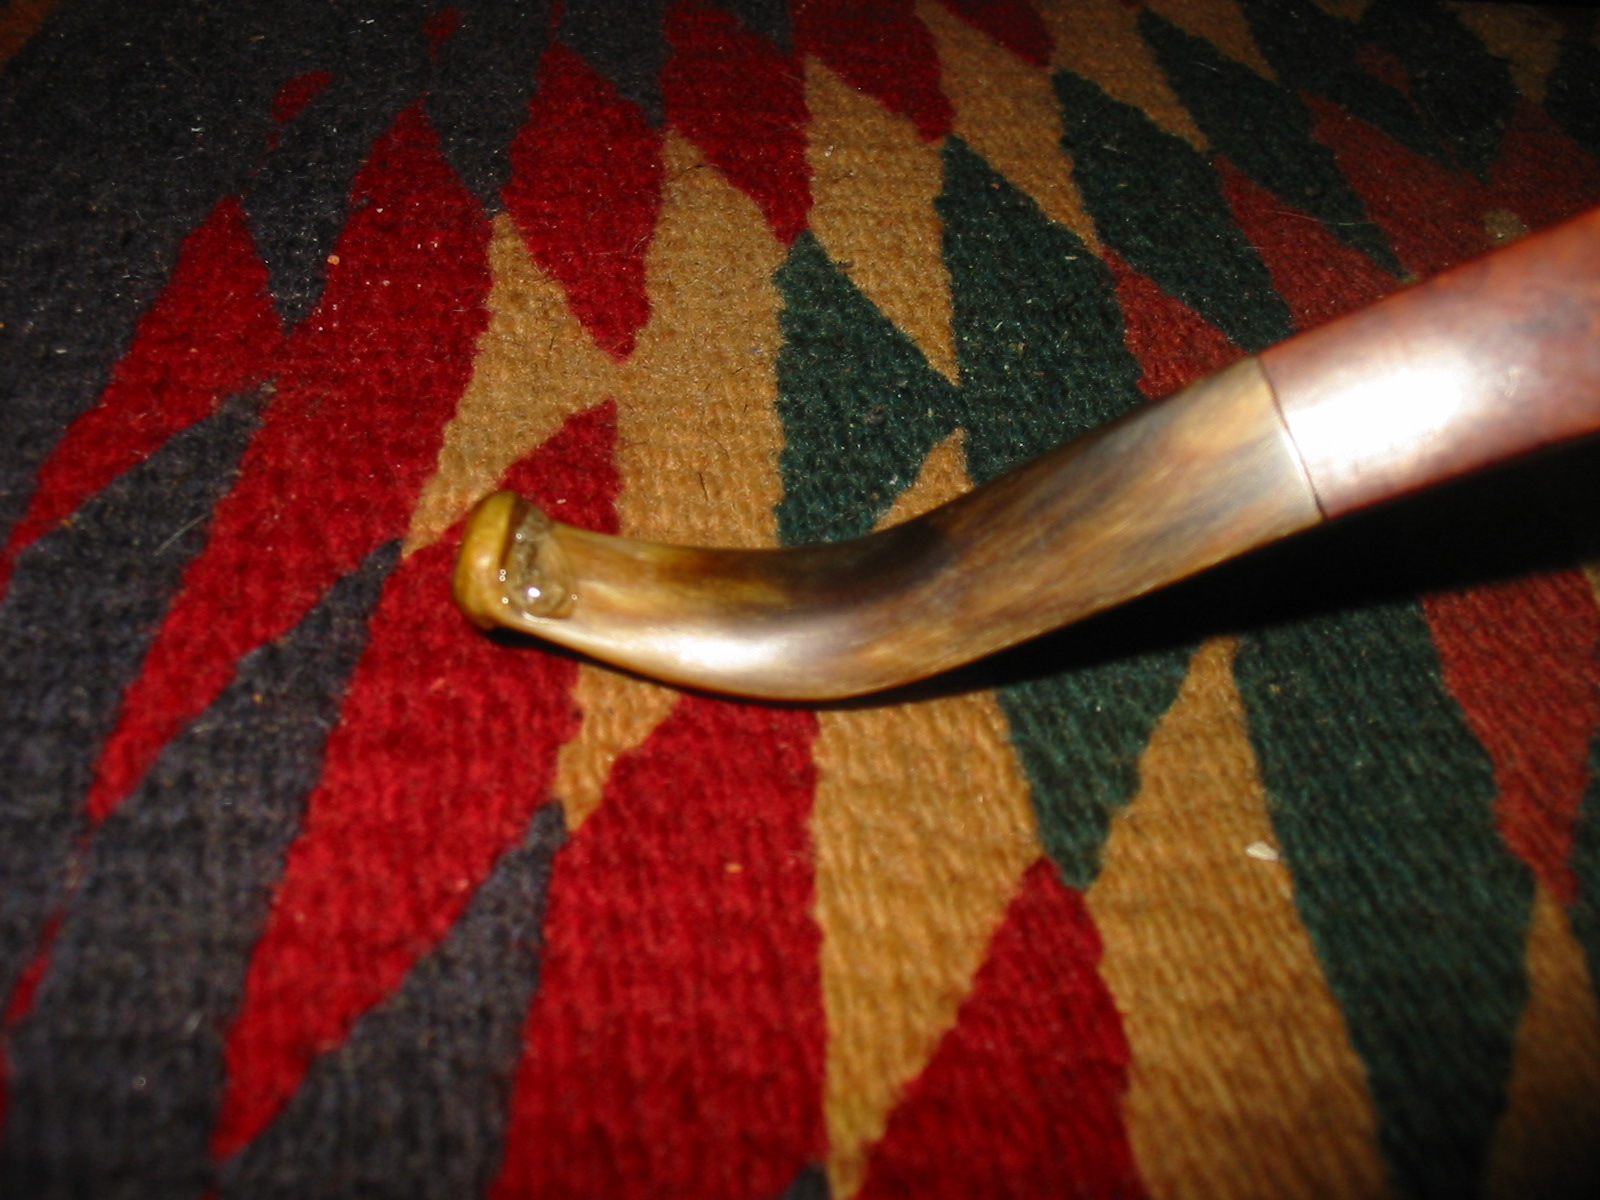
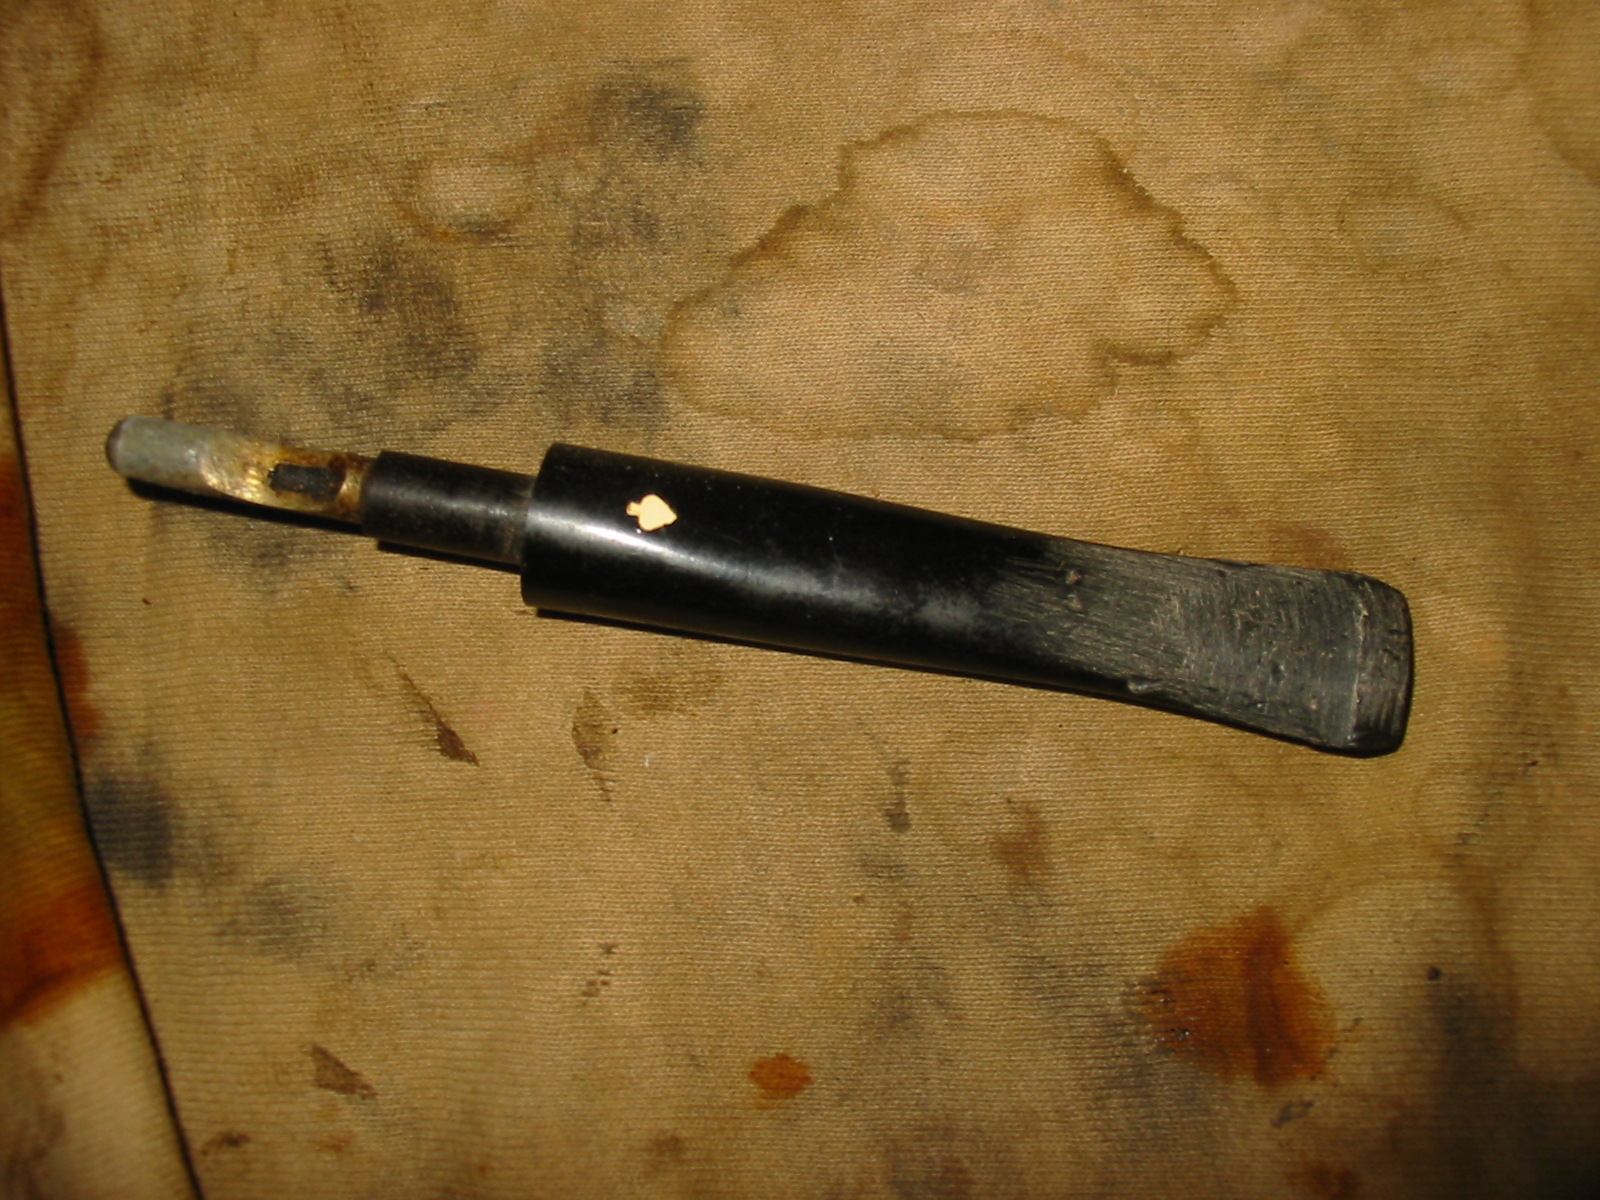
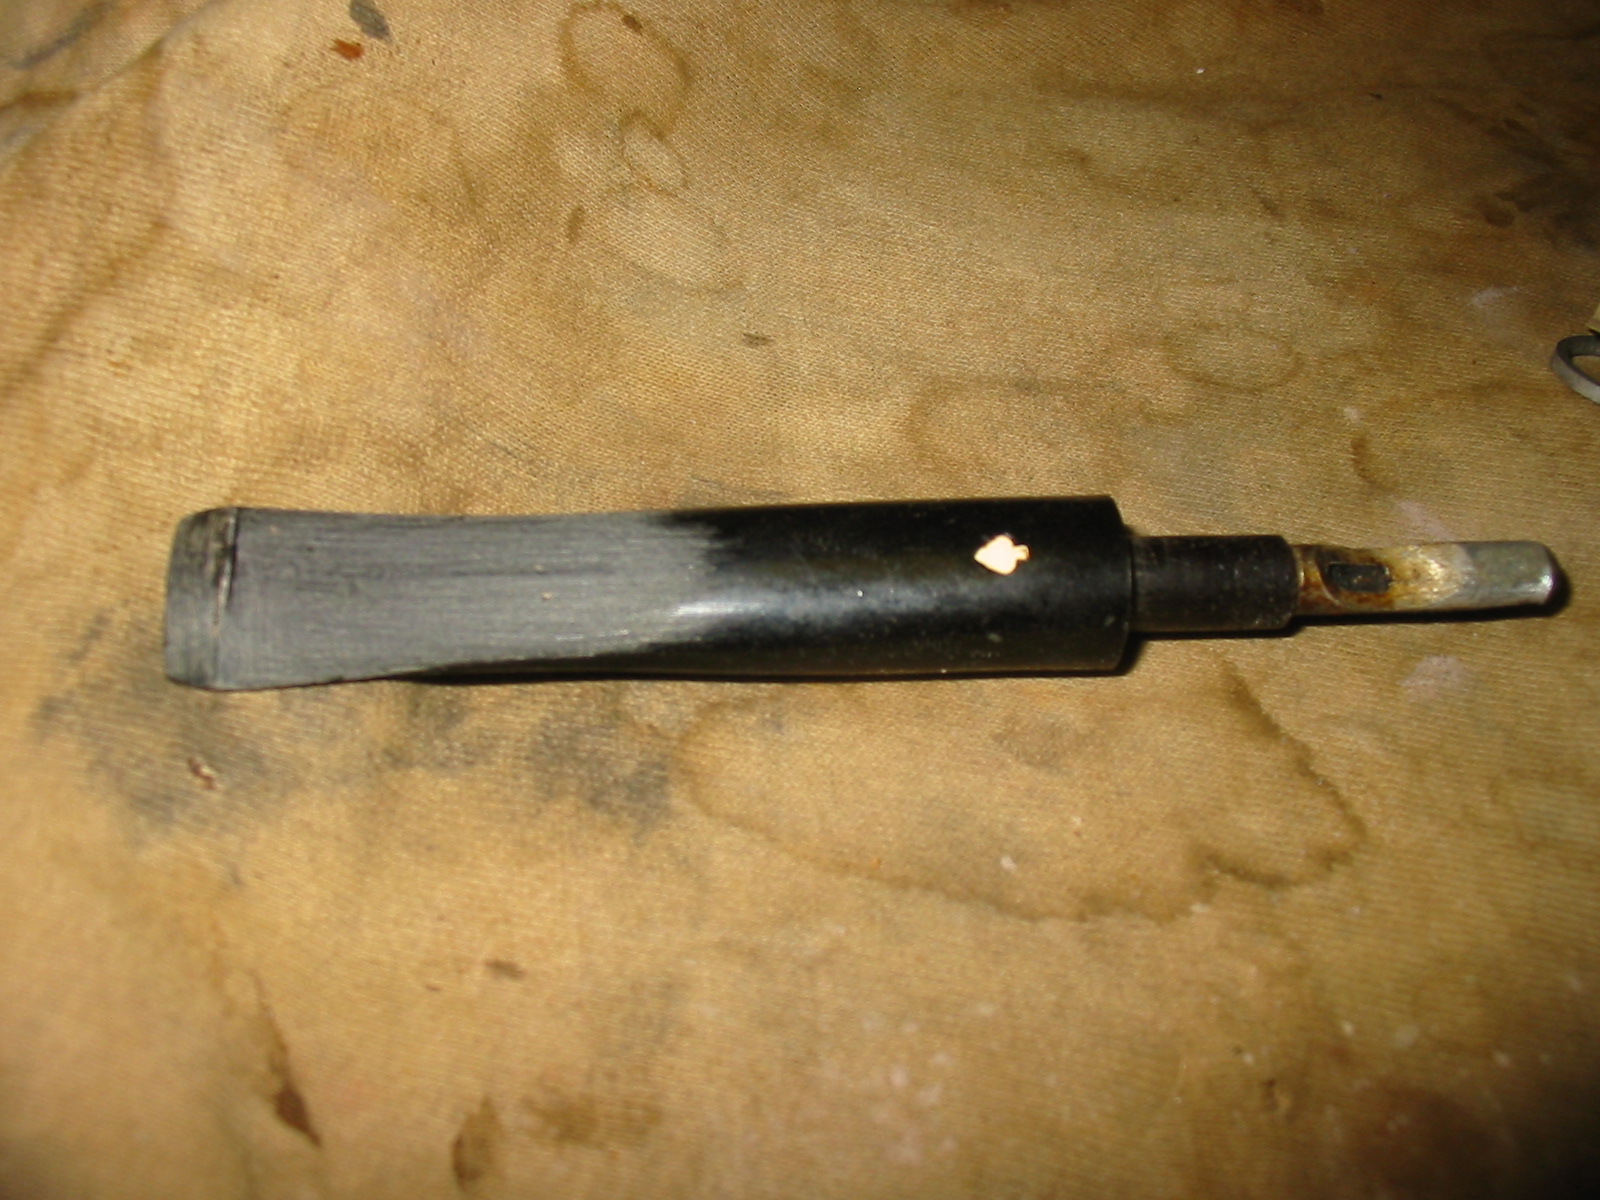
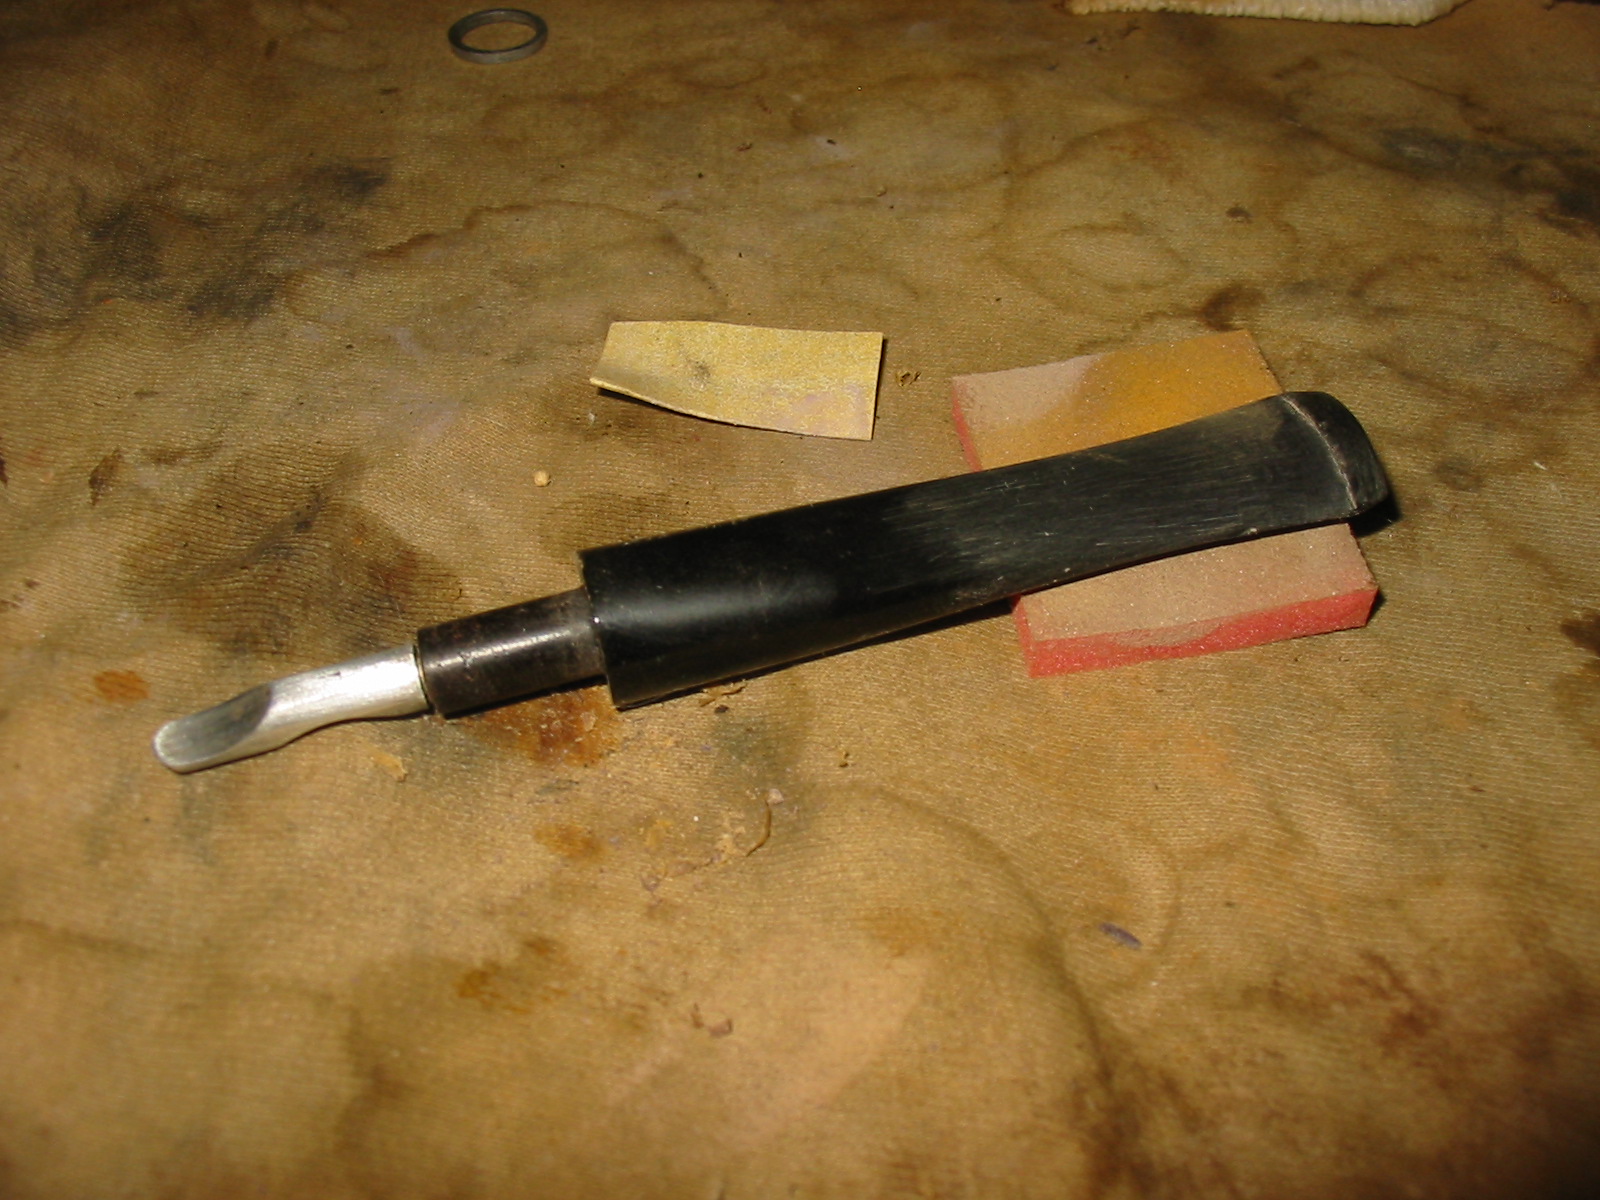
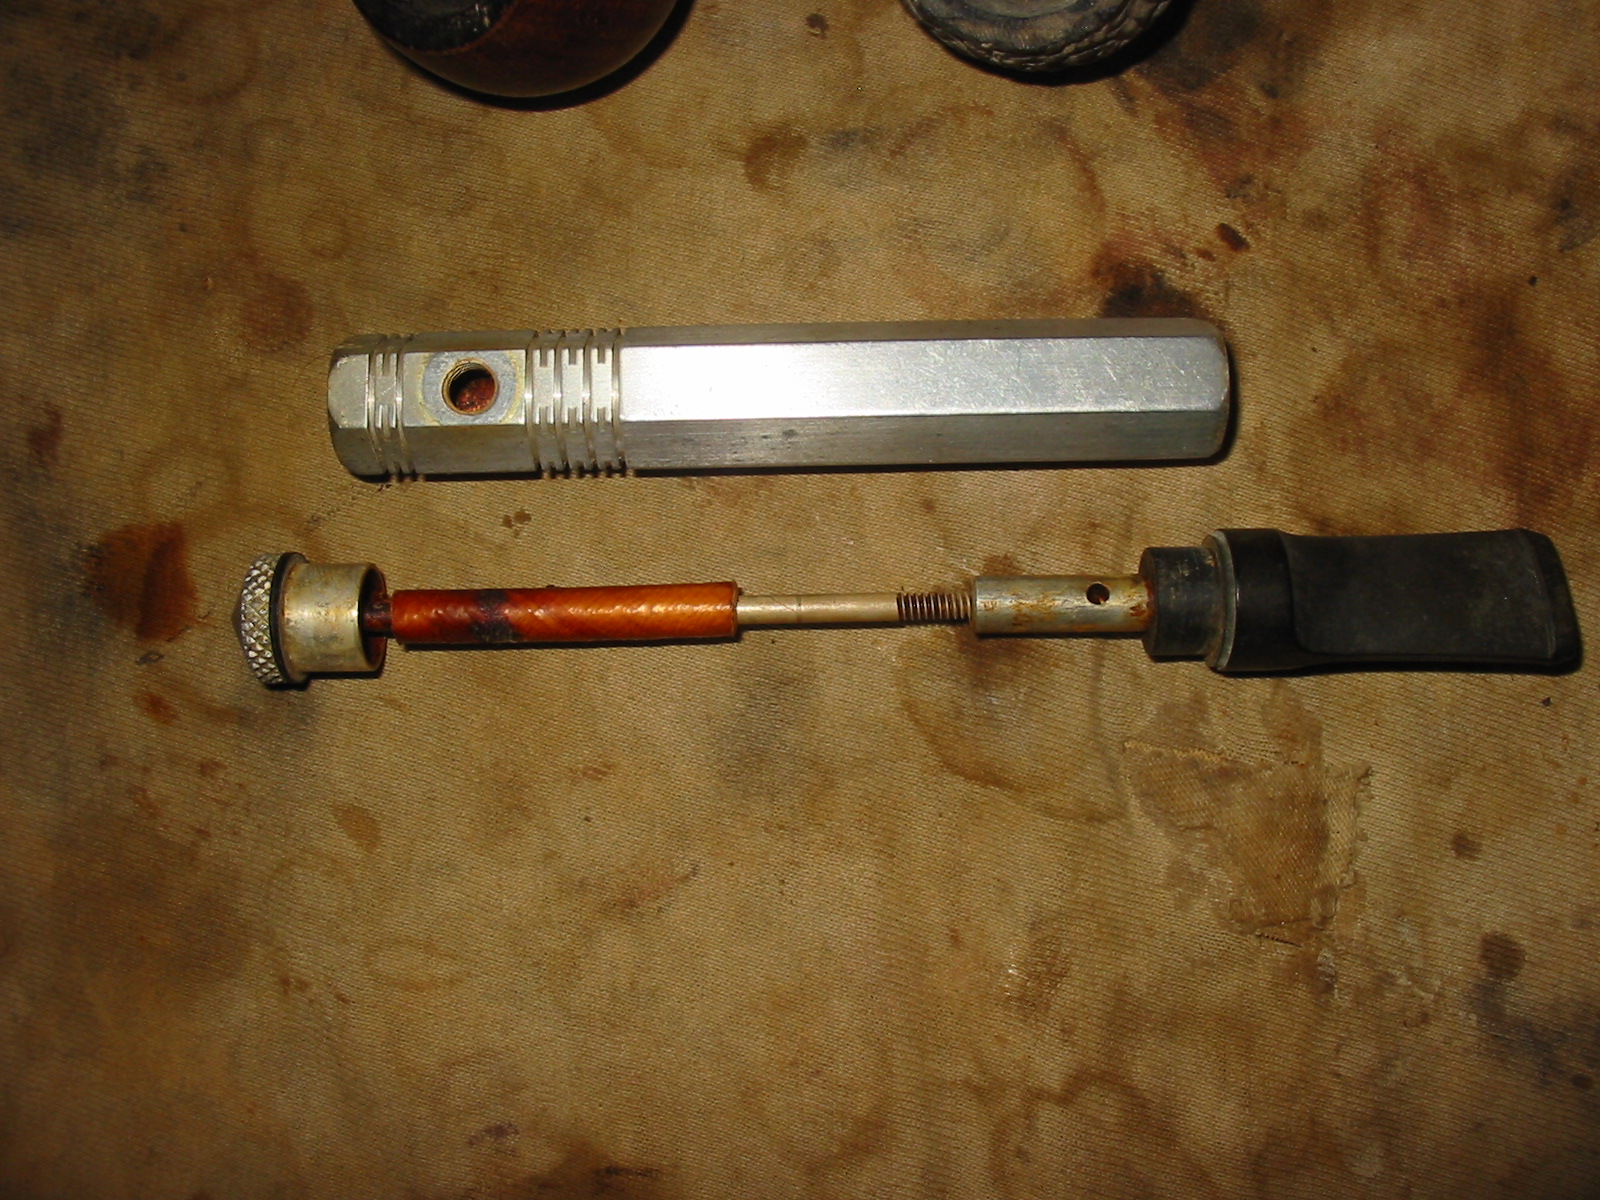
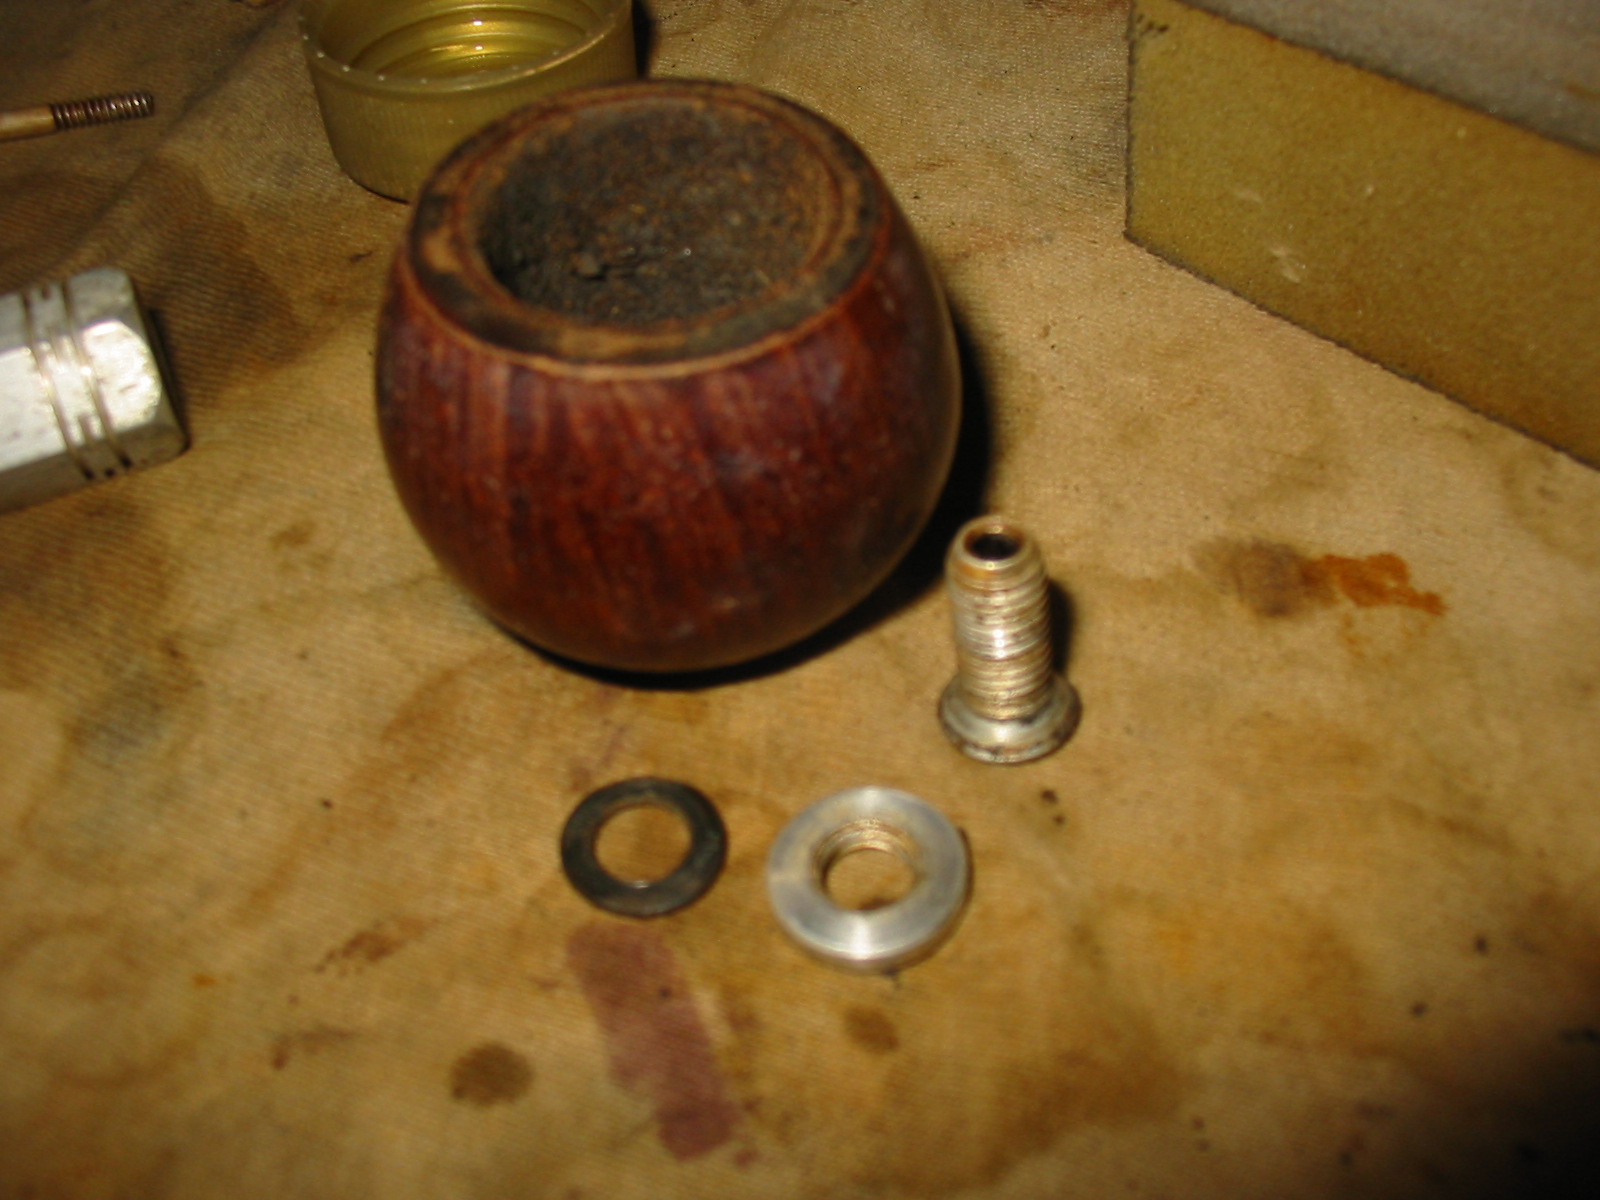
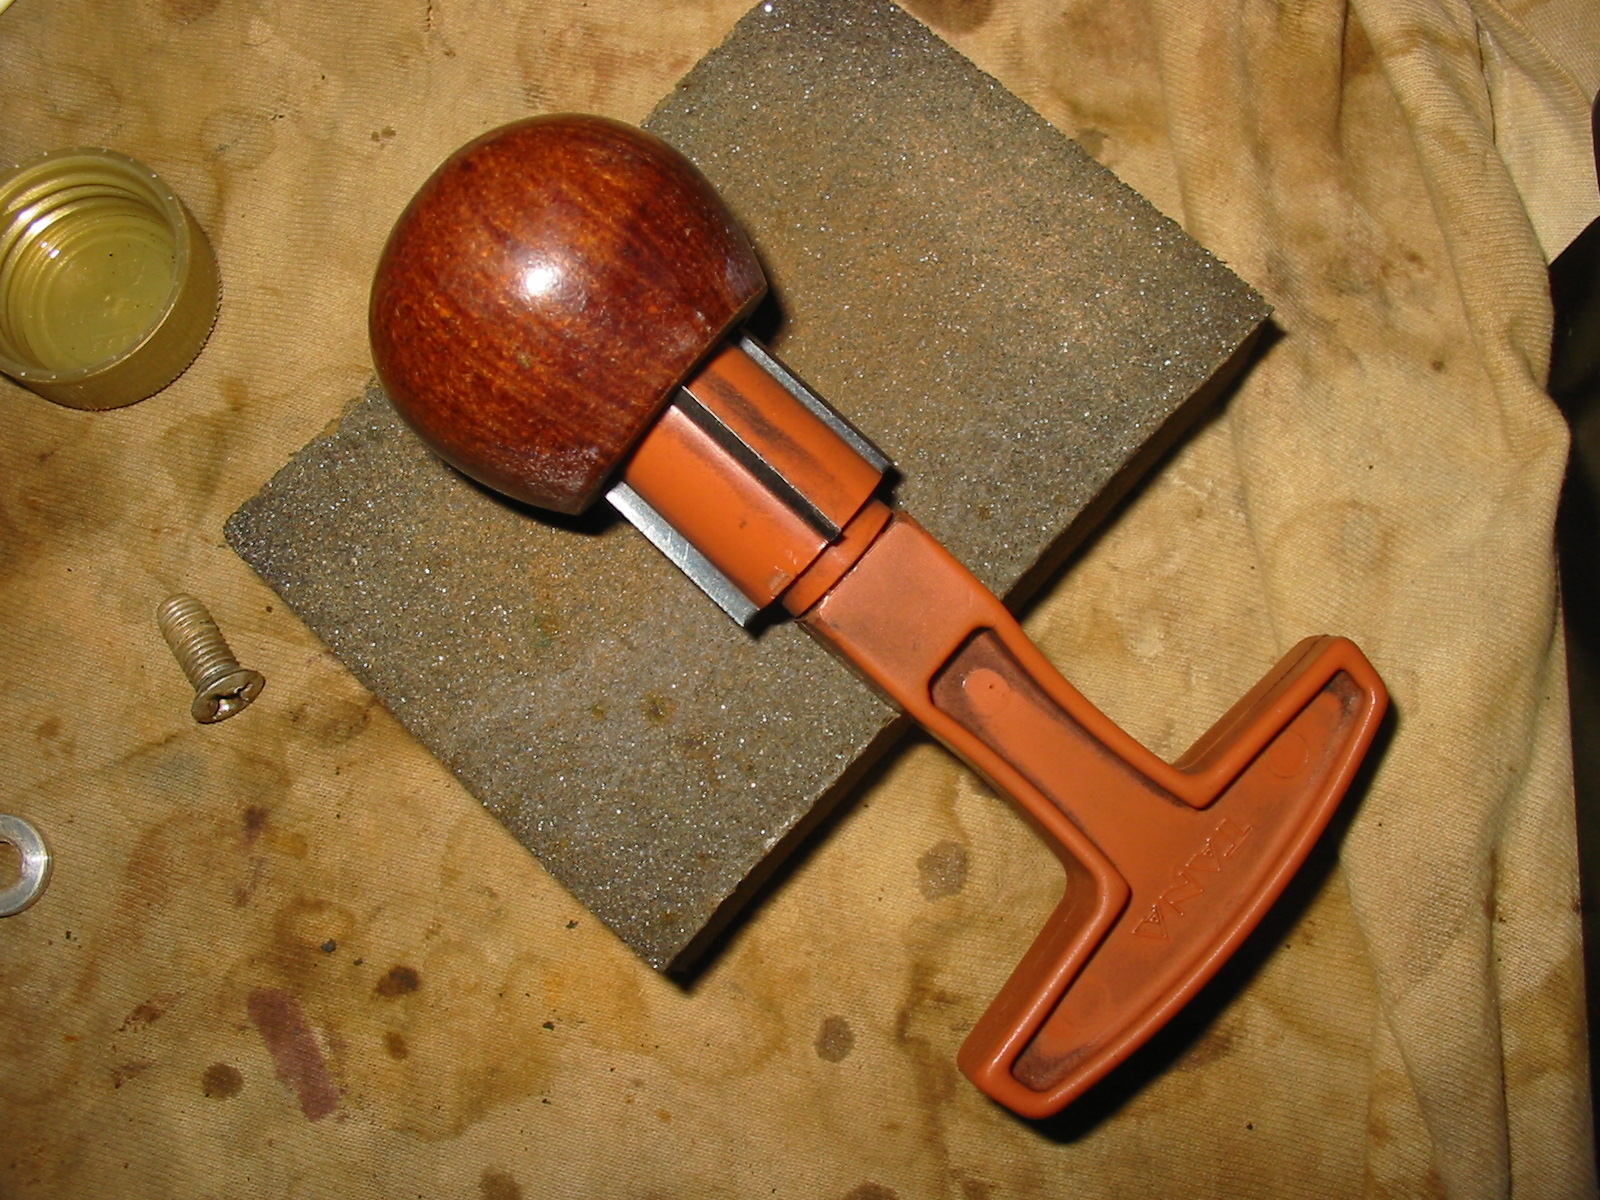
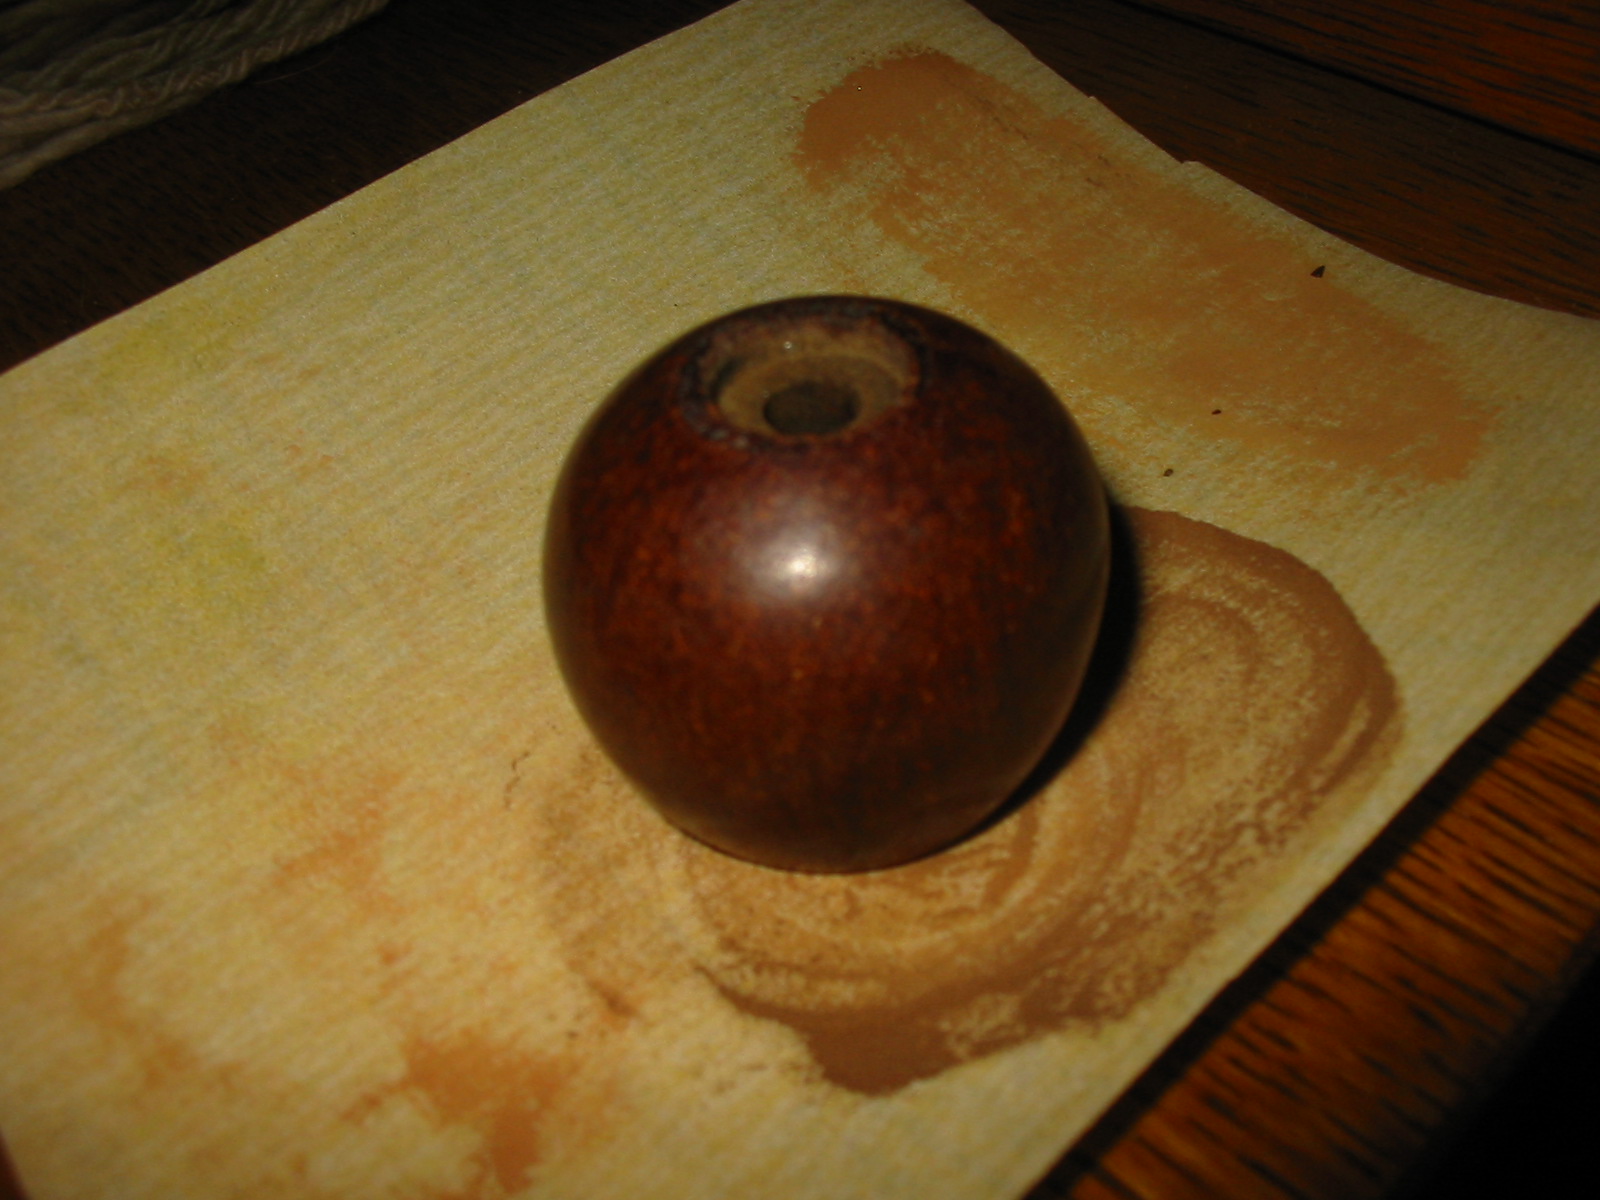
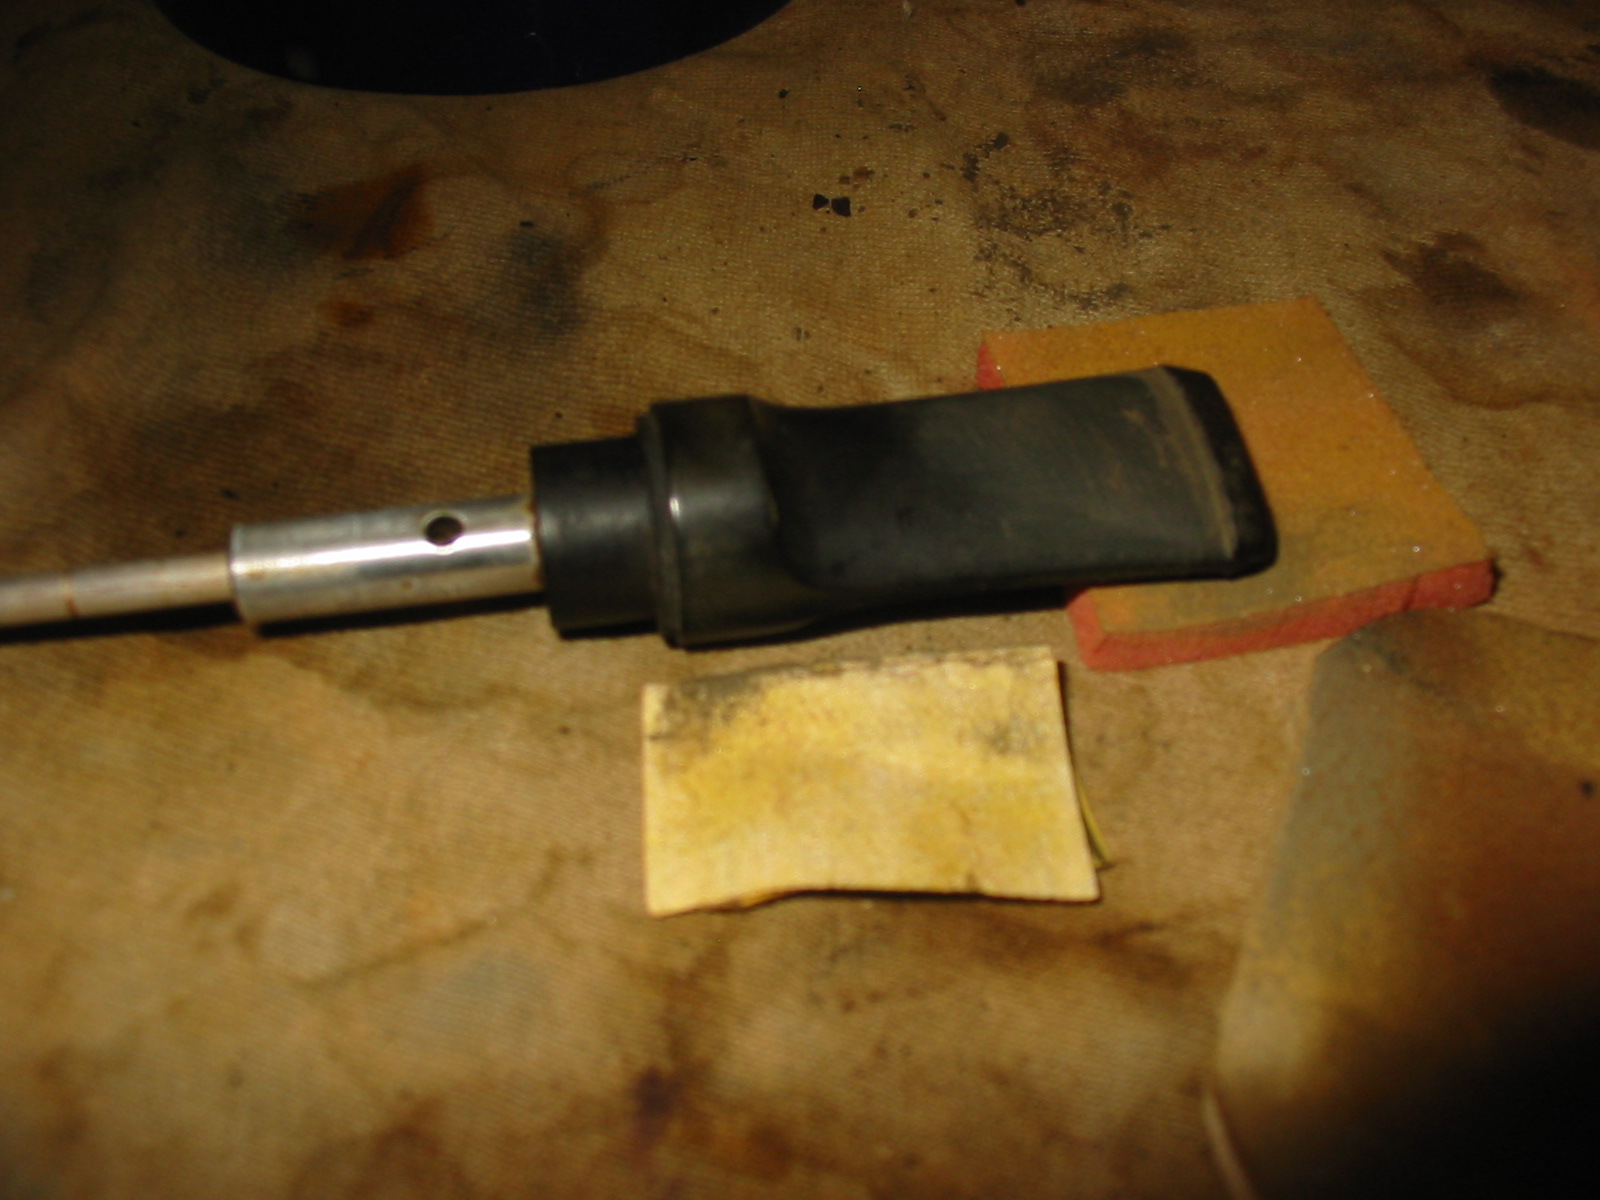
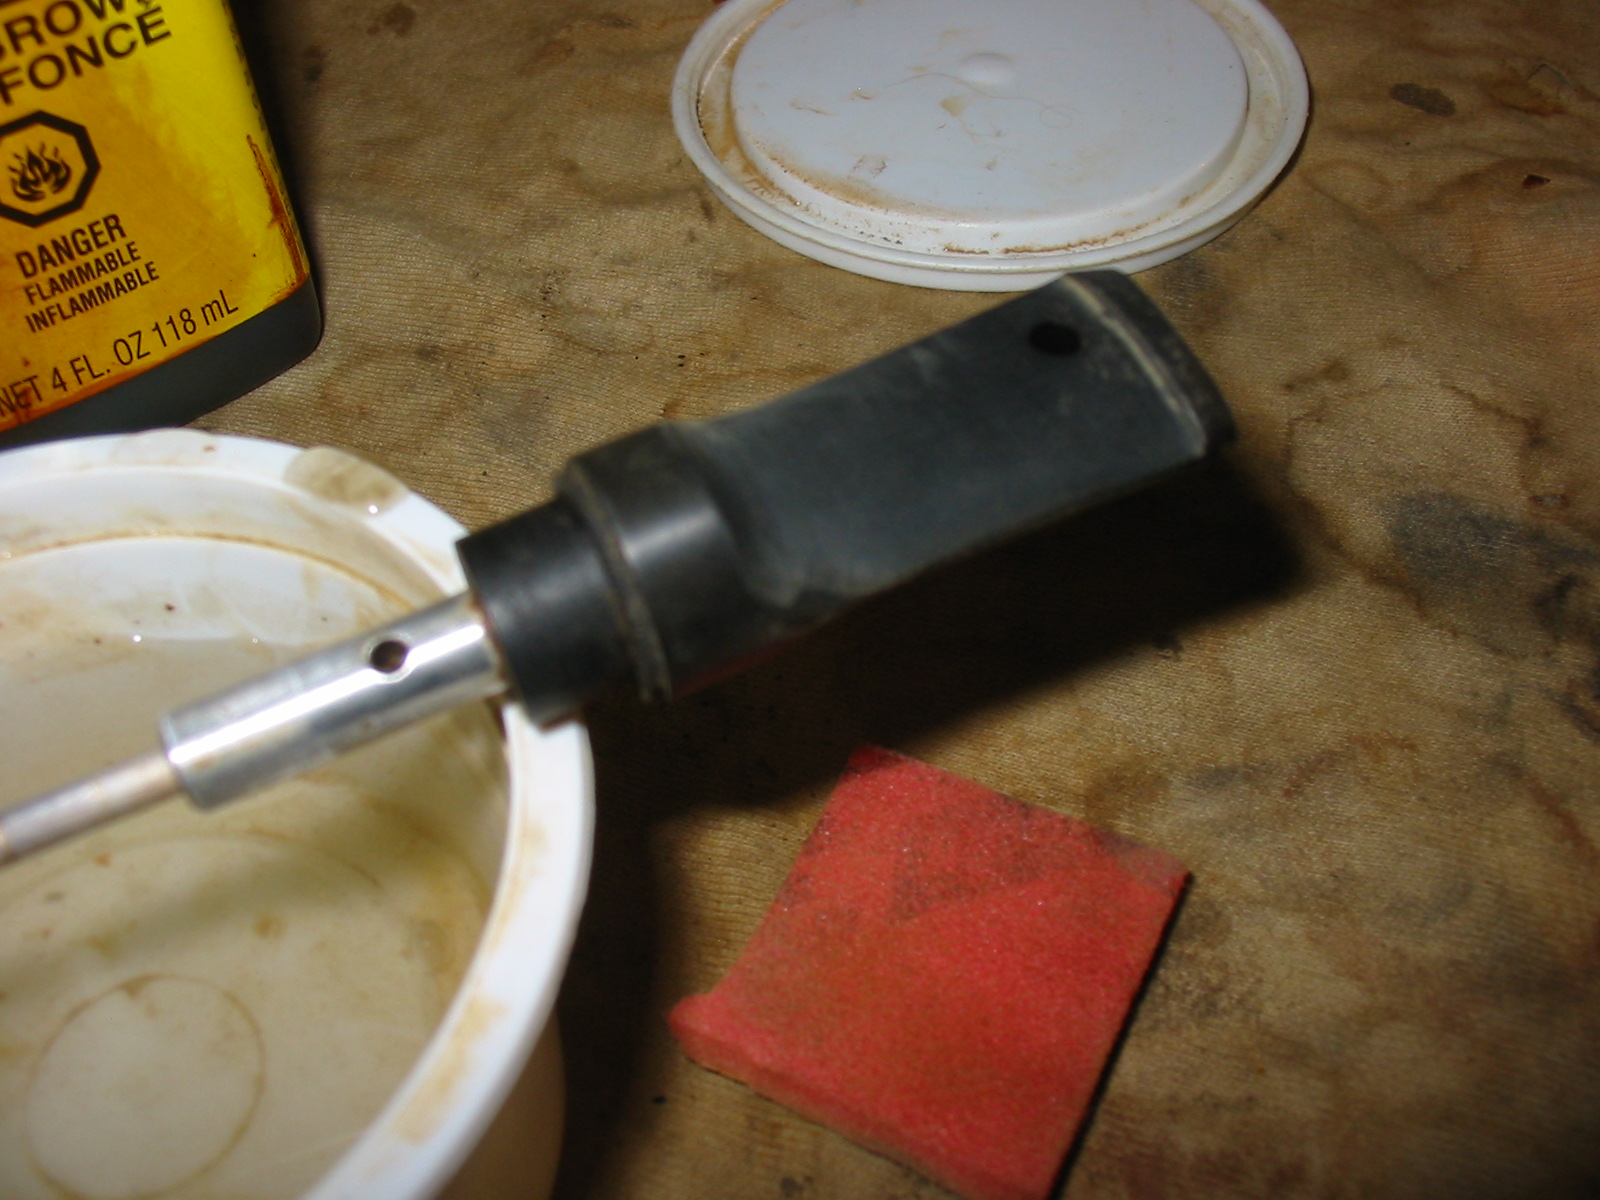
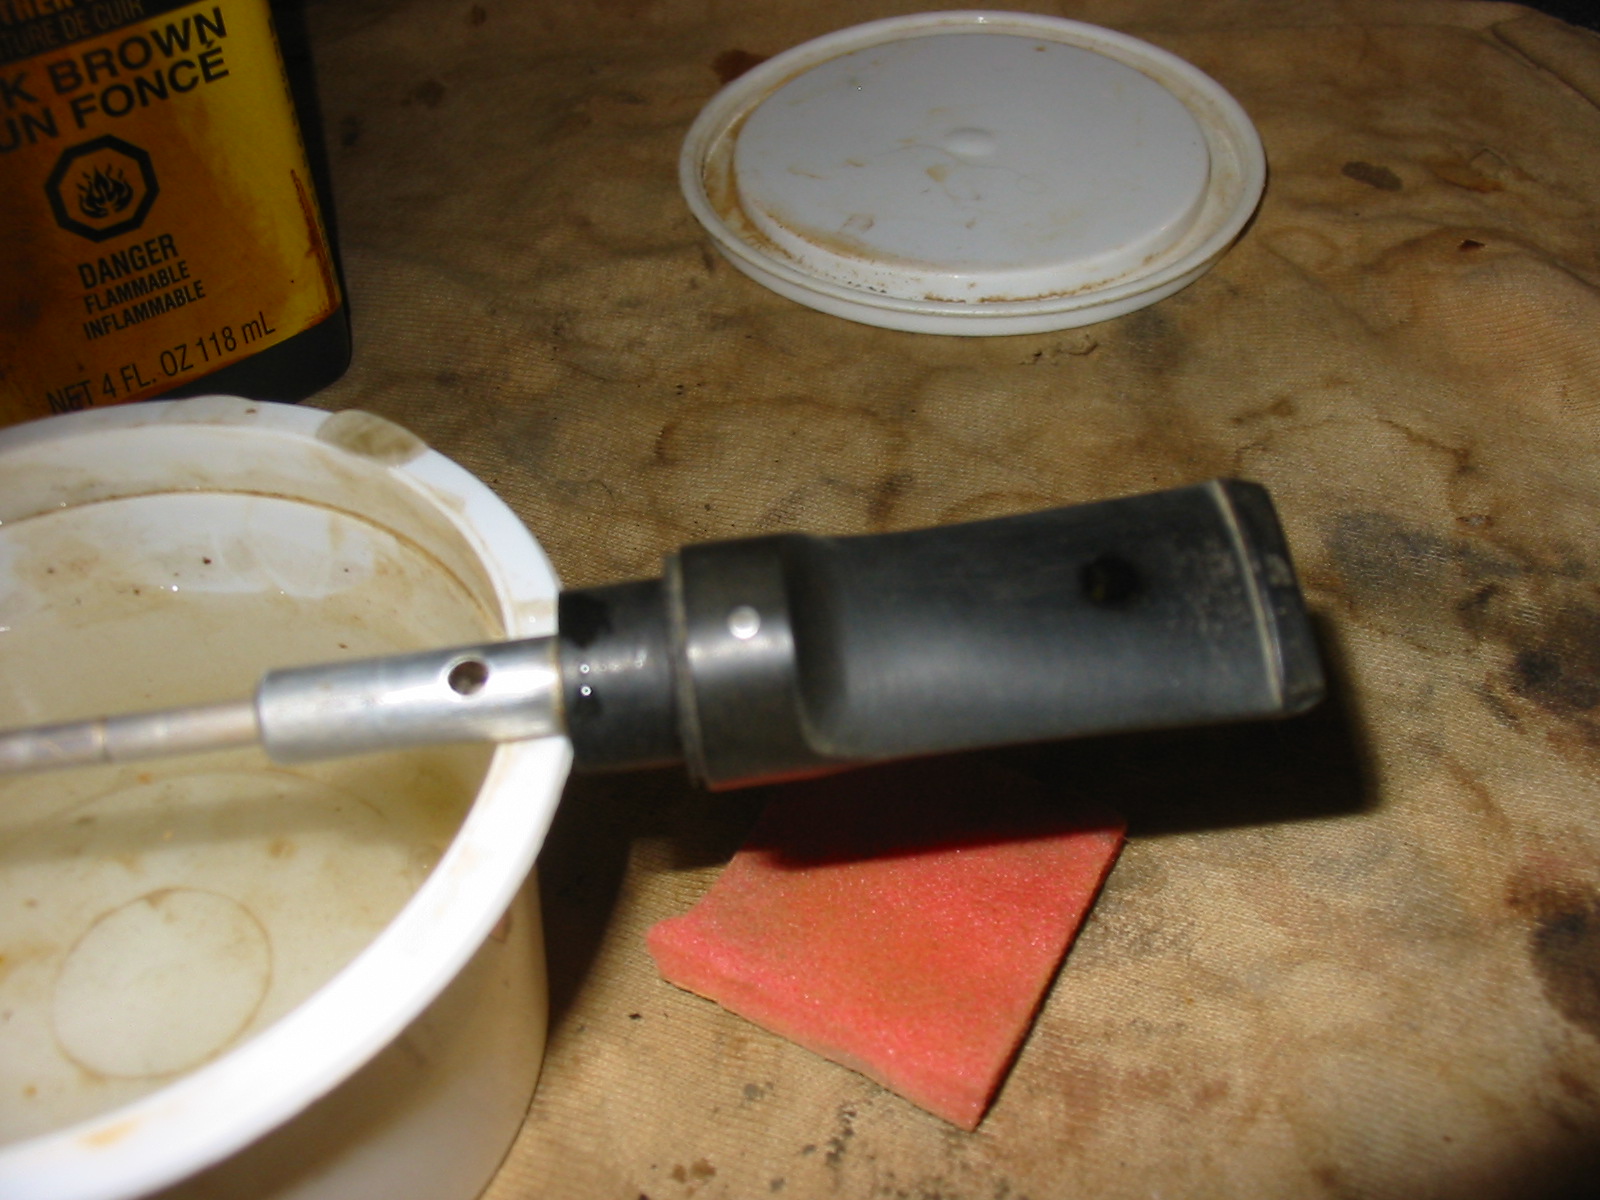
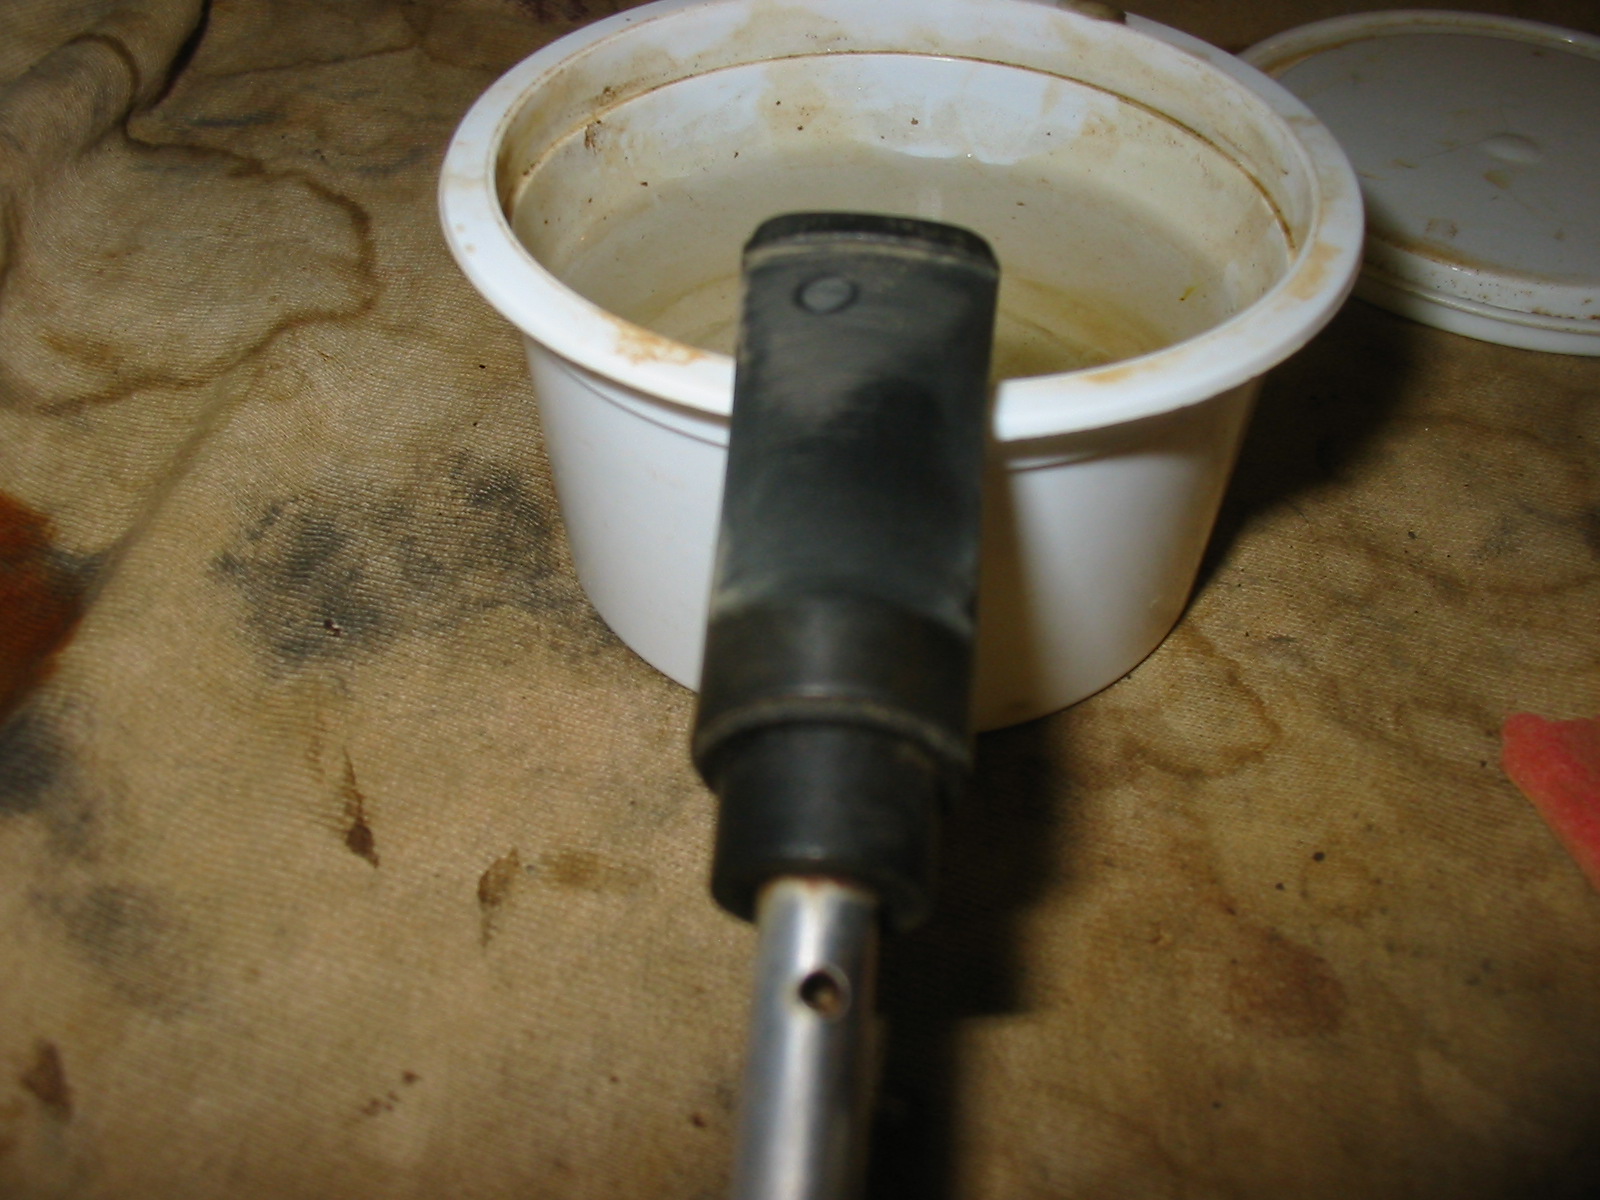
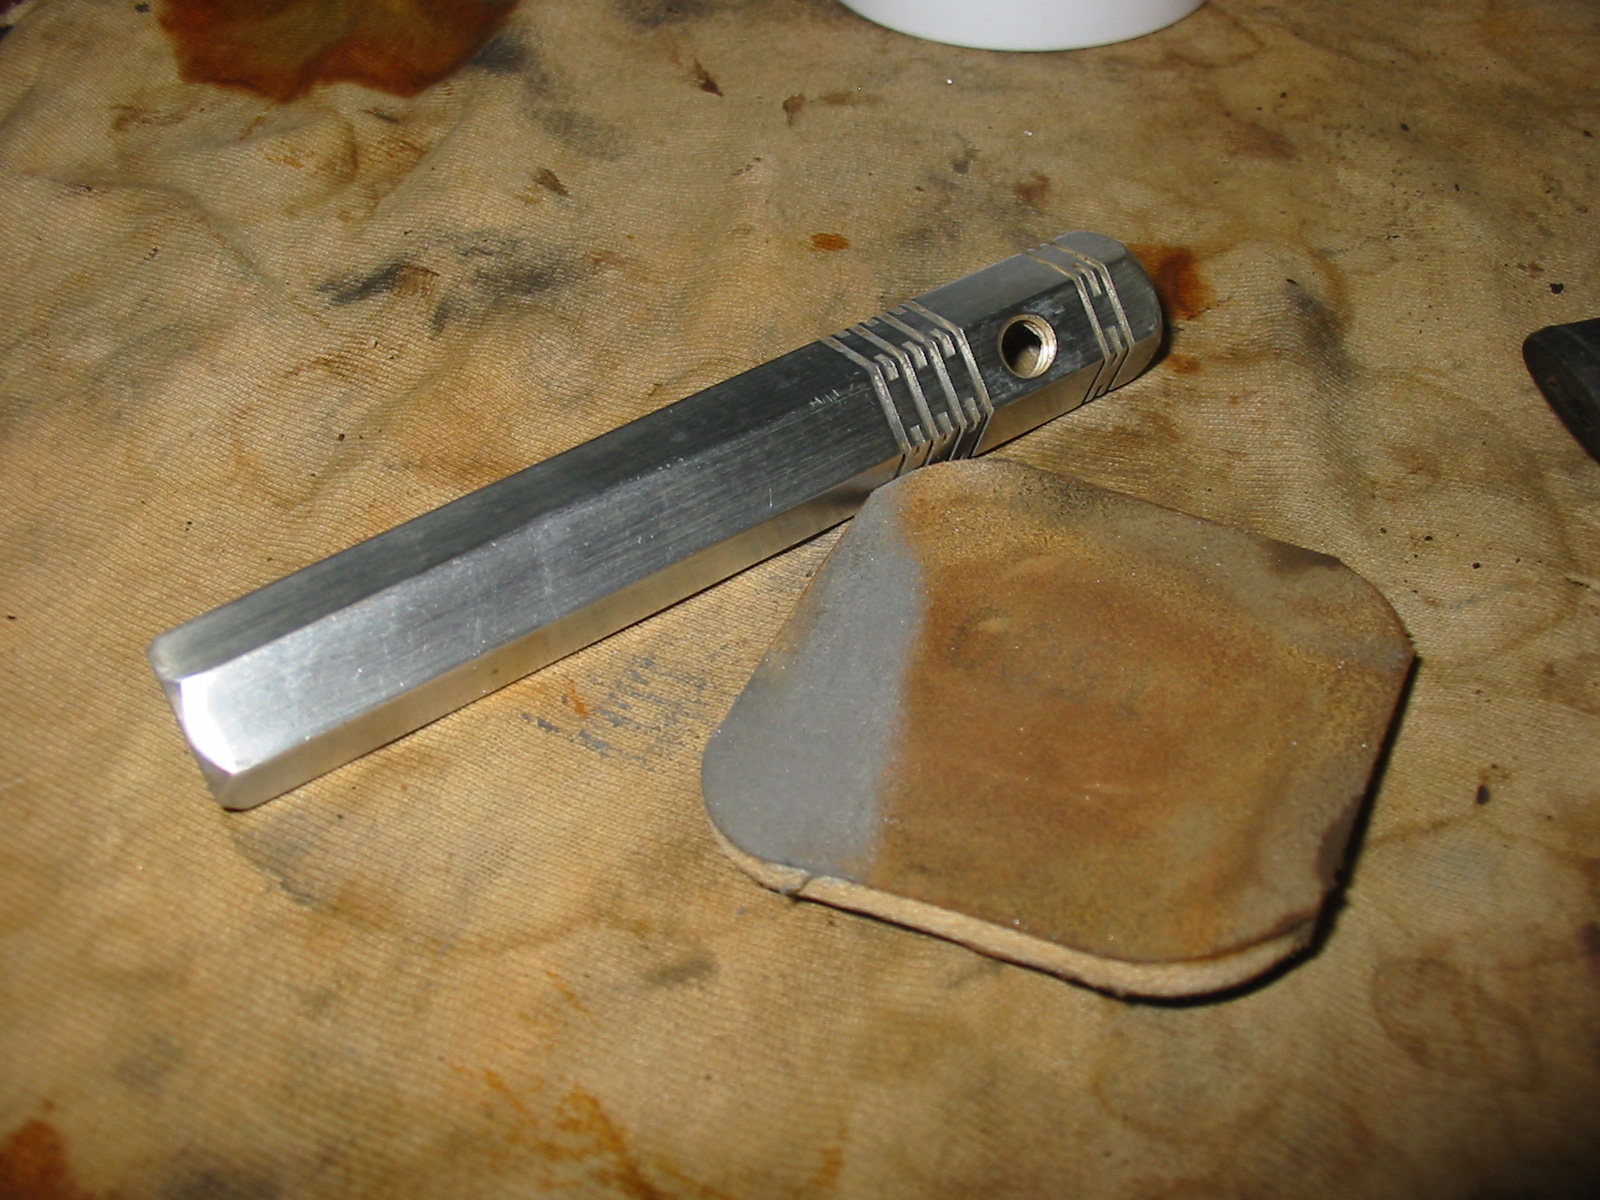
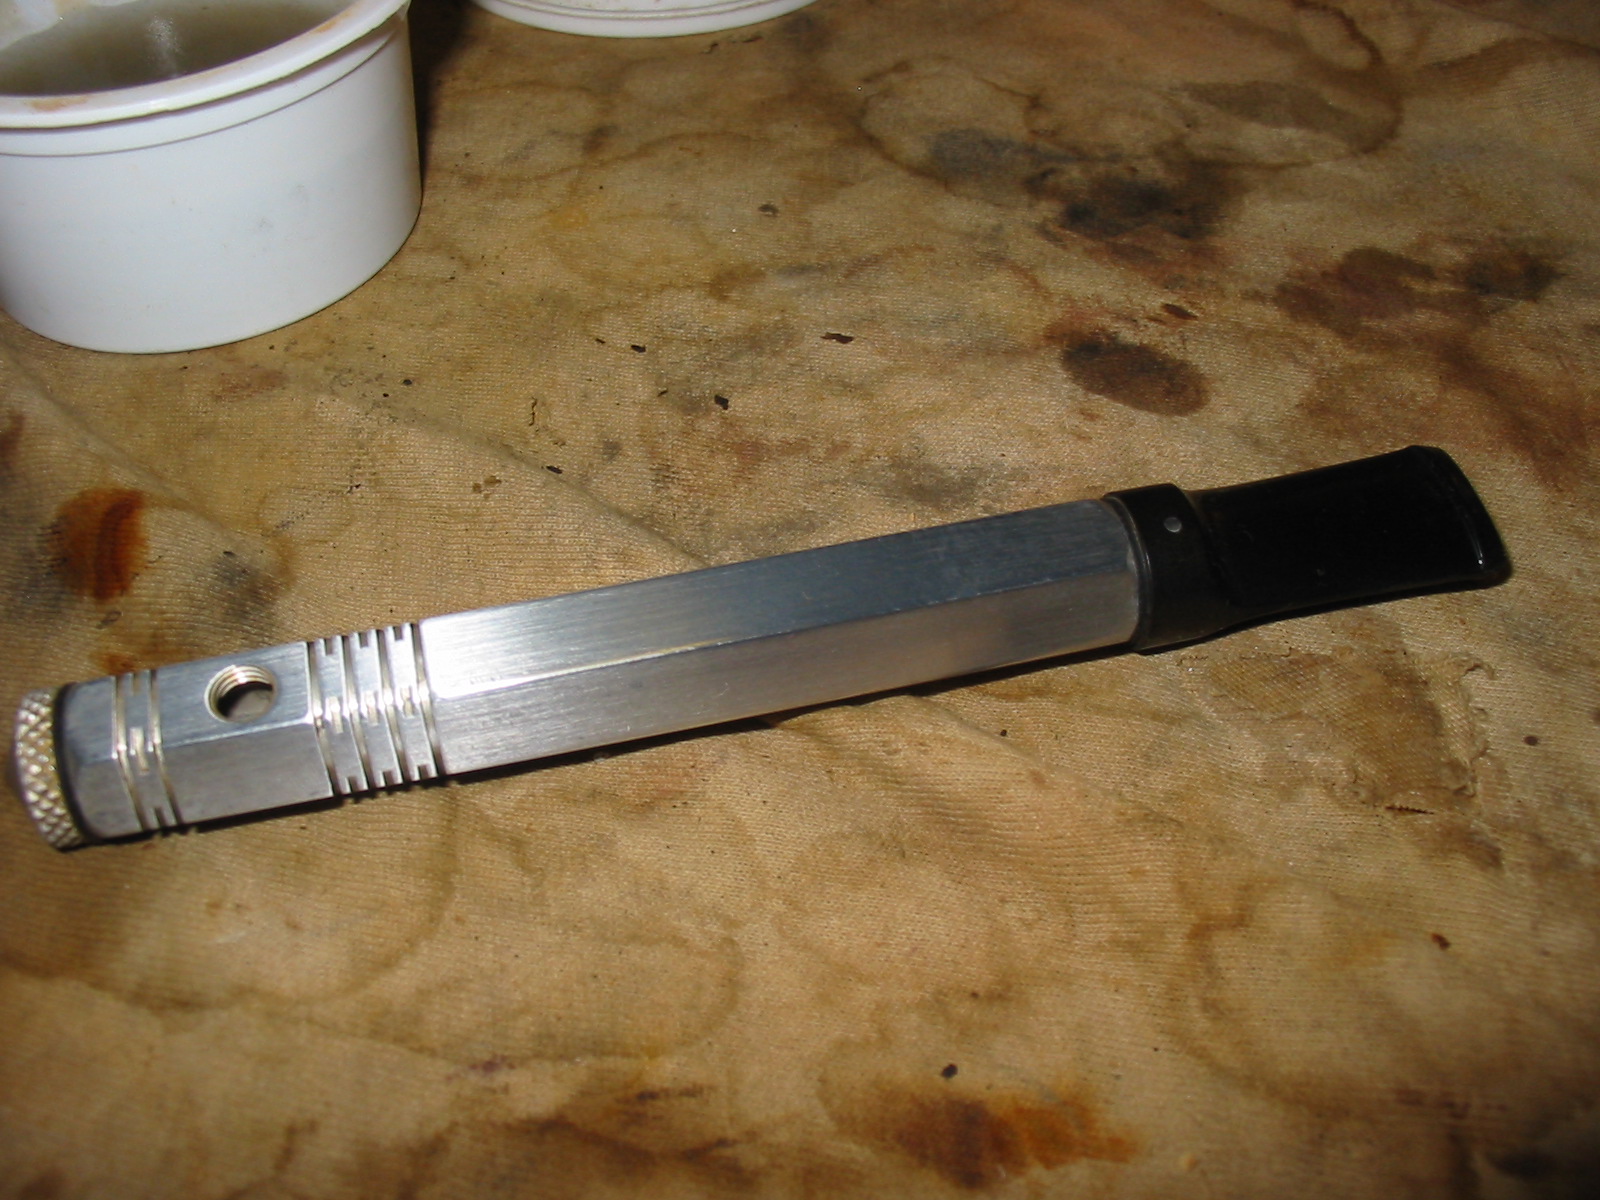
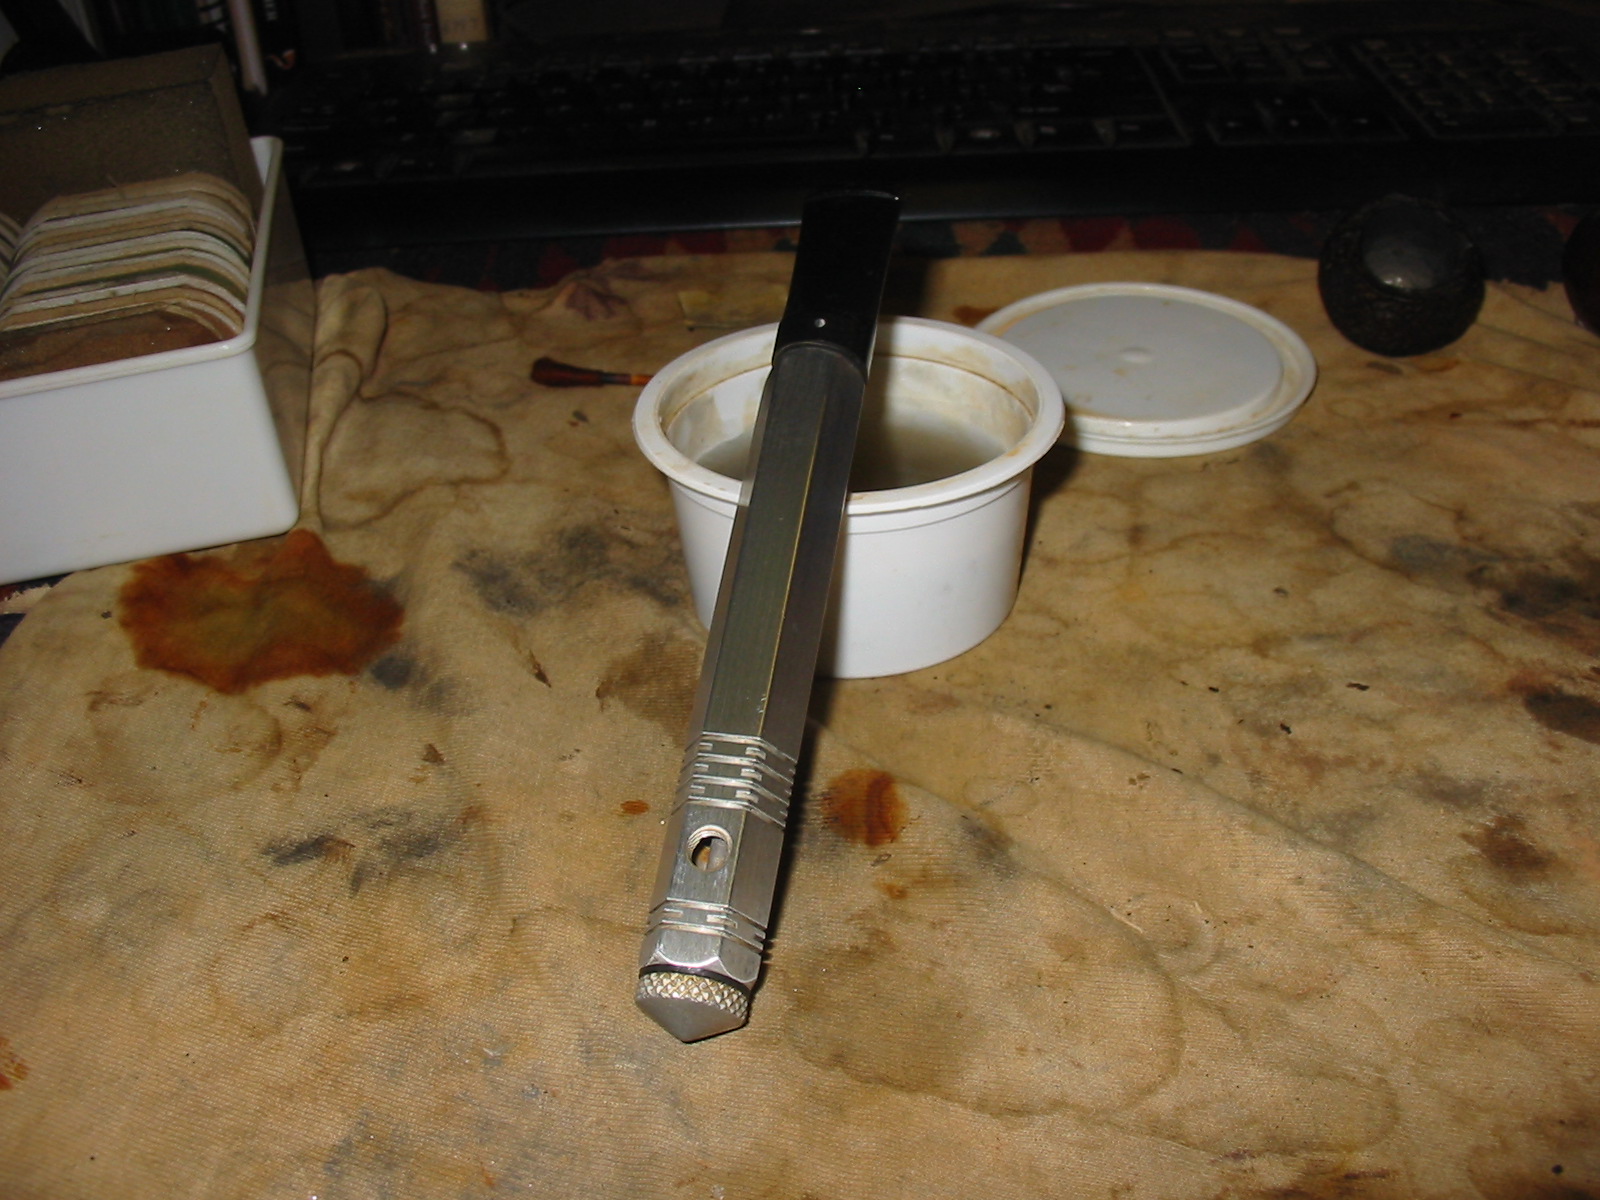
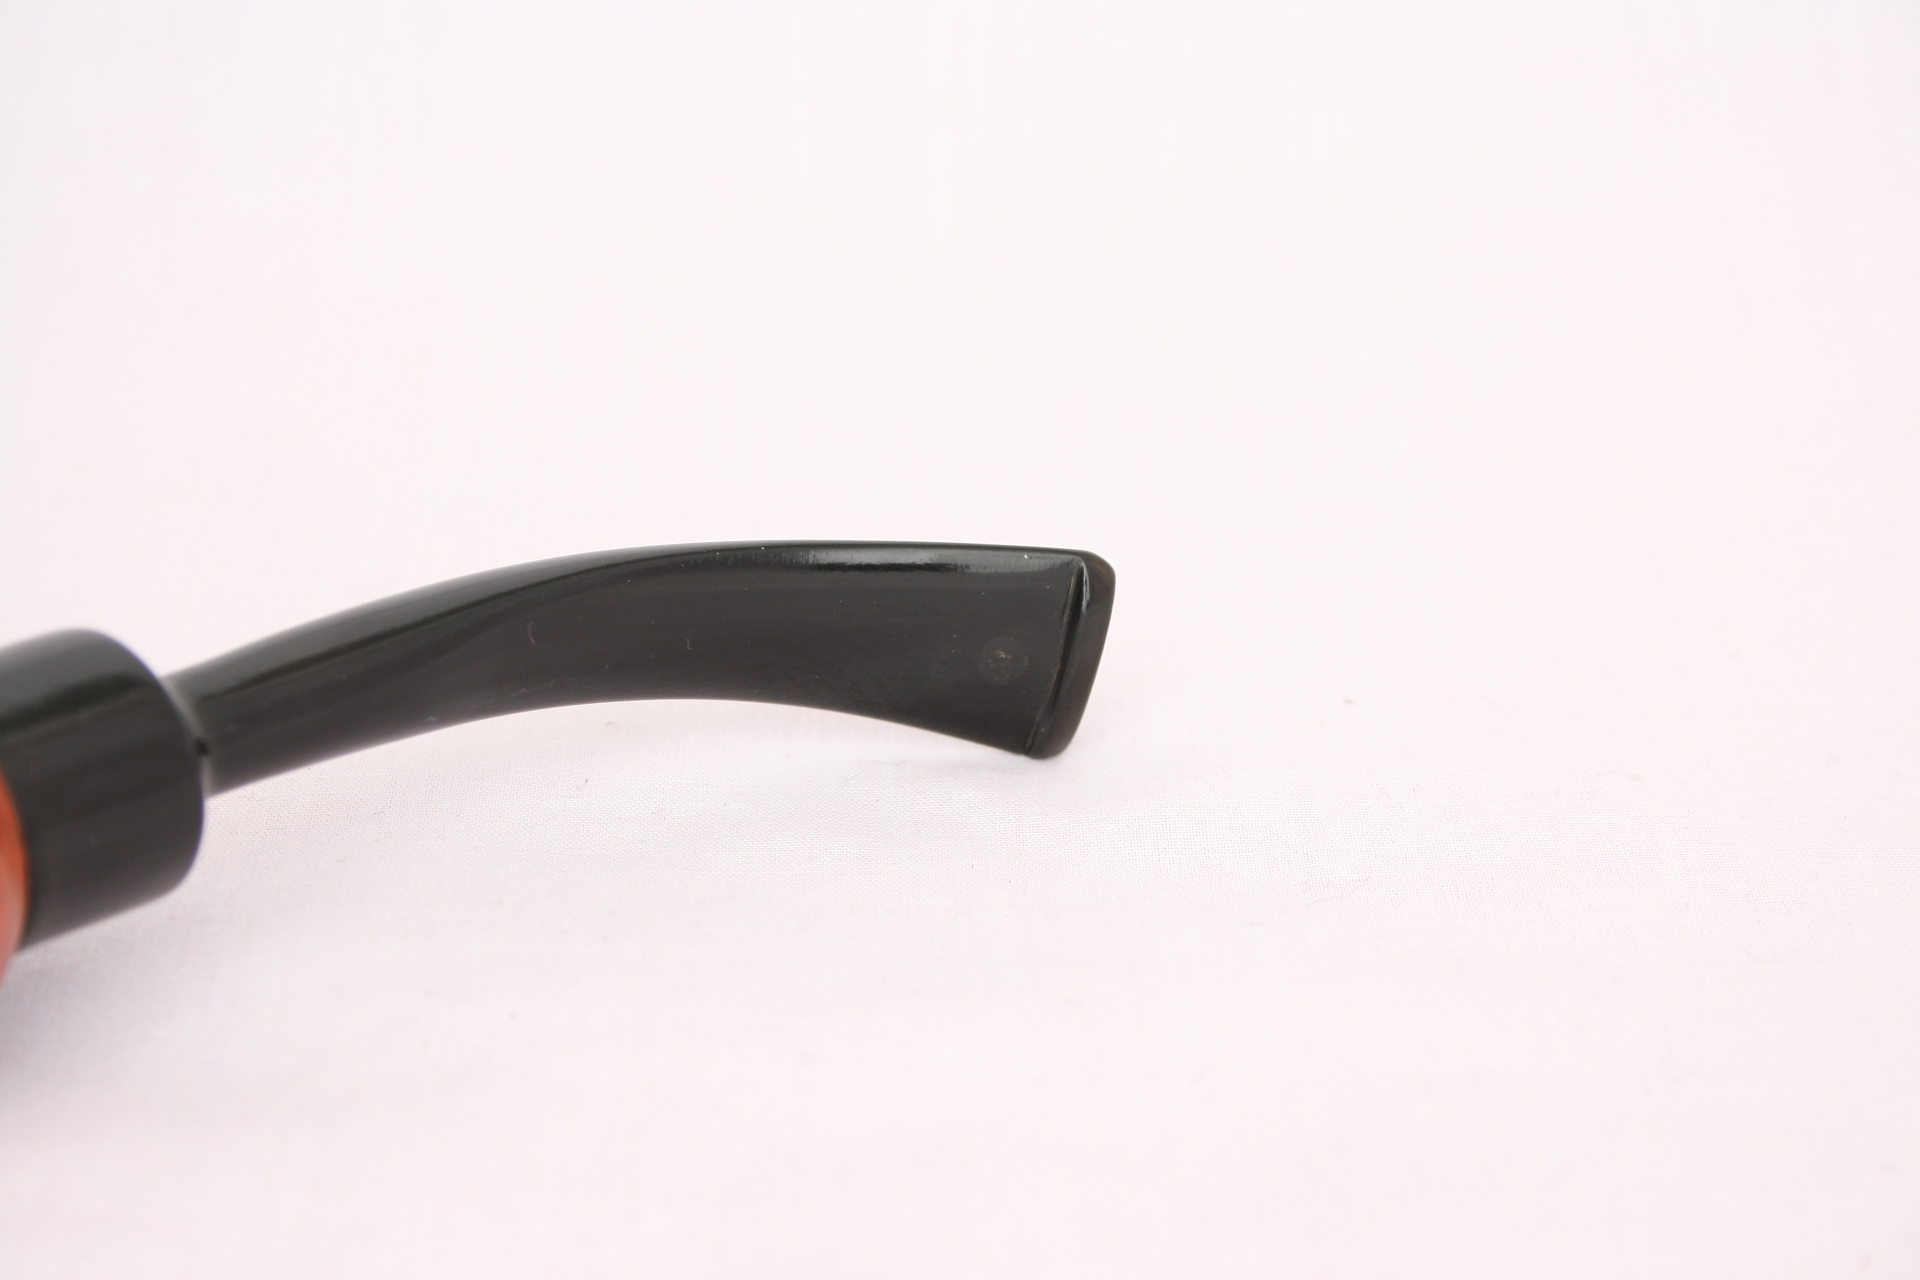
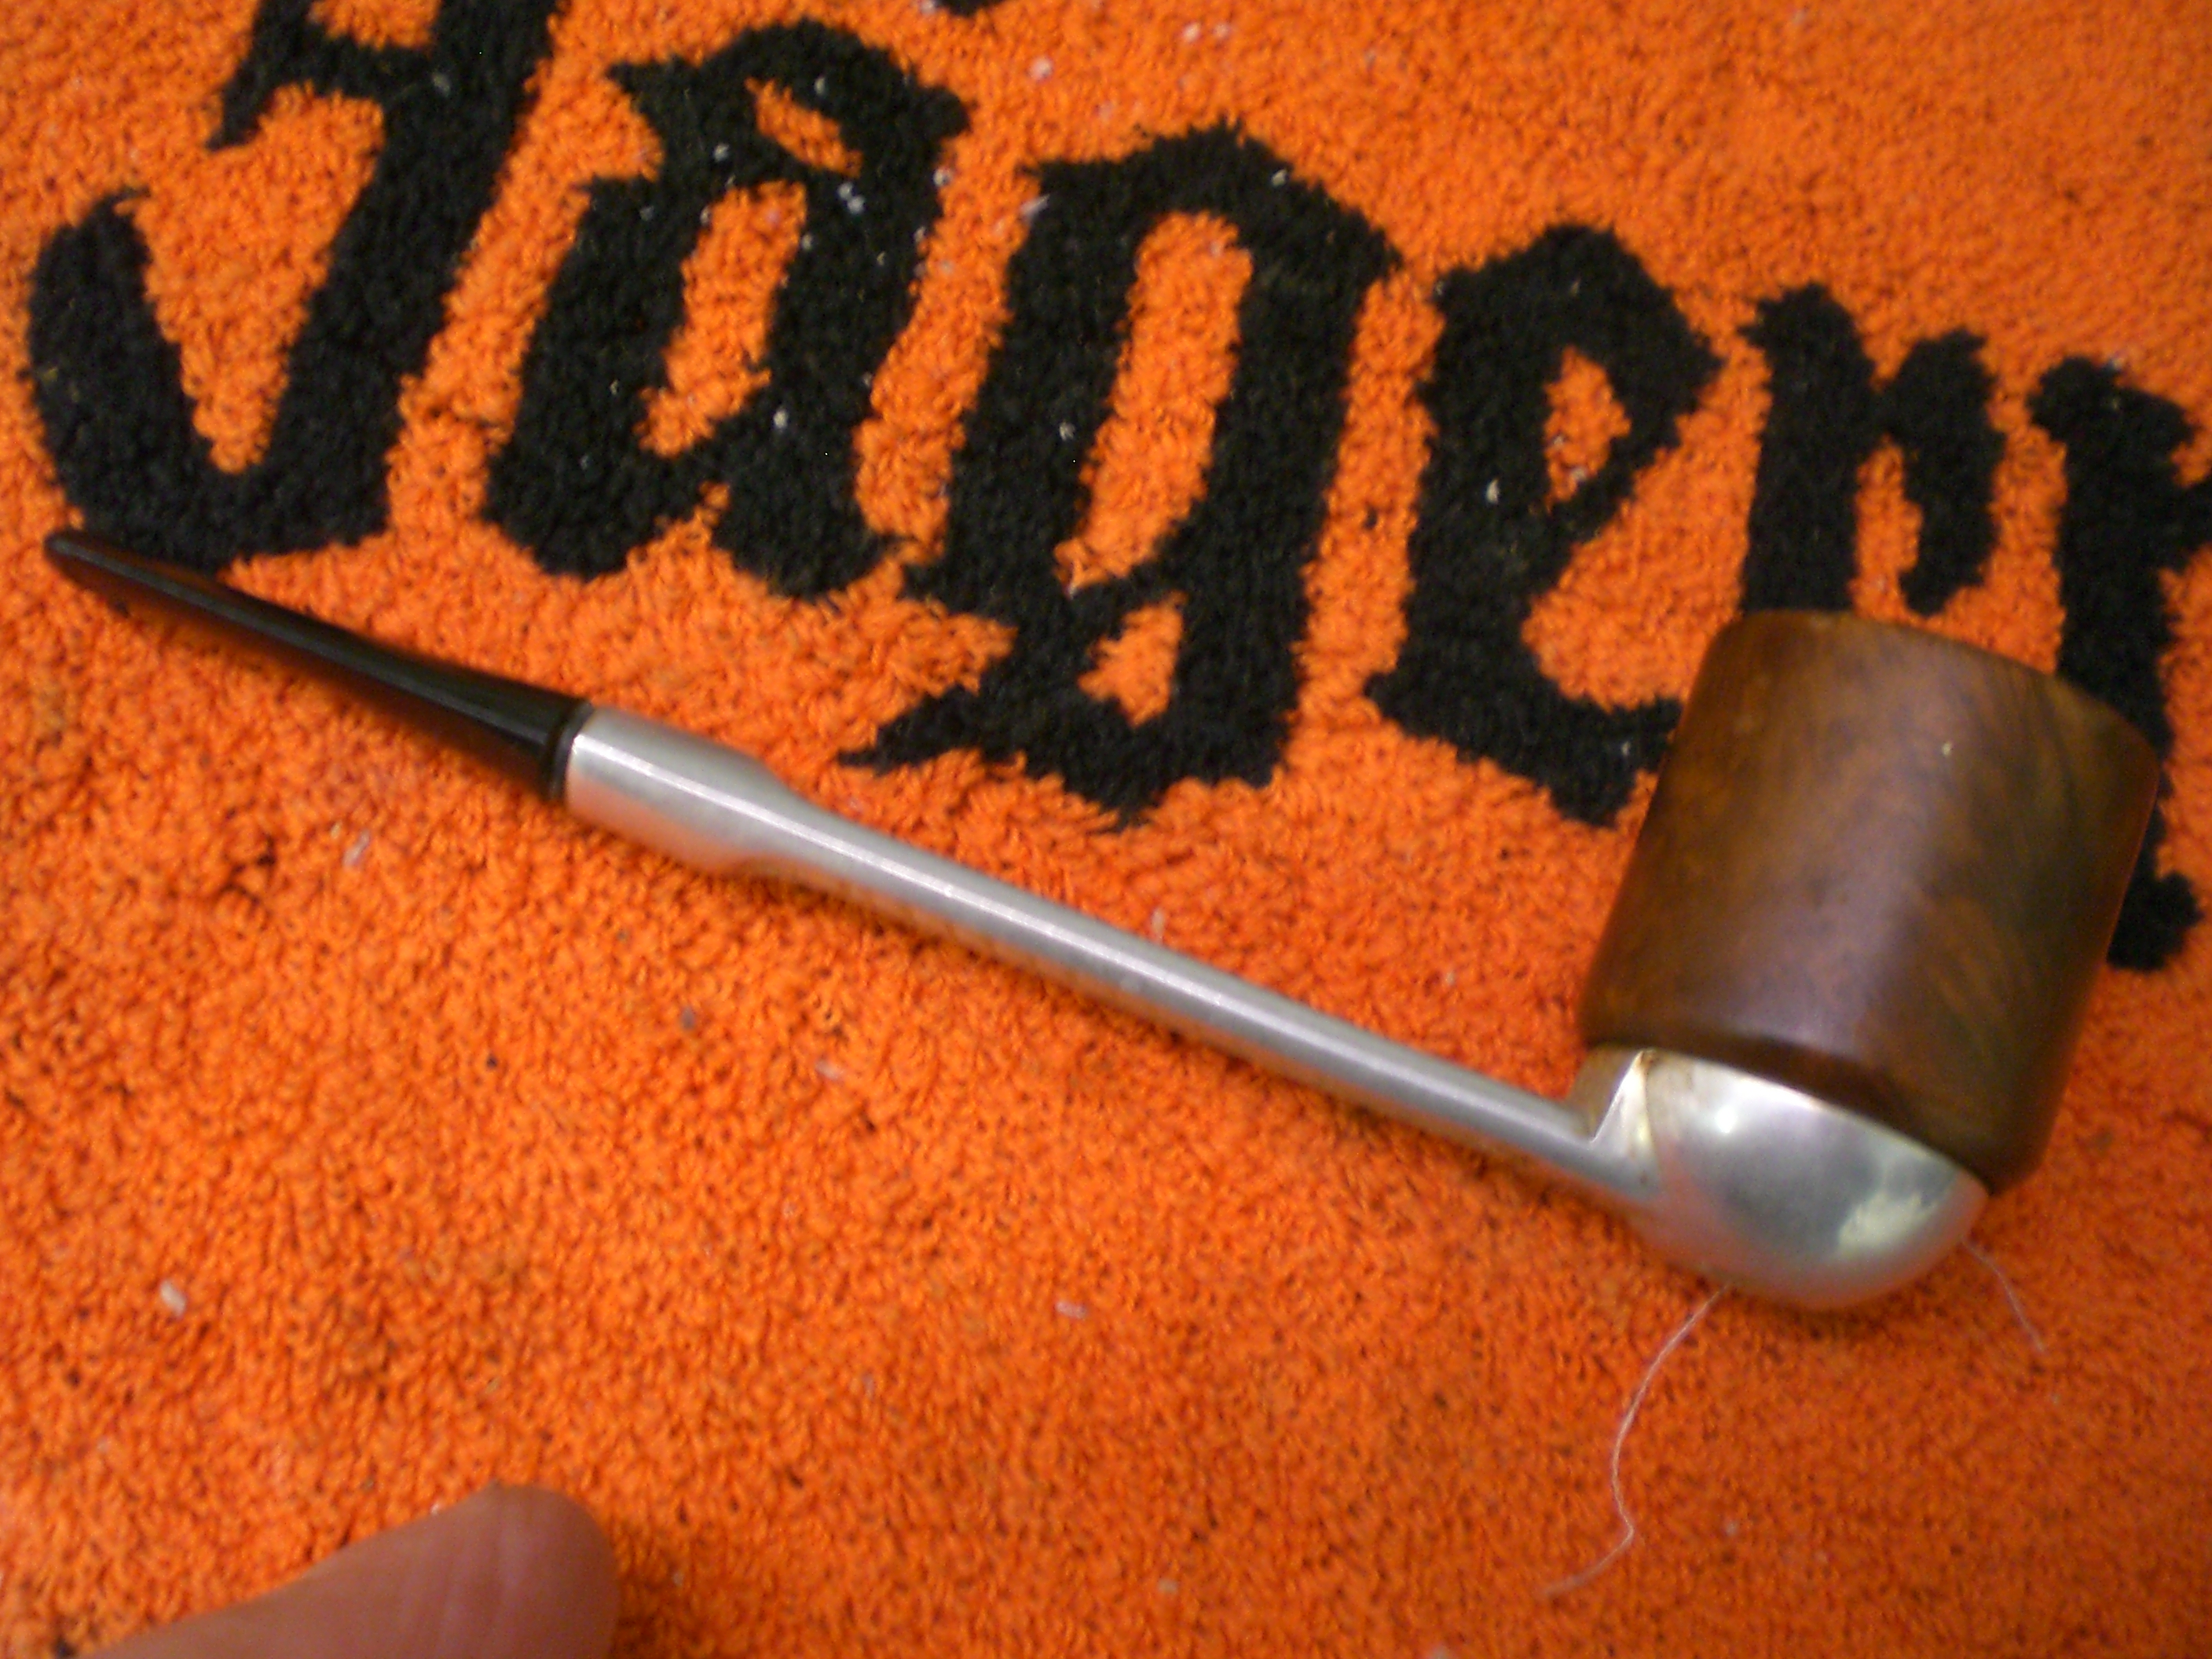
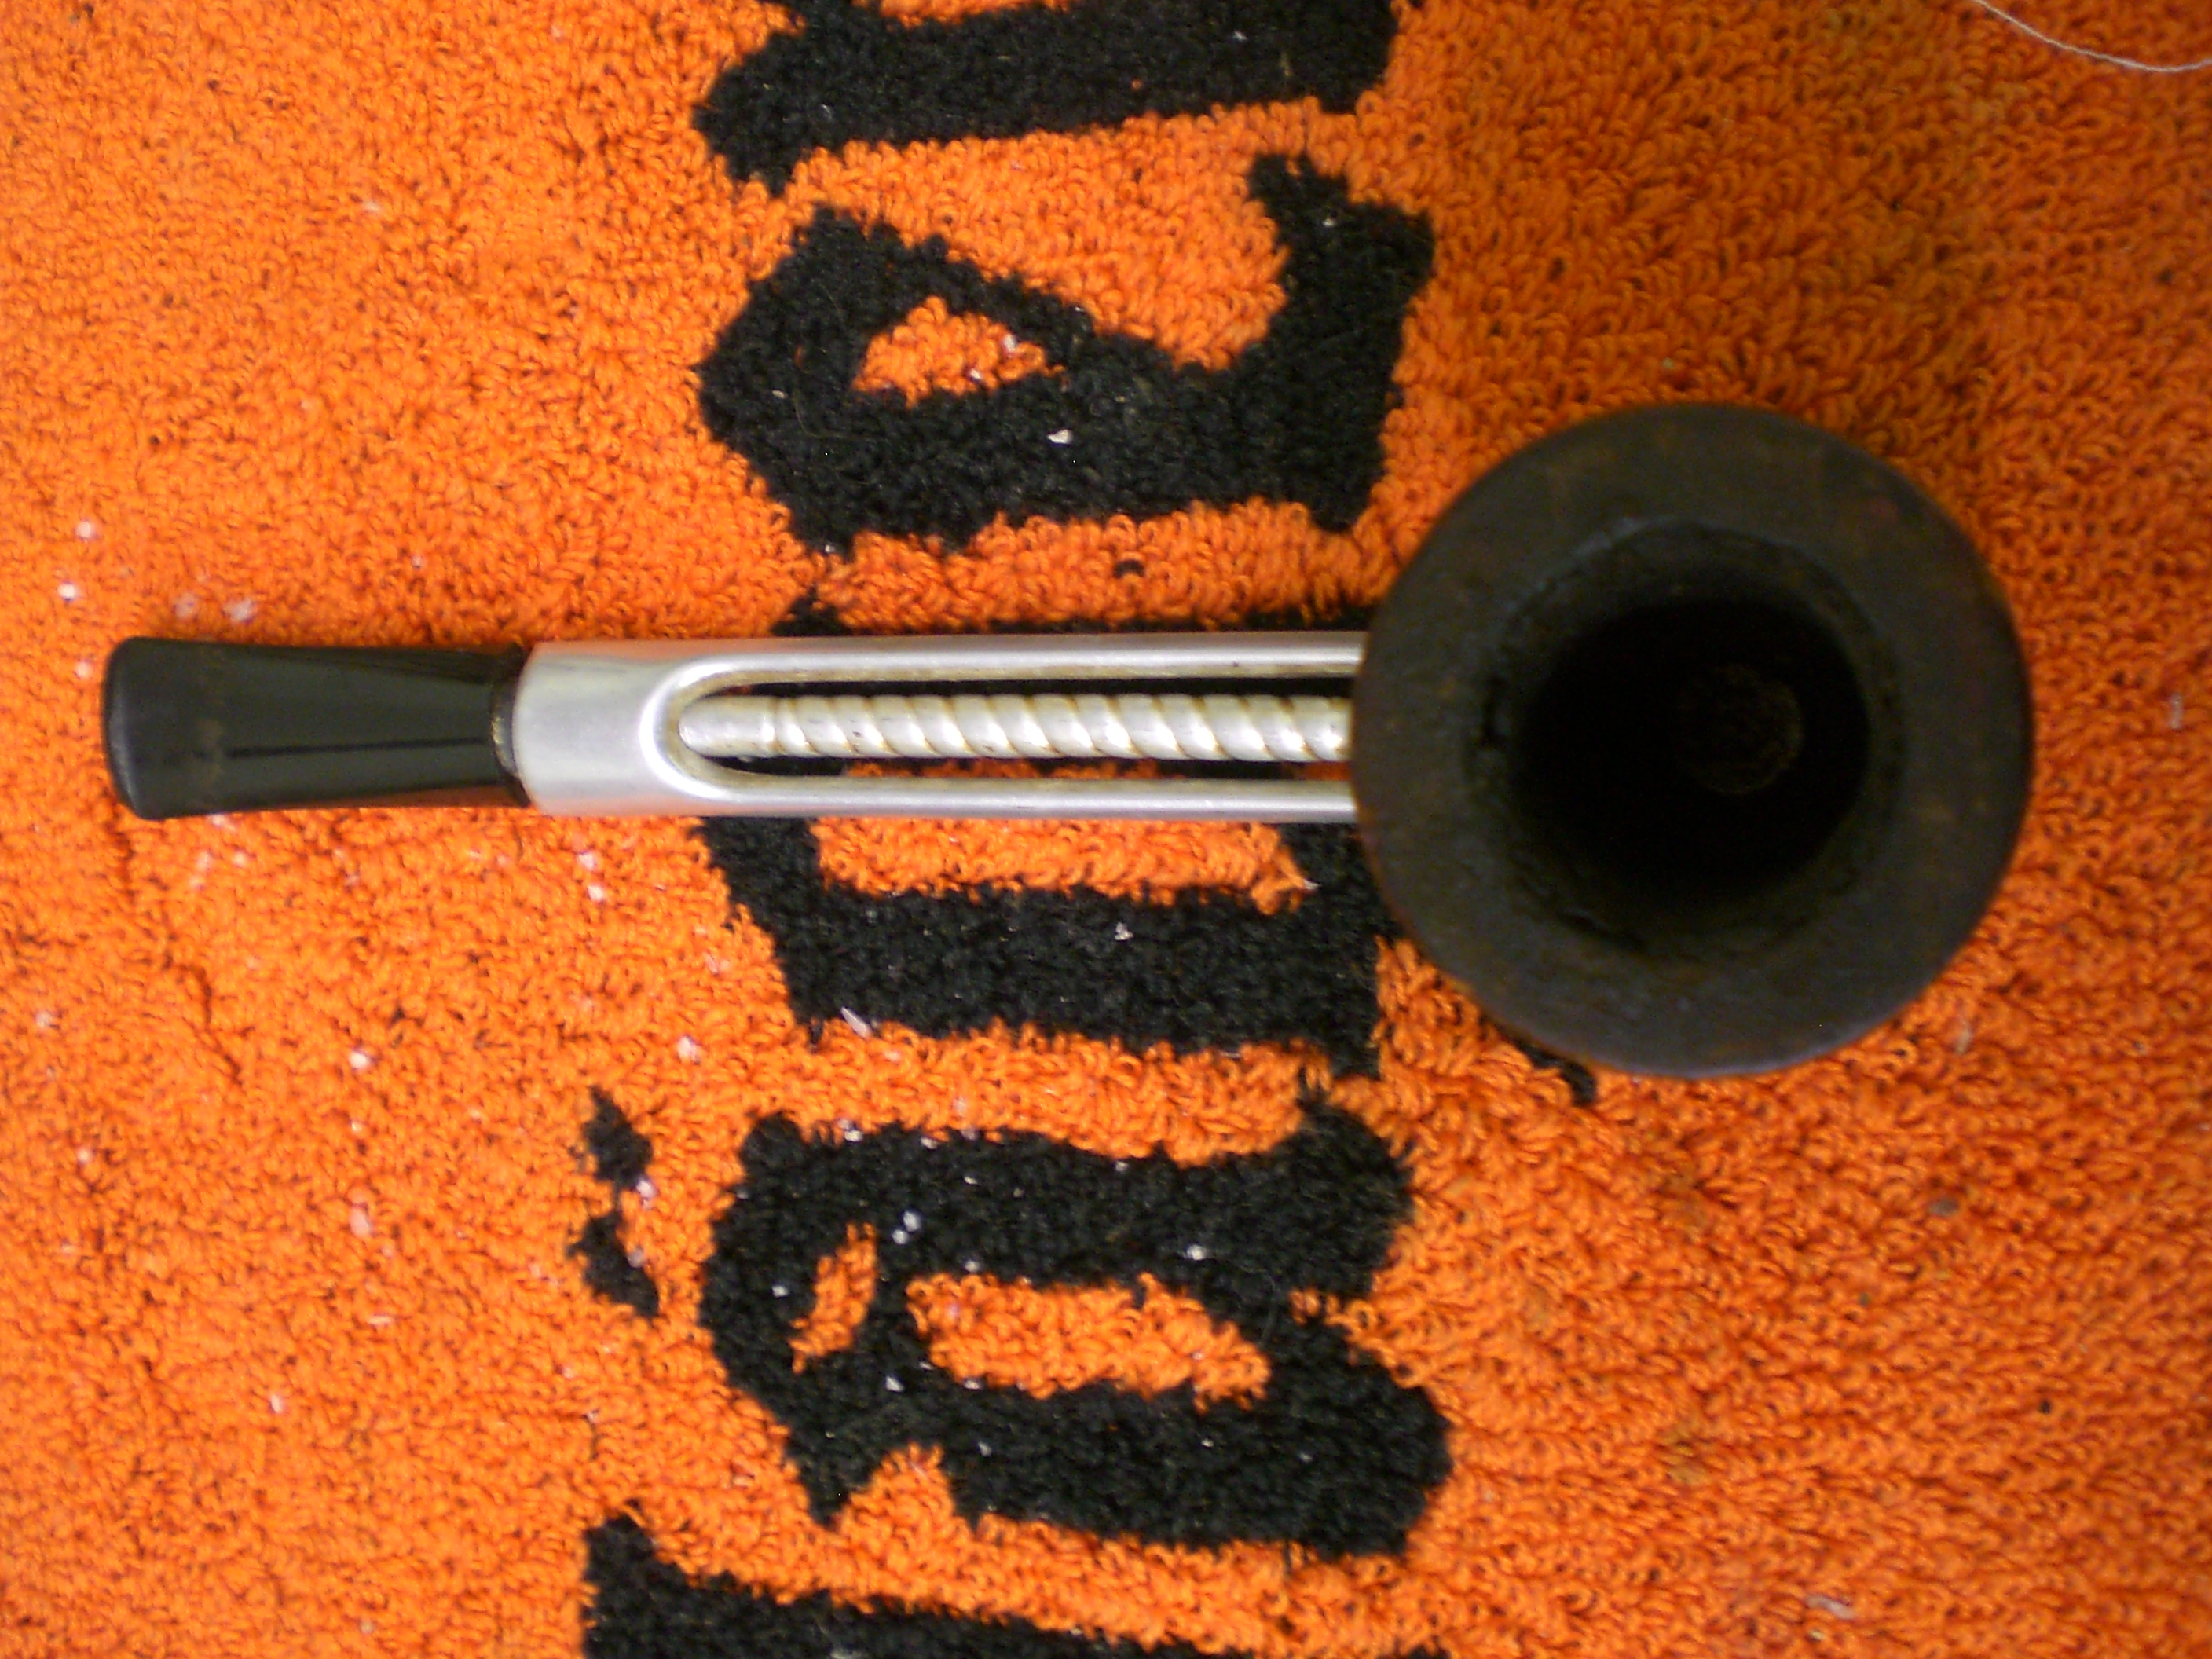
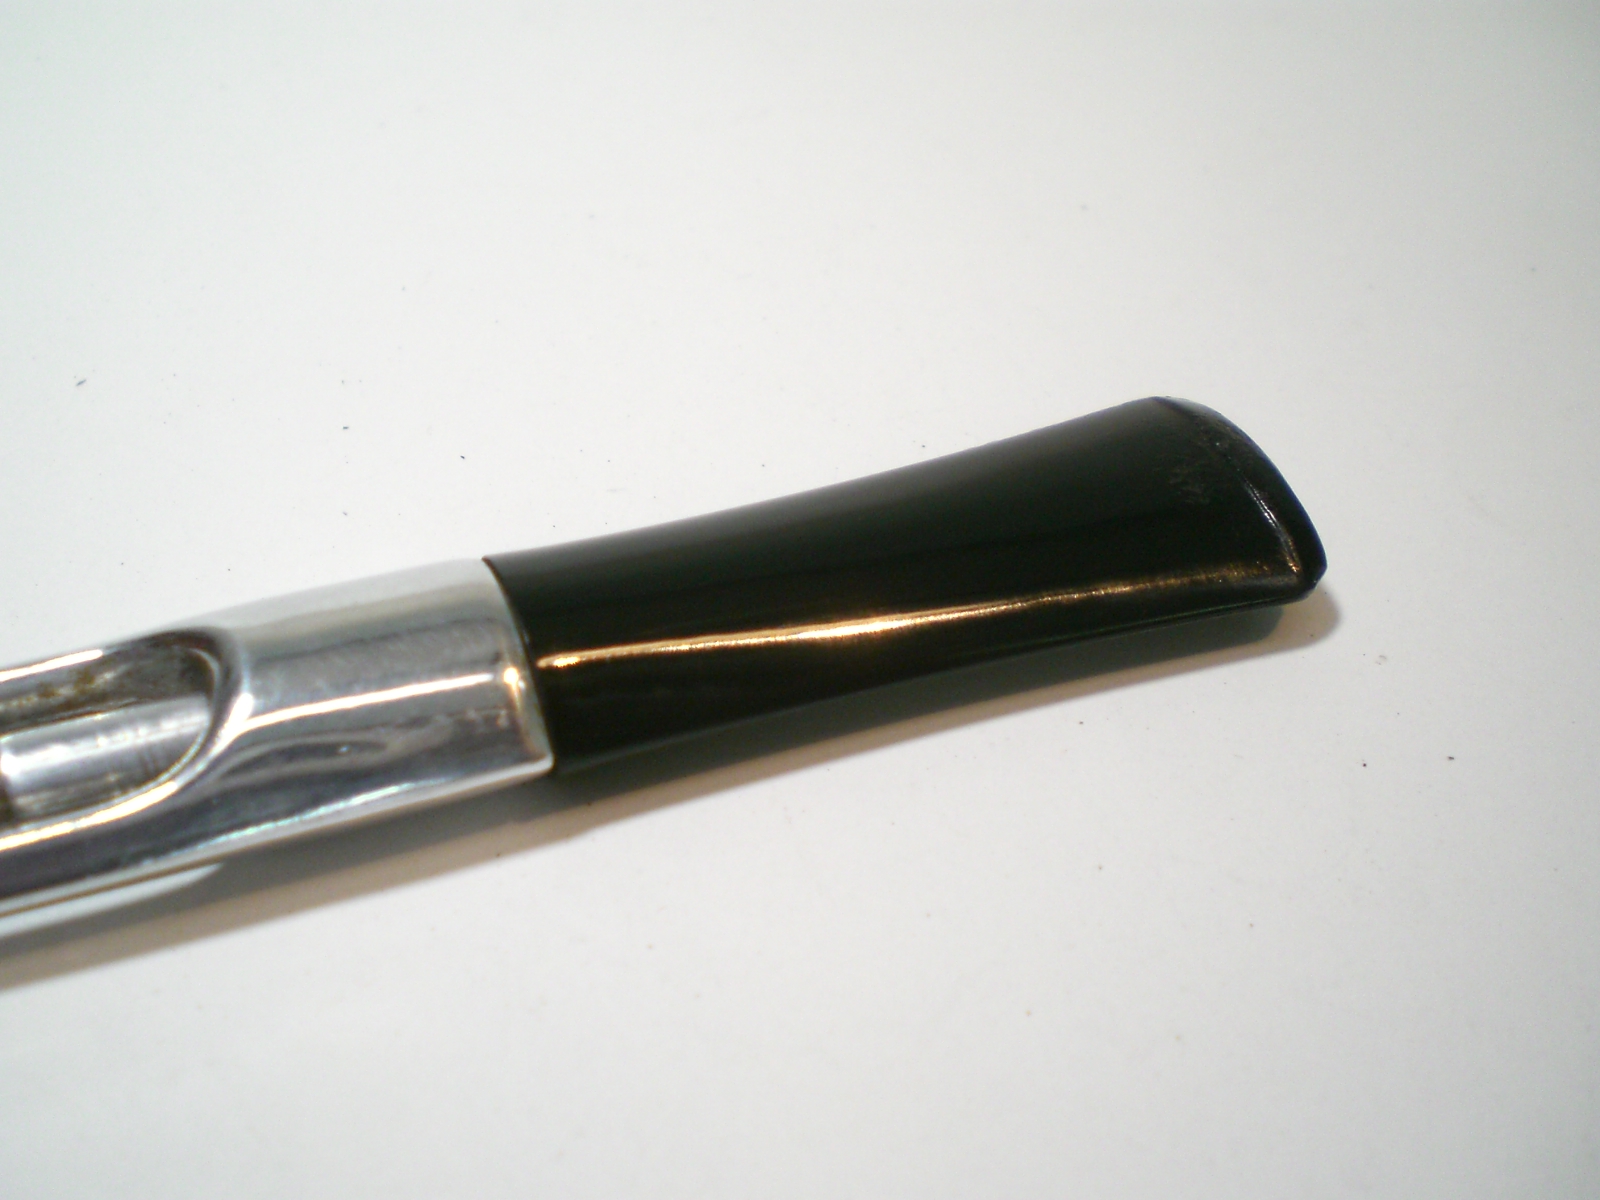
Lance took the pipe apart unscrewing the bowl and removing the stem and ramrod from the barrel. The valve at the end was stuck so we had to drive it out with piece of rod I have here. Once it was apart we each went to work cleaning the parts. Lance worked on the barrel and the valve cleaning the outside and the inside of the parts. I worked on the ramrod and the stem. He cleaned out the valve with cotton swabs, pipe cleaners and Everclear and also cleaned out the inside of the barrel with the same. He polished the barrel with silver polish to remove the oxidation and then we washed the barrel with a wash of black aniline stain to give it a bit of an antique look. I sanded out the tooth marks on the stem and polished the ramrod. Lance then sanded the stem with micromesh sanding pads from 1500-12,000 grit. Once the stem was polished he rubbed it down with Obsidian Oil and then we gave the stem a quick buff with White Diamond on the buffer. We rubbed Vaseline into the O-rings on the valve and the stem/ramrod then reassembled the pipe. We gave the entire pipe a light buff with carnauba wax and a soft flannel pad to polish it. Here is the finished pipe.
IMG_3559

IMG_3560

IMG_3561

IMG_3562

IMG_3564

When we finished we filled a bowl with well aged Balkan Sobranie Virginian No. 10 and retired to the porch to have a bowl and a visit. It was a great way to spend a grey Vancouver day and get to know my son in law a bit better. We are already planning more hunts and pipe refurbishing sessions. It is great to have someone working with me who is interested in learning the tricks of the hobby living so close by.

Restoring an LHS Certified Purex Pot


Blog by Steve Laug

This LHS pot was another gift from a friend in exchange for restemming his pipe. It is stamped on the left side of the shank Certified Purex in a convex arc and underneath is a concave arc stamped Imported Briar. In the middle the stamping is very faint but using a magnifying lens the remnants of a diamond with the letters LHS are barely visible. The finish was very dirty and the rim was blackened but not burned. The bottom of the bowl near the front was covered with dents and pin pricks like the pipe had been tapped or dropped on concrete. There was very little cake in the bowl. The stem had a screw mount tenon with an aluminum receptor on the end of the shank. The stem itself had an aluminum end on it with a push in stinger apparatus. The stem had deep tooth marks on the top and the bottom sides and was oxidized. On the left side of the stem was an aluminum diamond that was inserted in the stem.
IMG_3137

IMG_3138

IMG_3139

IMG_3140

I looked up LHS Certified Purex pipes on Google and found the following information. The first comes from http://www.pipephil.eu/logos/en/logo-lhs.html#certifiedpurex . Phil has a page on the LHS pipes. The L&H Stern Inc. was established by Ludwig Stern (1877-1942) in 1911. His brother Hugo (1872-?) acted as vice-president & secretary. The firm moved to 56 Pearl St. Brooklyn in 1920. It closed down in the 1960s. LHS was one of the main pipe suppliers for US soldiers during WWII. LHS had several seconds lines, two of which are the London Royal and the Stanhope. Phil included the two photos below. The first is of the diamond insert on the stem. The one I am refurbishing has the same diamond. The second is of the stamping on the pipe. The top photo which is a picture of the stamping reads Certified Purex over Imported Briar with the LHS in a Diamond inside the two arcs. This stamping matches the pipe I worked on.
lhs5blhs3a Pipedia also had information on the pipes from which I summarize some additions that were not included above. L & H Stern (LHS) of Brooklyn, New York. The company’s famous logo is in a diamond. These pipes are high quality production pipes. A popular and moderately priced pipe made from 1896 through the 1960’s by the L&H Stern Company of Brooklyn, New York. Many of their later Sterncrest pipes featured silver bands and some were made with 14kt. gold bands as well. The “Diamond” series appears to be their high-end line. They had a different logo which was 3 diamonds in a row, larger in the middle. They also had Allbriar models (stem and bowl both made of briar) in the Diamond line, and these tended to have a screw type fitment with stinger, like Kaywoodie or Dr. Grabows.

With this information I took the Purex pot to my work table. I took off the stem and dropped the bowl into an alcohol bath to soak while I worked on the stem. It sat in the bath for about an hour while I addressed the issues on the stem.
IMG_3141

I sanded the stem with 220 grit sandpaper to remove the calcification around the button and up the stem for about ½ inch. I also wanted to clean up around the tooth dents to see what I would have to do to fix them. In the next two photos below the dents in the stem are clearly visible on the top and the underside of the stem. Removing the calcification made the dents very clear.
IMG_3142

IMG_3143

After examining them with a magnifying glass I could see that they were dents. I was able to heat them and lift them to some degree and then sanded what remained after heating. The next three photos show the removal of the dents and remaining marks with the sandpaper.
IMG_3144

IMG_3145

IMG_3147

I sanded the stem with a medium grit “pink” sanding sponge that is visible in the photos below. This removed the scratches left behind by the 220 grit sandpaper. In these photos the dents are no longer visible. The sanding also removed the majority of the oxidation on the stem.
IMG_3148

IMG_3150

IMG_3151

I wiped the bowl down with acetone on a cotton pad to remove the finish before I worked on the pitting and marks on the bottom of the bowl. I steamed the dents and then filled the remaining marks with superglue to smooth them out. I sanded the superglue with 220 grit sandpaper to remove the slight bubble on the super glue and also followed up that with a medium grit sanding sponge. I wet sanded the bowl with 1500-2400 grit micromesh sanding pads.
IMG_3152

IMG_3153

IMG_3154

I stained the bowl with black aniline stain and flamed it to set it deep in the grain. I repeated the staining and flaming to make sure I got a smooth and even coverage on the undercoat of stain. The black understain does a great job in hiding the small fills that were in the bottom of the bowl.
IMG_3155

IMG_3156

IMG_3157

IMG_3158

I wiped down the stain with acetone to remove the topcoat and to highlight the dark grain pattern that remained. The dents on the bottom of the bowl are not visible in the fourth photo below. The grain shows through nicely. I sanded the bowl with 1800-2400 micromesh sanding pads to remove the scratches that were still visible in the finish.
IMG_3159

IMG_3160

IMG_3161

IMG_3162

I then stained the pipe with a oxblood stain for a finish coat. I applied the stain, flamed it and reapplied it and flamed it repeatedly until I had the coverage I wanted on the pipe. The next three photos show the rich overstain. The repairs to the pits on the bottom of the bowl are no longer visible.
IMG_3163

IMG_3164

IMG_3165

The stem had been slightly overturned so I needed to heat the tenon and turn it clockwise on the shank until it lined up again. I removed the stinger and then heated the tenon over a heat gun to loosen the glue in the stem. Once it was heated I screwed it into the shank of the pipe until it was aligned again.
IMG_3166

IMG_3167

I put the stinger back in place and wet sanded the stem with 1500-2400 grit micromesh pads and then dry sanded with 3200-12,000 grit pads.
IMG_3169

IMG_3170

IMG_3171

Once I finished sanding the stem I wiped it down with Obsidian Oil and rubbed it into the vulcanite. I polished the aluminum on the shank and the stem with the higher grits of micromesh and then with silver polish. I then took the pipe to the buffer and buffed the pipe and stem with White Diamond and then with multiple coats of carnauba wax to polish and protect it. The finished pipe is pictured below.
IMG_3173

IMG_3174

IMG_3175

IMG_3176

Reworking a Stetson Sport Zulu


This pipe was gifted to me in exchange for a bit of stem work that I did recently for a friend of mine. It came in a box with the pipe to be repaired and two others. It was a brand that I knew absolutely nothing about. The pipe was obviously American made and had a coat of thick varnish on the bowl that was beginning to flake and peal. I decided to do a bit of research on the brand to see if I could find any information on it.
IMG_3100

I found a document online for the John B. Stetson Company. Stetson is the manufacturer of Western hats but I was not aware that they also made pipes. One source seemed to point to the fact that the pipes were made by Marxman Pipe Company and branded with the Stetson name.

The document was written as a brand page for the company in application for a trademark. I have included that document below as I find the historical detail quite interesting. The source of the information is this website: http://www.legalforce.com/stetson-78583631.html I quote the following information in part from that site.

John B. Stetson Company

Absorbent paper for tobacco pipes, ashtrays not of precious metal, chewing tobacco, cigar bands, cigar cutters, cigar humidifiers, cigar tubes, cigarette cases not of precious metal, cigarette lighters not of precious metal, cigars, cigarillos, hand-rolling tobacco, humidors, match boxes not of precious metal, match holders, matches, non-electric cigar lighters not of precious metal, pipe pouches, pipe tampers, pipe tobacco, tobacco, rolling papers…

This is a brand page for the STETSON trademark by John B. Stetson Company in Mt. Kisco, NY, 10549. Write a review about a product or service associated with this STETSON trademark. Or, contact the owner John B. Stetson Company of the STETSON trademark by filing a request to communicate with the Legal Correspondent for licensing, use, and/or questions related to the STETSON trademark.

On Wednesday, March 09, 2005, a U.S. federal trademark registration was filed for STETSON by John B. Stetson Company, Mt. Kisco, NY 10549. The USPTO has given the STETSON trademark serial number of 78583631. The current federal status of this trademark filing is ABANDONED – NO STATEMENT OF USE FILED. The correspondent listed for STETSON is BARRY A. COOPER of GOTTLIEB, RACKMAN & REISMAN, P.C., 270 MADISON AVE FL 8, NEW YORK, NY 10016-0601. The STETSON trademark is filed in the category of Smoker’s Products . The description provided to the USPTO for STETSON is Absorbent paper for tobacco pipes, ashtrays not of precious metal, chewing tobacco, cigar bands, cigar cutters, cigar humidifiers, cigar tubes, cigarette cases not of precious metal, cigarette lighters not of precious metal, cigars, cigarillos, hand-rolling tobacco, humidors, match boxes not of precious metal, match holders, matches, non-electric cigar lighters not of precious metal, pipe pouches, pipe tampers, pipe tobacco, tobacco, rolling tobacco, smokeless tobacco, smoking pipe cleaners, sm.”

I also found the following stamping photos on Pipephil’s Stamping and Logos site: http://www.pipephil.eu/logos/en/logo-s12.html
Stetson

Armed with the information I found I tackled the cleanup and restoration of this American Pipe from John B. Stetson! The pipe is stamped Stetson over Sport on the left side of the shank and Imported Briar over Italy on the right side of the shank. The finish was very rough and peeling off the surface of the briar on the bowl where the hands held it. The rim had a thick cake of tars and oils. The inner edge of the rim was nicked and burned and was slightly out of round. The bowl was heavily caked with a soft carbon cake that was crumbling in places. The stem had screw on tenon and was over turned to the right. It had tooth marks on the top and the bottom side of the stem and oxidation on the entirety. There was an S logo stamped in the left side of the saddle. The stinger apparatus in the stem was tarred and dirty and the inside of the stem was slightly clogged with tars.
IMG_3099

IMG_3101

IMG_3102

I reamed the bowl with a PipNet reamer to take the cake back to bare wood. The crumbling cake toward the bottom of the bowl made this necessary so that the next owner can build up their own hard cake.
IMG_3103

I topped the bowl with 220 grit sandpaper on a board and took off the damaged surface of the rim. I also cleaned up the inner edge of the rim with a folded piece of sandpaper. I wanted to smooth out the damage to the inner edge and repair the out of round shape of the bowl.
IMG_3104

IMG_3105

I wiped the bowl down with acetone on a cotton pad. The thick coat of varnish was hard to break down with the acetone. I wiped it until I had softened the varnish and then sanded the bowl and shank with the 220 grit sandpaper and then a sanding sponge. The putty fills were shrunken and formed small divots in the bowl. I filled these with superglue and briar dust and then sanded them down when I sanded the bowl. After sanding the bowl down I wiped it again with acetone to remove the sanding dust.
IMG_3106

IMG_3107

IMG_3108

IMG_3109

I sanded the bowl with a fine grit sanding sponge and then wet sanded it with 1500 and 1800 grit micromesh sanding pads. Once I had a smooth surface to work with I stained the bowl with a black aniline stain and then flamed it with a lighter. I wanted to set the stain deep in the grain.
IMG_3110

IMG_3111

IMG_3112

When the stain was dry I wiped the bowl down with acetone on a cotton pad to remove the excess stain. I wanted the black to remain in the grain and highlight that while masking the fills.
IMG_3113

IMG_3115

I sanded the stained bowl with a medium grit sanding sponge to remove the excess. The next two photos show the bowl after sanding and then buffing with red Tripoli and White Diamond. The grain is standing out nicely from the black stain.
IMG_3116

IMG_3117

I restained the bowl with an oxblood coloured aniline stain and flamed it. I repeated the process until I had an even coverage on the bowl and shank. The next three photos show the bowl after staining with the oxblood.
IMG_3118

IMG_3119

IMG_3120

I sanded the stem with 220 grit sandpaper to remove the tooth marks on the top and bottom side of the stem. I followed that by sanding with a medium grit sanding sponge to remove the scratches left behind by the sandpaper.
IMG_3121

IMG_3122

IMG_3123

I put the stem back on the pipe and took it to the buffer and buffed it with Tripoli. I buffed the bowl and stem with White Diamond. The next photos show the pipe after the initial buffing.
IMG_3125

IMG_3126

I wet sanded the stem with 1500, 1800 and 2400 grit micromesh sanding pads and then dry sanded with the remaining grits from 3200-12,000. I rubbed the stem down with Obsidian Oil and the waited for it to soak in. Afterwards I hand buffed with carnauba wax.
IMG_3127

IMG_3128

IMG_3129

IMG_3130

The next series of four photos show the finished pipe. The interior is shiny and new looking and the pipe bowl has a good contrast stain. The stem is shinier and the oxidation is pretty well gone. The photo of the stem looking down on the top shows a little oxidation around the saddle area. That area has been problematic on this pipe. In the daylight the stem looks better than this night photo with lights. My guess is that the oxidation is still there and in the glare of the flash it is very visible. This pipe will make a nice addition to someone’s rotation.
IMG_3131

IMG_3132

IMG_3133

IMG_3134

Reworking A Previous Refurbishment – A Genod Rhodesian


In photographing my Rhodesian pipes last evening I was examining this pipe and decided to work it over again. It is stamped Genod on the left side of the shank and Iwan Ries & Co. on the right side. I wrote about the work on it in this previous blog post: https://rebornpipes.wordpress.com/2012/09/04/reviving-a-genod-shaped-like-a-9242-gbd/ I think I worked on it the first time quite a few years ago and have learned a few more tricks since I did that old pipe.

The four photos below show what it looked like when I started this time around. The burn mark on the top and side of rim was quite prominent. There was a slight dip in the outer rim edge of the burn. The stem had some tooth damage as can be seen in the last two photos.

Image

Image

Image

Image

The stem had some bite marks next to the button on the top and the bottom and there was oxidation along the edges. The angle of the button was not clean and had scratches and marks as well. I sanded the stem with 220 grit sandpaper, medium grit sanding sponge and micromesh sanding pads from 1500-12,000 grit. I wet sanded with the 1500-2400 grit and dry sanded with the the remaining grits through 12,000 grit. I buffed the stem with White Diamond and then rubbed it down with Obsidian Oil.
IMG_3080

IMG_3081

IMG_3088

IMG_3089

IMG_3090

IMG_3091

The rim was damaged from a burn and I had not done much with it above so I decided to gently top the bowl and sand the burn mark to try and minimize its extent. I sanded entire crown around the bowl above the two lines. Once the burn mark was a minimize as I could make it I sanded it with a medium grit sanding sponge and then with micromesh sanding pads. I restained the pipe with an oxblood aniline stain thinned 2:1 with isopropyl to get the colour I wanted for the bowl. I buffed it and waxed it first with White Diamond and then carnauba.
IMG_3082

IMG_3083

IMG_3084

IMG_3085

IMG_3086

IMG_3087

I reinserted the stem and buffed the whole pipe with White Diamond a final time and then gave the entirety several coats of carnauba wax. The photo below shows the finished pipe. It is far better looking now after the rework than when I took it from the cupboard.
IMG_3092

IMG_3093

IMG_3094

IMG_3095

Restoring an Older GFB Three Star Horn Stem Bent Bulldog


Blog by Steve Laug

The pipe below is one I bought off EBay because it looked like a challenge, that and the fact that it was another GFB pipe. This is the third GFB that I have in my collection. I love the way they feel in the hand and the elegant look of the curves and angles they have. I went back and reread my previous two posts on the GFB pipes I had refurbished to remind myself of their history. There I described the process of hunting down information on the brand. I summarize that here for those may not have read the other two posts. (https://rebornpipes.wordpress.com/2013/06/07/restemming-and-reclaiming-an-older-unsmoked-gfb-briar-calabash/ , https://rebornpipes.wordpress.com/2013/04/01/restoring-a-gfb-bent-billiard-another-reclamation-project/)

The first thing I found was information that the GFB brand was an older French Trademark and that it came from Saint Claude, France. A more focused search for GFB French Briar Pipes led to information that the stamping GFB stood for Great French Briar – something about that did not seem right to me so I continued to look and finally came across the following advertisement from a Sears Catalogue. It shows a full page of GFB pipes and the header says GENUINE FRENCH BRIAR. That made much more sense to me, and all three of my GFB pipes match the pipes in the catalogue. It was good to be reminded of the old brand. I am pretty sure that all three of my GFB pipes come from either the late 1890’s or the early 1900’s.
genuine-french-briar-pipes-on-parade

This third pipe was a charmer to me. When I saw the photos I decided I would bid to win it. The elegance of the old pipe caught me. The bowl appeared to be in good shape and it had a horn stem. The striations and colour of the stem was beautiful even in its oxidized state. The three photos below were included in the EBay sale. The third photo shows the underside of the stem and the damage to the underside near the button. It looked to be more than tooth marks or chewing. It actually looked like “worm” damage. From the photos it appeared to be localized to that part of the stem and was worth a chance. Worst case scenario, I would sacrifice the stem and restem the old pipe with a vulcanite stem.
GFB1

GFB2

GFB3

I find that photographing stem damage is difficult and my photos can be out of focus. But I now have a tripod to help with the clarity of the photos (did not get it until after I had started the repairs on this stem. Ah well sorry about the clarity of some of these). When the pipe arrived I took it apart and examined the holes on the end of the stem. Under the lens it was clear that it was not a worm hole at all. Rather it had been bitten and the stem had crumbled in that area. It did not go through into the airway so I think that the previous owner had scraped out the crumbled area of the horn stem for cleanliness and just kept smoking it. That was encouraging to me as it meant that I could repair and not worry about an old “worm” somewhere in the horn stem chewing his way out later! The next two photos show the extent of the damage to the area
GFB4

I cleaned out the open area with cotton swabs and Everclear, careful to not use too much of the alcohol on the horn stem. Once it was clean of debris and dust I decided to fill the area with a superglue gel rather than the usual liquid superglue I generally use (Photo 1). My thinking was that the gel would sit better in the large area without running all over the stem. There were also nicks on the sharp edges near the shank that I also repaired with the superglue gel (Photo 2). I layered the glue into the hole to build it up gradually (Photo 3) as each previous layer dried.
GFB5

GFB6

GFB7

Once the glued cured over night I sanded the area with medium grit emery paper to remove the high spots and smooth out the surface (Photo 1). I refilled the low areas on the fill to further level out the area. There was also a deep nick on the sharp edge of the shank. I cleaned that out and used the superglue to fill that as well. It would dry black but with the staining of the bowl that could be minimized and I wanted it smooth to the touch rather than the sharp cut of the nick that was previously present (Photo 2).
GFB8

GFB10

With everything glued I set the bowl and stem aside and went to work for the day. I would work on the patched areas when I returned home in the evening.

When I returned in the evening, the patches were dry and the pipe was ready to be worked on. I reamed the bowl with the PipNet reamer. On this particular pipe the bowl was conical so it took three different cutting heads on the T handle to ream the bowl to the bottom. With down I cleaned the bowl, shank and stem with Everclear, pipe cleaners and cotton swabs. I wanted the pipe cleaned out before I worked on the exterior.
GFB11

GFB15

The next two photos show the stem after the patches had hardened. Though the photos are a bit blurry, the shininess of the spots where the superglue patches were applied is very clearly visible. Those areas would need to be sanded smooth to match the surface of the surrounding horn.
GFB12

GFB13

I sanded the patch on the shank of the pipe with 220 grit sandpaper and also medium grit sanding sponge to remove the excess glue from the patch. Then I wiped the bowl down with Everclear on a cotton pad. I decided not to use acetone as the stamping on the shank was filled with a gold paint and was still visible. I did not want to damage that stamping. I carefully worked the Everclear around the stamping so as not to get any in the grooves of the stars and GFB stamp.
GFB14

GFB16

GFB17

GFB18

I sanded the patch on the stem with 220 grit sandpaper and then a medium grit sanding sponge to smooth out the patch. I continued to sand it with the micromesh sanding pads. I wet sanded with 1500-2400 grit and dry sanded with the remaining grits up to 12,000.
IMG_2645

GFB19

I buffed the stem with White Diamond on the buffer and the finished stem is shown below. The patch still shows some small holes that need to be repaired with superglue. The sanding and polishing made them very apparent in the first photo below. The patch at the sharp edge near the shank came out very well and is invisible. The horn of the rest of the stem has a deep sheen to it after all the sanding and polishing.
GFB20

GFB21

I unscrewed the stem and set it aside while I stained the bowl. I used a medium walnut stain mixed with linseed oil to stain this pipe. The colour is a rich brown with a slight red in certain lights. It matches the colour of the other GFB pipes that are in my collection. I buffed the bowl with White Diamond on the buffing wheel. Then I gave it a coat of carnauba wax and set it aside to work some more on the stem.
GFB22

GFB23

GFB24

GFB25

I was not completely satisfied with the stem patch so I sanded it next to the button some more and cleaned it out. I put some more of the superglue in the low spots and set it aside to cure while I went to work for the day.
GFB26

GFB27

When I returned the glue was hard and the patch a solid bubble on the surface of the stem. I sanded it with the medium grit emery paper and then 220 grit sandpaper to remove the over fill. I always over fill the spots as the glue shrinks as it dries. I have learned that it is easier to remove the excess than to continue to fill and sand repeatedly. I sanded it with a medium grit sanding sponge and then went through the grits of micromesh sanding pads again from 1500-12,000 grit. When I had finished I rubbed the stem down with Obsidian Oil and set it aside to absorb. Once done I buffed it on the wheel with multiple coats of carnauba wax.
GFB28

After buffing and polishing the horn stem I buffed the entire pipe with White Diamond on the buffing wheel to polish it then gave it multiple coats of carnauba wax to restore and preserve the shine on the horn and the briar. The finished pipe is back to usable with the stem patch taking care of the deep holes that were previously in the stem. The striated horn stem looks like new and the colouration of the horn goes amazingly well with the medium brown walnut stain. Other than the slightly visible patch the pipe looks like new. I intend to enjoy a bowl of some aged tobacco in a pipe that is far older than I am. I look forward to the day when I pass it on in trust to the next pipeman who will care for and cherish it. Sentimental? I don’t think so, just a realist who knows that this pipe has lived and will live longer than I.
GFB29

GFB30

GFB31

GFB32

A Dr. Grabow Special Rhodesian/Bulldog – A Makeover


The last of the pipes from the Ebay lot below was the one in the bottom left corner of the photo. It was stamped Dr. Grabow over Special over Imported Bruyere on the left side of the shank. The finish was a varnish or polyurethane coat over the briar. It was bubbling and crackling. There was water damage on the edges of the rim. The briar itself was in good shape with no dents or roughening on the rim. The rim was slightly darkened but no dents or dings. The bowl was slightly out of round from poor reaming but very workable. The stem was a mess with chew marks on the top and the bottom for about an inch up the stem from the button. The stem was made of nylon and not vulcanite. The tenon was a push style and not a screw in stem. There was a shovel like stinger in the end of the tenon. The stem was loose in the shank and there was significant debris and buildup in the shank and in the stem. The second photo below shows the pipe as it was in the pictures from the seller.
pipes1

pipes3

I took it to my worktable this evening and went to work on it. I took the stem out and began to sand on the bite marks on the top and bottom of it. The next series of five photos show the progress of smoothing out the stem by sanding. I began with 220 grit sandpaper and worked up to a medium grit sanding sponge. By the fourth and fifth photo the bite marks are gone and some sanding scratches remain that will need to be worked out with micromesh sanding pads. I recut the edge of the button on the top and bottom with a needle file to clean up the angles. That is also visible in the last two photos. I also removed the stinger and cleaned it with 0000 steel wool and then polished it with micromesh sanding pads.
IMG_2564

IMG_2565

IMG_2566

IMG_2567

IMG_2568

While I worked on the stem the bowl had been soaking in an alcohol bath to help loosen the varnish or urethane finish. My plan was to remove the finish totally and sand and restain the pipe once it was cleaned and sanded.
IMG_2569

IMG_2570

IMG_2571

The alcohol bath softened the finish so when I dried it off the finish was cloudy. I have found that with this kind of finish I can use acetone on a cotton pad afterward to further remove the softened finish. The next two photos show the bowl with the finish removed. There is some nice looking birdseye grain coming through. Once the briar was clean I reglued the metal decorative band back on the shank and let it dry.
IMG_2572

IMG_2574

I sanded the bowl with the medium grit sanding sponge and then with 1500-2400 micromesh sanding pads. The next series of four photos are a little out of focus but the cleaned surface of the briar is visible and the grain that was underneath the finish is quite nice. I was also able to remove the water marks/damage that was along the outer edge of the rim and down the side of the bowl in the process of the sanding. I also cleaned out the shank with cotton swabs and Everclear. I did the stem as well and cleaned until the cleaners and swabs came out clean and white.
IMG_2575

IMG_2576

IMG_2577

IMG_2579

While the glue dried I worked on the nylon stem. I was able to remove all of the tooth damage. I wet sanded it with 1500-2400 micromesh sanding pads and removed the majority of the scratches left behind by the sanding sponge. I continued to rework the stem with these sanding pads until all of the scratches were gone and the stem began to take on a shine. (Photos 1-2 below show a top and bottom view of the stem).
IMG_2581

IMG_2582

I dry sanded with the remaining grits of micromesh sanding pads from 3200-12,000 grit. The stem took on its original shine. The next series of four photos show the stem as it moves through each level of polishing.
IMG_2583

IMG_2584

IMG_2585

IMG_2586

I wiped the bowl down a final time with acetone on a cotton pad to remove the sanding dust and grit. I dried it carefully and then it was ready to stain. I decided to use a linseed oil and medium walnut stain on this pipe. I felt it would make the grain show well and give the bowl a good protective coat. I applied the stain and wiped it off, reapplied and wiped it until I got the coverage I wanted on the bowl. The next series of four photos show the stained bowl.
IMG_2587

IMG_2588

IMG_2589

IMG_2590

I buffed the bowl and shank on the buffing wheel lightly with Tripoli and then with White Diamond to give it a shine. I then buffed it with carnauba wax and gave it several coats to protect the wood. I did not buff the stem on the wheel as the nylon heats too quickly on the buffing wheel and melts. I have made a mess out of more than one nylon stem. It does not seem to matter how light a touch I use the wheel and the nylon stems do not work well together. I gave the stem a coating of Obsidian Oil and rubbed it into the stem. I then hand applied several coats of carnauba wax and hand buffed the stem with a shoe brush and a soft cotton cloth. The finished pipe is pictured below. All in all it is not a bad looking old Grabow. It is clean and should smoke very well.
IMG_2591

IMG_2592

IMG_2593

IMG_2594

Restoring a Bryson Metal Pipe with Two Bowls


I picked up this metal pipe with two bowls in an eBay lot recently. The shank shape and the two bowls intrigued me. I had no idea who had made the pipe but I bid on it because of some other items in the lot.
pipes4

pipes5

I decided to do a bit of research on the metal pipe on the great Smoking Metal website. It is a gift to the pipe smoking community looking for information on particular metal pipes that they come across or may have in their collection. The web address is: http://www.smokingmetal.co.uk/pipe.php?page=57
This is what I found out about the metal pipe pictured above: (credit given to the site above)

“This pipe was made by the Briarwood Corporation, Palo Alto, California; the BRYSON has number D120275 under the Bryson name on the pipe stem. There is a crosshead screw to attach the briar bowl to the stem. The end cap attaches to the mouthpiece by means of a rod through the length of the pipe, in which the air hole is close to the mouth piece. The stem is of polished duraluminum and hexagonal in cross-section.

The bowls are unusual in that they are not briar turned on a lathe, but briar wood, ground to a powder and compressed under very high pressure (no glue, heat or plastics are used, just pressure. It is claimed this produces a perfect bowl of aged briar every time with increased porosity. The varnished finish on the smooth bowl however is often very badly crazed.

Two bowls, one smooth and one rusticated, were supplied with the new pipe. The bowl retaining screw is ‘locked’ onto the bowl by a gasket and metal collar, enabling rapid replacement of the bowls without the need of a screwdriver. The corn cob bowl, in centre image, is another version, not sure if this was manufactured by Bryson, or a home workshop job.

The set here shown was available for $3.50 new, but in what year? Below that are pictures of adverts seen from 1946 magazine. The last photograph was of a possible derivative on eBay in 2003, although US patent D122042 seems to be this pipe, invented by Max Bressler, Chicago Ill 1940.

There are also other derivatives without the Bryson name stamped in the metal and variations on the shape and grooving of the stem. The pipe pictured with Pat Pend under the Bryson name has no grooves forward of the bowl and the front end cap is a larger thread than the other models, including my version with no name. 30 April 1940 US patent # D120275 Inventor Charles Rothman, Cleveland Heights, Ohio, assignor Briarwood Corp, also of Cleveland Ohio at that time.”
Bryson1

Bryson2

Bryson3

When the pipe arrived it was in pretty rough shape. The aluminum was oxidized on the barrel and the bowls were both very dirty and filled with cobwebs and built up grit. The rusticated bowl had not been smoked very much so it was clean on the inside underneath the dust and webs. There was no cake or tars. The smooth bowl was the exact opposite. The bowl was caked and the top of the rim was tarred and dented. In examining it I notice that the grain on the smooth one was peeling and fading in places – it was a decal and not truly grain. I could also see the composite make up of the pipe bowl as described above. This was strange looking material – similar to my Medico Brylon but also a lot like particle board that is used in building. This was going to be a fun piece to clean up and restore. The metal barrel was unstamped but the lines on the barrel match the photos above perfectly.

I was able to take it apart, which sounds normal but I have found that on these metal pipes that are in this condition the end cap and bowl are often welded together with tars that make breaking it free and taking it apart virtually impossible. The four photos below show the state of the parts once the pipe was disassembled. The bowl each had a screw in the bottom of the bowl with a hole in the center and a cap on the bottom of the bowl that was inset. The bowls thus could be quickly interchanged. The apparatus on the inside consisted of an end cap, a long pin that was threaded on both ends – into the cap and into the tenon on the stem, a nylon stem and in this case a paper filter slid over the pin. The pin was not hollow but acted as the connection that held the stem in place in the aluminum barrel. The end cap was inserted on one end with the pin extended the length of the barrel and the stem screwed onto the pin and tightening against the barrel. Without the end cap and pin in place the stem did not stay in place.

The inside of the barrel had a dark lacquer of tobacco juices that had hardened on the walls. The pin and inside the cap and tenon the same dark amber lacquer was hardened. This was going to be a challenge to clean up. The pressed briar bowls would also not be easy to clean as I was afraid of using alcohol on them for fear of decompressing the material with moisture.
IMG_2378

IMG_2379

IMG_2380

IMG_2381

I took apart the smooth bowl in order to ream and clean it. The next two photos show the parts of the bowl. You can see the hollow screw, the insert cap and a small washer. From all appearances the washer was an addition to the set up done by the previous owner. I appeared to me that the bowl had been over tightened and the cap pressed to deeply into the bowl for a tight fit. The washer took up the excess space and allowed the bowl to be tightened. In the second photo the top edge of the rim can be seen with the dents and damage visible.
IMG_2383

IMG_2384

I cleaned the screw and the washers with Everclear and cotton swabs to remove the lacquer buildup. I reamed the bowl with the largest cutting head of the PipNet reamer set as the bowl is quite large. In the first photo below the damaged finish is also visible. Once I had reamed the bowl I topped it with my usual method – a piece of sandpaper on a flat board. I twisted the bowl surface against the sandpaper until the damage was removed. Once done the composite nature of the bowl material was very visible.
IMG_2385

IMG_2386

IMG_2388

Cleaning out the barrel and all of the metal internals was labour intensive. It took many pipe cleaners, cotton swabs and Everclear to get the pipe barrel clean. I used cotton bolls that I twisted into plugs, dipped in Everclear and rammed through the barrel – just like cleaning a rifle. In the photos below you can see some of the plugs and swabs that were used. Once I had scrubbed the surfaces clean inside the barrel I worked on the pin, tenon and end cap. I used 0000 steel wool to clean the aluminum surface and brighten it.
IMG_2389

IMG_2391

IMG_2392

The nylon stem had a deep tooth mark on the top and on the underside of the stem. I sanded the stem with 220 grit sandpaper and then a medium grit sanding sponge to remove the tooth chatter and the calcification on the stem. I wiped it clean with Everclear to remove the sanding dust, cleaned the inside with Everclear and picked out the debris in the tooth dents. Once they were clean and dry I patched the dents with a drop of clear superglue. Because the colour of the stem is more of a grey black the black superglue did not match. The clear superglue was transparent and when dried and sanded was invisible.
IMG_2393

IMG_2394

IMG_2395

IMG_2396

IMG_2397

I set the stem aside to let the superglue spot patches to cure before I sanded them smooth. While it was drying I restained the bowls with a dark brown aniline stain applied with a cotton swab. I applied it and flamed it to set it. I was not sure the stain would take on the smooth bowl as it seemed to have a varnish coat on the surface and the grain pattern was a decal. Once it was dry I would give it a light buff and see if it took.
IMG_2399

IMG_2401

I set the bowls aside and worked on the superglue patches on the stem. I sanded them smooth with 220 grit sandpaper and then followed that by sanding with a medium grit sanding sponge. The next series of four photos show the process of blending in the repair.
IMG_2402

IMG_2403

IMG_2404

IMG_2405

Once I had blended the patch into the surface of the stem it was time to sand it with the micromesh sanding pads from 1500-12,000 grit. I decided to sand both the stem and the aluminum barrel at the same time. I wet sanded with the 1500—2400 grit pads to minimize the scratching on both and then dry sanded with the remaining grits. By the end of the process the patch was invisible and both the stem and the barrel shone.
IMG_2406

IMG_2407

IMG_2408

IMG_2409

IMG_2410

IMG_2411

IMG_2412

Once I had finished with the micromesh sanding pads I reassembled the internals, stem and the barrel. I gave it a light buff with White Diamond. A light touch is necessary in order not to turn the buffing pads black with the metal as it is polished. I took it back to the work table and hand applied wax and hand buffed it with a soft towel. The next two photos show the finished barrel and stem.
IMG_2413

IMG_2414

When the bowls had dried I buffed them with White Diamond as well. The rusticated bowl worked well and the shine came up on it with no problem. The smooth bowl was another story altogether. As I buffed it the finish came off in pieces. The varnish coat lifted and along with it the decal. The grain coat disappeared. I then gave it a clean buff with red Tripoli to remove the coat in its entirety. I hand sanded the bowl with the medium grit sanding sponge. Once the surface was clean I wiped it down with an alcohol dampened cotton pad. I then used a permanent black marker to draw grain lines on the surface of the bowl. These looked horrible after I had applied them but with some sanding with micromesh sanding pads and the sanding sponge I was able to lighten them and they began to look more natural. I then restained the bowl with some linseed oil and cherry stain. The photo below shows the finished surface of both bowls.
IMG_2415

When the bowls had dried I tried screwing each bowl to the barrel to make sure they fit well. I coated the rusticated bowl with Halcyon II wax and gave it a light buff with a clean flannel buffing pad. The smooth bowl I coated with carnauba wax and lightly buffed with the flannel buff as well. The finished pipe is pictured below with each of the bowls in place. I am pleased with how it turned out. In evaluating the amount of work to keep it clean, I am not sure I will ever smoke this one. It may well end up in the display cupboard as part of my oddities collection.
IMG_2416

IMG_2417

IMG_2418

IMG_2420

IMG_2421

IMG_2422

IMG_2423

IMG_2424

Repairing Deep Tooth Marks and Bite Throughs on Vulcanite Stems – AJ Verstraten


Blog by AJ Verstraten

It is with pleasure that I post AJ’s second post on rebornpipes. AJ is known to the online community as Bananabox-Ninja.

Greetings, today a small post about the use of black super glue on a few pipes I had previously cleaned and refurbished; before I found Rebornpipes. This did give me a small problem as I did not extensively take pictures of the process as I had no reason to share the process at that moment and as such I am missing a few ‘before’ pictures.

The pipes I revisited for this project were:
– 11 Wahl Filtro
– Lorenzo Elba
– Machiavelli Como
– BBB Medina
– Spitfire by Lorenzo Riviera
All of them had bite marks on the mouthpiece and the Riviera had even been bitten clean through.

Lorenzo is a good Italian brand that is quite popular in Germany. The BBB Medina is an old English made pipe that has a good reputation here in the Dutchlands. The Wahl and the Machiavelli pipes are a mystery to me. I can find some eBay listings for them but I cannot pinpoint their true origin.

First up the pictures I did have of the before process.

BBB Medina
001 BBB Before

Lorenzo Elba
002 Lorenzo before

11 Wahl
003 11 Wahl Filtro before

As these pipes had already been waxed I first removed the wax layer using my motor, water and grinding wheel. This only took a few moments, after which I used a cotton swab and some alcohol to really clean the surface of the mouthpiece.
004 Wax removed

The following steps I repeated a few times as I found I was a little impatient in the drying process, I advise to let the glue set for a night just to be sure it is dry to the core.

Using a piece of cardboard dipped in Vaseline (sorry no pictures) I closed the hole in the Riviera mouthpiece and with cotton swabs and toothpicks applied the glue to the bite marks on all the other mouthpieces.
005 Glue applied

When the glue had dried I used 600 and 1000 grit sanding paper wrapped around a model file to sand off the excess glue and smooth the mouthpiece.
006 Top and bottom after sanding

I checked the smoothness using my mouth and tongue and although in all cases it felt smooth I noticed that in taking the pictures of the finished product the glue spots are visible. This bothered me, like when I sand a round shoulder or edge on the stem. A casual observer will not notice this, but I know it is there and it will bother me. However I decided against re-sanding them in the hopes of getting them perfect. Because in the end it is my lips and tongue that are handling the mouthpiece the most, not my eyes 

To finalize this short post here are the finished mouthpieces, pipes and the tools I used for this project.

11 Wahl Filtro
007 11 Wahl Filtro

008 11 Wahl Filtro

Lorenzo Elba
009 Elba mouthpice finished

010 Lorenzo Elba

Machiavelli Como
011 MAchiavelli Como finished mouthpiece

012 Machiavelli Como

BBB Medina
013 BBB Mouthpiece finished

014 BBB Medina

Spitfire by Lorenzo Riviera
015 Spitfire by Lorenzo Riviera Mouthpiece

016 Spitfire by Lorenzo Riviera

Tools used during this project
017 Tools used

Falcon Restored


Blog by Al Jones (aka “upshallfan”)

We had some glorious weather in the Maryland/Virgina area in September and one beautiful Sunday, the wife and I drove down to Winchester, VA in the MGB. We toured Patsy Cline’s home (that has been on our list). Winchester is also home to JB Hayes Tobacconist, a fine pipe shop. I didn’t find anything there, but we also made several antique/junk shop stops as I was on the hunt for an old cabinet to re-purpose for my pipe collection. I didn’t have any luck with a cabinet, but did spy this old Falcon in a case. For a few bucks, it was mine ($3 from memory).

The bowl top was pretty beat up and scorched, but the rest of the pipe and stem looked in decent shape. I had never seen a metal pipe in person to this point and was curious as to how it was assembled or if it held any restoration challenges. Here are some pictures of the pipe as I found it.

Falcon_Before

Falcon_Before (1)

Falcon_Before (2)

Falcon_Before (3)

The pipe broke down without drama and the bowl top screwed off nicely, but the threads were just about perfect. I reamed the bowl, which has a fairly thick cake. The bowl was quite tall and I thought it would look best topped and refinished. I sanded the bowl top smooth with some 320 grit paper flat on my workbench, followed by 800 grit wet paper, using water. I immersed the bowl in a shot glass full of isopropyl alcohol, you can’t do that with a briar pipe!

Falcon_Progress (2)

While the pipe bowl was soaking, I turned my attention to the metal bowl and stem. The stem had some teeth abrasions but no real dents. To me, the stem was somewhat “plasticky” but the fellow who ended up purchasing this one said they are quite durable and clenching doesn’t seem to harm them. The bottom of the metal bowl had some mild build-up, which I removed with some fine steel wool. I buffed the metal parts with white diamond and then red rouge. The metal shined up nicely, but I suspect will dull quickly over time.

Falcon_Progress

Falcon_Finished (6)

Falcon_Progress (1)

I used 1500 and then 2000 grit wet sandpaper on the stem and was able to remove most of the abrasions. I then polished it with 8000 and 12000 grit micromesh cloth. It was also buffed with white diamond.

Falcon_Finished (1)

Once the bowl was soaked, the stain sanded off nicely with 800 grit paper. This revealed a number of fills. I decided a two-stage stain would cover up those fills nicely. I warmed the bowl with a hair dryer, then applied a full coat of black stain. I lit the stain with flame to “set” it into the grain. After it dried, I sanded the stain off with alcohol and 800 grit paper. I then removed more of the black stain with tripoli on the buffer. A very light, almost transparent coat of brown stain was applied over the black.

Falcon_Progress (3)

Falcon_Progress (5)

Once dry, the bowl was buffed with white diamond and then several coats of carnuba wax. I’m very pleased with the finish and the two stage stain hid the fills nicely.

Falcon_Bowl_Pix (2)

Falcon_Bowl_Pix (1)

Falcon_Bowl_Pix

Falcon_Finished (2)

And finally the finished pipe.

Falcon_Finished

Reworking a Unique Nylon “Vikingish” Pipe


Blog by Steve Laug

When I saw this old pipe in the rack at the antique mall I wanted it because of its uniqueness. The price was also good – $9.95. I figured at that price it was like buying a corn cob pipe and certainly would function in the same capacity for me. This one had a nylon base and stem with a briar bowl that screwed into the base. Dr. Grabow bowls fit this pipe base perfectly but Falcon bowls do not fit. The only stamping on the pipe is on the bottom of the base where it reads Nylon. In researching this pipe on the net I was unable to find any pertinent information. When I posted it on Pipe Smoker Unlimited Forums I got a suggestion and a link to the Smoking Metals site. Low and behold the link took me to the exact pipe base as the one I had found. Here is the link: http://www.smokingmetal.co.uk/pipe.php?page=60 The pipe pictured has a far better bowl than the one that I found. What I found interesting was the information that was on the site regarding this pipe. I am copying it verbatim:

“No makers name, simply the word ‘NYLON’ on the base of the stem under the bowl. The briar bowl is Viking style, accepting all Dr Grabow Viking and Koolsmoke bowls. The bit can be varying colours and not always vulcanite so often severely damaged. The stems can be silvered or in gilt, or even painted, but it is not known if this is how they left the manufacturer. Among names sold under is Forecaster Superline. US Patent# 179,373 Inventor Berenson would seem to apply.”

This pipe was in good shape. The stem is attached and not removable. It had some tooth chatter but no tooth marks or bites. It was made of nylon and not vulcanite even though it is black. The base itself is an opalescent white colour and showed tobacco stains in the base and the shank. The bowl was unfinished and showed tooling marks from the turning on the lathe. There was a slight uneven ridge on one side where the top of the bowl curved upward. There were rough spots all around the bowl and the finish was unsanded. The wood is not briar and seems more like the maple or hickory bowls that come from Missouri Meerschaum. The inside of the bowl has a slight uneven carbon build up in the top of the bowl and dried and hardened pieces of dottle stuck to the sides in the bottom half of the bowl. The reservoir in the base also had a buildup of tars and shreds of tobacco stuck to the base. The first photo below was taken the day I found the pipe. Photos two through five show the bowl when I began working on it at my work table.
IMG_0490

IMG_2195

IMG_2196

IMG_2197

IMG_2198

I unscrewed the bowl from the base and set it aside while I worked on the base to begin with. I cleaned out the stained reservoir with cotton swabs dipped in Everclear and used bristle and fluffy pipe cleaners on the inside of the stem and the shank. The dried tobacco shreds were stuck to the base so it took some scrubbing to remove the dried materials. The next three photos give an idea of the state of the reservoir and the slight tooth chatter on the stem. The fourth photo shows the cleaned but stained base of nylon.

IMG_2199

IMG_2200

IMG_2201

IMG_2204

Once the base was clean and the tars and buildup removed I worked on the finish of the bowl. I sanded it with 220 grit sandpaper to remove the marks from the lathe and the rough spots. I wanted to remove as much of the marking on the bowl as possible without changing the shape. As I sanded it I was impressed by the grain on the particular piece. I sanded the stem at the same time with the 220 grit sandpaper to remove the tooth chatter. Interestingly the nylon stem sanded out greyish white. The sanding dust was light grey in colour.
IMG_2202

IMG_2203

IMG_2205

IMG_2206

The next step in the sanding process was to use a medium grit sanding sponge and also with a fine grit sanding block to remove the marks and scratches left behind by the 220 grit sandpaper on both the bowl and the stem. I followed that by wet sanding the bowl and the stem with 1500, 1800 and 2400 grit micromesh sanding pads.
IMG_2207

IMG_2208

IMG_2209

I then dry sanded with the remaining grits of micromesh sanding pads from 3200-12,000 grit. I used the micromesh pads on both the bowl and the stem. I did not include pictures of all of the sanding process but chose the one below as representative.
IMG_2211

When I had finished sanding the stem and the bowl I buffed them lightly with White Diamond and then gave both a coat of carnauba wax. I chose for this bowl to not stain it but leave it natural as I like the look of the grain in the wood. The photos below show the finished pipe. Any ideas on what the wood might be?
IMG_2213

IMG_2214

IMG_2215

IMG_2216