Blog by Dal Stanton
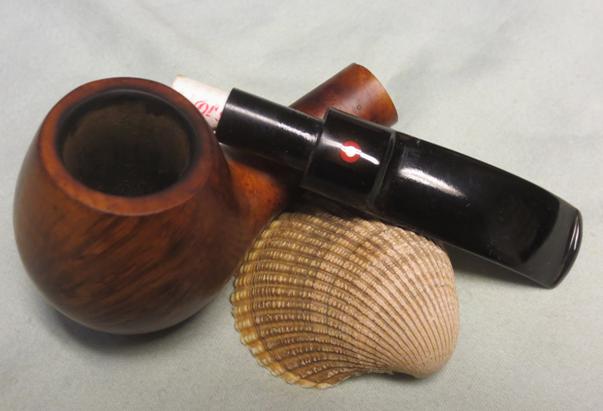
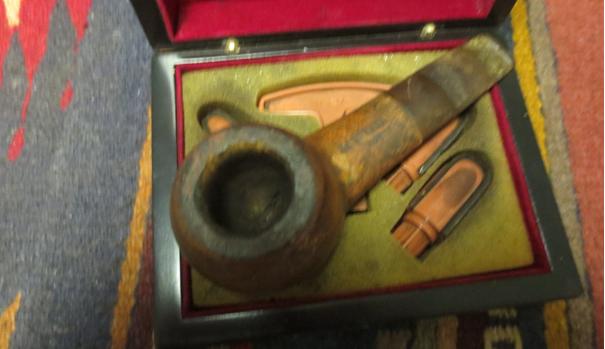
Emboldened by the responses and expressions of welcome from my first submission of the restoration of the Dr. Plumbs, Oom-Paul (named, Chicho Pavel for Bulgarian residence), I wanted to tackle a beautiful Savinelli Tortuga 628 that Steve and I met at what I affectionately call the ‘Hole in the Wall’ antique store (first door pictured below – getting a paint job that day – thanks to Google Maps) in an ethnically diverse area of Sofia near Zhenski Pazar (Women’s Market) on Brother Miladinovi Street. After finding a few pipes at the Antique Market near Nevski Cathedral we made the trek to the Hole in the Wall. I remembered on other occasions the shop owner producing (from a safe place behind his desk) a beautiful leather 4-pipe pouch and I asked about it. I was glad that he still had it so that Steve could take a look – 4 pipes still intact. Steve’s eyebrows raised a bit as he looked over the contents – the leather bag itself was a find. The 4 revealed after unzipping the bag were a Savinelli Tortuga 628, Danske Club Vario 85, Capitol (I discovered later to be a Savinelli second) and to complete the find, a Butz-Choquin Rocamar. At 150 Leva (86$) asking price for the lot, I had always passed on it – more in tuned to search for the 5-10 Leva orphans that needed a new home. But I have to be honest – the Tortuga was pulling at my heart-strings! The Danske Club Vario was a close second – feeling like the 16-year-old kid with braces and acne and looking at the prom queen – ‘out of your league, son!’
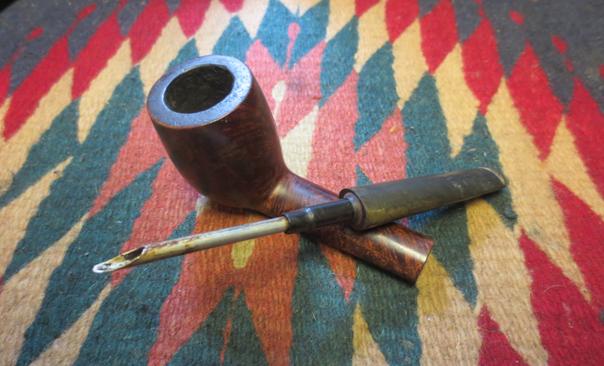
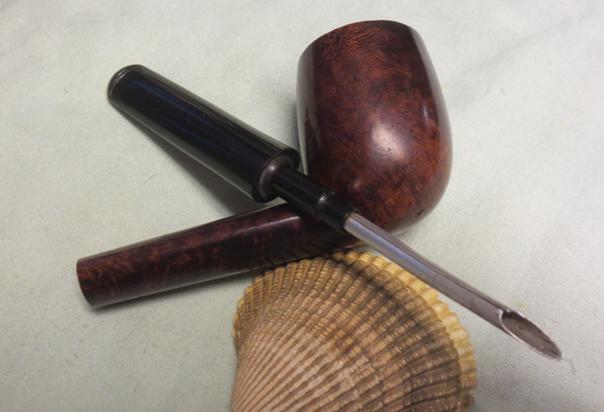
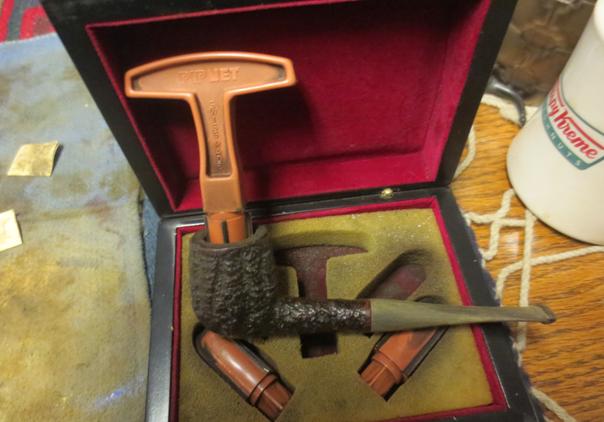
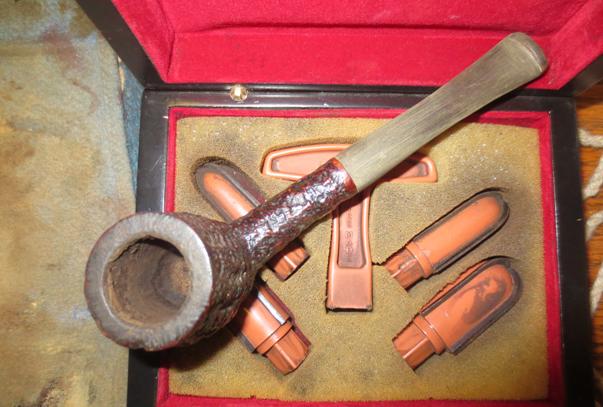
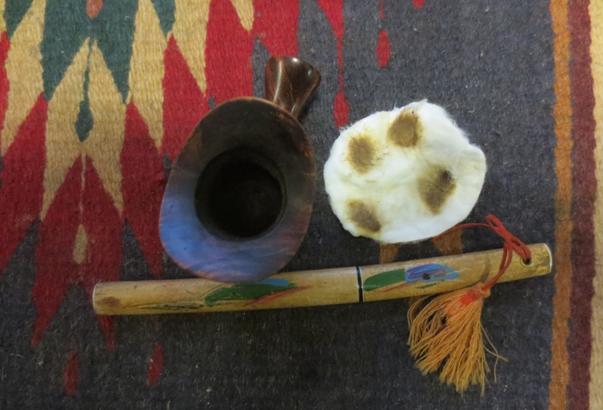
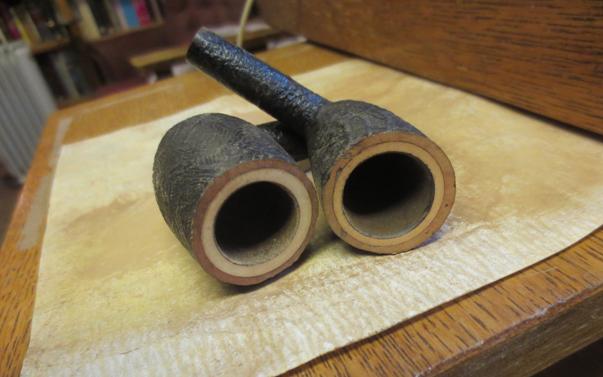
Neither Steve nor I left any of our money at the Hole in the Wall that day, but it didn’t take long heading home on the metro before Steve and I were weighing the pros and cons of me heading back and laying claim to the Bag of 4 – I could sell two of the pipes to bankroll the purchase…. Suddenly, with Steve’s encouragement, the prom queen became a possibility! I could imagine the Tortuga planted in my palm. I returned to the HitW the next morning to lay claim to the Bag of 4 only to discover the shop was closed for the weekend. I returned Monday and was able to strike a deal at 130 Leva – roughly 74$ US – not really bad when you include the leather bag as well. When I arrived home, I promptly took pictures and sent them off to Steve, who had moved on to Athens that morning for his work. He posted the pictures I sent at https://rebornpipes.com/2016/06/10/ for “Some Good Pipe Finds on a Recent Trip to Europe”. I’ve included a picture of the Bag of 4 below. I also found two pipe tools as I explored the pockets – one looks to have some age – a Duncan Made in England with what appears to be the original leather holder. Another was marked ‘Queen’. I looked a bit on the internet and the Duncan might have some collector value. I’ve grown to love the hunt!


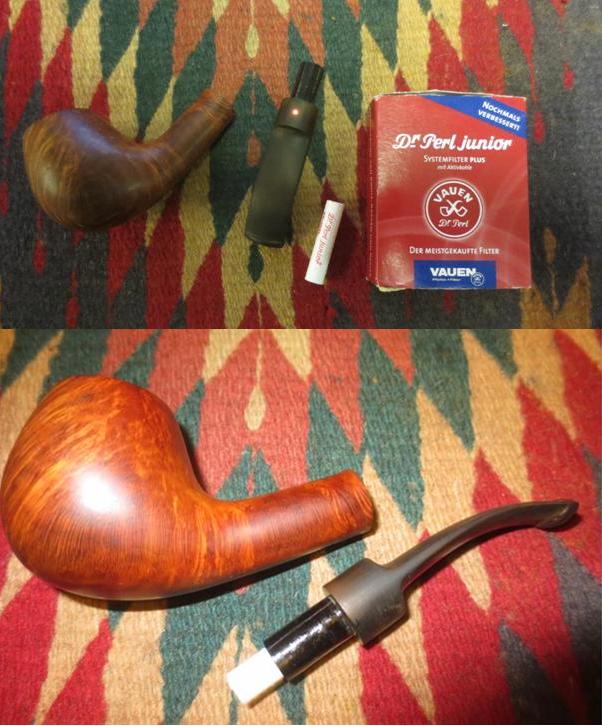
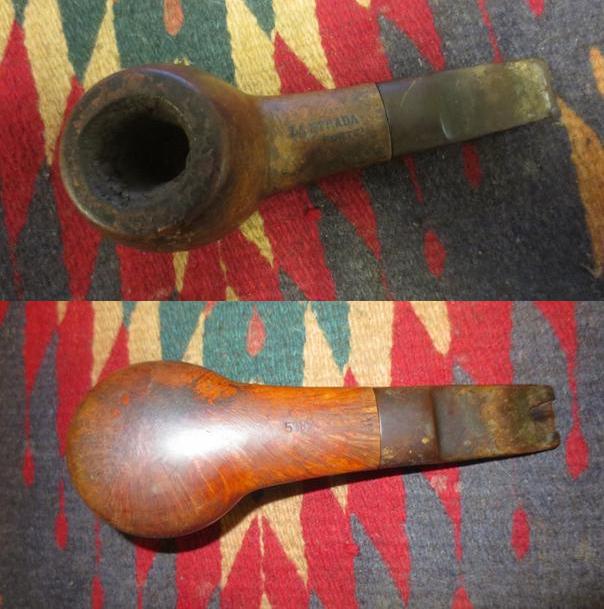
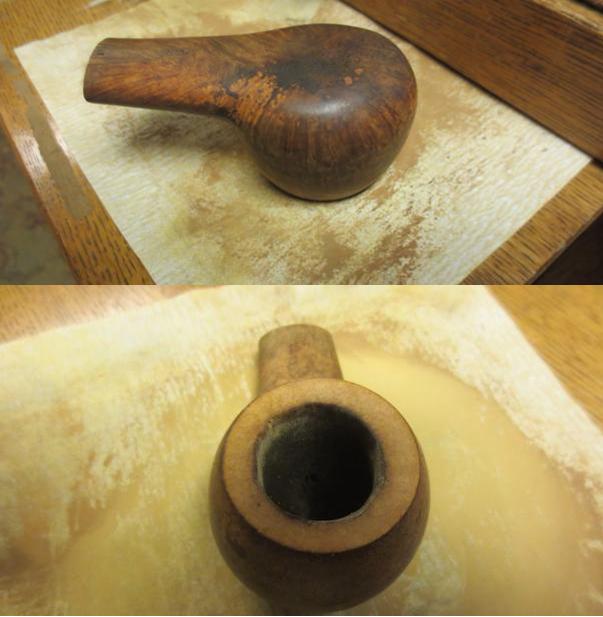
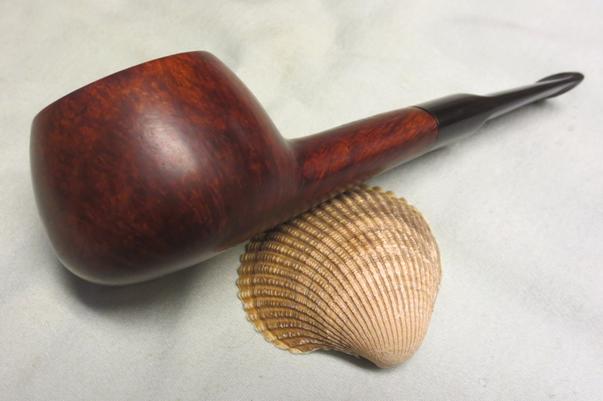
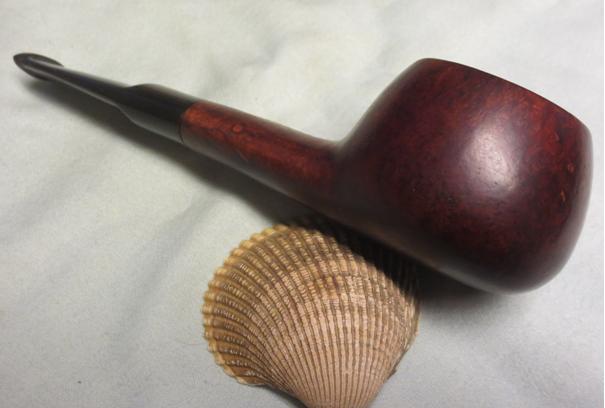
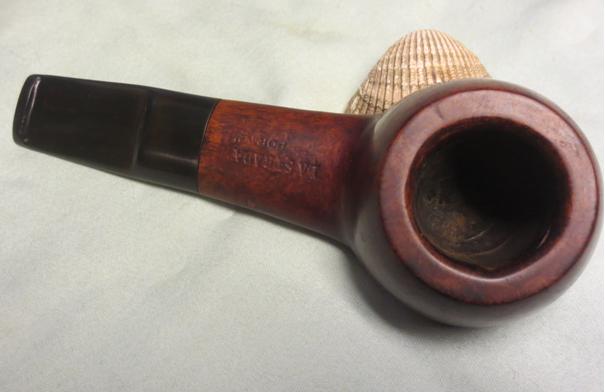
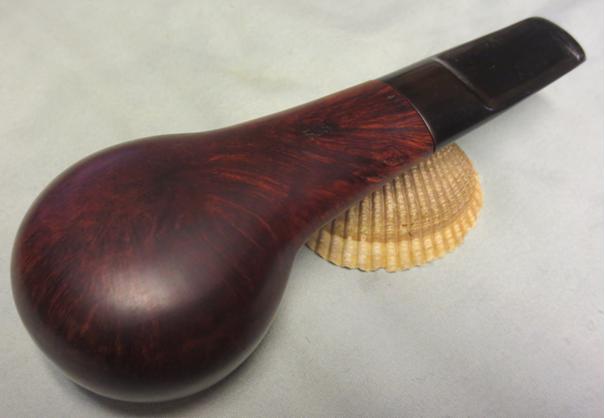
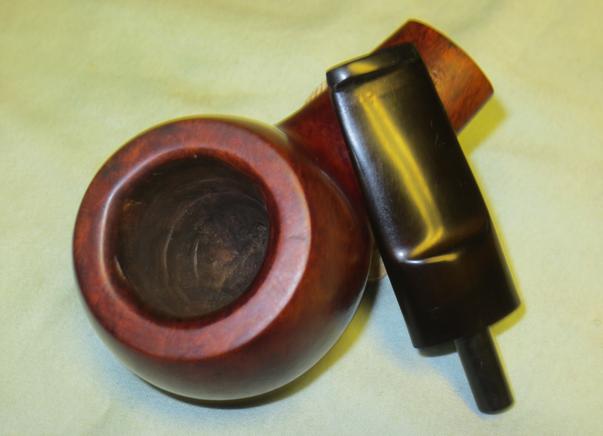
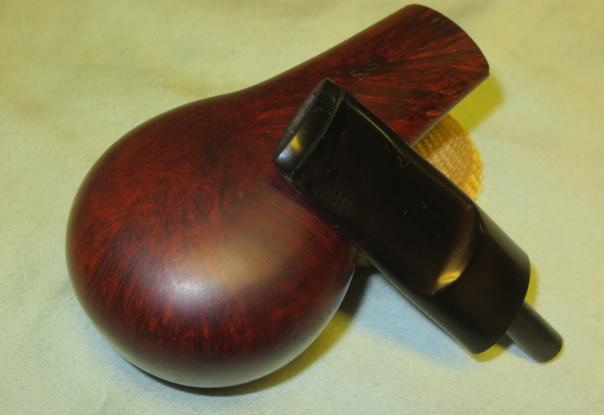
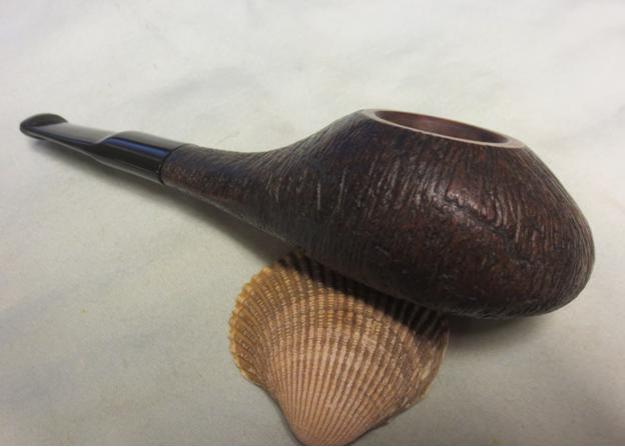
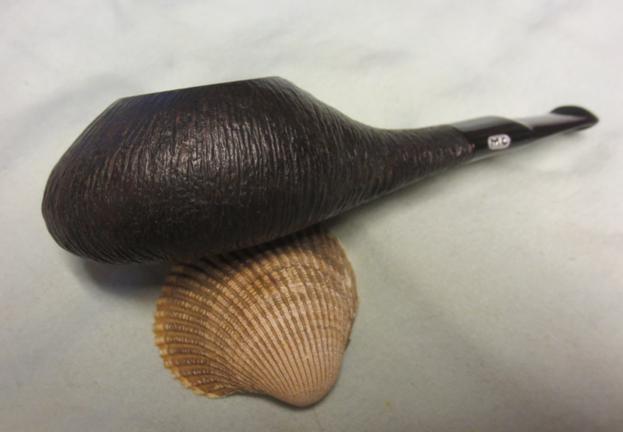
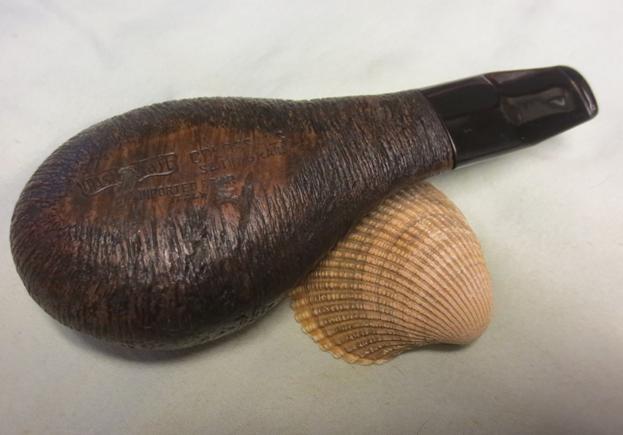
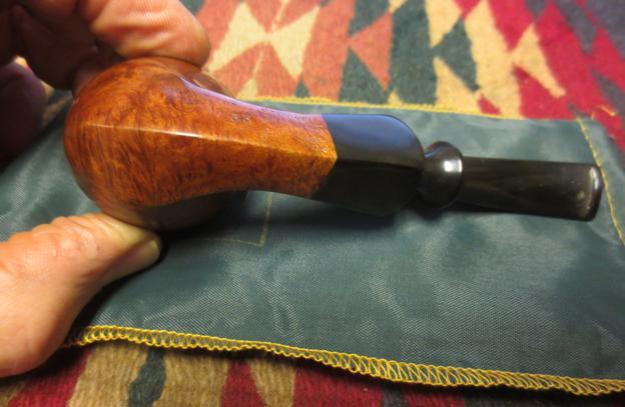
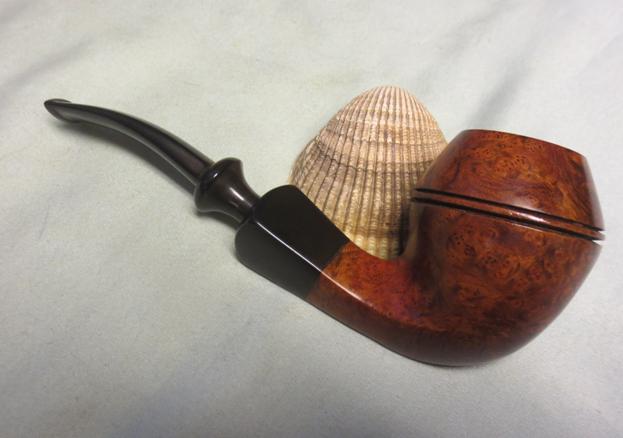
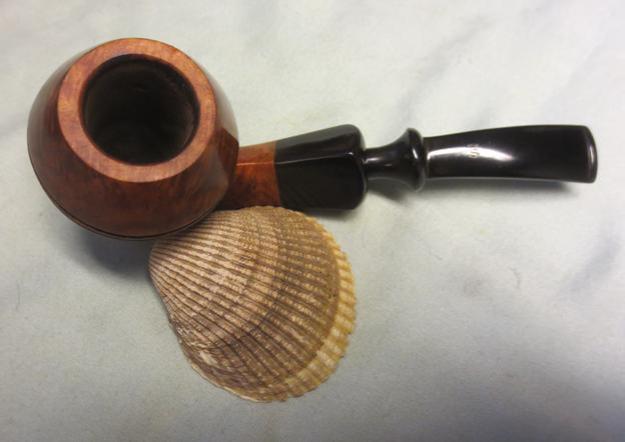
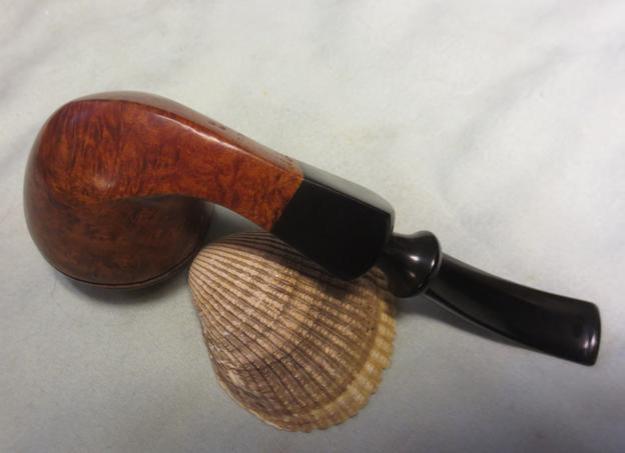
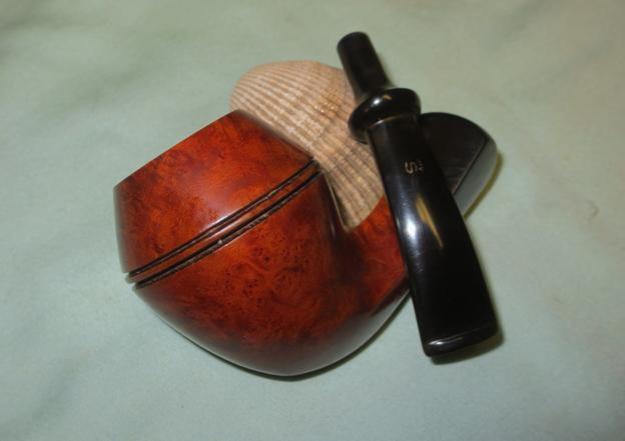
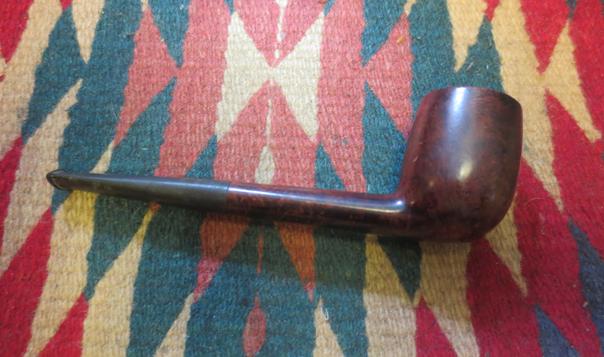
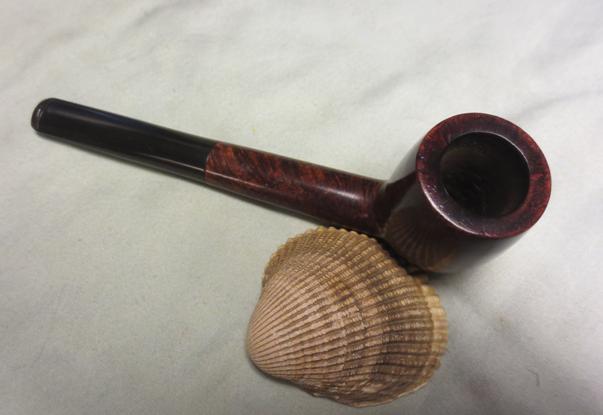
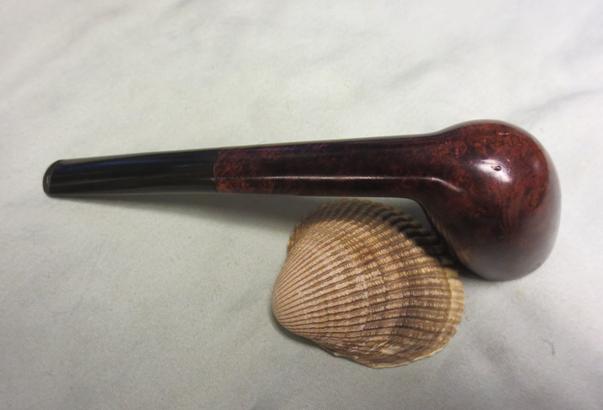
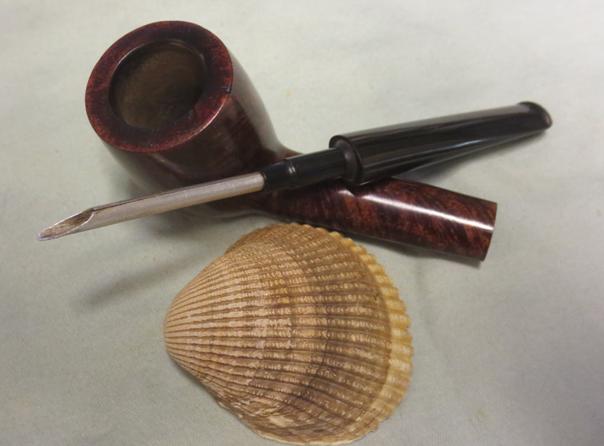
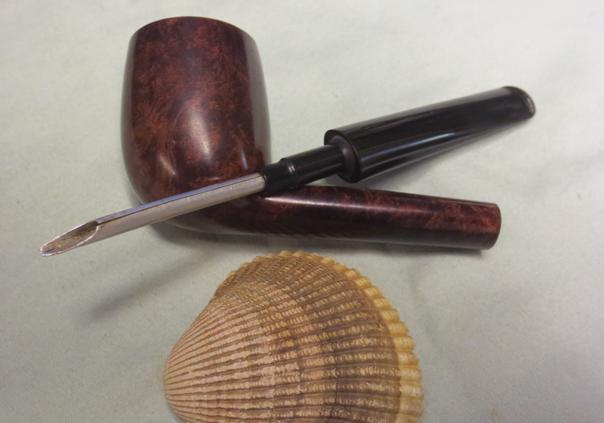
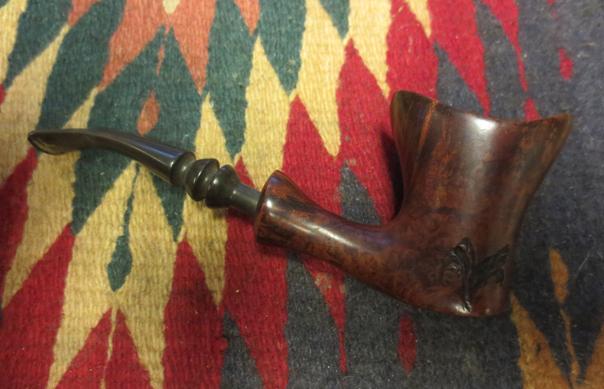
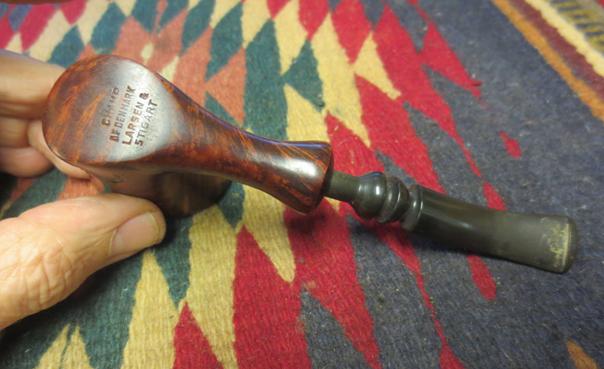
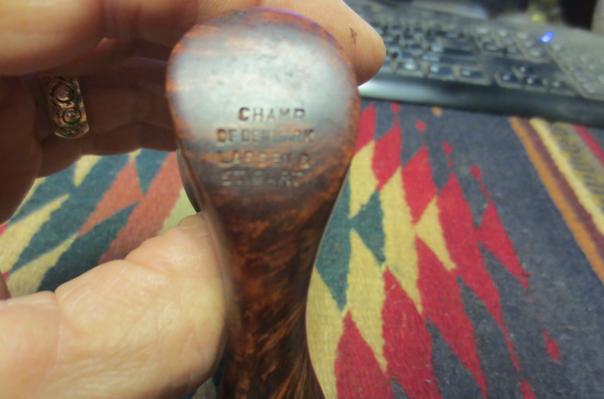
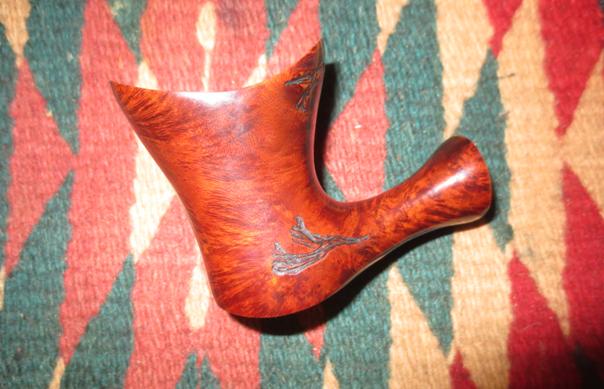
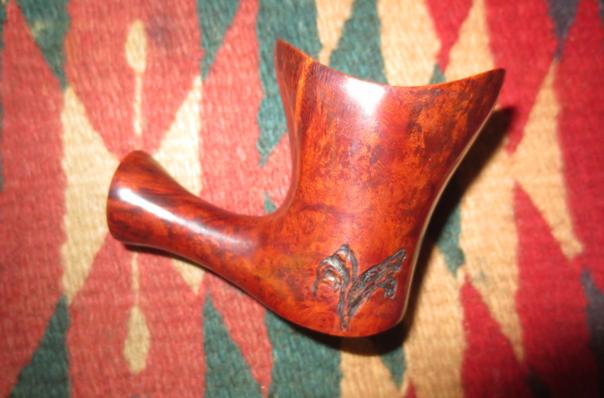
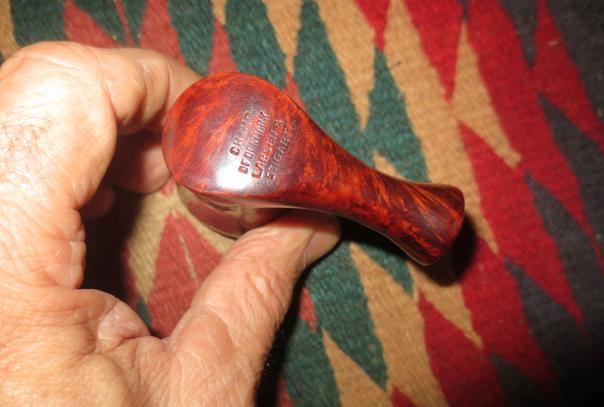
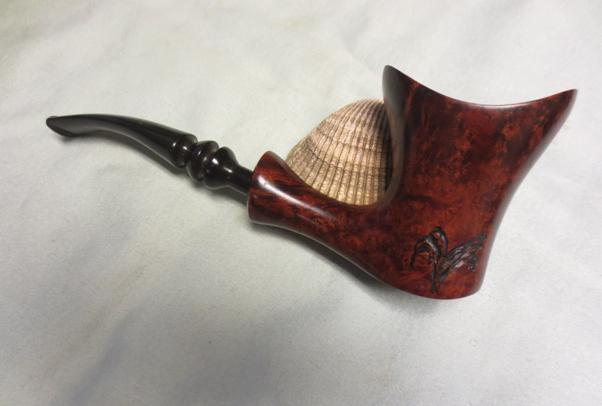
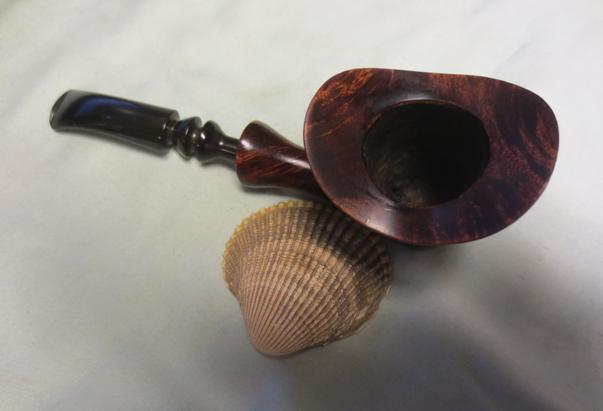
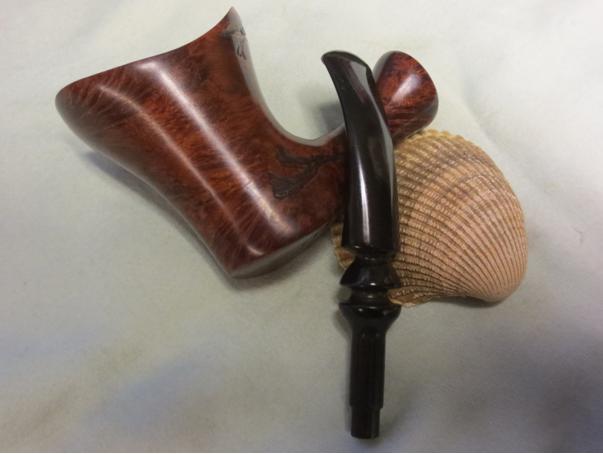
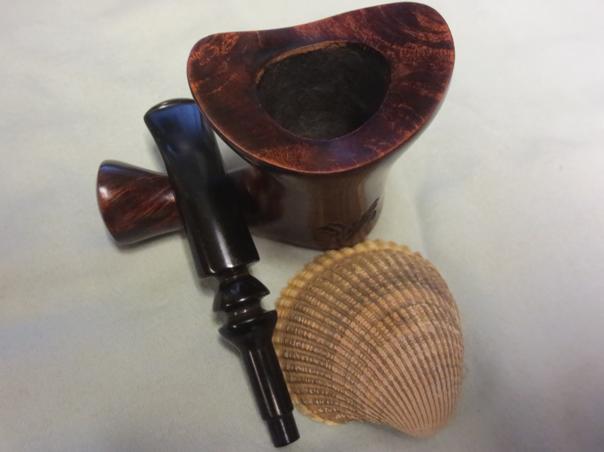
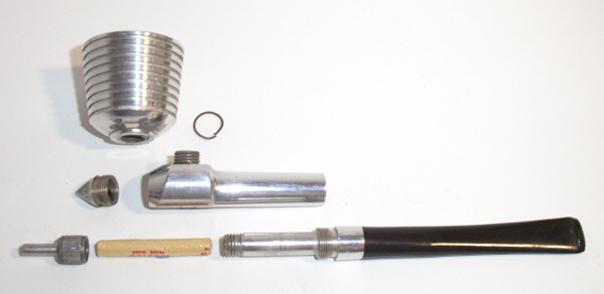
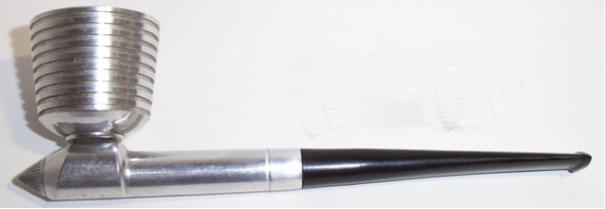
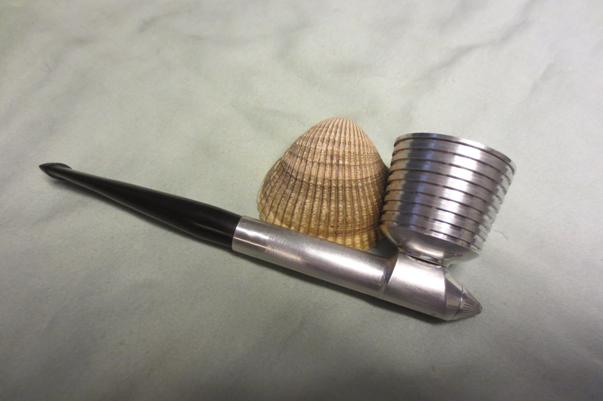
 As a newbie to the hobby, several months ago Steve directed me to eBay’s Estate Pipe listings where my Tobacciana education began in earnest. It was by trolling through the plethora of pipes on the block, reading descriptions, that I began to distinguish shapes, markings and names. Savinelli pipes caught my attention early on because the briar always seemed to be on fire and the Lucite stems were rolling matrices of color smartly complimenting the wood grains. I also noticed that the name Savinelli consistently created more bidding wars and happier results for the sellers! I was fortunate enough to place the winning bid to add my first Savinelli marked ‘Goliath’ 619EX which I brought back to Bulgaria from my recent trip to the US – in queue along with several others I brought back. I looked on the internet to see if I could find any specific information about the Savinelli Tortuga 628 and I discovered that for at least the Tortuga series, Savinelli sells them with bowl toppers which appear to match the Lucite stems – a very nice touch which I’ll keep in mind for later. There’s much information about the Savinelli name in Pipedia.com and I enjoyed reading of the beginnings in 1876 when Achille Savinelli Sr. opened the first shop in Milan. On this trip to Pipedia I also discovered that the ‘Capitol’, appearing to be a petite bent apple, also acquired in the Bag of 4 was a Savinelli second – the only non-filtered pipe in the lot. Following are the pictures taken after acquiring the Tortuga from the Hole in the Wall:


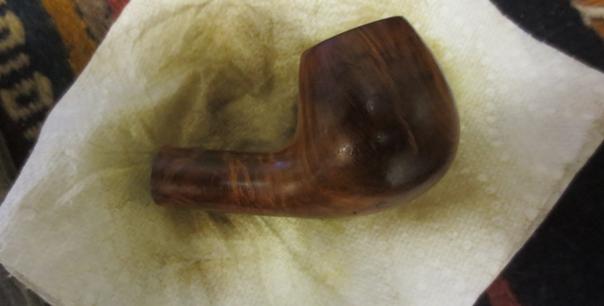
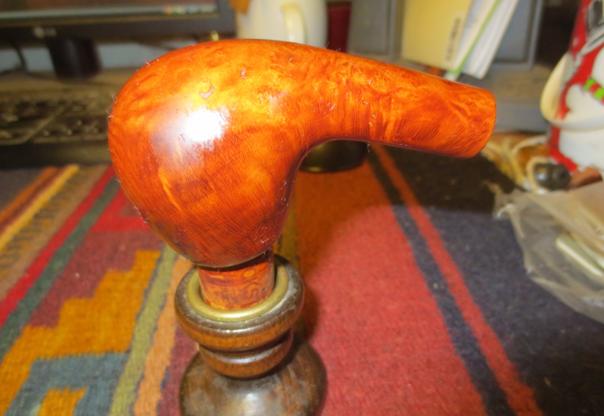
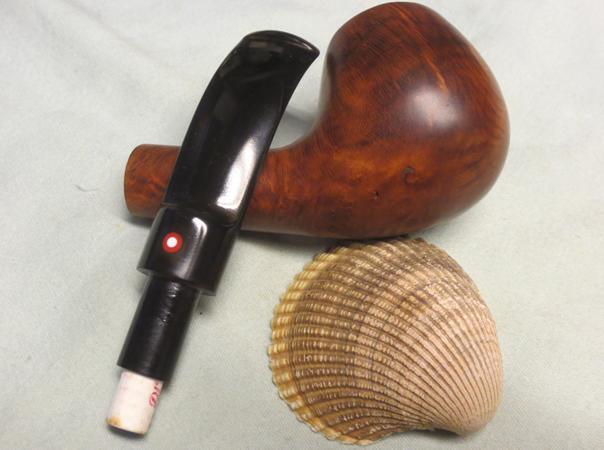
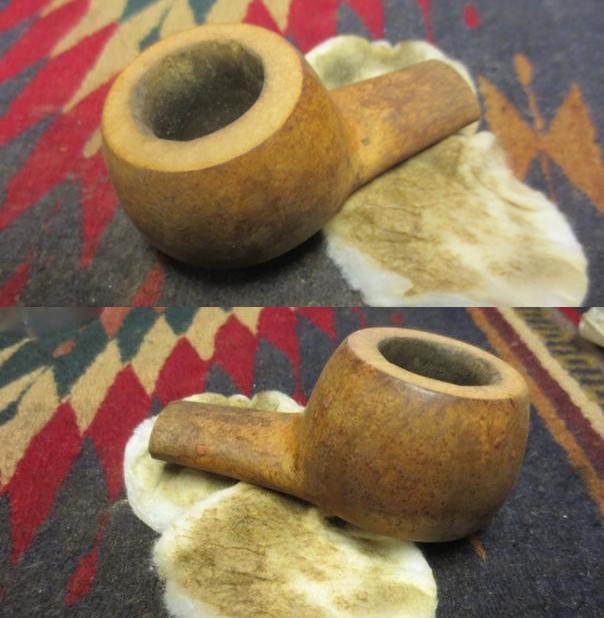
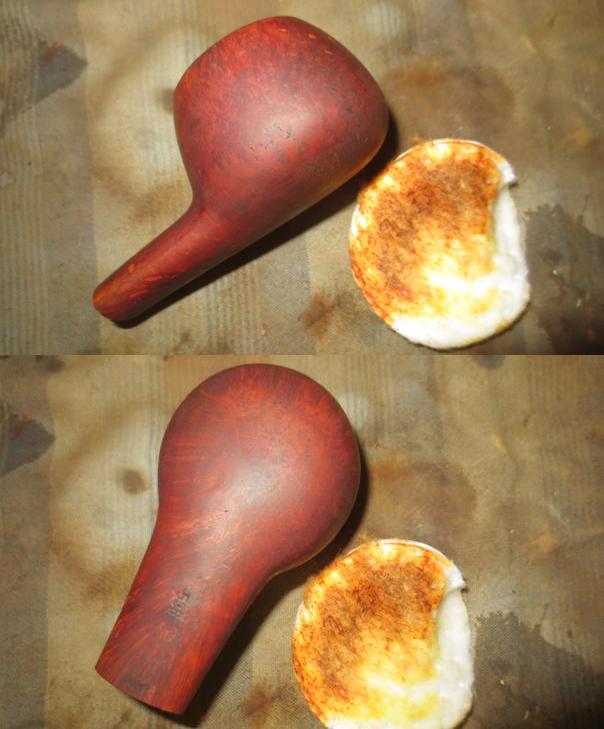
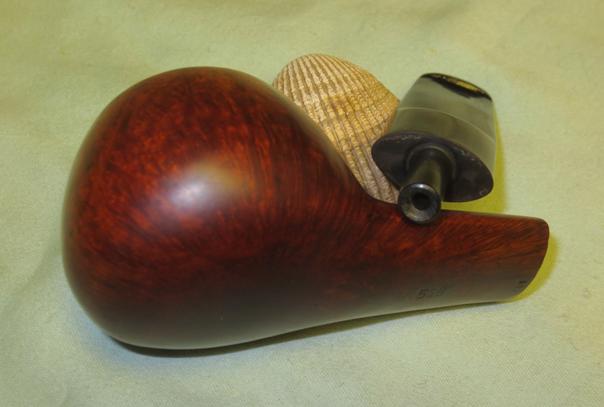
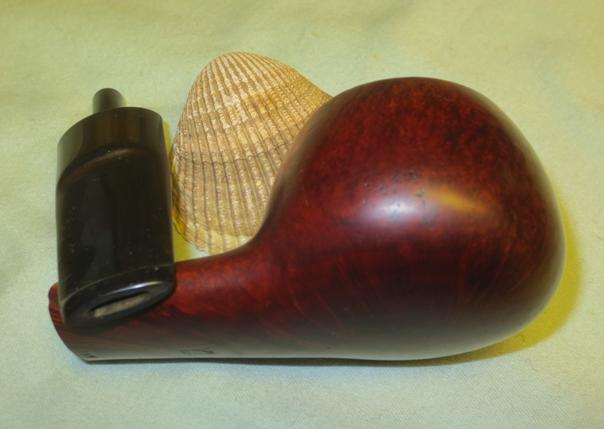
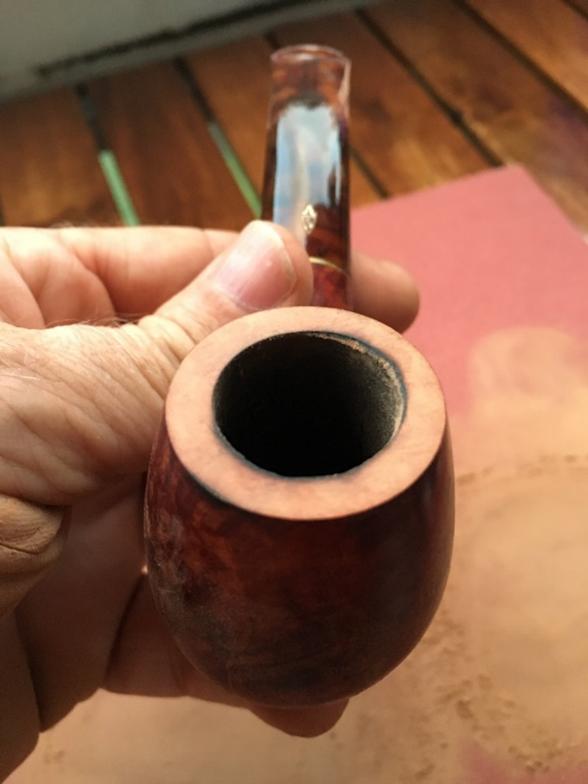
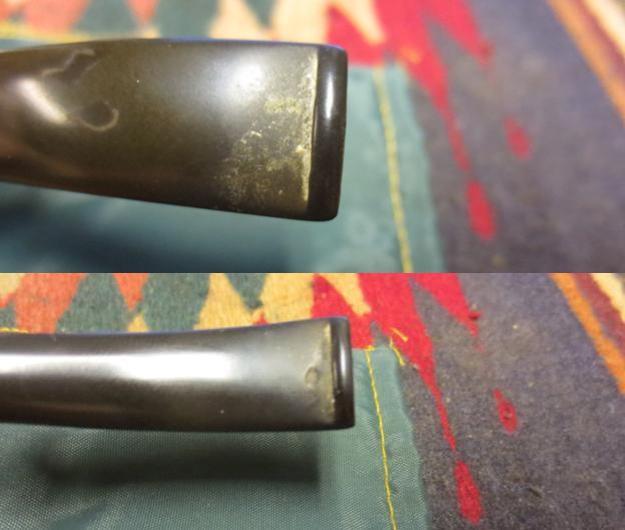
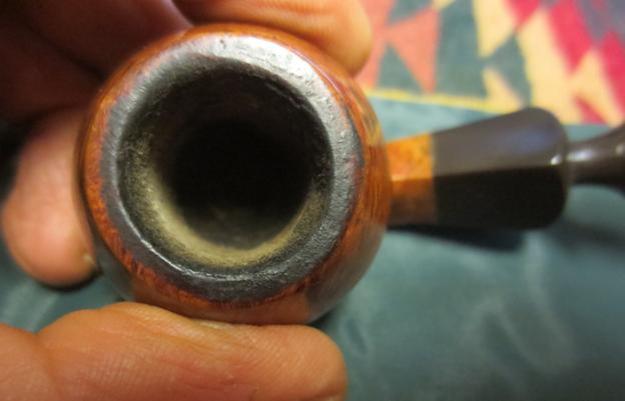
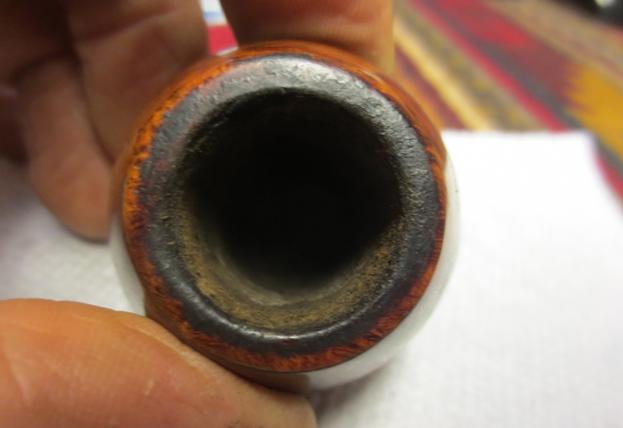
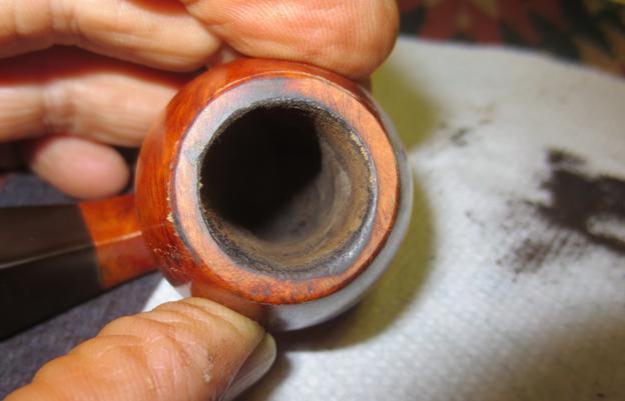
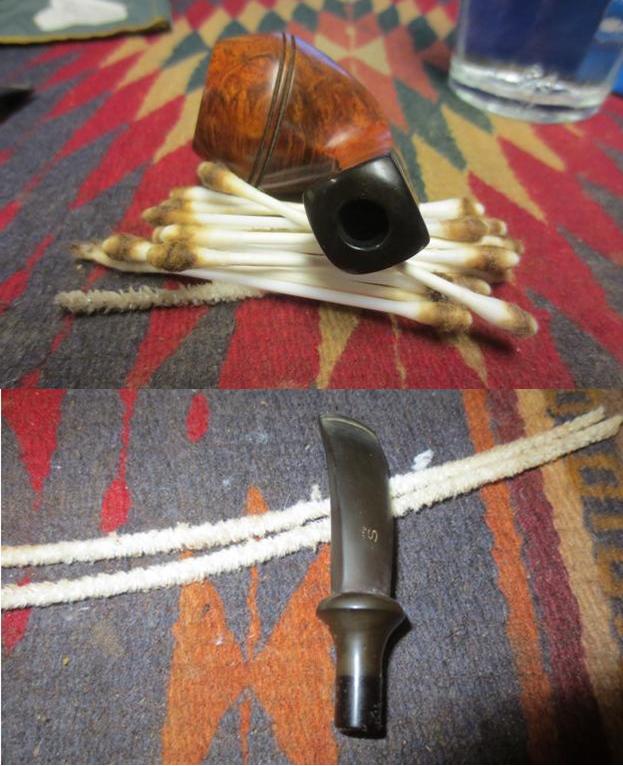
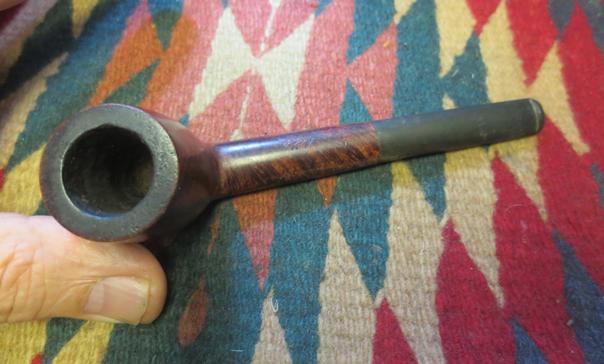
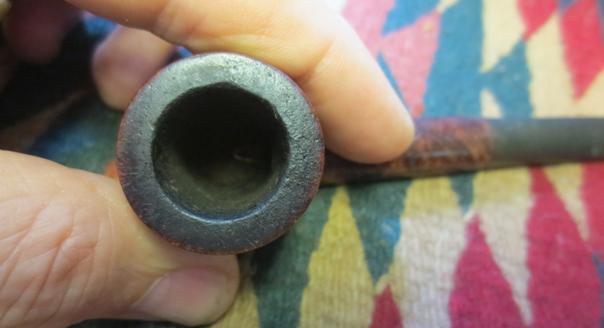
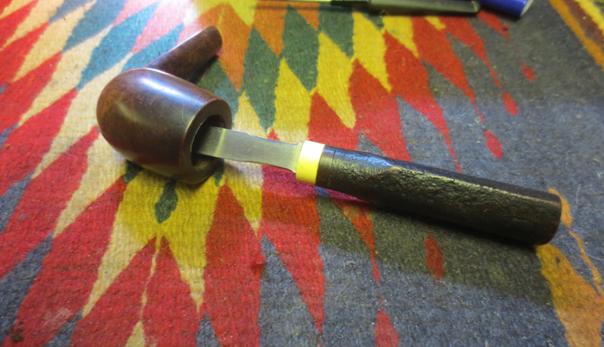
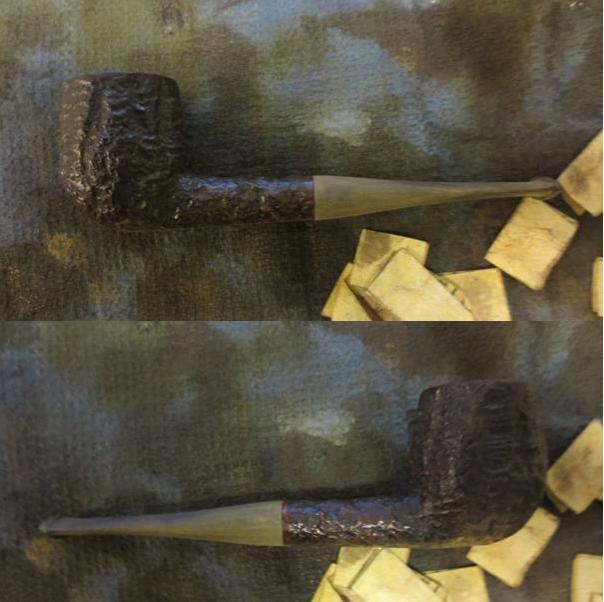
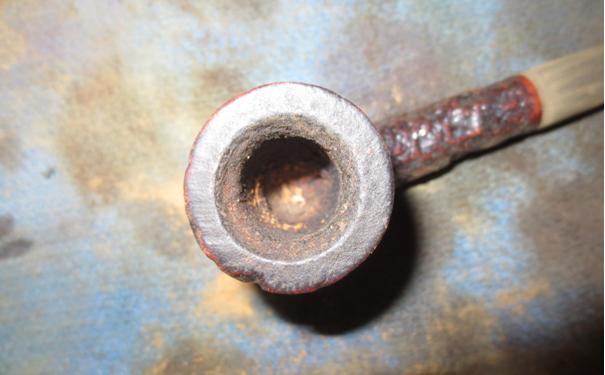
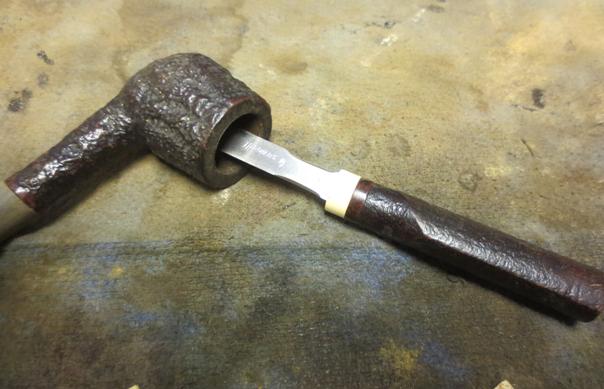
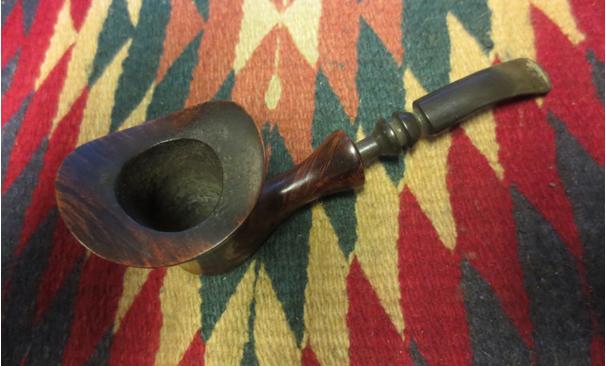
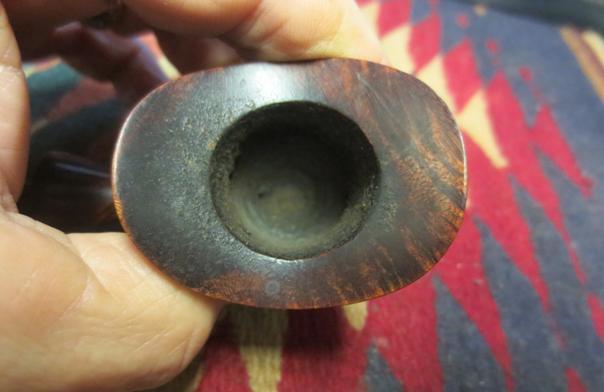
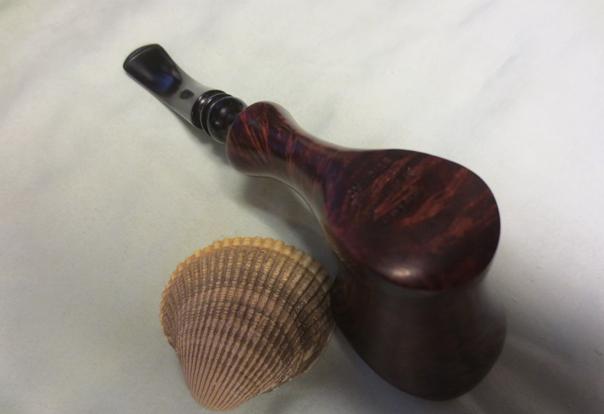
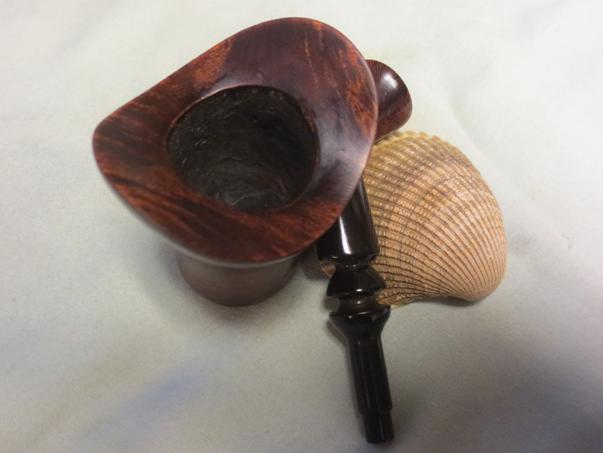
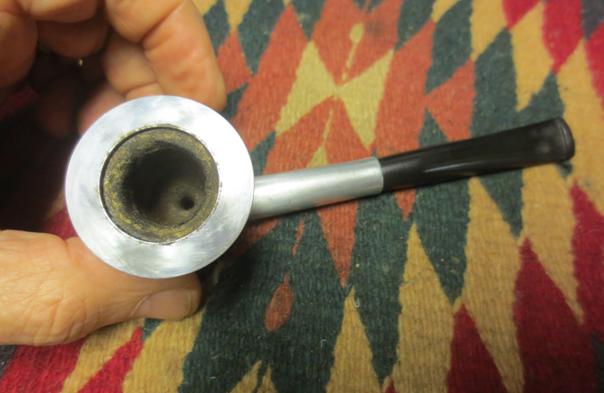
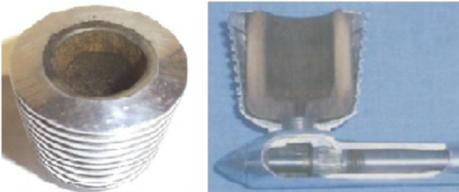
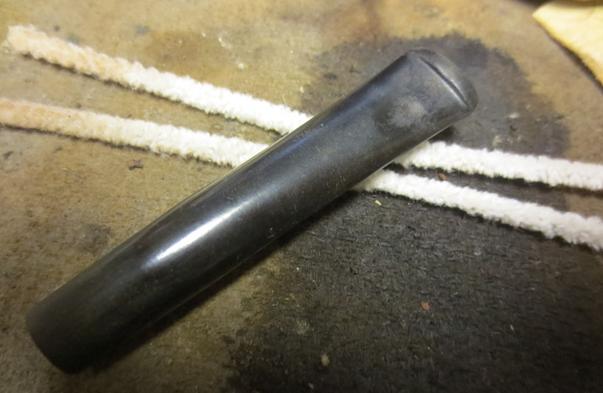
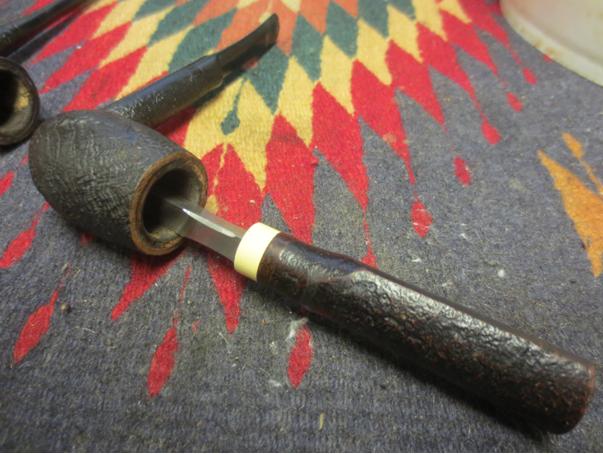
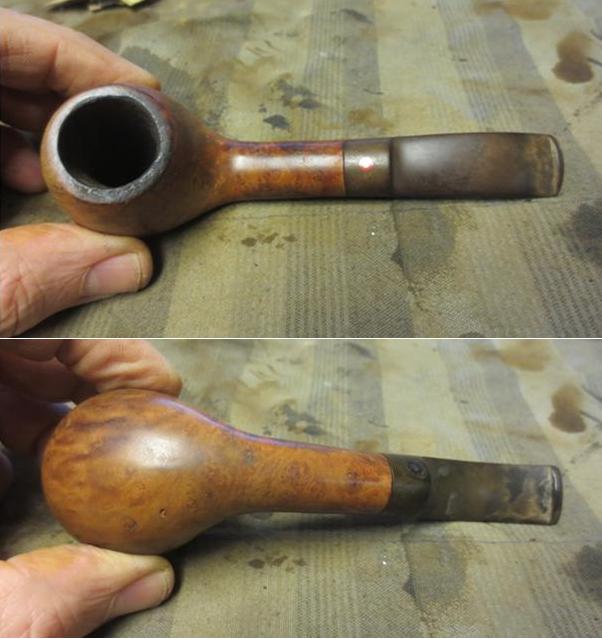
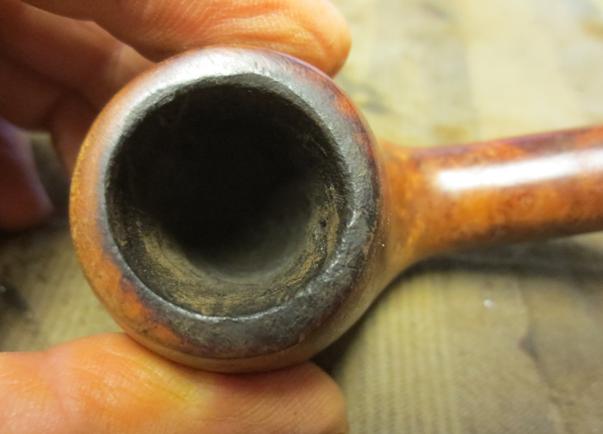
 With the prom queen in my gaze, I was not disappointed. The stummel was in need of basic cleaning but needed no fills. She would shine up nicely with the briar ablaze. There was moderate cake in the chamber that would need to be reamed to bring it down to the wood – a fresh start. The rim revealed the most abuse – there was normal lava buildup but a significant burn at seven o’clock which revealed the Tortuga’s former steward’s right-handed lighting practices – drawing the flame over the rim – ugh. I detected a nice, crisp bevel on the inside ring of the rim – that would be nice to restore. I like ‘accent’ bevels – a classier detailed look. Other than this, the stummel appeared to be in good condition. The stem had minor tooth chatter on the top and bottom and I detected oxidation on the band that I would need to address. The Lucite stem – my first to work on – looks to shine up well. I’ll work on the stem internals to remove the dark build-up evident in the airway through the translucent Lucite – at this point I’m not sure what will actually clean-up in the airway. Yes, and I’ll need to toss the used filter left behind which would reveal the former owner’s DNA code. Thankful to Steve for his coaching and with a prayer, I decided to tackle the bowl first with my PipNet kit to restore the bowl to the wood. Since my workstation is in our bedroom, I first spread out the paper towel to collect the released cake and minimize clean-up. Starting with the smallest blade I rotated the blade while applying gentle, consistent vertical pressure. I could tell when the blade was finished when the cake resistance stopped as I turned the tool. As the charcoal fell out of the bowl, I realized that the overhead fan that was keeping me cool was also scattering the soot into the atmosphere – my wife won’t be happy about that! Fan off – I continued with the next larger blade and that was sufficient. In order to get a better look at the rim, and survey the extent of the scorched area, I cleaned the rim with a brass brush and isopropyl 95%. The pictures show the progress.

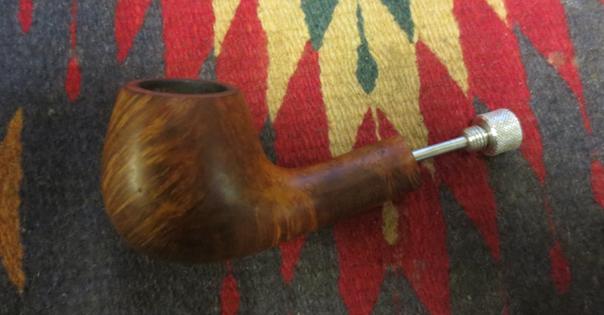
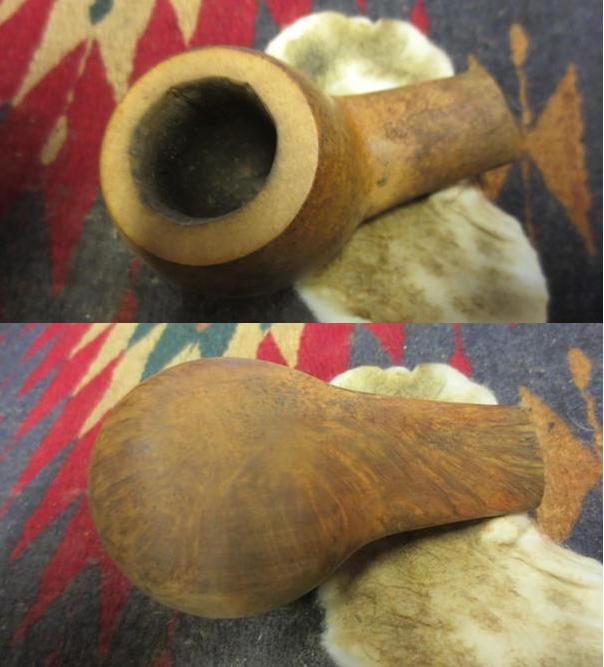
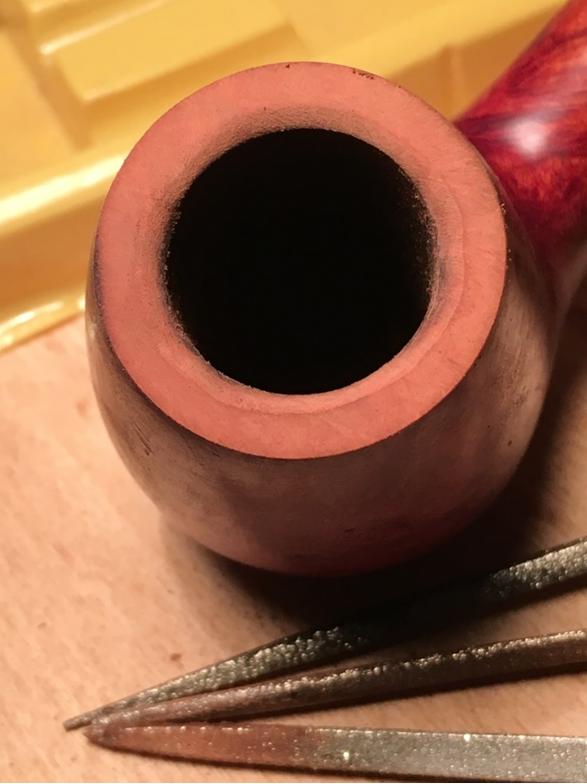
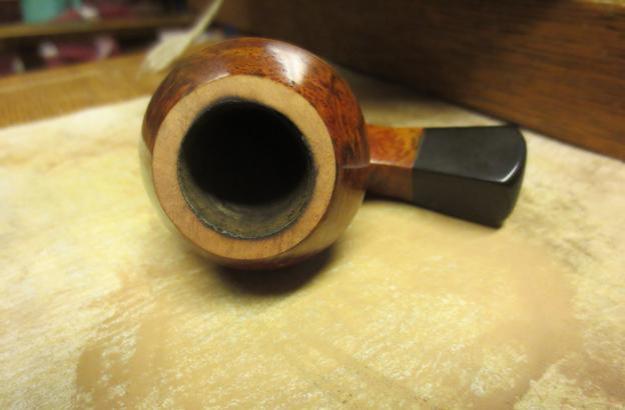
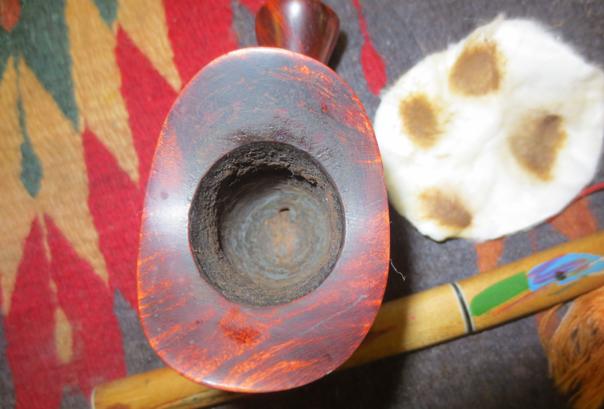
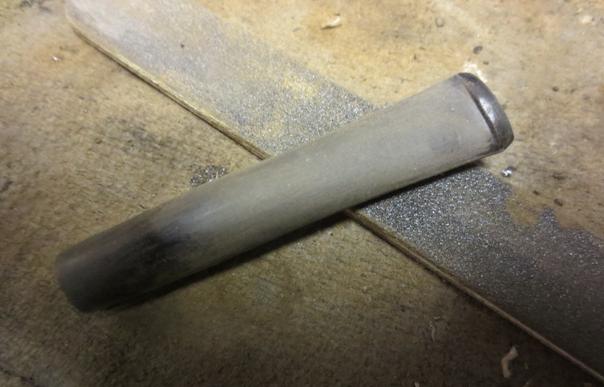
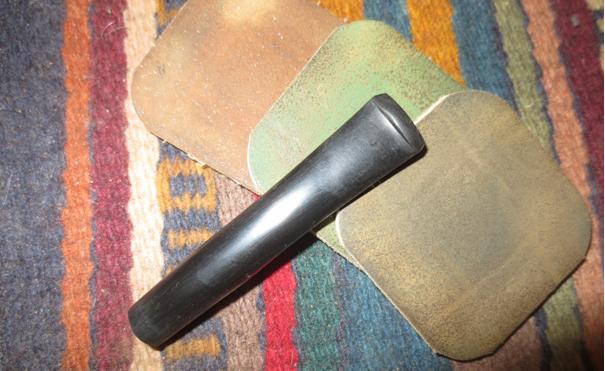
 With the rim fully exposed I can now see more of the inner bevel that I want to restore and I can see the depth of the burn. I would need to top the bowl taking off only enough to remove the burn damage. With my last (maiden!) full restore of the Dr. Plumbs Oom Paul (https://rebornpipes.com/2016/06/10/a-newbie-restore-of-a-dr-plumb-9456-oom-paul/) I made the mistake of topping the bowl at a slight (unfortunate!) angle so that it was not perpendicular to the shank/stem. Steve said that this can happen when a part of the rim is softer and that can pull the angle off. OK, burn spot – maybe a soft spot on the Tortuga’s rim. I don’t want to ‘re-top’ the bowl like last time! I decide to remove the stem from the stummel so that while topping, I can allow it to ‘free-stand’ periodically and eyeball things – to make sure the angle is true! I spread out 240 grit paper on a chopping board and offer another prayer. For this procedure, I move out onto my 10th floor balcony ‘Man Cave’ so as to minimize sawdust in the bedroom atmosphere. I decide to turn on Eric Clapton’s ’24 Nights’ live concert album (on my iPhone) and I go to work. After a bit, I decided to put the stem back on the stummel because it helped me line things up. It seems I did a better job topping this time around so I began work on the inner rim to restore a nice bevel before I micromesh the bare rim. I used needle files and sandpaper to do this. I think the bevel is looking pretty even around the inner circumference of the bowl. Working by hand, I was a bit disappointed that I was not able to restore the sharp, crisp bevel as I had hoped. I was reluctant to use the Dremel, as it has a tendency (in my hands) to chew out more than expected. The finished bevel is rounded out more than I wanted but still attractive. I will leave it as is – put beveling techniques on the learning list! I move to micromesh the rim with 1500-2400 to remove all the scratches from the topping and bevel work. I completed the rim by applying a mahogany stain stick. Using isopropyl and cotton pad I lightly wiped the rim to lighten the application. I found that I could either lean toward the lighter or darker tones of the Tortuga briar. I chose the darker – from my vantage point, a pretty good match! She’s looking great! I’m pleased with the progress!

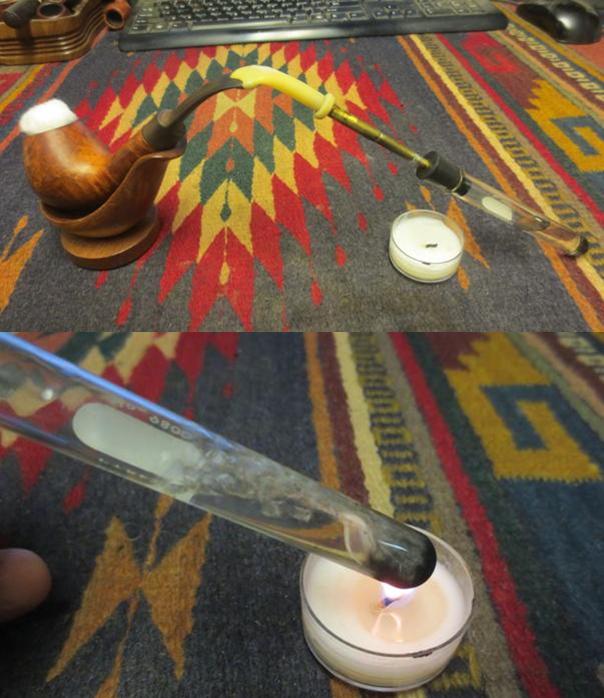
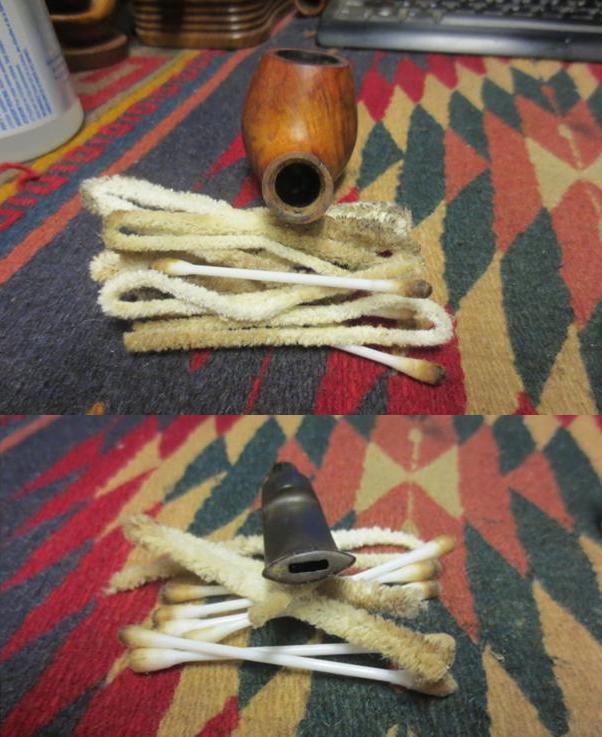
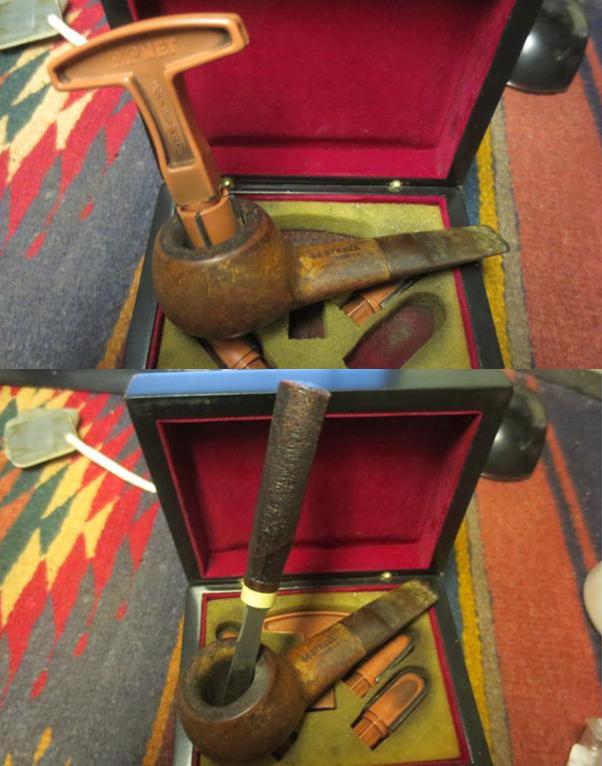
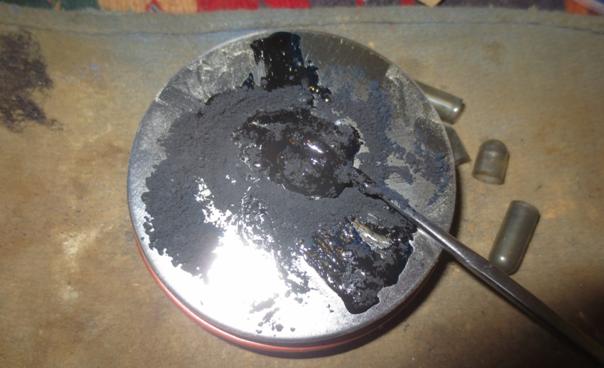
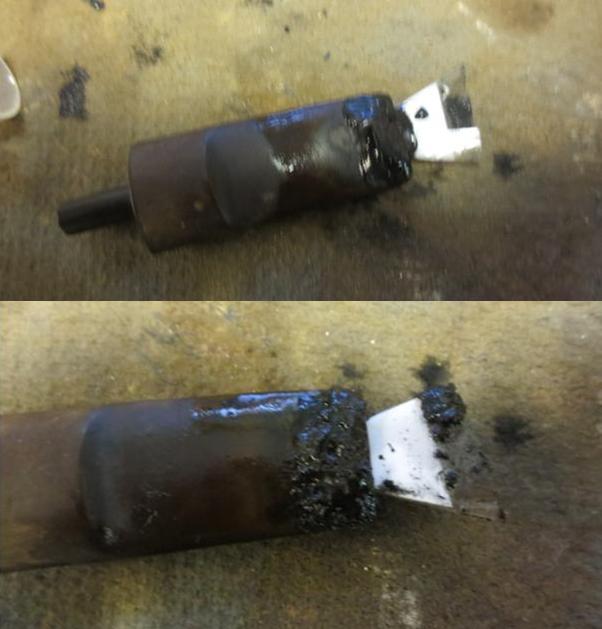
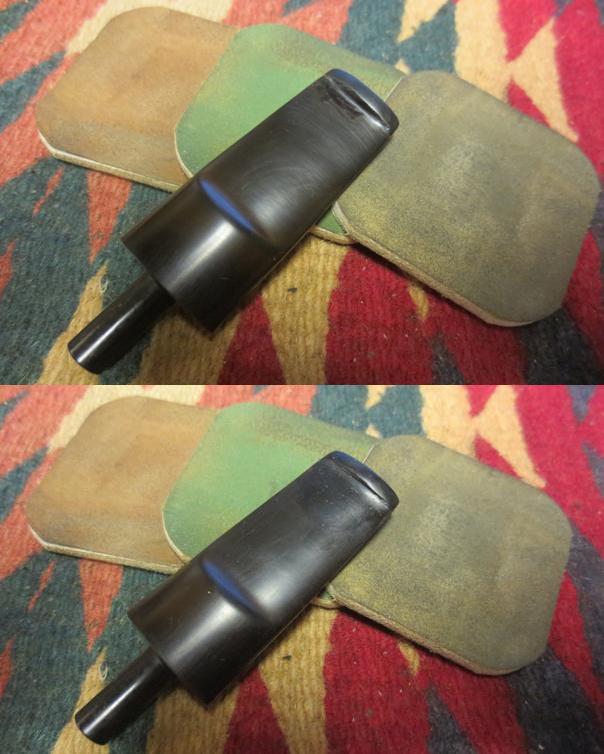
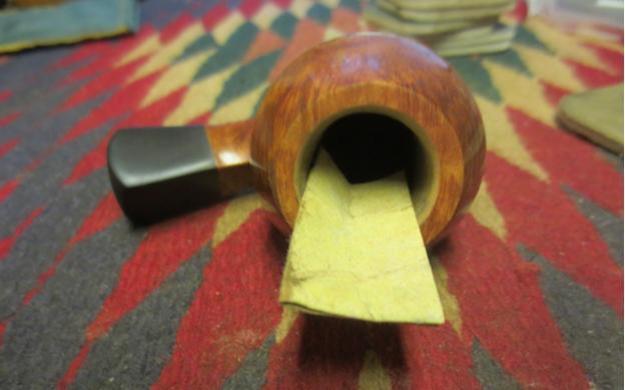
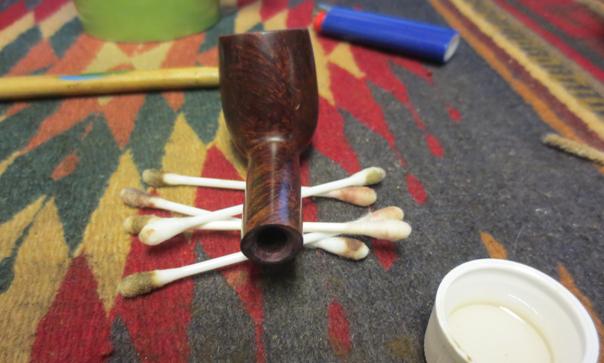
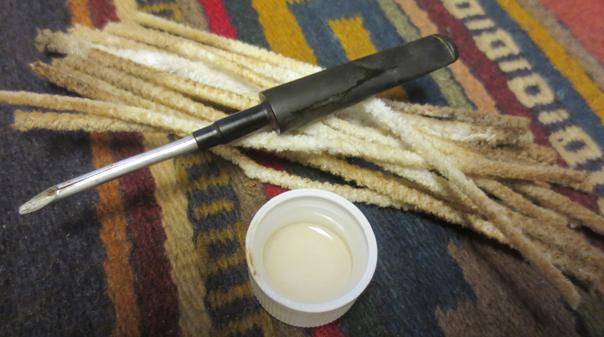
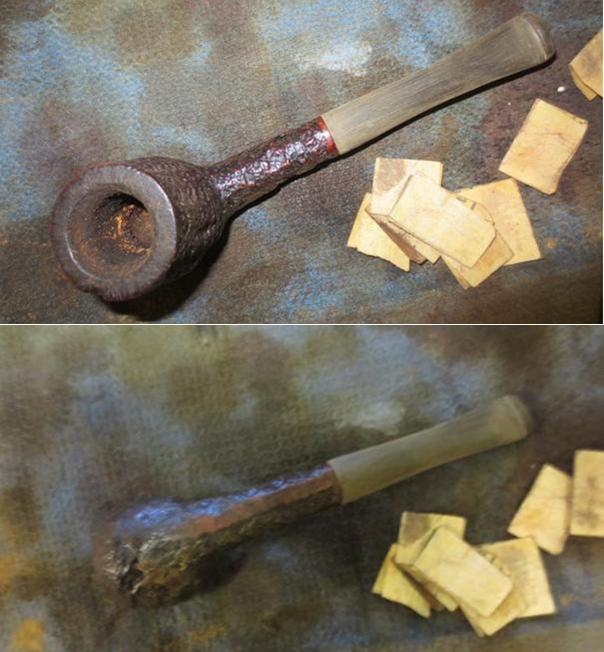
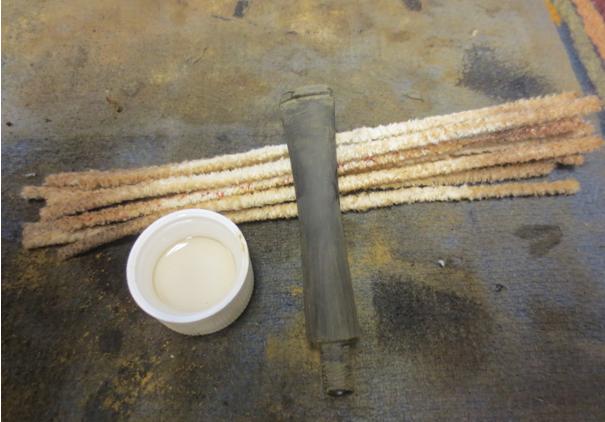
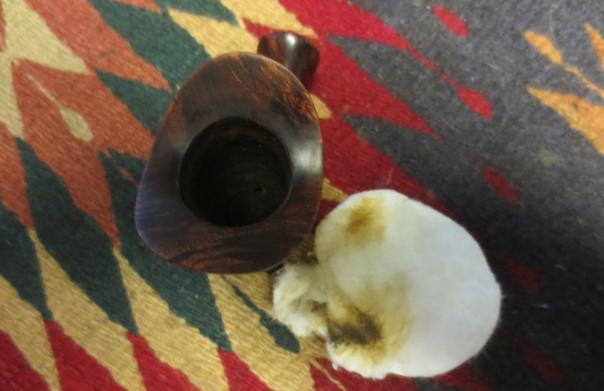
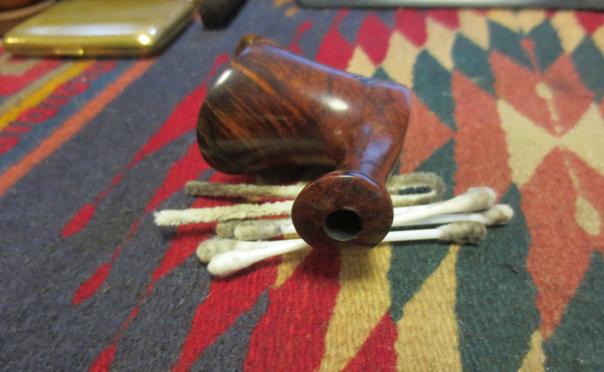
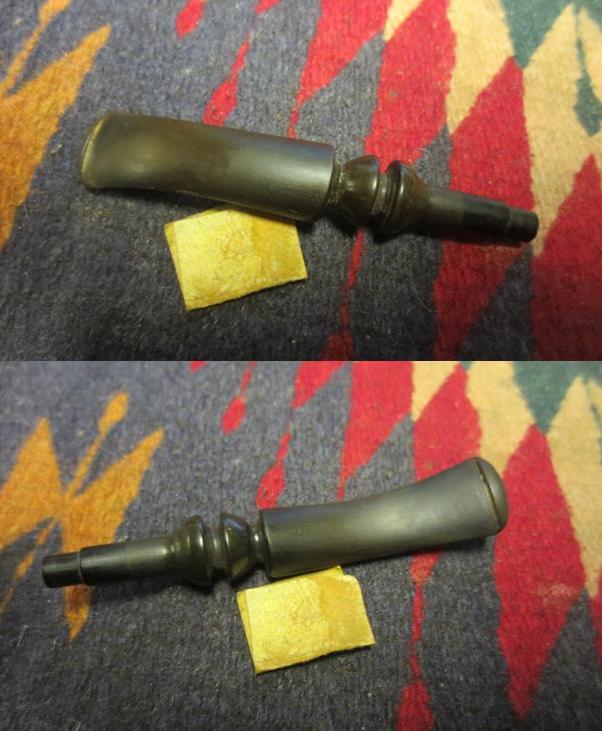
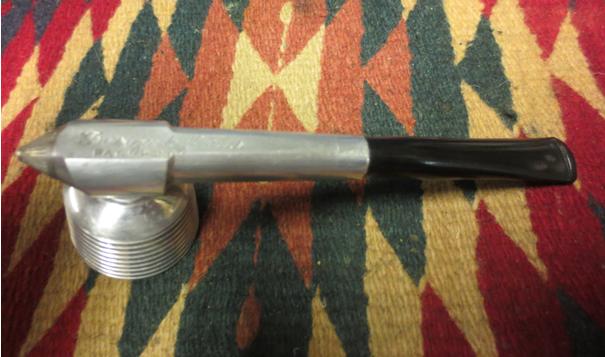
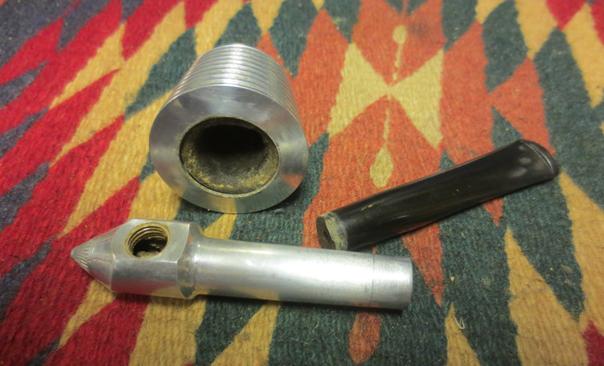
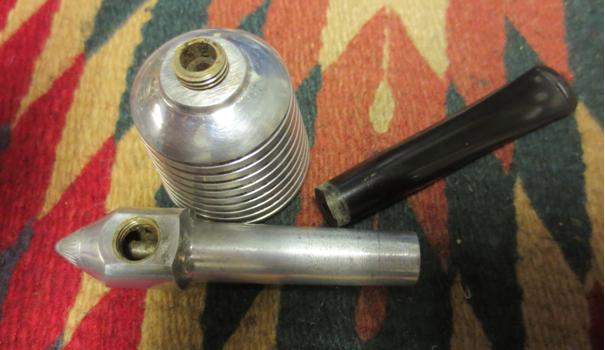
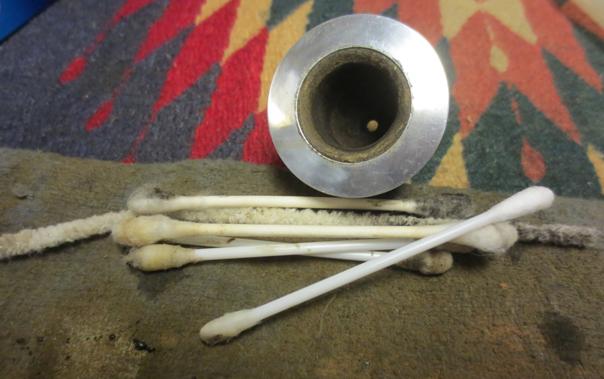
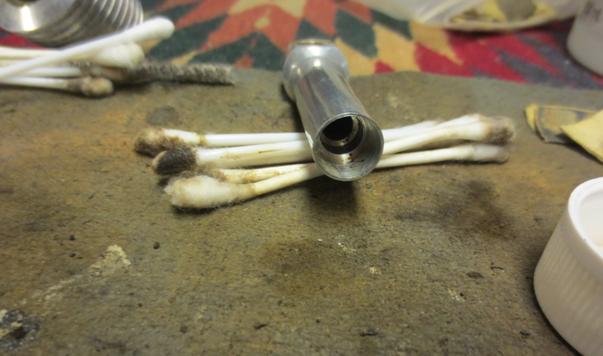
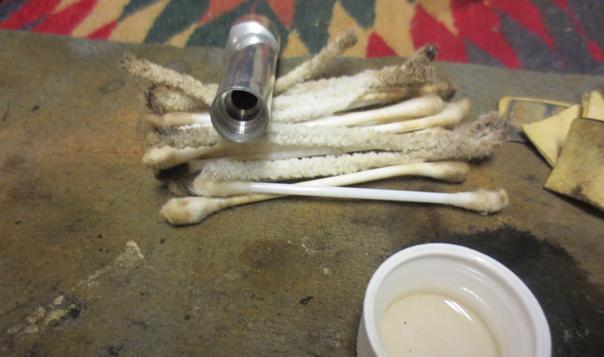
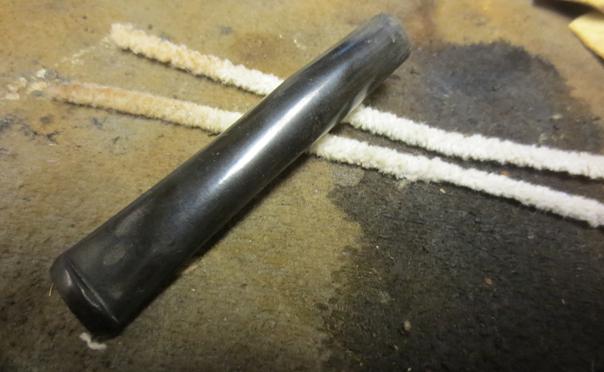
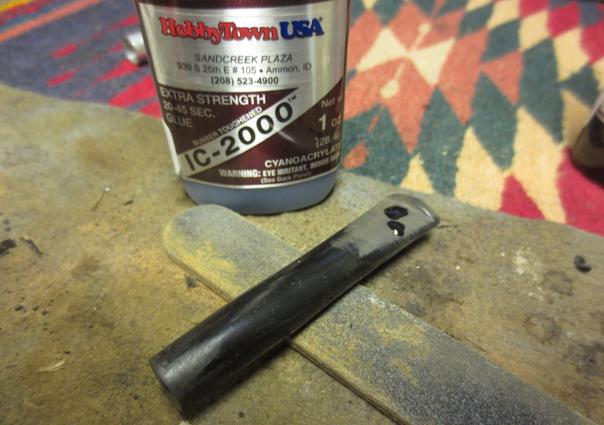
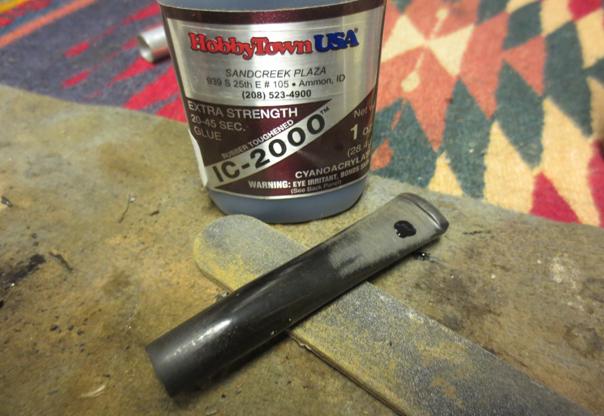
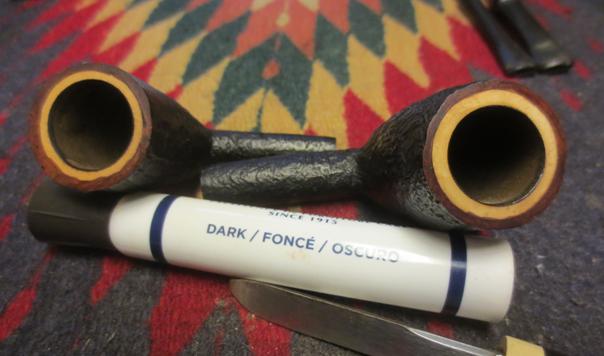
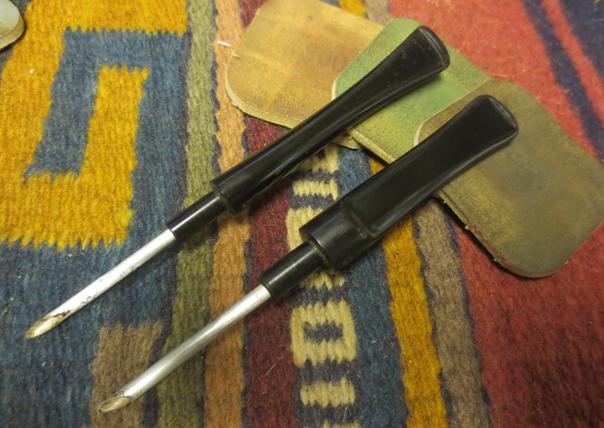
 With the rim repaired and bowl reamed, I moved to the internals of the stummel – cleaning with pipe cleaners and Q-tips dipping in isopropyl 95%. Well, about 4 minutes into the process with Q-tips blasting away at the muck while I listened to the track of Westside Story, a thought sprang to life in my right lobe – ‘Why not break out the new retort you just brought back from the States?’ My first reflex was – ‘Oh no – boil alcohol?’ That thought has bothered me since I ordered it and read about retorts and watched YouTube demonstrations. It took me a minute to remember where I had stowed the box it came in – eBay of course, from Mark Johnston (www.pipeandwine.com). I remember appreciating that he was selling to promote the “Wounded Warrior Project” – very cool. I paid his asking price and sent a note thanking him for his service in the Navy and proud to say that my son too, was a naval veteran having served on an LA class attack sub as a reactor technician – the USS Boise. After finding the box and unpacking the contents, I thought it might be wise to read the directions included. The first paragraph didn’t ease my concerns as it recommended having safety glasses and fire extinguisher nearby, “just in case.” Fears aside, I start putting things together. The directions were very much ‘spoken English’ and I could almost hear Mark explain the debate about what kind of alcohol to use – potable or isopropyl? I’ve used a strong Bulgarian drink called, Rakia (brandy) but I’ll give vodka a try for the retort. Settled. The retort worked as advertised with only one exciting moment when the cotton ball shot out of the bowl. I wasn’t fast enough to catch a picture of that. The stem before and after pictured below.


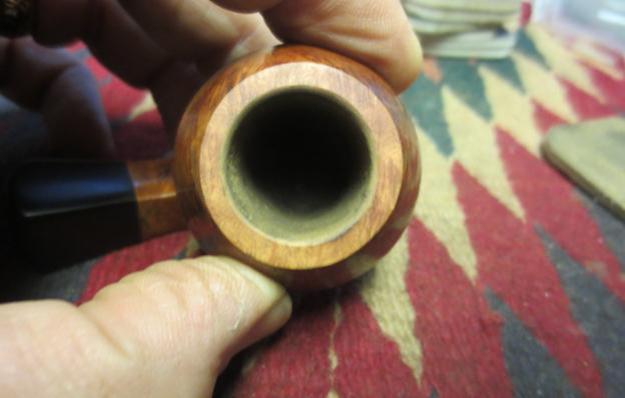
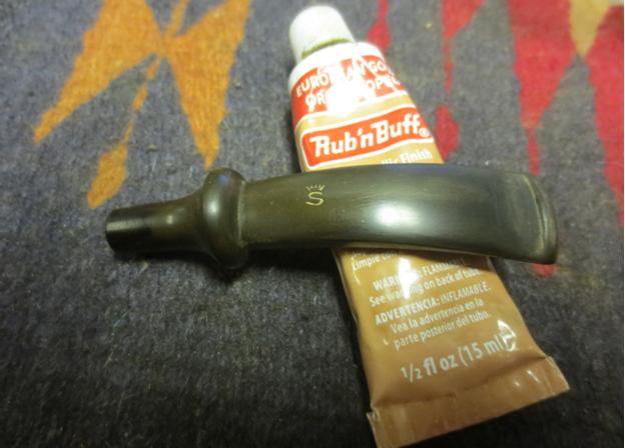
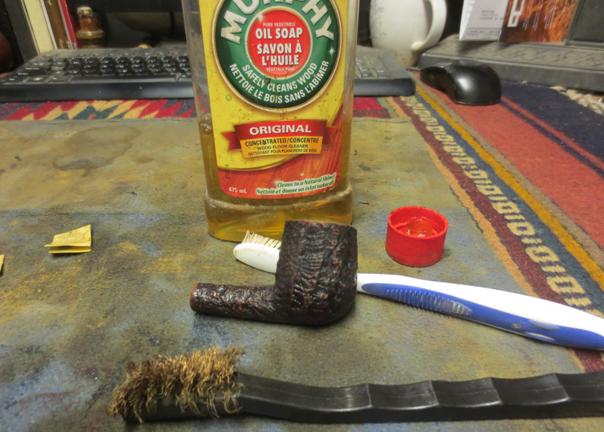
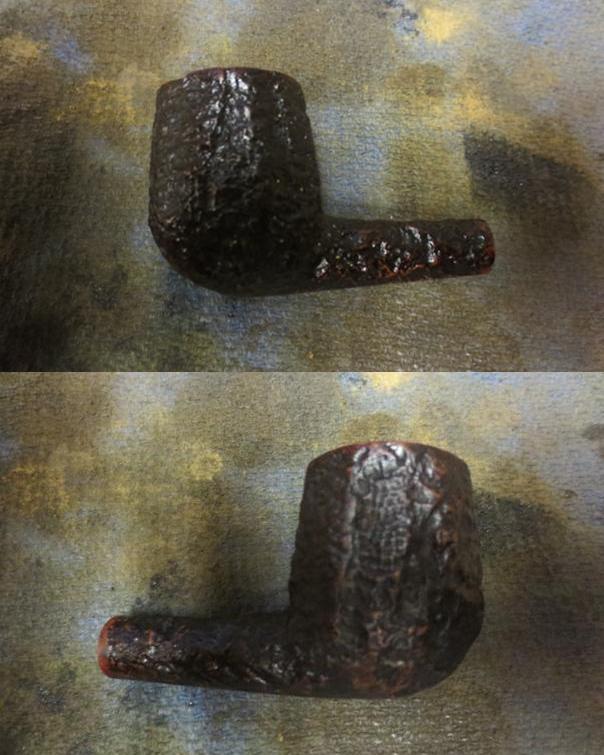
With the internal cleaning complete for both bowl and stem, I move to the externals. I decide to work on the stummel first – starting with a light cleaning with Murphy’s Soap, which weighed quite a bit in my suitcase flying from Atlanta to Sofia. With Steve’s counsel, I used cotton pads and made a light application, undiluted, and quickly wiped it off with a cotton pad with tap water so as to not take off stain and dampen the color already in the briar. As expected, Murphy’s dulled the finish as it took off the superficial wax layer. Now, what I’ve been waiting for – since the stummel is already in stellar condition – no significant scratches or blemishes, I move directly to the polishing regimen with carnauba wax using my Dremel (truth be known, I actually do not have a Dremel brand tool – but a Skil (It does the job and was a bit cheaper here in Bulgaria) and Chinese-purchased cotton wheels off eBay. Since about 50 came in the bag, I decided to use a new one for the Tortuga but I know that means I’ll be covered with cotton fiber as the new wheel settles down from being new! I put the stem back on the stummel so that I would have a good hold for the Dremel work – launching the cotton ball with the retort was enough excitement. I don’t want to launch the pipe too, especially as I work around the rim. I use the slowest RPM setting and am careful to keep the wheel moving over the briar surface to not overheat the wood. I took a couple close-ups of the stummel before I started for a comparison later. I applied several coats of carnauba wax and finished with a clean wheel buff and a vigorous rub with a micro-fiber cloth to give the grain depth. Pictures show great progress and a look at my chop-block lap work with the Dremel – it’s easier to stay on top of things. Now to the stem – the home-stretch.


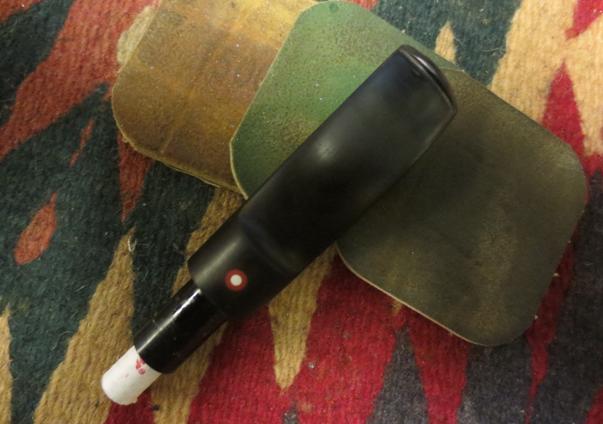
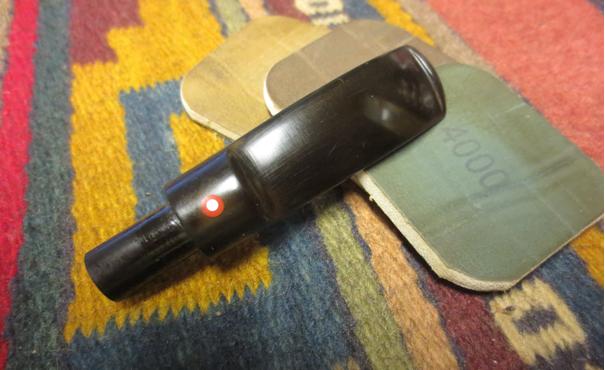
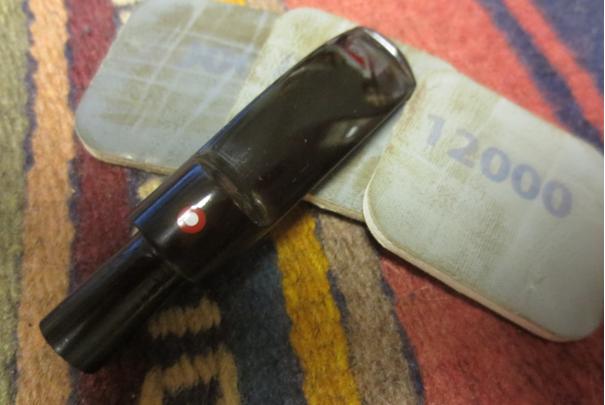
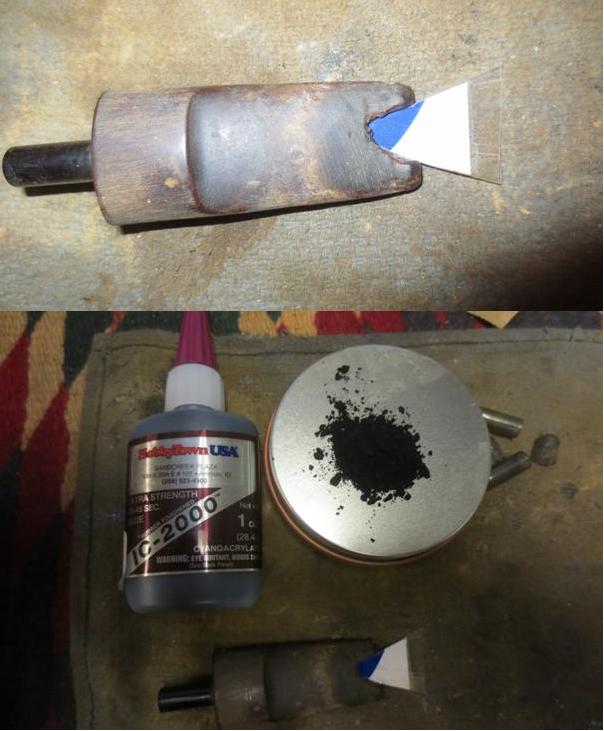
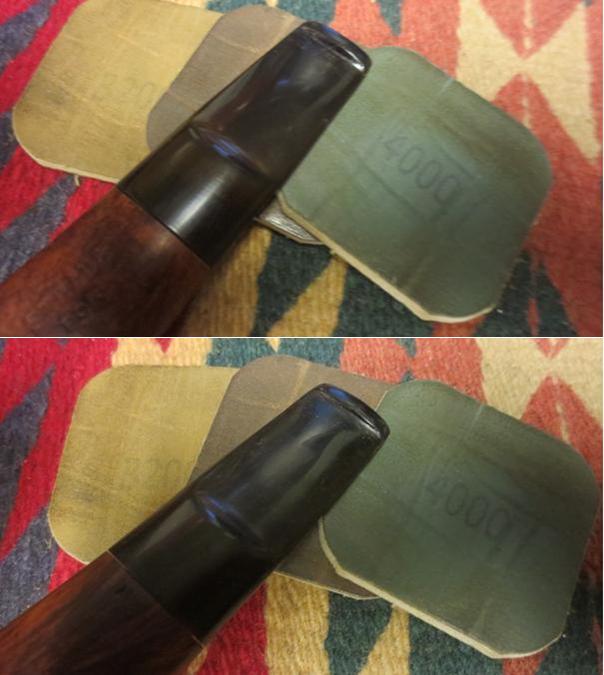
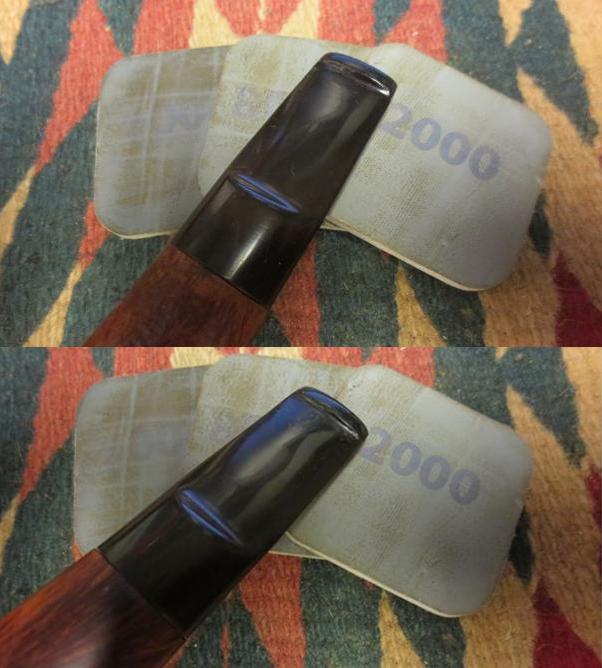
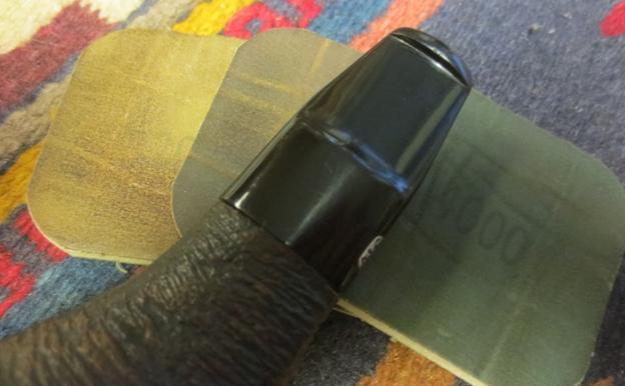
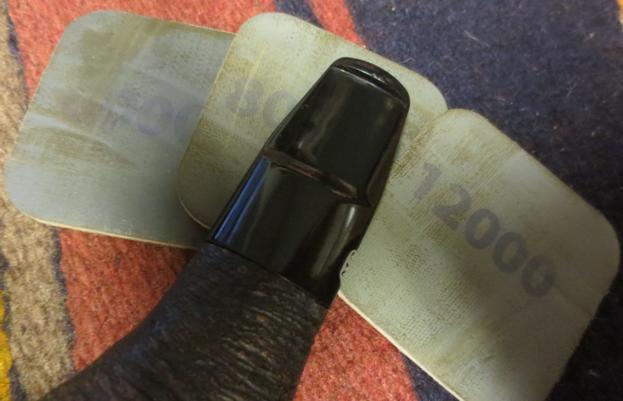
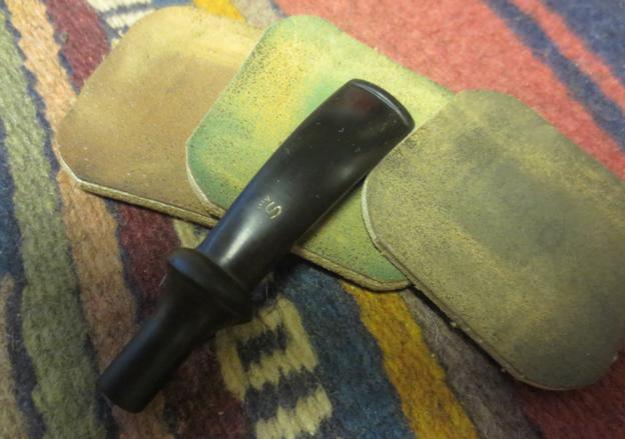
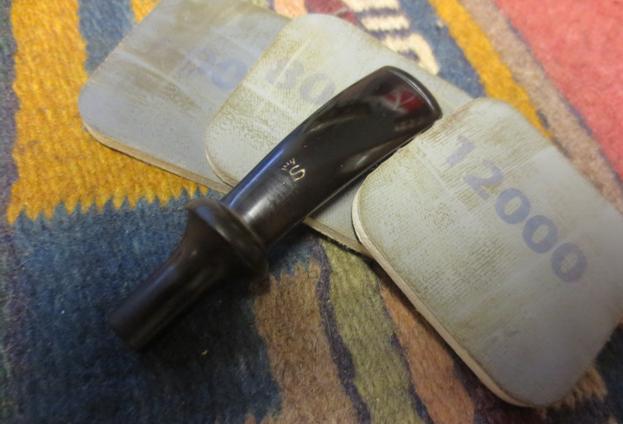
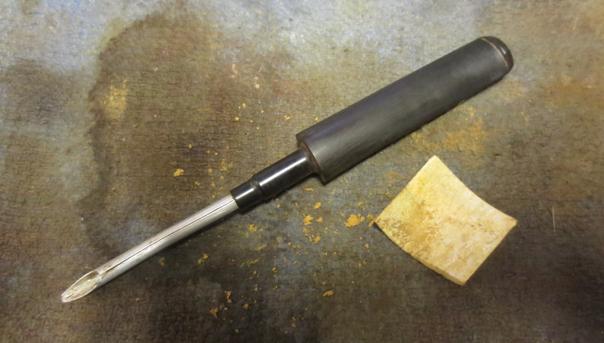
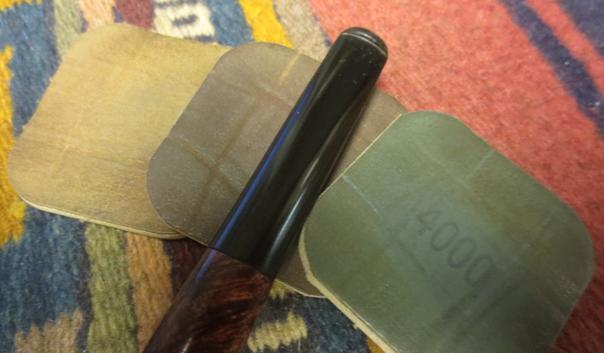
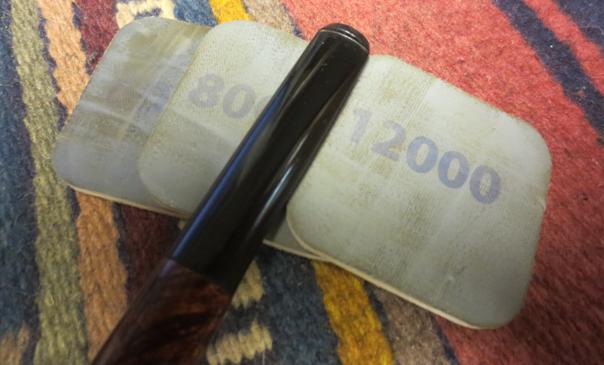
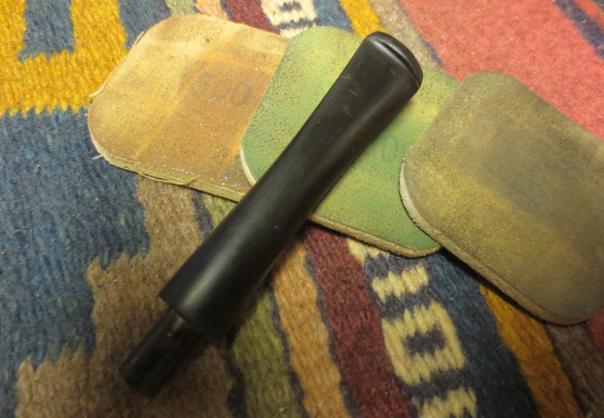
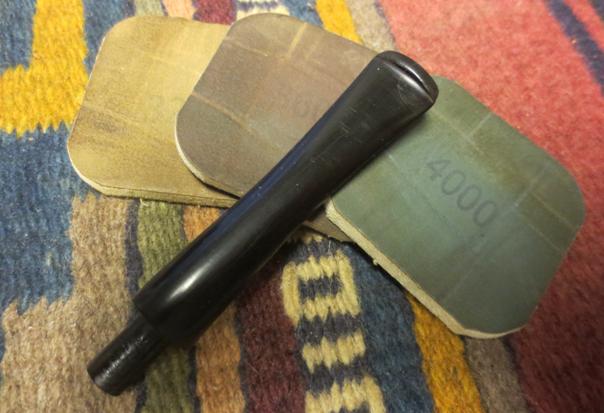
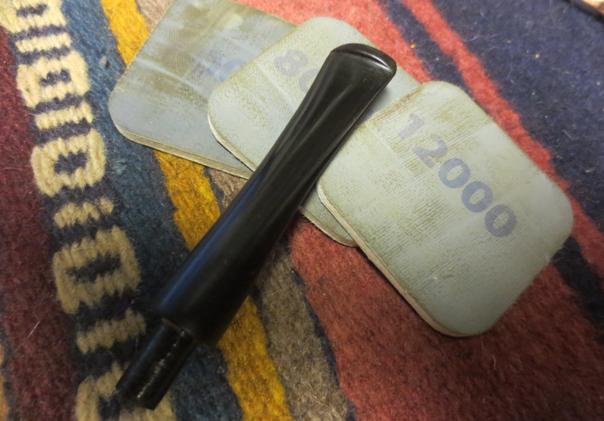
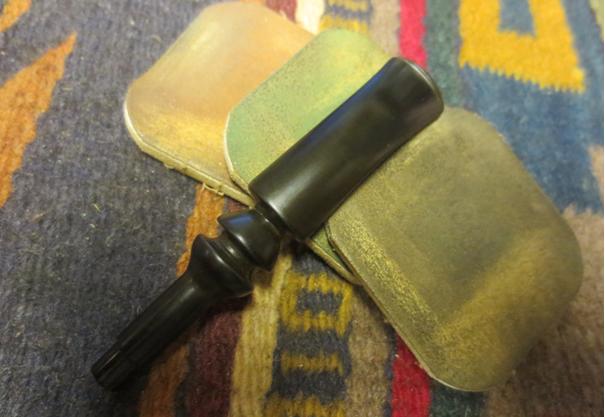
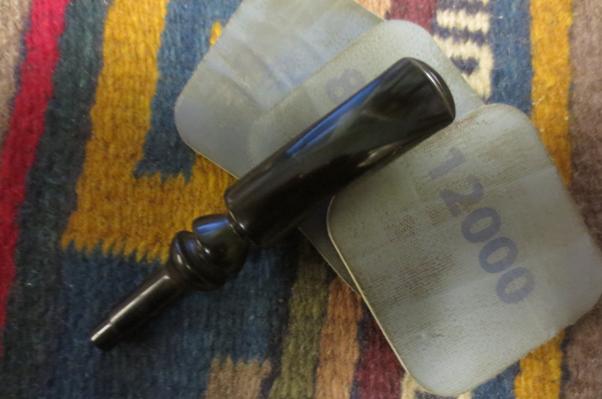
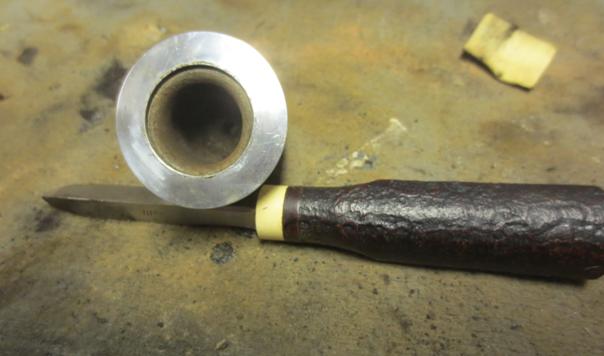
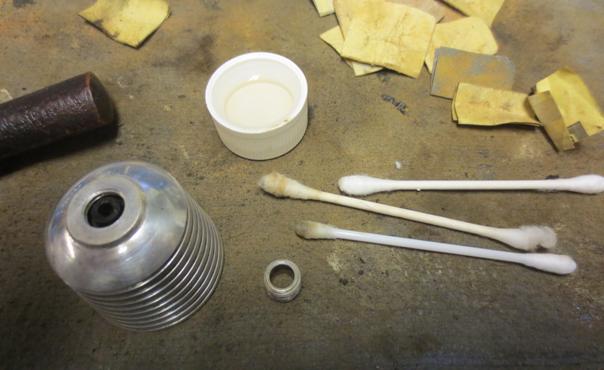
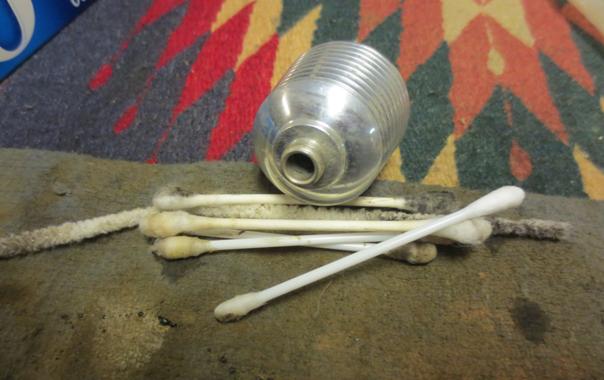
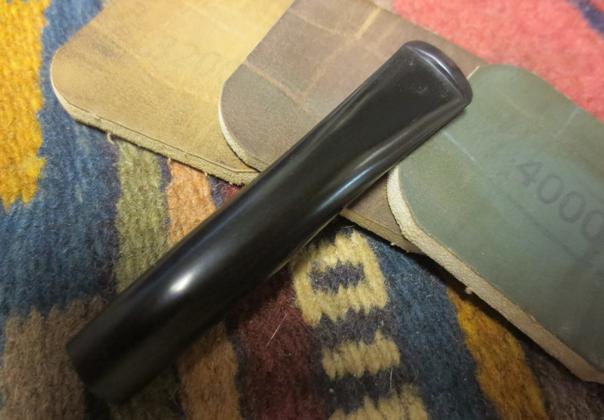
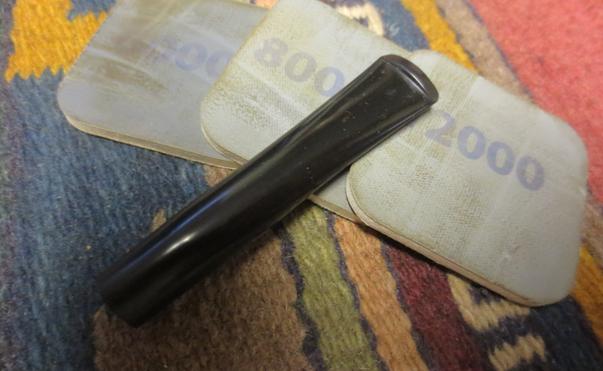
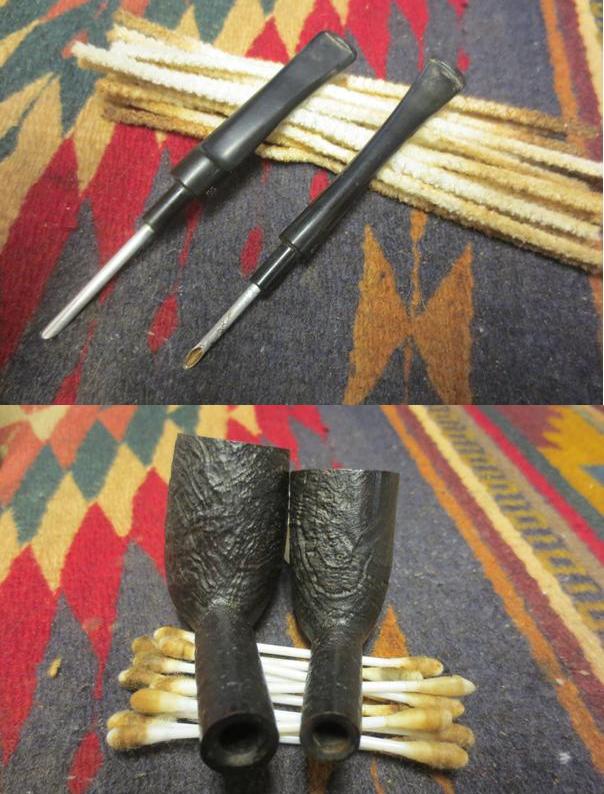
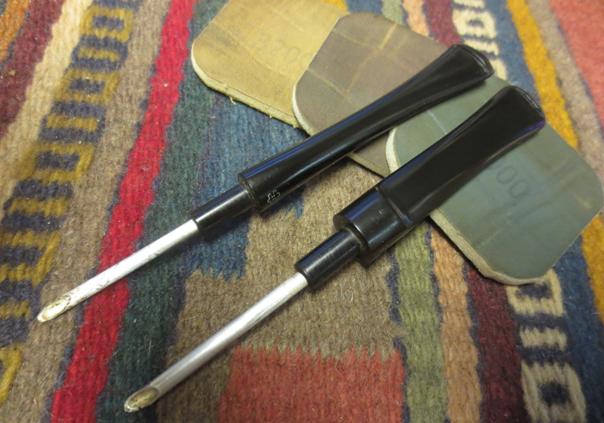
 I’ve not worked on a Lucite stem before but Steve assured me it’s the same basics as a vulcanite stem. I took another close up of the button area to determine if 240 grit sandpaper will be sufficient to deal with the moderate teeth chatter or if I need to build the divots up with super glue first. I decided simply to strategically sand the teeth chatter and gave the button a bit more definition with the needle file. To remove the scratches from working with the file and paper I used the full regimen of micromesh 1500-2400, 3200-4000, and 6000-12000. During the first cycle I also used a bit of 240 grit sandpaper on the band focusing on some pitting from oxidation that I detected. It worked the problems out of the band and I continued with the micromesh regimen. The pictures tell the story!


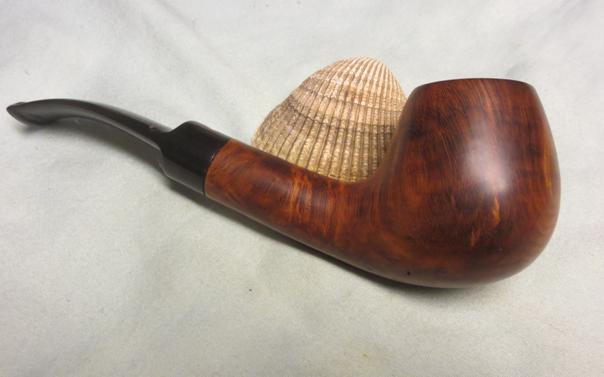
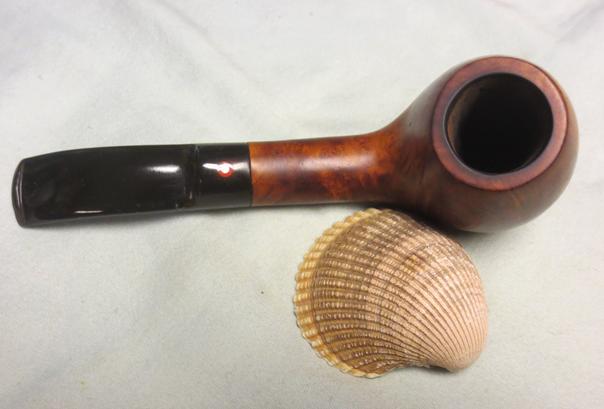
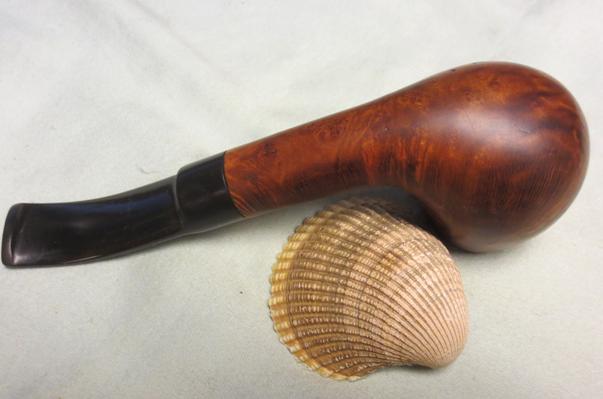
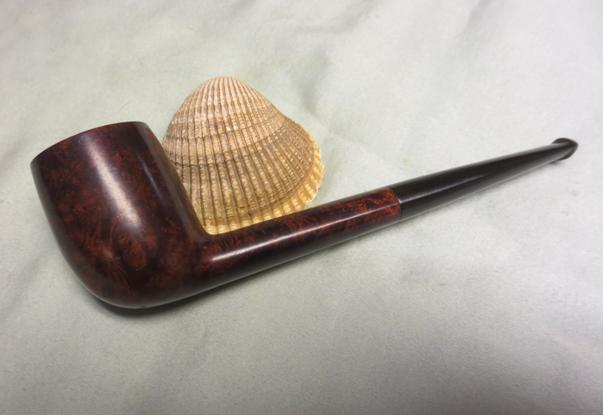
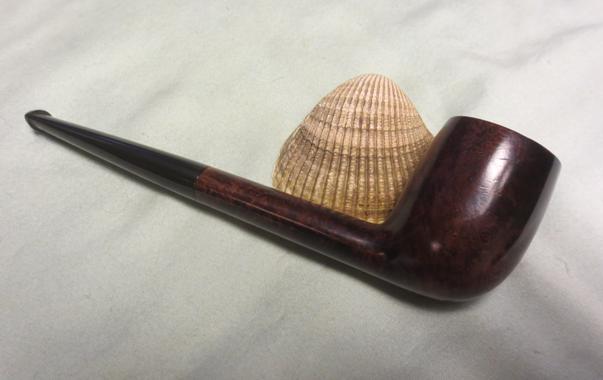
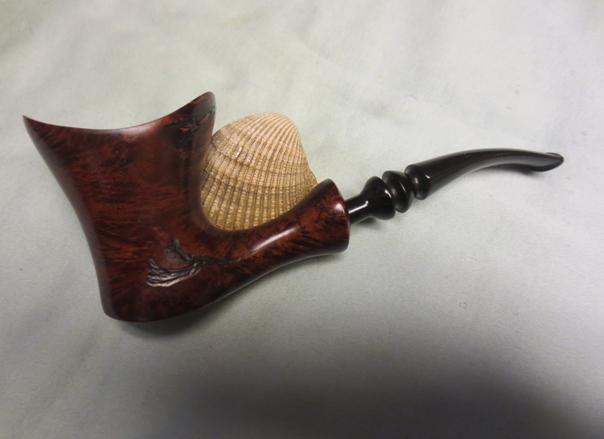
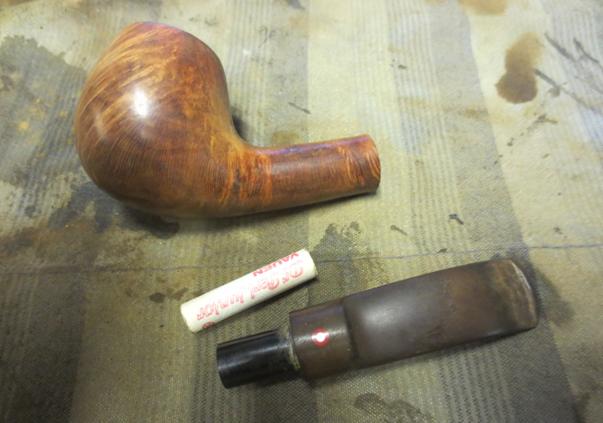
 Well, I’m not disappointed with the prom queen! She’s beautiful. The briar is on fire as I hoped and the Lucite ‘turtle’ stem compliment the wood perfectly. I was disappointed with the bevel initially, but I like how the rounded bevel flows with the rest of the grain movement. I will be cannibalizing a stem and fabricating a filter adapter – I don’t like filtered systems. So, before I try this Savinelli out, I’ll be working on that. As with my other pipes – a name is appropriate when it stays in my meager but growing collection. I think Savinelli already did a good job. Tortuga is a cool name! Thanks!


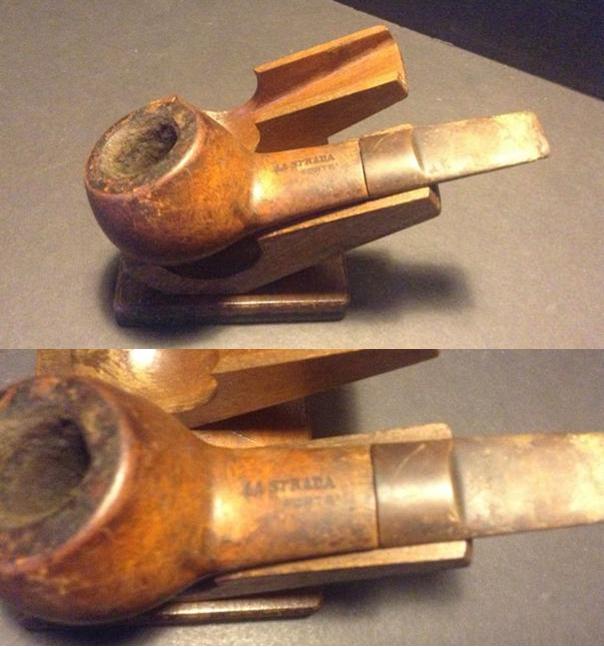
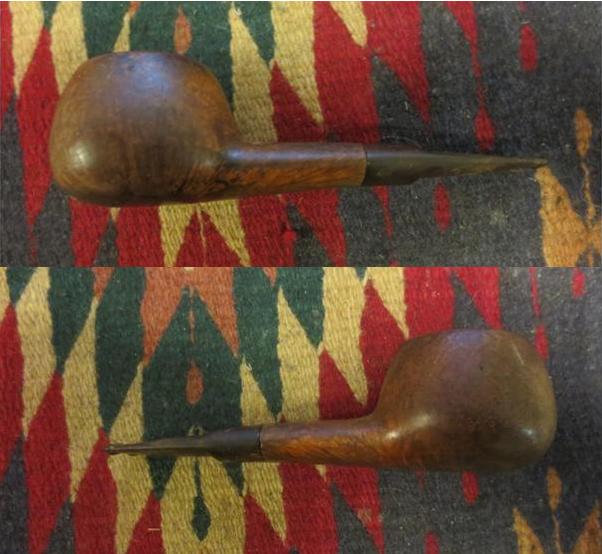
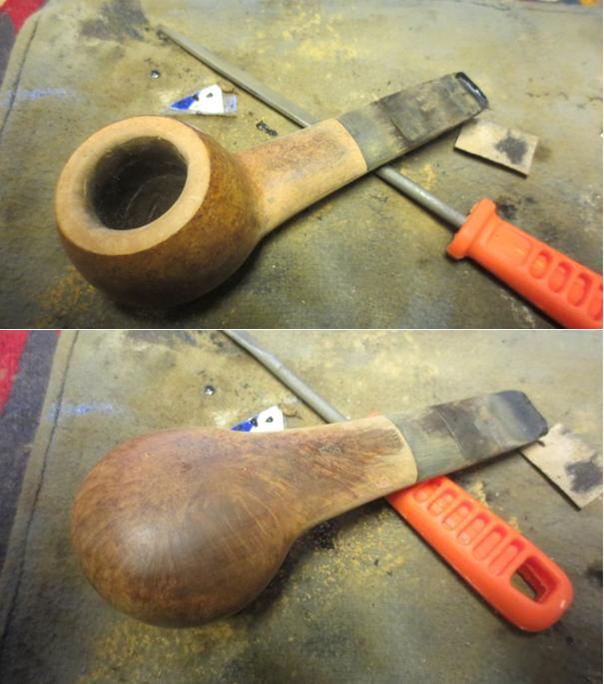
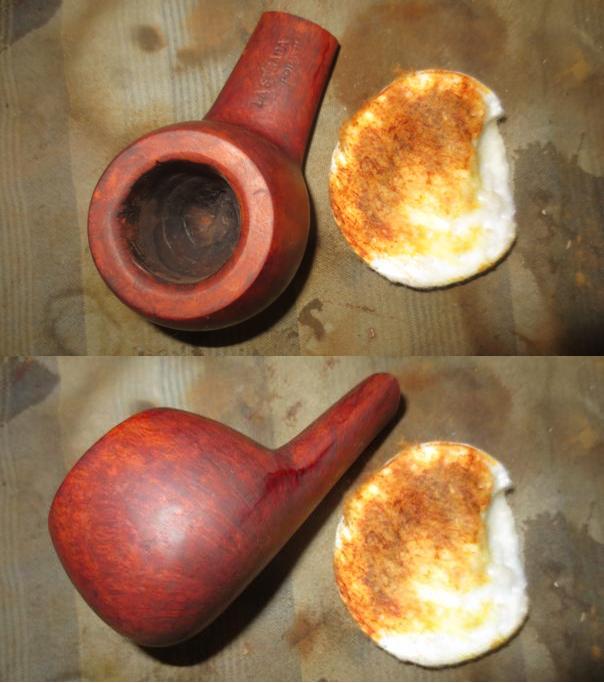
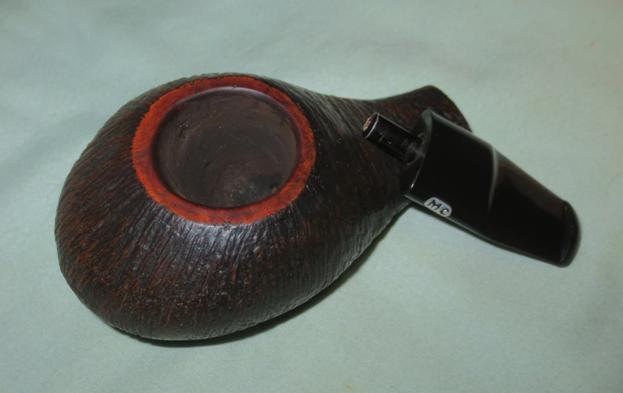
 I cleaned up the reaming angles with the Savinelli Pipe Knife and was able to get the bowl clean and smooth back to briar.
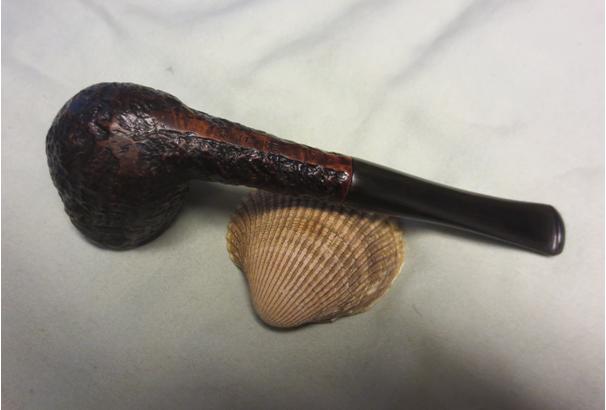
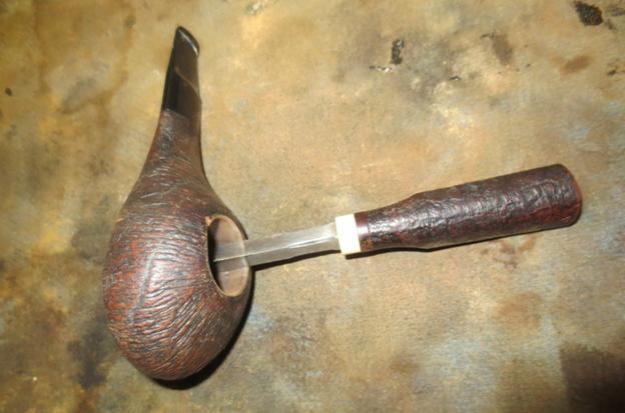 I decided to try to bevel the rim to remove the gouges on the right top side. I worked on it for quite a while before I gave up on that and topped the bowl. In the photo below the largest gouge is the light brown portion of the rim on the top of the photo toward the back of the bowl.
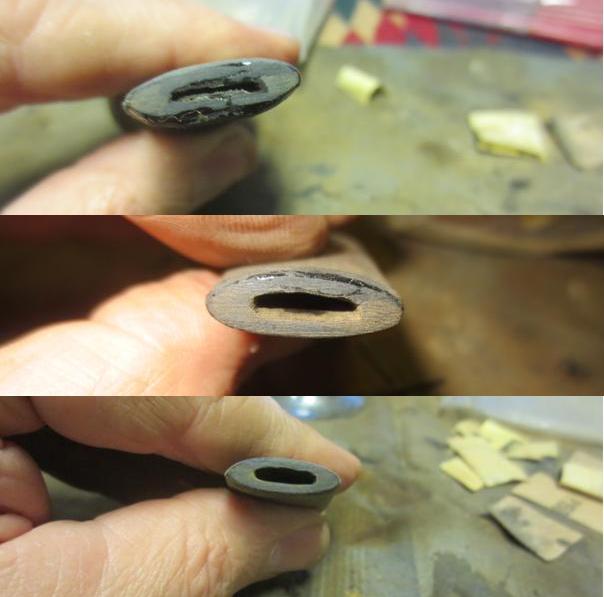
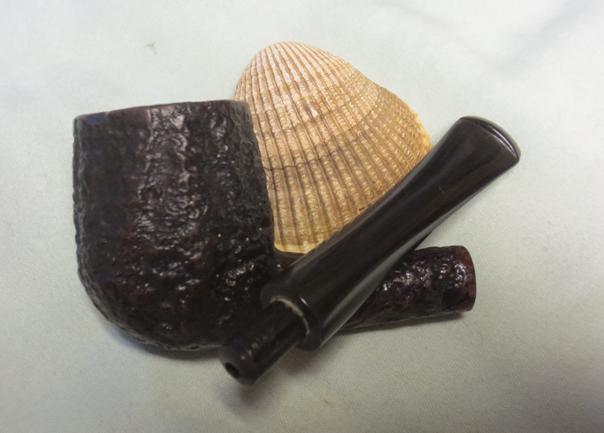
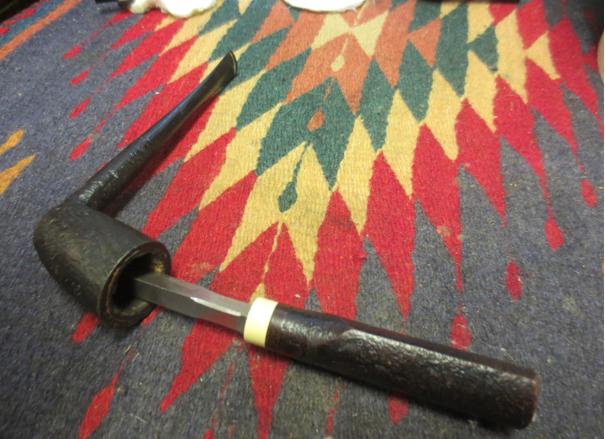
 I took some photos of the stem to show the damage that needed to be worked on to recondition and rework it to bring it back to new. The first photo is the top of the stem and the second the underside.
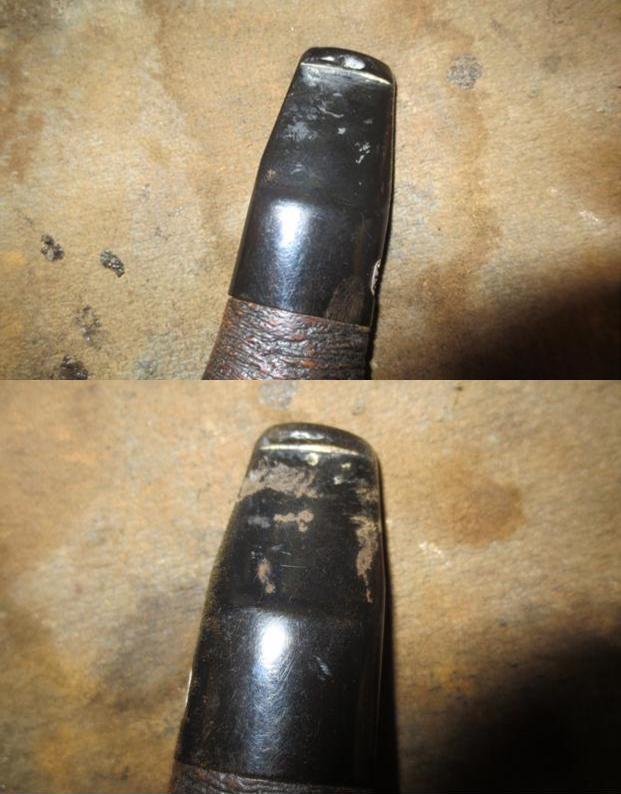 I was able to sand out the tooth marks on the top side of the stem with 220 grit sandpaper and also reshape the button a bit. I did the same on the underside but there was one deep tooth mark that I would need to fill.
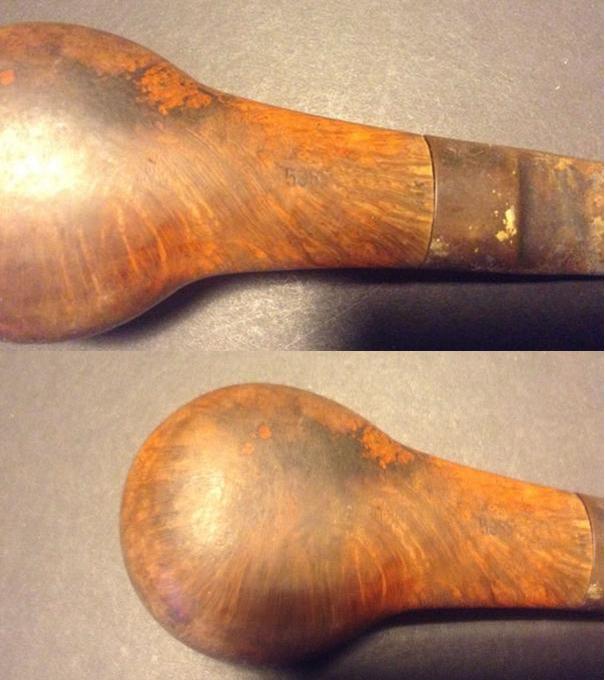
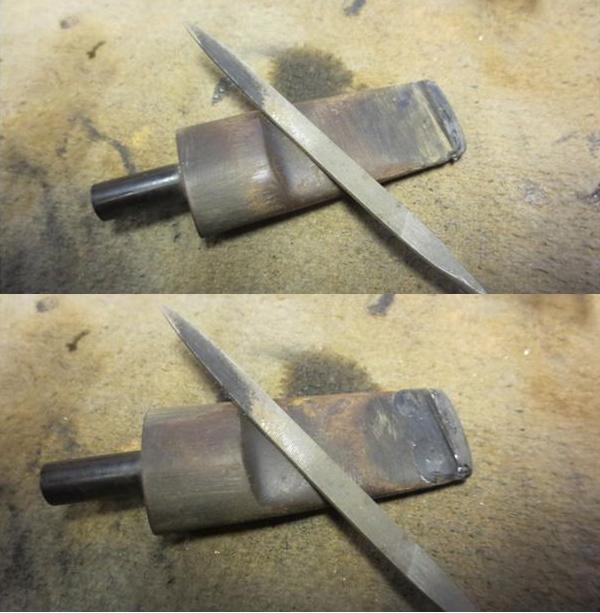
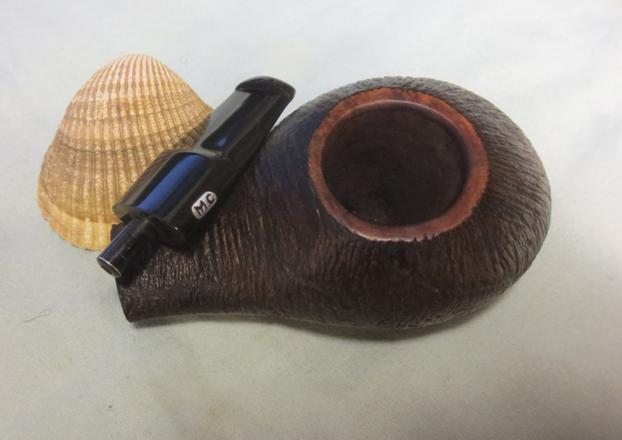
 Giving up on trying to reshape the rim or repair it I topped the bowl on my topping board and took of the damaged area on the right side of the rim and the back of the left side as well. The gouges were just not something I wanted to try to fill in. I also decided that I would flatten the rim and give the inner edge a slight bevel. I would stain the rim to match the smooth portion on the underside of the pipe.
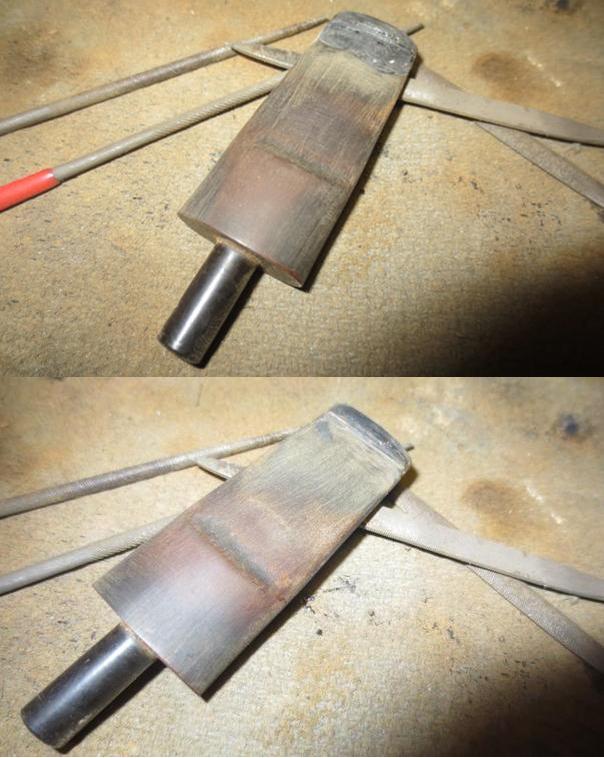
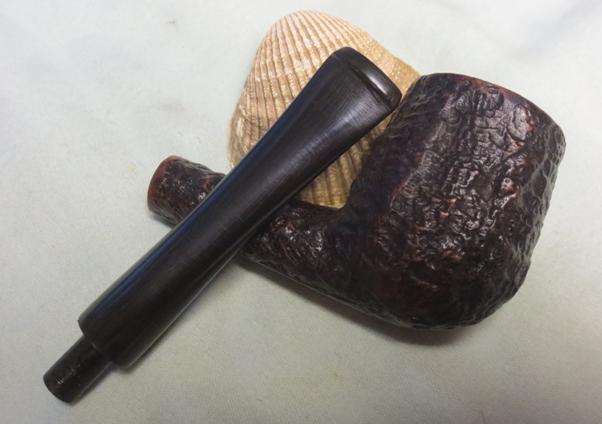
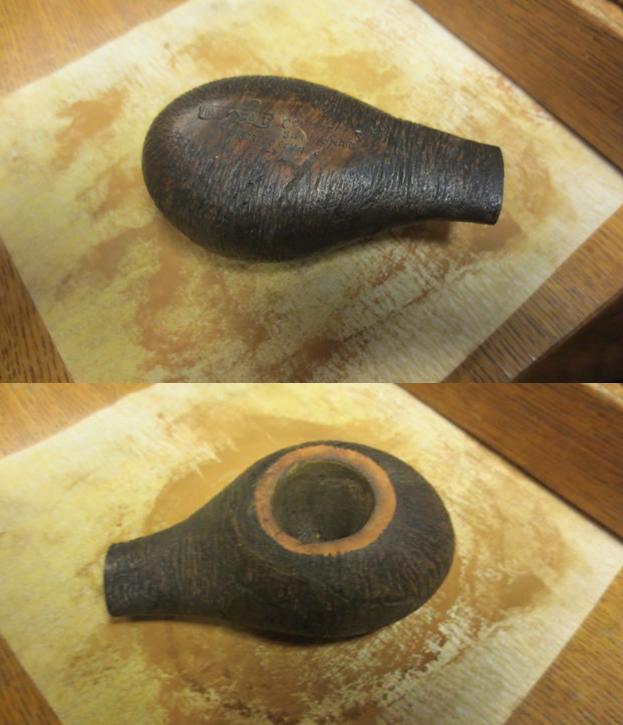 I used the Dremel and sanding drum to bring the bowl back into round and then lightly beveled the inner rim edge with the sanding drum (first picture below). I cleaned up the Dremel work with a folded piece of 180 grit sandpaper followed by 220 grit (second picture).
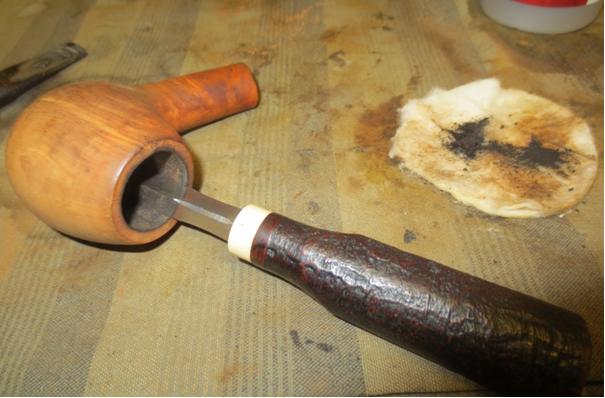
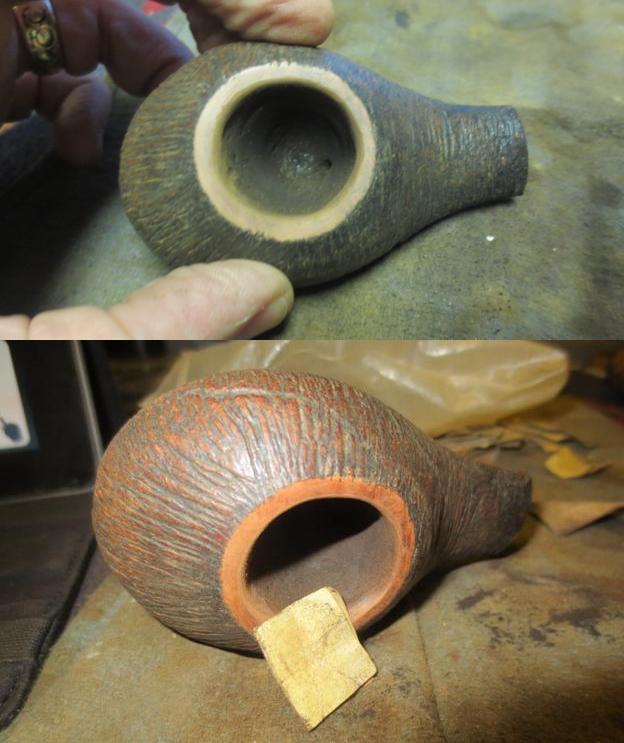 I cleaned the mortise and airways in the bowl and the stem with pipe cleaners, cotton swabs and alcohol (I have always used 99% isopropyl).
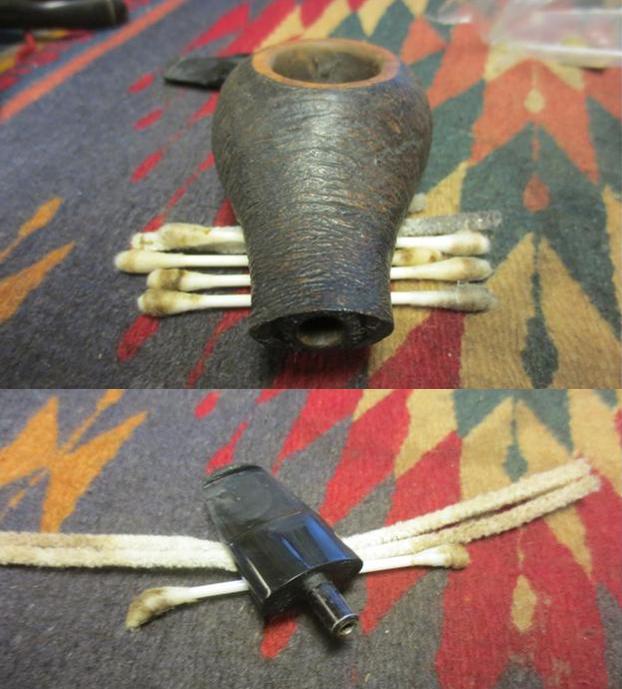 I restained the rim with a dark brown stain pen and blended in some black from a Sharpie pen. I wiped down the exterior of the bowl with alcohol on a cotton pad to remove the grime and to blend the rim colour with the bowl.
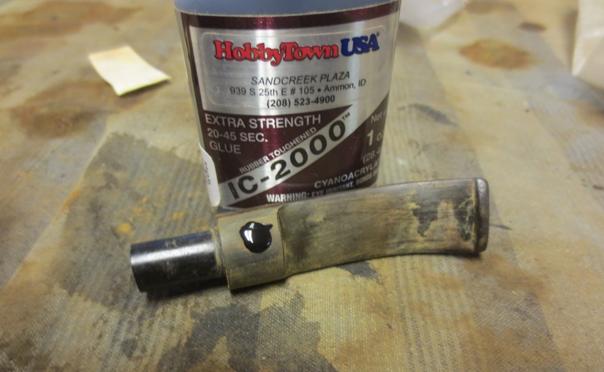
 I built up the tooth mark on the underside of the stem and the deep marks on the button surface with black super glue. Once it dried I sanded the repairs with 220 grit sandpaper to blend them into the surface and sharpened the button edge with a needle file. I sanded the stem with 400-600 grit wet dry sandpaper to remove the scratches. I wet sanded it with 1500-3600 grit micromesh sanding pads and dry sanded it with 4000-12000 grit pads. I buffed it quickly with Blue Diamond and gave the stem a light coat of carnauba wax.
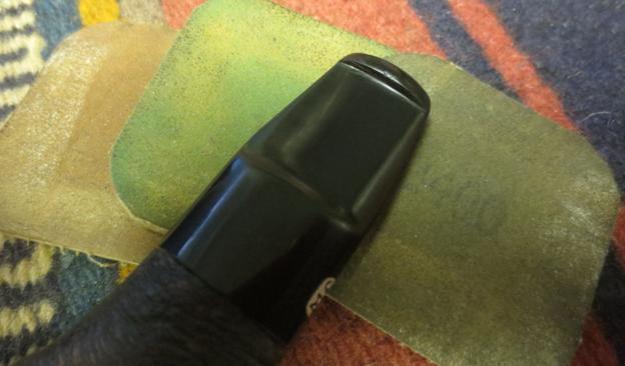
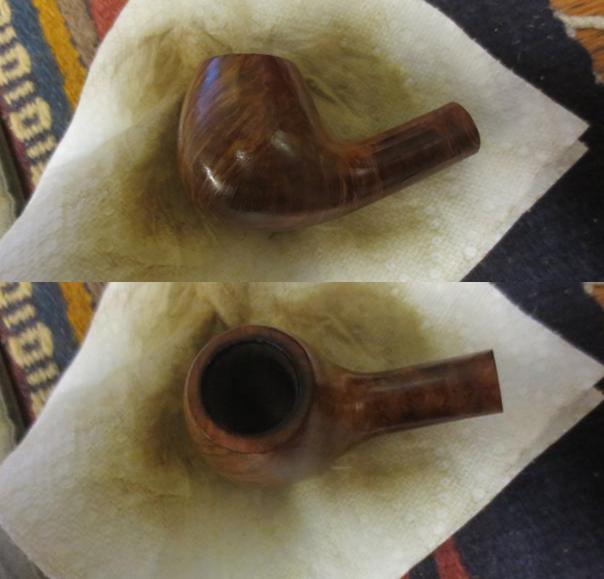
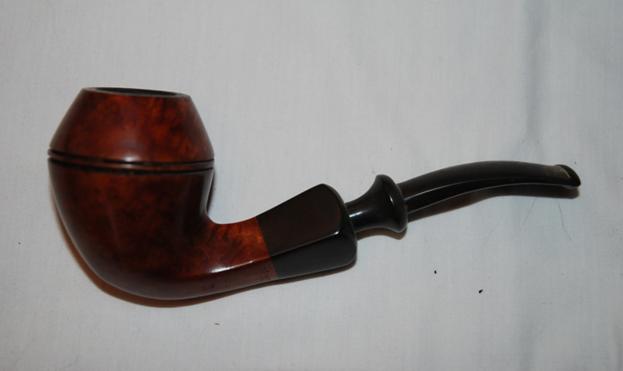
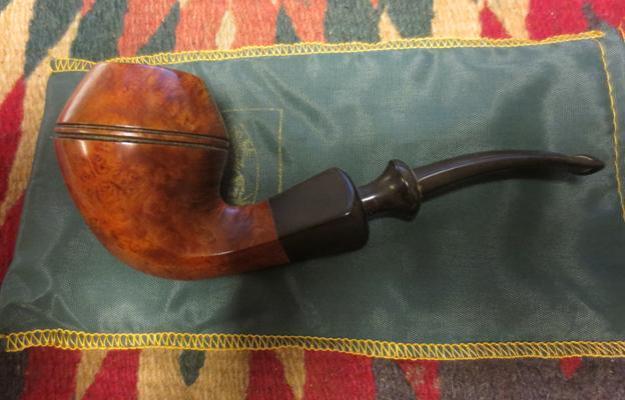
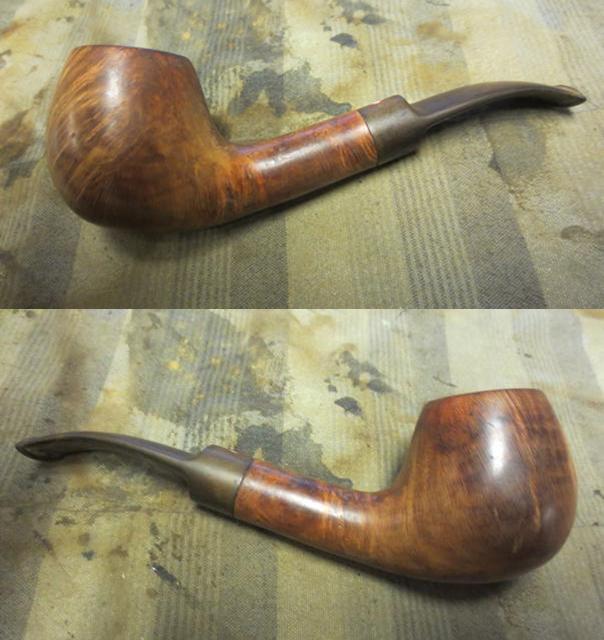
 I gave the bowl several coats of Conservator’s Wax and buffed it with a shoe brush and a microfibre cloth to give it a shine. I gave the stem several more coats of carnauba wax. I lightly buffed the pipe with a clean buffing pad and then again with the microfibre cloth. The finished pipe is shown in the photos below. What started out as an oddball pipe to me somehow in the process of restoration took on a beauty of its own. I like the smooth rim and the contrast it gives with the wire finish on the bowl and shank. Together they work for me. I know in the box of pipes I have sitting to refurbish that Jeff has sent me some others that cause a raised eyebrow but I have to say he has an eye for seeing beauty where I would walk by it and leave the pipe to molder away.
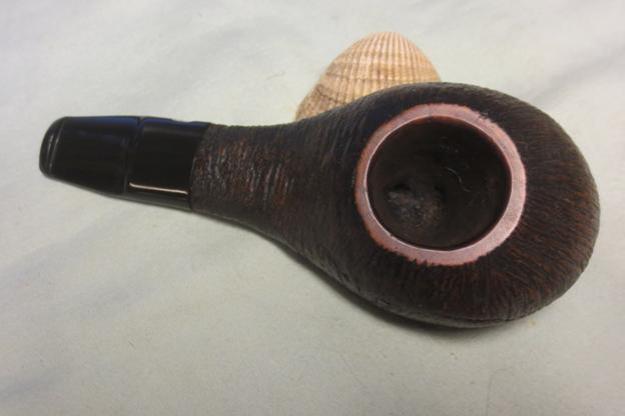


![thumbnail_20160709_144214-1_resized[1]](https://rebornpipes.com/wp-content/uploads/2016/06/thumbnail_20160709_144214-1_resized1.jpg?w=625&h=313)
![thumbnail_20160709_144222-1_resized[1]](https://rebornpipes.com/wp-content/uploads/2016/06/thumbnail_20160709_144222-1_resized1.jpg?w=625&h=682)
![thumbnail_20160709_144234-1_resized[1]](https://rebornpipes.com/wp-content/uploads/2016/06/thumbnail_20160709_144234-1_resized1.jpg?w=625&h=651)
![thumbnail_20160709_144253-1_resized[1]](https://rebornpipes.com/wp-content/uploads/2016/06/thumbnail_20160709_144253-1_resized1.jpg?w=625&h=683)
![thumbnail_20160709_144305-1_resized[1]](https://rebornpipes.com/wp-content/uploads/2016/06/thumbnail_20160709_144305-1_resized1.jpg?w=625&h=568)
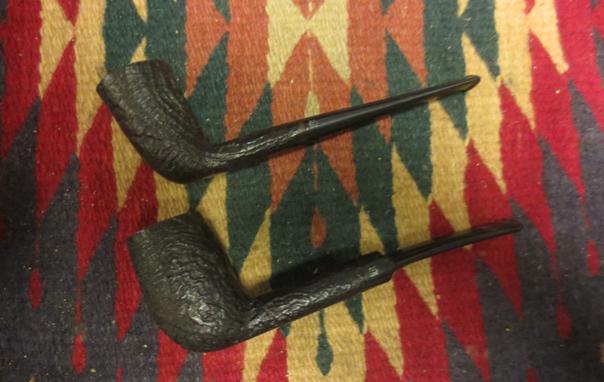
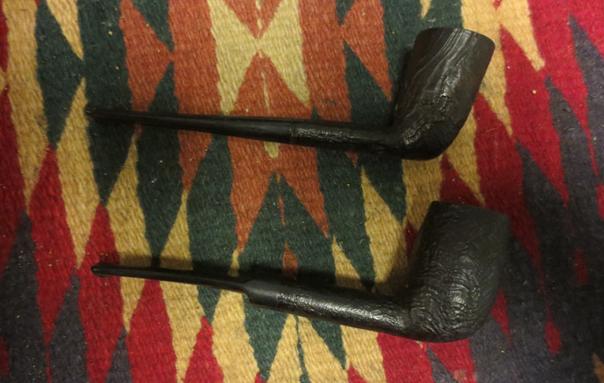


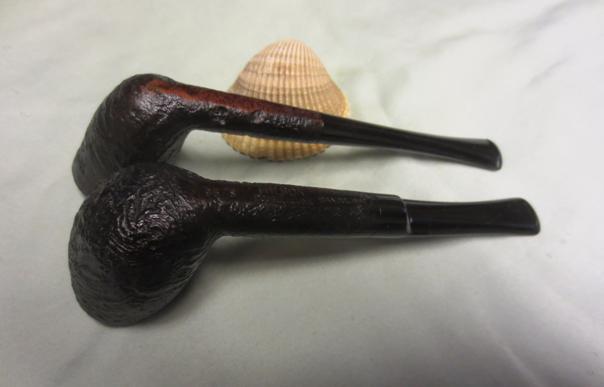
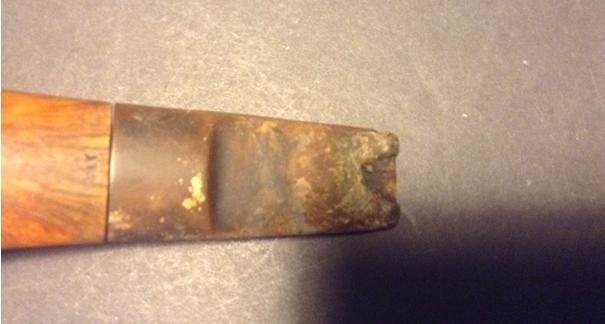
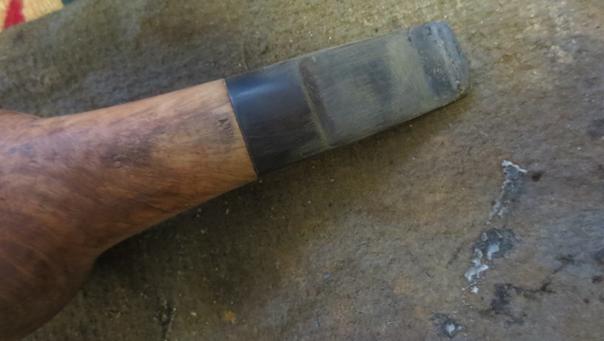
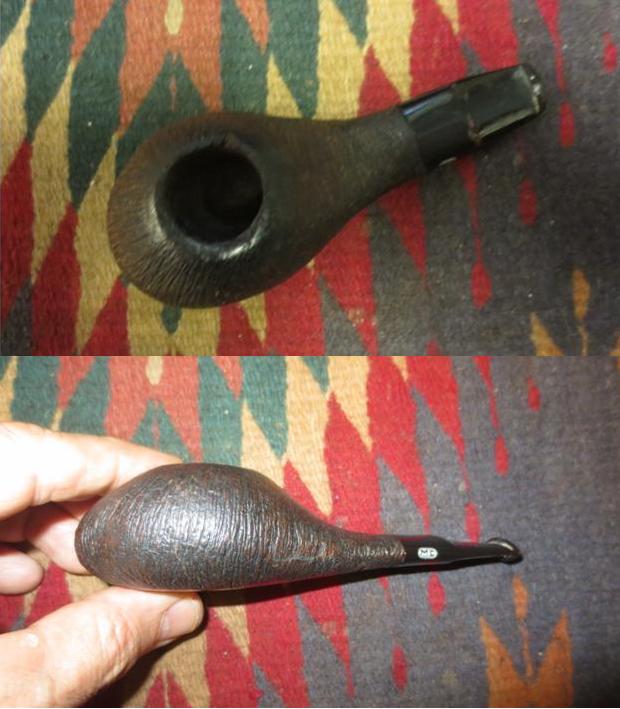
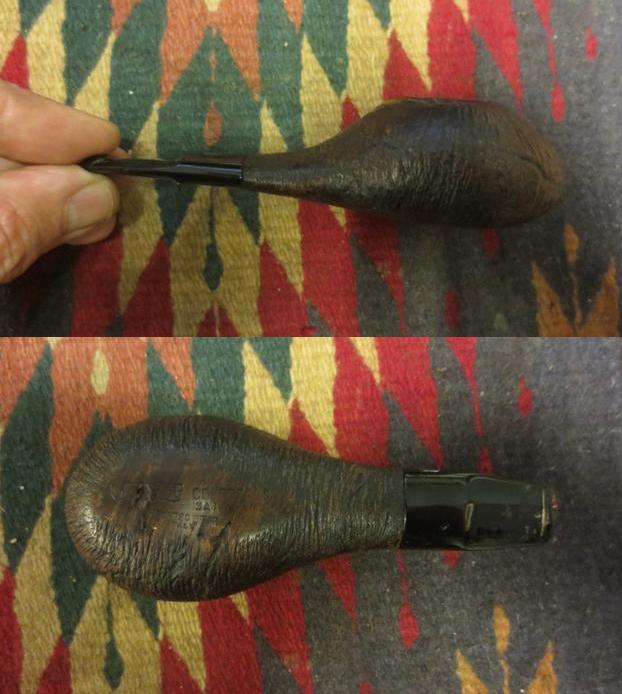
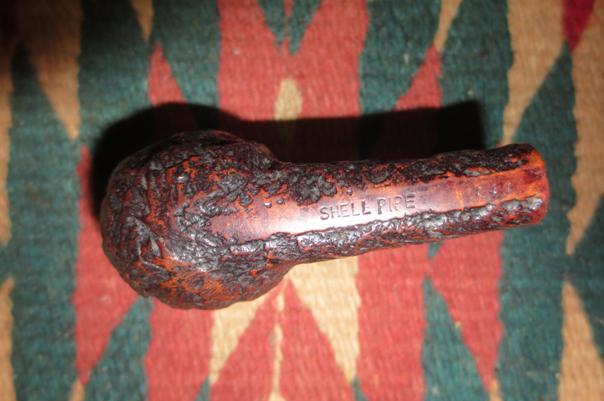
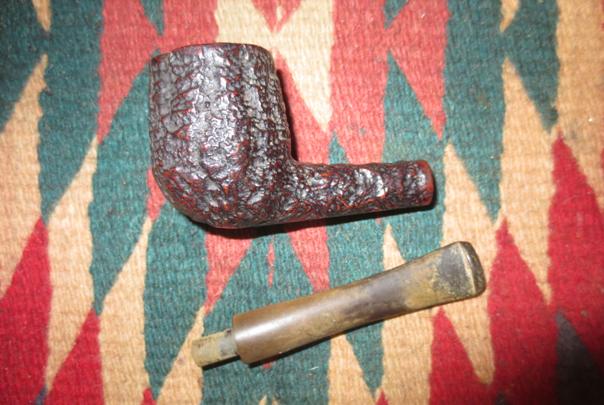
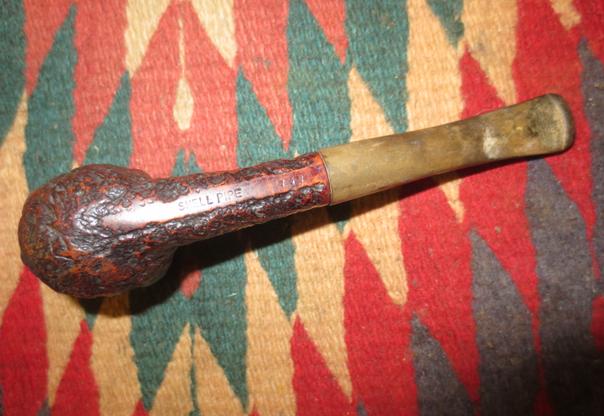
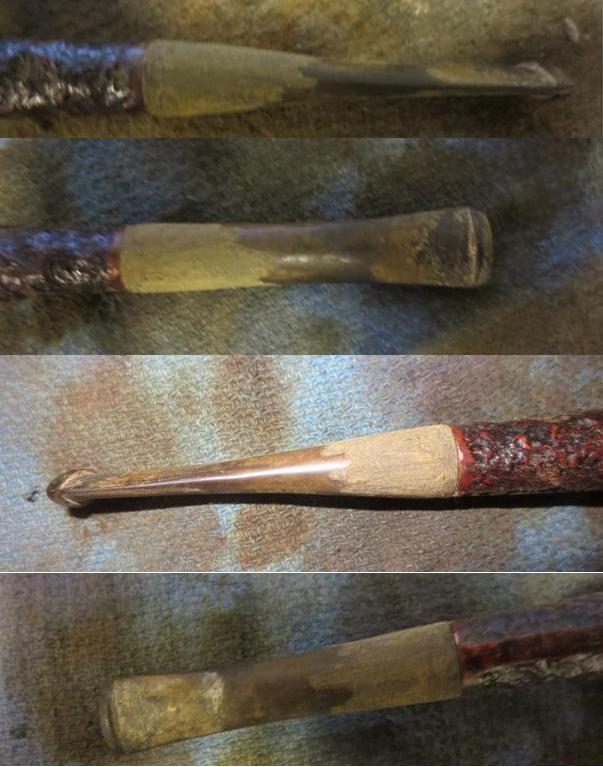
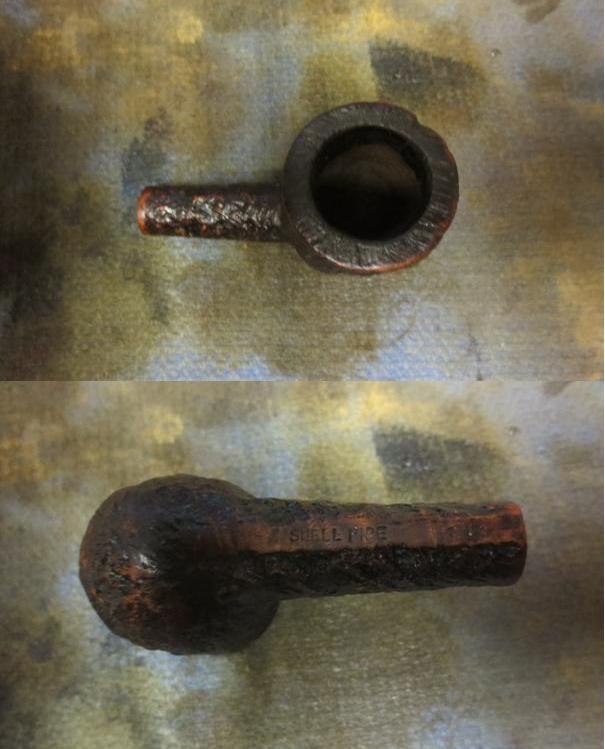
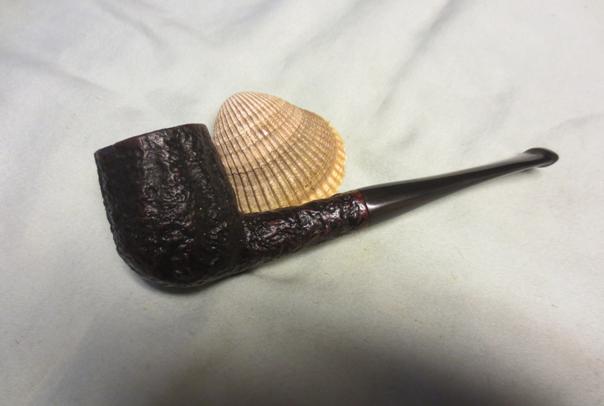
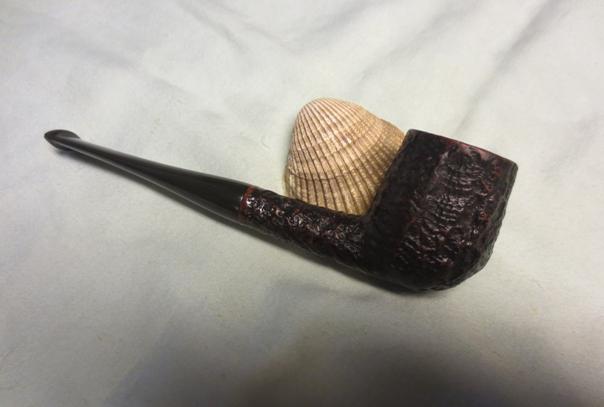
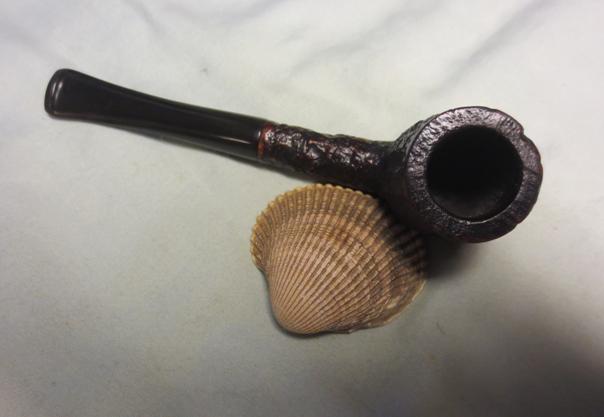
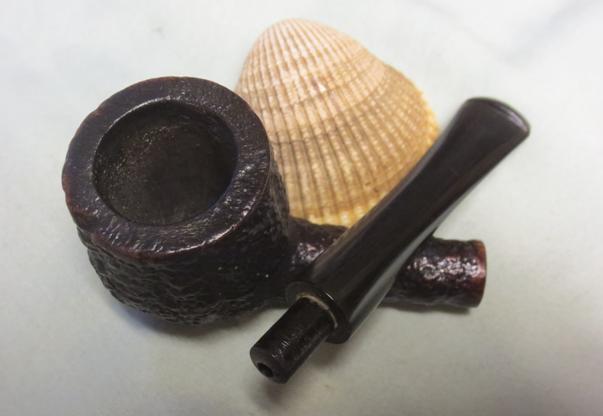
 On the underside of the right side of the pipe there was a burn mark in the vulcanite stem. It looked as if someone had laid the pipe down in an ashtray and a cigarette or ash had burned this spot on the stem. The first close-up photo below shows the burn mark. The second photo show the tooth chatter and marks on the stem near the button (The ones on the other side of the stem are not as deep). The third close-up photo below shows the rim of the pipe and the state of the bowl.
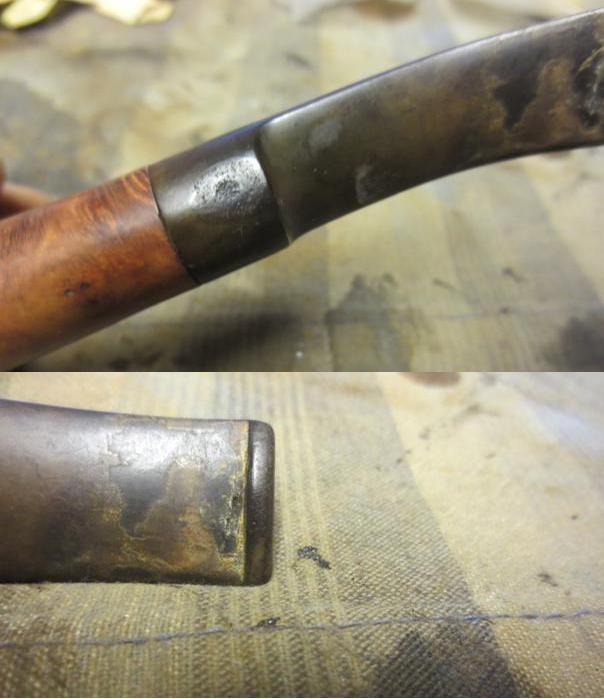
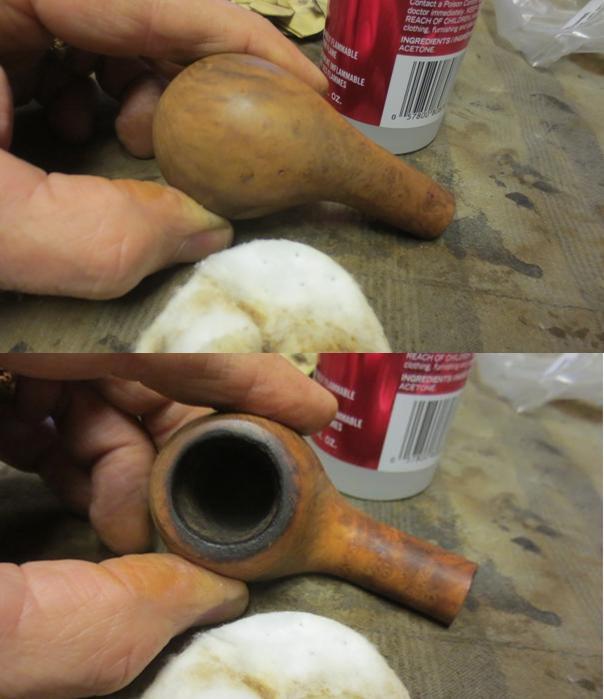
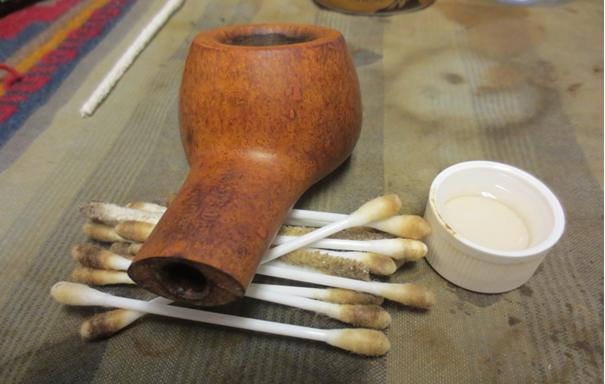
 I scrubbed the bowl surface with acetone on a cotton pad to remove the finish from the bowl. It removed the grime and oils from the original natural finish of the bowl and left it clean.