Blog by Steve Laug
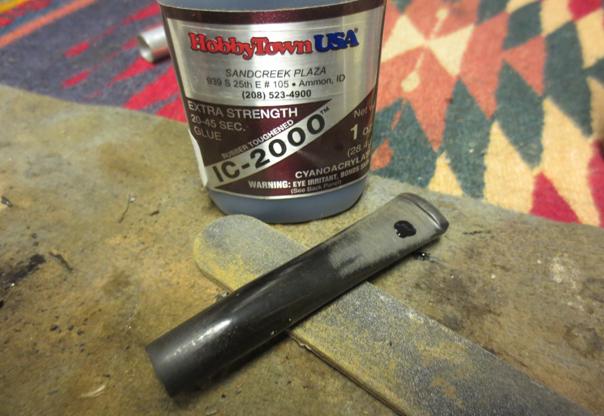
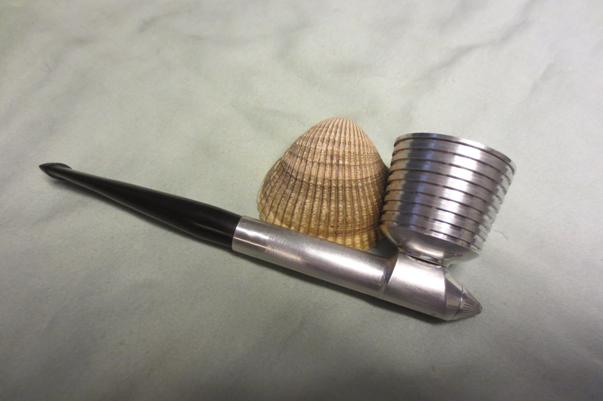
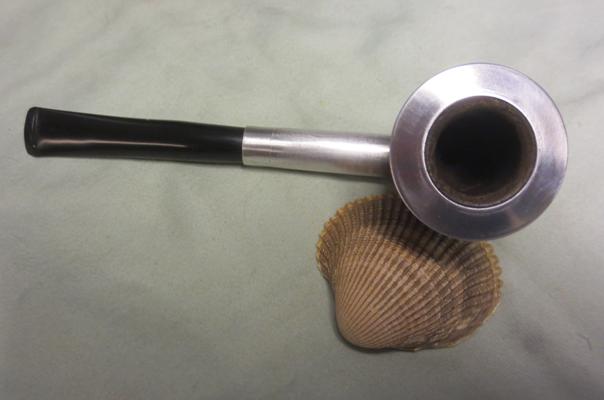
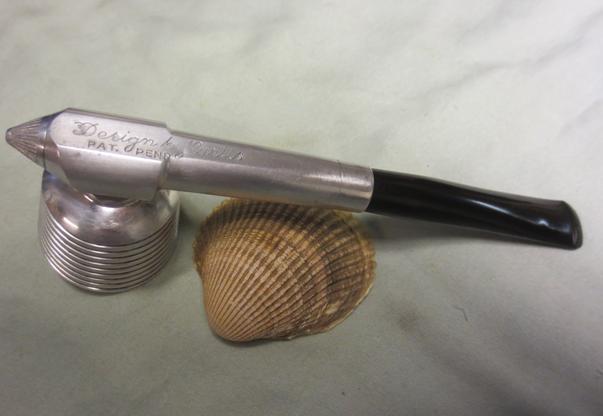
This smoking metal pipe is really Art Deco looking. It has a metal finned bowl with a pressure fit top cap holding in a briar bowl. There is a threaded connector between the bowl and the metal shank base. The connector threads into both the bowl and the shank. The shank has a pointed end cap that is frozen in place. The bowl was caked and worn. The stem had bite marks on both the top and the bottom sides near the button. The stem is a military mount that sits in a stepped down interior of the metal shank. There is a tube at the end of the airway in the shank that seems to have holes in it as the air flows through when blown into the end. The exterior of the pipe is oxidized and dull. The bottom of the shank is stamped Design by Curtis over Pat. Pend. It is a brand about which I know nothing.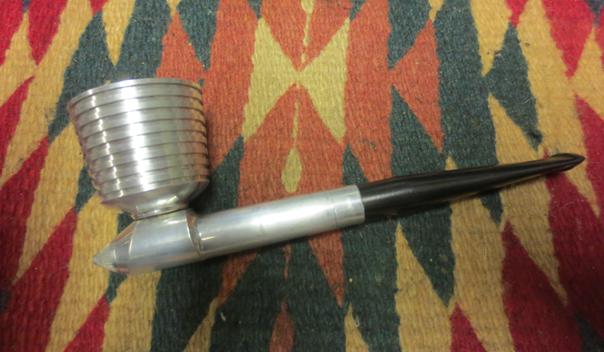
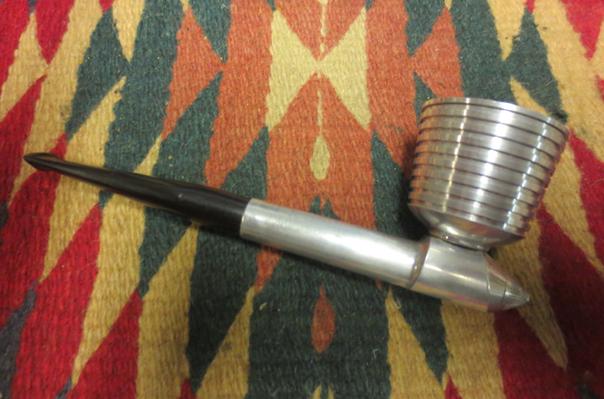
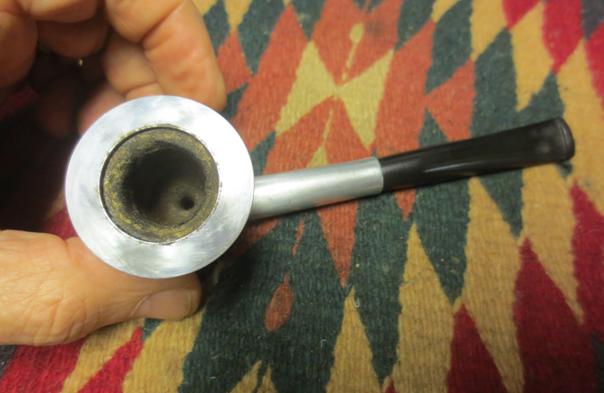
 I took some close-up photos of the bowl and the stamping on the shank to give a better idea of what the pipe looked like when I started.
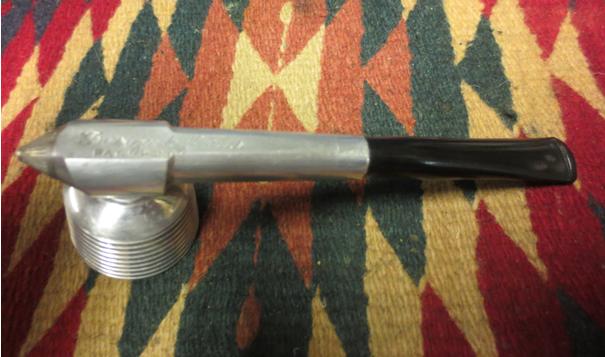
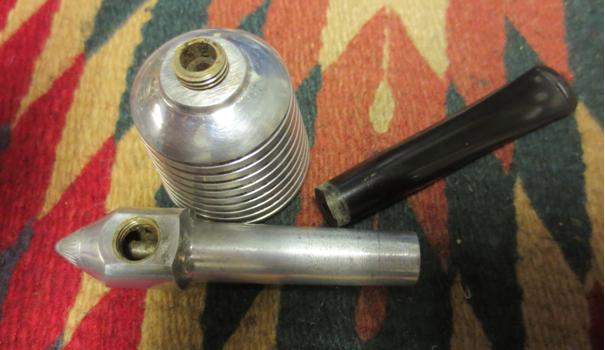
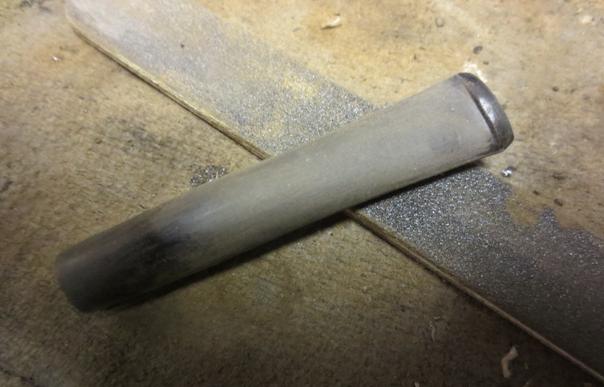
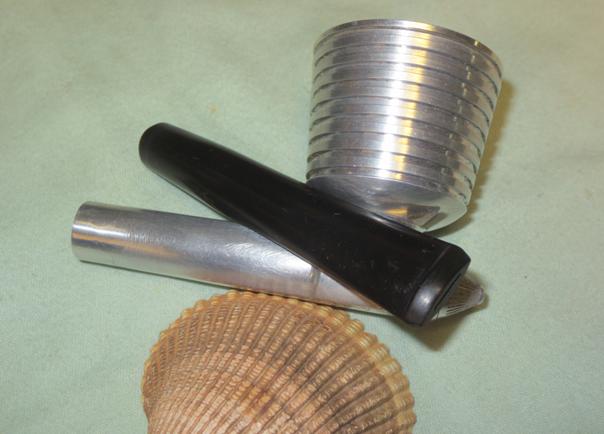
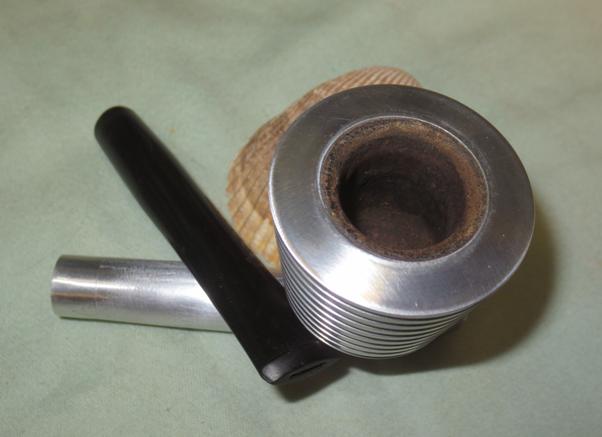
 I took the pipe apart to have a look at the pieces individually and see what I could learn from the way it fit together. I was unable to take the end cap off the shank and I was not willing to damage the cone shaped piece to work it free.
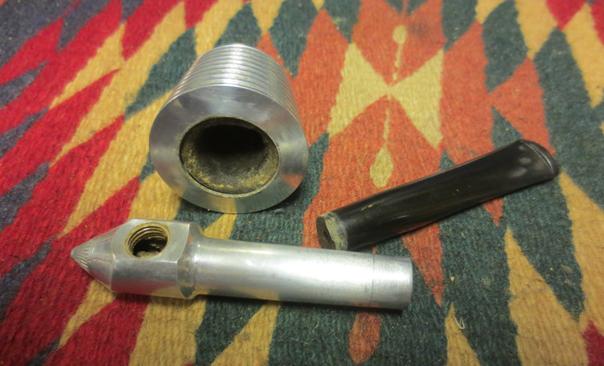
 I wanted to learn more about the pipe so I did a bit of digging on the Smoking Metal Pipes Site and found this information and pictures (http://www.smokingmetal.co.uk/pipe.php?page=52 ). The site showed a picture of another version of the pipe. It may be newer than the one that I had in hand. It was marked as a Curtis Custom-Built Pipe Model 100. It was manufactured by Curtis Industries of 1120 East 222nd Street, Cleveland, Ohio. They were first seen around 1946. The pipe that was pictured was different in several ways. The stem was different in that it had a filter insert and a threaded tenon. My version did not have a filter system and also did not have the stinger end cap that held the filter in place. The pictures that follow come from that site. I have cropped and rearranged them to better suit the order of my blog. The brochure also comes from that site.
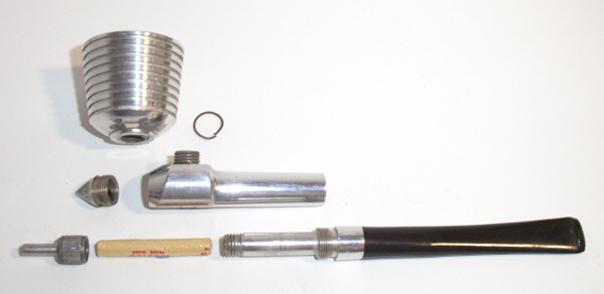
 From the Smoking Metal Site it appears that the patent was applied for 25 December 1945. It had the patent number #D143257 and the inventor is named as Howard Abrams from University Heights, Ohio. The site also showed a cut away photo of the bowl and cup.
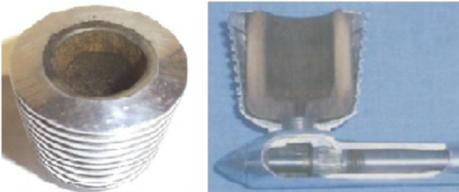 It also includes a copy of the brochure that was included with the pipe. The cover of the brochure reads The Curtis Custom-Built Pipe and three descriptors – Streamlined, Precision Built, Guaranteed. The back reads The Curtis Pipe carries a six month guarantee. The rest reads No. 52927 over Curtis Industries 1120 East 222nd St. Cleveland, Ohio over Model 100 Patent Pending.
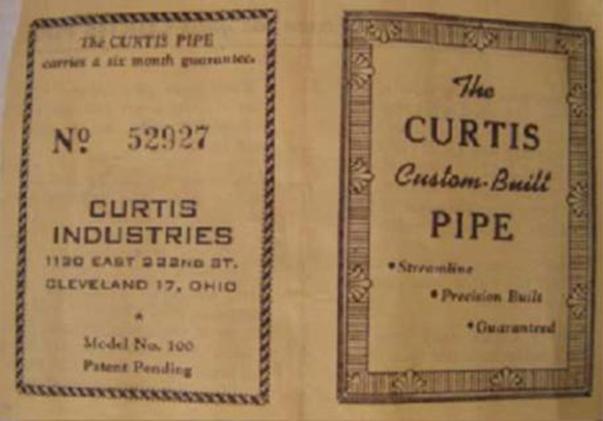 Inside it reads A few simple ways to care for your Curtis Pipe. I typed out the contents below the picture.
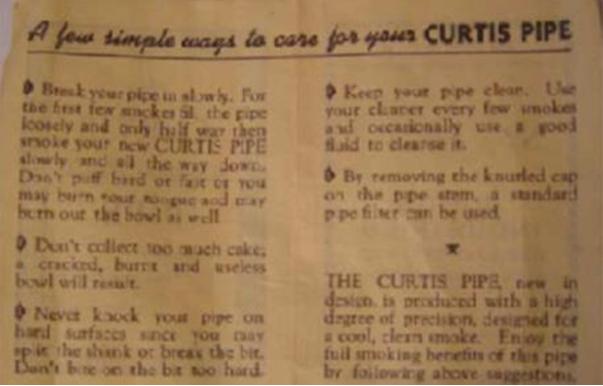 1. Break your pipe in slowly. For the first few smokes fill the pipe loosely and only half way then smoke the new Curtis Pipe slowly and all the way down. Don’t puff hard or fast or you may burn your tongue and may burn out the bowl as well.
2. Don’t collect too much cake, a cracked, burnt and useless bowl will result.
3. Never knock your pipe on hard surfaces since you may split the shank or break the bit. Don’t bite on the bit too hard.
4. Keep your pipe clean. Use your cleaner every few smokes and occasionally use a good fluid to cleanse it.
5. By removing the knurled cap on the pipe stem, a standard pipe filter can be used.
The Curtis Pipe, new in design is produced with a high degree of precision, designed for a cool, clean smoke. Enjoy the full smoking benefits of the pipe by following above suggestions.
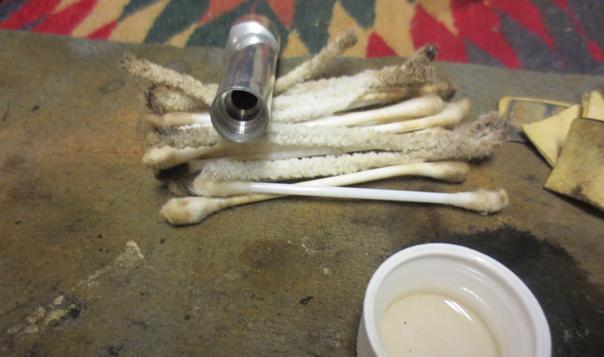
Armed with this information I took the pipe apart and began to clean and restore it. I reamed the bowl with the Savinelli Pipe Knife to remove the cake and clean up the briar rim of the bowl insert.
 I unscrewed the bowl and the threaded connector from the bottom of the bowl. I cleaned out the connector and the airway in the bowl with alcohol, pipe cleaners and cotton swabs.
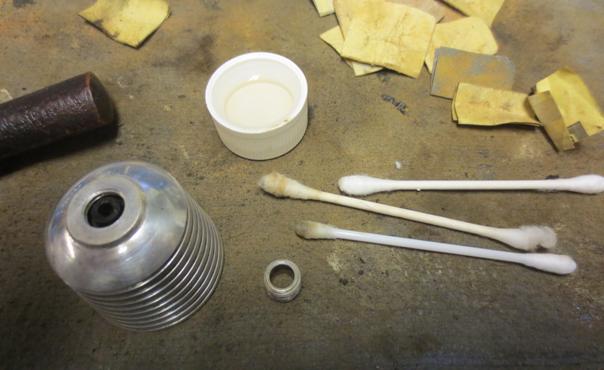
 I scrubbed the rim and the interior of the bowl with cotton swabs and alcohol to clean out the remaining debris in the bowl and on the rim.
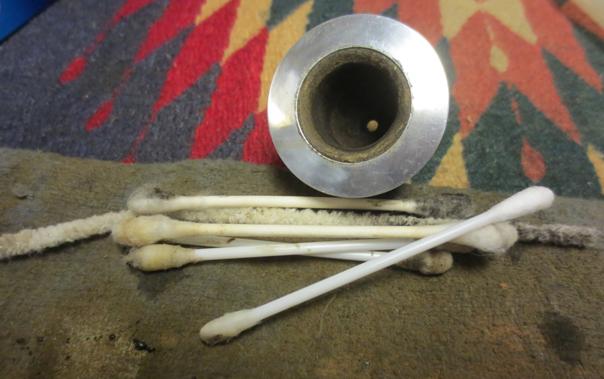 I scrubbed out the mortise and airway with alcohol, pipe cleaners and cotton swabs to remove the tars and residue.
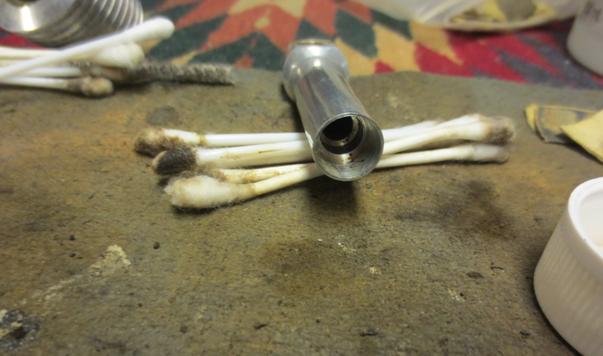
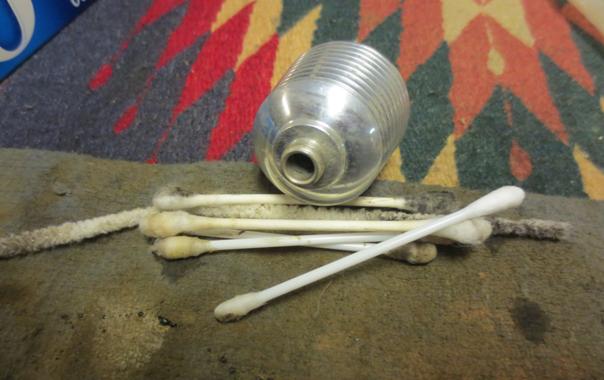
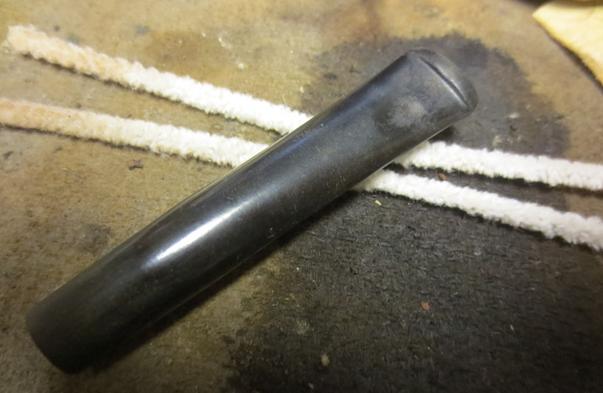
 I heated the end cap and still could not remove it so I cleaned out the inside of the airway from the top of the shank with pipe cleaners, cotton swabs and alcohol. It was a bit of a pain to work around the tube in the shank below but I was able to remove the grime and build up in that place.
 I set the shank aside and worked on the stem. I cleaned it out with alcohol. There were two deep tooth marks on top and the underside of the stem.
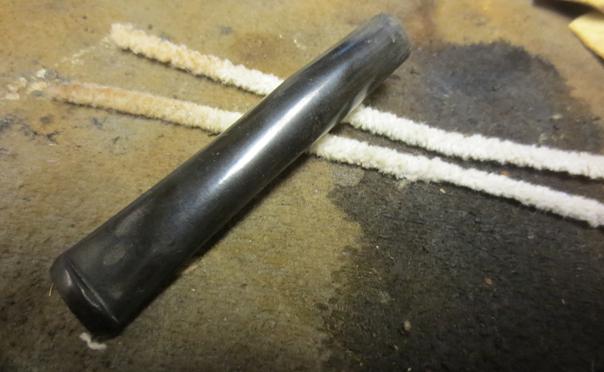
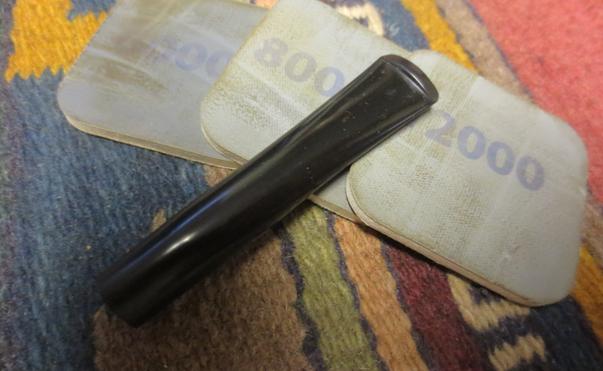
 I wiped the stem surface down and filled in the dents with black super glue. I sprayed the glue with the accelerator and then sanded the repairs down with 220 grit sandpaper and a medium grit sanding stick until they matched the surface of the stem.
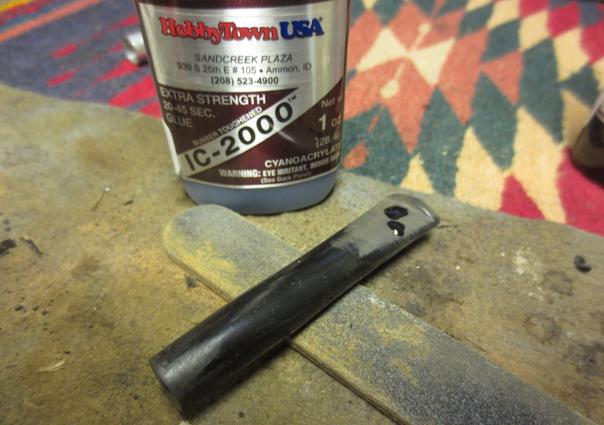
 I wet sanded the stem with 1500-2400 grit micromesh sanding pads and rubbed it down with Obsidian Oil. I dry sanded with 3200-4000 grit pads and gave it another coat of oil. I finished sanding it with 6000-12000 grit pads and gave it a final coat of oil. I let the oil dry.
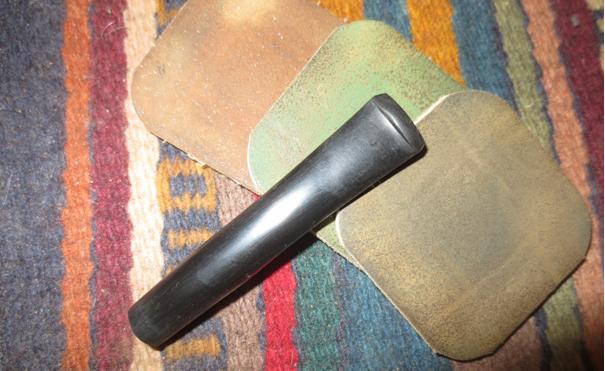
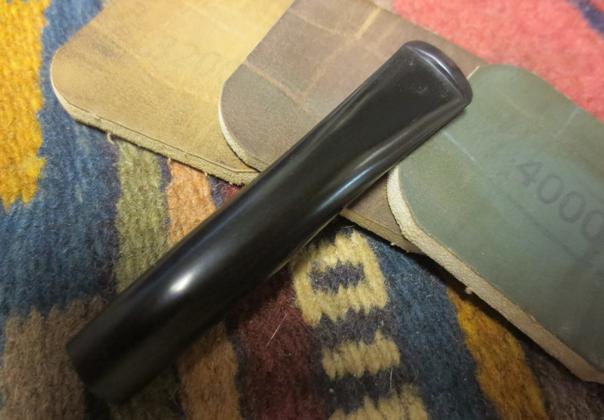
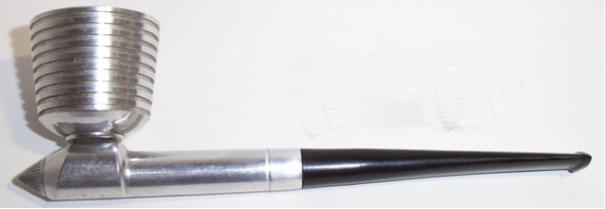
 I dry sanded the aluminum barrel shank and the rim of the bowl with 4000-12000 grit micromesh pads. I buffed the stem with Blue Diamond and then buffed it with a clean flannel buffing pad. The finished pipe is shown in the photos below. It is a beautiful example of the Curtis pipe and the finished pipe is a great addition to my metal collection. Thanks for looking.
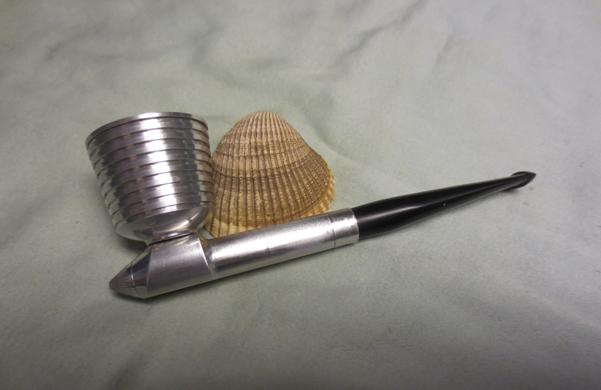


ADDENDUM
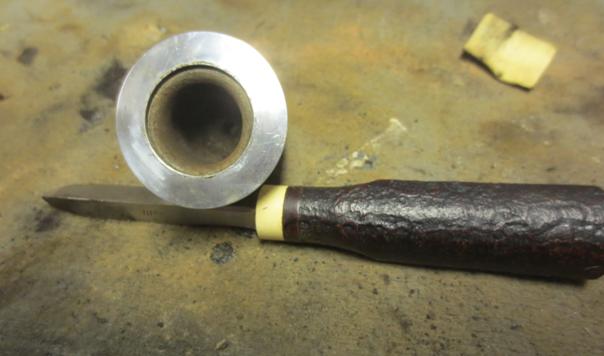
I received and email from one of the blog’s readers, Doug with some photos of the break down of the bowl system. It looks like the rim top is indeed pressure fit. Thanks for providing these photos Doug. They certainly add to our understanding of the way the bowl was designed. ![thumbnail_20160709_144214-1_resized[1]](https://rebornpipes.com/wp-content/uploads/2016/06/thumbnail_20160709_144214-1_resized1.jpg?w=625&h=313)
![thumbnail_20160709_144222-1_resized[1]](https://rebornpipes.com/wp-content/uploads/2016/06/thumbnail_20160709_144222-1_resized1.jpg?w=625&h=682)
![thumbnail_20160709_144234-1_resized[1]](https://rebornpipes.com/wp-content/uploads/2016/06/thumbnail_20160709_144234-1_resized1.jpg?w=625&h=651)
![thumbnail_20160709_144253-1_resized[1]](https://rebornpipes.com/wp-content/uploads/2016/06/thumbnail_20160709_144253-1_resized1.jpg?w=625&h=683)
![thumbnail_20160709_144305-1_resized[1]](https://rebornpipes.com/wp-content/uploads/2016/06/thumbnail_20160709_144305-1_resized1.jpg?w=625&h=568)

Pingback: An Amazing transformation of a 1946/47 Design by Curtis Pat. Pend. Metal – The Pipe Steward
Mr Steve Laug,
“Breathing New Life into a Design by Curtis Metal Pipe” 15 December 2018
I have just finished approximately the same process, in cleaning a “Design by Curtis”, Pat Pending Metal Pipe. I noticed that you indicated during your restoration, “My version did not have a filter system and also did not have the stinger end cap that held the filter in place”. Hmmmm, I thought the same, however in the process of cleaning the pipe, I discovered that this is just not he case (provoked by poor air draw).
I took out masking tape doubled it over to make a tube, adhesive side out, to apply to the faintly outlined stem and tenon partition area. I wrapped the tape tightly and with my fingers only, gripping the tape firmly I wrenched the two parts apart ( did I mention after a 24+ hour static soak in 100% ETOH). I unscrewed the finely machined threads (I used the same tape method with the cone end cap to take it off) and Eureka, there was the filter assembly with the draft hole/stinger at the end. I unscrewed the the now, draft hole/stinger/filter cap and there was the cause of the poor airflow, an old paper tube filter, brown and saturated. I am quite sure that the tolerances on the two surfaces that screw together to form the stem filter shank assembly are in the 0.001 range, the shank’s internal threads and counter sunk edge mating to the filter stem/portion can easily fool the eye into thinking ,that it is an engraved or pressed decorative edge.
My final task is to separate the bowl cap and remove the briar insert for formal inspection and
cleaning and to take measurements of the briar insert, to create a new one and one out of corn cob.
*LAST NOTE (finally!) The filter draft hole cap is an adapted: “Schrader Valve Cap”, adapted with a drilled hole and tube inserted in the end, how do I know this, well I tried it, and it fit 4 bikes and two cars also! Oh those Curtis-Guy Americans, “Tech-Savvy Economy”!
I don’t know if you still have your Curtis metal pipe,… if so give it a try….!
Mr Steve Laug,
Thank you for the very fine instructional manual (blog), please publish it soon so that I can have the first autographed copy! Oh and the pipe racks are a just fit and a delight, “because… I use pipes in all of my decorating”!
LikeLike
Thanks Michael. Really helpful now I want Togo back check over. Glad you like the racks
LikeLike
Love your blog, Actually I just came across one of these pipes. I noticed something I think you missed. Your pipe, and mine, are just like the one on smokingmetal.com but the stem is broken where the vulcanite joins the aluminum. It is supposed to screw apart at the line just past the stem. I realized this as I looked at an odd shape on the stem of mine, and comparing to the pictures on smoking metal, it dawned on me that mine has a generic stem that was sanded down to fit the pipe. Further, judging by the way the threads seize up, this is an obvious weak point. I still have not managed to free that thread. I did free the nose cone on mine by pouring alcohol into the hole where the bowl screws in.
Cheers.
LikeLiked by 1 person
I LOVE IT!
LikeLike
Thanks for another unique and interesting pipe. Had never seen anything like it, and it looks very cool. Really came out bright in your cleanup.
LikeLike