Blog by Steve Laug
When my brother sent me the link for this one and I scrolled through the pictures the seller included, I almost said to pass on it. It was such a mess that the ugliness made me not want to even deal with this one. But there was something challenging about the pipe and through the gunk it looked like it might have some interesting grain. I know in the early days of my estate buying on EBay I did not pay attention to the measurements on the pipe. I figured it would be a moderately sized Banker or Author with an oval shank. I also ignored the brand stamping on the pipe. It read La Strada Forte on the top of the shank which also should have been a bit of a giveaway. Even the photos below that the seller included of the pipe in a rest should have been a clue. But I missed the clue because I was blown away by the sheer disaster of the pipe. As you look at it below try to catalogue the issues that you see.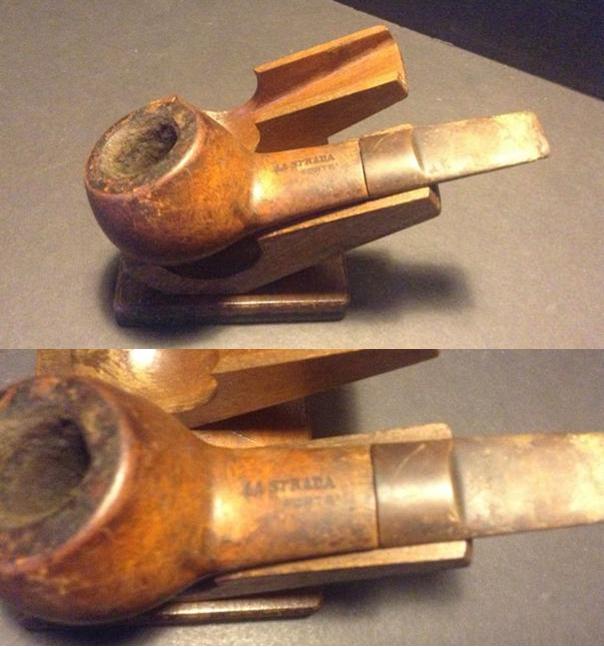

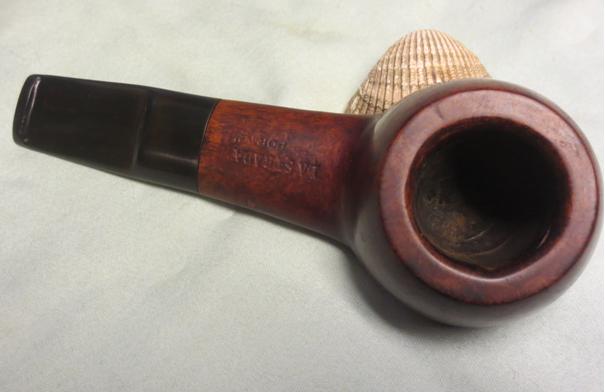
 Let me tell you what, no matter how much I prepared myself by cataloging the issues I saw in the pictures they in no way captured the reality of the mess this pipe was in. It was actually quite unbelievable. First off, I should have read the measurements. This pipe was huge. The length was average really, at 5 ½ inches long. The width of the shank was a bit bigger at 1 1/8 inches wide. The diameter of the bowl exterior was 2 1/8 inches. The chamber appeared to be an inch in diameter but the cake in it reduced it to about ¾ inch. The cake was thick and it was hard. It overflowed onto the top of the bowl and part way down the sides. The inner edge of the rim looked like someone had hacked at it with a knife so underneath the thick cake I could see the chop marks of the knife in the edges of the bowl. The finish was more than shot – it was gone and in its place was thick oily grime ground into the briar. The stamping was black with the oils. It was thick enough that the grime was flaking off on the bottom of the bowl. The stamping was readable and said LA STRADA over FORTE on the top side. On the underside was the shape number 538 and next to the shank stem junction was stamped Italy. The stem was not only oxidized but really worn. The top edge of the button was almost flattened and there were tooth marks in the top of the stem. The underside was another story – there was a chunk of vulcanite missing and the button was gone. The airway was collapsed and the inside surface was gouged with file marks. This poor pipe was looking pretty desperate and I thought about cannibalizing it for briar and parts.
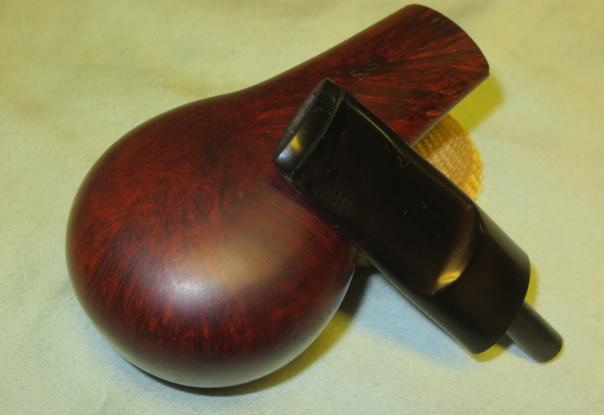
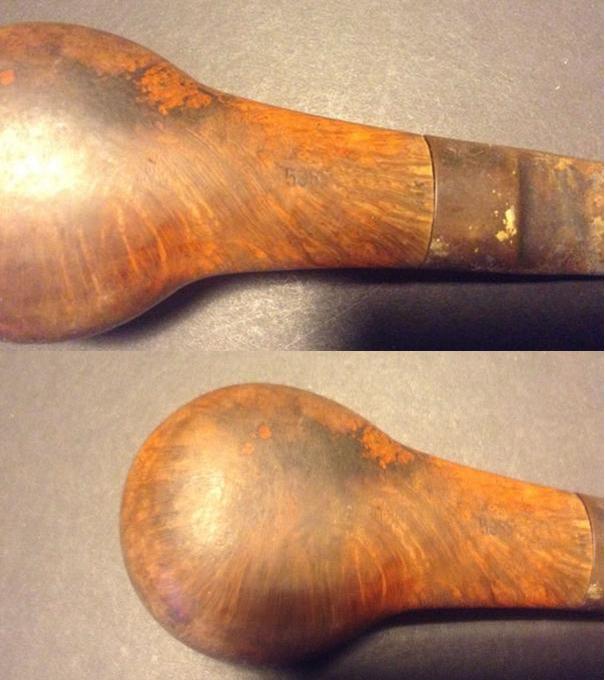
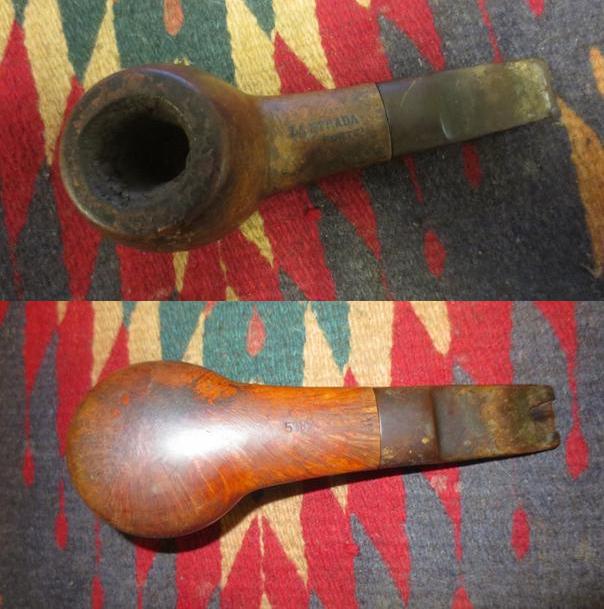 Then I looked at the briar through the grime. The bottom of the bowl had some really nice grain – a few fills popping through – but still really nice. The sides of the bowl also had some promise under the grime. And, I liked the shape of the pipe even though it was a war club. Maybe…just maybe…
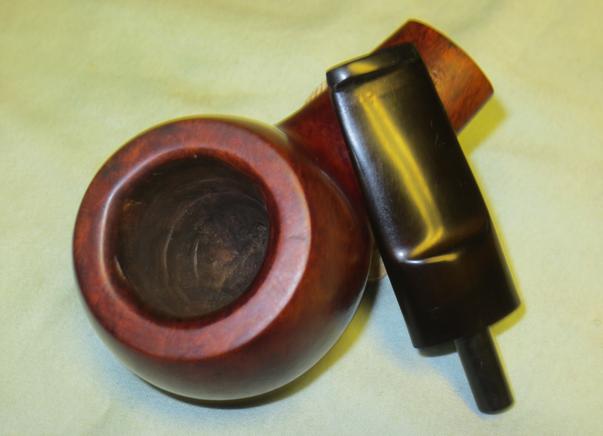
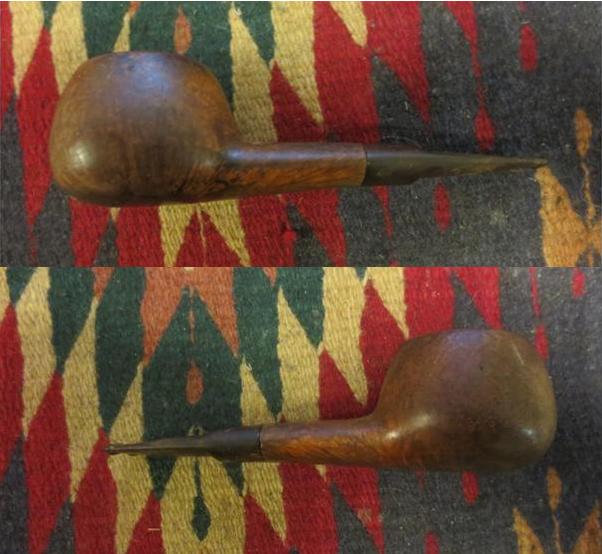 I took a close-up photo of the top of the bowl and the cake inside. I still shake my head when I see the state of the bowl and the damage to the inner rim. It was really in bad shape. Just look at the hack job that had been done to that inner edge.
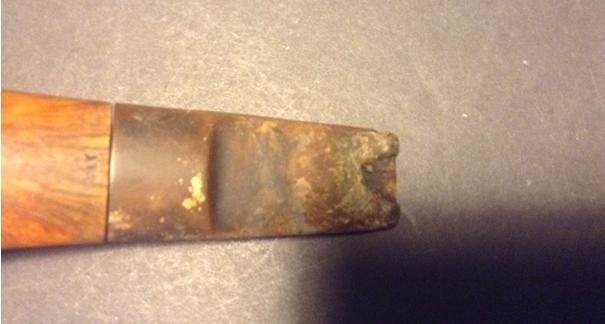
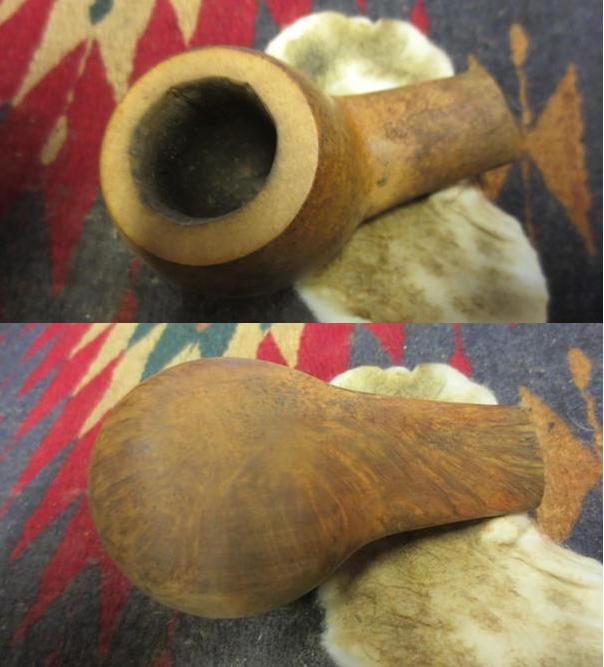
 I also took a couple of close-up photos of the stem to show the extent of damage that had been done to it as well. It was in very rough shape.
 I reamed the bowl with a PipNet reamer starting with the smallest cutting head to clean up the walls of the bowl slowly. I worked through all four reaming heads ending with the largest one. I used the Savinelli Pipe Knife to do some clean up to the edges and try to smooth out some of the rim damage.
 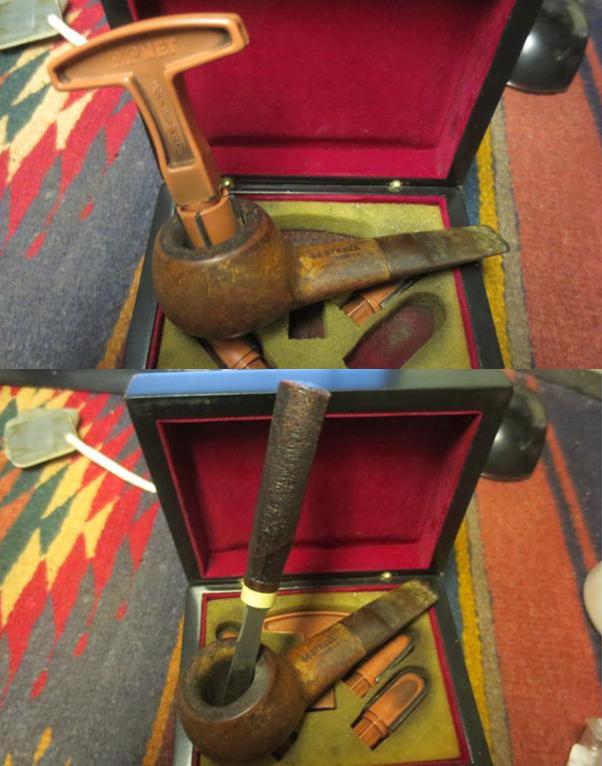 Between the largest PipNet cutting head and the pipe knife I was able to do a lot of redeeming work on the inner edge of the rim.
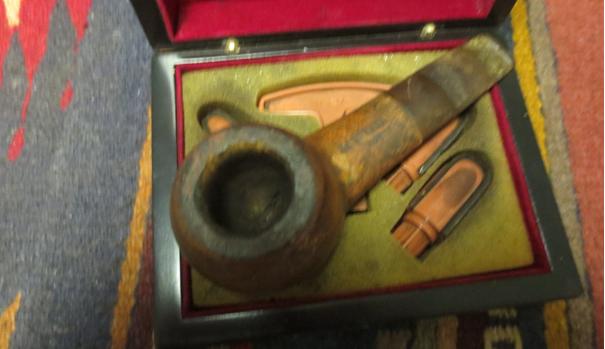 I topped the bowl on the topping board to remove the damaged finish and to reduce the damage to the inner edge of the rim.
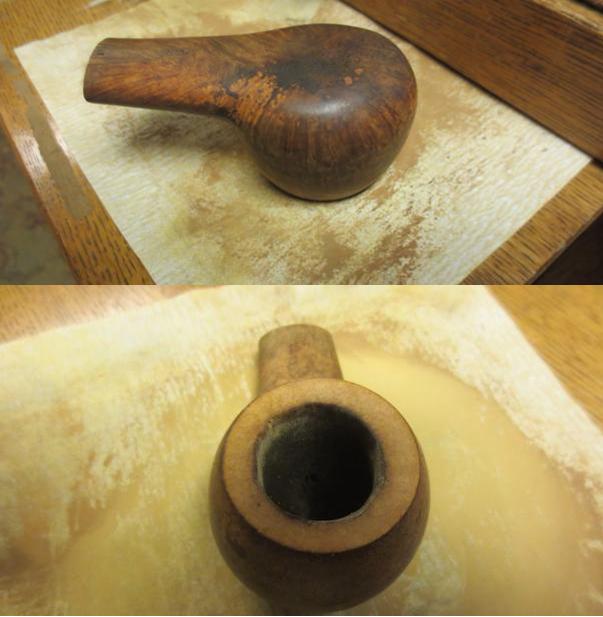 I scrubbed the surface of the briar with acetone on cotton pads to remove the dirt and grime in the grain as well as the oils. It was amazing how much grit came off the bowl.
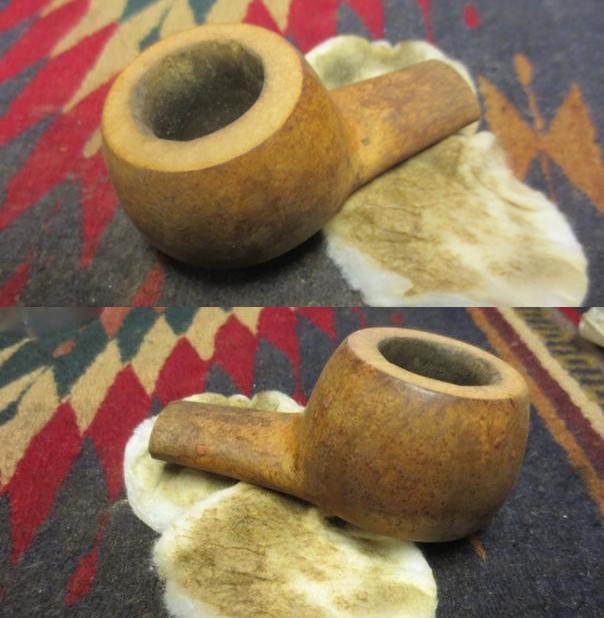
 Once the surface was clean I worked on the inner rim. I used a folded piece of 220 grit sandpaper to bevel the edge inward and clean up the cuts and nicks in the edge. I did not take a picture at this point but you will see the cleaned up rim in the pictures that follow the work on the stem.
I set the bowl aside to work on the stem. To take care of the damaged stem I made a wedge out of cardboard and covered it with clear strapping tape so that the super glue mixture I was going to use would not stick to it. I wanted it thick enough to leave an airway/slot in the stem. I mixed up a paste of charcoal powder and black super glue. The glue has a slow drying time so I was able to mix a thick paste with the combination.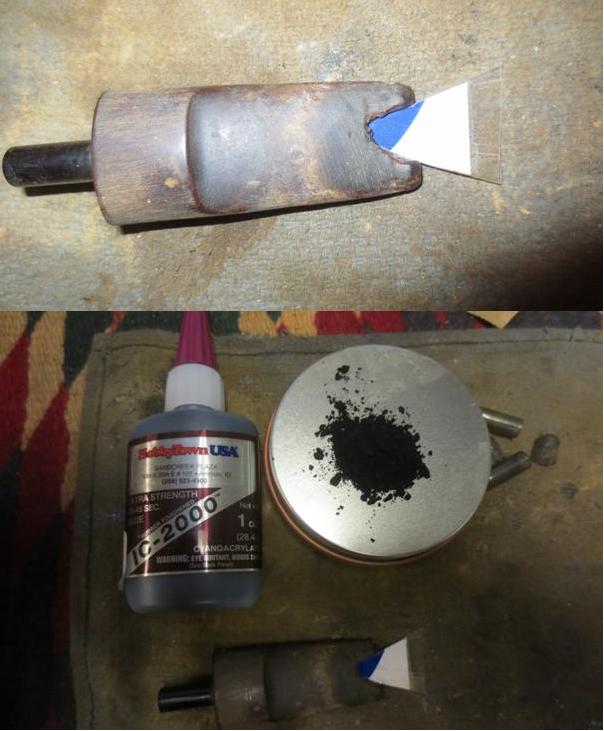
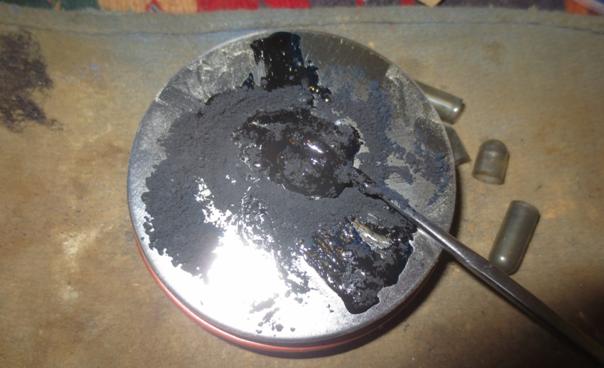 I used a dental pick and spatula to put the mixture in place on the top and the bottom of the stem and build up the area that would become the button on the top side and the repair and button on the underside. I also built up a slope on the stem underside to give me a bit more thickness over the airway. At this point I sprayed the repair with an accelerator to harden the surface of the glue. I set it aside to let the glue repair cure/harden.
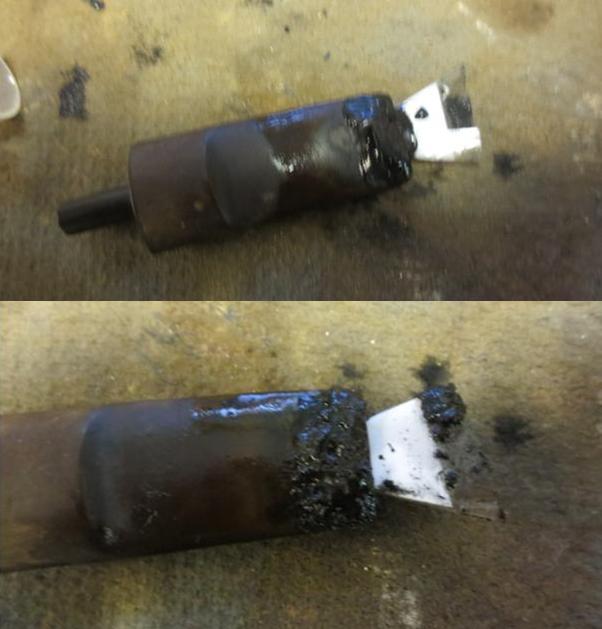 Once the repair had hardened I used the sanding drum on the Dremel to smooth out the repair. I would still need to sand it by hand but the Dremel took a lot of the heavy spots out of the mix and also allowed me to rough shape the button.
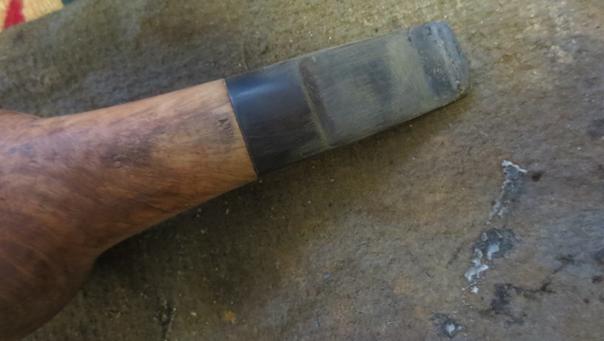
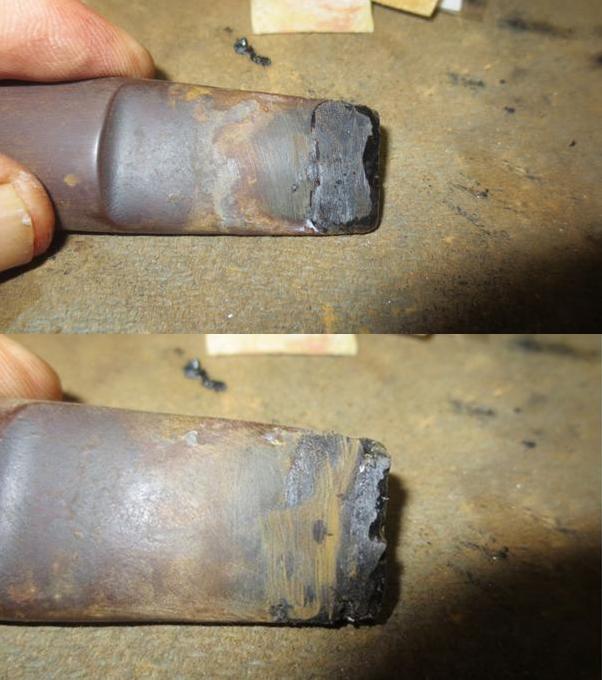 The next photos show the repairs after a lot of filing and sanding. The shape is very clear and distinct. The repair is rock solid. You can also see the inner rim bevel on the rim of the bowl in the first photo.
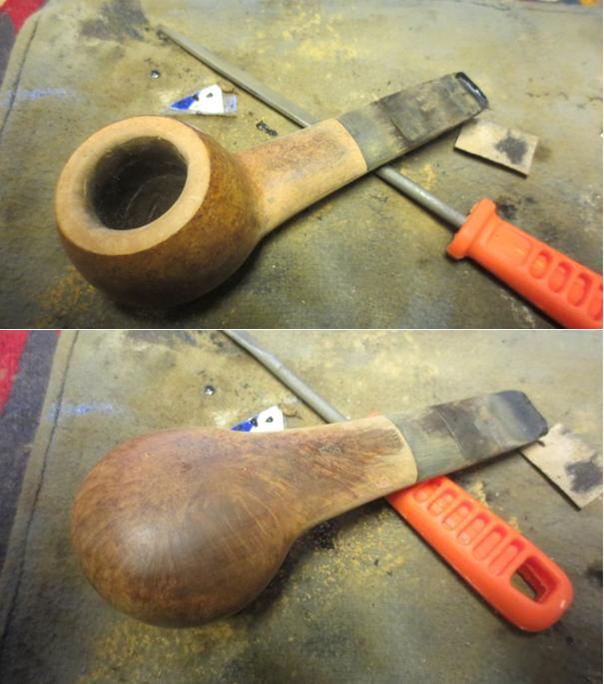 The slot was really tight in the button. It was partially closed off and need to be reopened. I used different shaped needle files to open the slot and to reshape it. I also reshaped the button with the needle files. The three photos below show the development of the slot and the button.
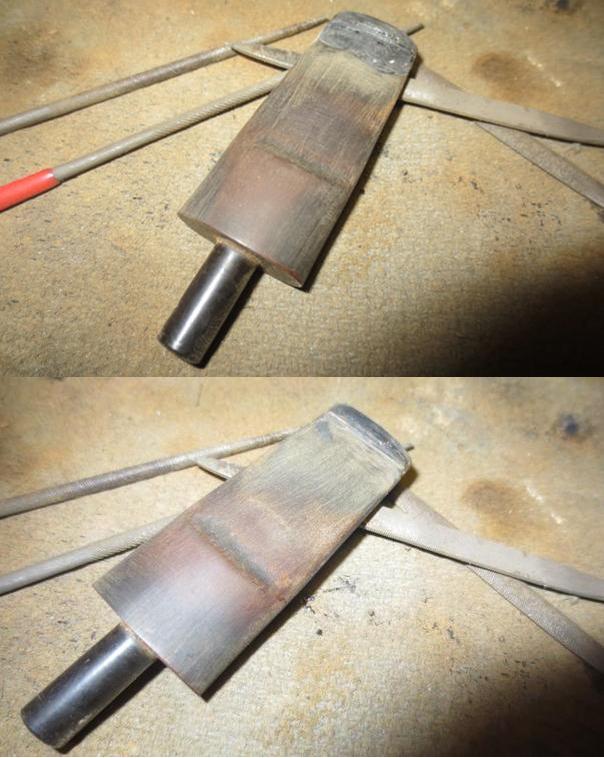
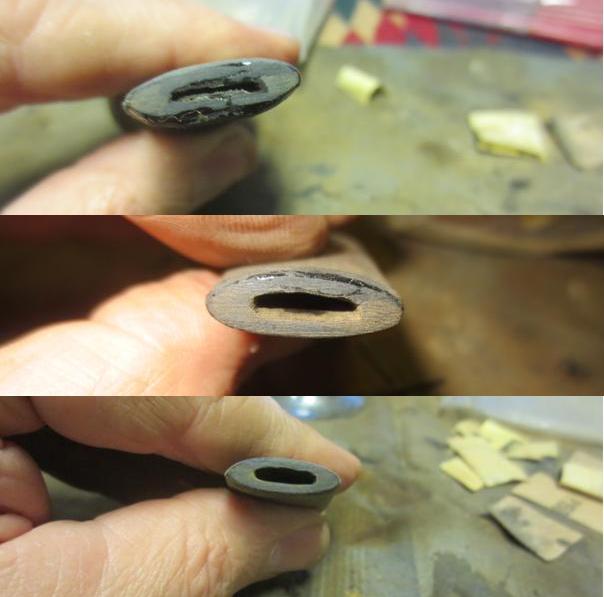 I reshaped the button edges with needle files and reshaped the taper of the stem from the saddle to the button. I sanded it with 220 grit sandpaper to blend it into the surface of the vulcanite stem. The photos show the progression in the shaping. There is still a lot of sanding to do to finish the shaping and polishing of the stem but I set it aside and worked on the bowl for a while.
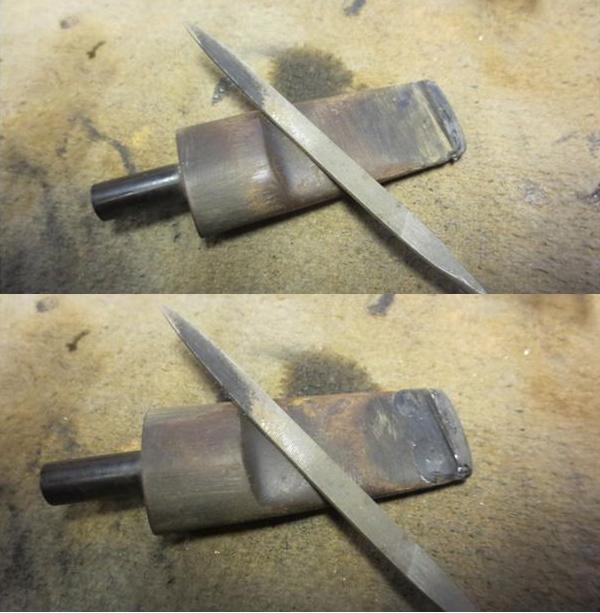
 I cleaned out the inside of the mortise and the airway in the shank with pipe cleaners, cotton swabs and alcohol. It took a lot of scrubbing to clean out the airway and mortise.
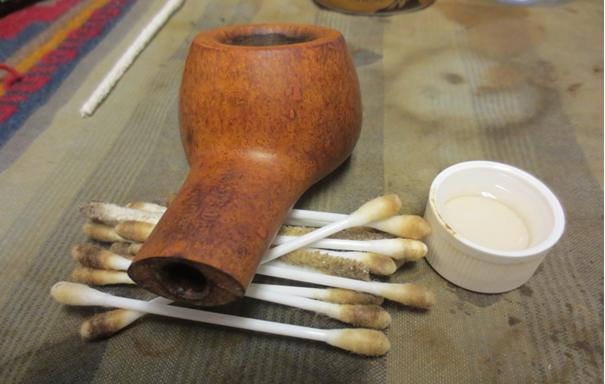 I heated the briar with a blow dryer and then stained it with a dark brown aniline stain mixed 50% with isopropyl. I used a black Sharpie to darken the fills on the bowl and shank then applied the stain with a cotton swab and flamed it with a lighter to set it in the grain.
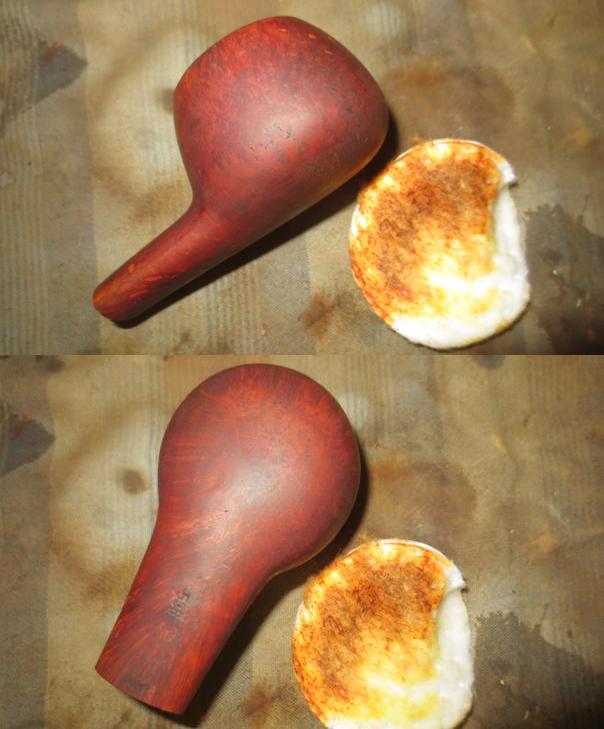
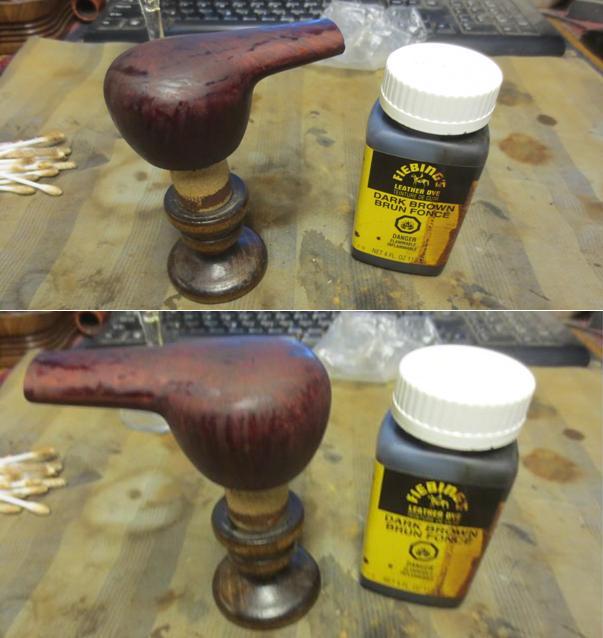 I wiped the bowl down with alcohol cotton pads to blend the stain and to make it more transparent. The photos below show the bowl after the wipe down. The scrubbed bowl looks quite a bit lighter but once it is waxed it will darken again.
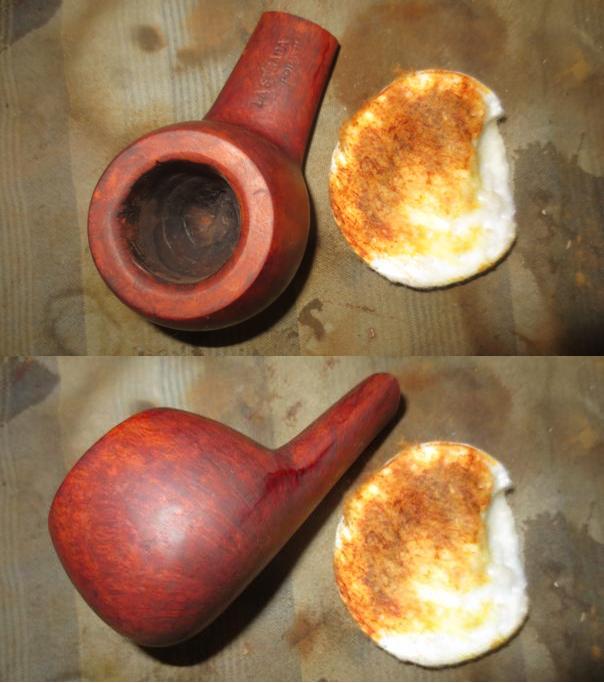
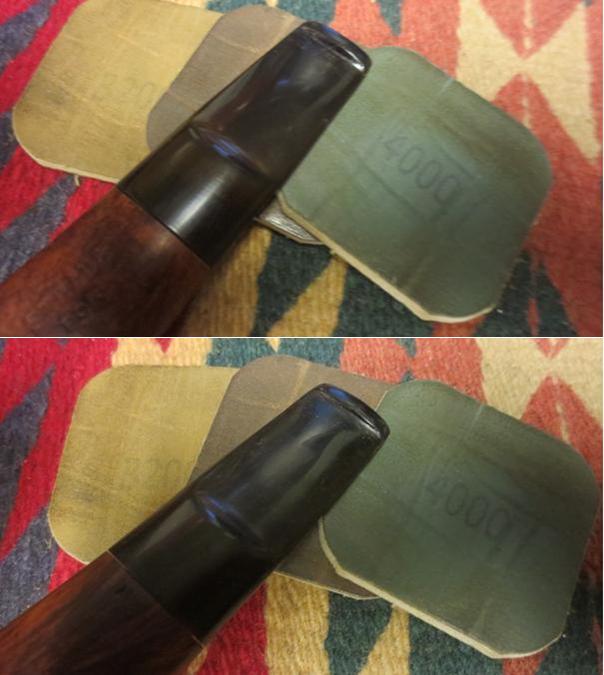
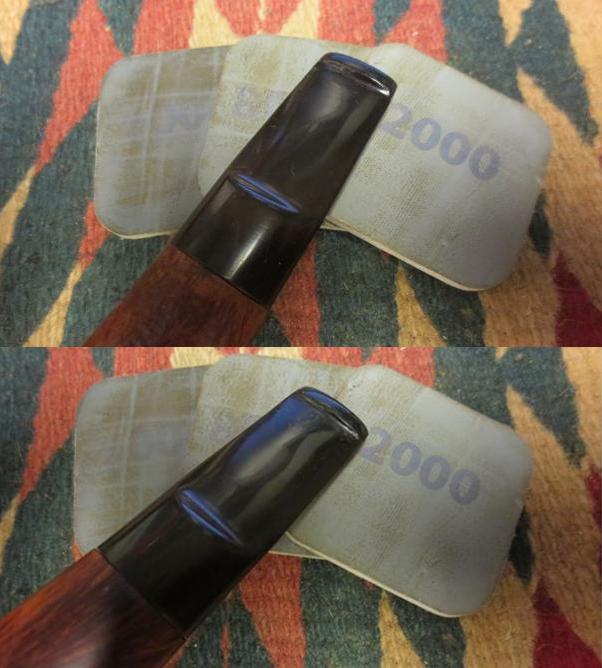
 I wet sanded the stem with 1500-2400 micromesh sanding pads and rubbed the stem down with Obsidian Oil. I dry sanded it with 3200-4000 grit pads and gave it another coat of oil. I finished sanding it with 6000-12000 grit pads and gave it a final coat of oil and let it dry. (The photos below show both sides of the stem with each set of micromesh pads.)
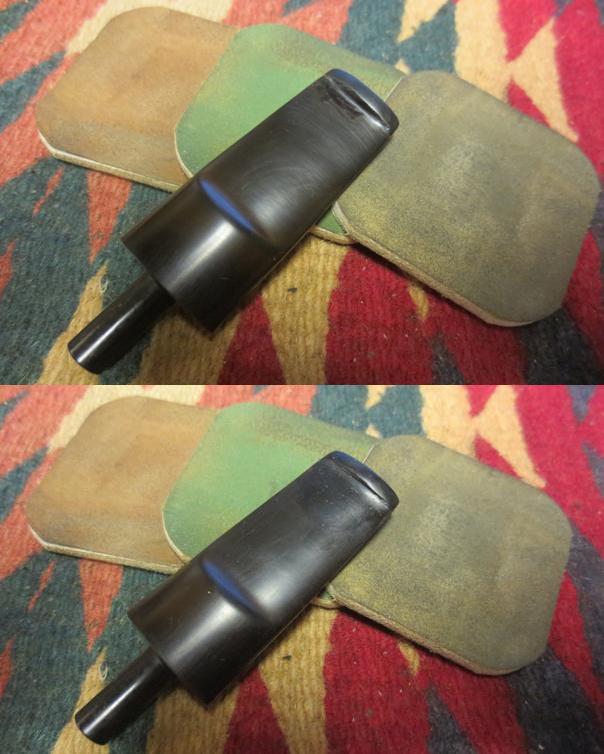
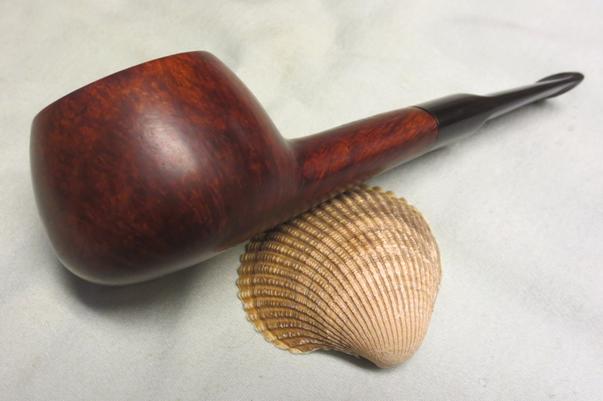
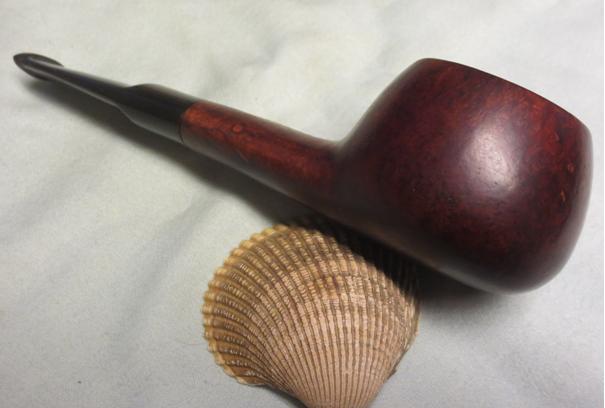
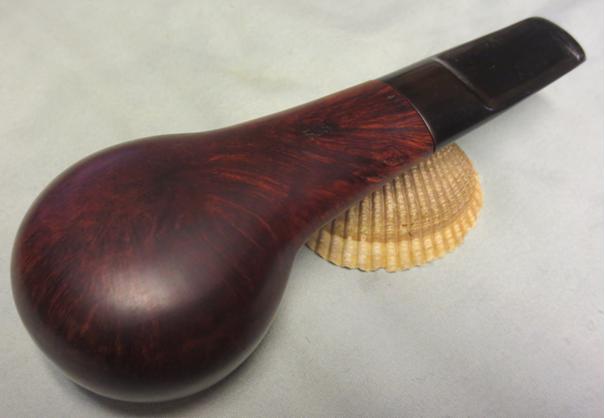
 I buffed the pipe with Blue Diamond on the wheel and then gave it multiple coats of carnauba wax. I buffed it with a clean buffing pad to polish the wax. I buffed it by hand with a microfibre cloth to add depth to the shine. I am pleased with the overall look of the pipe and considering what it was like when I first looked at it the improvement is vast. The stem repair is quite extensive. It has cured and is hard now and I am curious as to how it will hold up over time. The pipe looks good and should have a long life ahead of it. Thanks for looking.