Blog by Dal Stanton
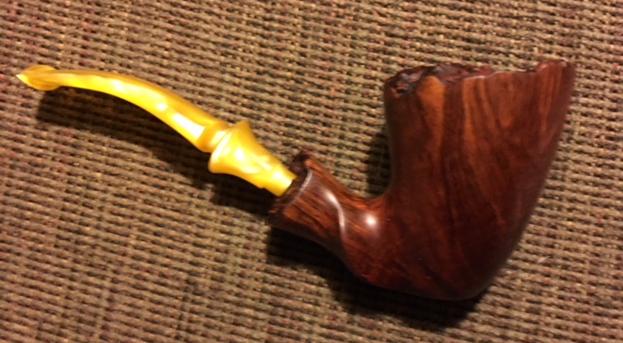
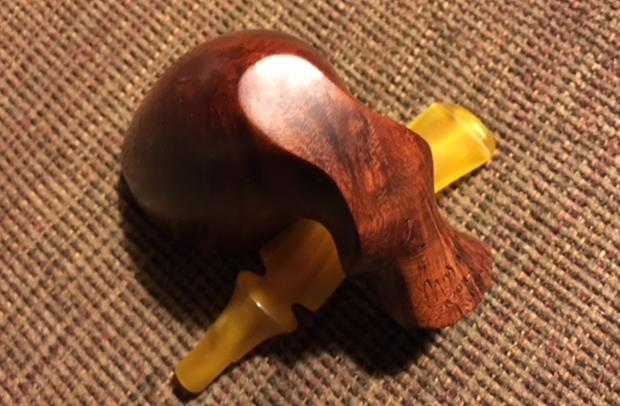
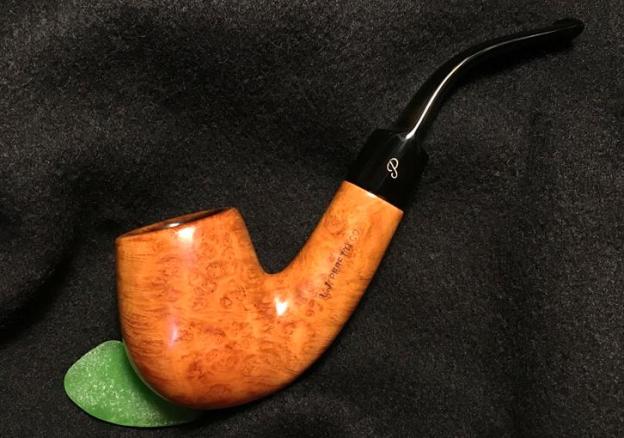
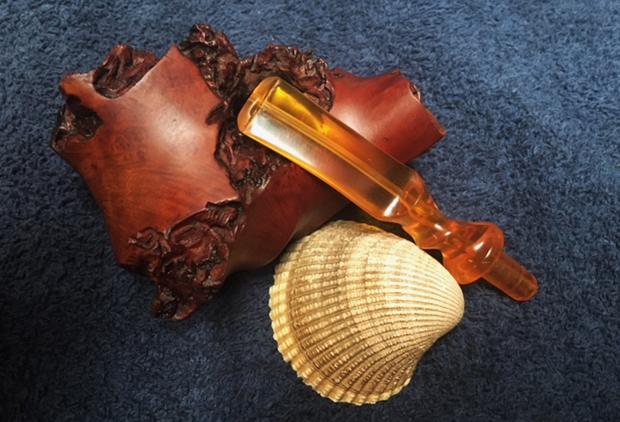
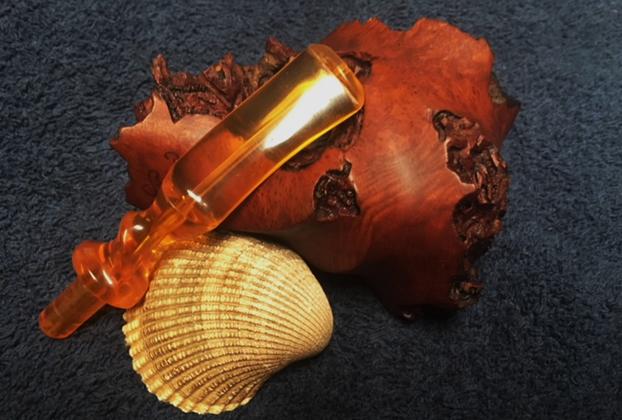
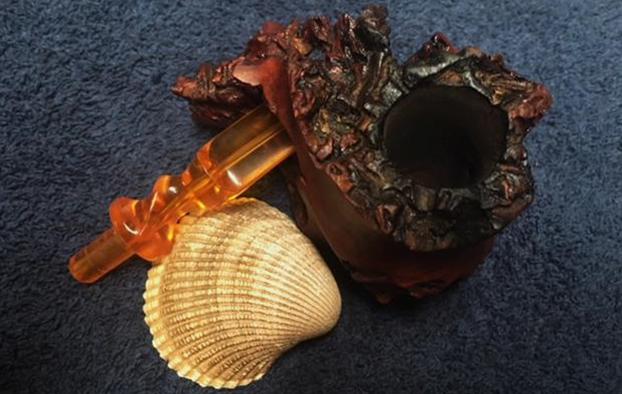
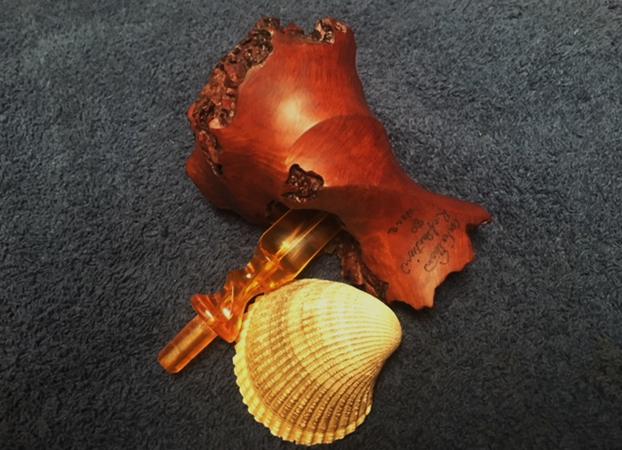
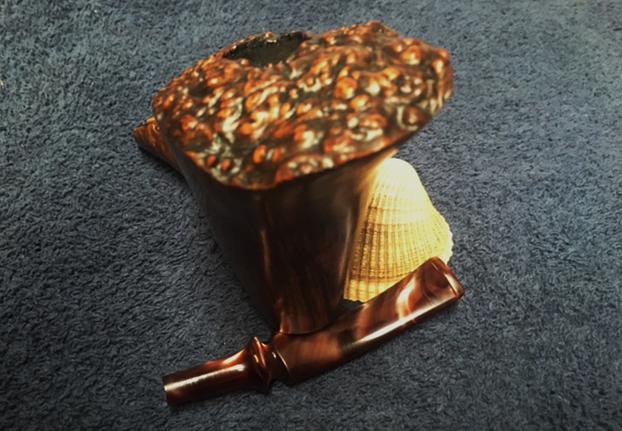
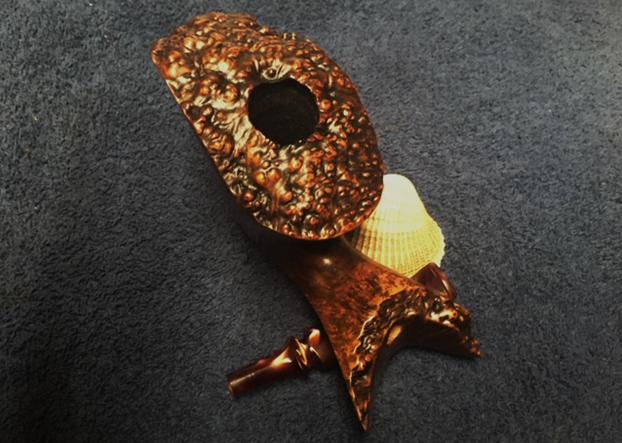
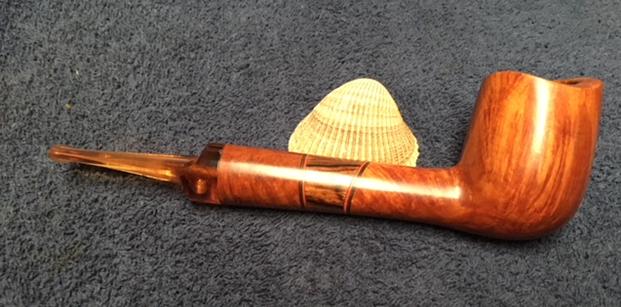
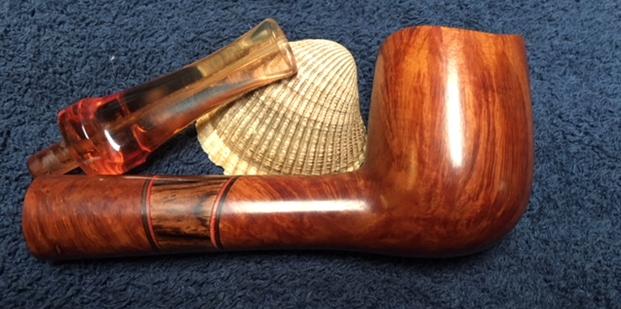
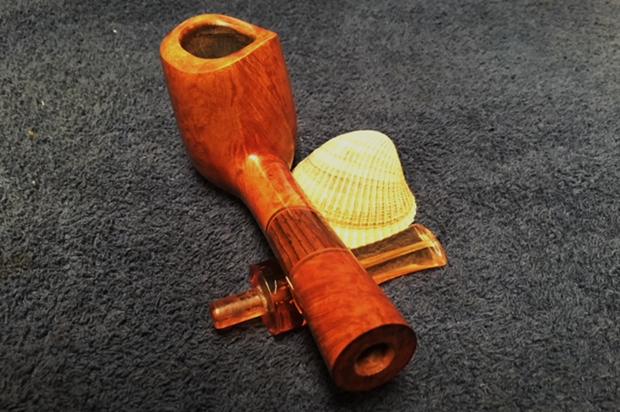
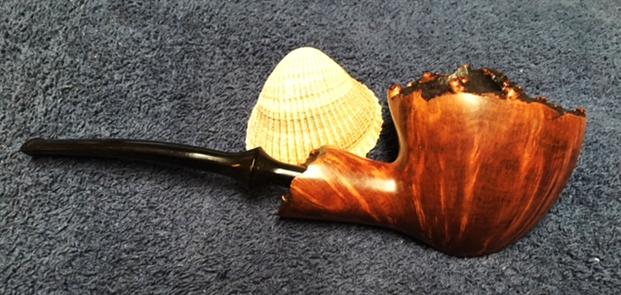
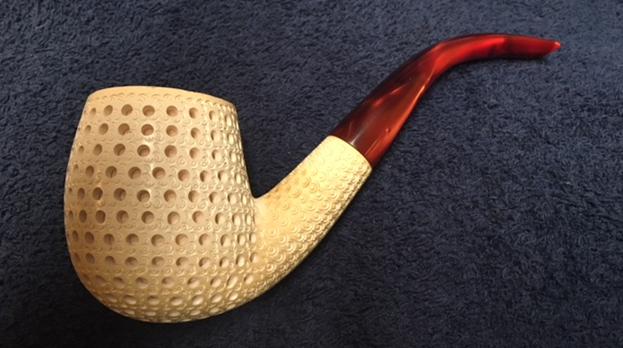
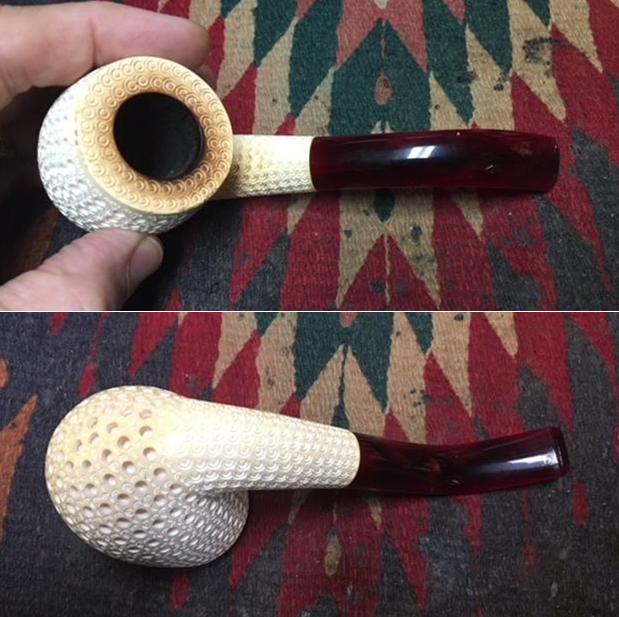
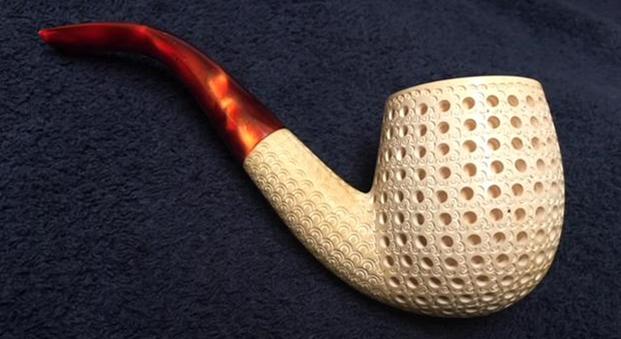
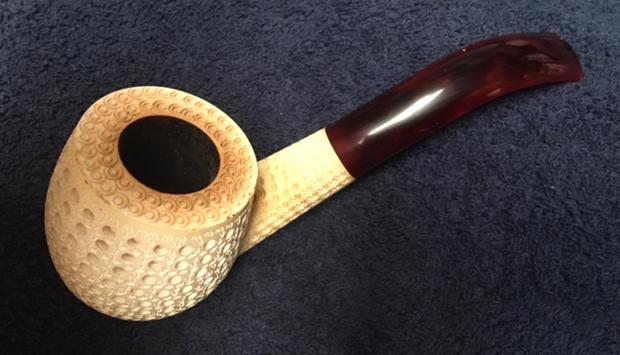
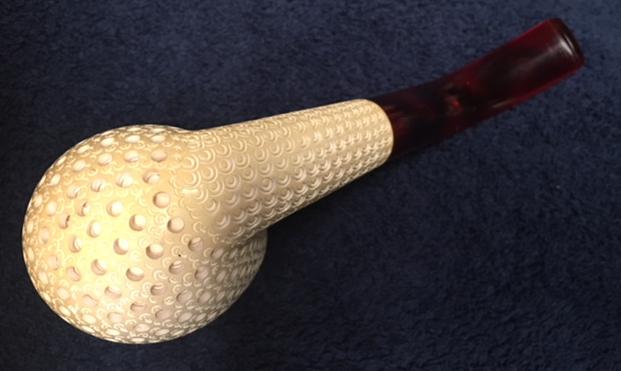
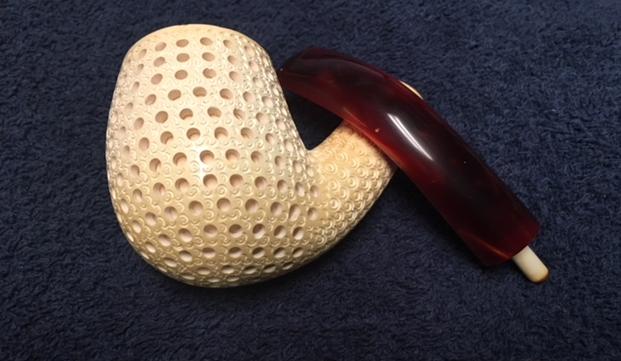
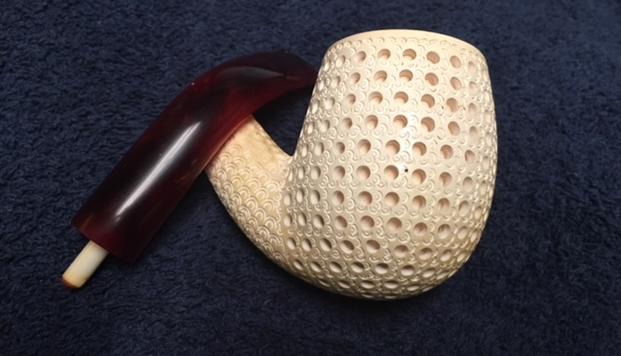
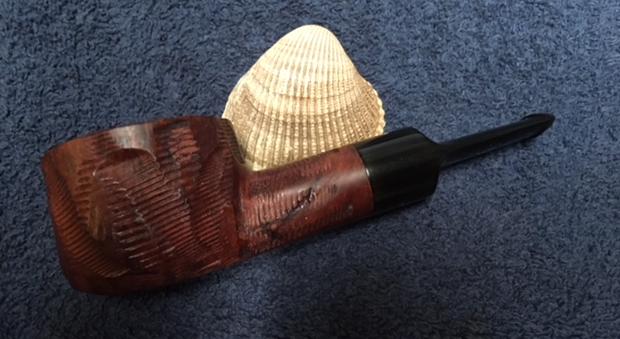
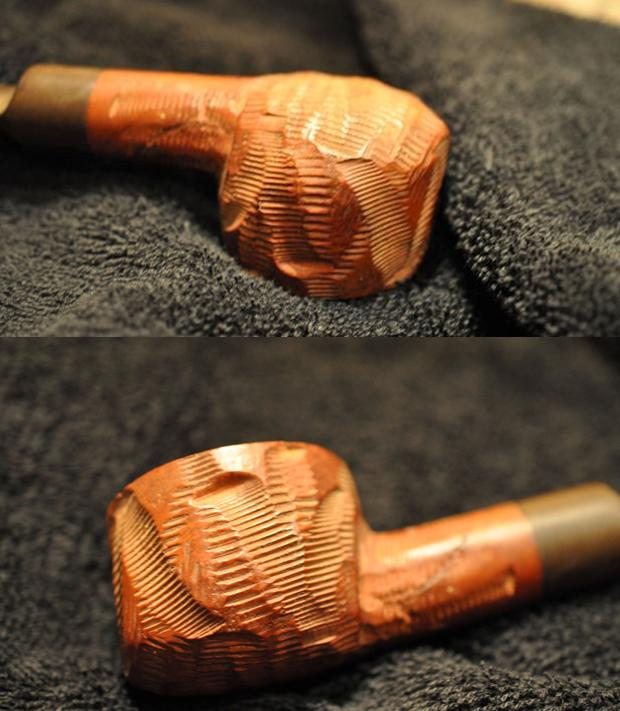
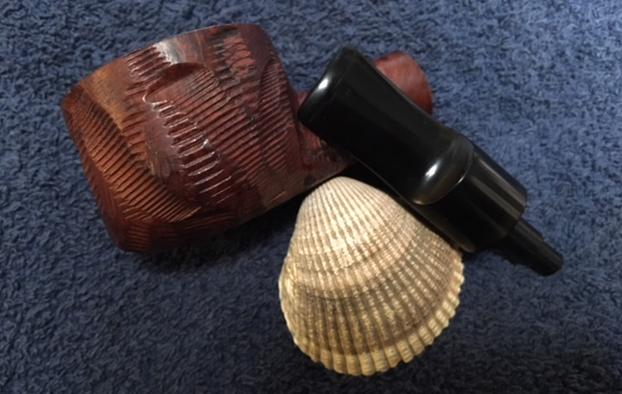
When I saw this pipe on the eBay auction block, I wanted it! I was drawn initially by two factors – first, it was a Comoy’s Pebble Grain. Secondly, I had never seen a Comoy’s with this shape – a very nice Bent Poker and classy to boot! Or was it a Poker? The seller’s tagline said: Details about Comoy’s Pre-Cadogan Pebble Grain Lightweight OOM Paul 609 Made In England. Uh, Oom Paul? Here is what I saw:
 Despite the confusing information which I decided I would sort out later, I was able to dodge last second bidders and land this beautiful, blasted Comoy’s Pebble Grain Bent Poker. This Comoy’s has been in my ‘Help Me! Basket’ here in Bulgaria for some time waiting to unravel the confusion. Now, fast forward to a recent visit to Bulgaria of my wife’s sister and her husband, Sarah and Greg. It was great having family visit! As is often the case, when people visit, they know about my sideline activity of restoring pipes for the Daughters of Bulgaria and often, people visiting our home are interested in the process of restoring, etc. And VERY OFTEN, people desire to help the Daughters, too, and go through the MANY pipes I have in the ‘Help Me!’ basket and pick out a special pipe for them that will also benefit the Daughters. Well, Greg caught the bug and wanted to choose ‘a’ pipe for himself which became two pipes because he couldn’t decide between the two! He chose this Comoy’s as well as a K&P Peterson’s Republic of Ireland – both now in the queue for restoration to benefit the Daughters. Thanks, Greg!
The one thing the eBay seller had right about this Comoy’s is that it is Pre-Cadogan, which means that it is pre-1981 the year of the merger. The origins of Comoy from Saint-Claude, France, started in the 1820s by Francois Comoy. His son, Henri, started the London extension of the Comoy name in 1879 with not much more than the tools of his trade – making pipes. He is cited by Pipedia as being the author of the appellation, “London Made”. In 1929 the company merged with the macro-concern, Oppenheimer Pipes. With this, albeit brief history, Pipedia’s describes the present summation:
Comoy’s remained a family owned company until it was finally taken over by Cadogan Investments during the early 1980’s. Cadogan have continued to manufacture Comoy pipes to the present day and, under Michael Adler, the Comoy brand is their flagship and efforts are being made to once more re-instate the well-known quality of the brand.
Time to sort out the confusion. I did a simple Google search for a Comoy’s pipe shapes chart which brought me PipePages.com where I found the actual shape 603 (not 609 on the eBay block), described as a ‘Modern – Bent Poker’. The page provided information associating the Comoy’s pipe chart with the corresponding 1975 Comoy’s of London Catalog which I looked at. The 603 is on the right, second down in the chart below. I remember 1975! I was in college, driving my red ‘68 VW Bug, Gerald Ford was President of the US, and it was the year Jaws hit the cinema (I think!). 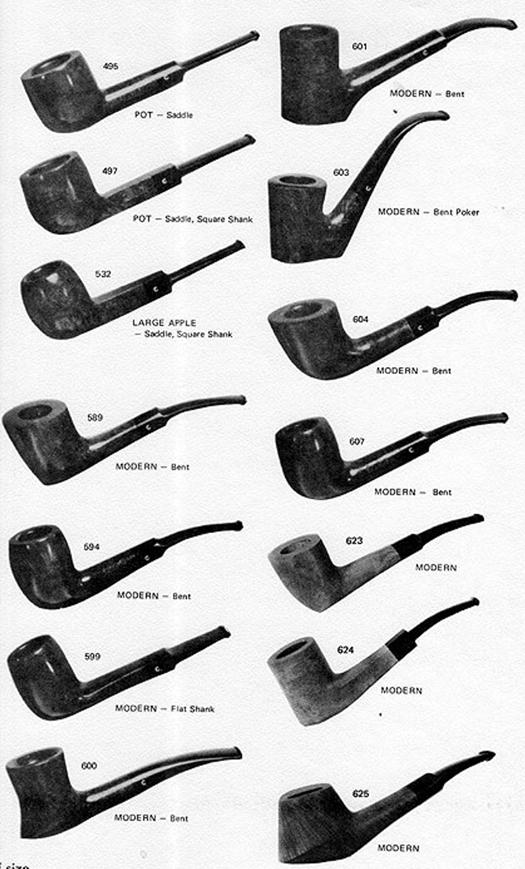 The catalog described the Pebble Grain line’s qualities and also provided a price list that I found interesting to see how the various Pebble Grain line shapes ranked in monetary value in 1975 – not a cheap pipe! It was tied for second in value with Comoy’s Golden Grain, behind number 1 – Comoy’s Diplomat line (See below).
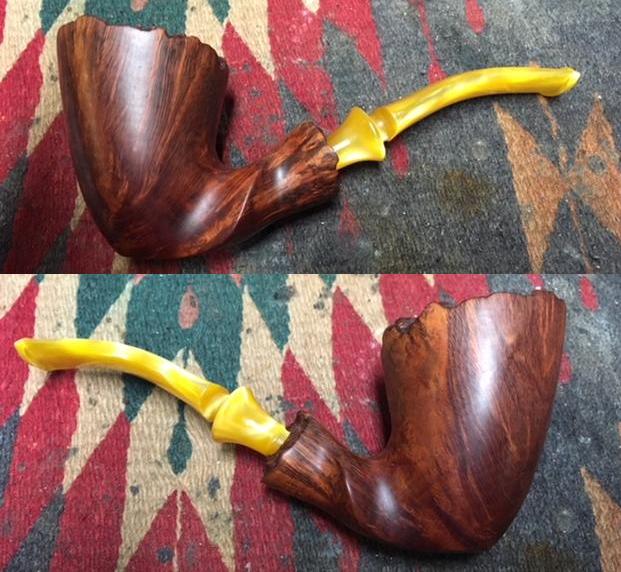
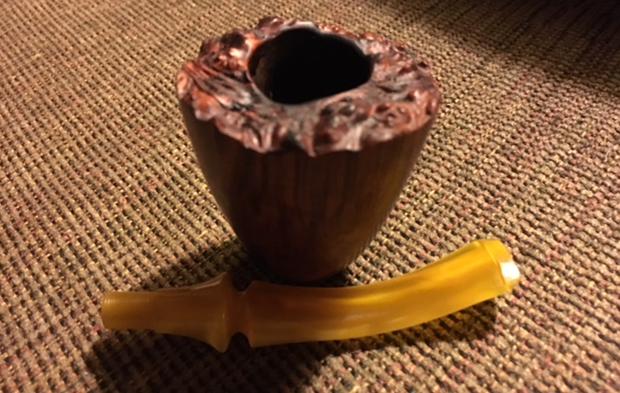
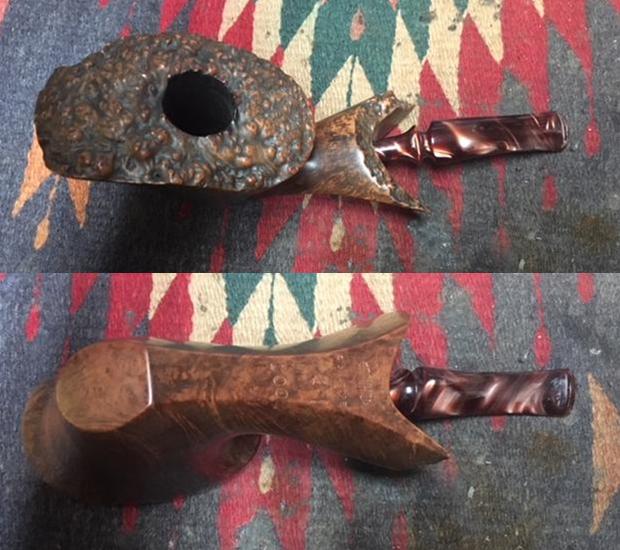
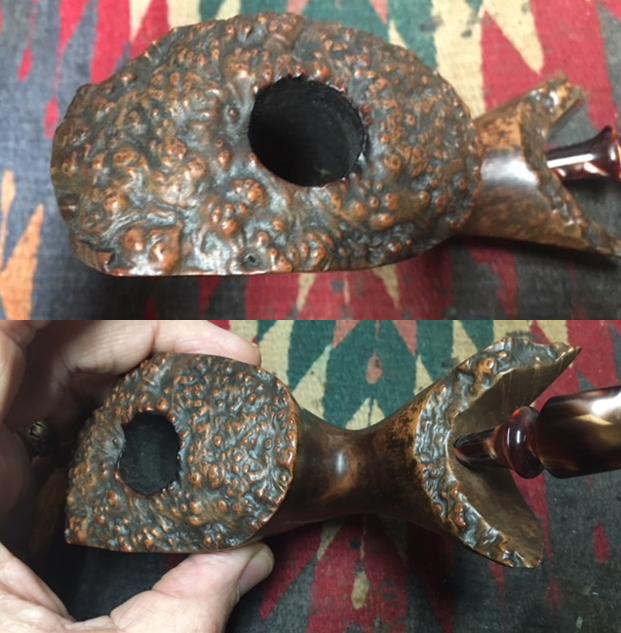
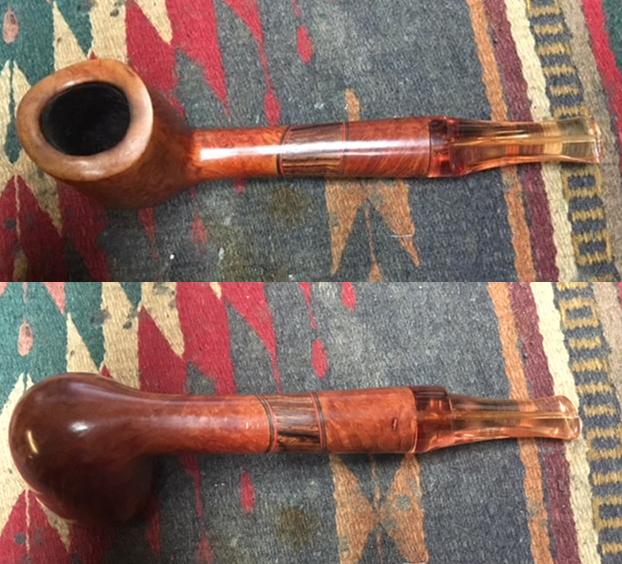
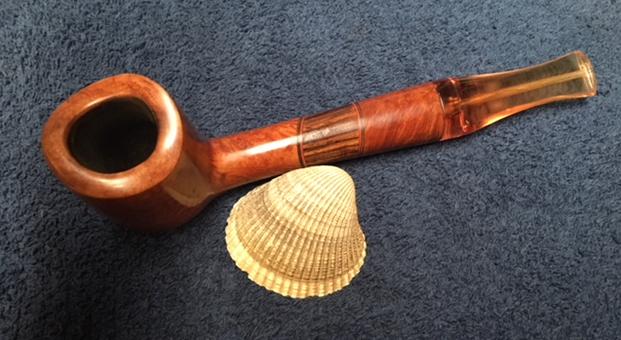
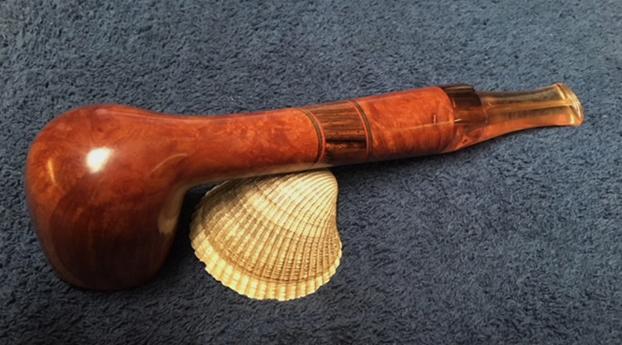
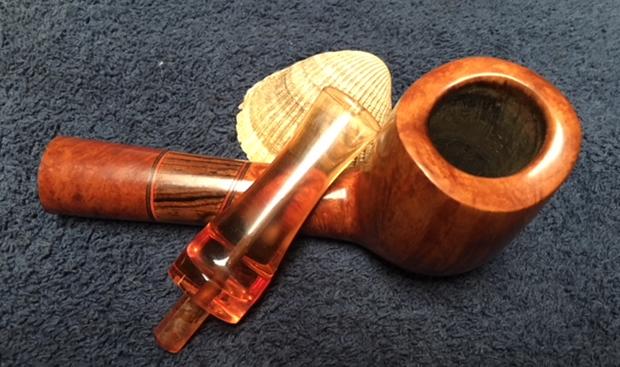
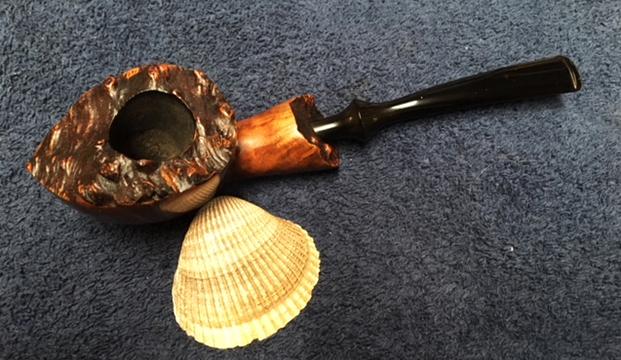
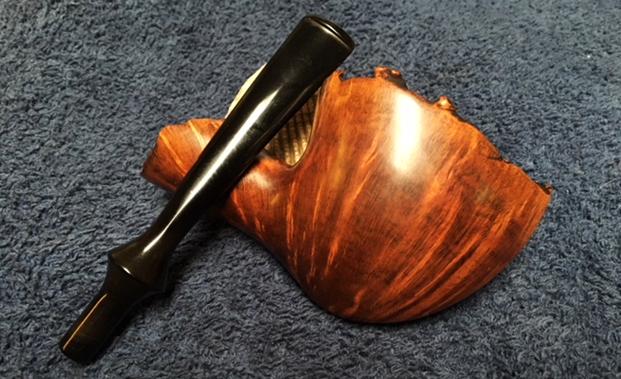
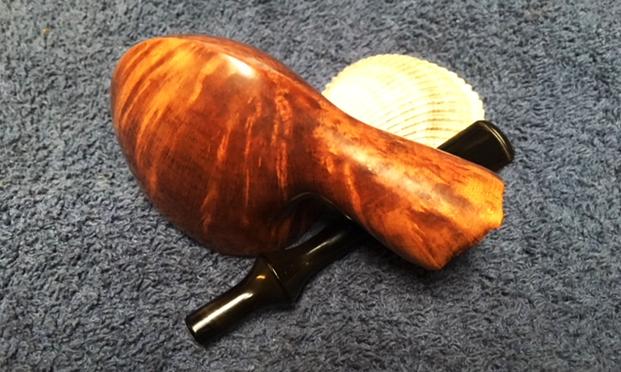
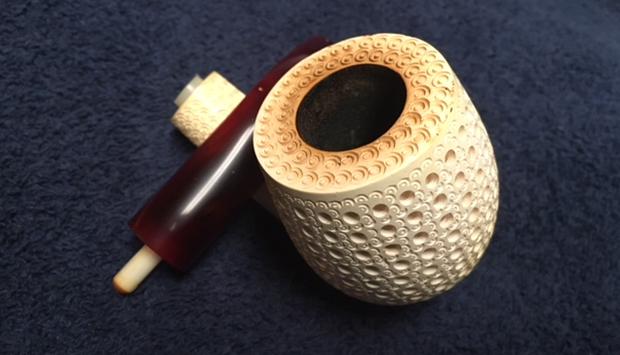
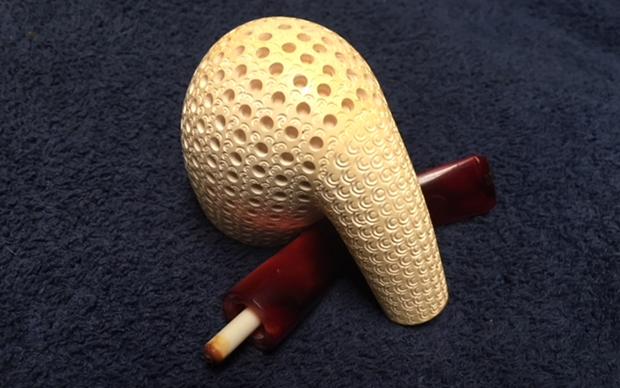
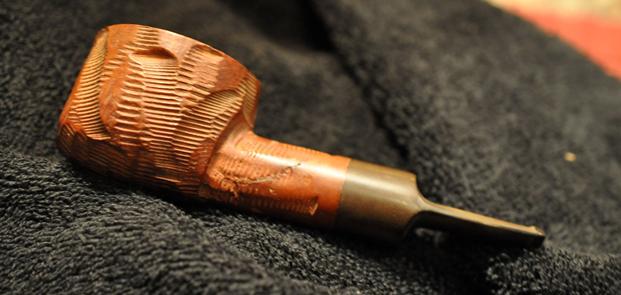
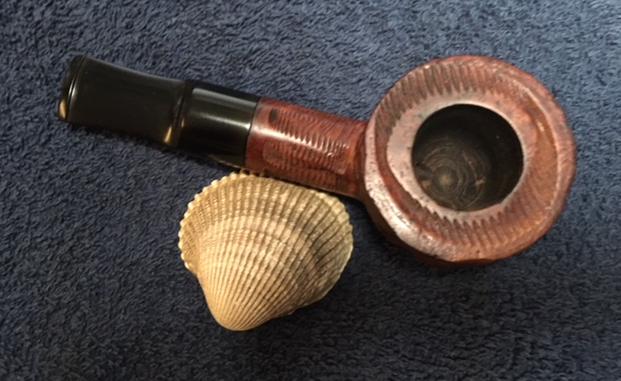
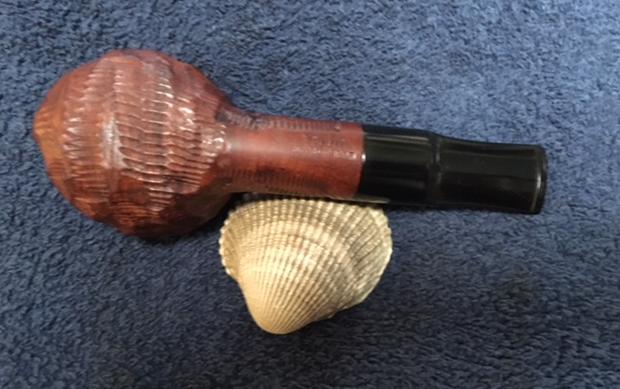
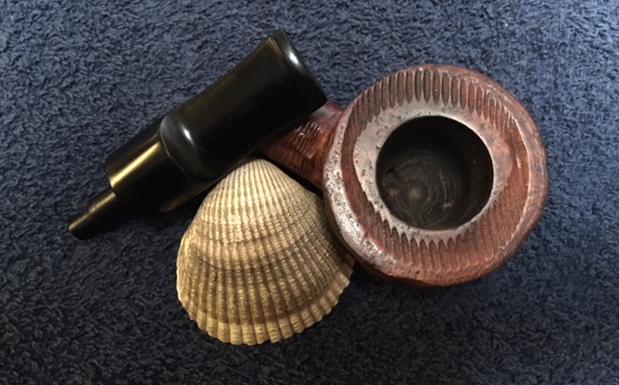
 With the confusion dispensed, I take the 1975 Comoy’s Pebble Grain, Modern – Bent Poker, to the worktable and take additional pictures to get a closer look at this classy Comoy’s Pebble Grain Modern Poker.


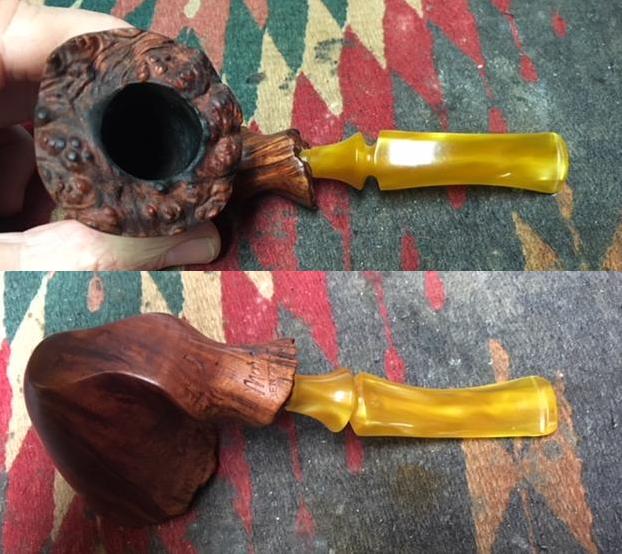
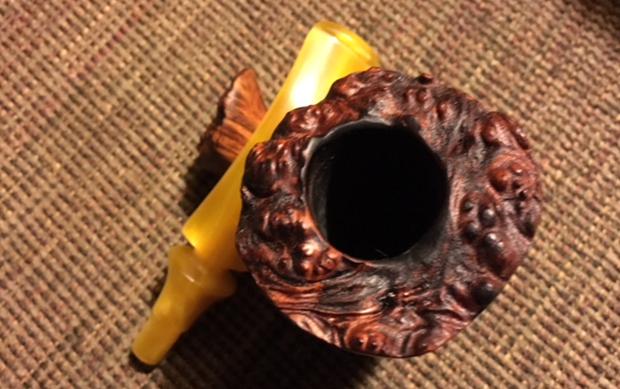
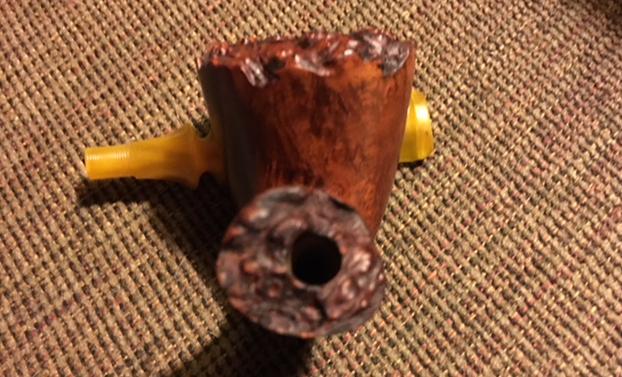
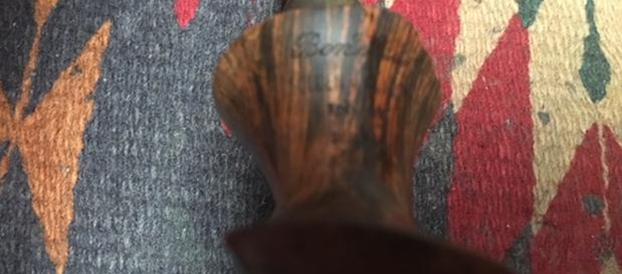
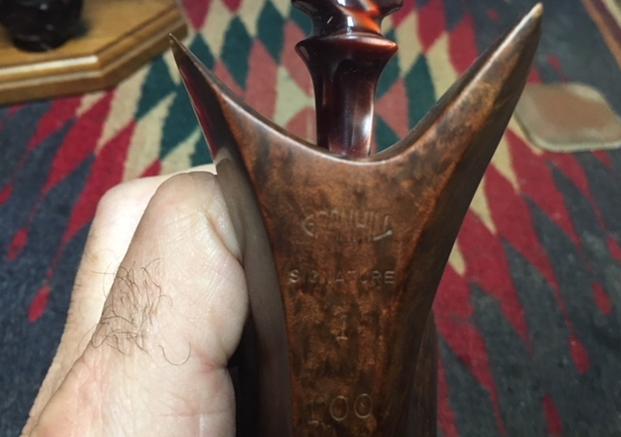
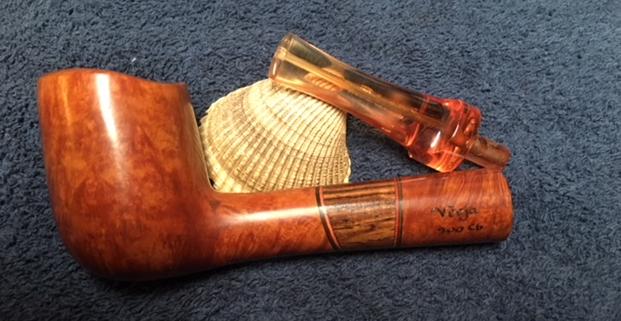
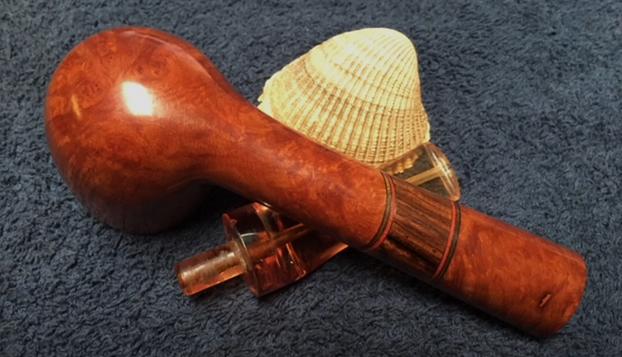
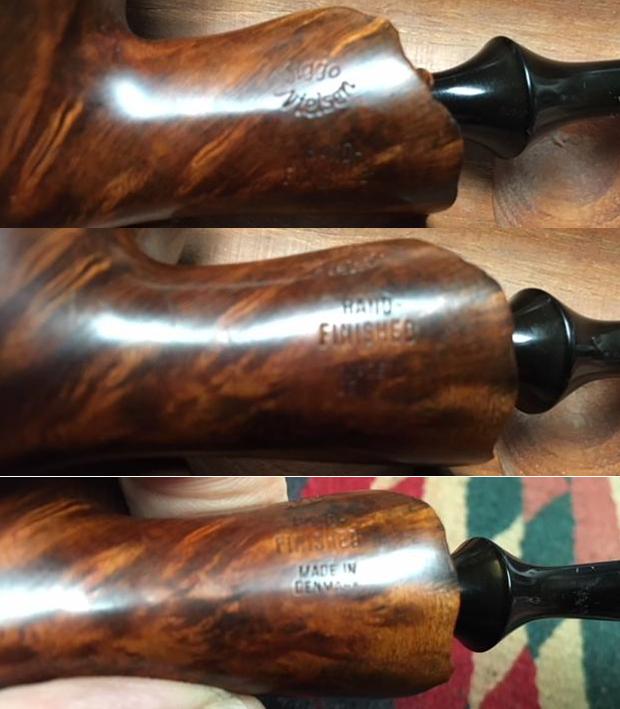
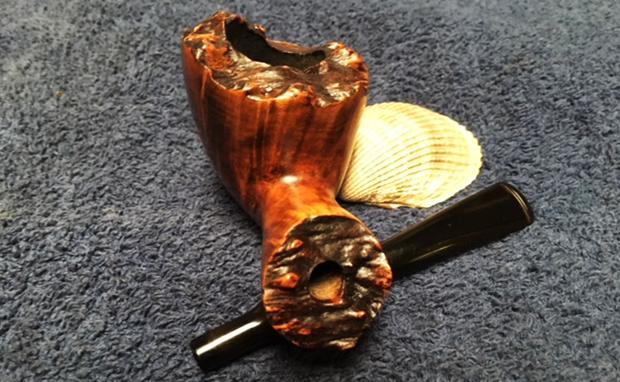
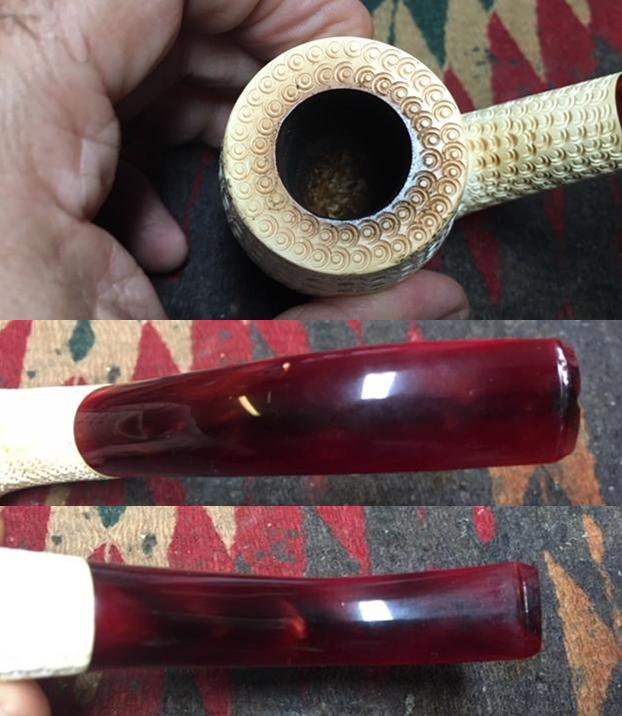
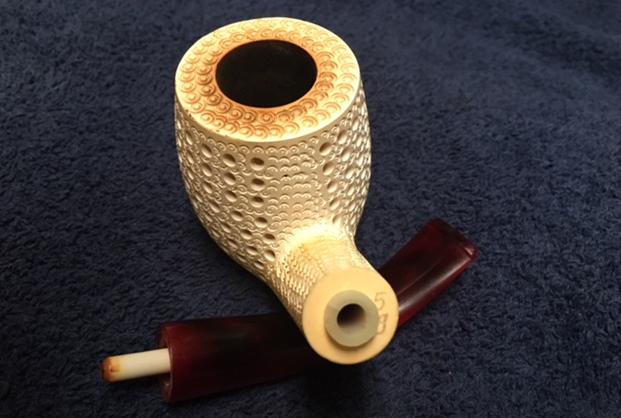
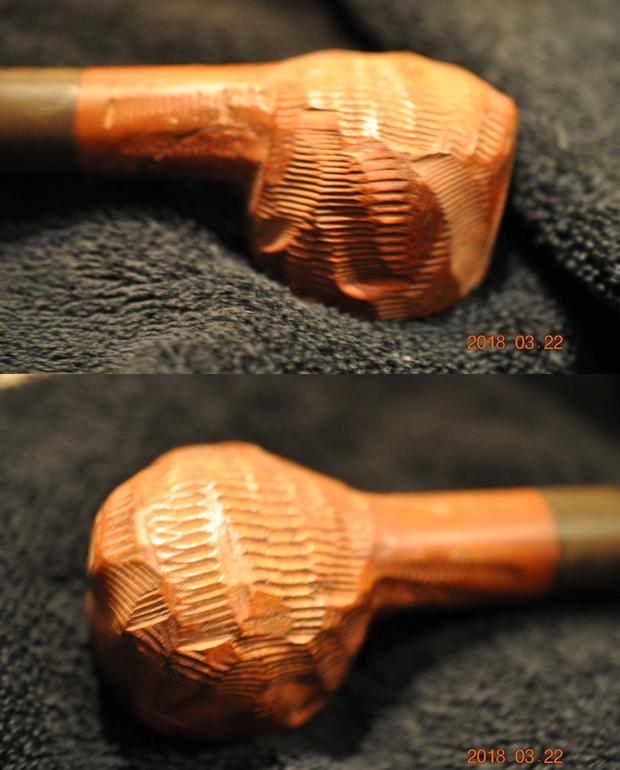
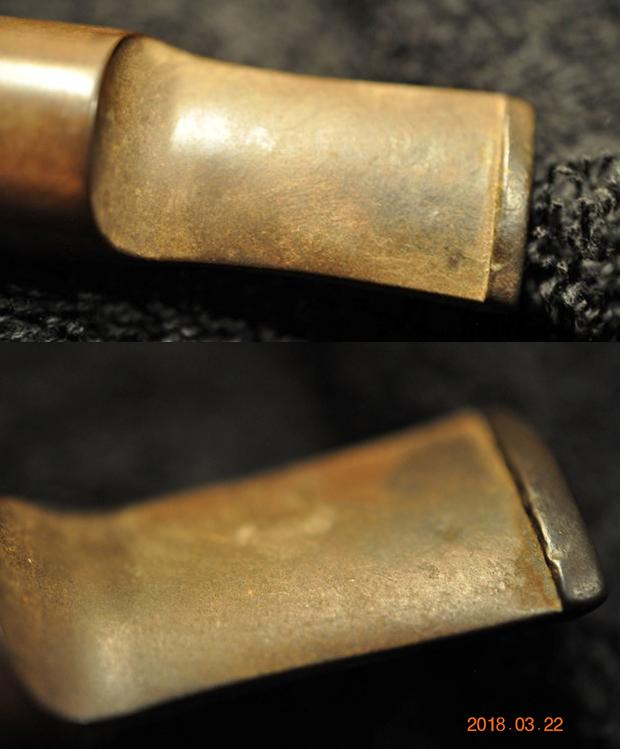
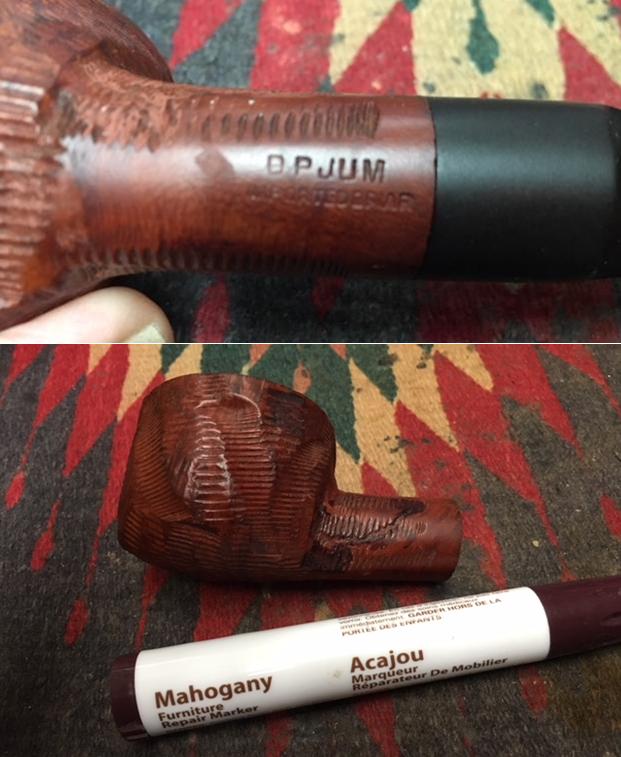
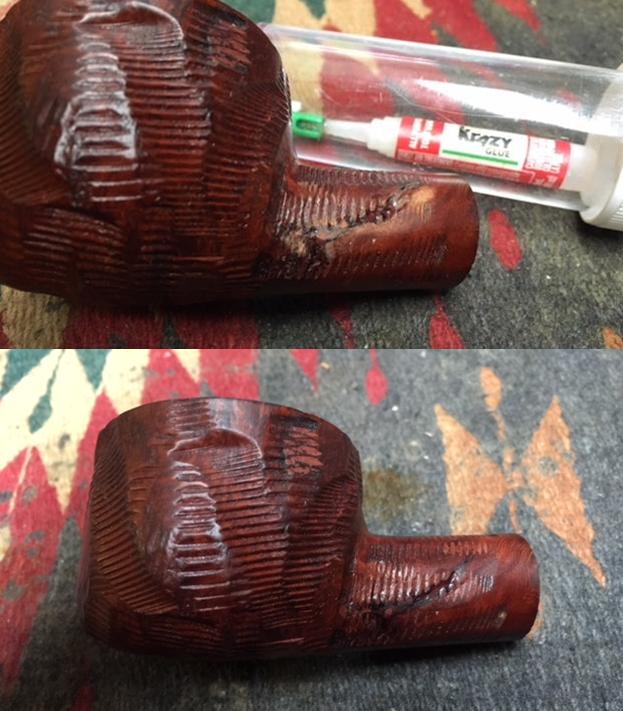
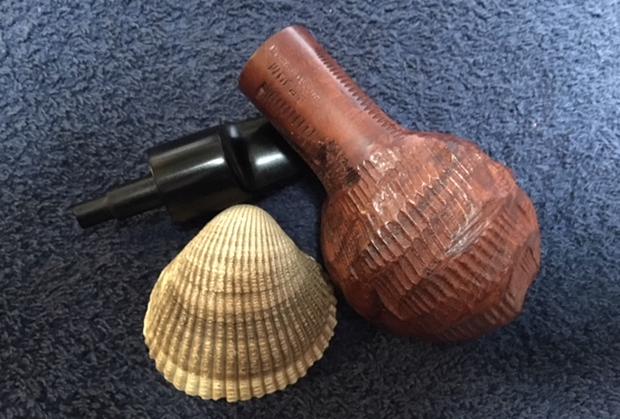
 The heel of the Poker contains the nomenclature: ‘COMOY’S’ over ‘PEBBLE GRAIN’ over ‘MADE IN LONDON’ over ‘ENGLAND’ over ‘603’, the shape number. According to Pipedia’s article, A History Of Comoy’s and A Guide Toward Dating the Pipes, the ‘Made in London England’ was used after WW2. According to the same article, the ‘Inlaid C’ which this Poker has, was stopped with the Cadogan era in 1981. So, this Comoy’s is placed after WW2 to the 1970s – the 1975 Comoy’s catalog siting seems to be confirmed. I found this information about the inlaid C interesting:
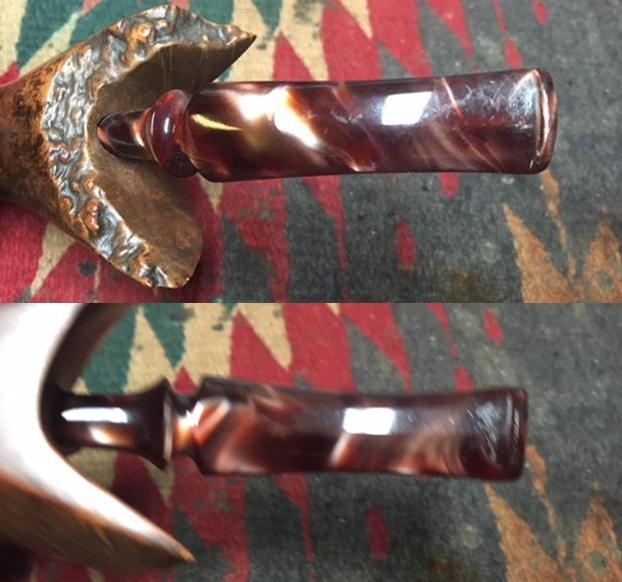
“C” was first inlaid in the side of the mouthpiece around 1919. This was a complex inlay needing three drillings. First, a round white inlay was inserted, then the centre of the white was drilled out, and a smaller round black inlay was inserted. Finally, another drilling was made to remove the open part of the “C,” and an even smaller black inlay was inserted. This inlaid “C,” known as the “three-piece C,” was continued until the Cadogan era in the 1980s. However, the “C” in the 1920s and early 30s is much thinner and more delicate than the one post-war. Cadogan first changed the “C” to a single drilling with an inlay that had the “C” in the centre, and more recently it became a laser imprint. I have a cased pair of early 1920’ “Par Excellence” where the “C” is on top of the mouthpiece.
The picture above shows the ‘three-piece C’ detected by the drilling if you look closely. Very cool!
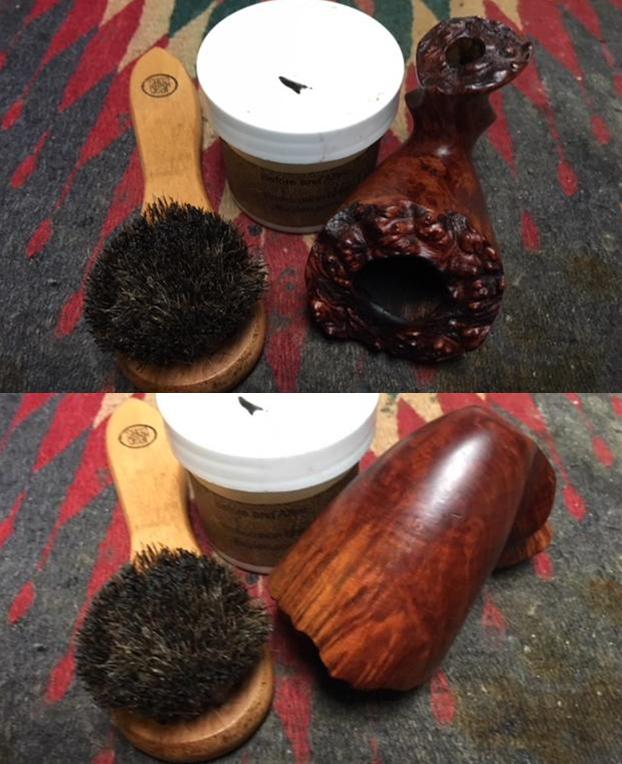
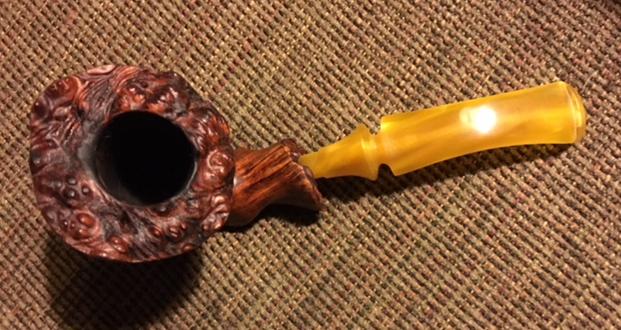
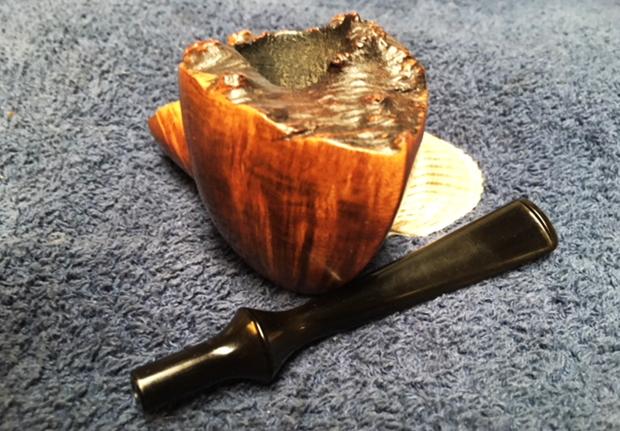
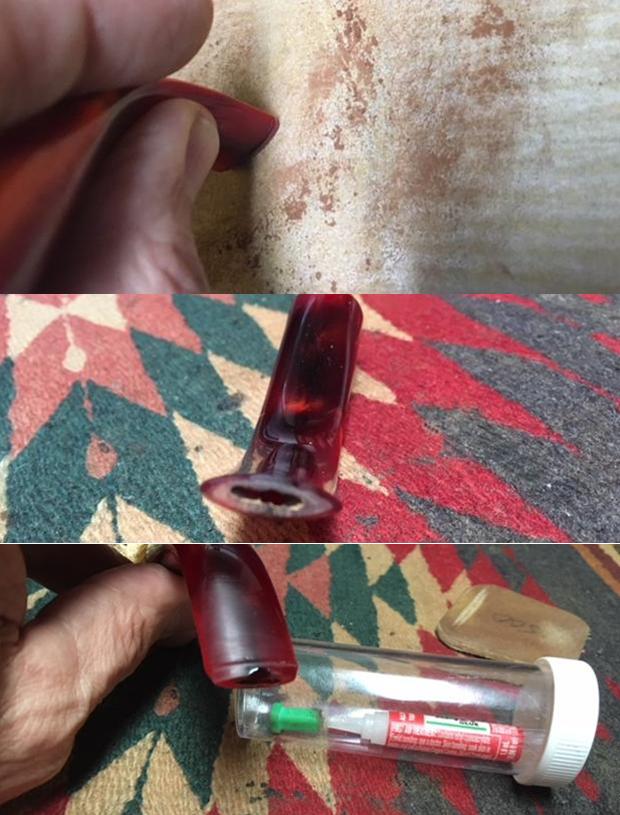
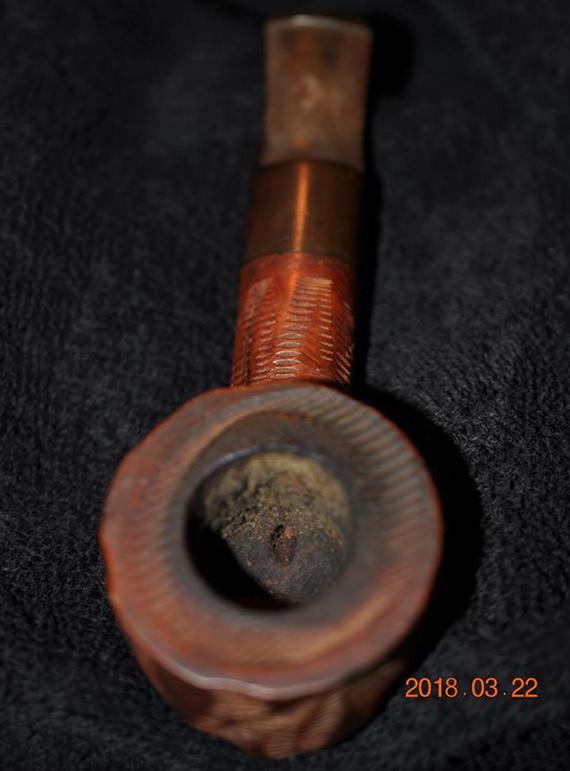
The condition of the Comoy’s Pebble Grain ¾ Bent Modern Poker is pretty good. The blasted finish is exceptional, which seems to be a hallmark of the Comoy’s name. The surface is dirty and needs to be cleaned. The rim has significant lava flow over it and the chamber is sporting some moderate cake buildup. The stem has a good bit of tooth chatter but no dents that I detect. The oxidation is deep. I want to keep my eye that – not to progress too far finishing the stem and discover oxidation! That is not fun. I begin the restoration of the Comoy’s Pebble Grain by first cleaning the internals with pipe cleaners and isopropyl 95%. I then add the stem to a Before and After Deoxidizer bath along with other stems. After some hours, I fish out the Comoy’s stem and after allowing it to drain a bit, I wipe off the raised oxidation using cotton pads and light paraffin oil, Bulgaria’s version of mineral spirits. The oxidation wipes off and then I buff the stem clean with the cotton pad. I run a pipe cleaner through the stem to rid the airway of Deoxidizer fluid.
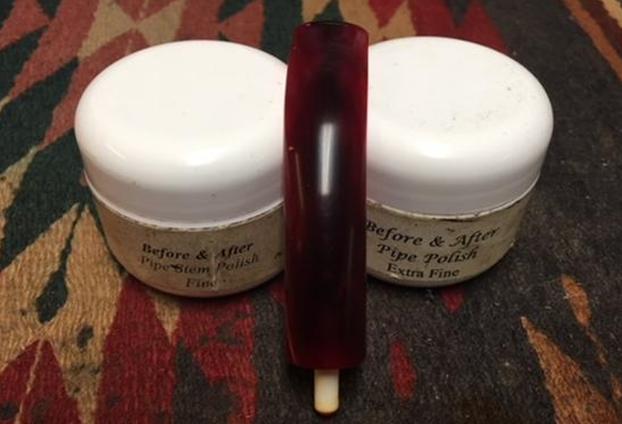
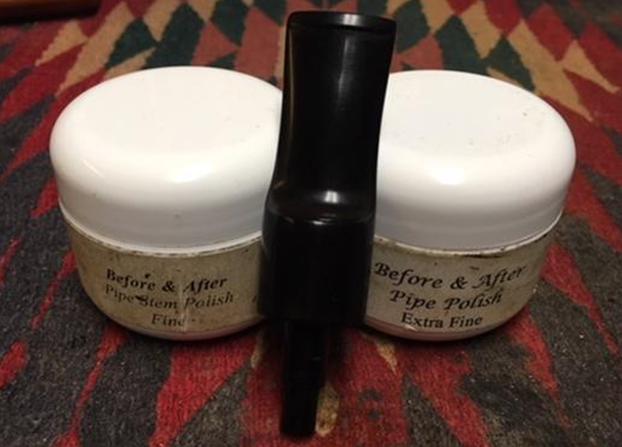
 I follow the Deoxidizer bath by applying Before and After Fine Polish and then Extra Fine Polish to further remove oxidation and revitalize the vulcanite stem. I put a little of the polish on my finger and work it into the vulcanite until it has absorbed well. I do the same with the Extra Fine Polish. I wipe off each application with a cotton pad. I take a close look and I can still see the deep greenish haze of oxidation – ugh! Instead of immediately turning to sanding, I decide to utilize the method I’ve used in the past – an OxiClean bath. I cover the Comoy’s ‘C’ with petroleum jelly to protect it and I put the stem in the bath with a pipe cleaner inserted in it for easier retrieval. I leave the stem in the OxiClean bath over nite.

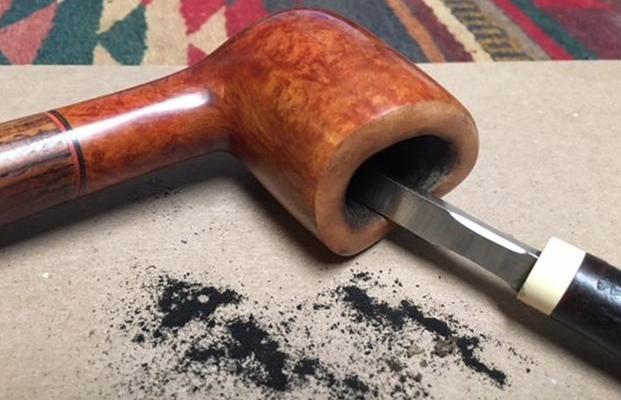
 With the stem soaking, I turn to the Comoy’s Poker stummel. I begin by reaming the chamber to remove the moderate carbon cake buildup. Uncovering fresh briar enables me to examine the chamber walls for cracks or crevices. Using the Pipnet Reaming Kit, I start with the smallest blade after putting paper towel down to ease on cleanup. I use 3 of the 4 blades available to me in the Pipnet Kit – I’m surprised how large the bowl is for a smaller sized pipe. I then scrape more carbon out of the chamber using the Savinelli Fitsall tool which is great for getting hard to reach places. Using a Sharpie Pen, around it I wrap 240 grit paper and sand the fire chamber to expose the fresh briar. I finish with cleaning the chamber of carbon dust with a cotton pad wetted with isopropyl 95%. The chamber has no cracks or crevices upon inspection.


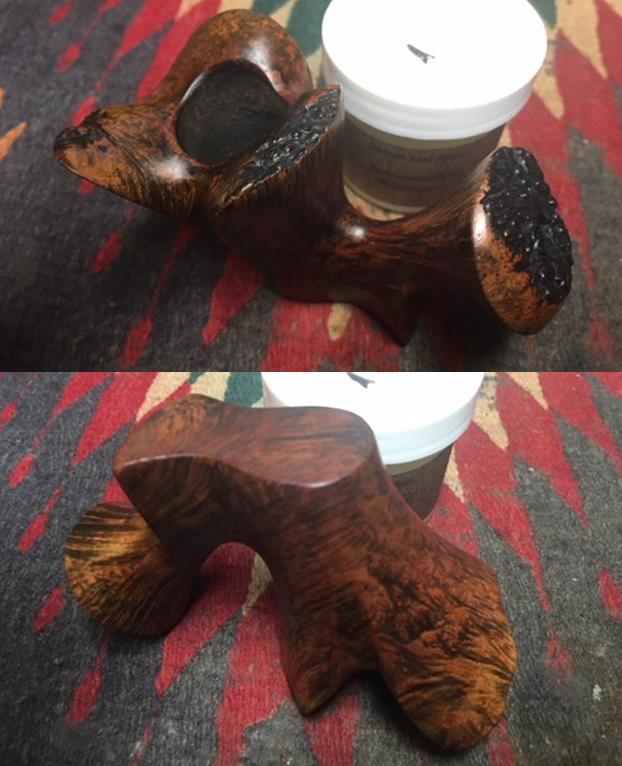
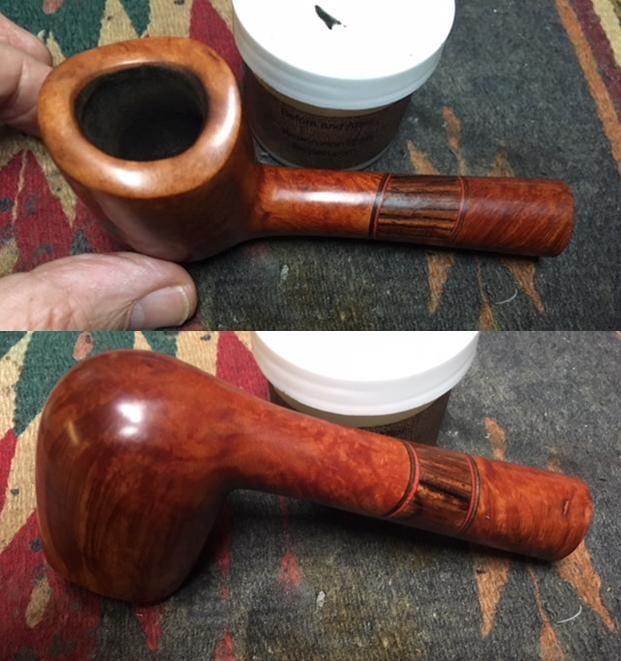
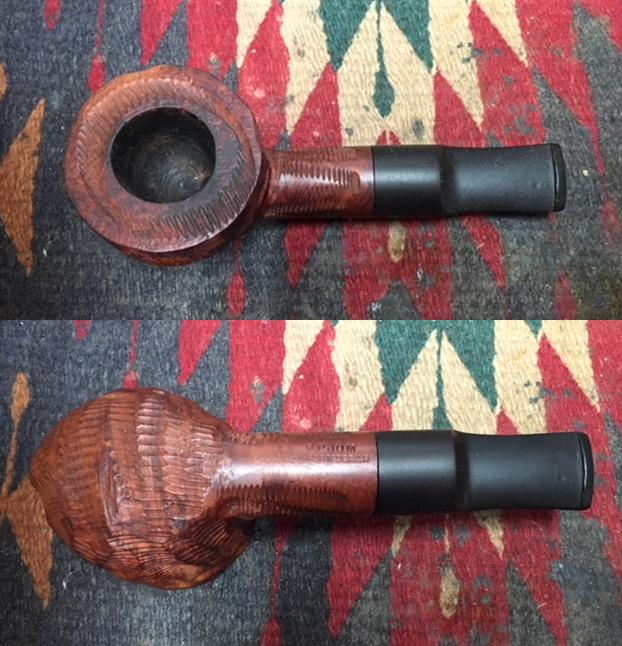
 Next I attack the lava flow on the rim and cleaning the stummel surface. I use undiluted Murphy’s Oil soap with cotton pads to do the cleaning. The rim requires the use of a brass brush which doesn’t harm the briar. I then rinse the stummel using cool tab water careful to keep water out of the internals. The Murphy’s cleaned the surface well – it was grimy and the old finish was lightened at different places – especially around the rim. I take a few pictures below to show what I’m seeing.
 I like working on a clean pipe so I decide to do the dirty work now. Using pipe cleaners and cotton buds dipped in isopropyl 95%, I work on cleaning the mortise and draft hole. I find the internals pretty dirty but finally the pipe cleaners and buds are coming out fairly clean. I like to make sure the internals are clean so I will also use the more subtle approach – kosher salt and alcohol soak. I use kosher salt because, unlike iodized salt which leaves a taste in the wood, kosher does not. I fill the chamber with salt and cover the top and give it a shake to move the salt around. Then I use a cotton ball to create a wick by stretching and twisting it. I stuff it down the mortise and place the stummel in an egg carton for stability. Using a large eyedropper, I then fill the chamber with isopropyl 95% until it surfaces over the salt. After a few minutes, I will top the alcohol again. The night is late, I leave the stummel to soak over nite and I call it a day.
 The next morning before heading out for my workday, I need to tend to the kosher salt and alcohol soak. The salt was discolored and the wick was wonderfully colored – it did the job that was asked of it! I dump out the used salt in the waste basket and wipe the bowl with paper towel and a bristled brush to remove the leftover salt. I also blow through the mortise to purge any left over salt in the mortise. I finish by running a few pipe cleaners dipped in isopropyl 95% through the airway and I’m satisfied. The bowl is clean!
 I also fish the Comoy’s stem out of the OxiClean bath. The bath has raised more oxidation from the vulcanite. I adjust the aperture on the iPhone camera to show better what I’m able to see with the naked eye.
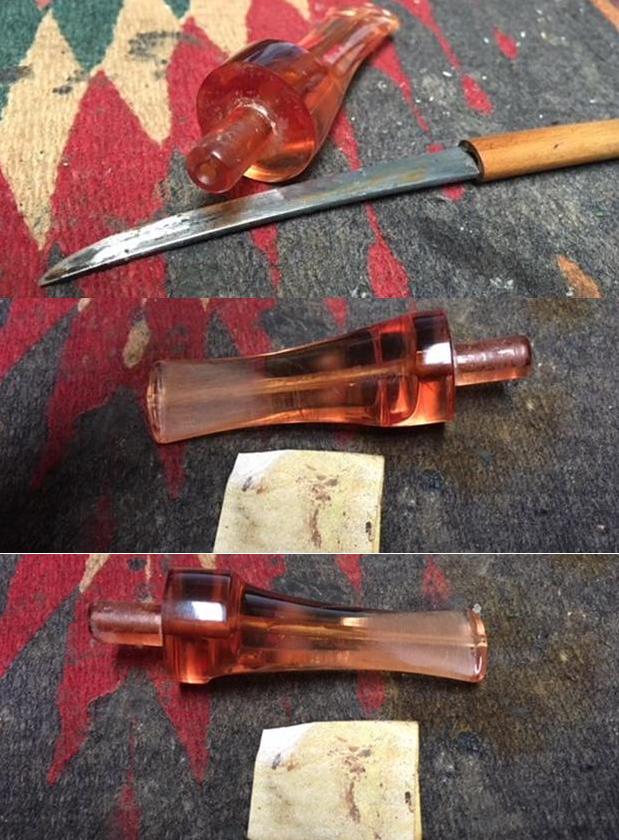
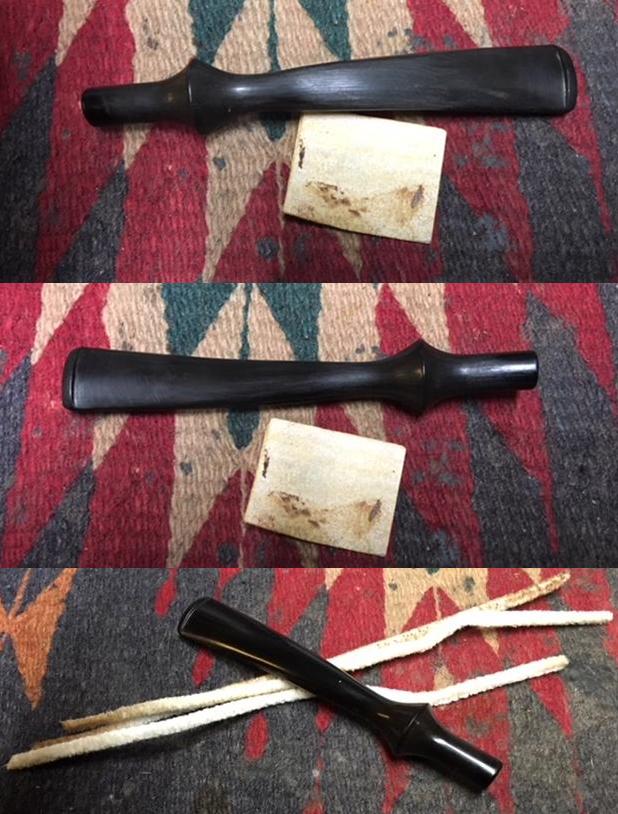
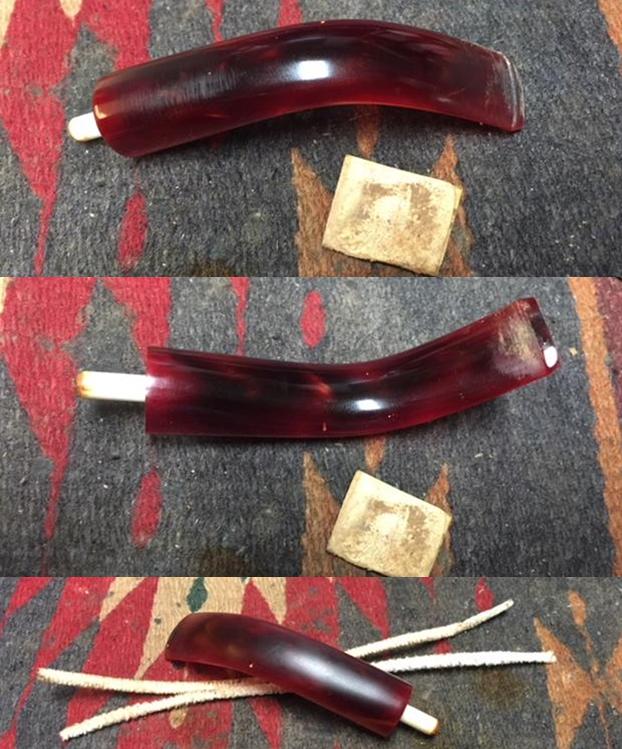
 I attack the oxidation by wet sanding with 600 grade paper. When it’s time to head to work, I’m still not satisfied that the oxidation was conquered and will continue tonight!
 I continue working on the oxidation when I return in the evening. I continue sanding using 600 grade paper but change to dry sanding. I also utilize a disc I fashioned to wedge up to the shank end of the stem to avoid the sanding creating a ‘shoulder’ on the stem – a rounding of the edge. I think I’m making progress. I follow the 600 paper by buffing the stem with 0000 grade steel wool. Through out I take a very light approach to sanding on the Comoy’s 3 piece ‘C’, though since it is an inlay, it’s not fragile – at least that is my hope! At this point, I’m feeling better about the oxidation being subdued for the most part!
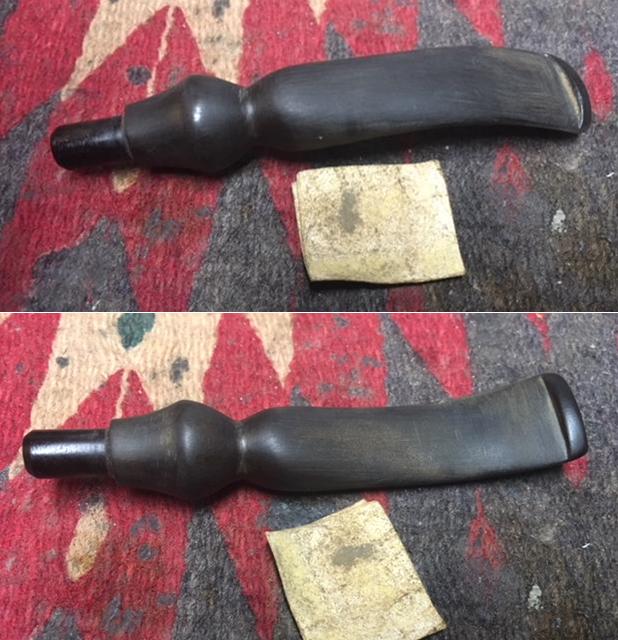
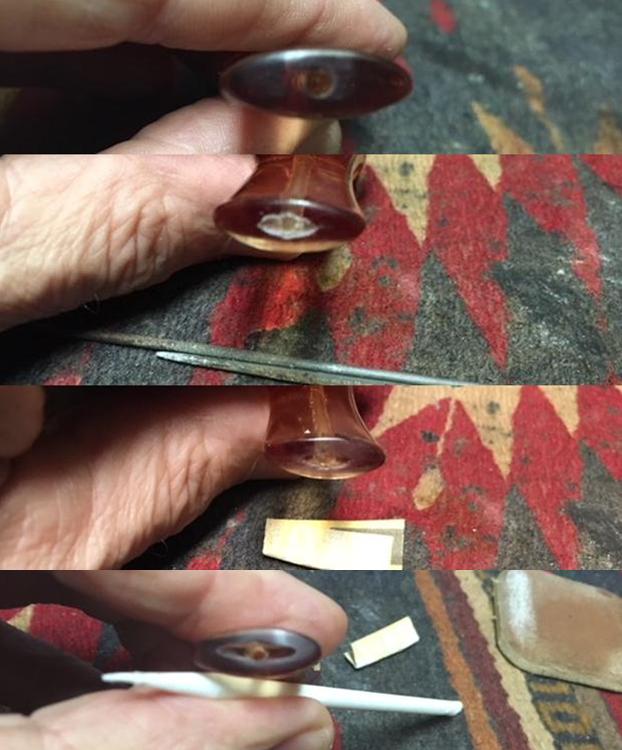
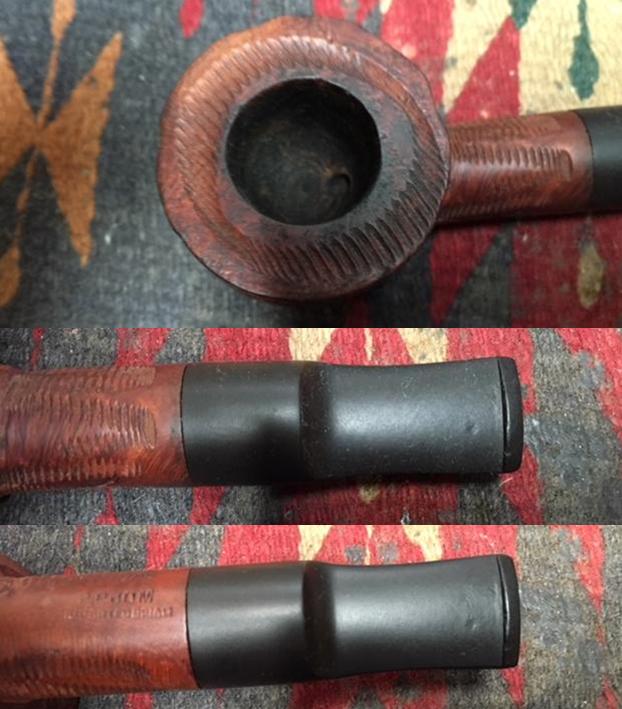
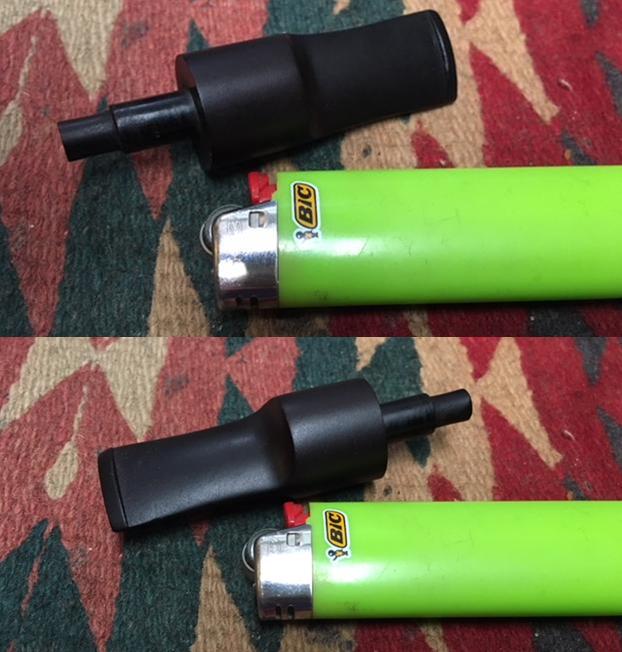
 Now, taking a close look at the bit area to determine tooth chatter needing to be taken care of, I see that the work dealing with the oxidation has almost cleared all the chatter. There is still a little that will easily sand out. I take pictures of the minor issues and then use 470 grade paper on the upper and lower bit areas removing the chatter. I then return to 600 grade paper then 0000 steel wool to erase the tracks of the coarser papers. The pictures show the progress.

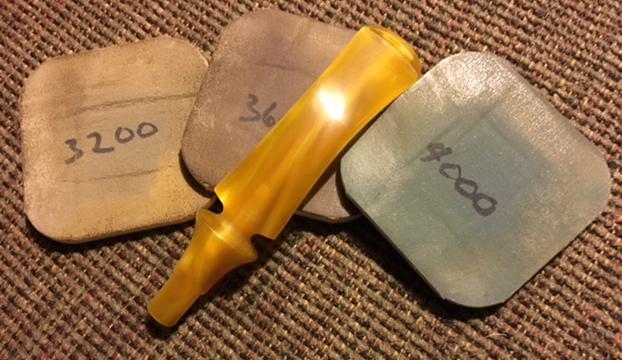
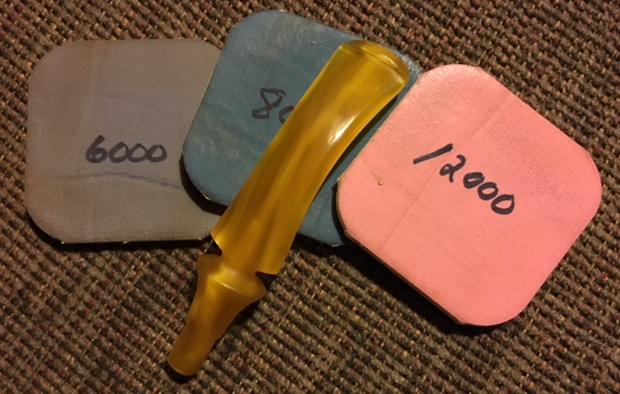
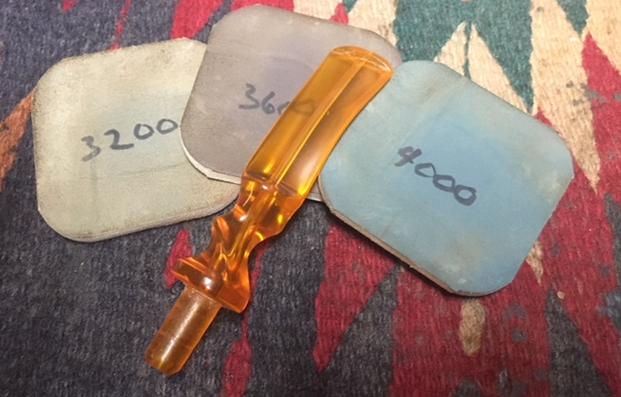
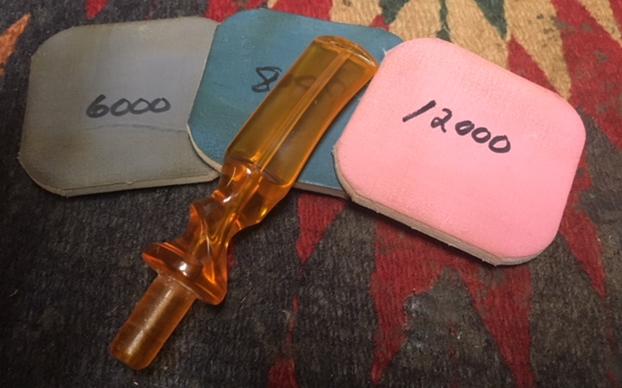
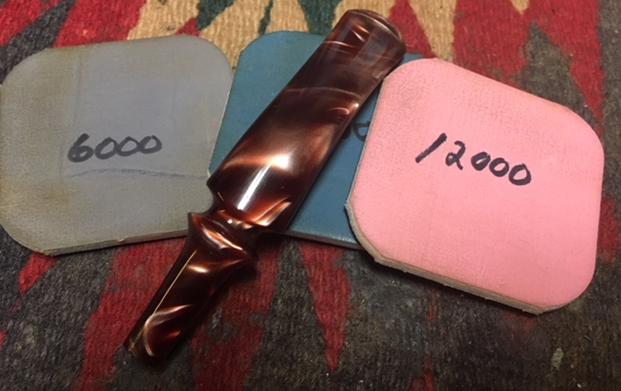
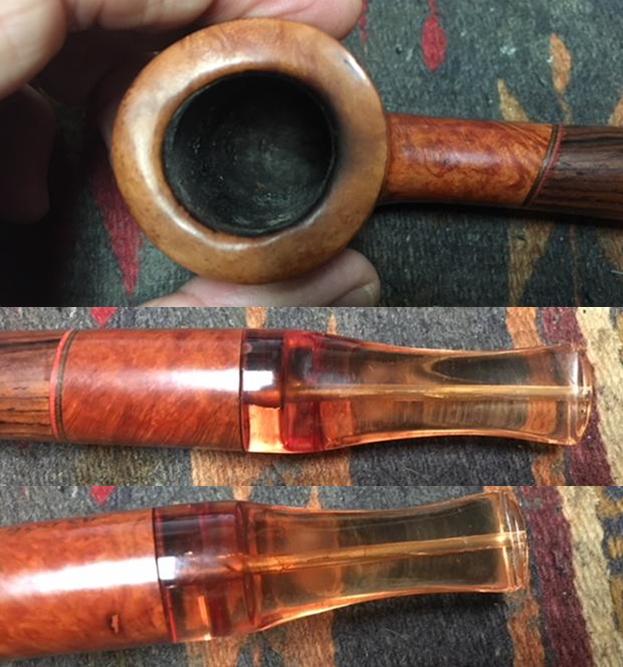
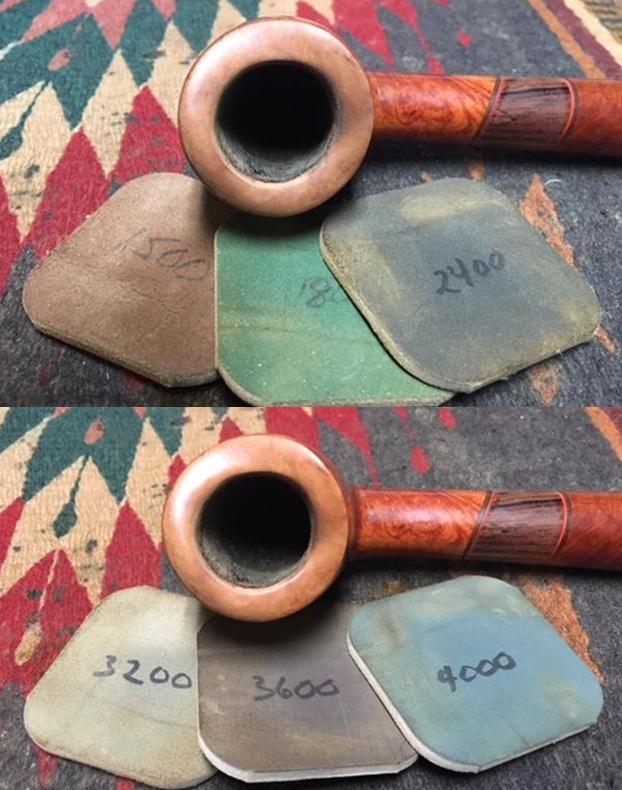
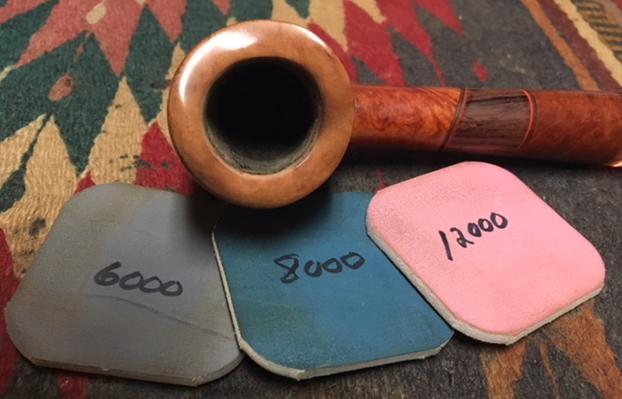
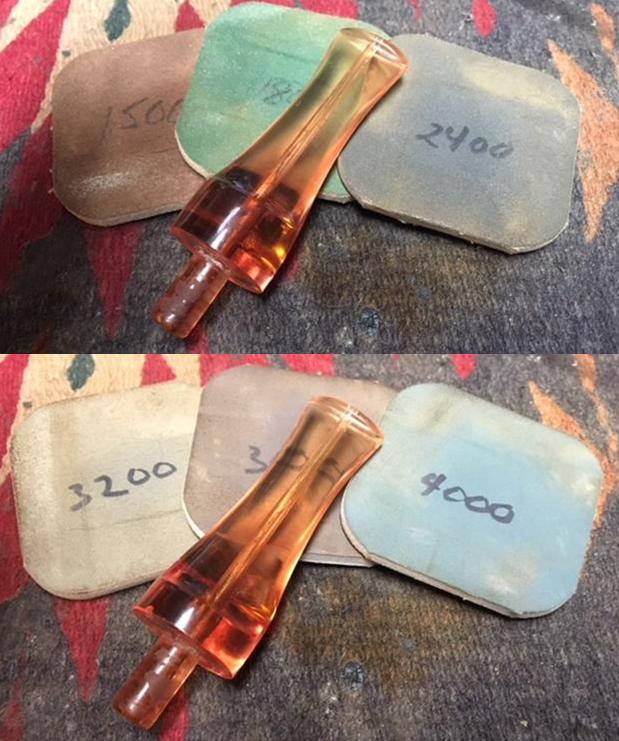
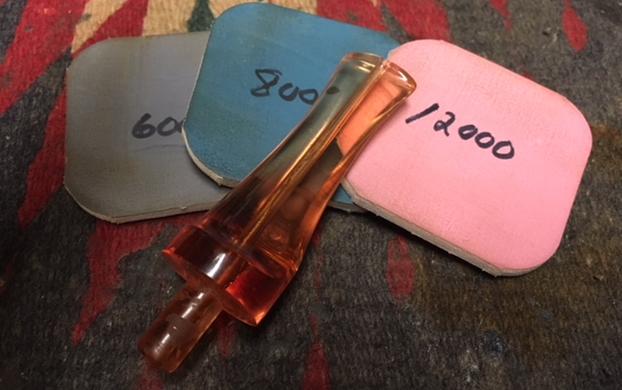
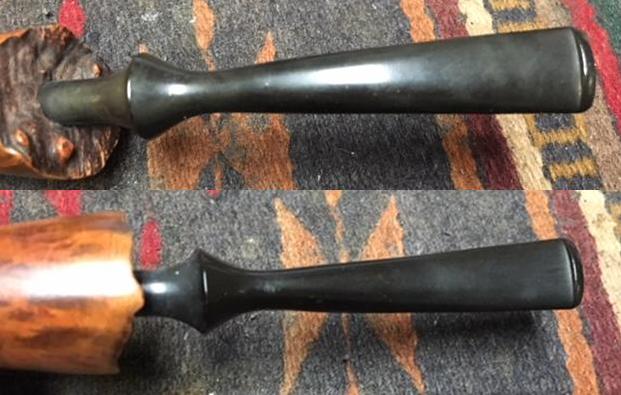
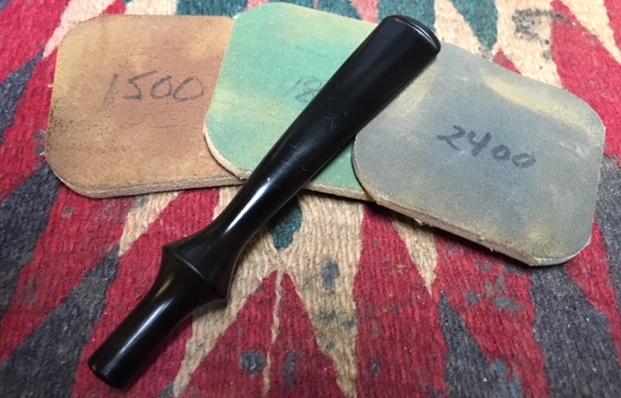
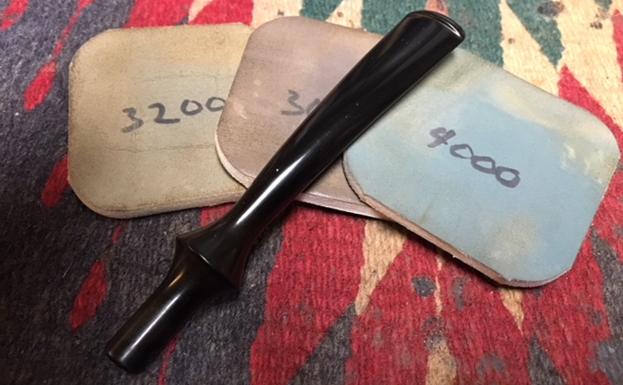
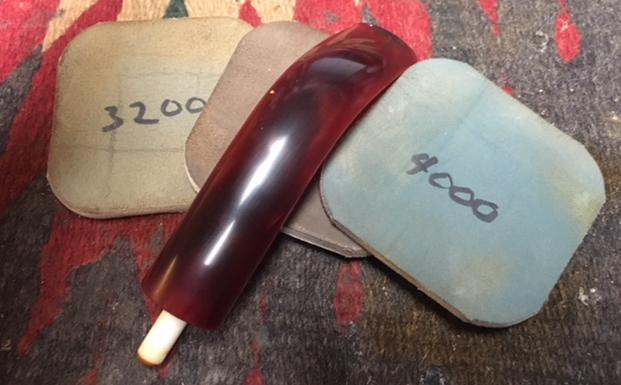
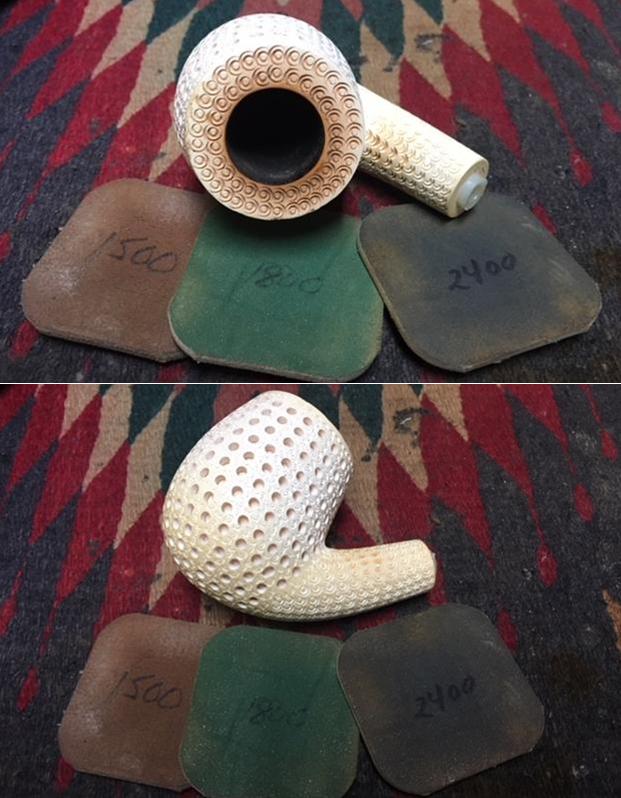
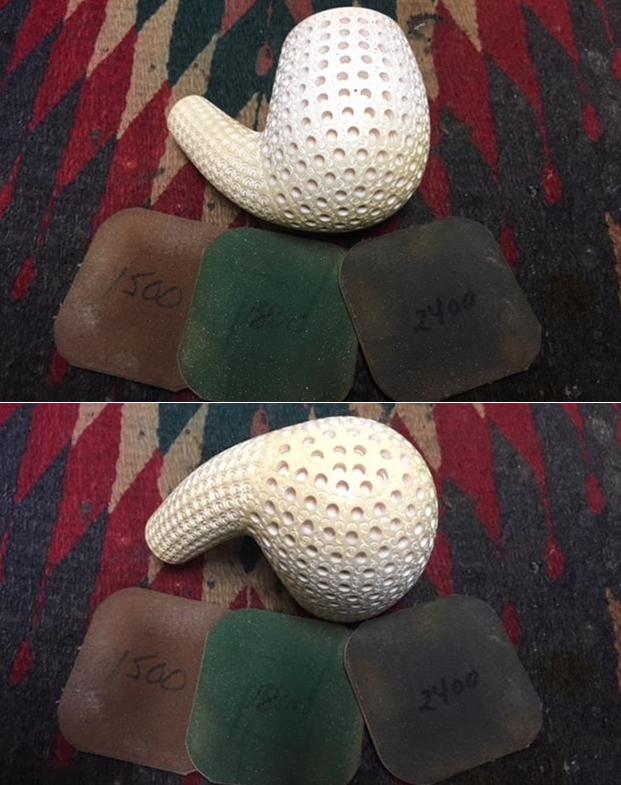
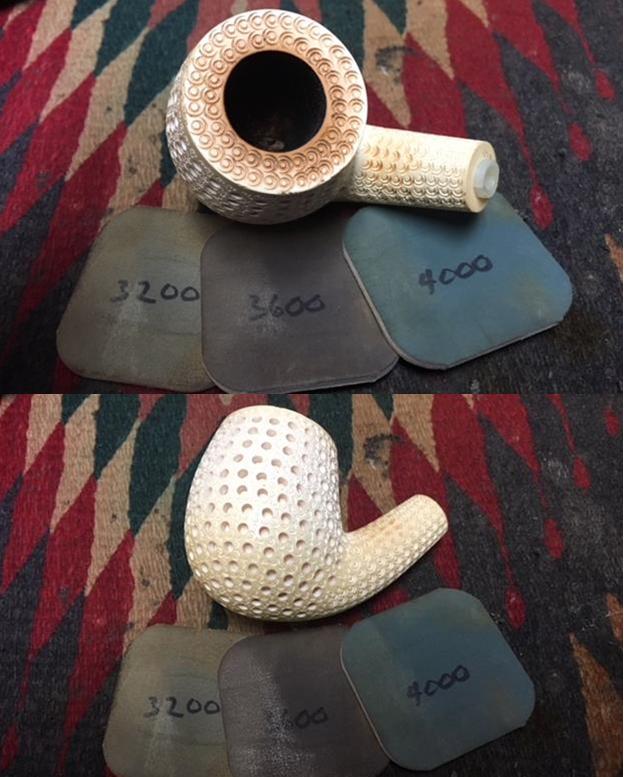
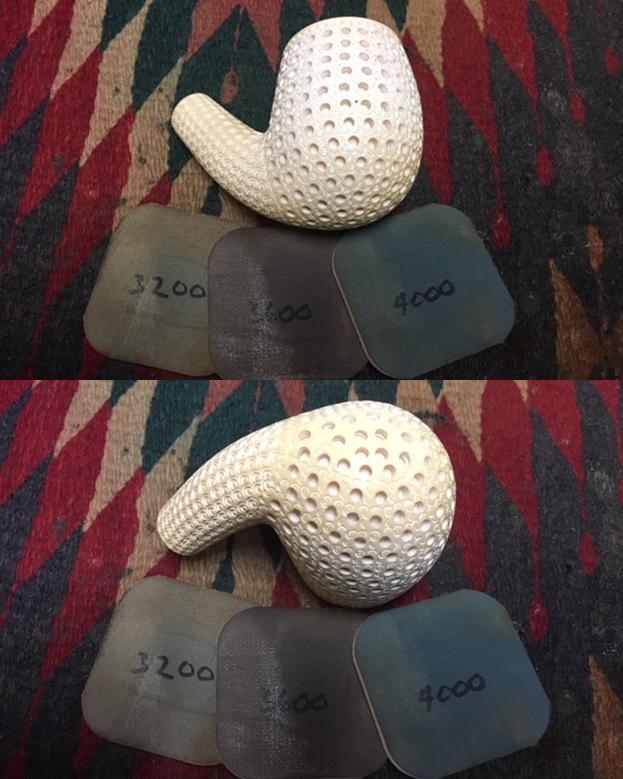
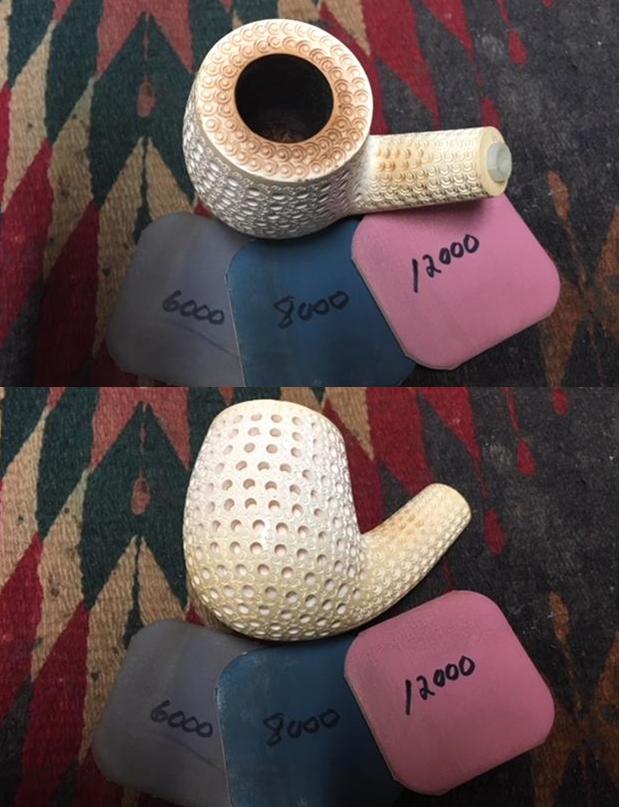
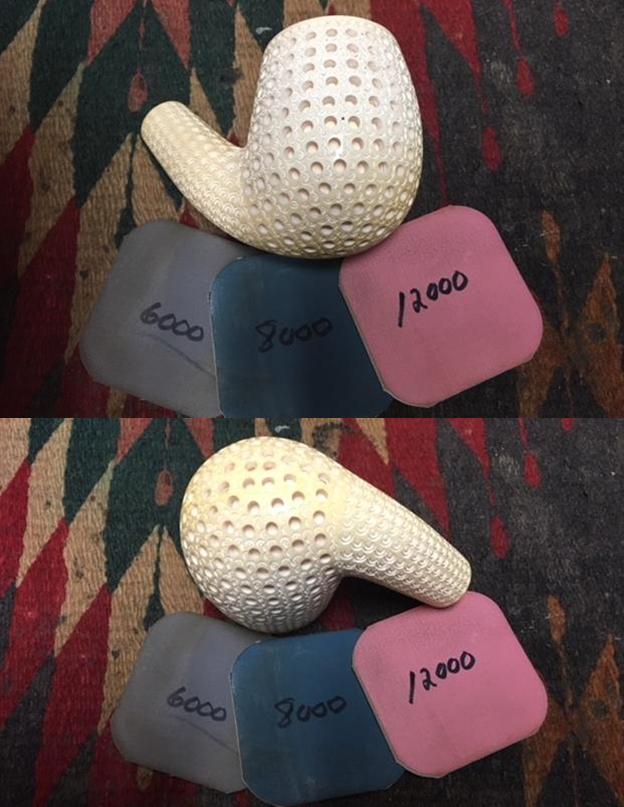
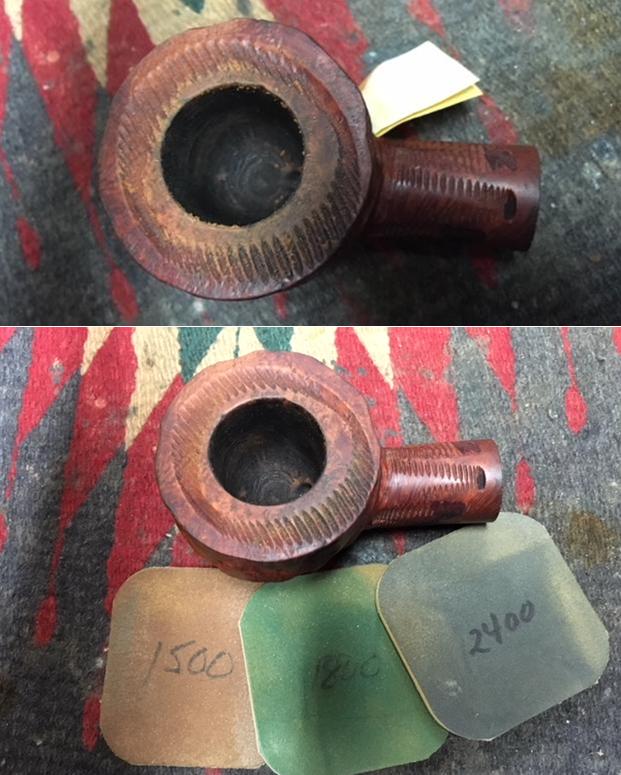
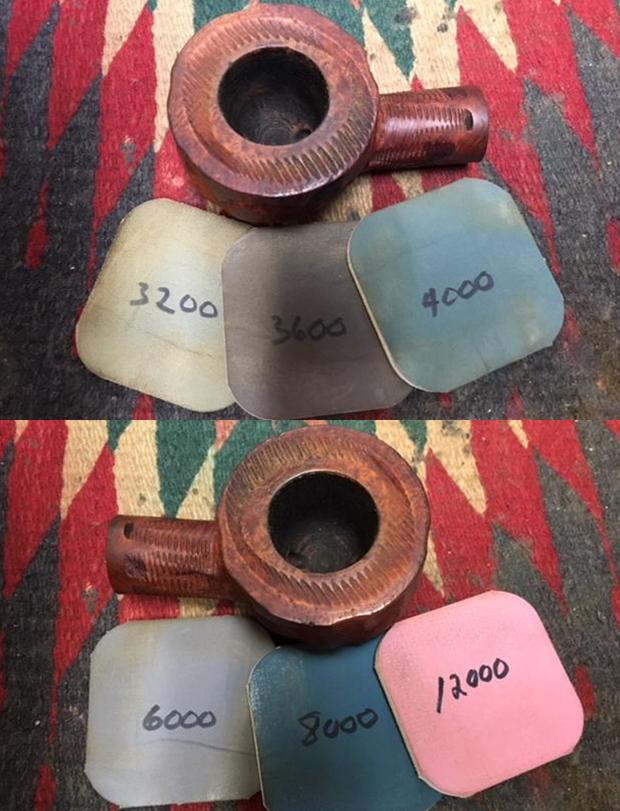
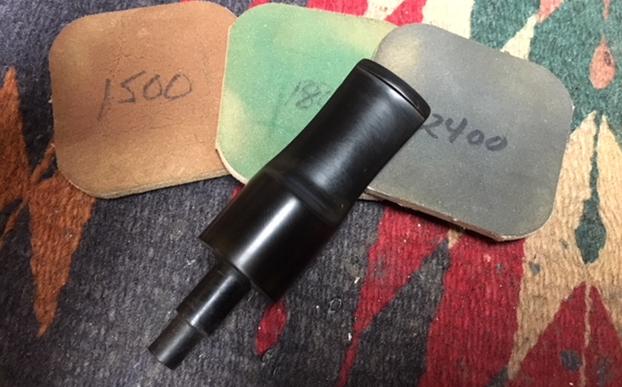
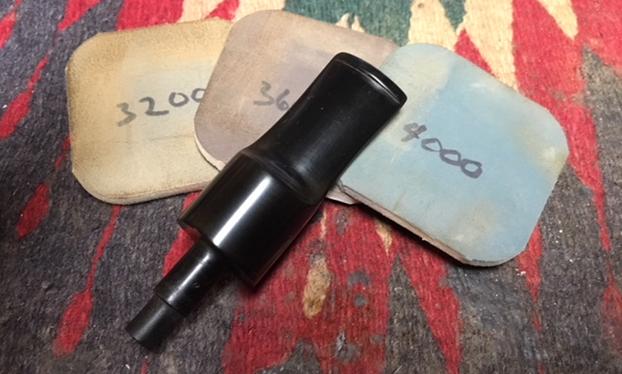
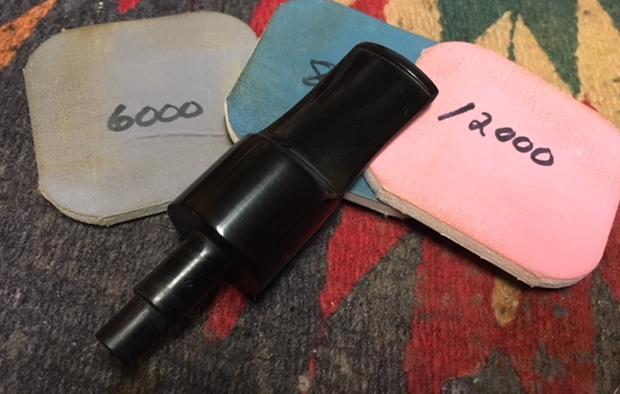
 Next, using micromesh pads, I wet sand the stem using pads 1500 to 2400. Following this I dry sand using pads 3200 to 4000 then 6000 to 12000. Following each set of 3 pads, I apply Obsidian Oil which the vulcanite drinks up. I think that stems require more time than any other part of the restoration process – they take lots of patience and this Comoy’s stem looks good – he’s really popping!
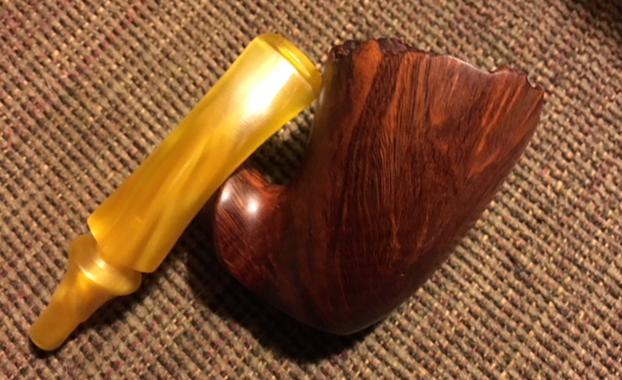
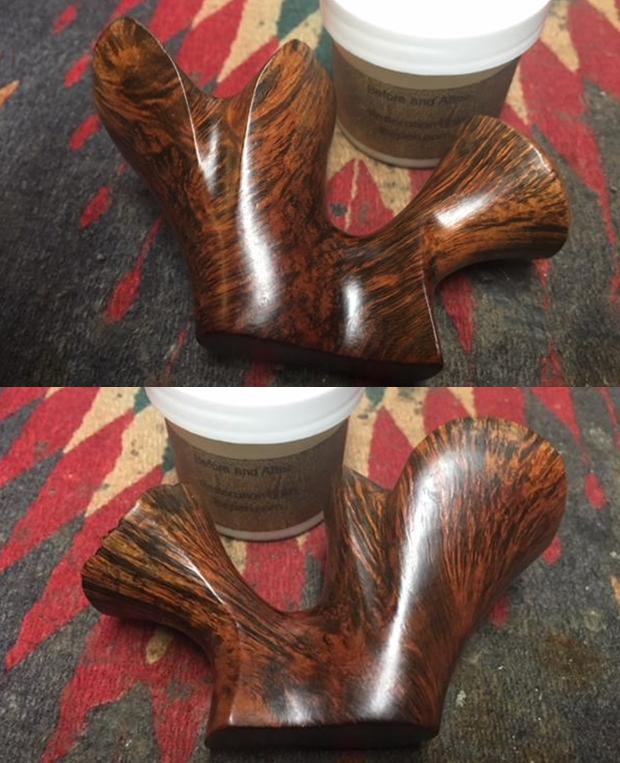
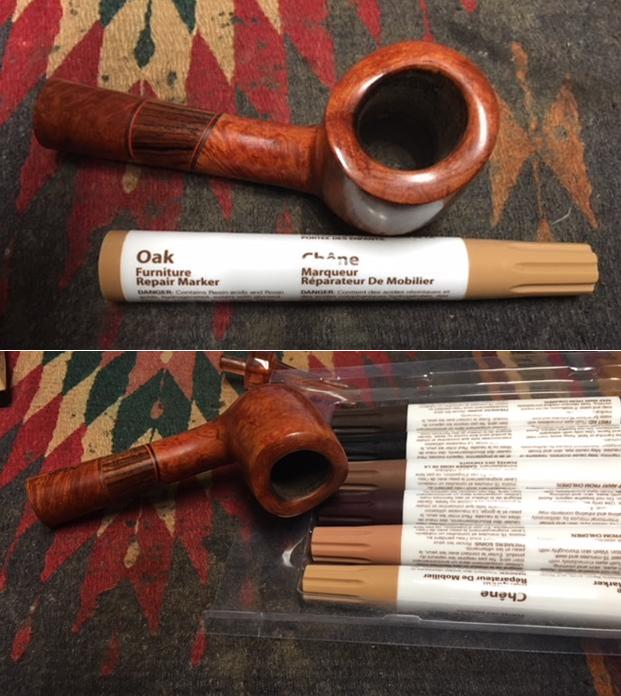
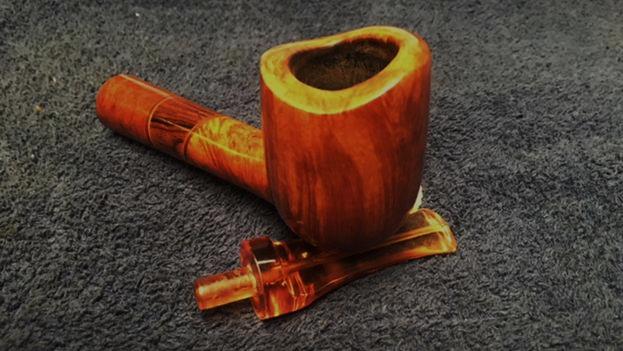
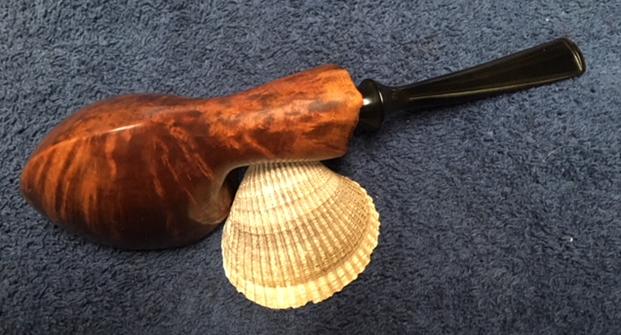
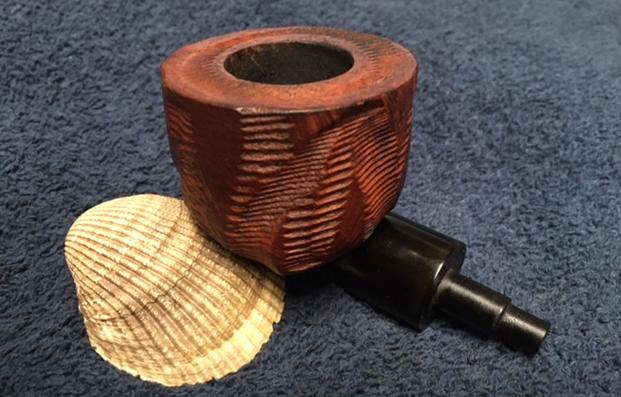
 Turning to the Pebble Grain Poker stummel, I’m looking forward to seeing how he will shape up! The Comoy’s Pebble Grain blasted finish is second to none in my opinion – the three-dimensional perspective of the grain revealed in the blasting process gives a different kind of enjoyment. I love to see the grain emerge in smooth briars, but a quality blasted surface, as this Comoy’s is, gives a unique grain look and touch all in one package. Earlier when I cleaned the stummel with Murphy’s Soap, I felt like it lightened the finish at places. With this classic pipe I want to keep it as close to the original as I can – only refreshing it where its tired. I reached out to Steve with all his rebornpipes experience to get his input which was helpful as expected! The working plan is to touch up areas that are worn more and exposed briar is showing. This is especially true of the outer rim lip – through wear, the finish is thin. I take a few pictures to mark the start.

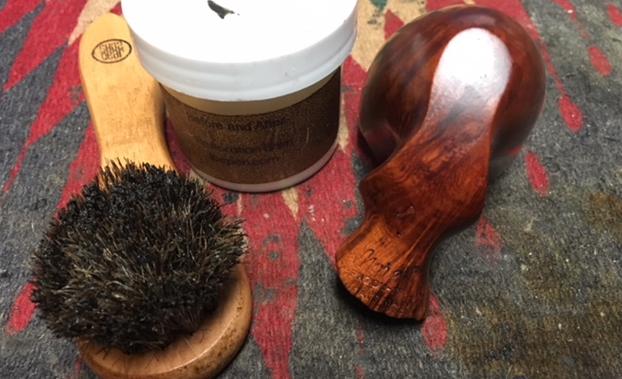
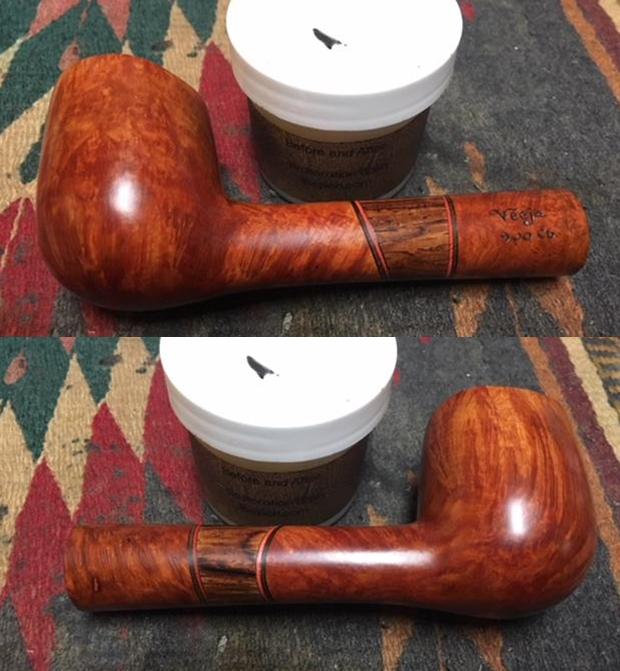
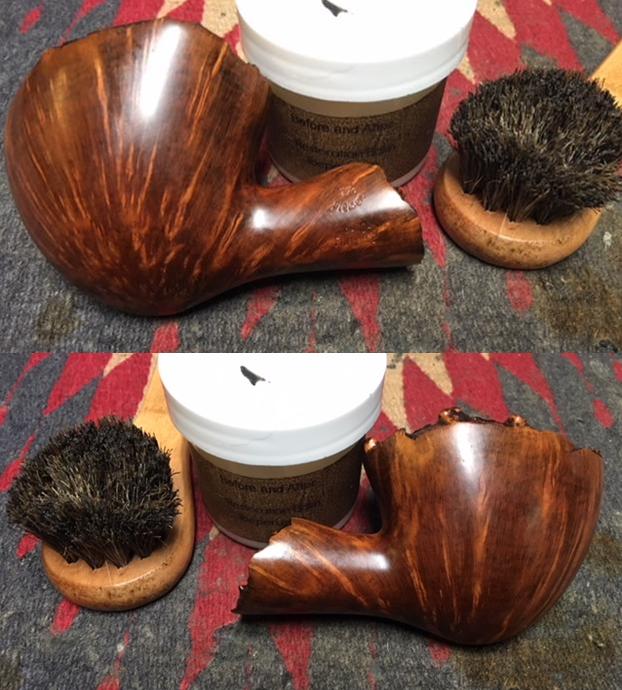
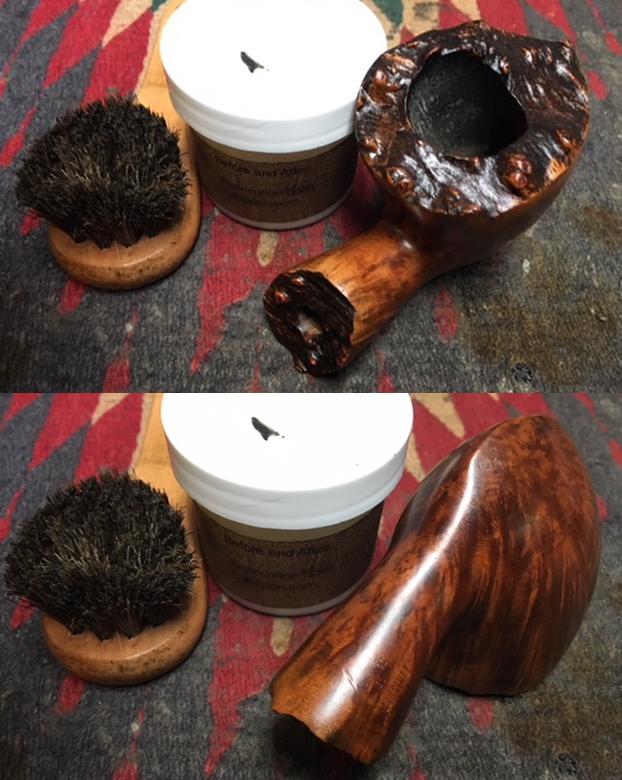
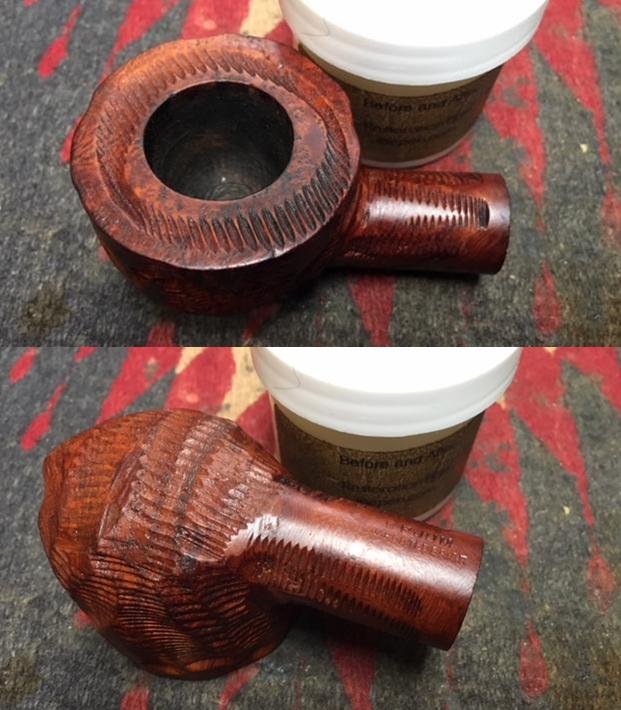
 With a Cherry dye stick, which seems to be a good, subtle match, I touch up the rim as well as a few spots around the base of the shank and on the shank end. I then apply Before and After Restoration Balm, Steve’s suggestion, by placing Balm on my fingers and working it into the crevices of the Comoy’s Poker blasted finish. The Balm starts off more liquidy then firms up into a wax-like substance that continues to be supple. It takes a few applications to my finger to cover the surface well. I set it aside for a while to allow the Balm to do its thing! I take a picture with the Balm on the stummel. After about ten minutes, I wipe the Balm off with a cotton cloth towel until it start shining up. I’m very pleased with the results – the Balm brought the blasted briar to a rich brown hue with the light reddish flecks that give the briar surface depth and character.
 I reunite the stem to the Modern Poker stummel and mount a cotton cloth buffing wheel dedicated to White Diamond compound to the Dremel. With the speed set at the lowest for the Dremel, I apply the compound to the stem to bring out the gloss. I don’t press hard on the wheel but allow the speed, the wheel and the compound to do the work. After completing the application of compound to the stem, I mount a cotton cloth wheel on the Dremel to apply Carnauba wax to both the blasted stummel and stem. What I have grown to enjoy is the up close and personal approach that I have developed with the Dremel. I am able to apply the carnauba wax by changing the orientation of the wheel to correspond to the terrain of the blasted surface. This allows me to apply the wax strategically and to avoid too much or too little. After completing a couple of applications of the wax, I give the Comoy’s Poker a rigorous hand buffing with a mircromesh towel dispense any leftover wax and to raise the shine.
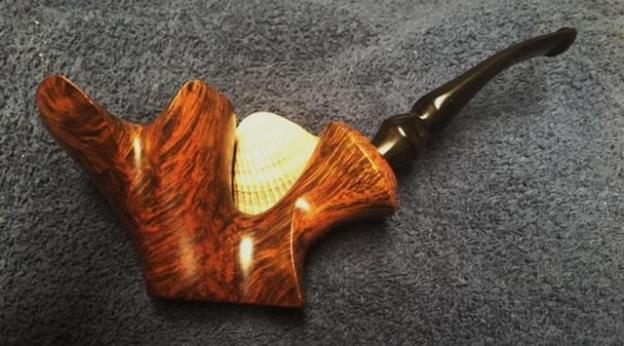
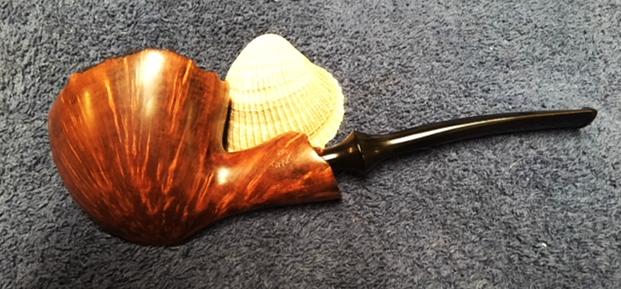
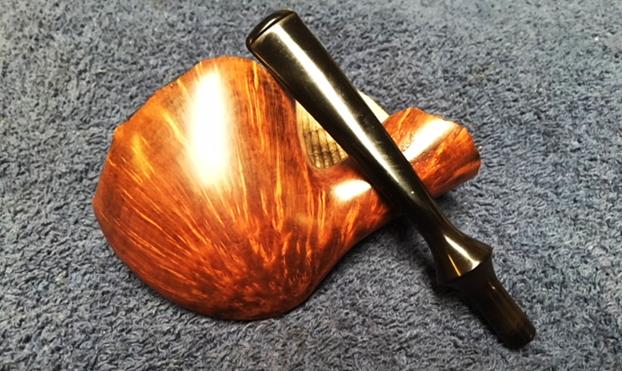
Oh my! What a classic presentation of this Made in London England, Comoy’s Modern ¾ Bent Poker. The blasted surface is beautiful – I love the 3 dimensional perspective of the grain. The process of blasting is different from rustification. When I started restoring pipes it took me a while to figure this out. The blasting technique, which Comoy’s has certainly perfected over the years, gently removes the soft wood and leaves the contours of the harder wood of the grain peeks. This leaves an intricate mosaic of grain pattern to enjoy by sight and by touch as one enjoys his (or her) favorite blend. This vintage Comoy’s Pebble Grain 603 Bent Modern Poker is a keeper and I’m reluctantly giving him up! A unique addition to anyone’s pipe collection. Since Greg commissioned the Poker, he has first dibs on it when I put it into The Pipe Steward Store. This Comoy’s Pebble Grain benefits the work of the Daughters of Bulgaria – helping women and girls who have been trafficked and sexually exploited. Thanks for joining me!


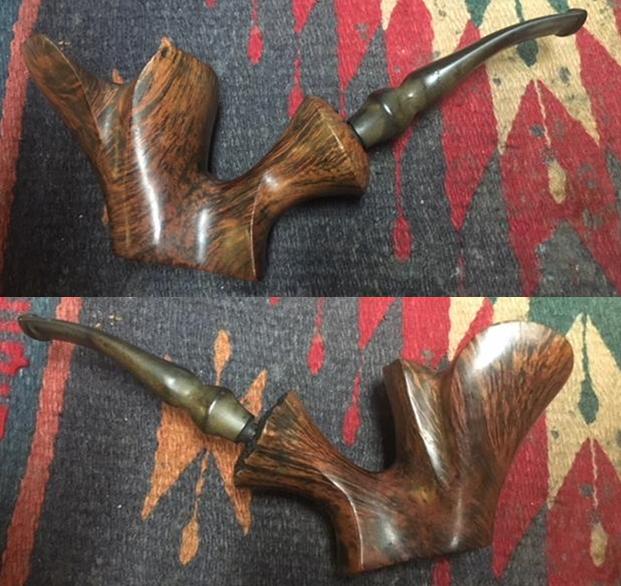
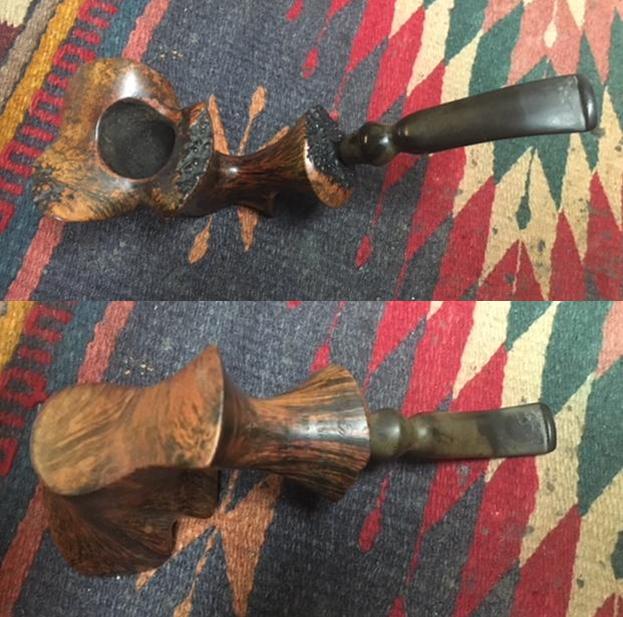
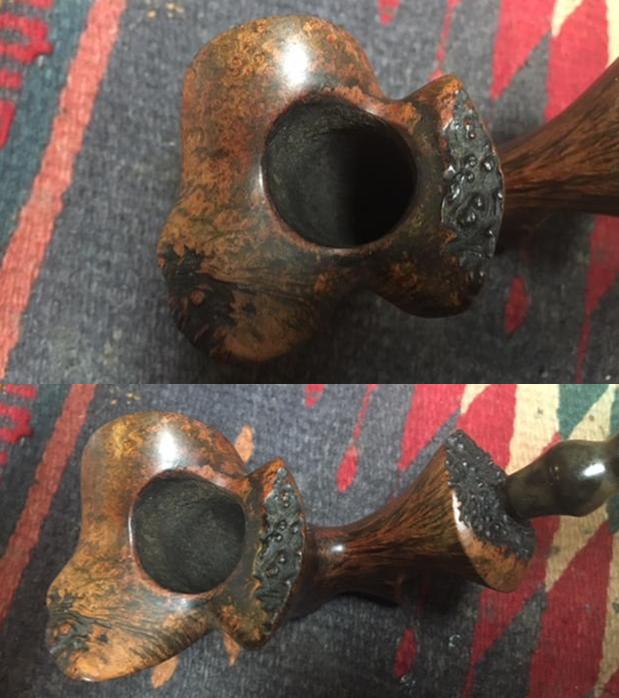
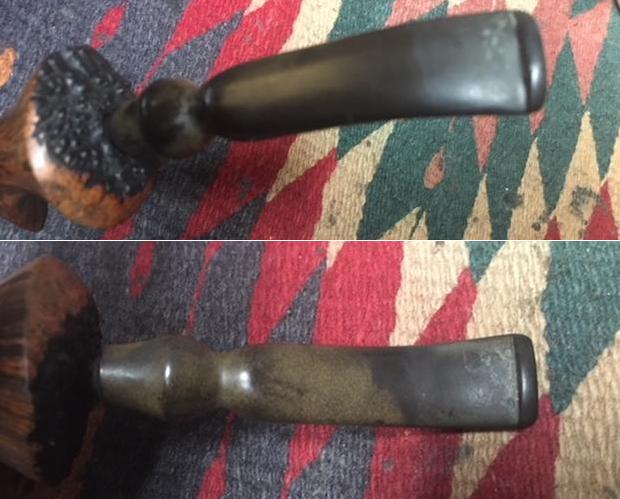
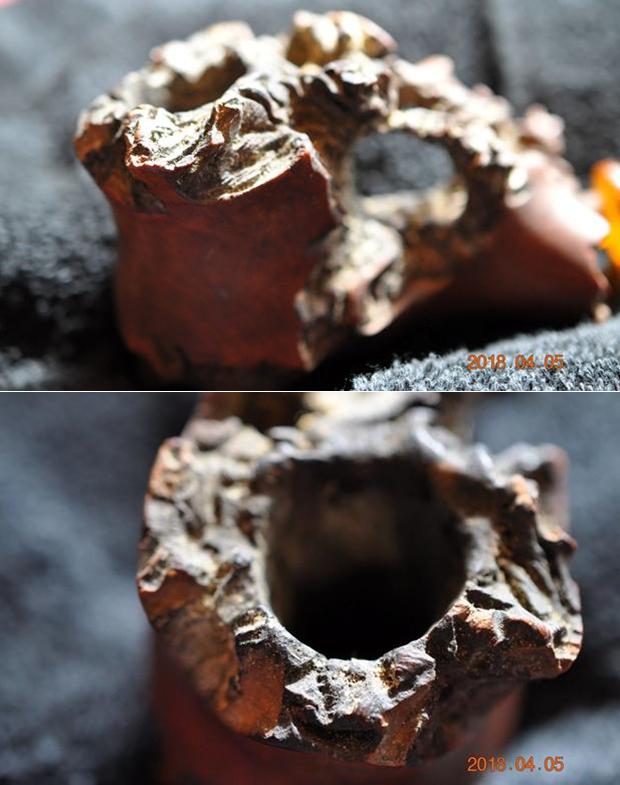
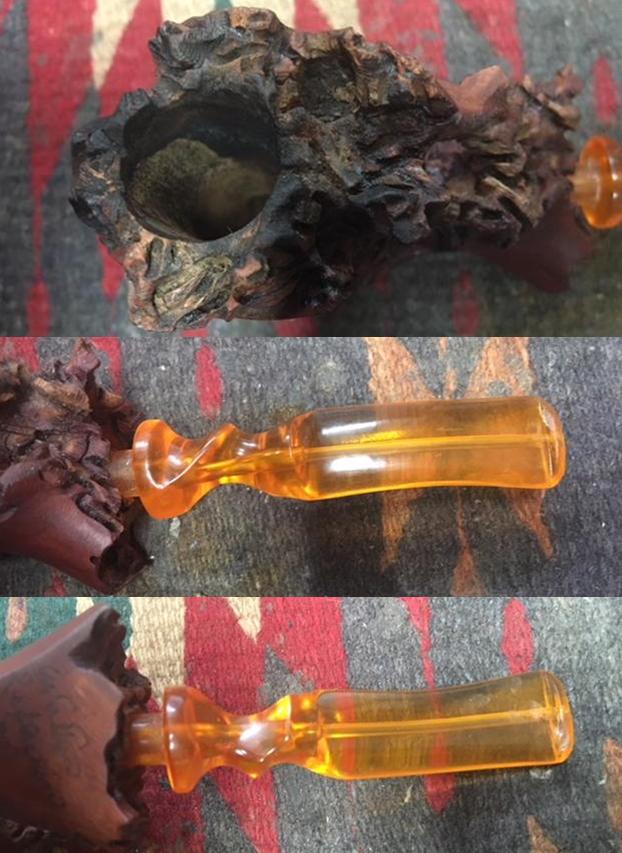
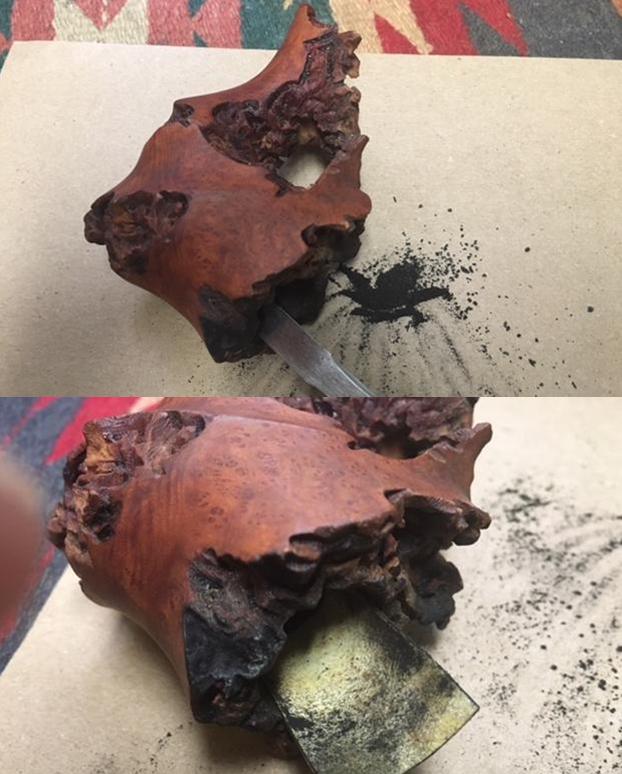
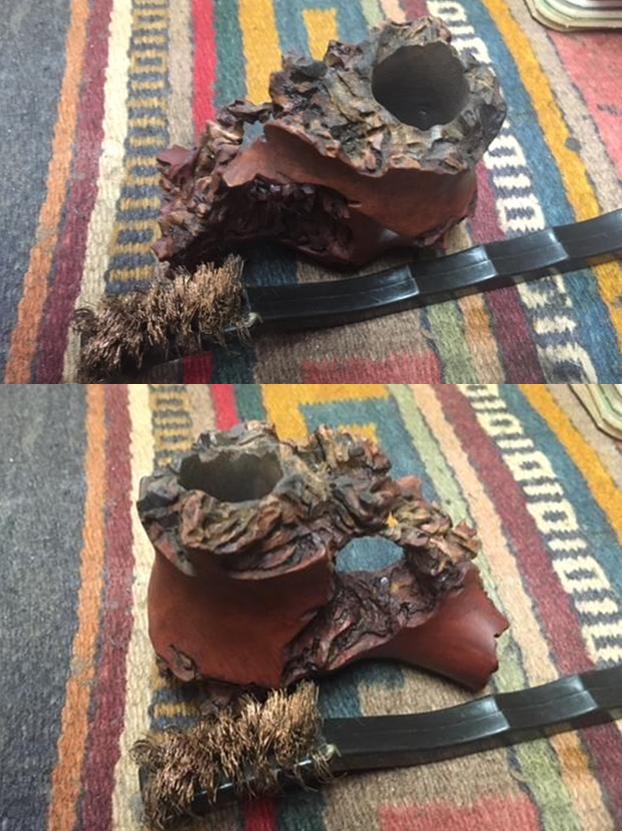
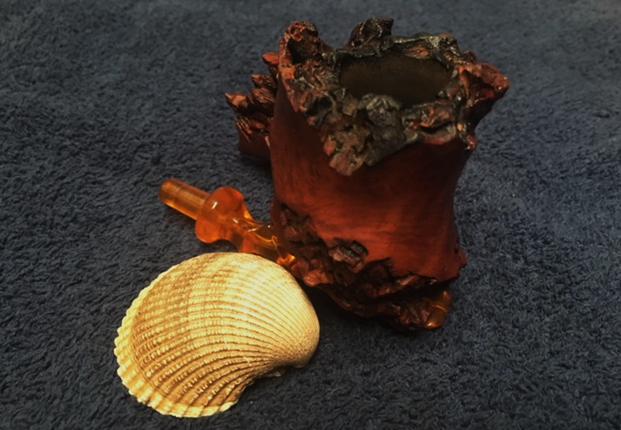
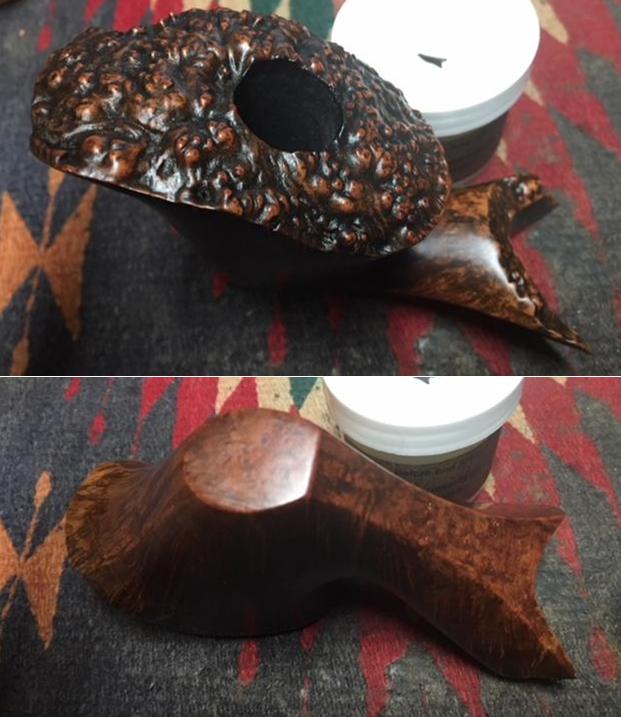
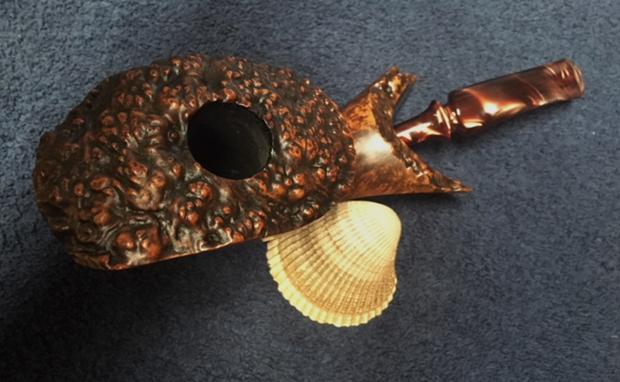
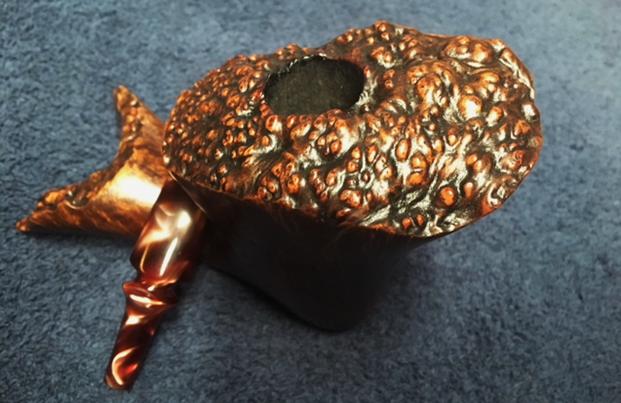
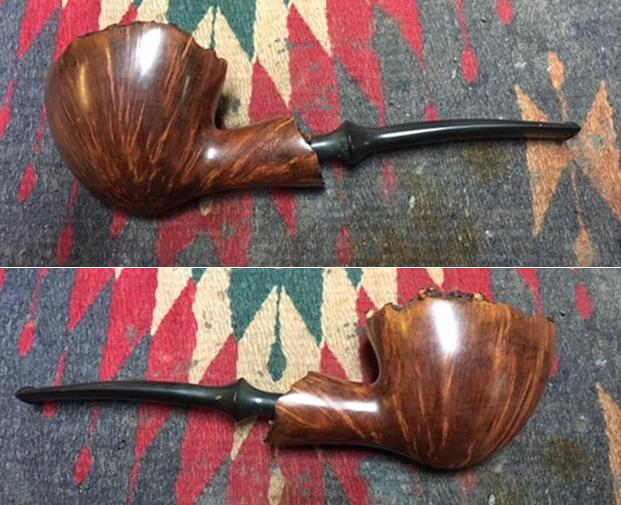
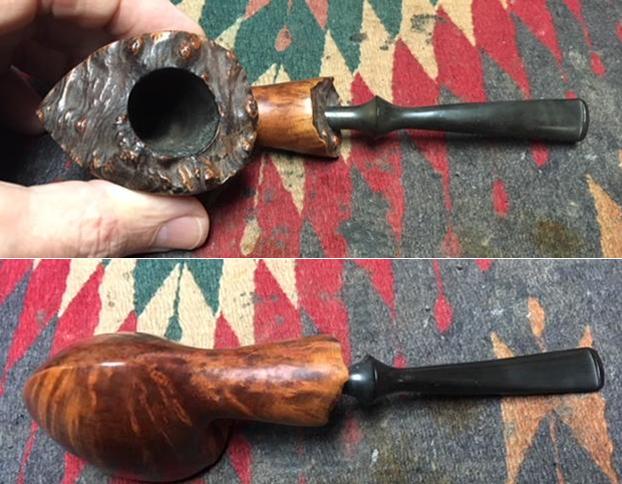
 Jeff had cleaned the rim top and removed the debris in the plateau. He had scrubbed the exterior with Murphy’s Oil soap and a tooth brush to remove the dust and grime that had accumulated there. He reamed the bowl with a PipNet reamer and touched it up with a Savinelli Fitsall Pipe Knife. He cleaned the interior of the mortise and the airway in the shank and the stem with alcohol, cotton swabs and pipe cleaners. It came to me clean and ready to touch up and polish. The stem was cleaned but had tooth chatter on the top and underside near the button and on the surface of the button. I took close up photos of the rim top and the shank end to show the condition of the plateau. There were some burned areas around the inside edge of the rim. It is darkened and burned. I also took photos of the stem to give a clear picture of what I had when I started.
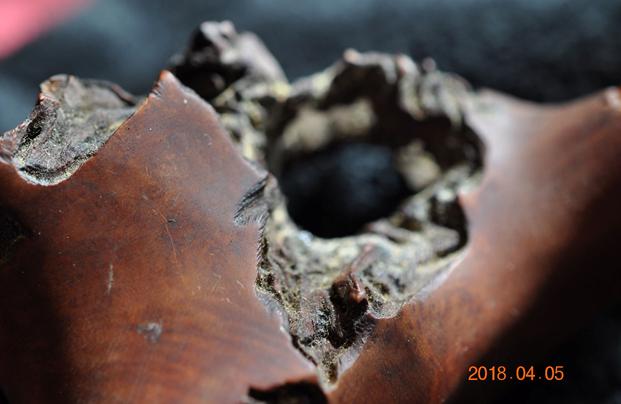
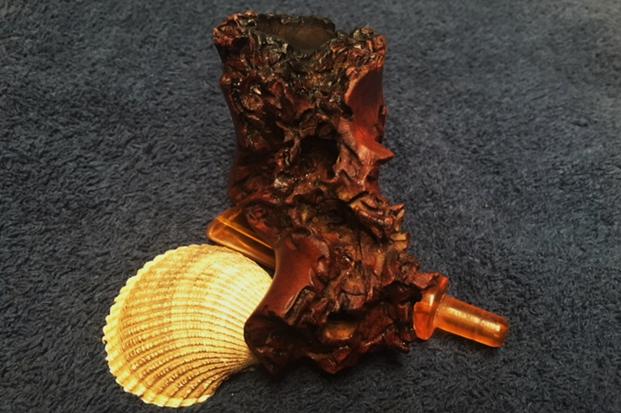
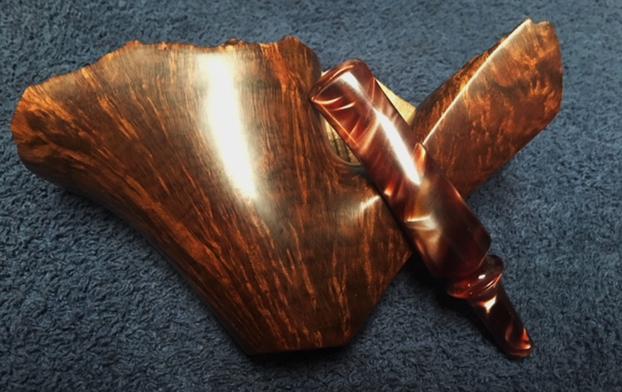
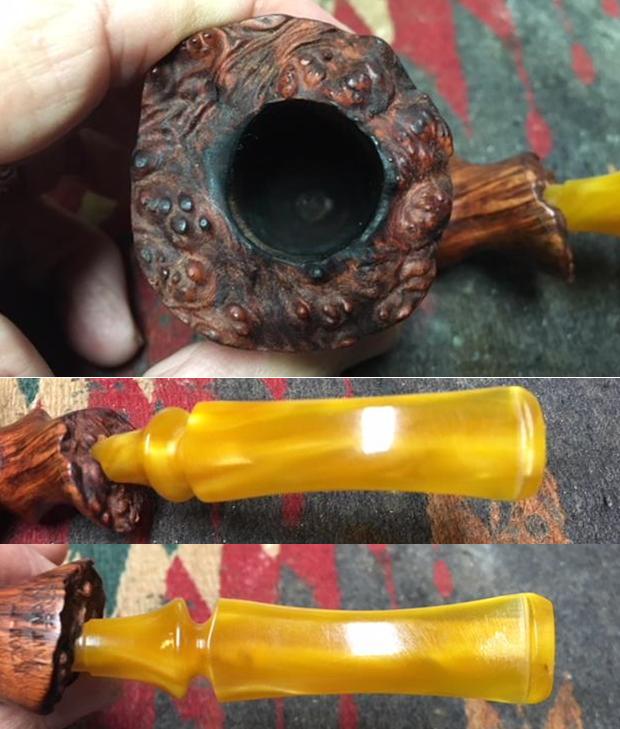 I took a photo of the underside of the shank to show the stamping there. It read Morel over Benzon-Italia over Fait Main over France. I will need to do some work on the maker. I have several Morel pipes and really like them so this was one I wanted to work on. There is a small twisted fill just above the Morel stamp. It is slightly shrunken and will need to be repaired and smoothed out. This is the only flaw on the otherwise beautifully grained briar.
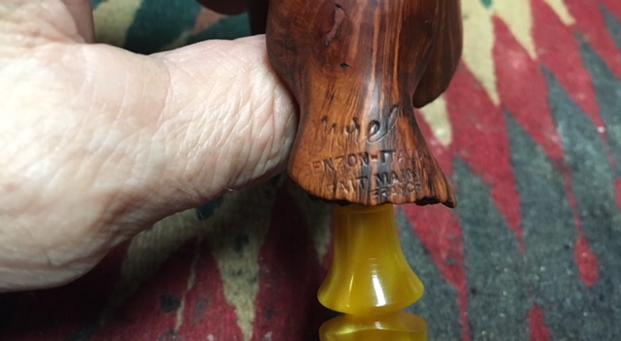 I needed to refresh my memory on the history and background of Morel. I knew from memory that he had made pipes for Chacom at one point in time but could not remember the details. I went to pipephil’s site and looked up the brand to see what I could find. The pipe that was included in the entry on the site was similar to the one I am working on. The one I have has a flattened bottom on the shank and bowl and a twist in the shank. It also has an acrylic stem. Here is the link http://www.pipephil.eu/logos/en/logo-m7.html. I did a screen capture of the pertinent entry and the photo of Morel. They are included below.
 The stam
 ping on the shank “Morel” is exactly as it is spelled out above. The “e” in Morel is the cursive letter. The Benzon – Italy stamp is the same so this helps to date the pipe to pre-1980 when Benzon ceased to be Morel’s Italian reseller.
 Morel, an independent free-hand pipe maker, was enlisted by Chacom to create a line of completely hand made pipes, called the Chacom Grand Cru. For this line he created the free-hand shapes Naja and “Fleur de Bruyère”. In 1987, Pierre Morel joined the team at Chapuis-Comoy full-time. (The above is an excerpt from the Chacom website)
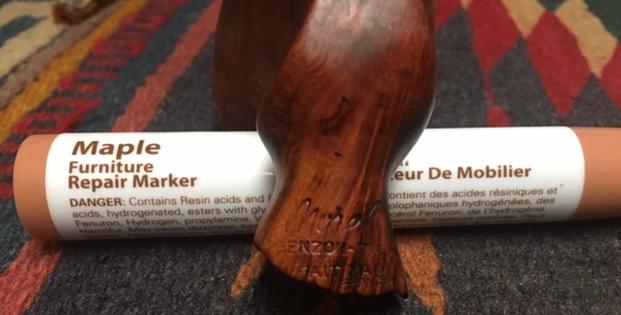
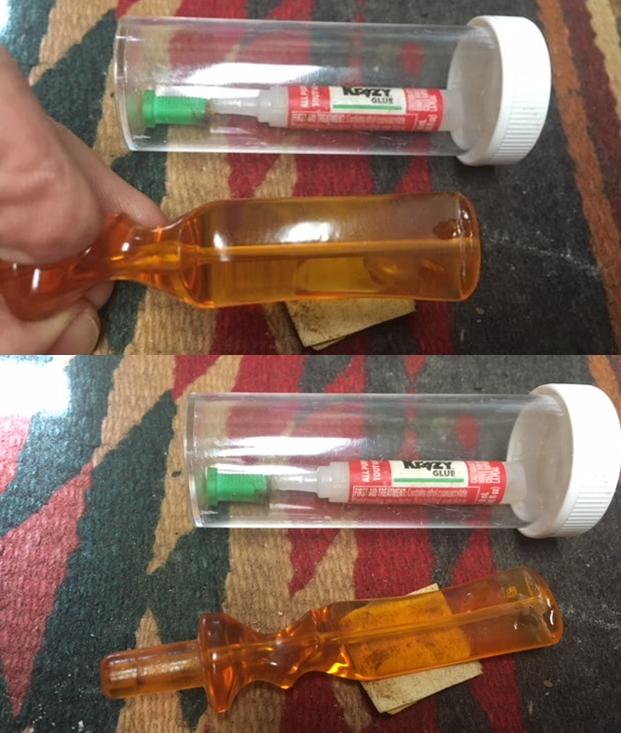
 I filled in the shrunken fill with clear super glue. Once the glue had dried I sanded the repair smooth with 220 grit sandpaper to blend it in to the rest of the briar. I polished the repaired area with micromesh sanding pads – 1500-12000 grit pads. I touched up the stain with a stain pen to blend the colour into the rest of the finish.
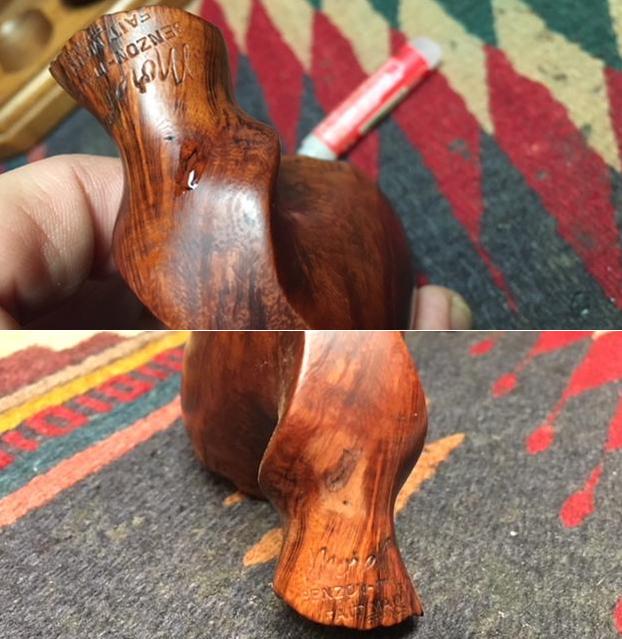
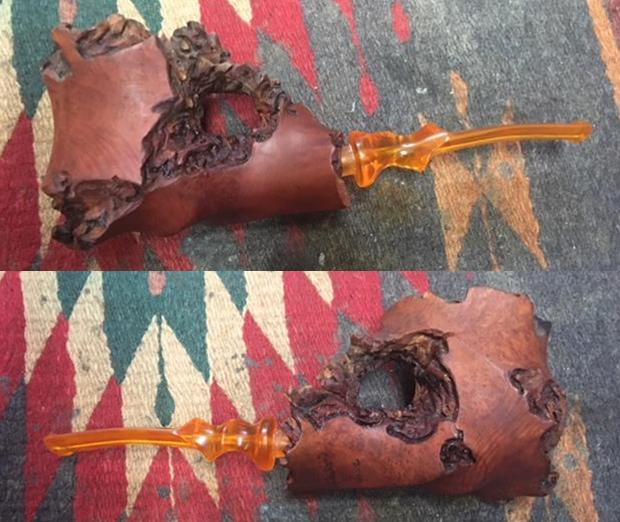
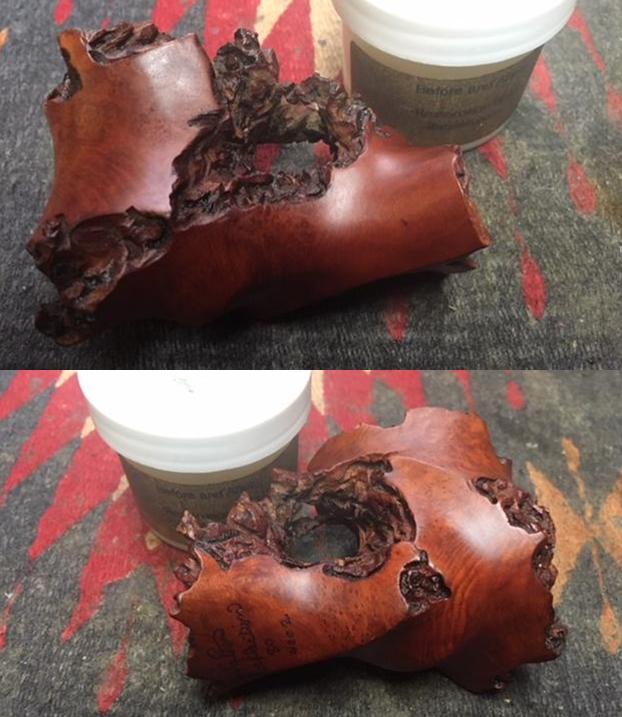
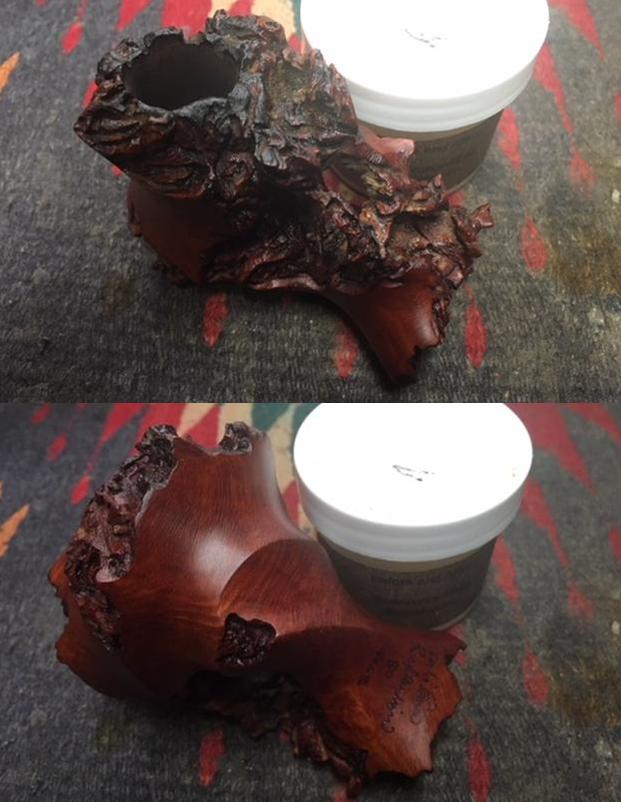
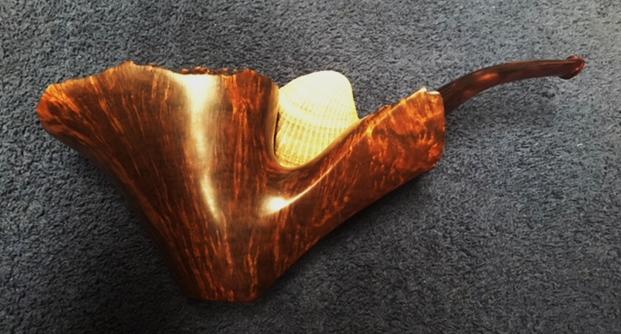
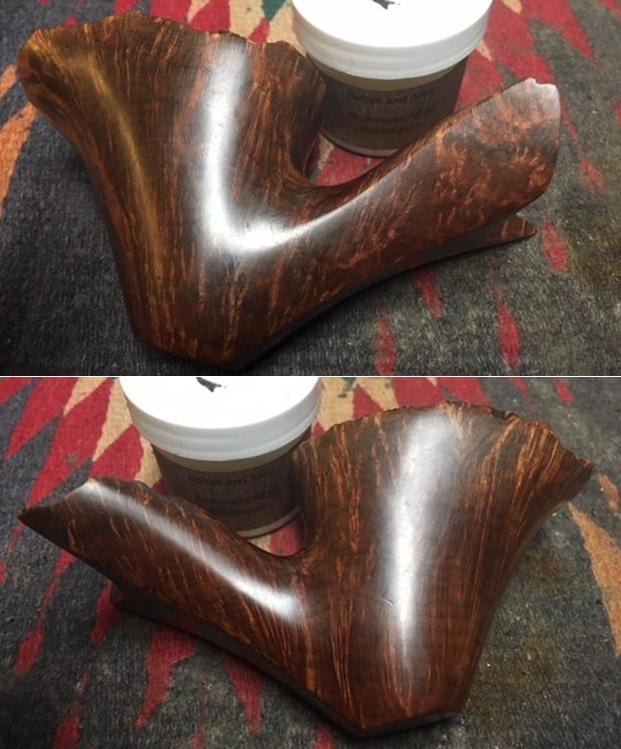
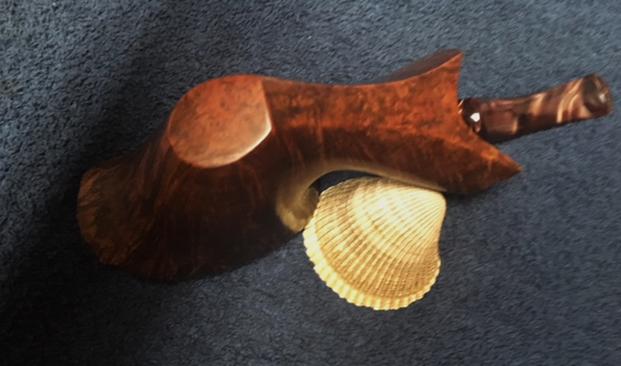
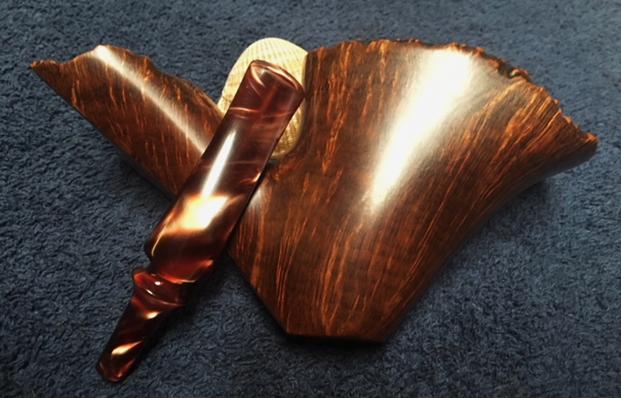
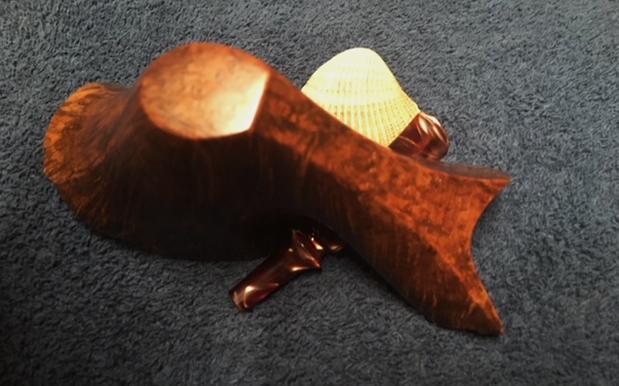
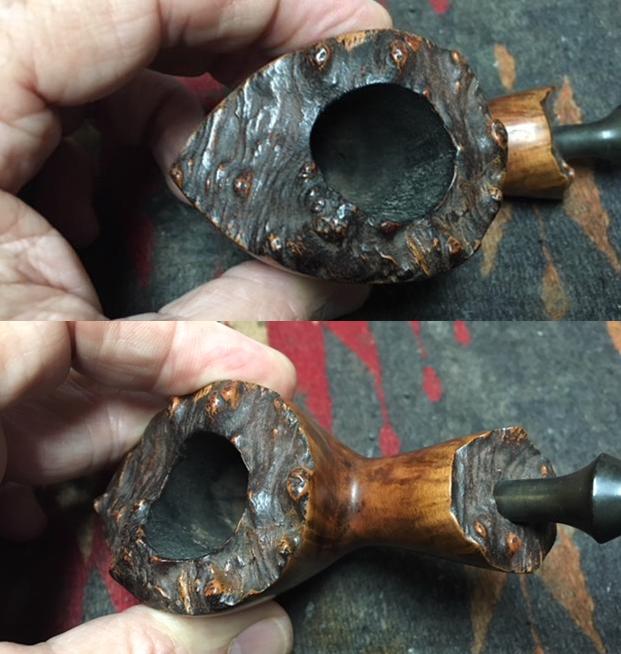
 From that I knew that the pipe in my hands came from some time during the 1970s and before 1980. The briar was clean but dried out and lifeless. I rubbed the bowl down with Before & After Restoration Balm to deep clean the briar bowl and shank. The product works to clean, enliven and protect the briar. I hand rubbed it with my fingers, working it into the exterior of the pipe and working it into the plateau areas with a horsehair shoe brush. I wiped it off and buffed it with a soft cloth to polish it. The pipe really began to have a rich shine. I took some photos of the bowl at this point to mark the progress in the restoration.
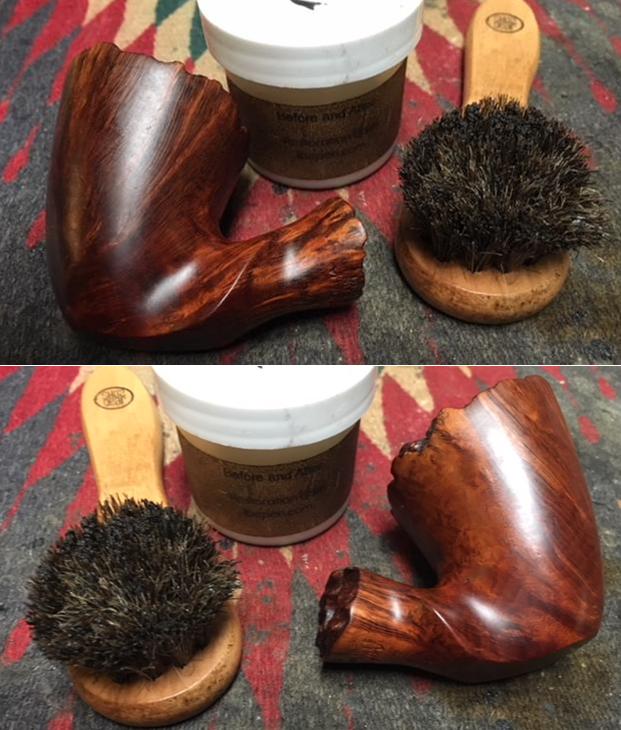
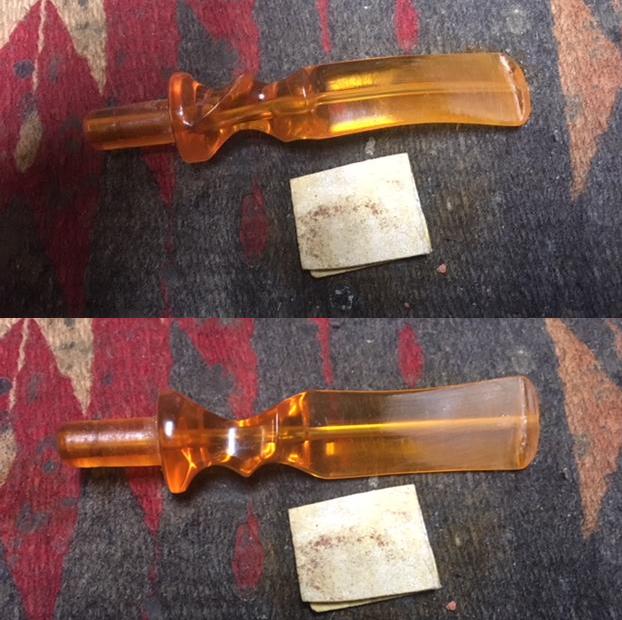
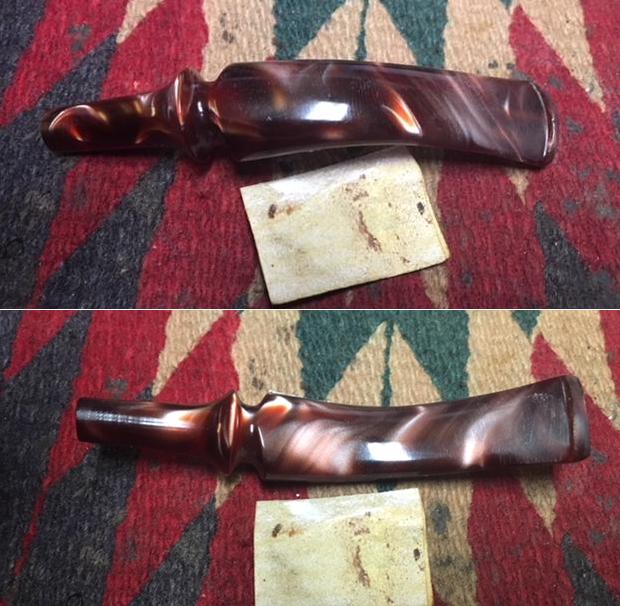
 I set the bowl aside and turned my attention to the stem. I sanded out the tooth chatter out of both sides of the stem with 220 grit sandpaper. I worked over the surface with sandpaper to remove the tooth marks and chatter.
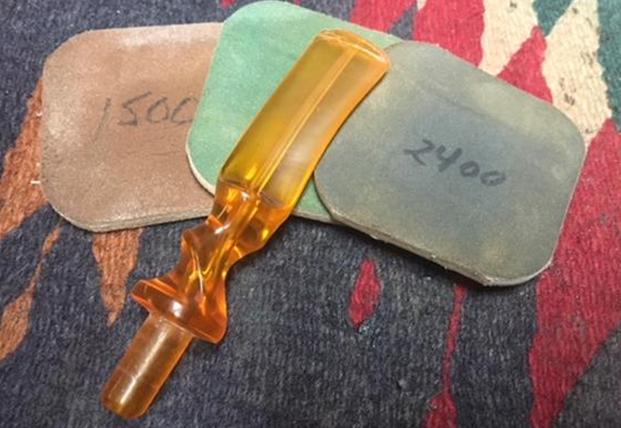
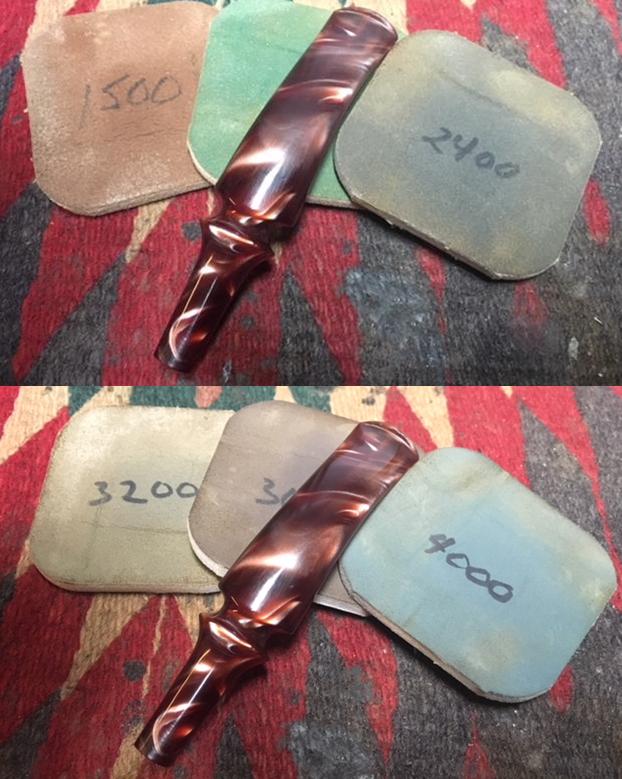
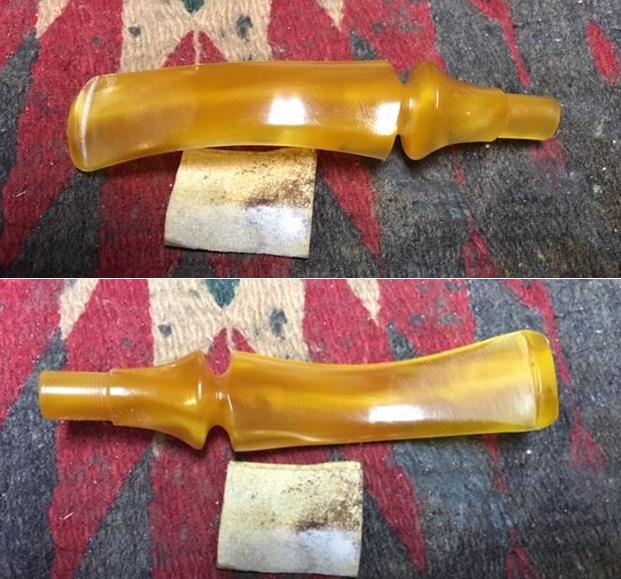 I polished the acrylic stem with micromesh sanding pads – wet sanding with 1500-2400 grit pads and dry sanding with 3200-12000 grit pads. I wiped the stem down after each pad with a damp cloth pad to remove the sanding dust. I buffed it with a soft cloth to polish it.
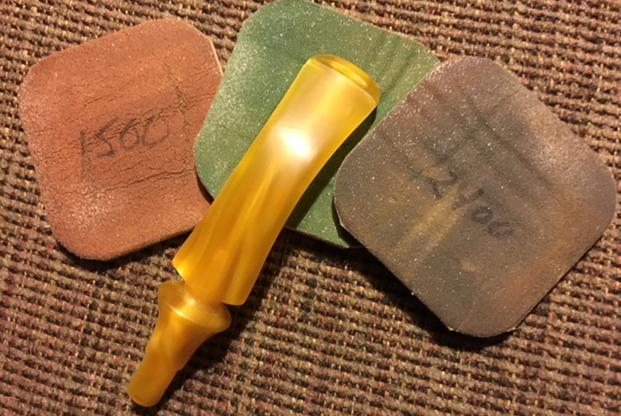
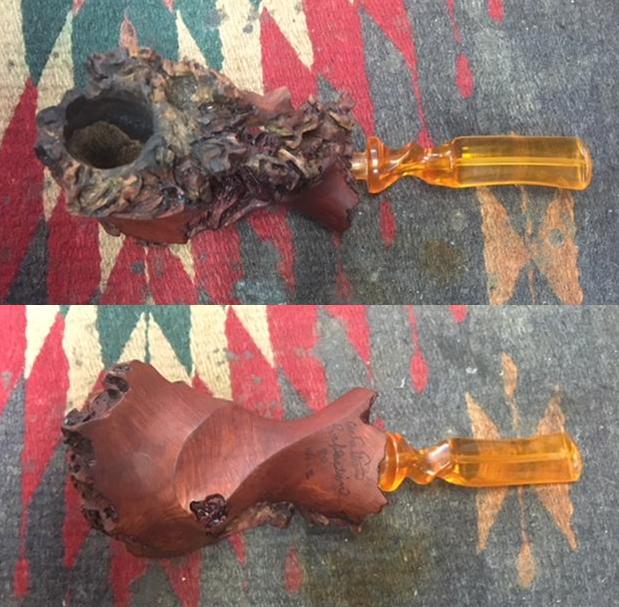
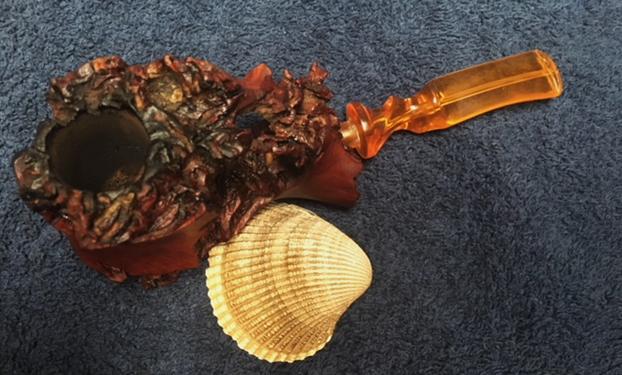
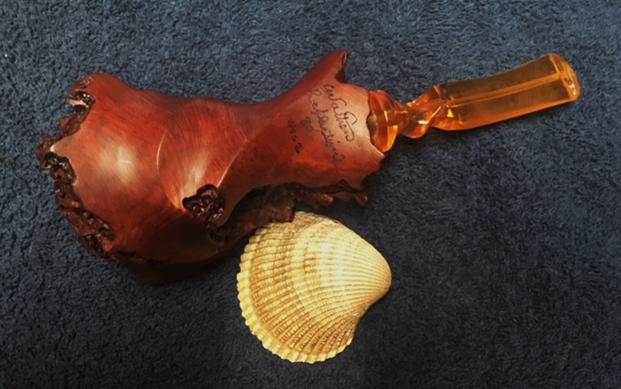
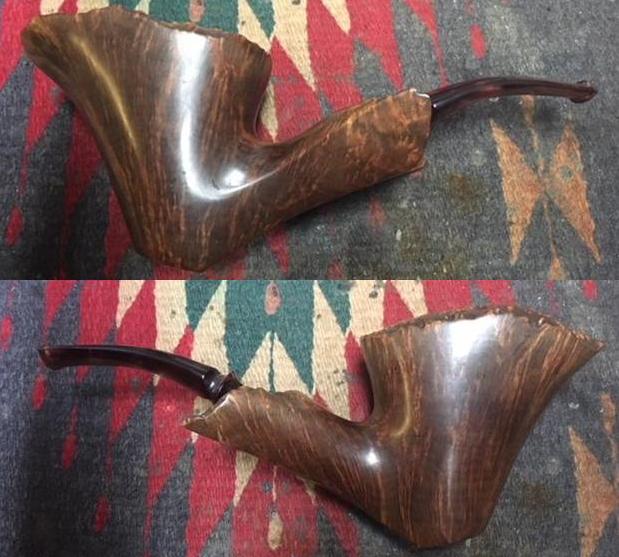
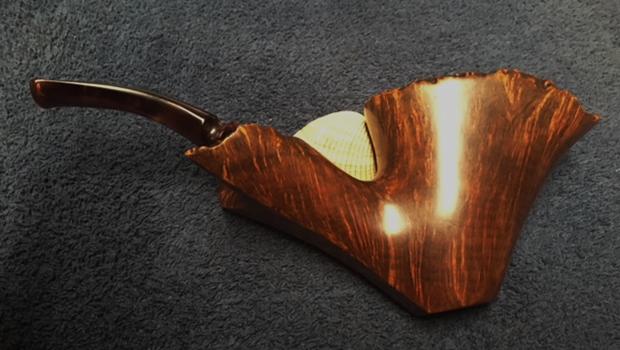
 I polished stem and bowl with Blue Diamond to polish out the remaining small scratches. I gave the bowl and the stem multiple coats of carnauba wax and buffed the pipe with a clean buffing pad to raise the shine. I hand buffed it with a microfiber cloth to deepen the shine. The pipe polished up pretty nicely. The plateau on the rim top and shank end and the medium brown stain with red contrasts work very well with the golden acrylic stem. The finished pipe is shown in the photos below. This is the first of Morel’s Freehands that I have worked on and it was a pleasure. Like the Danes, he does great work and is quite innovative in terms of shapes, flow and finishes on his pipes. The dimensions of the pipe are Length: 6 inches, Height: 2 ½ inches, Outer diameter of the bowl: 1 7/8 inches, Chamber diameter: ¾ inches. This one is will be added to the rebornpipes store shortly. If you would like to add it to your collection send me an email to slaug@uniserve.com or a message on Facebook. Thanks for walking through this restoration with me as I worked over this beauty. I have other Freehands that I will be working on in a variety of shapes and sizes in upcoming blogs.
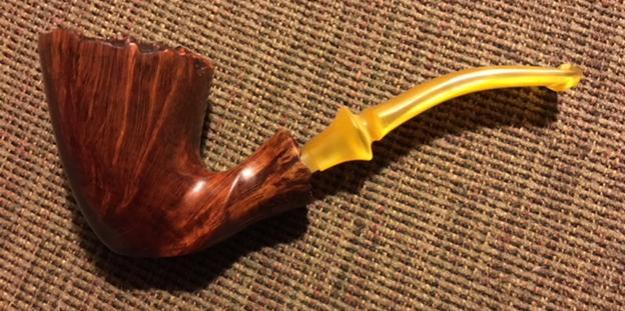


