Blog by Steve Laug
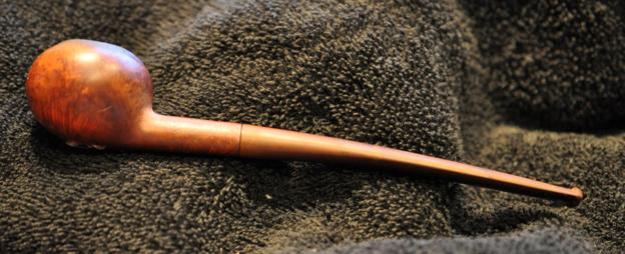
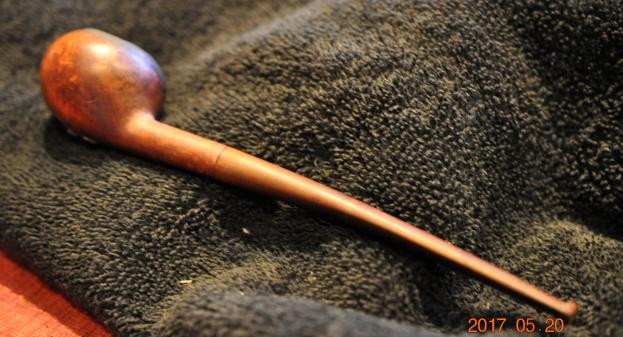
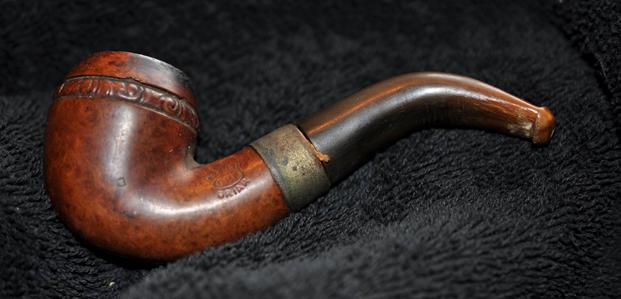
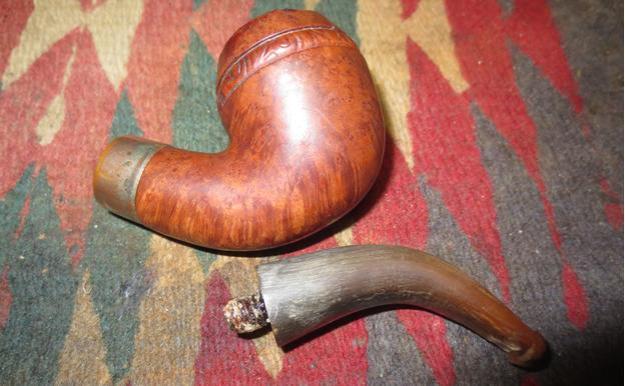
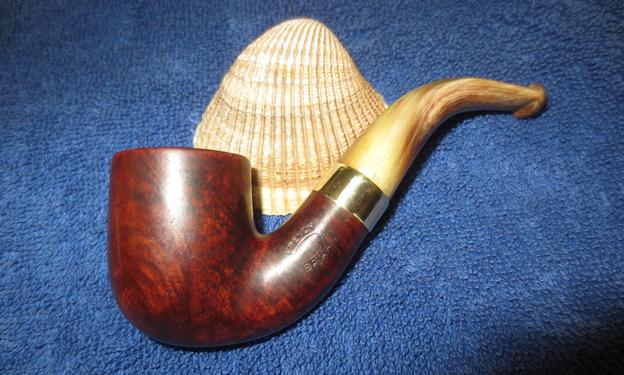
The next restoration on my worktable was a Borlum Bent Billiard. It came to me in the lot of older pipes that my brother brought home from our virtual pipe hunt in Montana. It was in rough condition with the finish very worn and almost non-existent. The bowl had a thick cake that had overflowed the bowl onto the rim top. The previous owner had obviously loved this pipe and the condition was testimony to it being a great smoker. He also seemed to have a very utilitarian view of his pipes. This one appeared to have never been cleaned – a veritable stranger to the aid of a pipe cleaner. The outer edge of the bowl had been knocked about a lot and there was lots of damage to the edge – it was broken down and rounded all the way around. He had obviously knocked the pipe out on a fence, a rock or his boot heel when finishing a bowl. There were dings and nicks in the sides and bottom of the bowl. The stem was oxidized and had some tooth marks on the top and underside near the button. Jeff took the next photos of the pipe before he started to work on cleaning it.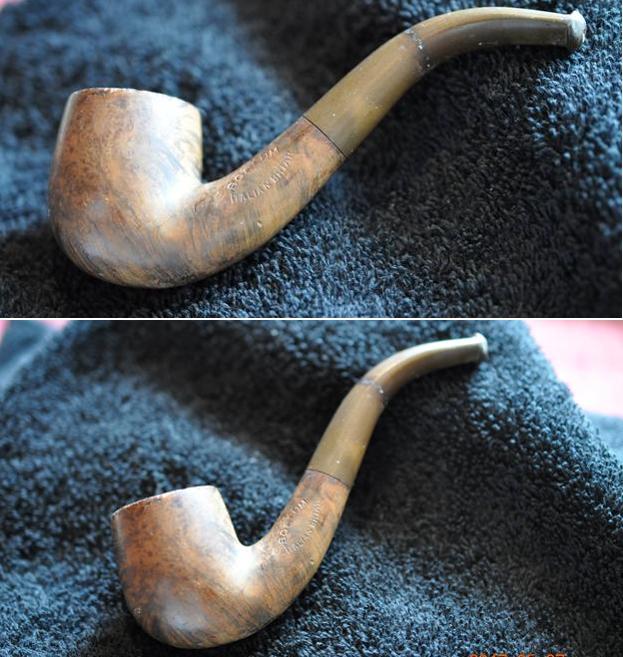 From an earlier Borlum pipe that I had refurbished back in 2014, I had learned a lot about the background of the manufacturer of the brand. I quote from that blog to summarize the historical background of the pipe (https://rebornpipes.com/tag/kbb-borlum-pipes/). The italicized portions of the text come from the blog with minor edits.
I already knew that Kaufmann Brothers and Bondy was the oldest pipe company in the USA, established in 1851. The Club Logo predated Kaywoodie with the “KB&B” lettering stamped within the Club, and a multitude of KB&B lines were in production long before “Kaywoodie” first appeared in 1919. Therefore, I knew that the pipe I had was a pre-1919, pre-Kaywoodie KB&B Made BORLUM.
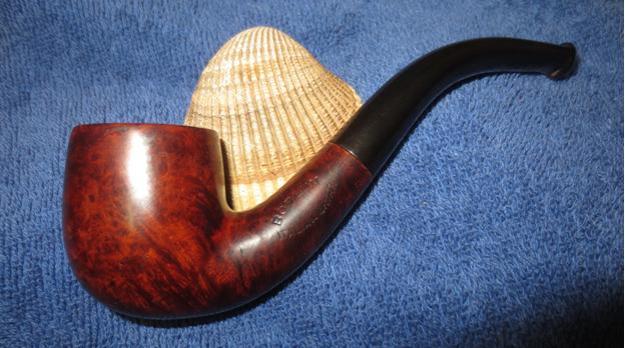
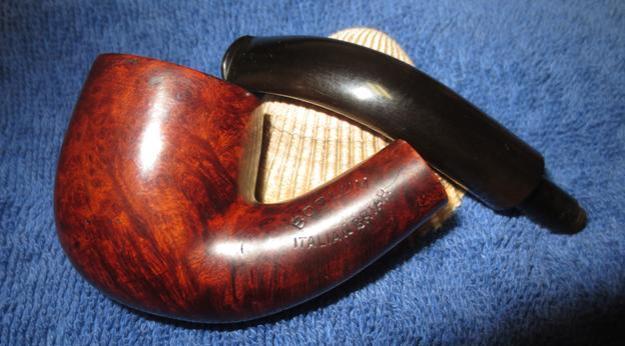
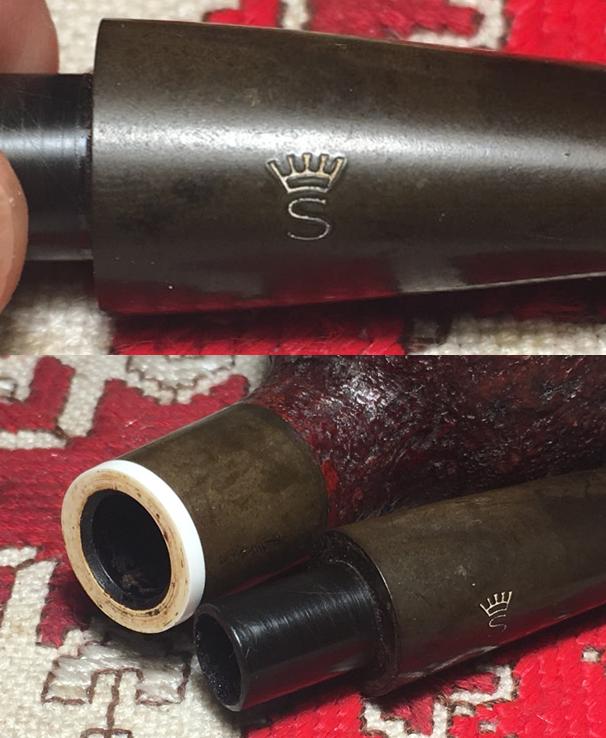
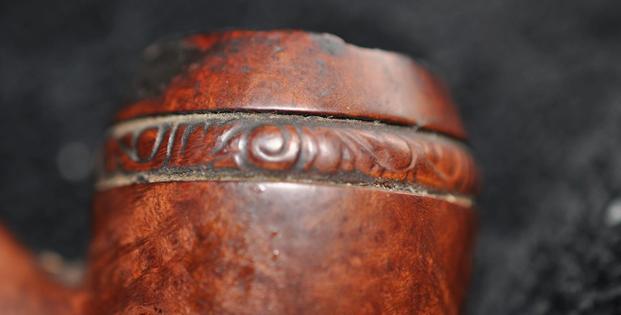
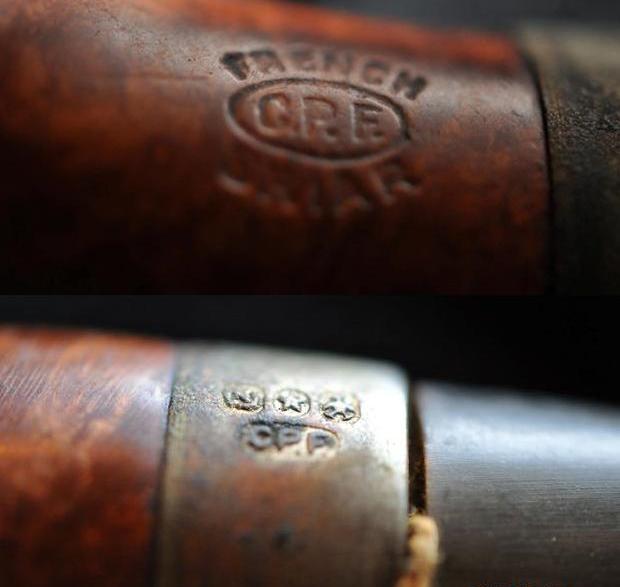
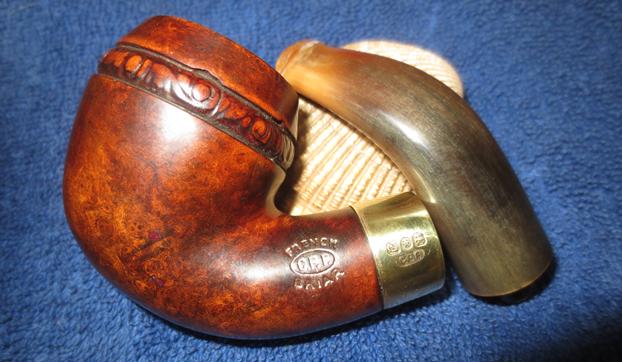
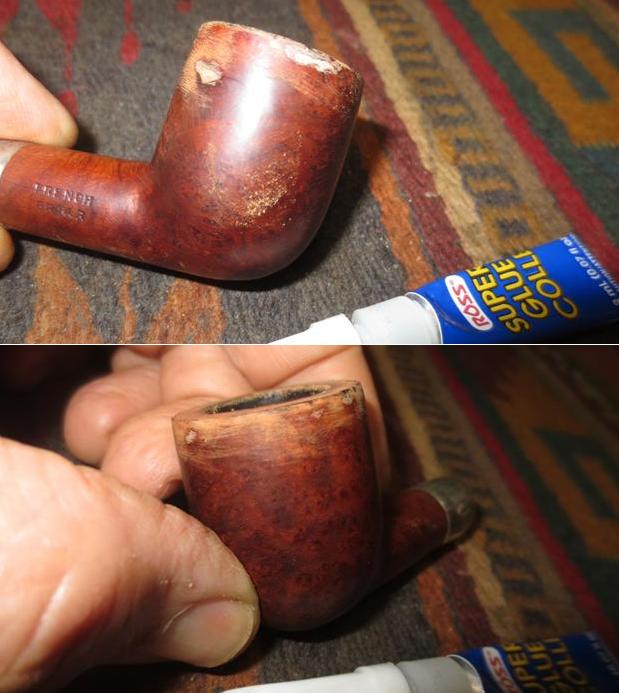
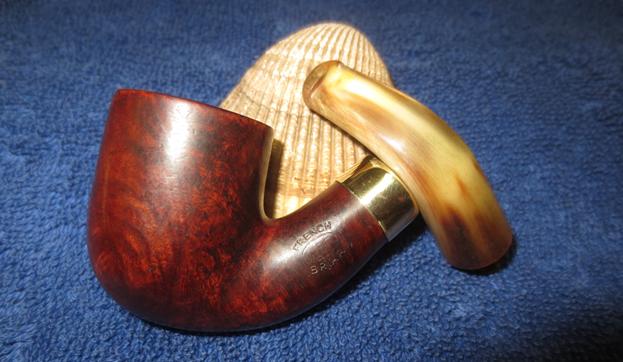
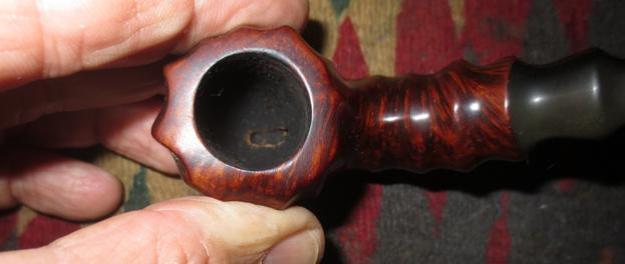
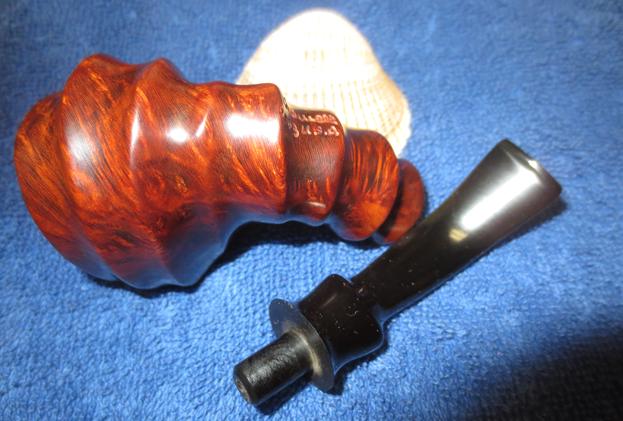
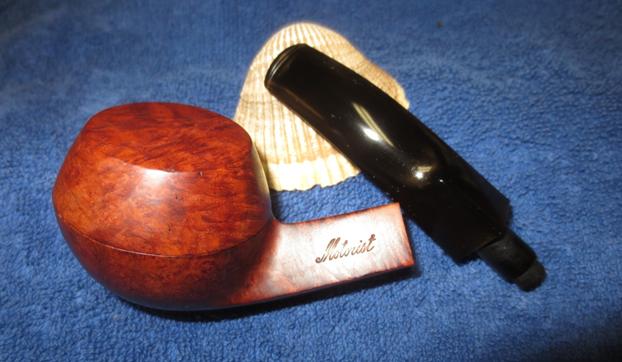
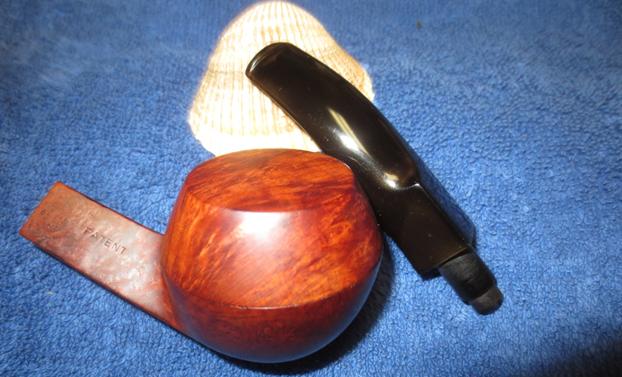
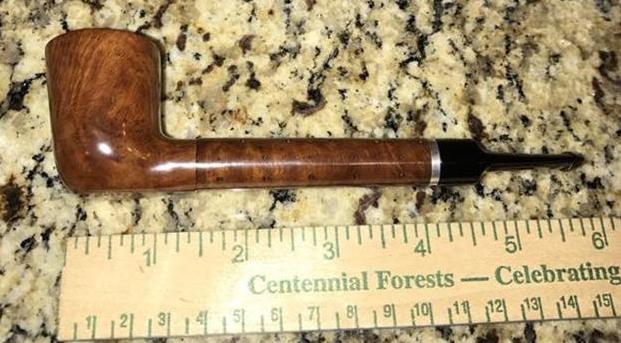
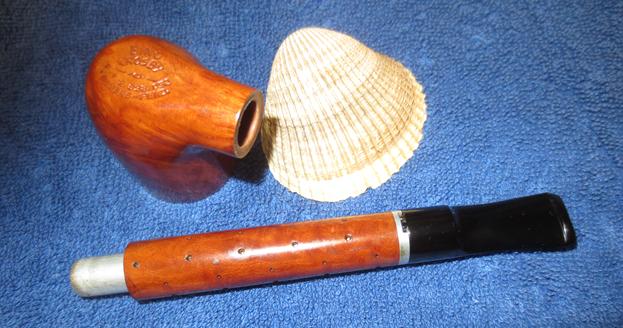
This particular pipe is stamped on the left side of the shank with the words BORLUM in an arc over KB&B in a cloverleaf. The cloverleaf is faintly stamped but still readable with a bright light and lens. Underneath that it is stamped ITALIAN BRIAR in a reverse arc. On the right side of the shank it is stamped UNBREAKABLE BIT. As stated above it was made before Kaywoodie became the flagship name for pipes from Kaufman Brothers & Bondy (KB&B). It was made before the Kaywoodie invention of the “Stinger” was added, and even before shank logos, model stamps and other features invented by Kaywoodie came to be standards of the pipe making industry. It comes from a time when names like Ambassador, Heatherby, Melrose, Suez, Rivoli, Cadillac and Kamello dominated the pre-Kaywoodie scene. Borlum is one of those names.
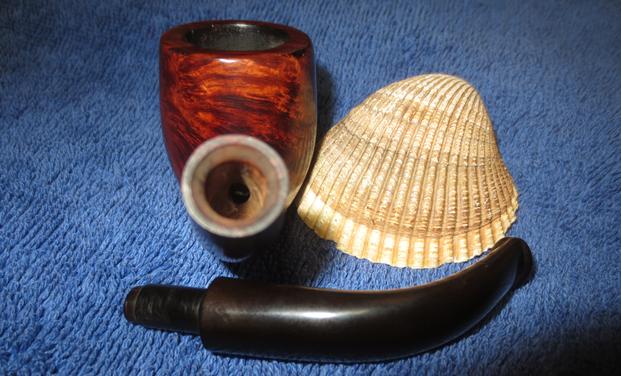
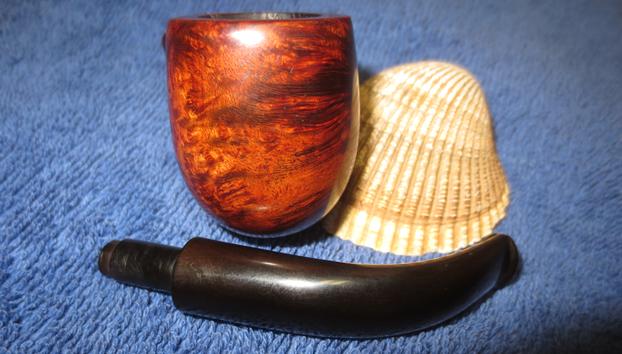
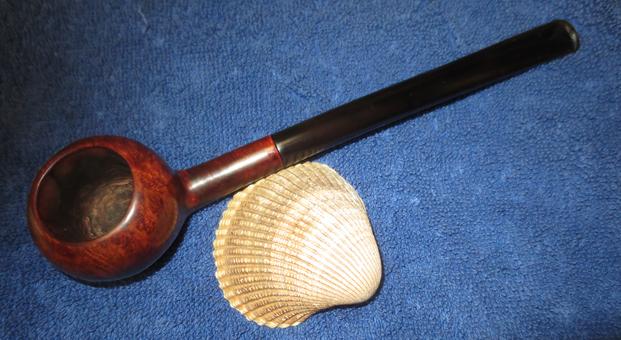
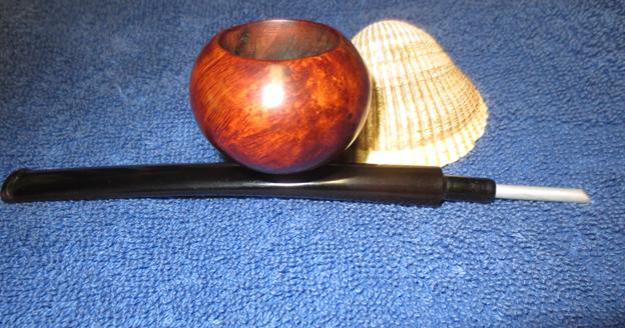
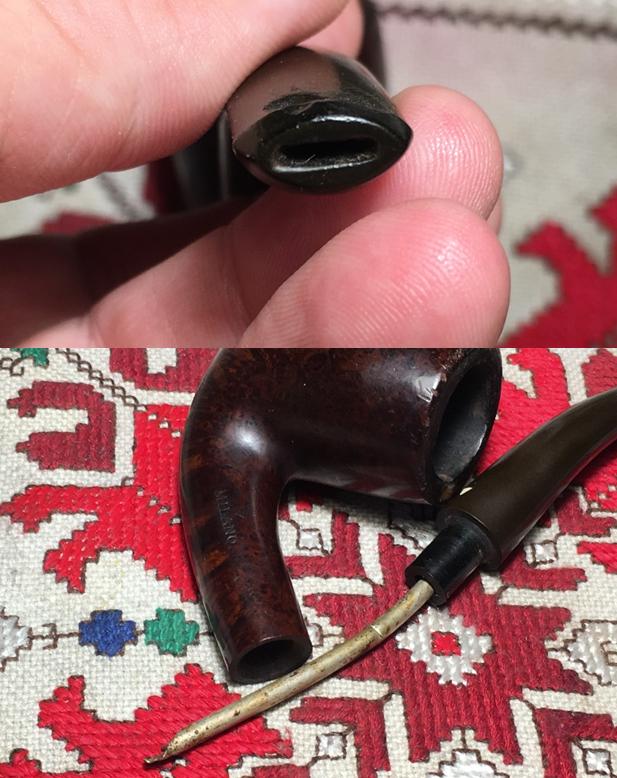
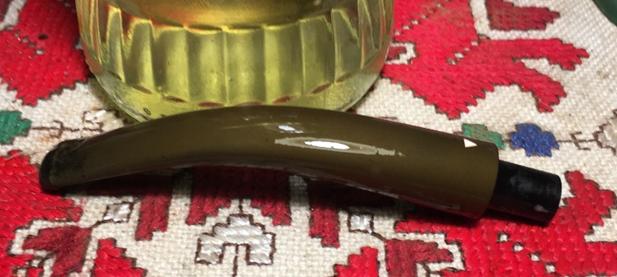
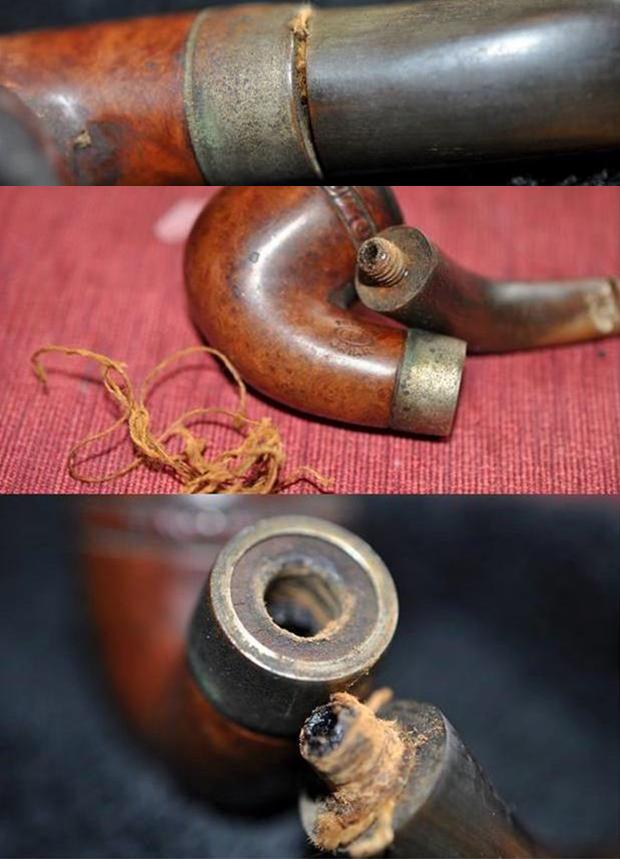
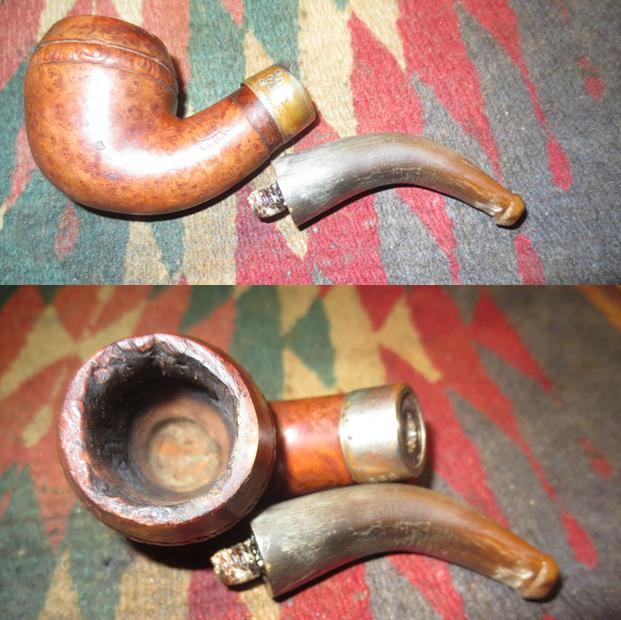
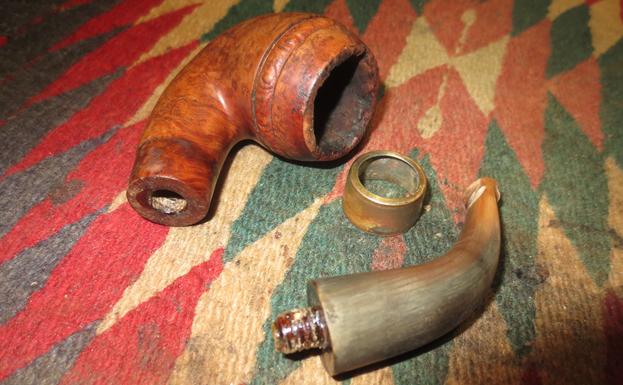
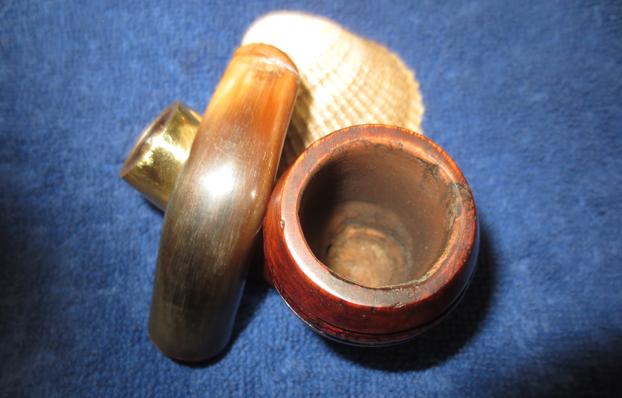
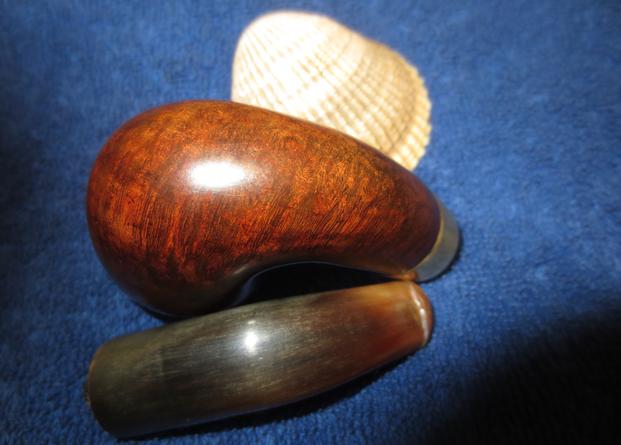
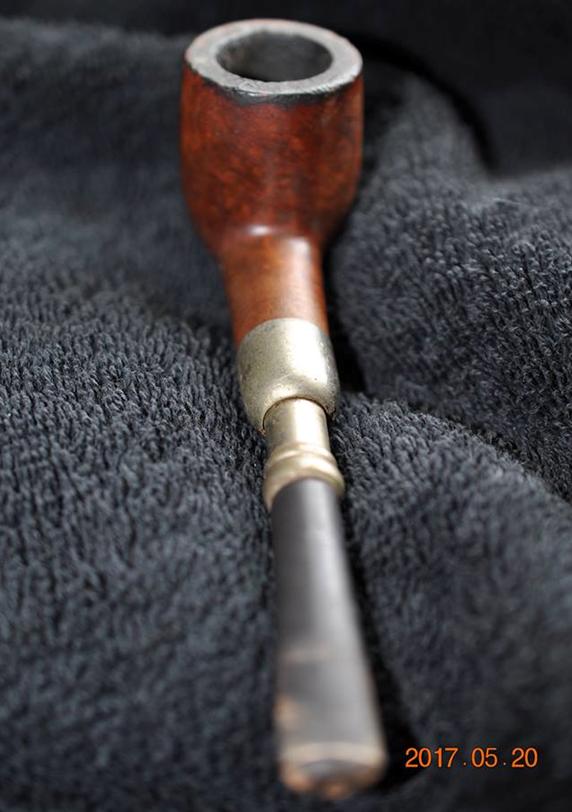
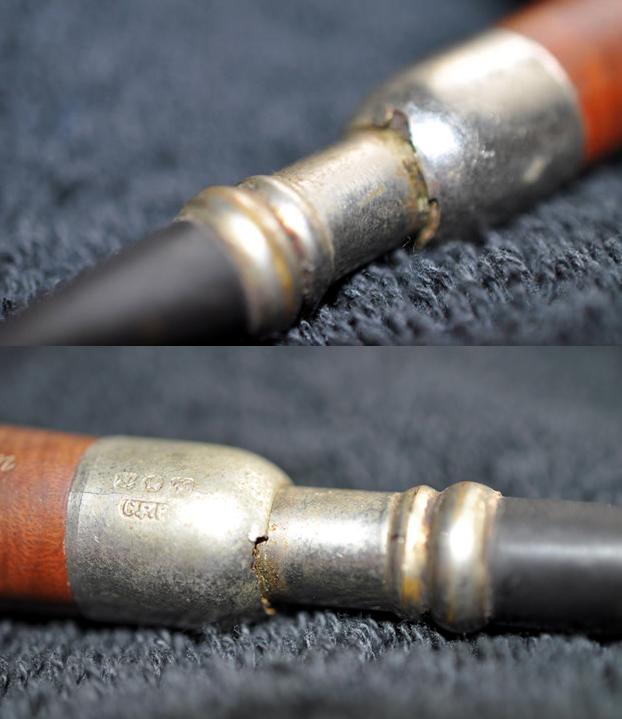
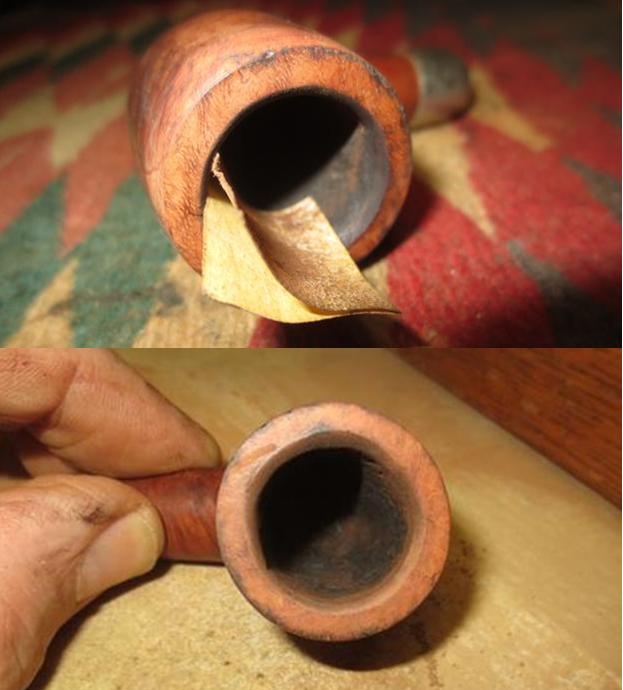
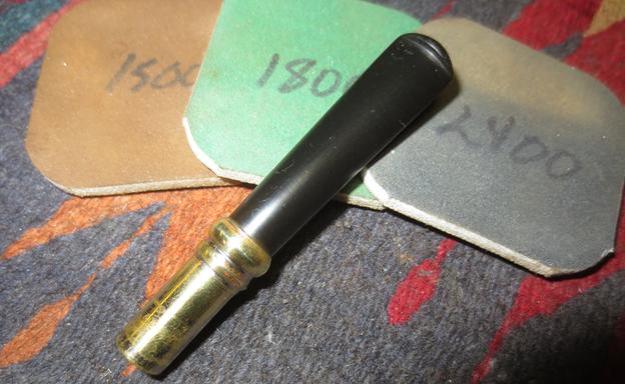
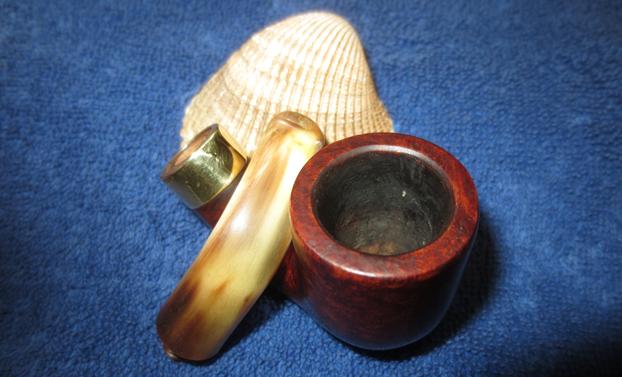
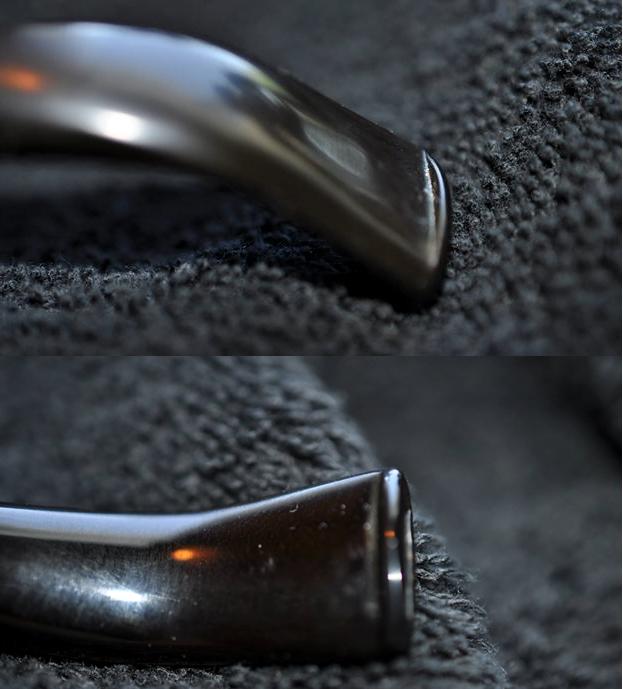
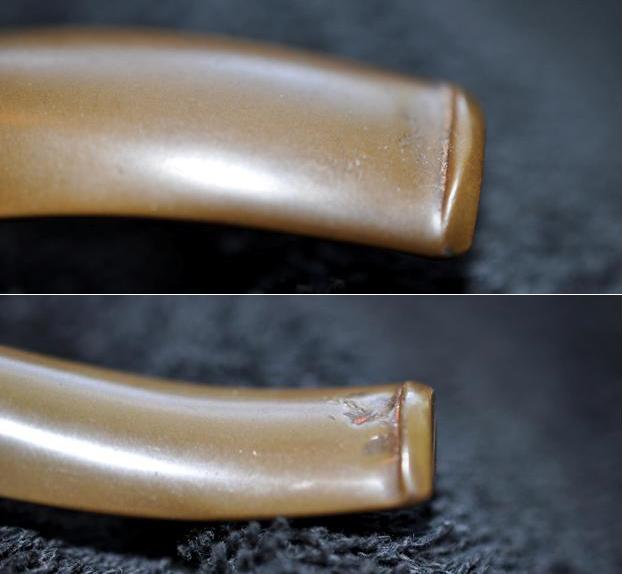
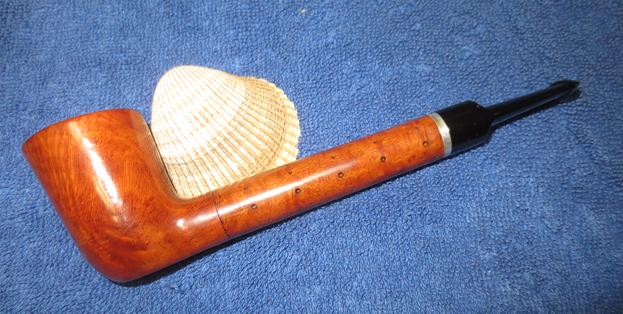
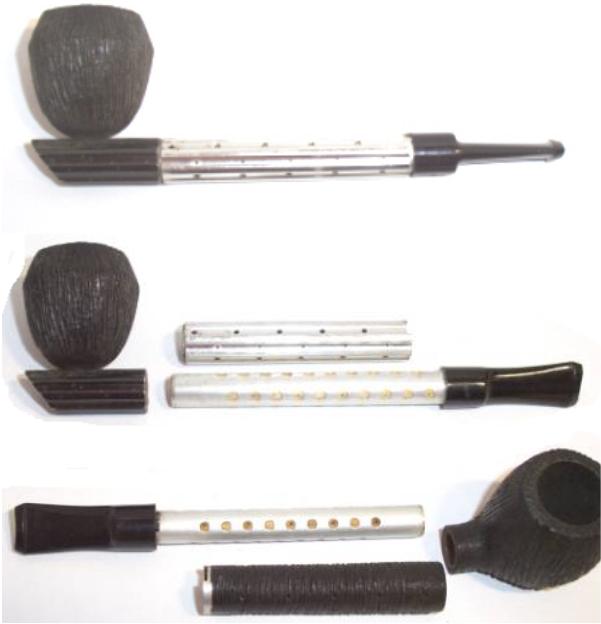
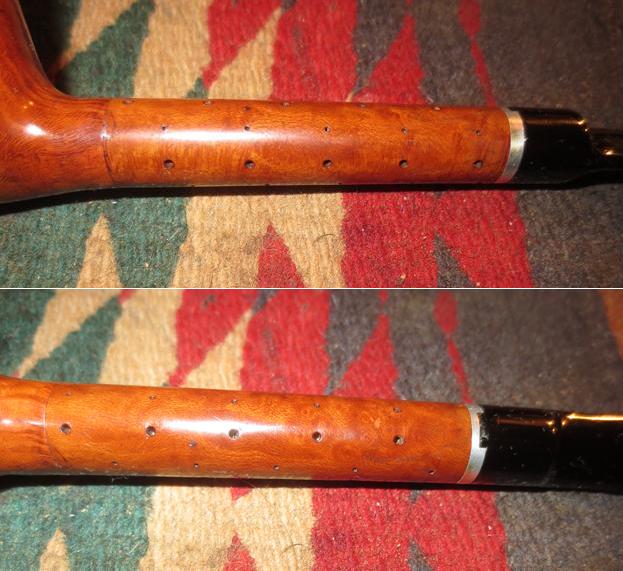
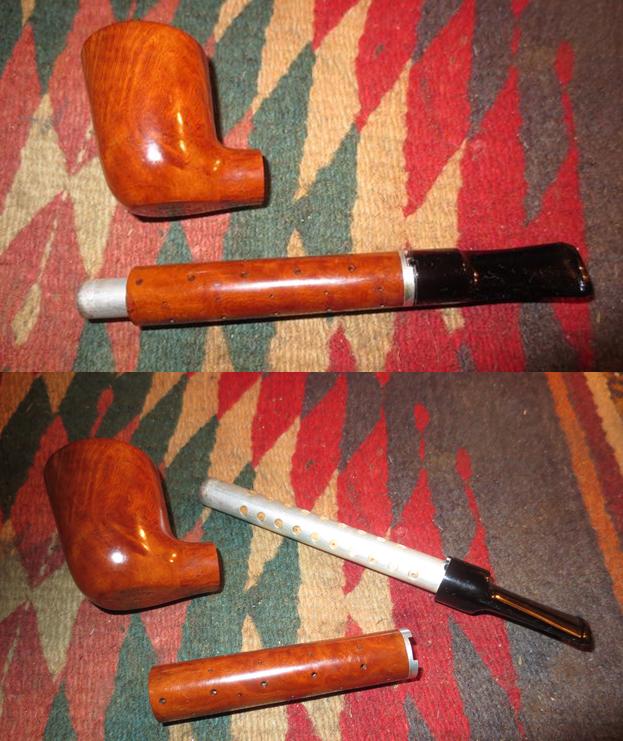
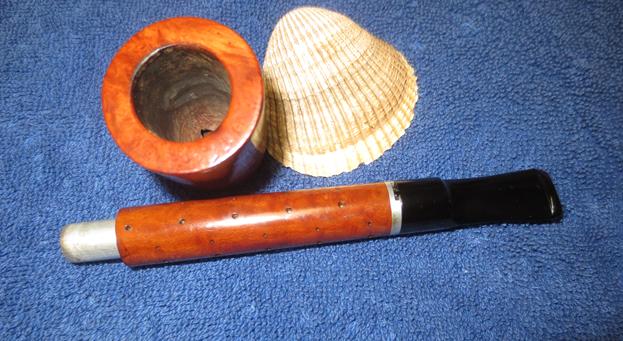
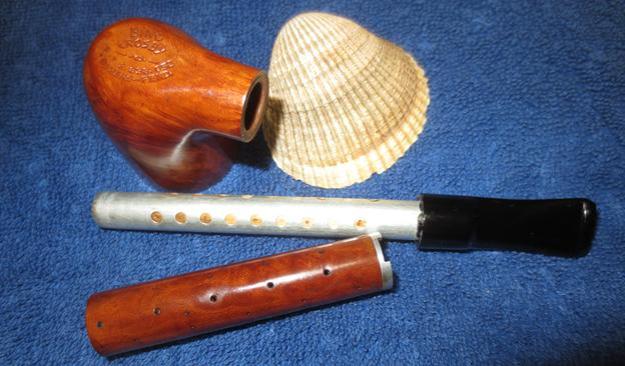
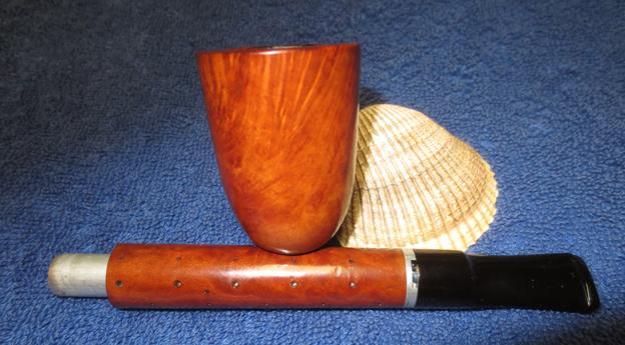
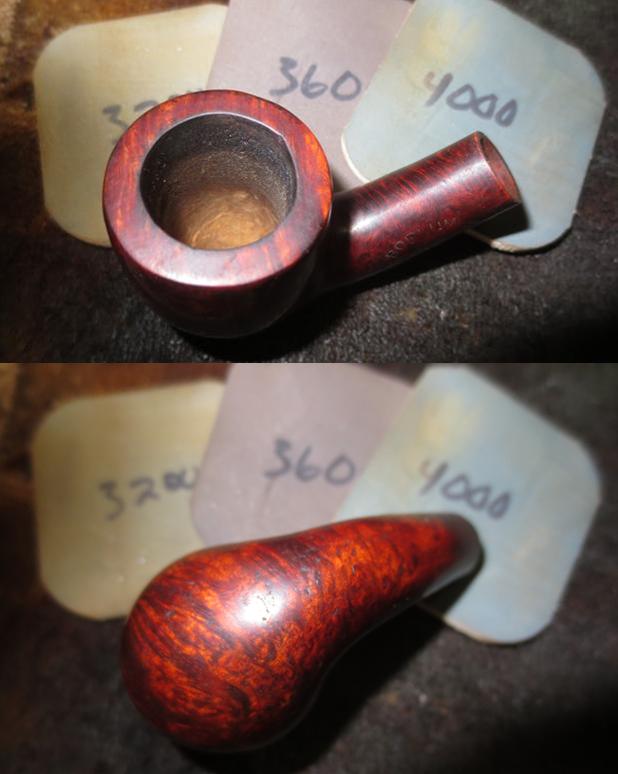
I learned while researching for that blog and rediscovered while working on this one that the Borlum pipe featured some innovations that were new for the time but commonplace to us. These included (1) a solid rubber bit (vulcanite, ebonite), (2) an aluminum inner-tube construction in the stem that stabilized and strengthened the stem explaining the stamping of “Unbreakable Bit” on the right side of the shank, (3) a standard nickel-plated band (marked KB&B) to strengthen the shank connection for the stem. (This particular pipe does not have the nickel-plated band and does not appear to have had one).The stem features the older style more rounded bit tip/orific button, and you can see the aluminum inner-tube fitting just inside the tip.
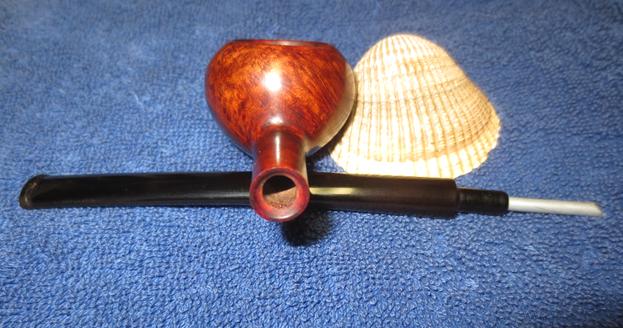
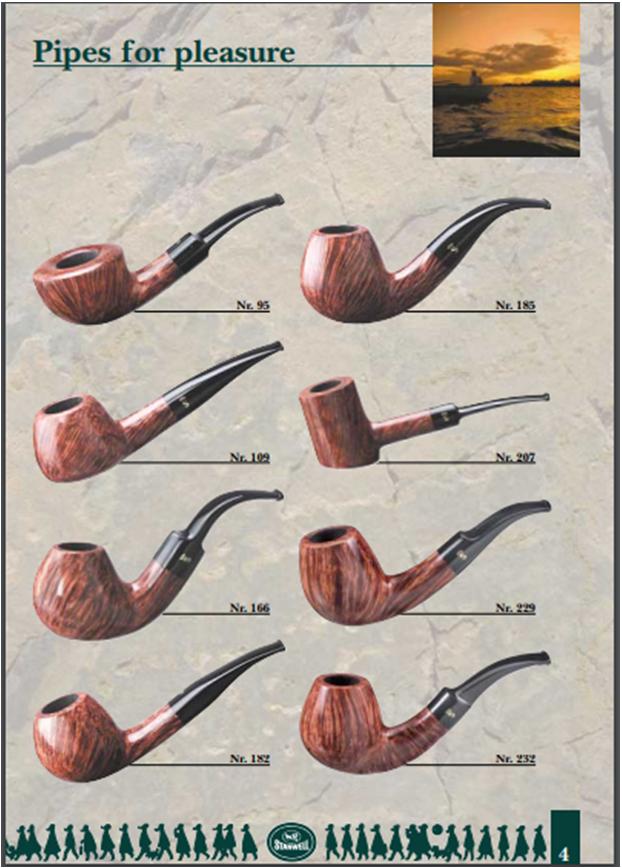
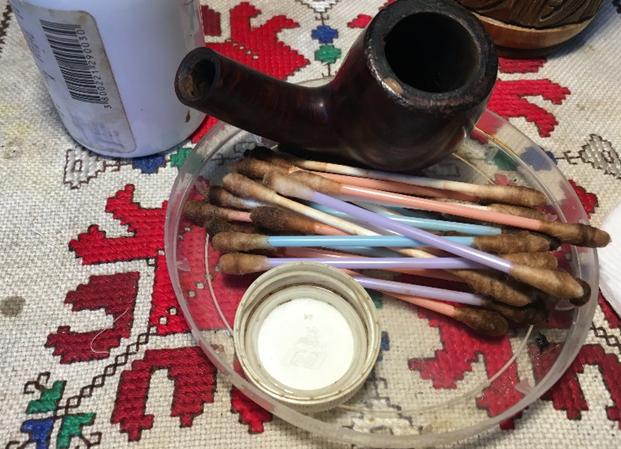
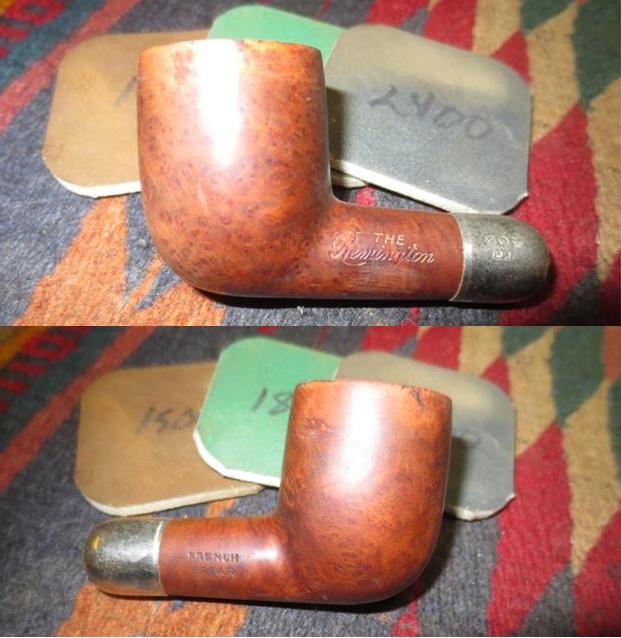
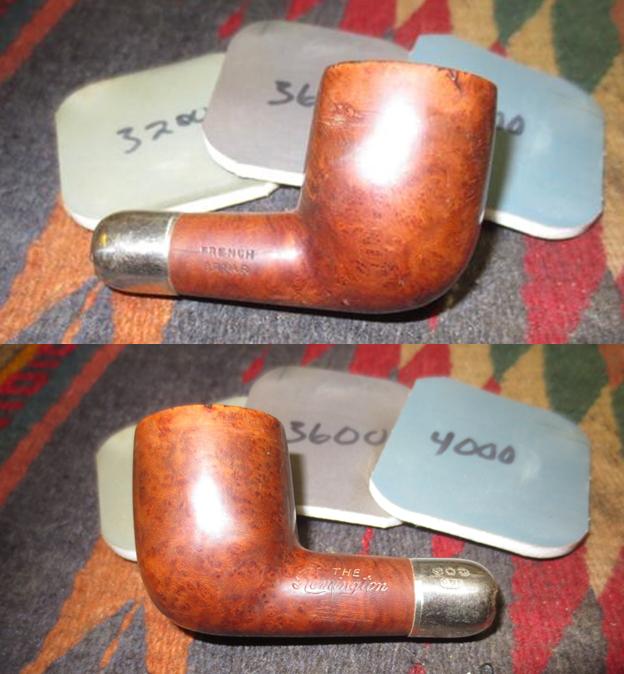
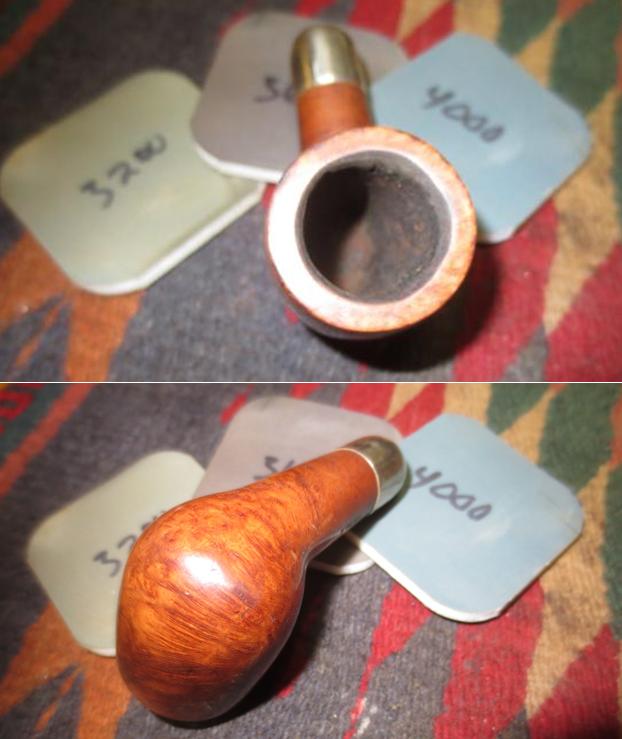
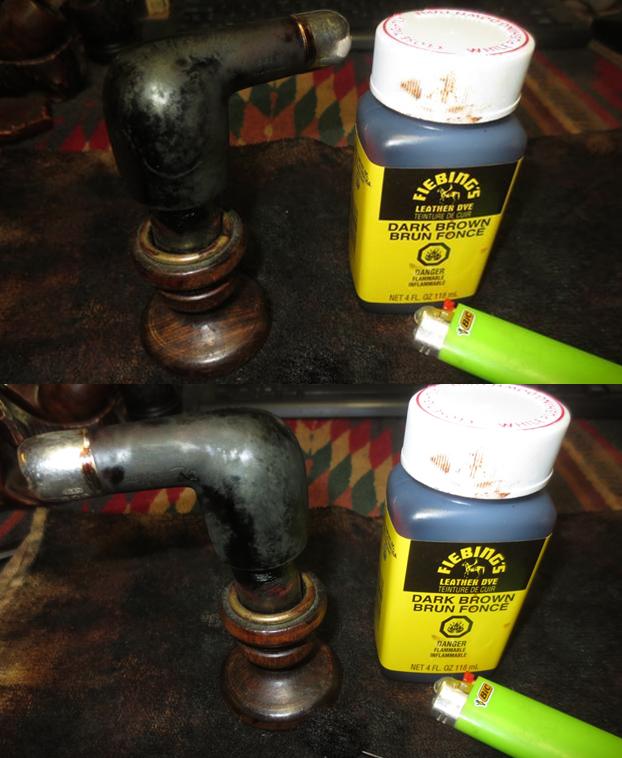
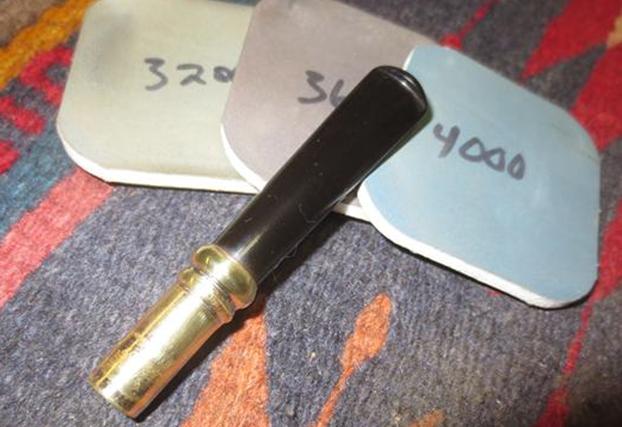
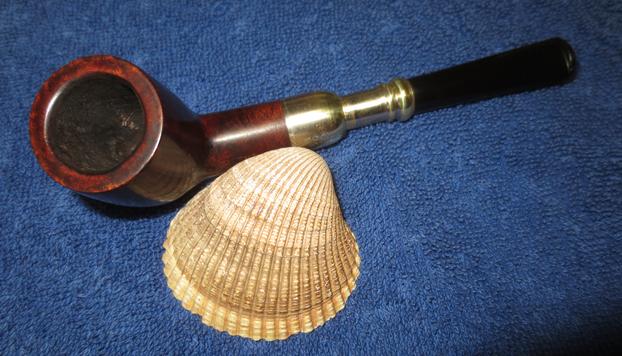
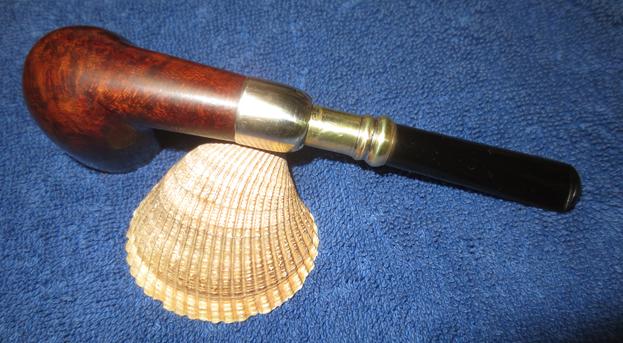
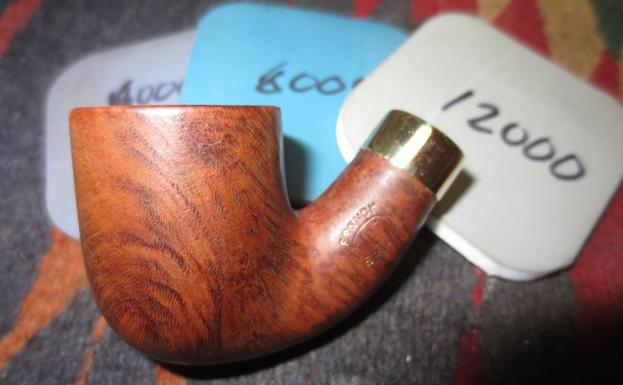
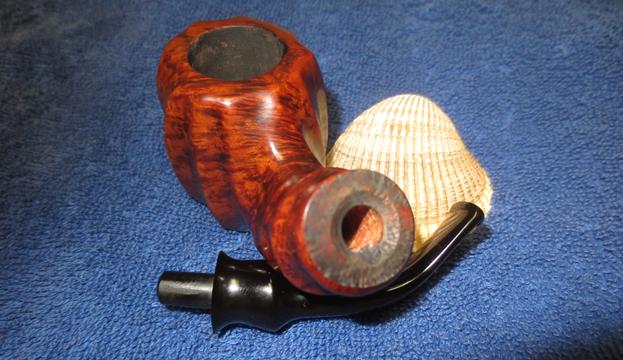
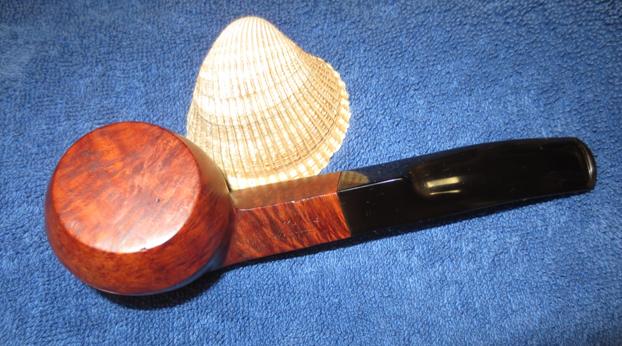
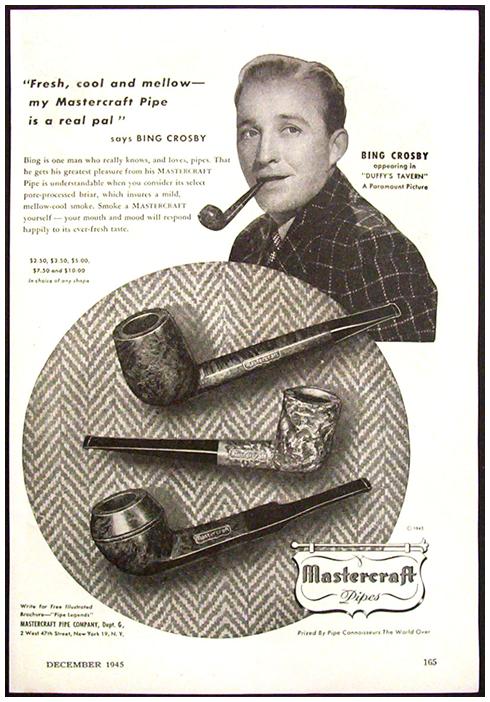
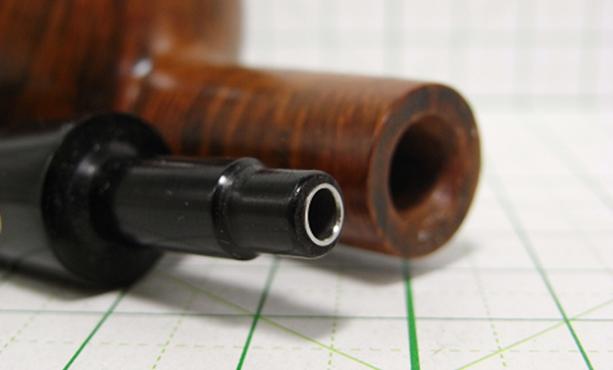
I have included several pictures that I found on the internet that show the unique stem tube in the Borlum that gives rise to the claim that it has an Unbreakable Bit. The first photo shows the bent stem, third from the left with the same metal tube showing at the button. The second photo shows the other end of the tube in the tenon in the Borlum stem.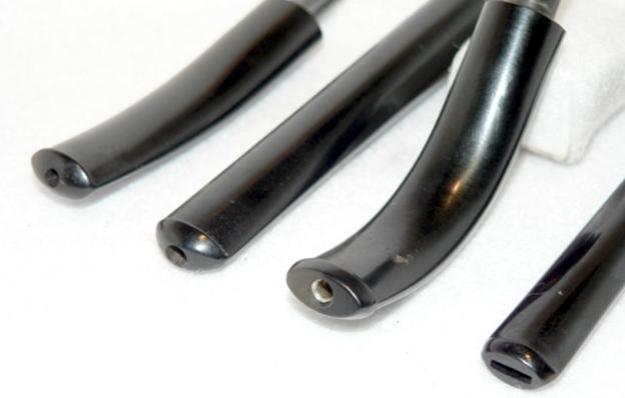
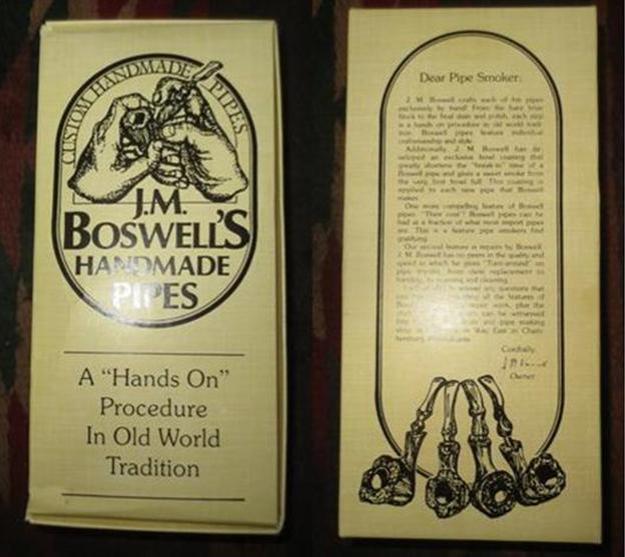
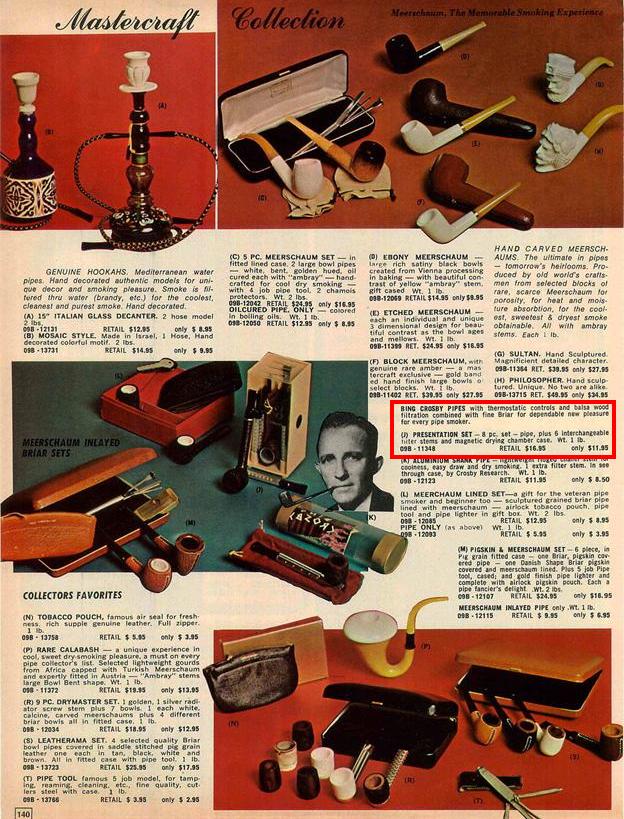
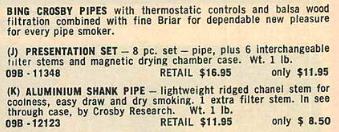
 That told me that the pipe I had was made after 1851 and before 1919. I am guessing that because of the other pipes in this lot dating in the late 1890s to about 1905 this one is probably from that same era. Not too bad for a 100+ year old pipe. During the hunt for information, I also found the next photo of a Borlum display and sales card. What is particularly interesting to me is the diagram at the top of the card showing the interior of the stem in place in the shank. It also includes the claim, “Guaranteed against Breakage”. I love the advertisements and sales brochures of these old pipes. The descriptive language that promises so much and the prices the pipes sold for are a nostalgic journey to the past. Note the $1 and up price tag on the sales card.
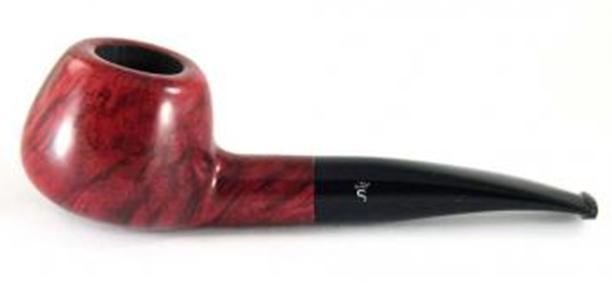
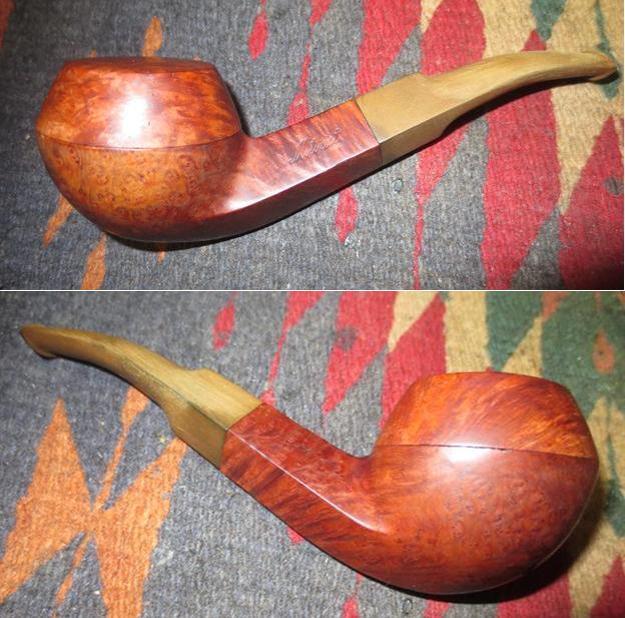
The pipe that I am working on presently is identical to the bottom pipe on the right side of the photo. I have circled it in red. It has the identical shape, curved shank and lack of a nickel-plated band as mine. It has the hard rubber stem with an orific button. It is more rounded than the modern flat stem but it is still a comfortable feeling stem in the mouth.
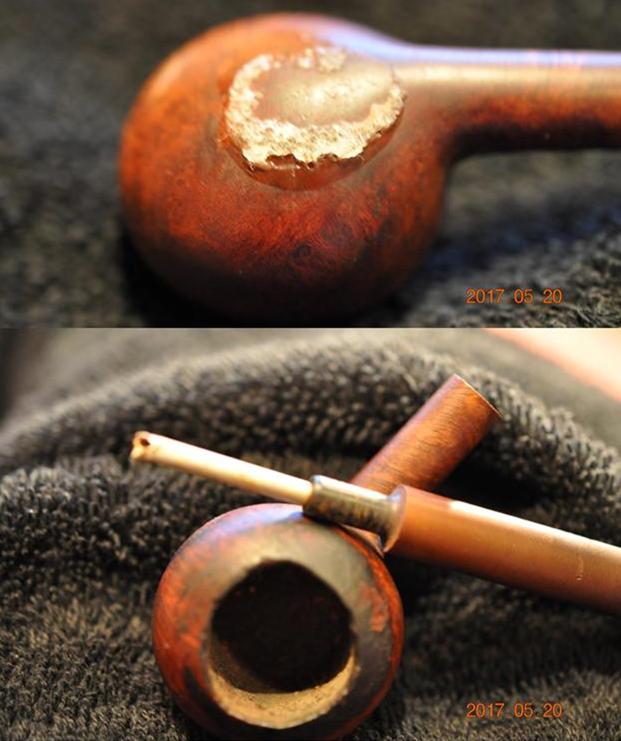
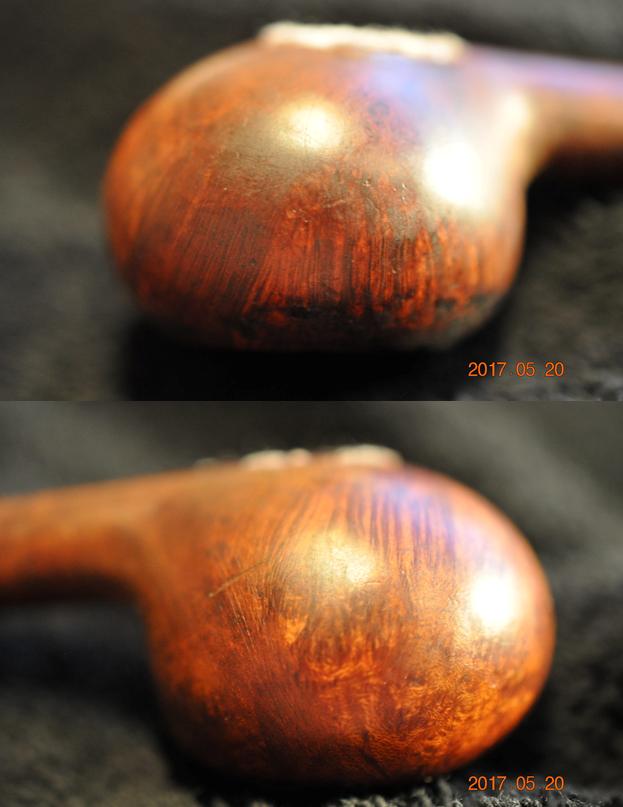
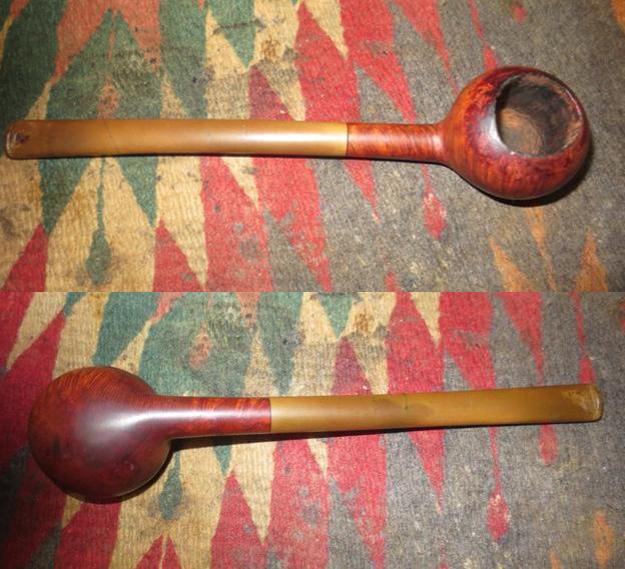
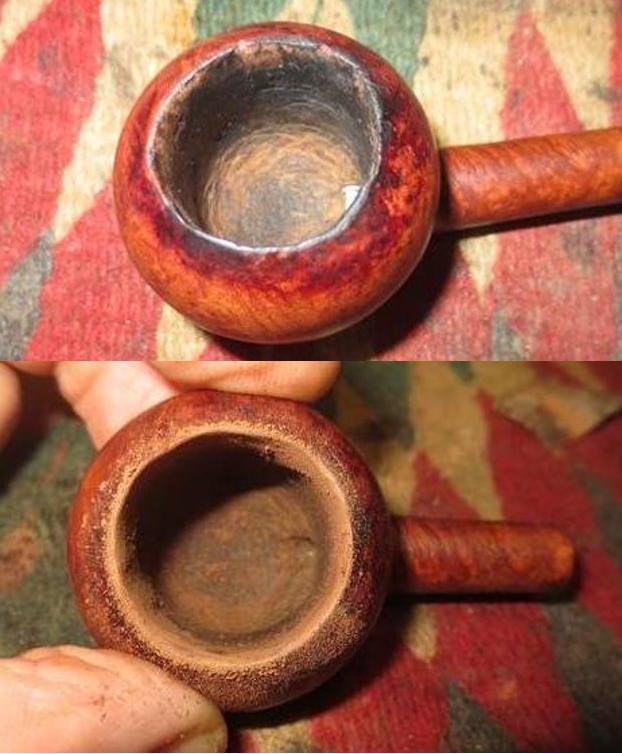
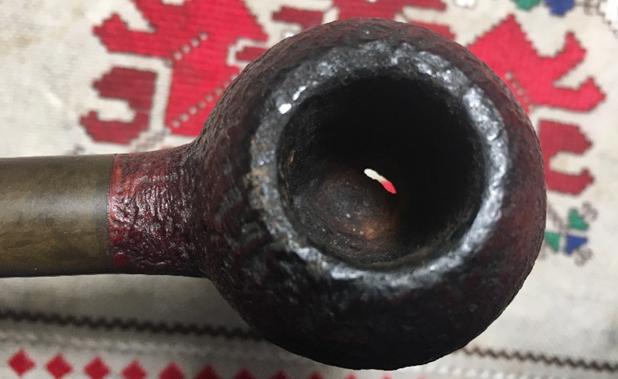
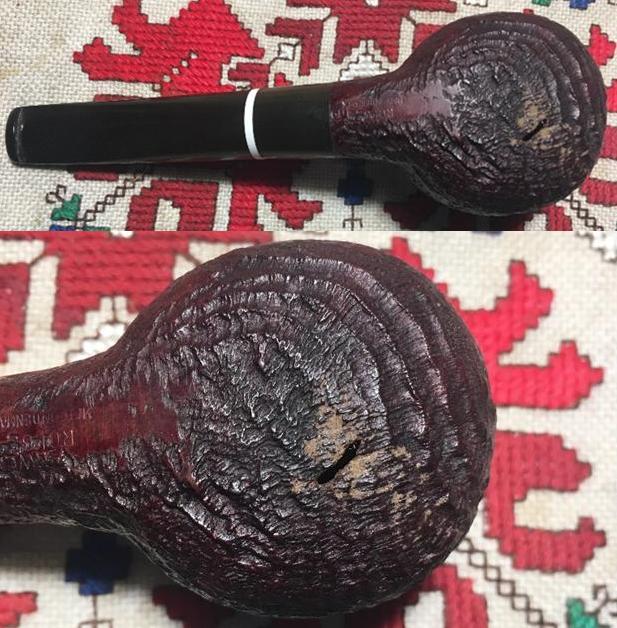
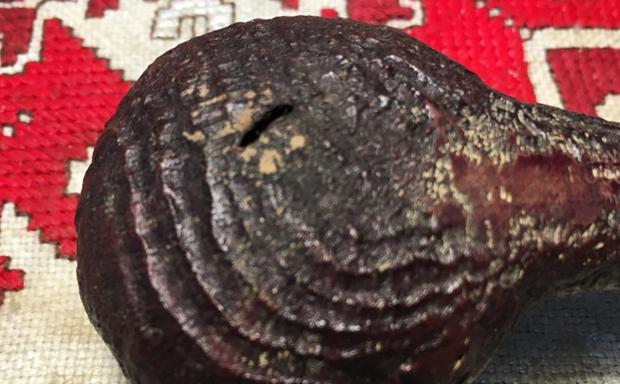
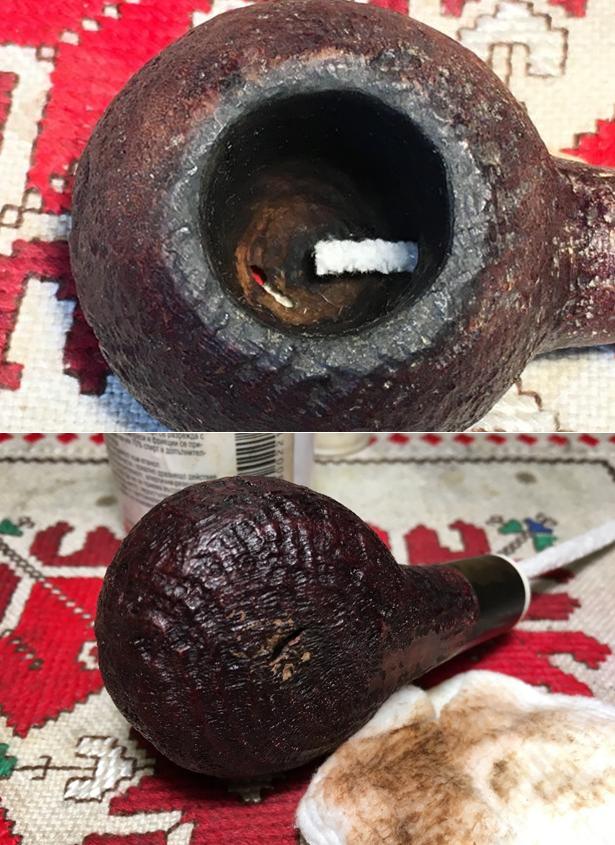
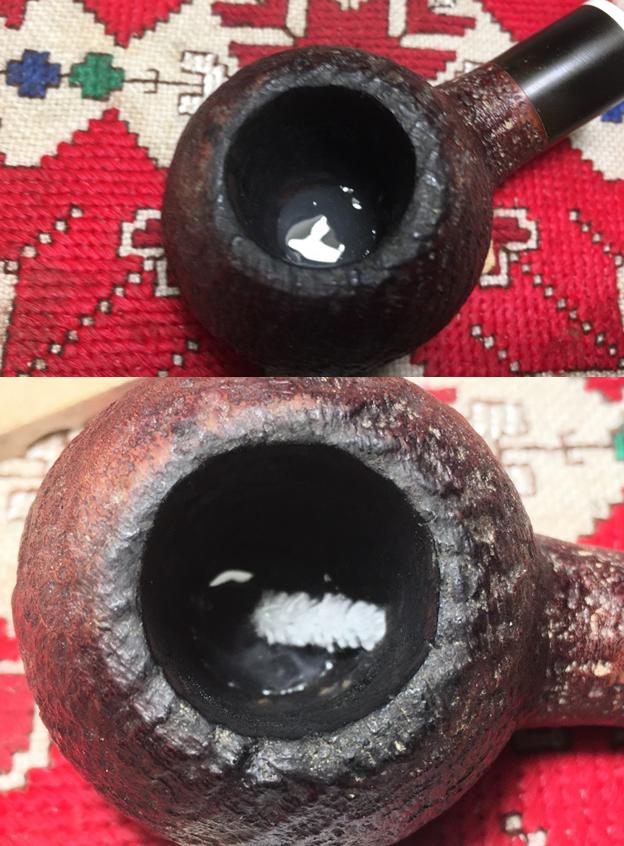
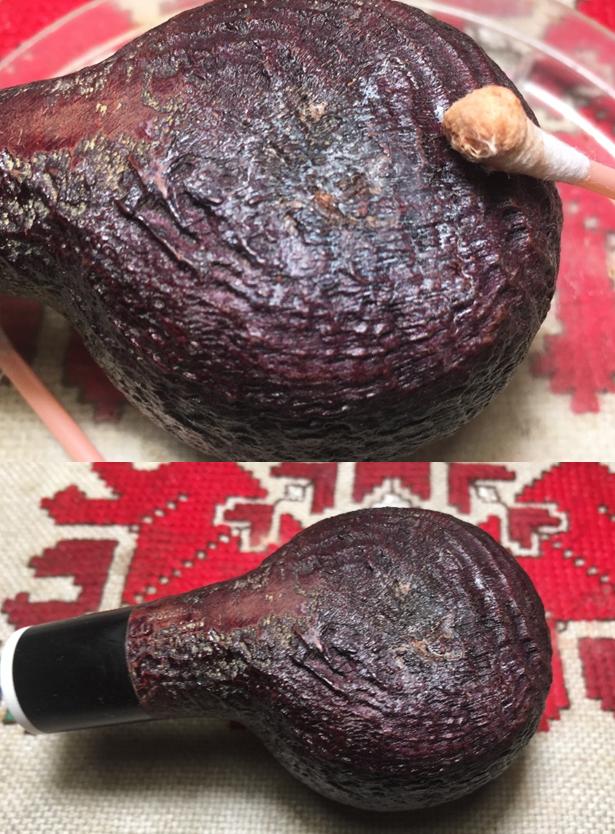
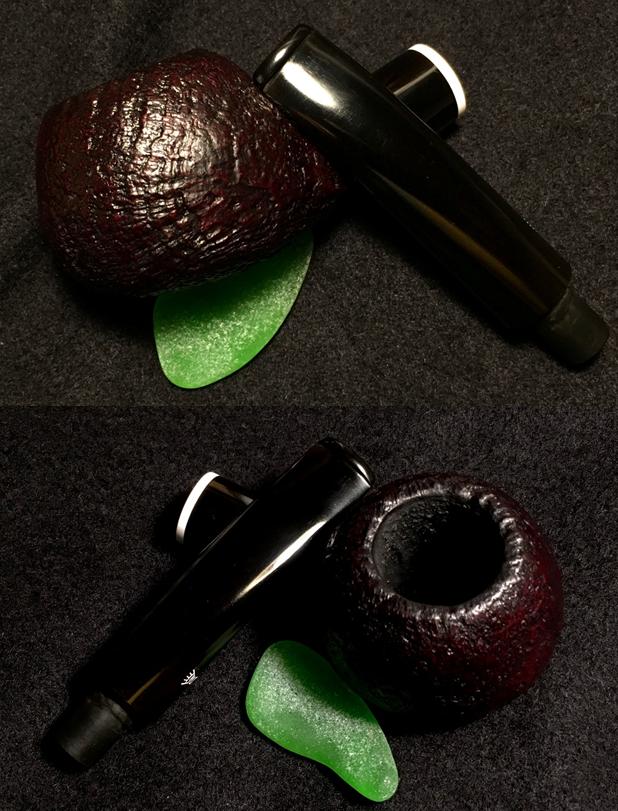
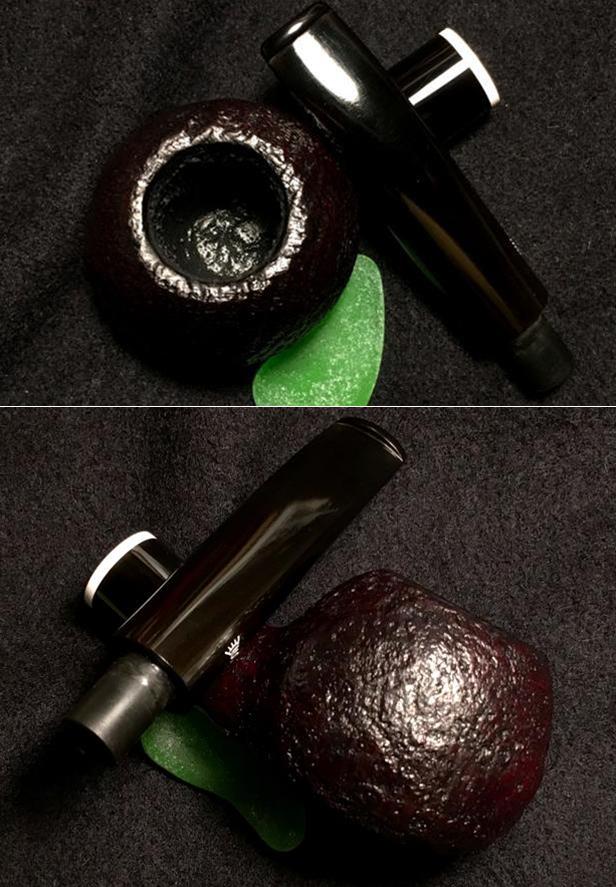
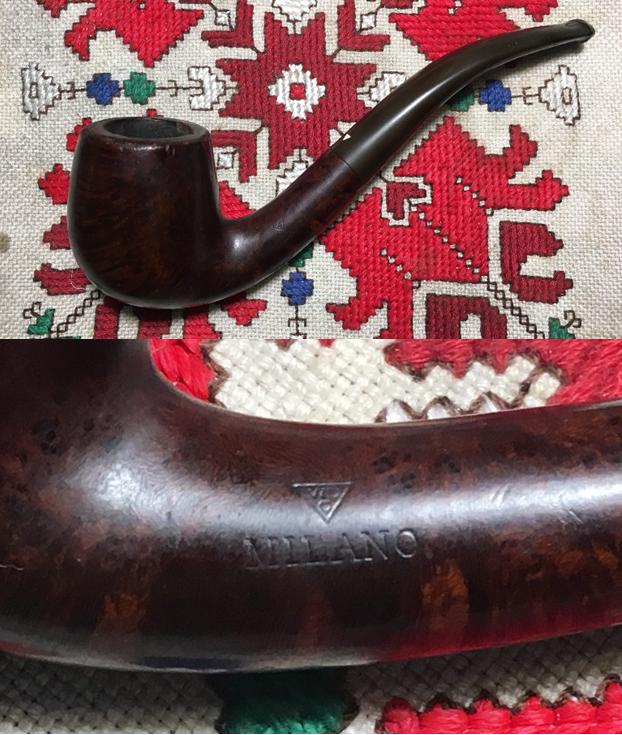
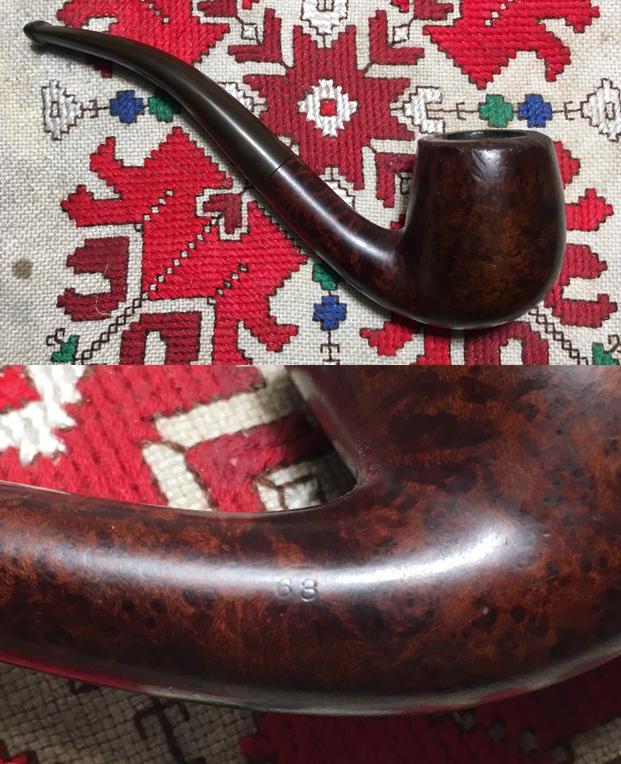
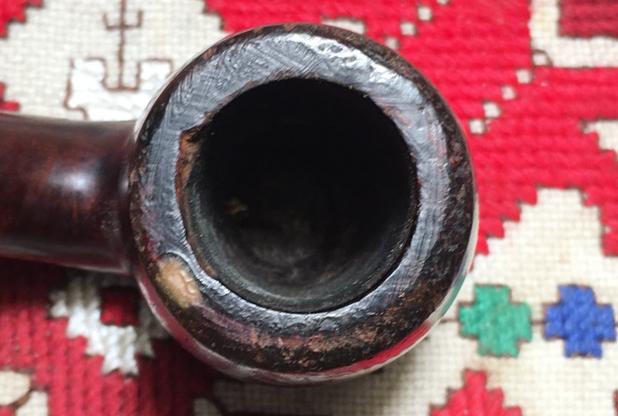
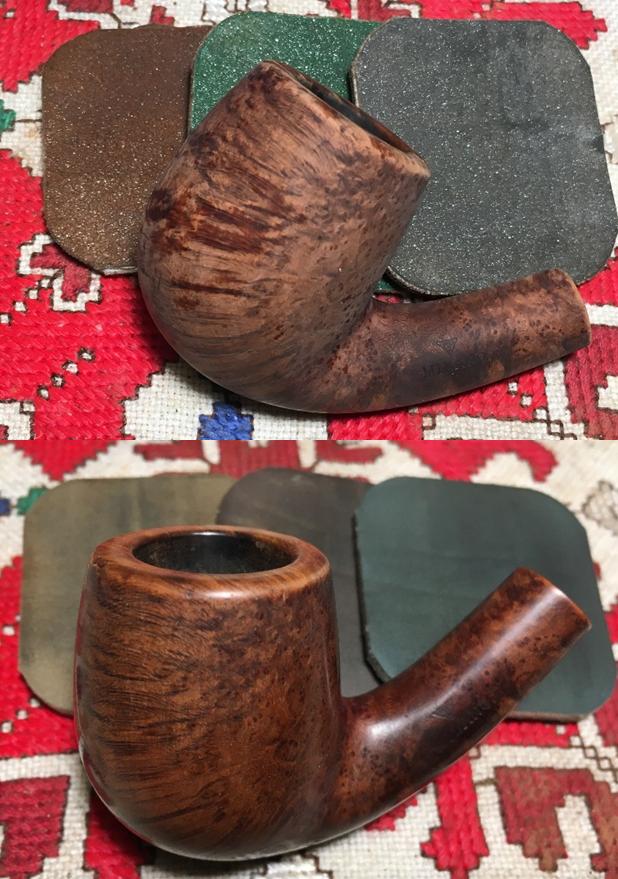
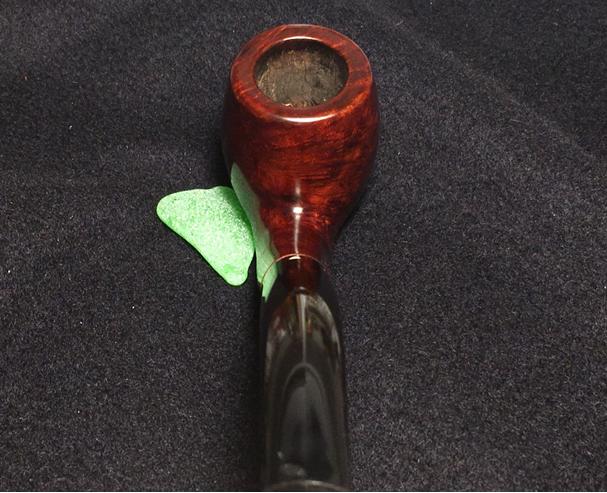
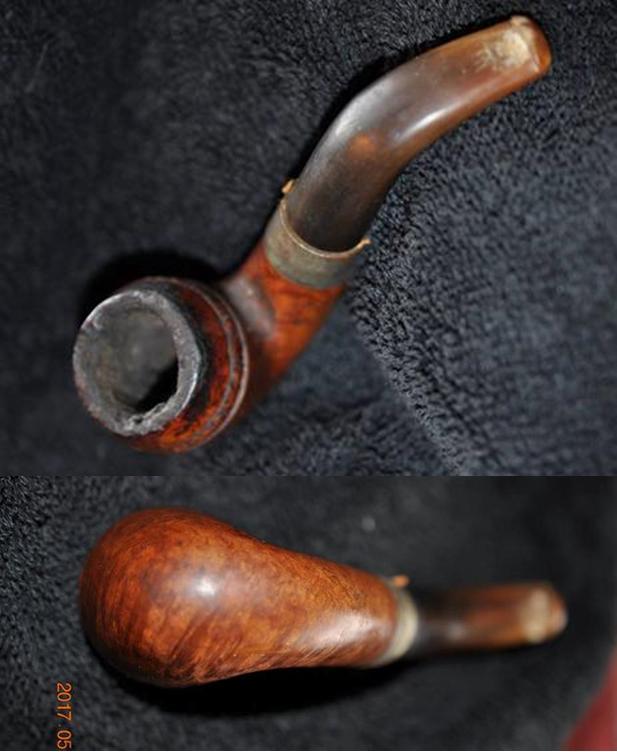
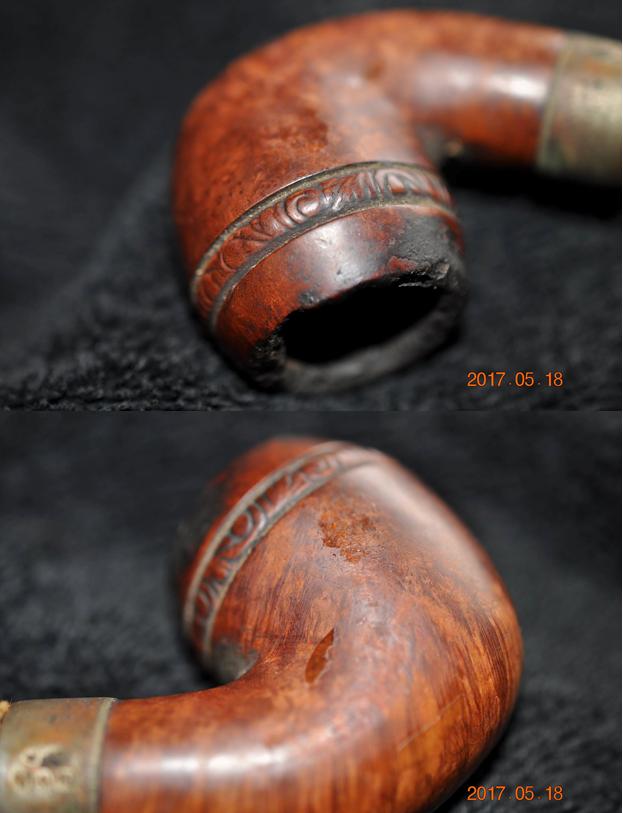
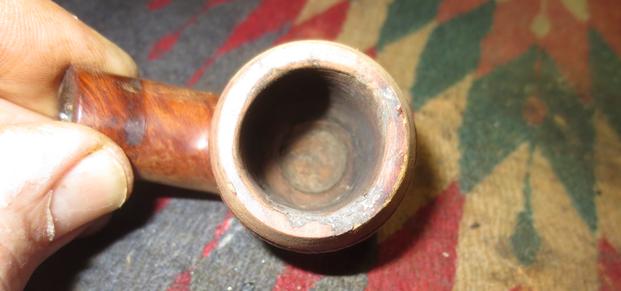
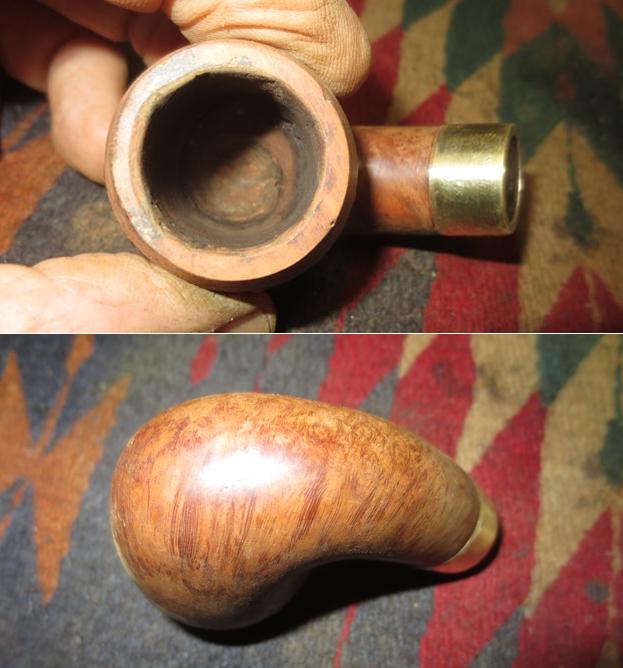
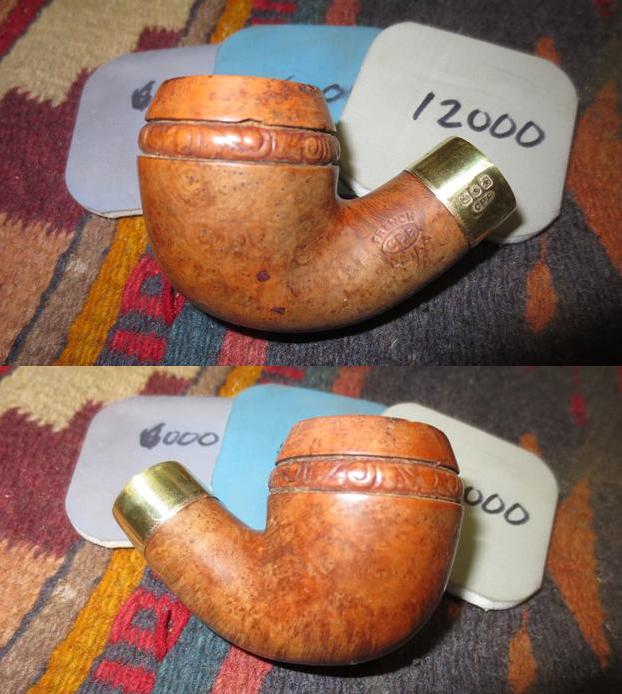
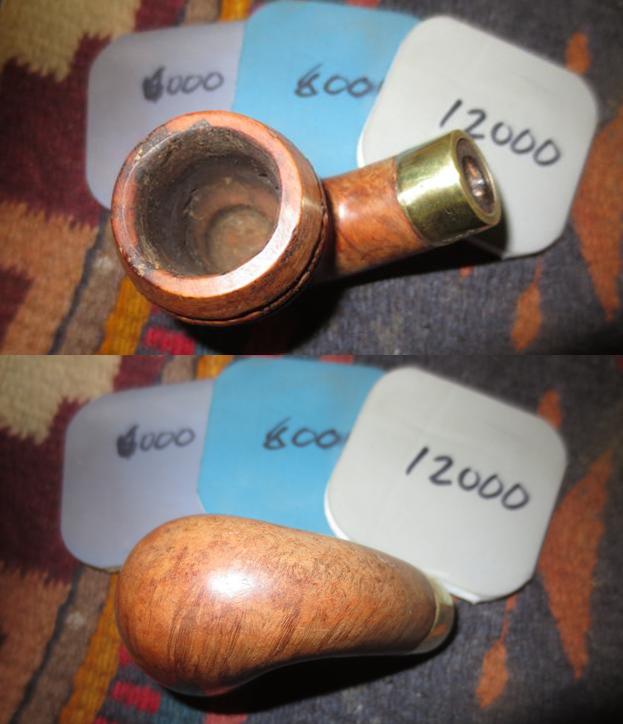
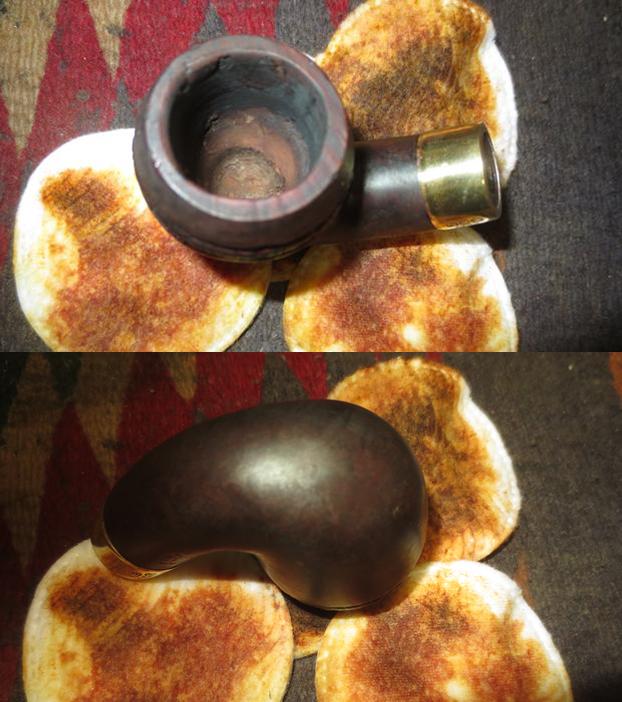
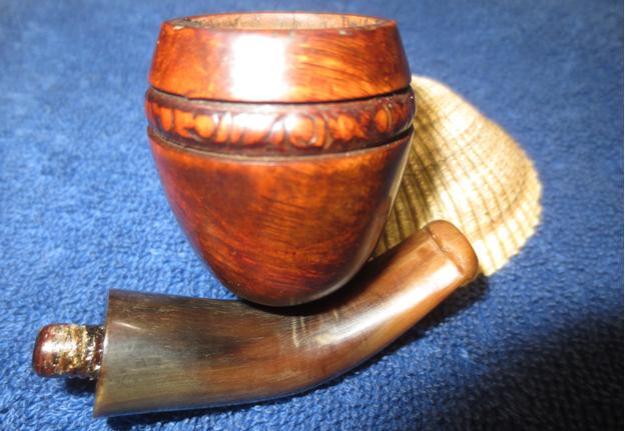
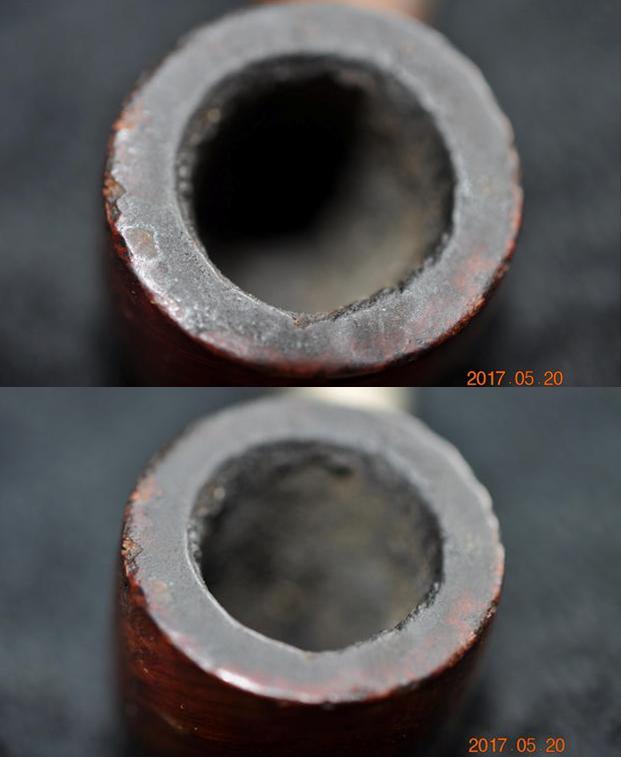
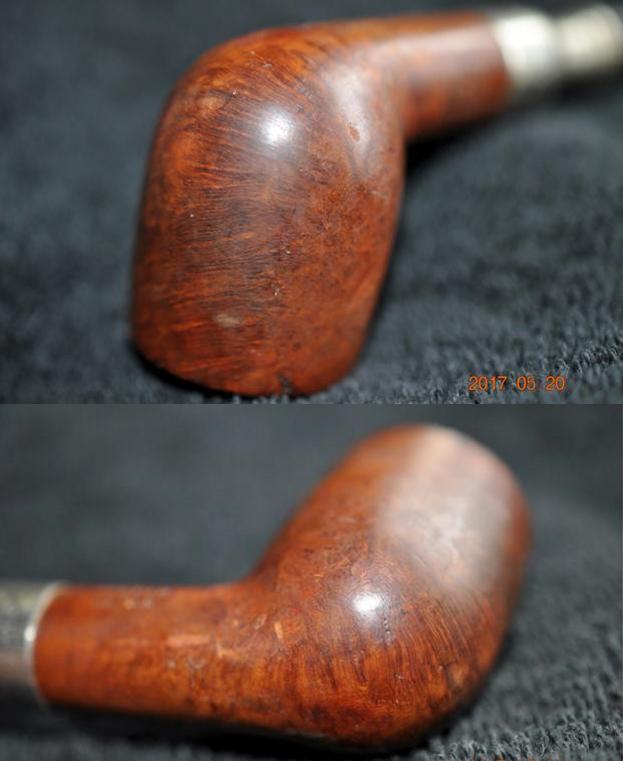
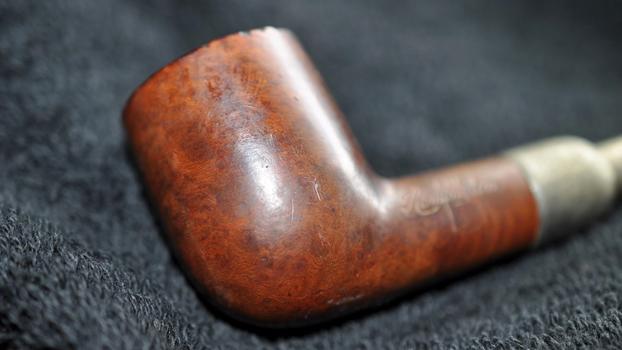
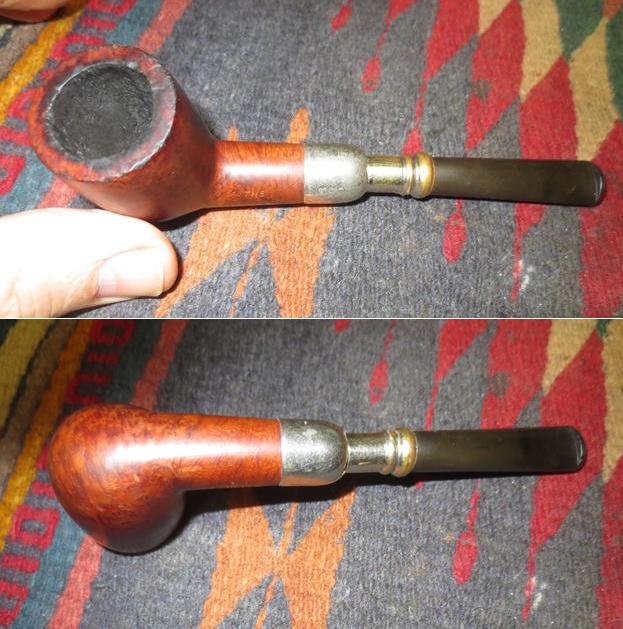
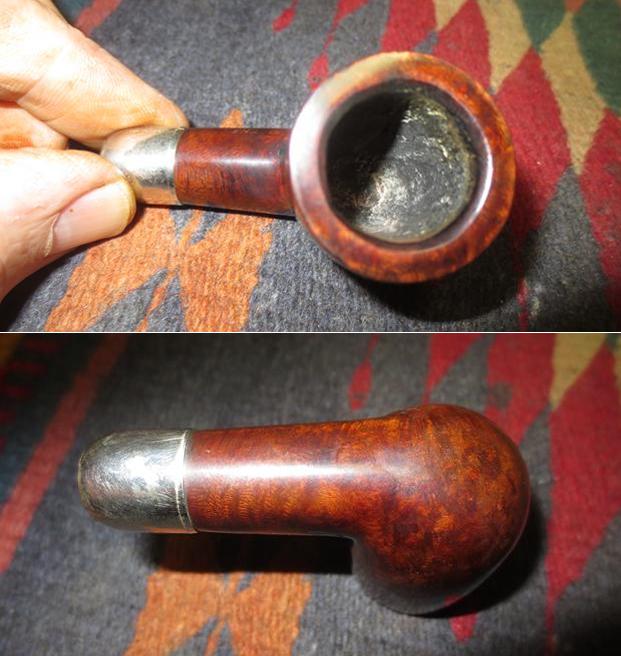
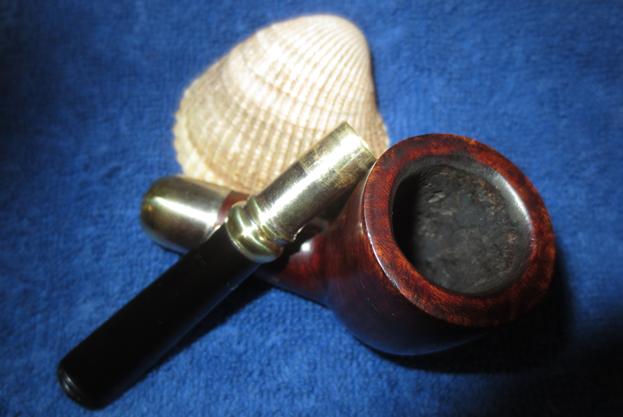
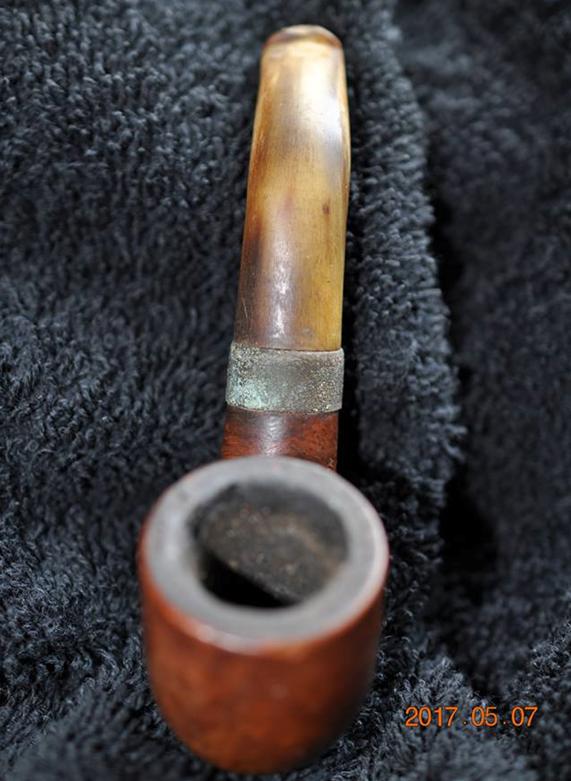
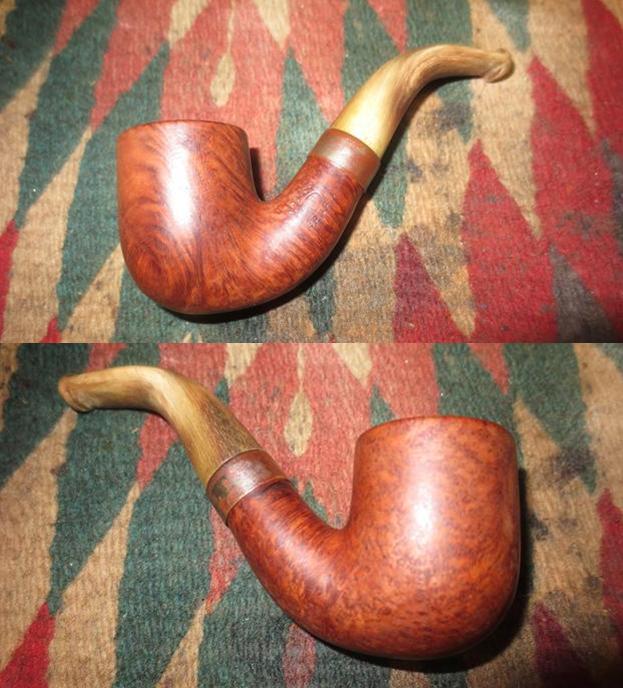
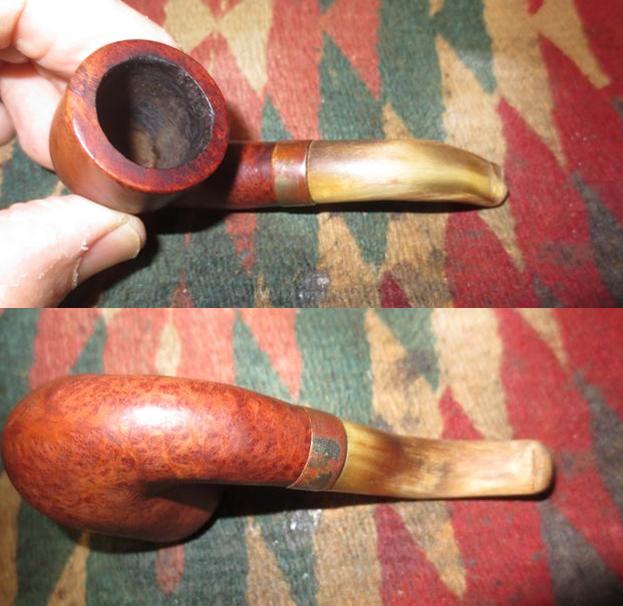
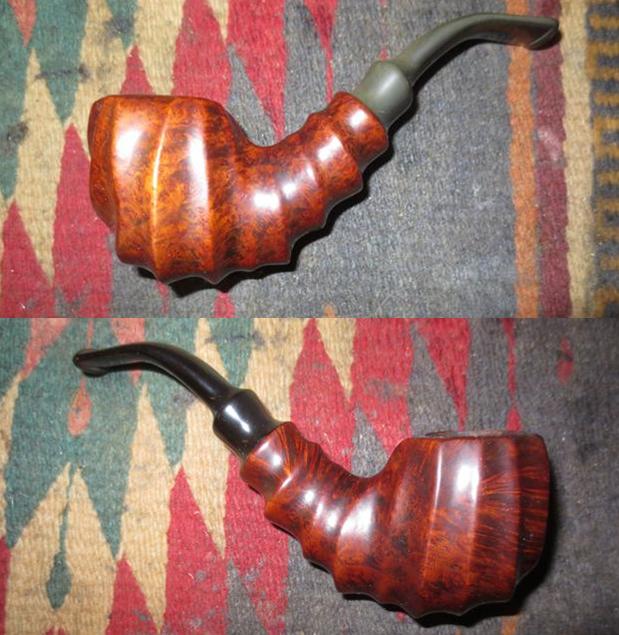
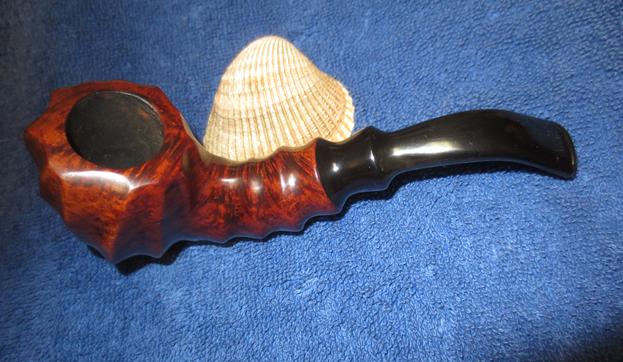
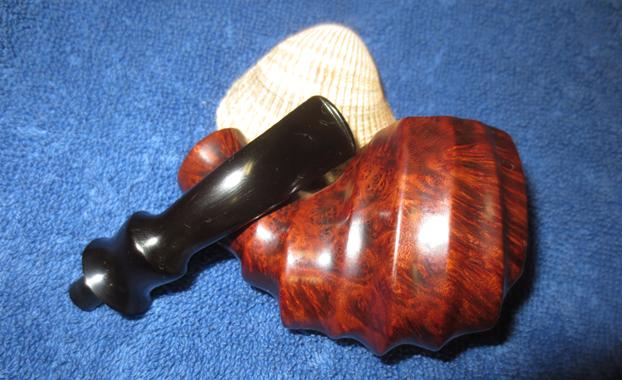
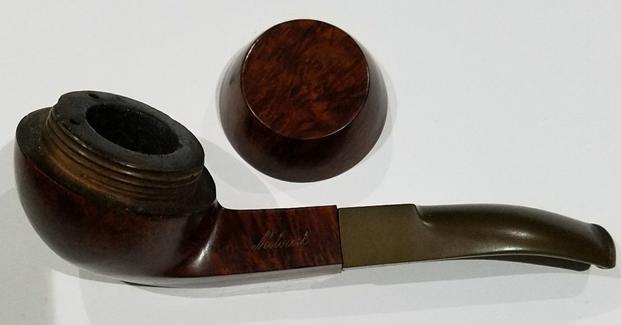
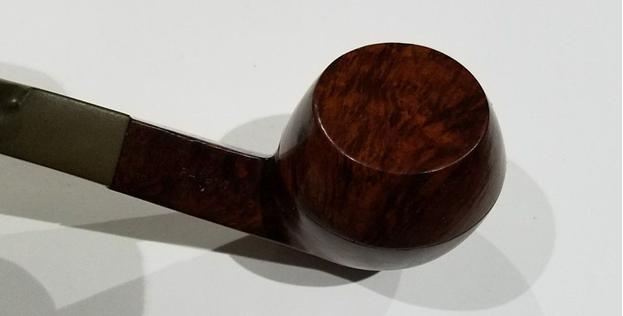
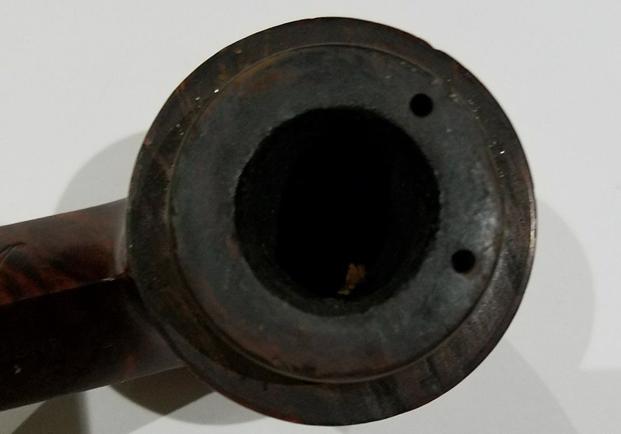
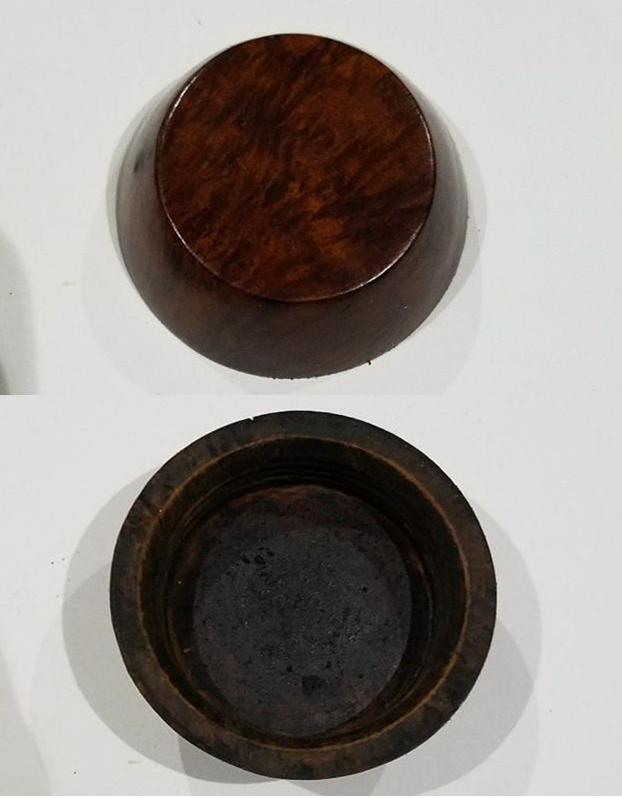
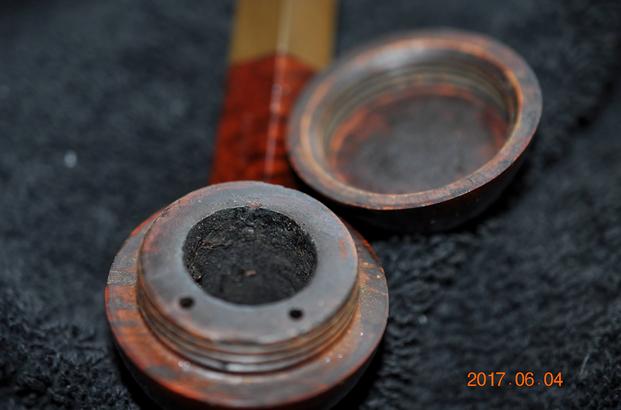
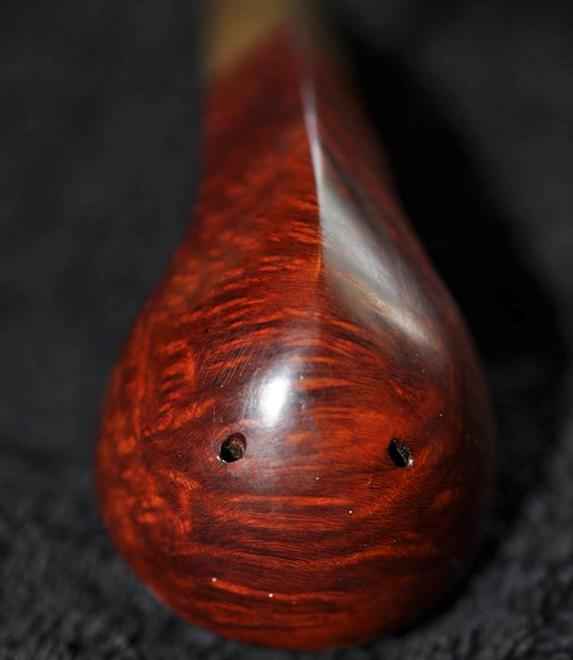
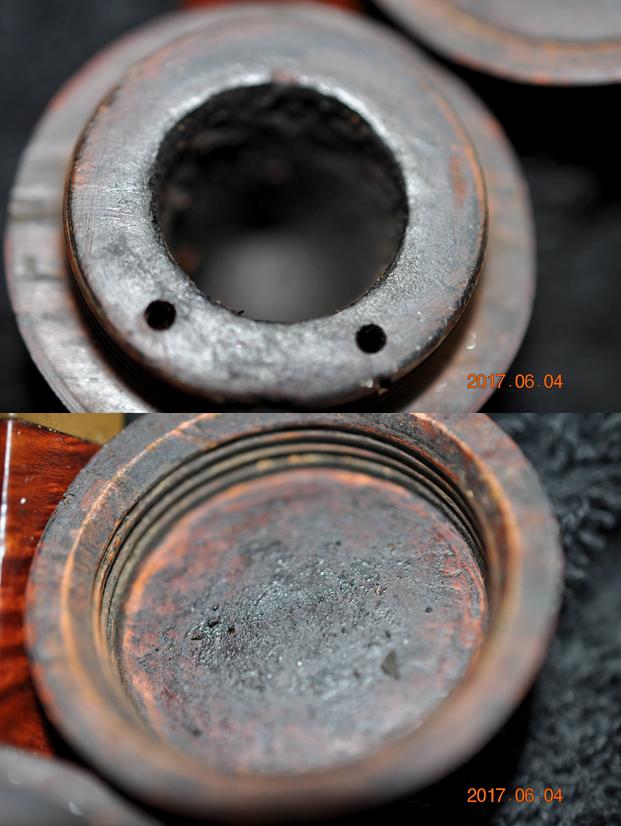
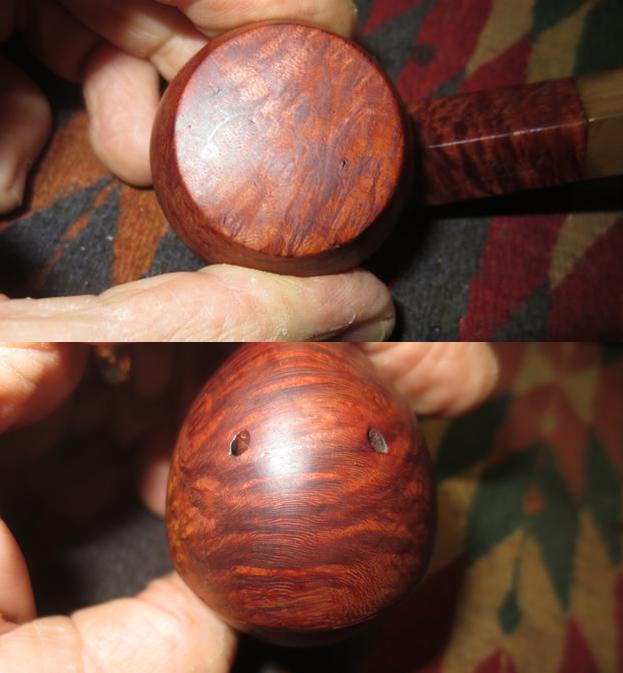
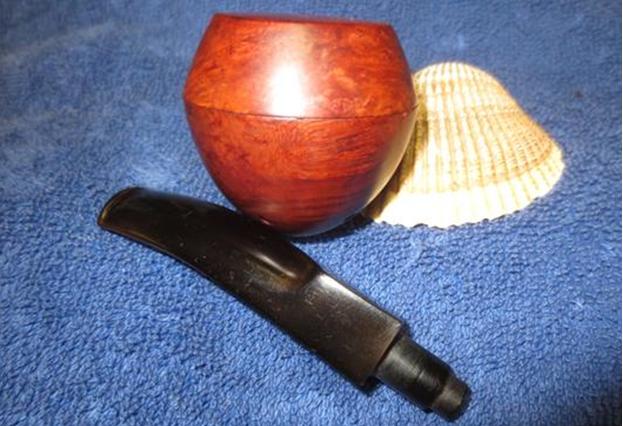
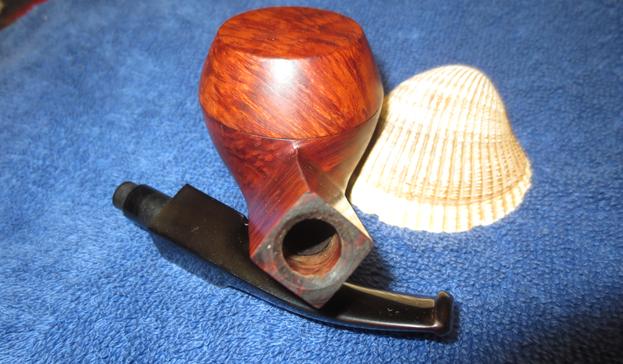
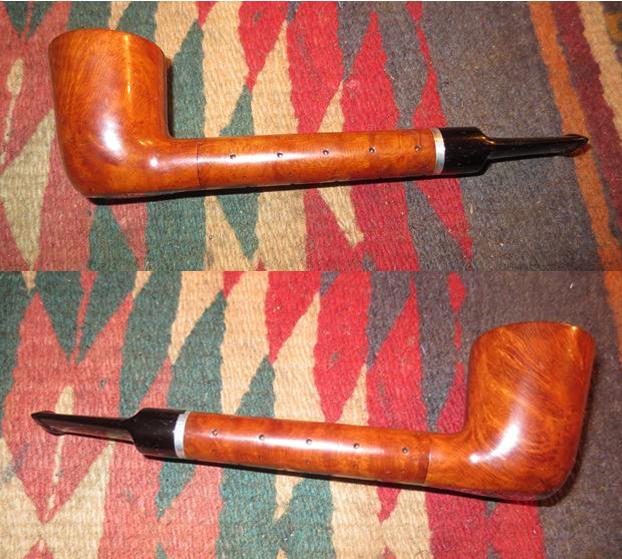
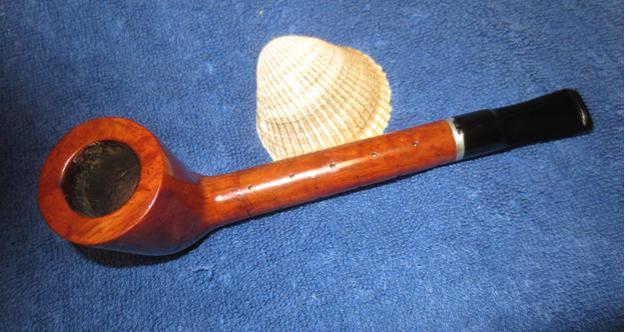
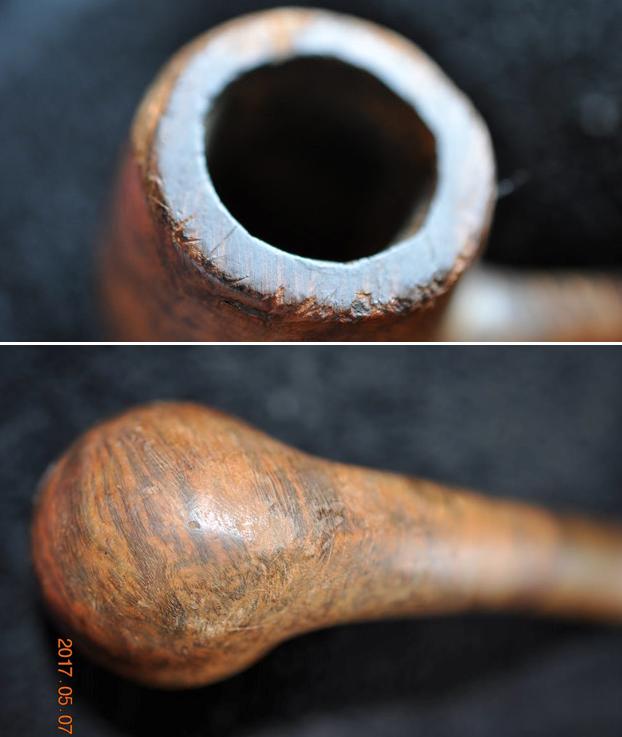
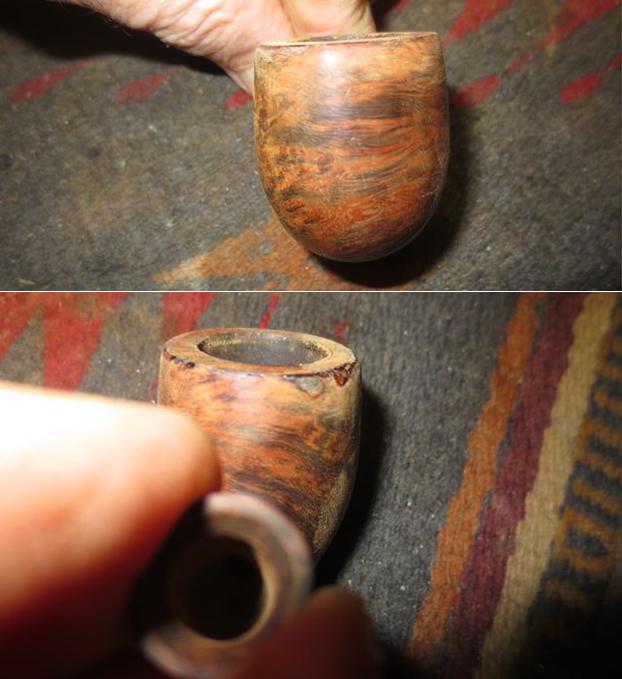
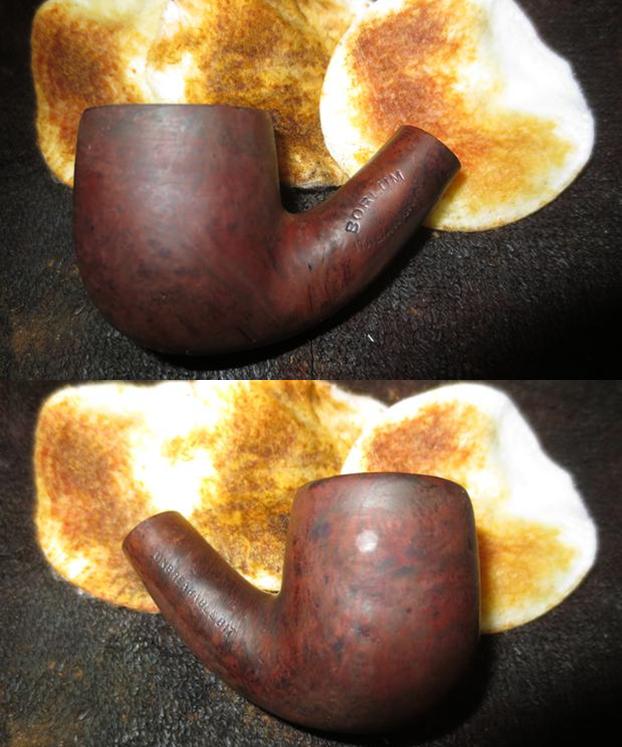
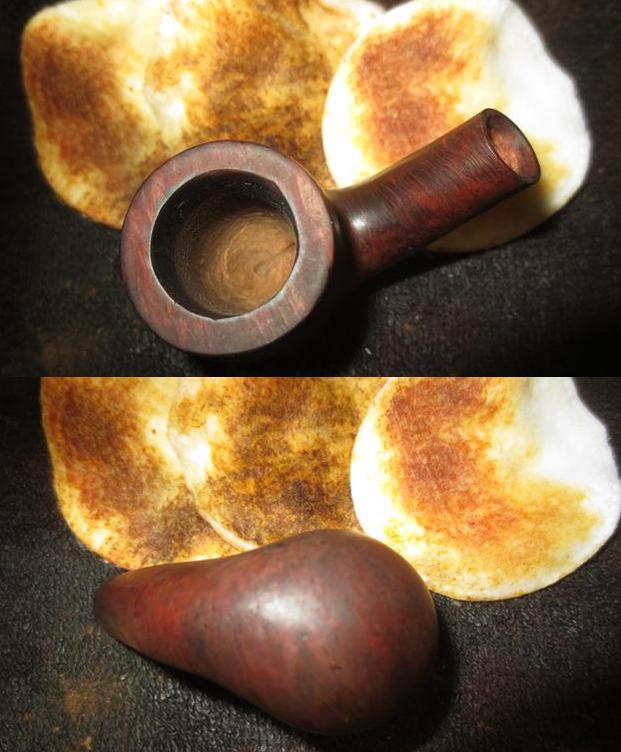
Jeff took some close up photos of the pipe bowl to give an idea of the condition of the pipe before we started to work on it. The first two photos show the sides of the bowl. You can see from those photos that the bowl is in rough shape. The outer rim has a lot of damage to it and the finish is worn and tired.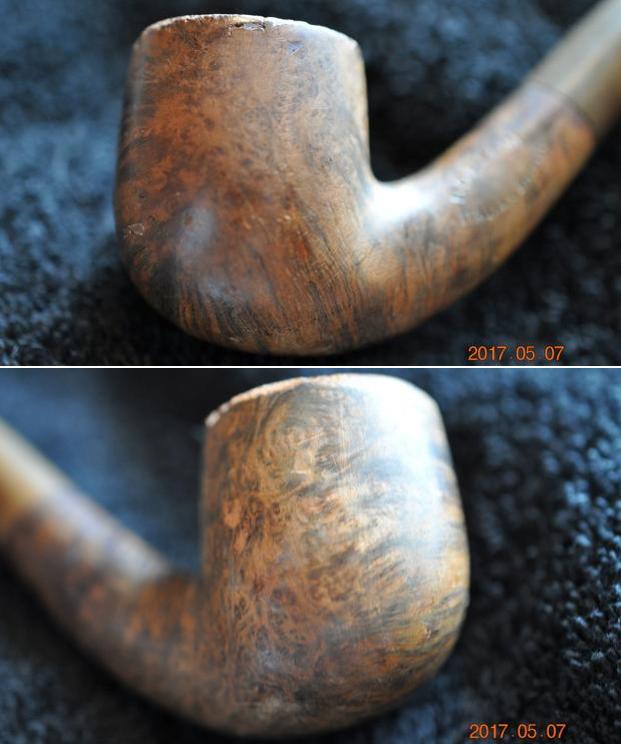 The next two photos show the rim top and the clean bowl. Note how beat up the edge of the rim is in both photos. The third photo below shows the heel of the bowl and all of nicks and dents in the surface of the briar.
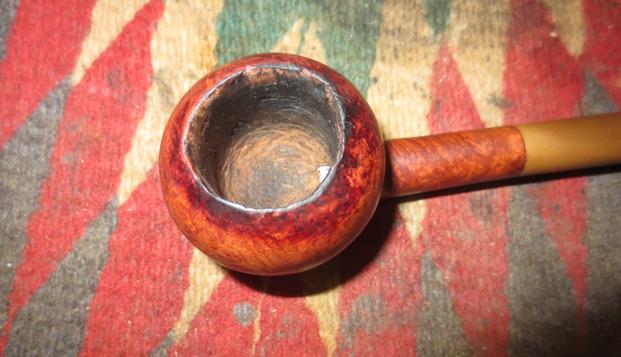
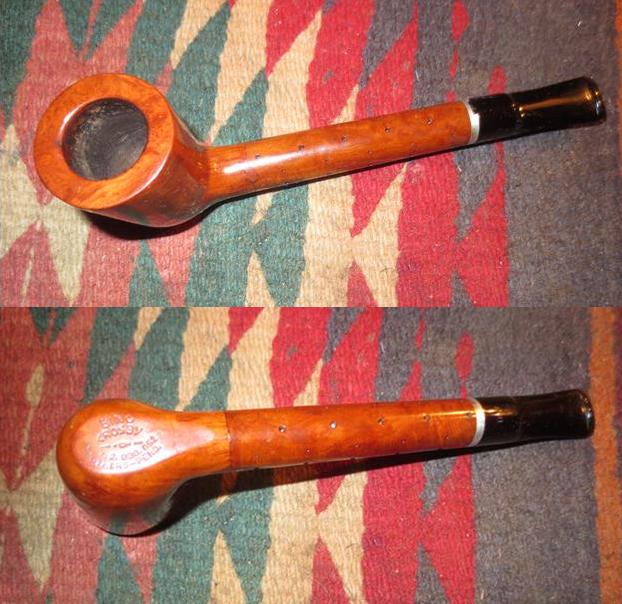
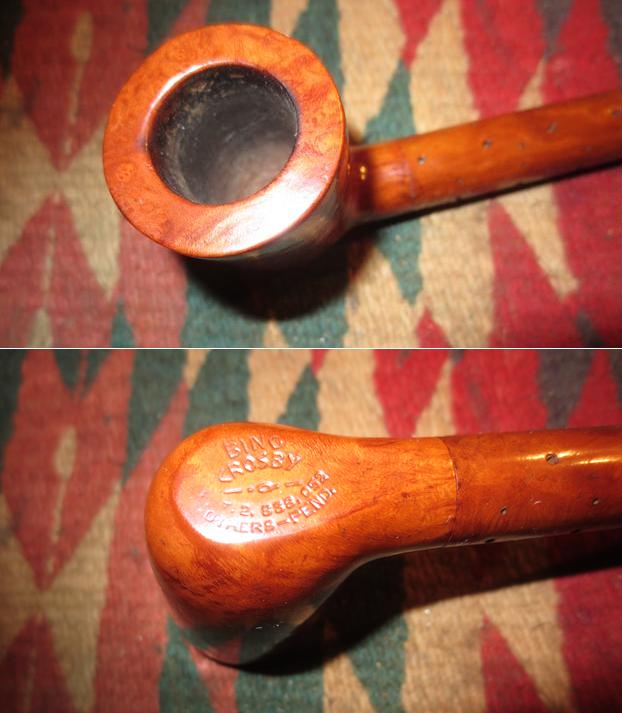
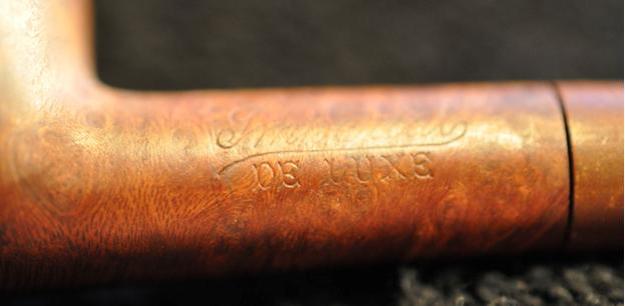
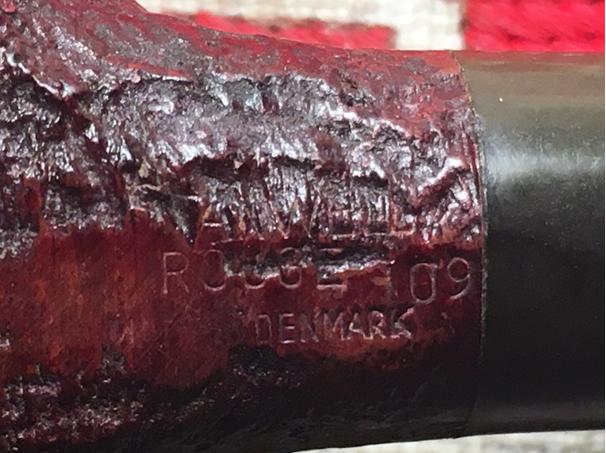
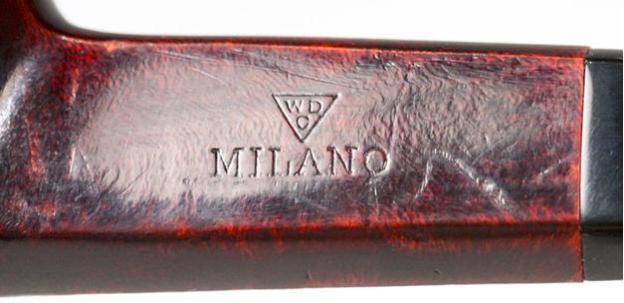
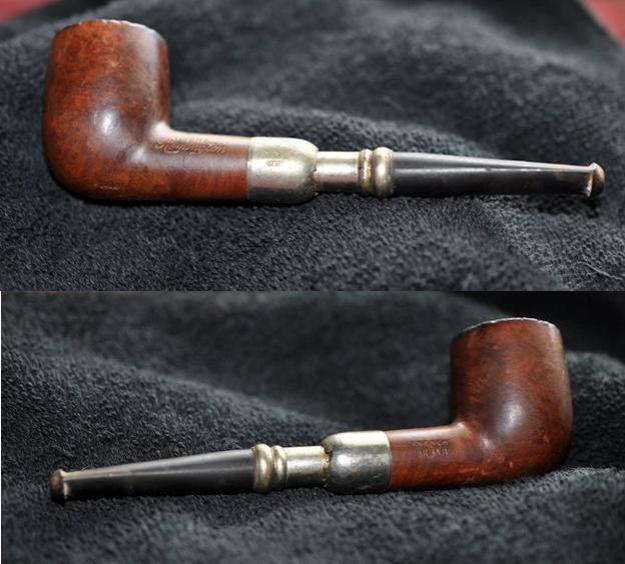
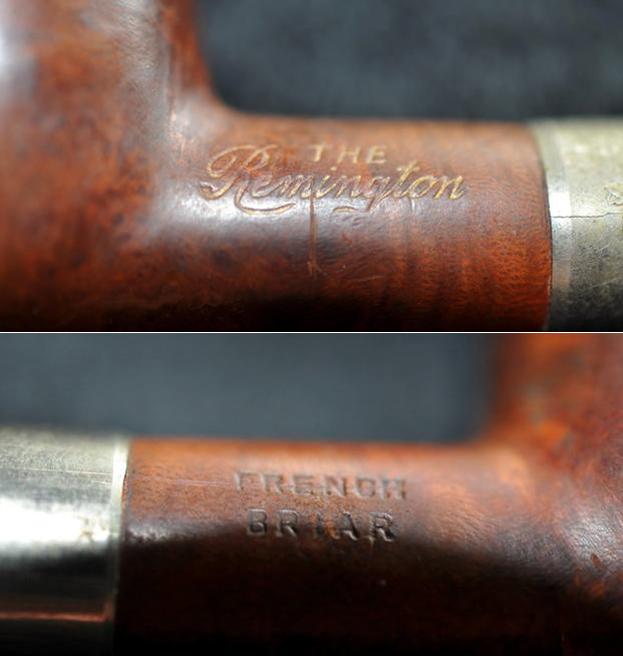
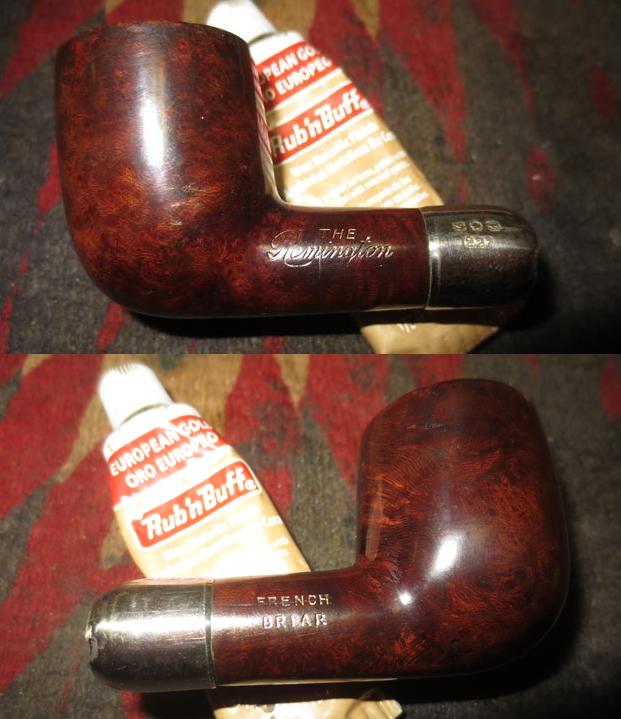
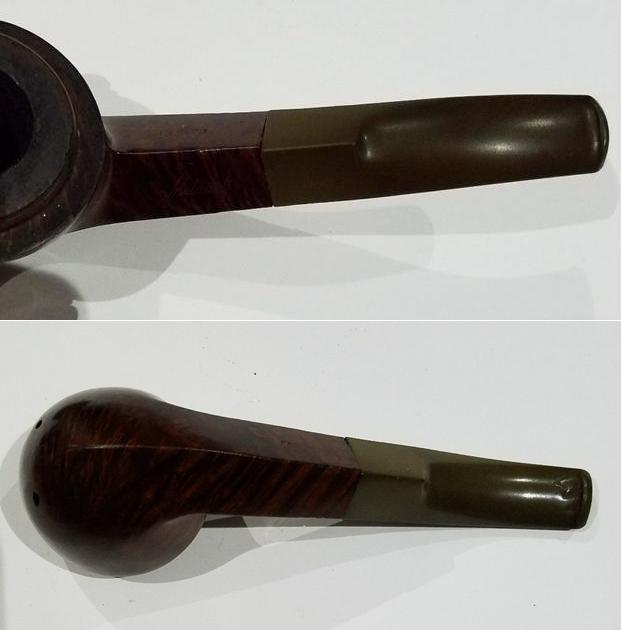
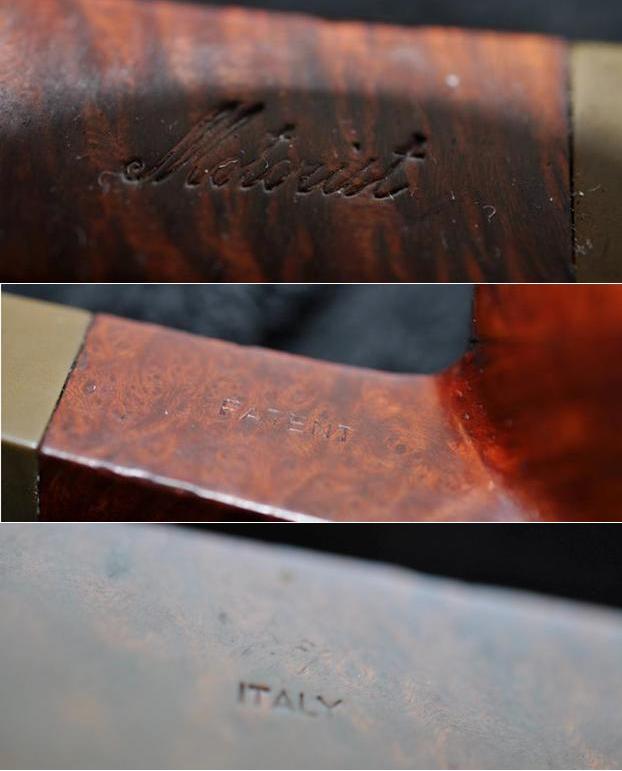
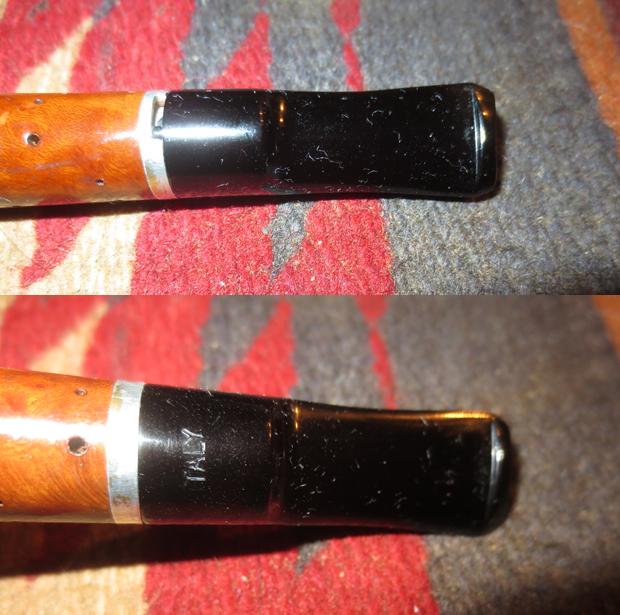
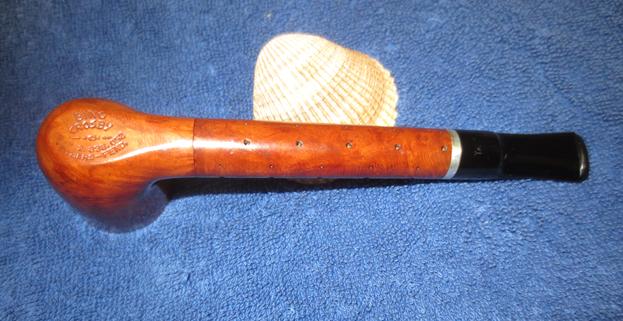
 The stamping on the left side of the shank and the right side of the shank is readable in the next two photos.
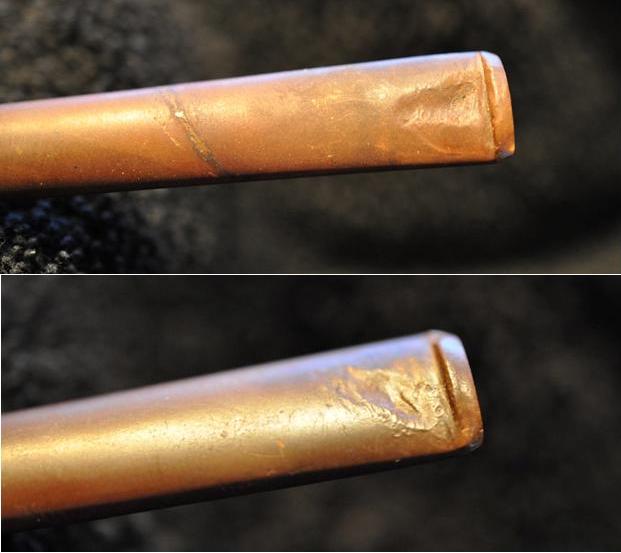
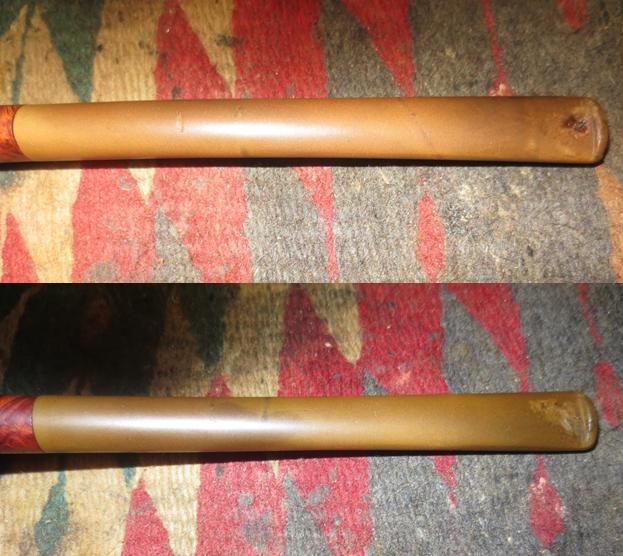
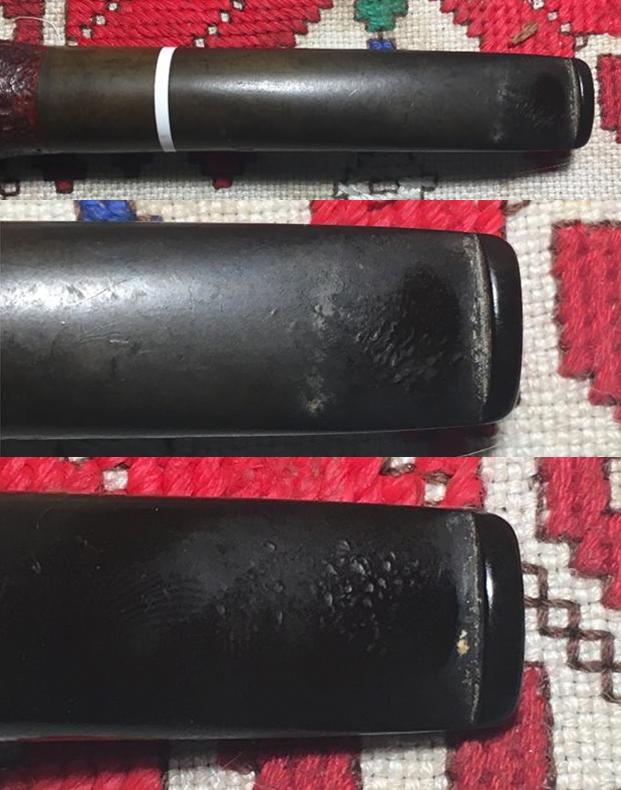
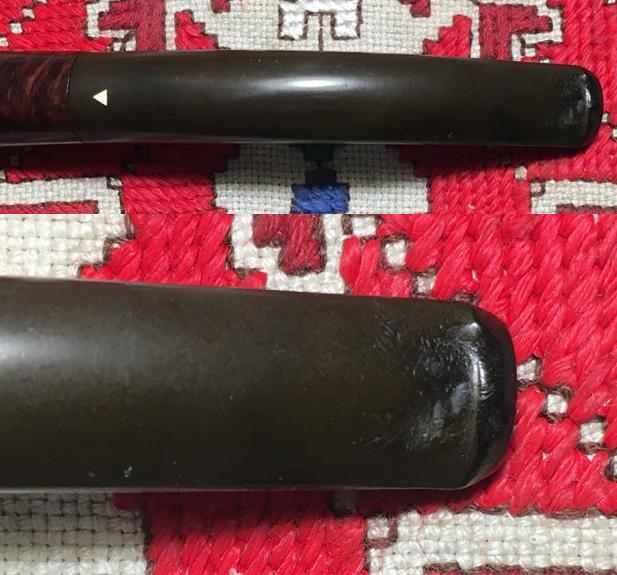
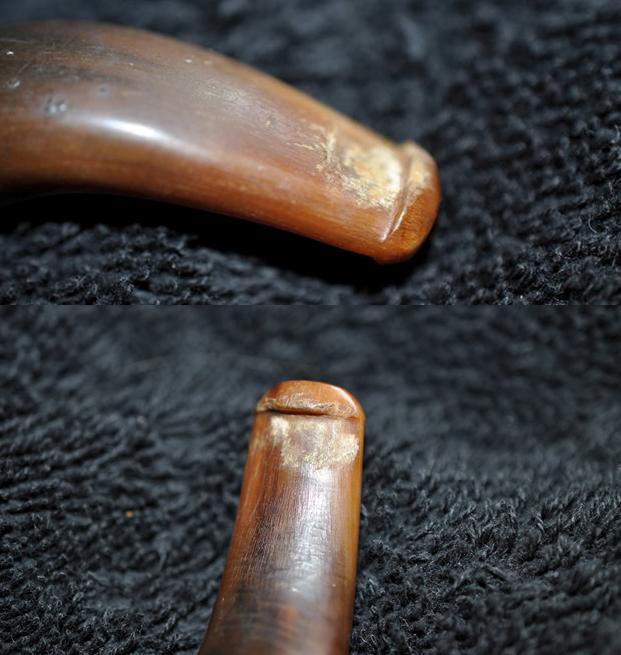
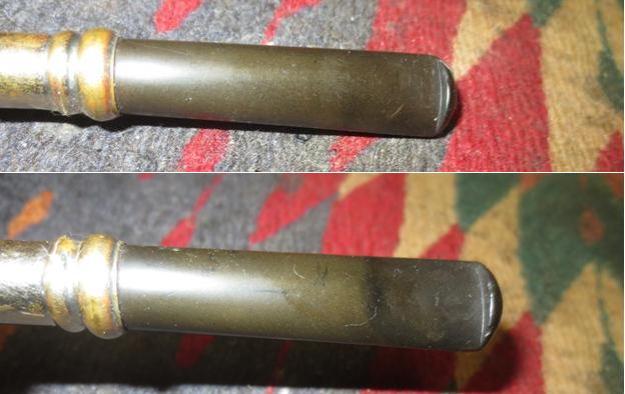
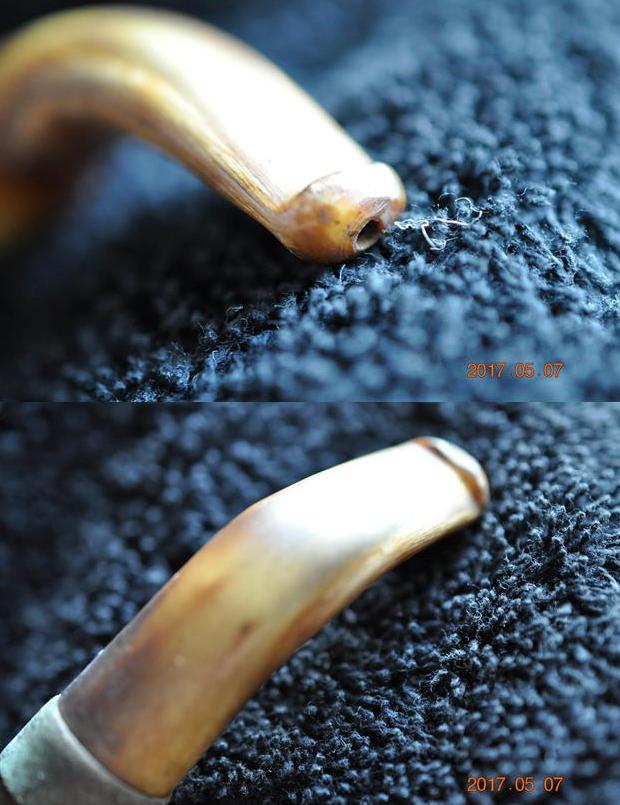
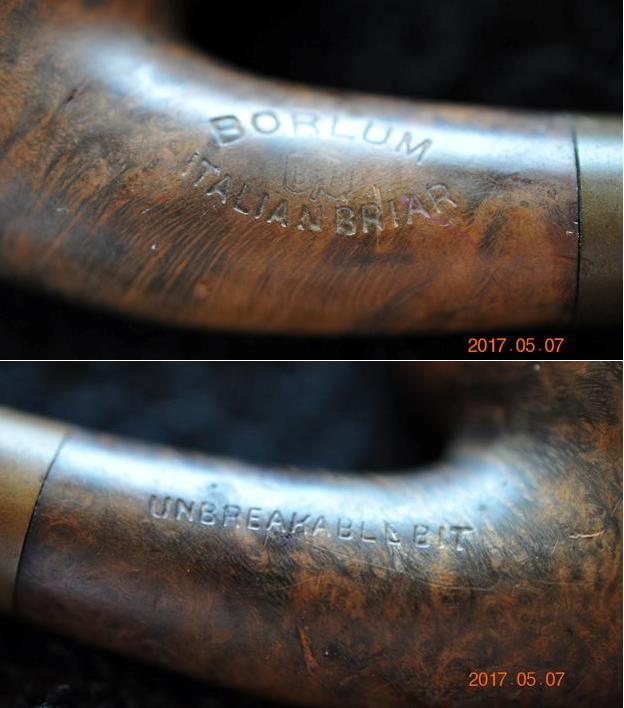 The next photos show the condition of the stem. It is oxidized and there is a dark line across the top of the stem that looks like a crack. Under a bright light there is no crack visible, it is merely a mark on the vulcanite.
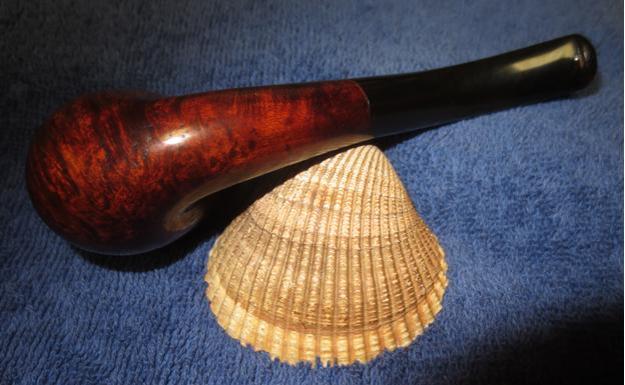
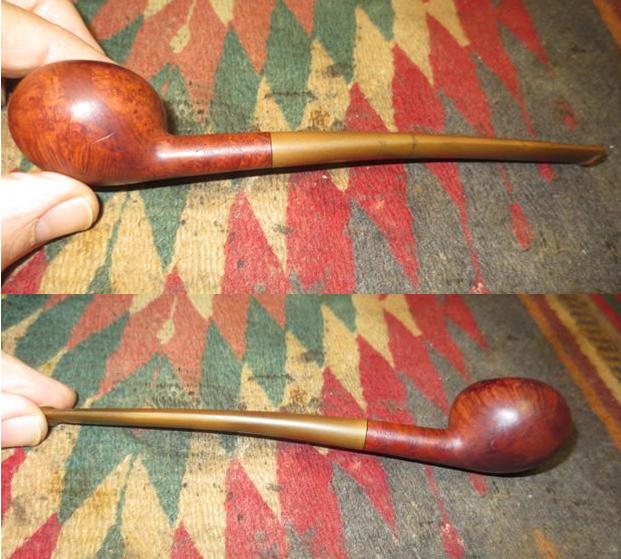
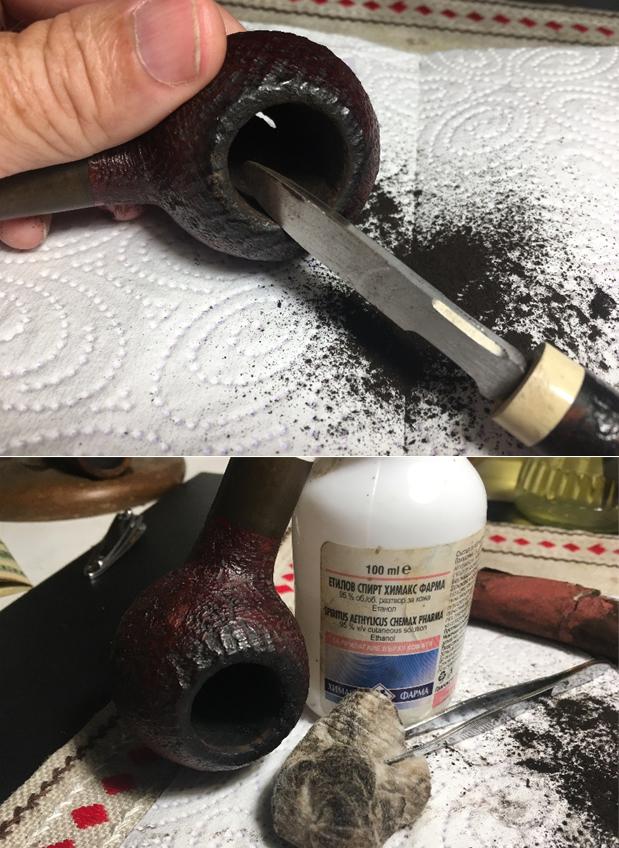
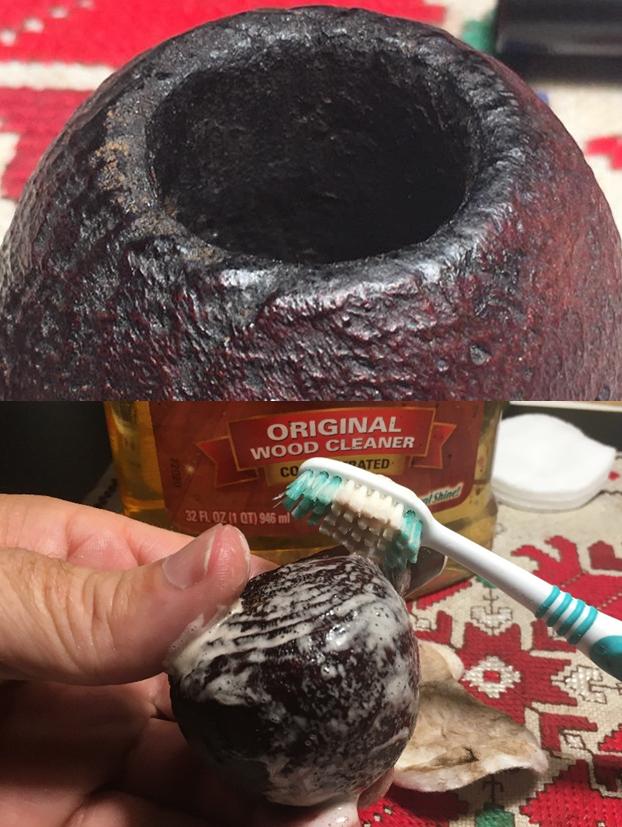
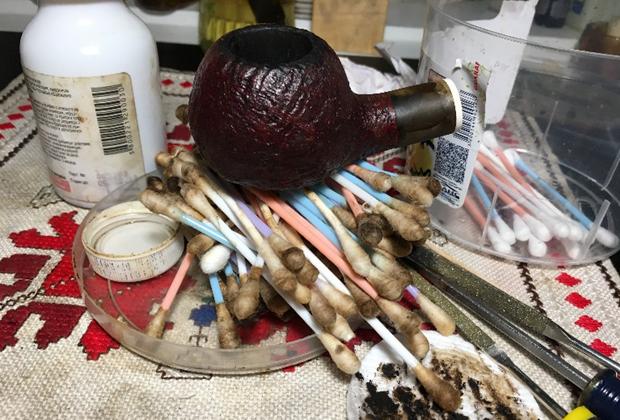
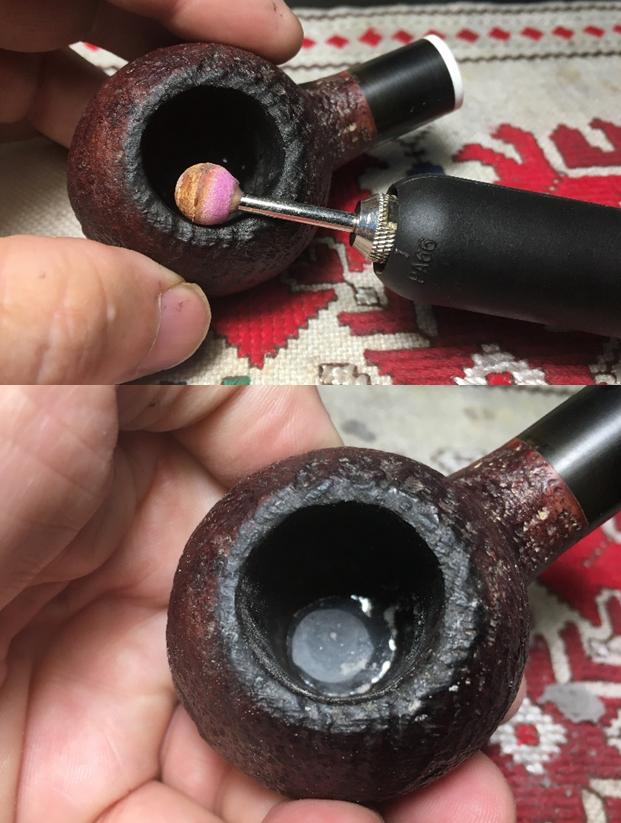
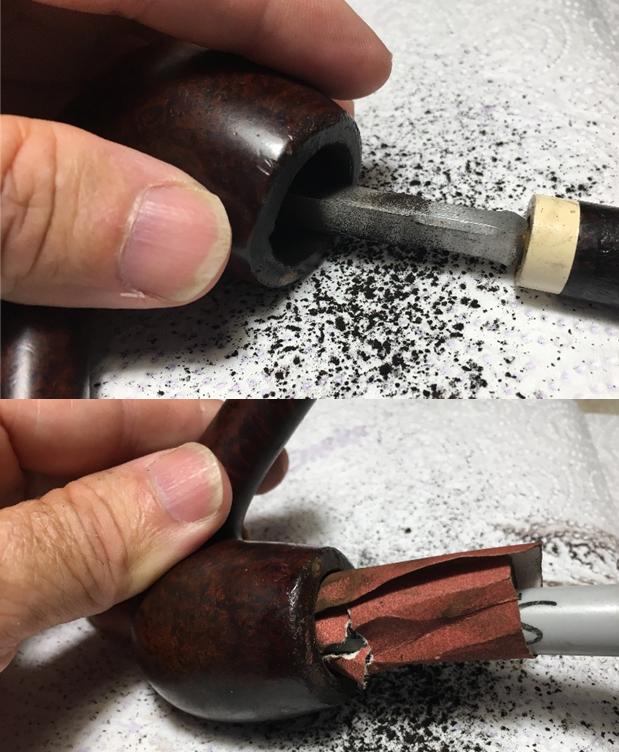
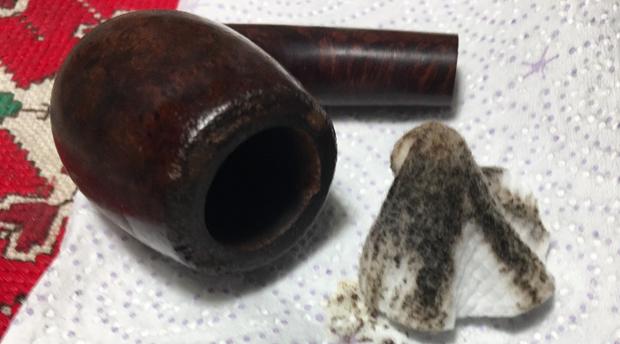
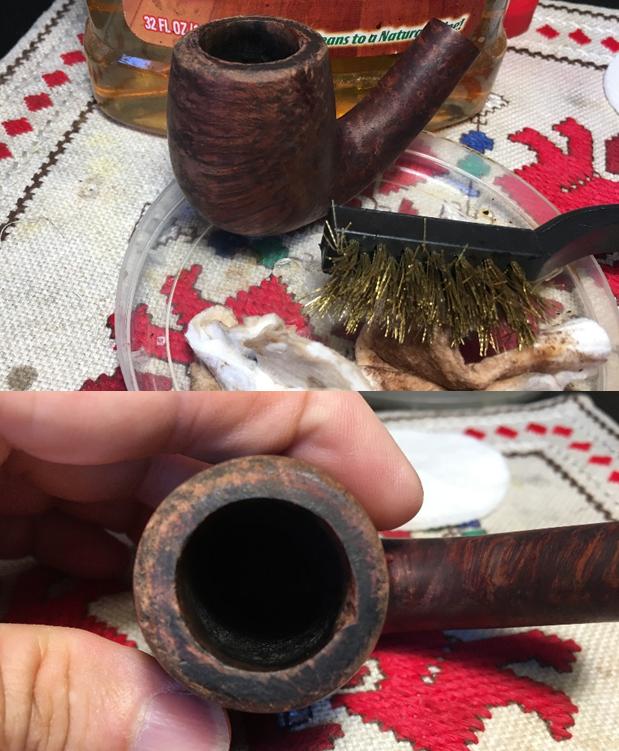
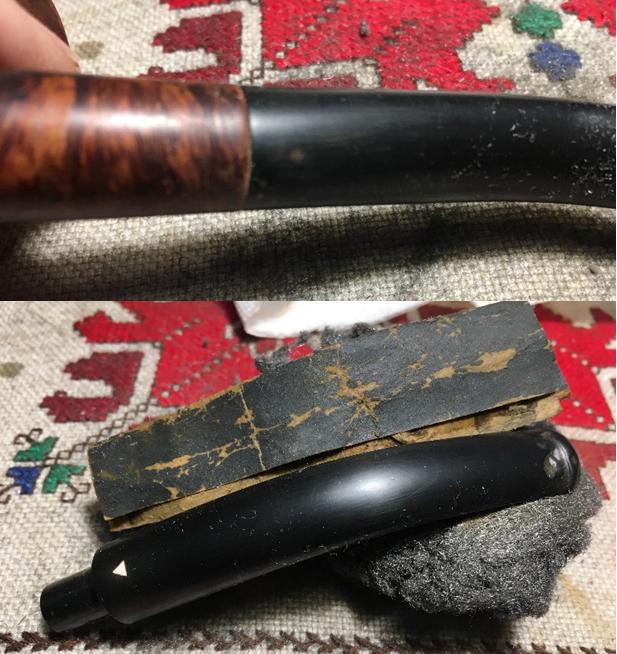
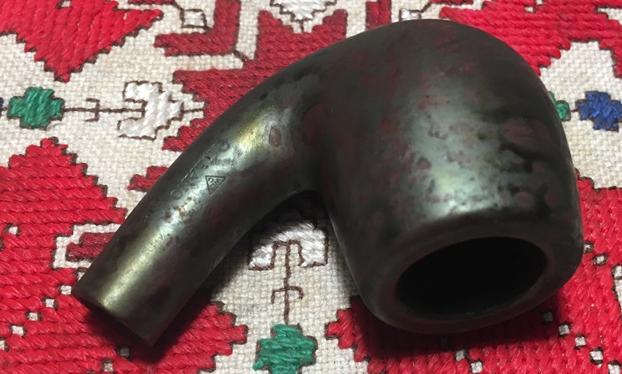
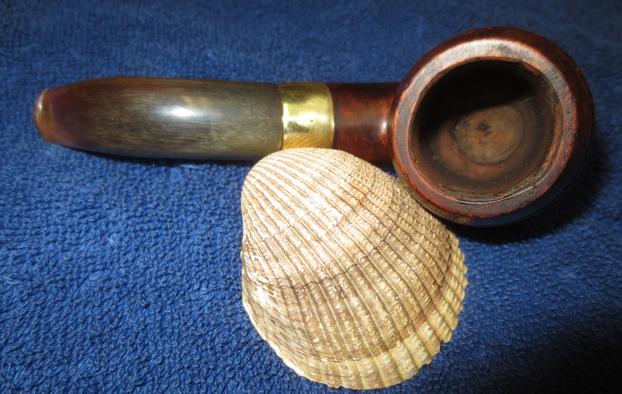
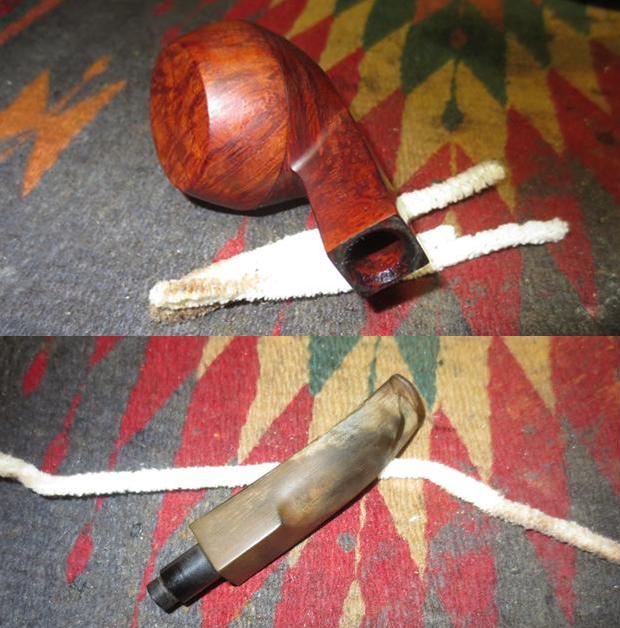
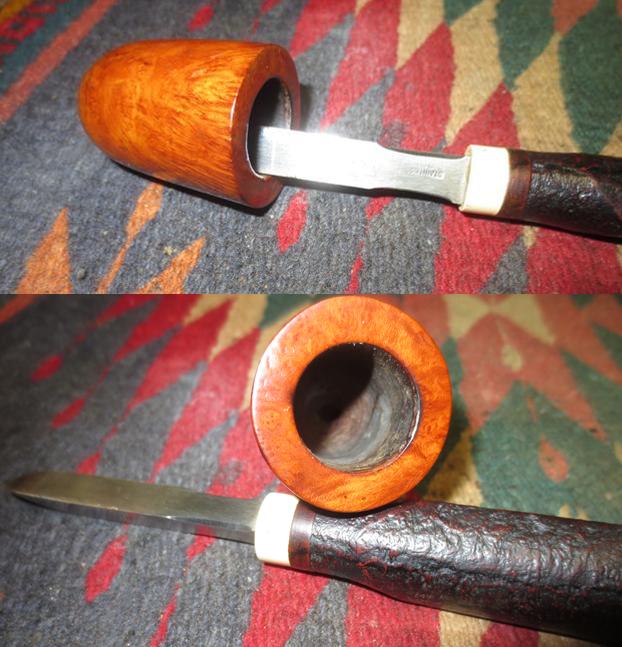
 Jeff rarely varies his established process for thoroughly cleaning the pipes he sends to me. He reamed the bowl with a PipNet reamer and touched it up with a Savinelli Fitsall Pipe Knife. He scrubbed out the mortise and the airway in the shank and the stem with pipe cleaners, cotton swabs and alcohol. He scrubbed the exterior of the pipe with Murphy’s Oil Soap to remove the grime and grit on the bowl. He worked over the rim and removed the lava overflow. He scrubbed it with a tooth brush and the oil soap until he removed the buildup and clean up the damaged edges of the rim. The grain on this pipe is quite stunning. He soaked the stem in an Oxiclean bath to bring out the oxidation and scrubbed the debris from the exterior of the stem. I took photos of the pipe to show the condition it was in when it arrived in Vancouver.
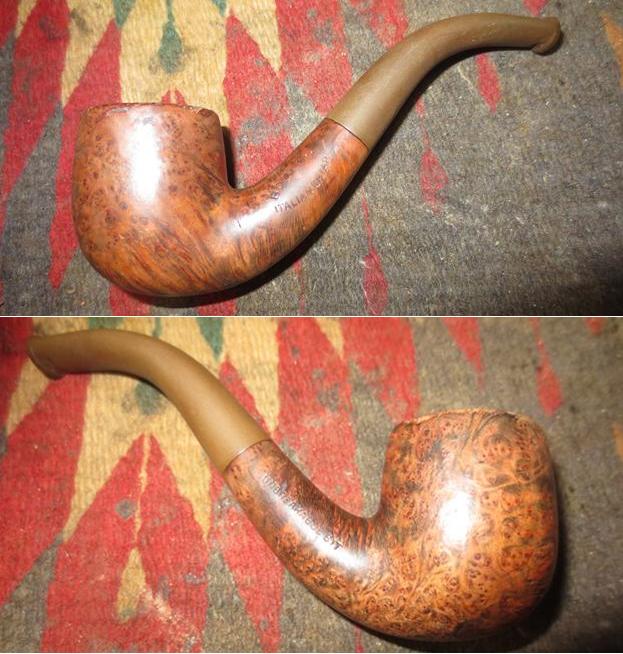
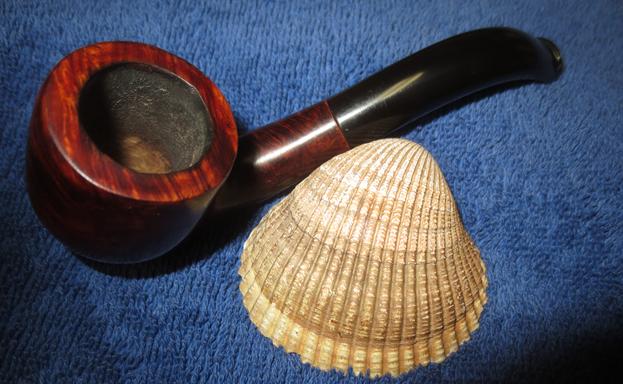
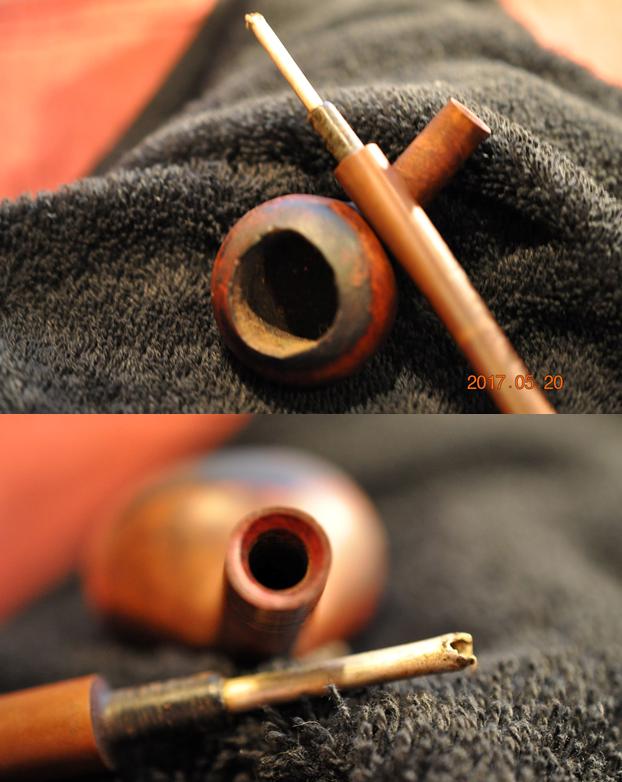
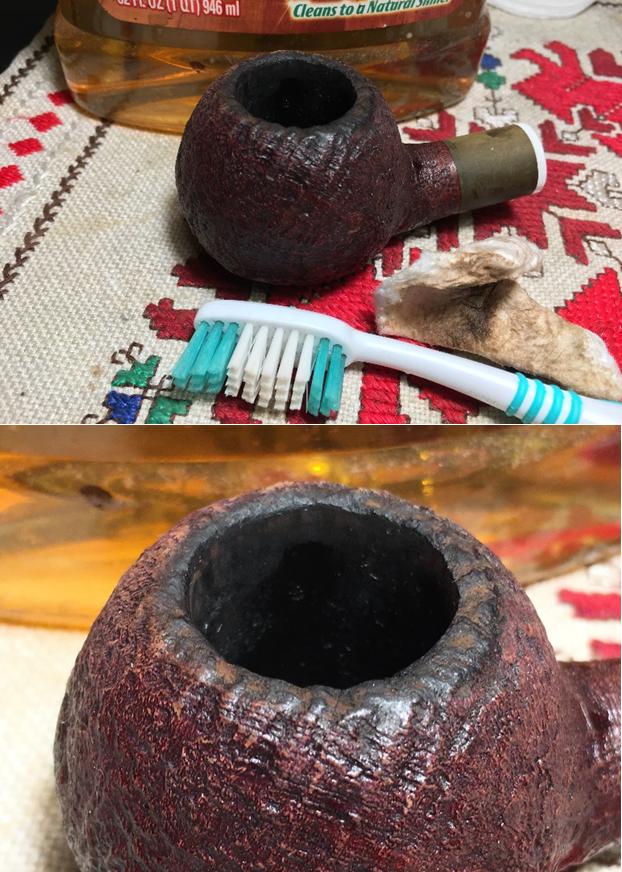
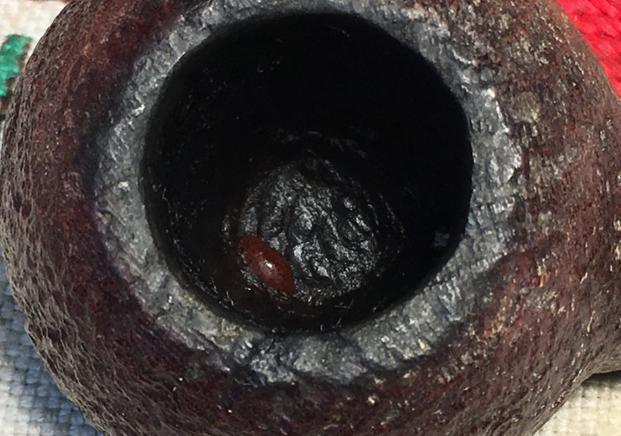
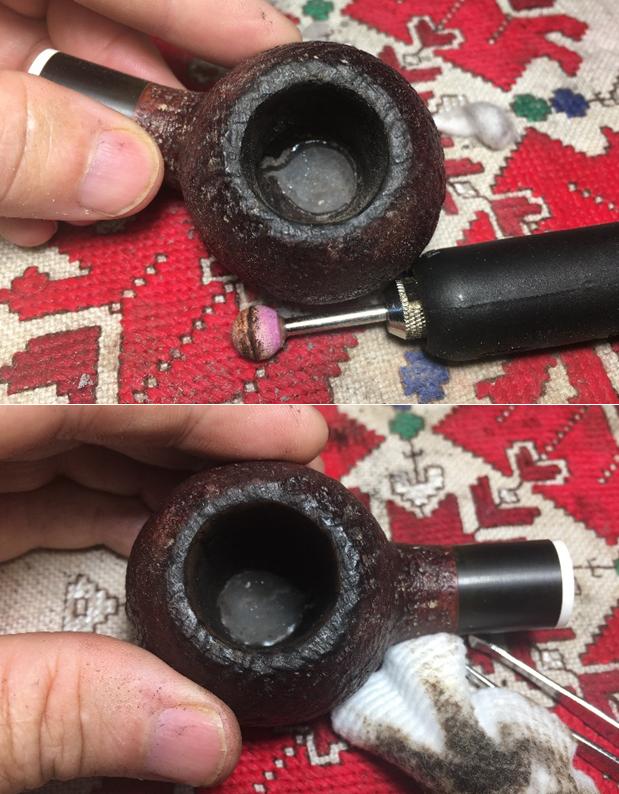
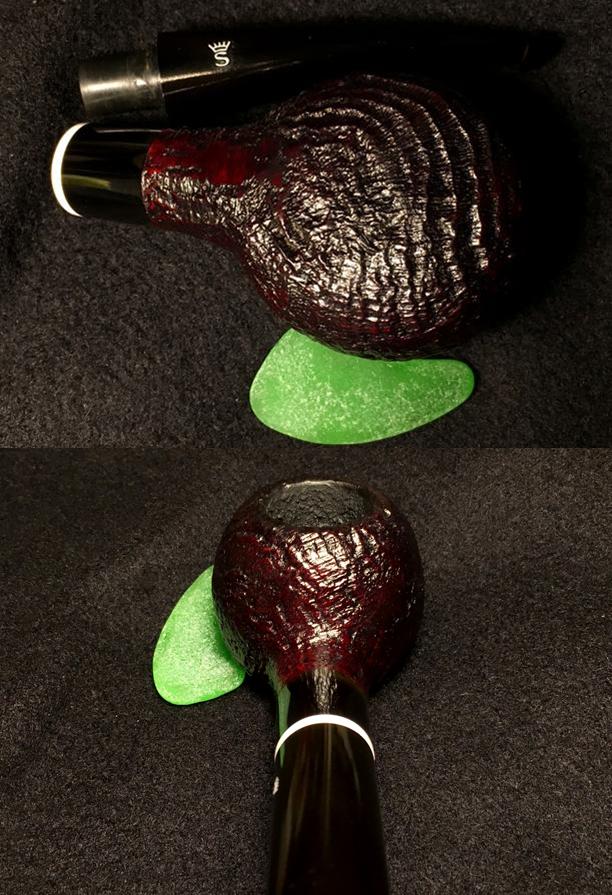
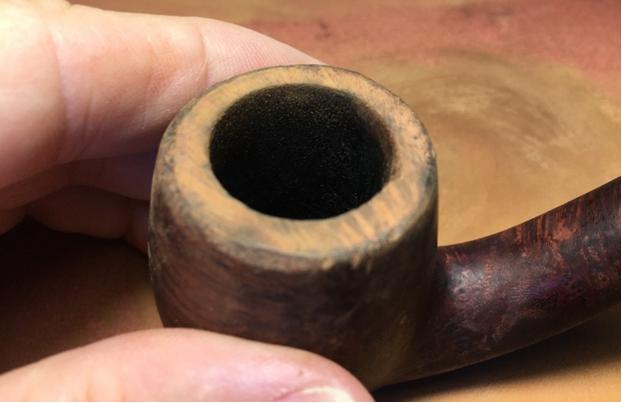
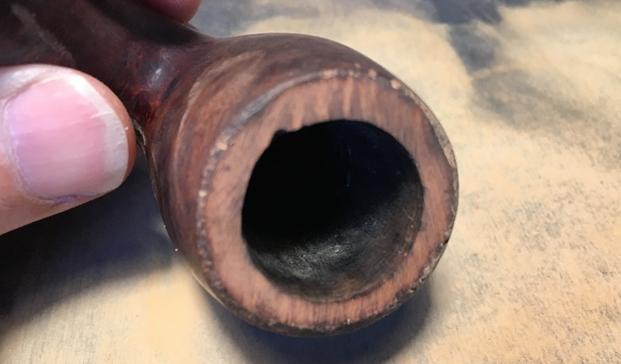
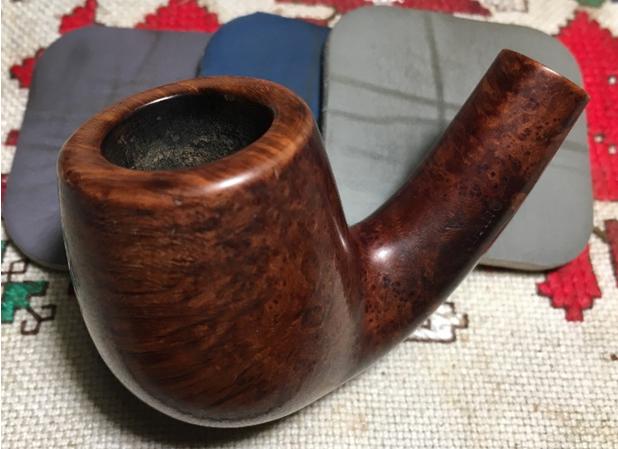
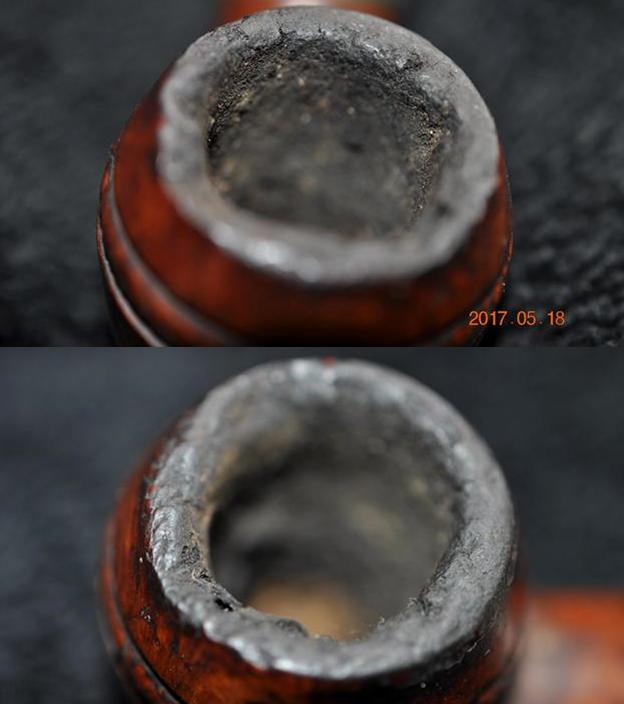
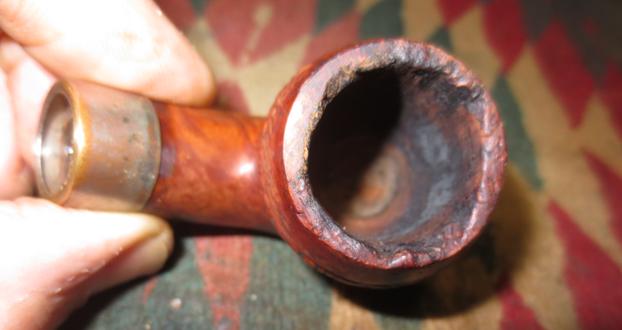
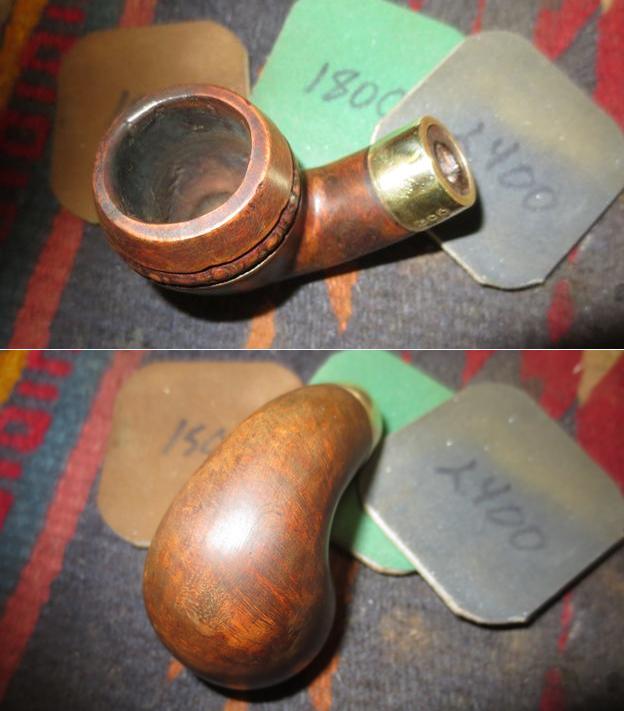
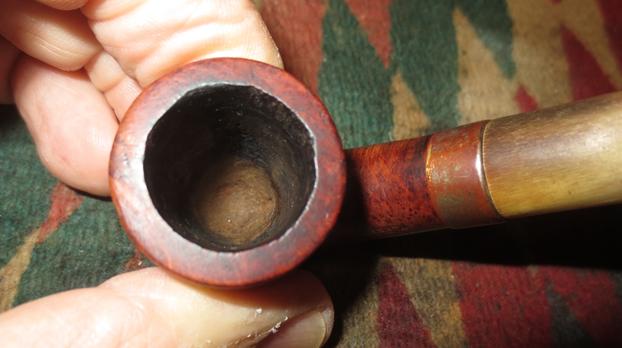
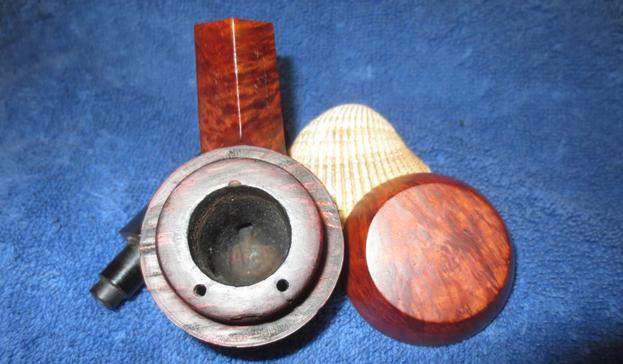
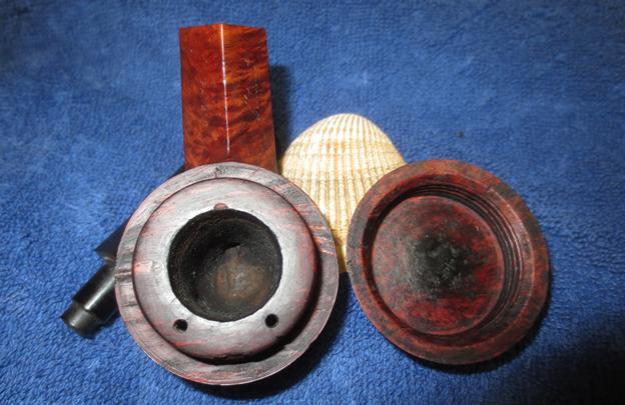
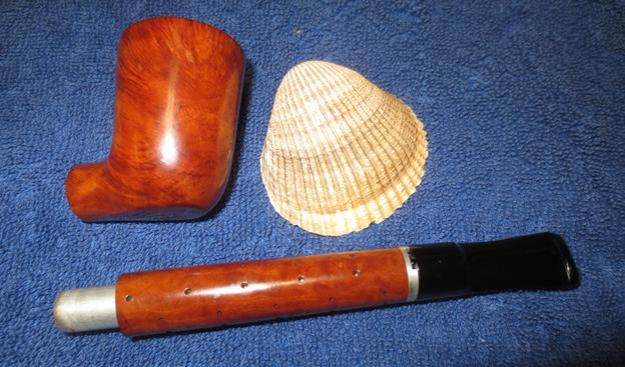
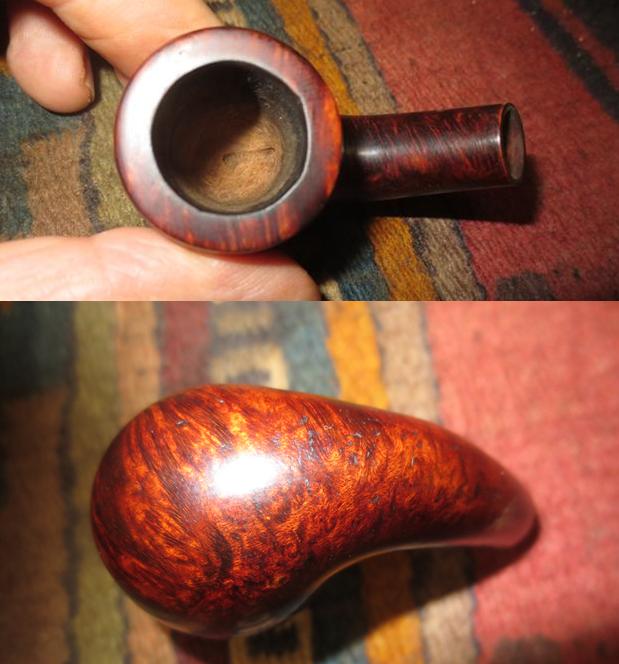
 I took a close up of the rim to show the damaged condition of the edges. It really is a mess and will be an interesting restoration. The idea is to get it back to a smooth condition without changing the profile of the pipe.
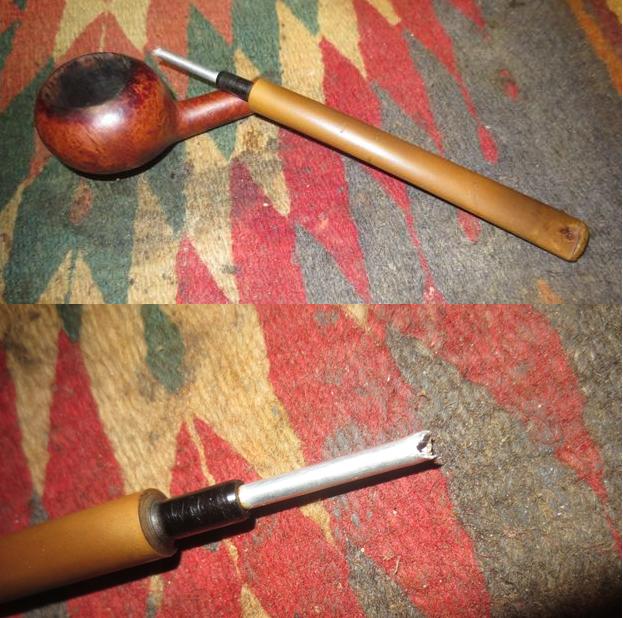
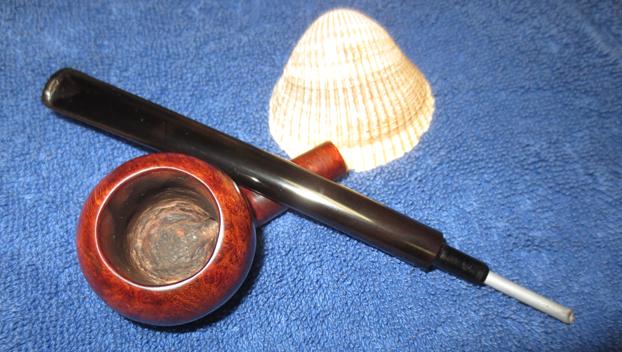
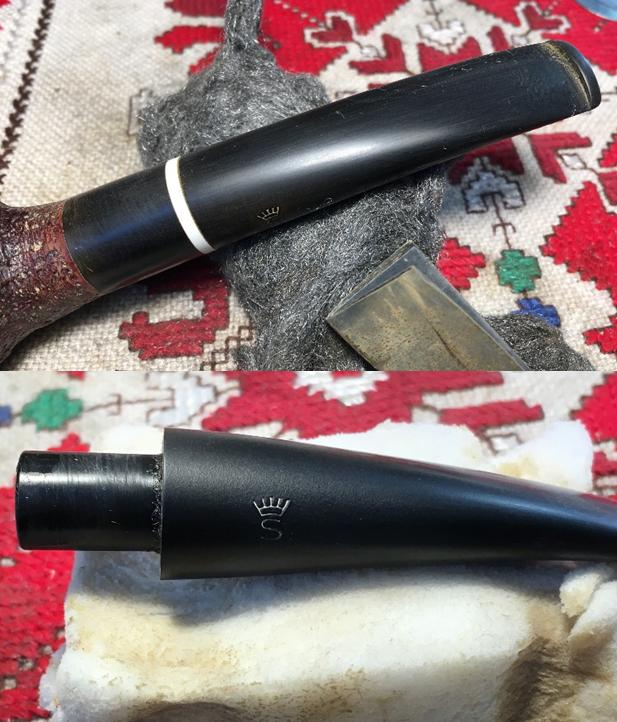
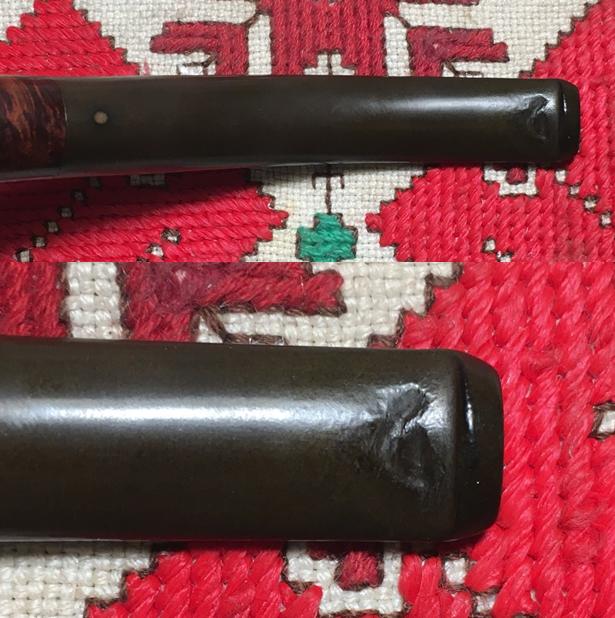
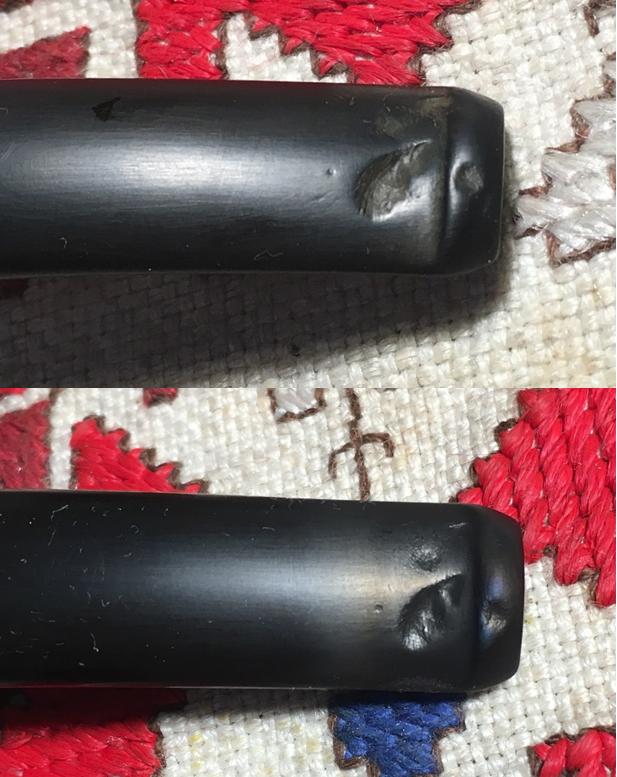
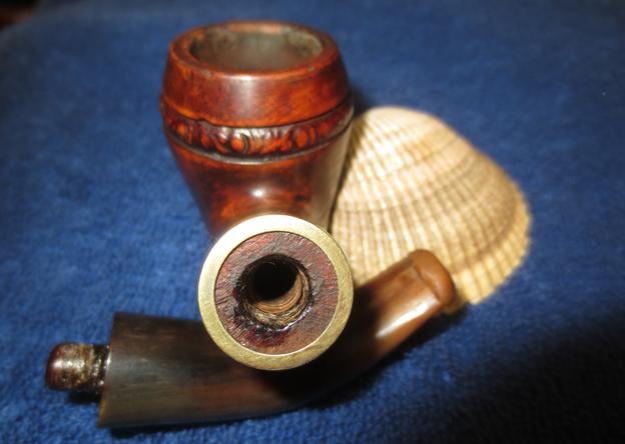
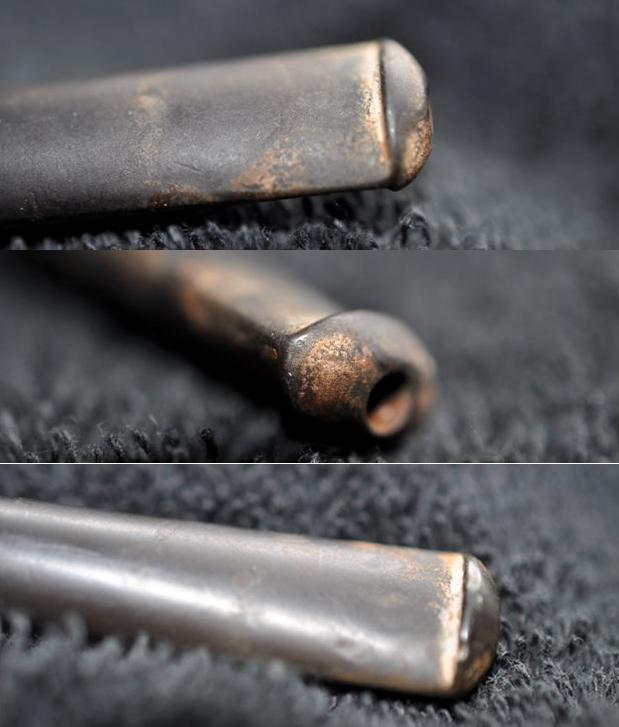
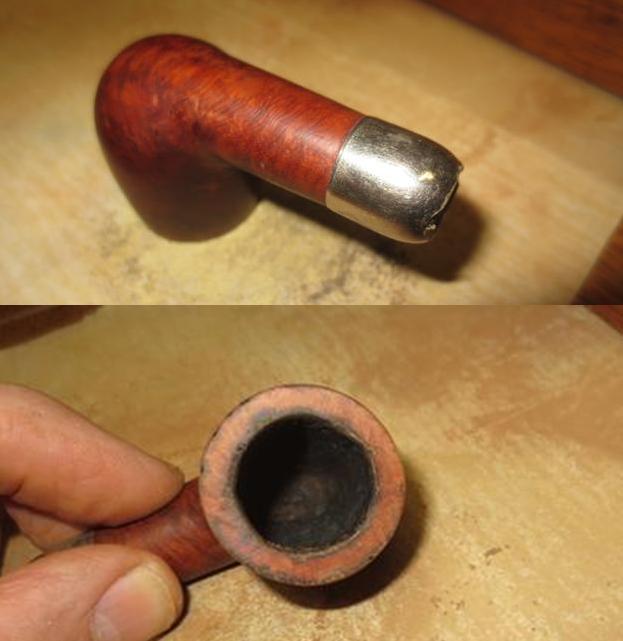
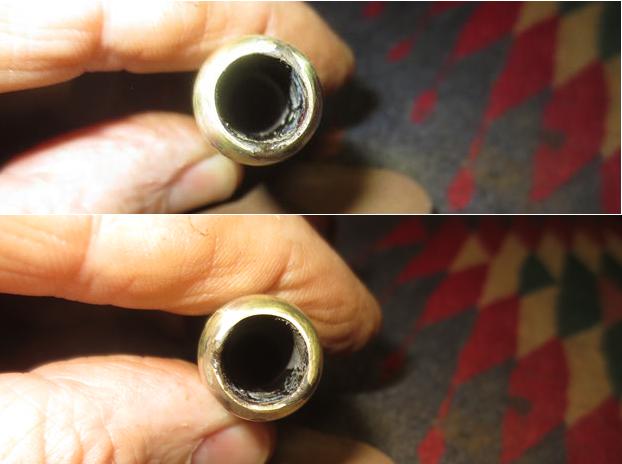
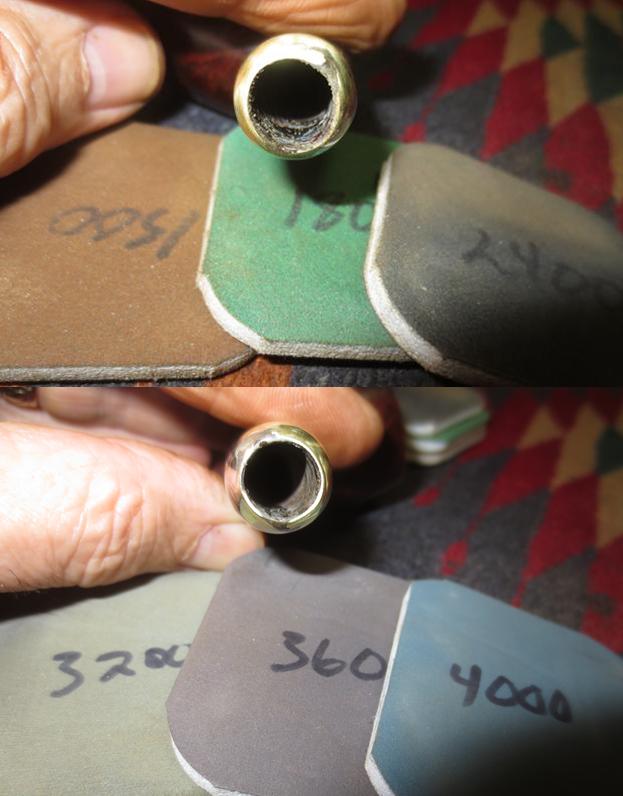
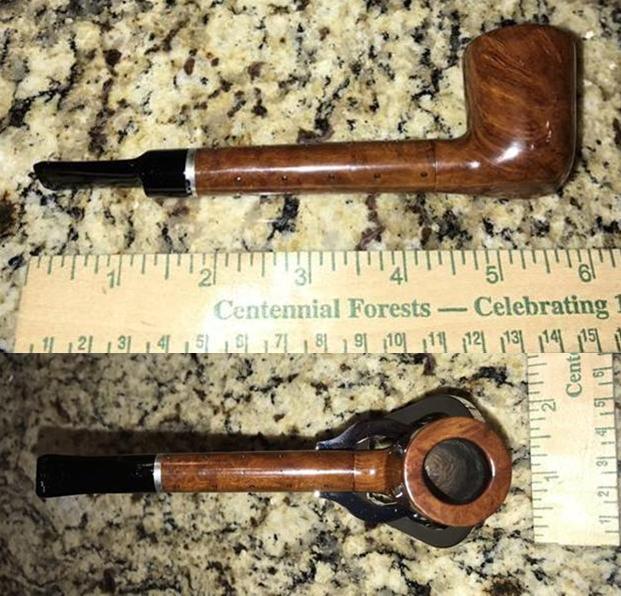
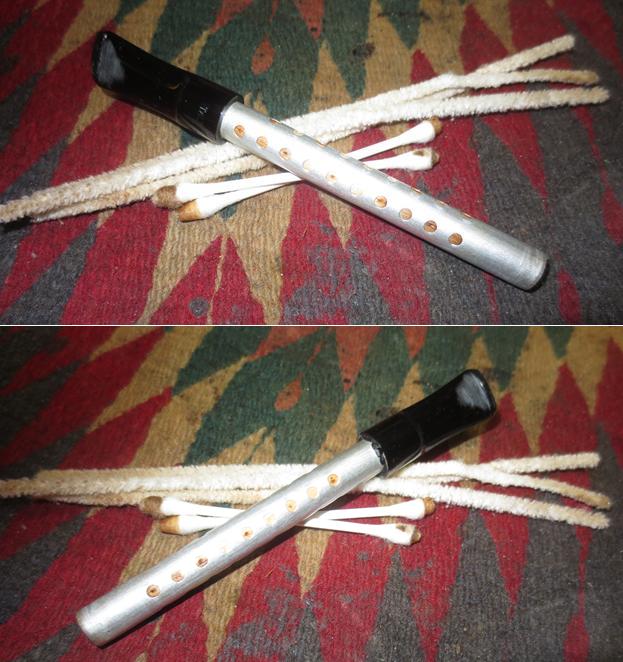
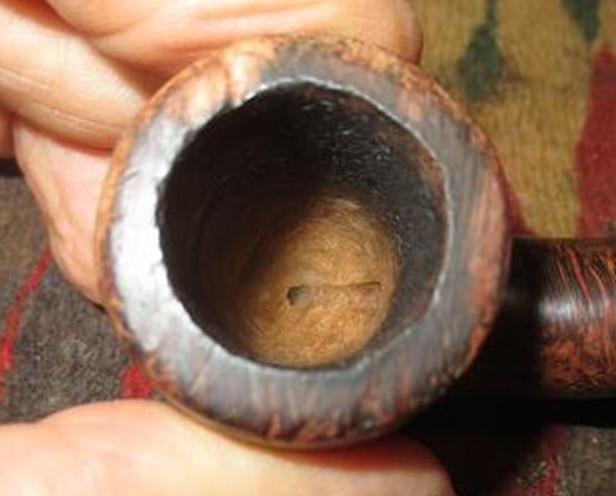 A lot of the grime and grit on the stem disappeared in the OxiClean soak. The dark line on the top left of the stem disappeared and showed that there were no cracks in the “Unbreakable Bit”. There were some tooth marks on both sides of the stem near the button. The ones on the underside were definitely deeper. The last photo below shows the inner tube from the button end view.
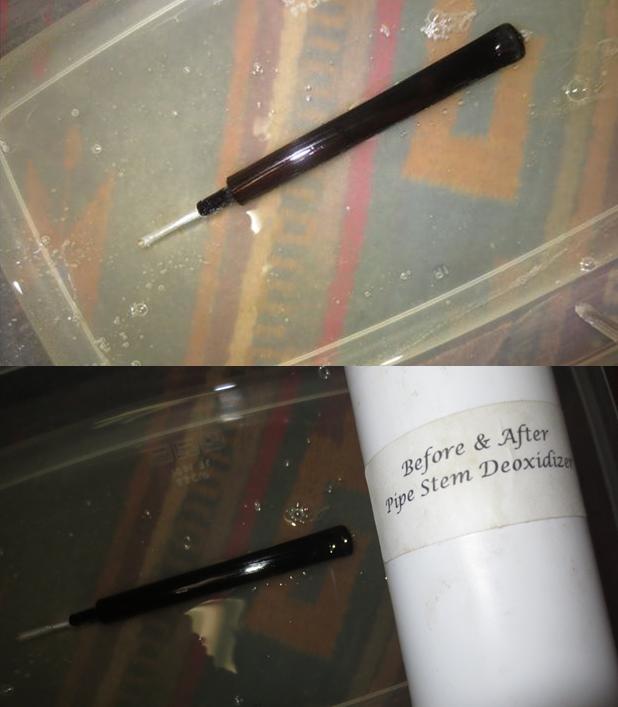
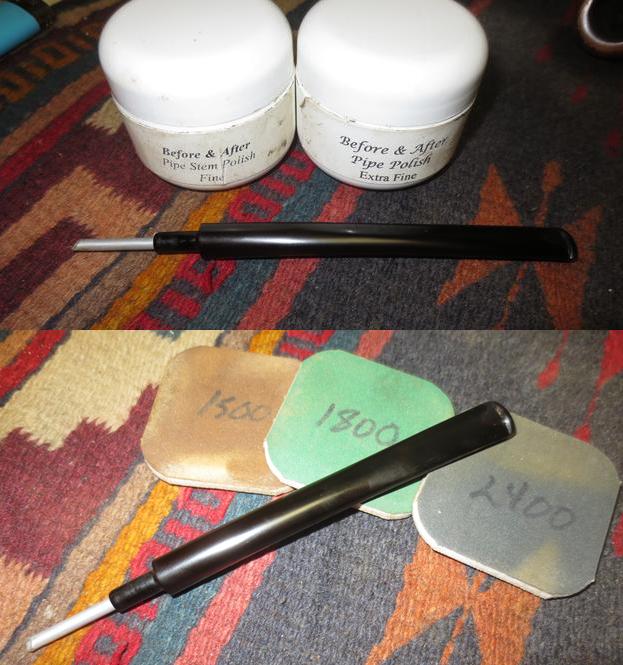
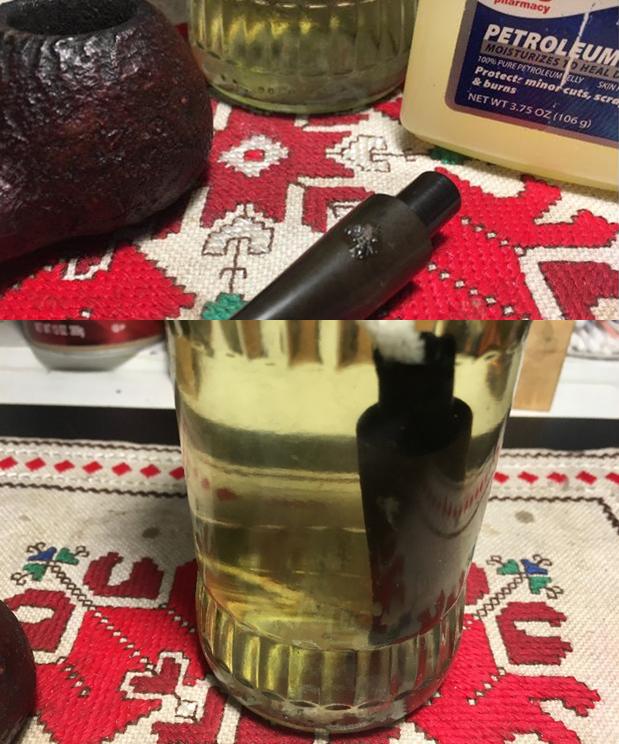
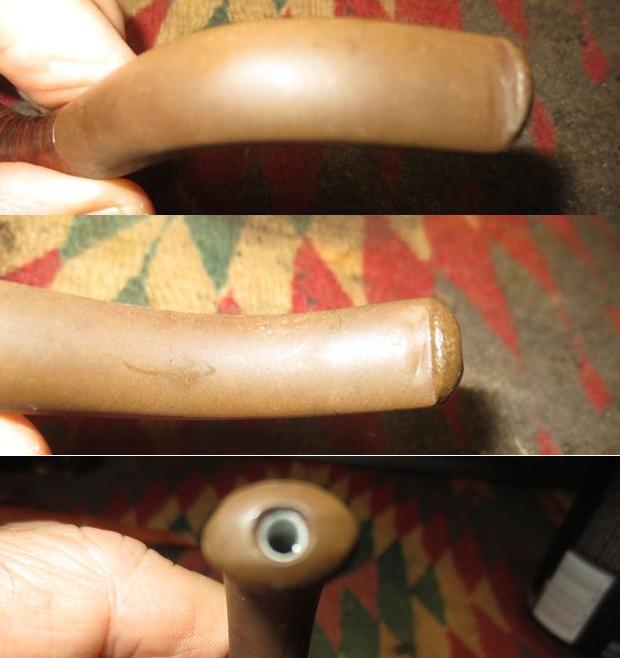 I decided to try something a little different this time around on the removal of the oxidation. Months ago I had purchased some Before & After Pipe Stem Deoxidizer from a guy on Facebook. His name is Mark Hoover and he is on the Gentlemen’s Pipe Smoking Society Group on Facebook. He has a pen making site where you can email and order the deoxidizer and the polishes (http://www.lbepen.com/). I have actually never used it according to the directions. I have sponged it on and scrubbed it off. In talking with Mark the concept was simple – put the stem in the Deoxidizer to soak. The Deoxidizer will do its work and leave the stem oxidation free. With a bit of skepticism I poured the mixture into a tray and set the stem in it to soak overnight.
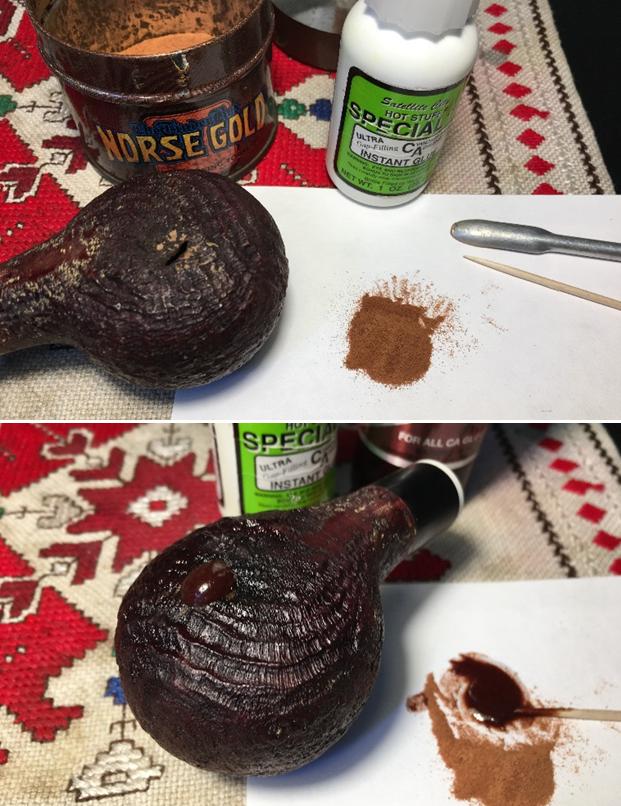
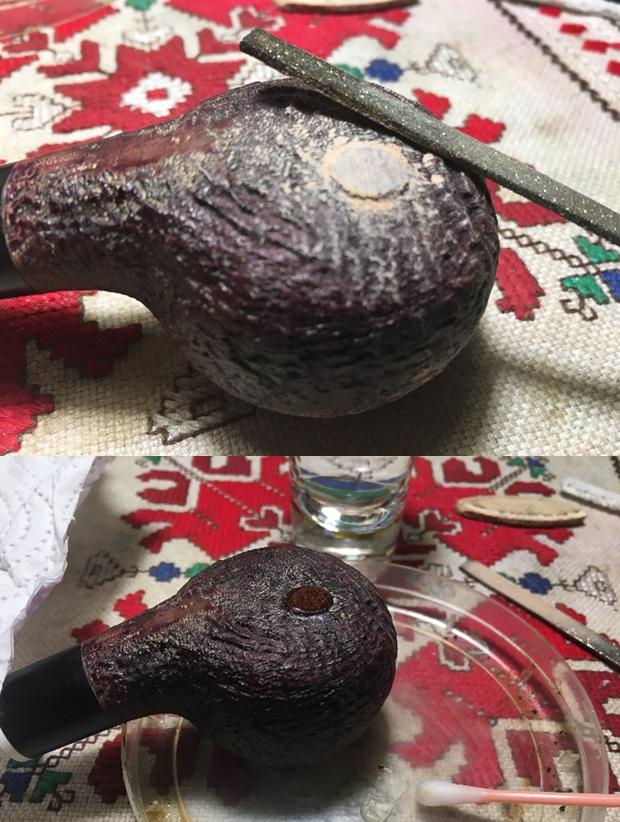
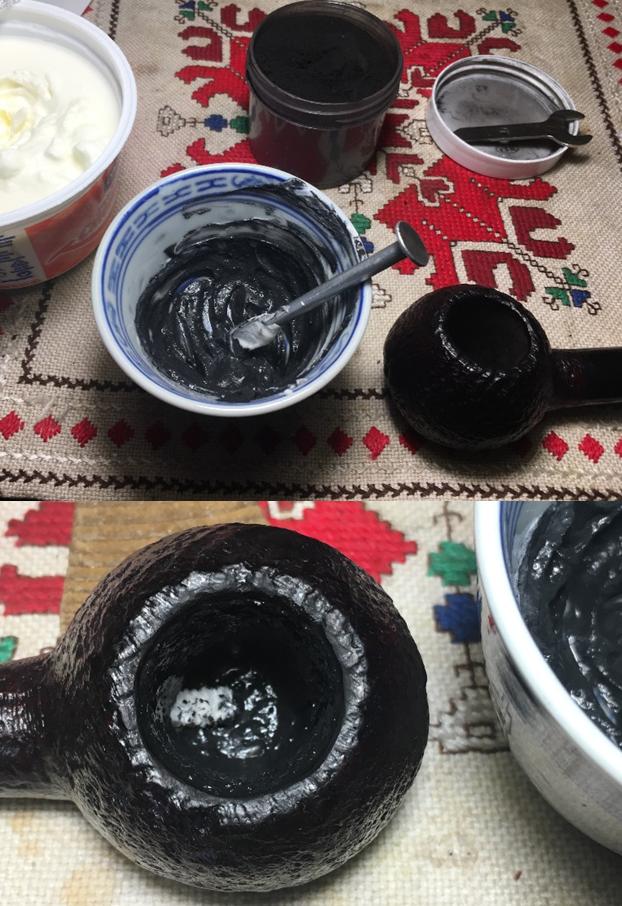
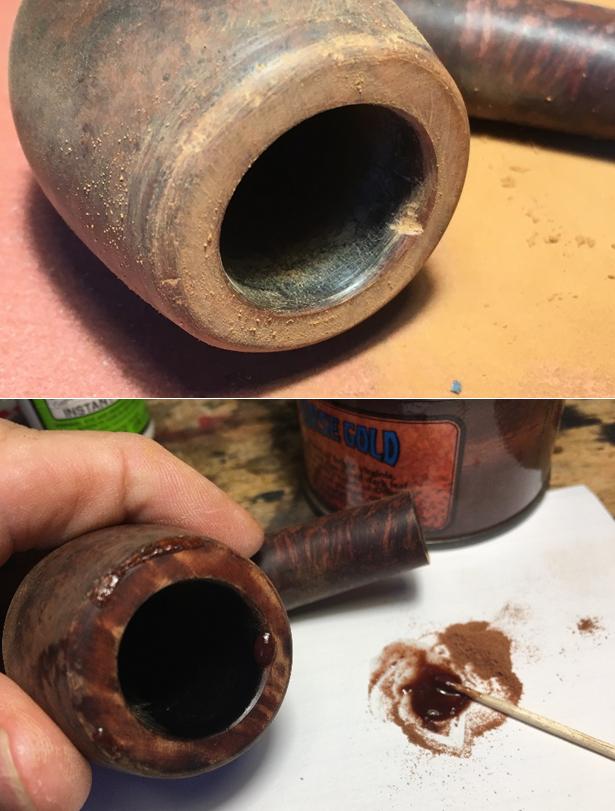
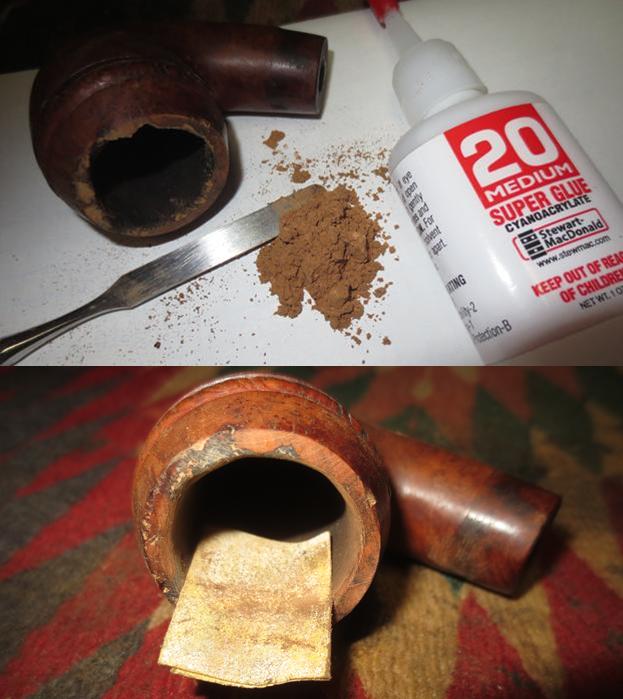
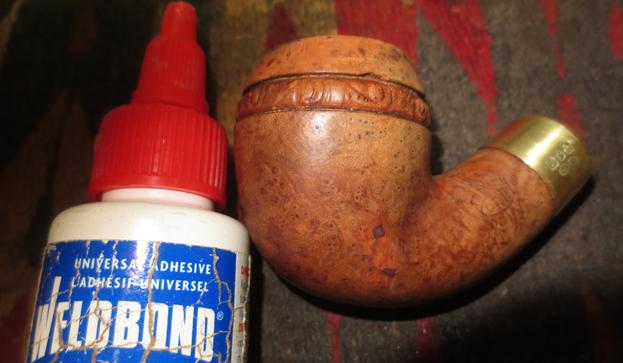
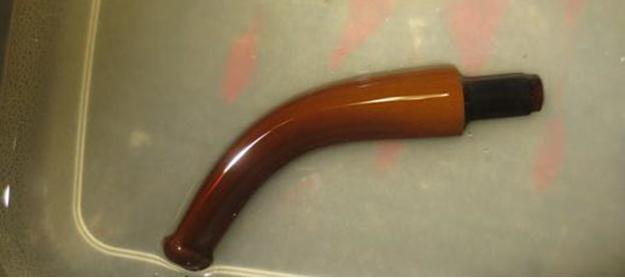 I worked on the bowl for a while that evening before calling it a day. I lightly topped the bowl to remove some of the damage on the top surface of the rim and leave a flat, smooth surface. I wiped down the bowl with alcohol on a cotton pad to remove the dust. I carefully filled in the outer rim edge with clear super glue to build up the chipped and damaged areas. I think that this is the first time that I have worked on a pipe with this much damage and chipping all the way around the outer rim.
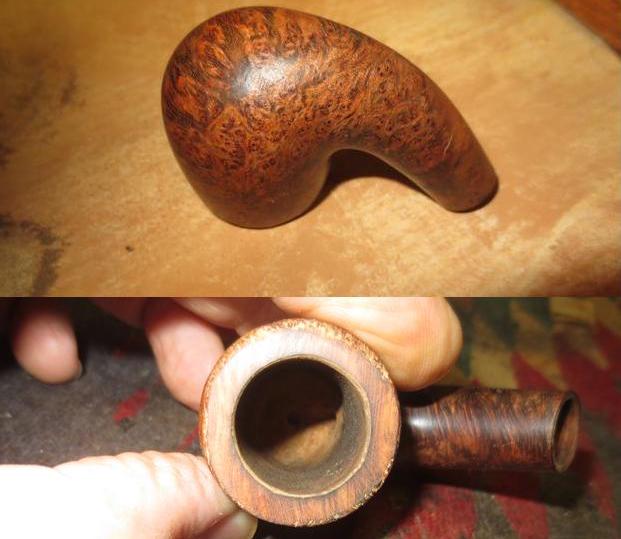
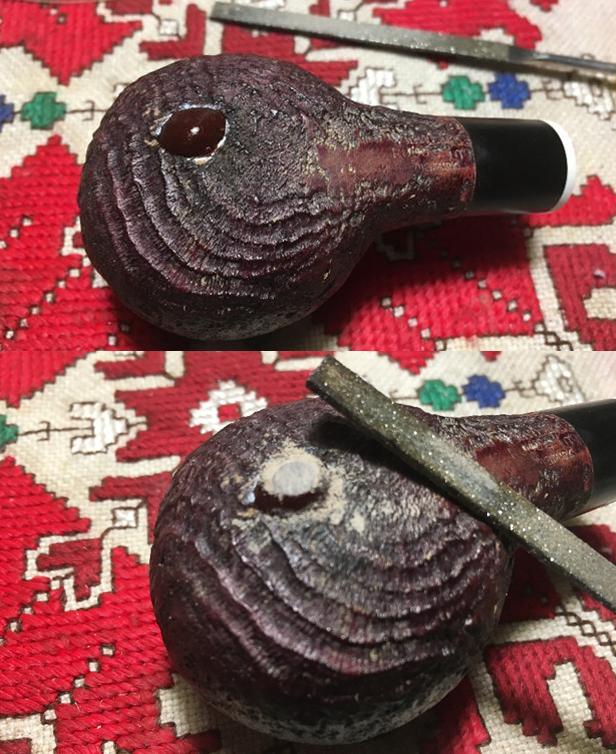
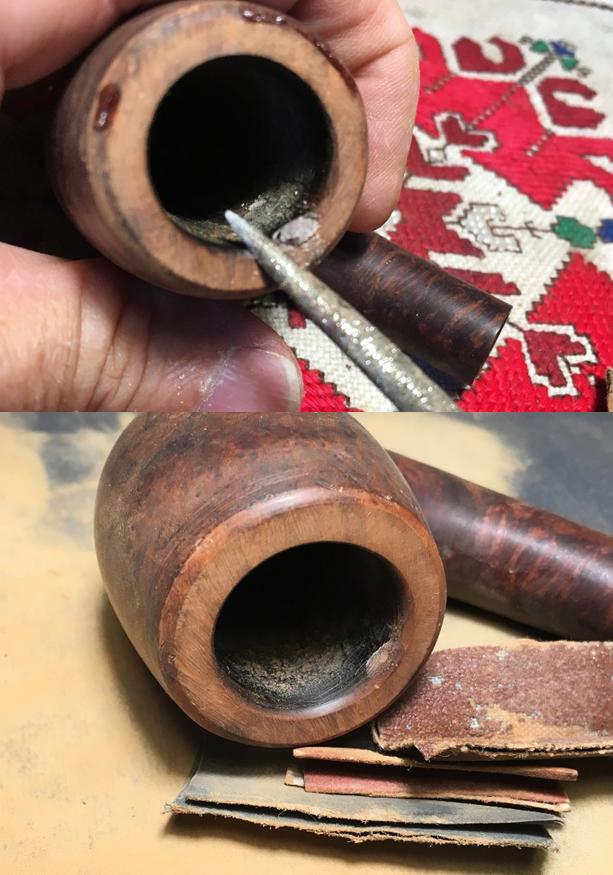
 It did not take too long for the glue to dry and when it did I sanded the outer edge of the rim smooth blending the fills into the surface of the briar and ‘sharpening’ the edge itself. The photos that follow tell the story.
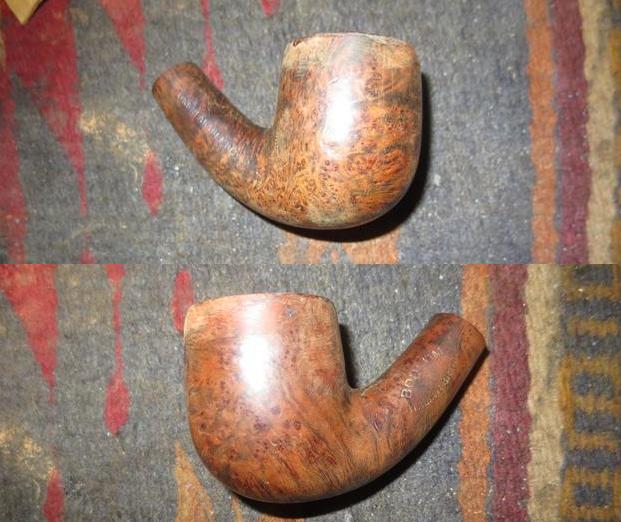
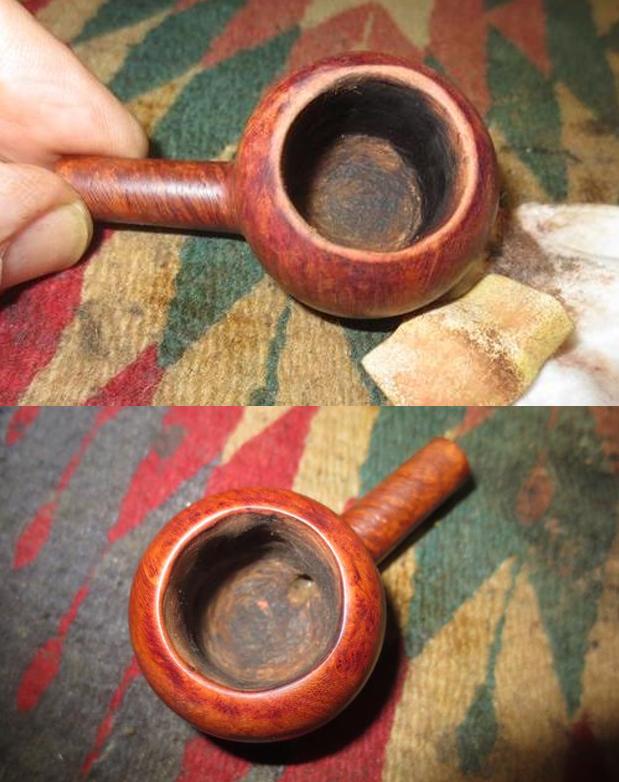
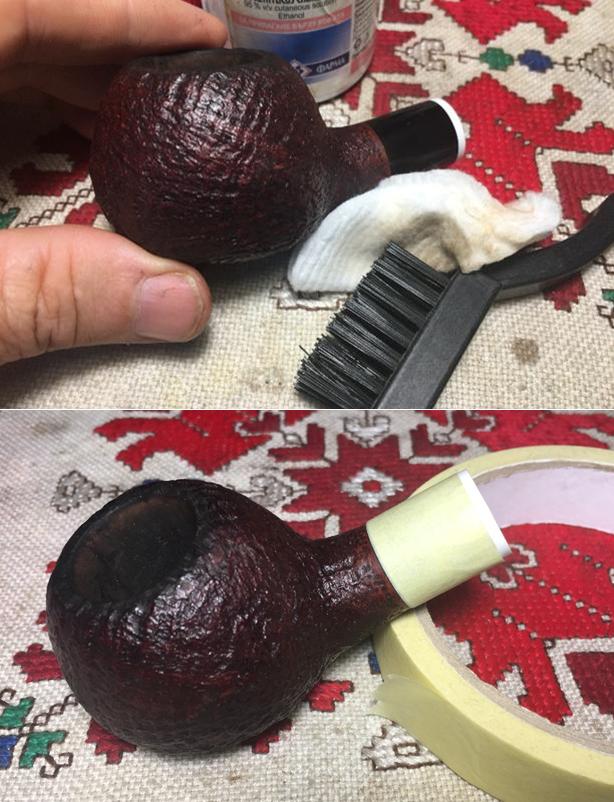
 When I finished smoothing out the fills I wiped the bowl down with alcohol on a cotton pad to remove the sanding dust and check to make sure I had sanded the rim edge enough. If any spots are still too large and not blended they will show up glaringly when the bowl is stained.
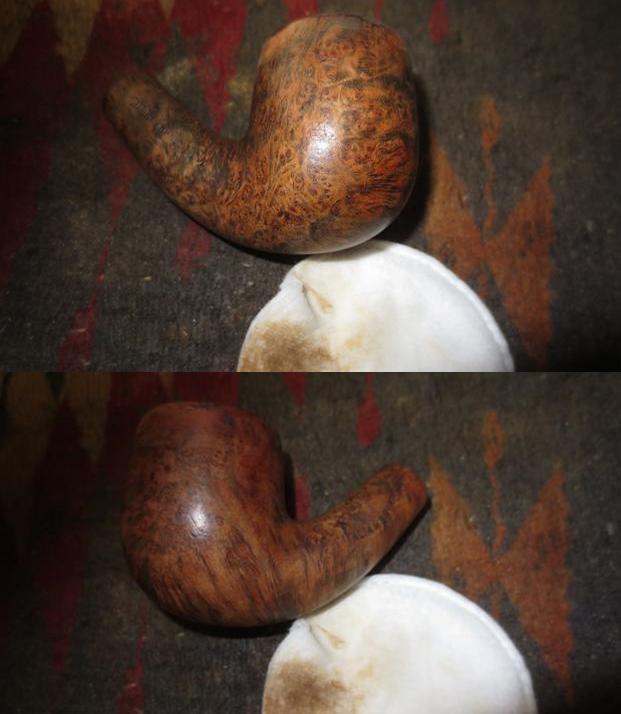
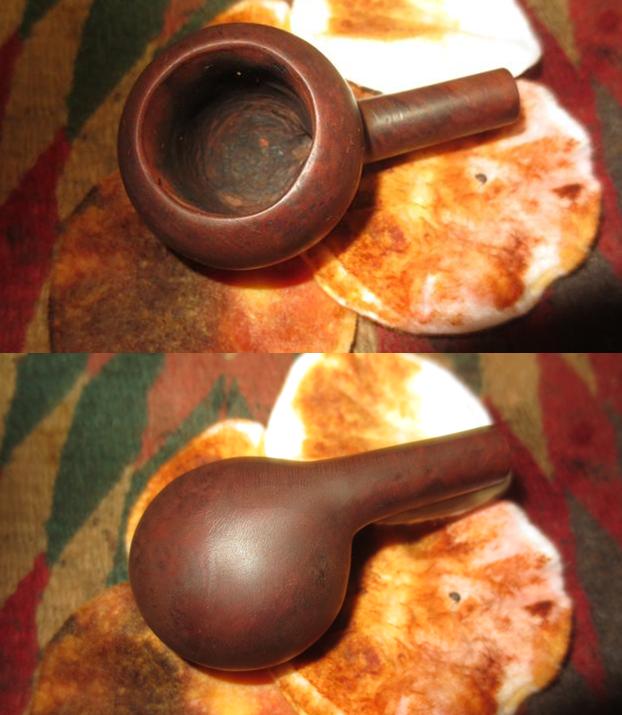
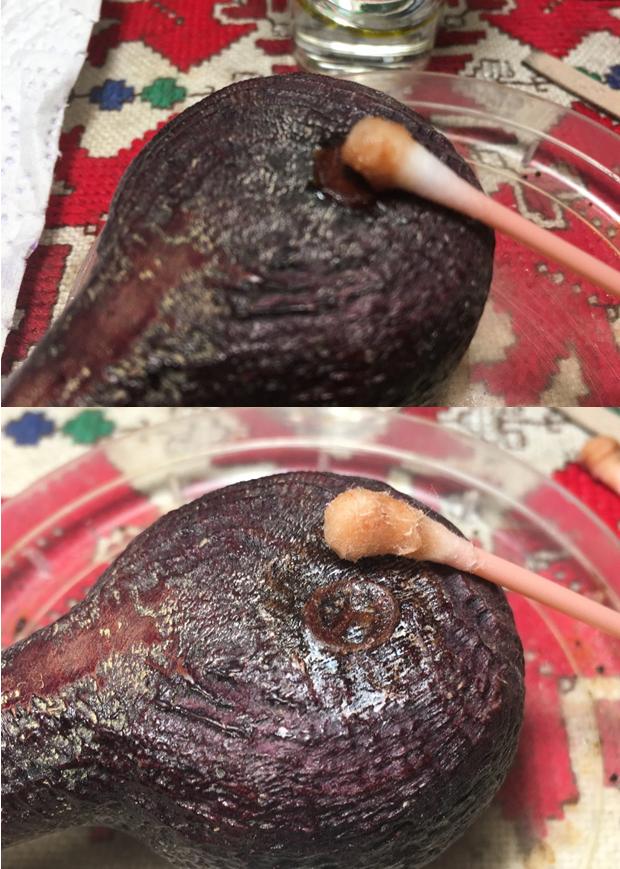
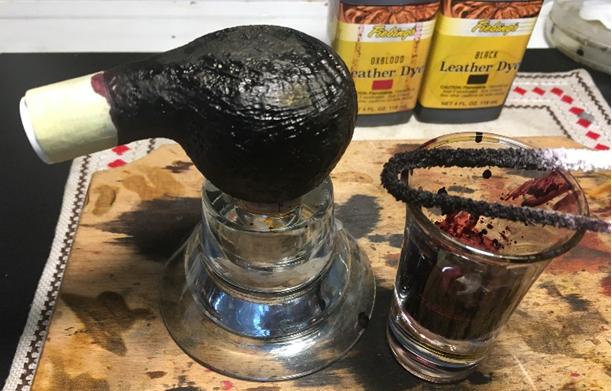
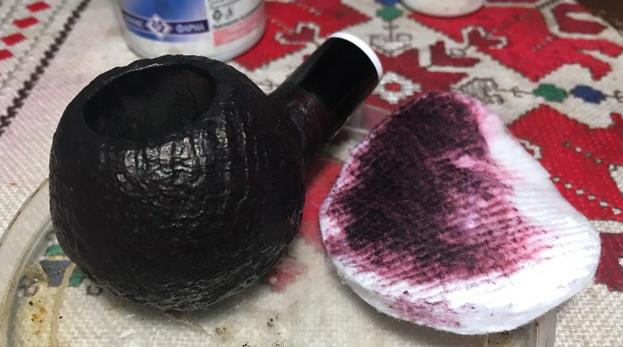
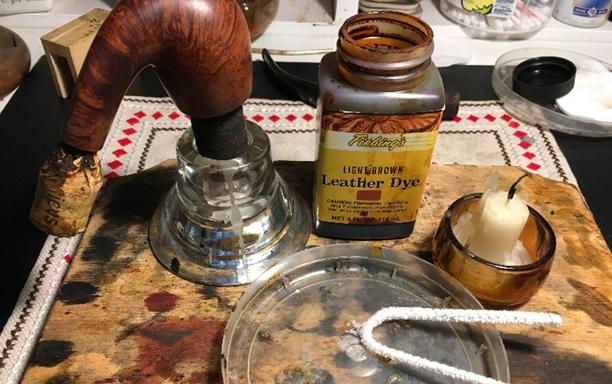
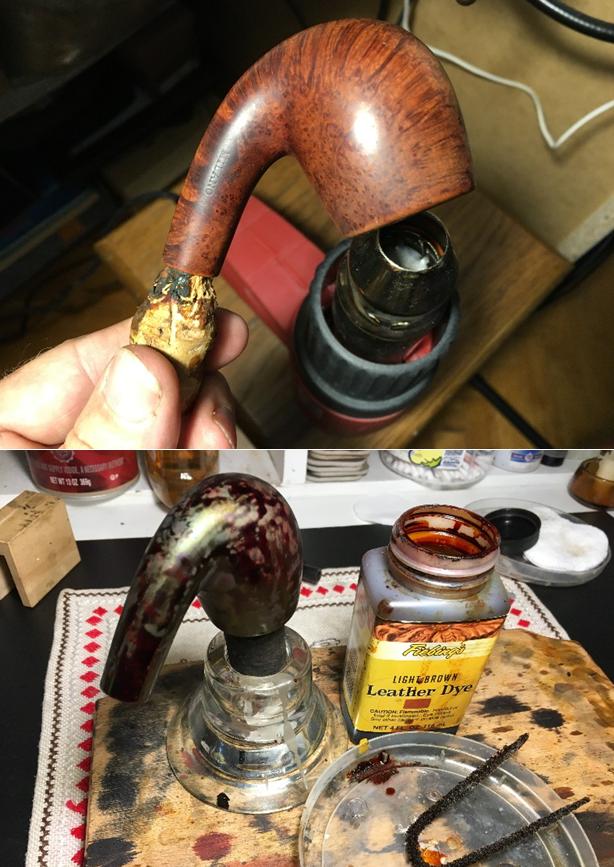
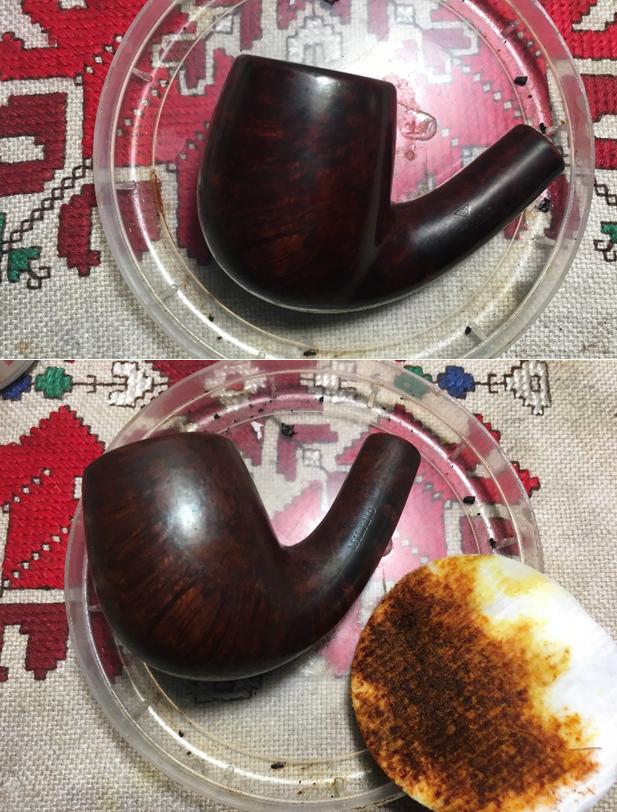
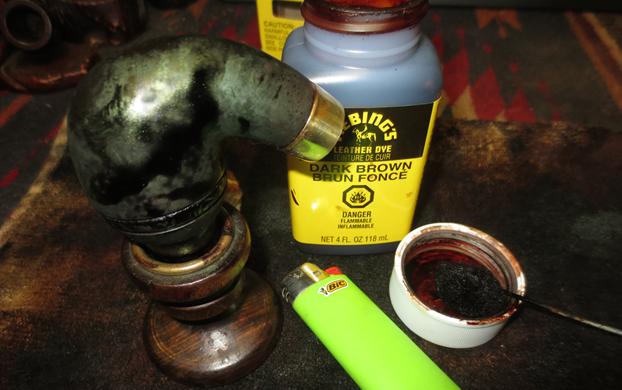
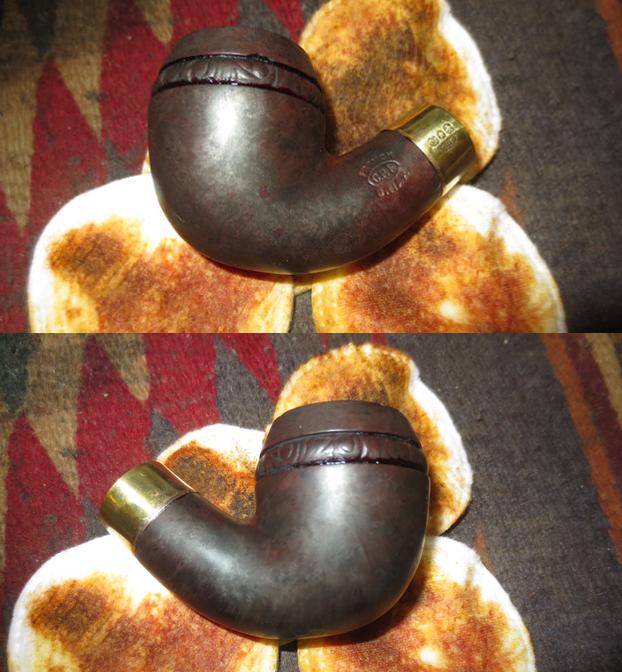
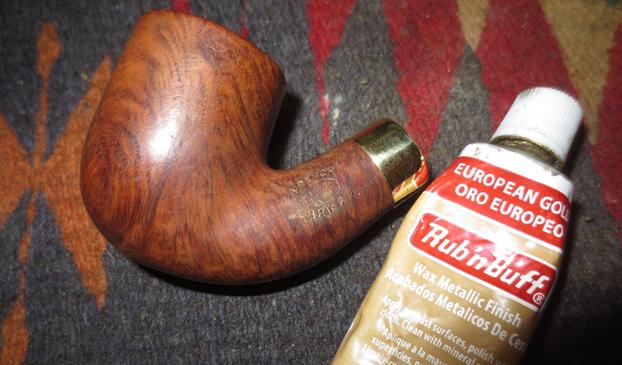
 I stained the bowl with a dark brown aniline stain mixed 50/50 with isopropyl alcohol. I flamed the stain on the bowl and repeated the process until the coverage was even. I set the bowl aside for the evening. In the morning I “unwrapped” the bowl (borrowing one of Dal Stanton’s terms) to see what the stain had done. I wiped it down with alcohol on cotton pads to make it more transparent. Once I finished it was still too dark to my liking and obscured the grain too much.
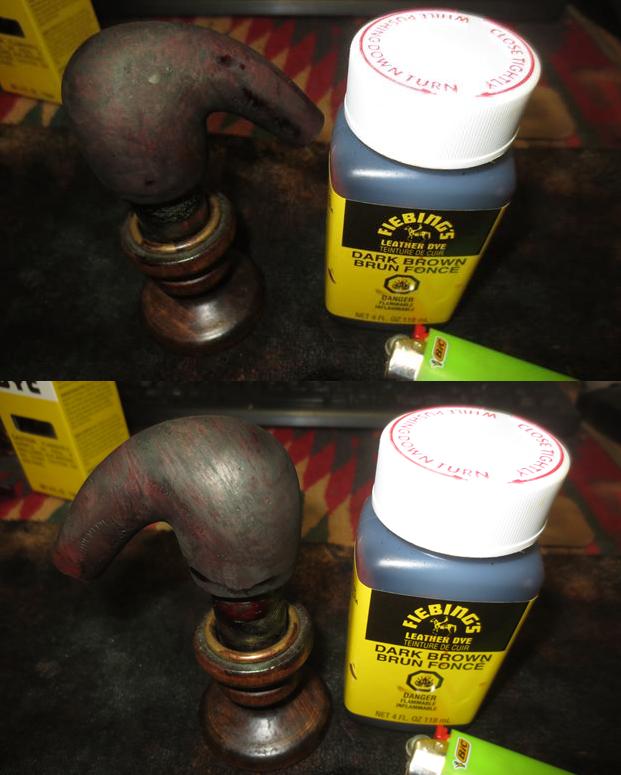
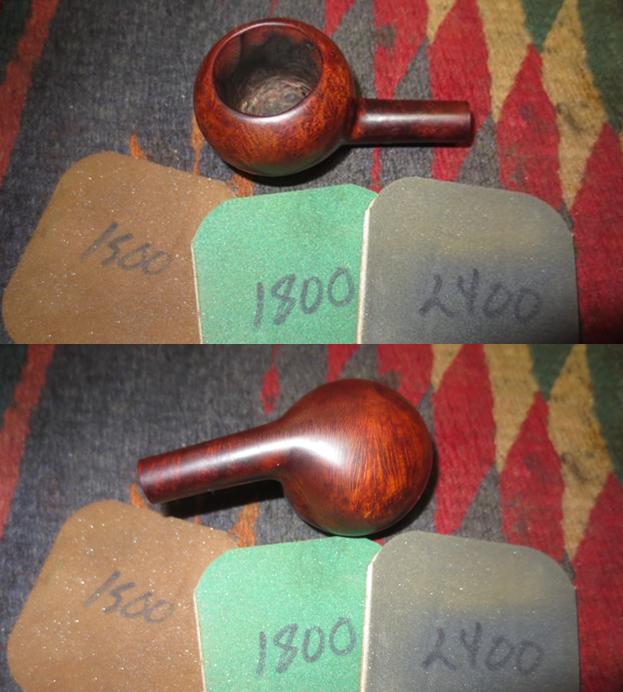
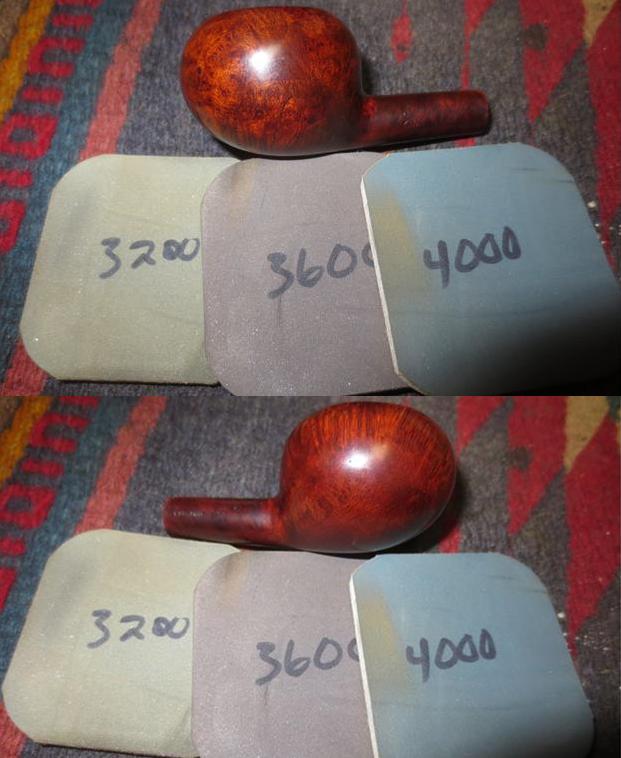
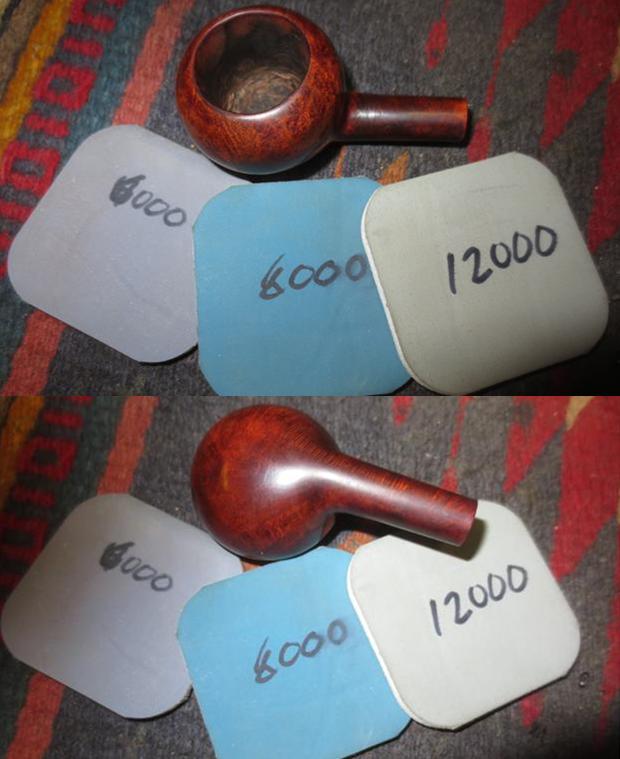
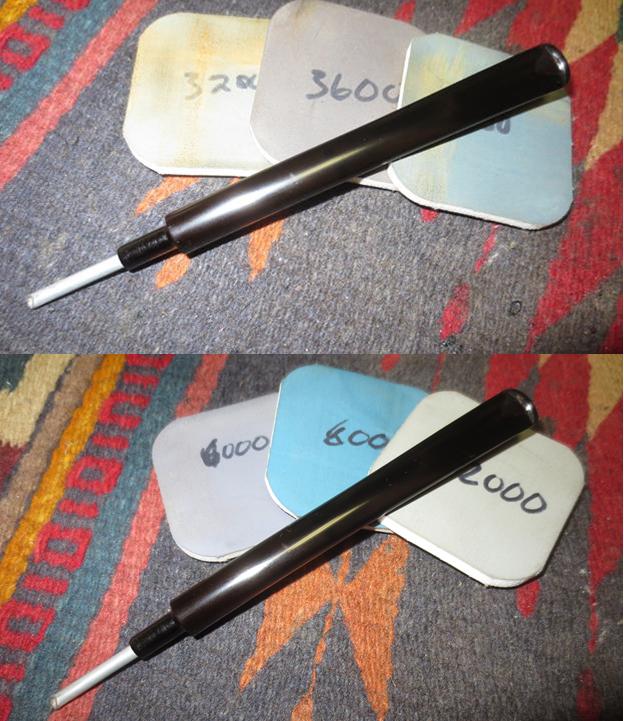
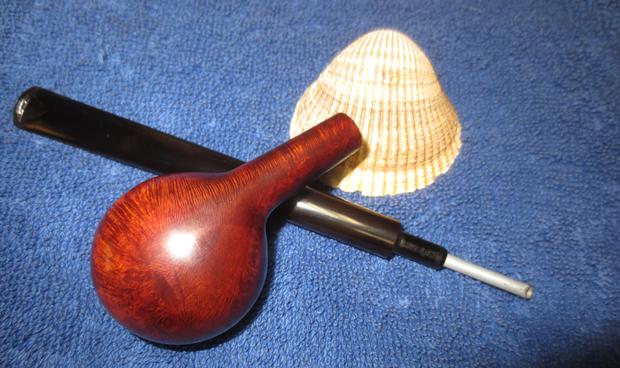
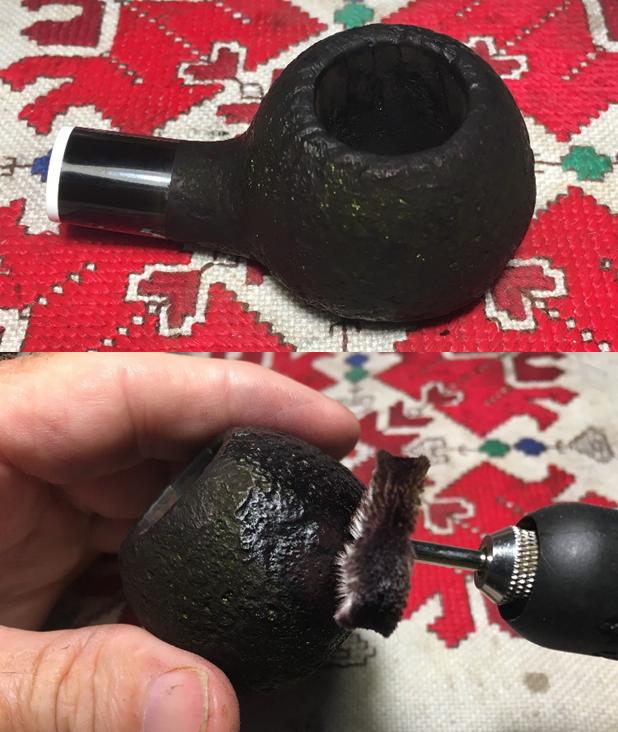
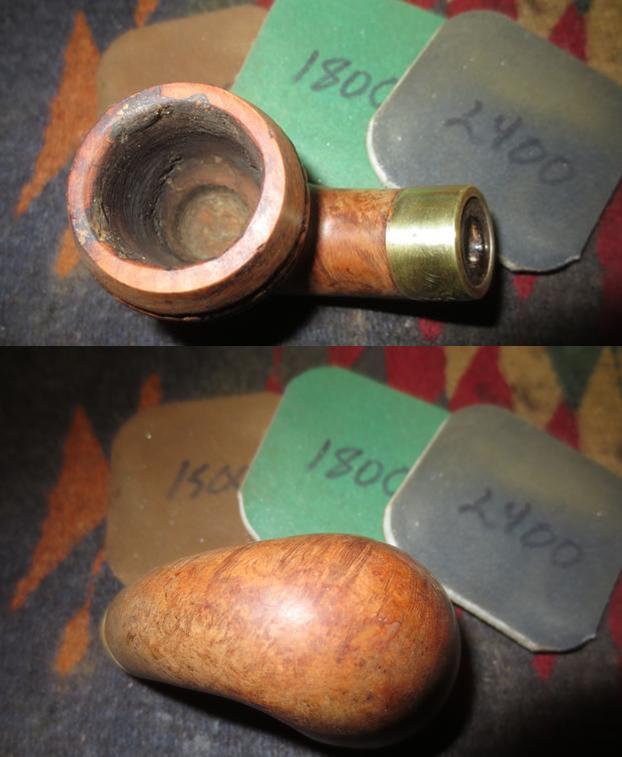
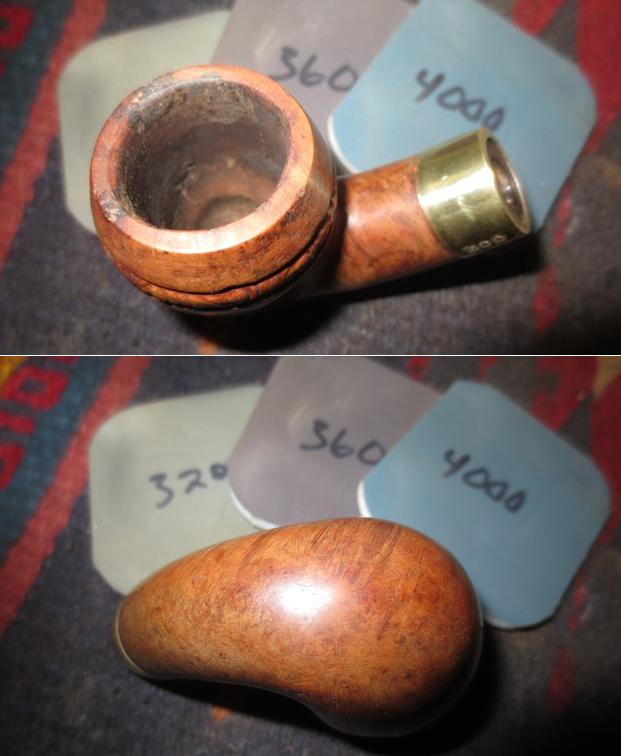
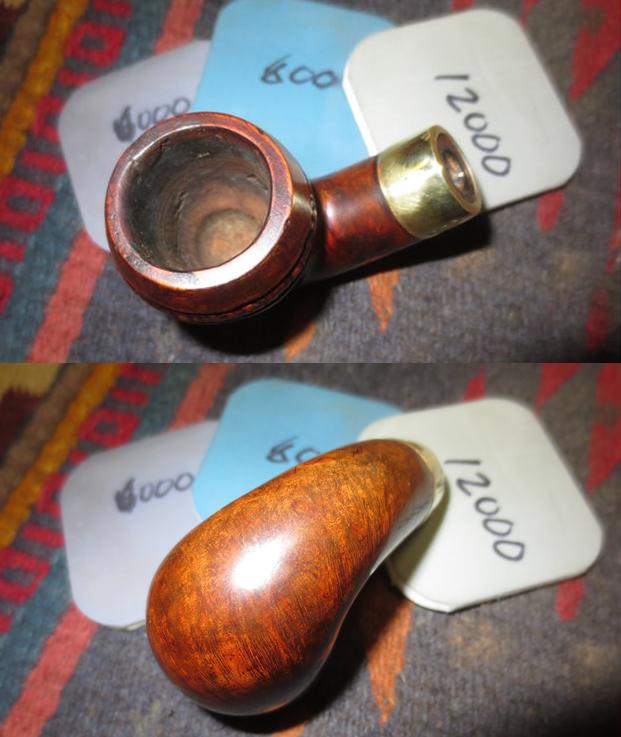
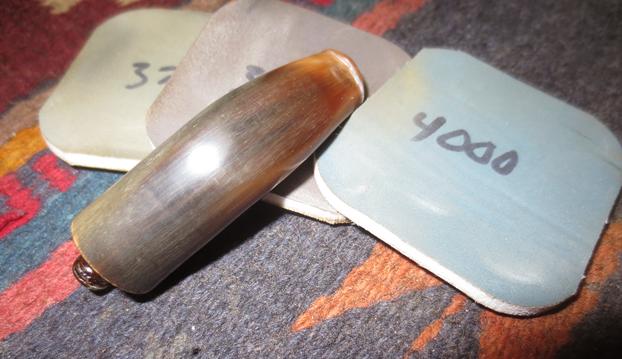
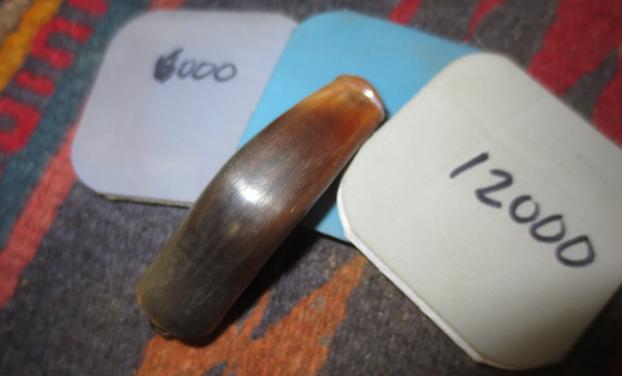
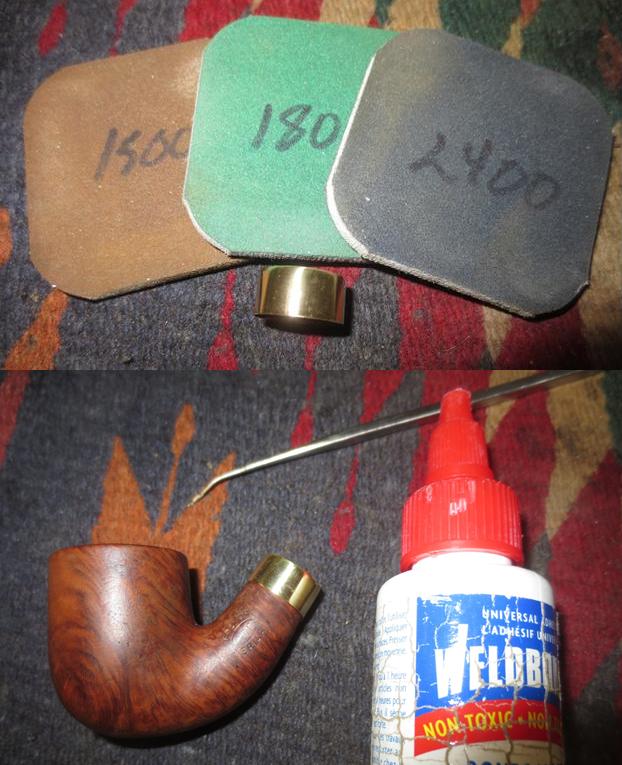
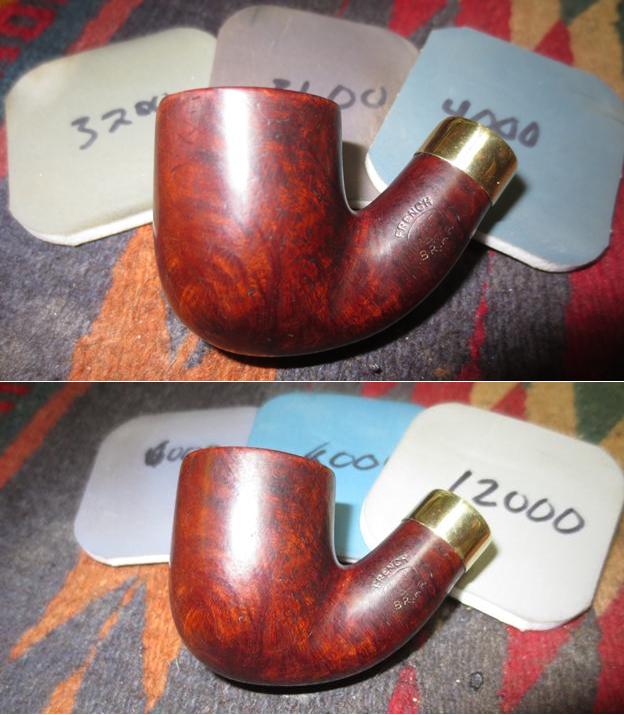
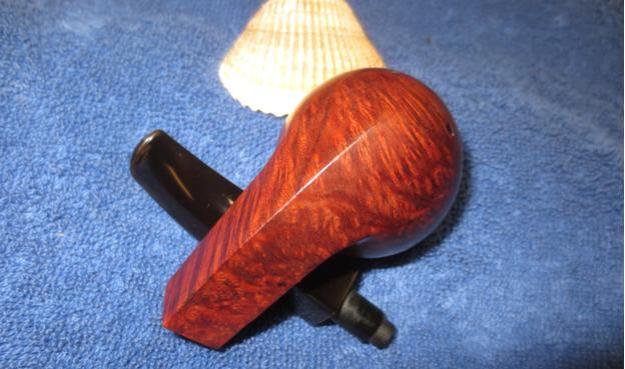
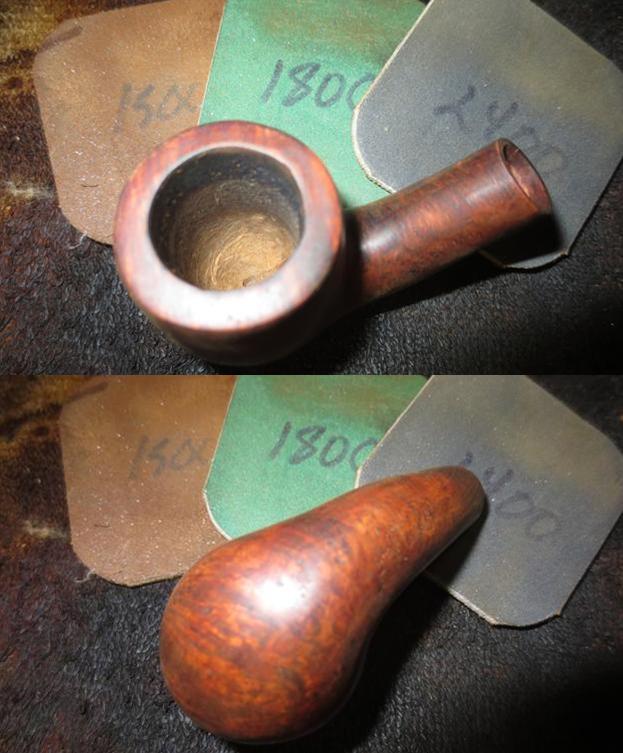
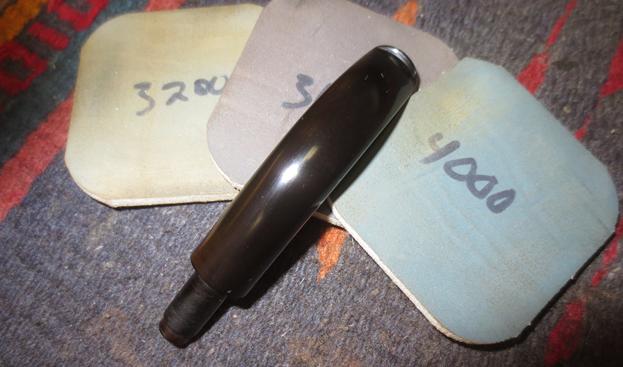
 I sanded the bowl with micromesh sanding pads to remove more of the stain. After sanding with 1500-2400 grit pads I wiped it down with a bit of alcohol on a cotton pad and I was pleased with what I was seeing. I polished it some more with 3200-12000 grit pads and finished by giving it a light buff with a microfiber cloth. Now the colour was what I was aiming for – a reddish brown that highlighted the grain and muted the repairs and some of the imperfections.
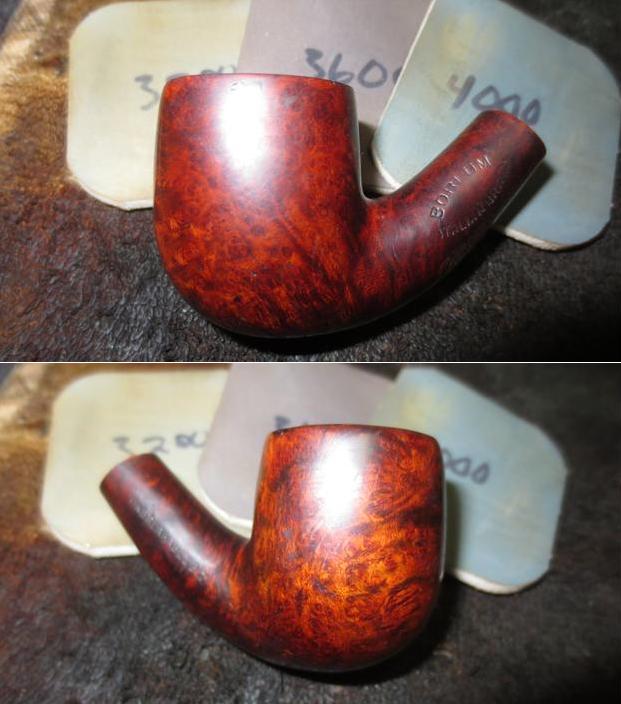

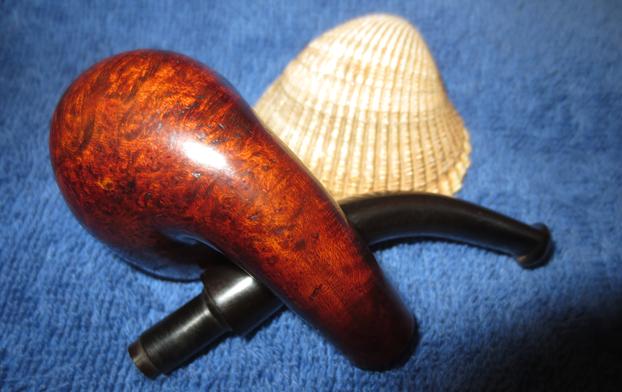
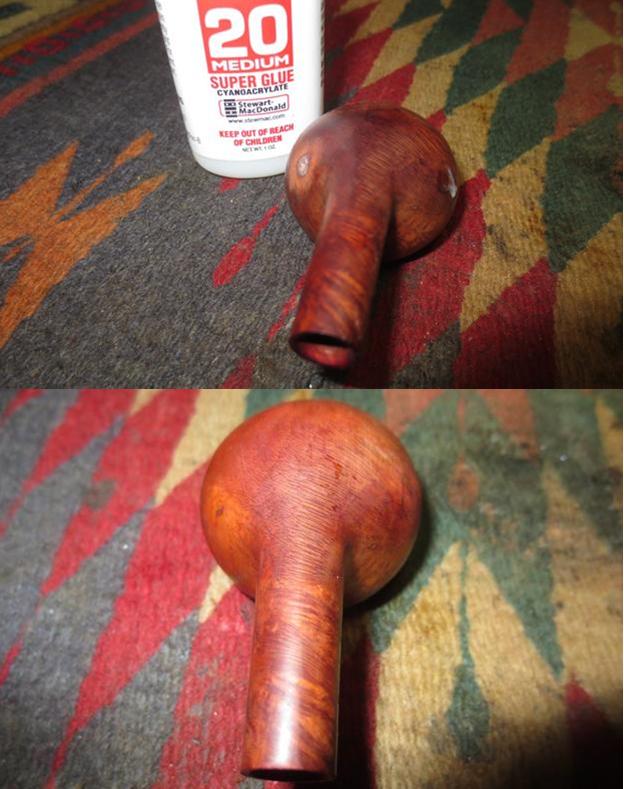
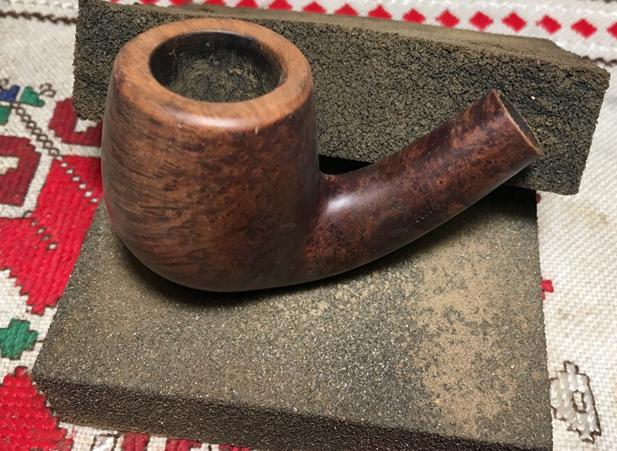
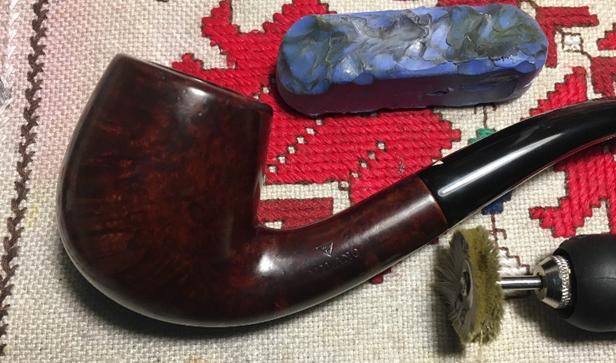
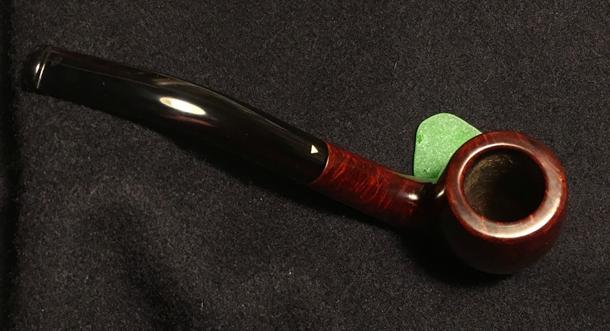
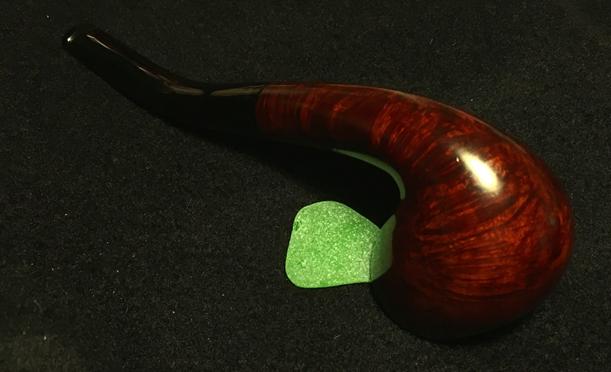
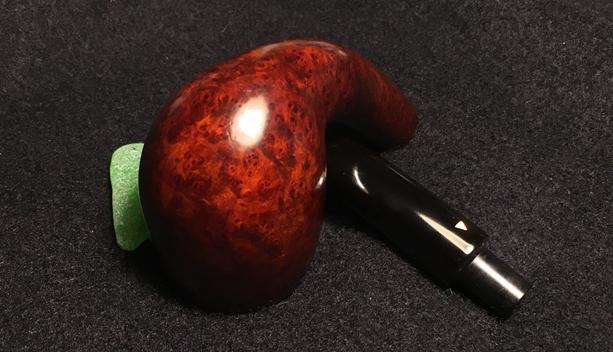
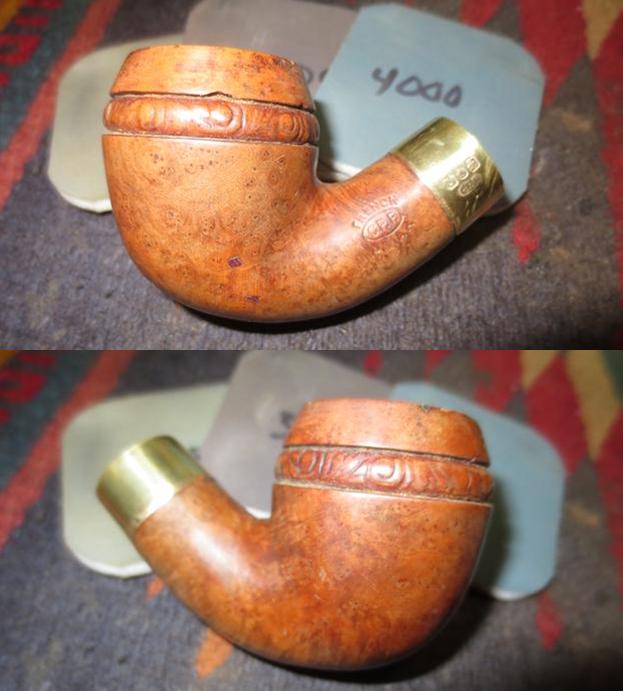
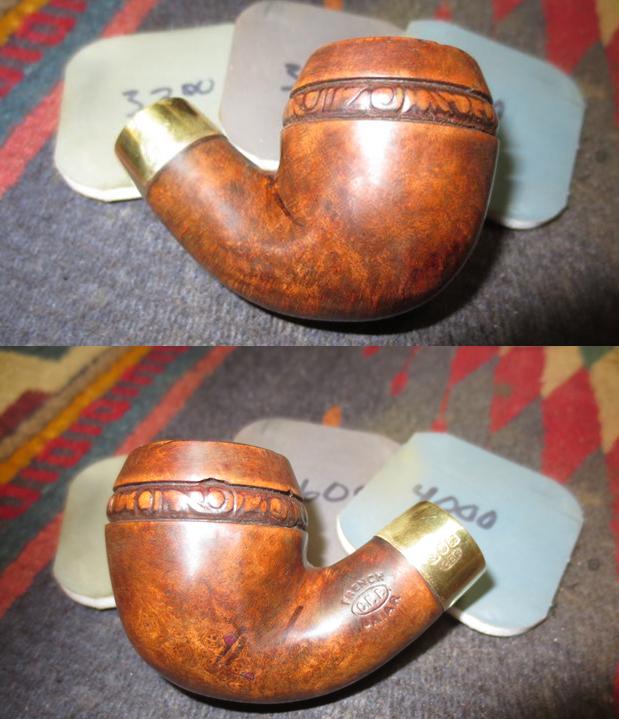
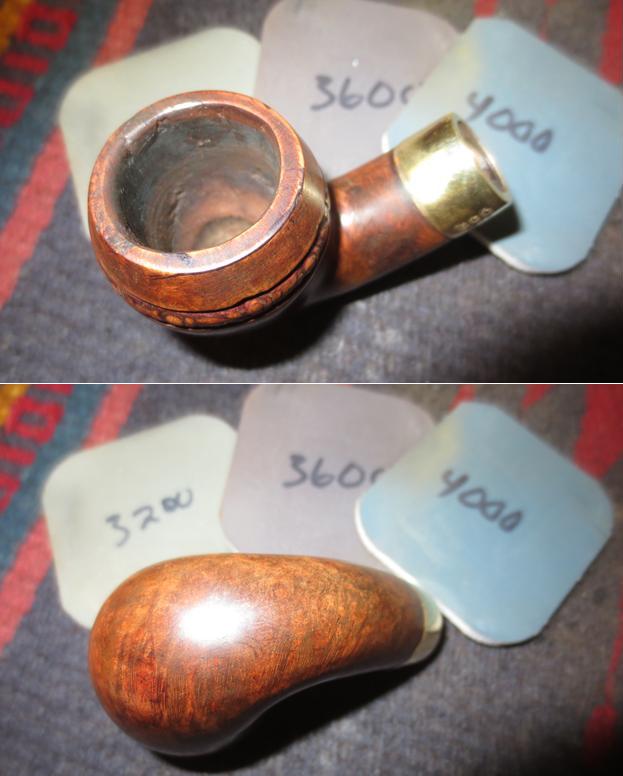
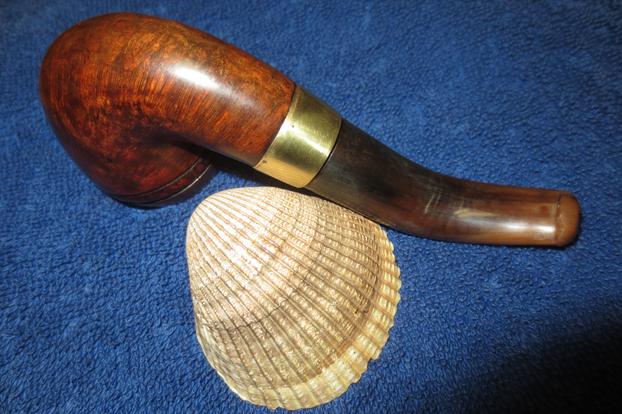
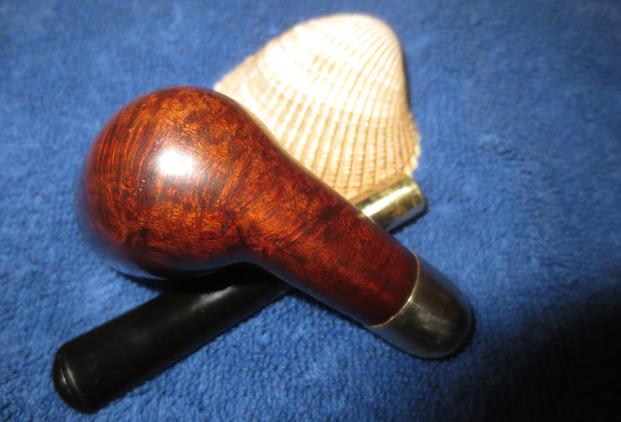
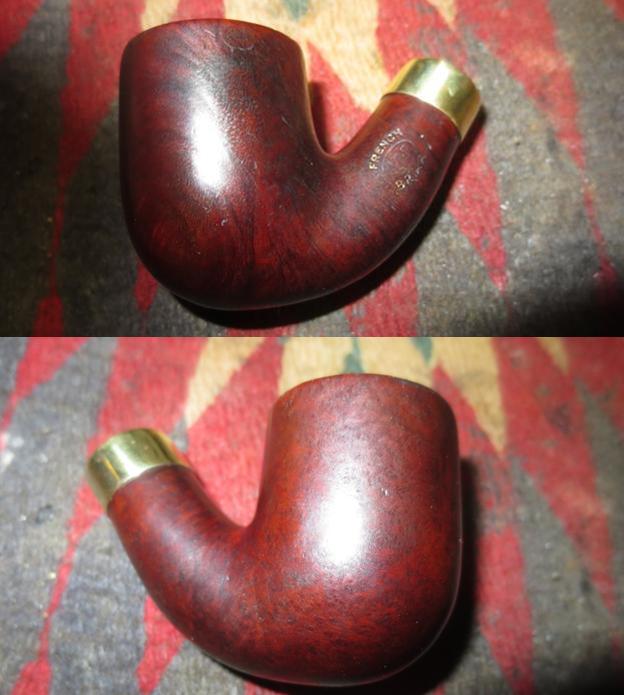
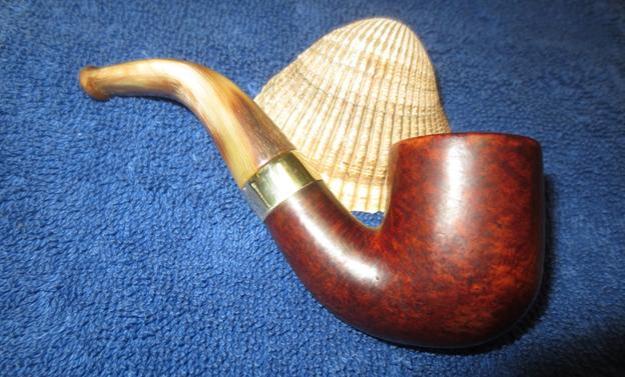
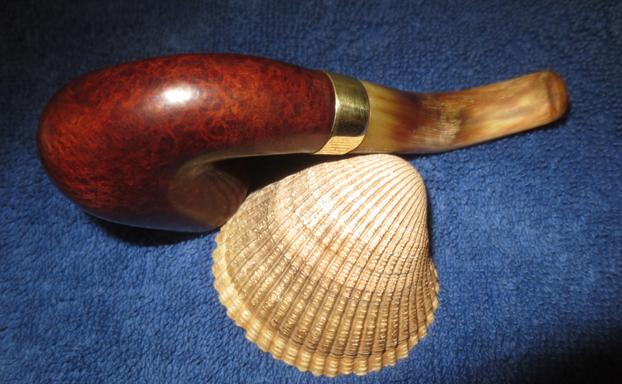
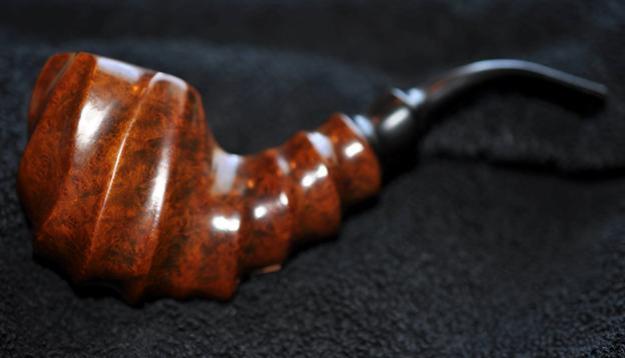
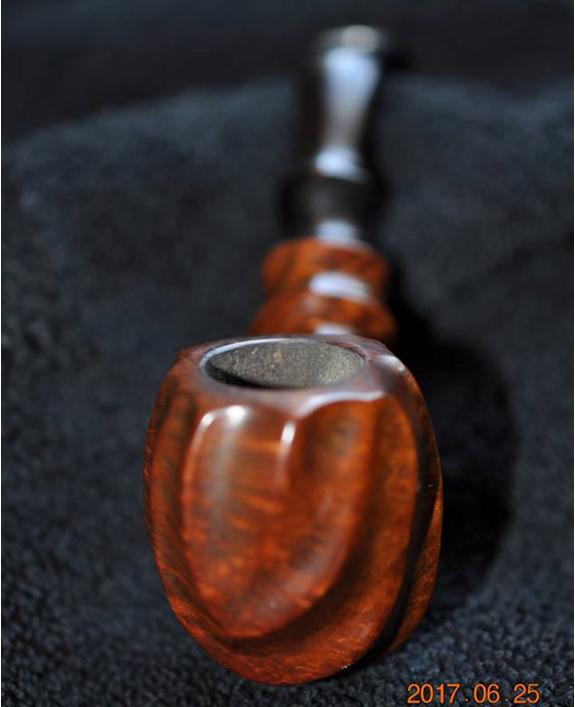
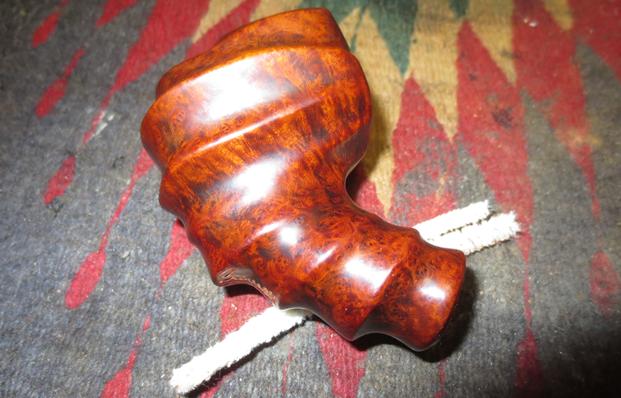
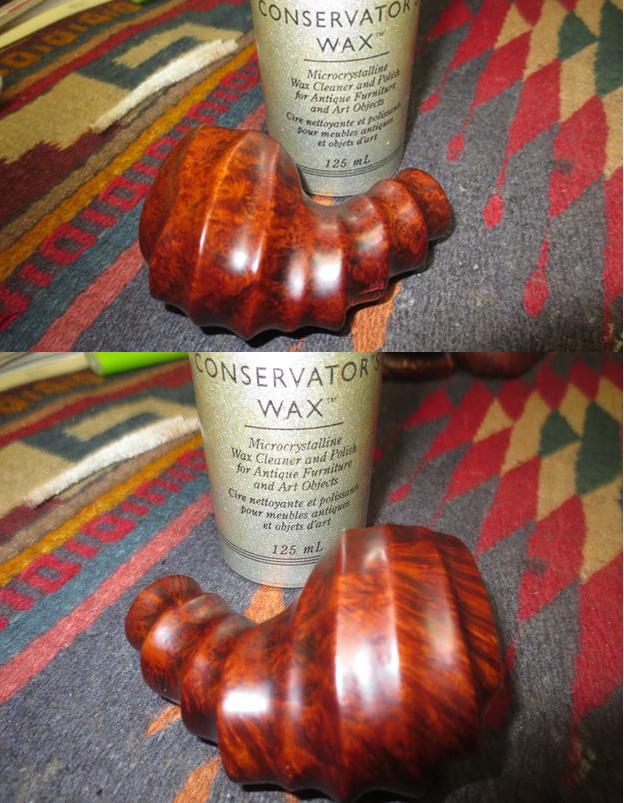
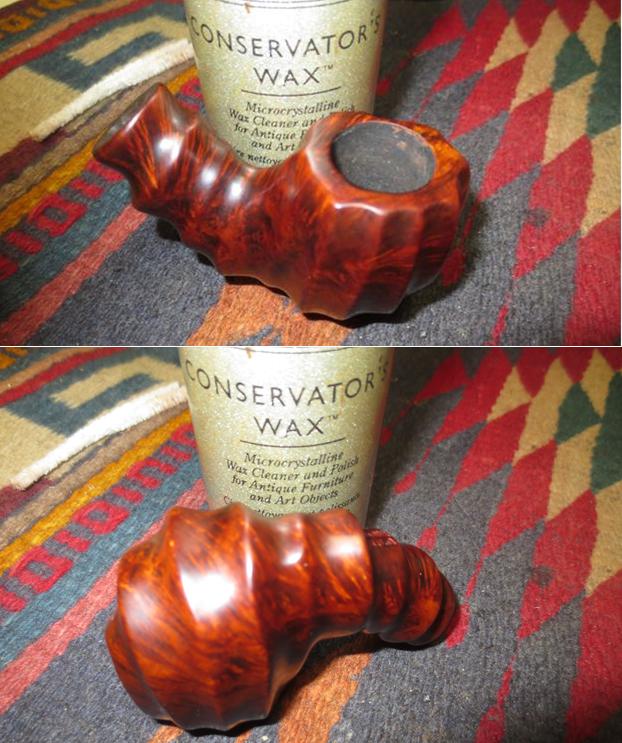
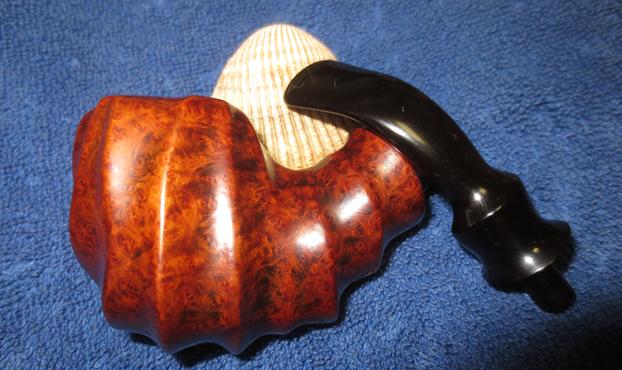
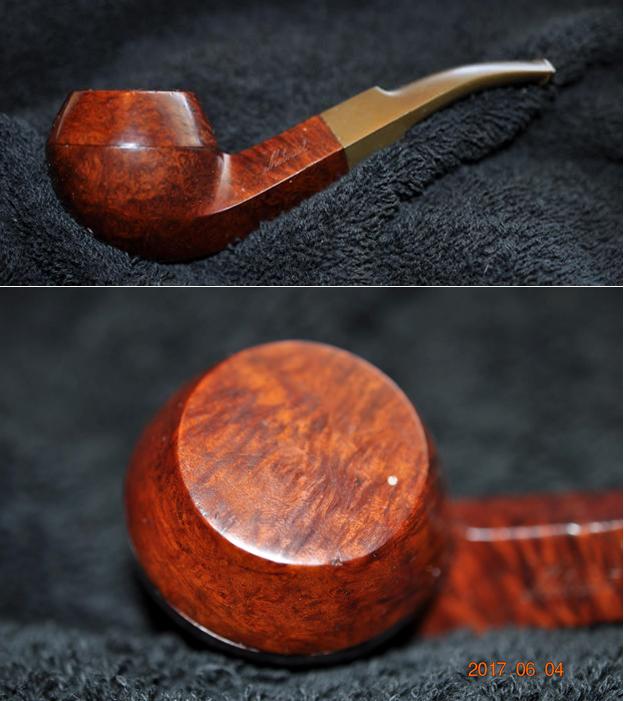
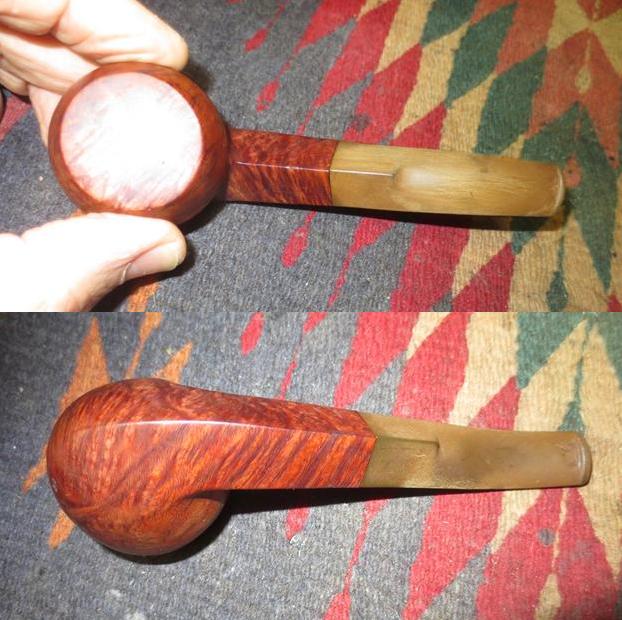
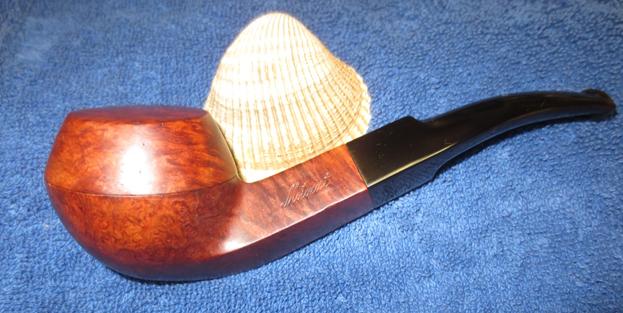
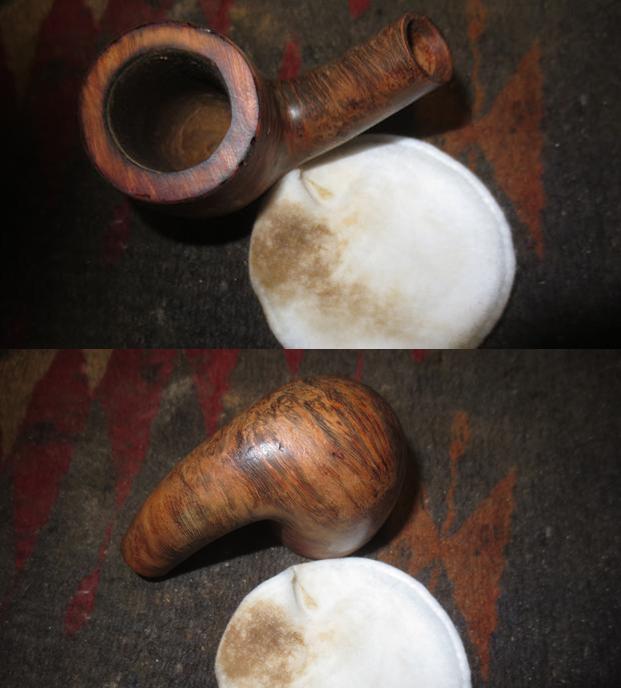
 I buffed the bowl on the buffing wheel using Blue Diamond polish and hand buffed it with a cloth. The following photos show what the finish looked like after the buffing. I still needed to wax it but I really liked what I saw.
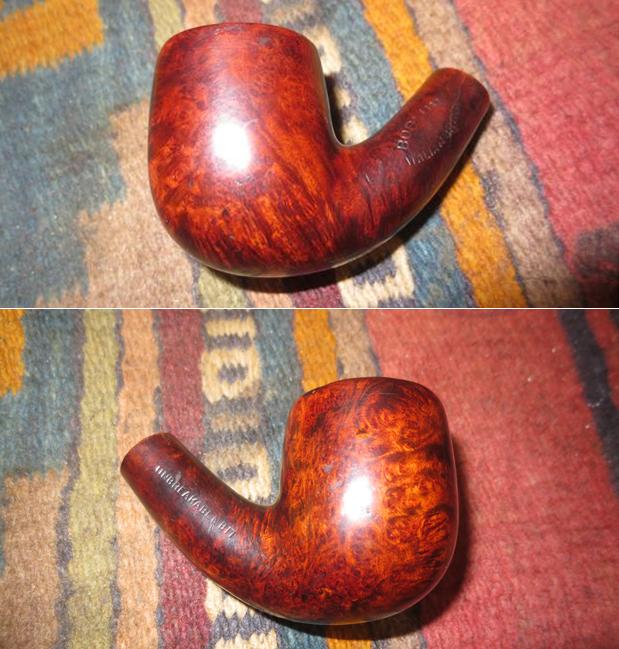
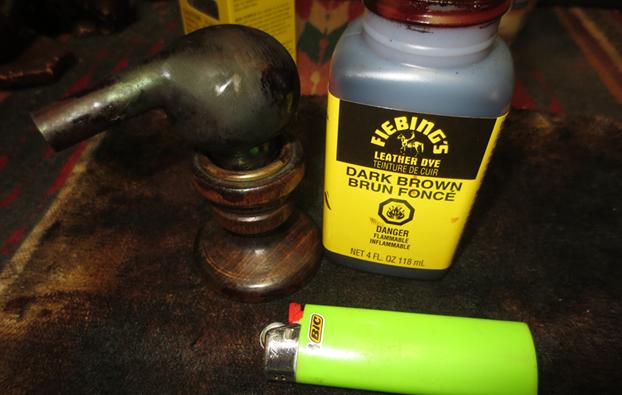
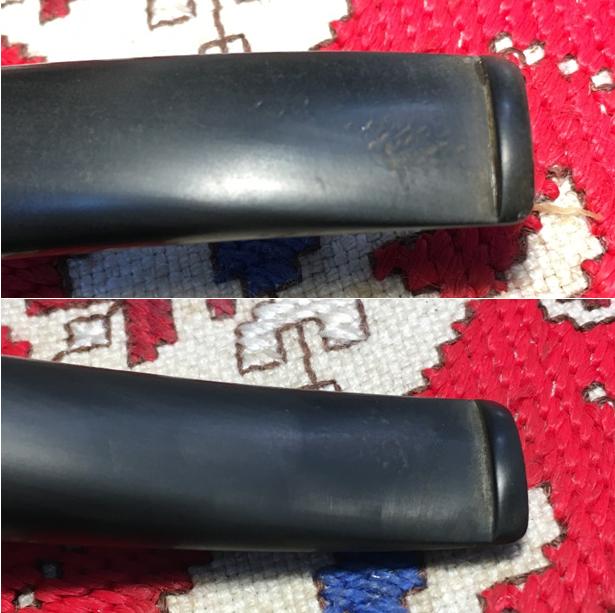
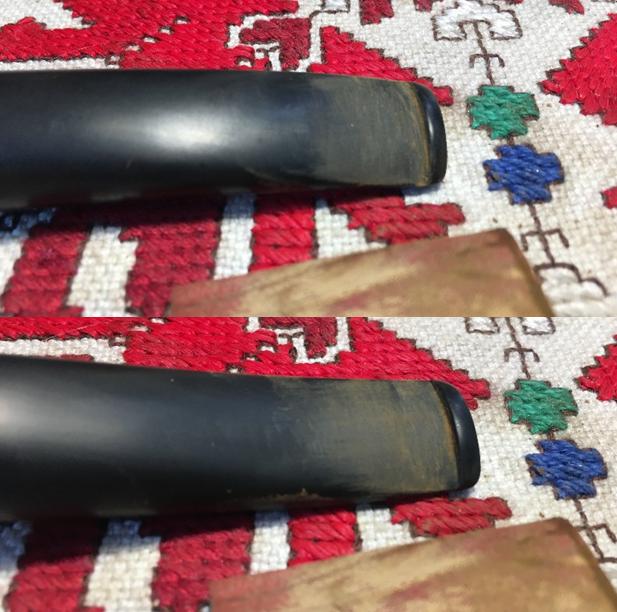
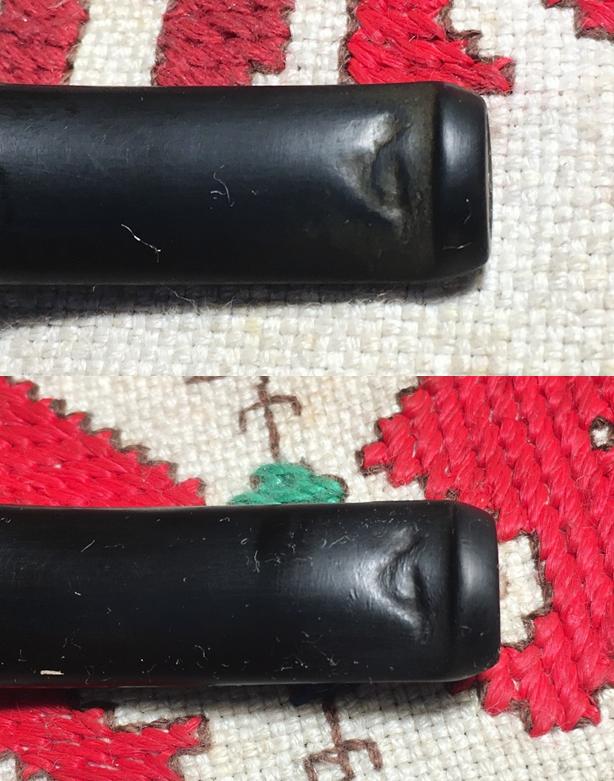
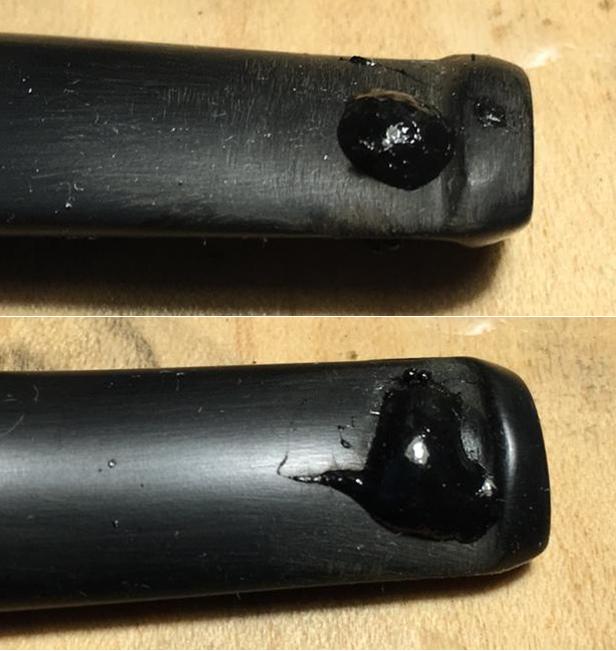
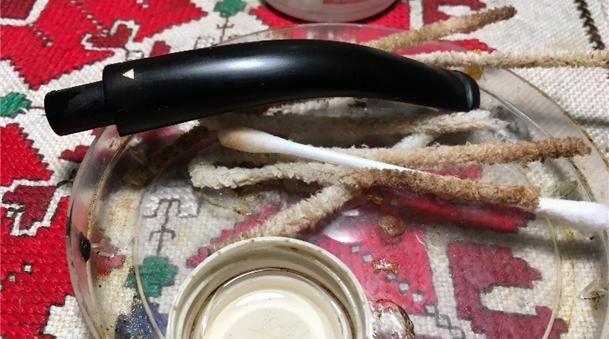
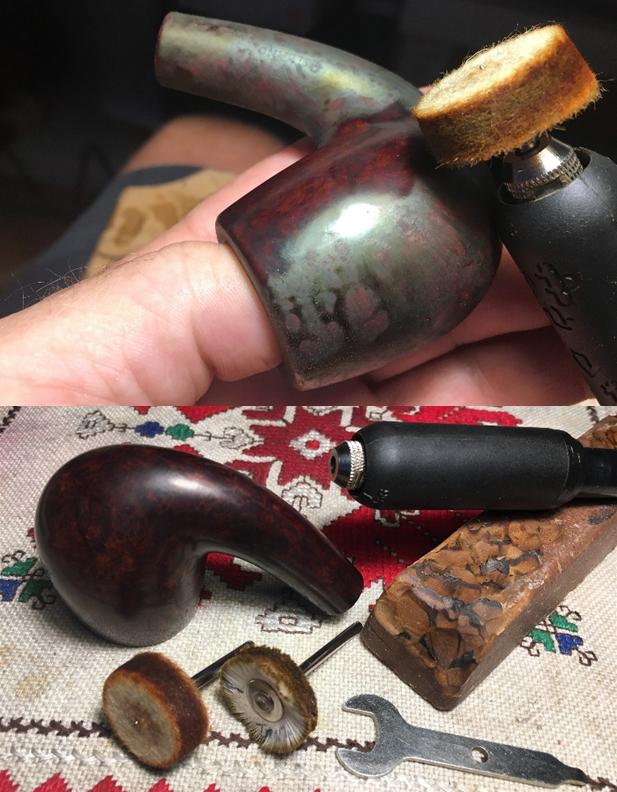
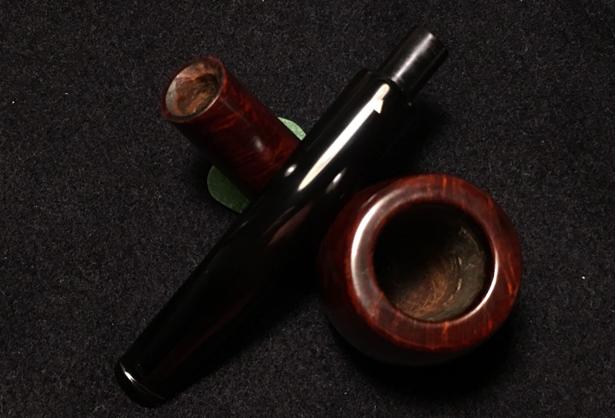
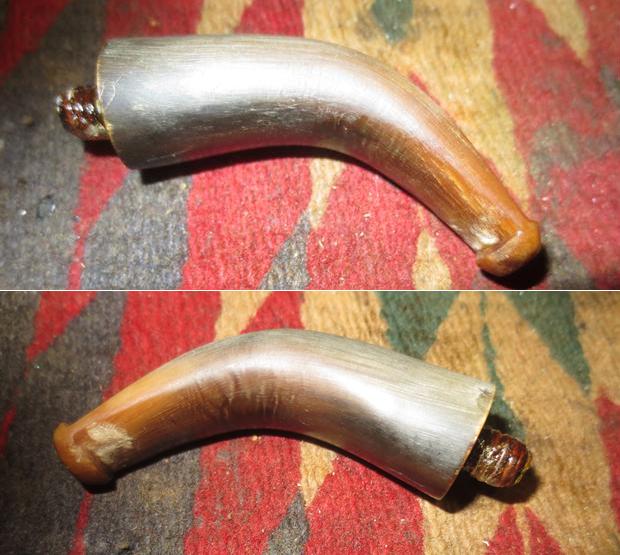
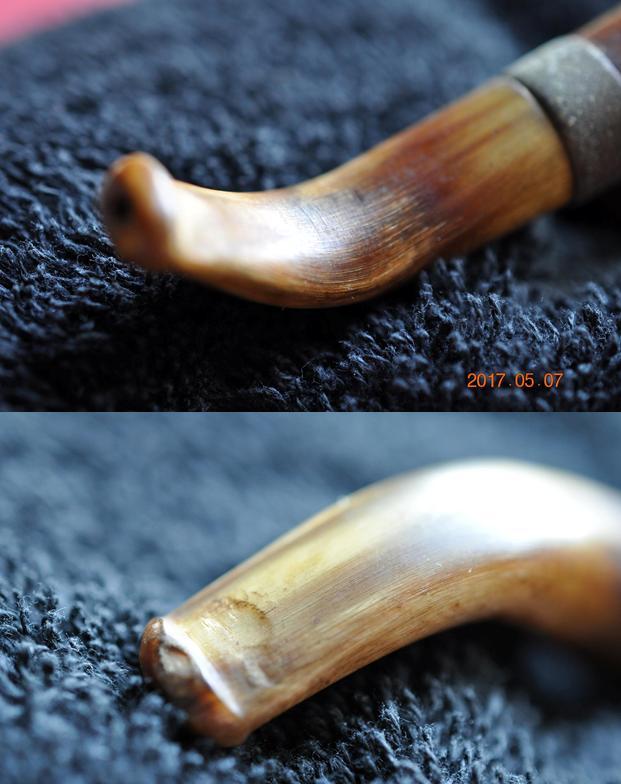
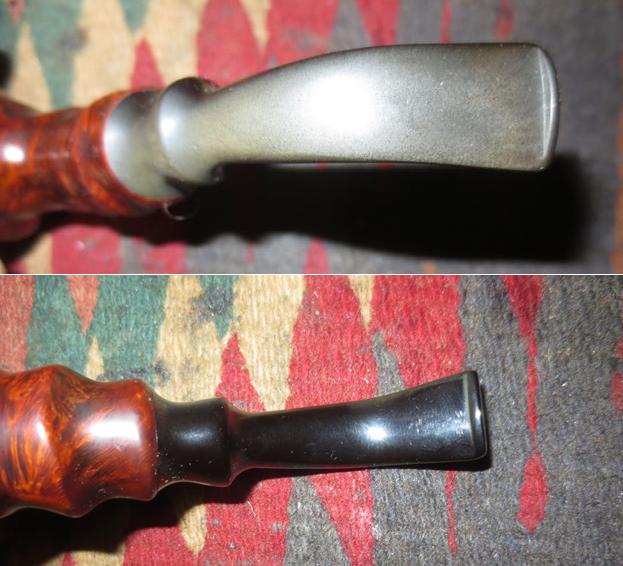
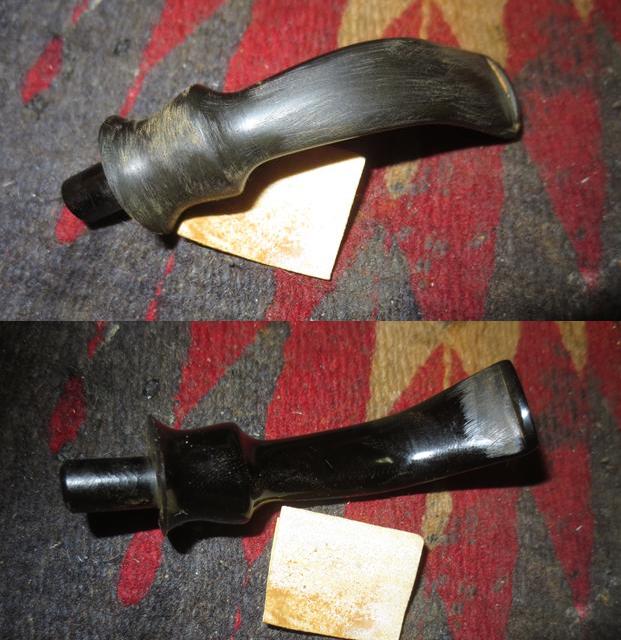
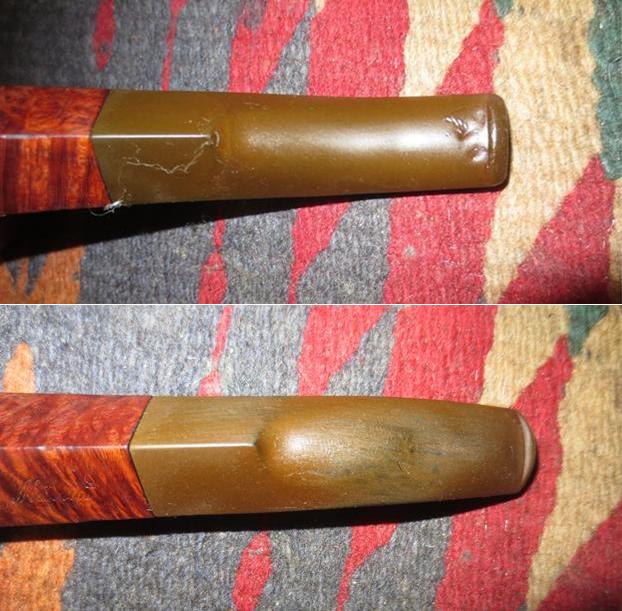
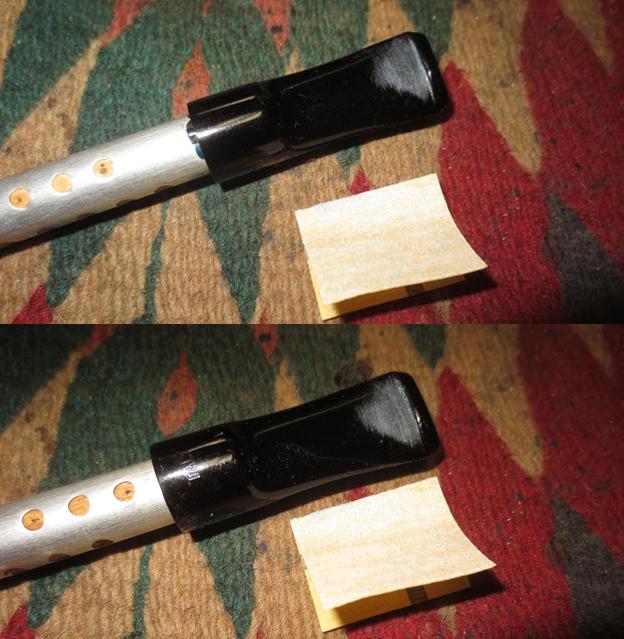
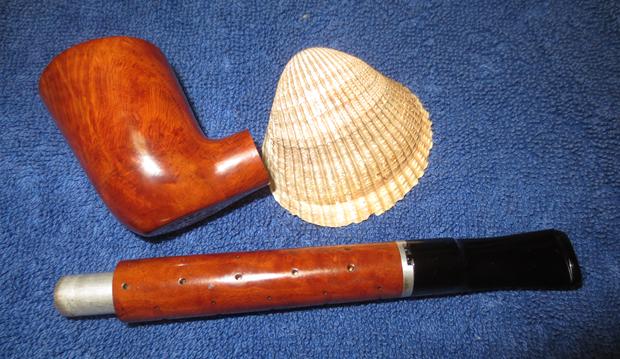
 I took the stem out of the deoxidizer bath and wiped it down with cotton pads. The bath definitely had removed much of the oxidation and wiping it down afterward it was clear to see how much had come off the brown looking stem. I ran a pipe cleaner through the airway to remove the deoxidizer from the inside of the pipe. The stem clearly looked better than when I had started. The surface was dull and there was still some stubborn oxidation on the curve. The tooth marks in the surface are very visible in the photo of the underside of the stem.
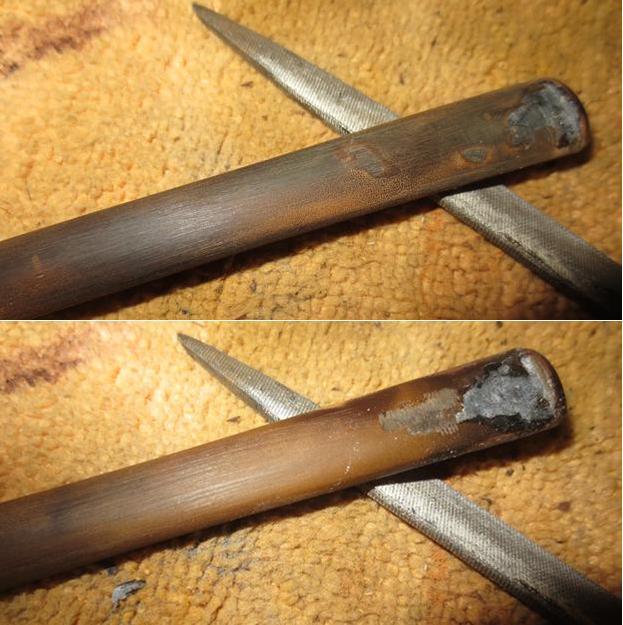
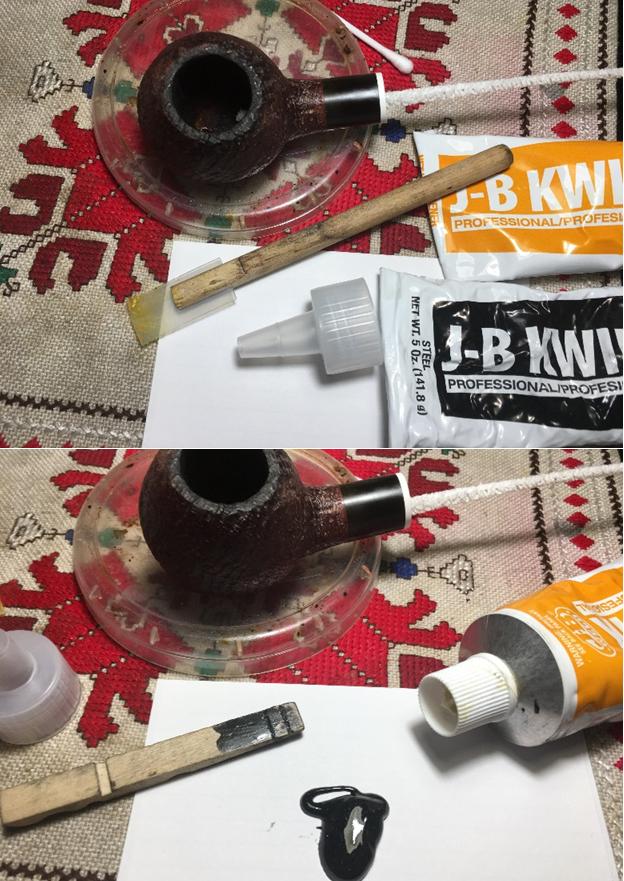
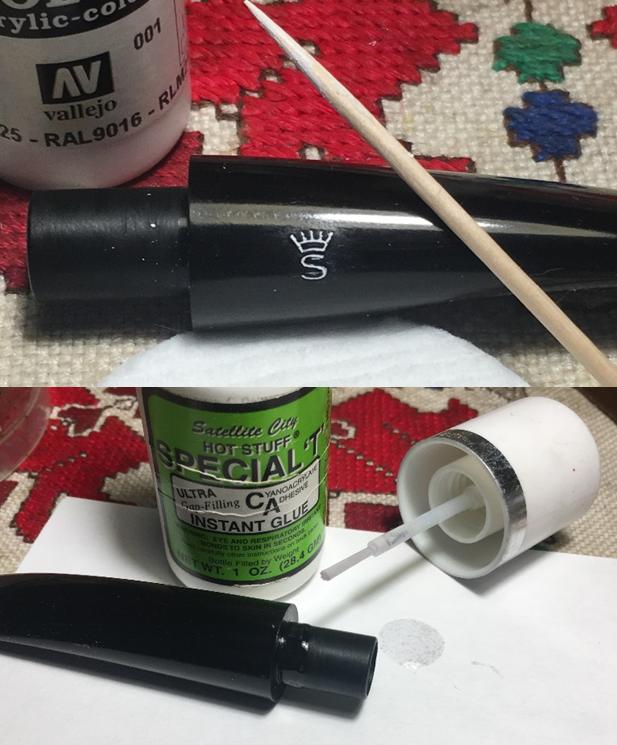
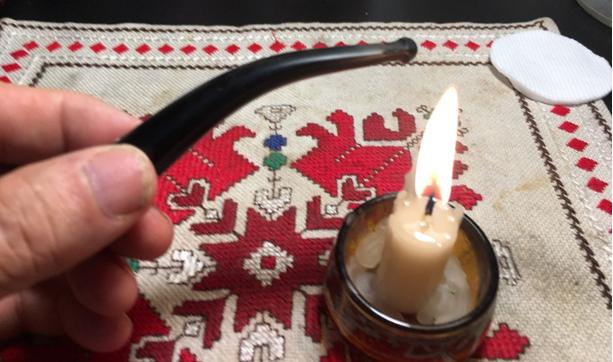
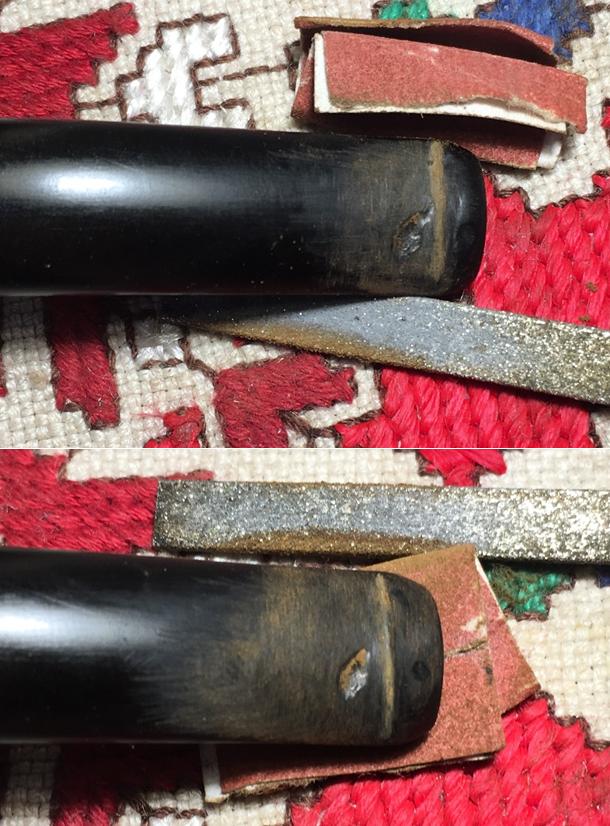
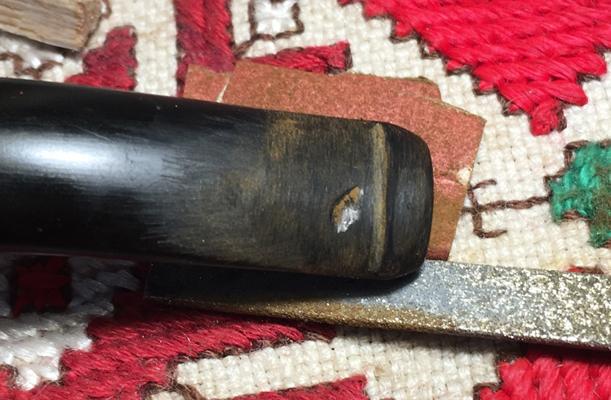
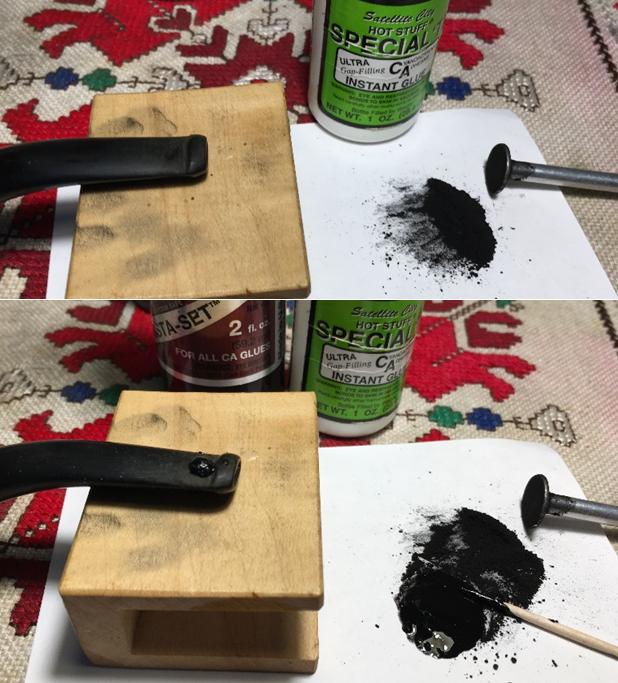
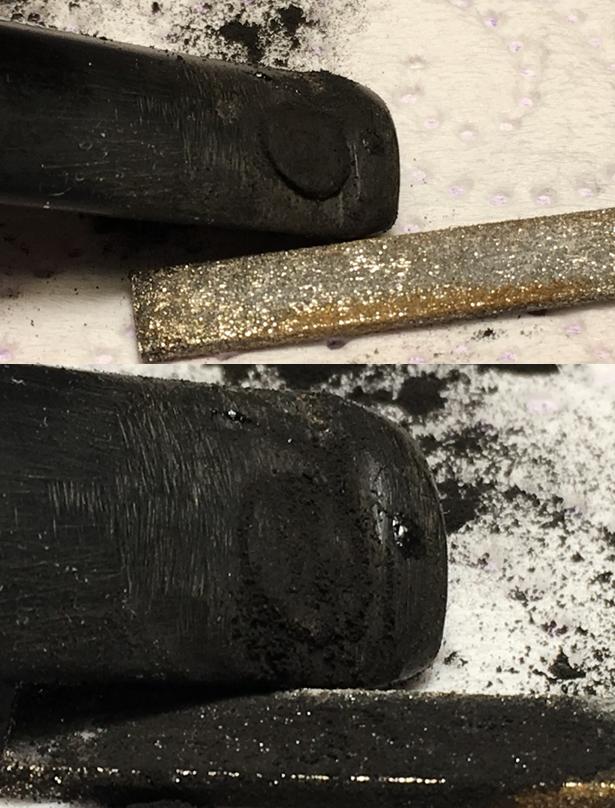
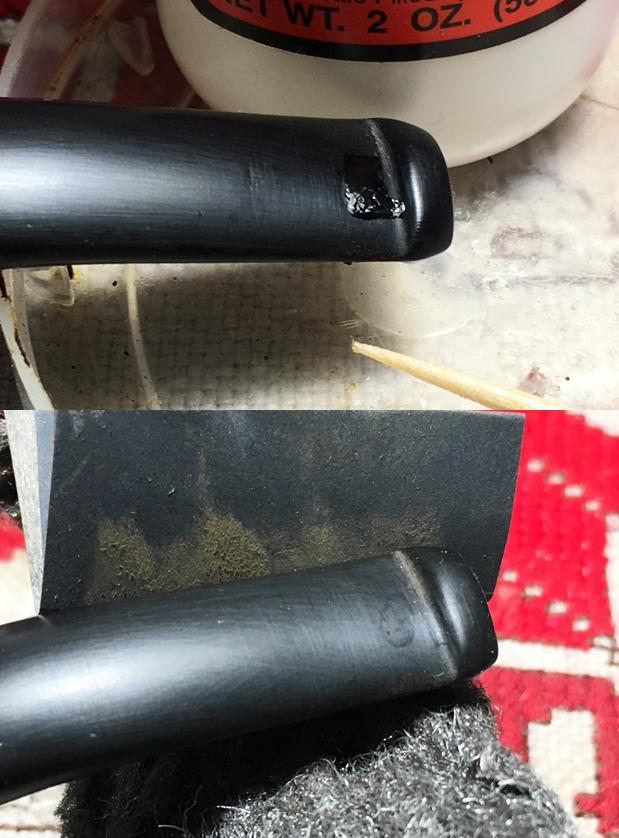
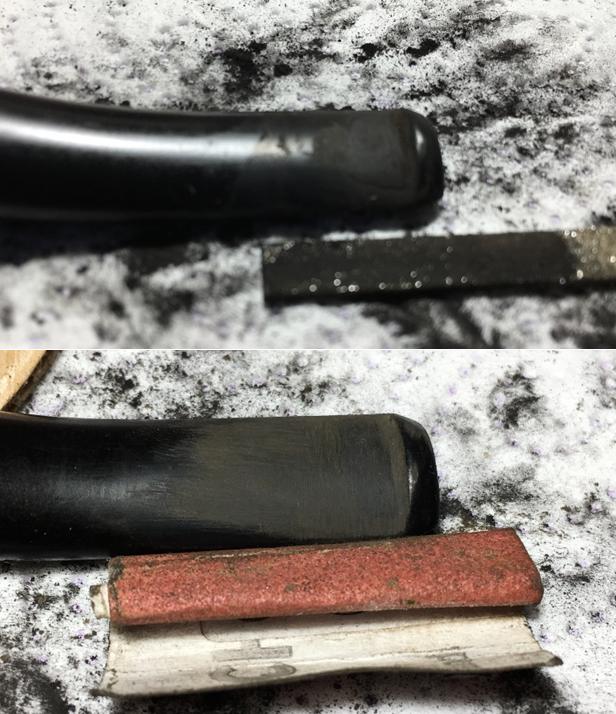
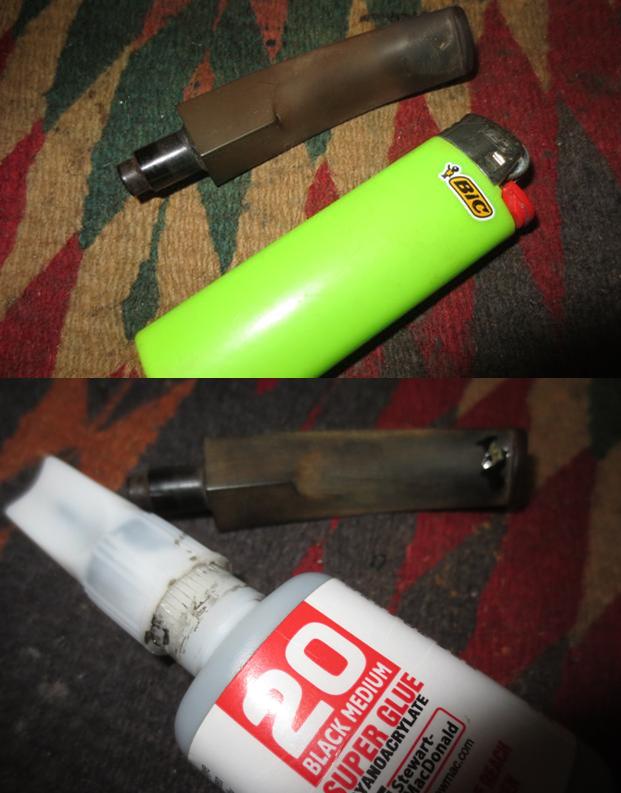
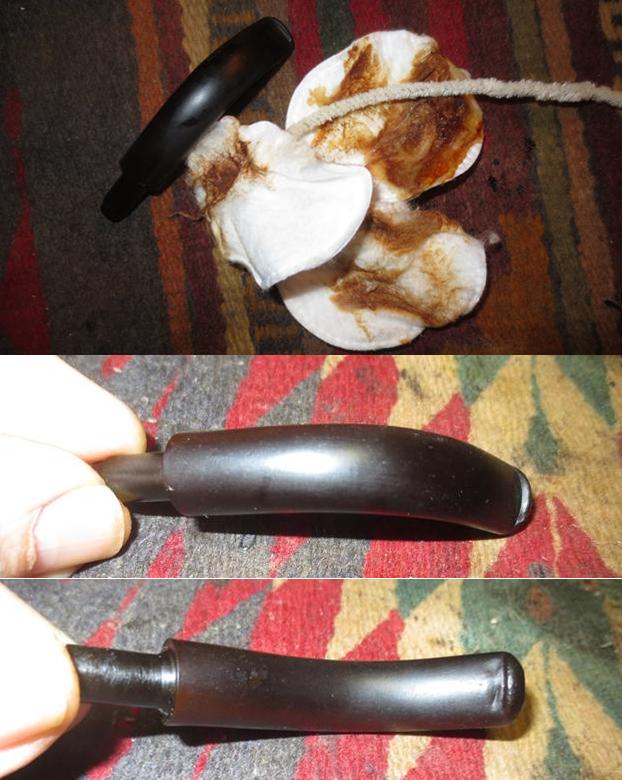 I painted the tooth marks with the flame of a lighter to lift them as much as possible and filled in the remaining tooth marks with clear superglue. I chose to use the clear super glue rather than black as I have found it blends better with the hard rubber stems on these older pipes. When the repair had dried I sanded the stem with 220 grit sandpaper to smooth out the area on the underside and used a needle file to sharpen the edge of the button on the top and underside.
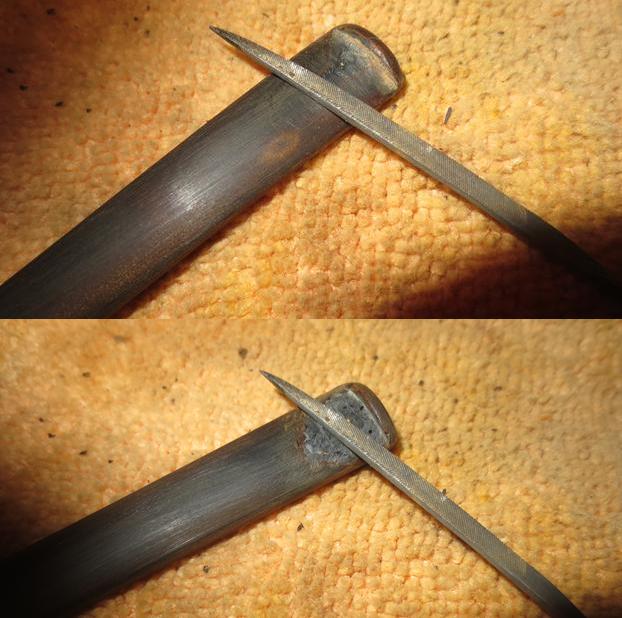
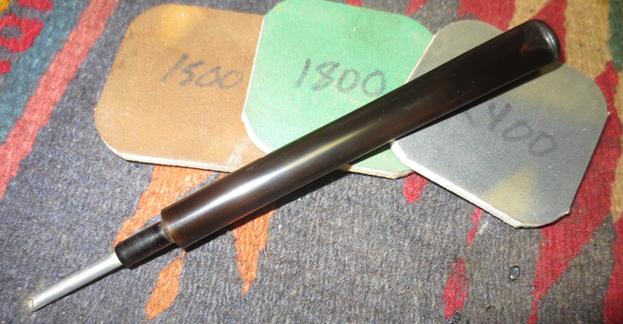
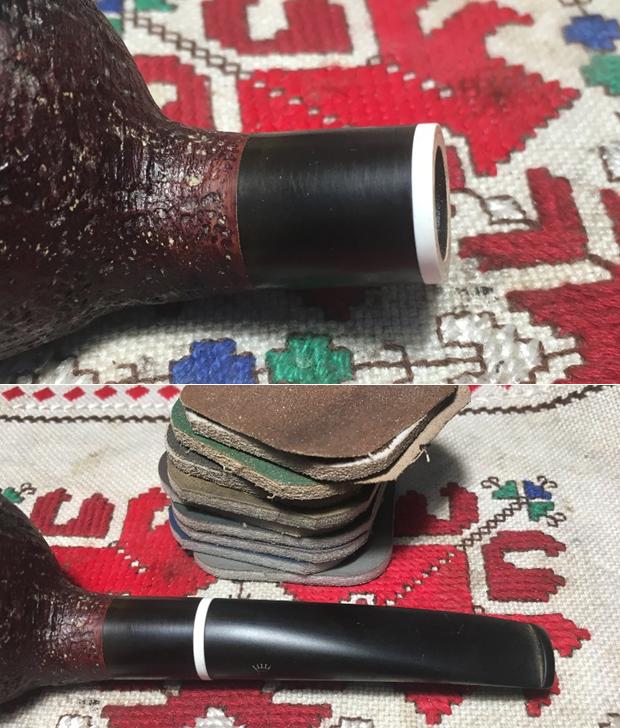
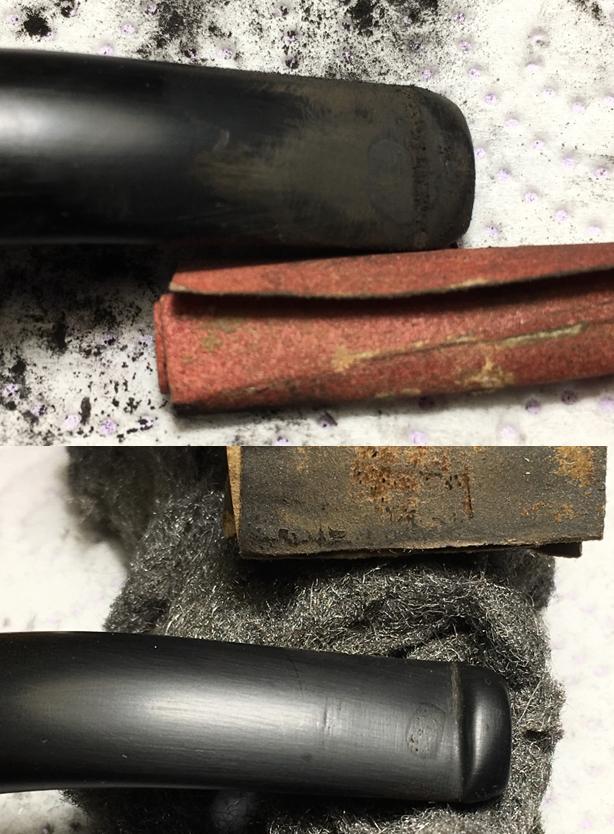
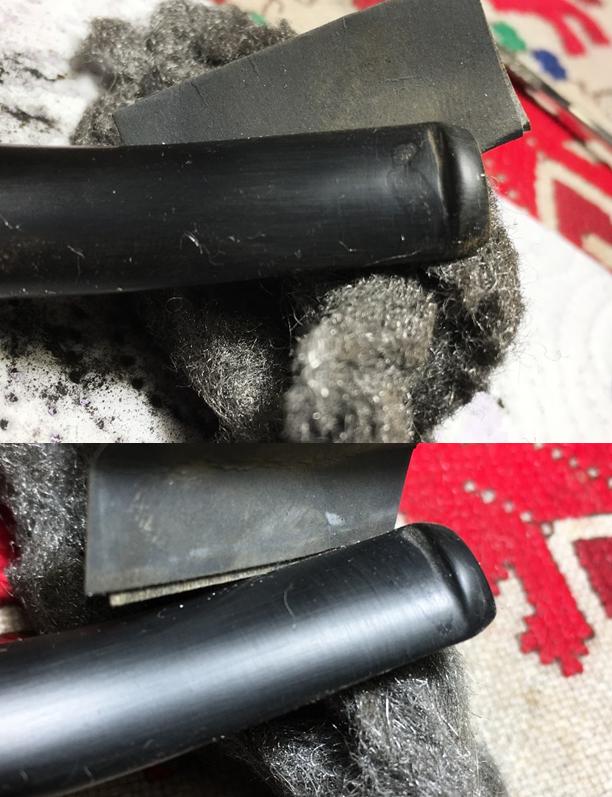
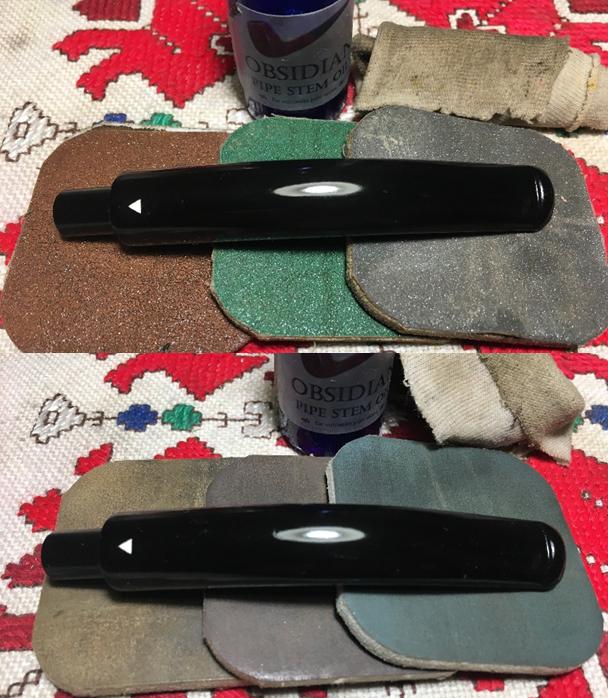
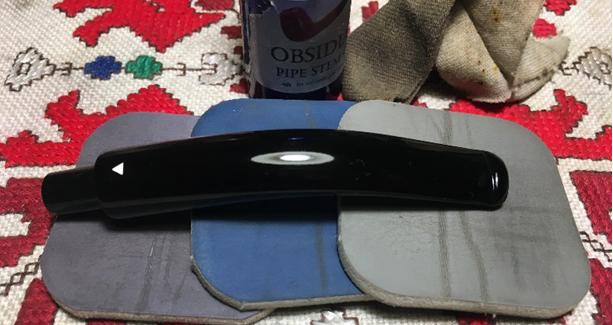
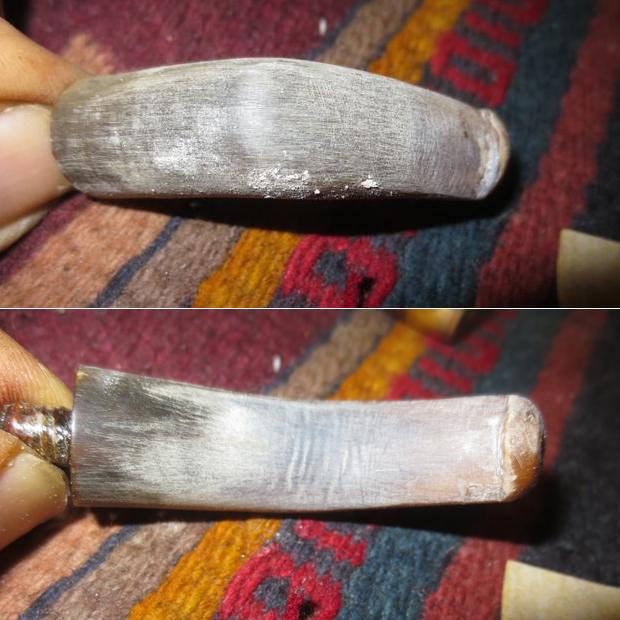
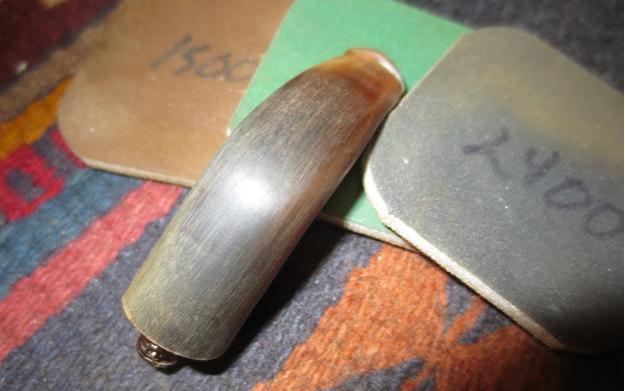
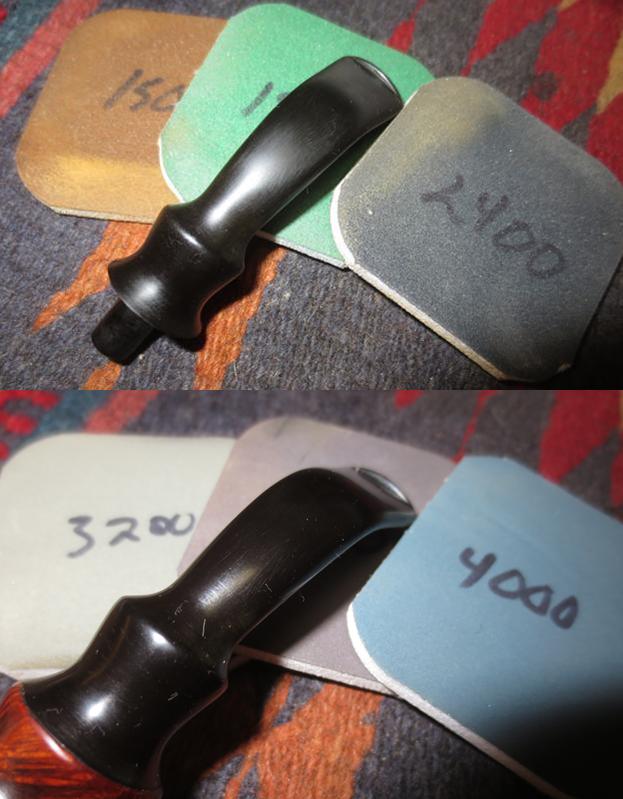
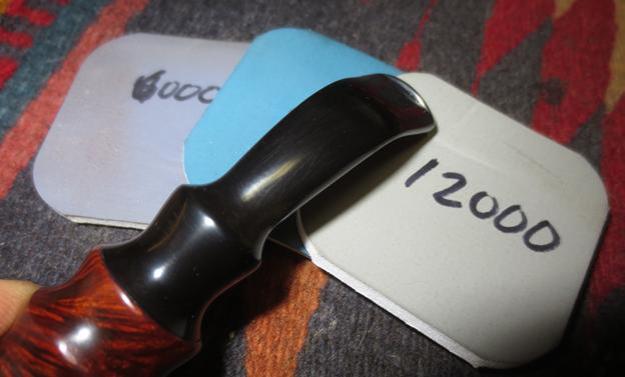
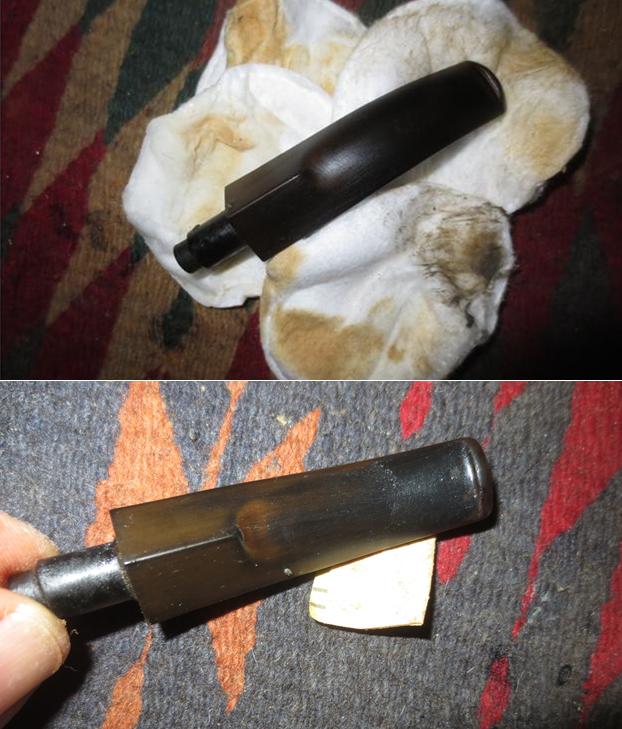
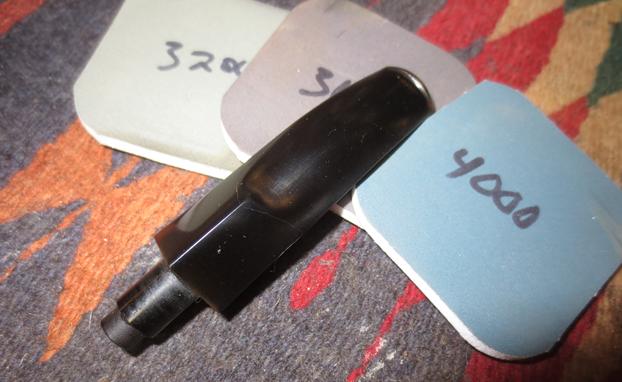
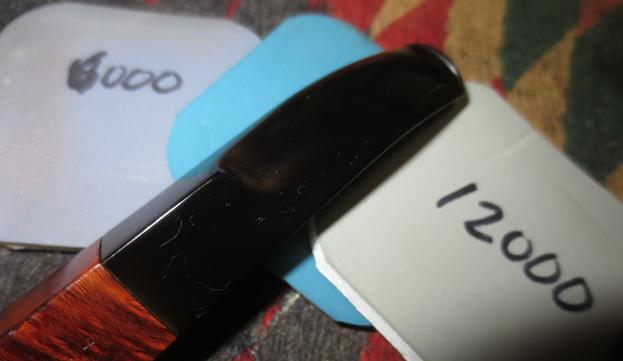
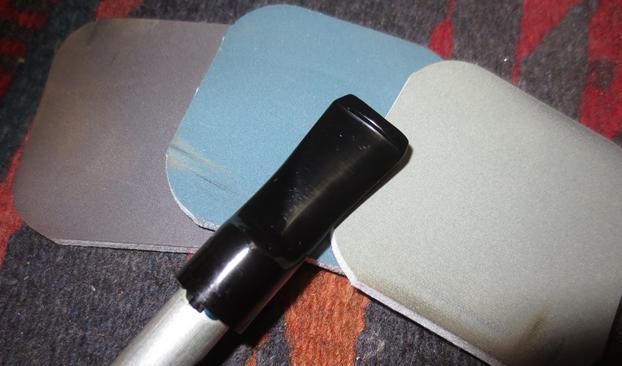
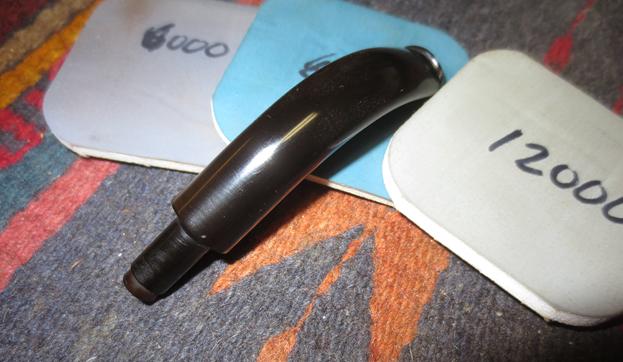
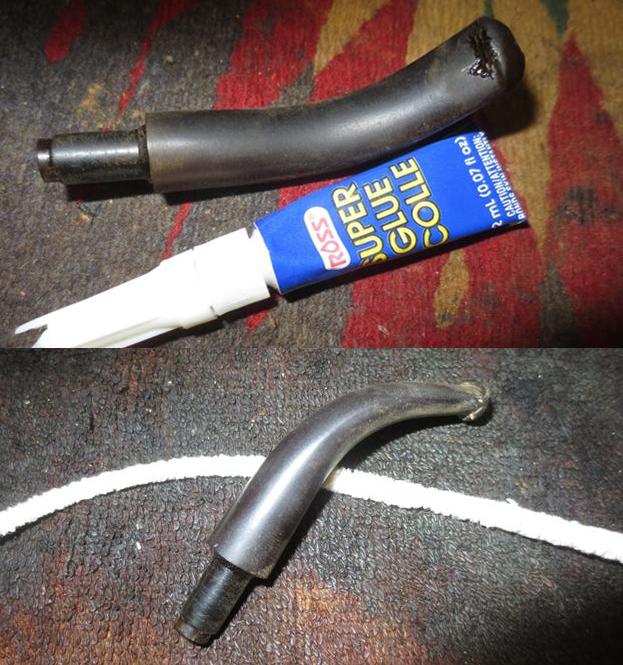 I polished the stem with micromesh sanding pads – wet sanding with 1500-2400 grit pads and dry sanding with 3200-12000 grit pads. I wiped the stem down after each pad with Obsidian Oil and after the final pad gave it a last coat and set it aside to dry.
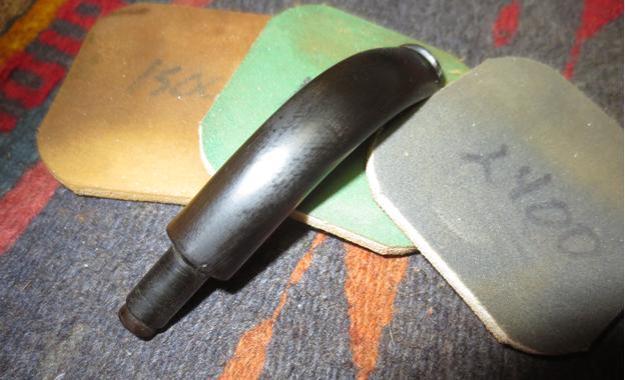
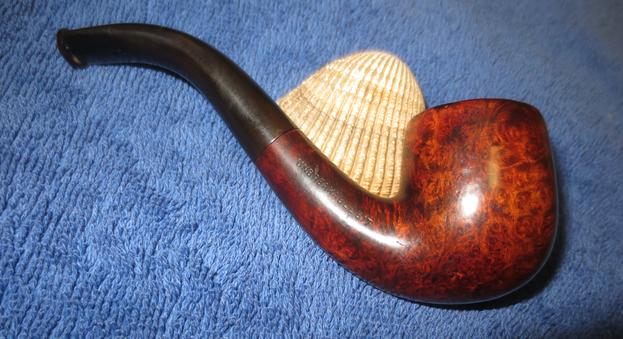
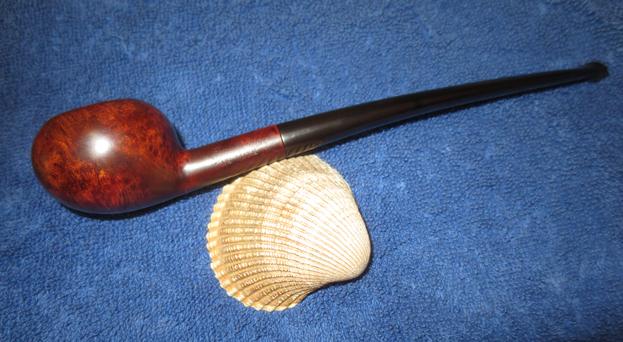
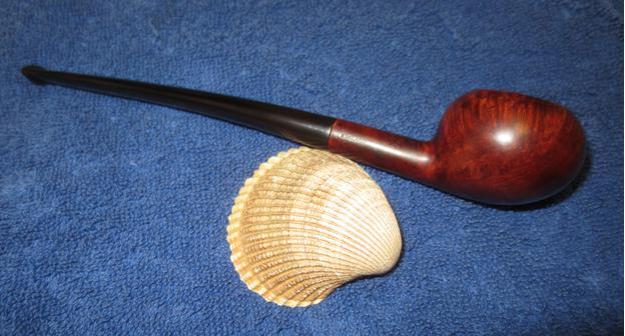
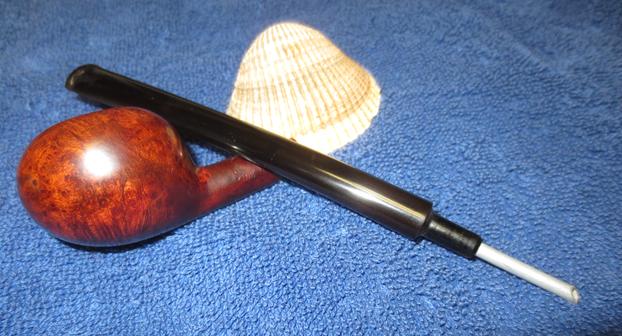
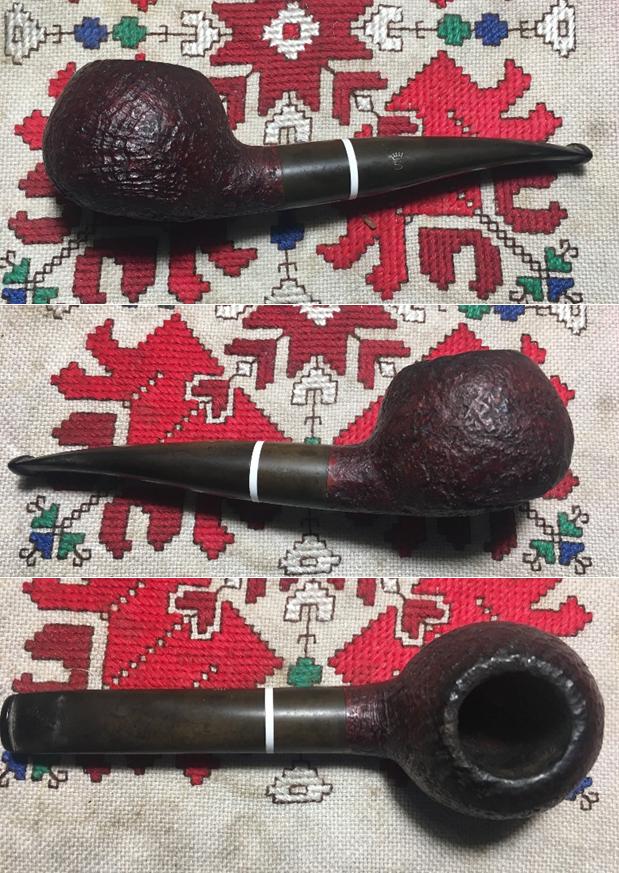
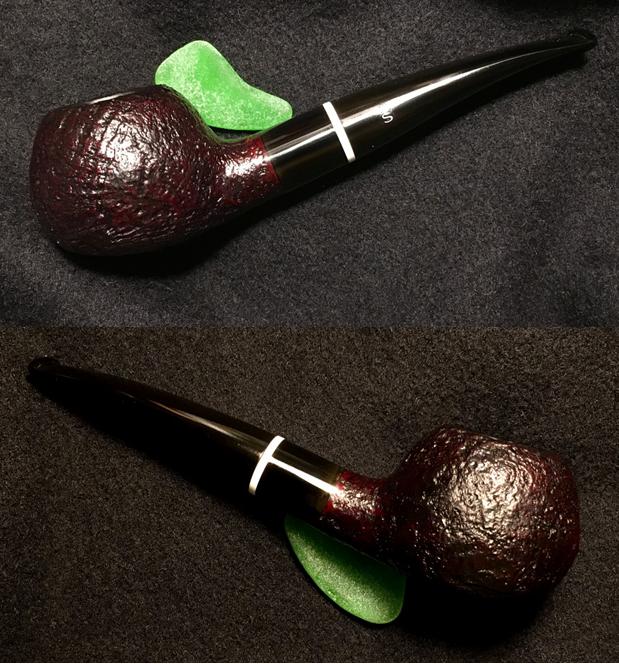
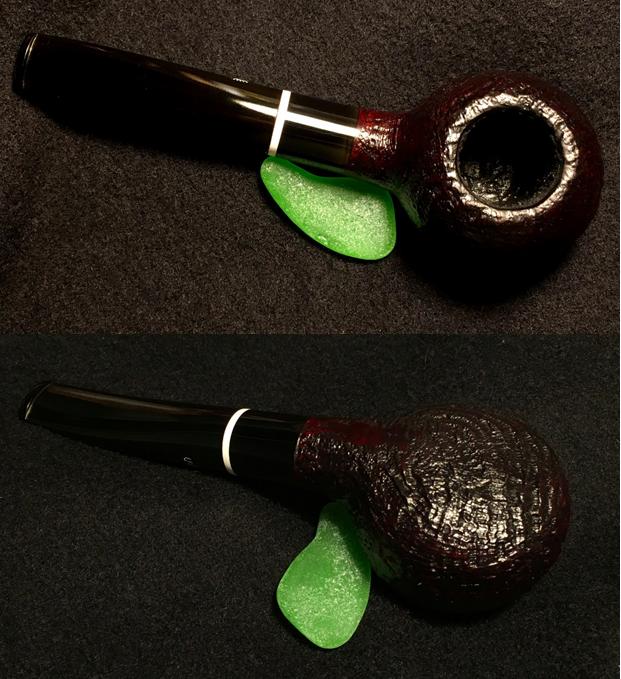
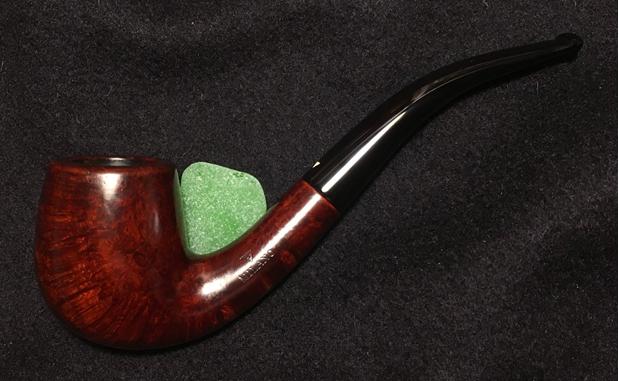
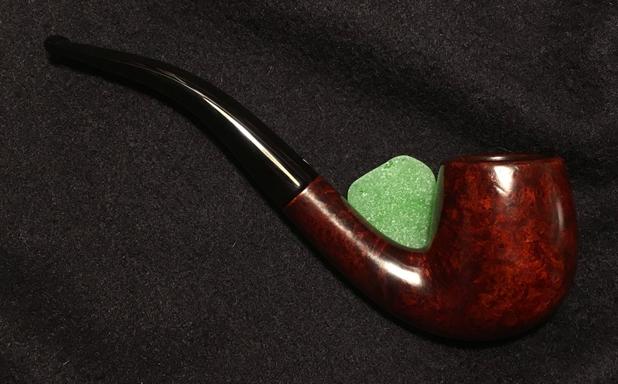
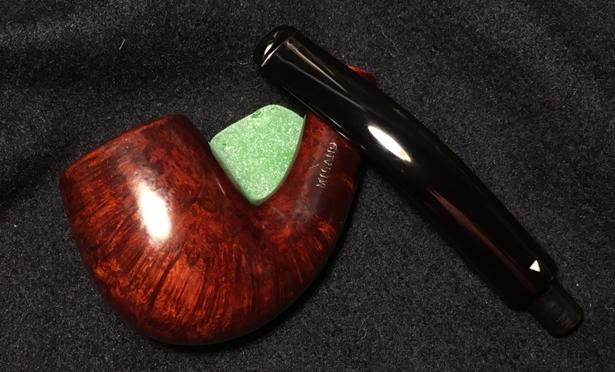
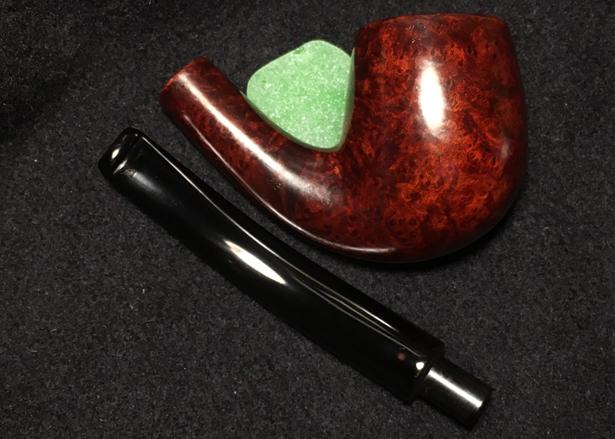
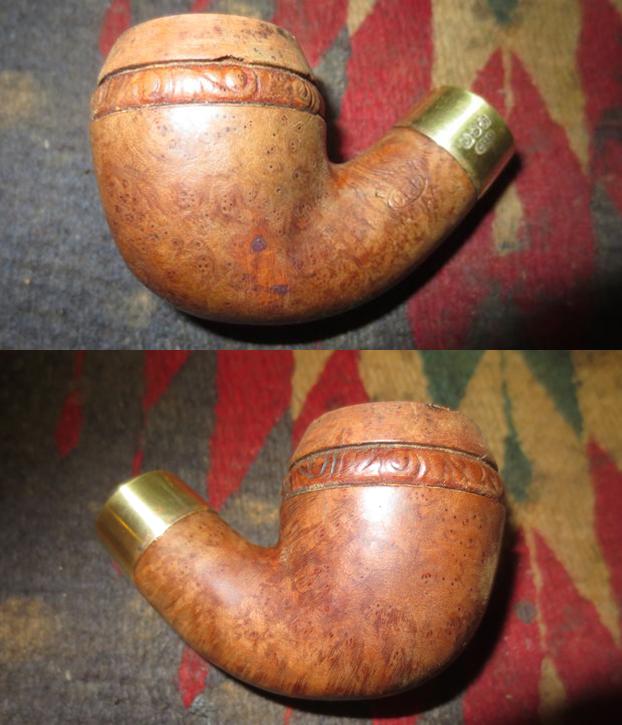
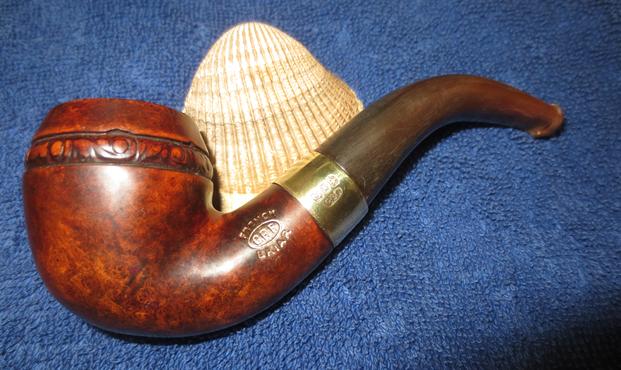
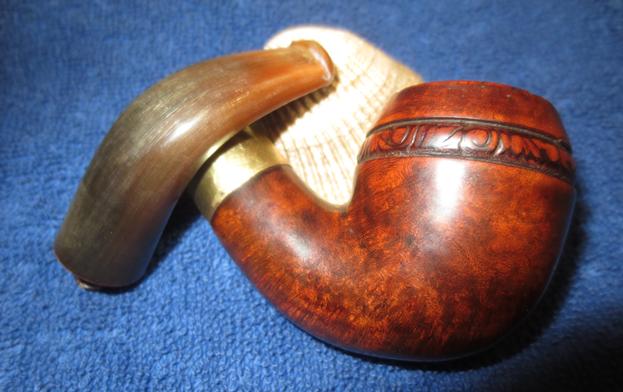
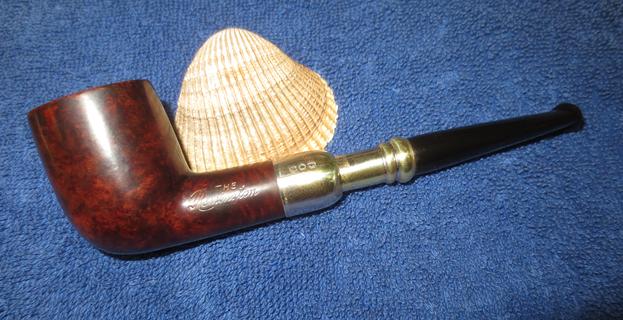
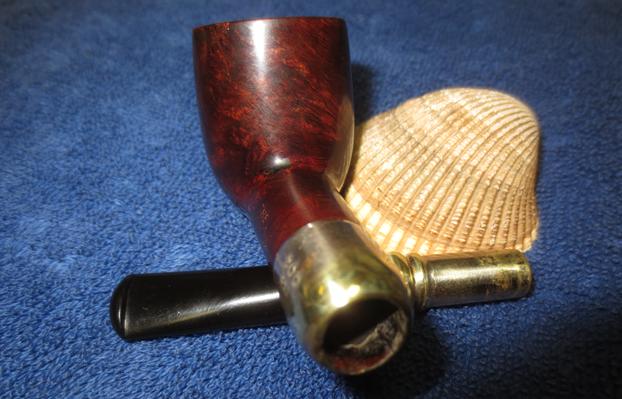
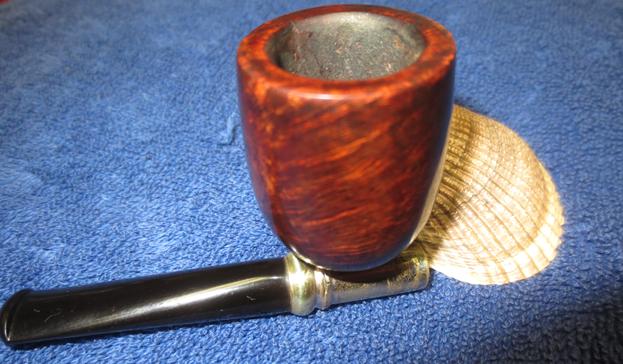
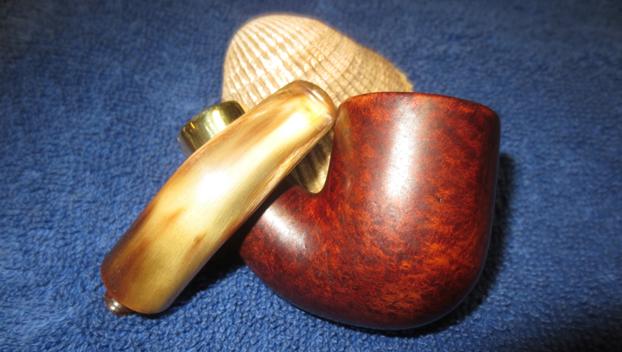
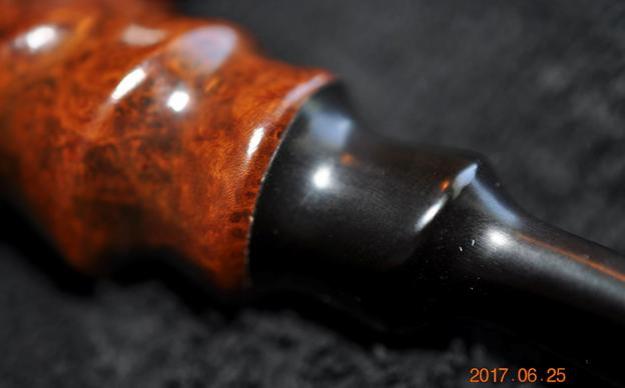
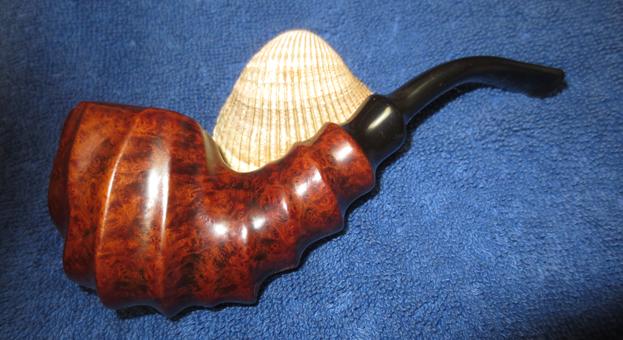
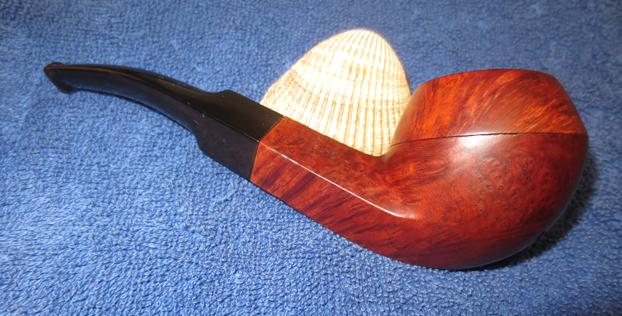
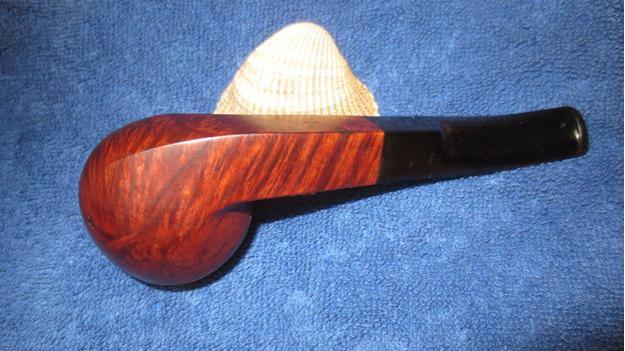
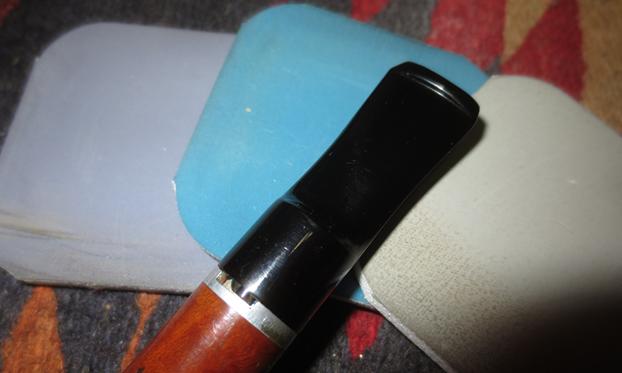
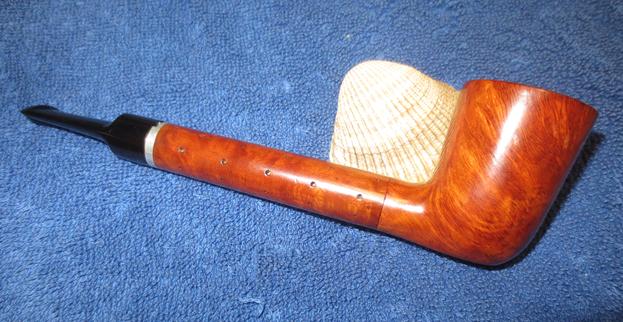
 I buffed the stem with Blue Diamond and then gave the pipe mulitple coats of carnauba wax. I buffed it with a clean buffing pad to raise the shine and hand buffed it with a microfibre cloth to deepen the shine. The finished pipe is shown in the photos below. I am not a 100% happy with the stem – the flash seems to reveal some more oxidation in it but to my eye it looks fine. I will do some more polishing and buffing to get it do the rich black that my eye sees but the camera does not at this point. Ah well, the refurbisher’s work is never finished. Thanks for looking.