Guest Blog by Robert M. Boughton
Member, North American Society of Pipe Collectors
http://www.naspc.org
http://www.roadrunnerpipes.com
http://about.me/boughtonrobert
Photos © the Author
“Every writer is a frustrated actor who recites his lines in the hidden auditorium of his skull.”
― Rodman Edward “Rod” Serling (1924-1975), U.S. TV/film writer, narrator, anti-war and –racism activist, in “Vogue” magazine [April 1957]
INTRODUCTION
Good evening. Imagine, if you will, a rather large college town in the heart of the American Southwest, population estimated at a little more than half a million. This sprawling urban area does not appear on any globe of the Earth, nor do its lights draw the attention of a satellite passing far overhead at night in the vacuum of outer space. Nevertheless, due to the proximity of two of the country’s three top nuclear weapons developers to this liberal college and arts metropolis, it is likely the target of hundreds if not thousands of such warheads from other, potentially hostile nations or terrorists, foreign and domestic.
In today’s episode, we are about to meet a 53-year-old man named Robert Boughton, who as a matter of record resides in this sprawling burg. Mr. Boughton knows the twin peaks that are, atop the one, success and hope, and the other, defeat and futility. At the moment, he is at the very zenith of the heap of that more and more common social malaise that people glibly call the harried man. He is finding his way through one of the more interesting times of his life, in the sense of the ancient Chinese curse. Honest, hard-working and trustworthy, he has had more jobs than he could ever recall to put down on a government security clearance application, from maintenance man to assistant manager in hotels; neighborhood delivery boy to photojournalist for newspapers, and, most recently, both caregiver and pipe restorer – tobacco pipes, he always adds to prospective new customers he doesn’t know as he offers them his card.
During the past seven years, Mr. Boughton has postponed his lifelong pursuit of a literary career to dedicate almost every waking hour as caregiver to a mentally unstable roommate with a slightly shorter list of physical disorders, one of them fatal; a shrewish man a few years over the hill who carries his misfortunes the way some brag about drug abuse or petty thievery, but in his case molded into the very form and execution of his tragic worldview by the madness of living day-to-day knowing he is deteriorating from the core of marrow of his brittle bones to the disappearing sheath around every nerve fiber and the corresponding loss of sight and voluntary movement, and finally to the thin skin of his failing frame.
Mr. Boughton’s roommate has no idea how close he has come to being granted his repeated if insincere request to be put out of his misery; to a drive far out onto a back road of the desert for a very long stay. He has pushed Mr. Boughton to the limits of his self-control – to the end of his wits and the edge of his sanity. But the downward spiral is about to change, as you will soon understand. For not long ago, Mr. Boughton caught sight of a pinhole of light in the abyss; a hobby that helped him survive the slings and arrows that another writer once called outrageous fortune.
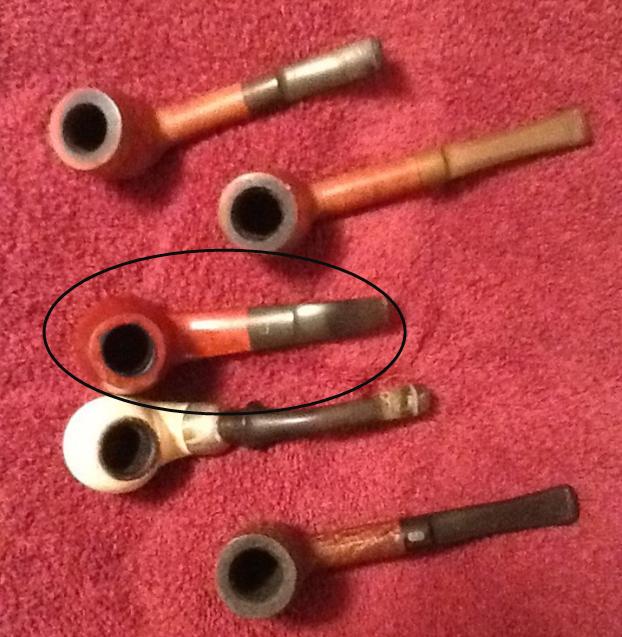
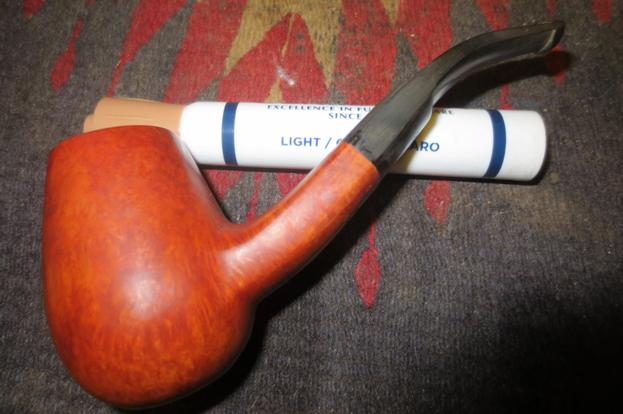
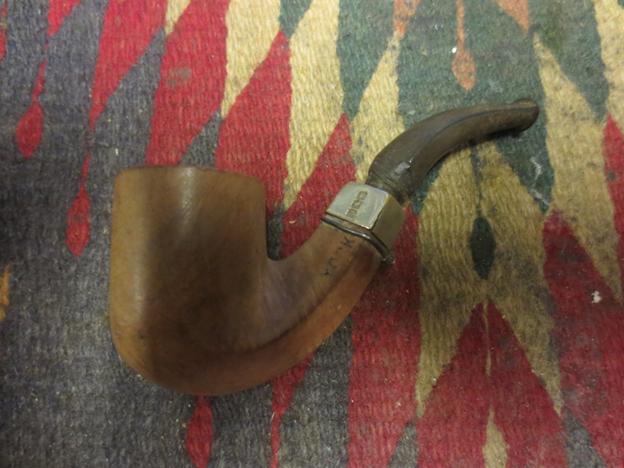
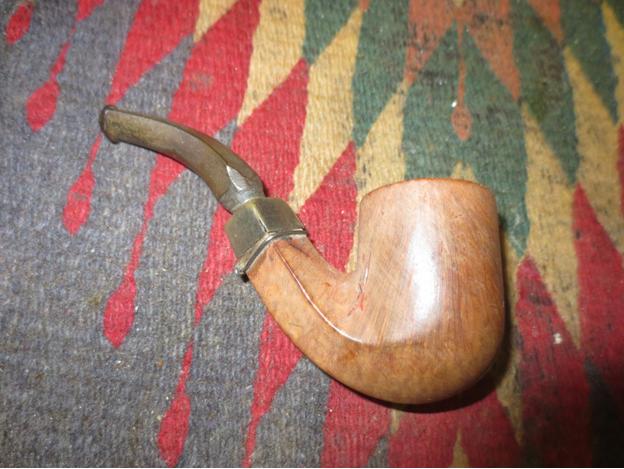
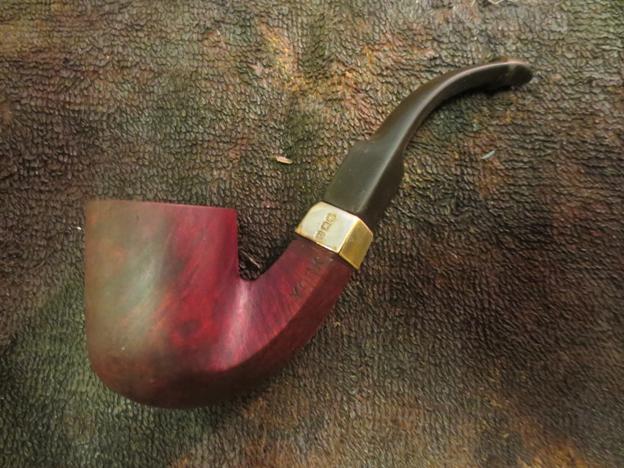
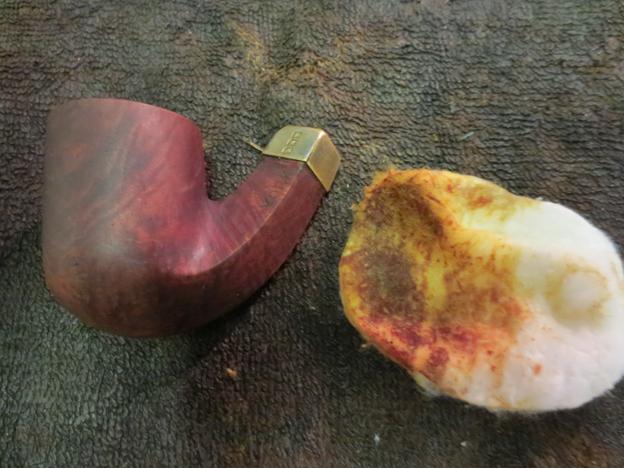
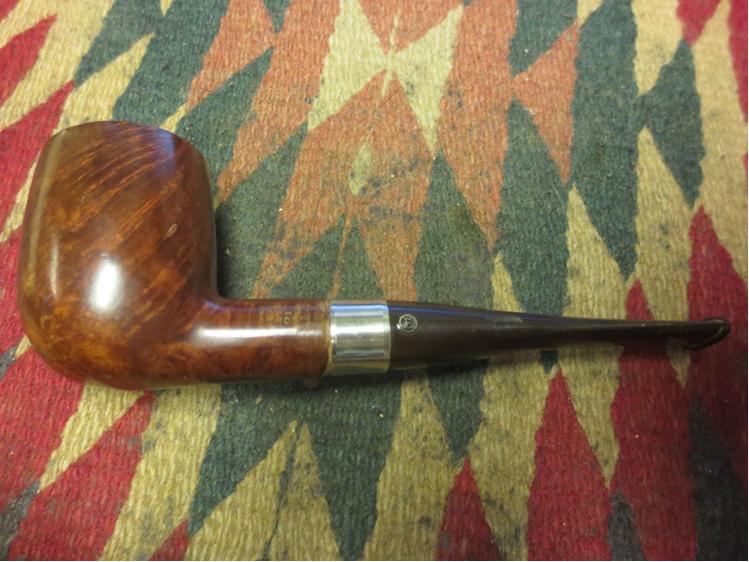
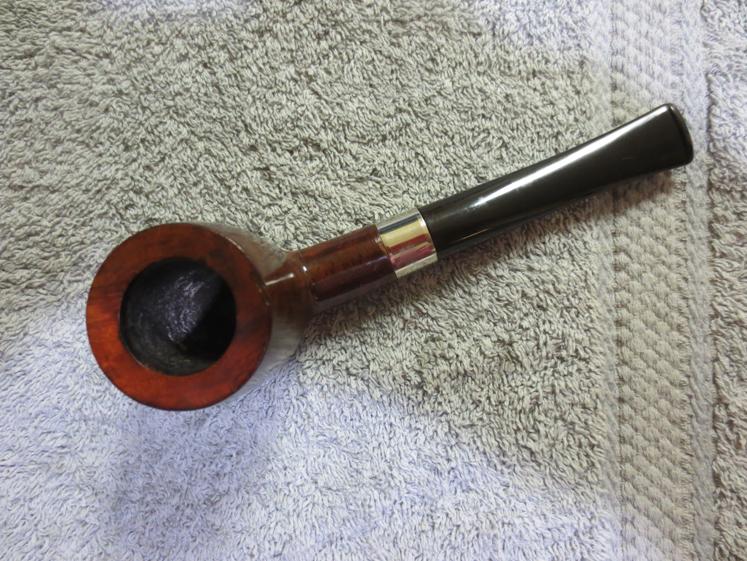
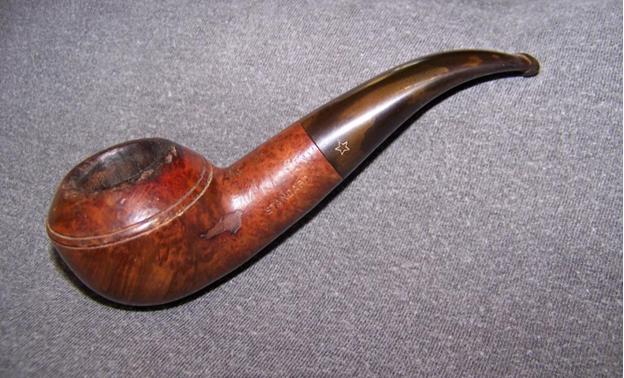
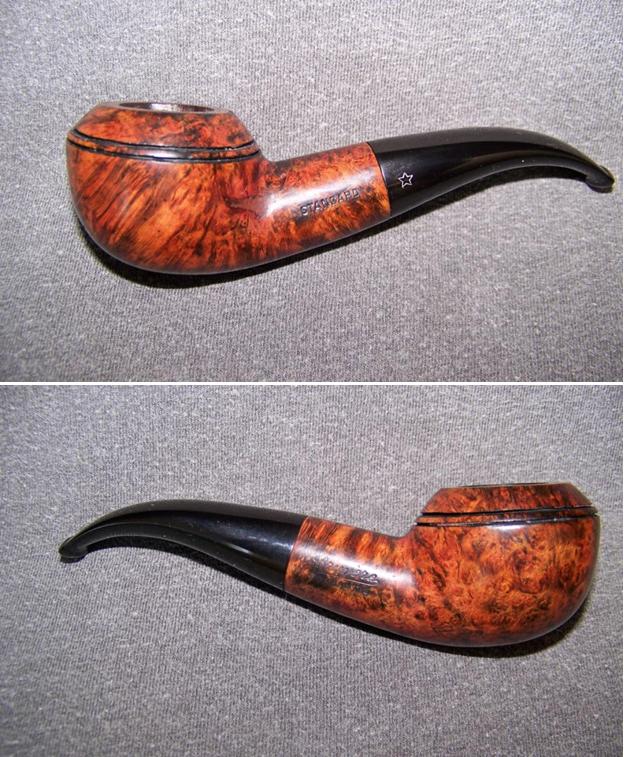
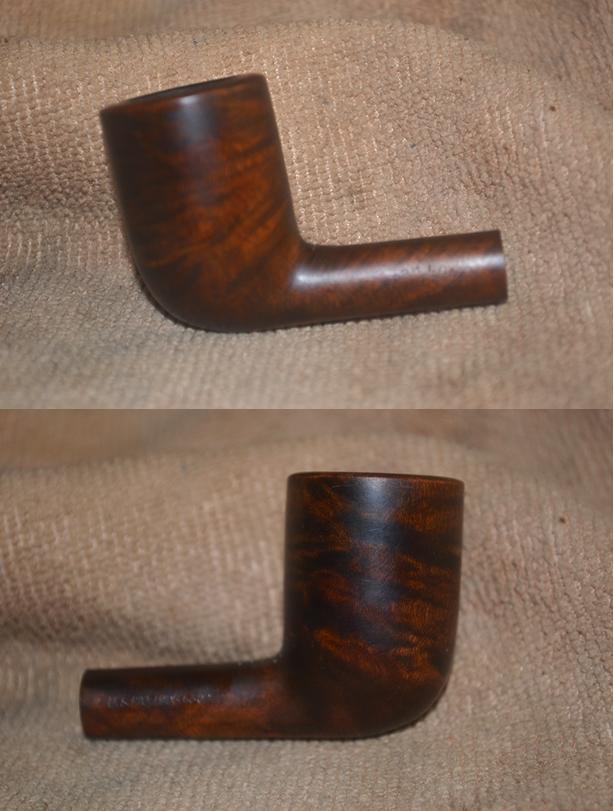
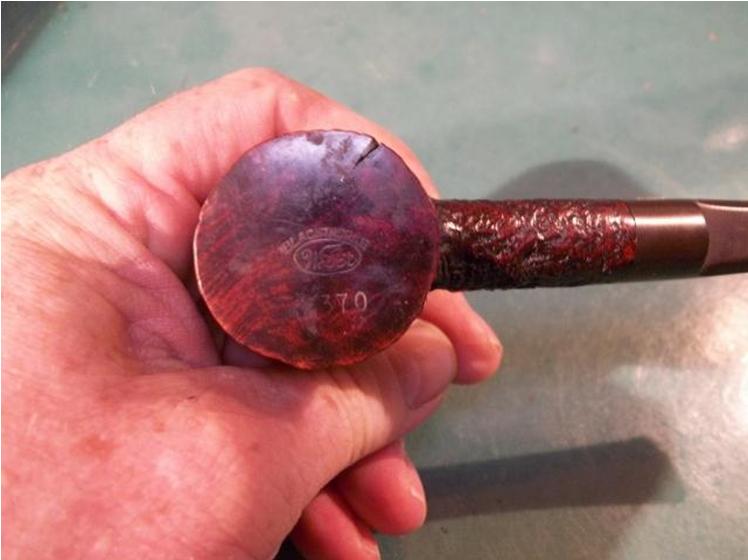
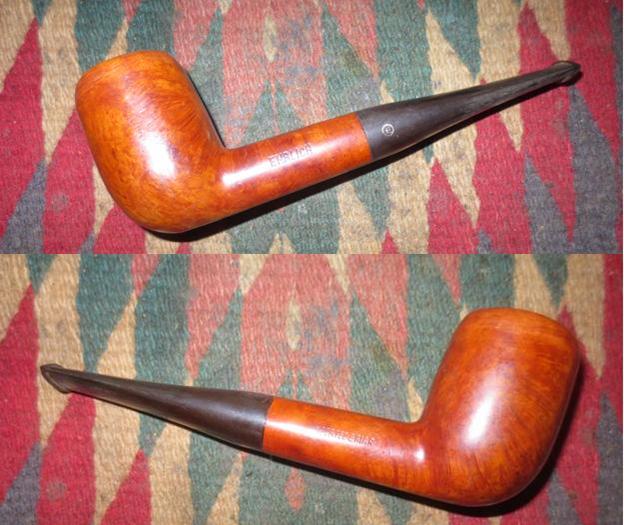
And now all of Mr. Boughton’s troubles are about to change for the better from the simple purchase of an estate lot of seven tobacco pipes in time to write off as an expense on last year’s business income taxes. All of them would have been finds for more than the $25 he paid for the lot – but at a glance, the real gem, in the eye of the restorer at any rate, first went unnoticed. See if you can spot it in the following picture from our gallery, which we call “Lot #7: Tobacco Pipes.”  If you correctly identified the L&H Stern Straight Billiard, on the right in the middle, as the object of Mr. Boughton’s growing obsession, shall we say, then you either have what is commonly referred to as the Sixth Sense or you are an astute collector of fine pipes.
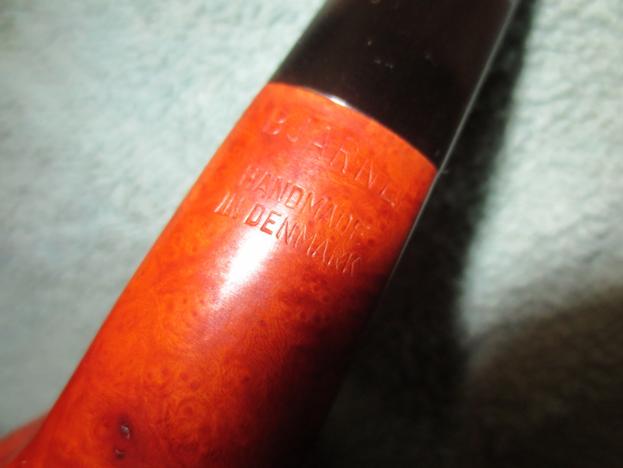
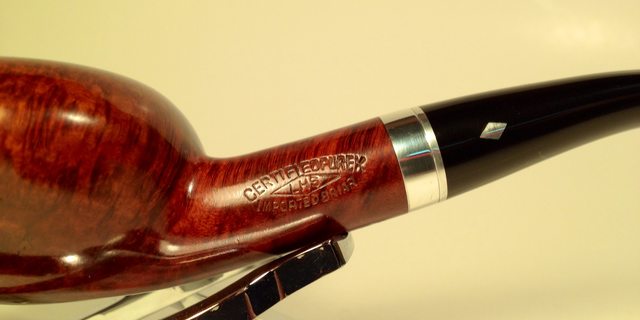
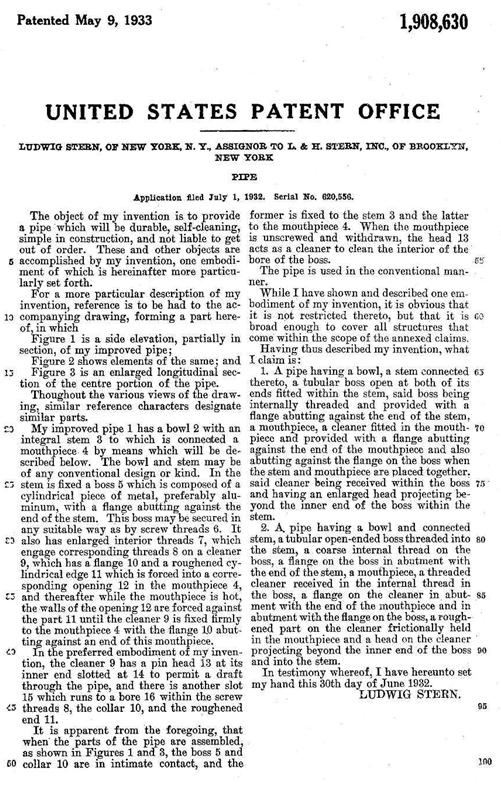
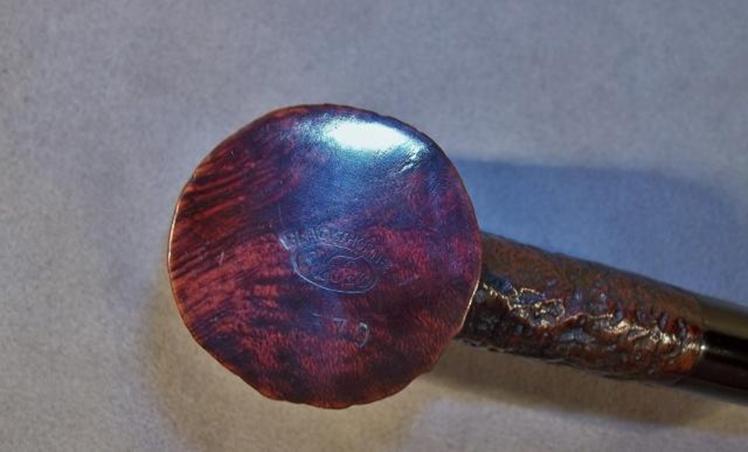
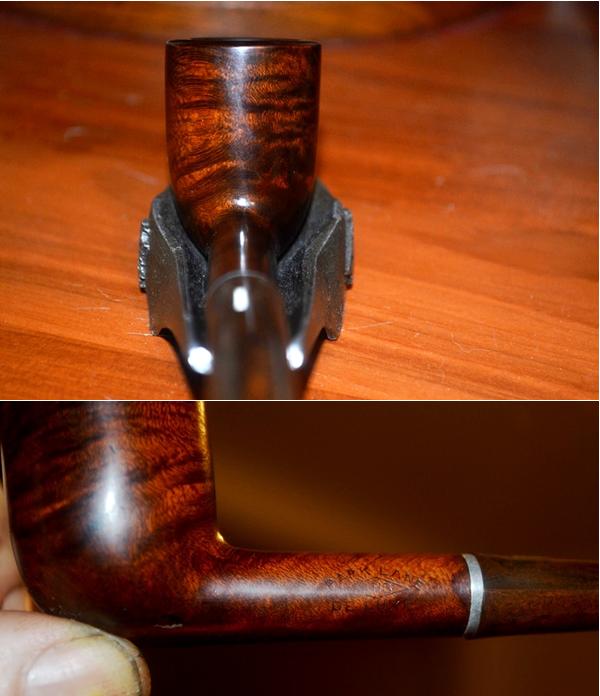
The Park Lane, an invention of the company’s primary founder, is stamped with U.S. Patent № 1908630, issued May 9, 1933. Mr. Boughton has always appreciated the elegant – in expressions of poetry, law, logic and art, to name a few – and as for Patents, he considers this one, being only two pages including the obligatory illustration of parts, to be as brief and comprehensive as they come.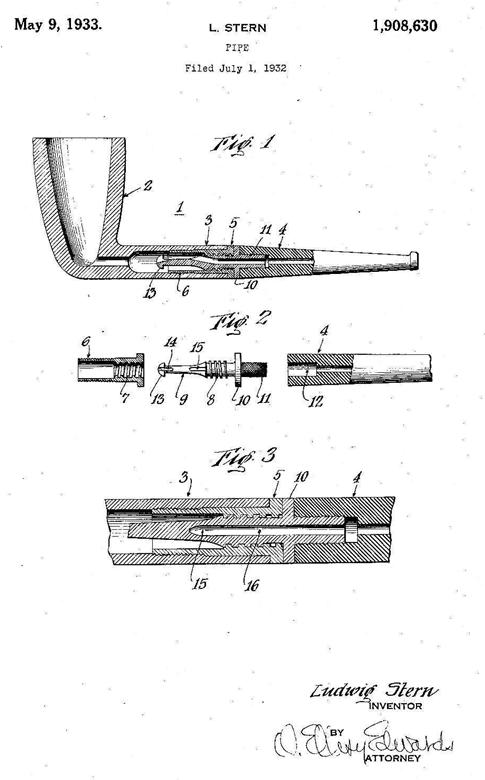
 L&H Stern Inc. was officially organized in 1911 by one Ludwig Stern (the L in the initials, which in the early days were fashioned L. & H. S.), with his older brother, Hugo (the H). Ludwig emigrated from Germany as a young man, after his brother, who was five years older.
(And now, if the audience will permit a brief side-bar, a point of interest: Ludwig worked for the largest supplier of tobacco products to the entire state of New York – somehow providing an estimated 90% of cigarettes, cigars, pipe tobacco and other related items to manufacturers and retailers in the area – as early as 1899, the year the behemoth tobacco supplier was spawned. Called the Metropolitan Tobacco Company, a corporation born of a cartel of others in the same business known to everyone who was anyone within the industry as the “Tobacco Trust,” became the object of a drawn-out restraint of trade civil complaint. The original trial and both appeals of said cause were decided, not surprisingly, in favor of the tobacco industry defendants. The small shops, banded together as plaintiffs, now collectively relegated to historical obscurity by a single last name and “et al.,” were forced to close. I submit for your consideration one question: could the wheels of justice have been greased in this case by the main product of the second of the Seven Deadly Sins? This is offered as food for thought – only available at your local diner in the Twilight Zone.) [See Link 2.)
The brothers moved the re-formed business in 1920 to Brooklyn. The new location, in a seven-story building, was – for the then-ubiquitous craft – in a convenient part of town now known by its acronym, D.U.M.B.O. (Down under the Manhattan Bridge Overpass). It remained there until closing in the mid-1960s. [See Link 3.] LHS was already so well respected in the business at the time that the company reorganization and move were news in those bygone days. [See Link 4.]
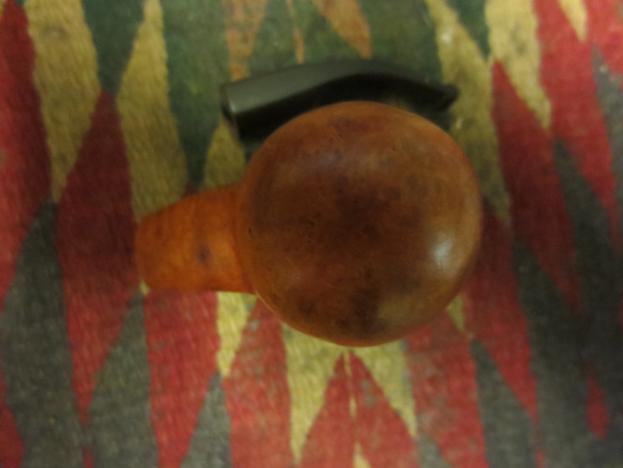
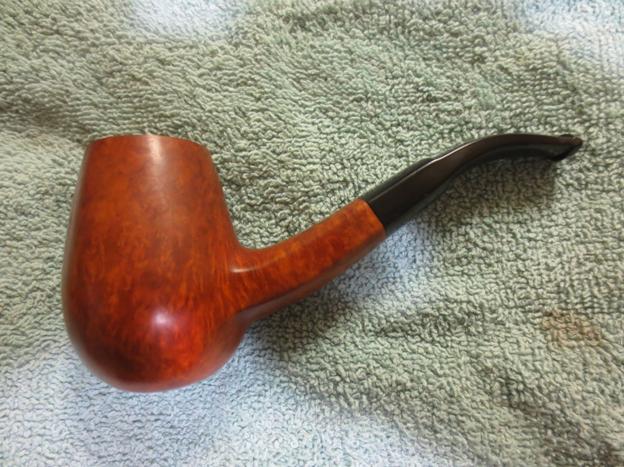
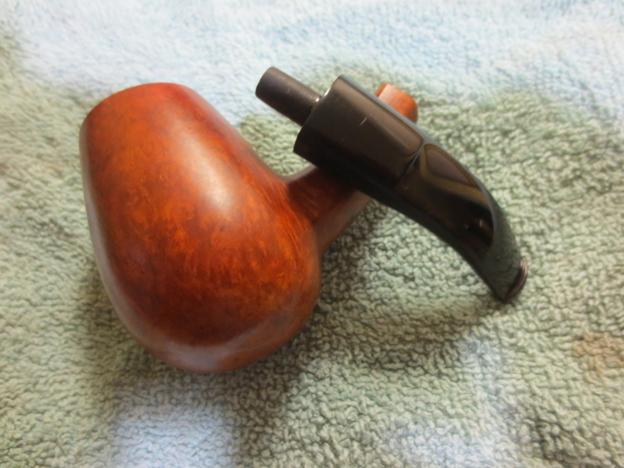
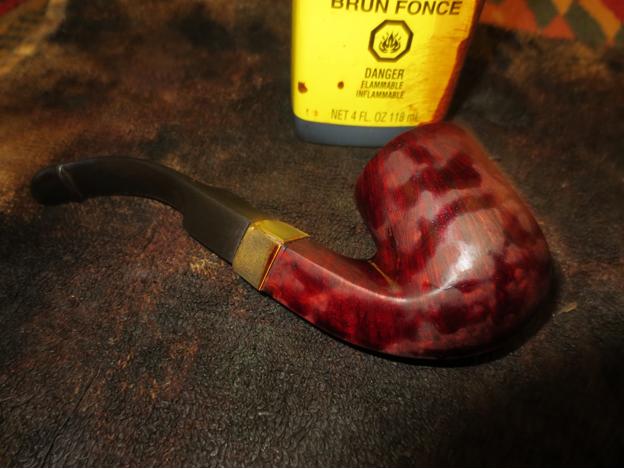
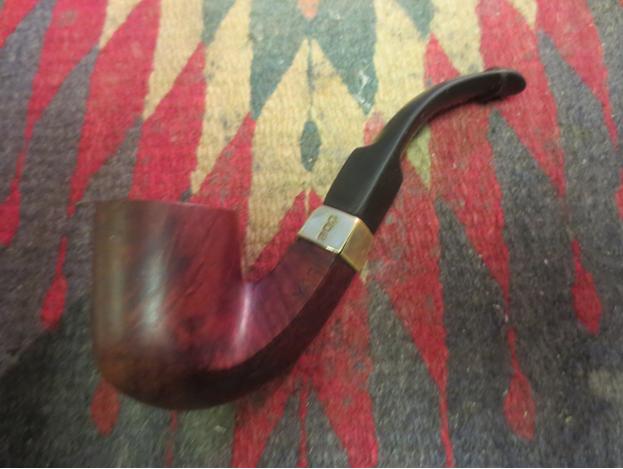
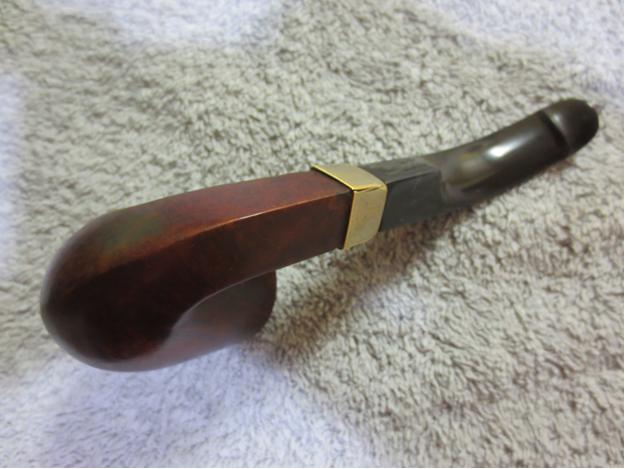
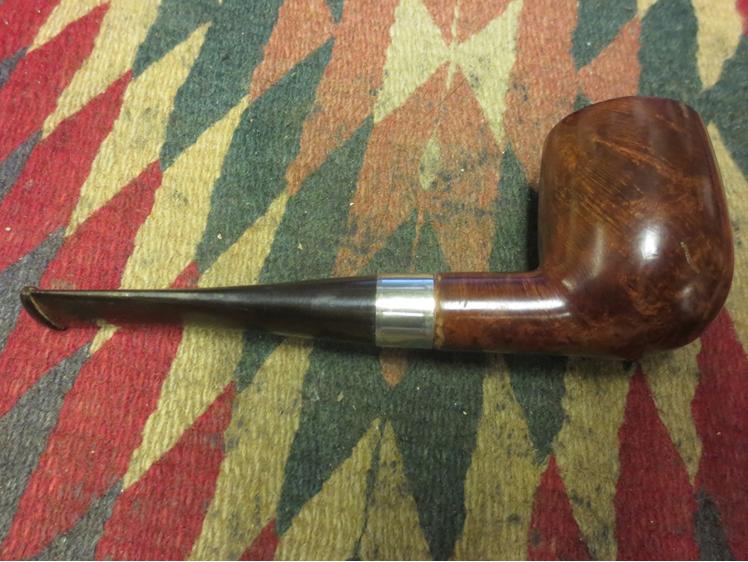
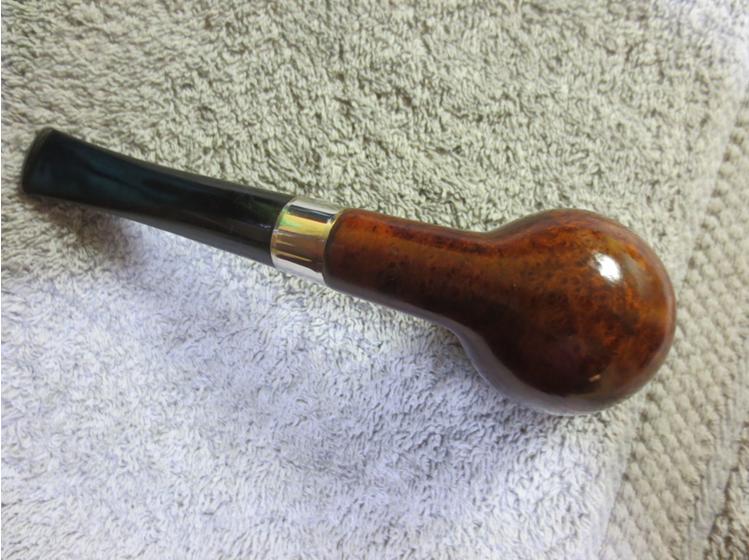
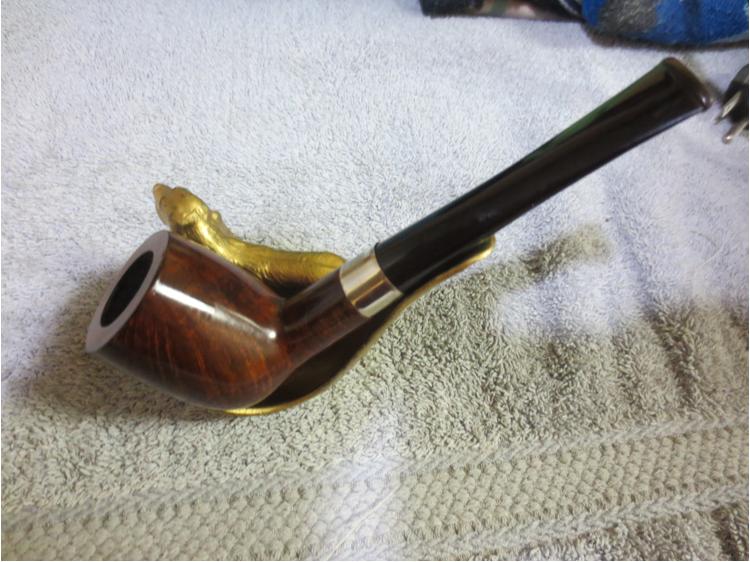
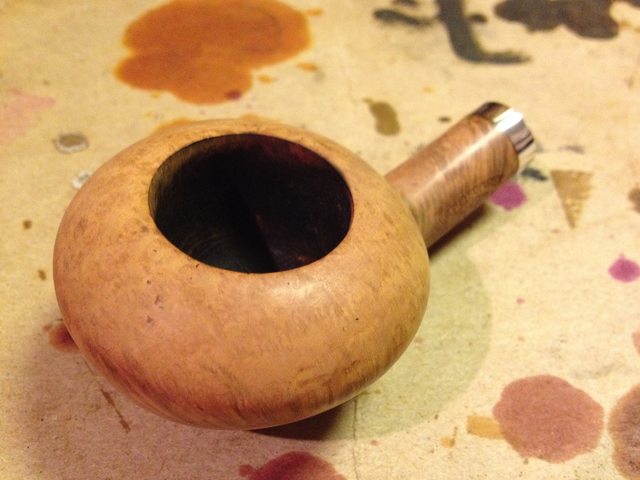
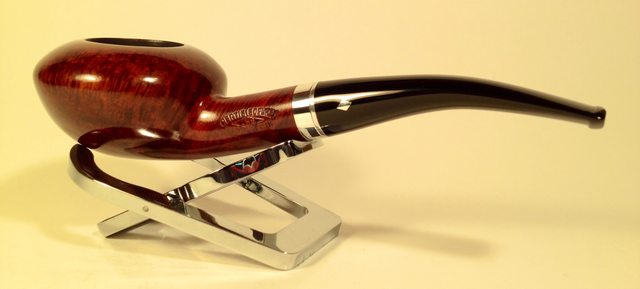
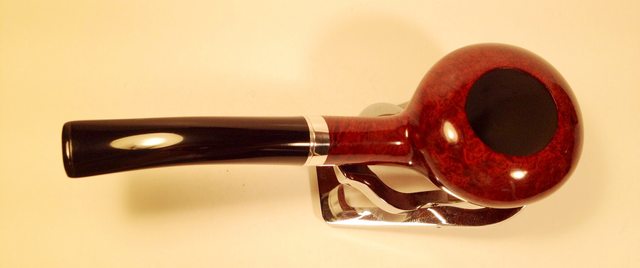
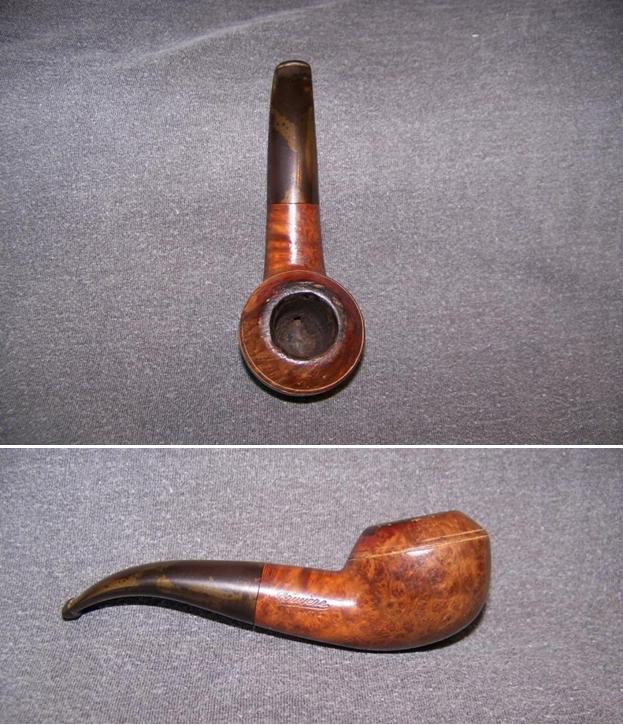
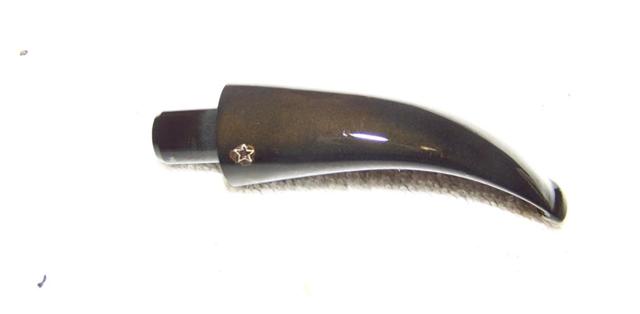
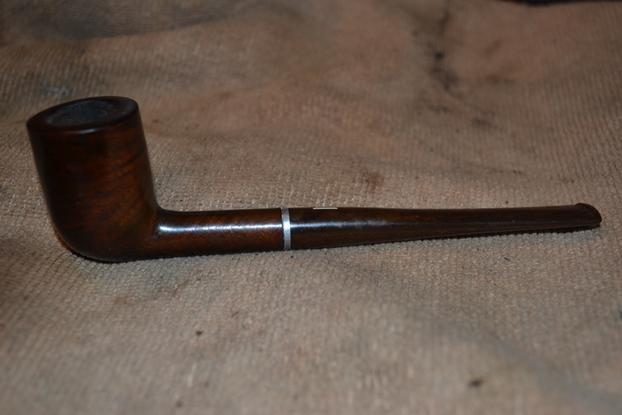
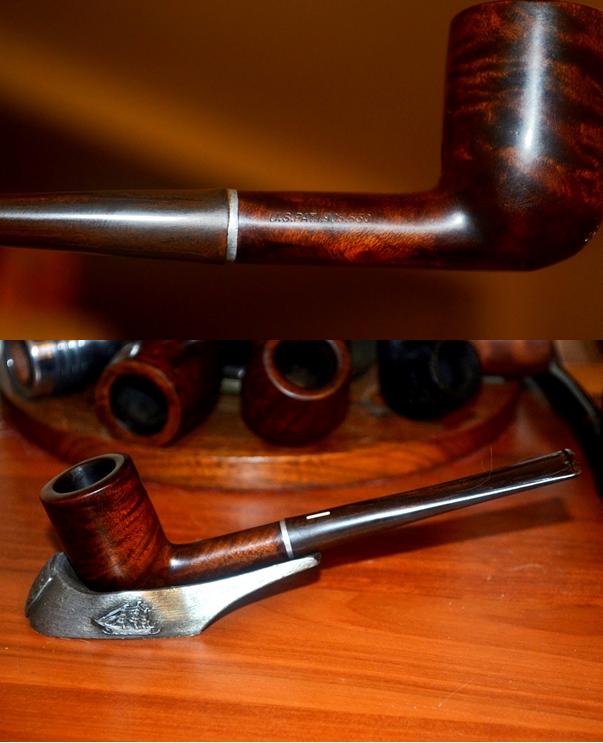
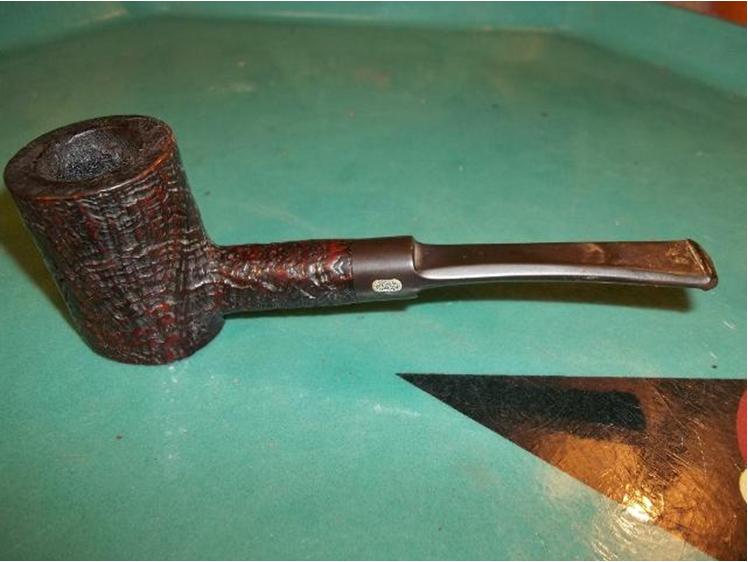
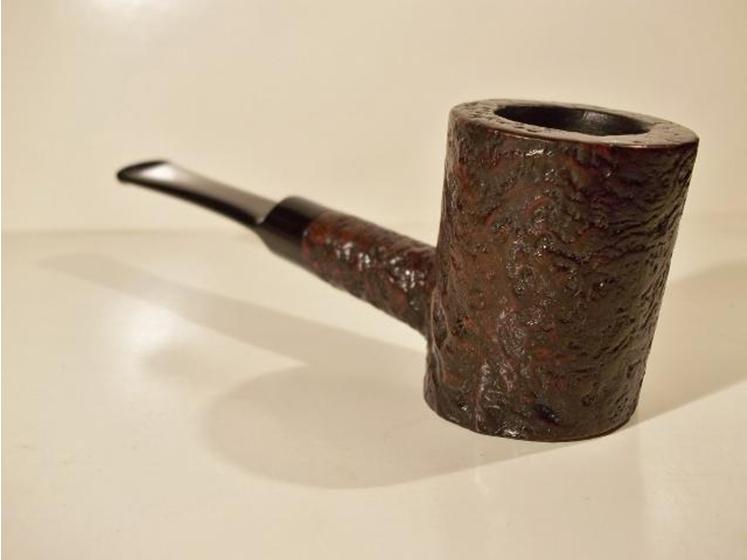
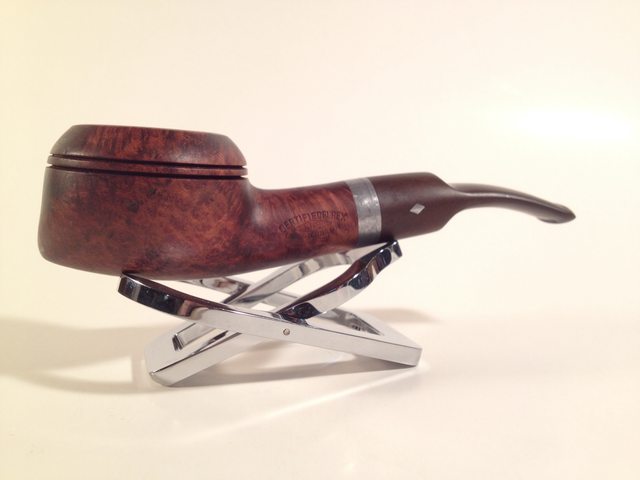
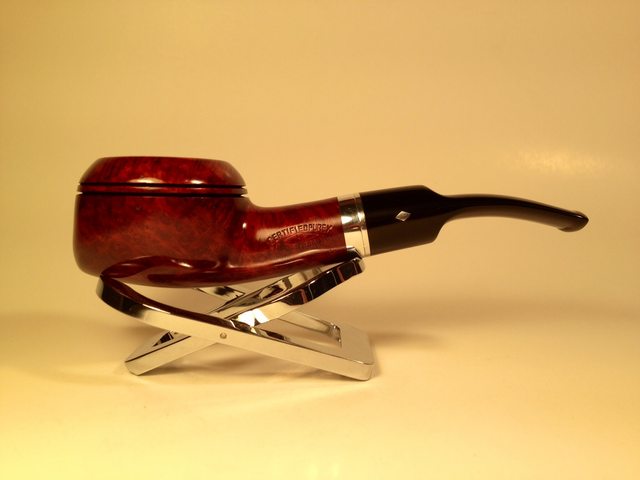
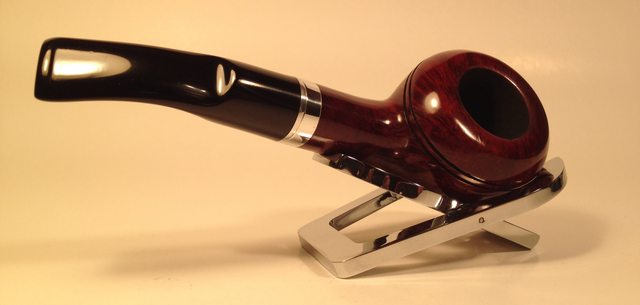
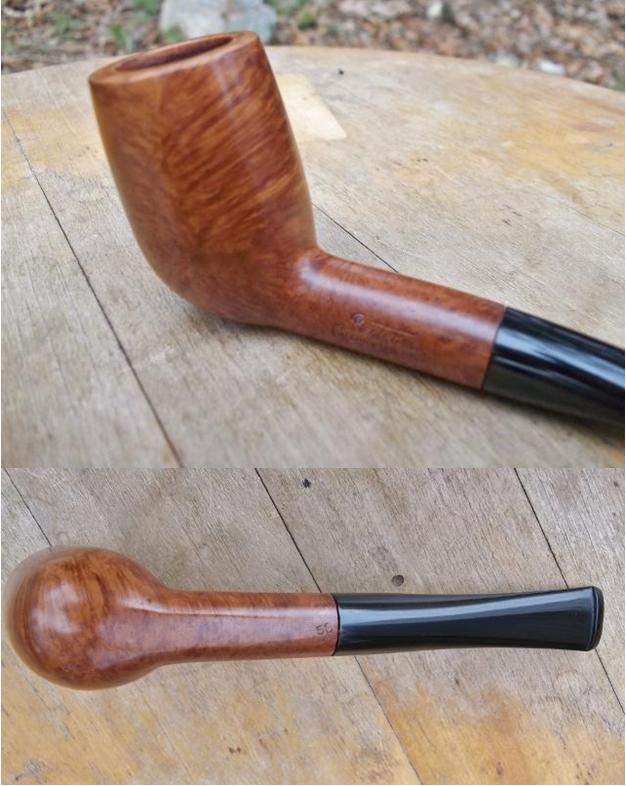
The LHS Park Lane Billiard included a brown and orange swirled Cumberland bit, handmade from Ebonite and fashioned in this case to look like wood. Mr. Boughton considered the task of restoring this pipe to be distinctly good fortune and a pleasure of restoring, in particular because of a certain aspect of the repair that was new to him. The line was made only in the 1930s. [See Link 5.]
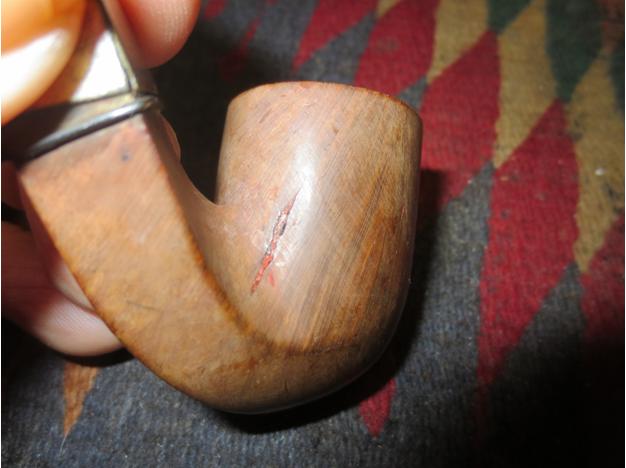
At the present moment, Mr. Boughton is busy at work attempting to restore the WDC Park Lane to its original state. As noble as the endeavor may be, the only problem, with this peculiar specimen, is the invisible transformation the pipe has undergone during years of smoking by a single prior owner who had the good grace to love it. As Mr. William Shakespeare so aptly put it in “A Midsummer Night’s Dream”: “Love looks not with the eyes, but with the mind,/And therefore is wingèd Cupid painted blind.” Now, meet Mr. Boughton in his favorite activity – restoring tobacco pipes with every ounce of his love.
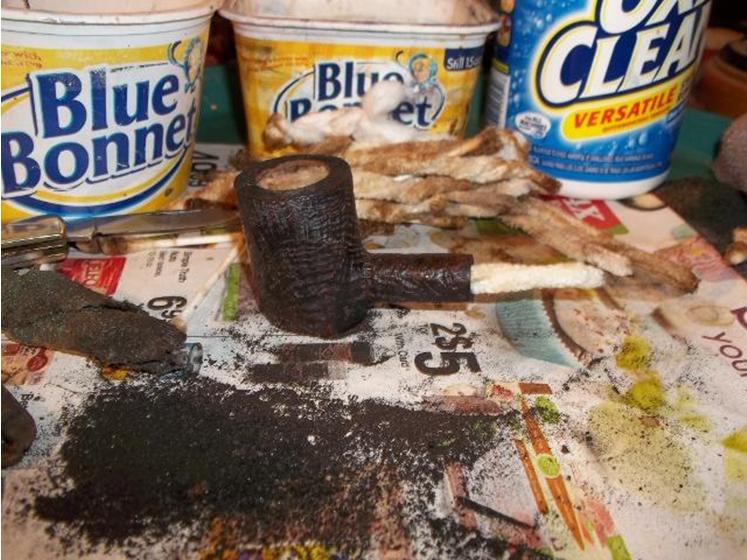
RESTORATION

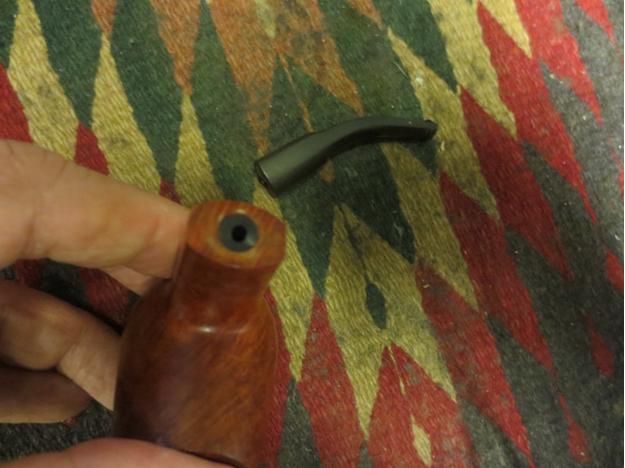
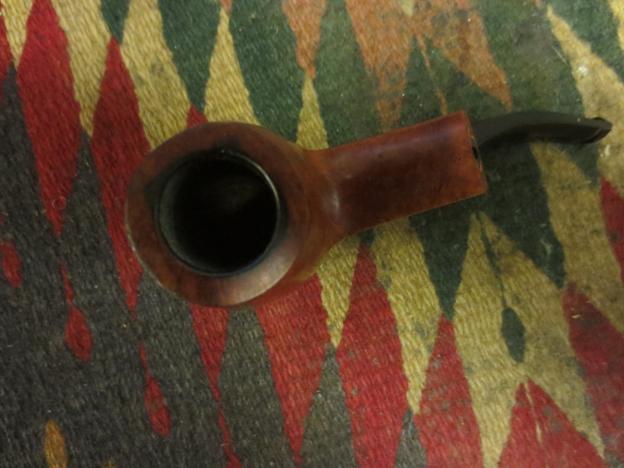
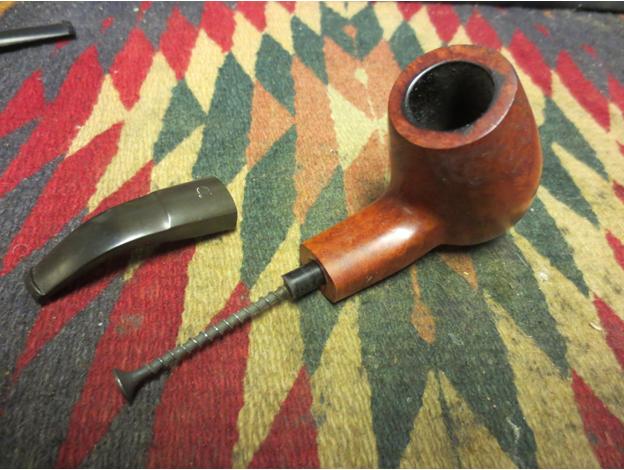
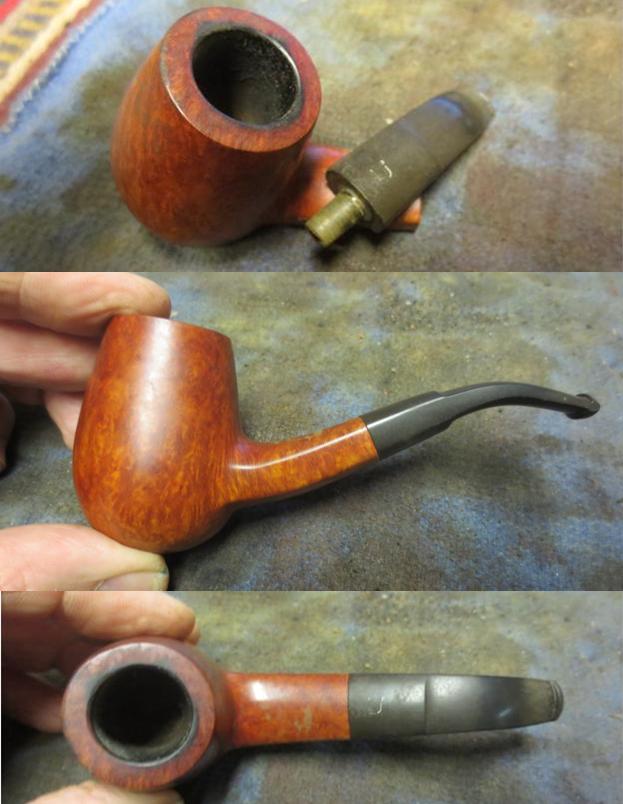
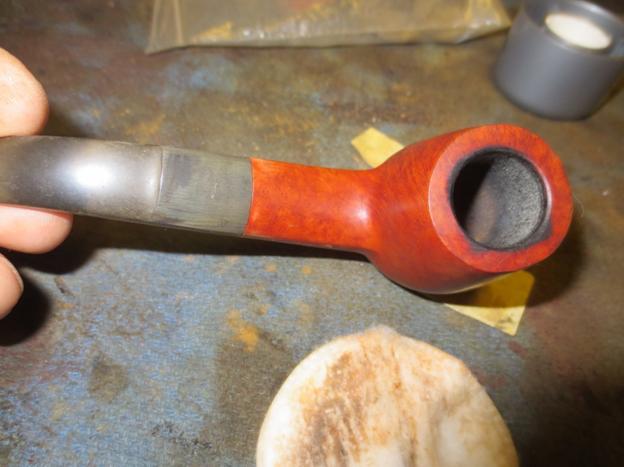
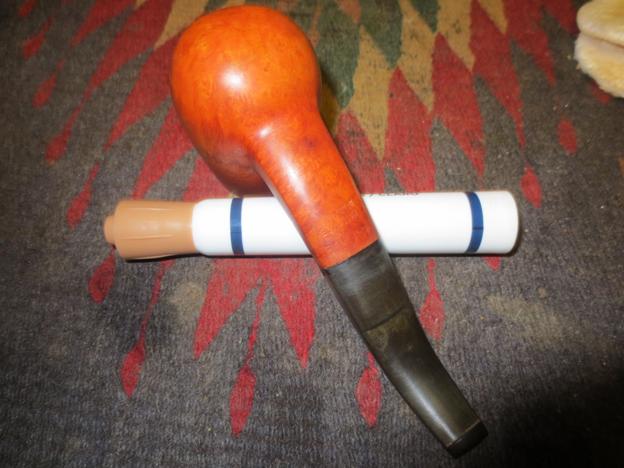
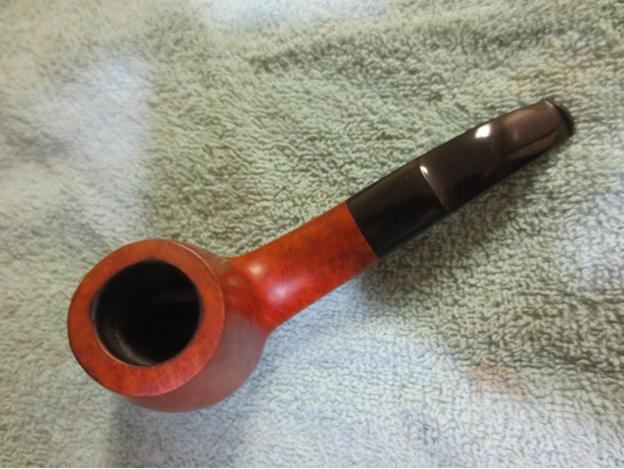
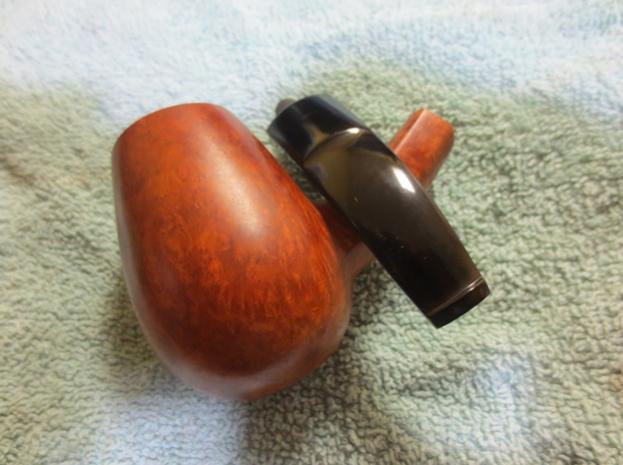
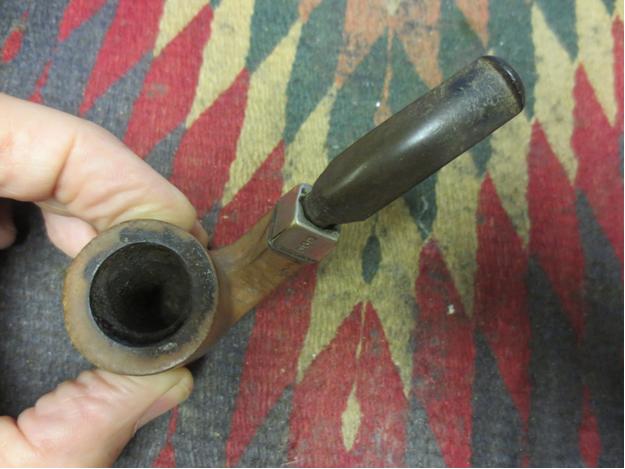
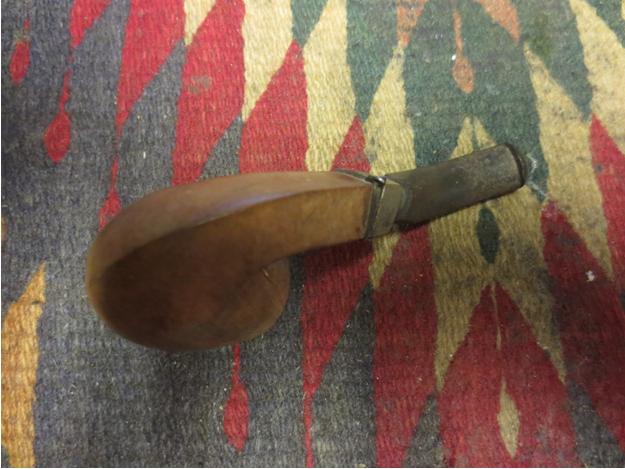
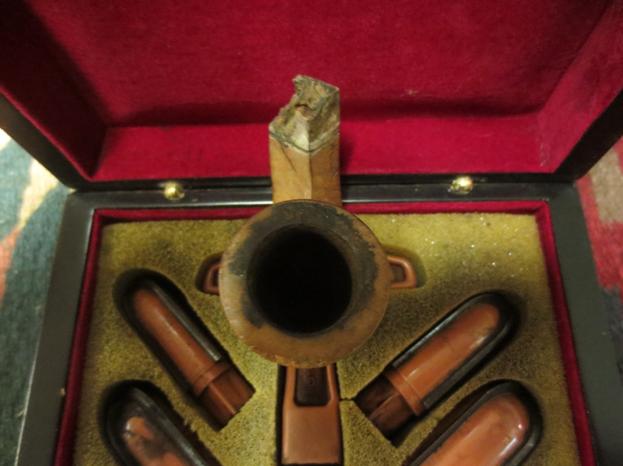
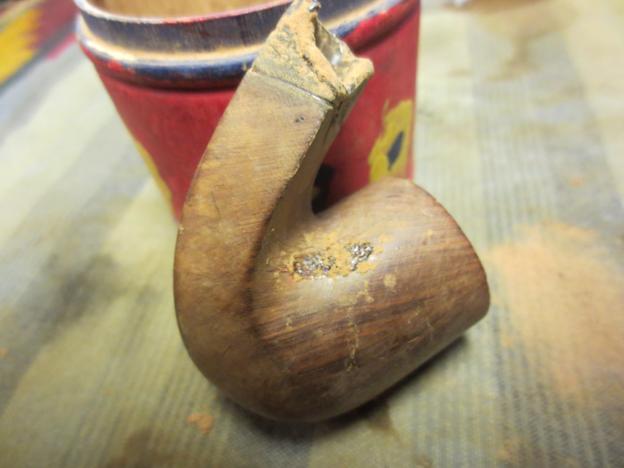
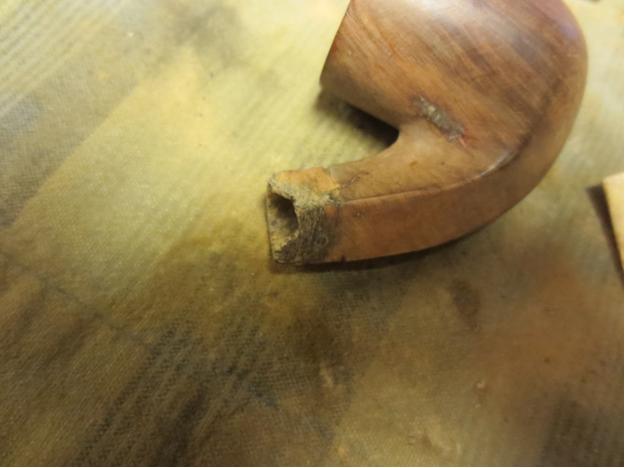
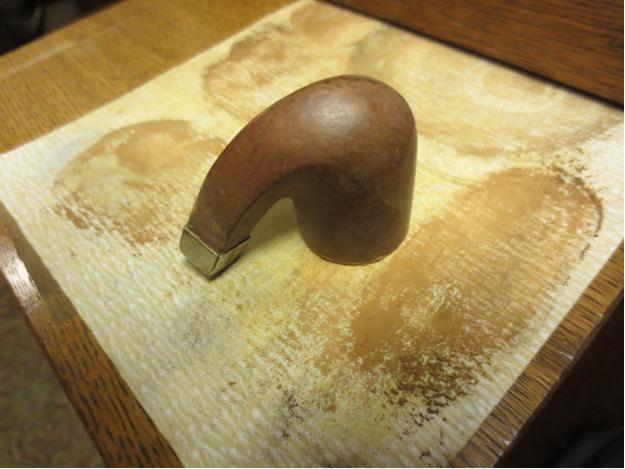
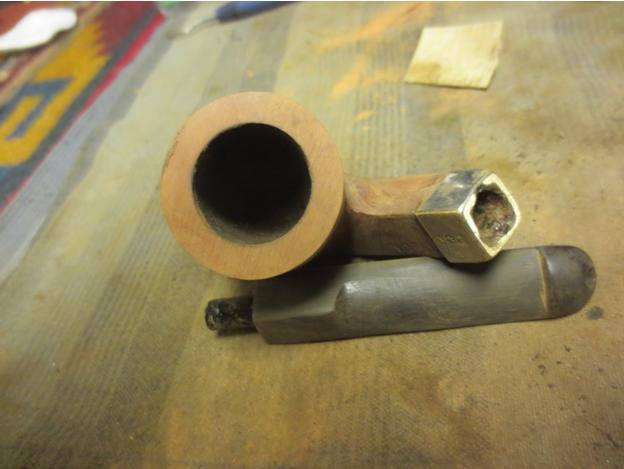
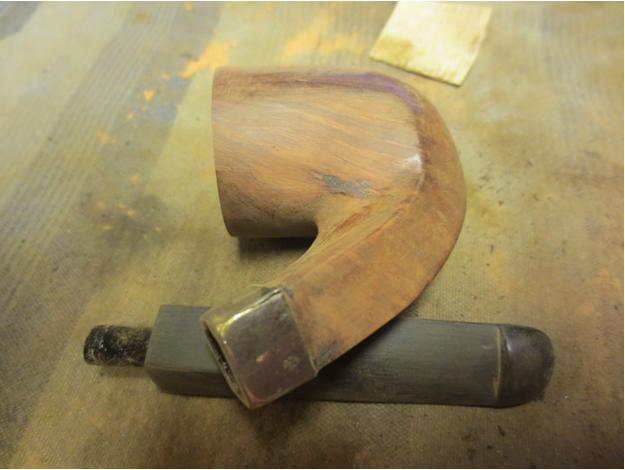
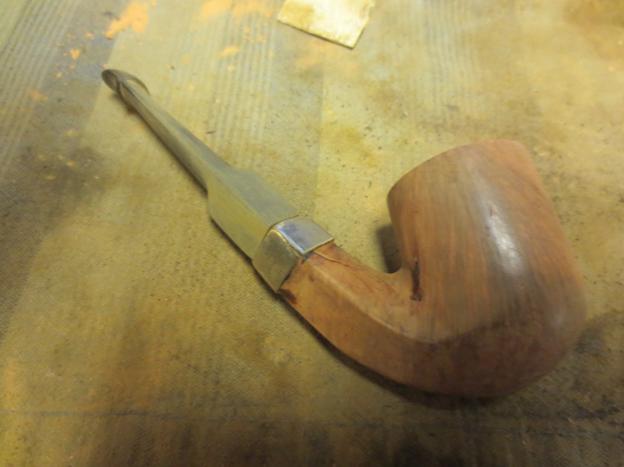
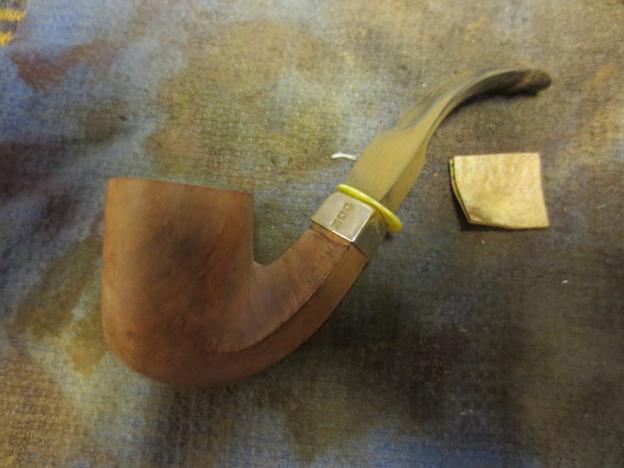
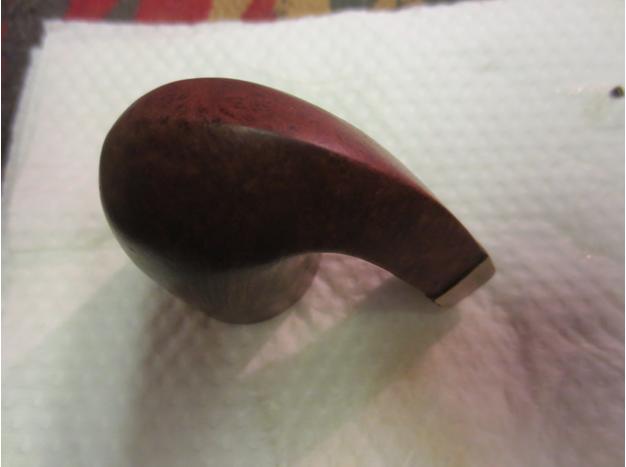
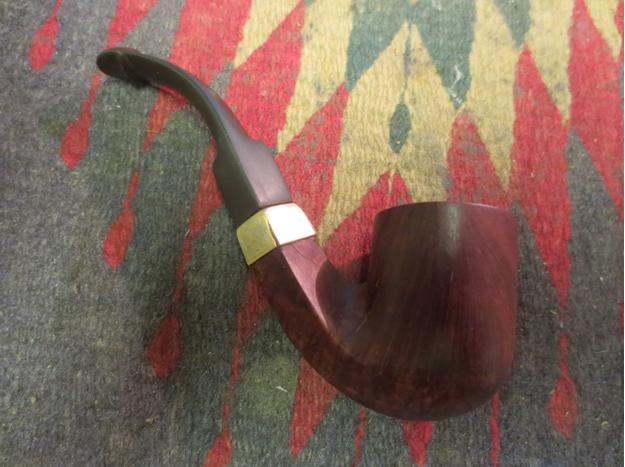
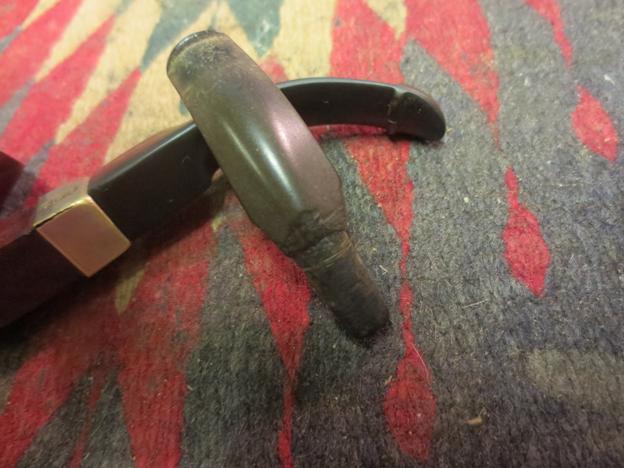
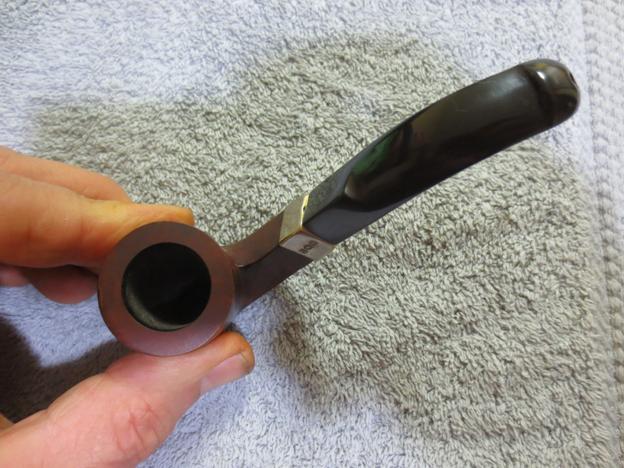
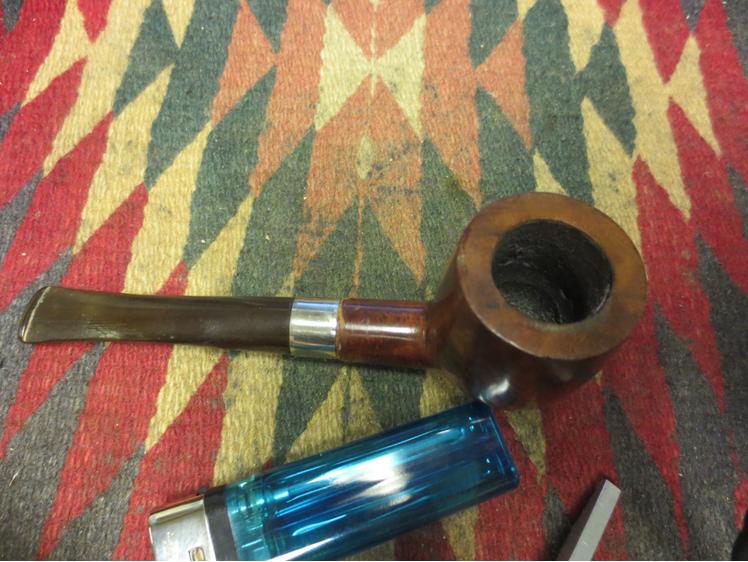
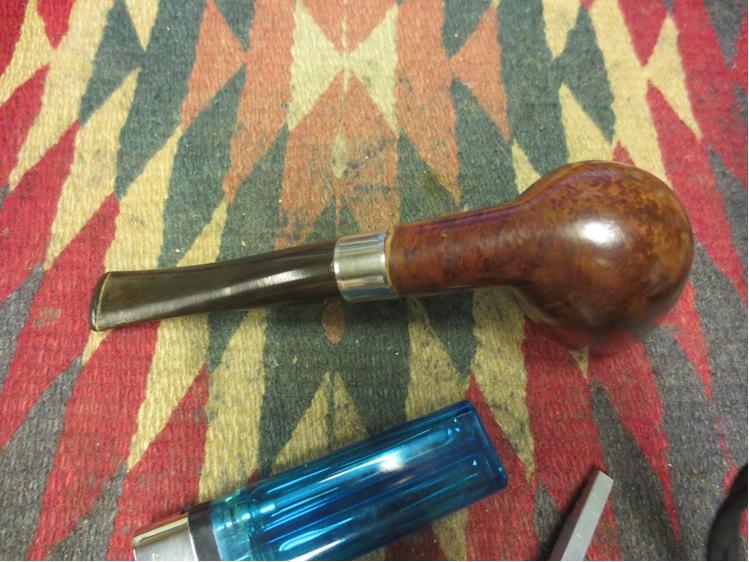
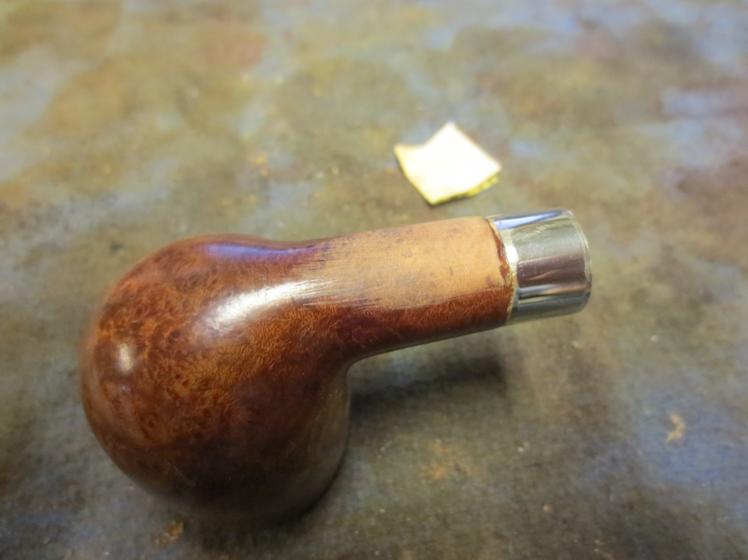
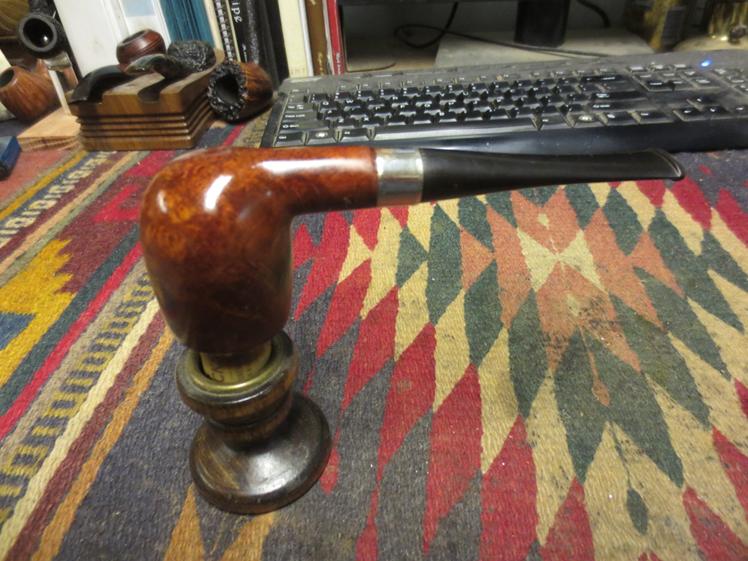
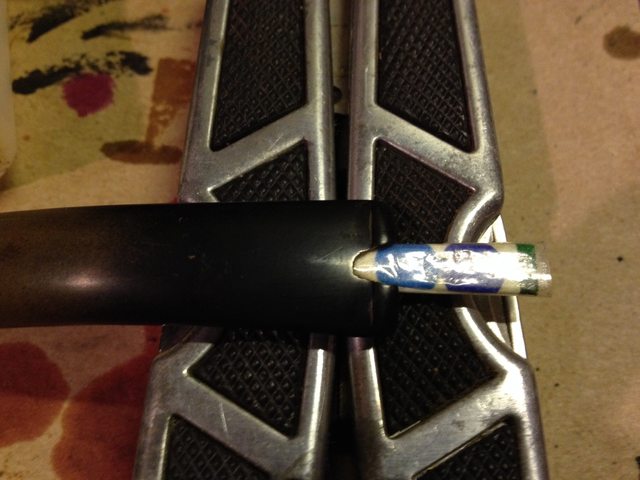
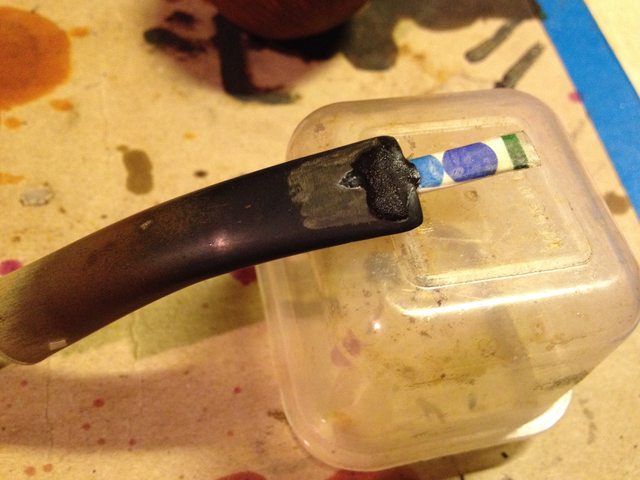
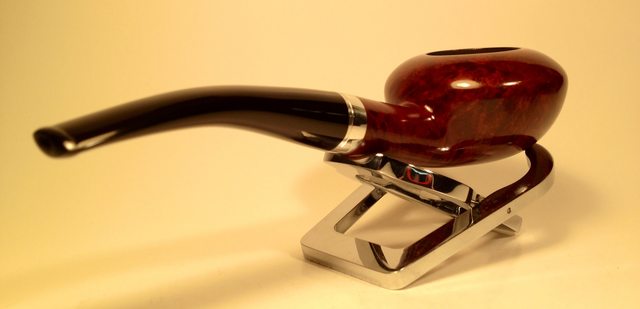
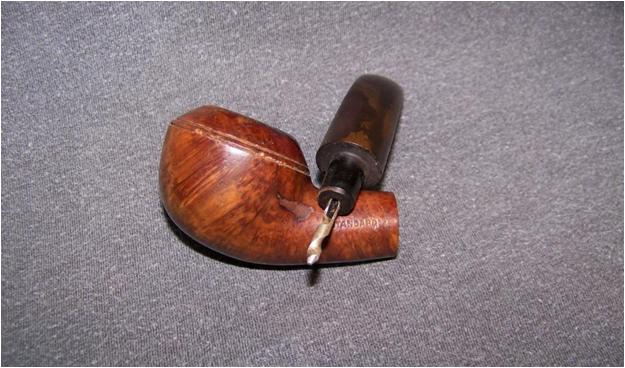
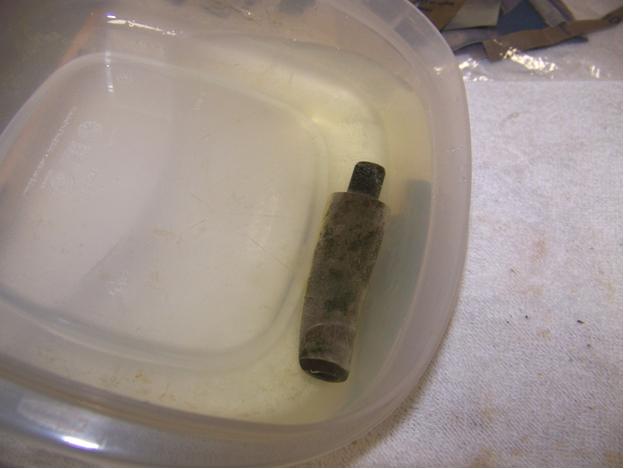
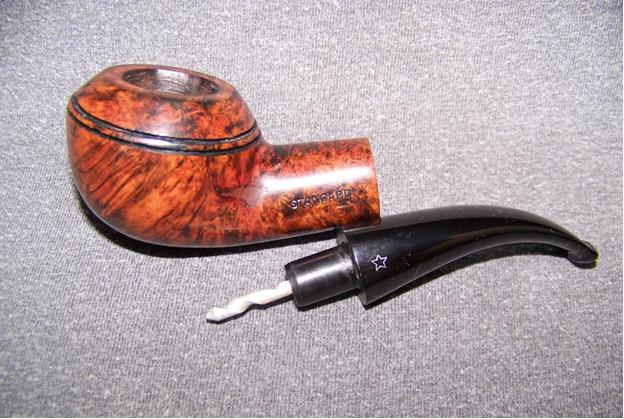
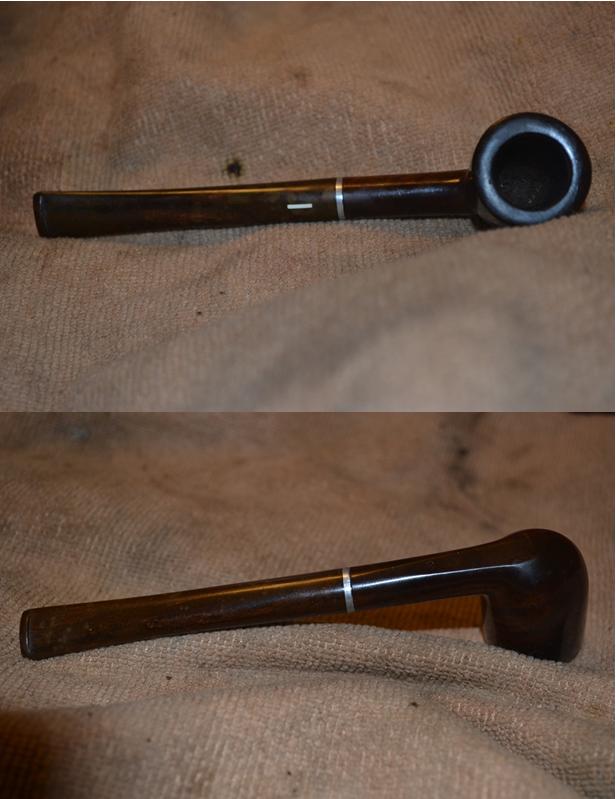
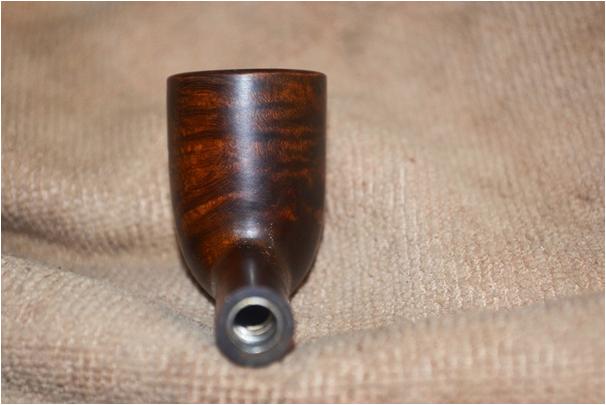
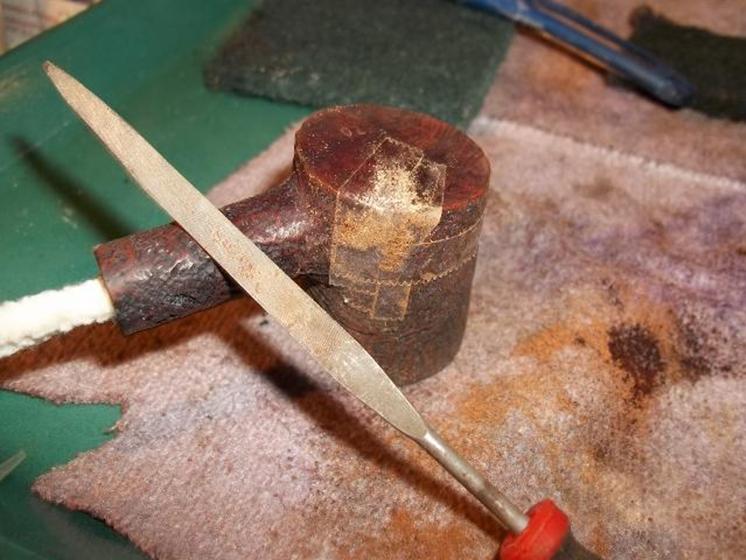
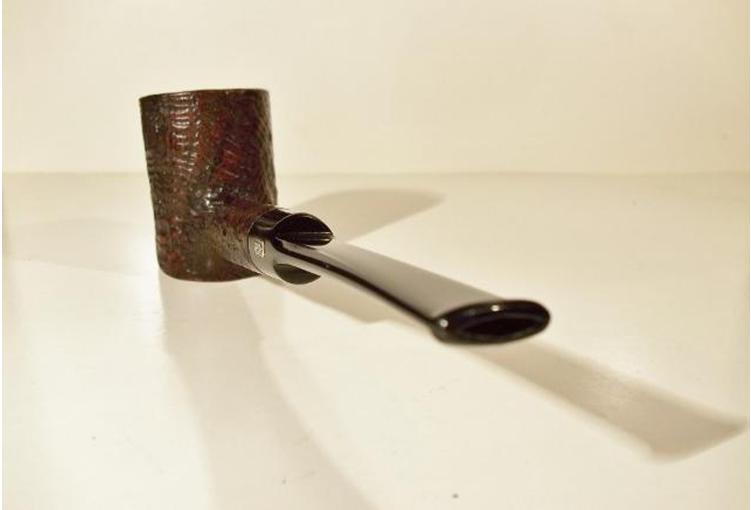
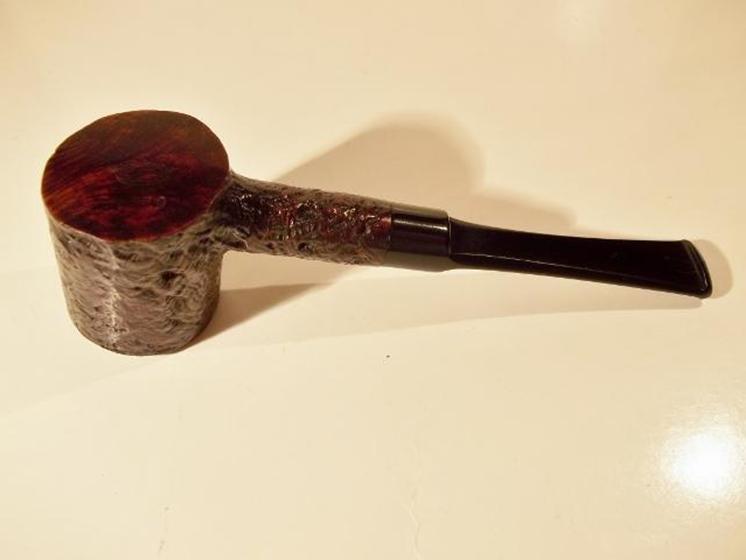
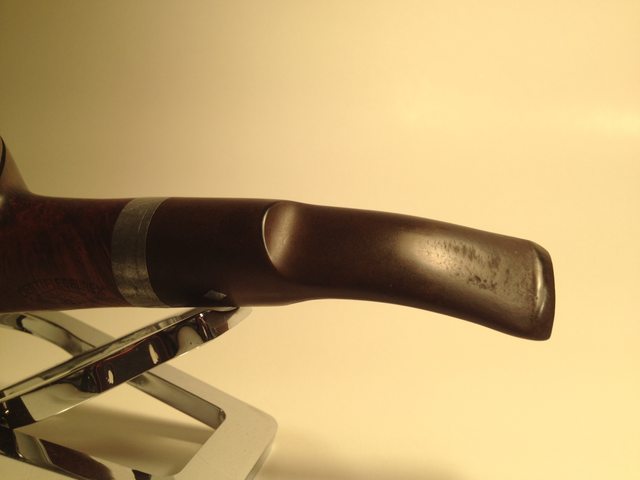
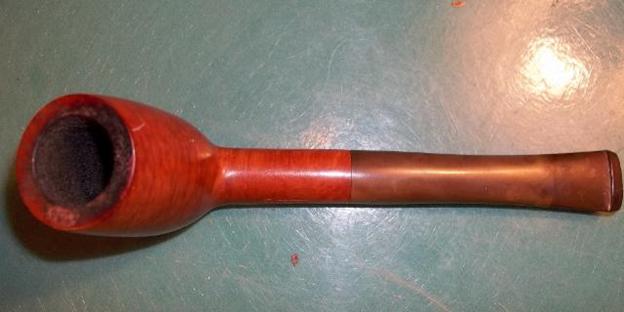
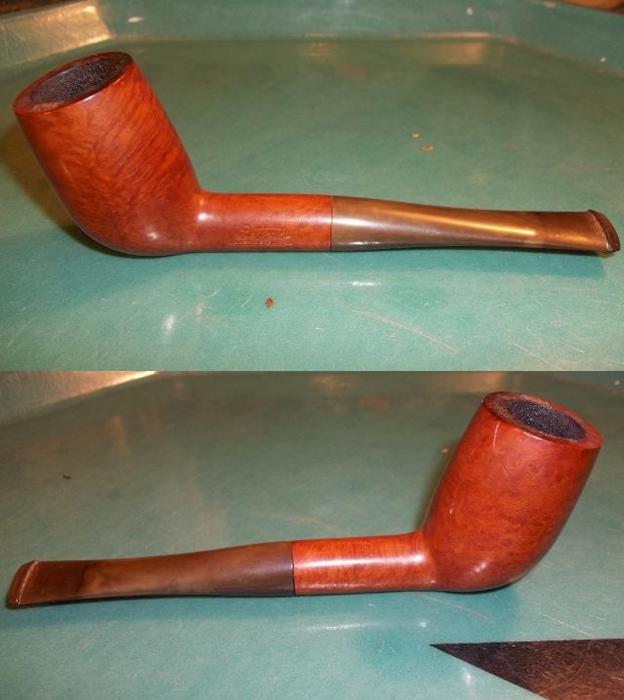
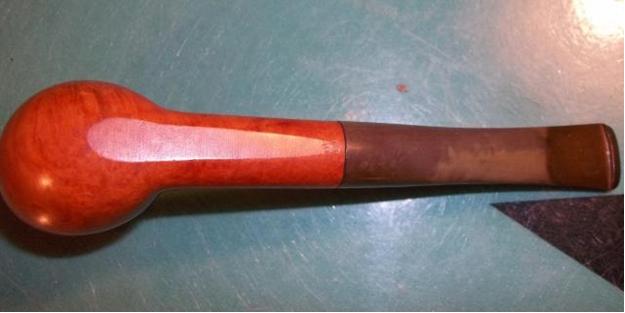
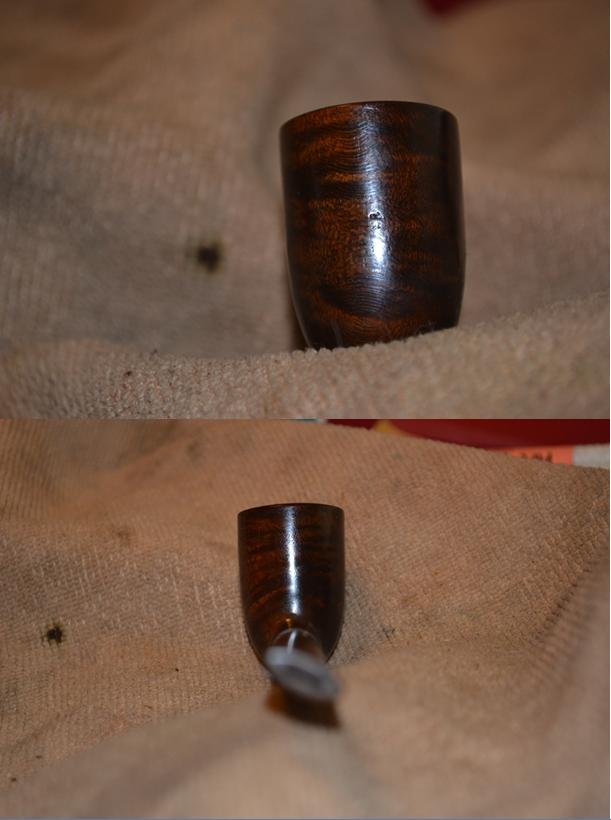 The last shot of the Park Lane prior to restoration, above, makes the most serious problem I encountered apparent. The bit was off by about an eighth of a turn, which may seem negligible to one who has never enjoyed the ruminating quality of a fine pipe, but is in fact a microcosmic chasm along the lines of the Grand Canyon to the general viewer.
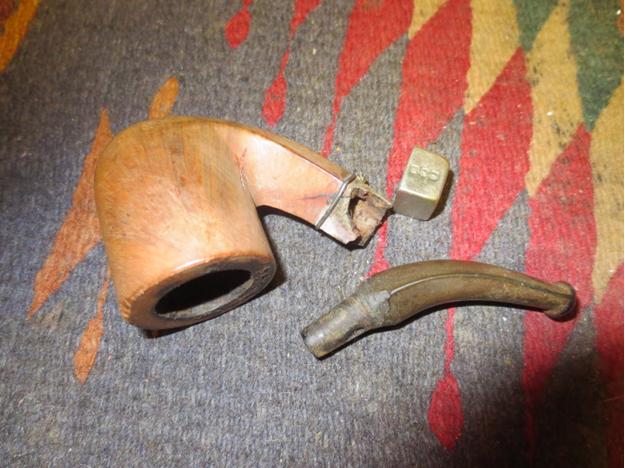
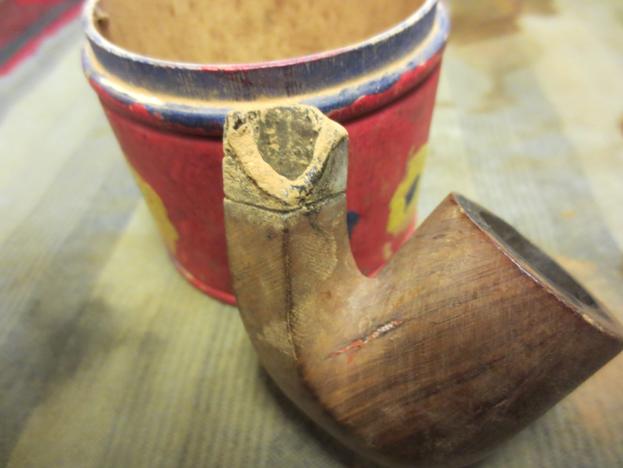
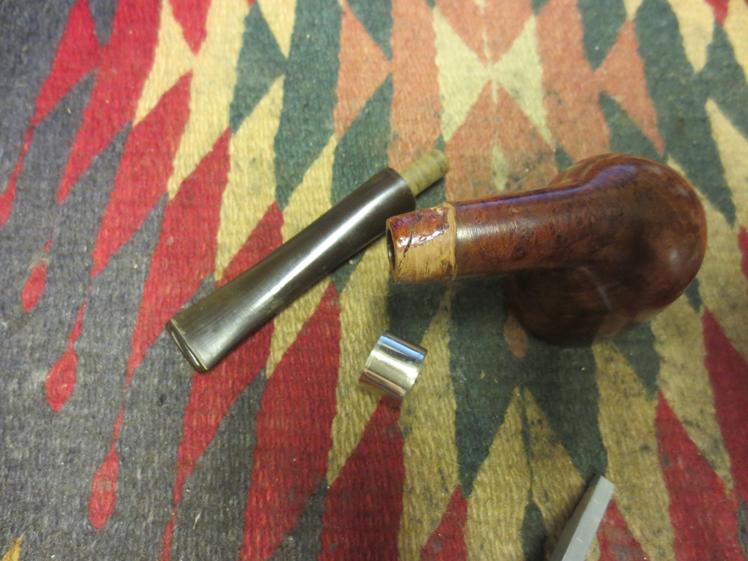
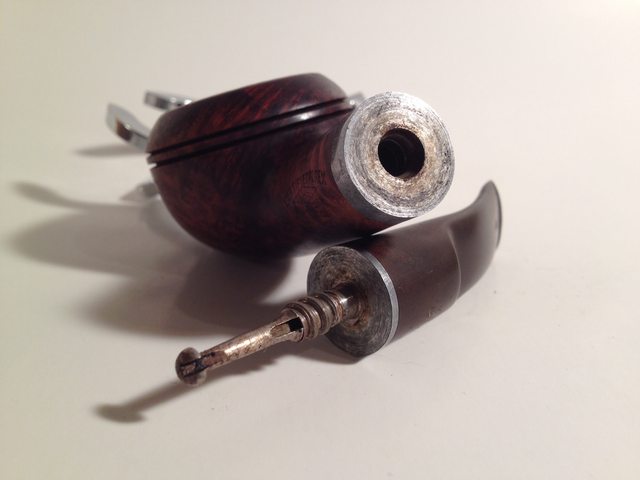
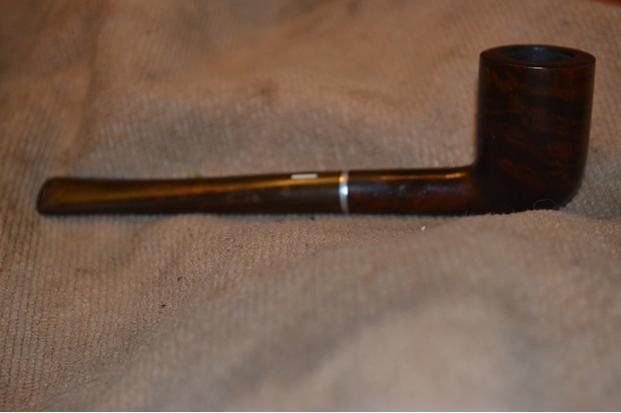
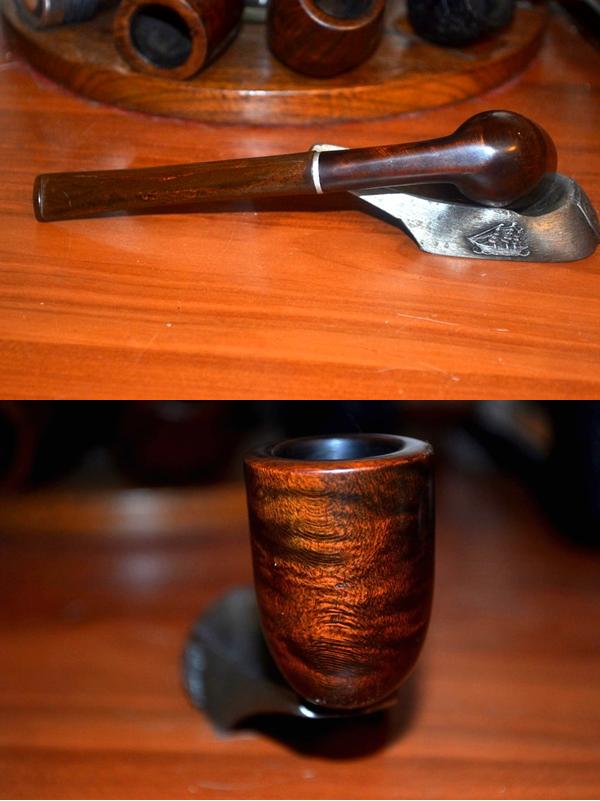
The flaw was masked by the seller of these estate pipes, who, with no small amount of duplicity, placed a piece of paper around the metal tenon screw built into the opening of the shank.
 The wily culpability of this particular ilk of seller is obvious from the freshness of the paper. Hence the conspicuous starting point for my restoration.
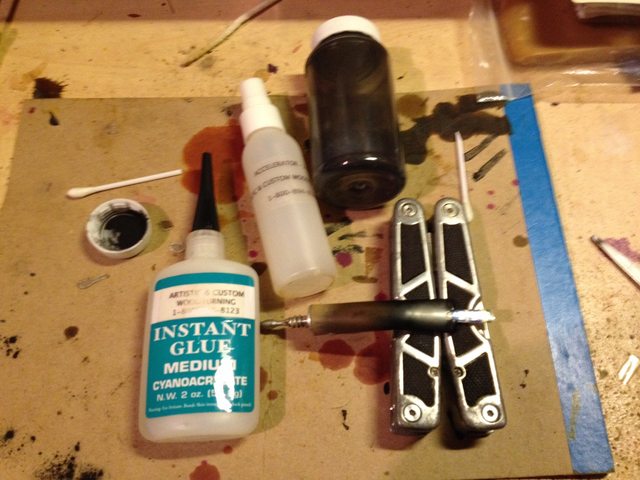
At this point of experience restoring pipes, I consider myself a journeyman in the craft. Although familiar with various ways to tighten Vulcanite, Ebonite, Lucite and other tenon materials, I was unable to locate any useful information on the Internet – the modern day Library of Alexandria, which was dedicated to the Muses, or nine gods and goddesses of the Arts – concerning the re-alignment of metal tenons fixed either to the bit or shank.
Nevertheless, finding myself without a clue how to proceed, I sent an email to Steve Laug, who soon replied with the suggestion that I read his recent online blog on the restoration of an LHS Purex Bulldog. This amused me, as the many notices of comments on the blog in question were forwarded to me, I wondered what all the hoopla was about and had intended to check it out.
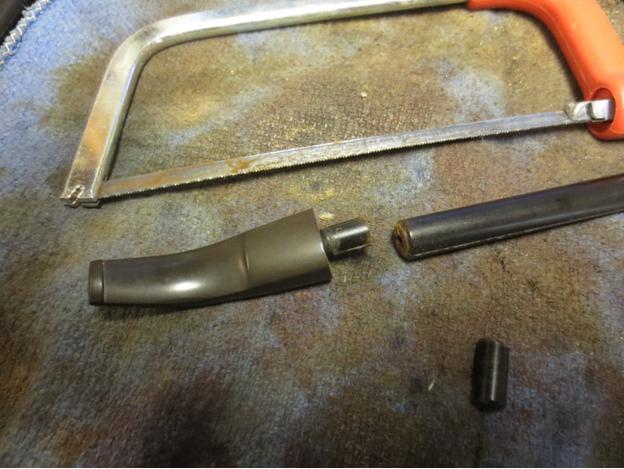
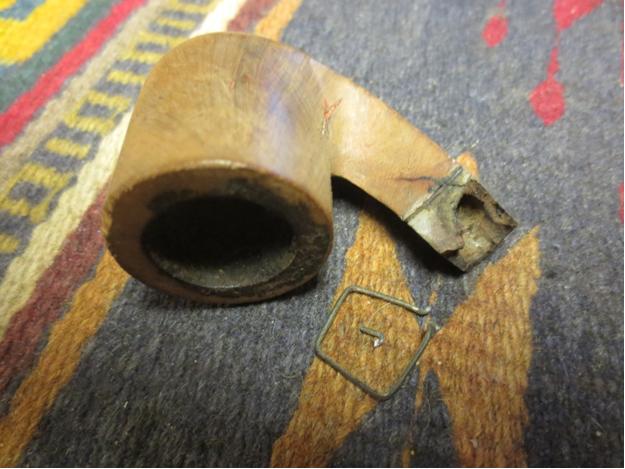
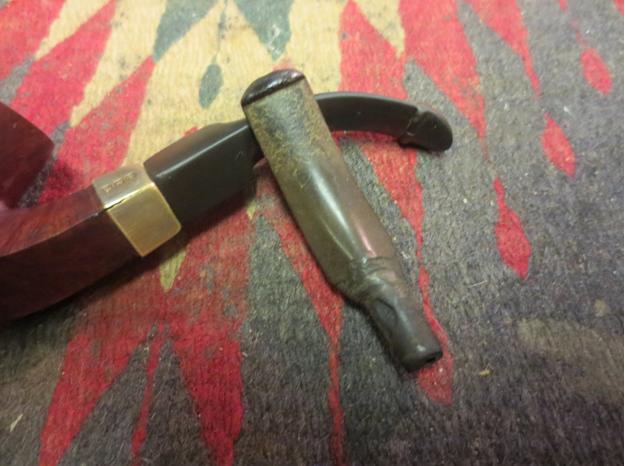
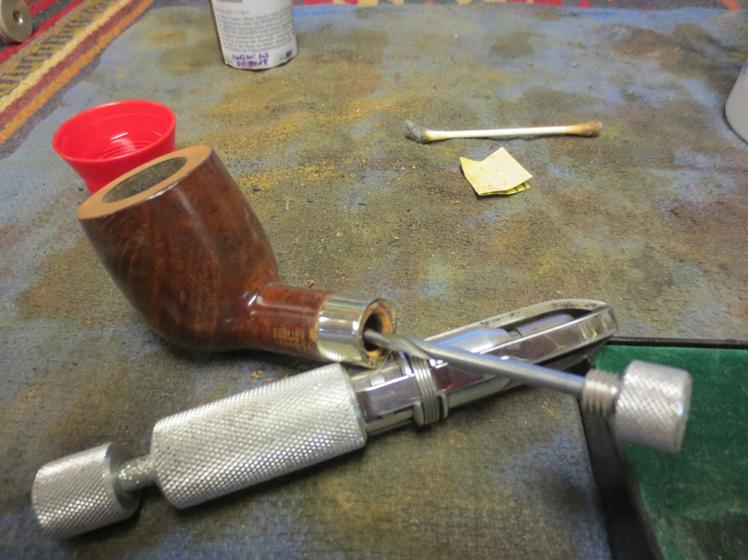
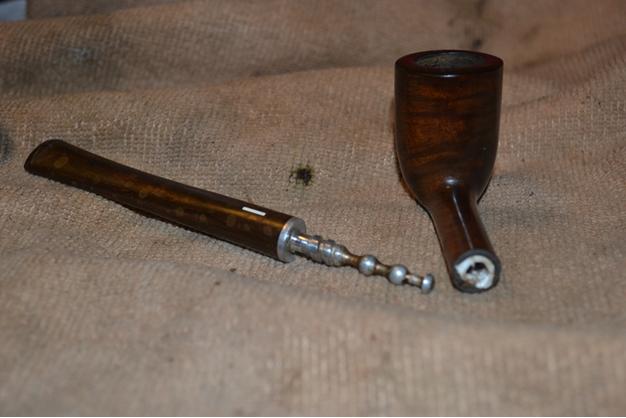
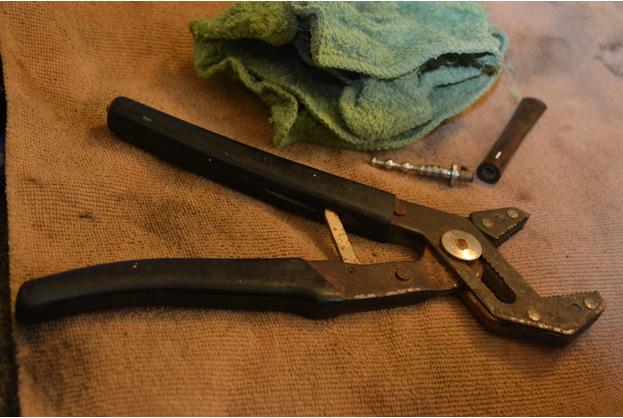
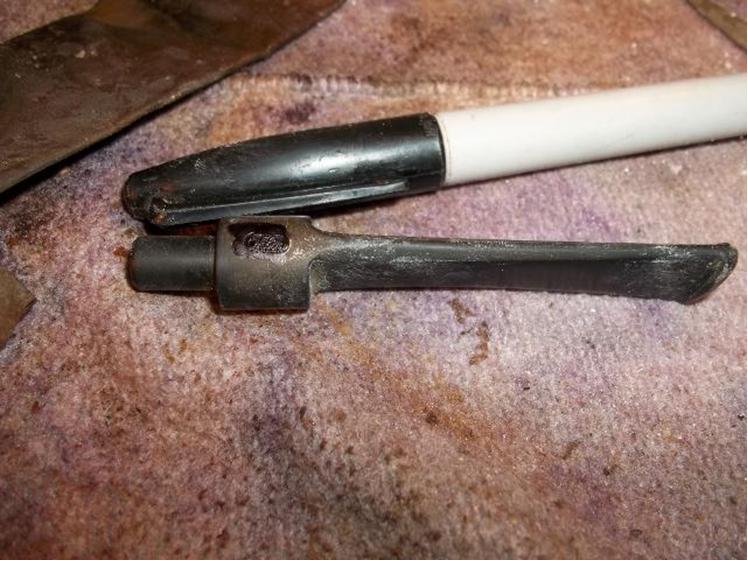
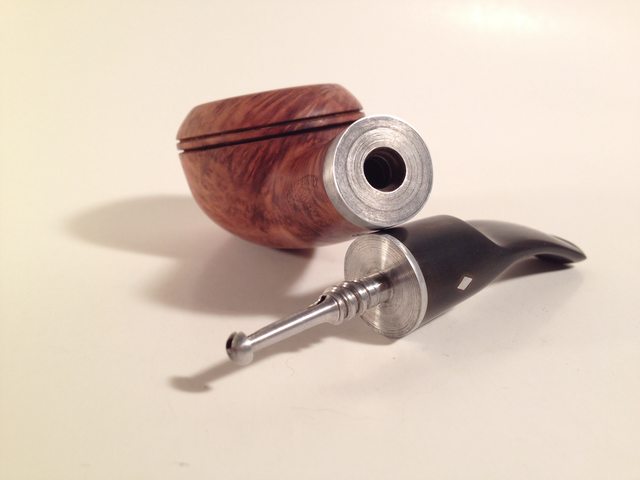
However, awaiting Steve’s reply did not hinder me from proceeding with certain steps I knew, such as the fact that the stinger extension of the tenon should come off. Thinking of that, I tried heating the entire aluminum tenon with the flame of a Bic, careful not to touch the shank opening beyond the part of the tenon Ludwig Stern referred to as the flange [see p. 1, Fig. 2, part 10 of the Patent]. Unfortunately, the tenon still would not budge. Even the stinger [illustrated as a whole as part 9, with parts 13, 14 and 15 forming its length and pushing into part 8] seemed to form a single piece. I was aware this would be odd, if not unprecedented, but after four attempts, I swear it would not come off.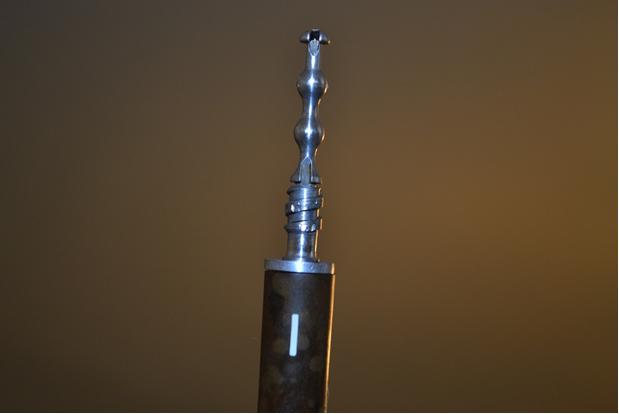 One lesson I did manage to learn from my dad in his countless frustrated endeavors to teach me about mechanics was that if a part of a mechanism or machine would not come free using reasonable pressure, don’t force it. But, always believing that not all of his maxims were absolute, I suspected he meant it as a guideline that was not immutable under controlled conditions I might someday, by some miracle, learn to recognize. Therefore, I found a small wash rag and a pump plier that I feared might be overkill, but it was all I owned that had not been stolen by previous apartment owners. I also possess a wicked sense of adventure at moments like these. Adjusting the rivet to match the job, I then wrapped the small towel around the base of the tenon/stinger by the flange and loosely clamped the end of the plier over the tenon. As I applied pressure, I could feel the two sides of the mouth turn and clamp firmly down on the rag-covered metal. Gripping the bit in one hand, I turned the plier with my other and immediately felt it begin to move. Slowly, it came free and undamaged.
 In the meantime, Steve replied with the suggestion that I read his recent online blog on the restoration of an LHS Purex Bulldog. This amused me, in a good way. As the many notices of comments on the blog in question were forwarded to me, I wondered what all the hoopla was about and had intended to check it out.
Reading through to the first mention of the difficulty encountered by Steve, my heartbeat quickened. Confident I was on the verge of making the discovery that would enlighten me, I continued, on the edge of my seat on the couch in my living room, as though I were reading a real page-turner of a book or watching an Alfred Hitchcock thriller or perhaps “The Twilight Zone.” Indeed, in my mind I envisioned the Canadian master at work in his studio, so vivid were the words and photographs flashing across his computer screen.
Nearing the expected moment of revelation, I was consumed with anticipation – only to come to a single photograph of Steve’s LHS shank that dashed my hopes in a nanosecond, as is the popular if peculiarly à propos phrase these days; for the illustration revealed the exact reverse of my predicament, one that could not be repaired in the same fashion.
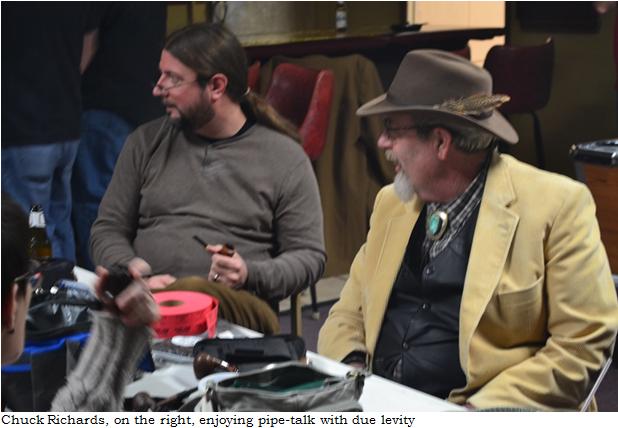
Delayed but not daunted, I set out to do that which I knew I should have attempted in the first place: taking the Park Lane to my own friend and mentor, Chuck Richards, I humbly sought his advice.
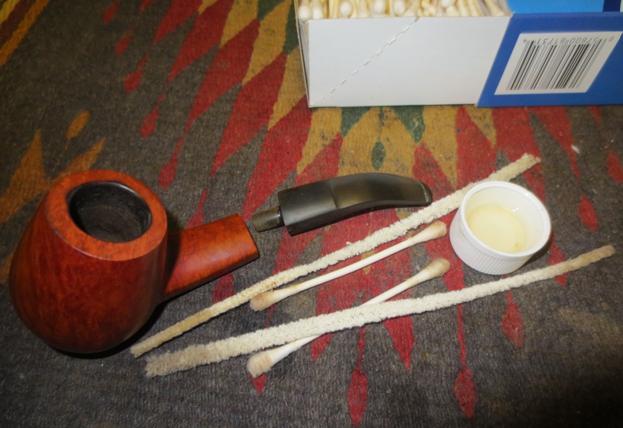
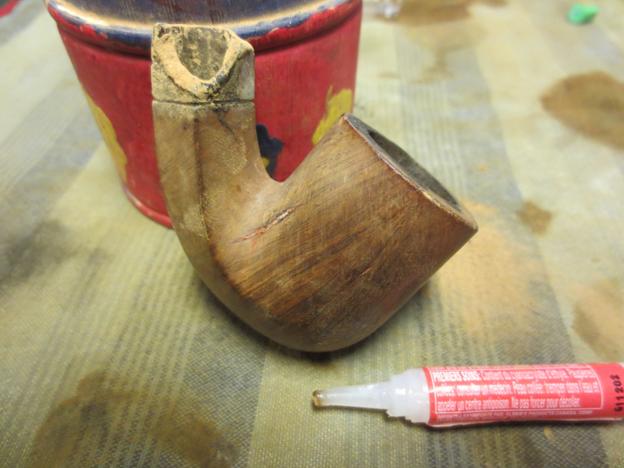
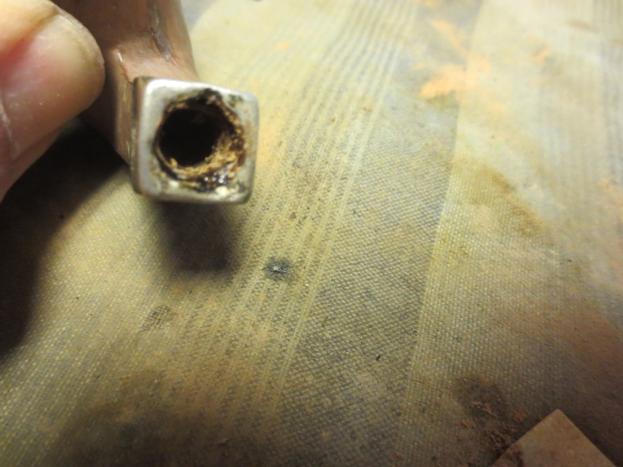
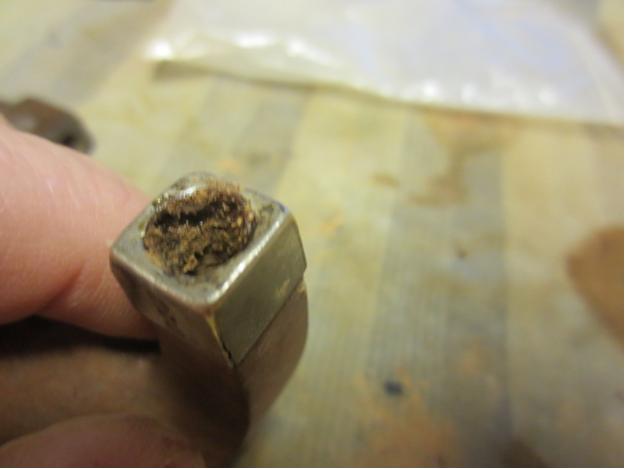
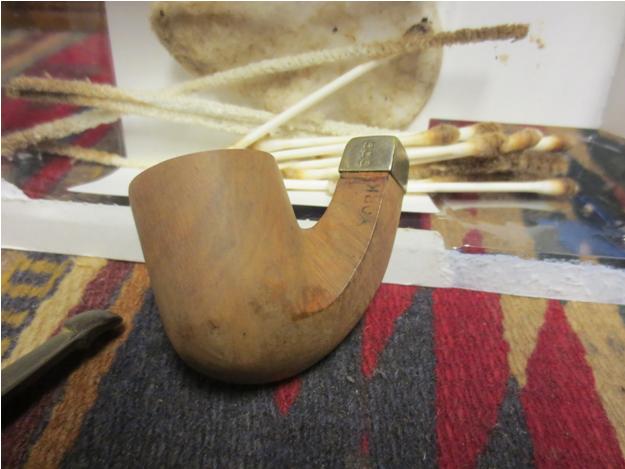
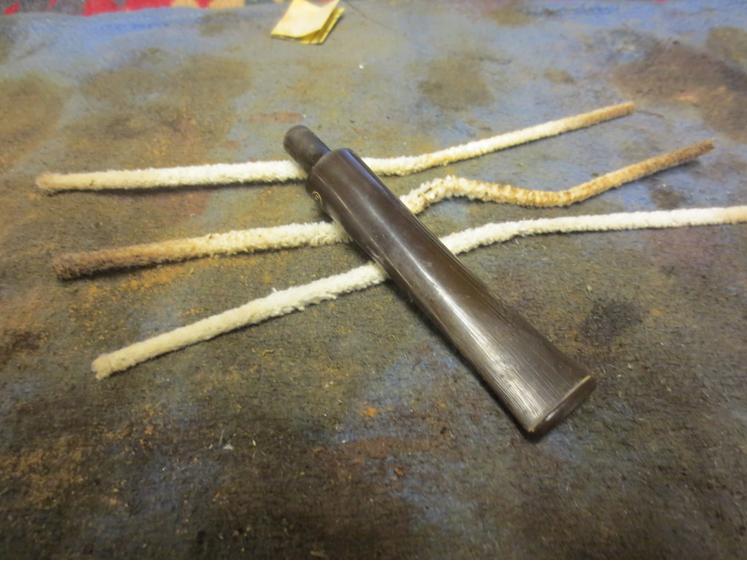
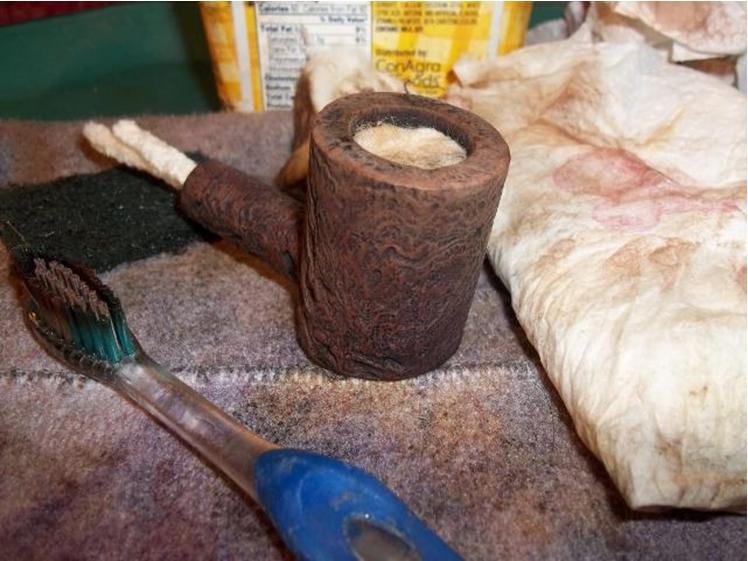
Before doing that, I continued where I had left off, cleaning the tenon and stinger inside and out, including the corroded threads that screwed into the bit, using a small square piece of cotton cloth soaked with Everclear and bristly cleaners that passed through the airways. To be done with it, I also ran a pipe cleaner with alcohol through the air hole of the bit, and when it came out filthy, recalled Steve’s words in his blog that this sort of pipe often needs considerable cleaning of the shank and bit. Quite a few cleaners later, I had the mess under control for the time. Known to my dad for having “a mind like a steel trap” and to my friends as being on the stubborn – or, as I prefer to think, confident side – I was by whatever label loathe to surrender to any challenge.
 When I arrived at the pipe shop and we exchanged pleasantries, I presented my distressed pipe. Chuck, pipe of the day in mouth, put on his eyeglasses and examined the LHS closely. Within a blurring handful of seconds, my older, more experienced mentor made his diagnosis, telling me with his typical certitude to heat the tenon before tightening it into the bit. A man who prefers to let people learn as much as they can on their own, Chuck then offered the rare treat of extra advice: “It will be counter-intuitive.”
Intrigued, I took a seat in the pipe shop and, starting a fresh bowl full of tobacco in a new pipe, mulled over the problem in my mind. In a flash, I thought of a comparison, and unfortunately blurted it to the complete perplexity of all of the cigar smokers present.
“Like turning into the skid on ice!”
Chuck, caught unawares by the outburst and not at first grasping the metaphor, at last smiled and said, “Yes, something like that.”
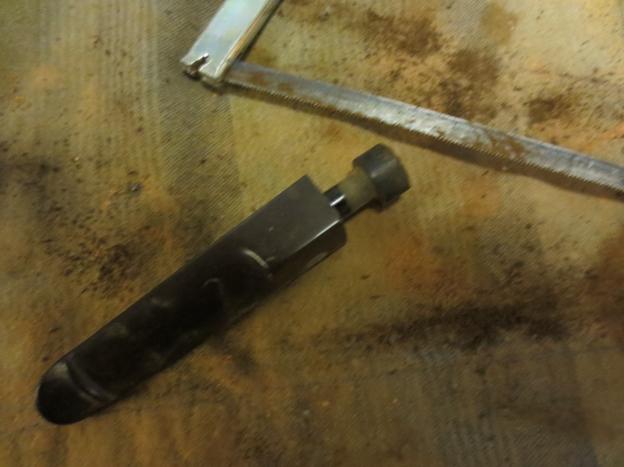
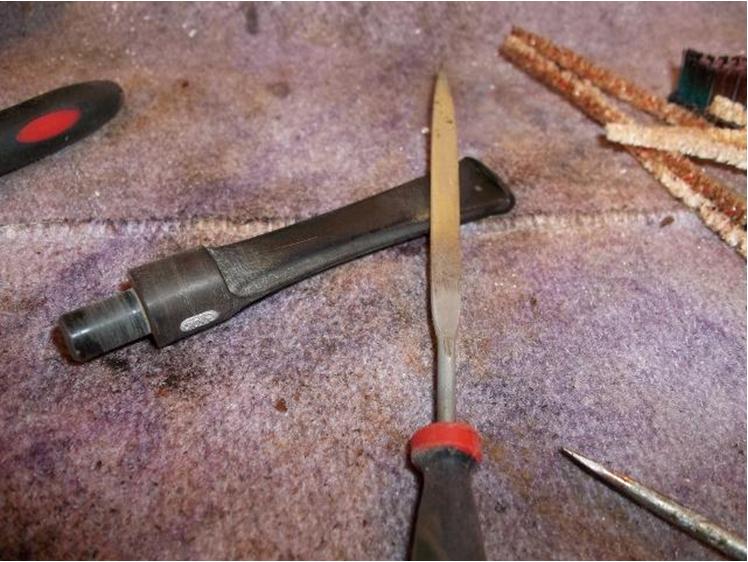
At home later, the first chance I had, I sat down with my movable feast of standard implements of construction, including quite a few that were improvised, to make my first attempt at the genuine repair of a loose bit.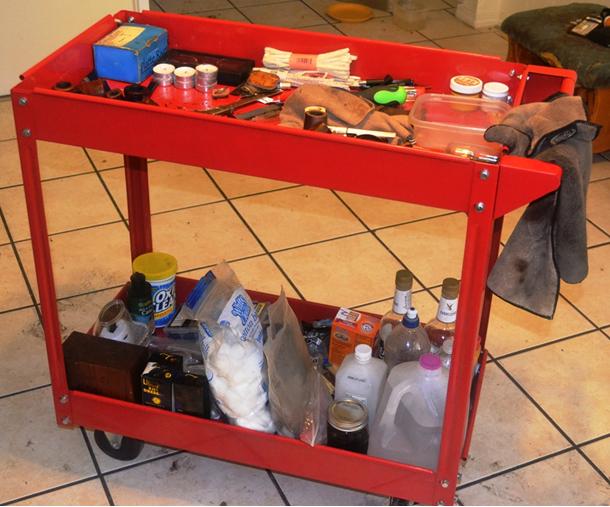 Following Chuck’s advice, and keeping the counter-intuitive dog treat in mind, I was set to apply heat to the tenon stinger when the idea struck me to try removing the stinger again. Of course, then it came out with a simple turn of my fingers, apparently loosened by the work I did earlier and the passage of time.
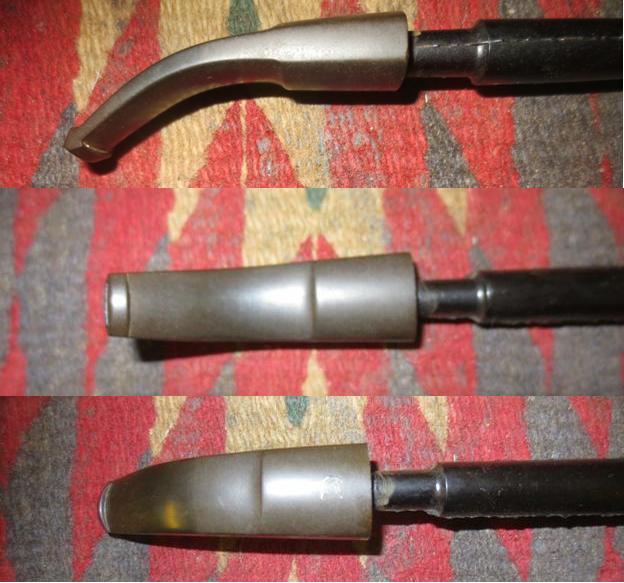
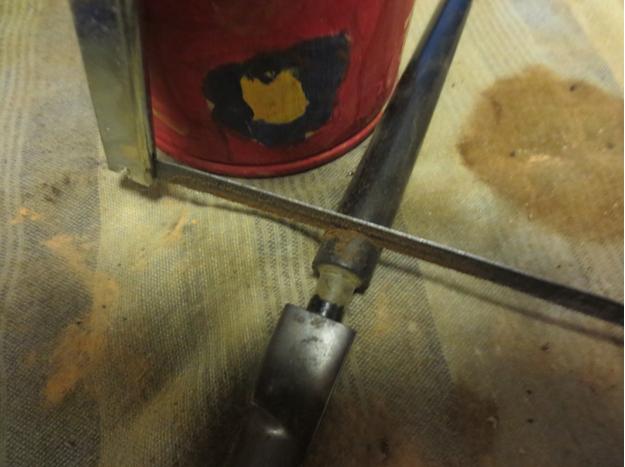
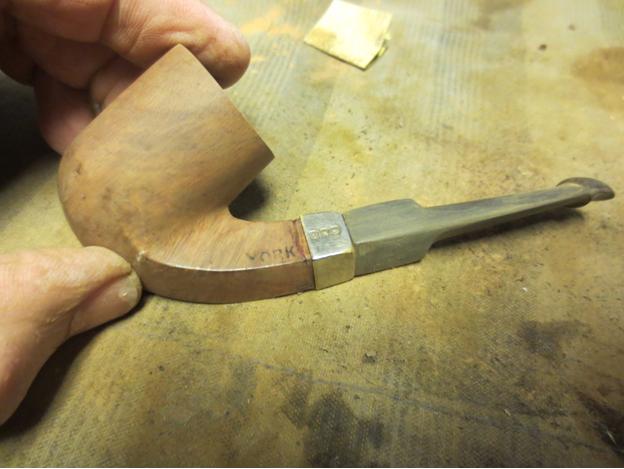
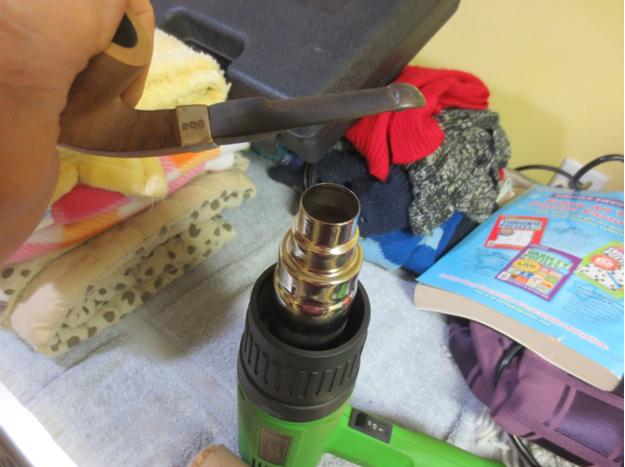
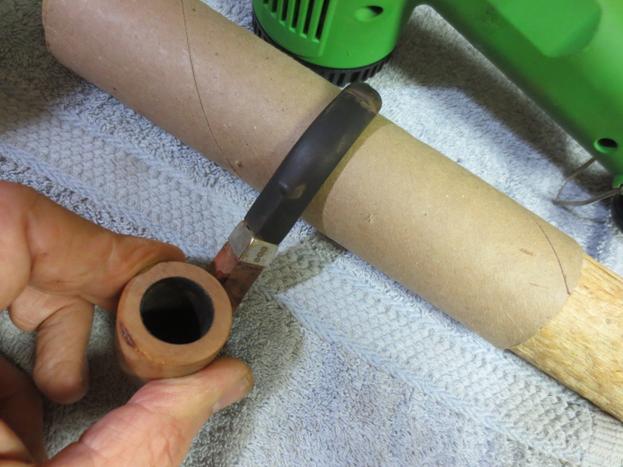
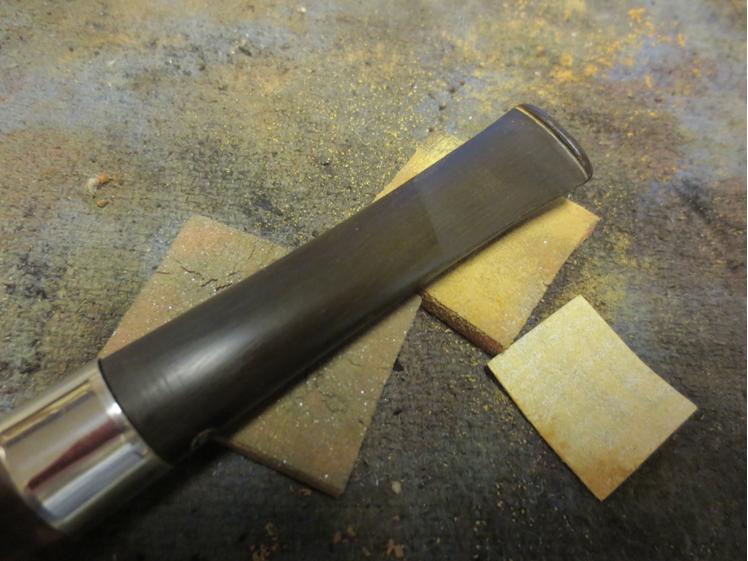
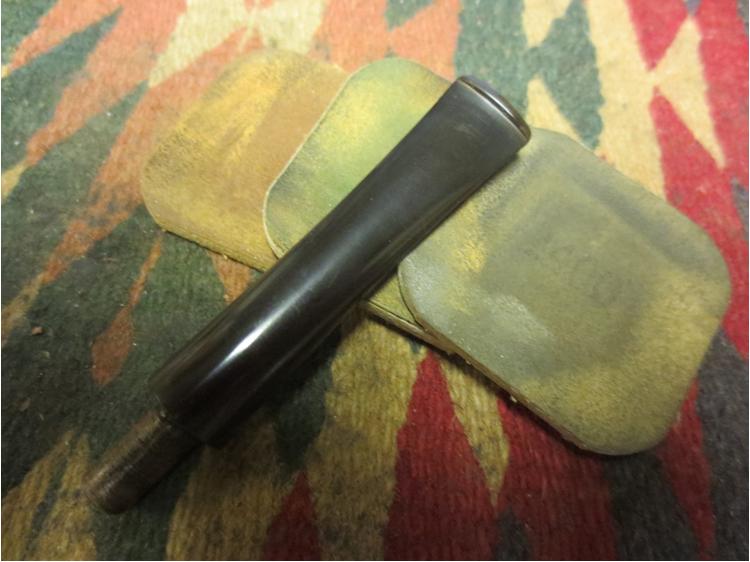
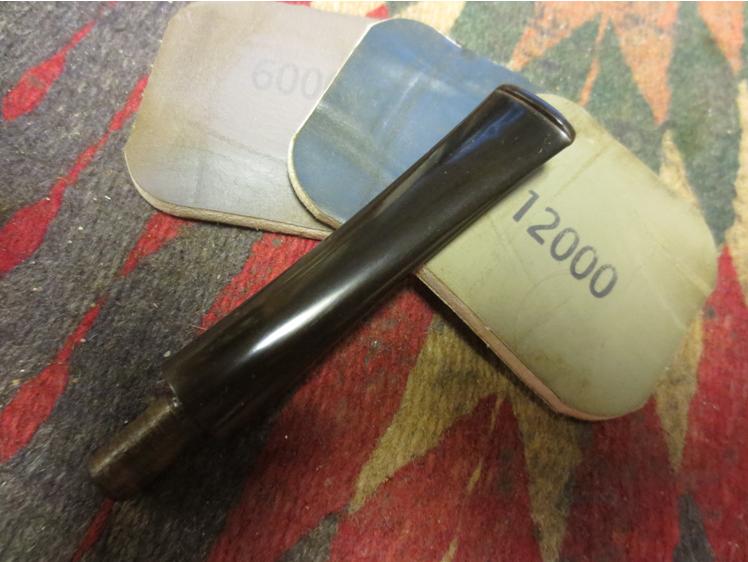
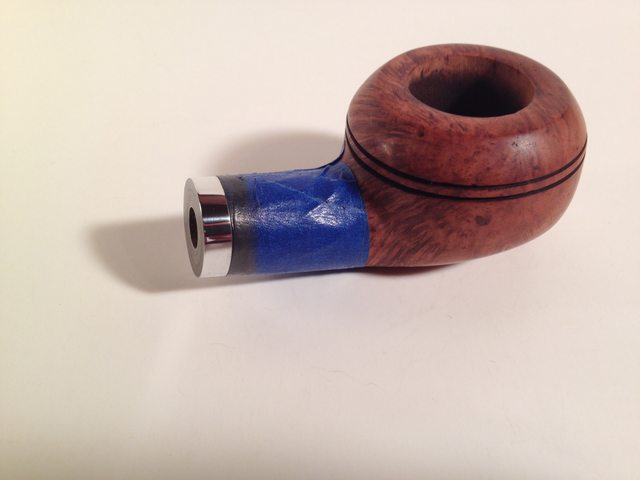
And so I flicked my Bic and held it under the small tenon with even more care not to burn the precious Cumberland bit. (A Cumberland, by the way, is made from a special sort of Ebonite that can be colored with limits, which in turn is a particular variation of Vulcanite. This subject, I understand from research, is a matter of some hot debate.) With the tenon blackened, I quickly tossed a small rag over it and grabbed my pump pliers, clamping them firmly and remembering not to turn the small metal insert opposite from the direction the bit was off but toward it – as one would, if one hoped to avoid losing control of a vehicle and crashing or rolling, turn into the skid on black ice. Thus one particularly memorable experience on a bridge late one night in Colorado Springs, when my training and reflexes saved me, proved useful in this new endeavor. Each of several increasingly difficult rounds of this process brought the bit closer until it was aligned snugly.
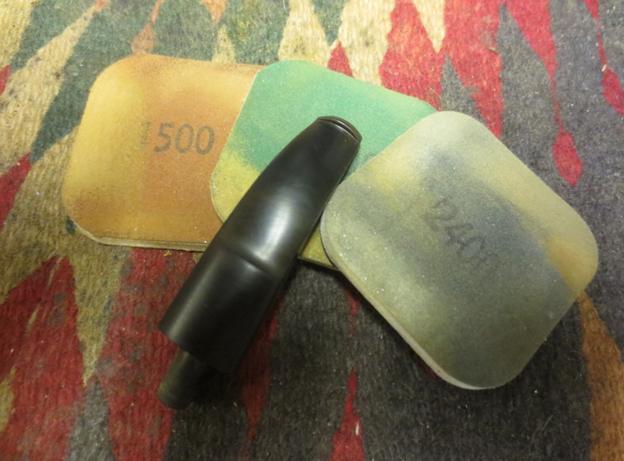
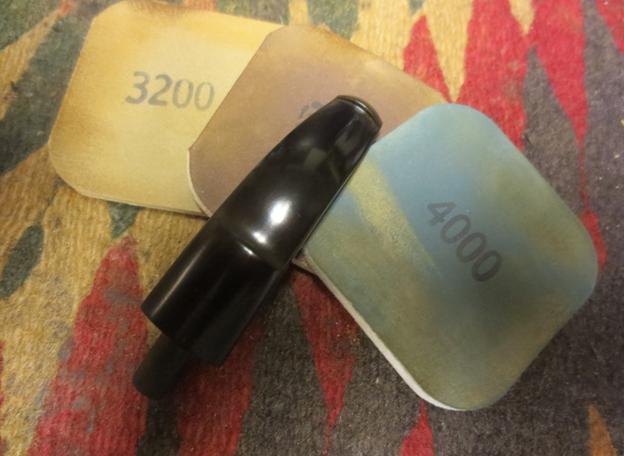
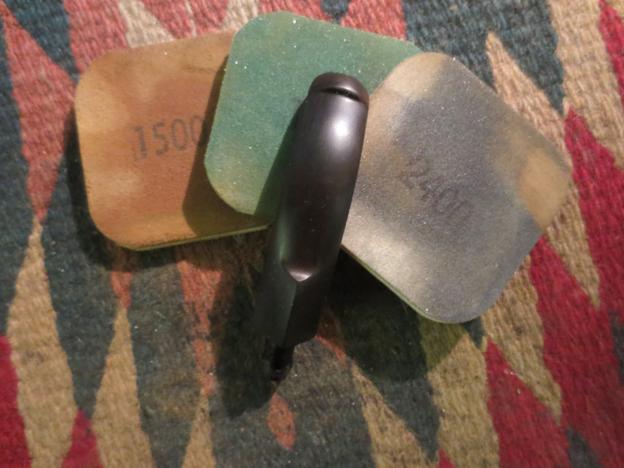
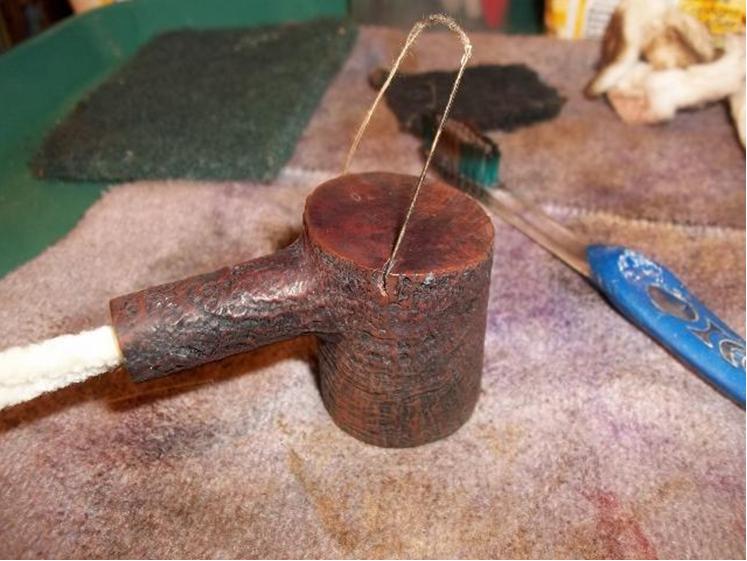
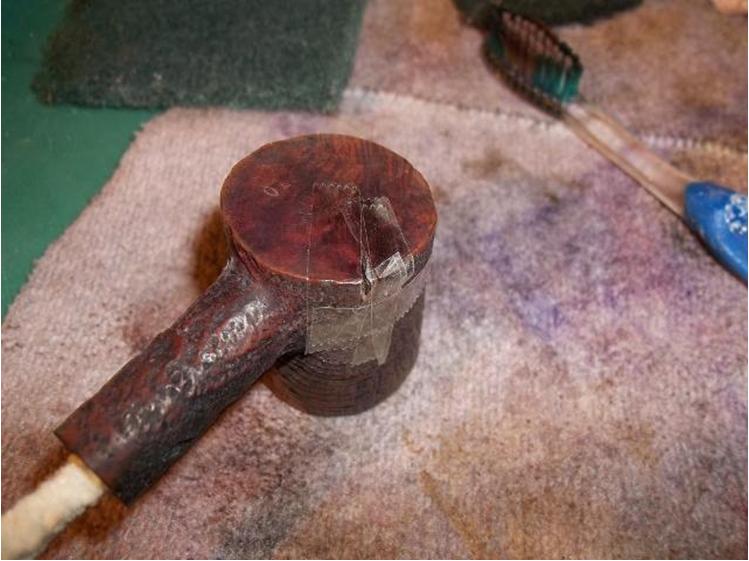
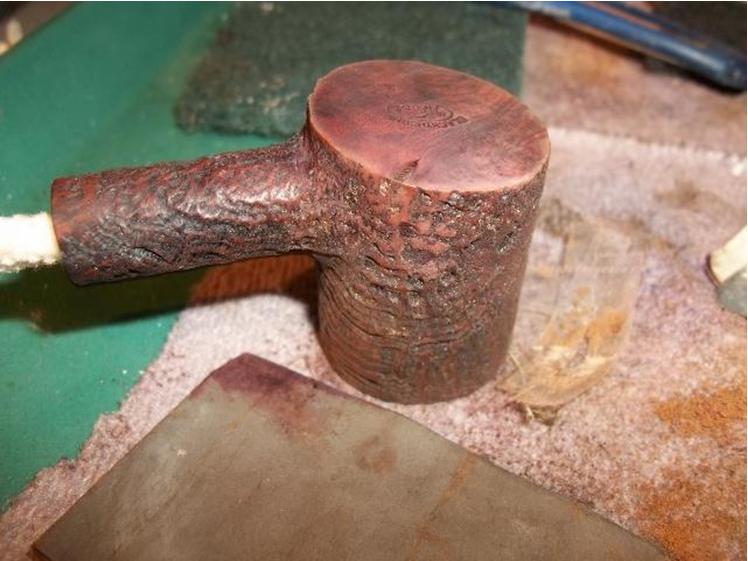
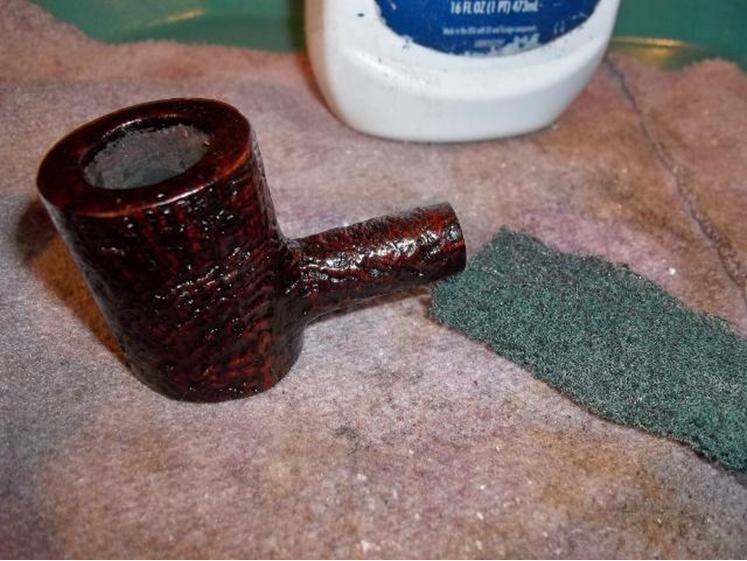
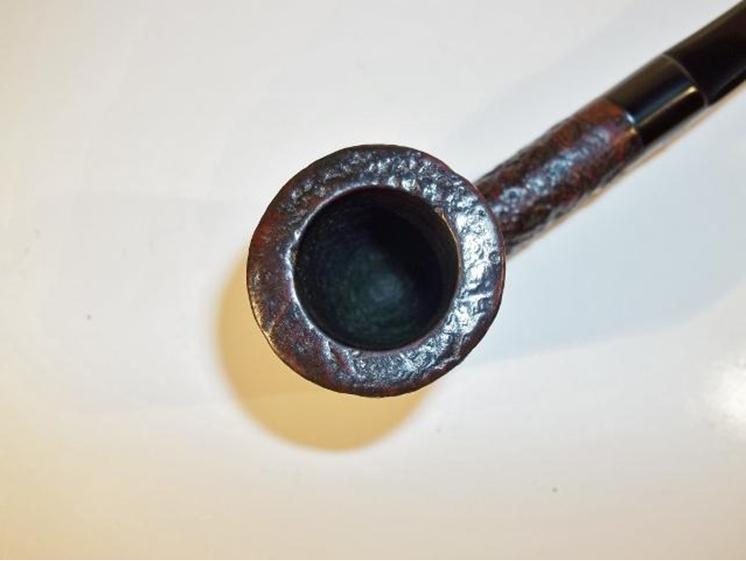
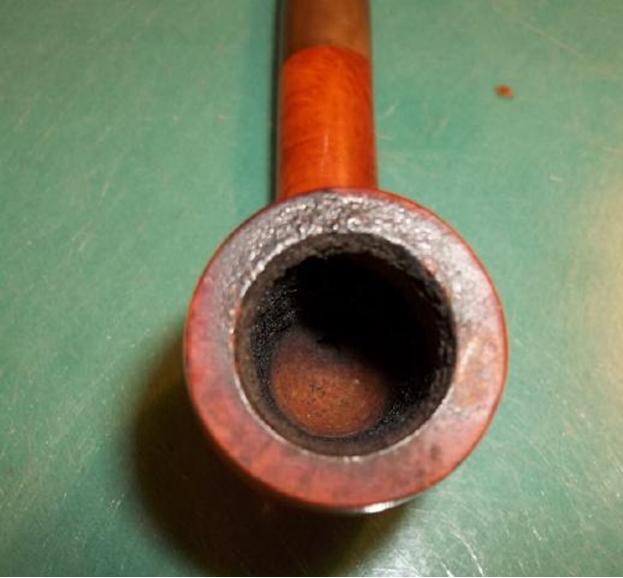
Reaming the chamber and sanding it with 150-grit paper before 200 and then 320 was an easy task, as was using super fine 0000 steel wool to remove the rim char and excess dark stain that was popular when the pipe was made somewhere around three-quarters of a century ago. The rim and bowl then only needed a progression of micromesh from 1500-4000.
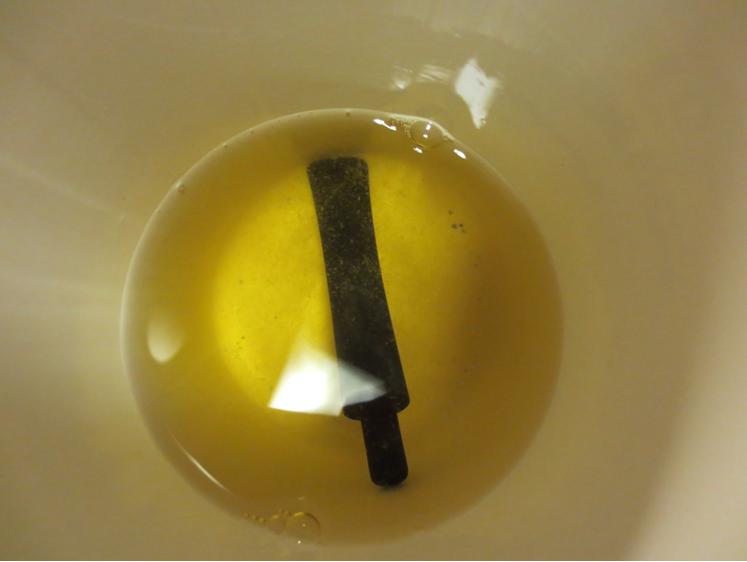
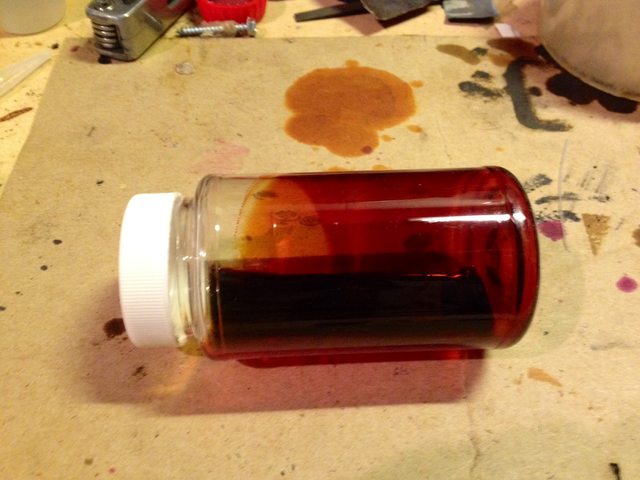
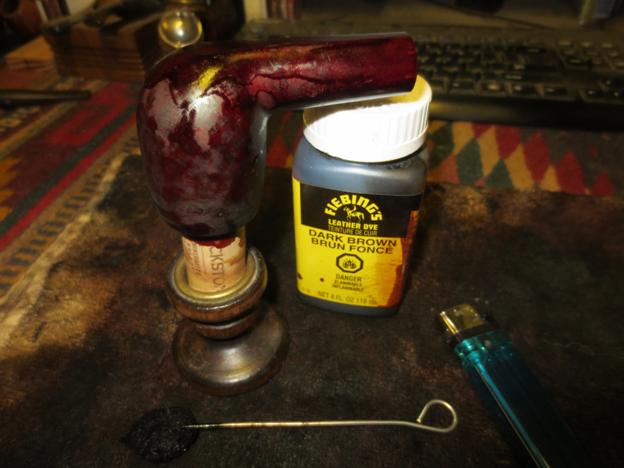
At this late stage of the restore, I retorted the pipe, again, unfortunately, with the tenon in place. I at least left the stinger aside for that process, which required about five Pyrex tubes of Everclear boiled through the pipe’s innards to clear out decades of crud and juices soaked into the briar from considerable use by someone who loved this pipe.
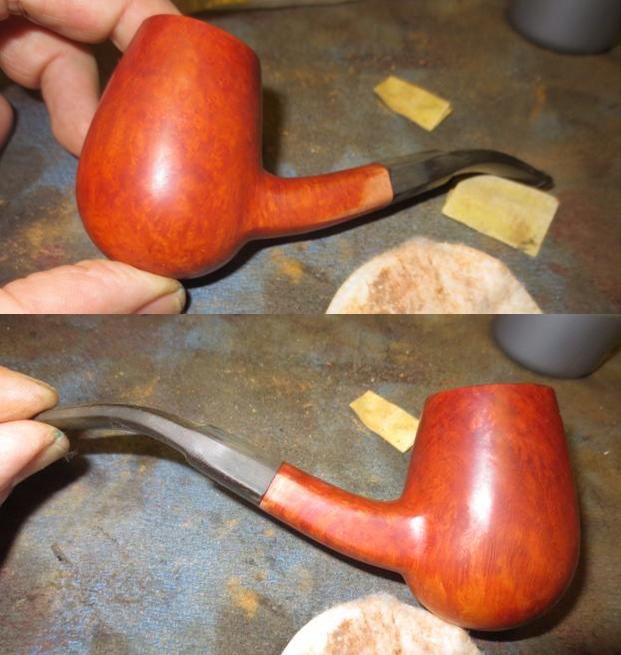
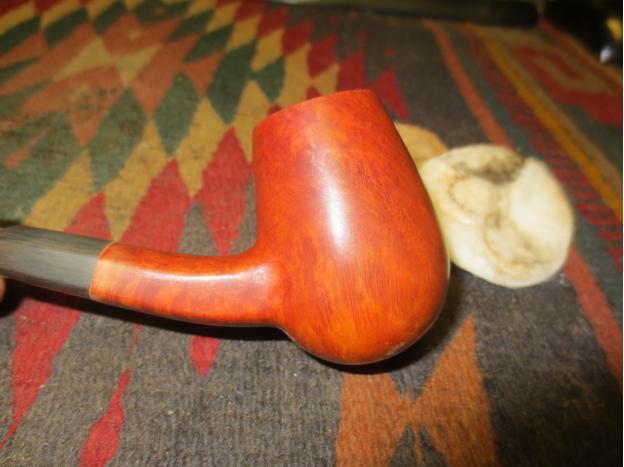
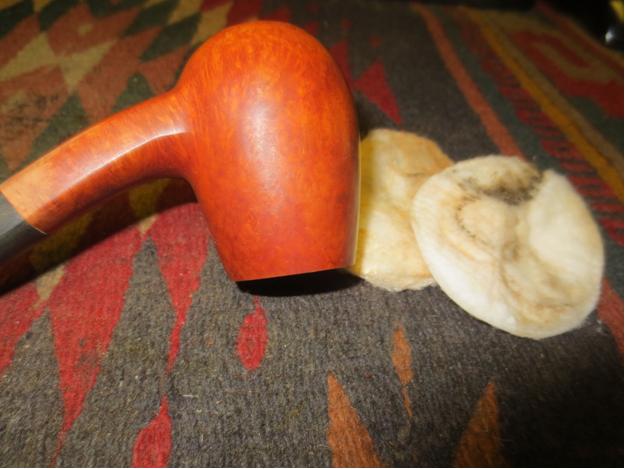
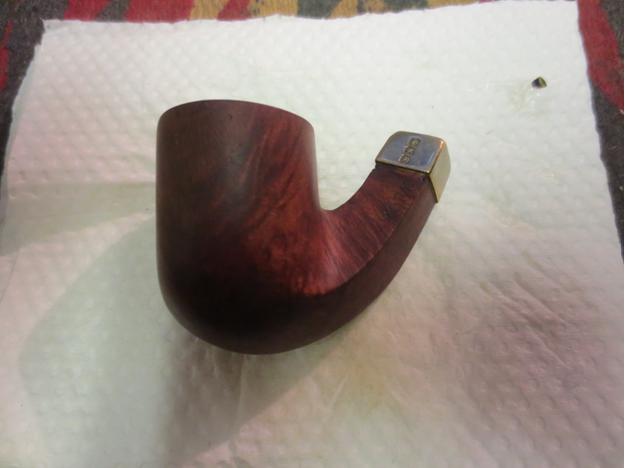
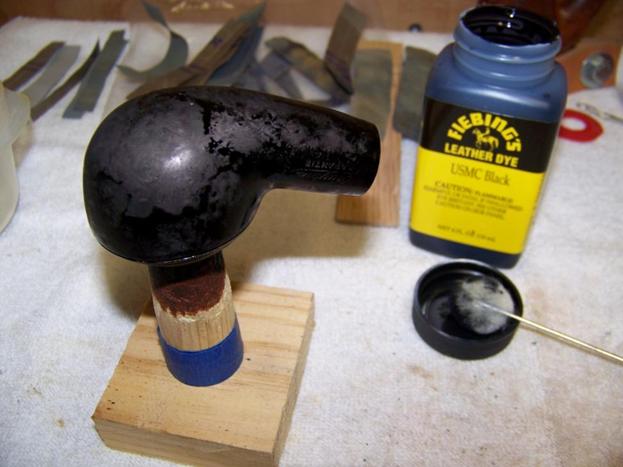
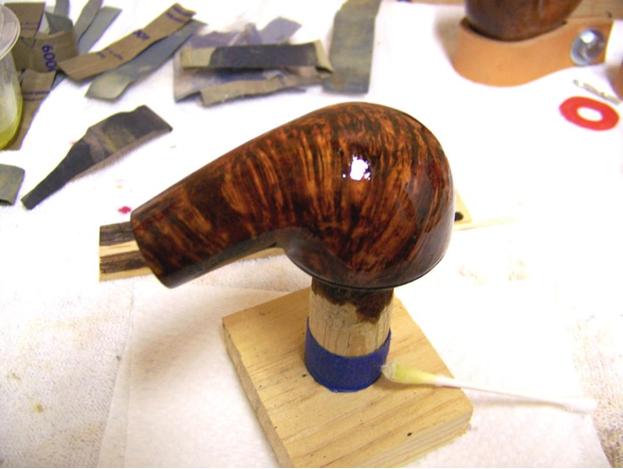
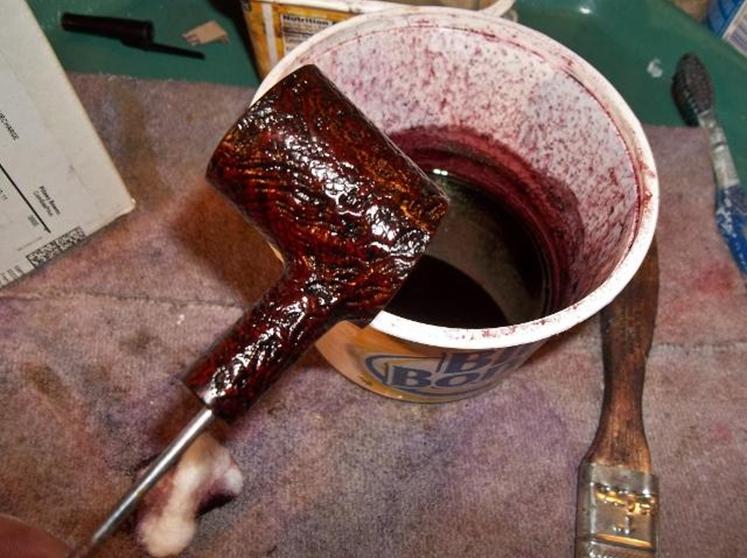
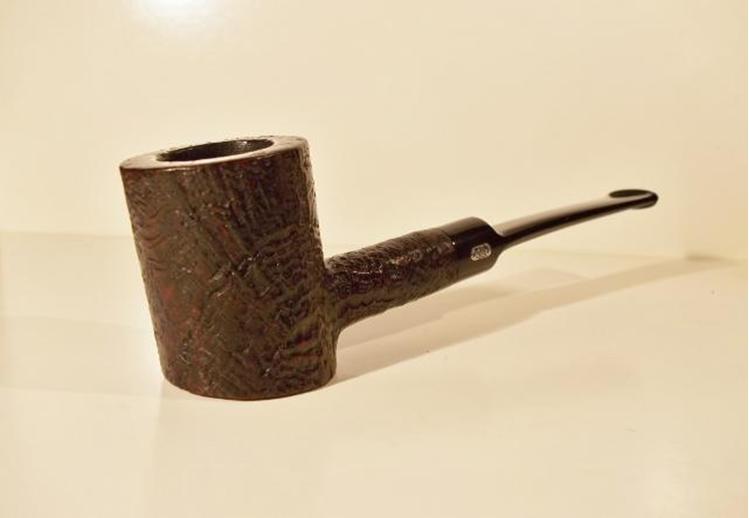
I stained the briar with Lincoln Brown boot stain, as opposed to Medium Brown which appears lighter, and flamed it before removing the thin layer of char with gentle rubbing using 3600 micromesh.
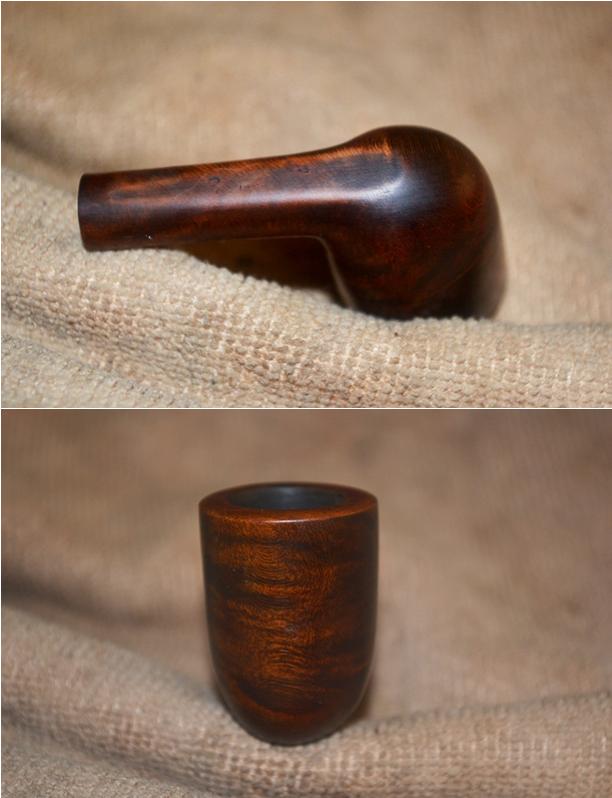
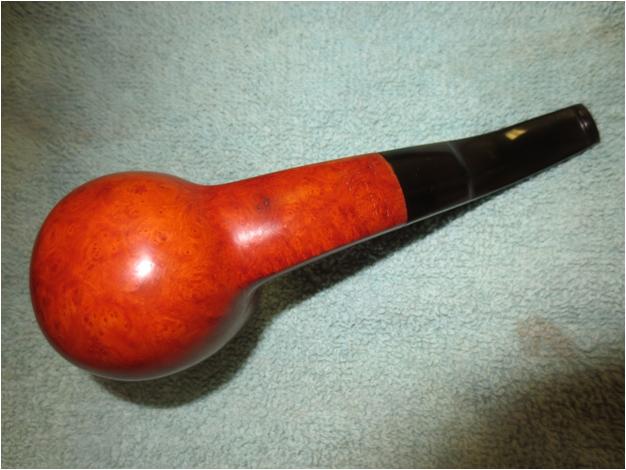
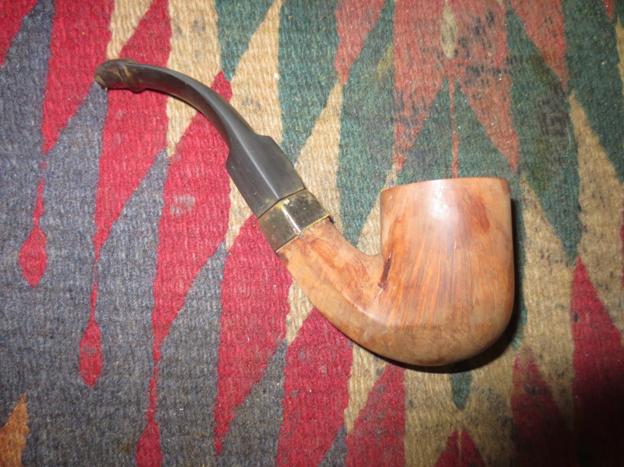
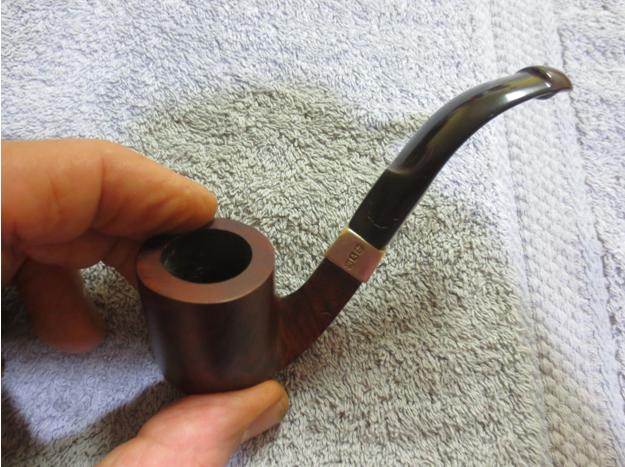
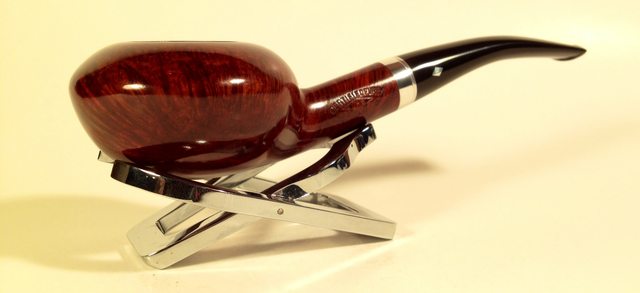
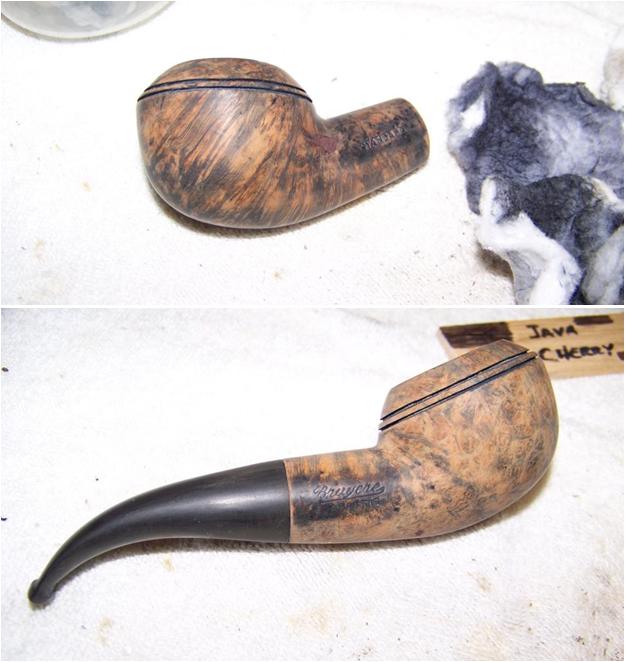
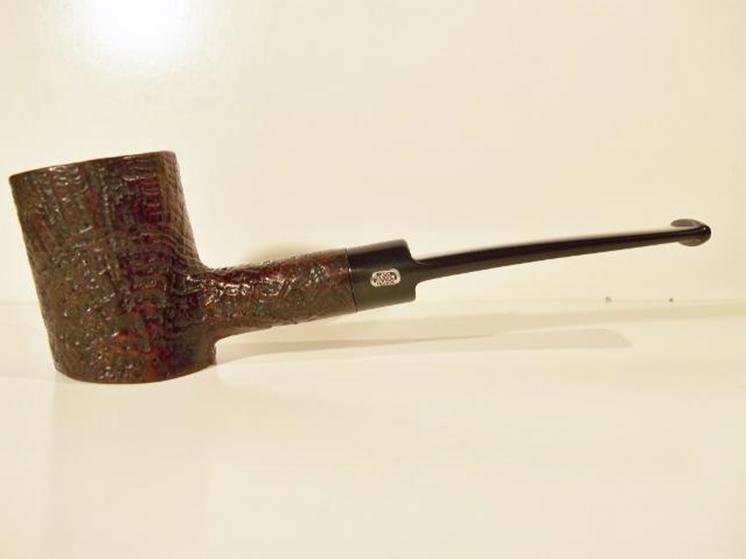
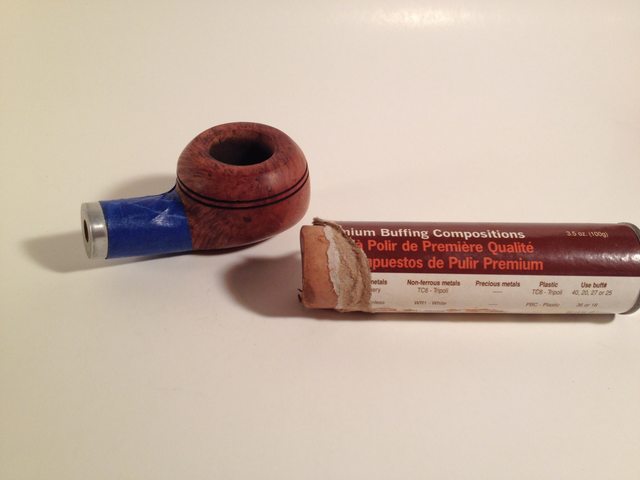
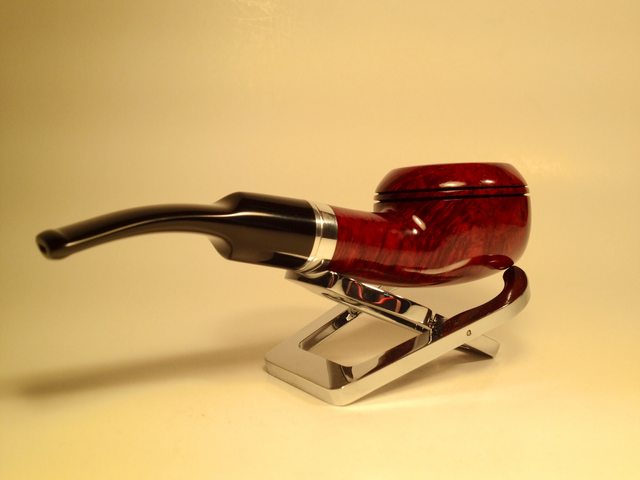
 At last I am at the end of this rather strange, I admit, blog. I buffed the stem with white and red Tripoli and White Diamond, using a soft cotton cloth and a clean wheel between each. Then I used white Tripoli, White Diamond and carnauba on the wood, with the same steps between each.
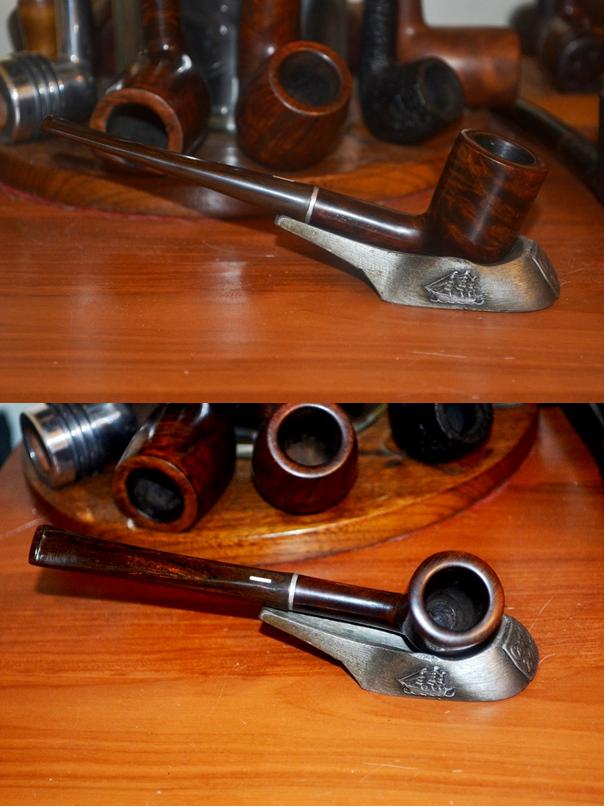
 CONCLUSION
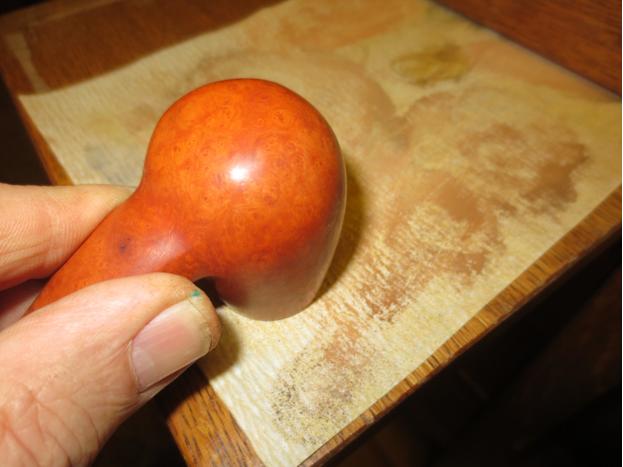
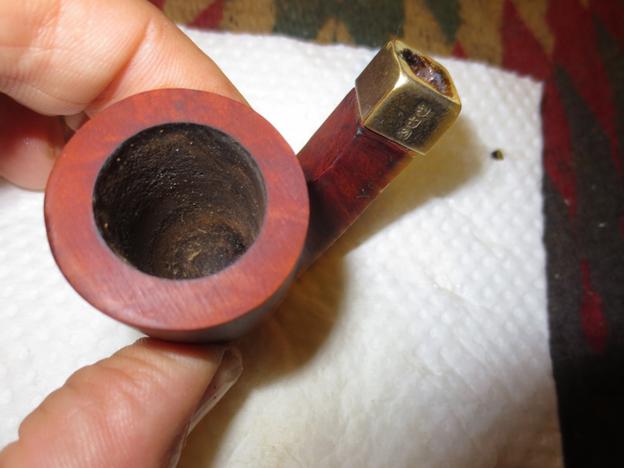
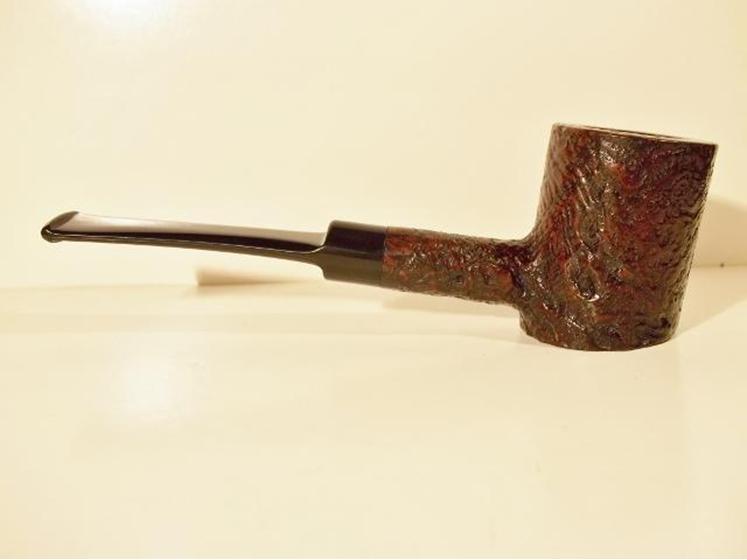
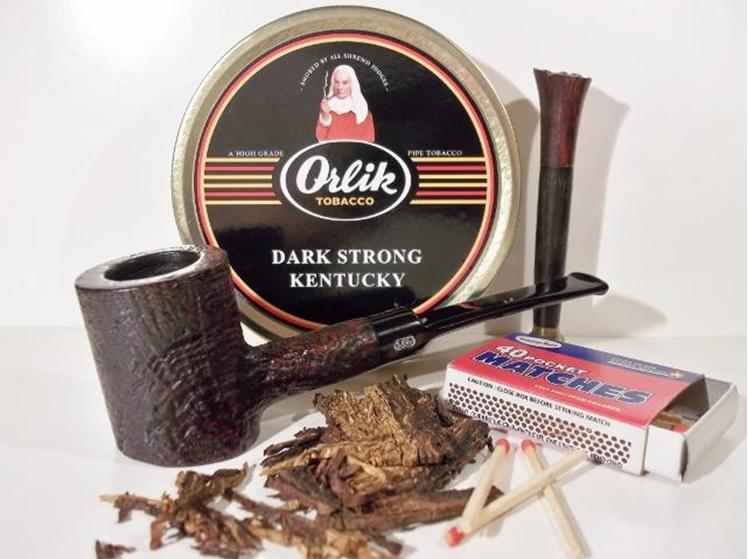
Mr. Boughton had intended to offer this fine LHS pipe for sale at his online store. But following an odd impulse he could neither resist nor explain, he found himself loading a bowl of one of his best tobacco blends and, before he knew it, striking a match and placing the flame to the firm top layer.
The magical qualities of the pipe immediately became apparent. Where he had been tense to the point of explosive results, he was consumed with a sense that all was right in the world. Continuing to puff the mysterious pipe that had somehow found its way to him, he pondered the possible reasons behind the overwhelming sense of attraction to the diminutive pipe. Nothing he could imagine provided a satisfactory explanation, and Mr. Boughton also found he no longer cared.
Mr. Shakespeare also wrote, on the same subject and in the same play: “And yet, to say the truth, reason and love keep little company together nowadays.” Truer words may never have been written.
For at that very moment, although Mr. Boughton thought he was sitting on his sofa in his suddenly less dreary little apartment in the heart of the American Southwest, he was, in fact, still on the outskirts of the Twilight Zone.
SOURCES
1. “The Twilight Zone,” Introduction, Season 2, with thanks. http://www.imdb.com/title/tt0052520/quotes
2. Locker et al. v. American Tobacco Co. et al, NY Sup. Ct. (1907), pp. 115-124. https://books.google.com/books?id=34g7AAAAIAAJ&pg=PA117&lpg=PA117&dq=metropolitan+tobacco+company+brooklyn&source=bl&ots=hQ6aVa_tY8&sig=1uaY2AesgKT4mCKepaOyan9gB9I&hl=en&sa=X&ei=MIiQVZGuHYizoQSxsouAAg&ved=0CCgQ6AEwAg#v=onepage&q=metropolitan%20tobacco%20company%20brooklyn&f=false
3. L&H Stern background, including D.U.M.B.O.
Featured Fade – L & H Stern – Smoking Pipes & Holders – DUMBO – Fred King
4. Magazine story on L&H Stern 1920 move.
https://books.google.com/books?id=rpc7AQAAMAAJ&pg=RA1-PA22&lpg=RA1-PA22&dq=l%26h+stern+inc&source=bl&ots=cDWCX4gIom&sig=eLu9PUkd8JzfNPCZDb7df71R4Ic&hl=en&sa=X&ei=M5-MVbi1FM7IogThw5ToDg&ved=0CCsQ6AEwAg#v=onepage&q=l%26h%20stern%20inc&f=false
5. LHS Park Lane dating confirmation.
http://www.smokingpipes.com/pipes/estate/united-states/moreinfo.cfm? Product_ID=100458
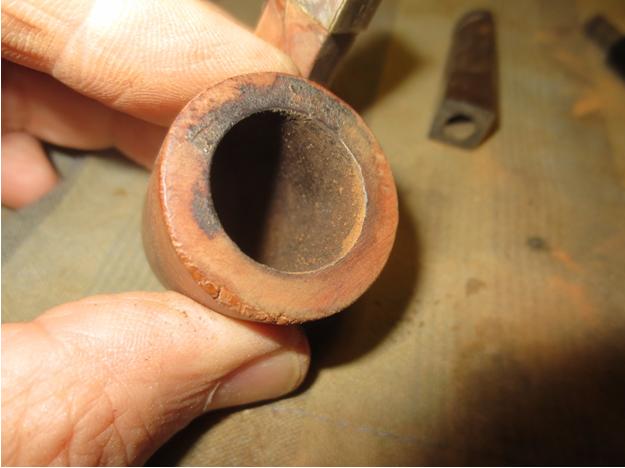
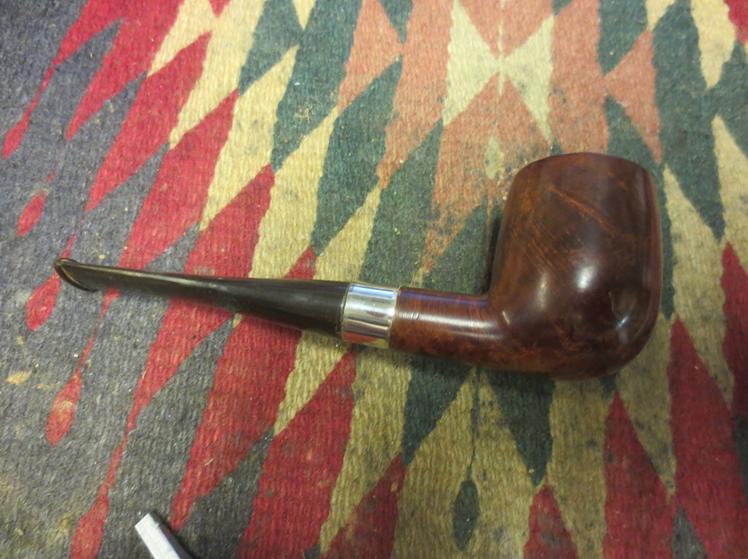
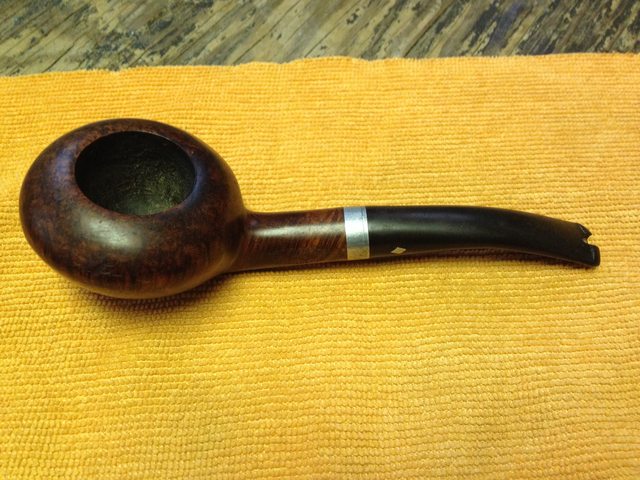
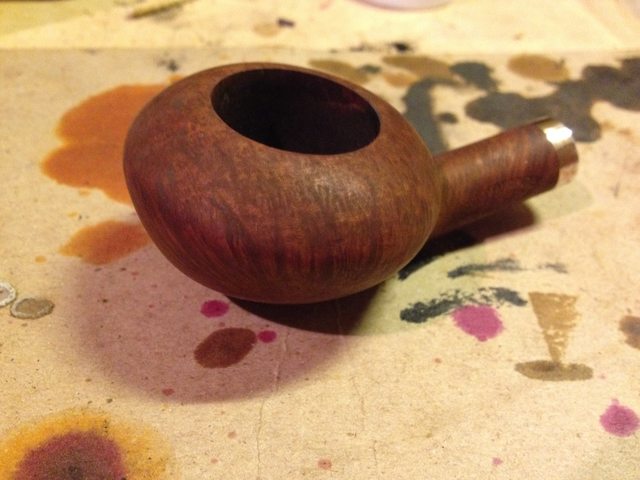
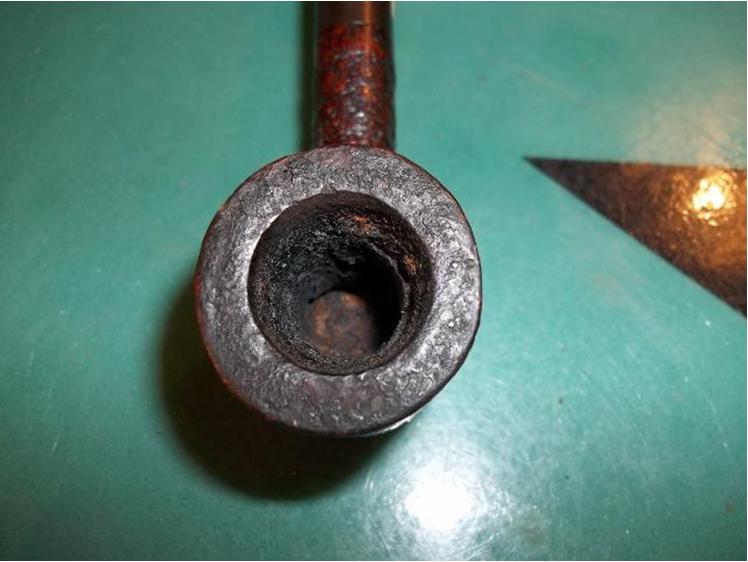
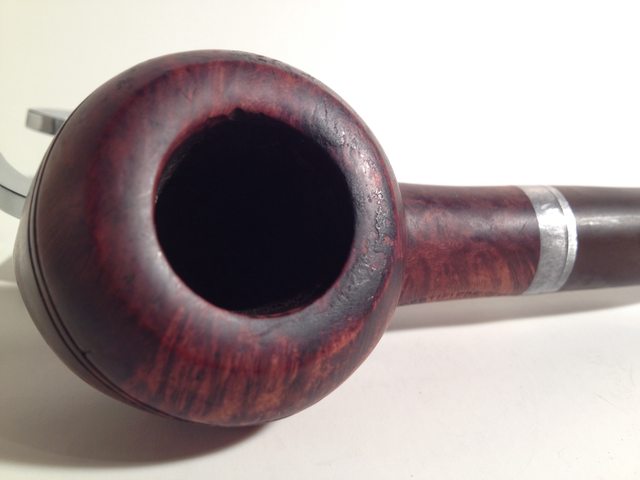
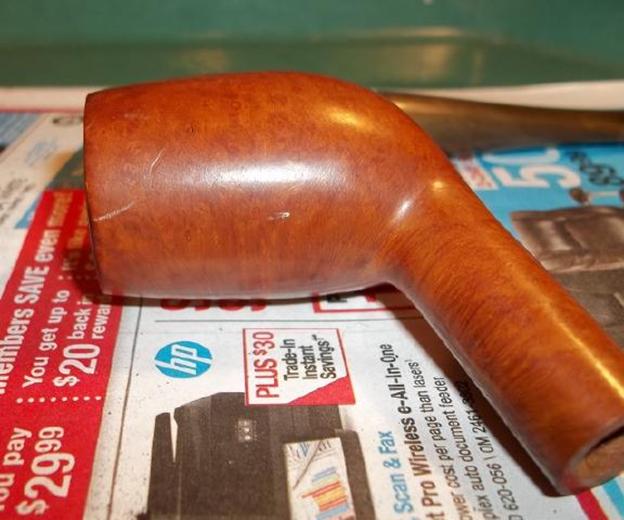
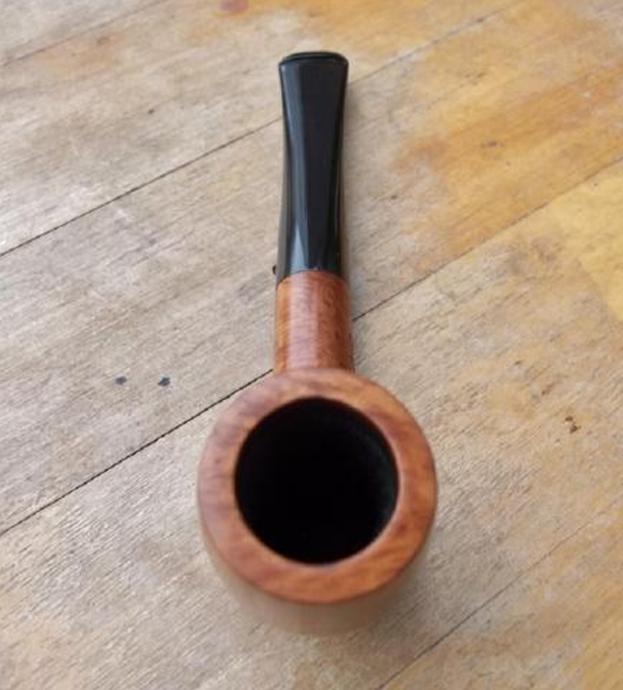
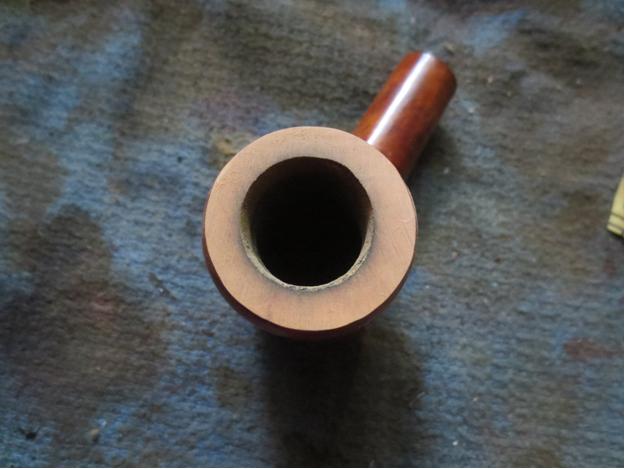
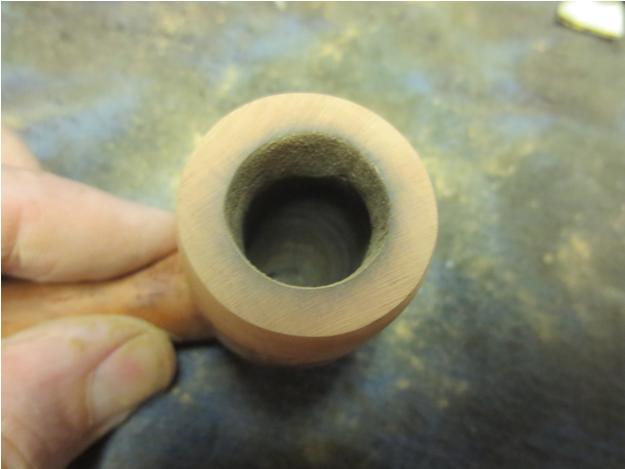
 The top of the rim was very rough. The inner edge was no longer round. The flat top was cut and damaged with the carving knife that had been used on the outer edge of the rim to round it out. The underside of the shank was in good shape but the bowl sides and bottom had some dings and dents in it from knocking it about.
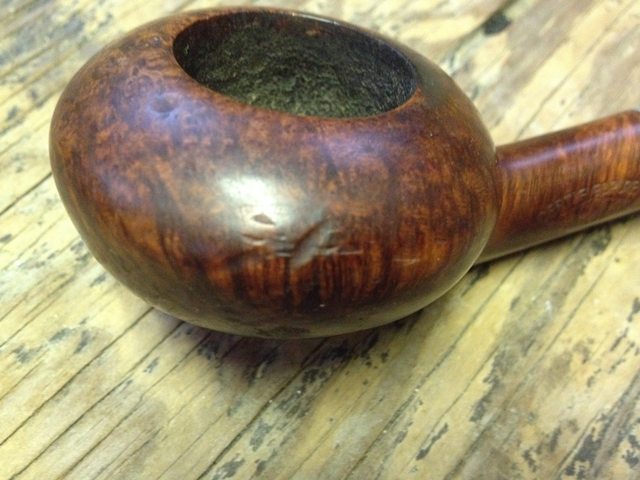
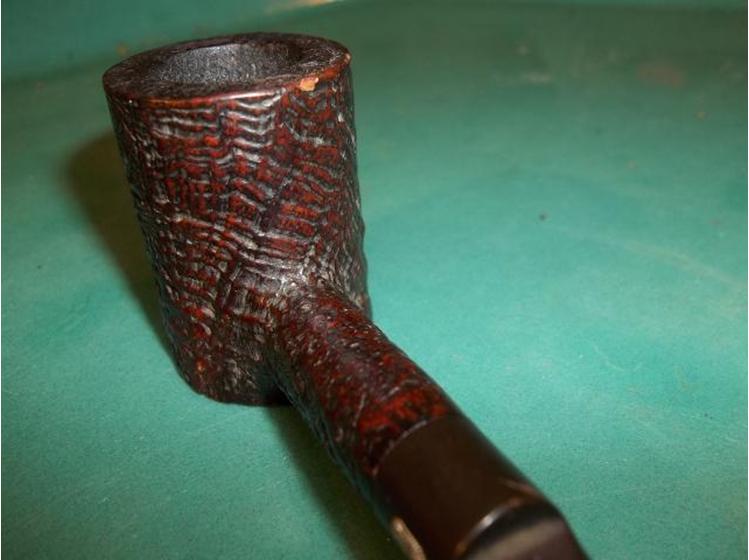
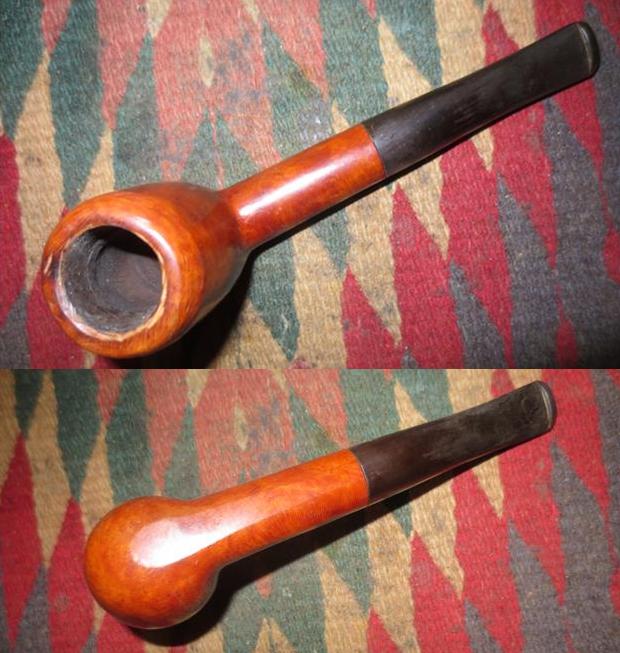 I took a series of close up photos of the rim and the sides of the bowl to show the knife damage that had been done. You can see from the first photo how the inner edge had been beveled with a knife and was quite uneven. The top of the rim was scratched and had deep grooves from where the knife had slipped. The second and third photo shows the sides of the bowl and how the outer edge of the rim had been rounded haphazardly with a knife. The front and back side also was rounded and hacked. It was very poorly done and left the pipe a mess. The finish was worn and had been covered with a coat of varnish that was bubbling.
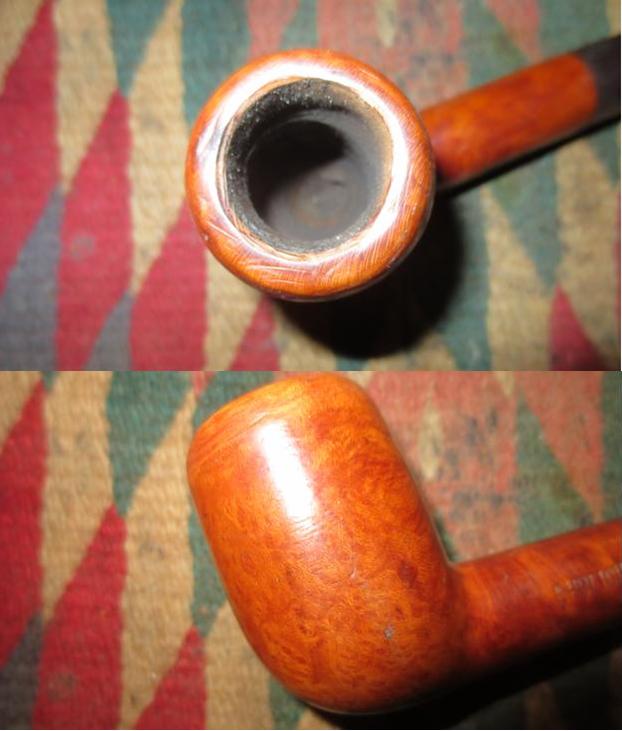
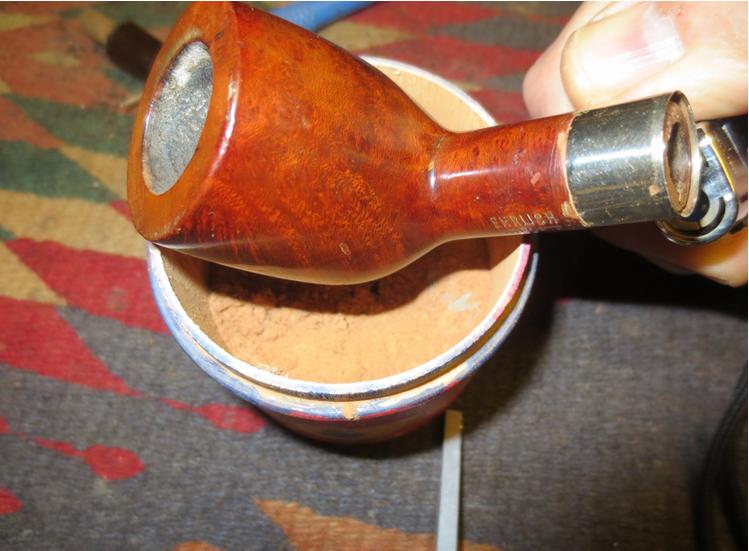
 I decided to top the bowl first. It would need to be topped quite a bit to take out the rounded and cut sides of the bowl. The damage was significant and I would need to bring the top down at least a ¼ inch to repair it. I used the topping board and 220 grit sandpaper to remove the damaged wood. It took probably 30 minutes of continuous sanding to bring it down. I had to press the rim against the sandpaper to keep the rim flat and horizontal.
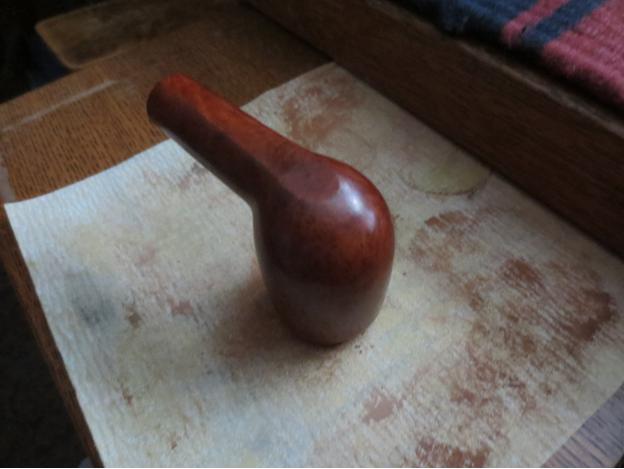
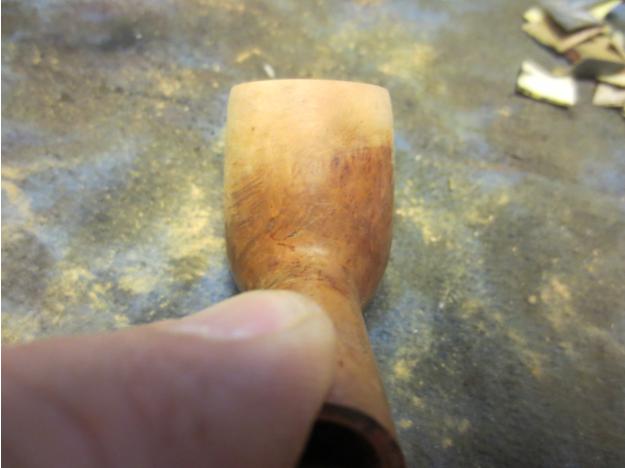
 Once the top was flat and most of the damaged outer edge removed I used a folded piece of 220 grit sandpaper to smooth out the taper from the bowl side up to the outer edge of the rim. It took a bit of time to smooth out the transition and remove all of the nicks and dents in the briar.
 I wiped down the bowl with acetone on cotton pads to remove the finish and sanded the bowl sides until the transition to the rim was smooth.
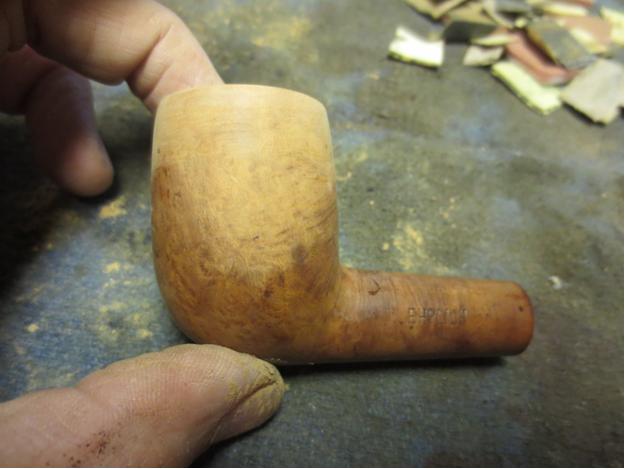

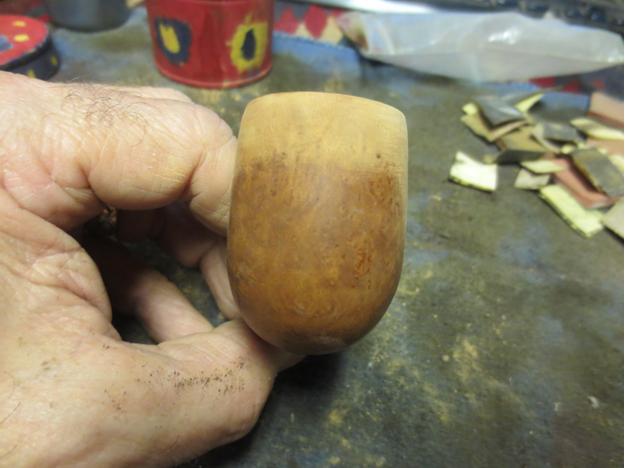
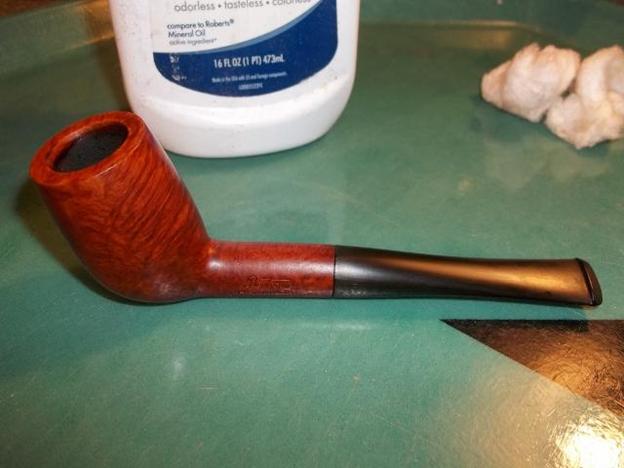
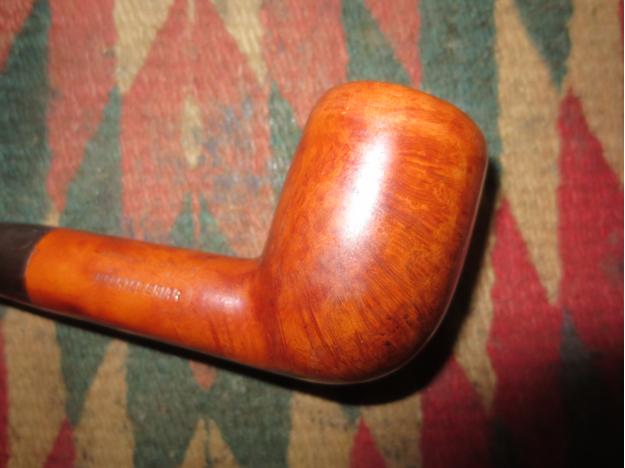
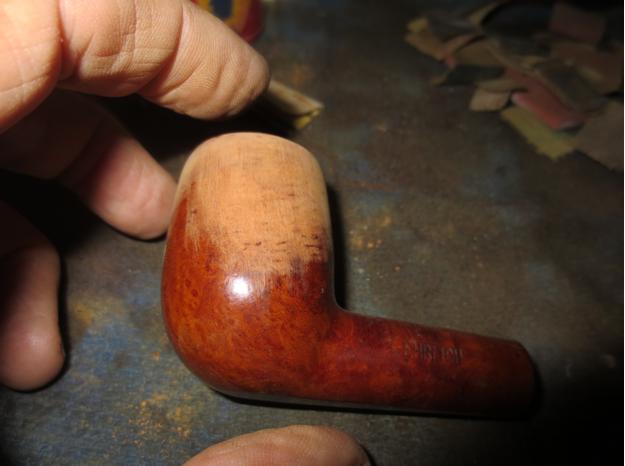
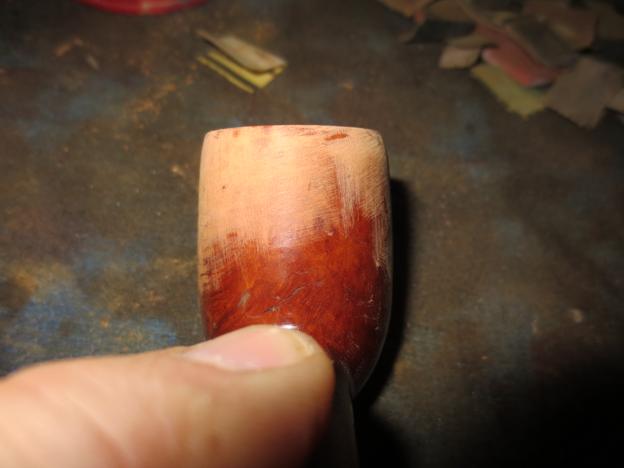
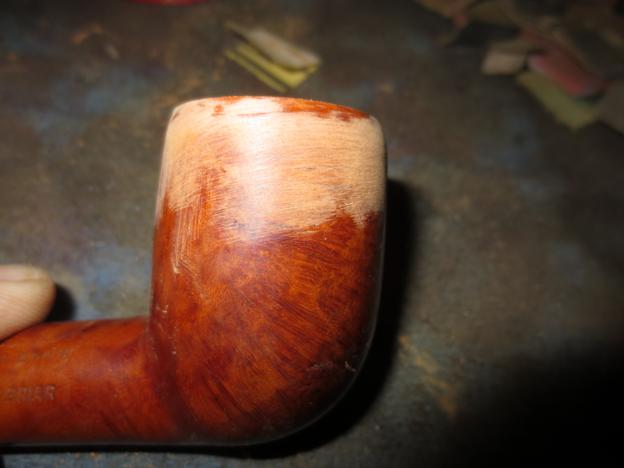
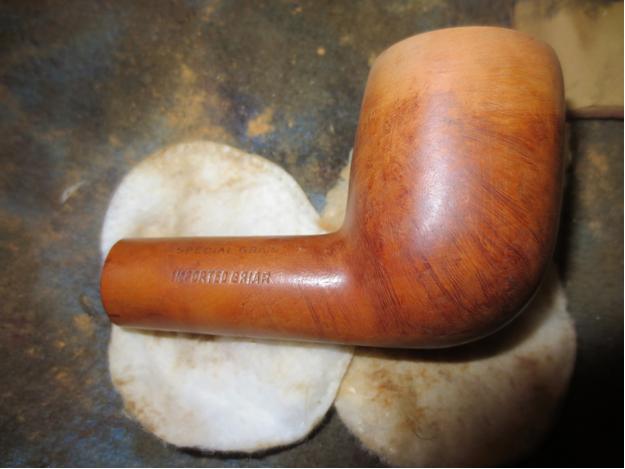
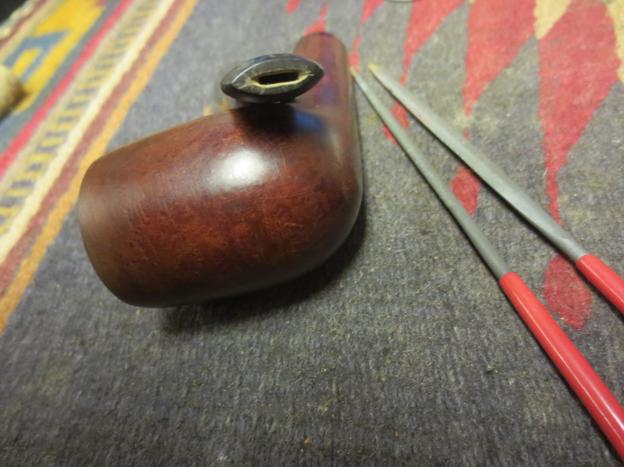
 When the transition was smooth and the sides of the bowl flowed evenly to the top I wiped the bowl down with isopropyl alcohol to clean off the remaining finish and the sanding dust. I sanded the bowl with a medium and a fine grit sanding sponge and then took the following four photos to show the new look of the bowl.

 I sanded the bowl and rim with 1500-2400 grit micromesh sanding pads and then prepped it to be stained. I put a cork in the bowl so that I could stand it in the candle holder that I used for drying my stained bowls. I stained the bowl with a 50-50 mixture of alcohol and dark brown aniline stain. I flamed it, repeated the stain and the flame and set it aside to dry.
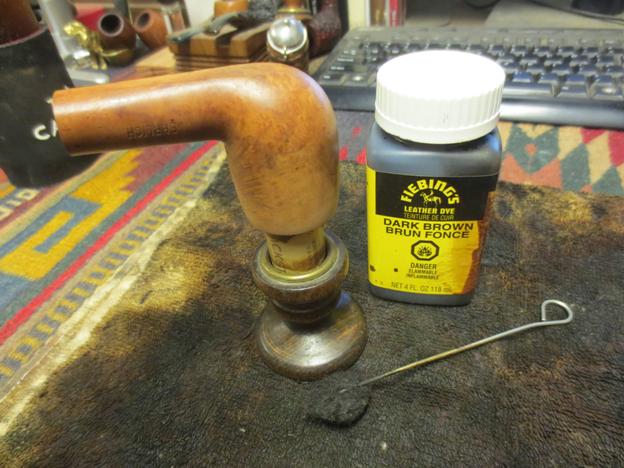
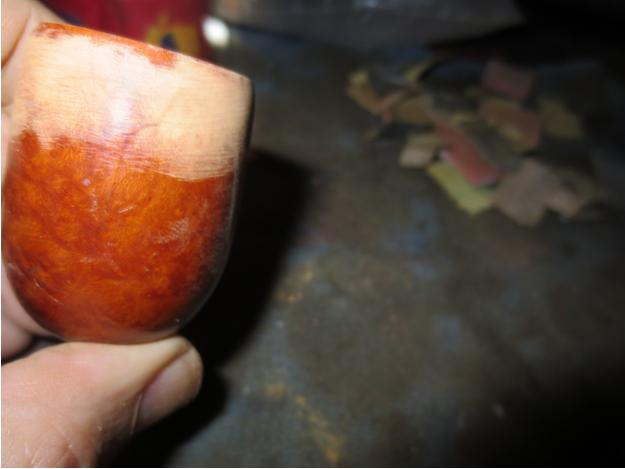
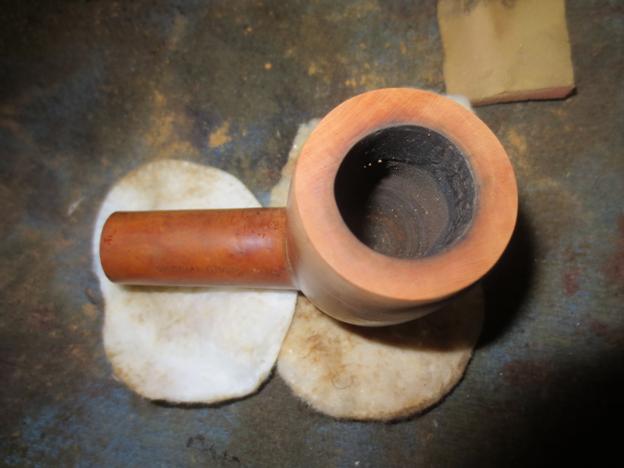
 Once it dried enough to pick up I wiped it down with acetone on cotton pads to thin the dark coat and make the grain stand out better.
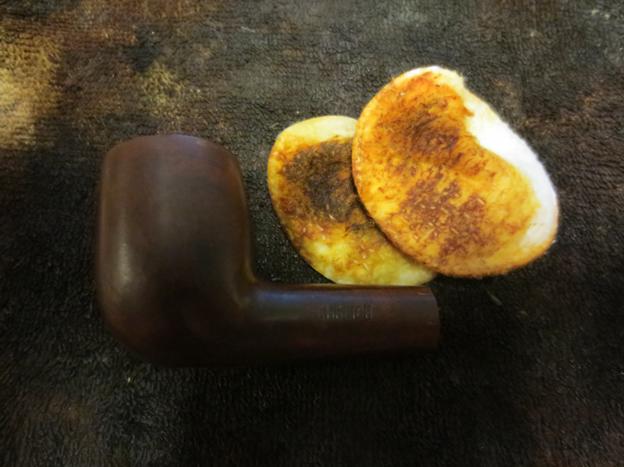


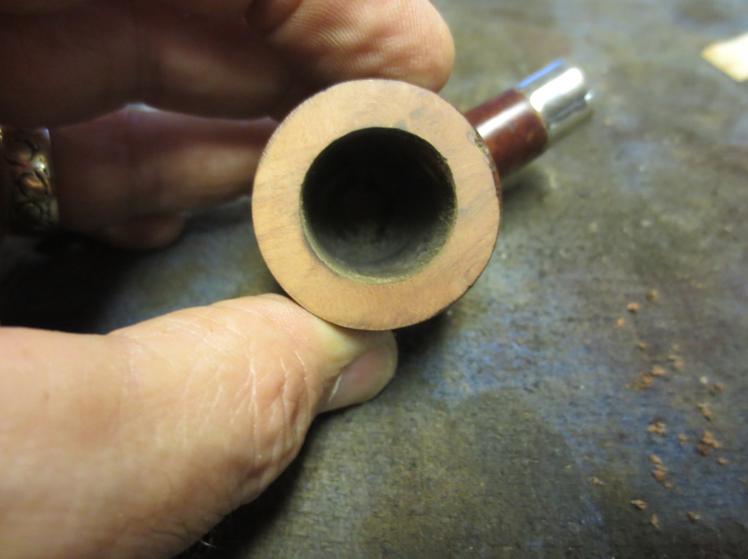
 I cleaned out the shank and stem with alcohol, cotton swabs and pipe cleaners. I lightly reamed the bowl with a pen knife to remove the debris from the sides of the bowl.
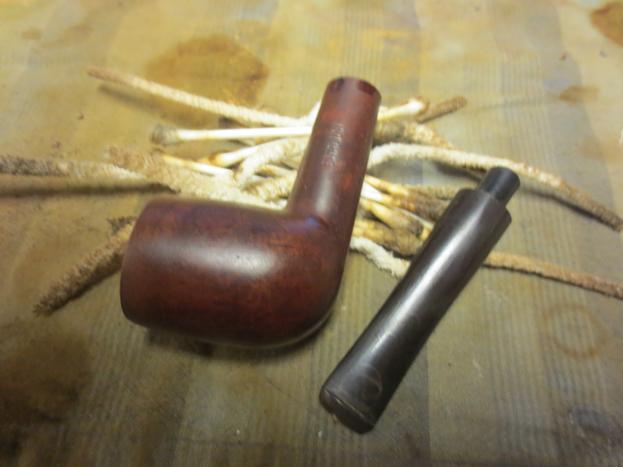 I sanded the stem with medium and fine grit sanding sponges. I followed that by sanding it with micromesh sanding pads – wet sanding with 1500-2400 grit pads and then rubbing it down with Obsidian Oil.
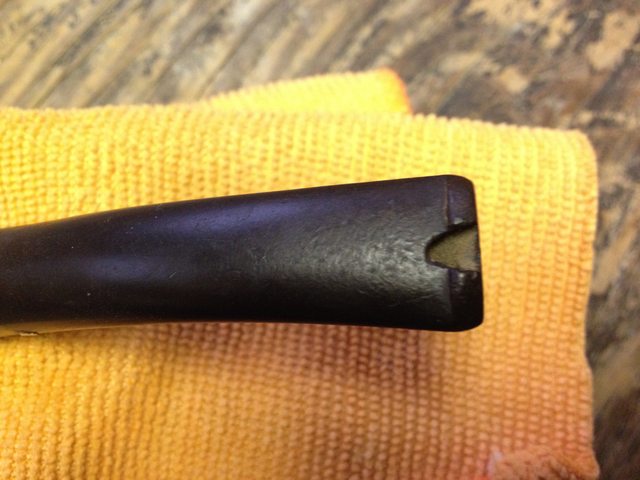
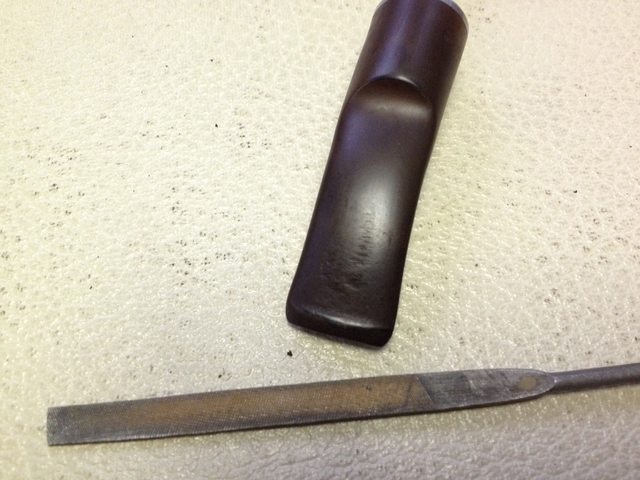
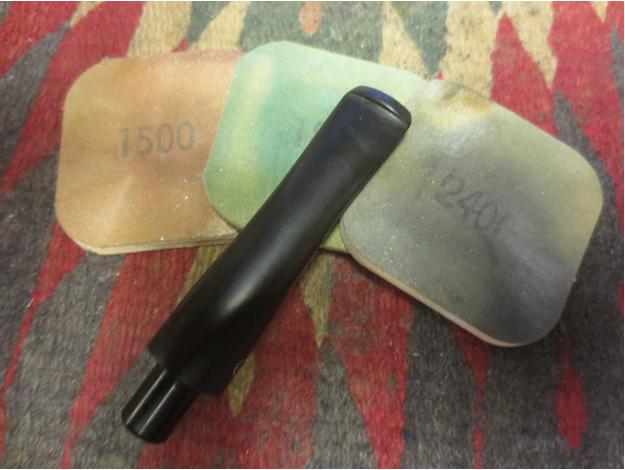 After the wet sanding I decided to open up the slot to make it easier to clean out the stem and shank with a pipe cleaner. I used a flat oval needle file to start the work and finished it with a thicker oval file. Once I had it opened I used a folded piece of sandpaper to smooth out the opening.
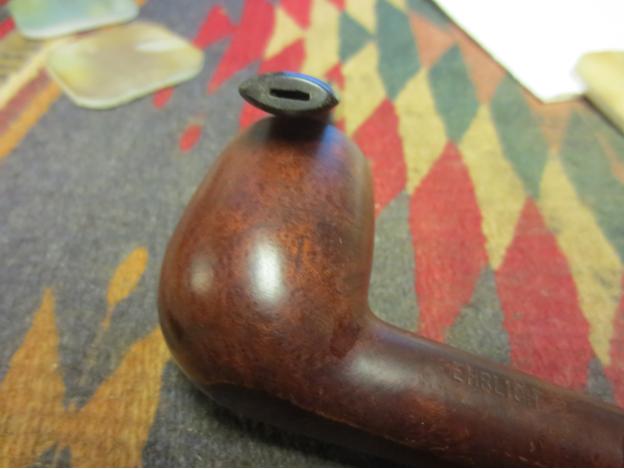
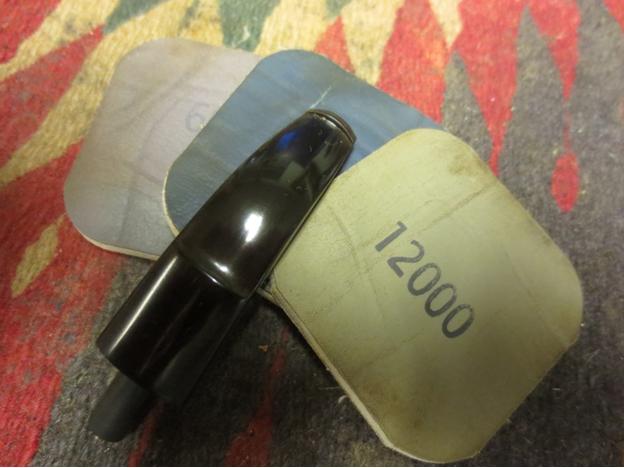
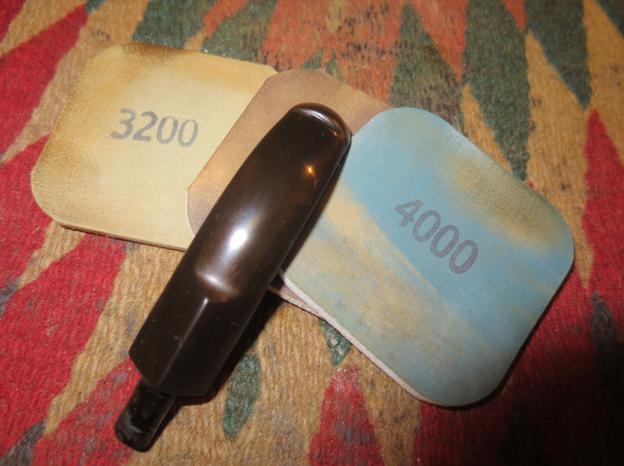
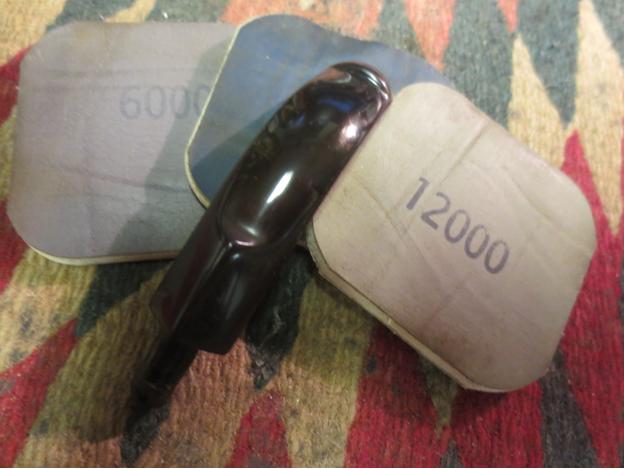
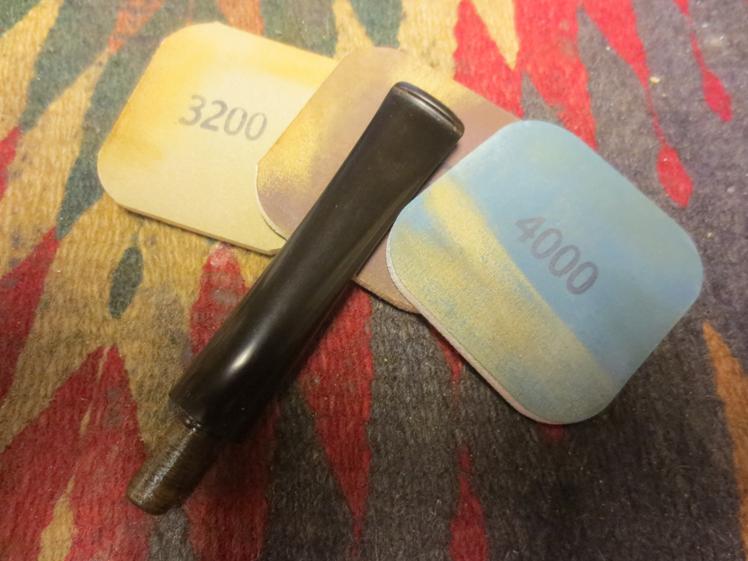
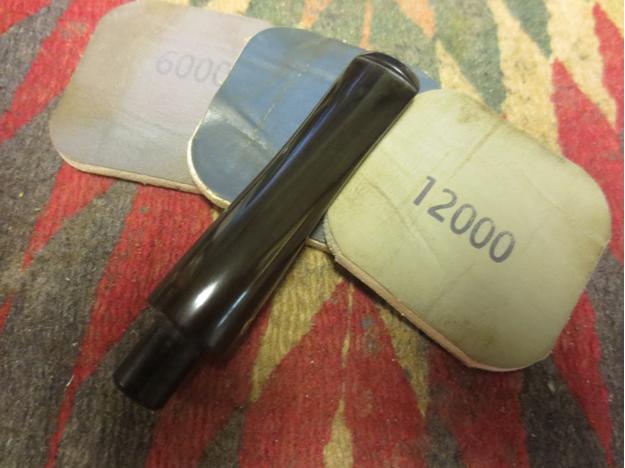
 I dry sanded the stem and the end of the button with 3200-4000 and rubbed it down with oil a second time. I finished with the micromesh pads by sanding with the 6000-12000 grit pads, rubbed it down with Obsidian Oil. Once it dried I buffed it with Blue Diamond on the buffer.
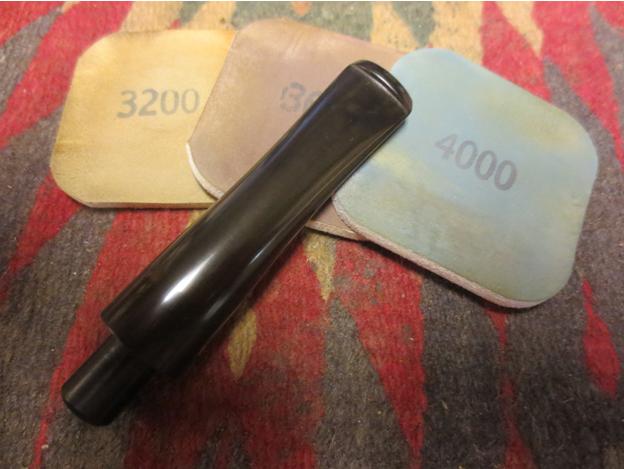
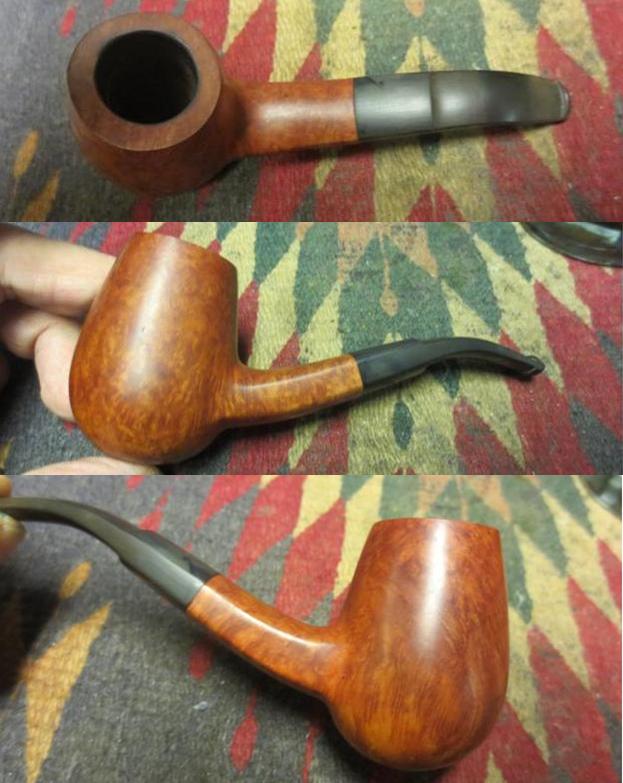
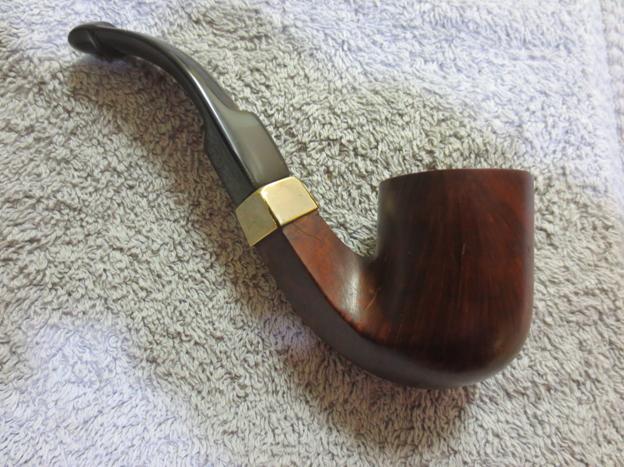
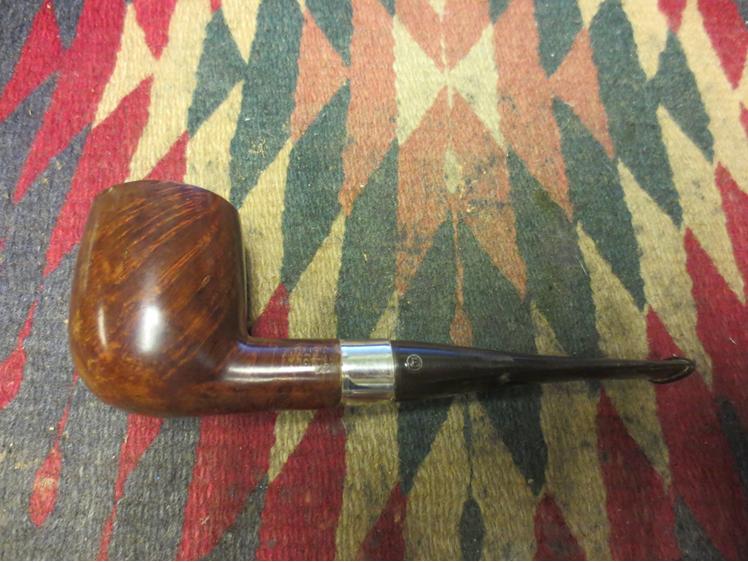
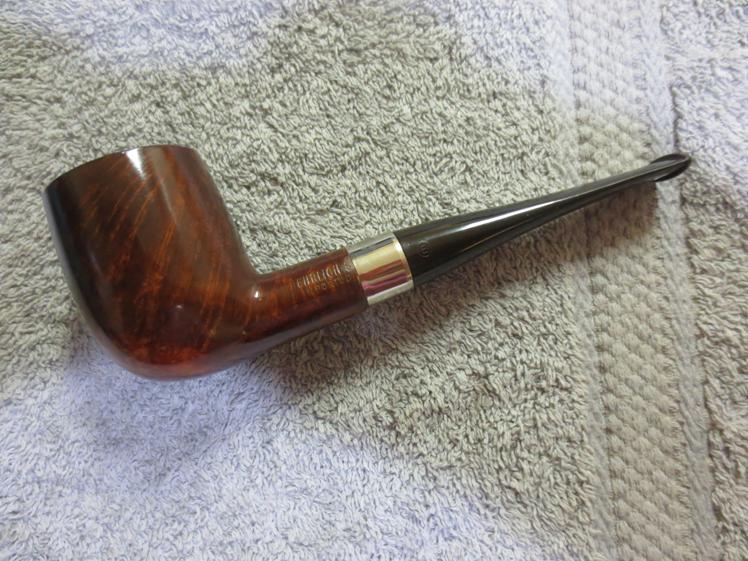
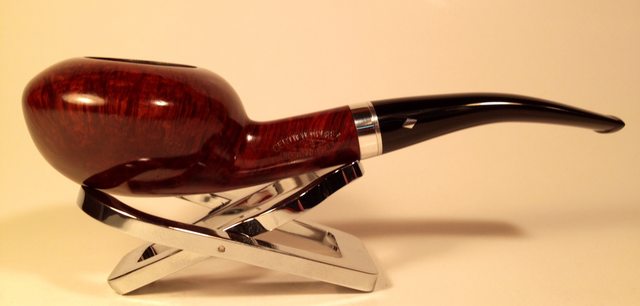
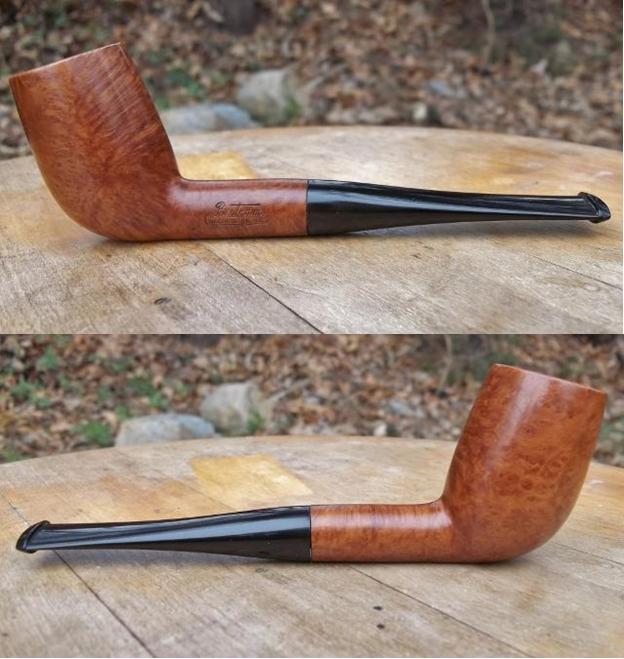
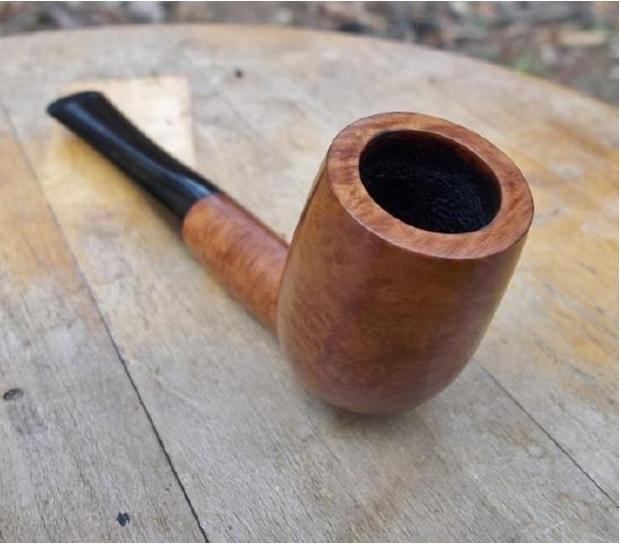
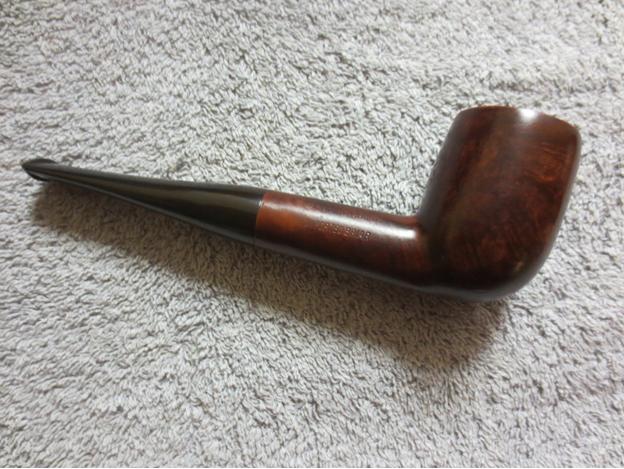
 The reborn Ehrlich Billard is shown in the photos below. I was able to clean up the mess of the bowl and rim and open the stem for a better draw. The bumbled job on the rim and bowl had disappeared and a sharp billiard took its place. The slightly darker colour of the stain adds richness to the billiard that I really like. It is now ready to be sold into the hands of its next owner.

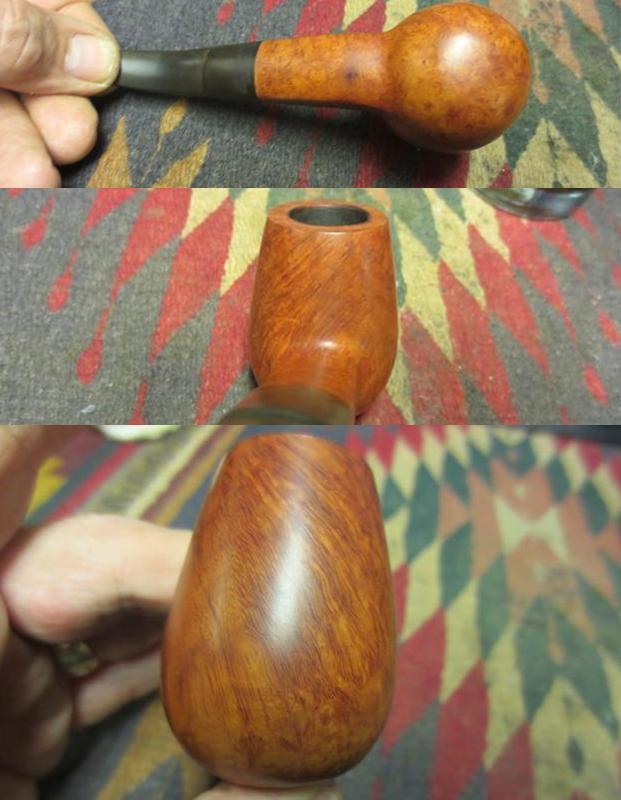
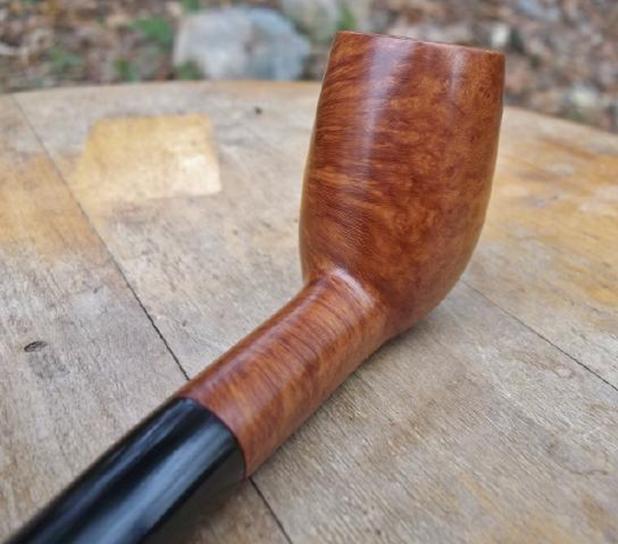
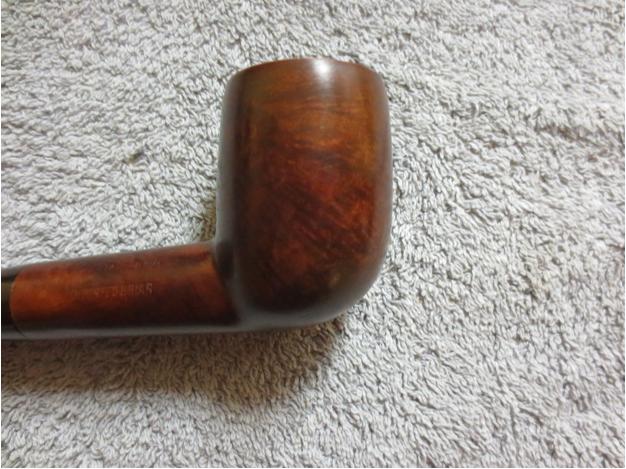
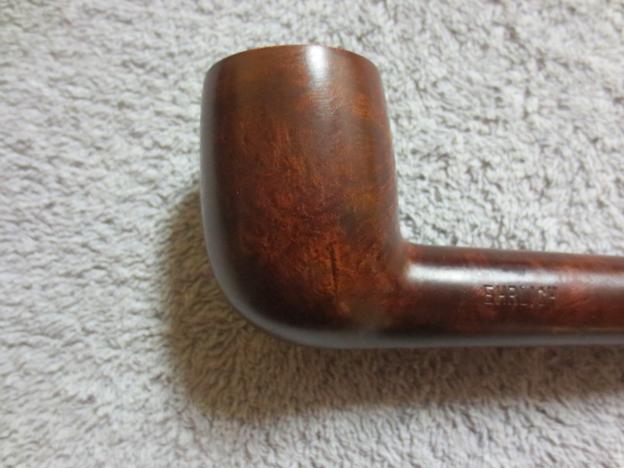
 The next three photos give a clear picture of the rim top and sides of the bowl to show the grain.
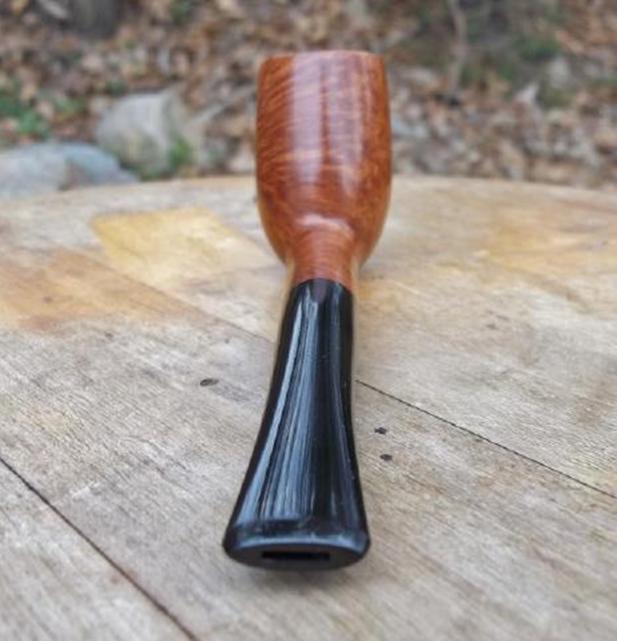
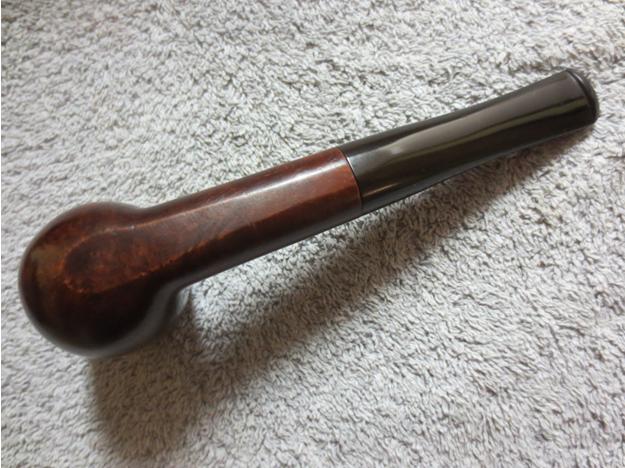
 The last two photos show the tenon and slot on the stem.
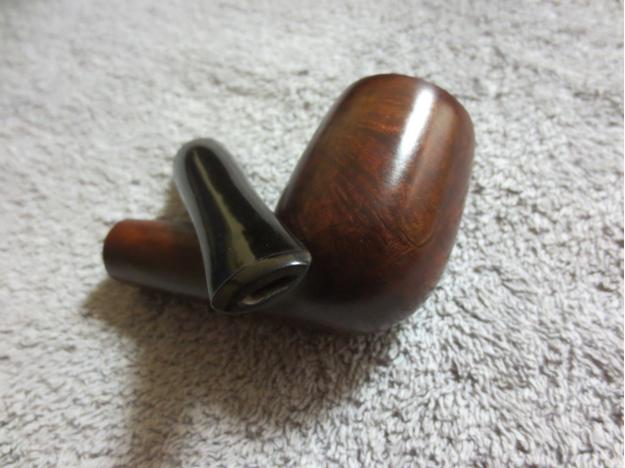
 This Ehrlich billiard is a chubby shank larger sized pipe, probably the same size as a Group 4 in Dunhill terms. The grain is quite nice and the thinned dark brown stain allows the grain to show through to its advantage. It should make someone a great addition. If you are interested in this pipe email me with an offer at slaug@uniserve.com and we can discuss it. The entirety of the sale price will go to the Nepal project. I will pay the postage so that does not get taken off the proceeds. If you are interested in reading about the SA Foundation you can look at their website at http://www.safoundation.com.