Tag Archives: Bertram

Restemming & Restoring a Bertram 60 Bent Bulldog


Blog by Steve Laug

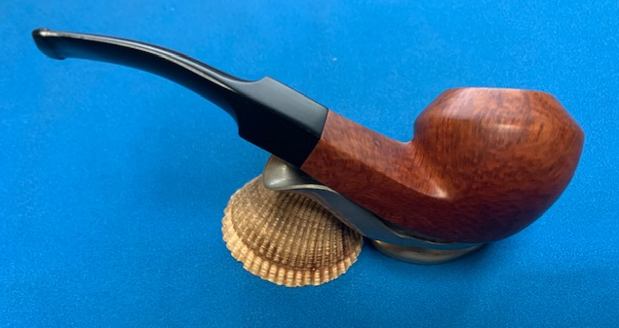
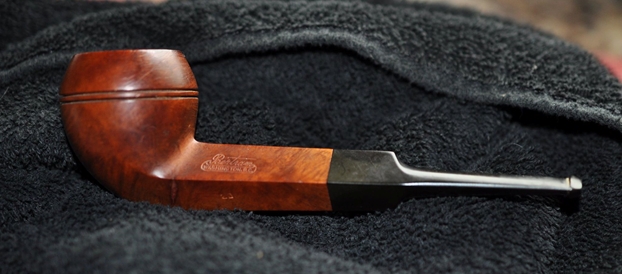
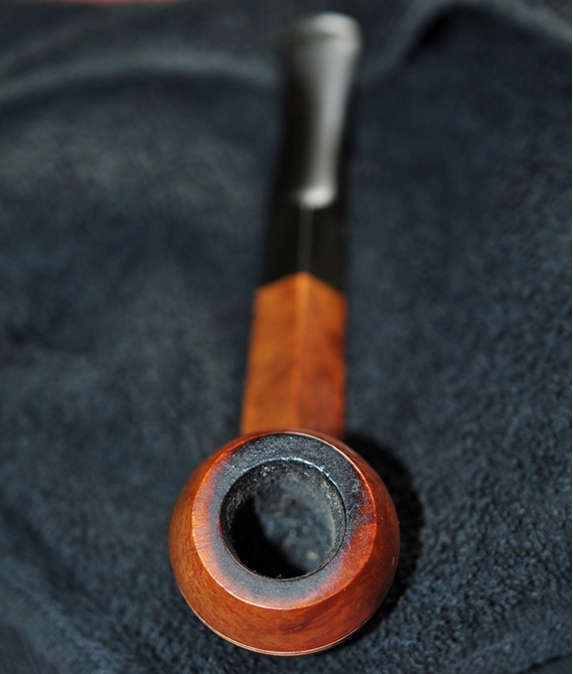
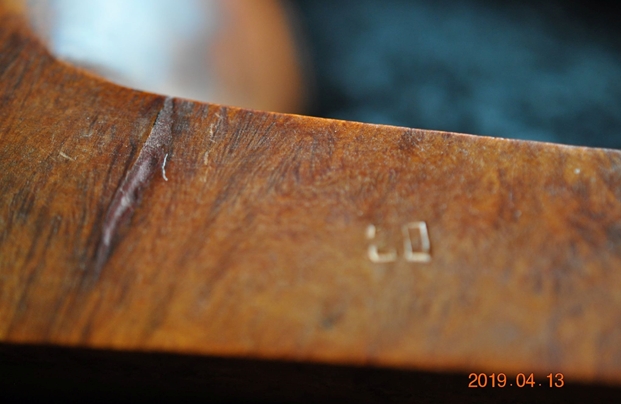
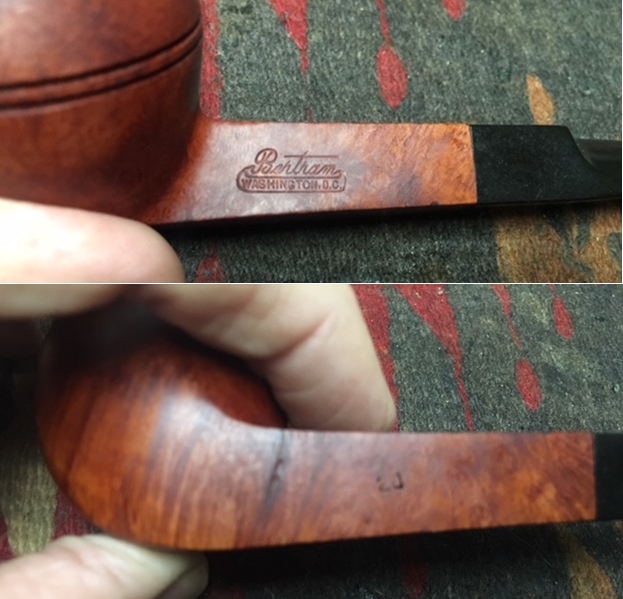
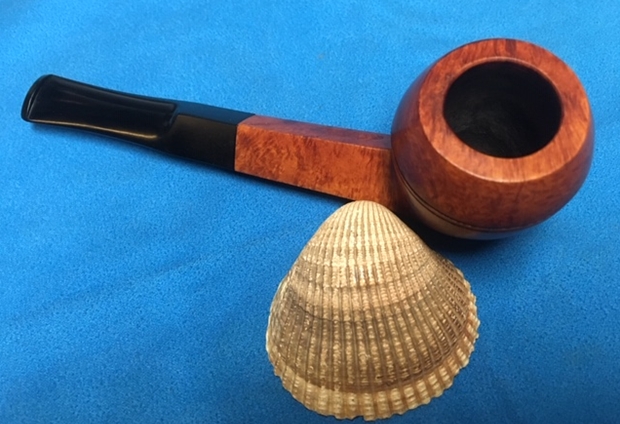
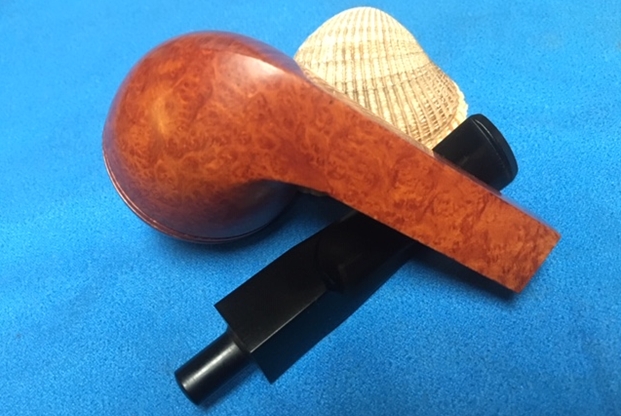
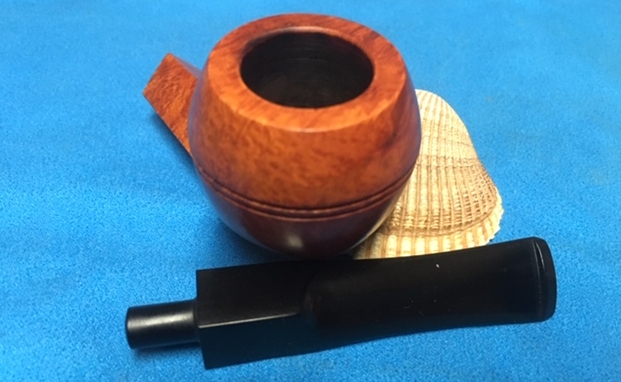
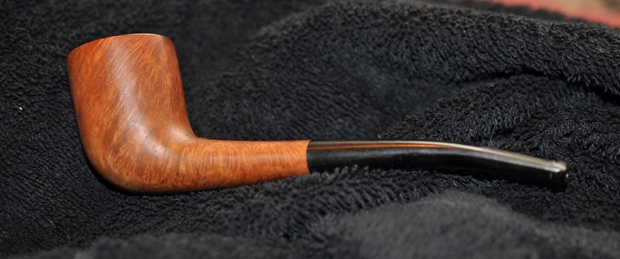
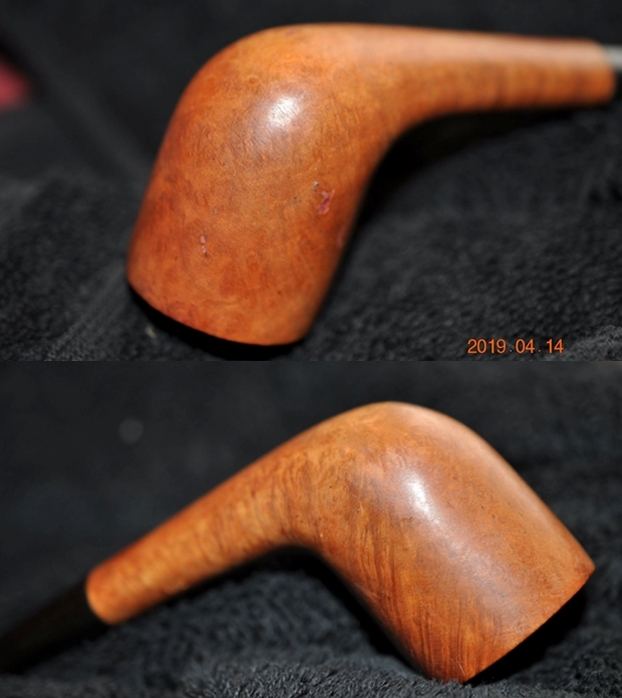
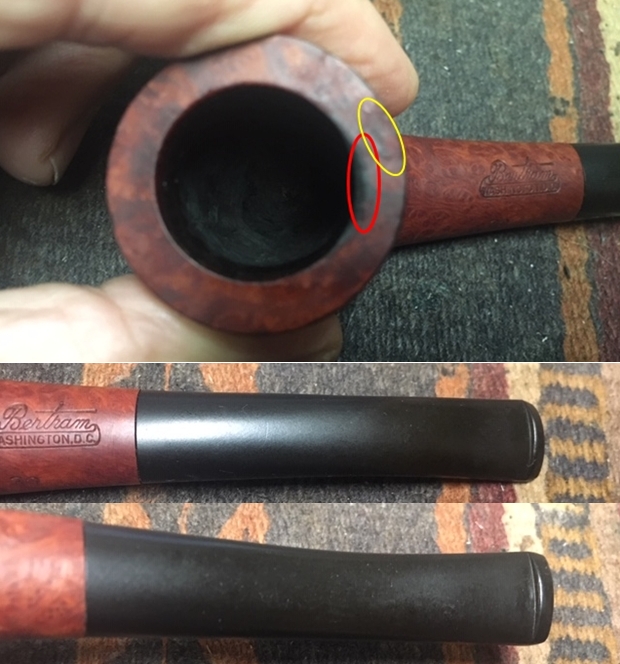
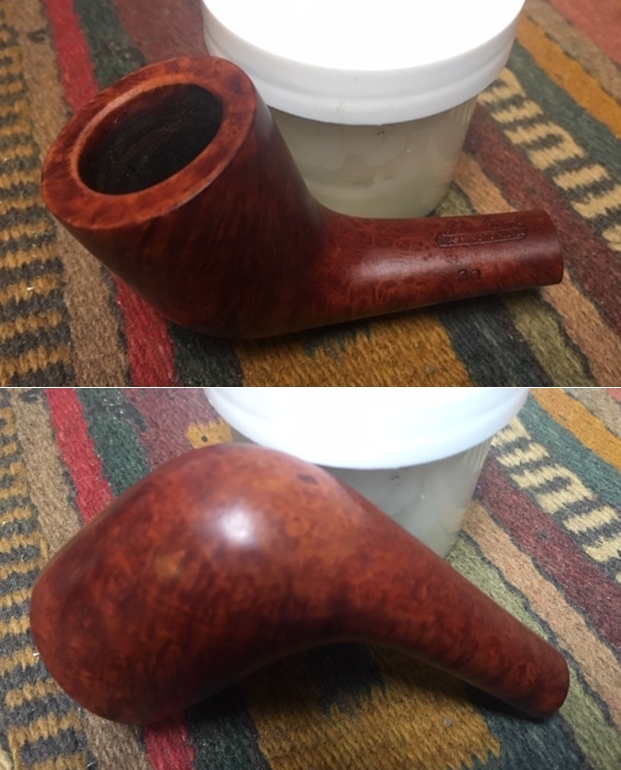
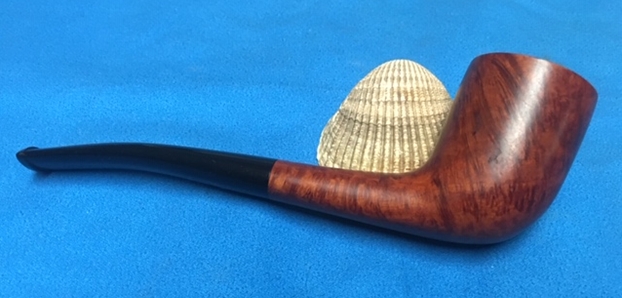
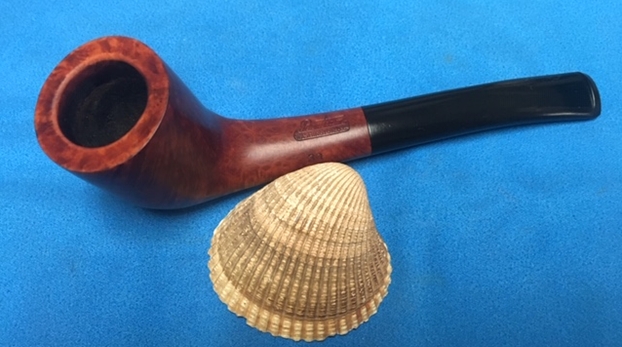
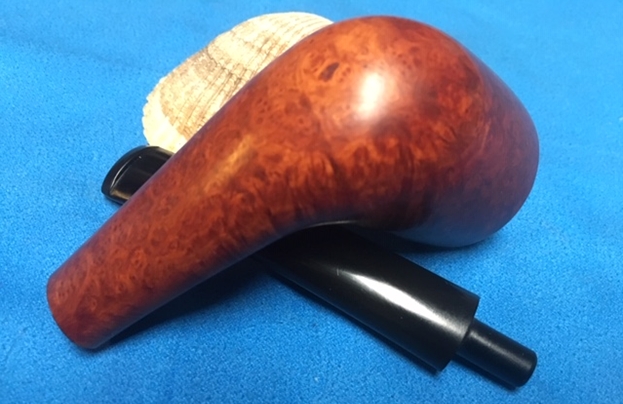
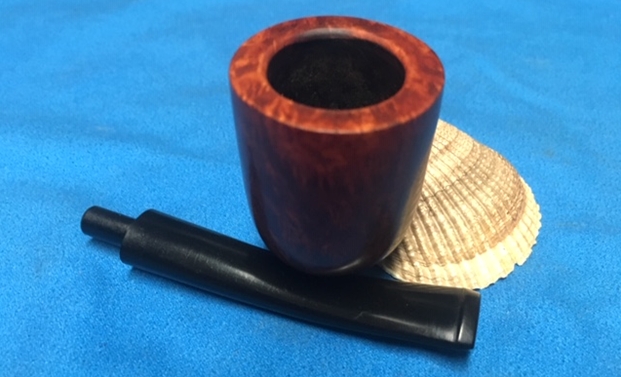
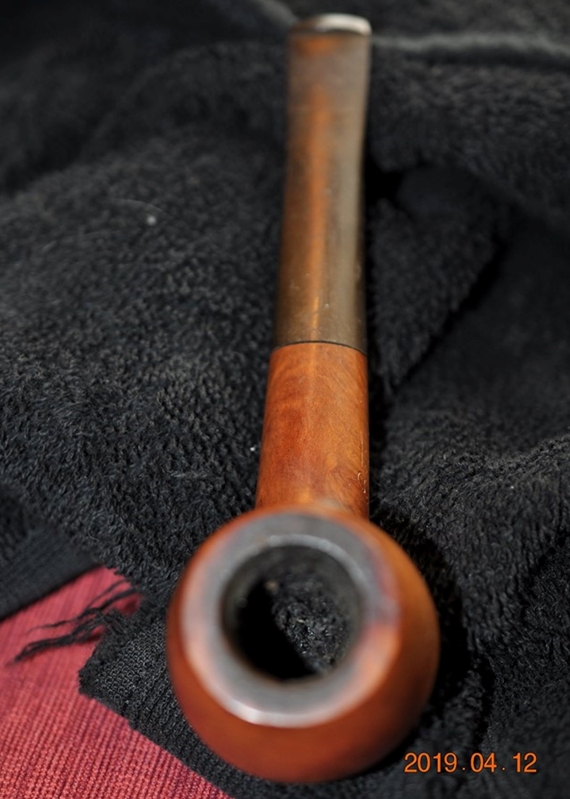
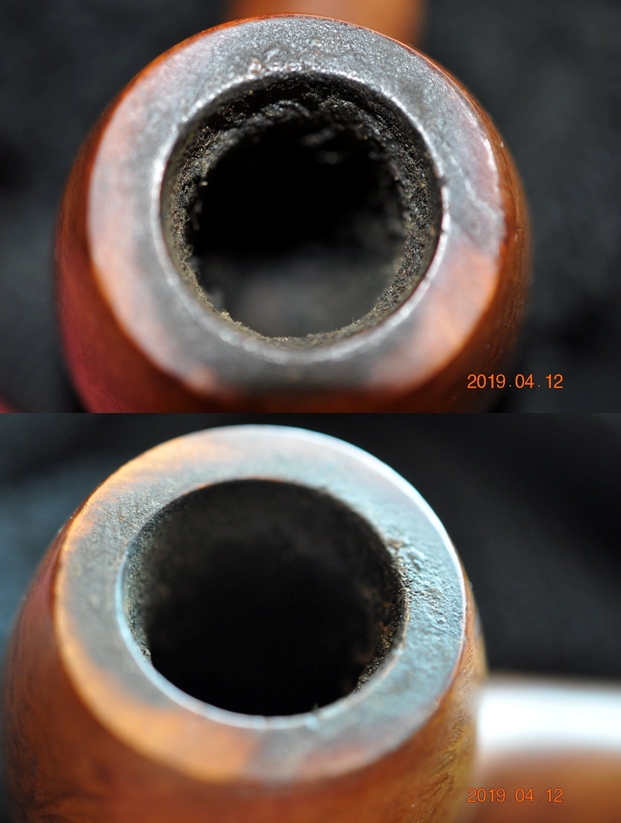
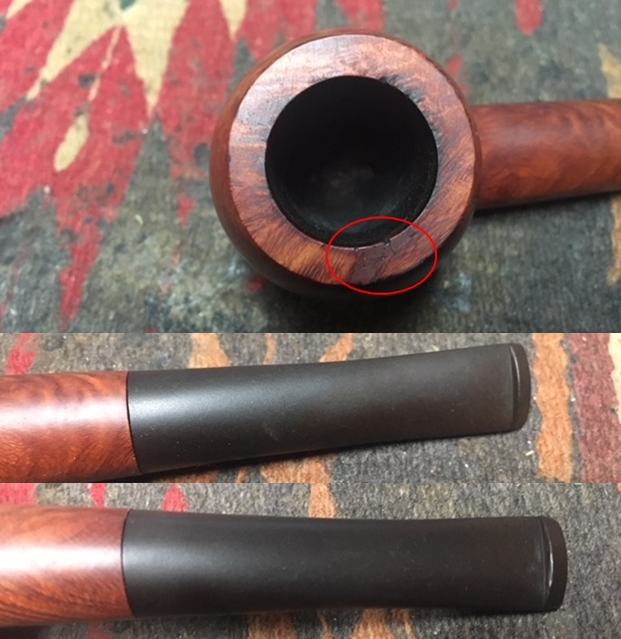
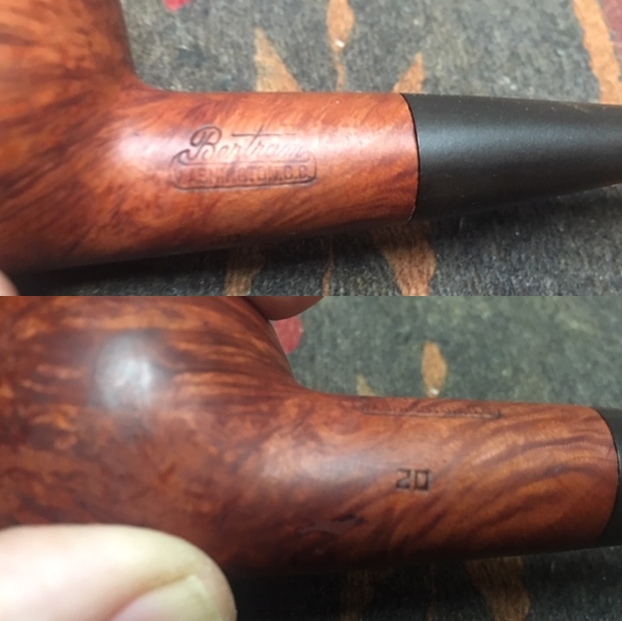
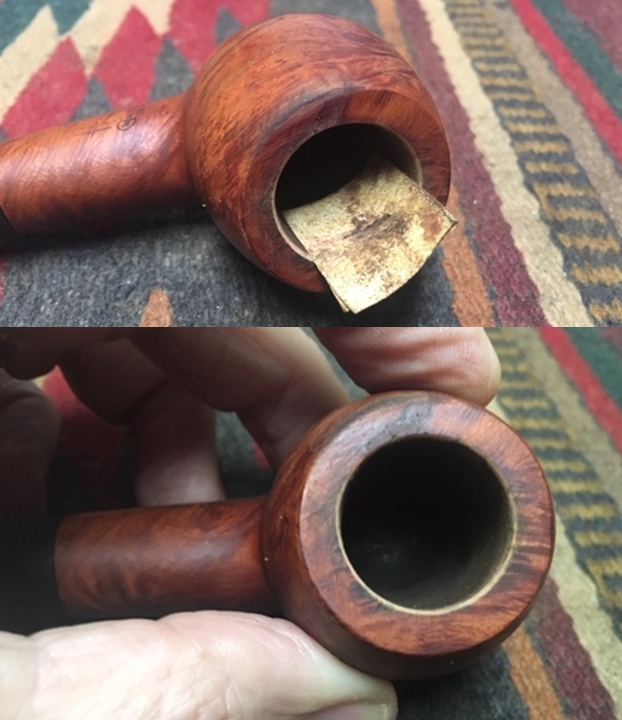
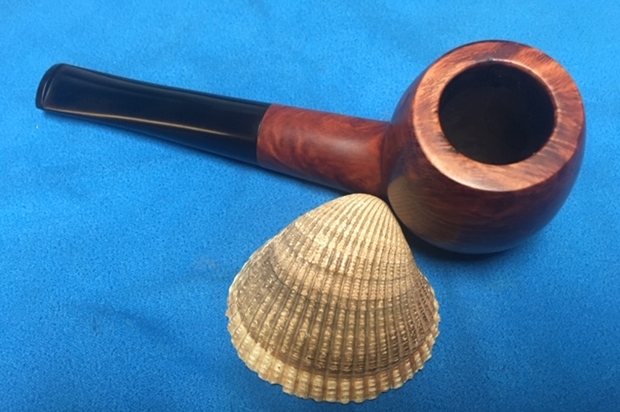
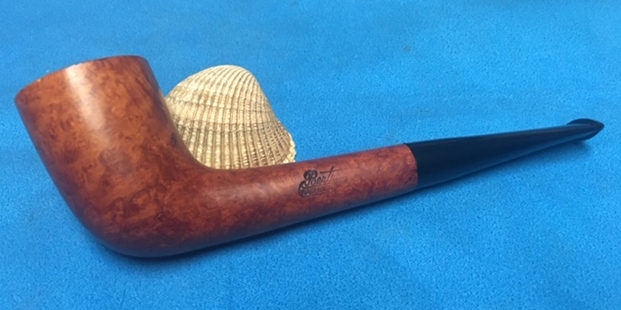
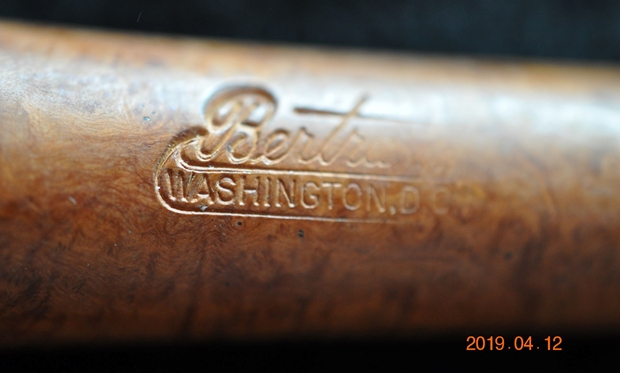
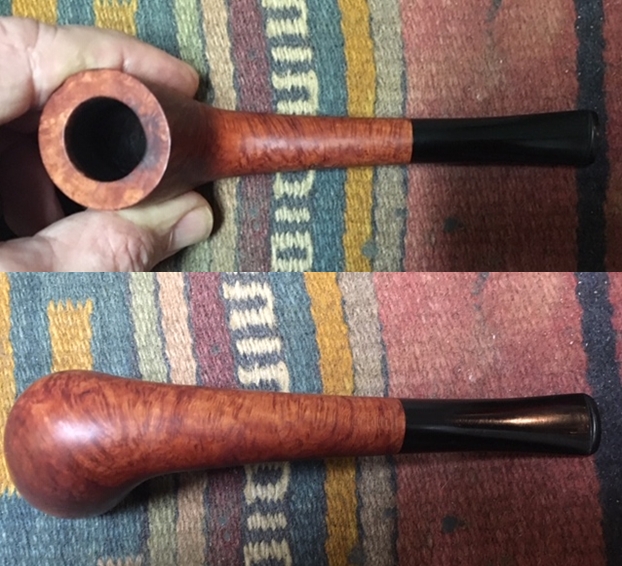
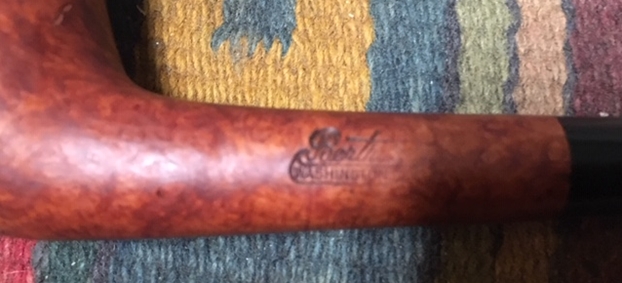
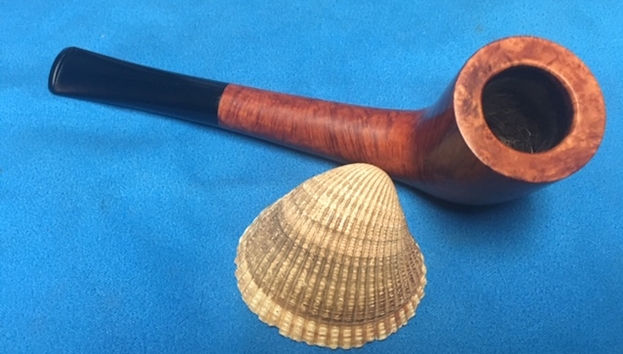
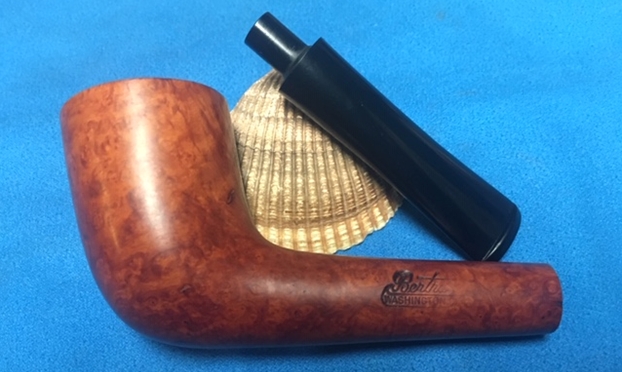
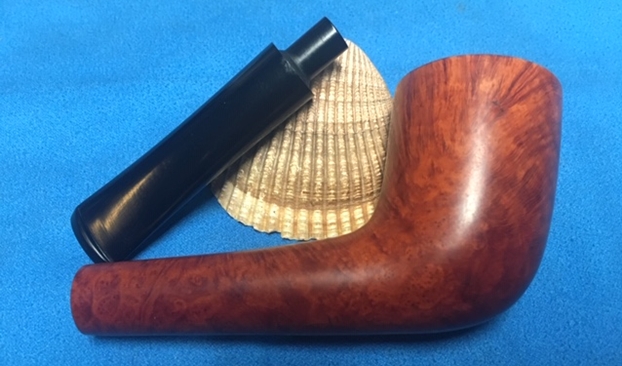
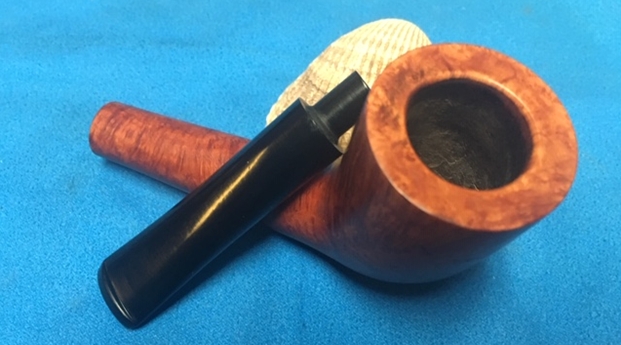
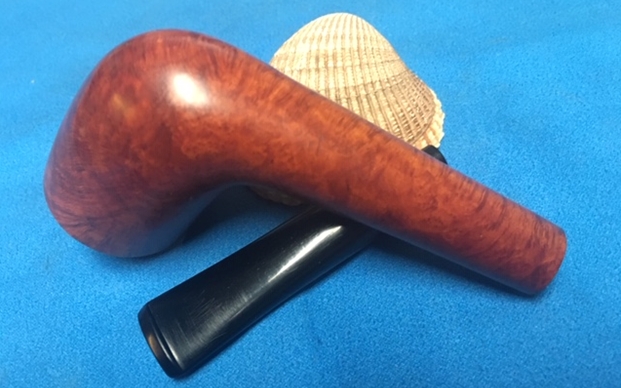
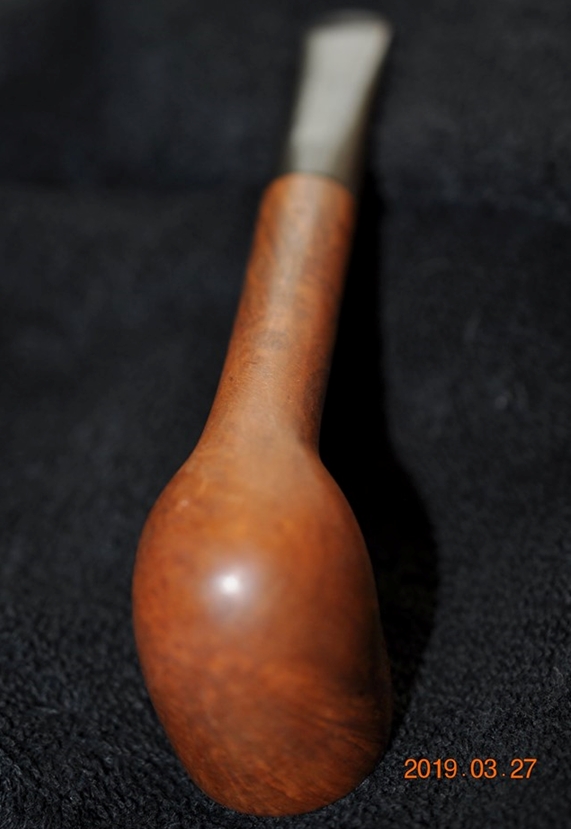
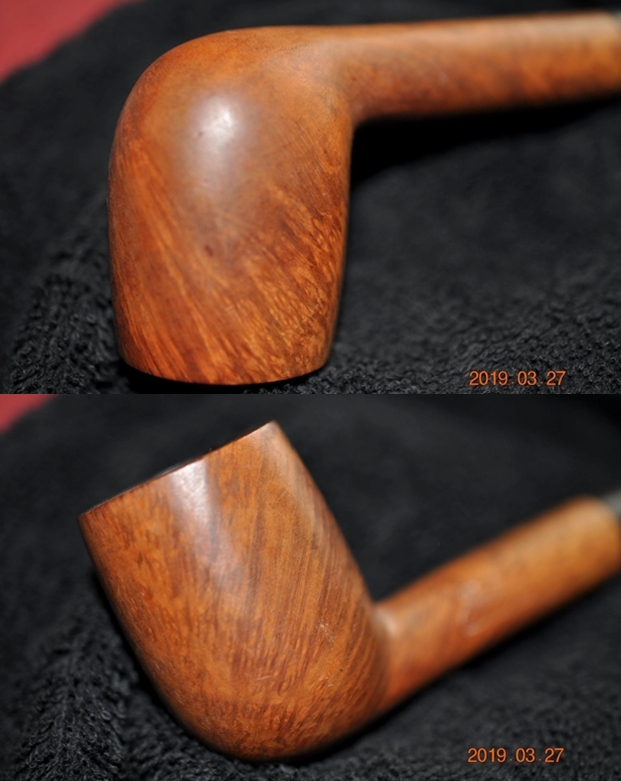
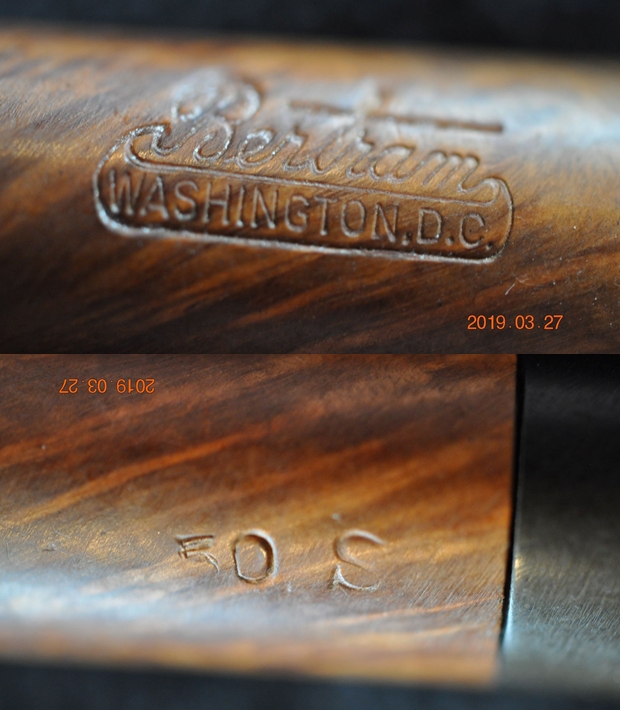
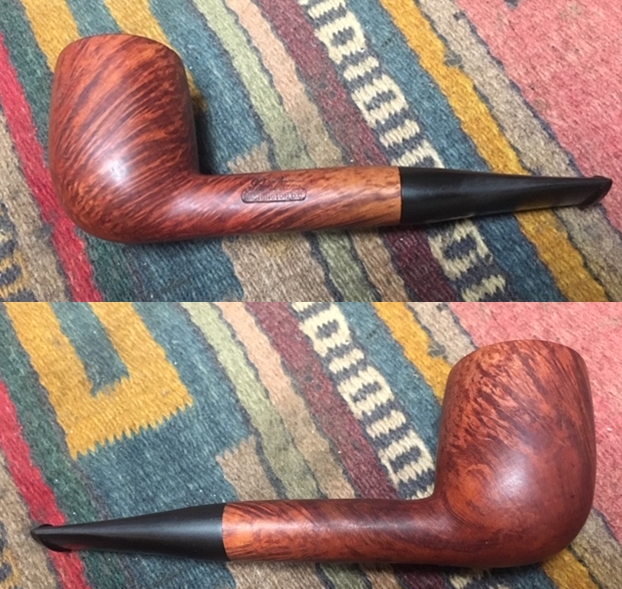
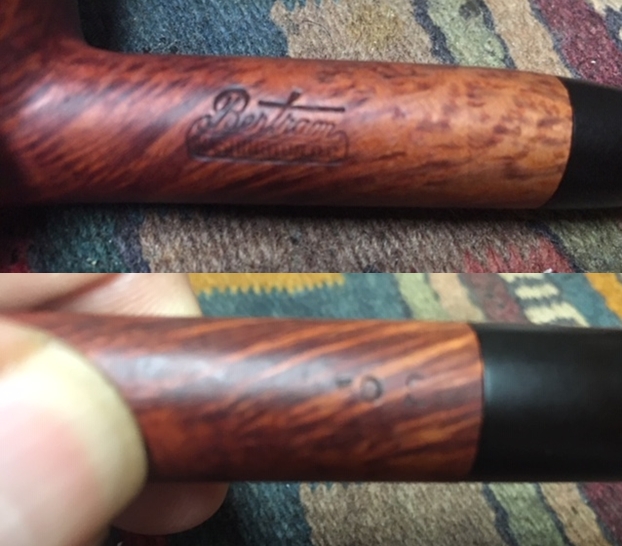
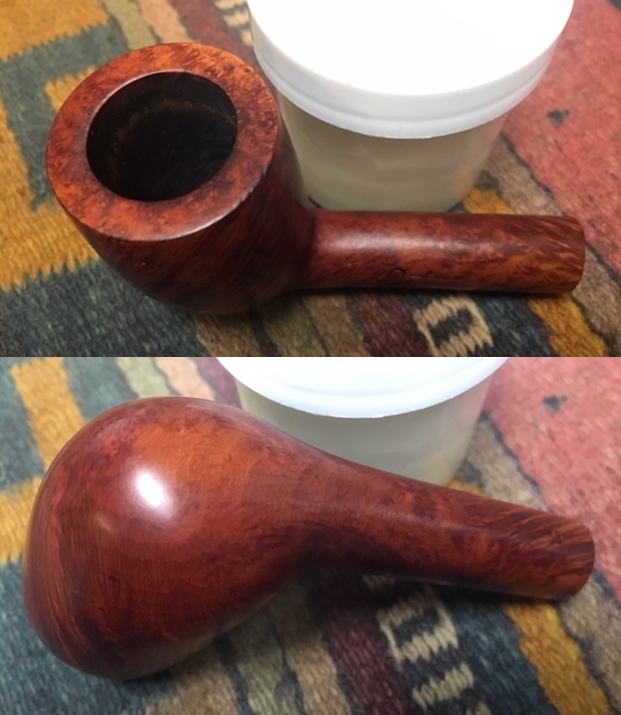
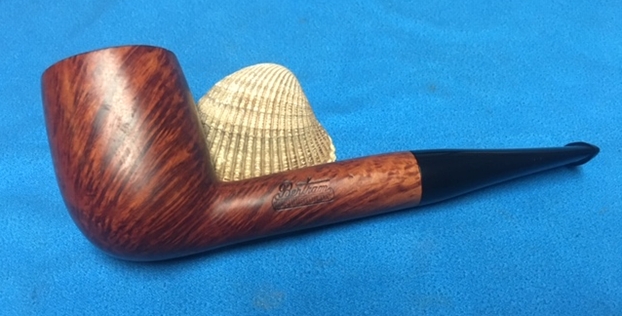
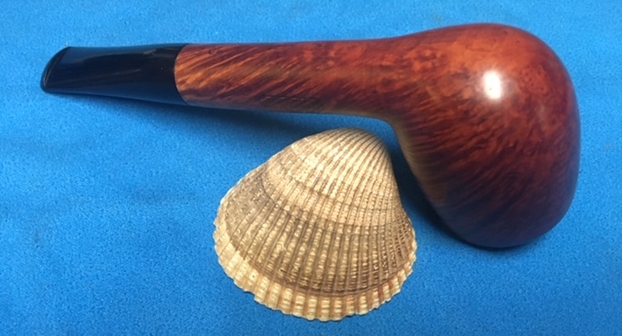
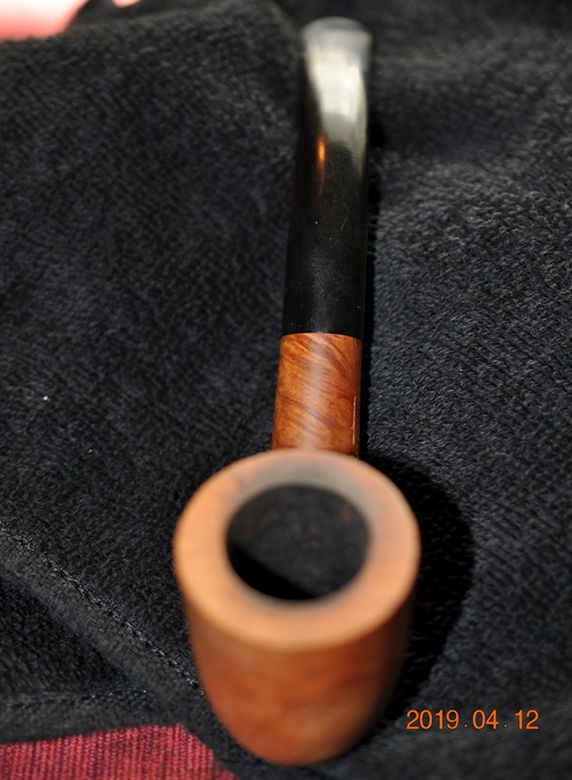
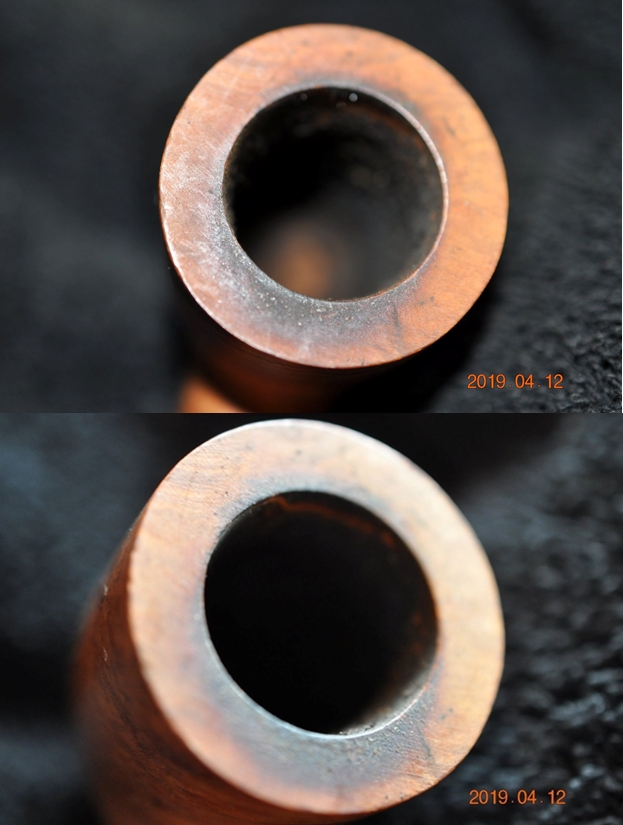
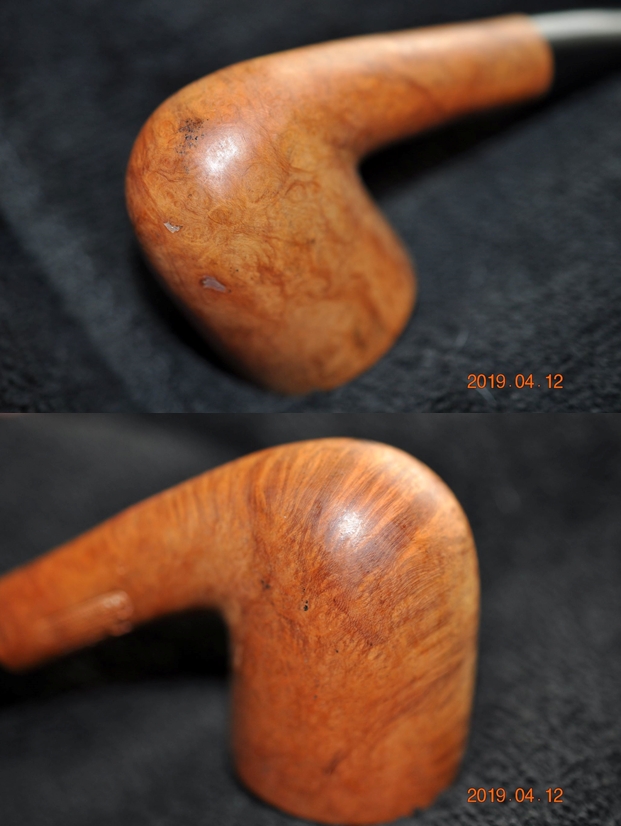
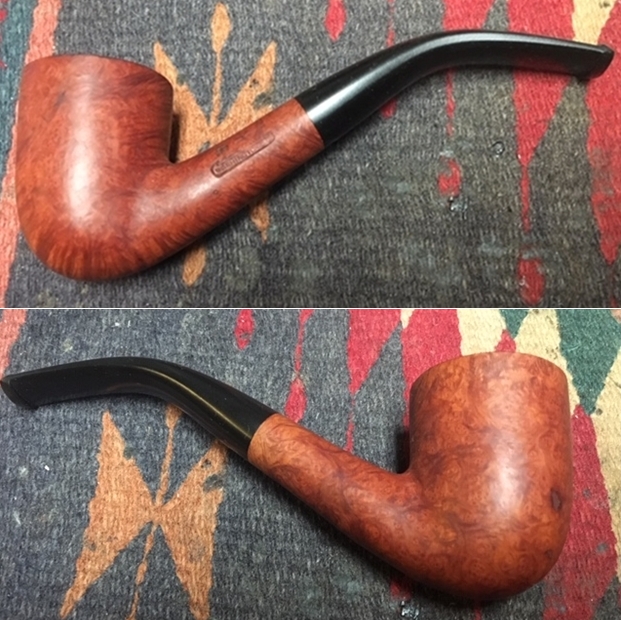
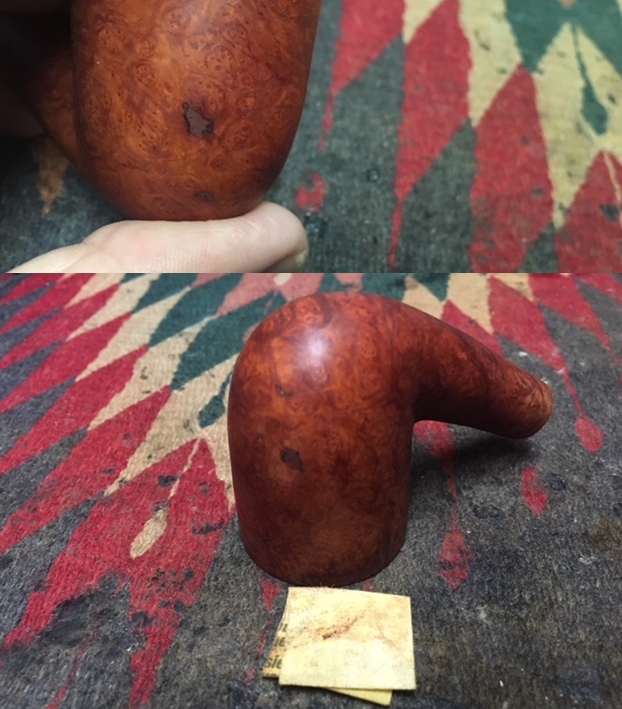
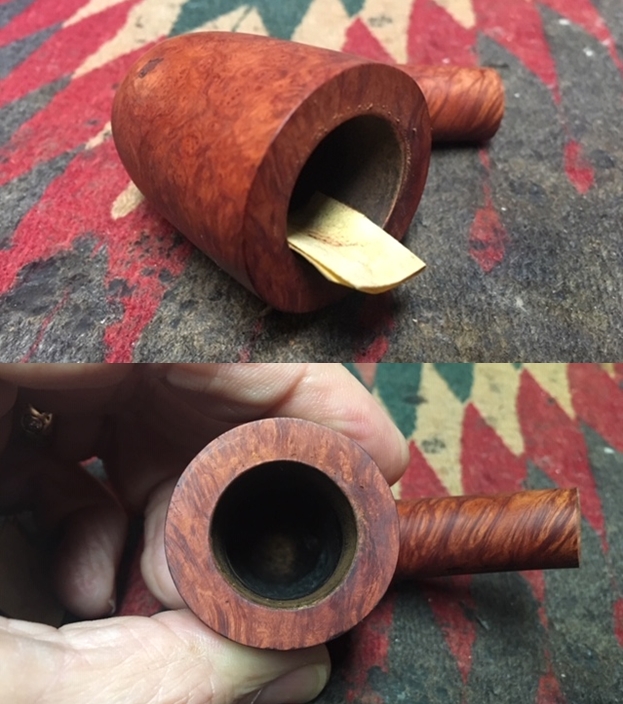
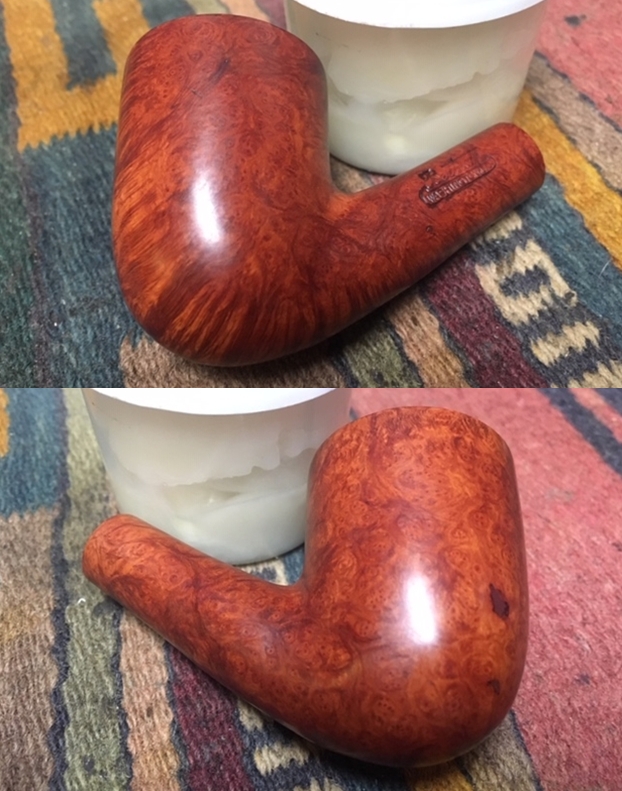
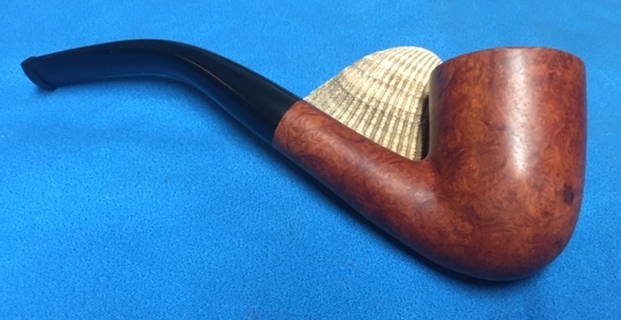
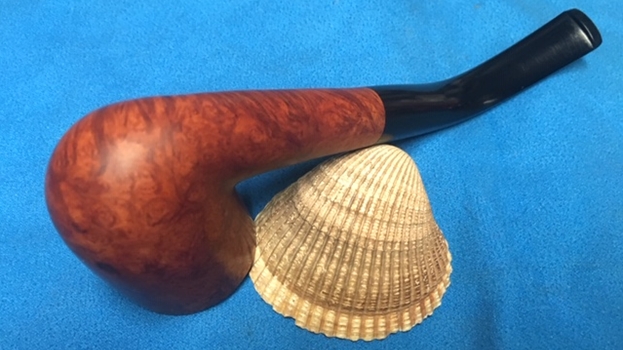
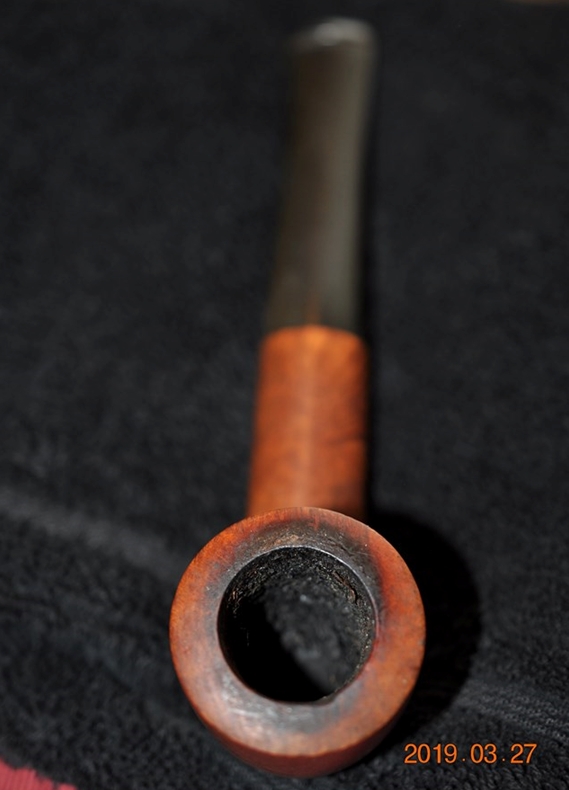
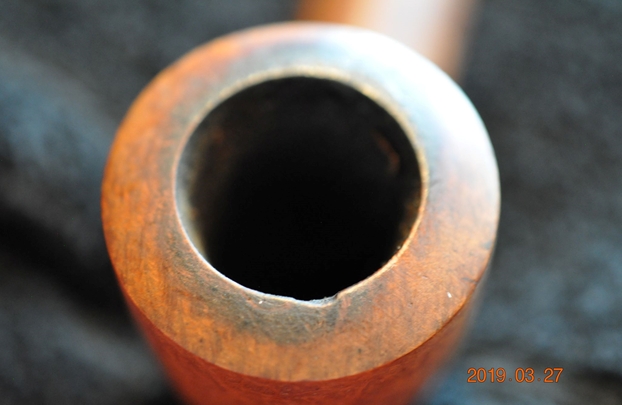
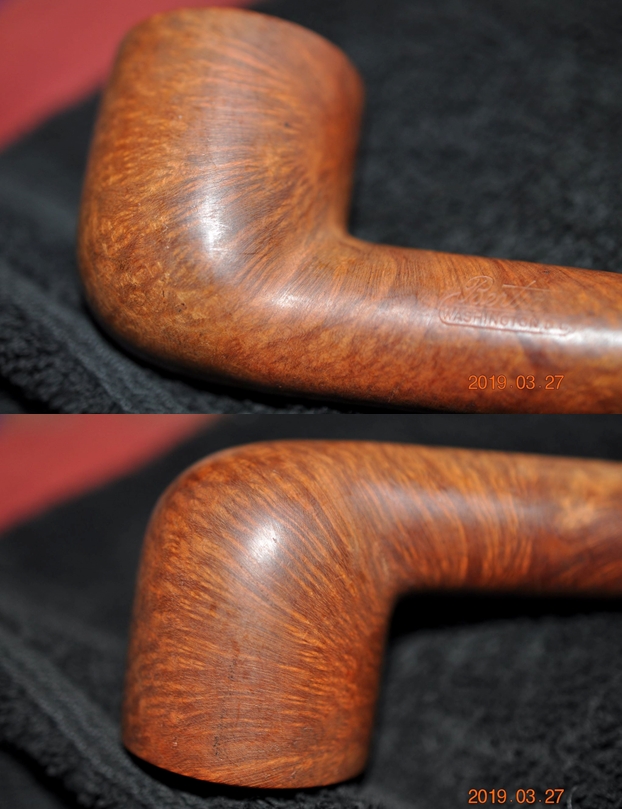
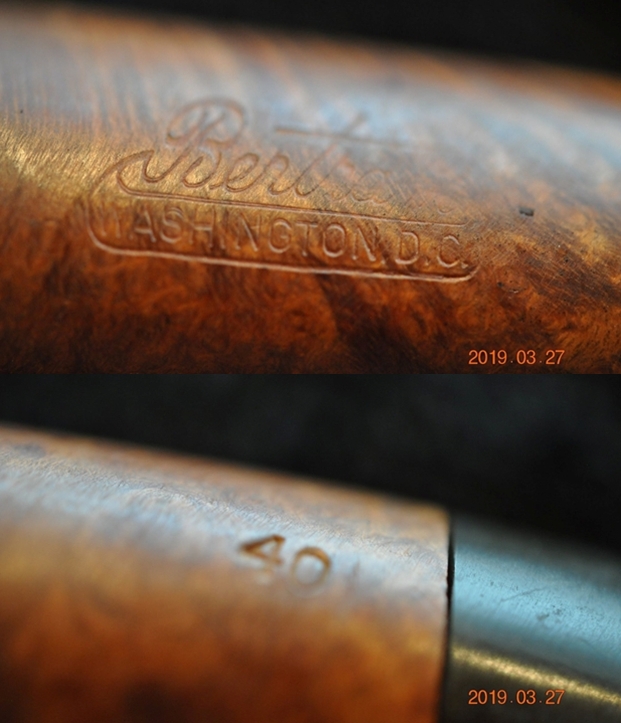
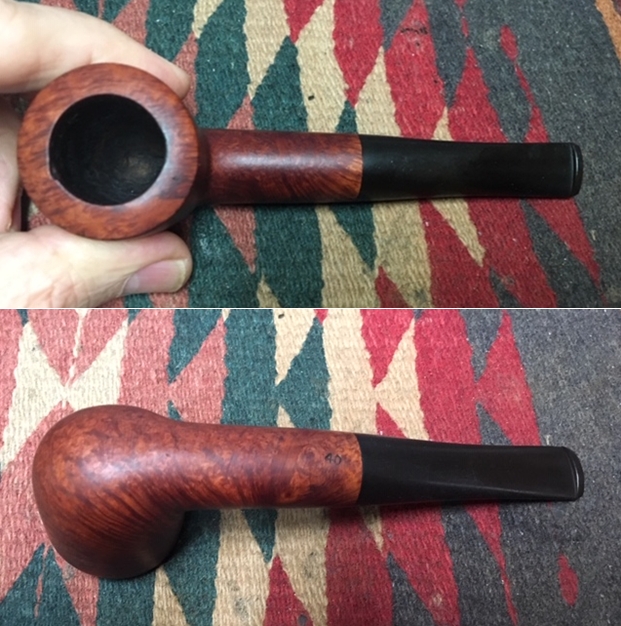
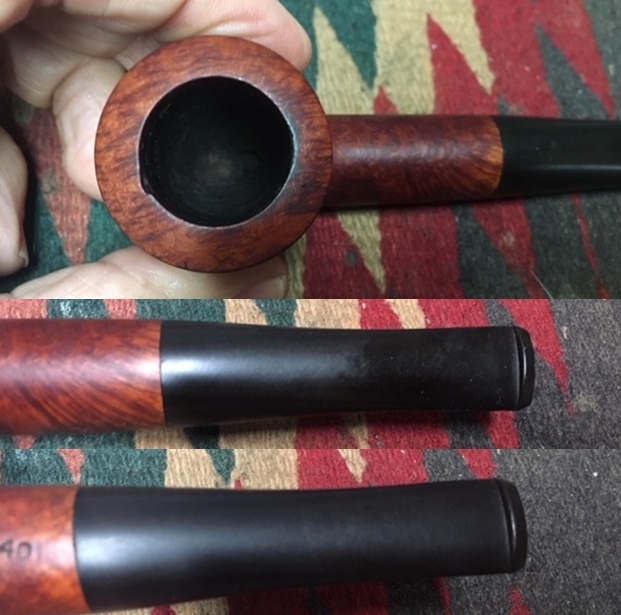
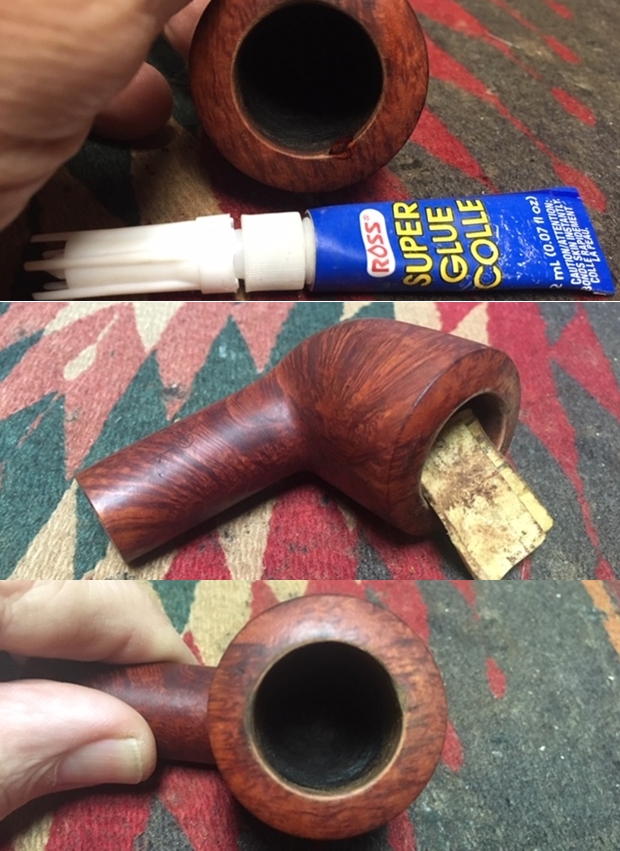
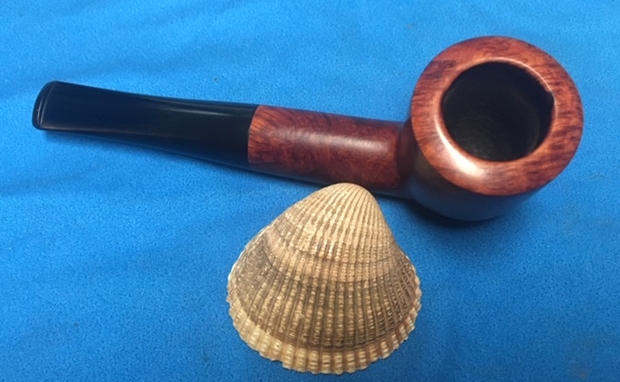
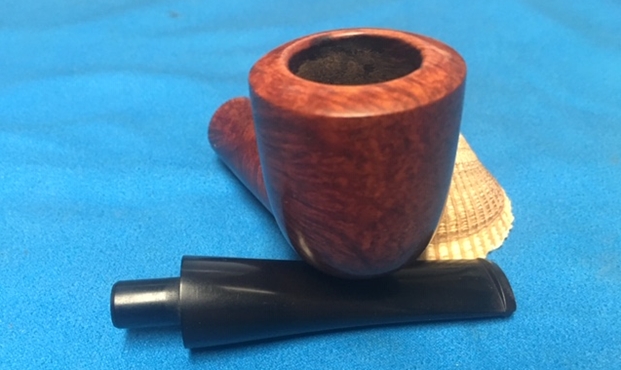
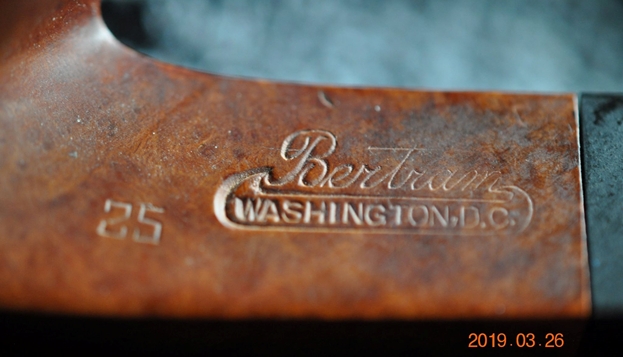
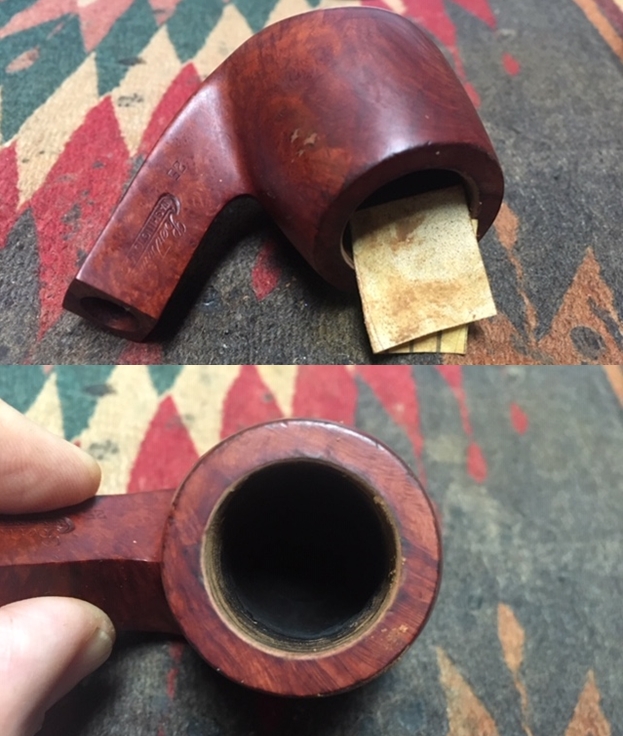
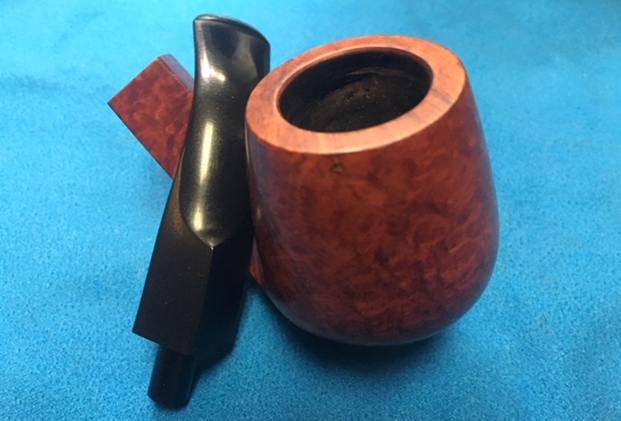
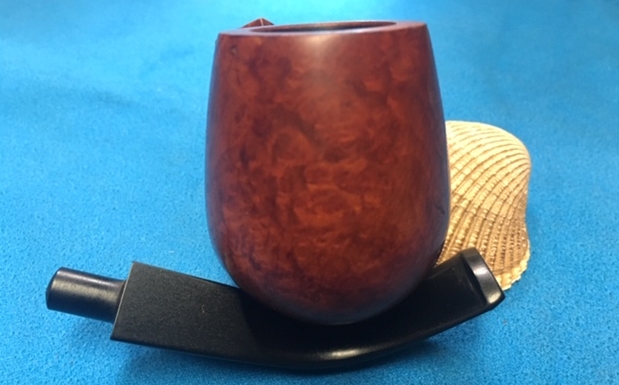
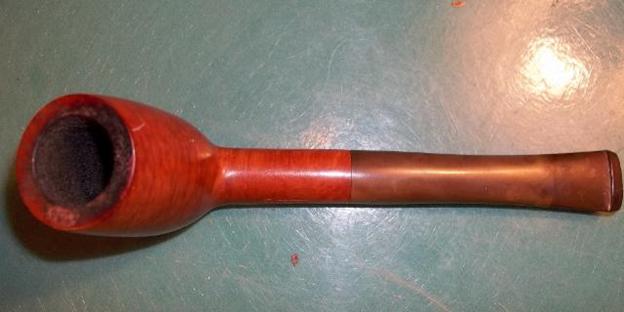
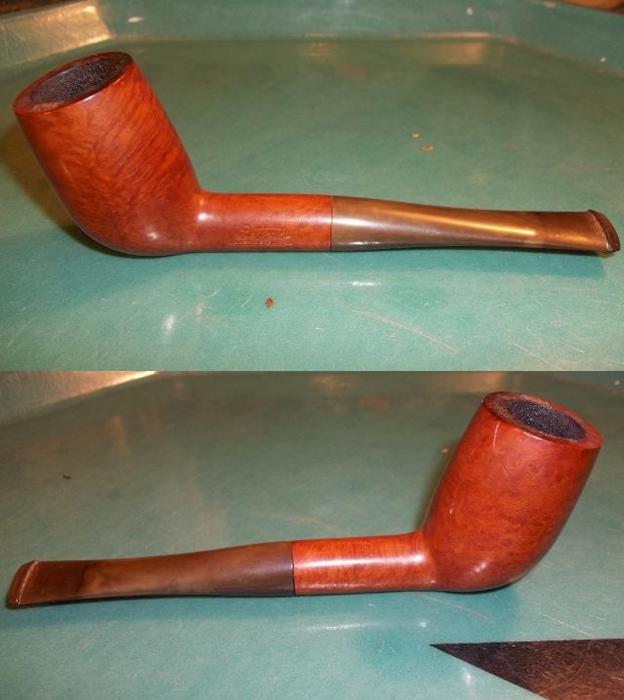
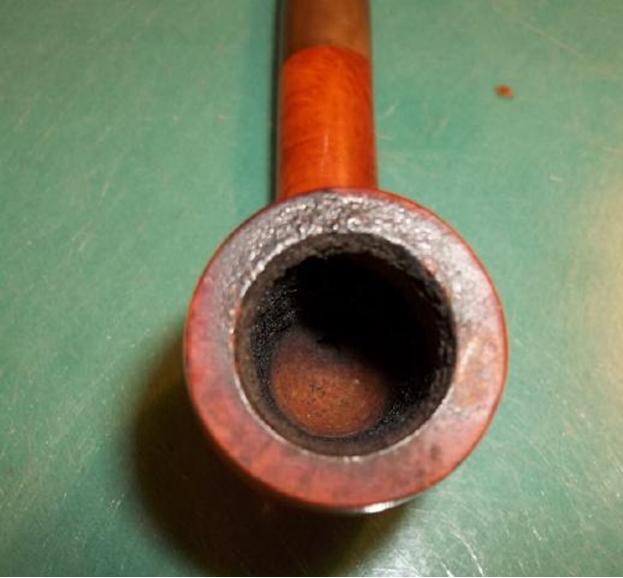
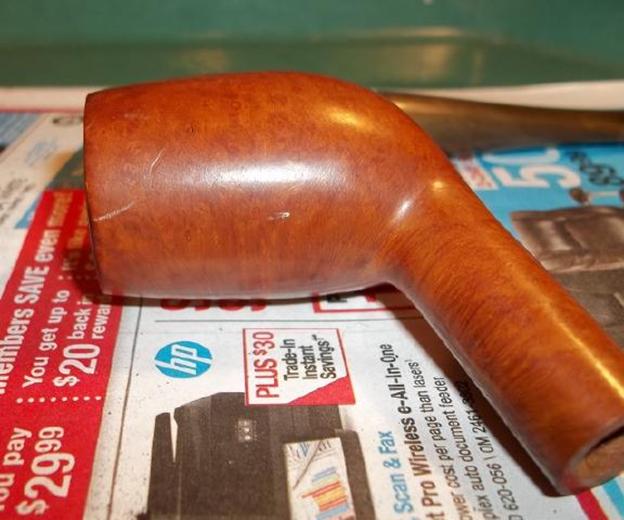
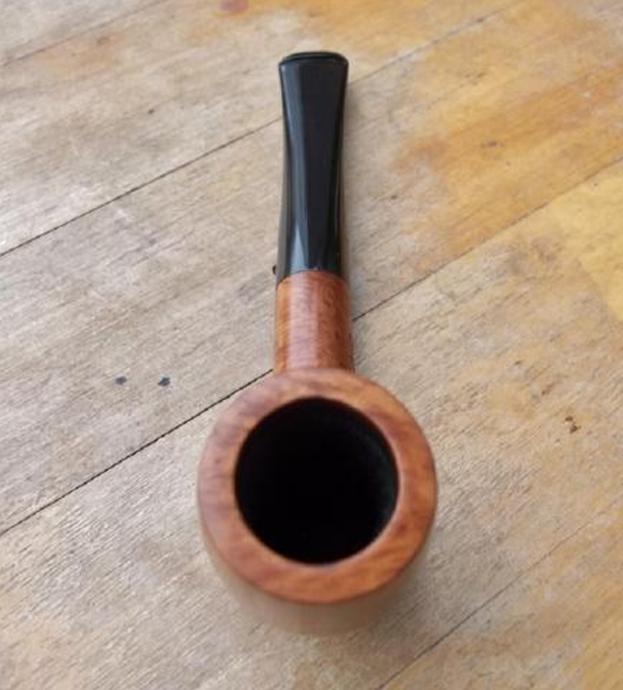
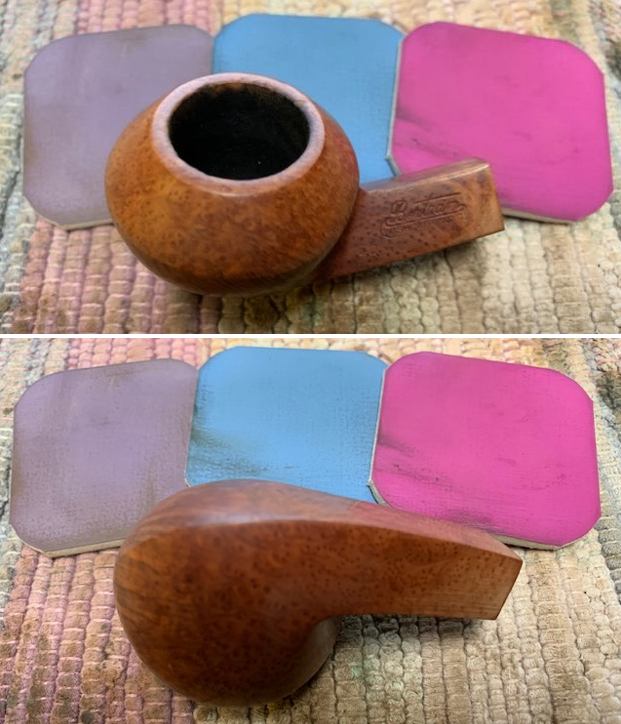
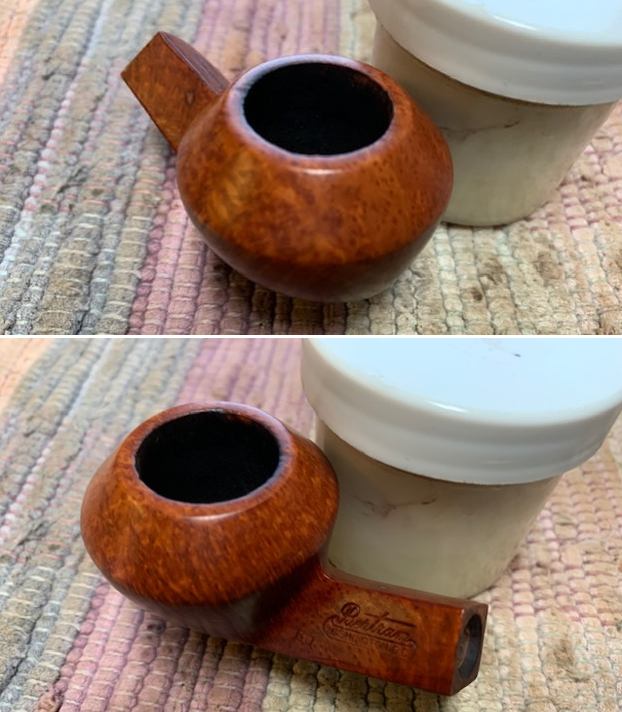
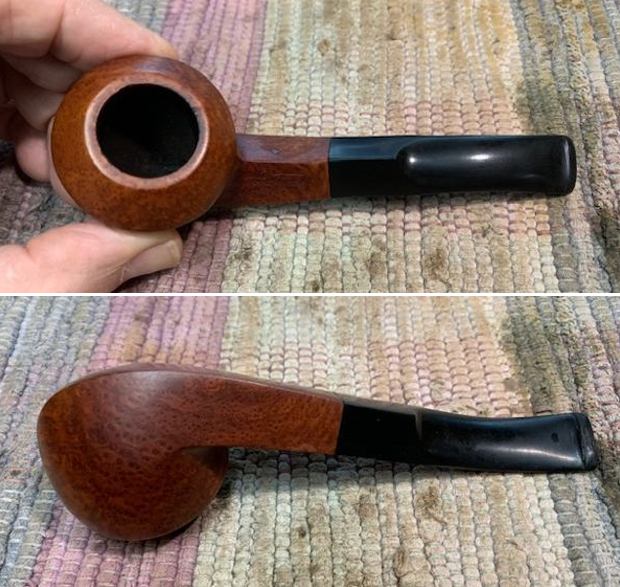
Sometimes the repetitive work on similar pipes and stems gets tiring to me and to alleviate the inevitable boredom I change things up a bit to refresh me. I have a box of stummels (bowls) here that I periodically go through and see if I have a potential stem that would fit them. Sunday afternoon I went through the box and picked out two bowls and found workable stems for them both. They were in different states of need but all had been thoroughly cleaned before I boxed them up. The pipe I chose to work on next is a nicely grained Bulldog stummel. The bowl looked very good. The grain around the sides was quite nice and a mix of flame and birdseye grain. There was one small fill on the right side of the shank but it was in good condition. The rim top was in excellent condition with a bit of darkening toward the rear of the bowl. The interior of the bowl was clean and there were not any chips, cracks or checking on the walls. The finish was dull and bit and tired but still quite redeemable. The stamping on the pipe was clear and readable. On the left side it read Bertram in script [over] Washington DC in a ribbon. The grade 60 stamp was on the same side near the bowl/shank junction. I took some photos of the bowl before I started to work on it.   
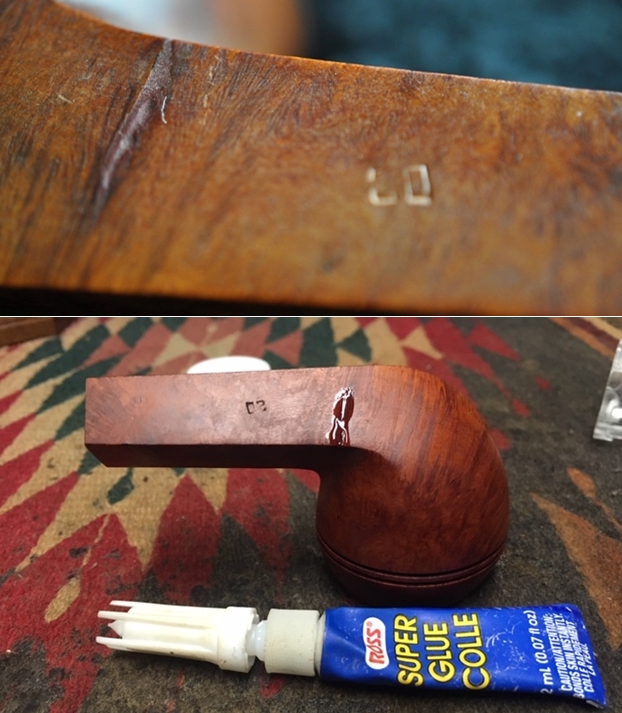
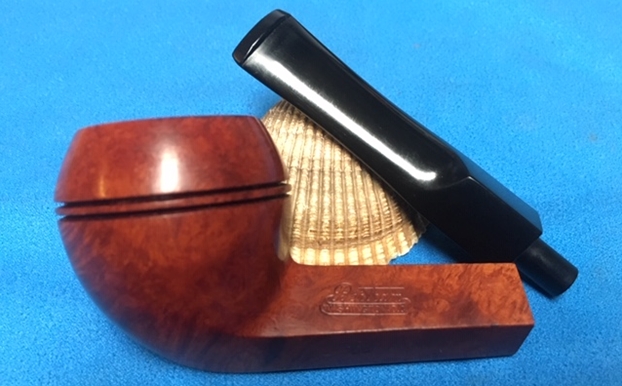
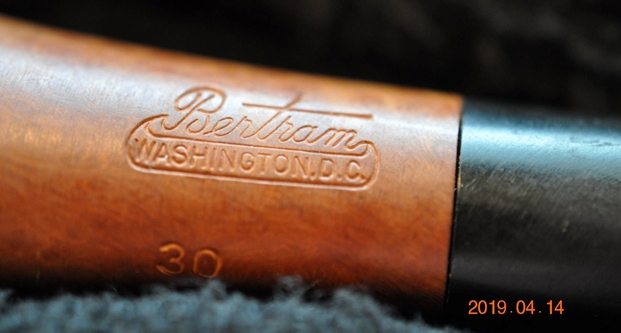
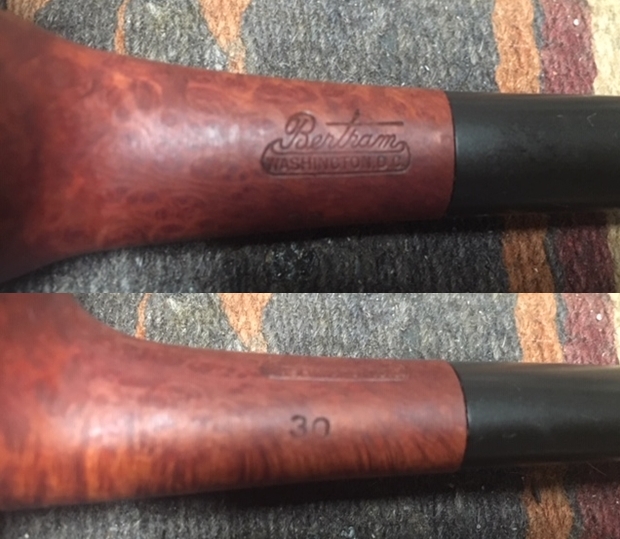
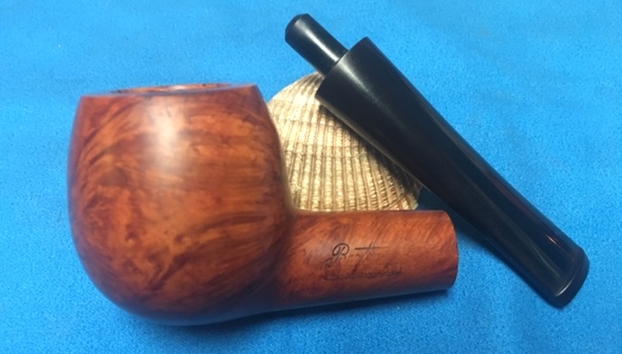
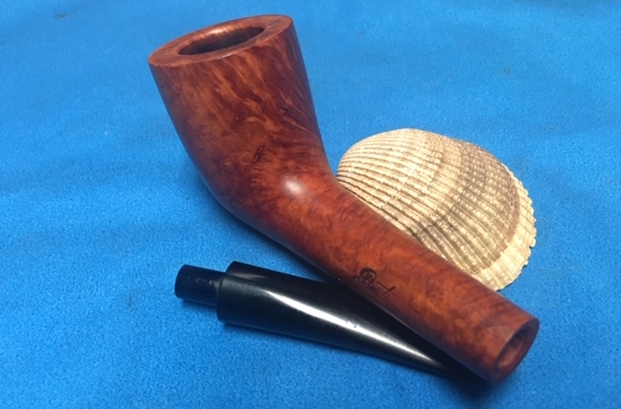
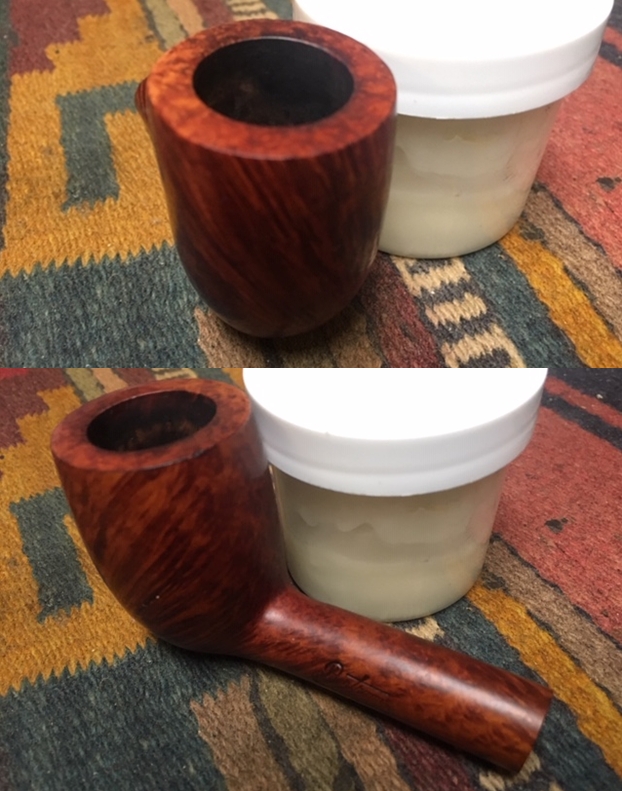
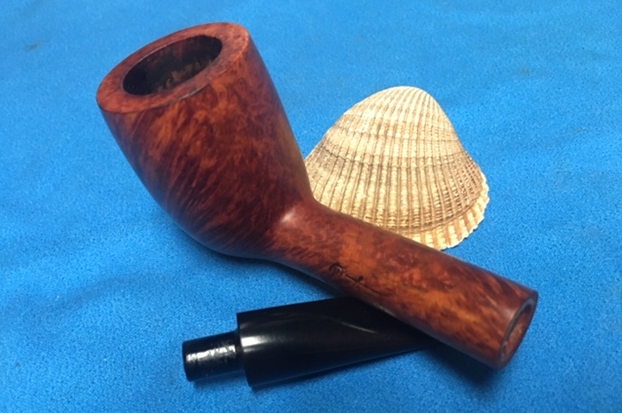
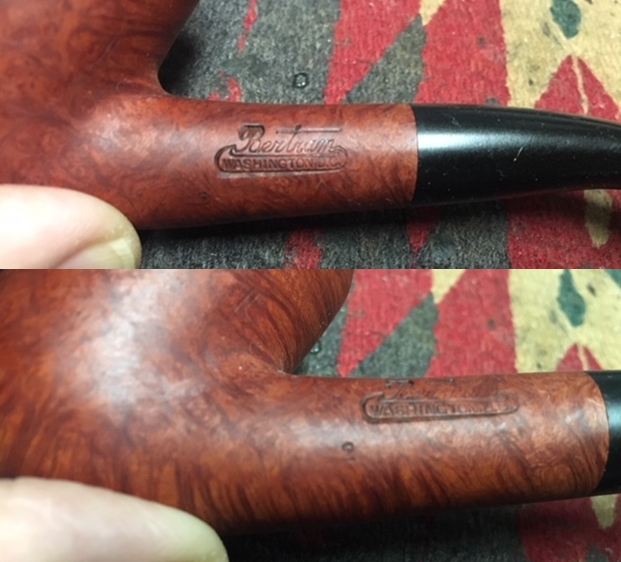
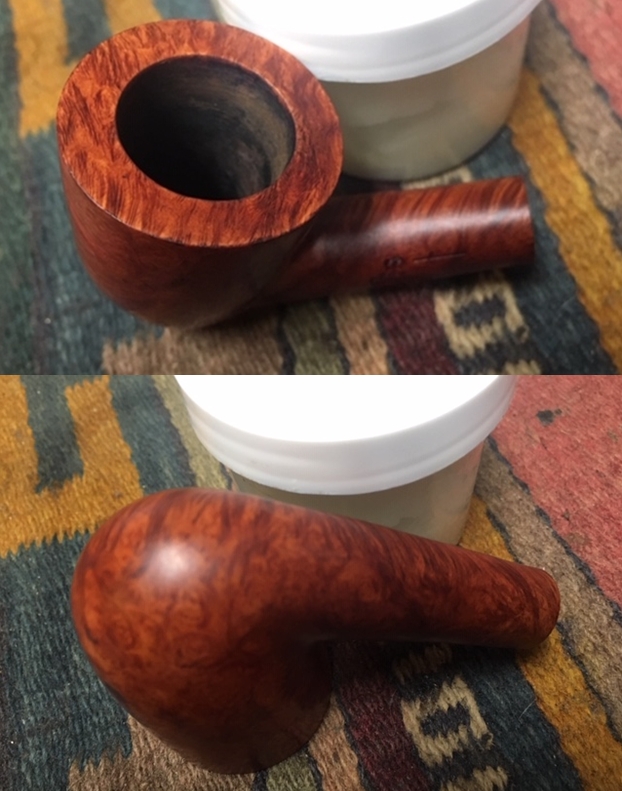
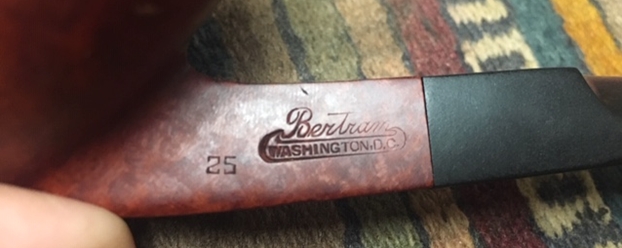
I took a photo of the stamping on the left side of the shank. It reads as noted above and is clear and readable.
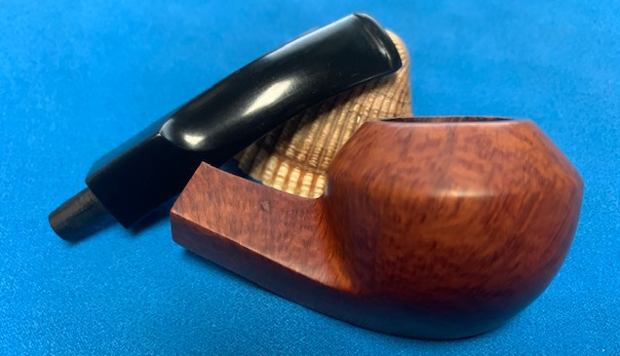
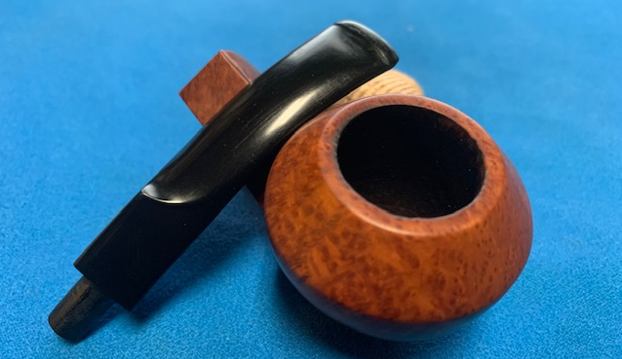
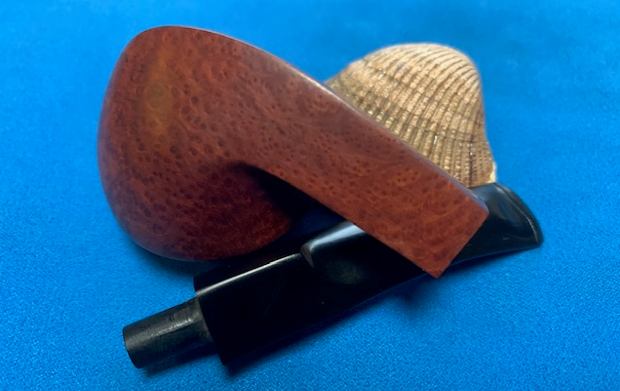
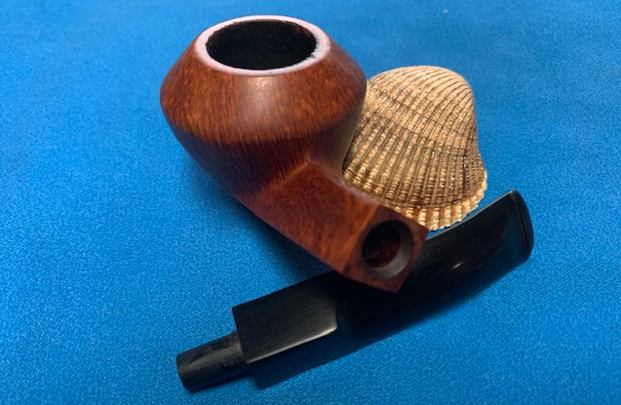
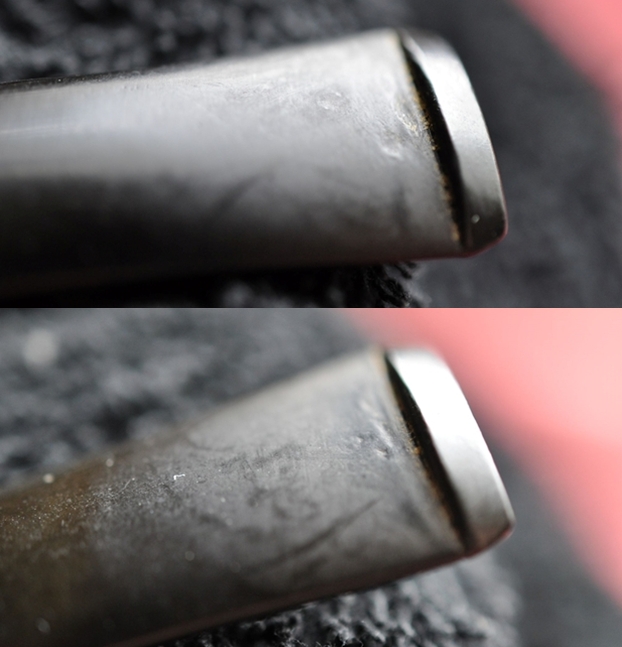
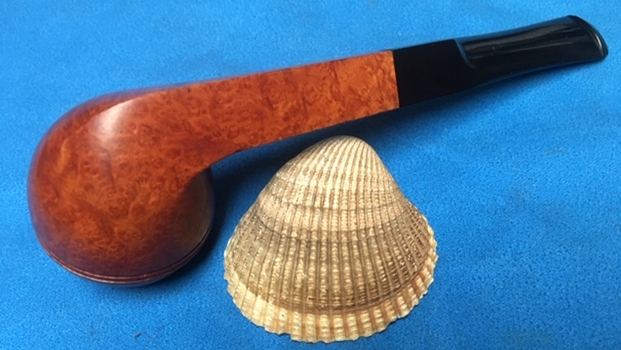
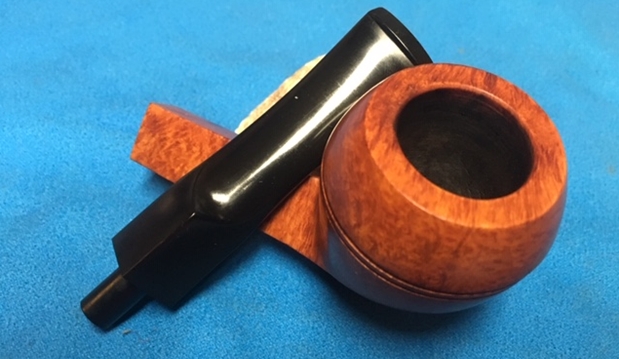
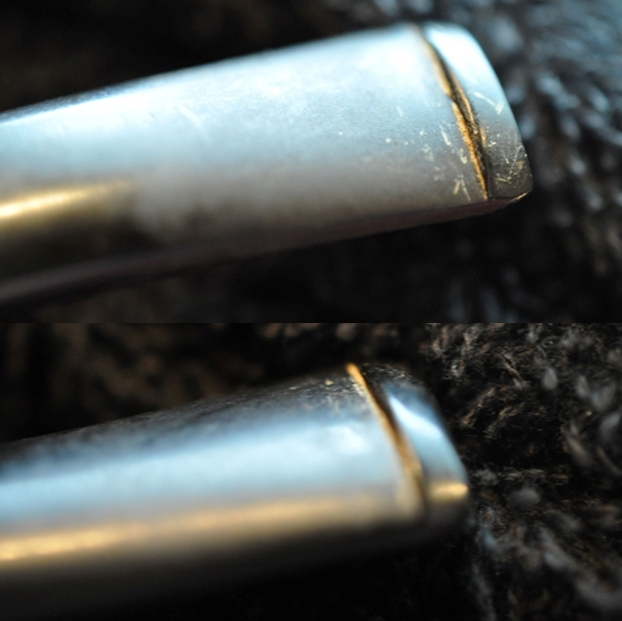
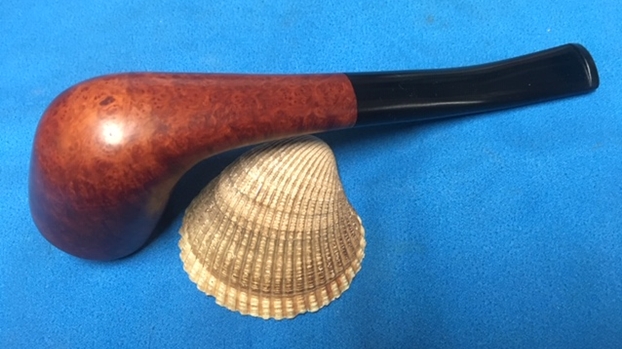
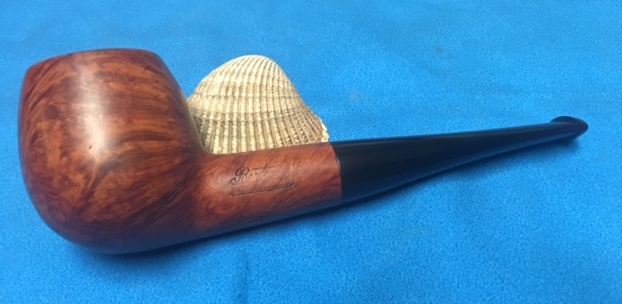
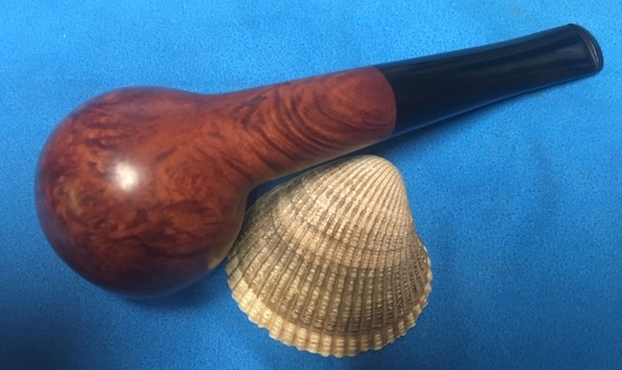
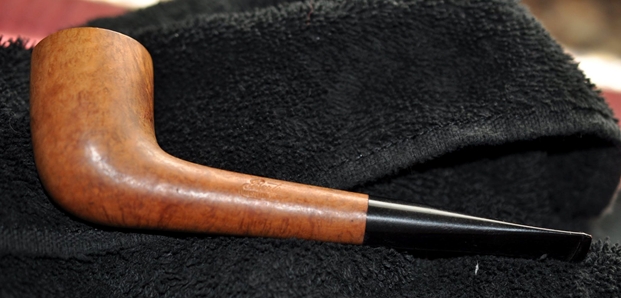
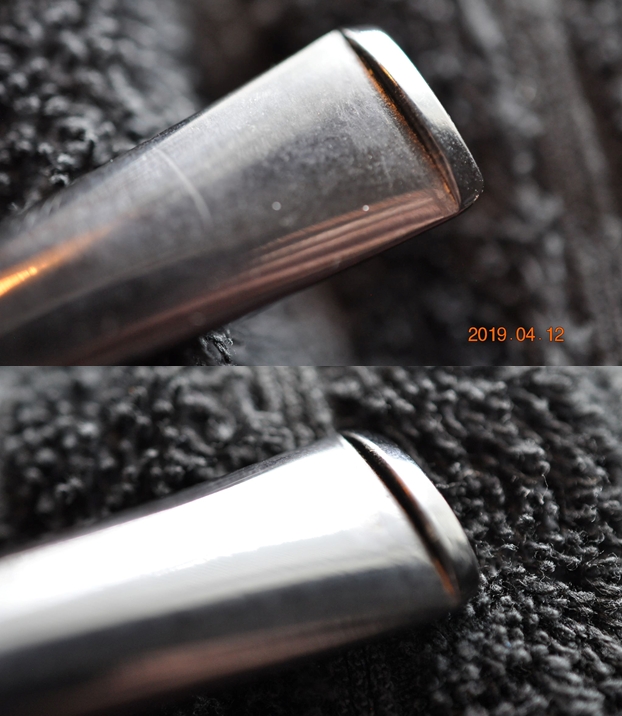
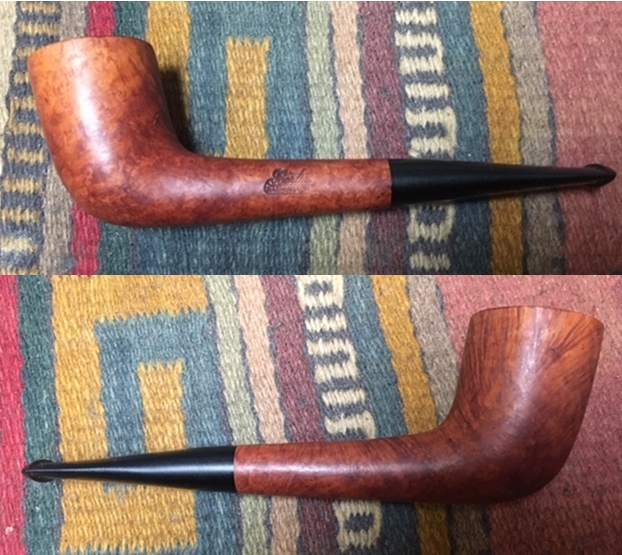
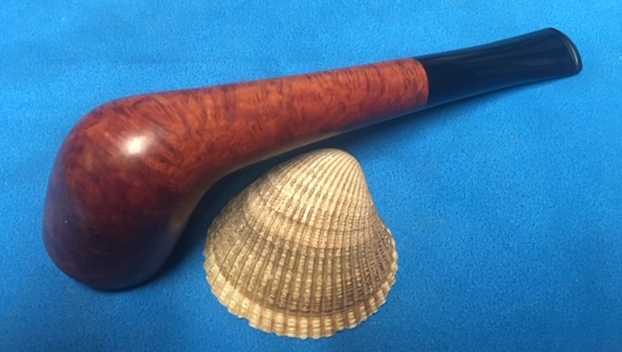
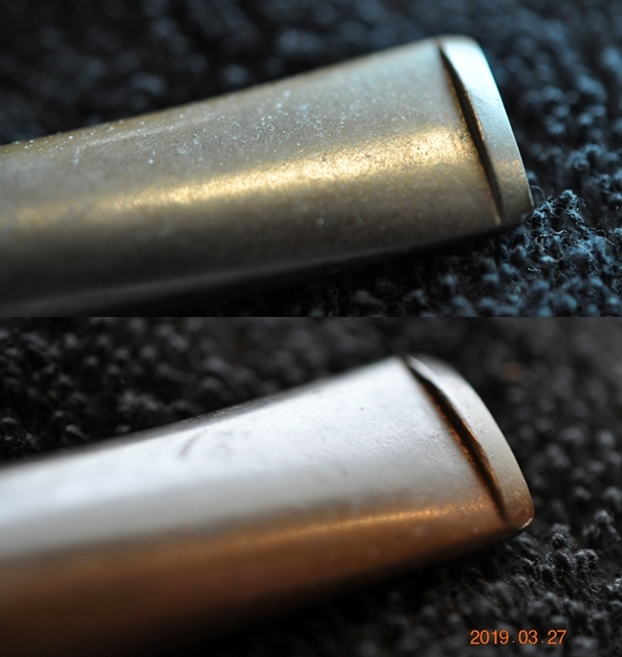
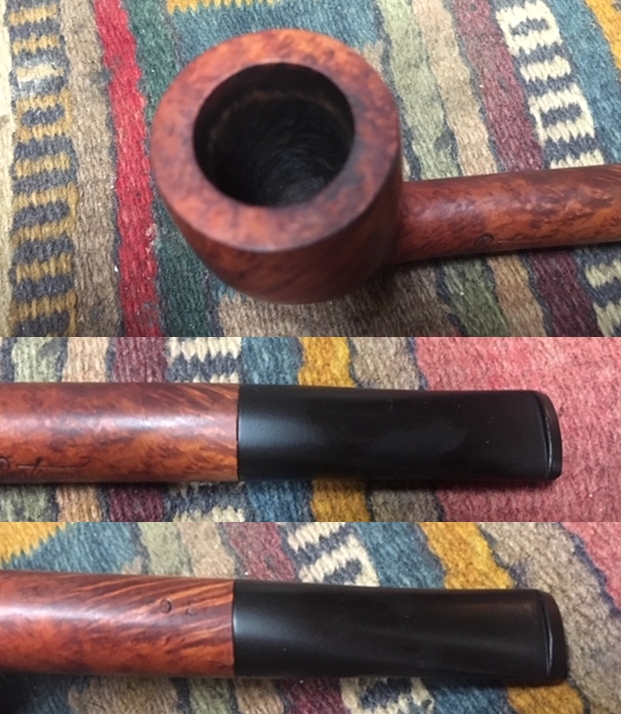
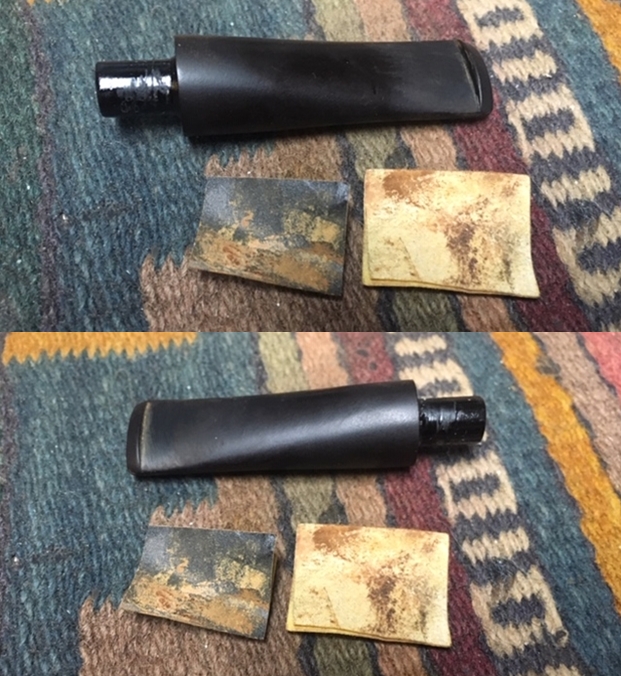
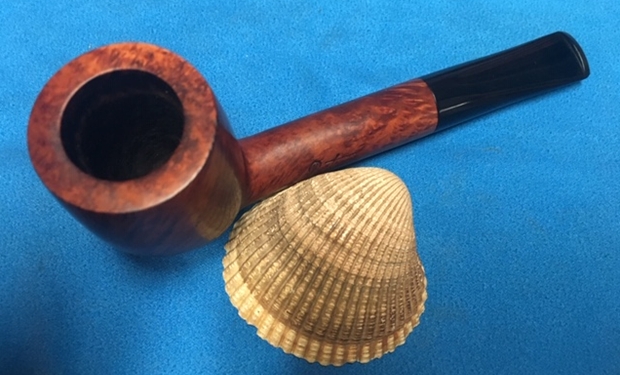
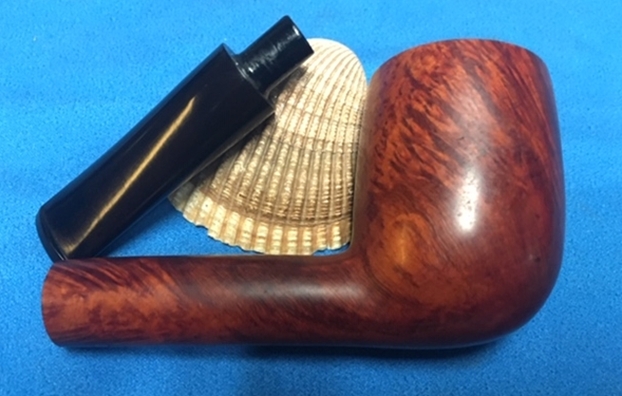
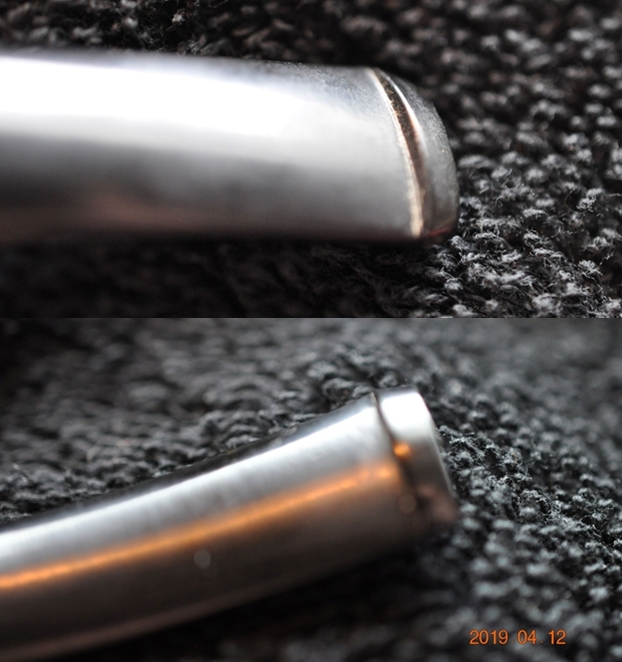
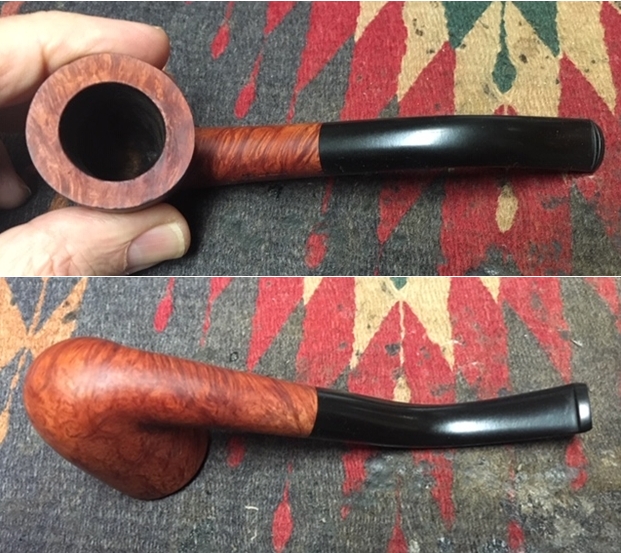
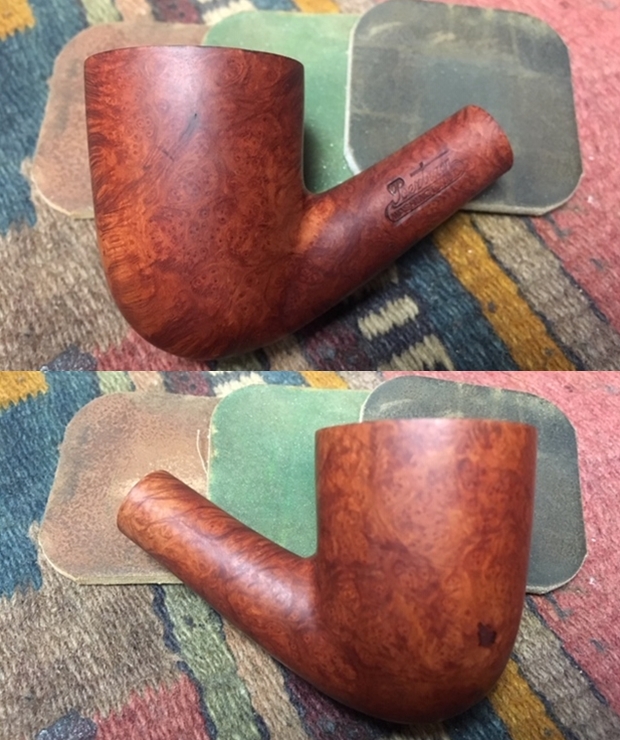
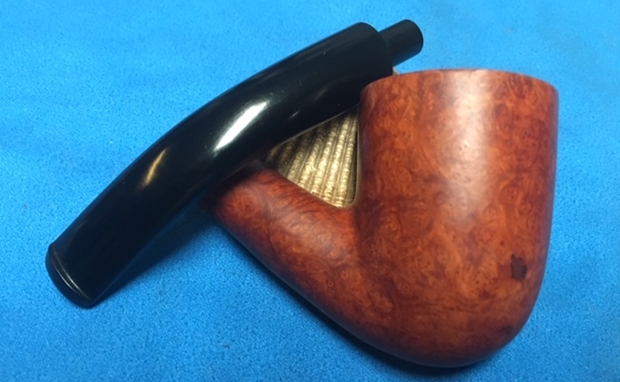
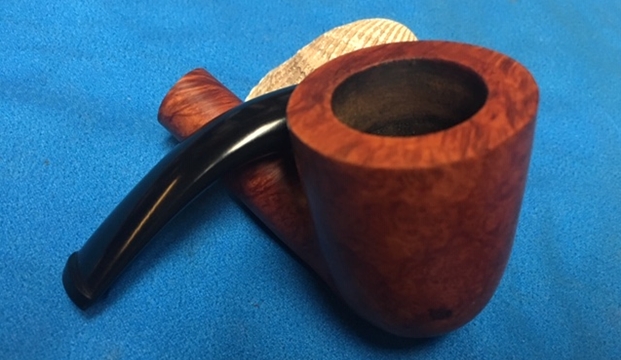
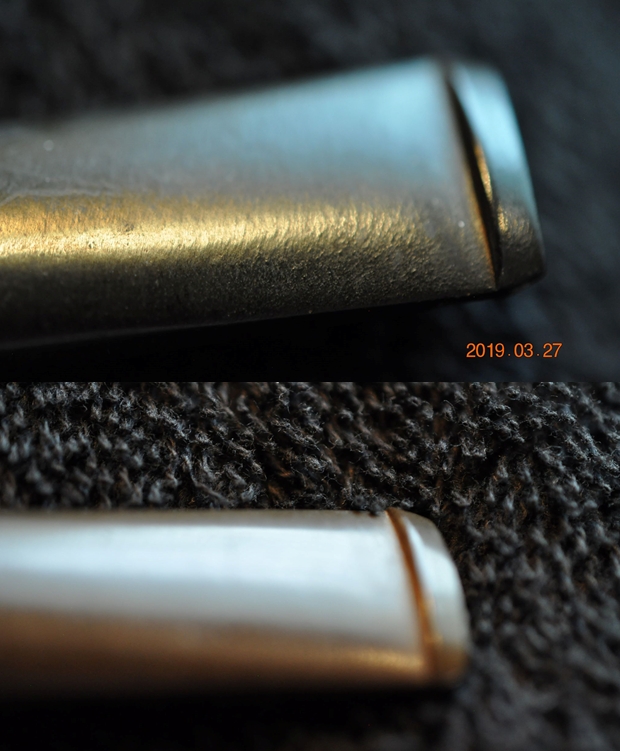
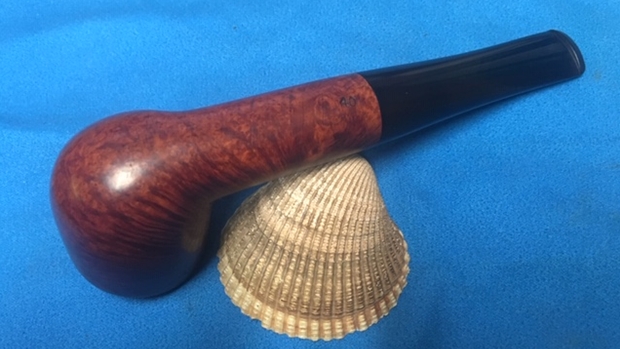
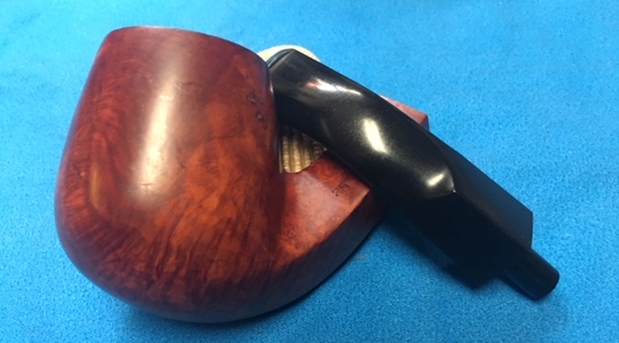
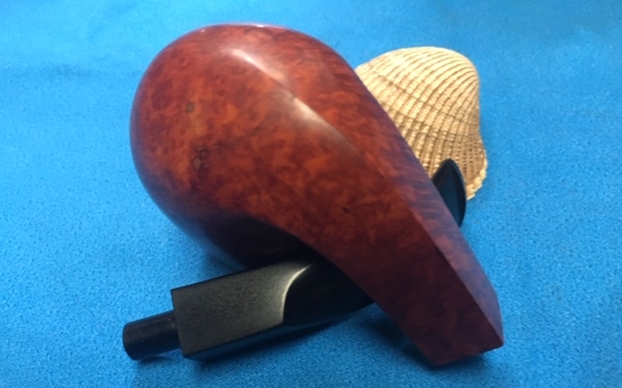
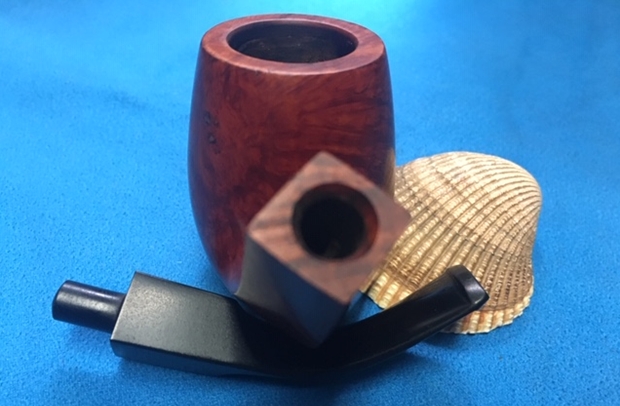
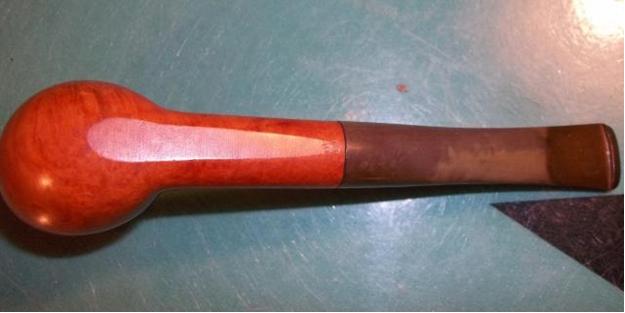
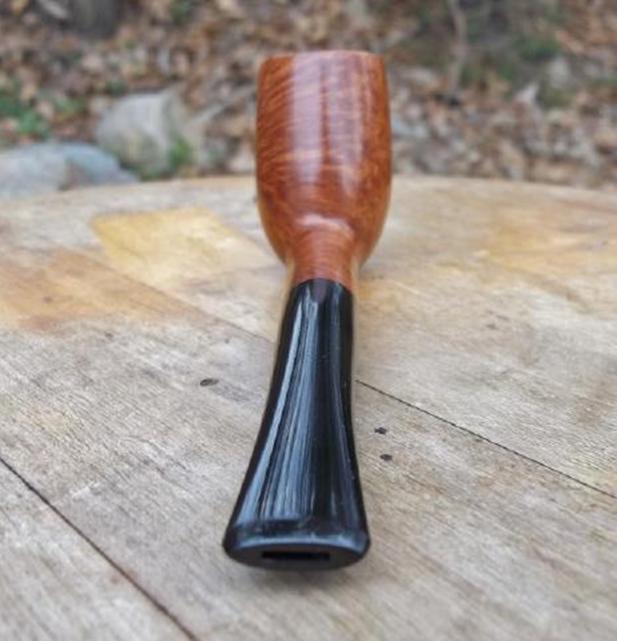
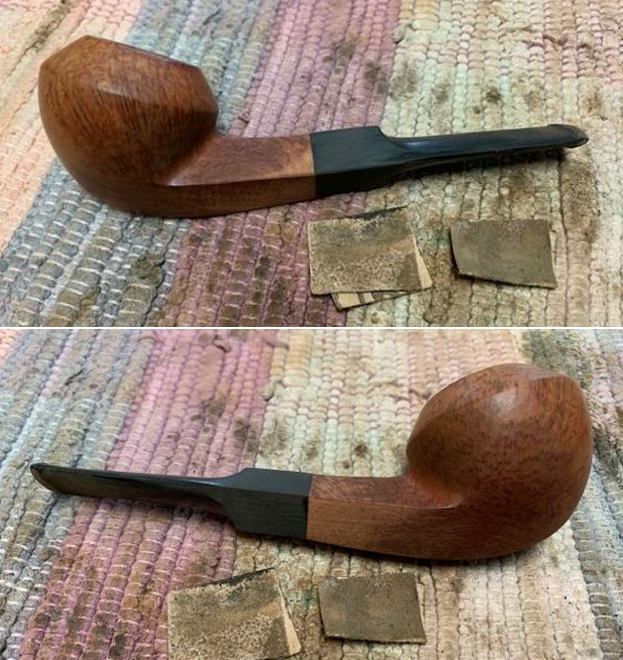
I went through some of stems and found this diamond saddle style stem that was close to the right diameter and had a tenon that would work as well. It has some file damage on the surface near the button but it would clean up well. I also took a photo of the stem and bowl together to give a sense of the look.
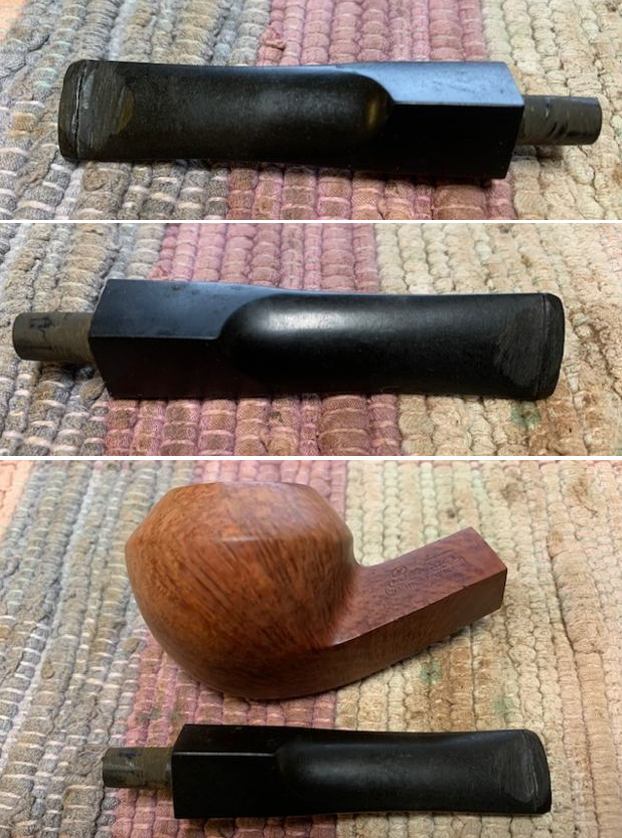
The pipe is a Bertram from the Bertram Pipe Shop in Washington DC. I have posted a lot of different blogs on the brand so the information available is quite accessible. I am including pic of a post card that a reader of the blog sent me. It is a great memento that I love to spend time looking at. I started my work on the pipe by fitting the new stem to the shank. I trimmed down the tenon diameter slightly with a file so that the fit in the shank was snug. The stem diameter needed more work so I worked it with a file to match it to the shank. I sanded it with 220 grit sandpaper to smooth it out. 
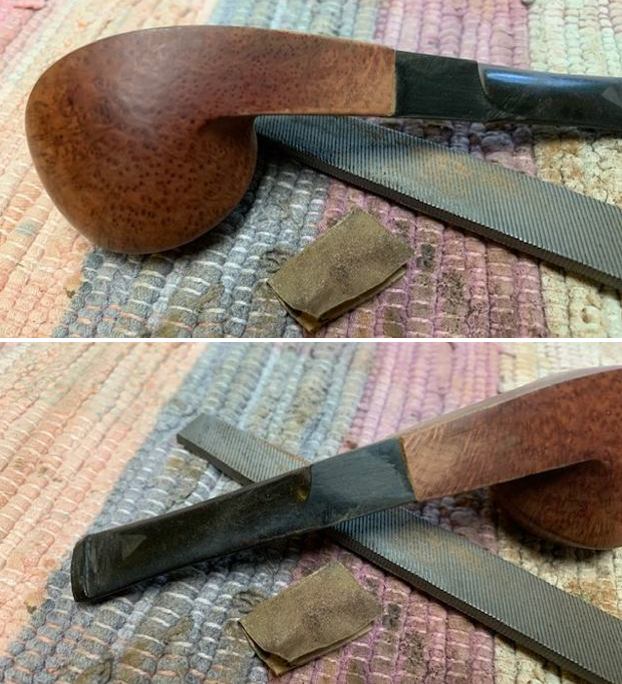
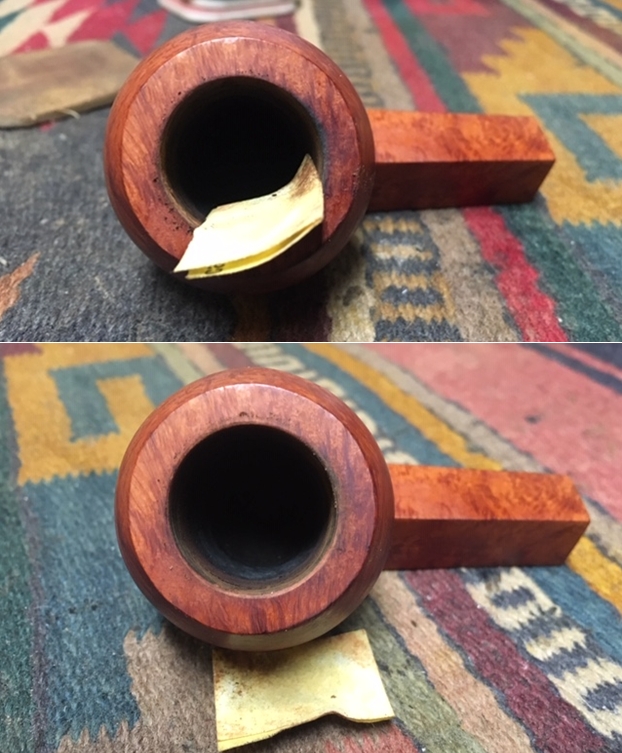
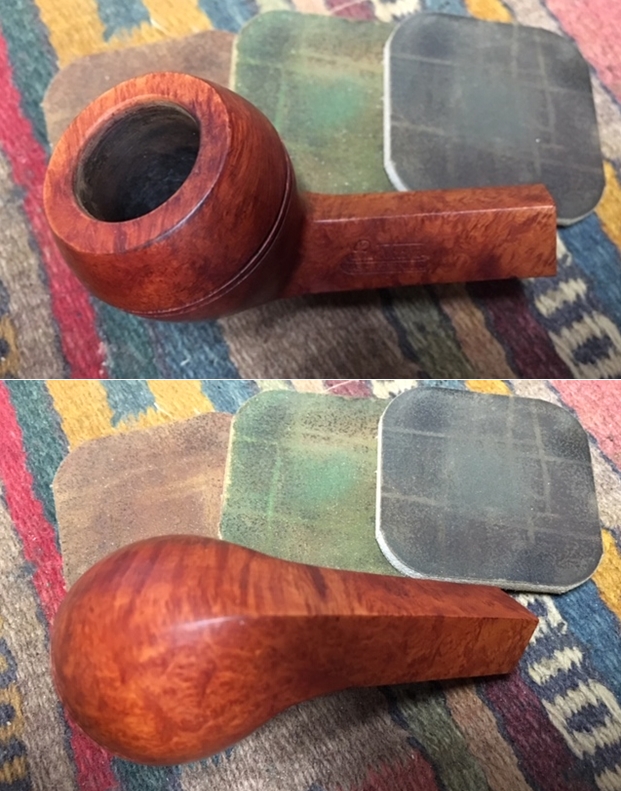
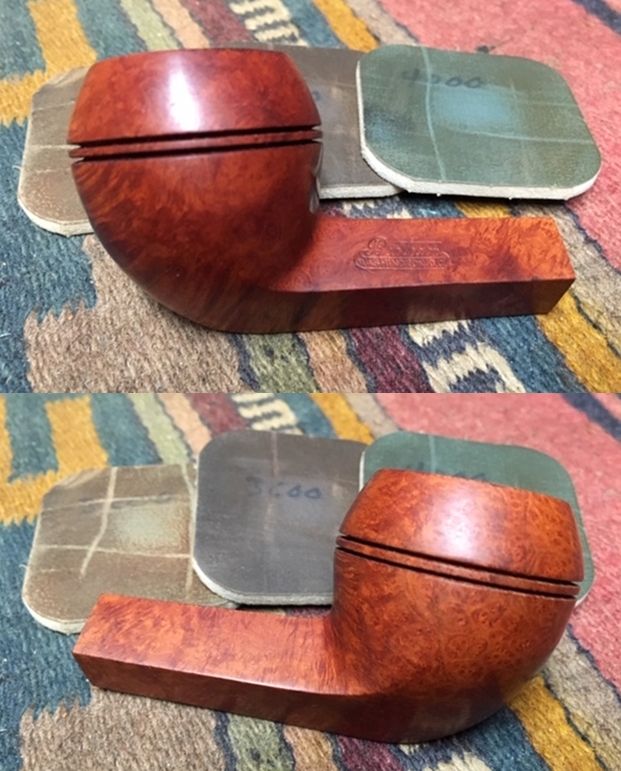
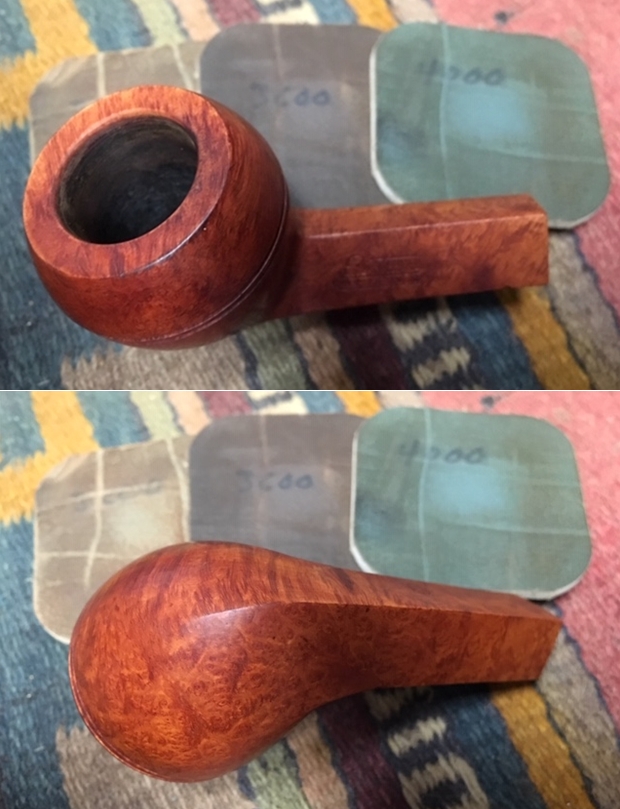
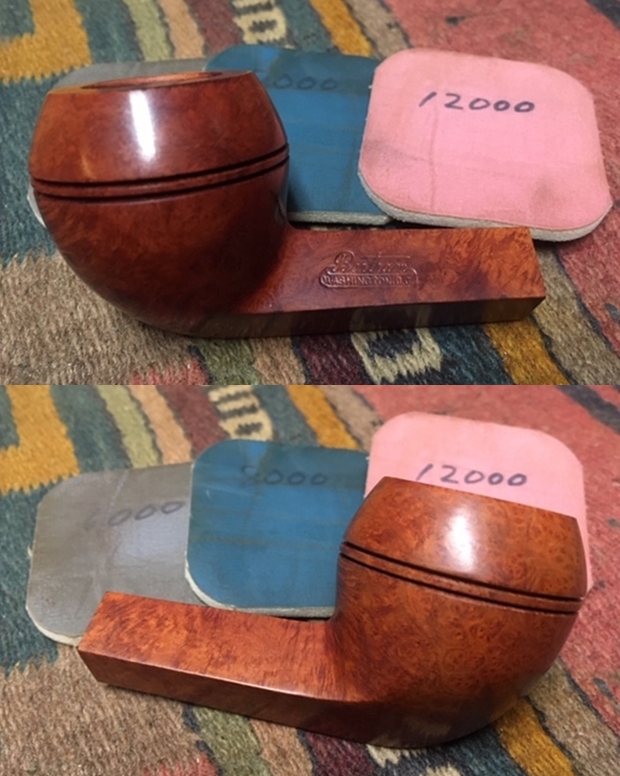
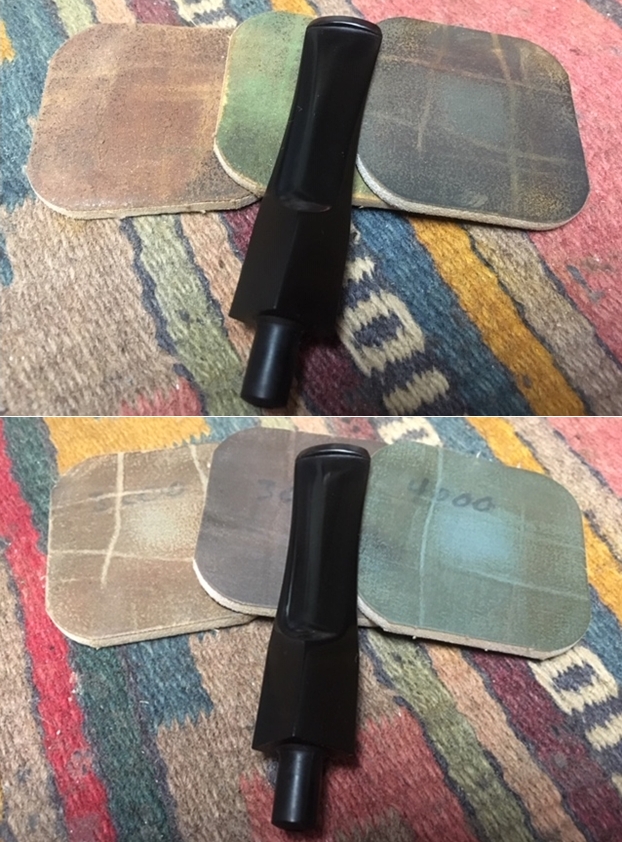
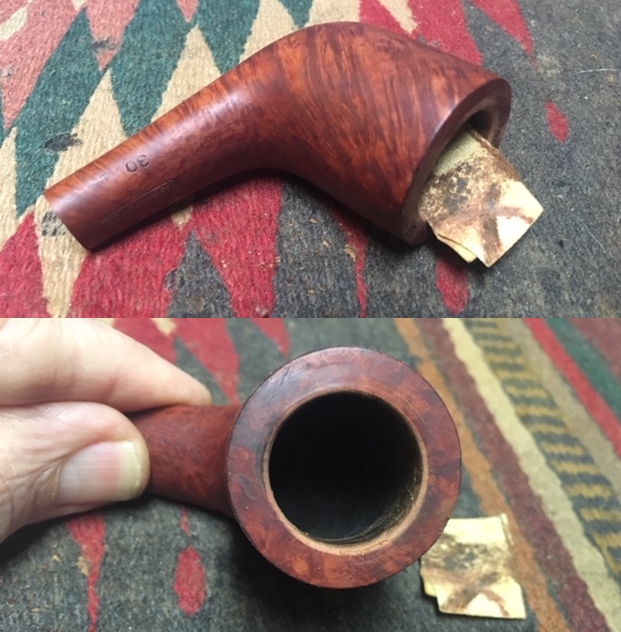
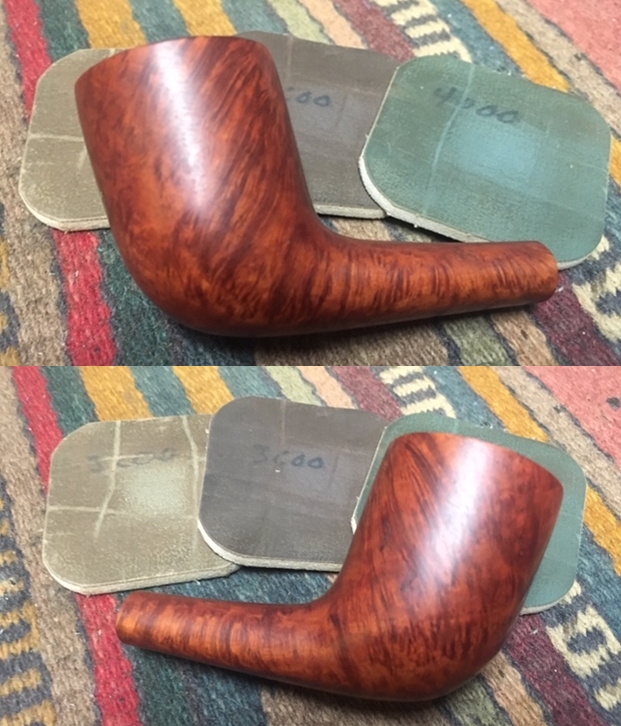
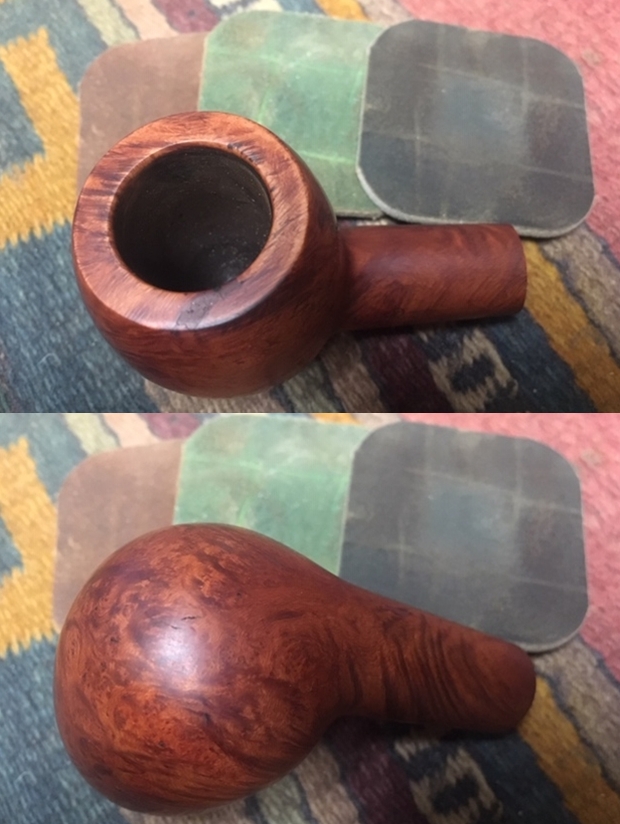
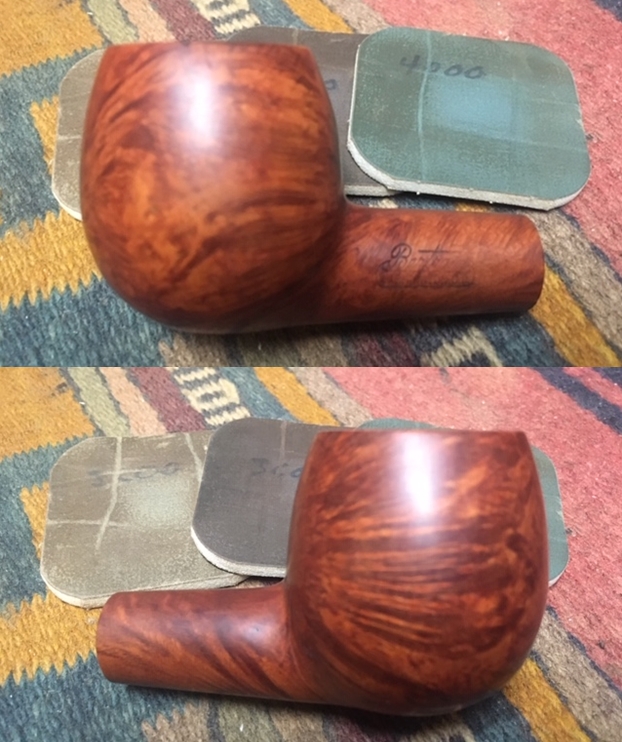
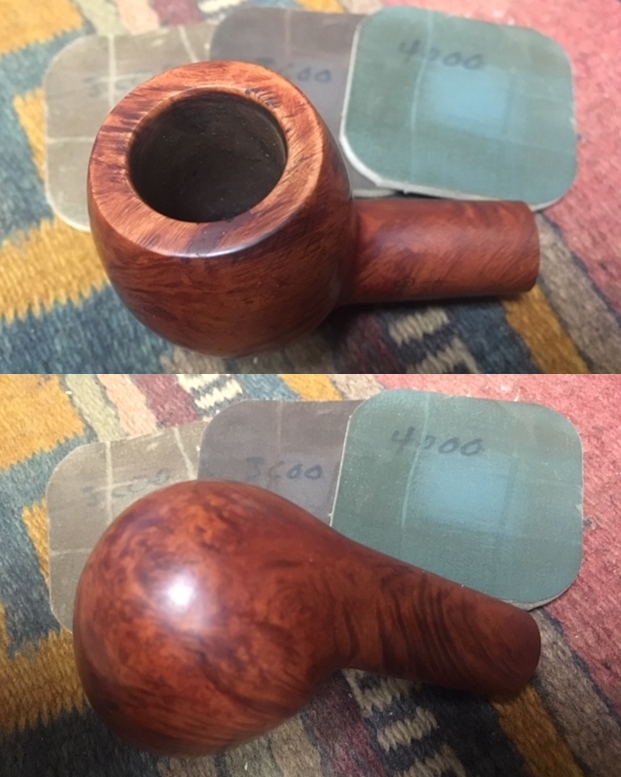
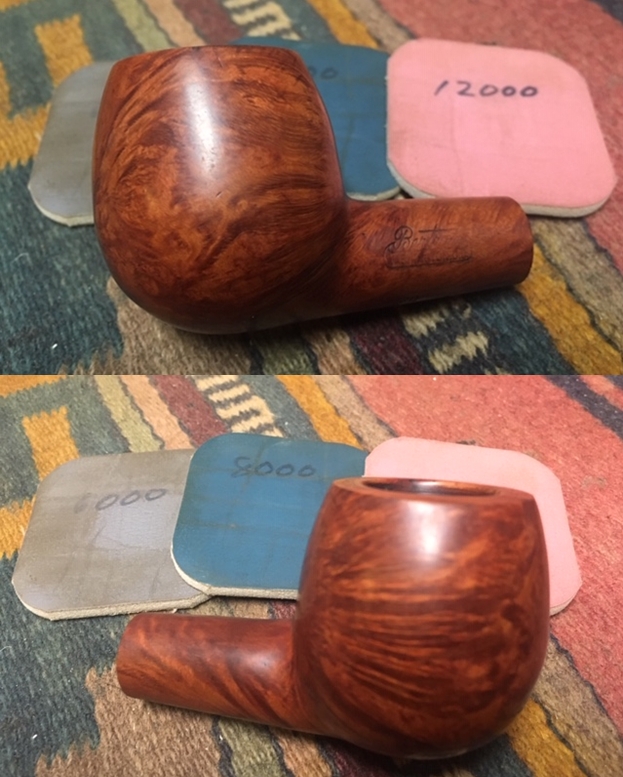
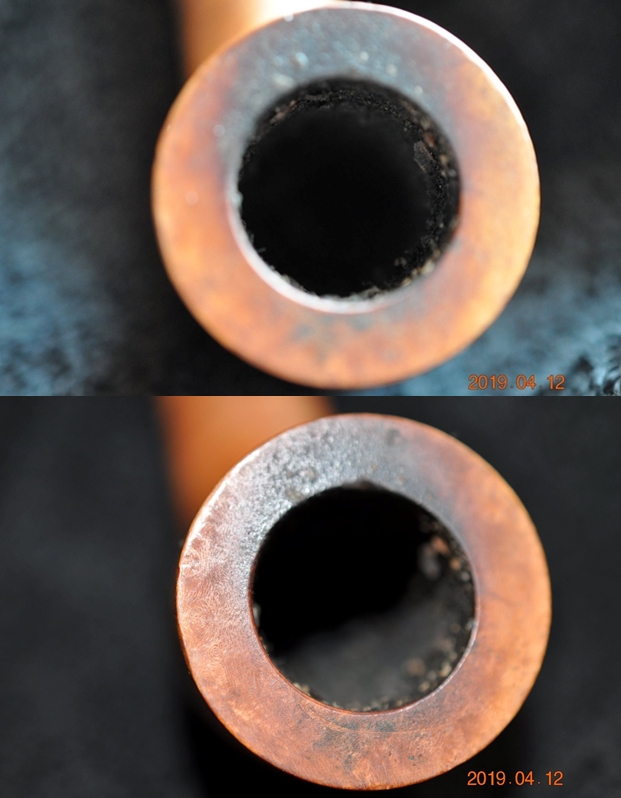
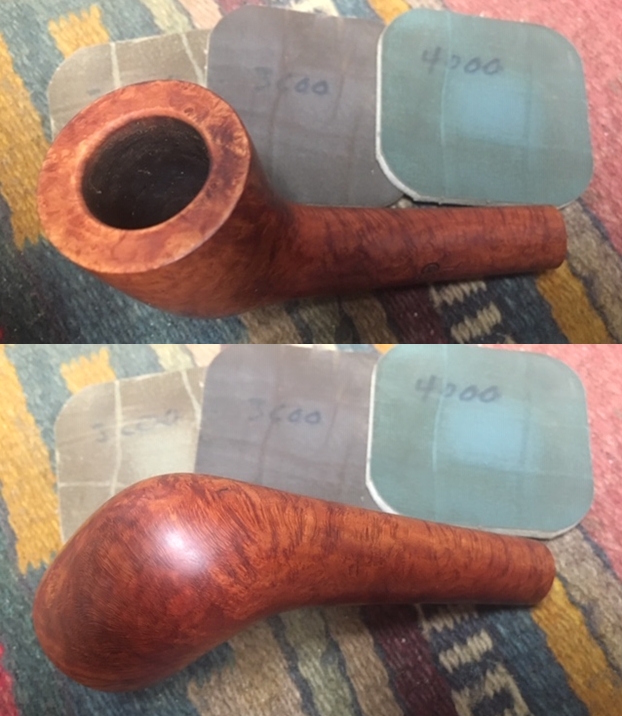
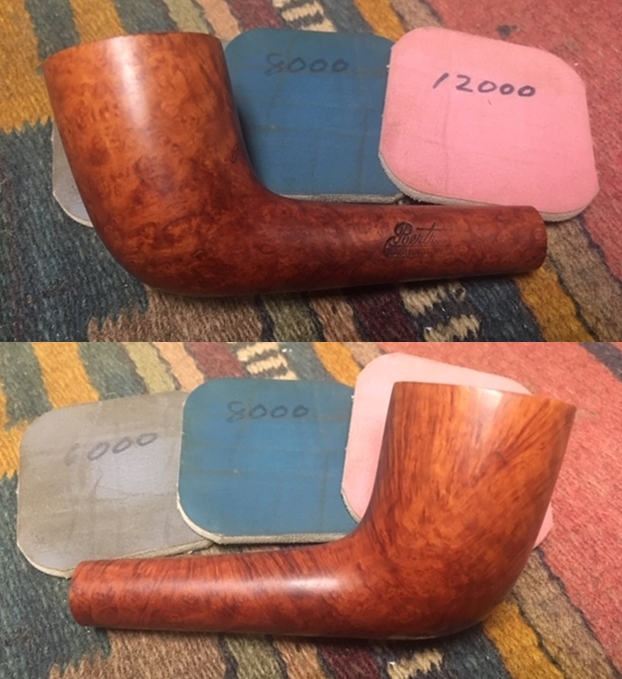
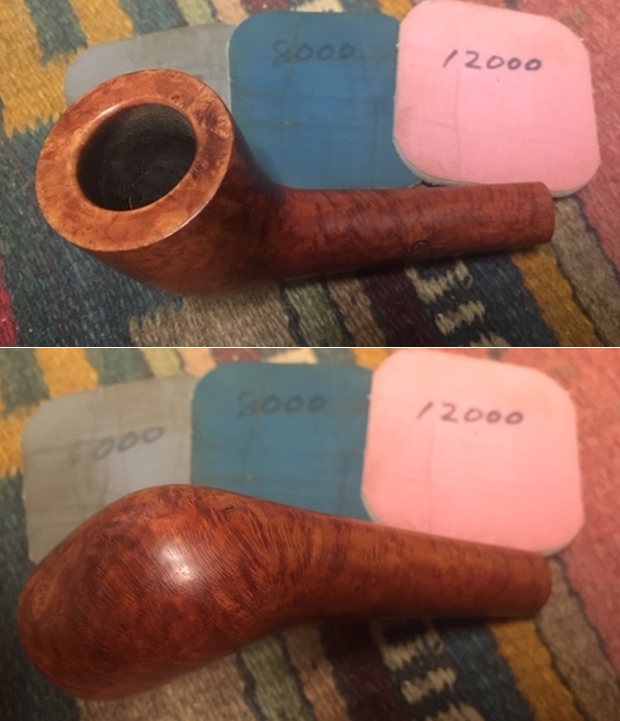
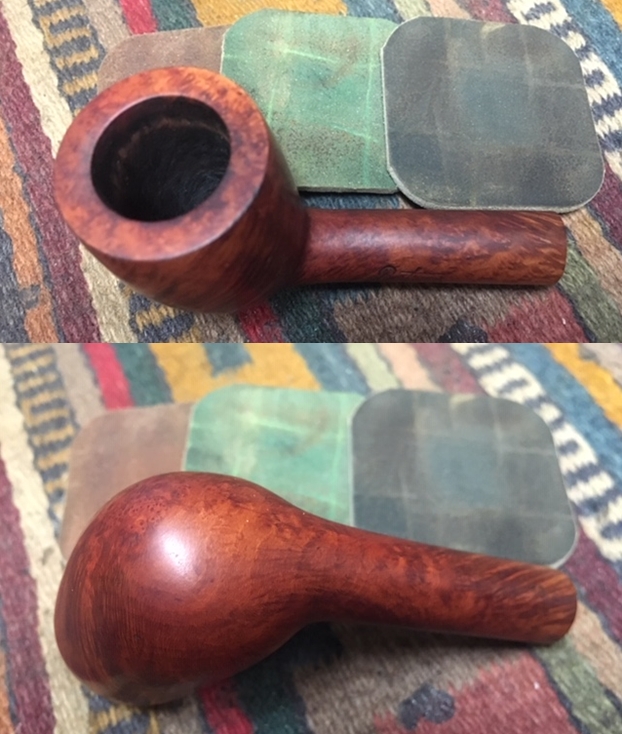
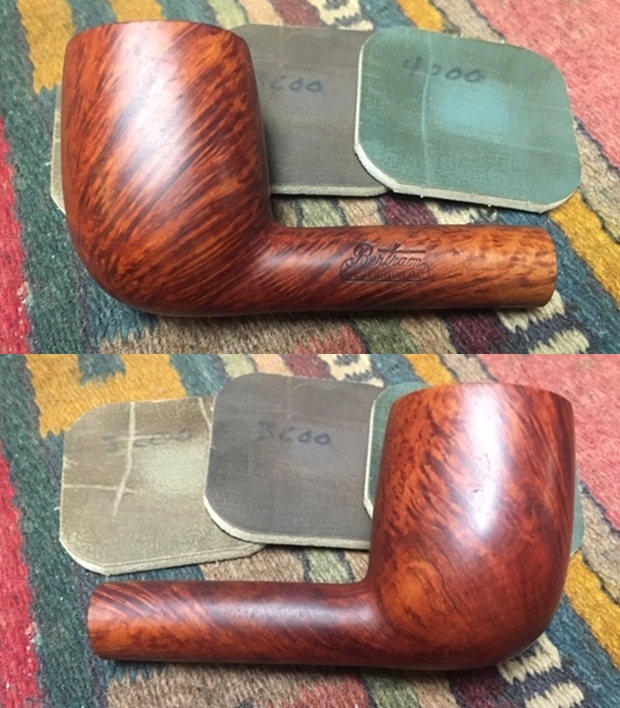
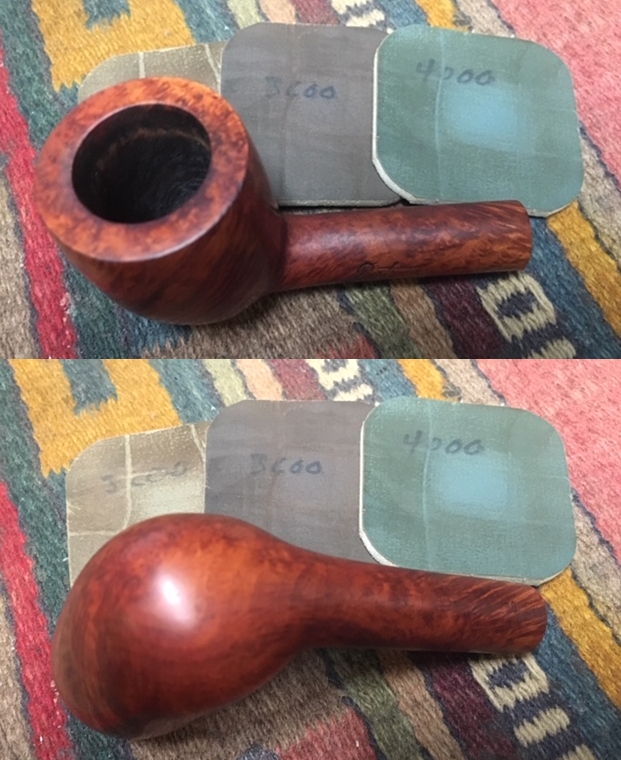
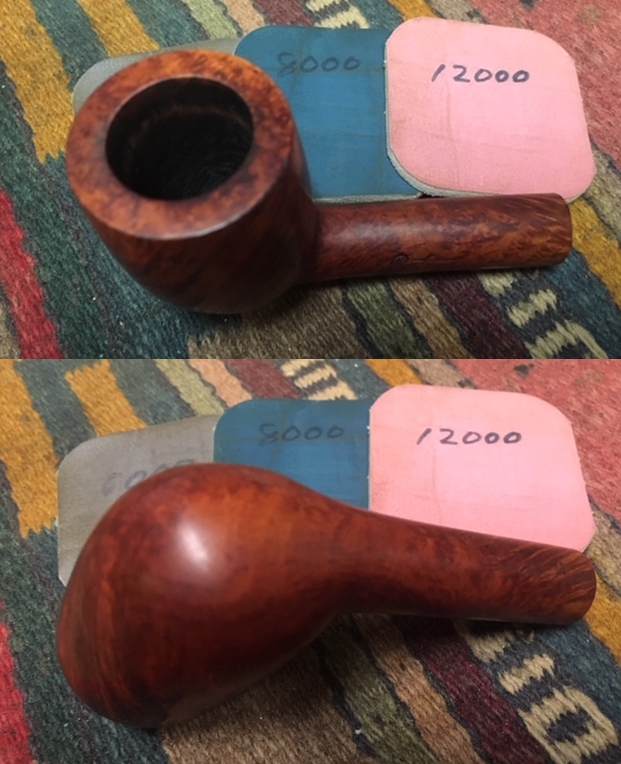
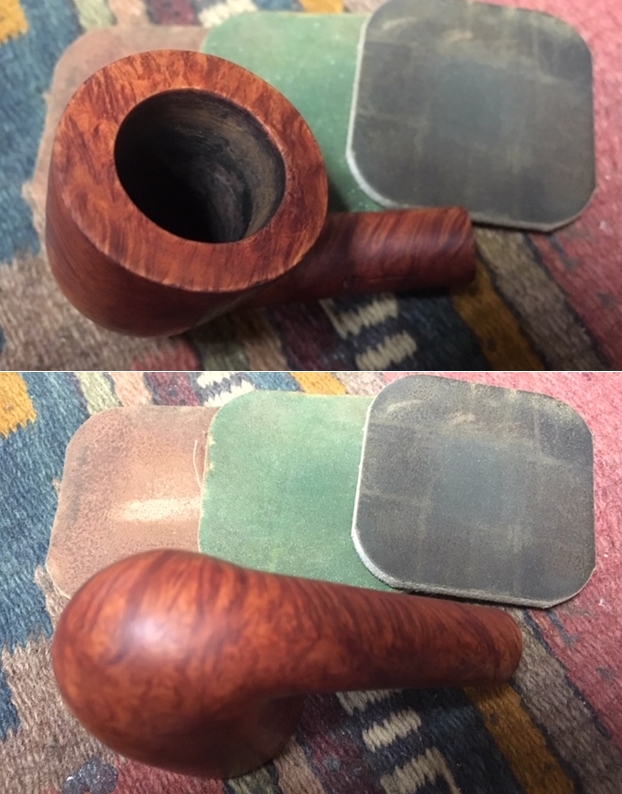
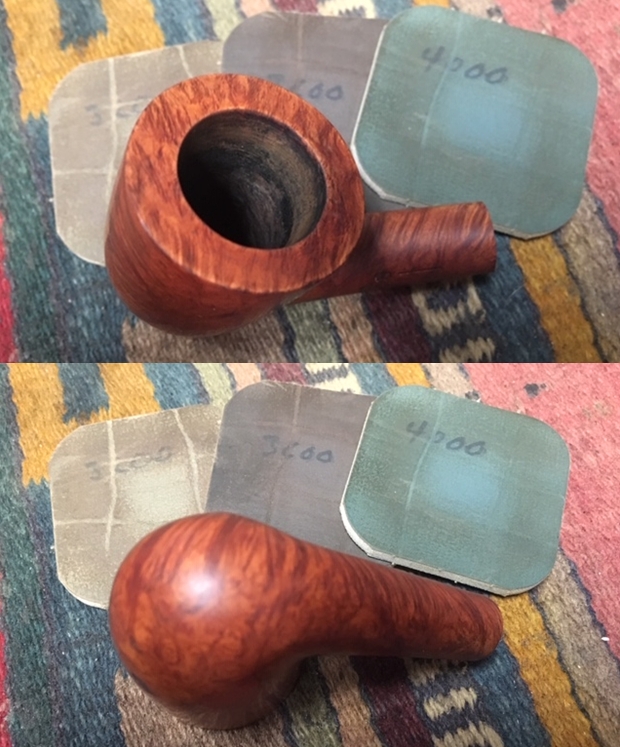
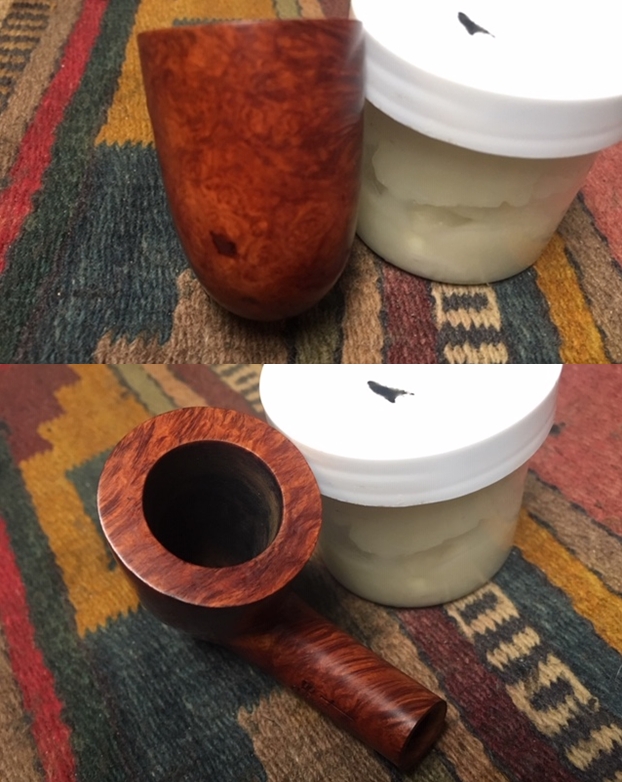
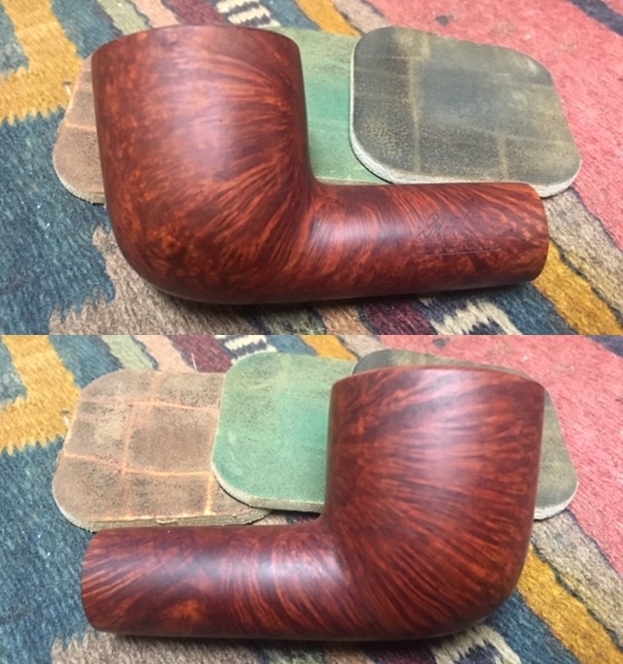
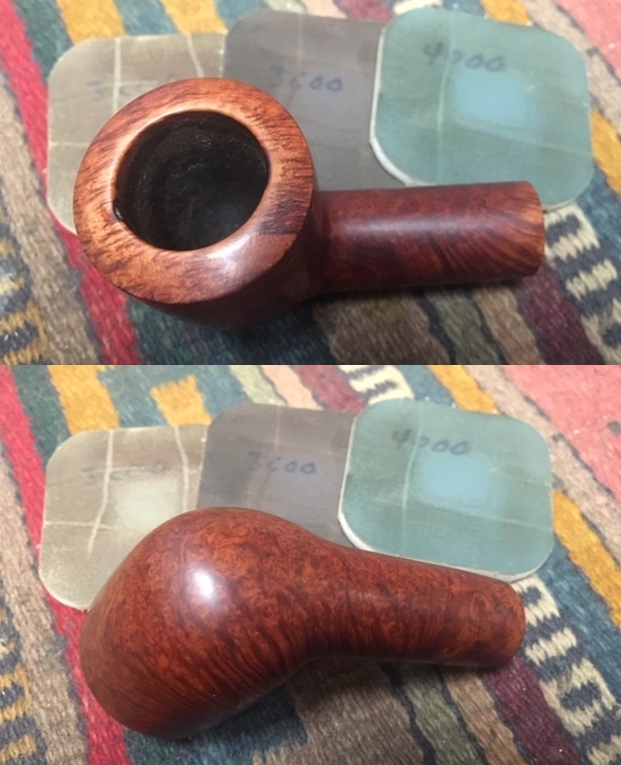
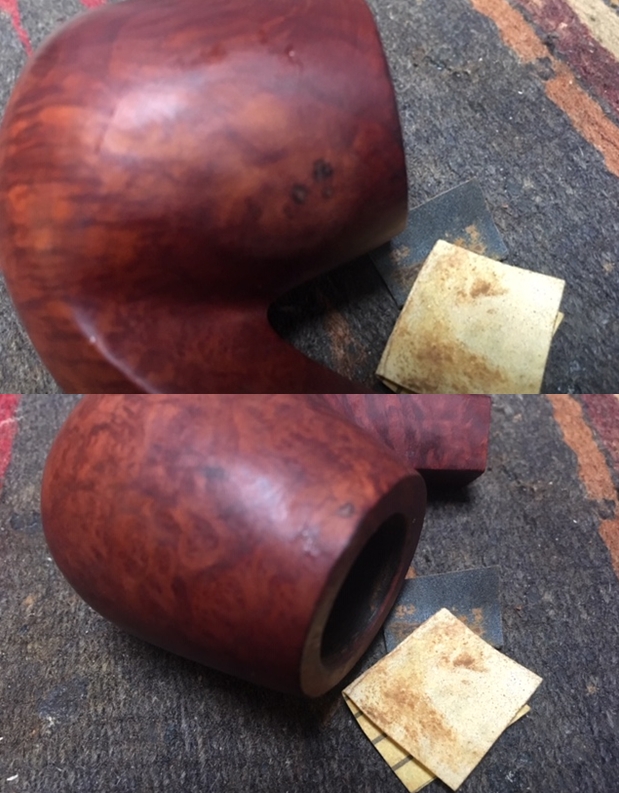
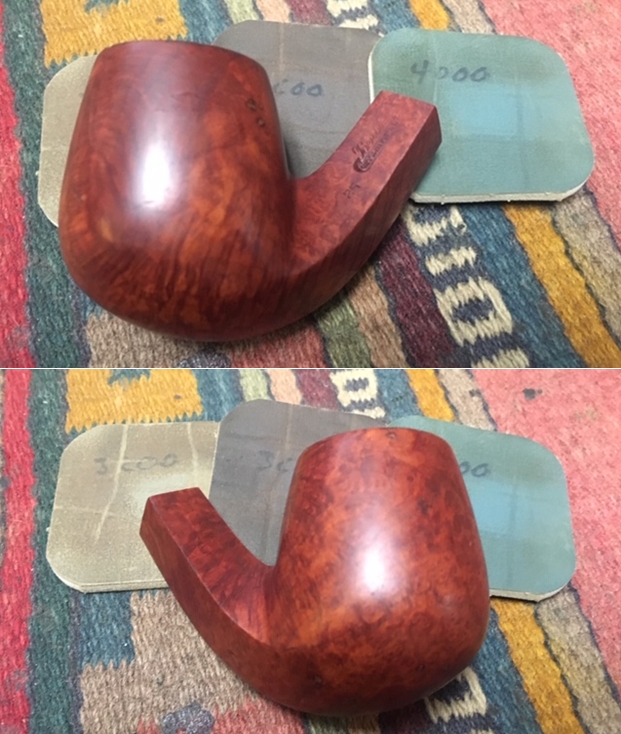
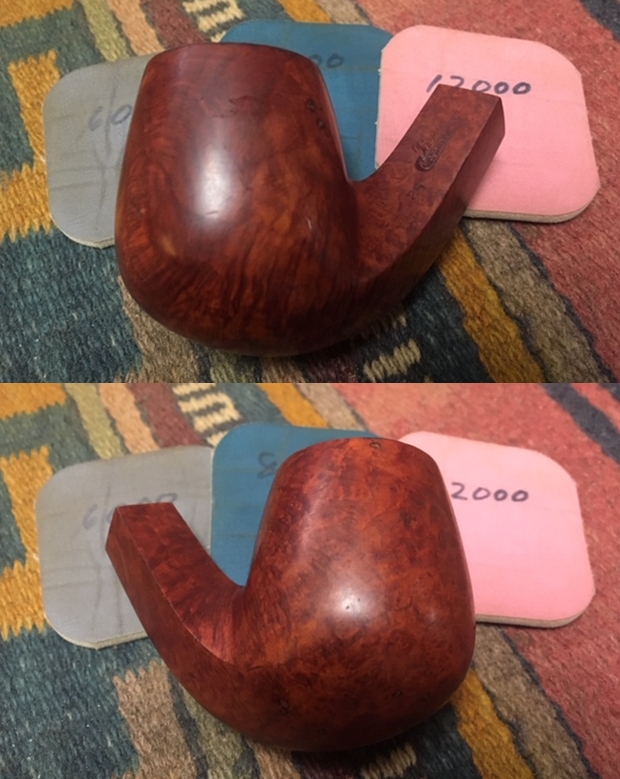
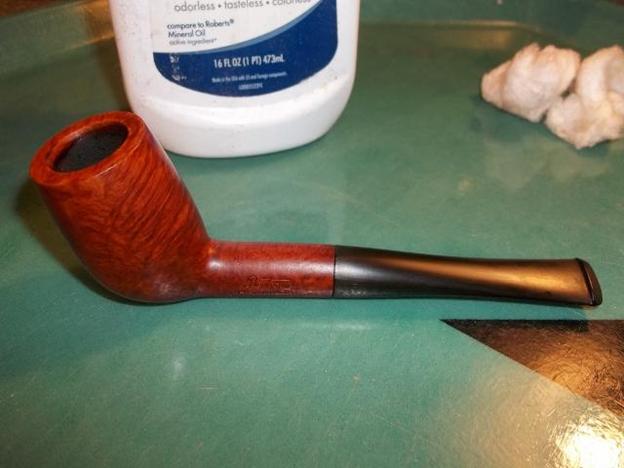
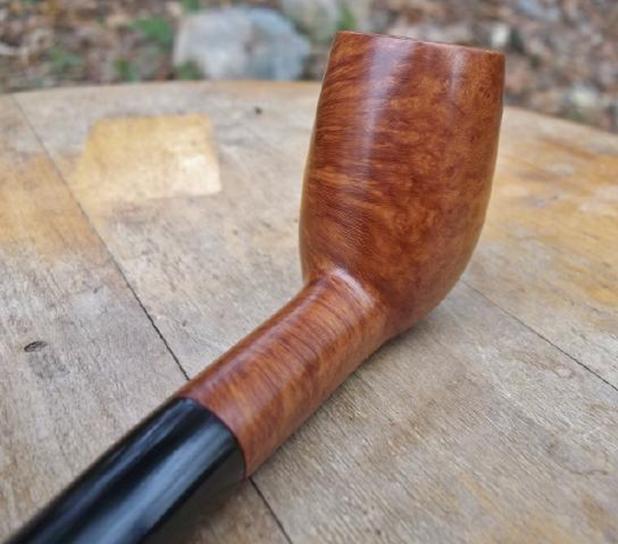
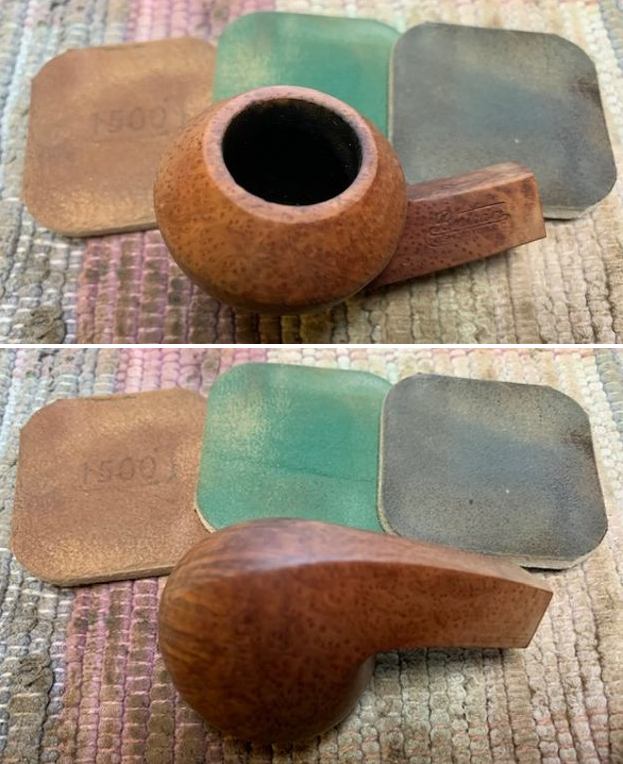
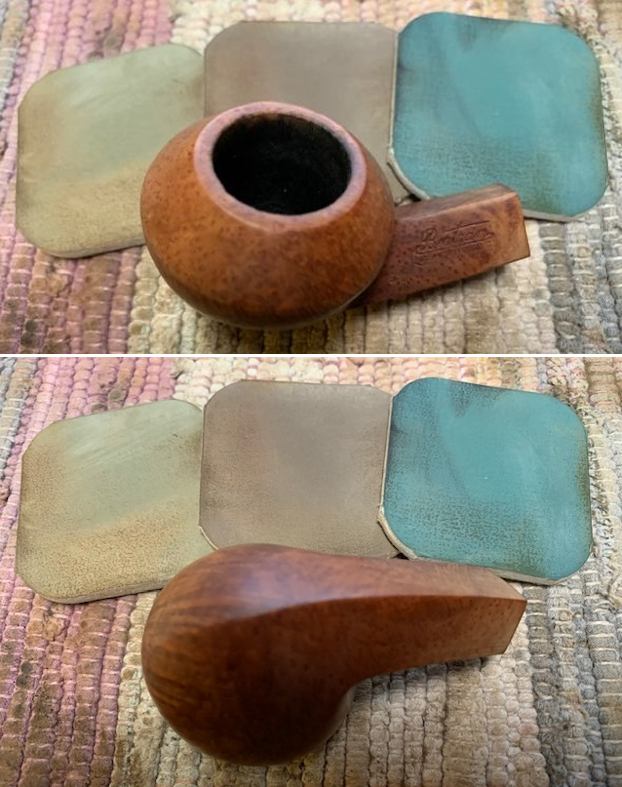
I removed the stem and polished the briar (bowl and sanded shank end) with micromesh sanding pads – dry sanding with 1500-12000 grit pads and wiping it down with a damp cloth after each pad. It really began to shine. 
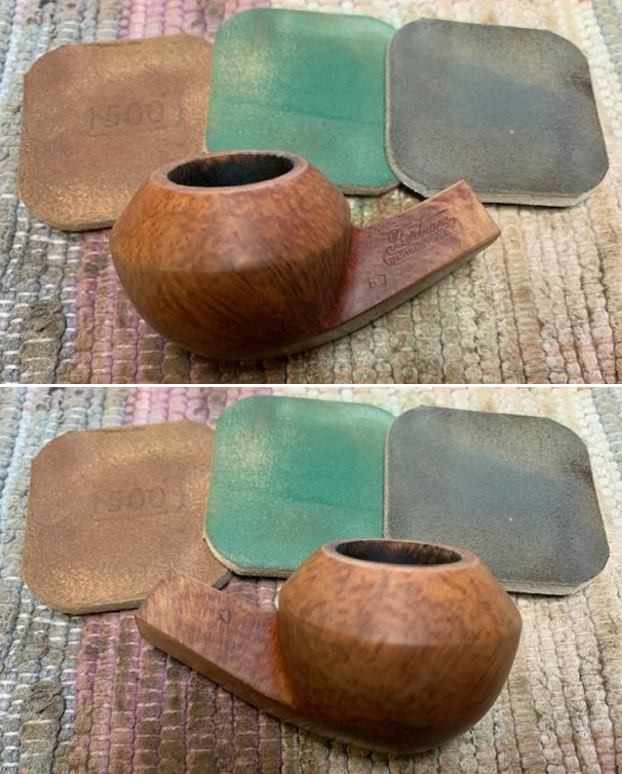
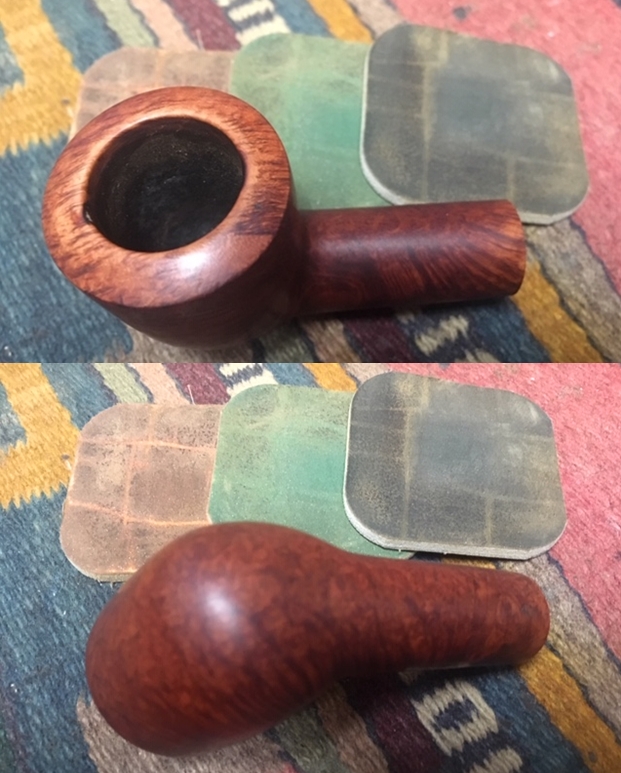
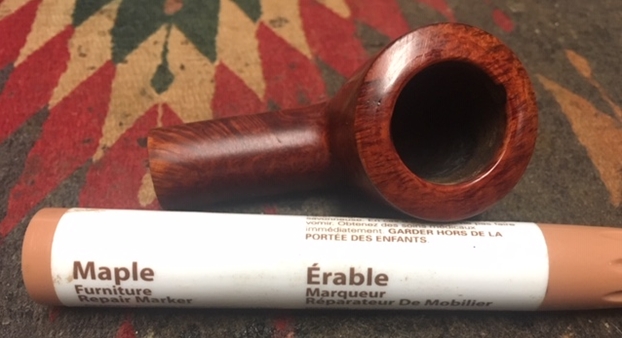
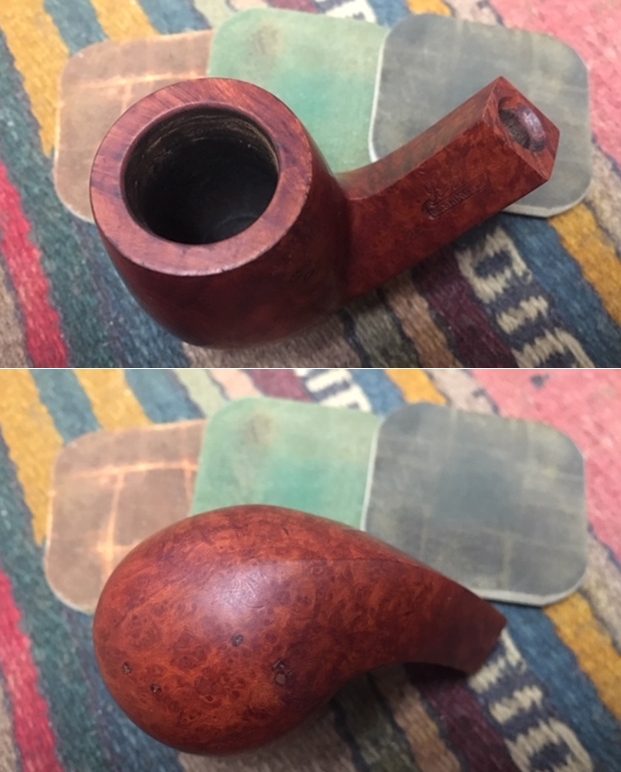
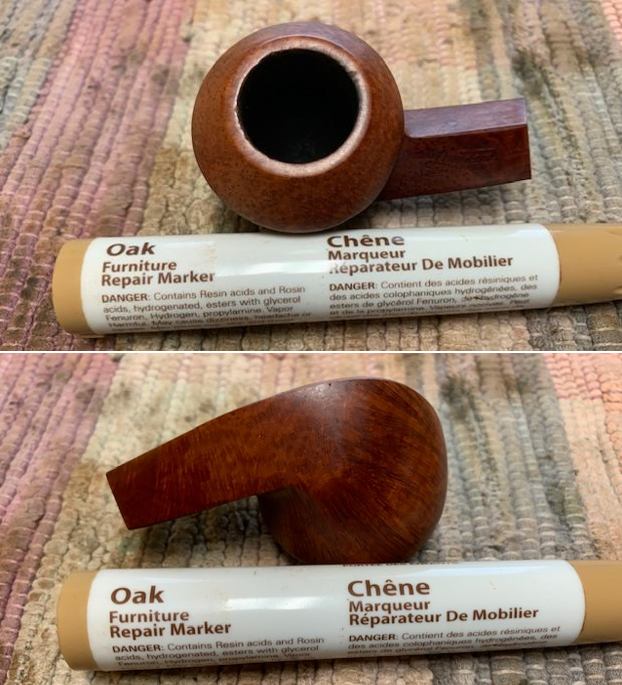
I restained the shank end where I had sanded it to make the transition to the new stem smooth with an Oak stain pen. The colour was a perfect match. Once the bowl was buffed the newly stained section will blend in even better. 
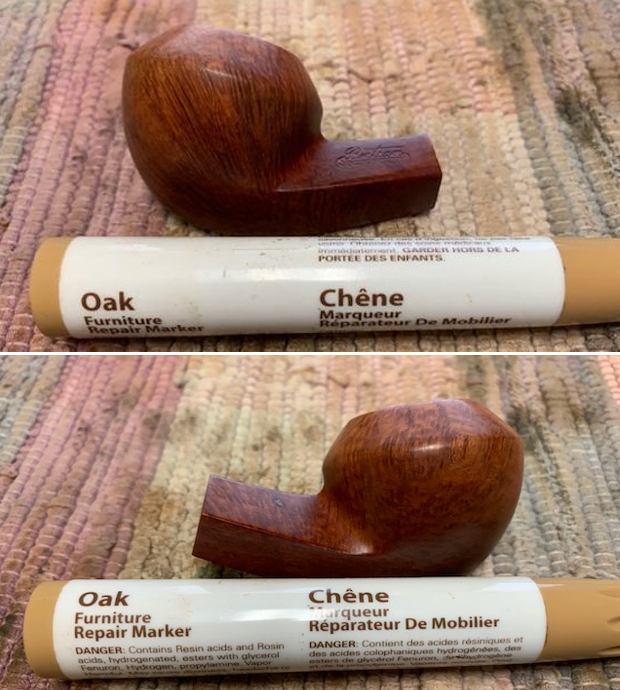
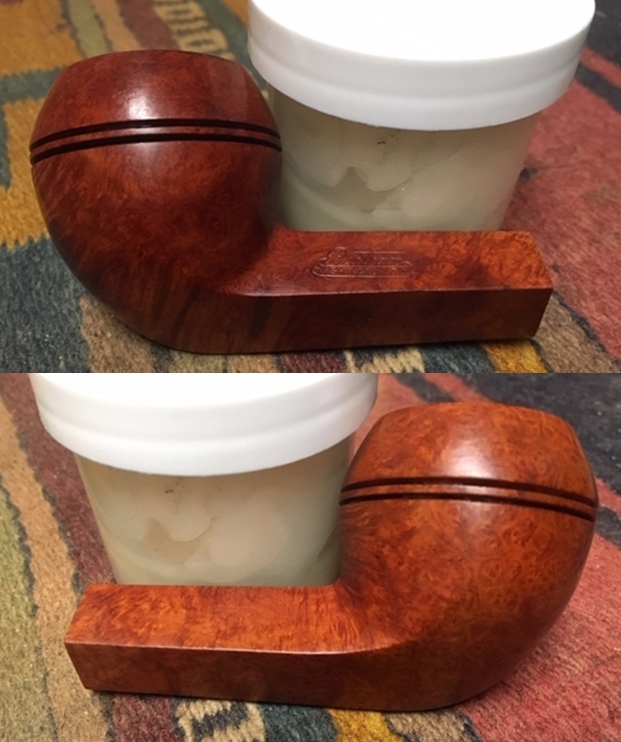
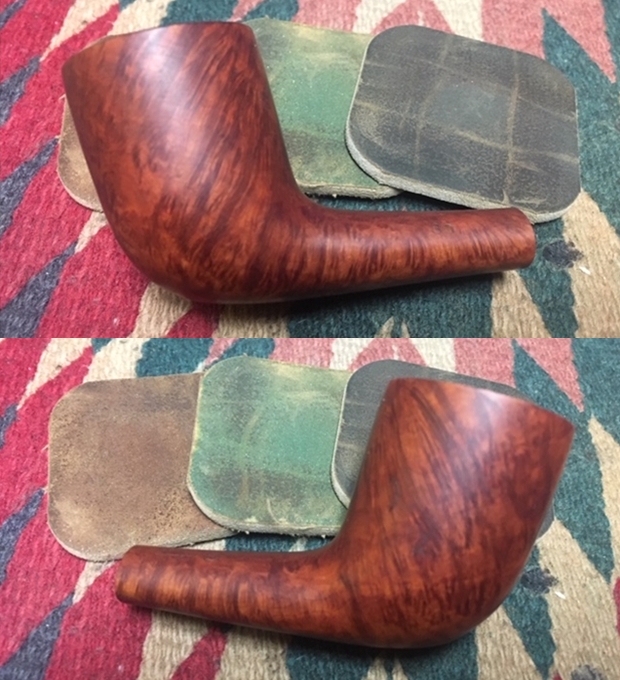
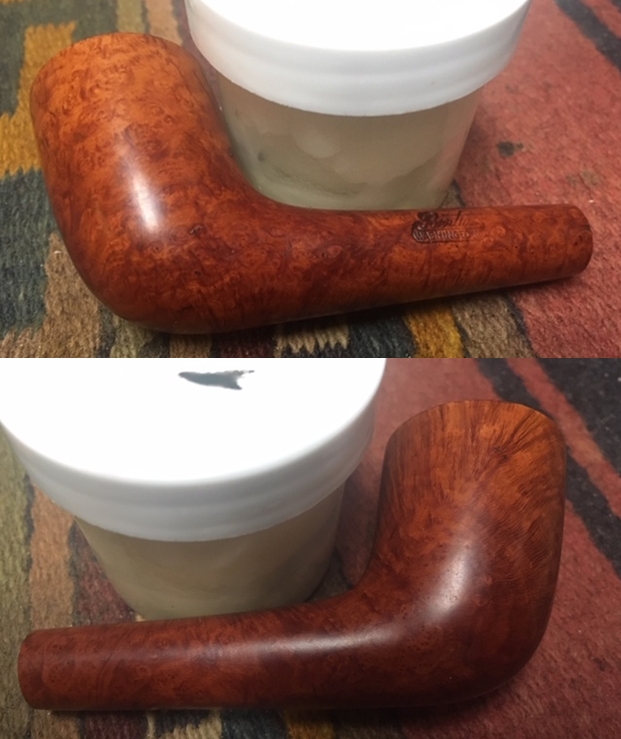
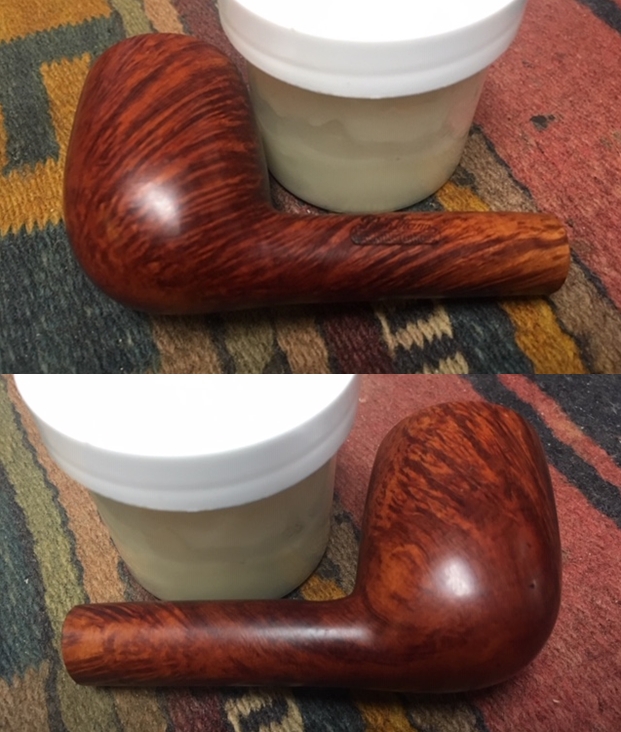
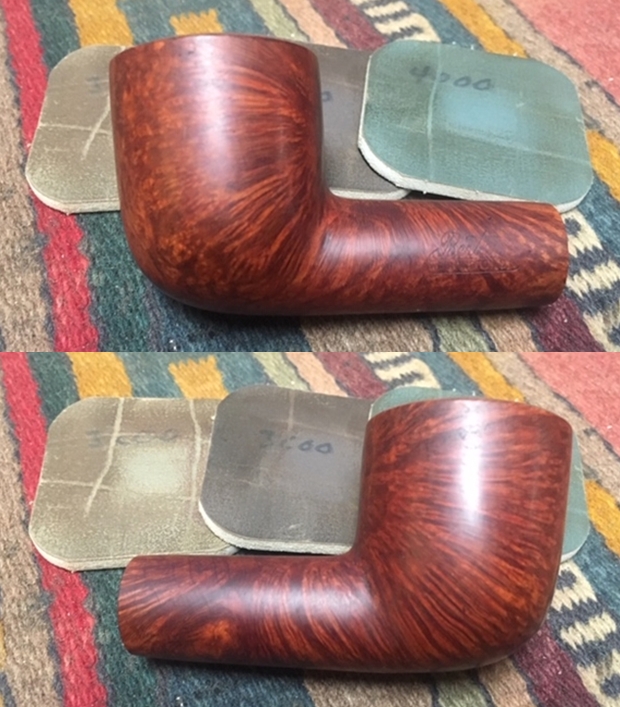
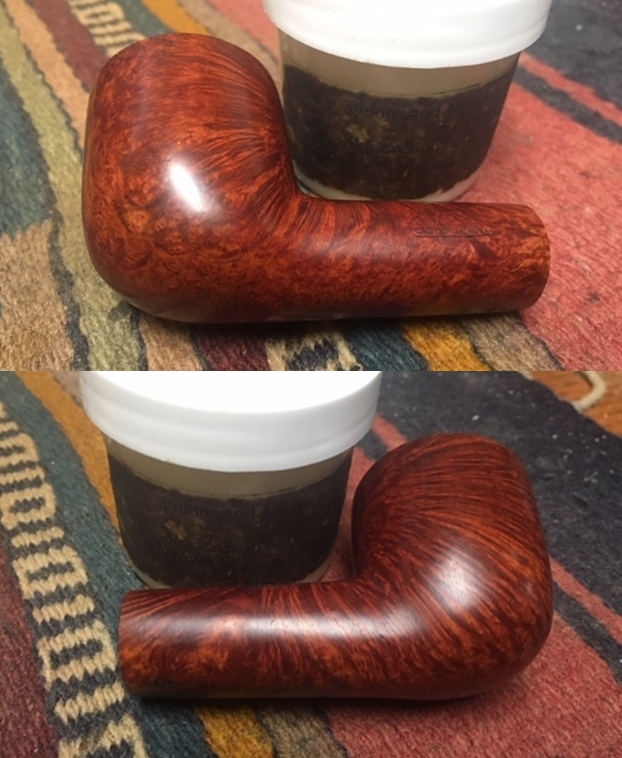
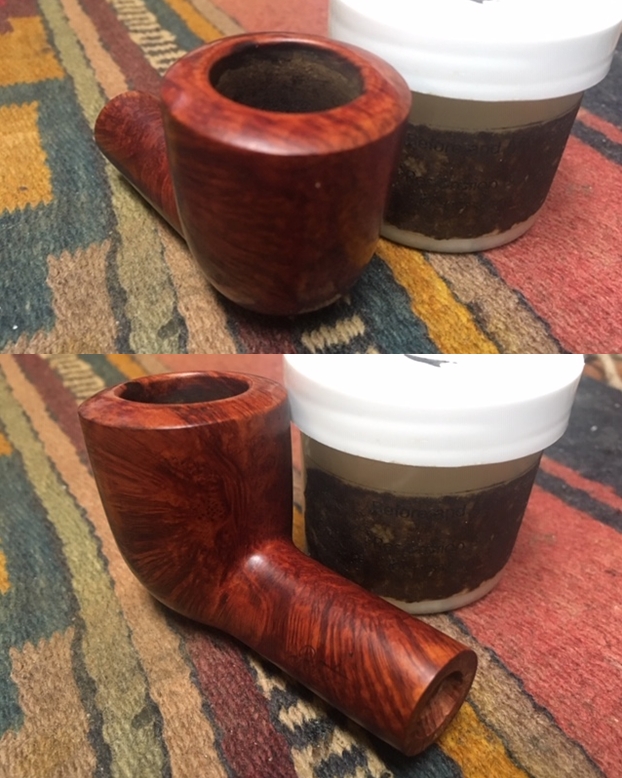
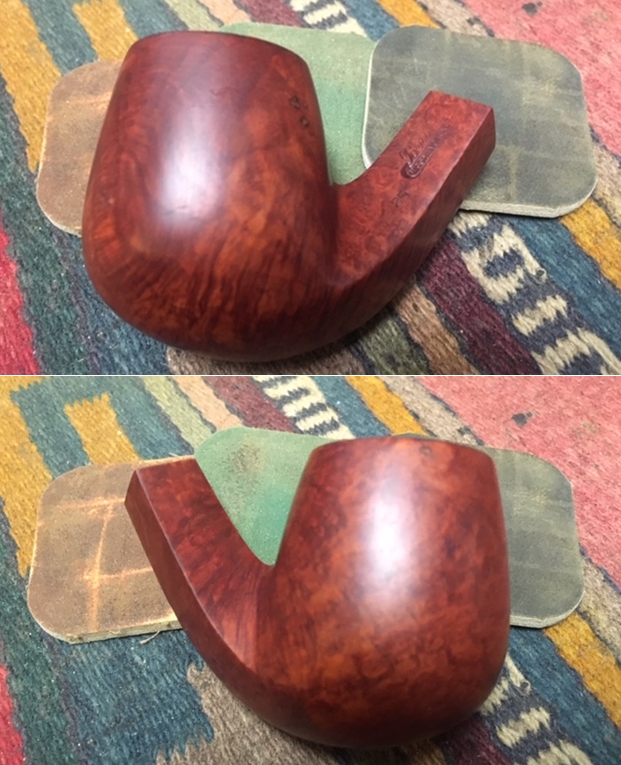
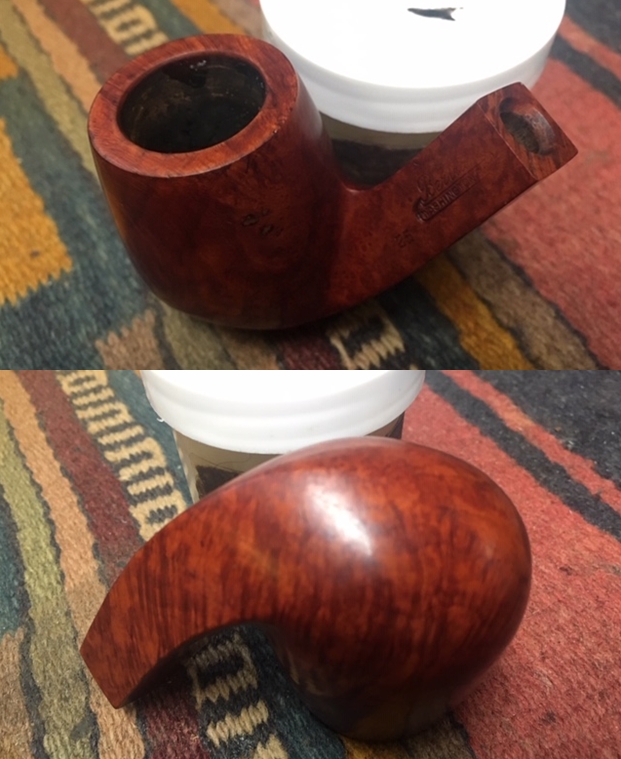
I worked some Before & After Restoration Balm into the surface of the smooth briar with my finger tips. The product is amazing and works to clean, enliven and protect the briar. I let it sit on the briar for 10 or more minutes and then buff it off with a soft cloth. It really makes the grain sing. 
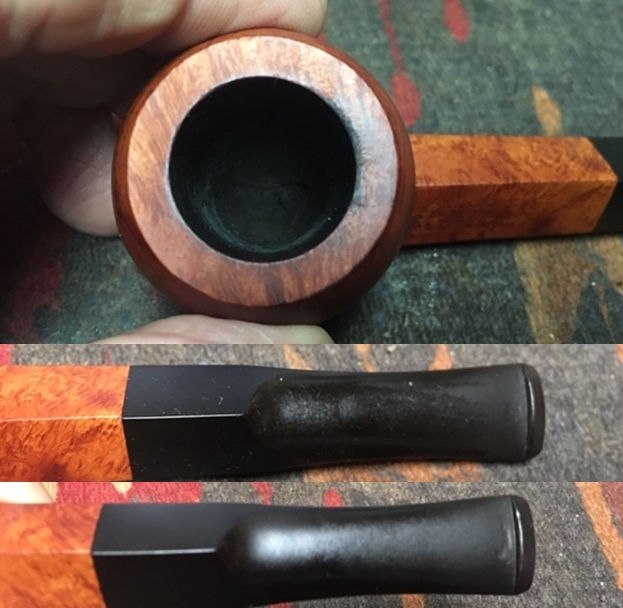
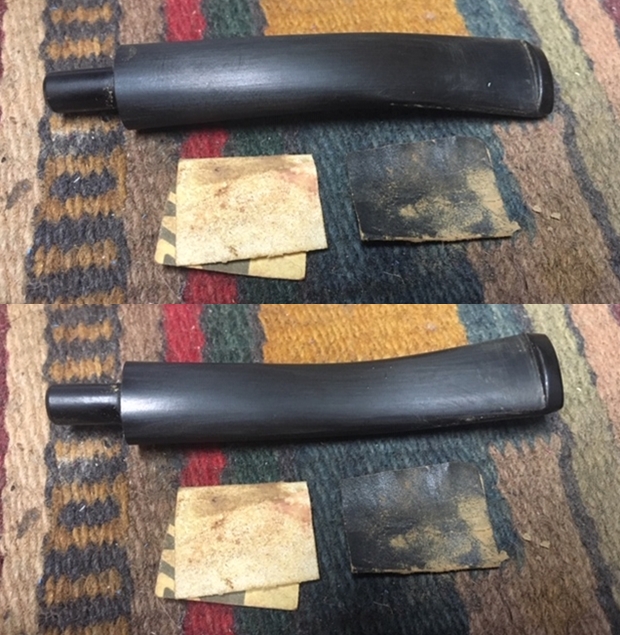
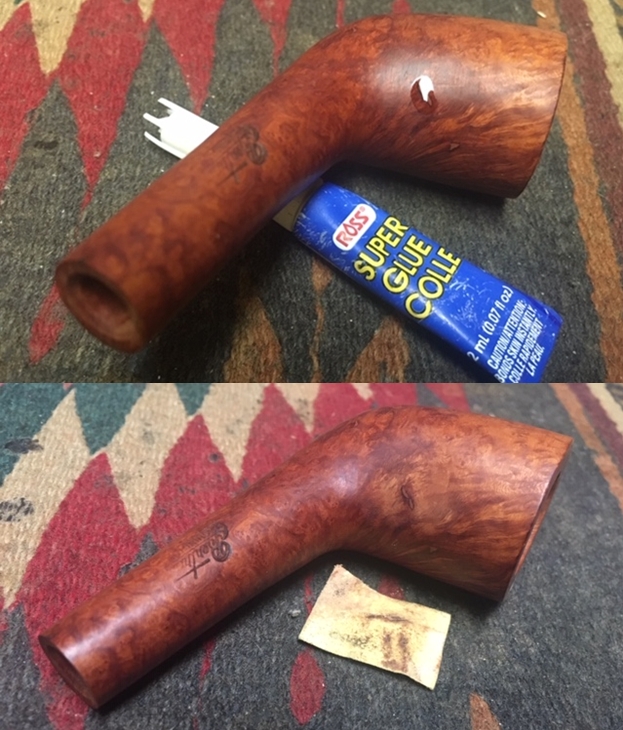
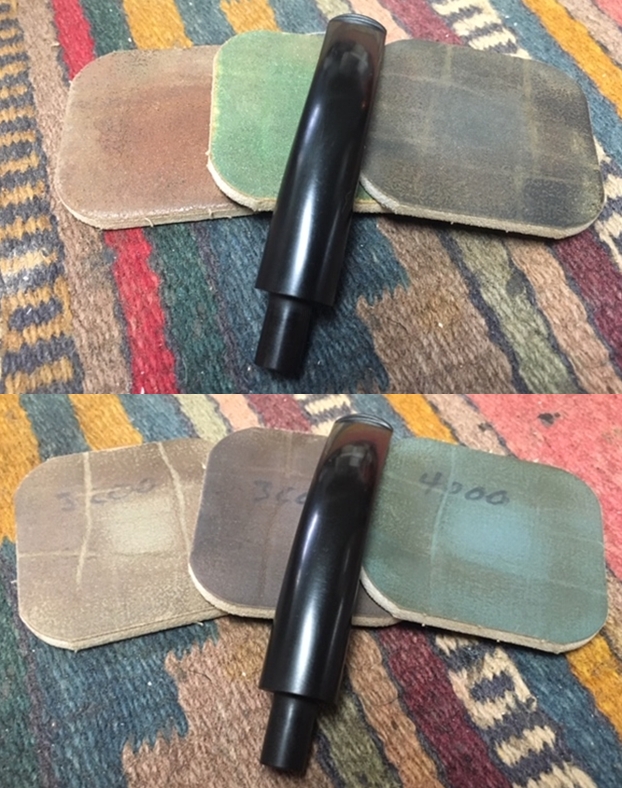
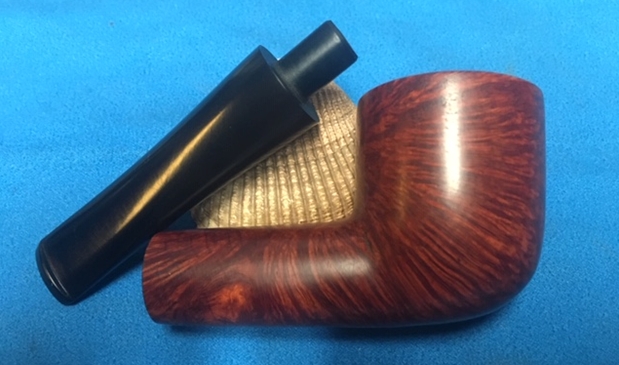
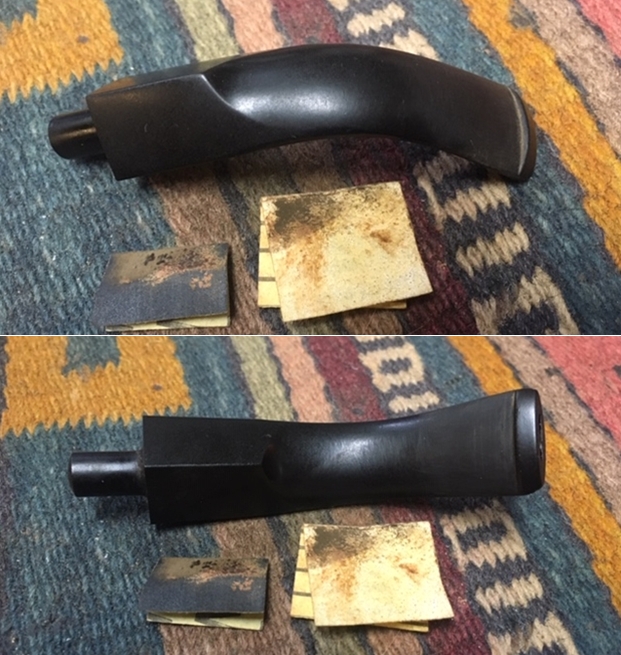
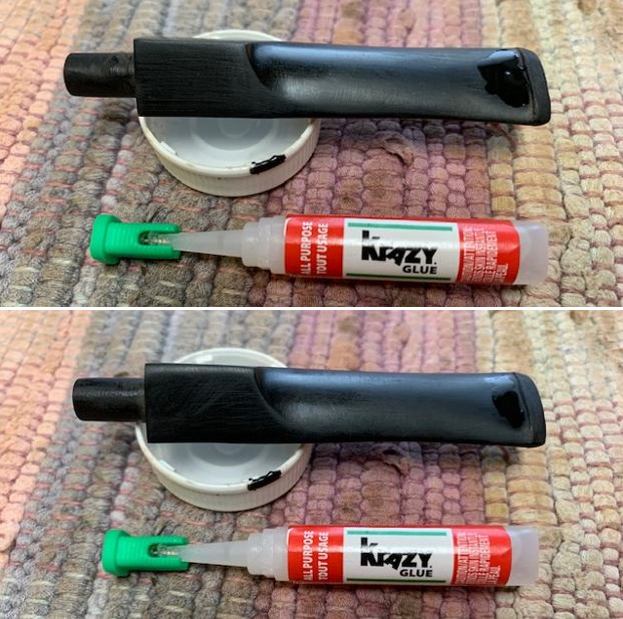
I set the bowl aside and turned my attention to the stem. I flattened out the file marks as much as possible with a flat file. I knew I would not remove them this way but I wanted make them flatter. I filled in the deeper cut marks with clear CA glue and once it was hard smoothed out the repairs with 220 grit sandpaper and started polishing the stem with 400 grit wet dry sandpaper. 
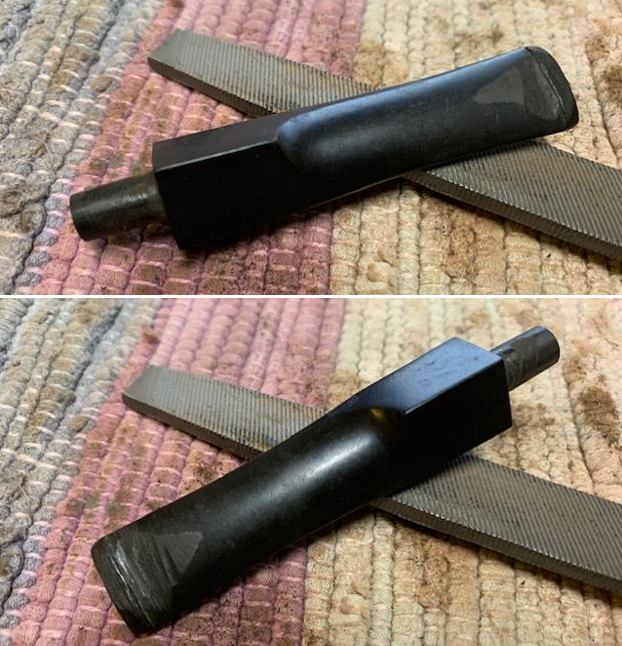
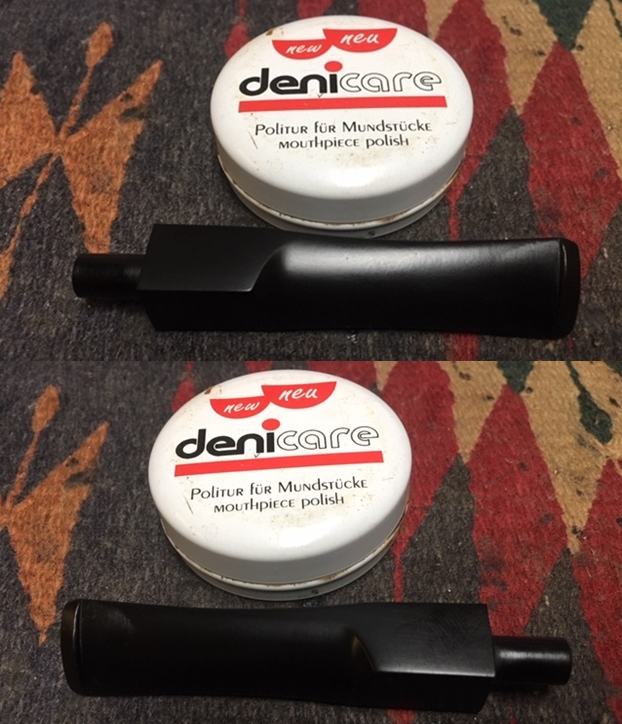
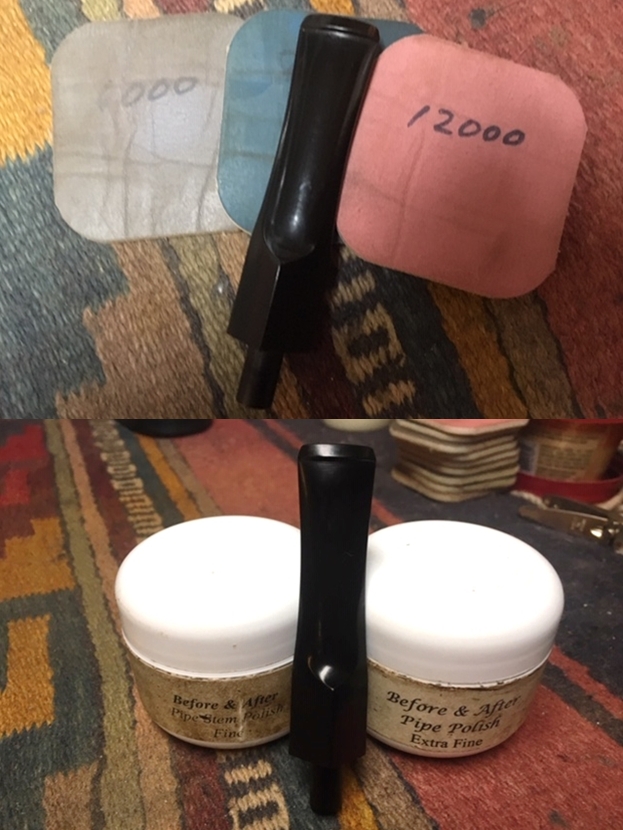
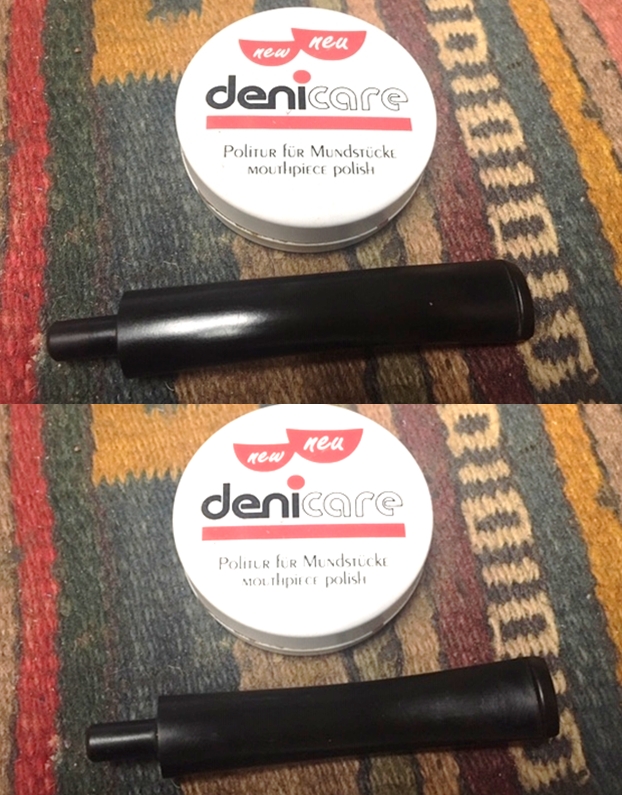
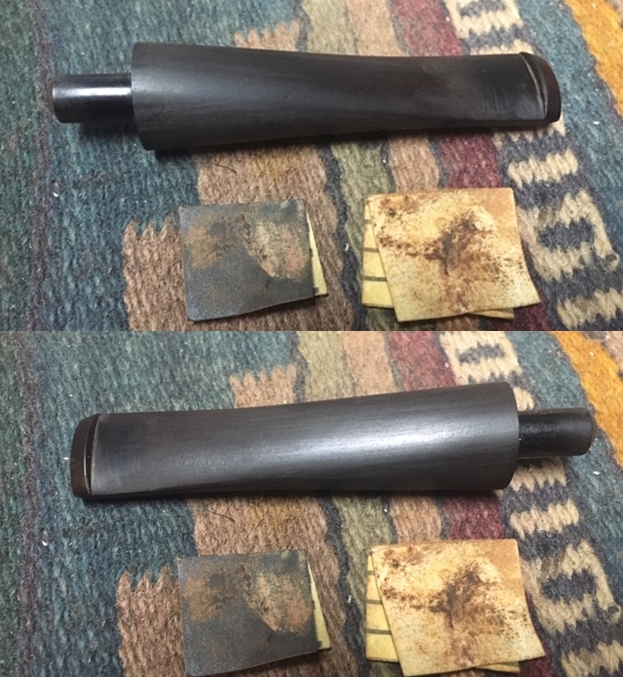
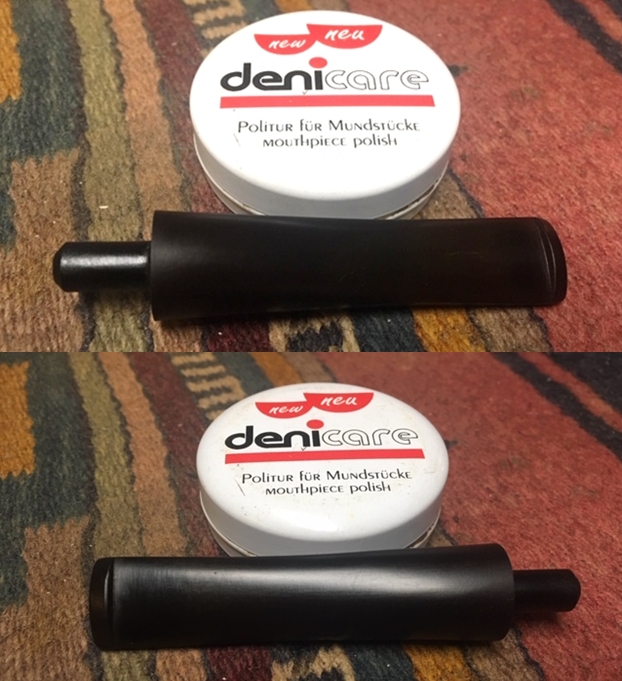
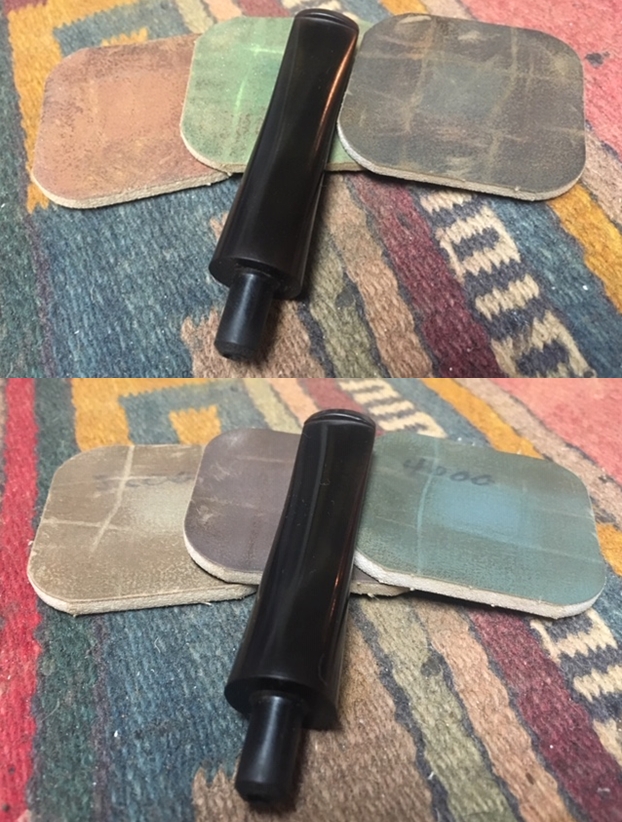
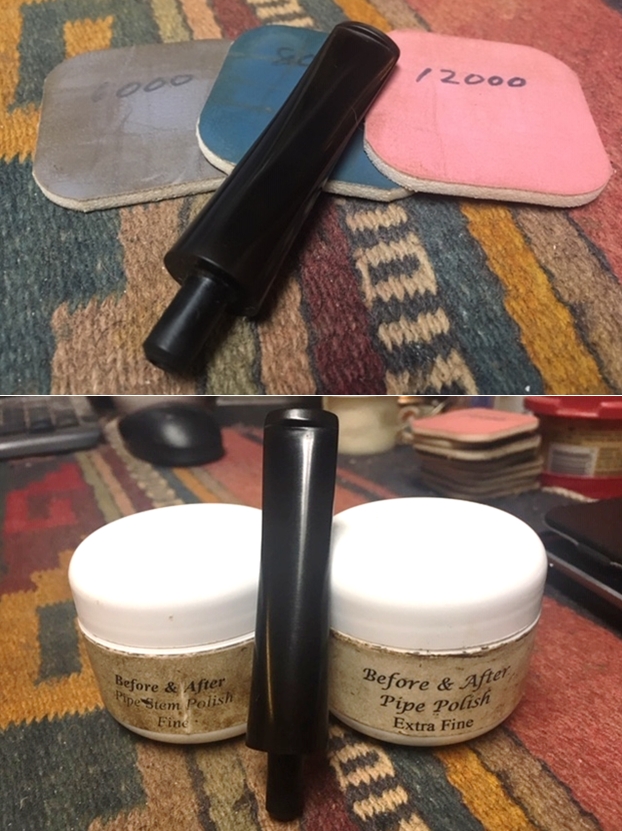
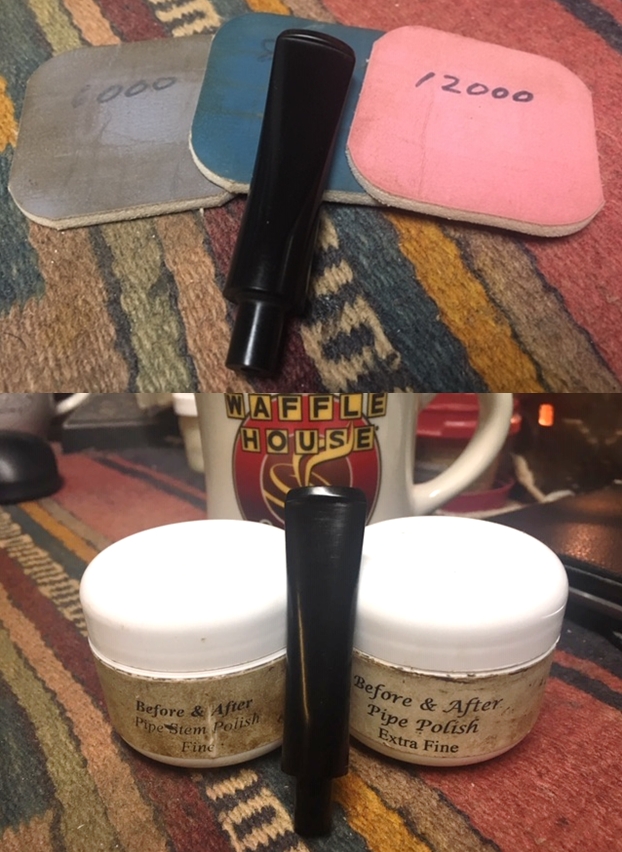
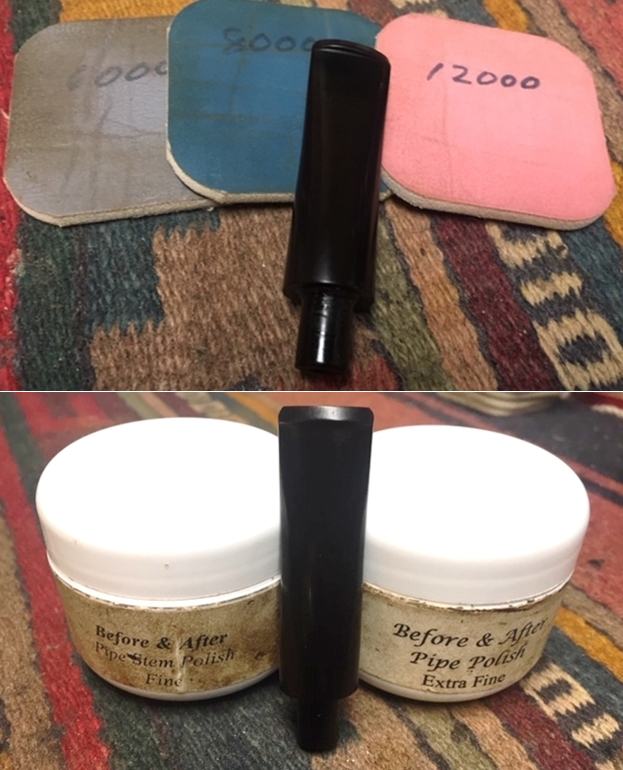
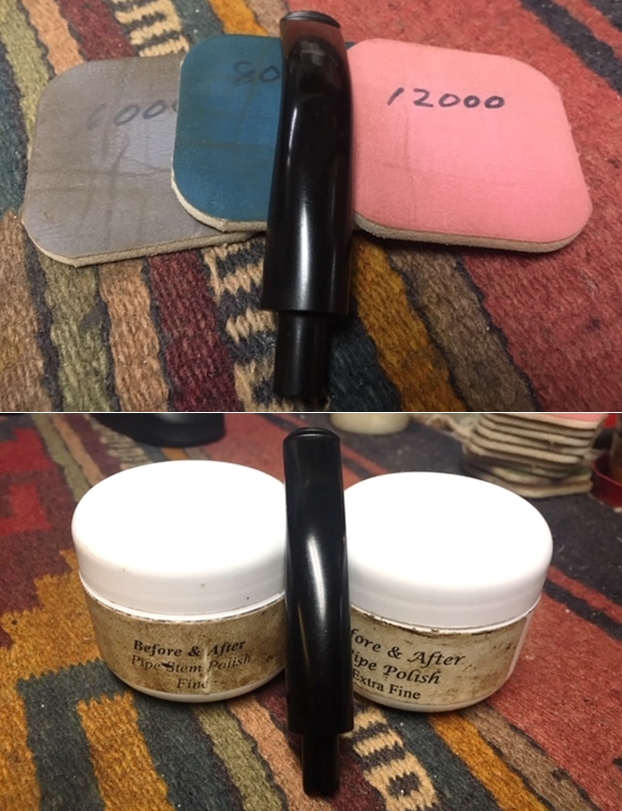
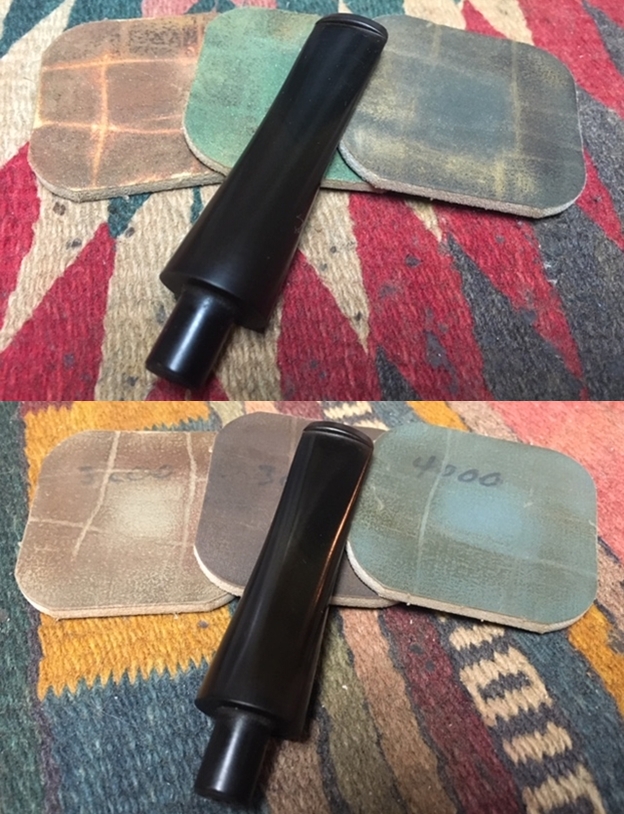
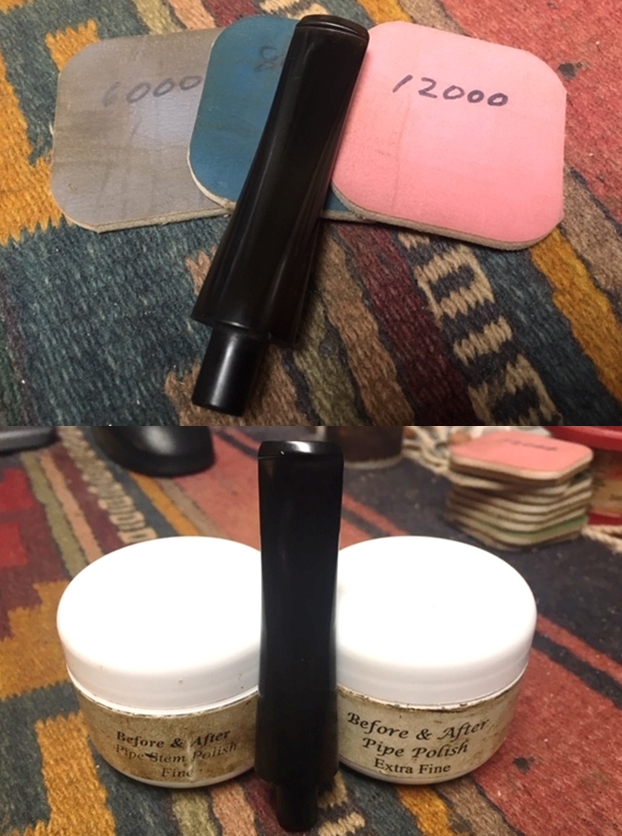
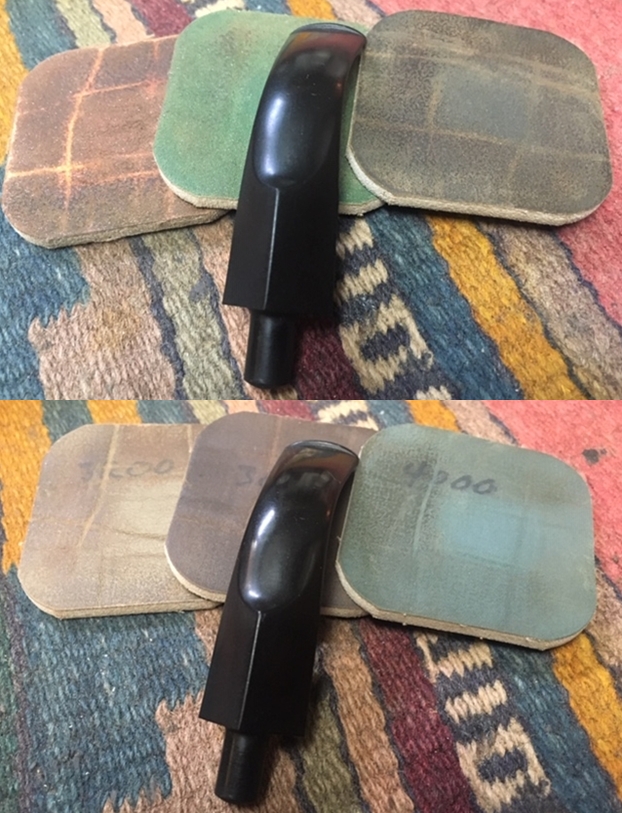
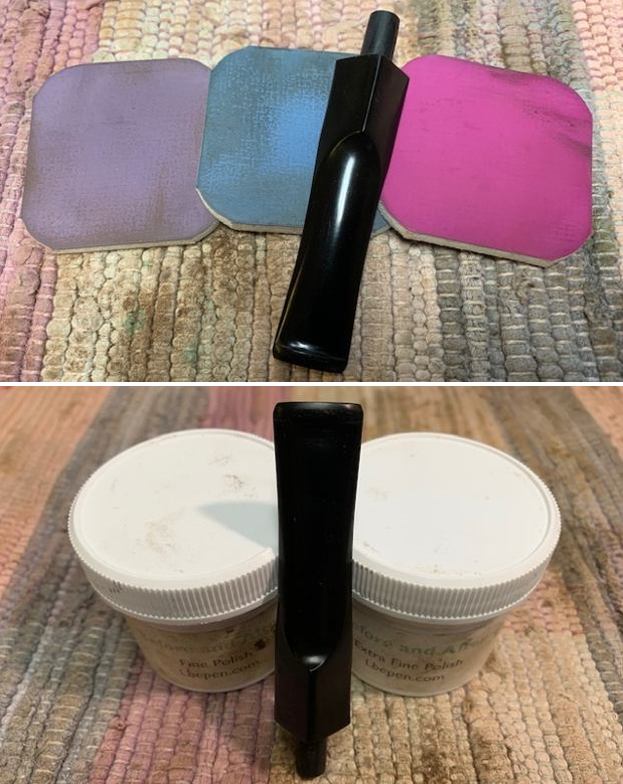
I polished the stem with micromesh sanding pads – dry sanding with 1500-12000 grit pads. I wiped the stem down after each pad with a cloth and Obsidian Oil. I finished the polishing with Before & After Pipe Stem Polish – both Fine and Extra Fine. I gave it a final coat of Obsidian Oil. 
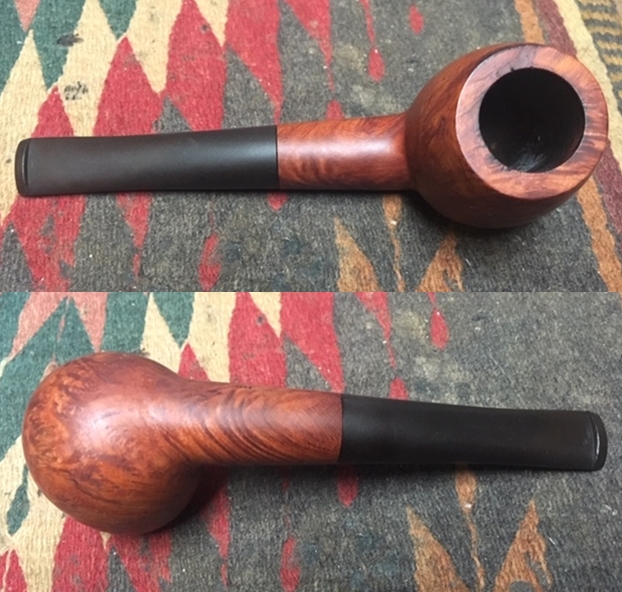
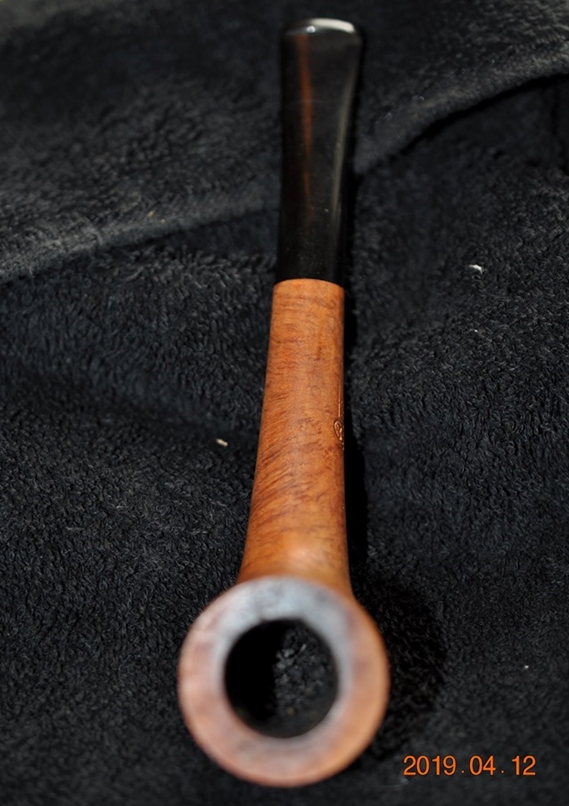
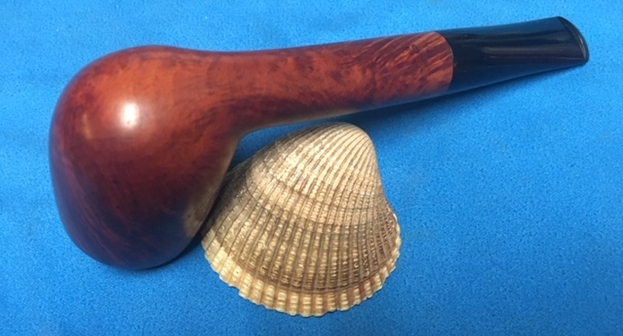
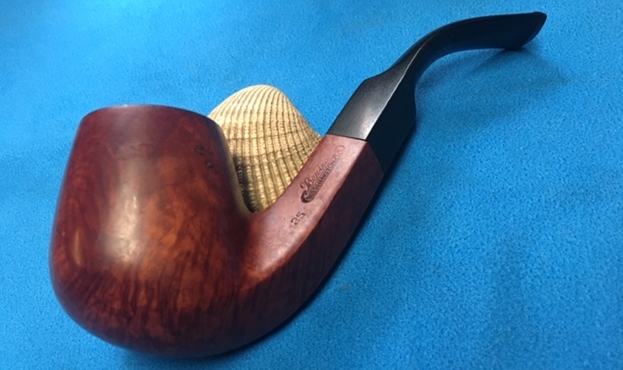
I used my heat gun to bend the vulcanite stem to match the angles of the bowl and give it a proper Bent Bulldog look. 
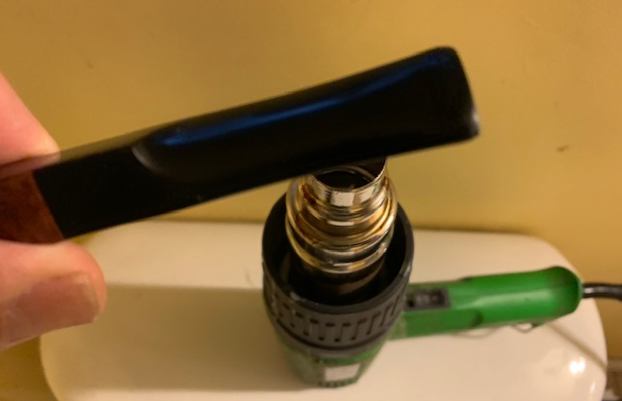
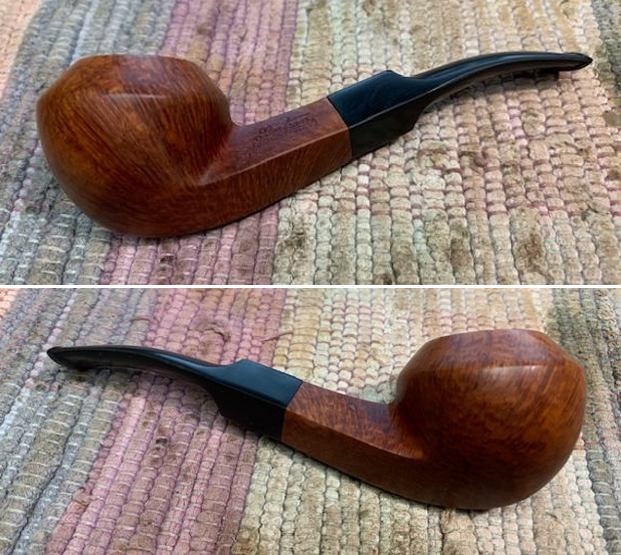
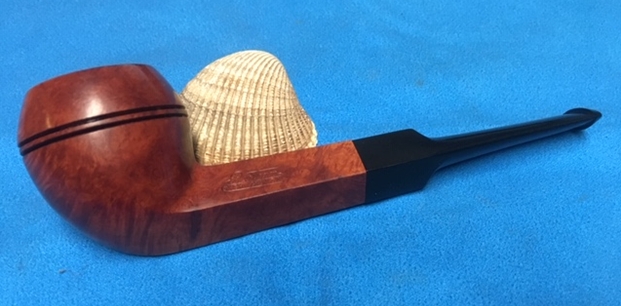
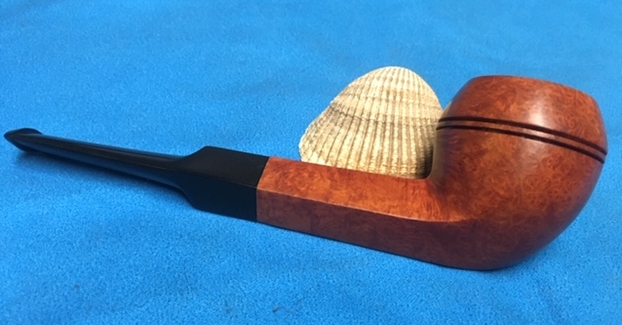
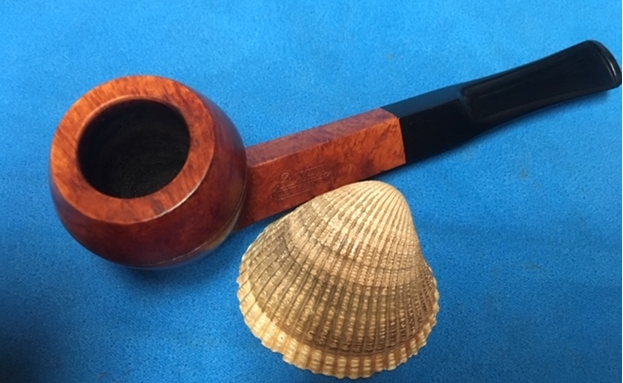
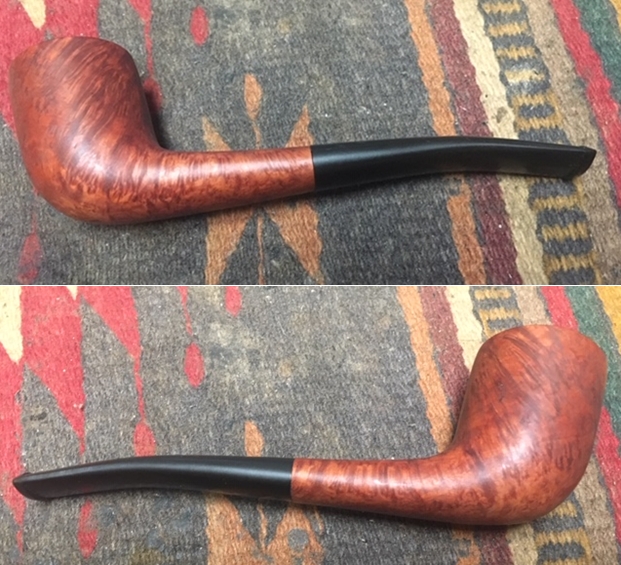
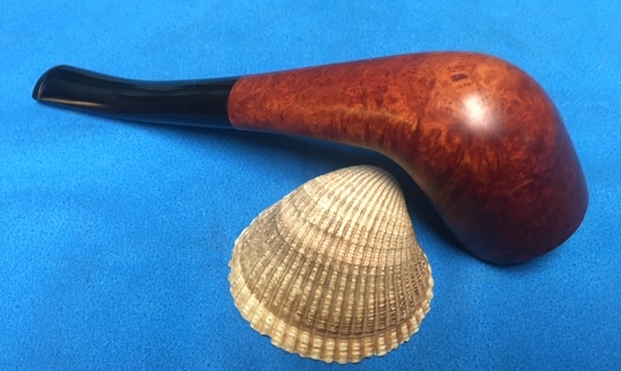
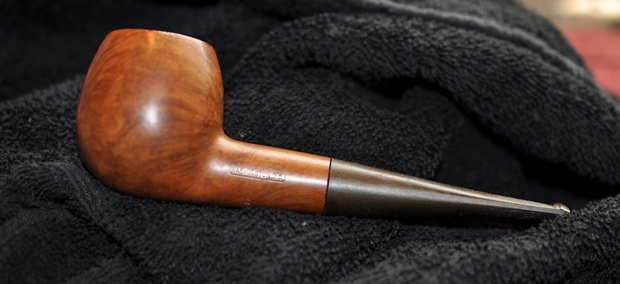
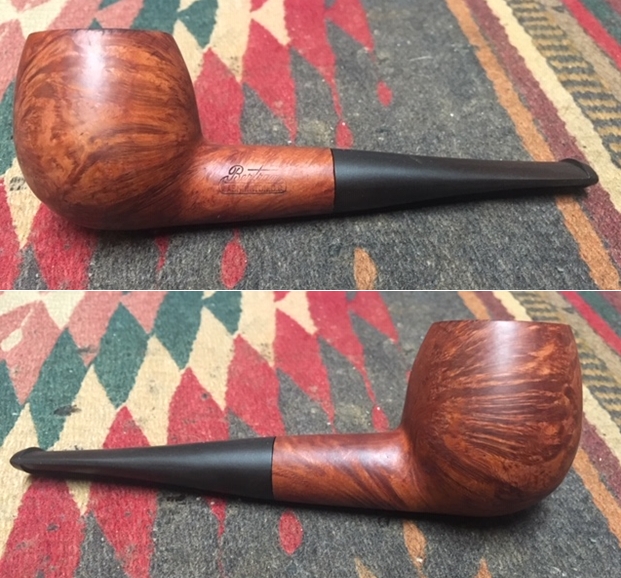
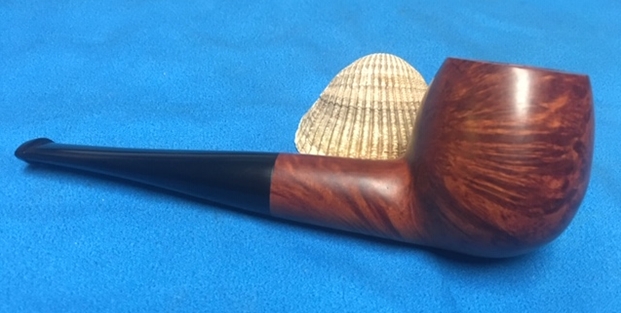
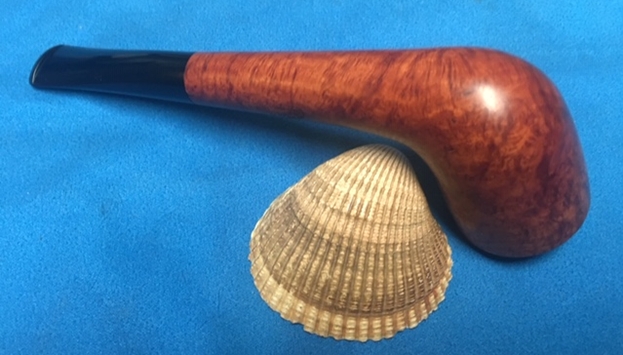
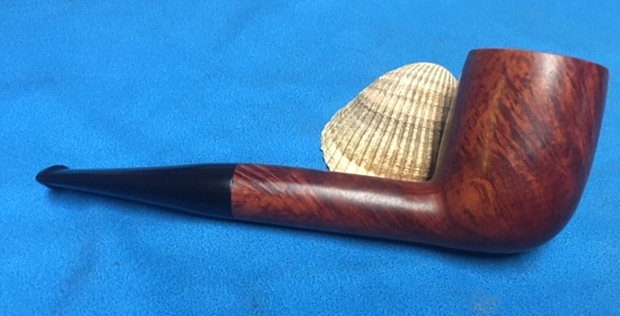
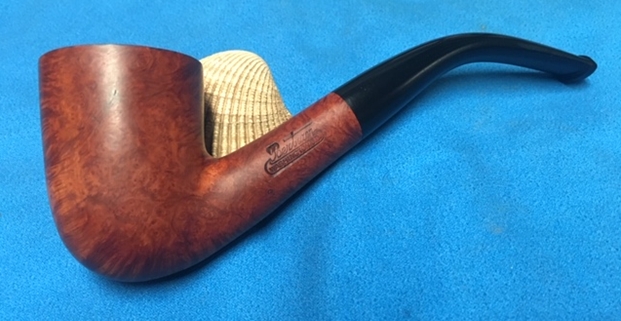
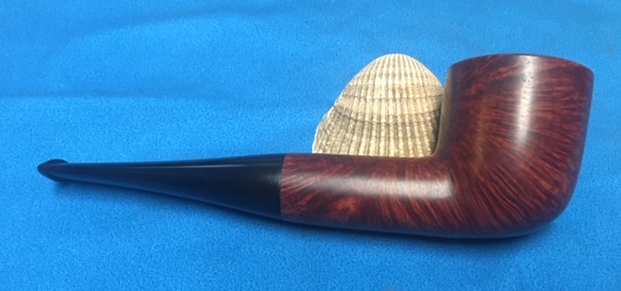
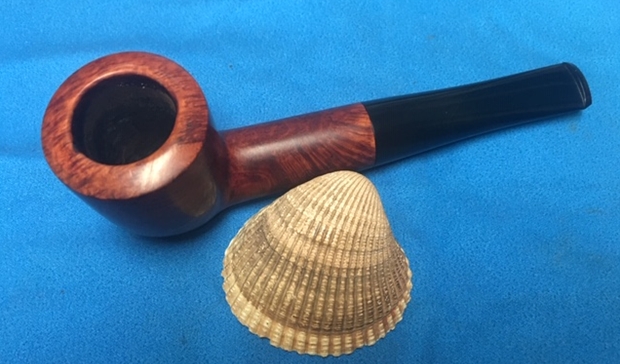
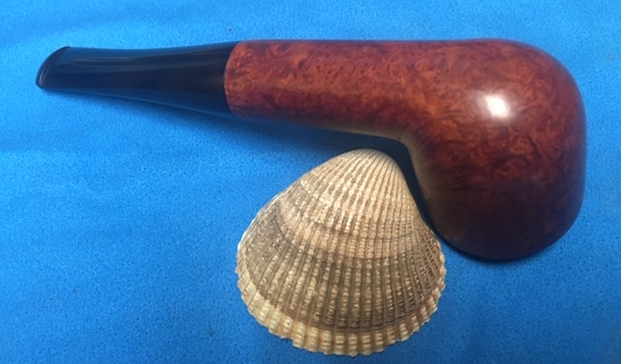
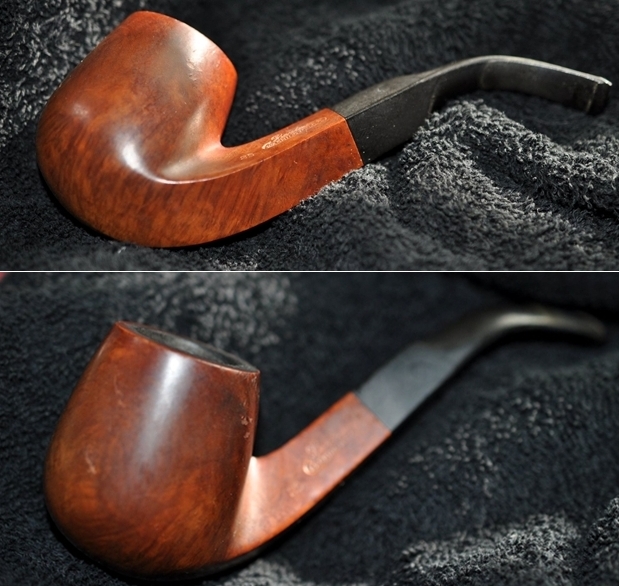
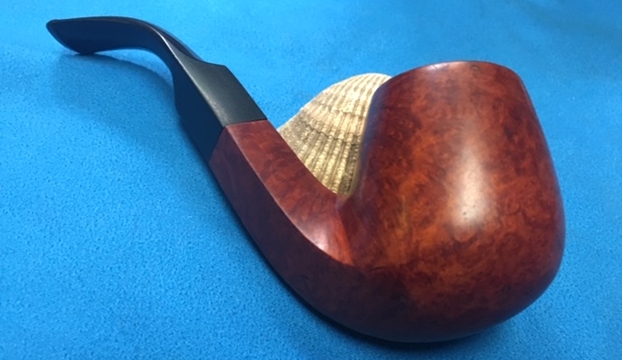
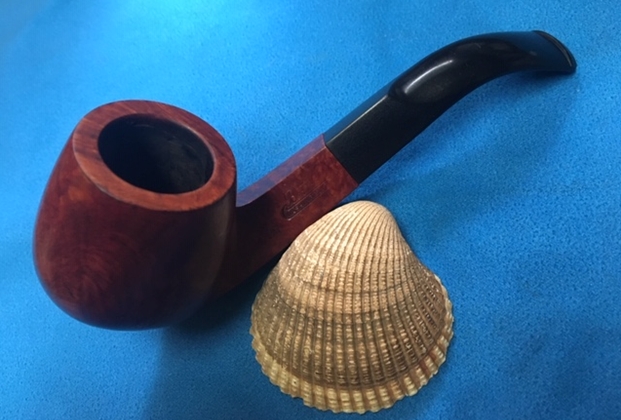
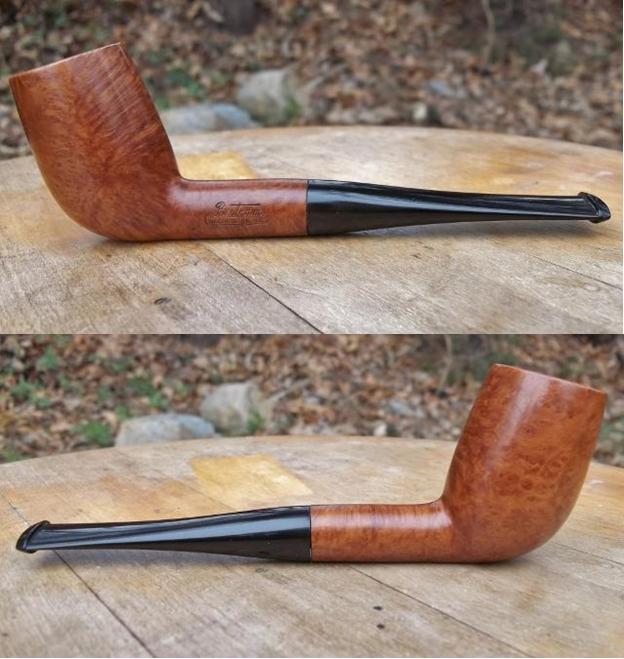
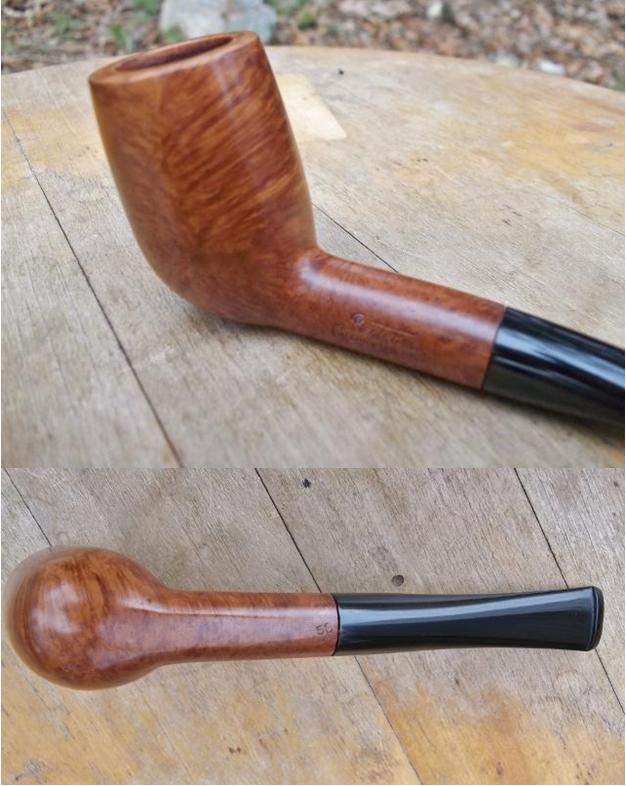
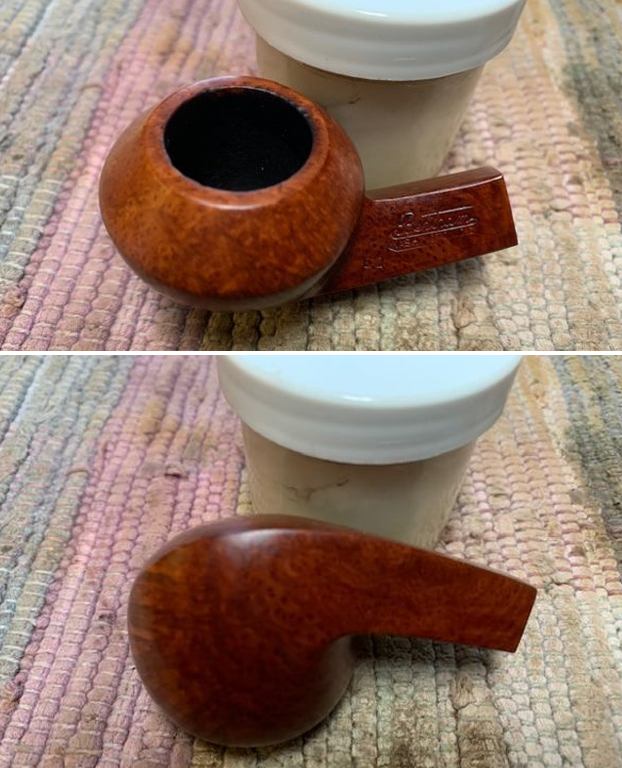
I put the pipe together – the bowl with its new stem. This restored and restemmed Bertram Washington DC Grade 60 Bent Bulldog is a real beauty and I think the chosen stem works well with it. The grain on the bowl came alive with the buffing. I used Blue Diamond on the buffing wheel on both the bowl and stem. I gave both multiple coats of carnauba wax on the wheel then buffed it with a clean buffing pad to raise the shine. I hand buffed it with a microfibre cloth to deepen the shine. The Bertram Bent Bulldog feels great in the hand. It is lightweight and the contrast in the browns of the briar and the polished vulcanite stem with the popping grain on the mixed brown stained bowl is quite amazing. The dimensions of the pipe are Length:5 ½ inches, Height: 1 ¾ inches, Outer diameter of the bowl: 1 ¾ inches, Chamber diameter: ¾ of an inch. The weight of the pipe is 1.31 ounces/37 grams. It really is a beauty. I will be putting it on the rebornpipes store in the American Pipe Makers section shortly if you are interested in adding it to your collection. Thanks for walking through the restemming and the restoration with me. Cheers.

Restoring a Beautiful Bertram Long Shank Bulldog 20


Blog by Steve Laug

It you have not read the previous blogs I have posted on this brand give them a read to get some background on the pipes in this lot. If you have not been hit with a box I am sure you have a hard time understanding how overwhelming it feels to look at the 200+ pipes that need to be restored. It is mind boggling for sure – but there is only one way to move ahead – 1 pipe at a time. I could not do it without Jeff’s help doing the clean up on the lot. If I had to do it all by myself it would be more than I handle moving through this many pipes. From his cleaned pipes I get to choose what I want to work on. Doing the work this way we have already cleaned about 70 pipes and I have restored around 38 of them. We are getting there slowly but surely.

This time I chose a Bertram Bulldog to work on. It has a long, diamond shank and a diamond saddle vulcanite stem. It has grade 20 number stamped on the left underside of the shank. The briar has a mix of grains – straight, flame and birdseye. The exterior of the bowl looked really good. There was on large fill on the left underside of the shank near the bowl/shank junction that was chipped and rough. The bowl had cake in the chamber and the rim top had some darkening and lava overflow. It was hard to know what the inner edge of the bowl edge of the bowl looked like until the cake and lava were gone. The stem had some oxidation and tooth marks and chatter near the button on both sides. Jeff took some photos of the pipe before he began his cleanup Jeff took close-up photos of the bowl and rim to capture the condition of the pipe when it arrived. The rim top had a thick coat of lava and the bowl had a thick cake. You can see from the photos why it was hard to tell the condition of the inner edge of the rim.The pictures of the bowl sides and the heel give a clear picture of the grain around the heel and the sides of the bowl. Other than the one obvious large fill the bowl looks very good. I am looking forward to seeing what is under all of the grime. The large fill /flaw is visible in the second photo below. I have circled it in red so it easy to identify. The next photos capture the stamping on the left side of the shank. You can see the Bertram Washington, D.C. stamp on the upper left side of the diamond shank and the grade 20 stamp on the left underside of the shank. The photo below captures the nature of the flaw and damaged fill that I had noted above with the red circle. It is on the left underside of the diamond shank.The next two photos show the stem surface. They show the calcification, oxidation and the chatter on both sides near the button. There are light tooth marks on the stem near the button. There is some wear on the button edge.

With each of the blogs that I have written on the Bertrams that I have worked on I have included the following information. If you have read it in past blogs, you can skip over it. If you have not, I have included the link to Bertram history and information. I would recommend that if you don’t know much about them take some time to read the background. I include a link to the write up on Pipedia (http://pipedia.org/wiki/Bertram). Bertram pipes were based out of Washington DC. They were popular among famous politicians and celebrities of the time. They made many products for them from FDR’s cigarette holders to Joseph Stalin’s favorite pipe. They were considered some of the best America had to offer till they finally closed their doors in the 70s. Bertram graded their pipes by 10s and sometimes with a 5 added (15, 25, 55 etc.), the higher the grade the better. Above 60s are uncommon and 80-90s are quite rare. I have worked on one 120 Grade billiard. I have several blogs that I have written on rebornpipes that give some history and background to Bertram pipes. (https://rebornpipes.com/2015/06/16/an-easy-restoration-of-a-bertram-grade-60-217-poker/).

I have included the following link to give a bit of historical information on the pipe company. It is a well written article that gives a glimpse of the heart of the company. http://www.streetsofwashington.com/2012/01/bertrams-pipe-shop-on-14th-street.html#

From this information I learned that all of these Bertrams were made before the closure of the shop in the 1970s. This Bertram Bulldog with a long shank is the first of this style that I have worked on. This pipe has a grade 20 which I am sure takes into account the large fill that is present on the shank.

Jeff is methodical in his cleaning regimen and rarely varies the process. He reamed the bowl with a PipNet pipe reamer and followed up with a Savinelli Fitsall pipe knife to remove the cake. He scrubbed out the mortise and the airway in the shank and the stem with alcohol, cotton swabs and pipe cleaners. He scrubbed the exterior of the bowl, rim, shank and stem with a tooth brush and Murphy’s Oil Soap to remove the oils and tars on the rim and the grime on the finish of the bowl. He rinsed it under running water. He dried it off with a soft cloth. He was able to remove lava build up on the rim top and you could see the great condition of the beveled rim top and edges of the bowl. He soaked the stem in Before & After Deoxidizer to remove the oxidation. I took photos of the pipe before I started my work on it. I took a close up photo of the rim top to show the condition of the bowl and rim after Jeff had cleaned up the grime and lava. Without the lava the inward bevel on the rim looked very good with slight darkening at the rear. The inner edge was in great condition. The stem photos show that the light oxidation is gone. The stem is in excellent condition with some light tooth marks and chatter on both sides near the button.I took photos of the stamping to show how it looked after the cleanup. The Bertram Washington, DC is clear and readable as is the Grade stamp 20.The damaged fill/flaw on the underside of the diamond shank was the only significant issue with the pipe. I wiped it down with alcohol on a cotton swab then filled it in with clear super glue. Once the repair had cured I sanded it smooth with 220 grit sandpaper and with 400 grit wet dry sandpaper. It is fascinating to see that the fill or flaw follows the pattern of the grain perfectly and once it was sanded it blended in well with the grain on that portion of the bowl. I cleaned up the darkening on the rim and smoothed out the damage on the back inner edge with a folded piece of 220 grit sandpaper. I cleaned up the sanding marks with 400 grit wet dry sandpaper.I polished the bowl and rim top with micromesh sanding pads – wetsanding it with 1500-12000 grit pads. I wiped the bowl down with a damp cloth after each pad to remove the sanding debris. The grain began to stand out. After the final sanding pad I hand buffed it with a cotton cloth to raise a shine. I worked some Before & After Restoration Balm into the finish of the briar with my fingertips to clean, enliven and protect it. I let the balm sit for a little while and then buffed with a cotton cloth to raise the shine. The Restoration Balm really makes the grain stands out beautifully. If you have not tried some why not give it a try. I sanded out the small tooth marks and chatter next to the button on both sides of the stem with a folded piece of 220 grit sandpaper. I sanded the stem with 400 grit wet dry sandpaper to remove the scratches. I polished it with Denicare Mouthpiece Polish to scrub out the scratches. I wiped it down with some Obsidian Oil and set it aside to dry. I polished out the sanding scratches with micromesh sanding pads – wetsanding it with 1500-12000 grit pads. I wiped the stem down with Obsidian Oil after each pad. I polished it with Before & After Pipe Polish – both Fine and Extra Fine and gave it a final coat and set it aside to dry. Jeff and I are gradually working through this 200+ lot dealing with each of the challenges they present one at a time. This one is Bertram’s take on a classic long shank straight Bulldog shape. I put the stem and bowl back together and buffed the pipe with Blue Diamond on the buffing wheel. I polished the briar and the minute scratches still in the vulcanite of the stem until there was a rich shine. For a Bertram Grade 20 this pipe is quite stunning. I cannot find any sign of visible fills. The grain is sporadic but pretty. It has a saddle stem on a diamond shank. The finish really has some interesting grain on a proportionally well carved pipe. Once I buffed the pipe the briar came alive and the mixture of grain popped with polishing. The black vulcanite stem had a rich glow. The finished pipe is well shaped long shank Bulldog. This Bertram feels great in the hand sits right in the mouth. Have a look at the finished pipe in the photos below. The dimensions are Length: 6 inches, Height: 2 inches, Outside diameter of the bowl: 1 1/2 inches, Chamber diameter: 3/4 of an inch. Maybe this shape speaks to you and you want to add it to your collection. If you are interested let me know as I will be adding it to the store soon. Thanks for walking through the restoration with me as it was a pleasure to work on.

Restoring a Bertram Oval Shank Zulu 30 from the Bertram Lot


Blog by Steve Laug

Feel free to refer to the previous blog posts on the brand if you want some background on the pipes in this lot. I have a hard time expressing how overwhelming it is to look at the 200+ pipes that need to be restored. It is mind boggling but there is only one way to move ahead – 1 pipe at a time. I could not do it without Jeff’s help. He is doing the clean up on the lot as that would be more than I could handle by myself in moving through this many pipes. From his cleaned pipes I get to choose what I want to work on. This time I chose an interesting oval shank Bertram Zulu. It has grade 30 number on the left side of the shank. The grain was a mix of grains – swirls, flame, cross and birdseye. It is another round bottom pipe with a taper stem. The exterior of the bowl looked really good. The bowl had cake in the chamber that was no problem. The rim top had some darkening and lava overflow on the back side. There appeared to be a bit of damage to the back side of the inner edge of the bowl. The stem had some oxidation and tooth chatter near the button on both sides. There were two deeper tooth marks on the underside near the button. Jeff took some photos of the pipe before he began his cleanup work on it. Jeff took close-up photos of the bowl and rim to capture the condition of the pipe when it arrived. The rim top had a coat of lava and the bowl had a thick cake. There were a few nicks in the back side of the inner edge of the rim.Jeff took pictures of the bowl sides and the heel to show the great looking grain around the sides of the bowl. There appear to be some fills on the underside of the bowl amidst the grime and dirt.Jeff took a photo to capture the stamping on the topside of the shank. It shows the stamping which read Bertram over Washington, D.C. There is a number 30 stamped on the  top of the left side of the shank. That is the quality number designation on this pipe. The next two photos show the stem surface. They show the calcification, oxidation and the chatter on both sides near the button. There are several deeper tooth marks on the underside of the stem near the button. There is some wear on the button edge.I have included this information with each of the Bertram blogs I have posted. You can skip the next bit. But if you have not, then I include the link to Bertram history and information. I would recommend that if you don’t know much about them do some research on them. I include a link to the write up on Pipedia (http://pipedia.org/wiki/Bertram). Bertram pipes were based out of Washington DC. They were popular among famous politicians and celebrities of the time. They made many products for them from FDR’s cigarette holders to Joseph Stalin’s favorite pipe. They were considered some of the best America had to offer till they finally closed their doors in the 70s. They graded their pipes by 10s, the higher the grade the better. Above 60s are uncommon and 80-90s are quite rare. I’ve never heard of or seen a 100 grade. I have several blogs that I have written on rebornpipes that give some history and background to Bertram pipes. (https://rebornpipes.com/2015/06/16/an-easy-restoration-of-a-bertram-grade-60-217-poker/).

I have included the following link to give a bit of historical information on the pipe company. It is a well written article that gives a glimpse of the heart of the company. http://www.streetsofwashington.com/2012/01/bertrams-pipe-shop-on-14th-street.html#

From this information I have learned that the shape and grade Bertram I have in front of me now was made before the closure of the shop in the 1970s. This Bertram Zulu is yet another different shape from the other Bertram shapes I have restored. I have restored one other Zulu from this collection (https://rebornpipes.com/2019/06/01/a-zulu-shaped-bertram-30-from-the-bertram-collection/). Like the other one this also has a 30 grade stamp that gives some idea of how Bertram identified the quality of this pipe.

By now if you have been a reader for long you have Jeff’s cleaning regimen pretty well memorized. If you know it you can skip right to the pictures. If not I will include them once more. Jeff reamed the bowl with a PipNet pipe reamer and followed up with a Savinelli Fitsall pipe knife to remove the cake. He scrubbed out the mortise and the airway in the shank and the stem with alcohol, cotton swabs and pipe cleaners. He scrubbed the exterior of the bowl, rim, shank and stem with a tooth brush and Murphy’s Oil Soap to remove the oils and tars on the rim and the grime on the finish of the bowl. He rinsed it under running water. He dried it off with a soft cloth. He was able to remove lava build up on the rim top and you could see the great condition of the bowl top and edges of the rim. The rim and edges were in amazing condition. He soaked the stem in Before & After Deoxidizer to remove the oxidation. I took photos of the pipe before I started my work on it. I took a close up photo of the rim top to show the condition of the bowl and rim after Jeff had cleaned up the grime and lava. Without the lava there was a clear fill on the right topside of the rim toward the back of the bowl. I have circled it in yellow in the photo below. There was also some burn damage to the rear inner edge. I have circled the burn damage in red in the photo below. There was some nicking along the inner edge that would need to be dealt with as well. The stem photos show that the light oxidation is gone. The stem is in excellent condition with some tooth marks on the underside near the button and light tooth chatter on both sides.I took photos of the stamping to show how it looked after the cleanup. The Bertram Washington DC is clear and readable. The second photo shows the grade 30 stamp on the left side of the shank.I cleaned up the burn damaged inner edge and outer edge of the rim with a folded piece of 220 grit sandpaper. I cleaned up the sanding marks with 400 grit wet dry sandpaper. I sanded the area with the fill to smooth it out and blend it in better.I polished the bowl and rim top with micromesh sanding pads – wetsanding it with 1500-12000 grit pads. I wiped the bowl down with a damp cloth after each pad to remove the sanding debris. The grain began to stand out. After the final sanding pad I hand buffed it with a cotton cloth to raise a shine. I worked some Before & After Restoration Balm into finish of the briar with my fingertips to clean, enliven and protect it. I let the balm sit for a little while and then buffed with a cotton cloth to raise the shine. The Restoration Balm really makes the grain stands out beautifully. If you have not tried some why not give it a try. I sanded out the small tooth marks and chatter next to the button on both sides of the stem with a folded piece of 220 grit sandpaper. I sanded the stem with 400 grit wet dry sandpaper to remove the scratches. I followed by polishing the stem with Denicare Mouthpiece Polish with a cotton pad. I wiped it down with some Obsidian Oil and set it aside to dry. I polished out the sanding scratches with micromesh sanding pads – wetsanding it with 1500-12000 grit pads. I wiped the stem down with Obsidian Oil after each pad. I polished it with Before & After Pipe Polish – both Fine and Extra Fine and gave it a final coat and set it aside to dry. Jeff and I are gradually working through this 200+ lot dealing with each of the different challenges they present. This one is Bertram’s take on a classic Zulu shape. I put the stem and bowl back together and buffed the pipe with Blue Diamond on the buffing wheel. I polished the briar and the minute scratches still in the vulcanite of the stem until there was a rich shine. This is a Grade 30 pipe with some small fills around the bowl and rim top. It has a tapered oval stem on a oval shank. The finish really has some interesting grain on a proportionally well carved pipe. Once I buffed the pipe the briar came alive and the mixture of grain popped with polishing. The black vulcanite stem had a rich glow. The finished pipe is well shaped oval shank Zulu. This Bertram feels great in the hand sits right in the mouth. Have a look at it with the photos below. The dimensions are Length: 6 inches, Height: 2 inches, Outside diameter of the bowl: 1 3/8 inches, Chamber diameter: 3/4 of an inch. Maybe this shape speaks to you and you want to add it to your collection. Rest easy, this one will soon be on the rebornpipes store. If you are interested let me know. Thanks for walking through the restoration with me as it was a pleasure to work on.

Restoring a Bertram Thick Shank Apple 20 from the Bertram Lot


Blog by Steve Laug

Feel free to refer to the previous blog posts on the brand if you want some background on the pipes in this lot. I have a hard time expressing how overwhelming it is to look at the 200+ pipes that need to be restored. It is mind boggling but there is only one way to move ahead – 1 pipe at a time. I could not do it without Jeff’s help. He is doing the clean up on the lot as that would be more than I could handle by myself in moving through this many pipes. From his cleaned pipes I get to choose what I want to work on. This time I chose an interesting thick shank Bertram Apple. It has grade 20 number on the underside of the shank. The grain was a mix of grains – swirls, flame, cross and birdseye. It is another round bottom pipe with a taper stem. The exterior of the bowl looked really good. The bowl had cake in the chamber that was no problem. The rim top had some darkening and lava overflow on the back side. There appeared to be a bit of damage to the back side of the inner edge of the bowl and a little darkening on the outer edge on the left side. The stem had some oxidation and tooth chatter near the button on both sides. There were two deeper tooth marks on the underside near the button. Jeff took some photos of the pipe before he began his cleanup work on it. Jeff took close-up photos of the bowl and rim to capture the condition of the pipe when it arrived. The rim top had a coat of lava and the bowl had a thick cake. There were a few nicks in the back side of the inner edge of the rim.Jeff took pictures of the bowl sides and the heel to show the great looking grain around the sides of the bowl. There appear to be some fills on the underside of the bowl amidst the grime and dirt.Jeff took a photo to capture the stamping on the left side of the shank. It shows the stamping which read Bertram over Washington, D.C. There is a number 20 stamped on the underside of the shank. That is the quality number designation on this pipe. The next two photos show the stem surface. They show the calcification, oxidation and the chatter on both sides near the button. There are several deeper tooth marks on the underside of the stem near the button. There is some wear on the button edge.I have included this information with each of the Bertram blogs I have posted. You can skip the next bit. But if you have not, then I include the link to Bertram history and information. I would recommend that if you don’t know much about them do some research on them. I include a link to the write up on Pipedia (http://pipedia.org/wiki/Bertram). Bertram pipes were based out of Washington DC. They were popular among famous politicians and celebrities of the time. They made many products for them from FDR’s cigarette holders to Joseph Stalin’s favorite pipe. They were considered some of the best America had to offer till they finally closed their doors in the 70s. They graded their pipes by 10s, the higher the grade the better. Above 60s are uncommon and 80-90s are quite rare. I’ve never heard of or seen a 100 grade. I have several blogs that I have written on rebornpipes that give some history and background to Bertram pipes. (https://rebornpipes.com/2015/06/16/an-easy-restoration-of-a-bertram-grade-60-217-poker/).

I have included the following link to give a bit of historical information on the pipe company. It is a well written article that gives a glimpse of the heart of the company. http://www.streetsofwashington.com/2012/01/bertrams-pipe-shop-on-14th-street.html#

From this information I have learned that the shape and grade Bertram I have in front of me now was made before the closure of the shop in the 1970s. This Bertram Apple is yet another different shape from the other Bertram shapes I have worked. The 20 grade stamp gives some idea of how Bertram identified the quality of this pipe.

By now if you have been a reader for long you have Jeff’s cleaning regimen pretty well memorised. If you know it you can skip right to the pictures. If not I will include them once more. Jeff reamed the bowl with a PipNet pipe reamer and followed up with a Savinelli Fitsall pipe knife to remove the cake. He scrubbed out the mortise and the airway in the shank and the stem with alcohol, cotton swabs and pipe cleaners. He scrubbed the exterior of the bowl, rim, shank and stem with a tooth brush and Murphy’s Oil Soap to remove the oils and tars on the rim and the grime on the finish of the bowl. He rinsed it under running water. He dried it off with a soft cloth. He was able to remove lava build up on the rim top and you could see the great condition of the bowl top and edges of the rim. The rim and edges were in amazing condition. He soaked the stem in Before & After Deoxidizer to remove the oxidation. I took photos of the pipe before I started my work on it. I took a close up photo of the rim top to show the condition of the bowl and rim after Jeff had cleaned up the grime and lava. Without the lava there was a clear fill on the left topside of the rim. I have circled it in red in the photo below. There was some nicking along the inner edge that would need to be dealt with as well. The stem photos show that the light oxidation is gone. The stem is in excellent condition with only light tooth chatter on both sides near the button.I took photos of the stamping to show how it looked after the cleanup. The Bertram Washington DC is clear and readable. The second photo shows the grade 20 stamp on the underside of the shank.I cleaned up the damaged inner edge and outer edge of the rim with a folded piece of 220 grit sandpaper. I cleaned up the sanding marks with 400 grit wet dry sandpaper. I sanded the area with the fill to smooth it out and blend it in better.I polished the bowl and rim top with micromesh sanding pads – wetsanding it with 1500-12000 grit pads. I wiped the bowl down with a damp cloth after each pad to remove the sanding debris. The grain began to stand out. After the final sanding pad I hand buffed it with a cotton cloth to raise a shine. I worked some Before & After Restoration Balm into finish of the briar with my fingertips to clean, enliven and protect it. I let the balm sit for a little while and then buffed with a cotton cloth to raise the shine. The Restoration Balm really makes the grain stands out beautifully. If you have not tried some why not give it a try. I sanded out the small tooth marks and chatter next to the button on both sides of the stem with a folded piece of 220 grit sandpaper. I sanded the stem with 400 grit wet dry sandpaper to remove the scratches. I followed by polishing the stem with Denicare Mouthpiece Polish with a cotton pad. I wiped it down with some Obsidian Oil and set it aside to dry. I polished out the sanding scratches with micromesh sanding pads – wetsanding it with 1500-12000 grit pads. I wiped the stem down with Obsidian Oil after each pad. I polished it with Before & After Pipe Polish – both Fine and Extra Fine and gave it a final coat and set it aside to dry. Jeff and I are gradually working through this 200+ lot dealing with each of the different challenges they present. This one is Bertram’s take on a classic Apple shape. I put the stem and bowl back together and buffed the pipe with Blue Diamond on the buffing wheel. I polished the briar and the minute scratches still in the vulcanite of the stem until there was a rich shine. This is a Grade 20 pipe with some small fills around the shank and rim top. It has a tapered stem on a thick shank. The finish really has some interesting grain on a proportionally well carved pipe. Once I buffed the pipe the briar came alive and the mixture of grain popped with polishing. The black vulcanite stem had a rich glow. The finished pipe is well shaped thick shank Apple. This Bertram is a handful and sits right in the mouth. Have a look at it with the photos below. The dimensions are Length: 5 1/2 inches, Height: 2 inches, Outside diameter of the bowl: 1 1/2 inches, Chamber diameter: 3/4 of an inch. Maybe this shape speaks to you and you want to add it to your collection. Rest easy, this one will soon be on the rebornpipes store. If you are interested let me know. Thanks for walking through the restoration with me as it was a pleasure to work on.

Restoring a Bertram Long Shank Cutty from the Bertram Lot


Blog by Steve Laug

Once again if you want the background on the lot of Bertram pipes that Jeff and I purchased please refer to the previous blog posts on the brand. Like I have said, words escape me in trying to adequately describe how overwhelmed I am when I look at the 200+ pipes that need to be restored. It is mind boggling but there is only one way to move ahead – 1 pipe at a time. I am glad Jeff is helping with the clean up on the lot as that would be more than I could handle by myself in moving through this many pipes. From his cleaned pipes I chose a beautifully grained Bertram Cutty with a long shank. It has no grade number on the shank sides or bottom. It is very different from the other pipes in the lot that I have worked on so far. The grain was a mix of grains – swirls, flame, cross and birdseye. It was a round bottom pipe with a taper stem. The exterior of the bowl looked really good and there were a few small fills on this beauty. The bowl had cake in the chamber that was no problem. The rim top had some darkening and lava overflow on the back side. There appeared to be a bit of damage to the back side of the inner edge of the bowl look very good. The stem had some oxidation and tooth chatter near the button on both sides. Jeff took some photos of the pipe before he began his cleanup work on it. Jeff took close-up photos of the bowl and rim to capture the condition of the pipe when it arrived. The rim top had a coat of lava and the bowl had a thick cake. There was a nick in the back side of the inner edge of the rim.Jeff took pictures of the bowl sides and the heel to show the great looking grain around the sides of the bowl.It really is quite stunning and very dirty!Jeff took a photo to capture the stamping on the left side of the shank. It shows the stamping which read Bertram over Washington, D.C. The stamping is fainter on the right side of the impression. There is no quality number designation on this pipe. The next two photos show the stem surface. They show the calcification, oxidation and the chatter on both sides near the button. There is also some wear on the button edge. Once again, if you have read the previous Bertram blogs I have posted about the pipes that I have cleaned up so far you can skip the next bit. But if you have not, then I include the link to Bertram history and information. I would recommend that if you don’t know much about them do some research on them. I include a link to the write up on Pipedia (http://pipedia.org/wiki/Bertram). Bertram pipes were based out of Washington DC. They were popular among famous politicians and celebrities of the time. They made many products for them from FDR’s cigarette holders to Joseph Stalin’s favorite pipe. They were considered some of the best America had to offer till they finally closed their doors in the 70s. They graded their pipes by 10s, the higher the grade the better. Above 60s are uncommon and 80-90s are quite rare. I’ve never heard of or seen a 100 grade. I have several blogs that I have written on rebornpipes that give some history and background to Bertram pipes. (https://rebornpipes.com/2015/06/16/an-easy-restoration-of-a-bertram-grade-60-217-poker/).

I have included the following link to give a bit of historical information on the pipe company. It is a well written article that gives a glimpse of the heart of the company. http://www.streetsofwashington.com/2012/01/bertrams-pipe-shop-on-14th-street.html#

From this information I have learned that the shape and grade Bertram I have in front of me now was made before the closure of the shop in the 1970s. This Bertram Cutty is slightly different from the other Bertram shapes I have worked. Without a grade stamp it is impossible to know the quality of this pipe.

By now if you have been a reader for long you have Jeff’s cleaning regimen pretty well memorized. If you know it you can skip right to the pictures. If not I will include them once more. Jeff reamed the bowl with a PipNet pipe reamer and followed up with a Savinelli Fitsall pipe knife to remove the cake. He scrubbed out the mortise and the airway in the shank and the stem with alcohol, cotton swabs and pipe cleaners. He scrubbed the exterior of the bowl, rim, shank and stem with a tooth brush and Murphy’s Oil Soap to remove the oils and tars on the rim and the grime on the finish of the bowl. He rinsed it under running water. He dried it off with a soft cloth. He was able to remove lava build up on the rim top and you could see the great condition of the bowl top and edges of the rim. The rim and edges were in amazing condition. He soaked the stem in Before & After Deoxidizer to remove the oxidation. I took photos of the pipe before I started my work on it. I took a close up photo of the rim top to show the condition of the bowl and rim after Jeff had cleaned up the grime and lava. The lava left a little darkening on the rear rim top but otherwise the bowl looked very good. The stem photos show that the light oxidation is gone. The stem is in excellent condition with only light tooth chatter on both sides near the button.I took photos of the stamping to show how it looked after the cleanup. The Bertram Washington DC is faint on the right side of the stamp but it is still readable. I could not find any quality number on the sides of the shank.I cleaned up the damaged inner edge of the rim with a folded piece of 220 grit sandpaper. I cleaned up the sanding marks with 400 grit wet dry sandpaper.There was a large sandpit that had a loose fill on the back left side of the bowl. I picked out the dust, wiped it down with alcohol on a cotton pad. I dried it off and then filled it in with clear super glue. When the glue repair dried I sanded it with a folded piece of 220 grit sandpaper.I polished the bowl and rim top with micromesh sanding pads – wetsanding it with 1500-12000 grit pads. I wiped the bowl down with a damp cloth after each pad to remove the sanding debris. The grain began to stand out. After the final sanding pad I hand buffed it with a cotton cloth to raise a shine. I worked some Before & After Restoration Balm into finish of the briar with my fingertips to clean, enliven and protect it. I let the balm sit for a little while and then buffed with a cotton cloth to raise the shine. The Restoration Balm really makes the grain stands out beautifully. If you have not tried some why not give it a try. I sanded out the small tooth marks and chatter next to the button on both sides of the stem with a folded piece of 220 grit sandpaper. I followed that by sanding the stem with 400 grit wet dry sandpaper to remove the scratches. I polished out the sanding scratches with micromesh sanding pads – wetsanding it with 1500-12000 grit pads. I wiped the stem down with Obsidian Oil after each pad. I polished it with Before & After Pipe Polish – both Fine and Extra Fine and gave it a final coat and set it aside to dry. Jeff and I are gradually working through this 200+ lot dealing with each of the different challenges they present. This one is Bertram’s take on a classic Cutty shape. I put the stem and bowl back together and buffed the pipe with Blue Diamond on the buffing wheel. I polished the briar and the minute scratches still in the vulcanite of the stem until there was a rich shine. This one does not have a grade number but it is likely a 30-50 grade pipe judging from the grain and the small flaws and fills. It has a tapered stem at the end of a long shank. The finish really has some interesting grain on a proportionally well carved pipe. Once I buffed the pipe the briar came alive and the mixture of grain popped with polishing. The black vulcanite stem had a rich glow. The finished pipe is an interestingly grained Cutty. Like the other Bertrams I have worked on this one fits well in the hand and sits right in the mouth. Have a look at it with the photos below. The dimensions are Length: 6 inches, Height: 2 inches, Outside diameter of the bowl: 1 1/4 inches, Chamber diameter: 3/4 of an inch. Maybe this shape speaks to you and you want to add it to your collection. Rest easy, this one will soon be on the rebornpipes store. If you are interested let me know. Thanks for walking through the restoration with me as it was a pleasure to work on.

A Bertram 50S Lumberman Pipe from the Bertram Lot


Blog by Steve Laug

If you want the background on the lot of Bertram pipes that Jeff and I purchased please refer to the previous blog posts. I can’t adequately describe how overwhelmed I am when I look at the 200+ pipes that need to be restored. It is mind boggling but there is only one way to move ahead – 1 pipe at a time. I am glad Jeff is helping with the clean up on the lot as that would be more than I could handle by myself in moving through this many pipes. From his cleaned pipes I chose a beautifully grained Bertram 50S that was a Lumberman shape with a great look and line. The grain was a mix of grains – swirls, flame, cross and birdseye. It was a round bottom Lumberman pipe with a tapered stem. The exterior of the bowl looked really good and there were no fills on this beauty. The bowl had cake in the chamber that was no problem. The rim top had some darkening and lava overflow on the back side. The inner and outer edges of the bowl look very good. The exterior of the briar looked lifeless and was dusty with the grime of years of storage. The stem had some oxidation and tooth chatter near the button on both sides. Jeff took some photos of the pipe before he began his cleanup work on it. Jeff took close-up photos of the bowl and rim to capture the condition of the pipe when it arrived. The rim top had a coat of lava and the bowl had a thick cake. Jeff took pictures of the bowl sides and the heel to show the great looking grain around the sides of the bowl. You can see the fills on the front right side of the bowl. It really is quite stunning and very dirty! Jeff took a photo to capture the stamping on the left side of the shank. It shows the stamping which read Bertram over Washington, D.C. The second photo shows the number stamp on the underside of the shank at the shank/stem junction. The number designates the quality of the pipe. The next two photos show the stem surface. They show the calcification, oxidation and the chatter on both sides near the button. There is also some wear on the button edge.Once again, if you have read the previous Bertram blogs I have posted about the pipes that I have cleaned up so far you can skip the next bit. But if you have not, then I include the link to Bertram history and information. I would recommend that if you don’t know much about them do some research on them. I include a link to the write up on Pipedia (http://pipedia.org/wiki/Bertram). Bertram pipes were based out of Washington DC. They were popular among famous politicians and celebrities of the time. They made many products for them from FDR’s cigarette holders to Joseph Stalin’s favorite pipe. They were considered some of the best America had to offer till they finally closed their doors in the 70s. They graded their pipes by 10s, the higher the grade the better. Above 60s are uncommon and 80-90s are quite rare. I’ve never heard of or seen a 100 grade. I have several blogs that I have written on rebornpipes that give some history and background to Bertram pipes. (https://rebornpipes.com/2015/06/16/an-easy-restoration-of-a-bertram-grade-60-217-poker/).

I have included the following link to give a bit of historical information on the pipe company. It is a well written article that gives a glimpse of the heart of the company. http://www.streetsofwashington.com/2012/01/bertrams-pipe-shop-on-14th-street.html#

From this information I have learned that the shape and grade Bertram I have in front of me now was made before the closure of the shop in the 1970s. This Bertram Lumberman is slightly different from the other Bertram shapes I have worked. With a grade 50S stamp it is a mid-range        pipe. I have yet to figure out the “S” stamp on some of the higher grade pipes. Can anyone shed some light on this.

By now if you have been a reader for long you have Jeff’s cleaning regimen pretty well memorized. If you know it you can skip right to the pictures. If not I will include them once more. Jeff reamed the bowl with a PipNet pipe reamer and followed up with a Savinelli Fitsall pipe knife to remove the cake. He scrubbed out the mortise and the airway in the shank and the stem with alcohol, cotton swabs and pipe cleaners. He scrubbed the exterior of the bowl, rim, shank and stem with a tooth brush and Murphy’s Oil Soap to remove the oils and tars on the rim and the grime on the finish of the bowl. He rinsed it under running water. He dried it off with a soft cloth. He was able to remove lava build up on the rim top and you could see the great condition of the bowl top and edges of the rim. The rim and edges were in amazing condition. He soaked the stem in Before & After Deoxidizer to remove the oxidation. I took photos of the pipe before I started my work on it. I took a close up photo of the rim top to show the condition of the bowl and rim after Jeff had cleaned up the grime and lava. The lava left a little darkening on the rear rim top but otherwise the bowl looked very good. The inner edge has some small nicks at the back of the bowl. The stem photos show that the light oxidation is gone. The stem is in excellent condition with only light tooth chatter on both sides near the button.I took photos of the stamping to show how it looked after the cleanup. The Bertram Washington DC is still readable and clear. The quality number stamp was on the underside of the shank and read 50S.I polished the bowl and rim top with micromesh sanding pads – wetsanding it with 1500-12000 grit pads. I wiped the bowl down with a damp cloth after each pad to remove the sanding debris. The grain began to stand out. After the final sanding pad I hand buffed it with a cotton cloth to raise a shine. I know I have mentioned it before but I really like the balm that Mark Hoover created. It really does wonders on a dry piece of briar. I worked some Before & After Restoration Balm into finish of the briar with my fingertips to clean, enliven and protect it. I let the balm sit for a little while and then buffed with a cotton cloth to raise the shine. The Restoration Balm really makes the grain stands out beautifully. If you have not tried some why not give it a try. I sanded out the small tooth marks and chatter next to the button on both sides of the stem with a folded piece of 220 grit sandpaper. I followed that up with 400 grit wet dry sandpaper.I polished out the sanding scratches with micromesh sanding pads – wetsanding it with 1500-12000 grit pads. I wiped the stem down with Obsidian Oil after each pad. I polished it with Before & After Pipe Polish – both Fine and Extra Fine and gave it a final coat and set it aside to dry. I am having fun doing these pipes from the Bertram Collection. Each one presents different challenges but all are well laid out classic shapes. This is no exception. I put the stem and bowl back together and buffed the pipe with Blue Diamond on the buffing wheel. I polished the briar and the minute scratches still in the vulcanite of the stem until there was a rich shine. This Bertram is in interesting take on a Lumberman shape with tapered stem. The finish really highlights some interesting grain on a proportionally well carved pipe. Once I buffed the pipe the briar came alive and the mixture of grain popped with polishing. The black vulcanite stem had a rich glow. The finished pipe is a beautiful grained Lumberman. Like the other Bertrams I have worked on this one fits well in the hand and sits right in the mouth. Have a look at it with the photos below. The dimensions are Length: 6 inches, Height: 2 inches, Outside diameter of the bowl: 1 1/2 inches, Chamber diameter: ¾ of an inch. Maybe this shape speaks to you and you want to add it to your collection. Rest easy, this one will soon be on the rebornpipes store. If you are interested let me know. Thanks for walking through the restoration with me as it was a pleasure to work on.

A 1/2 Bent Bertram 20 Danish Shaped Pipe from the Bertram Lot


Blog by Steve Laug

If you want the background on the lot of Bertram pipes that Jeff and I purchased please refer to the previous blog posts. I can’t adequately describe how overwhelmed I am when I look at the 200+ pipes that need to be restored. It is mind boggling but there is only one way to move ahead – 1 pipe at a time. I am glad Jeff is helping with the clean up on the lot as that would be more than I could handle by myself in moving through this many pipes. From his cleaned pipes I chose an unusual Bertram 20 that was a 1/2 bent Danish looking pipe. The grain was a mix of grains – swirls, flame, cross and birdseye. It was a round bottom billiard type pipe with a tapered stem. The exterior of the bowl looked pretty good other than a large fill on the right side toward the bottom of the bowl. The bowl had cake in the chamber that was no problem. The rim top had some darkening and lava overflow on the back side. The inner and outer edges of the bowl look very good. The exterior of the briar looked lifeless and was dusty with the grime of years of storage. The stem had some oxidation and tooth chatter near the button on both sides. Jeff took some photos of the pipe before he began his cleanup work on it. Jeff took a close-up photo of the bowl and rim to capture the condition of the pipe when it arrived. The rim top had a coat of lava and the bowl had a thick cake.Jeff took pictures of the bowl sides and the heel to show the great looking grain around the sides of the bowl. You can see the fills on the front right side of the bowl. It really is quite stunning and very dirty!Jeff took a photo to capture the stamping on the left side of the shank. It shows the stamping which read Bertram over Washington, D.C. The stamping on this pipe is a faint on the right side of the impression. The second photo shows the number stamp below the brand stamp on the shank. The number designates the quality of the pipe. The next two photos show the stem surface. They show the calcification, oxidation and the chatter on both sides near the button. There is also some wear on the button edge.Once again, if you have read the previous Bertram blogs I have posted about the pipes that I have cleaned up so far you can skip the next bit. But if you have not, then I include the link to Bertram history and information. I would recommend that if you don’t know much about them do some research on them. I include a link to the write up on Pipedia (http://pipedia.org/wiki/Bertram). Bertram pipes were based out of Washington DC. They were popular among famous politicians and celebrities of the time. They made many products for them from FDR’s cigarette holders to Joseph Stalin’s favorite pipe. They were considered some of the best America had to offer till they finally closed their doors in the 70s. They graded their pipes by 10s, the higher the grade the better. Above 60s are uncommon and 80-90s are quite rare. I’ve never heard of or seen a 100 grade. I have several blogs that I have written on rebornpipes that give some history and background to Bertram pipes. (https://rebornpipes.com/2015/06/16/an-easy-restoration-of-a-bertram-grade-60-217-poker/).

I have included the following link to give a bit of historical information on the pipe company. It is a well written article that gives a glimpse of the heart of the company. http://www.streetsofwashington.com/2012/01/bertrams-pipe-shop-on-14th-street.html#

From this information I have learned that the shape and grade Bertram I have in front of me now was made before the closure of the shop in the 1970s. This Bertram Danish Shaped with a 1/2 bent stem is different from the other Bertram shapes I have worked. With a grade 20 stamp it is a lower range pipe.

By now if you have been a reader for long you have Jeff’s cleaning regimen pretty well memorized. If you know it you can skip right to the pictures. If not I will include them once more. Jeff reamed the bowl with a PipNet pipe reamer and followed up with a Savinelli Fitsall pipe knife to remove the cake. He scrubbed out the mortise and the airway in the shank and the stem with alcohol, cotton swabs and pipe cleaners. He scrubbed the exterior of the bowl, rim, shank and stem with a tooth brush and Murphy’s Oil Soap to remove the oils and tars on the rim and the grime on the finish of the bowl. He rinsed it under running water. He dried it off with a soft cloth. He was able to remove lava build up on the rim top and you could see the great condition of the bowl top and edges of the rim. There was still some darkening to the rim top toward the back of the bowl. He soaked the stem in Before & After Deoxidizer to remove the oxidation. I took photos of the pipe before I started my work on it. I took a close up photo of the rim top to show the condition of the bowl and rim after Jeff had cleaned up the grime and lava. The lava left a little darkening on the rear rim top but otherwise the bowl looked very good. The inner edge has some small nicks at the back of the bowl. The stem photos show that the light oxidation is gone. The stem is in excellent condition.I took photos of the stamping to show how it looked after the cleanup. The Bertram Washington DC is still readable and clear. The quality number stamp was missing the second number before and it is still not visible. The first number 2 is clear. The pipe could be a 20 or a 25.The large fill on the lower front side of the bowl is very visible. It is solid so I intend to leave it alone. I sanded it with 220 grit sandpaper to ensure that it was smooth to touch. The outer edges of the fill were a little rough before so sanding took care of that issue. There were also some deep gouges on the bowl on the left side next to the shank bowl junction. I filled them in with clear super glue and sanded them with the 220 grit sandpaper. I used a folded piece of 200 grit sandpaper to smooth out the inner edge of the rim and remove the nicks and damage.I polished the bowl and rim top with micromesh sanding pads – wetsanding it with 1500-12000 grit pads. I wiped the bowl down with a damp cloth after each pad to remove the sanding debris. The grain began to stand out. After the final sanding pad I hand buffed it with a cotton cloth to raise a shine. I know I have mentioned it before but I really like the balm that Mark Hoover created. It really does wonders on a dry piece of briar. I worked some Before & After Restoration Balm into finish of the briar with my fingertips to clean, enliven and protect it. I let the balm sit for a little while and then buffed with a cotton cloth to raise the shine. The Restoration Balm really makes the grain stands out beautifully. If you have not tried some why not give it a try. The stem was in great condition when I received it. I polished out the sanding scratches with micromesh sanding pads – wetsanding it with 1500-12000 grit pads. I wiped the stem down with Obsidian Oil after each pad. I polished it with Before & After Pipe Polish – both Fine and Extra Fine and gave it a final coat and set it aside to dry. I am having fun doing these pipes from the Bertram Collection. Each one presents different challenges but all are well laid out classic shapes. This is no exception. I put the stem and bowl back together and buffed the pipe with Blue Diamond on the buffing wheel. I polished the briar and the minute scratches still in the vulcanite of the stem until there was a rich shine. This Bertram is in interesting take on a bent Danish shape with tapered stem. The finish really highlights some interesting grain on a proportionally well carved pipe. Even the fills do not distract and look all right on the polished pipe. Once I buffed the pipe the briar came alive and the mixture of grain popped with polishing. The black vulcanite stem had a rich glow. The finished pipe is a beautiful grained Bent Danish. Like the other Bertrams I have worked on this one fits well in the hand and sits right in the mouth. Have a look at it with the photos below. The dimensions are Length: 6 inches, Height: 2 inches, Outside diameter of the bowl: 1 1/2 inches, Chamber diameter: ¾ of an inch. Maybe this shape speaks to you and you want to add it to your collection. Rest easy, this one will soon be on the rebornpipes store. If you are interested let me know. Thanks for walking through the restoration with me as it was a pleasure to work on.

A Crowned Thick Shank Billiard 40 from the Bertram Lot


Blog by Steve Laug

Once again rather than repeat myself about the background, please refer to the previous blog posts on the collection of Bertrams and other brands that Jeff and I purchased. I can’t adequately describe how overwhelmed I am when I look at the 200+ pipes that need to be restored but there is only one way to move ahead – 1 pipe at a time. I am glad Jeff is helping with the clean up on the lot as that would be more than I could handle by myself in moving through this many pipes. From his cleaned pipes I chose a thick shank Billiard Bertram 40 with a crowned rim top. The grain was a mix of cross grain and birdseye. It was a Billiard with a tapered stem. The bowl had cake in the chamber that was no problem. The rim top had some darkening and lava overflow on the back side. There was a chip in the front, inner edge of the bowl and what appeared to be a burn mark on back inner edge. The outer edge of the bowl appeared to be in good condition but we would know more once the bowl had been reamed and cleaned. The exterior of the briar looked lifeless and was dusty with the grime of years of storage. The stem had some oxidation and tooth chatter near the button on both sides. Jeff took some photos of the pipe before he began his cleanup work on it. Jeff took a close-up photo of the bowl and rim to capture the condition of the pipe when it arrived. The rim top had a coat of lava and the bowl had a thick cake. There is also an obvious nick on the front inner edge of the bowl that will need to be dealt with.Jeff took pictures of the bowl sides and the heel to show the great looking grain around the sides of the bowl. It really is quite stunning and very dirty!Jeff took a photo to capture the stamping on the left side of the shank. It shows the stamping which read Bertram over Washington, D.C. The stamping on this pipe is a faint on the right side of the impression. The second photo shows the number stamp 40 which shows the quality of the pipe. The number stamp is on the underside at the stem/shank junction.The next two photos show the stem surface. They show the oxidation and the chatter on both sides near the button. There is also some wear on the button edge.Once again, if you have read the previous Bertram blogs I have posted about the pipes that I have cleaned up so far you can skip the next bit. But if you have not, then I include the link to Bertram history and information. I would recommend that if you don’t know much about them do some research on them. I include a link to the write up on Pipedia (http://pipedia.org/wiki/Bertram). Bertram pipes were based out of Washington DC. They were popular among famous politicians and celebrities of the time. They made many products for them from FDR’s cigarette holders to Joseph Stalin’s favorite pipe. They were considered some of the best America had to offer till they finally closed their doors in the 70s. They graded their pipes by 10s, the higher the grade the better. Above 60s are uncommon and 80-90s are quite rare. I’ve never heard of or seen a 100 grade. I have several blogs that I have written on rebornpipes that give some history and background to Bertram pipes. (https://rebornpipes.com/2015/06/16/an-easy-restoration-of-a-bertram-grade-60-217-poker/).

I have included the following link to give a bit of historical information on the pipe company. It is a well written article that gives a glimpse of the heart of the company. http://www.streetsofwashington.com/2012/01/bertrams-pipe-shop-on-14th-street.html#

From this information I have learned that the shape and grade Bertram I have in front of me now was made before the closure of the shop in the 1970s. This Bertram Thick Shank Crowned Billiard is different from the other Bertram shapes I have worked. With a grade 40 stamp it is a more of lower mid-range pipe, though I am not sure why as the briar is very clean and the grain very interesting.

By now if you have been a reader for long you have Jeff’s cleaning regimen pretty well memorized. If you know it you can skip right to the pictures. If not I will include them once more. Jeff reamed the bowl with a PipNet pipe reamer and followed up with a Savinelli Fitsall pipe knife to remove the cake. He scrubbed out the mortise and the airway in the shank and the stem with alcohol, cotton swabs and pipe cleaners. He scrubbed the exterior of the bowl, rim, shank and stem with a tooth brush and Murphy’s Oil Soap to remove the oils and tars on the rim and the grime on the finish of the bowl. He rinsed it under running water. He dried it off with a soft cloth. He was able to remove lava build up on the rim top and you could see the great condition of the bowl top and edges of the rim. There was still some darkening to the rim top toward the back of the bowl. He soaked the stem in Before & After Deoxidizer to remove the oxidation. I took photos of the pipe before I started my work on it.I took a close up photo of the rim top to show the condition of the bowl and rim after Jeff had cleaned up the grime and lava. The damaged area on the front inner edge and a burned area that has damaged the rear inner edge are visible. The stem photos show that the oxidation is gone. The light tooth chatter is hard to see but I should be able to sand it out quite easily. I used a drop of clear super glue to fill in the chip in the inner edge and rim top on the front of the bowl. Once the repair cured, I used a folded piece of 220 grit sandpaper to smooth out the repair and to cleanup the burn damage to the rear inner edge of the rim.I polished the bowl and rim top with micromesh sanding pads – wetsanding it with 1500-12000 grit pads. I wiped the bowl down with a damp cloth after each pad to remove the sanding debris. The grain began to stand out. After the final sanding pad I hand buffed it with a cotton cloth to raise a shine. I touched up the rim top with a Maple Stain pen to blend the repairs to the rim top and edge into the rest of the surrounding briar. It did not take much to get a good match. I will need to buff it in the final steps to get the proper look but I am liking it.I know I have mentioned it before but I really like the balm that Mark Hoover created. It really does wonders on a dry piece of briar. I worked some Before & After Restoration Balm into finish of the briar with my fingertips to clean, enliven and protect it. I let the balm sit for a little while and then buffed with a cotton cloth to raise the shine. The Restoration Balm really makes the grain stands out beautifully. The stem was in pretty decent condition. I polished out the light tooth chatter with micromesh sanding pads – wetsanding it with 1500-12000 grit pads. I wiped the stem down with Obsidian Oil after each pad. I polished it with Before & After Pipe Polish – both Fine and Extra Fine and gave it a final coat and set it aside to dry. I am having fun doing these pipes from the Bertram Collection. Each one presents different challenges but all are well laid out classic shapes. This is no exception. I put the stem and bowl back together and buffed the pipe with Blue Diamond on the buffing wheel. I polished the briar and the minute scratches still in the vulcanite of the stem until there was a rich shine. This Bertram is a classic Thick Shank Crowned Billiard shape with tapered stem. The finish really highlights some amazing grain on a proportionally well carved pipe. Once I buffed the pipe the briar came alive and the mixture of grain popped with polishing. The black vulcanite stem had a rich glow. The finished pipe is a beautiful grained Billiard. Like the other Bertrams I have worked on this one fits well in the hand and sits right in the mouth. Have a look at it with the photos below. The dimensions are Length: 5 1/2 inches, Height: 1 3/4 inches, Outside diameter of the bowl: 1 1/2 inches, Chamber diameter: ¾ of an inch. This one will soon be on the rebornpipes store. If you are interested let me know. Thanks for walking through the restoration with me as it was a pleasure to work on.


A Bent Diamond Shank Billiard Bertram 25 from the Bertram Collection


Blog by Steve Laug

Once again rather than repeat myself with the repetition please refer to the previous blog posts on the collection of Bertrams and other brands that Jeff and I purchased. I can’t adequately describe how overwhelmed I am when I look at the 200+ pipes that need to be restored but there is only one way to move ahead – 1 pipe at a time. I am glad Jeff is helping with the clean up on the lot as that would be more than I could handle by myself in moving through this many pipes. From his cleaned pipes I chose a Diamond Shank Bent Billiard Bertram 25 with mixed grain to be the next pipe that I would work on. It was a1/2 bent Billiard with a saddle stem. The bowl had cake in the chamber that was no problem. The rim top had some darkening and lava overflow on the back side. The inner and outer edge of the bowl appeared to be in good condition but we would know more once the bowl had been reamed and cleaned. The exterior of the briar looked lifeless and was dusty with the grime of years of storage. I am still trying to figure out Bertrams numbering system as some of the higher number pipes seems to have more fills than the 25s. The stem had some oxidation and tooth marks near the button on both sides. Jeff took some photos of the pipe before he began his cleanup work on it. Jeff took a close-up photo of the bowl and rim to capture the condition of the pipe when it arrived. The rim top had a thick coat of lava and the bowl had a thick cake.Jeff took pictures of he bowl sides and the heel to show the great looking grain around the sides of the bowl. It really is quite stunning and very dirty! Jeff took a photo to capture the stamping on the top and left side of the shank. It shows the stamping on the topside which read Bertram over Washington, D.C. The stamping on this pipe is clear and readable. It also shows the number stamp 25 which shows the quality of the pipe.The next two photos show the stem surface. They show the oxidation and the chatter on both sides near the button. The tooth marks are visible on the underside next to the button. There is also some wear on the underside button edge.If you have read the previous Bertram blogs I have posted about the pipes that I have cleaned up so far you can skip the next bit. But if you have not, then I include the link to Bertram history and information. I would recommend that if you don’t know much about them do some research on them. I include a link to the write up on Pipedia (http://pipedia.org/wiki/Bertram). Bertram pipes were based out of Washington DC. They were popular among famous politicians and celebrities of the time. They made many products for them from FDR’s cigarette holders to Joseph Stalin’s favorite pipe. They were considered some of the best America had to offer till they finally closed their doors in the 70s. They graded their pipes by 10s, the higher the grade the better. Above 60s are uncommon and 80-90s are quite rare. I’ve never heard of or seen a 100 grade. I have several blogs that I have written on rebornpipes that give some history and background to Bertram pipes. (https://rebornpipes.com/2015/06/16/an-easy-restoration-of-a-bertram-grade-60-217-poker/).

I have included the following link to give a bit of historical information on the pipe company. It is a well written article that gives a glimpse of the heart of the company. http://www.streetsofwashington.com/2012/01/bertrams-pipe-shop-on-14th-street.html#

From this information I have learned that the shape and grade Bertram I have in front of me now was made before the closure of the shop in the 1970s. This Bertram Diamond Shank Bent Billiard with a darker finish is different from the other Bertram shapes I have worked. With a grade 25 stamp it is a lower range pipe.

By now if you have been a reader for long you have Jeff’s cleaning regimen pretty well memorized. If you know it you can skip right to the pictures. If not I will include them once more. Jeff reamed the bowl with a PipNet pipe reamer and followed up with a Savinelli Fitsall pipe knife to remove the cake. He scrubbed out the mortise and the airway in the shank and the stem with alcohol, cotton swabs and pipe cleaners. He scrubbed the exterior of the bowl, rim, shank and stem with a tooth brush and Murphy’s Oil Soap to remove the oils and tars on the rim and the grime on the finish of the bowl. He rinsed it under running water. He dried it off with a soft cloth. He was able to remove lava build up on the rim top and you could see the great condition of the bowl top and edges of the rim. There was still some darkening to the rim top toward the back of the bowl. He soaked the stem in Before & After Deoxidizer to remove the oxidation. I took photos of the pipe before I started my work on it. I took a close up photo of the rim top to show the condition of the bowl and rim after Jeff had cleaned up the grime and lava but the rim top had some light damage, some pits and darkening on the inner edge of the rim. The stem photos show that the oxidation is gone. The light tooth chatter is hard to see but I should be able to sand it out quite easily. Every one of the pipes that I have worked on from this Bertram Collection has had tooth marks on the underside of the stem and some on the topside as well. The tooth marks on the underside will take a little more work to remove.I also took a photo of the stamping on the left side of the shank showing how the stamping was laid out.I used a folded piece of 220 grit sandpaper to cleanup the light damage to the inner edge of the rim. I would address the darkening when I polished it with micromesh sanding pads.I used a black Sharpie pen to put a black spot in each of the fills on the bowl sides. Once I had done that I filled in the dents with clear super glue. Once the repairs had cured I sanded the repaired spots with 220 grit sandpaper to blend them into the surface of the briar. I polished the bowl and rim top with micromesh sanding pads – dry sanding it with 1500-12000 grit pads. I wiped the bowl down with a damp cloth after each pad to remove the sanding debris. After the final sanding pad I hand buffed it with a cotton cloth to raise a shine. I know I have mentioned it before but I really like the balm that Mark Hoover created. It really does wonders on a dry piece of briar. I worked some Before & After Restoration Balm into finish of the briar with my fingertips to clean, enliven and protect it. I let the balm sit for a little while and then buffed with a cotton cloth to raise the shine. The Restoration Balm really makes the grain stands out beautifully. I set the bowl aside to work on the stem. I used a folded piece of 240 grit sandpaper to blend the tooth marks and chatter into the surface of the stem. Once the surface was smooth I sanded out the scratch marks and started the polishing of the stem with a folded piece of 400 grit sandpaper. I wiped the stem down with Obsidian Oil. I polished the stem with micromesh sanding pads – wetsanding it with 1500-12000 grit pads. I wiped the stem down with Obsidian Oil after each pad. I polished it with Before & After Pipe Polish – both Fine and Extra Fine and gave it a final coat and set it aside to dry. I am having fun doing these pipes from the Bertram Collection. Each one presents different challenges but all are well laid out classic shapes. This is no exception. I put the stem and bowl back together and buffed the pipe with Blue Diamond on the buffing wheel. I polished the briar and the minute scratches still in the vulcanite of the stem until there was a rich shine. This Bertram is a classic Bent Billiard shape with a diamond shank and saddle stem. The stain really highlights some amazing grain on a proportionally well carved pipe. Once I buffed the pipe the briar came alive and the mixture of grain popped with polishing. The black vulcanite stem had a rich glow. The finished pipe is a beautiful grained Billiard. Like the other Bertrams I have worked on this one fits well in the hand and sits right in the mouth. Have a look at it with the photos below. The dimensions are Length: 5 inches, Height: 2 inches, Outside diameter of the bowl: 1 3/8 inches, Chamber diameter: ¾ of an inch. This one will soon be on the rebornpipes store. If you are interested let me know. Thanks for walking through the restoration with me as it was a pleasure to work on.

A Bertram Grade # 50 Cutty


Blog by Troy Wilburn

This is the other Bertam I have in my collection that I refurbished last fall. It was my first refurbish of a higher end type pipe. I figured I would show it off since I got such a nice positive response on my latest Bertram poker I posted recently. When I acquired this pipe I had been looking and wanting a nice Bertram but most out of my price range, but luckily I found this one with just enough work to get it cheaper than most. I had also wanted a Cutty shaped pipe and this one really caught my eye.

The pipe was in wonderful shape and didn’t need much work. By the scorching on rim you think it would have been smoked more but wasn’t. There was barely any cake built up at all under inspection. I didn’t even have to clean out shank and stem but did so very lightly with 91% alcohol and a couple of pipe cleaners.

Pipe as it arrived from Ebay seller.Bertram1

Bertram2

Bertram3

Bertram4 There were some scratches in bowl.Bertram5 I sanded out scratches with nothing more than 2500 grit paper and mineral oil.Bertram6 The drilling was perfect.Bertram7 After soaking the stem in Oxy Clean I gave it a very light wet sanding with 800 grit sandpaper and then worked my way up to 2500 grit.

Stem and bowl back together for some time on the buffer.Bertram8 After buffing and waxing I took the pipe outside for some pics to really show off the grain and color.Bertram9

Bertram10

Bertram11

Bertram12

Bertram13

Bertram14

Bertram15

Bertram16

Bertram17 It’s an excellent smoker and really shines with VA/Per blends. I don’t smoke it often but when I do it brings great pleasure.Bertram18