Guest Blog by Robert M. Boughton
Member, International Society of Codgers
Member, North American Society of Pipe Collectors
http://www.naspc.org
http://www.roadrunnerpipes21.biz under construction
http://about.me/boughtonrobert
Photos © the Author except as noted
How shall not the ministration of the spirit be rather glorious?
— 2 Corinthians 3:8
INTRODUCTION
As Chuck Richards, my good friend and mentor, has now worked his last official day at the local tobacconist where we enjoyed our pipes together on so many occasions – each of us often absorbed by our own thoughts – his presence is missed by many. Almost every time I visit the shop, I see customers come in, eager to pick Chuck’s mind on one thing or another concerning pipes, only to learn that he is no longer there. Then a young emeritus member of our pipe club, who moved away a couple of years ago to study engineering at Purdue, called a mutual friend and said he had some pipes that needed cleaning. When he asked for Chuck, our common friend referred him to me.
Soon after, I received an email from the young man, Joe Allen, who no doubt still looks too young to be smoking a pipe by the day’s legal standards. I found out Joe was concerned with three pipes he described as having excess cake and some rim burn and other typical problems he wanted cleaned up by someone he knows and trusts. I made him an offer he couldn’t refuse. No, I didn’t have to kill my friend’s horse and put its head in his bed; I have trouble picturing Joe atop that amazing species of animal, although for all I in fact know about him he could be a country boy who grew up on a farm with horses and cows and all the rest, and be outraged at the suggestion that he is in any way equestrian challenged.
All I knew about Joe’s present whereabouts was that he changed his major from engineering (thank God) and moved to Missouri to go to med school and become a surgeon. Now, that’s more the speed of the Joe Allen I remember.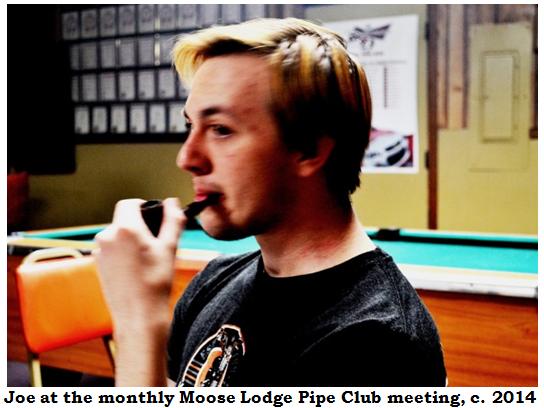 For Joe, I was tempted to tell him to send them to me with a return label so I could do the work for free. But then my senses returned. I just can’t keep cleaning and fixing my friends’ pipes without getting something in return other than the pleasure of working on their beautiful prizes! So we settled on $10 each, which included return postage. I didn’t even have a clue as to the kind of pipes Joe was sending me, except of course that they were designed for tobacco.
For that and other reasons, I was excited when the insured box arrived at my Post Office several days later, $30 in cash tucked with a note in an envelope stashed inside. When I got to my car, I used my handy flip knife to open the well-wrapped package that was padded with the exceptional care for the precious cargo one would expect from a future surgeon. I knew from the layers of bubble wrap that stuffed the small USPS Priority Mail box, and in particular upon finding the three pipes in question wrapped in smaller taped pieces of the same material, that they were cherished and adored by Joe. I was honored that he entrusted his treasures to me and determined not to disappoint him.
Anyone who knows me, even if only from my blogs here, might have guessed that I had to get a look at the pipes right then and there. With complete respect and care for the contents, I removed each of the neat little bubble-wrapped pipes one at a time. I was surprised and pleased by the variety.
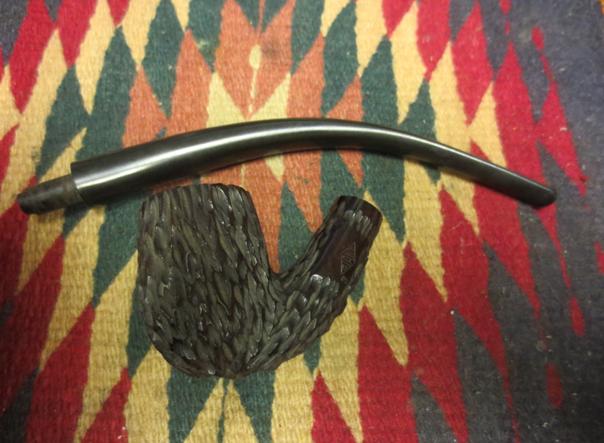
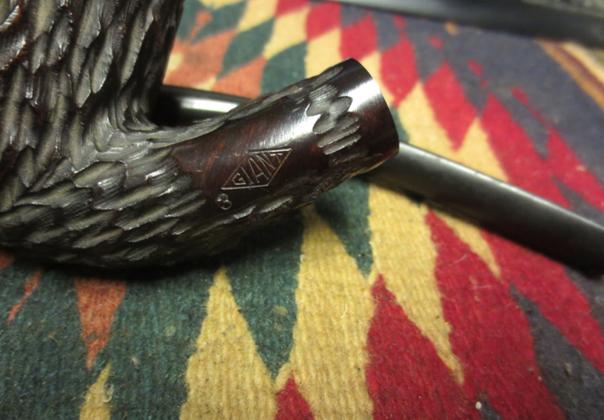
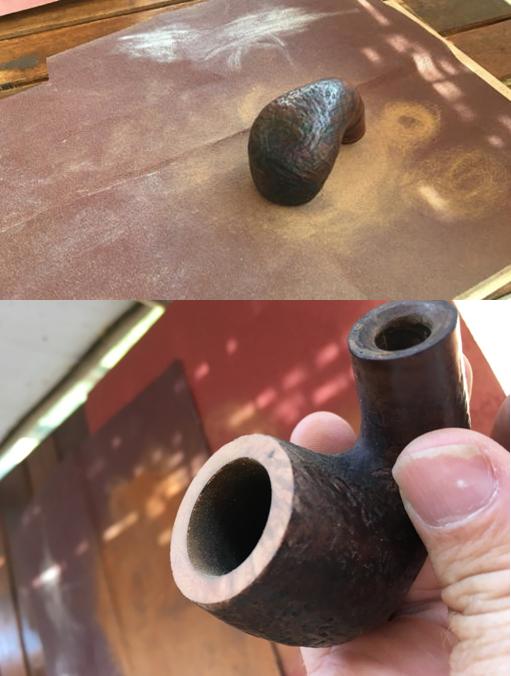
The first was a Hardcastle of London rustic bent billiard #45 of a beautiful, dark red color. There are two stamps on the bit, an H on the left side and, in capital letters across the underside where it meets the shank, the word France. I can find no mention of French made Hardcastles and suspect this may have been from a convenient bit supplier. Steve confirms my guess. But the fine briar smoker was in excellent, almost new condition that appeared to present no problems, although of course one popped up that I will describe later.
The second was a very nice Dr. Grabow smooth straight billiard with the name Bucko and a yellow spade on the left side of the bit. My first impression of the Bucko, other than its wonderful vertical grain around both sides and the back and a nice birds-eye on the front, was that the bit seemed to be a replacement, as it was not flush with the shank opening. I was happy, though, to see the bit rather than the shank was too big in places, just right on both sides and only extended too far on the top and bottom. I knew I could fix that.
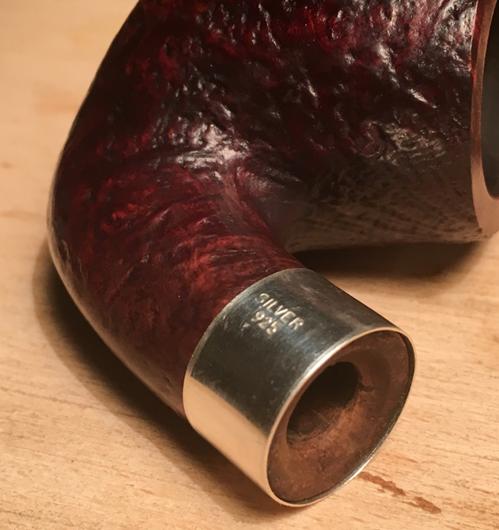
Then came the last pipe, and I even guessed the brand from feeling the shape through the bubble wrap: a classic K&P Peterson of Dublin System Standard smooth bent billiard. Admiring it, I was startled when the bit popped out in one of my hands holding it with reverence. Giving it an easy slight twist back into the nickel banded shank, it did it again. And again. Well, I ventured to guess, this little beauty was going to be an interesting challenge. I could not wait to get to work on them, having estimated a two-day turn-around. First, of course, I had to stop by the tobacconist for a little relaxation and contemplation while I puffed one of my own pipes and studied Joe’s excellent set awaiting my gentle ministrations. All of them, which were nowhere near as dirty or caked-up as Joe indicated, presented interesting challenges nevertheless.
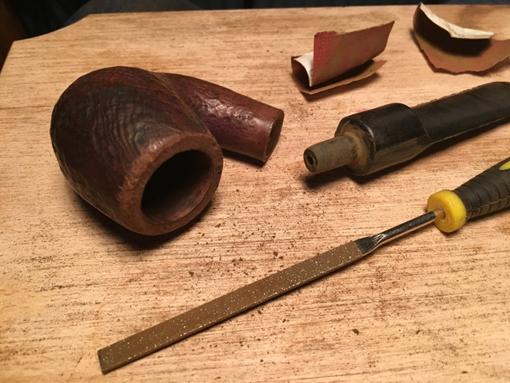
RESTORATIONS – DR. GRABOW BUCKO


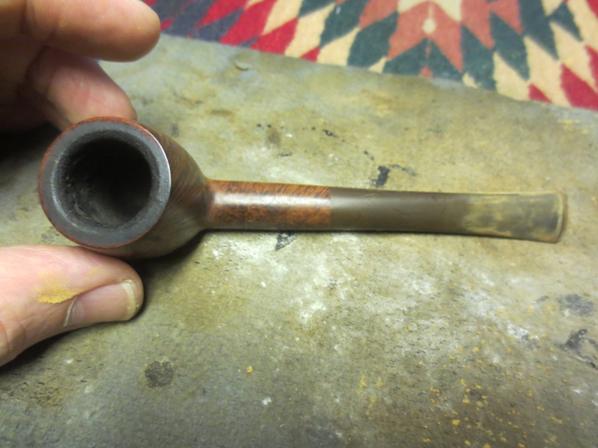
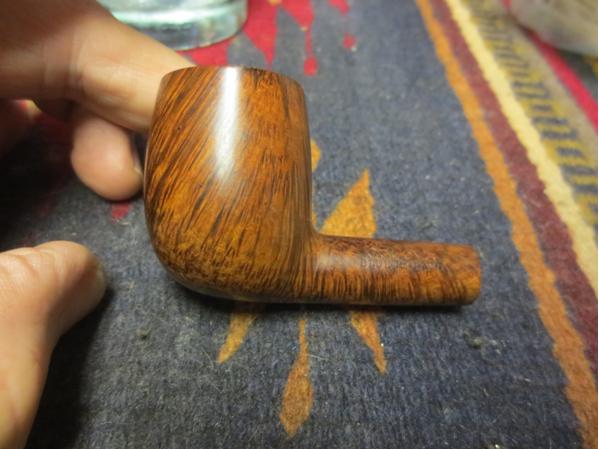
 For all the nasty talk about the brand, I have to admire the appealing visual twists on classic shapes that Dr. Grabow will throw into some of its designs, in particular the older ones. Take this billiard, for example, with the unusual oblong aspect of the tapering shank. At a glance, the problems that presented with the stout little Bucko were all minor. There was slight rim darkening, far less than average chamber char, and a small amount of the original stain on the top of the shank that appeared to have been applied with some haste resulting in a shiny patch where heat drew out the liquid, which then re-dried. Then again, perhaps the Bucko’s stummel had faded everywhere else, and that little area was all that remained of the factory finish. Another possibility is that whoever chose the replacement bit prepped the wood for a refinish that for whatever reason was never applied.
 Closer inspection reaffirmed the theory of a replacement bit that was added without quite enough attention to detail, although the sides were perfect. Again, only the top and bottom were misaligned.
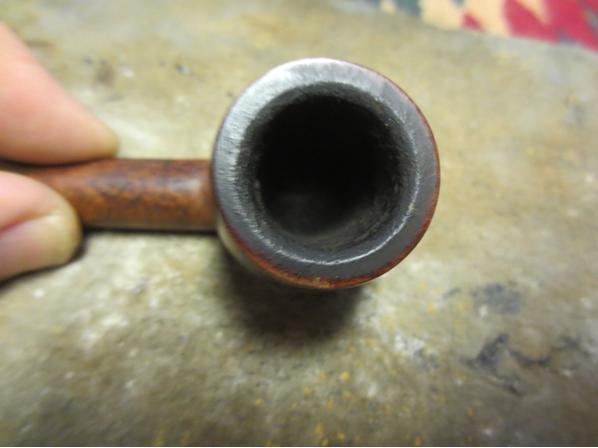
  I began with the rim, which came clean after firmer than usual rubbing with superfine “0000” steel wool, and went for my usual approach on the chamber: I used my Senior Reamer before sanding, first with 150-grit paper, then 180, 220 and 320.
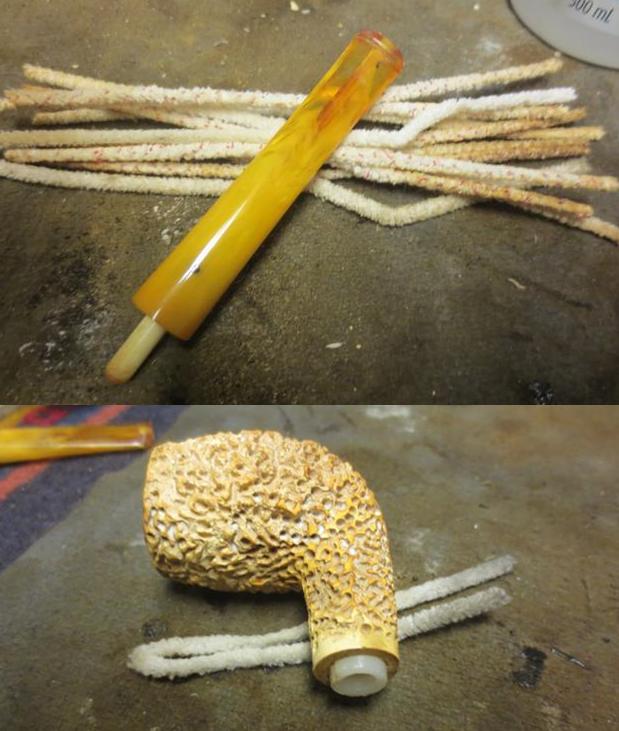
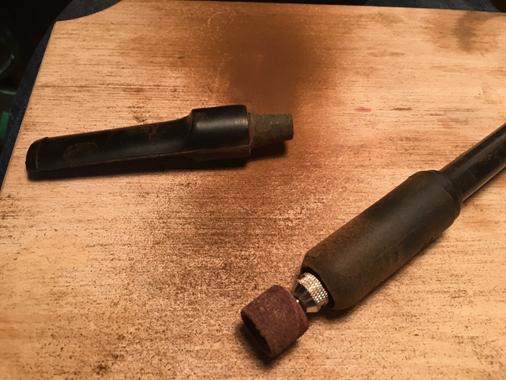
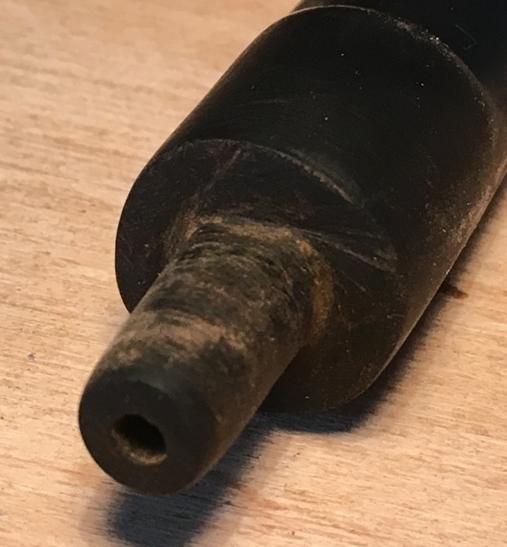
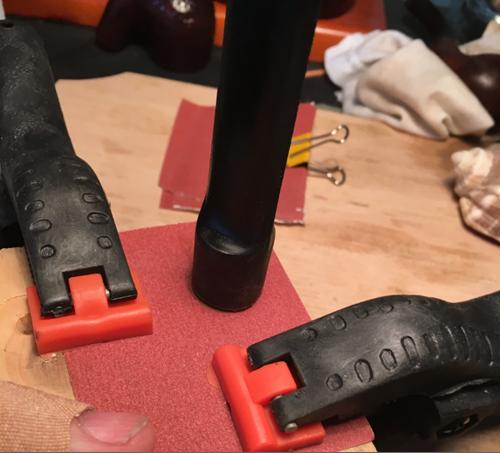
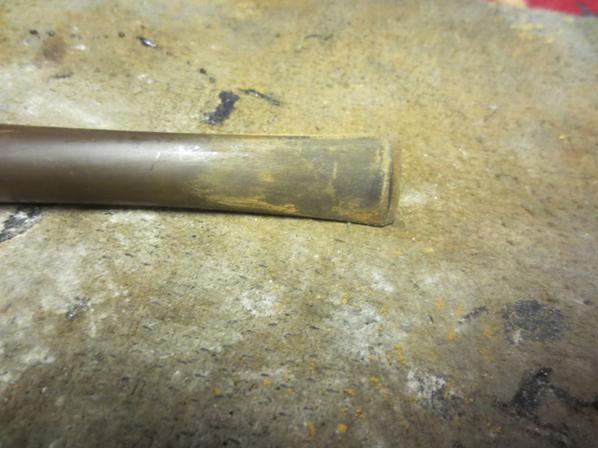
 I decided I might as well get the only real challenge with the Bucko out of the way and regarded the bit.
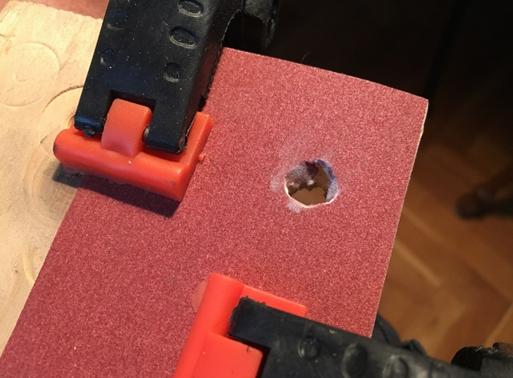
 I started with 220-grit paper to take off the excess Vulcanite on the top and bottom, but that got me nowhere. I reached for the 180, and about a half-hour later was done with the fitting task. I tossed the scratched bit in a preliminary OxiClean wash. The scratches came off with wet micro meshing from 1500-12000.
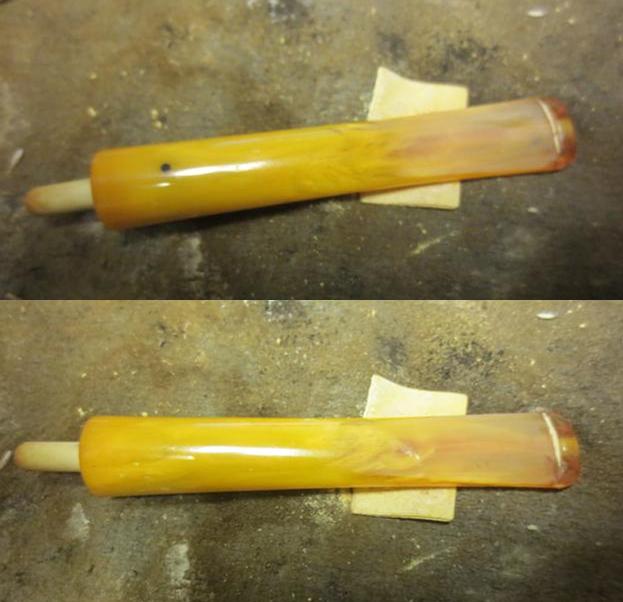
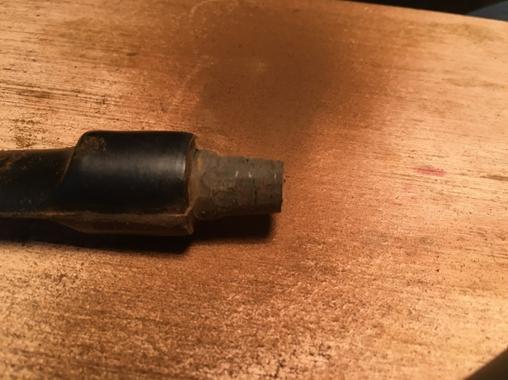
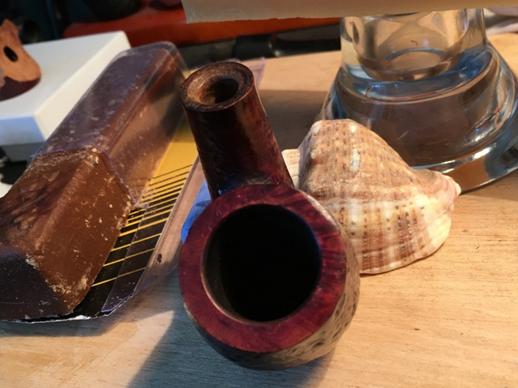
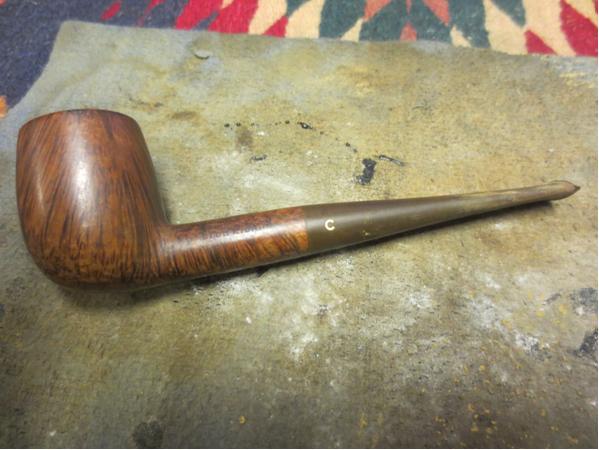
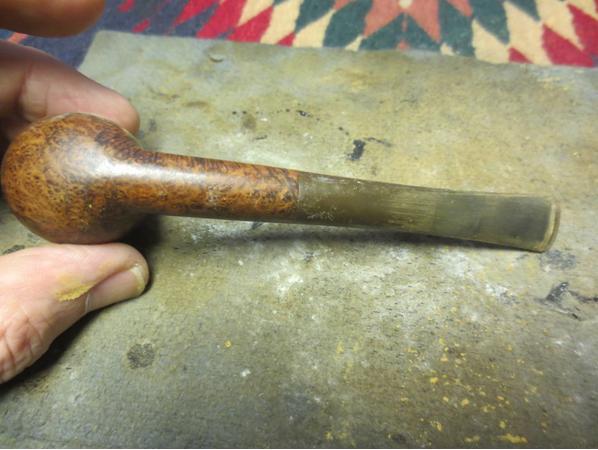
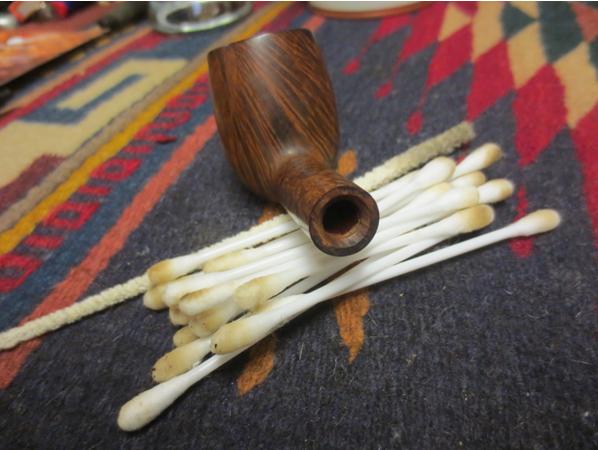
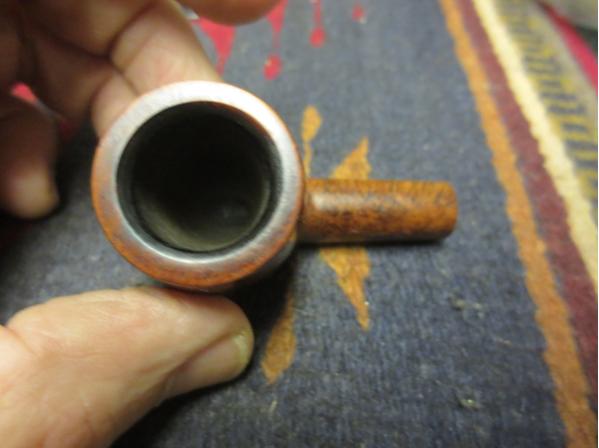
 I took a close look at the scratches on the stummel.
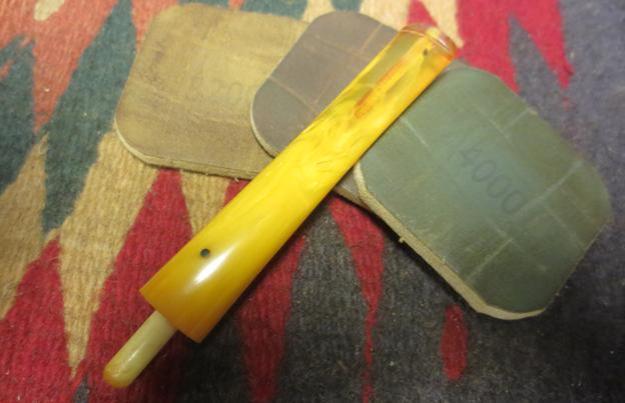
 With only the steel wool and the full range of micro mesh, wiping the wood with a soft cotton cloth between each grade, I was able to give the briar a nice, even smoothness.


 I retorted the pipe with Everclear.
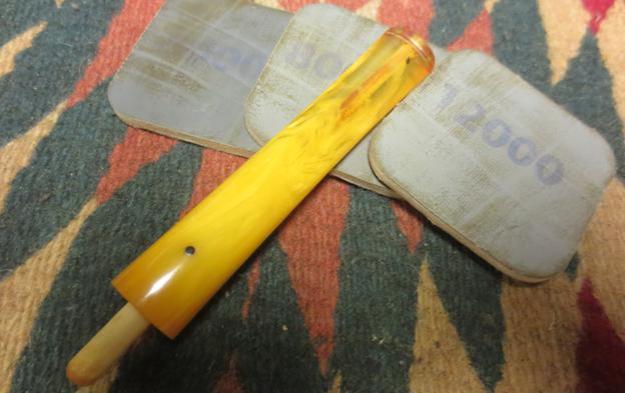
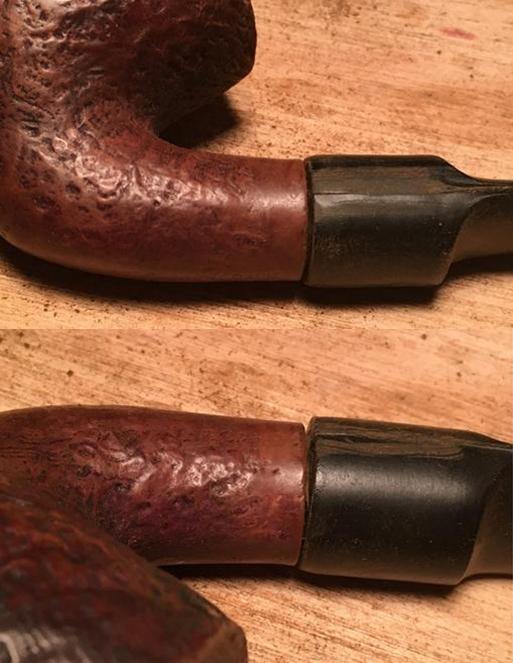
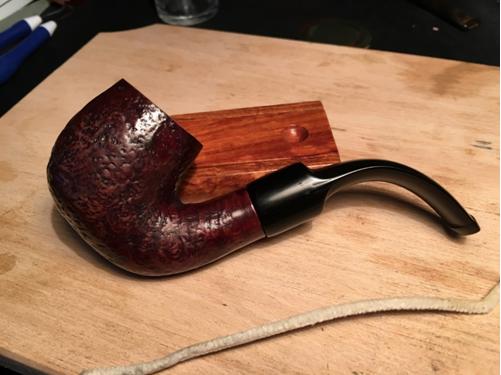
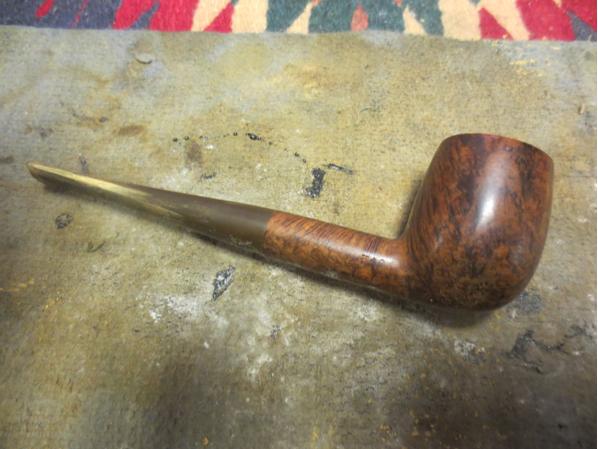
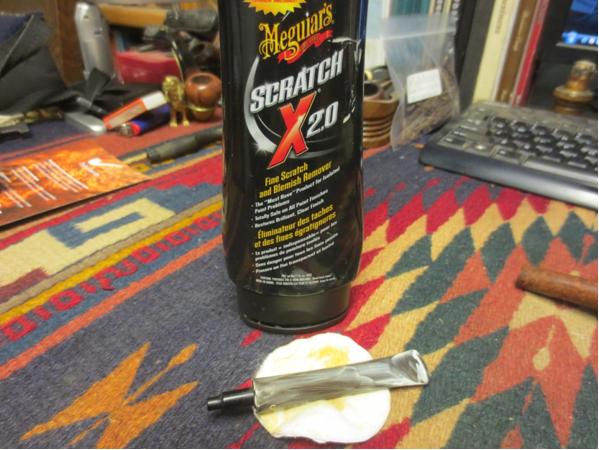
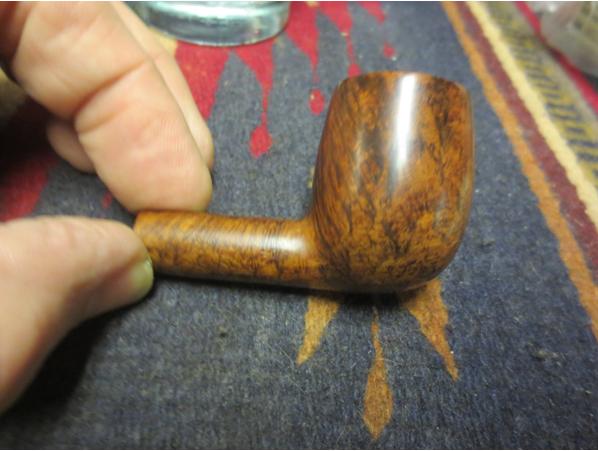
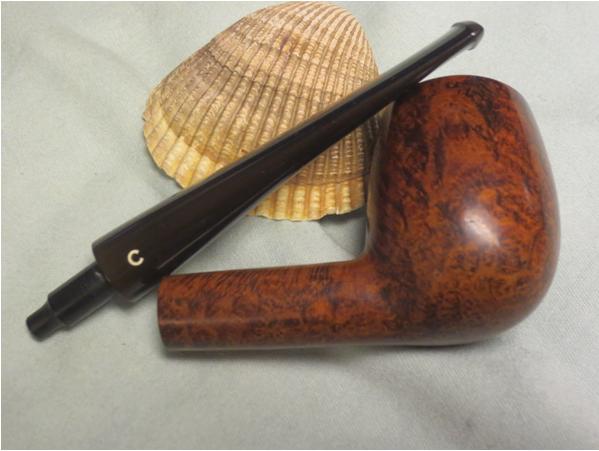
 After using the electric buffers to apply red and white Tripoli, White Diamond and carnauba to the bit and all of the same except for the red Tripoli to the stummel, here is the finished Bucko.


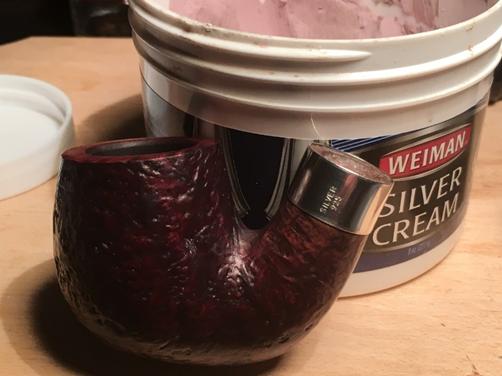
 PETERSON SYSTEM STANDARD


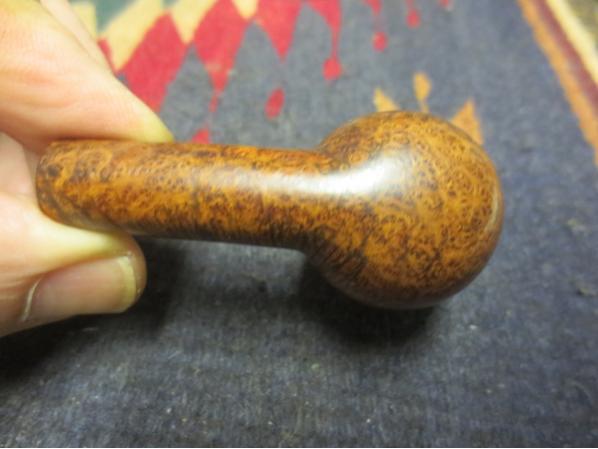
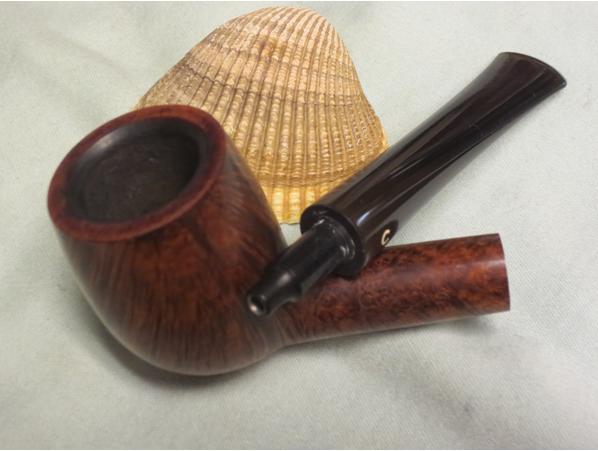
 I started by reaming and sanding the chamber and dispensing with the light rim char. After giving my Senior Reamer a few turns in the chamber, I used 150-, 180-, 220- and 320-grit papers to make it ultra-smooth, but the steel wool was not enough to do the trick with the rim so I used a light touch of 320-git paper for the rest of the burns there. As the second photo below shows, it turned out quite well.
 There were some scratches and light pocks on the stummel that I eliminated by lightening the color of the stummel somewhat with steel wool.
 Then I applied Fiebing’s Brown boot treatment to the stummel, let it cool and removed the thin layer of residue with 12000 micromesh.
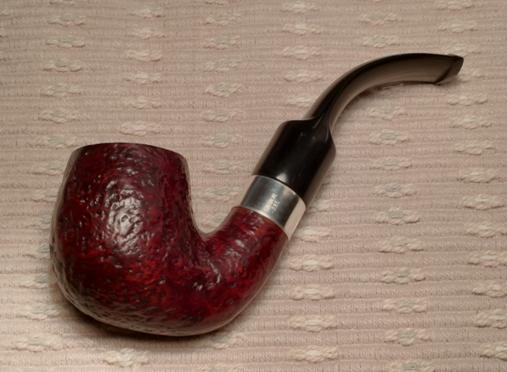
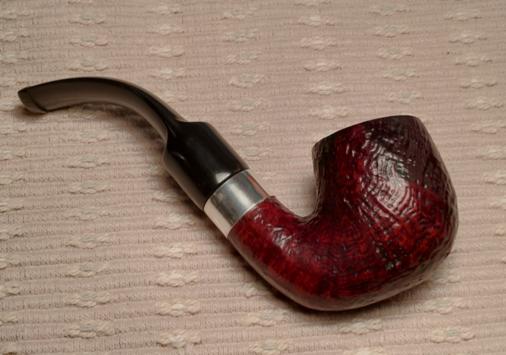
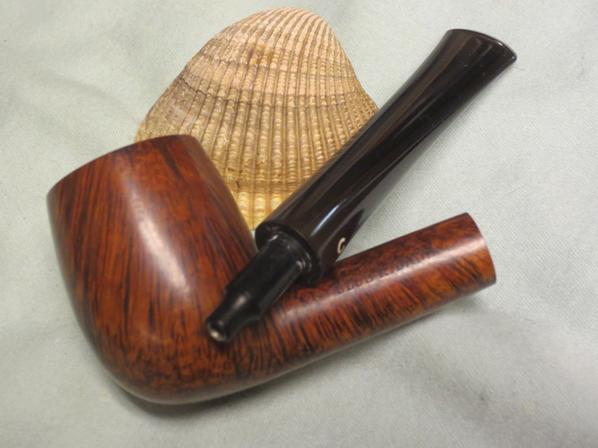
 The bit that appeared at first to be loose worked itself out somehow, maybe with the retort I did next. And that was it, other than buffing the wood with white Tripoli, White Diamond and carnauba. This was the only time I didn’t need to do anything to the bit.


 HARDCASTLE OF LONDON


 Just to shake things up a bit, as I never start with the bit, that’s what I’m going to do. Besides, this one is so easy, I might as well get the hardest part out of the way.
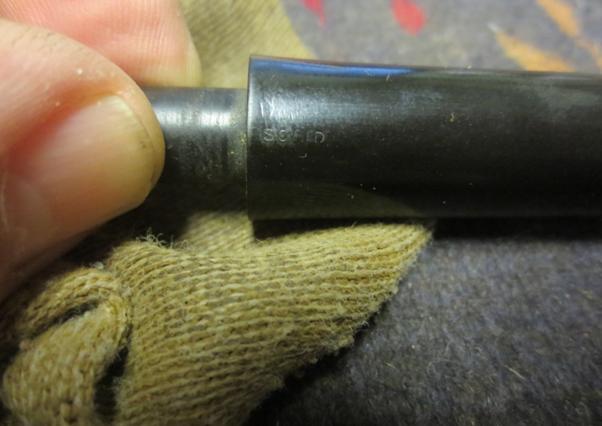
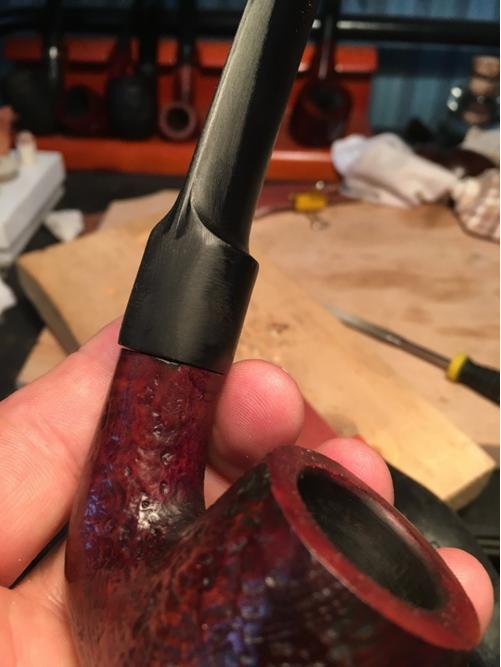
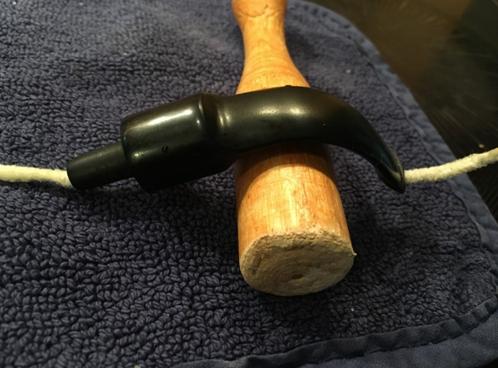
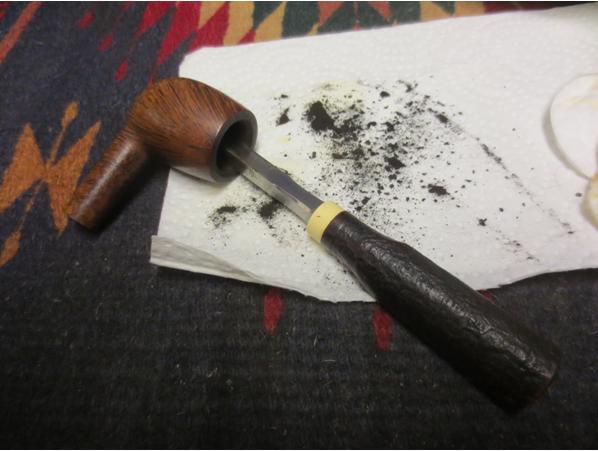
When I removed the bit the first time, I noticed it was so tight it wouldn’t budge. Afraid of breaking either the tenon or part of the shank, I followed one of Chuck’s first lessons to me. Grasping the bit firmly in one hand – prepared to stop if I felt one more hint that a foreign substance was making the two parts stick – I turned the stummel with my other hand. The sound was awful, but the parts came loose with a slowness I didn’t rush. All that was needed to loosen the bit so it was easy to turn into the shank was a couple of tight turns of steel wool around the tenon.
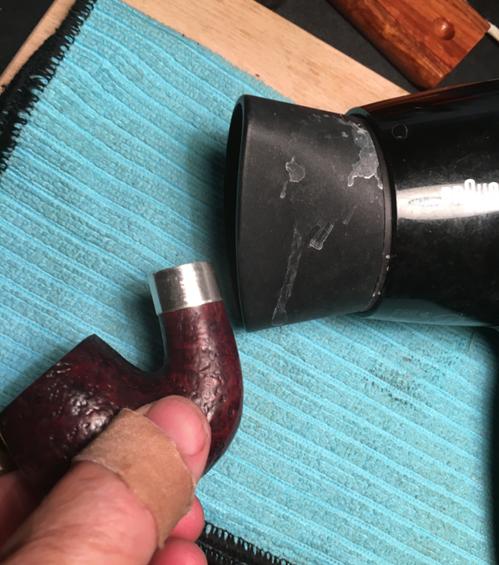
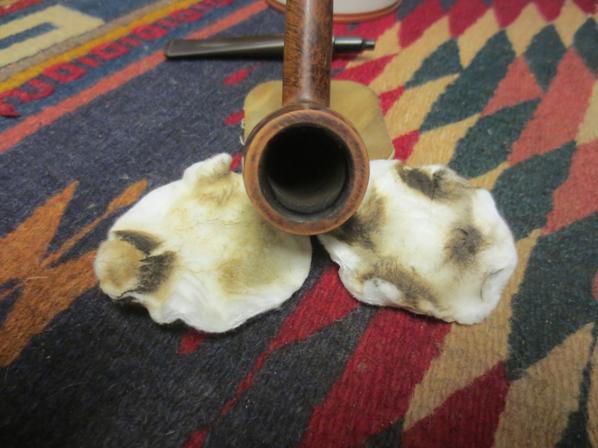
The discoloration is shown just as it in fact appeared with my own eyes for once, rather than the camera’s POV. In my opinion, just as a camera will add a few unwanted and unfair pounds to humans, so will it give a more flattering gloss to Vulcanite than the material often deserves. I gave it an OxiClean bath for about a half-hour.
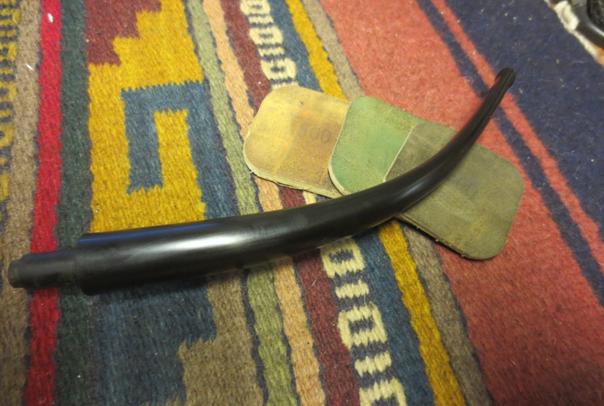
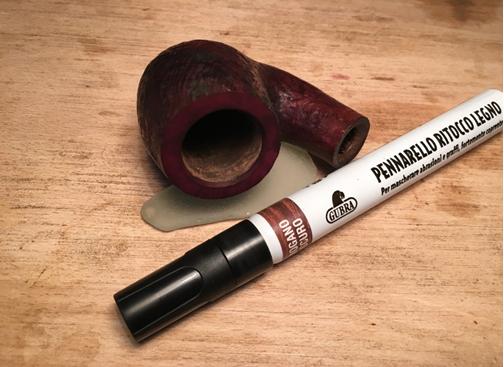
 And here it is after the bath and a brisk rub down with a soft cotton cloth.
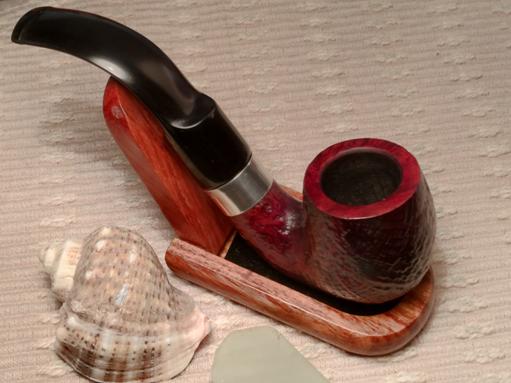
 After wet micro meshing from 1500-12000, buffing on the wheel with red and white Tripoli, White Diamond and carnauba, and re-filling the empty H with a white china marker, this is the final result.
 I reamed and sanded the chamber and rid the rim of dark marks. I used the same approach as the first two pipes on the chamber, and again, only steel wool was needed for the rim.
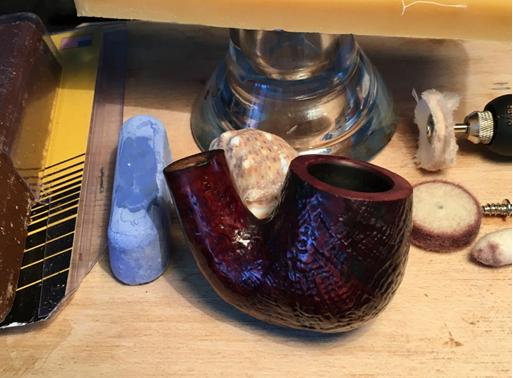
 All that was left before the final buff was to retort the pipe, and as always, I was glad I did.
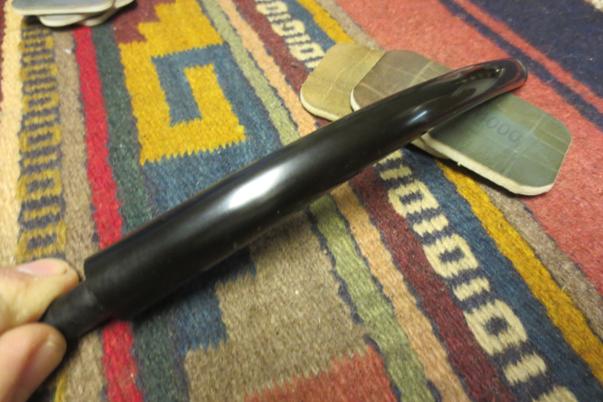
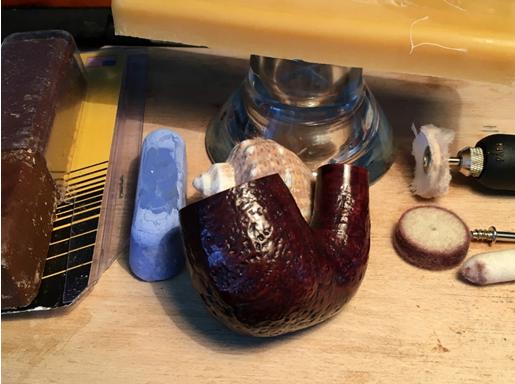
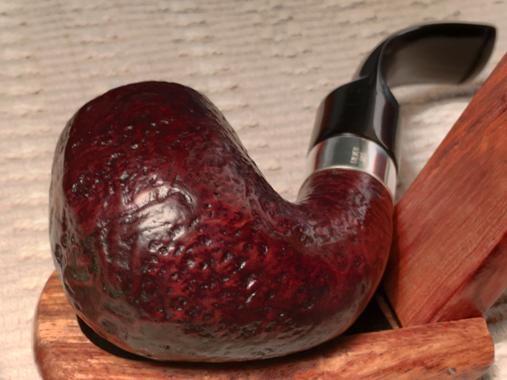
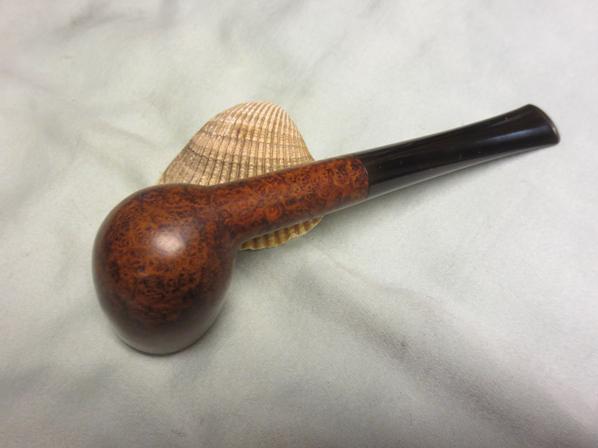
 Coating the already beautiful, rusticated red briar with Halcyon II wax, I set it aside to dry before wiping it down with a soft cotton cloth.
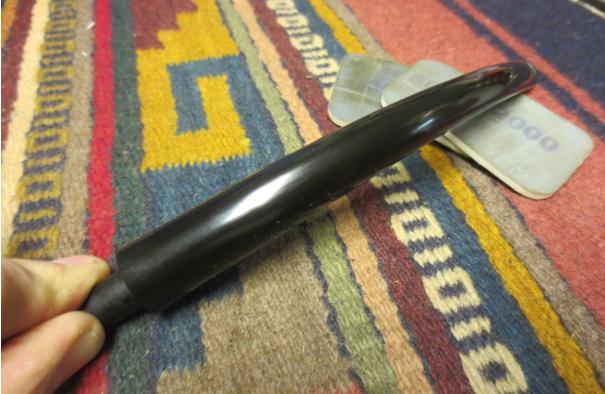
 I was almost sad to be finished.


 CONCLUSION
Now I have to return these three fine pipes to their owner.
SOURCES
http://www.pipephil.eu/logos/en/logo-hardcastle.html
https://pipedia.org/wiki/Hardcastle
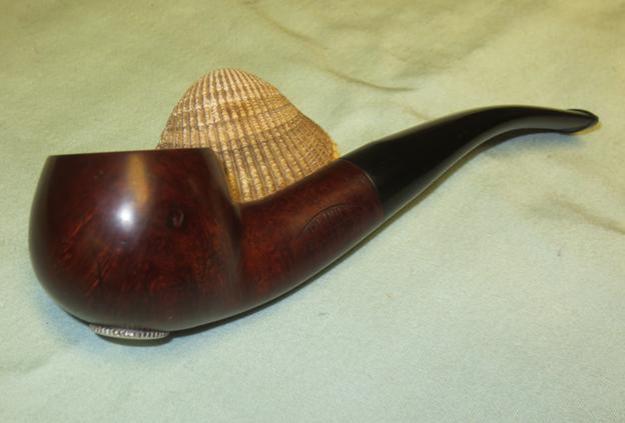
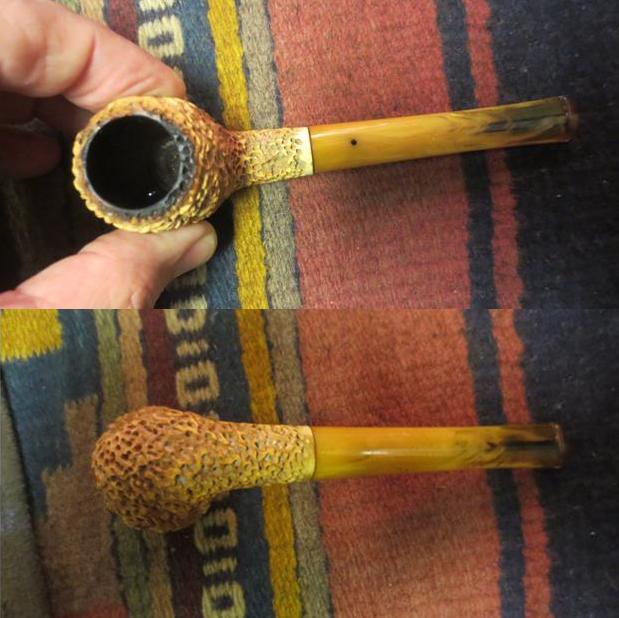
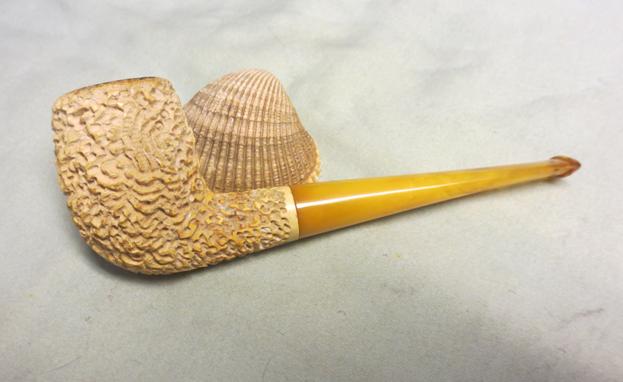
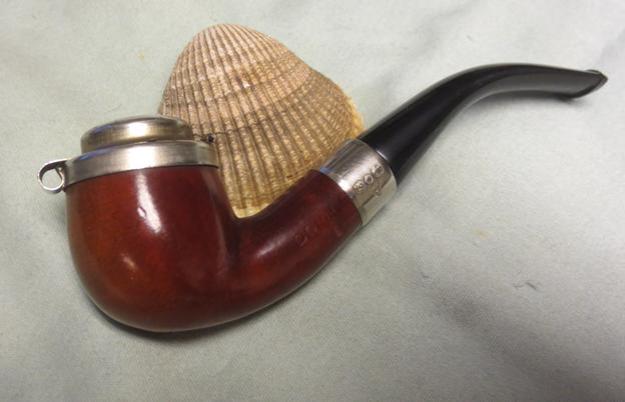
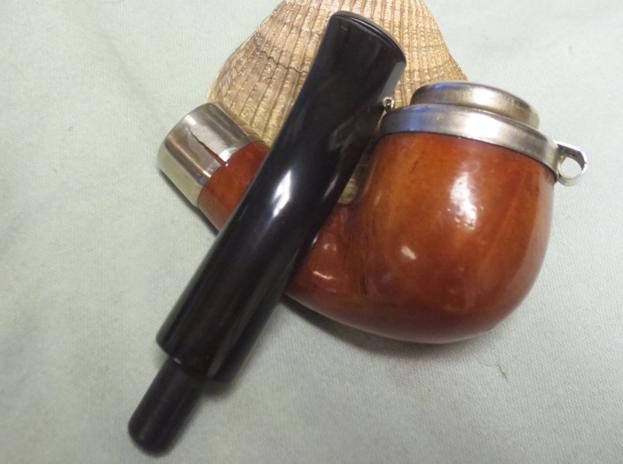
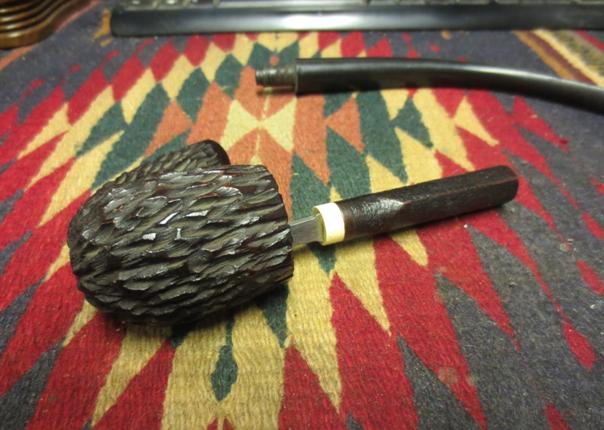
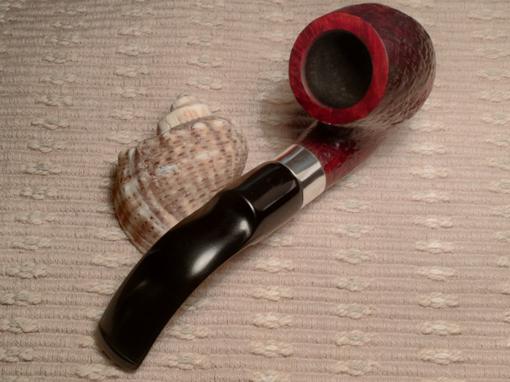
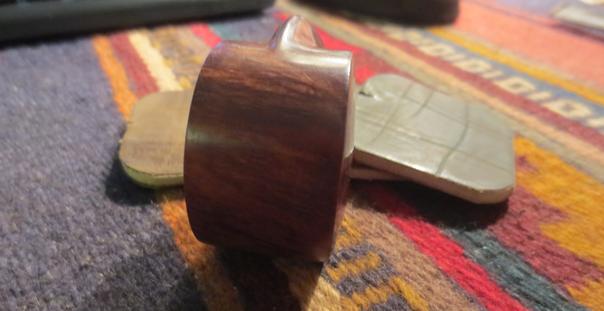
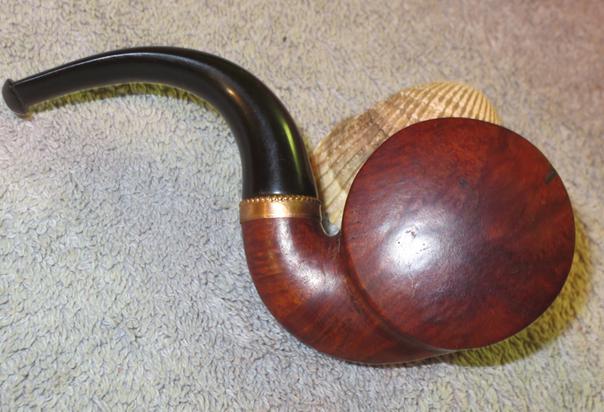
 Over the years I have restored many folding pocket pipes where the stem folded over the top of the bowl. These have typically been Italian made and stamped with various names such as Imported Briar or even Rolex. They all looked the same and all were relatively flat, oval bowled pipes and bowls. They were thinned walled and most of the time they were unsmoked. I have given away quite a few of them over time though I think I may have one or two unused ones in my cabinet today. This one is very different. It is oddly shaped – almost perfectly round with an almost ninety degree bent shank. The sides of the bowl are actually thicker than any of the others that I have seen. The bowl oval and it appears to be unsmoked. The briar is quite nice with a combination of birdseye and cross grain around the sides and the shank. There is a brass band with a scalloped edge around the top of the rim. It is more or less a cap on the end of the shank. The shank is stamped La Merdienne (Deposee) on the left side of the shank. It is a French made pipe. The name means The Meridian (Registered). The Meridian is defined as (1): a great circle on the surface of the earth passing through the poles (2): the half of such a circle included between the poles. It is also defined as a representation of such a circle or half circle numbered for longitude on a map or globe. In this case the poles are represented by the bowl running north and south on the circle of the bowl. The next two photos are ones that my brother took when it arrived in Idaho Falls.
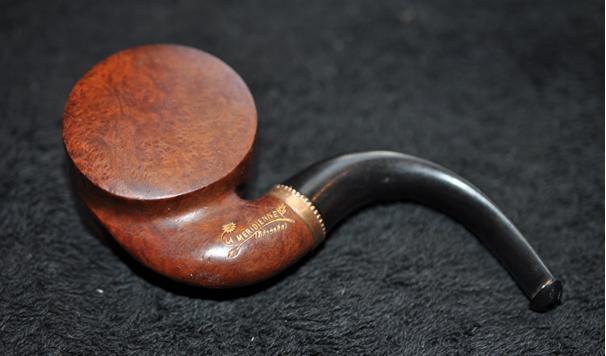 The next photo my brother sent me shows the pipe from the top. You can see that it is very clean. The bowl is clean and in person looks unsmoked. With the stem removed it is also clean. There is no staining from smoke or tobacco in the pipe. The stem is clean as well with no tooth marks or tooth chatter.
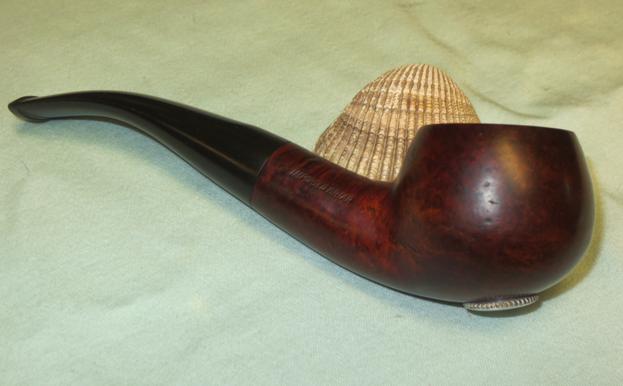
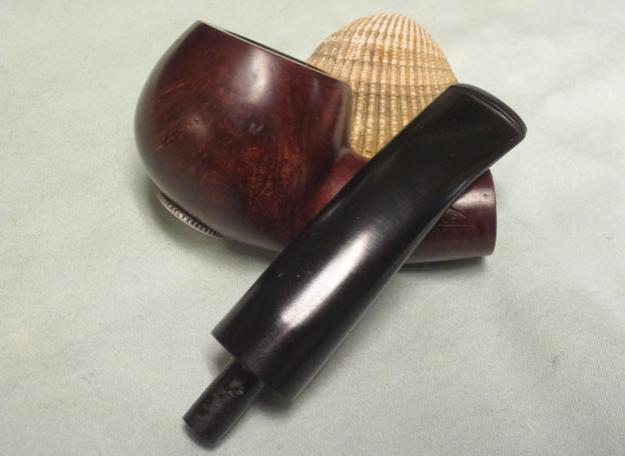
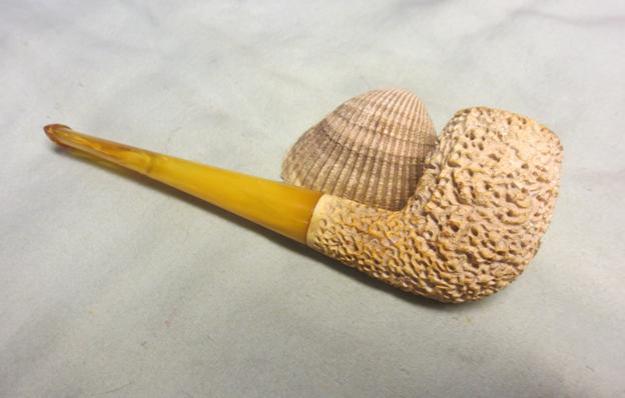
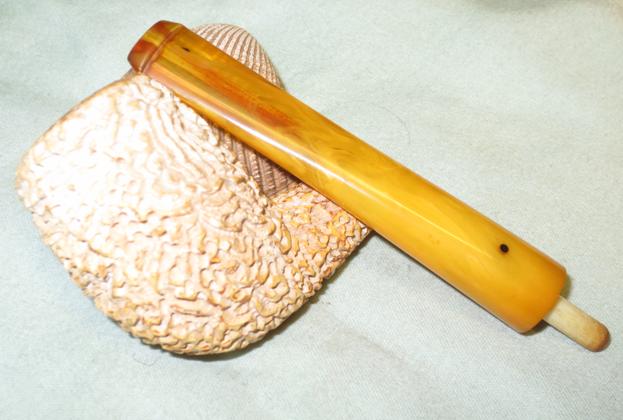
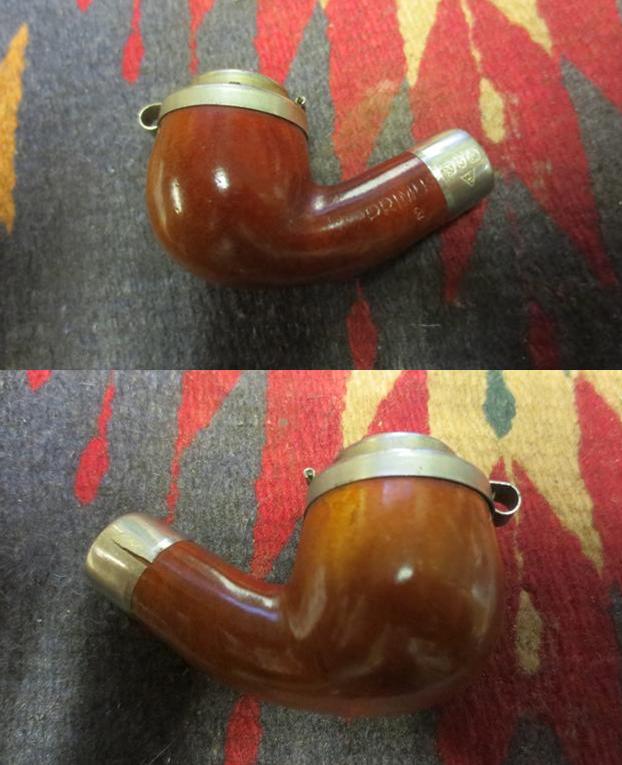
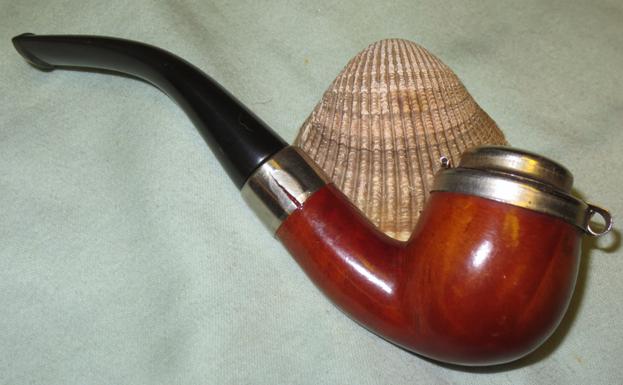
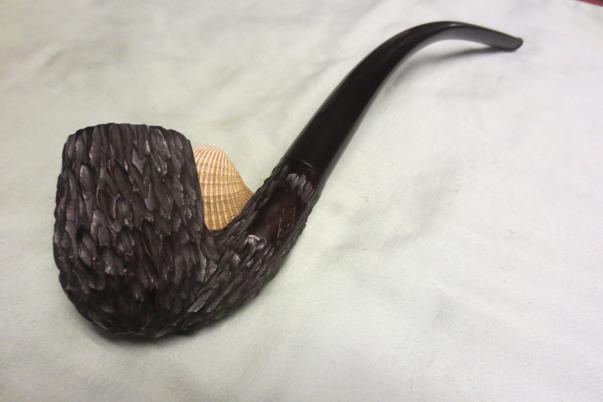
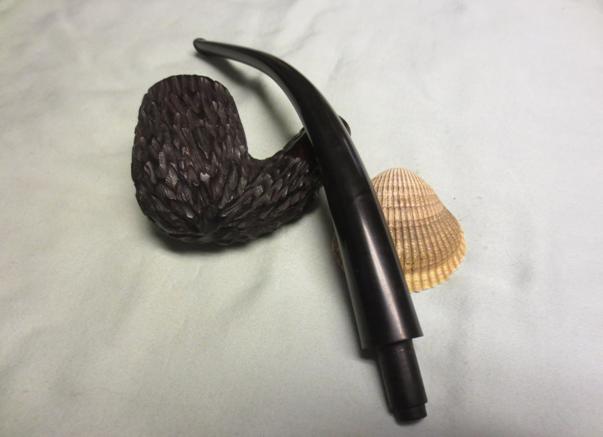
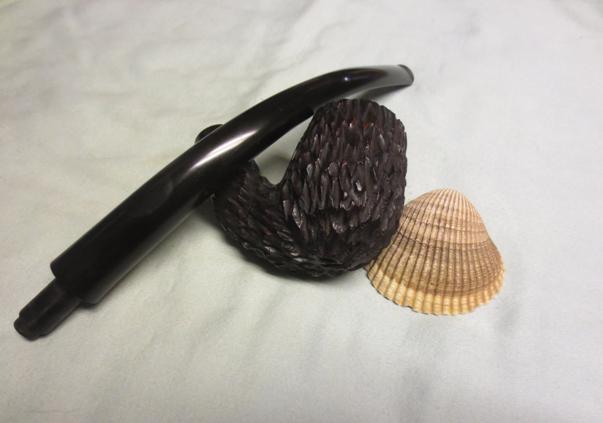
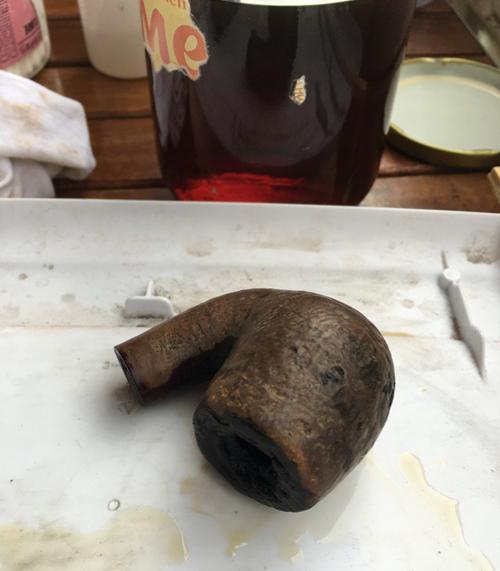
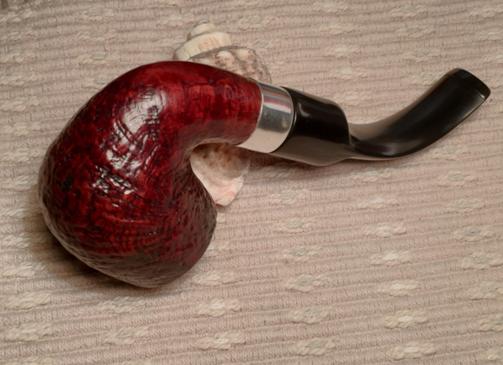
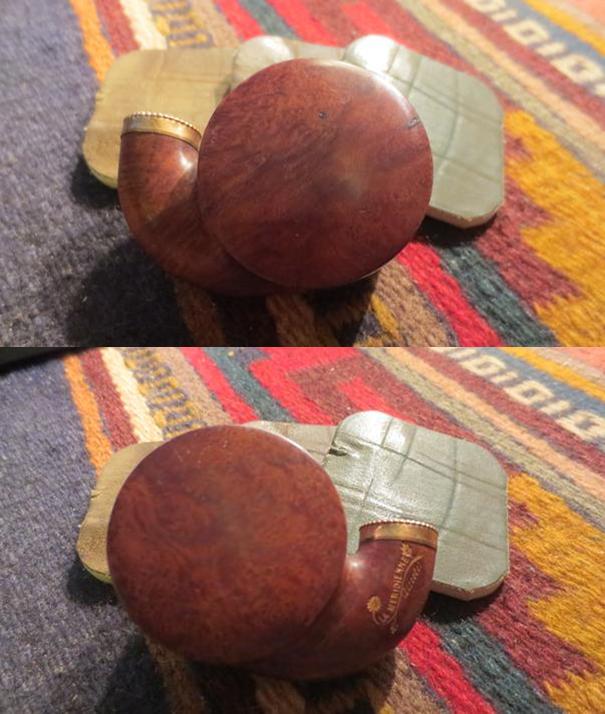
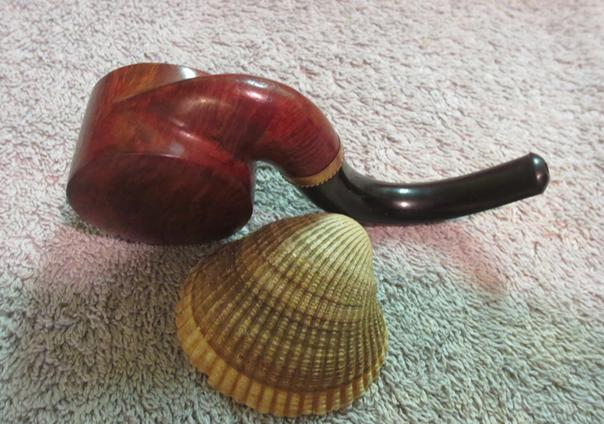
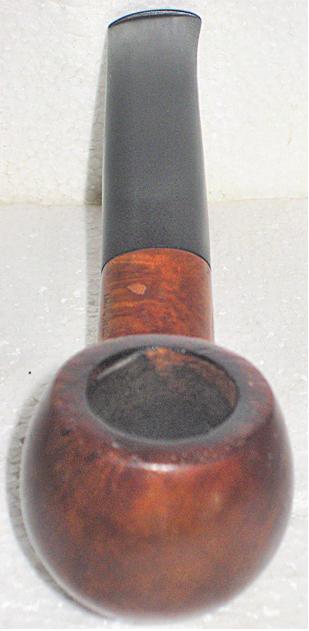
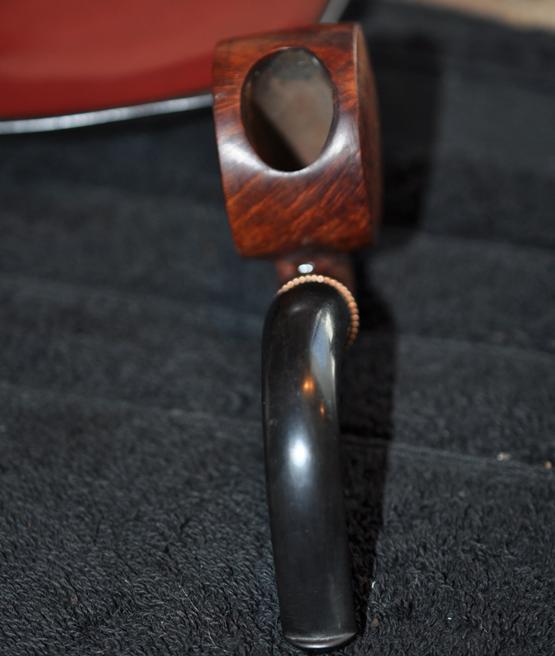 The grain on the bowl is really quite stunning on the round sides and the edges of the bowl. The curved shank is perfectly set off by the gold band and the scalloped edge that sits against the stem at the shank stem junction. The first set of four photos show what the pipe looked like when it arrived in Vancouver.
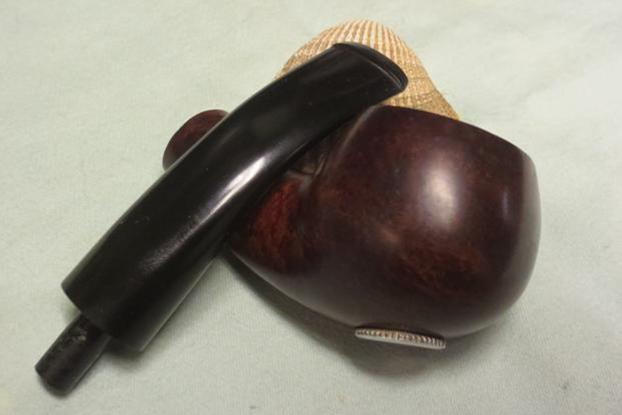
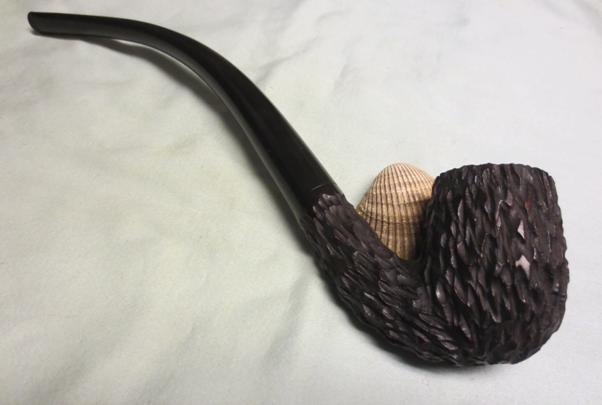
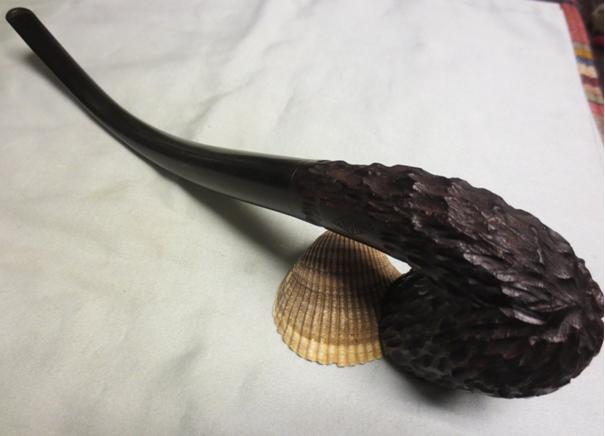
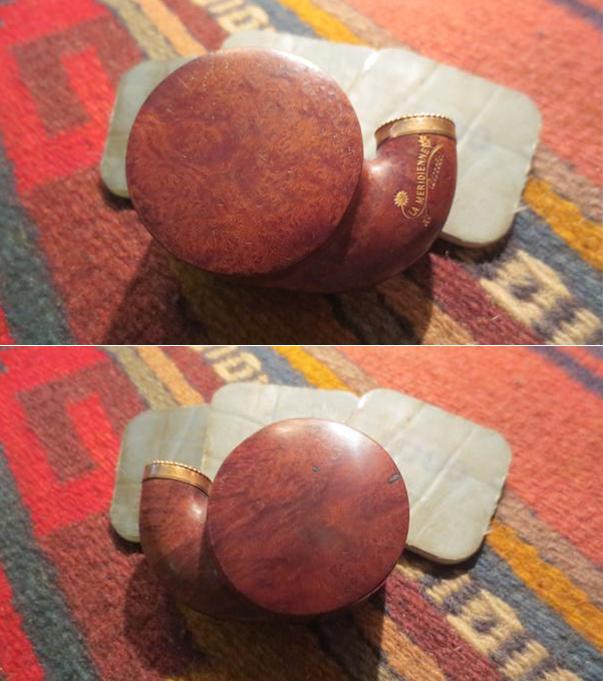
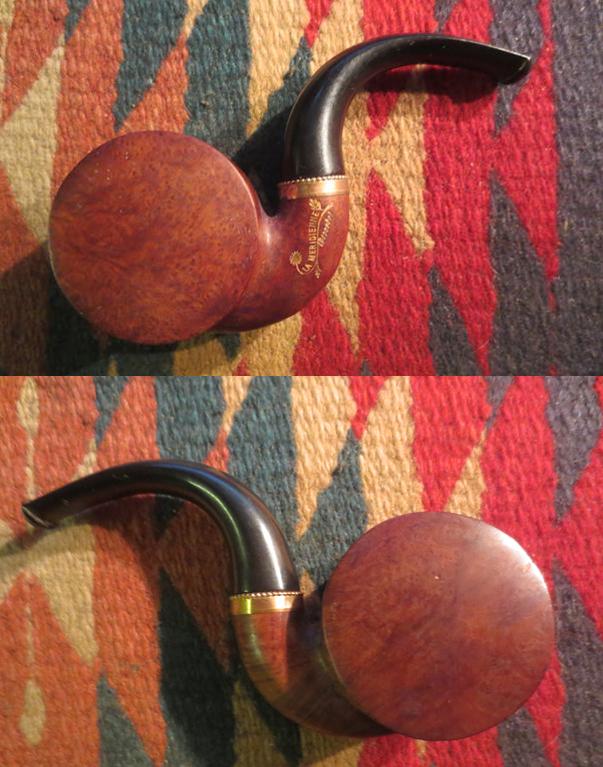
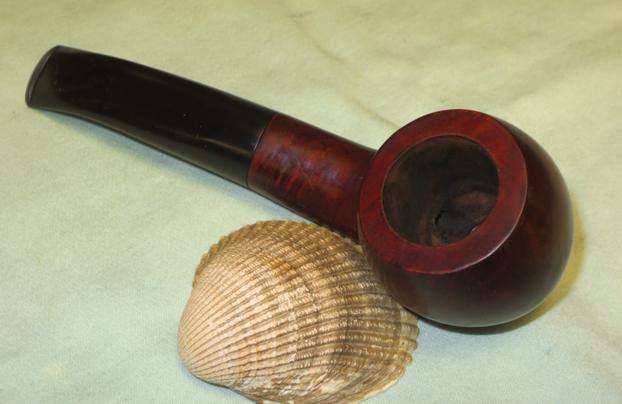
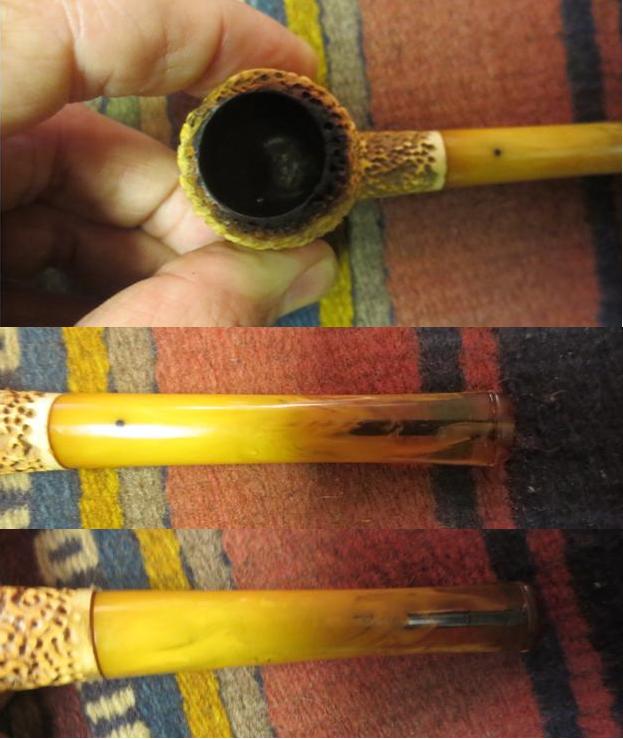
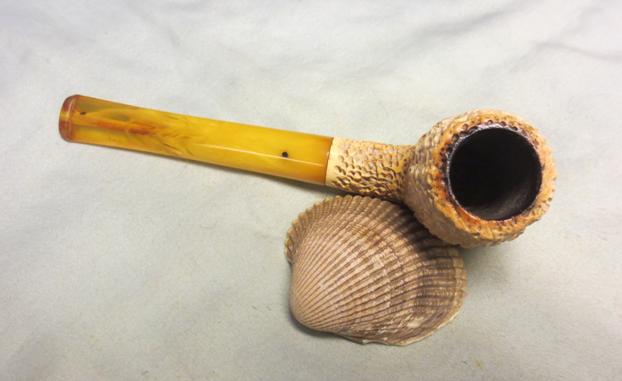
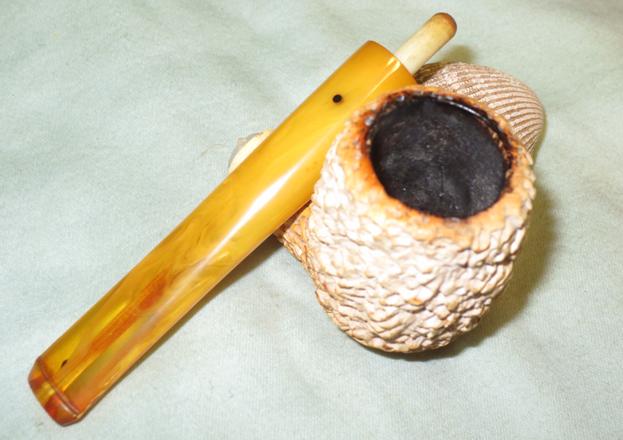
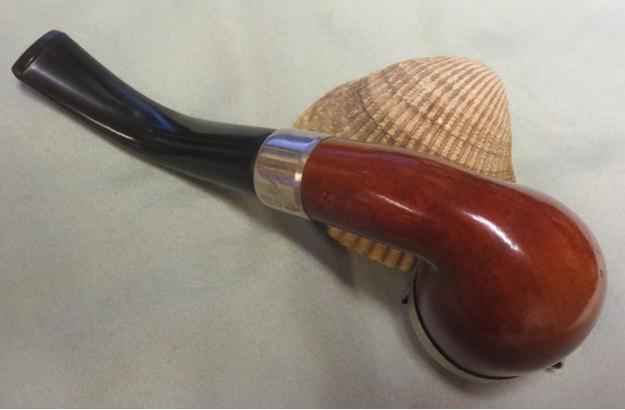
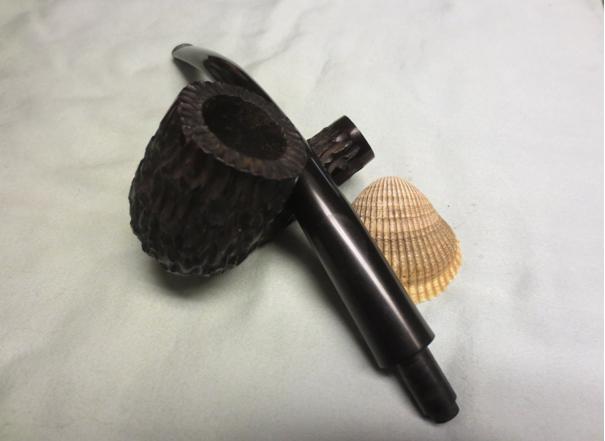
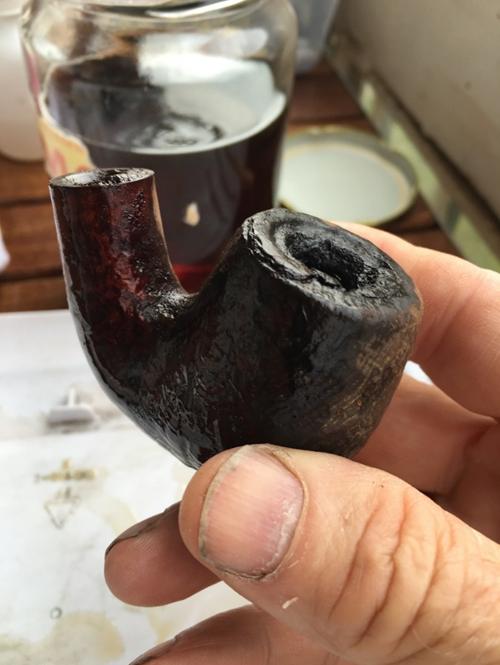
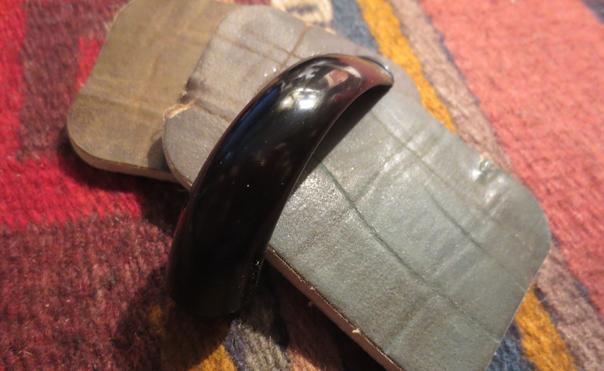
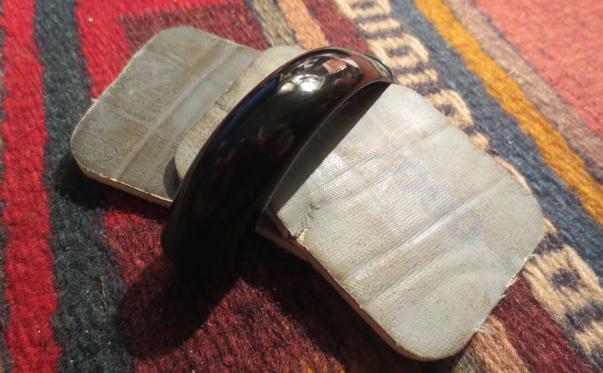
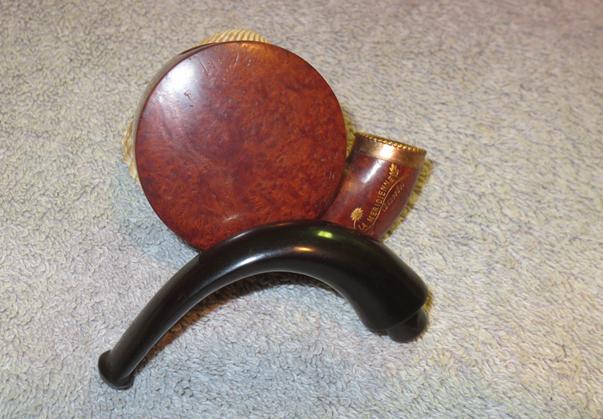
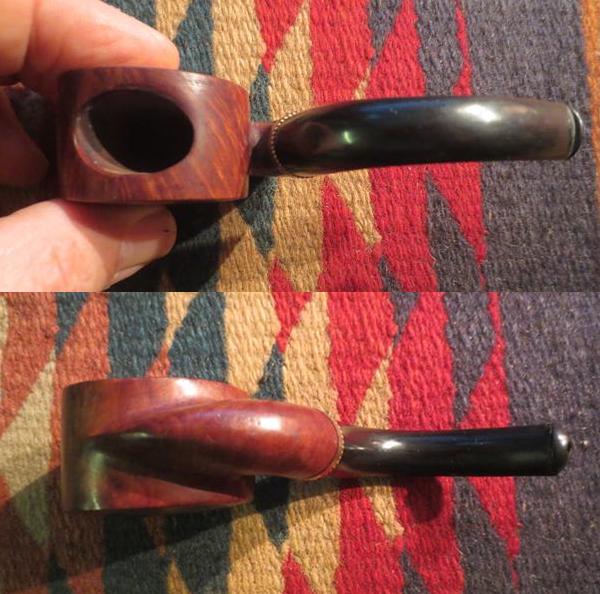 I folded the stem over the bowl and took some photos of the pipe ready for the pocket.
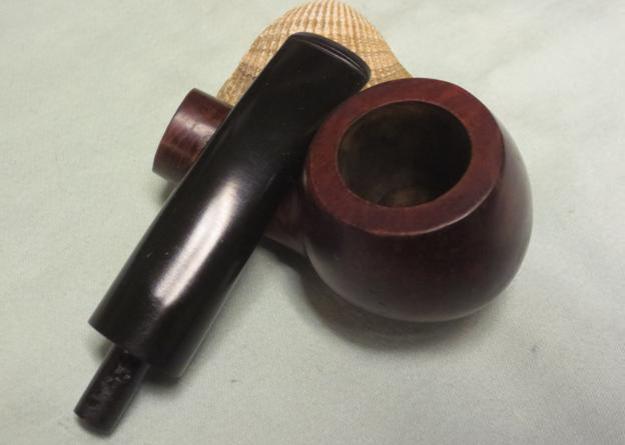
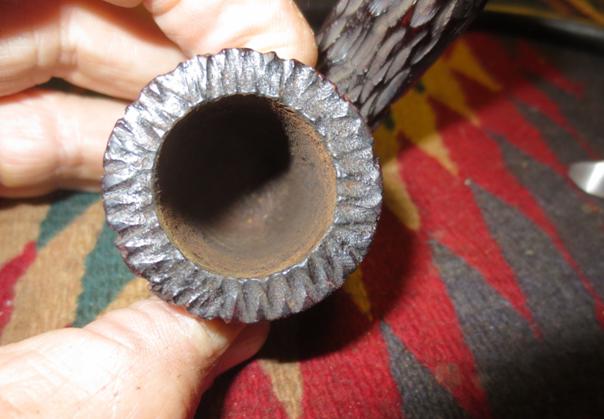
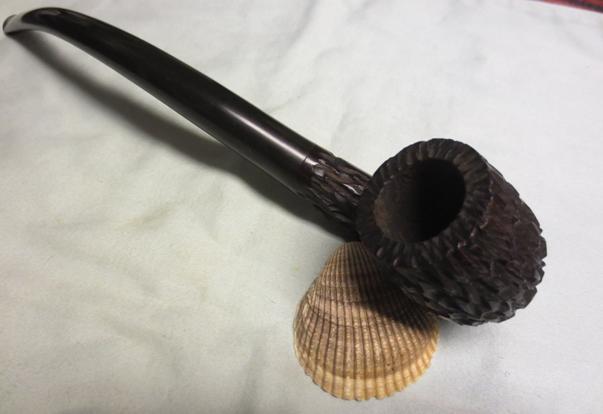
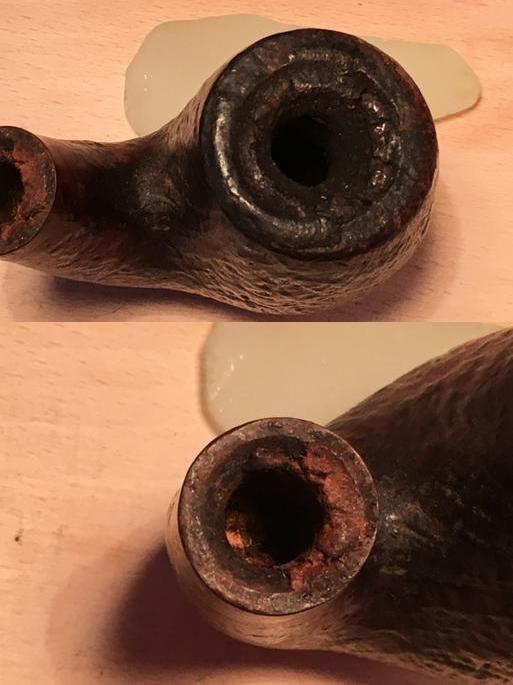
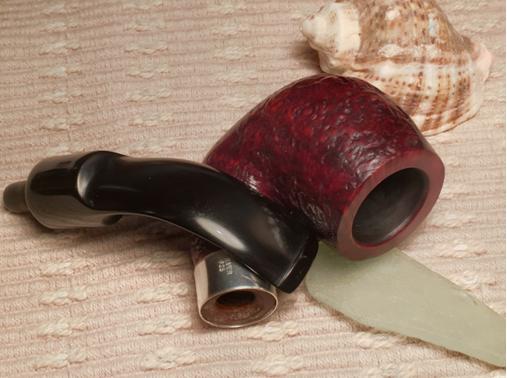
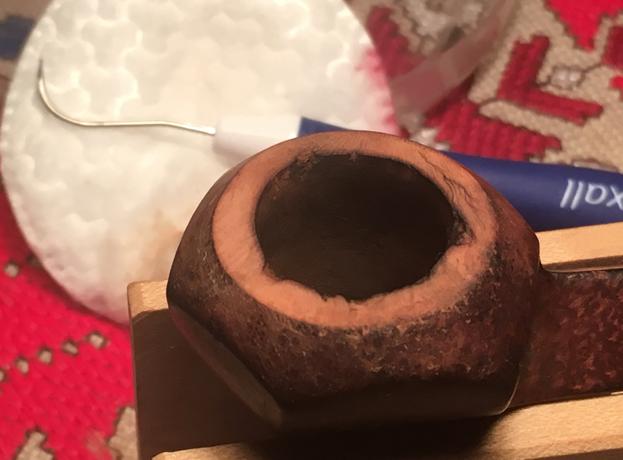
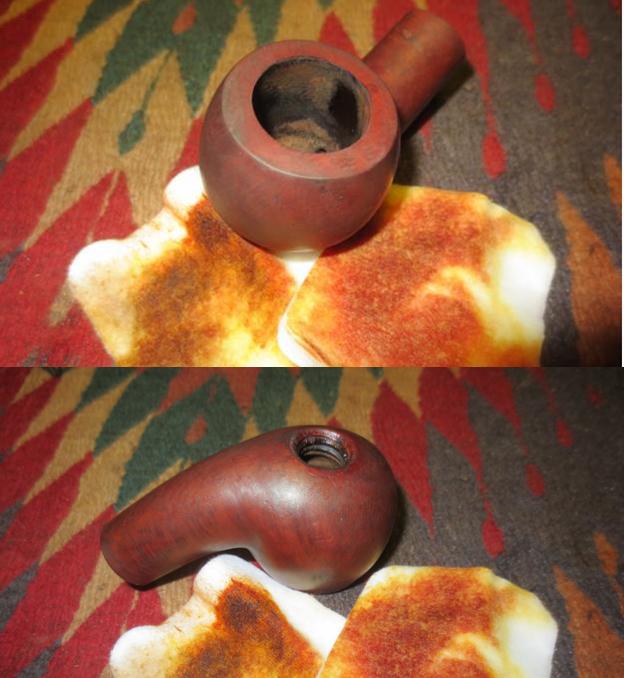
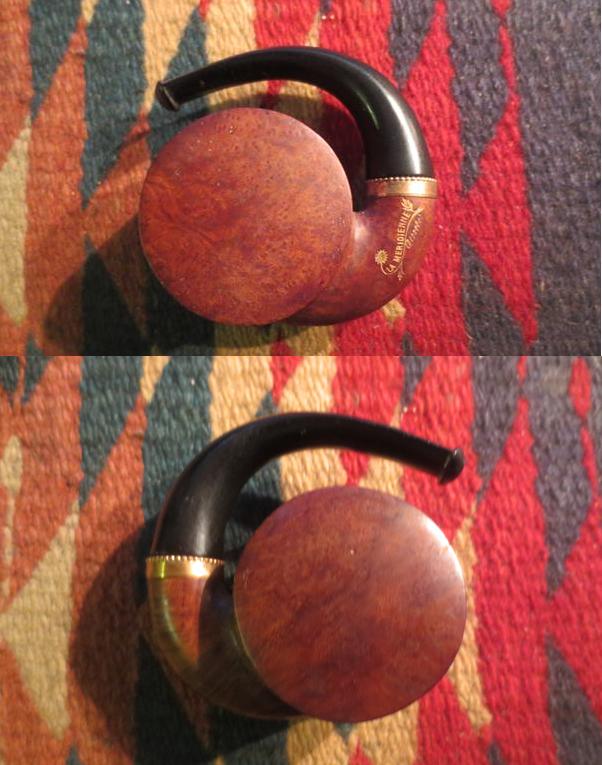 I took a close up photo of the bowl top and interior to show what the pipe looked like when I got it. The rim and bowl were in excellent shape.
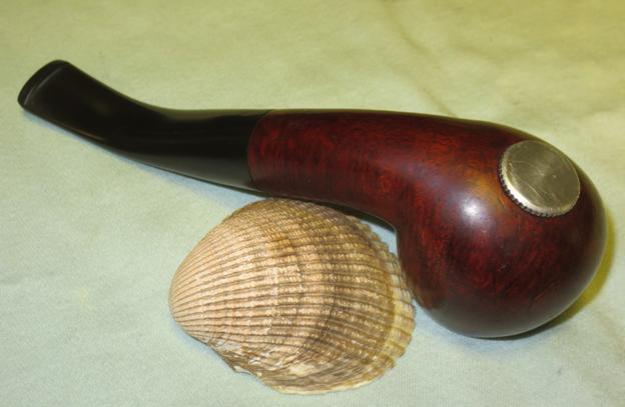
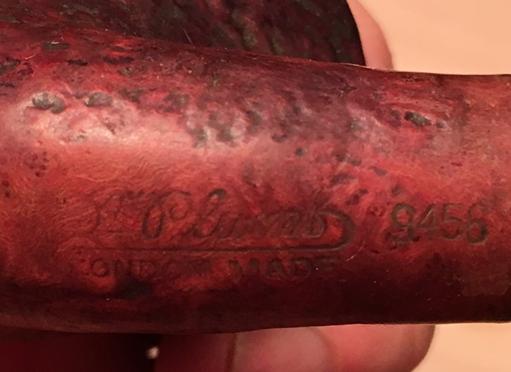
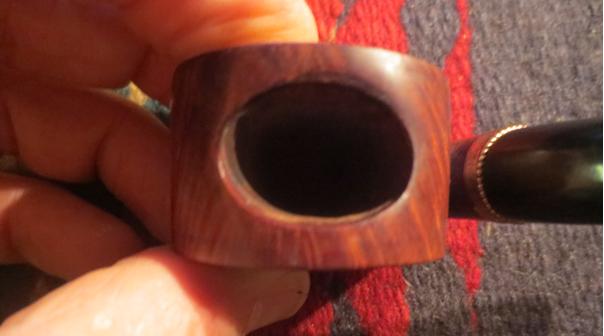 I took a close up photo of the stamping on the shank. It is filled with gold leaf. There is a stock of a flower with the flower and two leaves that weaves between the curves of La Meridienne and separates it from (Deposee).
 I sanded the bowl with 1500-12000 grit micromesh sanding pads to polish out some of the scratches and marks on the sides of the bowl.
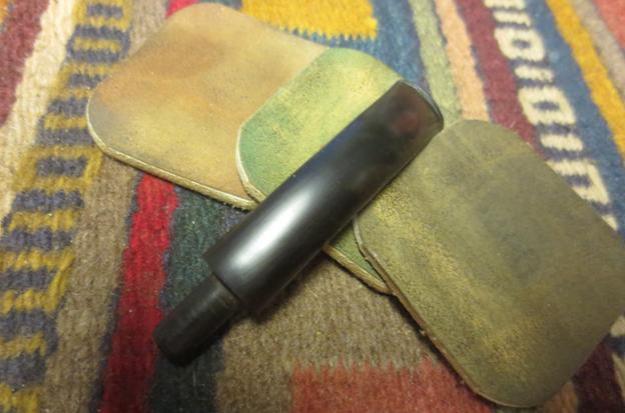
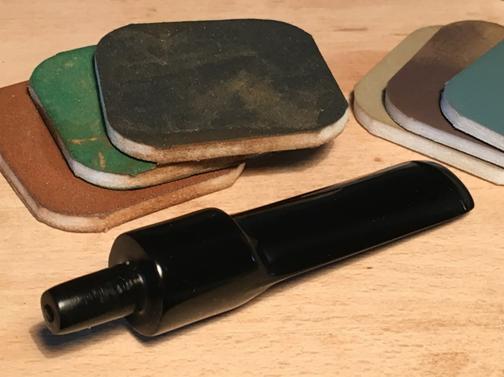
 With the bowl polish and smooth I worked on the stem with micromesh sanding pads – wet sanding it with 1500-2400 grit pads and dry sanding it with 3200-12000 grit pads. I rubbed the stem down with Obsidian Oil after each set of three pads. After sanding the 12000 grit pad I set the stem aside to dry.
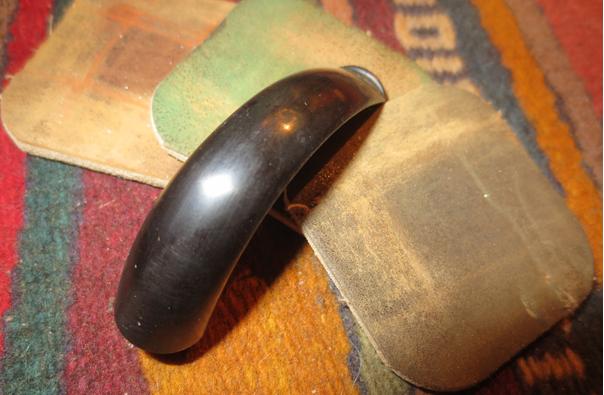
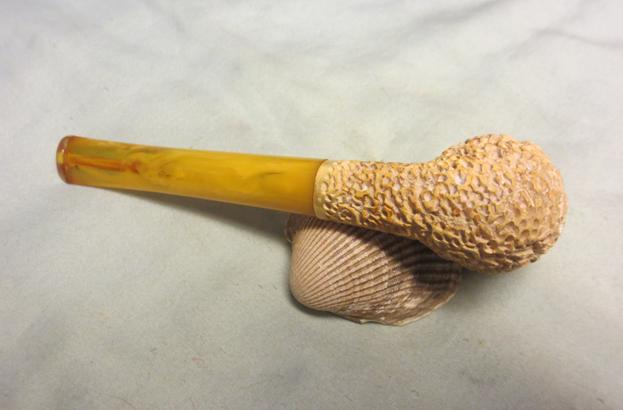
 I buffed the pipe with Blue Diamond on the buffing wheel and gave it multiple coats of carnauba wax. I buffed it with a clean buffing pad to raise the shine. I buffed it by hand with a microfibre cloth to deepen the shine. The finished pipe is shown in the photos below. It is ready for many more years of service.
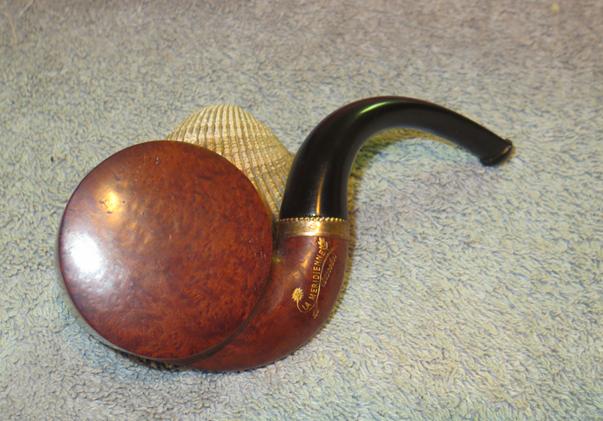


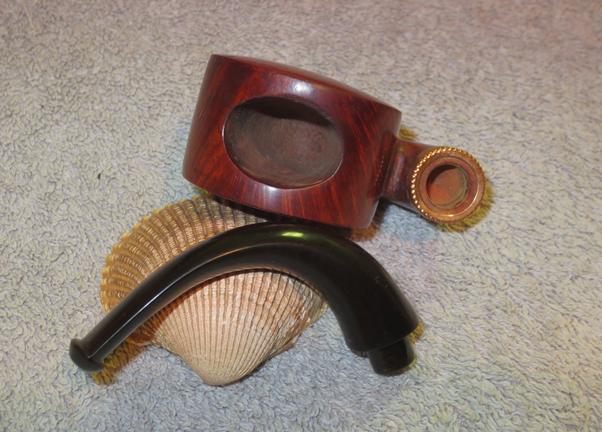


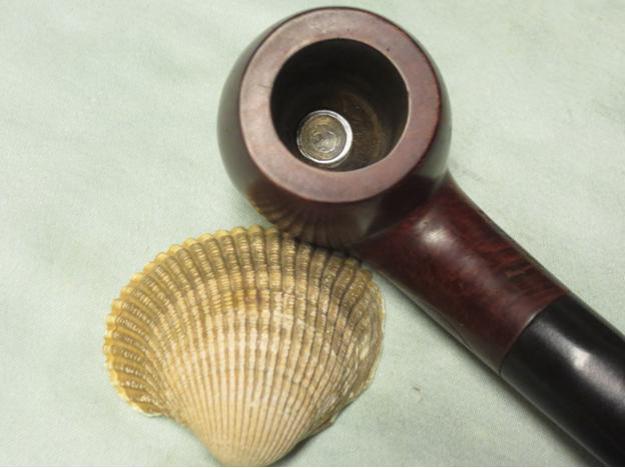
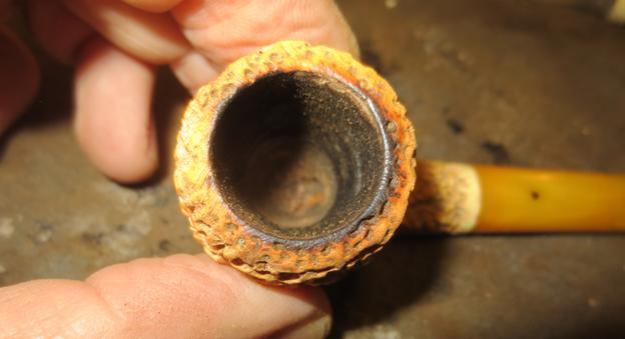
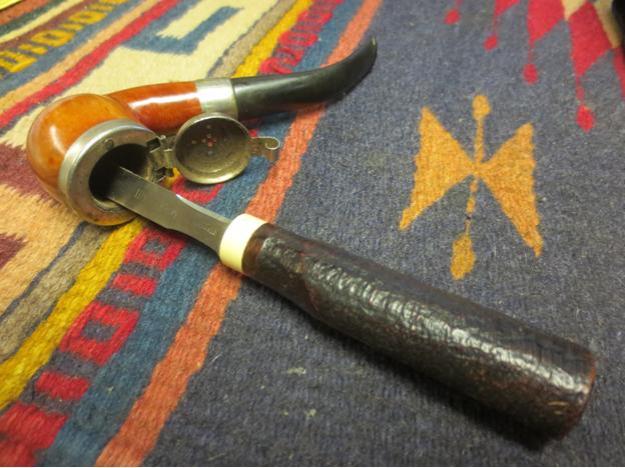
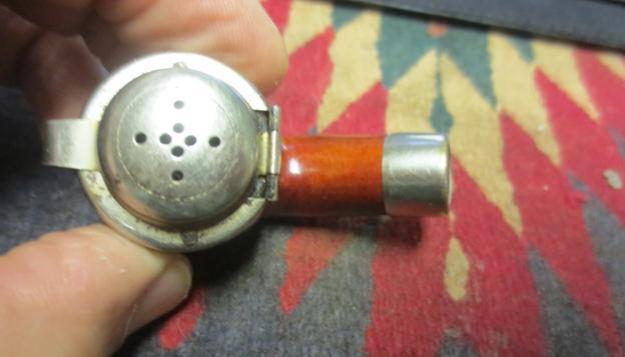
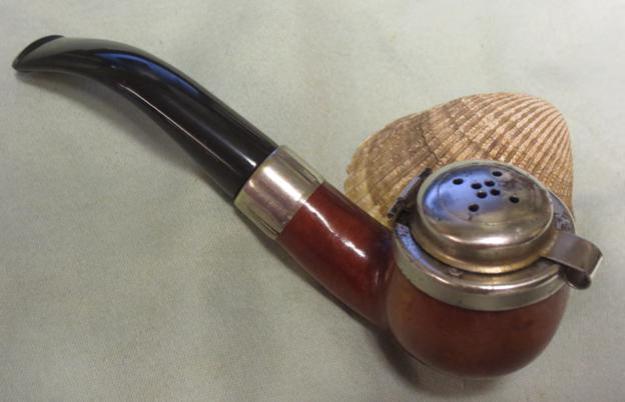
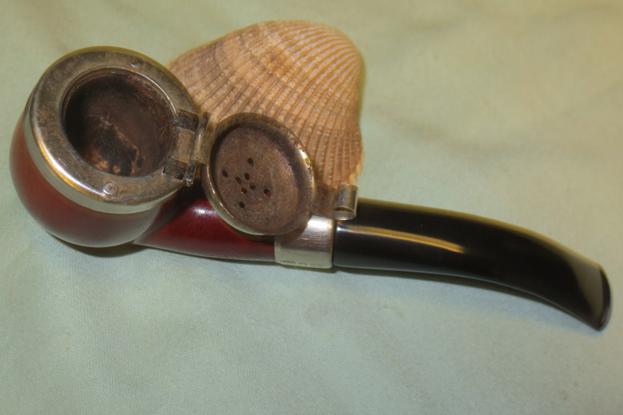
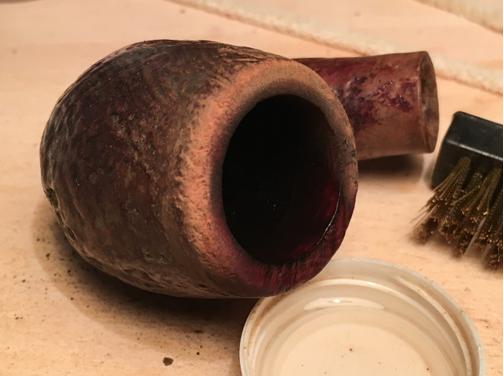
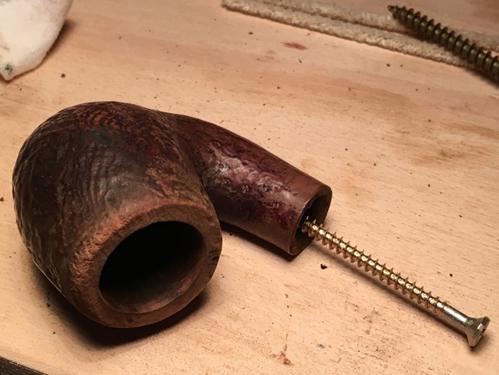
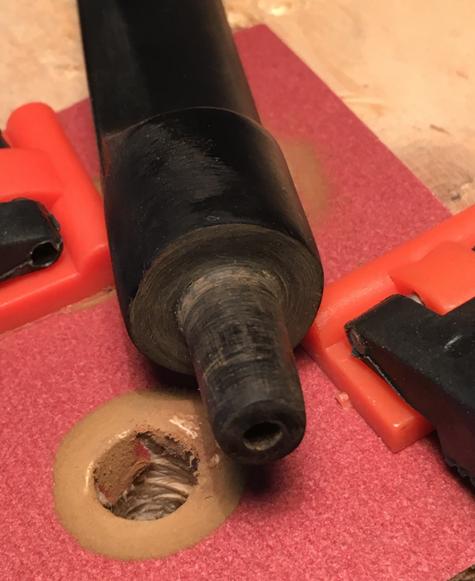
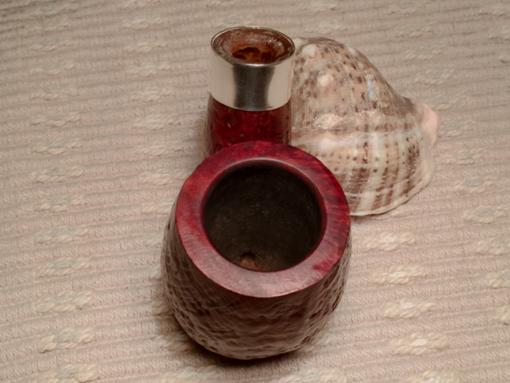
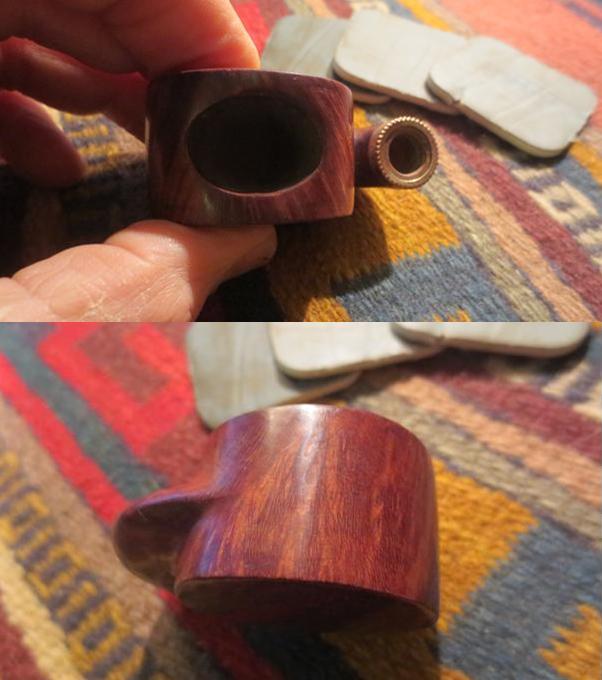
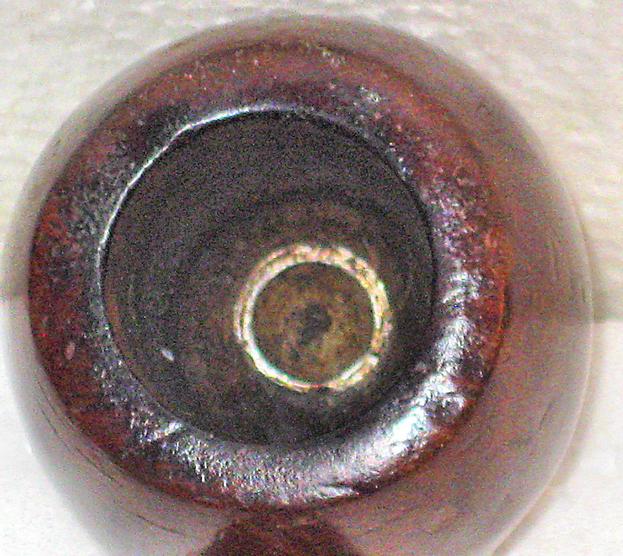
 The fourth and fifth pictures remove the mystery of the knurled edge on the bottom of the bowl that showed in the first photo. You can see in that photo of the bowl bottom that the silver disk looks like it was made to be rotated. We talked and my brother bid and won the pipe (I can’t wait for the pipe to get here so I can check this out). The fifth photo shows the inside of the bowl. The top of the disk appears to be a cup intruding into the bowl bottom. It was really odd looking.
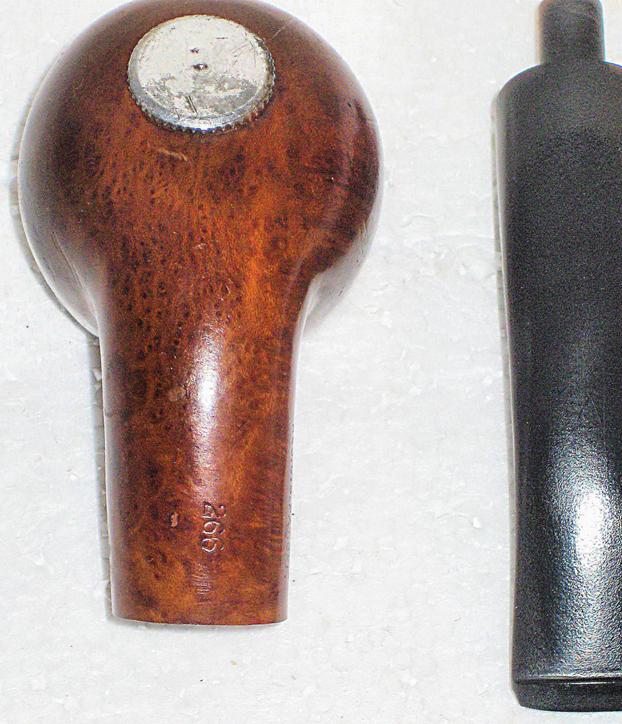
 That information was helpful on many levels. He did not however have any photos or drawings of the pipe or pictures of the advertisements. I wanted to know if the bottom “sump” as he called it was pressure fit or threaded and screwed into the briar. I wanted to know if the bottom of the bowl was damaged or if the “sump” sat as it was supposed to flush with the bottom. It was hard to tell from the photos. I wanted to know was the “wads” were that sat in the sump. From the look of the bowl bottom it appeared that the “wads” may well have been lozenges that fit in the curved cup and then sat flat in the bottom of the bowl. But what did they look like? More research would be needed to answer these questions. But at least the mystery of the knurled edge peaking from the first photo was solved. It was a single unit with a cup on the inside of the bowl. I could not wait to see this in person and “fiddle” with it.
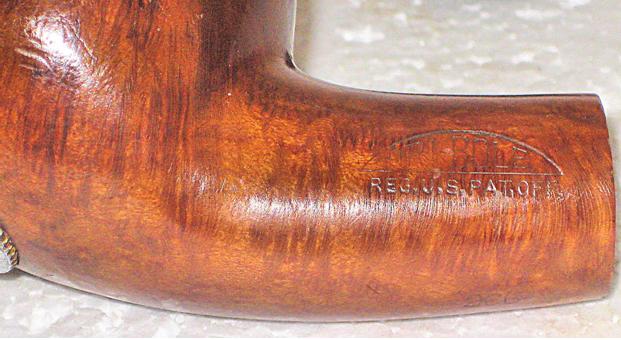 He gave the dimensions of the pipe as follows: overall length: 5 ½ inches, bowl height: 1 ½ inches, diameter of the bowl: 1 5/8 inches, bore diameter: 7/8 inches, bore depth: 1 1/8 inches and the weight: 44 grams or 1.6 ounces
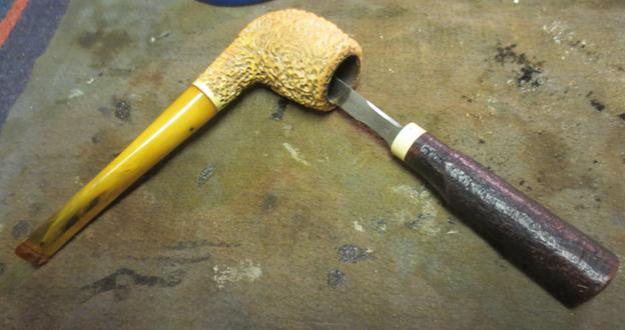
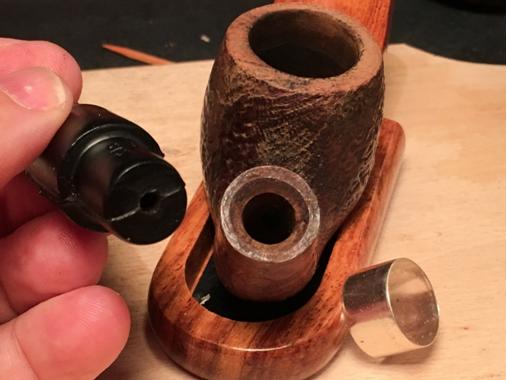
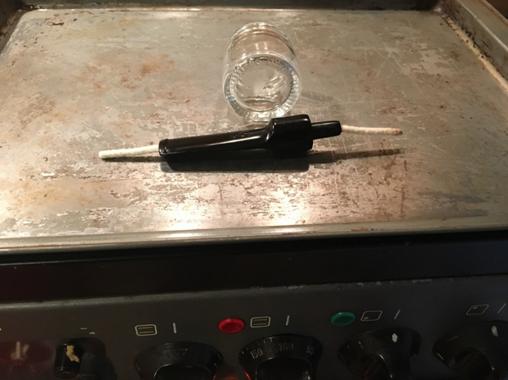
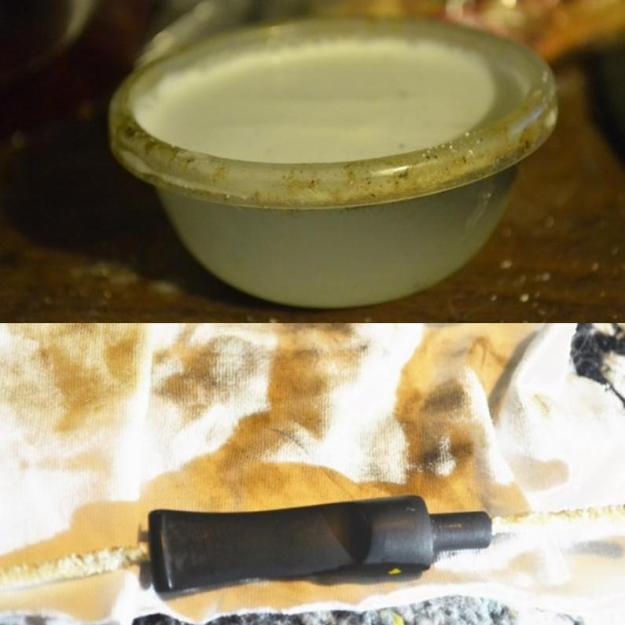
 I took it out of the alcohol bath and heated the disk with the flame of a lighter. I used a pair of pliers to hold tightly to the edge of the disk and I was able to twist it out of the bowl. Once it popped free I could undo it by hand. The first photo below shows the inside of the silver disk. The second shows the knurled outside.
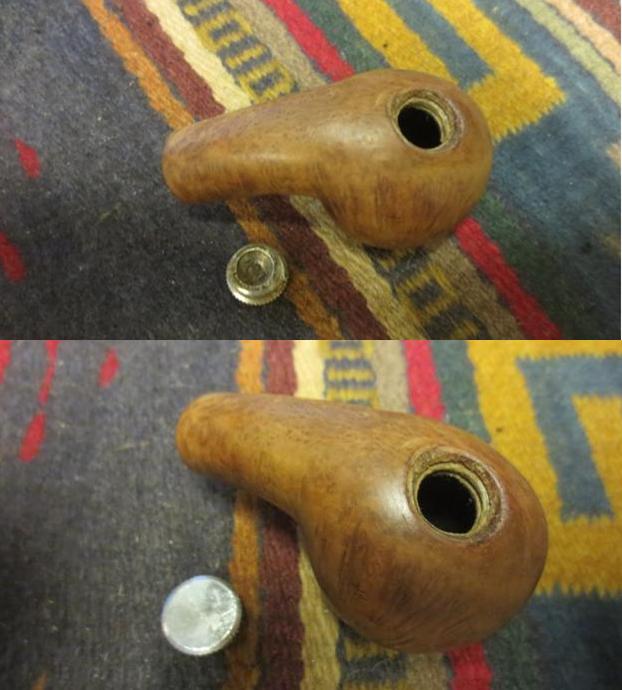 To remove the damage to the rim top and edges I topped the bowl on a topping board with 220 grit sandpaper.
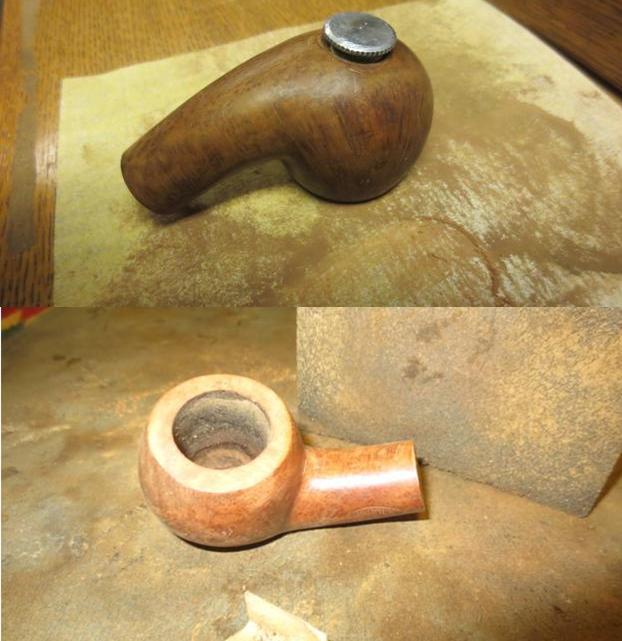 There were some nicks around the hole in the bottom of the bowl so I sanded those smooth with sandpaper and then cleaned out the threads in the briar with a cotton swab and alcohol.
 I used the brass bristle brush to scrub the threads and the cup on the disk. I cleaned it afterwards with cotton swabs and alcohol.
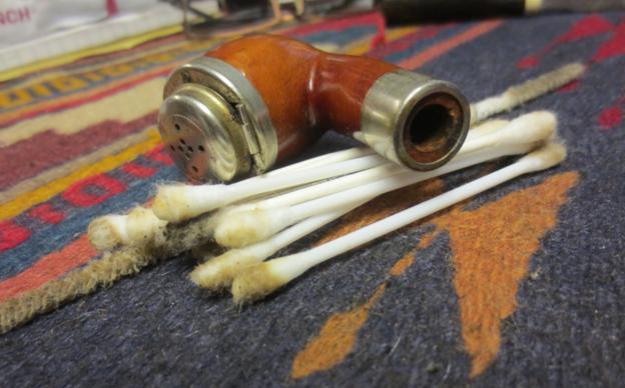
 I used a cotton swab to coat the threads on the disk with Vaseline and turned it into the bottom of the bowl. I wanted to make sure that I could easily turn the disk by hand.
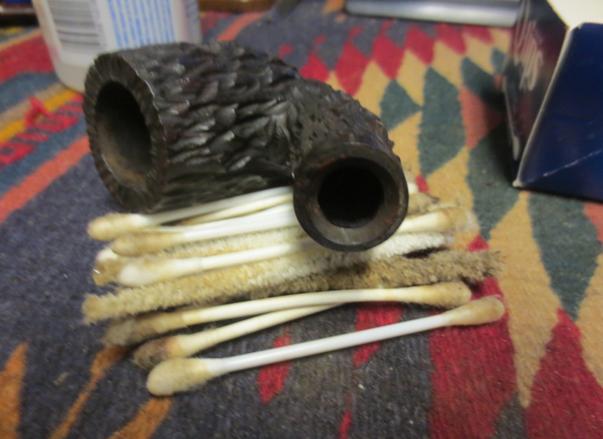
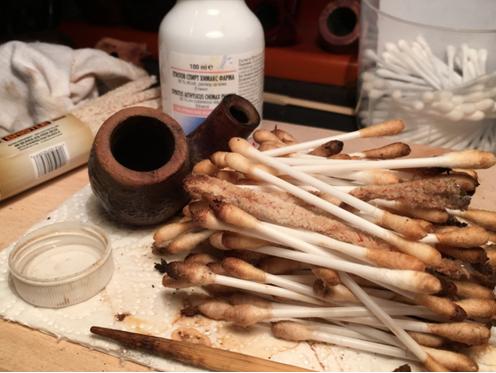
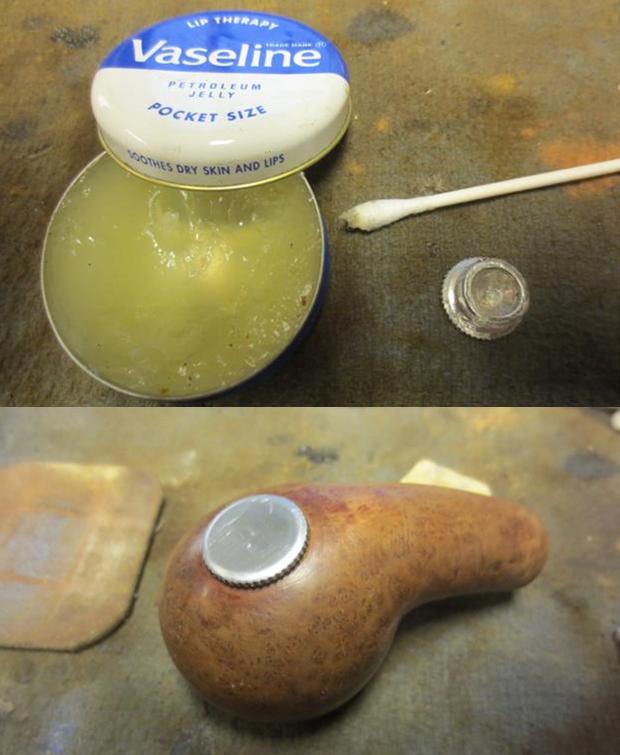 I cleaned out the internals with pipe cleaners, cotton swabs and alcohol. It was pretty clean thanks to my brother. It did not take too many to clean it out.
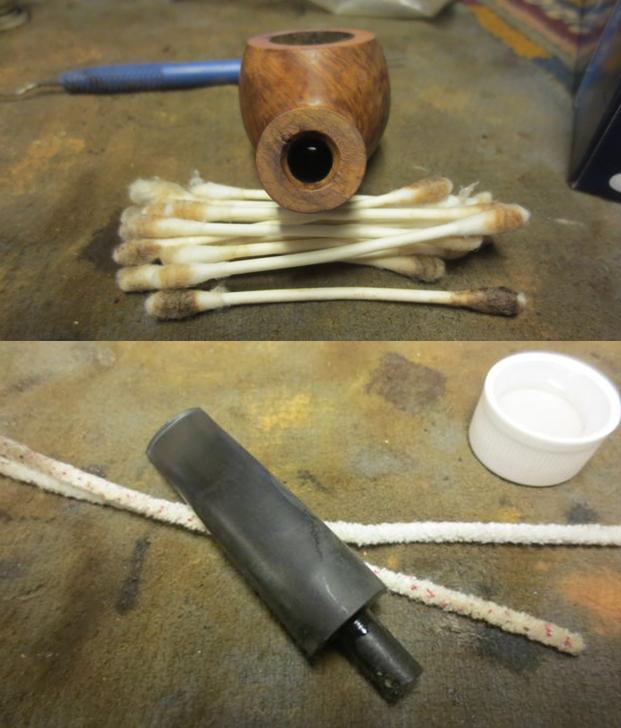 I sanded the bowl and stem with a medium and a fine grit sanding block. The pipe is beginning to look really good. I had to make a decision how far to sand the bowl and how many of the original dings and dents to remove without changing the “story” and character of this old timer.
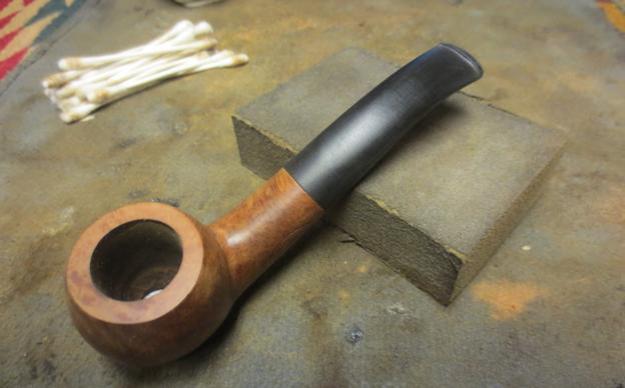 I heated the briar and then stained it with dark brown aniline stain cut by 50% with isopropyl alcohol. I flamed it to set the stain and repeated the process.
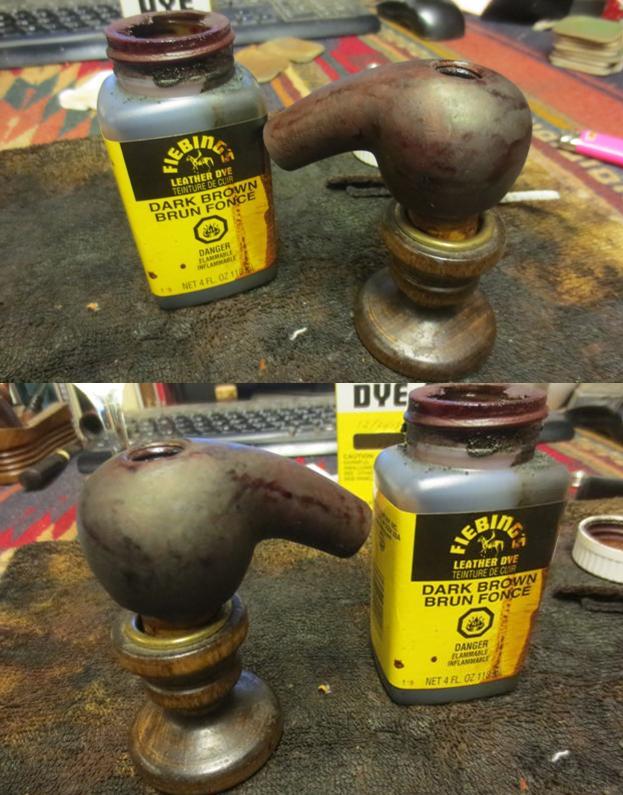 I wiped down the stain with alcohol dampened cotton pads to make it more transparent and make the grain stand out. At this point the fills stood out and I would need to address them a bit differently.
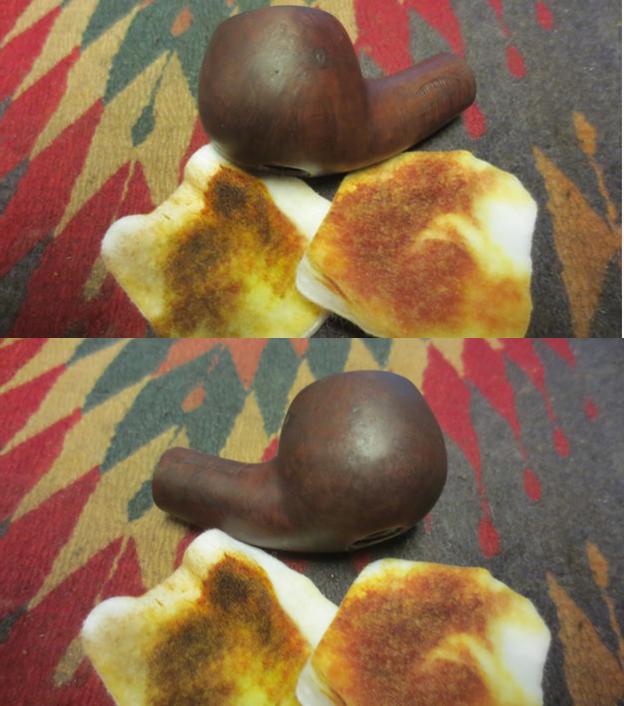
 I used a black Sharpie Permanent Marker to draw some lines across the fills and blend them into the grain on the pipe. I then chose to give the bowl a second contrast staining using a Cherry Danish Oil stain. I find that the combination of the black marker and the cherry stain blends the fills better than a brown stain. The combination of the brown and the cherry stains gives depth to the finish so I like using them together.
 Once the cherry Danish Oil stain dried (overnight) I buffed it lightly on the wheel with Blue Diamond and then gave the bowl a coat of carnauba wax. I hand buffed it with a microfibre cloth. You can see the small dings that I left in the bowl sides rather than change the look. I polished the silver disk with a silver polishing cloth. The next series of photos shows the bowl at this point in the process.
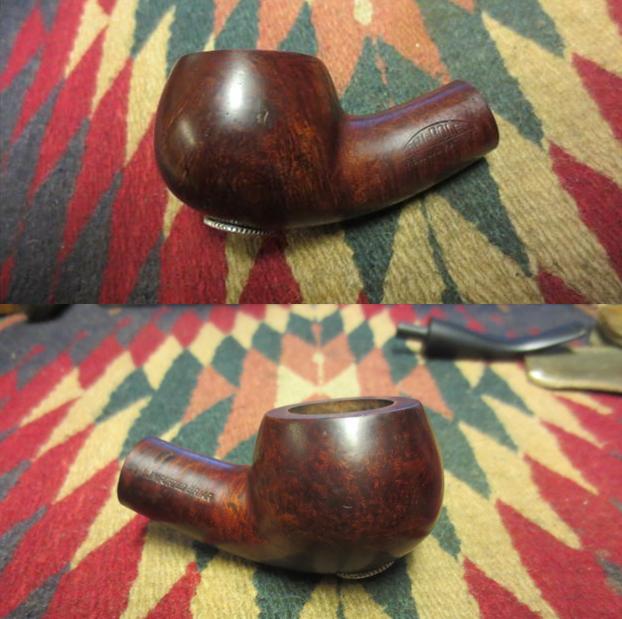
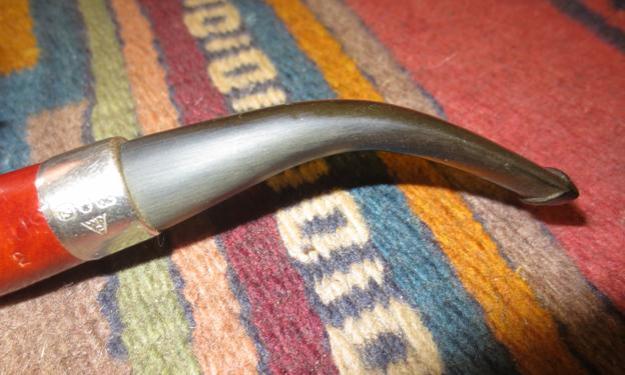
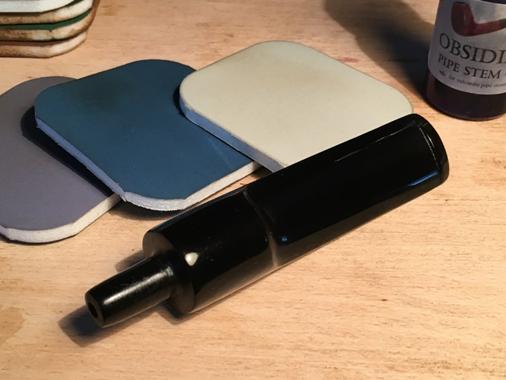
 I set the bowl aside and worked on the stem. The old hard rubber that was used on this stem was good quality. There was very little oxidation if any on it. The main issue was the pitting that covered the surface of the stem. I sanded it with 220 grit sandpaper to address the pitting and smooth out the surface and then began my normal sequence of micromesh sanding pads. Between each set of three grits (1500-2400, 3200-4000, 6000-12000) I rubbed the stem down with Obsidian Oil. I gave it a final coat of the oil and let it dry before I buffed the pipe.
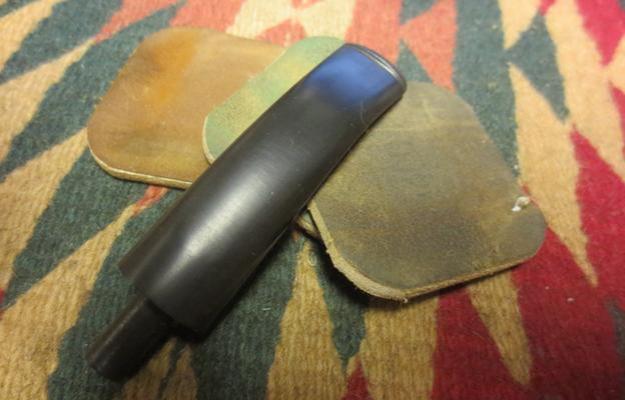
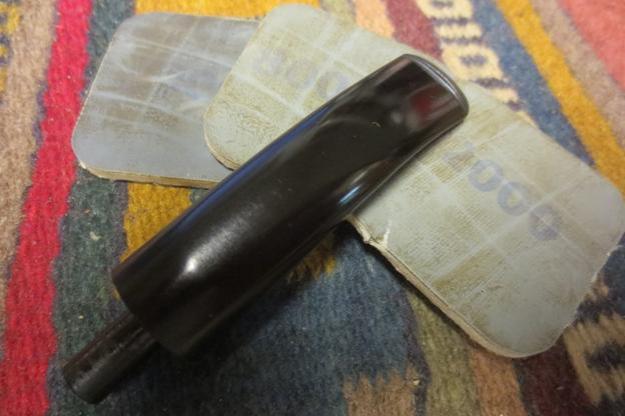 I buffed the pipe and stem with Blue Diamond and gave it several coats of carnauba wax. I buffed it with a clean buffing pad to raise the shine. I hand buffed it with a microfibre cloth to put the finishing touches on the pipe. The finished pipe is shown in the photos below. Thanks for looking.