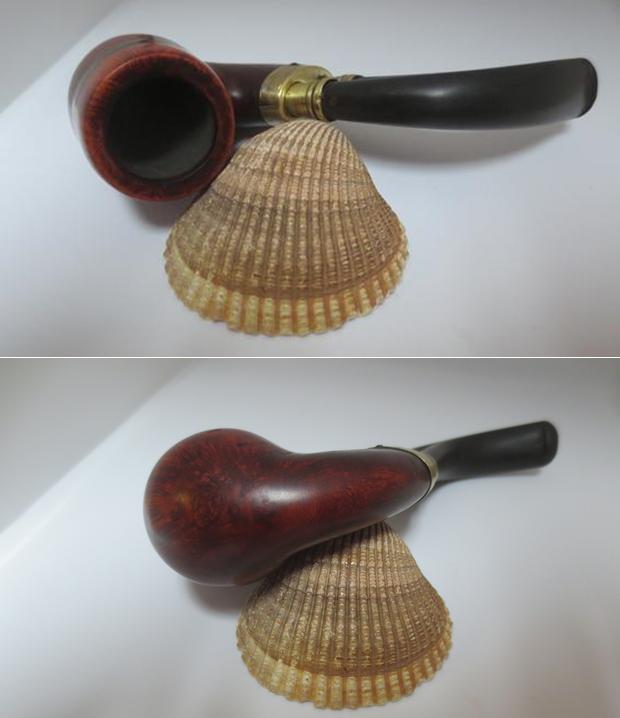
Blog by Steve Laug
A few months back I sold a nice older Wally Frank pipe to a fellow named Jim in the South Eastern US. Recently he called to tell me about a group of six pipes that he purchased on one of his own pipe hunts. He wanted to know if I could help him identifying what he had found. There were two older Kaywoodies (a bent meerschaum lined billiard and a Super Grain Zulu), a Selected Straight Grain bent billiard, a GBD Sauvage Bulldog, a Henley Club Apple (made by Sasieni), and the last one a Medico Crest Prince.
In our conversation he told me he was going to box up the lot and mail them to me to have a look. When they arrived he said we could talk and make an arrangement regarding the pipes that he decided to have restored. But he wanted my opinion on the others as well. The box arrived last week and I opened it to have a good look at what Jim had sent to me. I went through them making notes on what I saw regarding the condition of each pipe. I sent Jim my notes on the pipes and he sent back the two pipes that he wanted me to work on for him in the lot – the first one was a large Bent Selected Straight Grain Billiard and the second was the Kaywoodie Super Grain Zulu. We fired several emails back and forth talking about the pipes and the decision was made. I would restore the two pipes for him.
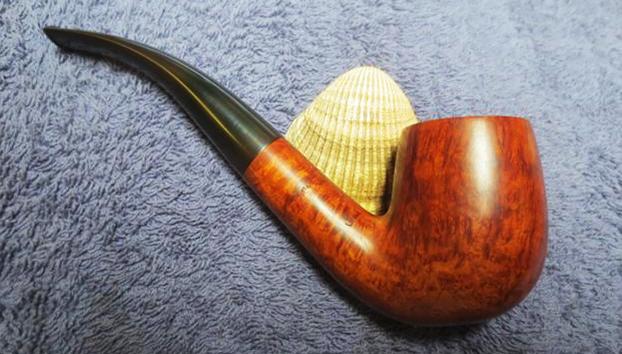
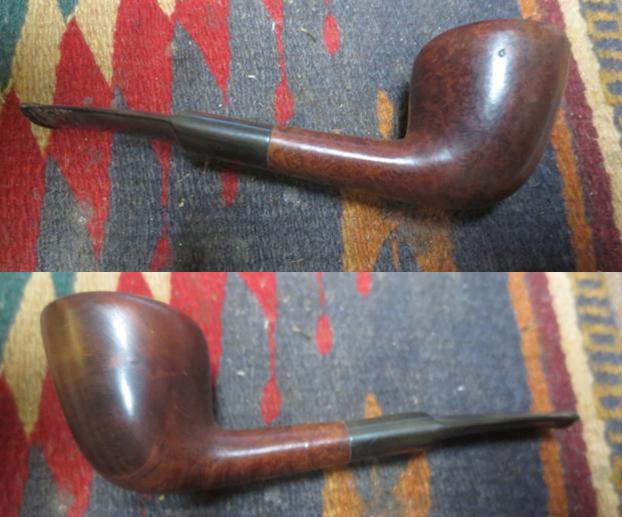
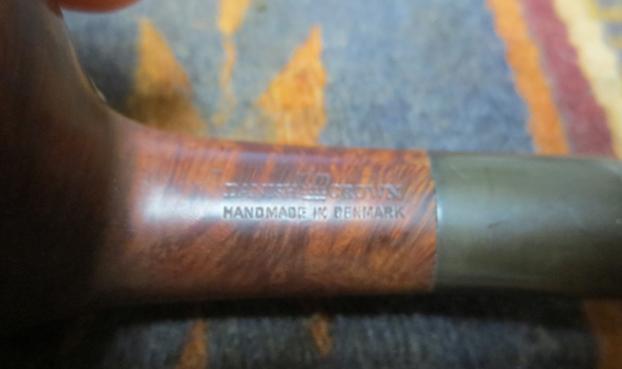
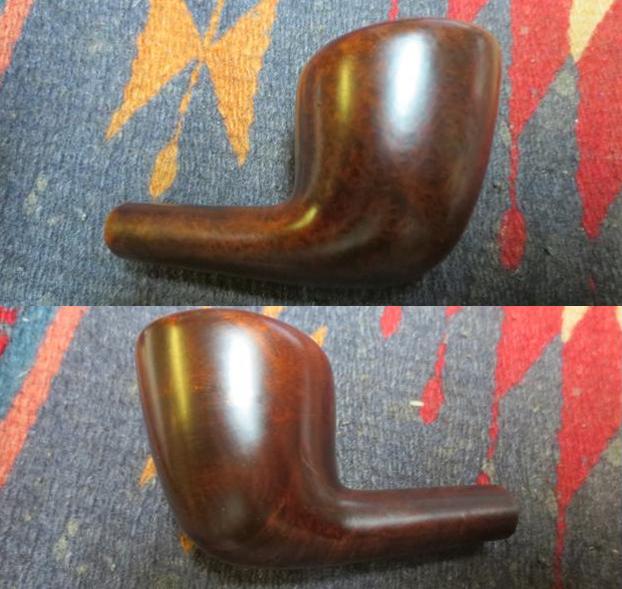
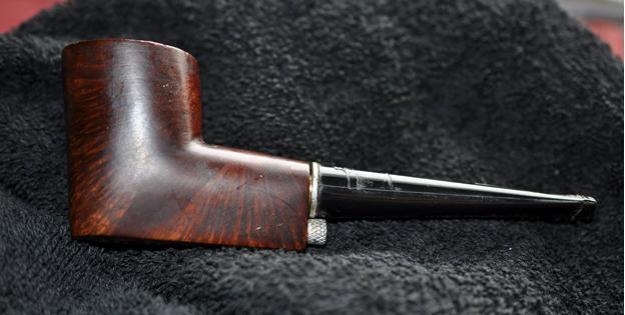
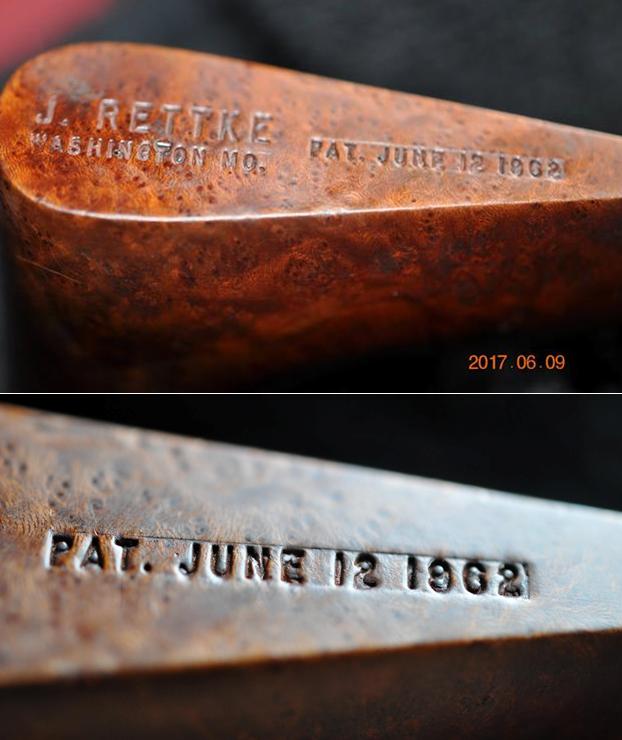
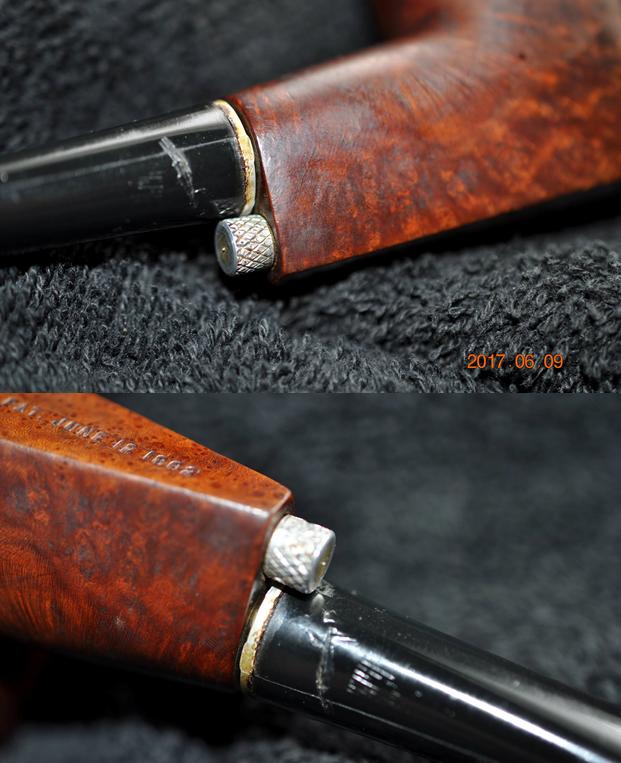
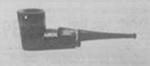
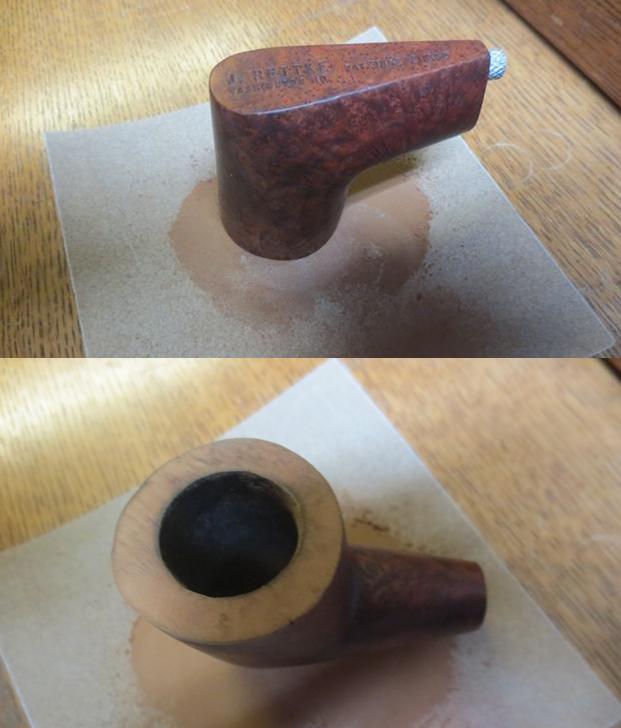
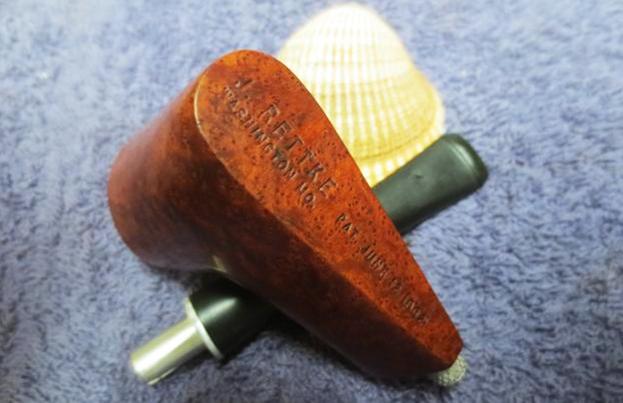
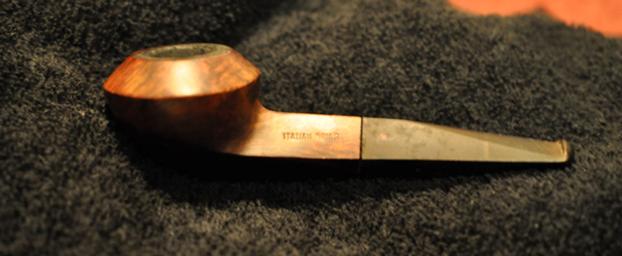
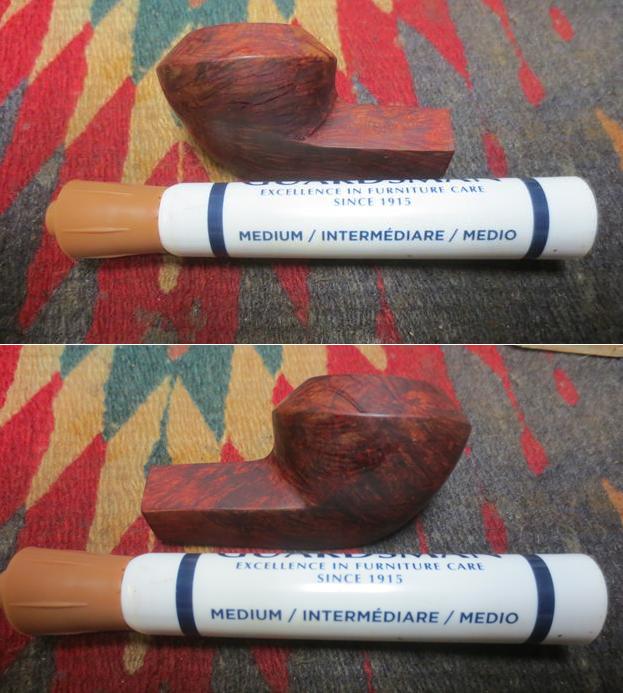
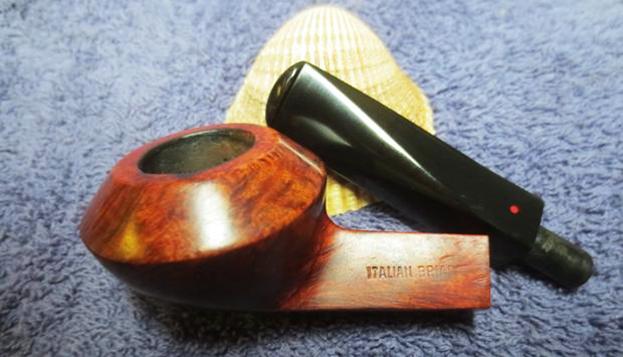
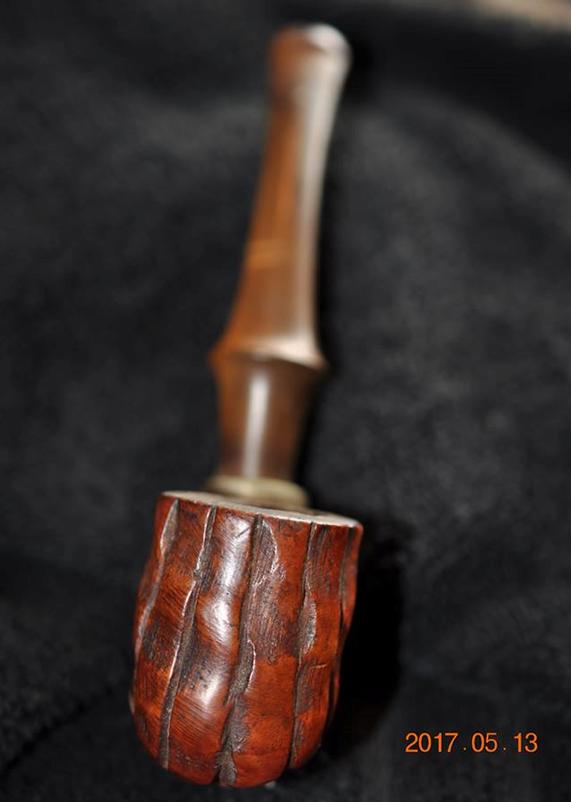
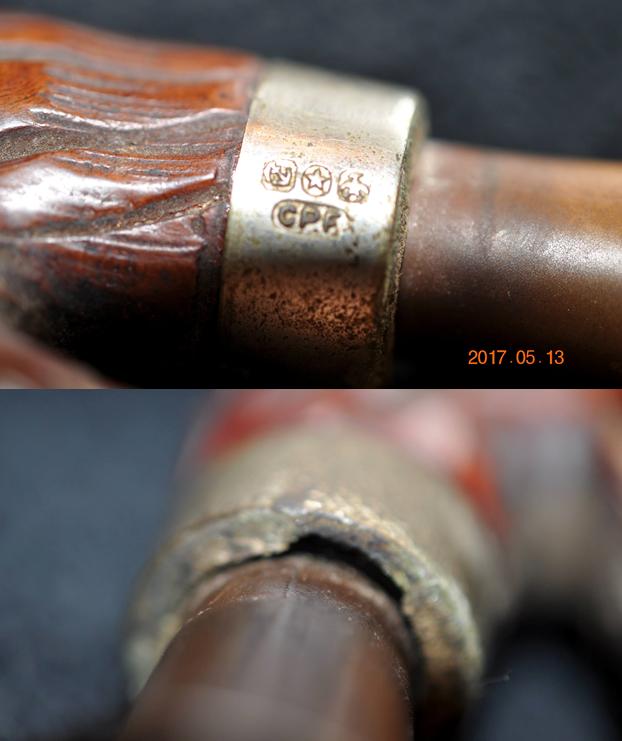
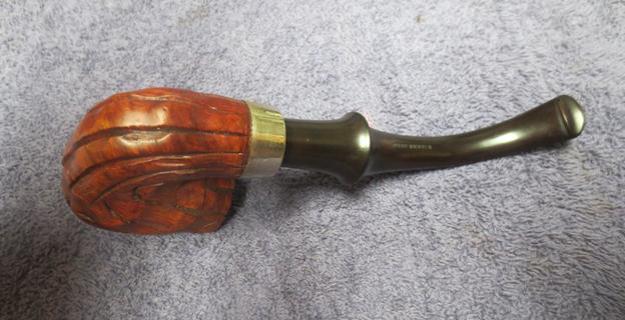
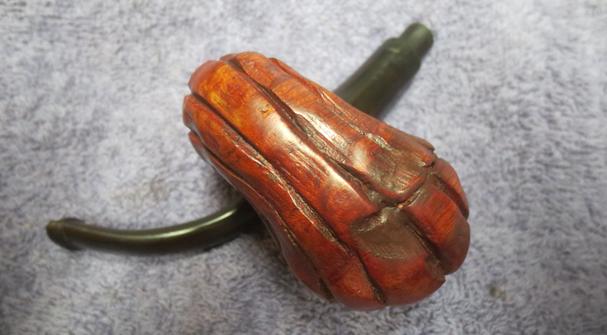
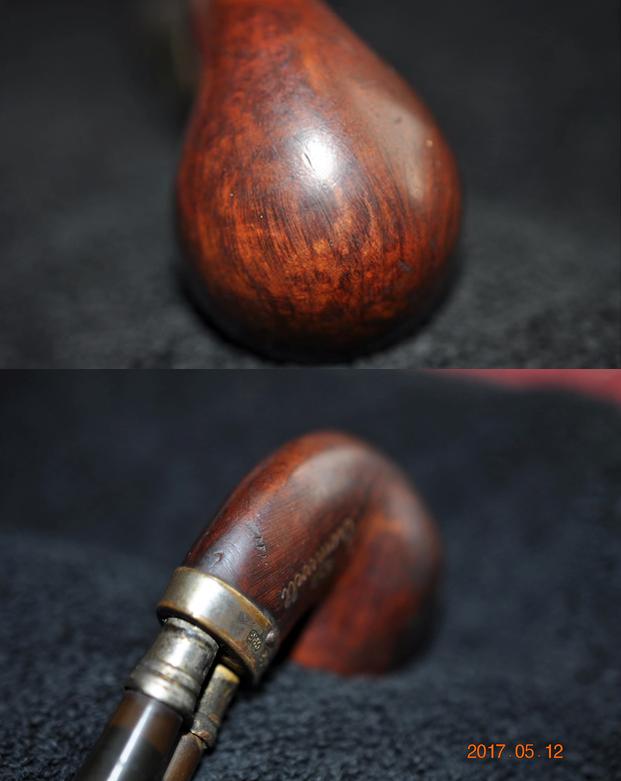
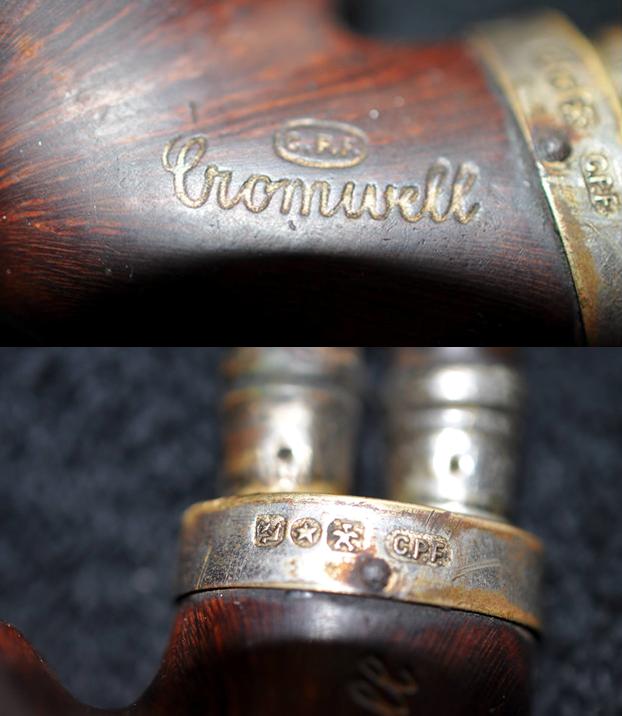
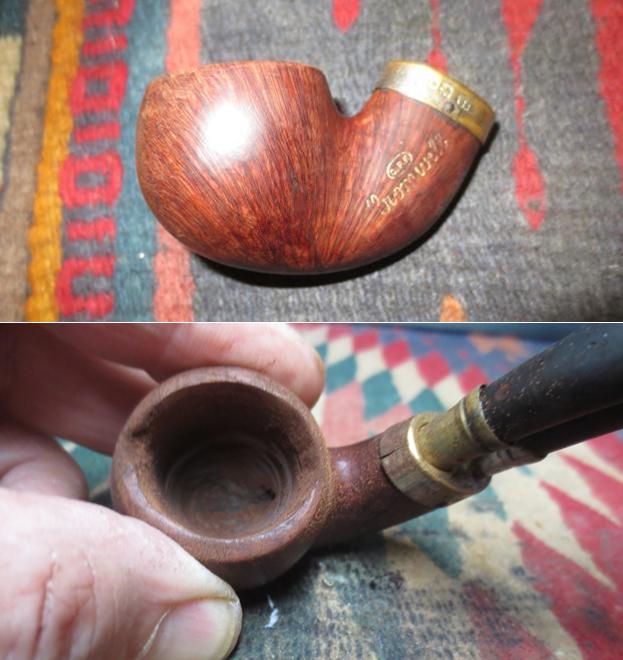
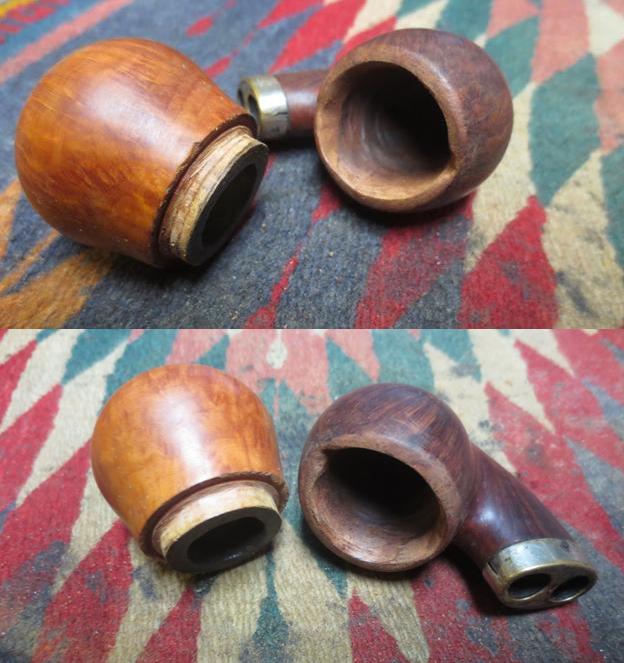
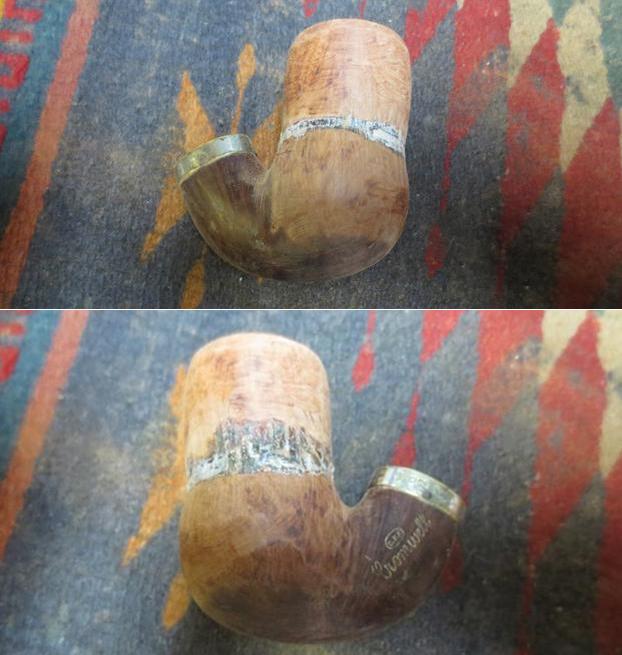
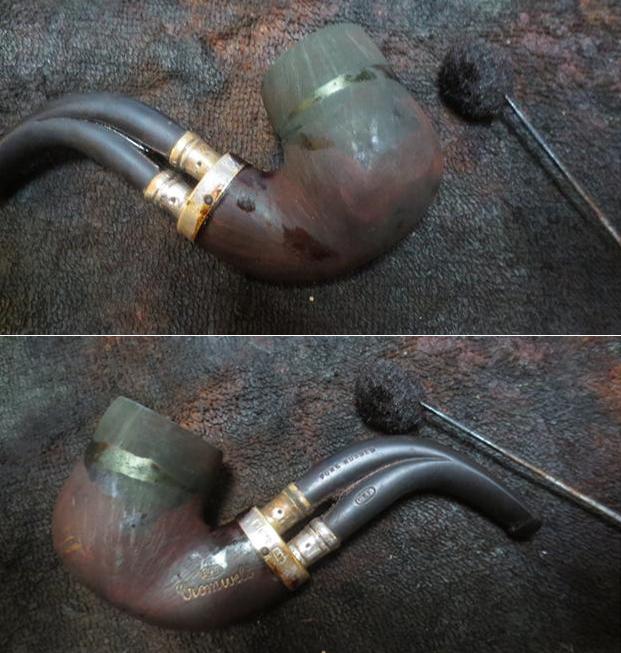
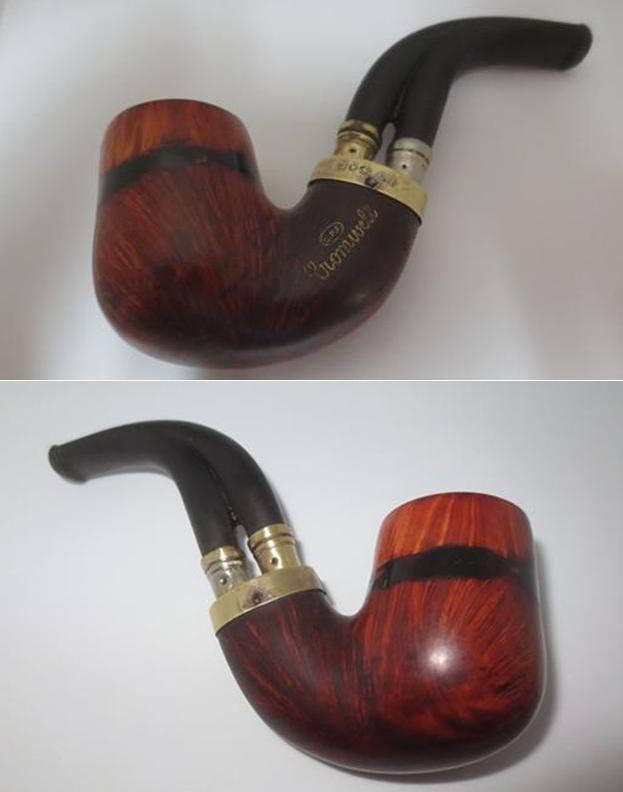
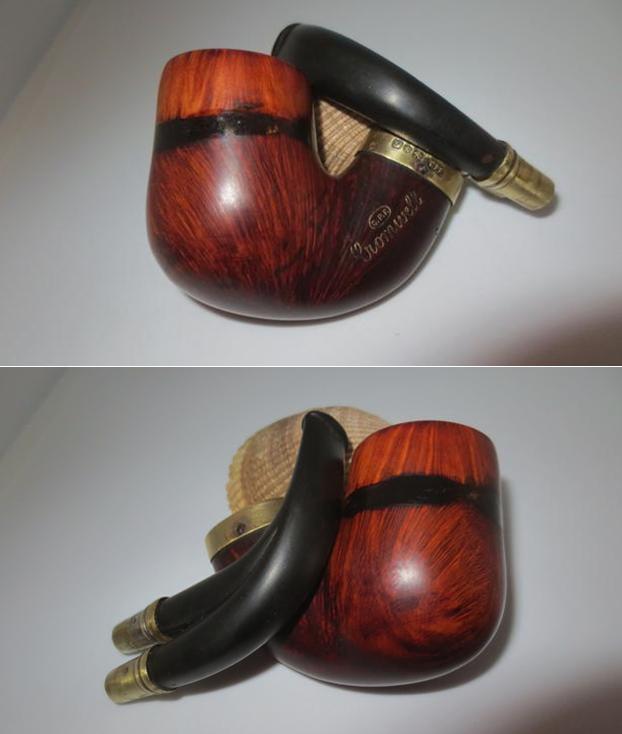
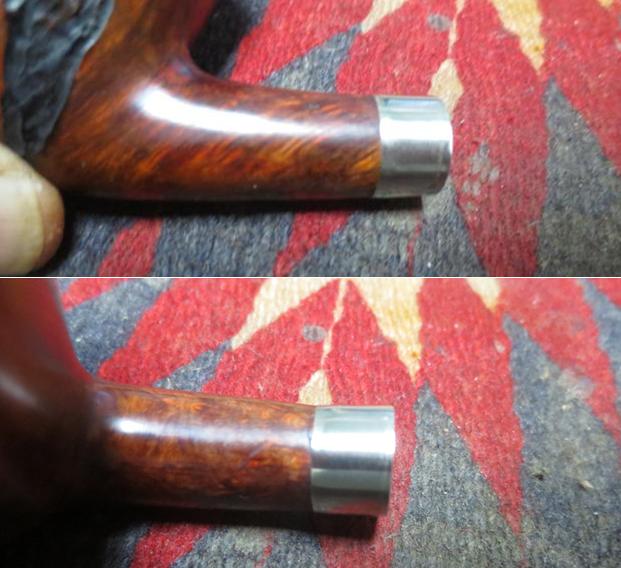
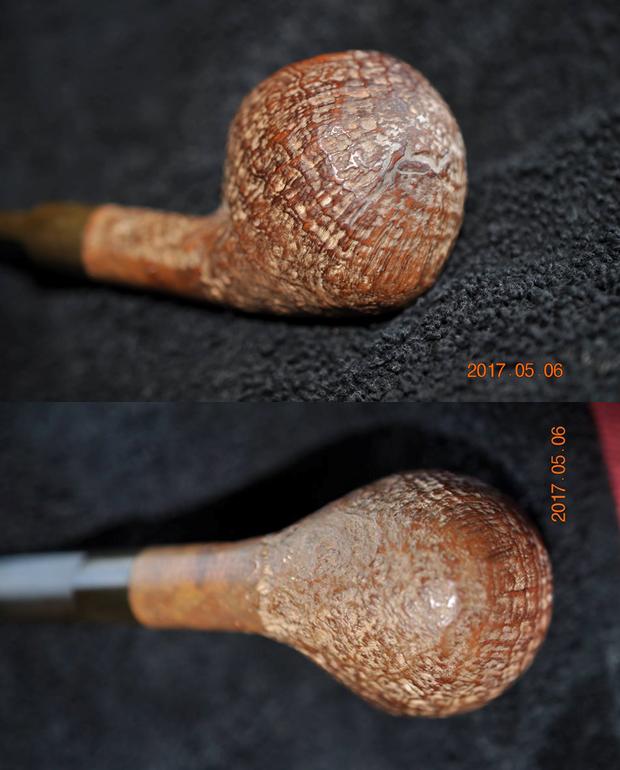
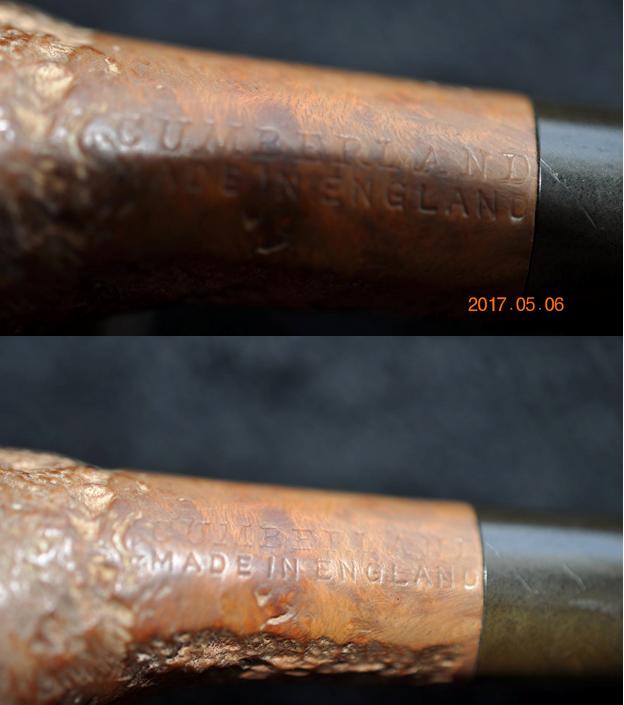
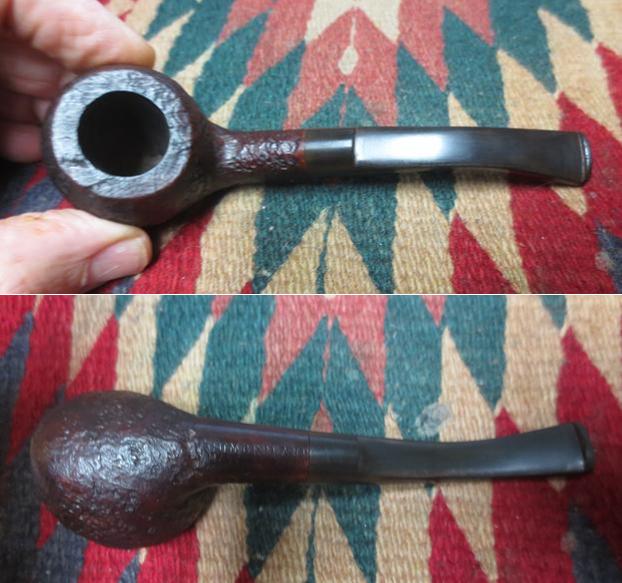
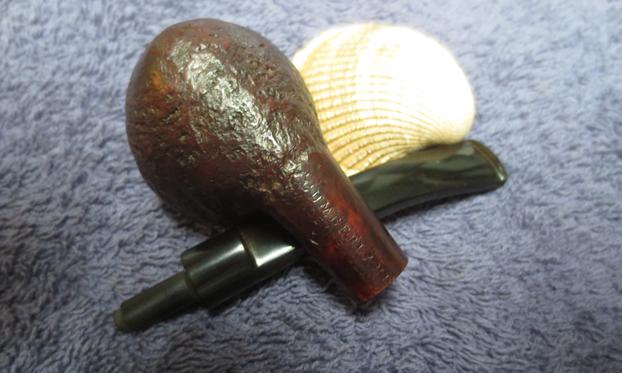
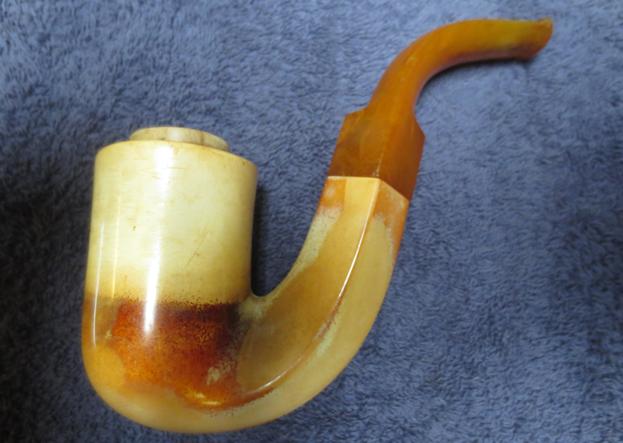
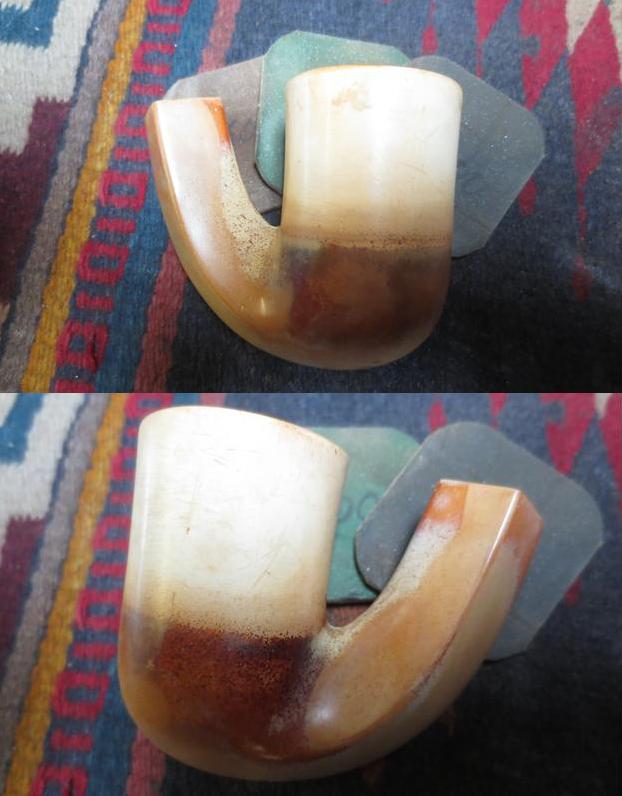
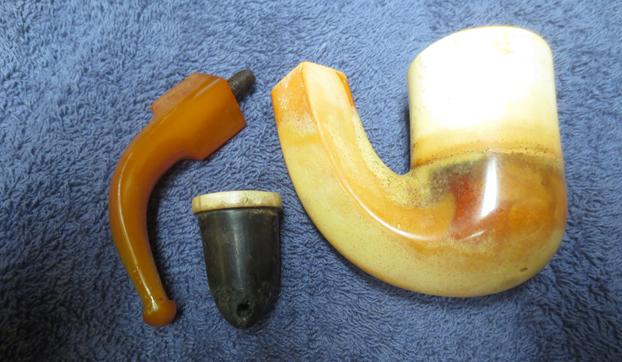
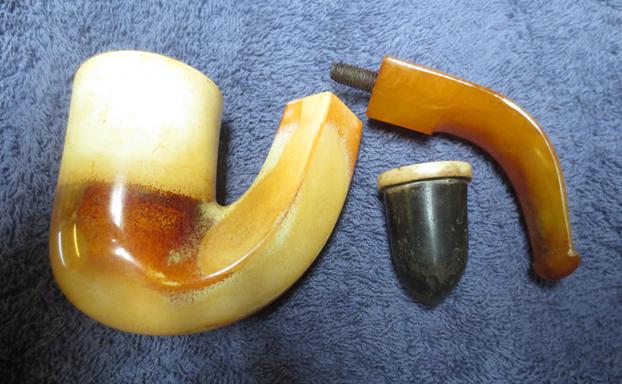
I decided to work larger of the two pipes first. It is stamped on the left side of the shank Selected arched over Straight and Grain underneath that. On the right side of the shank it is stamped with the standard circular COM (Country of Manufacture) stamp – Made in London in a circle over England followed by the shape number 43. Both the COM stamp and the shape number led me to believe this was a Comoy’s made pipe but I was not certain at this point in the process. The shape is a half bent billiard. It was a nice pipe that showed some extraordinary grain underneath the grime.
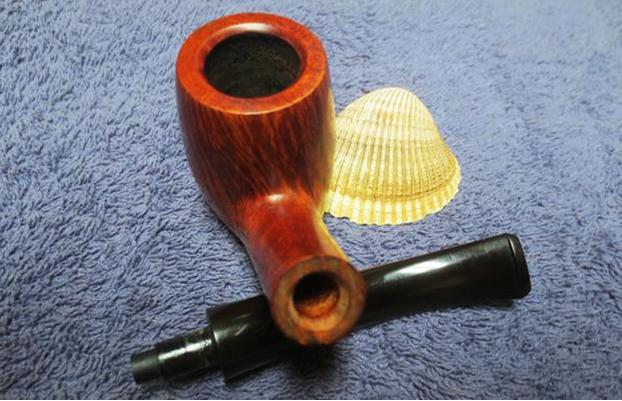
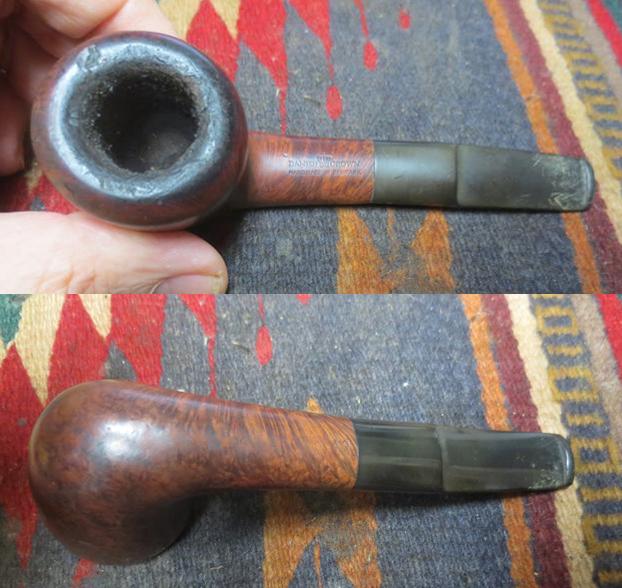
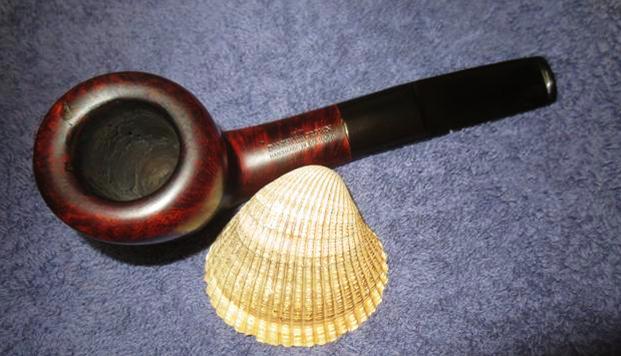
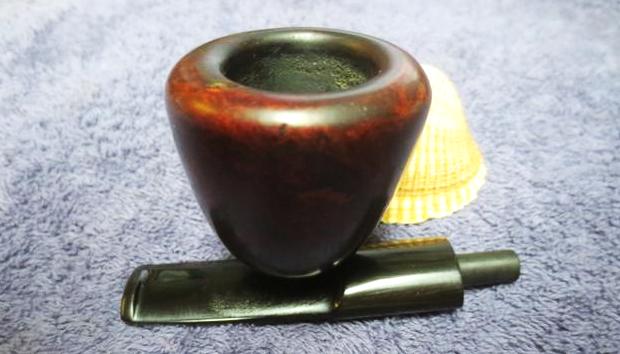
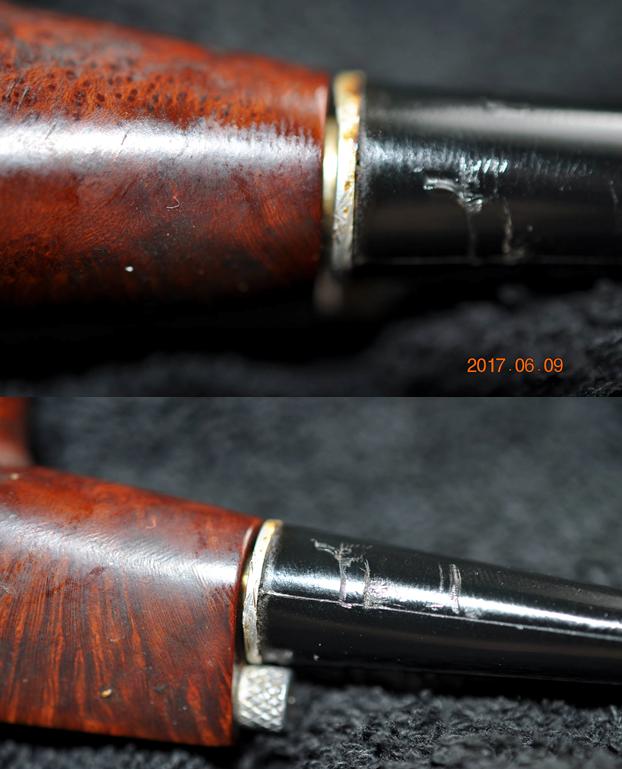
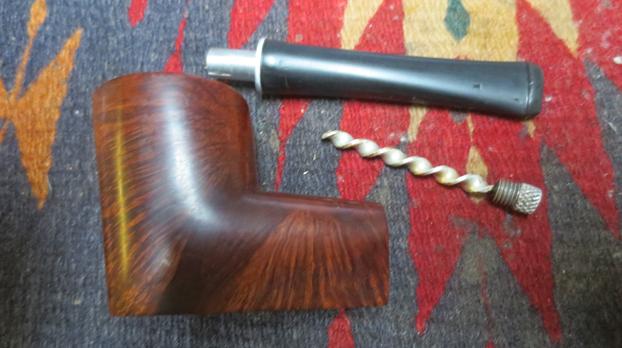
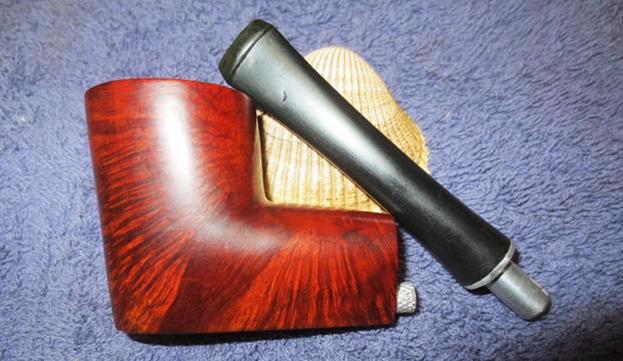
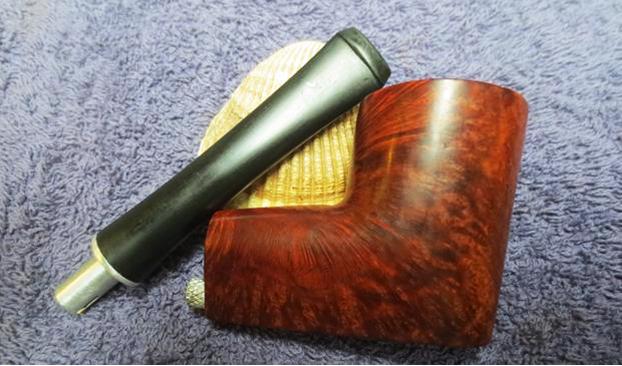
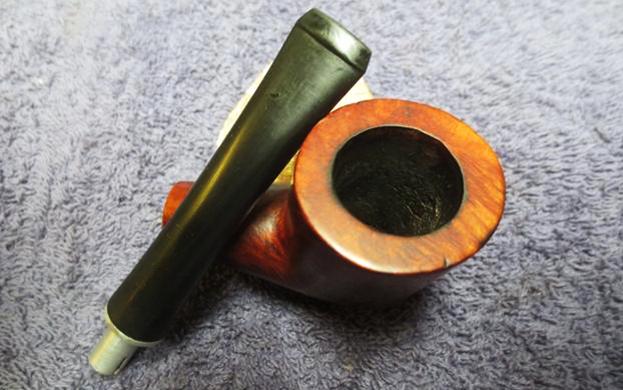
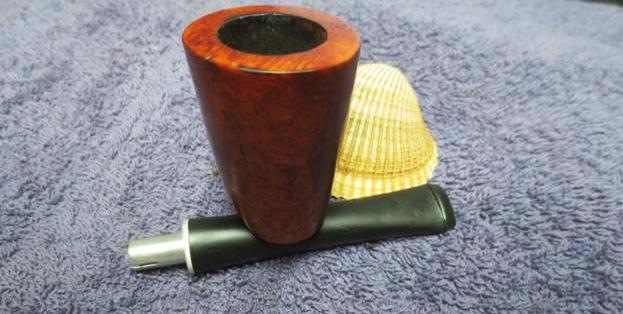
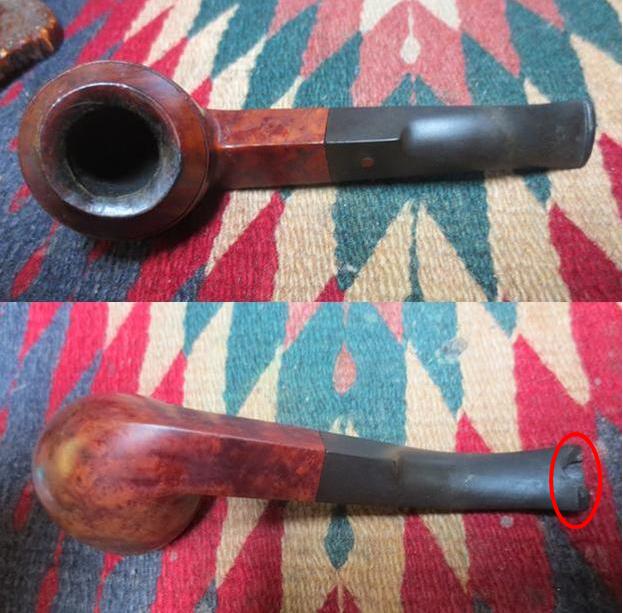
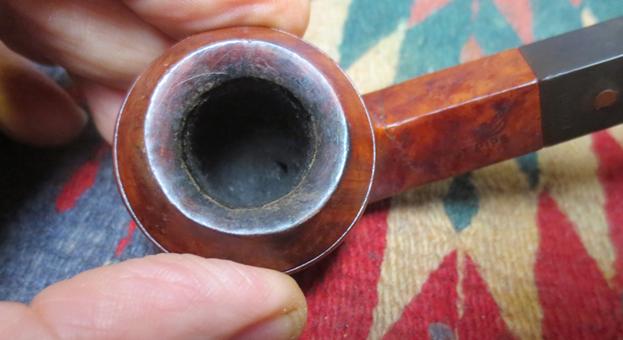
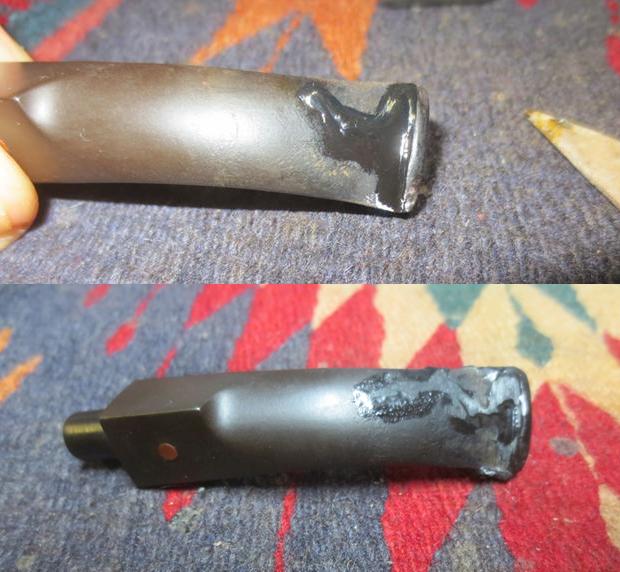
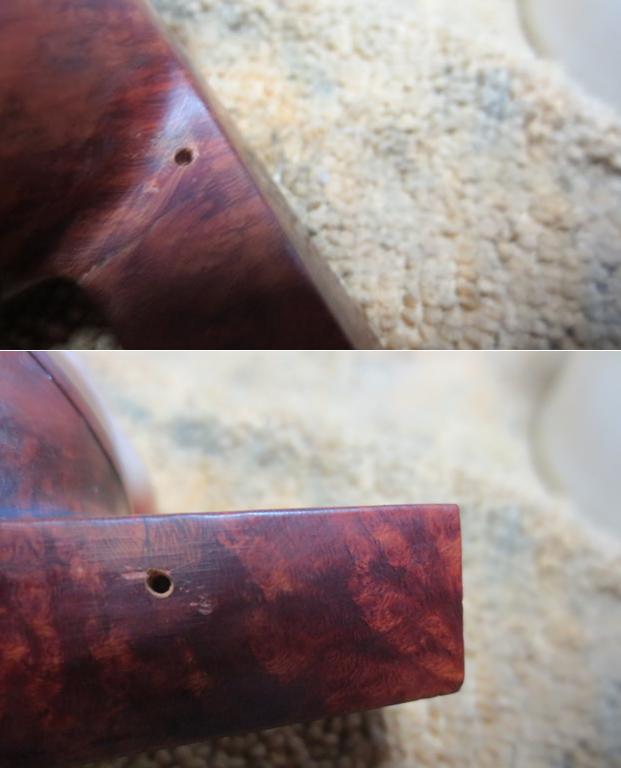
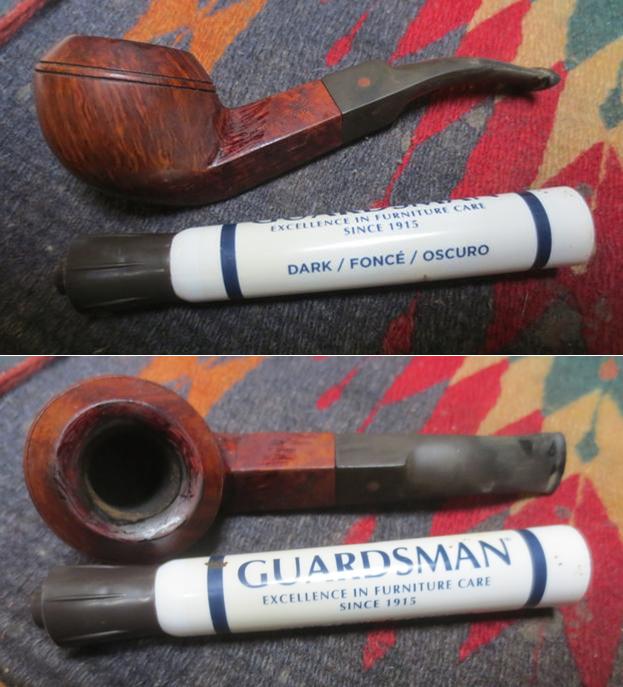
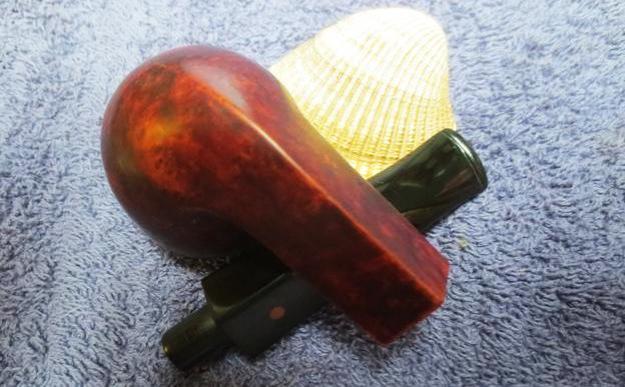
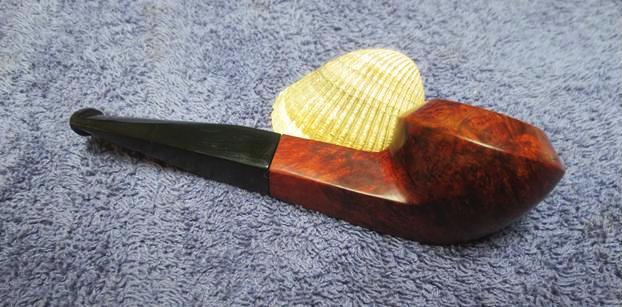
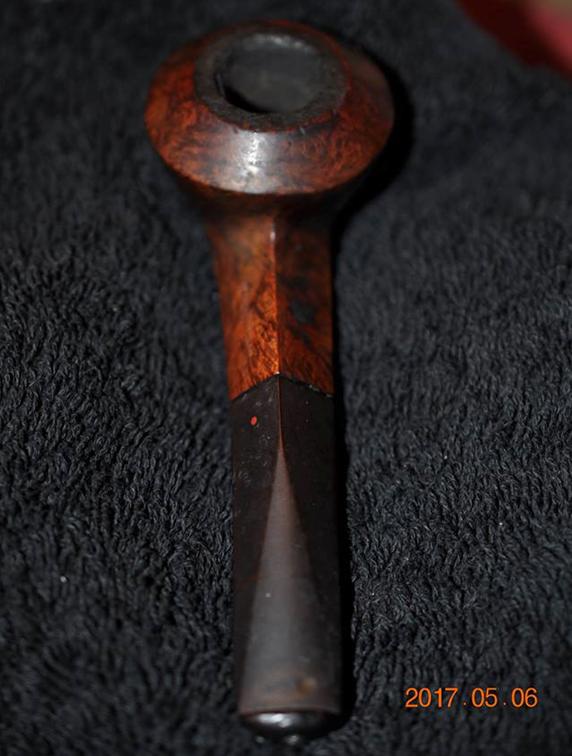
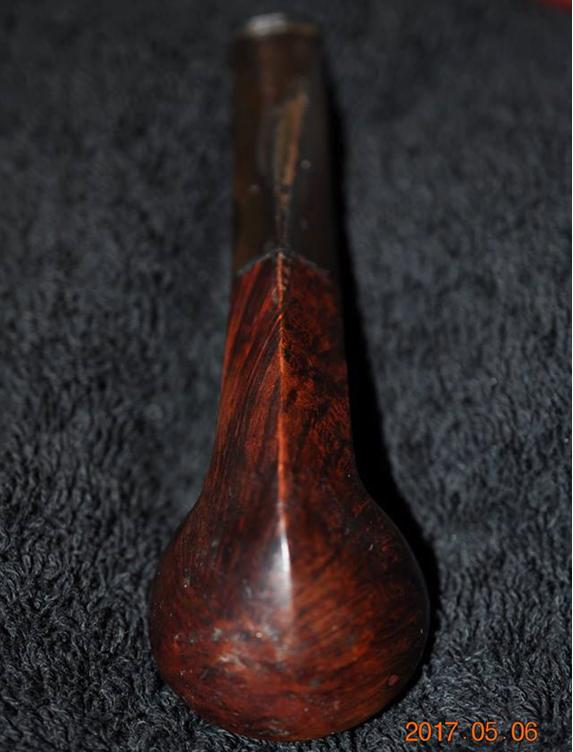
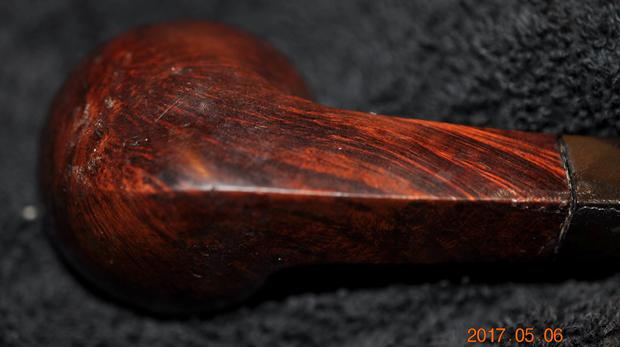
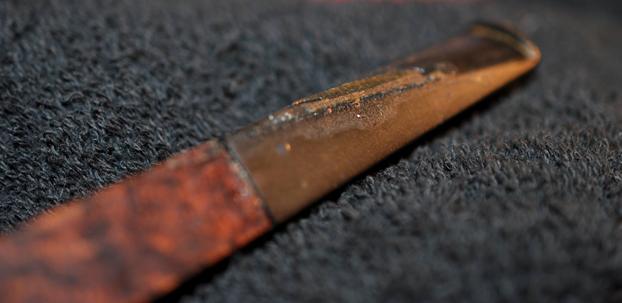
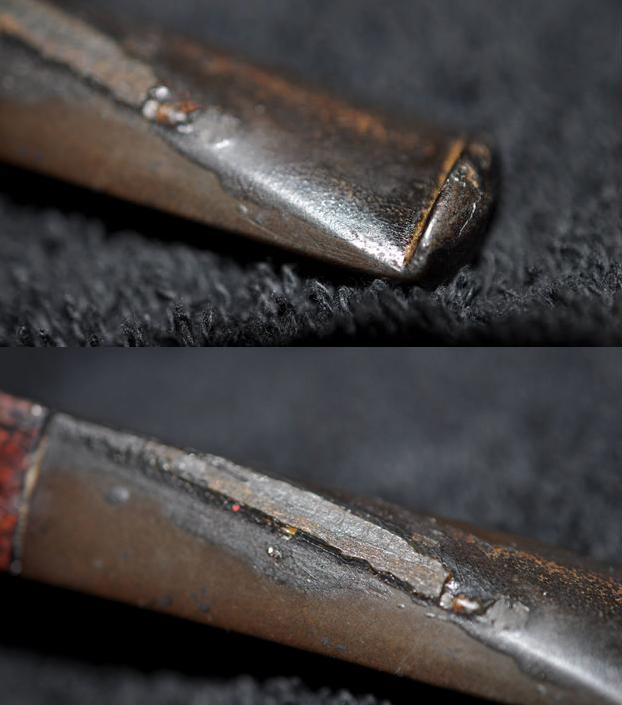
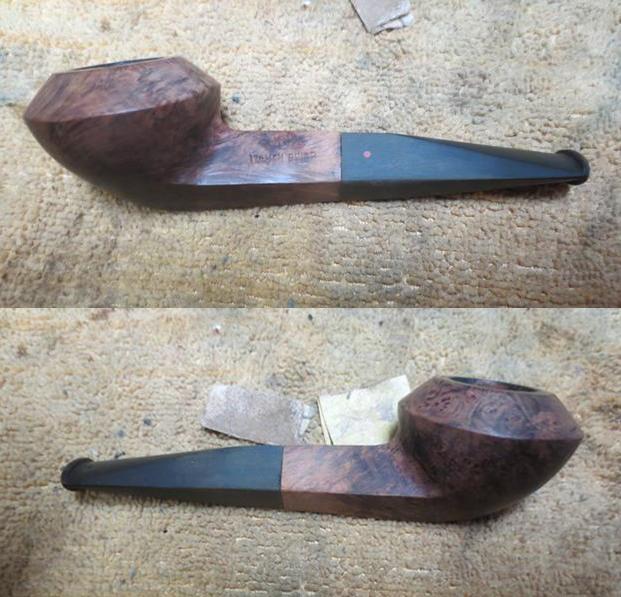
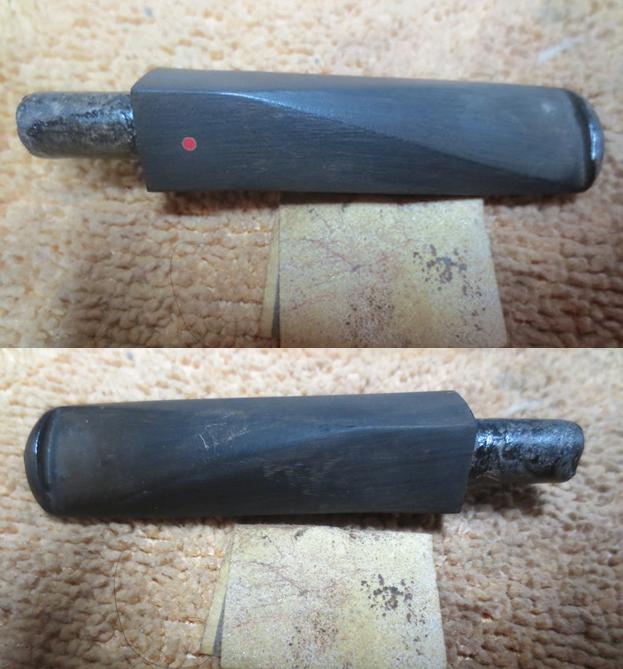
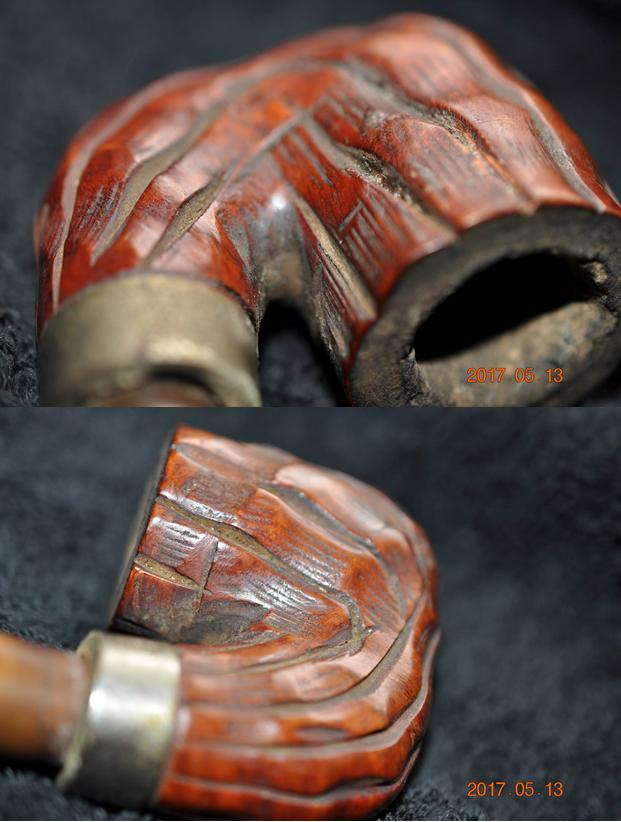
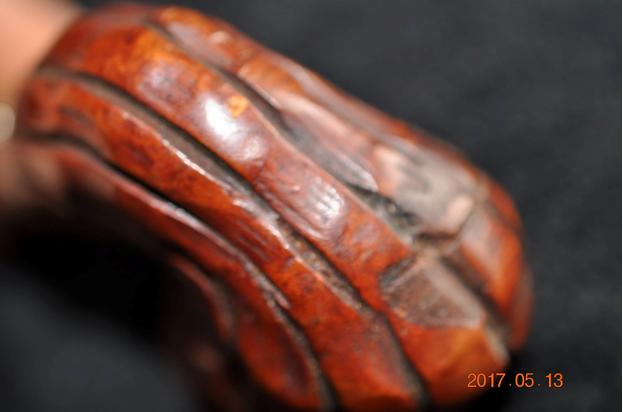
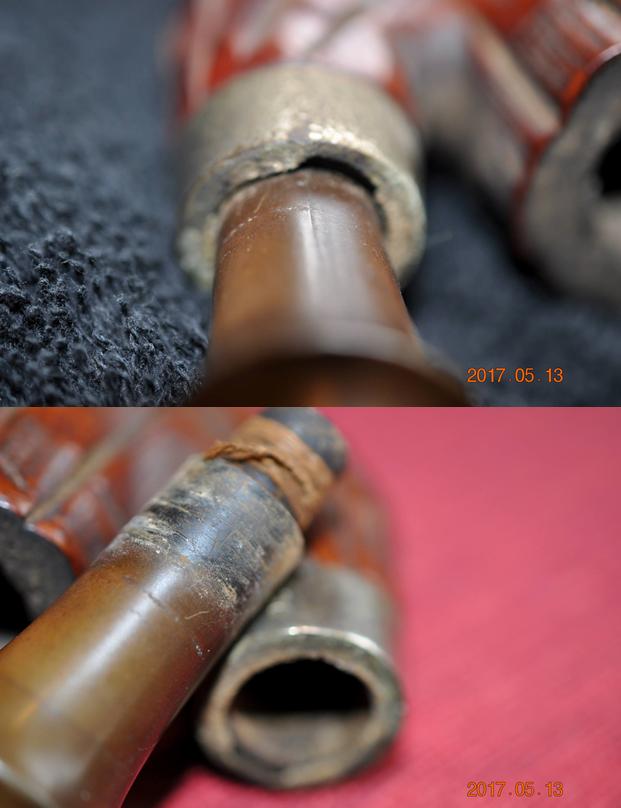
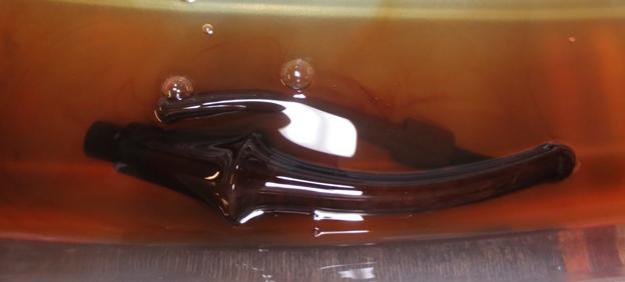
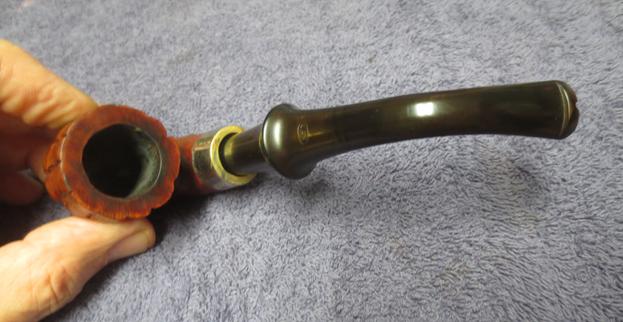
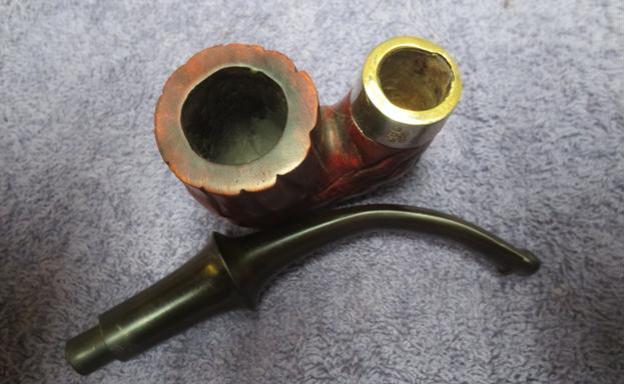
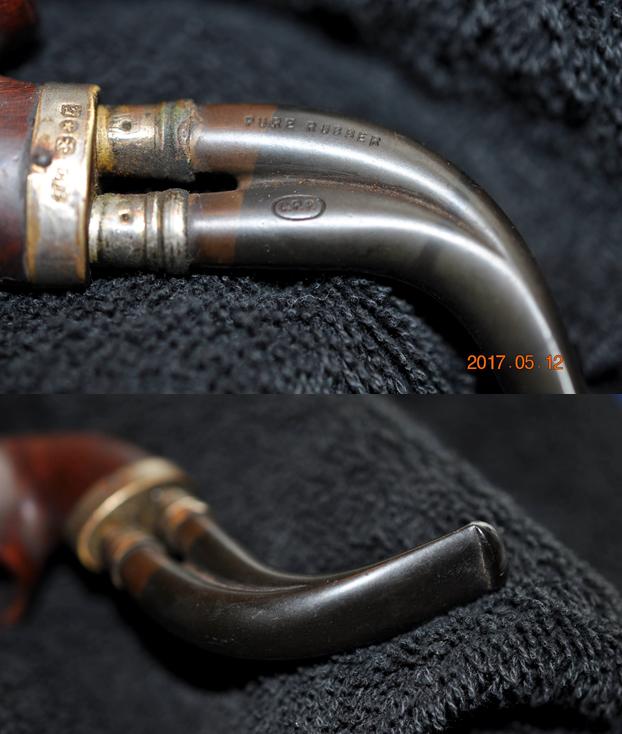
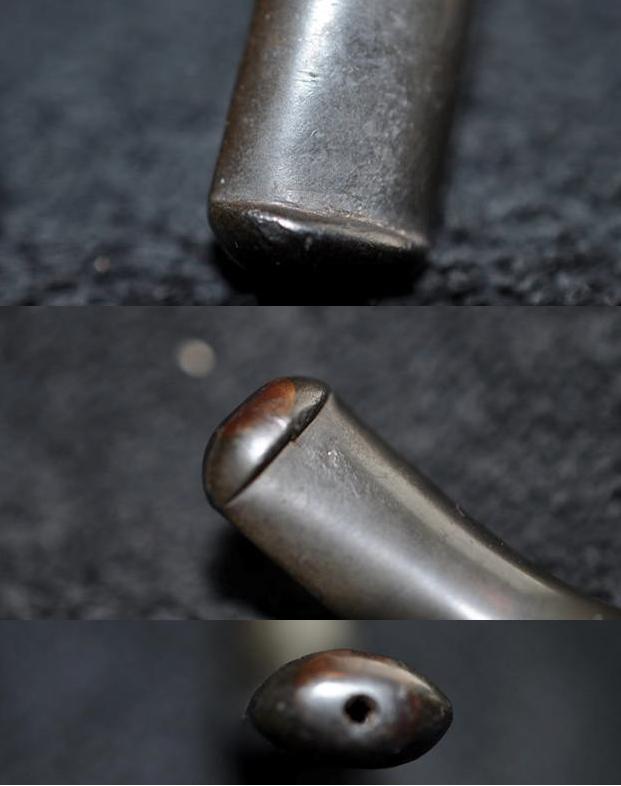
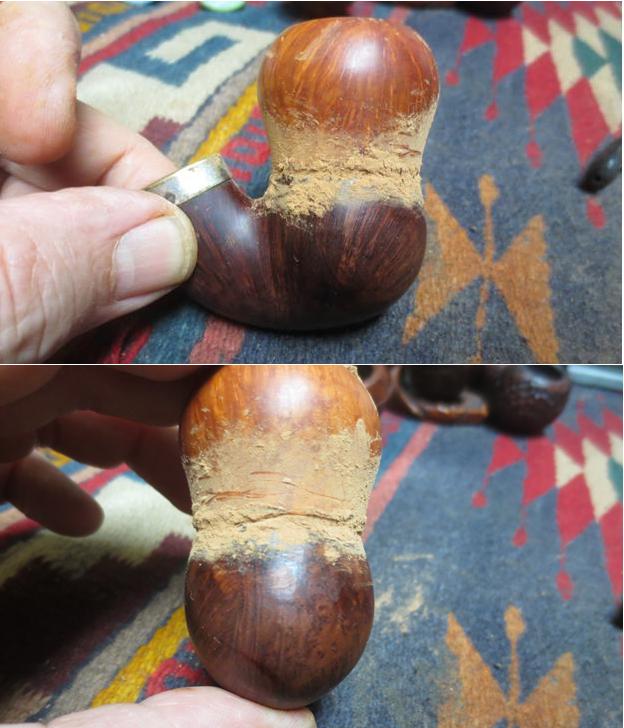
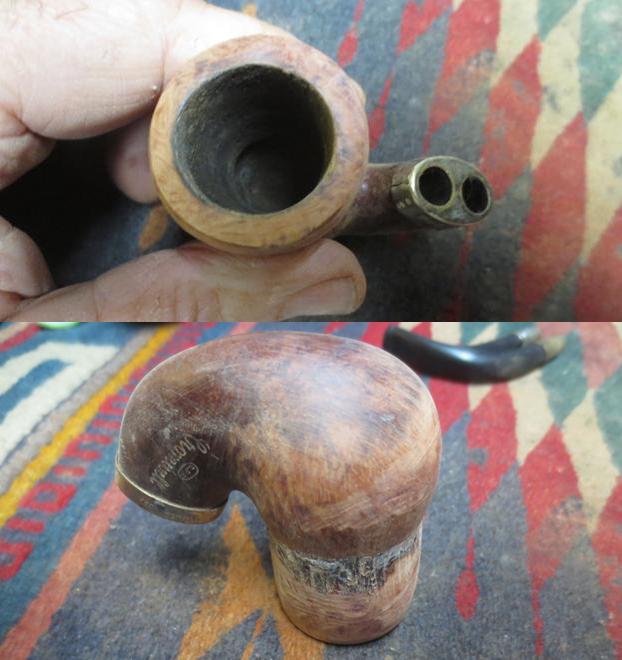
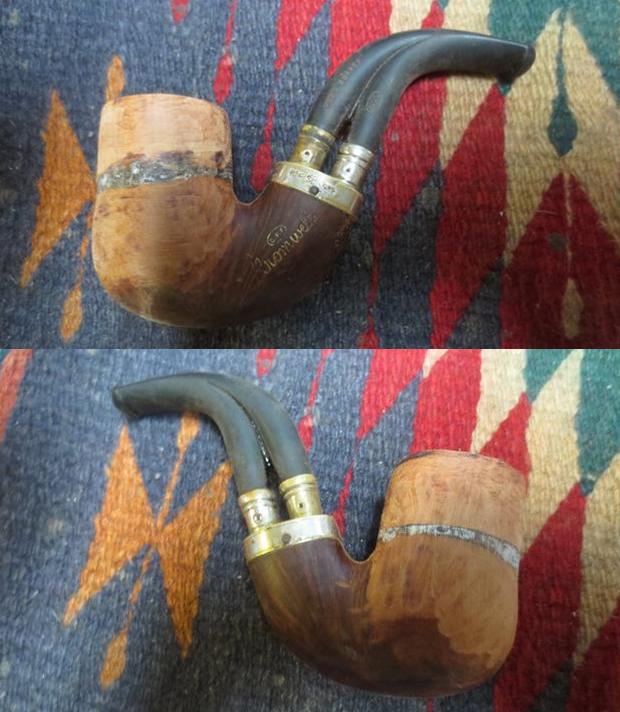
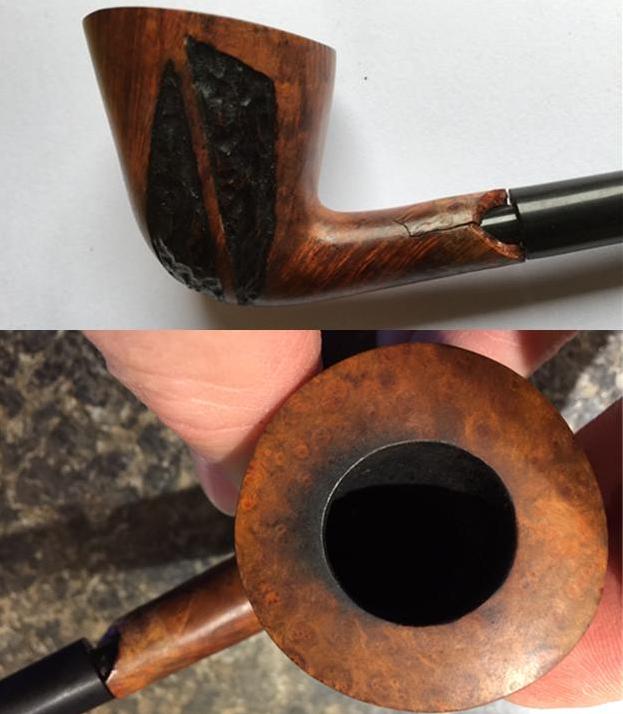
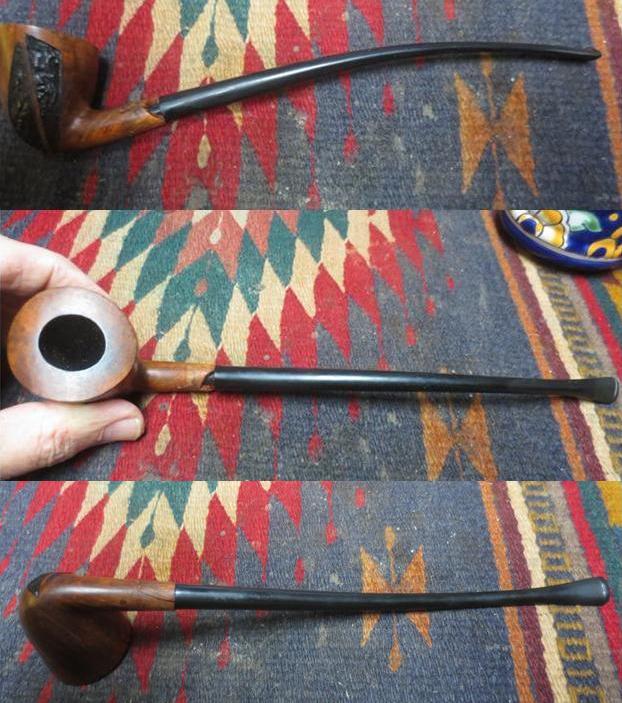
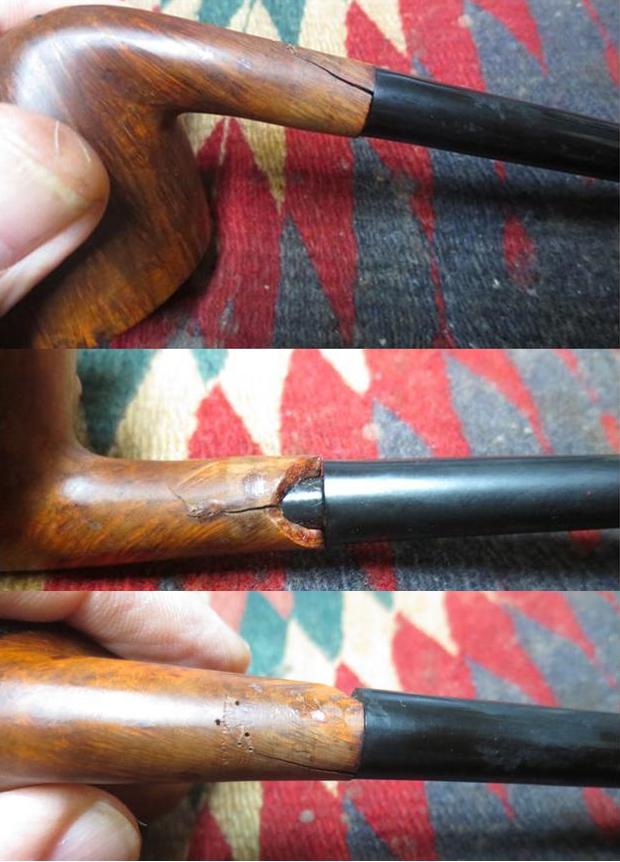
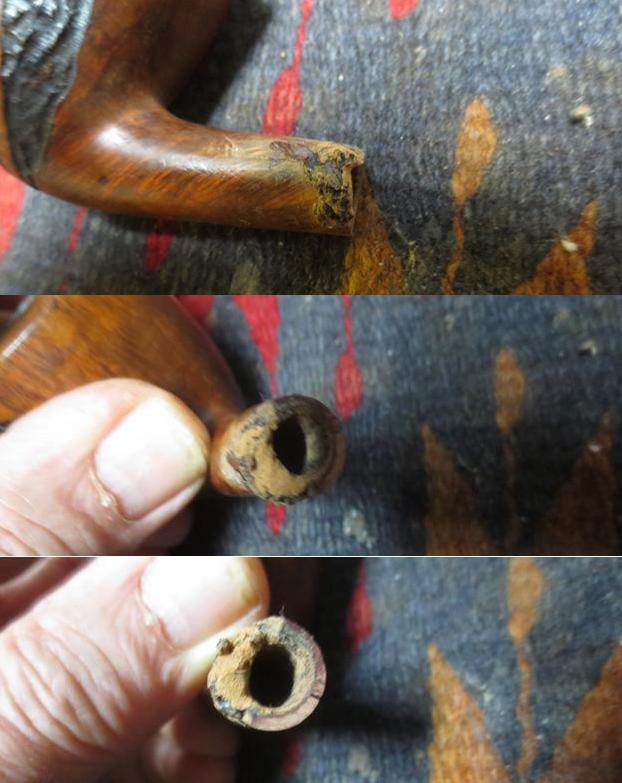
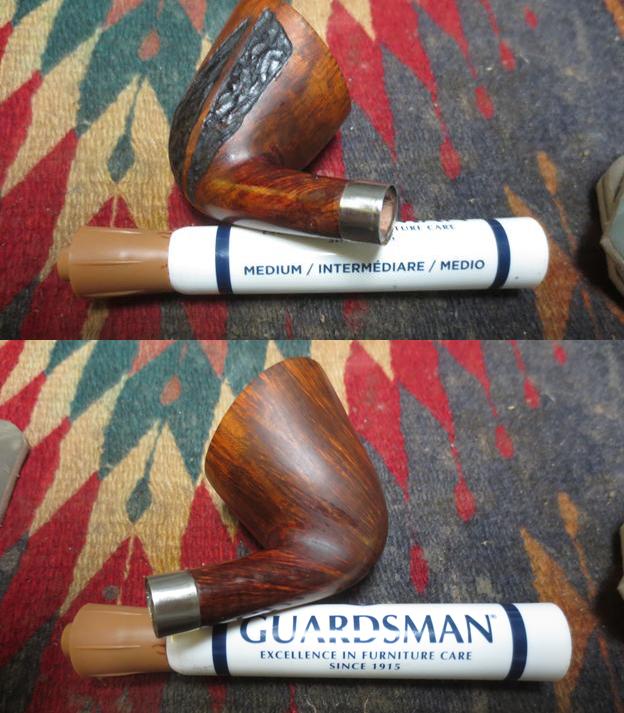
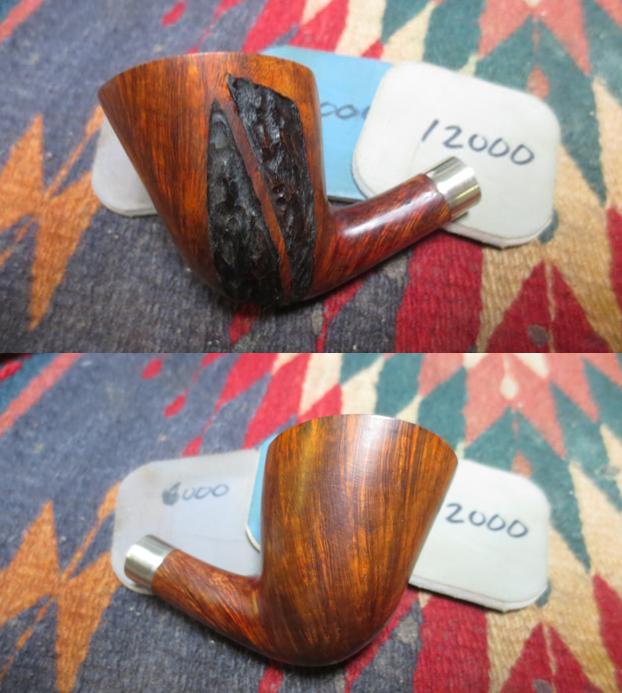
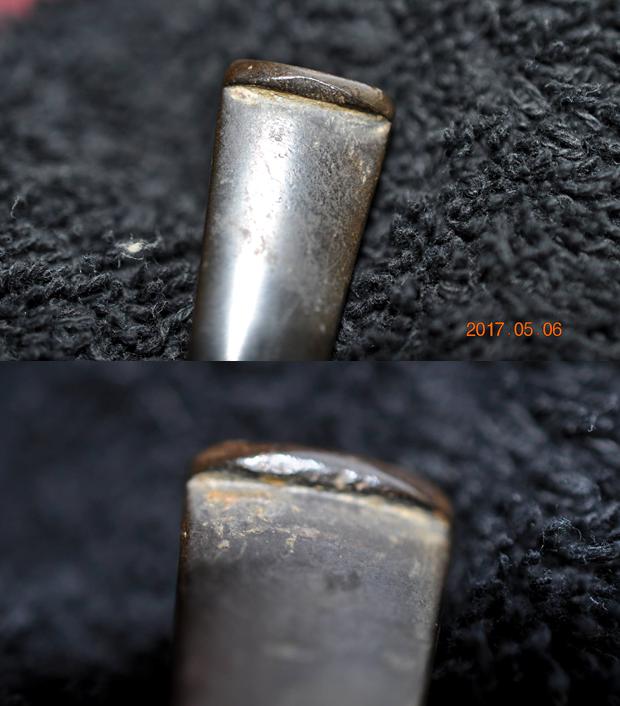
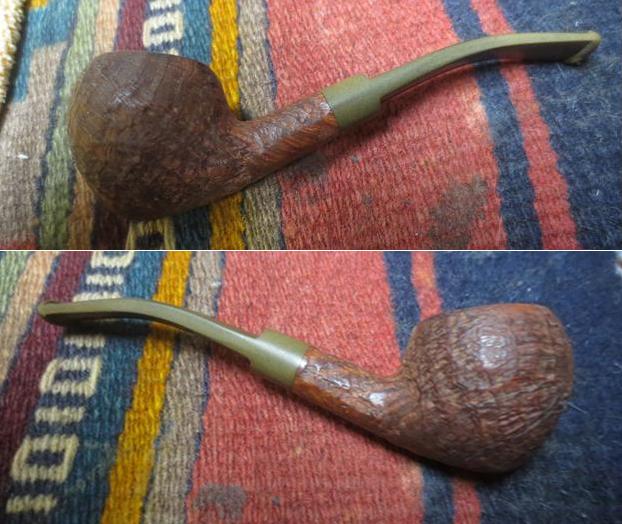
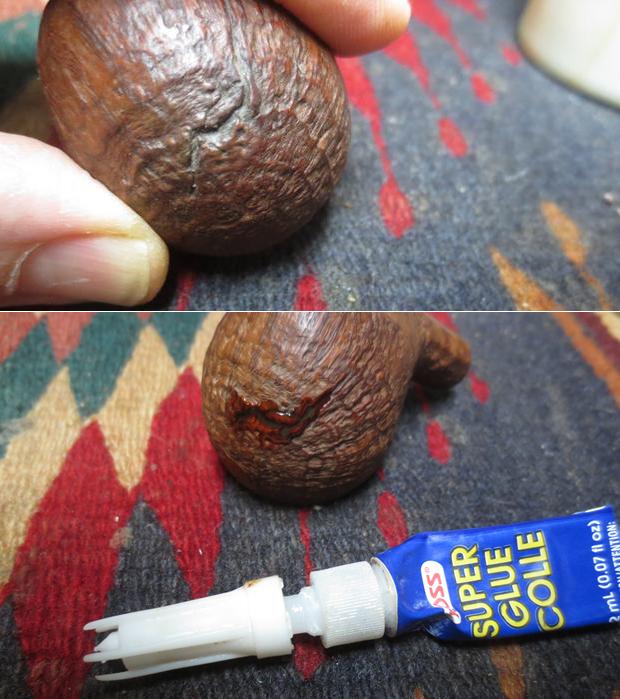
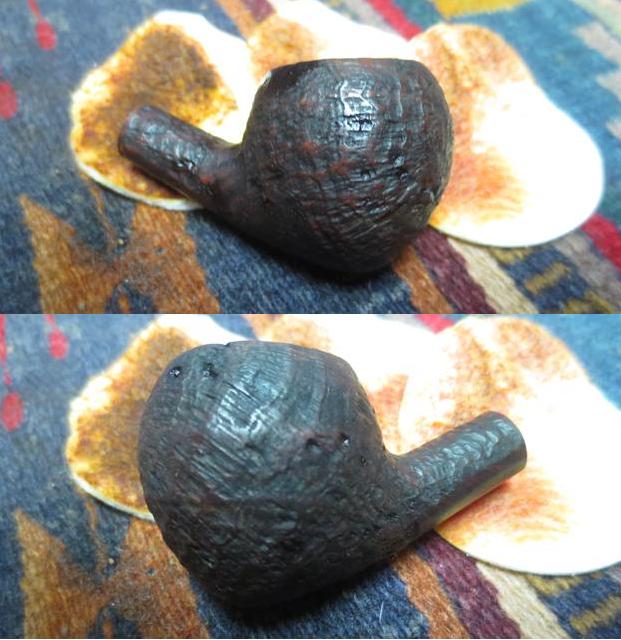
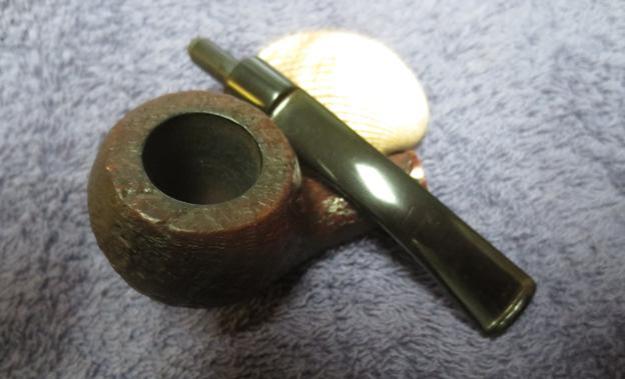
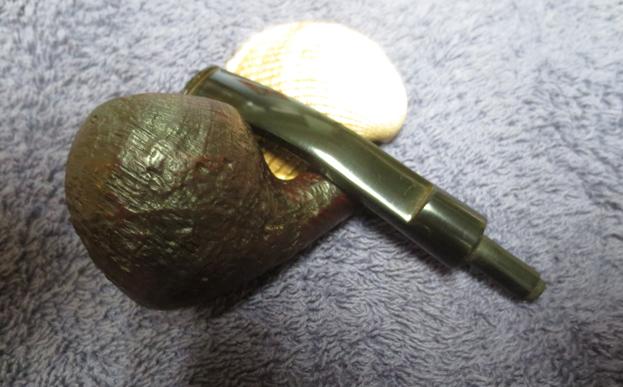
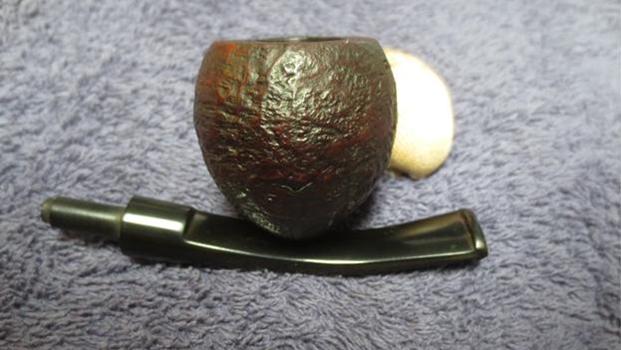
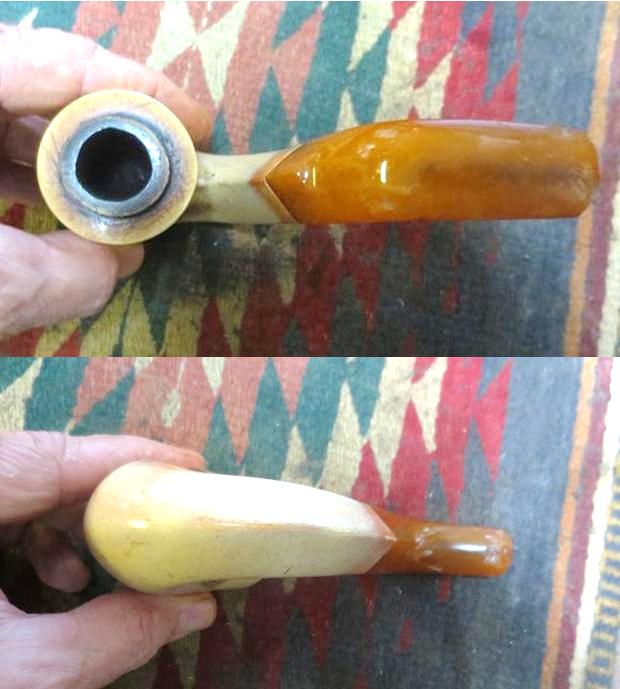
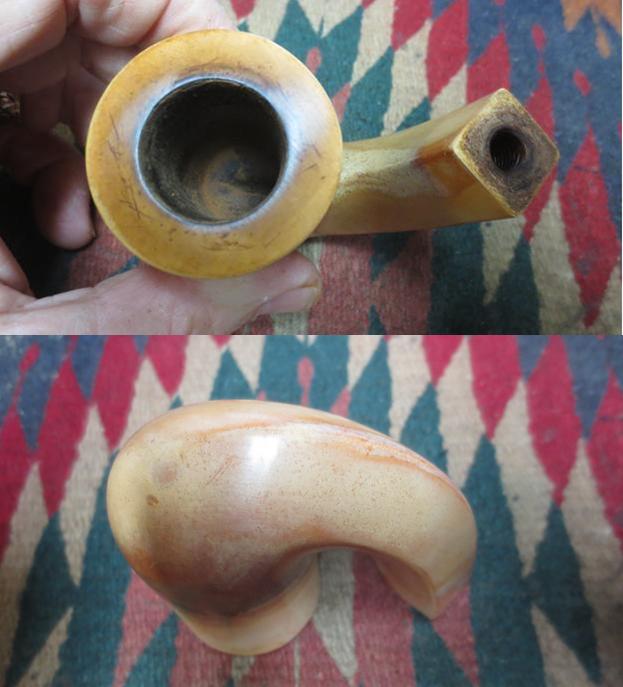
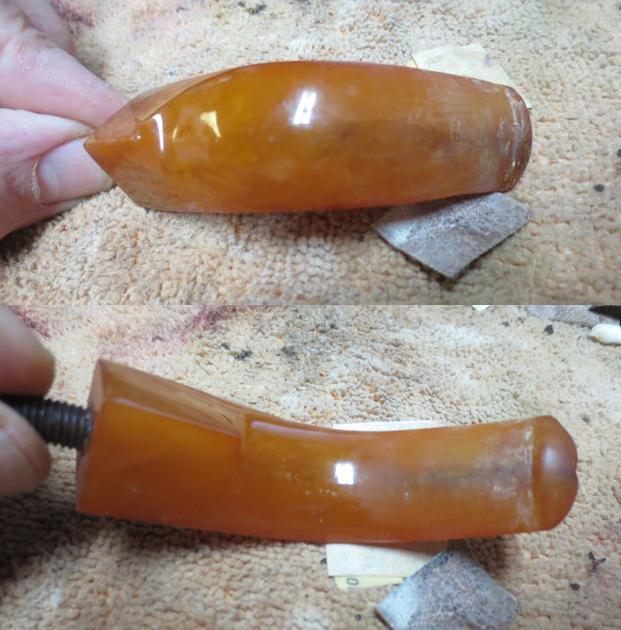
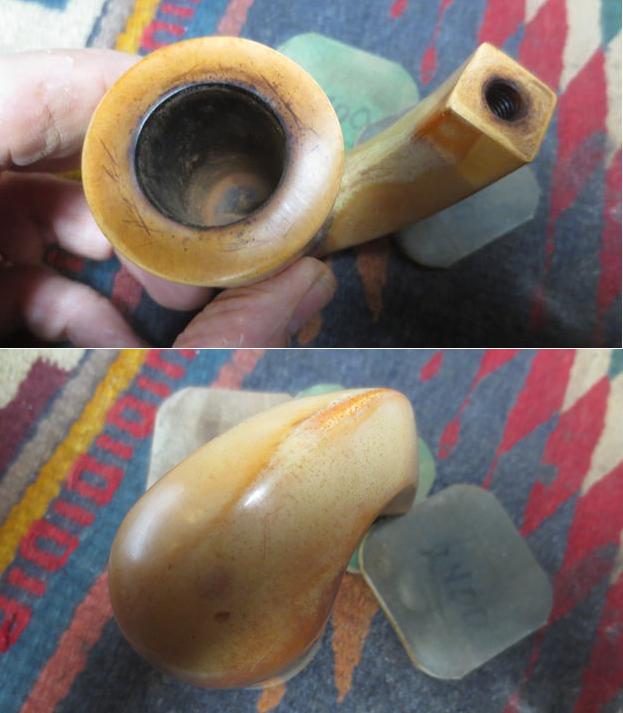
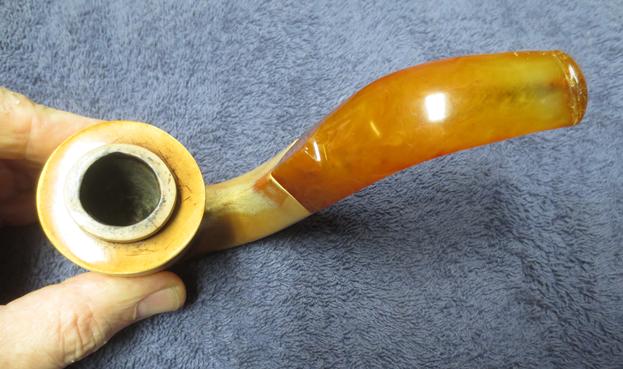
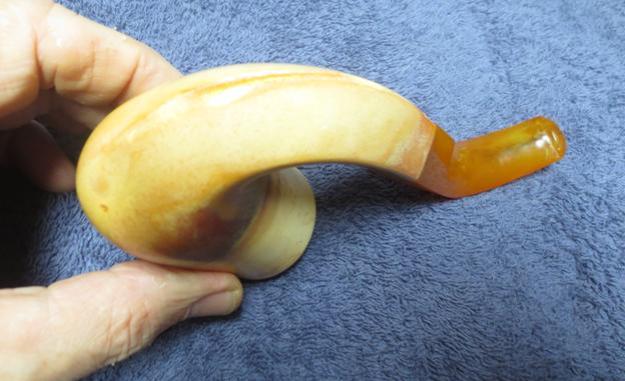
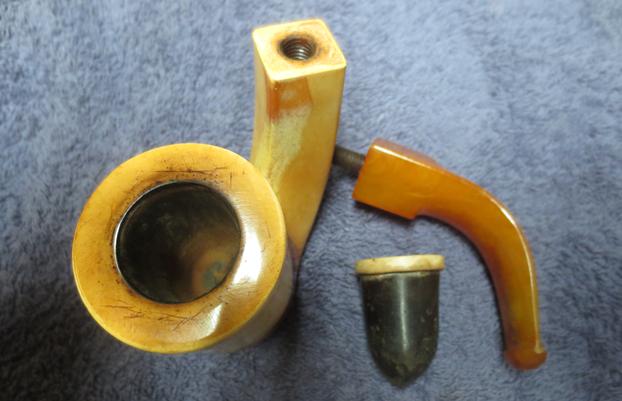
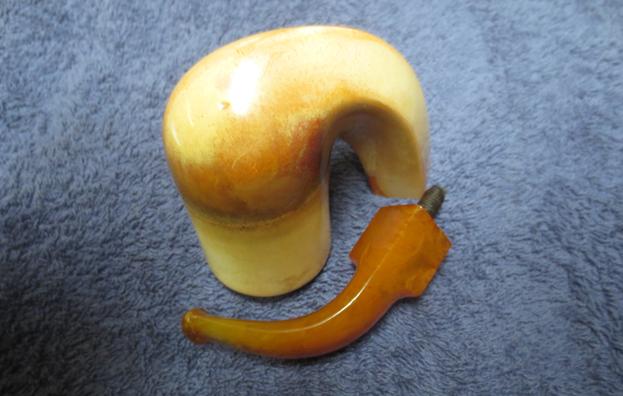
The pipe was larger than I expected when Jim and I spoke and was a pretty nice looking piece of briar. There were a couple of issues with the bowl. There were some small sand pits on the bottom of the bowl and shank. There was a large flaw that looked like an X at the junction of the bowl and the shank on the left side near the top of the shank. The bowl had a thick cake in it and there were actually cobwebs in the bowl. The rim had a light coat of tars and lava that overflowed onto the beveled surface of the inner edge of the rim. There was a deep gouge on the rim top on the right side toward the back of the bowl. The finish was spotty and worn with shiny spots and scratches on the shank and on parts of the bowl sides. The stem was lightly oxidized and sported a lot of tooth chatter but no deep tooth marks. The stem did not fit tight against the shank with a small gap at the top that told me that the tenon was slightly bent.
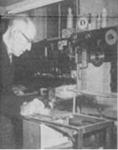
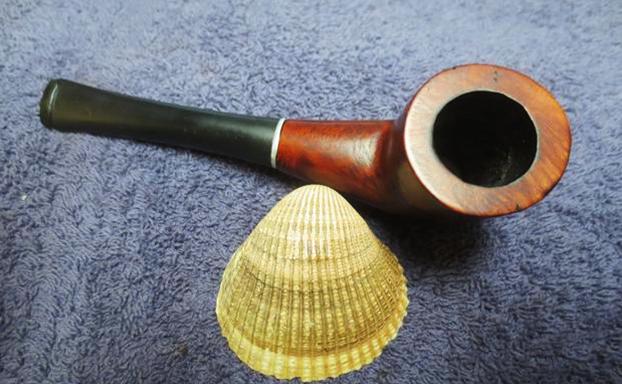
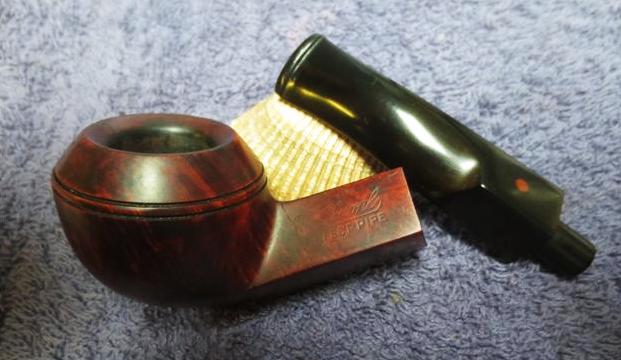
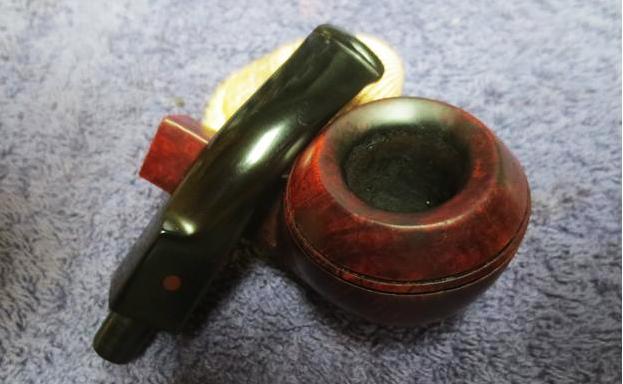
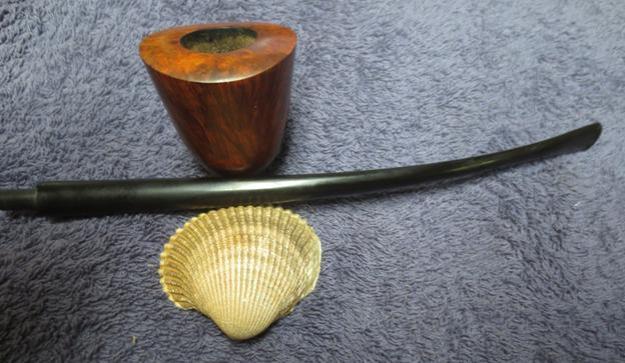
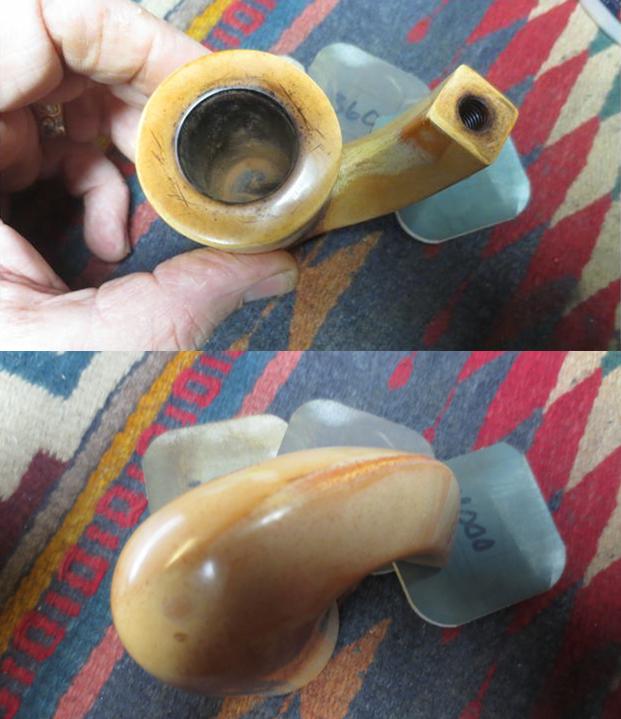
I took a series of photos of the pipe to record the condition it was in when it arrived.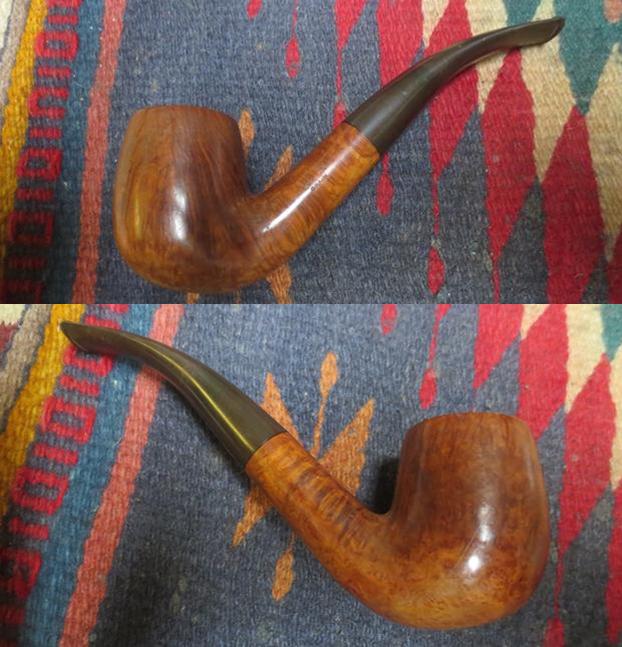
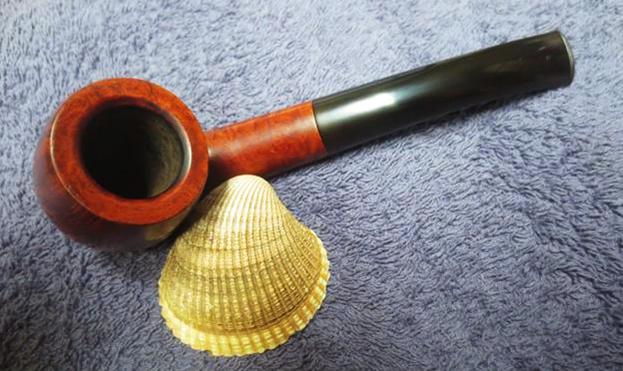
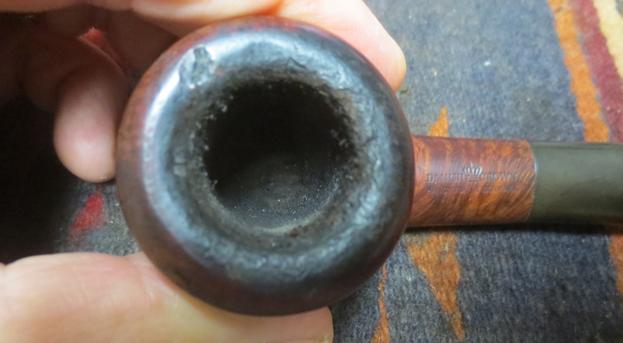
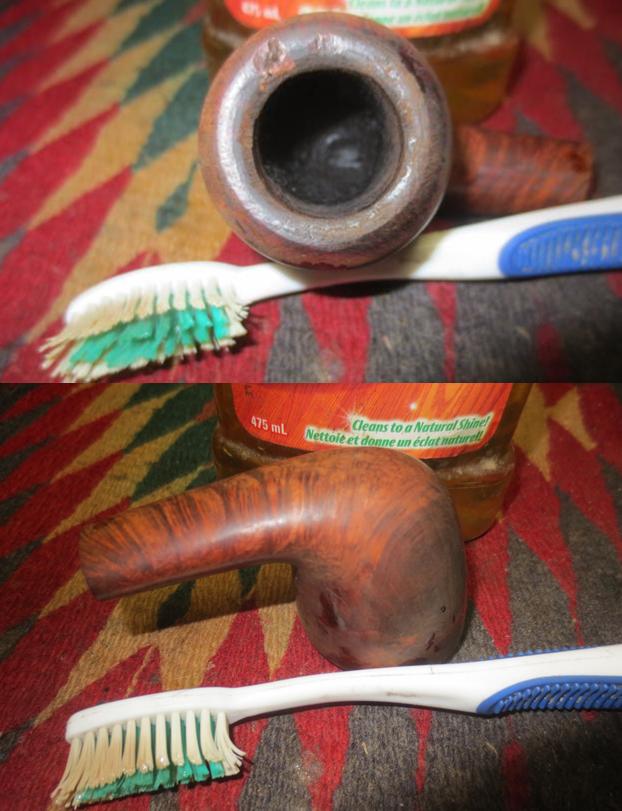
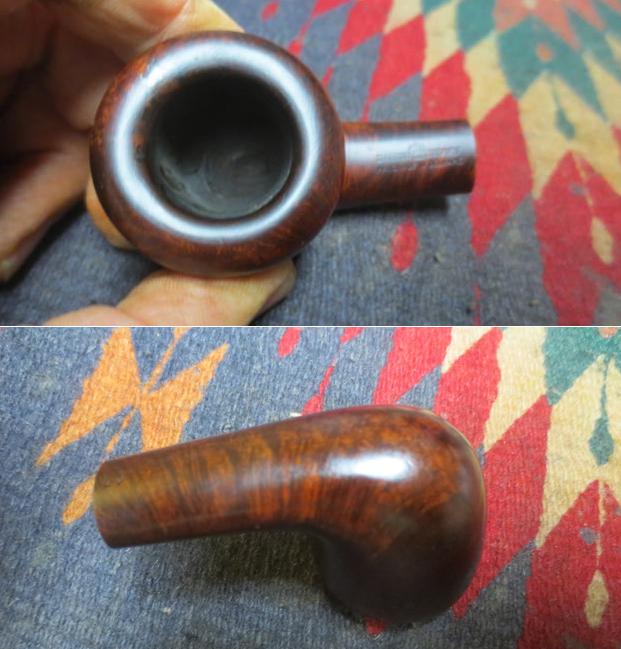
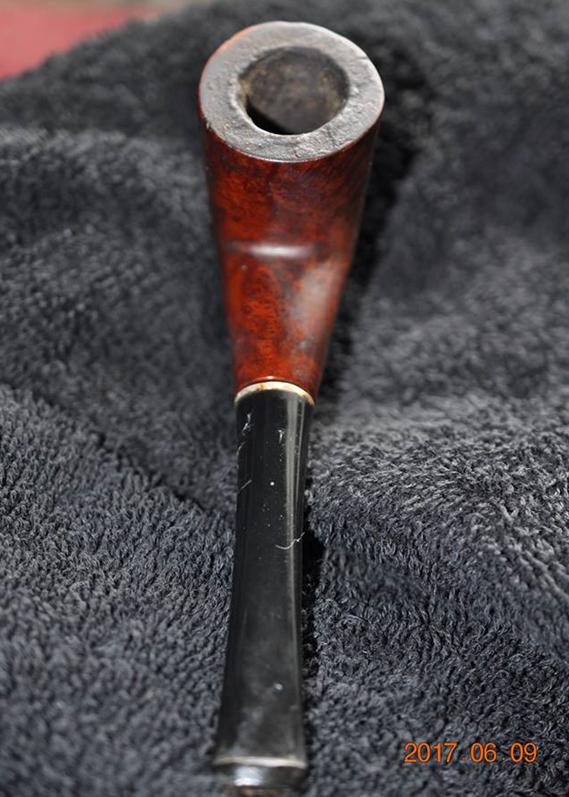
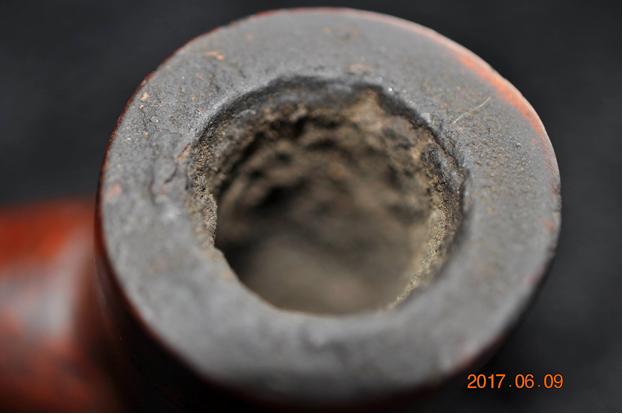
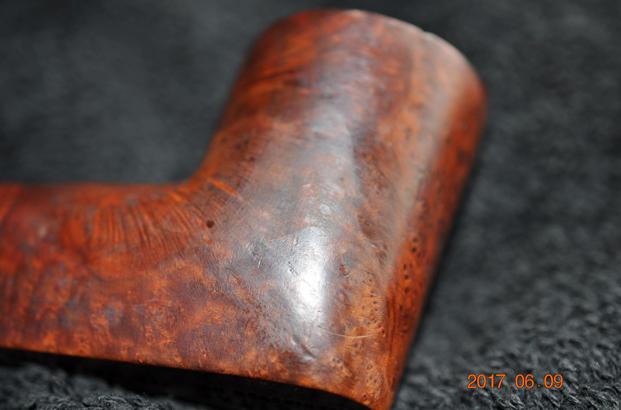
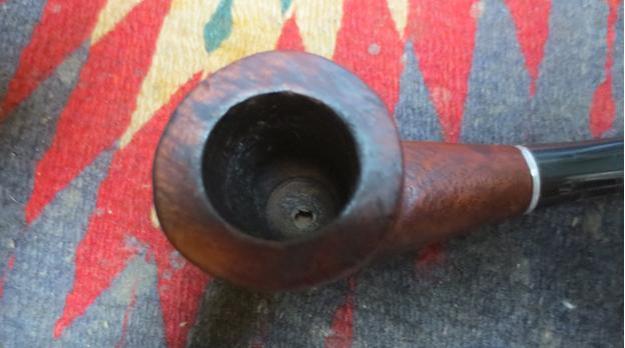
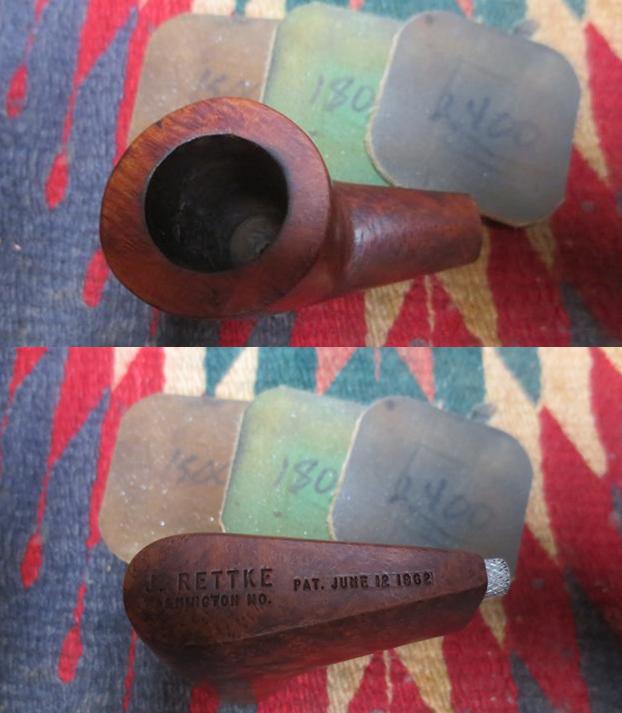
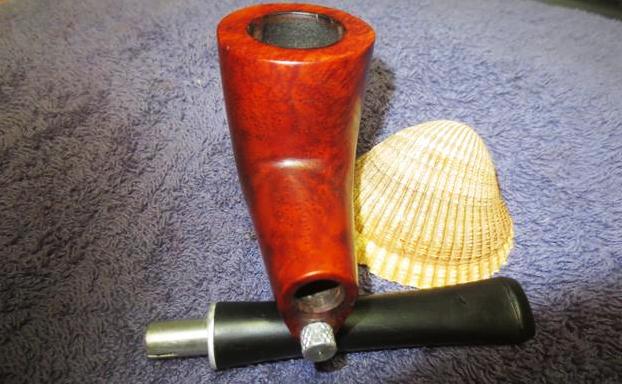
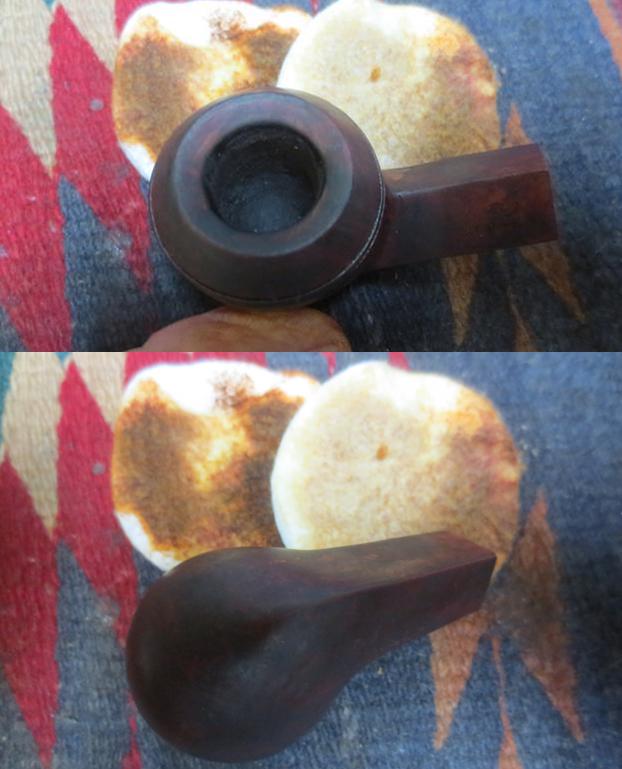
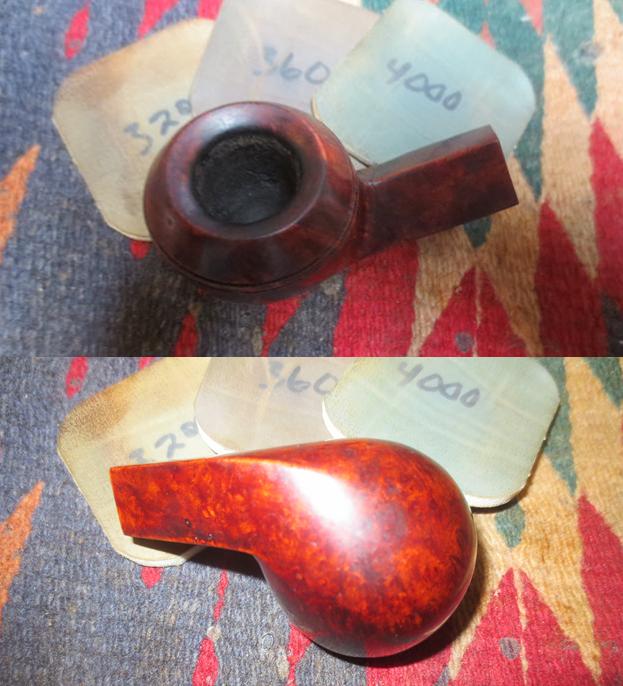
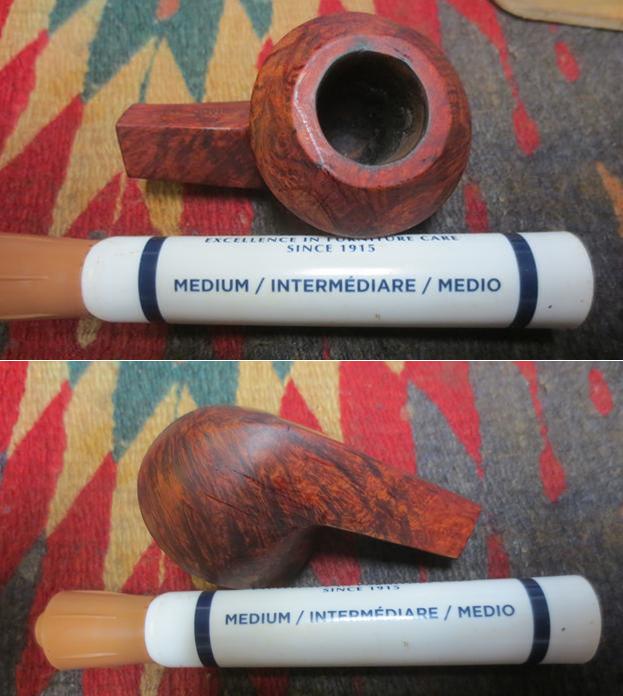
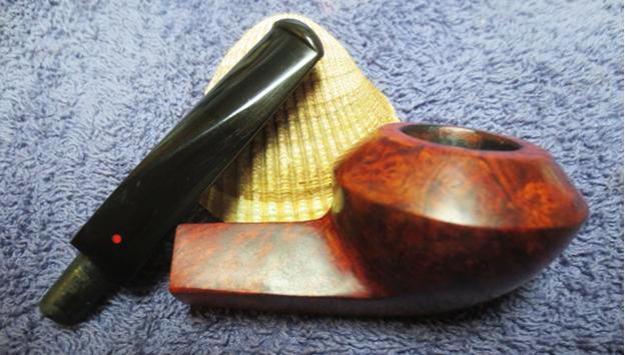
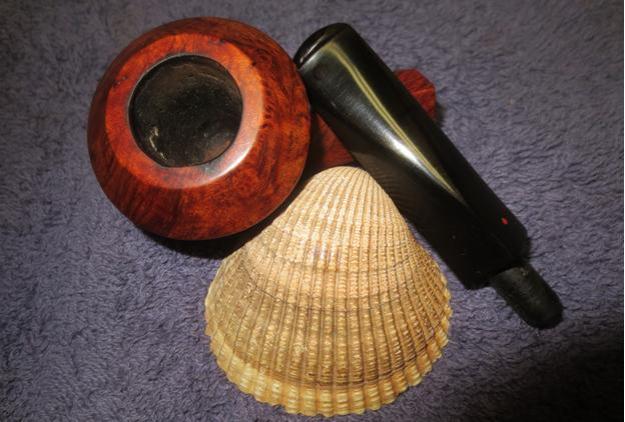
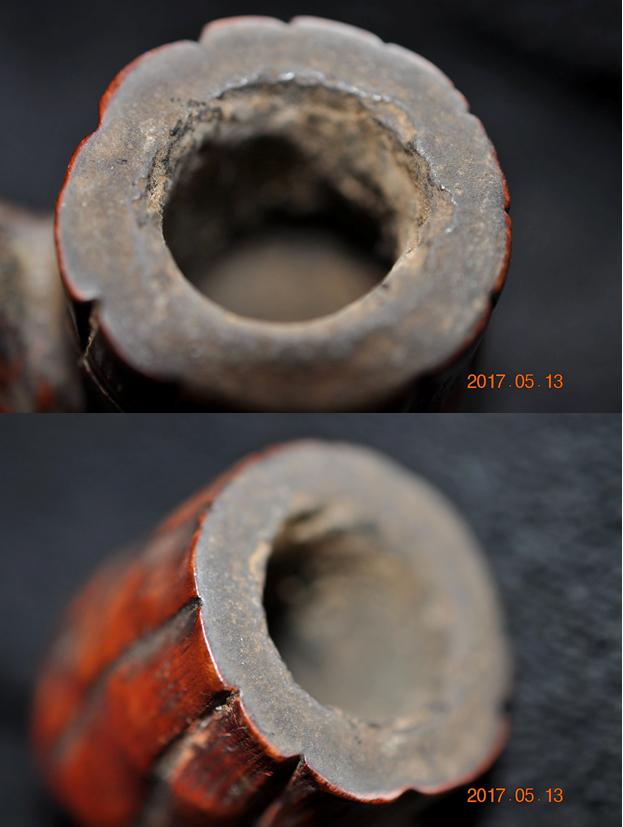
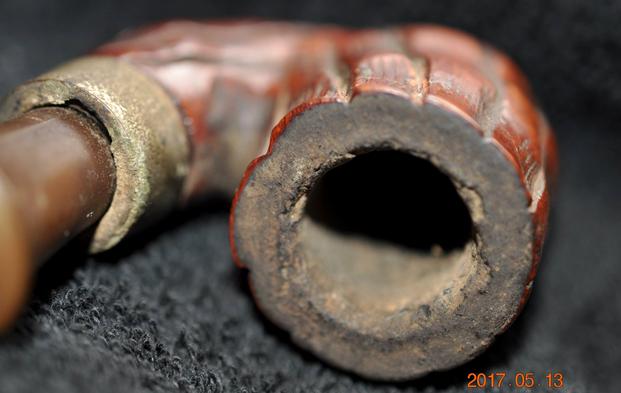
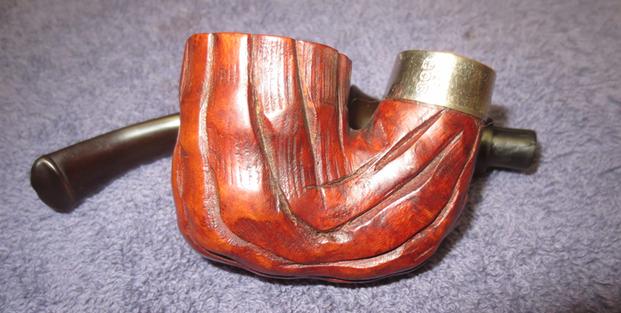
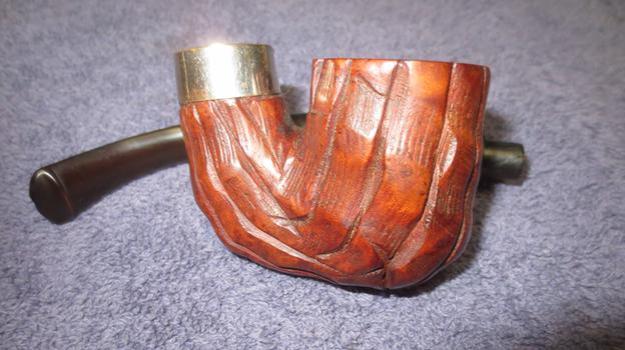
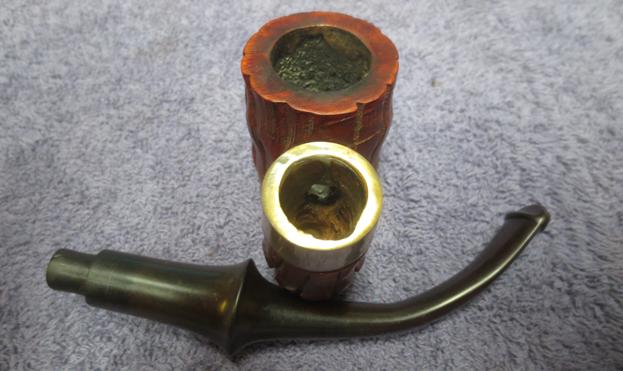
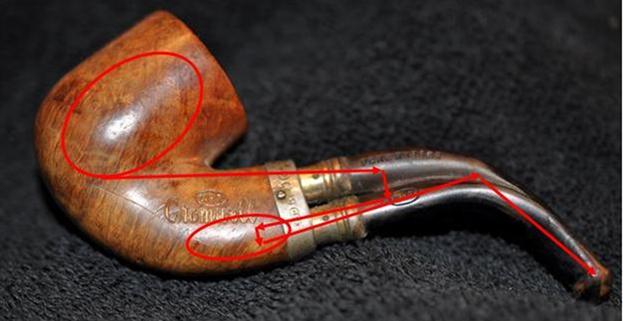
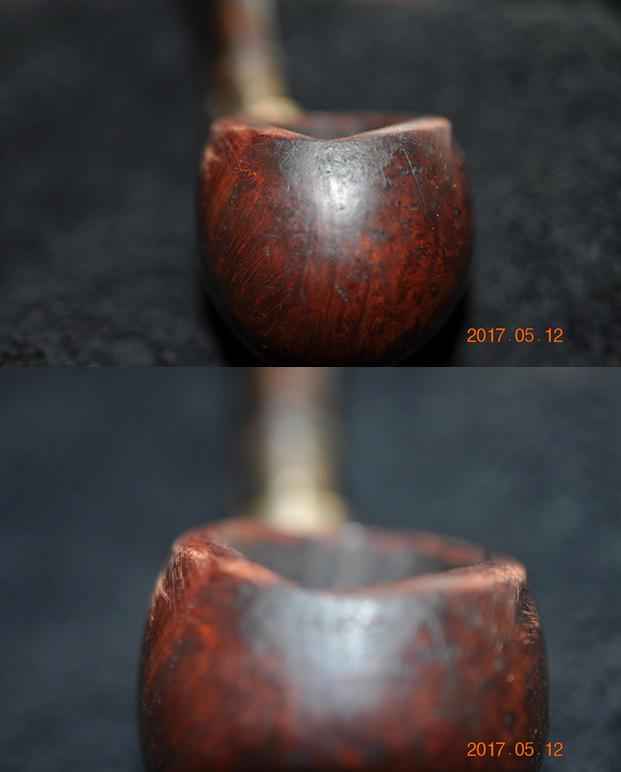
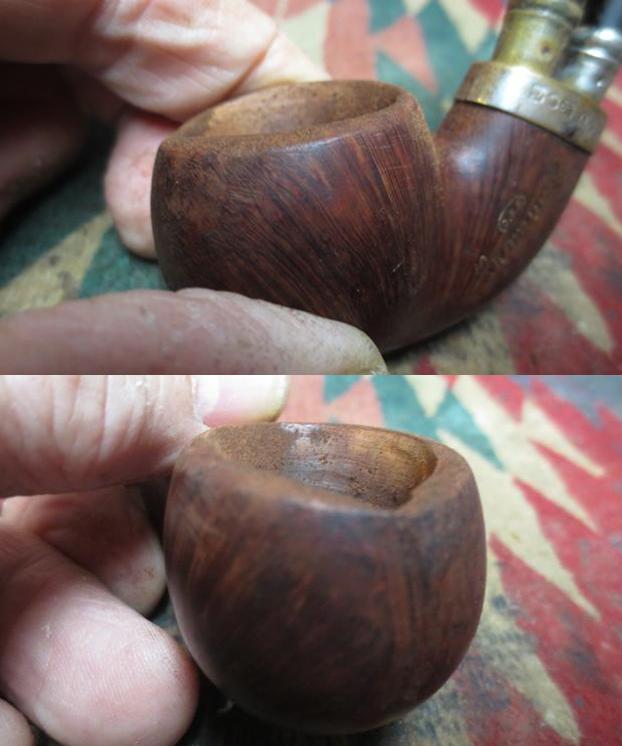
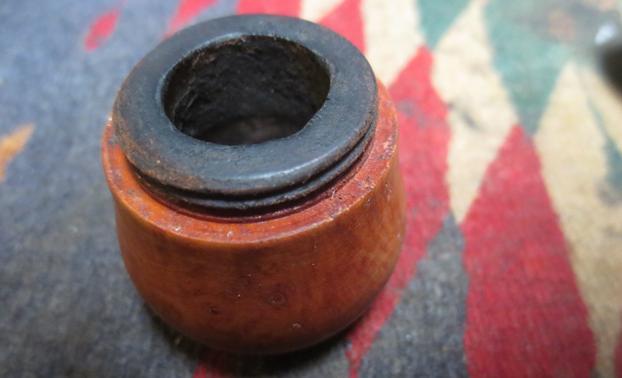
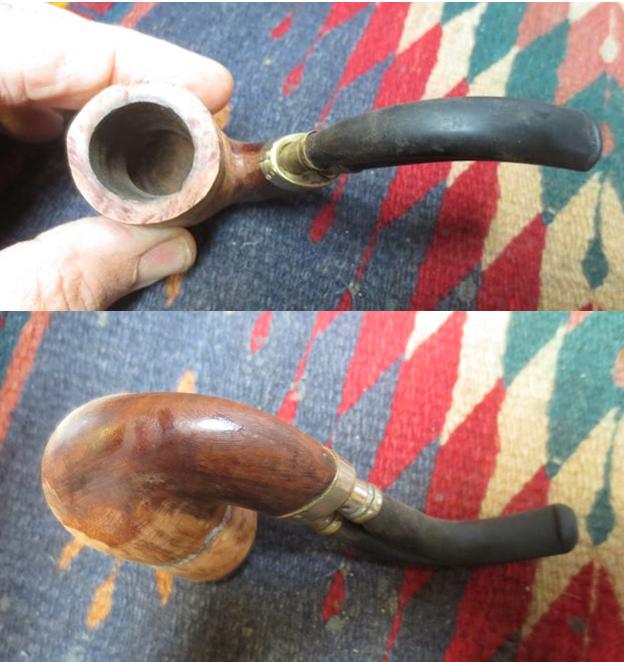
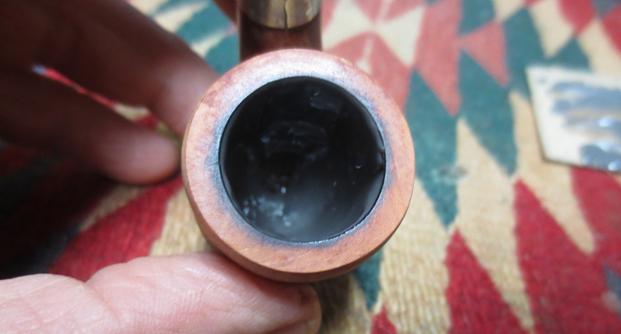
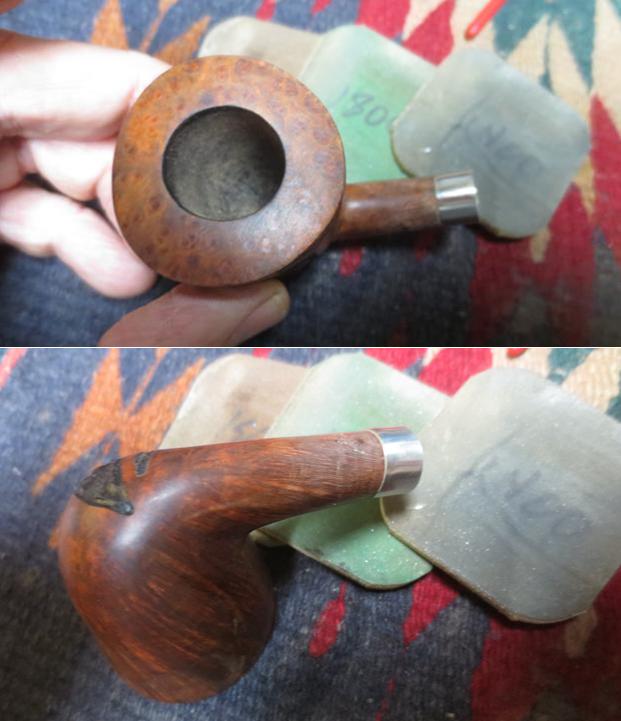
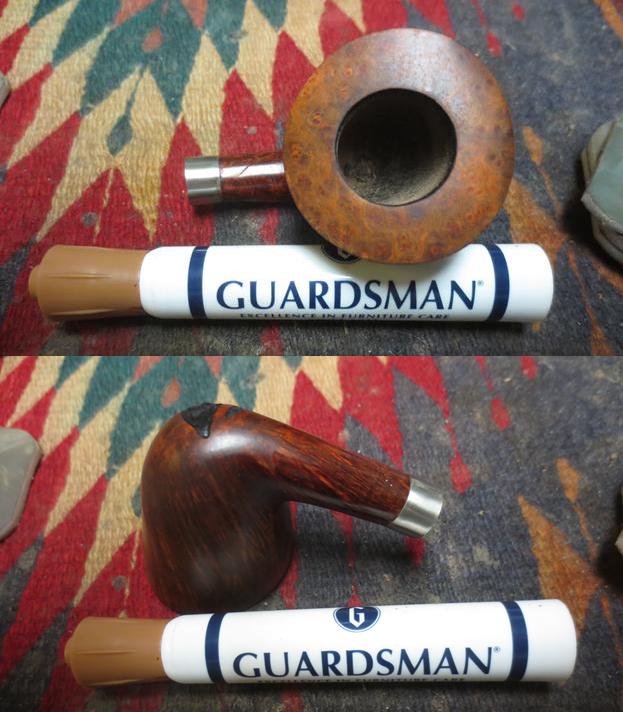
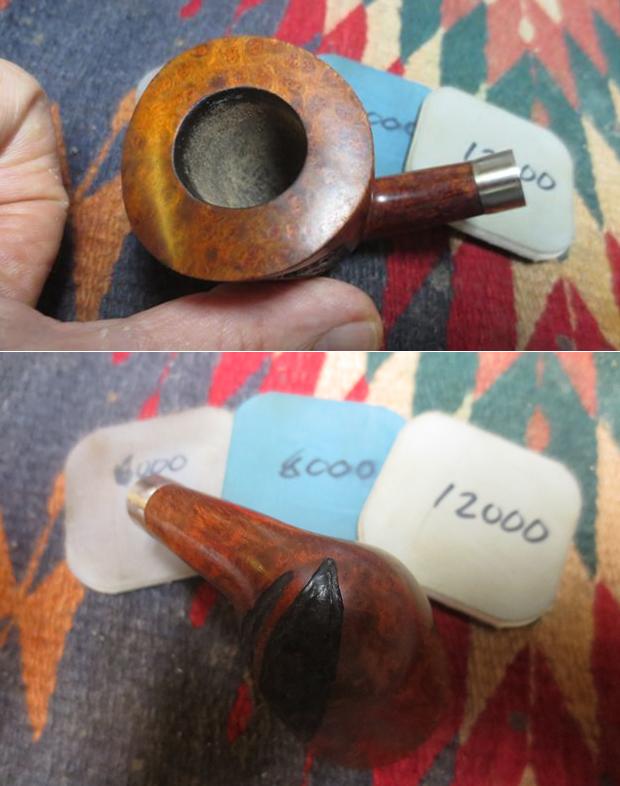
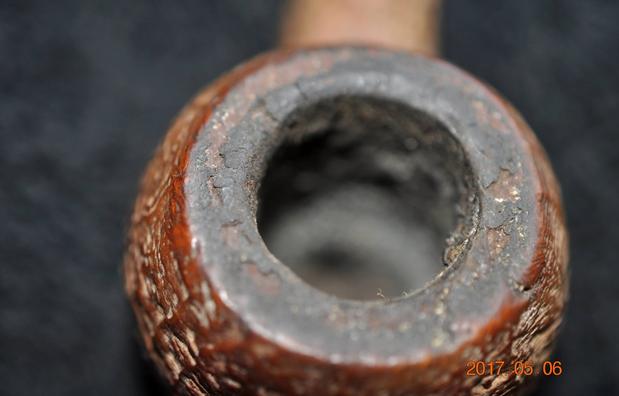
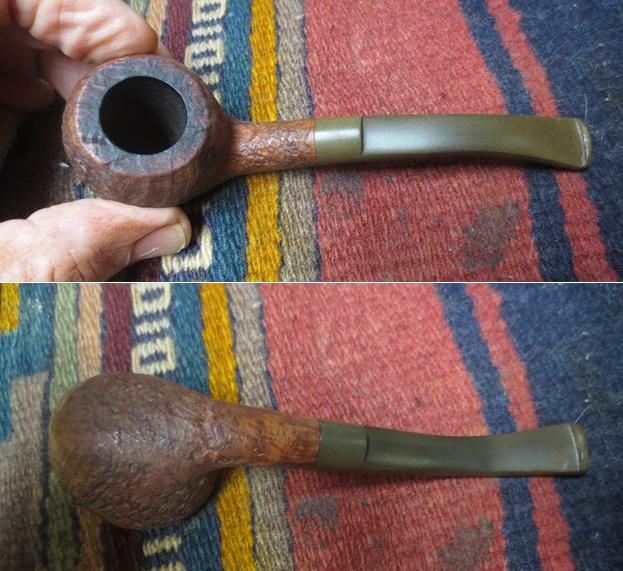
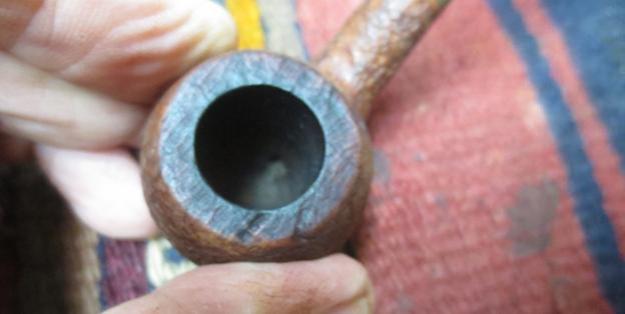
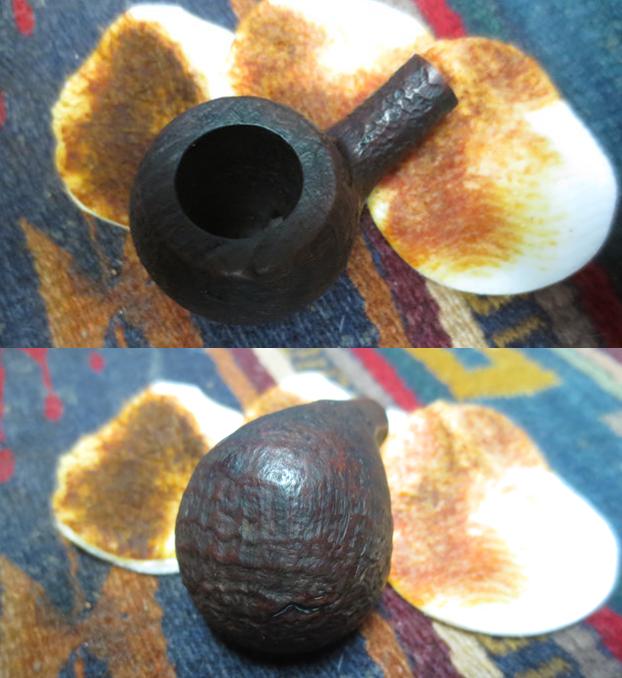
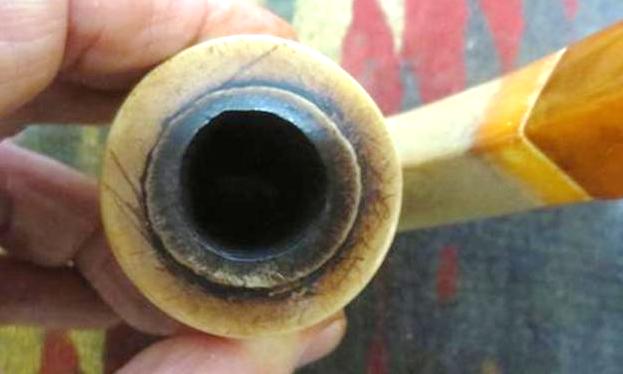
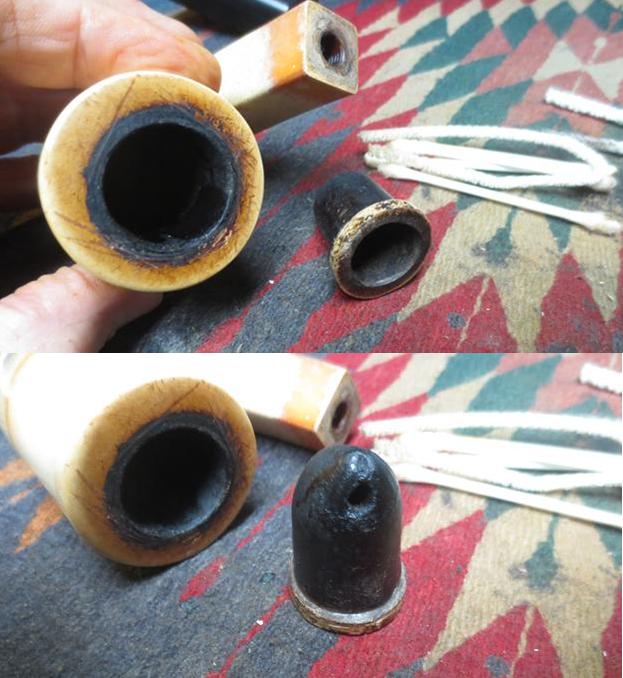
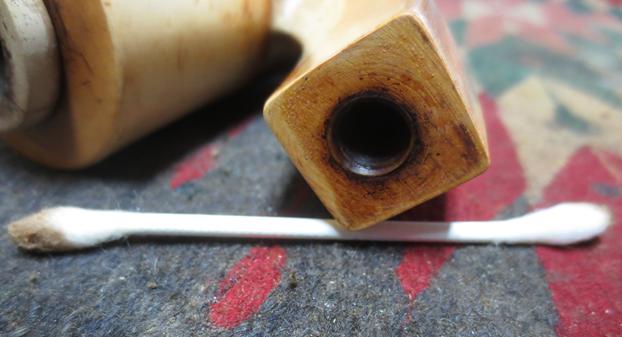
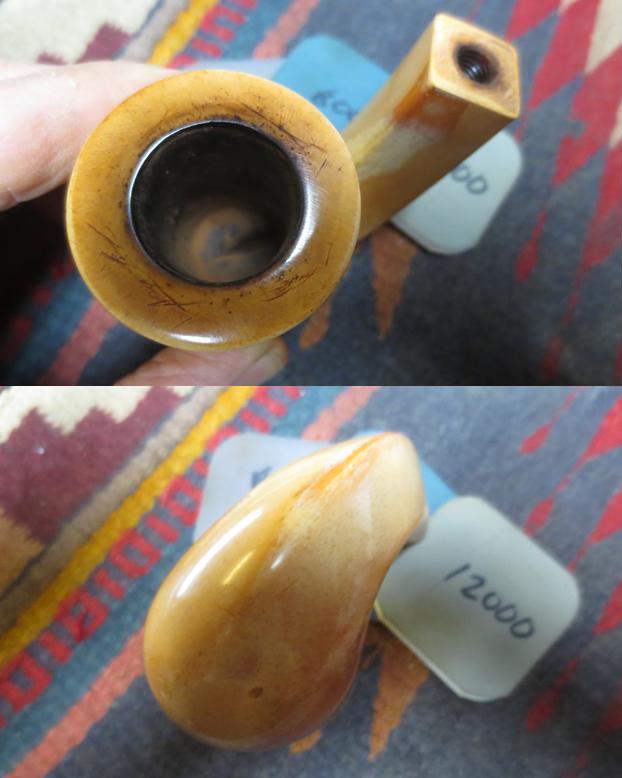
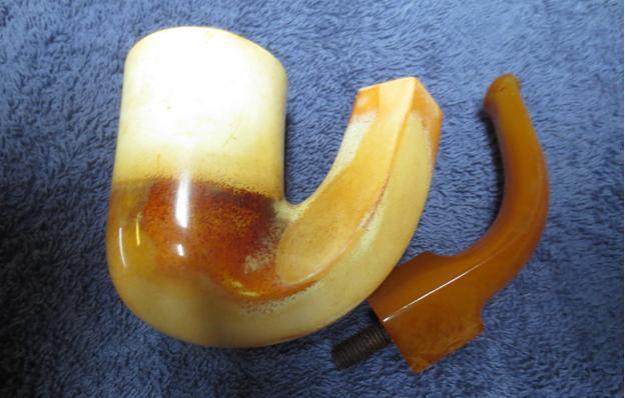
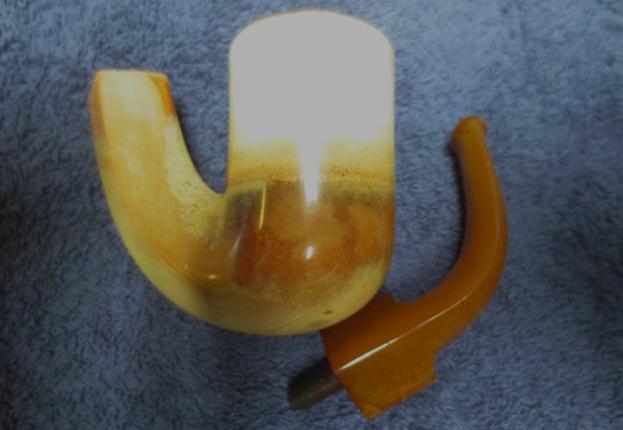
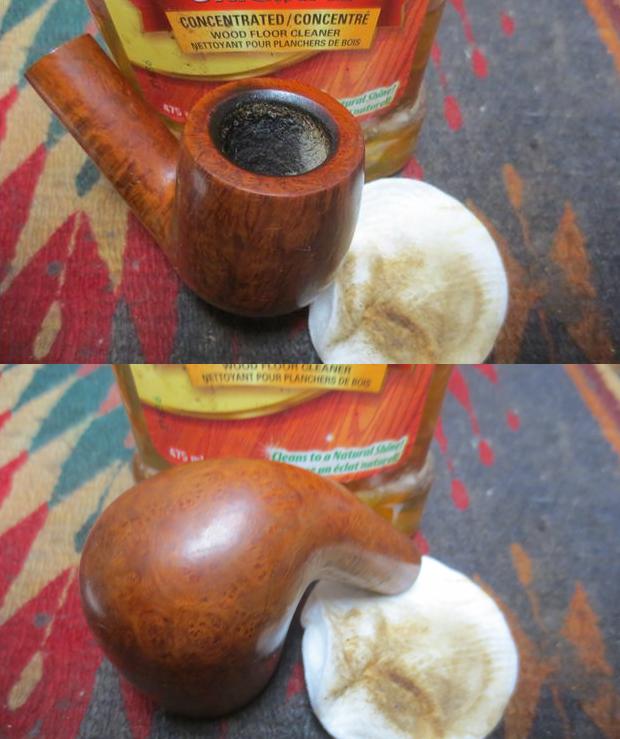
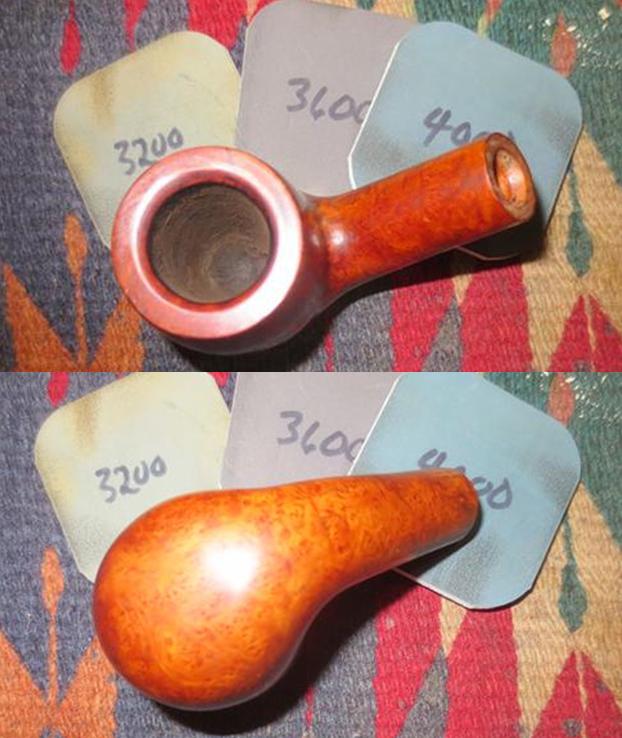
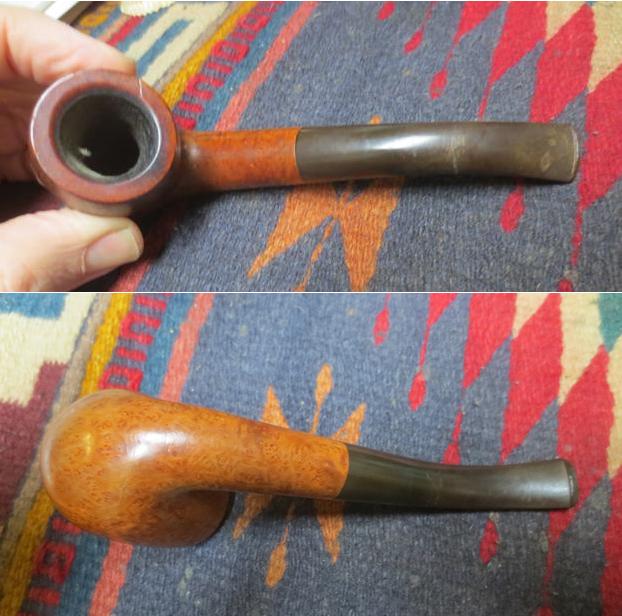 The next photo show the top of the rim, the darkened and lava encrusted beveled inner edge, the thick cake and the cobwebs deep inside the bowl. You can also see the gouge on the right side of the rim top at the 1 o’clock position in the photo below. I have circled it in red for ease of reference. The pipe certainly had great bones but it was in dire need of a cleanup so that it could be passed on in the pipeman’s trust. This was going to be a fun pipe to work on.
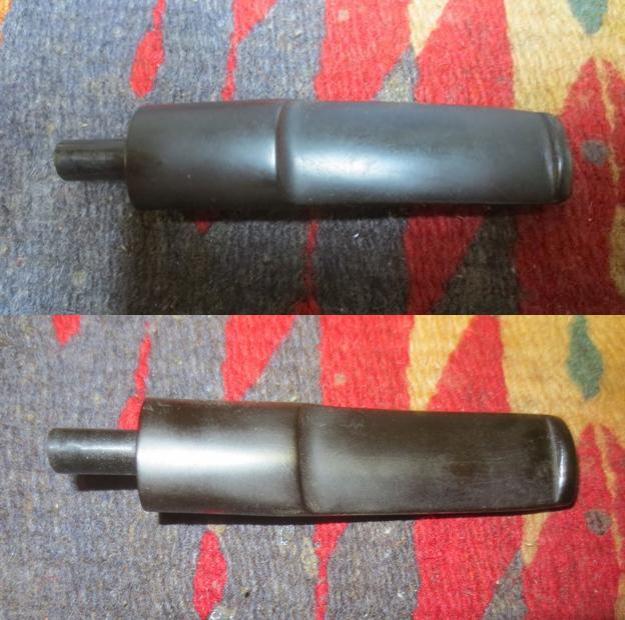
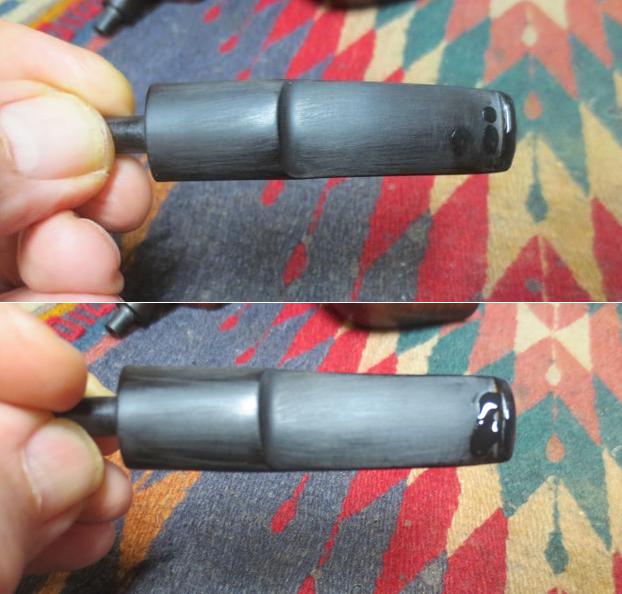
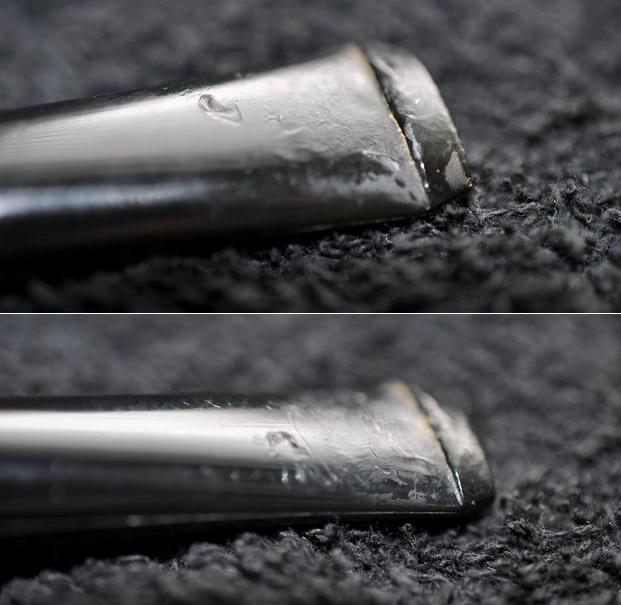
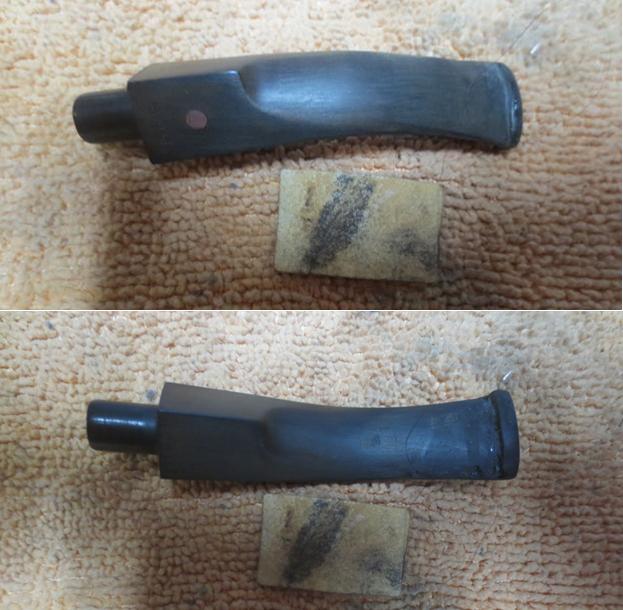
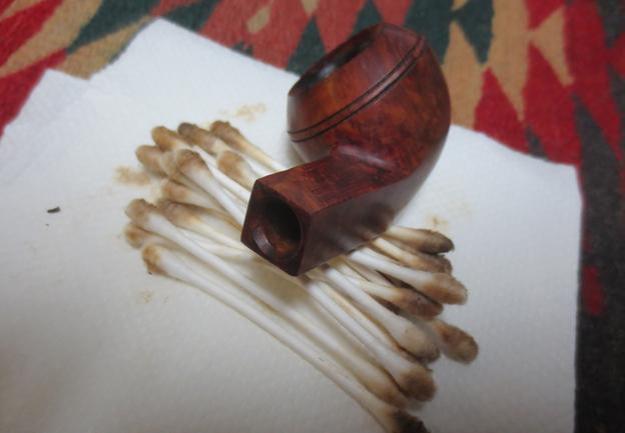
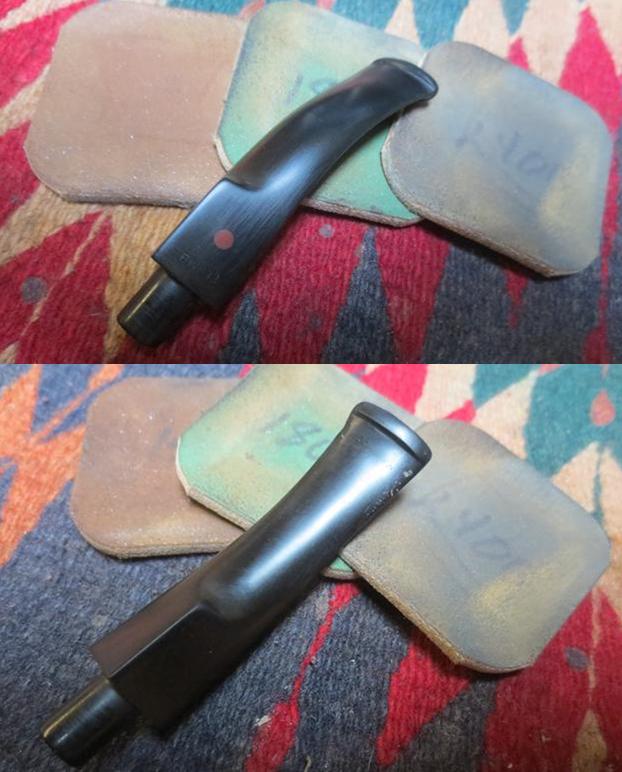
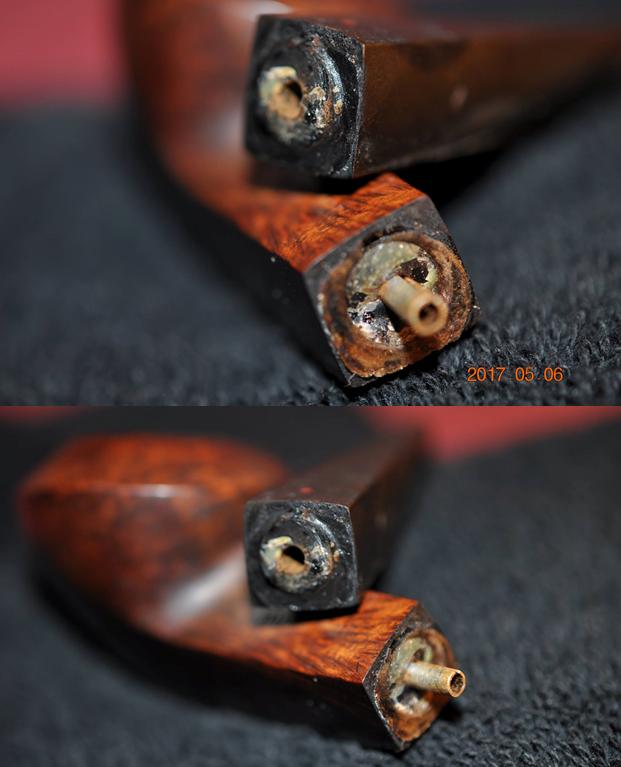
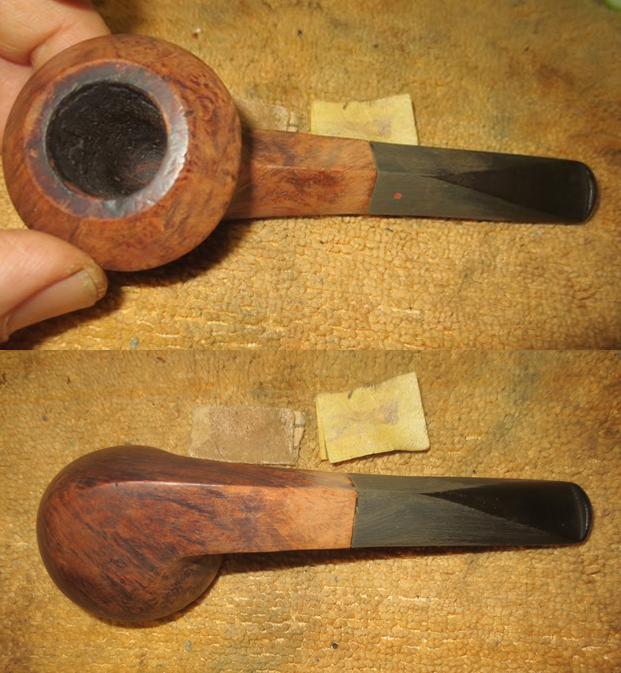
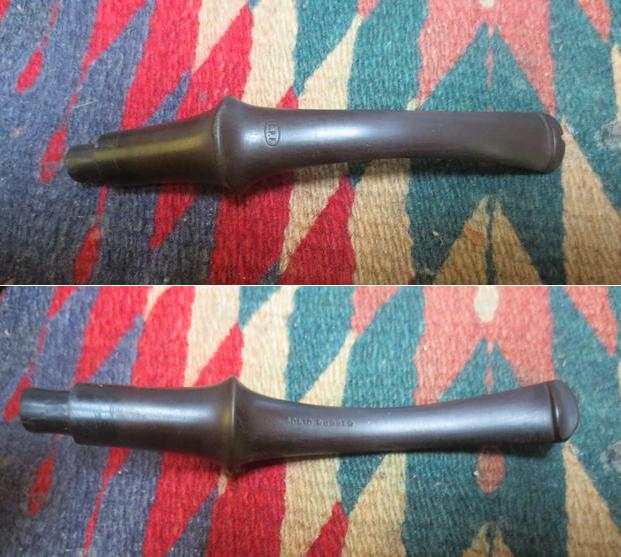
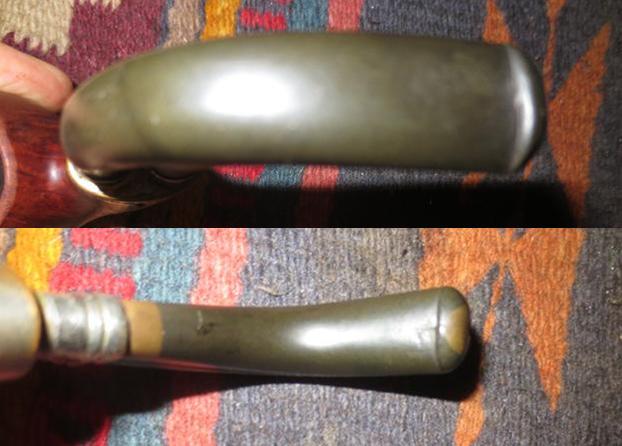
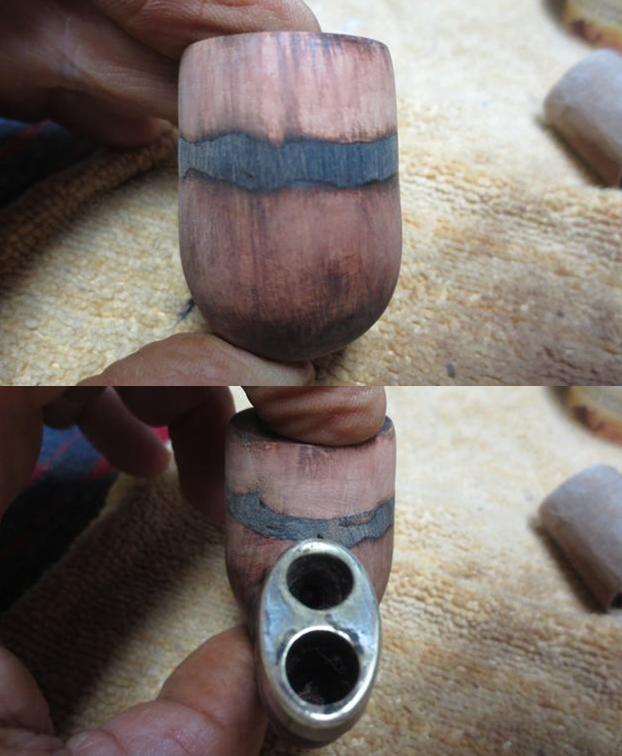
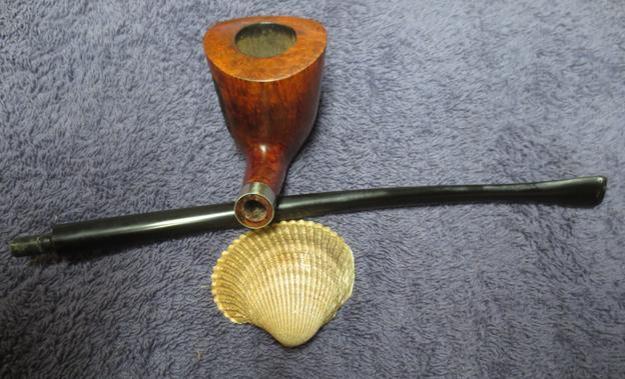
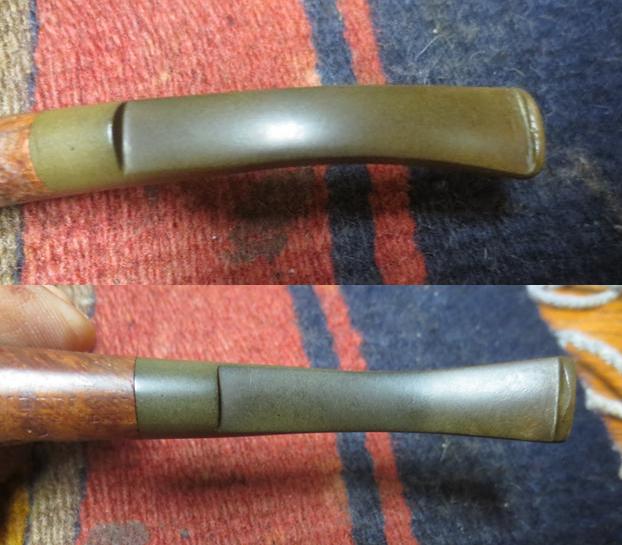
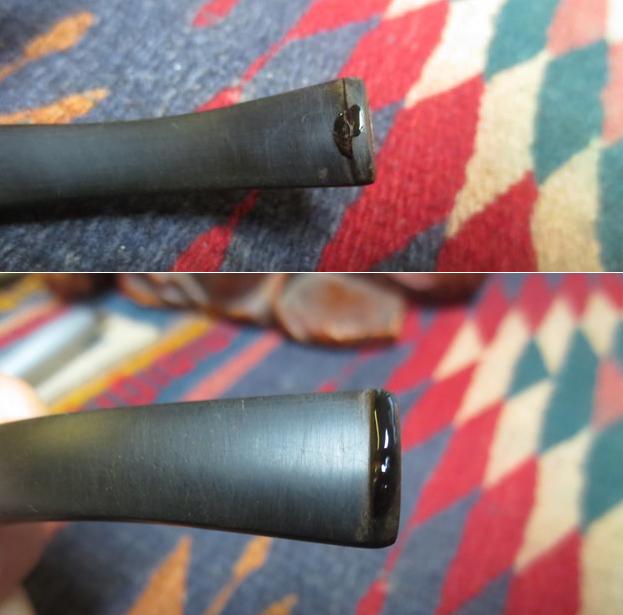
 I took photos of the oxidized stem to show the general condition of the vulcanite. It looked pretty good. The button was clean and not damaged. There was tooth chatter but no deep tooth marks on either side of the stem. The stem was lightly oxidized but good quality vulcanite.
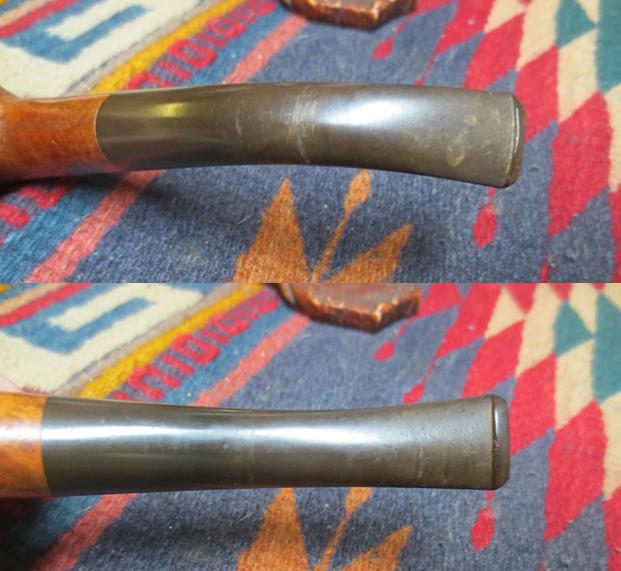 I did a bit of hunting online and read on Pipedia that these pipes were made by Comoy’s and were essentially “Specimen Straight Grain” (exceptional line of Comoy’s pipes). The Selected Straight Grain pipes were seconds to the Specimen line that exhibited some small flaw or sand pit. They were listed in the 1965 catalogue at $15 or $17.50 in Extraordinaire size.
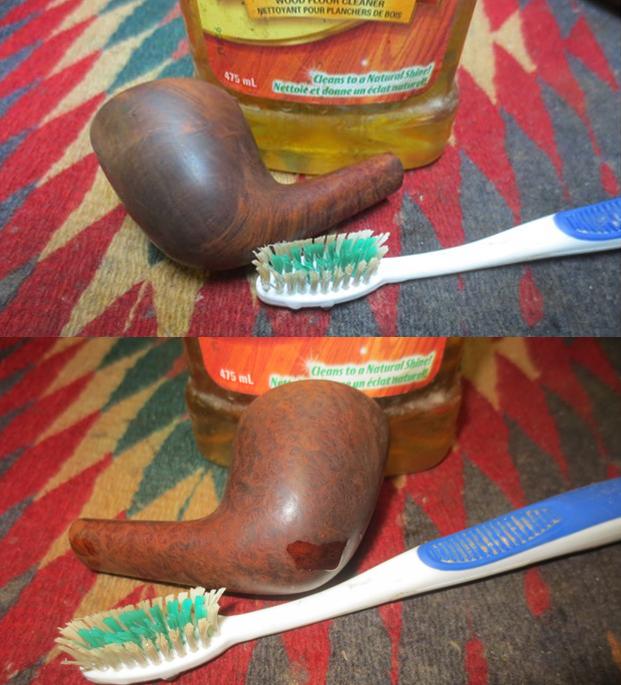
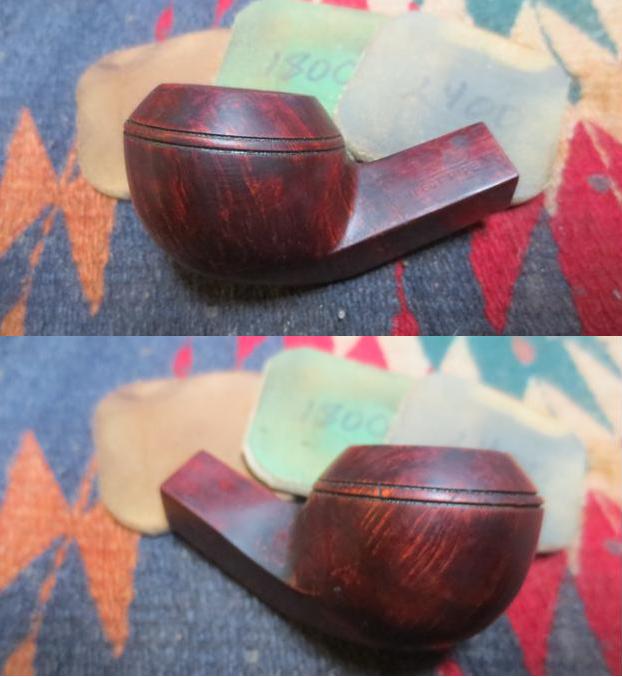
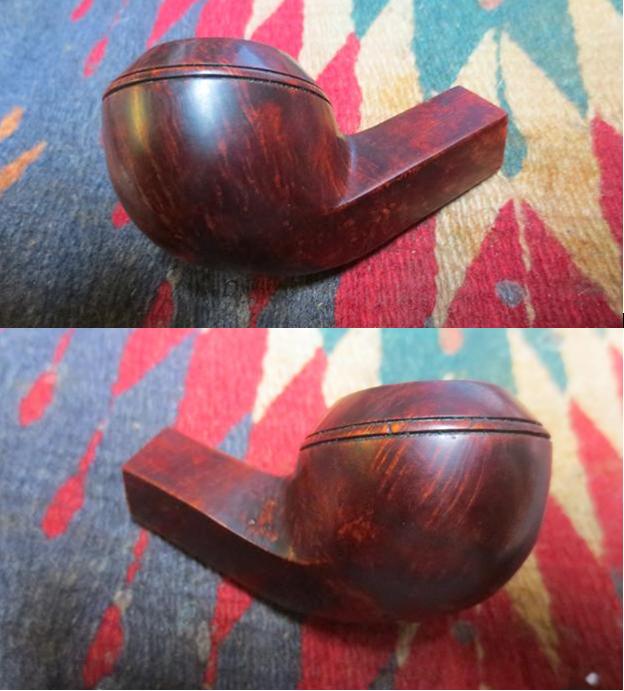
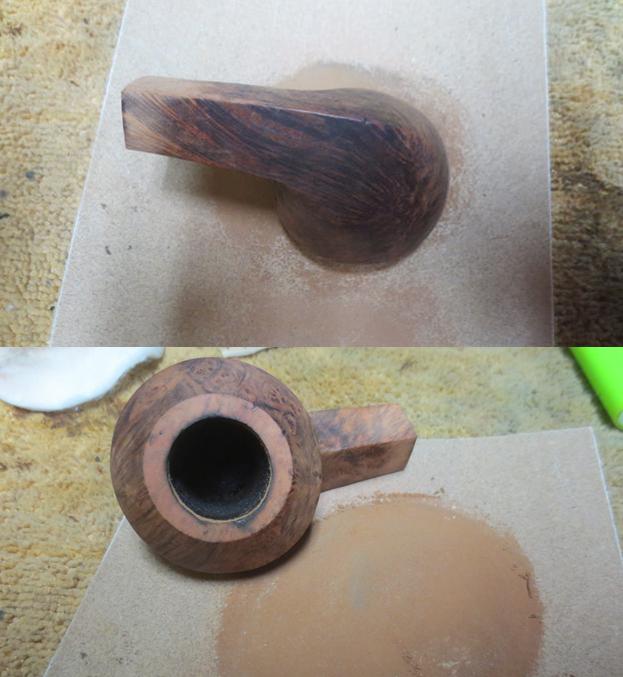
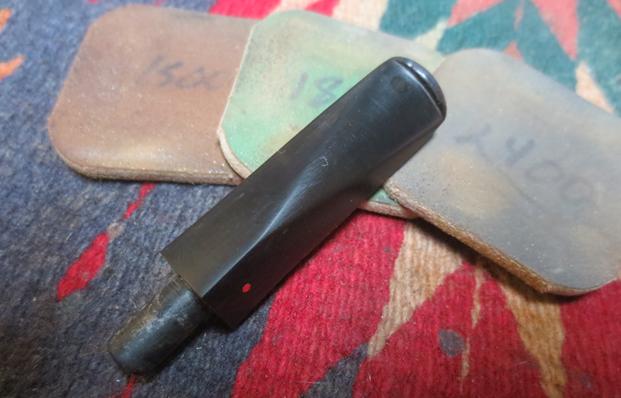
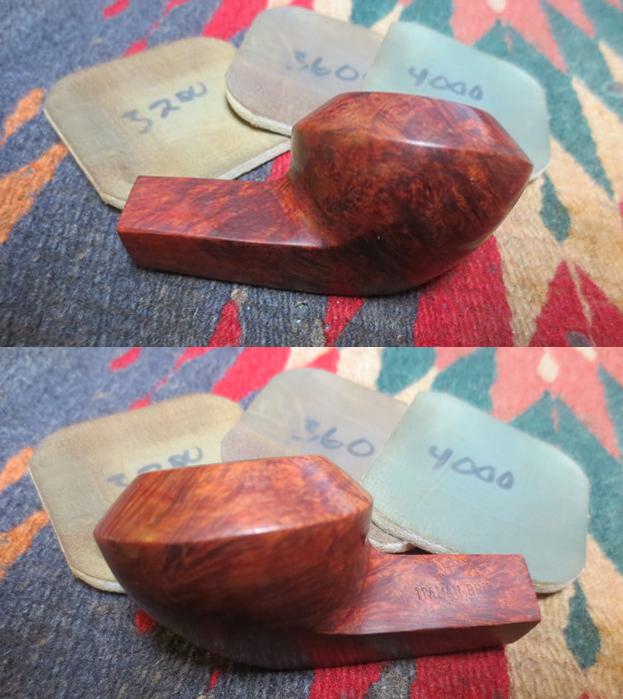
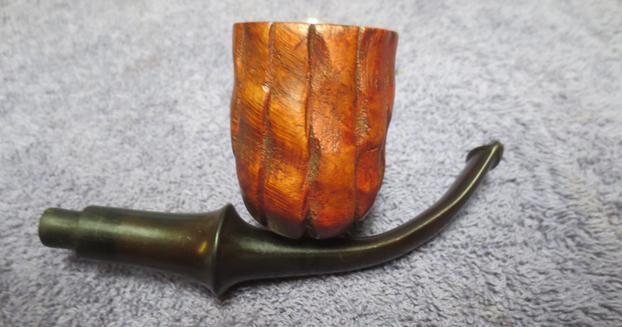
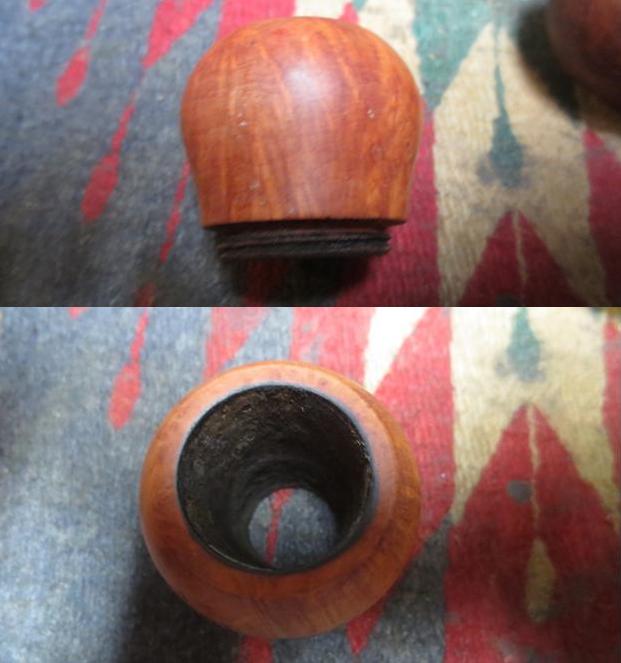
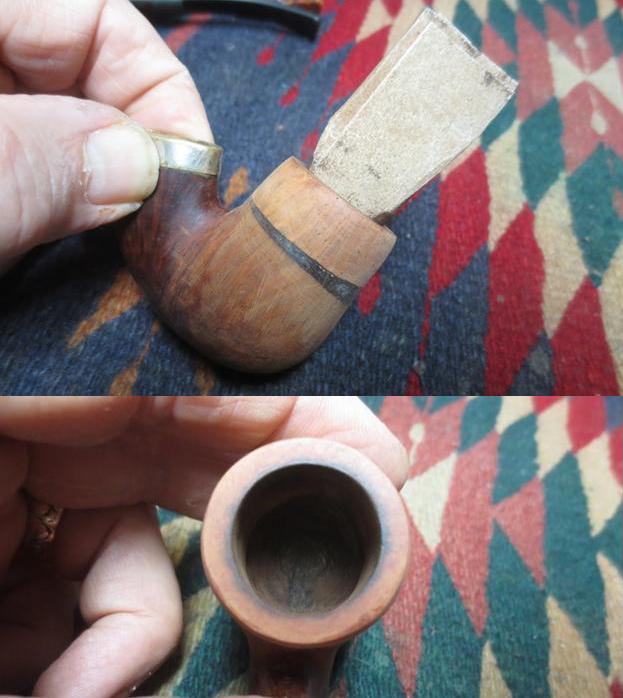
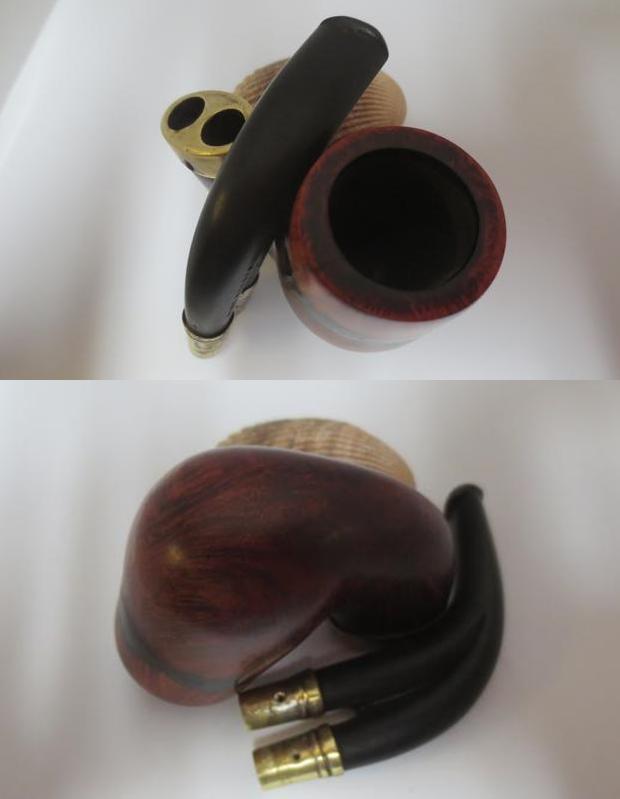
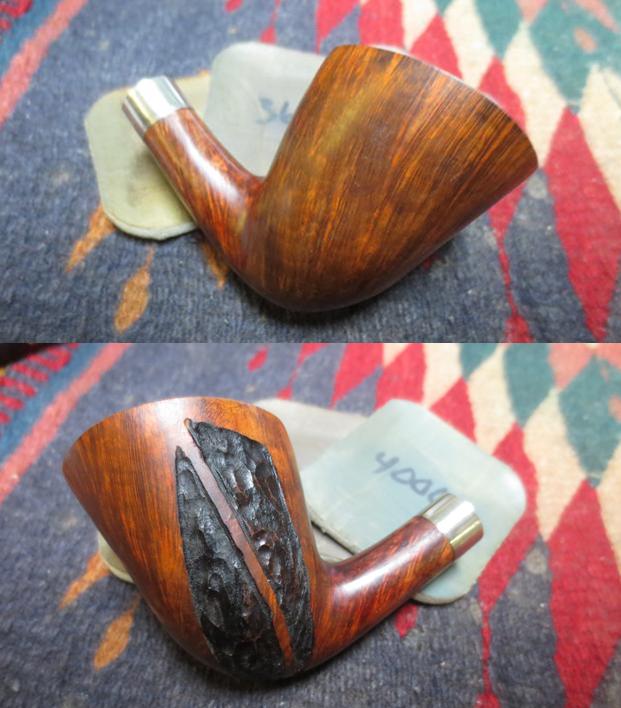
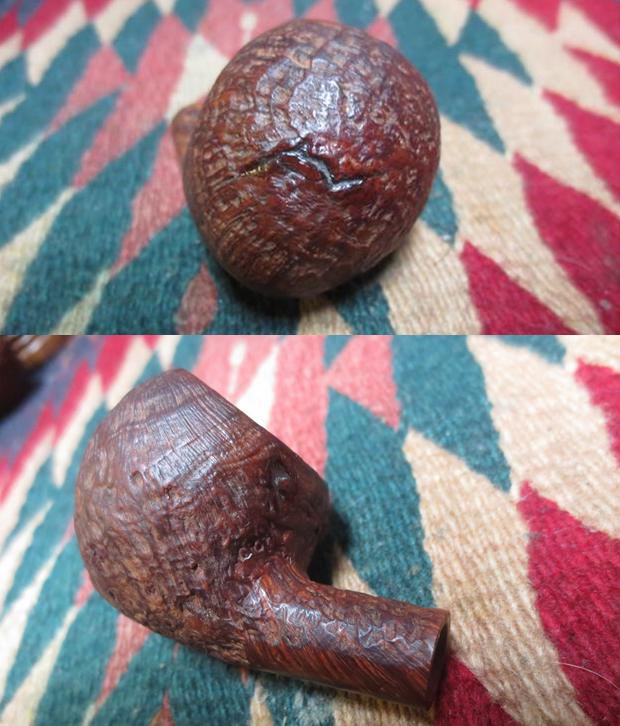
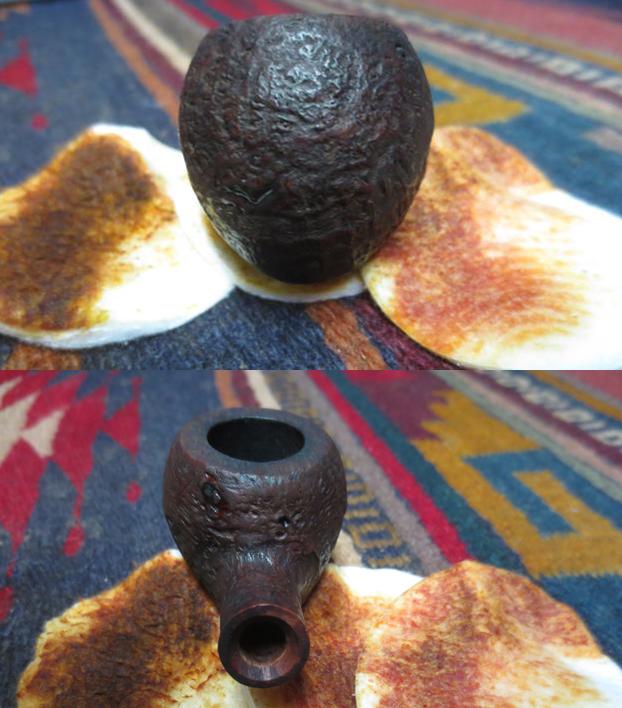
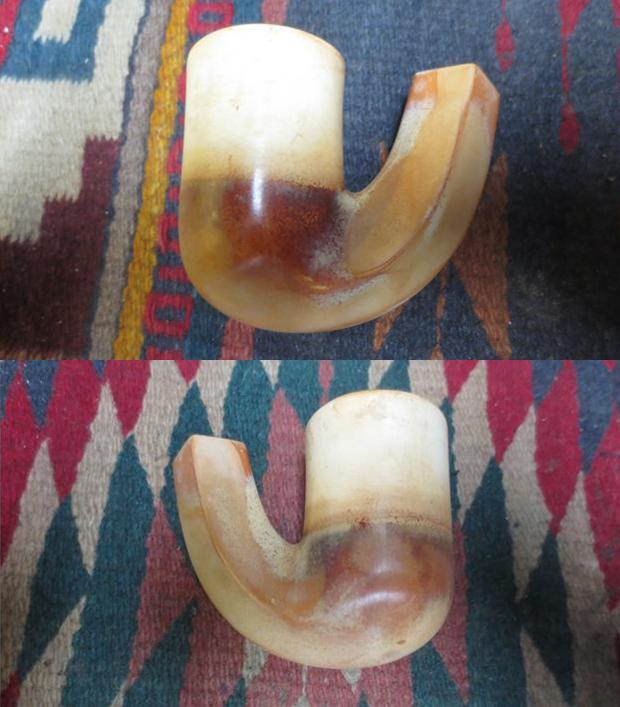
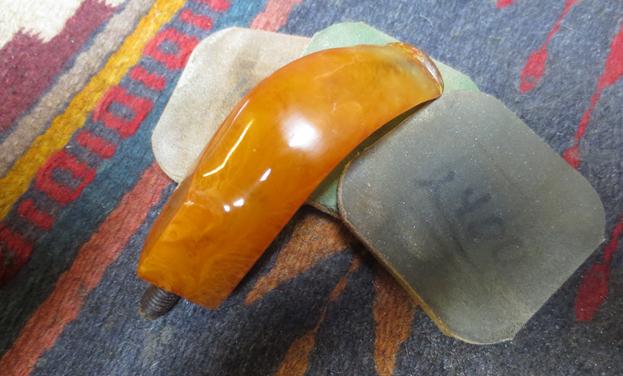
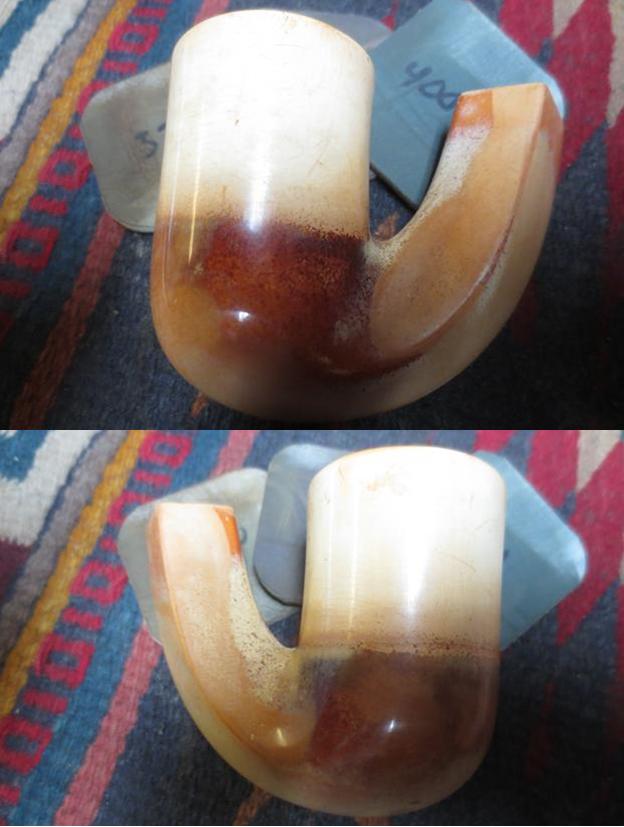
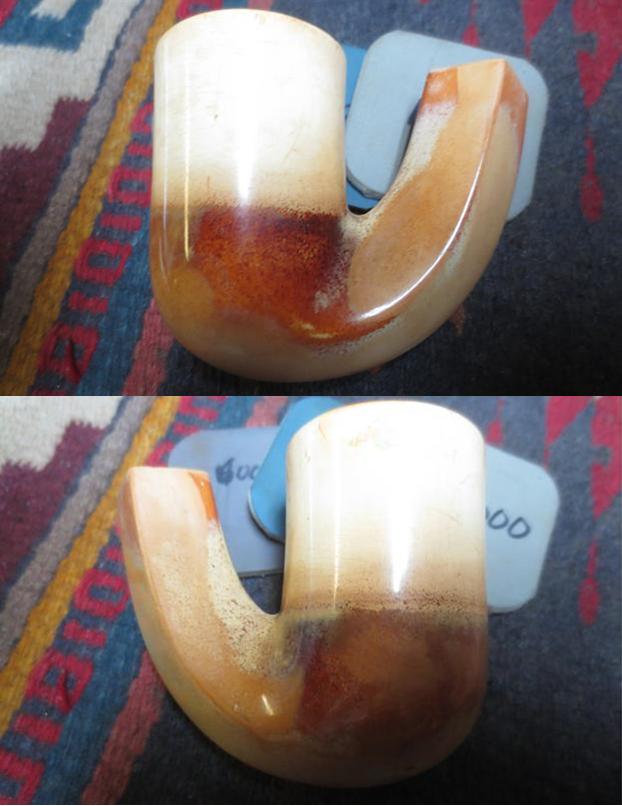
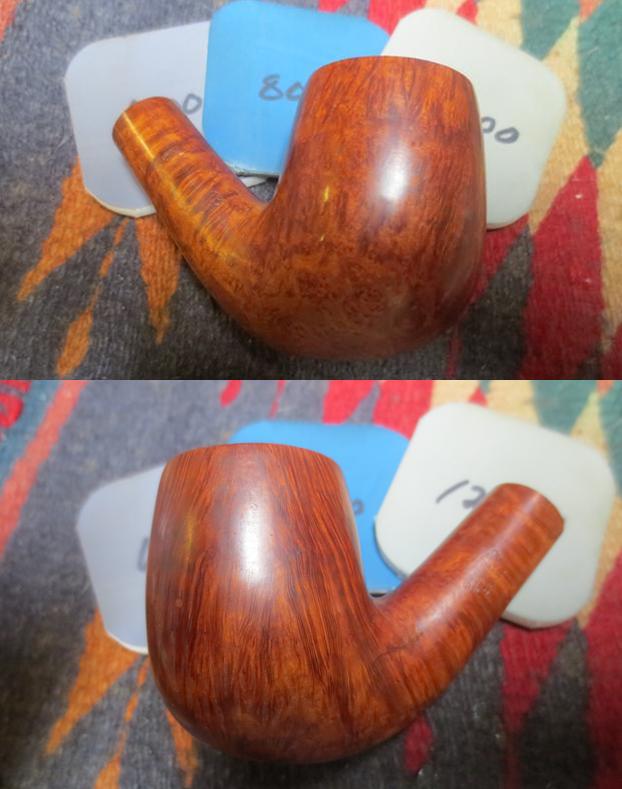
Armed with that information I turned my attention to work on the pipe. It was dirty and sticky so I varied my usual habit of reaming the bowl first and scrubbed the exterior with Murphy’s Oil Soap and cotton pads. I was able to remove all of the grime on the bowl sides and much of the grime and lava on the rim top and inner beveled edge of the bowl. I took photos of the bowl after scrubbing. You can see the amazing grain on the bowl and shank sides. You can also see the X shaped sandpit in the first photo. I have circled it in red to highlight the damage there.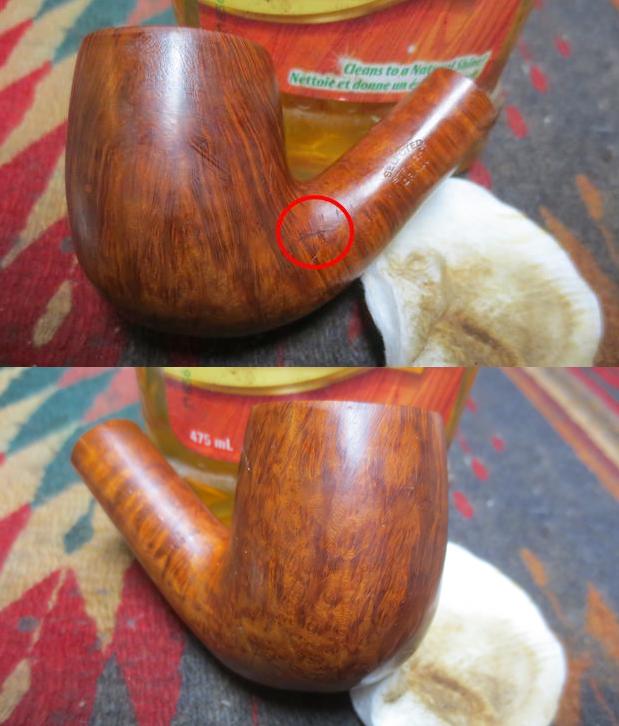
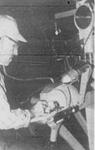
 With the outside of the bowl clean it was easier to hold onto while I reamed it with a PipNet pipe reamer. I started with the smallest cutting head and worked my way up to the third cutting head. I took the cake back to bare briar. I cleaned up the remnants of the cake with a Savinelli Fitsall Pipe Knife.
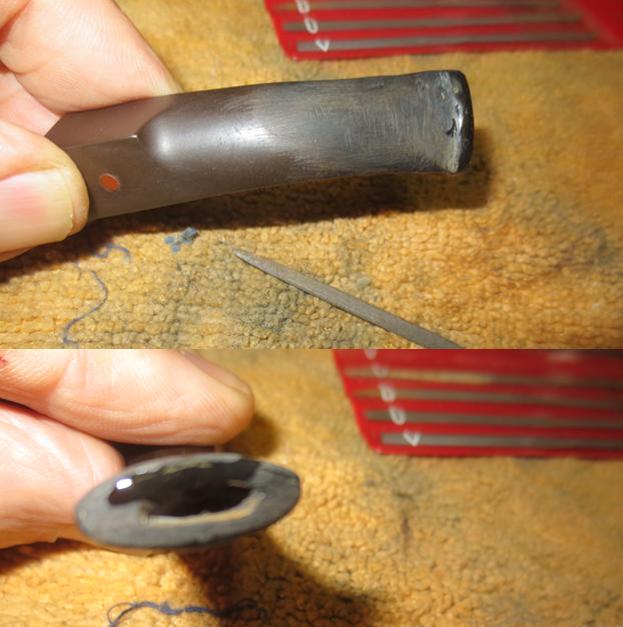
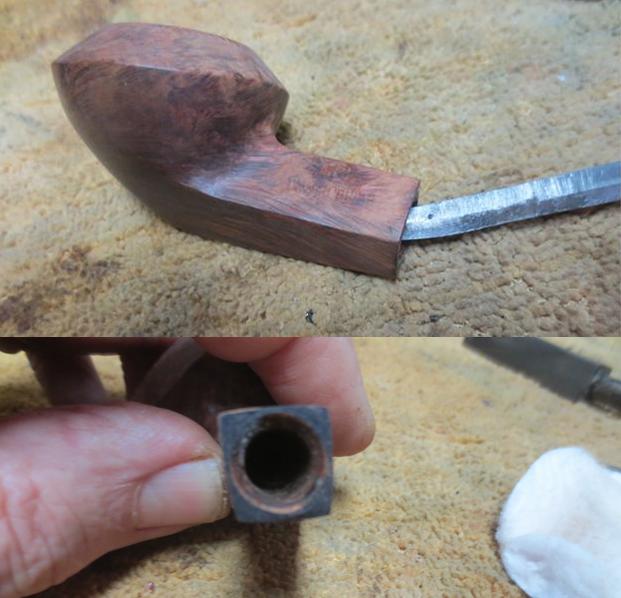
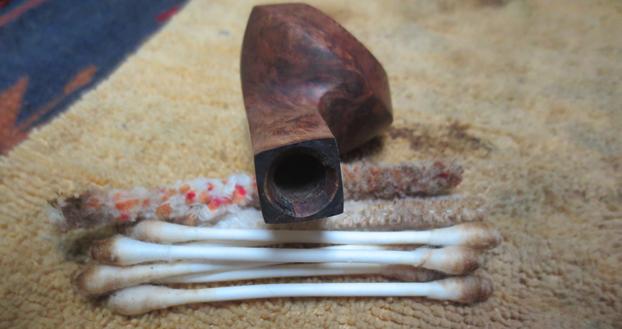
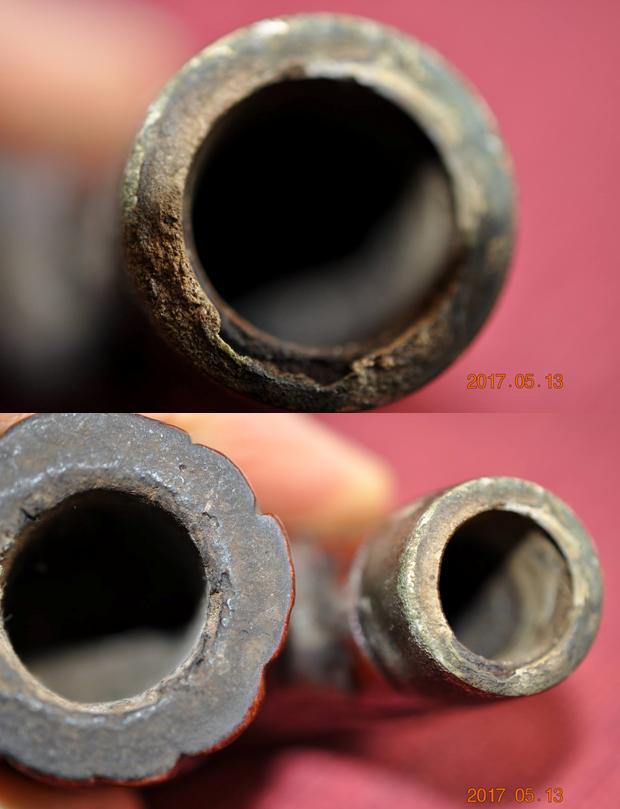
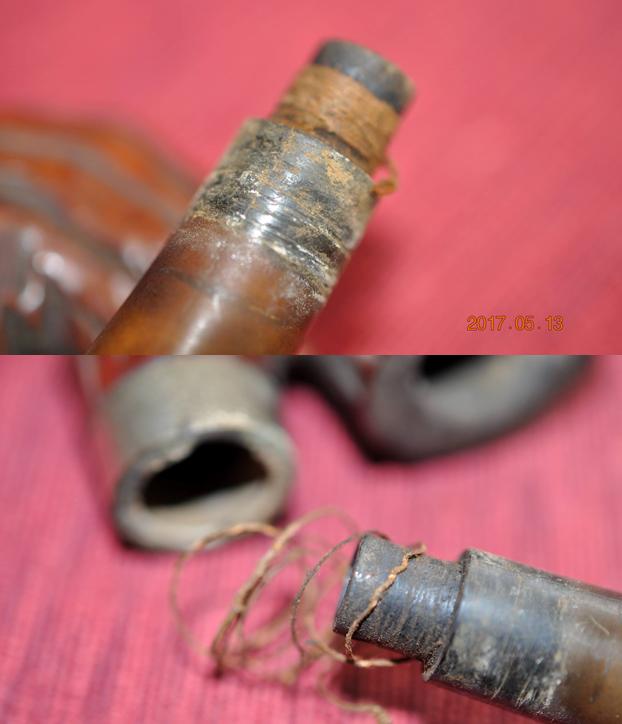
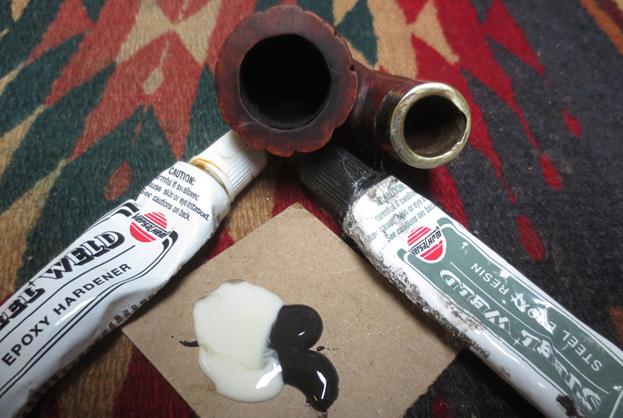
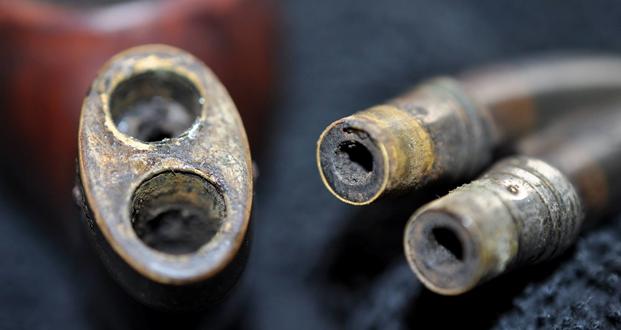
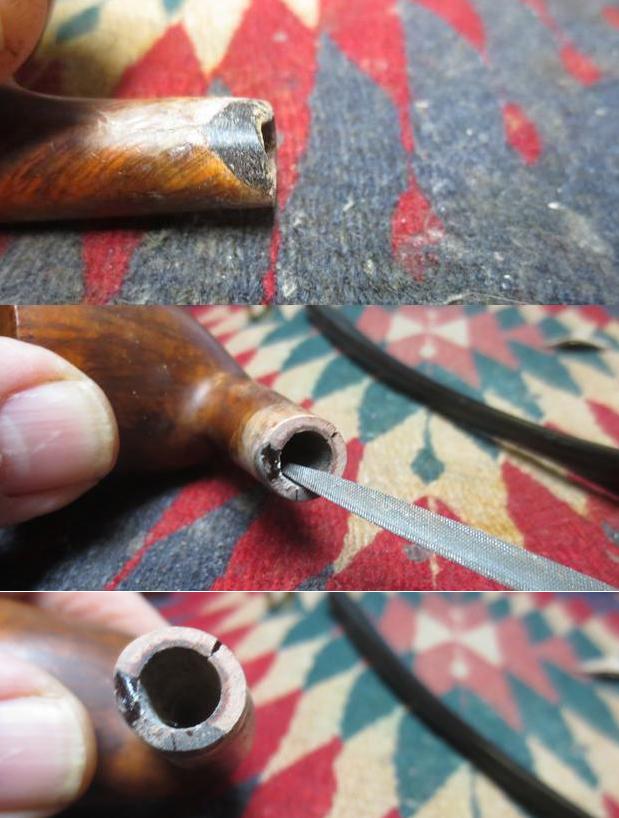
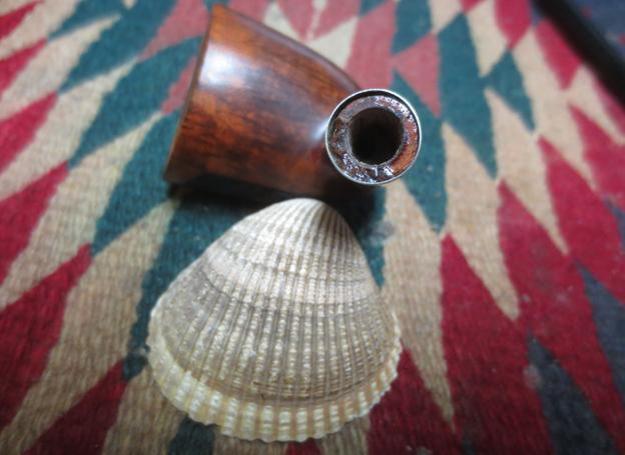
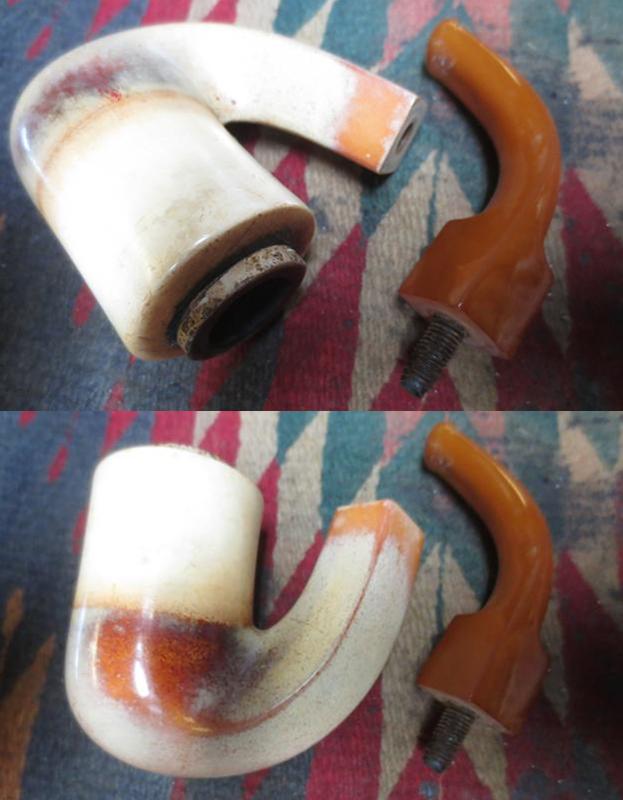
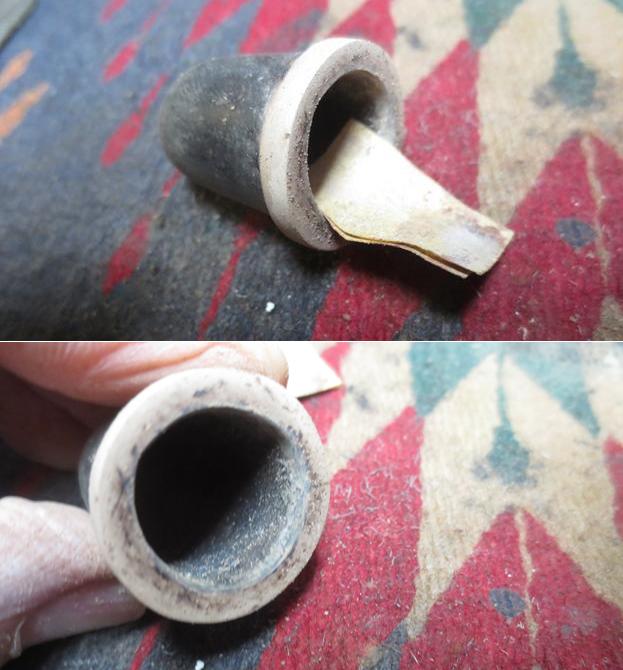
 I used a dental spatula to scrape out the buildup on the walls of the mortise. There was a thick coat of tars and oils that had hardened there and made the fit of the stem very tight in the shank. Once I had scraped out the hardened substances I cleaned out the mortise and the airway in the shank and stem with alcohol, cottons swabs and pipe cleaners.
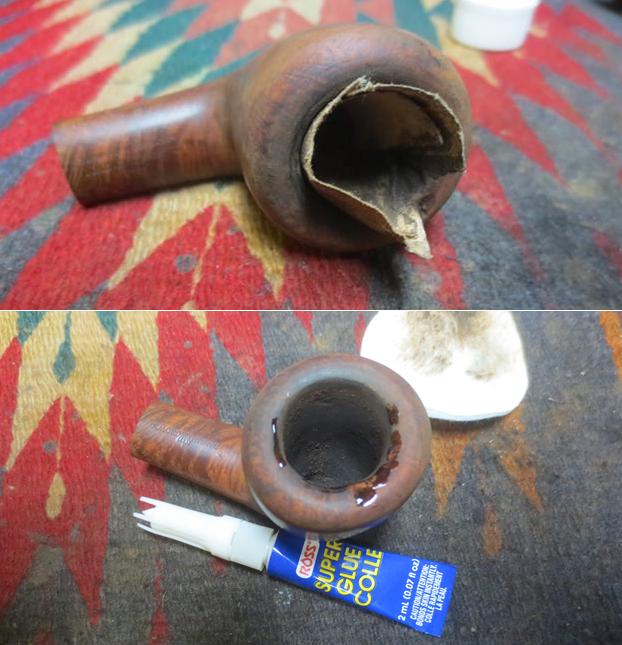
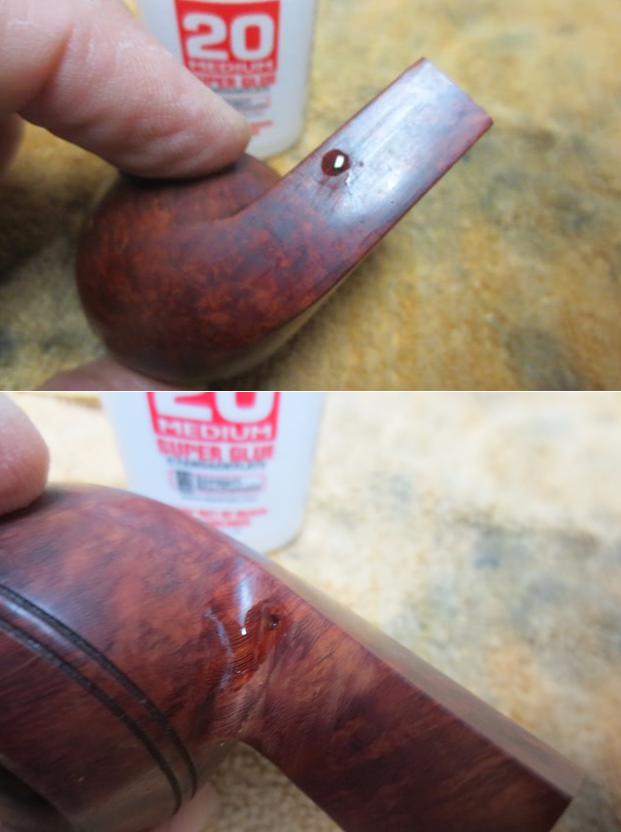
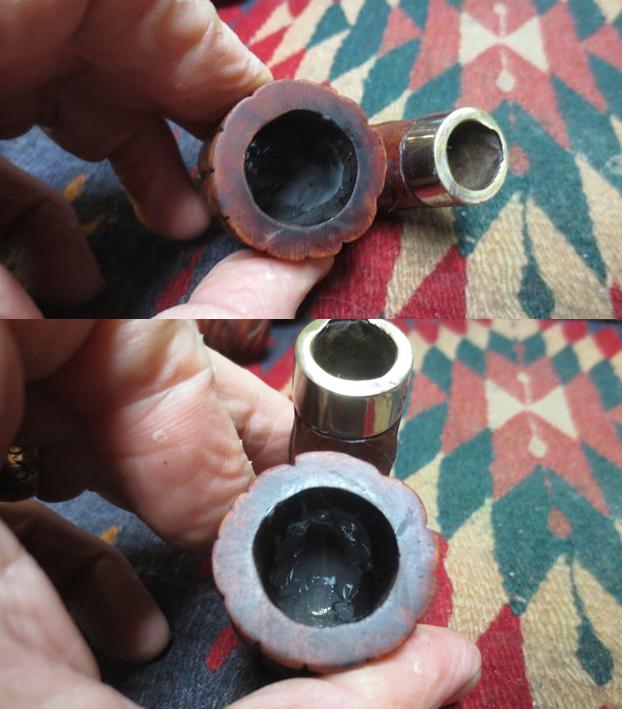
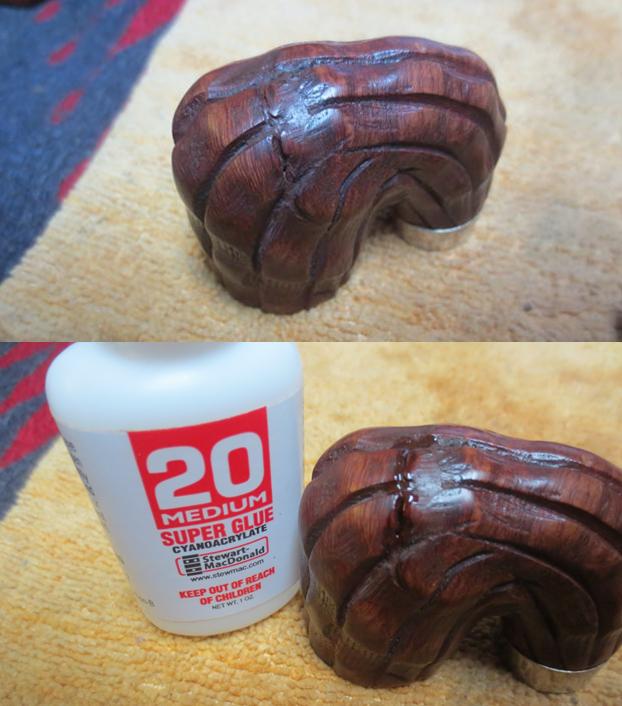
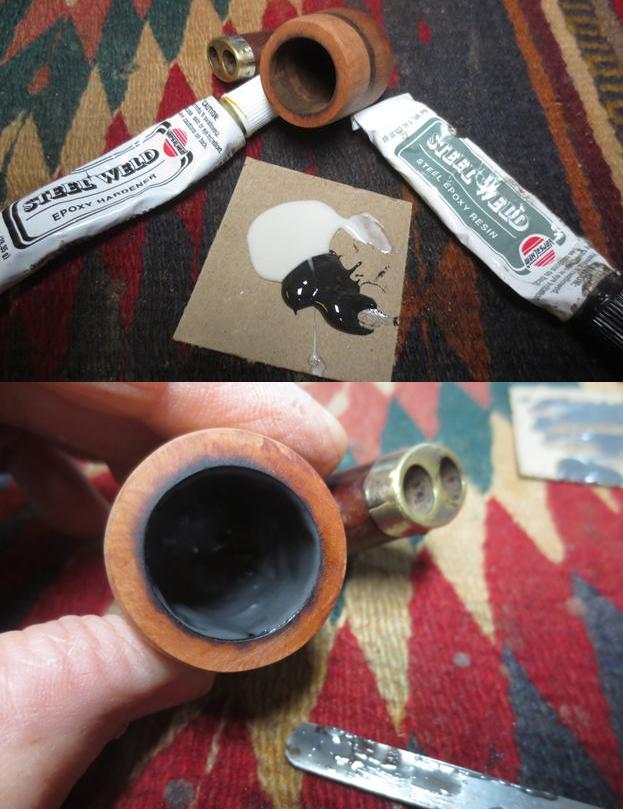
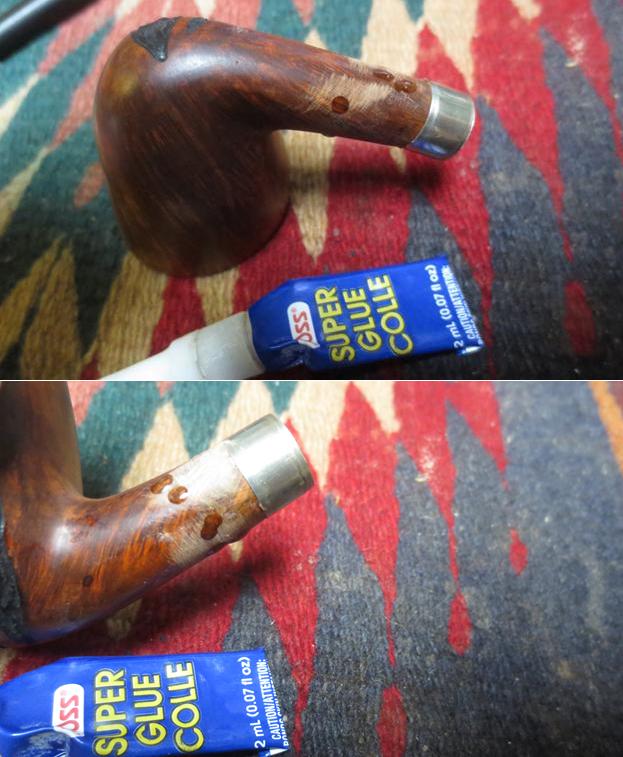
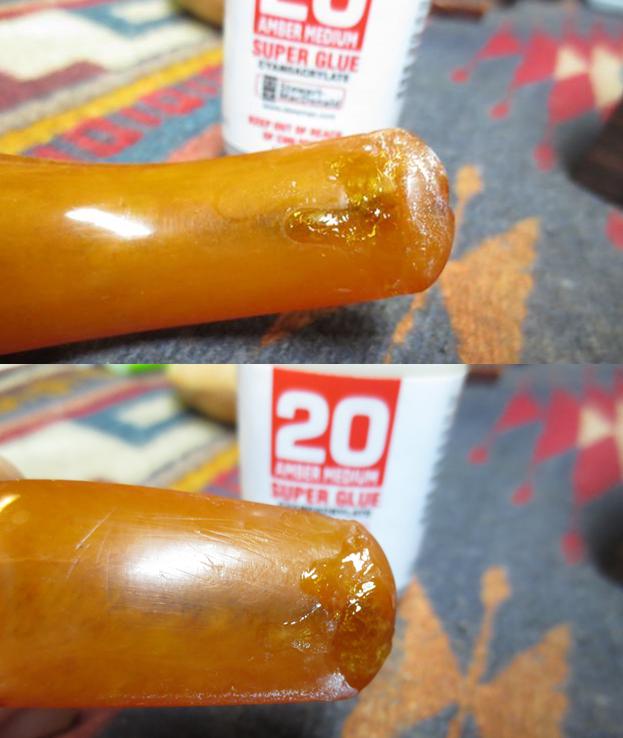
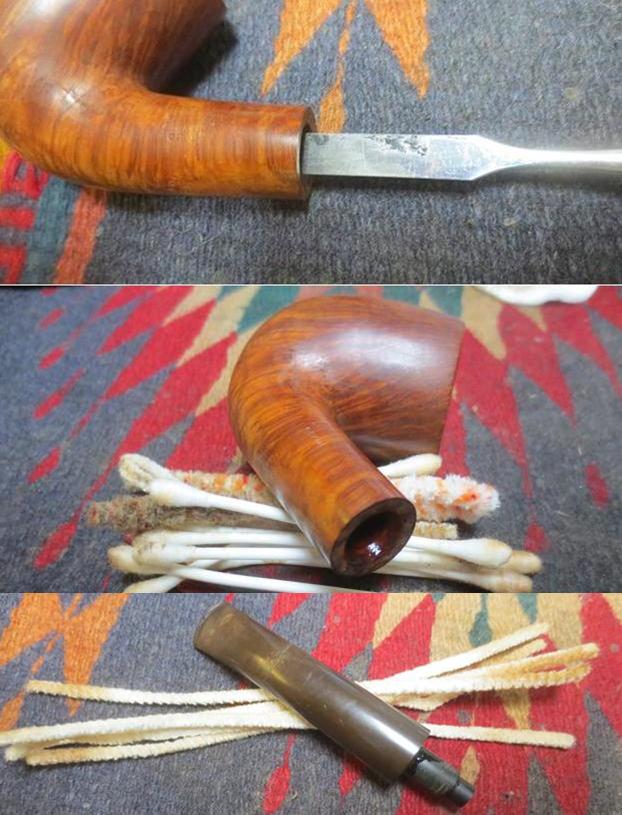 With the exterior and the interior of the bowl cleaned it was time to work on repairing the sandpits and gouges on the bowl. I wiped down the area of the X pit on the left side of the bowl at the shank bowl junction with alcohol.When it was dry I filled in the area with clear super glue and pressed it into the pit with a dental spatula. I repeated the process with the gouge on the right side of the rim top.
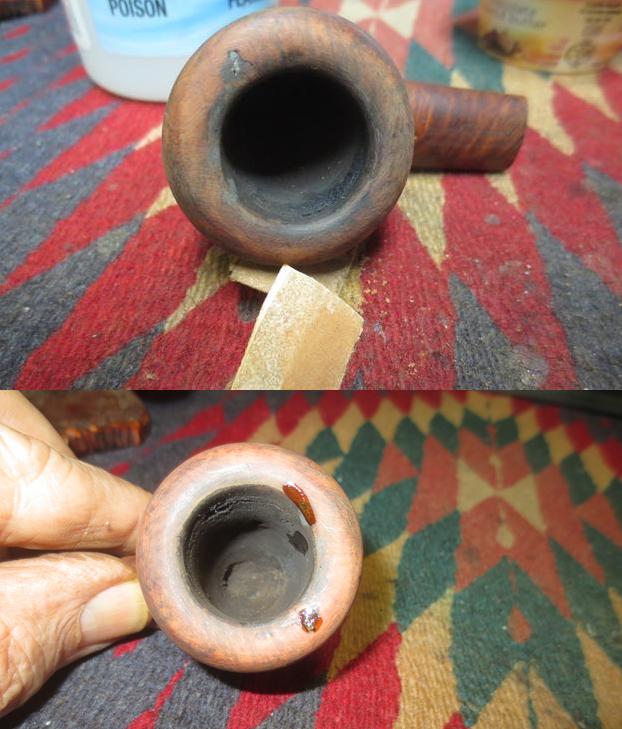
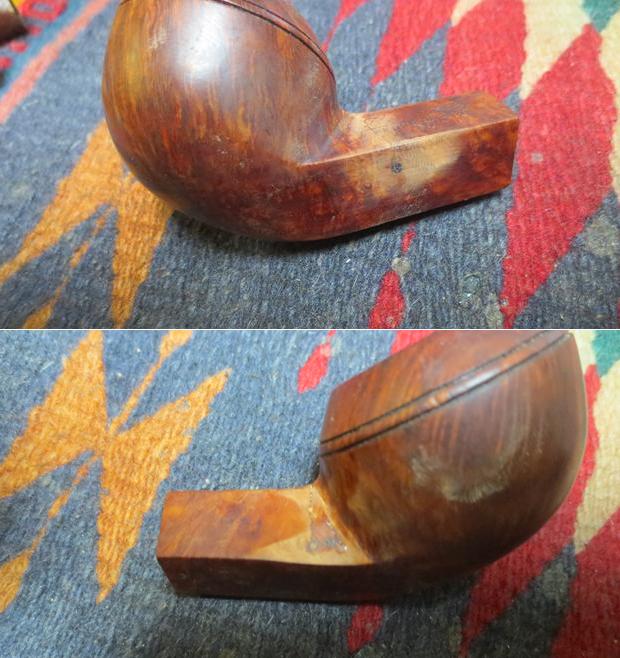
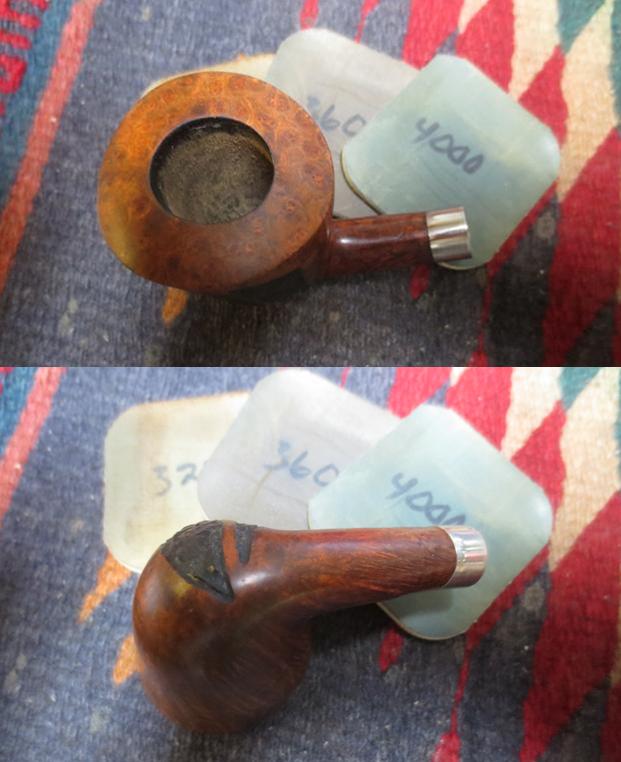
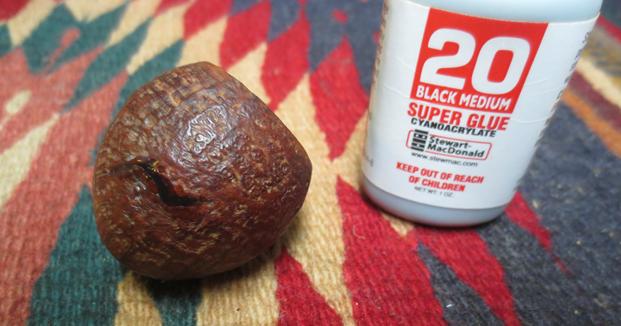
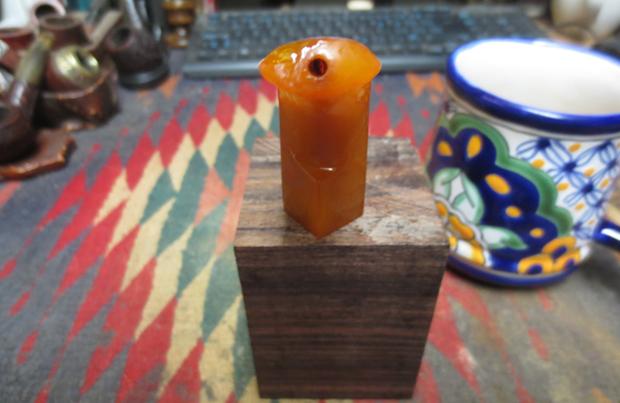
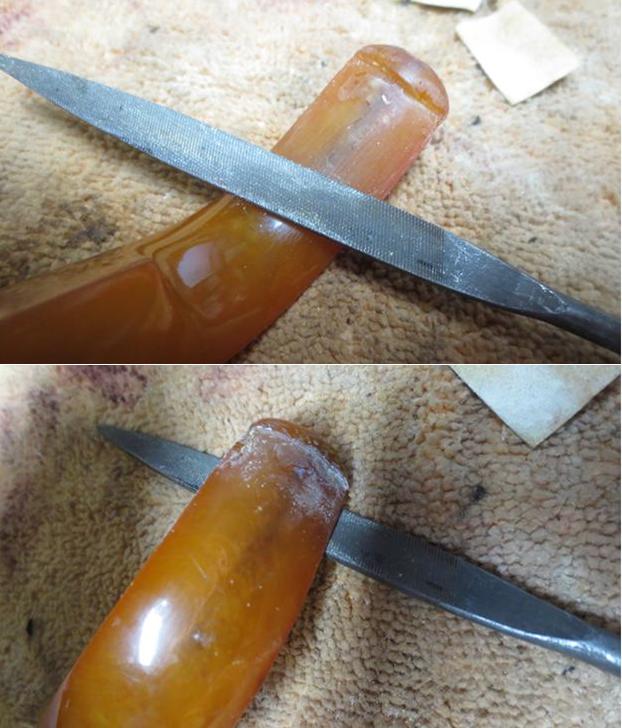
  When the repair had cured I sanded it with a folded piece of 220 grit sandpaper to blend it into the surface of the briar. I also sanded the inner beveled edge of the bowl to clean up the darkening and damage at that point. I sanded the repair on the side of the shank and bowl with the same sandpaper until the spots were blended into the briar and smooth to touch.
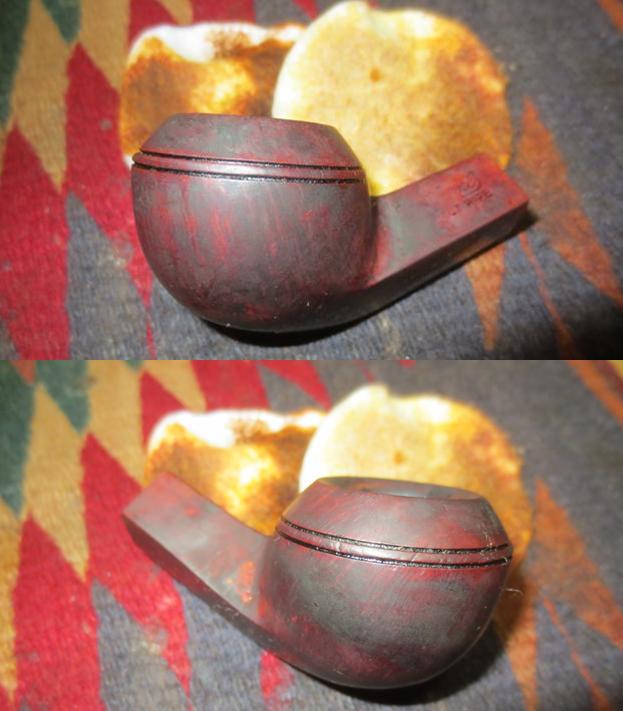
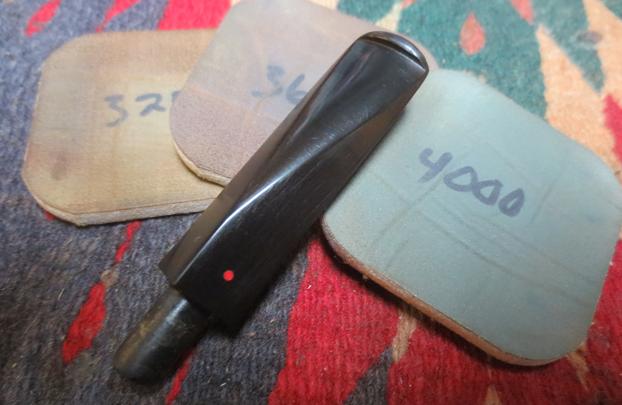
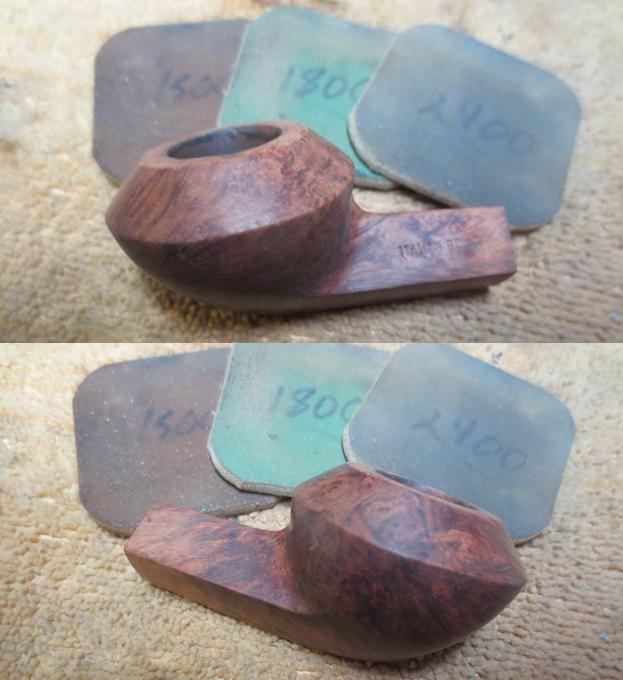
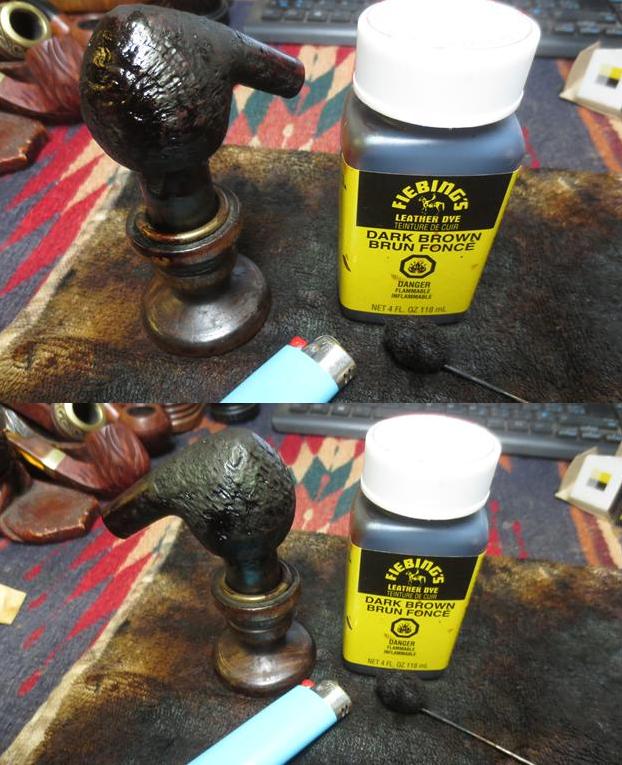
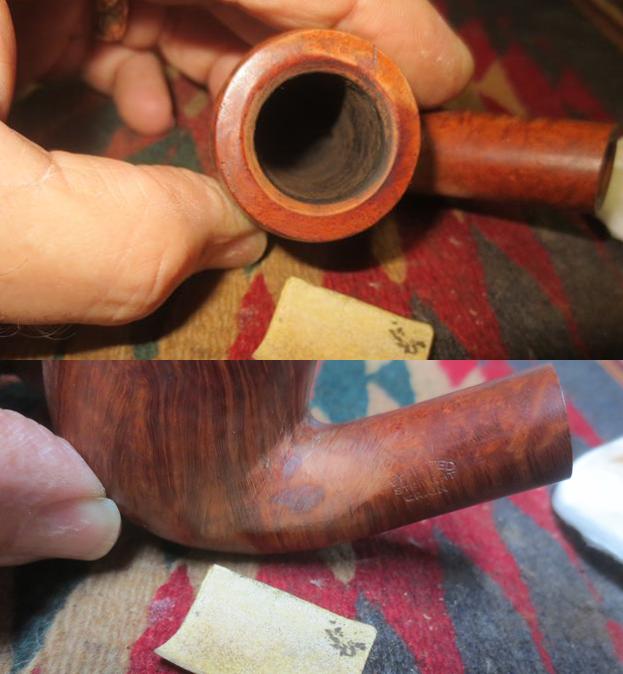 I polished the repaired areas with micromesh sanding pads – sanding with 1500-4000 grit pads to smooth out the sanding scratches. I stained the rim top and the repair on the shank and bowl with a light brown stain pen to match the stain on the rest of the bowl.
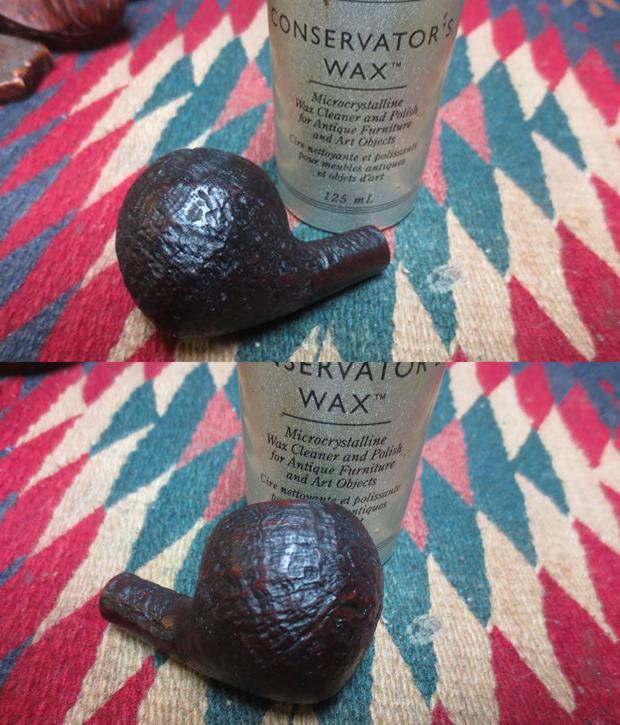
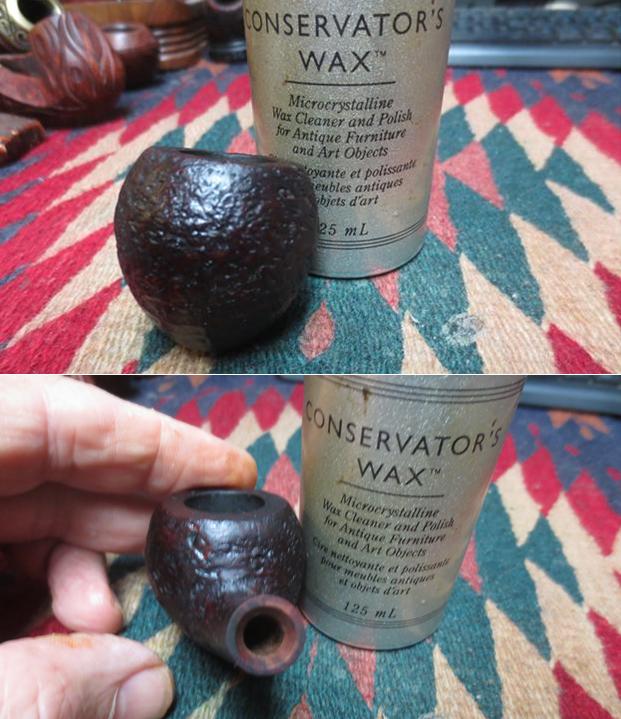
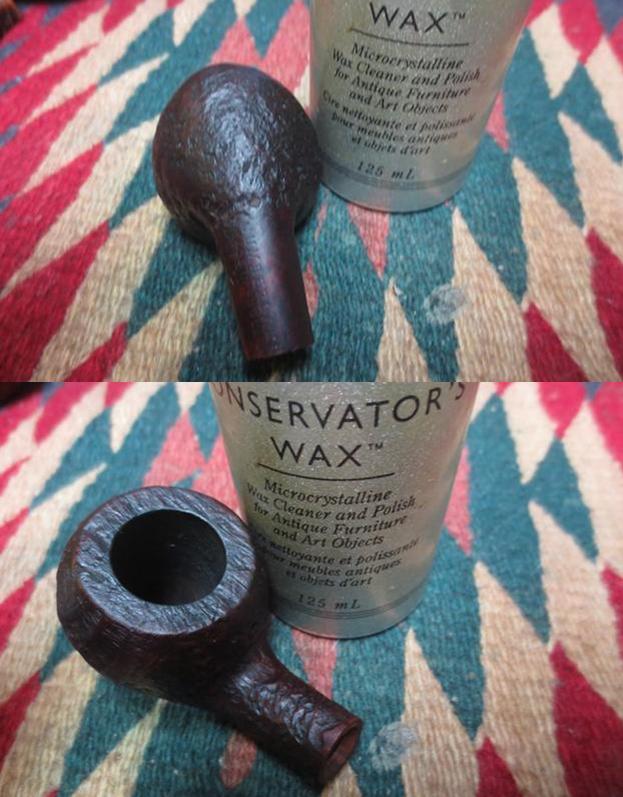
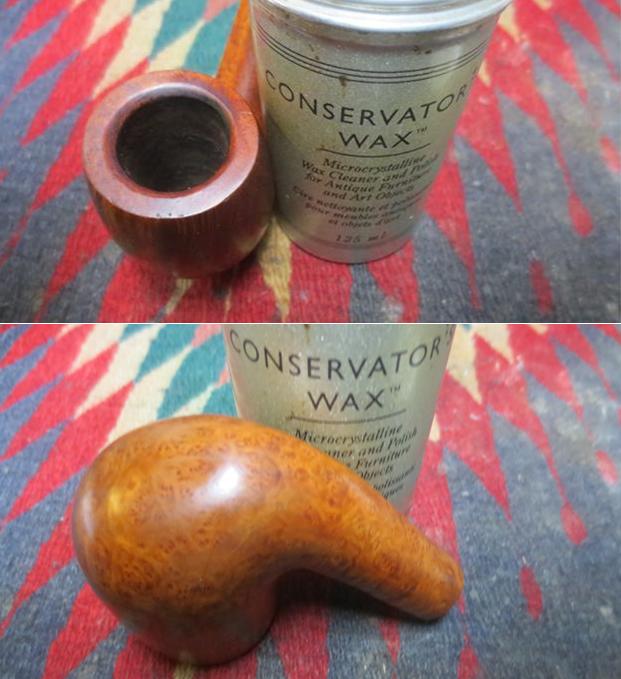
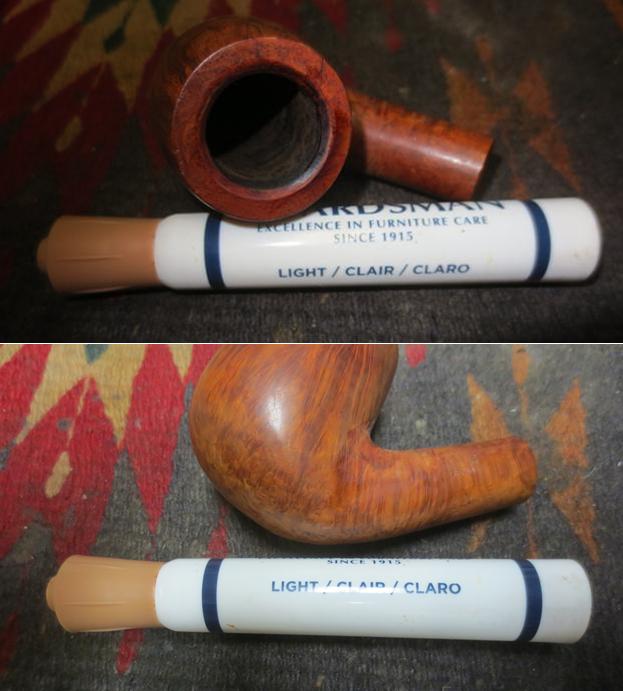 Whenever I used the stain pens, regardless of colour, I blend the stain with the existing stain using Conservator’s Wax. I find that the microcrystalline wax polishes and blends the two areas together when I hand buff the bowl once the wax dries.
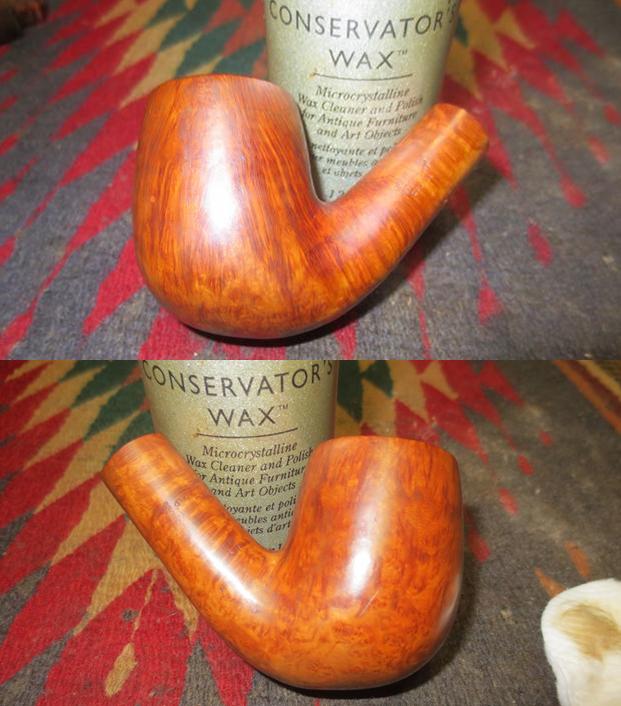
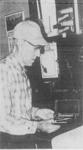
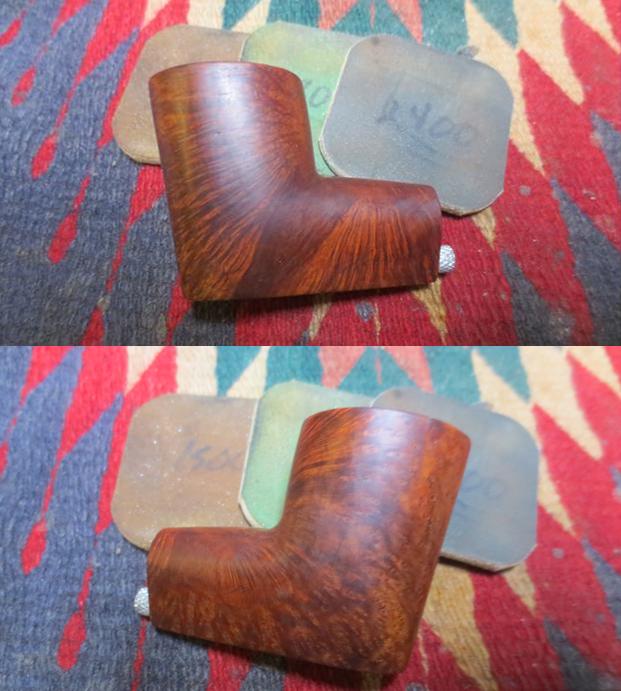
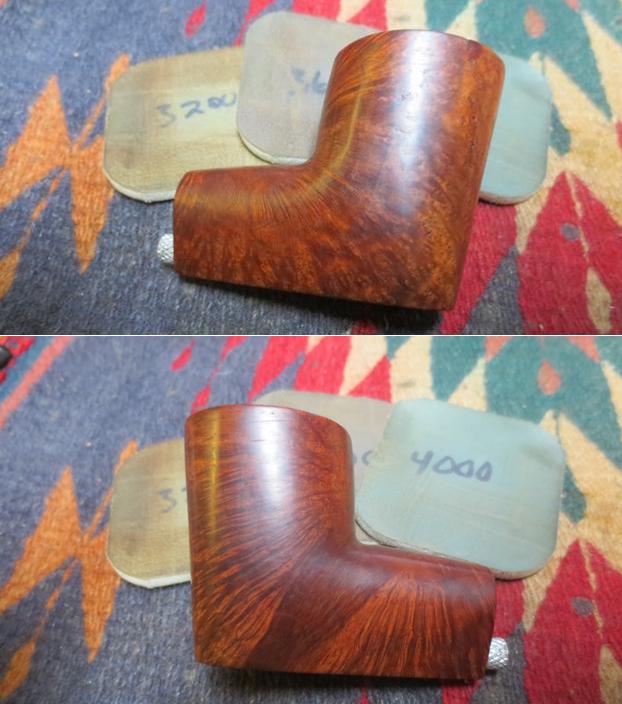
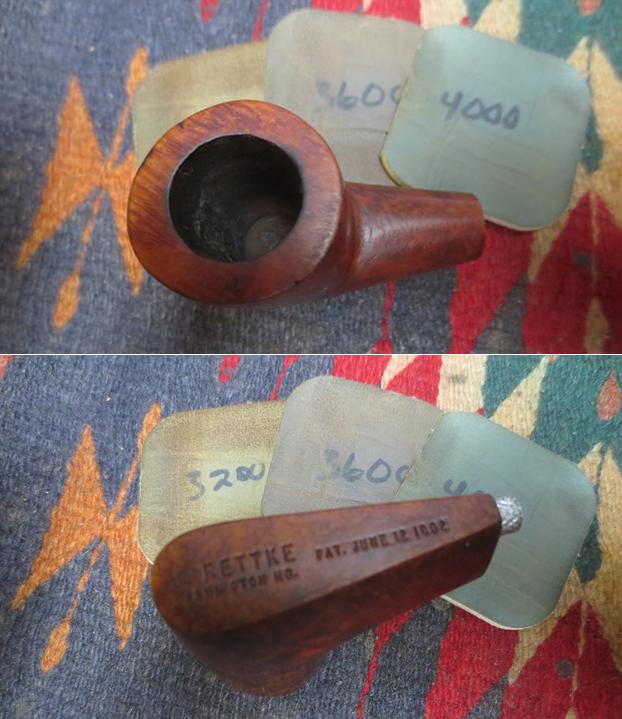
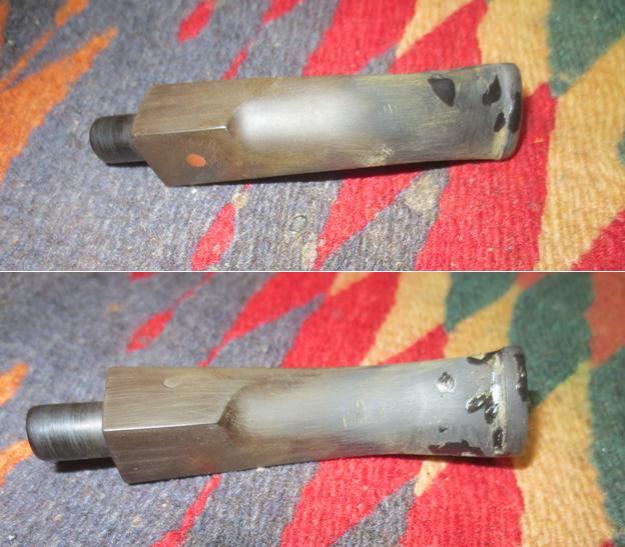
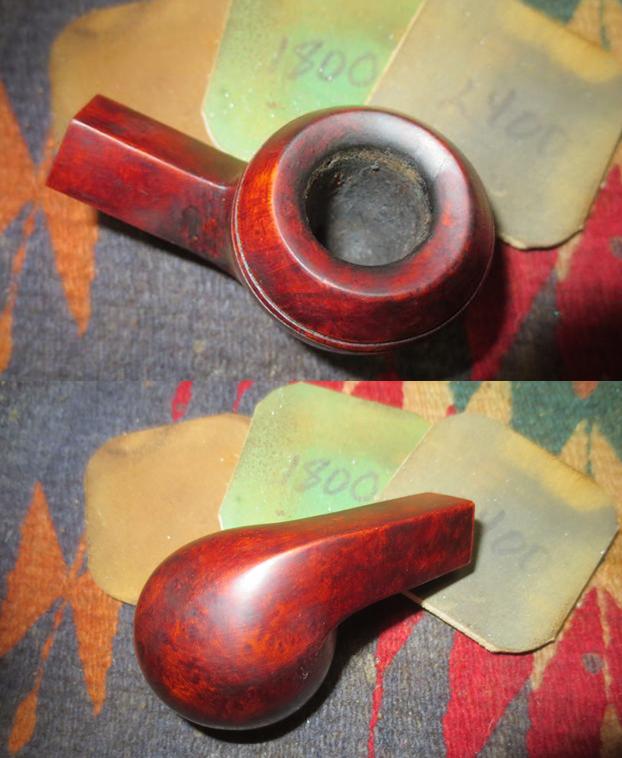
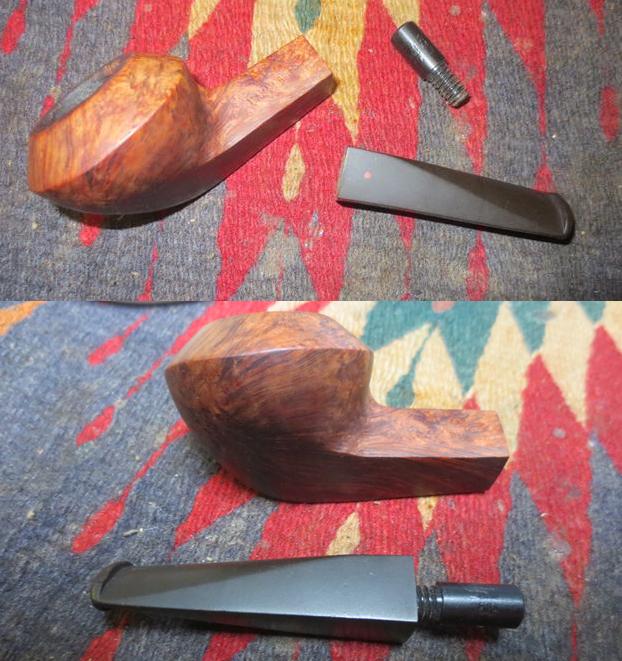
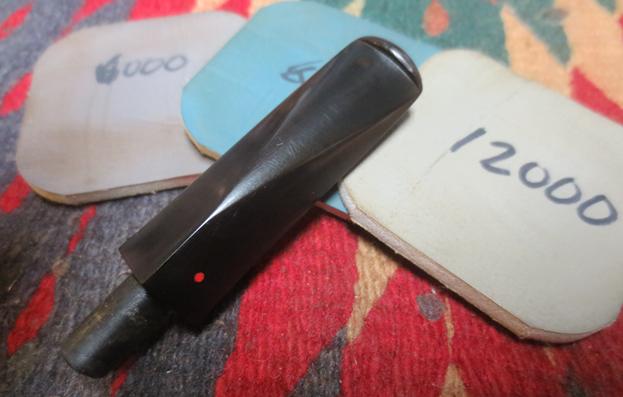
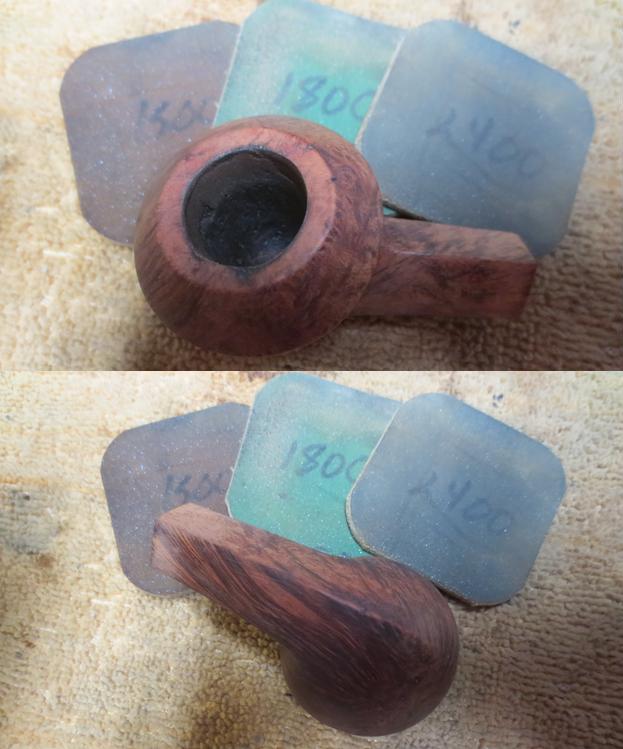
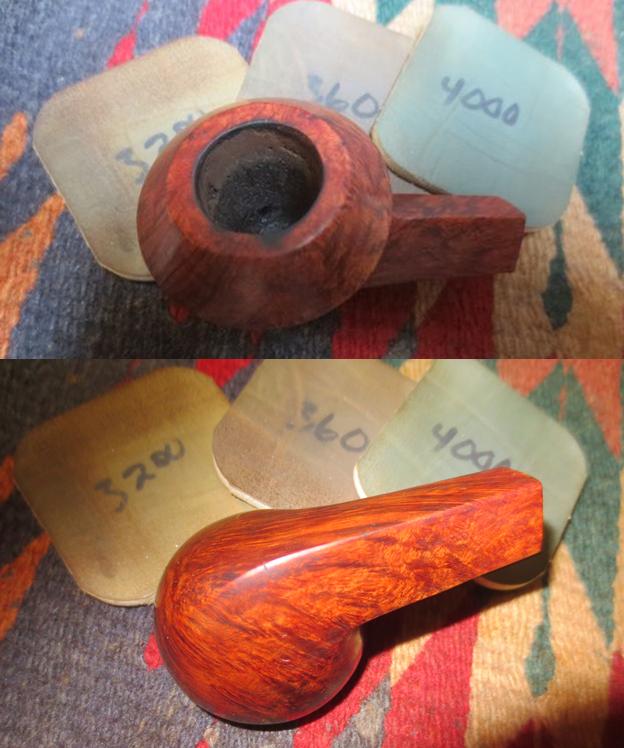
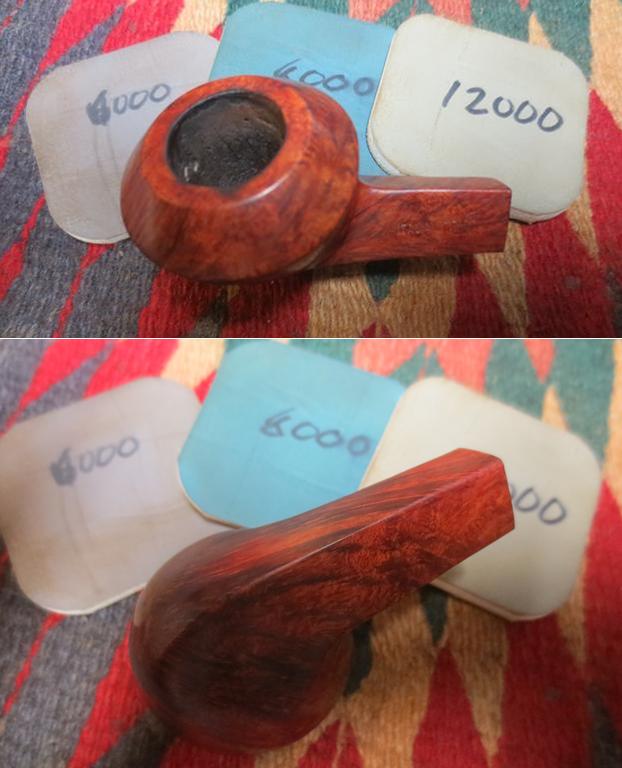
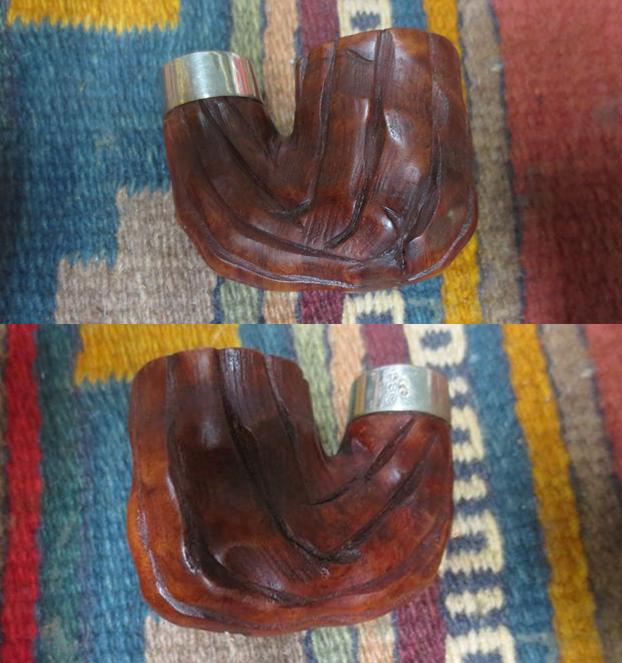
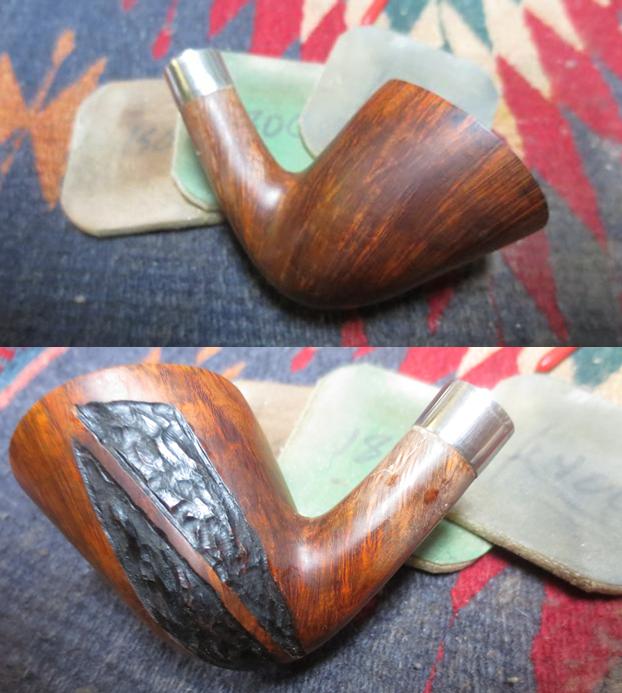
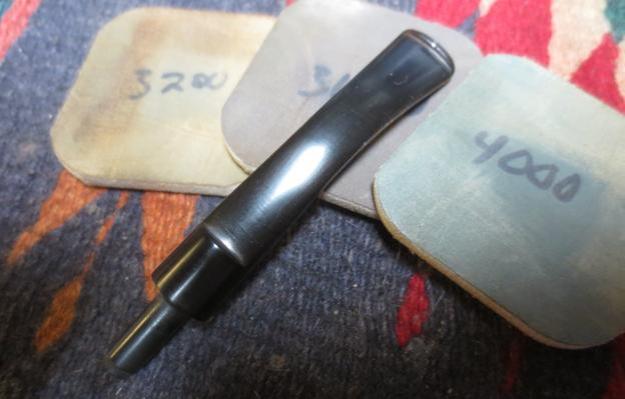
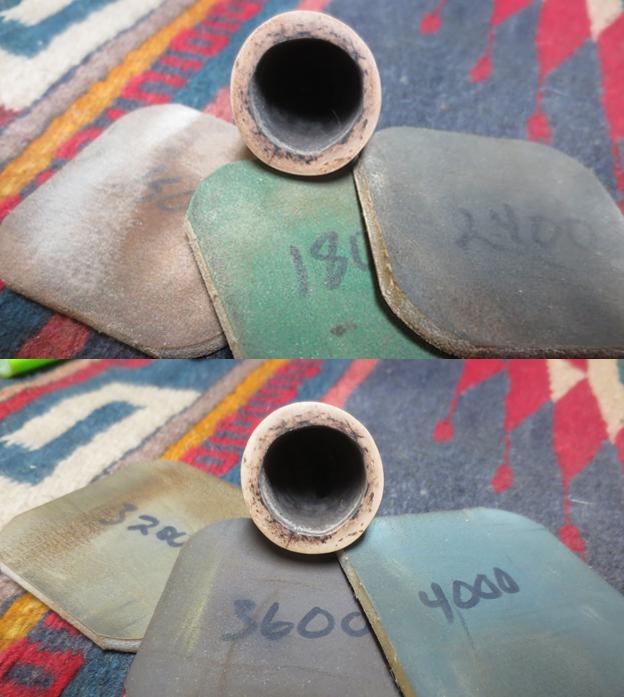
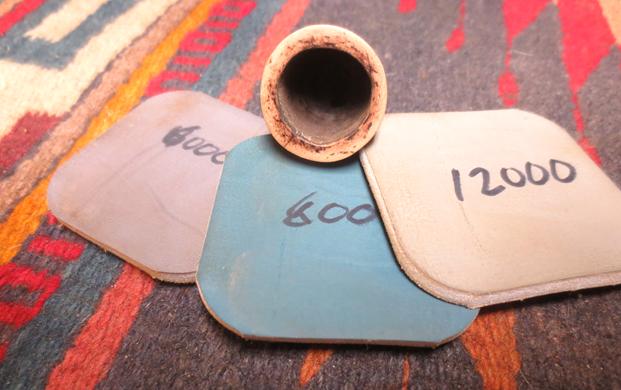
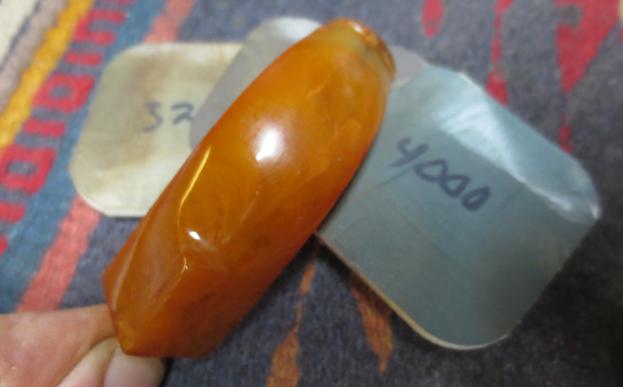
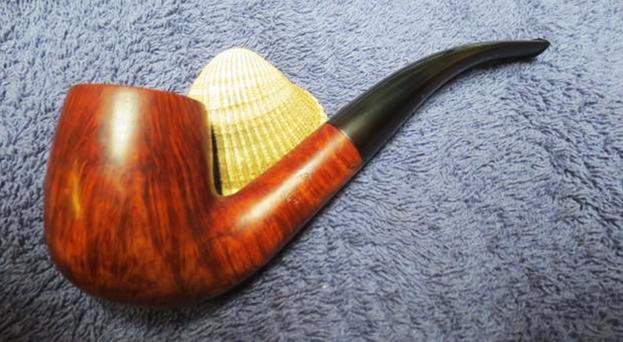
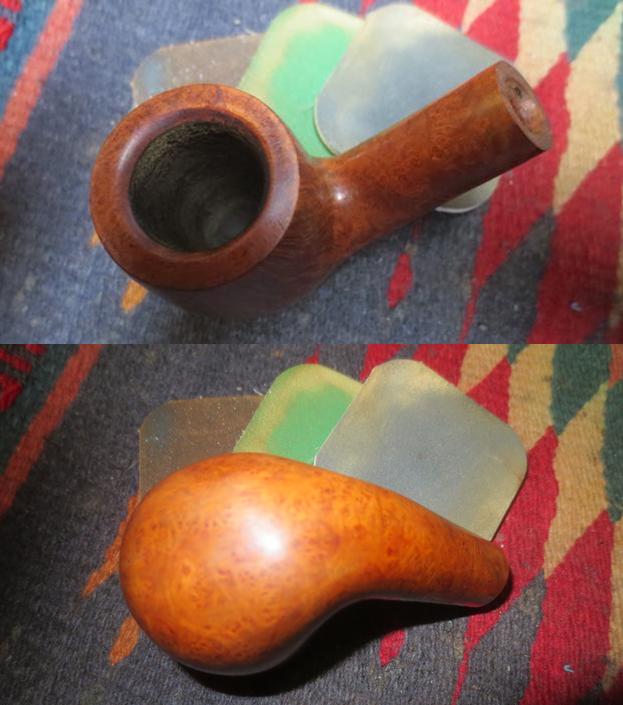
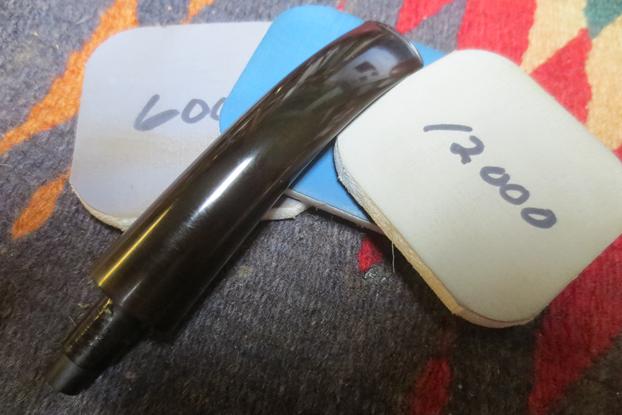
 I buffed the bowl with Blue Diamond to polish it a bit and see where I needed to do some work before the final buff. I hand polished the stem with micromesh sanding pads – wet sanding with 1500-2400 grit pads and dry sanding with 3200-12000 grit pads. I wiped the bowl down with a damp clot after each buffing pad. I hand buffed it with a microfibre cloth after the 12000 grit pad. The pictures below show the progress of the polishing on the briar.
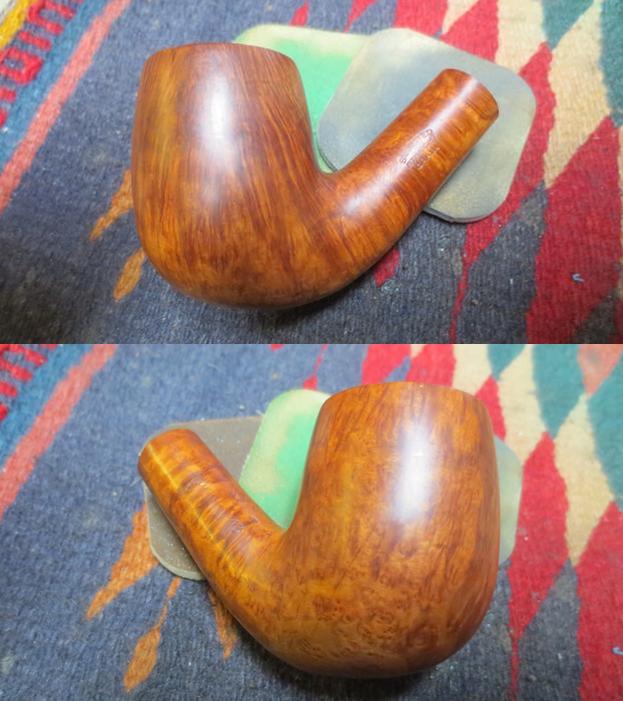
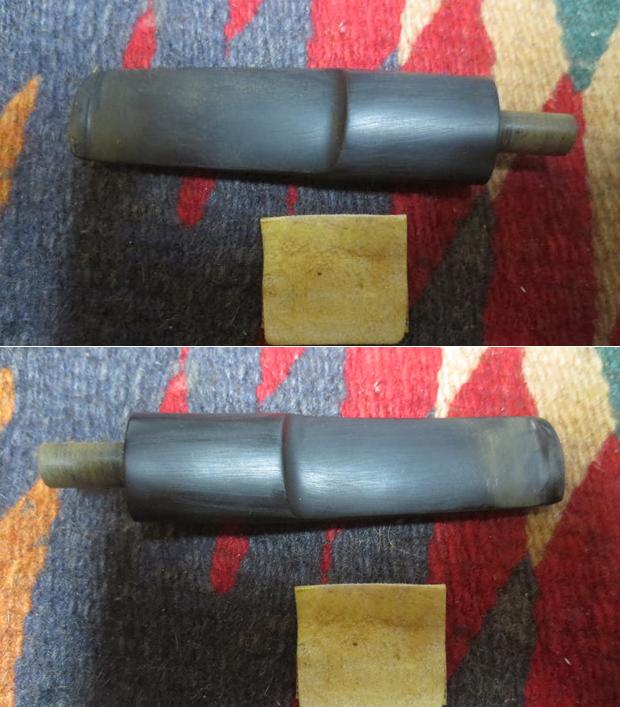
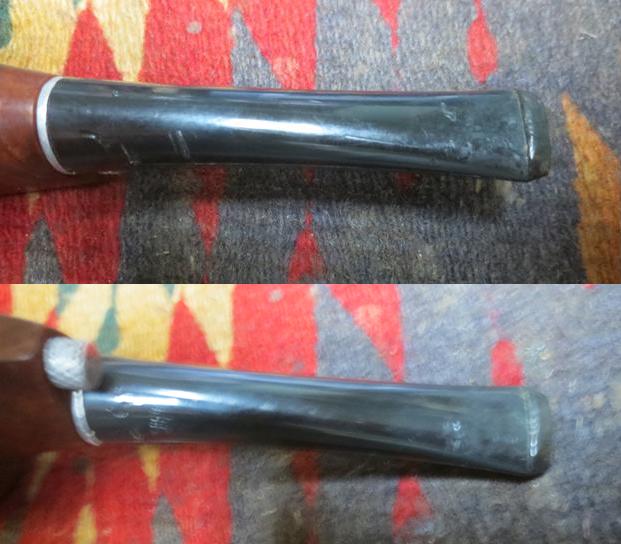
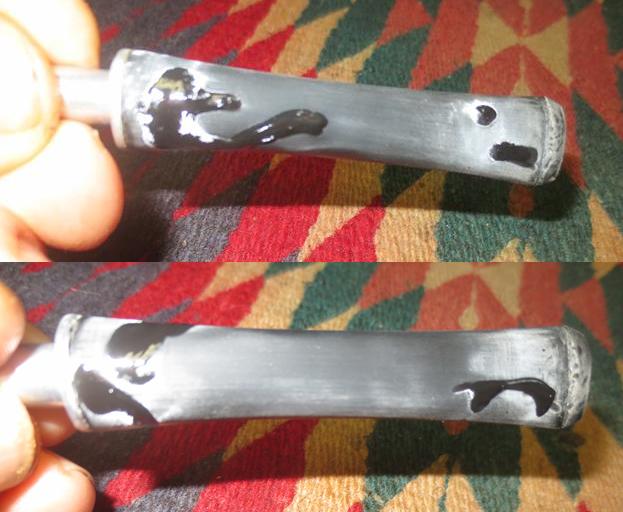
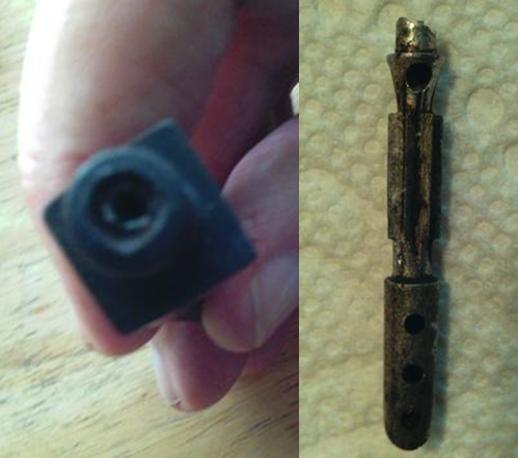
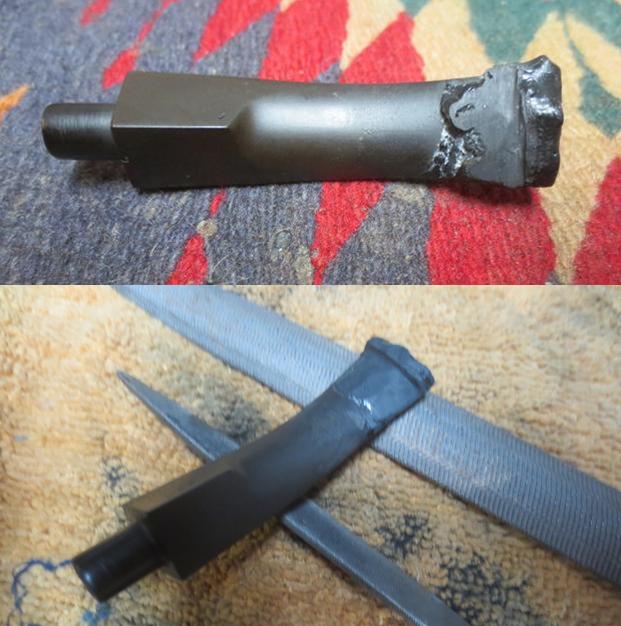
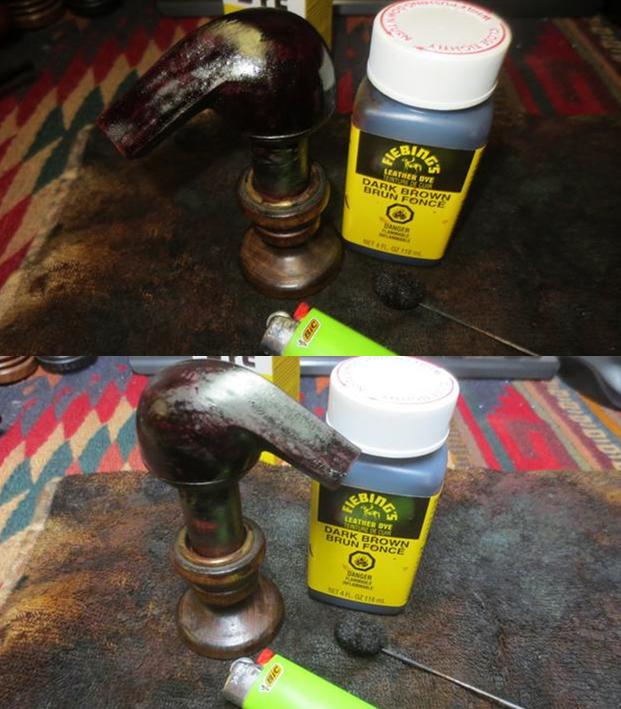
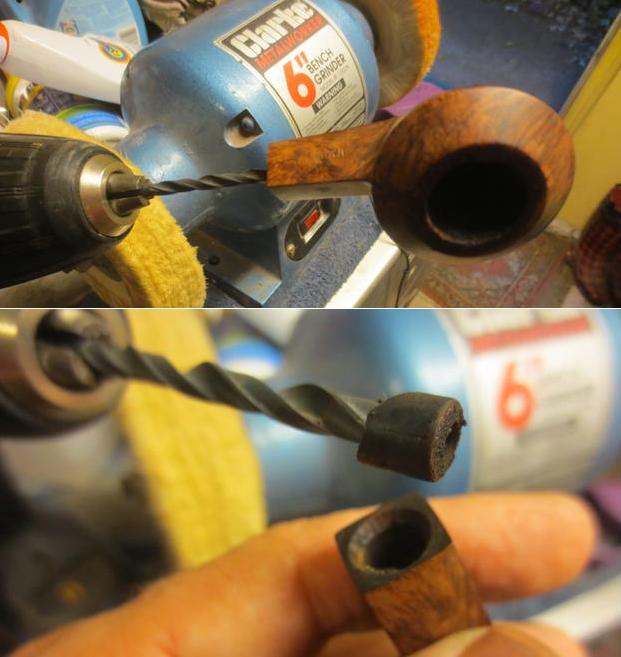
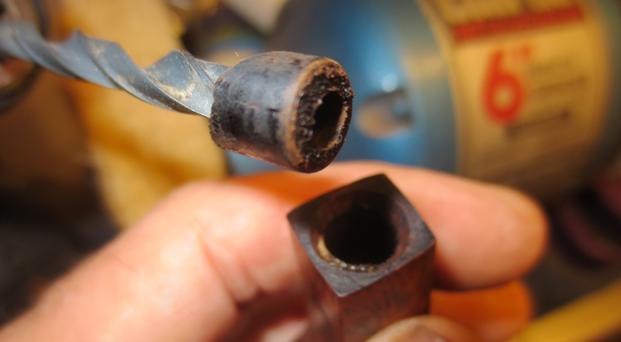
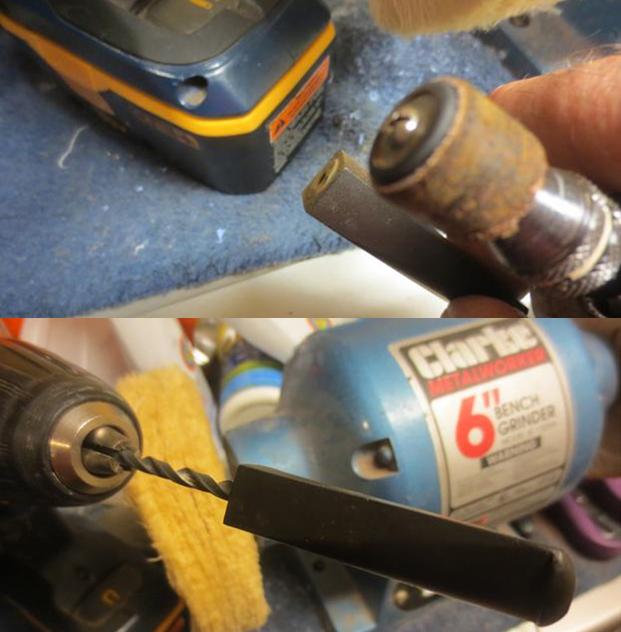
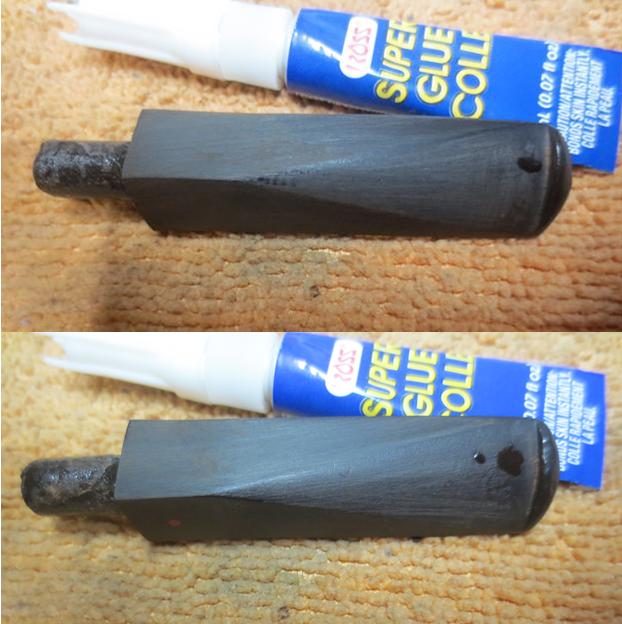
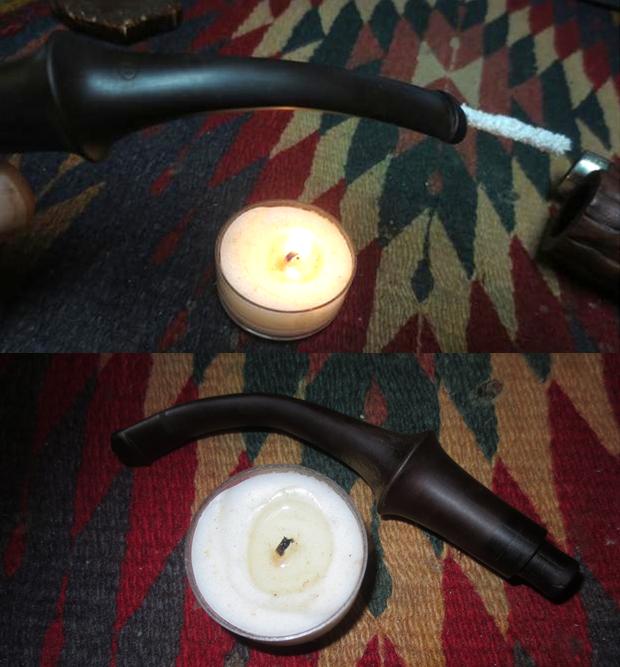
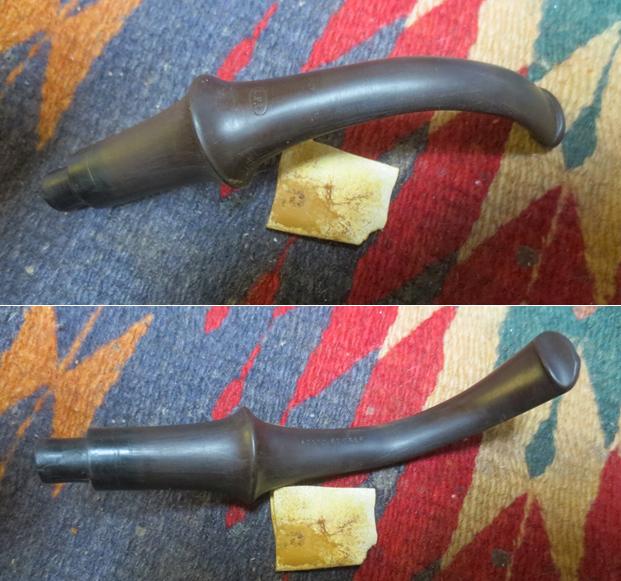
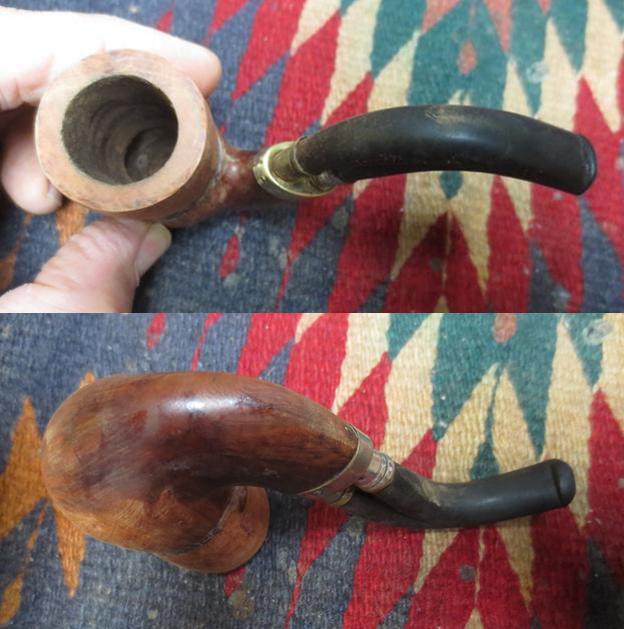
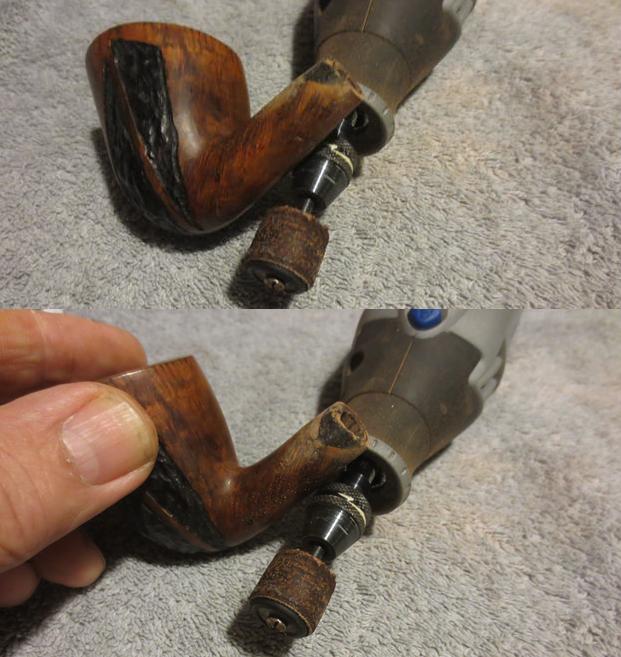
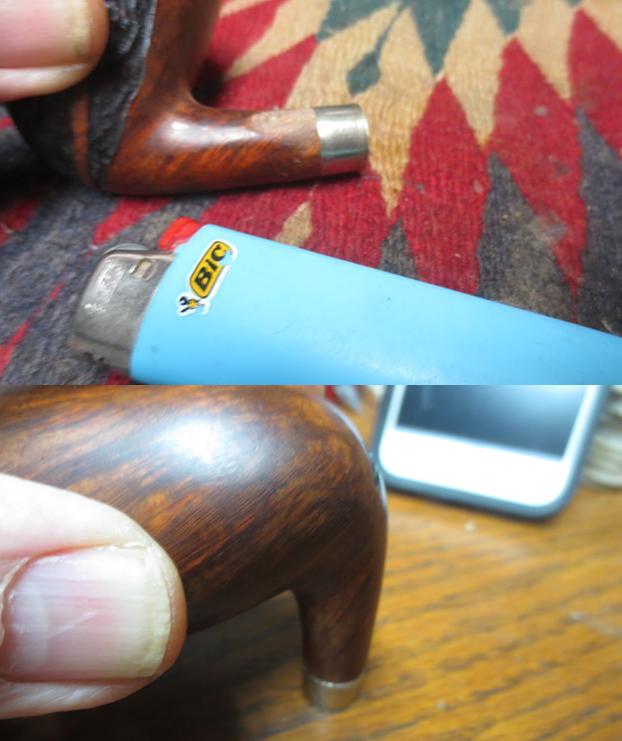
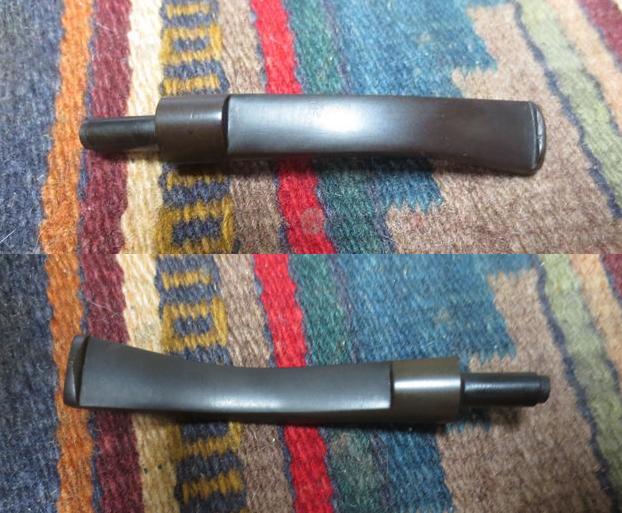
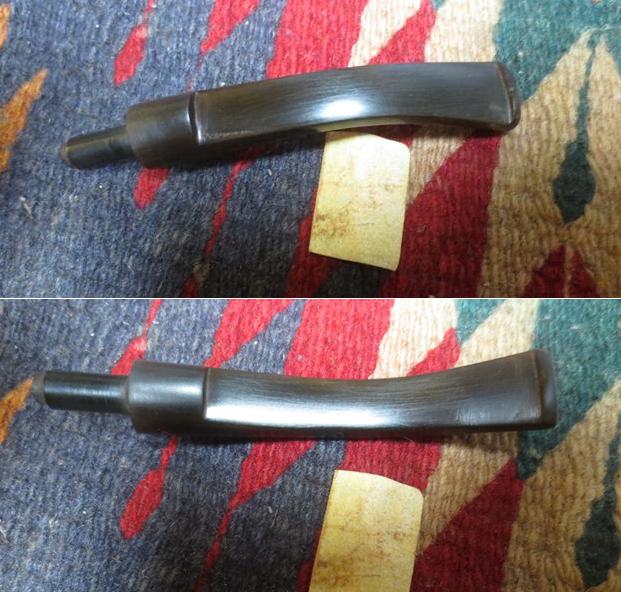
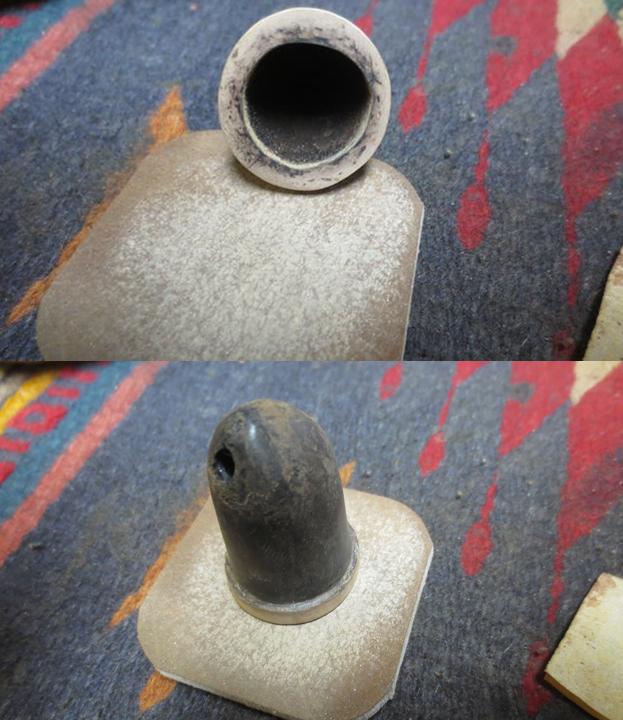
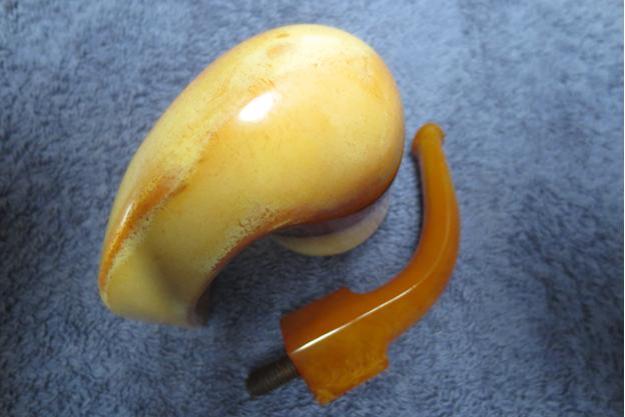
 I addressed the fit of the stem against the shank. The tenon was slightly bent downward causing a gap at the top of the shank stem union. I heated the tenon with a Bic lighter to soften it and inserted it in the shank and straightened it. I held it in place while the stem cooled and the fit was perfect against the shank.
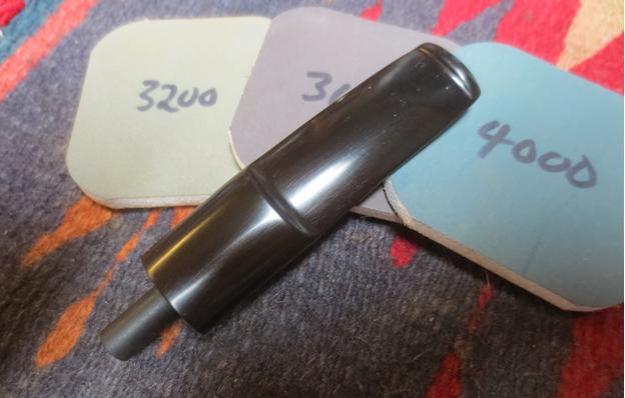
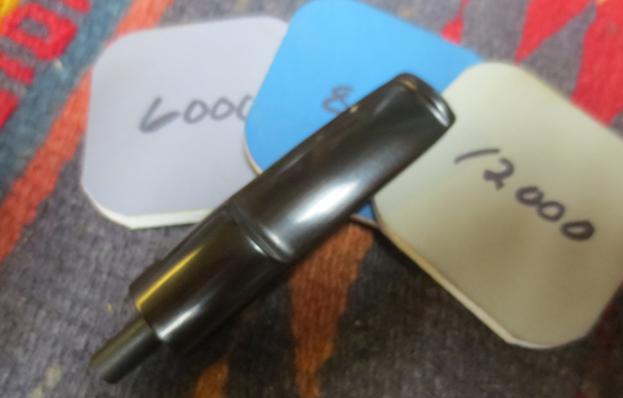
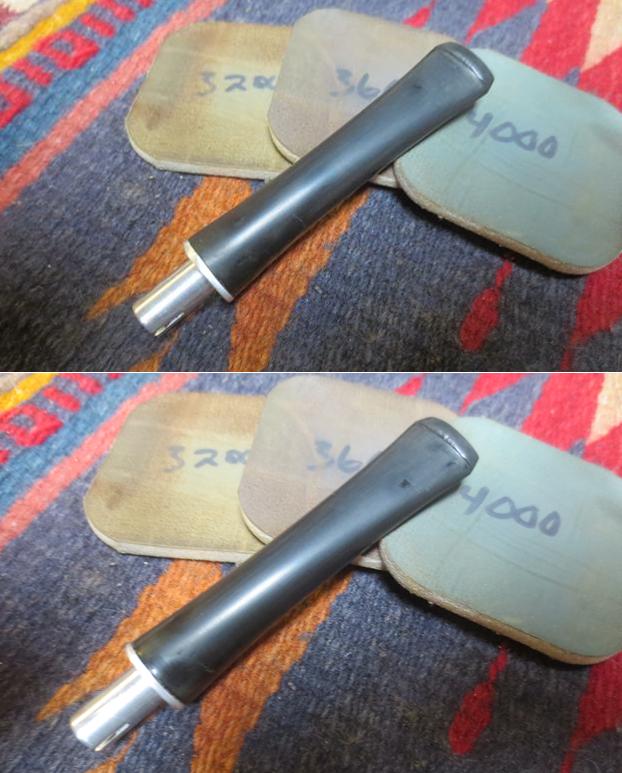
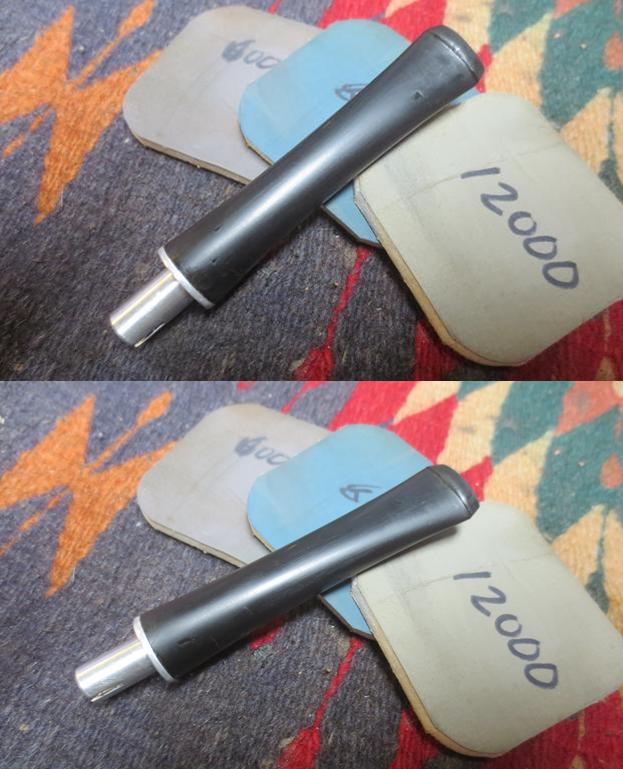
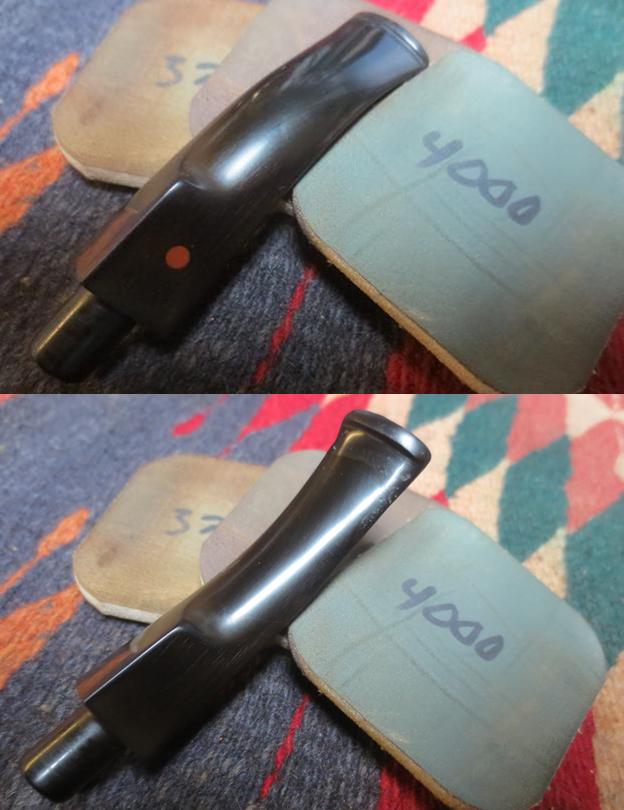
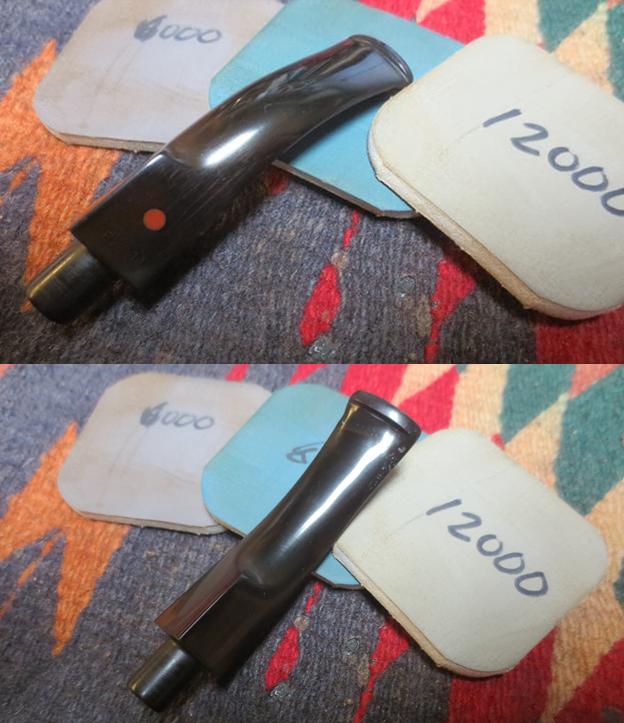
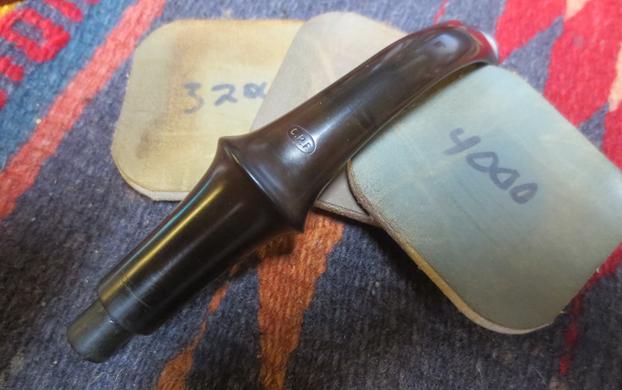
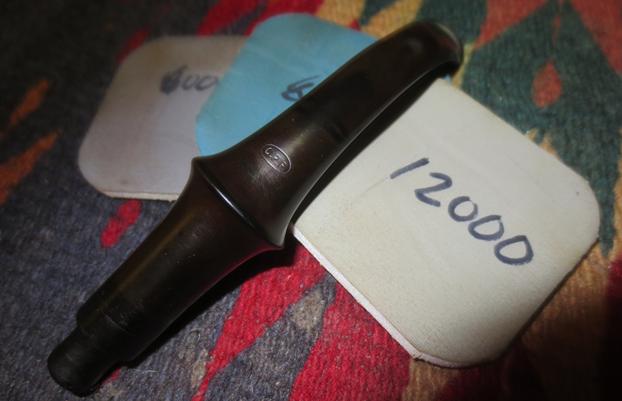
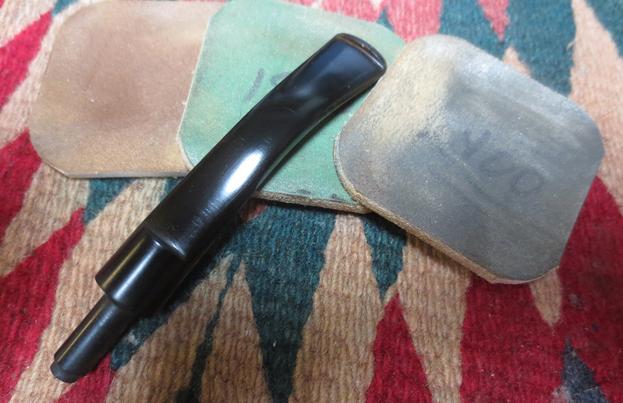
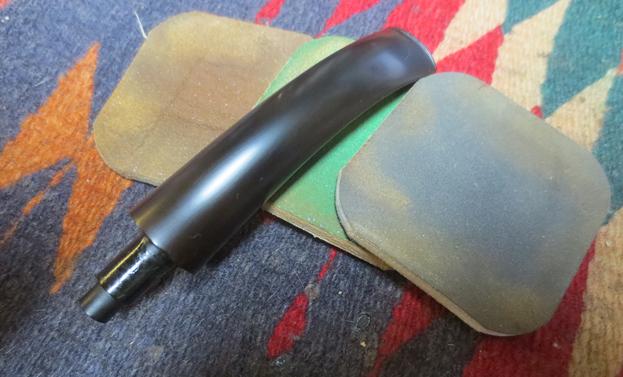
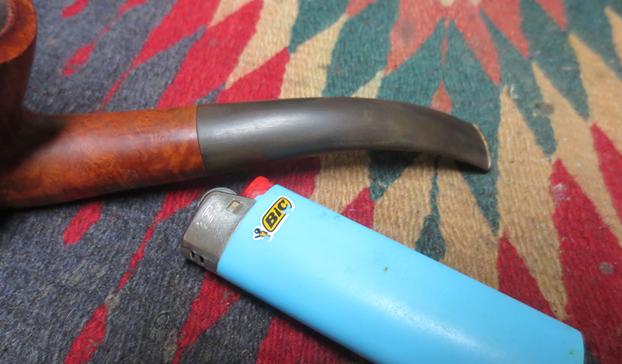 I sanded the light tooth chatter and the oxidation on the stem with 220 grit sandpaper. I wanted to break up the oxidation on the surface of the vulcanite and that is the easiest way to do it. I polished the stem with micromesh sanding pads – wet sanding with 1500-2400 grit pads and dry sanding with 3200-12000 grit pads. I rubbed the stem down after each pad with Fine grit Before & After Pipe Polish.

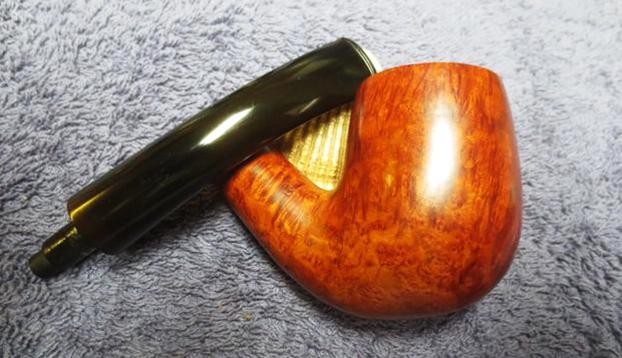
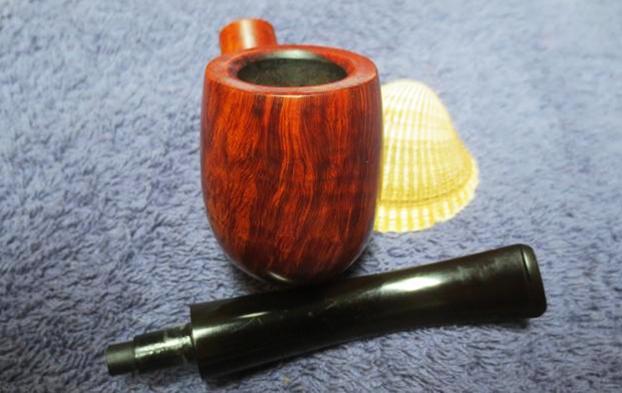
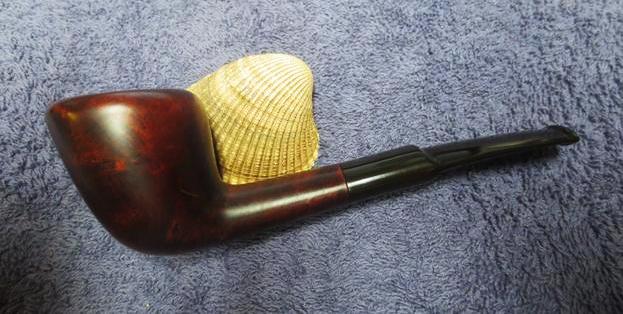
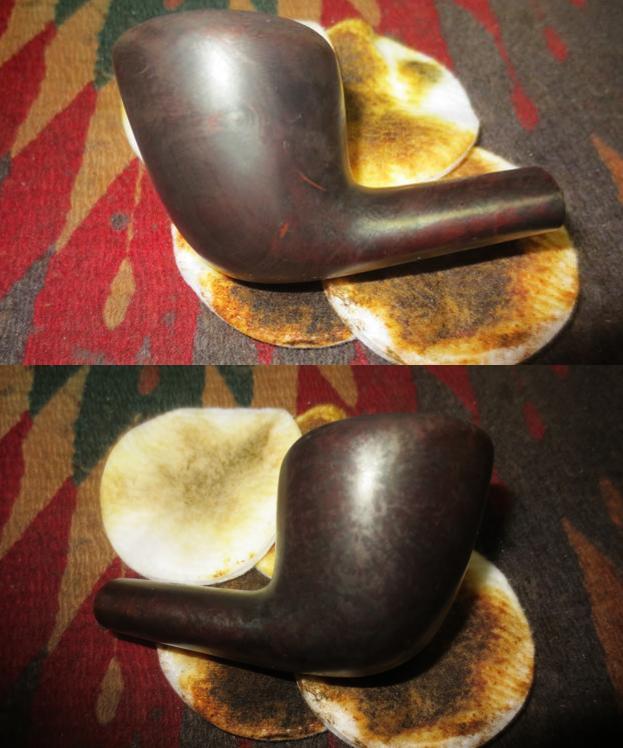
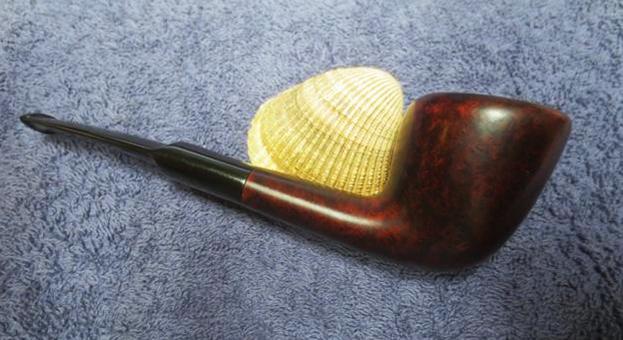
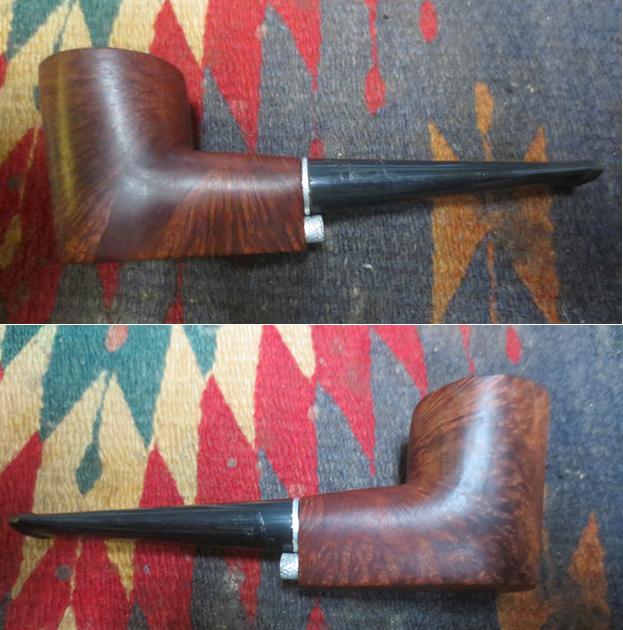
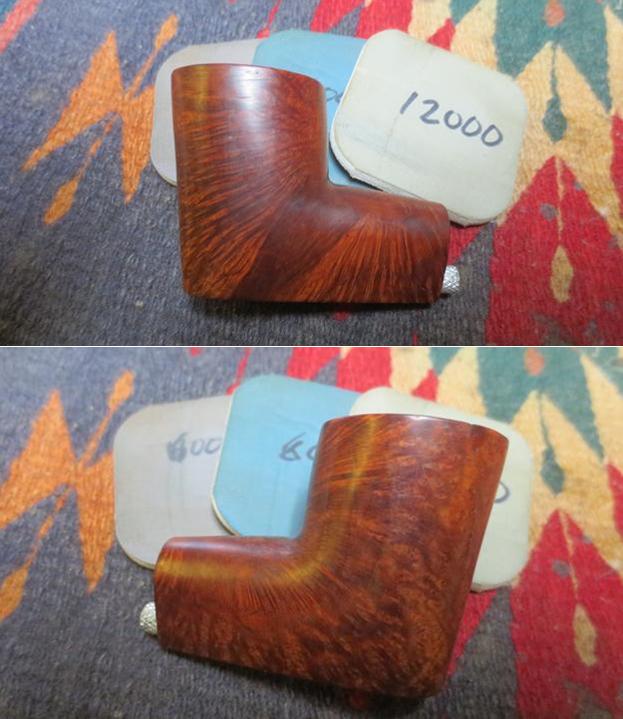
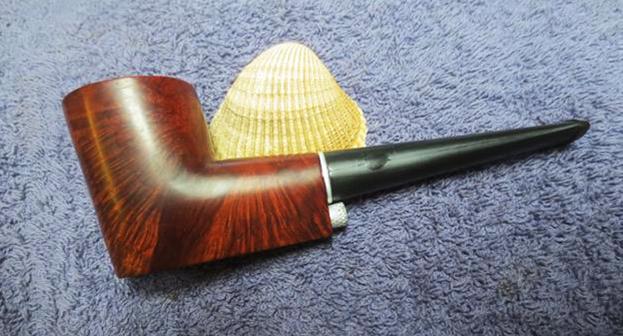
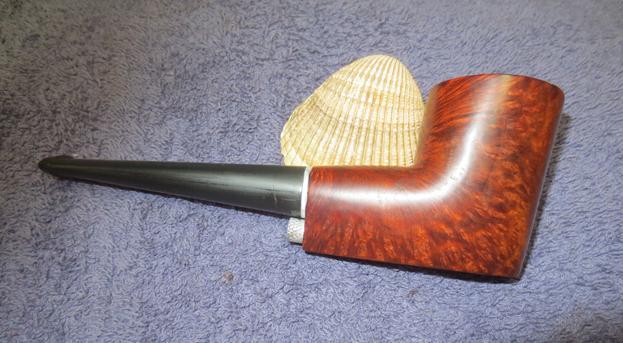
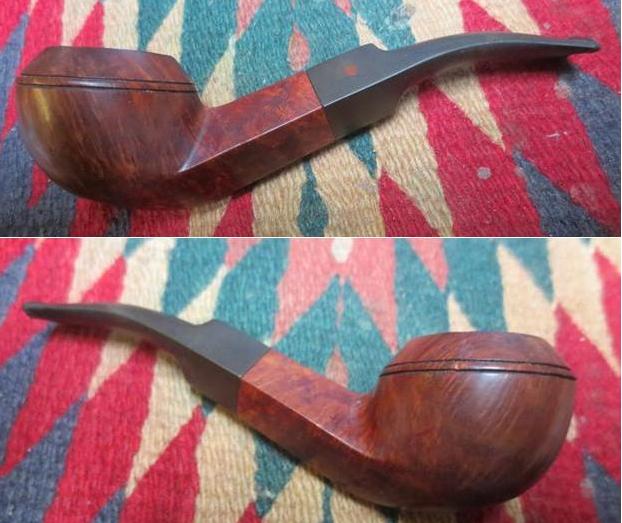
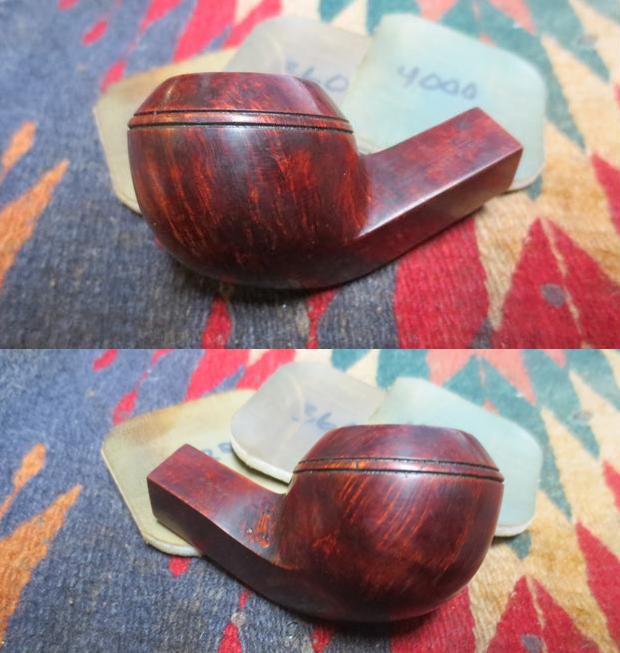
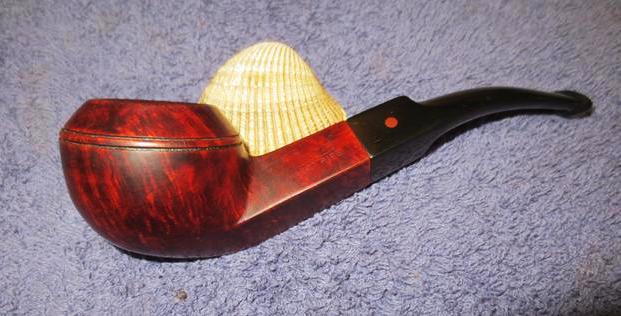
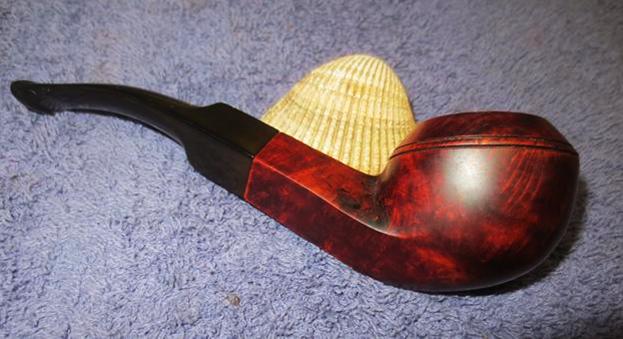
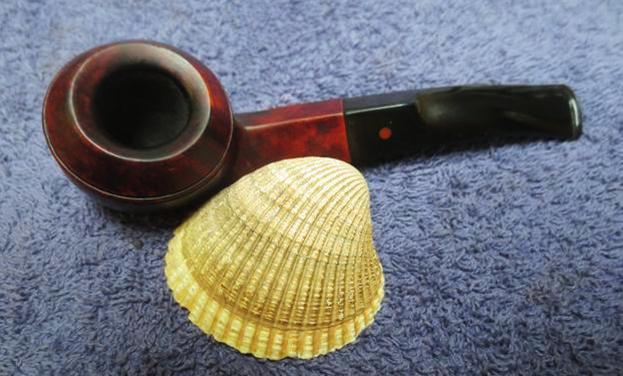
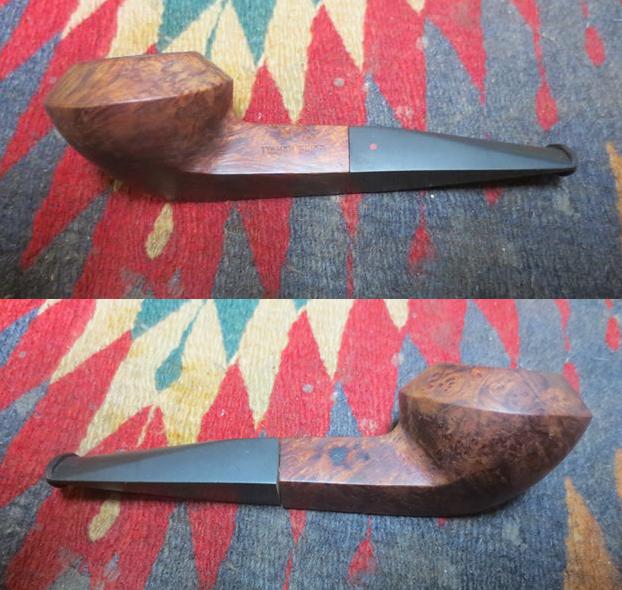
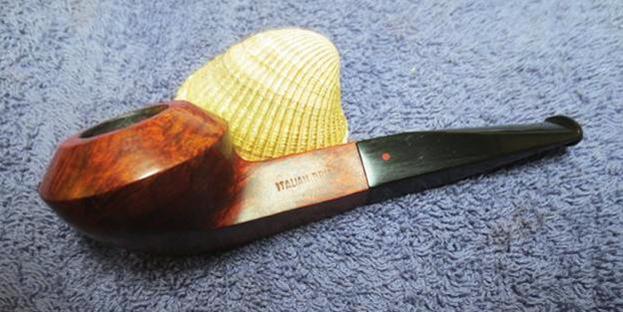
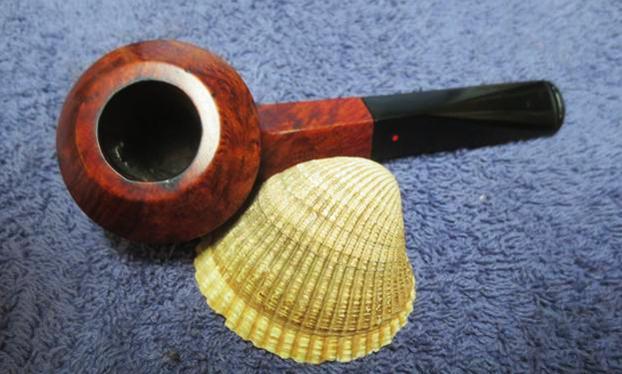
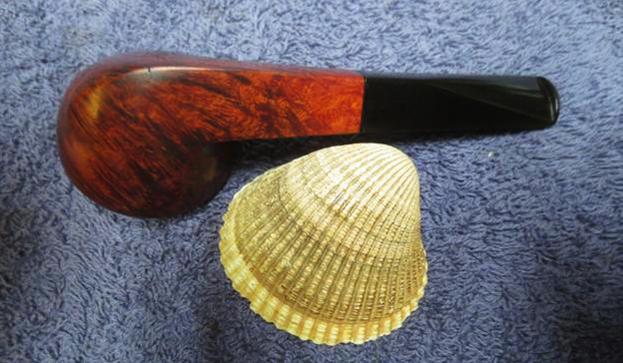
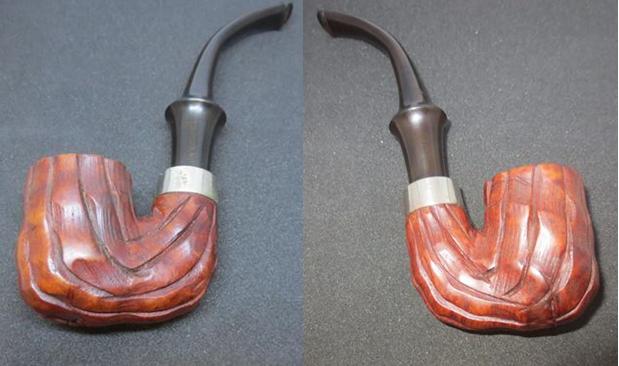
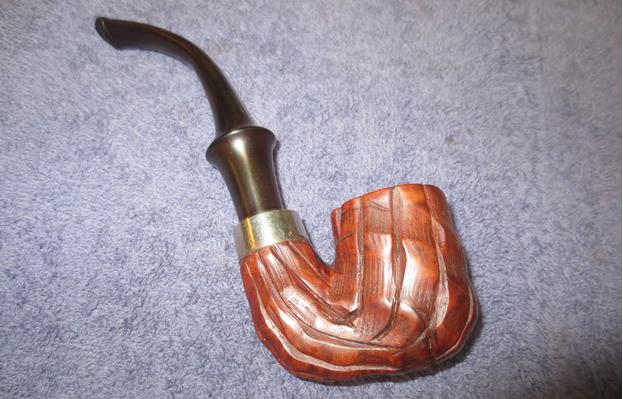
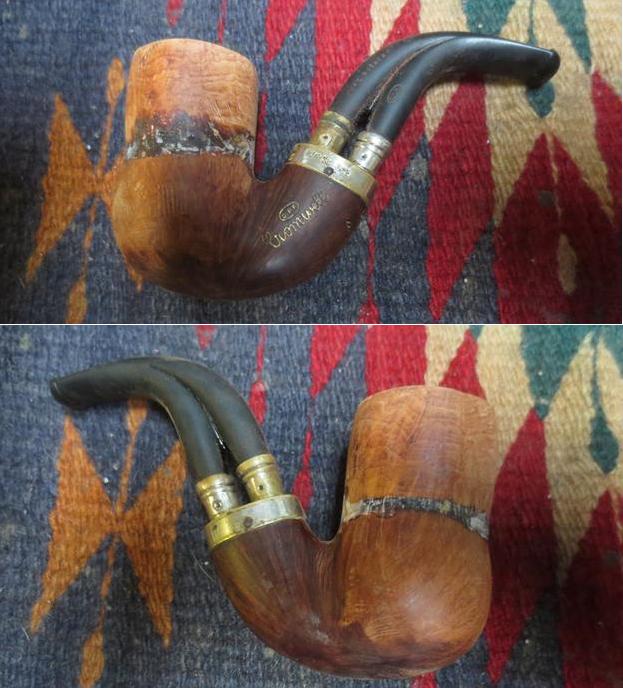
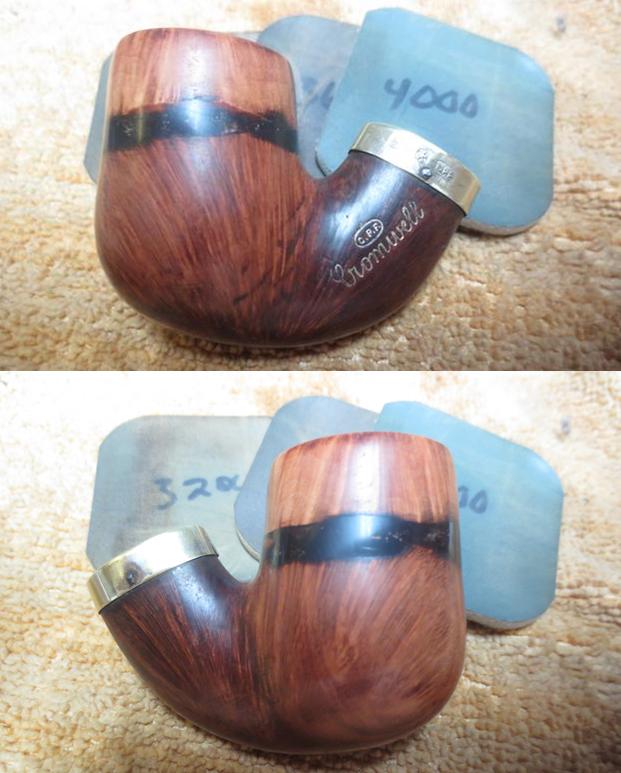
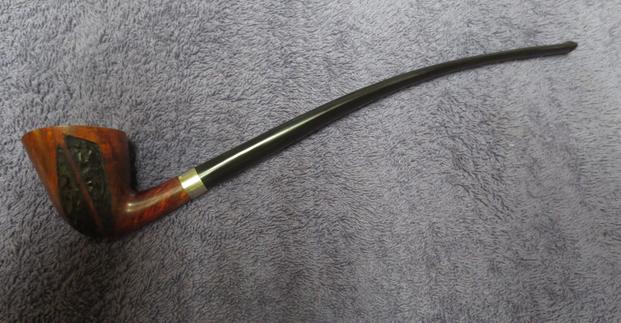
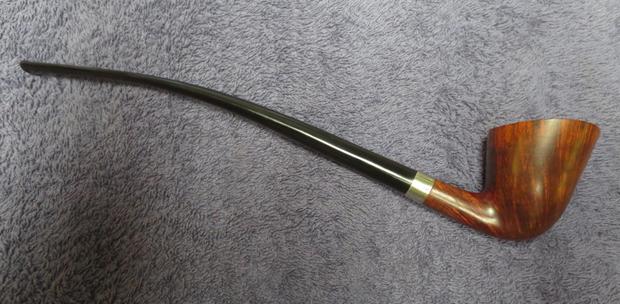
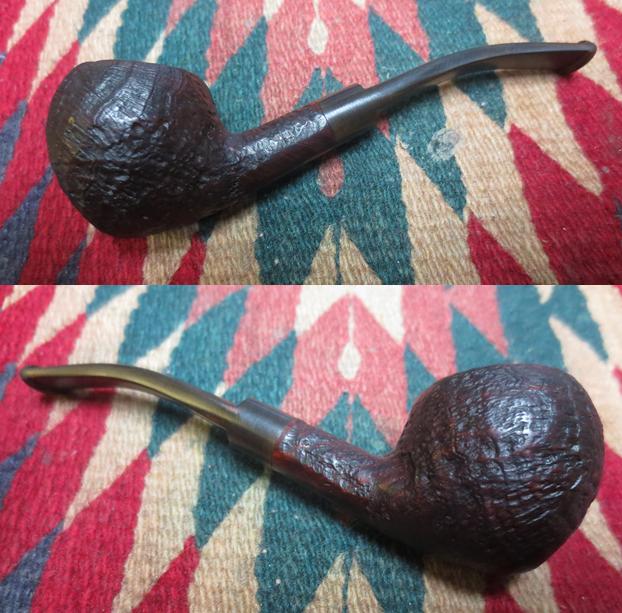
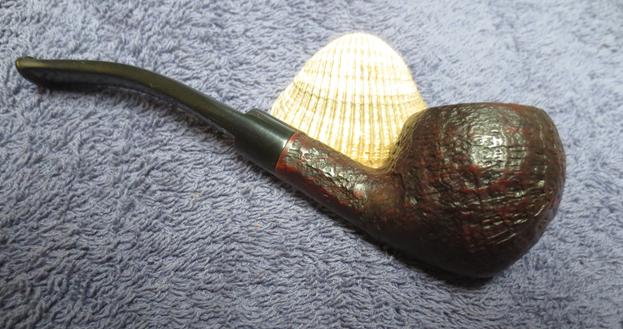
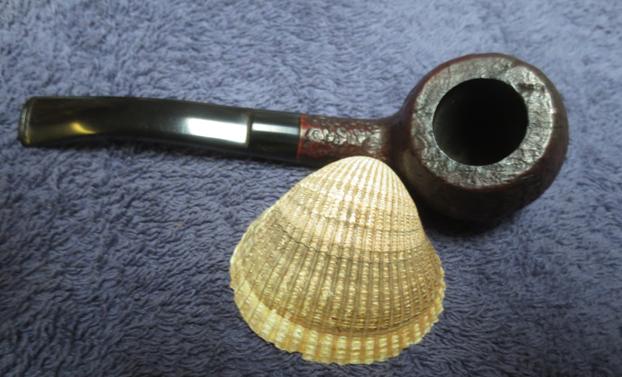
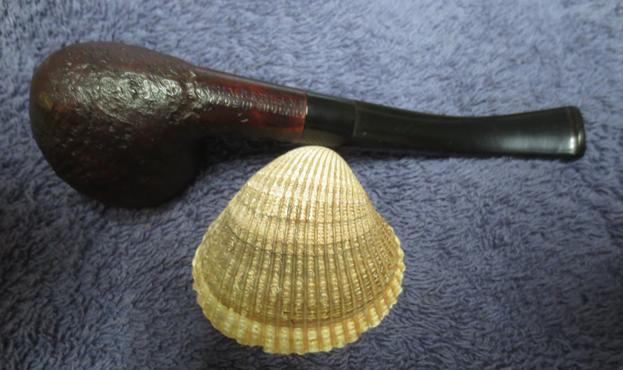
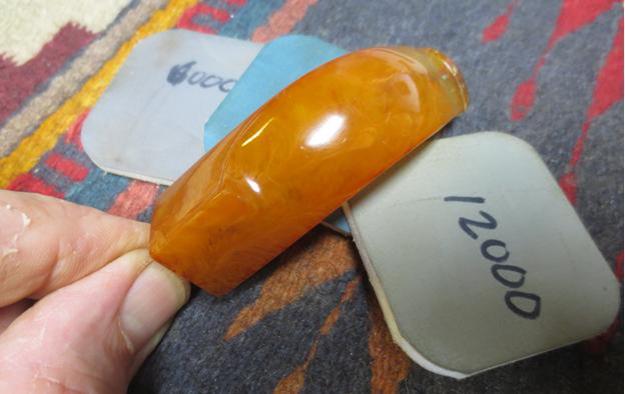
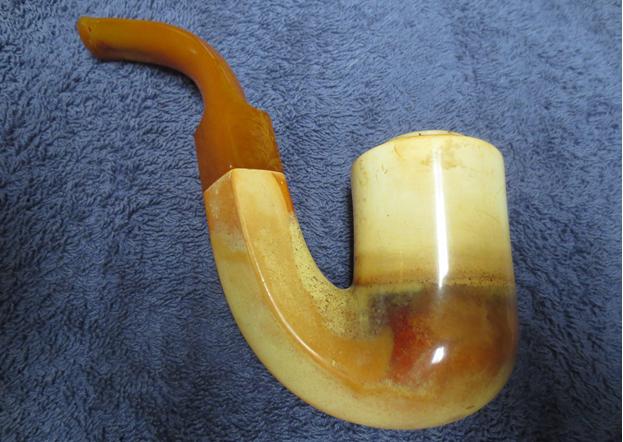
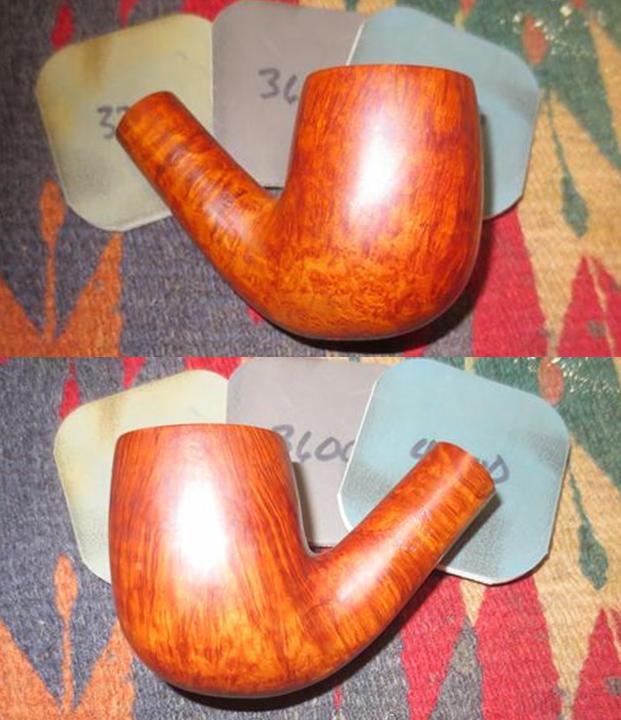
 I buffed the pipe on the wheel using Blue Diamond Polish and worked over the stem and bowl to remove any remaining scratches. I was careful around the stamping so as not to buff it out and soften it. I gave the pipe multiple coats of carnauba wax and buffed it with a clean buffing pad to raise a shine. I hand buffed it with a microfiber cloth to deepen the shine. The finished pipe is shown in the photos below. It really is a beauty. The flaws that I repaired really disappeared into the grain of the pipe. If you did not know where they were before they are hard to identify. The black of the polished vulcanite and the polished briar work well together to present a beautiful pipe. I have to finish Jim’s second pipe and then the pair will go in the mail. I can’t wait to hear what he thinks of this one once he has it in hand and fires it up for the first time. Thanks for looking.