Blog by Dal Stanton
 Tavern Pipe
By Suzie Baker
Summary and excerpts of the artist’s description:
Here the subject poses as an American Colonial man from 1776; he actually posed on Washington’s Birthday. He has a ruddy complexion and piercing blue eyes. From my perspective, he is more interesting to paint than a golden-haired beauty.
He poses with a tavern pipe. This type of pipe was a communal pipe used in pubs in the 18th century. After each use, the pipe stem was cut away then replaced on the mantel for the next user. I chose a color scheme appropriate to the time period and drew inspiration from Rembrandt’s work in the direct gaze, dark background and loose handling of paint, especially in the clothing….
Let me first tell you the story about the commissioning of the Cutty Tavern Pipe now on my worktable and then I will tell you about the gifted artist I discovered in my research about tavern pipes, Suzie Baker, and her amazing offer to benefit the Daughters of Bulgaria with her ‘Tavern Pipe’. Living in Bulgaria, the opportunities to talk with our grown children (and growing grandchildren!) residing in the US, is a special treat. My son, Jonathon, reached out to me on
  FaceTime with a special, ‘historical’ request. Jonathon desired to commission a special ‘historical’ pipe as a gift for Andrew, a friend who was leaving his job as the assistant curator of the Dearborn Historical Museum – an American city in the state of Michigan that takes its history seriously. Jonathon, while serving on the mayoral appointed Dearborn Historical Commission, befriended Andrew as Andrew fulfilled his duties as a curator for the museum tasked with safeguarding Dearborn’s history.
Today, Dearborn, a suburb of Detroit, is proud to be one of the most ethnically diverse cities in the world. Yet, Dearborn’s history is predominantly shaped by the controversial industrialist and auto manufacturer, who called Dearborn his home, Henry Ford (1863-1947).
When Jonathan shared his desire to commission a pipe with some historicity as a gift for a CURATOR of a museum, and that museum was the Dearborn Historical Museum, I was anxious to rise to the challenge that that request presented. I did a fast dictionary search on Google to see a working definition of ‘Curator’. This is what I found:
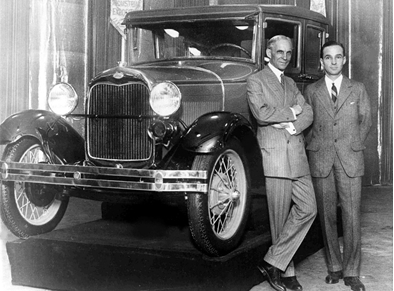
Automobile manufacturer Henry Ford, left, and his son, Edsel, in one of their car showrooms in January 1928. (AP) from Washington Post article (link)
Curator:
a keeper or custodian of a museum or other collection.
“the curator of drawings at the National Gallery”
synonyms: custodian, keeper, conservator, guardian, caretaker, steward
I took special interest in the last word listed as a synonym of curator – ‘steward’, which speaks to my ‘Pipe Steward’ sentiments. Understanding that we are not the owners ultimately but protecting and caring for that which belongs to others to pass it on. I understand this as I handle pipes which are laden with their own histories revealed in the nomenclature, but often the history and legacies of that pipe’s steward(s) joins the pipe’s legacy moving together to the future. As a curator, Andy participated in guarding history. History by its very nature comes with a blend of beauty and goodness coalescing with ugliness and pain – each side of the pendulum is history which we guard so that we do not forget it and continue to learn from past triumphs and failures – even when it’s not comfortable.
So, the gauntlet was thrown: A Steward of History (Andrew the Curator) is celebrated for his service by the current president of the Dearborn Historical Commission (my son), who reaches out to The Pipe Steward (that’s Dal in Bulgaria) to commission a special pipe, with historical gravitas to adequately serve as an appropriate gift. Jonathon asked for my recommendations, but relying on the Harry Potter principle in wand selection approach, I turn Jonathon loose

Keens Steakhouse reported to be the oldest pub/restaurant in NYC and that celebrates their history of clay cutty taven pipes and have a serious collection of clay pipes on display (Link from PipesMagazine.com).
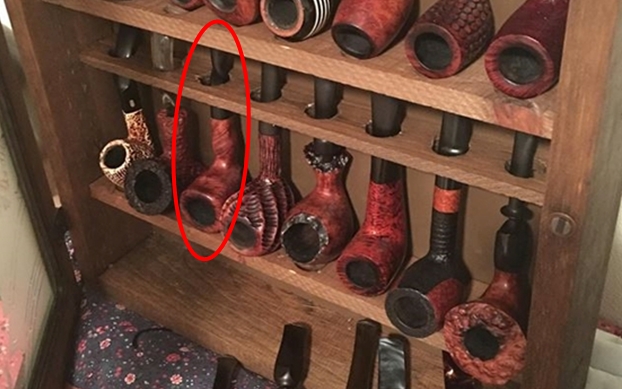
looking through my virtual ‘Help Me!’ baskets in the For “Pipe Dreamers” Only! collection to discover which pipe would choose Andrew and let Jonathon know 😊. After whittling the list down, one pipe did the choosing – the Cutty Tavern Pipe which I acquired from the Lot of 66 off the eBay auction block. After Jonathon confirmed the commissioning, the first question that came to my mind, since I don’t know Andrew personally, was whether he is the kind of curator that enjoys a trip to the pub after a long day curating at the museum? This was an important question for my historical research – how do you talk about Tavern Pipes without an appreciation for the natural and historical habitats from which Tavern Pipes have their genesis? Thankfully, with a confident confirmation, Jonathan assured me that yes, Andrew would enjoy a pub. With that settled, I began my research.
I found a short description of the Cutty shape on ThePipeGuys site to be a good summary and historical description of the Cutty Tavern Pipe.
Cutty
Tavern scene with a man smoking a pipe next to a barrel with a jug on top of it, his left foot resting on a bench. 1694 From the British Museum (Link)
There is no denying the resemblance that the Cutty bears to the clay tavern pipes of a bygone age. Delicately shaped, Cuttys typically have not an ounce of excess briar left in place. This delicacy of shaping necessitates the use of a special drill bit for the tobacco chamber, which tapers even more drastically than a Danish conical bit, and comes to a sharp point at its tip. A special honor is paid to this pipe, in that this type of conical bit is now called the “cutty bit”.
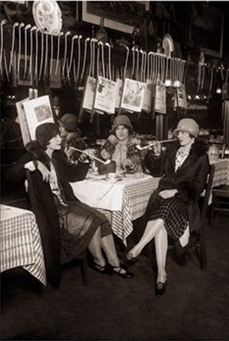
Notice, the ladies are not left out!
From Pinterist Pipe Smoker Group (link)
Many Cuttys still include the “spur” at the foot of the bowl, once again hearkening back to their clay ancestors, but while the spur of a clay pipe was the remnant of the manufacturing process, the briar versions are purely nostalgic. The bowl of the Cutty is heavily canted forward, which helps differentiate it from other long-shanked pipes like the Canadian. The Cutty may sometimes display a very unique stem, which is slim, slender, and round (almost like a straw). However, the majority of modern Cuttys now sport a tapered stem and come in many finishes.
Try simply googling ‘Cutty Tavern Pipe’ and 100s of images begin sharing different shards of the story and one feels like he’s in a time machine. Of course, the briar descendants of the classic clay workhorse Cuttys of the 1800s and the early 1900s, claim this heritage as their own.
Elizabethans called a pipe a “little Ladell.”
TobaccoPipes.com adds this information in their ‘Complete Guide to Tobacco Pipe Shapes’:
As far as we can tell, the Cutty is the oldest pipe shape that is still available today.
As early as the 16th century, pipe smokers would settle in at their favorite tavern and–if they had a high enough social status–would pull out a long clay pipe, almost always a Cutty shape. This shape was common because it was easy to craft in the molds used for clay pipes (William Goldring, The Pipe Book: A History and How to:1973).
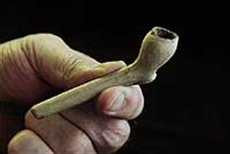
In my digging into the Cutty clay pipe history, I discovered one very interesting and surprising 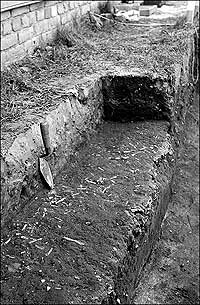 article (at least to me) that a curator would appreciate. The Colonial Williamsburg Foundation’s (Virginia, USA) website, History.org, published an article by Ivor Noël Hume entitled, “Hunting for a Little Ladle – Tobacco Pipes” (link). The author describes how archeologist can learn much about different periods of Colonial America in Williamsburg, Virginia’s, history through the recovery of thousands of clay pipe fragments! As we’ve already mentioned, hygienic concern is the predominant theory. An excerpt from the author is enlightening:
There are thousands of pipe fragments found in Williamsburg. An early explanation for their ubiquity had it that in colonial-era taverns’ pipes passed from mouth to mouth, but that in the interests of hygiene the previously lip-gripped section was broken off and thrown away. There is no documentary support for that notion, but it is known that used pipes were placed in iron cradles and heat cleansed in bake ovens before being issued to the next round of smokers.
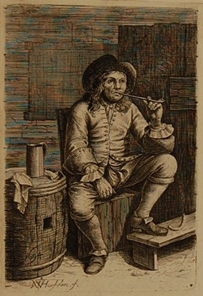
And then I came across this picture that was among 100s of others on the google ‘Tavern Pipe’ image search page results – and I paused. I see a pipe man in an age gone by and I immediately know what he’s doing as a fellow-pipe man. Yes, he’s smoking his beautifully shaped long Cutty Tavern Pipe, but he’s doing something else much more important – that his Cutty clay is helping him to do – reflection. He’s looking out the window, or at the hearth with his eyes, but his heart and soul are elsewhere, seeking understanding or perhaps a much-needed answer. It is not lost to me as well, that his waiting quill – while ready to move and inscribe on the parchment the sought-out knowledge or answer that his reflection is cultivating, is at rest. For that moment, the quill waits for the hand’s movement from the heart’s command.
 Every pipe man and woman know that smoking a pipe is more than smoking. It’s a ritual that brings us into calm or fellowship and a slowed time for reflection as we seek to negotiate life and care for loved ones and friends. The name of the painting I was lost in was simply ‘Tavern Pipe’. I knew at that moment I wanted to include this painting in the writeup of this special Cutty Tavern Pipe for a special friend of my son – a museum curator would appreciate what I see.
In the next moment I was composing my email to the artist, Suzie Baker, after I clicked on the link taking me to her website where I found her contact information. This is what I wrote:
Dear Ms. Baker,
I’m writing to you asking for permission to use the picture of your beautiful painting, Tavern Pipe, in a write up I am doing on the restoration of a briar wood Cutty Tavern Pipe. I came across your www.suziebaker.com site while doing research on tavern pipes. I will give full credit to your work and website when I cite the information.
I am an artist of another kind. You can see my website at www.ThePipeSteward.com. I collect old, used and often discarded vintage pipes and restore them. I then sell them world-wide and give the proceeds to the Daughters of Bulgaria – a work in Bulgaria helping women and girls who have been trafficked and sexually exploited. My wife and I live and work in Bulgaria with the Daughters of Bulgaria. The pipe restoration hobby is a personal way I try to make a difference by talking about this issue to primarily a men’s world – pipe smokers. Each restoration has its own write-up which you can see at the website. I will not use the picture of your painting without permission and if given, will, as I said, give you and your site full recognition. As a pipe lover and one who enjoys a bowl now and then, your painting captures something of the spirit of those who enjoy, and yes, love not only the smoking of pipes, but the beauty of pipes as they showcase both beauty and design. I call my work, The Pipe Steward, is because unlike cigarettes and cigars (which I do not like!) pipes are often heirlooms and are passed down from generation to generation. They often carry with them the memories of those who had them before.
Thank you for your consideration of this request.
Best regards,
Dal Stanton
The Pipe Steward
In the past I’ve written notes like this to individuals and pipe houses asking for information about pipes to aid research and I press the ‘send’ button with a very low expectation that this burst of electrons ever finding their way back to my inbox. I was surprised when her reply arrived so quickly. Here is what she said:
Hi Dal,
Thanks for the request and your service to those caught in trafficking, a daunting and worthy cause.
Yes, I would be pleased for you to use my image in your write-up. In fact, this painting is still available so if the posting results in a sale, I will donate 25-30% of the sale back to your worthy cause. The price and details are listed on my sight in the info under the painting (as seen on a computer screen) or info tag on a Mobile device.
I am on an airplane currently and about to take off. I can send you the image tomorrow. Please let me know what resolution you require.
Blessings,
Suzie Baker OPA
Vice President, Oil Painters of America

Well, as the president of the Daughters of Bulgaria Foundation, her generous offer was something I could not refuse as we work for the benefit of the Daughters. I appreciated her response and offer. After looking at her website, I was drawn to the “About Suzie Baker” tab – who is this person? Not only is she an accomplished artist, wife and mother, but she recognizes that her talent is a gift and she uses this gift to give back to others – especially artists. There’s much more on this page that describes the accomplishments of this artist who also desires to be a benefactress of women who have been trafficked and sexually exploited. Her ‘calling’ is similar to my own, as I seek to ‘give back’ specially to pipe men and women, the gift of restoring pipes that I am stewarding for a time, and at the same time, seeking to benefit the Daughters. About Suzie Baker:
Giving Back
This artist also believes in giving back to the community of artists, and she is proud to serve as a Board Member with the Oil Painters of America. “Serving on the board with OPA is and will be a highlight of my career, primarily because of the opportunity it gives me to serve my fellow artists,” she says. “Being on the path of a working artist is a calling. I find helping others on their path a very satisfying pursuit.” She has also earned Signature Member status in numerous other prestigious art organizations: the American Impressionist Society, the

Click the picture for the Daughters!
National Oil and Acrylic Painters Society, the Laguna Plein Air Painters Association, the Outdoor Painters Society, the California Art Club, and American Women Artists.” – from Suzie Baker, Fine Artist at https://www.suziebaker.com/info/suzie
Pipe men and women, if you would like to add the ‘Tavern Pipe’ to your collection of pipes and artwork and help a good and needful cause at the same time, the Daughters of Bulgaria, click the image on the right which takes you to Suzie Baker’s site with a full description of the Tavern Pipe painting, and a higher resolution picture to view. Contact information for Suzie Baker is also included. When you contact her, simply tell her that it’s for the Daughters.
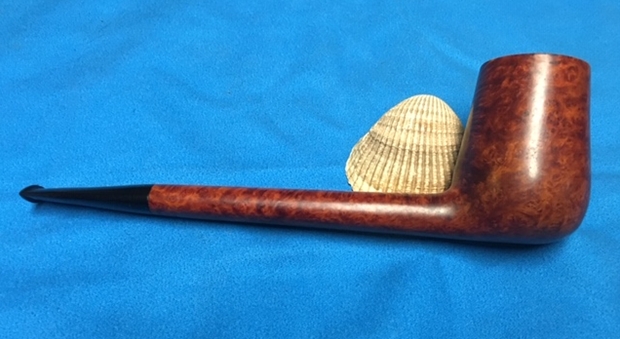
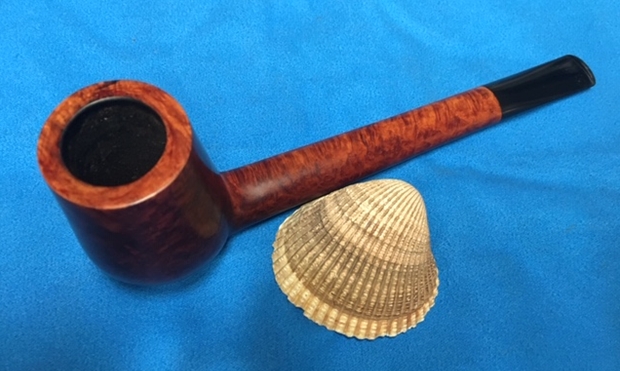
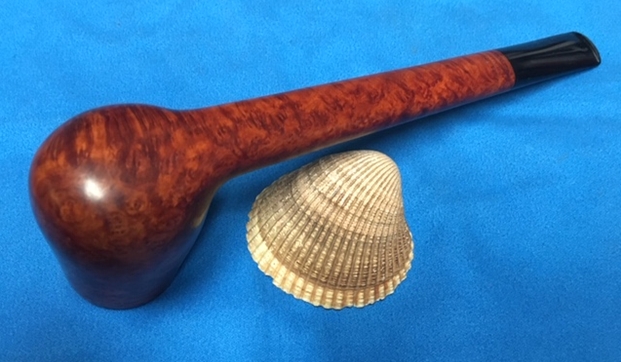
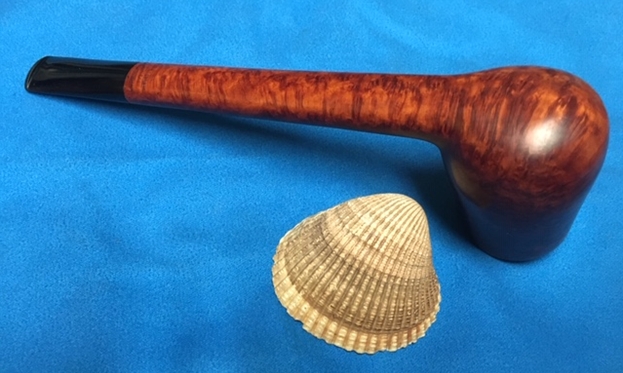
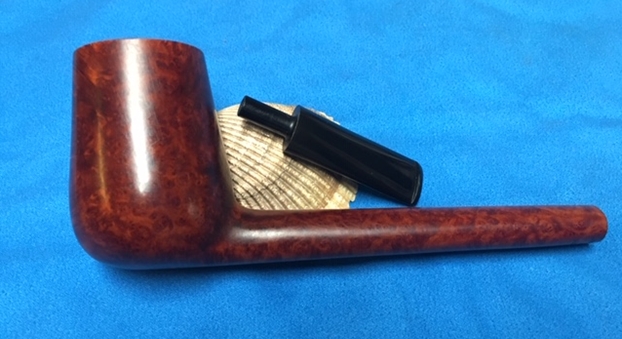
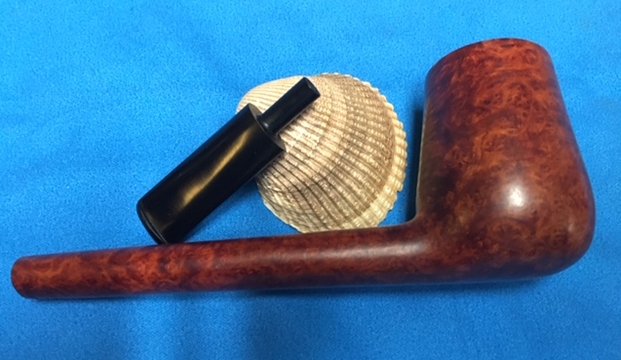
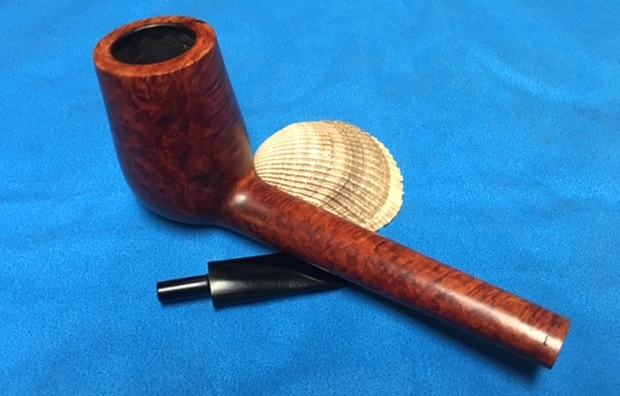
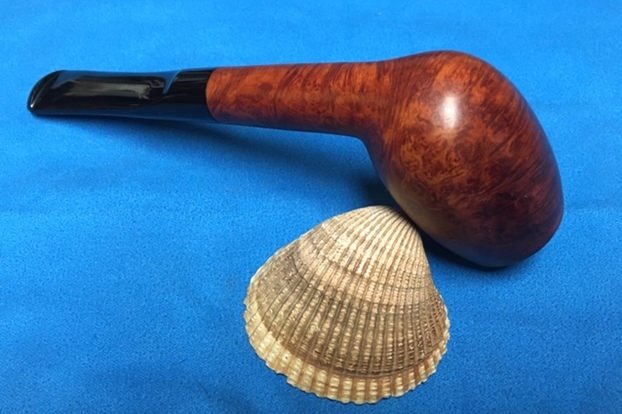
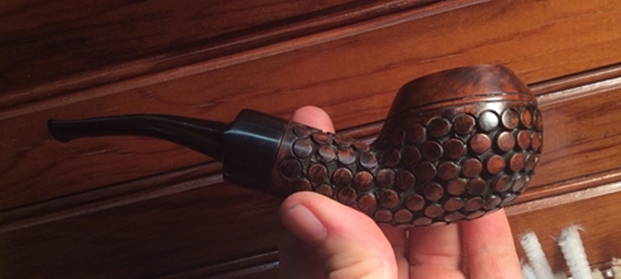
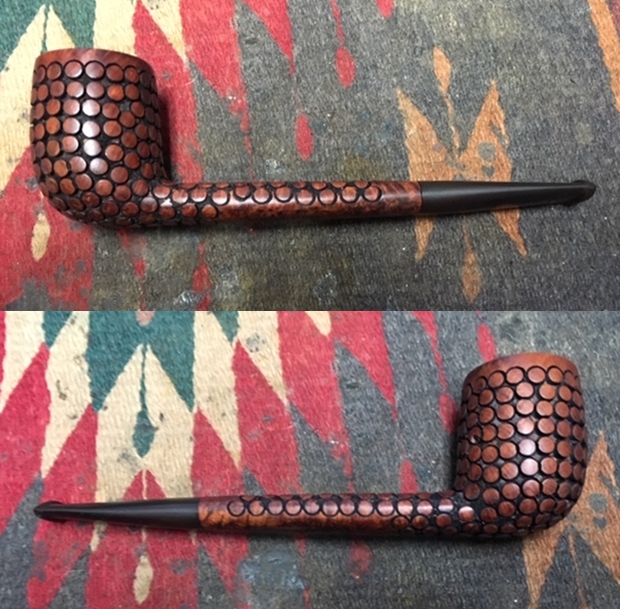
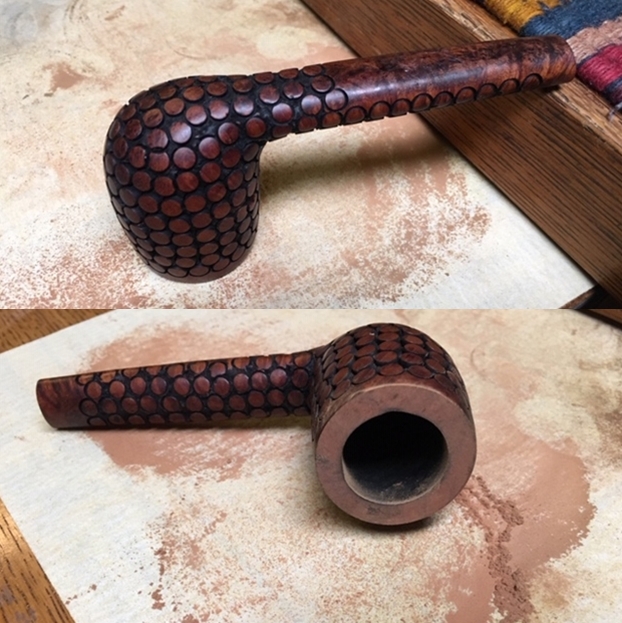
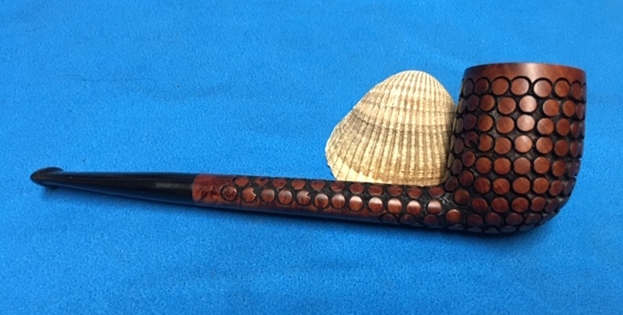
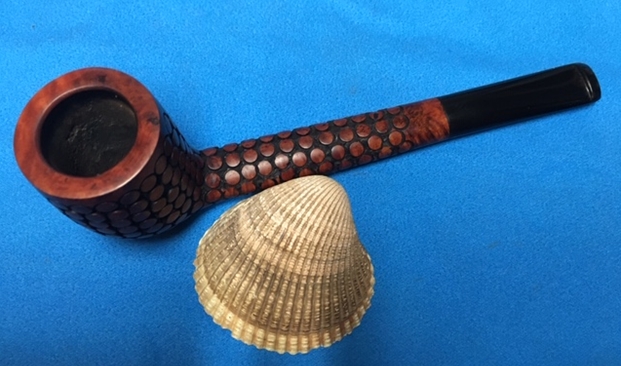
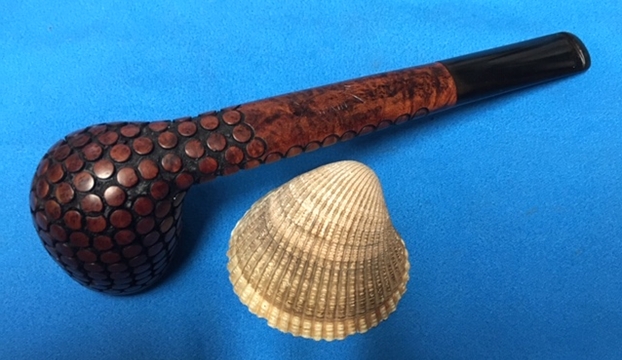
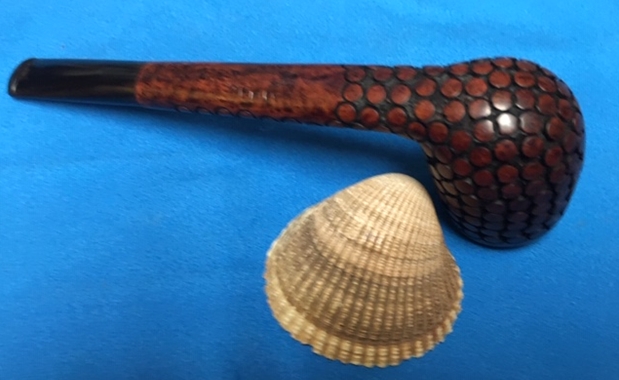
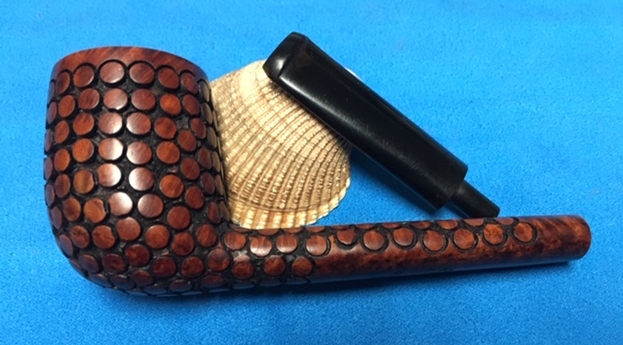
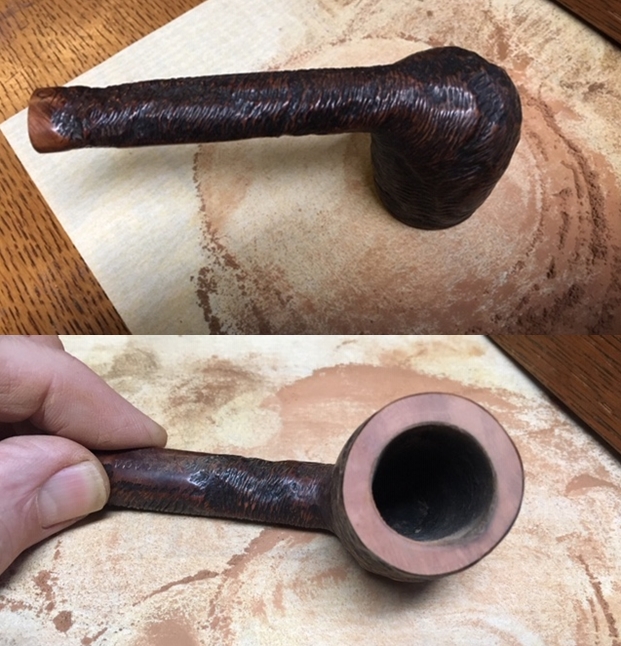
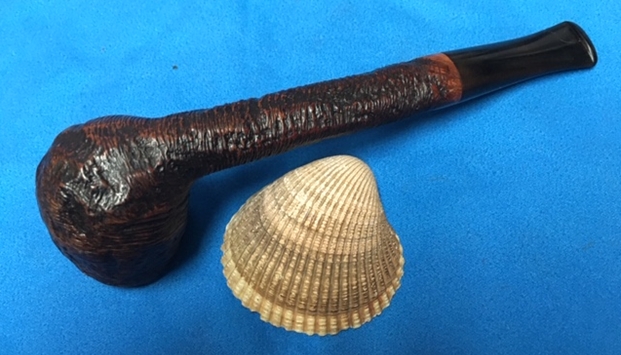
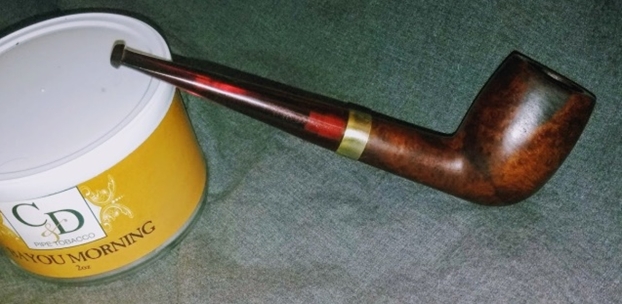
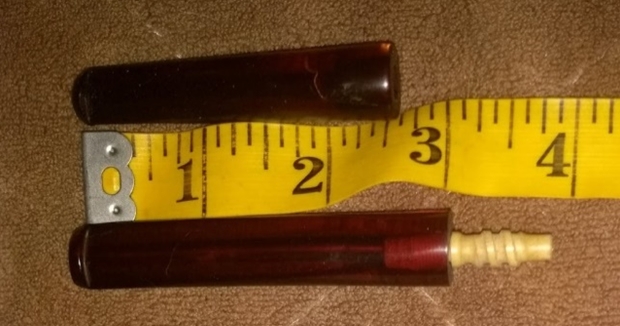
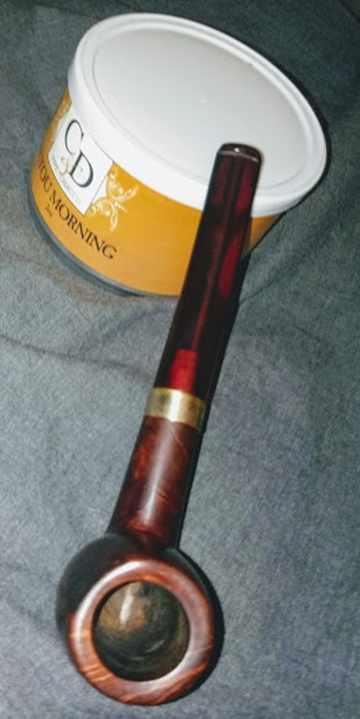
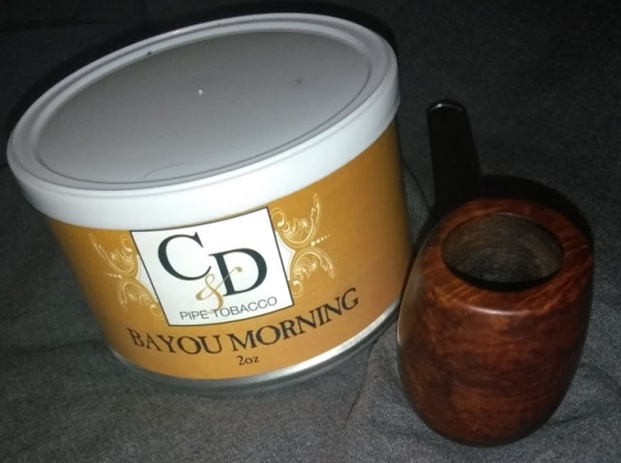
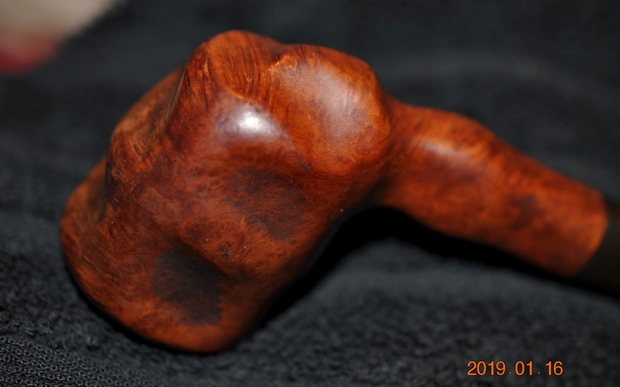
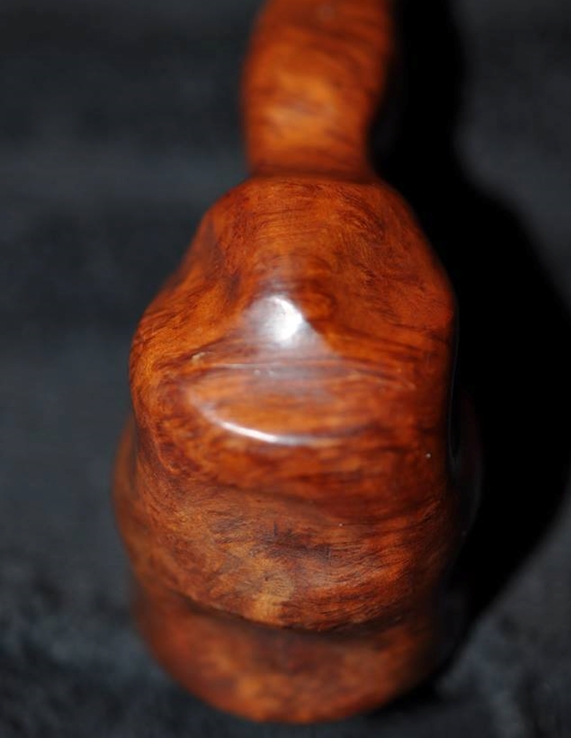
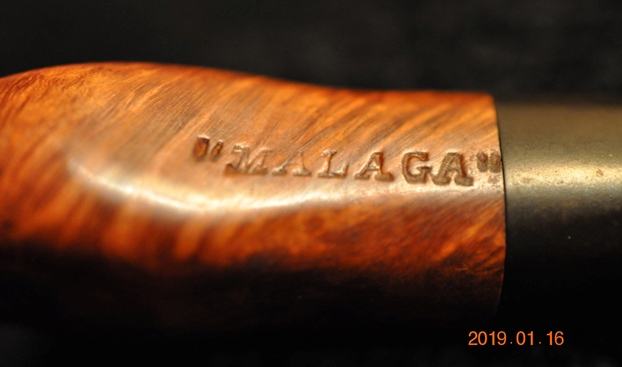
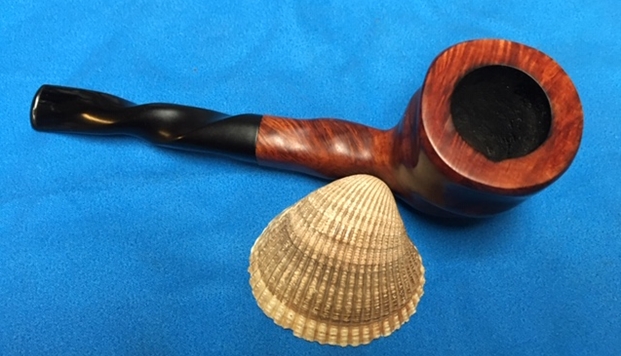
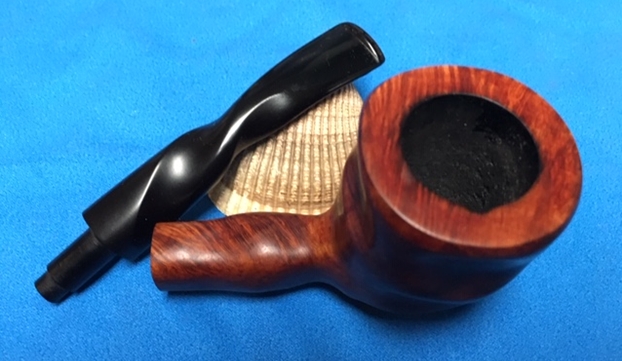
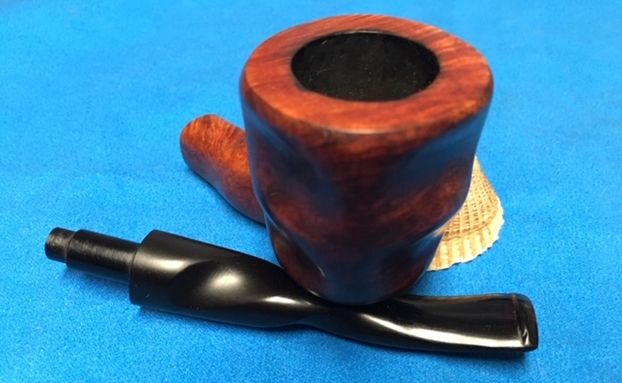
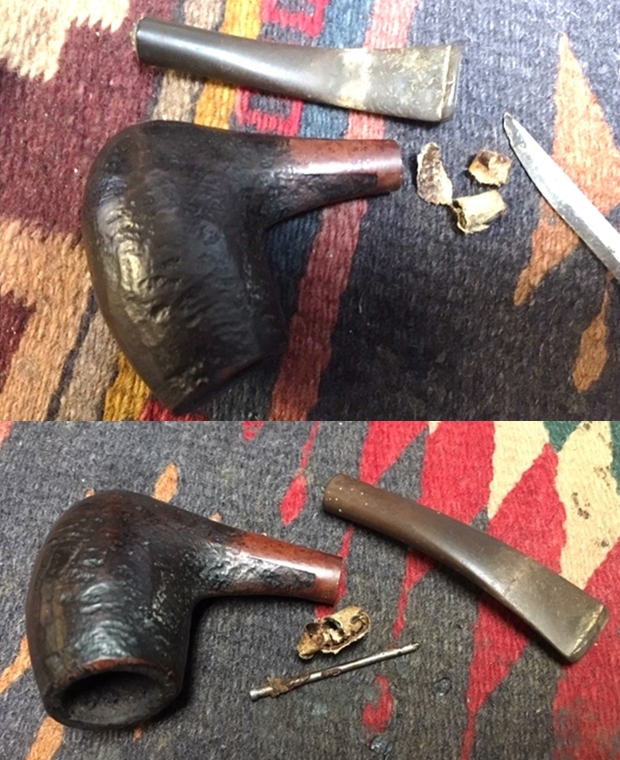
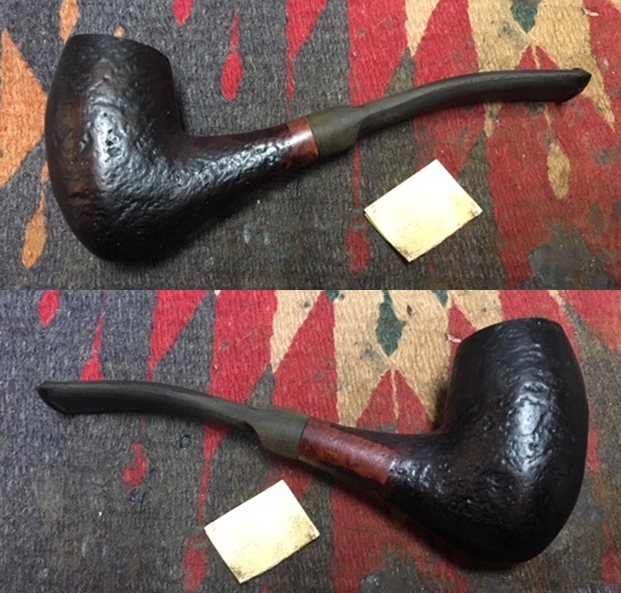
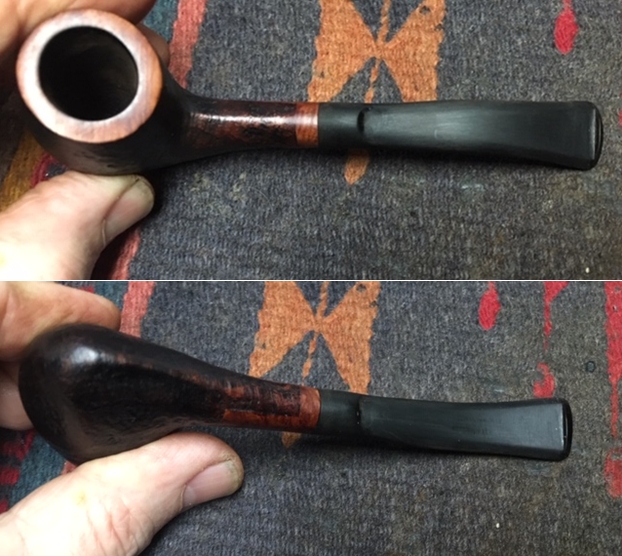
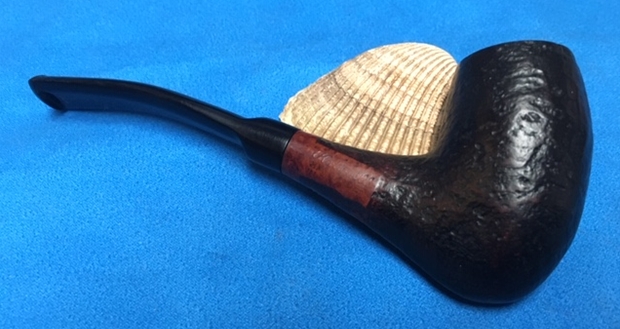
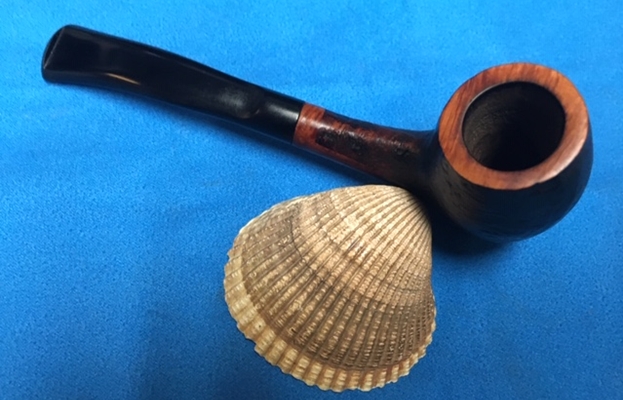
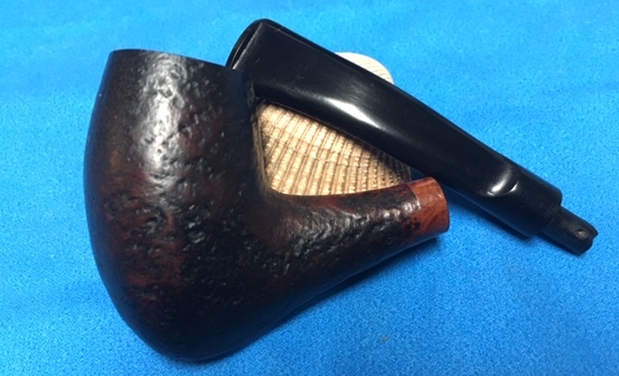
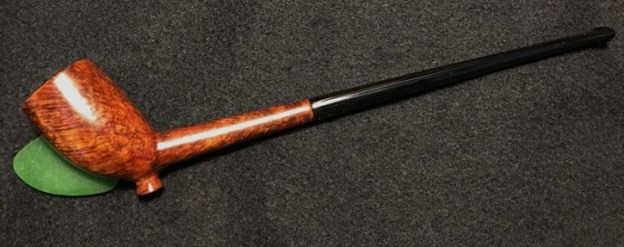
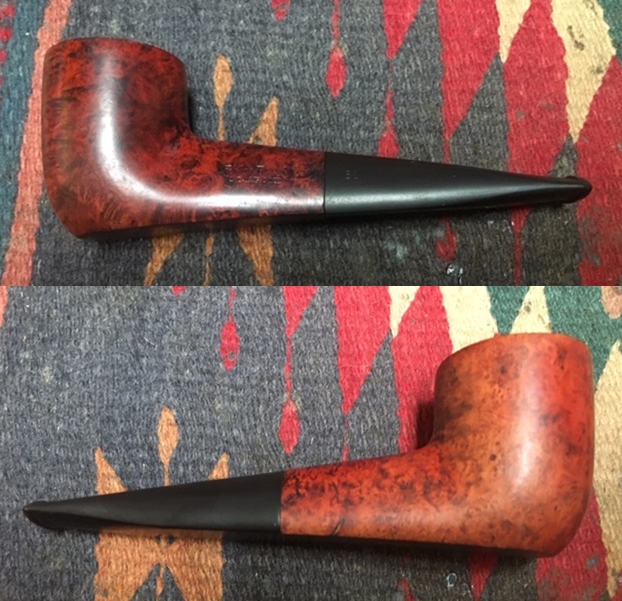
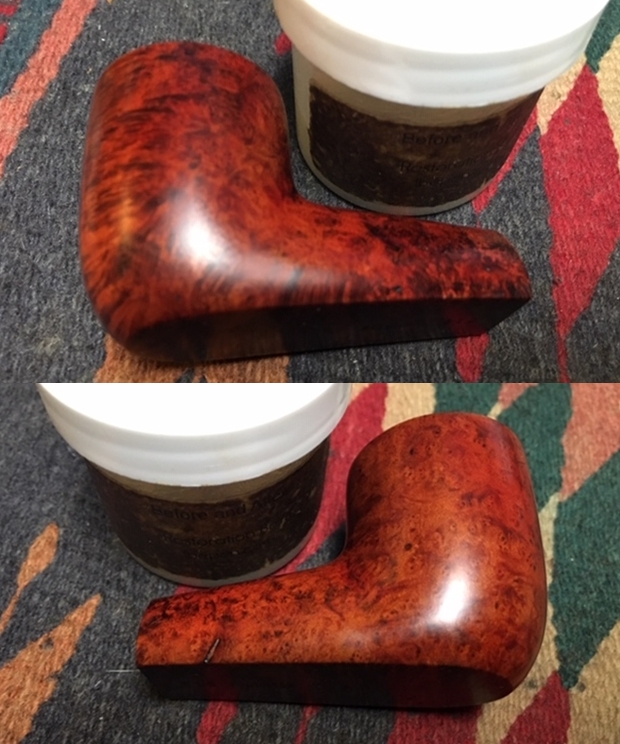
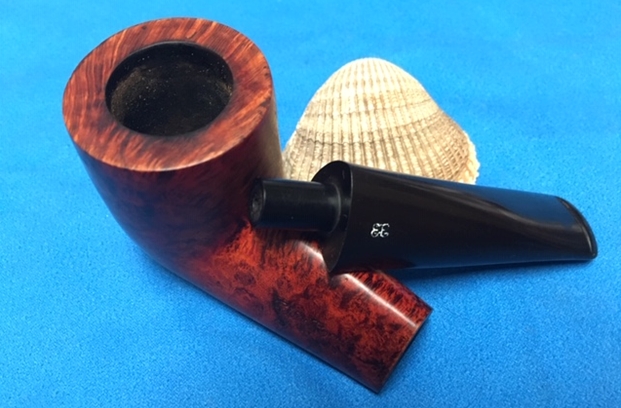
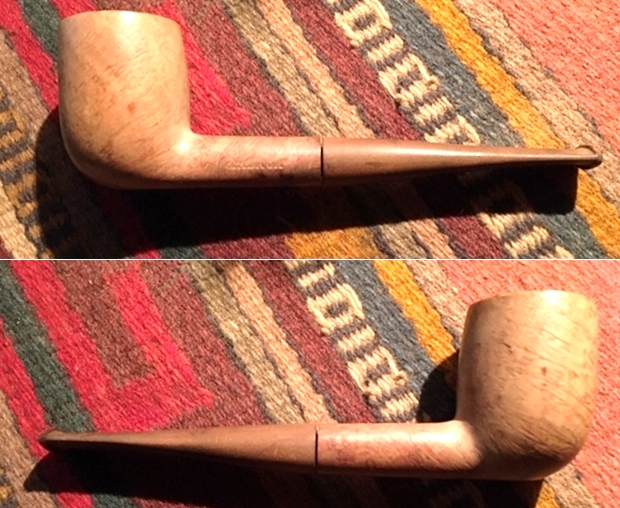
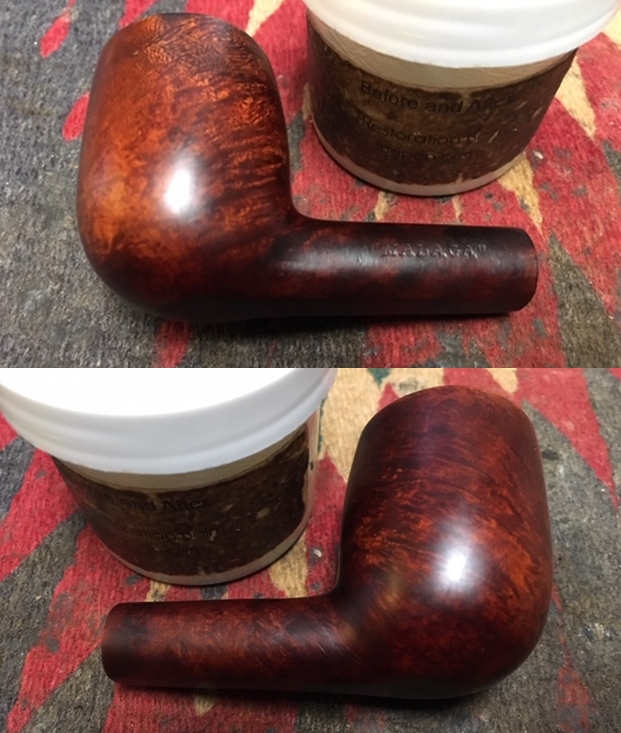
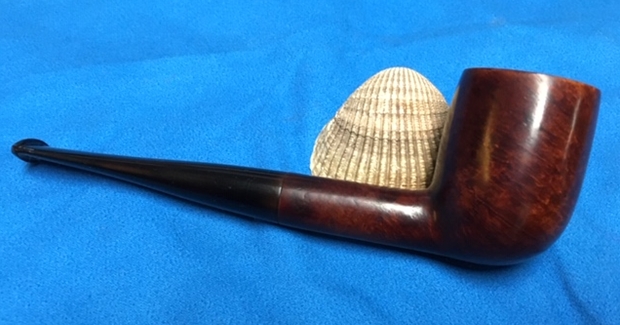
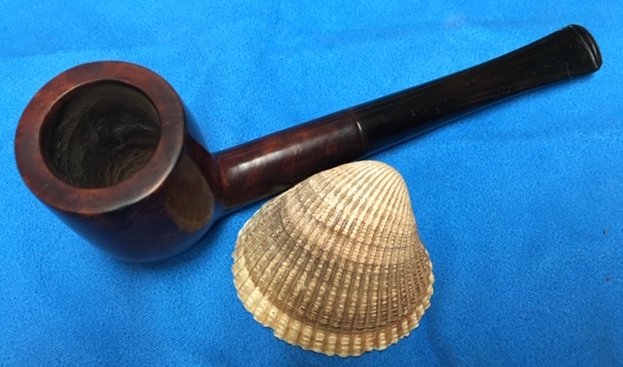
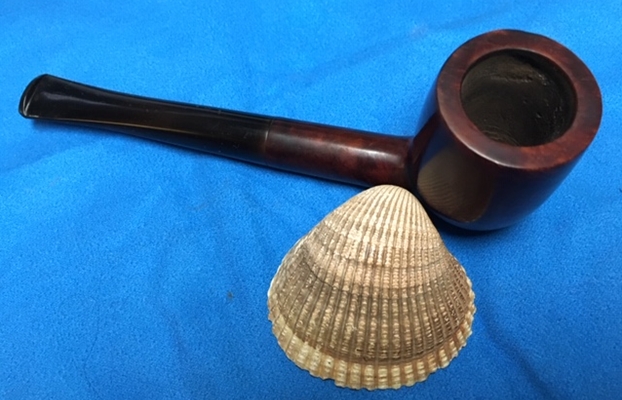
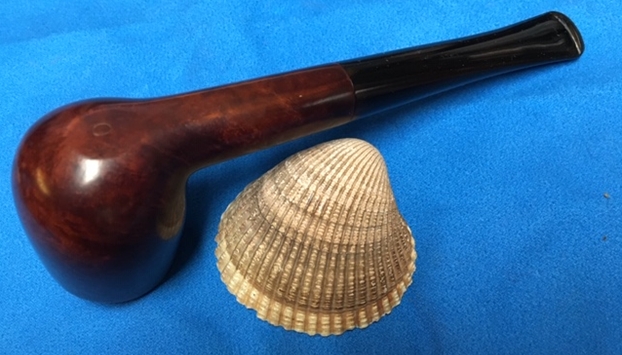
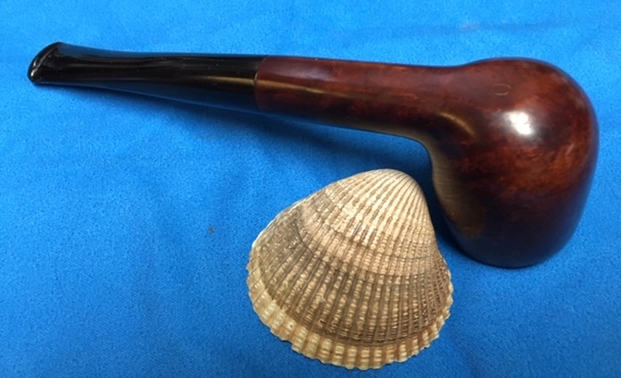
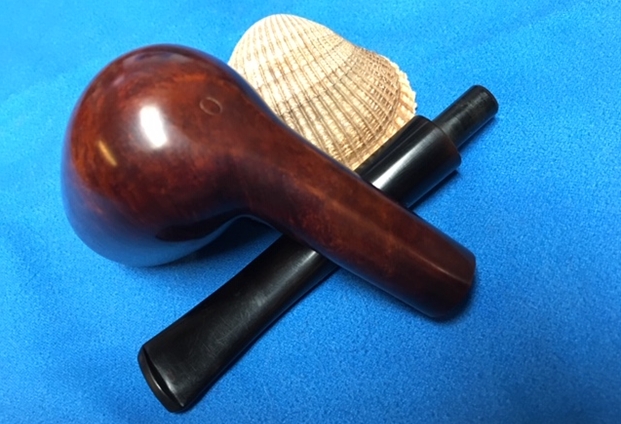
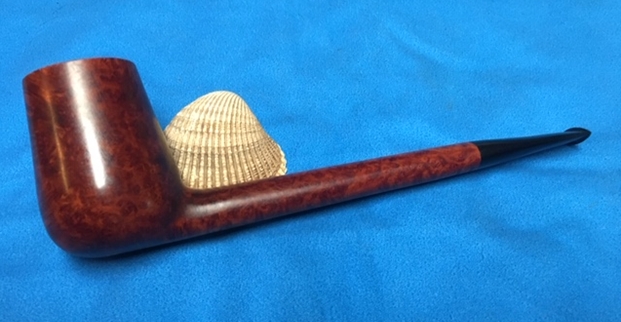
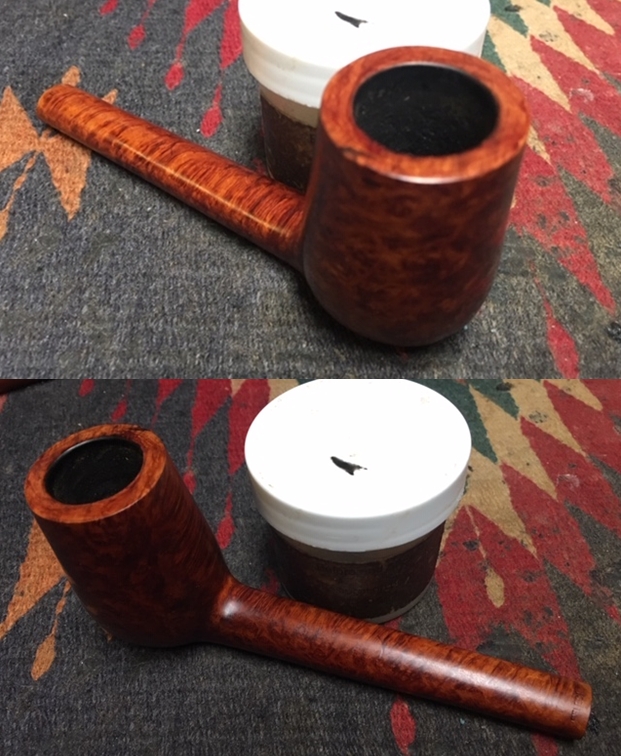
This story has told you about the son, the curator and the artist. Now, the story turns to the Cutty Tavern Pipe on my work table – the main character! I was fascinated by the research I did that shed light on this unmarked Cutty. All the before-mentioned descriptions are true of this 9-inch Cutty Tavern Pipe. Here are pictures that show you what I’m seeing. 


 This pipe is the perfect gift for the curator! One more bit of research that showcases the historical uniqueness of clay Cutty Tavern Pipes and its relations to its briar descendants. The severely canted and uniquely shaped bowl comes to a point as it ties into the long, pencil thin shank and stem. A very interesting diagram I discovered at CanadianArchaeology.com (link) of the National Historic Parks Branch
 of Canada, depicts the historical development of the clay pipe bowl and provides the corresponding dating for that particular style. As I look at the diagram’s images and comparing them to our Cutty, it was fashioned after the clay Cuttys belonging to the period from 1820 to 1860. The canting and the bowl width, along with the spur, now ornamental for the briar, all seem to align. I have no way of dating the Cutty Tavern Pipe heading to Andrew, but its history and heritage wrap around it even in the absence of a verifiable nomenclature.
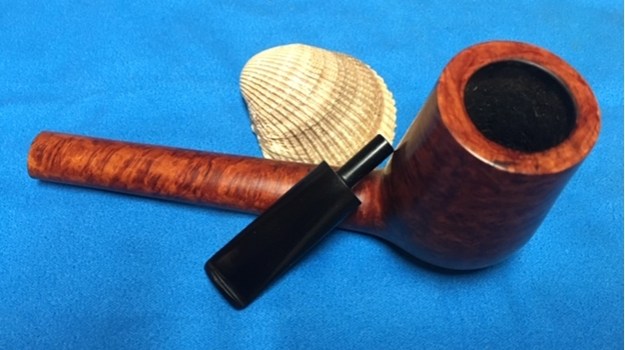
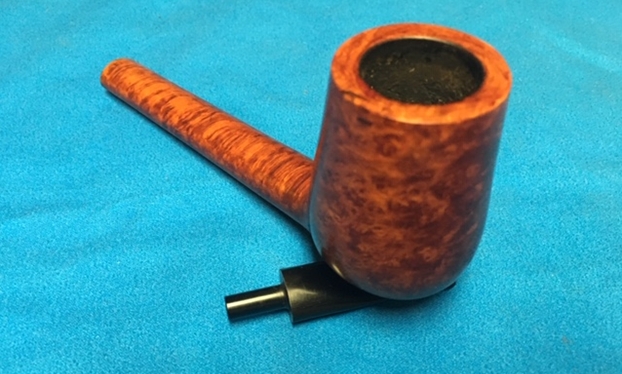
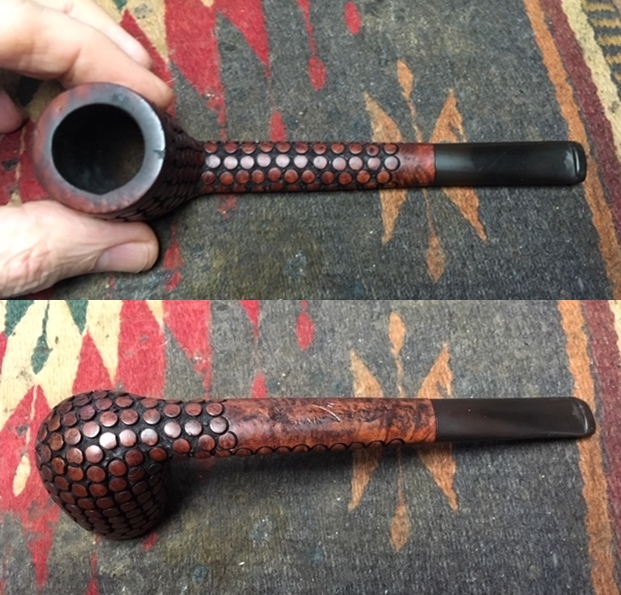
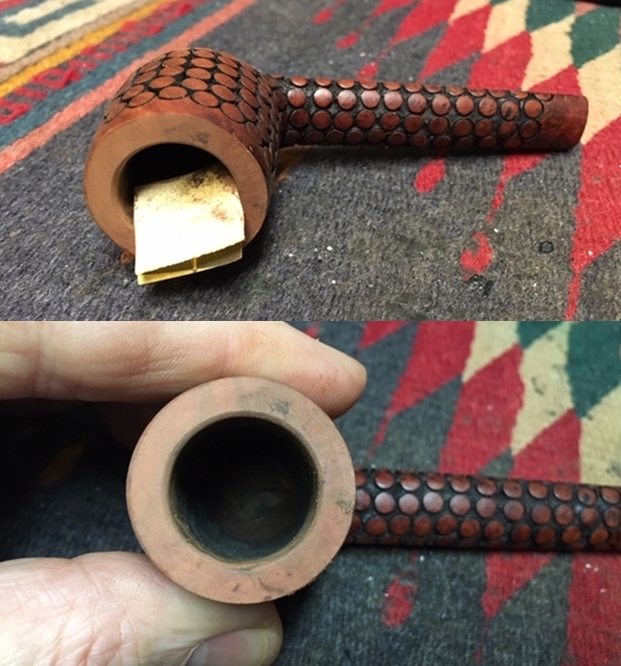
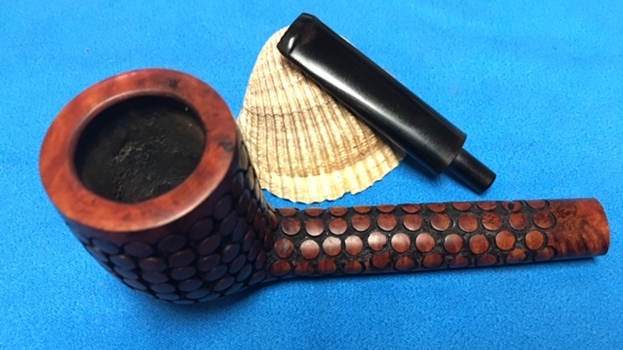
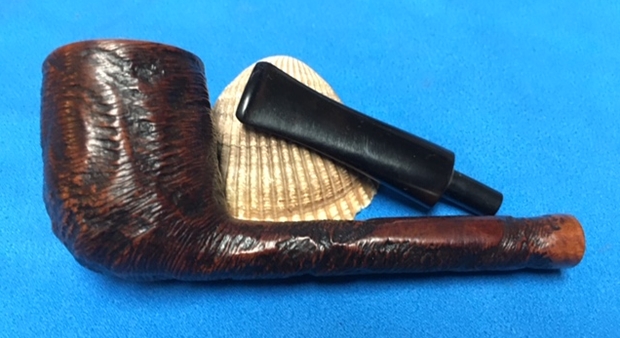
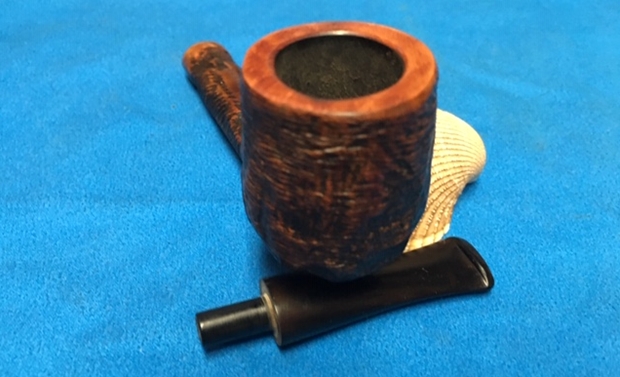
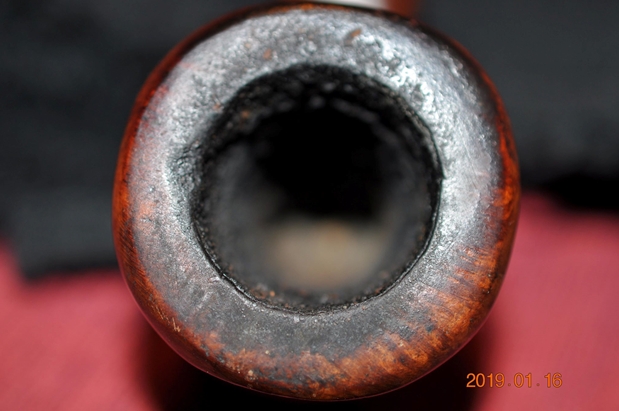
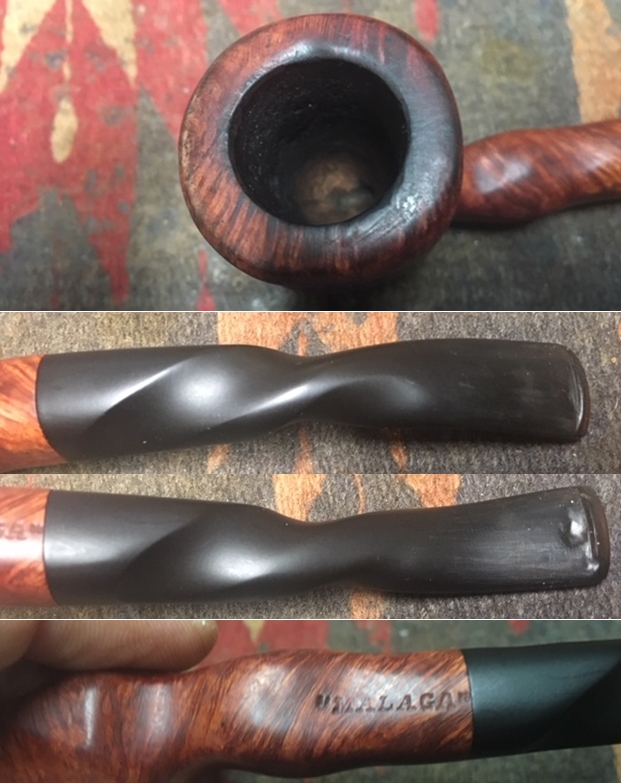
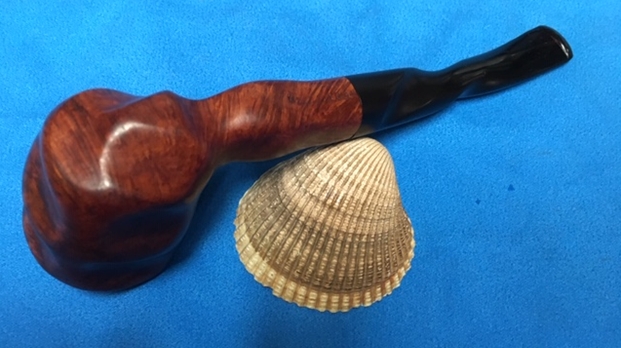
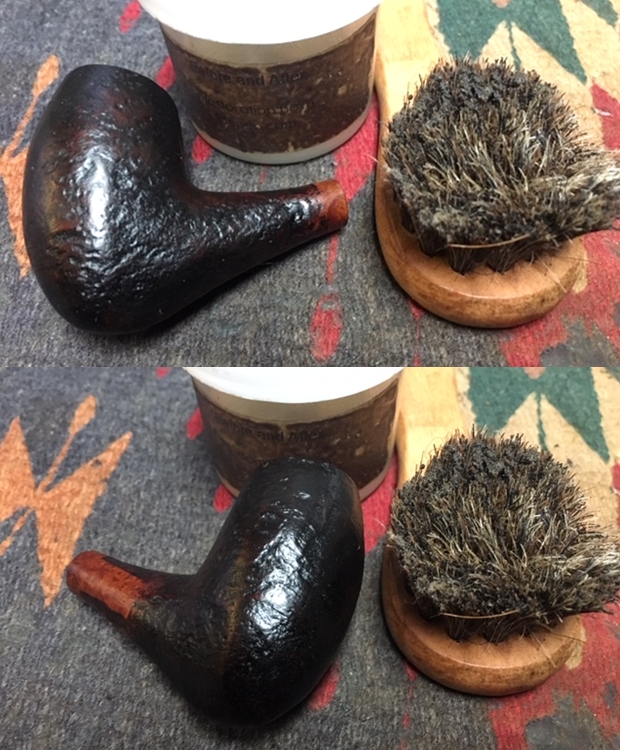
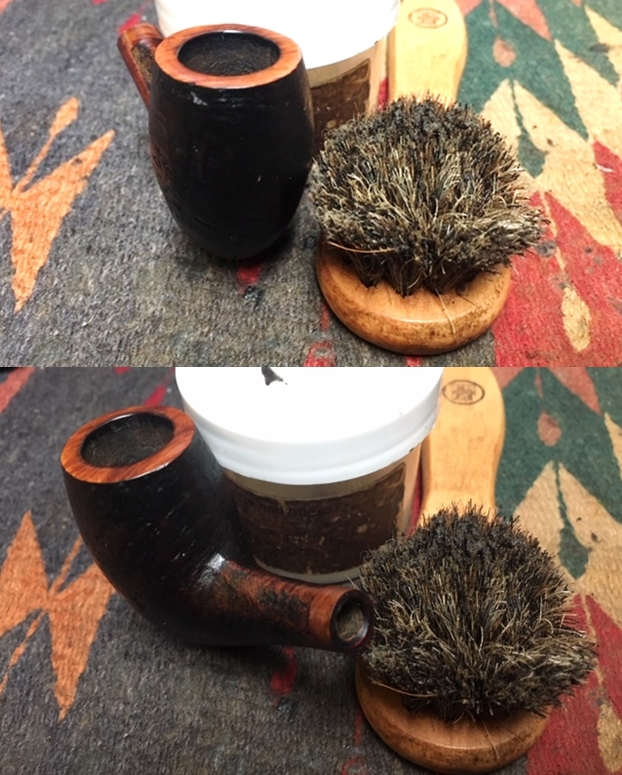
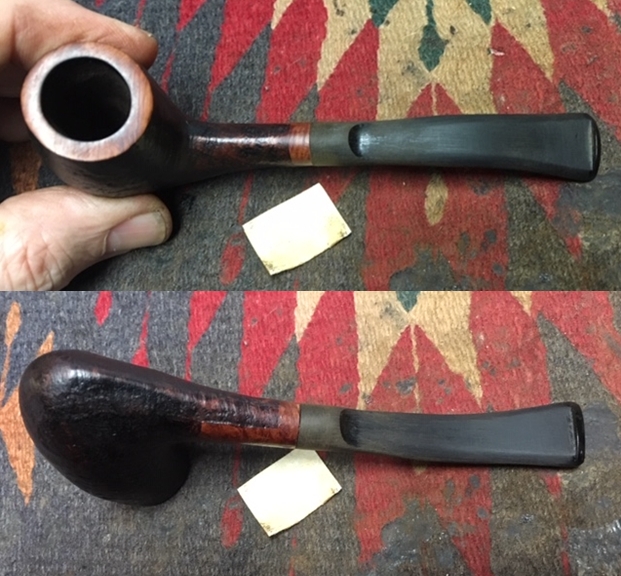
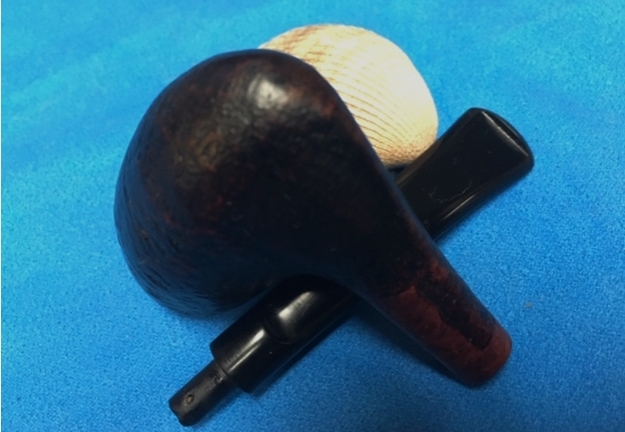
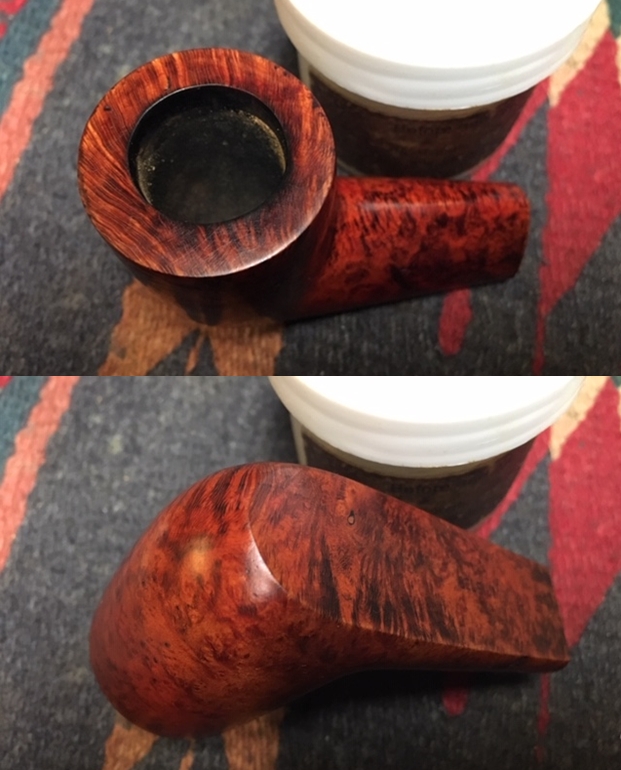
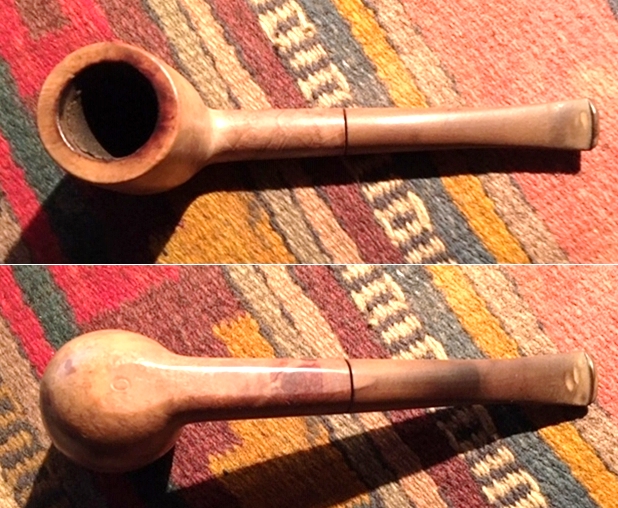
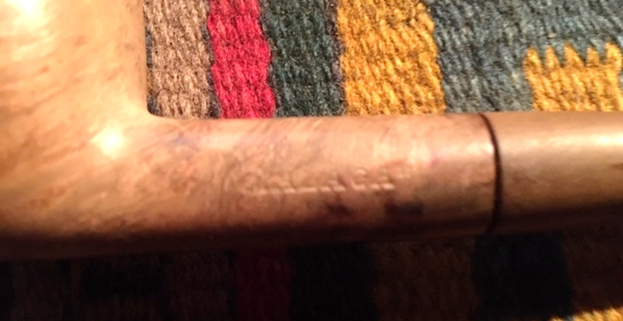
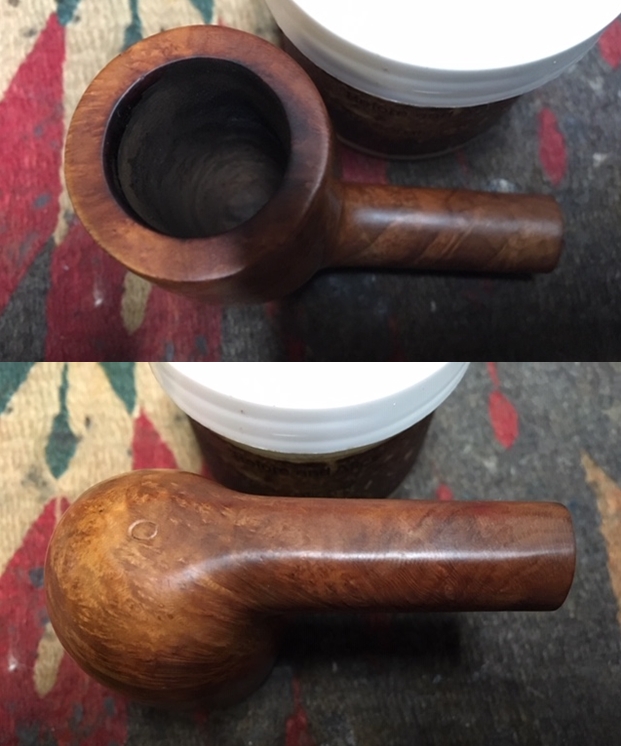
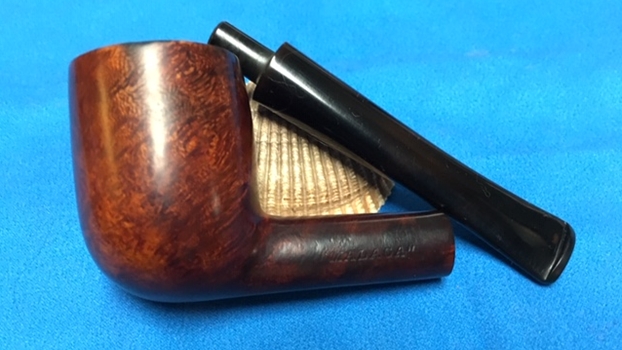
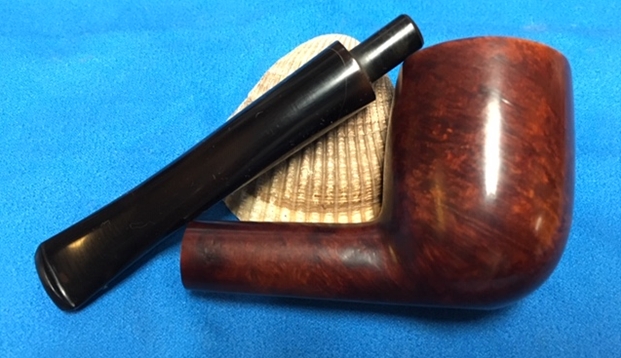
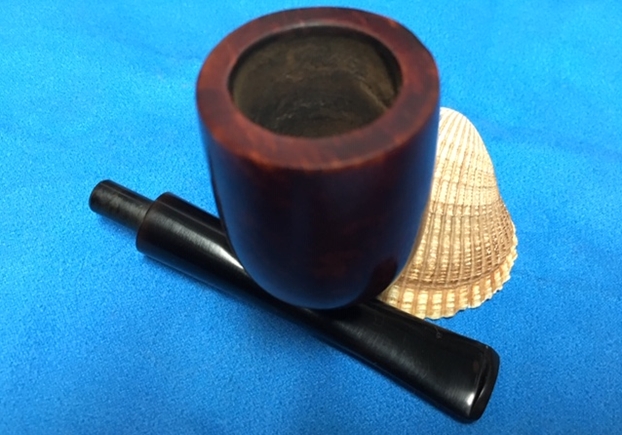
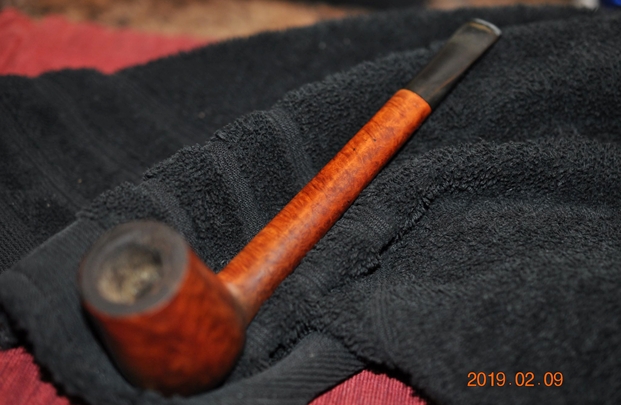
Armed now with a deeper and more comprehensive understanding of the Cutty Tavern Pipe on my table, I take a closer look at his condition. The briar, somewhat subdued underneath the dirt and grime, is beautiful. The surface itself shows that it has been well loved and used by a previous steward. There are nicks and dents over the bowl surface as well as the shank. The pipe shows signs of wear but has been well-cared for. I say that because, with a shank of only 7/16 inches wide at the stem joint, the fact that the shank hasn’t cracked at this very thin juncture is amazing! A caution to the future steward, be careful with the stem mounting and removal! The shank IS pencil thin. 

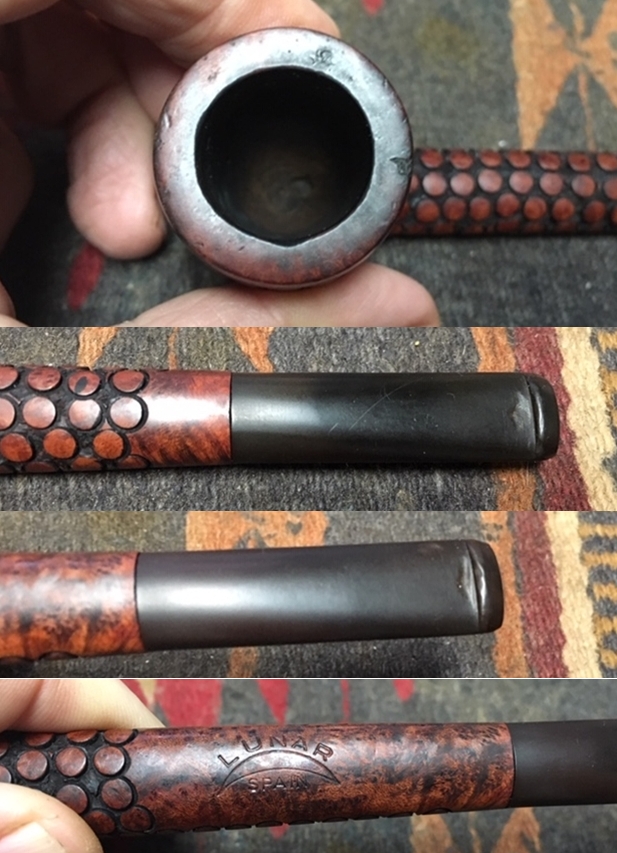
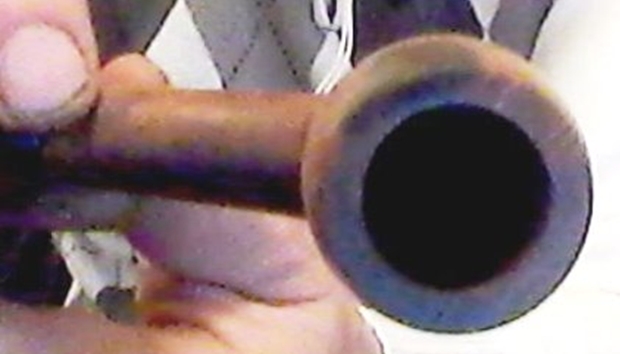
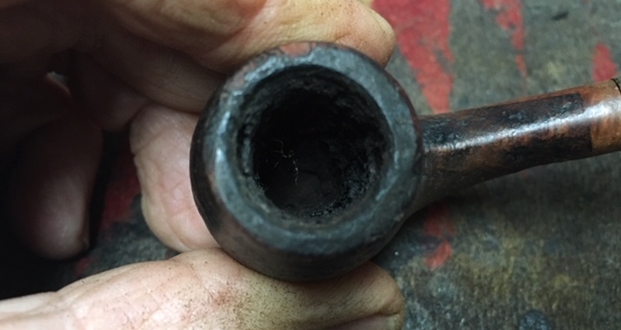
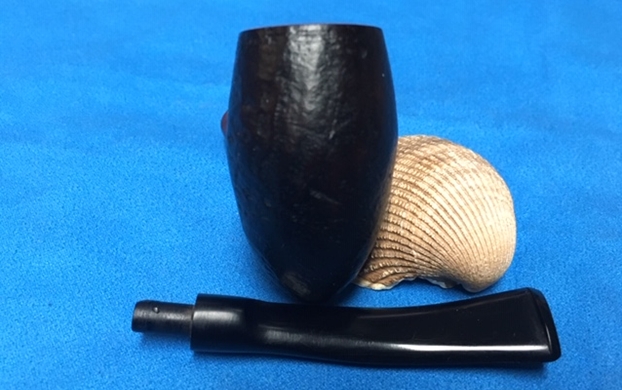
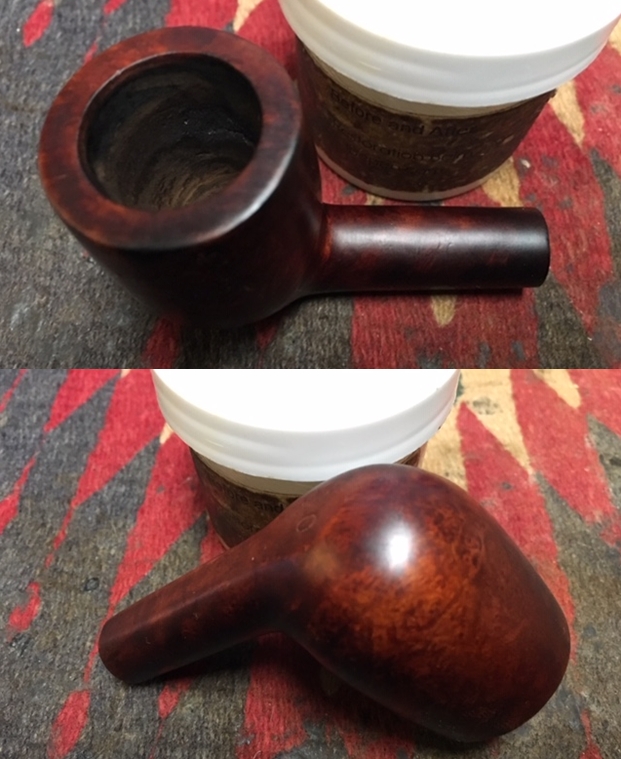
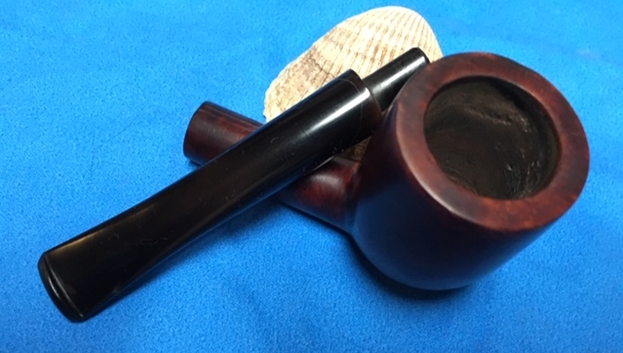
 Looking at the rim, there are some dents on the external lip and some significant lava flow over the backside of the rim. The conical chamber has moderate cake build up which I will remove to provide the briar a fresh start.

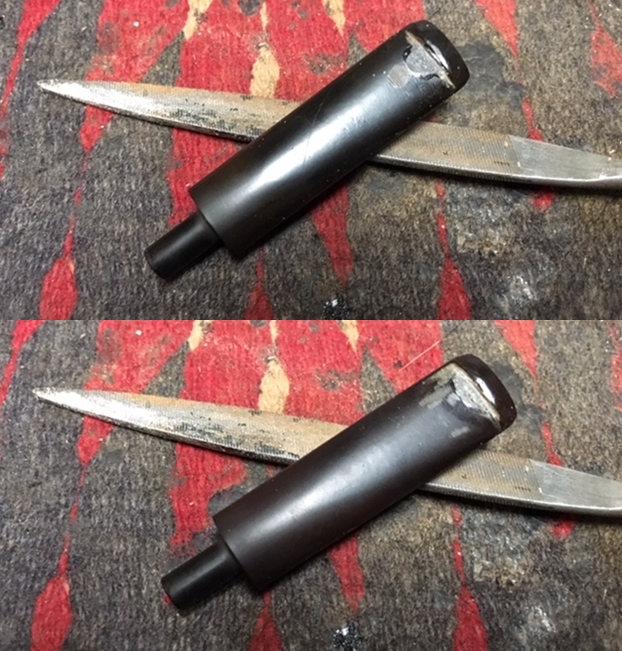
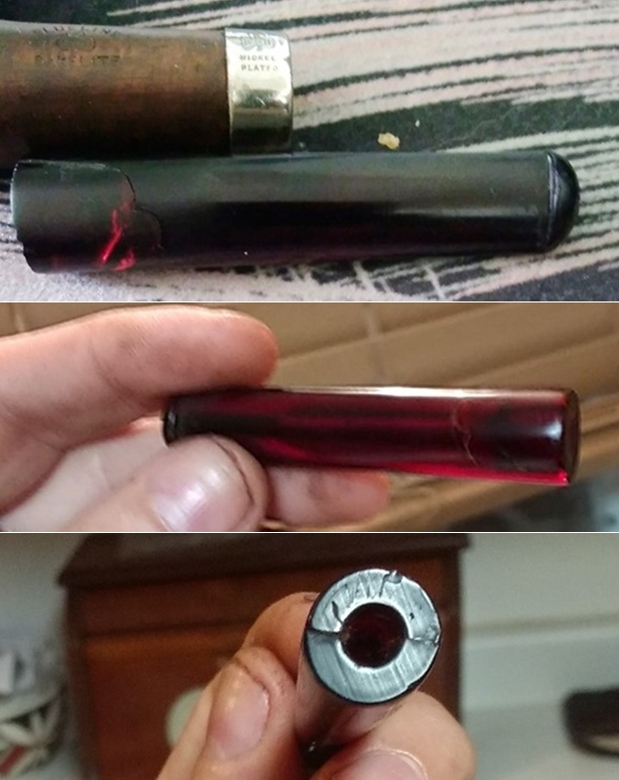
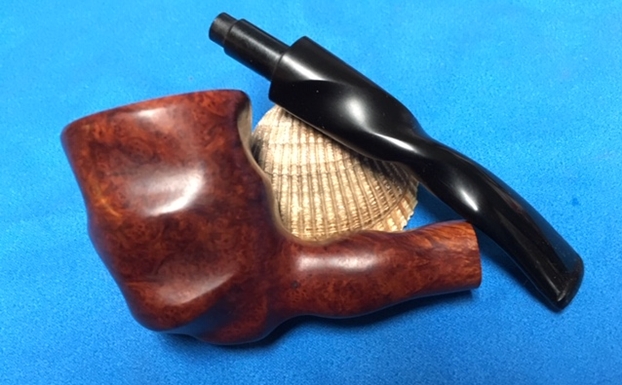
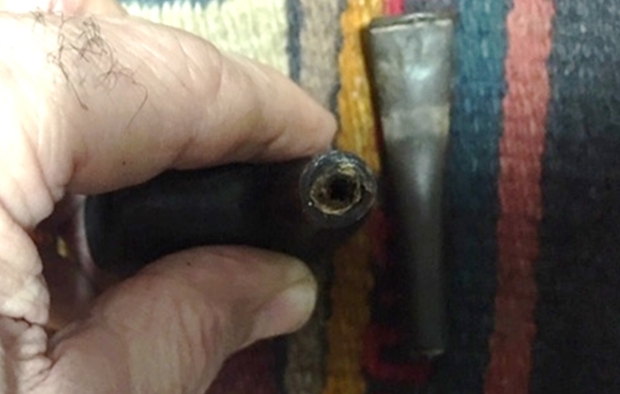
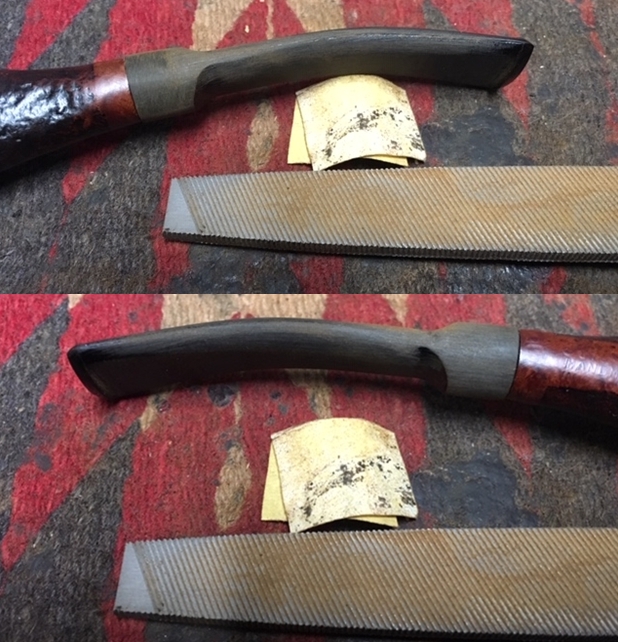
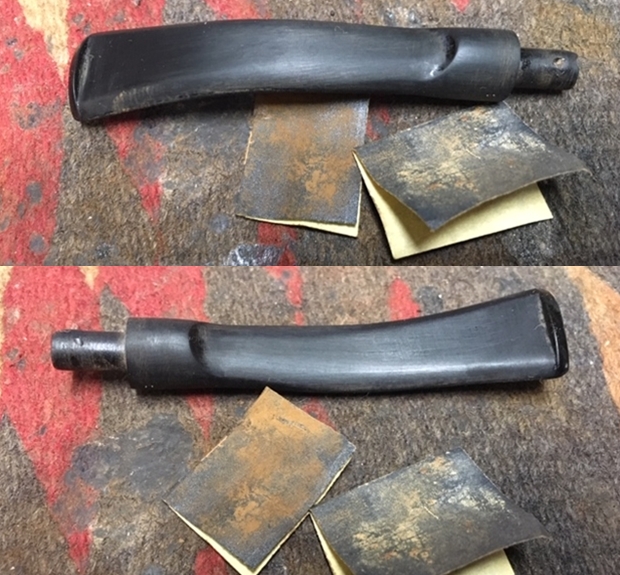
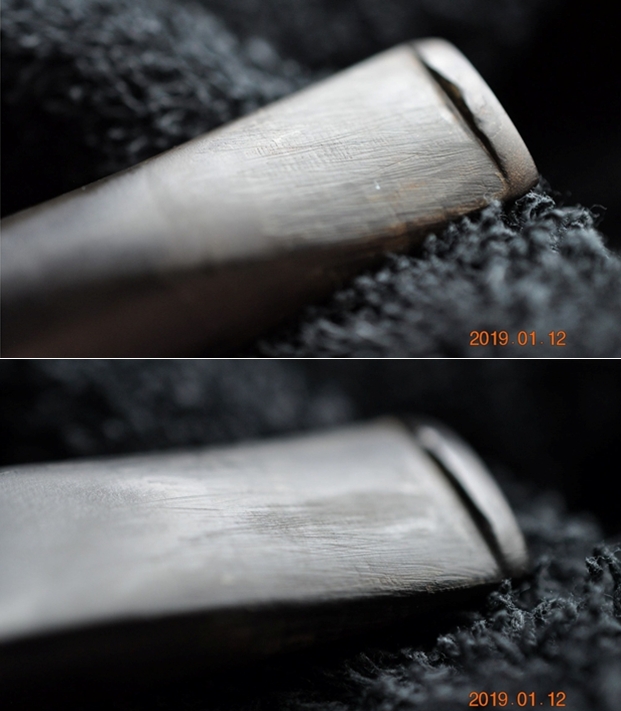
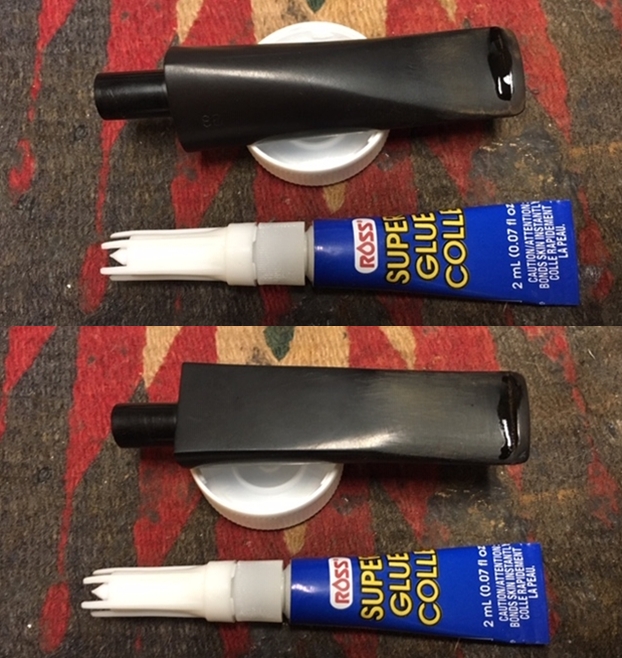
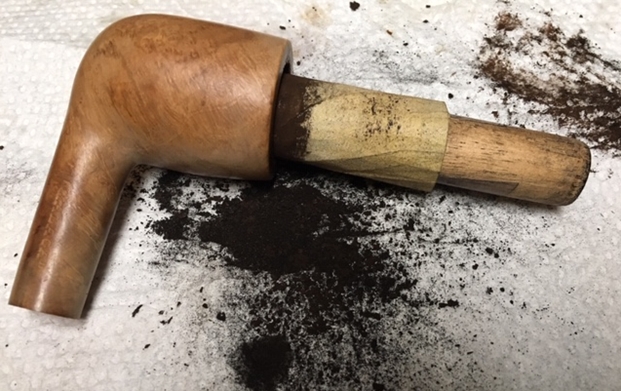
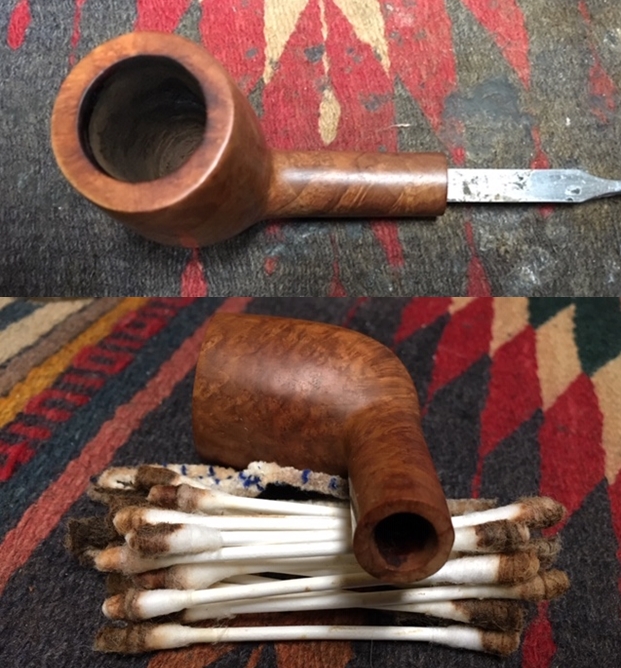
 The long pencil stem shows some oxidation and tooth chatter on the bit. The button and slot look to be in good shape.
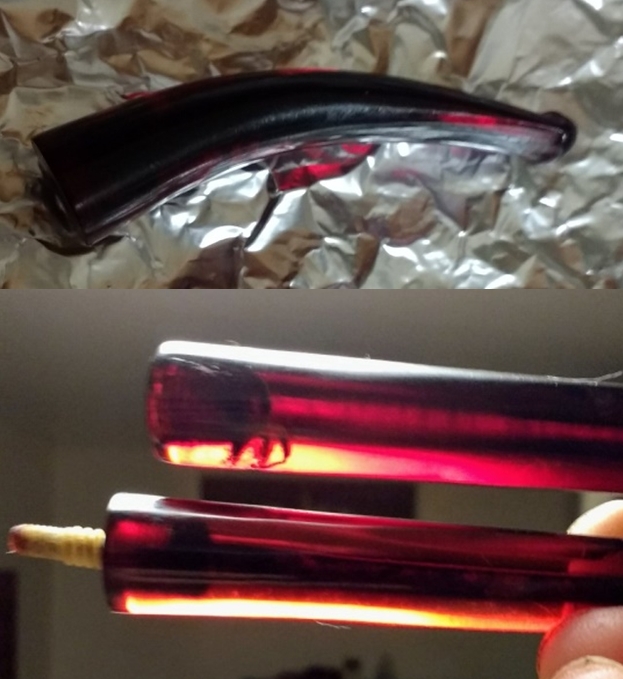
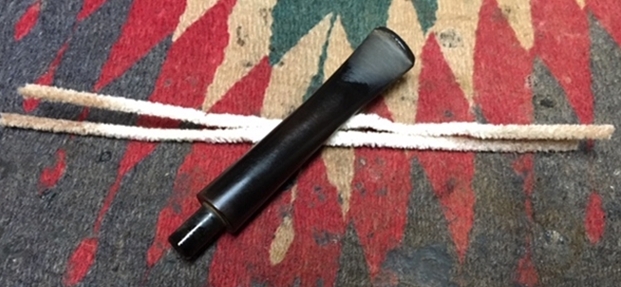
 To begin the restoration, using pipe cleaners dipped in isopropyl 95% and long shank brushes, I clean the internal airway of the pencil stem. It was dirty.
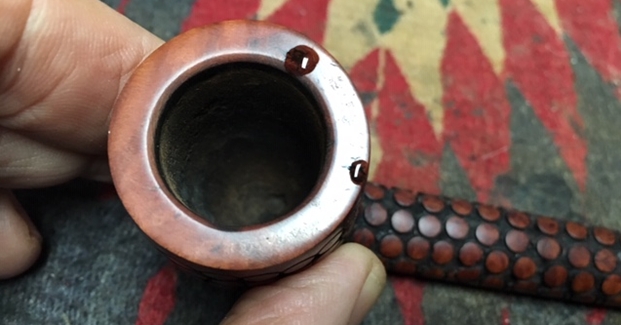
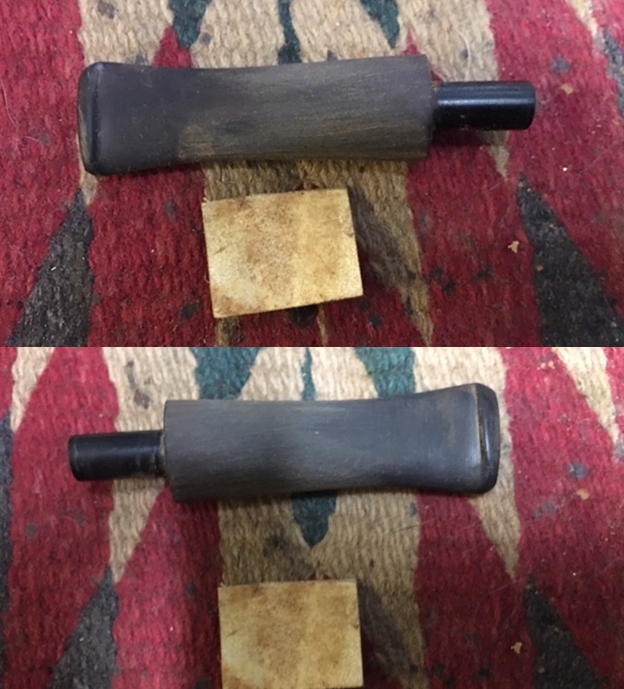
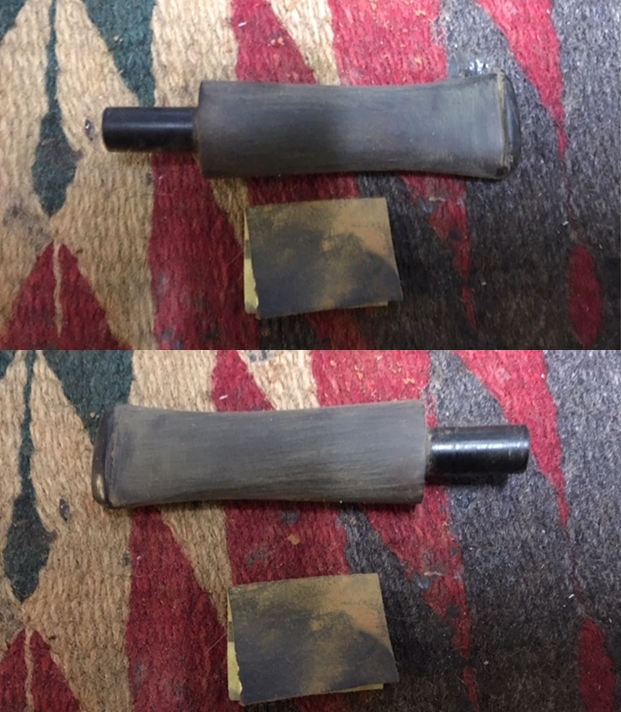
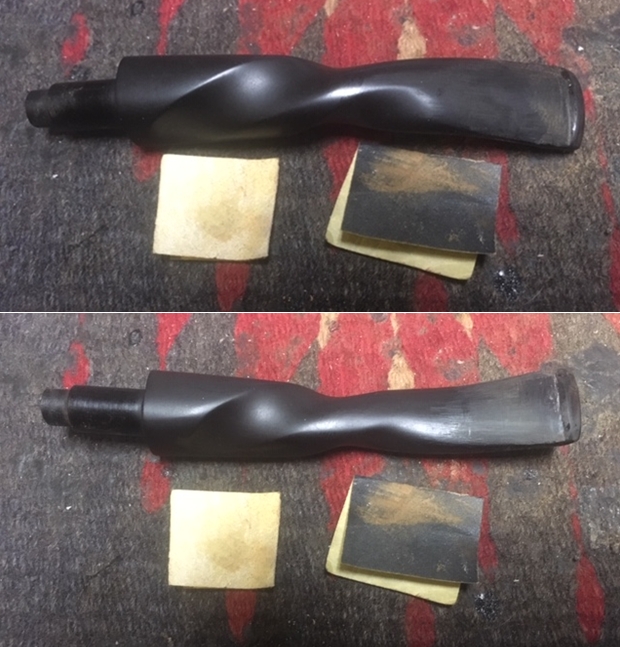
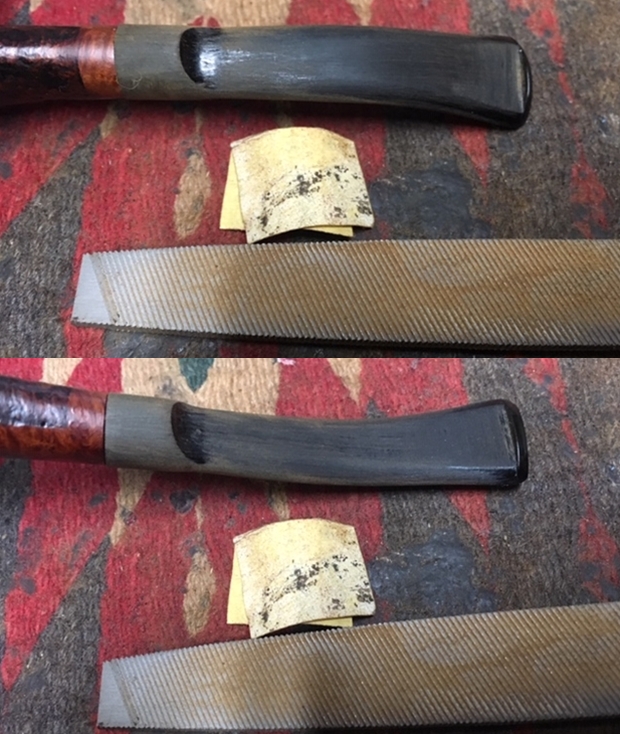
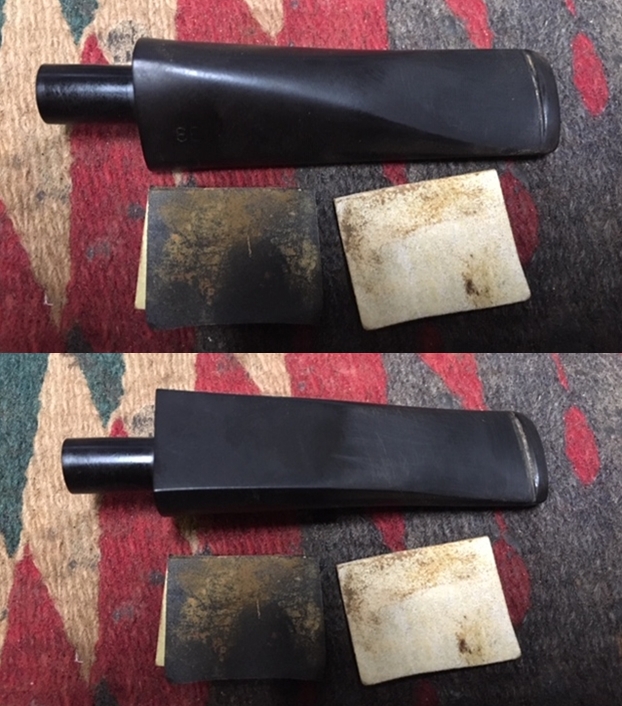
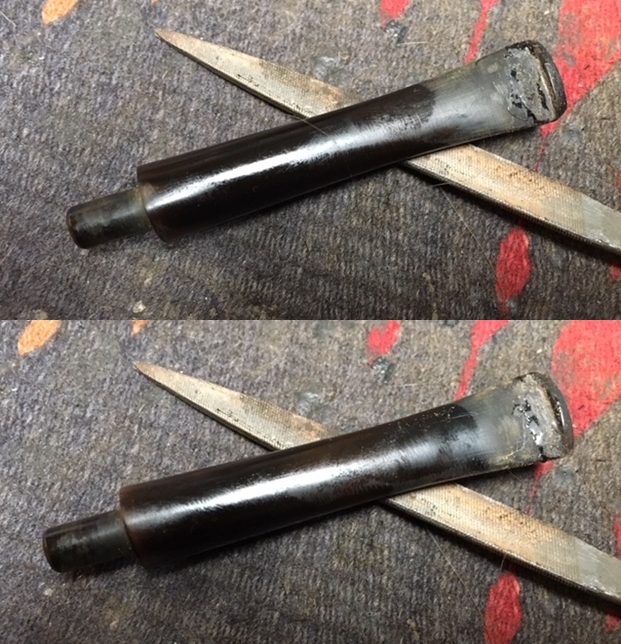
 After soaking for several hours, I remove the stem and take a closeup shot to reveal the raised oxidation – the olive green layer is now to be removed.
 To remove the oxidation, I wet sand the stem using 600 grade paper. Following the sanding, I apply a 0000-grade steel wool on the entire stem as well cleaning the surface further. To begin the process of rejuvenating the vulcanite, I apply a mineral oil – paraffin oil, to the stem and put it aside to absorb. It’s looking good!
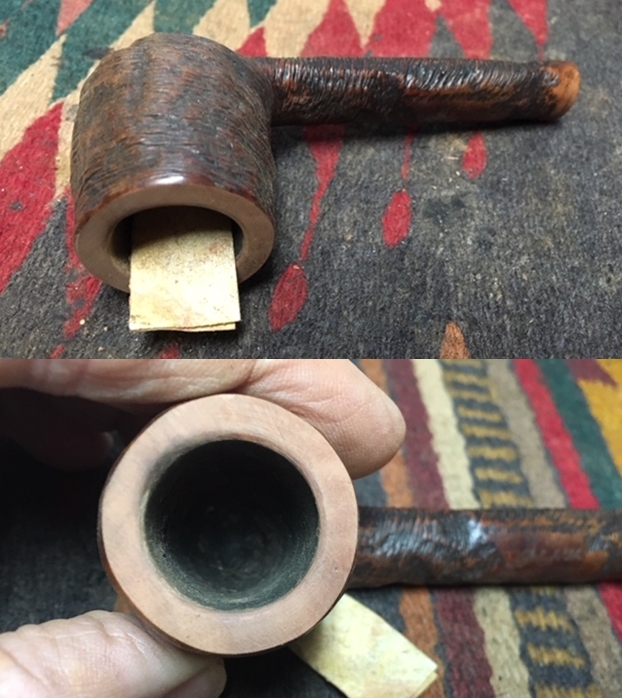
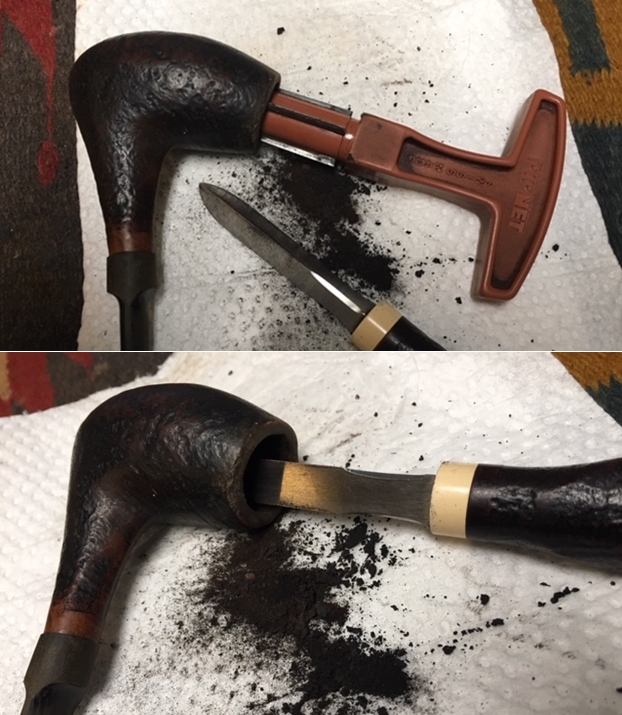
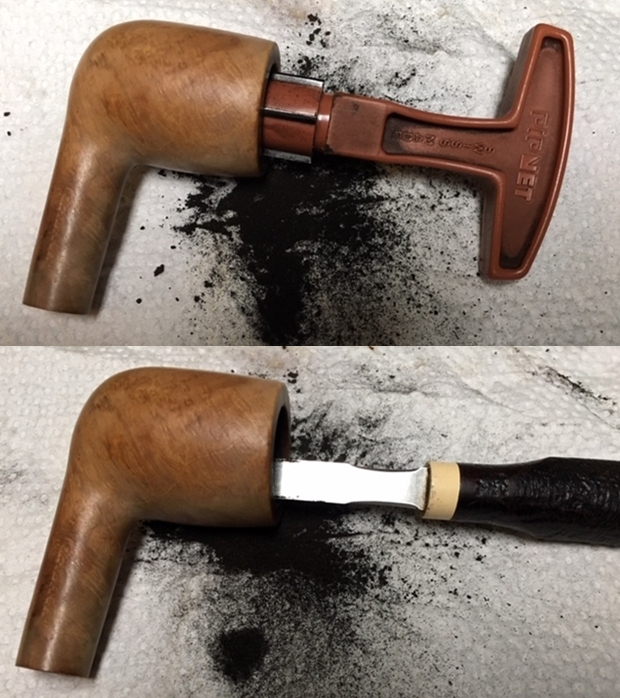
 I begin the cleaning process of the stummel by reaming the chamber. Because of the small, tapering chamber, I do not use my regular Pipnet Ream kit but instead go directly to using the Savinelli Fitsall tool and it does a stellar job. It reaches very easily to the difficult areas at the floor of the chamber and negotiates well the angle of the conical bowl. Using 240 grit paper around a Sharpie Pen, I sand the chamber to clean further the carbon cake. Finally, I clean the carbon dust using a cotton pad wetted with isopropyl 95%. After inspecting the chamber, I see no heating problems with cracks or fissures. I move on.

 Next, to clean the external surface of the stummel I use undiluted Murphy’s Oil Soap with a cotton pad to scrub. This does a great job. I also utilize the straight edge of a pocket knife to gently scrape the lava crust from the rim and then use a brass wire brush to work on the burned area of the rim. The cleaning well removes the finish on the stummel, but there remains a darkened area on the rim where there was scorching.


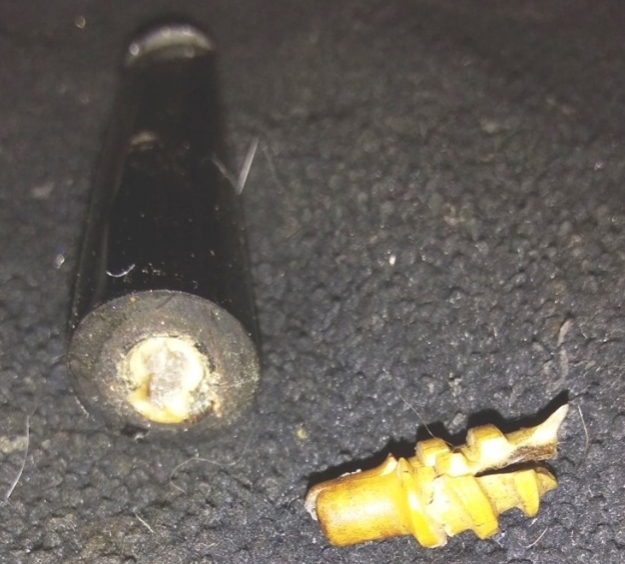
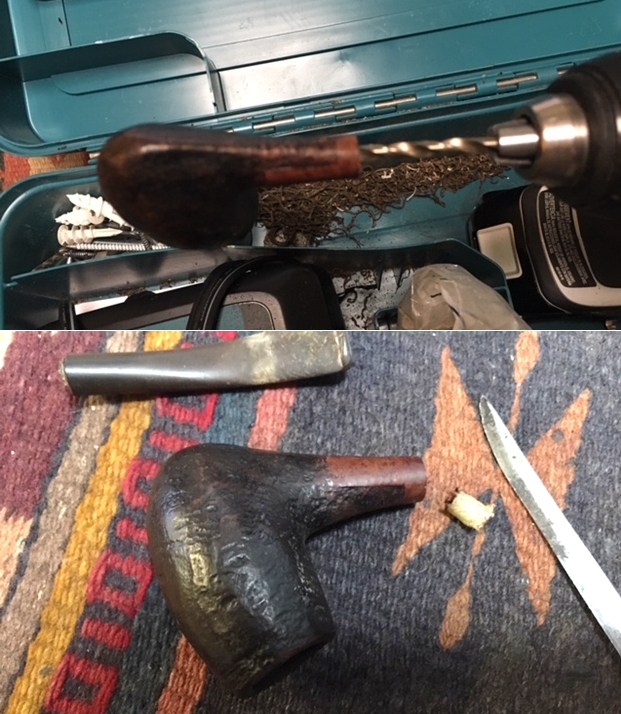
 To complete the basic cleaning regimen, I use pipe cleaners and cotton buds to work on the internals of the mortise. With the stem internal airway as dirty as it was, I am not surprised to find the mortise equally mucked up with tars and gunk. After I put on surgical gloves, my first hurdle was to clear the entire airway. The first pipe cleaners I plunged into the abyss would not push through the draft hole – something was blocking. After a few attempts, the pipe cleaner pushed old tobacco through, and it was finally cleared. In addition to pipe cleaners and cotton buds dipped in alcohol, I use a long-wired shank brush wetted with alcohol to clean the airway. A dental probe was also helpful reaching in and excavating the collected tars off the mortise walls. To increase my cleaning leverage more, I use a drill bit almost the size of the airway, hand turning it as it moves up the airway, scraping the tars of the briar as it goes. Finally, some headway is realized, and cotton buds begin to lighten. I’m satisfied with the cleaning for now.
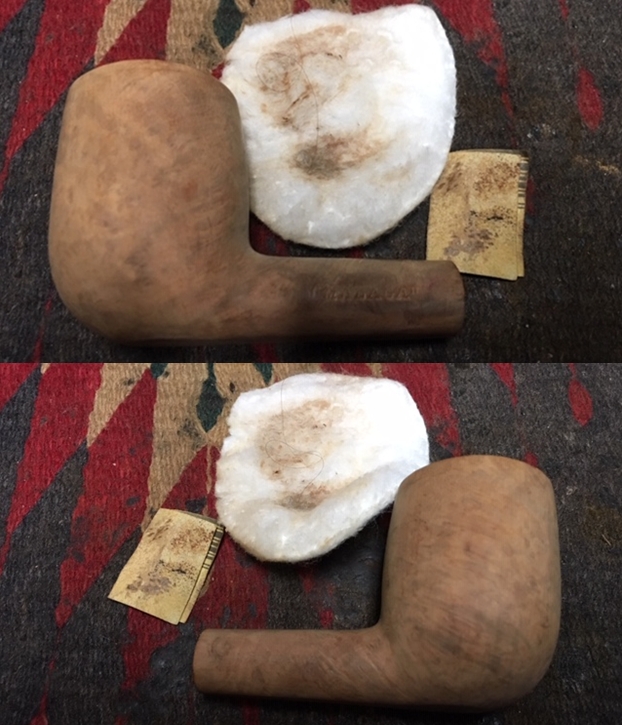
 With the workday ending, I continue the cleaning of the internals using a kosher salt and alcohol bath. I first stretch and twist a cotton ball to form a ‘mortise wick’ that I insert into the long, narrow shank of the Cutty. I use a slender painter’s brush to help force the cotton down the airway. I then situate the stummel in an egg carton and fill the bowl with kosher salt. Kosher salt doesn’t leave an aftertaste like iodized salt. I then fill the bowl with isopropyl 95% until is surfaces over the salt. I wait a few minutes as the alcohol recedes and then top it off. I turn out the light to let the salt and alcohol do it job through the night.
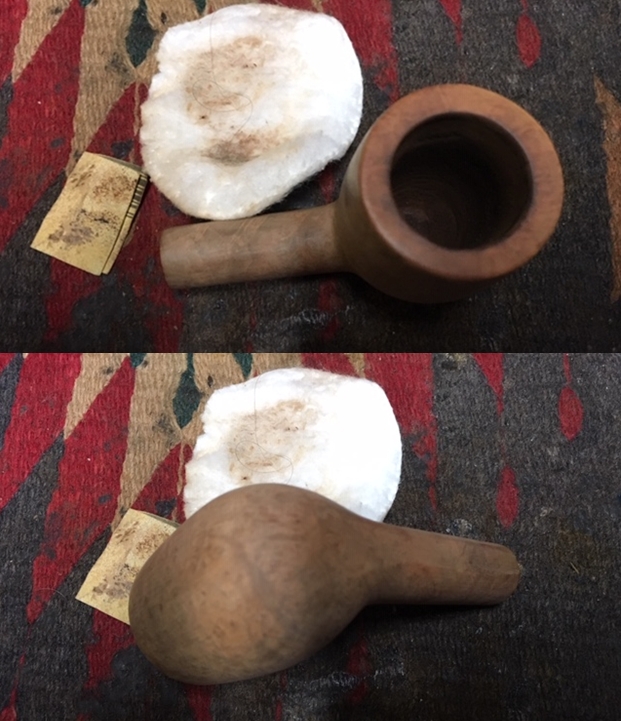
 The next morning the soak has done the expected job. The kosher salt and cotton wick are soiled after drawing out oils and tars from the internal cavity. I empty the bowl of salt, wipe the chamber with a paper towel, use a shank brush and blow through the mortise to remove any left-over salt crystals. To make sure the cleaning is complete, I expend a few more cotton buds and pipe cleaners and find great results. A refreshed pipe for the curator! Moving on!
 I look now at the rim. With the dents I see on the outer lip and the scorched darkened briar on the inside of the rim lip, I decide to top the stummel lightly to remove most of the damage to the rim and to freshen the rim lines.
  After placing 240 grade paper on a chopping board, with the stummel inverted, I rotate the stummel over the paper several times to top the stummel. I check to make sure I’m remaining true and finish with a few more rotations.
 I change the paper on the board to 600 grade and rotate the inverted stummel a few more times to smooth the rim surface further following the coarser 240 grit. Not all the darkened briar is removed, but I’m not willing to give up more of the rim’s briar. I focus now on the internal lip of the rim and introduce a bevel to remove more of the darkened briar. I first cut the bevel using a coarse 120 grade paper followed by 240, then 600. With each grade of paper, I fold it into a tight roll and then pinch it against the inner rim with my thumb. I work the rolls around the rim so at the end it is an even, consistent bevel. I like the subtle softening of the internal bevel and it accomplishes sufficient removal of damaged briar.
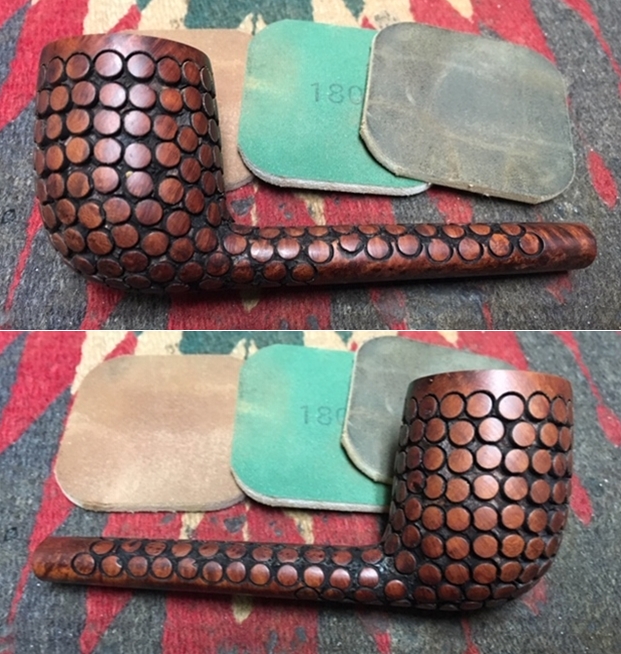
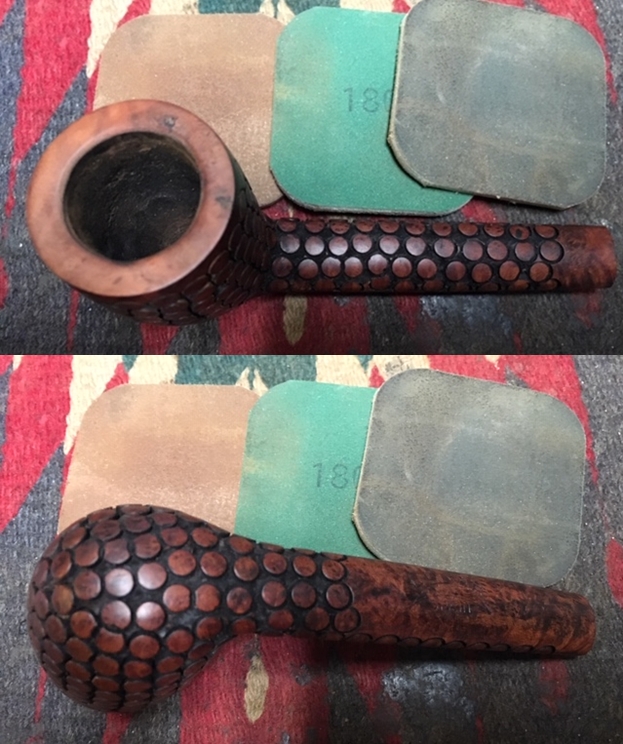
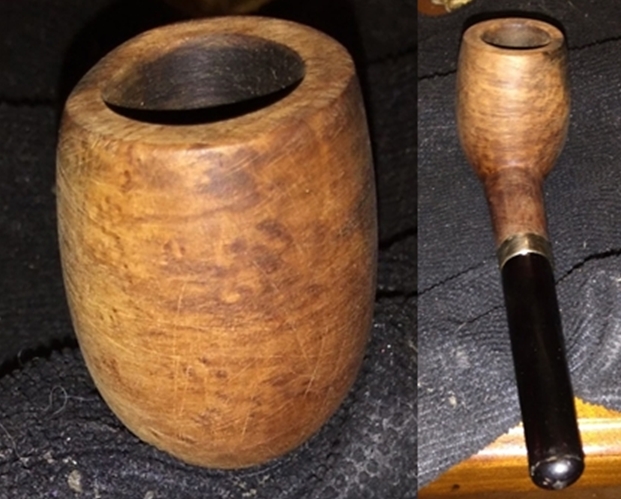
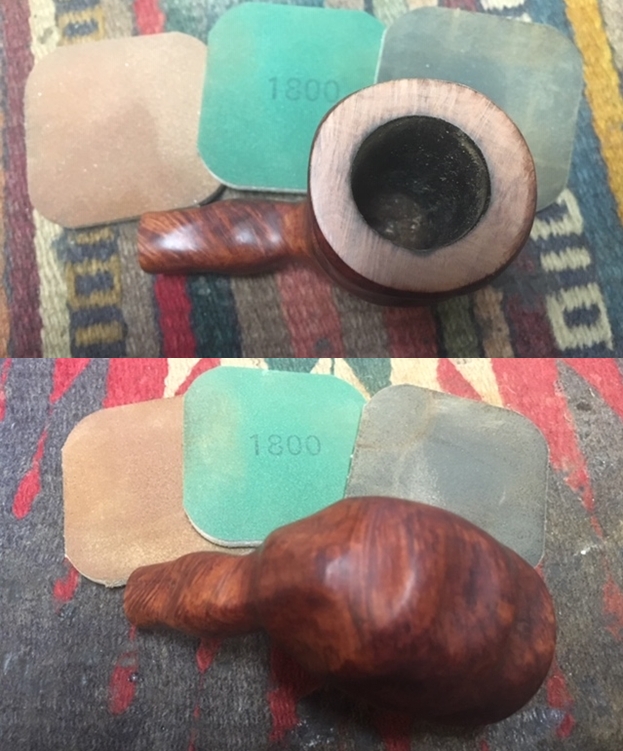
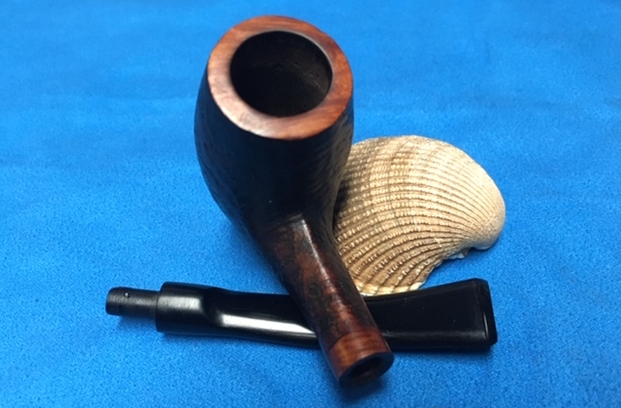
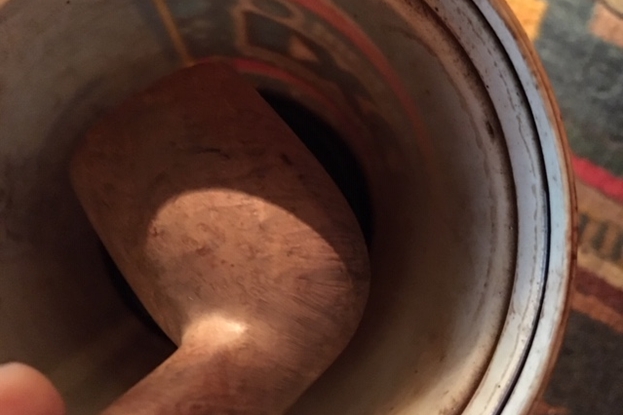
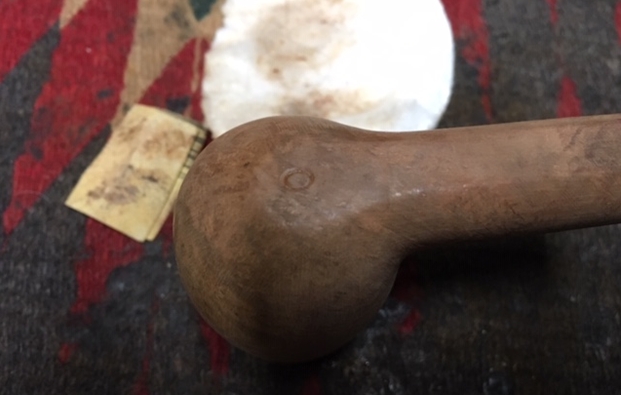
 I move on to the stummel preparation. As I identified above, I find some significant cuts and dents in the stummel, and especially in the narrow shank. My guess is that the pipe was stored in a can with the stem inserted first. The cuts in the shank look like injuries sustained as the shank rubbed against the can edge – my theory. I take a few pictures to show this. I decide to fully clean the briar surface and I use 240 grade sanding paper over the entire stummel followed by 470 grade paper. I then wet sand the stummel using 600 grade paper. The pictures show the progress.
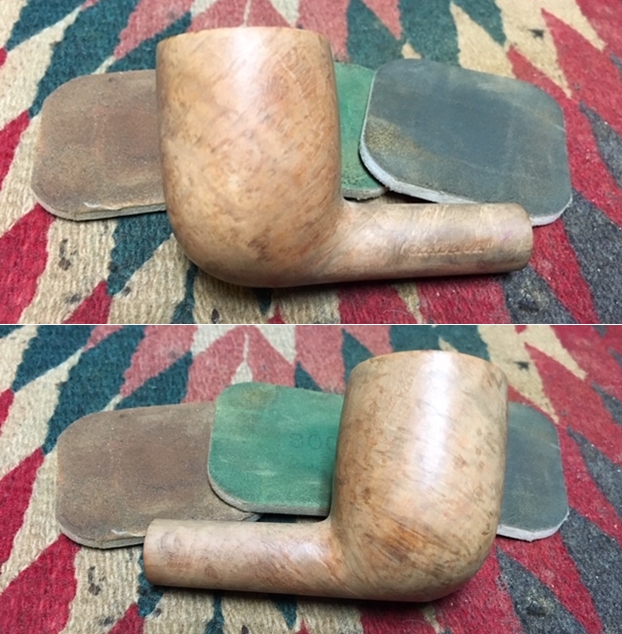
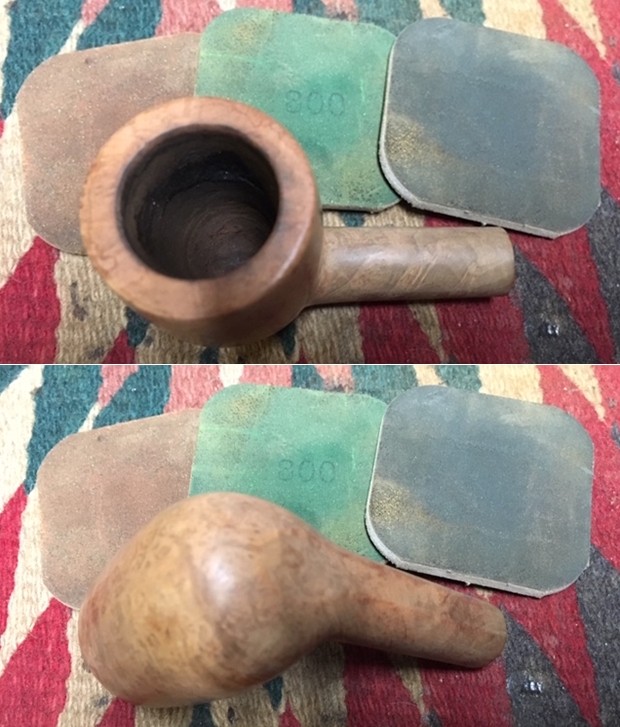
 Next, I use sanding sponges to sand and smooth the surface more. I start with a coarse sponge, then medium then finally, a light grade sponge. The grain starts emerging during the sponge sanding process. It looks good.
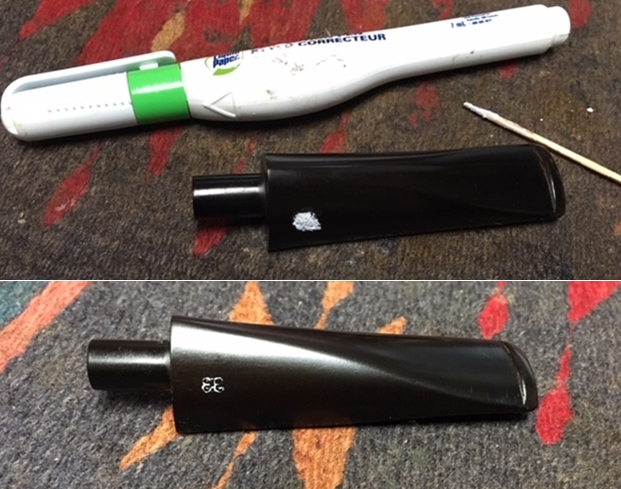
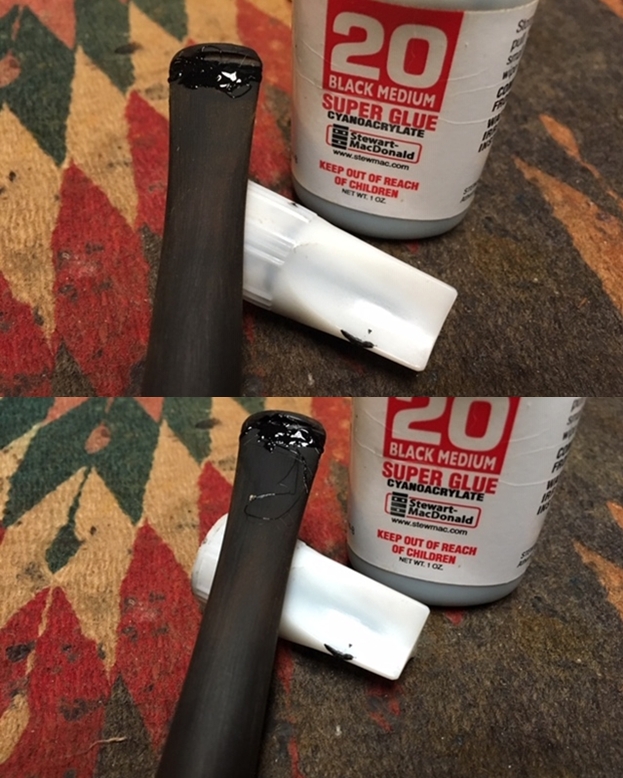
 While inspecting the shank afterwards, I notice the crevasse that remains in the shank. I use a magnifying glass to take a closer look. It doesn’t appear to be a trauma resulting in a crack but a gouge or cut. To be on the safe side and for cosmetic reasons, after wiping the area with alcohol to clean it, I apply CA glue to it to seal it. After applying a drop of CA glue on the crevasse, I put the stummel aside giving time for the CA glue patch to cure.
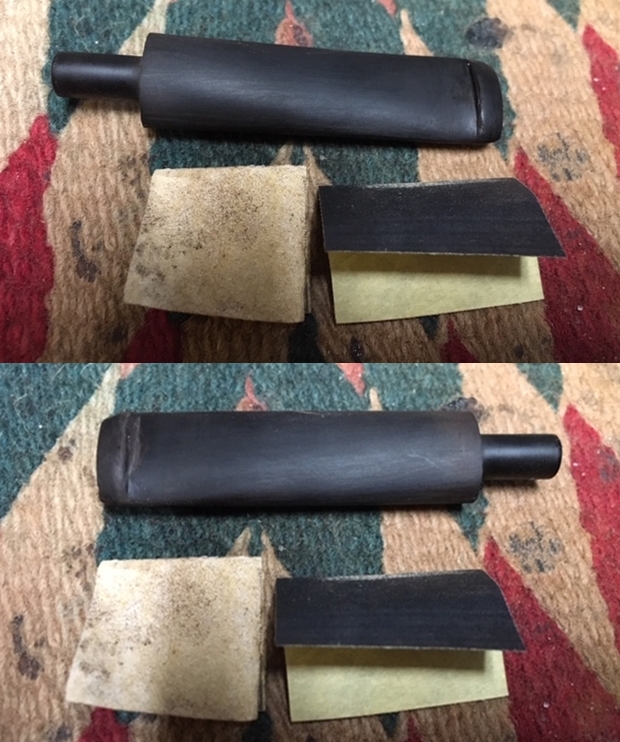
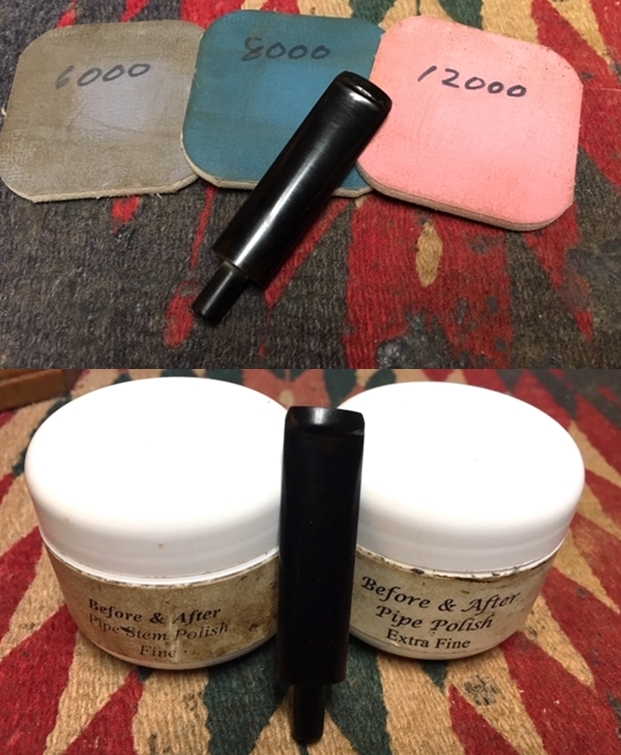
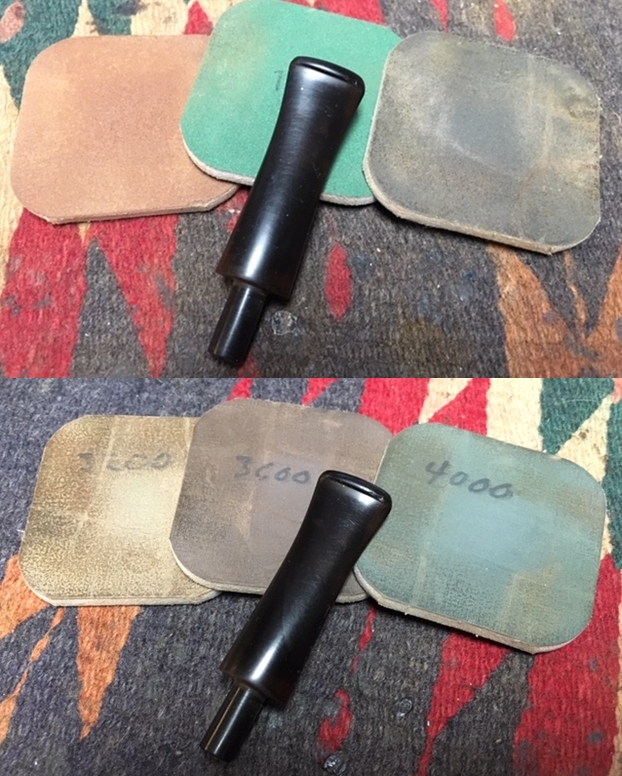
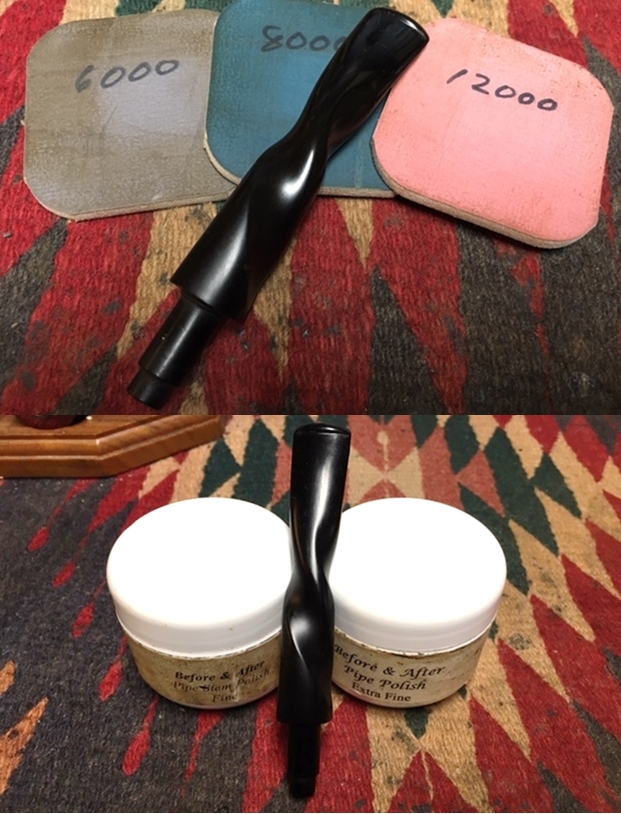
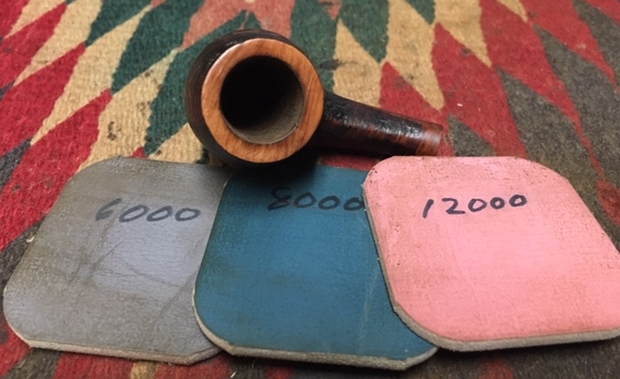
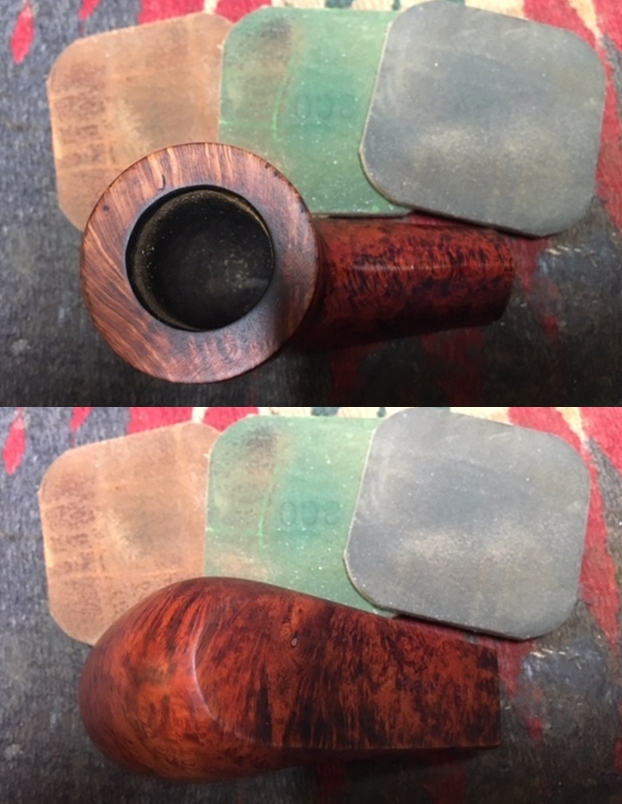
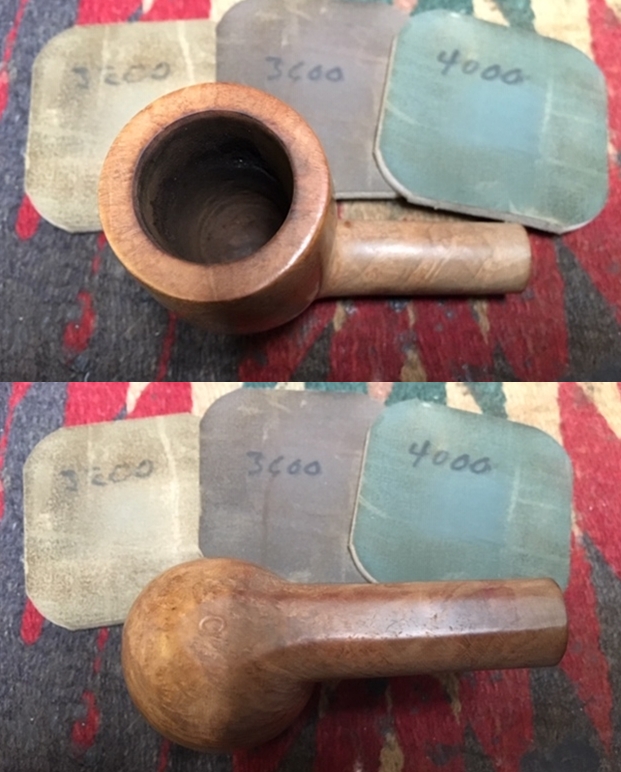
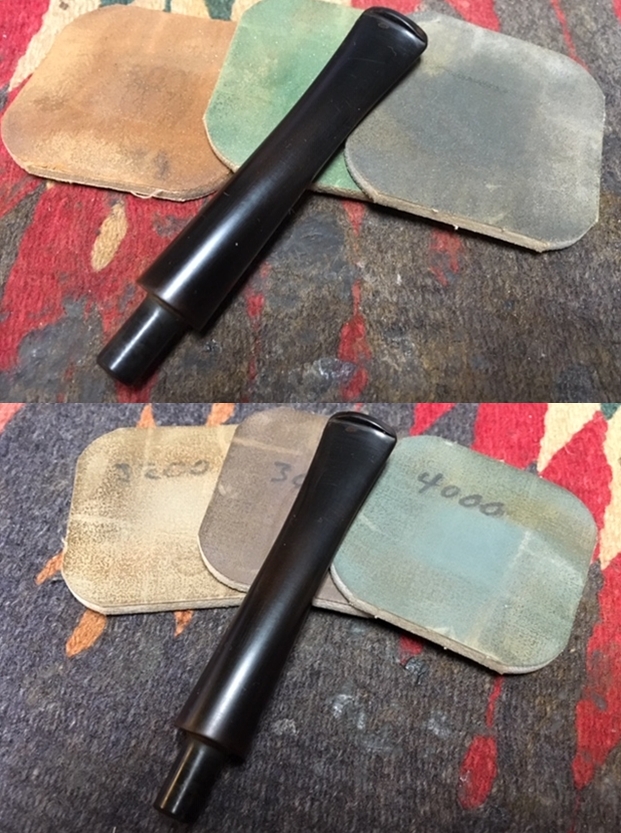
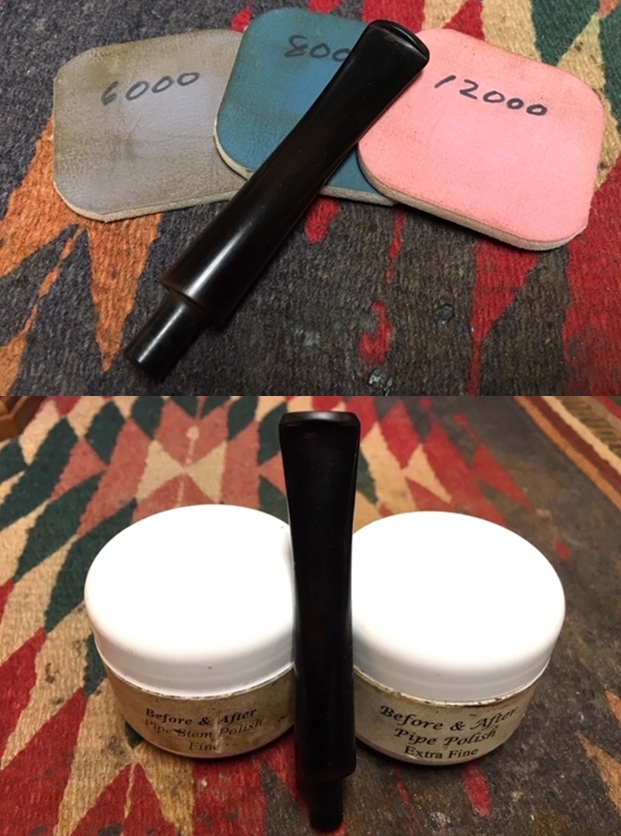
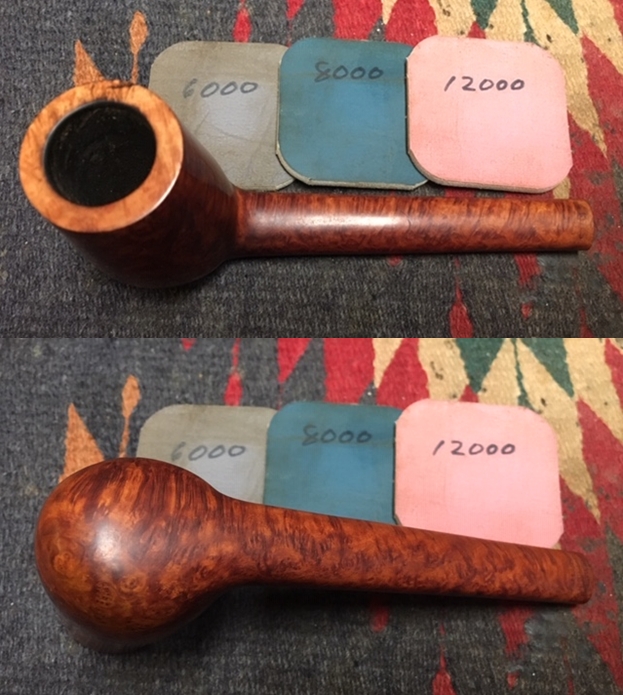
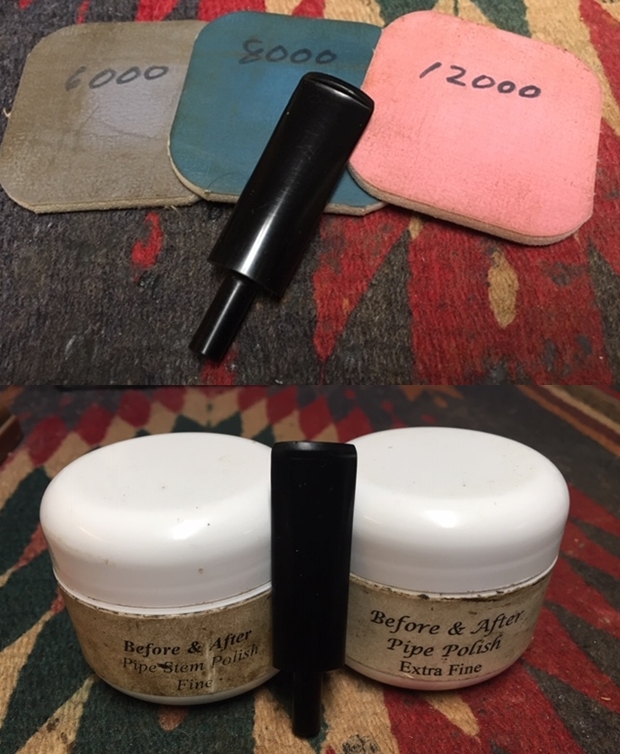
 With the stummel on the side, I turn back to the stem and look at it again. The tooth chatter that was evident before was fully removed during the earlier wet sanding with 600 grade paper and 0000 steel wool. I decide to move now to the micromesh phase by first wet sanding with pads 1500 to 2400 and follow this by dry sanding with pads 3200 to 4000 and 6000 to 12000. Between each set of 3 I apply Obsidian Oil to revitalize the vulcanite. The pencil stem looks great!
 The CA glue patch applied to the crevasse on the shank has cured and is ready to be sanded down and blended. Using 240 grit paper, I sand down the initial patch mound until it is flush with the briar surface. Following this, I again use 600 grit paper to erase the 240 scratches and to smooth it out. As before, I then apply each sanding sponge, starting with the coarse sponge, medium then light. I can still see the scar, but it is now sealed and smooth to the touch and blends in nicely. A needed detour.
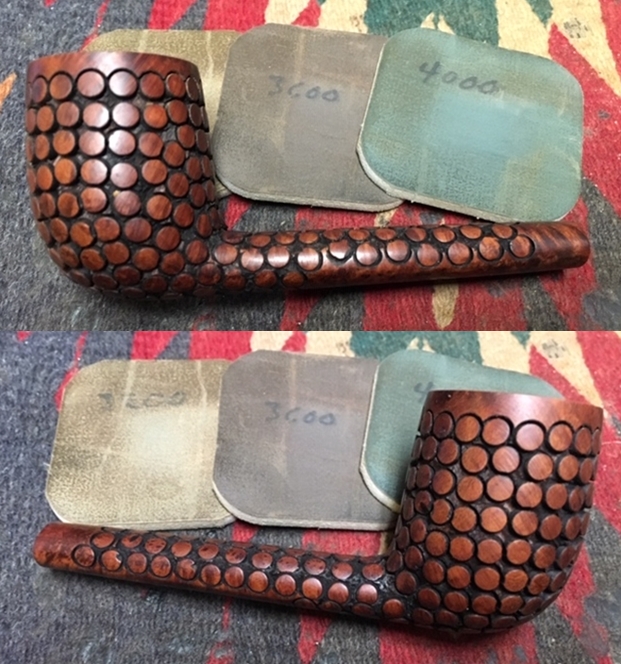
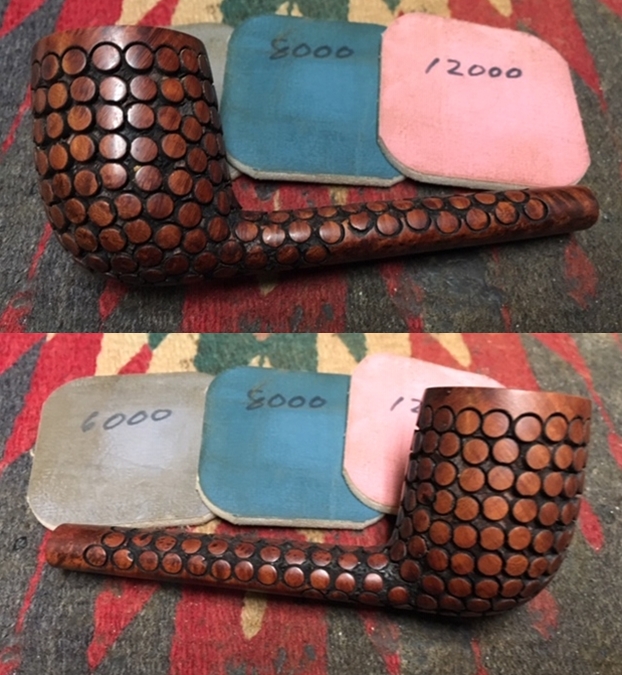
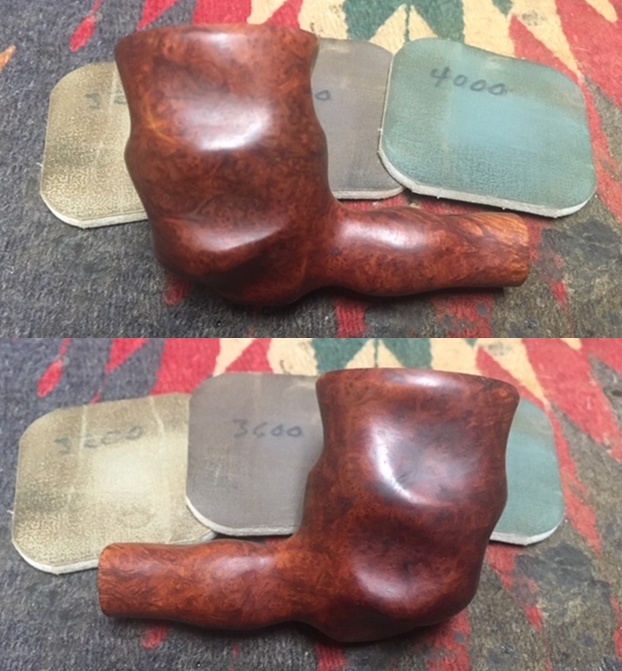
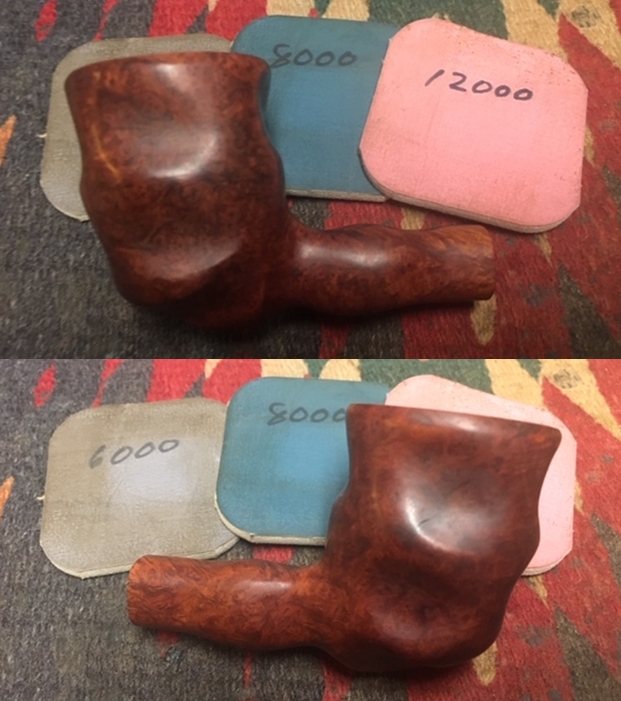
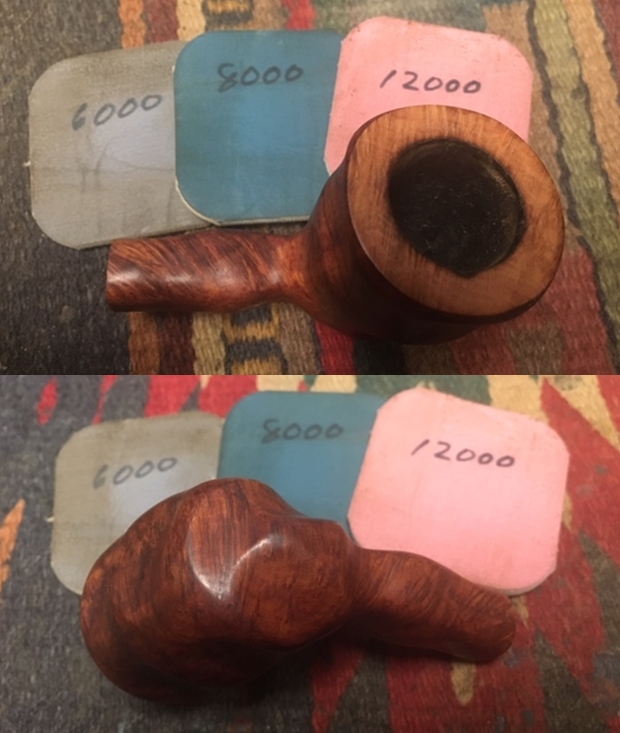
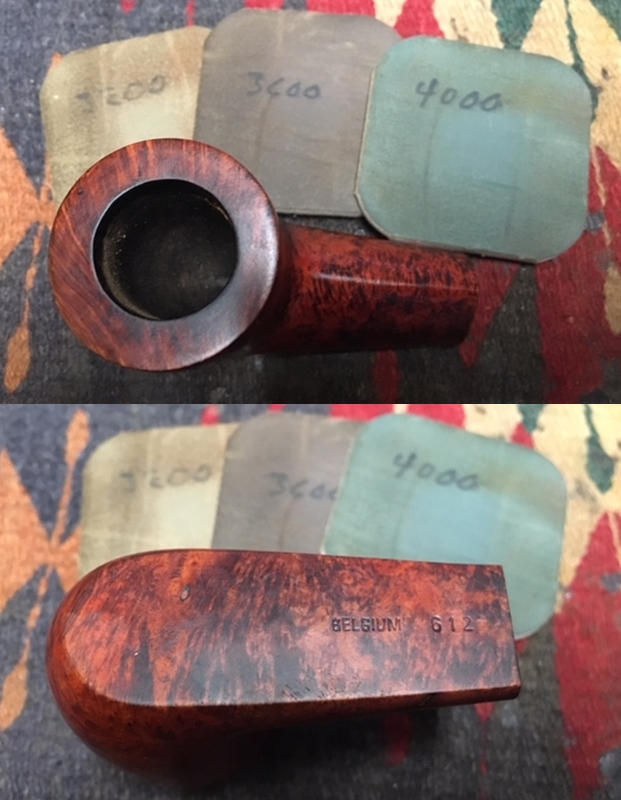
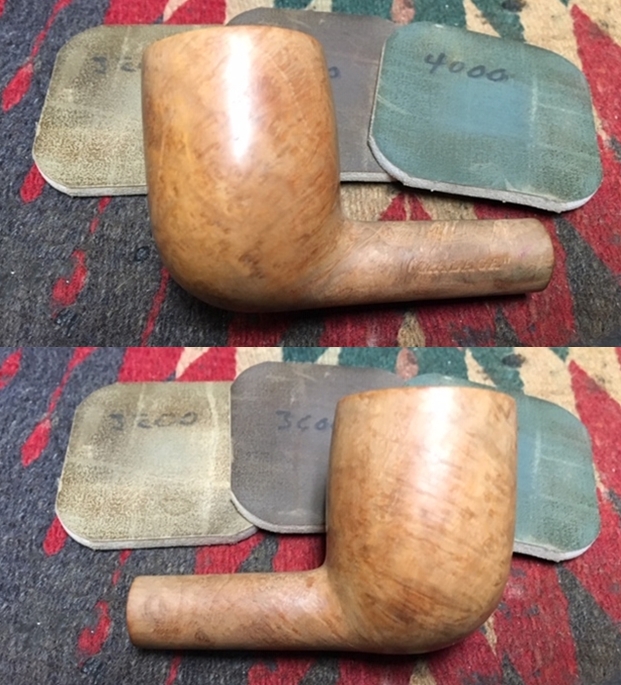
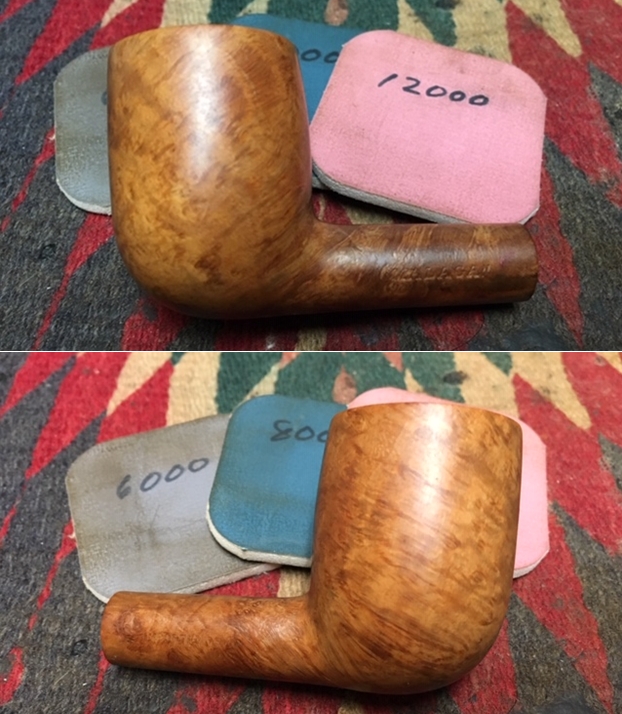
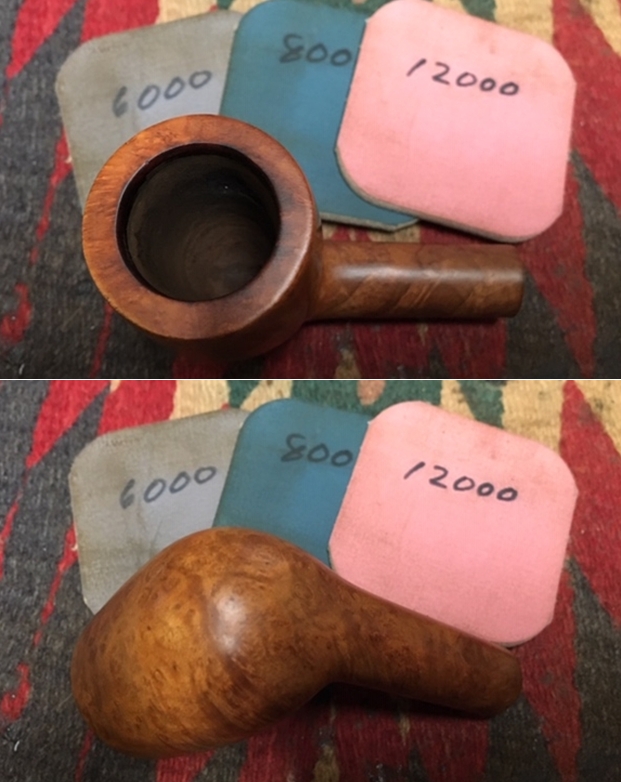
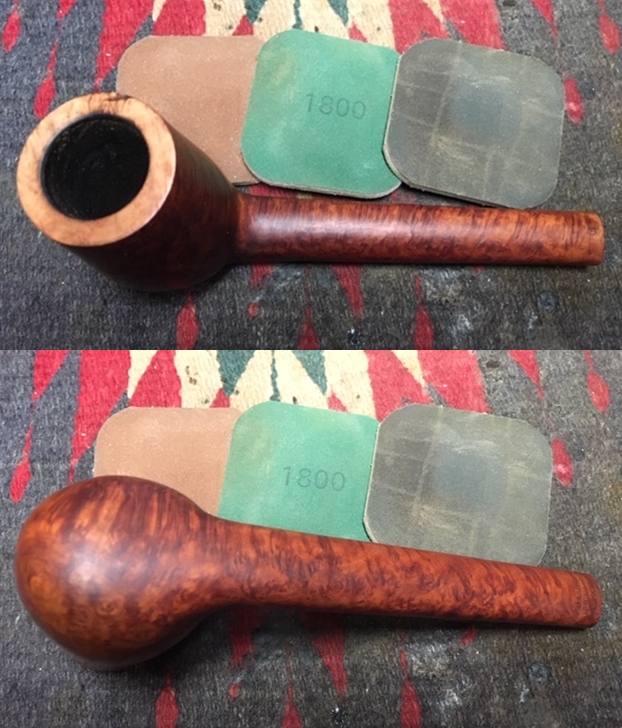
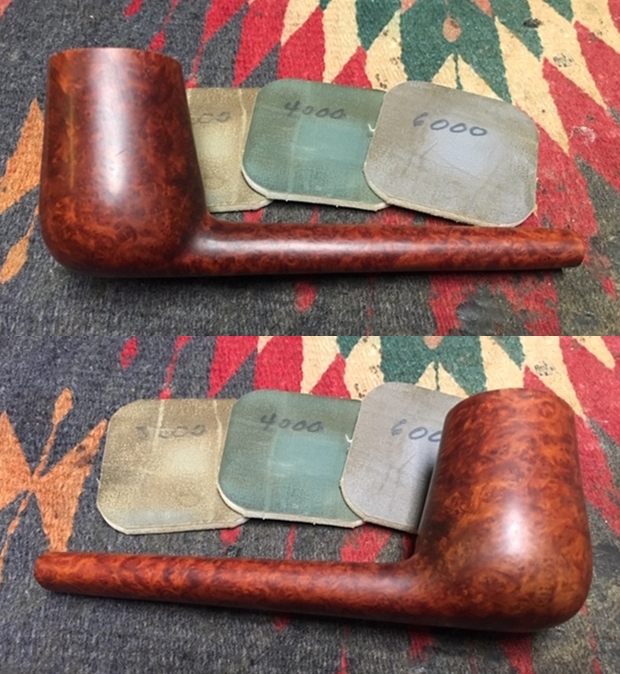
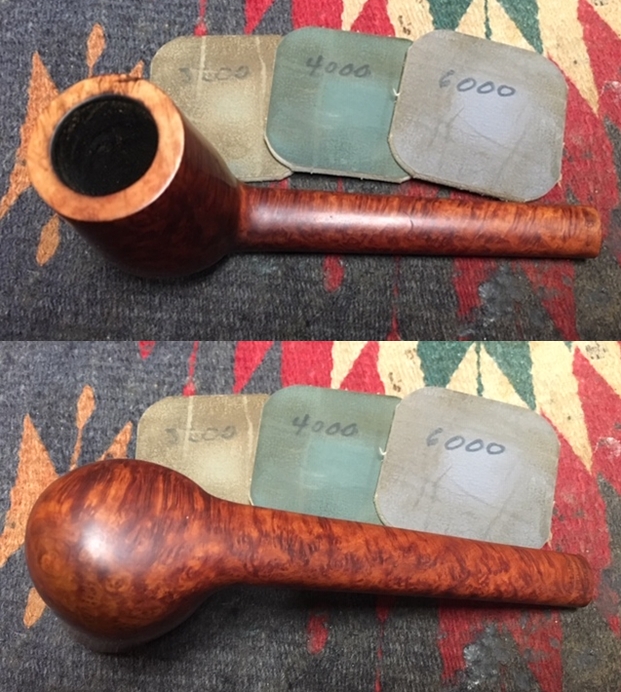
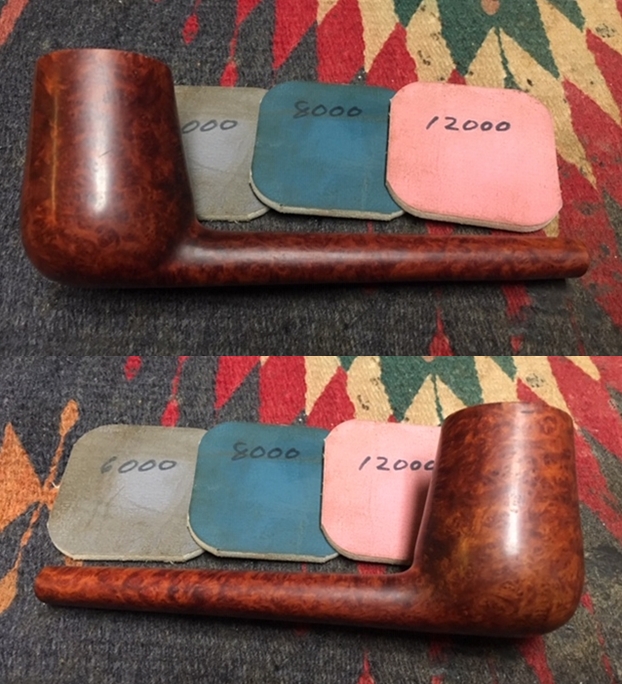
 With the repair finished, now I apply micromesh pads to the Cutty stummel. First, I wet sand using pads 1500 to 2400. Following I dry sand with pads 3200 to 4000 and 6000 to 12000. The spur even gets its time in the sanding process!
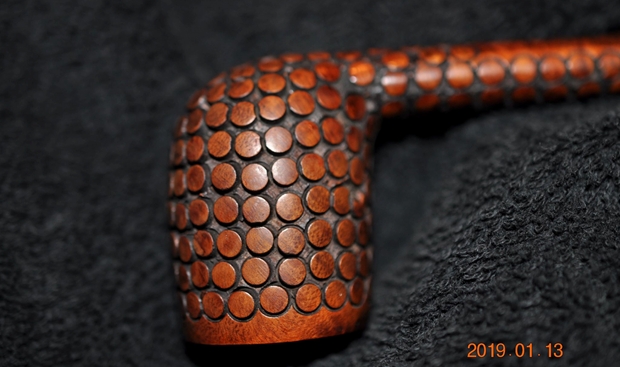
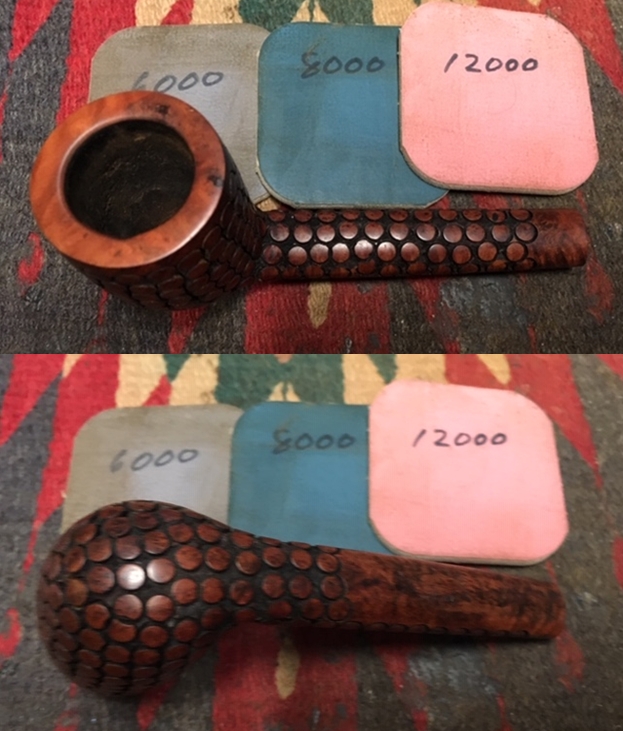
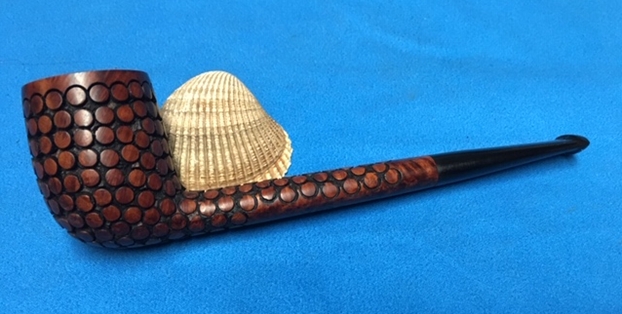
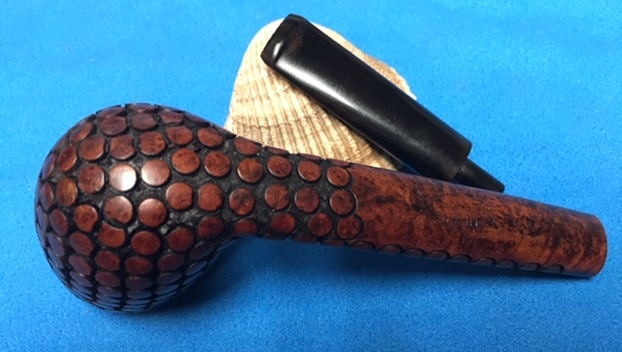
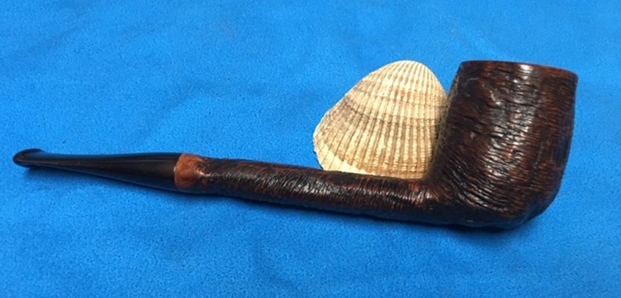
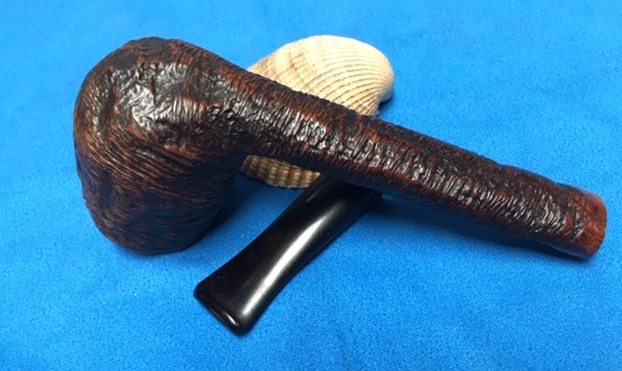
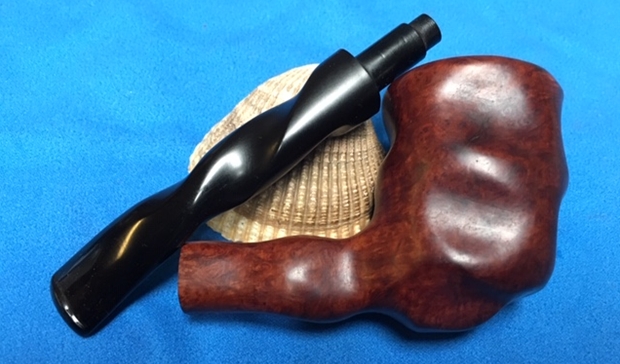
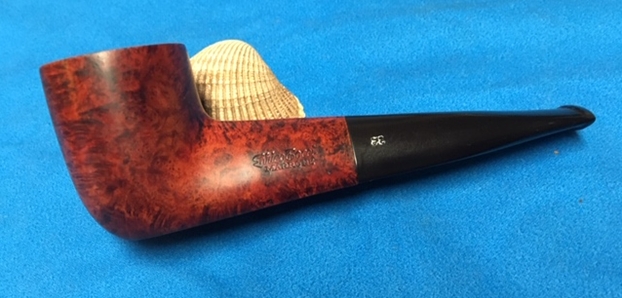
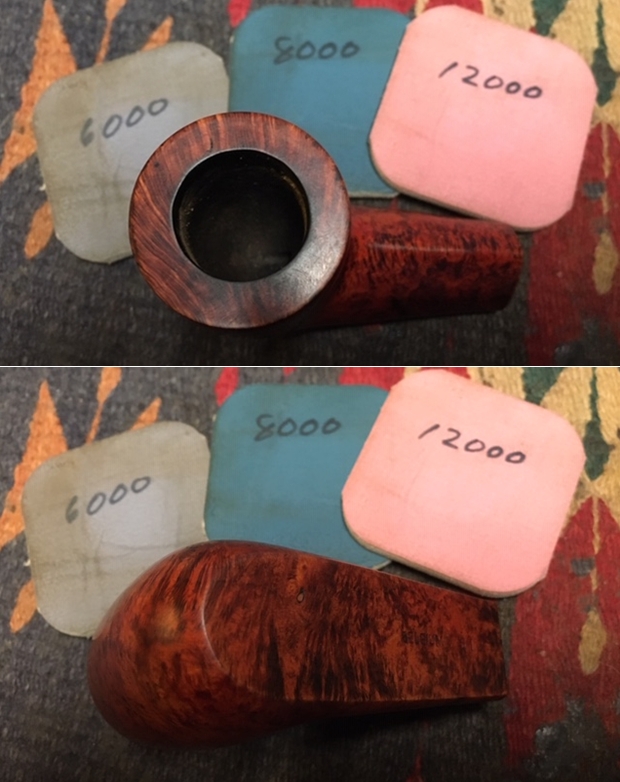
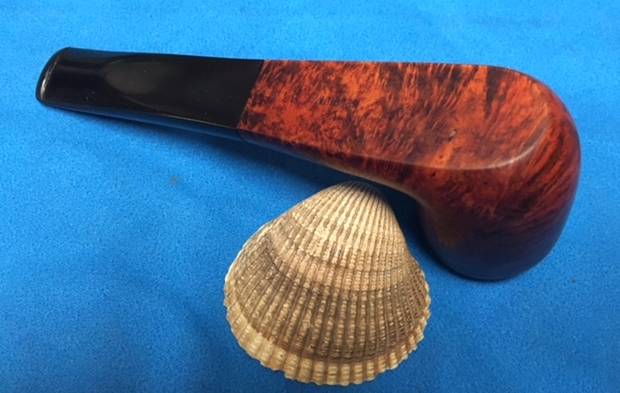
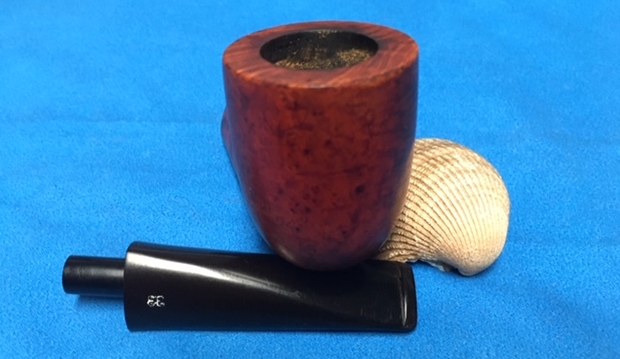
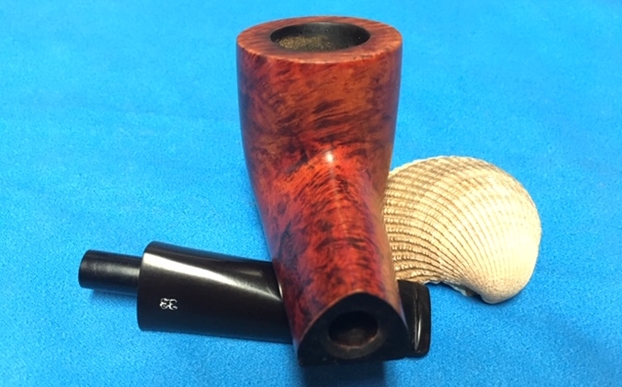
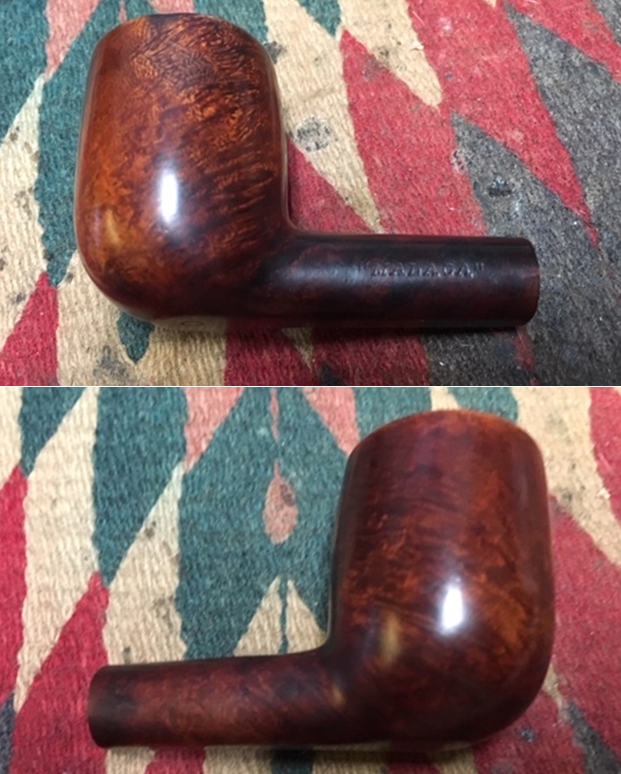
 During the micromesh phase, I watch the grain emerge and it is beautiful, and see the Cutty bowl design more clearly. The horizontal grain flanking both sides of the bowl run parallel with the shank. The cant of the bowl is accented by the grain as the bowl seems to jut out with the grain. The effect catches the eye. Added to this is the bird’s eye grain that is on the fore and rear of the bowl. Whoever turned this block of briar into the Cutty was insightful and could see what the lines would do with the canted Cutty angles. The picture of the Comoy’s Blue Riband 347 Cutty below (link) has the same eye catching grain motif.
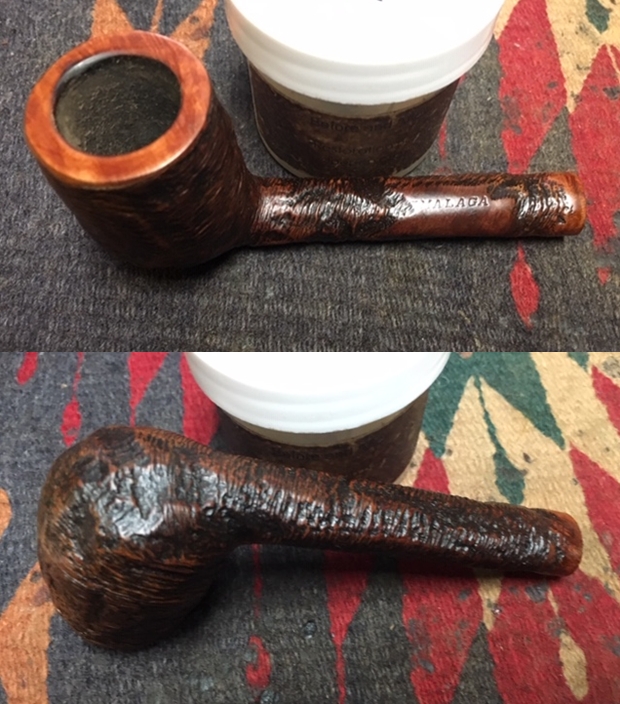
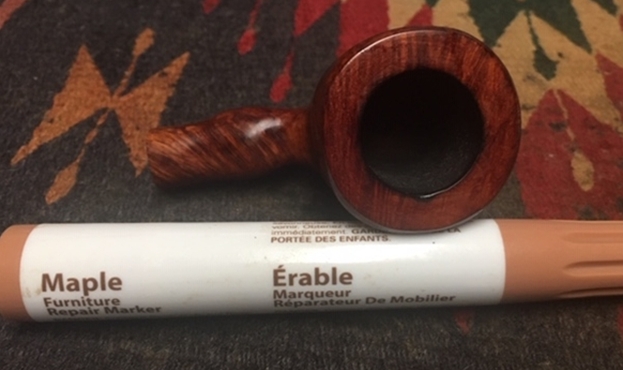
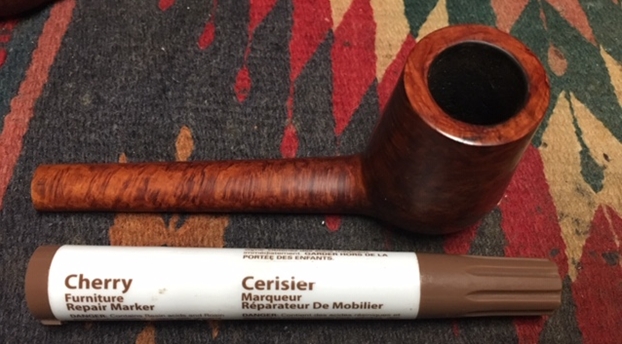
  I found this picture of a Cutty as I was doing an online survey looking at the different hues that briar Cuttys come in generally. Of course, you will find a spectrum of color from dark to light as you look at the googled image pages. Yet, as I looked at 100s of pictures, what seemed to be resonating with me was the darker hues like the Comoy’s above depicts. Of course, the clay Cutty is white, but the older ‘English’ classic feel was communicated more through the darker hues like this striking Comoy’s. My decision was made, and after assembling my desktop staining tools, I mix together Fiebing’s Dark Brown Leather Dye 2 parts to 1 with Fiebing’s Saddle Tan Pro Dye in a shot glass. After wiping the stummel with alcohol to clean it, I insert into the mortise two doubled pipe cleaners to serve as my handle. I then heat the Cutty stummel with a hot air gun to open the briar helping it to be more receptive to the dyes.
  Using a folded pipe cleaner as an applicator, I ‘wash’ parts of the stummel with the dye and then ‘flame’ it using a lit candle. As an aniline dye, the alcohol combusts when it meets the flame and as the alcohol burns off in a ‘puff!’ it sets the dye pigment into the briar. I methodically apply the dyes to the entire stummel flaming as I go.
  When thoroughly covered, I put the stummel inverted on a cork situated in a candle stick holder to rest through the night allowing the dye to settle. I discovered that this period of resting is important as it helps guard against the newly applied stain to come off on the fingers later when the pipe is first put into service and the briar is heated for the first time.
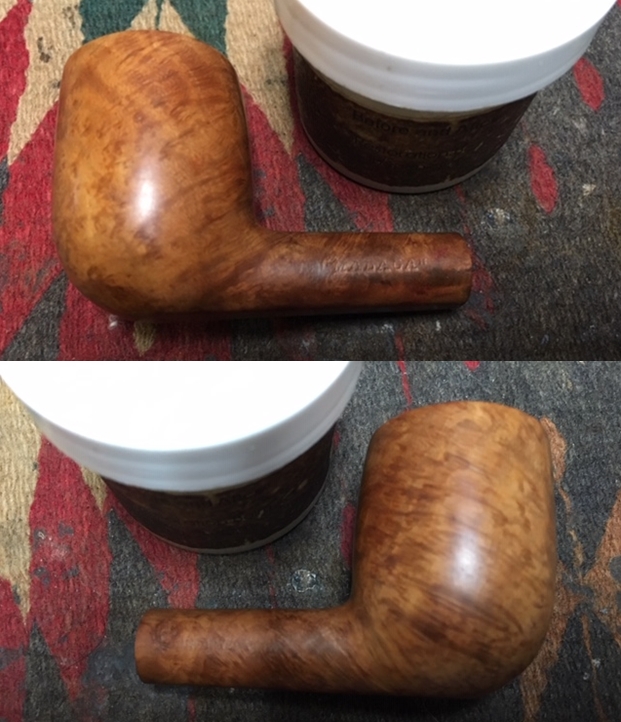
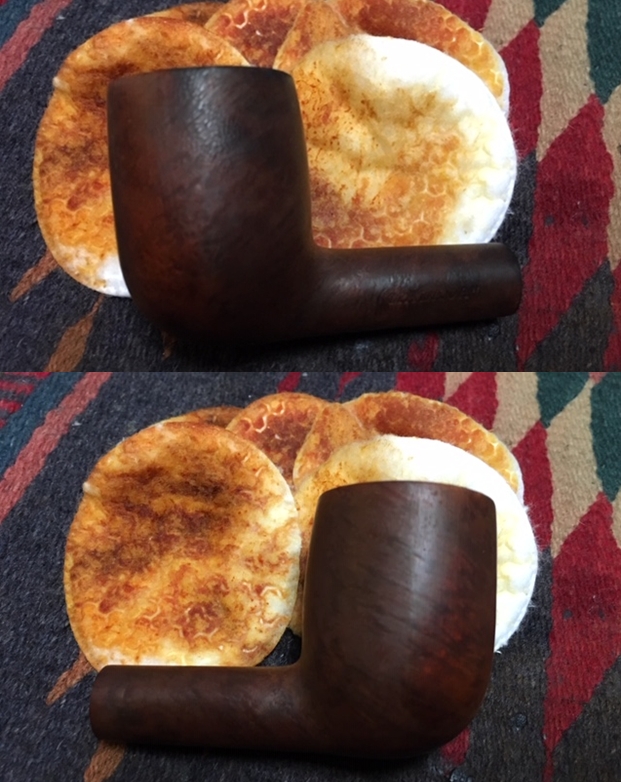
 The next morning I’m ready to start ‘unwrapping’ the fired and dyed stummel. The firing creates a crust on the surface which I initially remove with the use of a felt buffing wheel applying Tripoli compound. I mount the felt buffing wheel onto the Dremel, set the speed at the lowest RPMs because I do not want to create too much friction and scorch the briar.
 I methodically work the felt wheel through the crust revealing the briar grain underneath the crust. Throughout the process, I purge the felt wheel often as it collects the crusty fired dye. I stage a picture (below) to show the contrast after the felt wheel applies Tripoli compound and has unwrapped a portion of the stummel revealing the stained grain beneath. After I complete the initial unwrapping of the entire stummel, I change from a felt cloth buffing wheel to a cotton cloth wheel and increase the speed of the Dremel to 40% full power. I then apply another round of Tripoli compound with the softer cotton wheel. I discovered doing this after the felt wheel helps to angle in to the crook of the shank/bowl junction better, but it also removes more dye blotches revealing a sharper grain contrast.
 After completing the second round of Tripoli, I wipe the stummel with a cotton cloth wetted with alcohol. This can lighten the finish if I choose to rub more aggressively but I don’t. I’m satisfied with the color, but the wipe helps blend the finish further and remove excess dye.
 I follow the Tripoli compound by applying the finer Blue Diamond compound. I mount another cotton cloth wheel to the Dremel, keep the speed at 40%, and apply the compound. I apply it to both the stummel and the stem. Since the stem is longer, it’s easier to keep them separated as I apply the compound.
 Following the Blue Diamond, another cotton cloth wheel is mounted, the speed remains the same and I apply Carnauba wax to both the stem and stummel.
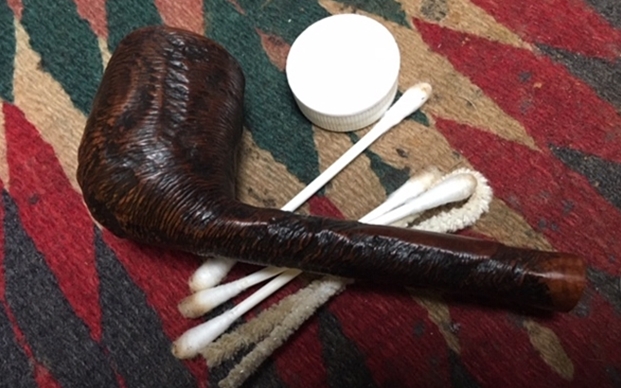
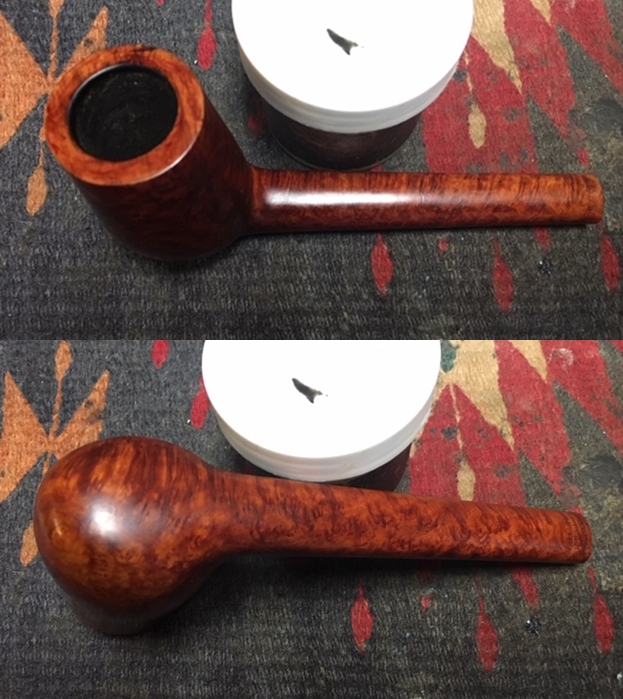
 After completing the application of wax, I try to reunite the stem and stummel and discover that the tenon/mortise fit is too snug for comfort. This often happens after internal cleaning and the briar is wet and that can expand it microscopically – enough that forcing the tenon into this pencil thin shank is a recipe for disaster – cracking a shank is not a fun thing to deal with! To remedy this, I wrap a piece of 600 grit paper around the tenon and sand it down until it fits more easily and snuggly.
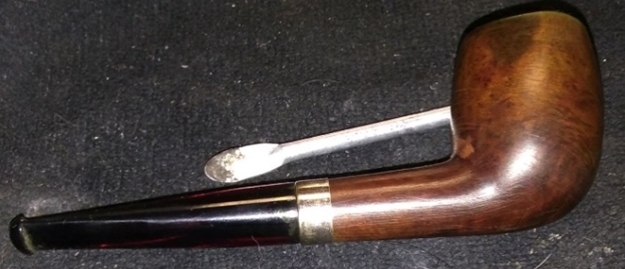
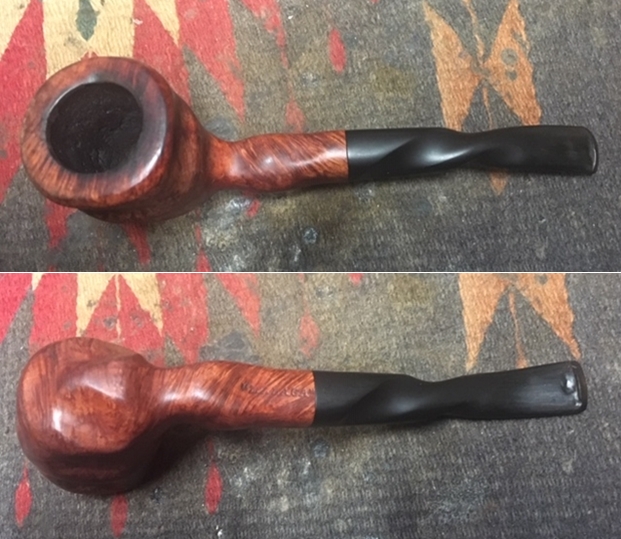
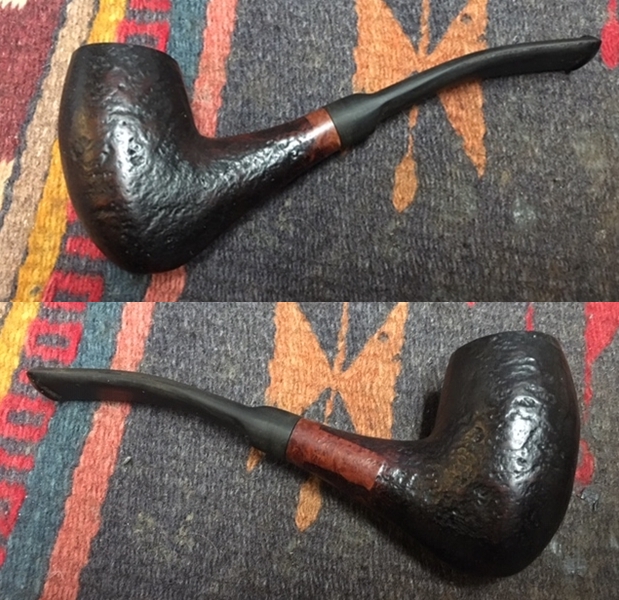
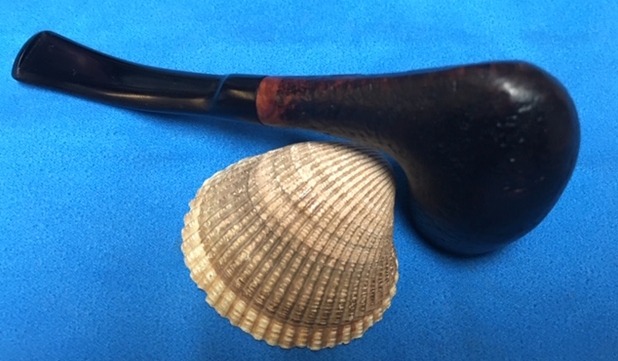
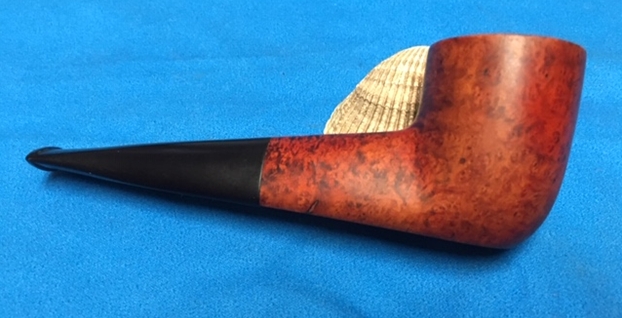
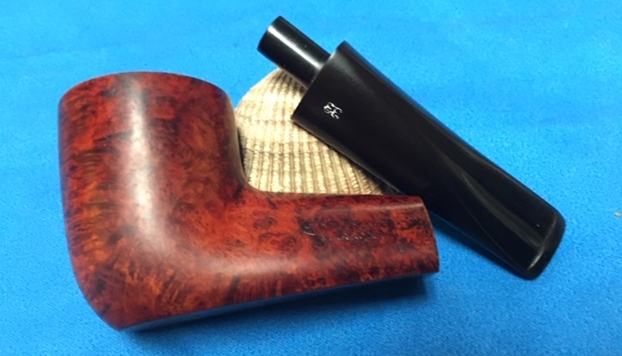
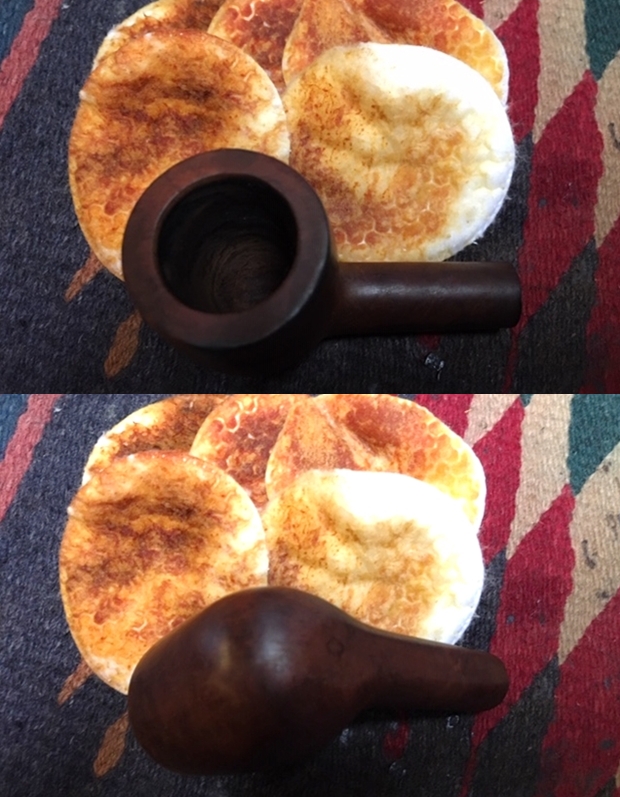
  This restoration has told an interesting story. The Cutty Tavern Pipe looks great. The dark brown finish and polishing regimen has resulted in a unique Cutty bowl drawing even more attention. The Cutty Tavern Pipe’s lines are classic and harken back to a day gone by when these pipes were fashioned with clay and were held proudly by both those with means and the common man and woman who had gathered with friends to enjoy each other at the pub and a smoke. A fitting gift for a curator of history and even more so, the commissioning of this pipe by my son, benefits the Daughters of Bulgaria – helping women and girls who have been trafficked and sexually exploited. The unexpected turn in this story is the painting, ‘Tavern Pipe’, depicting the pipe man and his pipe – an accurate and telling image captured on canvas by the brush of a gifted artist, Suzie Baker, whose generosity is making available a percentage of the sale of this painting to the Daughters of Bulgaria. Is there a pipe man or woman out there to bring the Tavern Pipe home benefiting the Daughters? I hope so! Thank you for joining me!


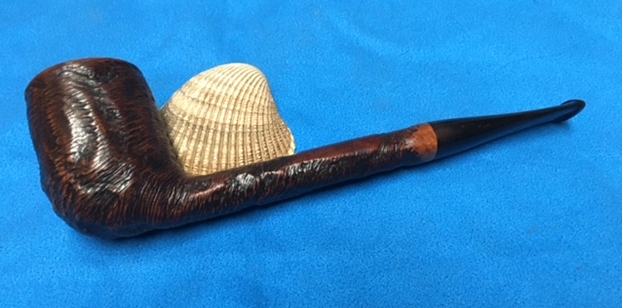
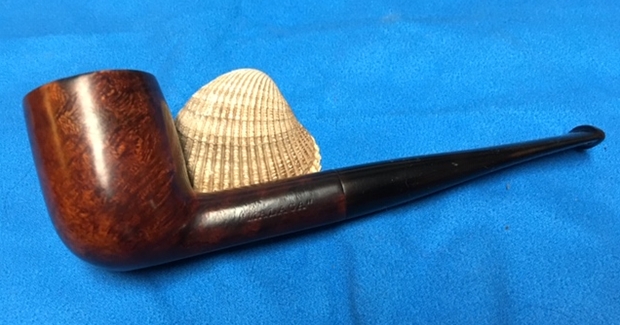
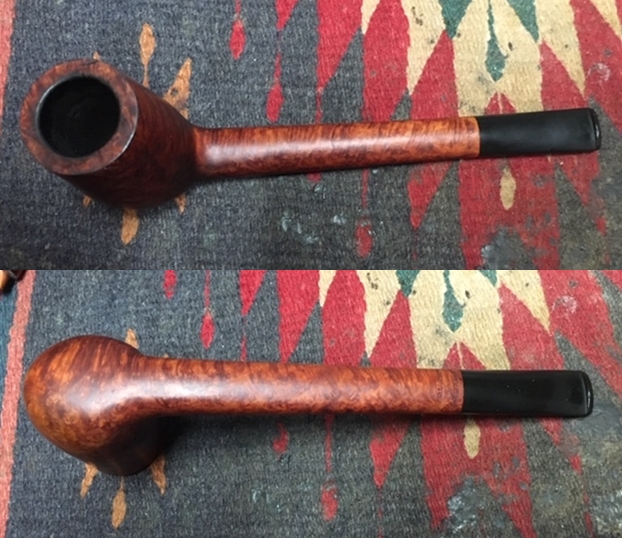
 The next pipe in the queue is from a fellow in Florida who picks up some pipes for Jeff and me. It was one of several that he found and sent to us. It is a well-made W.O. Larsen Select, Brandy shaped Canadian. The entire pipe had some beautiful cross grain on the front and rear of the bowl and the top and underside of the shank. It had some great birdseye grain on both sides of the bowl and shank. The bowl has a Brandy snifter shaped bowl and a long, oval shank that defines the Canadian shape. The pipe has a rich medium brown finish that really makes the grain on the pipe stand out. The carver at Larsen did a great job utilizing the block of briar to maximize the grain. The pipe is stamped on the underside of the shank. It reads W.O. Larsen over Handmade over Made in Denmark. On the topside of the shank it is stamped SELECT. The stamping is horizontal on the end of the shank on both sides next to the stem/shank junction. The stem is short, tapered vulcanite and has no marking or stamping on it. This is a beautiful example of the work coming from W.O. Larsen.
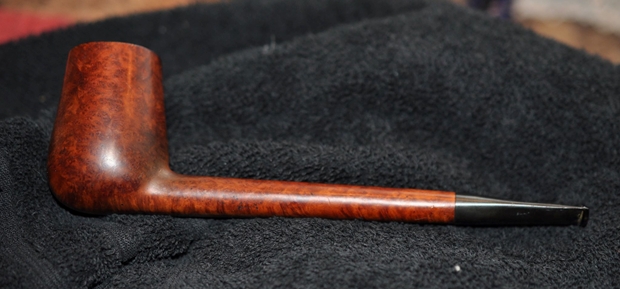
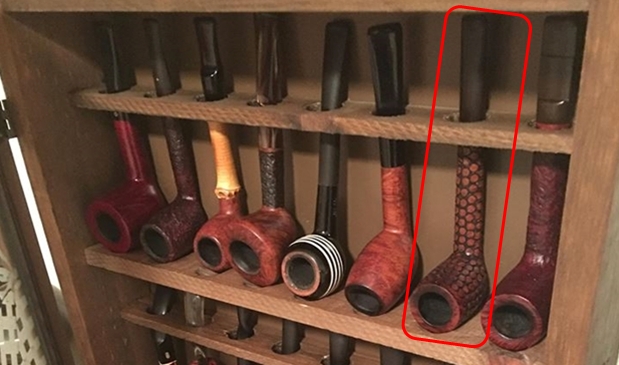
 Jeff took photos of the bowl and rim to capture the condition of the pipe before he started his cleanup work. There was a thick coat of lava on the rim and the cake in the bowl. It shows the mess this pipe was in when we received it. The thick lava overflow on the rim top made it hard to know what the inner edges of the bowl looked like. The outer edge appeared to have deep gouge on the right side of the rim top. I have circled it in red to identify the issue. There is also a general accumulation of grease and grime ground into the finish on the rest of the bowl and shank.
 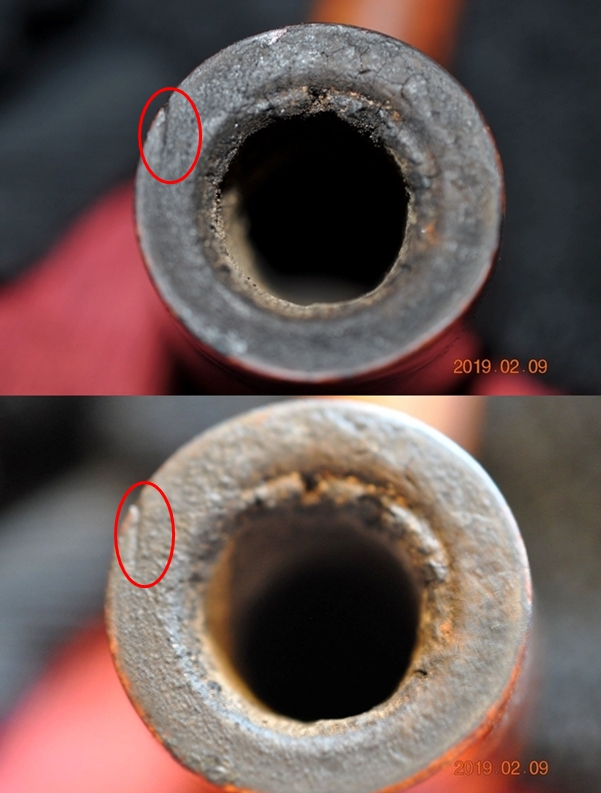 He also took a photo of the right and underside of the bowl and shank to show the interesting grain around the bowl and shank. The finish is very dirty but the grain is visible in the photos.
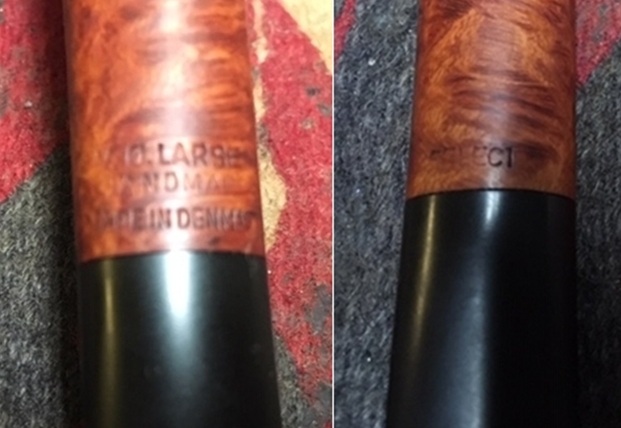
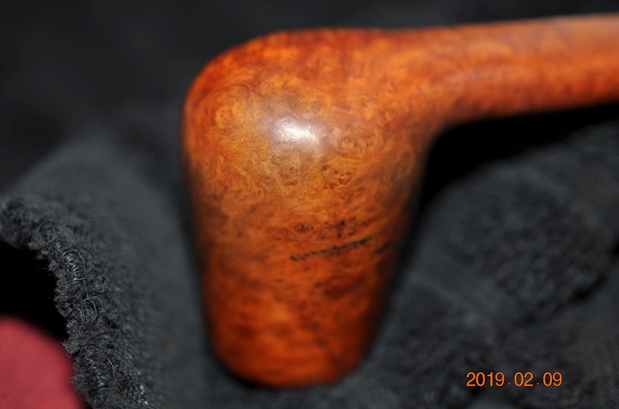 Jeff took photos of the stamping on the top and underside of the shank. It reads as noted above and is clear and legible.
 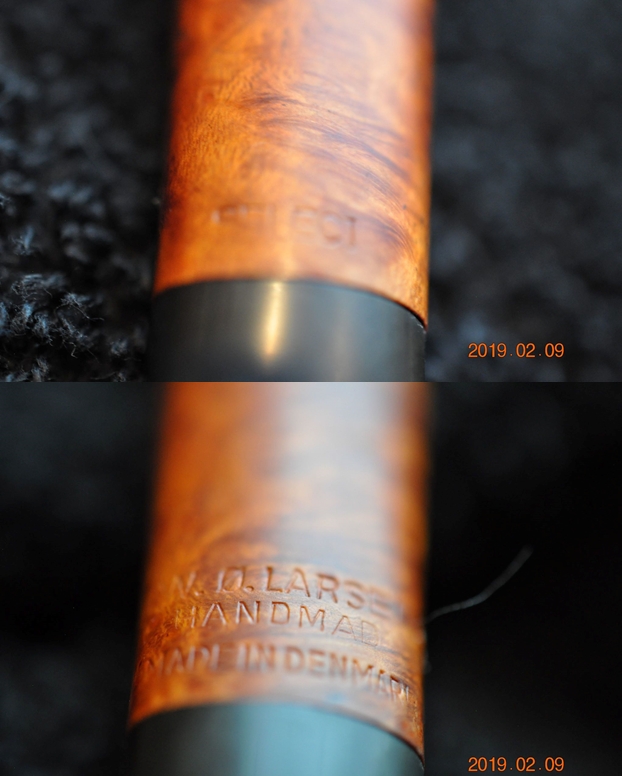 The next two photos show the stem surface. They show the tooth marks and chatter on both sides near the button. There are also some marks on the sharp edge of the button. The stem is dirty and is covered in scratches.
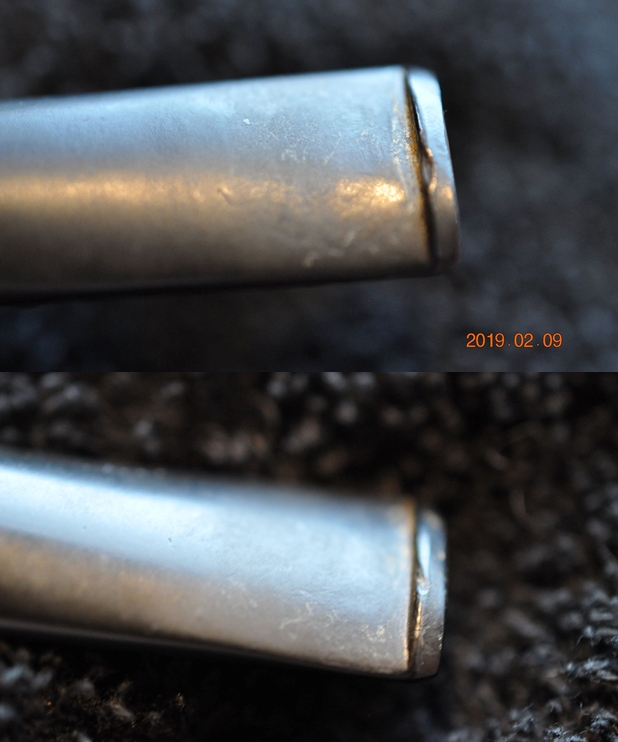 I wanted to refresh my memory about the pipes coming out of Ole Larsen’s Copenhagen tobacco shop. I knew that many famous Danish Carvers started their careers carving for the shop. I turned first to the pipephil wesite to get and over view of the brand. Here is the link (http://www.pipephil.eu/logos/en/logo-l2.html). I did a screen capture of the section on the site showing a summary of the brand and the typical stamping.
  I then turned to Pipedia to do a bit more reading about the brand and the various lines making it up. Here is the link (https://pipedia.org/wiki/W.%C3%98._Larsen). The link took me to some pages on the finepipes.com website. Here is the link to the summary of the history of the brand. I quote it in full. I have marked the pertinent section with bold font to mark out the section on the SELECT series (https://www.finepipes.com/pipes/danish/w-o-larsen?sort=20a&page=2&zenid=562ff4b9d62f4f612d0f6ee60cab1224).
 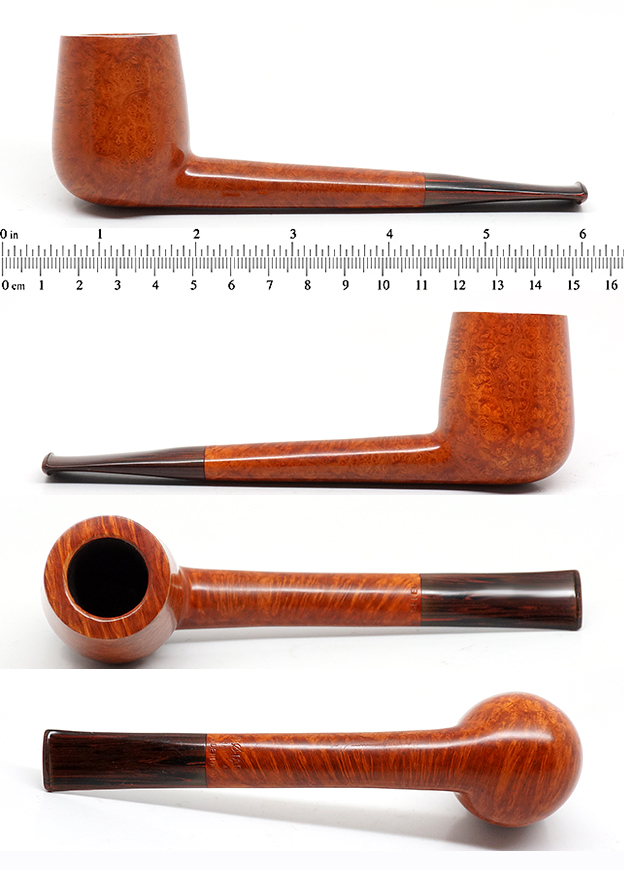 From the above information I knew that the pipe came from the 1960s and was carved by some of the Danish greats who were responsible for the SELECT and STRAIGHT GRAIN series. Names like Teddy Knudsen, Tonni Nielsen, Jess Chonowitch, Peter Hedegaard and others are some of those associated with the series pipe that I am working on. In many ways it is a high grade pipe made by a great maker but a pipe that I may never know the actual carver who crafted it in WO Larsen’s studio.
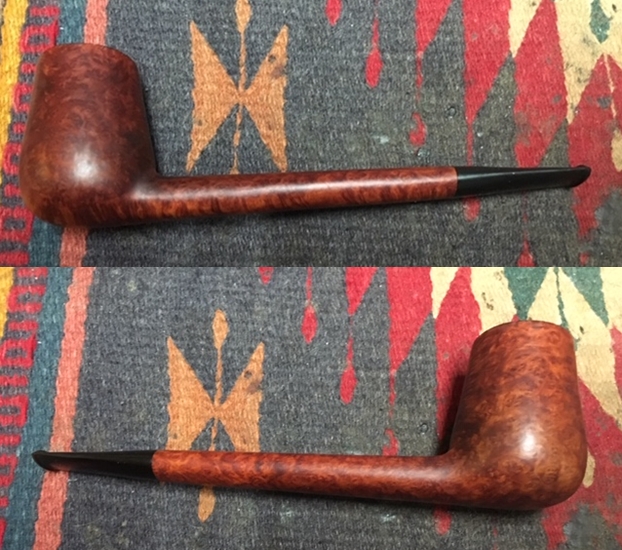
 I took a close up photo of the rim top to show the darkening on the top and the deep gouge on the right side of the outer edge of the rim top. Jeff had done an amazing job cleaning off the lava buildup. The outer edge of the rim has some deep nicks on the front of the bowl. The inner edge of the bowl had some darkening and some wear on the left side. The vulcanite stem photos show the tooth marks and the wear on the button surface on both sides. I also decided to take photos of the stamping on both the top and underside of the shank to show its condition.
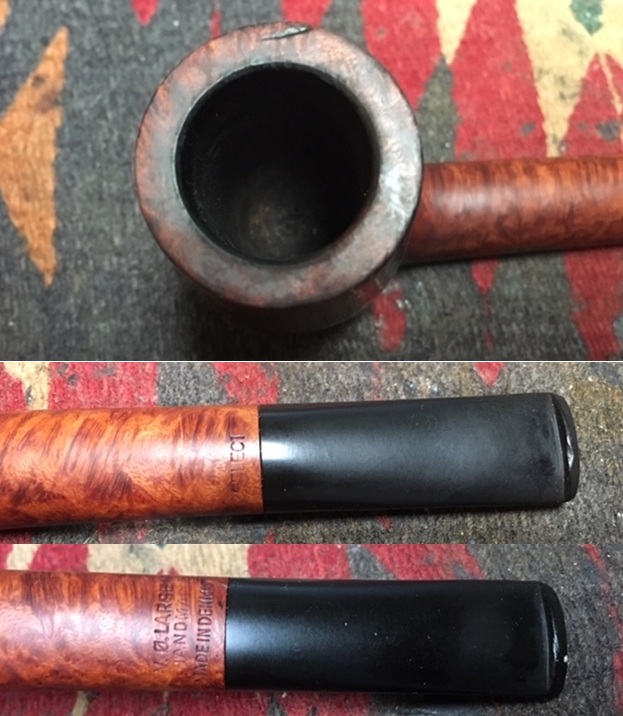
 I decided to start my work on the pipe by addressing the darkening and damage to the rim top and edges. I topped the bowl on a topping board with 220 grit sandpaper to remove the damage and minimize the outer and inner edge damage. I was able to remove much of the damage. To address the gouge in the rim top on the right side I filled it in with clear super glue and continued the topping until it was smooth. I cleaned up the inner edge with a folded piece of 220 grit sandpaper to minimize the damage to the edge.
 I polished the bowl sides and rim top with micromesh sanding pads. I wet sanded with 1500-2400 grit pads and dry sanded with 3200-12000 grit pads. I wiped the bowl and rim down with a damp cloth after each pad. As I polished it the sanded rim top began to shine and blend in with the rest of the briar. When I finished polishing the rim top I stained it with a Cherry stain pen to match the colour of the rest of the bowl.
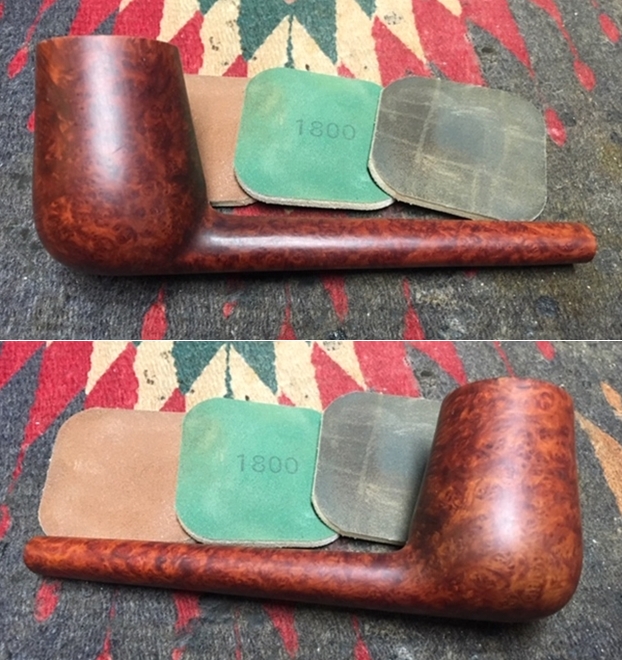
 Once the stain had dried. I worked some Before & After Restoration Balm into the surface of the briar with my fingertips to clean, enliven and protect it. I let the balm sit for a little while and then buffed with a cotton cloth to raise the shine. The following photos show the bowl at this point in the restoration process. The bowl and the rim top look really good. The pipe looks very good with the rich finish on the bowl and rim. I am very happy with the results.
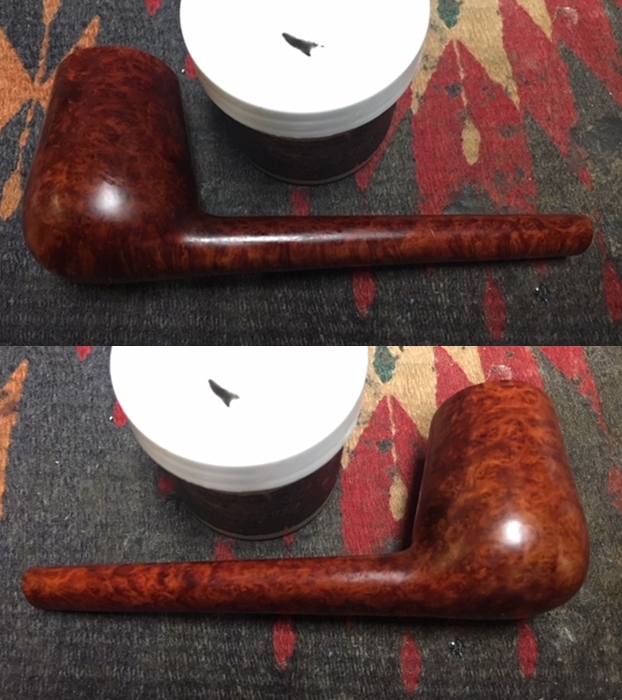
 I used a folded piece of 220 grit sandpaper to smooth out the damage to the stem and reshape the button. Once the surface was smooth I sanded out the scratch marks and started the polishing of the stem with a folded piece of 400 grit sandpaper. I wiped the stem down with Obsidian Oil and took the following photos.
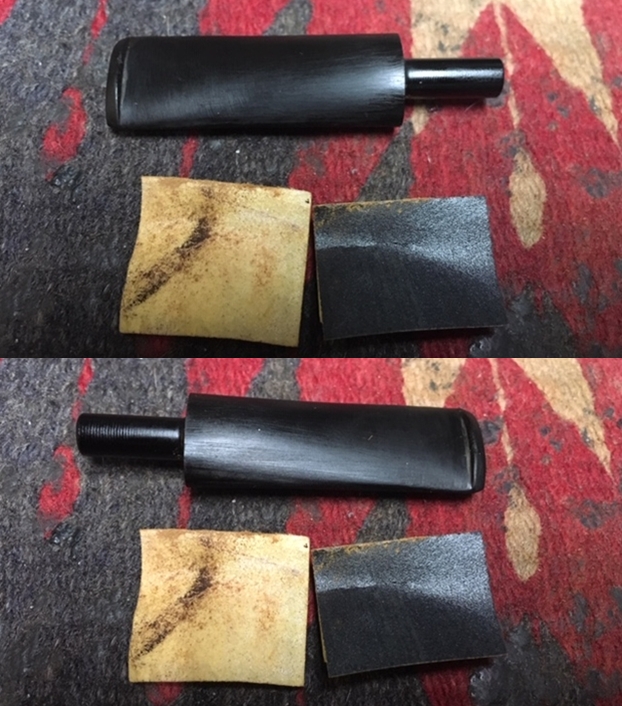 I polished the stem with micromesh sanding pads – wet sanding it with 1500-2400 grit pads and dry sanding it with 3200-12000 grit pads. I wiped the stem down with a damp cloth after each pad. I polished it with Before & After Pipe Stem Polish – Fine and Extra Fine. I wiped it down with a coat of Obsidian Oil and set it aside to dry.
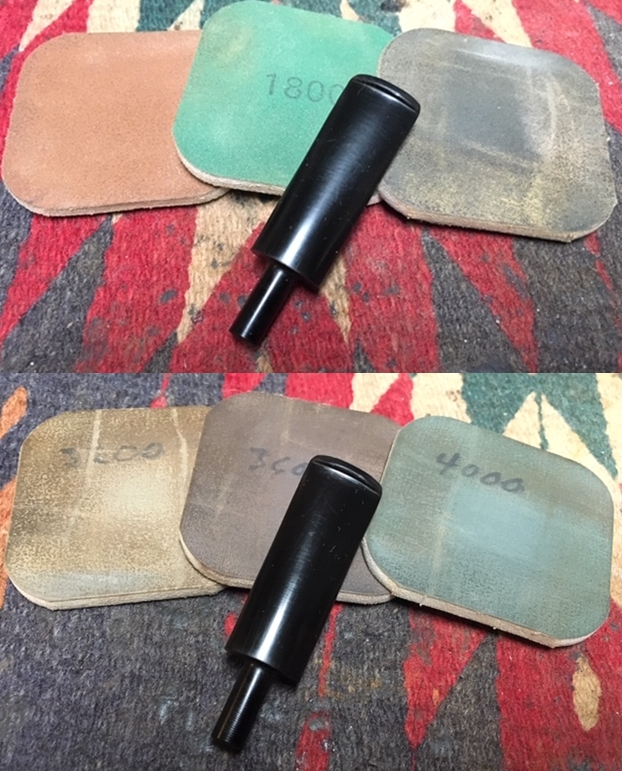
 I put the stem back on the bowl and polished them both with Blue Diamond polish on the buffing wheel. I gave the bowl and stem multiple coats of carnauba wax. I buffed the pipe with a clean buffing pad to raise the shine. I hand buffed it with a microfiber cloth to deepen the shine. The pipe polished up pretty nicely. The grain on the natural brown briar that had darkened over time came alive with the buffing. The finish worked well with the polished black vulcanite stem. Have a look at it in the photos below. The dimensions are Length: 7 inches, Height: 2 1/4 inches, Outside diameter of the bowl: 1 3/8 inches, Chamber diameter: 3/4 of an inch. This beauty will soon be on the rebornpipes store. It would make a beautiful addition to somebody’s pipe rack. Thanks for walking through the restoration of this Danish take on the Canadian/Brandy shape from the 60s with me as it was a fun pipe to work on.