Here is another addition to the collection of catalogues and leaflets that I have scanned and added to the rebornpipes document library. Give it a read.


Tag Archives: Charatan Pipes

The English Calabash That Wanted to Be a Charatan
Blog by Robert M. Boughton
https://www.facebook.com/roadrunnerpipes
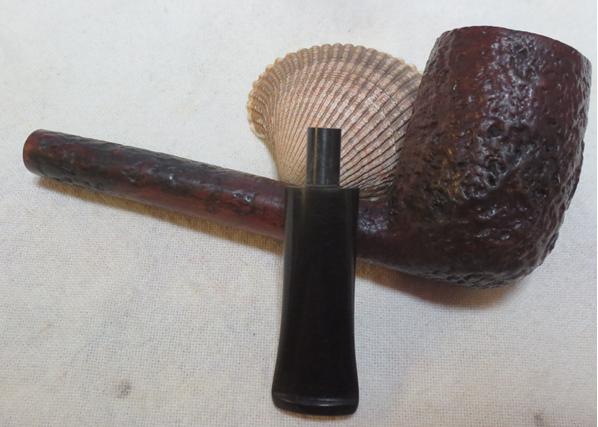
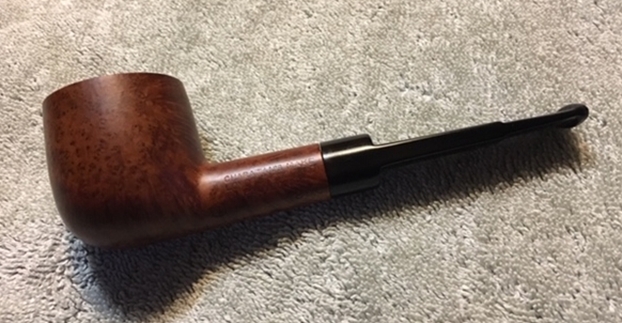
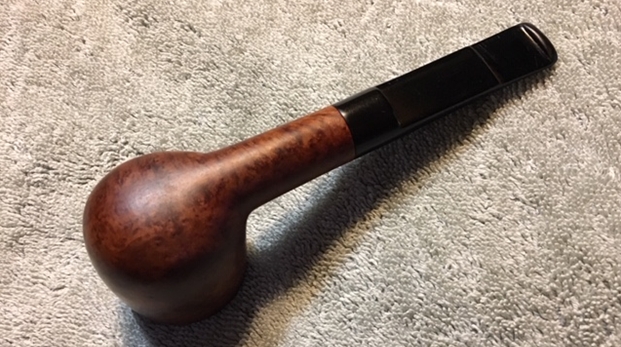
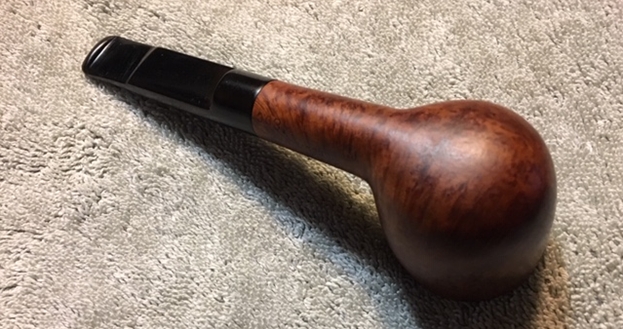
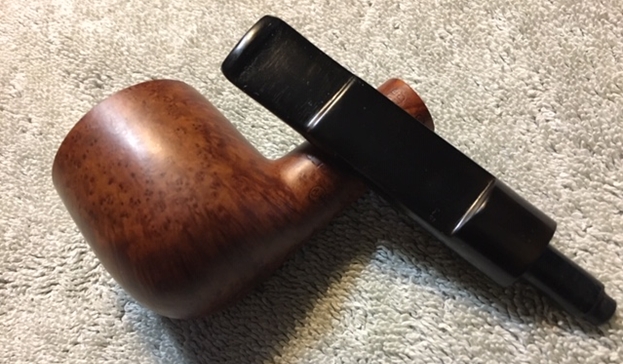
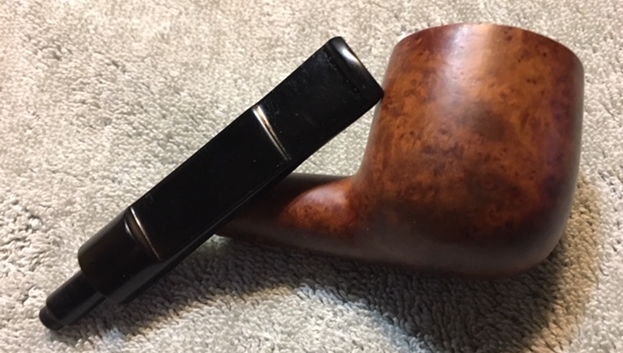
Not even once in a blue moon does a pipe with an uncommon feature – but having no nomenclature other than the county where it was made – find its way into my hands. The two most recent examples show MADE IN over LONDON ENGLAND on the right shank and did not meet their makers’ exacting standards. The previous was a Ben Wade celebrating the poker shape with capacious panache, but other than replacing the stem with a smaller, lighter, inappropriate one, there was no way to counter the off-center of gravity and force the poker sitter to sit. This time it’s a Charatan that looks more akin to a beanpot to me but was called a calabash by the maker. Had not Steve seen my “beanpot” for what it is, I might have concluded that both pipes began their lives as Ben Wades. Although Charatan pipes do not include MADE IN, I concluded that the two words were added when the pipe was rejected, maybe to differentiate the rejected from the approved. Here are two models of Charatan’s Make calabashes from Worthpoint. Based on the seller’s detailed description of the smooth finish calabash, at the first link below, I believe Charatan made these pipes while Dunhill owned the brand (1978-1988). The grain of my pipe is not very good and required a few fills, but I don’t see why it could not have been modified to a sandblasted or relief finish as shown above. Here is mine as I received it.


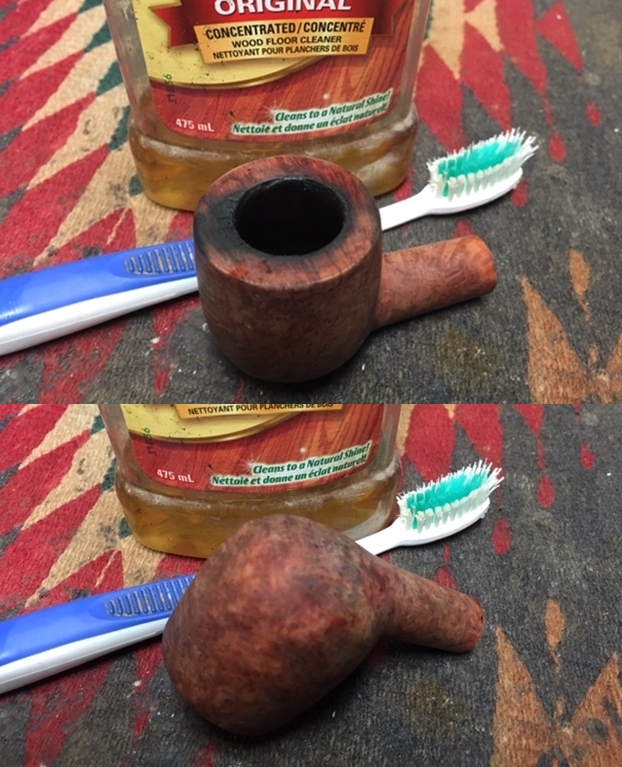
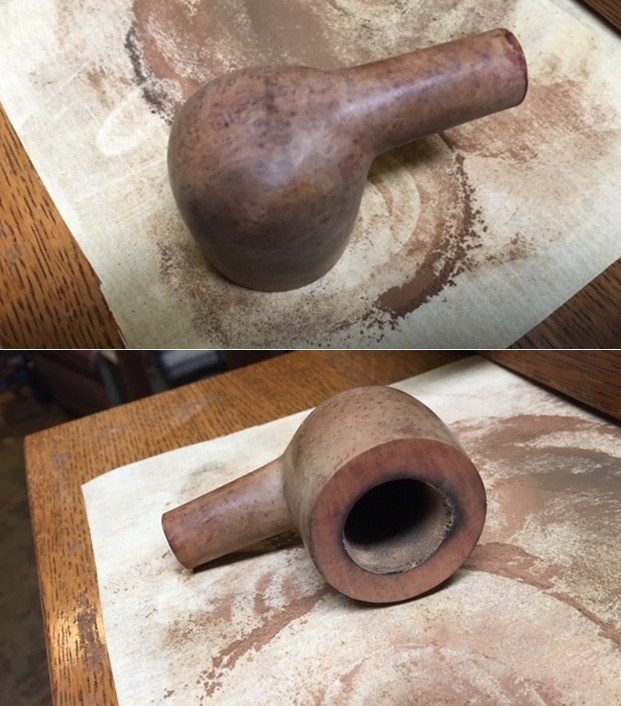
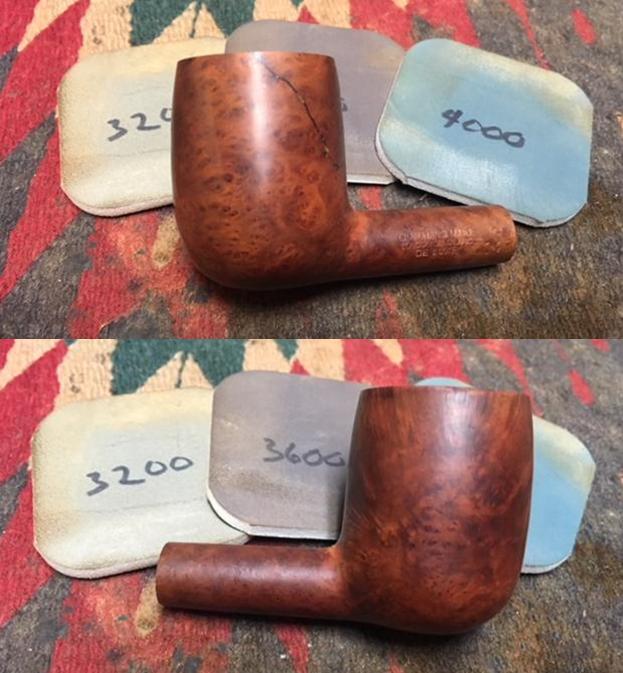
 Sanding with 220- and 320-grit paper cleaned it up pretty well.
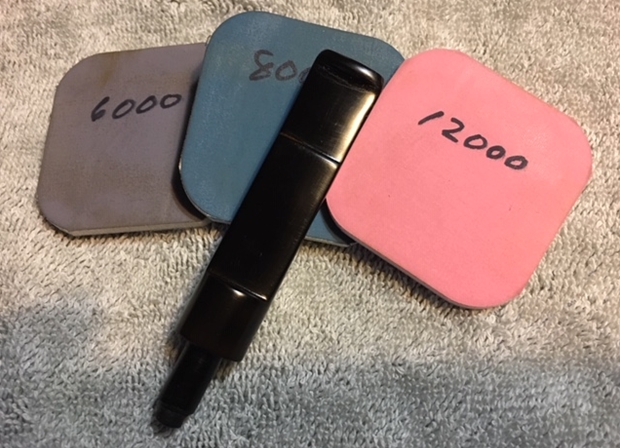
 Using 400-, 600- and 1000-grit paper, I was able to give it a first glow.
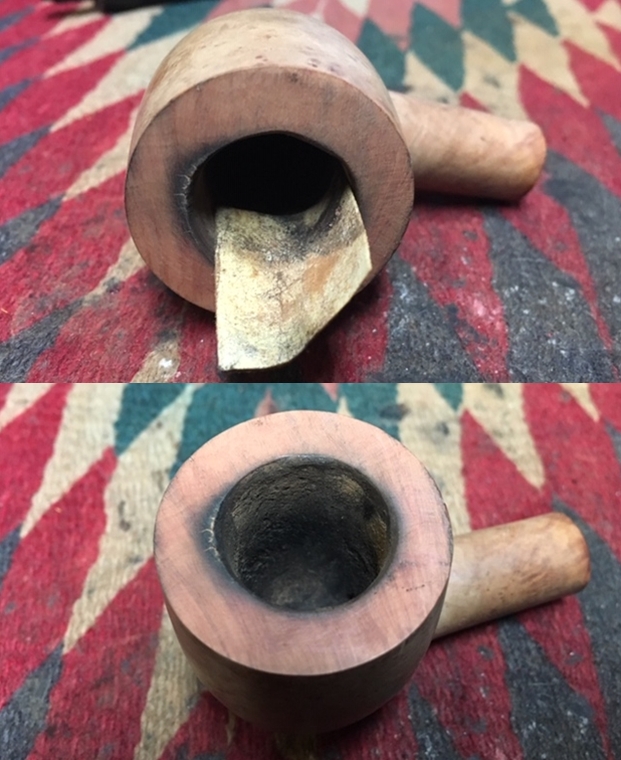
 After retorting the pipe, I turned my attention to the stem, which, other than being dirty, looked much better than most.
 I’ve started giving stems a bath in generic viscous stain remover. So far, I haven’t tried it on a specimen with oxidation, and I doubt it will do more than remove the grime that often goes with estate pipe stems. But I will report back on that.
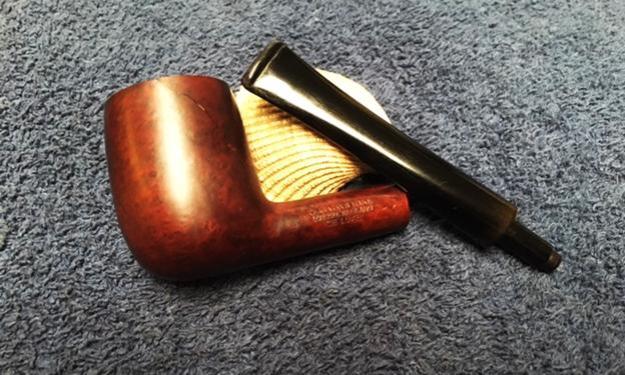
 An hour later, I took the stem out of the goop, rinsed it and ran a pipe cleaner through. Micro meshing it made two small teeth marks stand out.
 What I should have done was flick my Bic on the annoying little marks, but that didn’t come to me until after I reached the point of no return with another method that’s great on real divots. Anyway, mixing Super Glue and vulcanite shavings from an old stem that’s perfect for the task was good practice.
 This method for removing bite marks makes a mess. Cleaning it up took a couple of days of sanding and buffing before the final shots after one more progression of 60-1000-grit sandpaper and all nine micro mesh pads – but the practice and results were worth it.
 Time to stain.
 At this point, I would have had only the final wheel buff left. In fact, that’s what I did. But the pic I took of the nomenclature revealed a hairline crack just below LONDON, ENGLAND.
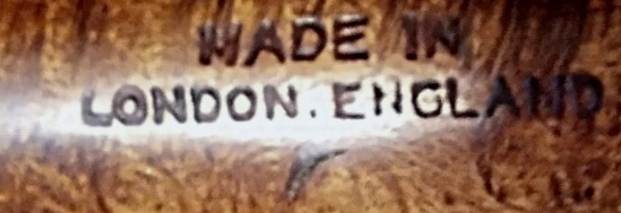 To mitigate the potential for the crack to spread, I used a touch of Super Glue and let it sit overnight. At least the foul spot was not all the way through the shank.
  A 120/180 sanding pad followed by a full micro meshing took off the excess dried glue. I re-stained the effected area with Moccasin Brown and buffed the char off with 8000-12000 micro mesh.
  I decided to make the rim lighter with 8000-12000 micro mesh, also.
 Quick wheel buffing of the stem and stummel with Red Tripoli and carnauba on the buffer wheel completed the Charatan’s Make Calabash reject.


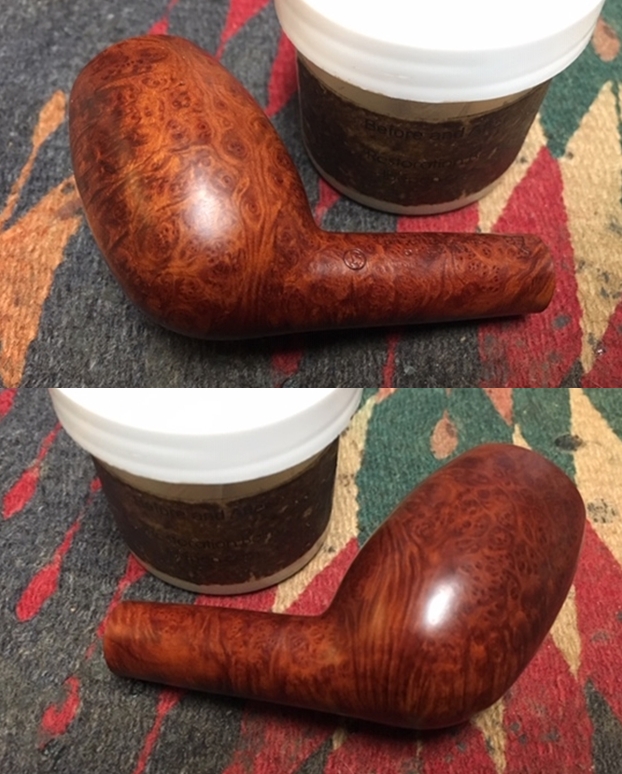
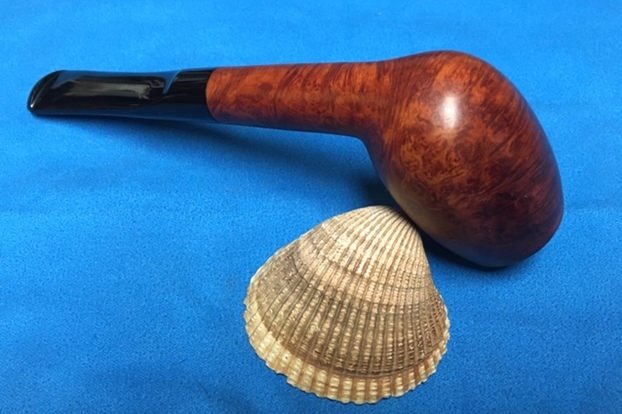
 The best part of this restoration is how close I came with my sweet reject to the stain of a third Charatan’s Make Perfection Calabash I found online.
 And I didn’t even know it until I copied and pasted the pic from Pipehub.com. I look forward to finding a loving home for my poor disadvantaged friend here.
SOURCES
https://www.worthpoint.com/worthopedia/charatans-make-london-england-special-495600609
https://www.worthpoint.com/worthopedia/lane-era-charatans-make-relief-grain-412563595
http://www.pipephil.eu/logos/en/logo-charatan.html
http://www.pipephil.eu/logos/en/logo-benwade.html

Refurbishing An Inherited Charatan’s Make Deluxe “Special ‘S’ ”
Blog by Paresh Deshpande
The next pipe that caught my attention was a CHARATAN’S which was in one of the three very large boxes of pipes which I had inherited. Working on these inherited pipe is what I love the most because of the intrinsic connect I have with these pipes and the fact that once I pass away, these will be passed on to my kids as remembrance that their father had worked on restoring each of these vintage and priceless collection of pipes.
This Dublin had beautiful densely packed cross grains on the sides and also along the shank with some stunning bird’s eye grains to the front and back of the bowl. The bowl delicately flares up towards the rim top and together with the straight tapered vulcanite stem, lends this pipe a lovely Dublin shape with a charm and grace that can be seen on a well crafted pipe from this quality brand!! The overall large size of the pipe in general and the stummel in particular, lends this pipe a nice heft and fills up the palm nicely. The pipe is stamped as “CHARATAN’S MAKE” over “LONDON ENGLAND” over “DELUXE” over “SPECIAL” in block capital letters on the left side of the shank. It is also stamped with the letter “S” just forward of “SPECIAL” after letter L. The left side of the tapered stem is stamped with “CP” logo, with the lower half of the “C” embedded within the letter “P”. The stem logo is very delicate but crisp. The stampings on this pipe are crisp and easily readable.
  I searched Pipedia for more information about the brand and also to try and accurately date this pipe. Here is the link for the readers interested in history of Charatan’s and also in viewing a 1951 catalog (https://pipedia.org/wiki/Charatan).
“In 1863 Frederick Charatan, a Russian / Jewish immigrant, opened a shop in Mansell Street, located in the borough of Tower Hamlets, London E1, where he began to carve Meerschaum pipes.
Charatan was the first brand to make entirely hand-made briars from the rough block to the finished pipe including the stems. The nomenclature “Charatan’s make” refers to this method of production and was meant to differ Charatan from other brands who “assembled” pipes from pre-drilled bowls and delivered mouthpieces.”
Here is another link from the same page which takes the readers to an absolutely well researched page on Dating of Charatan’s (https://pipedia.org/wiki/Dating_of_Charatans).
I have reproduced the relevant portions which had helped me in roughly dating this pipe.
The first step on dating a Charatan is to carefully look to some details:
- a) Shape of the mouthpiece
- b) Marking on the mouthpiece
- c) Engraving on the shank
- d) Shape and position of shank engraving/writing
This is because you can make the following conclusions:
- a) From 1863 to 1960 the mouthpieces have a normal shape, saddle or tapered. From 1961 they use the ‘Double Comfort’ style still used today. By the way there are some saddle bits (without the double comfort) used in pipes that date after 1960 but these models are always characterized by an X (in the place of the DC) engraved after the shape number on the shank. This means that if a pipe has a tapered mouthpiece instead of a double comfort one, it is definitely a pre-Lane pipe before 1960. While if a pipe has a normal saddle bit stem, it could belong to every era. Nevertheless the pipe is pre 1961 if the shape code does not include an X, and is a pipe from after 1960 if the X is engraved.
Finally any pipe with the double comfort stem is definitely after 1960. - b) The CP logo on the stem is stamped in a different shape according the era it was used. Some differences are less obvious than others; however the glaring differences are detectable in 4 phases. The CP till the 1960 is very fine, the C penetrates the P.
From 1961 to 1977 the CP logo is more pronounced and the C penetrates the P.
I visited rebornpipes for clarification on the following issues which did not find mention on pipedia.org:
(a) The lack of shape code on this pipe.
(b) Grading/ hierarchy of this pipe in the line of Charatan’s offering. The relation between “DELUXE” and “SPECIAL” also did not find any explanation on pipedia.org.
(c) Lastly, the significance of the letter “S”!
There is a very informative article that Steve had re-blogged on Charatan’s Models & Shape Information for the Collector. Here is the link for this article; (https://rebornpipes.com/2018/08/22/charatan-models-shape-information-for-the-collector/).
I have reproduced relevant information from the above link
Charatan’s make “Apprenticeship” standard shape grades
Special
Relief Grain (tan)
Relief Grain (dark)
Belvedere
Perfection
From the above information, I assume that this particular piece dates from prior to 1960. The reason why I am not sure is that there is no shape code anywhere on the shank and the presence of the letter “S” without numerals 100, 200 etcetera, finds no explanation in all the eras that I read through. The stamp of “DELUXE” finds no explanation anywhere that I had searched. Well, the grey areas with respect to dating and grading this piece are too many and as always, may I request our esteemed readers to share any information that they have for the benefit of our piper community.
INITIAL VISUAL INSPECTION
The bowl is heavily caked with an equally heavy overflow of lava on to the rim top. The rim top surface has darkened considerably. The inner and outer rim edges appear to be damaged with a number of dents, dings and chipped edges, caused probably by banging the rim top against a hard surface to rid the chamber of all the dottle. The internal condition of the bowl can only be ascertained after the process of reaming is completed. The stummel and the shank are covered in grime and dust from years of use and subsequent storage, giving it a dull and a lackluster appearance. The stummel surface has taken on a nice patina which I intend to preserve. Through all the dirt and grime, beautiful bird’s eye grains peek out from the front and back of the stummel while tightly packed cross grains are seen to the sides and over the shank. A nice clean and polish will further accentuate this play of grains over the stummel surface.
 Air did not flow easily through the pipe and required some lung power to do so. The mortise is clogged with oils, tars and grime of all the yesteryear. This needs to be cleaned out.
 The stem is tapered vulcanite that is heavily oxidized. Heavy calcification can be seen on either stem surfaces in the bite zone. Apart from the calcification, both the upper and lower surfaces has a mysterious grey black patch extending for about an inch from the button edge. This, I suppose, would have to be some sort of a repair patch. Well, I shall get a closer look at it during the process of stem repairs. The horizontal slot and the tenon end are clogged with residual oils and tars and gunk, making air flow through the stem, laborious.
 All said and done, this pipe is in great condition given its appreciated age and the ruthless handling that it had survived at my grand old man’s hands. The large size, perfect heft, beautiful grains and the mysteriousness that surrounds its stamping, makes for an interesting project.
INITIAL CLEANING BY ABHA…
The initial cleaning on this pipe was done by Abha, my wife (she has cleaned up around 40-50 pipes and these have now reached me for further restoration). She reamed out the complete cake and further smoothened out the chamber walls with a folded piece of 220 grit sand paper. She further cleaned out the internals of the shank with pipe cleaners and alcohol and cotton buds. She followed the internal cleaning of the shank with external cleaning of the stummel using Murphy’s Oil soap and hard bristled tooth brush and dried it with paper napkins and cotton cloth.
Next she cleaned out the internals of the stem air way and immersed it in “Before and After Deoxidizer” solution along with the stem of other pipes in line for restoration. Once the stem had soaked overnight, she cleaned the stem under running warm water and scrubbed the raised oxidation from the stem surface using Scotch Brite pad. She further removed the oxidation by scrubbing the stem with 0000 grade steel wool and applied a little olive oil to rehydrate the stem. This time around she clicked a few pictures of the processes…
 ONCE THE PIPE IS ON MY WORK TABLE…
The cleaned up pipes presents a very clear picture of what needs to be done to restore this pipe to a pristine and smoke worthy condition. I really cannot thank Abha, my wife, enough for all the help and support that she extends me in my pursuance of this hobby. A clean pipe also helps in clearly identifying the work that would be required to restore a pipe. The pictures shows the condition of the pipe when it reached me after being cleaned.
 The stummel is solid without any flaws or fills. There are no dents or dings or chips to the stummel surface. The briar has taken on a nice deep colored patina which I shall endeavor to preserve. A nice polish and the beautiful grains should pop out and be on display in all their glory. The briar feels really solid and of high quality and the craftsmanship is also top notch.

 The smooth rim top surface is where the maximum damage is on this pipe. The outer rim edge is peppered all around with dents and dings and chipped edges. However, the damage to the outer edges in a 6 o’clock and 12 o’clock directions (both enclosed in red circles) is the most severe. The inner edge is also not spared of similar damage which is most severe in the 6 o’clock and 9 o’ clock directions. The rim top surface has considerably darkened around the inner edge; however, thankfully it is not charred. These issues will need to be attended to. The chamber has strong ghost smells. The thick chamber walls are solid without any signs of damage.


 The mortise and shank internals are also nice and clean now. The seating of the stem tenon into the mortise is snug and sits flush with the shank end.
 The oxidation on the tapered vulcanite stem has been removed, thanks to all the efforts put in by Abha. The slot, tenon end and stem internals are all clean and fresh. The large patch of grey on either surfaces of the stem is the only eyesore on this high quality vulcanite stem. If these are repair patches, then I must concede that though they are not aesthetically pleasing to the eye they are but rock solid!! I intend to sand them down to the vulcanite surface and if damaged, repair it using mix of activated charcoal and clear CA superglue which blends perfectly in to the surrounding stem surface.
 THE PROCESS
I start the refurbishing of this pipe with the stem repairs. With a folded piece of 220 grit sand paper, I sand down the grey patch from either surfaces of the stem. True enough, as anticipated, the bottom of the patch revealed a hole at the button edge. My guess is that it had been a through hole as a similar hole was revealed on the lower stem surface too. While I was sanding the patch, simultaneously, I worked the entire stem surface with the same piece of sand paper. I was very diligent and careful with the sanding around the stem logo. I further sand the entire stem with a 0000 grade steel wool. This helps to even out the deep scratches caused by the coarser grit sand paper. I wipe the stem with Murphy’s Oil soap on a cotton swab. This helps to clean the surface of all the dust and loosened residual oxidation from the stem surface. Once the stem surface is ice clean and dry, I insert a regular pipe cleaner coated in petroleum jelly through the slot end in to the airway. This prevents the glue from seeping into the airway and blocking it while helping in the smooth extraction of the pipe cleaner once the mix has cured. Thereafter, I mix a small quantity of activated charcoal and superglue and apply it over the holes and set the stem aside to cure.
 With the stem fill set aside to cure, I decide to address the issues on the stummel surface. I start by addressing the rim top surface damage. I top the rim on a piece of 220 grit sand paper, checking frequently till I am satisfied that the darkened surface is addressed to a great extent and the rim top surface is nice, smooth and even. The inner and outer edges are still uneven, though much better than before topping, and shall be addressed subsequently. The following pictures show the progress being made and improvements to the inner and outer rim edges.

 At this stage in refurbishing, I realize that the odors from the chamber are still strong and hence decide to address the issue of ghost smells by subjecting the chamber to a salt and alcohol bath. I wrap some cotton around a folded regular pipe cleaner, keeping the tip of the pipe cleaner free of wrapped cotton as this would be inserted through the draught hole in to the chamber. This would form the wick for the shank. I tightly pack the chamber with cotton balls and fill it with 99% pure isopropyl alcohol using a syringe and set it aside. By next day, the cotton and alcohol had drawn out the tars and oils from the chamber and max from the shank. With tools at my disposal, I scrap out the entire loosened gunk from the mortise and the airway leading to the draught hole. The stummel now smells fresh and is thoroughly clean.
 With a folded piece of a 220 grit sand paper pinched between my thumb and forefinger, I create a slight bevel on the inner and outer edges of the rim top surface. This helps to mask and address the minor dents and dings that had remained on the rim edges after topping. I am careful so as not to alter the profile of the stummel by excessive topping or creation of the bevels. I am pretty pleased with the appearance of the rim top and edges at this stage.

 This is followed up with the micromesh polishing cycle. I dry sand the stummel going through with 1500 to 12000 grit pads. I wipe the stummel with a moist cloth after every three pads as this helps firstly, to remove the sanded dust and secondly, gives an idea of the progress being made and areas which need more attention. The stummel has taken a beautiful sheen and looks good. Discerning readers must have noted that I did not sand the stummel surface with a sand paper and have resorted to dry sanding with the micromesh pads. This is done so as to maintain the old patina which I want to preserve.

 I rub some “Before and After” restoration balm over the stummel surface with my fingers. This product has been developed by Mark Hoover and it helps to enrich and enliven the briar. For me it is an absolute “must have” item in my list of items for pipe restorations. I rub this balm in to the briar and set it aside for some time. The transformation is almost immediate and the stummel positively looks amazing.

 With the stummel nearly completed, I turn my attention back to the stem. The fill has cured nicely and with a flat head needle file, I sand the fill to achieve a rough match with the surrounding surface. To achieve a perfect match, I sand the stem with a 220 grit paper, progressively moving to 600 and 800 grit sand papers. As expected, a clean and neat looking stem stared back at me. I rub a little Extra Virgin Olive oil into the stem surface to hydrate it and set it aside to be absorbed in to the vulcanite. Unfortunately, I missed out on taking pictures of this step. Suffice to say, I am very happy with the blending of the fill with the rest of the stem surface. I highlight the stem logo by filling it with a whitener pen and once it has dried, I carefully wipe out the excess with a cloth. The logo is now crisp and prominent.
 I finish the stem reconstruction by polishing the stem with micromesh pads, wet sanding with 1500 to 12000 grit pads. I apply a small quantity of Extra Virgin Olive oil to the vulcanite stem and rub some “Before and After” restoration balm before setting it aside.
 To apply the finishing touches to the pipe, I mount a cotton cloth buffing wheel on to my hand held rotary tool and apply a coat of Blue Diamond to the stummel and the stem to polish out the minor scratches. With a cotton buffing wheel that I use for carnauba wax, I apply a coat of carnauba wax and continue to work on it till the complete coat of wax had been polished out. I mount a clean cotton cloth buffing wheel and give the entire pipe a once over buff. I finish the restoration by giving the entire pipe a rigorous hand buffing using a microfiber cloth to raise the shine further. The finished pipe looks beautiful and is ready to join my collection of the British pipes that I have inherited. The finished pipe looks robust yet elegant, the pictures speaking for themselves.


 P.S. First, this pipe bears some of the strangest stampings that I have come across on a Charatan’s to date. The absence of shape code, presence of both Deluxe and Special stamping and the letter S without any numeral like 100, 200 etc is truly baffling. I would be singularly thankful if any of the esteemed readers can shed some light over this aspect.
Thanks to all readers of rebornpipes who have spared a moment of their invaluable time in reading through this write up and as is always, your suggestions and advice are always welcome as this would not only help me but may also help the new pursuers of this art.

New Life for a Charatan Lonsdale 87X Cutty
Blog by Steve Laug
The next pipe in the queue is yet another interesting pipe from the Michigan lot – a well-made Charatan Cutty with plateau on the rim top and shank end. The entire pipe had some beautiful cross grain on the front and rear of the bowl and the top and underside of the shank. It had some great birdseye grain on both sides of the bowl and shank. The bowl has a forward cant to it that defines the cutty shape. The pipe has a natural briar finish that really makes the grain on the pipe pop. The carver did a great job utilizing the block of briar to maximize the grain. The pipe is stamped on the left side of the shank. It reads Charatan’s Make (over) London, England (over) SPECIAL. There is the circle cursive L identifying the pipe as a Lane era made Charatan. To the right of the stamping is the shape number 87X. The stem is an obvious replacement and is Lucite rather than the original vulcanite and has no marking or stamping on it. It is given a unique saddle shape that looks good with the Cutty pipe. This is another nice looking piece much like the rest of those in this 21 pipe Michigan pipe lot. The Charatan’s Make I am working on is shown on the top shelf of the rack pictured below. It is the third pipe from the right and I put a red box around it to make it easy to identify. Jeff took some photos of the pipe when he received them to show the general condition of the pipe before he started his cleanup work. Like the rest of the pipes from the Michigan collection this pipe was very dirty and well used. There was a thick cake in the bowl and lava overflowing onto the plateau rim top. It was hard to know if the edges of the bowl were damaged or not because of the cake and lava. The exterior of the briar was dirty with grease and oils from being held. The Lucite stem is dirty and had bite marks but still had a gloss to it. There were deep tooth marks on both sides of the stem at the button edge and some wear on the button edge itself. The photos below tell the story and give a glimpse of the beautiful canted Cutty shape.
 Jeff took a photo of the bowl and rim to capture the condition of the pipe before he started his cleanup work. There was a thick coat of lava on the rim and the cake in the bowl. It shows the mess this pipe was in when we received it. The thick lava overflow on the rim top made it hard to know what the inner edges of the bowl looked like. The outer edges had some damage from knocking the bowl out against a hard surface. There is also a general accumulation of grease and grime ground into the finish on the rest of the bowl and shank.
 He also took a photo of the right and underside of the bowl and shank to show the interesting grain around the bowl and shank. The finish is very dirty but the grain is visible in the photos.
 Jeff took a photo of the stamping on the left side of the shank. It reads as noted above and is clear and legible.
 The next two photos show the stem surface. They show the tooth marks and chatter on both sides near the button. There are also some marks on the sharp edge of the button. The stem is dirty and is covered in scratches.
 I wanted to know where the Special fit in the Charatan Hierarchy so I turned to Pipedia to get a grasp of the order of the various pipes that were made. Here is the link(https://pipedia.org/wiki/Charatan). I did a screen capture of the poster to the left showing that the SPECIAL is just below the strain grain and was noted for perfection in grain and had a natural finish.
I thus knew I was dealing with a higher grade Charatan’s Make pipe. It also has the circled L which was the Lane Trademark. Pipedia said that:
The Lane Trademark serif and circled L indicates the pipe is from the “Lane Era” (approx. 1955 to 1979 -1984?), however it appears that both the English factory or Lane themselves sometimes, or perhaps even often forget to stamp the L on a pipe. The Charatan factory was known for inconsistencies, especially in stampings. Therefore, although an L on the pipe definitely defines it as a Lane Era pipe, the lack of it could simply mean the pipe missed receiving the stamp from the factory. The lack of the trademark could also mean the pipe was destined for the European market.
From there I turned to do some reading in a link on Pipedia to a 1951 Charatan Catalogue. I wanted to be able to do some more reading on the “Natural Finish” noted above and also to see if I could identify the shape 87X that was stamped on the left side of the shank at the stem/shank junction. Here is the link (https://pipedia.org/images/3/37/CHARATAN_1951.pdf). I did a screen capture of pertinent parts of the catalogue. The first is the concept of their Natural Bruyere. The second gives a listing of the hierarchy of pipes. Note in that clipping that the SPECIAL pipes were Premier quality pipes, cut in “cross grain” or “bird’s eye” graining.
 In paging through the catalogue, I found what I was looking for in terms of shape designations. I had looked on various shape charts and had not found the shape 87 number. In this catalogue not only did I find the shape number but a drawing of the shape with the original’s stem. The pipe is what Charatan called the Lonsdale with the 87 being the larger Lonsdale shape.
 Jeff reamed the bowl with a PipNet pipe reamer and followed up with a Savinelli Fitsall pipe knife to remove the cake. He scrubbed out the mortise and the airway in the shank and the stem with alcohol, cotton swabs and pipe cleaners. He scrubbed the exterior of the bowl, rim, shank and stem with a tooth brush and Murphy’s Oil Soap to remove the oils and tars on the rim and the grime on the finish of the bowl. He rinsed it under running water. He dried it off with a soft cloth. He was able to remove the lava build up on the rim top and you could see the overall condition of the bowl top and edges of the rim. He scrubbed the stem with soap to remove the grime on the surface. I took photos of the pipe to show its condition before I started work on it.
 I took a close up photo of the rim top to show the darkening on the top and the burn damage on the front and right inner edge. Jeff had done an amazing job cleaning off the lava buildup. The outer edge of the rim has some deep nicks on the front of the bowl. The bowl is slightly out of round on the right rear inner edge. The Lucite saddle stem photos show the tooth marks and the wear on the button surface on both sides.
 I decided to start my work on the pipe by addressing the darkening and damage to the rim top and edges. I topped the bowl on a topping board with 220 grit sandpaper to remove the damage and minimize the outer and inner edge damage. I was able to remove much of the damage. To address the burn on the front edge and the area on the right rear edge making the bowl out of round I used a folded piece of 220 grit sandpaper to give the rim edge a slight bevel. The bevel worked to hide the damage and bring the bowl back into round.
 I polished the bowl sides and rim top with micromesh sanding pads. I wet sanded with 1500-2400 grit pads and dry sanded with 3200-12000 grit pads. I wiped the bowl and rim down with a damp cloth after each pad. As I polished it the sanded rim top began to shine and blend in with the rest of the briar.


 I worked some Before & After Restoration Balm into the surface of the briar with my fingertips to clean, enliven and protect it. I let the balm sit for a little while and then buffed with a cotton cloth to raise the shine. The following photos show the bowl at this point in the restoration process. The bowl and the rim top look really good. The finish looks very good with the rich finish on the bowl and rim. I am very happy with the results.

 I used a folded piece of 240 grit sandpaper to blend the repairs into the surface of the stem. Once the surface was smooth I sanded out the scratch marks and started the polishing of the stem with a folded piece of 400 grit sandpaper. I wiped the stem down with Obsidian Oil and took the following photos.
 I polished the stem with micromesh sanding pads – wet sanding it with 1500-2400 grit pads and dry sanding it with 3200-12000 grit pads. I wiped the stem down with a damp cloth after each pad. I wiped it down with a coat of Obsidian Oil and set it aside to dry.
 I put the stem back on the bowl and polished them both with Blue Diamond polish on the buffing wheel. I gave the bowl and stem multiple coats of carnauba wax. I buffed the pipe with a clean buffing pad to raise the shine. I hand buffed it with a microfiber cloth to deepen the shine. The pipe polished up pretty nicely. The natural brown briar that had darkened over time came alive with the buffing. The replacement Lucite stem had an interesting asymmetrical saddle that looked very good with the stem. Have a look at it with the photos below. The dimensions are Length: 6 inches, Height: 2 inches, Outside diameter of the bowl: 1 1/4 inches, Chamber diameter: 3/4 of an inch. This beauty will soon be on the rebornpipes store. It would make a a beautiful addition to somebody’s pipe rack. Thanks for walking through the restoration of this uniquely carved Charatan from the Lane Era with me it was a pleasure to work on.




Farida’s Dad’s Pipes #7 – Restoring a Charatan’s Make Belvedere 48DC Pot
Blog by Steve Laug
I am back working on one of the two pipes that are left in the lot that came from the estate of an elderly gentleman here in Vancouver. I met with his daughter Farida almost a year ago and we looked at his pipes and talked about them then. Over the Christmas 2017 holiday she brought them by for me to work on, restore and then sell for her. There are 10 pipes in all – 7 Dunhills (one of them, a Shell Bulldog, has a burned out bowl), 2 Charatan Makes, and a Savinelli Autograph. I have restored all but three of them – a Dunhill Shell and the two Charatan’s Makes. His pipes are worn and dirty and for some folks they have a lot of damage and wear that reduce their value. To me each one tells a story. I only wish they could speak and talk about the travels they have had with Farida’s Dad.
 The pipe I am working on is a Charatan’s Make Belvedere. Whenever I see that stamping I am taken back to a US sitcom that I used to watch in the 80s called Mr. Belvedere. It was about a butler, Lynn Aloysius Belvedere who worked for an American family called Owens. Throughout the series, Mr. Belvedere serves as a mentor of sorts to Wesley as well as to the other children. Being a cultured man with many skills and achievements (having even once worked for Winston Churchill), he also comes to serve as some sort of “counselor” to the Owens clan, helping them solve their dilemmas and stay out of mischief (https://en.wikipedia.org/wiki/Mr._Belvedere).
The stocky and solid look of this cultured Charatan’s Make Belvedere is built almost as solidly as Lynn Aloysius Belvedere. When it came to me it was worn and tired looking. I have already caused a lot of discussion on the cleanup of this pipe on the Facebook Tobacco Pipe Restorers Group. The ongoing debate of Restoration vs. Preservation filled a lot of airtime on the group. I do not care to relive or recount that as I am only following the directives of the daughter of the original deceased pipeman. She wanted them restored to usable condition so others can carry on her father’s love of these pipes. She is quite happy with the finished results and others of his pipes are now all over the world being enjoyed by the next generation of pipemen.
When first looked at the pipe here is what I saw. The bowl on the pipe was thickly caked and the cake had flowed over onto the smooth finish on the rim top forming hard lava that made the top uneven. It was hard to know if there was damage to the inner and outer edges of the rim and I would not know until I removed some of the grime. It looked like there was some burn damage on the top toward the front of the bowl but it was hard to know. The outer edge looked far better than any of the other pipes in this collection when I started. The finish was invisible under the thick coat of oils and grime that covered the bowl and shank. In fact at this point I had no idea what the stamping looked like because it was covered. I have wondered as I cleaned the other pipes in this lot if the oily build up was a combo of the life lived in the Antarctic. The stem was oxidized and very dirty but otherwise in good condition. There was a thick sticky, oily substance on the surface of the stem that I could scrape with my fingernail. There were tooth marks and chatter on both sides in front of the button. The stem would not seat properly in the tenon do to the tars in the shank. I took photos of the pipe to show what it looked like before I started the cleanup work.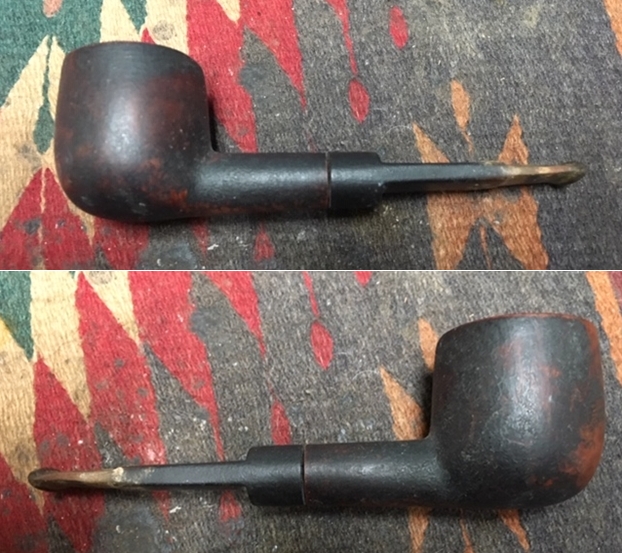
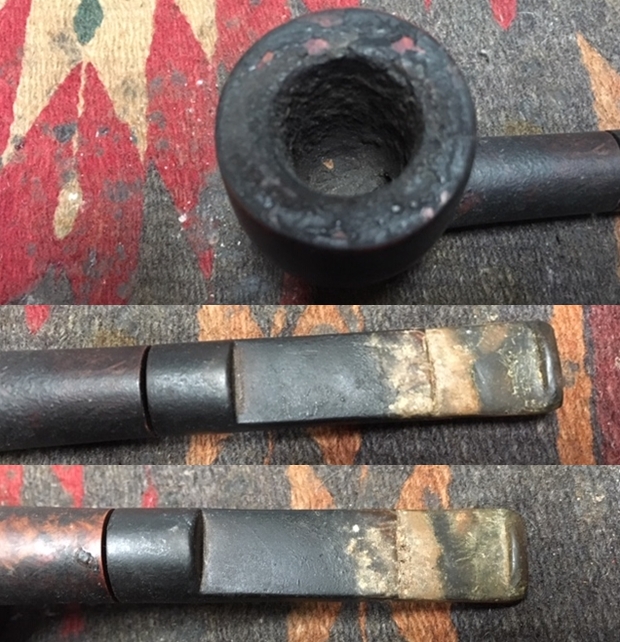
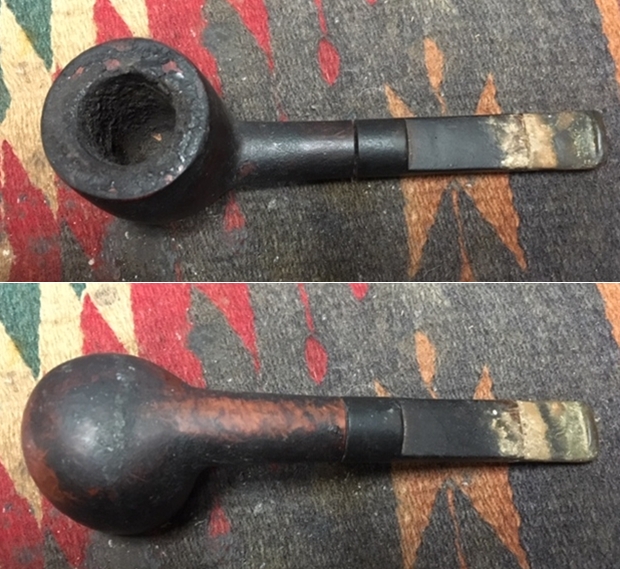 I took close up photos of the bowl and rim top as well as the stem. You can see the condition of the rim top and bowl in the first photo. The outer edge appears to be in decent condition under the grime and lava. The inner edge looks ok but there looks like some damage on the front. I won’t really know the full story until I remove the thick lava overflow on the surface. The stem had tooth chatter and some bite marks on the top and the underside of the stem just ahead of the button.
 It has been a while since I have worked on the remaining pipes that belonged to Farida’s Dad. I thought it might be helpful to remind us all of the background story of these pipes. Here is the material that I quoted in previous blogs. I have included both the written material and the photo that Farida included of her Dad.
When I wrote the blog on the Classic Series Dunhill and thinking about its travels, Farida sent me an email with a short write up on her Dad. She remembered that I had asked her for it so that I could have a sense of the stories of her Dad’s pipes. Here is what she wrote: My dad, John Barber, loved his pipes. He was a huge fan of Dunhill and his favourite smoke was St. Bruno. No one ever complained of the smell of St. Bruno, we all loved it. I see the bowls and they’re large because he had big hands. When he was finished with his couple of puffs, he would grasp the bowl in the palm of his hand, holding the warmth as the embers faded. The rough bowled pipes were for daytime and especially if he was fixing something. The smooth bowled pipes were for an evening with a glass of brandy and a good movie. In his 20s, he was an adventurer travelling the world on ships as their radio operator. He spent a year in the Antarctic, a year in the Arctic and stopped in most ports in all the other continents. He immigrated to Canada in the mid-fifties, working on the BC Ferries earning money to pay for his education. He graduated from UBC as an engineer and spent the rest of his working life as a consultant, mostly to the mining companies. Whatever he was doing though, his pipe was always close by.
She sent along this photo of him with his sled dogs in the Antarctic sometime in 1953-1954. It is a fascinating photo showing him with a pipe in his mouth. He is happily rough housing with his dogs. As a true pipeman the cold does not seem to bother him. Thank again Farida for sending the photo and the story of your Dad for me to use. I find that it explains a lot about their condition and gives me a sense of who Dad was. If your Dad was rarely without a pipe I can certainly tell which pipes were his favourites.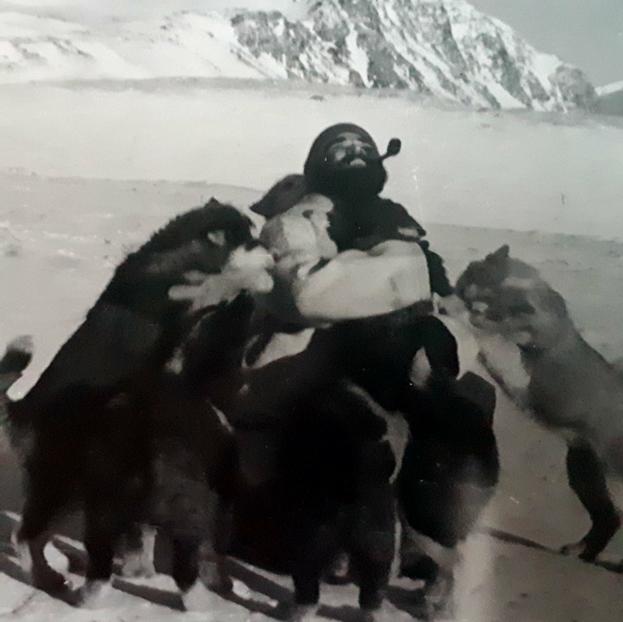 As I looked over the pipes I noted that each of them had rim damage and some had deeply burned gouges in the rim tops. The bowls seemed to have been reamed not too long ago because they did not show the amount of cake I would have expected. The stems were all covered with deep tooth marks and chatter and were oxidized and dirty. The internals of the mortise, the airway in the shank and stem were filled with tars and oils. These were nice looking pipes when her Dad bought them and they would be nice looking one more when I finished.
Here are the links to the previous six blogs that I wrote on the five pipes that I have finished. The first was a Dunhill Shell oval shank pot (https://rebornpipes.com/2018/02/04/restoring-a-1983-dunhill-shell-41009-oval-shank-pot/). The second was a Dunhill Classic Series Shell Billiard (https://rebornpipes.com/2018/02/08/faridas-dads-pipes-2-restoring-a-1990-lbs-classic-series-dunhill-shell-billiard/). The third pipe was a Savinelli Autograph (https://rebornpipes.com/2018/02/15/faridas-dads-pipes-3-restoring-a-savinelli-autograph-4/).The fourth pipe was a Dunhill Red Bark Pot that was in rough shape (https://rebornpipes.com/2018/03/10/faridas-dads-pipes-4-restoring-a-dunhill-red-bark-pot-43061/). The fifth pipe was a Dunhill Root Briar Bent Billiard (https://rebornpipes.com/2018/07/07/faridas-dads-pipes-5-restoring-a-dunhill-root-briar-56-bent-billiard/). The sixth pipe was a Charatan’s Make Distinction https://rebornpipes.com/2018/08/22/faridas-dads-pipes-6-restoring-a-charatan-make-distinction/
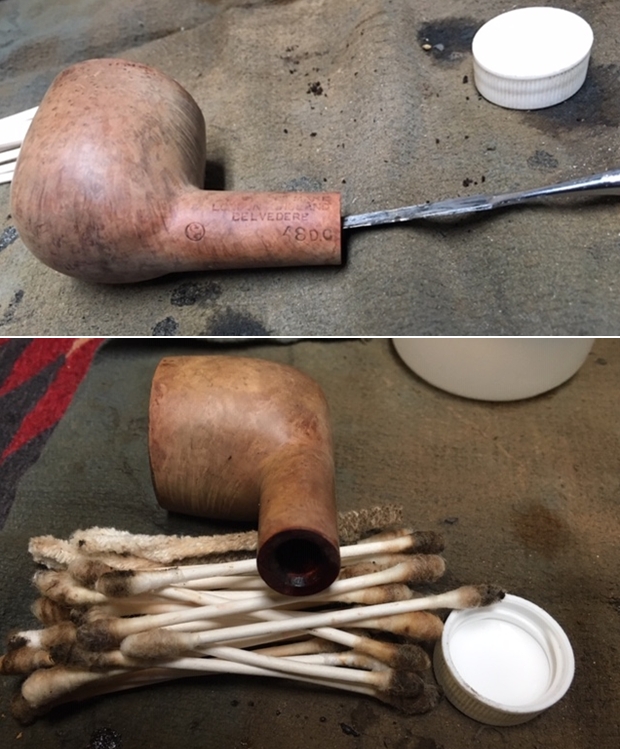
Today, I went back to the remaining two pipes in the collection today and chose to work on the Charatan’s Make – a pot shaped pipe. It was dirty so it took a bit of cleaning on the shank to read the stamping. On the left side of the shank it is stamped Charatan’s Make, over London, England over Belvedere. Under that at the bowl shank junction is a cursive L in a circle denoting a Lane era pipe. To the right of the stamping near the shank stem junction it is stamped with the shape number 48DC. The DC refers to the Double Comfort style stem. The smooth finish was sticky with oils and thick grime. The bowl felt oily to touch.
To try to figure out the era of the Charatan’s pipe I was working on I turned to the pipephil website, Logos and Stampings. There is some really helpful information on each of the lines of Charatan’s Make pipes that entered the market. Here is the link to the section of the site that I turned to, http://www.pipephil.eu/logos/en/logo-charatan.html. There is an alphabetical listing of the lines but the Belvedere they showed had a stem made for a 9mm filter while the one I have is a nonfiltered pipe. The site did give a short history of the brand. I quote the portion that is most pertinent.
The brand was founded in 1863 by Frederik Charatan. When his father retired in 1910, Reuben Charatan took over the family business. All the pipes were handmade until 1973. The brand name has been overtaken by Dunhill in 1978 and sold in 1988 to James B. Russell Inc.(NJ, USA). During the period 1988-2002 Charatans were crafted by Butz Choquin in St Claude (France). Dunhill re-purchased Charatan brand name in 2002 and Colin Fromm (Invicta Briars, Castleford) followed up on freehand production.
I turned to Pipedia to see if I could find more information on the brand and possibly a link to the Distinction line (https://pipedia.org/wiki/Charatan) but once again in the general article it was not listed. It did give a little more historical information. I quote the pertinent parts and have highlighted in bold the sections that give information on this particular pipe.
In 1863 Frederick Charatan, a Russian/Jewish immigrant, opened a shop in Mansell Street, located in the borough of Tower Hamlets, London E1, where he began to carve Meerschaum pipes. These pipes got very popular soon, and thus Charatan moved to a bigger workshop in Prescot Street, just around the corner. Here he began to make briar pipes which should make the name famous the world over. Charatan was the first brand to make entirely hand-made briars from the rough block to the finished pipe including the stems. The nomenclature “Charatan’s Make” refers to this method of production and was meant to differ Charatan from other brands who “assembled” pipes from pre-drilled bowls and delivered mouthpieces.
Being the undisputed No. 1 in English pipemaking, Charatan was approached by Alfred Dunhill who was unsatisfied with the quality of the pipes he imported from France. During 1908 – 1910 Dunhill bought pipes from Charatan paying exorbitant prices to ensure he had some of the very best pipes for sale in England. In 1910 he lured away Joel Sasieni, one of Charatan’s best carvers, and opened his own small pipe workshop on 28 Duke Street. On the retirement of his father in 1910 Reuben Charatan took over the family business…
…The pre-Lane period (prior to 1955) and the Lane era pipes (1955 to until sometime between 1979 – 1984) are of primary interest the collector. The Lane era is often quoted as beginning about 1950… Charatan records are almost non-existent before Lane due to a factory fire, making it difficult to date pre-Lane pipes. Charatan used 4 basic grades prior to 1950: Supreme, Selected, Executive, and Belvedere. After 1950 Herman Lane’s influence began, and the grades started to expand. In 1955 Lane took over sole distributorship of Charatan in the US. In 1957 he introduced the Supreme S. Most of his other introductions were from the 60’s and early 70’s…
The section called Miscellaneous Notes had some interesting information.
Charatan records indicate the DC (Double Comfort) bit was introduced in the 50’s, but some report seeing them in earlier production. Still others indicate they were introduced by Lane in 1960. Regardless, the DC bit is not an accurate way to date a pipe because many Charatan’s were made with regular and saddle type bits throughout the “Lane Era”…
…The Lane Trademark serif and circled L indicates the pipe is from the “Lane Era” (approx. 1955 to 1979 -1984?), however it appears that both the English factory or Lane themselves sometimes, or perhaps even often forget to stamp the L on a pipe. The Charatan factory was known for inconsistencies, especially in stampings. Therefore, although an L on the pipe definitely defines it as a Lane Era pipe, the lack of it could simply mean the pipe missed receiving the stamp from the factory. The lack of the trademark could also mean the pipe was destined for the European market.
I continue digging further into the dating of the pipe, but what I had found was a good start for me. If some of you would like to try your hand at dating it more accurately as to the time period it came out you might want to check out the article on Pipedia on Dating Charatans (https://pipedia.org/wiki/Dating_of_Charatans). I had enough for me to start working on the pipe itself and see what lay beneath the heavy tars and oils.
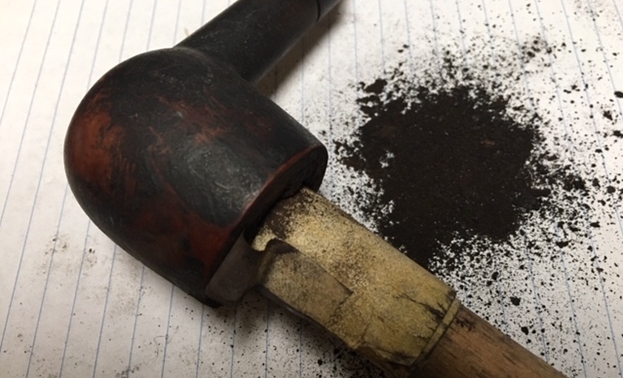
Like most work the refurbisher does this one walks a fine line between restoration and preservation. The deciding feature with this pipe was the wishes of the family. They wanted the pipe to be cleaned and smoked by someone who could carry on the pipe man’s legacy of their Dad. I understand that it meant changing the current state of the pipe to bring it back closer to the way it was when their father bought it. I reamed the bowl with a PipNet reamer. I used two of the four cutting heads to clean out the cake. The bowl was thickly caked I started with the smaller of the two and worked my way up to the second which was about the same size as the bowl. I cleaned the remnants with a Savinelli Fitsall Pipe Knife and scraped it back to bare briar. I finished by sanding the inside of the bowl with a dowel wrapped in sandpaper. I scraped the top of the rim with the edge of the Savinelli Fitsall Pipe Knife to remove the lava.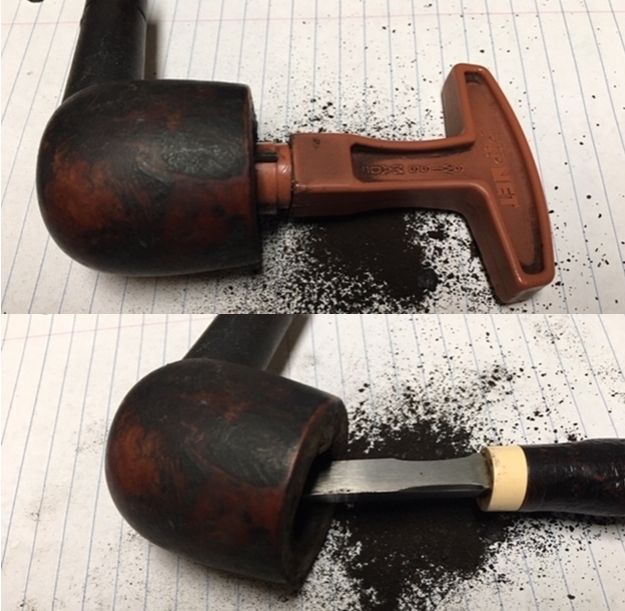
 I scrubbed the exterior of the bowl and shank with a tooth brush and Murphy’s Oil Soap to break through all the grime. I rinsed the bowl under running water to remove the grime and grit. I repeated the process until I had the bowl clean. I took photos of the cleaned exterior of the bowl to show where things stood at this point in the process.
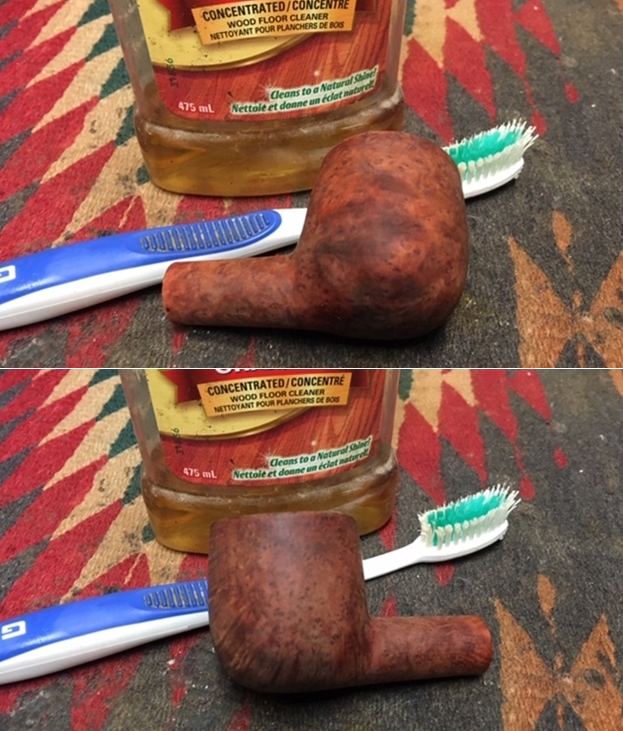
 I topped the bowl on a topping board with 220 grit sandpaper to remove the damage to the top surface of the rim and clean up the damage to the edges. I did not have to remove a lot and repeatedly checked it to make sure that I had removed enough but not too much. I wanted to take the rim top down until the burn damaged area was smooth and minimized. The second photo shows the remaining burn mark at the front of the bowl.
  I used a folded piece of 180 and 220 grit sandpaper to bevel the inner edge of the rim until I had removed most of the damage on the back inner edge.
 With the externals clean it was time to clean out the mortise and shank and airway into the bowl and the airway in the stem with alcohol, cotton swabs and pipe cleaners. I scraped the mortise with a dental spatula and a pen knife to loosen the tars before cleaning. I worked on the bowl and stem until the insides were clean.
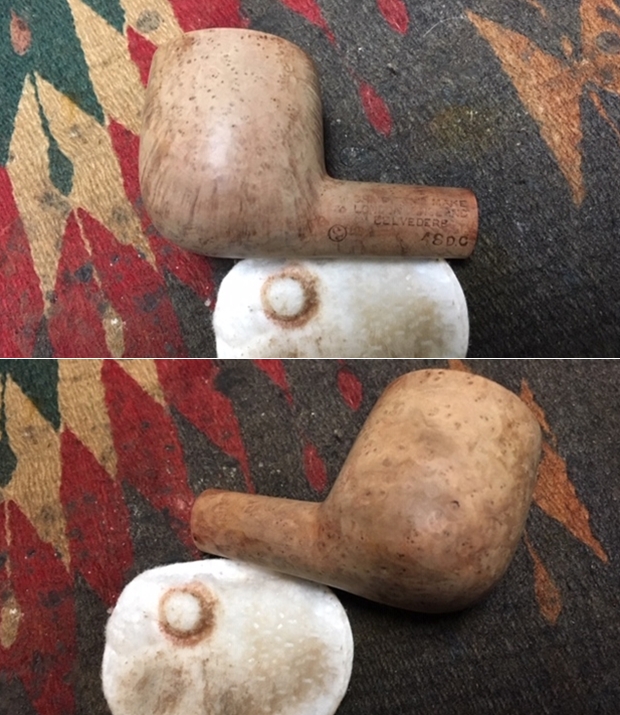
 I wiped down the exterior of the bowl with alcohol on a cotton pad to remove any remaining oils and grimes from my cleaning of the bowl and rim. Once the alcohol evaporated the briar was very dry but also very clean.
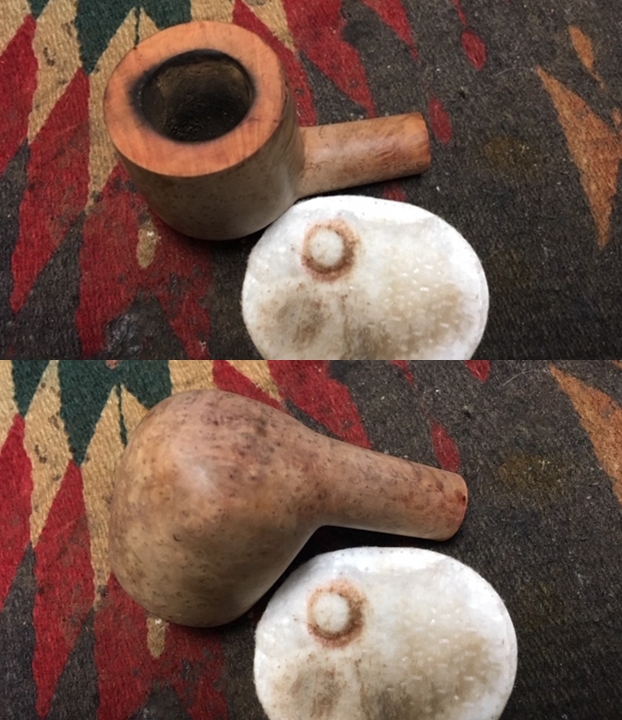 I restained the bowl with a Maple stain pen to match the colour that was original on this pipe. The rim top matched the rest of the bowl. When the stain dried I wiped the bowl down with alcohol to even out the stain on the sides and top of the bowl.
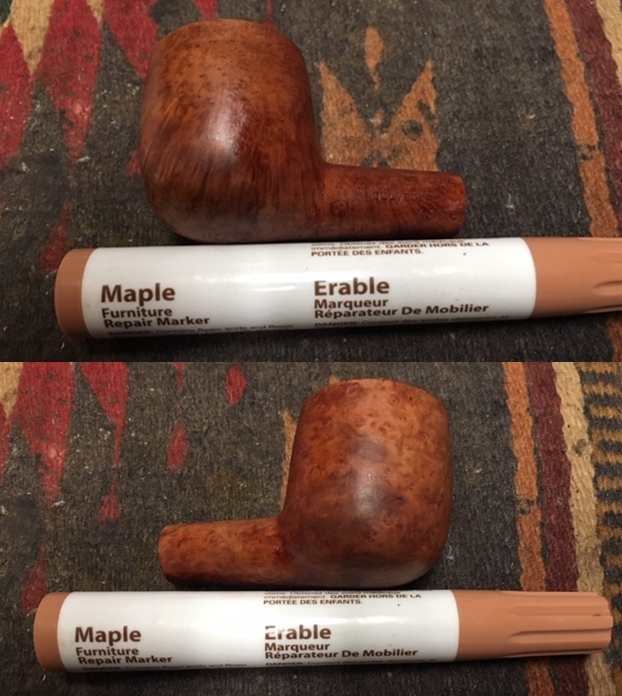
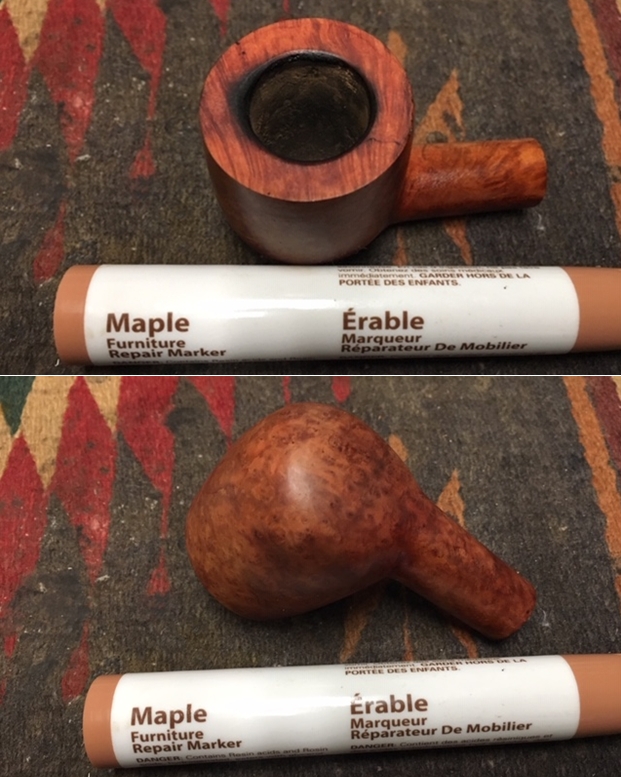 I rubbed down the briar with Before & After Restoration Balm. I worked it into the smooth finish to clean, enliven and protect the new finish. It also evened out the stain coat and gave the stain a dimensional feel. I let the balm sit for a little wall and then buffed it with a horsehair shoe brush. I buffed the bowl with a cotton cloth to raise the shine.
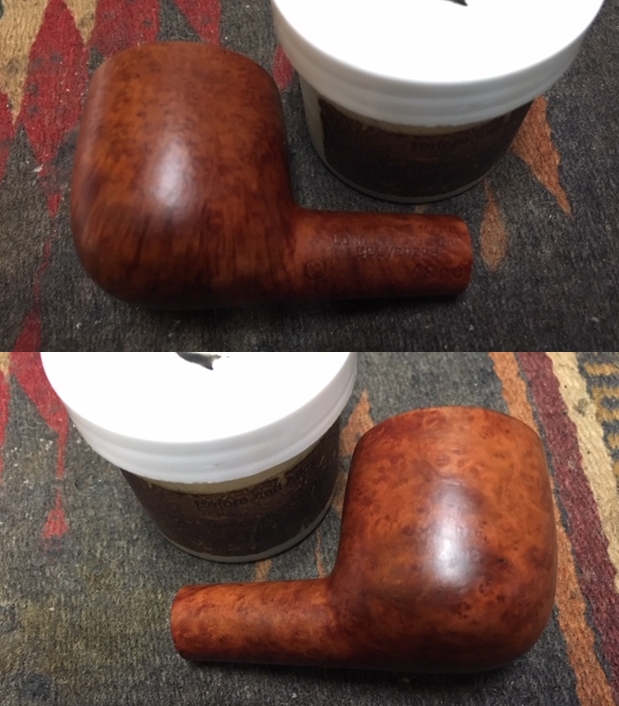
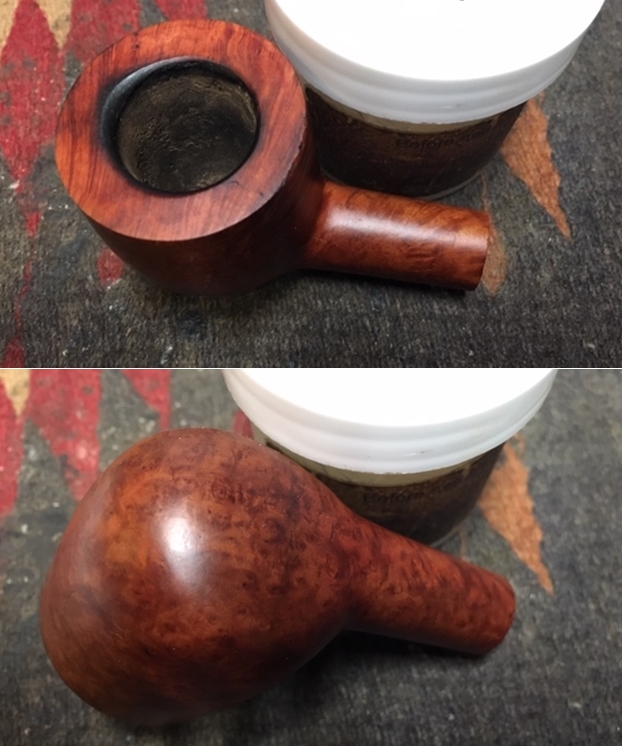 I buffed the bowl with Blue Diamond on the buffing wheel to raise the shine and smooth out the finish. I took photos of the pipe at this point to show the condition.
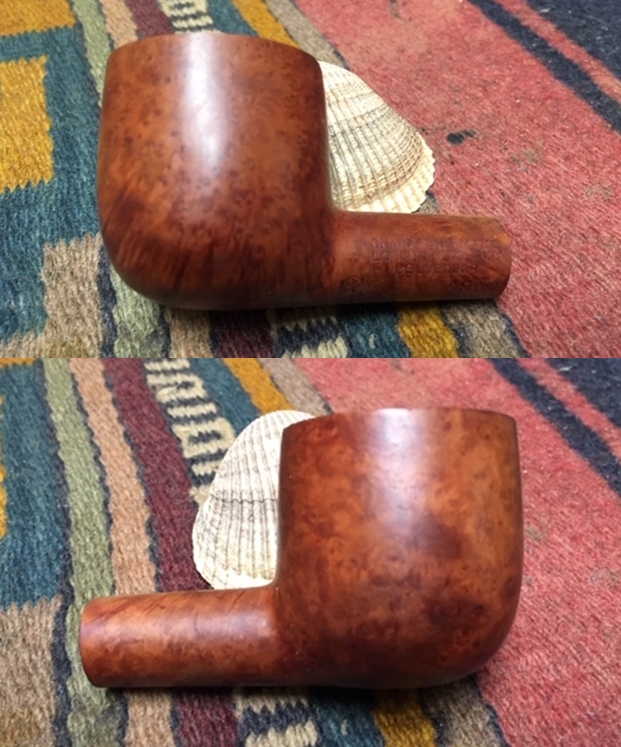
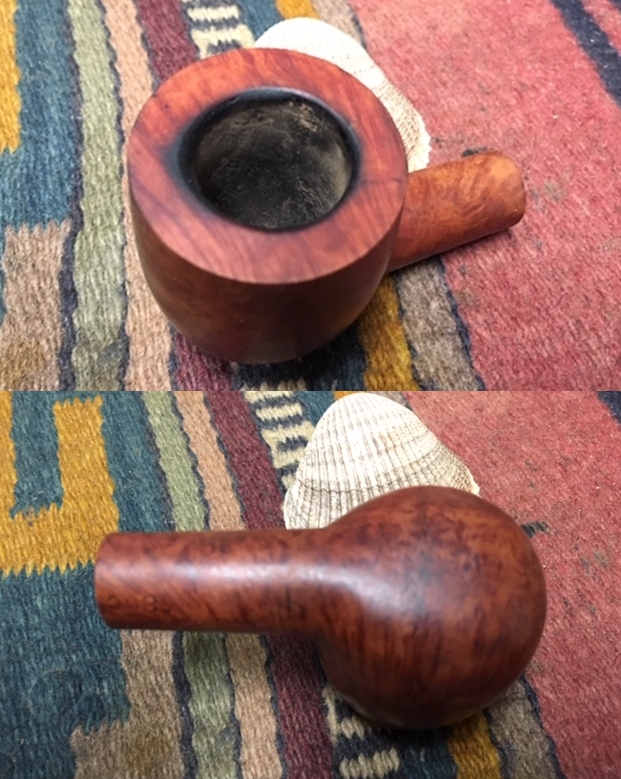 I was still not happy with the burned edge toward the front of the bowl and figured I would give it a light bevel to smooth it out and make it less noticeable. The next series of photos tells the story on this. Though I know some will find this damaging to the bowl to me it removes the significant char on the front edge of the bowl and gives it a refined look.
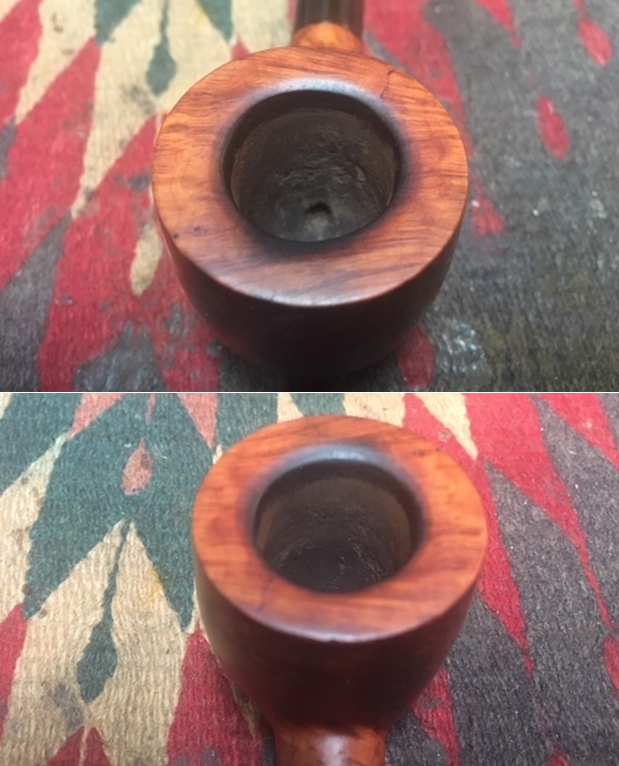
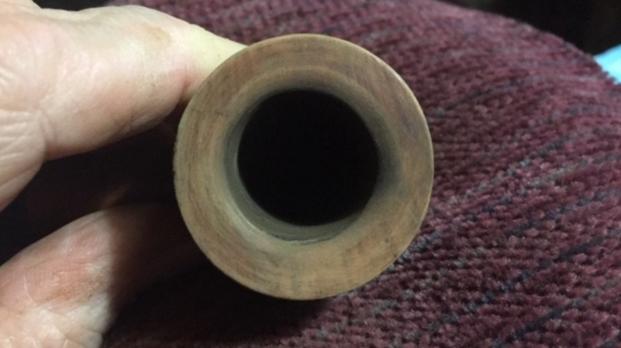 I polished the rim top with micromesh sanding pads – wet sanding with 1500-2400 grit pads and dry sanding with 3200-12000 grit pads. I wiped the rim down with a damp cloth after each pad. The rim was really looking better. I gave it a light coat of a walnut stain to blend it in with the rest of the bowl colour. The photos below tell the story.
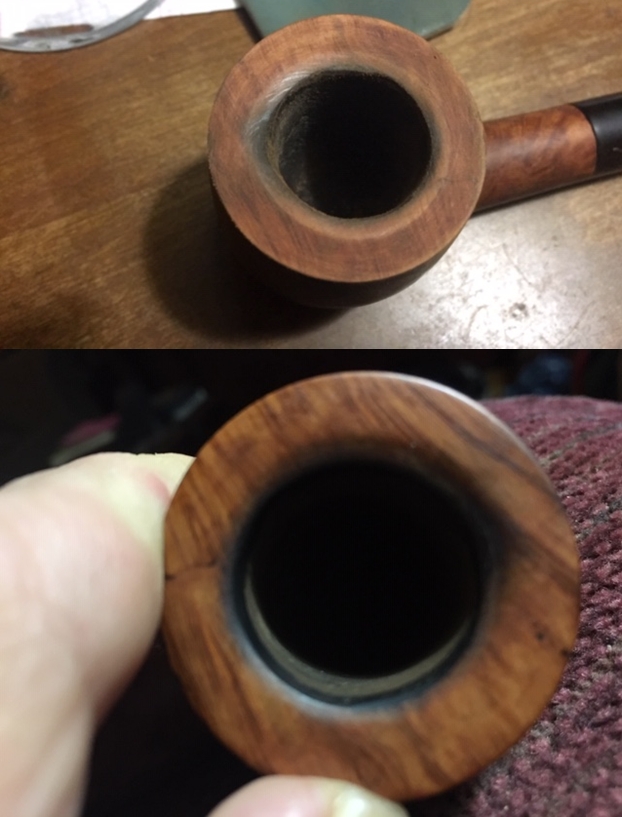
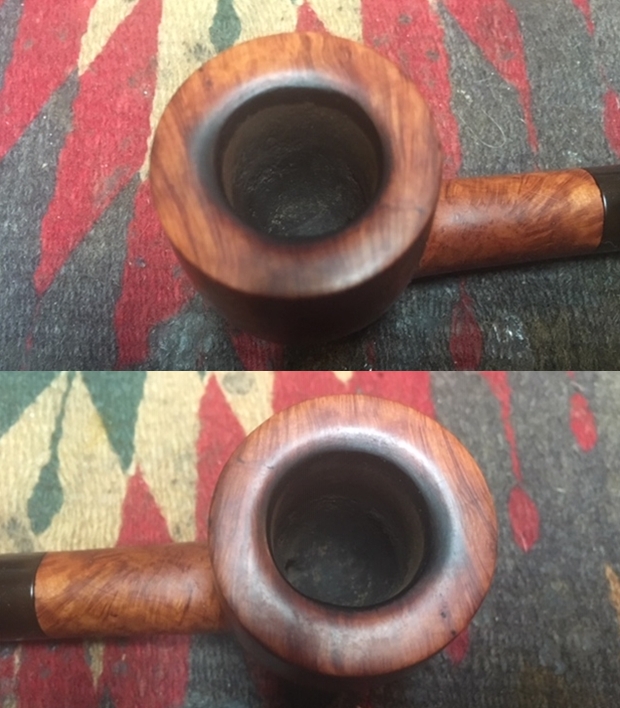
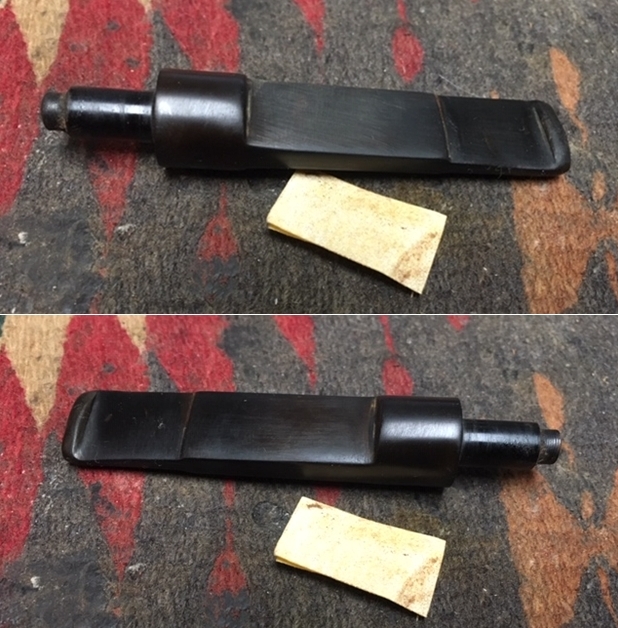
 I set the bowl aside and turned my attention to the stem. I sanded out the tooth chatter on both sides with a folded piece of 220 grit sandpaper.
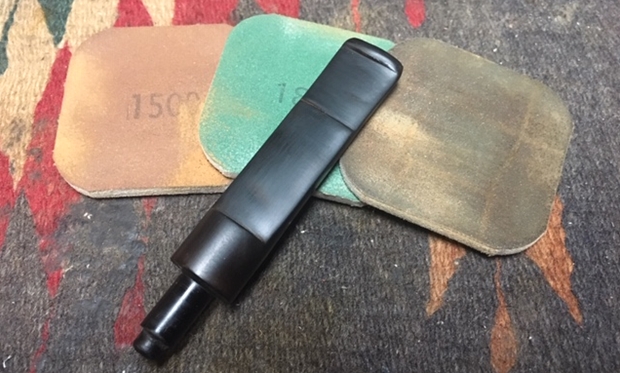
  I polished the stem with micromesh sanding pads – wet sanding with 1500-2400 grit micromesh sanding pads and dry sanding it with 3200-12000 grit pads. I rubbed the stem down with Obsidian Oil after each pad. When I finished I gave it a final rub down with the oil and set it aside to dry.
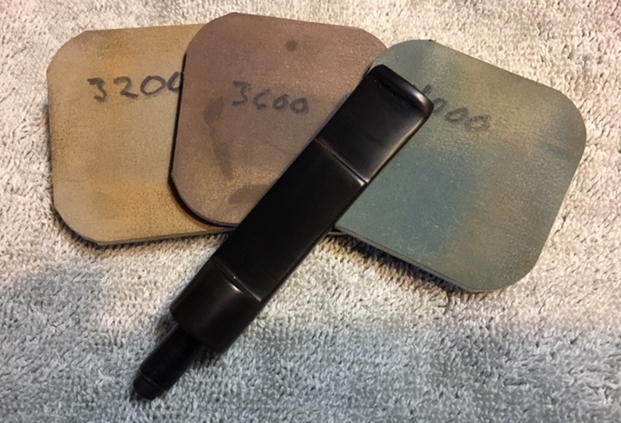
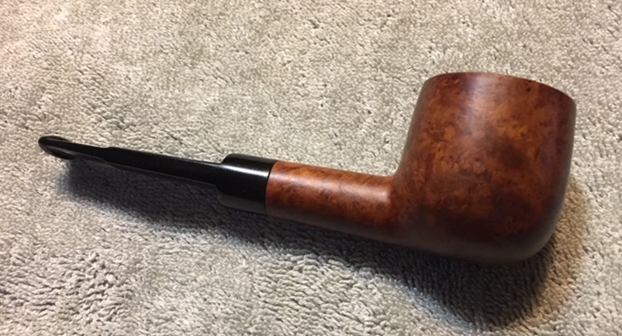
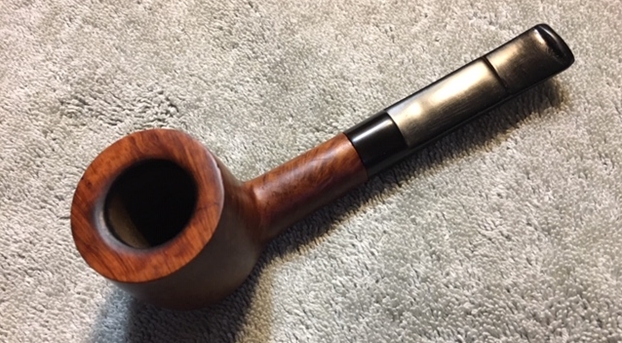
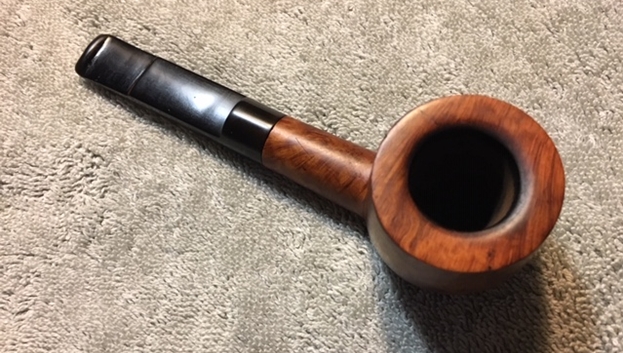
 With the stem polished I put it back on the pipe and lightly buffed the bowl with Blue Diamond. I buffed the stem with a more aggressive buff of Blue Diamond. I gave the bowl several coats of Conservator’s Wax and the stem several coats of carnauba wax and buffed the pipe with a clean buffing pad to raise the shine. I hand buffed it with a microfiber cloth to deepen the shine. The pipe polished up pretty nicely. The finished pipe is shown in the photos below. This is the seventh of Farida’s Dad’s pipes that I am restoring from his collection. I am looking forward to hearing what Farida thinks once she sees the finished pipe on the blog. This Charatan’s Make Belvedere Pot shaped pipe will soon be on the rebornpipes store if you want to add it to your rack. The dimensions are Length: 5 ¼ inches, Height: 1 3/4 inches, Outside diameter of the bowl: 1 1/2 inches, Chamber diameter: 7/8 inches. Thanks for walking through the restoration with me as I worked over another of her Dad’s pipes. I have one more of his pipes to work on –a Dunhill Shell Billiard with a saddle stem.
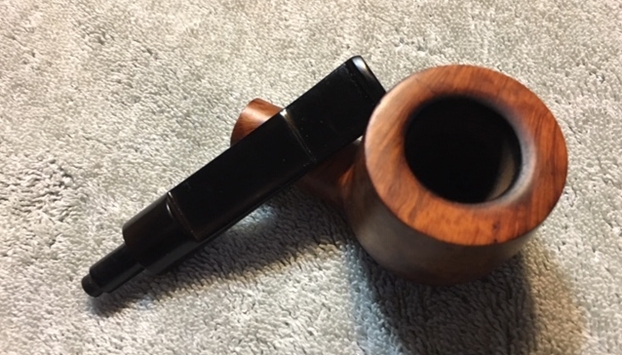
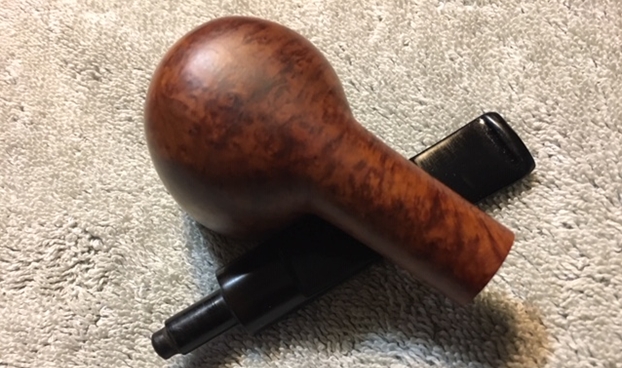
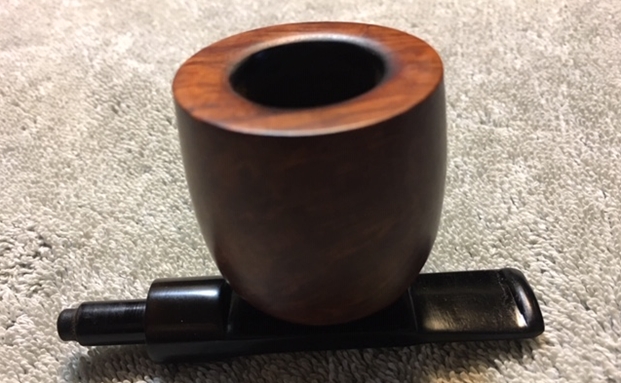
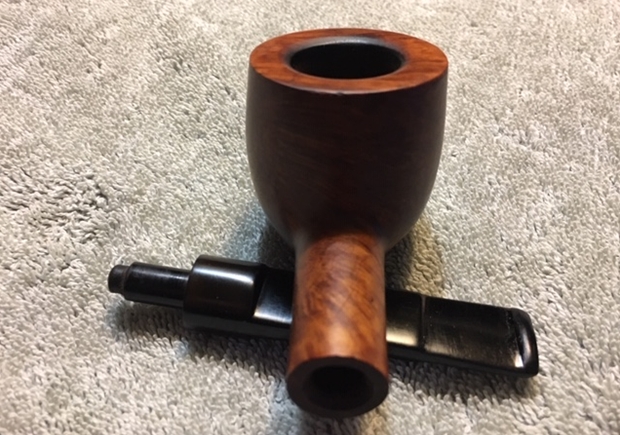
A Charatan Pipe Booklet
Blog by Steve Laug
This booklet was also posted on the Pipe Club of Brasil Facebook Group by Victor C. Naddeo who is the Administrator of that group. Over the past month he has posted some interesting pieces of pipe memorabilia. He posted this older Charatan booklet yesterday and I had to share with you all and preserve it on rebornpipes. As I have said repeatedly, I enjoy reading the descriptions that are used in these old pipe advertisement pieces. The descriptions and prices take me back in time and give me a surge of nostalgia. Thank you Victor for sending me these photos. I am really enjoying the current batch of posts that you are putting on the Pipe Club Brasil Group. I invite others to check out the group on Facebook. Here is the link: https://www.facebook.com/groups/1001391469961131/


Paresh’s Grandfather’s Pipe #7 – Charatan’s Make De Luxe 140 Billiard
Blog by Steve Laug
I have repaired 6 of the 7 older pipes (1937-1950s) left to Paresh by his Grandfather. I have enjoyed working on and researching them. His Grandfather was a pipeman who worked for the Indian Railroad. Paresh recently learned that his Grandfather smoked a pipe. This 7th pipe is a Charatan’s Make De Luxe 140 Billiard with a taper stem. I took photos of the pipe before I stated to work on it. The bowl was in rough shape with a series of cracks running down two spots on the bowl – one on the left side at the centre of the top and running down the bowl and connecting with another crack just right of the centre of the bowl at the back. It was a U shaped crack that went all the way through the bowl. The finish was dirty and the rim top had damage and lava on the rim top. The bowl was out of round. The outer edge of the bowl was damaged from knocking out against hard surfaces. The stem had tooth marks on the top and underside near the button. The stem had the CP stamped on the left side. 
 The rim top had been cleaned and the bowl reamed. There was still some cake in the bowl. Abha (Paresh’s wife) had once again done a great job cleaning the finish. She had scrubbed it with Murphy’s Oil Soap and removed all of the debris and dust from the smooth finish. The cracks showed up on the outside of the bowl and also on the inside of the bowl. The inner edge of the bowl was damaged and slightly out of round. I also took a close up photos of both sides of the stem. You can see the tooth marks on both the top and underside of the stem just in front of the button. The surface of the stem is lightly oxidized.
 The stamping is readable. On the left side of the shank reads Charatan’ Make over London, England over De Luxe. Next to that is the shape number 140 next to the stem shank junction. There was no stamping on the right side of the shank. I looked up an article on determining dates of manufacture of Charatan Make pipes (https://pipedia.org/wiki/Dating_of_Charatans). That article helped me date this pipe with some level of certainty to the Rueben Era Charatan made between the years 1910-1960. I quote from the portion of the article that gave the identifying characteristics of that era. I quote in full.
Identification of a second era pipe (Rueben’s era, 1910-1960)
Pipes belonging to this period are rare, however is it possible to come across one. They can be distinguished from a pipe of the first era mainly because their larger size. Their characteristics are similar to the ones of the previous era.
1) Pipes can be larger, up to the dimension of a Dunhill group 5
2) The mouthpiece is tapered or saddle.
3) No double comfort
4) the CP logo is engraved so that the C enters the P
5) Absence of £ on the pipe shank (note that from 1955 all the pipe imported in the USA by Lane has it, however that stamping is not synonymous of the Lane era).
6) Absence of the letter X on the shape code engraved on the shank (for ex. 2502 and not 2502X)
7) Absence of letters DC after the shape number (for ex. 2502 and not 2505DC)
8) Absence of the engraving “MADE BY HAND” on the shank (introduced for the first time in 1958)
9) Presence of the writing “CHARATAN’S MAKE LONDON ENGLAND” on 2 lines
10) The CP logo is finer than in following eras
All ten of the items in the above list apply to the pipe in hand. From the stamping on the stem where the C enters the P to the missing L which places it as pre-1955 to the lack of a double comfort bit all help to place this pipe in this time period.
With that I reread Paresh’s biographical write up on his Grandfather once again. There Paresh stated that his Grandfather had visited England in 1946 and that later after 1947 the British left India for good. Many of the Superior Officers gave his Grandfather pipes as parting gifts. I am fairly confident that this was one of those gift pipes given to him around 1947. I am including his bio now as part of the background information on this pipe. Here is Paresh’s tribute.
Respected Sir,
Now that the first batch of my Grandfather’s pipes has reached you, I would like to share my memories of him with you, the aim being to provide you with an insight to his personality, the era in which he lived, and a brief history associated with the pipes that I have inherited from him.
My Grandfather, Ananta (named after an exotic seasonal white flower having lovely fragrance), was born in a small coastal town of Konkan region of Maharashtra, India, in 1918. These were very turbulent times when India’s freedom struggle against British rule was gathering momentum and the atmosphere was charged with “Quit India Movement”. Having completed his graduation from Bombay, he joined Railways in 1937. This also marked the beginning of his journey into the world of pipe smoking!!!!!
Having seen his potential, in 1945, he was sponsored by the Government to visit England, for gaining further experience and expertise in his profession. This was a period when India’s Independence was round the corner and efforts were being made to train Indians for various administrative appointments in future Independent India. He returned back to India after a year, in 1946 and with him came some pipes that he had purchased in England. I believe a few of his Petes, Barlings, Charatans and GBDs are from this visit.
In 1947, when the British finally left India for good, my Grandfather was gifted pipes by his British peers, subordinates and Superior Officers as a parting gift. He stayed in touch with a few of them over all these years, even visiting them in 1959-60. Some of his later era Charatans and Barlings and Petes are from this trip. He quit smoking in early 1970s (before I was even born!!!!) and his pipes were packed up. There were a number of pipes which were used as TINDER for lighting fires (CAN’T BELIEVE IT…… I have not overcome my grief of this loss till date!!!!!) due to ignorance!!!!!!
My Grandfather was a very strict disciplinarian and temperamental (I did not know this as he was neither when dealing with me as I am the youngest of all his grandchildren!!!!!! He was always the most understanding and loving person in my life). I later learned that in his office, he was not to be disturbed when his pipe was lit, as he would be in his thinking/ contemplating mode while it was just the opposite as he lit his pipe in the evening while at home, when he would be at his relaxed best!!!!.
The interesting part is that neither of us knew that we each smoked a pipe until after his demise in Jan 2018!!!! In our culture, to this day, smoking or alcohol consumption is socially never talked about (mute acceptance!!!). It was during his last rites that absent mindedly I lighted my pipe and looking into the flickering flames of his funeral pyre, remembered and recollected all the wonderful memories and talks that we had shared. No one said a word to me about my lighting up a pipe!!!!!! Immediately thereafter, I rejoined my duty station. A few days later, my wife, Abha, received a box from my Uncle with a note that said “Grandfather would have loved Paresh to have these”. This box contained a collection of his fountain pens and 8-10 of his pipes (since then as my folks are winding up his belongings, I have received 2-3 packets and a large number of pipes, some in decent condition and some in unspeakable state). Abha immediately messaged me with pictures of these pipes and pens. I had been collecting and restoring (no major repairs, though) fountain pens since long and immediately recognized some of them as highly collectibles, however, pipes were a totally different ball game! I was inexperienced with no knowledge/ information regarding various brands/ pipe makers, shapes and materials. I knew nothing about the value of these pipes, nothing about pipe restorations, nothing about caring for them; I mean zero knowledge about collecting pipes. I smoked some real cheap Chinese pipes which were readily and unfortunately, the only ones, available in India and some inexpensive pipes from eBay India!!!!! Also regular pipe cleaning, pipe rotation, pipe cleaners and such things were unknown to me.
Thus, to know more about the REAL pipes, I embarked upon the journey of exploring finer nuances of pipe brands/ makers, their history and watching “How to videos” on packing a pipe, cleaning, repairing and caring for ones pipes. I found it extremely interesting and satisfying. It was while meandering through this confusing quagmire of pipe world that I came across rebornpipes.com website and eventually established contact with you, Mr Steve, who has since been my mentor, guide and GURU, making this journey a wonderful and satisfying experience.
Sir, there is one more thing that I need to thank you for and that is when you asked me to write a brief about my grandfather and his pipes, I realized how little I knew about him, in fact, knew nothing, as I was not even aware that he was a “pipeman” as no one in my family ever spoke about it being taboo subject and since he had quit a long time before I was even born!!!! This led me to ask the elders in my family, questions on the subject and came to know the above details. I cannot thank you enough for prodding me to get to know my grandfather and his pipes a lot better. Sir, these pipes of his, with your help and guidance, will remain with me forever in mint condition…
I began work on the pipe by cleaning up the reaming of the bowl first with a PipNet pipe reamer. I began with the smallest cutting head and worked on cleaning up the inside of the bowl. While I cleaned it up the cracked section of the bowl came loose. I cleaned up the unbroken portion of the bowl and the broken chunk with a Savinelli Fitsall Pipe Knife to remove the remnants of cake left behind.  I cleaned off the edges of the broken chunk of bowl and the remaining bowl with alcohol on cotton swabs. I used a slow curing clear super glue to repair the cracked chunk of briar. I painted the edges of the bowl and the chunk with the super glue and pressed the chunk in place in the bowl side. I held it in place until the glue had set and the chunk was firmly in place. I wiped the bowl down with alcohol on a cotton pad to wipe off the excess glue.
  I sanded the repaired cracks with 220 grit sandpaper and smoothed out the finish to blend in the repairs with the rest of the bowl. Once I had cleaned up the repairs I touched them up with clear super glue to fill in the divots in the repair.
  I sanded the bowl with 220 grit sandpaper to smooth out the repair further after the touch ups. I took pictures of the repair at this point to show the progress.
 I topped the bowl with 220 grit sandpaper and a topping board to smooth out the finish on the top. I removed the damaged areas, removed the glue that had squeezed out from the repairs and cleaned up the rough areas on the outer edge of the rim.
 I polished the bowl with micromesh sanding pads to blend the repairs into the finish of the bowl. I wet sanded with 1500-2400 grit pads and dry sanded it with 3200-12000 grit pads. I wiped it down with a damp cotton pad after each grit sanding pad.




 I mixed up a batch of JB Weld and applied it to the inside of the bowl with a paper clip and a folded pipe cleaner. I worked it into the inside of the cracks and lined the bowl walls all around the cracks until it was smooth. I set it aside to let it cure.
 Abha had done a great job cleaning out the internals of the mortise and shank with pipe cleaners, cotton swabs and alcohol. I ran a pipe cleaner through the shank to remove any of the debris that I had loosened when reaming the bowl. It was pretty clean so it did not take much as the interior was clean.
 I worked Before & After Restoration Balm deep into the briar of the bowl and shank to clean, enliven and protect it. I worked it in with my fingertips and set it aside for a few minutes to let the balm work. I wiped it off and buffed it with a soft cloth to polish it. The briar really began to have a deep shine and the grain began to shine through. I took photos of the bowl at this point to mark the progress in the restoration.

 I worked on the inside edge of the rim with a folded piece of 220 grit sandpaper to smooth out the damage to the edge of the bowl.
 I stained the briar with a Dark Brown aniline stain and flamed it with a Bic lighter to set the stain. I repeated the process until I had even coverage on the bowl.
 I wanted to leave the stain pretty opaque to blend the repaired crack into the rest of the briar. I let the Dark Brown stain dry. Once it was dried I gave the bowl a coat of Conservator’s Wax, let it dry and then buffed the bowl by hand. I repeated the wax until the pipe looked good to my eye.

 I set the bowl aside and began the work on the stem. There were some deep tooth marks in the surface of the stem near button. I cleaned the areas with alcohol and filled in the marks with black super glue.
  When the super glue cured I sanded it with 220 grit sandpaper to blend it into the surface of the stem. I used a needle file to sharpen the inside edge of the button.
 I sanded the repaired areas with 220 grit sandpaper to smooth out the repairs and blend them into the surface of the surrounding vulcanite.
 I cleaned out the airway on the stem with pipe cleaners and alcohol to clean out the tar and oils. It did not take much work to remove all of the remaining tars because Abha had done a really good job cleaning out the stem.
 I polished the stem with micromesh sanding pads – wet sanding with 1500-2400 grit sanding pads and dry sanding with 3200-12000 grit pads. I wiped the stem down with Obsidian Oil after each sanding pad and set it aside to dry. I polished it with Before & After Pipe Polish – both Fine and Extra Fine polishes. I wiped it down with some Obsidian Oil to fine the polishing process.


 With the stem polished I put it back on the pipe and lightly buffed the bowl and stem with Blue Diamond. I gave the bowl multiple coats of Conservator’s Wax and the stem multiple coats of carnauba wax. I buffed the pipe with a clean buffing pad to raise the shine and hand buffed it with a microfiber cloth to deepen the shine. The pipe polished up pretty nicely. I left a little oxidation around the CP stamp on the stem so as not to damage it. The finished pipe is shown in the photos below. It is the final pipe from Paresh’s Grandfather’s pipes that I finished and I will get them packed up and sent across the sea to India where he can carry on the legacy. I know that he is looking forward to having them in hand and enjoying a bowl of his favourite tobacco in memory of his Grandfather. Thanks for walking through the restoration with me as I worked this pipe over.




Restoring the third Classic Find – a Charatan’s Make 0120 Canadian
Blog by Steve Laug
My brother and I recently purchased some pipes from an estate sale from an old pipeman named Gene in Pocatello, Idaho. There were a lot of great pipes in the lot. I have written about the pipes on a previous blog: (https://rebornpipes.com/2016/10/07/a-good-day-hunting-orchestrated-between-british-columbia-and-idaho/). I wrote of how he had stopped at an antique shop and four found prestigious finds. These included a Four Dot Sasieni Pembroke with a patent number, Pat.No. 150221/20, a Dunhill Root Briar Canadian EC 4R, a Charatan’s Make Canadian Sandblast 0121 and a Jost’s Supreme Diamond Shank bent billiard. I wrote about the restoration of the Sasieni and the Dunhill earlier in two other blogs: (https://rebornpipes.com/2016/11/05/restoring-a-classic-find-a-sasieni-four-dot-london-made-pembroke/) (https://rebornpipes.com/2016/11/06/restoring-another-classic-find-a-dunhill-4r-root-briar-canadian-ec/). The third pipe that I have chosen to restore is the sandblast Charatan’s Make 0120 Canadian.
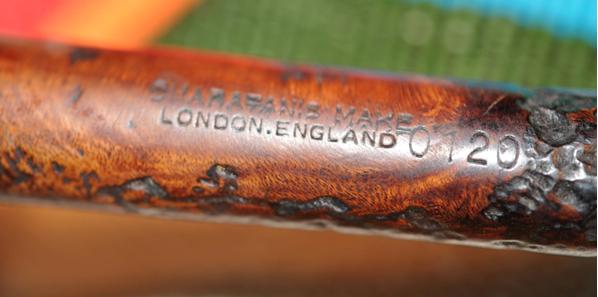
The Charatan pipe also had a replacement stem as there was no sign of a CP logo stamp on the top side. The stamping was on the smooth underside of the shank and it read Charatan’s Make and underneath it read London, England. At the end of the brand stamping was the number 0120 which is the shape number of a Canadian. I did some searching online and read the Charatan’s entry in Pipedia (https://pipedia.org/wiki/Dating_of_Charatans). I quote from there: “Pipes that belong to eras till the 1960 have the engraving ‘CHARATAN’S MAKE LONDON, ENGLAND’ in two lines, the shape code is composed by numbers only. The X and the DC appear only on pipes after 1960.”
My brother had found another good one. The stamping gave me information about the time frame it was made. I knew that it was made prior to 1960 by the style of the stamping. It came from what the article identified as the Reuben era of Charatans that went from 1910-1960. Like the Dunhill the only thing that would have been better was if it had come with the original stem. My brother took the photos that follow. They show the pipe before he cleaned it up and sent it to me. It had a nice sandblast that deep and craggy on the bowl and shank. From mid shank back to the stem it appeared that the pipe had been rusticated to match the blast pattern. He took some photos of the pipe to give a feel for the overall look of it when he received it. These photos show the pipe before he cleaned and reamed it.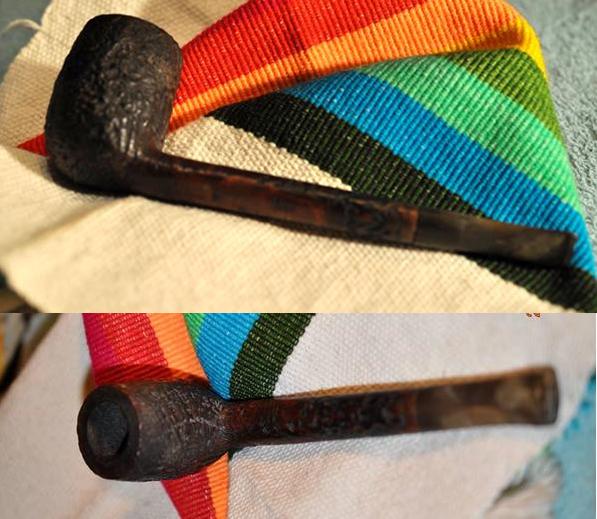 He took some close up photos of the bowl and sandblast on the bottom of the bowl. The bowl had a thick cake that had flowed over the top of the rim in hard tarry lava. It was thick but it appeared that the outer rim was undamaged and with any luck the inner one would be as well. The blast is interesting in that it also has a rustication pattern on the bowl bottom and also on the shank. It follows the pattern of the grain on the bowl.
 The next photo shows the clear and sharp stamping on smooth underside of the shank. It reads as noted above – Charatan’s Make over London England with the shape number 0120 on the stem end of the shank.
 The stem had a lot of tooth chatter and some shallow tooth dents. There was oxidation and also calcification.
 My brother did his normal thorough job of cleaning the pipe. He scrubbed it with a tooth brush and Murphy’s Oil Soap. He cleaned out all of the dust and debris in the grooves and crevices of the “blastication”. The stem does not fit tightly against the shank at this point. The next photos below show the pipe as it looked when I brought it to my work table.
 I took some close up photos of the rim to show how well it cleaned up. My brother was able to get the lava out of the grooves on the rim and also on the underside of the shank. The stamping was still very clear.
 He cleaned out a lot of the gunk in the shank but the stem still did fit tightly against the shank end. He did get the calcification and some of the oxidation off the stem. You can clearly see the tooth chatter and the tooth dents now that the stem was clean.
 I scraped out the inside of the mortise with a dental pick with a flattened blade end. I scraped the stepped down area of the mortise as it entered the airway in the shank. I took a lot of tar and gunk out the shank area.
 I scrubbed the mortise, the airway in the shank and the stem with cotton swabs, pipe cleaners and alcohol. Once it was clean the stem fit more closely against the end of the shank.
 I scrubbed down the bowl and shank with acetone on cotton pads to remove the finish that remained on the pipe.
 I restained the pipe with a dark brown aniline stain thinned 50/50 with isopropyl alcohol. I flamed the stain and repeated the process until the coverage was even.
 I put the stem in the shank and took the pipe to the buffer. I buffed it to polish the stain. When I was just about finished I could not believe what happened. It is that moment when you are buffing a pipe where you get a sick feeling. The wheel grabbed the pipe out of my hand, off my finger and threw it against the table top under the buffer. It was not far – a mere 2 inches but I heard the snap as the tenon broke. I was sick to my stomach. I was almost finished with the pipe and then this had to happen. I took a photo of the broken tenon once I had pulled it from the shank. It was almost a clean break at the end of the stem. Oh the frustration.
I used a Dremel to flatten the broken edge of the tenon against the face of the shank. It took a few moments to smooth out the broken part. I used the topping board with 220 grit sandpaper to face the end of the stem. I went through my box of threaded tenons and actually had one left in the box that was not a Jobey Link system tenon. It was the same diameter as the broken tenon. I chucked a drill bit in the cordless drill that was just a little larger than the air way in the stem. I turned the stem onto the drill bit the length of the threaded portion of the replacement tenon. I put two more drill bits in the drill and turned the stem onto the bits. Once it was the same diameter as the threaded portion I shortened the threaded end slightly so that it would fit tight against the stem. I roughed up the threads with the Dremel and a sanding drum. I left the threads in place so that I could turn it into the stem.
 I screwed it into the stem as far as it would go by hand and then used a pair of pliers to finish turning it tight against the stem face.
 I put the stem in place in the shank and the fit was tight against the shank. I polished the stem with micromesh sanding pads – wet sanding with 1500-2400 grit pads and dry sanding with 3200-12000 grit pads. I rubbed it down with Obsidian Oil after each set of three pads. After the final set I rubbed it down with a last coat of oil. I set the stem aside to dry. (In the photos below of the shank and stem I did not push the stem in against the shank so it shows a small gap at that point. You will notice in the final photos that I pushed it back in place.)

 With fear and trepidation I took the pipe back to the buffer. I did not want to repeat the broken tenon so I was very careful. I worked the pipe against the buffing wheel that had been charged with Blue Diamond polish. I buffed it until the stem shone. I lightly buffed the bowl with the polish as well – being careful to not let it build up in the grooves. I polished the stem with carnauba wax and put Conservator’s Wax on the sandblast finish of the bowl and shank. I buffed the pipe with a clean buffing pad to raise the shine. I hand buffed it with a microfibre cloth to deepen the shine. The finished pipe is shown in the photos below. The fit of the stem against the shank was better than when I started. Thanks for walking through the restoration with me and also through the frustrating need to replace the tenon.


