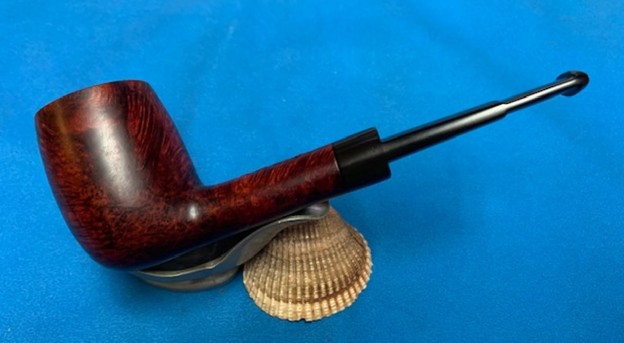
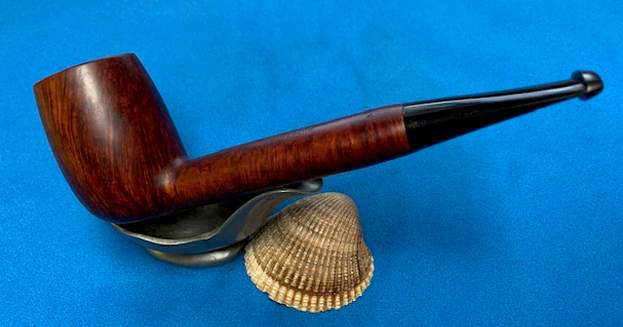
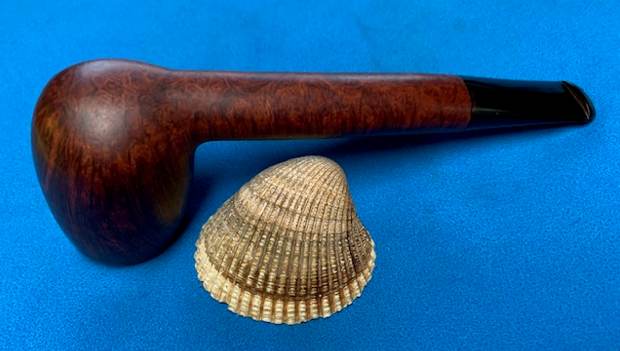
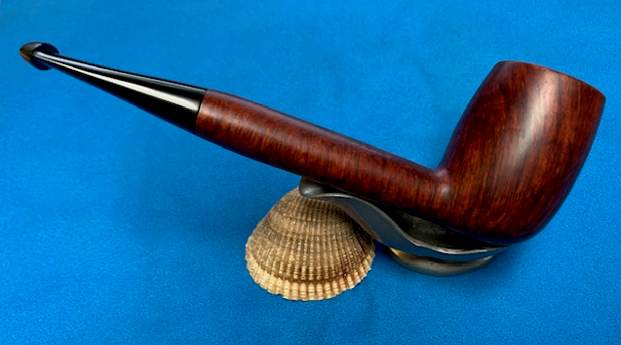
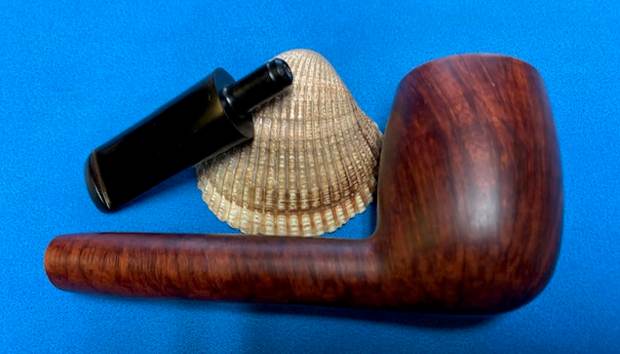
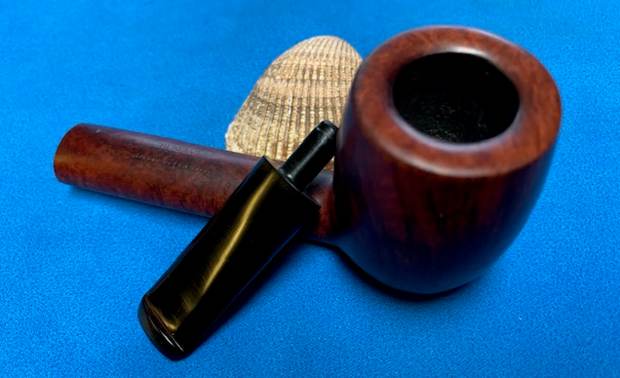
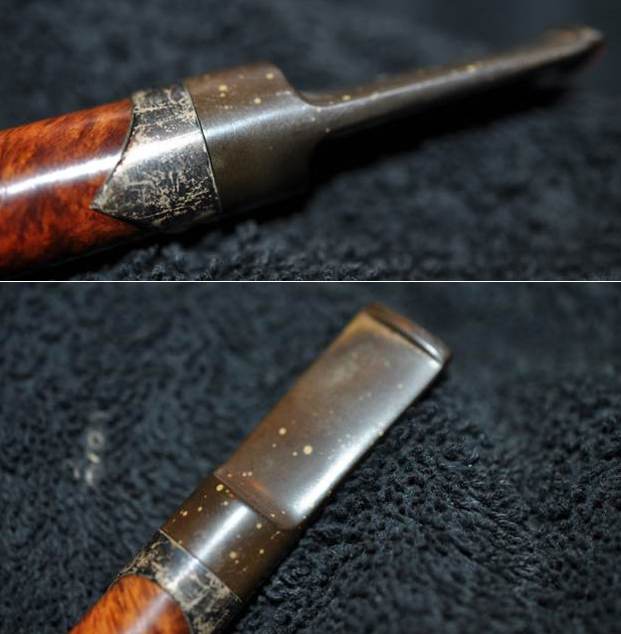
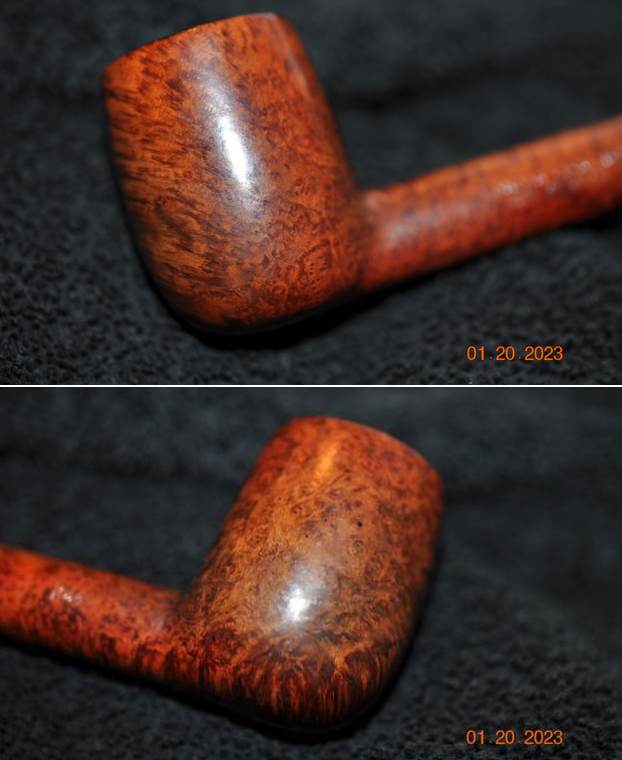
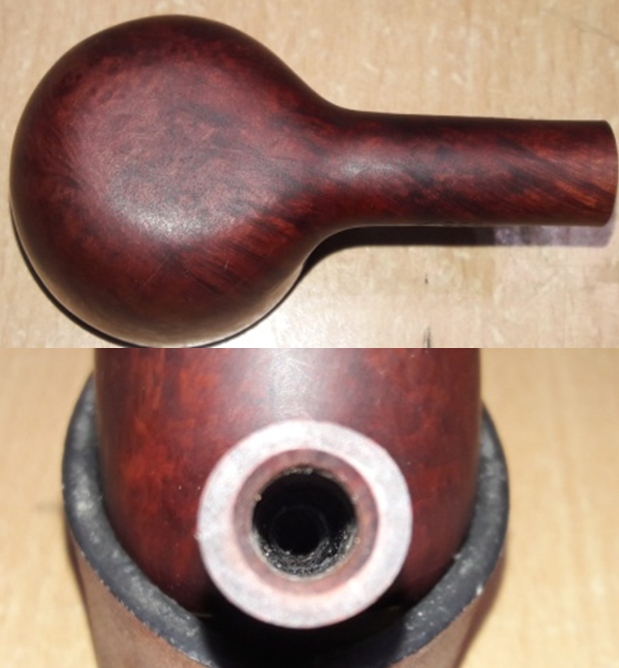
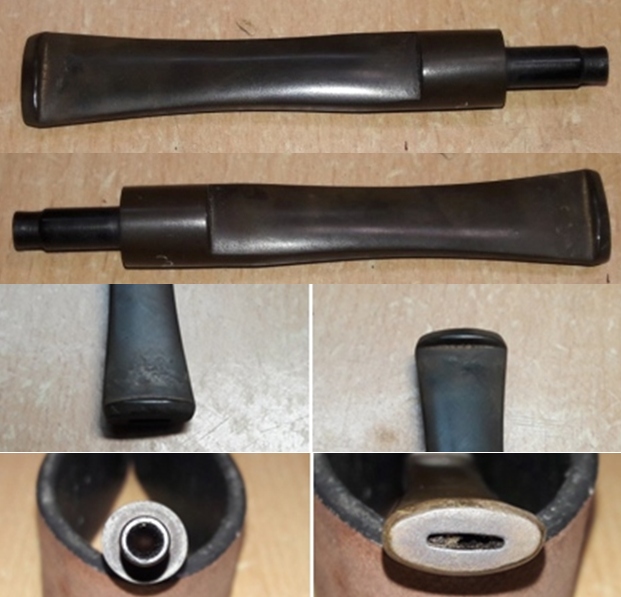
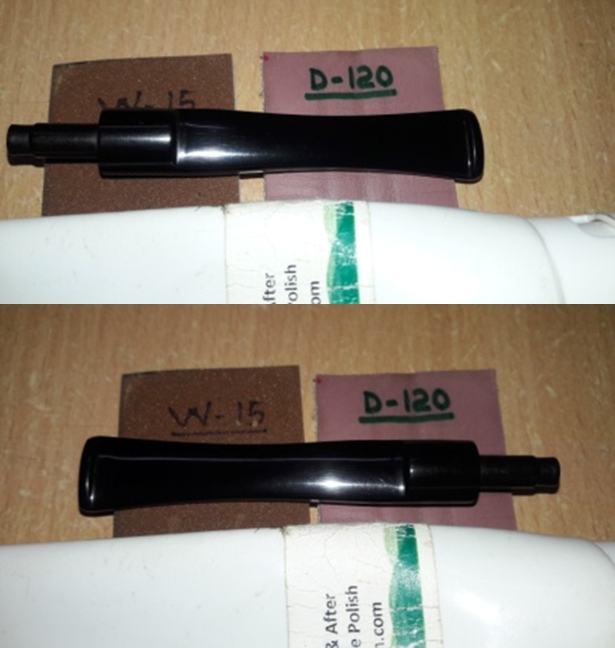
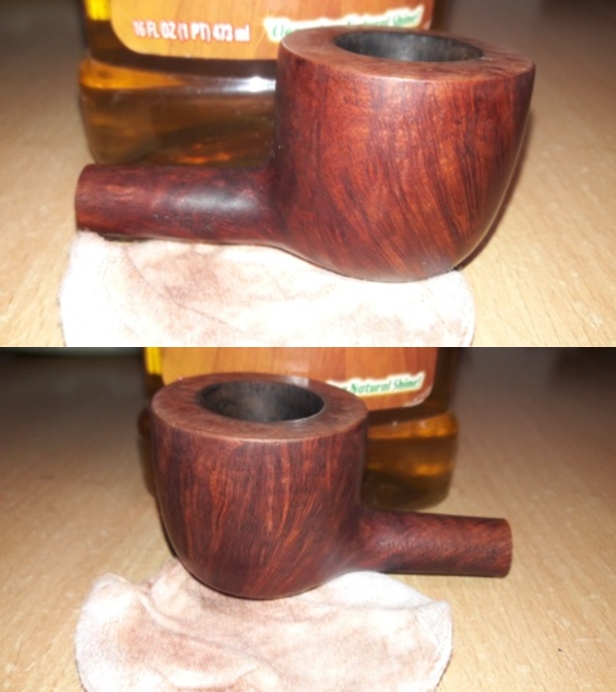
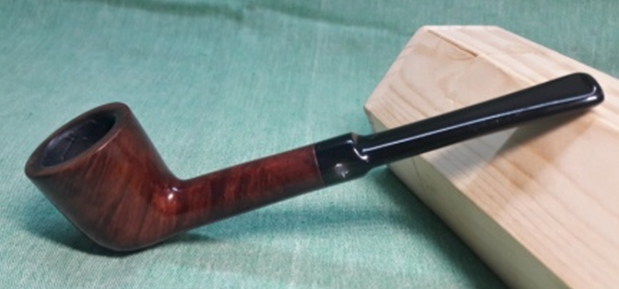
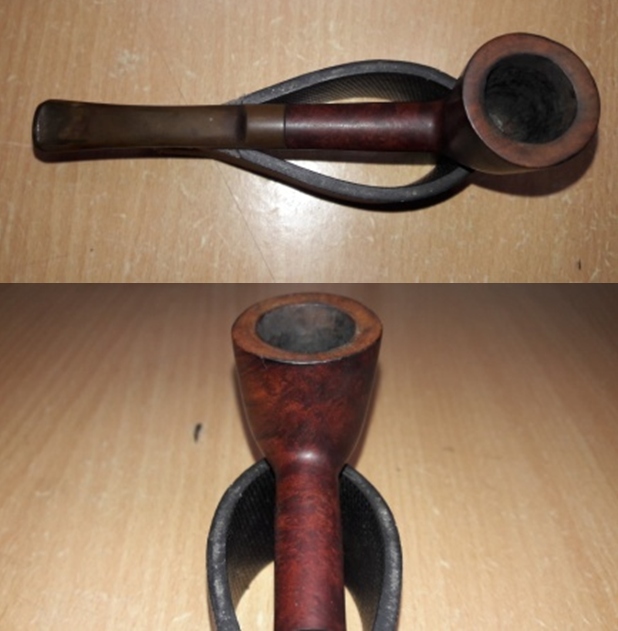
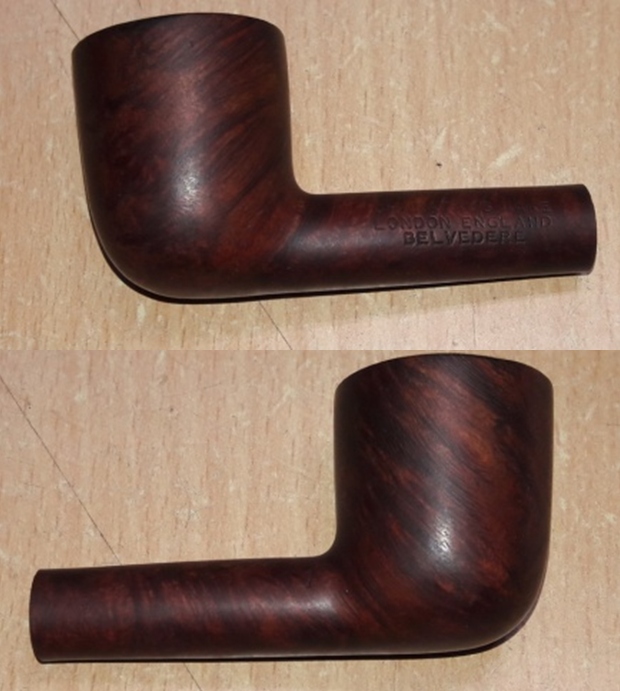
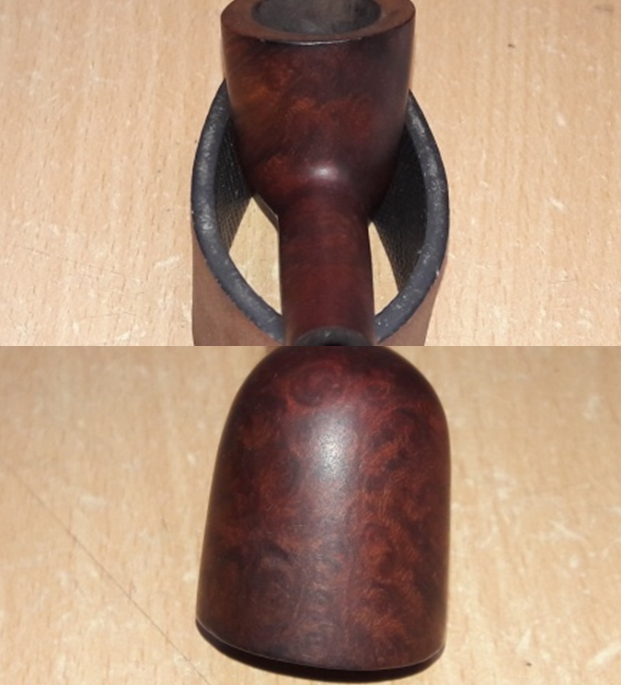
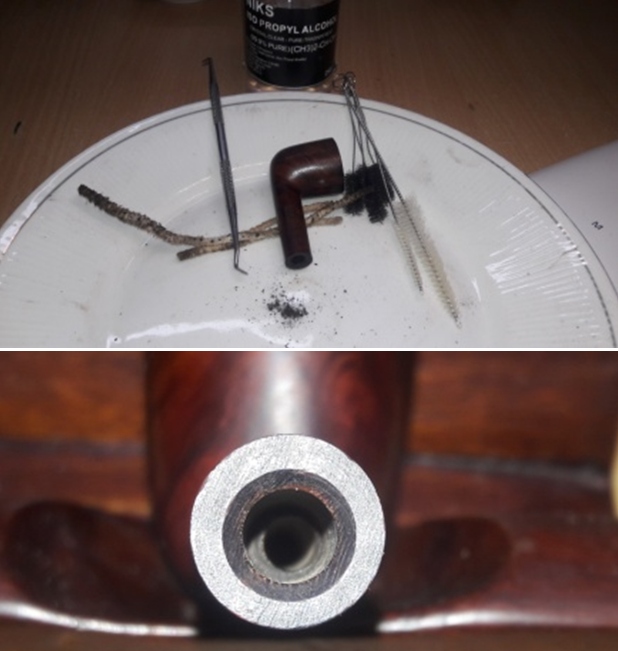
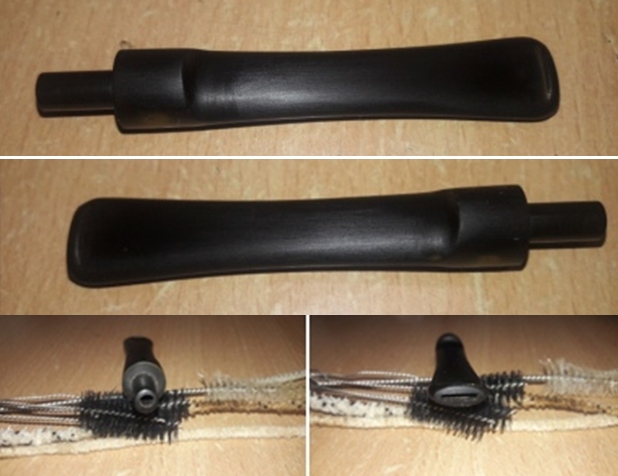
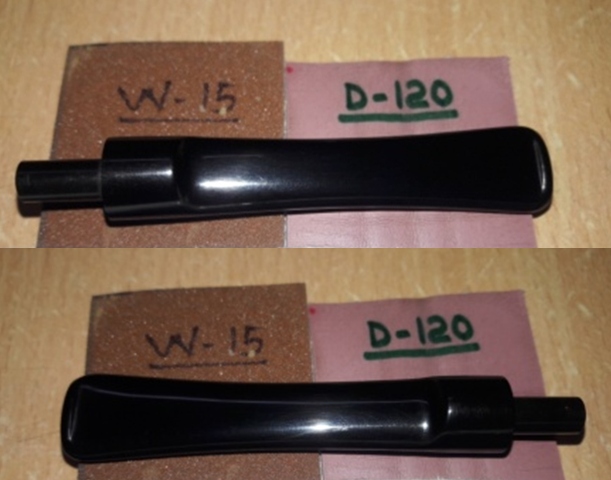
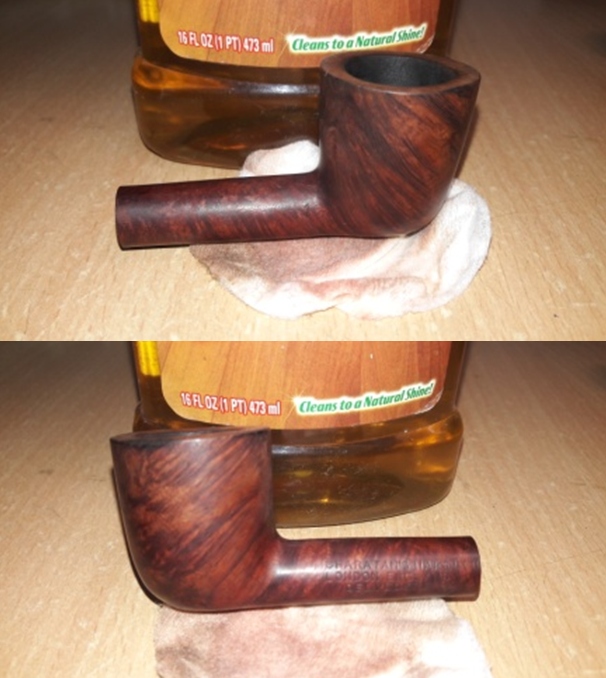
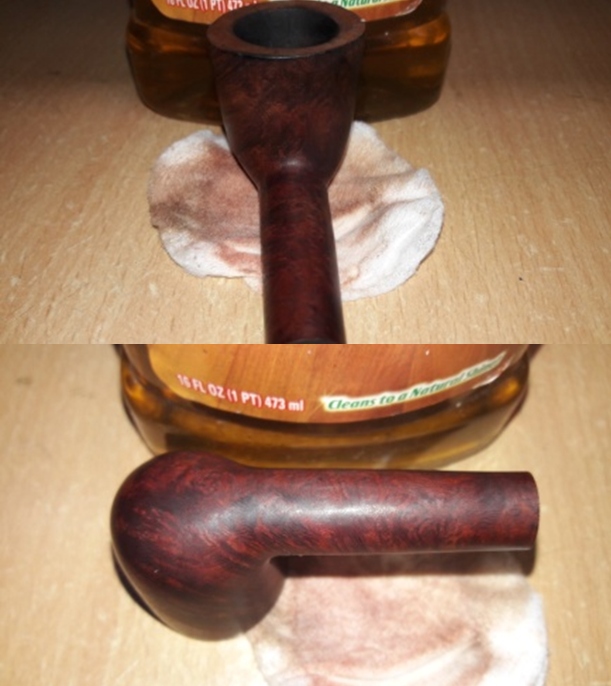
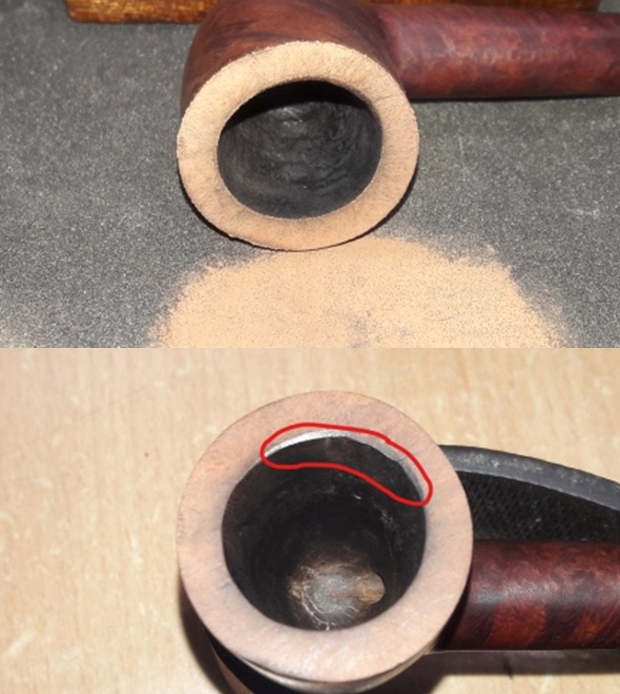
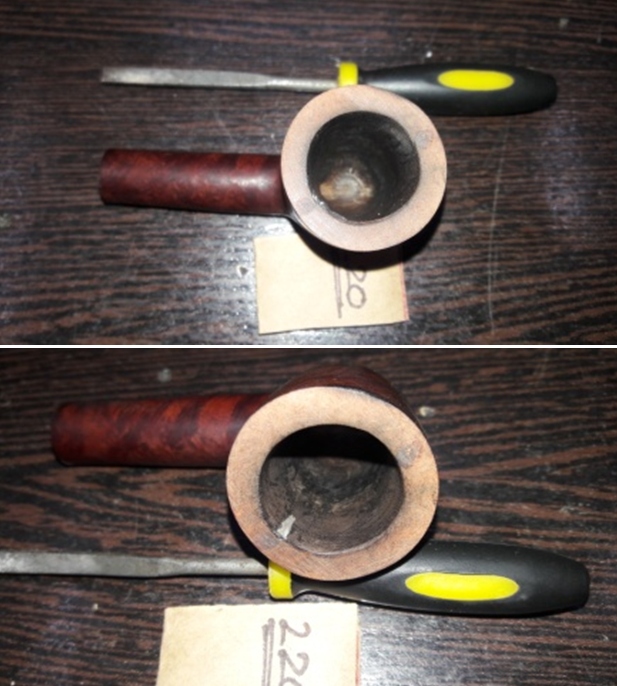
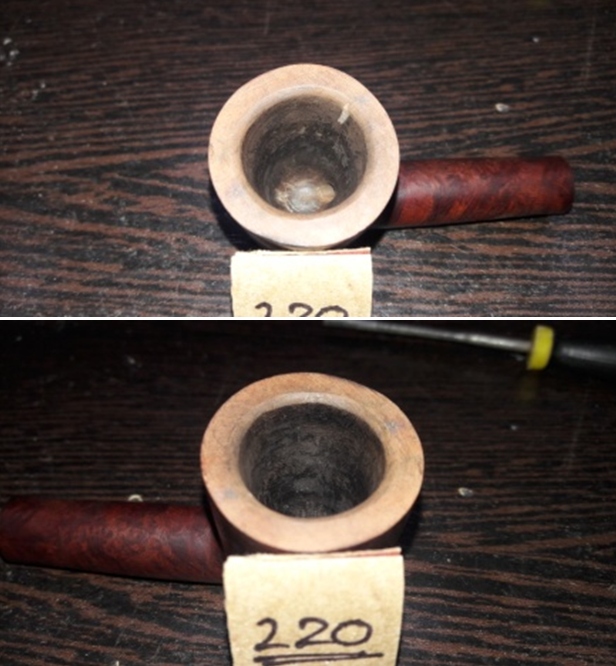
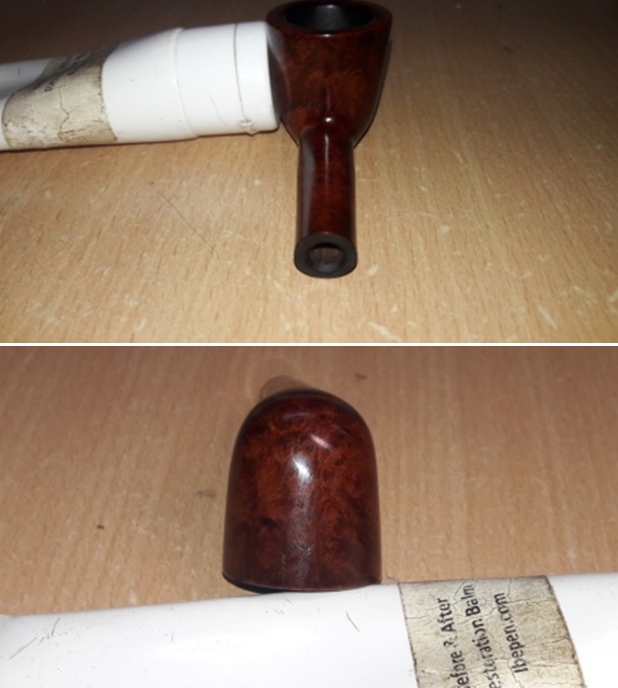
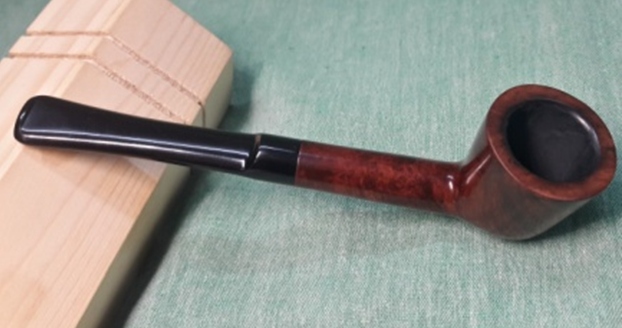
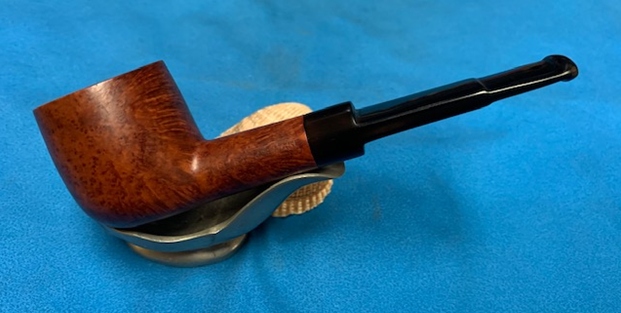
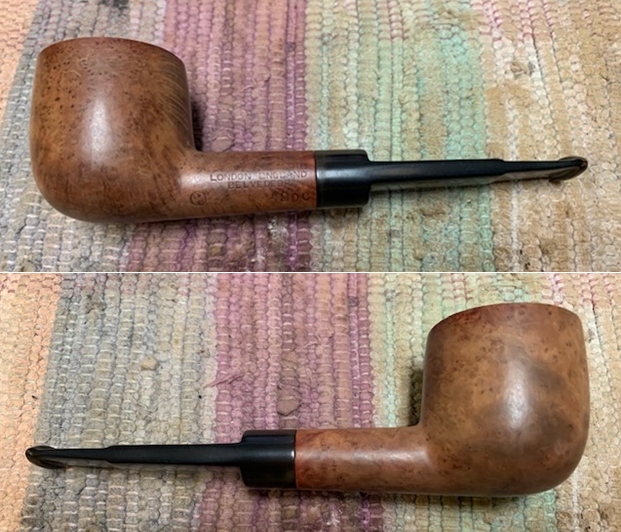
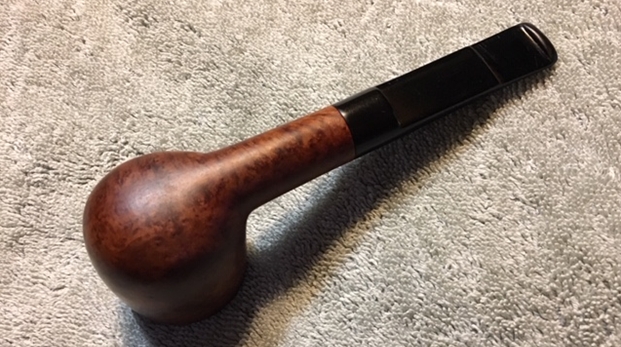
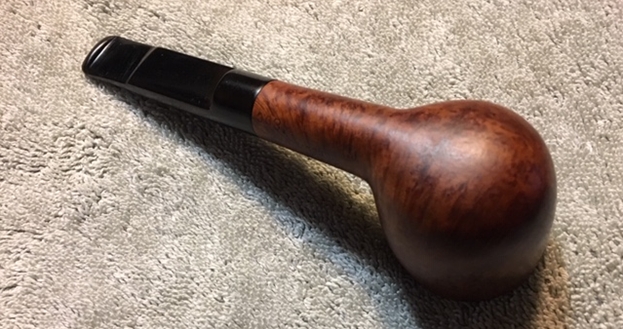
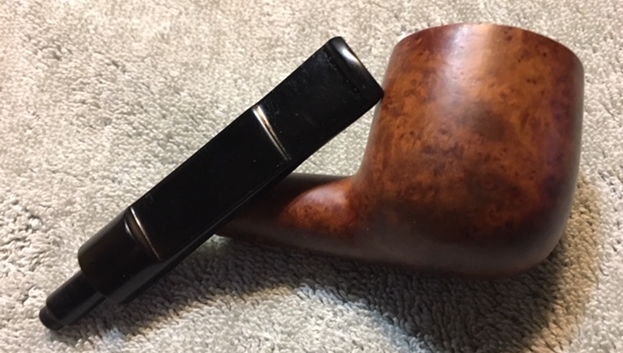
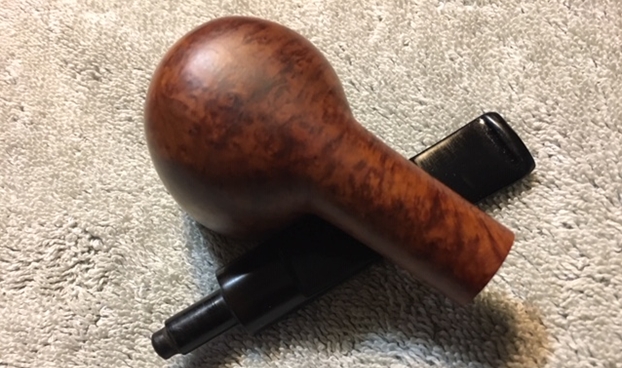
Tag Archives: Charatan’s Make Belvedere Pipes

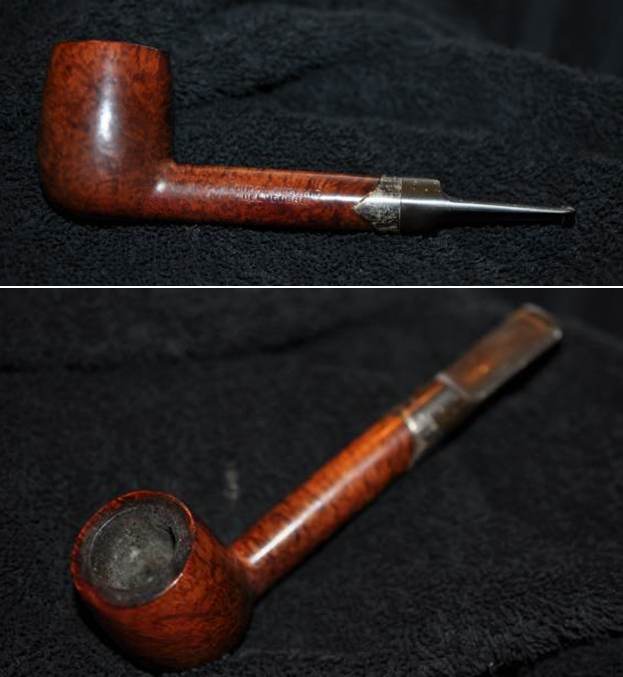
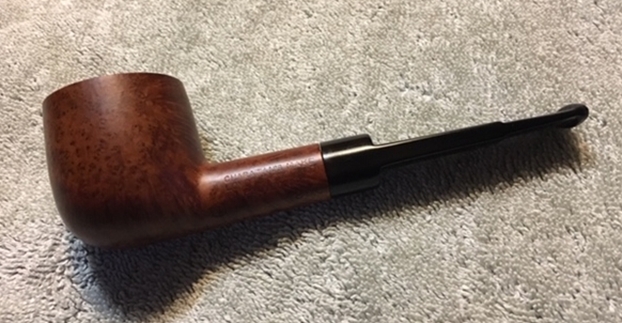
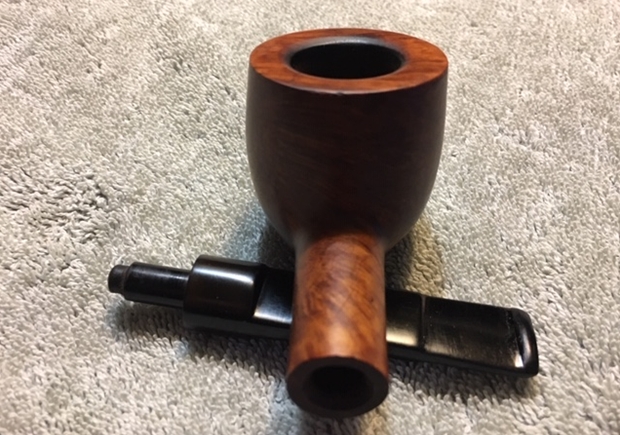
Restoring a Charatan’s Make Belvedere 4 Saddle Stem Billiard with the stamping starred out


Blog by Steve Laug

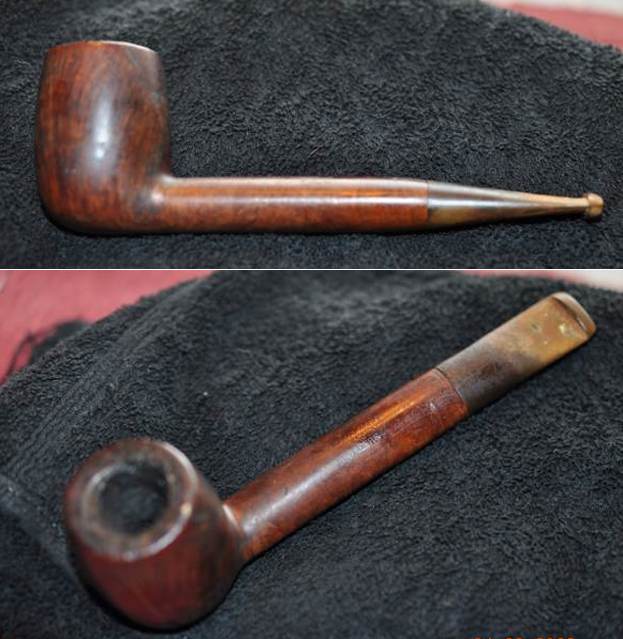
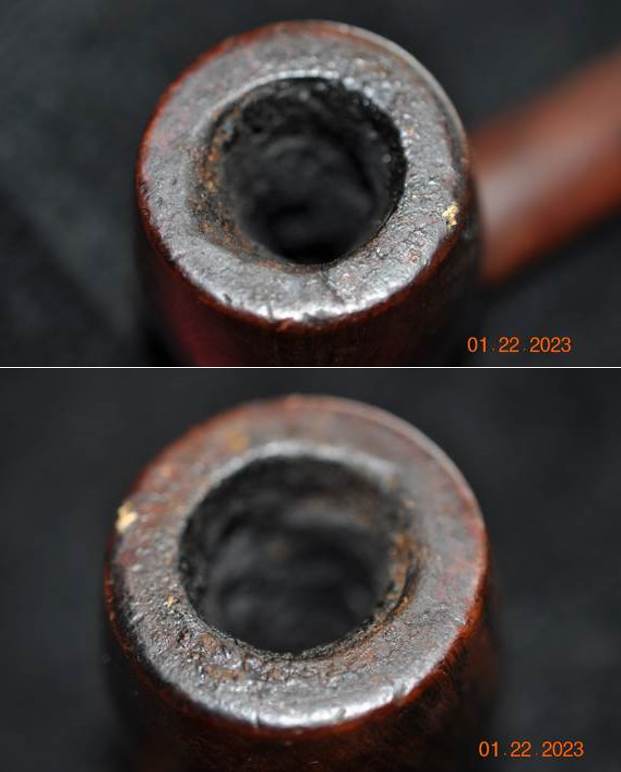
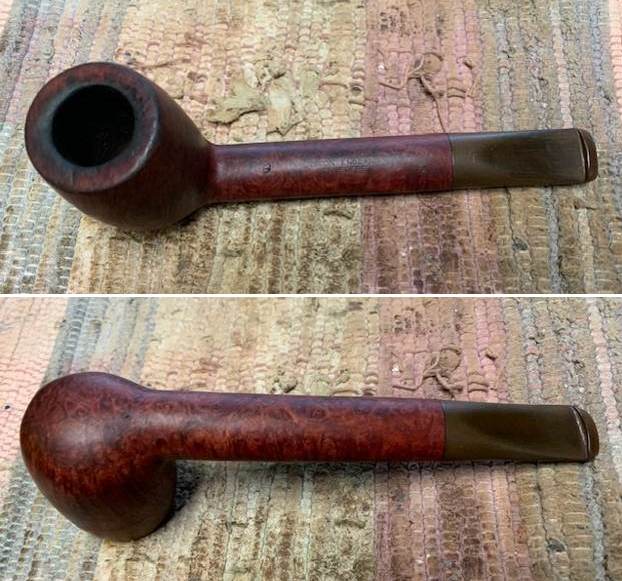
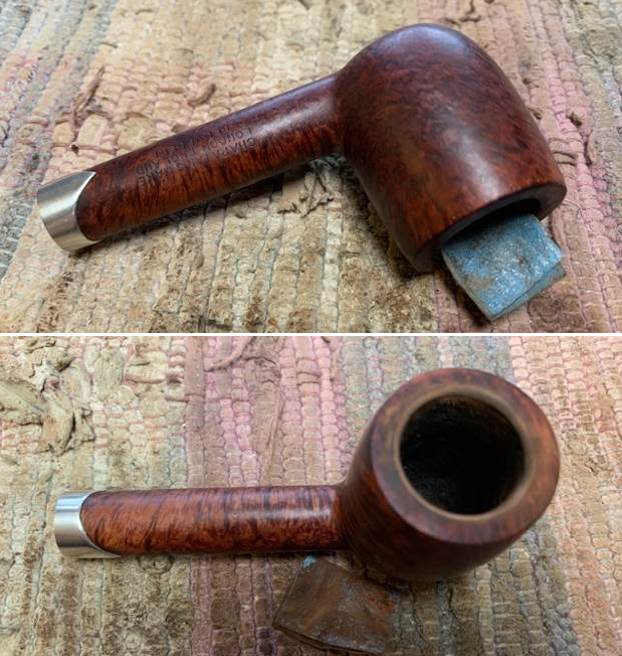
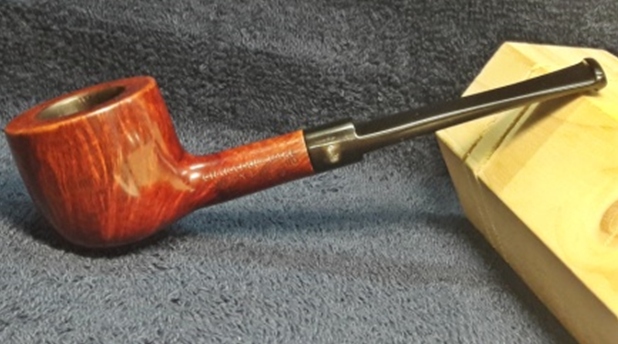
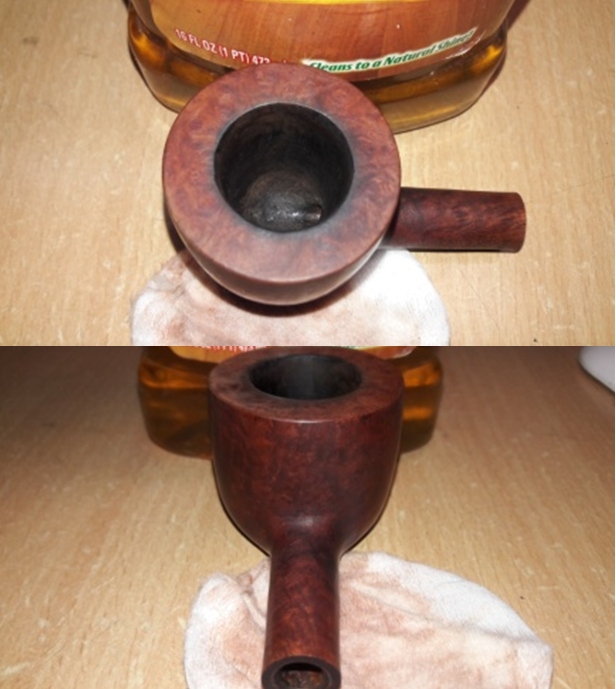
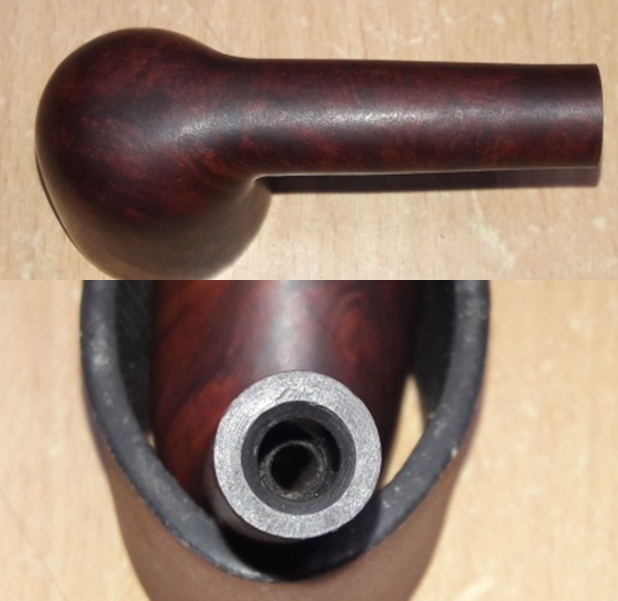
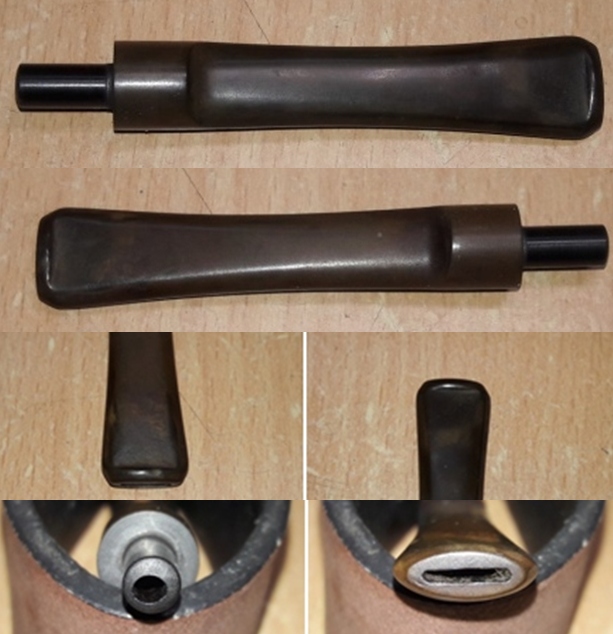
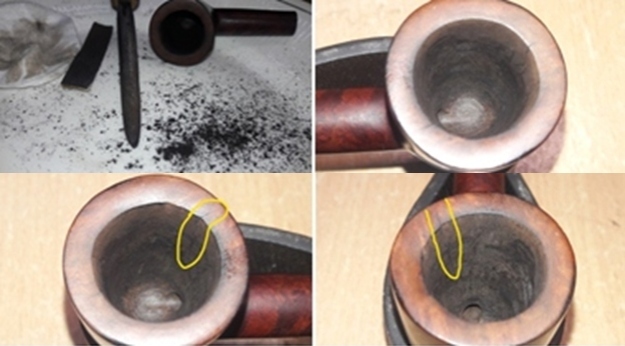
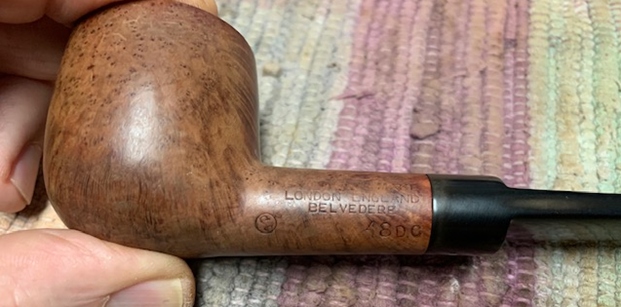
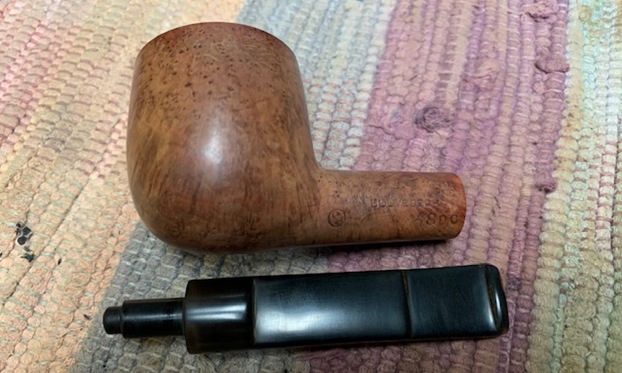
The next pipe on the table is a strange one. It is a well made Charatan’s Make billiard with some nice grain around the bowl and shank. The stamping is quite clear though the entire stamp has been covered with flower/star stamps obliterating it for the most part. I am not sure what it means as I have not seen this before. Under the flower stamps it is stamped on the topside and reads Charatan’s Make[over] London England [over] Belvedere in three lines. On the underside it is stamped Made in London [over] England. Above that it has a number stamp 4 which I assume is a shape number. We purchased the pipe on 06/24/2023 from an auction in Garland, Texas, USA. The finish on the pipe was dirty but obviously well loved. There was a thick cake in the bowl with lava flowing up and onto the rim top and edges. It is heavier on the back side of the rim top but is present all the way around. The stem was oxidized and light calcification on the area around the button. There were light tooth marks and chatter on both sides. There was no CP stamp on the sides of the stem but it was stamped on the underside and read REGD NO [over] 203573. It had the DC or Double Comfort step down saddle stem. Jeff took photos of the pipe before he started his clean up work on the pipe.He took photos of the bowl and rim top to show their general condition. You can see the tars on the inner edge of thick lava coated rim top. The cake in the bowl is quite thick and there is tobacco debris on the walls of the bowl. The finish on the bowl is very dirty with grime and oils ground into the bowl, but still very stunning. This pipe has a classic Charatan Double Comfort stem that has some oxidation, calcification on the surface of the vulcanite. There is chatter and tooth marks on the top and underside. Jeff took some photos of the sides and heel of the bowl to give an idea of the grain on this particular piece of briar. It is amazing and I cannot wait to see what it looks like once it is polished and waxed. He took photos of the stamping on the top and underside of the shank to capture it for me. The first photo shows the topside of the shank and the floral/sunburst overstamping as noted above. The second shows the underside of the shank with the Made in London [over] England as noted above. You cannot see the numeral 4 but it is above the Made in London stamp.An added part of pipe restoration for me is to try to gather as much background on a brand and maker as I can find. With Charatan that is an enjoyable web to untangle. There is a lot of information and it can lead to understanding what era a pipe was made in. To try to figure out the era of the Charatan’s pipe I was working on I turned to the Pipephil website, Logos and Stampings (http://www.pipephil.eu/logos/en/logo-charatan.html). There is some really helpful information on each of the lines of Charatan’s Make pipes that entered the market. There is an alphabetical listing of the lines but the Belvedere they showed had a stem made for a 9mm filter while the one I have is a nonfiltered pipe. The site did give a short history of the brand. I quote the portion that is most pertinent.

The brand was founded in 1863 by Frederik Charatan. When his father retired in 1910, Reuben Charatan took over the family business. All the pipes were handmade until 1973. The brand name has been overtaken by Dunhill in 1978 and sold in 1988 to James B. Russell Inc. (NJ, USA). During the period 1988-2002 Charatans were crafted by Butz Choquin in St Claude (France). Dunhill re-purchased Charatan brand name in 2002 and Colin Fromm (Invicta Briars, Castleford) followed up on freehand production.

Next, I turned to Pipedia to see if I could find more information on the brand and possibly a link to the Belvedere line (https://pipedia.org/wiki/Charatan) but once again in the general article it was not listed. It did give a little more historical information. I quote the pertinent parts and have highlighted in red the sections that give information on this particular pipe.

In 1863 Frederick Charatan, a Russian/Jewish immigrant, opened a shop in Mansell Street, located in the borough of Tower Hamlets, London E1, where he began to carve Meerschaum pipes. These pipes got very popular soon, and thus Charatan moved to a bigger workshop in Prescot Street, just around the corner. Here he began to make briar pipes which should make the name famous the world over. Charatan was the first brand to make entirely hand-made briars from the rough block to the finished pipe including the stems. The nomenclature “Charatan’s Make” refers to this method of production and was meant to differentiate Charatan from other brands who “assembled” pipes from pre-drilled bowls and delivered mouthpieces.

Being the undisputed No. 1 in English pipemaking, Charatan was approached by Alfred Dunhill who was unsatisfied with the quality of the pipes he imported from France. During 1908 – 1910 Dunhill bought pipes from Charatan paying exorbitant prices to ensure he had some of the very best pipes for sale in England. In 1910 he lured away Joel Sasieni, one of Charatan’s best carvers, and opened his own small pipe workshop on 28 Duke Street. On the retirement of his father in 1910 Reuben Charatan took over the family business…

…The pre-Lane period (prior to 1955) and the Lane era pipes (1955 to until sometime between 1979 – 1984) are of primary interest the collector. The Lane era is often quoted as beginning about 1950… Charatan records are almost non-existent before Lane due to a factory fire, making it difficult to date pre-Lane pipes. Charatan used 4 basic grades prior to 1950: Supreme, Selected, Executive, and Belvedere. After 1950 Herman Lane’s influence began, and the grades started to expand. In 1955 Lane took over sole distributorship of Charatan in the US. In 1957 he introduced the Supreme S. Most of his other introductions were from the 60’s and early 70’s…

From this I am fairly certain I am dealing with an early Lane pipe made in 1955 and because of the Belvedere stamp it could potentially go back as far as before 1950. There are none of the expected Lane stampings on the pipe which is interesting though the Double Comfort bit helps point to the Lane time.

I continued digging further into the dating of the pipe, but what I had found above was a good start for me. If some of you would like to try your hand at dating it more accurately as to the time period it came out you might want to check out the article on Pipedia on Dating Charatans (https://pipedia.org/wiki/Dating_of_Charatans).

I also reread the article on Pipedia by the Italian fellow who contributed some really helpful information on the brand (https://pipedia.org/wiki/Charatan_-_Milan_2014). I quote the section on the Second period: Reuben Charatan 1910 – c. 1962. I have highlighted a portion of the section on the shank in red to point out some more helpful dating information.

– In 1962 Herman Lane took over the business from the Charatan family, although he had already influenced production from the 1950s.

– The pipes were mostly larger than the previous ones and corresponded in size to Dunhill group 5. These are slightly less rare, but still difficult to find.

– Stem: Usually in ebonite, saddle shaped or tapered, bearing a fine “CP” stamp, underbore system (see below) used when necessary.

– Shank: The shape code is stamped on it together with the nomenclature “CHARATAN’S MAKE LONDON ENGLAND” arranged in two lines. From 1955 onwards on the models marketed for the USA there is also a serif and circled capital “L” (but not all models bear this) which resembles the pound sterling symbol. The “L” is for Lane, the importer.

From 1958, Lane changed the nomenclature for models marketed for the US to clarify the message: “MADE BY HAND”.  In this period the underbore was introduced. Its manufacturing period ranged between 1920 and c.1930. This model was equipped with a duralumin plunger trap fitted in the stem, which served to clean the residue more easily. This particular model bore a special stamp on the stem, and also had its own catalogue…

QUALITY GRADES…The stem did not only display the stamps mentioned above. Another stamp that can help dating is the one referring to the quality of the pipe. Until Herman Lane arrived on the scene there were four quality grades. Starting with the lowest: Belvedere, Executive, Selected, and Supreme. Lane went on to add higher grades from time to time: Supreme S, Supreme S100, S150, S200, S250, S300, Coronation, Royal Achievement, Crown Achievement, and Summa Cum Laude; these last three are extremely rare and almost impossible to find. He also invented other, different grades, even changing the previous pipe classification standards. We will not go into detail here, but it means that if we find an S100 or Coronation the pipe was manufactured following Herman Lane’s acquisition. In particular, the FH mark, or Freehand pipe was commissioned to the famous Danish craftsman, Preben Holm.

Now I knew I was working on an early Lane pipe which actually means it was made around 1955 as shown by the stamping. I wanted to now see if I could find any information the shape 4 number as it was not listed in any shape charts I could find.

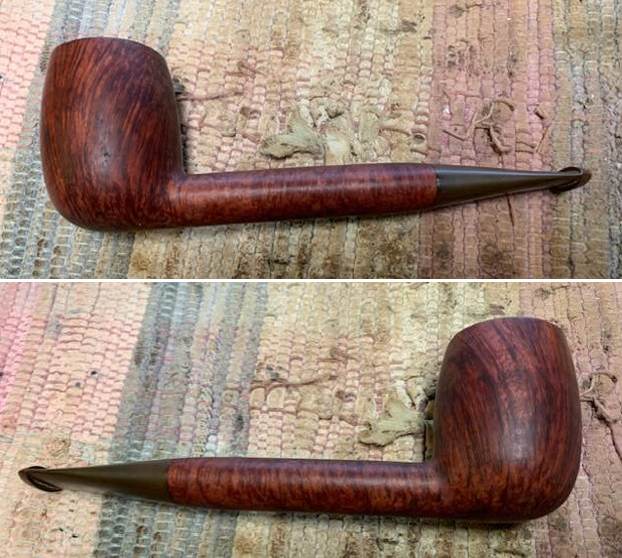
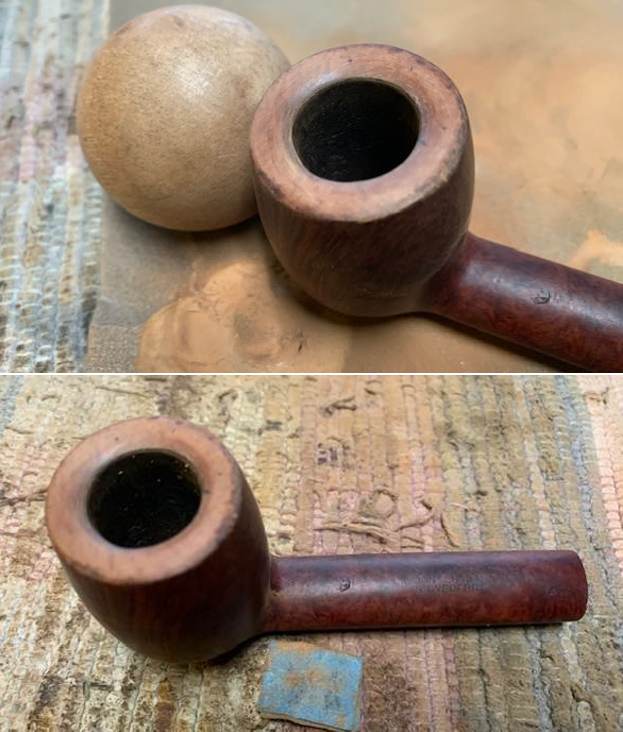
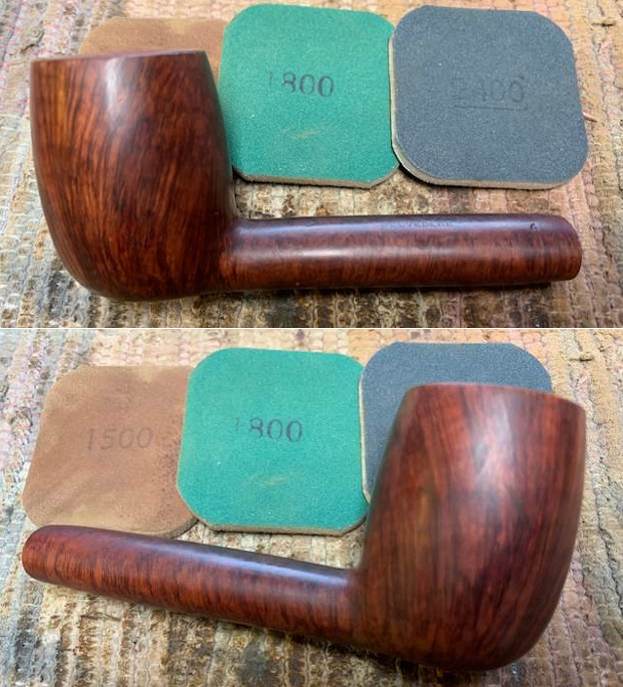
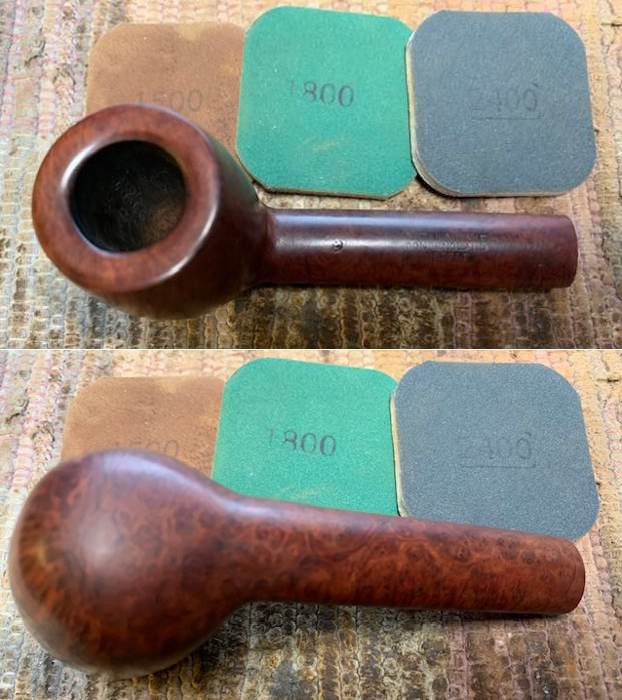
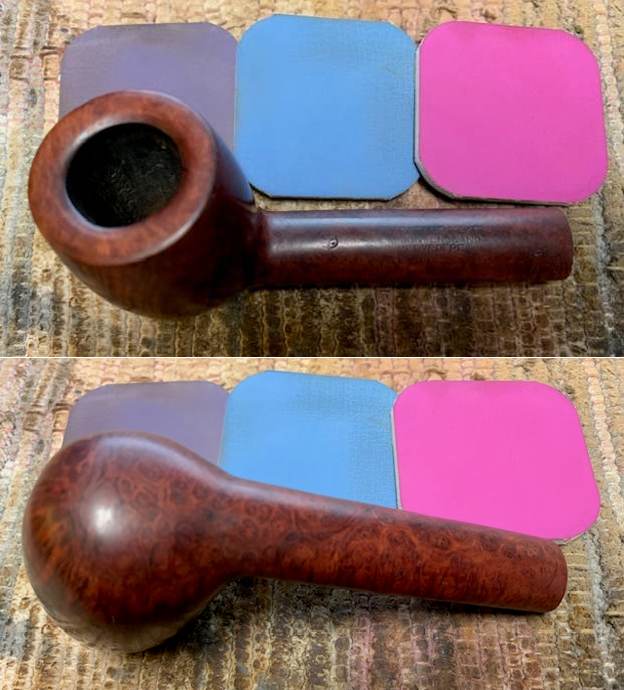
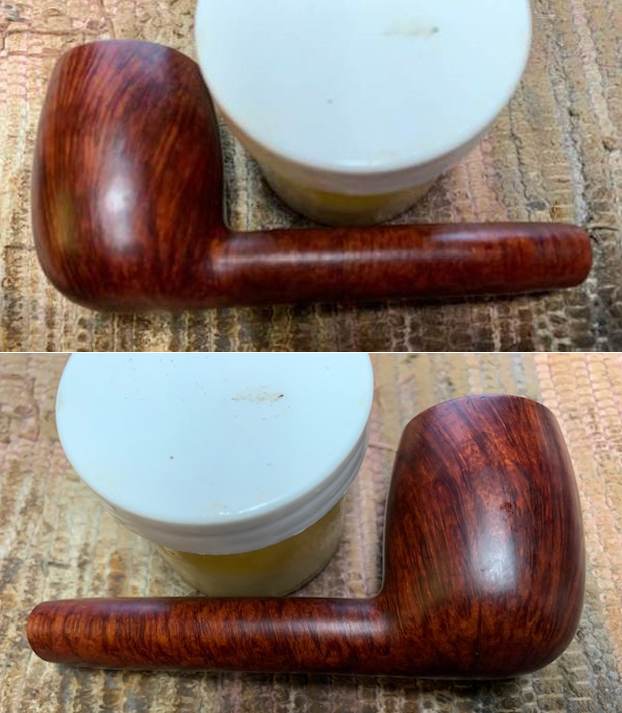
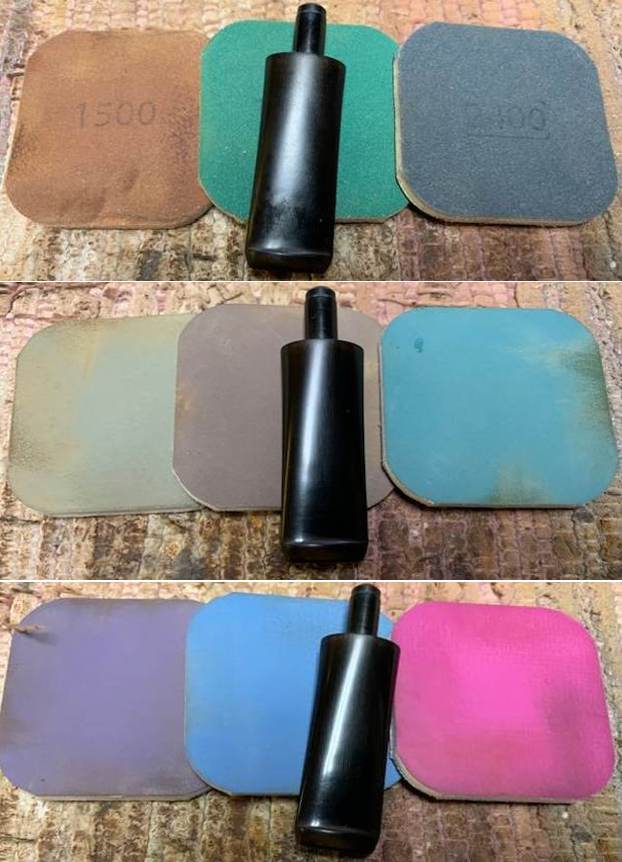
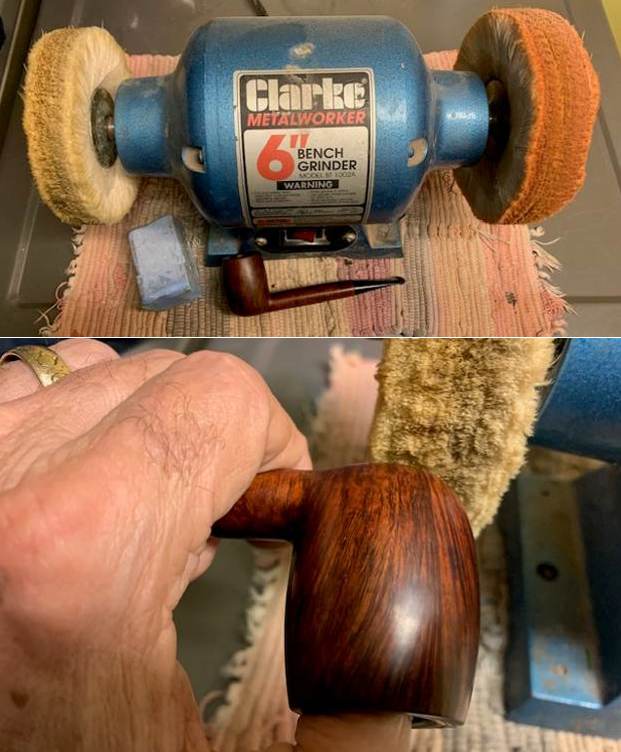
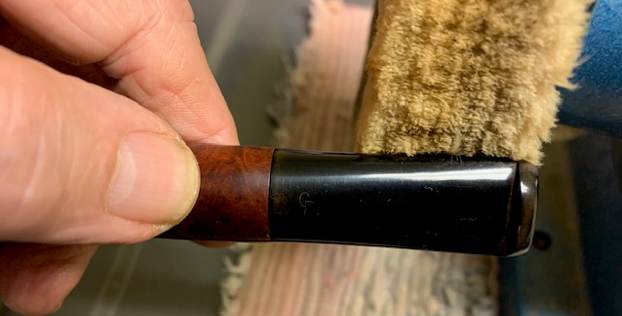
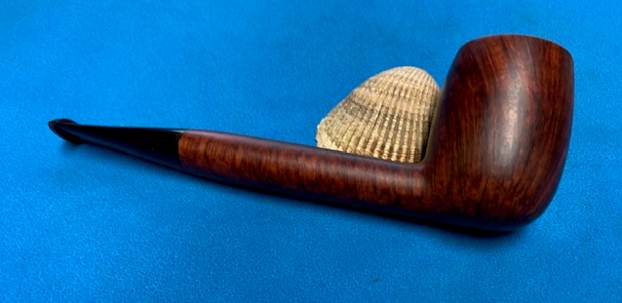
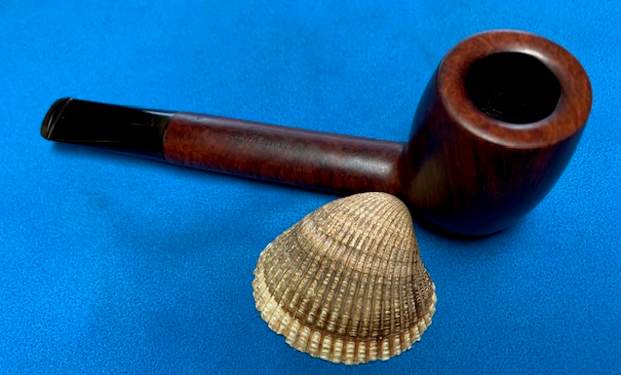
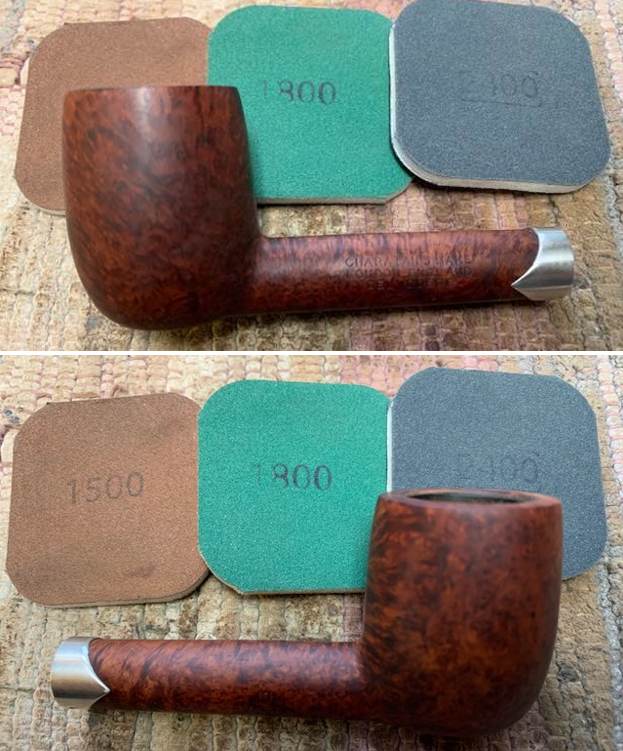
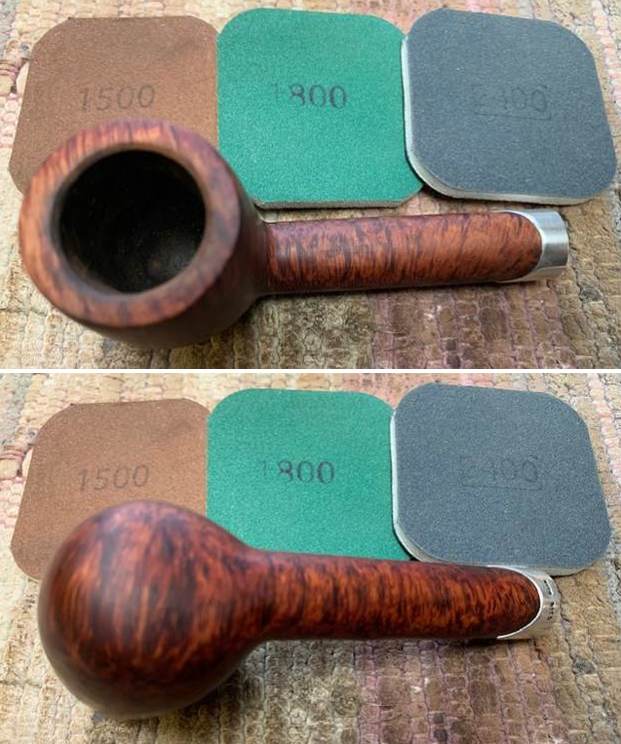
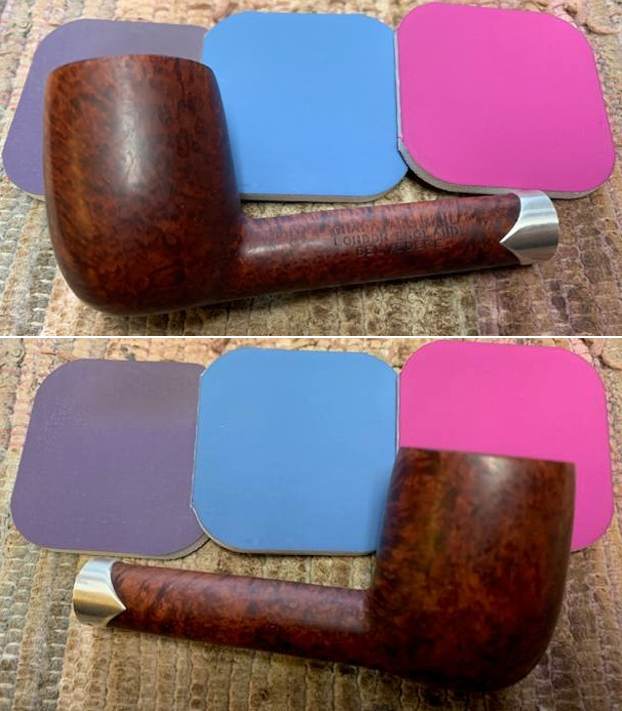
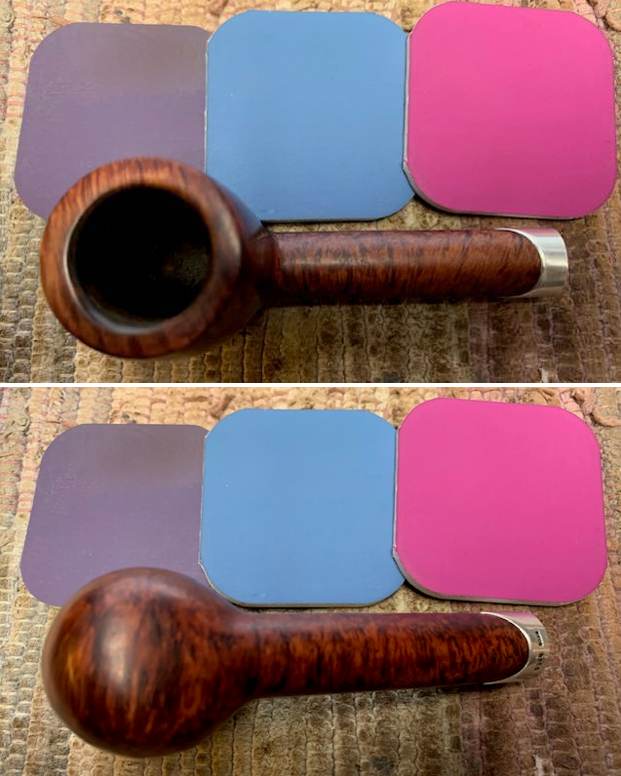
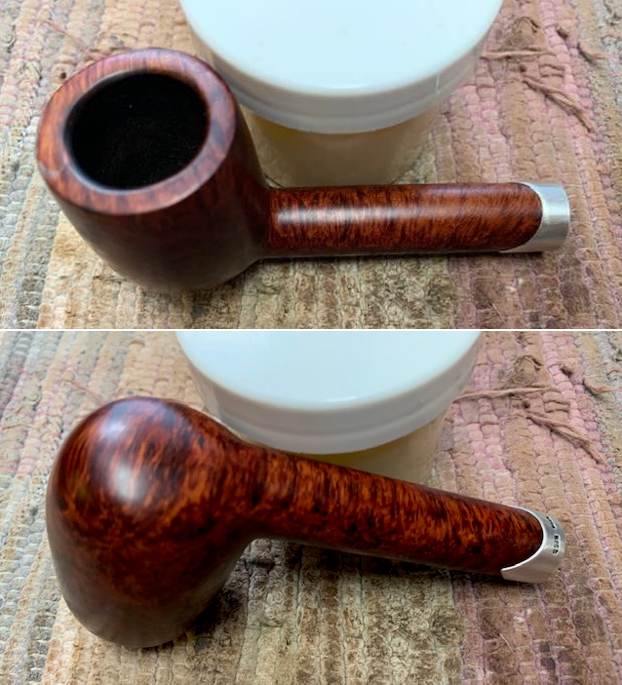
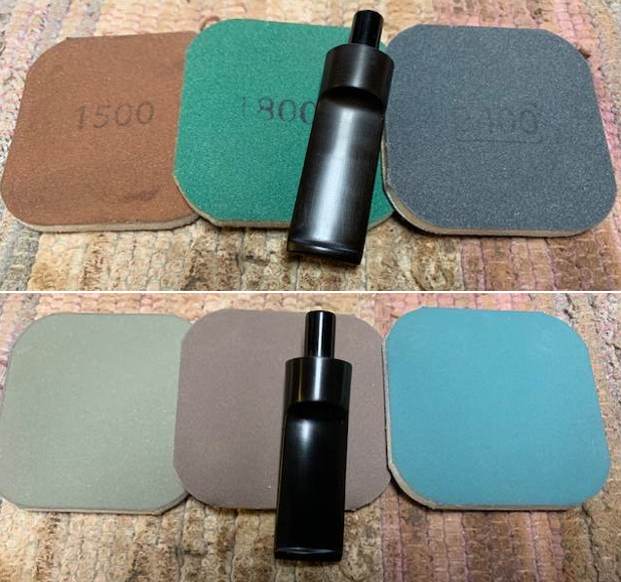
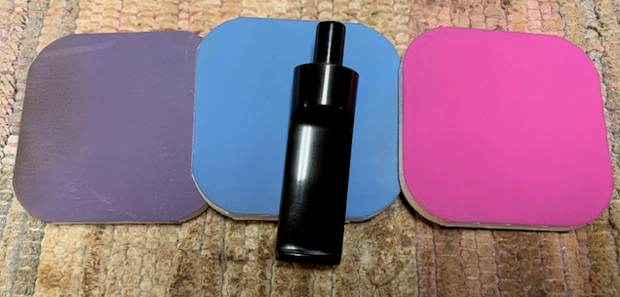
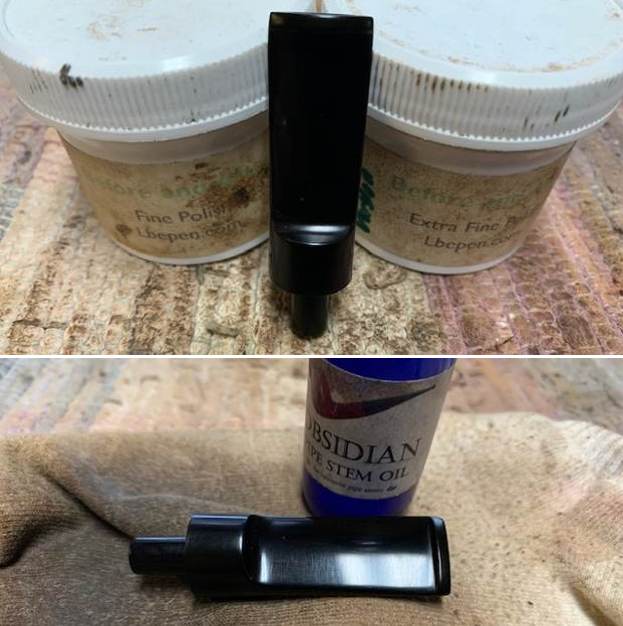
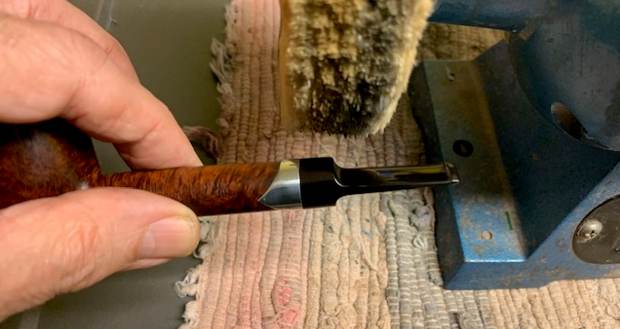
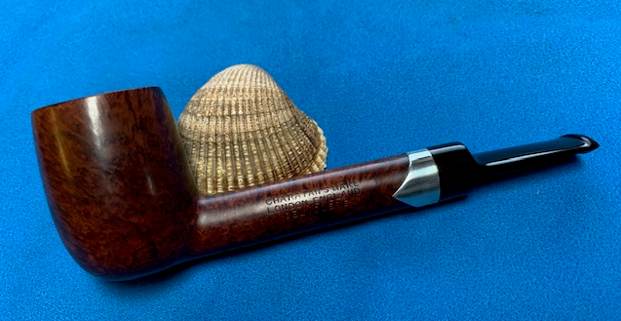
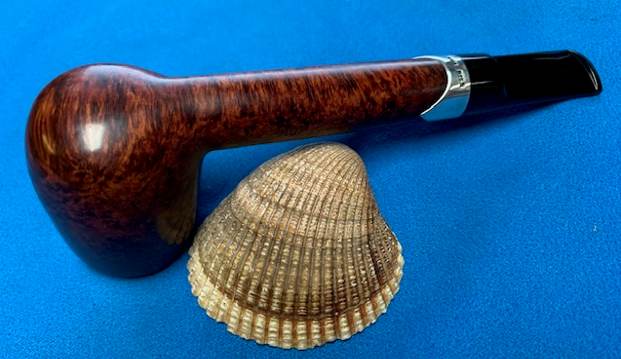
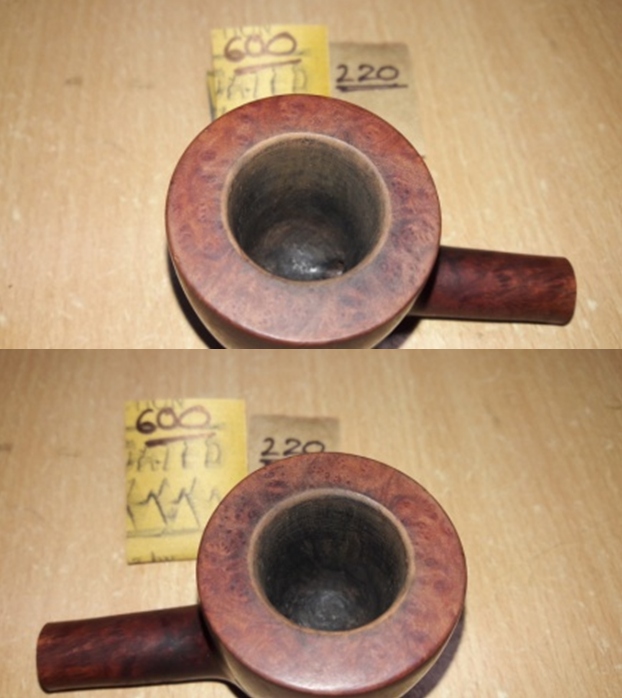
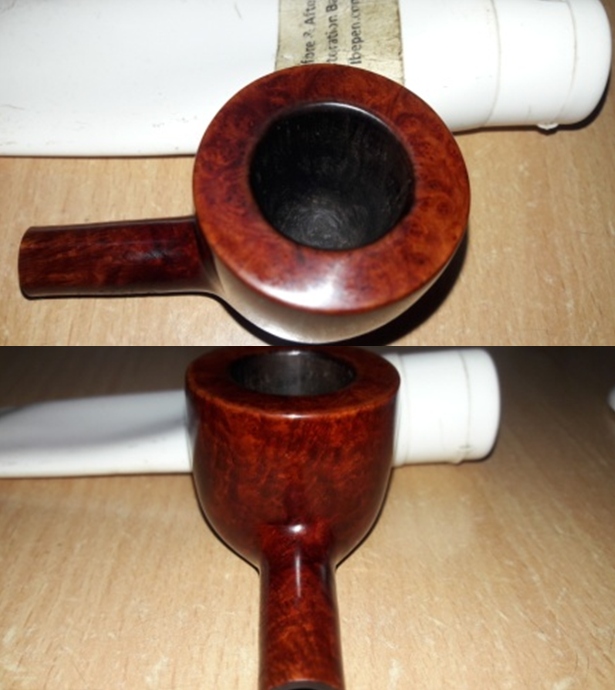
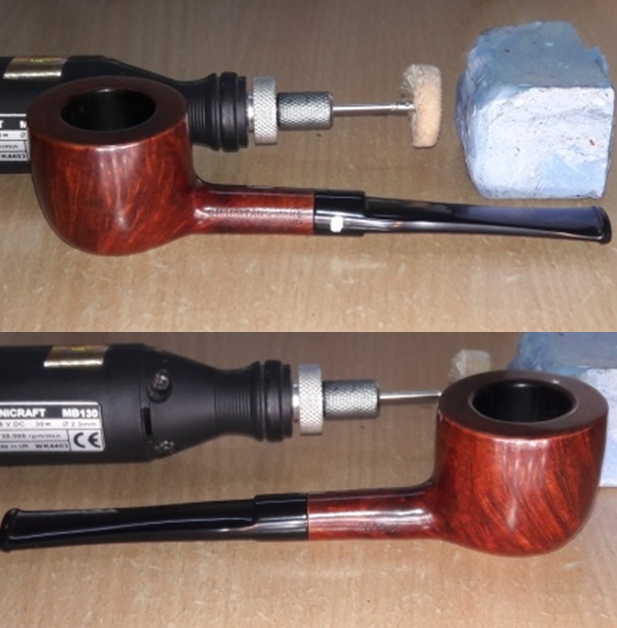
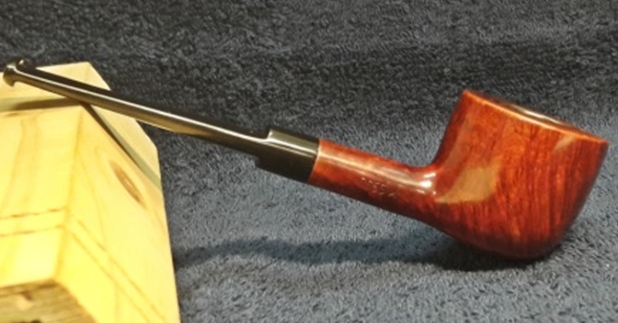
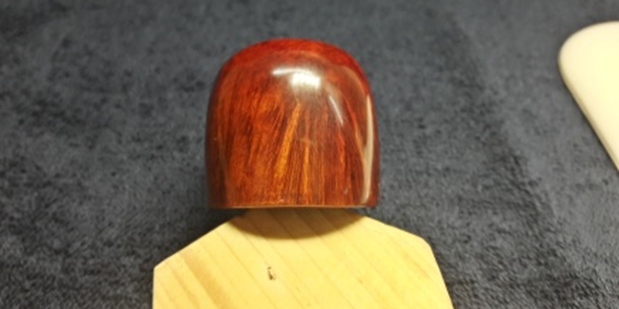
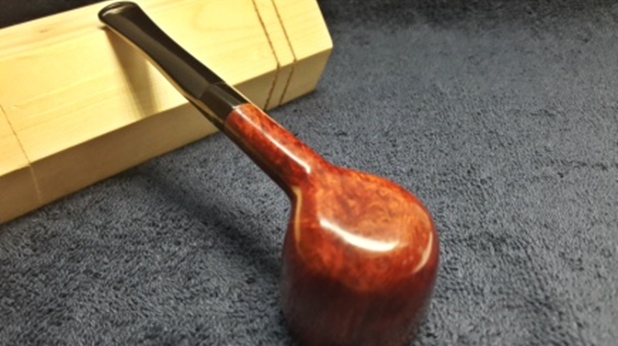
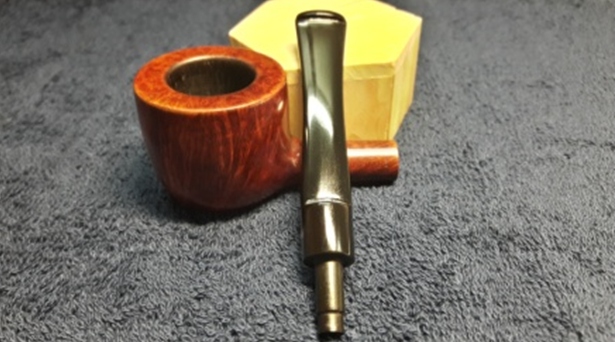
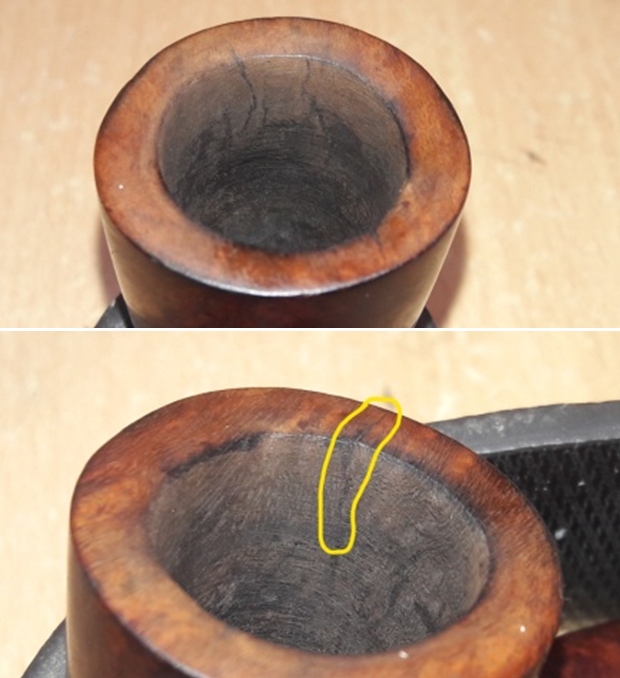
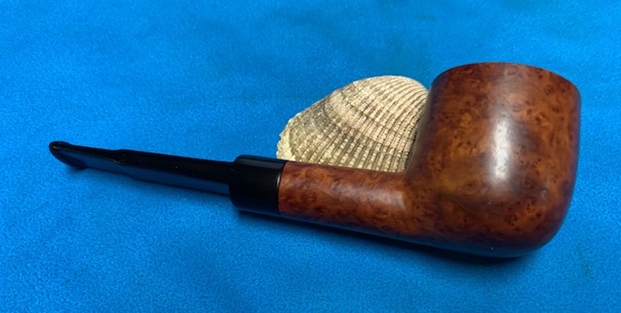
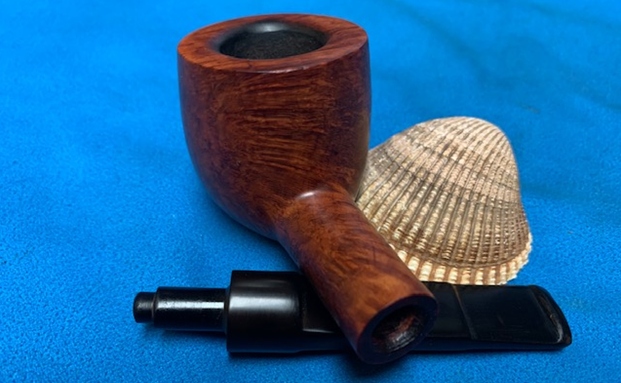
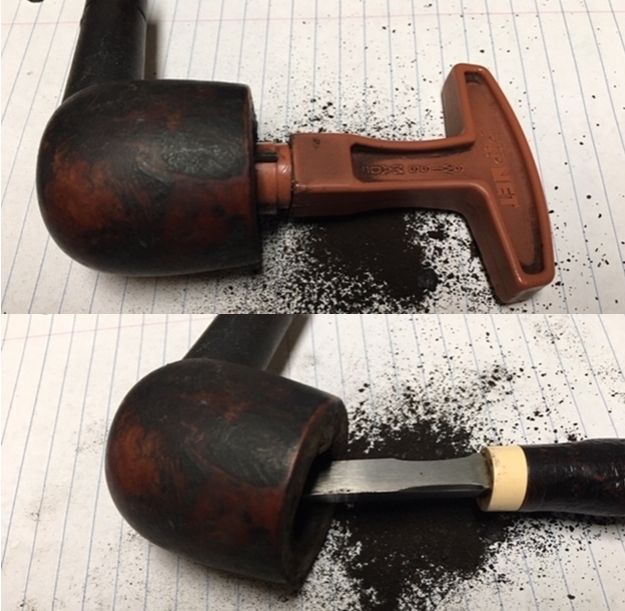
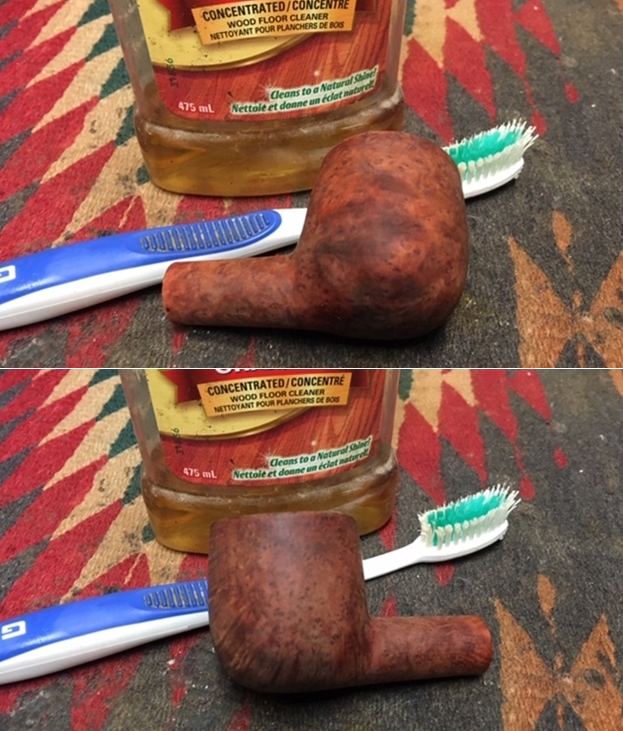
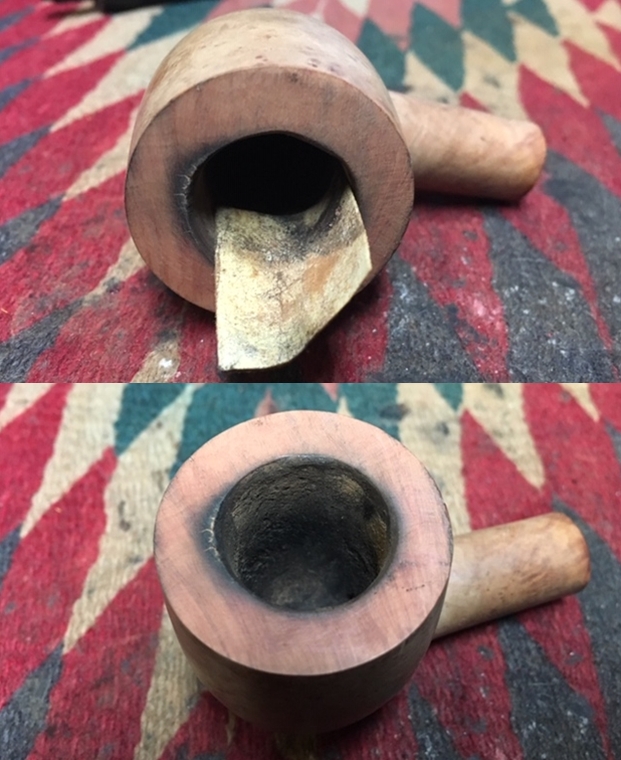
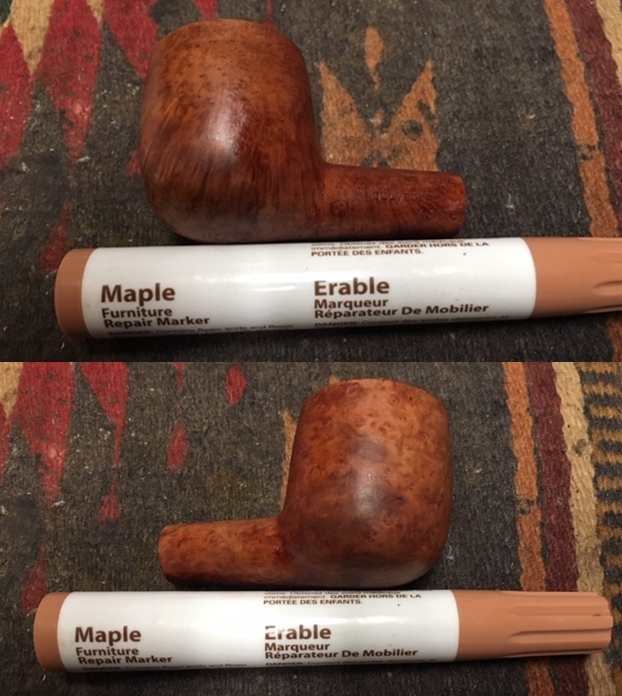
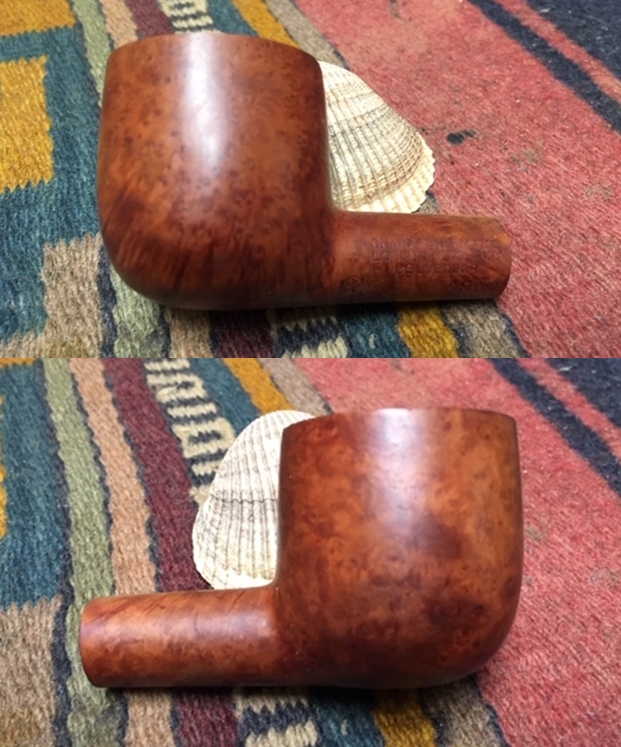
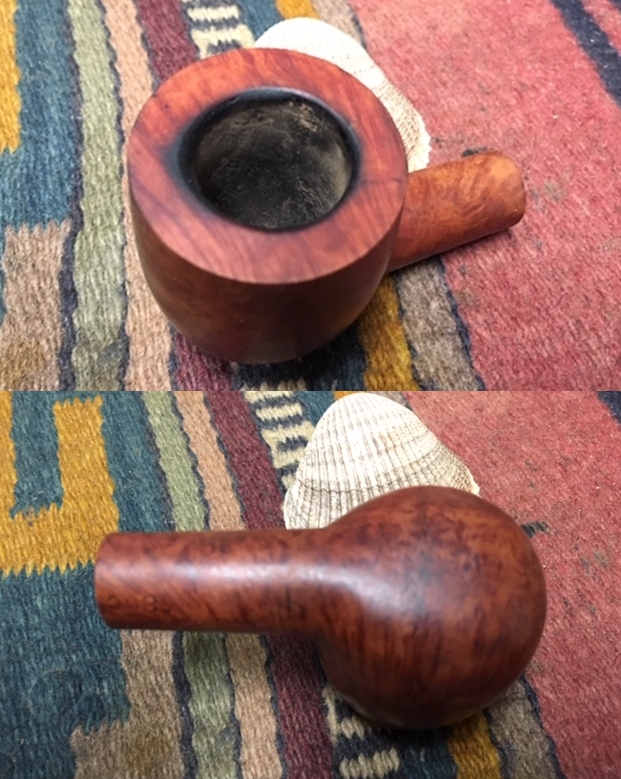
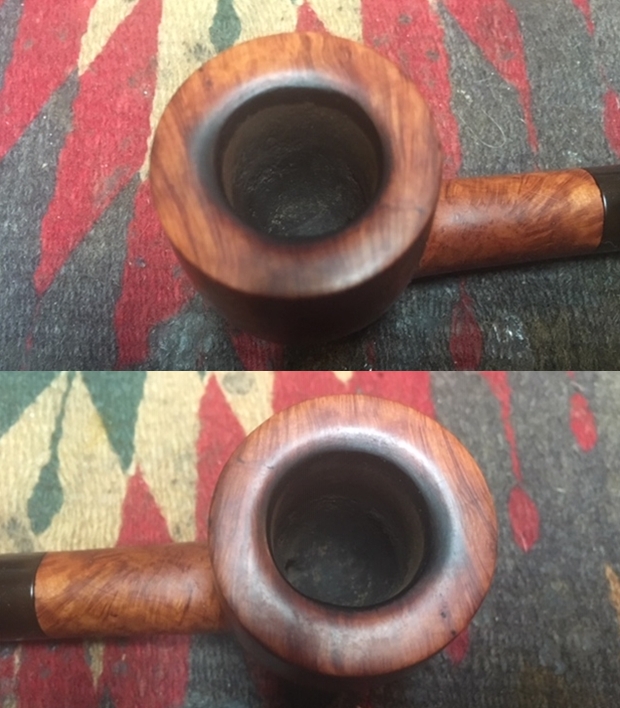
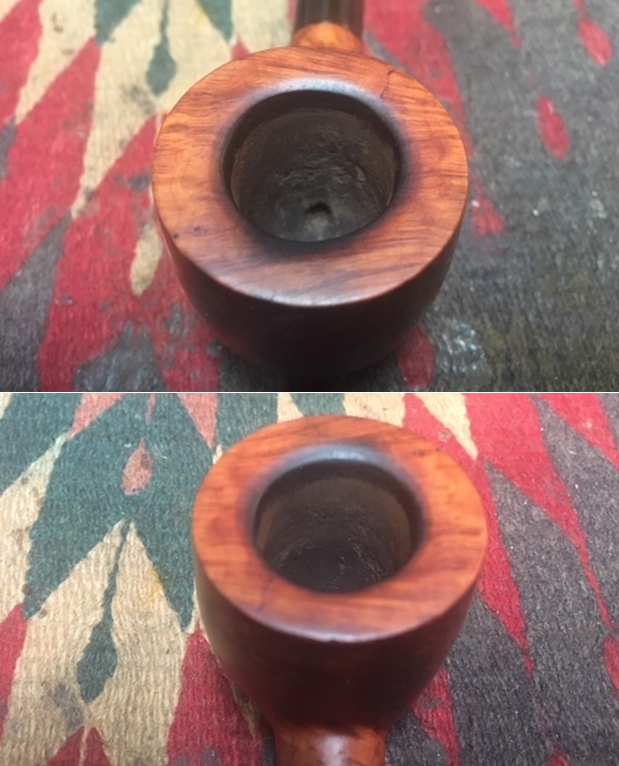
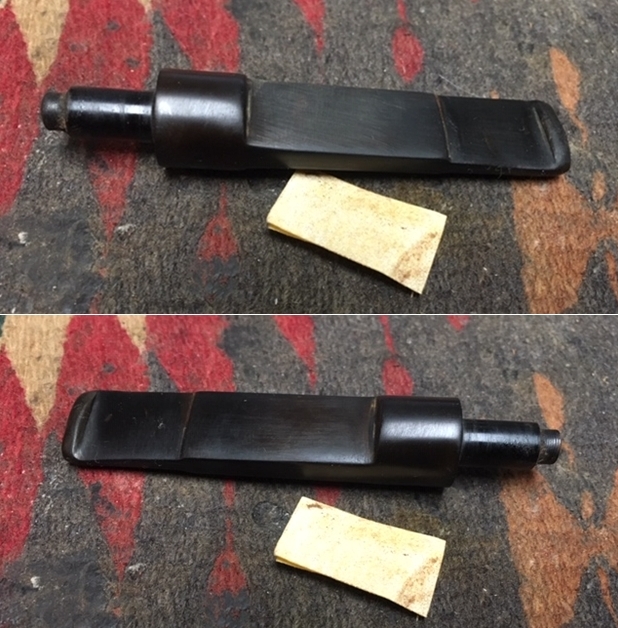
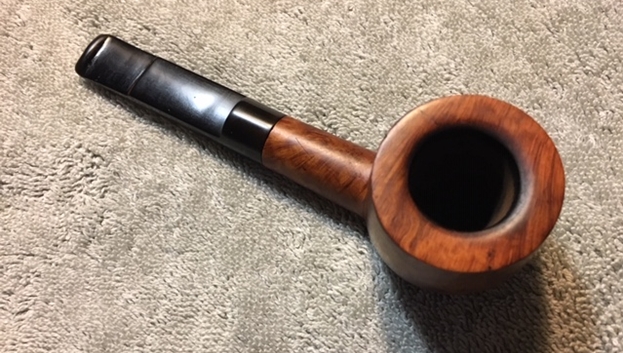
With that information at hand I turned to work on the pipe itself. Jeff had thoroughly cleaned up the pipe. He reamed the pipe with a PipNet Pipe Reamer and cleaned up the remnants with a Savinelli Fitsall Pipe Knife. He scrubbed the bowl with undiluted Murphy’s Oil Soap with a tooth brush. He rinsed it under running warm water to remove the soap and grime. He cleaned out the inside of the shank and the airway in the stem with alcohol, cotton swabs and pipe cleaners. He scrubbed the exterior of the stem with Soft Scrub to remove as much of the oxidation and calcification as possible. He soaked the stem in Briarville’s Pipe Stem Deoxidizer and rinsed it off with warm water. I took photos of the pipe once I started to work on it.  I took some photos of the rim top and stem. The rim top and bowl looked very good. The cake and lava overflow were gone and the inward inward edge of the rim was very clean. There was damage on the back and front of the inner rim edge. Jeff had been able to get rid of most of the darkening and all of the lava and tars. The rim top looked good with no marks or nicks on the surface or edges. The closeup photos of the stem shows that it is a much cleaner and better-looking stem. There is still some residual oxidation on the saddle and blade that I will need to deal with. The light tooth chatter was still present but faint and the stem looked really good. I took some photos of the stamping on the shank sides to show the condition after the cleanup. Often the stamping takes a hit with the cleaning and is lessened in its clarity. Jeff does a great job in leaving the stamping looking very good. I also removed the stem from the shank and took a photo of the pipe to show the proportions of the pipe. It is a pretty pipe. Now it was time to work on the pipe. I started working on this pipe by turning to the bowl. I chose to deal with the darkening and burn damage on the inner rim edges and top. I used a folded piece of 220 grit sandpaper to remove the damage and darkening. It took a little work but I was able to remove all of the darkening. It is a beautiful piece of briar with some great grain.Once rim edges were reshaped and reworked I needed to blend them into the rest of the briar. I polished the briar with micromesh sanding pads. I choose to dry sand the briar rather than wet sand it. Again, it is a matter of personal preference. I prefer to use the pads dry and find they work very well on the briar. I sand with each pad (9 in total) and group them by threes for ease of reference. I also work over the plateau areas at the same time. I wipe the bowl down after each pad with a damp cloth to remove the sanding debris and check the briar. I love seeing the developing shine on the briar as I move through the pads which is why I include so many photos of this step. For the past few years now I have been using Before & After Restoration Balm. It is a “waxy” paste/balm that is rubbed into the surface of the briar and the plateau. The product works to deep clean the nooks and crannies of finish, enliven and protect the briar. I worked it into the briar with my finger tips and let it sit for 10 minutes to do its work. I wiped it off with a soft cloth and buffed it with a cloth. The briar really took on a deep shine and the grain shone through. The photos I took of the bowl at this point mark the progress in the restoration. It is a gorgeous pipe. I set the bowl aside and turned my attention to the stem. The stem was in good nick other than the light oxidation on the top side. There some light tooth marks next to the button edge button chatter on the surface. I “painted” the surface in those areas with the flame of a light and raised them. I sanded out what remained with 220 grit sandpaper and then started polishing with 600 grit wet dry sandpaper.  I scrubbed the stem surface with Soft Scrub cleanser to remove the oxidation in the vulcanite. I was able remove all of the residual in the finish and the stem looked much better. I used micromesh sanding pads and water to wet sand the stem with 1500-12000 grit sanding pads. I wiped it down after each sanding pad with Obsidian Oil on a cotton rag after each sanding pad as I find it does two things – first it protects the vulcanite and second it gives the sanding pads bite in the polishing process.   After finishing with the micromesh pads I rub the stem down with Before & After Fine and Extra Fine stem polish as it seems to really remove the fine scratches in the vulcanite. I rub the Fine Polish on the stem and wipe it off with a paper towel and then repeat the process with the extra fine polish. I finish the polishing of the stem down with a final coat of Obsidian Oil and set the stem aside to let the oil absorb. This process gives the stem a shine and also a bit of protection from oxidizing quickly.I finished with the Blue Diamond and moved on to buffing with carnauba wax. Once I have a good shine in the briar and vulcanite I always give the bowl and the stem multiple coats of carnauba wax. I have found that I can get a deeper shine if I following up the wax buff with a clean buffing pad. It works to raise the shine and then I follow that up with a hand buff with a microfiber cloth to deepen the shine. It is always fun for me to see what the polished bowl looks like with the polished vulcanite and acrylic combination stem. It really is a beautiful pipe. The smooth finish around the bowl sides and shank show the grain shining through the rich brown stains of this Charatan’s Make London England Belvedere 4 Billiard overstamped with flower/sun figures. The finished pipe feels great in my hand. It is light and well balanced. Have a look at it with the photos below. The dimensions are Length: 6 inches, Height: 2 inches, Outside diameter of the bowl: 1 ½ inches, Chamber diameter: ¾ of an inch. The weight of the pipe is 2.01 ounces/57 grams. It is a beautiful pipe and one that I will be putting on the rebornpipes store in the British Pipe Maker section.

Thanks to each of you who are reading this blog. I am always open to questions and comments from you who are reading the blog. Remember we are not pipe owners; we are pipe men and women who hold our pipes in trust until they pass on into the trust of those who follow us.

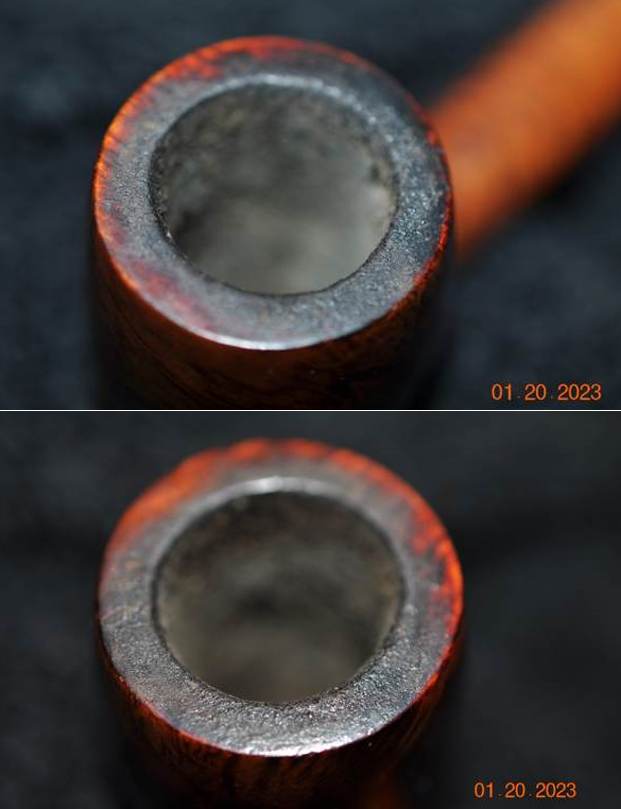
Life for a Chunky, Lane Era Charatan’s Make Belvedere 402 Canadian


Blog by Steve Laug

Once again in this write up and I will take you through my process of working on each pipe that we purchase. Jeff has set up a spread sheet to track where the pipe came from, the date of purchase and what we paid for it so that we know what we have invested in the pipe before we even work on it. This takes a lot of the guess work out of the process. This particular pipe was purchased on 07/22/2021 from an Antique Shop in Vancouver, Washington, USA. I also want you to understand why we take the photos we do. If you have followed for a while then you will see the familiar pattern of the photos we include both in the before and midstream process of working on a pipe. It is not accidental or chance as the photos have been taken to help me make an assessment of the pipe Jeff sees before he starts his clean up work. We do this to record the condition that the pipe was in when received it and to assess what kind of work will need to be done on. When I look at these photos this is what I see.

  1. The first thing I see is the chunky shank and large size of the bowl. It is well proportioned and well made with a classic English shape.
  2. The finish is dirty and there are oils from the smoker’s hands on both side of the bowl. There is grime ground into the finish as well but even so there is also some great grain peeking through.
  3. The rim top had a thick lava overflow from the cake in the bowl. There is some damage on the front inner edge and top but it is hard to know if there is darkening or damage under the lava. Sometimes the lava protects the rim top and edges and sometime it hides issues. Its is very dirty looking.
  4. The bowl has a thick cake in it that hides the walls and the inner edge of the bowl but once it is clean we will know what the edges look like. There are a some nicks in the inner edge of the bowl that will become clearer when the pipe is cleaned. The outer edges look good and there does not appear to be any obvious burn damage to the top or bowl edges.
  5. The vulcanite taper stem is in good condition – dirty, oxidized, calcified and has tooth chatter and marks on both sides. There appears to be a CP logo on the top of the stem – it is faint but still present.

Overall my impressions of this pipe is that it is a beauty that once cleaned up will look pretty amazing. The exterior of the bowl does not show any hot spots or darkening. The pipe is very English looking and is a classic oval shank Canadian that has the distinctive cut of a Charatan. The photos below confirm the assessment above. Jeff took close up photos so that I could have a clearer picture of the condition of the bowl, rim edges and top. The rim top photos confirm my assessment above. The cake in the bowl is quite thick and the rim top has lava and debris on it. You can also see the condition of the outer edge but the inner edge is a bit of a mystery at this point. This is what I look for when assessing a pipe. While there is lava and darkening there is no visible burn damage at this point. The bowl is still fairly round. The photos of the stem surface from various angles confirmed my assessment of its condition. You can see the oxidation and the fit against the tarnished silver band on the shank end. The stem surface though dirty does not appear to have tooth marks – chatter yes, but no deep marks. The stem is quite dirty but otherwise undamaged. The next photos show the amazing grain around the heel and the sides of the bowl. Tell me what you see? Are there any visible problems that stand out to you? Are the cracks or scratches? Are there visible flaws or fissures in the briar? What kind of grain stands out around the bowl and heel? Any visible issues on the heel of the bowl? Even the questions should help you to see what I am looking for when I see these photos. You have read it a few times now in the previous blogs. What am I looking for when I look at the shank stamp? In this case it is stamped on the left side and reads Charatan’s Make[over] London England [over] Belvedere in three lines. How does the stamping look to you? Is it clear and readable? Is it faint in spots or is it uniform? I know you are looking at photos but so do I at this point in the process. The topside is also stamped near the shank/stem junction and reads 402 which is the shape number for a Canadian. The same questions apply here as well. An added part of pipe restoration for me is to try to gather as much background on a brand and maker as I can find. With Charatan that is an enjoyable web to untangle. There is a lot of information and it can lead to understanding what era a pipe was made in. To try to figure out the era of the Charatan’s pipe I was working on I turned to the Pipephil website, Logos and Stampings (http://www.pipephil.eu/logos/en/logo-charatan.html). There is some really helpful information on each of the lines of Charatan’s Make pipes that entered the market. There is an alphabetical listing of the lines but the Belvedere they showed had a stem made for a 9mm filter while the one I have is a nonfiltered pipe. The site did give a short history of the brand. I quote the portion that is most pertinent.

The brand was founded in 1863 by Frederik Charatan. When his father retired in 1910, Reuben Charatan took over the family business. All the pipes were handmade until 1973. The brand name has been overtaken by Dunhill in 1978 and sold in 1988 to James B. Russell Inc.(NJ, USA). During the period 1988-2002 Charatans were crafted by Butz Choquin in St Claude (France). Dunhill re-purchased Charatan brand name in 2002 and Colin Fromm (Invicta Briars, Castleford) followed up on freehand production.

Next I turned to Pipedia to see if I could find more information on the brand and possibly a link to the Belvedere line (https://pipedia.org/wiki/Charatan) but once again in the general article it was not listed. It did give a little more historical information. I quote the pertinent parts that give information on this particular pipe.

In 1950 Herman G. Lane, striving to expand his business in Great Britain, made contacts with the Charatan family. Apparently Lane got a certain influence soon, but it was not until 1955 that Lane Ltd. became the sole distributor for Charatan’s in the United States superseding Wally Frank. This can be documented in a “biography” written for Herman G. Lane titled “Leaves from a Tobaccoman’s Log”.

Thanks to Herman G. Lane’s dedicated labor Charatan became hugely popular in the States. As reported by Ken Barnes in an interview with Rick Newcombe, Reuben Charatan passed away in 1962, and his widow sold the firm to Herman Lane 1 or 2 years after his death.[1] In the early 1960s Charatan pipes were the first to overstep the $100 Dollar line in US pipe sales. In 1978 Lane’s heirs sold the Charatan company to Dunhill. The Prescot Street factory was closed in March 1982. Thereafter the fame and quality of the make declined.

The pre-Lane period (prior to 1955) and the Lane era pipes (1955 to until sometime between 1979 – 1984) are of primary interest the collector. The Lane era is often quoted as beginning about 1950.

Charatan records are almost non-existent before Lane due to a factory fire, making it difficult to date pre-Lane pipes. Charatan used 4 basic grades prior to 1950: Supreme, Selected, Executive, and Belvedere. After 1950 Herman Lane’s influence began, and the grades started to expand. In 1955 Lane took over sole distributorship of Charatan in the US. In 1957 he introduced the Supreme S. Most of his other introductions were from the 1960s and early 1970s.

From this I am fairly certain I am dealing with a Lane pipe made after 1955 and because of the Belvedere stamp it could potentially go back as far as before 1950. There is also a circle L script mark that is a Lane stampings on the pipe which also supports this.

I continued digging further into the dating of the pipe, but what I had found above was a good start for me. If some of you would like to try your hand at dating it more accurately as to the time period it came out you might want to check out the article on Pipedia on Dating Charatans (https://pipedia.org/wiki/Dating_of_Charatans).

I also reread the article on Pipedia by the Italian fellow who contributed some really helpful information on the brand (https://pipedia.org/wiki/Charatan_-_Milan_2014). I quote the section on the Second period: Reuben Charatan 1910 – c. 1962. I have highlighted a portion of the section on the shank in red to point out some more helpful dating information.

– In 1962 Herman Lane took over the business from the Charatan family, although he had already influenced production from the 1950s.

– The pipes were mostly larger than the previous ones and corresponded in size to Dunhill group 5. These are slightly less rare, but still difficult to find.

– Stem: Usually in ebonite, saddle shaped or tapered, bearing a fine “CP” stamp, underbore system (see below) used when necessary.

– Shank: The shape code is stamped on it together with the nomenclature “CHARATAN’S MAKE LONDON ENGLAND” arranged in two lines. From 1955 onwards on the models marketed for the USA there is also a serif and circled capital “L” (but not all models bear this) which resembles the pound sterling symbol. The “L” is for Lane, the importer.

From 1958, Lane changed the nomenclature for models marketed for the US to clarify the message: “MADE BY HAND”.  In this period the underbore was introduced. Its manufacturing period ranged between 1920 and c.1930. This model was equipped with a duralumin plunger trap fitted in the stem, which served to clean the residue more easily. This particular model bore a special stamp on the stem, and also had its own catalogue…

QUALITY GRADES…The stem did not only display the stamps mentioned above. Another stamp that can help dating is the one referring to the quality of the pipe. Until Herman Lane arrived on the scene there were four quality grades. Starting with the lowest: Belvedere, Executive, Selected, and Supreme. Lane went on to add higher grades from time to time: Supreme S, Supreme S100, S150, S200, S250, S300, Coronation, Royal Achievement, Crown Achievement, and Summa Cum Laude; these last three are extremely rare and almost impossible to find. He also invented other, different grades, even changing the previous pipe classification standards. We will not go into detail here, but it means that if we find an S100 or Coronation the pipe was manufactured following Herman Lane’s acquisition. In particular, the FH mark, or Freehand pipe was commissioned to the famous Danish craftsman, Preben Holm.

Nomenclature

The Lane Trademark serif and circled L indicates the pipe is from the “Lane Era” (approx. 1955 to 1979 -1984?), however it appears that both the English factory or Lane themselves sometimes, or perhaps even often forget to stamp the L on a pipe. The Charatan factory was known for inconsistencies, especially in stampings. Therefore, although an L on the pipe definitely defines it as a Lane Era pipe, the lack of it could simply mean the pipe missed receiving the stamp from the factory. The lack of the trademark could also mean the pipe was destined for the European market.

Charatan pipes were not well distributed prior to the Lane Era, so very few pre-Lane pipes exist today. Herman Lane greatly grew the brand in the U.S., which caused corresponding growth in Europe.

Generally, when the pipe is stamped with the BLOCK letters “MADE BY HAND” it means the pipe was probably made between 1958 and 1965”

Generally, block letters “MADE BY HAND” and some of the other nomenclature in script (i.e. City of London or Extra Large next to the MADE BY HAND) means the pipe was made sometime between 1965 and the mid 1970s. The total script nomenclature “Made by Hand in City of London” evolved over this period of time, so many pipes had variants, such as Made By Hand in block letters and City of London in script, or some other variation of the terms or stampings.

It is believed the FH was used on Charatan pipes between 1957 and 1967-68. Three different sizes were used. The Charatan Logo (CP) on the pipe bit was changed over the year

Now I knew I was working on a pre-Lane pipe which actually means it was between 1950- 1955 as shown by the stamping.

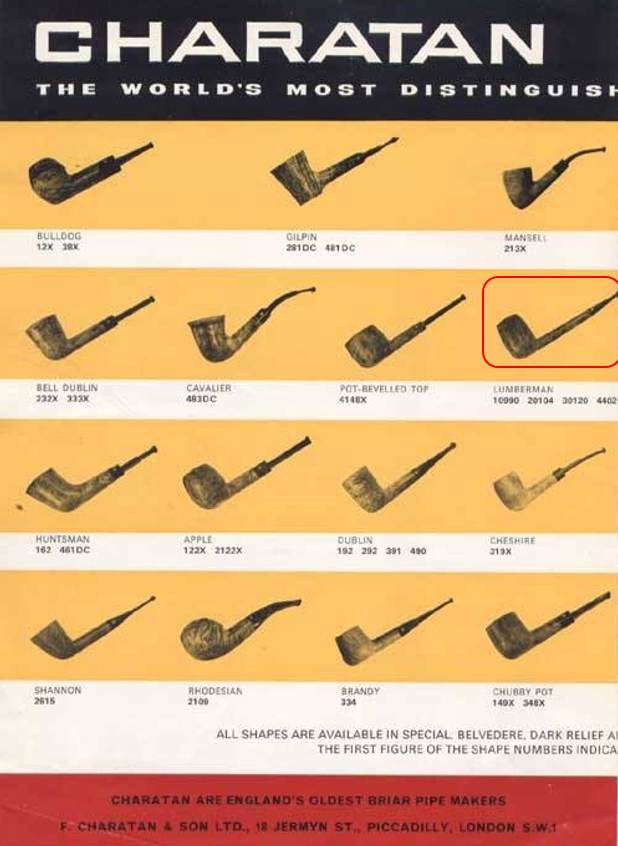
I followed a link to a catalogue listing for the shape 402 which is the shape number for an Outsize Lumberman/Canadian. Here is the link (https://pipedia.org/wiki/Charatan_Models_%26_Shape_Information_for_the_Collector) I am sure many of you will shake your head and ask maybe even out loud, “Why is he including this again?” However, please remember that the point of these blogs is not to wow your with the work or make you shake your heads but I want you to know the details of the work we do so you can do your own. Back in 2020 Jeff wrote a blog about his cleaning process. I am including a link to that now so you can see what I mean about his process. Do not skip it! Give it a read (https://rebornpipes.com/2020/01/20/got-a-filthy-estate-pipe-that-you-need-to-clean/). Here is the introduction to that blog and it is very true even to this day.

Several have asked about Jeff’s cleaning regimen as I generally summarize it in the blogs that I post rather than give a detailed procedure. I have had the question asked enough that I asked Jeff to put together this blog so that you can get a clear picture of the process he uses. Like everything else in our hobby, people have different methods they swear by. Some may question the method and that is fine. But it works very well for us and has for many years. Some of his steps may surprise you but I know that when I get the pipes from him for my part of the restoration they are impeccably clean and sanitized. I have come to appreciate the thoroughness of the process he has developed because I really like working on clean pipe!

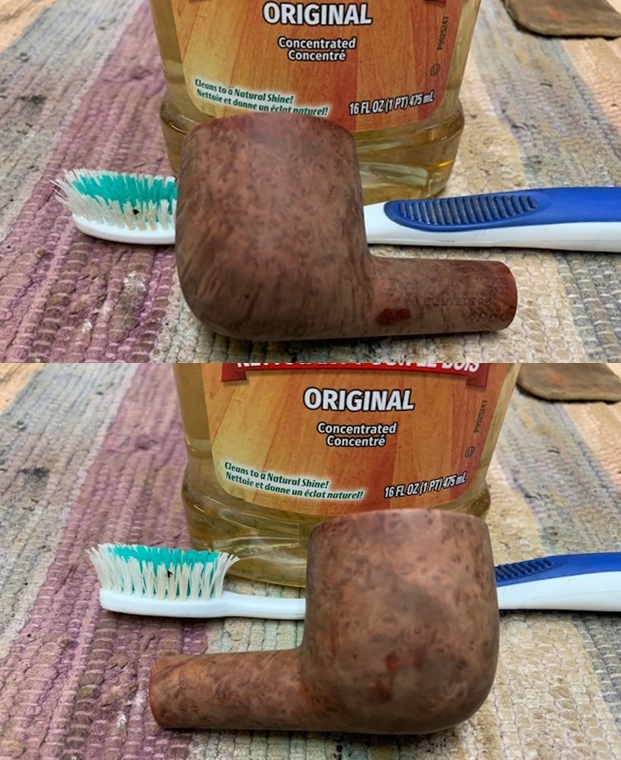
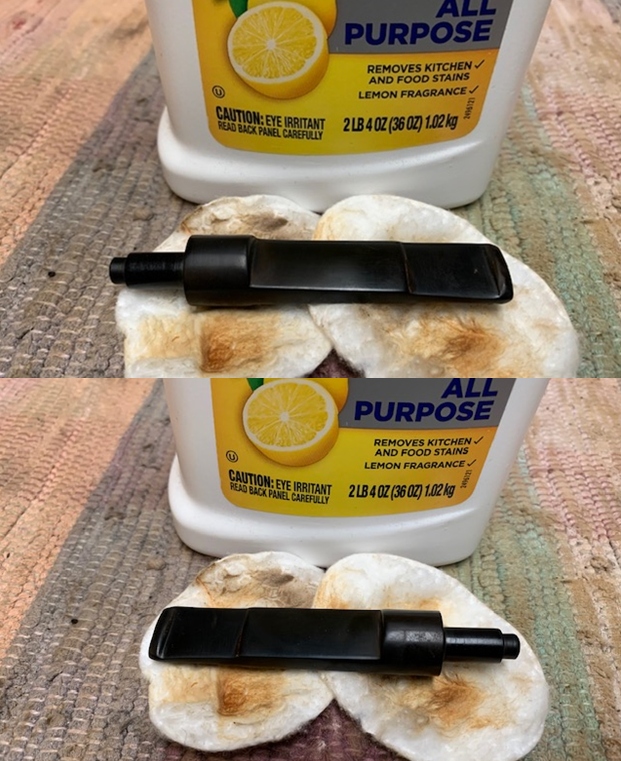
For the benefit of some of you who may be unfamiliar with some of the products he uses I have included photos of three of the items that Jeff mentions in his list. This will make it easier for recognition. These three are definitely North American Products so you will need to find suitable replacements or order these directly on Amazon. The makeup pads are fairly universal as we were able to pick some up in India when we were with Paresh and his family.

In the blog itself he breaks his process down into two parts – cleaning the stem and cleaning the bowl. Each one has a large number of steps that he methodically does every time. I know because I have watched him do the work and I have seen the pipes after his work on them. He followed this process step by step and when the pipe got to me it was spotlessly clean and ready for my work. The inside of the stem, shank and bowl were clean and to me that is an amazing gift as it means that my work on this end is with a clean pipe! I cannot tell you how much difference that makes for my work.

When the pipe arrives here in Vancouver I have a clean pipe and I go over it keeping in mind my assessment shared in the opening paragraph above. Now that I have it in hand I am looking for confirmation of what I saw in the photos as well as any significant structural changes in the bowl and finish as I go over it.

  1. The chunky shank and large size of the bowl look very good and are well proportioned and have a classic English Charatan shape.
  2. The finish is clean and the oils have been removed from both sides of the bowl. The grime ground into the finish is gone and there is some great grain around the bowl sides.
  3. The thick lava coat on the rim top has been removed and there is some nicks and damage on the top and inner edges of the bowl.
  4. The walls of the bowl are clean and I do not see any checking or burn damage. The inner edge of the bowl had some nicks and burn damage on the edges. There was damage on the front inner edge and some on the back edge as well. The outer edges look good and there does not appear to be any obvious burn damage there.
  5. The vulcanite taper stem is clean and has light tooth chatter and marks on both sides. There is a CP logo on the top of the stem – it is faint but still present.

Hopefully the steps above show you both what I look for when I go over the pipe when I bring it to the work table and also what I see when I look at the pipe in my hands. They also clearly spell out a restoration plan in short form. My work is clear and addressing it will be the next steps. I took photos of the whole pipe to give you a picture of what I see when I have it on the table. This is important to me in that it also shows that there was no damage done during the clean up work or the transit of the pipe from Idaho to here in Vancouver.  I carefully went over the bowl and rim top to get a sense of what is happening there. In this case once the lava was removed damage to the edge and top was revealed. Originally I thought it looked like reaming damage but I don’t think so as I examine it closely. I think it is actually burn damage to the edge that extends around the inner edge though it is heavier at the front and back of the bowl. The rim top also shows some damage. It is clean but will need to be worked on to bring it back to normal. I also go over the stem carefully. There were no tooth marks or dents in the stem. I could not see any sign of remaining CP stamping on the stem so no real clue as to whether it is original or a replacement. I took photos of the rim top and stem sides to show as best as I can what I see when I look at them. I always check to make sure that the clean up work did not damage the stamping on the shank in any way. It looks good but is faint in some parts – particularly the edges of the stamp. I always appreciate the handiwork of the carvers at Charatan who turn a piece raw briar into a beautiful pipe. I love just looking at the beauty of the lay of the pipe with the grain and the proportion of the hand made pipes. I like to remove the stem from the shank to get a sense of what was in the mind of the pipe maker when he crafted the pipe. It is a beauty in flow and shape. By this time you should know that I almost always start with the bowl in my restoration because I truly do not like the tedious work of stem repairs and polishing. I always leave that until last even though I know that it needs to be done. For me the encouragement of seeing a rejuvenated bowl is the impetus I need to attack the stem work.

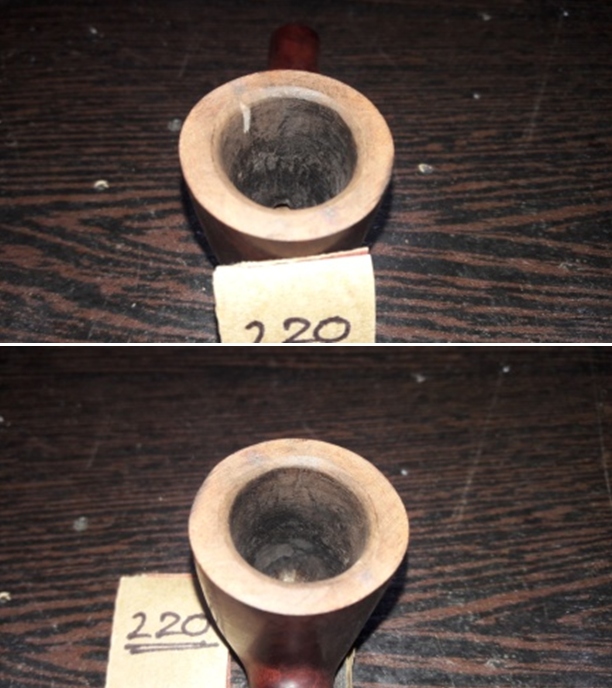
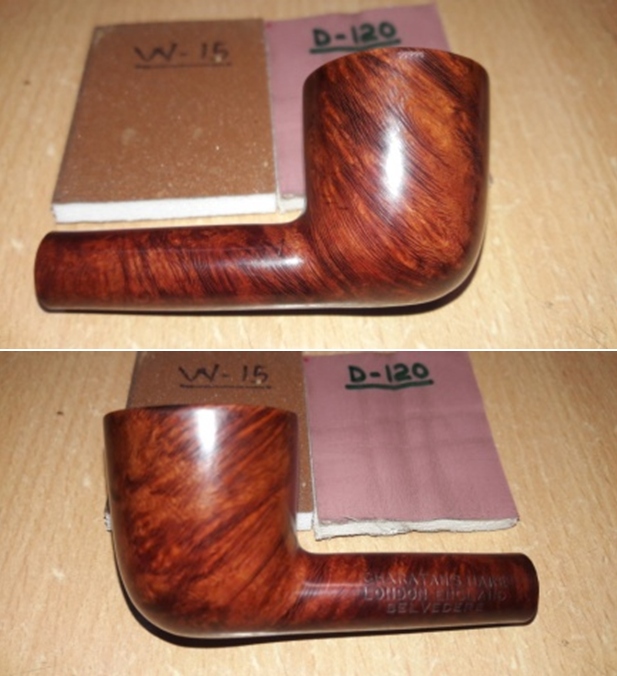
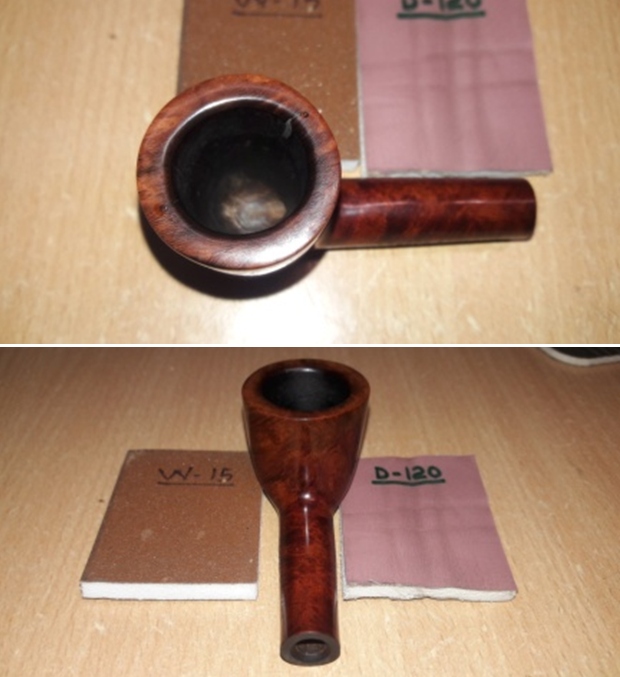
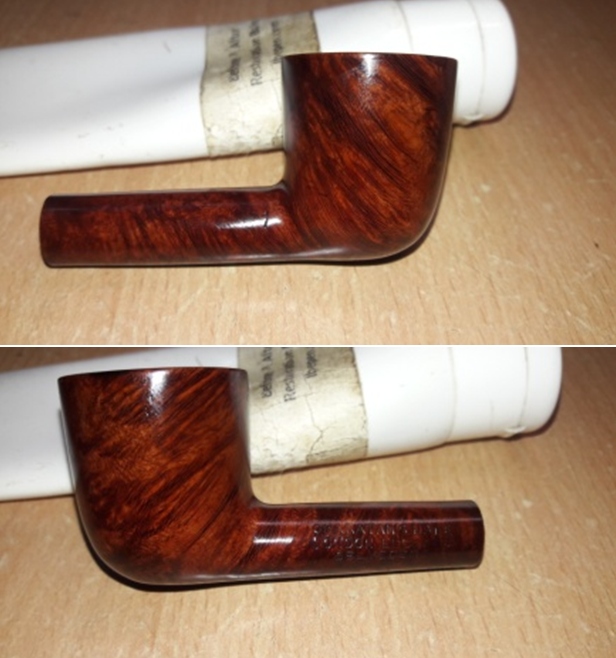
Today I started working on this pipe by turning to the bowl. I chose to deal with the nicks, darkening and burn damage on the rim edges and top. I used a piece of 220 grit sandpaper and a wooden sphere to reshape and remove the damage on the top and the inner edge. It took a little work but I was able to remove all of the darkening. It is a beautiful piece of briar with some great grain.     Once rim top was reshaped and reworked I needed to blend them into the rest of the briar. I stained it with an Oak stain pen to match the surrounding briar.I polished the briar with micromesh sanding pads. I choose to dry sand the briar rather than wet sand it. Again it is a matter of personal preference. I prefer to use the pads dry and find they work very well on the briar. I sand with each pad (9 in total) and group them by threes for ease of reference. I also work over the plateau areas at the same time. I wipe the bowl down after each pad with a damp cloth to remove the sanding debris and check the briar. I love seeing the developing shine on the briar as I move through the pads which is why I include so many photos of this step. For the past few years now I have been using a product developed by Mark Hoover called Before & After Restoration Balm. It is a paste/balm that is rubbed into the surface of the briar and the plateau. The product works to deep clean the nooks and crannies of finish, enliven and protect the briar. I worked it into the briar with my finger tips and let it sit for 10 minutes to do its work. I wiped it off with a soft cloth then buffed it with a cotton cloth. The briar really began to have a deep shine in the briar and the grain shone through. The photos I took of the bowl at this point mark the progress in the restoration. It is a gorgeous pipe. Now it was time to address the part of the restoration I leave until last. I set the bowl aside and turned my attention to the stem. I wiped the stem down with Soft Scrub cleanser to remove the light oxidation on the surface. The CP stamp was very faint and would not hold any paint or colour. It was pretty clear that it was more or less gone. I stated with the tooth marks. I “painted” the surface dents with a Bic light flame and was able to lift them significantly. I sanded the stem with 220 grit sandpaper to further blend them into the vulcanite. I started the polishing of the stem with 600 grit wet dry sandpaper. I use micromesh sanding pads and water to wet sand the stem with 1500-12000 grit sanding pads. I wiped it down after each sanding pad with Obsidian Oil on a cotton rag after each sanding pad as I find it does two things – first it protects the vulcanite and second it give the sanding pads bite in the polishing process.After finishing with the micromesh pads I rub the stem down with Before & After Fine and Extra Fine stem polish as it seems to really remove the fine scratches in the vulcanite. I rub the Fine Polish on the stem and wipe it off with a paper towel and then repeat the process with the extra fine polish. I finish the polishing of the stem down with a final coat of Obsidian Oil and set the stem aside to let the oil absorb. This process gives the stem a shine and also a bit of protection from oxidizing quickly.The final steps in my process involve using the buffer. I first buff the stem and the briar with Blue Diamond on the buffing wheel. Blue Diamond is a plastic polish but I find that it works very well to polish out the light scratches in the vulcanite and the briar. I work the pipe over on the wheel with my finger or thumb in the bowl to keep it from becoming airborne. It works well and I am able to carefully move forward with the buffing. The briar and stem just shone! I finished with the Blue Diamond and moved on to buffing with carnauba wax. Once I have a good shine in the briar and vulcanite I always give the bowl and the stem multiple coats of carnauba wax. I have found that I can get a deeper shine if I following up the wax buff with a clean buffing pad. It works to raise the shine and then I follow that up with a hand buff with a microfiber cloth to deepen the shine. It is always fun for me to see what the polished bowl looks like with the polished vulcanite and acrylic combination stem. It really is a beautiful pipe. The smooth finish around the bowl sides and shank show the grain shining through the rich brown stains of this Lane Era Charatan’s Make London England Belvedere 402 Canadian. The finished pipe feels great in my hand. It is light and well balanced. Have a look at it with the photos below. The dimensions are Length: 6 inches, Height: 2 inches, Outside diameter of the bowl: 1 ¼ inches, Chamber diameter: ¾ of an inch. The weight of the pipe is 1.98 ounces/55 grams. It is a beautiful pipe and one that I will be putting on the rebornpipes store in the British Pipe Maker section.

Hopefully the shape writing this blog is helpful to you in some way. In it I wanted to show both what I am looking for and how I move forward in addressing what I see when work on a pipe. Let me know if it is helpful to you. It is probably the most straightforward detailed description of my work process that I have done. As always I encourage your questions and comments as you read the blog. Thanks to each of you who are reading this blog. Remember we are not pipe owners; we are pipemen and women who hold our pipes in trust until they pass on into the trust of those who follow us.

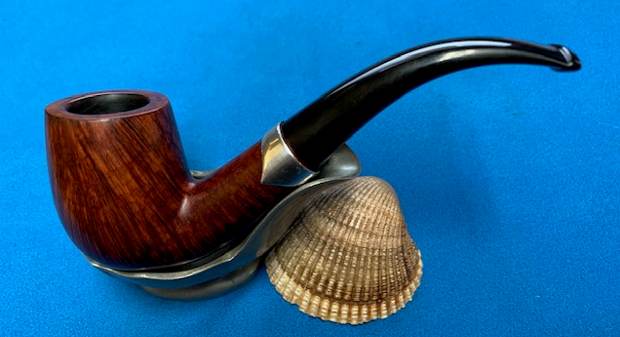
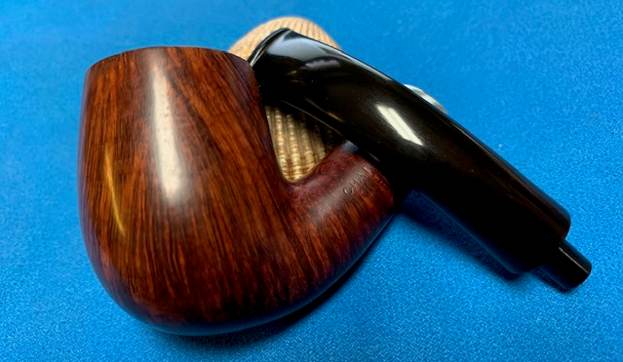
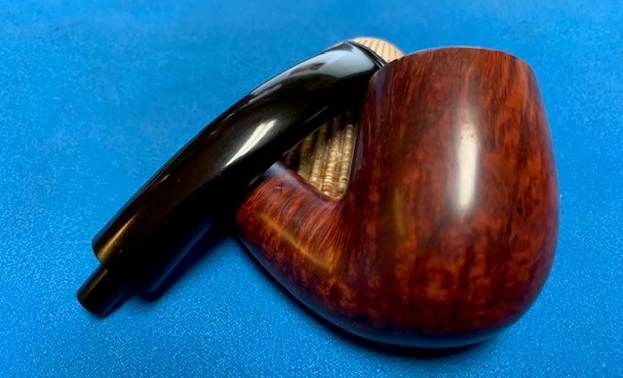
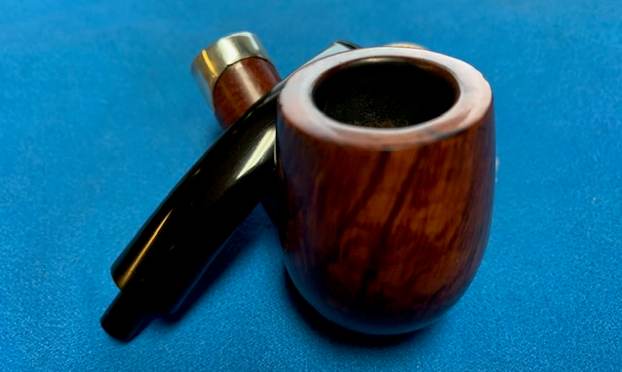
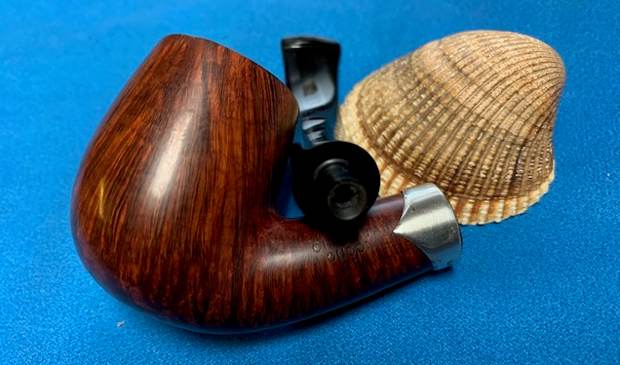
London meets Copenhagen – Charatan’s Make Belvedere 110X Bent Billiard with a S.Bang Band


Blog by Steve Laug

Once again in this write up and I will take you through my process of working on each pipe that we purchase. Jeff has set up a spread sheet to track where the pipe came from, the date of purchase and what we paid for it so that we know what we have invested in the pipe before we even work on it. This takes a lot of the guess work out of the process. This particular pipe was purchased on 11/10/2022 from Copenhagen, Denmark from a seller we buy a lot of pipes from. I also want you to understand why we take the photos we do. If you have followed for a while then you will see the familiar pattern of the photos we include both in the before and midstream process of working on a pipe. It is not accidental or chance as the photos have been taken to help me make an assessment of the pipe Jeff sees before he starts his clean up work. We do this to record the condition that the pipe was in when received it and to assess what kind of work will need to be done on. When I look at these photos this is what I see.

  1. The first thing I see is a unique Sterling Silver band on the shank that has become familiar from the pipes we have purchased from Copenhagen. Each one is much the same and all were made by S. Bang. I am pretty certain this is one as well. The question is if it is cosmetic like the others have been or does it take care of a crack in the shank. We shall see.
  2. The finish is dirty and there is oils from the smoker’s hands on both side of the bowl. There is grimed ground into the finish as well but even so there is also some great grain peeking through. From the exterior it does not appear that there is a crack in the shank but when Jeff examines it he will confirm either the presence or absence of a crack.
  3. The rim top had a moderate lava overflow from the cake in the bowl. It was thicker on the back half of the rim top but present all the way around. It is hard to know if there is darkening or damage under the lava. Sometimes the lava protects the rim top and edges and sometime it hides issues. Its is very dirty looking.
  4. The bowl has a thick cake in it that hides the inner edge of the bowl but once it is clean we will know what the edges look like. The outer edges look good and there does not appear to be any obvious burn damage to the top or bowl edges.
  5. The vulcanite taper stem is in good condition – dirty, lightly oxidized and has light tooth chatter on both sides. There does not appear to be a CP logo on the stem but the fit to the shank end is well done. It is hard to know with certainty if it is an original stem or a replacement.

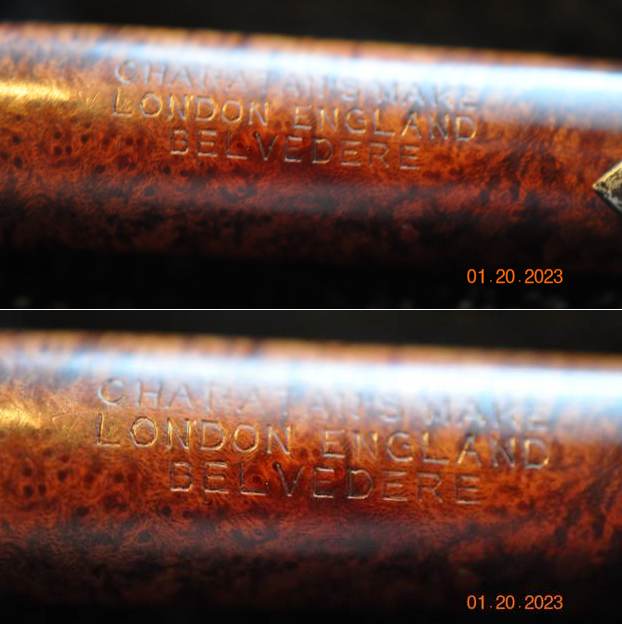
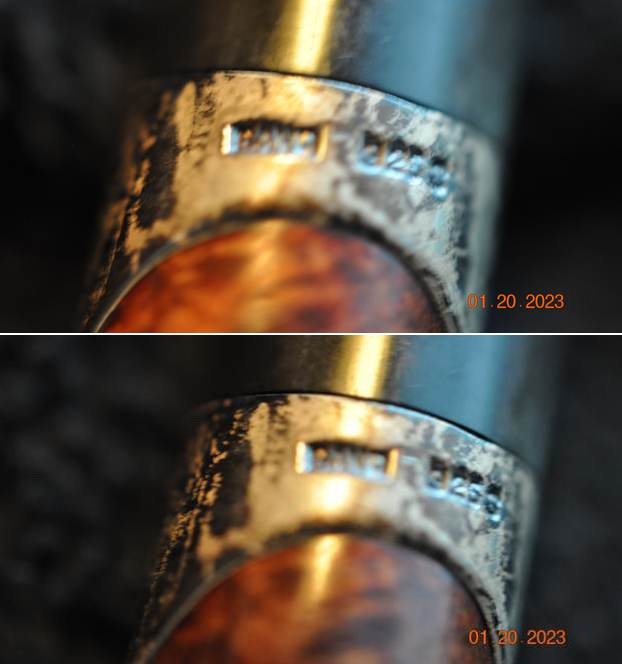
Overall my impressions of this pipe is that it is a beauty that once cleaned up will look pretty amazing. The oxidized S. Bang fancy Sterling Silver Band adds a touch bling even though tarnished that does not detract from the beauty of the pipe. The exterior of the bowl does not show any hot spots or darkening. The pipe is very English looking and is a classic Bent Billiard that has the distinctive cut of a Charatan. The photos below confirm the assessment above.Jeff took close up photos so that I could have a clearer picture of the condition of the bowl, rim edges and top. The rim top photos confirm my assessment above. The cake in the bowl is quite thick and the rim top has lava and debris on it. You can also see the condition of the outer edge but the inner edge is a bit of a mystery at this point. This is what I look for when assessing a pipe. While there is lava and darkening there is no visible burn damage at this point. The bowl is still fairly round.The photos of the stem surface from various angles confirmed my assessment of its condition. You can see the oxidation and the fit against the tarnished silver band on the shank end. The stem surface though dirty does not appear to have tooth marks – chatter yes, but no deep marks. The stem is quite dirty but otherwise undamaged. The next photos show the amazing grain around the heel and the sides of the bowl. Tell me what you see? Are there any visible problems that stand out to you? Are the cracks or scratches? Are there visible flaws or fissures in the briar? What kind of grain stands out around the bowl and heel? Any visible issues on the heel of the bowl? Even the questions should help you to see what I am looking for when I see these photos. You have read it a few times now in the previous blogs. What am I looking for when I look at the shank stamp? In this case it is stamped on the left side and reads Charatan’s Make[over] London England [over] Belvedere in three lines. How does the stamping look to you? Is it clear and readable? Is it faint in spots or is it uniform? I know you are looking at photos but so do I at this point in the process. The right side is also stamped and reads 110X which is the shape number. The same questions apply here as well.The next photos show where London Meets Copenhagen. The stamping on the stylized silver band are simply BANG in one box and 325S in the second box. I love this kind of backstory on a pipe. How did an English made pipe from London connect with an S.Bang Sterling Silver Band? I know it happened in Copenhagen as that is where we bought the pipe. We asked the seller the story on it and he said that the older gentleman who owned this pipe took it along with several others from his collection to the S. Bang workshop and had them add bands to his pipes. They were not necessary as the shank was not cracked but the old pipeman just wanted some decorative bands on his pipes (he may well have been my age so old is such a relative term). However that happened it is a great story of the meeting of this London pipe with a Danish silvermaker. I have to say that I really like the result! The only issue with this band is that it covers some of the stamping on the left side of the shank. An added part of pipe restoration for me is to try to gather as much background on a brand and maker as I can find. With Charatan that is an enjoyable web to untangle. There is a lot of information and it can lead to understanding what era a pipe was made in. To try to figure out the era of the Charatan’s pipe I was working on I turned to the Pipephil website, Logos and Stampings (http://www.pipephil.eu/logos/en/logo-charatan.html). There is some really helpful information on each of the lines of Charatan’s Make pipes that entered the market. There is an alphabetical listing of the lines but the Belvedere they showed had a stem made for a 9mm filter while the one I have is a nonfiltered pipe. The site did give a short history of the brand. I quote the portion that is most pertinent.

The brand was founded in 1863 by Frederik Charatan. When his father retired in 1910, Reuben Charatan took over the family business. All the pipes were handmade until 1973. The brand name has been overtaken by Dunhill in 1978 and sold in 1988 to James B. Russell Inc.(NJ, USA). During the period 1988-2002 Charatans were crafted by Butz Choquin in St Claude (France). Dunhill re-purchased Charatan brand name in 2002 and Colin Fromm (Invicta Briars, Castleford) followed up on freehand production.

Next I turned to Pipedia to see if I could find more information on the brand and possibly a link to the Belvedere line (https://pipedia.org/wiki/Charatan) but once again in the general article it was not listed. It did give a little more historical information. I quote the pertinent parts and have highlighted in red the sections that give information on this particular pipe.

In 1863 Frederick Charatan, a Russian/Jewish immigrant, opened a shop in Mansell Street, located in the borough of Tower Hamlets, London E1, where he began to carve Meerschaum pipes. These pipes got very popular soon, and thus Charatan moved to a bigger workshop in Prescot Street, just around the corner. Here he began to make briar pipes which should make the name famous the world over. Charatan was the first brand to make entirely hand-made briars from the rough block to the finished pipe including the stems. The nomenclature “Charatan’s Make” refers to this method of production and was meant to differentiate Charatan from other brands who “assembled” pipes from pre-drilled bowls and delivered mouthpieces.

Being the undisputed No. 1 in English pipemaking, Charatan was approached by Alfred Dunhill who was unsatisfied with the quality of the pipes he imported from France. During 1908 – 1910 Dunhill bought pipes from Charatan paying exorbitant prices to ensure he had some of the very best pipes for sale in England. In 1910 he lured away Joel Sasieni, one of Charatan’s best carvers, and opened his own small pipe workshop on 28 Duke Street. On the retirement of his father in 1910 Reuben Charatan took over the family business…

…The pre-Lane period (prior to 1955) and the Lane era pipes (1955 to until sometime between 1979 – 1984) are of primary interest the collector. The Lane era is often quoted as beginning about 1950… Charatan records are almost non-existent before Lane due to a factory fire, making it difficult to date pre-Lane pipes. Charatan used 4 basic grades prior to 1950: Supreme, Selected, Executive, and Belvedere. After 1950 Herman Lane’s influence began, and the grades started to expand. In 1955 Lane took over sole distributorship of Charatan in the US. In 1957 he introduced the Supreme S. Most of his other introductions were from the 60’s and early 70’s…

From this I am fairly certain I am dealing with a pre-Lane pipe made prior to 1955 and because of the Belvedere stamp it could potentially go back as far as before 1950. There are none of the expected Lane stampings on the pipe which also supports this.

I continued digging further into the dating of the pipe, but what I had found above was a good start for me. If some of you would like to try your hand at dating it more accurately as to the time period it came out you might want to check out the article on Pipedia on Dating Charatans (https://pipedia.org/wiki/Dating_of_Charatans).

I also reread the article on Pipedia by the Italian fellow who contributed some really helpful information on the brand (https://pipedia.org/wiki/Charatan_-_Milan_2014). I quote the section on the Second period: Reuben Charatan 1910 – c. 1962. I have highlighted a portion of the section on the shank in red to point out some more helpful dating information.

– In 1962 Herman Lane took over the business from the Charatan family, although he had already influenced production from the 1950s.

– The pipes were mostly larger than the previous ones and corresponded in size to Dunhill group 5. These are slightly less rare, but still difficult to find.

– Stem: Usually in ebonite, saddle shaped or tapered, bearing a fine “CP” stamp, underbore system (see below) used when necessary.

– Shank: The shape code is stamped on it together with the nomenclature “CHARATAN’S MAKE LONDON ENGLAND” arranged in two lines. From 1955 onwards on the models marketed for the USA there is also a serif and circled capital “L” (but not all models bear this) which resembles the pound sterling symbol. The “L” is for Lane, the importer.

From 1958, Lane changed the nomenclature for models marketed for the US to clarify the message: “MADE BY HAND”.  In this period the underbore was introduced. Its manufacturing period ranged between 1920 and c.1930. This model was equipped with a duralumin plunger trap fitted in the stem, which served to clean the residue more easily. This particular model bore a special stamp on the stem, and also had its own catalogue…

QUALITY GRADES…The stem did not only display the stamps mentioned above. Another stamp that can help dating is the one referring to the quality of the pipe. Until Herman Lane arrived on the scene there were four quality grades. Starting with the lowest: Belvedere, Executive, Selected, and Supreme. Lane went on to add higher grades from time to time: Supreme S, Supreme S100, S150, S200, S250, S300, Coronation, Royal Achievement, Crown Achievement, and Summa Cum Laude; these last three are extremely rare and almost impossible to find. He also invented other, different grades, even changing the previous pipe classification standards. We will not go into detail here, but it means that if we find an S100 or Coronation the pipe was manufactured following Herman Lane’s acquisition. In particular, the FH mark, or Freehand pipe was commissioned to the famous Danish craftsman, Preben Holm.

Now I knew I was working on a pre-Lane pipe which actually means it was made before 1955 as shown by the stamping. I wanted to now see if I could find any information the shape 110X number as it was not listed in any shape charts I could find.

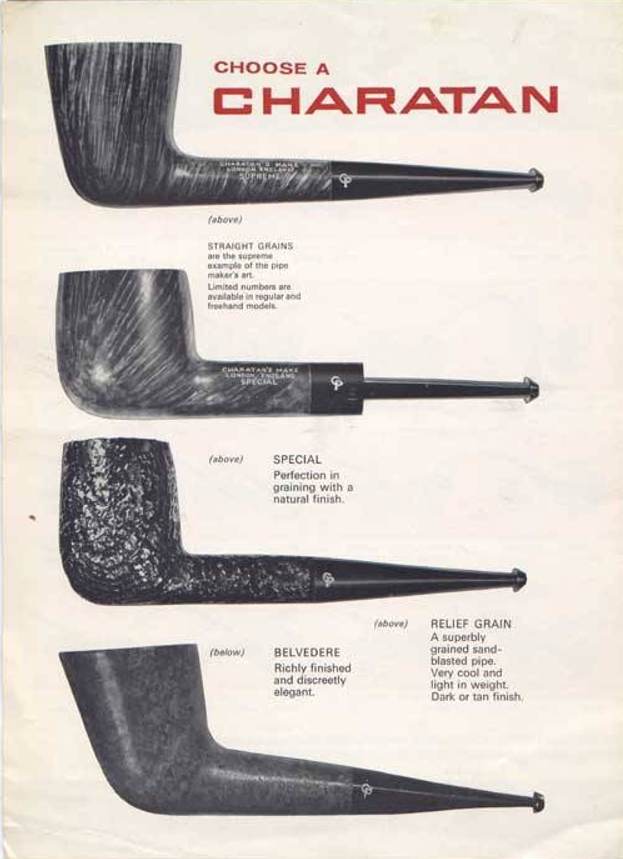
I did a Google search of the Charatan’s Make London England Belvedere 110X and was taken to on rebornpipes to a booklet I have there. It is a list shape numbers with images. Sure enough on the second row was the pipe I am working on a 110. I am not clear what the X means on the shank of this one though so that remains a mystery (https://rebornpipes.com/2018/08/03/a-charatan-pipe-booklet/).There was also a picture from the booklet with the various lines described. The Belvedere is listed and described as “Richly finished an discretely elegant.” It captures the look of the pipe very well.I am sure many of you will shake your head and ask maybe even out loud, “Why is he including this again?” However, please remember that the point of these blogs is not to wow your with the work or make you shake your heads but I want you to know the details of the work we do so you can do your own. Back in 2020 Jeff wrote a blog about his cleaning process. I am including a link to that now so you can see what I mean about his process. Do not skip it! Give it a read (https://rebornpipes.com/2020/01/20/got-a-filthy-estate-pipe-that-you-need-to-clean/). Here is the introduction to that blog and it is very true even to this day.

Several have asked about Jeff’s cleaning regimen as I generally summarize it in the blogs that I post rather than give a detailed procedure. I have had the question asked enough that I asked Jeff to put together this blog so that you can get a clear picture of the process he uses. Like everything else in our hobby, people have different methods they swear by. Some may question the method and that is fine. But it works very well for us and has for many years. Some of his steps may surprise you but I know that when I get the pipes from him for my part of the restoration they are impeccably clean and sanitized. I have come to appreciate the thoroughness of the process he has developed because I really like working on clean pipe!

For the benefit of some of you who may be unfamiliar with some of the products he uses I have included photos of three of the items that Jeff mentions in his list. This will make it easier for recognition. These three are definitely North American Products so you will need to find suitable replacements or order these directly on Amazon. The makeup pads are fairly universal as we were able to pick some up in India when we were with Paresh and his family.

In the blog itself he breaks his process down into two parts – cleaning the stem and cleaning the bowl. Each one has a large number of steps that he methodically does every time. I know because I have watched him do the work and I have seen the pipes after his work on them. He followed this process step by step and when the pipe got to me it was spotlessly clean and ready for my work. The inside of the stem, shank and bowl were clean and to me that is an amazing gift as it means that my work on this end is with a clean pipe! I cannot tell you how much difference that makes for my work.

When the pipe arrives here in Vancouver I have a clean pipe and I go over it keeping in mind my assessment shared in the opening paragraph above. Now that I have it in hand I am looking for confirmation of what I saw in the photos as well as any significant structural changes in the bowl and finish as I go over it.

  1. I was correct in my thoughts that the band was a Bang. It is clearly stamped Bang along with the 325S silver quality designation. It is for cosmetic purpose only as there are no visible cracks in the shank as I go over the exterior and the internal end of the shank. It is clear and it is a beauty. The oxidation is gone and the band looks very good.
  2. The finish is very clean and darkening from oils on the bowl sides is gone. The grain stands out on the surface of the clean briar. There are no cracks showing up in the grain lines or in the flaws under the grime. It is sound on the outside. I will need to polish the briar and buff it to bring back the shine.
  3. The rim top is clean of the lava but there is still some darkening on the top and edges of the bowl. The inner edge is ragged and shows both burn damage and also some previous reaming damage. It is still fairly round but not smooth. The good news for me is that there are no cracks showing up in the rim top. The rim top and edges were sound.
  4. The bowl was very clean and smelled clean. The clean walls did not show evidence of checking or cracking. There were no hot spots or damage on the walls or around the entrance of the airway into the bowl. It was clean and smooth which is great news for me. Both the shank and the bowl were very clean showing no debris on a clean pipe clean run through them. I would need to give it a final cleaning with pipe cleaners and alcohol once I had finished with the external work to remove the debris that may have collected there in the process.
  5. The vulcanite taper stem is in good condition – it cleaned up very well. All oxidation is gone. It is a little rough to the touch and the light chatter is not deep at all. There is not a CP logo on the stem but the fit to the shank end is well done. It is hard to know with certainty if it is an original stem or a replacement. (I lean toward it being a replacement stem added when the pipe was banded in Copenhagen.)

Hopefully the steps above show you both what I look for when I go over the pipe when I bring it to the work table and also what I see when I look at the pipe in my hands. They also clearly spell out a restoration plan in short form. My work on the pipe is spelled out clearly and addressing it will be the next steps. I took photos of the whole pipe to give you a picture of what I see when I have it on the table. This is important to me in that it also shows that there was no damage done during the clean up work or the transit of the pipe from Idaho to here in Vancouver. I carefully went over the bowl and rim top to get a sense of what is happening there. In this case once the lava was removed, damage to the edge and top was revealed. I think there is actually burn damage to the edge that extends around the inner edge though it is heavier at the front and back of the bowl. The rim top also shows some damage. It is clean but will need to be worked on to bring it back to normal. I also go over the stem carefully. There were no tooth marks or dents in the stem. I could not see any sign of remaining CP stamping on the stem so no real clue as to whether it is original or a replacement. I took photos of the rim top and stem sides to show as best as I can what I see when I look at them.I always check to make sure that the clean up work did not damage the stamping on the shank in any way. It looks very good still. I also took a photo of the silver. I always appreciate the handiwork of the carvers at Charatan who turn a piece raw briar into a beautiful pipe. I love just looking at the beauty of the lay of the pipe with the grain and the proportion of the hand made pipes. I like to remove the stem from the shank to get a sense of what was in the mind of the pipe maker when he crafted the pipe. It is a beauty in flow and shape.By this time you should know that I almost always start with the bowl in my restoration because I truly do not like the tedious work of stem repairs and polishing. I always leave that until last even though I know that it needs to be done. For me the encouragement of seeing a rejuvenated bowl is the impetus I need to attack the stem work.

Today I started working on this pipe by turning to the bowl. I chose to deal with the darkening and burn damage on the rim edges and top. I used a folded piece of 220 grit sandpaper to reshape and remove the rim top and damage. It took a little work but I was able to remove all of the darkening. It is a beautiful piece of briar with some great grain.Once rim top was reshaped and reworked I needed to blend them into the rest of the briar. I polished the briar with micromesh sanding pads. I choose to dry sand the briar rather than wet sand it. Again it is a matter of personal preference. I prefer to use the pads dry and find they work very well on the briar. I sand with each pad (9 in total) and group them by threes for ease of reference. I also work over the plateau areas at the same time. I wipe the bowl down after each pad with a damp cloth to remove the sanding debris and check the briar. I love seeing the developing shine on the briar as I move through the pads which is why I include so many photos of this step. For the past few years now I have been using Before & After Restoration Balm. It is a “waxy” paste/balm that is rubbed into the surface of the briar and the plateau. The product works to deep clean the nooks and crannies of finish, enliven and protect the briar. I worked it into the briar with my finger tips and let it sit for 10 minutes to do its work. I wiped it off with a soft cloth and buffed it with a cloth. The briar really took on a deep shine and the grain shone through. The photos I took of the bowl at this point mark the progress in the restoration. It is a gorgeous pipe. Now it was time to address the part of the restoration I leave until last. I set the bowl aside and turned my attention to the stem. The stem was in good nick other than the light oxidation on the top side. There were no tooth marks or chatter so it was simply a matter of polishing the stem and bring back a shine. I use micromesh sanding pads and water to wet sand the stem with 1500-12000 grit sanding pads. I wiped it down after each sanding pad with Obsidian Oil on a cotton rag after each sanding pad as I find it does two things – first it protects the vulcanite and second it give the sanding pads bite in the polishing process. After finishing with the micromesh pads I rub the stem down with Before & After Fine and Extra Fine stem polish as it seems to really remove the fine scratches in the vulcanite. I rub the Fine Polish on the stem and wipe it off with a paper towel and then repeat the process with the extra fine polish. I finish the polishing of the stem down with a final coat of Obsidian Oil and set the stem aside to let the oil absorb. This process gives the stem a shine and also a bit of protection from oxidizing quickly.The final steps in my process involve using the buffer. I first buff the stem and the briar with Blue Diamond on the buffing wheel. Blue Diamond is a plastic polish but I find that it works very well to polish out the light scratches in the vulcanite and the briar. I work the pipe over on the wheel with my finger or thumb in the bowl to keep it from becoming airborne. It works well and I am able to carefully move forward with the buffing. The briar and stem just shone! I finished with the Blue Diamond and moved on to buffing with carnauba wax. Once I have a good shine in the briar and vulcanite I always give the bowl and the stem multiple coats of carnauba wax. I have found that I can get a deeper shine if I following up the wax buff with a clean buffing pad. It works to raise the shine and then I follow that up with a hand buff with a microfiber cloth to deepen the shine. It is always fun for me to see what the polished bowl looks like with the polished vulcanite and acrylic combination stem. It really is a beautiful pipe. The smooth finish around the bowl sides and shank show the grain shining through the rich brown stains of this Charatan’s Make London England Belvedere 110X Bent Billiard with an S. Bang Silver Band. The finished pipe feels great in my hand. It is light and well balanced. Have a look at it with the photos below. The dimensions are Length: 5 ½ inches, Height: 1 ¾ inches, Outside diameter of the bowl: 1 ¼ inches, Chamber diameter: ¾ of an inch. The weight of the pipe is 1.31 ounces/37 grams. It is a beautiful pipe and one that I will be putting on the rebornpipes store in the British Pipe Maker section.

Hopefully the shape writing this blog is helpful to you in some way. In it I wanted to show both what I am looking for and how I move forward in addressing what I see when work on a pipe. Let me know if it is helpful to you. It is probably the most straightforward detailed description of my work process that I have done. As always I encourage your questions and comments as you read the blog. Thanks to each of you who are reading this blog. Remember we are not pipe owners; we are pipemen and women who hold our pipes in trust until they pass on into the trust of those who follow us.

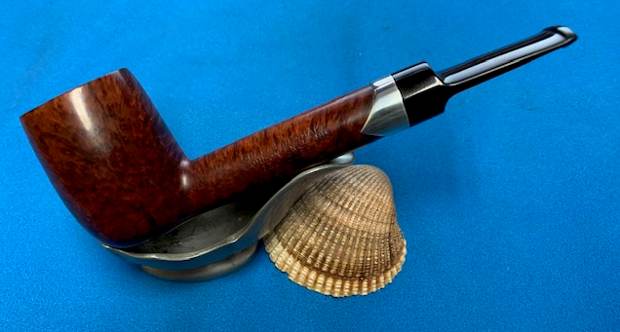
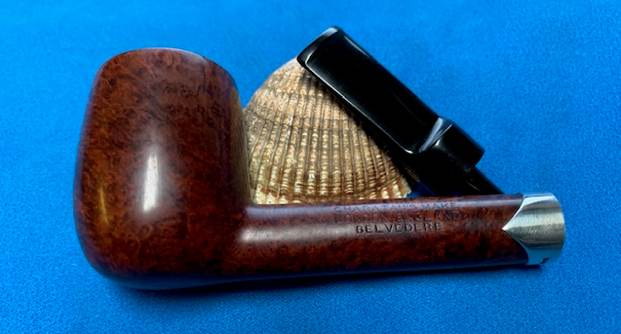
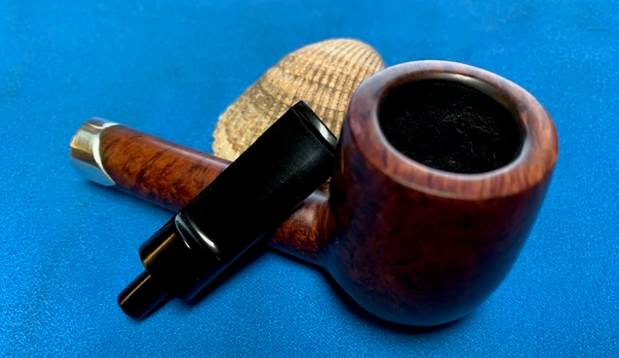
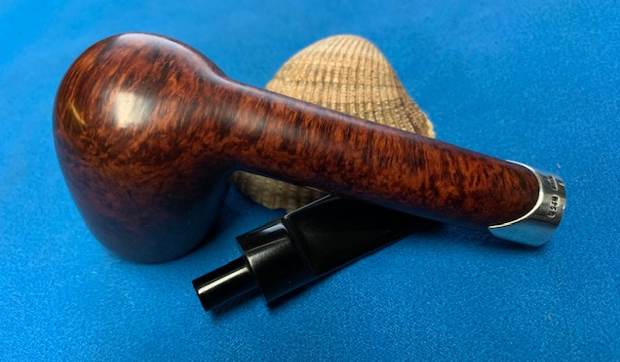
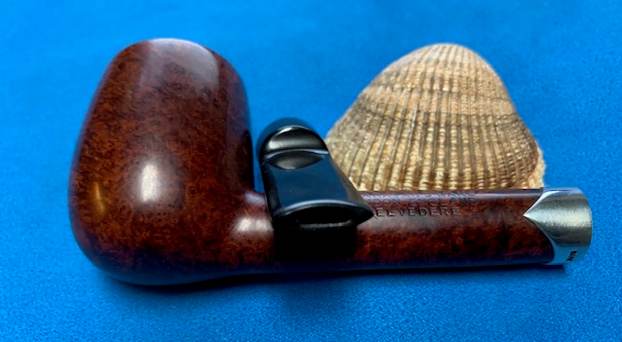
London meets Copenhagen – A Charatan’s Make Belvedere Lovat with an S Bang Silver Band


Blog by Steve Laug

Once again in this write up and I will take you through my process of working on each pipe that we purchase. Jeff has set up a spread sheet to track where the pipe came from, the date of purchase and what we paid for it so that we know what we have invested in the pipe before we even work on it. This takes a lot of the guess work out of the process. This particular pipe was purchased on 11/10/2022 from Copenhagen, Denmark from a seller we buy a lot of pipes from. I also want you to understand why we take the photos we do. If you have followed for a while then you will see the familiar pattern of the photos we include both in the before and midstream process of working on a pipe. It is not accidental or chance as the photos have been taken to help me make an assessment of the pipe Jeff sees before he starts his clean up work. We do this to record the condition that the pipe was in when received it and to assess what kind of work will need to be done on. When I look at these photos this is what I see.

  1. The first thing I see is a unique Sterling Silver band on the shank that has become familiar from the pipes we have purchased from Copenhagen. Each one is much the same and all were made by S. Bang. I am pretty certain this is one as well. The question is if it is cosmetic like the others have been or does it take care of a crack in the shank. We shall see.
  2. The finish is dirty and there is oils from the smoker’s hands on both side of the bowl. There is grimed ground into the finish as well but even so there is also some great grain peeking through. From the exterior it does not appear that there is a crack in the shank but when Jeff examines it he will confirm either the presence or absence of a crack.
  3. The rim top had a thick lava overflow from the cake in the bowl. It was thicker on the back half of the rim top but present all the way around. It is hard to know if there is darkening or damage under the lava. Sometimes the lava protects the rim top and edges and sometime it hides issues. Its is very dirty looking.
  4. The bowl has a thick cake in it that hides the inner edge of the bowl but once it is clean we will know what the edges look like. The outer edges look good and there does not appear to be any obvious burn damage to the top or bowl edges.
  5. The vulcanite saddle stem is in good condition – dirty, lightly oxidized and has light tooth chatter on both sides. There does not appear to be a CP logo on the stem but the fit to the shank end is well done. It is hard to know with certainty if it is an original stem or a replacement.

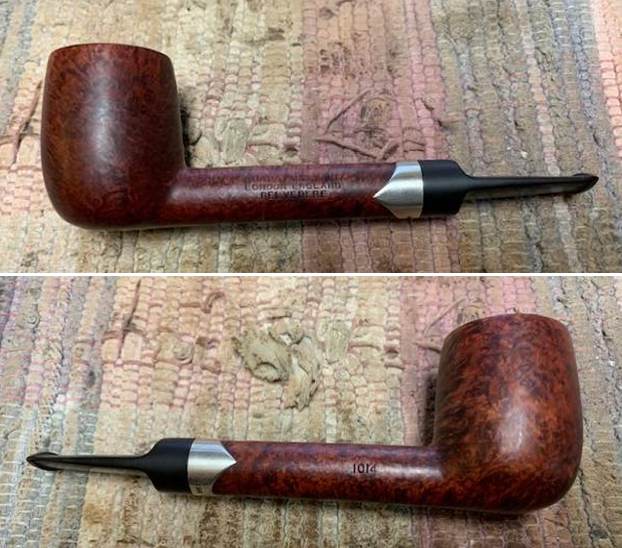
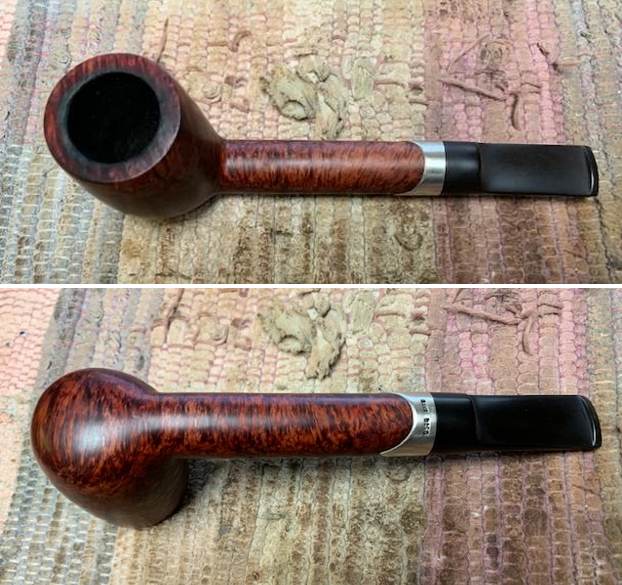
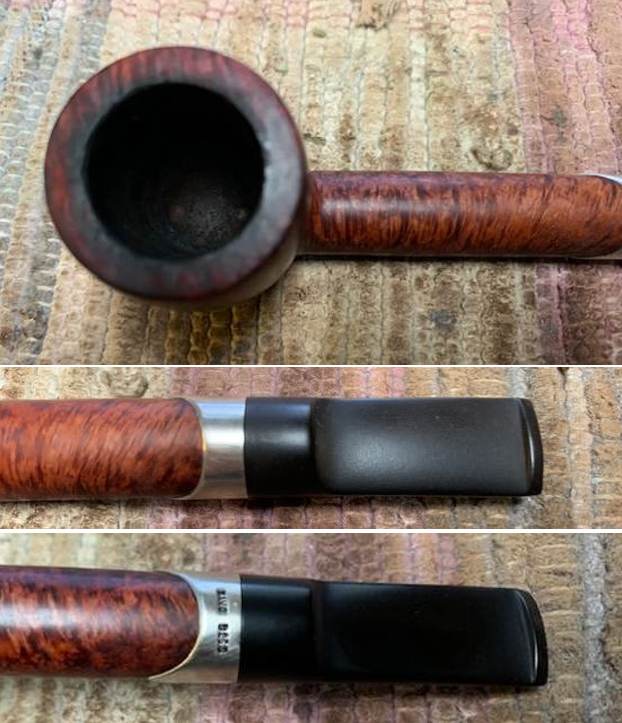
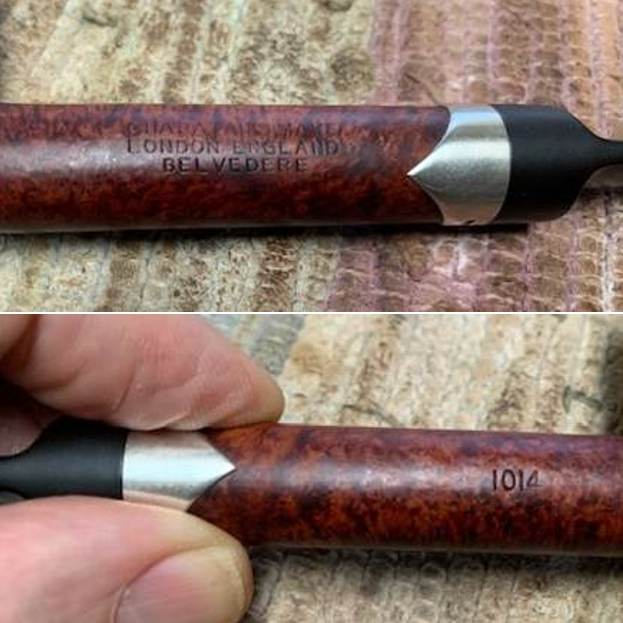
Overall my impressions of this pipe is that it is a beauty that once cleaned up will look pretty amazing. The oxidized S. Bang fancy Sterling Silver Band adds a touch bling even though tarnished that does not detract from the beauty of the pipe. The exterior of the bowl does not show any hot spots or darkening. The pipe is very English looking and is a classic Lovat that has the distinctive cut of a Charatan. The photos below confirm the assessment above.Jeff took close up photos so that I could have a clearer picture of the condition of the bowl, rim edges and top. The rim top photos confirm my assessment above. The cake in the bowl is quite thick and the rim top has lava and debris on it. You can also see the condition of the outer edge but the inner edge is a bit of a mystery at this point. This is what I look for when assessing a pipe. While there is lava and darkening there is no visible burn damage at this point. The bowl is still fairly round. The photos of the stem surface from various angles confirmed my assessment of its condition. You can see the oxidation and the fit against the tarnished silver band on the shank end. The stem surface though dirty does not appear to have tooth marks – chatter yes, but no deep marks. The stem is quite dirty but otherwise undamaged. The next photos show the amazing grain around the heel and the sides of the bowl. Tell me what you see? Are there any visible problems that stand out to you? Are the cracks or scratches? Are there visible flaws or fissures in the briar? What kind of grain stands out around the bowl and heel? Any visible issues on the heel of the bowl? Even the questions should help you to see what I am looking for when I see these photos. You have read it a few times now in the previous blogs. What am I looking for when I look at the shank stamp? In this case it is stamped on the left side and reads Charatan’s Make[over] London England [over] Belvedere in three lines. How does the stamping look to you? Is it clear and readable? Is it faint in spots or is it uniform? I know you are looking at photos but so do I at this point in the process. The right side is also stamped and reads 1014 which is the shape number. The same questions apply here as well. The next photos show where London Meets Copenhagen. The stamping on the stylized silver band are simply BANG in one box and 325S in the second box. I love this kind of backstory on a pipe. How did an English made pipe from London connect with an S.Bang Sterling Silver Band? I know it happened in Copenhagen as that is where we bought the pipe. We asked the seller the story on it and he said that the older gentleman who owned this pipe took it along with several others from his collection to the S. Bang workshop and had them add bands to his pipes. They were not necessary as the shank was not cracked but the old pipeman just wanted some decorative bands on his pipes (he may well have been my age so old is such a relative term). However that happened it is a great story of the meeting of this London pipe with a Danish silvermaker. I have to say that I really like the result!An added part of pipe restoration for me is to try to gather as much background on a brand and maker as I can find. With Charatan that is an enjoyable web to untangle. There is a lot of information and it can lead to understanding what era a pipe was made in. To try to figure out the era of the Charatan’s pipe I was working on I turned to the Pipephil website, Logos and Stampings (http://www.pipephil.eu/logos/en/logo-charatan.html). There is some really helpful information on each of the lines of Charatan’s Make pipes that entered the market. There is an alphabetical listing of the lines but the Belvedere they showed had a stem made for a 9mm filter while the one I have is a nonfiltered pipe. The site did give a short history of the brand. I quote the portion that is most pertinent.

The brand was founded in 1863 by Frederik Charatan. When his father retired in 1910, Reuben Charatan took over the family business. All the pipes were handmade until 1973. The brand name has been overtaken by Dunhill in 1978 and sold in 1988 to James B. Russell Inc.(NJ, USA). During the period 1988-2002 Charatans were crafted by Butz Choquin in St Claude (France). Dunhill re-purchased Charatan brand name in 2002 and Colin Fromm (Invicta Briars, Castleford) followed up on freehand production.

Next I turned to Pipedia to see if I could find more information on the brand and possibly a link to the Belvedere line (https://pipedia.org/wiki/Charatan) but once again in the general article it was not listed. It did give a little more historical information. I quote the pertinent parts and have highlighted in red the sections that give information on this particular pipe.

In 1863 Frederick Charatan, a Russian/Jewish immigrant, opened a shop in Mansell Street, located in the borough of Tower Hamlets, London E1, where he began to carve Meerschaum pipes. These pipes got very popular soon, and thus Charatan moved to a bigger workshop in Prescot Street, just around the corner. Here he began to make briar pipes which should make the name famous the world over. Charatan was the first brand to make entirely hand-made briars from the rough block to the finished pipe including the stems. The nomenclature “Charatan’s Make” refers to this method of production and was meant to differentiate Charatan from other brands who “assembled” pipes from pre-drilled bowls and delivered mouthpieces.

Being the undisputed No. 1 in English pipemaking, Charatan was approached by Alfred Dunhill who was unsatisfied with the quality of the pipes he imported from France. During 1908 – 1910 Dunhill bought pipes from Charatan paying exorbitant prices to ensure he had some of the very best pipes for sale in England. In 1910 he lured away Joel Sasieni, one of Charatan’s best carvers, and opened his own small pipe workshop on 28 Duke Street. On the retirement of his father in 1910 Reuben Charatan took over the family business…

…The pre-Lane period (prior to 1955) and the Lane era pipes (1955 to until sometime between 1979 – 1984) are of primary interest the collector. The Lane era is often quoted as beginning about 1950… Charatan records are almost non-existent before Lane due to a factory fire, making it difficult to date pre-Lane pipes. Charatan used 4 basic grades prior to 1950: Supreme, Selected, Executive, and Belvedere. After 1950 Herman Lane’s influence began, and the grades started to expand. In 1955 Lane took over sole distributorship of Charatan in the US. In 1957 he introduced the Supreme S. Most of his other introductions were from the 60’s and early 70’s…

From this I am fairly certain I am dealing with a pre-Lane pipe made prior to 1955 and because of the Belvedere stamp it could potentially go back as far as before 1950. There are none of the expected Lane stampings on the pipe which also supports this.

I continued digging further into the dating of the pipe, but what I had found above was a good start for me. If some of you would like to try your hand at dating it more accurately as to the time period it came out you might want to check out the article on Pipedia on Dating Charatans (https://pipedia.org/wiki/Dating_of_Charatans).

I also reread the article on Pipedia by the Italian fellow who contributed some really helpful information on the brand (https://pipedia.org/wiki/Charatan_-_Milan_2014). I quote the section on the Second period: Reuben Charatan 1910 – c. 1962. I have highlighted a portion of the section on the shank in red to point out some more helpful dating information.

– In 1962 Herman Lane took over the business from the Charatan family, although he had already influenced production from the 1950s.

– The pipes were mostly larger than the previous ones and corresponded in size to Dunhill group 5. These are slightly less rare, but still difficult to find.

– Stem: Usually in ebonite, saddle shaped or tapered, bearing a fine “CP” stamp, underbore system (see below) used when necessary.

– Shank: The shape code is stamped on it together with the nomenclatureCHARATAN’S MAKE LONDON ENGLAND” arranged in two lines. From 1955 onwards on the models marketed for the USA there is also a serif and circled capital “L” (but not all models bear this) which resembles the pound sterling symbol. The “L” is for Lane, the importer.

From 1958, Lane changed the nomenclature for models marketed for the US to clarify the message: “MADE BY HAND”.  In this period the underbore was introduced. Its manufacturing period ranged between 1920 and c.1930. This model was equipped with a duralumin plunger trap fitted in the stem, which served to clean the residue more easily. This particular model bore a special stamp on the stem, and also had its own catalogue…

QUALITY GRADES…The stem did not only display the stamps mentioned above. Another stamp that can help dating is the one referring to the quality of the pipe. Until Herman Lane arrived on the scene there were four quality grades. Starting with the lowest: Belvedere, Executive, Selected, and Supreme. Lane went on to add higher grades from time to time: Supreme S, Supreme S100, S150, S200, S250, S300, Coronation, Royal Achievement, Crown Achievement, and Summa Cum Laude; these last three are extremely rare and almost impossible to find. He also invented other, different grades, even changing the previous pipe classification standards. We will not go into detail here, but it means that if we find an S100 or Coronation the pipe was manufactured following Herman Lane’s acquisition. In particular, the FH mark, or Freehand pipe was commissioned to the famous Danish craftsman, Preben Holm.

Now I knew I was working on a pre-Lane pipe which actually means it was made before 1955 as shown by the stamping. I wanted to now see if I could find any information the shape 1014 number as it was not listed in any shape charts I could find.

I did a Google search of the Charatan’s Make London England Belvedere 1014 and was taken to one link. Interestingly it was on smokingpipes.com US website and it is the exact pipe I am working on sans the Bang band on the shank. The stamping the shape of the stem and all parts even the stain matches the one that I have in hand. I am also including a screen capture of the pipe (https://www.smokingpipes.com/pipes/estate/england/moreinfo.cfm?product_id=314515).I am sure many of you will shake your head and ask maybe even out loud, “Why is he including this again?” However, please remember that the point of these blogs is not to wow your with the work or make you shake your heads but I want you to know the details of the work we do so you can do your own. Back in 2020 Jeff wrote a blog about his cleaning process. I am including a link to that now so you can see what I mean about his process. Do not skip it! Give it a read (https://rebornpipes.com/2020/01/20/got-a-filthy-estate-pipe-that-you-need-to-clean/). Here is the introduction to that blog and it is very true even to this day.

Several have asked about Jeff’s cleaning regimen as I generally summarize it in the blogs that I post rather than give a detailed procedure. I have had the question asked enough that I asked Jeff to put together this blog so that you can get a clear picture of the process he uses. Like everything else in our hobby, people have different methods they swear by. Some may question the method and that is fine. But it works very well for us and has for many years. Some of his steps may surprise you but I know that when I get the pipes from him for my part of the restoration they are impeccably clean and sanitized. I have come to appreciate the thoroughness of the process he has developed because I really like working on clean pipe!

For the benefit of some of you who may be unfamiliar with some of the products he uses I have included photos of three of the items that Jeff mentions in his list. This will make it easier for recognition. These three are definitely North American Products so you will need to find suitable replacements or order these directly on Amazon. The makeup pads are fairly universal as we were able to pick some up in India when we were with Paresh and his family.

In the blog itself he breaks his process down into two parts – cleaning the stem and cleaning the bowl. Each one has a large number of steps that he methodically does every time. I know because I have watched him do the work and I have seen the pipes after his work on them. He followed this process step by step and when the pipe got to me it was spotlessly clean and ready for my work. The inside of the stem, shank and bowl were clean and to me that is an amazing gift as it means that my work on this end is with a clean pipe! I cannot tell you how much difference that makes for my work.

When the pipe arrives here in Vancouver I have a clean pipe and I go over it keeping in mind my assessment shared in the opening paragraph above. Now that I have it in hand I am looking for confirmation of what I saw in the photos as well as any significant structural changes in the bowl and finish as I go over it.

  1. I was correct in my thoughts that the band was a Bang. It is clearly stamped Bang along with the 325S silver quality designation. It is for cosmetic purpose only as there are no visible cracks in the shank as I go over the exterior and the internal end of the shank. IT is clear and it is a beauty. The oxidation is gone and the band looks very good.
  2. The finish is very clean and darkening from oils on the bowl sides is gone. The grain stands out on the surface of the clean briar. There are no cracks showing up in the grain lines or in the flaws under the grime. It is sound on the outside. I will need to polish the briar and buff it to bring back the shine.
  3. The rim top is clean of the lava but there is still some darkening on the top and edges of the bowl. The inner edge is ragged and shows both burn damage and also some previous reaming damage. It is still fairly round but not smooth. The good news for me is that there are no cracks showing up in the rim top. The rim top and edges were sound.
  4. The bowl was very clean and smelled clean. The clean walls did not show evidence of checking or cracking. There were no hot spots or damage on the walls or around the entrance of the airway into the bowl. It was clean and smooth which is great news for me. Both the shank and the bowl were very clean showing no debris on a clean pipe clean run through them. I would need to give it a final cleaning with pipe cleaners and alcohol once I had finished with the external work to remove the debris that may have collected there in the process.
  5. The vulcanite saddle stem is in good condition – it cleaned up very well. All oxidation is gone. It is a little rough to the touch and the light chatter is not deep at all. There is not a CP logo on the stem but the fit to the shank end is well done. It is hard to know with certainty if it is an original stem or a replacement.

Hopefully the steps above show you both what I look for when I go over the pipe when I bring it to the work table and also what I see when I look at the pipe in my hands. They also clearly spell out a restoration plan in short form. My work is clear and addressing it will be the next steps. I took photos of the whole pipe to give you a picture of what I see when I have it on the table. This is important to me in that it also shows that there was no damage done during the clean up work or the transit of the pipe from Idaho to here in Vancouver. I carefully went over the bowl and rim top to get a sense of what is happening there. In this case once the lava was removed damage to the edge and top was revealed. Originally I thought it looked like reaming damage but I don’t think so as I examine it closely. I think it is actually burn damage to the edge that extends around the inner edge though it is heavier at the front and back of the bowl. The rim top also shows some damage. It is clean but will need to be worked on to bring it back to normal. I also go over the stem carefully. There were no tooth marks or dents in the stem. I could not see any sign of remaining CP stamping on the stem so no real clue as to whether it is original or a replacement. I took photos of the rim top and stem sides to show as best as I can what I see when I look at them.I always check to make sure that the clean up work did not damage the stamping on the shank in any way. It looks very good still. I also took a photo of the silver. I always appreciate the handiwork of the carvers at Charatan who turn a piece raw briar into a beautiful pipe. I love just looking at the beauty of the lay of the pipe with the grain and the proportion of the hand made pipes. I like to remove the stem from the shank to get a sense of what was in the mind of the pipe maker when he crafted the pipe. It is a beauty in flow and shape. By this time you should know that I almost always start with the bowl in my restoration because I truly do not like the tedious work of stem repairs and polishing. I always leave that until last even though I know that it needs to be done. For me the encouragement of seeing a rejuvenated bowl is the impetus I need to attack the stem work.

Today I started working on this pipe by turning to the bowl. I chose to deal with the darkening and burn damage on the rim edges and top. I used a folded piece of 220 grit sandpaper to reshape and remove the rim top and damage. It took a little work but I was able to remove all of the darkening. It is a beautiful piece of briar with some great grain.Once rim top was reshaped and reworked I needed to blend them into the rest of the briar. I polished the briar with micromesh sanding pads. I choose to dry sand the briar rather than wet sand it. Again it is a matter of personal preference. I prefer to use the pads dry and find they work very well on the briar. I sand with each pad (9 in total) and group them by threes for ease of reference. I also work over the plateau areas at the same time. I wipe the bowl down after each pad with a damp cloth to remove the sanding debris and check the briar. I love seeing the developing shine on the briar as I move through the pads which is why I include so many photos of this step. For the past few years now I have been using a product developed by Mark Hoover called Before & After Restoration Balm. It is a paste/balm that is rubbed into the surface of the briar and the plateau. The product works to deep clean the nooks and crannies of finish, enliven and protect the briar. I worked it into the briar with my finger tips and let it sit for 10 minutes to do its work. I wiped it off with a soft cloth then buffed it with a cotton cloth. The briar really began to have a deep shine in the briar and the grain shone through. The photos I took of the bowl at this point mark the progress in the restoration. It is a gorgeous pipe. Now it was time to address the part of the restoration I leave until last. I set the bowl aside and turned my attention to the stem. The stem was in good nick other than the light oxidation on the top side. There were no tooth marks or chatter so it was simply a matter of polishing the stem and bring back a shine. I use micromesh sanding pads and water to wet sand the stem with 1500-12000 grit sanding pads. I wiped it down after each sanding pad with Obsidian Oil on a cotton rag after each sanding pad as I find it does two things – first it protects the vulcanite and second it give the sanding pads bite in the polishing process. After finishing with the micromesh pads I rub the stem down with Before & After Fine and Extra Fine stem polish as it seems to really remove the fine scratches in the vulcanite. I rub the Fine Polish on the stem and wipe it off with a paper towel and then repeat the process with the extra fine polish. I finish the polishing of the stem down with a final coat of Obsidian Oil and set the stem aside to let the oil absorb. This process gives the stem a shine and also a bit of protection from oxidizing quickly.The final steps in my process involve using the buffer. I first buff the stem and the briar with Blue Diamond on the buffing wheel. Blue Diamond is a plastic polish but I find that it works very well to polish out the light scratches in the vulcanite and the briar. I work the pipe over on the wheel with my finger or thumb in the bowl to keep it from becoming airborne. It works well and I am able to carefully move forward with the buffing. The briar and stem just shone! I finished with the Blue Diamond and moved on to buffing with carnauba wax. Once I have a good shine in the briar and vulcanite I always give the bowl and the stem multiple coats of carnauba wax. I have found that I can get a deeper shine if I following up the wax buff with a clean buffing pad. It works to raise the shine and then I follow that up with a hand buff with a microfiber cloth to deepen the shine. It is always fun for me to see what the polished bowl looks like with the polished vulcanite stem. It really is a beautiful pipe. The smooth finish around the bowl sides and shank show the grain shining through the rich brown stains of this Charatan’s Make London England Belvedere 1014 Lovat with an S. Bang Silver Band. The finished pipe feels great in my hand. It is light and well balanced. Have a look at it with the photos below. The dimensions are Length: 5 ½ inches, Height: 1 ¾ inches, Outside diameter of the bowl: 1 ¼ inches, Chamber diameter: ¾ of an inch. The weight of the pipe is 1.31 ounces/37 grams. It is a beautiful pipe and one that I will be putting on the rebornpipes store in the British Pipe Maker section.

Hopefully the shape writing this blog is helpful to you in some way. In it I wanted to show both what I am looking for and how I move forward in addressing what I see when work on a pipe. Let me know if it is helpful to you. It is probably the most straightforward detailed description of my work process that I have done. As always I encourage your questions and comments as you read the blog. Thanks to each of you who are reading this blog. Remember we are not pipe owners; we are pipemen and women who hold our pipes in trust until they pass on into the trust of those who follow us.

An Easy Refurbishing of a Charatan’s Make “Belvedere” # 2655 From Mumbai Bonanza Lot


Blog by Paresh

I was fortunate enough to have heeded the advice of my dear friend and mentor, Steve, and struck a deal with a junk collector from Mumbai for a pile of pipes that he had acquired. He did not know what he was selling and I did not know what quality and condition of pipes I was buying from him as we reside in different cities!! The argument that Mr. Steve presented was that if not anything, I shall at least have some spares and this was logical. I struck a deal and here are pictures of the pipes that I received in this lot. This lot contains some very nice collectible pipes, a few well known brands and some mediocre brands. Overall, with seven Dunhill pipes, a Preben Holm #1 FH, a couple of “Made in England” Pete System pipes, a couple of  Charatan’s Make “Belvedere”, Custom-Bilt, Stanwell and other assorted pipes, I would say that I had struck a decent haul!!! This is indeed my “Mumbai Bonanza”.
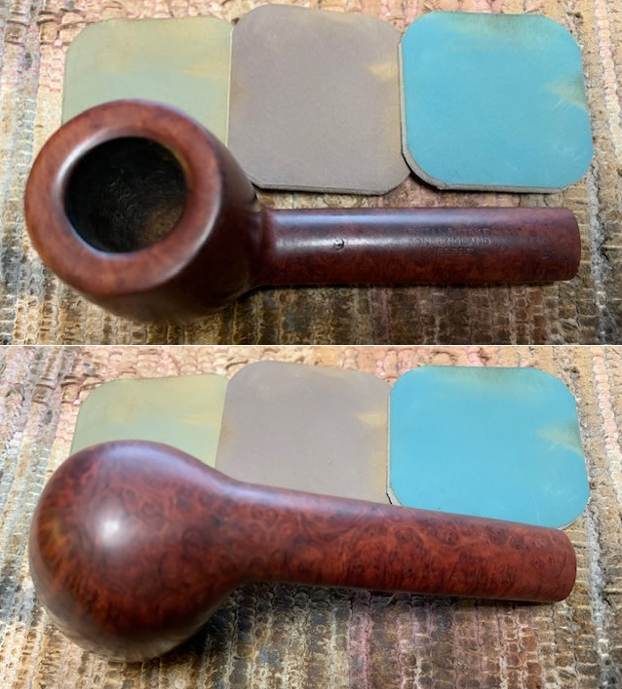
I had recently completed the refurbishing of a Peterson’s System 3 # 367 that had the “Made in England” COM stamp from my Mumbai Bonanza. Here is the link to this 19th pipe from this lot.

https://rebornpipes.com/2020/08/26/restoring-a-made-in-england-petersons-system-3-367-from-mumbai-bonanza-lot/

The 20th pipe that I decided to work on from this find is a thick walled CHARATAN’S MAKE “BELVEDERE” # 2655X Pot shaped pipe and is indicated by a gold cross.This pipe is stamped on the left of the shank towards the shank end as “CHARATAN’S MAKE” over “LONDON ENGLAND” over “BELVEDERE”, all in block capital letters. The right side of the shank surface bears the shape number “2655 X”. The high quality vulcanite saddle stem bears the trademark logo “CP” with the lower part of the C penetrating the P. All the stampings are crisp and easily readable save for the stem logo which is faint and the worn out.   In my earlier restoration of my inherited CHARATAN’S pipes, I had extensively researched the dating of these old pipes and I can say with certainty that this pipe is from the period post 1960s. However, to document and establish credibility to my understanding and also to refresh my memory of the brand, I visited pipedia.org. Here is the link for the readers interested in history of Charatan’s and also in viewing a 1951 catalog;

https://pipedia.org/wiki/Charatan

“In 1863 Frederick Charatan, a Russian / Jewish immigrant, opened a shop in Mansell Street, located in the borough of Tower Hamlets, London E1, where he began to carve Meerschaum pipes.

Charatan was the first brand to make entirely hand-made briars from the rough block to the finished pipe including the stems. The nomenclature “Charatan’s make” refers to this method of production and was meant to differ Charatan from other brands who “assembled” pipes from pre-drilled bowls and delivered mouthpieces.

Charatan used 4 basic grades prior to 1950: Supreme, Selected, Executive, and Belvedere. After 1950 Herman Lane’s influence began, and the grades started to expand. In 1955 Lane took over sole distributorship of Charatan in the US. In 1957 he introduced the Supreme S. Most of his other introductions were from the 60’s and early 70’s…

Here is another link from the same page which takes the readers to an absolutely well researched page on Dating of Charatan’s;

https://pipedia.org/wiki/Dating_of_Charatans

I have reproduced the relevant portions which had helped me in dating this pipe.

The first step on dating a Charatan is to carefully look to some details:

a) Shape of the mouthpiece

b) Marking on the mouthpiece

c) Engraving on the shank

d) Shape and position of shank engraving/writing

This is because you can make the following conclusions:

a) From 1863 to 1960 the mouthpieces have a normal shape, saddle or tapered. From 1961 they use the ‘Double Comfort’ style still used today. By the way there are some saddle bits (without the double comfort) used in pipes that date after 1960 but these models are always characterized by an X (in the place of the DC) engraved after the shape number on the shank. This means that if a pipe has a tapered mouthpiece instead of a double comfort one, it is definitely a pre-Lane pipe before 1960. While if a pipe has a normal saddle bit stem, it could belong to every era. Nevertheless the pipe is pre 1961 if the shape code does not include an X, and is a pipe from after 1960 if the X is engraved.
Finally any pipe with the double comfort stem is definitely after 1960.

b) The CP logo on the stem is stamped in a different shape according the era it was used. Some differences are less obvious than others, however the glaring differences are detectable in 4 phases. The CP till the 1960 is very fine, the C penetrates the P.

Identification of a third era pipe (First Lane era, 1961-1965)

Pipes of this period are quite common.

1) The mouthpiece is frequently double comfort, rarely saddle without the double comfort, never tapered. If the stem is not a double comfort but a saddle one, it is characterized by the letter X on the right of the shape code (e.g. 2502X), naturally in this case the letters DC are not displayed.

2) In the CP logo, the C enters the P

3) Presence of £ on the shank (note that from 1955 all the pipe imported in the USA by Lane has it, however that stamping is not synonymous of the Lane era)

4)Presence of the letter DC just after the shape number (e.g. 2502 DC) or of the letter X only if the stem is not a double comfort one

5) Presence in some models of the stamp “MADE BY HAND” on the shank (introduced for the first time in 1958)

6) Presence of the writing “CHARATAN’S MAKE LONDON ENGLAND” on 2 lines

7) The CP logo is thicker then in previous eras

Identification of a fourth era pipe (Second Lane era, 1965-76)

Pipes belonging to this period are quite common. Their characteristics are close to the one of the previous era, the distinctive element is that the writing on the shank changes from 2 to 3 lines.

I visited Reborn Pipes for more information and there is a very informative article that Steve had re-blogged on Charatan’s Models & Shape Information for the Collector. Here is the link for this article;

https://rebornpipes.com/2018/08/22/charatan-models-shape-information-for-the-collector/

I earnestly urge all the readers to go through this article on rebornpipes.

Thus I can conclusively say that the Charatan’s Make “BELVEDERE” pipe on my work table is from the First Lane Era and dates from the period 1961- 1965.

INITIAL VISUAL INSPECTION
The Charatan’s pipe that is currently on my work table has a classic Pot shape with thick walls. It has a chamber depth of about 1 inch, bowl height of about 1.4 inches, chamber inner diameter of 1 inch and overall pipe length of approximately 5.5 inches. The stummel has rich dark and medium contrasting reddish brown stains and is covered in dirt and grime through which beautiful straight grains can be seen around the sides, front, back and over the shank surface while Bird’s eye adorns the rim top and the foot of the stummel. There is a thin layer of cake in the chamber with lava overflow over the rim top surface. The inner rim edge has few dents and dings and a suspected char in 8 o’clock direction. The chamber appears out of round due to the inner rim edge damage. The vulcanite saddle stem is heavily oxidized with no damage to the bite zone on either surface. The buttons on both surfaces are in pristine condition. The following pictures will give the Readers an idea of the overall condition of the pipe as it sits on my work table. Overall, the thin layer of cake and excellent condition of the stem are pointers to the fact that the pipe seems to be well looked after. It should be an easy restoration project, unless some gremlins pop up during the process. DETAILED VISUAL INSPECTION
A thin and even layer of cake is seen in the chamber. The rim top surface is covered in overflow of lava, dirt, dust and grime. The condition of the inner walls of the chamber and rim top surface will be known once the cake has been taken down to bare briar and the rim top crud has been scraped off completely. The inner rim is uneven with a couple of dents (indicated with green arrows) and a suspected burn/ charred surface in 8 ‘O’ clock (marked in yellow circle). The bowl appears out of round. Only once the stummel has been thoroughly cleaned that I can be sure of my initial appreciation. The outer rim edge is in sans any damage. In spite of the thin cake, the chamber odor is strong and should be addressed to some extent once the cake has been taken down to the bare briar and the shank internals have been thoroughly cleaned. The stummel feels solid to the touch and I do not foresee any major issues with the condition of the chamber walls. The pristine condition of the rim top means that no topping is necessary. A thin delicate bevel to the inner edge should be sufficient to address the damage and get the bowl in perfect round. To be honest with you, this being a Belvedere pipe and the lowest grade in the Charatan’s line up, I had expected to find a few fills and some non-descript grain on the stummel briar. However, I was surprised to note that there is not a single fill in the stummel surface and the surface boasts of some beautiful straight grains around the sides, front, back and over the shank surface while loosely packed Bird’s eye adorns the foot of the stummel. The stummel surface is covered in dirt and grime giving the stummel a dull and dirty appearance. The stummel surface shows a few dents and dings. It does have a quality which is seen on vintage pipes, but difficult to explain in words. And not to forget, this is nearly 50 plus year old pipe!! The mortise shows accumulation of old oils and tars which would need to be cleaned. The dents and dings to the stummel surface is one issue that I am not sure about dealing with since I absolutely love the old dark reddish brown color and the patina that has developed over time that needs to be preserved. A nice polish with micromesh grit pads will bring a nice shine to the stummel and highlight the grain. The vulcanite saddle stem is heavily oxidized, but otherwise in a decent condition. The bite zone on either surface shows some minor tooth indentations with a small amount of calcification at the base of the button edge. The horizontal slot and tenon opening shows accumulation of dried oils and tars. All in all, the stem presents no major damage and should be an easy clean up.THE PROCESS
I started the restoration with cleaning of the stummel as I was keen to know the condition of the walls of the chamber. With my sharp fabricated knife, I removed the cake from the chamber and thereafter, using a folded piece of 180 grit sand paper, I sand out the last traces of cake and expose the walls of the chamber. I wiped the chamber with a cotton swab dipped in isopropyl alcohol to remove the carbon dust left behind by all the reaming and sanding process. Once the chamber walls were cleaned out, I was pleased to note a pristine chamber with no signs of heat fissures/ lines/ pits. With the same sharp knife, I gently scraped off the lava overflow from the rim top surface. The charred and uneven inner rim surface (encircled in red) and the dents/ dings to the rim edges (major ones indicated with blue arrows) are now clearly seen and should be easily addressed by creating a thin delicate inner edge bevel. The ghosting is still prevalent and will, in all probability, be addressed/ reduced once the shank internals are cleaned. Next, I cleaned out the internals of the shank and mortise. Using my dental tool, I scraped out all the dried oils, tars and gunk that had accumulated in the draught hole and on the walls of the mortise. The amount of crud that was scrapped out and the condition of the pipe cleaners that were used points to how dirt the shank internals were. I continued further cleaning of the mortise and the shank with shank brushes and dish washing soap. I have resorted to this process as it helps me save on to a ton of pipe cleaners as these are not available and which are very expensive for me to get here in India from US or the UK. I finished the cleaning by running a few pipe cleaners dipped in isopropyl alcohol through the mortise. I usually clean the mortise with dish soap/ shank brushes and rinsing under warm water when I clean the external stummel surface. However this time around, in order to preserve the old patina and the original stain over the stummel surface, I shall be avoiding the external cleaning of the stummel with warm water and Murphy’s Oil soap and resort to only wiping it clean with the oil soap on a cotton swab followed by a wipe with a moist soft cotton cloth. The old smells are still strong and would require more invasive methods to completely eliminate the ghosting.I continued the cleaning of the chamber and shank internals with a salt and alcohol bath. I usually use cotton balls which is an at par substitute to Kosher salt as I have realized over the years. However, this time around, I used kosher salt which had been lying around for some time now and I wanted to empty the container. I draw out a wick from the cotton and along with a folded regular pipe cleaner; insert it in to the mortise and through the draught hole in to the chamber. Thereafter, I packed the chamber with kosher salt to about quarter of an inch below the inner rim edge and filled it with isopropyl alcohol up to the brim. About half an hour later, the level of alcohol had gone down, having being absorbed by the salts. I topped it up once again with isopropyl alcohol and set it aside overnight. By next afternoon, the salt is dark colored and the kosher salt and alcohol had drawn out all the remaining oils and tars from the chamber and mortise, fulfilling its intended task. I removed the salts from the chamber and the pipe cleaner with cotton balls from the shank and ran pipe cleaners through the mortise to clean out all the loosened tars and gunk and further cleaned it by scarping the walls with a dental tool to completely remove the gunk. I blew through the draught hole to dislodge the trapped salts and wiped the bowl clean and dried the shank and bowl with paper napkins and set it aside to dry for an entire day. By next day, the pipe was nice and dry and all the smells were history.  With the stummel set aside for drying, I turned to address the stem issues. I addressed the deeper oxidation by sanding the entire stem with a folded piece of 220 grit sand paper. Once the oxidation was completely removed, I wiped the surface clean with Murphy’s oil soap on a cotton swab. I followed it up with cleaning the internals of the stem using hard and normal bristled pipe cleaners and isopropyl alcohol. The gunk that came out with the pipe cleaners tells the sordid tale of the stem condition. To save on to the requirement of number of pipe cleaners, I have resorted to cleaning the stem internals using thin shank brushes with anti-oil dish washing soap and finally rinsing the stem with warm water to clean and freshen up the stem internals. With a pointed dental tool, I scraped out the entire dried gunk from the tenon end and the horizontal slot. I rubbed a little Extra Virgin Olive oil to hydrate the stem and kept it aside. I used a tightly folded piece of 180 grit sand paper to shape and re-define the button edge on either surface. The stem at this point in restoration is shown below. Continuing with the stem refurbishing, I followed it up by further dry sanding the stem with 320, 600, 800 and wet sanding with 1000 grit sand papers to completely rid the surface of the oxidation and bring out the shine in the vulcanite. The stem should polish up nicely.  Using micromesh pads, I completed the polishing of the stem by wet sanding the stem surface with 1500 to 12000 girt pads. I gave a final rub with “Before and After Extra Fine” stem polish compound from Mark to remove fine scratches from the stem surface. I rub a little quantity of Extra Virgin Olive oil in to the stem surface and set it aside to be absorbed by the vulcanite. The stem polished up nicely and appears as good as when new.  Next, I cleaned the external surface of the stummel with Murphy’s Oil Soap on a cotton swab. As brought out earlier, in this project, I intended to preserve the patina and the original stain on the stummel and hence, the deviation from the usual process of scrubbing the surface with oil soap and dishing cleaning soap followed with rinsing under warm water. The external cleaning of the stummel has brought to the fore a few more scratches over the surface. I shall polish the stummel by dry sanding with micromesh pads to bring a nice shine to the stummel and highlighting the grains. Now that the rim top surface is clean and free of the entire lava overflow, the extent of the charring and dents and dings to the inner rim edge is fairly apparent. I addressed the out of round inner edge and the slight charring to the inner rim edge in 8 o’clock direction by creating a thin delicate bevel to inner edge with a folded piece of 220 grit sand paper pinched between my thumb and index finger. I addressed the issue of darkened rim surface by lightly sanding the rim top and polished the freshly created inner rim edge bevel with a piece of 600 grit sandpaper. I agree with the Readers who have observed that the issues of scratches/ dings/ dents to the stummel have not been addressed. However, I am ready to accept minor blemishes if I am able to preserve the old acquired patina of the briar. I am very happy at the way the chamber and rim top surface appears at this in restoration.I subjected the stummel to a complete cycle of micromesh polish, dry sanding with 1500 to 12000 grit pads. I paid greater attention to polish the rim top surface and the bevel created on the inner rim edge. I wiped the stummel with a moist cloth after every grit pad to remove the sanding dust left behind by the pads. This also helps in monitoring the progress being made and provides an opportunity to take early corrective action, if required. I am happy with the progress being made till now. The briar has taken on a nice deep shine with the original reddish brown of the stummel and the darker brown stains to the grains contrasting beautifully. I really like the dark reddish brown coloration and the patina that is seen over the stummel surface. Next, I rub a small quantity of “Before and After Restoration Balm” in to the briar with my finger tips and worked it deep in to the surface and let it rest for a few minutes. The balm almost immediately works its magic and the briar now has a nice vibrant appearance with the beautiful straight and Bird’s eye grain patterns on full display. The contrast of the dark browns of the grain with the light reddish brown hues of the rest of the stummel adds an interesting dimension to the appearance of the stummel. I further buffed it with a horse hair brush to further deepen the shine.   To refresh the stem logo, I coat the stem logo with white correction ink and let it dry out completely while I polished the pipe with Blue Diamond. Once the ink had dried out, with a toothpick, I gently removed the excess ink from the surrounding surface. Though the logo is not very crisp, this is the best that was possible given how worn out the stamping was to start with.To put the finishing touches, I mount a cotton cloth buffing wheel on to my hand held rotary tool and polished the stummel and stem with Blue Diamond compound. This compound helps to remove the minor scratch marks that remain from the sanding.   Next, I mount another cotton buffing wheel that I have earmarked for carnauba wax and applied several coats of the wax. I mount a clean cotton cloth buffing wheel and give the entire pipe a once over buff. I finished the restoration by giving the entire pipe a rigorous hand buffing using a microfiber cloth to raise the shine further. The finished pipe with the aged patina to the briar looks amazingly beautiful and is now ready for its long second innings with me. P.S. I had attempted to preserve the aged patina which had developed over the stummel surface with passage of time. I did accept the minor dents and scratches that were seen over the stummel surface and let them be. It would a good to know your approach in this project and the methods that you resort to while maintaining the patina over the stummel surface.

Praying for the health and safety of all the readers and their loved ones in these troubled times…


Refurbishing The Second Charatan’s Make “Belvedere” # 1 From Mumbai Bonanza Lot


Blog by Paresh

I was fortunate enough to have heeded the advice of my dear friend and mentor, Steve, and struck a deal with a junk collector from Mumbai for a pile of pipes that he had acquired. He did not know what he was selling and I did not know what quality and condition of pipes I was buying from him as we reside in different cities!! The argument that Mr. Steve presented was that if not anything, I shall at least have some spares and this was logical. I struck a deal and here are pictures of the pipes that I received in this lot.This lot contains some very nice collectible pipes, a few well known brands and some mediocre brands. Overall, with seven Dunhill pipes, a Preben Holm #1 FH, a couple of “Made in England” Pete System pipes, a couple of  Charatan’s Make “Belvedere”, Custom-Bilt, Stanwell and other assorted pipes, I would say that I had struck a decent haul!!! This is indeed my “Mumbai Bonanza”.

The 21th pipe that I decided to work on from this find is a beautiful small sized petite Dublin shaped CHARATAN’S MAKE “BELVEDERE” # 1 pipe and is indicated by a green cross.This pipe is stamped on the left of the shank towards the shank end as “CHARATAN’S MAKE” over “LONDON ENGLAND” over “BELVEDERE”, all in block capital letters. The right side of the shank surface bears the shape number “1”. The high quality vulcanite saddle stem bears the trademark logo “CP” with the lower part of the C penetrating the P. All the stampings are crisp and easily readable save for the stem logo which is faint and the worn out. In my earlier restorations of CHARATAN’S pipes, I had extensively researched the dating of these old pipes and I can say with certainty that this pipe is from the period post 1960s. However, to document and establish credibility to my understanding and also to refresh my memory of the brand, I visited pipedia.org. Here is the link for the readers interested in history of Charatan’s and also in viewing a 1951 catalog;

https://pipedia.org/wiki/Charatan

“In 1863 Frederick Charatan, a Russian / Jewish immigrant, opened a shop in Mansell Street, located in the borough of Tower Hamlets, London E1, where he began to carve Meerschaum pipes.

Charatan was the first brand to make entirely hand-made briars from the rough block to the finished pipe including the stems. The nomenclature “Charatan’s make” refers to this method of production and was meant to differ Charatan from other brands who “assembled” pipes from pre-drilled bowls and delivered mouthpieces.

Charatan used 4 basic grades prior to 1950: Supreme, Selected, Executive, and Belvedere. After 1950 Herman Lane’s influence began, and the grades started to expand. In 1955 Lane took over sole distributorship of Charatan in the US. In 1957 he introduced the Supreme S. Most of his other introductions were from the 60’s and early 70’s…

Here is another link from the same page which takes the readers to an absolutely well researched page on Dating of Charatan’s;

https://pipedia.org/wiki/Dating_of_Charatans

I have reproduced the relevant portions which had helped me in dating this pipe.

The first step on dating a Charatan is to carefully look to some details:

  1. a) Shape of the mouthpiece
  2. b) Marking on the mouthpiece
  3. c) Engraving on the shank
  4. d) Shape and position of shank engraving/writing

This is because you can make the following conclusions:

a) From 1863 to 1960 the mouthpieces have a normal shape, saddle or tapered. From 1961 they use the ‘Double Comfort’ style still used today. By the way there are some saddle bits (without the double comfort) used in pipes that date after 1960 but these models are always characterized by an X (in the place of the DC) engraved after the shape number on the shank. This means that if a pipe has a tapered mouthpiece instead of a double comfort one, it is definitely a pre-Lane pipe before 1960. While if a pipe has a normal saddle bit stem, it could belong to every era. Nevertheless the pipe is pre 1961 if the shape code does not include an X, and is a pipe from after 1960 if the X is engraved. Finally any pipe with the double comfort stem is definitely after 1960.

b) The CP logo on the stem is stamped in a different shape according the era it was used. Some differences are less obvious than others; however the glaring differences are detectable in 4 phases. The CP till the 1960 is very fine, the C penetrates the P.

Identification of a first era pipe (Frederick’s era, 1863-1910)

I immediately point out that pipes of this era are very rare and it is very unlikely to come across a pipe from this time.

Moreover these pipes are indiscernible from those of the second era, the only clue is that pipes of this era are, in 99% of the cases, are quite small in size.

1) Pipes are no larger than a Dunhill group 1 or max group 2

2) Saddle or tapered mouthpiece

3) No double comfort stems

4) The CP logo is engraved so that the C enters the P (not always present)

5) Absence of £ on the pipe shank

6) Absence of the letter X on the pipe shape code engraved on the shank (for ex. 2502 and not 2502X)

7) Absence of letters DC after the shape number (for ex. 2502 and not 2505DC)

8) Absence of the engraving “MADE BY HAND” on the shank

9) Presence of the writing “CHARATAN’S MAKE LONDON ENGLAND” on 2 lines

10) The CP logo is finer than in following eras

11) The stems are usually made by different material than ebonite (mostly amber, if they have not been replaced)

Identification of a second era pipe (Rueben’s era, 1910-1960)

Pipes belonging to this period are rare; however is it possible to come across one. They can be distinguished from a pipe of the first era mainly because their larger size.

Their characteristics are similar to the ones of the previous era.

1) Pipes can be larger, up to the dimension of a Dunhill group 5

2) The mouthpiece is tapered or saddle.

3) No double comfort

4) The CP logo is engraved so that the C enters the P

5) Absence of £ on the pipe shank (note that from 1955 all the pipe imported in the USA by Lane has it, however that stamping is not synonymous of the Lane era).

6) Absence of the letter X on the shape code engraved on the shank (for ex. 2502 and not 2502X)

7) Absence of letters DC after the shape number (for ex. 2502 and not 2505DC)

8) Absence of the engraving “MADE BY HAND” on the shank (introduced for the first time in 1958)

9) Presence of the writing “CHARATAN’S MAKE LONDON ENGLAND” on 2 lines

10) The CP logo is finer than in following eras

I visited rebornpipes for more information and there is a very informative article that Steve had re-blogged on Charatan’s Models & Shape Information for the Collector. Here is the link for this article;

https://rebornpipes.com/2018/08/22/charatan-models-shape-information-for-the-collector/

I earnestly urge all the readers to go through this article on Reborn pipes.

Thus I can say that the small petite Charatan’s Make “BELVEDERE” pipe on my work table is, in all probability, from the Rueben’s Era and dates from the period 1910- 1960. Here is a picture of the two Charatan’s Belvedere, # 2655 X that I had restored earlier and # 1 currently on my work table, for size comparison. This would give the readers an idea why my heart skipped a beat when I read that the “Frederick’s era, 1863-1910” pipes are no larger than a Dunhill group 1 or max group 2!! Initial Visual Inspection
The Charatan’s pipe that is currently on my work table is a small petite pipe with a classic Dublin shape. It has a chamber depth of about 7/8 inch, bowl height of about 1 inch, chamber inner diameter of slightly less than 1 inch and overall pipe length of 5 inches. The stummel has rich dark and medium contrasting reddish brown stains and is covered in dirt and grime through which beautiful cross grains can be seen around the sides and over the shank surface while Bird’s eye adorns the front and back of the stummel. There is a very thin layer of cake in the chamber. The rim top is very clean and appears to have been scraped and is uneven. The inner rim edge has few dents and dings and the chamber is out of round due to the inner rim edge damage. The vulcanite saddle stem is heavily oxidized with no damage to the bite zone on either surface. The buttons on both surfaces are in pristine condition. The following pictures will give the Readers an idea of the overall condition of the pipe as it sits on my work table. The condition of the pipe gives me the impression that the pipe has been worked on earlier to address the damage to the rim top; however, the job is amateurish at the best. Overall, the thin layer of cake, clean rim top and excellent condition of the stem are pointers to the fact that the pipe seems to be well looked after. Detailed Visual Inspection
The pipe appears to have been smoked just two to three times after the chamber had been completely reamed and cleaned down to the bare briar sometime in the past. There is a just a sprinkling of carbon layer over the walls of the chamber. The inner walls of the chamber are in pristine condition with no signs of heat lines/ fissures. The rim top is clean and appears to have been unevenly scraped to remove the lava overflow resulting in an undulating rim top surface. Two prominent cracks are seen over the rim top surface; the larger crack in the 4 ‘O’ clock direction extends from the inner to the outer edge while the smaller crack in 11 ‘O’ clock direction extends about half way across the rim surface from the inner edge. These cracks are encircled in red. The inner rim edge appears to have been scraped with a pocket knife to remove any charring that would have been present in the past and is uneven with a couple of dents (indicated with green arrows) making the bowl appear out of round. The outer rim edge is scorched in three places; 10 ‘O’ clock, 3 ‘O’ clock and 7 ‘O’ clock directions (encircled in yellow). In spite of the thin cake, the chamber odor is strong and should be addressed to some extent once the cake has been taken down to the bare briar and the shank internals have been thoroughly cleaned. The undulating and cracks on the rim top surface, and the out of round chamber are the major issues that would need to be dealt with.  I was surprised to note that, in spite of being the lowest grade in Charatan’s line up, there is not a single fill in the stummel surface and the surface boasts of some beautiful cross grain around the sides and over the shank surface while Bird’s eye adorns the front and back of the stummel. The stummel surface is covered in dirt and grime giving the stummel a lifeless, dull and dirty appearance. The mortise shows accumulation of old oils and tars which would need to be cleaned. I absolutely love the old dark reddish brown color and the patina that has developed over time that I intend to preserve during the restoration. A nice polish with micromesh grit pads will bring a nice shine to the stummel and highlight the grains.   The vulcanite saddle stem is heavily oxidized, but otherwise in a decent condition. The bite zone and the button edge on either surface show some minor tooth indentations. The horizontal slot and tenon opening shows accumulation of dried oils and tars. All in all, the stem presents no major damage and should be an easy clean up. The Process
I started the restoration with cleaning of the stummel. With my sharp fabricated knife, I removed the little remaining cake from the chamber and thereafter, using a folded piece of 180 grit sand paper, I sand out the last traces of cake and expose the walls of the chamber. I wiped the chamber with a cotton swab dipped in isopropyl alcohol to remove the carbon dust left behind by all the reaming and sanding process. Once the chamber walls were cleaned out, I was could make out a couple of minor heat fissures (encircled in yellow). With the same sharp knife, I gently scraped off the minor charring from the inner rim edge. The ghosting is still prevalent and will, in all probability, be addressed/ reduced once the shank internals are cleaned. I took a closer look at the heat fissures and it was a big relief to note that the heat fissures are superficial save for the one in 4 o’clock direction (encircled in yellow) which would need to be addressed. I intend to remove the charred briar from the heat fissure and fill it with J B Weld and subsequently coat the bowl with activated charcoal and yogurt to protect it from coming in direct contact with the burning tobacco.   Next, I cleaned out the internals of the shank and mortise. Using my dental tool, I scraped out all the dried oils, tars and gunk that had accumulated in the draught hole and on the walls of the mortise. The amount of crud that was scrapped out and the condition of the pipe cleaners that were used points to how dirt the shank internals were. I continued further cleaning of the mortise and the shank with shank brushes and dish washing soap. I finished the cleaning by running a few pipe cleaners dipped in isopropyl alcohol through the mortise. The old smells are still strong and would require more invasive methods to completely eliminate the ghosting.   I continued the cleaning of the chamber and shank internals with a salt and alcohol bath. I usually use cotton balls which is an at par substitute to Kosher salt as I have realized over the years. I draw out a wick from the cotton and along with a folded regular pipe cleaner; insert it in to the mortise and through the draught hole in to the chamber. Thereafter, I packed the chamber with cotton balls to about quarter of an inch below the inner rim edge and filled it with isopropyl alcohol up to the brim. About half an hour later, the level of alcohol had gone down, having being absorbed by the cotton. I topped it up once again with isopropyl alcohol and set it aside overnight. By next afternoon, the cotton balls are dark colored and along with alcohol, had drawn out all the remaining oils and tars from the chamber and mortise, fulfilling its intended task. I removed the cotton balls from the chamber and the pipe cleaner with cotton balls from the shank and ran pipe cleaners through the mortise to clean out all the loosened tars and gunk and further cleaned it by scarping the walls with a dental tool to completely remove the gunk. I wiped the bowl clean and dried the shank and bowl with paper napkins and set it aside to dry for an entire day. By next day, the pipe was nice and dry and all the smells were history. With the stummel set aside for drying, I turned to address the stem issues. I addressed the deeper oxidation by sanding the entire stem with a folded piece of 220 grit sand paper. Once the oxidation was completely removed, I wiped the surface clean with Murphy’s oil soap on a cotton swab. I followed it up with cleaning the internals of the stem using hard and normal bristled pipe cleaners and isopropyl alcohol. The gunk that came out with the pipe cleaners tells the sordid tale of the stem condition. I further cleaned the stem internals using thin shank brushes with anti-oil dish washing soap and finally rinsing the stem with warm water to clean and freshen up the stem internals. With a pointed dental tool, I scraped out the entire dried gunk from the tenon end and the horizontal slot. I rubbed a little Extra Virgin Olive oil to hydrate the stem and kept it aside. I used a tightly folded piece of 180 grit sand paper to shape and re-define the button edge on either surface. The stem at this point in restoration is shown below. Continuing with the stem refurbishing, I followed it up by further dry sanding the stem with 320, 600, 800 and wet sanding with 1000 grit sand papers to completely rid the surface of the oxidation and bring out the shine in the vulcanite. The stem should polish up nicely.Using micromesh pads, I completed the polishing of the stem by wet sanding the stem surface with 1500 to 12000 girt pads. I gave a final rub with “Before and After Extra Fine” stem polish compound from Mark to remove fine scratches from the stem surface. I rub a little quantity of Extra Virgin Olive oil in to the stem surface and set it aside to be absorbed by the vulcanite. The stem polished up nicely and appears as good as when new.  Next, I cleaned the external surface of the stummel with Murphy’s Oil Soap on a cotton pad. As brought out earlier, in this project, I intended to preserve the patina and the original stain on the stummel and hence, the deviation from the usual process of scrubbing the surface with oil soap and dishing cleaning soap followed with rinsing under warm water. I shall polish the stummel by dry sanding with micromesh pads to bring a nice shine to the stummel and highlighting the grains. With the internal and external cleaning of the stummel completed, I turn to addressing the issues of rim damage. I topped the rim top over a piece of 220 grit sand paper till I had a smooth and even surface. The charred surface in the 2 o’clock direction has been greatly reduced but is still visible (encircled in red). I had anticipated that the crack would be addressed at this stage itself if it had been superficial. However, that was not to be. Both the cracks, larger one in 4 o’clock and the smaller one in 11 o’ clock direction are still visible and indicated with blue arrows. I shall drill counter holes to prevent the spread of these cracks.  I again checked the alignment of the crack on the rim surface with the heat fissures in the chamber walls. With a sharp dental tool, I probed the heat lines. The heat line that aligned with the smaller crack is just superficial and the surrounding briar was solid. However, the heat fissure that aligned with the larger crack did have soft charred briar in it and would need to be addressed. I also checked the stummel surface to see if the crack extended over the stummel and was mighty pleased to note that it did not. What a relief!!   I marked the end points of the two cracks with a sharp dental tool. These marks also help to guide the drill bit when drilling the counter hole. With my hand held rotary tool mounted with a 0.1 mm drill bit, I drill counter holes at the end points. These counter holes arrests the further spread of these cracks. I fill this crack and the counter holes with a mix of CA superglue and briar dust and set the stummel aside for the fills to harden.   Next, with a sharp dental tool, I completely removed the charred briar from the heat line that aligned with the larger crack in 4 o’clock direction. To protect the crack from coming in to direct contact with the burning tobacco and causing a burnout, I plan, firstly, to fill only the crack of the chamber with J B Weld followed by a second coat of activated charcoal and yogurt to the entire chamber which would assist in faster cake formation. J B Weld is a two-part epoxy Cold Weld that consists of two parts; hardener and steel which are mixed in equal parts in a ratio of 1:1 with hardening time of 5-6 minutes and complete curing time of 6-8 hours. I squeezed out the contents of the two tubes and mixed it well. With a flat bamboo frond, I applied this mix and filled the intended crack. I worked fast to ensure a complete and even filling of the crack and set the stummel aside for the J B Weld to harden.  By the next afternoon when I got back to working on this pipe, the counter hole fills over the rim top and the J B Weld coat to the wall of the chamber had completely cured and hardened considerably. I sand the rim top fills with a flat needle file to achieve a rough match with the rest of the rim surface. I fine tune the match with a piece of 220 grit sand paper. Next, using a folded piece of 150 grit sandpaper, I sand the J B Weld coating to a smooth surface till I had as thin a coat as was essential to protect and insulate the crack from the direct heat of the burning tobacco. The Weld coat has completely covered only the crack which can be seen as a thin line. I am very pleased with the repairs at this stage.With the repairs to the cracks and heat fissure completed, I addressed the out of round inner edge and the slight charring to the inner rim edge in 4 o’clock direction by creating a nice deep bevel to inner edge with a folded piece of 220 grit sand paper pinched between my thumb and index finger.  I subjected the stummel to a complete cycle of micromesh polish, dry sanding with 1500 to 12000 grit pads. I paid greater attention to polish the rim top surface and the bevel created on the inner rim edge. I wiped the stummel with a moist cloth after every grit pad to remove the sanding dust left behind by the pads. I am happy with the progress being made till now. The briar has taken on a nice deep shine with the original reddish brown of the stummel and the darker brown stains to the grains contrasting beautifully. I really like the dark reddish brown coloration and the patina that is seen over the stummel surface.     Next, I rub a small quantity of “Before and After Restoration Balm” into the briar with my finger tips and work it deep in to the surface and let it rest for a few minutes. The balm almost immediately works its magic and the briar now has a nice vibrant appearance with the beautiful straight and Bird’s eye grain patterns on full display. The contrast of the dark browns of the grain with the light reddish brown hues of the rest of the stummel adds an interesting dimension to the appearance of the stummel. I further buffed it with a horse hair brush to further deepen the shine. Now that the cosmetic aspects of this pipe have been dealt with, all that remained was the functional aspect that needed to be taken care of. The J B Weld coated crack needs to be protected from the direct heat of the burning tobacco and for this; I coat the complete chamber walls with a mix of activated charcoal and yogurt and set it aside to harden naturally. The mix has to be of the right consistency; neither too thick nor too runny. It should be of a consistency that is thick enough to spread easily, evenly and stick to the walls. Also the coating should not be very thick. A thin film is all that is required. Another important aspect to remember is that it is essential to insert a pipe cleaner in to the mortise and through the draught hole for two reasons; first is obviously to keep the draught hole from getting clogged and secondly, the pipe cleaner absorbs all the moisture from the mix and helps in faster and even drying of the coat.To refresh the stem logo, I coat the stem logo with white correction ink and let it dry out completely while I polished the pipe with Blue Diamond. Once the ink had dried out, with a toothpick, I gently removed the excess ink from the surrounding surface. Though the logo is not very crisp, this is the best that was possible given how worn out the stamping was to start with.  To put the finishing touches, I mount a cotton cloth buffing wheel on to my hand held rotary tool and polished the stummel and stem with Blue Diamond compound. This compound helps to remove the minor scratch marks that remain from the sanding.    Next, I mount another cotton buffing wheel that I have earmarked for carnauba wax and applied several coats of the wax. I mount a clean cotton cloth buffing wheel and give the entire pipe a once over buff. I finished the restoration by giving the entire pipe a rigorous hand buffing using a microfiber cloth to raise the shine further. The finished pipe with a deep reddish brown and aged patina to the briar looks amazingly beautiful and is now ready for its long second inning with me. I would like to express my gratitude to all the readers of rebornpipes who have made the effort to walk through this journey with me and shared their words of encouragement through their comments and suggestions. This does help me gain experience and grow in this hobby about which I am very passionate.

Praying for the health and safety of all the readers and their loved ones in these troubled times…

Life for a Tired Lane Era Charatan’s Make Belvedere Pot 48DC


Blog by Steve Laug

A fellow Vancouver Pipeman named Alex continues to keep me busy with working on the pipes he is picking up. He has picked up some interesting American and English made pipes. The next of those pipes is an English made Pot. It is quite a stunning pipe with great grain around the bowl. From what I can see it is a flawless piece of briar. The grain is birdseye on the sides of the bowl and cross grain on the front and back. The pipe is stamped on the left side of the shank and it reads Charatan’s Make [over] London England [over] Belvedere. To the left of the stamping is a cursive “L” in a circle and to the right of the stamping is the shape number 48DC.  The L stamp and the DC (Double Comfort) stamp both point to the pipe being made during the Lane era of Charatan. The bowl had been reamed before coming to my work table. The rim top was clean other than some darkening on the inner bevel at the front of the bowl. The finish was worn off and very dirty with grime and oils ground into the surface of the bowl and shank. The vulcanite saddle stem is at one time would have had a CP on the left side of the saddle but it had long since been buffed off. The stem was clean but scratched and still having some remnants of oxidation at the sharp edges of the Double Comfort bit. Here are some photos of the pipe when I first received it.    I took a close-up photo of the rim to show the condition of the rim top, bowl and the inner edge of the bowl. You can see the darkening on the front inner bevel of the rim top. The stem was quite clean but someone had sanded and buffed it so it was a bit wavy.     The stamping on the side of the shank is shown in the photo below. It reads as noted above.  I removed the stem from the shank and took a photo of the flow of the pipe. The pipe was really going to look great once it was cleaned and polished.To try to figure out the era of the Charatan’s pipe I was working on I turned to the Pipephil website, Logos and Stampings. There is some really helpful information on each of the lines of Charatan’s Make pipes that entered the market. Here is the link to the section of the site that I turned to (http://www.pipephil.eu/logos/en/logo-charatan.html). There is an alphabetical listing of the lines but the Belvedere they showed had a stem made for a 9mm filter while the one I have is a nonfiltered pipe. The site did give a short history of the brand. I quote the portion that is most pertinent.

The brand was founded in 1863 by Frederik Charatan. When his father retired in 1910, Reuben Charatan took over the family business. All the pipes were handmade until 1973. The brand name has been overtaken by Dunhill in 1978 and sold in 1988 to James B. Russell Inc.(NJ, USA). During the period 1988-2002 Charatans were crafted by Butz Choquin in St Claude (France). Dunhill re-purchased Charatan brand name in 2002 and Colin Fromm (Invicta Briars, Castleford) followed up on freehand production.

I turned to Pipedia to see if I could find more information on the brand and possibly a link to the Belvedere line (https://pipedia.org/wiki/Charatan) but once again in the general article it was not listed.  It did give a little more historical information. I quote the pertinent parts and have highlighted in red the sections that give information on this particular pipe.

In 1863 Frederick Charatan, a Russian/Jewish immigrant, opened a shop in Mansell Street, located in the borough of Tower Hamlets, London E1, where he began to carve Meerschaum pipes. These pipes got very popular soon, and thus Charatan moved to a bigger workshop in Prescot Street, just around the corner. Here he began to make briar pipes which should make the name famous the world over. Charatan was the first brand to make entirely hand-made briars from the rough block to the finished pipe including the stems. The nomenclature “Charatan’s Make” refers to this method of production and was meant to differ Charatan from other brands who “assembled” pipes from pre-drilled bowls and delivered mouthpieces.

Being the undisputed No. 1 in English pipemaking, Charatan was approached by Alfred Dunhill who was unsatisfied with the quality of the pipes he imported from France. During 1908 – 1910 Dunhill bought pipes from Charatan paying exorbitant prices to ensure he had some of the very best pipes for sale in England. In 1910 he lured away Joel Sasieni, one of Charatan’s best carvers, and opened his own small pipe workshop on 28 Duke Street. On the retirement of his father in 1910 Reuben Charatan took over the family business…

The pre-Lane period (prior to 1955) and the Lane era pipes (1955 to until sometime between 1979 – 1984) are of primary interest the collector. The Lane era is often quoted as beginning about 1950… Charatan records are almost non-existent before Lane due to a factory fire, making it difficult to date pre-Lane pipes. Charatan used 4 basic grades prior to 1950: Supreme, Selected, Executive, and Belvedere. After 1950 Herman Lane’s influence began, and the grades started to expand. In 1955 Lane took over sole distributorship of Charatan in the US. In 1957 he introduced the Supreme S. Most of his other introductions were from the 60’s and early 70’s…

I continue digging further into the dating of the pipe, but what I had found was a good start for me. If some of you would like to try your hand at dating it more accurately as to the time period it came out you might want to check out the article on Pipedia on Dating Charatans (https://pipedia.org/wiki/Dating_of_Charatans).

I also reread the article on Pipedia by the Italian fellow who contributed some really helpful information on the brand (https://pipedia.org/wiki/Charatan_-_Milan_2014). I quote the section on the Second period: Reuben Charatan 1910 – c. 1962

– In 1962 Herman Lane took over the business from the Charatan family, although he had already influenced production from the 1950s.

– The pipes were mostly larger than the previous ones and corresponded in size to Dunhill group 5. These are slightly less rare, but still difficult to find.

– Stem: Usually in ebonite, saddle shaped or tapered, bearing a fine “CP” stamp, underbore system (see below) used when necessary.

– Shank: The shape code is stamped on it together with the nomenclature “CHARATAN’S MAKE LONDON ENGLAND” arranged in two lines. From 1955 onwards on the models marketed for the USA there is also a serif and circled capital “L” (but not all models bear this) which resembles the pound sterling symbol. The “L” is for Lane, the importer.

From 1958, Lane changed the nomenclature for models marketed for the US to clarify the message: “MADE BY HAND”.  In this period the underbore was introduced. Its manufacturing period ranged between 1920 and c.1930. This model was equipped with a duralumin plunger trap fitted in the stem, which served to clean the residue more easily. This particular model bore a special stamp on the stem, and also had its own catalogue…

QUALITY GRADES…The stem did not only display the stamps mentioned above. Another stamp that can help dating is the one referring to the quality of the pipe. Until Herman Lane arrived on the scene there were four quality grades. Starting with the lowest: Belvedere, Executive, Selected, and Supreme. Lane went on to add higher grades from time to time: Supreme S, Supreme S100, S150, S200, S250, S300, Coronation, Royal Achievement, Crown Achievement, and Summa Cum Laude; these last three are extremely rare and almost impossible to find. He also invented other, different grades, even changing the previous pipe classification standards. We will not go into detail here, but it means that if we find an S100 or Coronation the pipe was manufactured following Herman Lane’s acquisition. In particular, the FH mark, or Freehand pipe was commissioned to the famous Danish craftsman, Preben Holm

Now it was time to work on the pipe itself. I scrubbed the exterior of the bowl with a tooth brush and undiluted Murphy’s Oil Soap to get the grime and debris out of the briar. I rinsed it with running water and dried it off with a towel. With that the outside was clean… progress!    I cleaned out the mortise, shank in the briar and airway in the stem with pipe cleaners, cotton swabs and 99% isopropyl alcohol. The pipe was dirty with lots of tars and oils.   I worked on the damage to the inner edge of the bowl with 220 grit sandpaper to remove as much of the damage as possible and bring the bowl back to round. I took a photo of the rim top after the cleanup to show the progress in cleaning up the edges.      I polished the briar with micromesh sanding pads – wet sanding with 1500-12000 grit pads and wiping the bowl down with a damp cloth after each pad. The grain is really beginning to stand out and the rim top is blending in quite well.    I worked some Before & After Restoration Balm into the surface of the briar with my fingertips to clean, enliven and protect it. I let the balm sit for a little while and then buffed with a cotton cloth to raise the shine. The following photos show the bowl at this point in the restoration process. I am very happy with the results.    I set the bowl aside and turned my attention to the stem. I scrubbed the stubborn areas of the creases on the stem with Soft Scrub until they were clean. It too a bit of work but I was able to remove much of the oxidation.       There were several small tooth marks on the surface of the stem on each side. I filled them in with Loctite 380 Black CA glue and set the stem aside to let the repairs cure.     I smoothed out the repairs to blend them into the surface of the stem with 220 grit sandpaper. I also worked on the creases to remove oxidation as well as flattening some of the waviness of the stem surface. I started the polishing of the stem with 400 grit wet dry sandpaper. I polished the stem with micromesh sanding pads – wet sanding with 1500-12000 grit sanding pads and wiping it down after each pad with Obsidian Oil. I polished the stem with Before & After Stem Polish – both Fine and Extra Fine. I wiped it down a final time with Obsidian Oil when I finished.          This Charatan’s Make Belvedere 48DC Pot with a vulcanite saddle stem turned out to be a real beauty. The carver really maximized the grain with the shape of the pipe. Everything about the pipe – the finish, the rim top and the cut of the briar work well to highlight the grain around the bowl. I polished stem and the bowl with Blue Diamond polish on the buffing wheel and the finish just popped and came alive. I gave the bowl and the stem multiple coats of carnauba wax. I buffed the pipe with a clean buffing pad to raise the shine. I hand buffed it with a microfiber cloth to deepen the shine. The pipe polished up pretty nicely. The pipe took on life with the buffing. The rich brown finish works well with the polished vulcanite stem. The finished pipe has a rich look that is quite catching. Have a look at it with the photos below. The shape, finish and flow of the pipe and stem are very well done. The dimensions are Length: 5 ½ inches, Height: 1 ½ inches, Outside diameter of the bowl: 1 ½ inches, Chamber diameter: ¾ of an inch. The Charatan’s Make Belvedere will back in the box of pipes that I am working on for Alex. I am looking forward to what he will think of this one. Thanks for walking through the restoration with me as I worked over another estate pipe.

Farida’s Dad’s Pipes #7 – Restoring a Charatan’s Make Belvedere 48DC Pot


Blog by Steve Laug

I am back working on one of the two pipes that are left in the lot that came from the estate of an elderly gentleman here in Vancouver. I met with his daughter Farida almost a year ago and we looked at his pipes and talked about them then. Over the Christmas 2017 holiday she brought them by for me to work on, restore and then sell for her. There are 10 pipes in all – 7 Dunhills (one of them, a Shell Bulldog, has a burned out bowl), 2 Charatan Makes, and a Savinelli Autograph. I have restored all but three of them – a Dunhill Shell and the two Charatan’s Makes. His pipes are worn and dirty and for some folks they have a lot of damage and wear that reduce their value. To me each one tells a story. I only wish they could speak and talk about the travels they have had with Farida’s Dad.

The pipe I am working on is a Charatan’s Make Belvedere. Whenever I see that stamping I am taken back to a US sitcom that I used to watch in the 80s called Mr. Belvedere. It was about a butler, Lynn Aloysius Belvedere who worked for an American family called Owens. Throughout the series, Mr. Belvedere serves as a mentor of sorts to Wesley as well as to the other children. Being a cultured man with many skills and achievements (having even once worked for Winston Churchill), he also comes to serve as some sort of “counselor” to the Owens clan, helping them solve their dilemmas and stay out of mischief (https://en.wikipedia.org/wiki/Mr._Belvedere).

The stocky and solid look of this cultured Charatan’s Make Belvedere is built almost as solidly as Lynn Aloysius Belvedere. When it came to me it was worn and tired looking. I have already caused a lot of discussion on the cleanup of this pipe on the Facebook Tobacco Pipe Restorers Group. The ongoing debate of Restoration vs. Preservation filled a lot of airtime on the group. I do not care to relive or recount that as I am only following the directives of the daughter of the original deceased pipeman. She wanted them restored to usable condition so others can carry on her father’s love of these pipes. She is quite happy with the finished results and others of his pipes are now all over the world being enjoyed by the next generation of pipemen.

When first looked at the pipe here is what I saw. The bowl on the pipe was thickly caked and the cake had flowed over onto the smooth finish on the rim top forming hard lava that made the top uneven. It was hard to know if there was damage to the inner and outer edges of the rim and I would not know until I removed some of the grime. It looked like there was some burn damage on the top toward the front of the bowl but it was hard to know. The outer edge looked far better than any of the other pipes in this collection when I started. The finish was invisible under the thick coat of oils and grime that covered the bowl and shank. In fact at this point I had no idea what the stamping looked like because it was covered. I have wondered as I cleaned the other pipes in this lot if the oily build up was a combo of the life lived in the Antarctic. The stem was oxidized and very dirty but otherwise in good condition. There was a thick sticky, oily substance on the surface of the stem that I could scrape with my fingernail. There were tooth marks and chatter on both sides in front of the button. The stem would not seat properly in the tenon do to the tars in the shank. I took photos of the pipe to show what it looked like before I started the cleanup work. I took close up photos of the bowl and rim top as well as the stem. You can see the condition of the rim top and bowl in the first photo. The outer edge appears to be in decent condition under the grime and lava. The inner edge looks ok but there looks like some damage on the front. I won’t really know the full story until I remove the thick lava overflow on the surface. The stem had tooth chatter and some bite marks on the top and the underside of the stem just ahead of the button.It has been a while since I have worked on the remaining pipes that belonged to Farida’s Dad. I thought it might be helpful to remind us all of the background story of these pipes. Here is the material that I quoted in previous blogs. I have included both the written material and the photo that Farida included of her Dad.

When I wrote the blog on the Classic Series Dunhill and thinking about its travels, Farida sent me an email with a short write up on her Dad. She remembered that I had asked her for it so that I could have a sense of the stories of her Dad’s pipes. Here is what she wrote: My dad, John Barber, loved his pipes. He was a huge fan of Dunhill and his favourite smoke was St. Bruno. No one ever complained of the smell of St. Bruno, we all loved it. I see the bowls and they’re large because he had big hands. When he was finished with his couple of puffs, he would grasp the bowl in the palm of his hand, holding the warmth as the embers faded. The rough bowled pipes were for daytime and especially if he was fixing something. The smooth bowled pipes were for an evening with a glass of brandy and a good movie. In his 20s, he was an adventurer travelling the world on ships as their radio operator. He spent a year in the Antarctic, a year in the Arctic and stopped in most ports in all the other continents. He immigrated to Canada in the mid-fifties, working on the BC Ferries earning money to pay for his education. He graduated from UBC as an engineer and spent the rest of his working life as a consultant, mostly to the mining companies. Whatever he was doing though, his pipe was always close by.

She sent along this photo of him with his sled dogs in the Antarctic sometime in 1953-1954. It is a fascinating photo showing him with a pipe in his mouth. He is happily rough housing with his dogs. As a true pipeman the cold does not seem to bother him. Thank again Farida for sending the photo and the story of your Dad for me to use. I find that it explains a lot about their condition and gives me a sense of who Dad was. If your Dad was rarely without a pipe I can certainly tell which pipes were his favourites.As I looked over the pipes I noted that each of them had rim damage and some had deeply burned gouges in the rim tops. The bowls seemed to have been reamed not too long ago because they did not show the amount of cake I would have expected. The stems were all covered with deep tooth marks and chatter and were oxidized and dirty. The internals of the mortise, the airway in the shank and stem were filled with tars and oils. These were nice looking pipes when her Dad bought them and they would be nice looking one more when I finished.

Here are the links to the previous six blogs that I wrote on the five pipes that I have finished. The first was a Dunhill Shell oval shank pot (https://rebornpipes.com/2018/02/04/restoring-a-1983-dunhill-shell-41009-oval-shank-pot/). The second was a Dunhill Classic Series Shell Billiard (https://rebornpipes.com/2018/02/08/faridas-dads-pipes-2-restoring-a-1990-lbs-classic-series-dunhill-shell-billiard/). The third pipe was a Savinelli Autograph (https://rebornpipes.com/2018/02/15/faridas-dads-pipes-3-restoring-a-savinelli-autograph-4/).The fourth pipe was a Dunhill Red Bark Pot that was in rough shape (https://rebornpipes.com/2018/03/10/faridas-dads-pipes-4-restoring-a-dunhill-red-bark-pot-43061/). The fifth pipe was a Dunhill Root Briar Bent Billiard (https://rebornpipes.com/2018/07/07/faridas-dads-pipes-5-restoring-a-dunhill-root-briar-56-bent-billiard/). The sixth pipe was a Charatan’s Make Distinction https://rebornpipes.com/2018/08/22/faridas-dads-pipes-6-restoring-a-charatan-make-distinction/

Today, I went back to the remaining two pipes in the collection today and chose to work on the Charatan’s Make – a pot shaped pipe. It was dirty so it took a bit of cleaning on the shank to read the stamping. On the left side of the shank it is stamped Charatan’s Make, over London, England over Belvedere. Under that at the bowl shank junction is a cursive L in a circle denoting a Lane era pipe. To the right of the stamping near the shank stem junction it is stamped with the shape number 48DC. The DC refers to the Double Comfort style stem. The smooth finish was sticky with oils and thick grime. The bowl felt oily to touch.

To try to figure out the era of the Charatan’s pipe I was working on I turned to the pipephil website, Logos and Stampings. There is some really helpful information on each of the lines of Charatan’s Make pipes that entered the market. Here is the link to the section of the site that I turned to, http://www.pipephil.eu/logos/en/logo-charatan.html. There is an alphabetical listing of the lines but the Belvedere they showed had a stem made for a 9mm filter while the one I have is a nonfiltered pipe. The site did give a short history of the brand. I quote the portion that is most pertinent.

The brand was founded in 1863 by Frederik Charatan. When his father retired in 1910, Reuben Charatan took over the family business. All the pipes were handmade until 1973. The brand name has been overtaken by Dunhill in 1978 and sold in 1988 to James B. Russell Inc.(NJ, USA). During the period 1988-2002 Charatans were crafted by Butz Choquin in St Claude (France). Dunhill re-purchased Charatan brand name in 2002 and Colin Fromm (Invicta Briars, Castleford) followed up on freehand production.

I turned to Pipedia to see if I could find more information on the brand and possibly a link to the Distinction line (https://pipedia.org/wiki/Charatan) but once again in the general article it was not listed.  It did give a little more historical information. I quote the pertinent parts and have highlighted in bold the sections that give information on this particular pipe.

In 1863 Frederick Charatan, a Russian/Jewish immigrant, opened a shop in Mansell Street, located in the borough of Tower Hamlets, London E1, where he began to carve Meerschaum pipes. These pipes got very popular soon, and thus Charatan moved to a bigger workshop in Prescot Street, just around the corner. Here he began to make briar pipes which should make the name famous the world over. Charatan was the first brand to make entirely hand-made briars from the rough block to the finished pipe including the stems. The nomenclature “Charatan’s Make” refers to this method of production and was meant to differ Charatan from other brands who “assembled” pipes from pre-drilled bowls and delivered mouthpieces.

Being the undisputed No. 1 in English pipemaking, Charatan was approached by Alfred Dunhill who was unsatisfied with the quality of the pipes he imported from France. During 1908 – 1910 Dunhill bought pipes from Charatan paying exorbitant prices to ensure he had some of the very best pipes for sale in England. In 1910 he lured away Joel Sasieni, one of Charatan’s best carvers, and opened his own small pipe workshop on 28 Duke Street. On the retirement of his father in 1910 Reuben Charatan took over the family business…

…The pre-Lane period (prior to 1955) and the Lane era pipes (1955 to until sometime between 1979 – 1984) are of primary interest the collector. The Lane era is often quoted as beginning about 1950… Charatan records are almost non-existent before Lane due to a factory fire, making it difficult to date pre-Lane pipes. Charatan used 4 basic grades prior to 1950: Supreme, Selected, Executive, and Belvedere. After 1950 Herman Lane’s influence began, and the grades started to expand. In 1955 Lane took over sole distributorship of Charatan in the US. In 1957 he introduced the Supreme S. Most of his other introductions were from the 60’s and early 70’s…

The section called Miscellaneous Notes had some interesting information.

Charatan records indicate the DC (Double Comfort) bit was introduced in the 50’s, but some report seeing them in earlier production. Still others indicate they were introduced by Lane in 1960. Regardless, the DC bit is not an accurate way to date a pipe because many Charatan’s were made with regular and saddle type bits throughout the “Lane Era”…

…The Lane Trademark serif and circled L indicates the pipe is from the “Lane Era” (approx. 1955 to 1979 -1984?), however it appears that both the English factory or Lane themselves sometimes, or perhaps even often forget to stamp the L on a pipe. The Charatan factory was known for inconsistencies, especially in stampings. Therefore, although an L on the pipe definitely defines it as a Lane Era pipe, the lack of it could simply mean the pipe missed receiving the stamp from the factory. The lack of the trademark could also mean the pipe was destined for the European market.

I continue digging further into the dating of the pipe, but what I had found was a good start for me. If some of you would like to try your hand at dating it more accurately as to the time period it came out you might want to check out the article on Pipedia on Dating Charatans (https://pipedia.org/wiki/Dating_of_Charatans). I had enough for me to start working on the pipe itself and see what lay beneath the heavy tars and oils.

Like most work the refurbisher does this one walks a fine line between restoration and preservation. The deciding feature with this pipe was the wishes of the family. They wanted the pipe to be cleaned and smoked by someone who could carry on the pipe man’s legacy of their Dad. I understand that it meant changing the current state of the pipe to bring it back closer to the way it was when their father bought it. I reamed the bowl with a PipNet reamer. I used two of the four cutting heads to clean out the cake. The bowl was thickly caked I started with the smaller of the two and worked my way up to the second which was about the same size as the bowl. I cleaned the remnants with a Savinelli Fitsall Pipe Knife and scraped it back to bare briar. I finished by sanding the inside of the bowl with a dowel wrapped in sandpaper. I scraped the top of the rim with the edge of the Savinelli Fitsall Pipe Knife to remove the lava. I scrubbed the exterior of the bowl and shank with a tooth brush and Murphy’s Oil Soap to break through all the grime. I rinsed the bowl under running water to remove the grime and grit. I repeated the process until I had the bowl clean. I took photos of the cleaned exterior of the bowl to show where things stood at this point in the process. I topped the bowl on a topping board with 220 grit sandpaper to remove the damage to the top surface of the rim and clean up the damage to the edges. I did not have to remove a lot and repeatedly checked it to make sure that I had removed enough but not too much. I wanted to take the rim top down until the burn damaged area was smooth and minimized. The second photo shows the remaining burn mark at the front of the bowl. I used a folded piece of 180 and 220 grit sandpaper to bevel the inner edge of the rim until I had removed most of the damage on the back inner edge.With the externals clean it was time to clean out the mortise and shank and airway into the bowl and the airway in the stem with alcohol, cotton swabs and pipe cleaners. I scraped the mortise with a dental spatula and a pen knife to loosen the tars before cleaning. I worked on the bowl and stem until the insides were clean. I wiped down the exterior of the bowl with alcohol on a cotton pad to remove any remaining oils and grimes from my cleaning of the bowl and rim. Once the alcohol evaporated the briar was very dry but also very clean. I restained the bowl with a Maple stain pen to match the colour that was original on this pipe. The rim top matched the rest of the bowl. When the stain dried I wiped the bowl down with alcohol to even out the stain on the sides and top of the bowl. I rubbed down the briar with Before & After Restoration Balm. I worked it into the smooth finish to clean, enliven and protect the new finish. It also evened out the stain coat and gave the stain a dimensional feel. I let the balm sit for a little wall and then buffed it with a horsehair shoe brush. I buffed the bowl with a cotton cloth to raise the shine. I buffed the bowl with Blue Diamond on the buffing wheel to raise the shine and smooth out the finish. I took photos of the pipe at this point to show the condition. I was still not happy with the burned edge toward the front of the bowl and figured I would give it a light bevel to smooth it out and make it less noticeable. The next series of photos tells the story on this. Though I know some will find this damaging to the bowl to me it removes the significant char on the front edge of the bowl and gives it a refined look.  I polished the rim top with micromesh sanding pads – wet sanding with 1500-2400 grit pads and dry sanding with 3200-12000 grit pads. I wiped the rim down with a damp cloth after each pad. The rim was really looking better. I gave it a light coat of a walnut stain to blend it in with the rest of the bowl colour. The photos below tell the story. I set the bowl aside and turned my attention to the stem. I sanded out the tooth chatter on both sides with a folded piece of 220 grit sandpaper. I polished the stem with micromesh sanding pads – wet sanding with 1500-2400 grit micromesh sanding pads and dry sanding it with 3200-12000 grit pads. I rubbed the stem down with Obsidian Oil after each pad. When I finished I gave it a final rub down with the oil and set it aside to dry.  With the stem polished I put it back on the pipe and lightly buffed the bowl with Blue Diamond. I buffed the stem with a more aggressive buff of Blue Diamond. I gave the bowl several coats of Conservator’s Wax and the stem several coats of carnauba wax and buffed the pipe with a clean buffing pad to raise the shine. I hand buffed it with a microfiber cloth to deepen the shine. The pipe polished up pretty nicely. The finished pipe is shown in the photos below. This is the seventh of Farida’s Dad’s pipes that I am restoring from his collection. I am looking forward to hearing what Farida thinks once she sees the finished pipe on the blog. This Charatan’s Make Belvedere Pot shaped pipe will soon be on the rebornpipes store if you want to add it to your rack. The dimensions are Length: 5 ¼ inches, Height: 1 3/4 inches, Outside diameter of the bowl: 1 1/2 inches, Chamber diameter: 7/8 inches. Thanks for walking through the restoration with me as I worked over another of her Dad’s pipes. I have one more of his pipes to work on –a Dunhill Shell Billiard with a saddle stem.