Blog by Paresh
I was fortunate enough to have heeded the advice of my dear friend and mentor, Steve, and struck a deal with a junk collector from Mumbai for a pile of pipes that he had acquired. He did not know what he was selling and I did not know what quality and condition of pipes I was buying from him as we reside in different cities!! The argument that Mr. Steve presented was that if not anything, I shall at least have some spares and this was logical. I struck a deal and here are pictures of the pipes that I received in this lot.
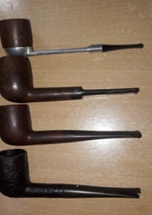 This lot contains some very nice collectible pipes, a few well known brands and some mediocre brands. Overall, with seven Dunhill pipes, a Preben Holm #1 FH, a couple of “Made in England” Pete System pipes, a couple of Charatan’s Make “Belvedere”, Custom-Bilt, Stanwell and other assorted pipes, I would say that I had struck a decent haul!!! This is indeed my “Mumbai Bonanza”.
The 21th pipe that I decided to work on from this find is a beautiful small sized petite Dublin shaped CHARATAN’S MAKE “BELVEDERE” # 1 pipe and is indicated by a green cross. This pipe is stamped on the left of the shank towards the shank end as “CHARATAN’S MAKE” over “LONDON ENGLAND” over “BELVEDERE”, all in block capital letters. The right side of the shank surface bears the shape number “1”. The high quality vulcanite saddle stem bears the trademark logo “CP” with the lower part of the C penetrating the P. All the stampings are crisp and easily readable save for the stem logo which is faint and the worn out.
  In my earlier restorations of CHARATAN’S pipes, I had extensively researched the dating of these old pipes and I can say with certainty that this pipe is from the period post 1960s. However, to document and establish credibility to my understanding and also to refresh my memory of the brand, I visited pipedia.org. Here is the link for the readers interested in history of Charatan’s and also in viewing a 1951 catalog;
https://pipedia.org/wiki/Charatan
“In 1863 Frederick Charatan, a Russian / Jewish immigrant, opened a shop in Mansell Street, located in the borough of Tower Hamlets, London E1, where he began to carve Meerschaum pipes.
Charatan was the first brand to make entirely hand-made briars from the rough block to the finished pipe including the stems. The nomenclature “Charatan’s make” refers to this method of production and was meant to differ Charatan from other brands who “assembled” pipes from pre-drilled bowls and delivered mouthpieces.
Charatan used 4 basic grades prior to 1950: Supreme, Selected, Executive, and Belvedere. After 1950 Herman Lane’s influence began, and the grades started to expand. In 1955 Lane took over sole distributorship of Charatan in the US. In 1957 he introduced the Supreme S. Most of his other introductions were from the 60’s and early 70’s…
Here is another link from the same page which takes the readers to an absolutely well researched page on Dating of Charatan’s;
https://pipedia.org/wiki/Dating_of_Charatans
I have reproduced the relevant portions which had helped me in dating this pipe.
The first step on dating a Charatan is to carefully look to some details:
- a) Shape of the mouthpiece
- b) Marking on the mouthpiece
- c) Engraving on the shank
- d) Shape and position of shank engraving/writing
This is because you can make the following conclusions:
a) From 1863 to 1960 the mouthpieces have a normal shape, saddle or tapered. From 1961 they use the ‘Double Comfort’ style still used today. By the way there are some saddle bits (without the double comfort) used in pipes that date after 1960 but these models are always characterized by an X (in the place of the DC) engraved after the shape number on the shank. This means that if a pipe has a tapered mouthpiece instead of a double comfort one, it is definitely a pre-Lane pipe before 1960. While if a pipe has a normal saddle bit stem, it could belong to every era. Nevertheless the pipe is pre 1961 if the shape code does not include an X, and is a pipe from after 1960 if the X is engraved. Finally any pipe with the double comfort stem is definitely after 1960.
b) The CP logo on the stem is stamped in a different shape according the era it was used. Some differences are less obvious than others; however the glaring differences are detectable in 4 phases. The CP till the 1960 is very fine, the C penetrates the P.
Identification of a first era pipe (Frederick’s era, 1863-1910)
I immediately point out that pipes of this era are very rare and it is very unlikely to come across a pipe from this time.
Moreover these pipes are indiscernible from those of the second era, the only clue is that pipes of this era are, in 99% of the cases, are quite small in size.
1) Pipes are no larger than a Dunhill group 1 or max group 2
2) Saddle or tapered mouthpiece
3) No double comfort stems
4) The CP logo is engraved so that the C enters the P (not always present)
5) Absence of £ on the pipe shank
6) Absence of the letter X on the pipe shape code engraved on the shank (for ex. 2502 and not 2502X)
7) Absence of letters DC after the shape number (for ex. 2502 and not 2505DC)
8) Absence of the engraving “MADE BY HAND” on the shank
9) Presence of the writing “CHARATAN’S MAKE LONDON ENGLAND” on 2 lines
10) The CP logo is finer than in following eras
11) The stems are usually made by different material than ebonite (mostly amber, if they have not been replaced)
Identification of a second era pipe (Rueben’s era, 1910-1960)
Pipes belonging to this period are rare; however is it possible to come across one. They can be distinguished from a pipe of the first era mainly because their larger size.
Their characteristics are similar to the ones of the previous era.
1) Pipes can be larger, up to the dimension of a Dunhill group 5
2) The mouthpiece is tapered or saddle.
3) No double comfort
4) The CP logo is engraved so that the C enters the P
5) Absence of £ on the pipe shank (note that from 1955 all the pipe imported in the USA by Lane has it, however that stamping is not synonymous of the Lane era).
6) Absence of the letter X on the shape code engraved on the shank (for ex. 2502 and not 2502X)
7) Absence of letters DC after the shape number (for ex. 2502 and not 2505DC)
8) Absence of the engraving “MADE BY HAND” on the shank (introduced for the first time in 1958)
9) Presence of the writing “CHARATAN’S MAKE LONDON ENGLAND” on 2 lines
10) The CP logo is finer than in following eras
I visited rebornpipes for more information and there is a very informative article that Steve had re-blogged on Charatan’s Models & Shape Information for the Collector. Here is the link for this article;
https://rebornpipes.com/2018/08/22/charatan-models-shape-information-for-the-collector/
I earnestly urge all the readers to go through this article on Reborn pipes.
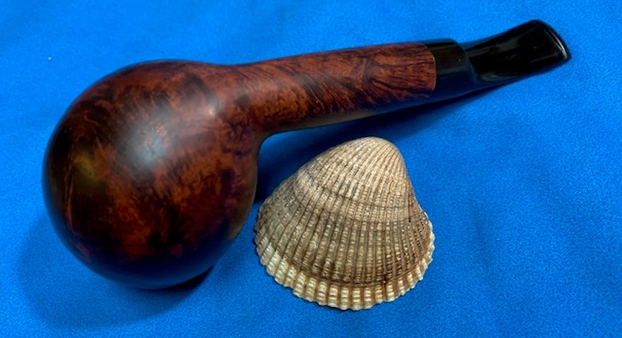
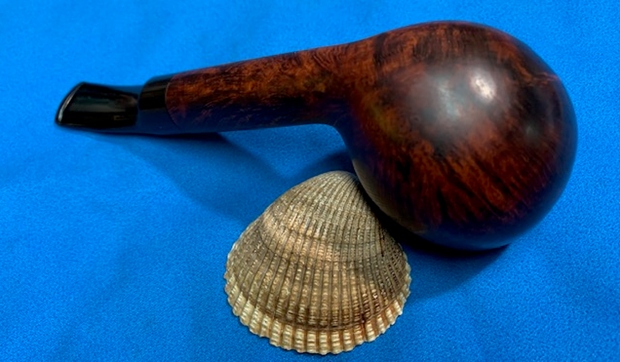
Thus I can say that the small petite Charatan’s Make “BELVEDERE” pipe on my work table is, in all probability, from the Rueben’s Era and dates from the period 1910- 1960. Here is a picture of the two Charatan’s Belvedere, # 2655 X that I had restored earlier and # 1 currently on my work table, for size comparison. This would give the readers an idea why my heart skipped a beat when I read that the “Frederick’s era, 1863-1910” pipes are no larger than a Dunhill group 1 or max group 2!! Initial Visual Inspection
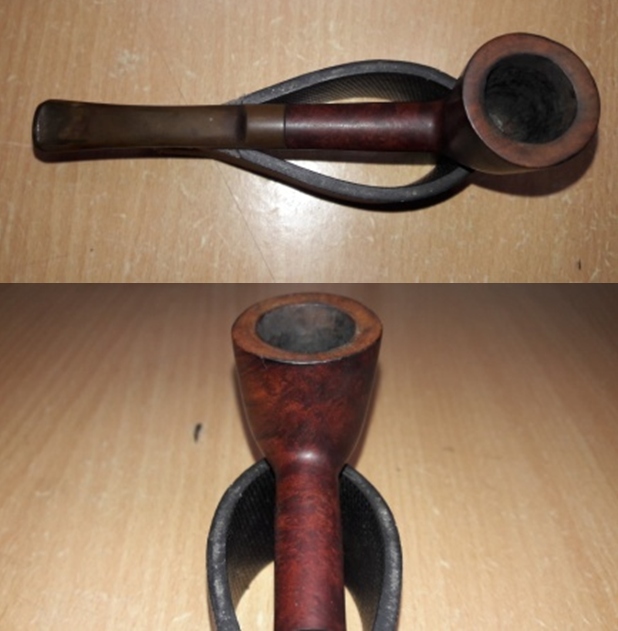
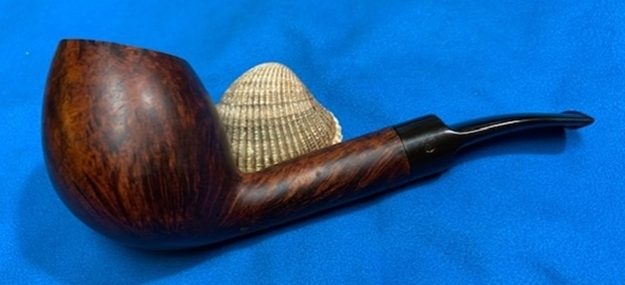
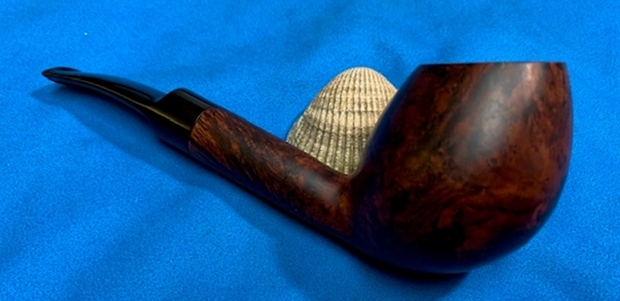
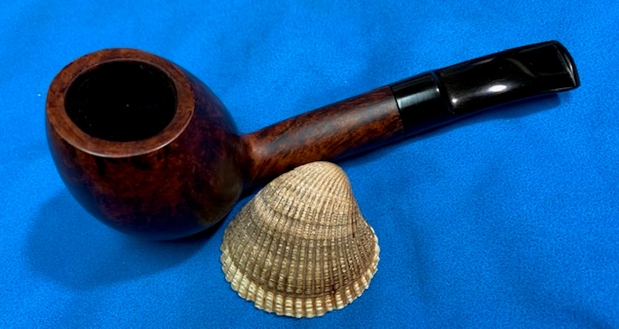
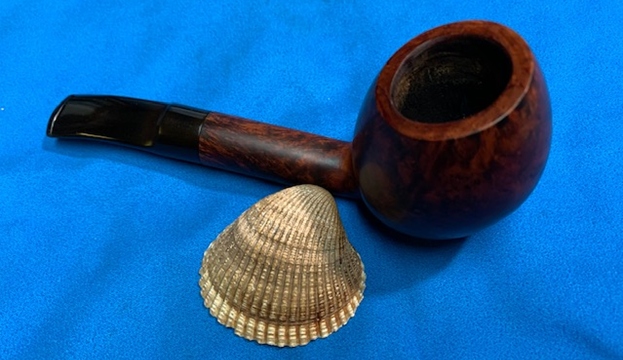
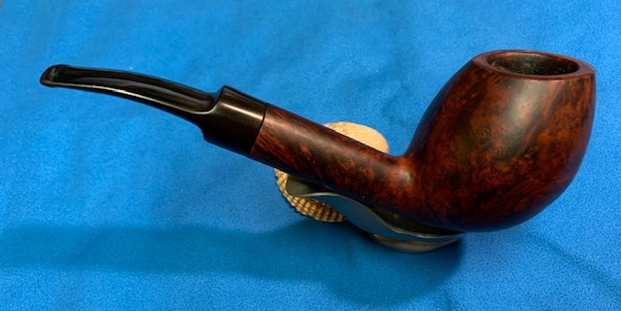
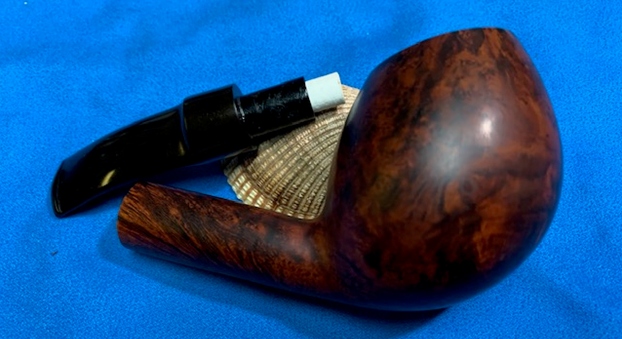
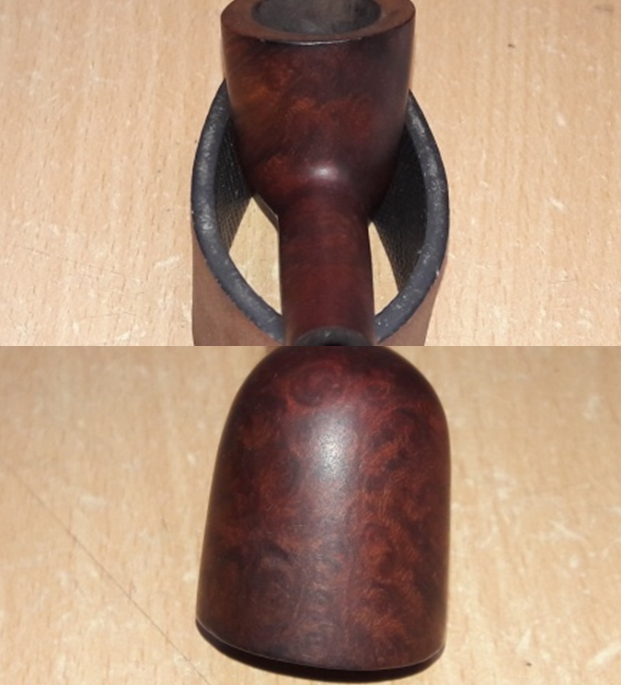
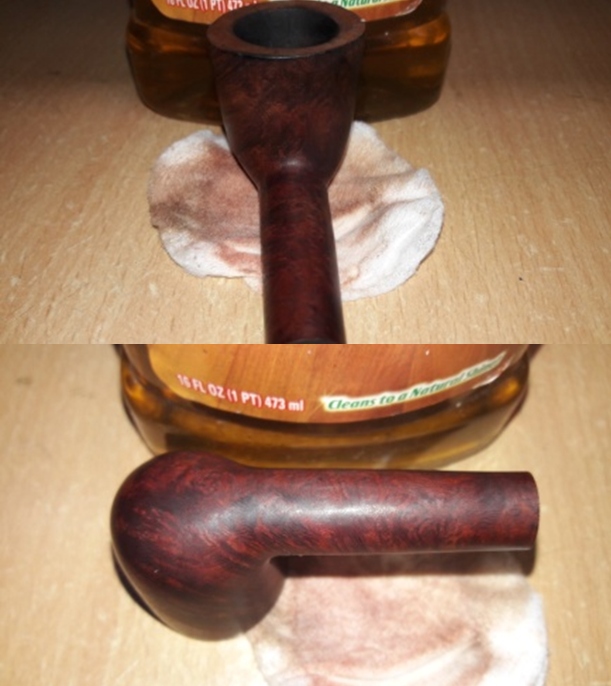
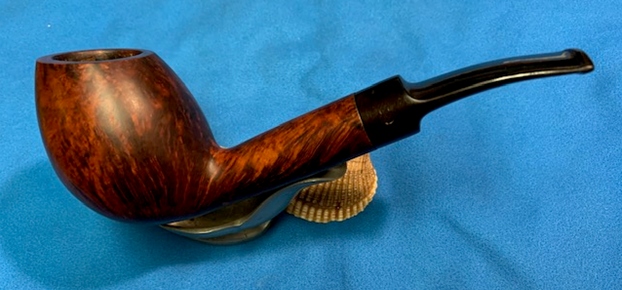
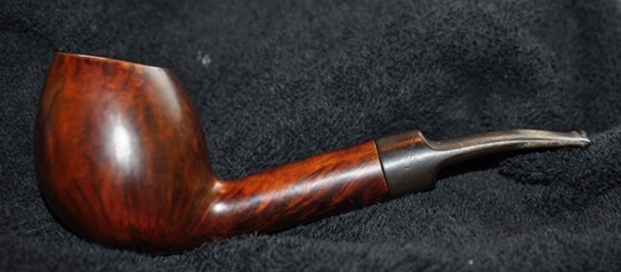
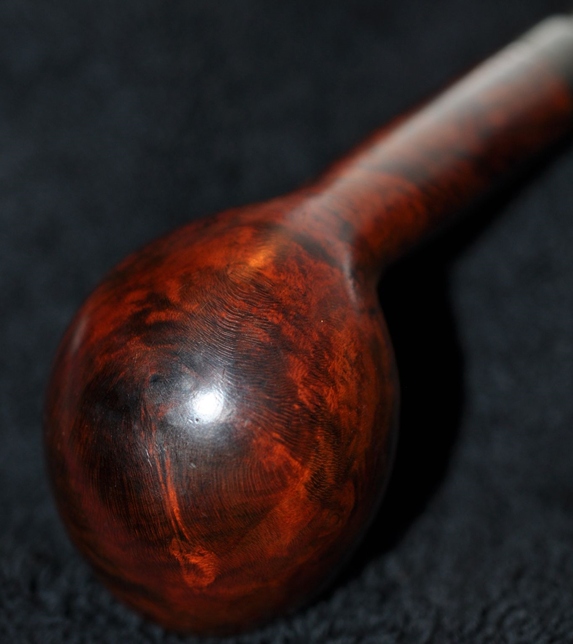
The Charatan’s pipe that is currently on my work table is a small petite pipe with a classic Dublin shape. It has a chamber depth of about 7/8 inch, bowl height of about 1 inch, chamber inner diameter of slightly less than 1 inch and overall pipe length of 5 inches. The stummel has rich dark and medium contrasting reddish brown stains and is covered in dirt and grime through which beautiful cross grains can be seen around the sides and over the shank surface while Bird’s eye adorns the front and back of the stummel. There is a very thin layer of cake in the chamber. The rim top is very clean and appears to have been scraped and is uneven. The inner rim edge has few dents and dings and the chamber is out of round due to the inner rim edge damage. The vulcanite saddle stem is heavily oxidized with no damage to the bite zone on either surface. The buttons on both surfaces are in pristine condition. The following pictures will give the Readers an idea of the overall condition of the pipe as it sits on my work table. The condition of the pipe gives me the impression that the pipe has been worked on earlier to address the damage to the rim top; however, the job is amateurish at the best. Overall, the thin layer of cake, clean rim top and excellent condition of the stem are pointers to the fact that the pipe seems to be well looked after.
 Detailed Visual Inspection
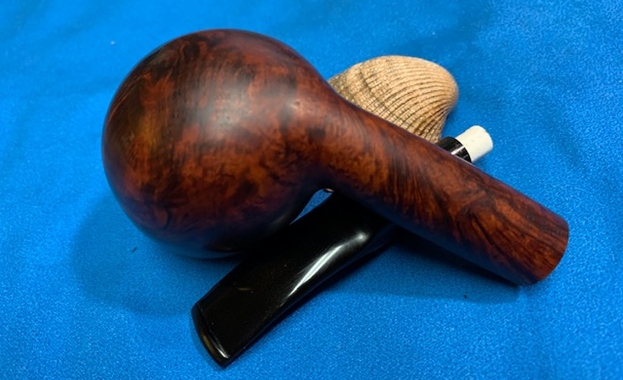
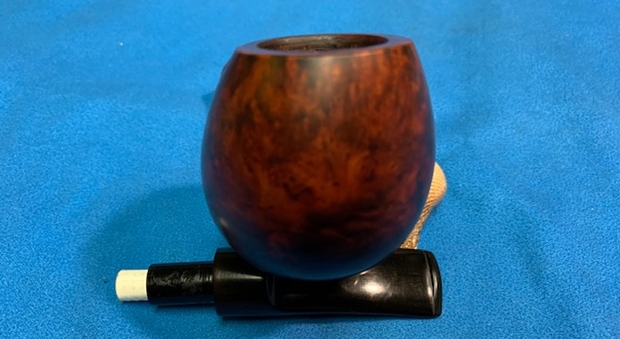
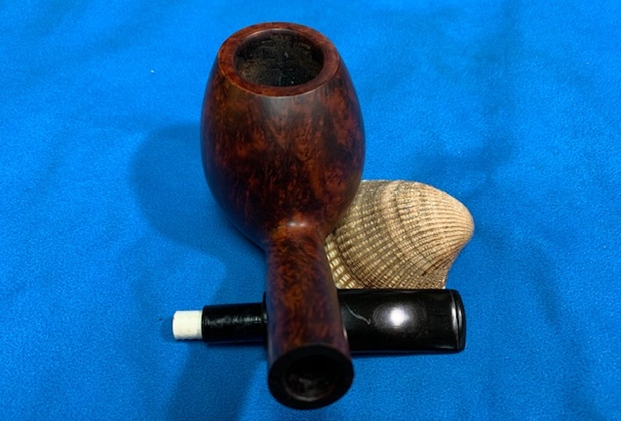
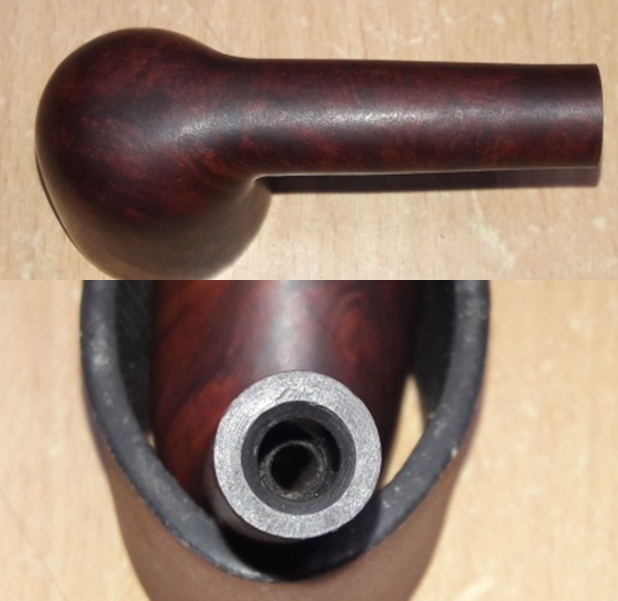
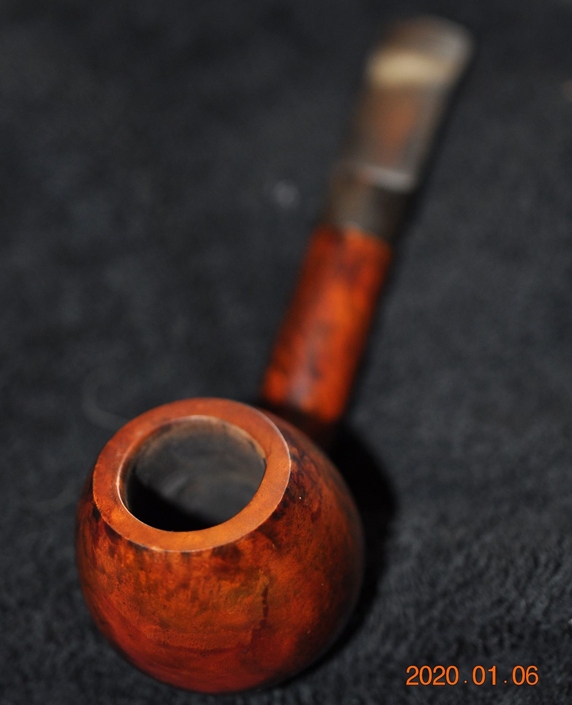
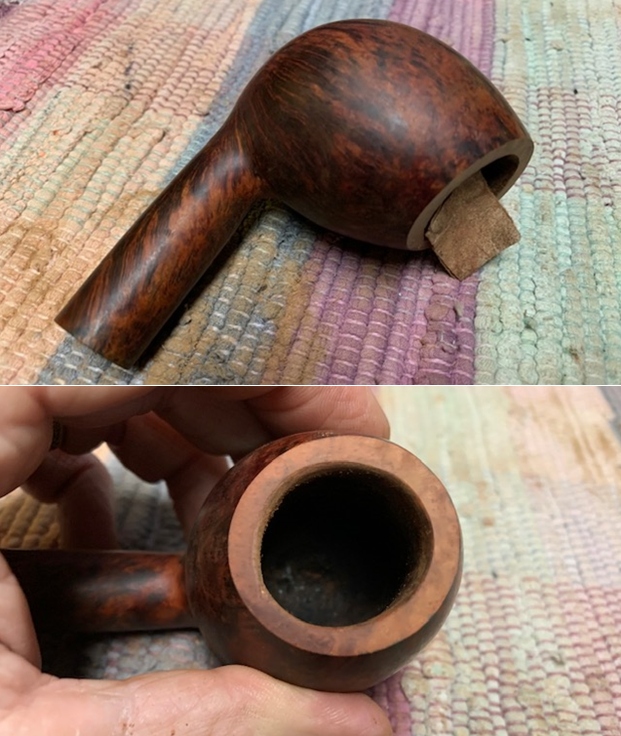
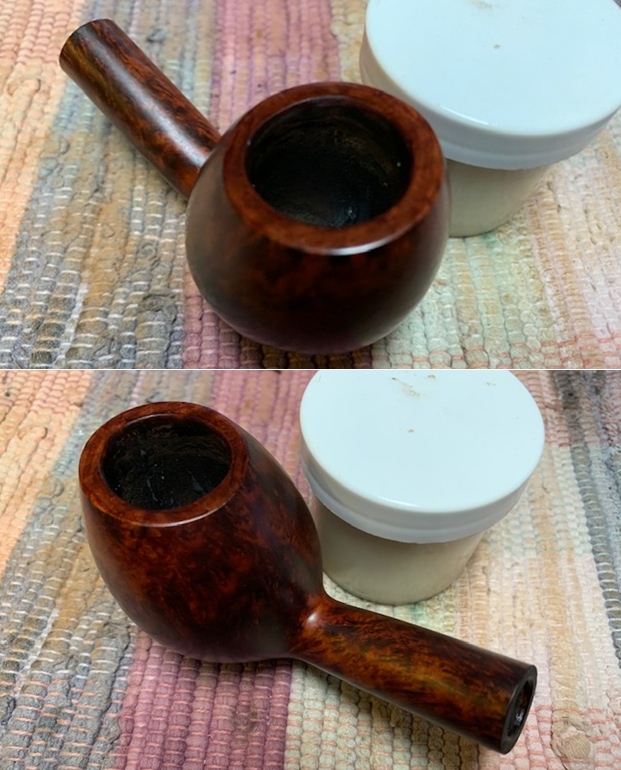
The pipe appears to have been smoked just two to three times after the chamber had been completely reamed and cleaned down to the bare briar sometime in the past. There is a just a sprinkling of carbon layer over the walls of the chamber. The inner walls of the chamber are in pristine condition with no signs of heat lines/ fissures. The rim top is clean and appears to have been unevenly scraped to remove the lava overflow resulting in an undulating rim top surface. Two prominent cracks are seen over the rim top surface; the larger crack in the 4 ‘O’ clock direction extends from the inner to the outer edge while the smaller crack in 11 ‘O’ clock direction extends about half way across the rim surface from the inner edge. These cracks are encircled in red. The inner rim edge appears to have been scraped with a pocket knife to remove any charring that would have been present in the past and is uneven with a couple of dents (indicated with green arrows) making the bowl appear out of round. The outer rim edge is scorched in three places; 10 ‘O’ clock, 3 ‘O’ clock and 7 ‘O’ clock directions (encircled in yellow). In spite of the thin cake, the chamber odor is strong and should be addressed to some extent once the cake has been taken down to the bare briar and the shank internals have been thoroughly cleaned. The undulating and cracks on the rim top surface, and the out of round chamber are the major issues that would need to be dealt with.  I was surprised to note that, in spite of being the lowest grade in Charatan’s line up, there is not a single fill in the stummel surface and the surface boasts of some beautiful cross grain around the sides and over the shank surface while Bird’s eye adorns the front and back of the stummel. The stummel surface is covered in dirt and grime giving the stummel a lifeless, dull and dirty appearance. The mortise shows accumulation of old oils and tars which would need to be cleaned. I absolutely love the old dark reddish brown color and the patina that has developed over time that I intend to preserve during the restoration. A nice polish with micromesh grit pads will bring a nice shine to the stummel and highlight the grains.
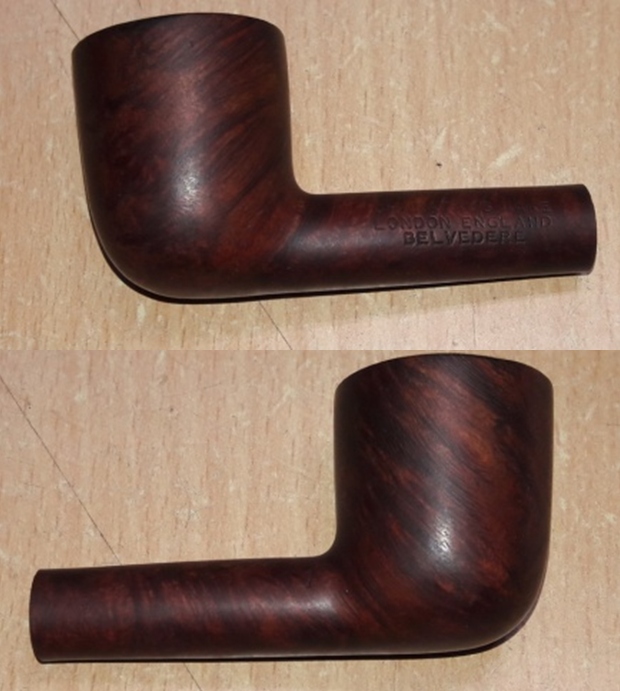
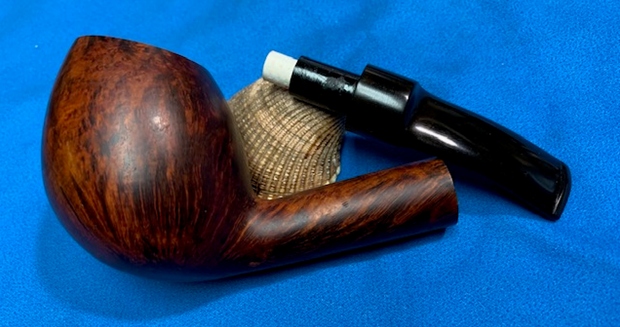
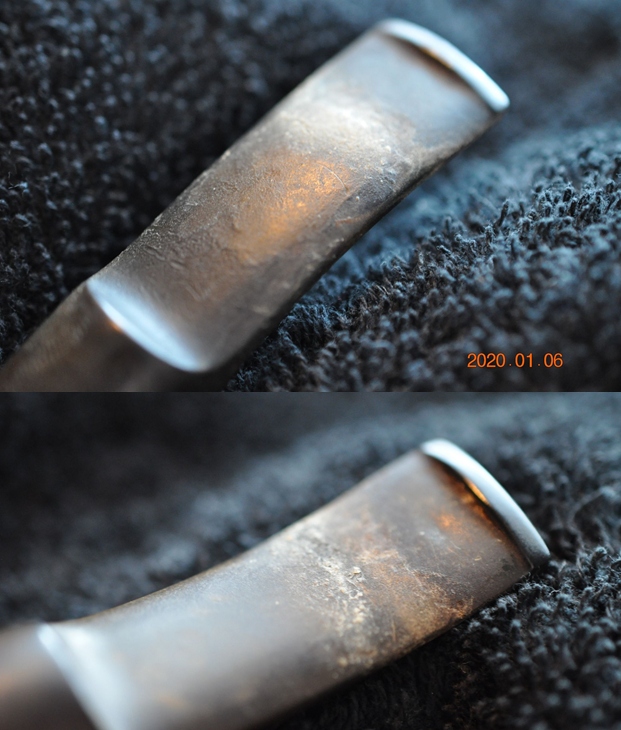
 The vulcanite saddle stem is heavily oxidized, but otherwise in a decent condition. The bite zone and the button edge on either surface show some minor tooth indentations. The horizontal slot and tenon opening shows accumulation of dried oils and tars. All in all, the stem presents no major damage and should be an easy clean up.
 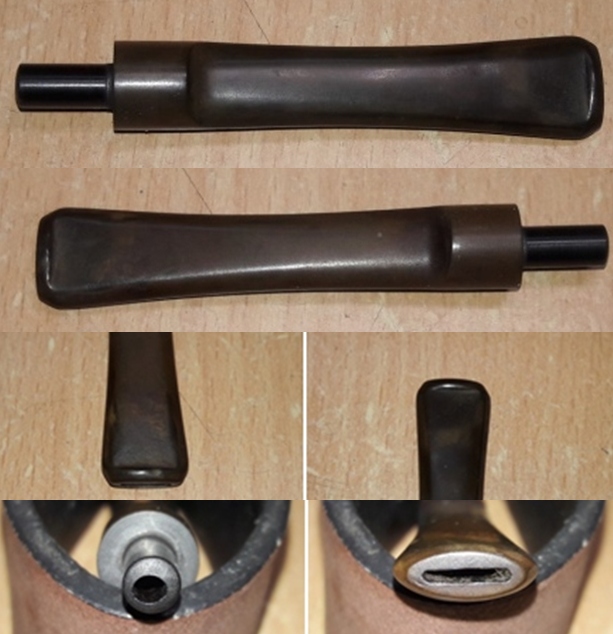 The Process
I started the restoration with cleaning of the stummel. With my sharp fabricated knife, I removed the little remaining cake from the chamber and thereafter, using a folded piece of 180 grit sand paper, I sand out the last traces of cake and expose the walls of the chamber. I wiped the chamber with a cotton swab dipped in isopropyl alcohol to remove the carbon dust left behind by all the reaming and sanding process. Once the chamber walls were cleaned out, I was could make out a couple of minor heat fissures (encircled in yellow). With the same sharp knife, I gently scraped off the minor charring from the inner rim edge. The ghosting is still prevalent and will, in all probability, be addressed/ reduced once the shank internals are cleaned. 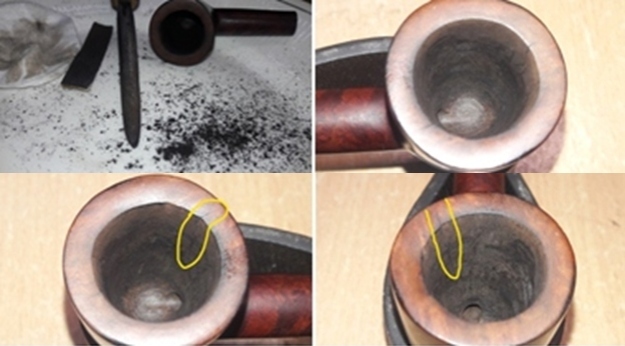 I took a closer look at the heat fissures and it was a big relief to note that the heat fissures are superficial save for the one in 4 o’clock direction (encircled in yellow) which would need to be addressed. I intend to remove the charred briar from the heat fissure and fill it with J B Weld and subsequently coat the bowl with activated charcoal and yogurt to protect it from coming in direct contact with the burning tobacco.
 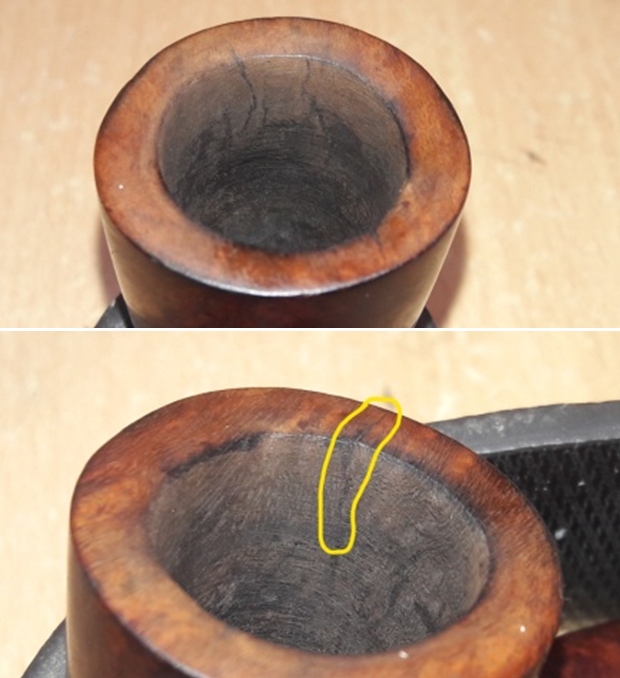 Next, I cleaned out the internals of the shank and mortise. Using my dental tool, I scraped out all the dried oils, tars and gunk that had accumulated in the draught hole and on the walls of the mortise. The amount of crud that was scrapped out and the condition of the pipe cleaners that were used points to how dirt the shank internals were. I continued further cleaning of the mortise and the shank with shank brushes and dish washing soap. I finished the cleaning by running a few pipe cleaners dipped in isopropyl alcohol through the mortise. The old smells are still strong and would require more invasive methods to completely eliminate the ghosting.
 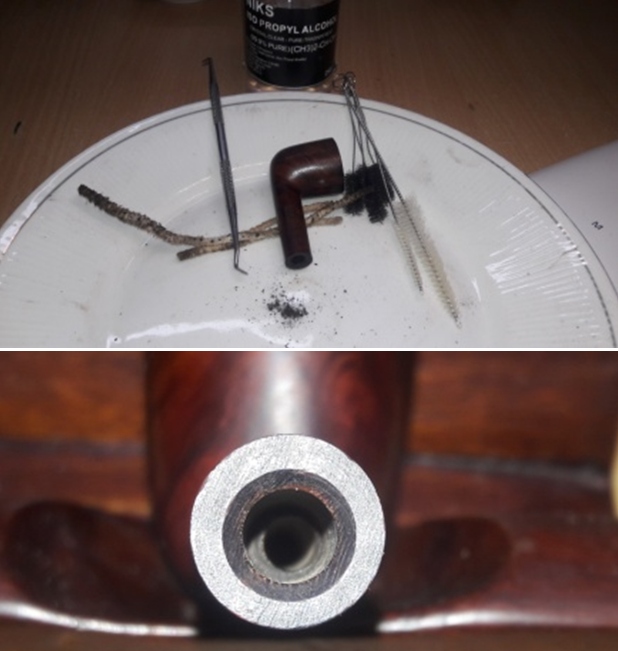 I continued the cleaning of the chamber and shank internals with a salt and alcohol bath. I usually use cotton balls which is an at par substitute to Kosher salt as I have realized over the years. I draw out a wick from the cotton and along with a folded regular pipe cleaner; insert it in to the mortise and through the draught hole in to the chamber. Thereafter, I packed the chamber with cotton balls to about quarter of an inch below the inner rim edge and filled it with isopropyl alcohol up to the brim. About half an hour later, the level of alcohol had gone down, having being absorbed by the cotton. I topped it up once again with isopropyl alcohol and set it aside overnight. By next afternoon, the cotton balls are dark colored and along with alcohol, had drawn out all the remaining oils and tars from the chamber and mortise, fulfilling its intended task. I removed the cotton balls from the chamber and the pipe cleaner with cotton balls from the shank and ran pipe cleaners through the mortise to clean out all the loosened tars and gunk and further cleaned it by scarping the walls with a dental tool to completely remove the gunk. I wiped the bowl clean and dried the shank and bowl with paper napkins and set it aside to dry for an entire day. By next day, the pipe was nice and dry and all the smells were history.
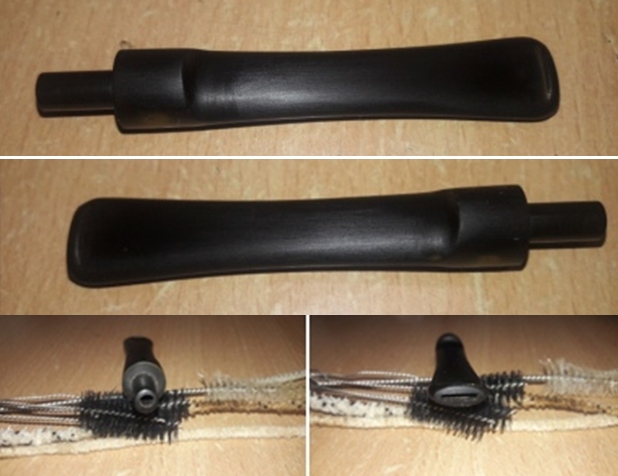
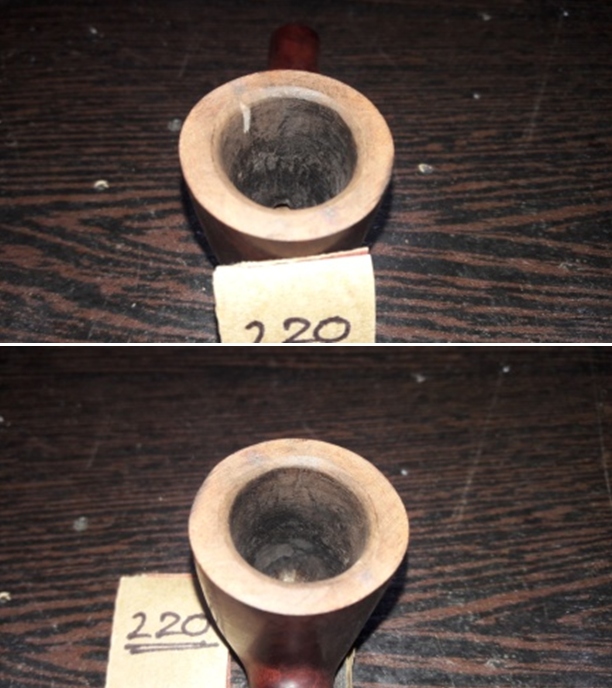
 With the stummel set aside for drying, I turned to address the stem issues. I addressed the deeper oxidation by sanding the entire stem with a folded piece of 220 grit sand paper. Once the oxidation was completely removed, I wiped the surface clean with Murphy’s oil soap on a cotton swab. I followed it up with cleaning the internals of the stem using hard and normal bristled pipe cleaners and isopropyl alcohol. The gunk that came out with the pipe cleaners tells the sordid tale of the stem condition. I further cleaned the stem internals using thin shank brushes with anti-oil dish washing soap and finally rinsing the stem with warm water to clean and freshen up the stem internals. With a pointed dental tool, I scraped out the entire dried gunk from the tenon end and the horizontal slot. I rubbed a little Extra Virgin Olive oil to hydrate the stem and kept it aside. I used a tightly folded piece of 180 grit sand paper to shape and re-define the button edge on either surface. The stem at this point in restoration is shown below.
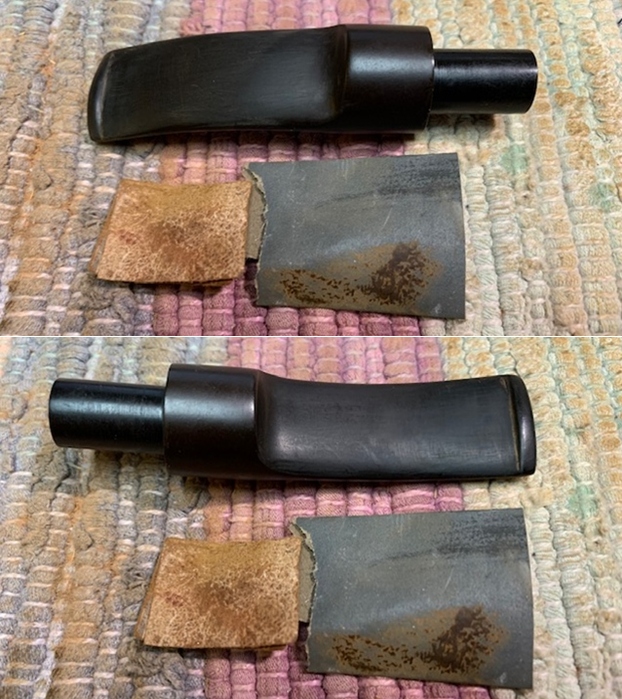
 Continuing with the stem refurbishing, I followed it up by further dry sanding the stem with 320, 600, 800 and wet sanding with 1000 grit sand papers to completely rid the surface of the oxidation and bring out the shine in the vulcanite. The stem should polish up nicely.
 Using micromesh pads, I completed the polishing of the stem by wet sanding the stem surface with 1500 to 12000 girt pads. I gave a final rub with “Before and After Extra Fine” stem polish compound from Mark to remove fine scratches from the stem surface. I rub a little quantity of Extra Virgin Olive oil in to the stem surface and set it aside to be absorbed by the vulcanite. The stem polished up nicely and appears as good as when new.
 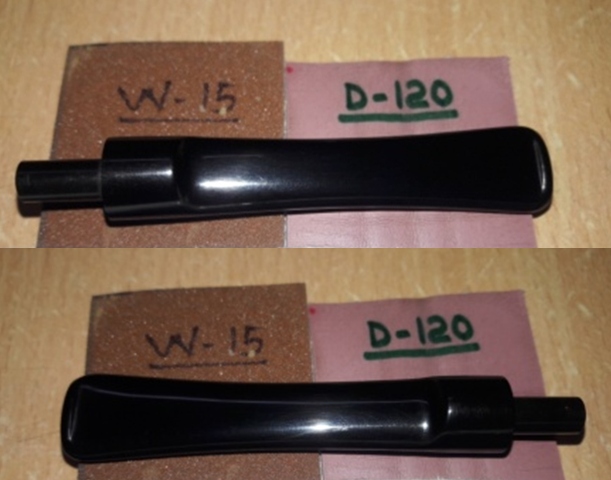 Next, I cleaned the external surface of the stummel with Murphy’s Oil Soap on a cotton pad. As brought out earlier, in this project, I intended to preserve the patina and the original stain on the stummel and hence, the deviation from the usual process of scrubbing the surface with oil soap and dishing cleaning soap followed with rinsing under warm water. I shall polish the stummel by dry sanding with micromesh pads to bring a nice shine to the stummel and highlighting the grains.

 With the internal and external cleaning of the stummel completed, I turn to addressing the issues of rim damage. I topped the rim top over a piece of 220 grit sand paper till I had a smooth and even surface. The charred surface in the 2 o’clock direction has been greatly reduced but is still visible (encircled in red). I had anticipated that the crack would be addressed at this stage itself if it had been superficial. However, that was not to be. Both the cracks, larger one in 4 o’clock and the smaller one in 11 o’ clock direction are still visible and indicated with blue arrows. I shall drill counter holes to prevent the spread of these cracks.
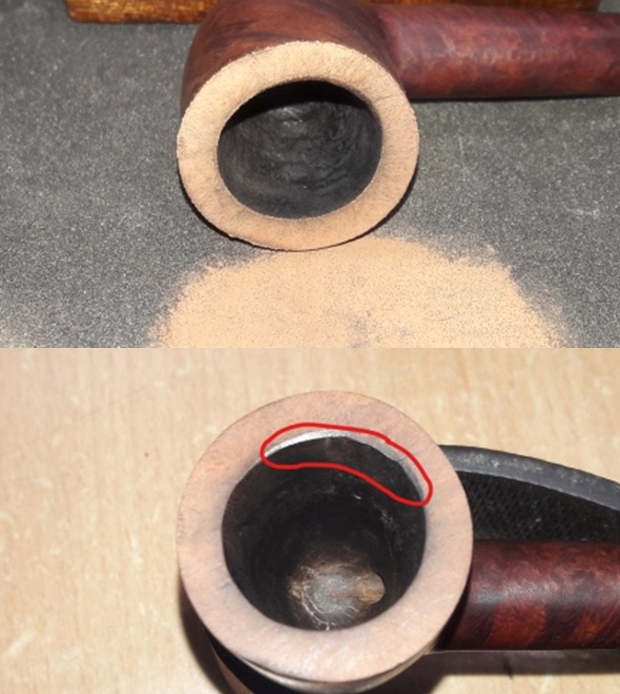
 I again checked the alignment of the crack on the rim surface with the heat fissures in the chamber walls. With a sharp dental tool, I probed the heat lines. The heat line that aligned with the smaller crack is just superficial and the surrounding briar was solid. However, the heat fissure that aligned with the larger crack did have soft charred briar in it and would need to be addressed. I also checked the stummel surface to see if the crack extended over the stummel and was mighty pleased to note that it did not. What a relief!!
  I marked the end points of the two cracks with a sharp dental tool. These marks also help to guide the drill bit when drilling the counter hole. With my hand held rotary tool mounted with a 0.1 mm drill bit, I drill counter holes at the end points. These counter holes arrests the further spread of these cracks. I fill this crack and the counter holes with a mix of CA superglue and briar dust and set the stummel aside for the fills to harden.
  Next, with a sharp dental tool, I completely removed the charred briar from the heat line that aligned with the larger crack in 4 o’clock direction. To protect the crack from coming in to direct contact with the burning tobacco and causing a burnout, I plan, firstly, to fill only the crack of the chamber with J B Weld followed by a second coat of activated charcoal and yogurt to the entire chamber which would assist in faster cake formation. J B Weld is a two-part epoxy Cold Weld that consists of two parts; hardener and steel which are mixed in equal parts in a ratio of 1:1 with hardening time of 5-6 minutes and complete curing time of 6-8 hours. I squeezed out the contents of the two tubes and mixed it well. With a flat bamboo frond, I applied this mix and filled the intended crack. I worked fast to ensure a complete and even filling of the crack and set the stummel aside for the J B Weld to harden.
  By the next afternoon when I got back to working on this pipe, the counter hole fills over the rim top and the J B Weld coat to the wall of the chamber had completely cured and hardened considerably. I sand the rim top fills with a flat needle file to achieve a rough match with the rest of the rim surface. I fine tune the match with a piece of 220 grit sand paper. Next, using a folded piece of 150 grit sandpaper, I sand the J B Weld coating to a smooth surface till I had as thin a coat as was essential to protect and insulate the crack from the direct heat of the burning tobacco. The Weld coat has completely covered only the crack which can be seen as a thin line. I am very pleased with the repairs at this stage.
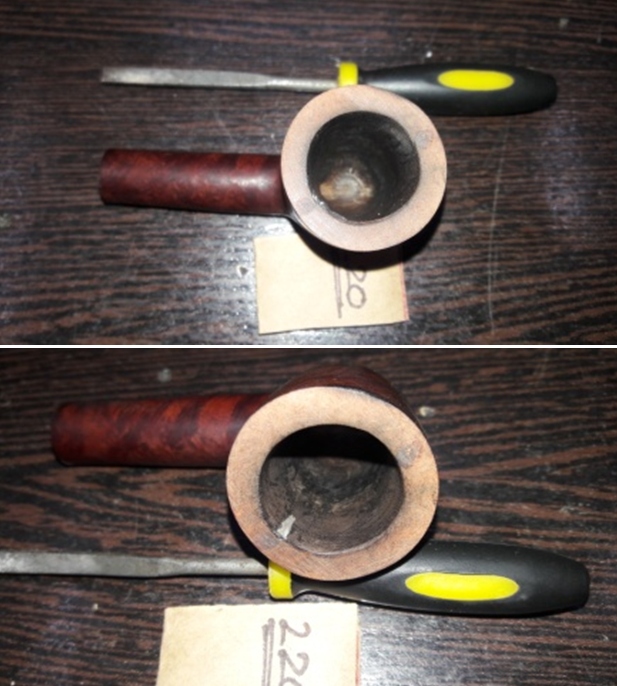 With the repairs to the cracks and heat fissure completed, I addressed the out of round inner edge and the slight charring to the inner rim edge in 4 o’clock direction by creating a nice deep bevel to inner edge with a folded piece of 220 grit sand paper pinched between my thumb and index finger.
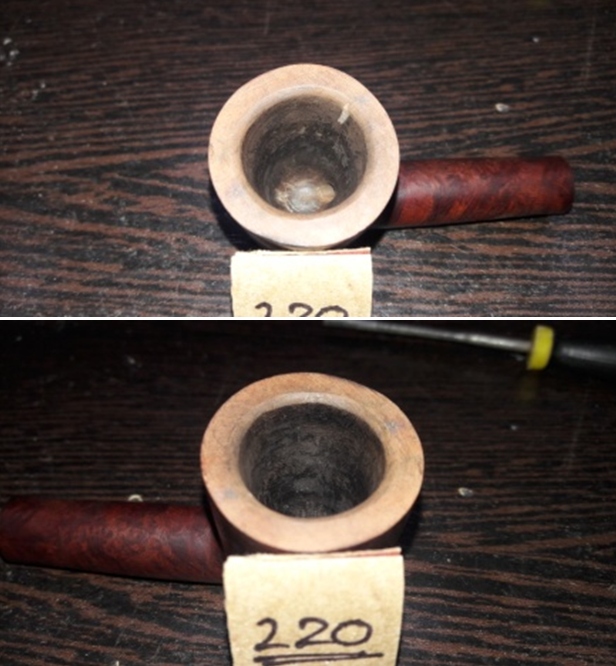
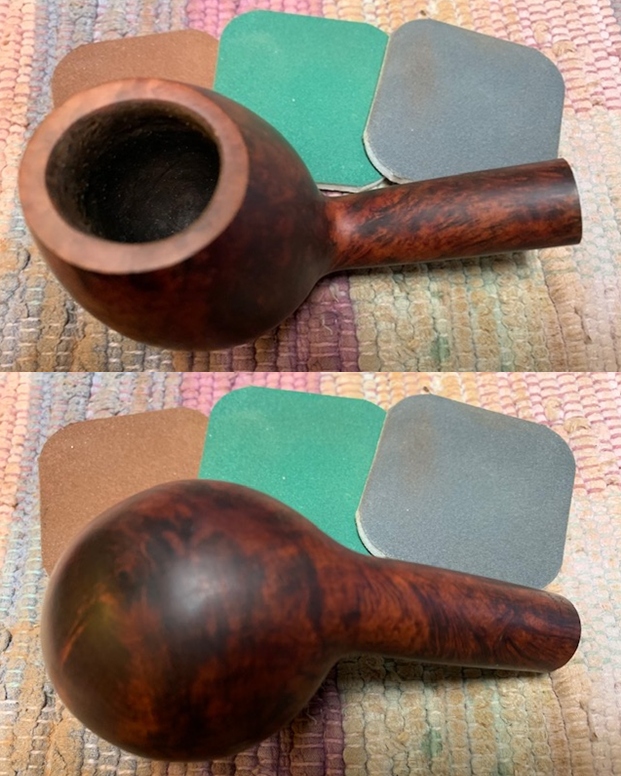
 I subjected the stummel to a complete cycle of micromesh polish, dry sanding with 1500 to 12000 grit pads. I paid greater attention to polish the rim top surface and the bevel created on the inner rim edge. I wiped the stummel with a moist cloth after every grit pad to remove the sanding dust left behind by the pads. I am happy with the progress being made till now. The briar has taken on a nice deep shine with the original reddish brown of the stummel and the darker brown stains to the grains contrasting beautifully. I really like the dark reddish brown coloration and the patina that is seen over the stummel surface.
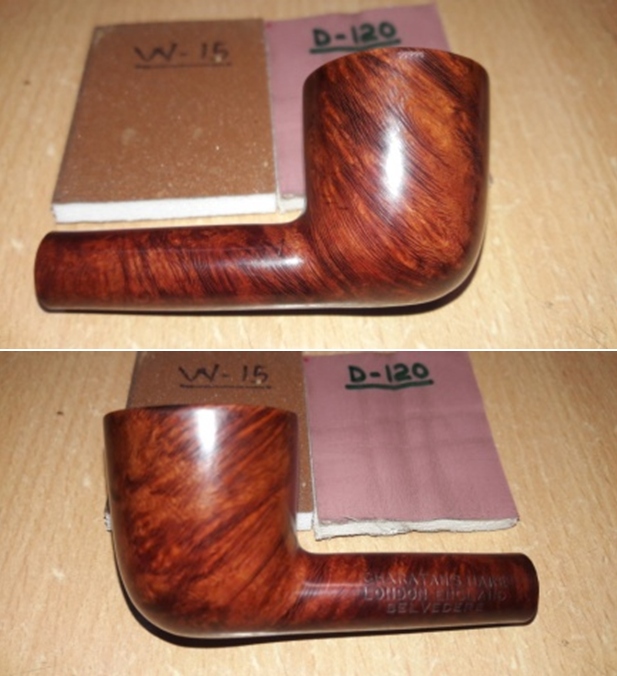

 Next, I rub a small quantity of “Before and After Restoration Balm” into the briar with my finger tips and work it deep in to the surface and let it rest for a few minutes. The balm almost immediately works its magic and the briar now has a nice vibrant appearance with the beautiful straight and Bird’s eye grain patterns on full display. The contrast of the dark browns of the grain with the light reddish brown hues of the rest of the stummel adds an interesting dimension to the appearance of the stummel. I further buffed it with a horse hair brush to further deepen the shine.
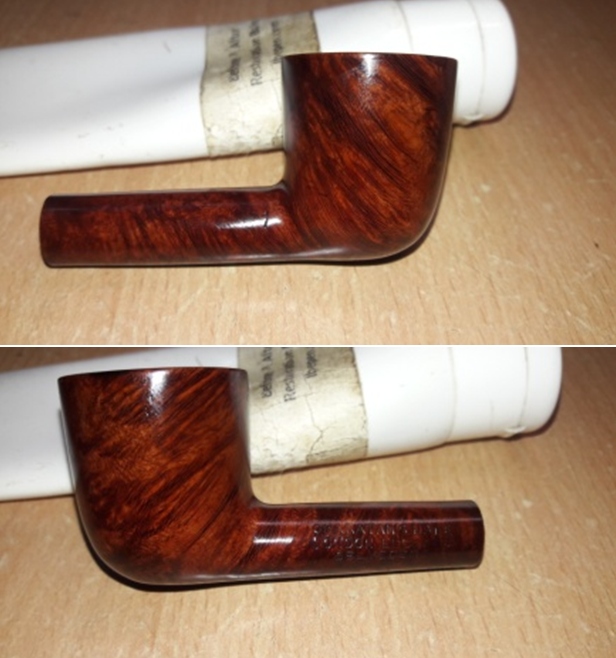
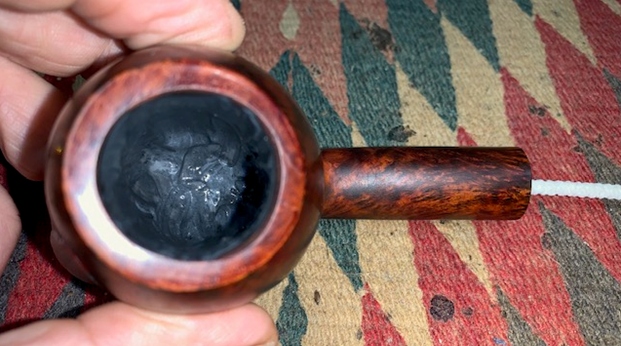
 Now that the cosmetic aspects of this pipe have been dealt with, all that remained was the functional aspect that needed to be taken care of. The J B Weld coated crack needs to be protected from the direct heat of the burning tobacco and for this; I coat the complete chamber walls with a mix of activated charcoal and yogurt and set it aside to harden naturally. The mix has to be of the right consistency; neither too thick nor too runny. It should be of a consistency that is thick enough to spread easily, evenly and stick to the walls. Also the coating should not be very thick. A thin film is all that is required. Another important aspect to remember is that it is essential to insert a pipe cleaner in to the mortise and through the draught hole for two reasons; first is obviously to keep the draught hole from getting clogged and secondly, the pipe cleaner absorbs all the moisture from the mix and helps in faster and even drying of the coat.
 To refresh the stem logo, I coat the stem logo with white correction ink and let it dry out completely while I polished the pipe with Blue Diamond. Once the ink had dried out, with a toothpick, I gently removed the excess ink from the surrounding surface. Though the logo is not very crisp, this is the best that was possible given how worn out the stamping was to start with.
  To put the finishing touches, I mount a cotton cloth buffing wheel on to my hand held rotary tool and polished the stummel and stem with Blue Diamond compound. This compound helps to remove the minor scratch marks that remain from the sanding.
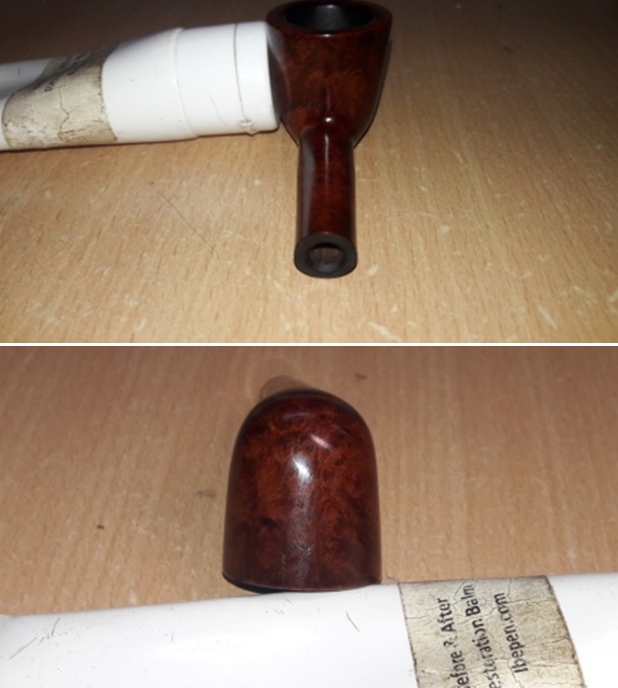
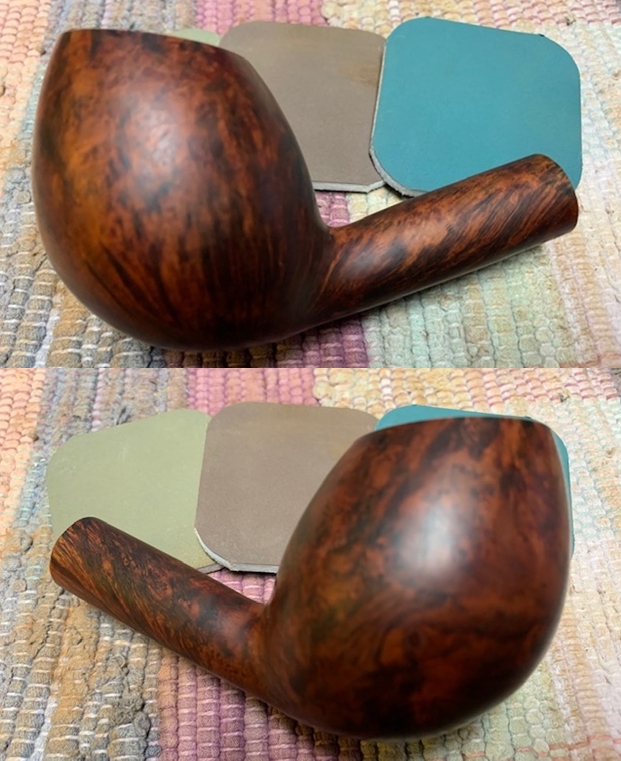
 Next, I mount another cotton buffing wheel that I have earmarked for carnauba wax and applied several coats of the wax. I mount a clean cotton cloth buffing wheel and give the entire pipe a once over buff. I finished the restoration by giving the entire pipe a rigorous hand buffing using a microfiber cloth to raise the shine further. The finished pipe with a deep reddish brown and aged patina to the briar looks amazingly beautiful and is now ready for its long second inning with me.


 I would like to express my gratitude to all the readers of rebornpipes who have made the effort to walk through this journey with me and shared their words of encouragement through their comments and suggestions. This does help me gain experience and grow in this hobby about which I am very passionate.
Praying for the health and safety of all the readers and their loved ones in these troubled times…
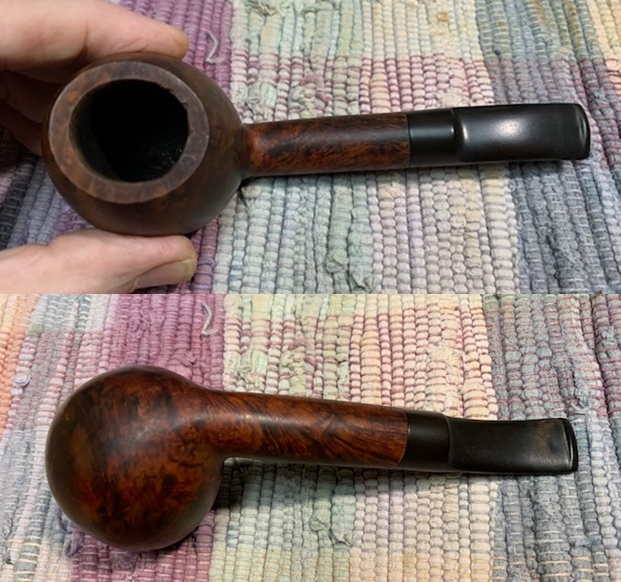
 He took photos of the rim top and bowl to give a clear picture of the good the pipe bowl looked inside. The rim was quite clean but the inner edge was out of round on backside. It was not burned but appeared to have been caused when it was reamed sometime in its history. The photos show the contrast of the bowl’s general condition with the wear and tear on the saddle stem surface.
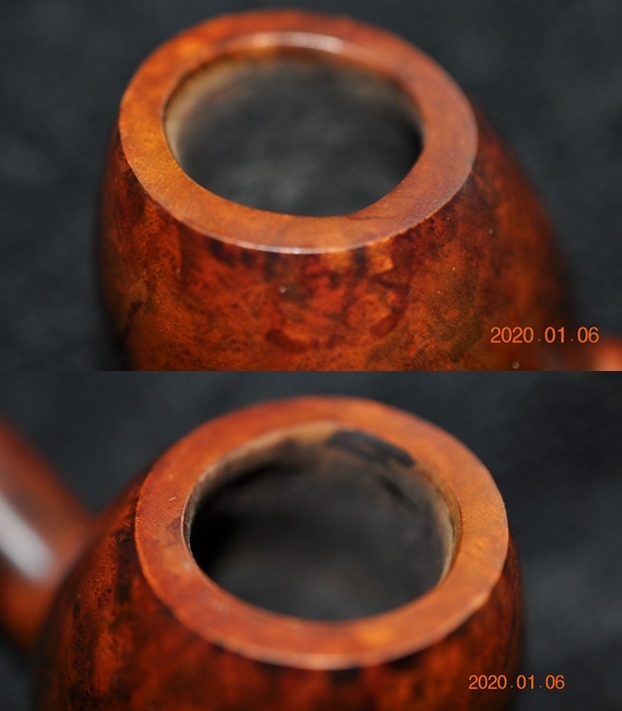
 Jeff took photos of the sides and heel of the bowl and shank to give a picture of what the briar around the pipe looked like.
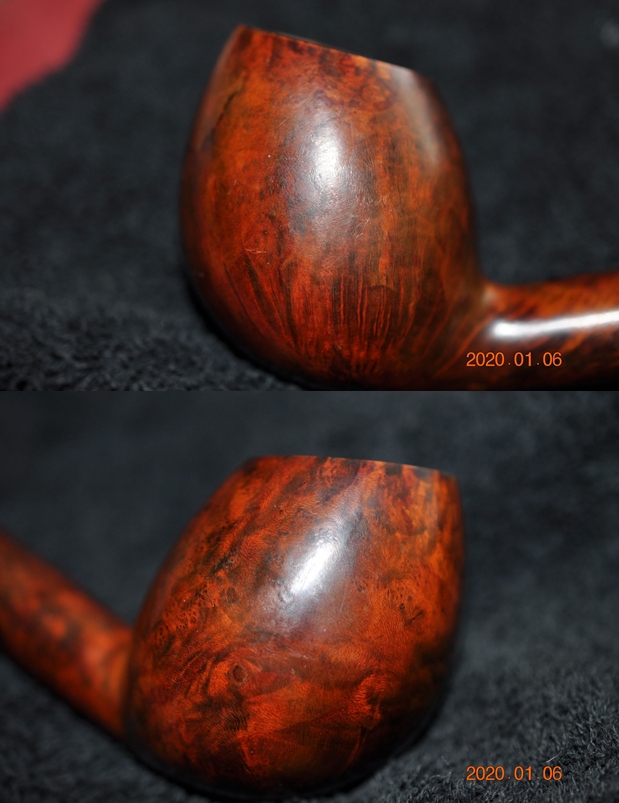
 He took a photo of the stamping on the shank. It reads as noted above and is clear and readable.
 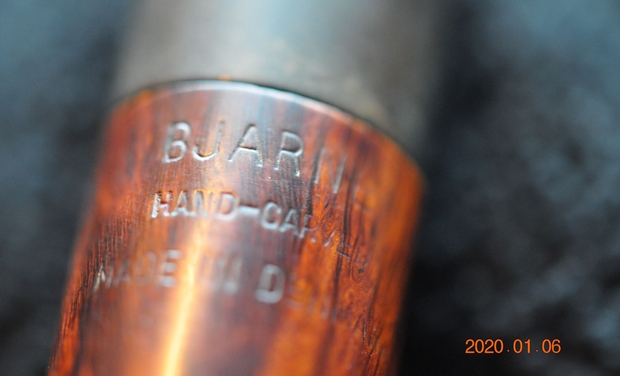 I turned to my favourite go to sites on the background of brands. The first is Pipephil’s site (http://www.pipephil.eu/logos/en/logo-b5.html). There I looked up the Bjarne brand. I have copied the pertinent information below.
 I turned to Pipedia and looked up the brand for a bit more information on the pipes that were stamped like the one that I am working on (https://pipedia.org/wiki/Bjarne). It is a great history of the brand and a good read. Toward the end of the article I found what I was looking for. I quote:
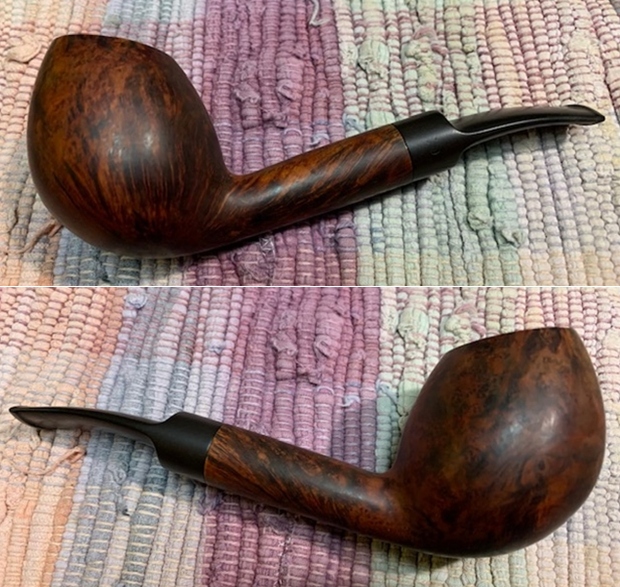
 The bowl had been over reamed to the point that there was a pit in the bottom of the bowl. There was a trough from the airway to the front of the bowl and large dip mid bowl. It makes the bottom of the bowl quite thin. There were chips out of the rim top and the bowl was out of round. The stem looks really quite good. There were some light tooth marks and chatter on both sides near the button.
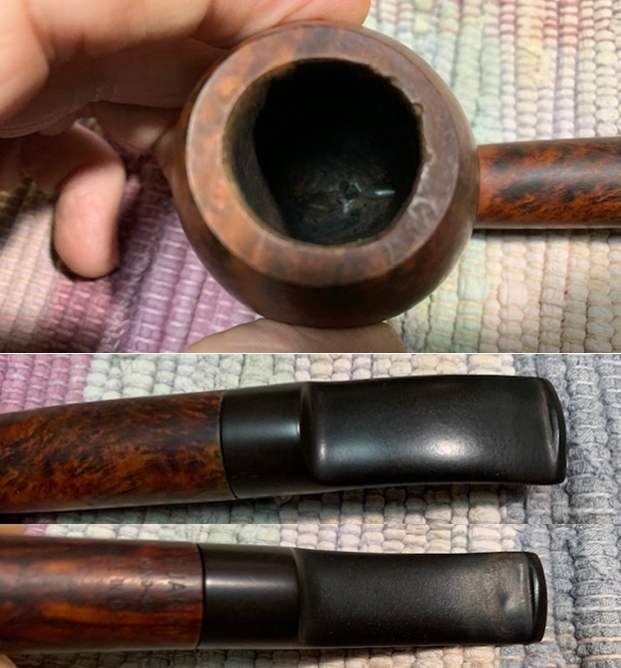 I took a photo of the stamping on the underside of the shank. It was clear and read as noted above.
 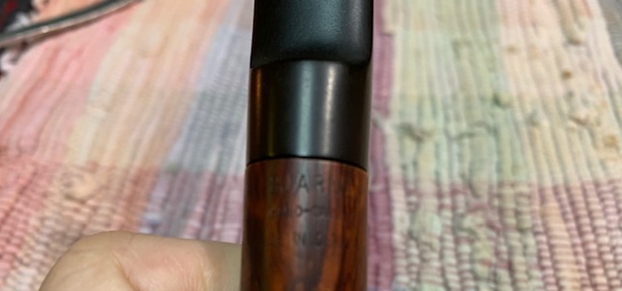 I took the stem off the shank and took a picture of the pipe to give a sense of its overall look. It is going to be a great looking pipe once the restoration is finished.
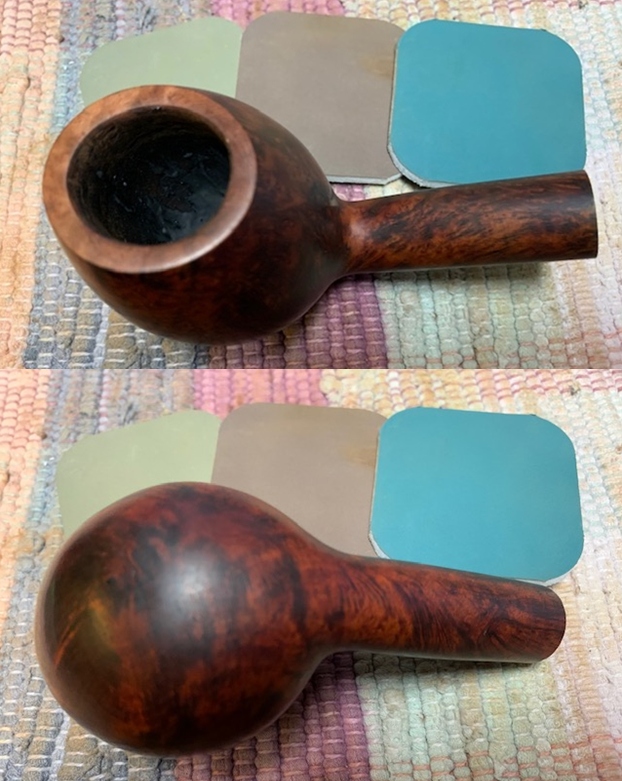
 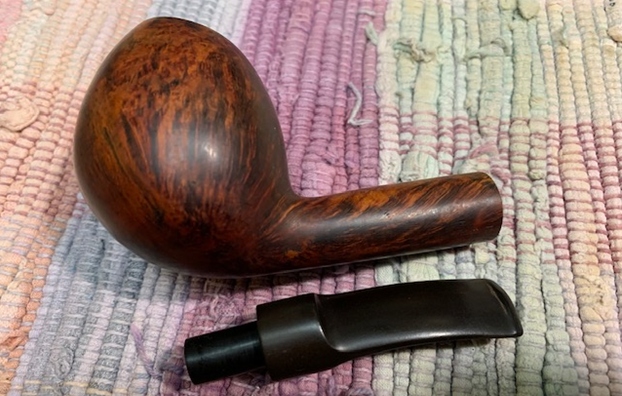 I decided to begin my work on the pipe by dealing with the damage to the rim top and inner edge of the bowl. I topped the bowl on a topping board with 220 grit sandpaper. I took of the damage and removed the chips from the rim top. I used a folded piece of 220 grit sandpaper to reshape the inner edge of the bowl. I gave it a light bevel to deal with the damage to the edge of the bowl. When I was finished it looked a lot better than when I started.
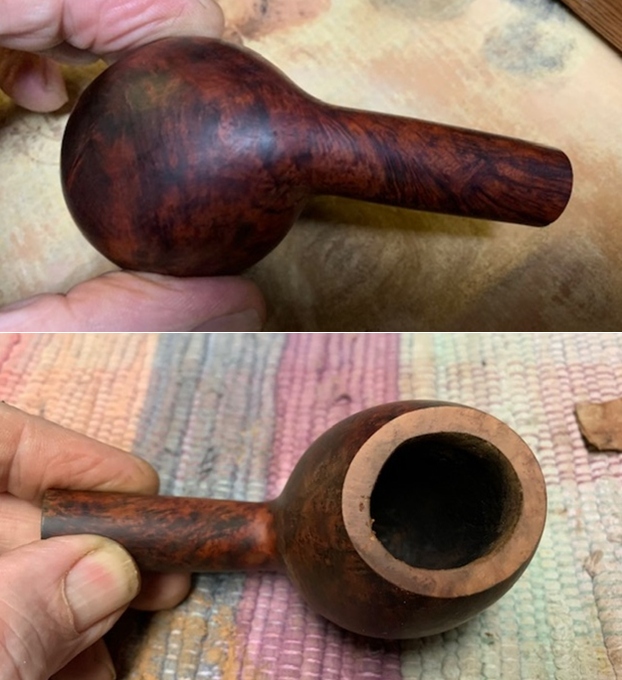
 The next item on the agenda was the surprise mess on the bottom of the bowl. The bowl had a trough from the entry of the airway to the front of the bowl and a pit mid bowl that made the bowl bottom dangerously thin. I mixed up a batch of JB Weld and filled in both the trough and the pit in the bowl bottom. I used a folded pipe cleaner to press it into the bottom and set it aside to cure.
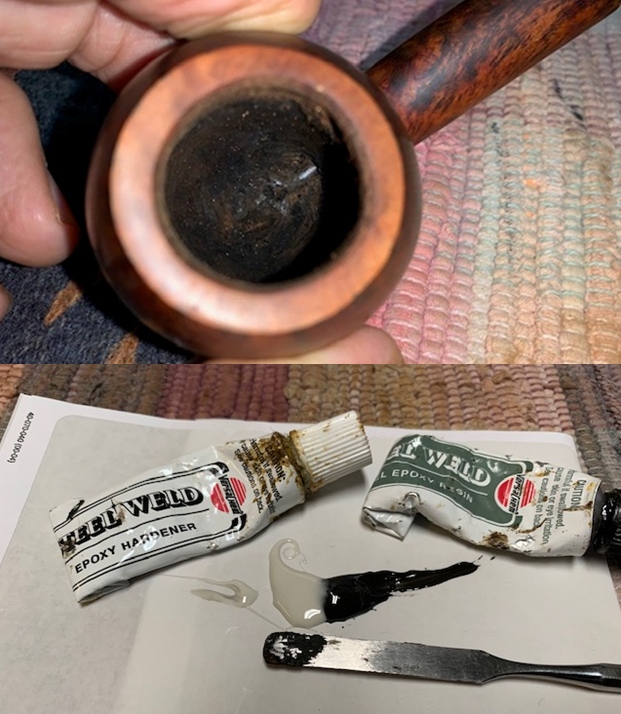
 I polished the briar with micromesh sanding pads – dry sanding with 1500-12000 grit pads. I wiped it down after each sanding pad to remove the sanding dust.
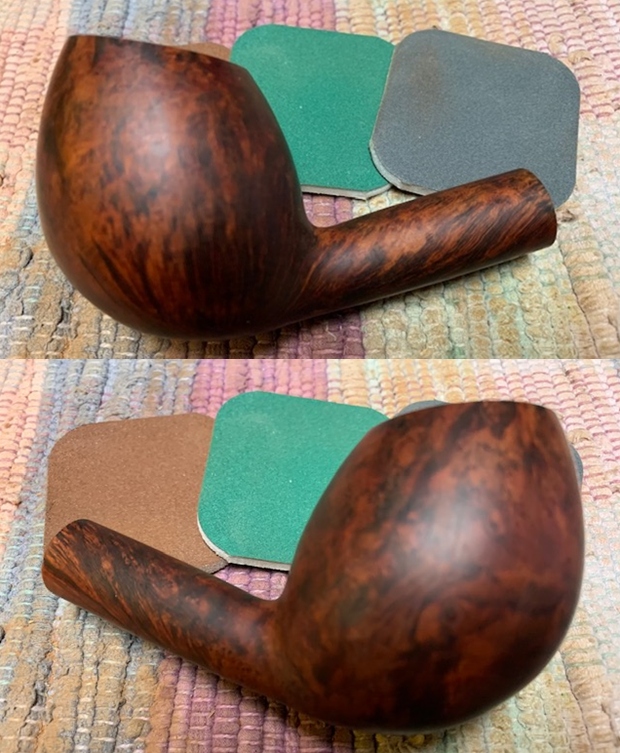

 I stained the top of the rim with a mix of Walnut and Maple Stain pens and was able to match the surrounding briar perfectly. Once it is buffed it will be very nice.
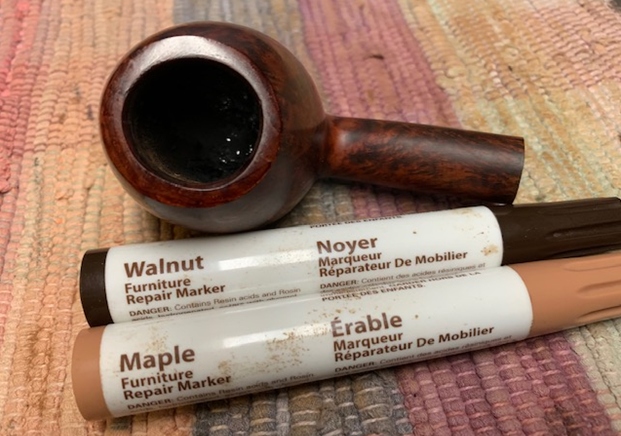 I rubbed the bowl down with Before & After Restoration Balm. I worked it into the surface of the bowl sides and shank with my fingertips. The product works to clean, enliven and protect the briar. I let the balm sit for 15 minutes and then buffed with a cotton cloth to raise the shine.
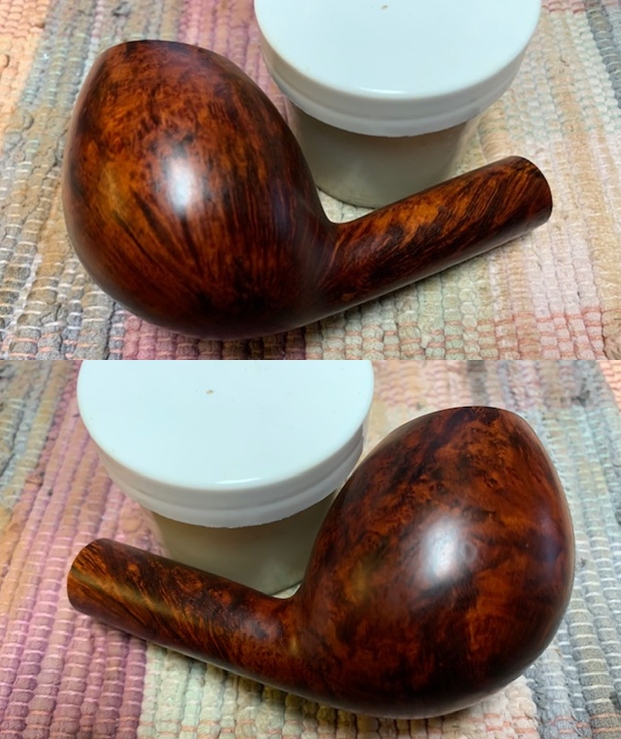
 I set the bowl aside and turned my attention to the stem that I had picked out. I “painted” the surface of the stem with the flame of a lighter to lift the tooth marks. I was able to lift all of them on the top side and all but one on the underside. I filled them in with super glue and set it aside to cure.
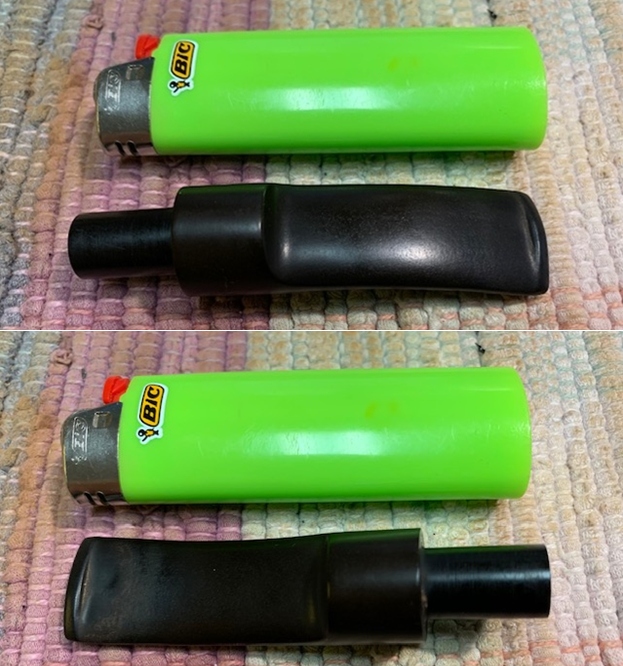
 I used a file to flatten the repair on the stem and reshape the button. Once I had it reshaped and the repair flattened I sanded the stem with 220 grit sandpaper to remove the scratching and blending them into the surface. I began the polishing with 400 grit wet dry sandpaper.
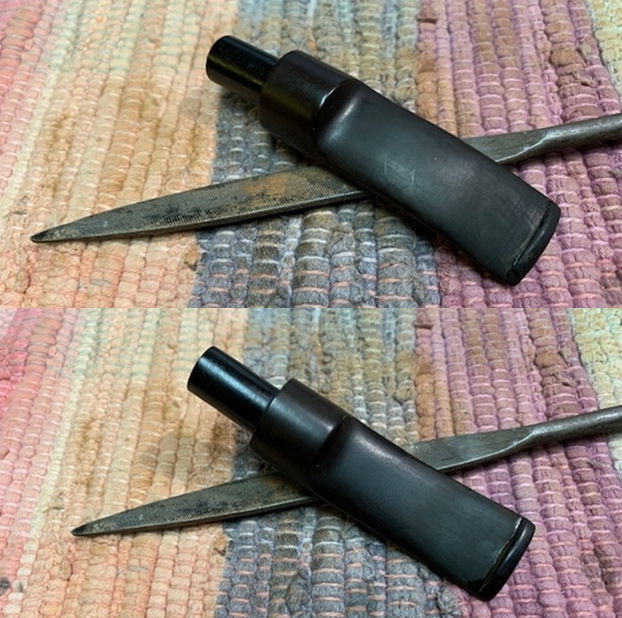
 The stamping on the left side of the saddle stem was faint but I touched up what remained with Rub’n Buff Antique Gold. I rubbed it into the stamping and used a tooth pick to work it into the stamp. I buffed it off with a cotton pad.
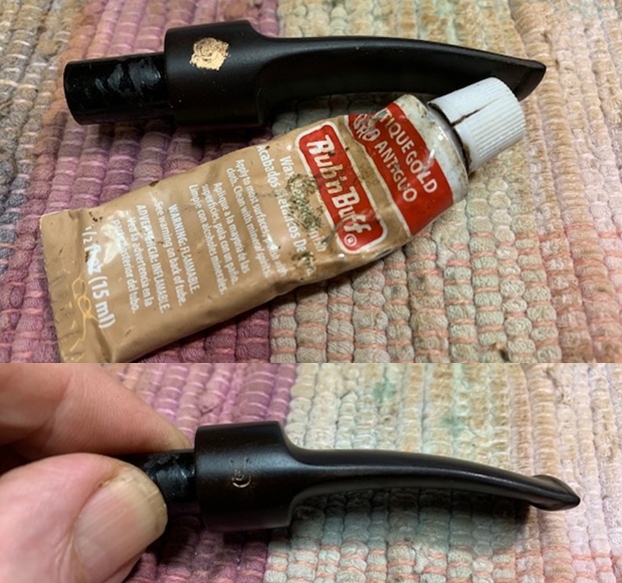 I polished the scratches out of the stem with micromesh sanding pads – 1500-12000 grit pads. I wiped it down with a damp cloth after each sanding pad. I used Before & After Pipe Polish – both Fine and Extra Fine to further polish the stem.
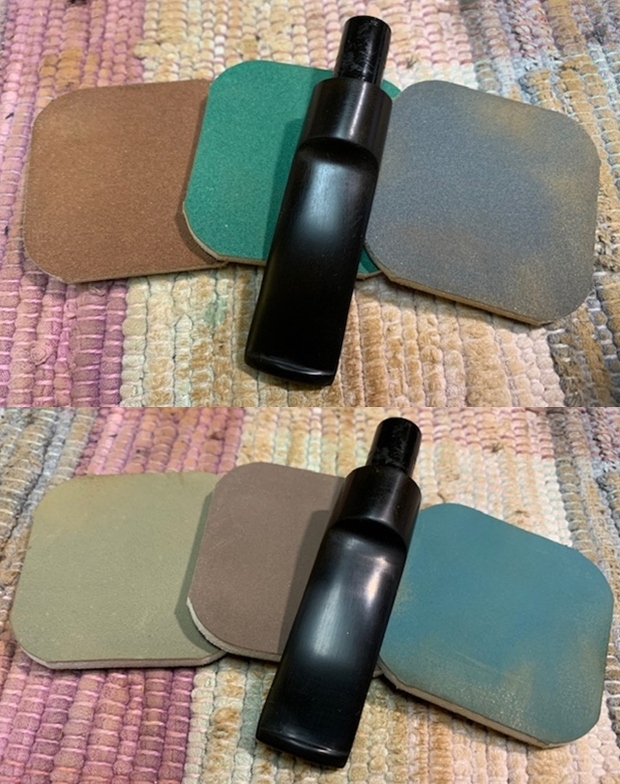
 The stem and shank were made for a 9MM filter so I took out a box of Vauen Dr. Perl Filters and fit one into the end of the stem. It fit perfectly in both the stem and the shank.
 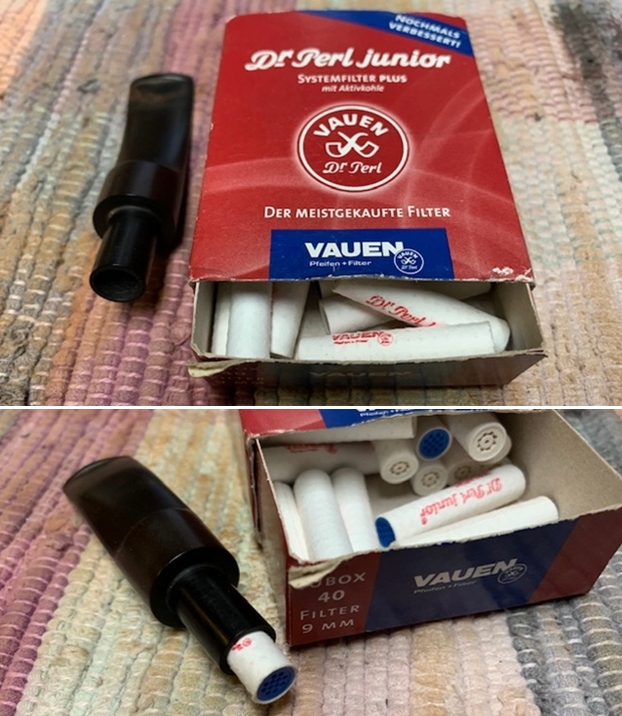 Once the repair in the bowl bottom cured I mixed a bowl of sour cream and charcoal powder to protect the bowl and facilitate breaking it in the first few smokes. I put a pipe cleaner in the airway into the bowl and used a folded pipe cleaner to paint the walls and bottom of the bowl with the mixture. I set the bowl aside to let the mixture harden and cure. Once the bowl coating dries it is neutral and leaves behind no taste that affects the flavour of the tobacco.
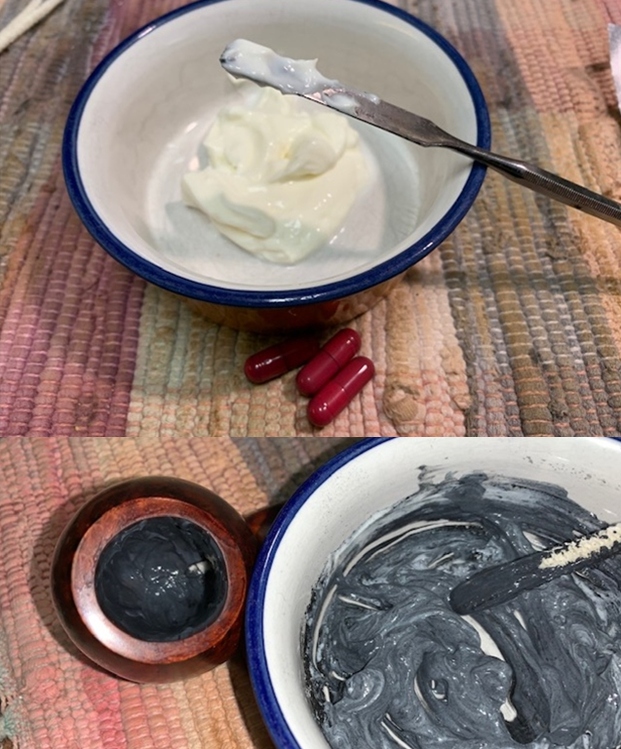
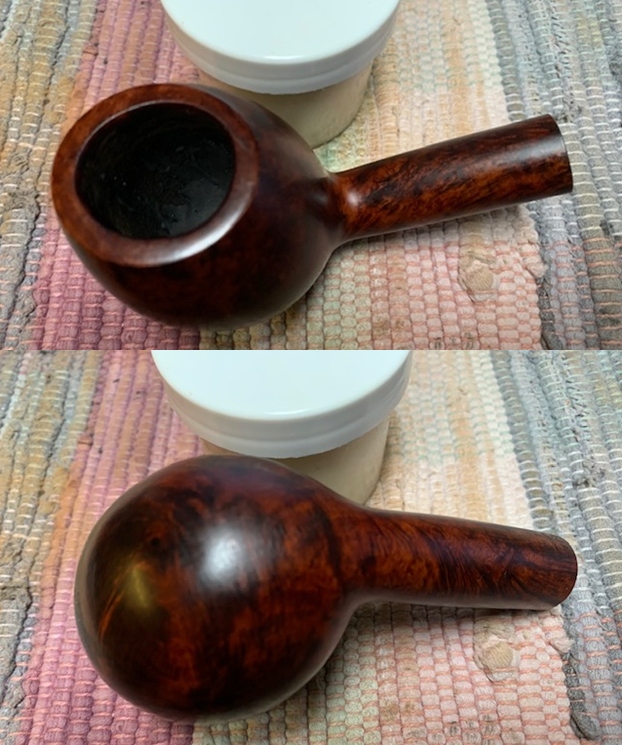
 This smooth finished Bjarne Hand-Carved Canted Egg is a great looking pipe. It is a pipe made in Denmark. The fancy, saddle vulcanite stem that is drilled for a 9mm filter works well and goes nicely with the reds of briar. I put the stem back on the bowl and buffed the pipe with Blue Diamond on the buffing wheel using a light touch on the briar. I gave the bowl and the stem multiple coats of carnauba wax on the buffing wheel and followed that by buffing the entire pipe with a clean buffing pad. I hand buffed the pipe with a microfiber cloth to deepen the shine. The finished Bjarne Canted Egg fits nicely in the hand and feels great. Give the finished pipe a look in the photos below. The dimensions of the pipe are Length: 6 ½ inches, Height: 2 ¼ inches, Outside diameter of the bowl: 1 ½ inches, Chamber diameter: 7/8 of an inch. The weight of the pipe is 74grams/2.61oz. I will be adding it to the rebornpipes store shortly in the Danish Pipe Makers Section. Thanks for reading this blog and my reflections on the pipe while I worked on it. There are many more to come!