Blog by Steve Laug
Not too long ago I sold one of the House of Robertson pipes to a fellow named John who collects them and lives in Salt Lake City, Utah. He loved the pipe that I sent him and wrote and asked if I would be willing to clean up and restore his first House of Robertson (HOR) pipe that had been given to him 30+ years ago by his brother. He said it was a billiard with a mixed finish – both rusticated and smooth. He said he had smoked it heavily as it was a favourite of his and it needed some attention. We made our arrangements and he shipped the pipe to me here in Vancouver. I was looking forward to working on it as I have enjoyed the other House of Robertson pipes that I have restored over the past months.
While I waited for its arrival, between working on other pipes I read over the last restoration blog I had written on an HOR pipe. I thought it might be helpful to add the information I had previously found for those of you who have not read those blogs. “House of Robertson” was in business for many years, but alas, closed their doors in 1999. They were located in Boise, Idaho. They are noted for making rather large and interesting pipes. Thayne Robertson… started the shop about 1947 and his son Jon started working there in 1970 when he finished college, along with Thayne’s daughter. Thayne and his son started making the big pipes at that time, and made them together until 1987 when Thayne passed away. Jon kept the store and his sister moved on to other things. The House of Robertson appears to have closed around 1999. https://pipedia.org/wiki/Robertson
I also received an email from Ed Mitchell from the Boise, Idaho area offering to share some of the history of the shop if I was interested. He was a frequent customer and loves the HOR Pipes. I of course was excited to learn more about the brand so I was looking forward to what he would write. It came in today’s email and I thought you might enjoy Ed’s reminiscences. Thanks Ed for sending me this information.
Hi, Steve
…I do not have any memorabilia, other than a box of two, from the House of Robertson shop. When Jon Robertson closed the store, it caught me by surprise. I do have several of Robertson pipes including a couple that need small repairs. Five or six I bought unsmoked from the widow of one of his Boise customers. The husband apparently was one of Thayne’s many friends and had bought pipes in the course of standing around visiting in his shop. One is a beautiful blond horn that I have saved unsmoked.
Thayne was a bear of a man in his 60s when I met him in the mid-1960s, a great raconteur with strong opinions on politics, religion, people and good pipes. For instance, he hated cigarette smoking; people who popped in to ask for cigarettes were shown the door with instructions on how to find the only other tobacco store in downtown Boise, an institution (still in business) that sold all types of tobacco, men’s magazines and pipes Thayne considered unworthy of any discerning smoker.
Another consequence of Thayne’s hatred of cigarettes was that he created a line of pipes sized and decorated (in some examples with inset bits of bling) for female smokers. He did make pipes in conventional shapes and sizes but preferred big freestyles. I can say I do not remember his ever making two pipes exactly alike. A large part of his business involved creating custom pipes on order. He mailed pipes to customers around the country and internationally. I am not sure what portion of his output was sold outside Boise but I had the impression that it was considerable.
The pipes I remember Thayne smoking in the shop were a couple of huge Oom Pauls about a foot long. The big man liked big pipes, usually loaded with strong English-style or oriental blends. He hooked me on my taste for Latakia tobaccos.
The shop was in one of the long, narrow brick storefronts of the old city core. An old-fashioned glass display case for pipes and accessories dominated the front along with shelves and stacks of at least 50 choices of tobaccos. A narrow flight of stairs led to inventory storage above the dusty workshop located in back behind a curtain.
For a one man shop, Thayne’s output was prodigious especially considering that the individual pipes were unique. His daughter Rosie and son Jon did assist in the shop’s latter years. Both were skilled makers but tended to create more conventionally carved and sized pipes. Most of the pipes made there, even after Thayne died and Jon was doing the work, came from a hoard of old Greek briar Thayne found in Holland around 1970. Some of the bold grain pipes from the latter years were as spectacular as smoking instruments can be. One feature I have never seen is a fill in a Robertson pipe. Thayne liked rusticating briar whenever the grain was flawed or just uninteresting.
Steve, I hope this gives you some brief insight into the House of Robertson. If you have questions to stimulate my ancient memory, I will be glad to try to answer. — Ed Mitchell
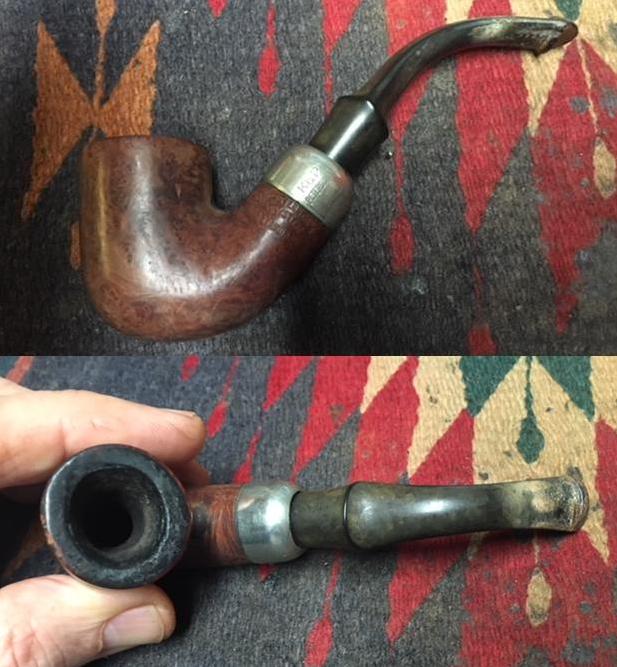
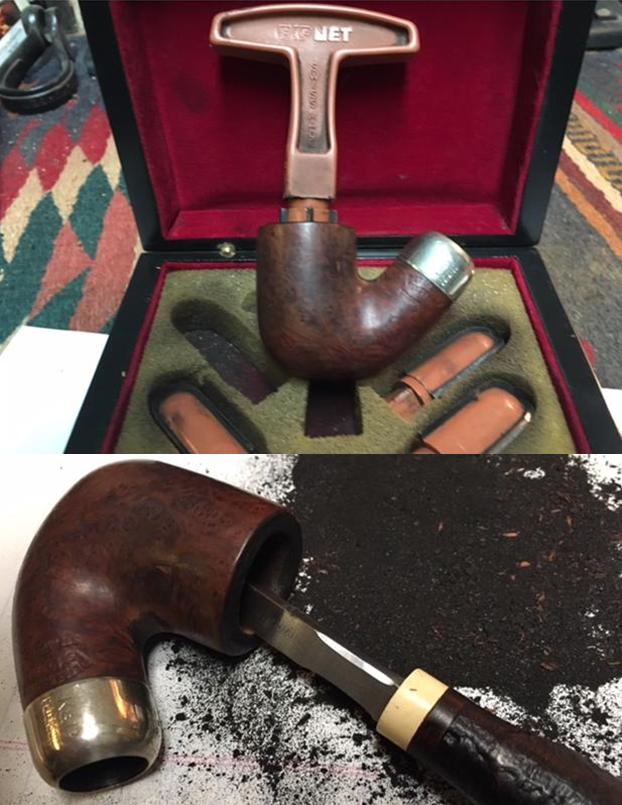
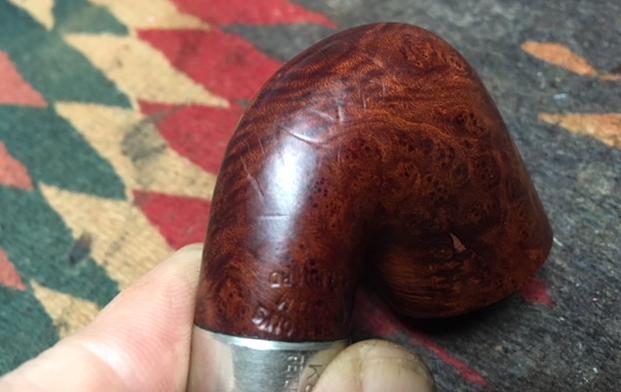
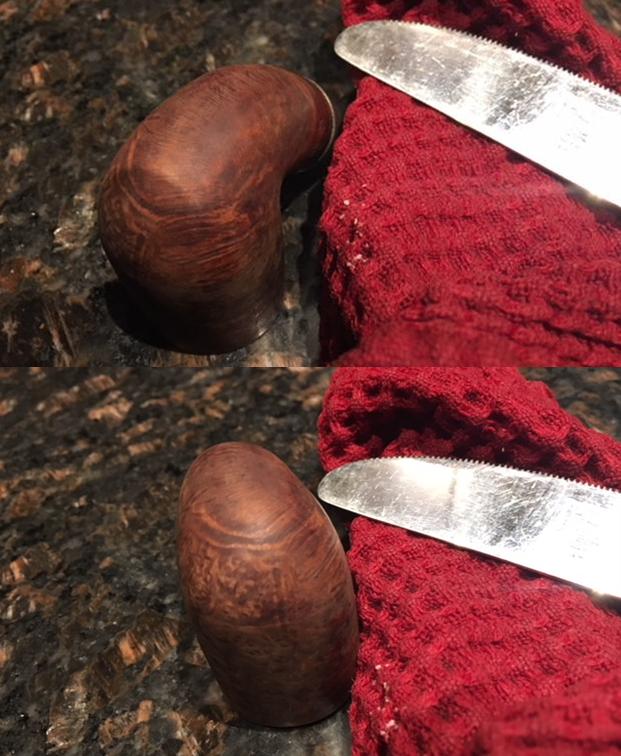
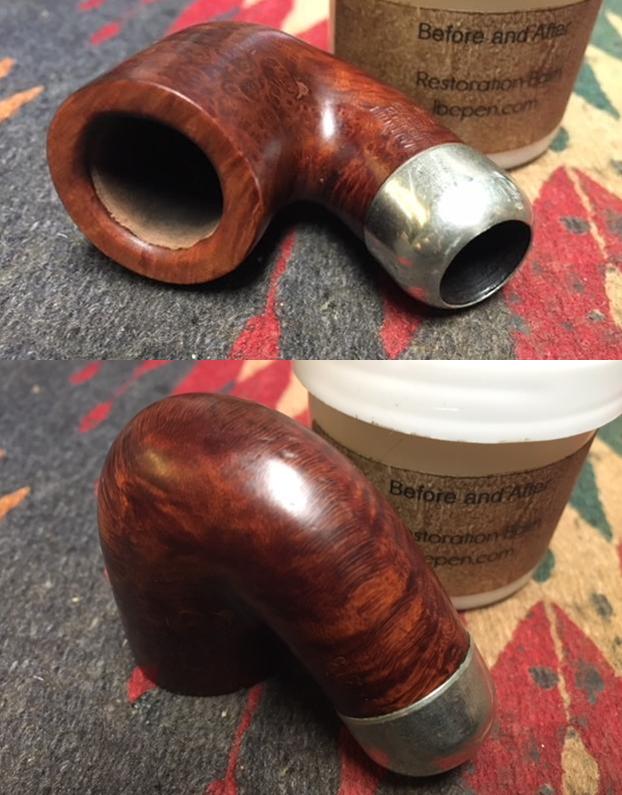
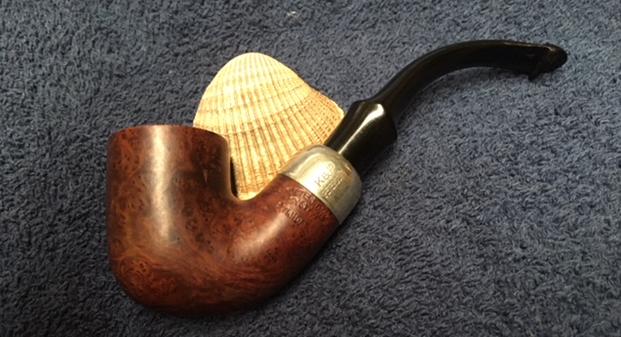
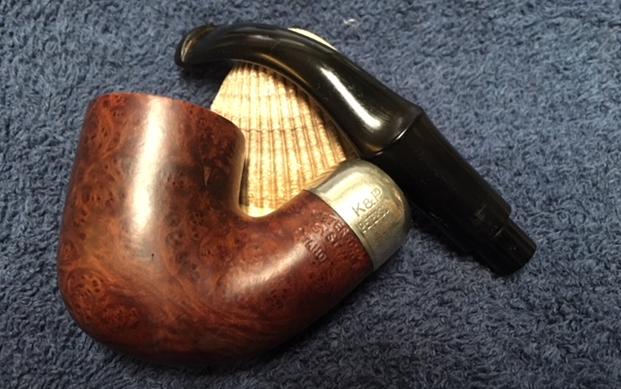
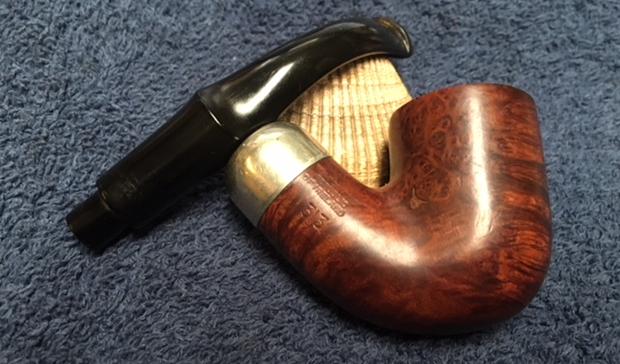
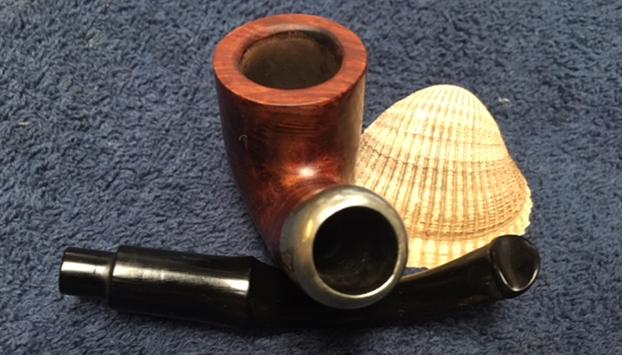
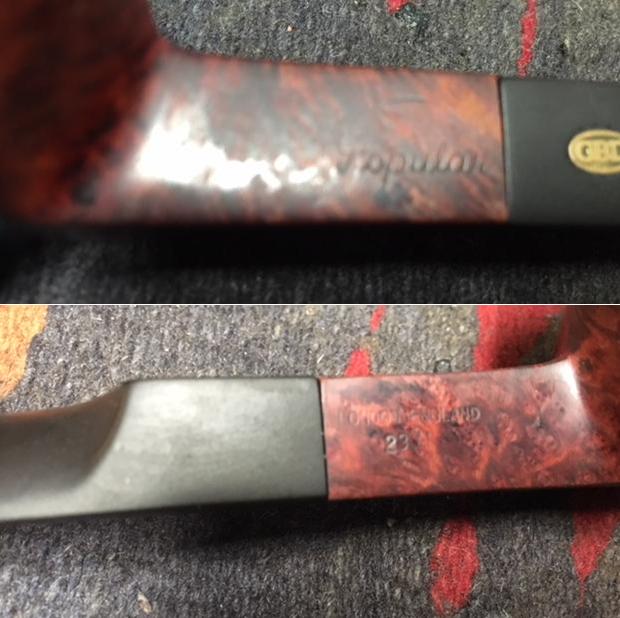
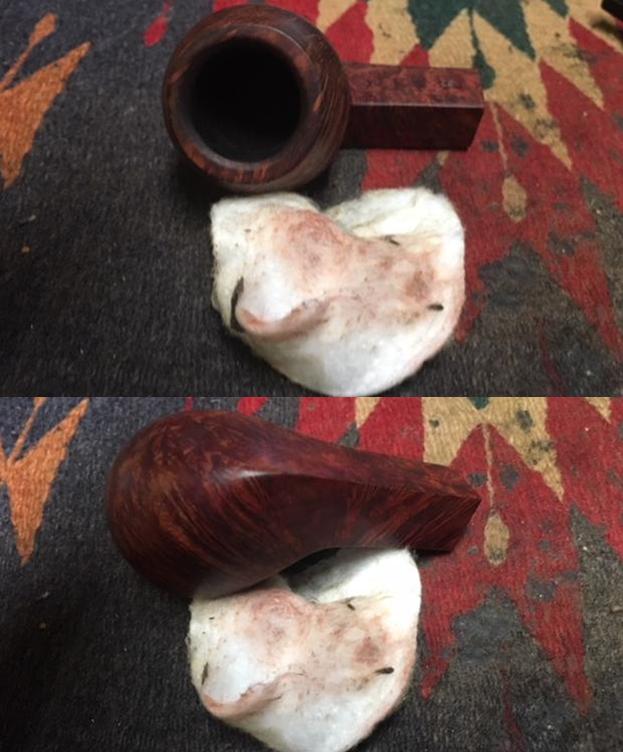
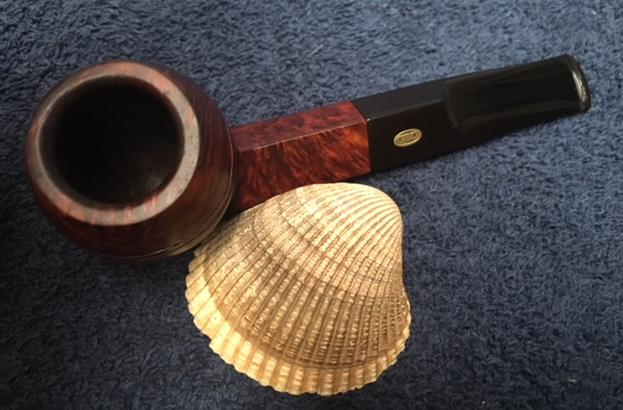
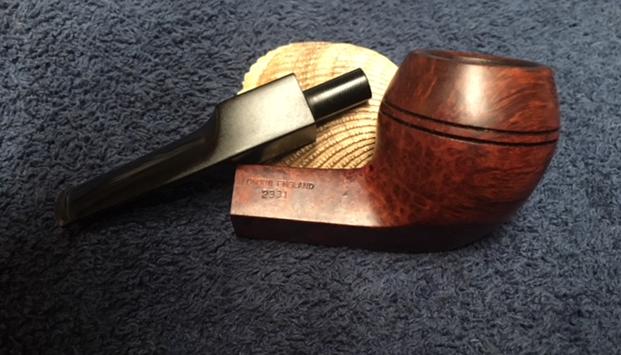
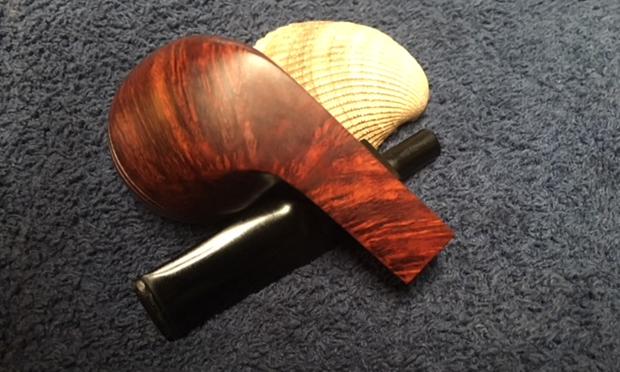
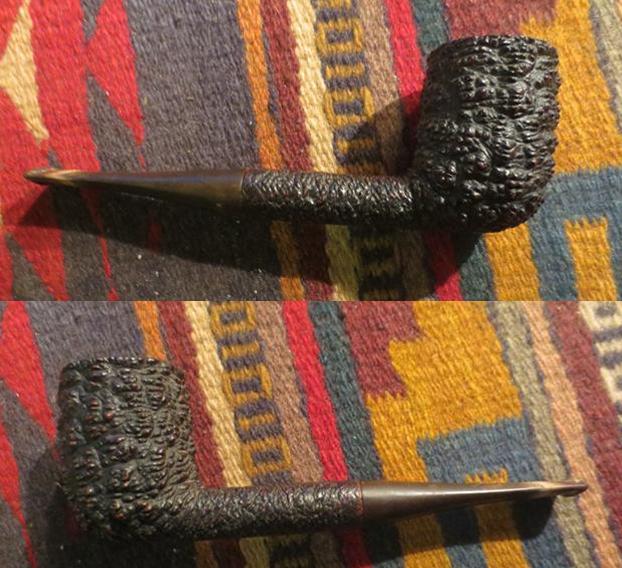
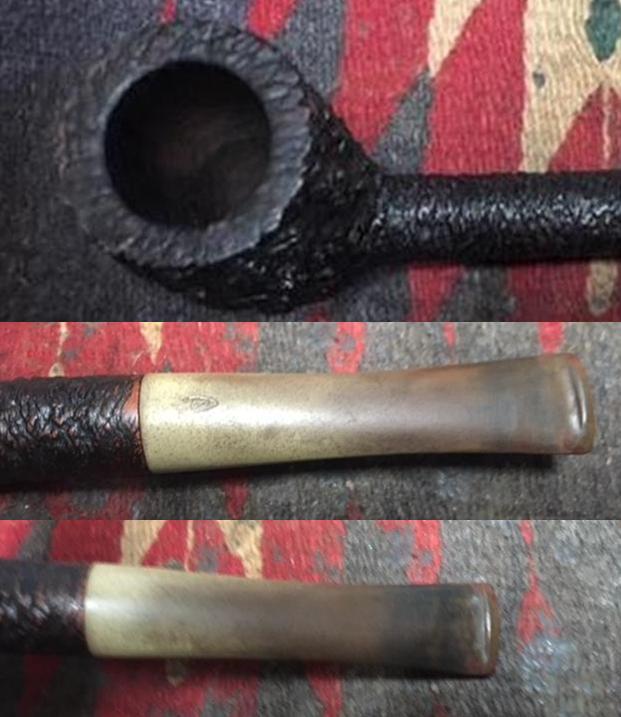
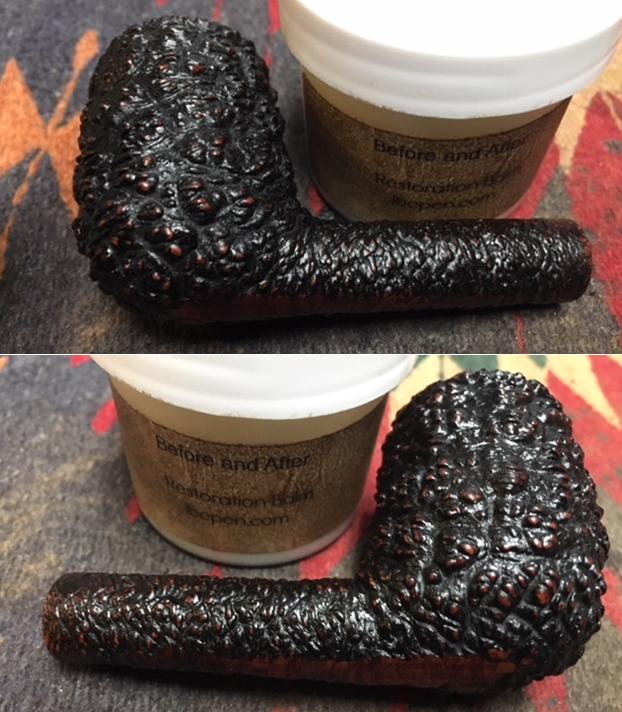
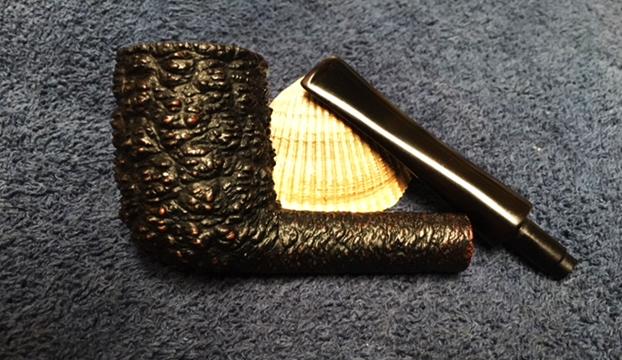
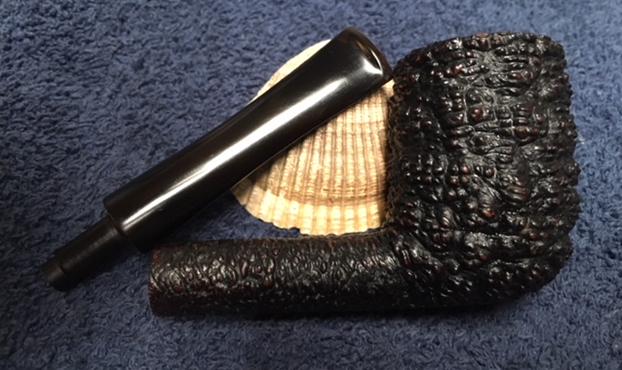
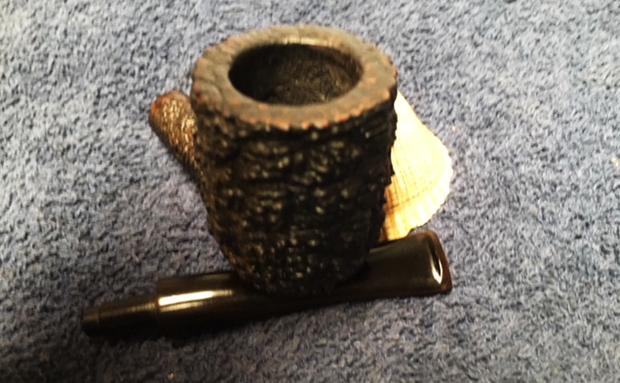
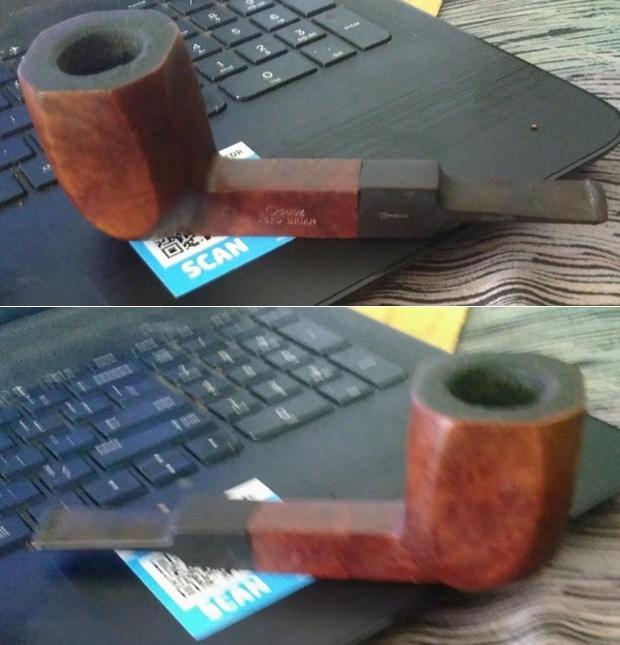
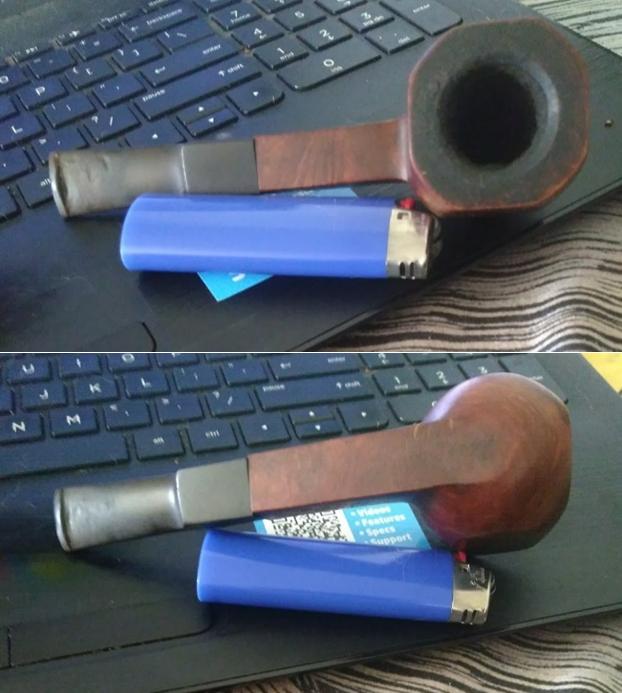
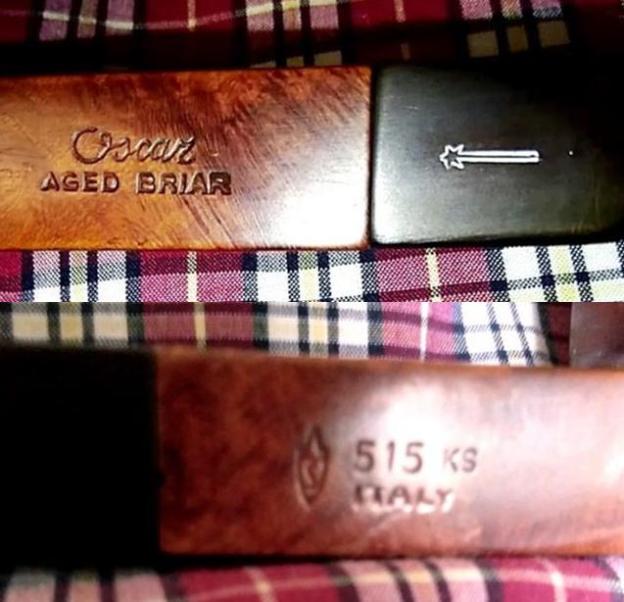
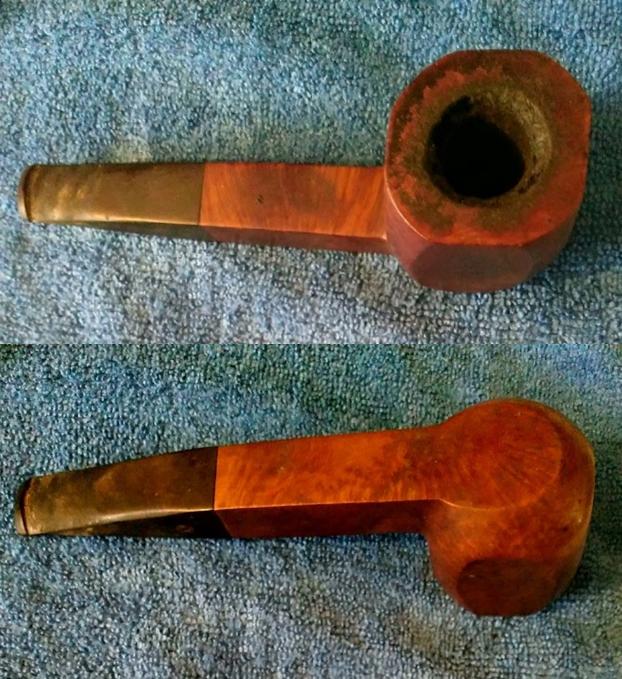
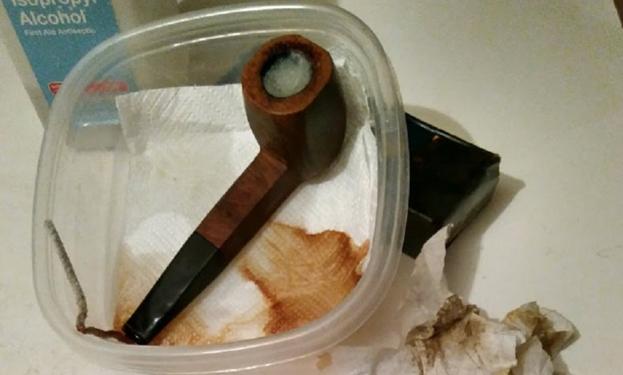
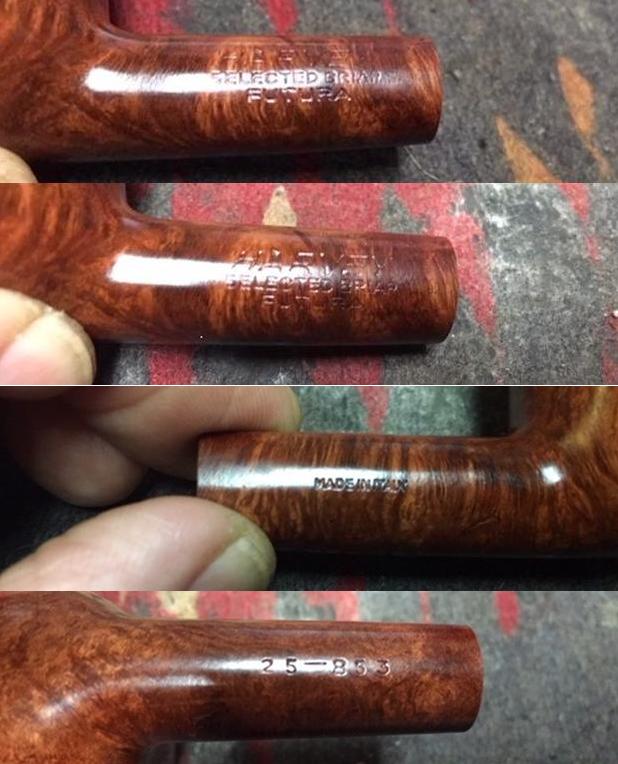
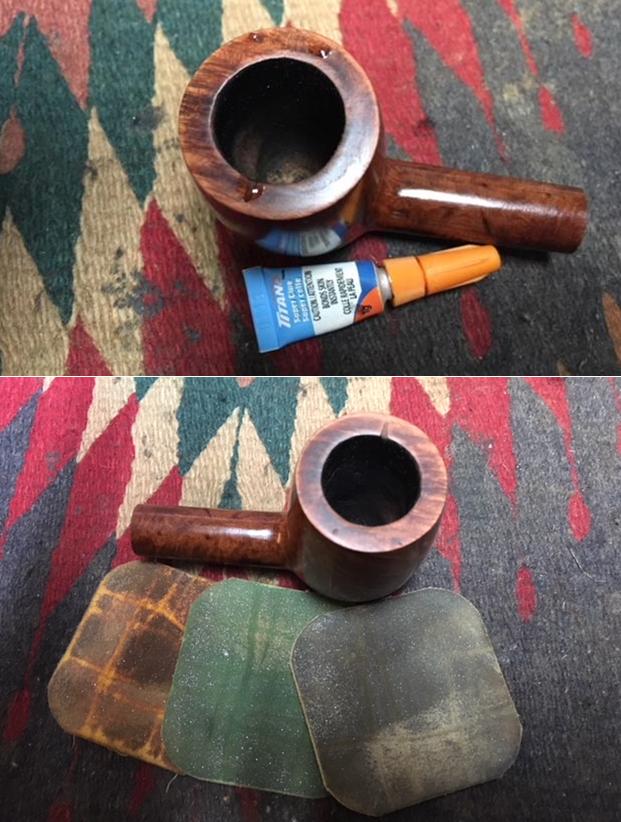
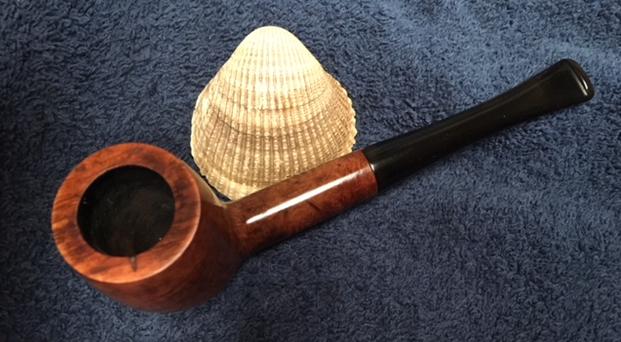
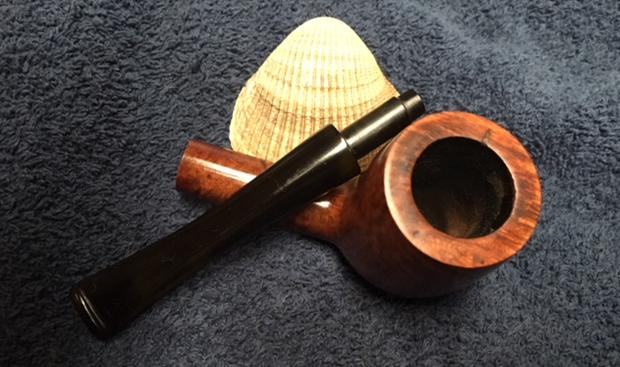
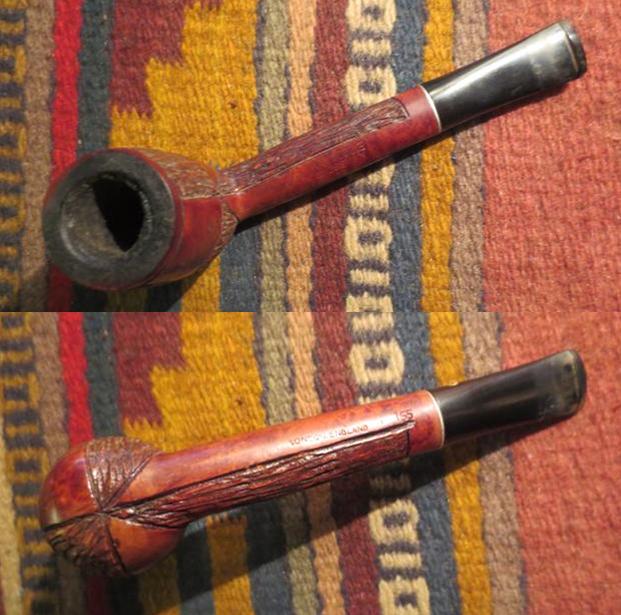
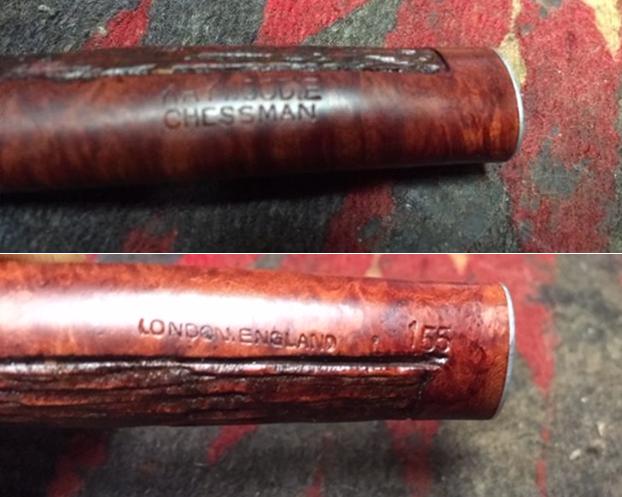
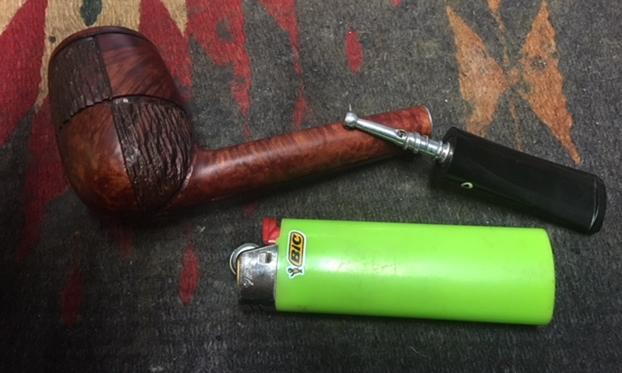
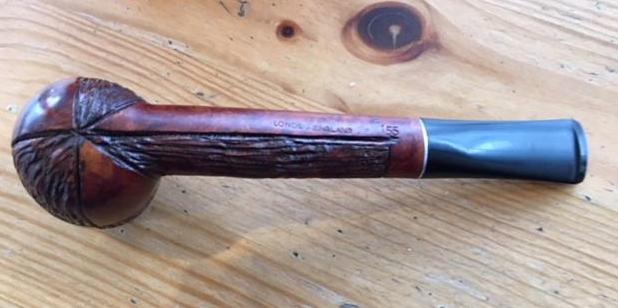
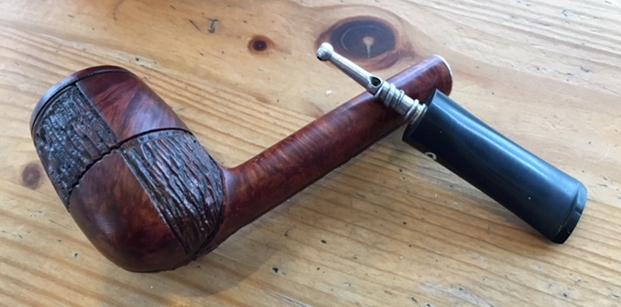
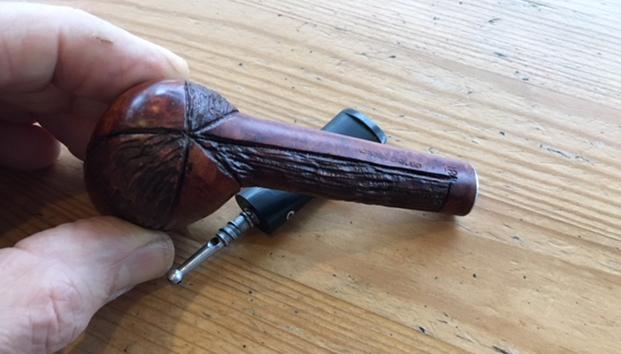
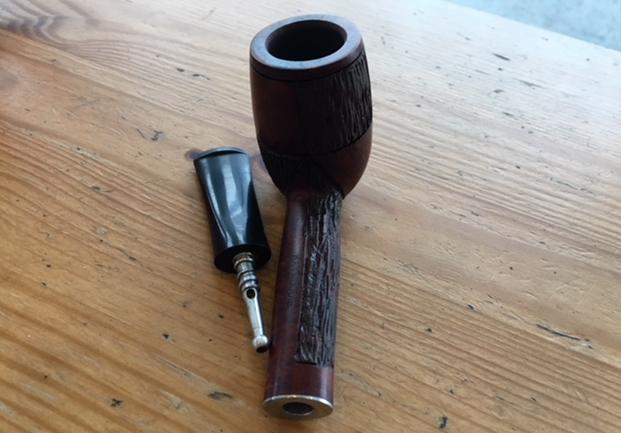
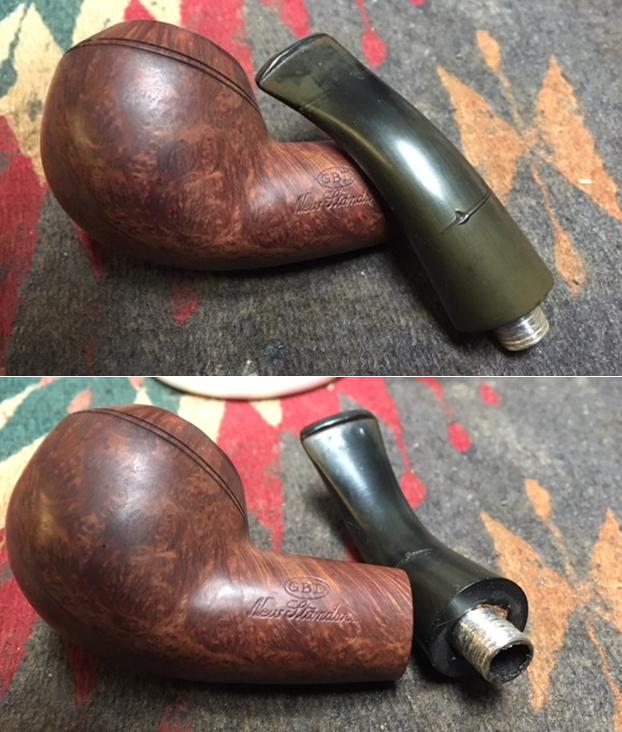
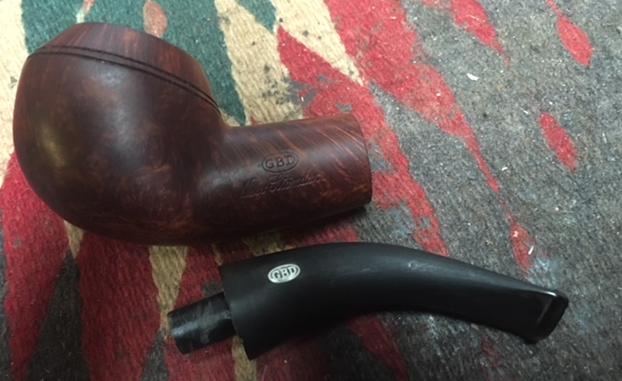
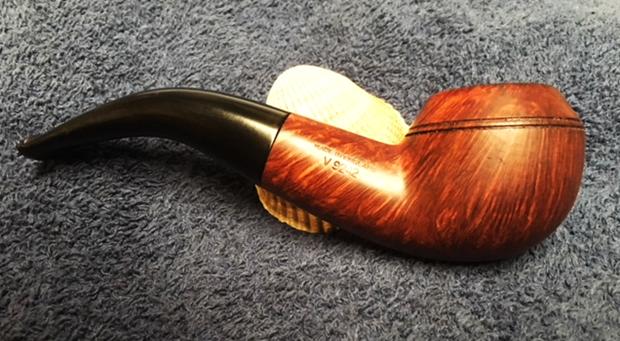
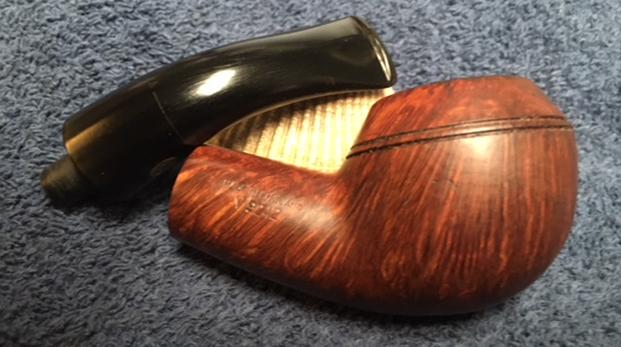
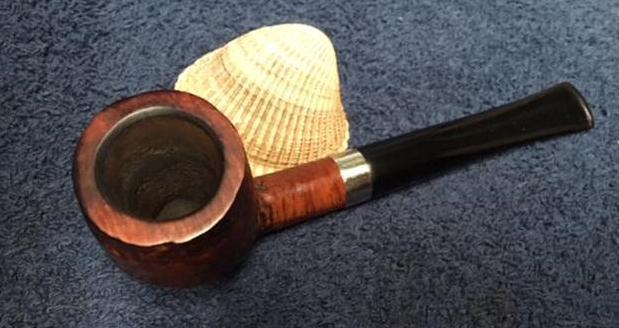
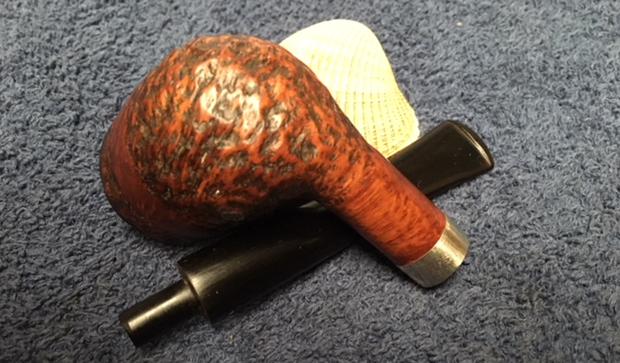
When the pipe arrived I took it out of the box to have a look at it and took some photos of it to show its condition before I began. It had a softee bit on the stem that had slid up about ¼ inch up the stem from the button. The finish was dirty and grimy. The rim top was damaged and the bowl was slightly out of round. There was a thick cake in the bowl and a heavy lava overflow on the top of the rim. There was a burn mark that was on the top of the rim at the front and extended down the bowl about a ½ inch. There was a nickel band on the shank that was a typical repair band that is available through repair suppliers. When I examined around the band on the shank end I could not see any cracks in the shank. The band had been cut off slightly so as not to cover the etched House of Robertson name on the left side of the shank. The stem was an obvious replacement that was slightly larger in diameter than the shank. The pipe definitely needed attention.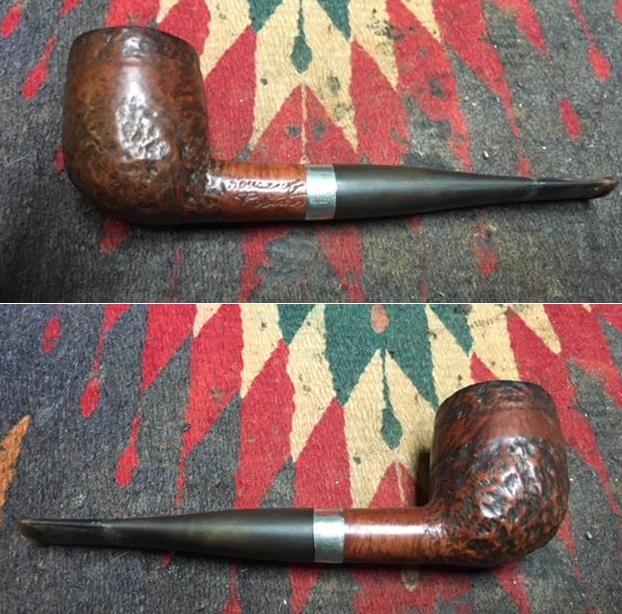
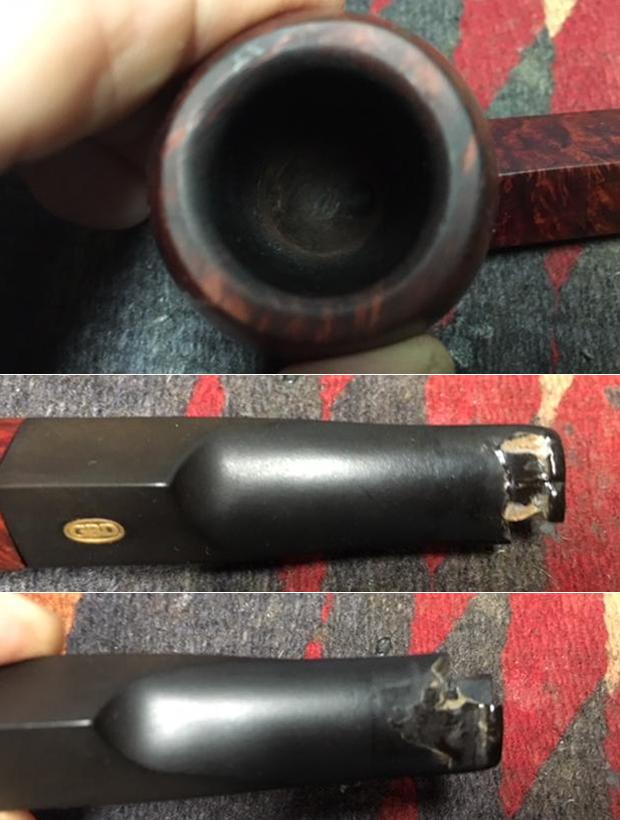
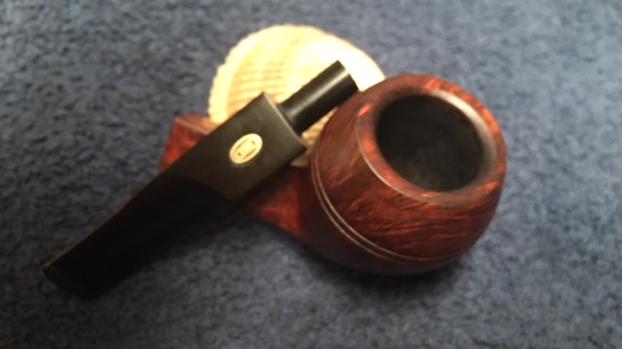
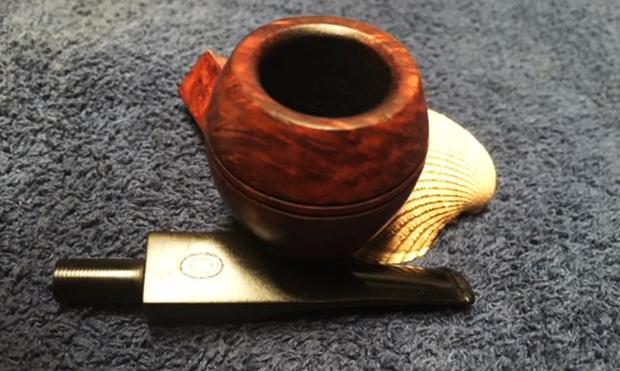
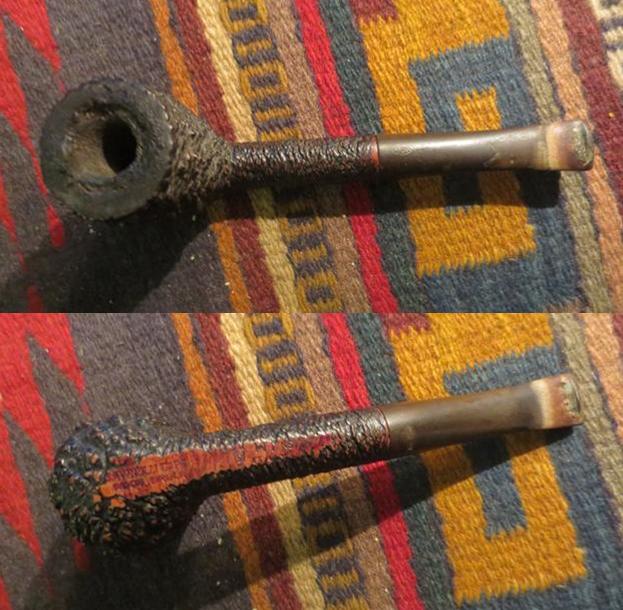
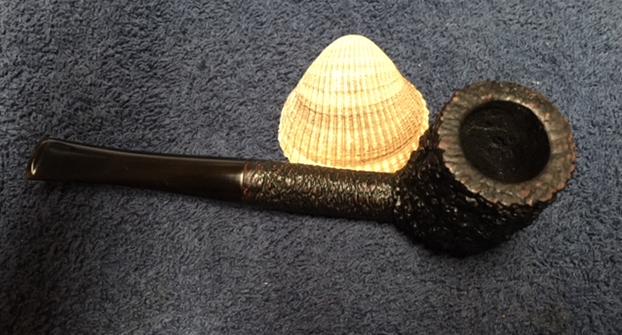
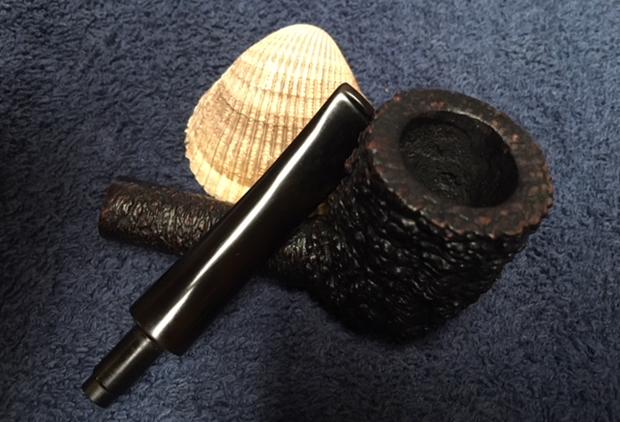
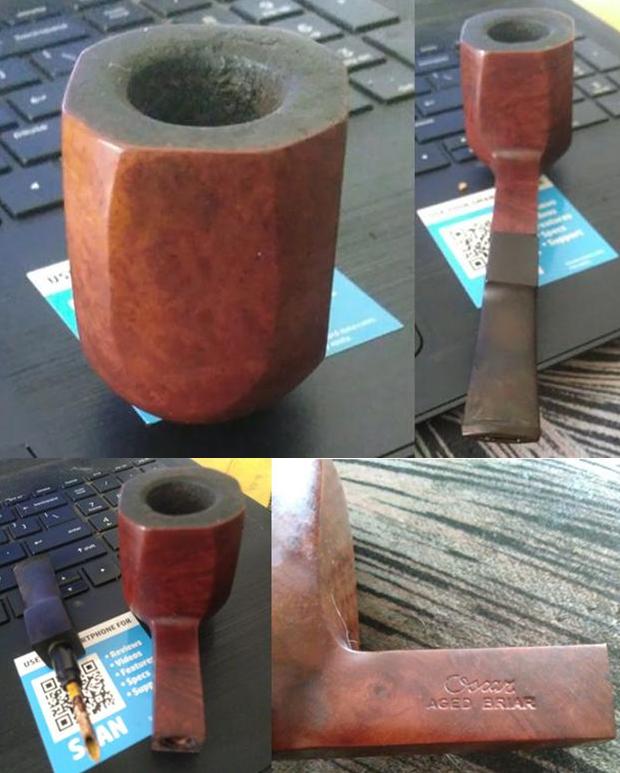
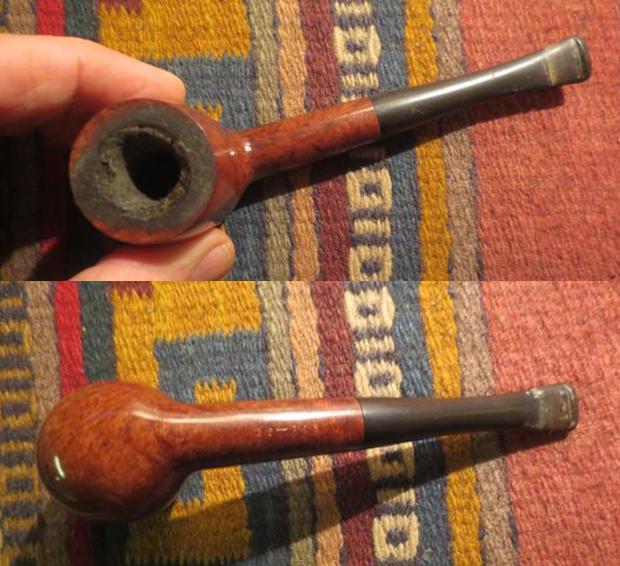
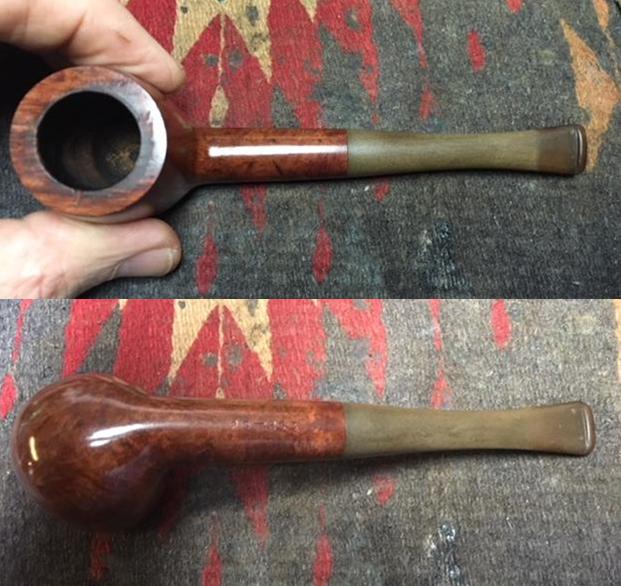
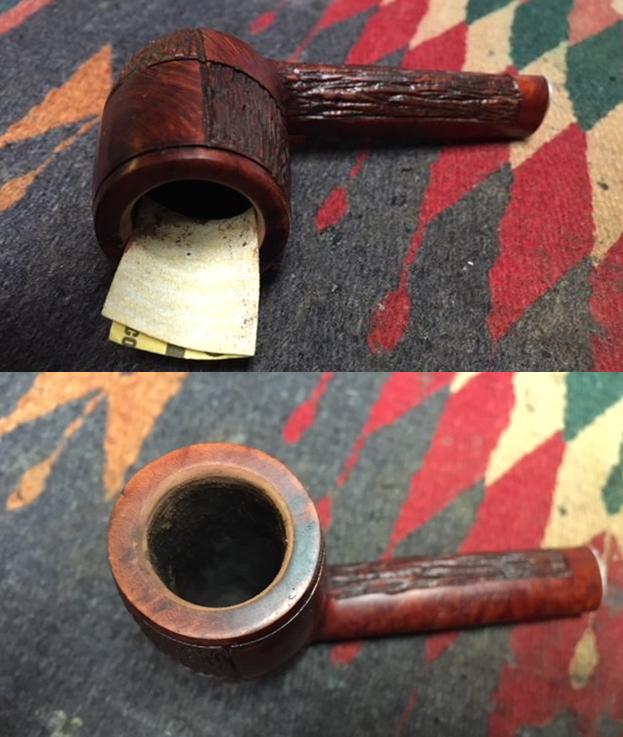
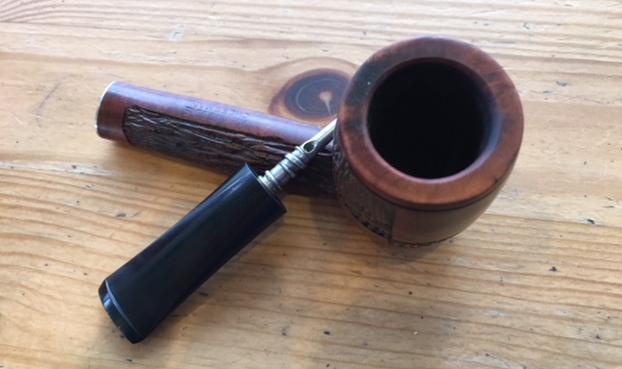
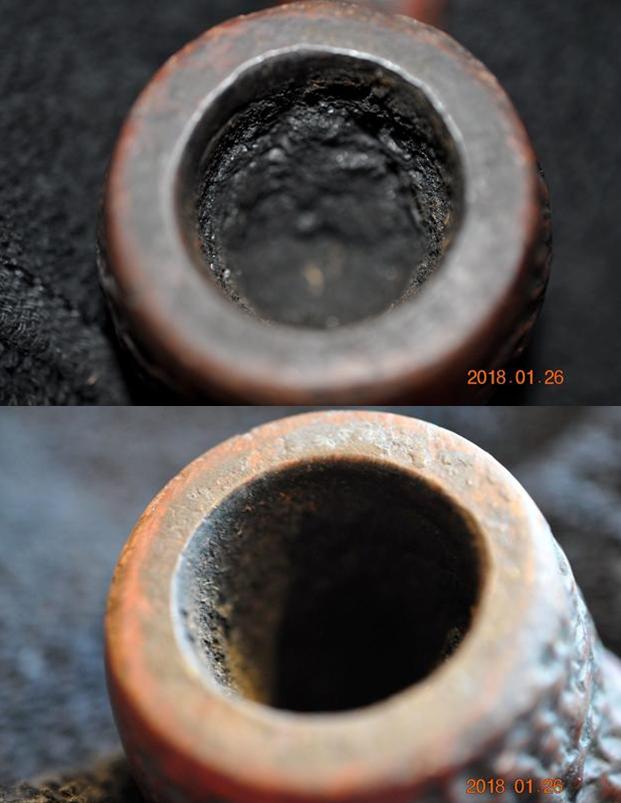
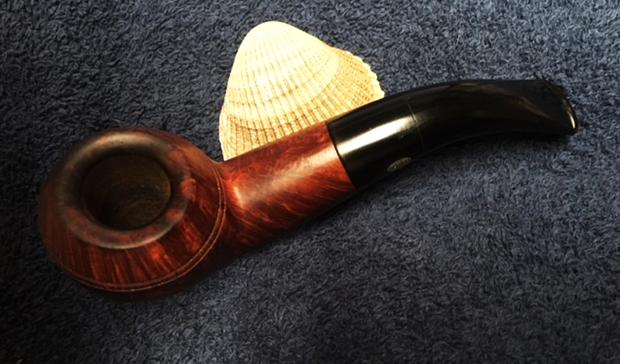
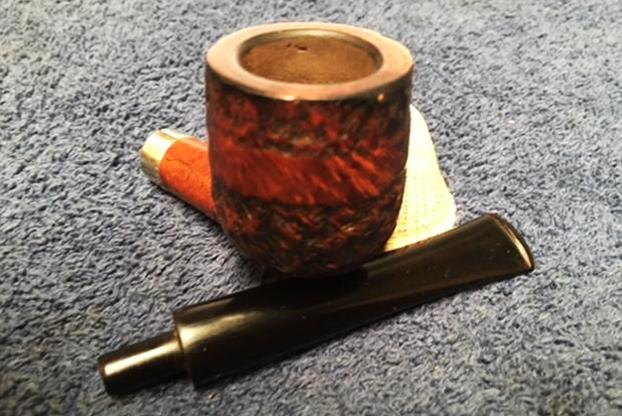
 I took a close up photo of the rim top to show the damage to the front of the bowl and the general condition of the pipe. The bowl is thickly caked and the rim has an overflow of lava on the rim top. You can see how the bowl is thicker on one side than the other. The front of the bowl looks damaged as the lava on that portion is different in texture than the hard stuff on the rest of the rim top. The stem was in decent condition – some calcification on the top and underside where the rubber softee bit had been. There were some light tooth marks and chatter on both sides. The stem was lightly oxidized.
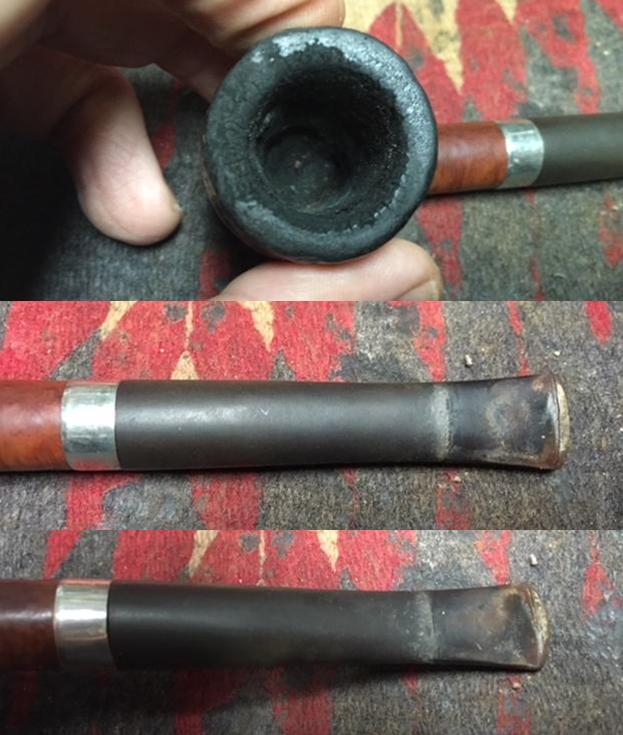 I did a quick assessment of the pipe and wrote John a quick email about what I saw as I looked it over. I sent my questions to him to see if he could shed any light on what I was seeing. I am including both my questions and his response as it helps clarify what I saw when I examined the pipe first hand.
- Is the band something that you added? It appears to be cosmetic but it could be a repair band. They are available through online pipe parts guys and are made out of nickel. I think it is a later addition as it covers the N in Robertson. Do you know if the shank was ever cracked?? I will leave it there as it is a touch of bling.
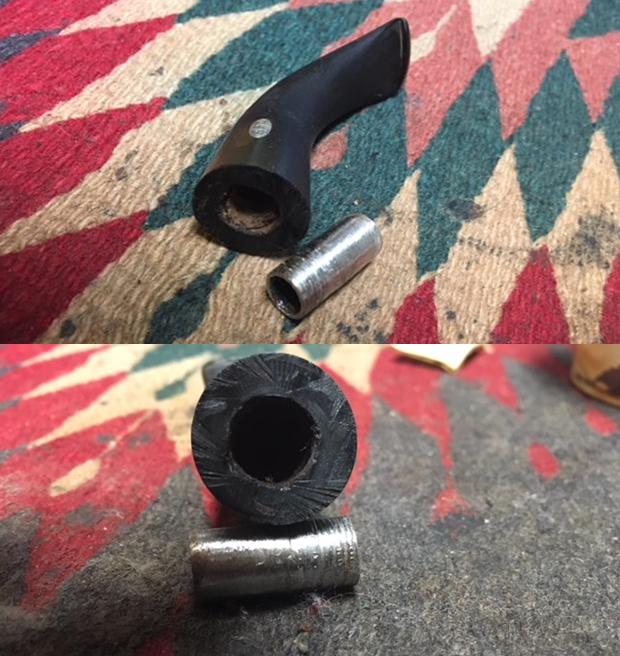
- Is the stem a replacement stem? It is wider is in diameter than the shank and appears to be a replacement. The shank was drilled for a filter stem and this one is not the original as far as I can tell. It is well made and will clean up nicely. I took the softee bit off and will clean it up. I will send the softee back with the pipe.
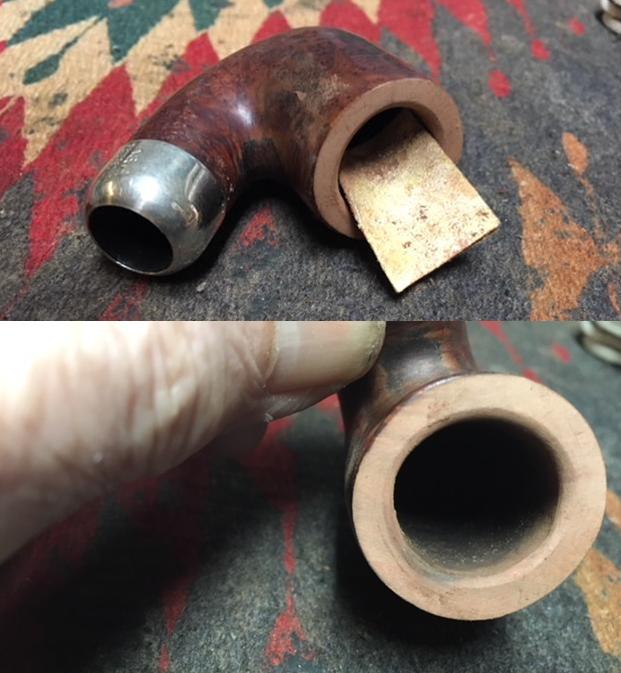
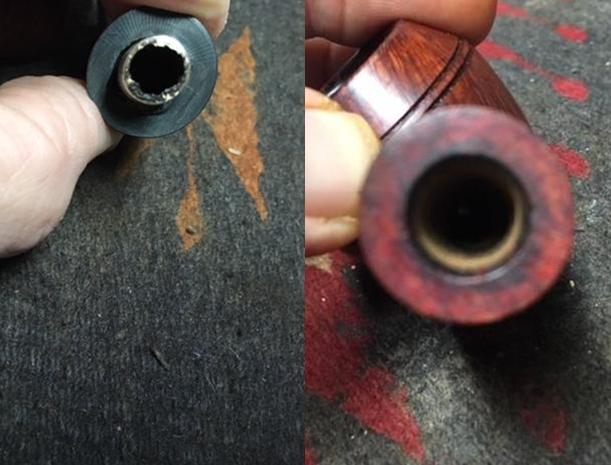
- What is the hard substance in the bottom of the bowl? It appears that someone added some fill to the bottom of the bowl (unevenly mind you) to lift the bowl bottom to the level of the entry of the airway into the bowl. Is this something you added or was it there previously? I can leave it be as it is as hard as concrete. I can also smooth it out a bit with a coat of JB Weld (which is what I think is in the bottom of the bowl already).
John replied to my queries and I am including the pertinent parts of his answers:
To my recollection, the pipe is the same un-worked-on one my little brother gave me 38 or so years ago, bought directly from Mr. Robertson at his shop — I’m assuming it was the father and not the son, but I can’t remember when the elder died.
I may have had it worked on — possibly a new stem — at Jeannie’s Smoke Shop (now sold to newcomers since my friend Jeannie died; the shop still retains the name) in Salt Lake City. I do remember taking it, or possibly another pipe, to the craftsman she employed. If that was the pipe I took in, I don’t think he would have filled the bottom of the bowl, but he may have replaced the stem. I smoked that pipe a lot years ago and may have bit the mouth piece off. If you don’t think the current stem is one that Robertson used and feel strongly that it should be changed out with new, proper stem, do it. But you indicate that the stem is fine and you can touch it up and smooth it out, that’s fine, too. Your decision. And do what you suggested with smoothing the bottom of the bowl and adding the JB Weld coat. I have no idea why that would have been filled in.
I don’t recall adding a band. I don’t recall if the shank was cracked years ago and that I may have asked the guy at Jeannie’s to fix that. Please do whatever you need to do with that part. A few weeks ago, I thought I detected a slight crack, or maybe just a dark line along the shank. You don’t seem to think that a new band is necessary. The last Robinson you sold me has a silver band; my other two do not have bands. But I am reasonably sure the nickel band is what Robertson had on it when he sold it to my younger brother ($50 at the time! — a lot of money for a 19-year-old’s gift to his older brother). Possibly the stem got damaged when Robertson was making the pipe, and that’s the way he fixed it…
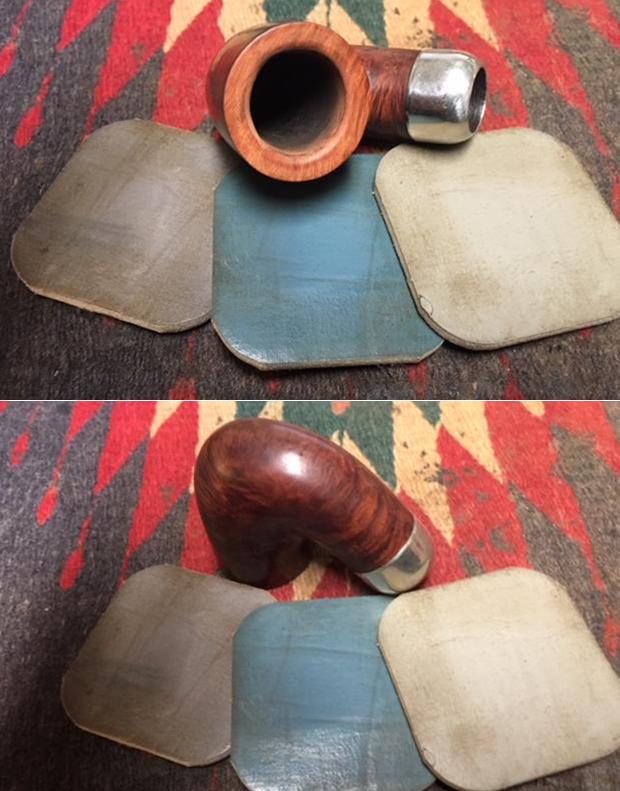
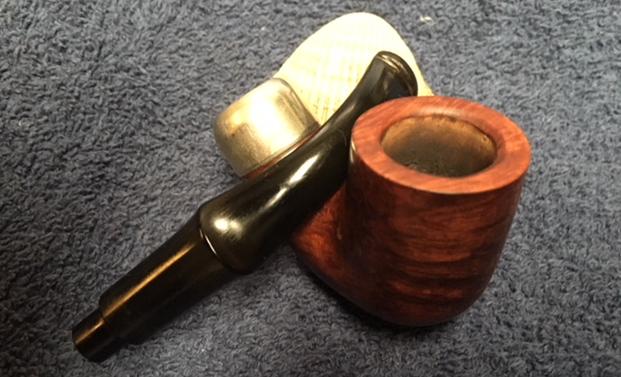
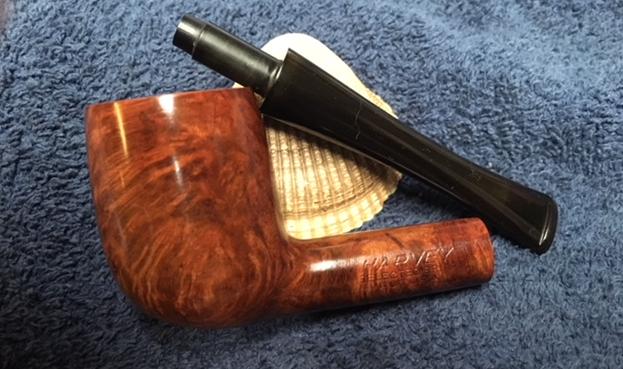
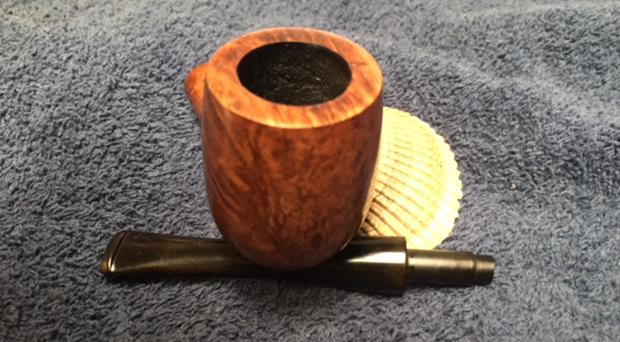
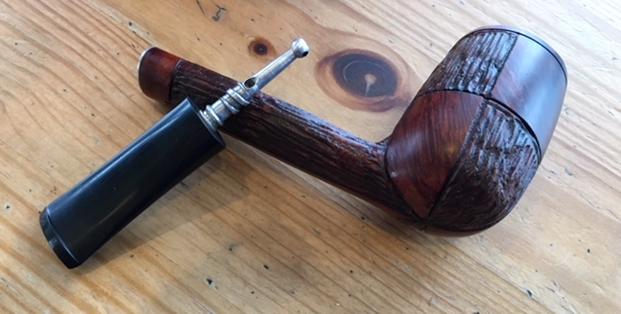
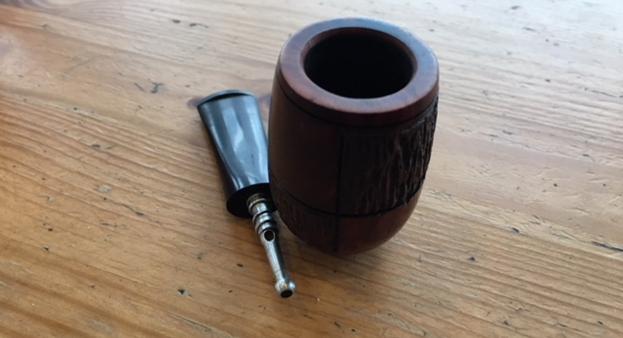
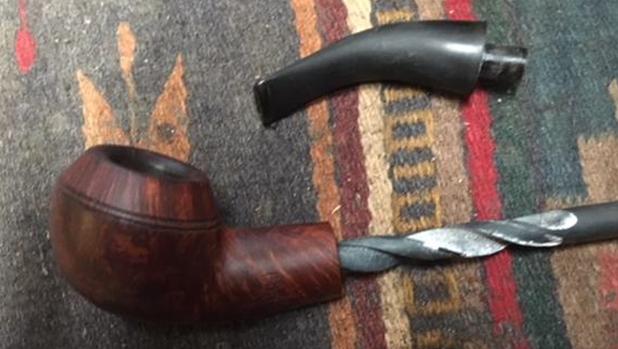
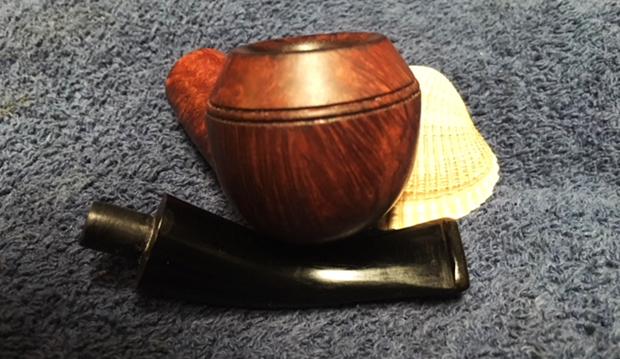
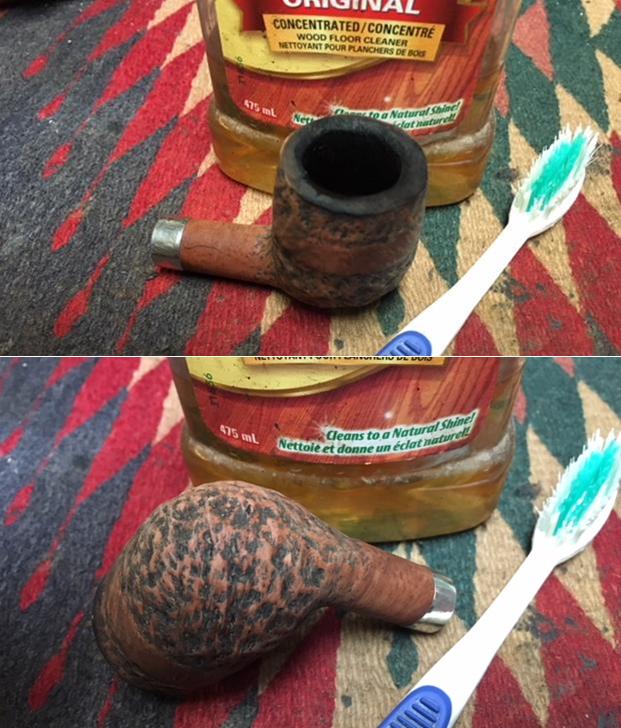
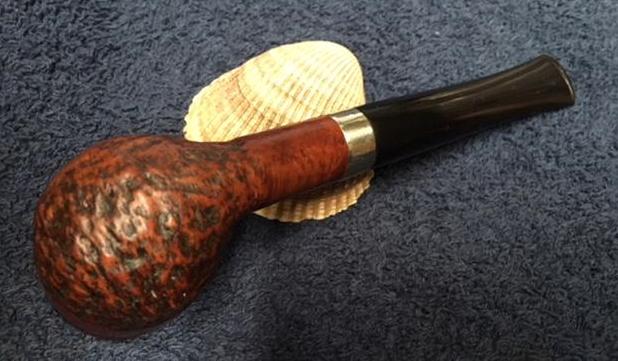
I reamed the bowl with a PipNet pipe reamer – starting with the smallest cutting head and working up to the third one. I cleaned up the remnants with a Savinelli Fitsall Pipe Knife. Surprisingly there was a rock hard substance at the bottom of the bowl – it looked like JB Weld or something like that. It was rock hard and seemed to have been used to bring the bottom of the bowl up to the bottom of the airway’s entrance to the bowl.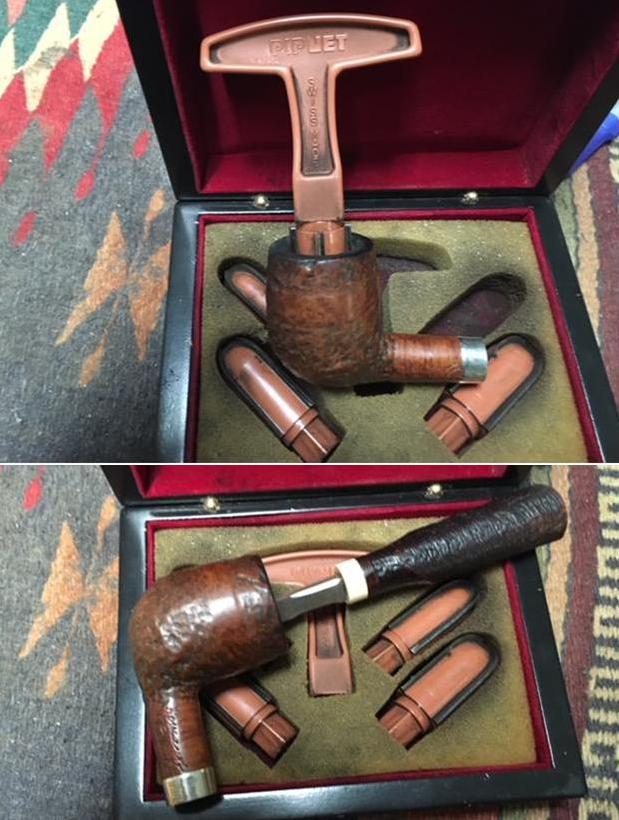 I scrubbed the exterior of the bowl with Murphy’s Oil Soap and a tooth brush. I worked over the rim top with a brass bristle wire brush to break up the lava flow there. I rinsed the bowl with running water and scrubbed it under the water while it was rinsing. The bowl began to look pretty good at this point. The contrast between the smooth band around the bowl and shank with the rustication above and below the band looked really good.
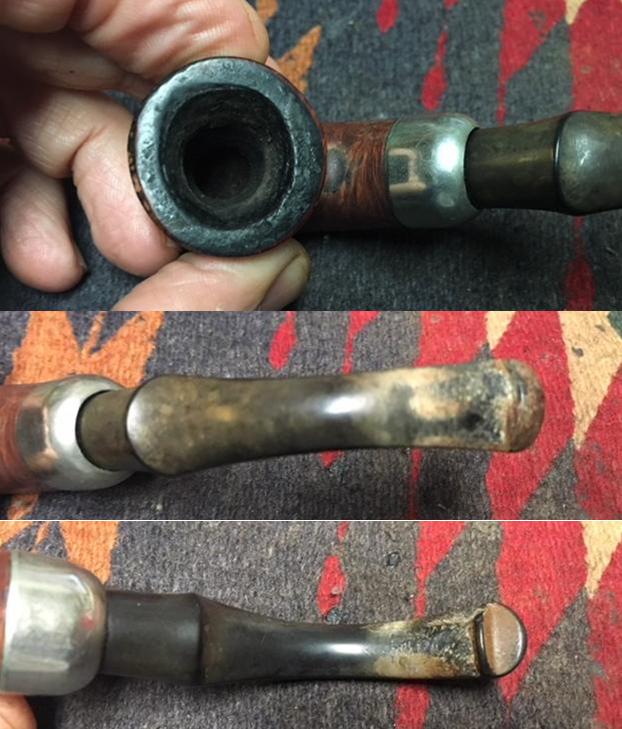
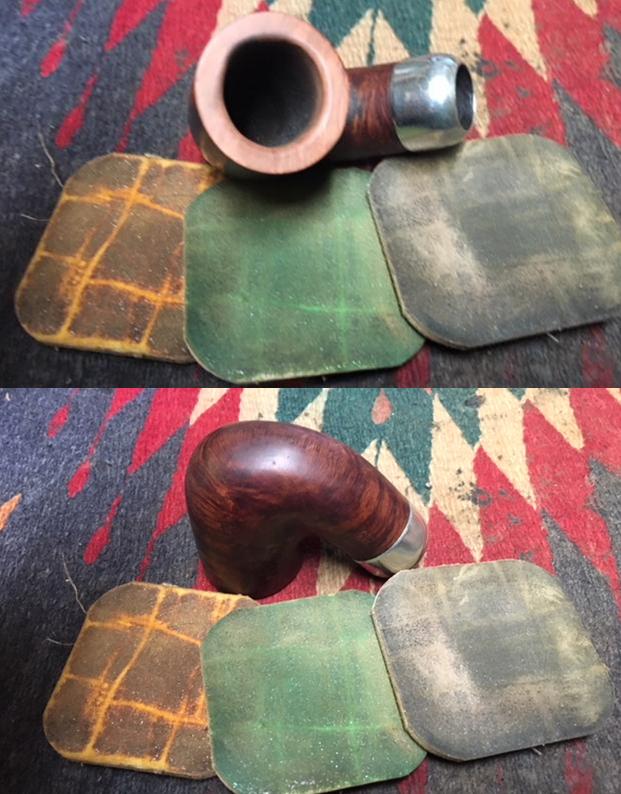
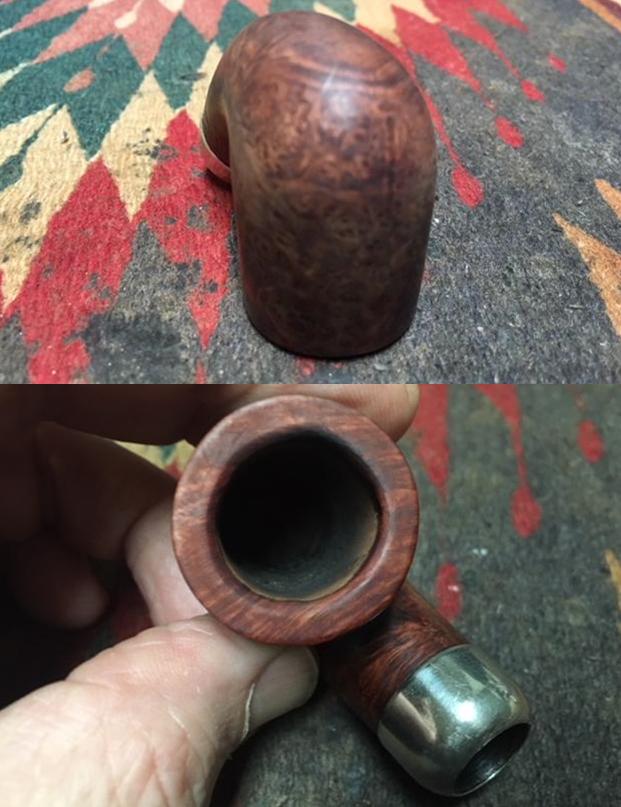
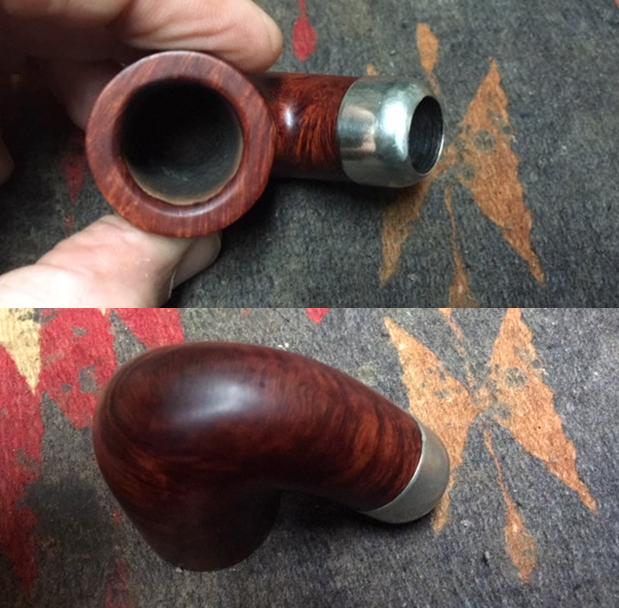
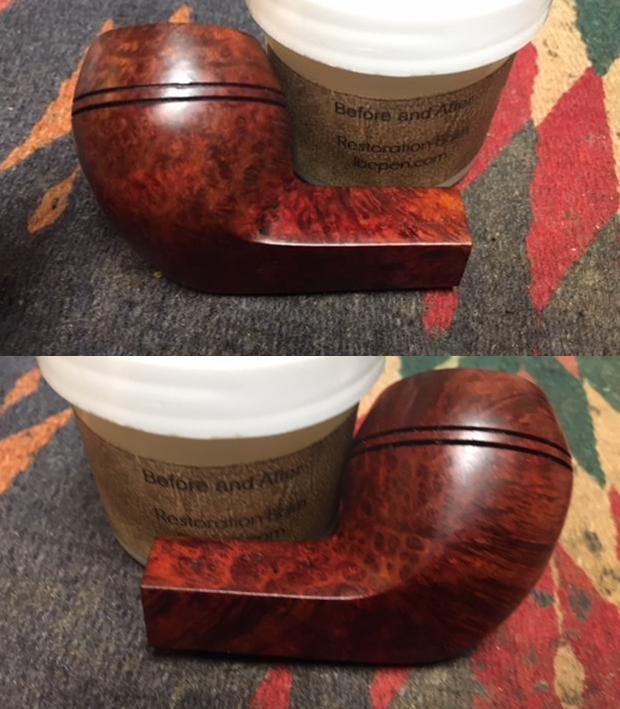
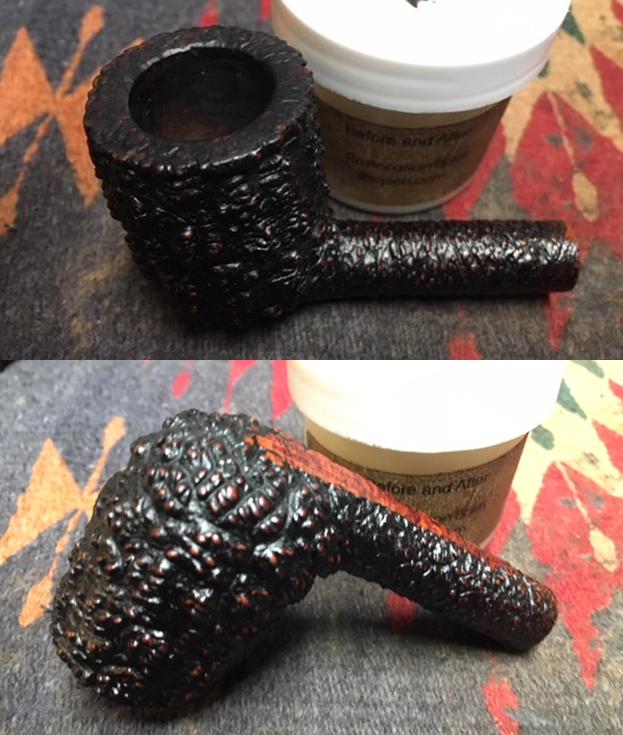
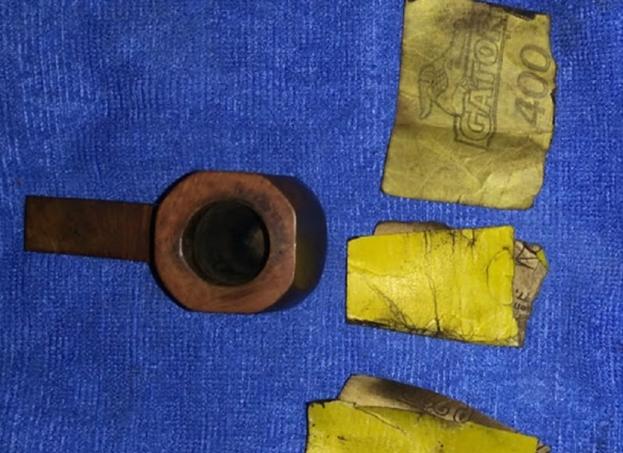
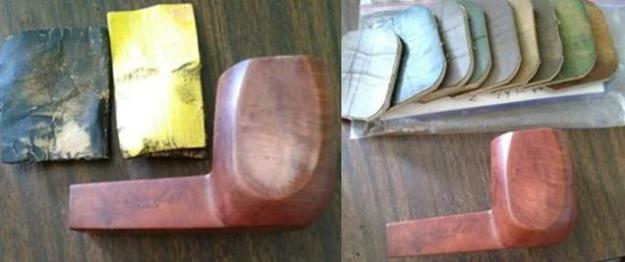
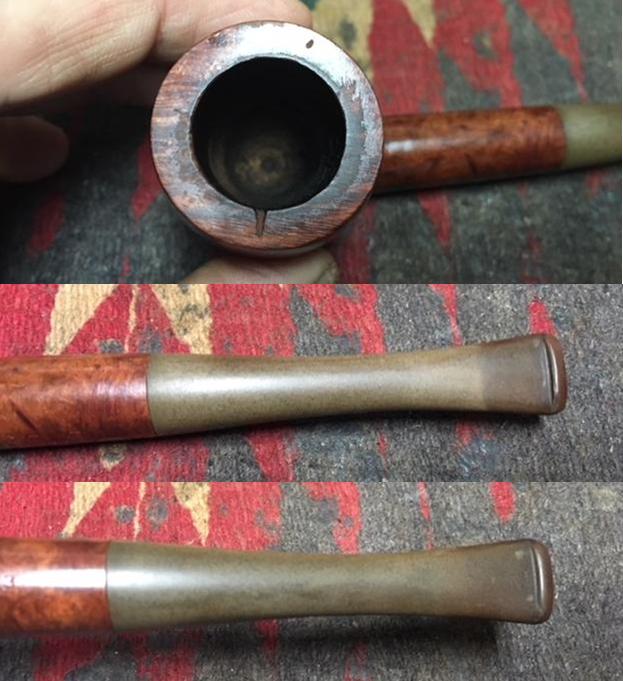
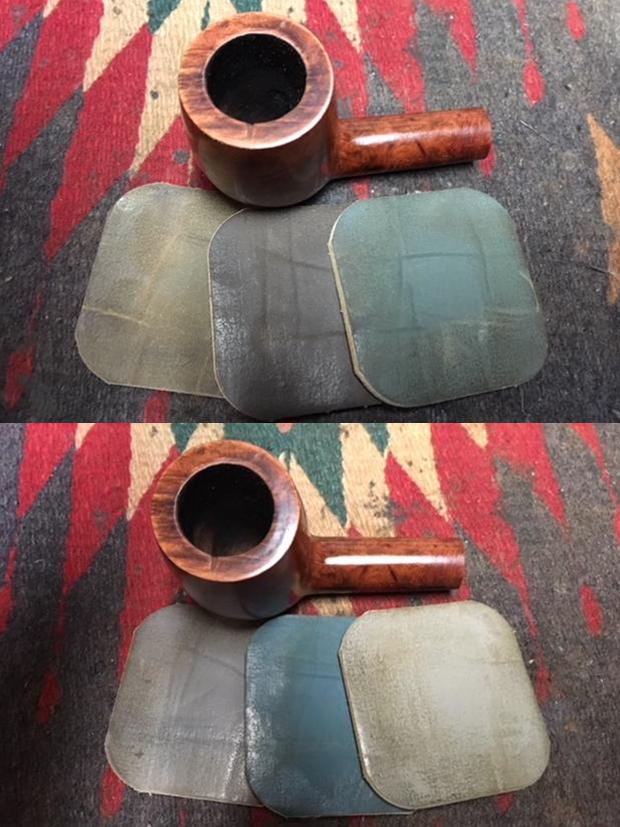
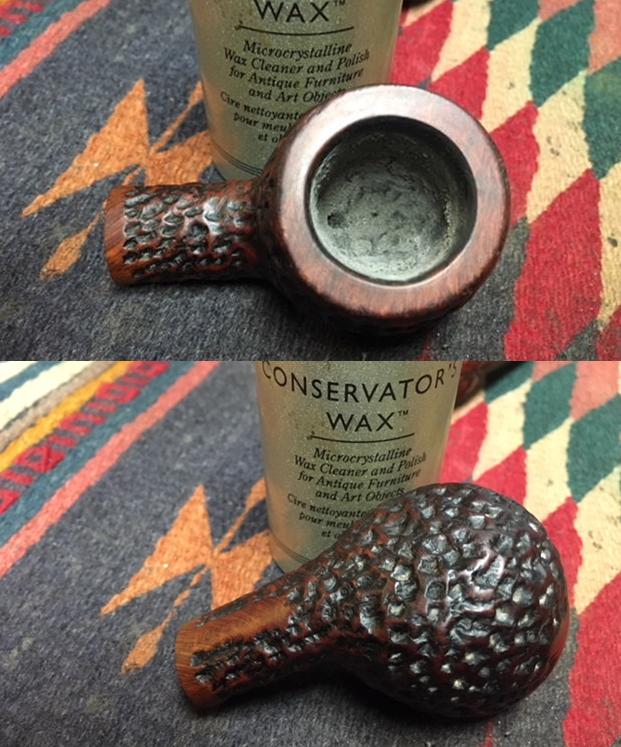
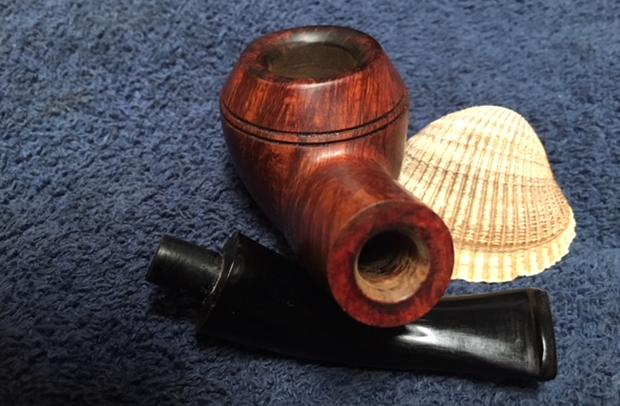
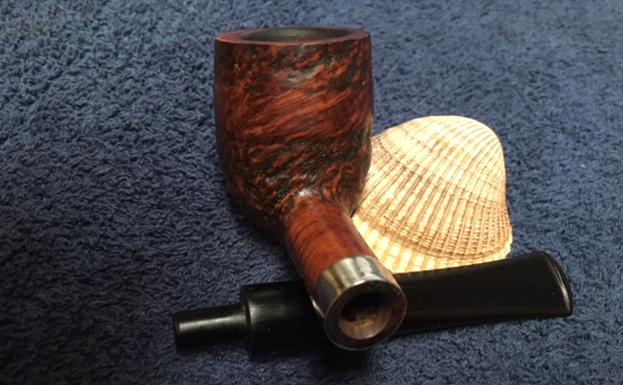
 The rim top was so damaged with the burn mark and the nicks around the outer edge that I decided to top the bowl lightly to remove as much of the damage as I could without noticeably changing the profile of the pipe. I worked on the inner edge of the rim and the light bevel with 220 grit sandpaper to clean up the inner edge. I used it to also lightly reshape the outer edge of the bowl. You can see from the photos how out of round the bowl edges are outside and inside. I worked on the bevel to work on it and you can see the result in the third photo.
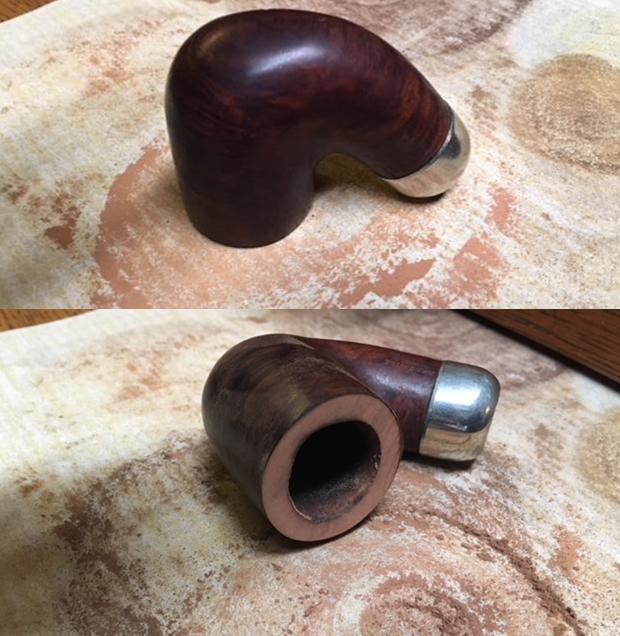
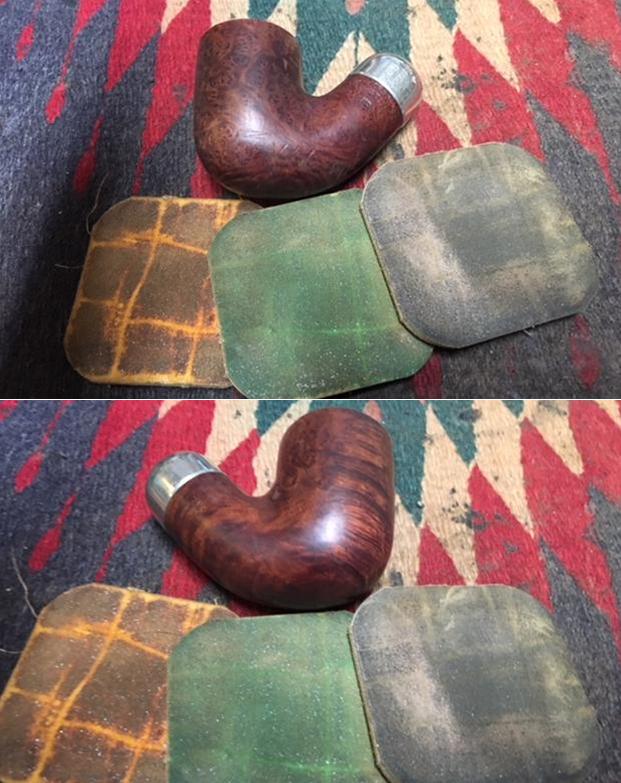
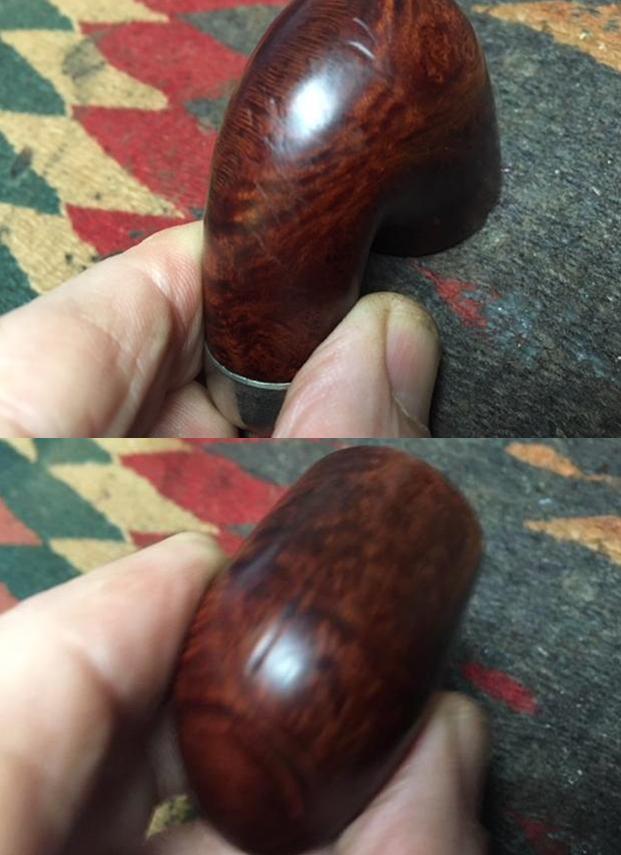
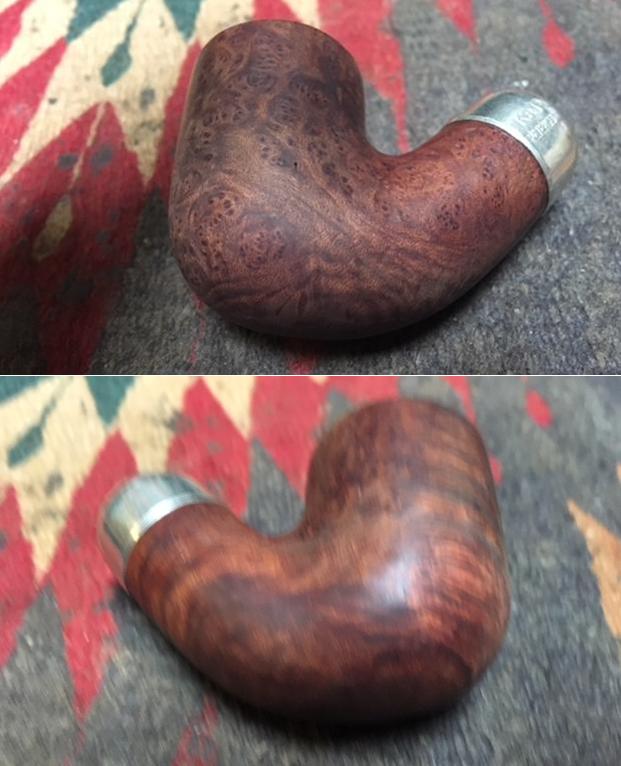
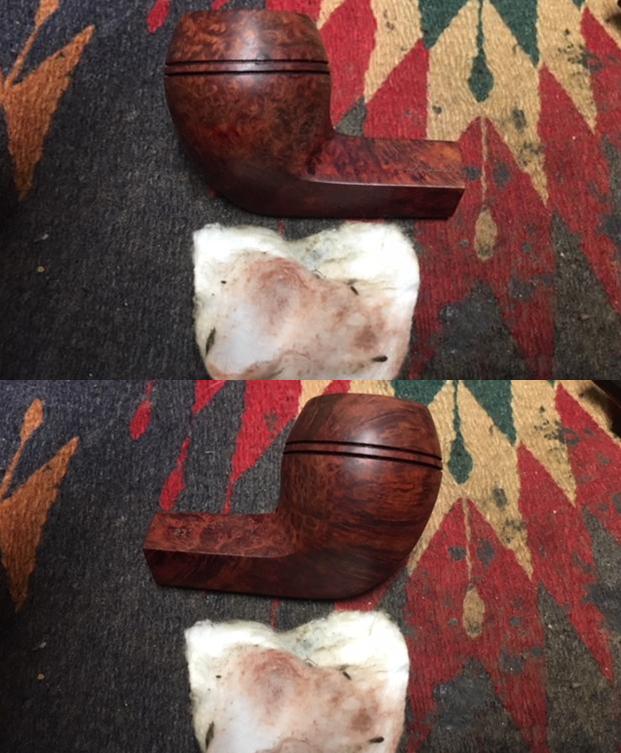
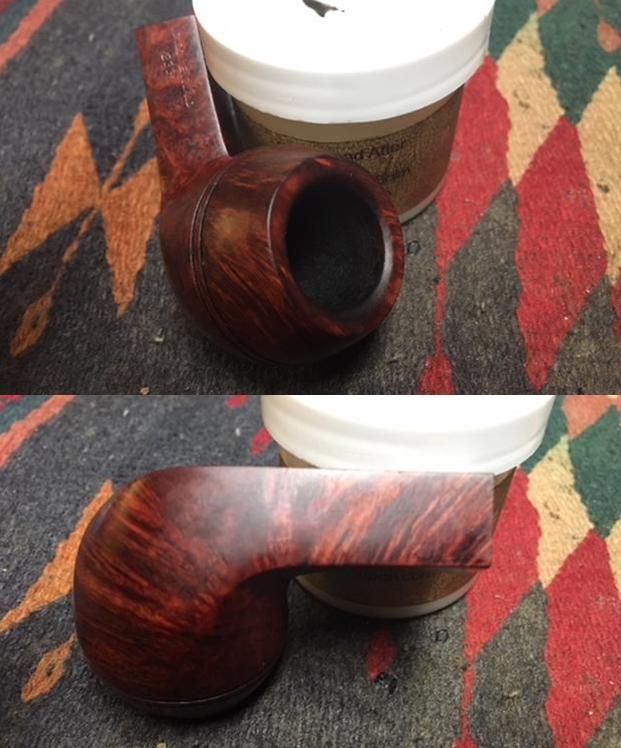
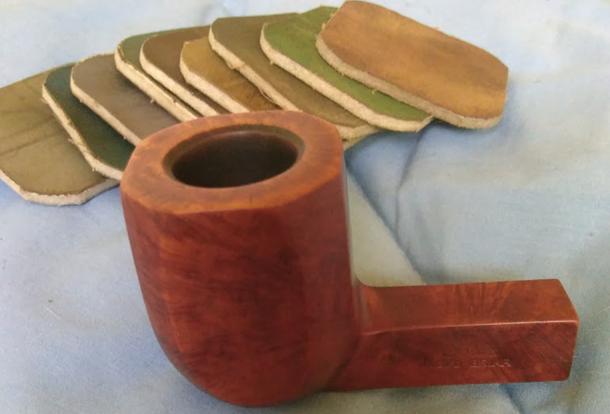
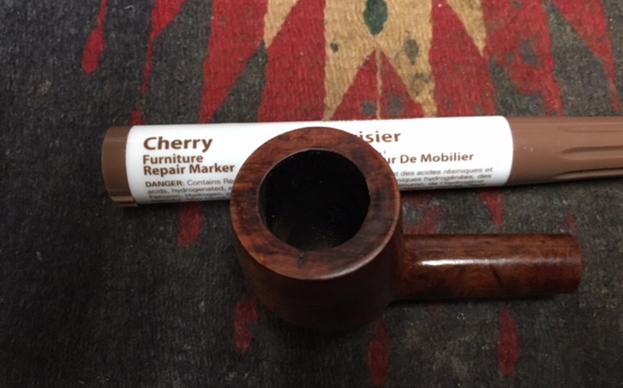
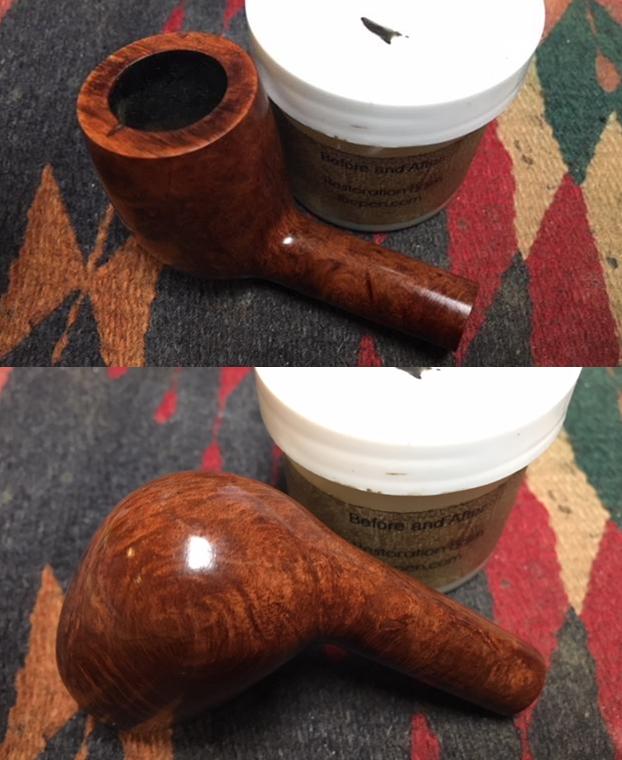
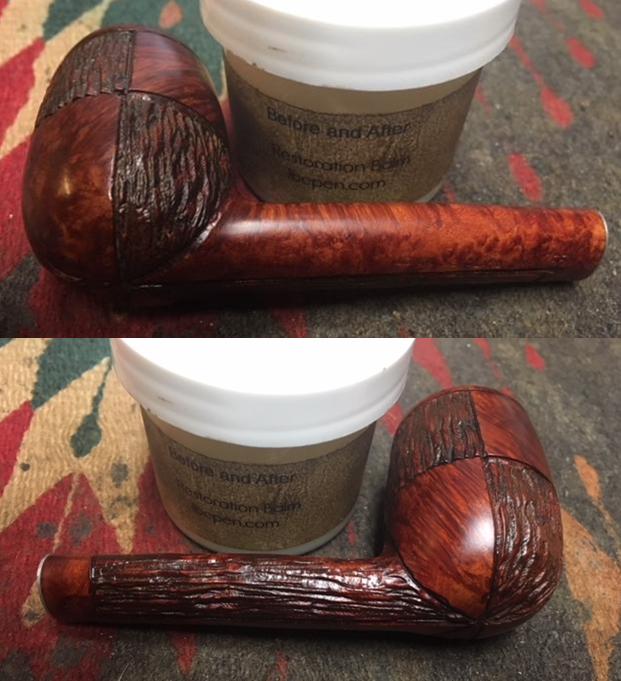
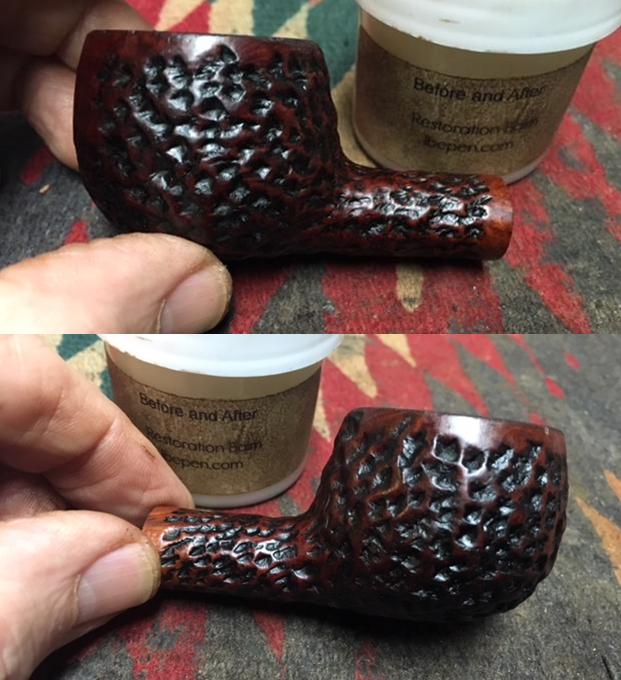
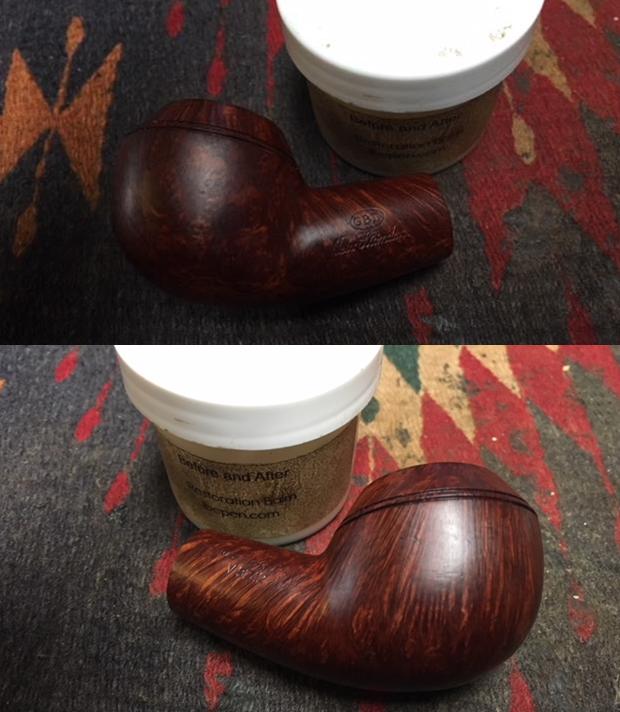
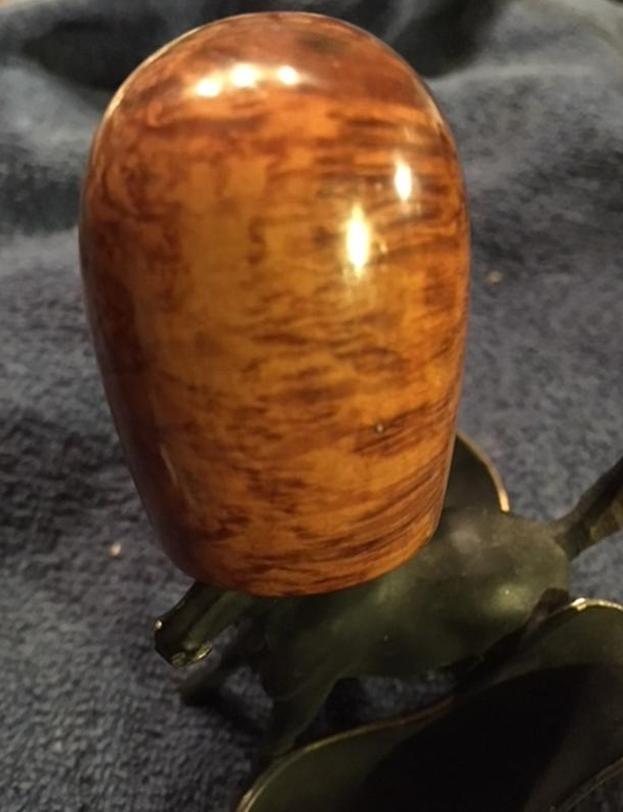
 I did not want to add stain to the oil finished bowl so I just rubbed the bowl down with Before & After Restoration Balm to deep clean the rustication on the briar. The rustication was well done and looked almost like a sandblast. I also rubbed it into the smooth portions on the band around the bowl, the rim top and the shank. The product works to clean, enliven and protect the briar. I hand rubbed it with my fingers to work it into the rustication. I wiped it off with a soft cloth. I buffed the bowl with a horsehair shoe brush to polish it. The briar really began to have a rich shine. I took some photos of the bowl at this point to mark the progress in the restoration.
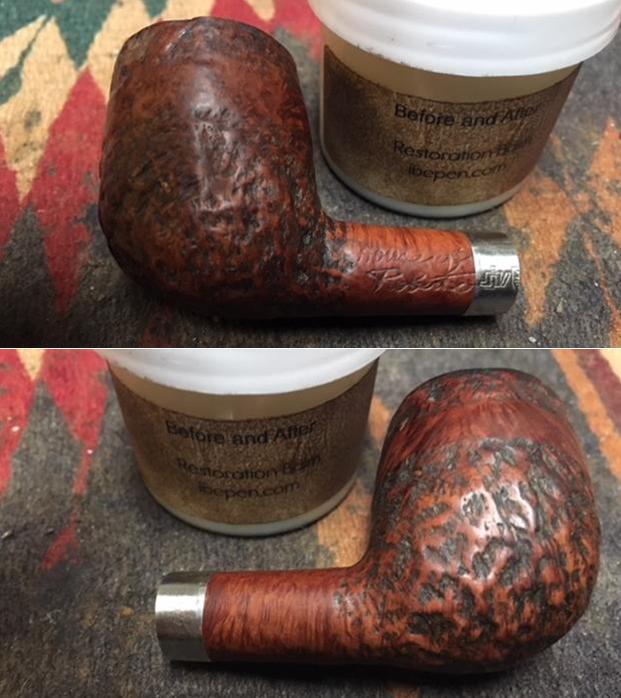
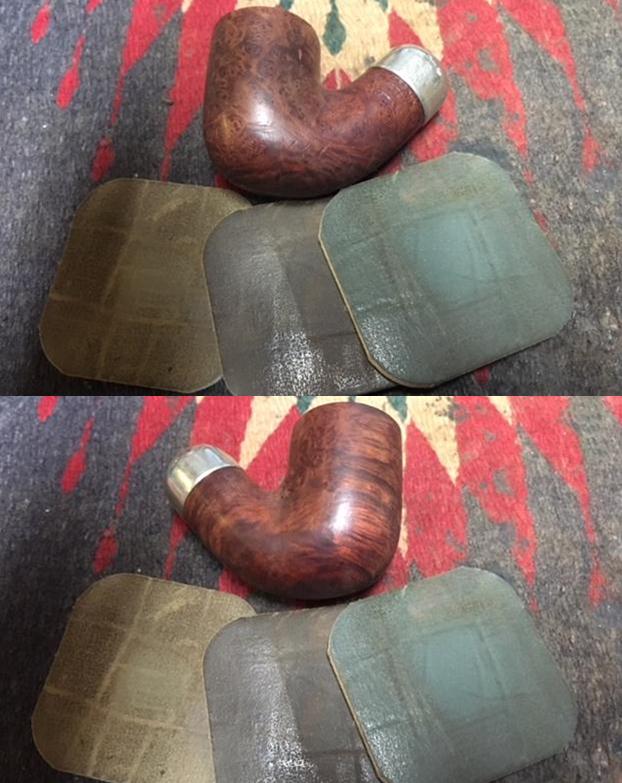
 I decided to polish the topped rim top once more using micromesh sanding pads as the balm revealed more scratches in the finish. I wet sanded it with 1500-2400 grit pads and dry sanded it with 3200-12000 grit pads. I wiped it down after each pad with a damp cloth.

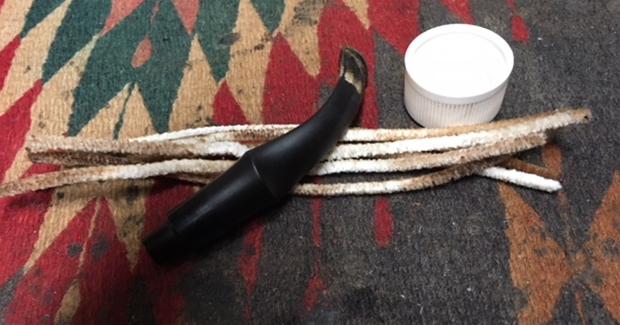
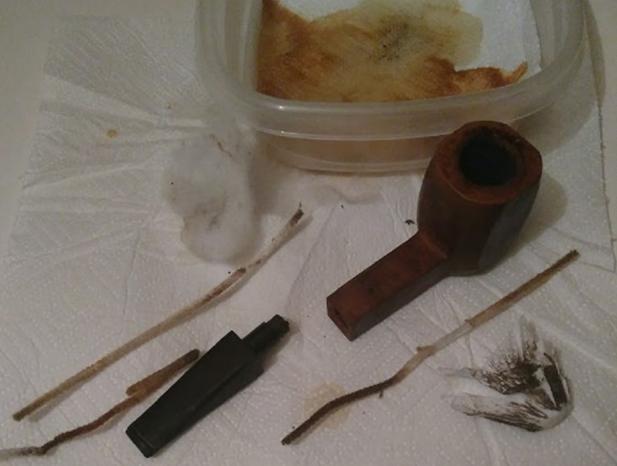
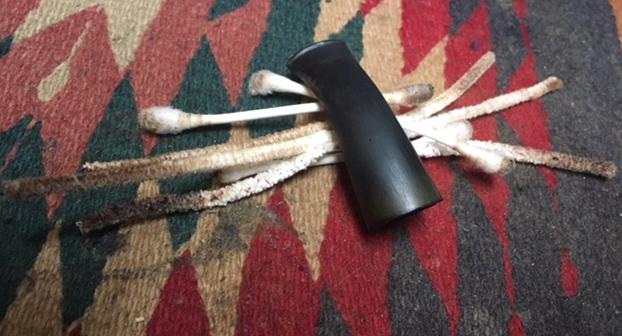
 I cleaned out the internals of the mortise and the airway in the shank and the stem with pipe cleaners, cotton swabs and alcohol. (I forgot to take photos of the stem after I cleaned it with alcohol and pipe cleaners).
 I mixed up a small batch of JB Weld to level the previous repair to the bottom of the bowl. I applied it to the uneven area with the end of a small sanding stick. I pressed it into the indentation and smoothed it out with the tip of my finger.
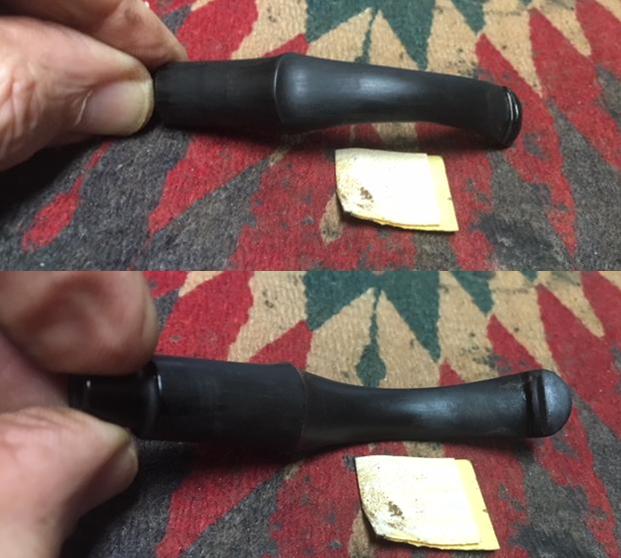
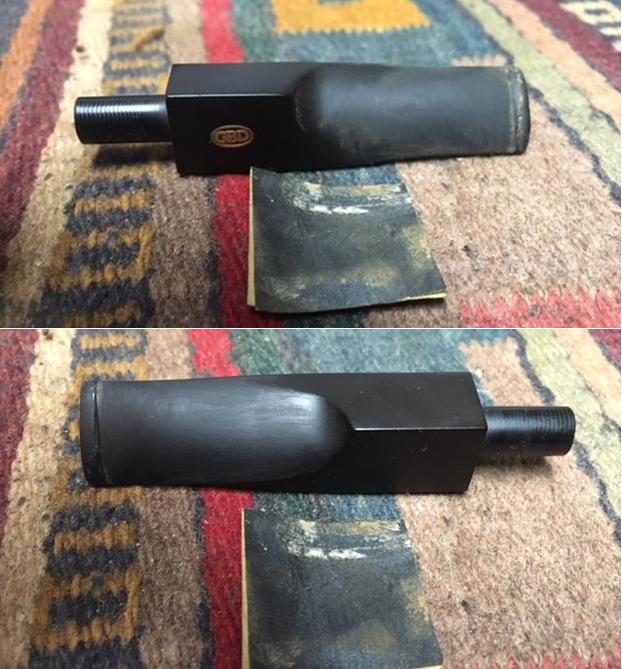
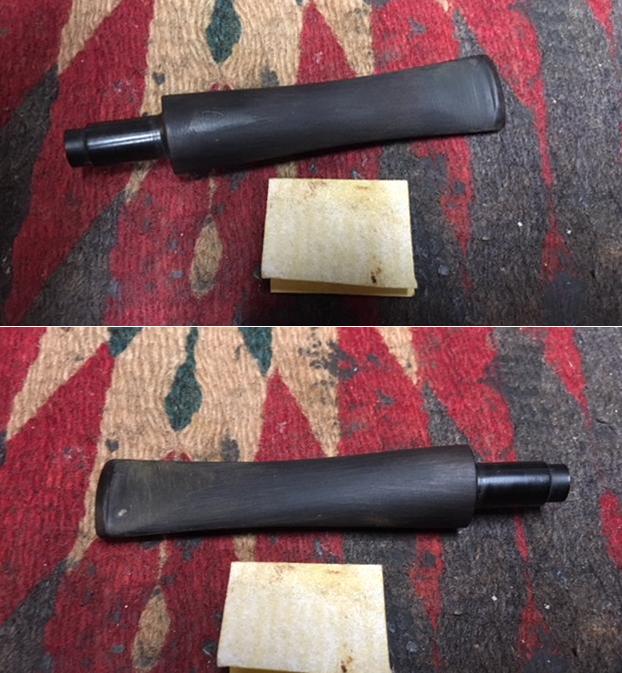
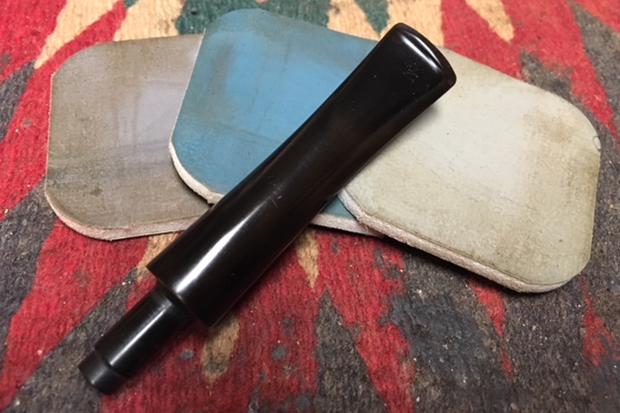
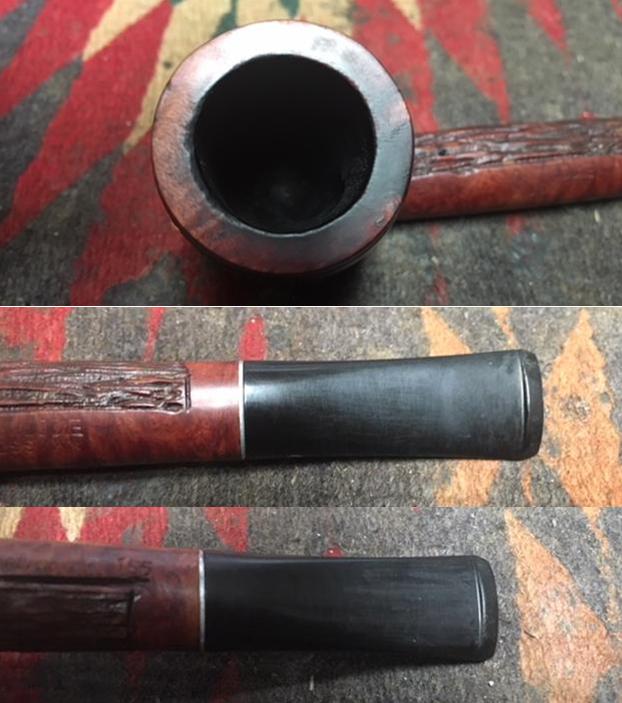
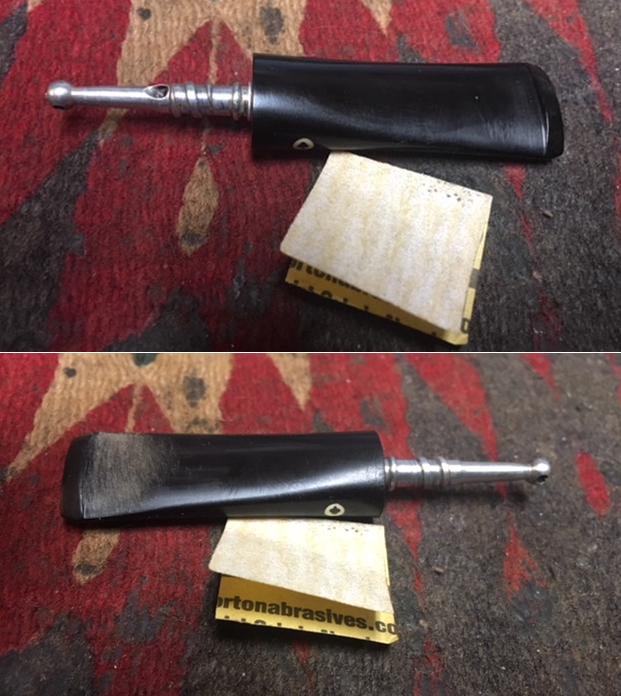
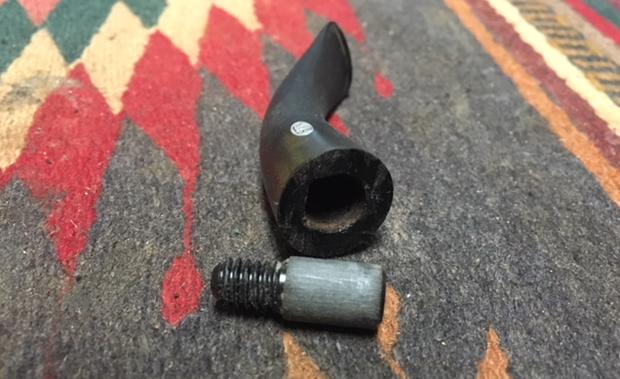
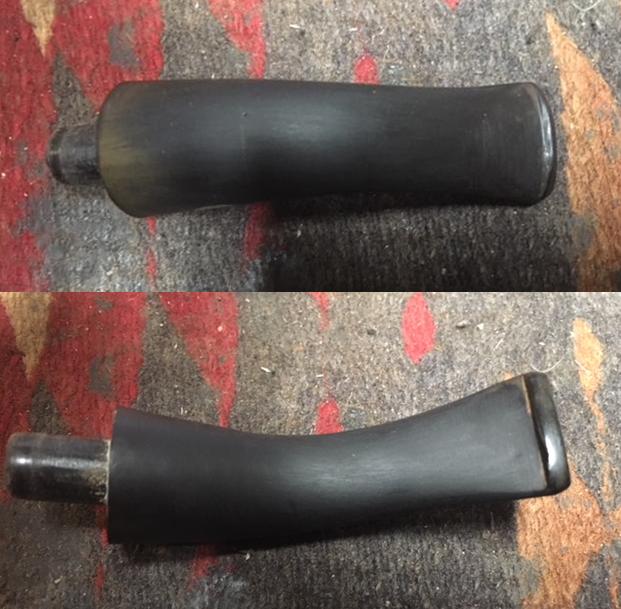
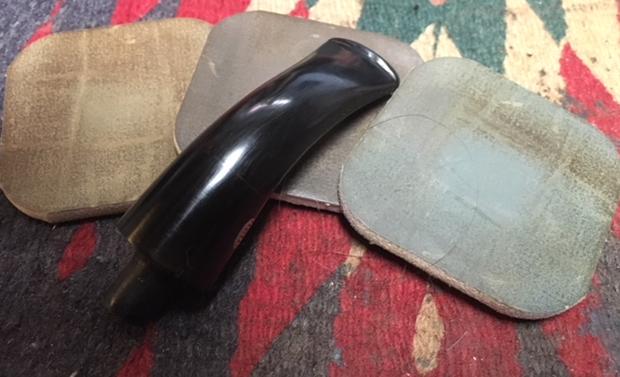
 I set the bowl aside and worked on the stem. I sanded out the tooth chatter, tooth marks and oxidation on the button end. I sanded the rest of the stem to remove the oxidation. The diameter of the stem was bigger than that of the shank so I sanded that at the same time to reduce it to the same size as the shank and reshape it at the junction.
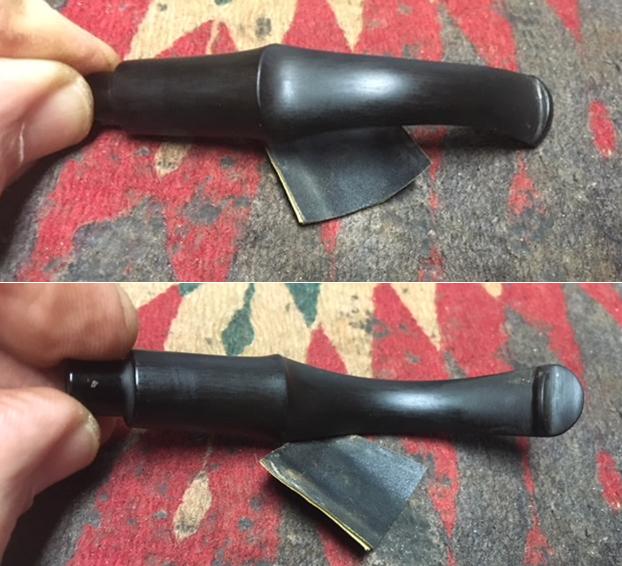
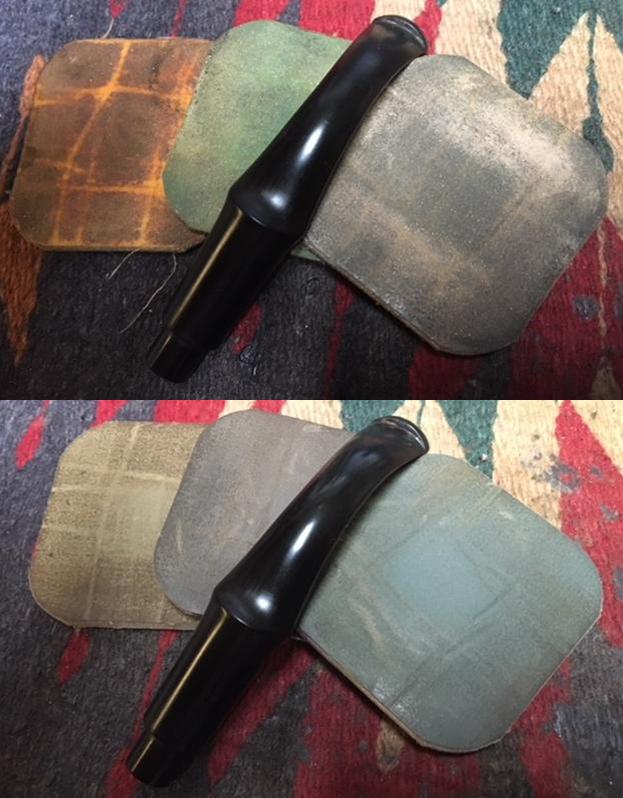
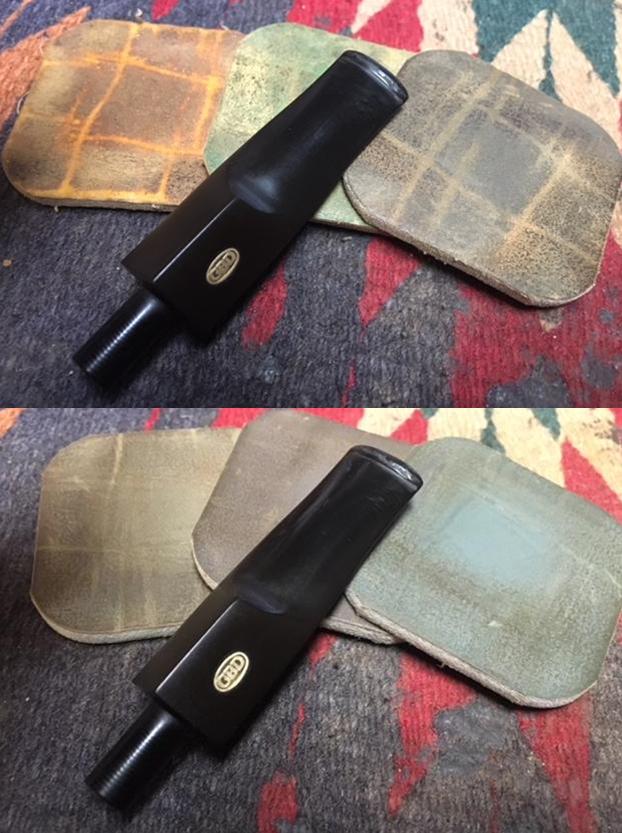
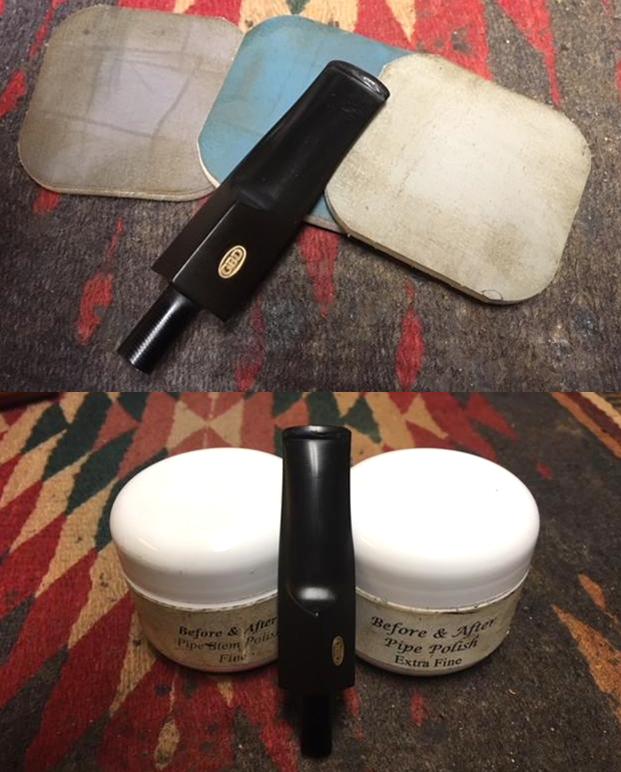
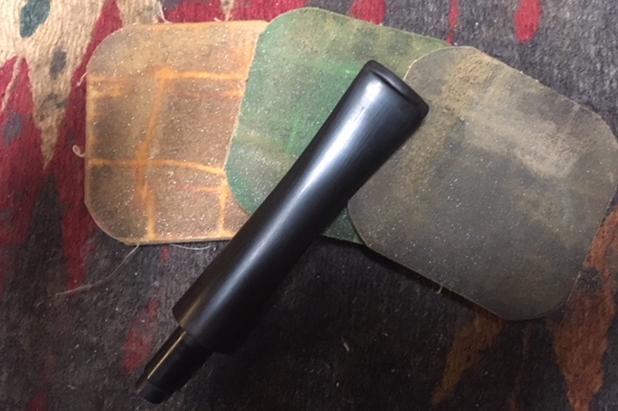
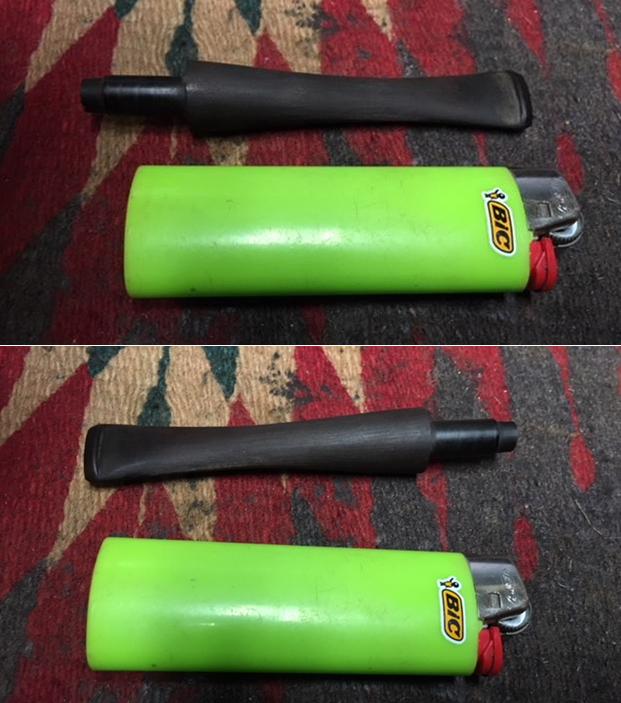
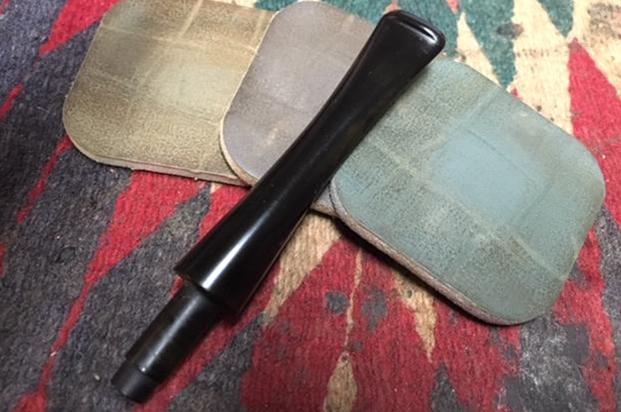
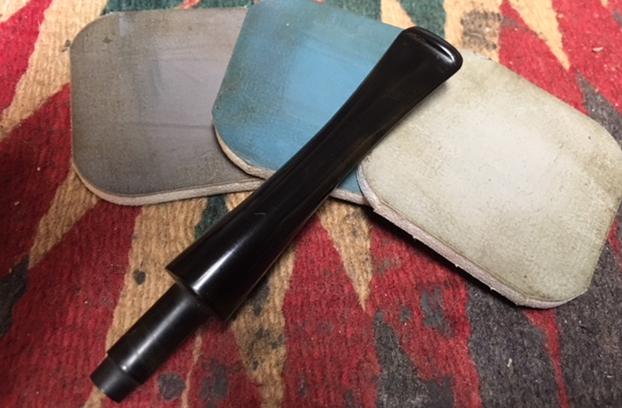
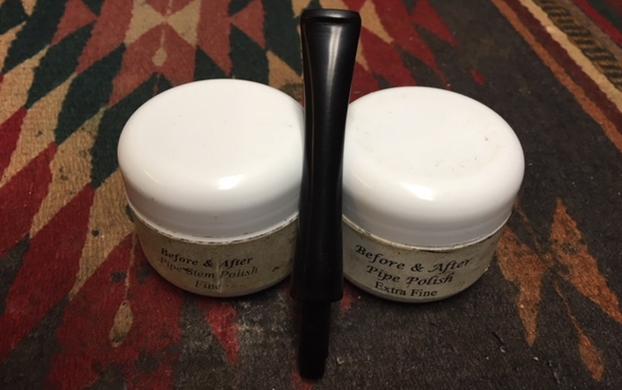
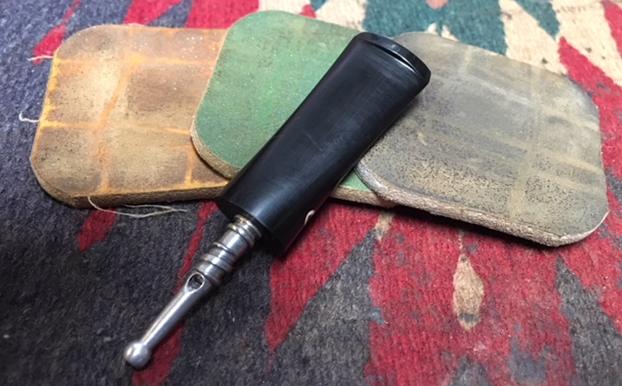
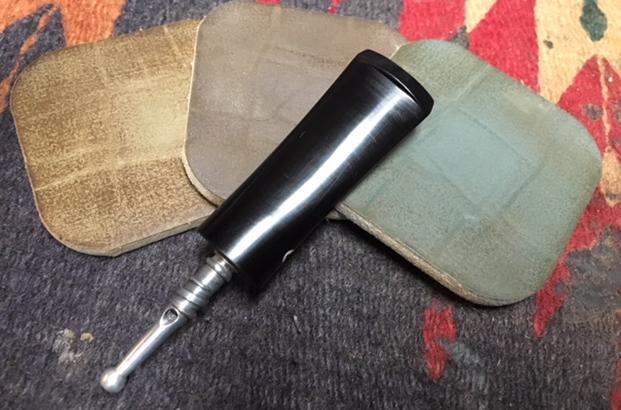
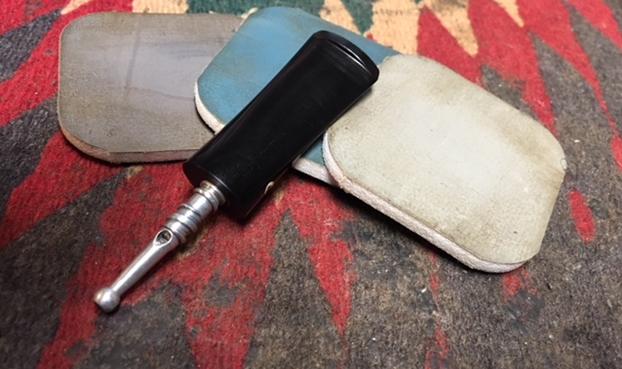
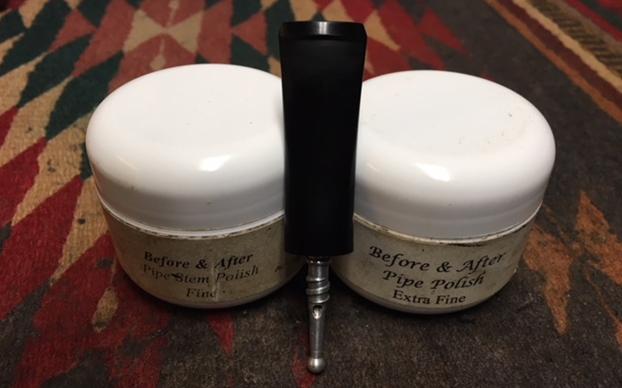
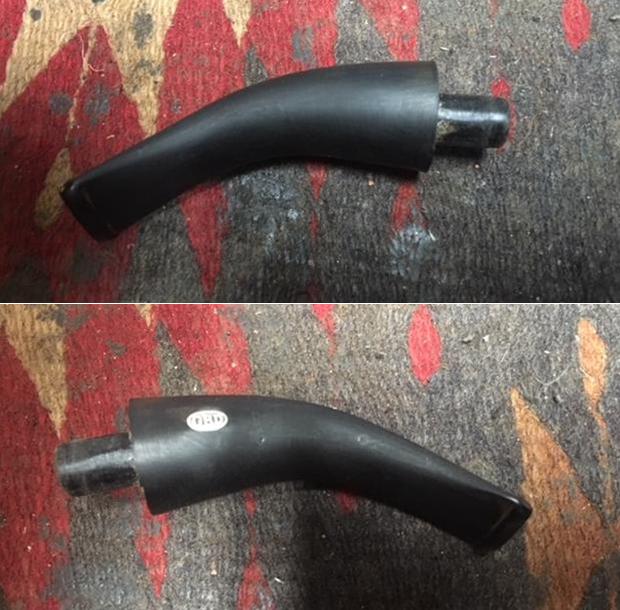
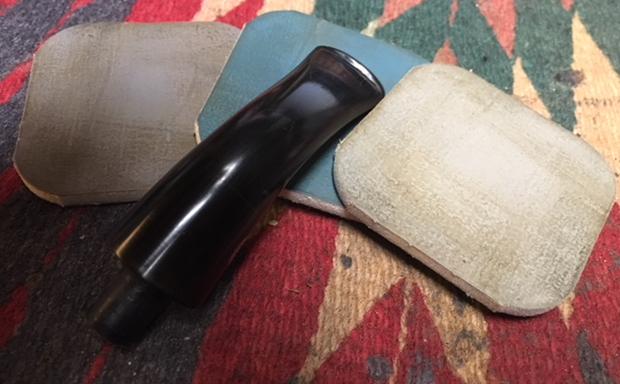
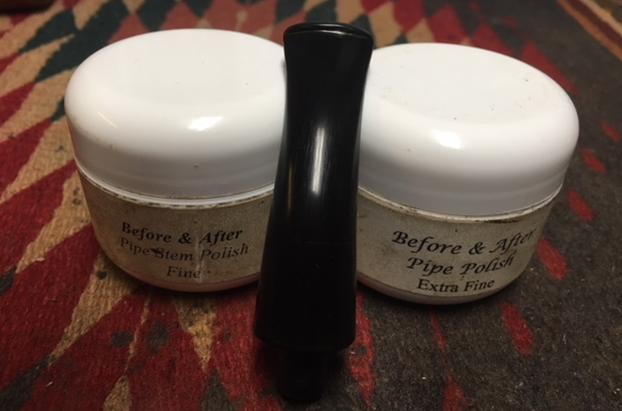
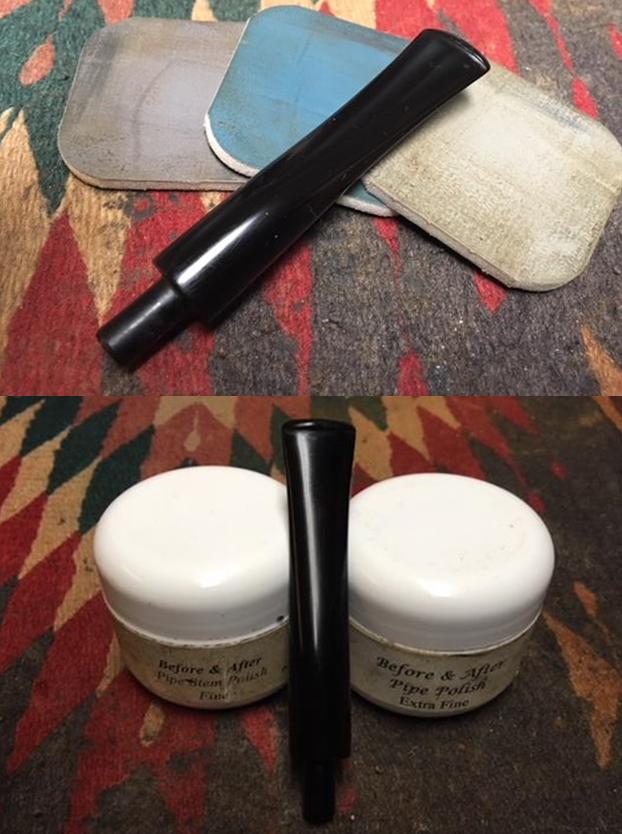
 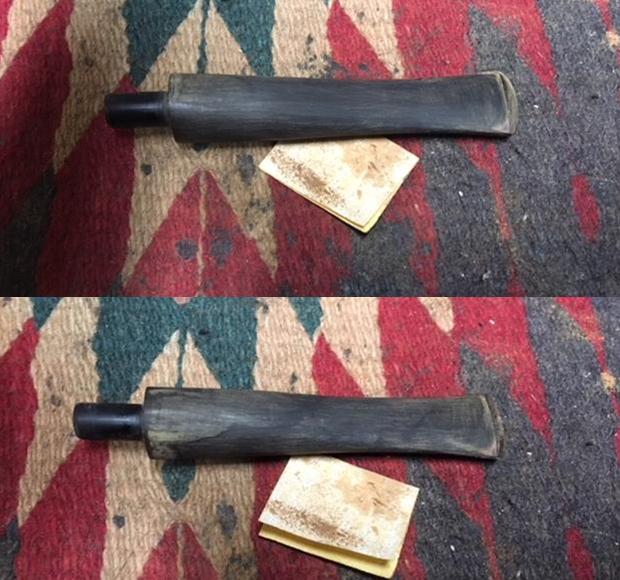 I polished the stem with micromesh sanding pads – wet sanding it with 1500-2400 grit pads to remove the scratching. I worked on it until the stem surface was smooth and the marks were less visible. I continued to polish it with 3200-12000 grit sanding pads. I wiped it down with Obsidian Oil after each sanding pad. I polished it with Before & After Pipe Stem Polish – both Fine and Extra Fine. I wiped it down a final time with Obsidian Oil.
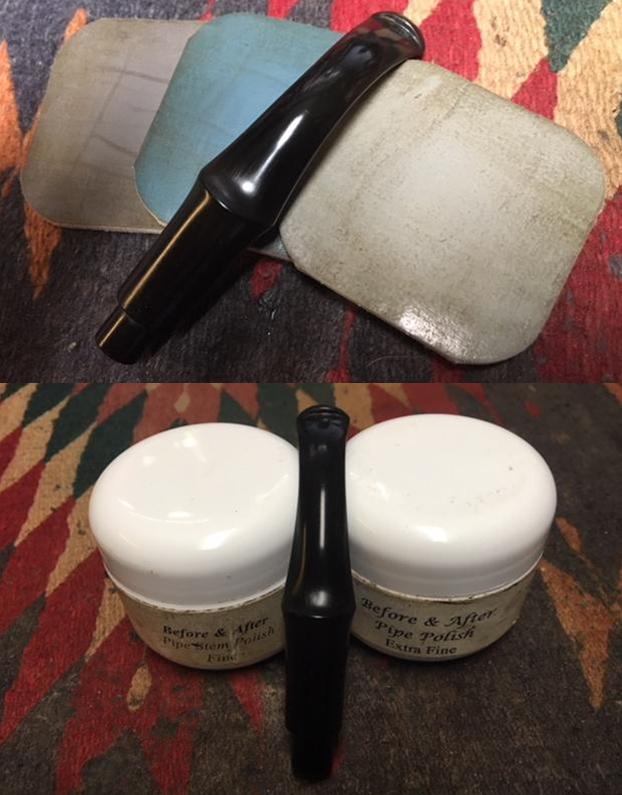
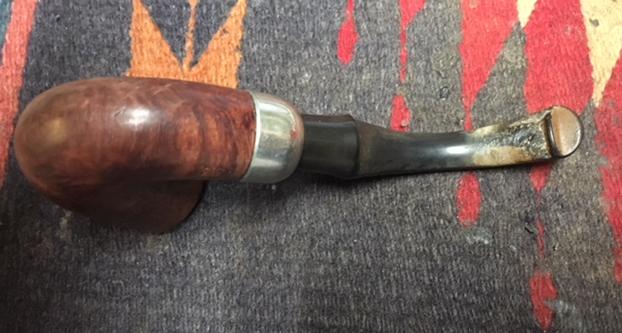
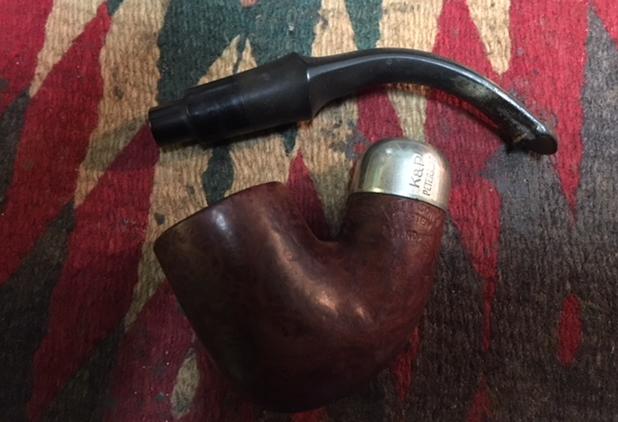
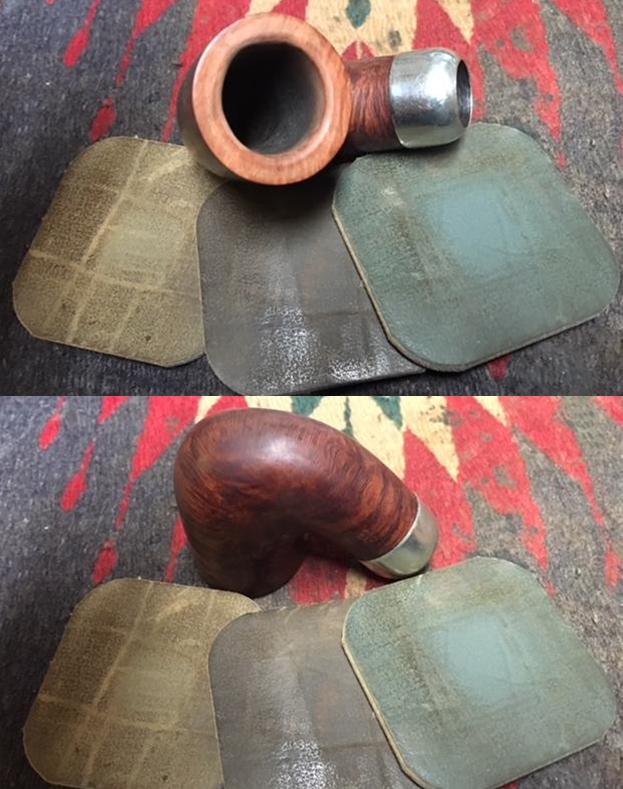
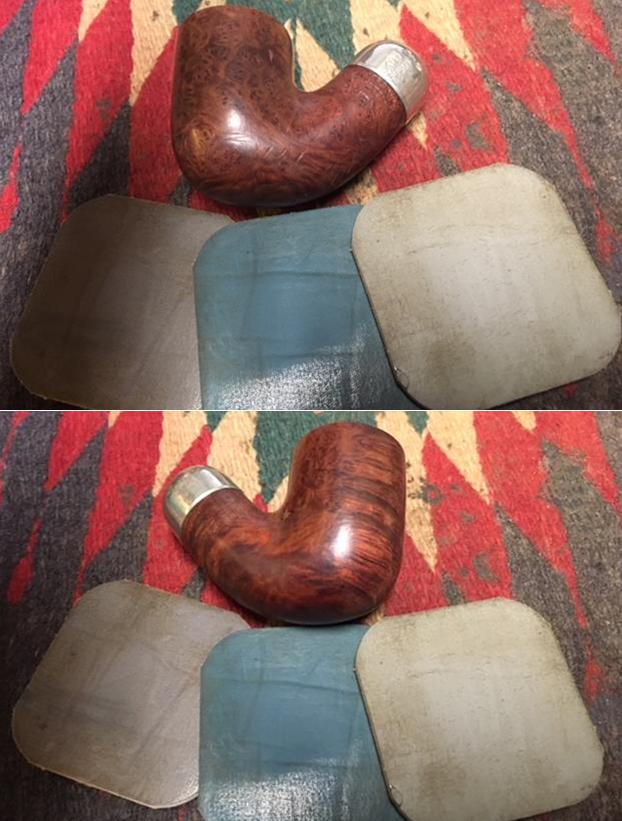
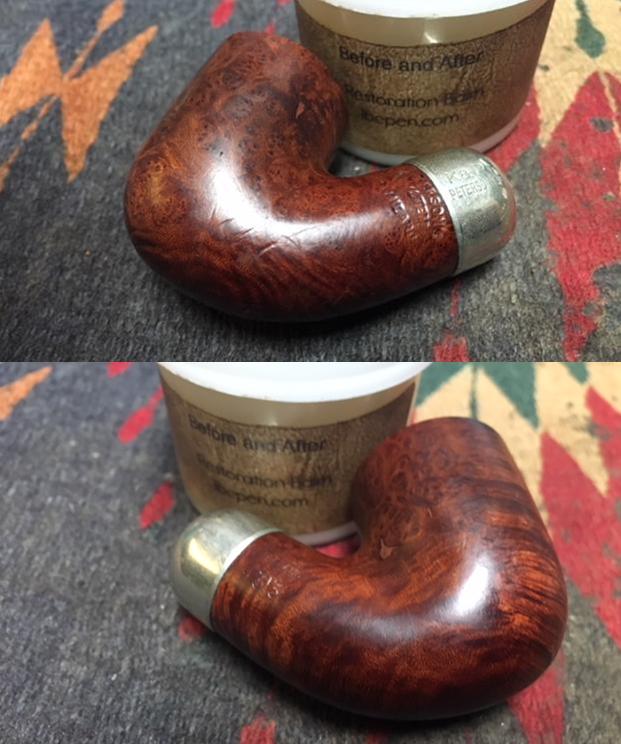
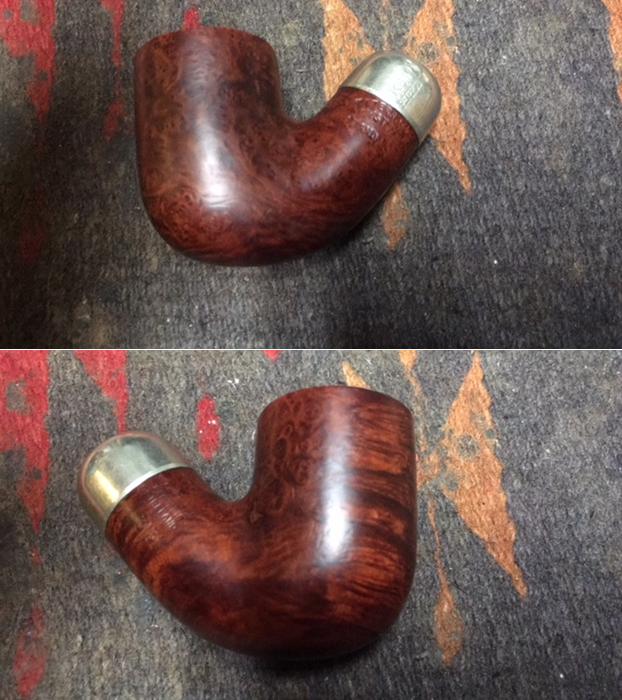
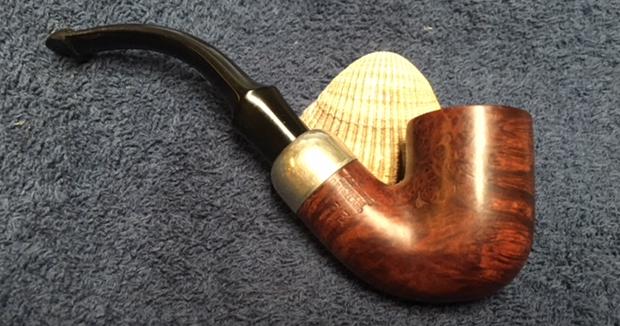
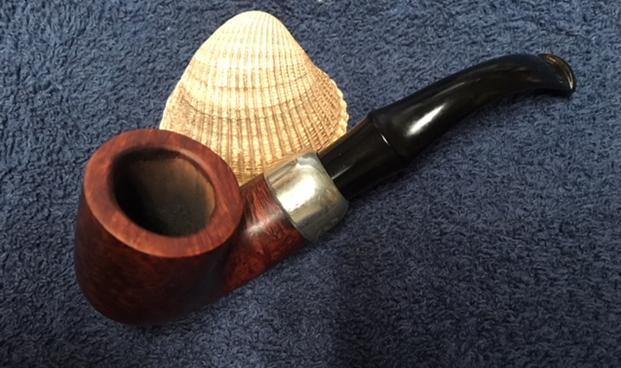
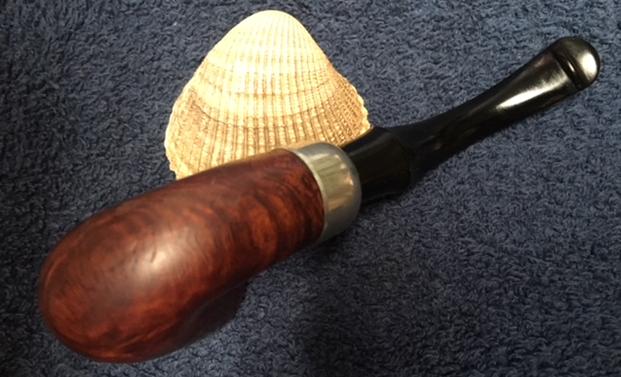
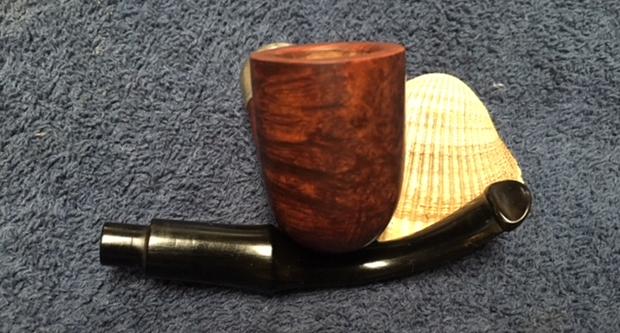
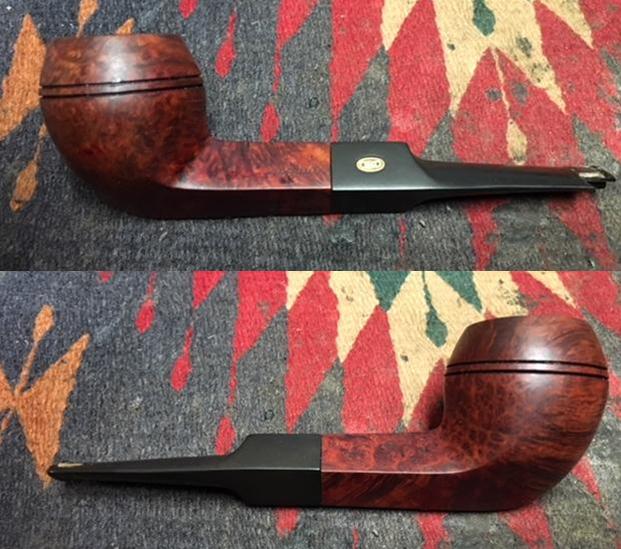
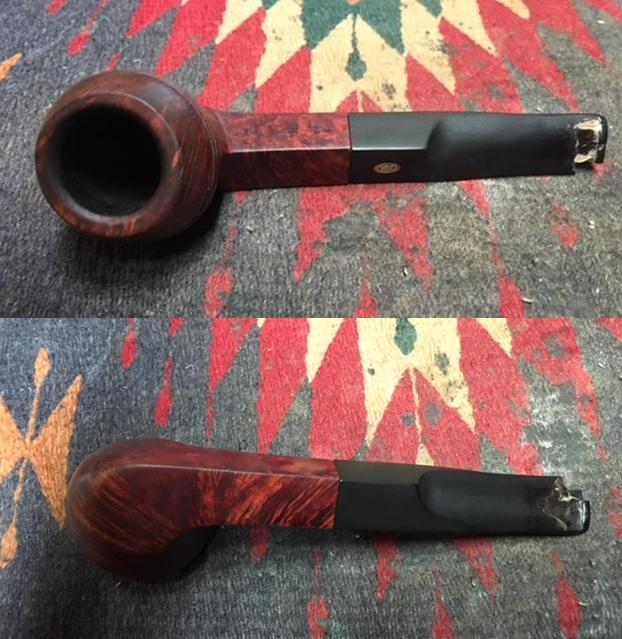
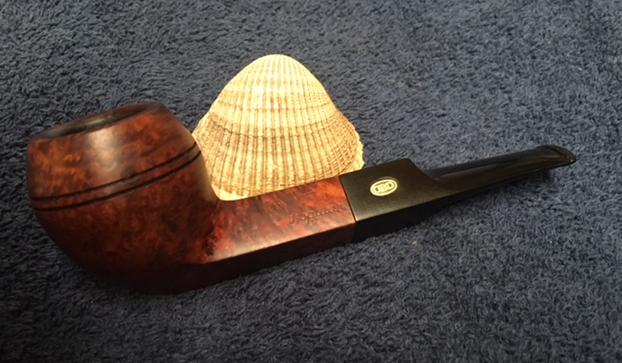
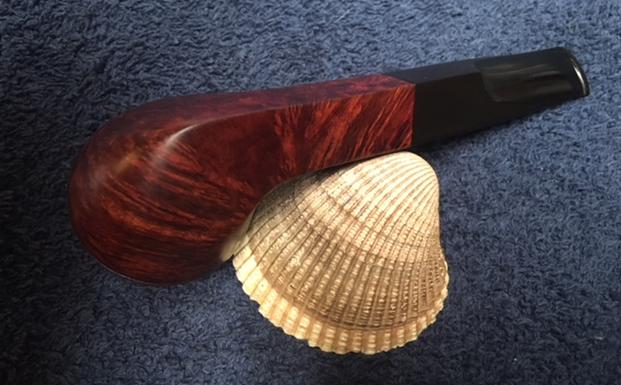
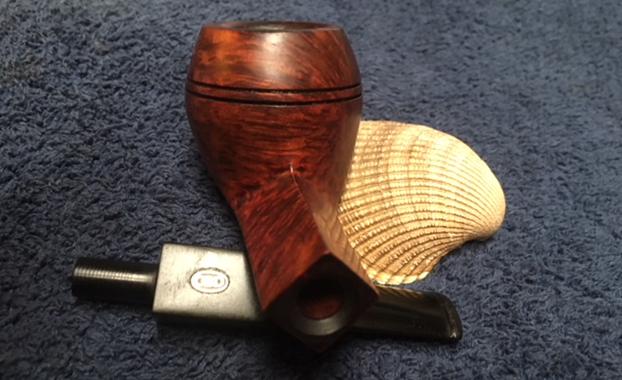
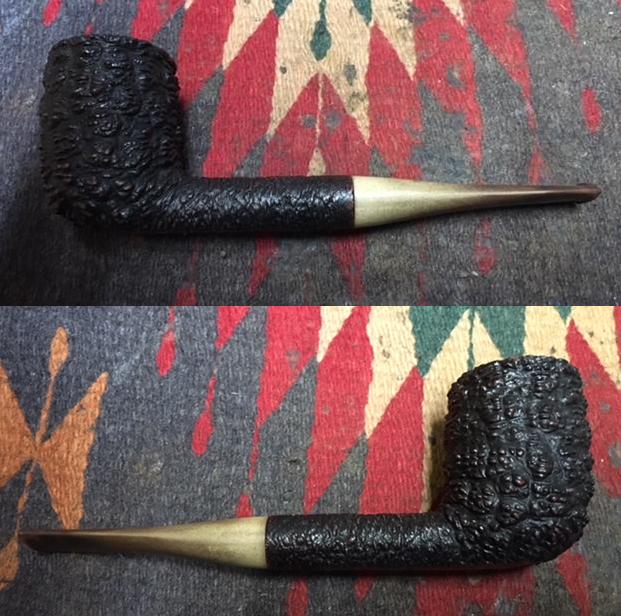
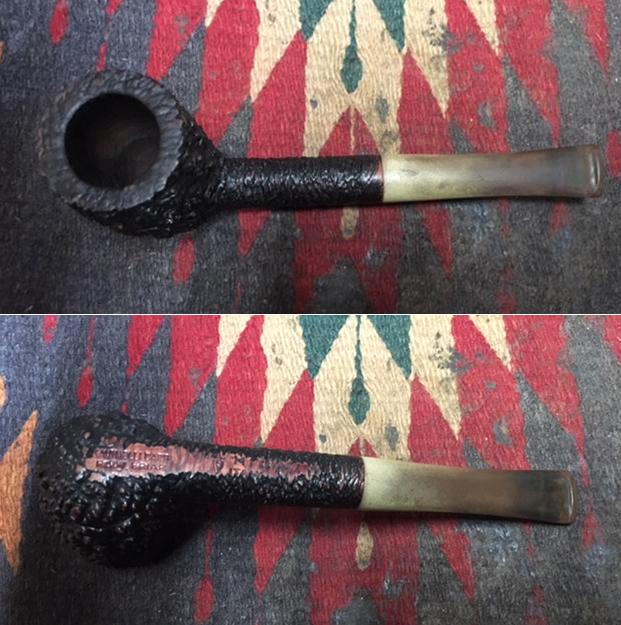
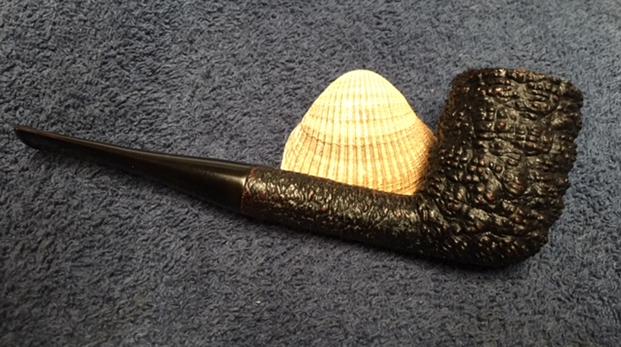
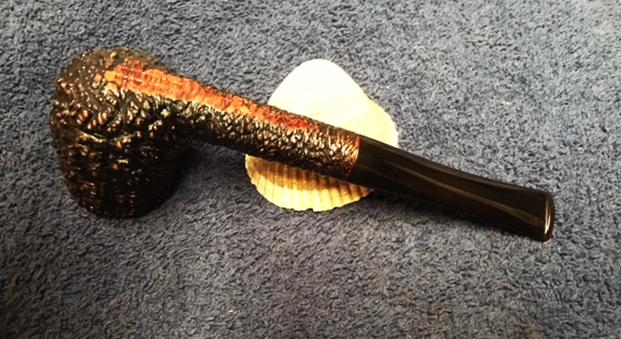
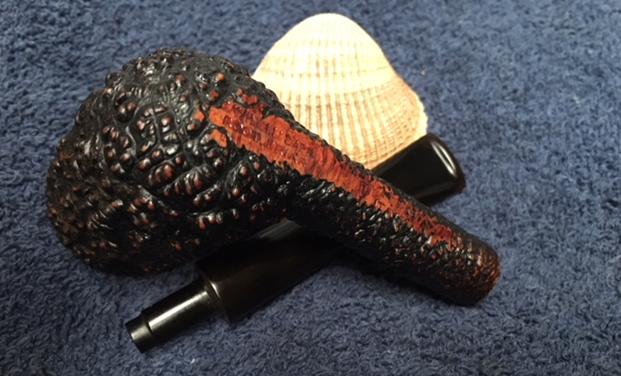
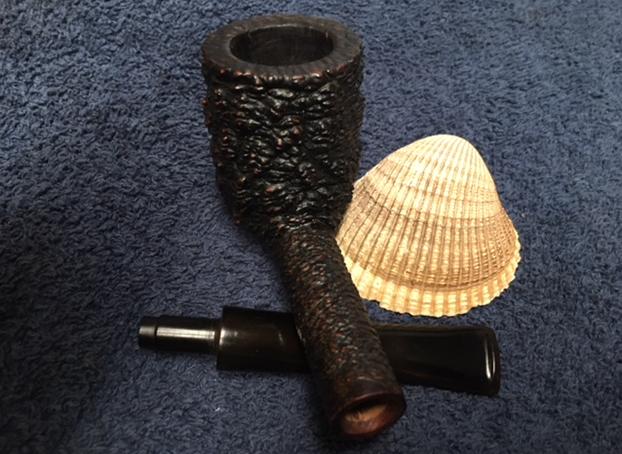
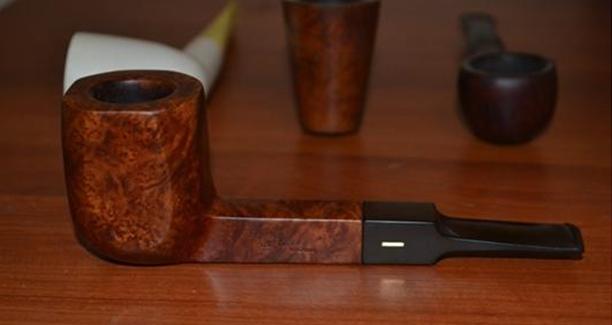
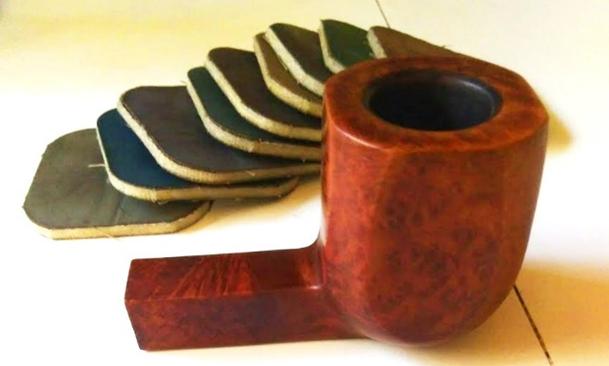
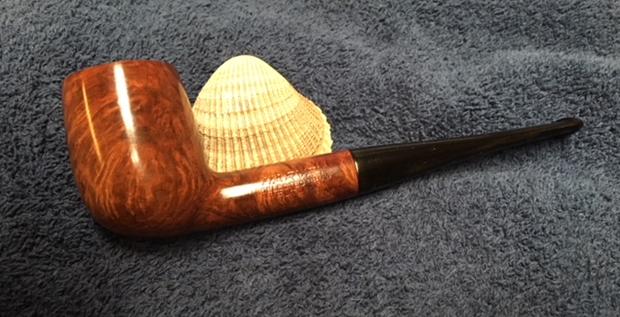
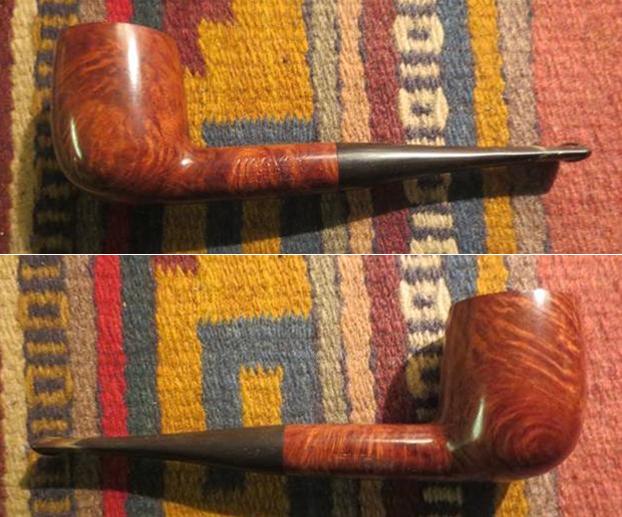
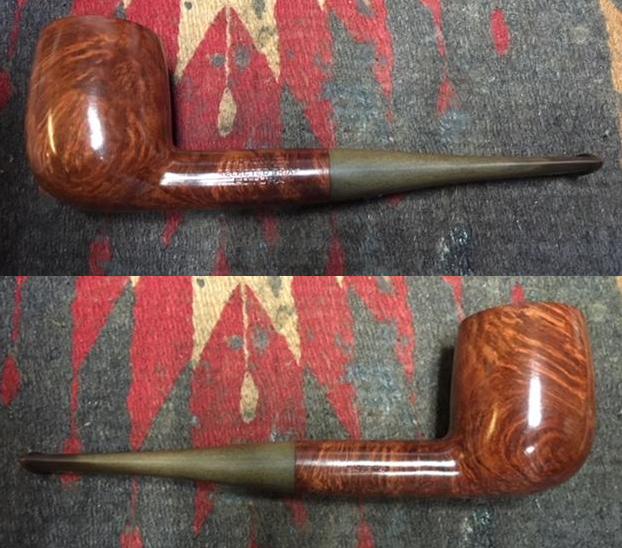
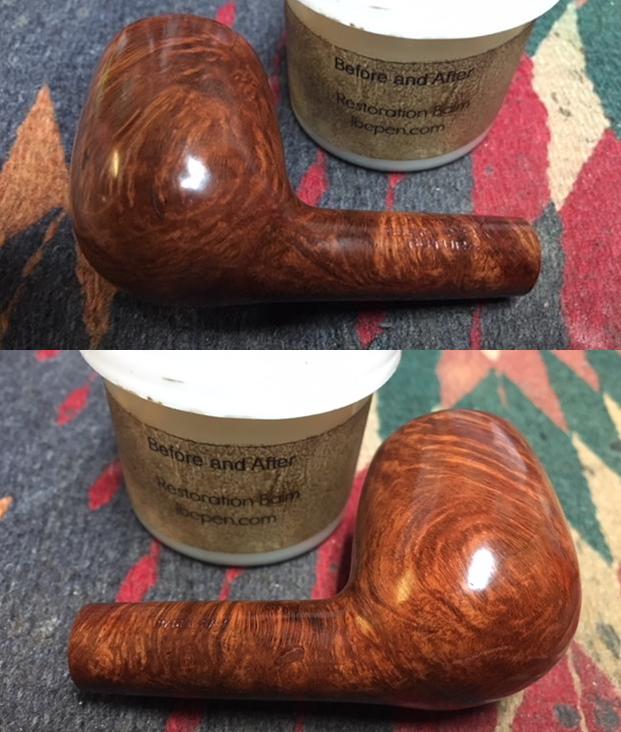
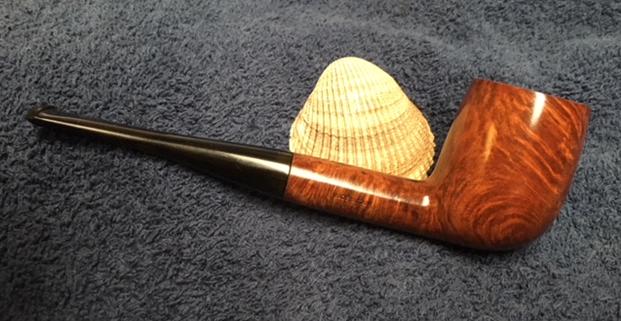
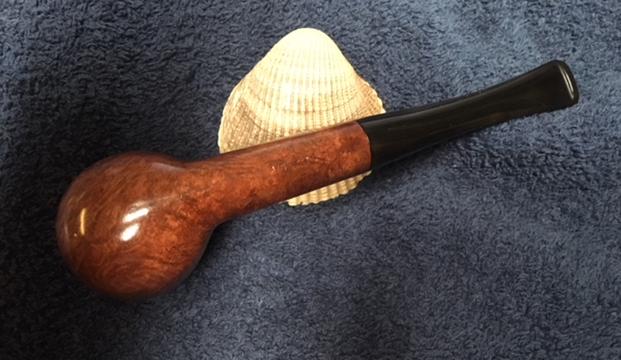
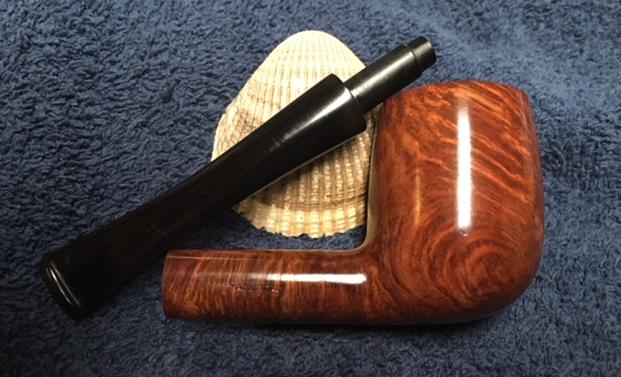
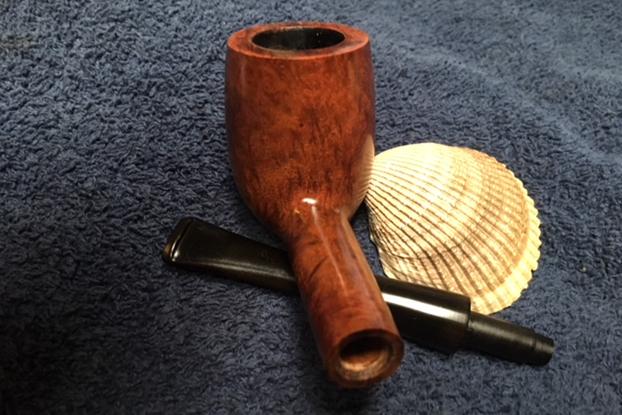
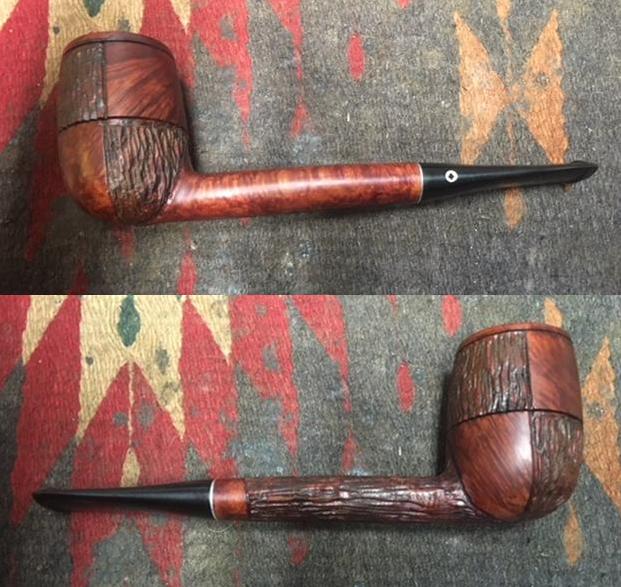
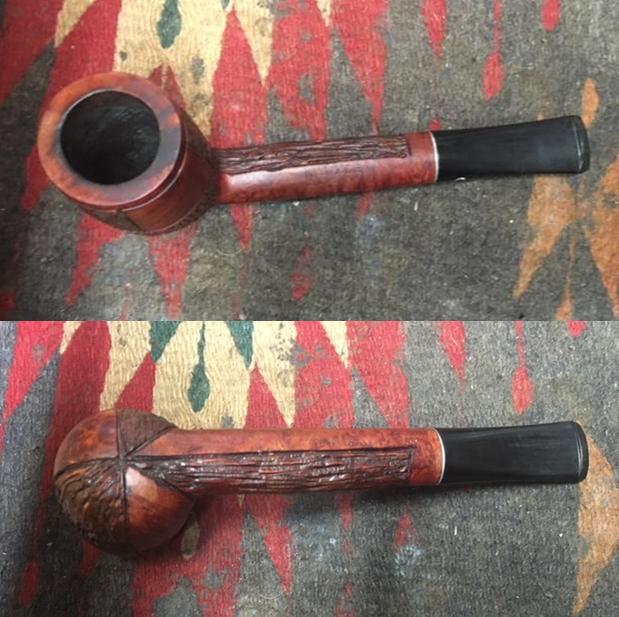
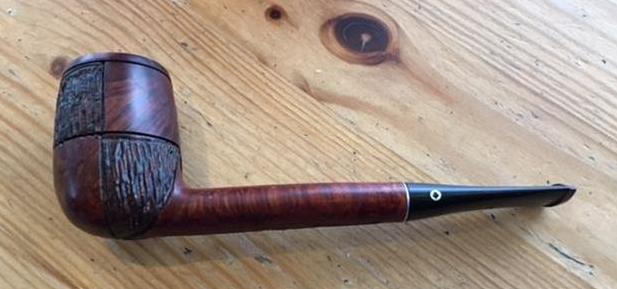
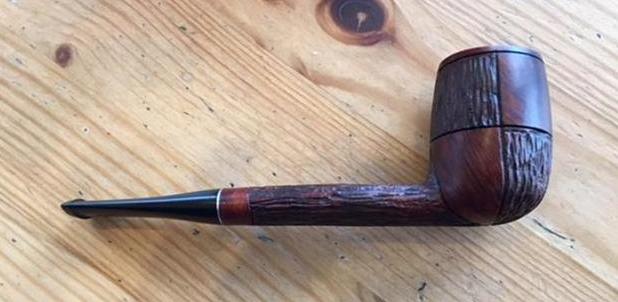
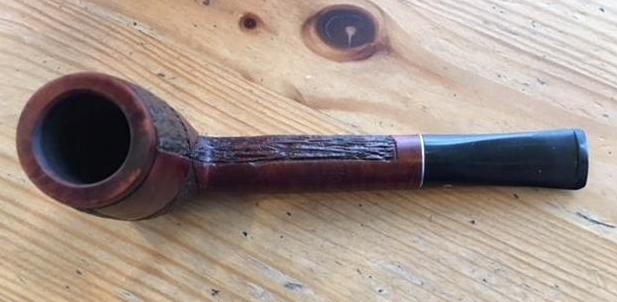
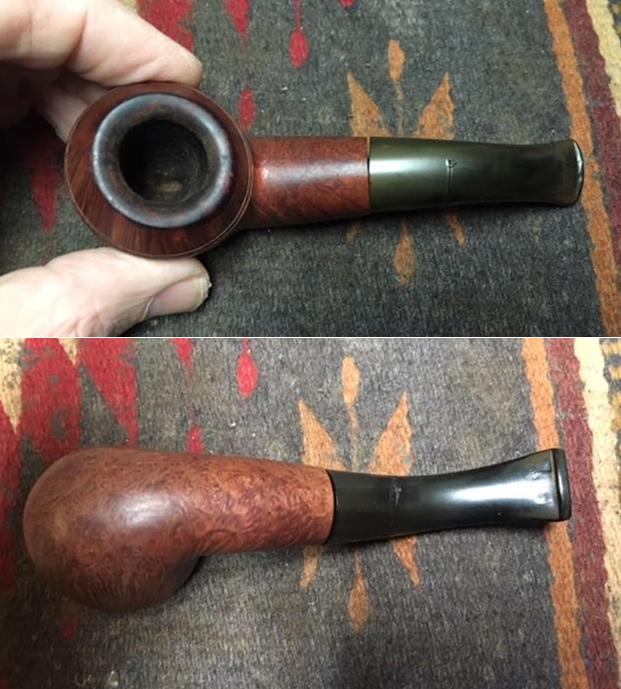
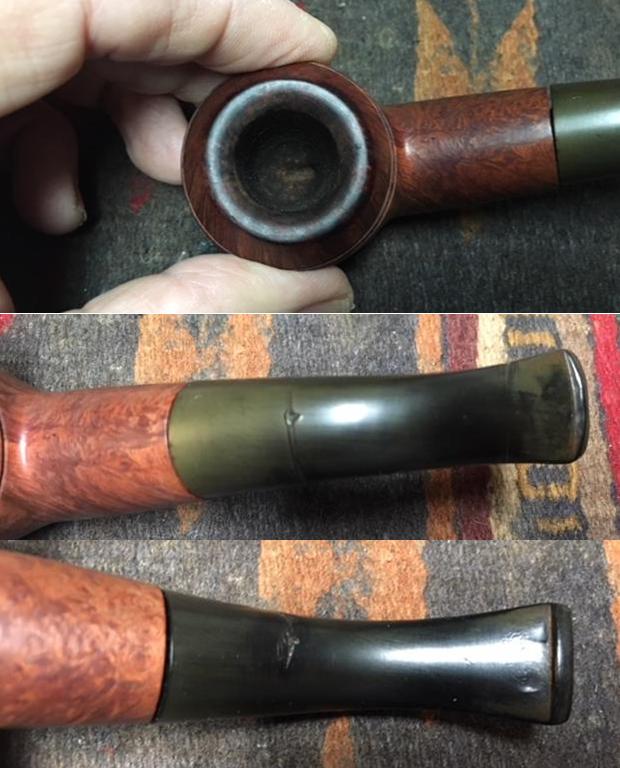
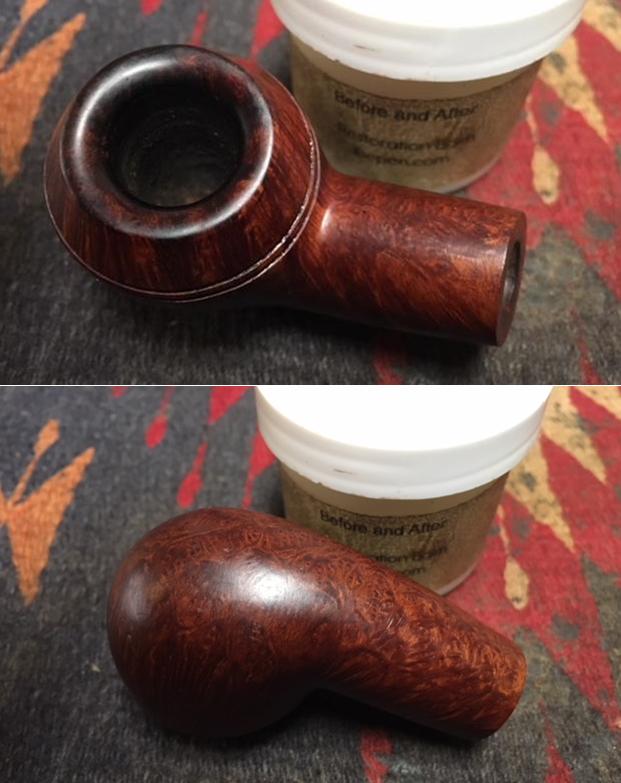
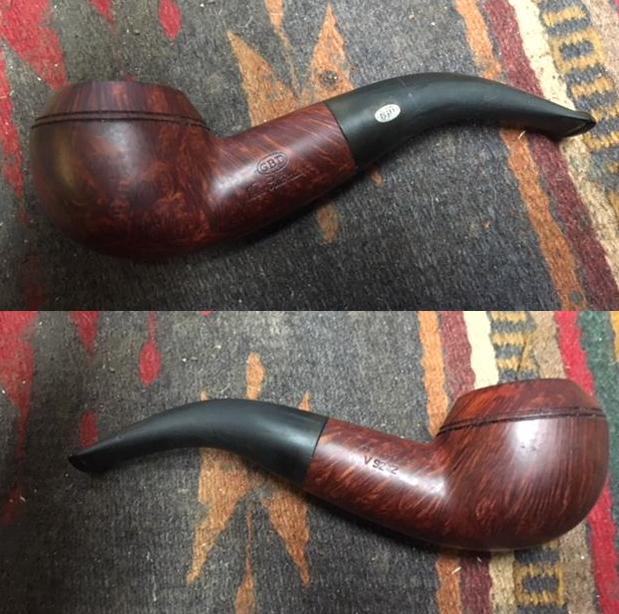
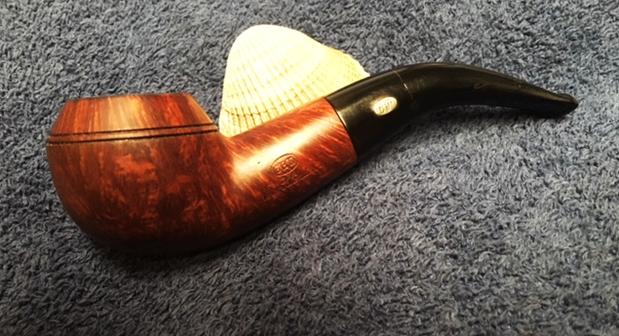
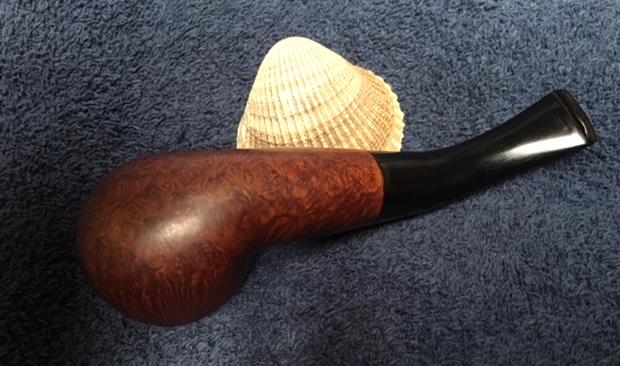
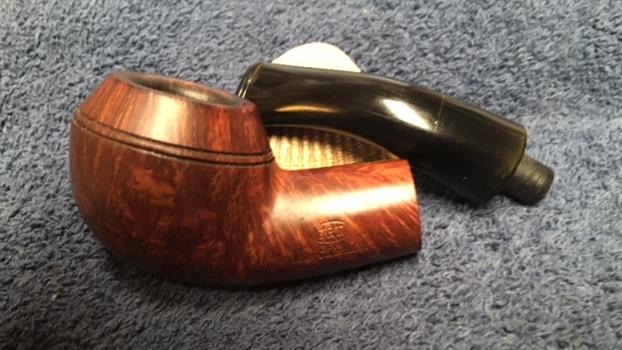
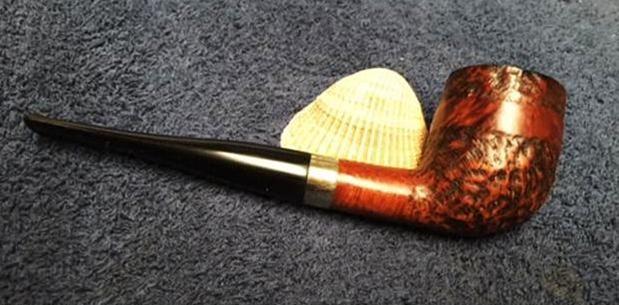
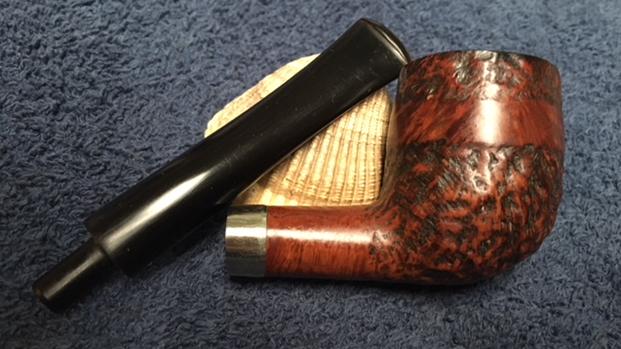
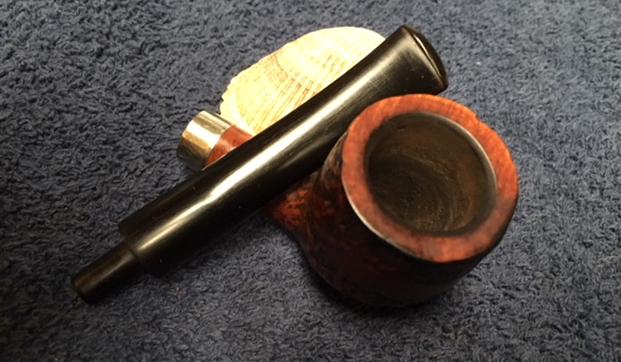
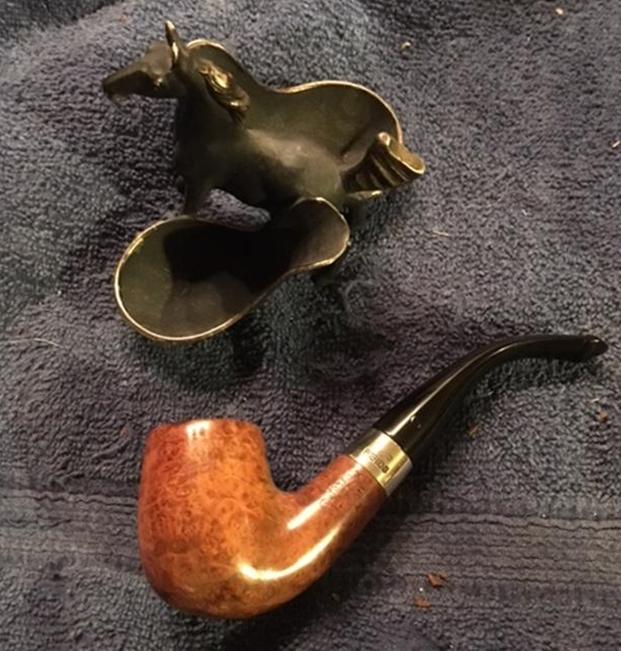
 I put the stem back on the bowl and worked the pipe over on the buffing wheel using Blue Diamond to lightly polish both the bowl and the stem. I buffed the bowl and stem to raise the gloss on the briar and the vulcanite. I gave the pipe multiple coats of carnauba wax. I buffed the entire pipe with a clean buffing pad to raise the shine. I hand buffed it with a microfiber cloth to deepen the shine. The finished pipe is shown in the photos below. I don’t think House of Robertson stained the pipes as they have the rich patina of an oil finish. If it had a stain coat it was a tan stain that went well with the rich black of the vulcanite stem. The dimensions of the pipe are: Length: 5 1/2 inches, Height: 1 3/4 inches, Outside Diameter: 1 3/8 inches, Diameter of the chamber: 7/8 inches. This is an interesting piece of briar that shows a mixture of grain on the smooth portions. I really like HOR pipe work the rustication and smooth parts together in unique ways. Once the repair in the bowl cures I will mail it back to John. I know he is looking forward to enjoying it again. Thanks for walking with me through the restoration.
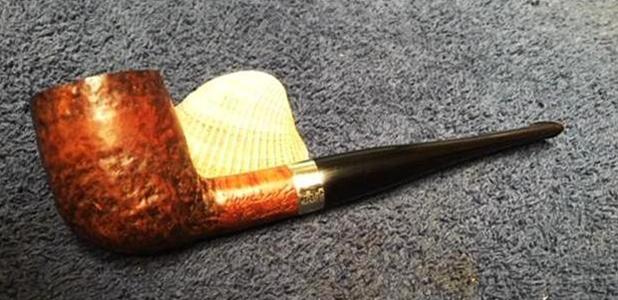

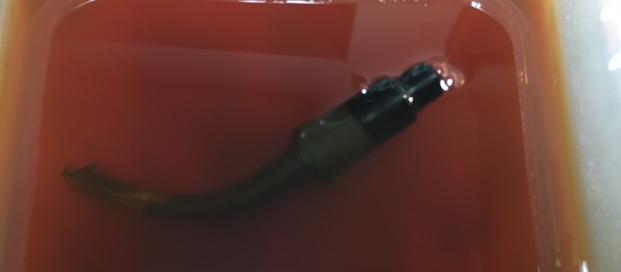
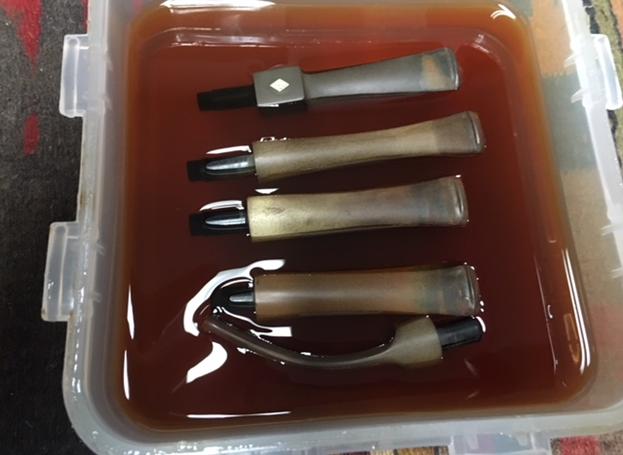
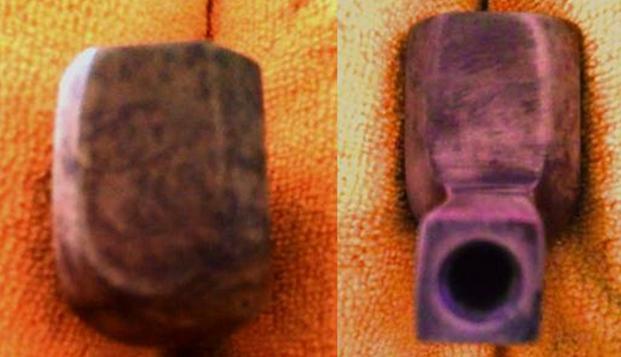
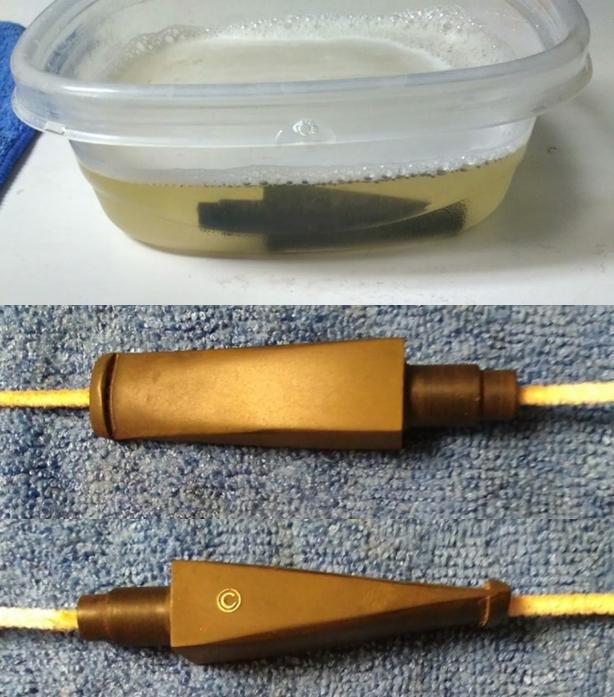
 This was an eruption of lava. My stomach sank. My first thought, with this much lava covering the bowl, the pipe must have been smoked hard and the inner bowl would be destroyed. Between the condition of the bowl and stem I figured the first step was to soak both the stem and the bowl. I removed the nickel band and placed the bowl to soak in isopropyl alcohol. The stem actually had so much calcium buildup on it I figured it would take an evening of sanding and rebuilding just to save the stem. While the bowl soaked I mixed up an Oxy clean bath and soaked the stem.
 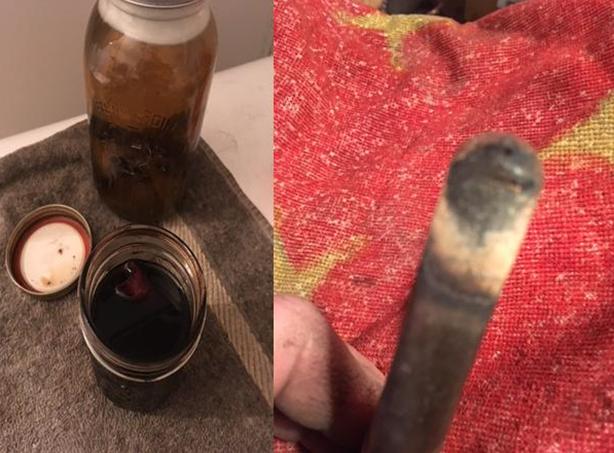 When I pulled the bowl out of the isopropyl alcohol I took it to the sink and using 0000 steel wool I scrubbed the bowl attempting to remove the softened lava. Some came off. I then removed the stem from its bath and took it to the sink as well. I used a pot scrubber to remover the buildup on the stem and then using hot water and a sank brush I managed to clean the stem to the point that a pipe cleaner could pass through it. Not to speak ill of a fellow pipe smoker but I couldn’t smoke a pipe in this condition.
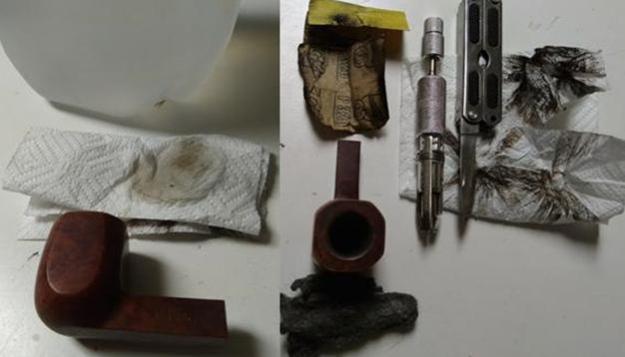
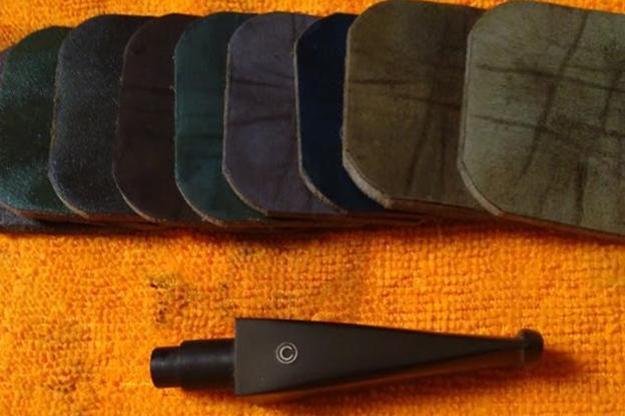
 Next, I decide to gently scrape the bowl using the back side of my pipe knife. I didn’t want to gouge the bowl, so I went at it slowly and took a few breaks during the process. Once I had removed all traces of the lava it was on to sanding. Using micro mesh pads, I started with 1500 and progressed to 12000.
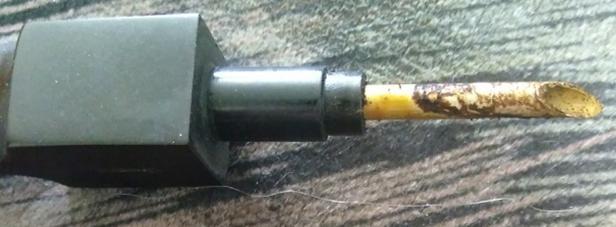
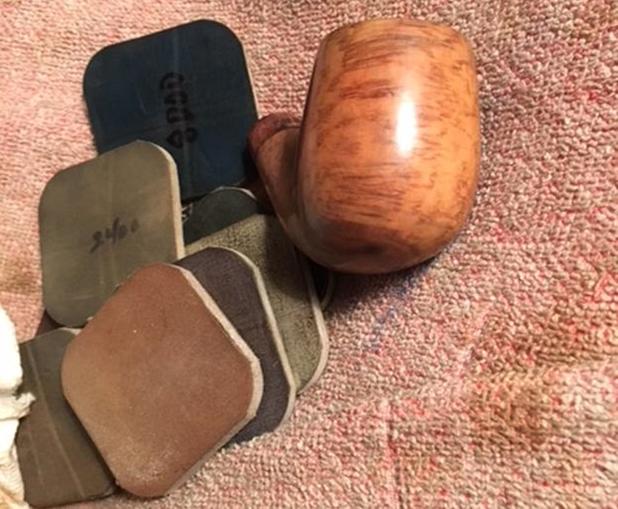 Now that there was some light at the end of the tunnel, there was still the inner bowl and the stem to deal with. As I said before. I’m not sure how someone smoked this pipe. The stem was plugged. The draft hole was plugged. There was still tobacco flakes still in the bowl.
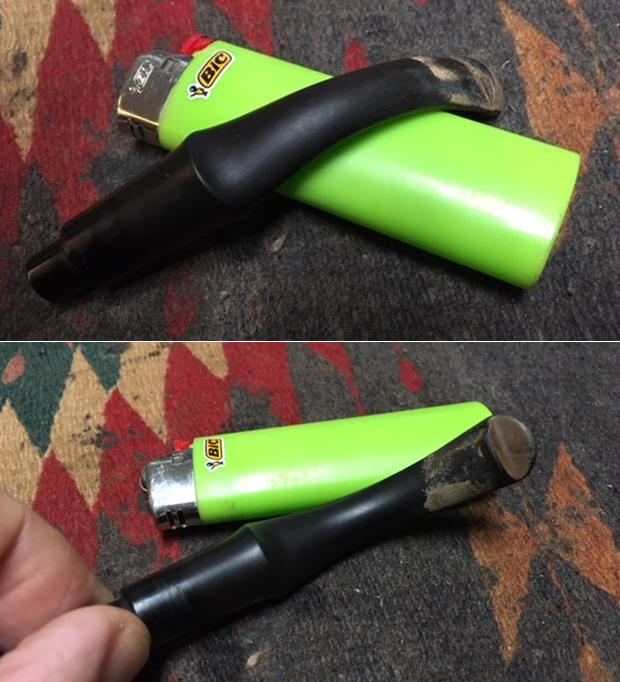
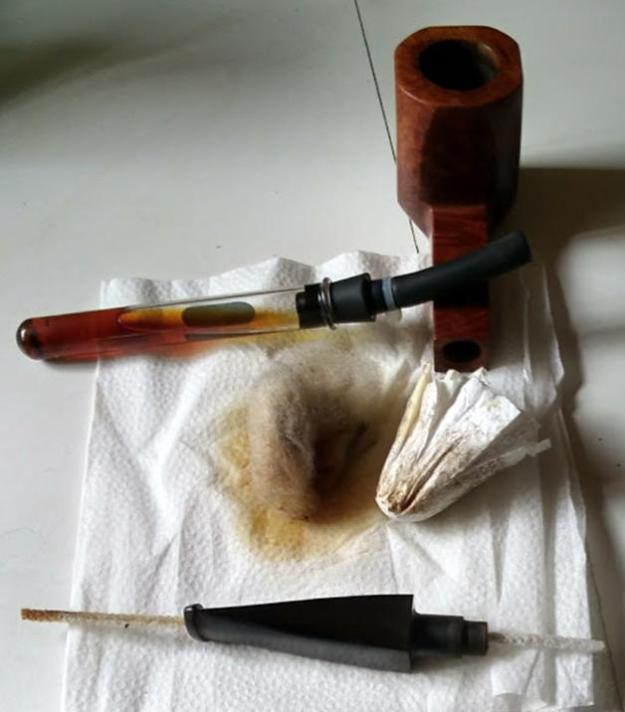
 After finishing with the retort, I flamed the bowl to remove any excess alcohol.
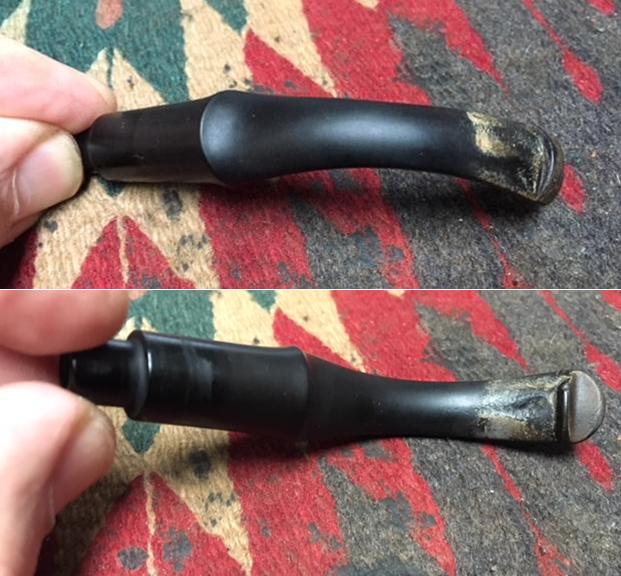
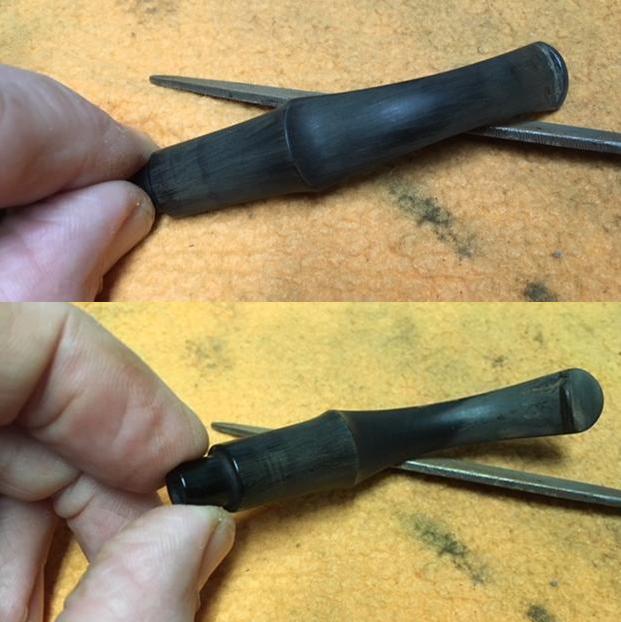
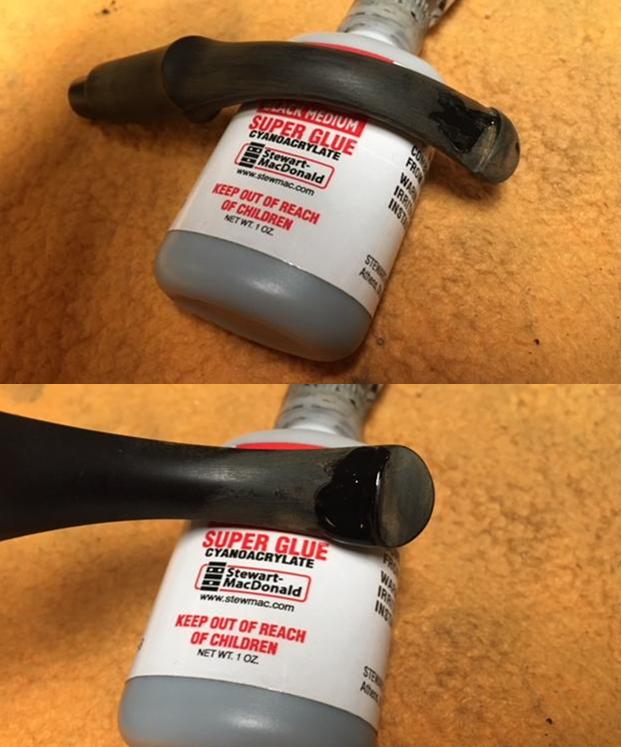
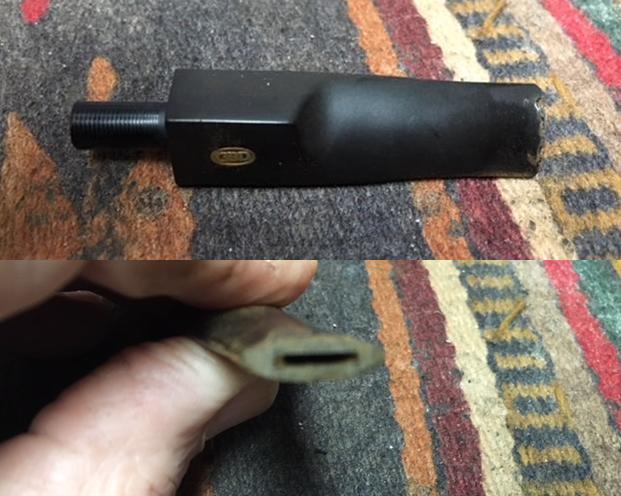
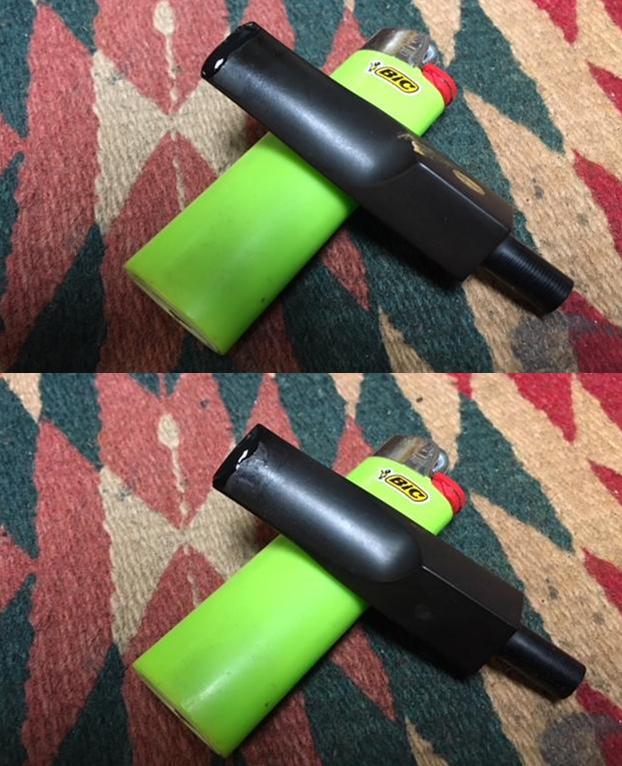
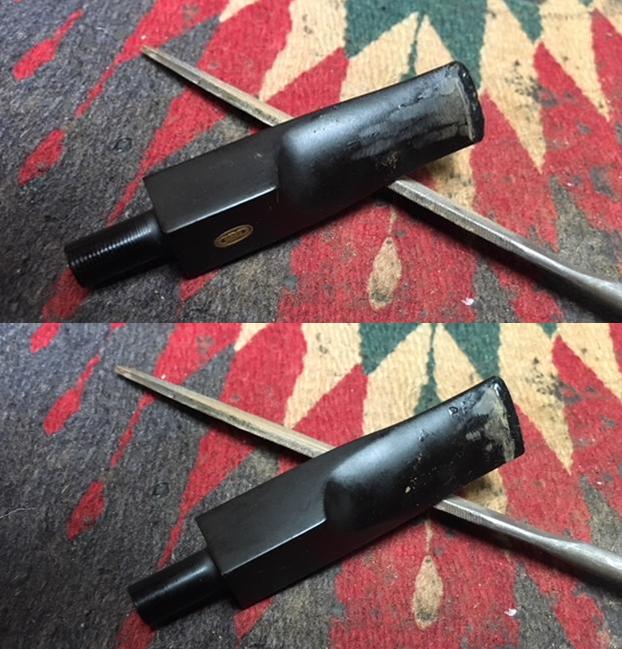
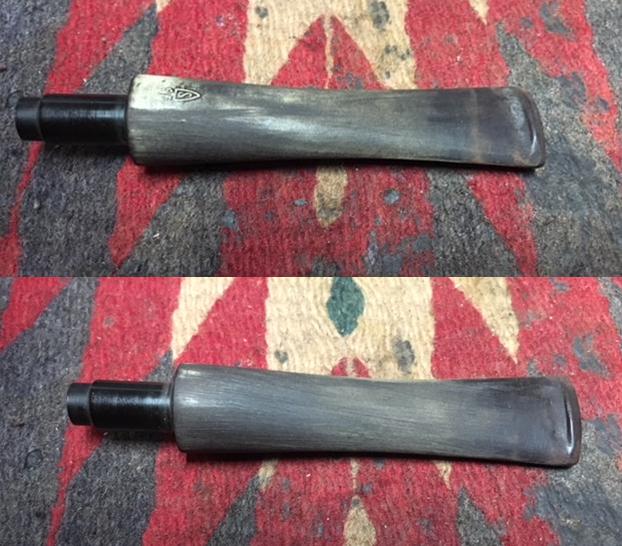
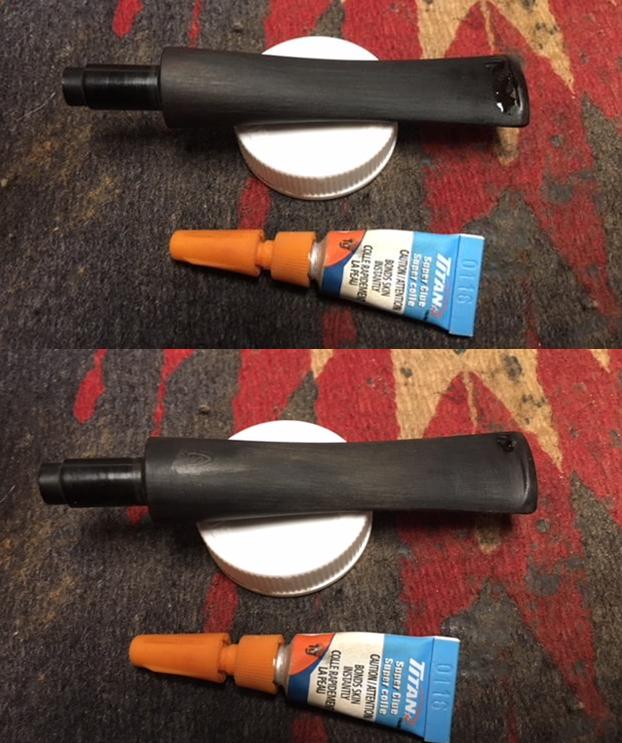
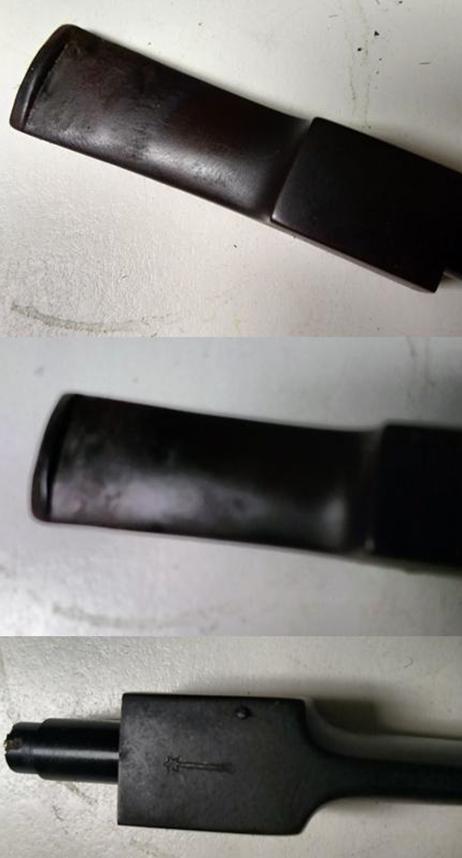
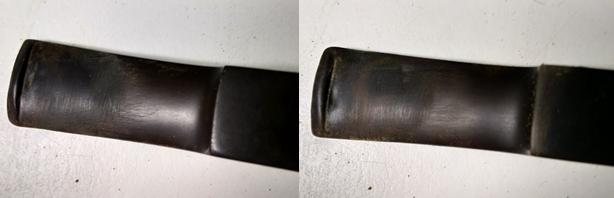
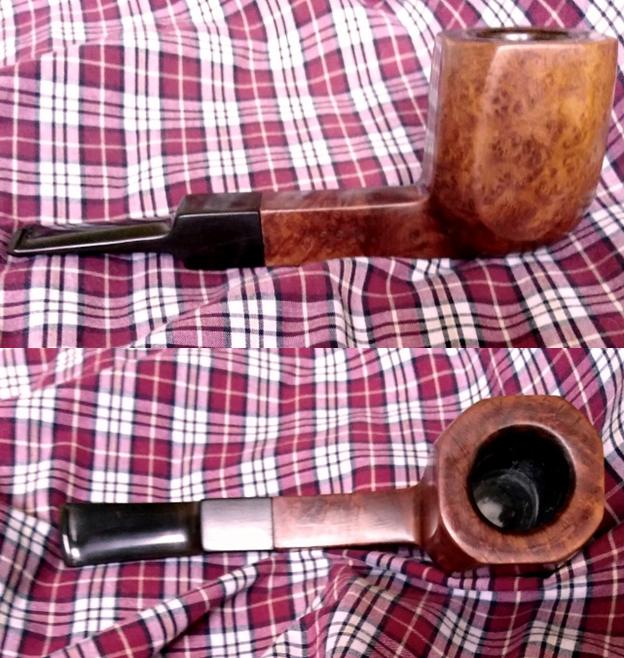
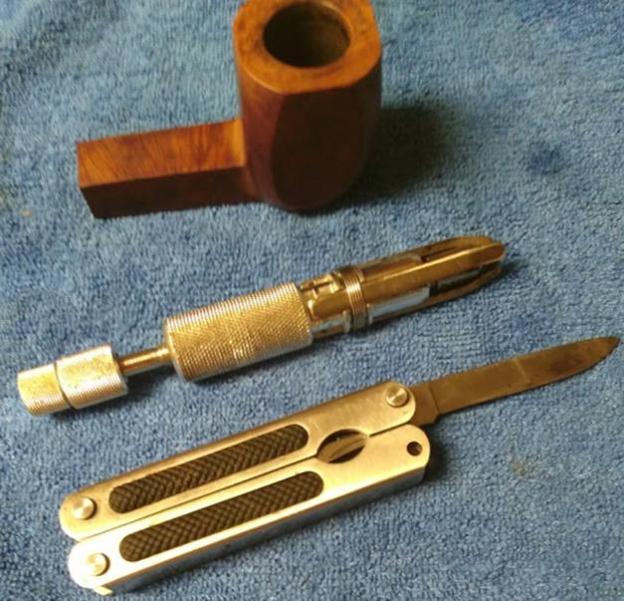
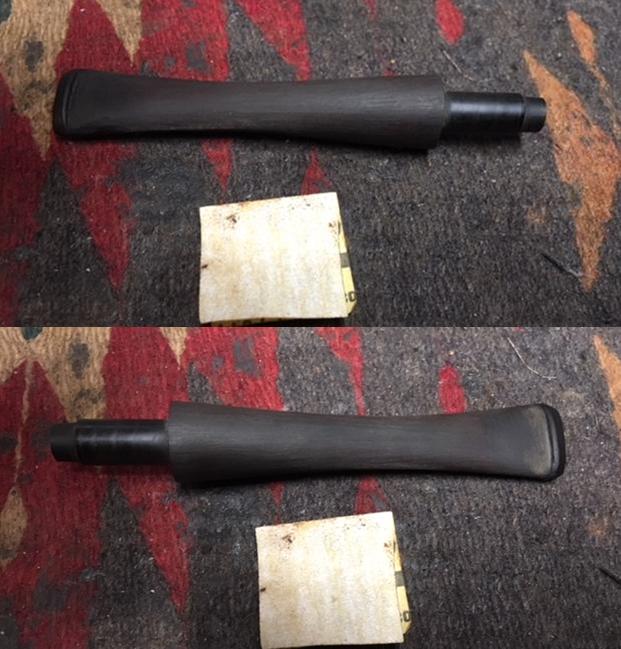
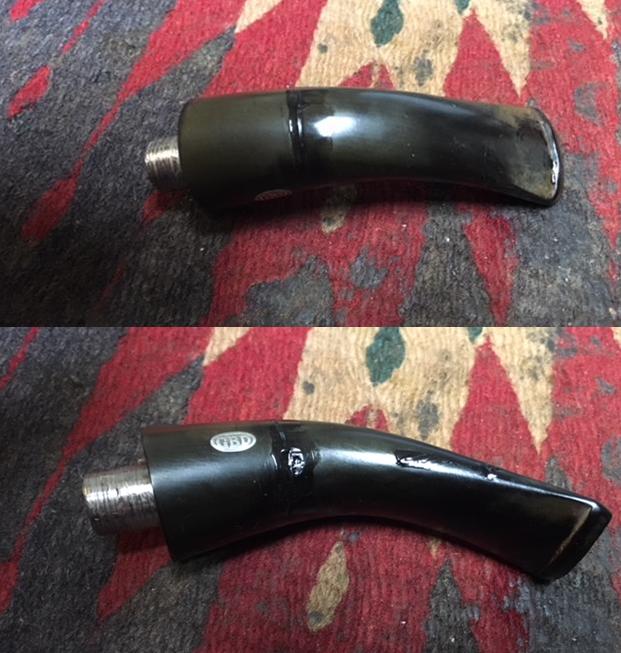
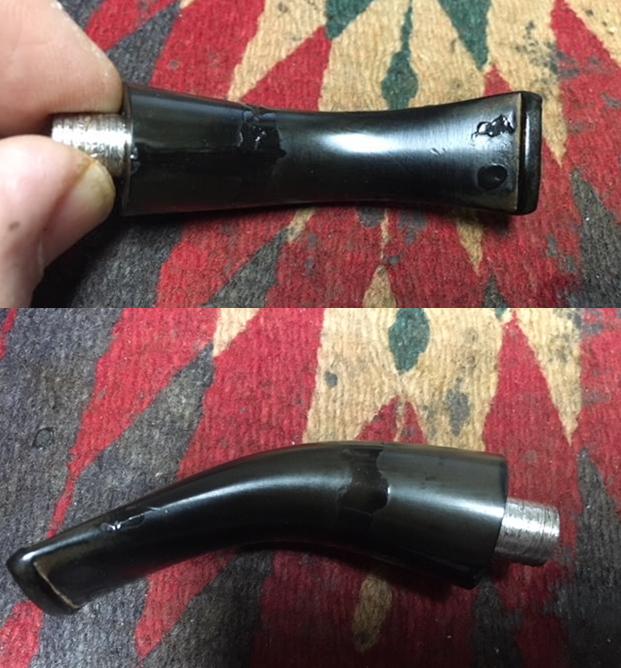
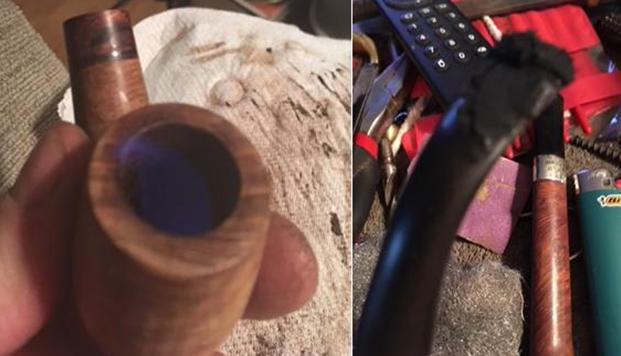 The next step was to fix the damage to the stem. The top of the P-lip was dented and the underside ridge was chewed. Mixture of rubberized CA glue and charcoal powder was applied to stem and left to dry overnight. The next evening after a long day it was nice to sit down by the woodstove with a coarse file and set about getting the rough shape of the stem back. To remove the file marks I sanded the stem starting with 220 grit paper finishing with 800 grit. I then switched to wet sanding finishing at 3000 grit. Micro mesh pads were used prior to buffing the stem. Blue diamond was used on the buffing wheel. Before waxing the stem the P stamped on the side was highlighted with Rub n Buff silver paste. The bowl was also polished with blue diamond compound on the buffer. Before waxing the bowl the band was fastened with white glue. The band was polished with Autosol and the bowl was sweetened.
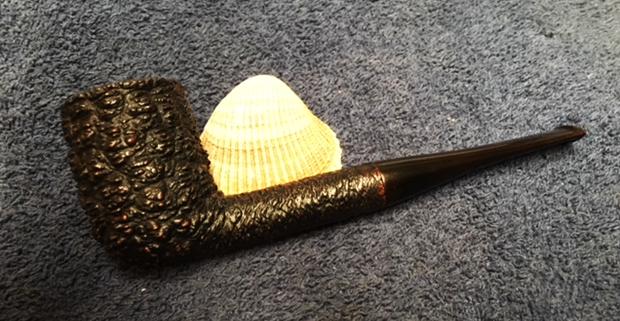
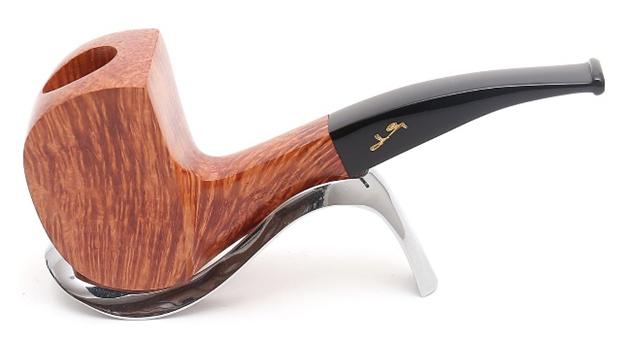
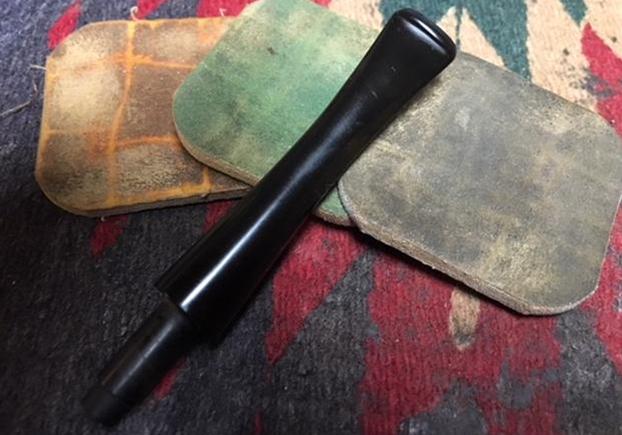
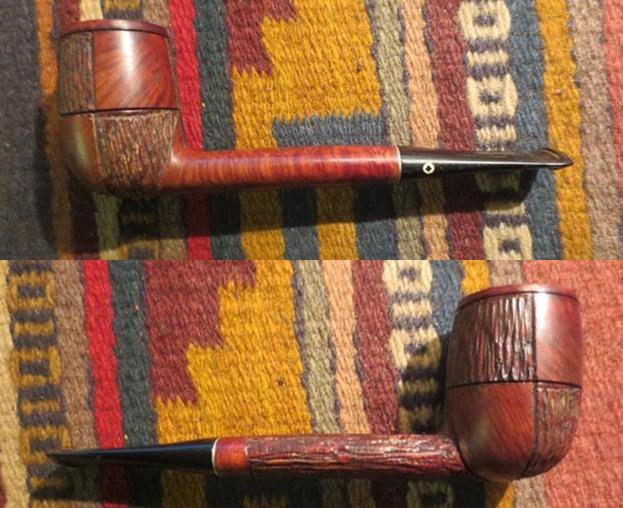
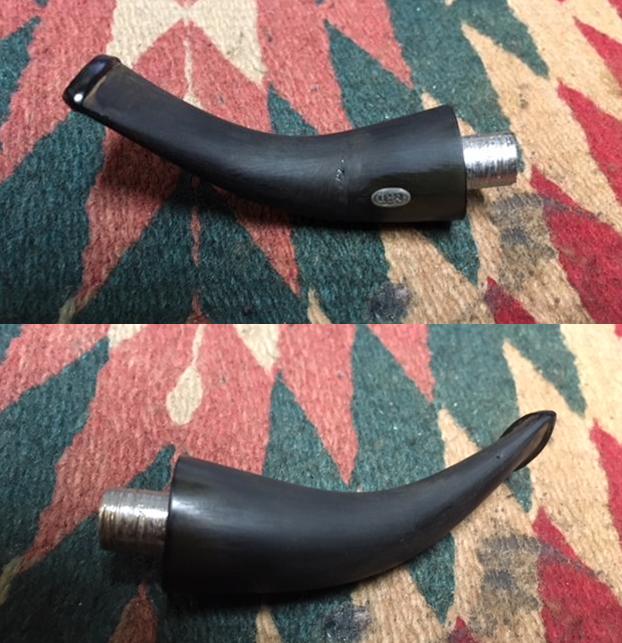
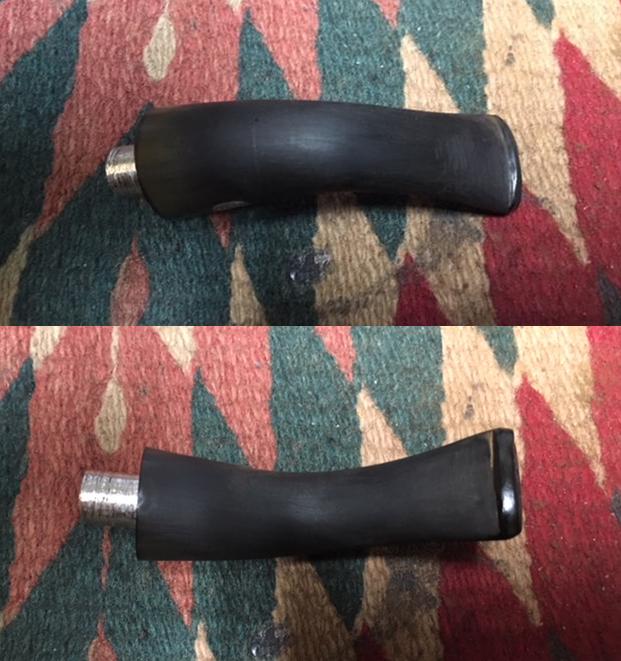
 And this is the finished pipe after a few coats of Carnauba Wax.
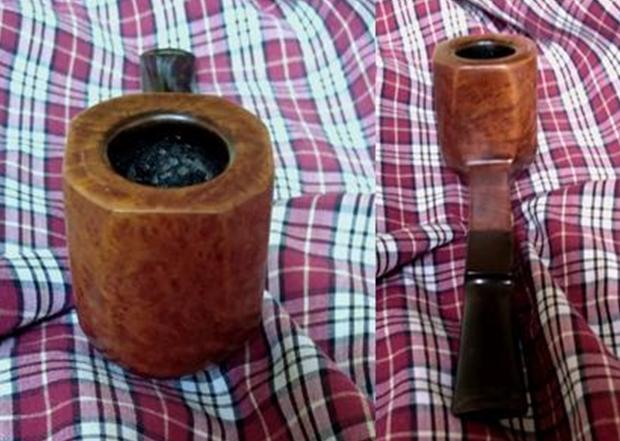
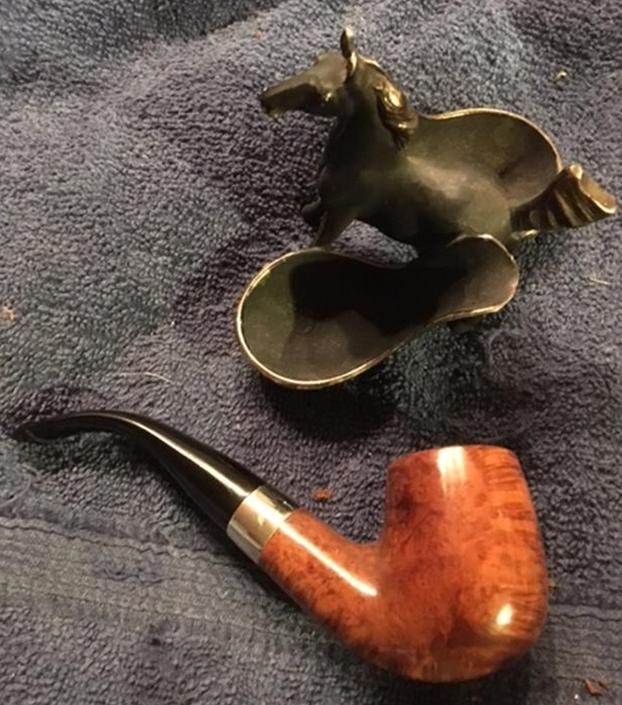

 Still blows me away how nice this pipe cleaned up. Keep on pipe’n.