Blog by Paresh Deshpande
This pipe had been on my ‘to do list’ for long but since it came without a stem and as I did not have one, this project was kept pending since long. Now that I have received my large consignment of estate vulcanite and bone/ horn stems, including one Pete System P-lip stem, I couldn’t help but fish out the Pete stummel again to work on.
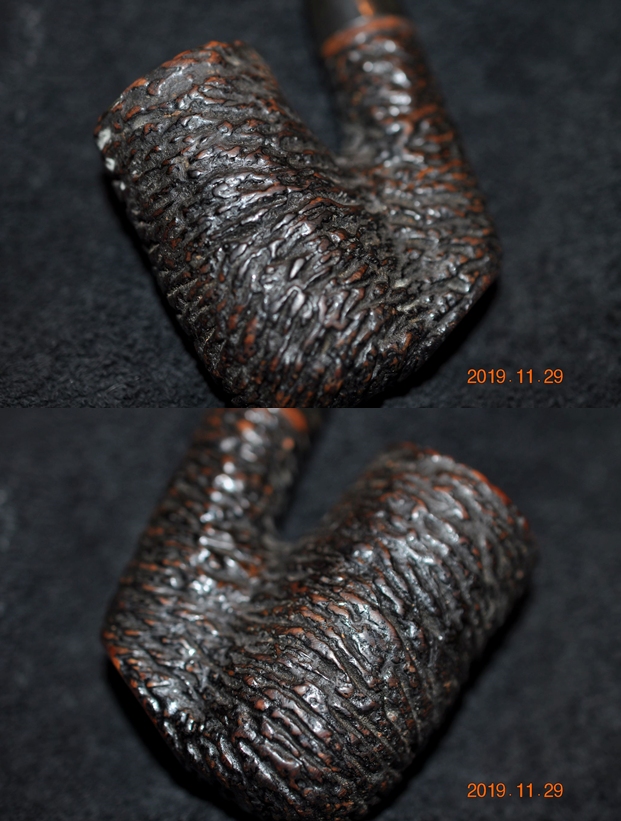
Most of my fellow pipe restorers would have turned away from this project that I had decided to work on next. To be honest, I would have led the pack in just consigning this pipe to history, but for the provenance of this Peterson’s System pipe. This pipe had once belonged to my grandfather and from the condition that it was in; it was apparently one of his favorite pipes!!
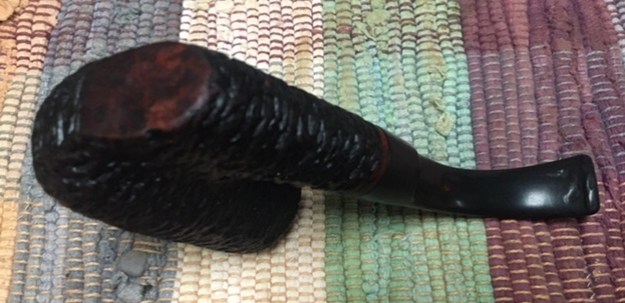
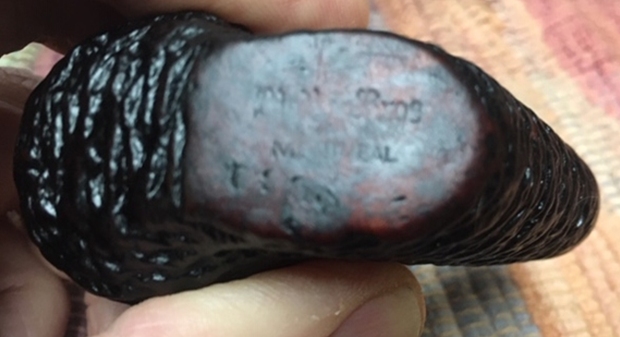
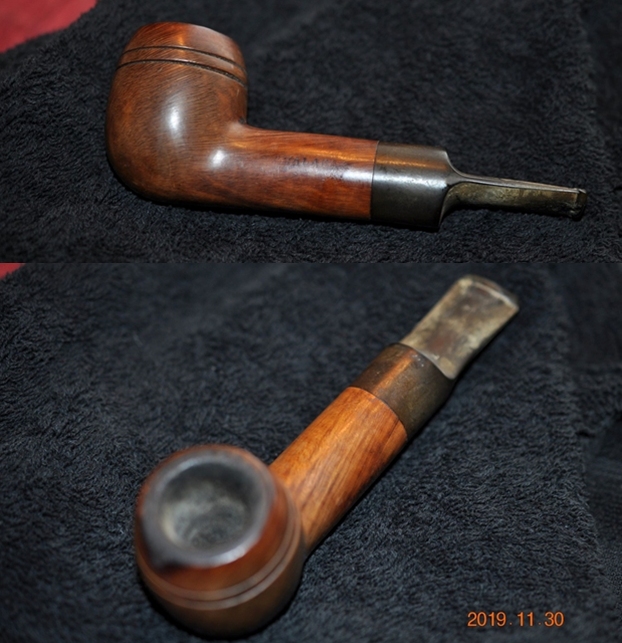
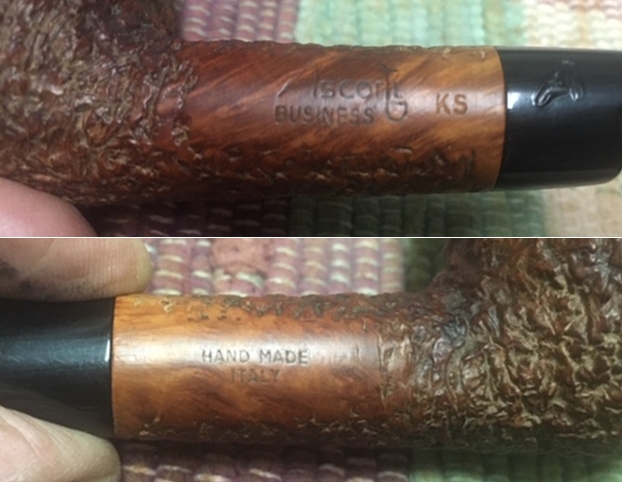
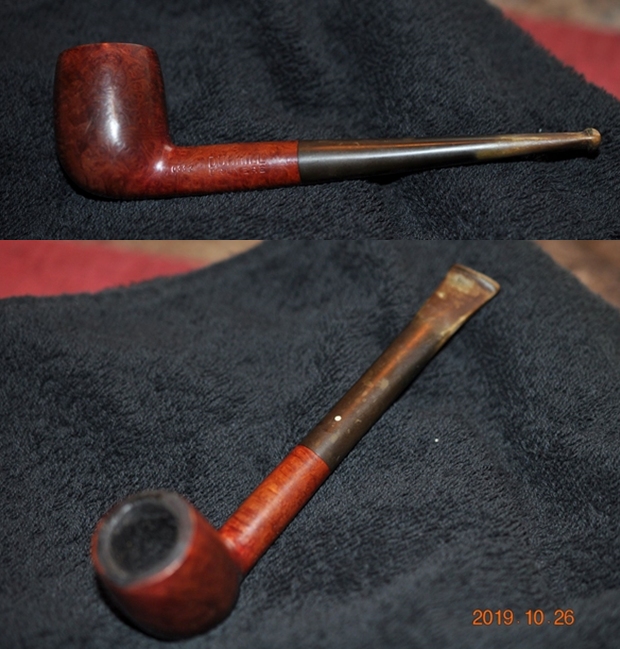
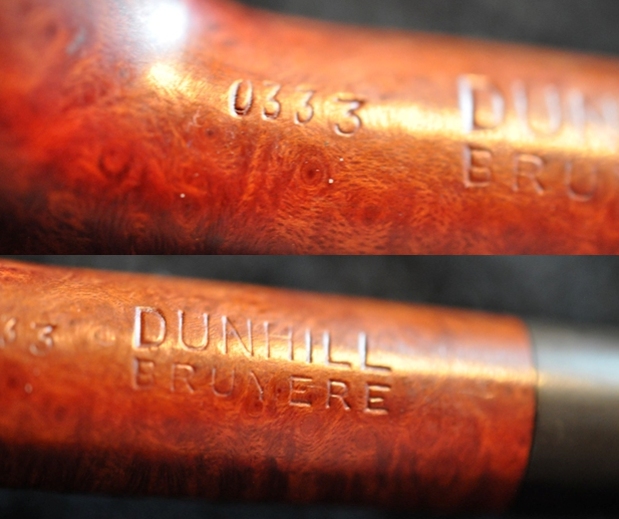
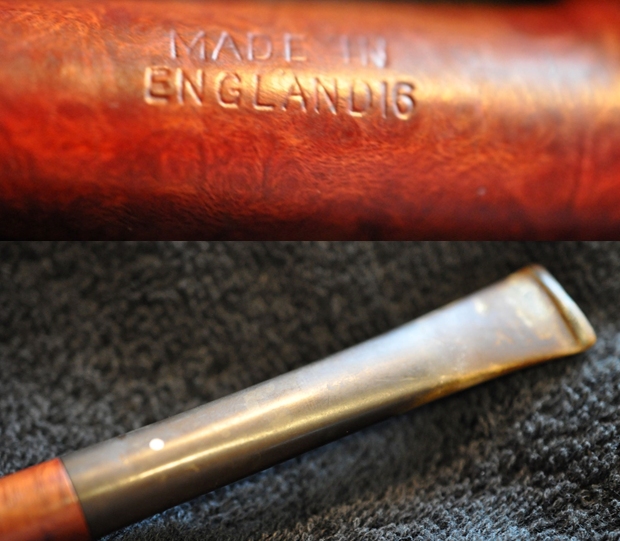
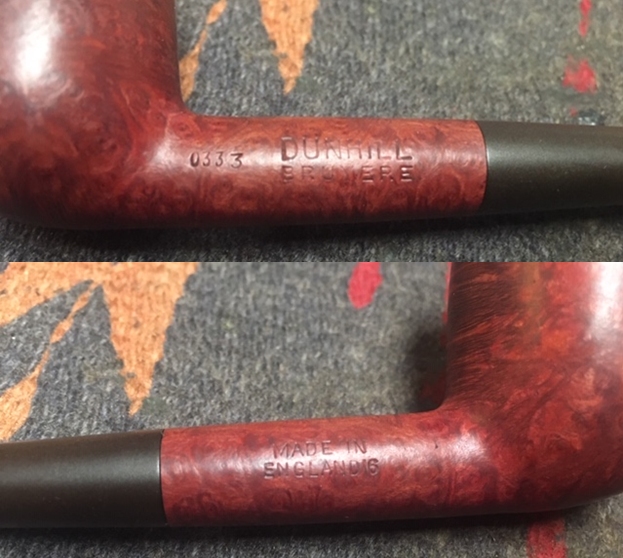
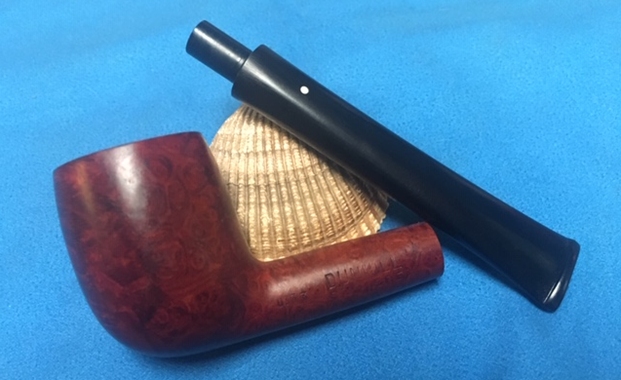
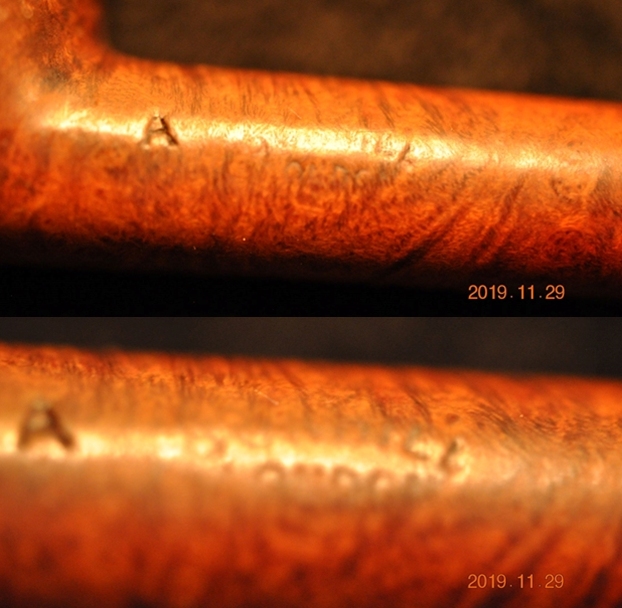
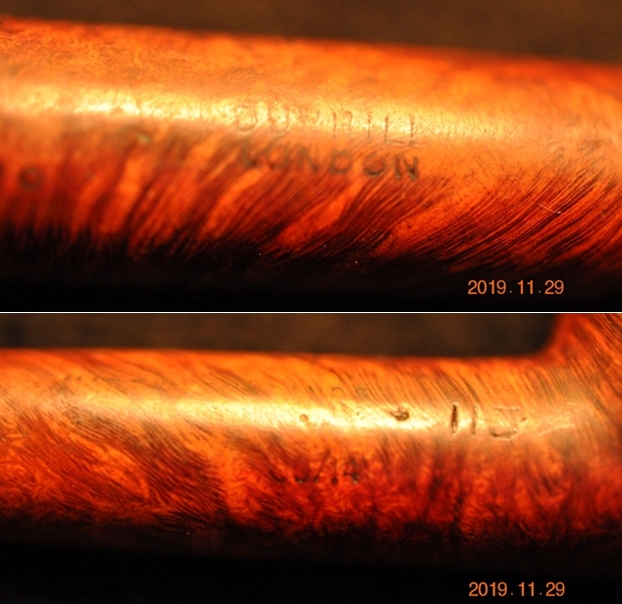
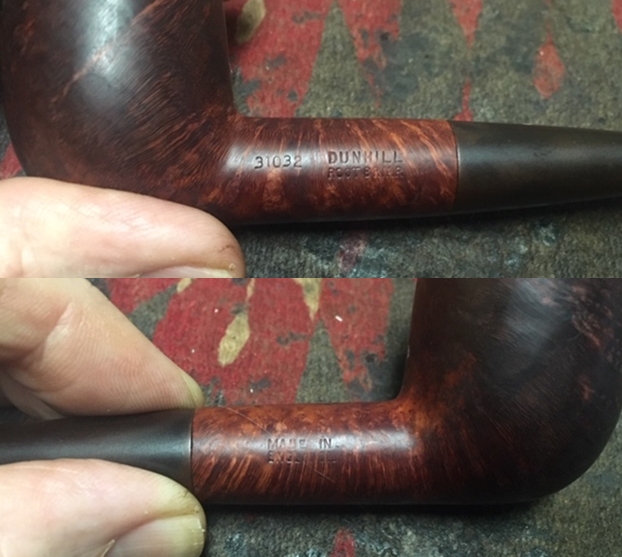
Well, the pipe that is now on my work table is in a pretty badly battered condition and came without a stem. There are ample signs of this pipe having been repaired earlier and extensively smoked thereafter. The stampings are all but worn out and can be seen under a bright light and under a magnifying glass. The left side of the shank bears the stamp “PETERSON’S” over “SYSTEM” over an encircled # 3. The pipe bears the COM stamp of “IRISH” over “FREE STATE” that is stamped perpendicular to the shank axis in two lines and very close to the shank end. The ferrule has the usual three cartouche with first having Shamrock, the second a Prone Fox and lastly a Stone Tower. Stamped above the cartouche are the letters “K & P” and is stamped below as “PETERSON’S” over “DUBLIN”.
 Having worked on quite a few old Peterson pipes from my inheritance and few from my Mumbai Bonanza, I was pretty sure that this pipe dates to 1920- 30 time period. To confirm this and also refresh my memory, I turned to my favorite site rebornpipes.com and to a write up “A Peterson Dating Guide; a Rule of Thumb” by Mike Leverette, here is the link (https://rebornpipes.com/2013/08/11/a-peterson-dating-guide-a-rule-of-thumb-mike-leverette/)
Here is what I have found and I reproduce it verbatim from the write up:-
The Irish Free State was formed on 15 January 1922. So the Free State Era will be from 1922 through 1937. Peterson followed with a COM stamp of “Irish Free State” in either one or two lines, either parallel or perpendicular to the shank axis and extremely close to the stem.
Thus, it is confirmed that this pipe is from the period 1922 to 1937 and this has to be one of the earliest Peterson’s pipes that was in my grandfather’s rotation and probably one that was his favorite.
INITIAL VISUAL INSPECTION
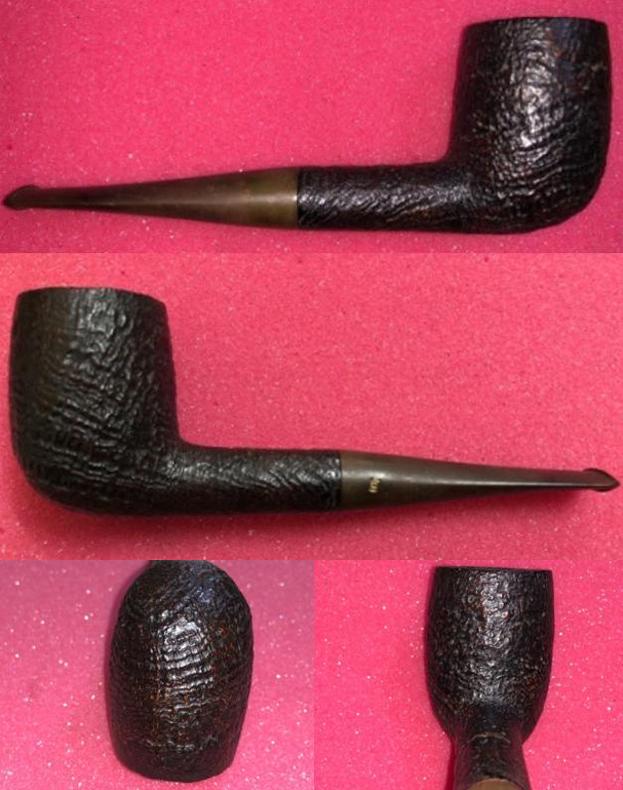
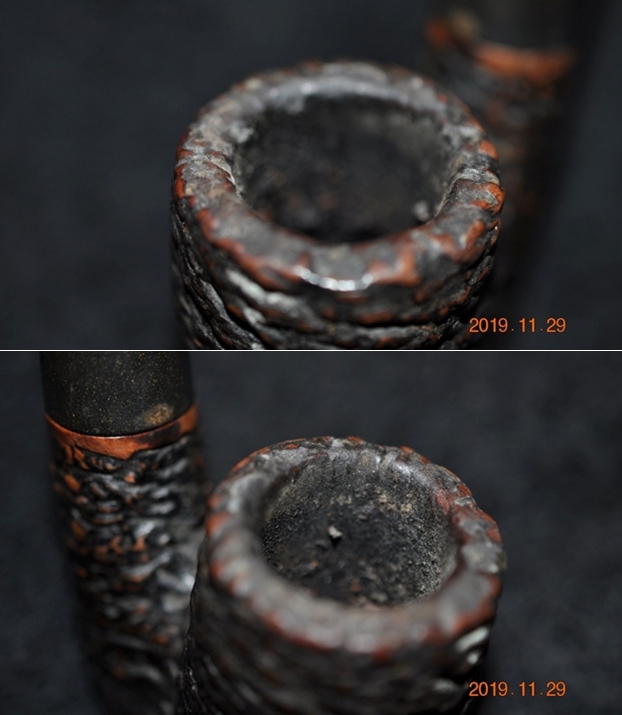
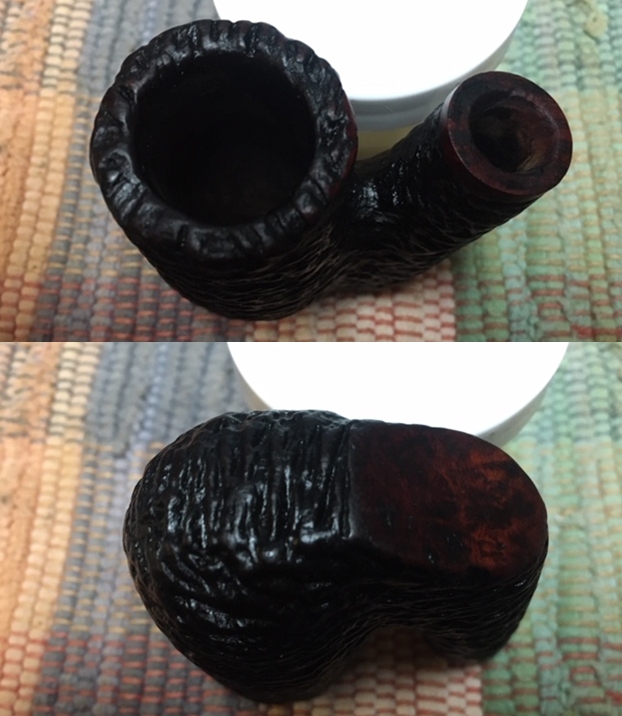
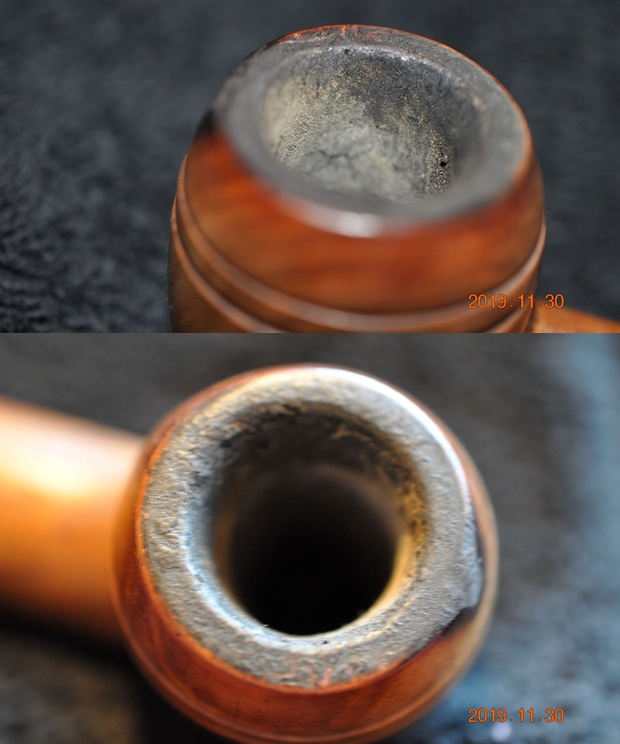
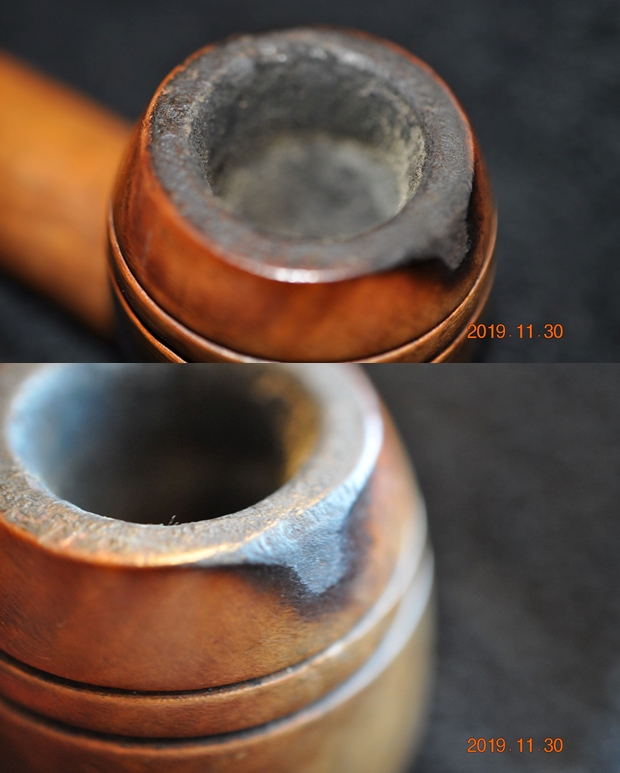
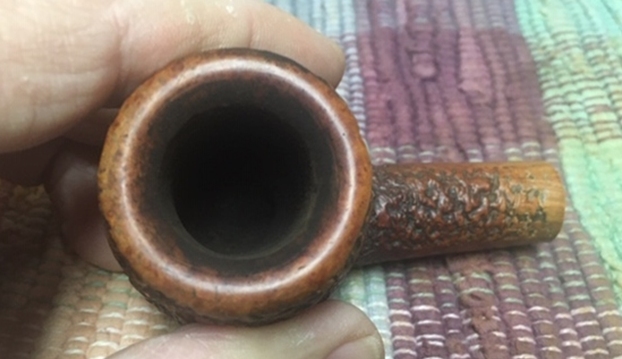
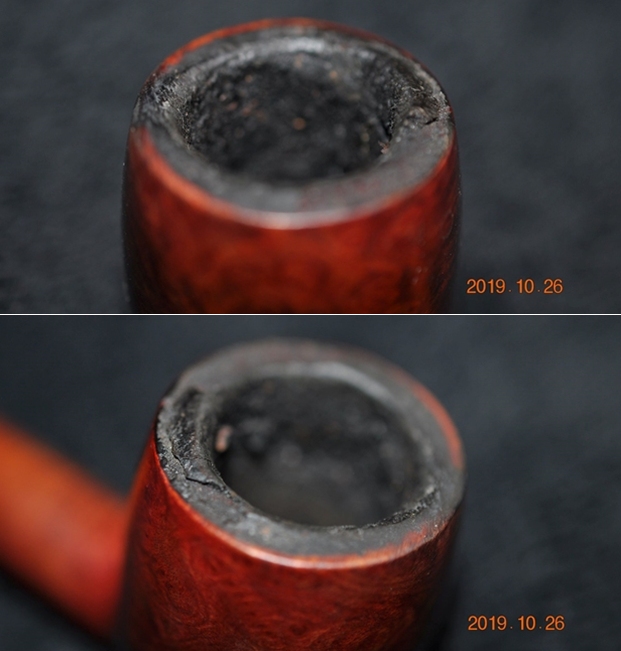
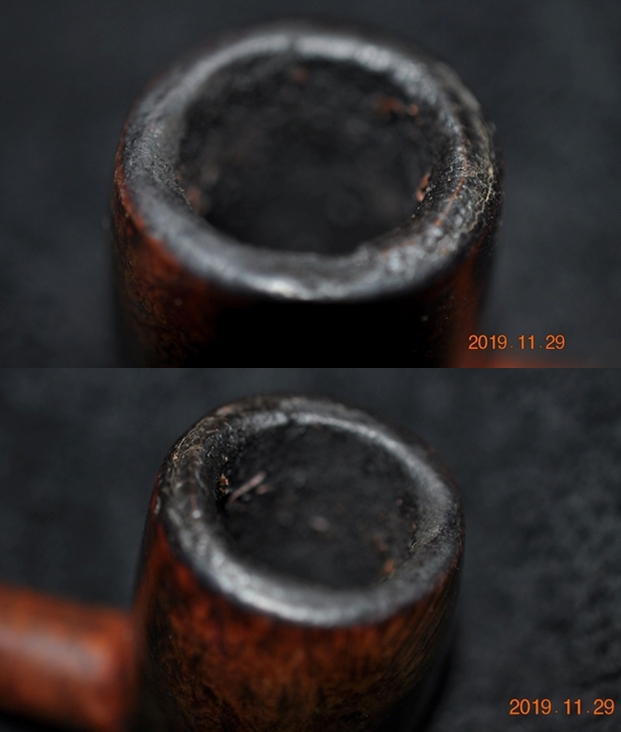
The stummel is covered in dirt and grime. All that catches your eyes is the dirty darkened upper portion of the stummel something like a flume, but not quite like it!!! Closer examination confirmed my worst fears….. CRACKS!! Yes, crack with an ‘s’. There are a couple of major cracks, one to the front of the stummel in 11 o’clock direction and the second major crack is at the back of the stummel. It is from the end of this big crack that three smaller and fine lined cracks emanate creating a web of cracks at the back and extending to the sides of the stummel. These cracks appear to have been repaired at some point in the past, definitely more than 40 years back, and these repairs have been camouflaged under a blotchy coat of black stain. The exact extent of damage can be assessed only after the external surface of the stummel had been completely cleaned and under magnification. The foot of the stummel has a number of dents and dings which needs to be addressed.

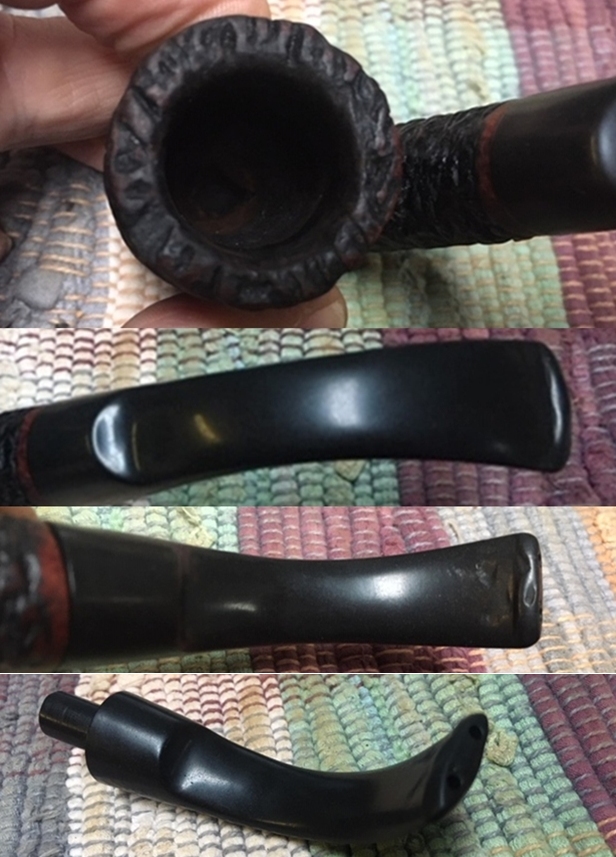
 In spite of all the cracks and its subsequent repairs, this pipe had been in continuous use as is evidenced by the thick layer of cake in the chamber. It seems that my grandfather even took the efforts to keep the thickness of the cake to a dime, not successfully though and so unlike him!! The rim top surface is completely out of round with the cracks extending over the rim top in to the chamber. The extent of these cracks in to the chamber and damage to the walls will be ascertained only after the chamber is cleaned off the complete cake. The rim top is covered in a thick layer of lava overflow. The ghost smells are ultra-strong, I say.
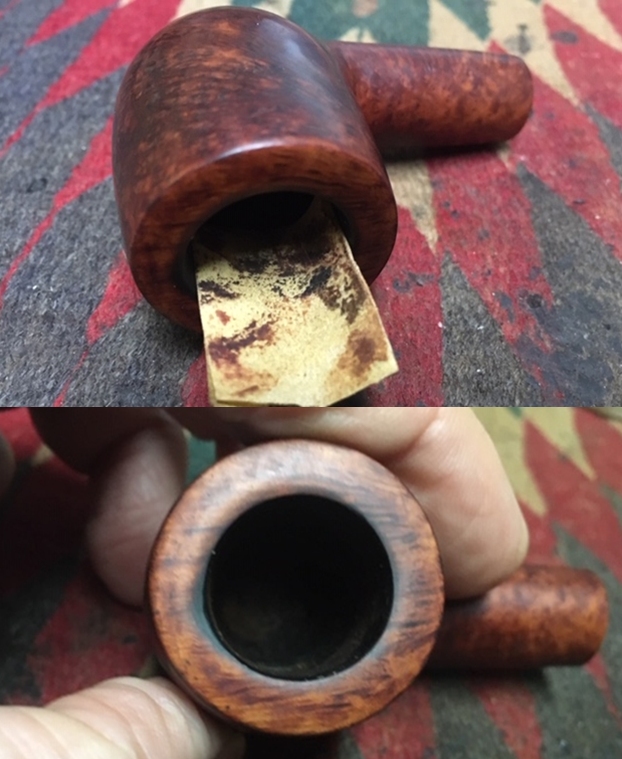
 The mortise, shank and especially the sump are chock-a-block with old oils, tars, grime and residual flecks of tobacco. The air flow through the draught hole is laborious and will require a thorough cleaning.
 There being no stem with this pipe, the biggest challenge will be to find one that fits. Nonetheless, this particular pipe, though I desire to restore and preserve, I am not sure what the real condition of the stummel would be under all the dirt and grime and even if it’s worth the efforts that would be needed.
THE PROCESS
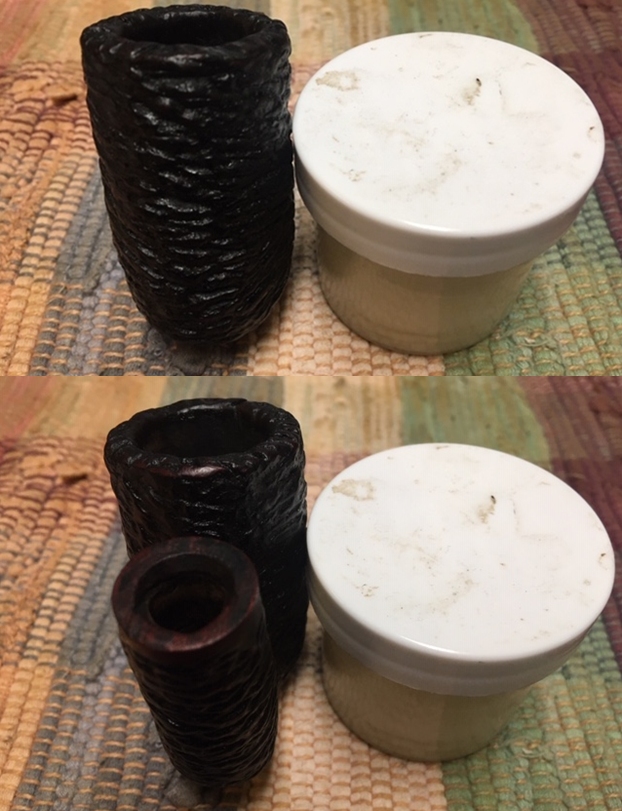
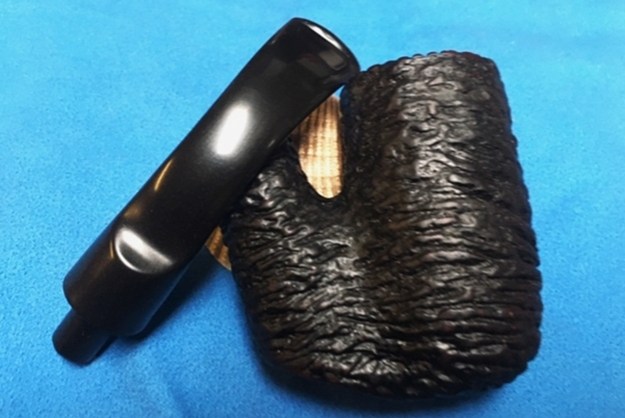
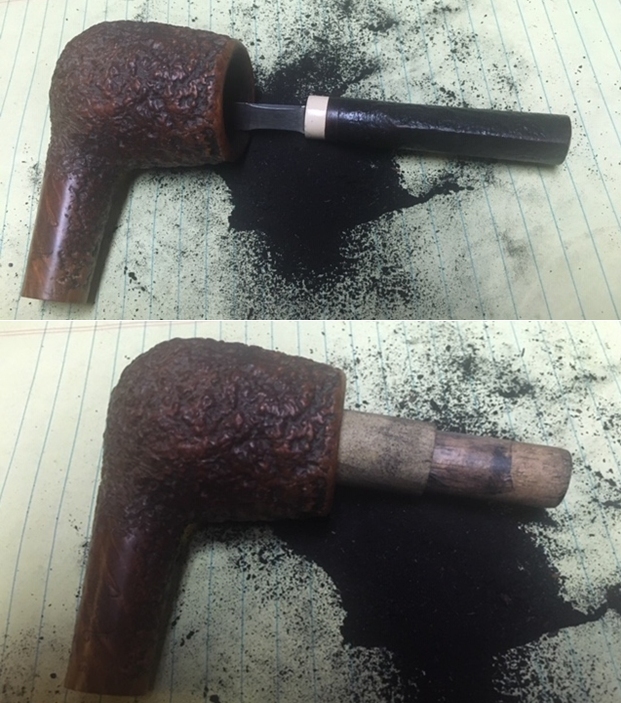
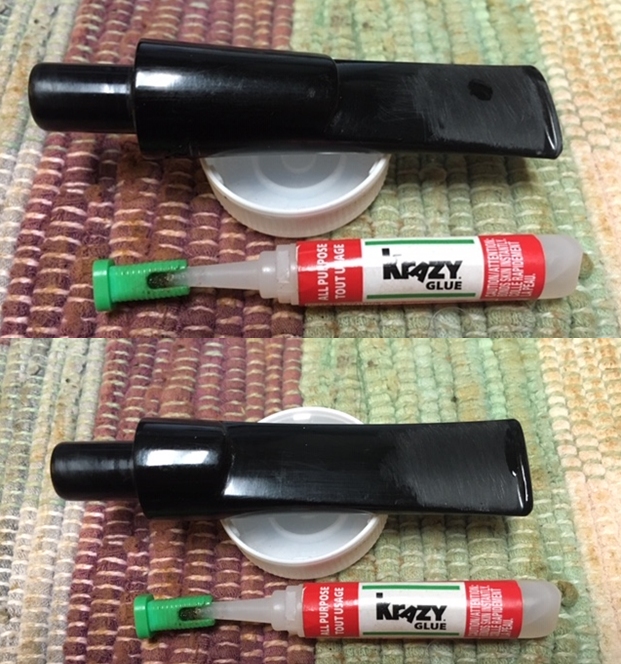
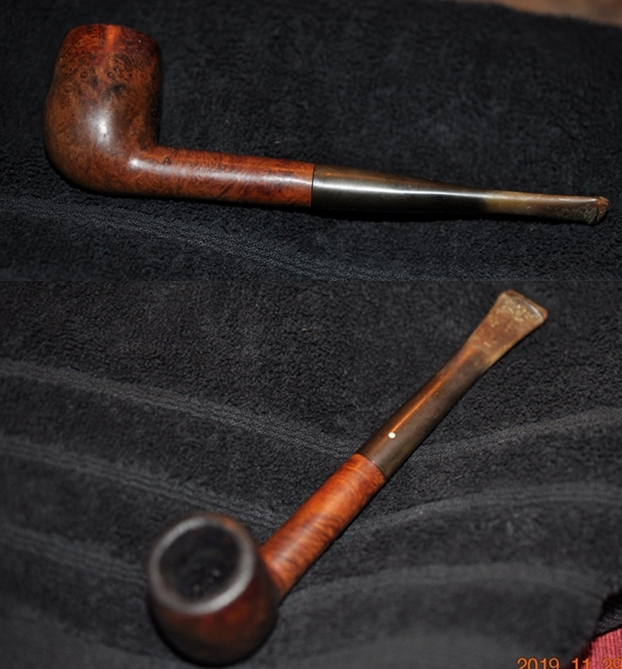
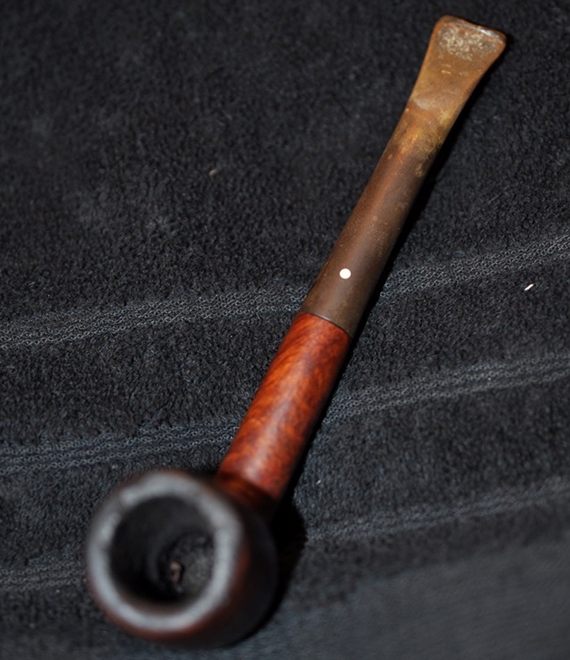
The first obvious issue that I wanted to address was to find a correct stem, preferably original P-lip stem, for the pipe. I rummaged through the parcel of estate pipe stems that had only recently reached me and I knew it contained a Pete System P-lip stem. I fished it out and tried the fit of the stem in to the mortise. Here is what I saw.
 Though the fit appears to be good in pictures, that is not so!! There are these following issues which are difficult to gauge from the pictures:
(a) The stem does not seat firmly into the mortise. There is a play between the tenon and the walls of the mortise; this, in spite of the rubber packing that the tenon came with. Or is this play a result of the rubber packing?
(b) The seating of the stem is too high. The tenon end does not reach anywhere near the draught hole, let alone reach slightly below it for the system to work.
(c) The stem, if pushed further in to the mortise would put additional pressure on the walls of the mortise, subsequently resulting in cracks at the shank end.
(d) The plane of the bowl and the bend of the stem are not aligned. The stem is too straight making for an awkward appearance.
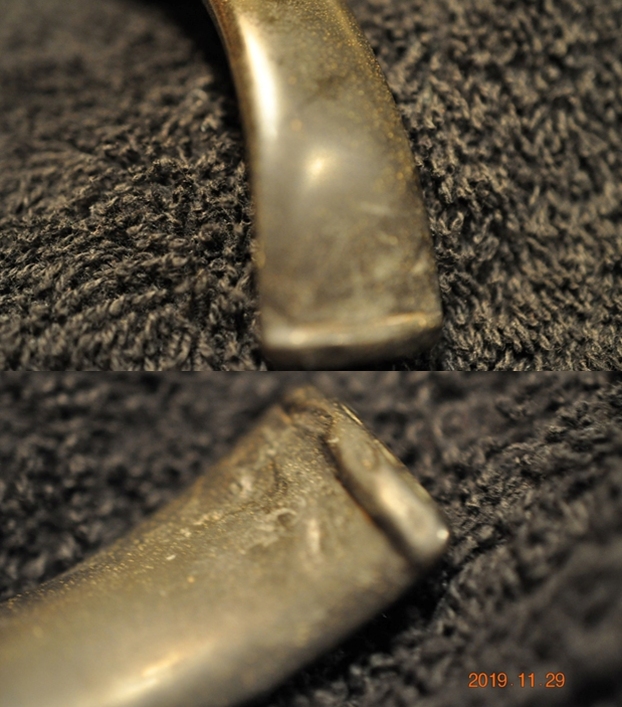
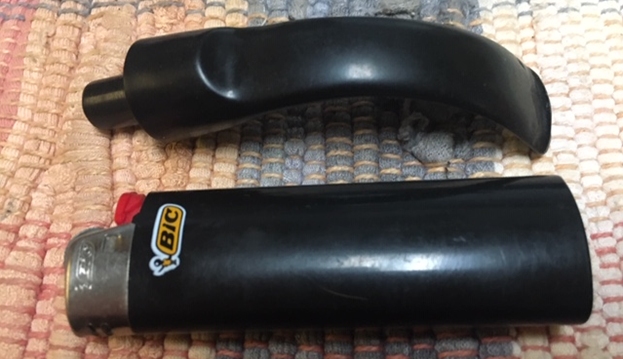
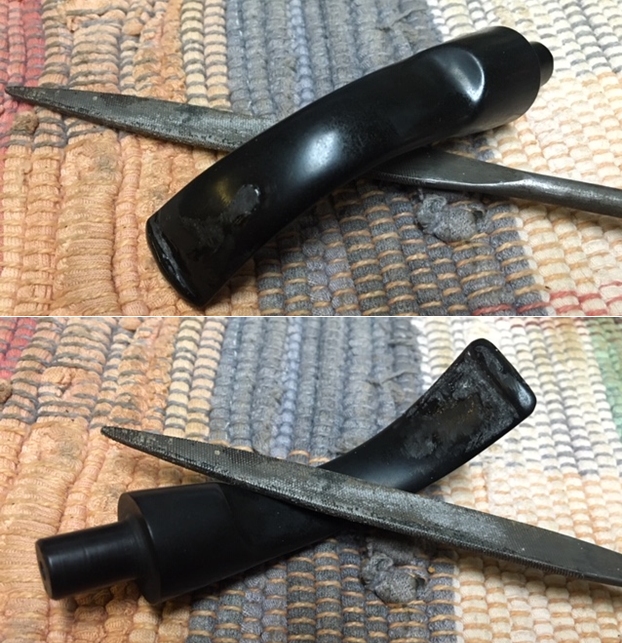
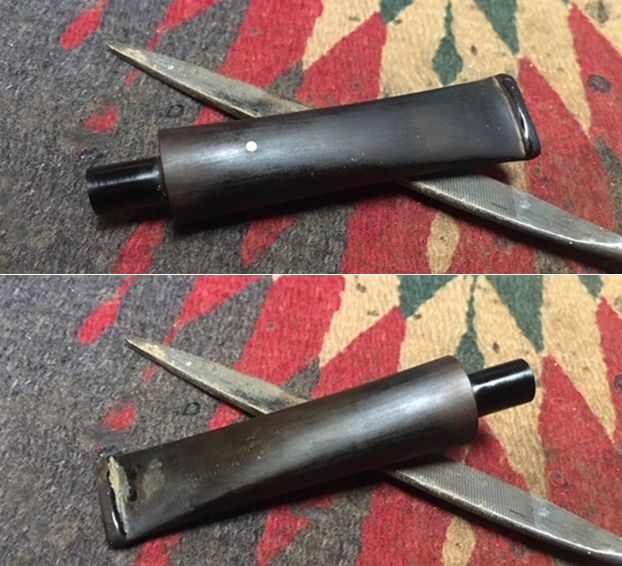
With certain modifications to the stem, I feel confident that I could make the stem work efficiently in a system pipe. The saddle is deeply gouged all around. The upper and lower surface of the stem has significantly deep tooth indentations in the bite zone. The button edges are badly deformed with deep bite marks. Following pictures show the condition of the stem as I received it.

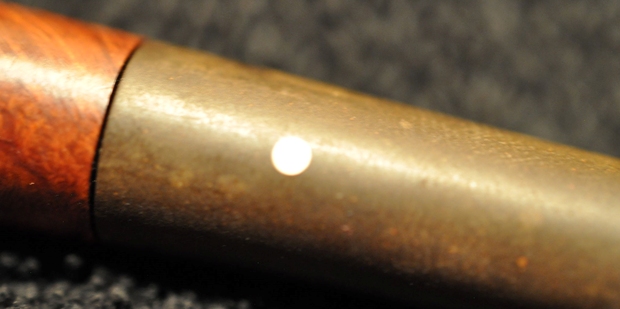
 The tenon is clogged with heavy accumulation of oils and tars which is seen through the tenon opening. The rubber packing cap is also covered in dirt and grime.
 With a sharp knife, I removed the rubber cap by separating it from the tenon end, expecting to find a chipped or badly damaged tenon. However, the tenon is intact and apart from being clogged the stem is in decent condition. After I had removed the rubber cap, I rechecked the seating of the stem in to the mortise. The seating was still loose and too high!!
 Next I moved ahead and reamed the chamber with a Castleford reamer head size 2 followed by size 3. With my sharp fabricated knife, I removed the cake from the chamber where the reamer head could not reach and gently scrapped away the lava overflow from the rim top surface. Thereafter, using a folded piece of 180 grit sand paper, I sanded out the last traces of cake and exposed the walls of the chamber and wiped the chamber with a cotton pad dipped in isopropyl alcohol to remove the carbon dust left behind by all the reaming and sanding process. Even though there are no heat fissures/ lines along the chamber walls where the cracks do not extend (a big solace, I say!!), the stummel cracks are a different story which I shall come to subsequently. The chamber ghosting is still significantly strong which may further reduce once I clean the sump/ reservoir and the mortise.
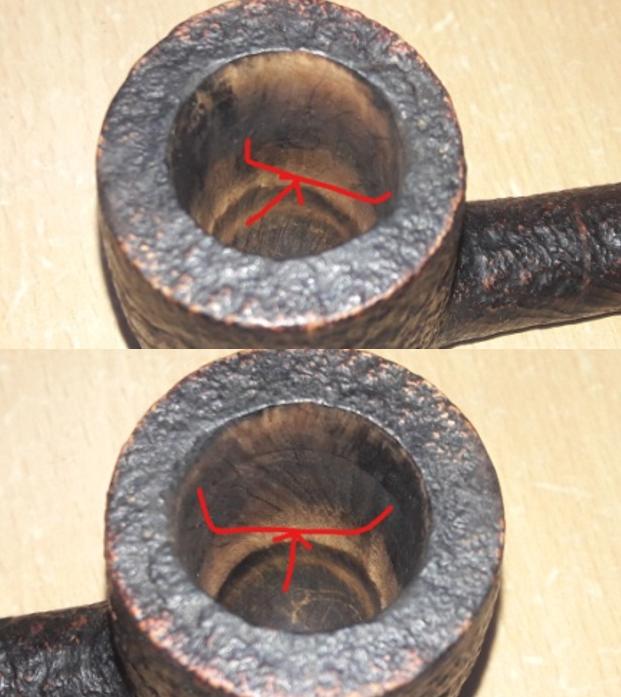
 The two major cracks (marked in red arrows) that were observed in the external stummel surface extend well in to the chamber with the old repair fills in these cracks in plain view. Further sanding and close scrutiny of the walls confirmed my gut feeling that the minor cracks originating from the major cracks will also be seen as heat fissures in the chamber walls. These have been marked in yellow arrows.
 As I was contemplating my further course of action to address the chamber issues, I set the stummel aside and decided to work on the stem. I cleaned the internals of the stem using hard and normal bristled pipe cleaners and isopropyl alcohol. With a pointed dental tool, I scraped out the entire dried gunk from the tenon end.
 I decided that I would first undertake the cleaning, both internal and external, of the stummel before proceeding with further repairs. This cleaning will not only give me a clear picture of the extent of damage but also the efforts that would be needed are justified or otherwise.
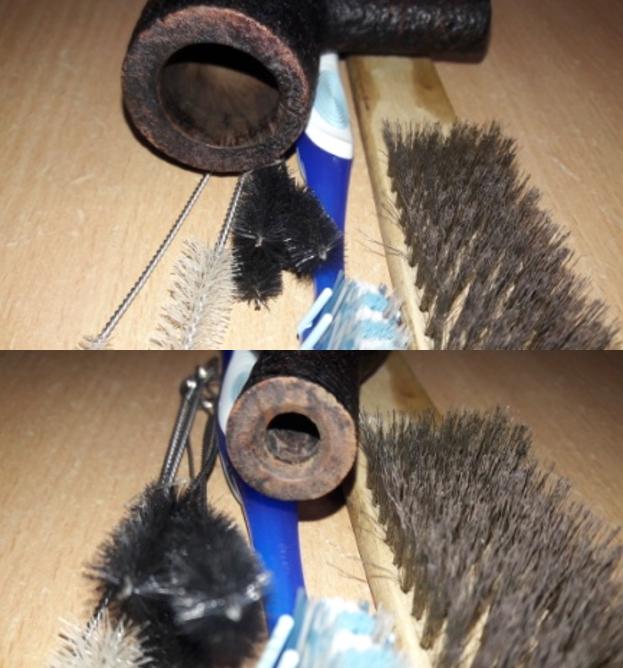
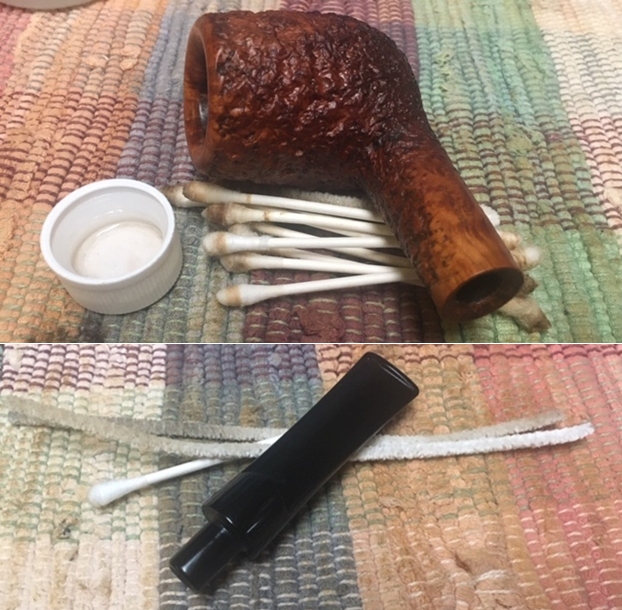
I cleaned out the internals of the shank and mortise. Using my dental tool, fabricated knife and specifically modified tool, I scraped out all the dried oils, tars and gunk that had accumulated in the draught hole, airway and sump. The amount of crud that was scrapped out and the condition of the pipe cleaners that were used leaves no surprise why the air flow through it was restricted. I finished the cleaning by running a few pipe cleaners dipped in isopropyl alcohol. I also wiped the sump with cotton buds and alcohol. I gave a final cleaning to the sump with a paper napkin moistened with isopropyl alcohol. This, however, did not address the issue of ghost smells in the stummel. I decided to address the issue of old odors in the chamber and shank by subjecting it to a cotton and alcohol bath. I wrapped some cotton around a folded pipe cleaner, keeping the tip of the pipe cleaner free of wrapped cotton as this would be inserted through the draught hole in to the chamber. This would form the wick for the shank. I tightly packed the chamber with cotton balls and filled it with 99% pure isopropyl alcohol using a syringe and set it aside. By next day, the cotton and alcohol had drawn out the all the old tars and oils from the chamber and max from the shank. With my dental tool, I further scrapped out the loosened gunk from the sump and mortise.
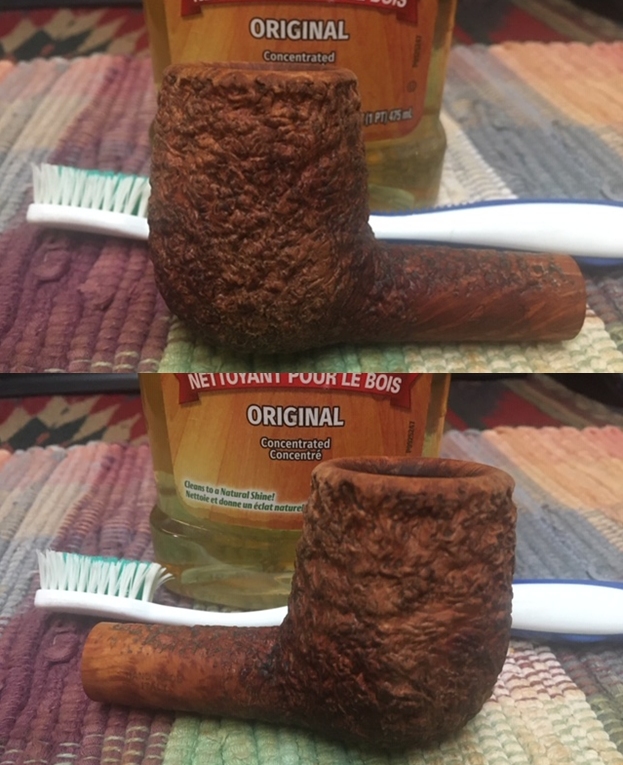
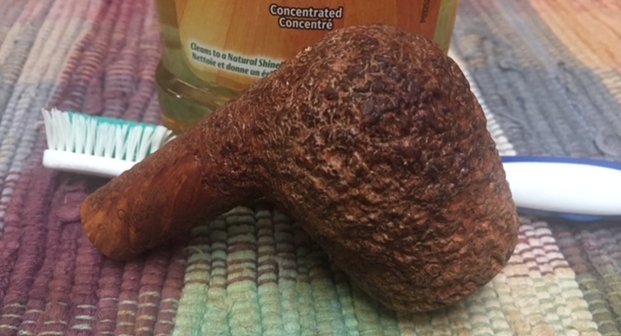
 I cleaned the external surface using a hard bristled toothbrush and Murphy’s Oil Soap. With a soft bristled brass wired brush, I removed the overflowing lava from the rim top surface and cleaned the internals of the shank with a shank brush and dish washing soap to remove what little crud remained in the shank. I rinsed it under running tap water and wiped the stummel dry with an absorbent soft cotton cloth.

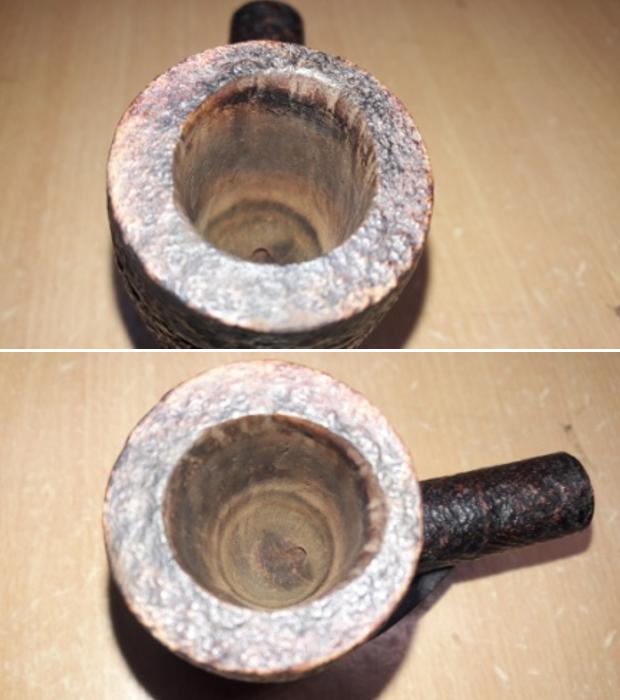
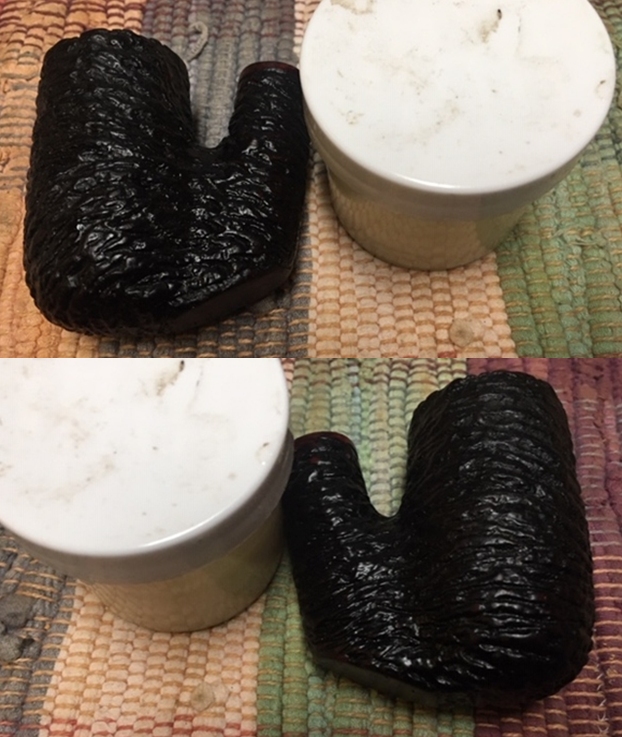
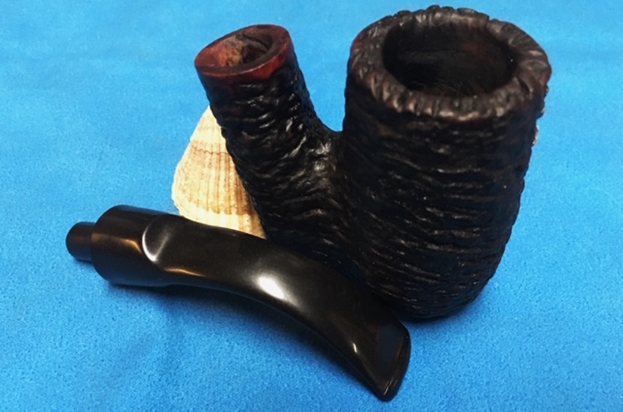
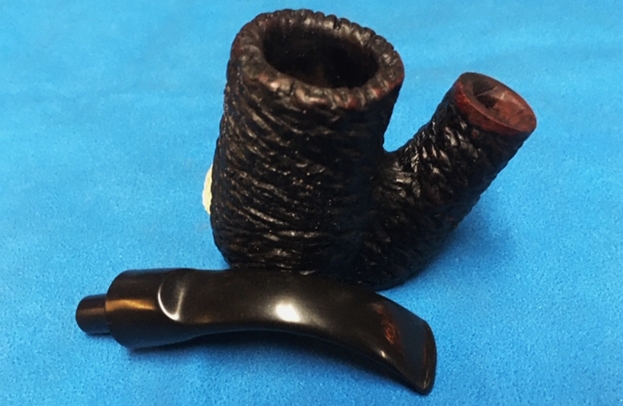
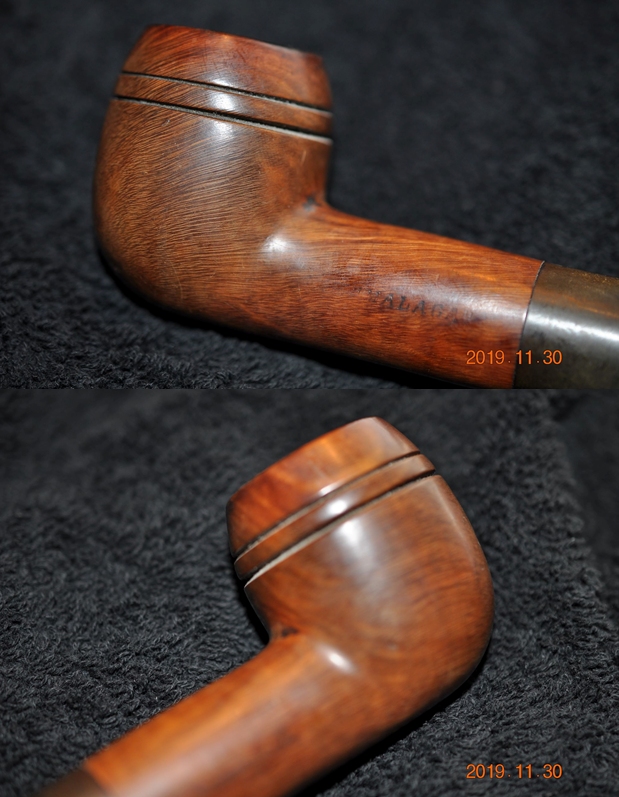
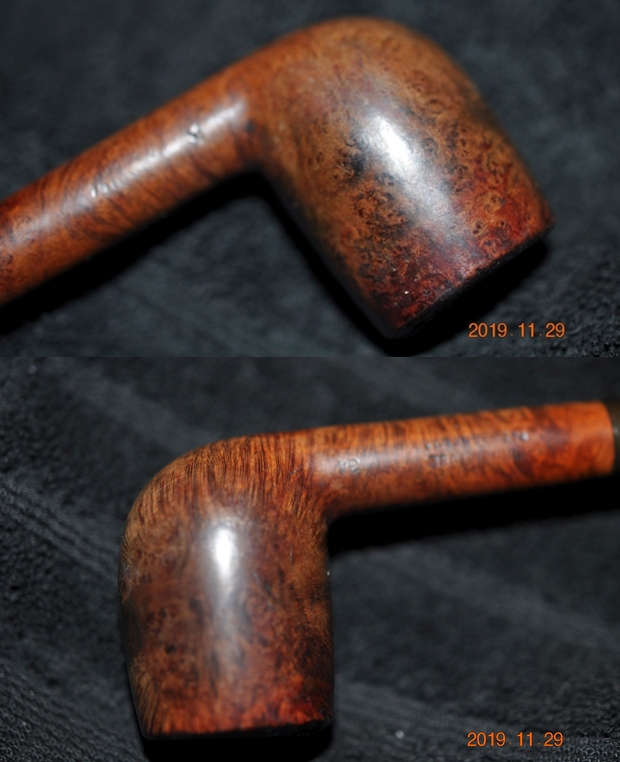
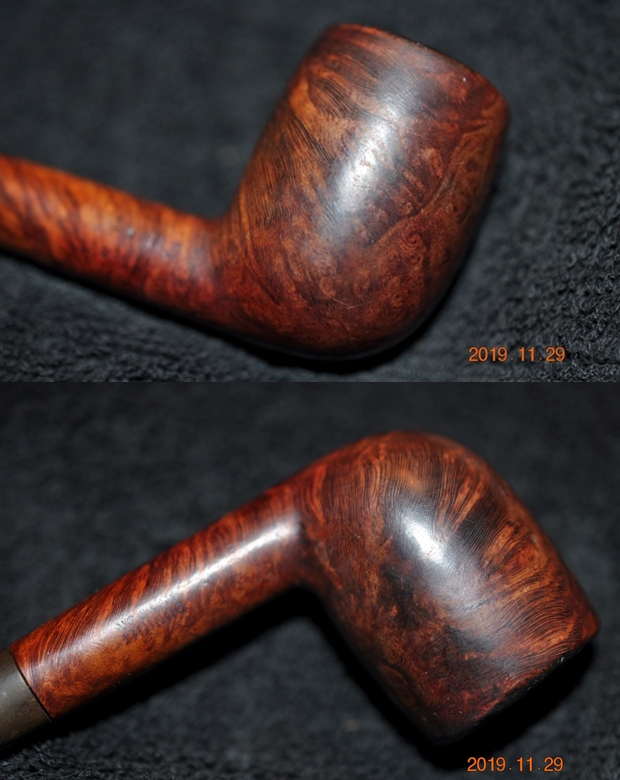
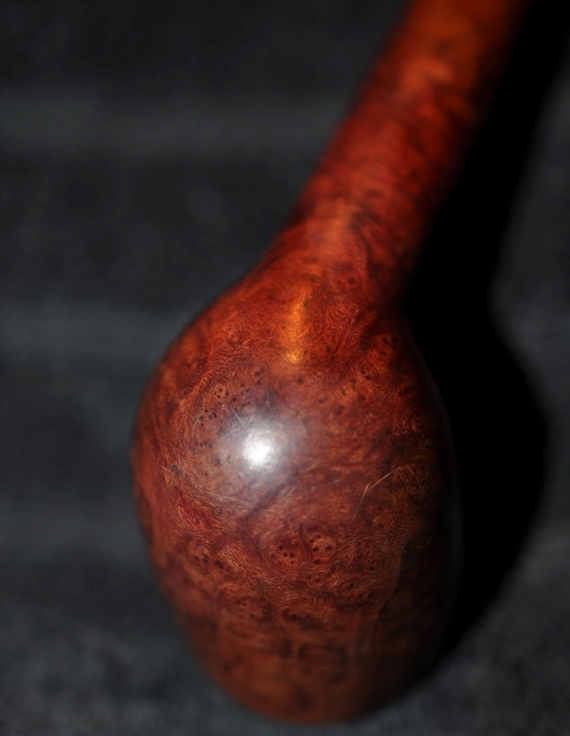
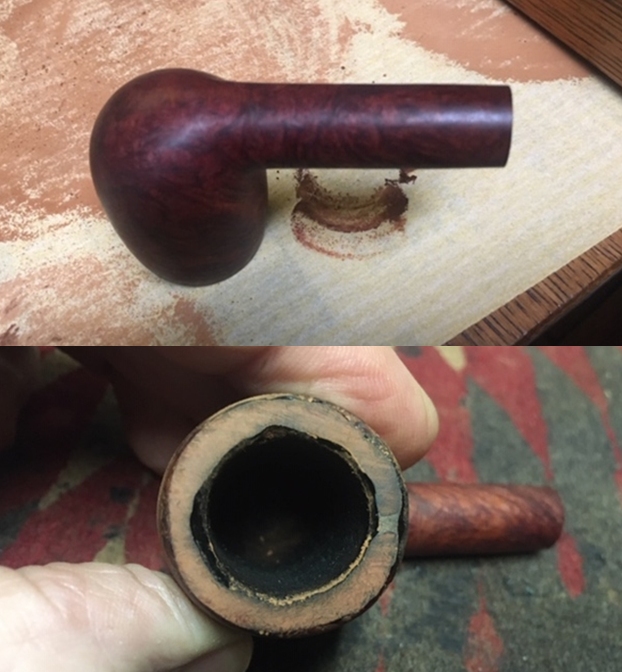
 Fortunately for me, the blotchy coat of black stain that was applied to mask the repairs came off with use of Murphy’s Oil Soap and dish washing soap. Had this not worked, an alternative method of removing this coat would be to wipe the stummel with pure acetone and/or isopropyl alcohol on cotton swabs. With the stummel nice and clean, the damage is now all too apparent and it did not present an encouraging picture. The major cracks are quite deep and the secondary minor cracks emanating from the major crack are restricted at the back of the stummel. Here is what I saw.

 I shared these images with Steve and sought his opinion if this project was even worth the effort. A few minutes later, Steve responded in his characteristic manner. I reproduce the exact exchange that took place between us
Steve: What a mess
Me: What is the best way ahead? Worth the effort? Grandpa collection…
Steve: That was my question… is it worth it? With the Grandpa connection, I would probably work on it. I would thoroughly clean the inside and outside. Once that is done, I would line the bowl with J B Weld to completely bind the inside together. Once that is done, then fill and repair the outside with glue and briar dust.
Me: This is the condition of the shank and stummel joint…emotions dictate restoration while practical experience says it’s a gonner…
Steve: I have been there…go with emotions on this one…it will take time and be a real resurrection!!
Now that clarity has been established and hints for the way ahead have been spelt, I decided to complete this project.
I decided to address the stem issues first.
As noted earlier, the seating of the stem in to the mortise was loose and too high for the Pete’s famed system to work efficiently. I inserted a pipe cleaner in to the mortise and up to just below the draught hole, bending the pipe cleaner at this point to mark the depth that I desired. Next, I mark the same depth on to the saddle of the stem with a white correction pen. I wound a scotch tape along the marked white line extending towards the button end. This gave me a reference line beyond which sanding needs to be avoided.
 With this initial preparation completed, I next mount a 180 grit sanding drum on to my hand held rotary tool, set the speed at half of the full speed and proceeded to sand down the portion of the stem towards the tenon end. I frequently checked the fit of the stem in to the mortise to ensure a snug fit and avoid excessive sanding of the stem. Making steady progress, I was satisfied with the stem modifications at this stage. The tenon was just below the draught hole and there was no play in the seating of the stem in to the mortise.

 Next, using 150 grit sandpaper, I sanded the entire stem, especially being diligent around the saddle portion that was shaved off to achieve a snug fit of the stem into the mortise. Though I had to spend a considerable time, I was happy with the blending to a smooth transition at the edge which was sanded down. I wiped the stem with Murphy’s oil soap on a cotton swab to remove the sanding dust and oxidation. The stem looked good and should function as it is supposed to, making me very pleased with the fruits of my efforts at this stage.
 Just a word of caution here for all the first timers using the sanding drum and rotary tool; firstly, ensure that the rotary tool is set at 1/3 or ½ of the full rpm of the tool as too high a speed will fling the stem away from your grip and may result in excessive sanding of the stem surface. Secondly, keep the stem turning evenly at all times to achieve as evenly sanded surface as possible and avoid deep gouges. Thirdly, frequently check the progress being made and remember the mantra “LESS IS MORE”! Fine tuning is best achieved by eyeballing and working with hands and sandpapers.
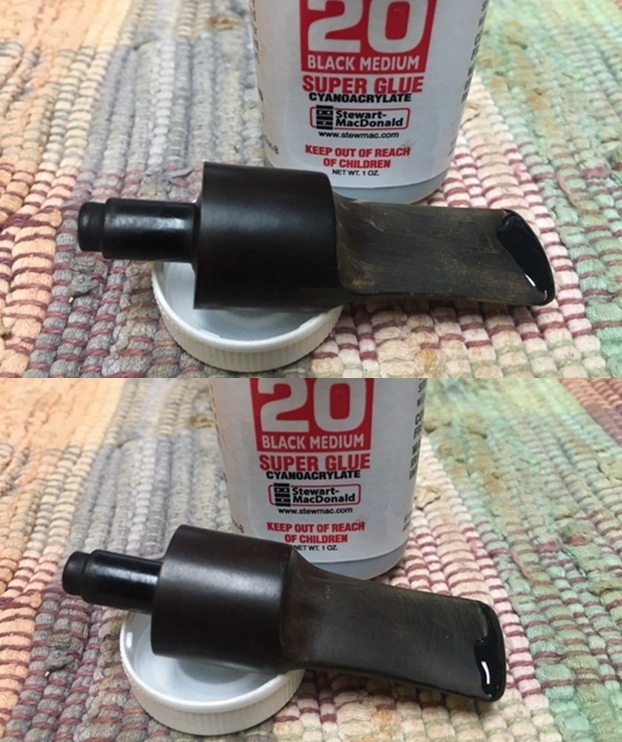
Staying with the stem repairs, I mixed CA superglue and activated charcoal, filled all the deep tooth chatter and indentations and also over the button edges and set the stem aside for the fills to cure. I shall blend these fills and also sharpen the button edges once the fill has hardened considerably. Now with the stem set aside for the fills to cure, it was time for me to work the stummel. I topped the rim on a piece of 220 grit sand paper to even out the rim surface dents and dings and also to reduce the charred rim surface. The repairs to the cracks, marked with red arrows, are all too apparent now as can be seen in the following pictures. The rim top surface is charred and thin in 10 o’clock direction which have been marked in blue circle. The rim top repair towards the front of the bowl has resulted in thinning of the rim top. This is marked in a yellow circle. This stummel has some serious issues that need to be addressed.
 I preceded the stummel repairs first by coating the walls of the chamber with a slightly thick layer of J B Weld. J B Weld is a two-part epoxy Cold Weld in two tubes; hardener and steel which are mixed in two equal parts (ratio of 1:1) with hardening time of 5-6 minutes and complete curing time of 6-8 hours. I poured the contents of the two tubes and mixed it well. I applied this mix, as evenly as possible, over the entire chamber wall surface. I worked fast to ensure an even coat over the chamber walls before the weld could harden. I set the stummel aside for the application to harden and cure overnight.
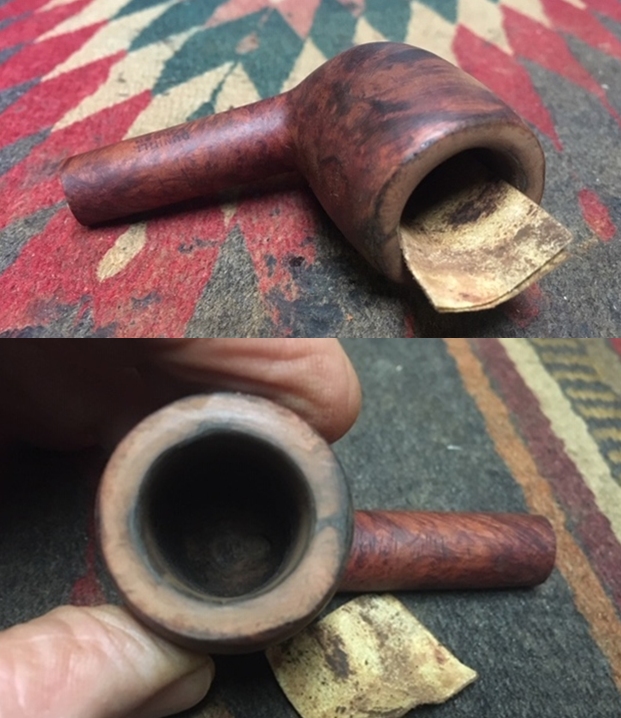
 By the next afternoon, the J B Weld had cured and hardened considerably and will now be able to hold the stummel together as I move along with drilling counter holes, refreshing the fills in the cracks and further sanding and polishing processes. I gouged out the old fills from the cracks. I was careful not to apply too much pressure or dig deeper than absolutely necessary to remove the old fills. Using a magnifying glass and a white correction pen, I marked the points for the counter holes at the start, the turning and the end points along the extent of all the cracks seen on the stummel, and mark my words all Readers, there were plenty and then some more!! After I was done with my markings, the stummel appeared more like a mosaic of white dots!! Next, I drilled counter holes with a 1mm drill bit mounted on to my hand held rotary tool deep enough to serve as a counter hole while taking care that I did not drill a through and through hole. These counter holes arrest and prevent the spread of the cracks further.
 The importance of these counter holes cannot be underestimated. In fact, this pipe had been repaired previously and the repairs were solid enough, though without counter holes, that the pipe was smoked by my grandfather for many years. However, in my scant experience in pipe restoration I have seen that the extensive spread of the cracks towards the back of the stummel is a result of lack of drilling a counter hole to arrest the spread!!
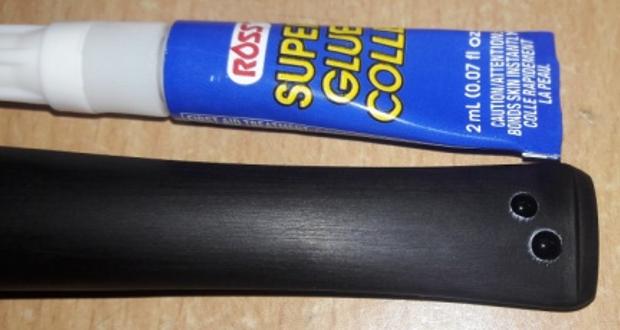
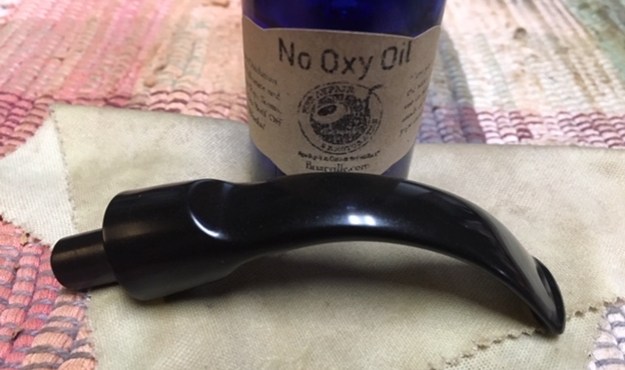
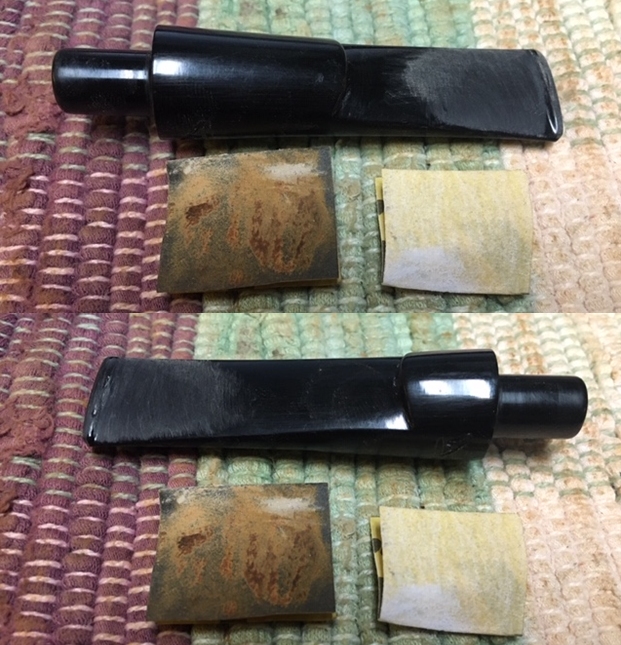
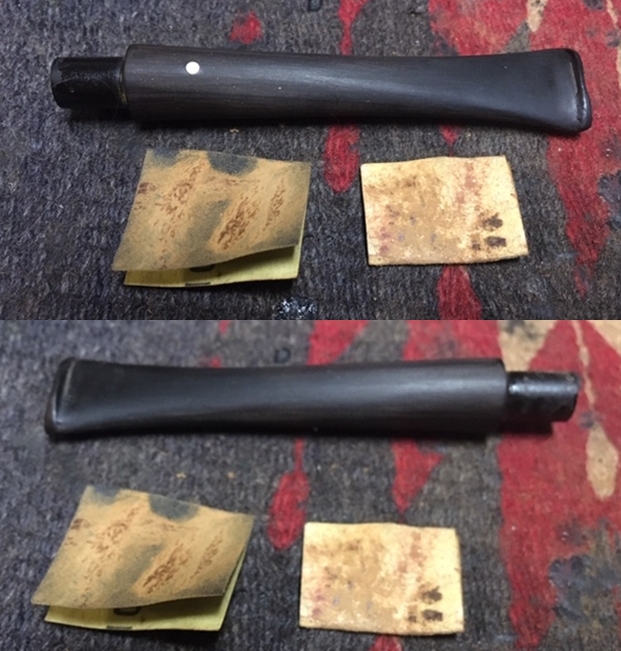
I filled these cracks and counter holes with a mix of briar dust and CA superglue using the layering method (layer of superglue followed by sprinkling of briar dust and repeated it till desired thickness of fill was achieved) and set it aside for the fills to cure. I ensured that I filled the thin outer edge of rim top surface that I will subsequently sand down to match with the rest of the rim surface. While the stummel was set aside for curing, I decided to correct the geometry of the stem in relation to the plane of the bowl. The stem was too straight and was awkward to clench. After inserting a pipe cleaner through the stem, I heated the stem with a heat gun till the vulcanite became a little pliable. Holding the tip of the pipe cleaner, I gave the stem a bend, eyeballing it to suit the bowl. Once I had achieved the desired bend, I held it in place under cold running water till the stem had cooled down sufficiently to retain the shape. The stem was now comfortable to clench. Here are the pictures of the stem before (on the left side) and after (on the right side) the bend.

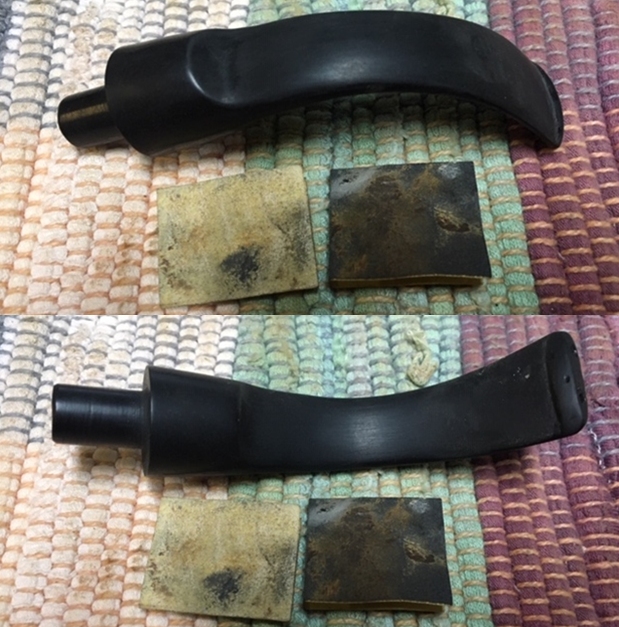
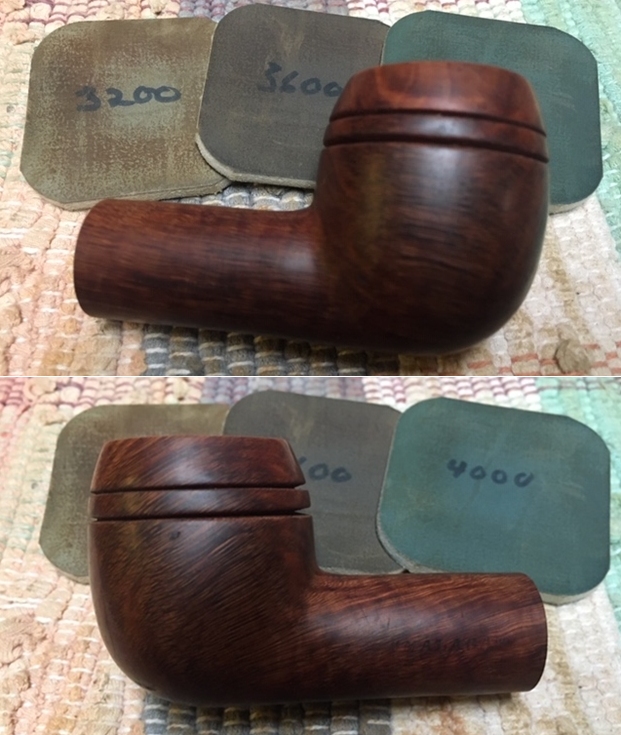
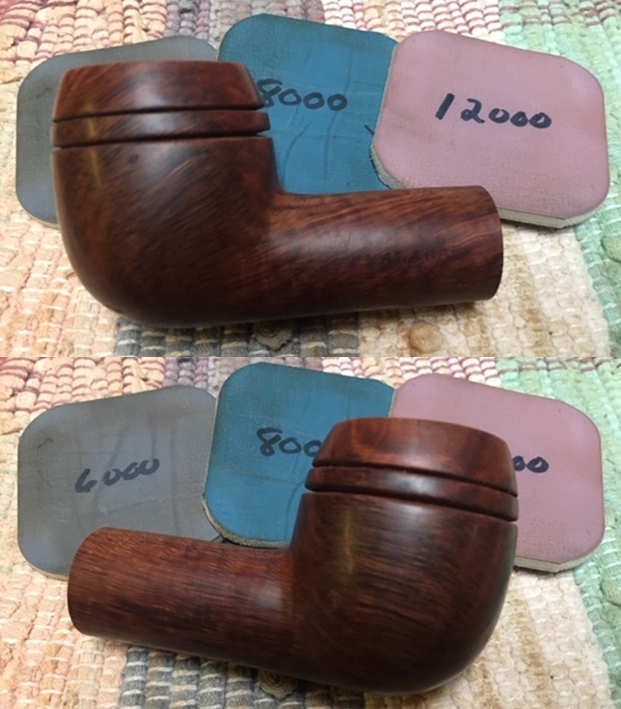
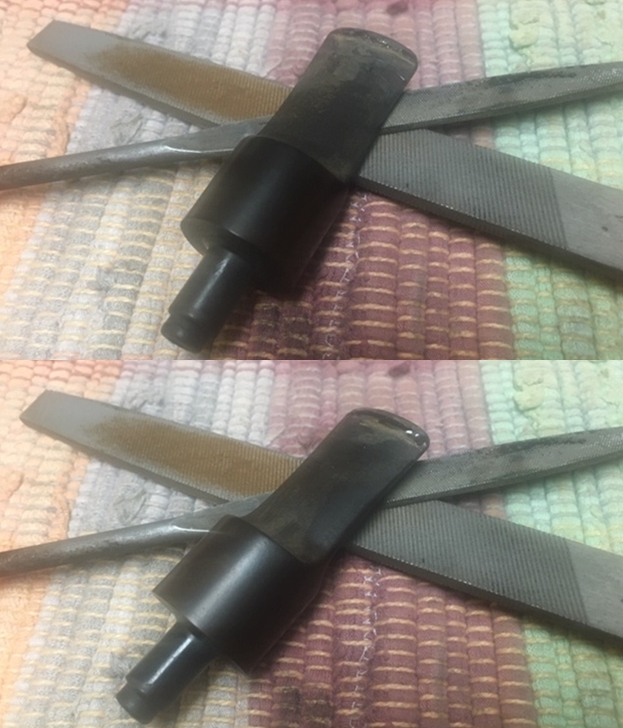
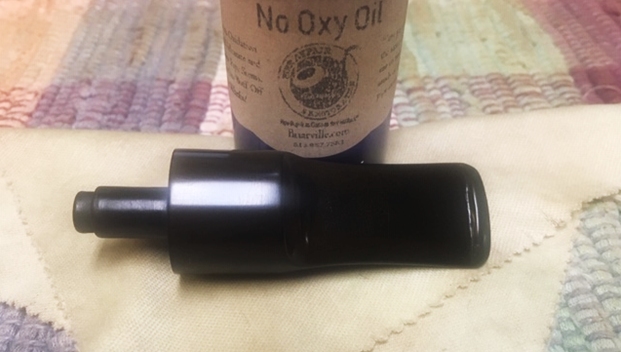
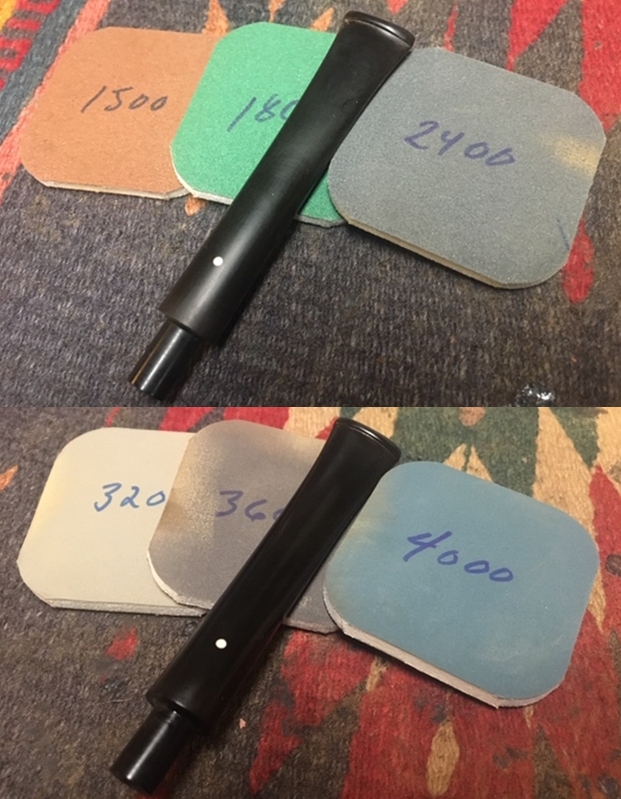
 Now that the seating of the stem into the mortise and the bend to the stem had been sorted out, I proceeded to sand/ blend the fills and impart a nice black glossy shine to the stem. With a flat head needle file, I sanded these fills to achieve a rough match. I further fine tuned the match by sanding the filled area with a folded piece of 220 grit sand paper pinched between my thumb and forefinger. I followed it up by sanding the entire stem surface using 400, 600, 800 grit sand papers and finally with a piece of 0000 grade steel wool. This serves to remove the deep seated oxidation and also reduces the sanding marks of the more abrasive sand papers. I also sharpened the button edges while sanding. I wiped the stem with a cotton swab and alcohol to remove all the oxidation and sanding dust from the surface. I applied a little Extra Virgin Olive oil over the stem and set it aside to be absorbed by the vulcanite. The stem has turned out amazing and now I felt upbeat about completing this project.
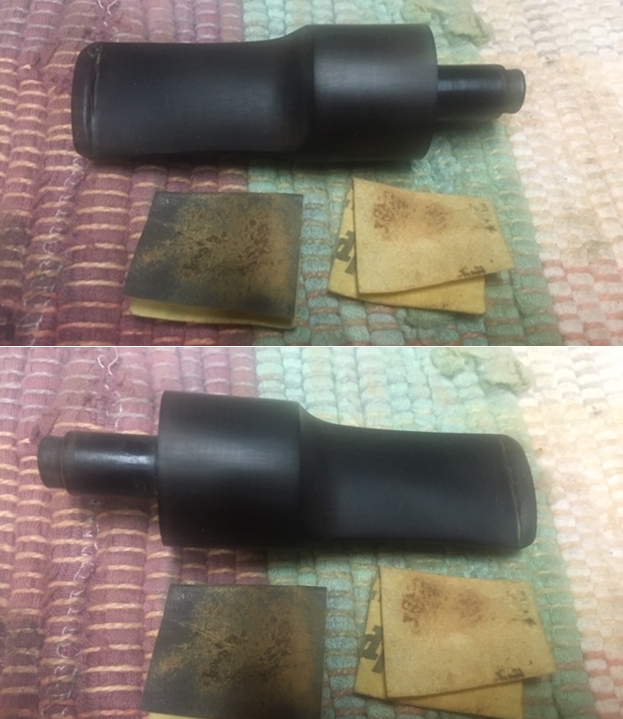
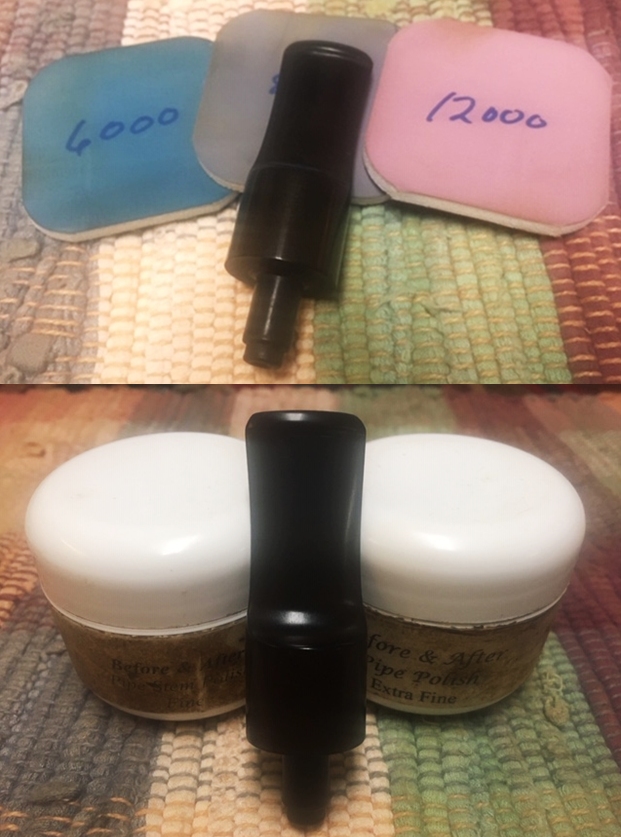
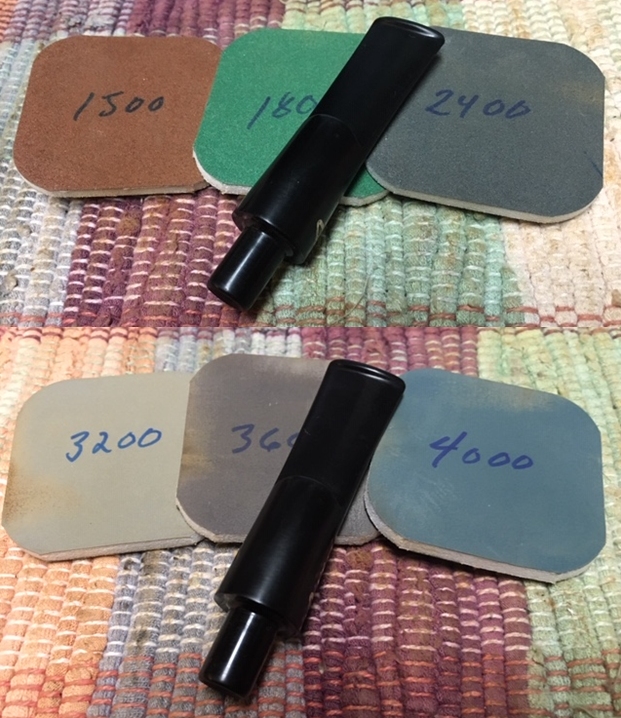
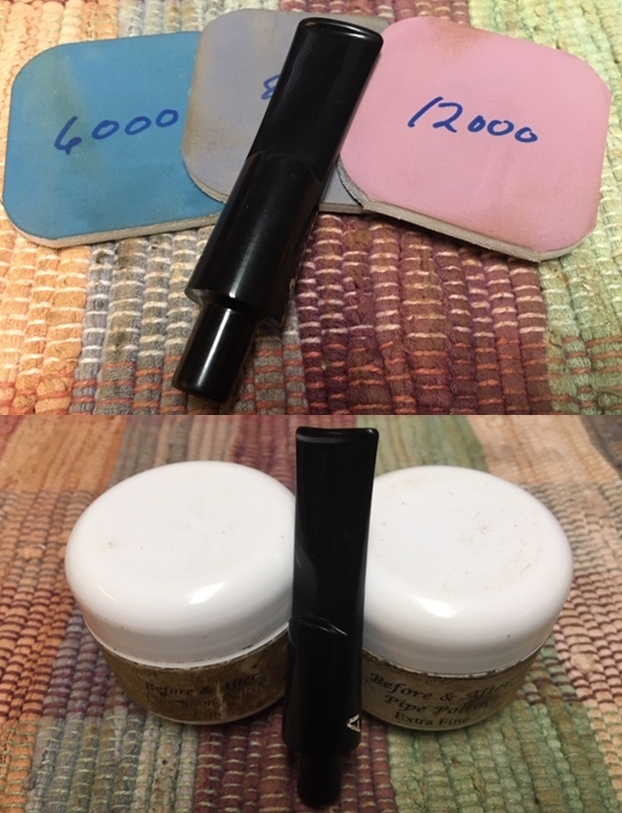
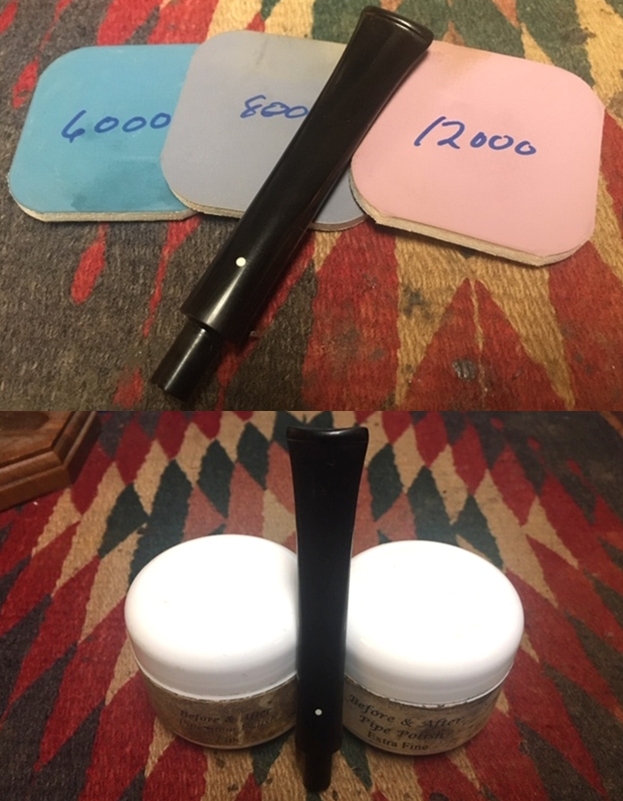
 I wet sand the stem with 1500 to 12000 grit micromesh pads. Next I rubbed a small quantity of extra fine stem polish that I had got from Mark and set it aside to let the balm work its magic. After about 10 minutes, I hand buffed the stem with a microfiber cloth to a nice shine. I rubbed a small quantity of olive oil in to the stem surface to hydrate it and set it aside. The stem now had a nice deep black and glossy shine.
 With the stem completed, I turned my attention to the stummel. In the intervening time when I worked the stem, the stummel crack fills had hardened and cured well. Using a flat head needle file, I sanded these fills to achieve a rough match with the rest of the stummel surface. I further fine tuned the fills by sanding the entire stummel surface with folded pieces of 220, 400 and 600 grit sandpapers. The stummel was now clean and even. On close scrutiny of the cleaned stummel surface, I observed a small crack which I had missed out earlier. I will need to drill counter holes to arrest the spread and extending of these cracks.

 Under a magnifying glass and bright light, I marked the ends of the now observed cracks with a white correction pen. I mounted a 1mm drill bit on to my hand held rotary tool and drilled counter holes. I filled these counter holes and cracks with a mix of briar dust and superglue. I also took this opportunity to touch up and refill those areas which required further fills and set the stummel aside to cure.

 Once the fills had cured, I went through the complete cycle of sanding with a flat head needle file followed with 220 grits sandpaper. The fills are all solid and have naturally blended in quite nicely with the entire briar surface. The rim top surface is now evenly thick and with folded piece of 220 grit sandpaper, I created a slight bevel to inner and outer edges of the rim top. I am happy with the appearance of the stummel at this stage of restoration.

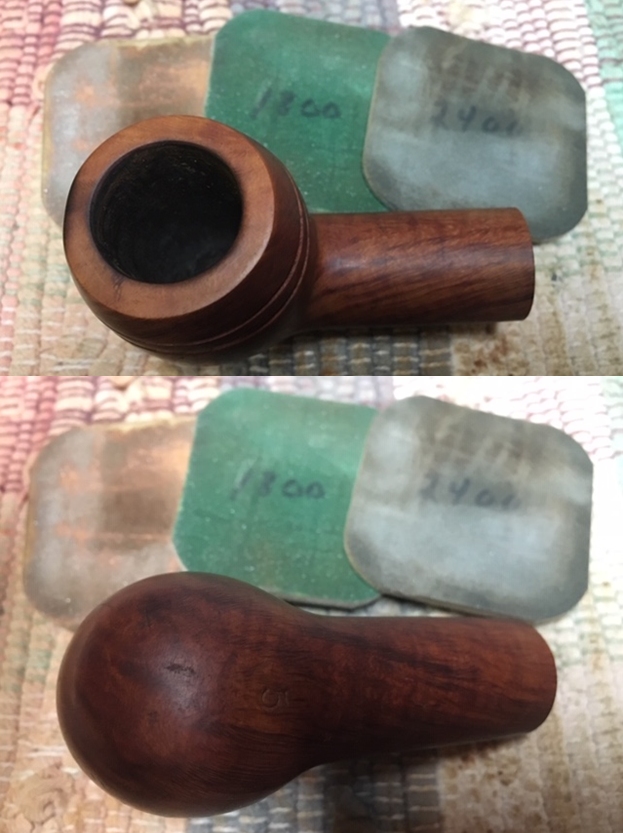
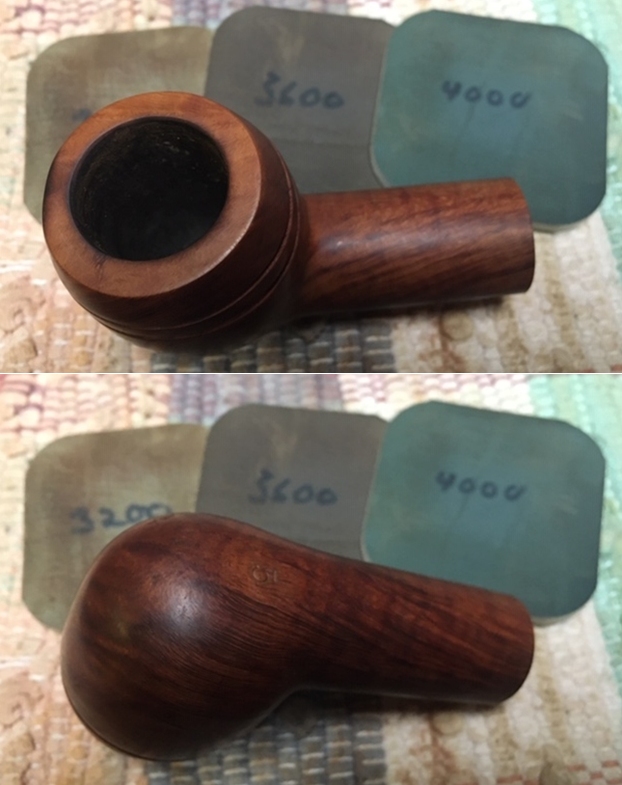
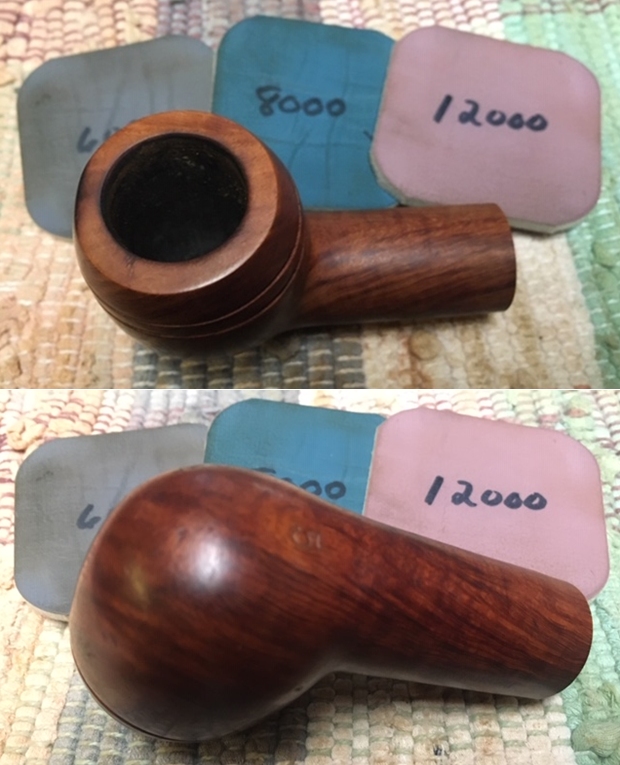
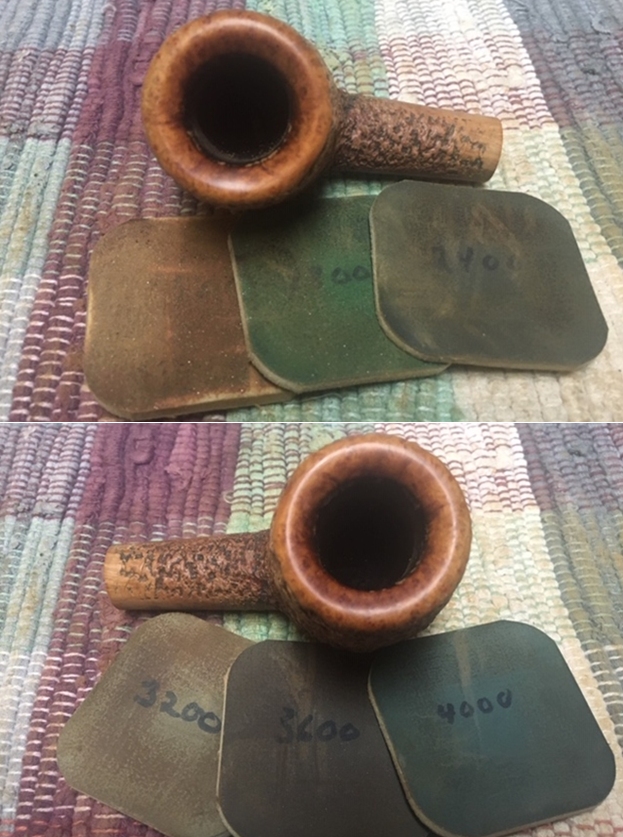
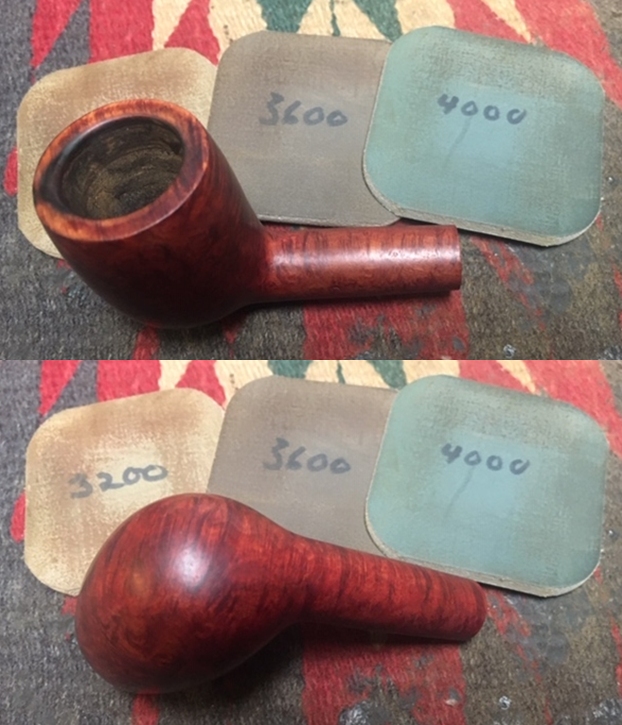
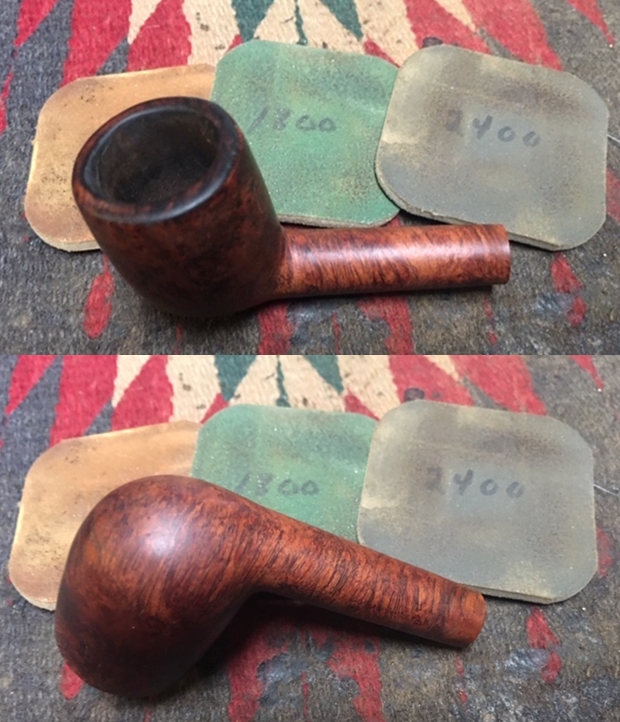
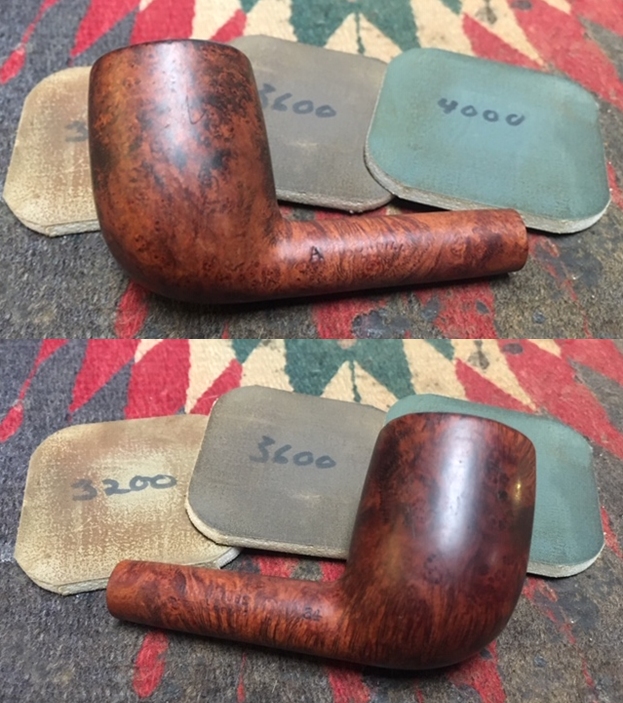
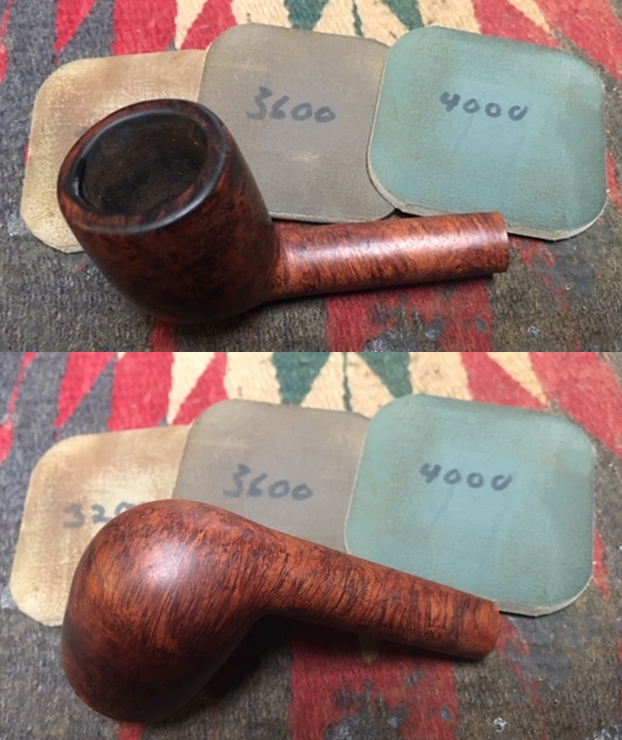
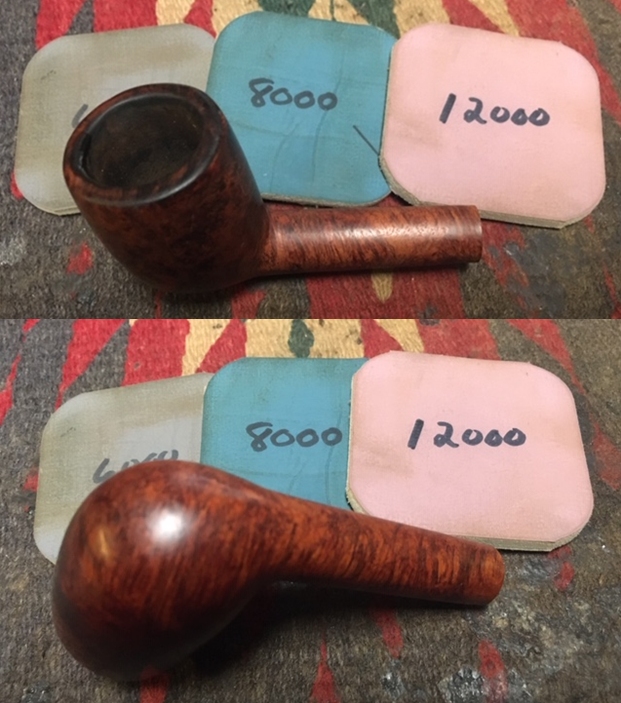
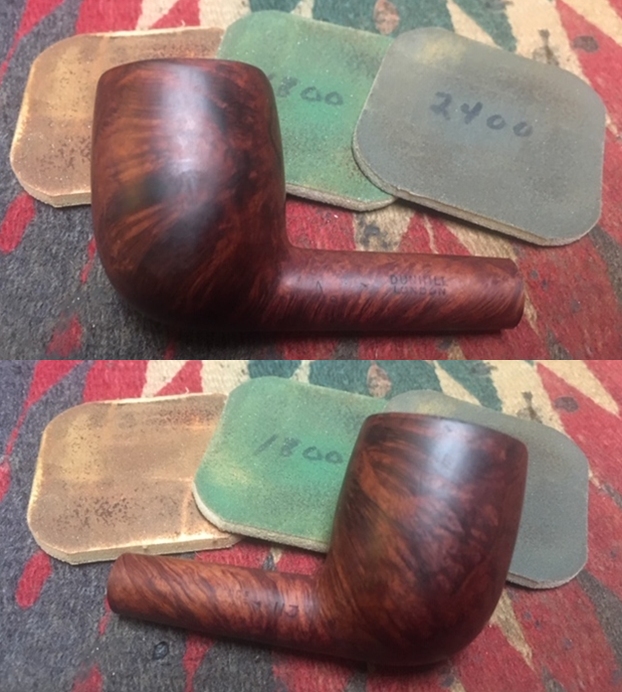
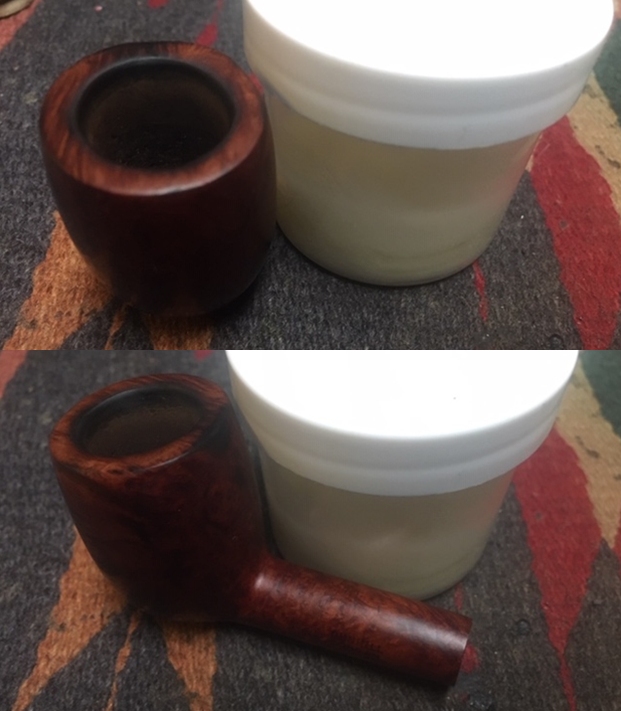
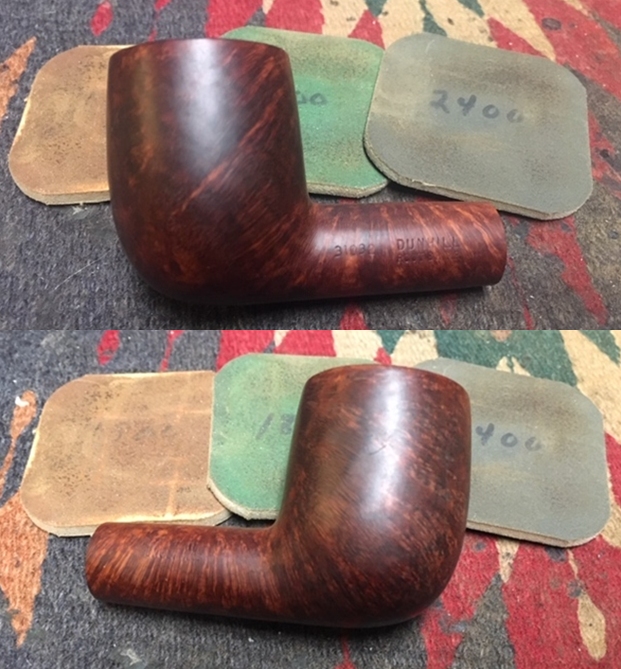
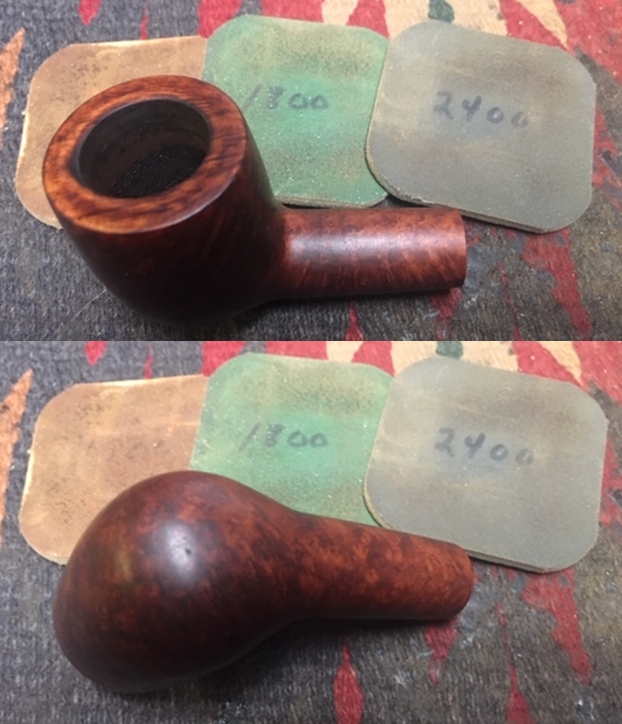
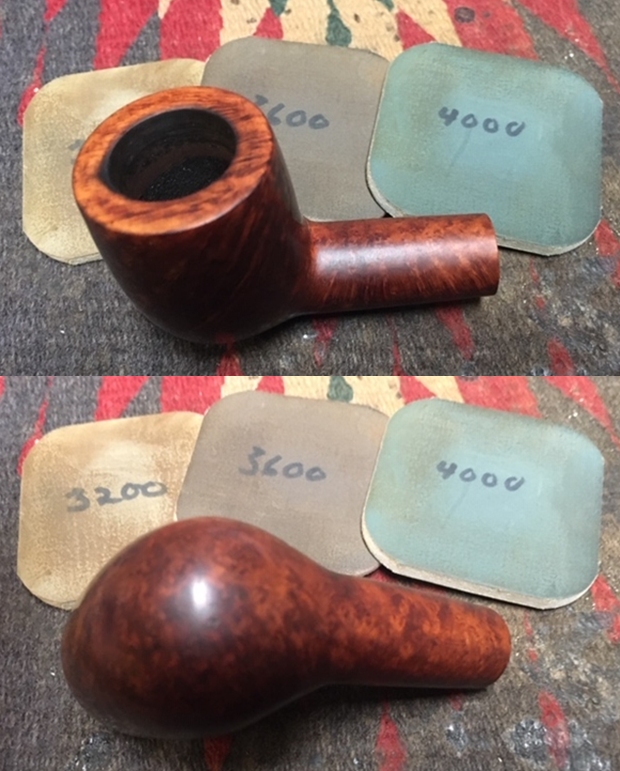
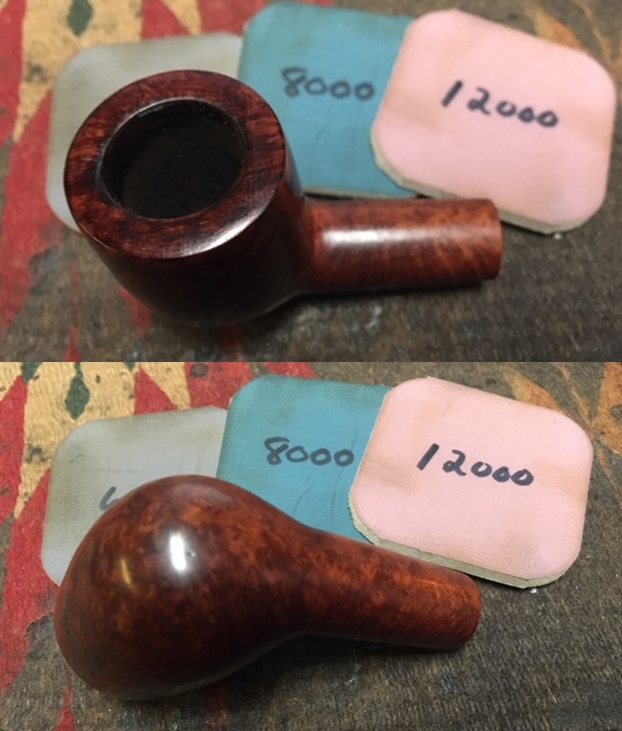
 I polished the stummel with micromesh pads, wet sanding with 1500 to 12000 pads. I polished the freshly topped rim surface and the newly created inner rim bevel. I wiped the surface with a soft cloth at the end of the micromesh cycle. The stummel looked amazing with a deep shine and beautiful grains popping over the stummel surface. I was surprised that the rim top surface has the same deep brown coloration as the rest of the stummel surface even though the repairs to the cracks were still sticking out like sore thumbs through the shining stummel surface, I was not overly perturbed having made peace with myself regarding the repairs showing, still I shall attempt to mask them by staining the stummel subsequently.

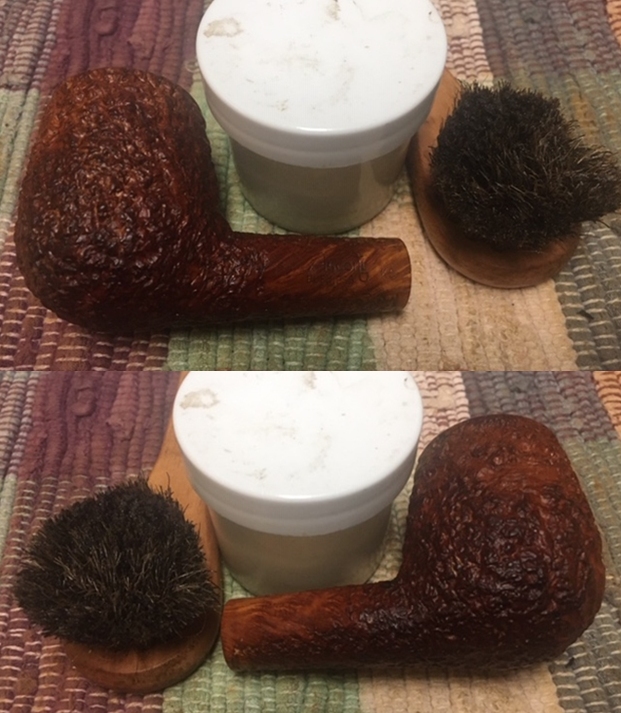
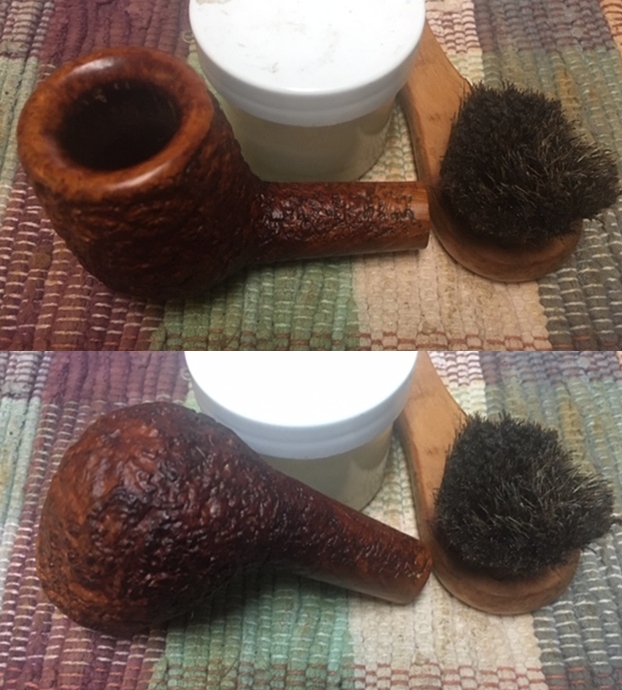
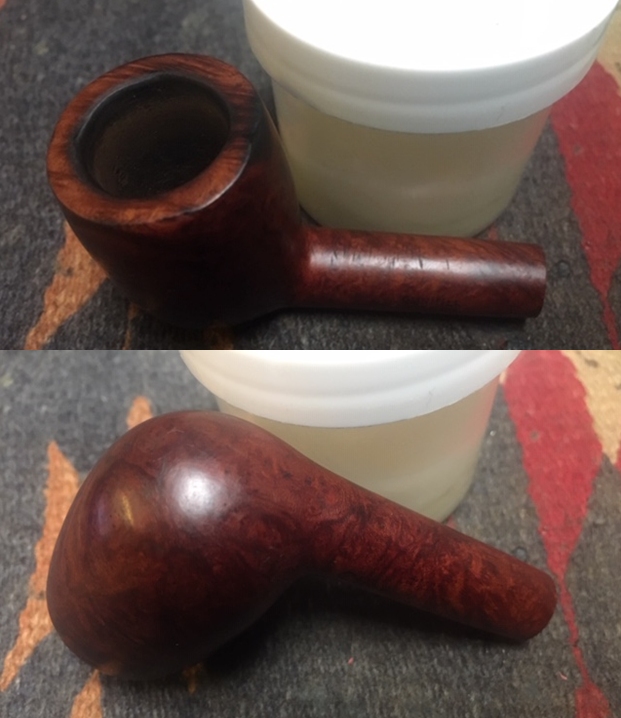
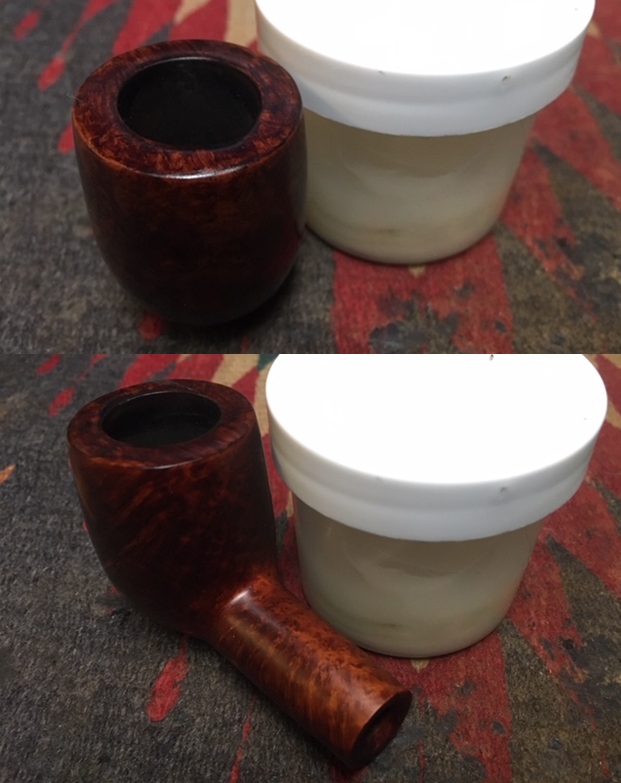
 I massaged a small quantity of “Before and After Restoration Balm” with my fingers into the briar. The immediate and incredible transformation that takes place is a worthy reward for all the efforts!! I let the balm sit on the surface to be absorbed in to the briar for about 20 minutes. The bowl now looked fresh and attractive with the grains popping out any which way you look at the briar. Even the repairs to the stummel are a lot less visible what with the briar taking up a deep dark and vibrant brown hues. I polished off the balm with a soft cloth to a lovely shine.

 Next, with a folded piece of 150 grit sandpaper, I sanded the coat of J B Weld from the internal walls of the chamber keeping just a thin layer of coat along the walls. The coat appeared uneven at this stage but once it was coated with pipe mud, the chamber walls would become even and smooth.
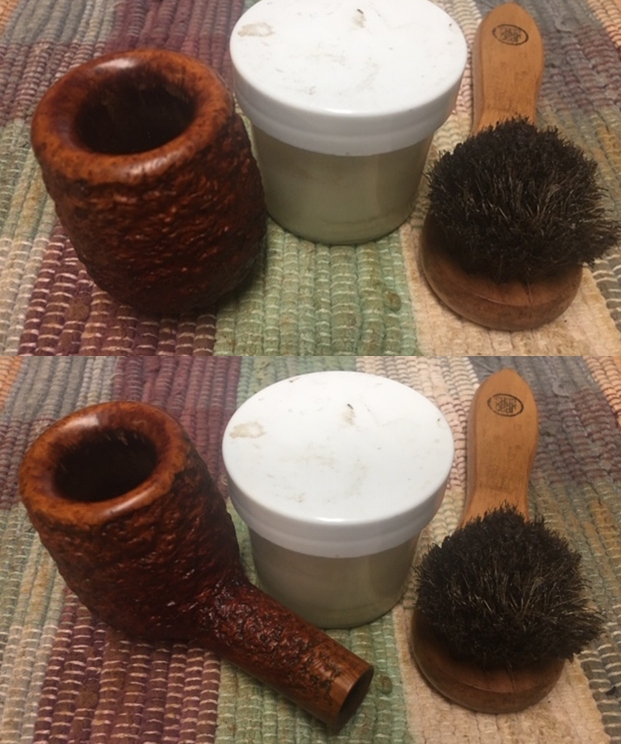
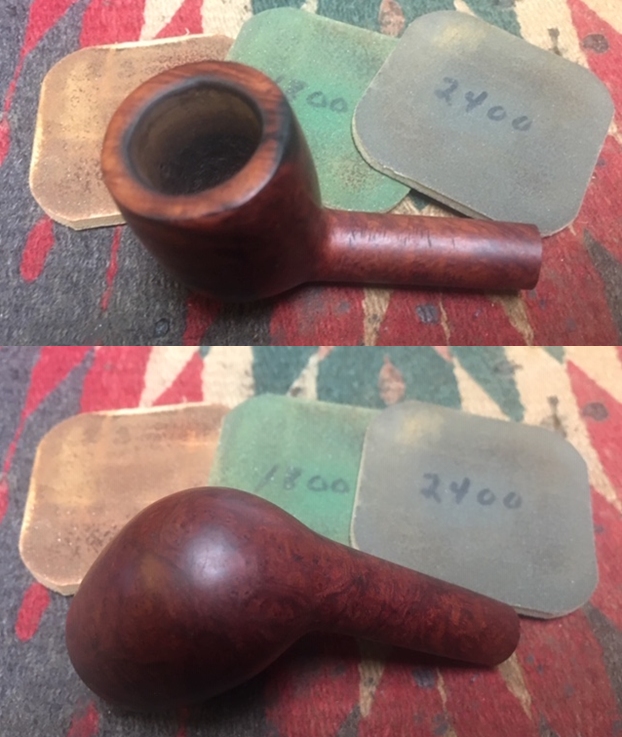
 I decided on giving the stummel a stain wash with a Feibing’s Dark Brown leather dye. I diluted the Feibing’s Dark Brown leather dye in 99.9% isopropyl alcohol in approximate ratio of 1:4 and with a cotton swab, I dabbed the diluted stain over the stummel surface, letting it set for a few moments and thereafter wiping it off with a dry clean cotton swab. I repeated the process till I had achieved the desired coloration. I was pleased with the color of the stummel which highlighted the grains while the stummel repairs were masked nicely. This time around, even the fills had absorbed the stain and blended in nicely with the rest of the stummel.

 In order to ensure that the stain wash sets in to the briar, I warmed the stummel with a heat gun while being careful that I did not overheat the crack repairs/ fills.
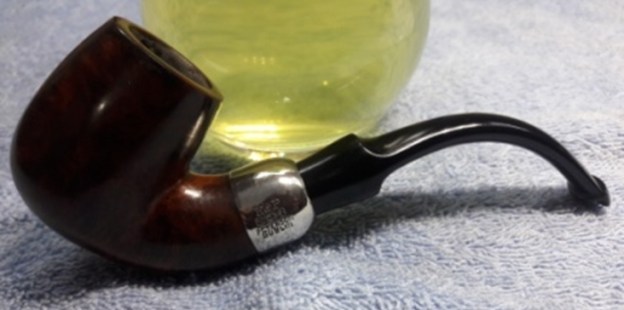
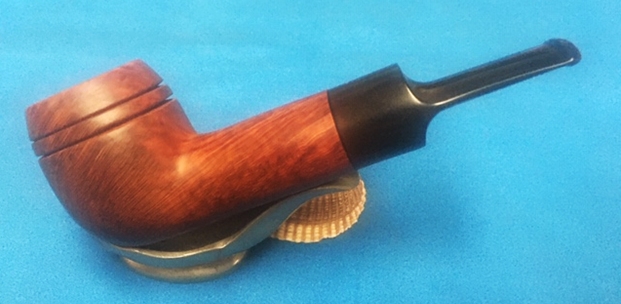
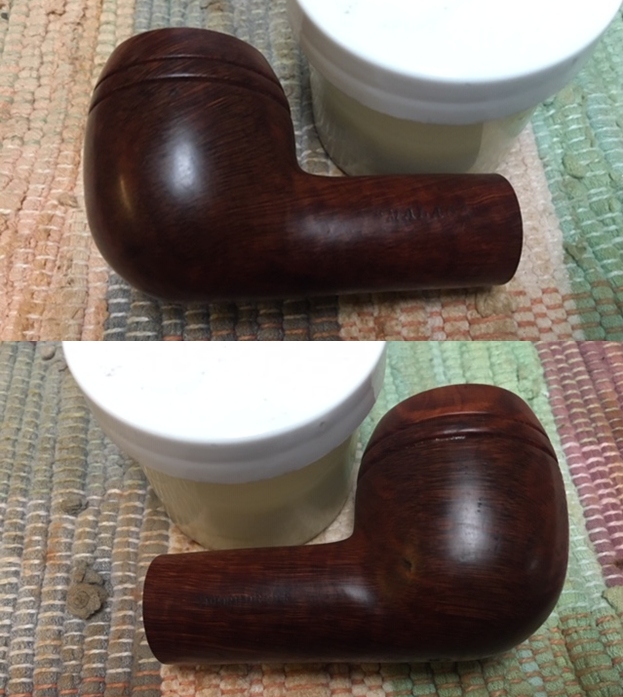
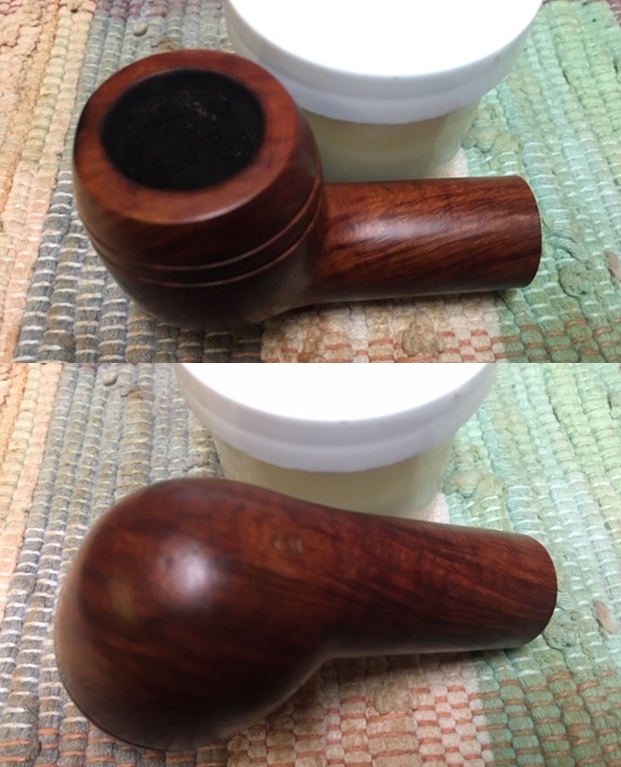
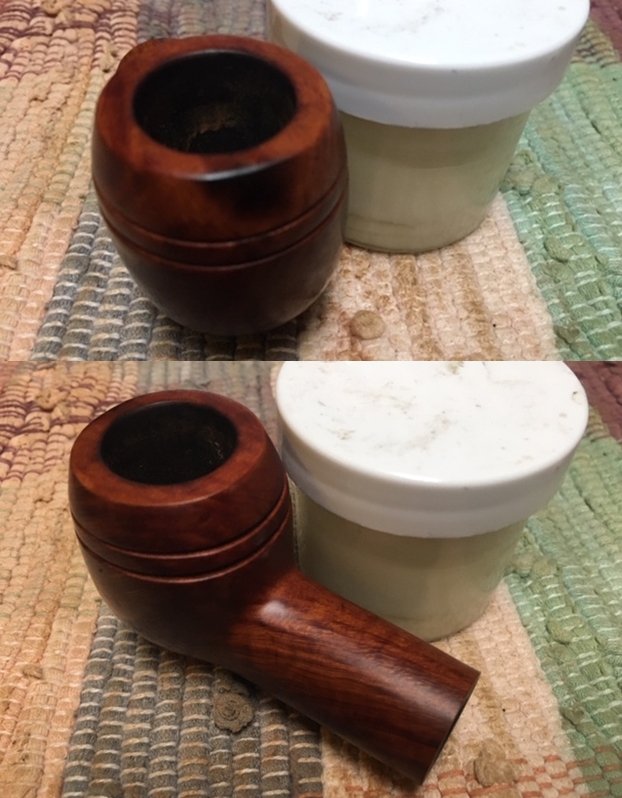
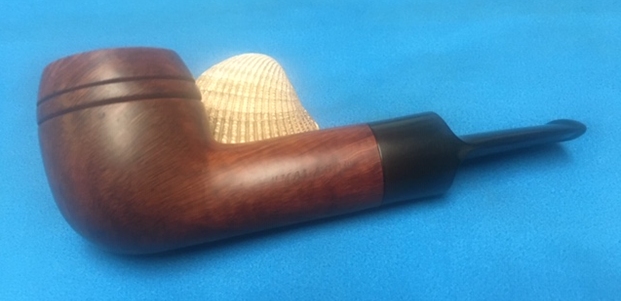
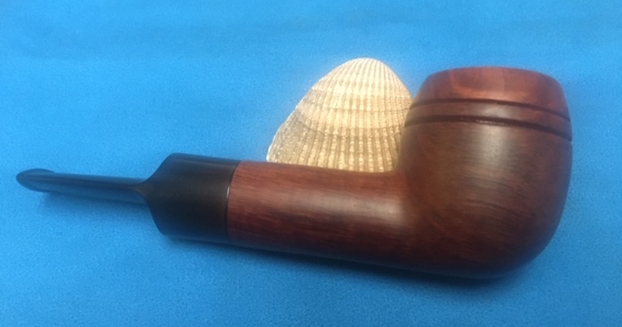
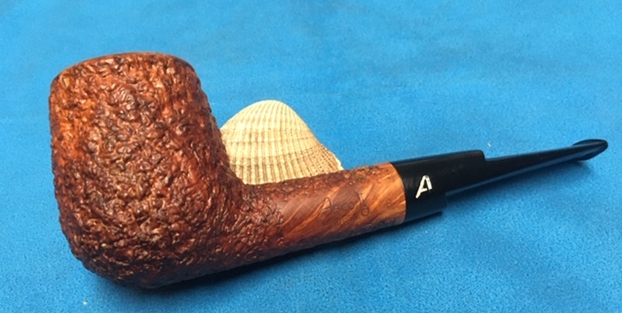
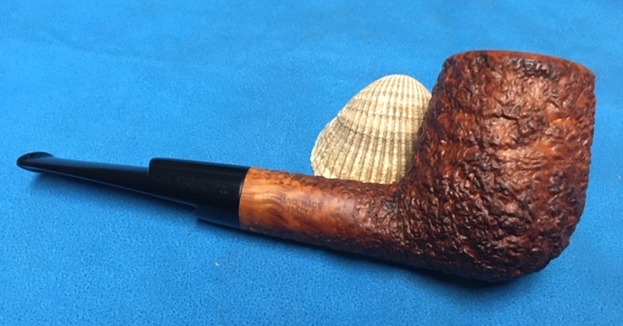
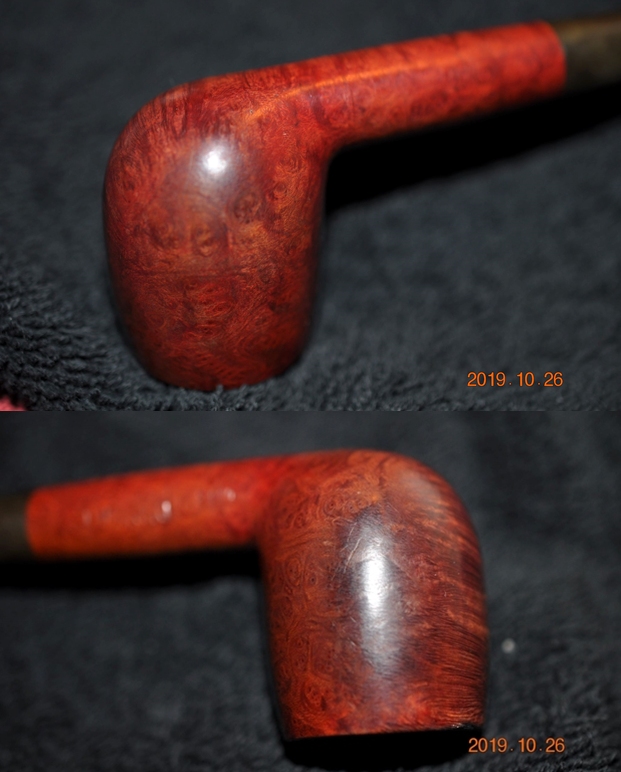
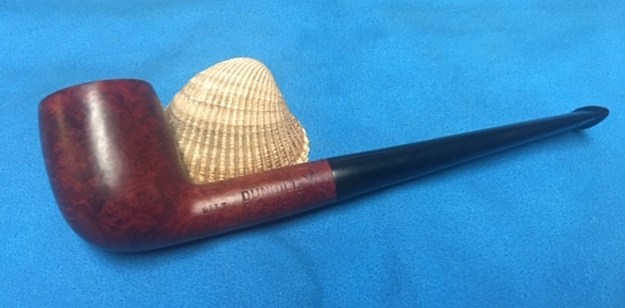
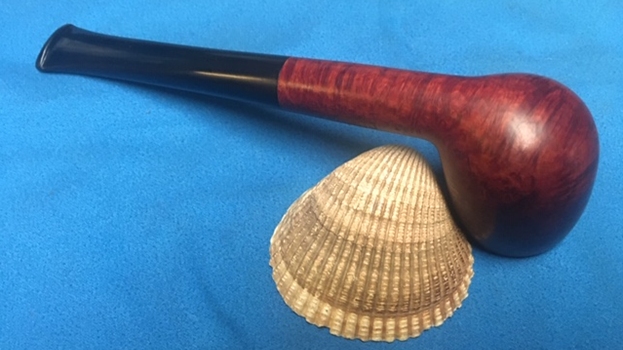
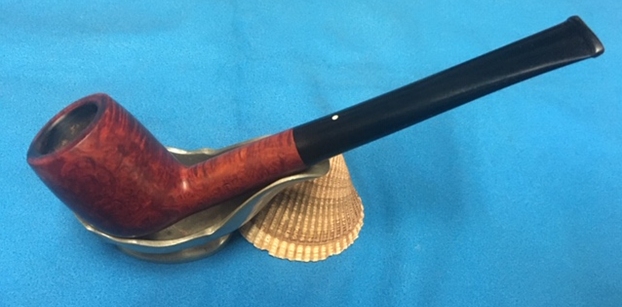
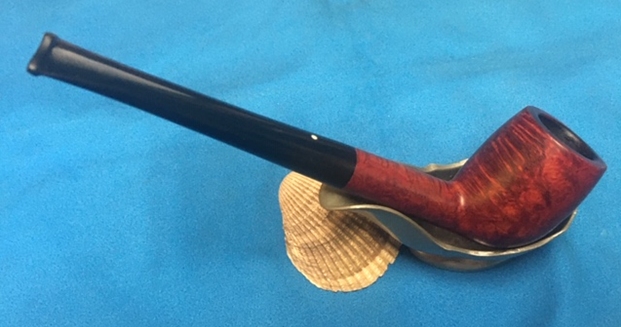
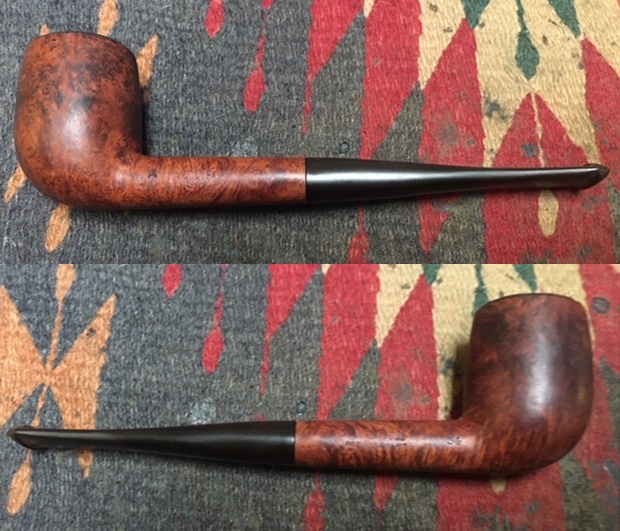
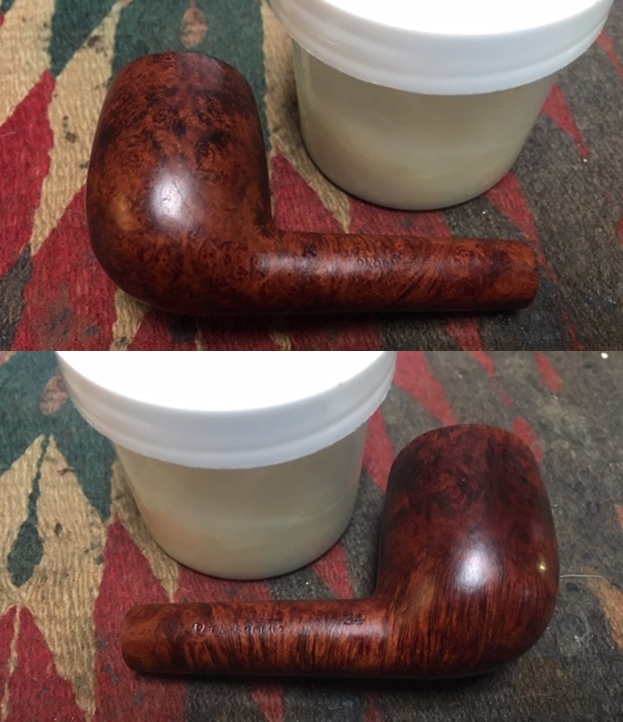
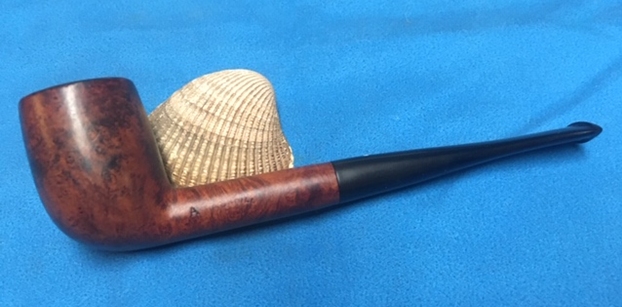
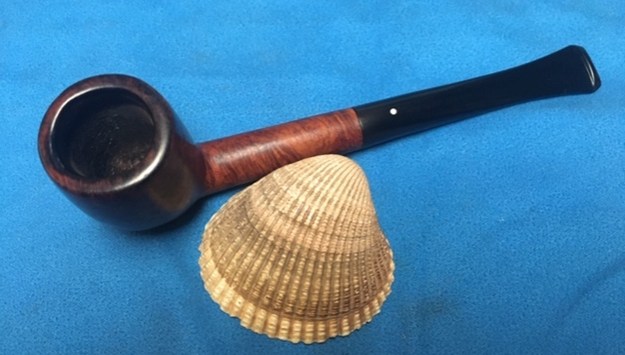
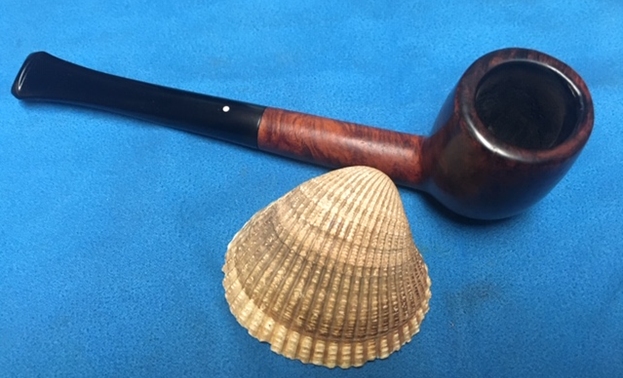
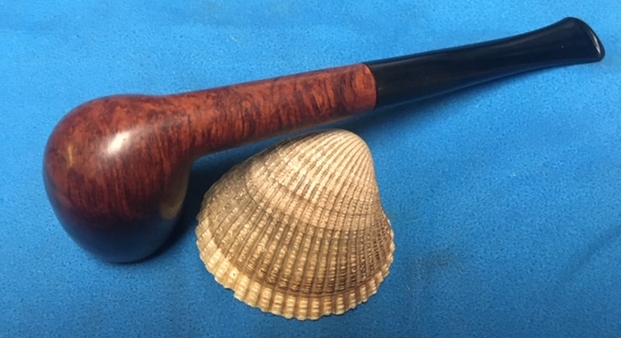
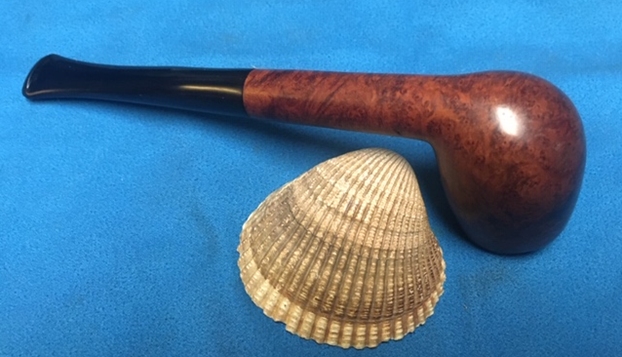
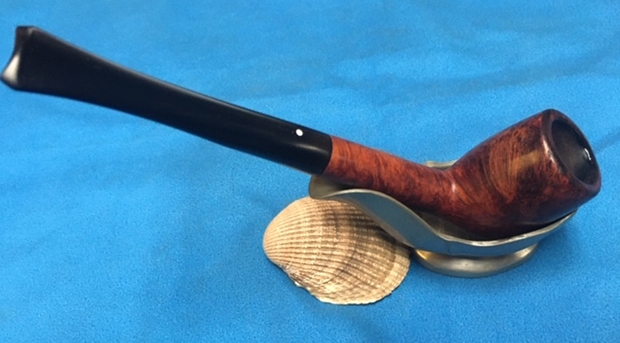
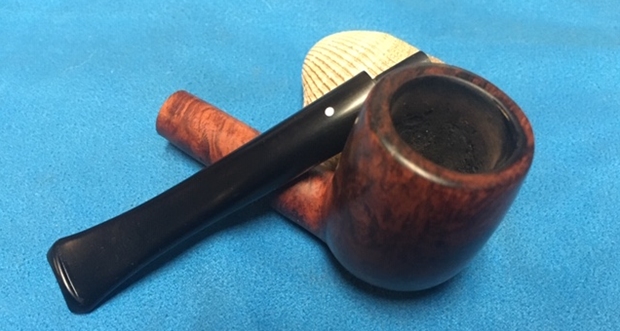
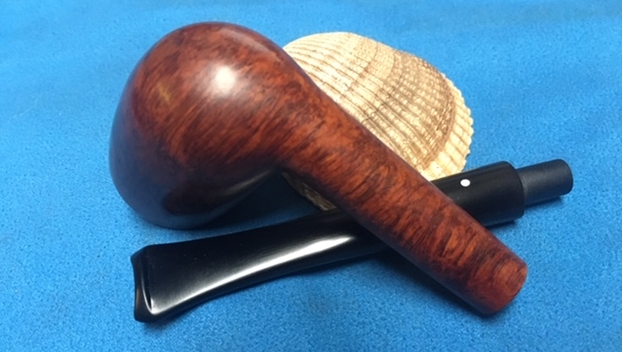
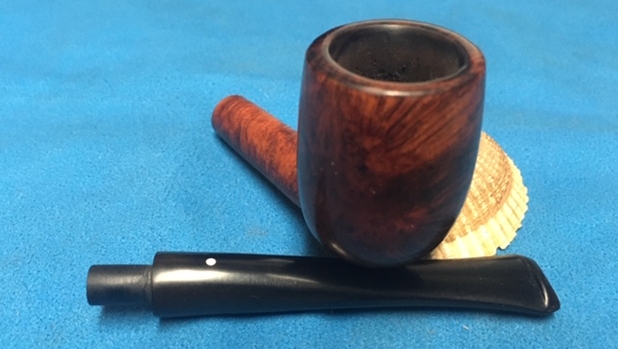
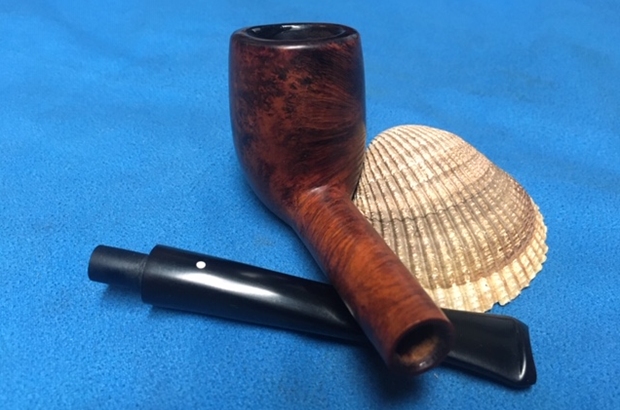
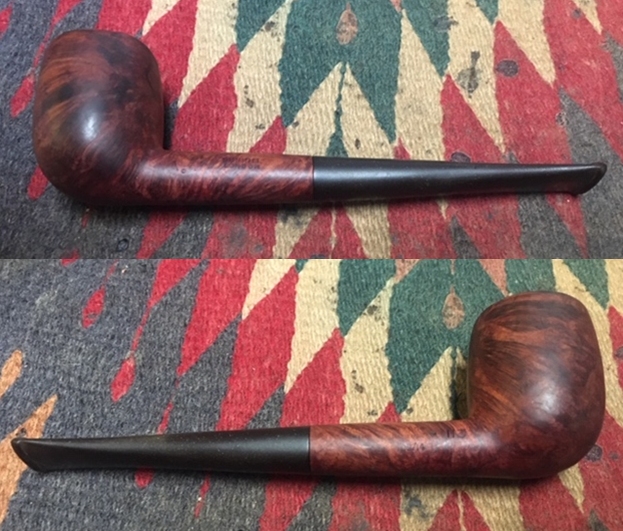
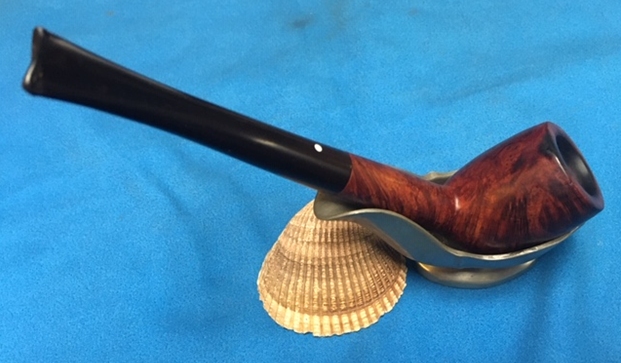
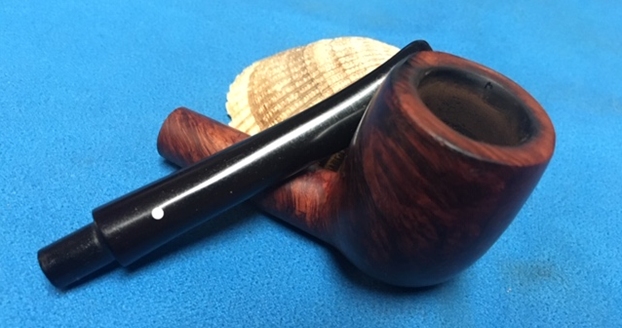
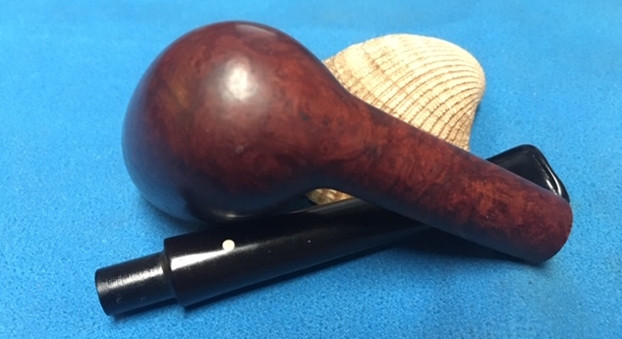
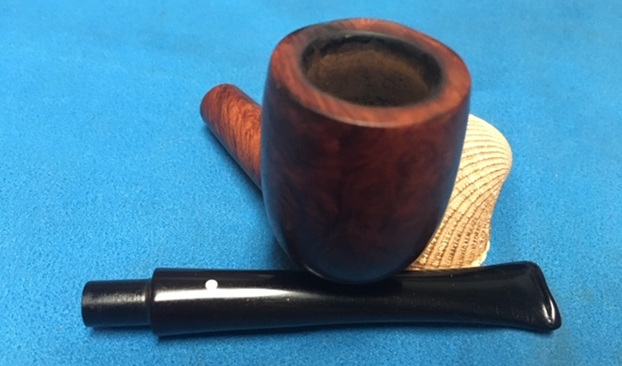
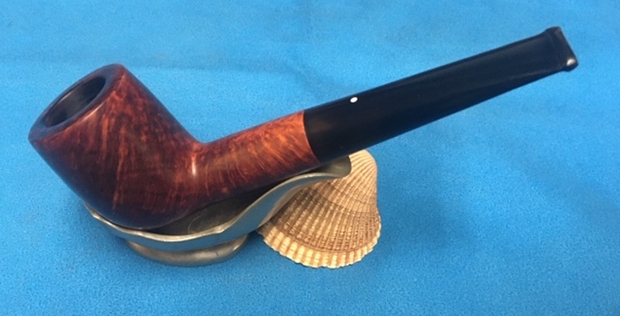
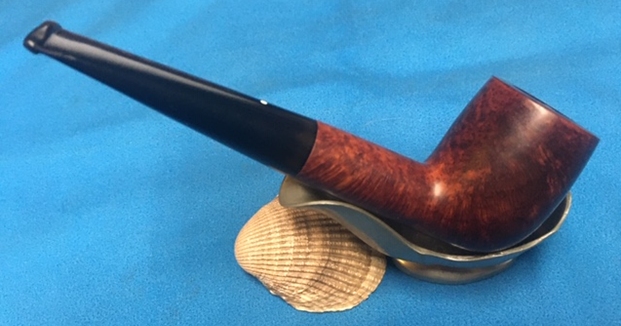
 Now on to the home stretch… To complete the restoration, I re-attached the stem with the stummel. I mounted a cotton cloth buffing wheel to my hand held rotary tool, set the speed at about half of the full power and applied Blue Diamond compound to the entire pipe to remove all the minor scratches that remained. I wiped/ buffed the pipe with a soft cotton cloth to clear it of any leftover compound dust. With a cotton buffing wheel earmarked for carnauba wax, I applied several coats of carnauba wax. I worked the complete pipe till the time all the wax was absorbed by the briar. The pipe now boasted of a beautiful and lustrous shine. I vigorously rubbed the pipe with a microfiber cloth to deepen the shine and also clean away any residual wax that had been left behind. I vigorously buffed the nickel ferrule with a jeweler’s cloth and brought it to a nice shine. I was very happy with the way this beauty had turned out. The following pictures speak of the transformation that the pipe has undergone.


 There was only one more issue that needed to be addressed and one that could not be ignored, being a functional issue. After I had lined the walls of the chamber with a thin coat of J. B. Weld, it was necessary to prevent the walls from coming in to direct contact with the burning tobacco. I addressed this issue by mixing activated charcoal and plain yogurt to a thicker consistency, just enough that it would spread easily and thereafter applied it evenly all along the chamber walls after inserting a folded pipe cleaner through the draught hole to keep it open. Once dry and set, this will not only protect the walls but also aid in faster buildup of cake.
 P.S.: This project was one with many challenging issues that needed to be addressed, the first and biggest being finding an original Peterson’s system P-lip pipe stem, ensuring a snug fit in to the mortise, modifying the stem to function as it is supposed to and finally addressing, fixing and masking all those cracks. But now that the project is completed and the pipe is definitely smoke-able and gorgeous looking, I cannot but thank Steve who goaded me in to working on this pipe in the first place and for all the input/ suggestions rendered during the process to help me preserve memories of ancestor.
I wish to thank each one for sparing their valuable time to read through this write up and sharing this journey with me while I enjoyed working on this treasured inheritance.

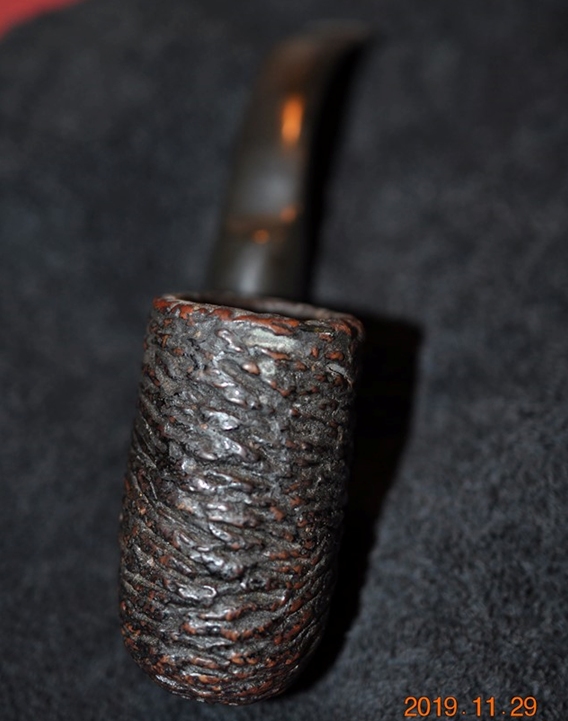
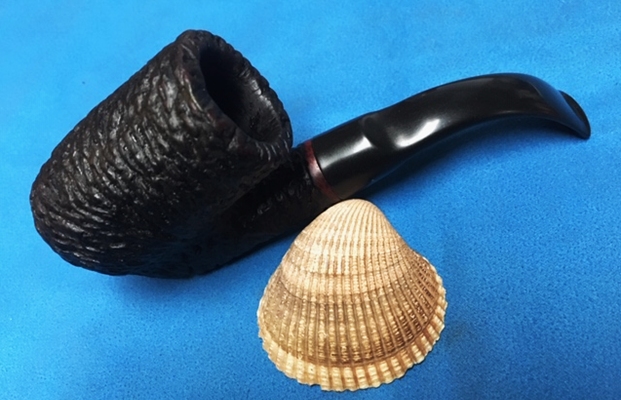
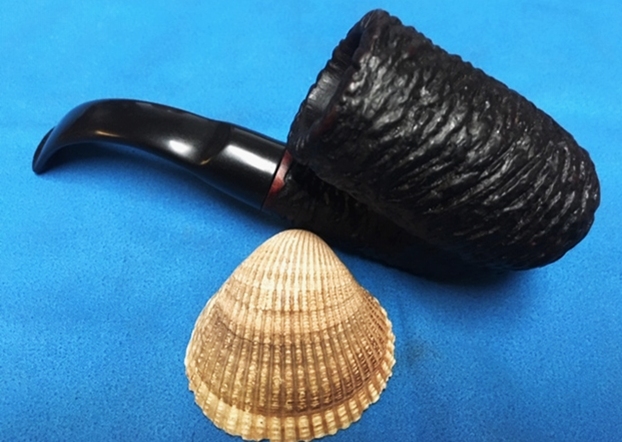
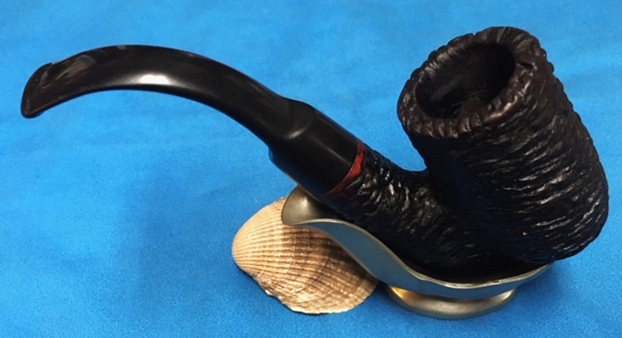
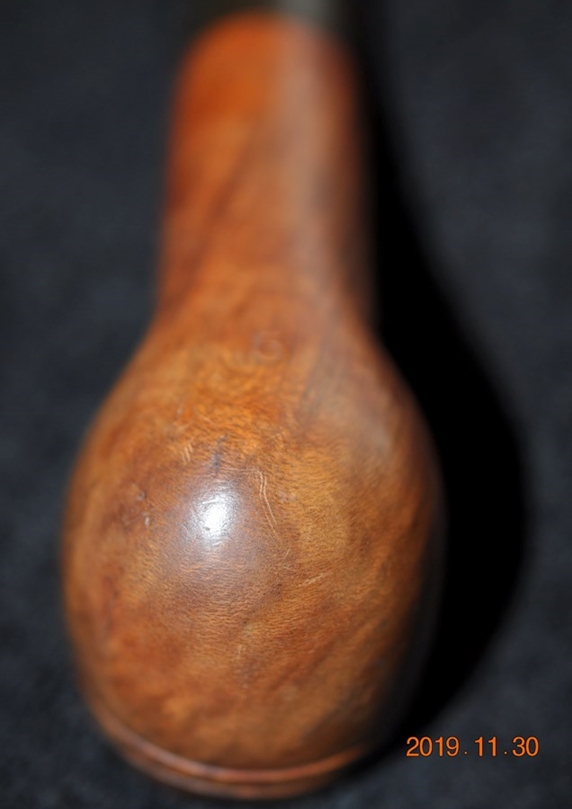
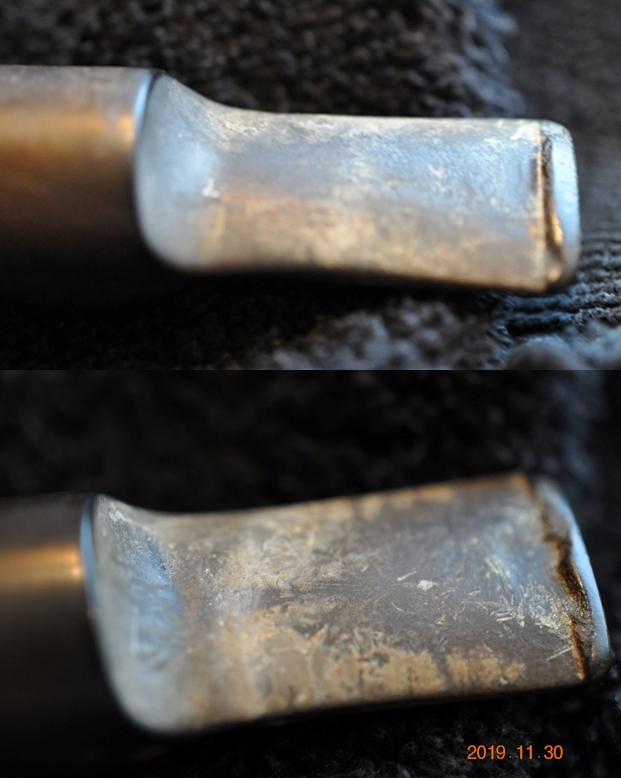
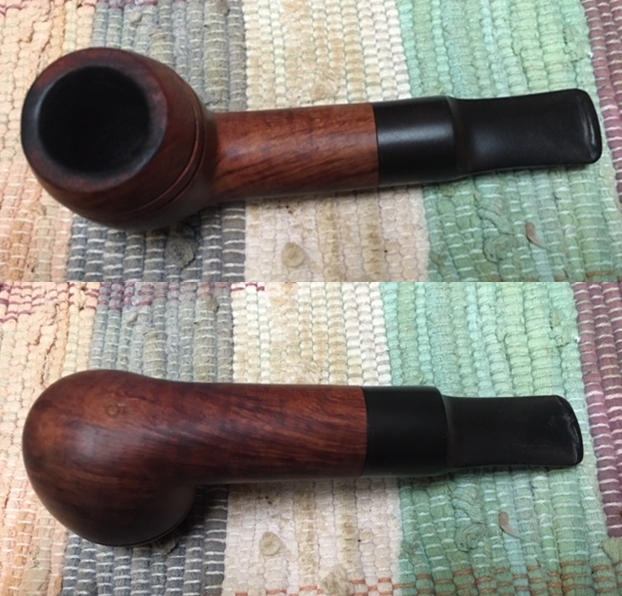
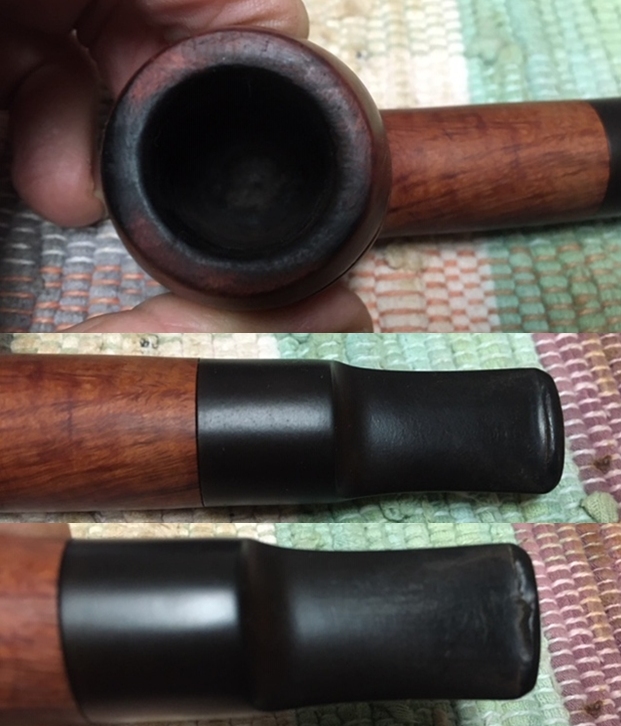
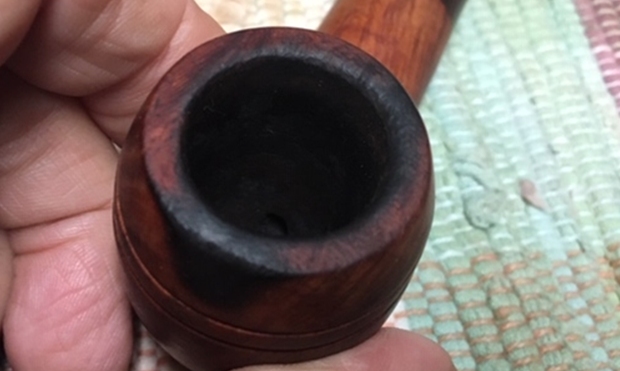
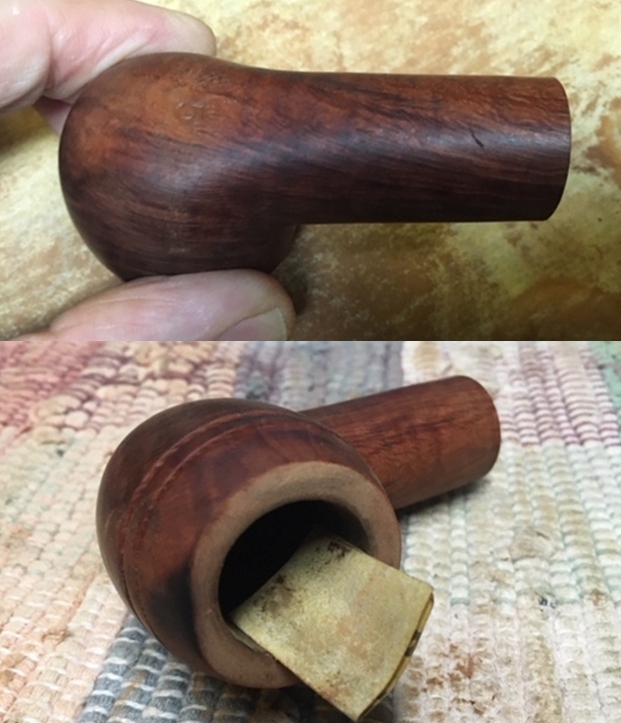
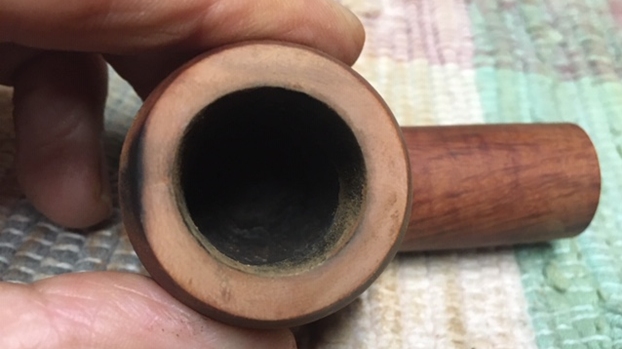
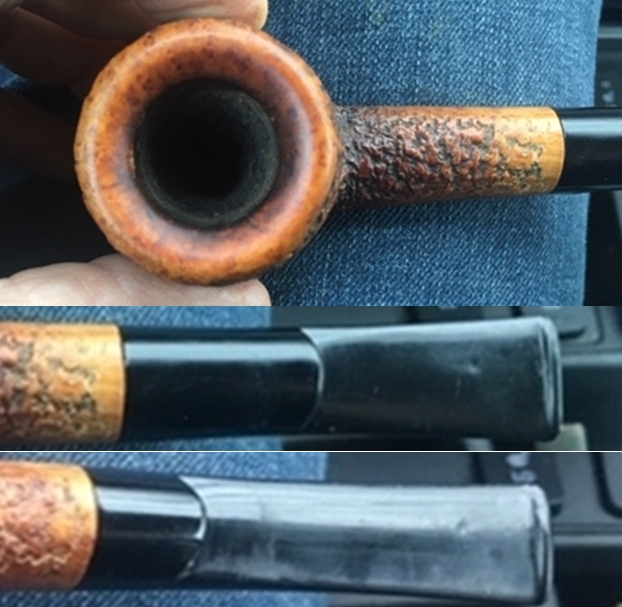
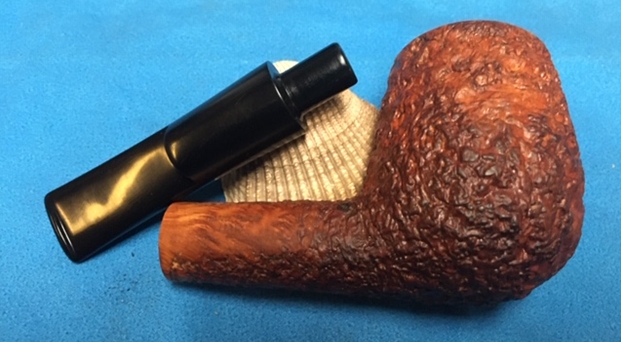
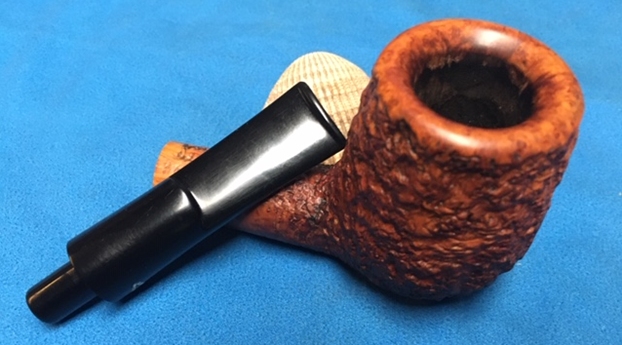
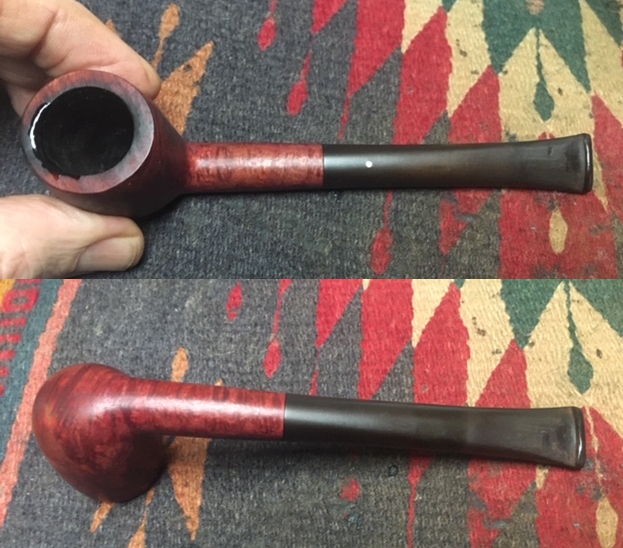
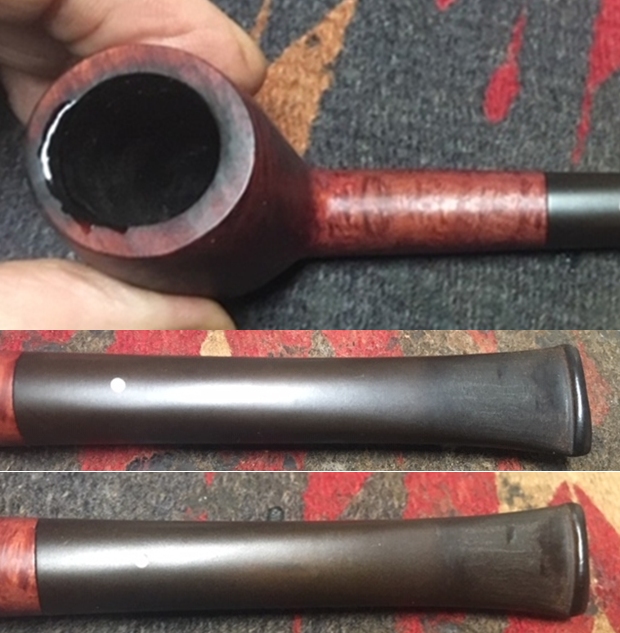
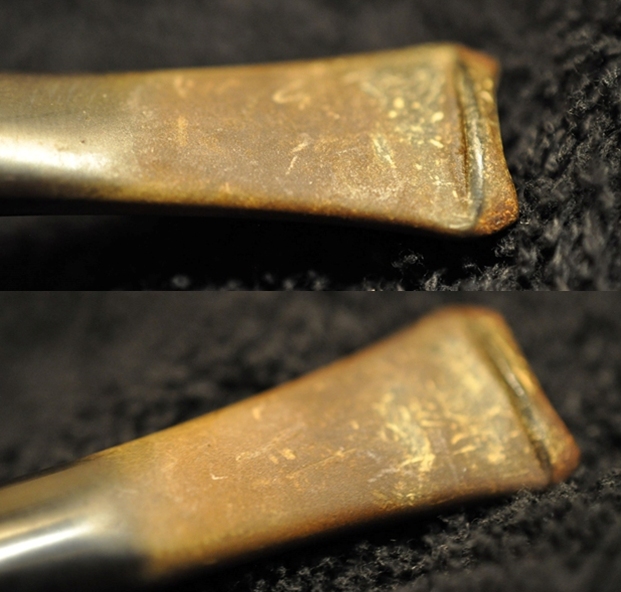
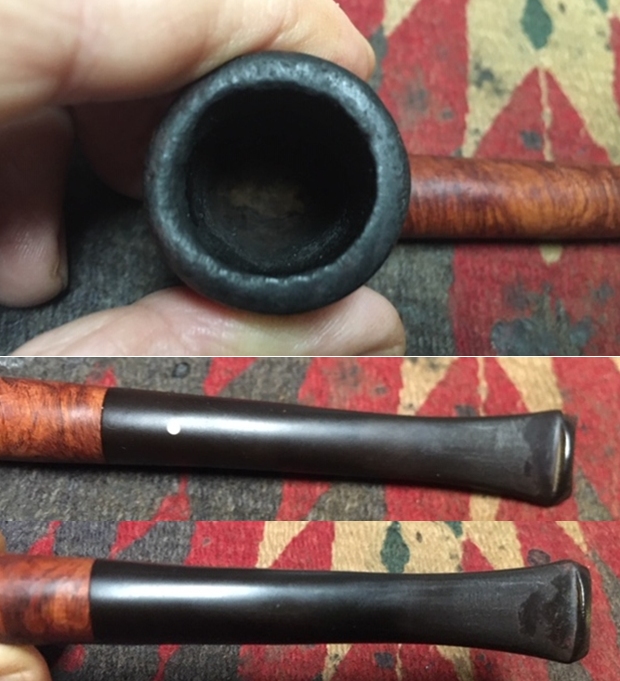
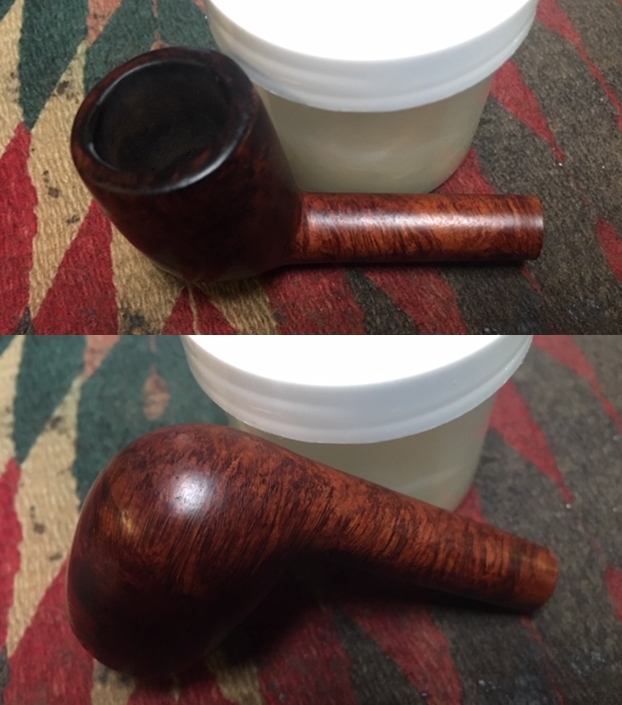
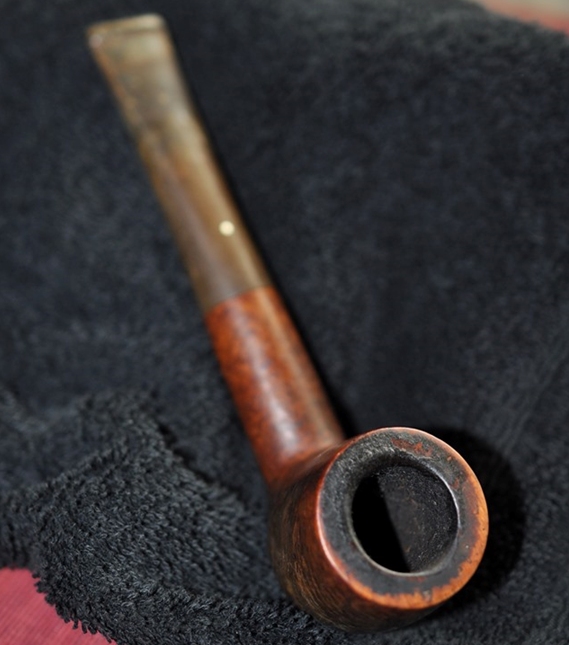
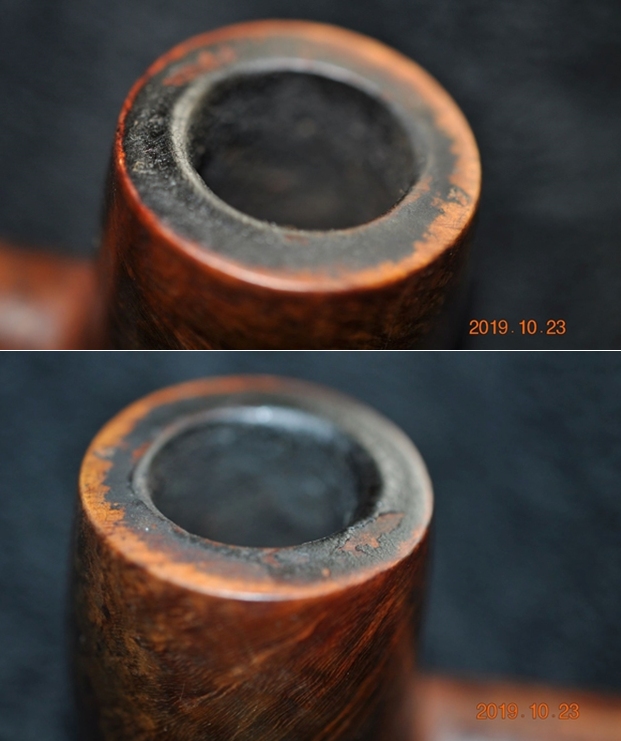
 It really is a stunning pipe and feels great in the hand. I took photos of the rim top to show the damage that is present on the top and on the inner edge of the bowl. It almost looked as if the bowl had been knocked out against concrete. I took photos of the stem as well to try to capture the condition of the stem. The top side was dirty and dull but there were no tooth marks or chatter. The underside looked good other than a deep scratch that ran from the button edge forward on the stem for about an inch.
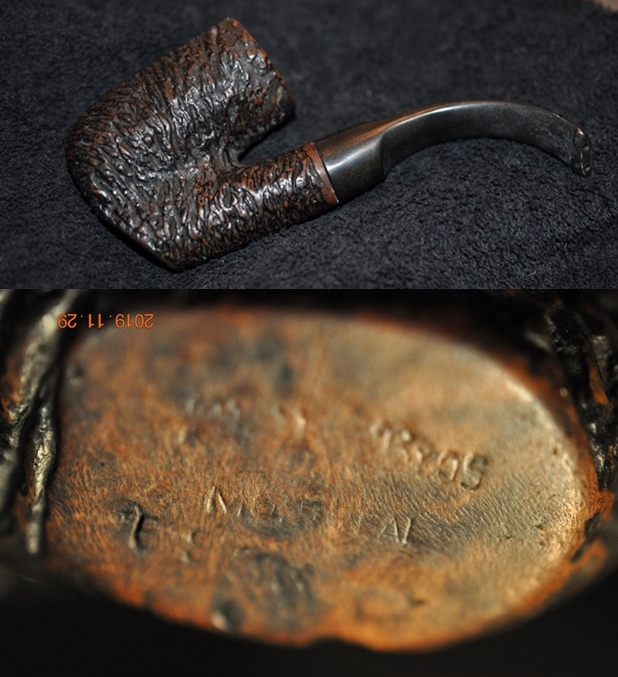
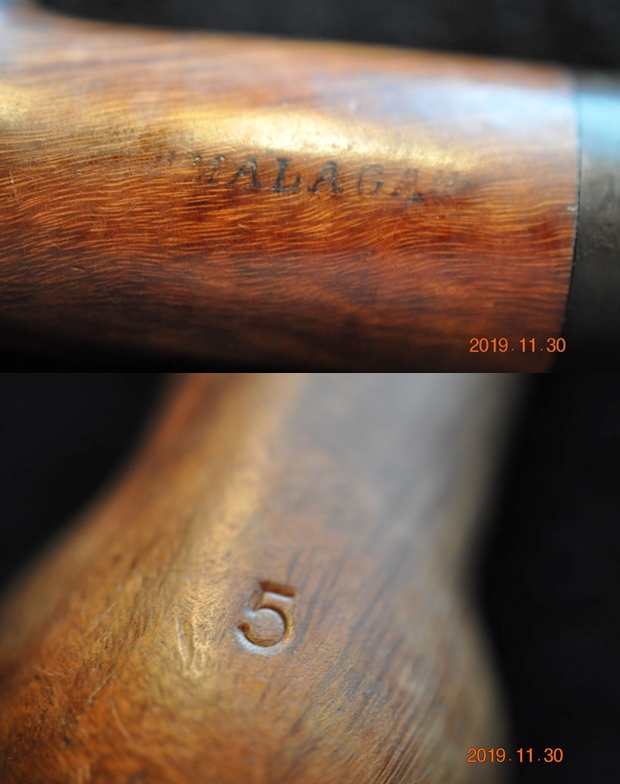
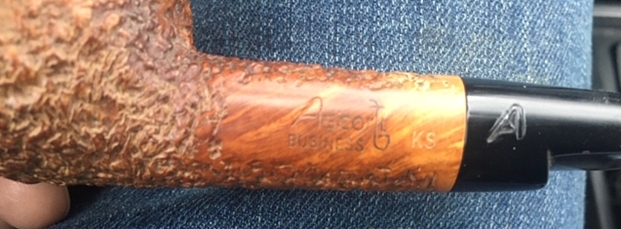
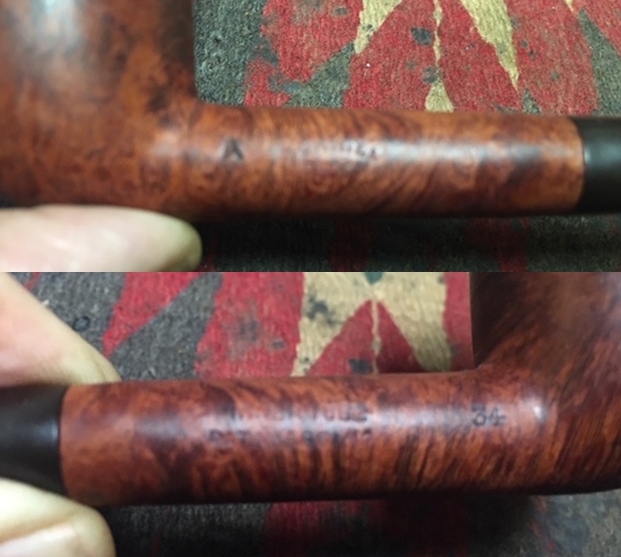
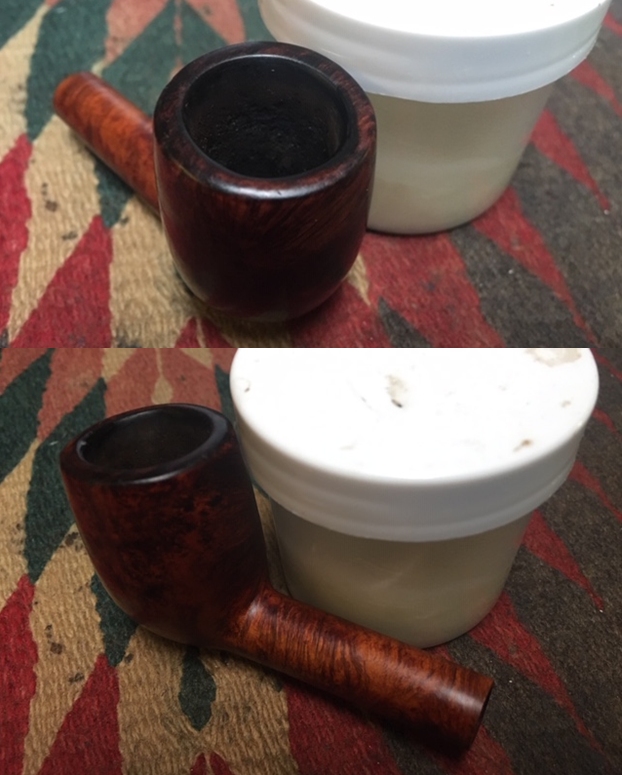
  I took a photo of the COM stamp on the underside of the shank and it reads as noted above. It is clear and readable with the stamp running around the circle.
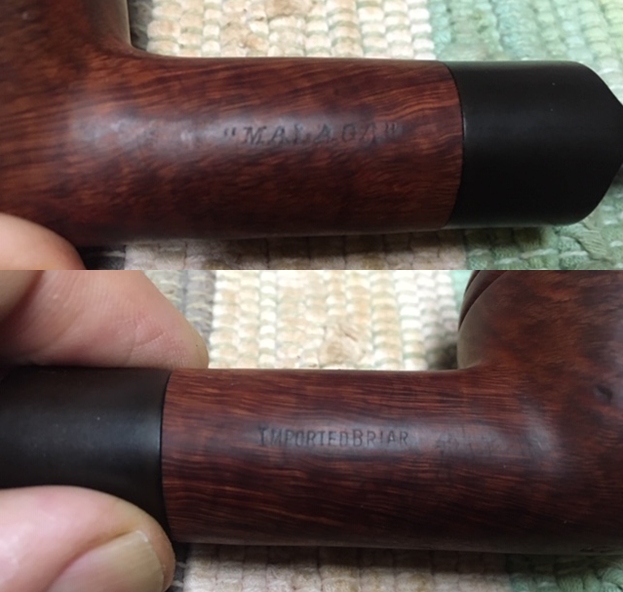
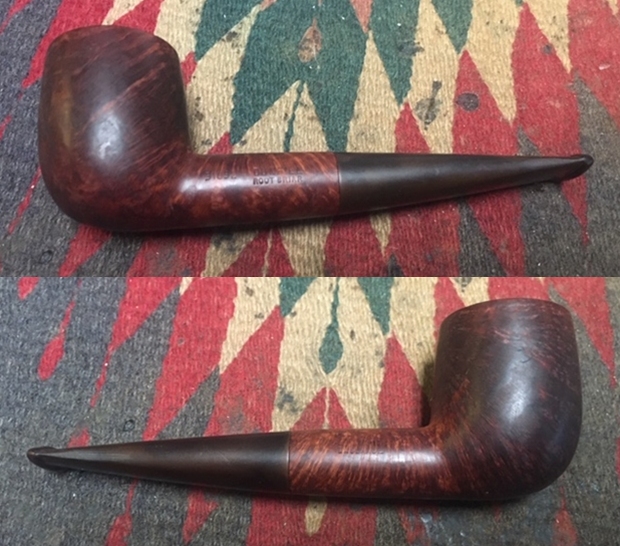
 I wanted to know a bit more about the Ekstravagant stamping on this pipe. I have worked on quite a few pipes from Karl Erik (Karl Erik Ottendahl) over the years but this was the first with the Ekstravagant stamping. I turned to the Pipedia article on KE pipes for help with this (https://pipedia.org/wiki/Karl_Erik). From there I learned that these pipes were large pipes entirely handmade by Karl Erik Ottendahl.
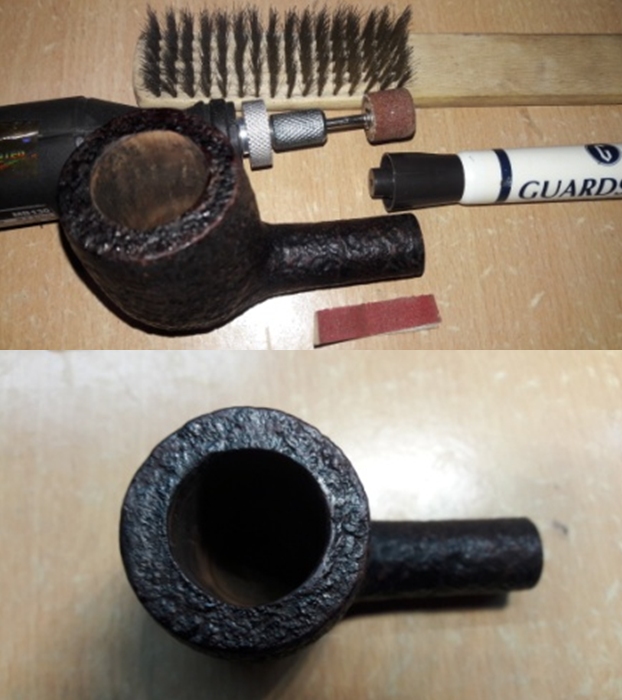
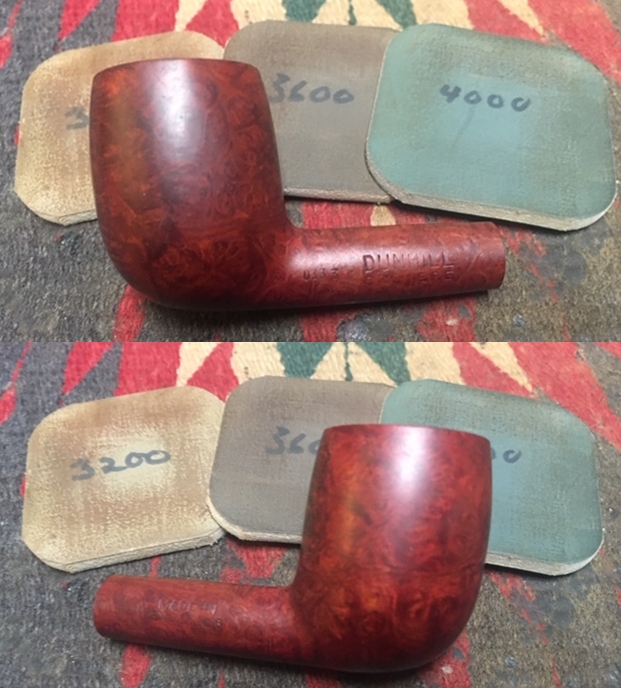
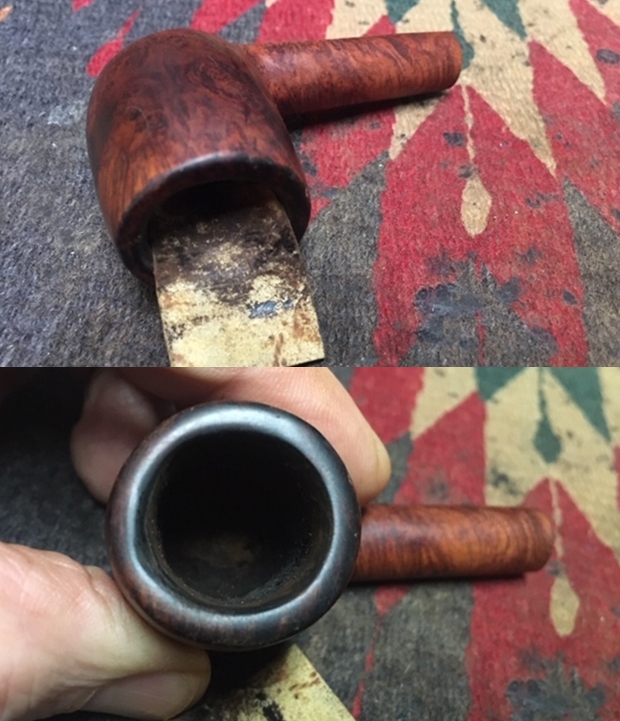
 I turned to stronger measures and carefully top the bowl on a topping board with 220 grit sandpaper. I needed to address the deep nicks in the surface and the edges – both inner and outer and this was the means I chose. It took care of the majority of the issues and minimized the burn mark at the front and back of the bowl. It was not gone but it looked better.
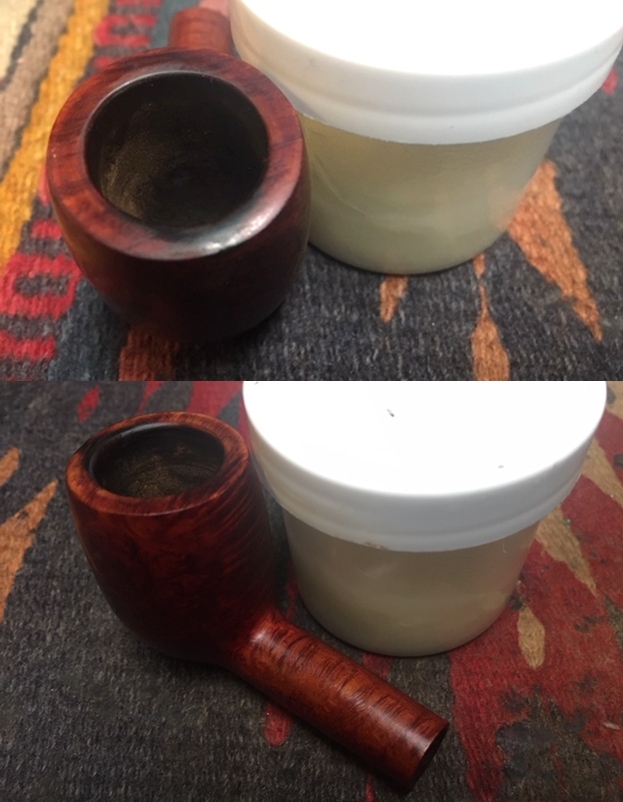
  I used a folded piece of 220 grit sandpaper to work on the inner edge. I wanted to give it a slight bevel to clean up the burn damage. While it was not perfect it was much better. I did not want to sacrifice the roundness of the bowl to do more work on it so I left it.
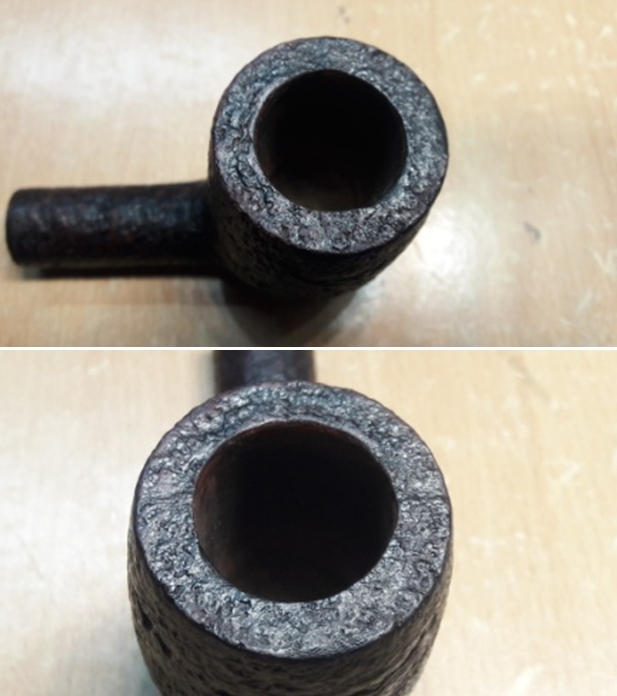
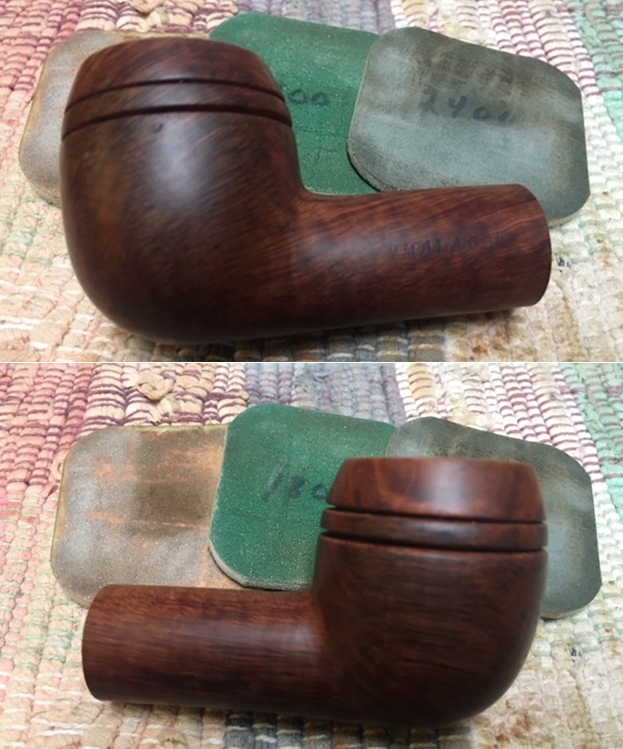
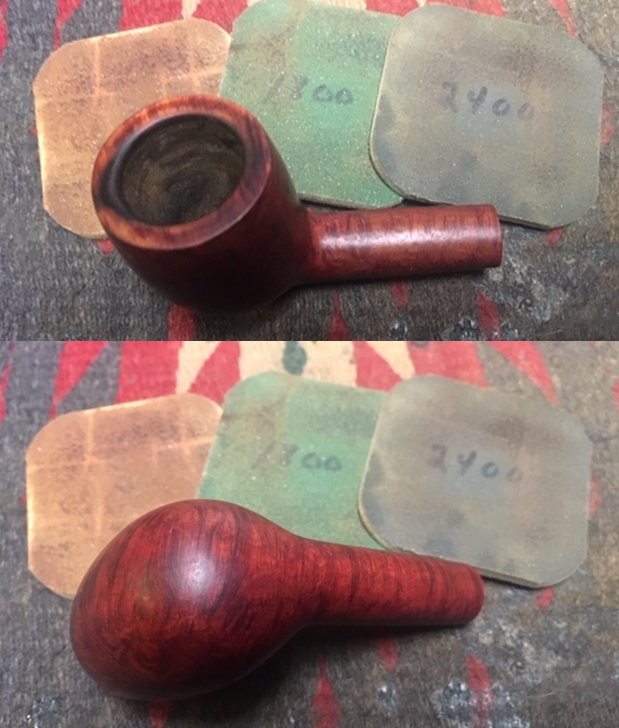
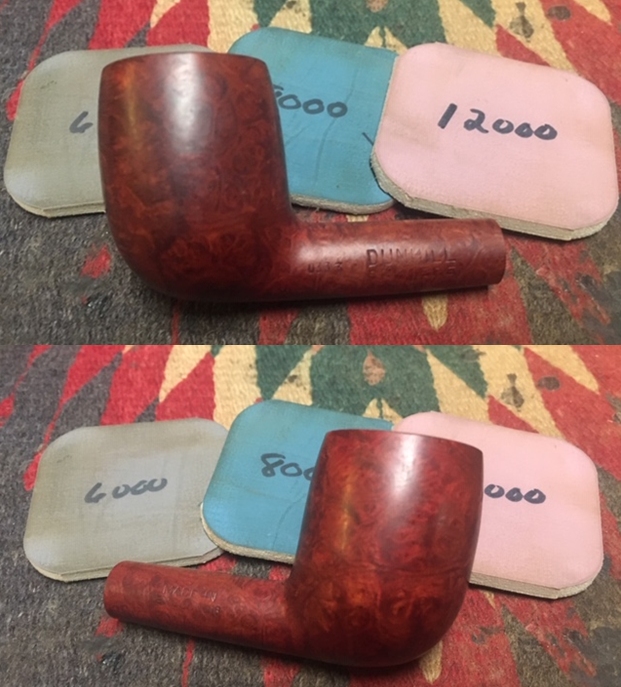
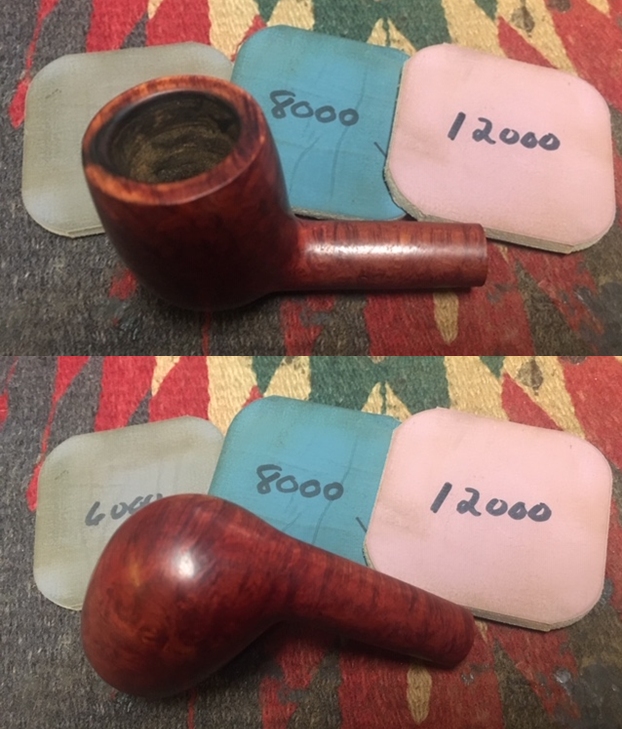
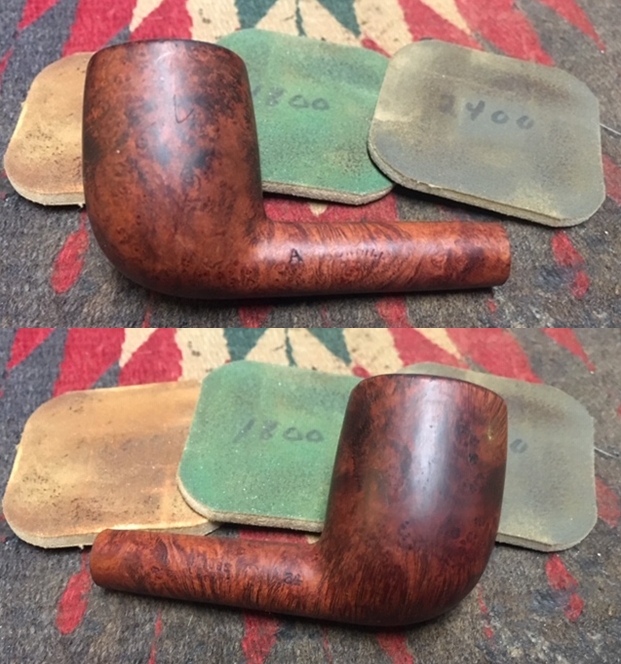
 I polished the rim top and edges of the bowl with micromesh sanding pads. I wet sanded it with 1500-12000 grit sanding pads and wiped it down with a damp cloth after each pad. The rim top came out looking very good. The darkening was lessened and the damage was smoothed out. The rim was looking very good at this point.
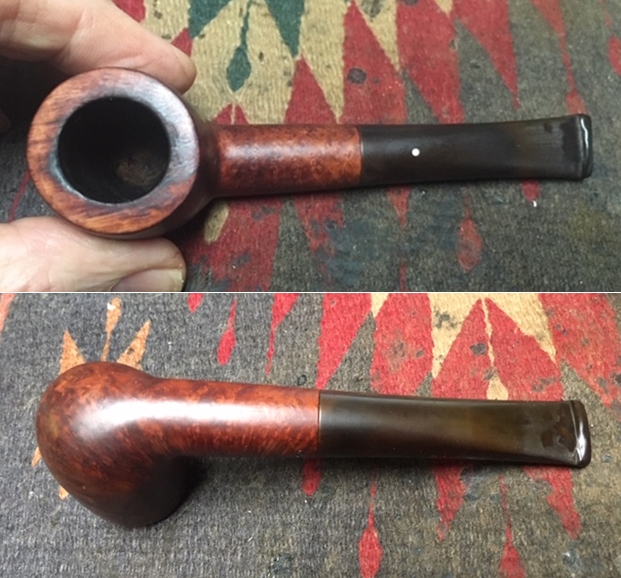
 I stained the top of the bowl with a blend of Oak and Cherry stain pens. This combination matched the stain on the rest of the bowl perfectly. I am pretty happy with the look of the rim top at this point in the process.
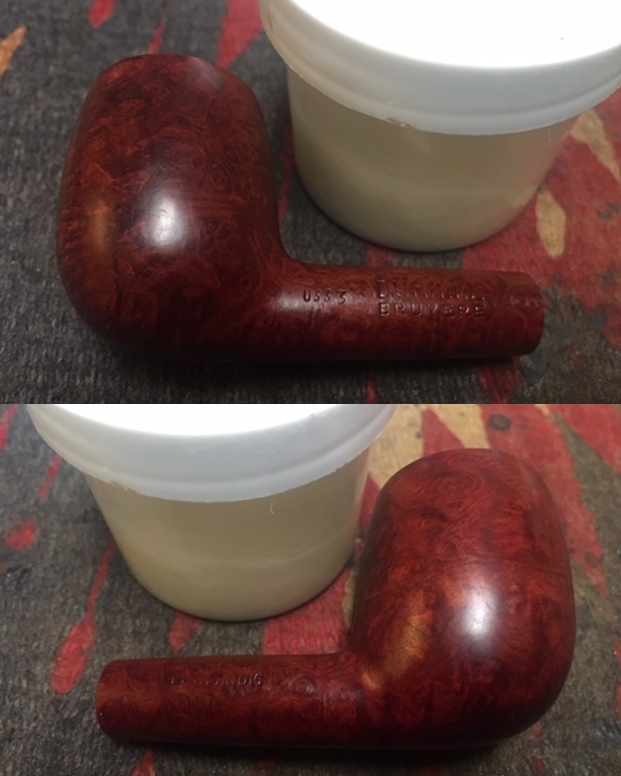
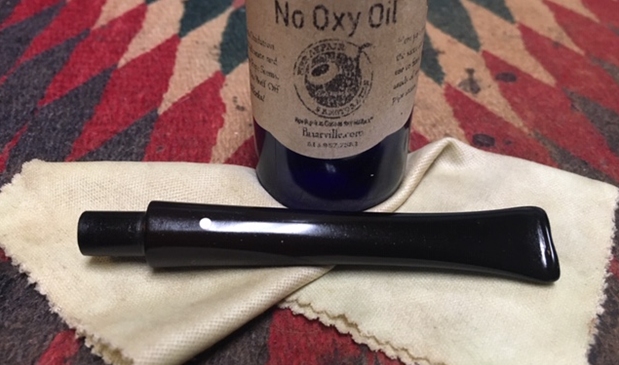
 I worked some Before & After Restoration Balm into the surface of the briar with my fingertips and let it sit for about 10 minutes. I buffed it off with a soft cloth. It is a product that I have really come to appreciate. Mark Hoover crafted it to enliven, clean and protect briar. I use it on every pipe I work on and find that with a single application the briar comes alive with deep glow.

 Because the pipe looked so clean I forgot to clean out the internals. I went back and cleaned out the mortise and the airway in the shank and stem with alcohol, cotton swabs and pipes cleaners. The shank was quite dirty but the airway in the stem was pretty clean. I repeated the scrubbing until the cleaners came out clean.
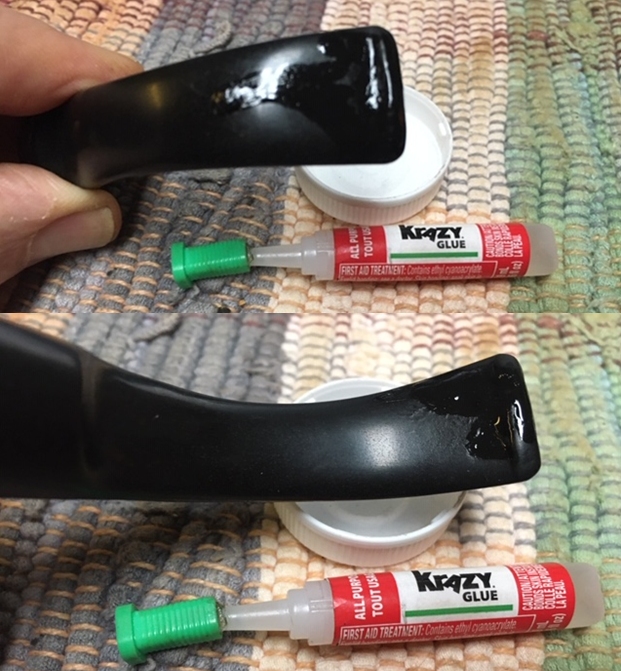
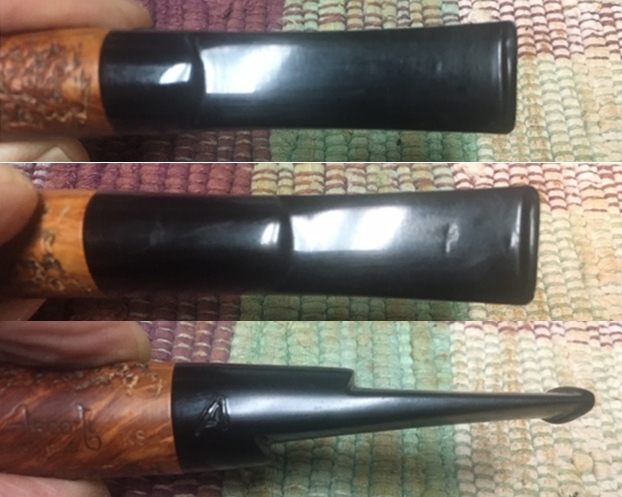
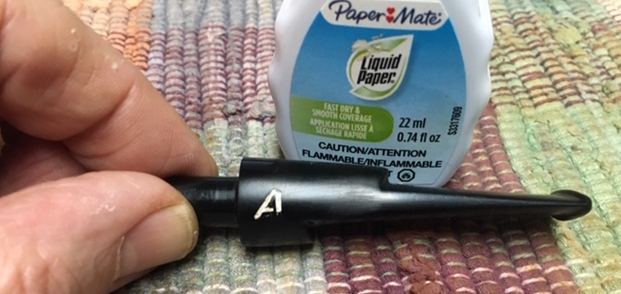
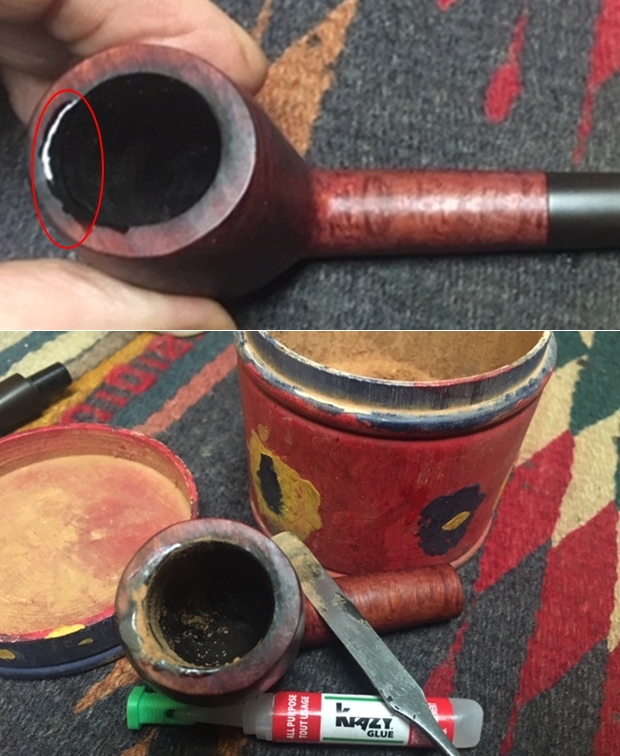
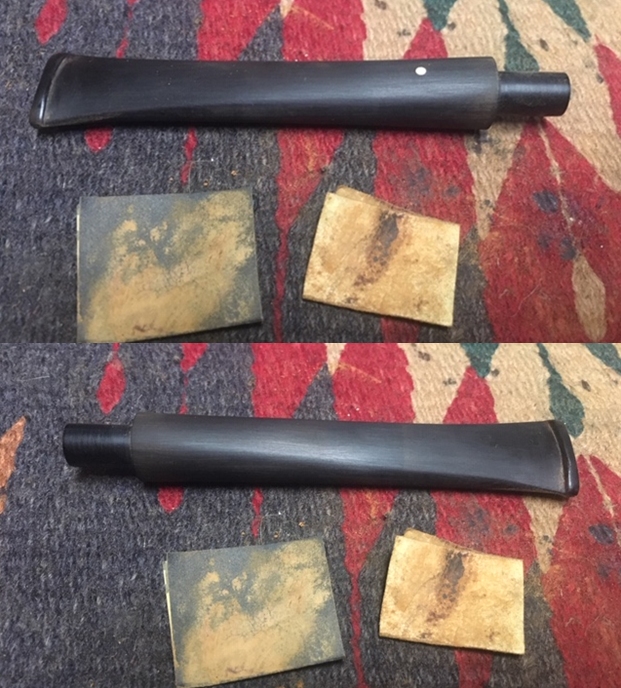
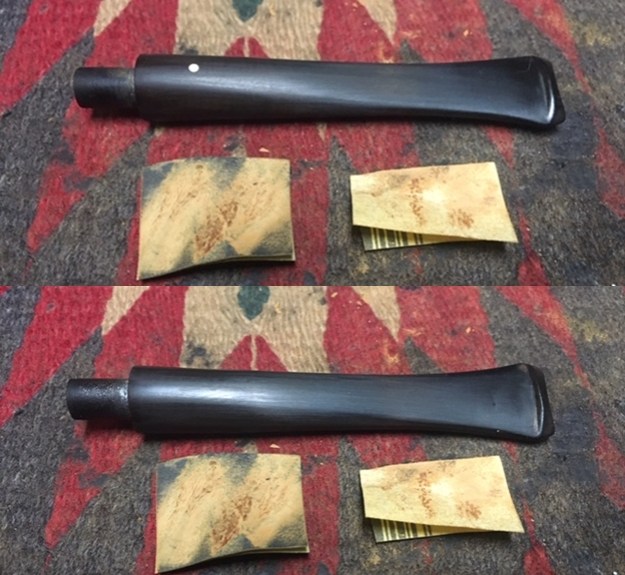
 I set the bowl aside and turned my attention to address the deep scratch in the stem. It was really a gouge that had carved a line from the button forward. It was not a crack lest you might think so. I examined it in detail with a lens and the stem was solid. I wiped down the area with a cotton swab and alcohol and then filled in the gouge with clear Krazy Glue. Once the repair cured I used a folded piece of 220 grit sandpaper to blend the repair into the stem surface. I polished the area I had sanded with 400 grit wet dry sandpaper.
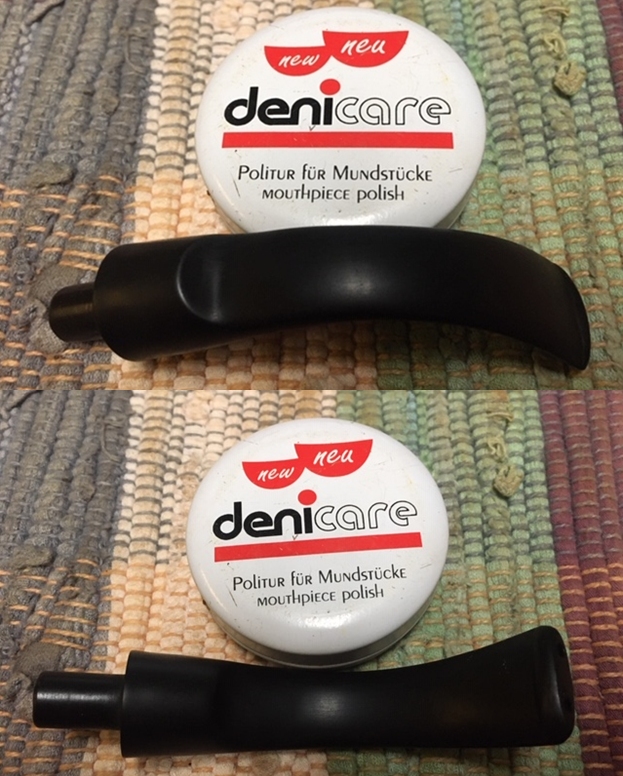
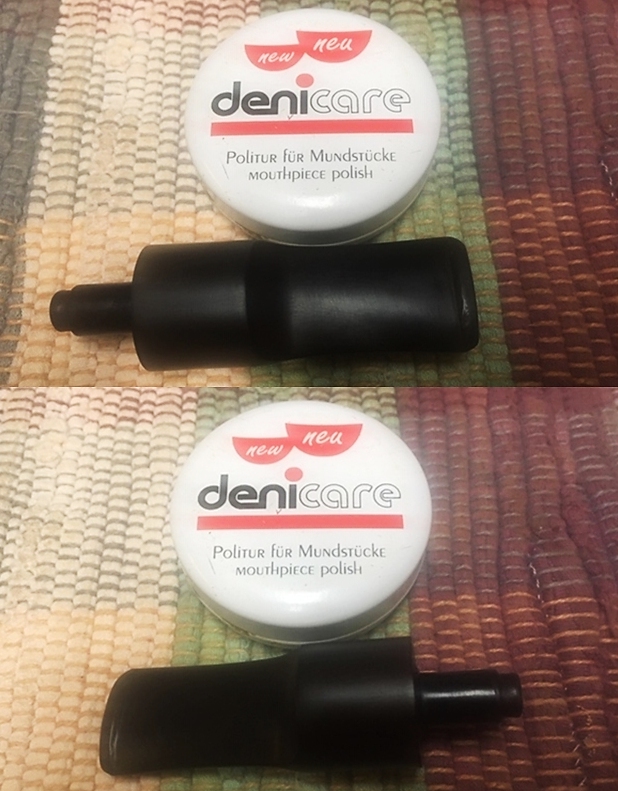
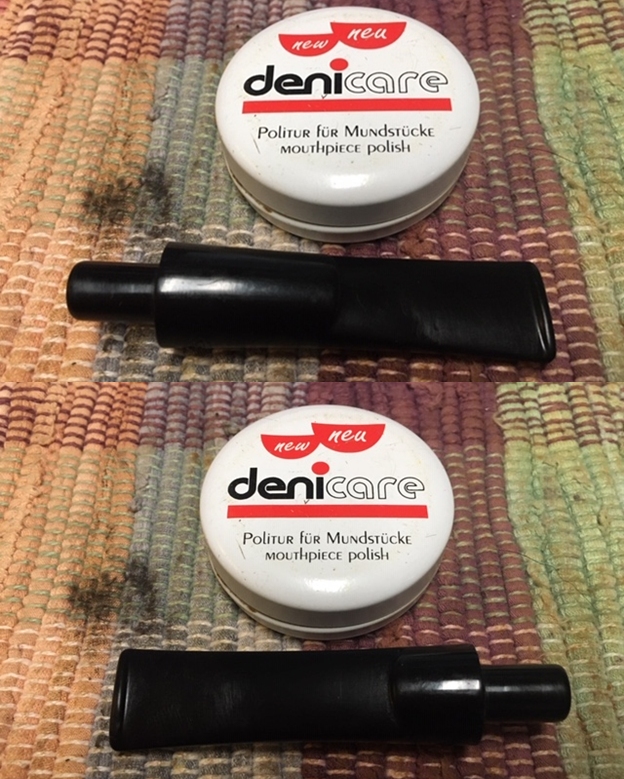
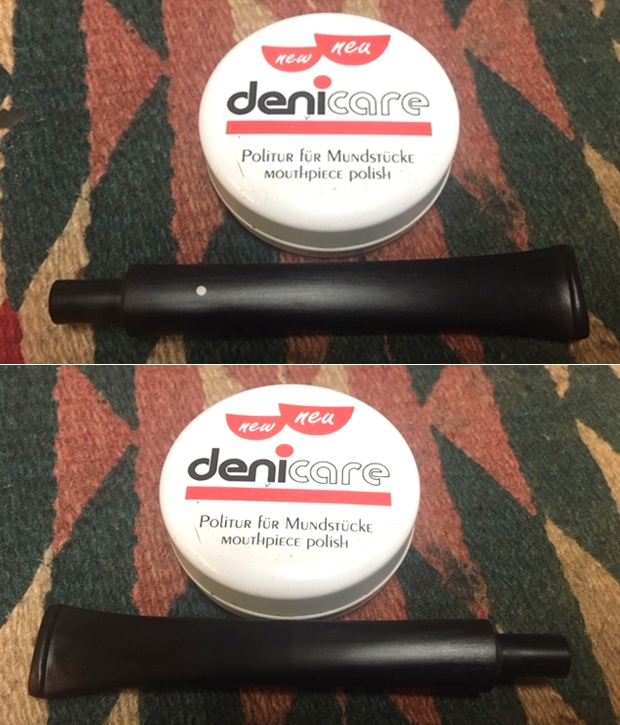
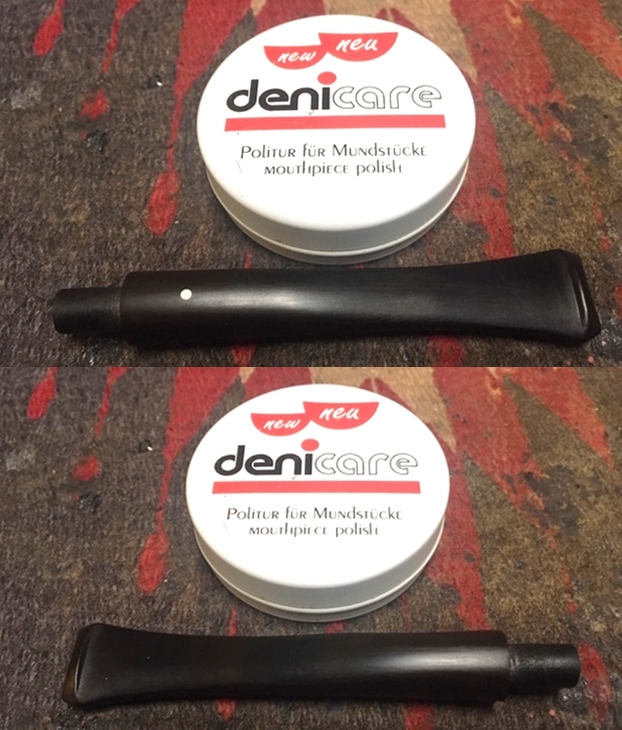
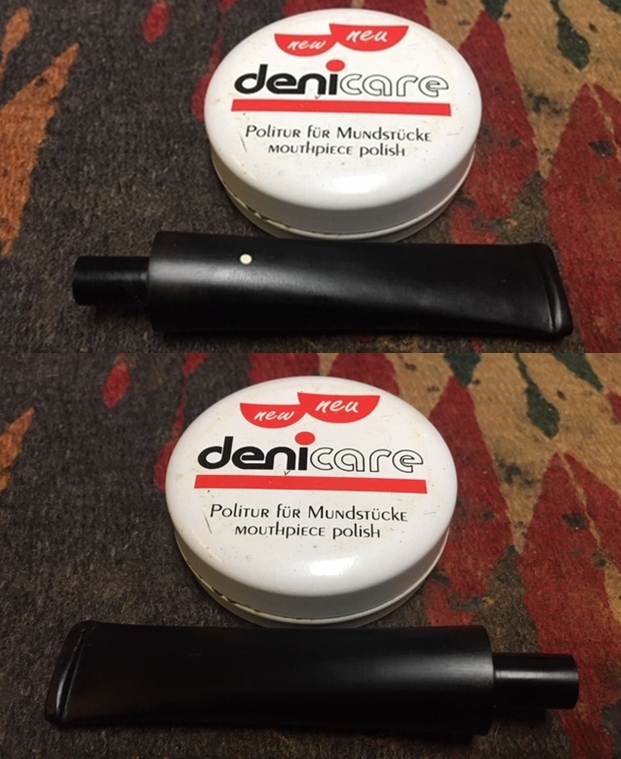
 Denicare Mouthpiece Polish is a gritty read paste that I have been using as a pre-polish for the mouthpieces. It removes a lot of very minor scratches and works well in removing the hard to get area in the crease of the button. I work it on with my fingers and then scrub the stem with a cotton pad and wipe it off when finished. I avoided the gold stamping on the topside to protect it from over buffing.
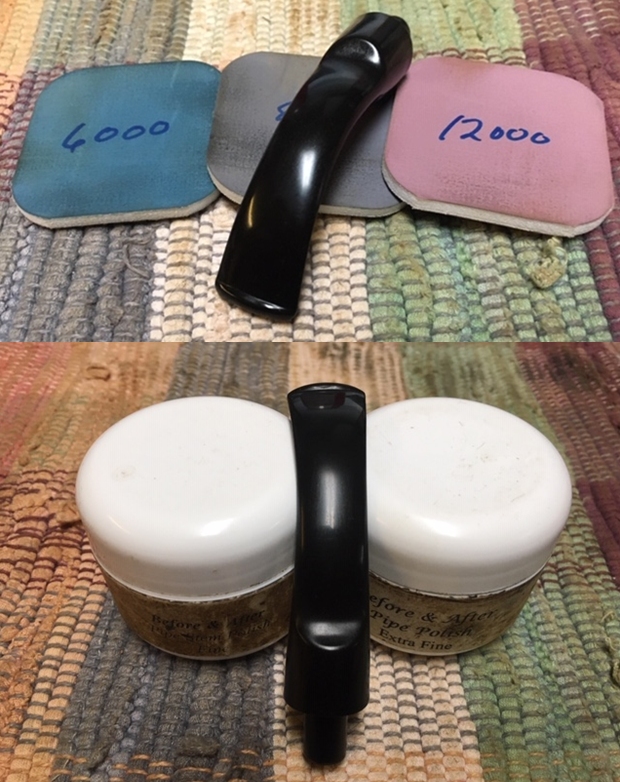
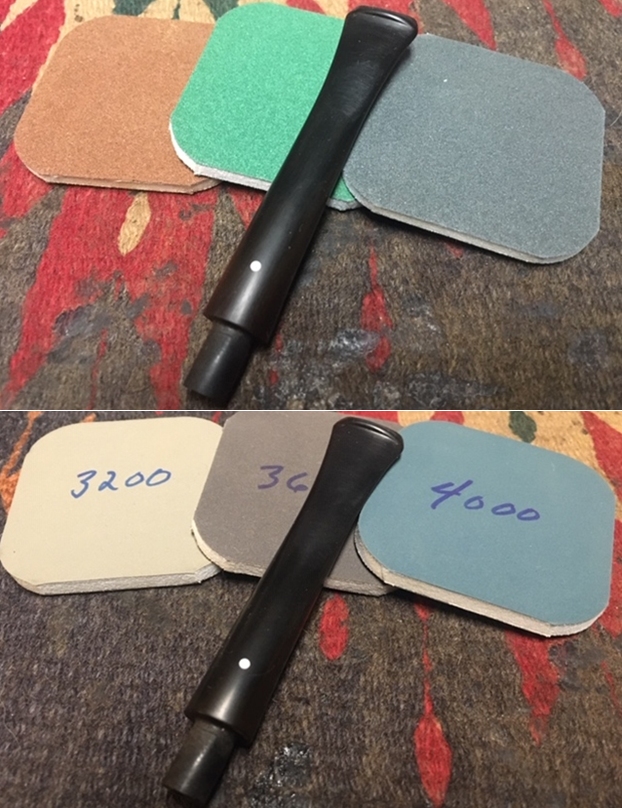
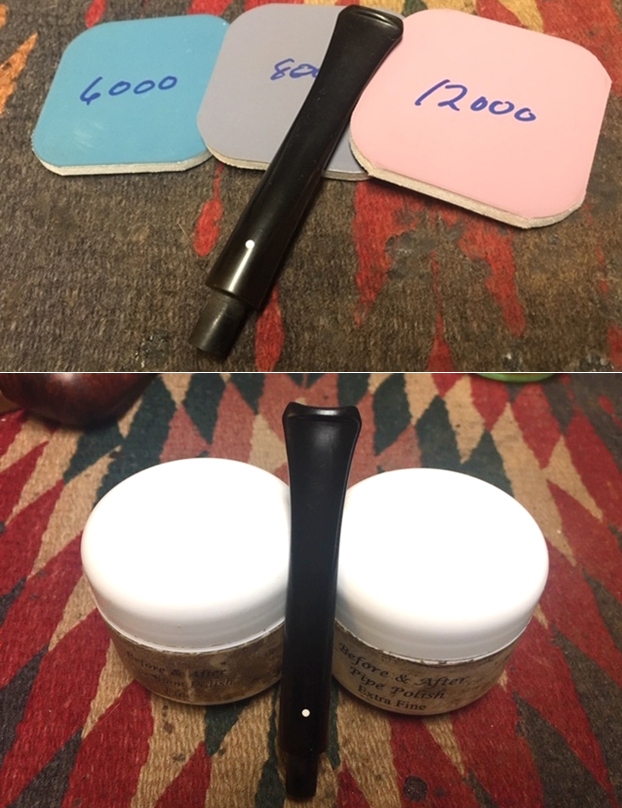
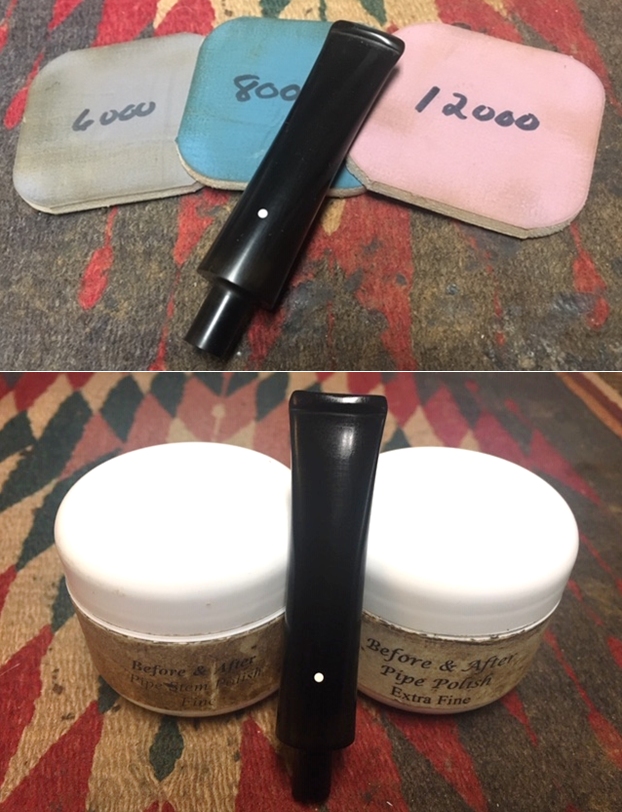
 I polished the acrylic stem with micromesh sanding pads – wet sanding it with 1500-12000 grit pads and wiping it down with a damp cloth between each set of pads. The stem began to take on a deep shine. I used Before & After Pipe Polish – both Fine and Extra Fine to finish the polishing. By this point the stem looks great and the gouge is gone!


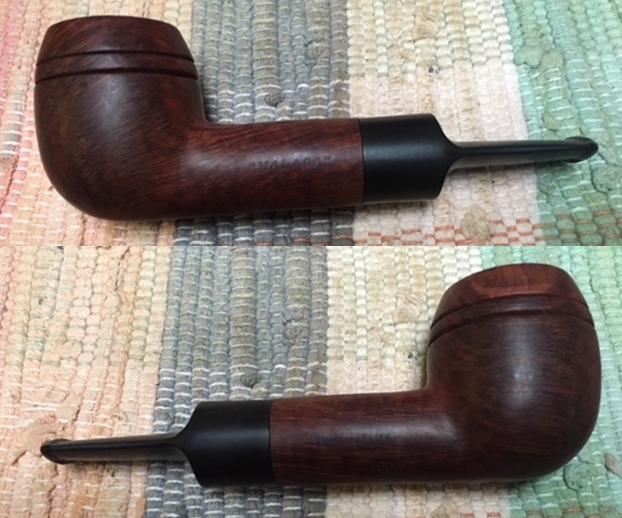
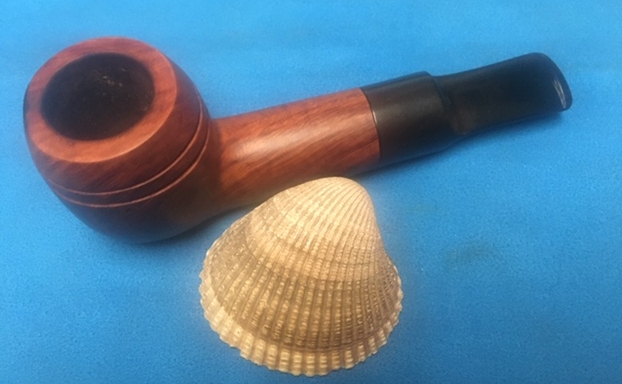
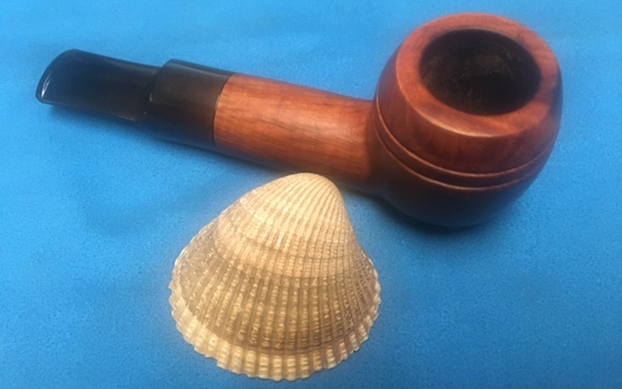
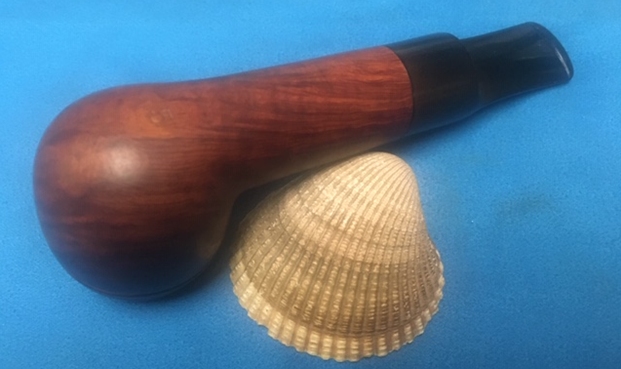
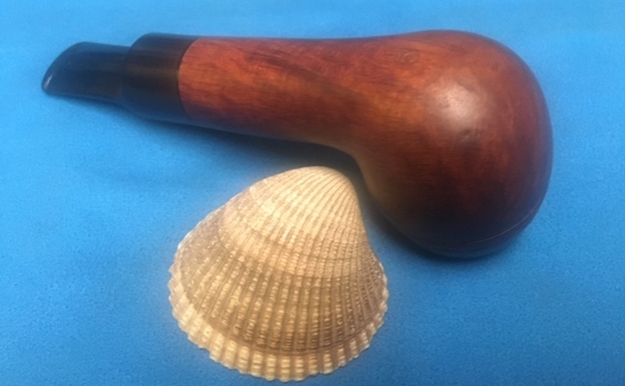
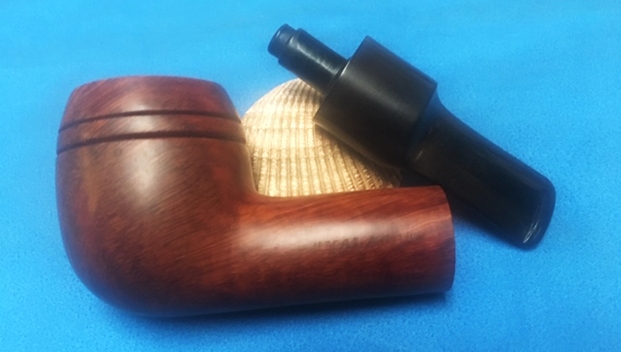
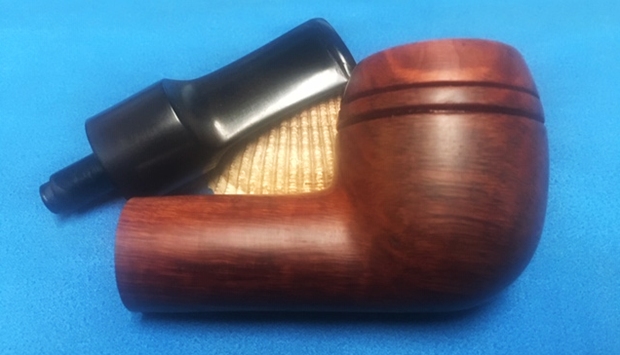
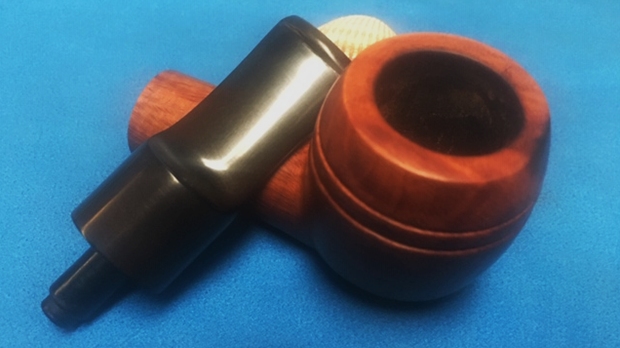
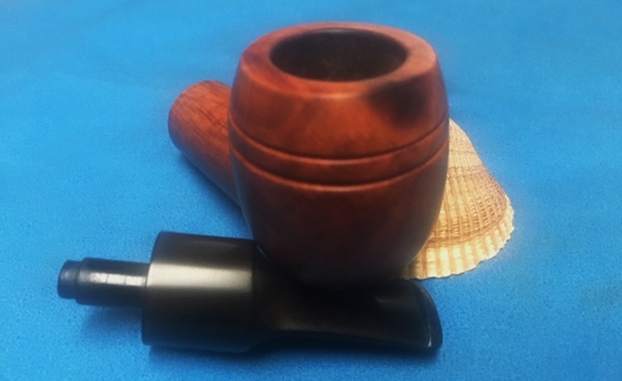
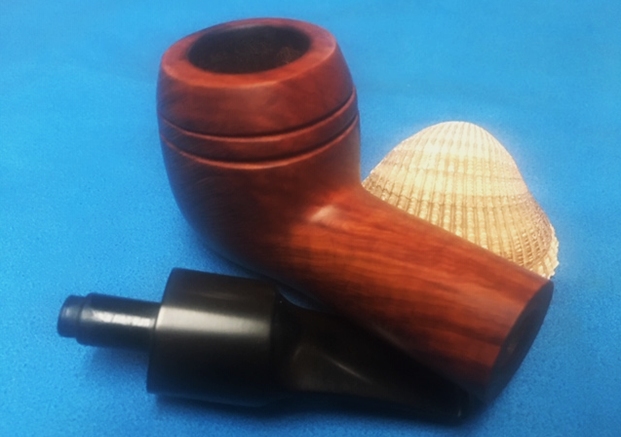
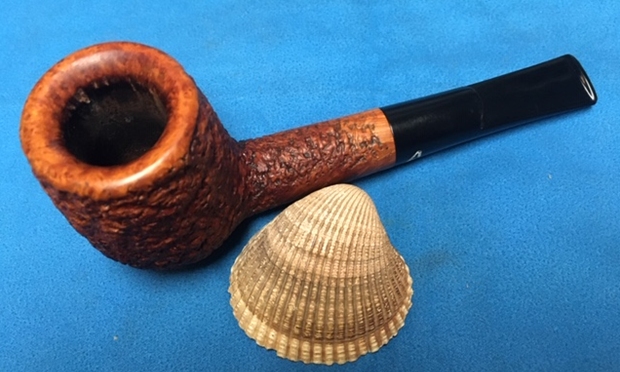
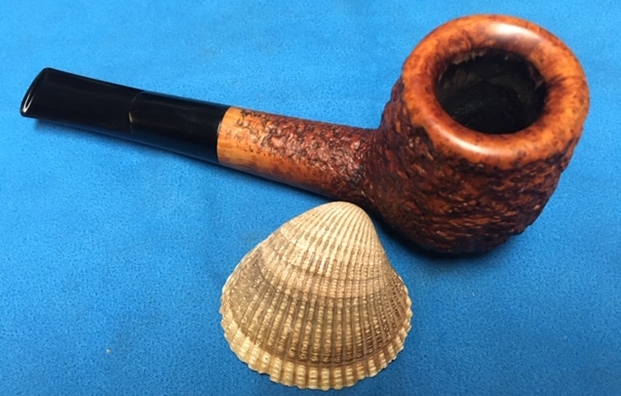
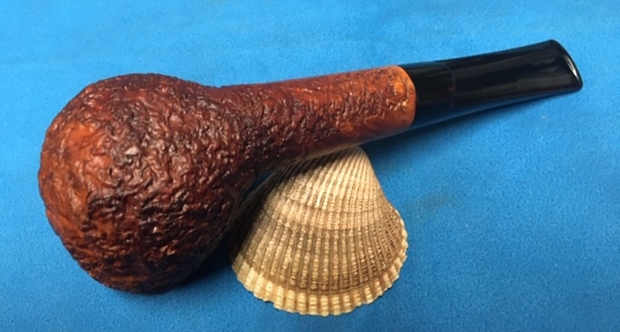
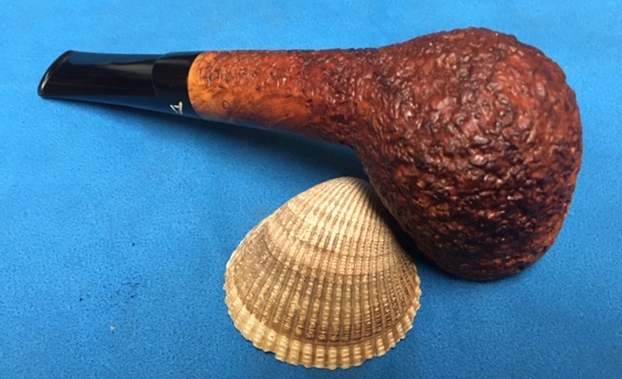
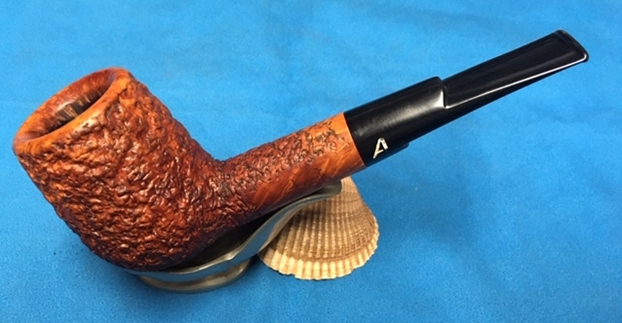
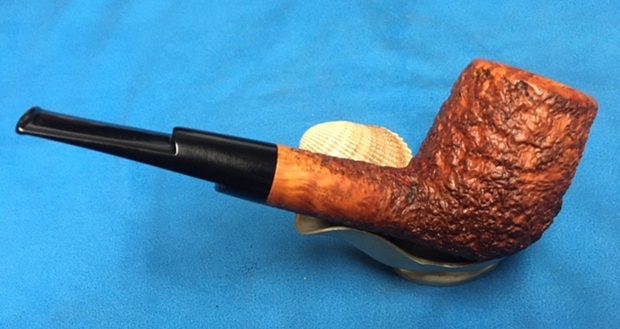
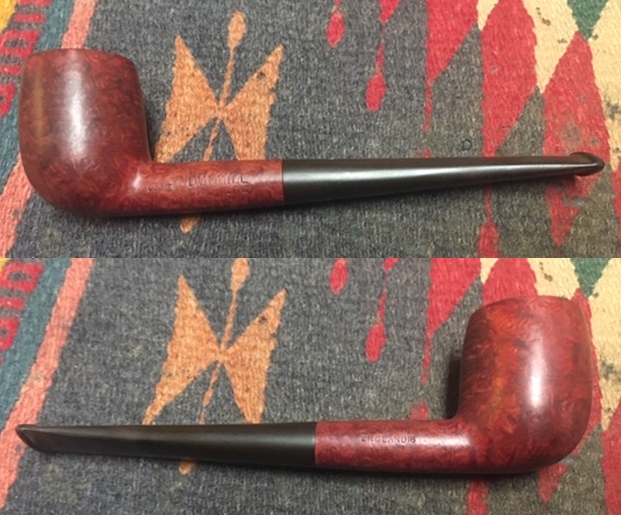
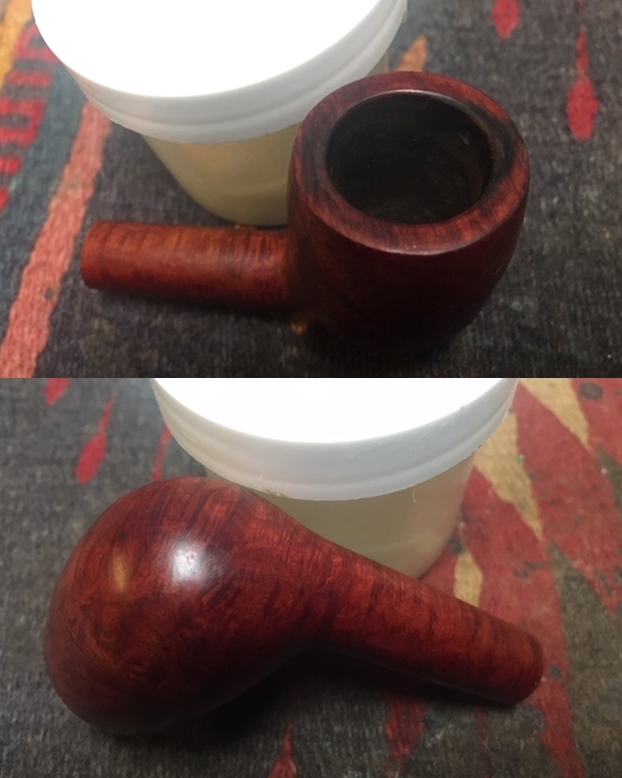
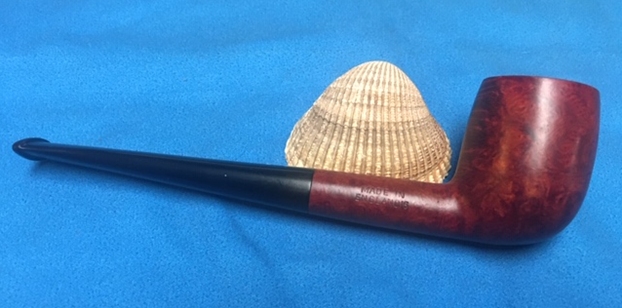
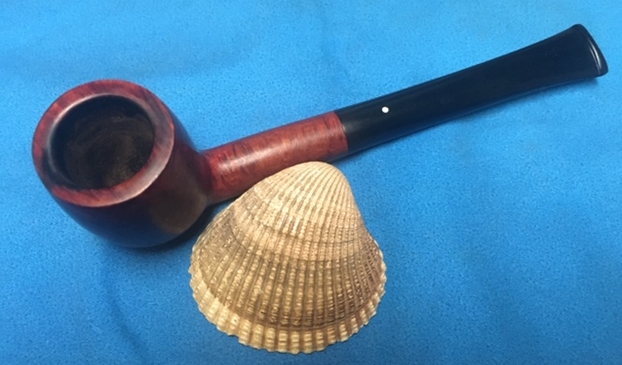
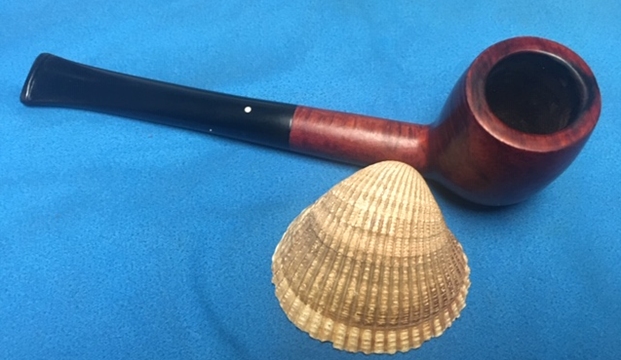
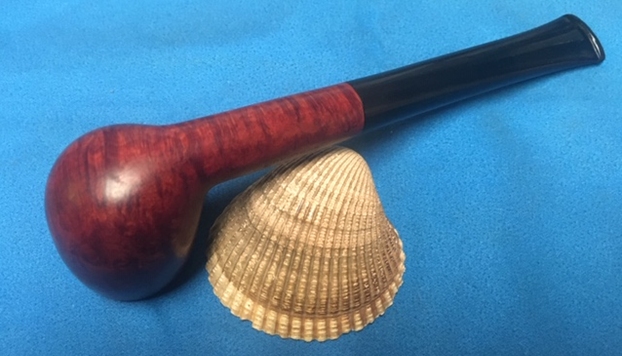
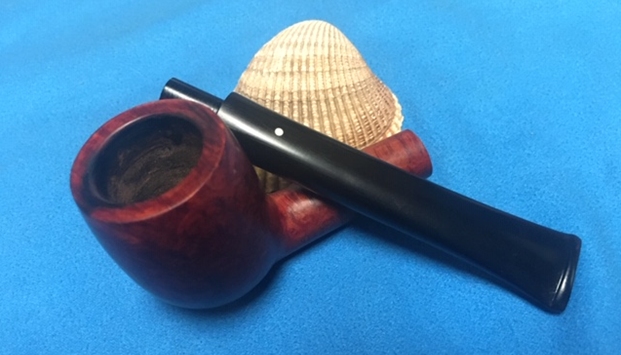
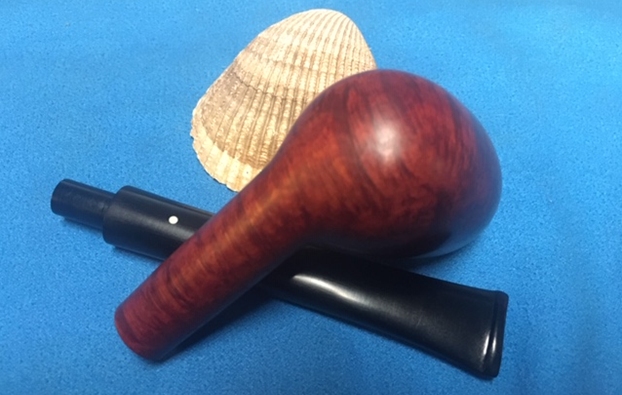
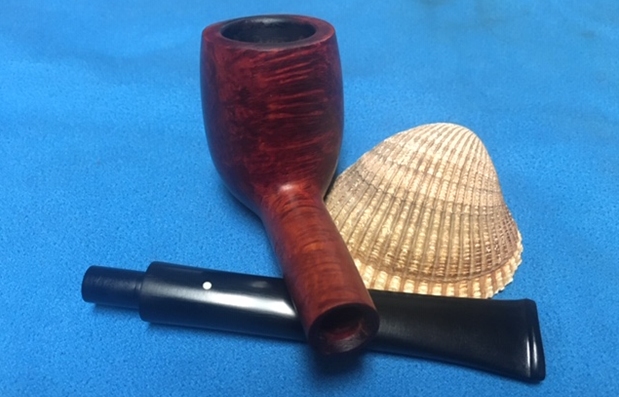
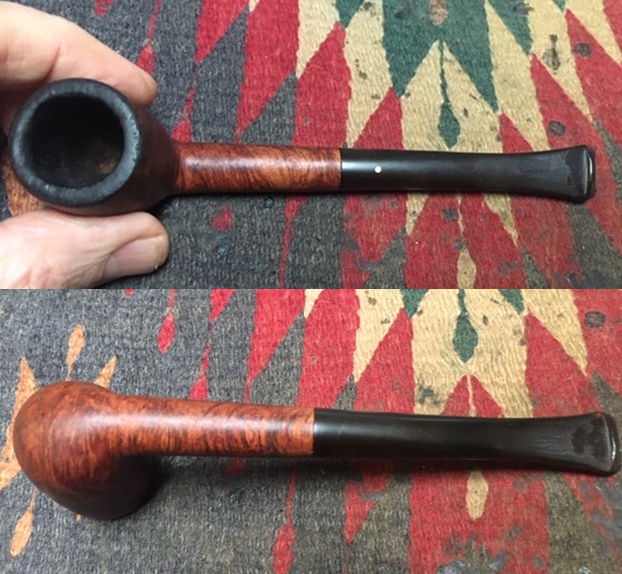
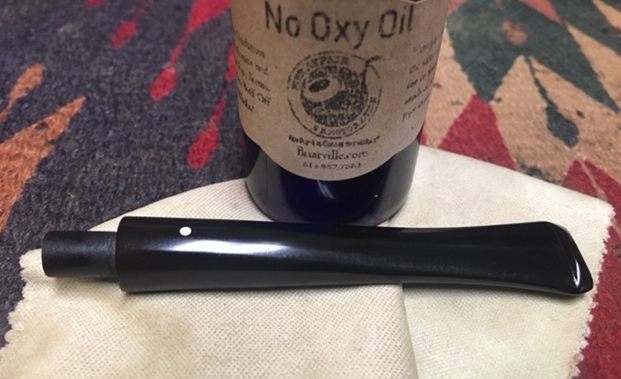
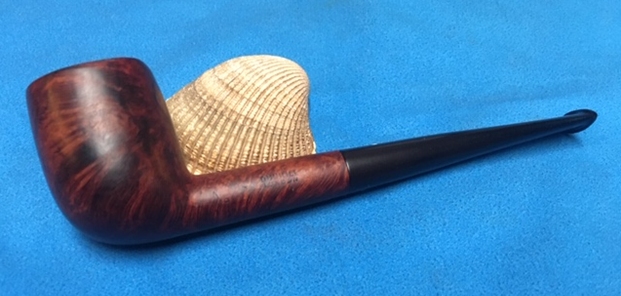
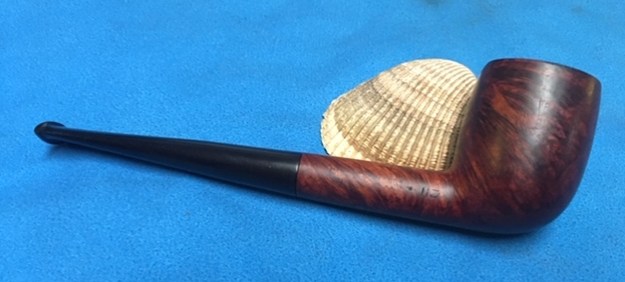
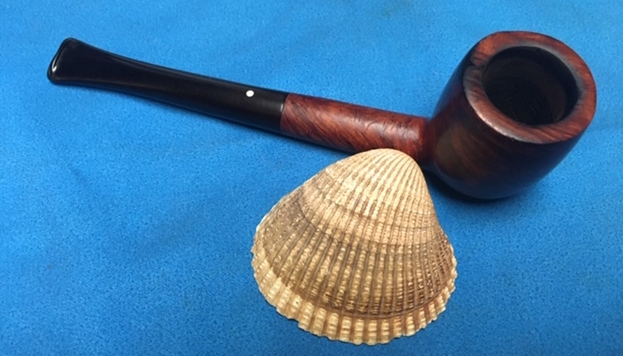
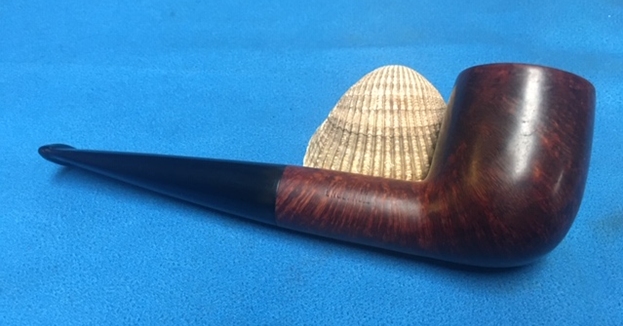
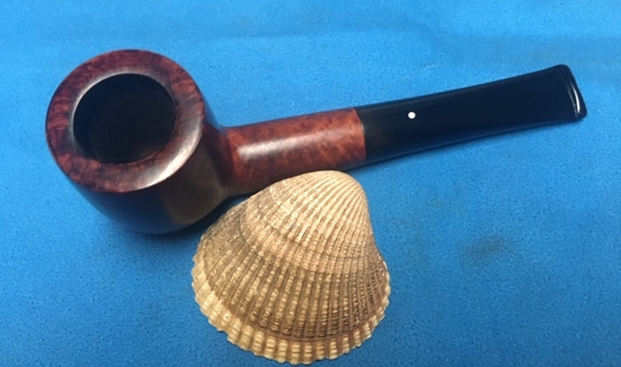
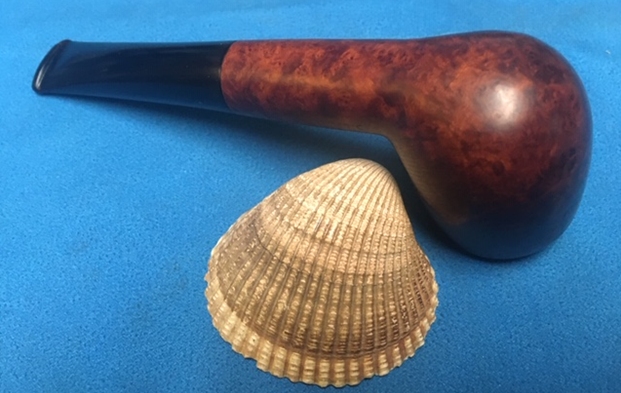
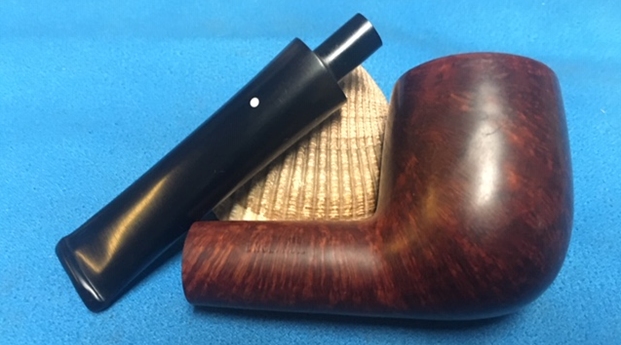
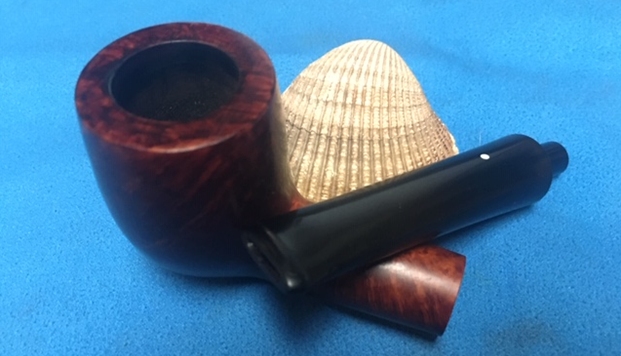
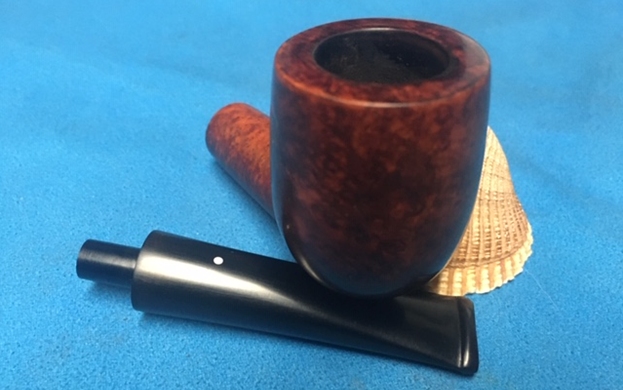
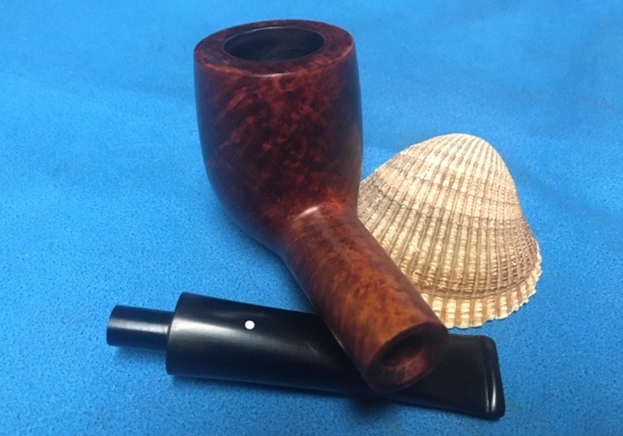
 Once I finished I put the stem back on the shank and carefully buffed the pipe with Blue Diamond polish using a lightly loaded pad and a soft touch. I wanted to raise a shine and buff out some of the small scratches in the briar and the acrylic stem. I gave the stem a vigorous polish being careful around the stylized gold KE on the stem top. I gave the bowl and the stem several coats of carnauba. I buffed the pipe with a clean buffing pad and hand buffed it with a microfiber cloth. The finished pipe is shown in the photos below. It is a great looking Karl Erik Ekstravagant Tulip shaped pipe whose sale price is going for a great cause. The dimensions of the pipe are Length: 6 inches, Height: 2 ½ inches, Outer Bowl Diameter: 1 ½ inches, Chamber Diameter: ¾ of an inch. The pipe will soon be on the rebornpipes store and you can purchase it and support a very worthy cause. Thanks for walking with me through the restoration.