Blog by Paresh Deshpande
Re-Cap…
During one of the many Facetime interactions with Steve, I expressed my anxiety of ‘what after’ I had gone through restoring all of my inherited collection. Also discussed during this interaction was that I would be interested in working on pipes from various makers and with greater variety of repair works to gain more experience and learn new techniques. Since the ‘pipe culture’ in India met its last in the early 1970s, I did not have access to large lots of estate pipes as is available in Europe and USA. Steve suggested that I grab one of the “grab bags” which he had in his store. I requested him to make one from an assortment of pipes that he had to which he agreed. Soon the awaited grab bag along with other pipes that I had liked arrived in my home town and was received by Abha. She sent me this picture of the pipes that were received. The one crossed in red is a Dunhill sitter that is added to my personal collection. There are a total of 15 pipes in the grab bag, each with different shapes, issues and requiring different skill sets to address them. This is exactly what I was looking for and that there are some nice branded ones is like an icing on the cake. This lot included pipes that Jeff, (Steve’s brother who does all the preliminary cleaning of pipes) had cleaned and sent to Steve for further restoration works.
Returning To The Present…
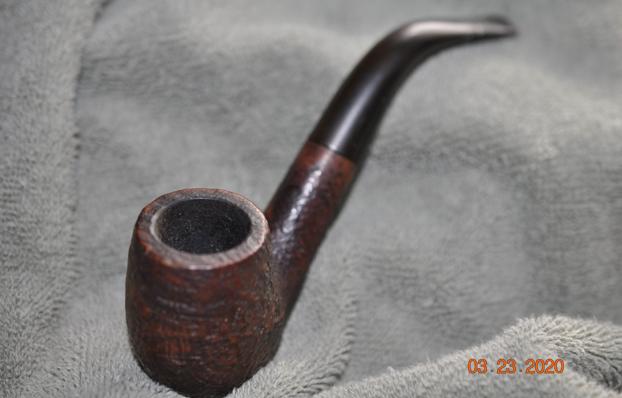
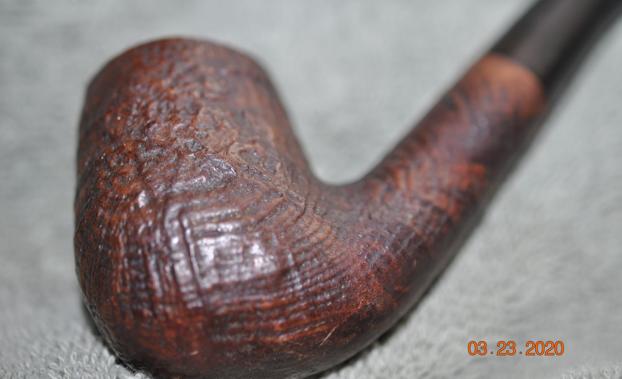
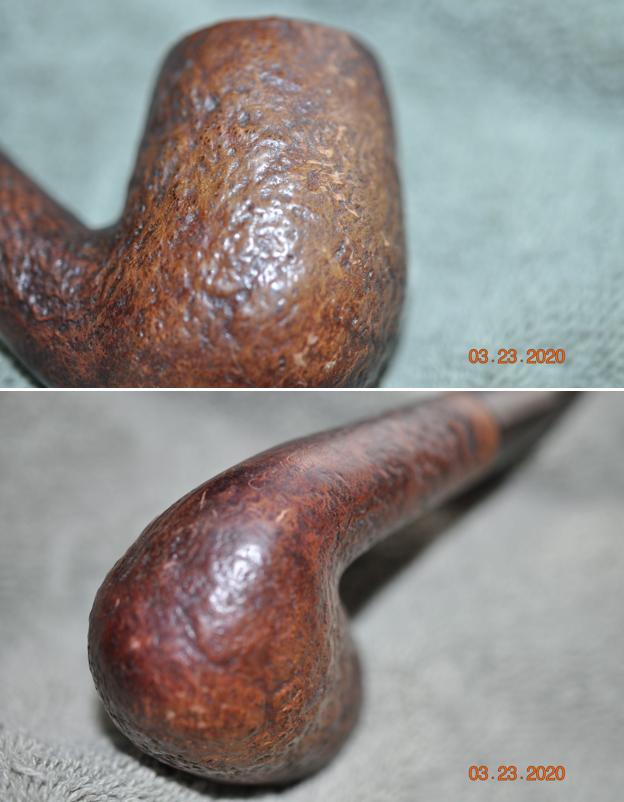
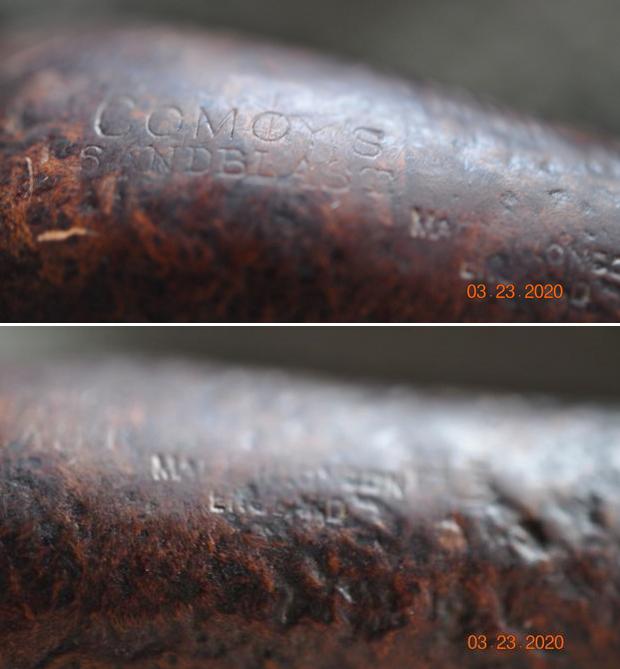
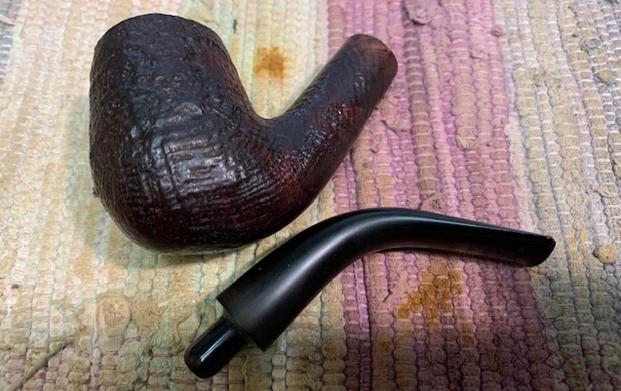
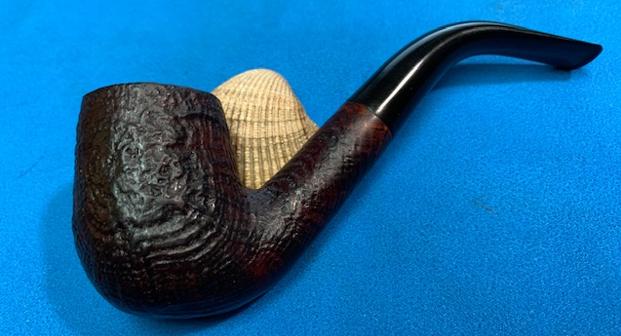
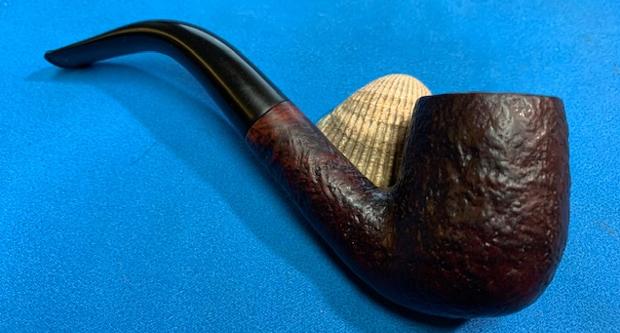
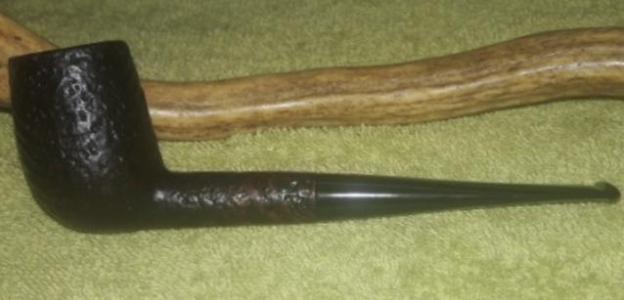
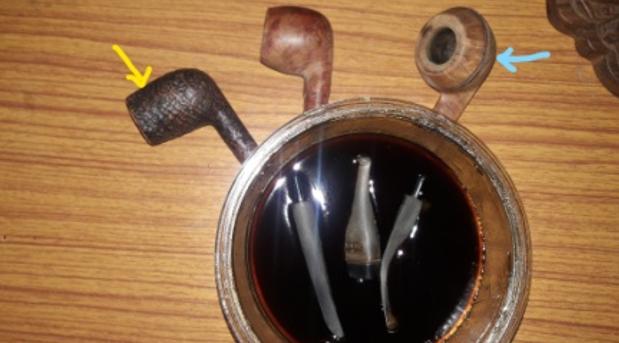
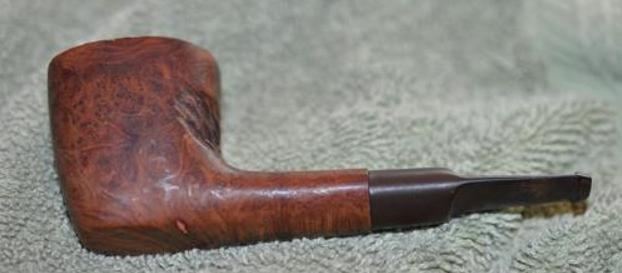
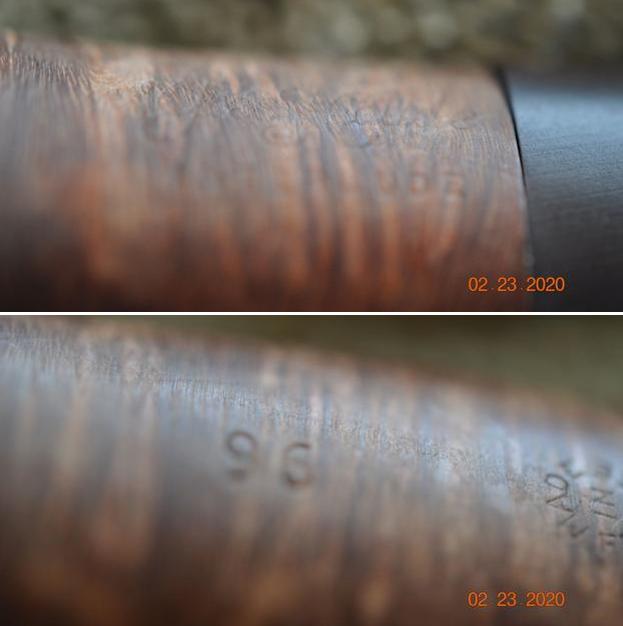
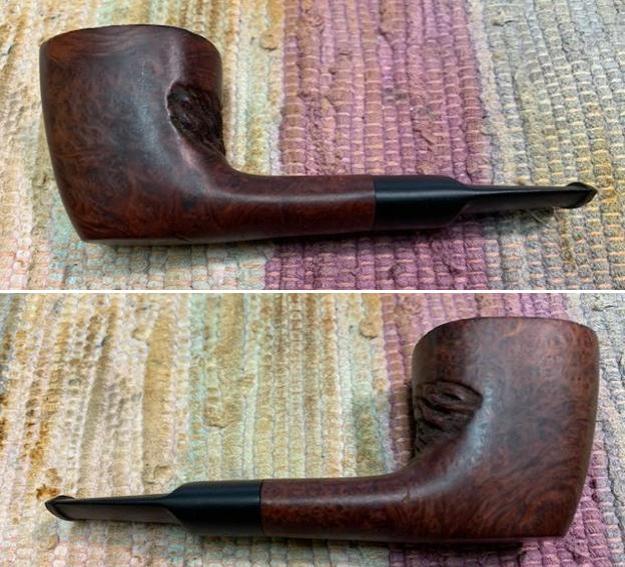
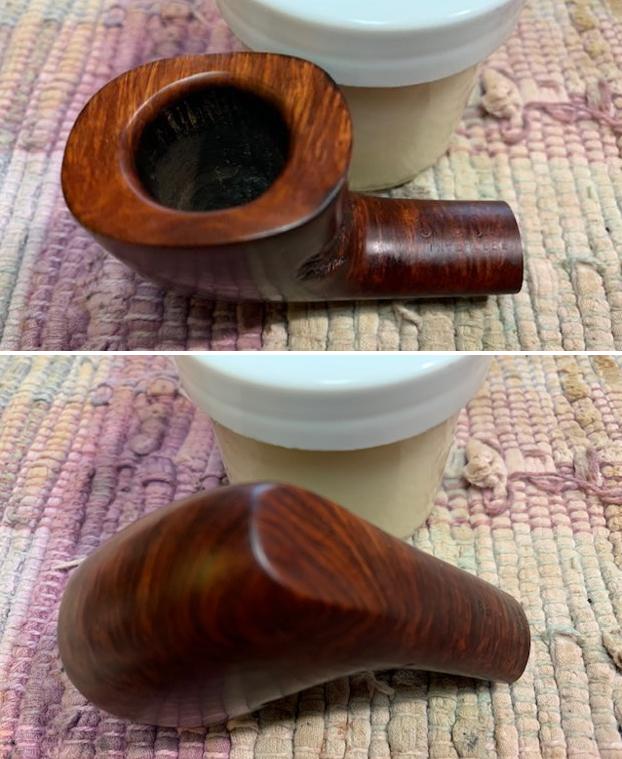
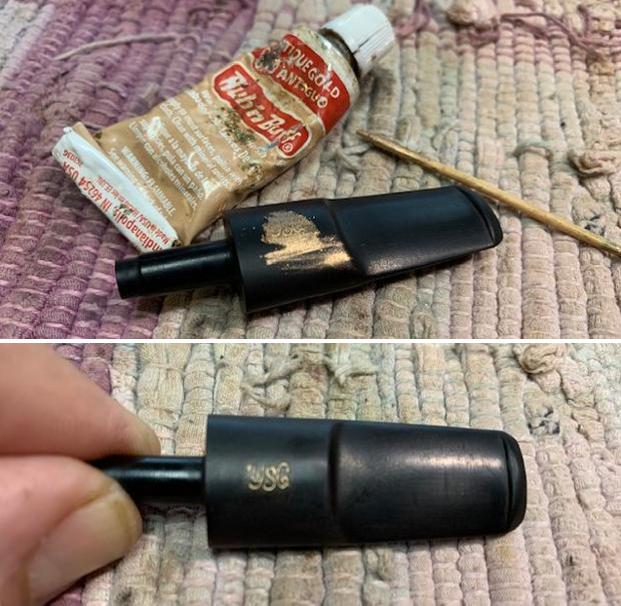
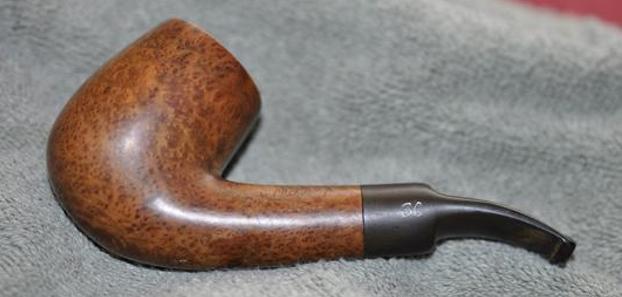
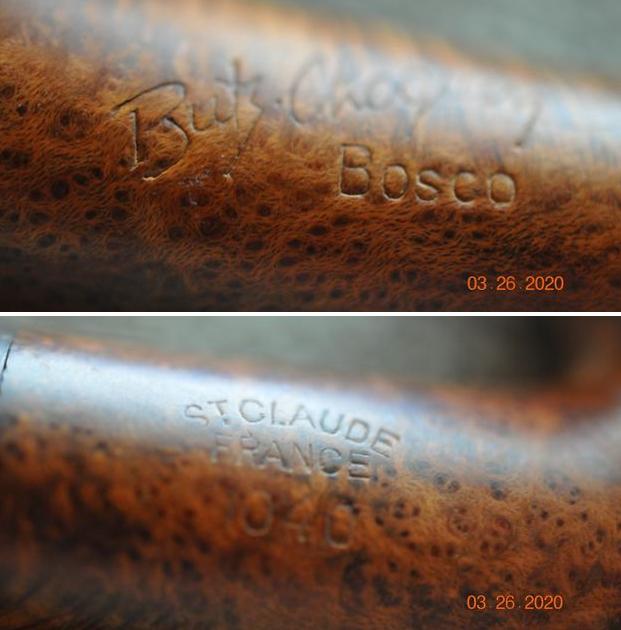
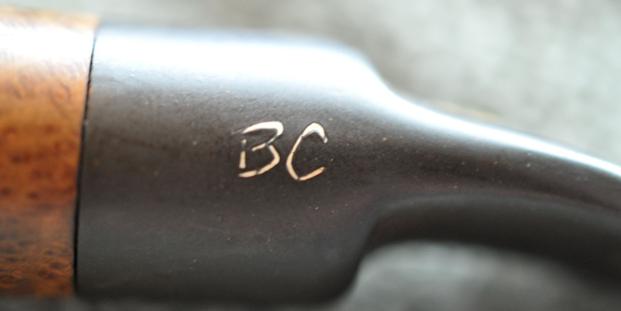
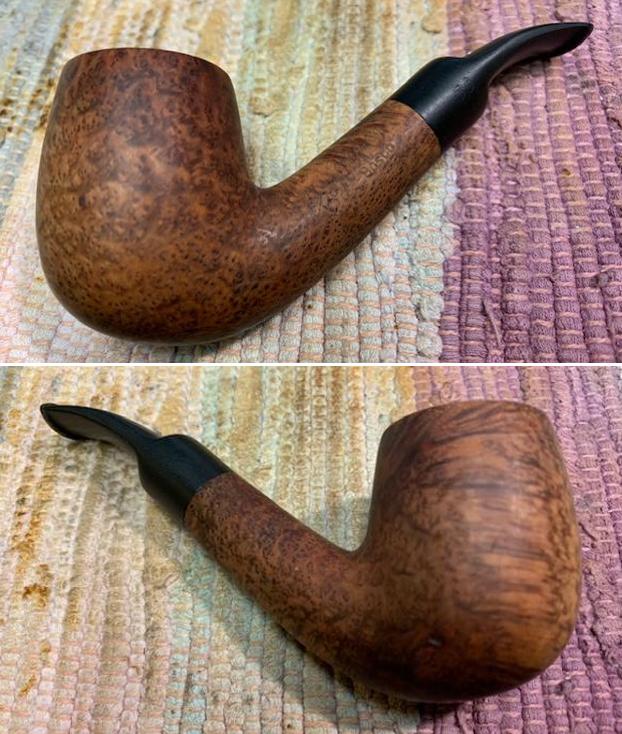
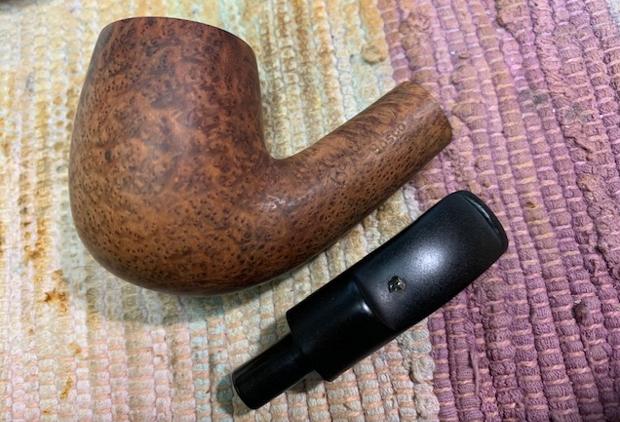
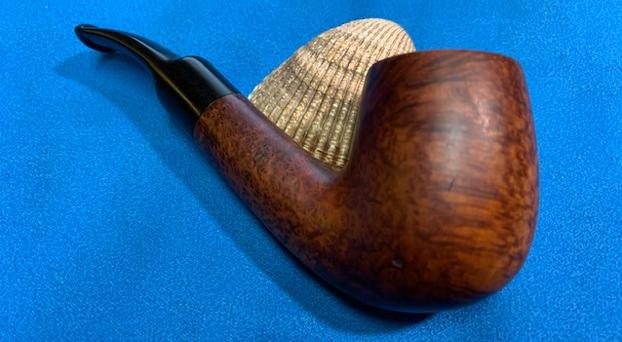
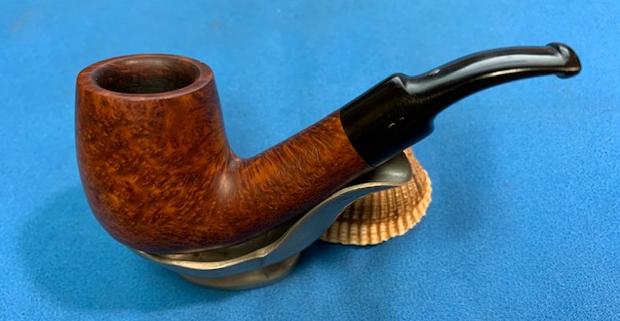
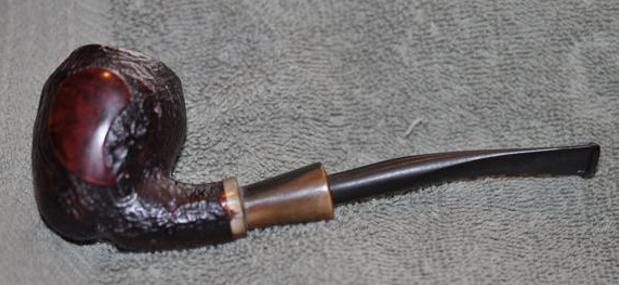
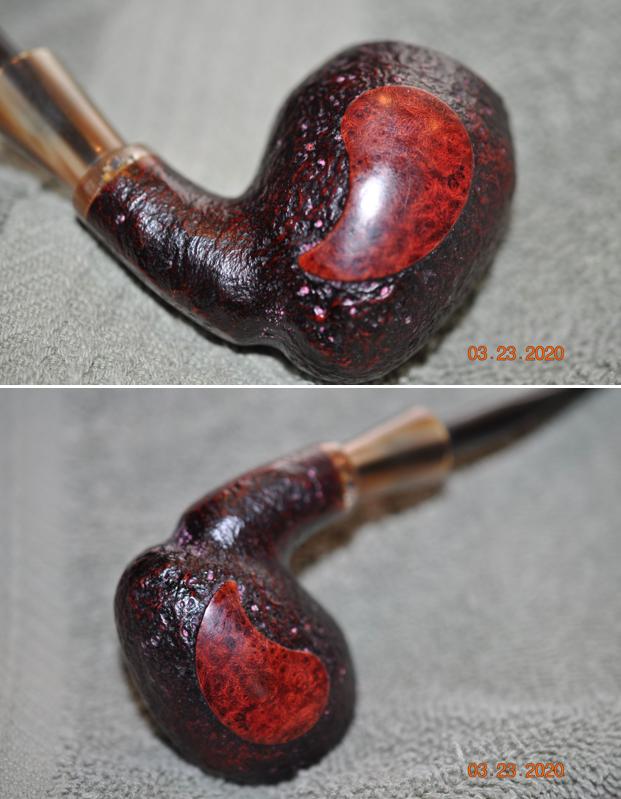
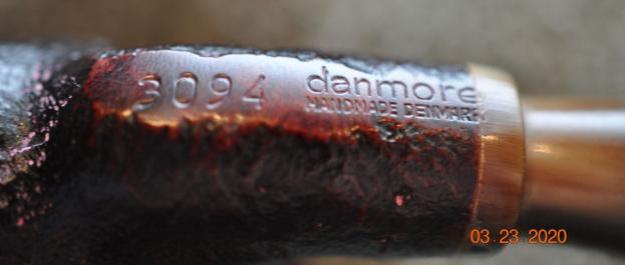
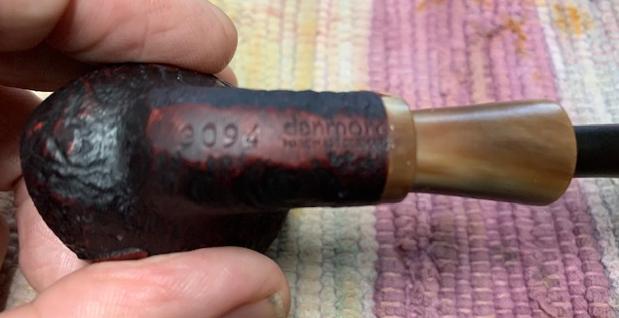
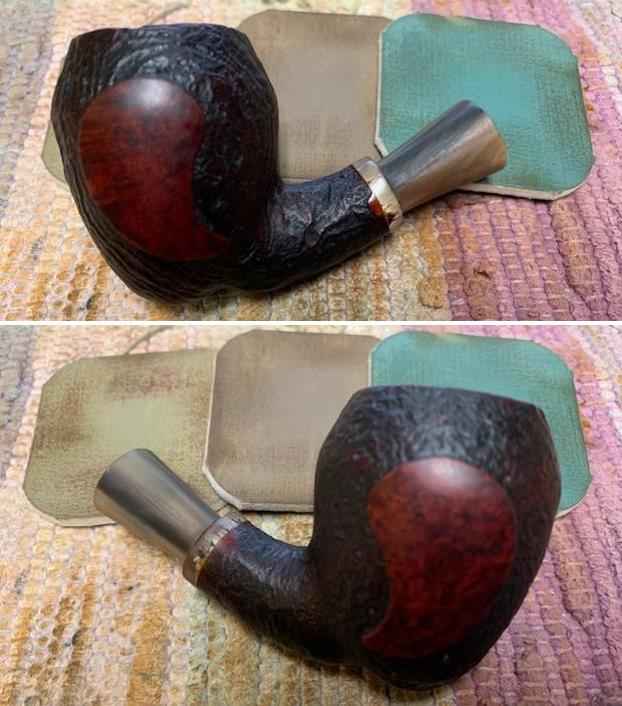
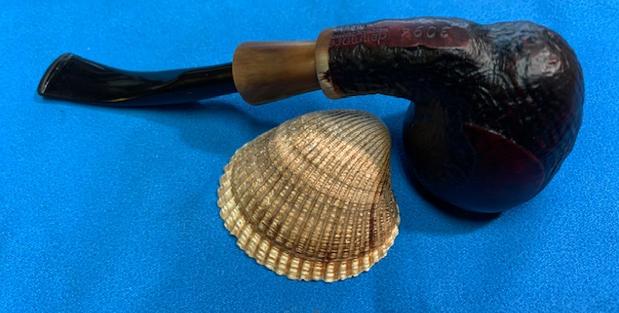
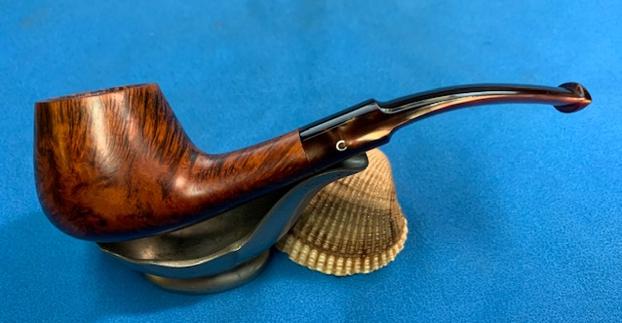
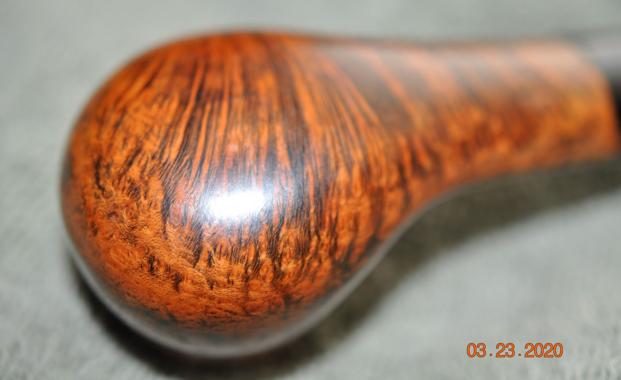
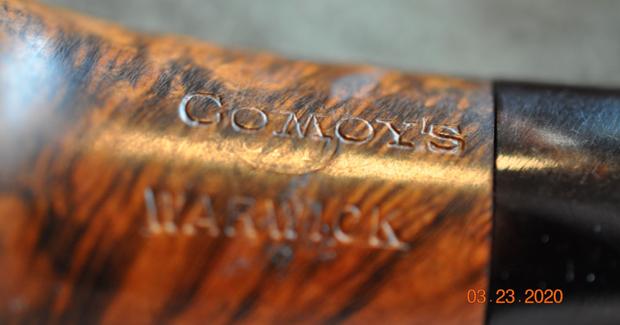
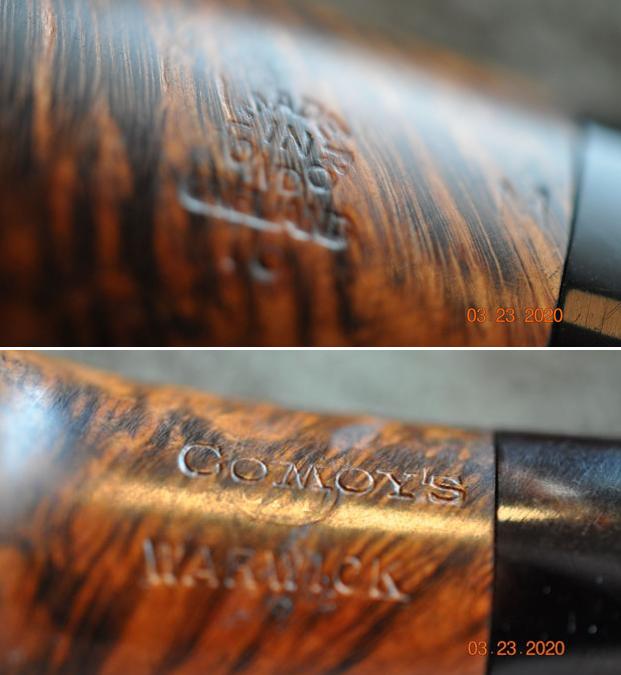
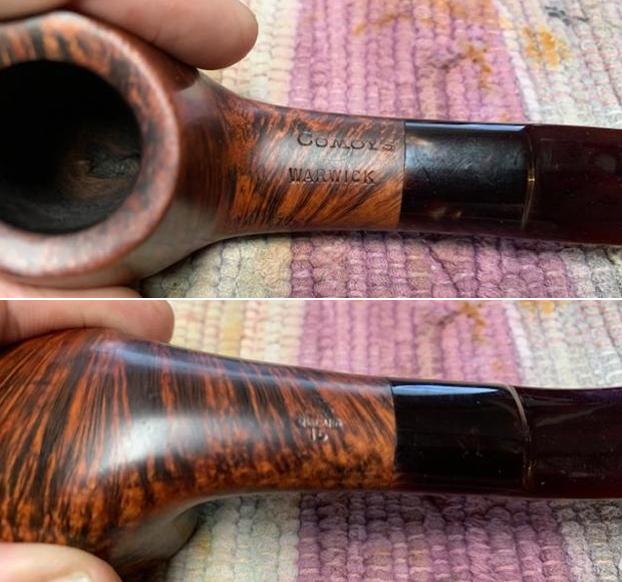
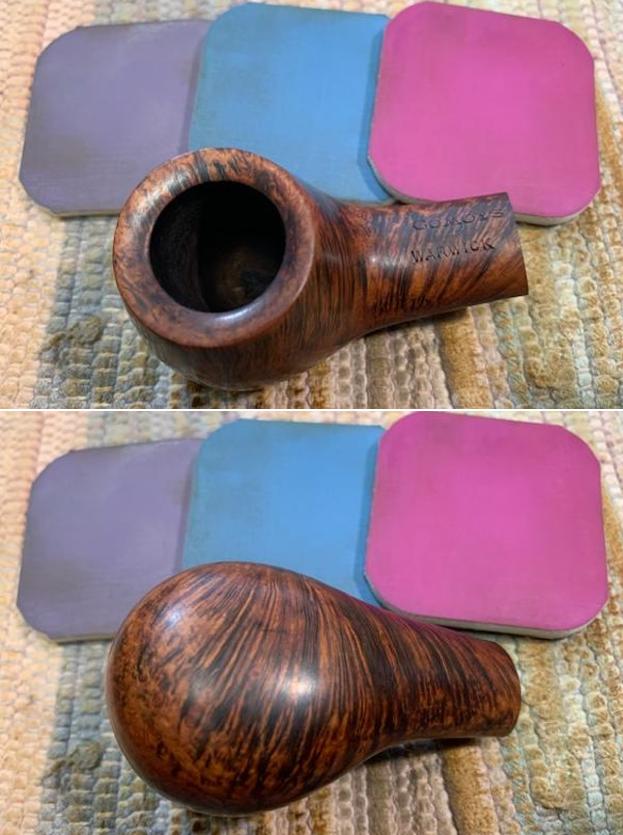
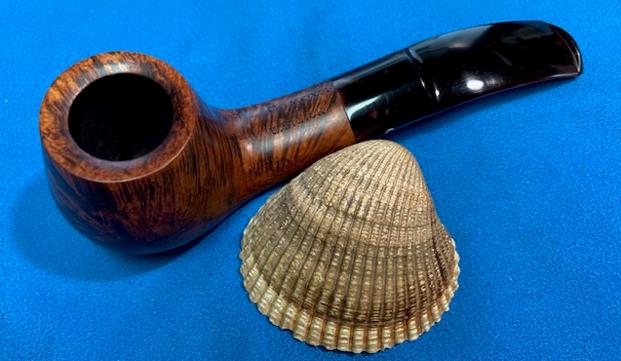
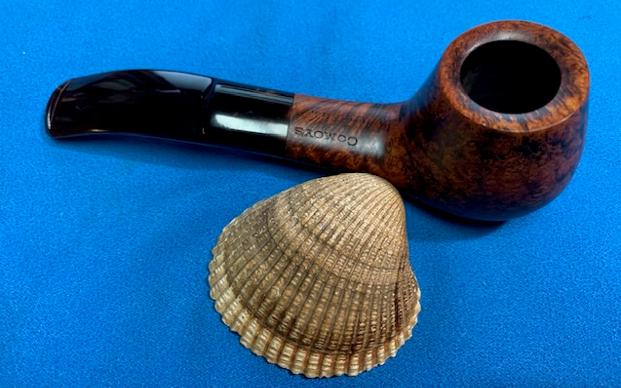
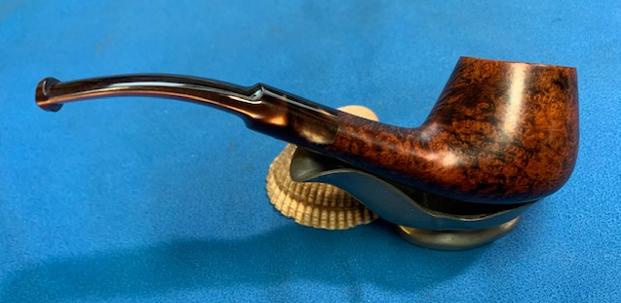
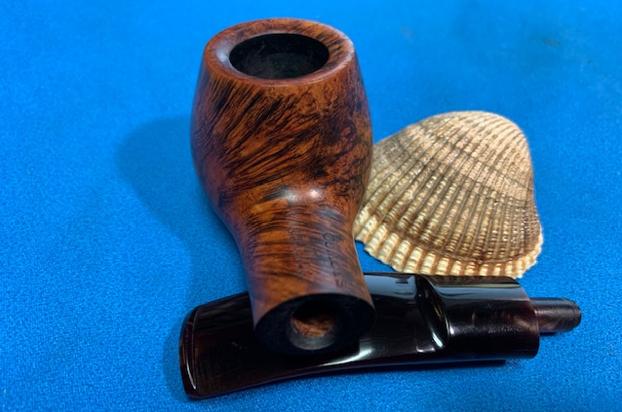
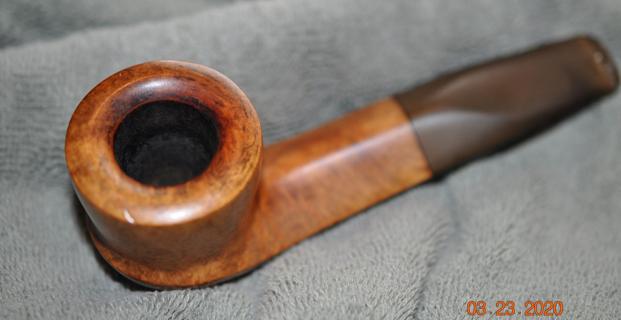
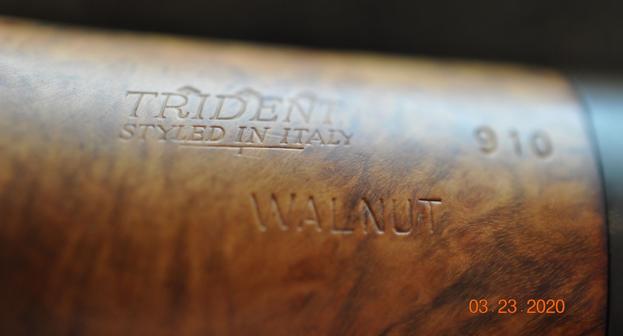
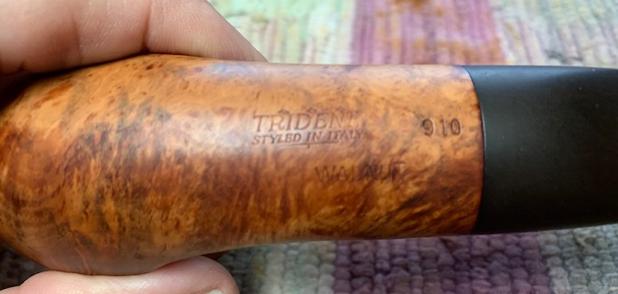
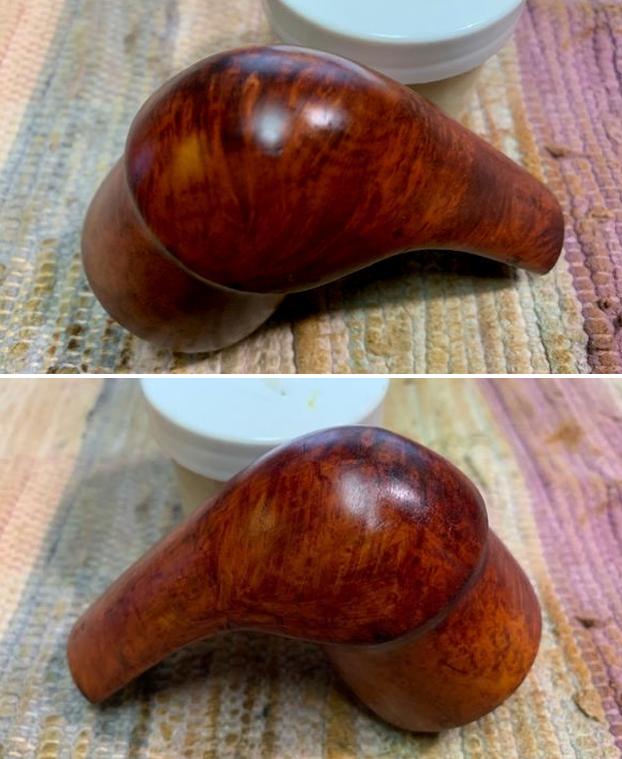
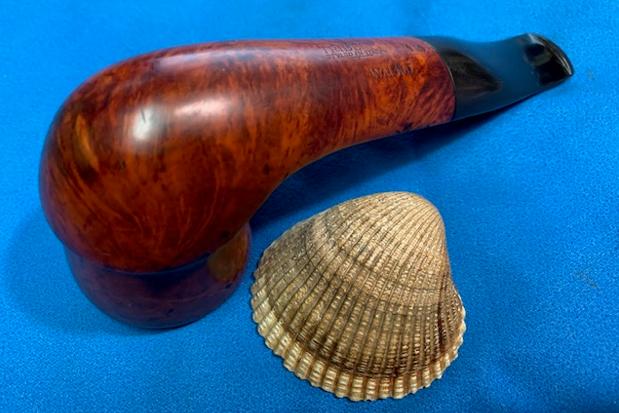
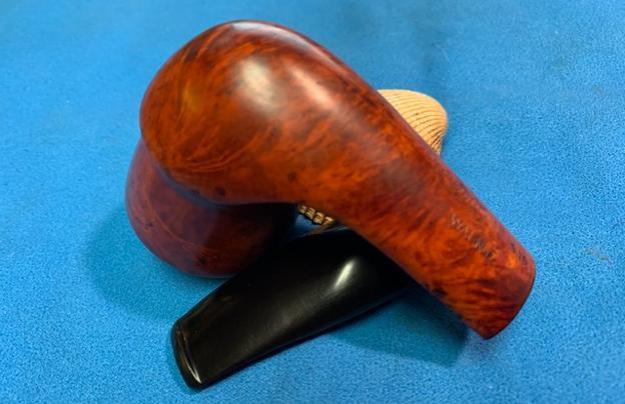
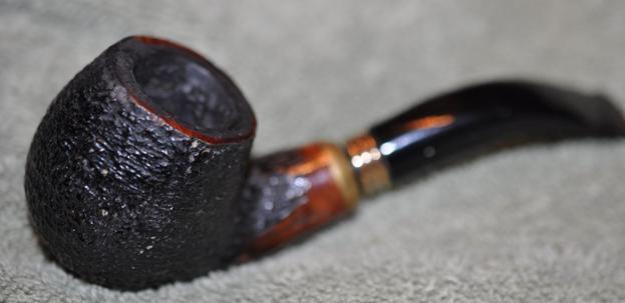
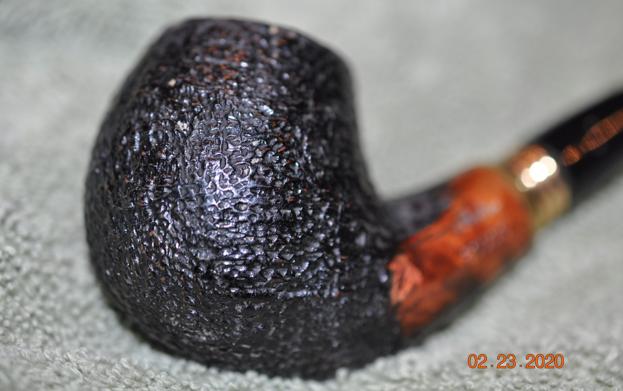
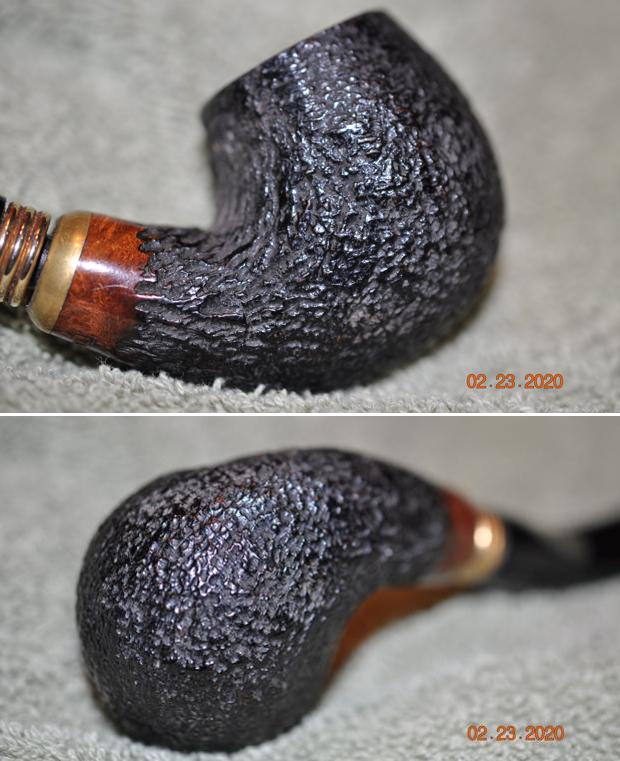
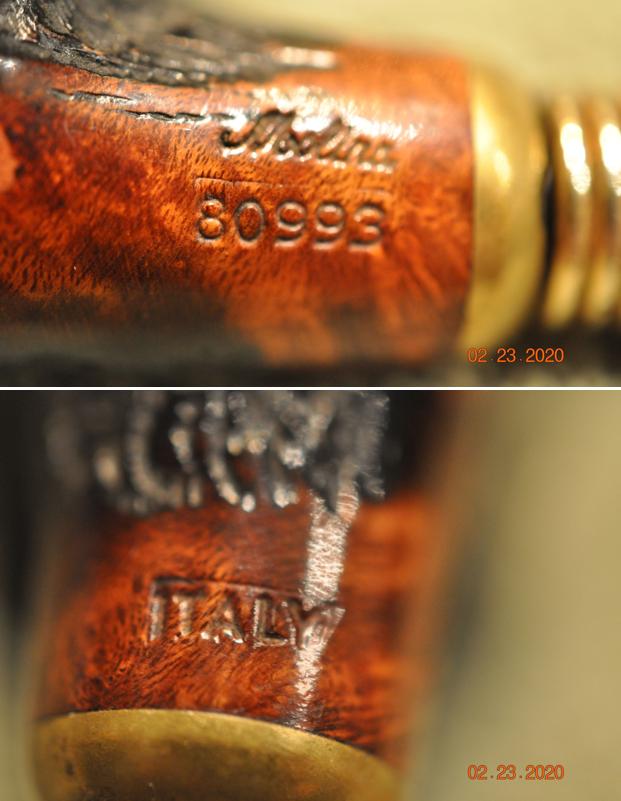
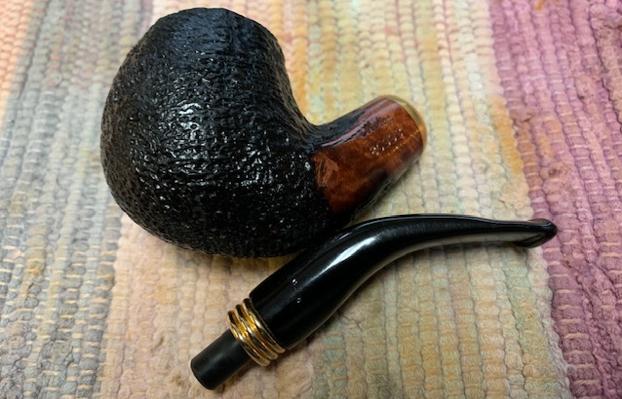
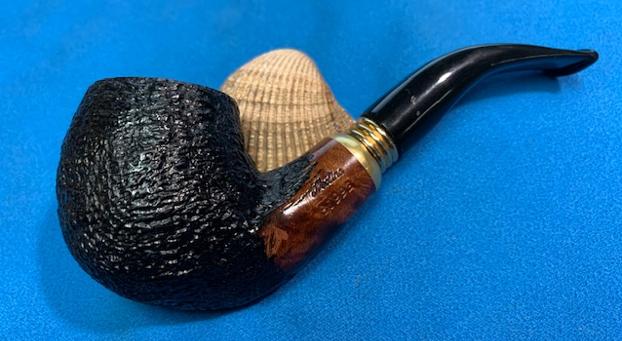
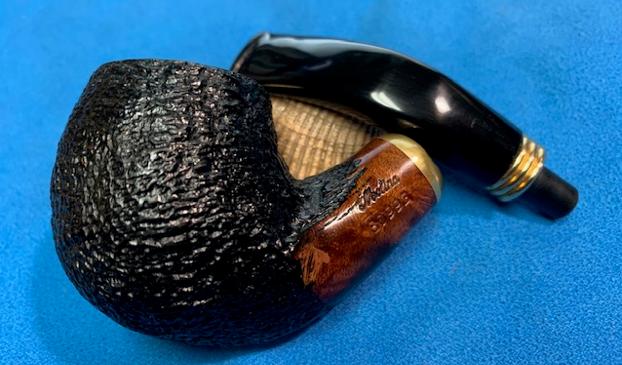
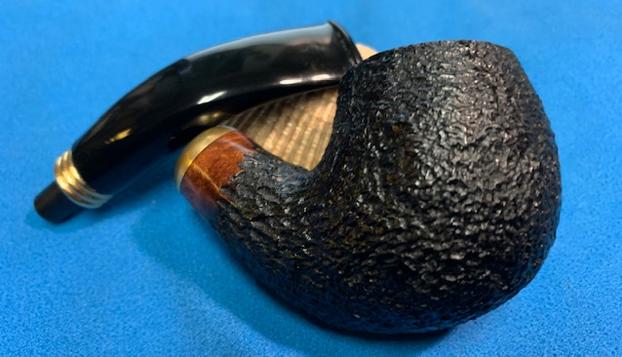
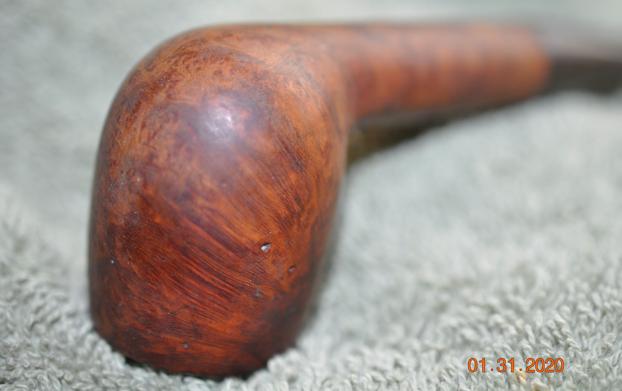
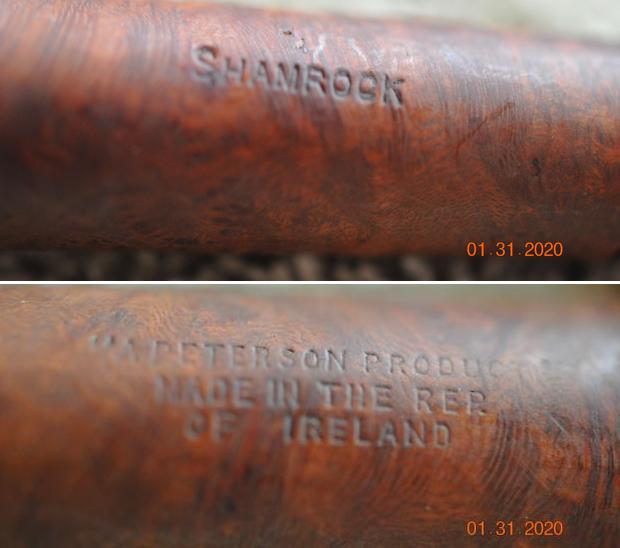
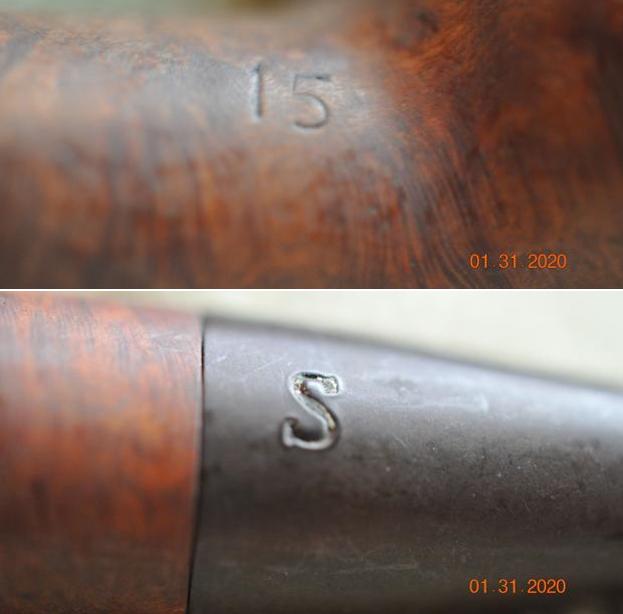
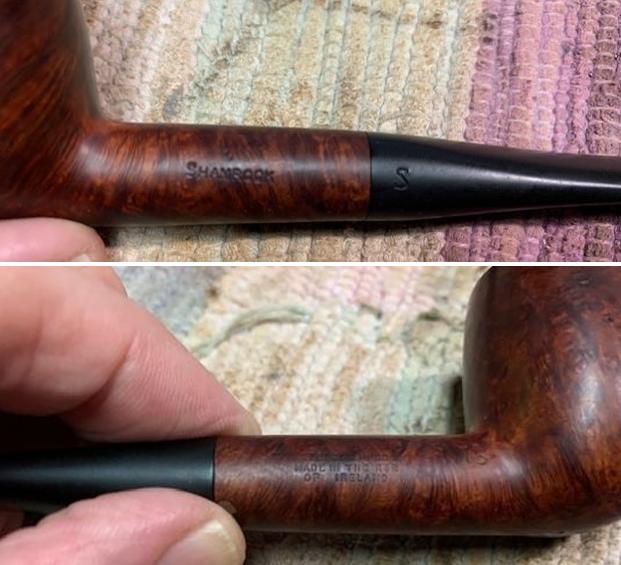
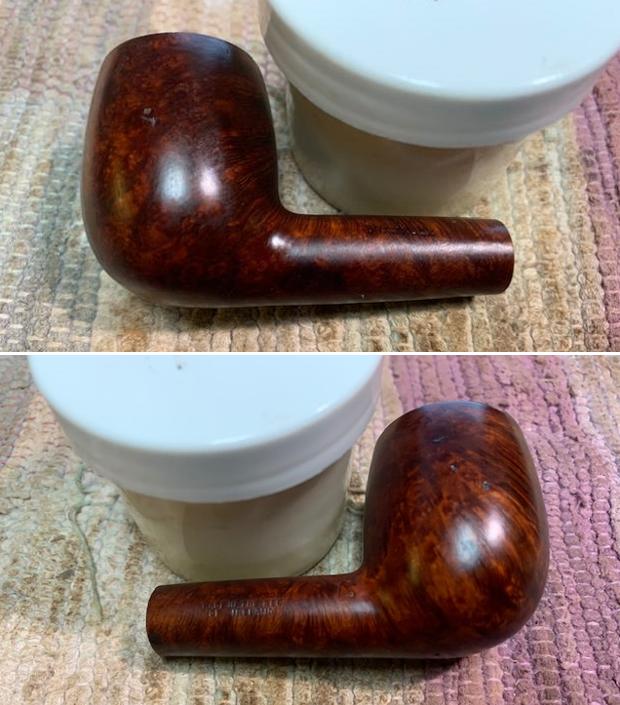
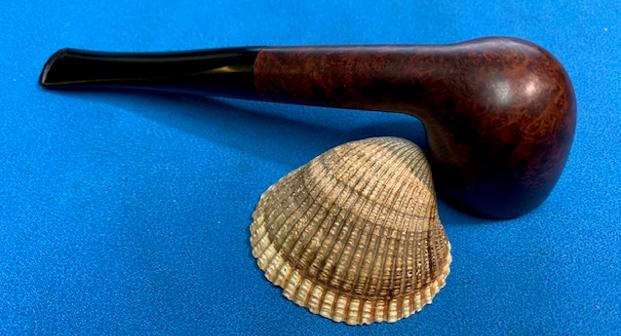
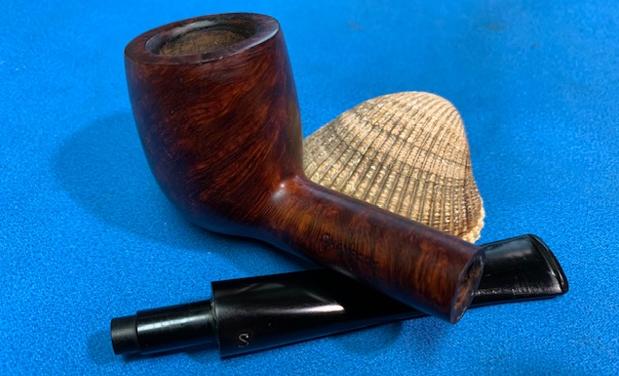
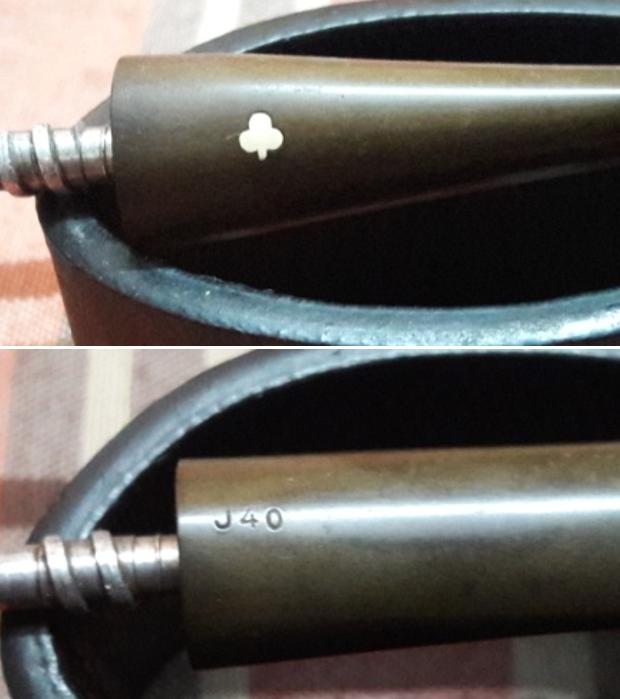
The next pipe on my work table is KAYWOODIE “STANDARD” in a classic Dublin shape from Steve’s grab bag that had been reamed, cleaned and readied for next stage of restoration by Jeff. This pipe is indicated in pastel blue arrow with the numeral 4. This petite ultra lightweight pipe has some beautiful and densely packed cross grains on the front, aft and over the shank surface of the stummel while bird’s eye adorns the sides of the bowl. The stamping of “KAYWOODIE” in capital letters over “STANDARD” in script over “IMPORTED BRIAR” is on the left side of the shank. The right side of the shank bears the shape code “08”. The stem, with its three holed aluminum threaded stinger, bears the Kaywoodie trademark inlaid white Clover Leaf logo on the left side of the stem. The lower surface of the stem is stamped as “J 40” towards the stinger end.
 The lack of KB & B stamping in clover leaf over the shank surface and the three holed aluminum stinger, points to a later era Kaywoodie pipe. The shape code # 08 finds mention in the 1936 catalog as medium Dublin (indicated by the red arrow) and is conspicuous by its absence in the 1970s. (Refer Kaywoodie – Pipedia)
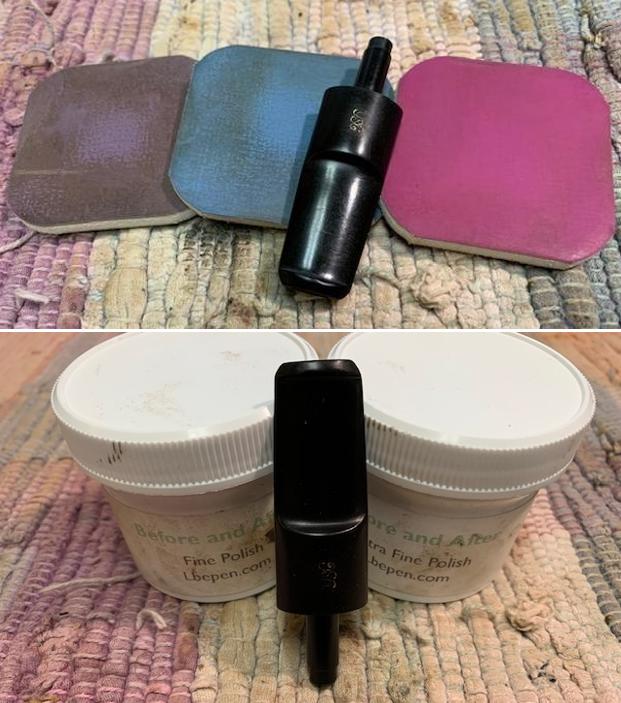
 The Standard grade stamp indicates this pipe to be the cheapest offering from Kaywoodie at the time and is described as “the original dry- smoking, pure smoking pipe” in the flyer (indicated by the red tick mark) that was available on pipedia.org. The same has been reproduced below for ease of reference. Collector’s Guide to Kaywoodie Pipes – Pipedia
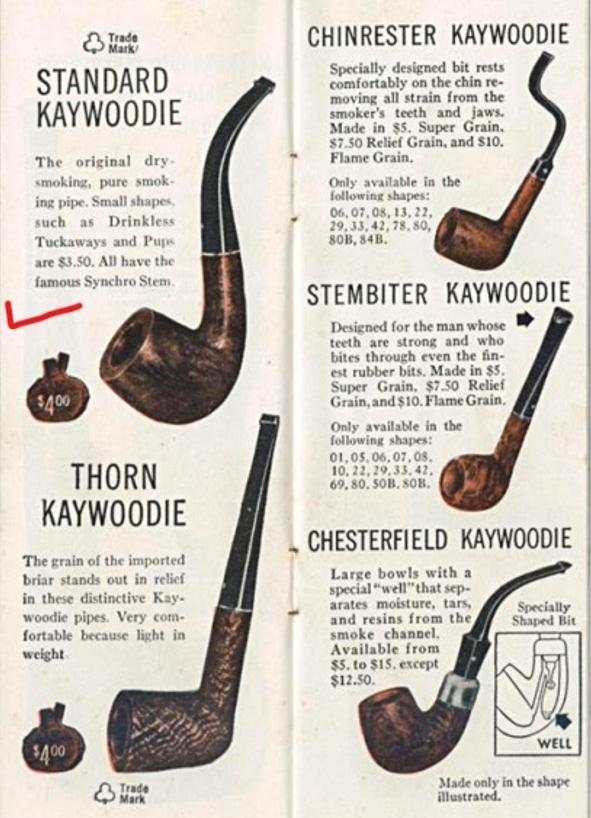 Thus, the Kaywoodie Standard presently on my work table dates to pre-1970s (not a definitive supposition) but definitely post 1950s when the stinger head size was reduced in diameter and three holes replaced the four holes. In spite of my best efforts, I have not come across any concrete information on the stamp “J 40”. It is my guess that this is the code that would help for replacing the stem by Kaywoodie retail outlets in the event that the original stem is broken by the owner.
Initial Visual Inspection
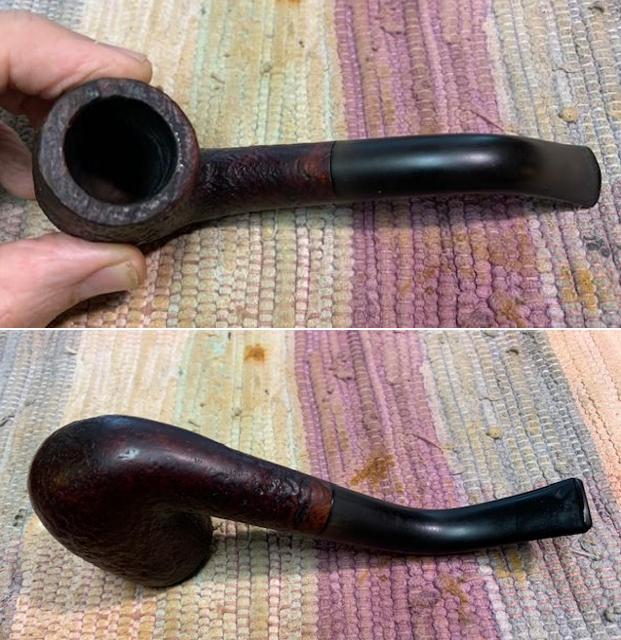
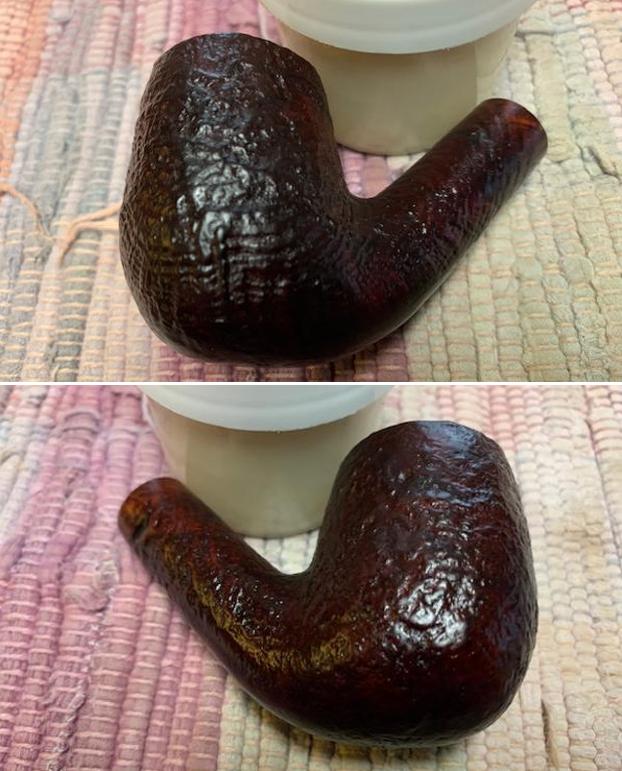
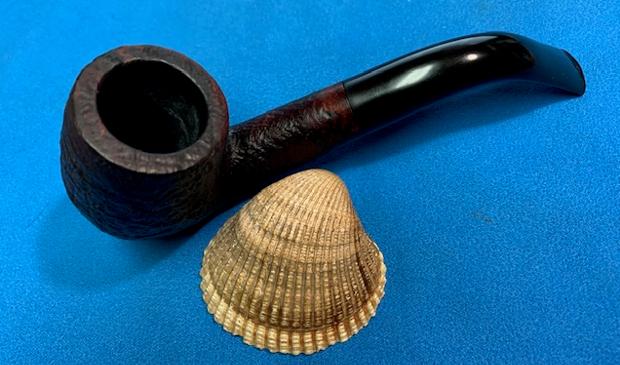
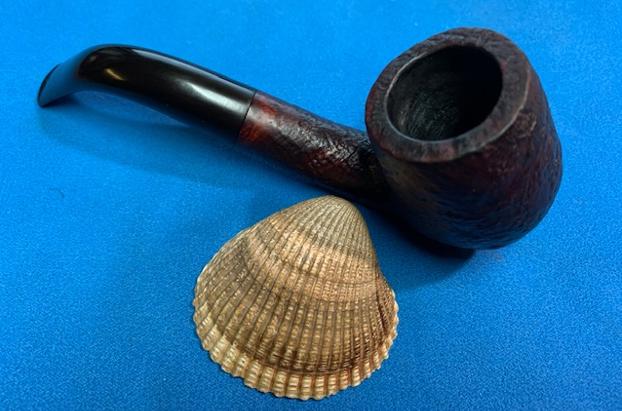
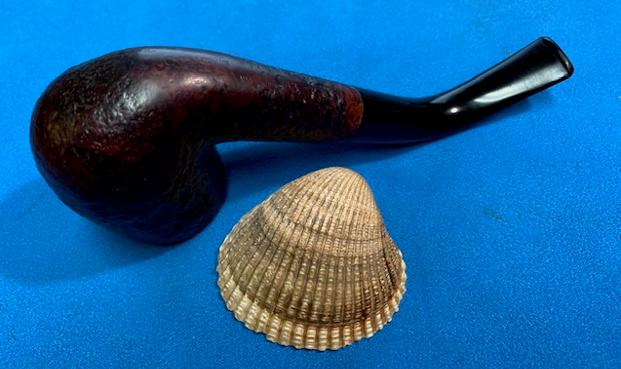
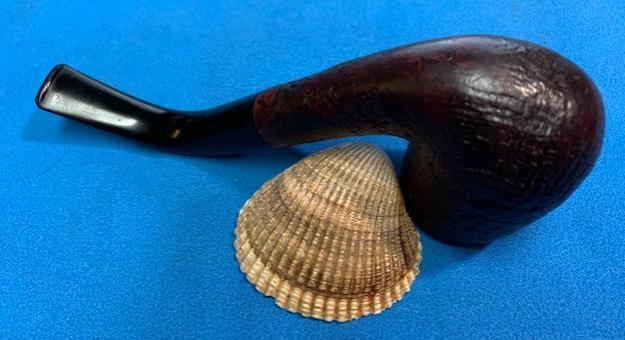
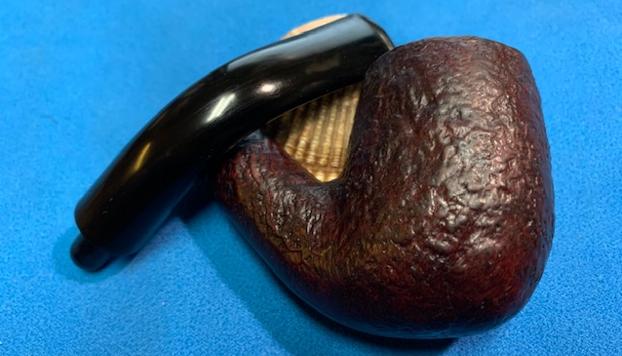
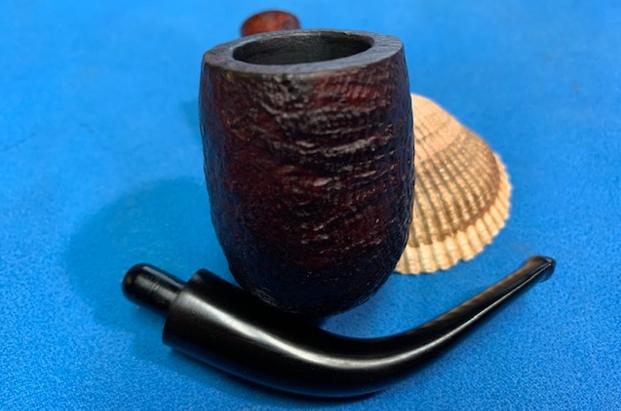
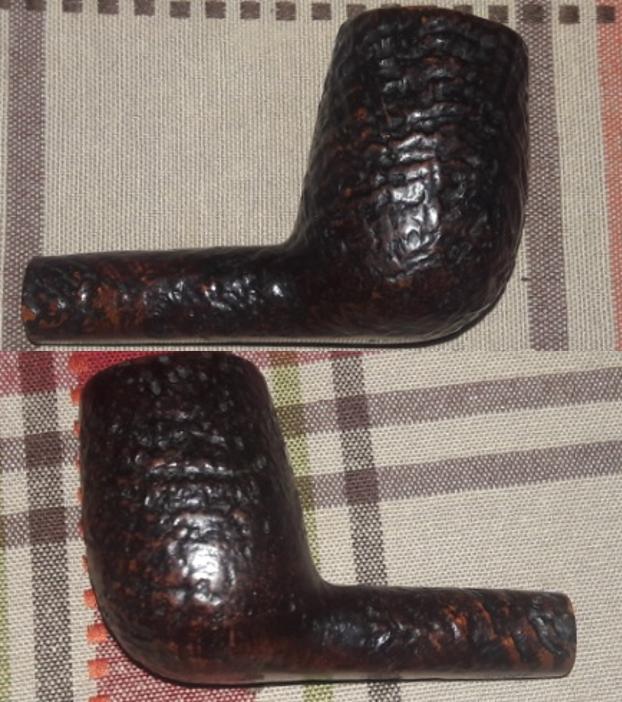
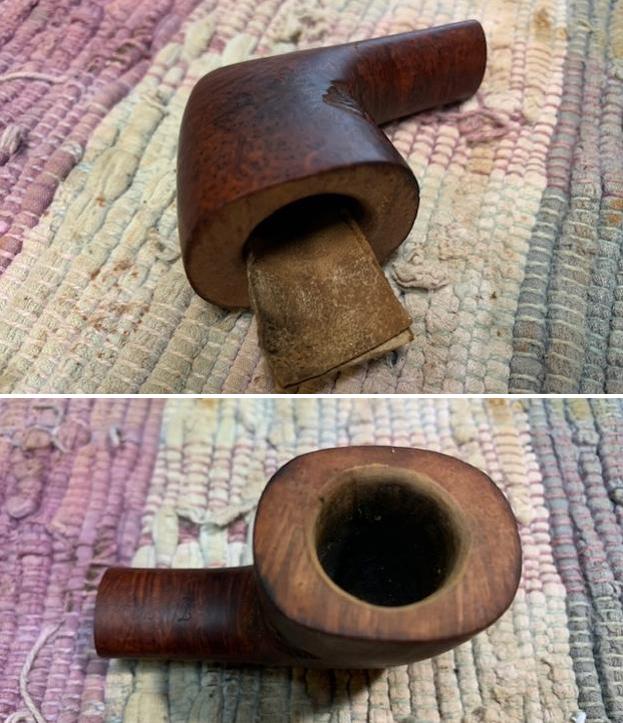
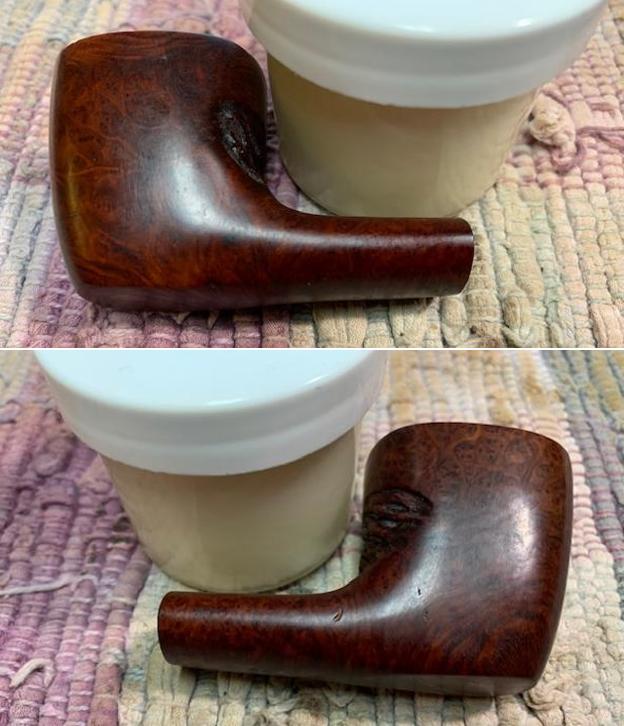
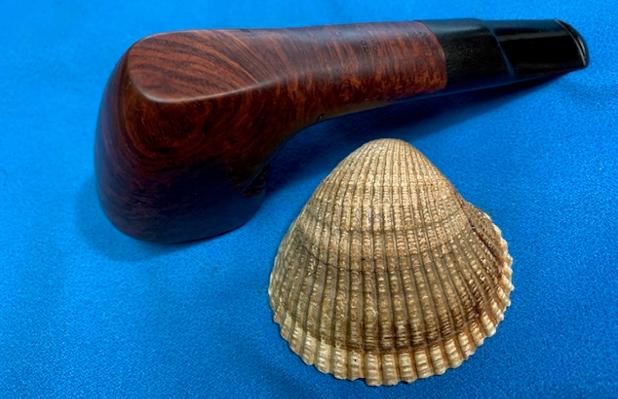
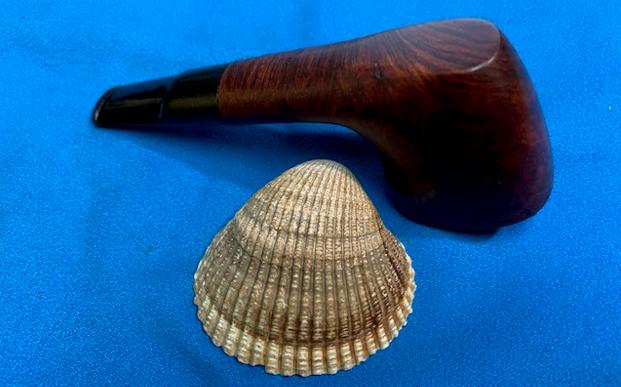
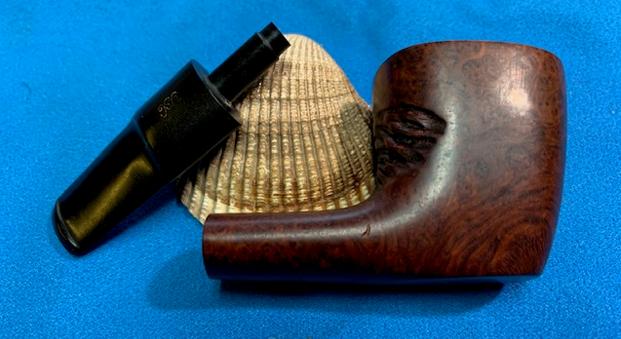
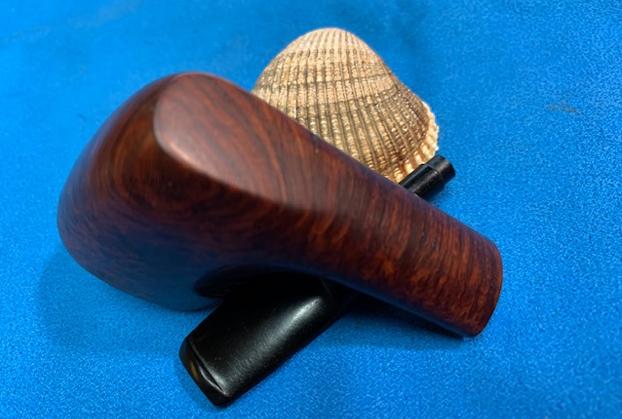
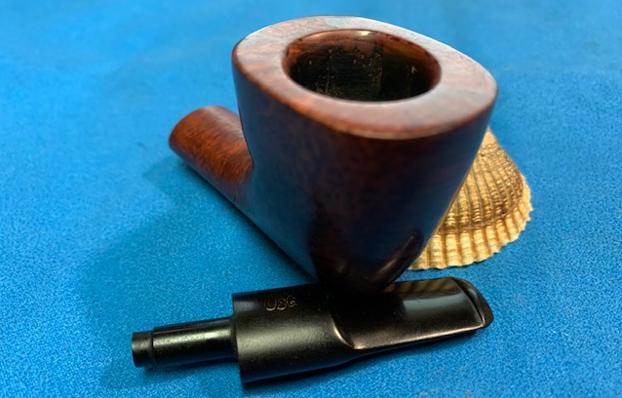
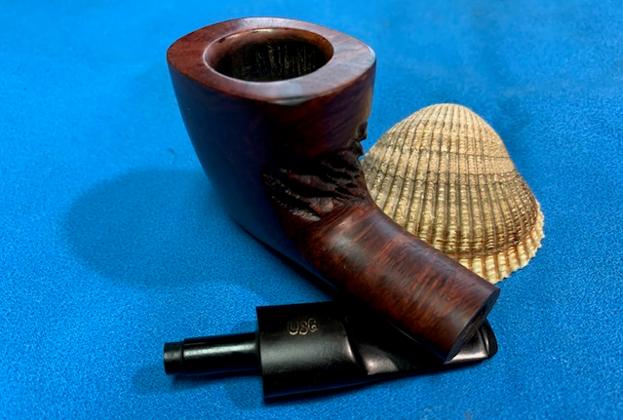
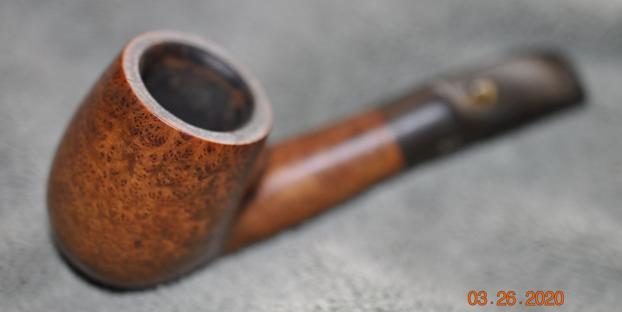
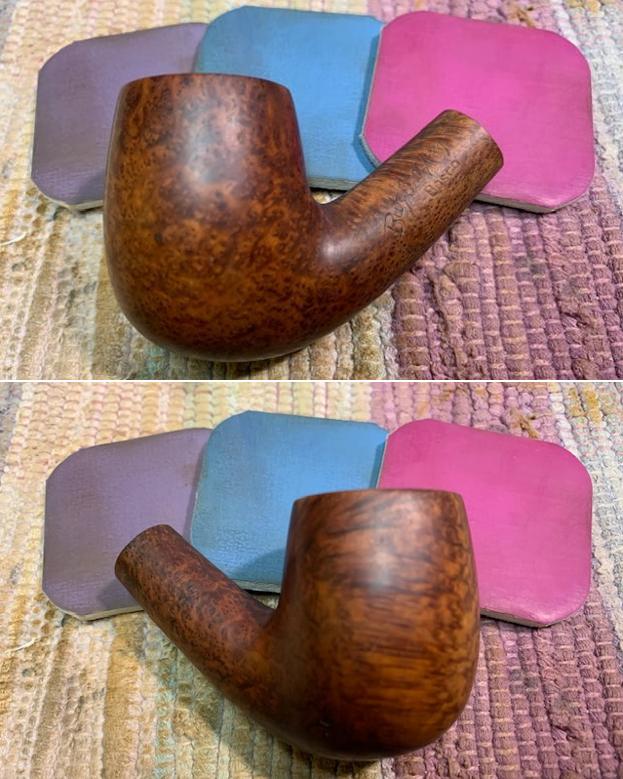
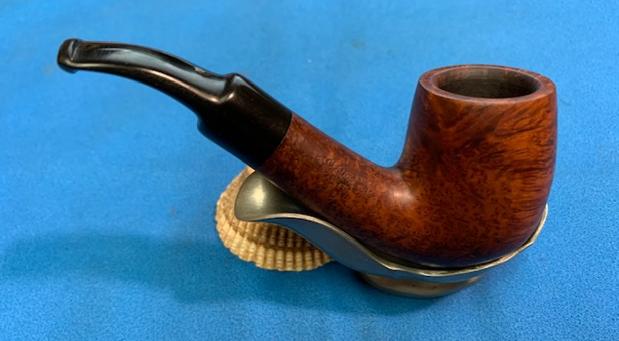
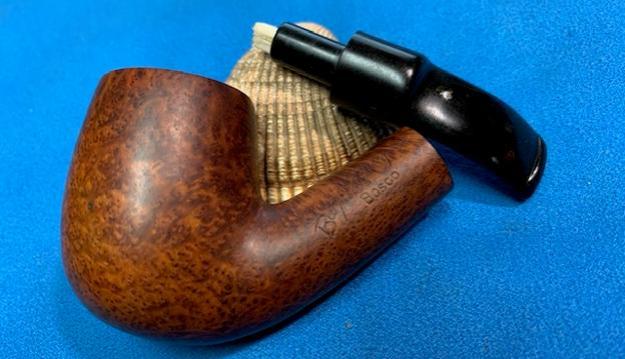
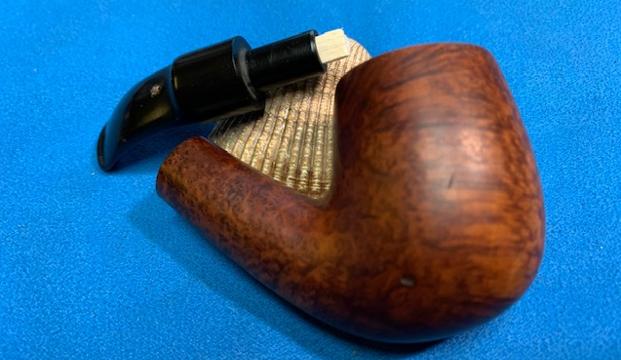
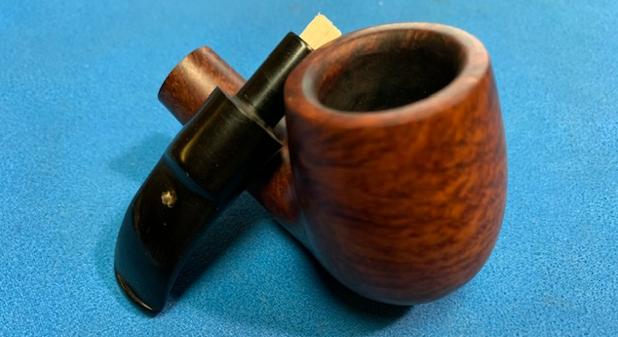
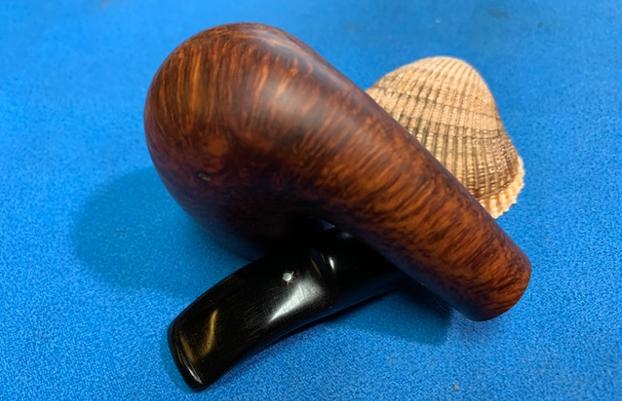
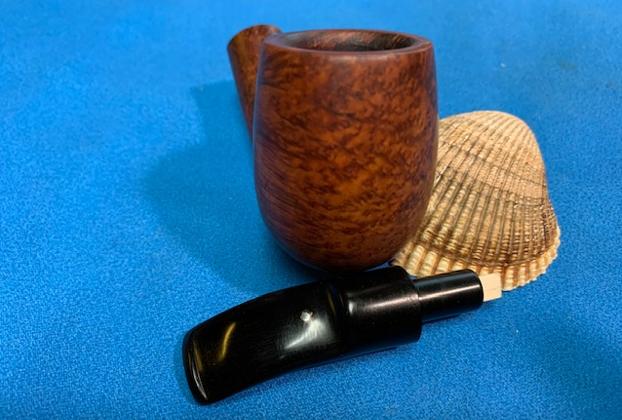
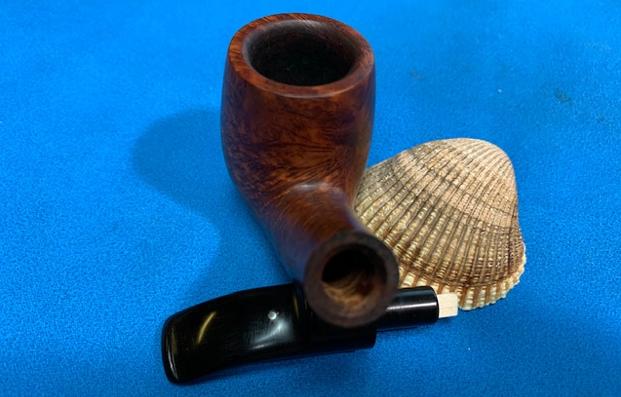
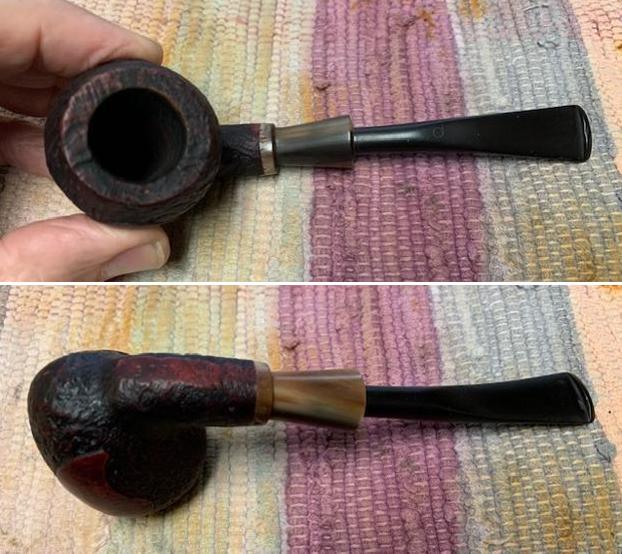
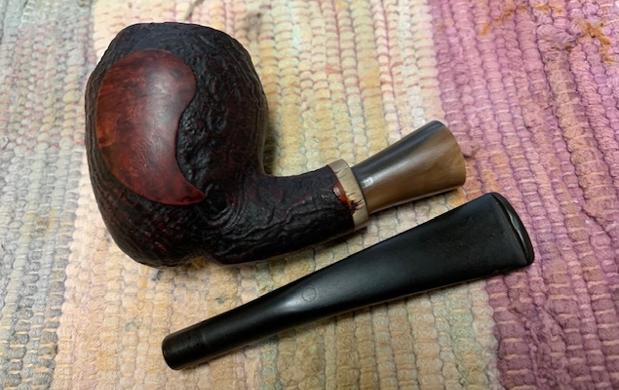
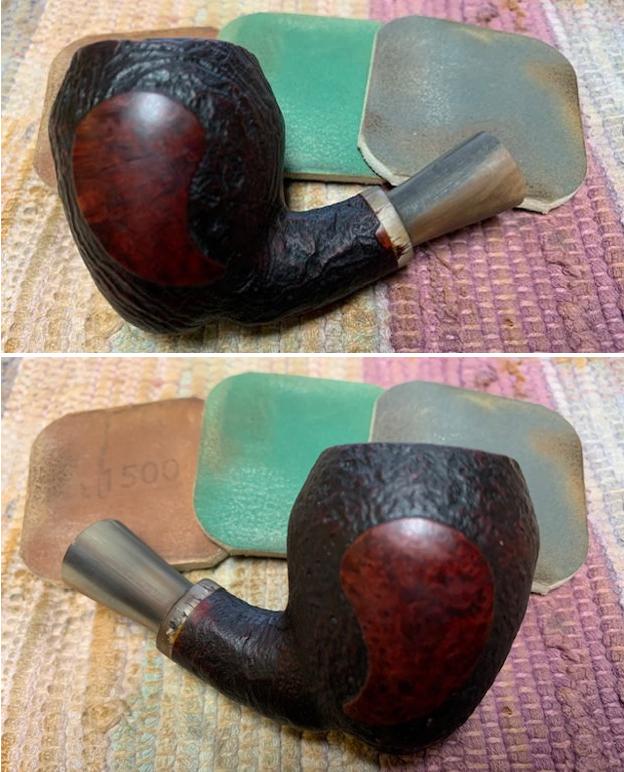
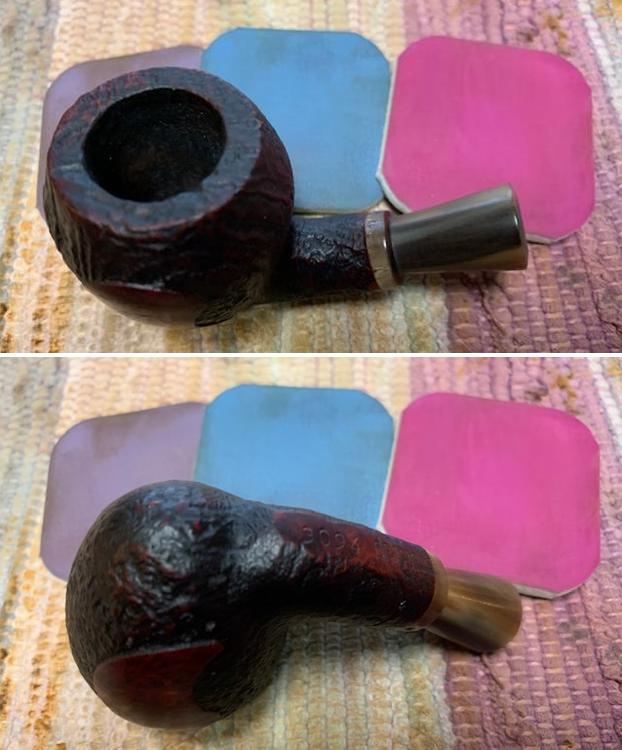
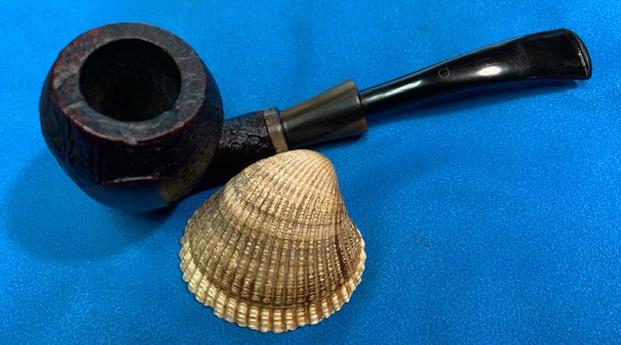
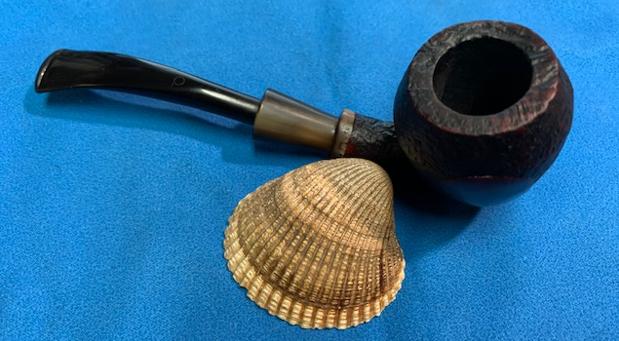
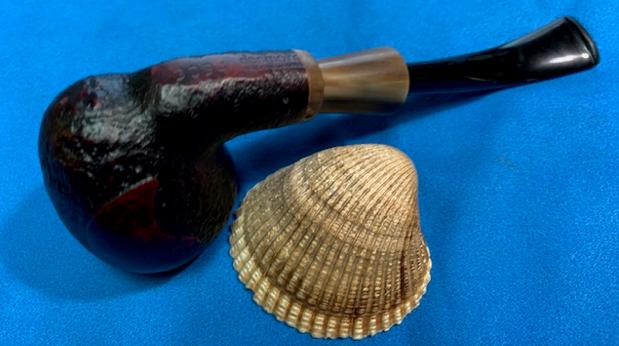
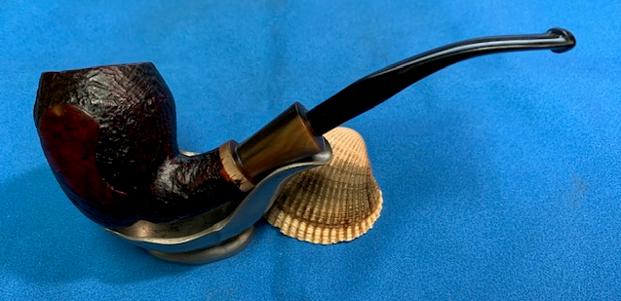
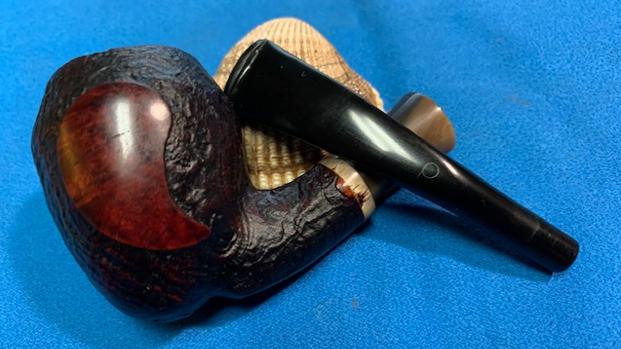
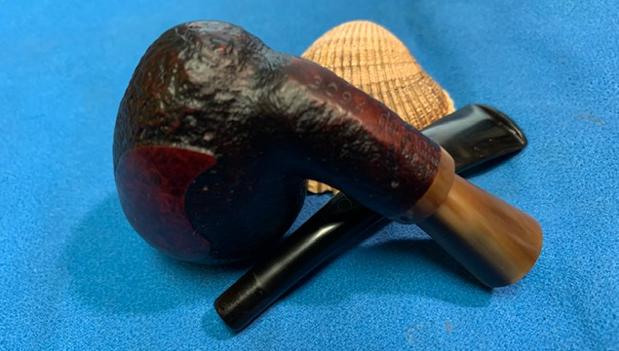
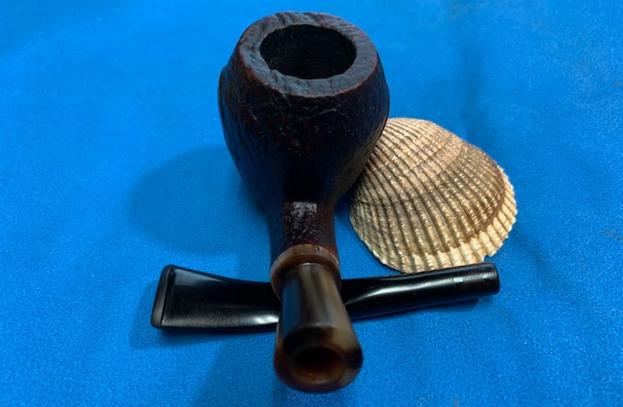
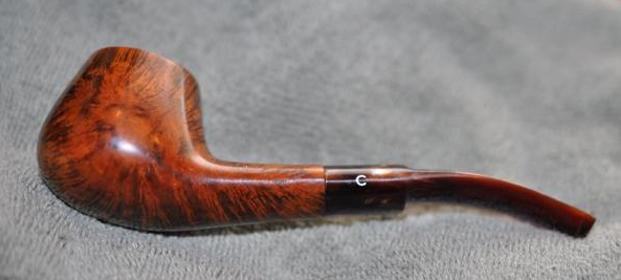
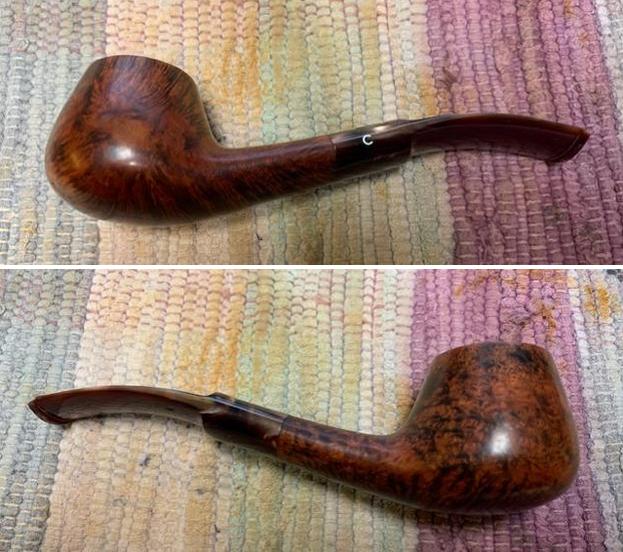
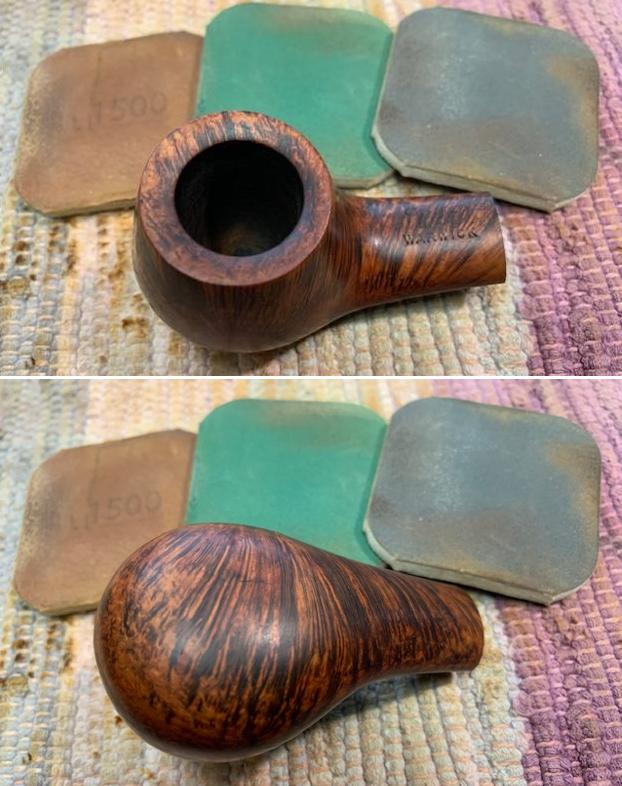
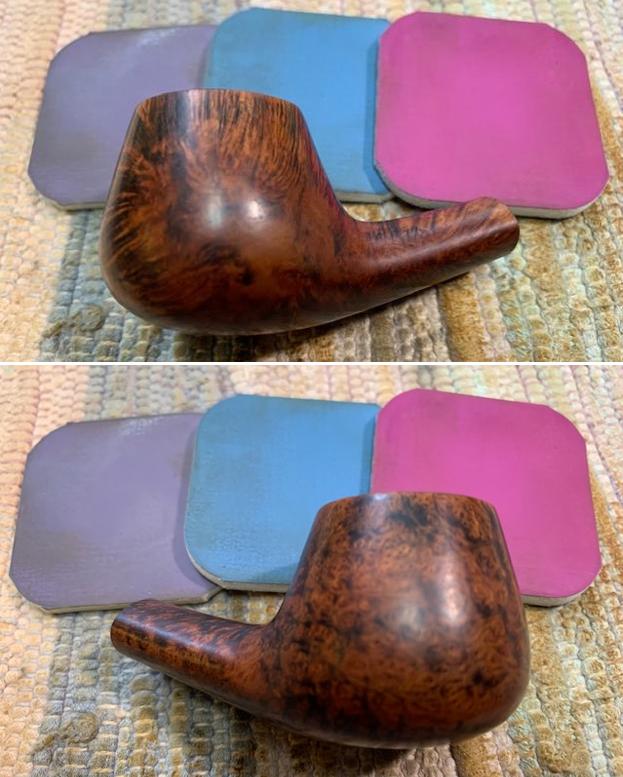
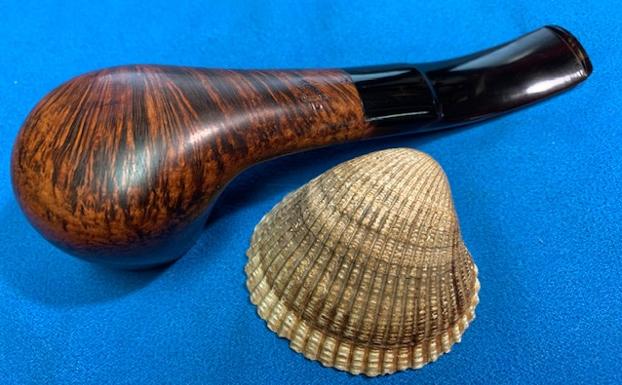
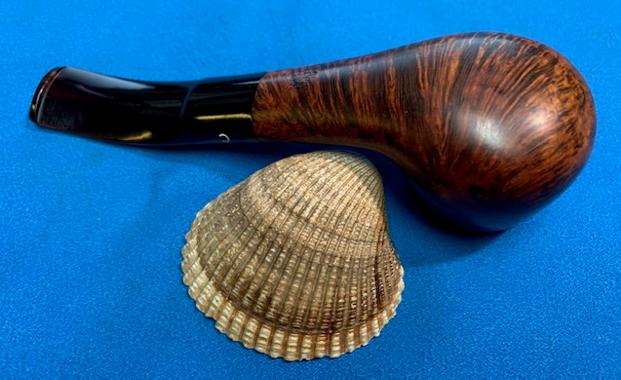
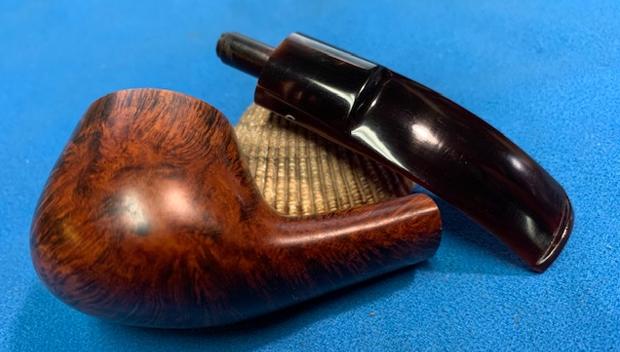
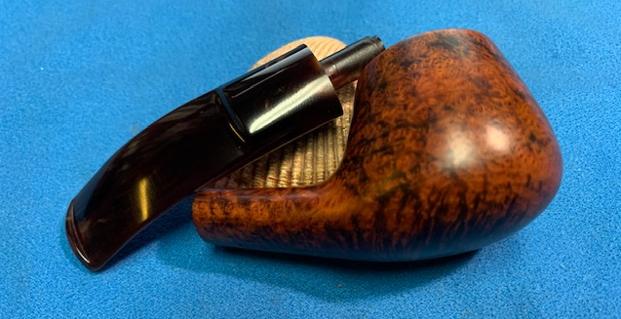
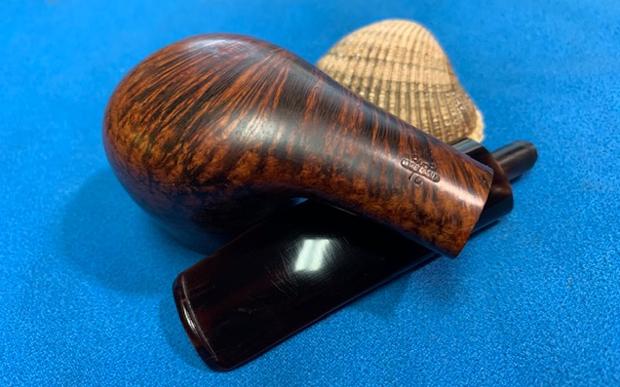
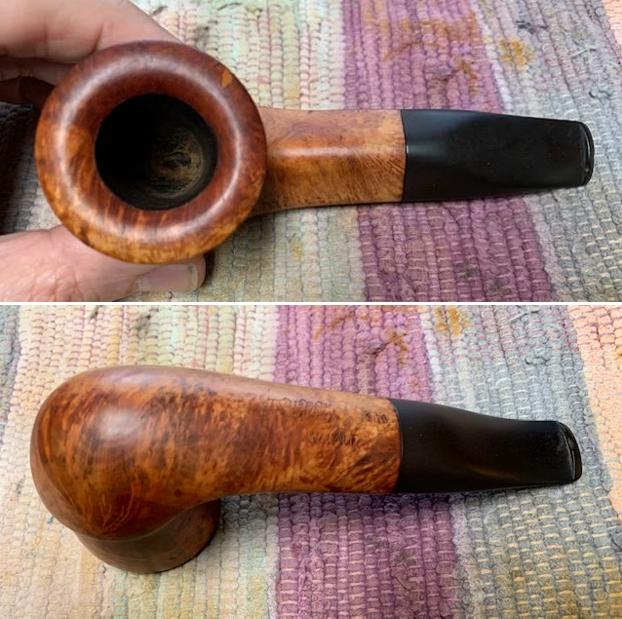
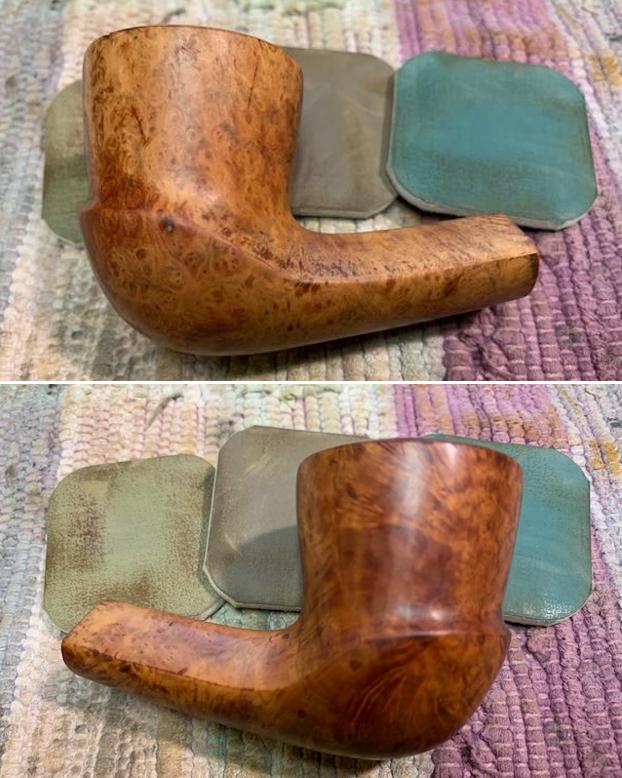
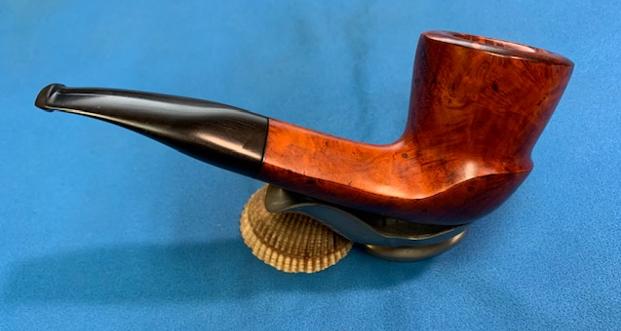
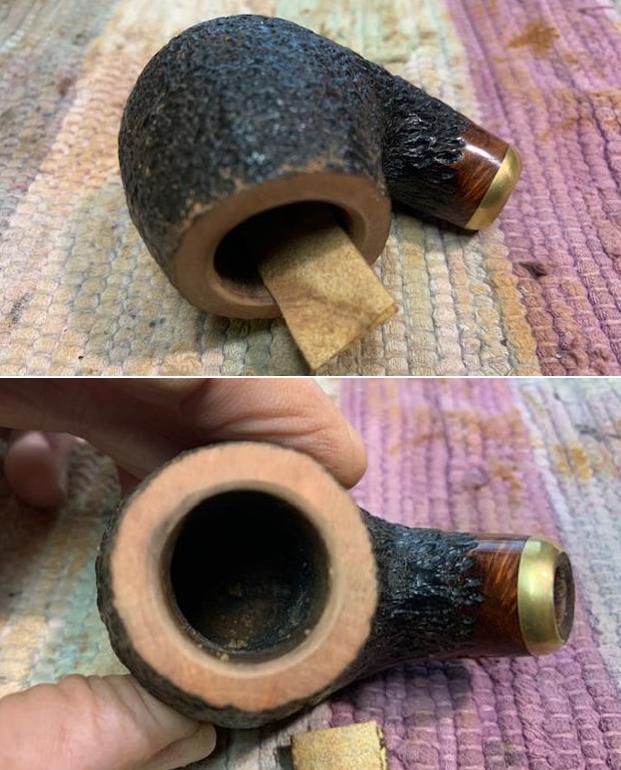
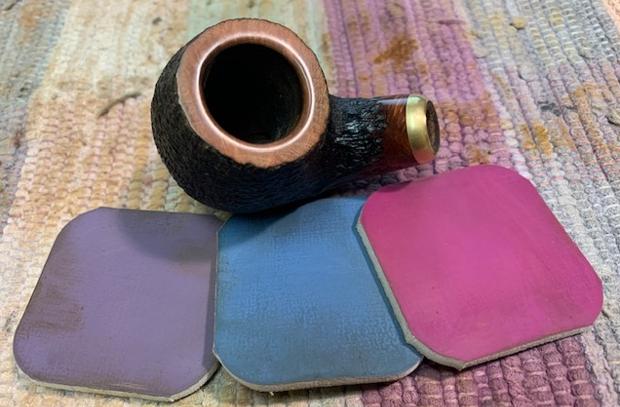
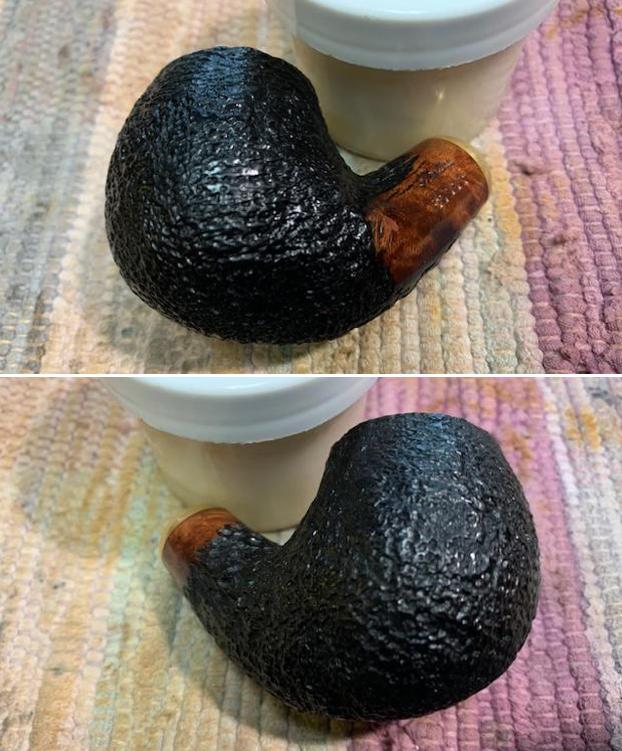
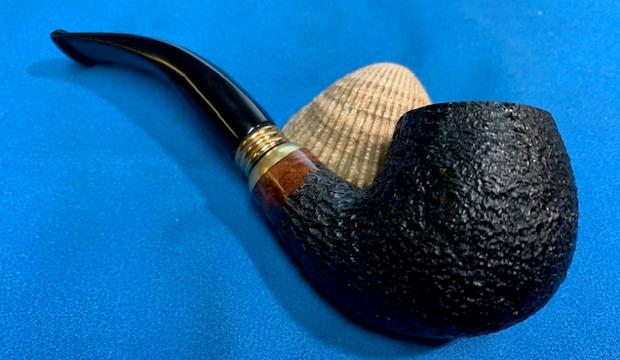
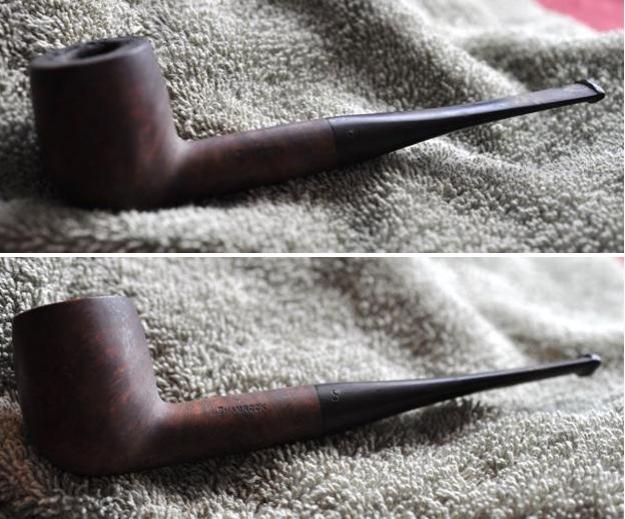
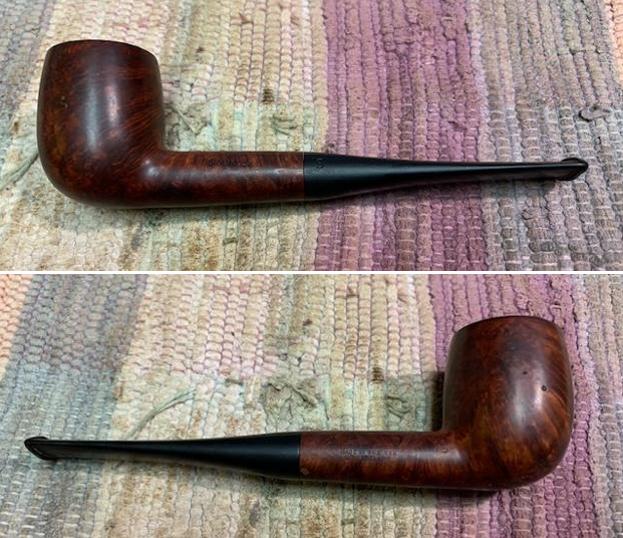
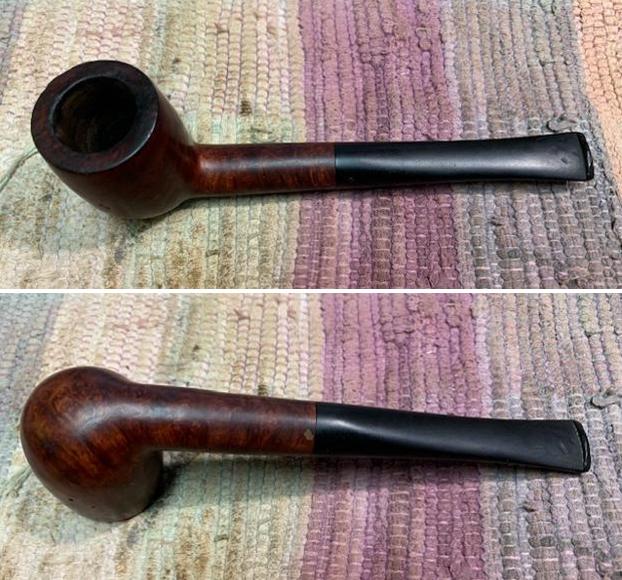
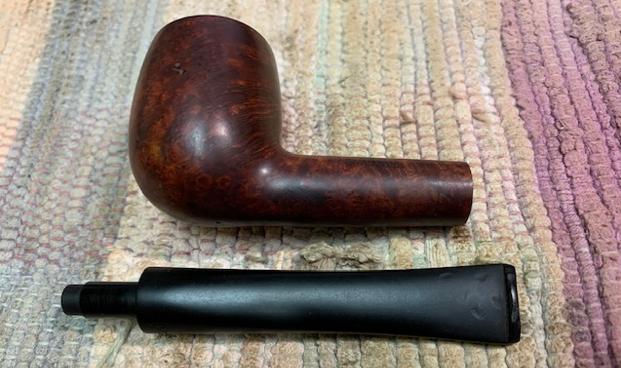
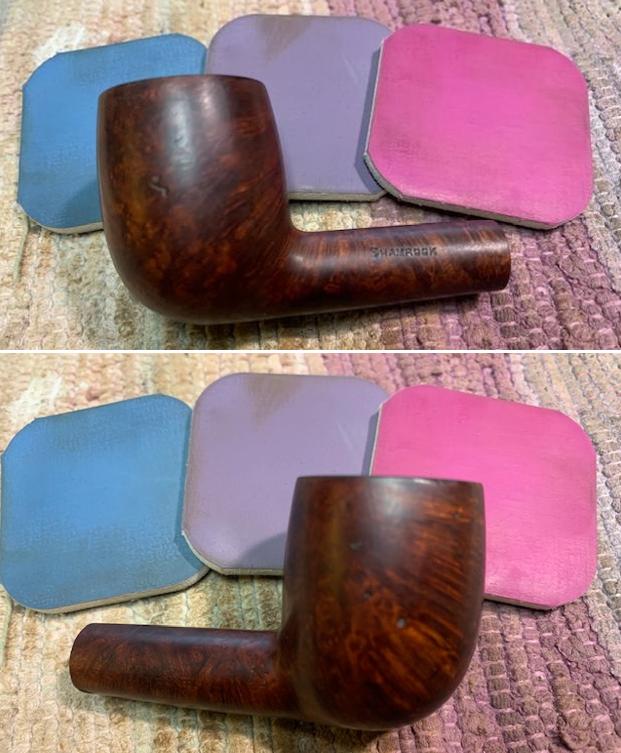
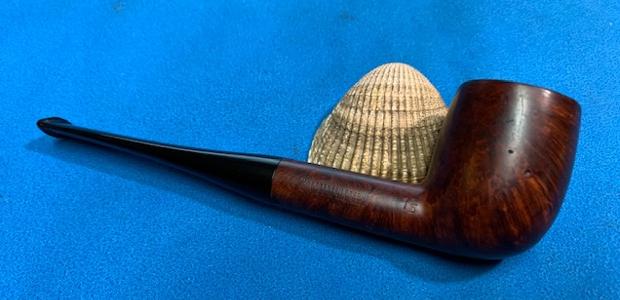
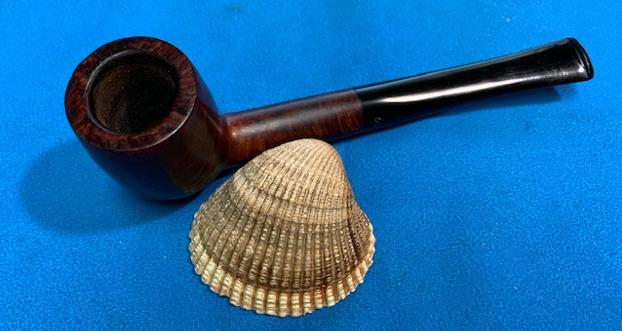
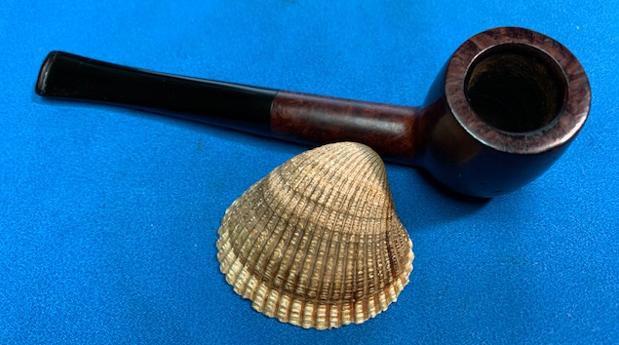
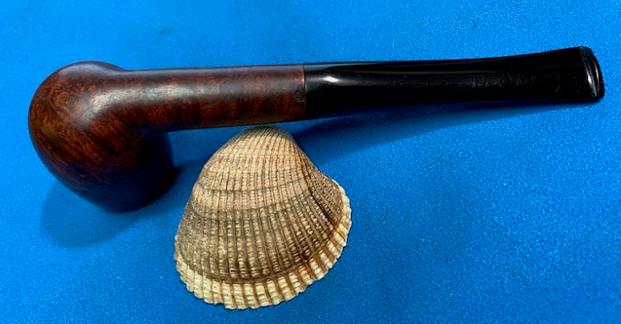
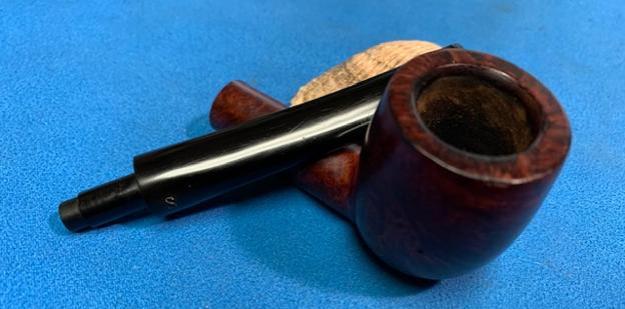
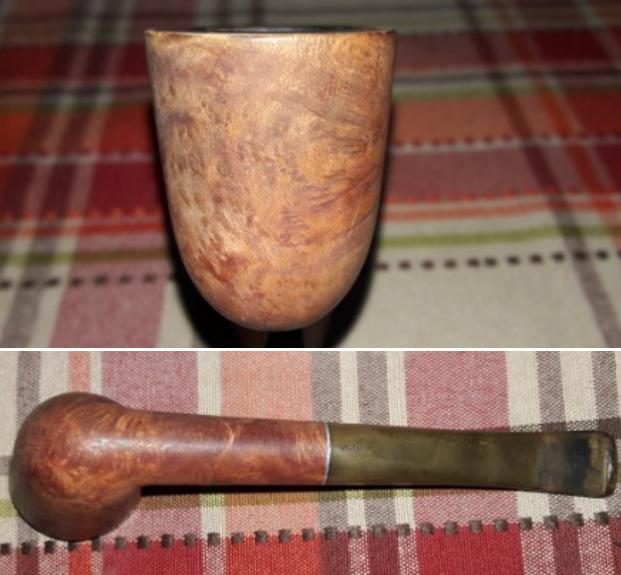
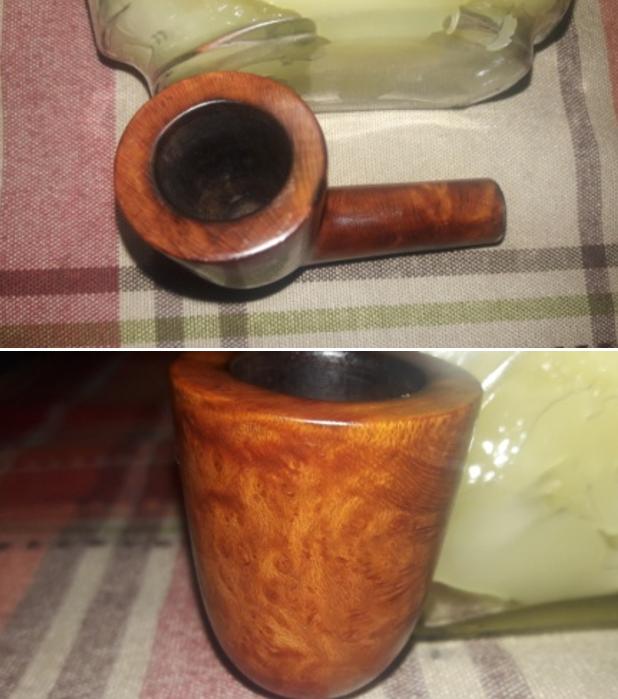
This grab bag that Steve had sent me contained few pipes that Jeff had already cleaned and sent across to Steve for further restoration. Thus, unfortunately, before condition pictures are not available with me to share with the readers, but the best part is that I get to work on a pipe that Jeff has already worked his magic upon and presented me with a clean pipe. Below are a few pictures of the pipe as I had received it. 

 Detailed Inspection
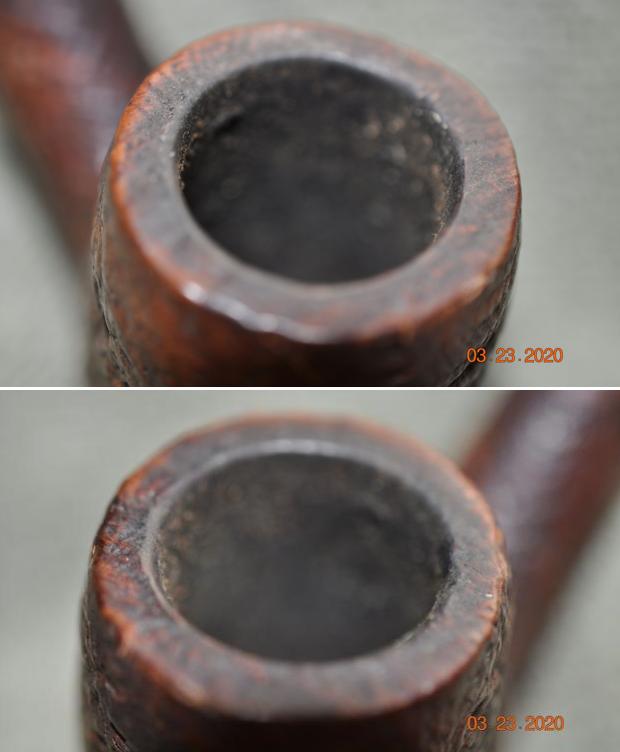
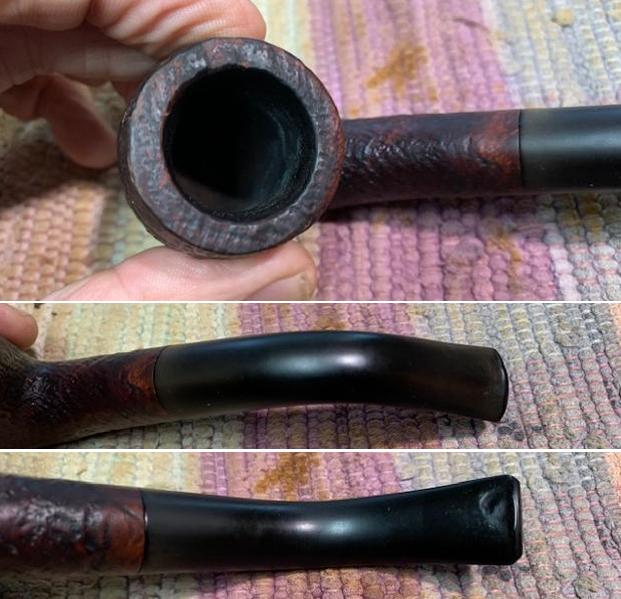
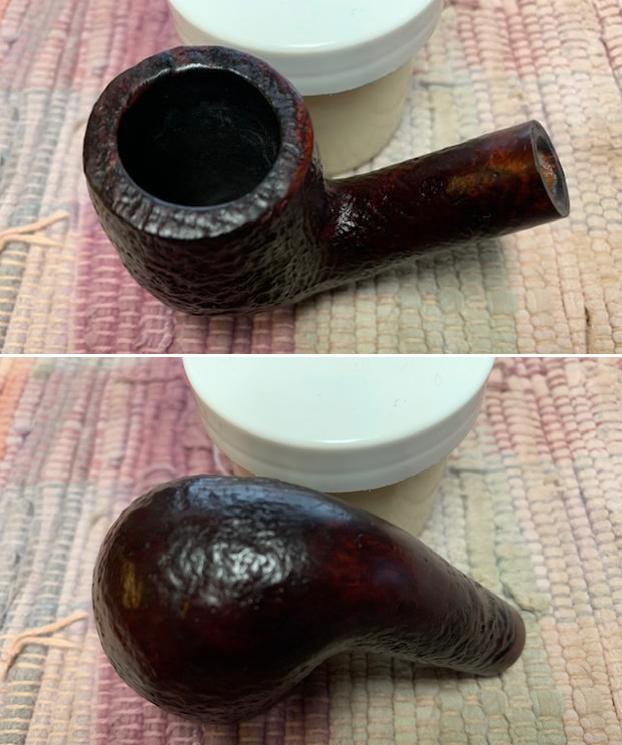
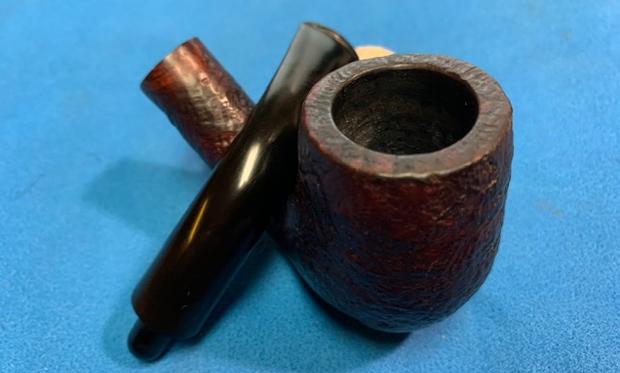
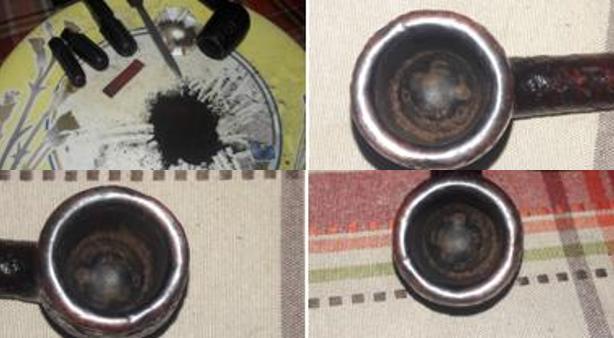
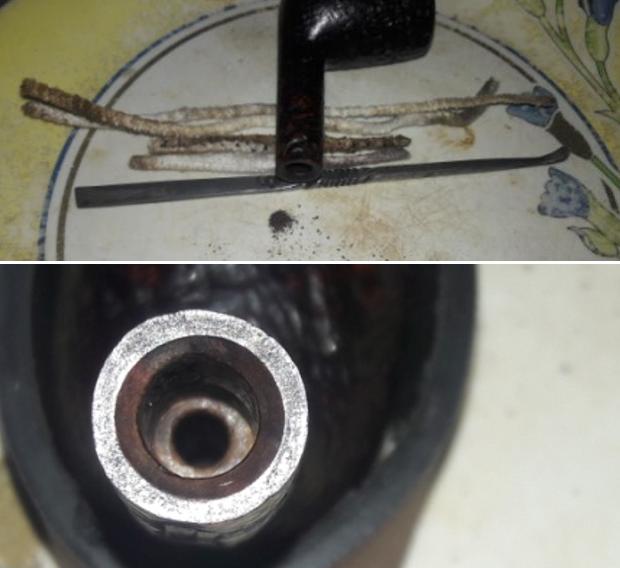
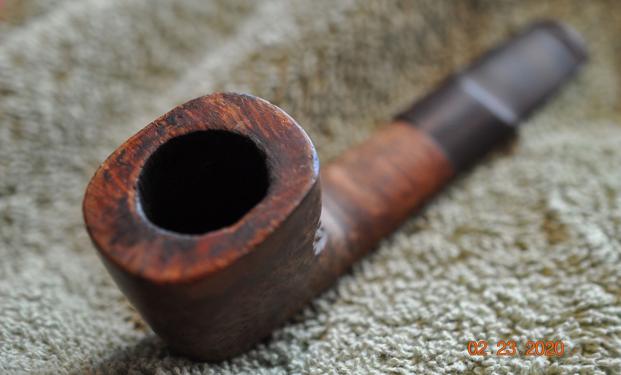
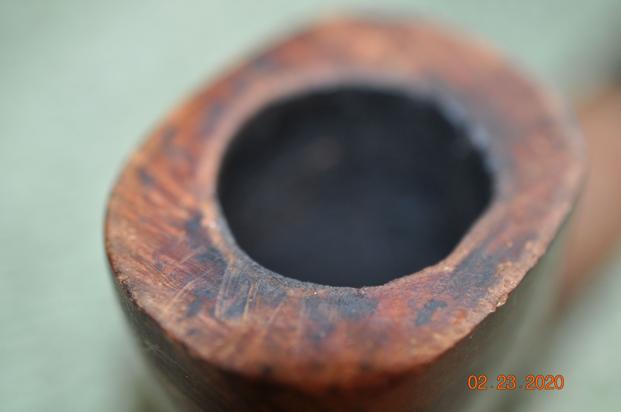
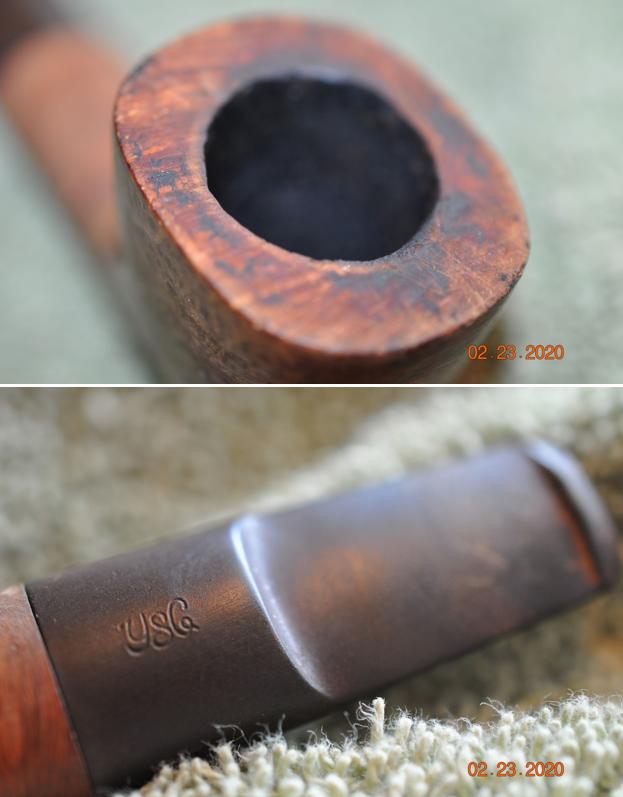
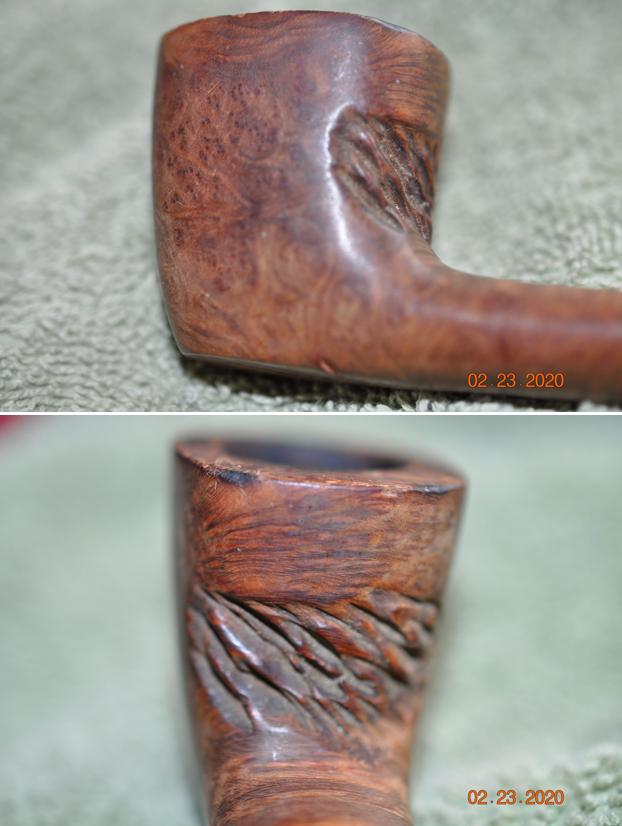
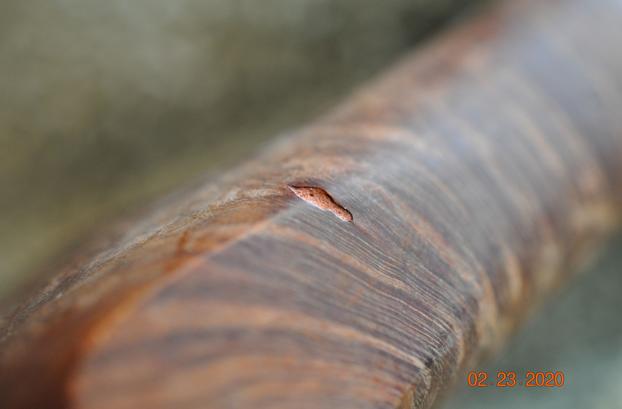
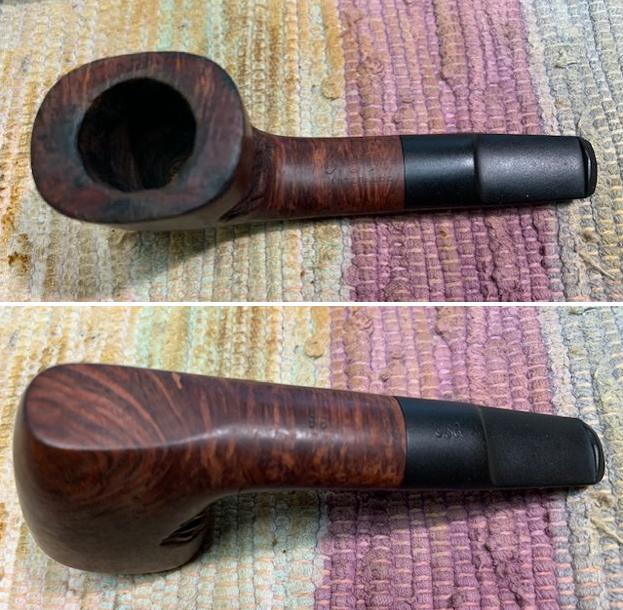
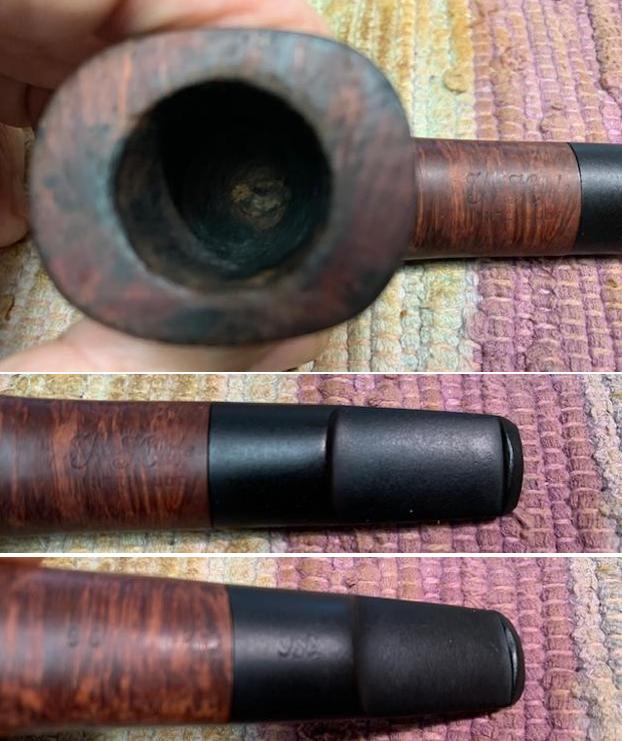
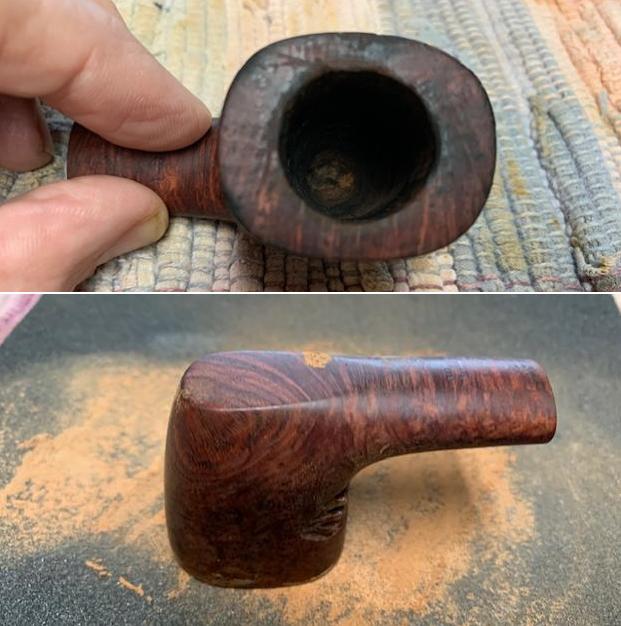
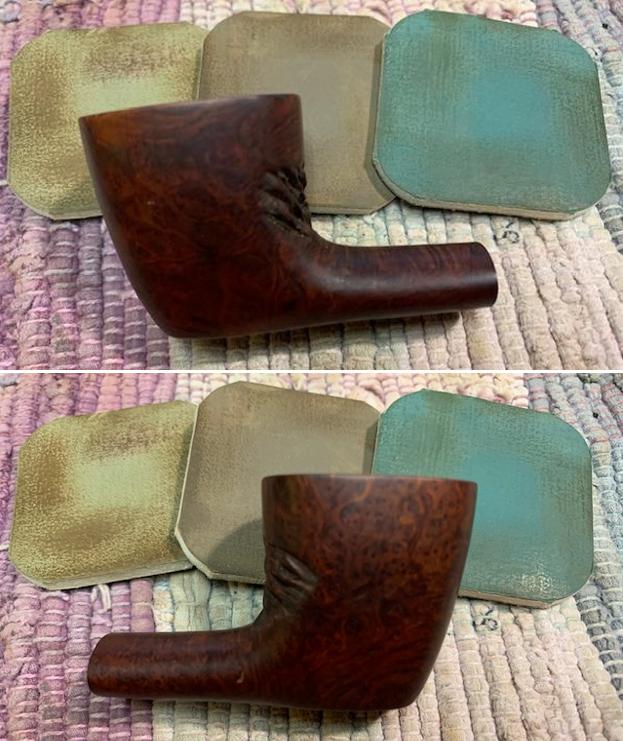
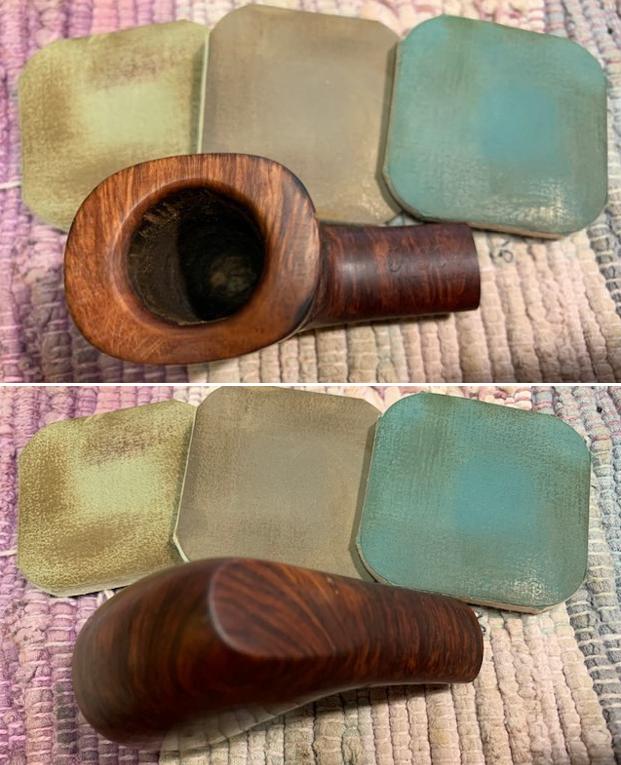
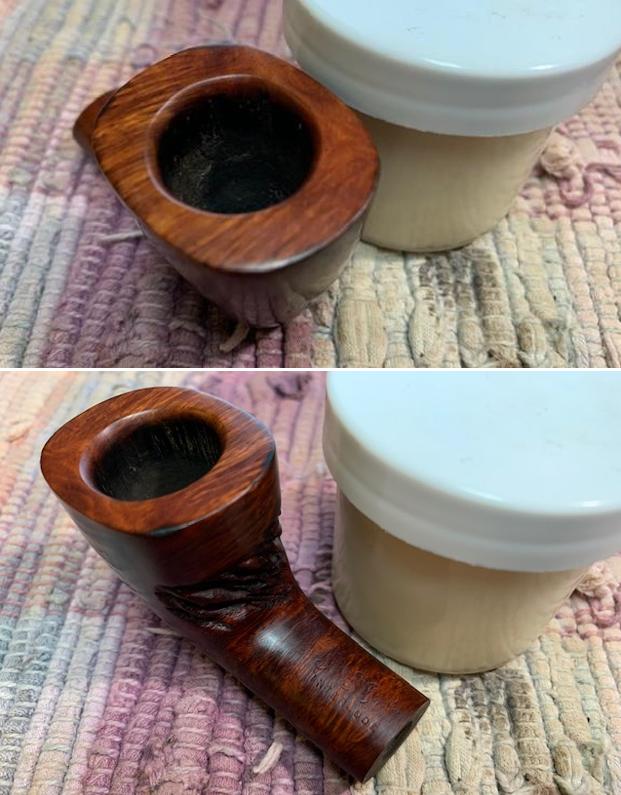
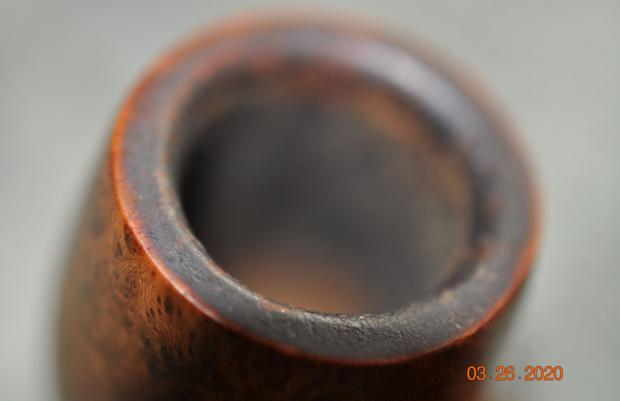
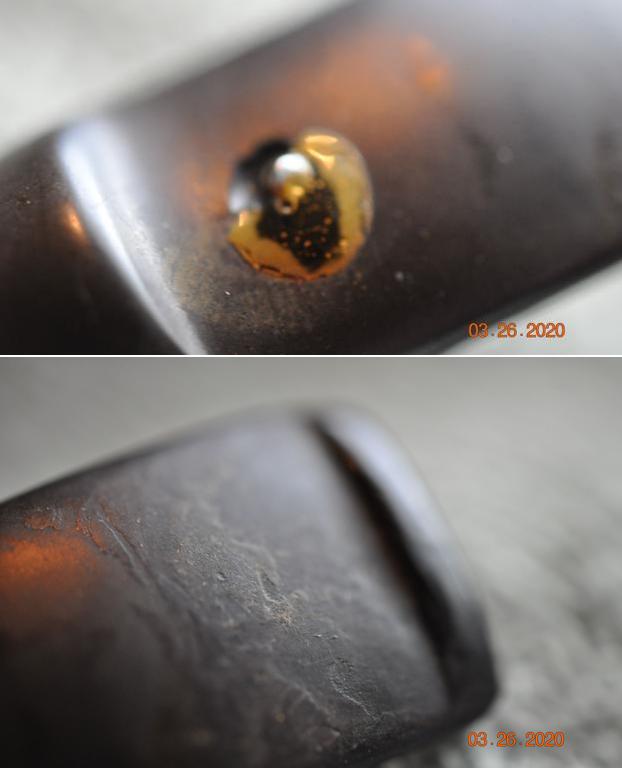
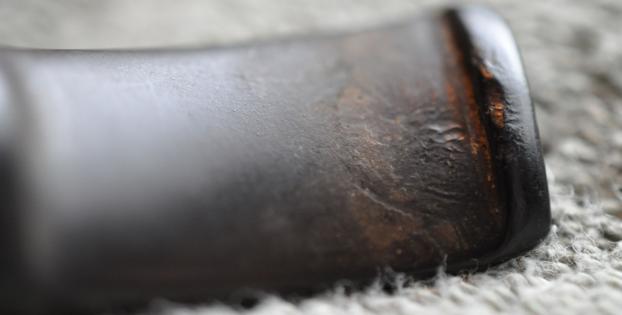
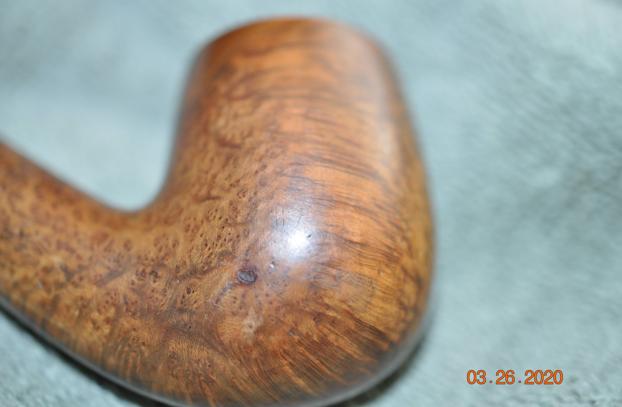
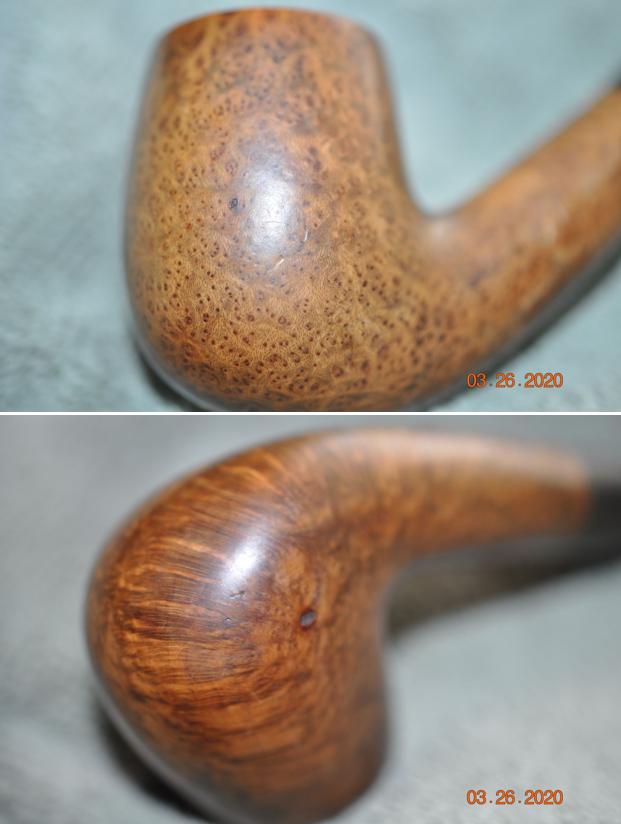
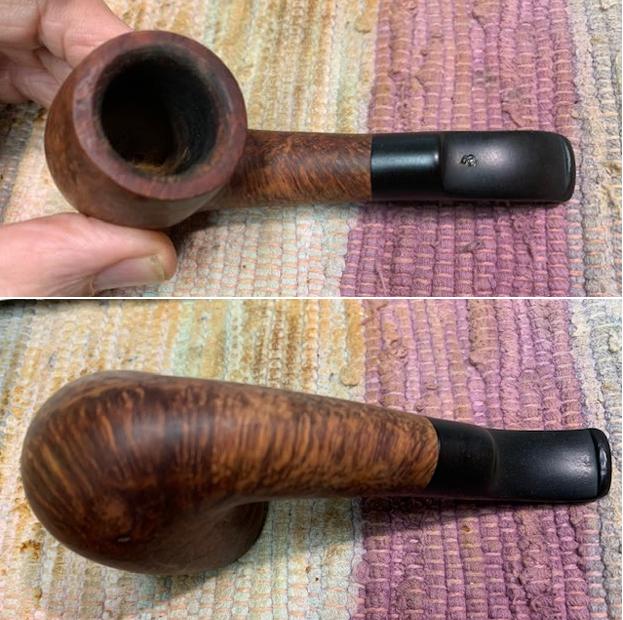
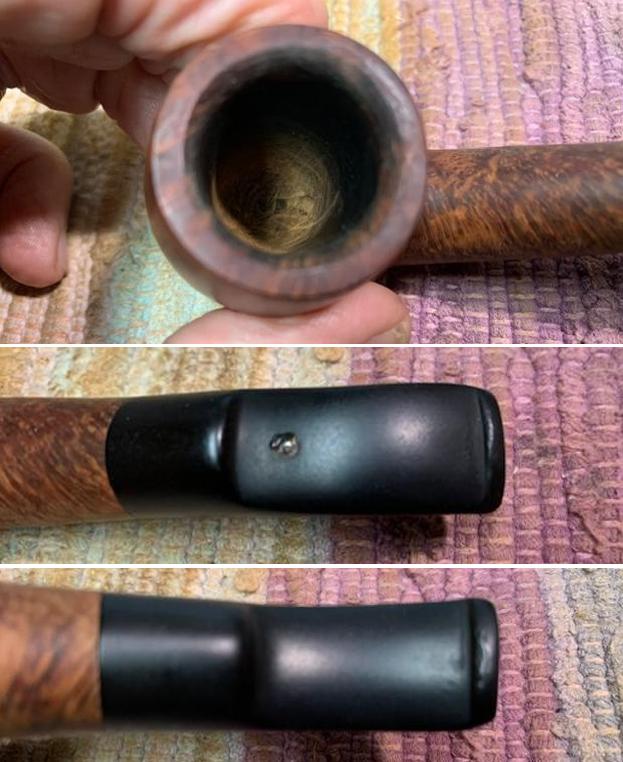
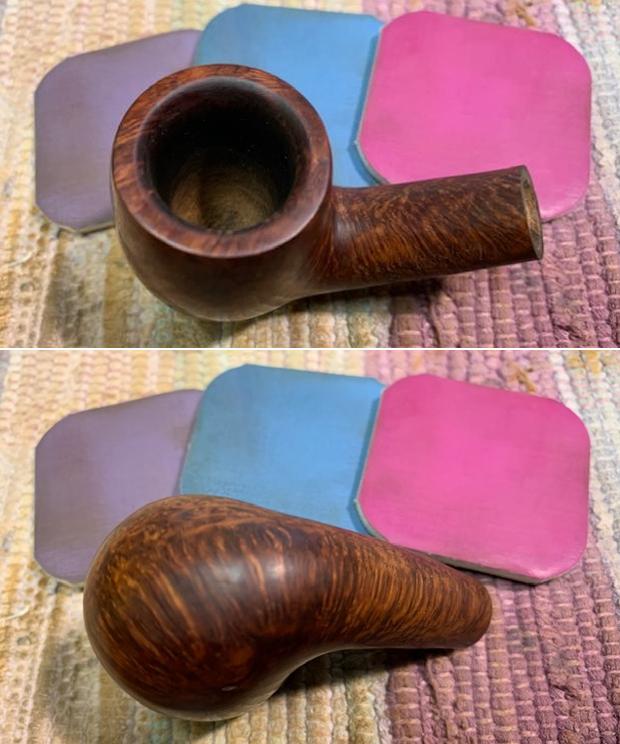
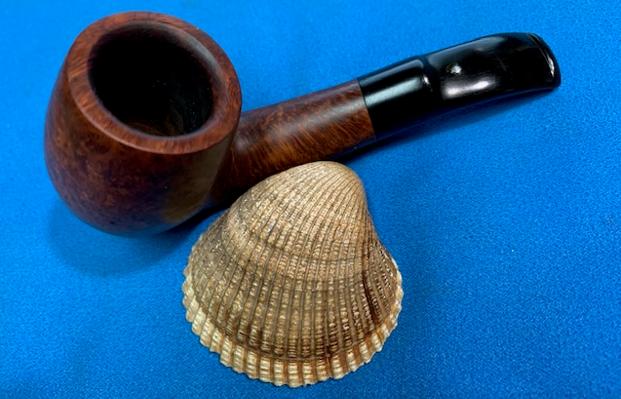
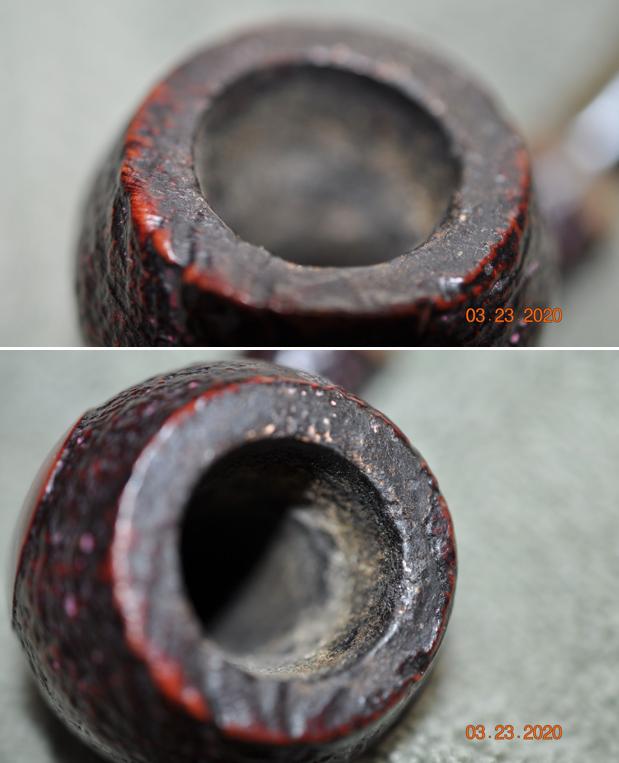
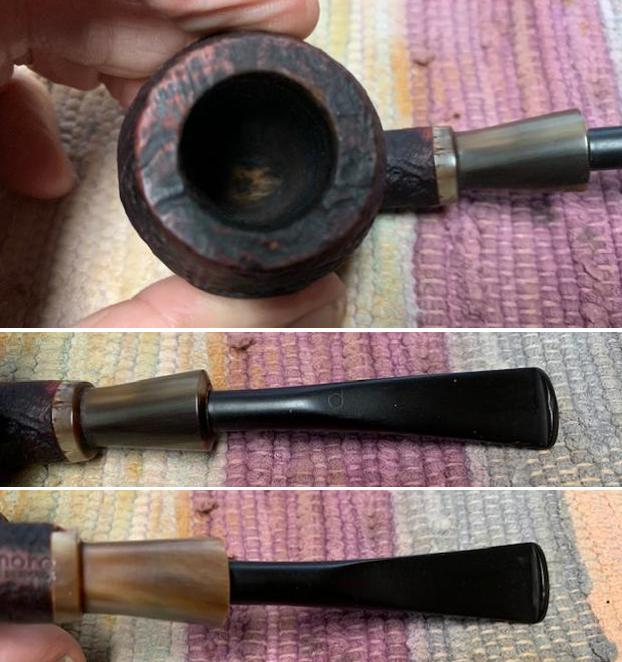
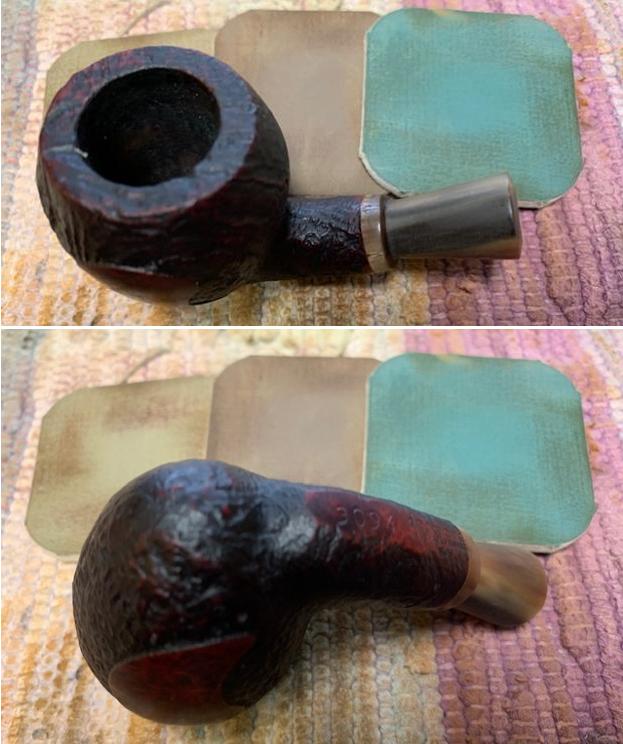
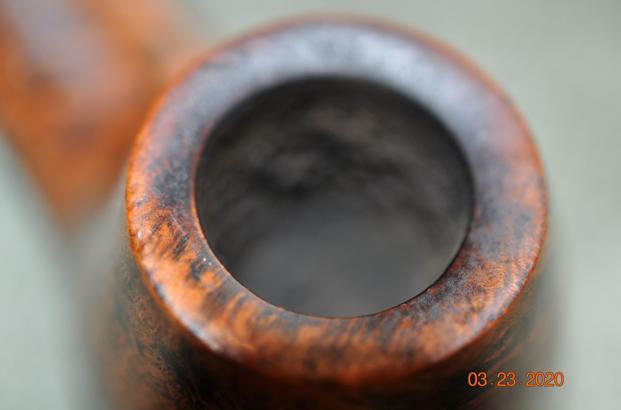
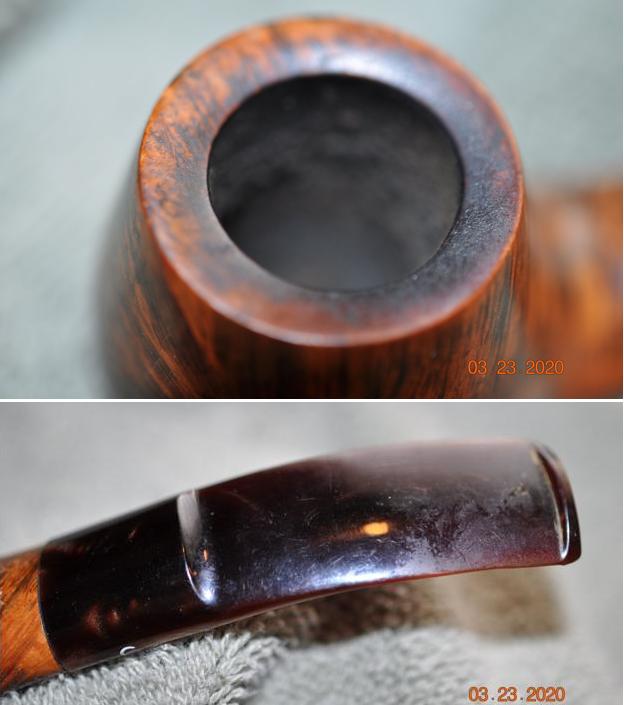
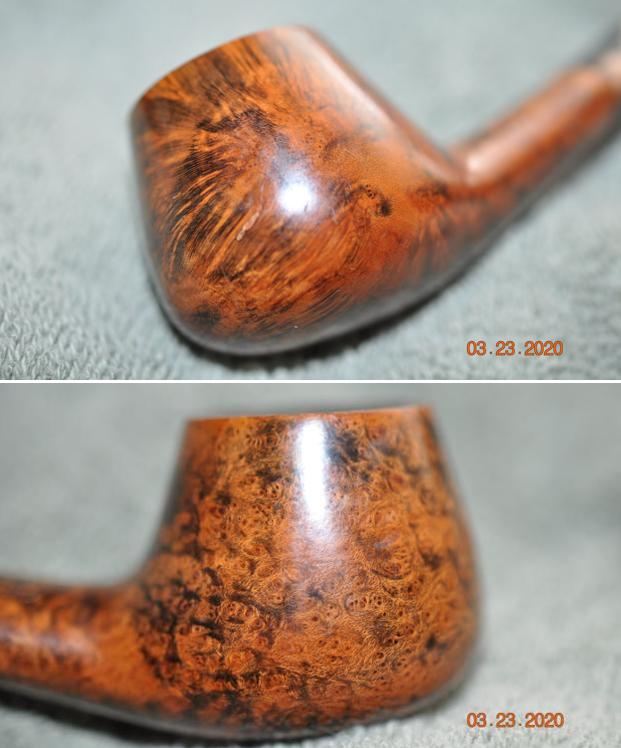
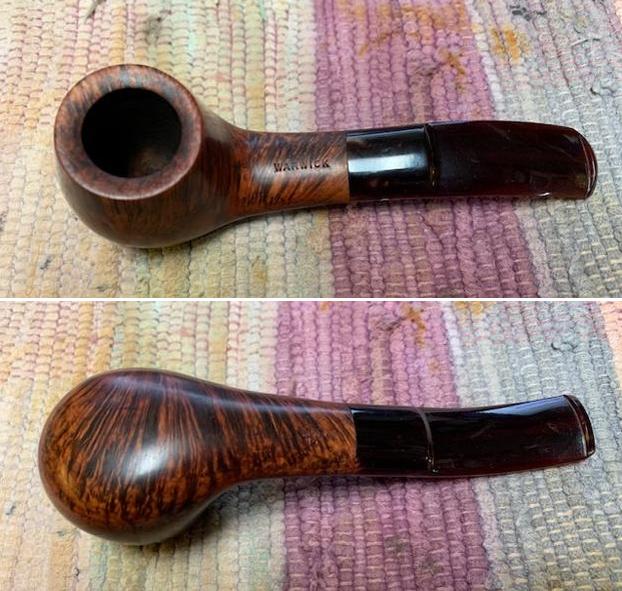
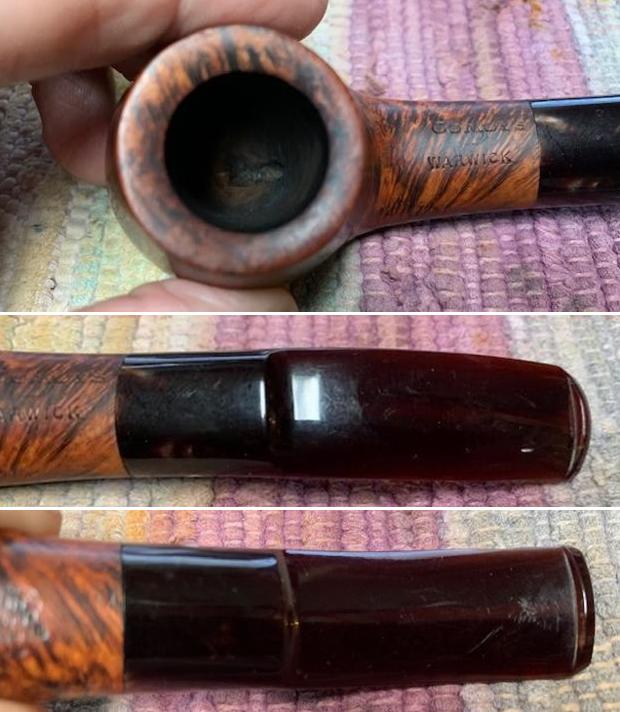
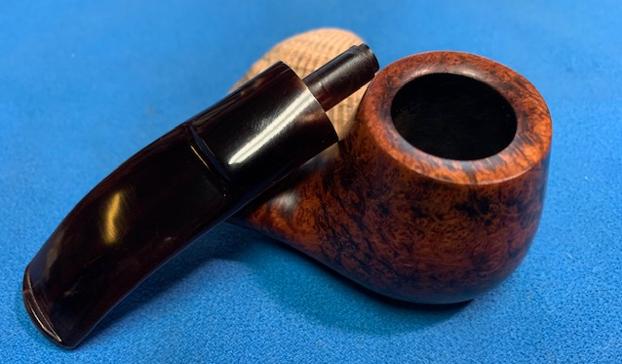
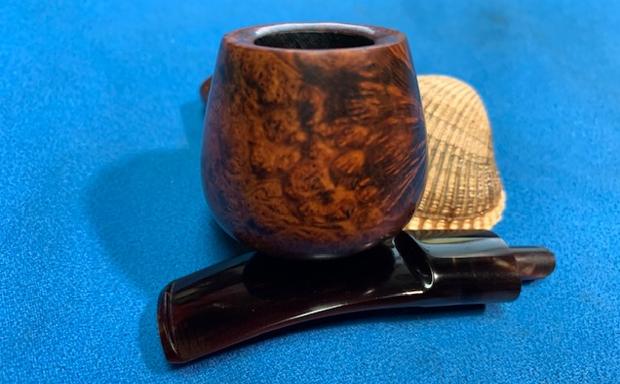
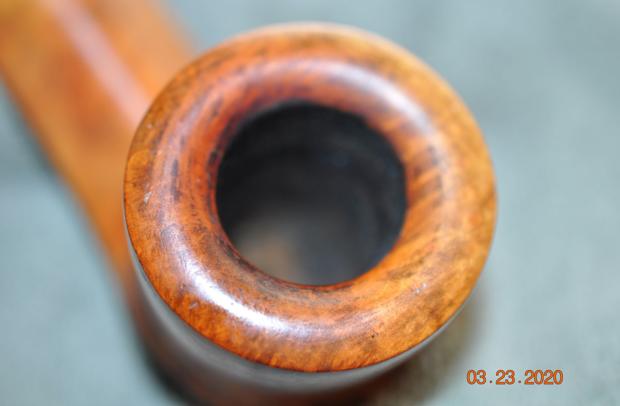
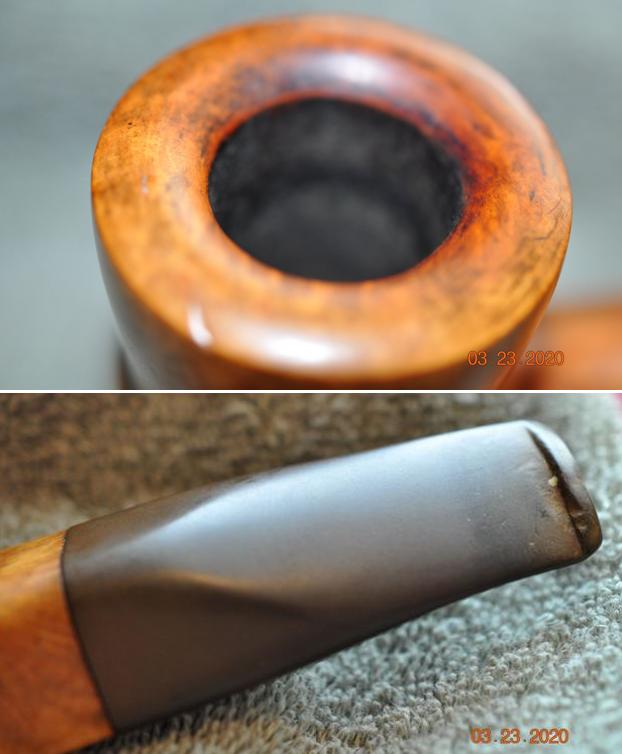
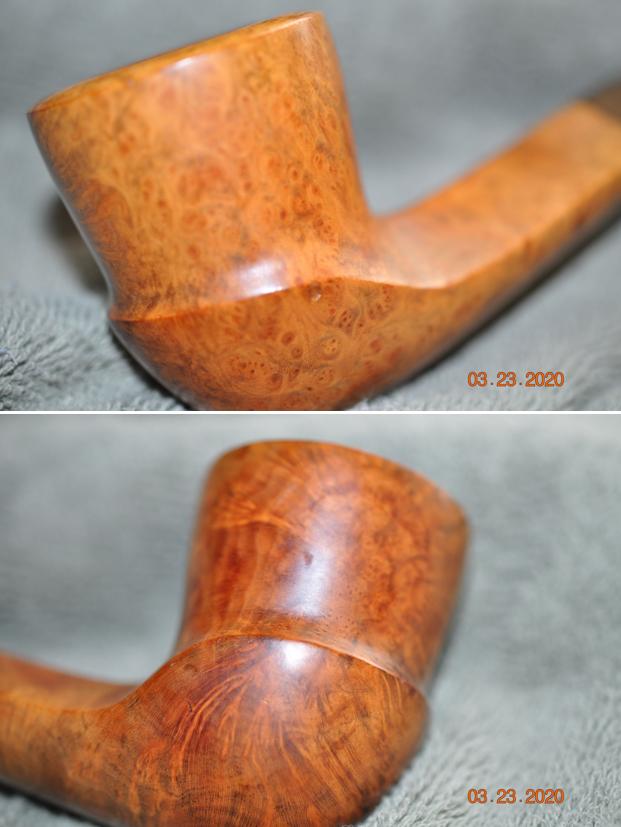
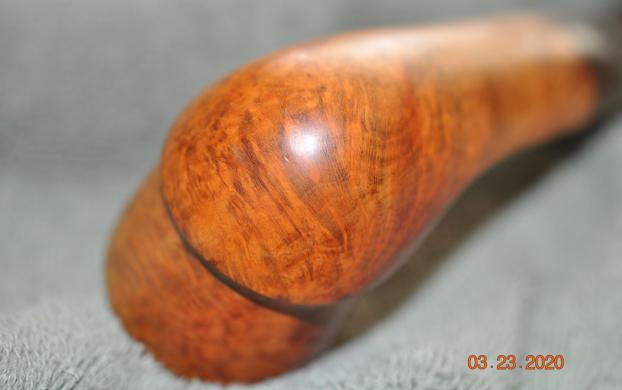
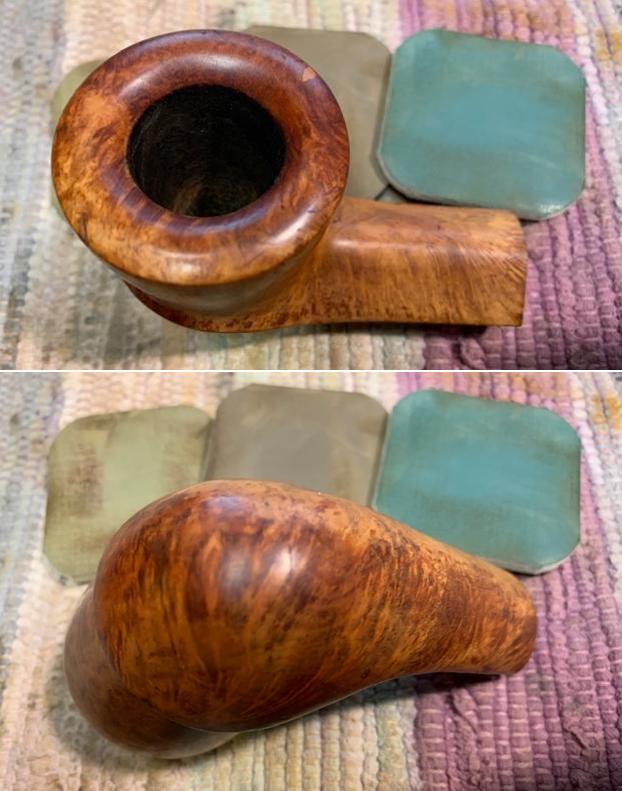
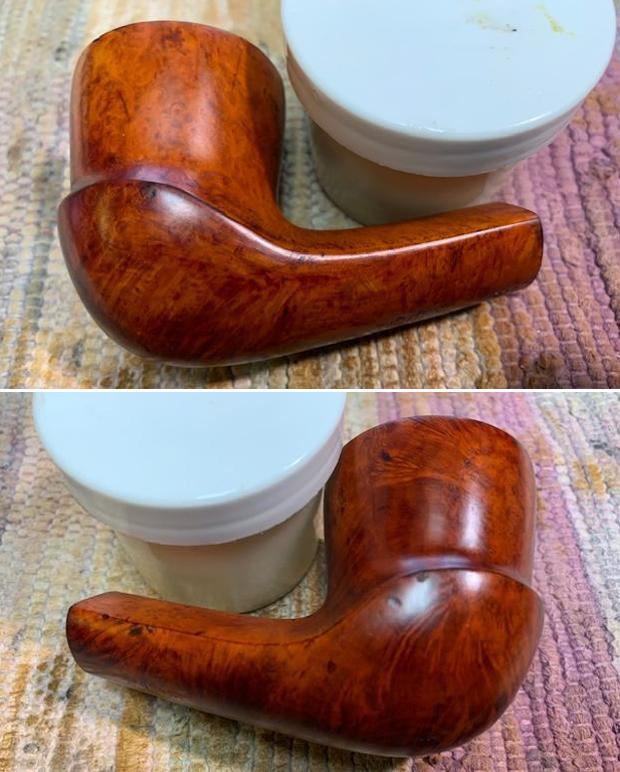
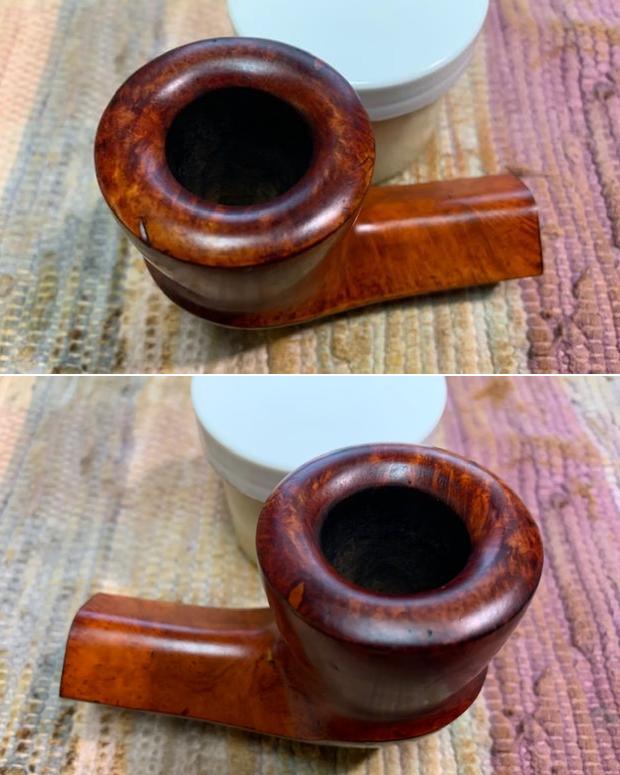
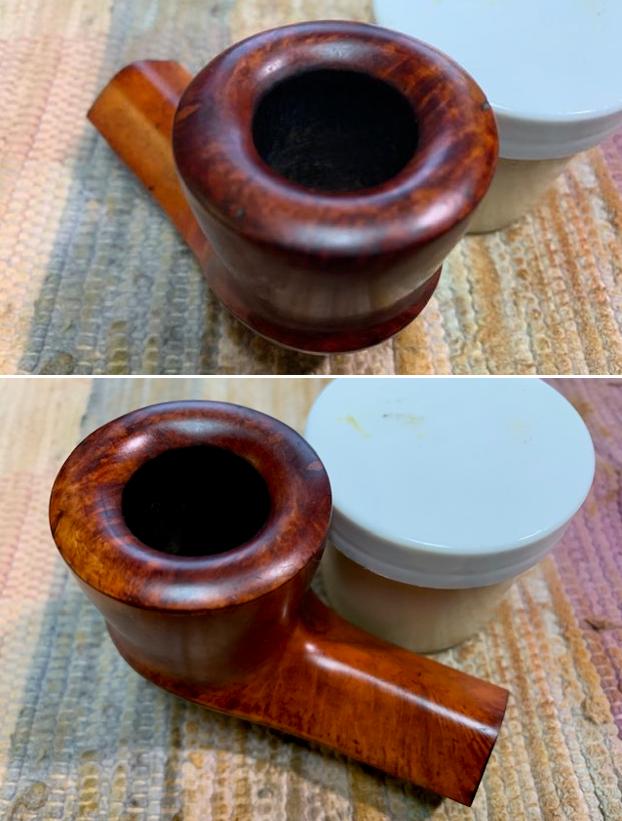
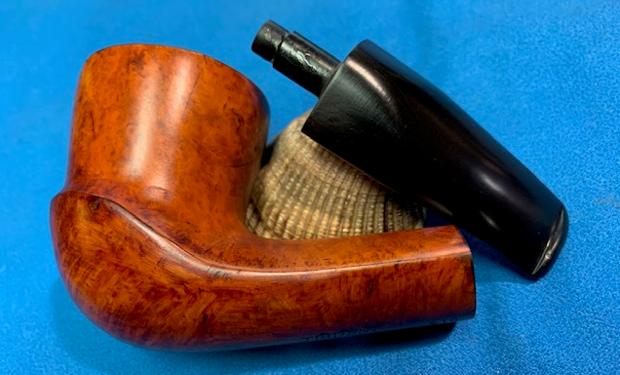
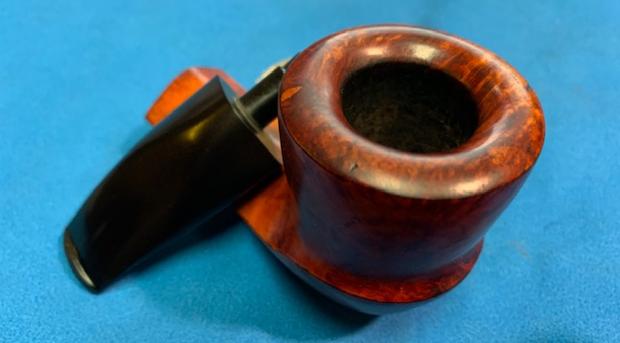
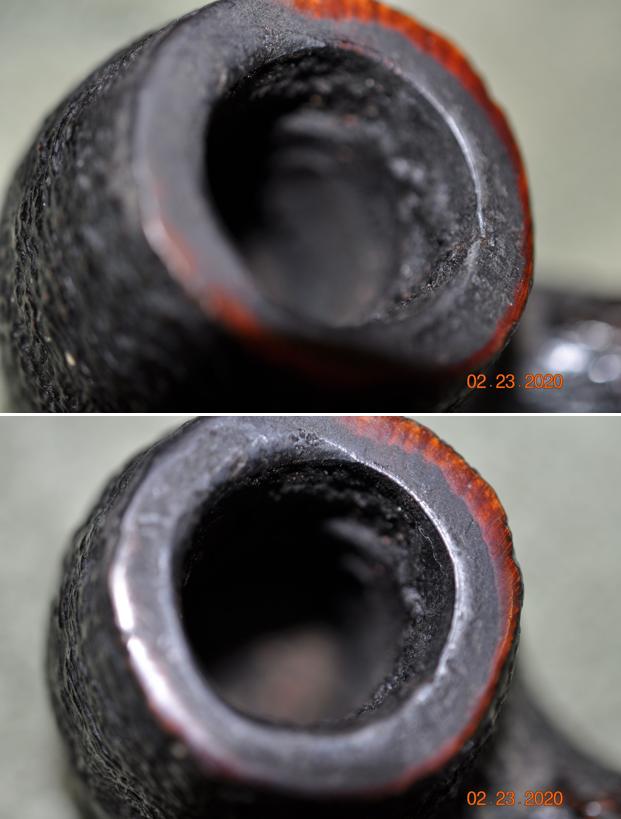
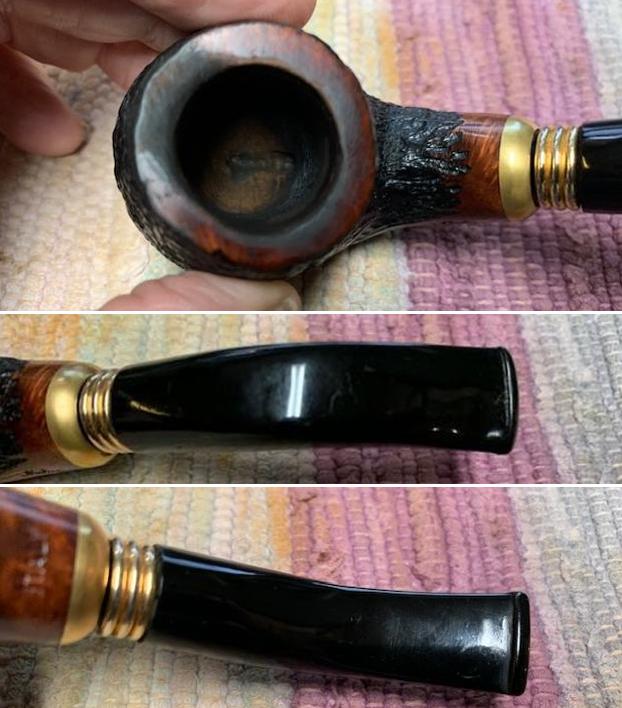
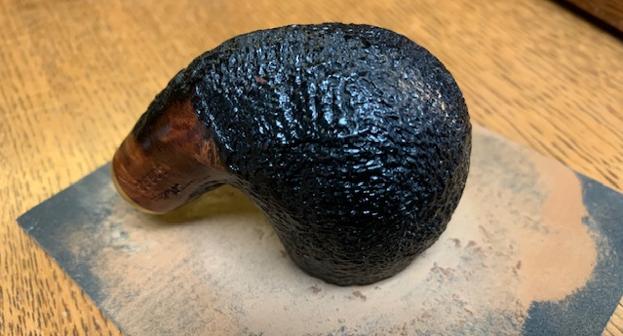
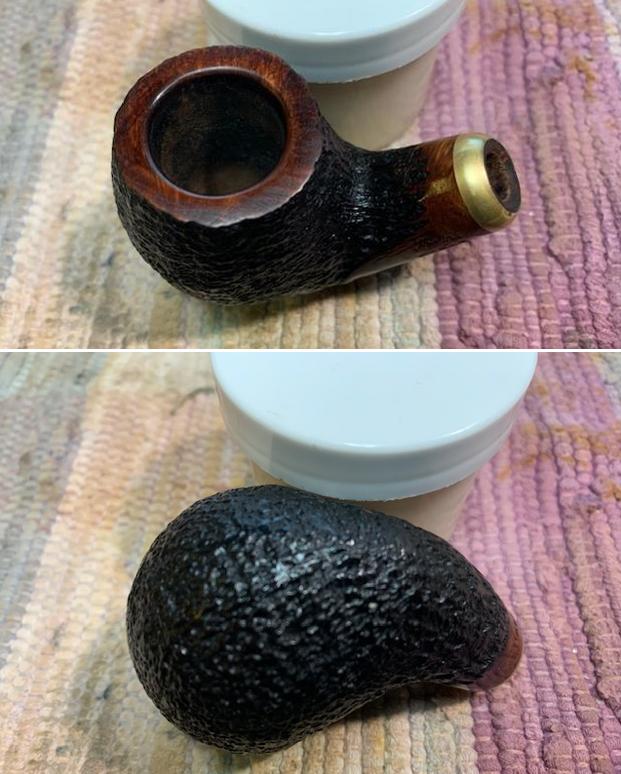
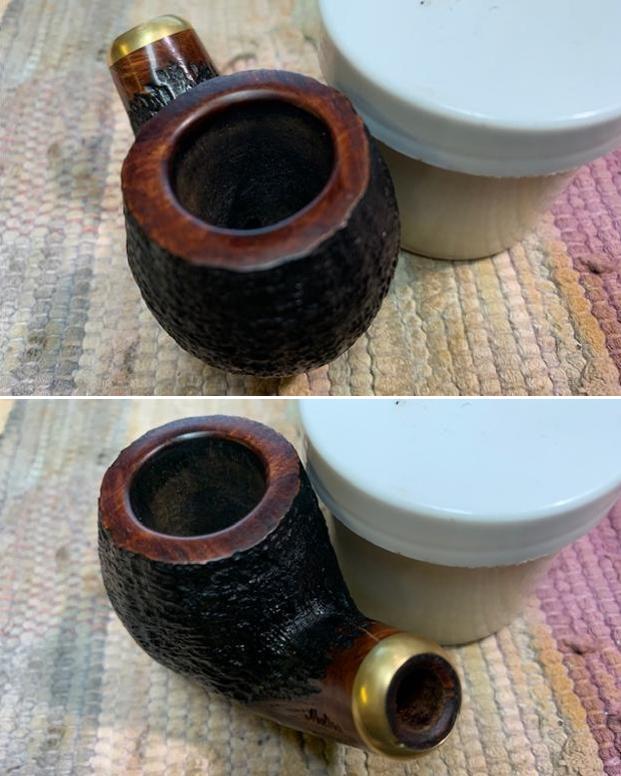
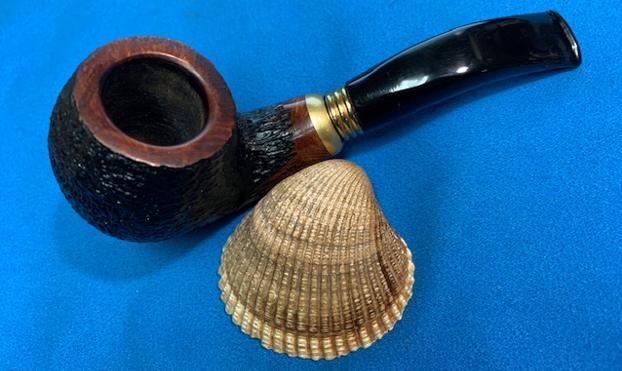
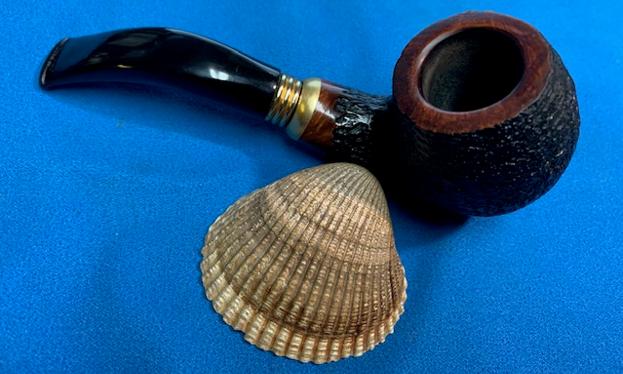
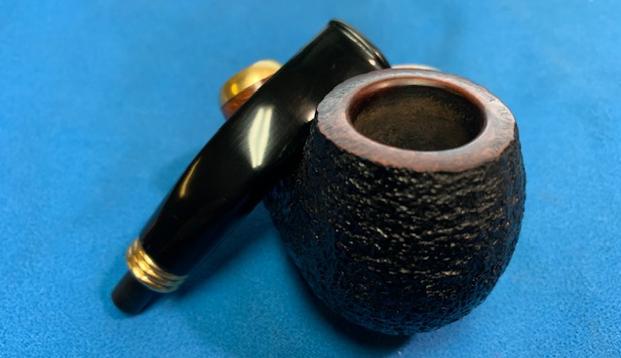
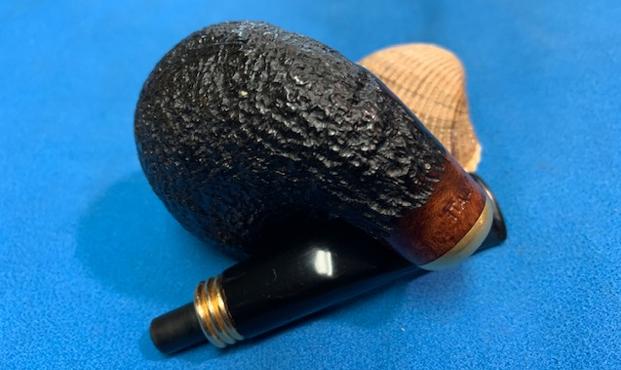
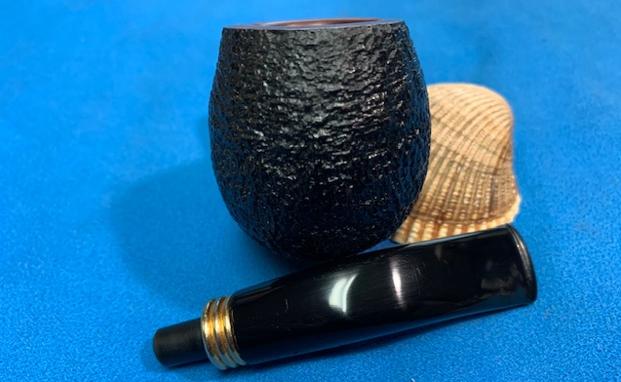
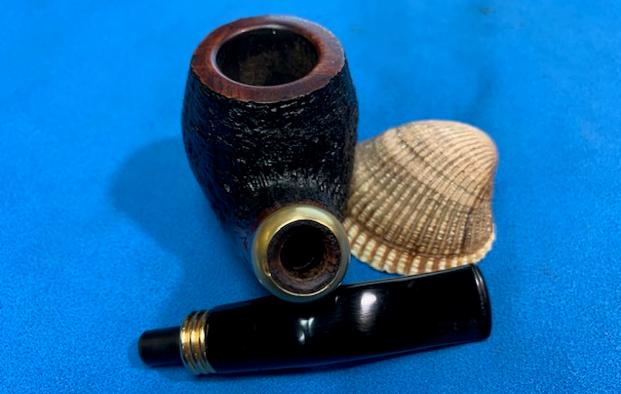
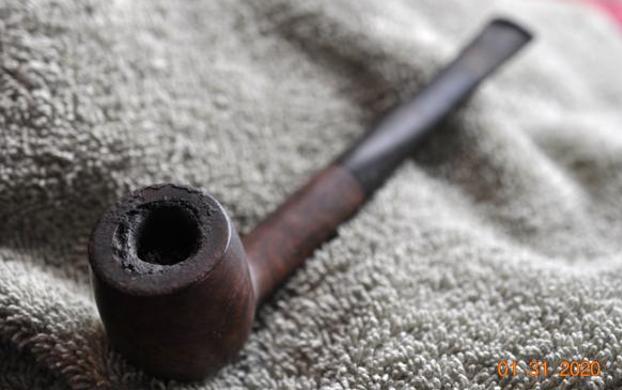
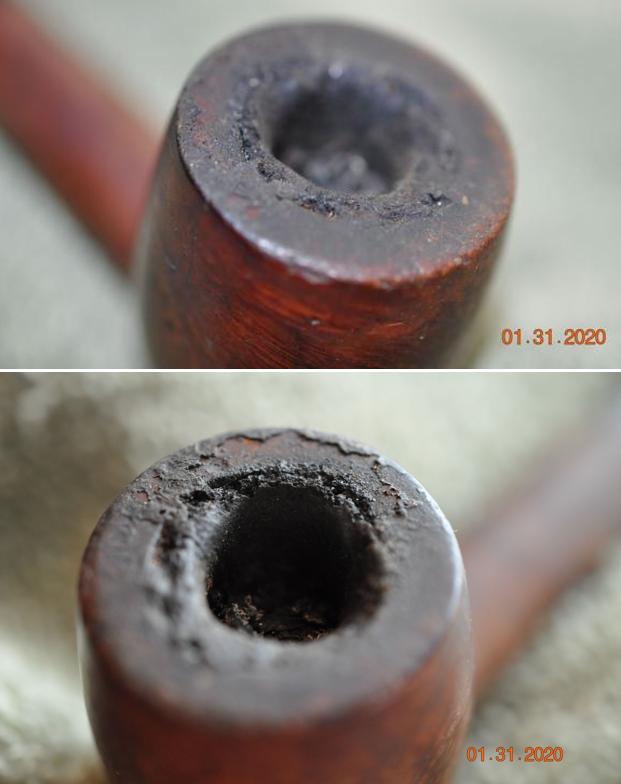
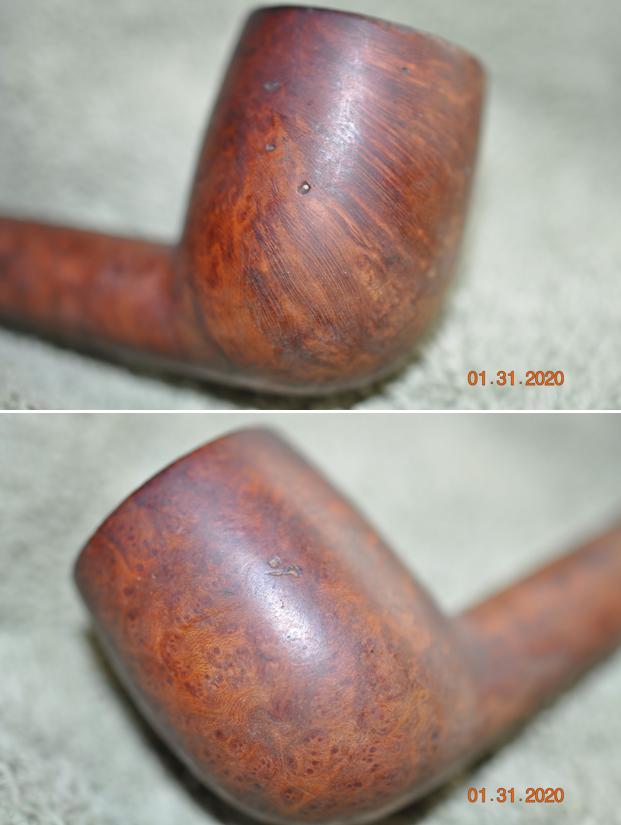
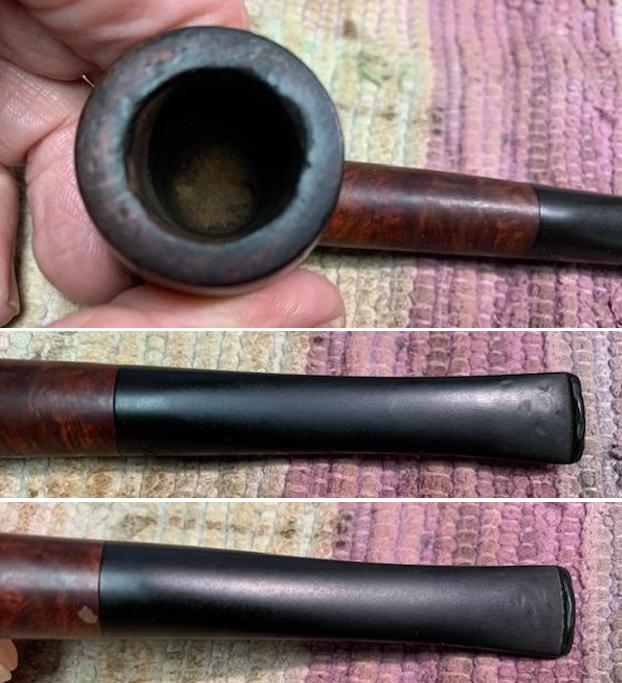
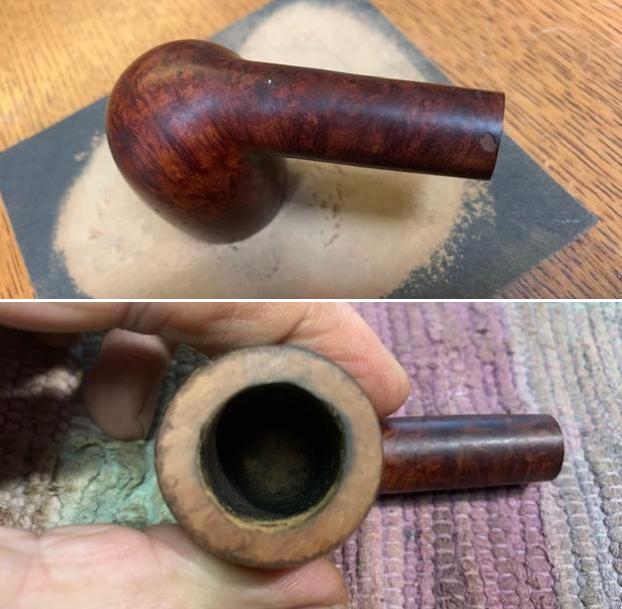
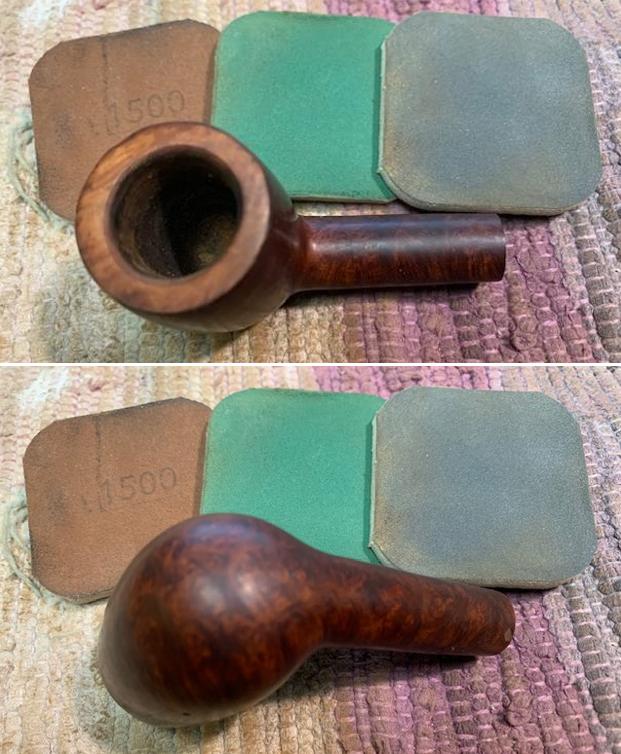
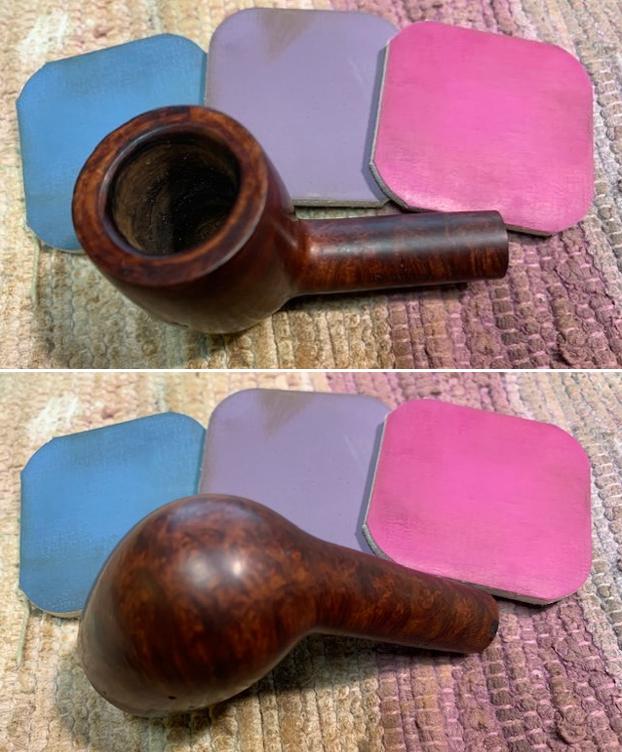
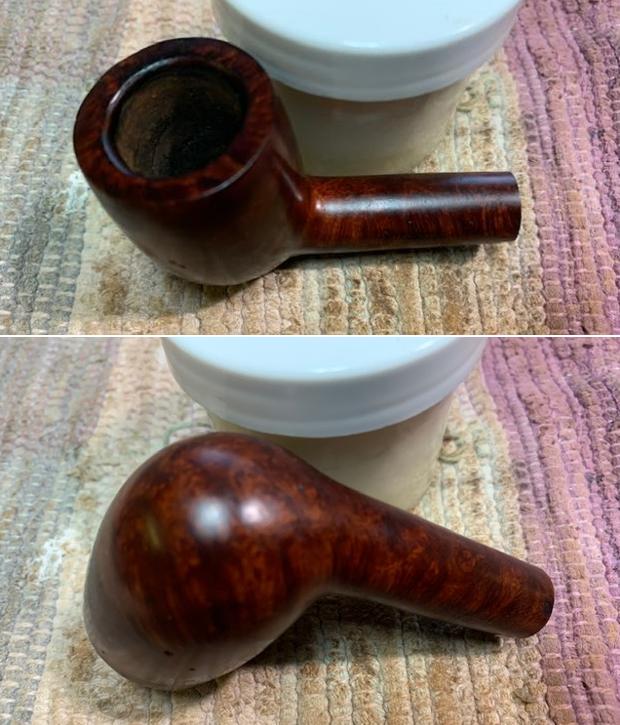
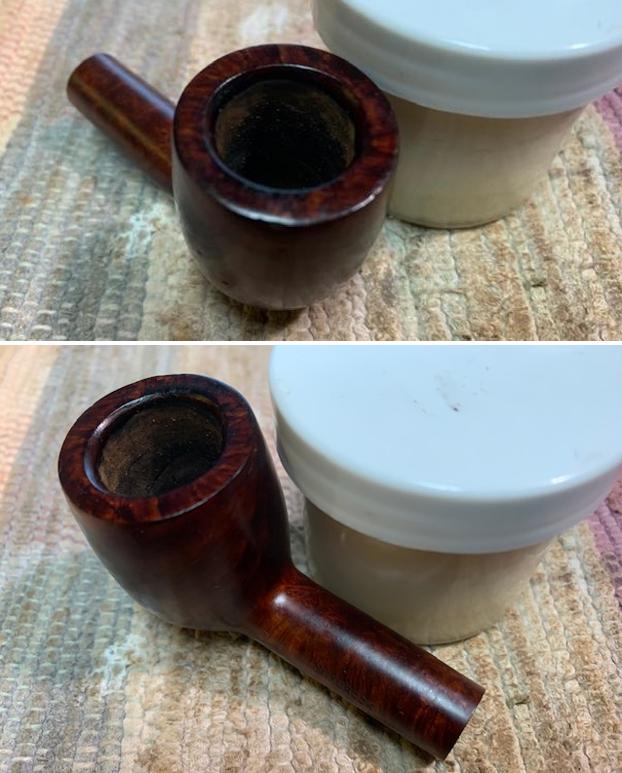
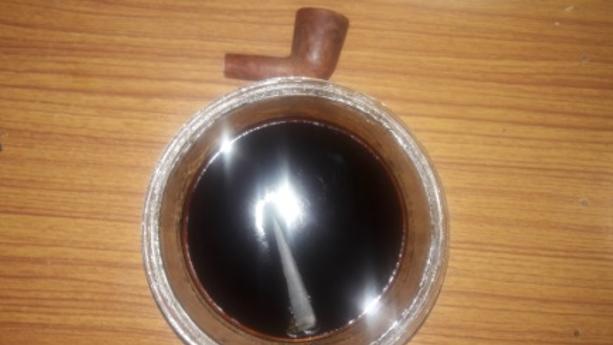
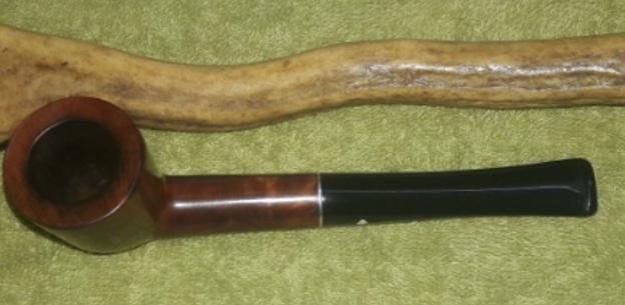
The chamber is clean and odorless without any trace of the old cake. There is no damage to the inner walls of the chamber. The rim top and the rim edges is where the maximum damage can be seen on this pipe. The rim top has darkened not because of lava overflow, but maybe due to charring, notably between 11 o’clock and 1 o’clock direction (encircled in yellow). The rim top surface is peppered with numerous scratches, dents and dings (few of them are indicated by indigo arrows) and probably caused due to knocking the rim against a hard surface to remove the dottle. There is significant damage to both the inner and outer edge of the rim all around. The inner rim appears charred along the 12 o’clock direction and is encircled in red. The outer rim damage too is significant with sever chipped surface in 6 o’clock and 8 o’clock directions (encircled in green) and dents/ dings and chipping all along the edge. The draw is smooth, full and open. Simple topping of the bowl on a piece of 220 grit sandpaper should address this issue, however, in addressing this issue, though I absolutely hate it unfortunately, I would be losing some briar estate, a price I am willing to pay to resurrect this beauty.  The stummel is clean with some interesting grain pattern that needs to be brought to the fore. There are few minor scratches, dents and dings on the stummel surface. Maybe, sanding and further micromesh polishing will address these dents and scratches. The stummel has a rich golden brown hue to the briar. The shank end of the pipe, including the aluminum spacer, is clean and so is the mortise.
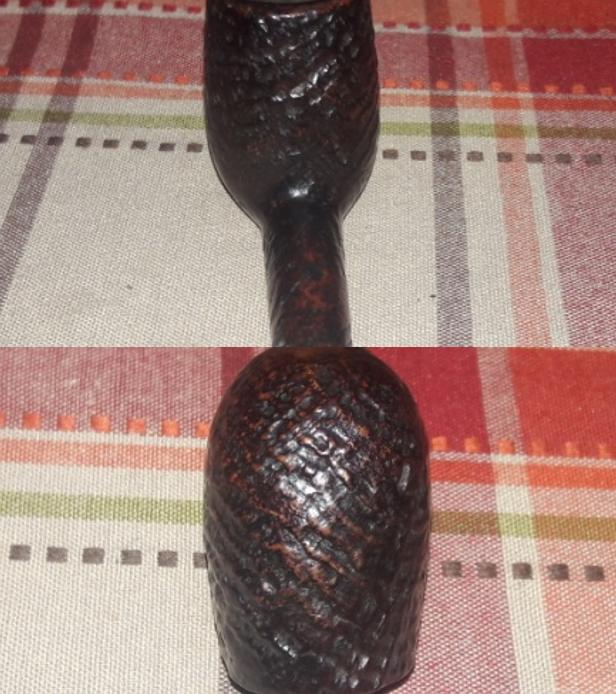
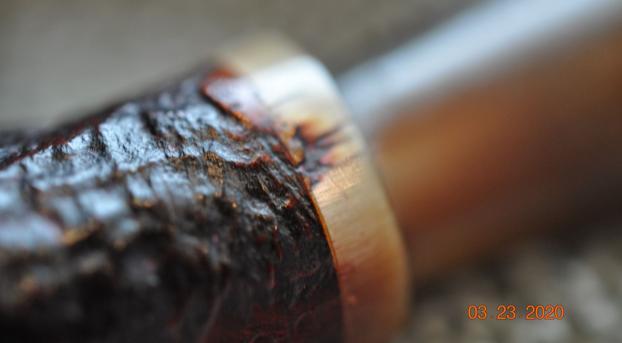
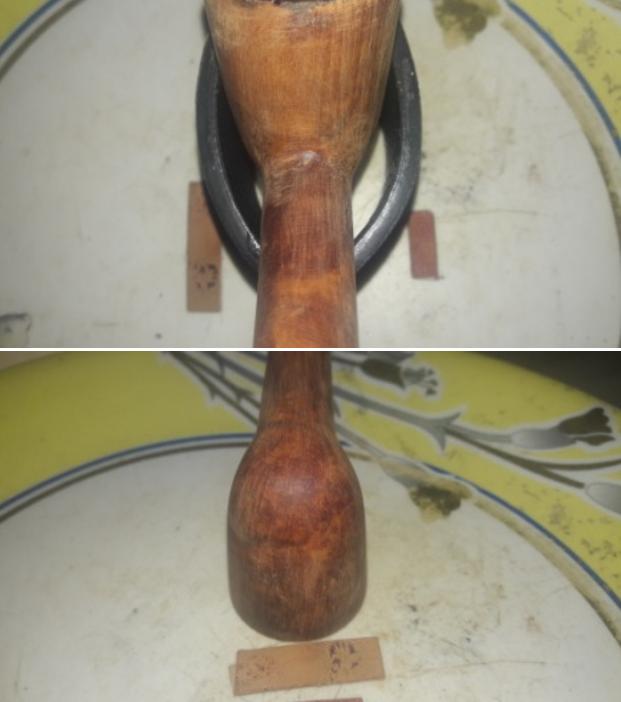
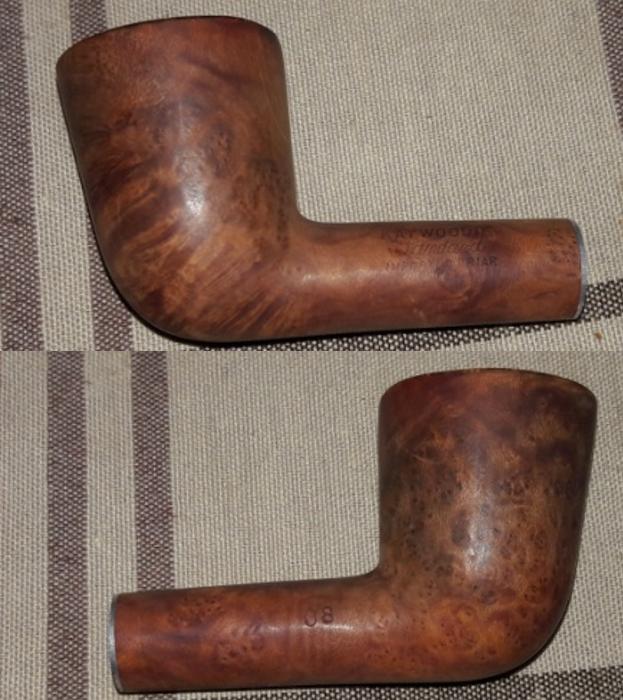

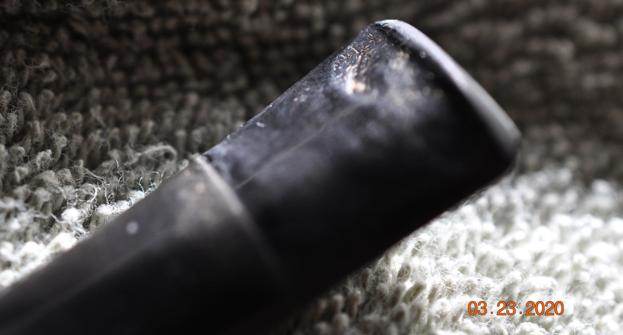
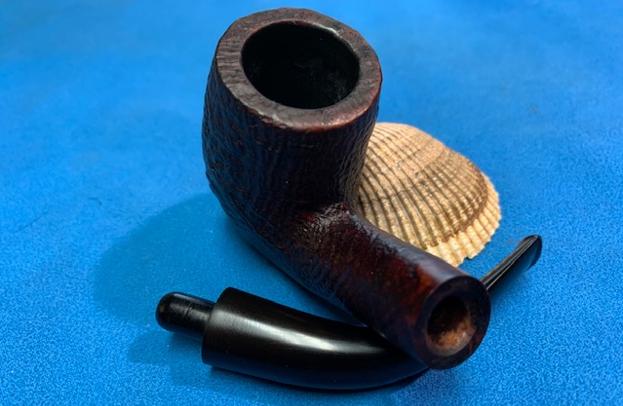
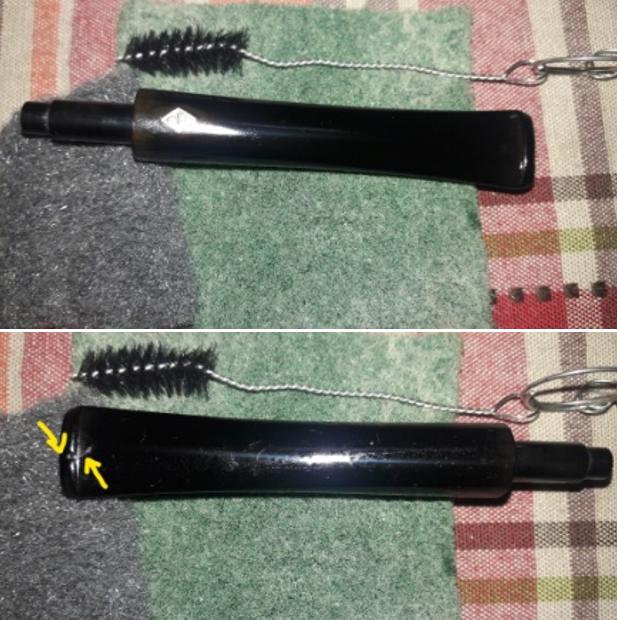
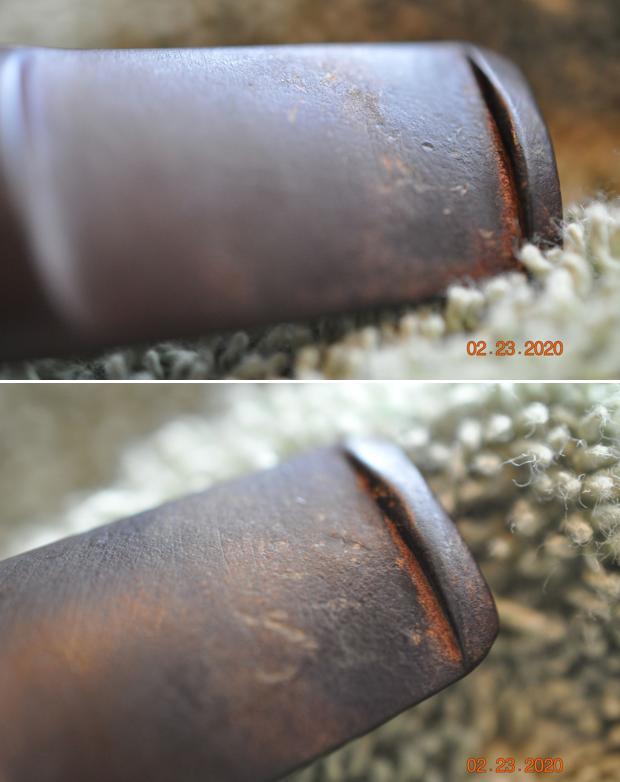
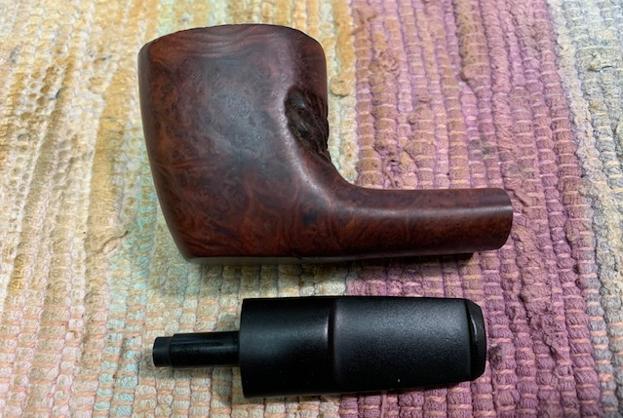
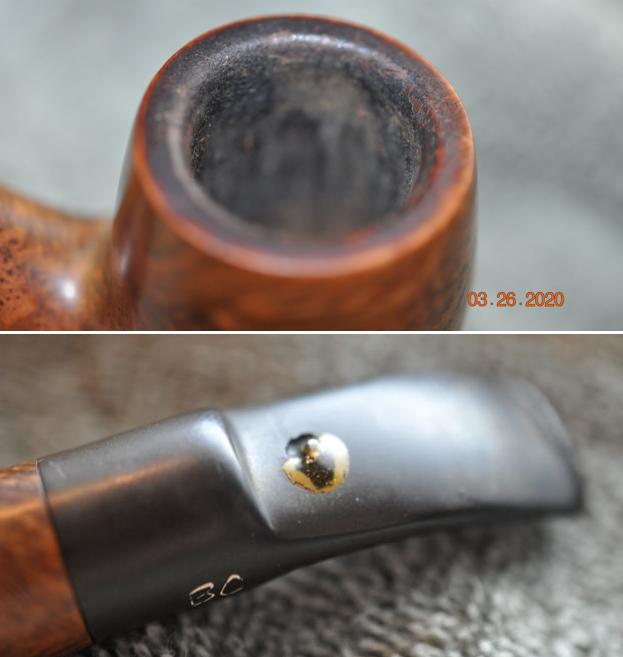
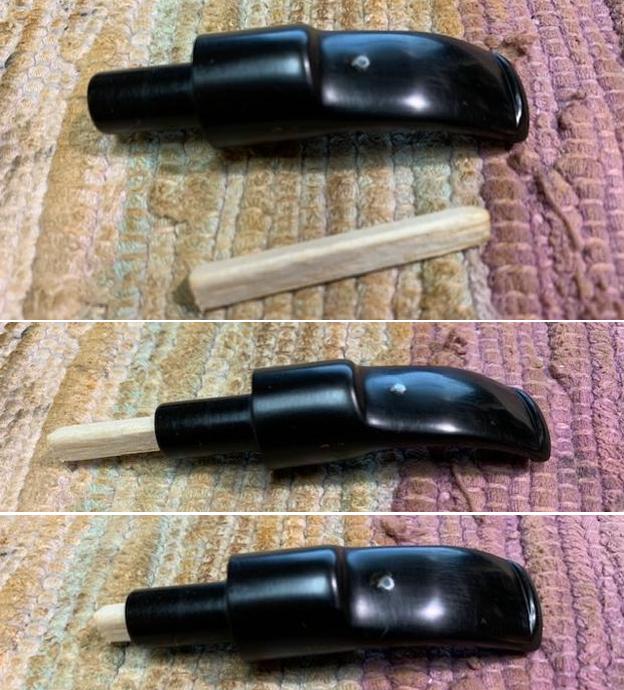
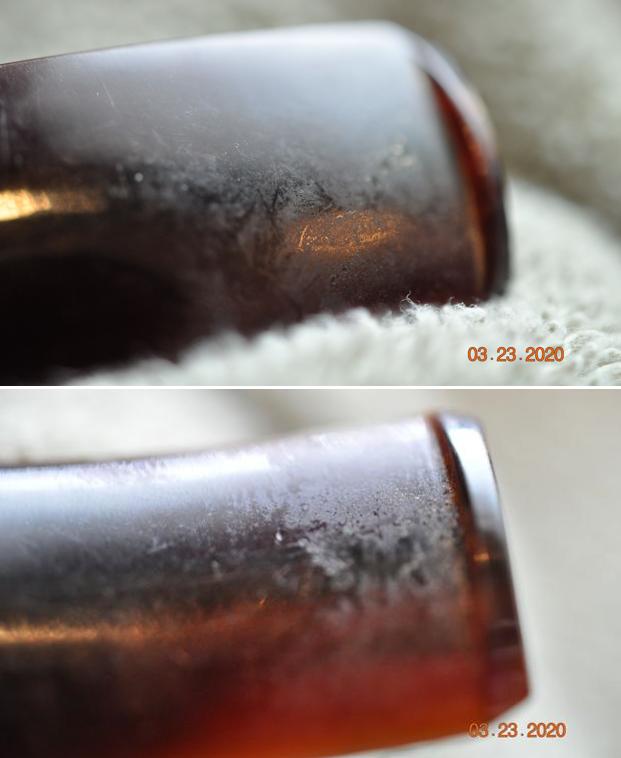
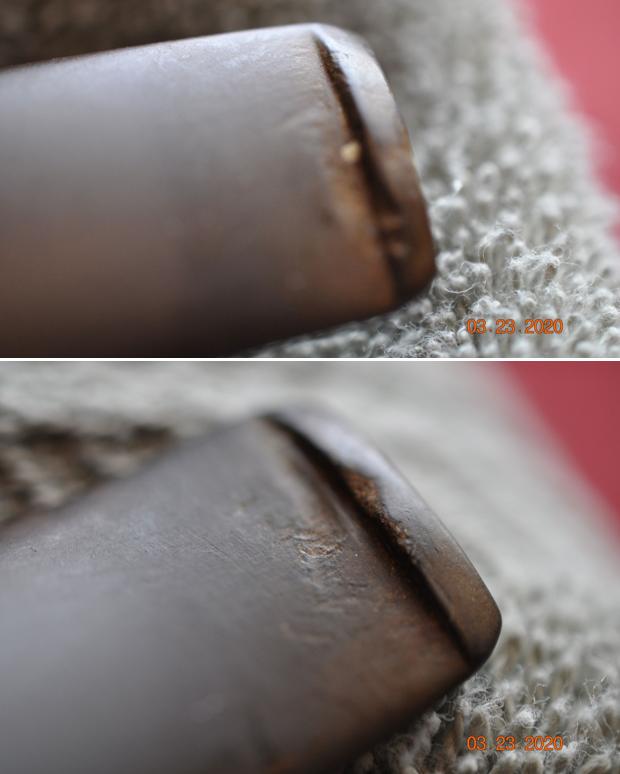
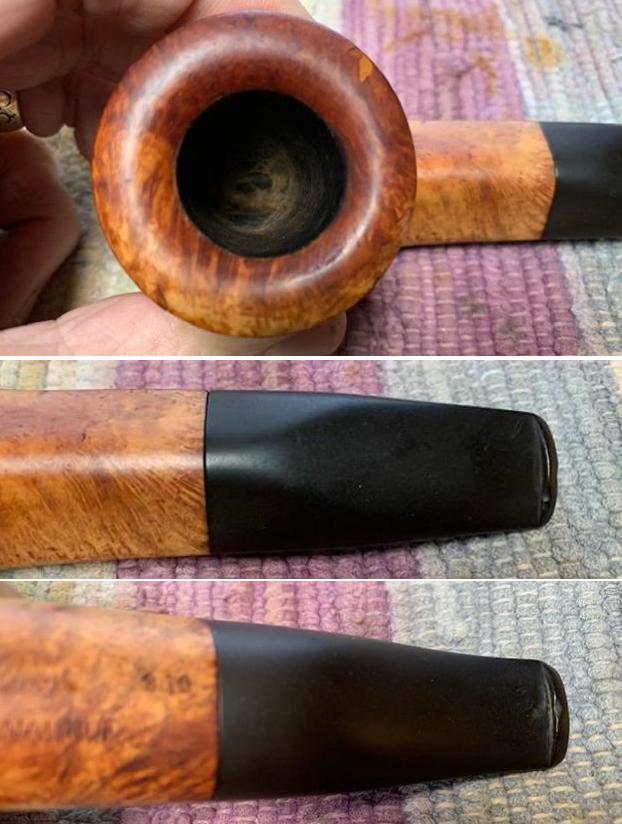
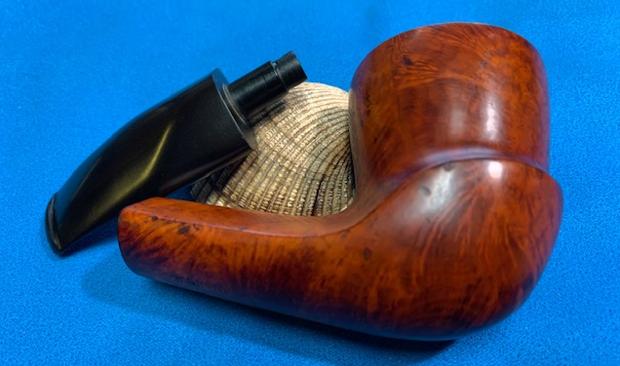
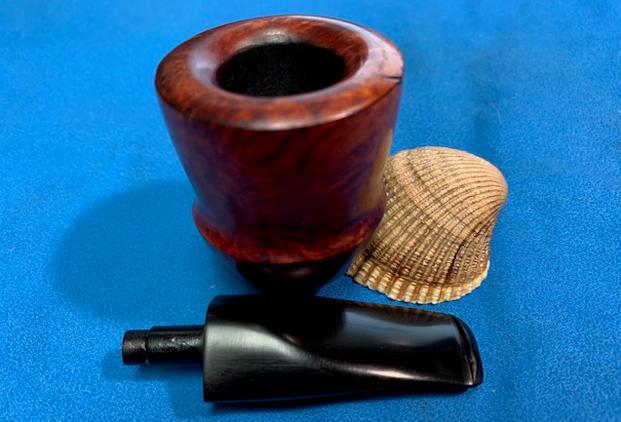
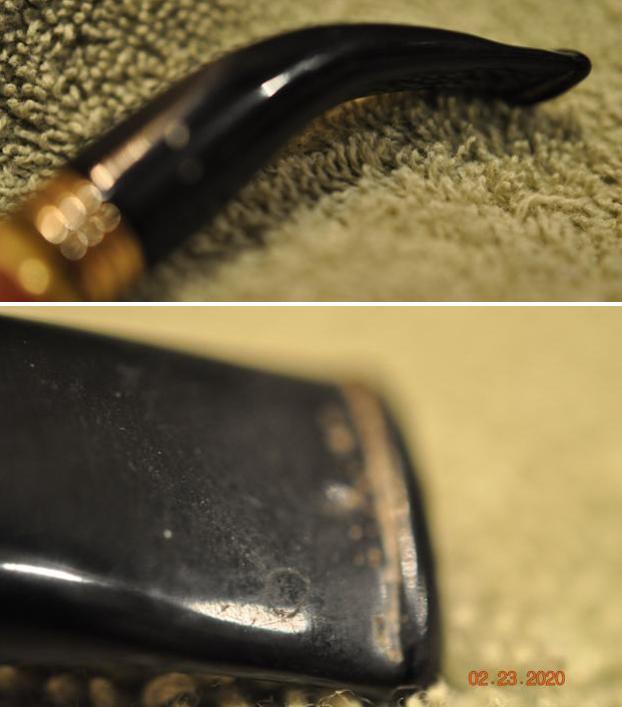
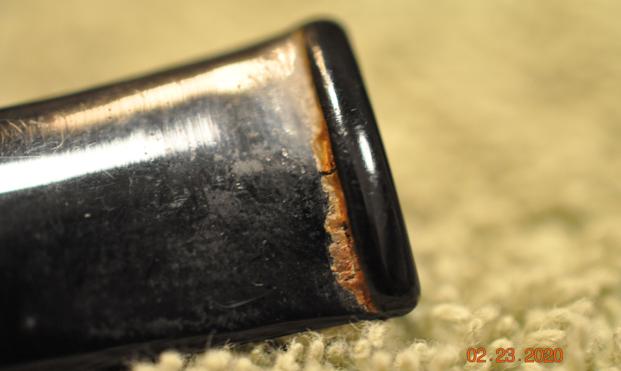
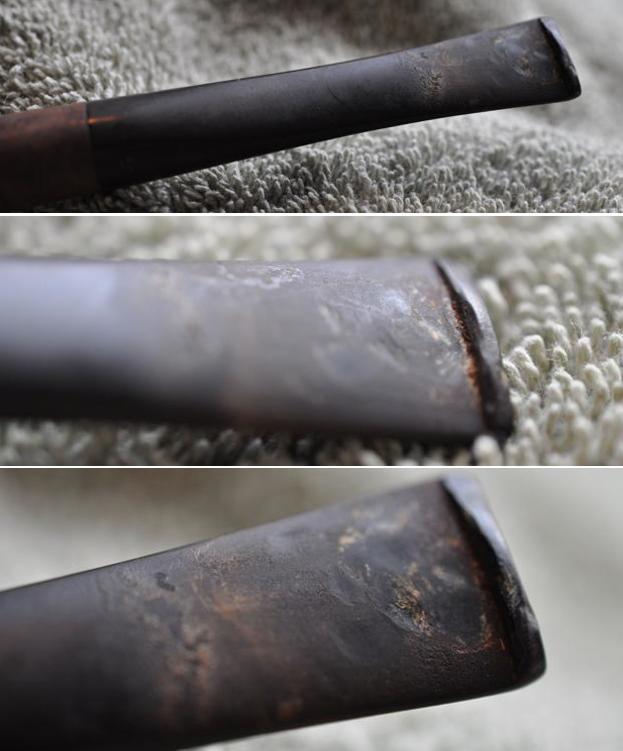
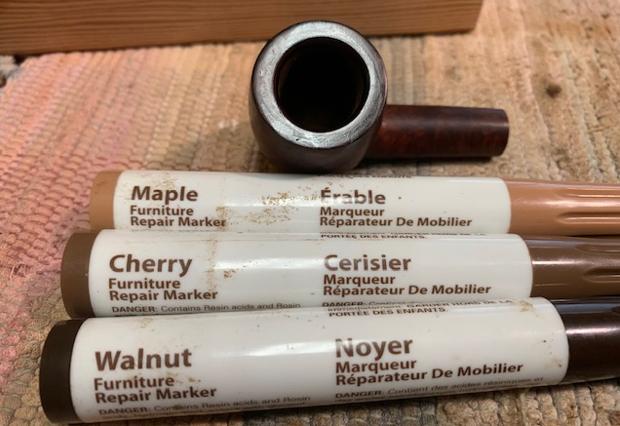
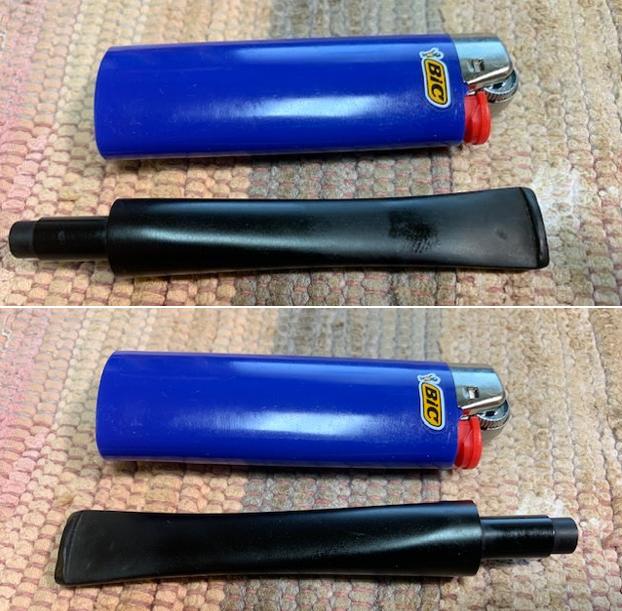
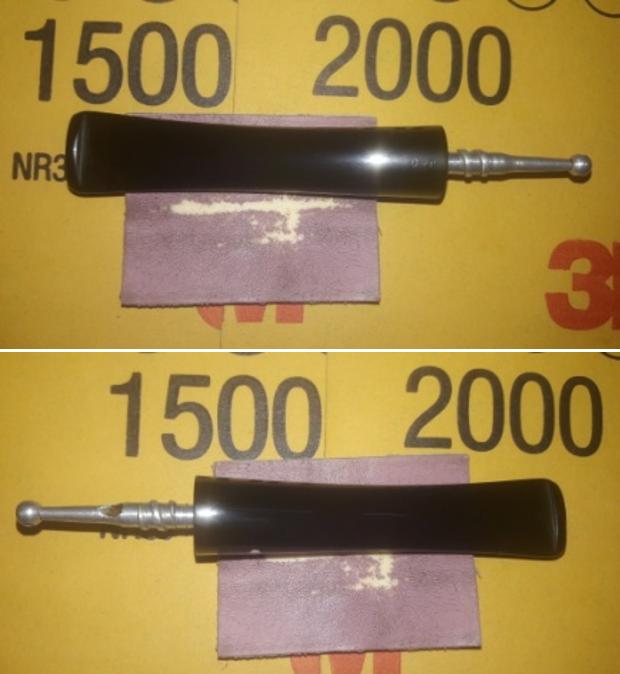
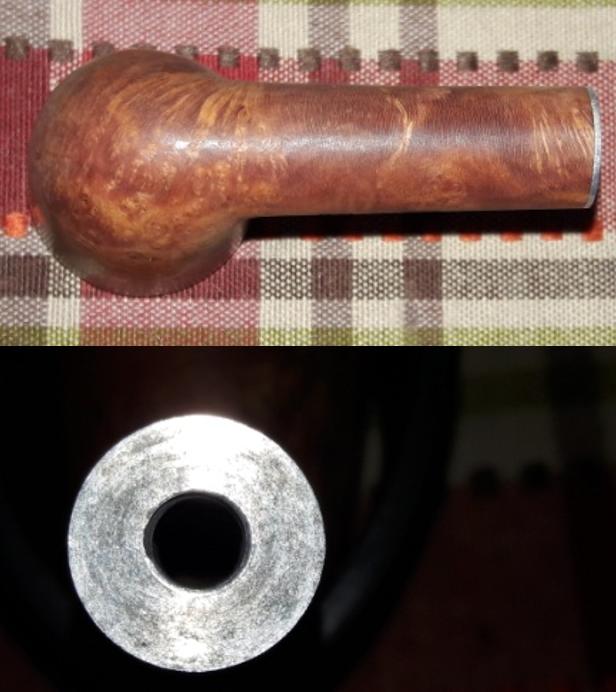 The tapered vulcanite stem has a couple of deep tooth indentation and minor tooth chatter on both the upper and lower surface near the button edge in the bite zone. Both upper and lower buttons are worn out and has bite marks. The stem has deep seated oxidation and some amount of calcification is seen in the bite zone. The threaded aluminum stinger tenon is also clean and the seating of the stinger in the shank is flush and perfectly aligned with the shank face. The air way is clear and draw is easy and smooth.
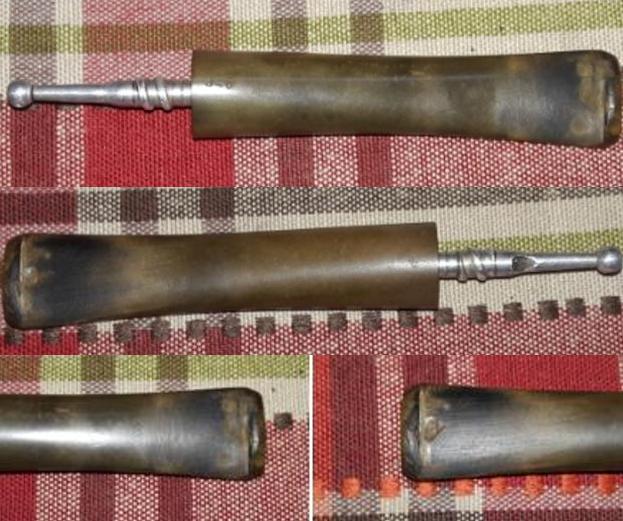 The Process
Since Jeff had done the initial cleaning, I straight away get on with addressing the issues as observed during my initial inspection. I decided to start this restoration with stem repairs and cleaning as this takes up the maximum time in the entire restoration process.
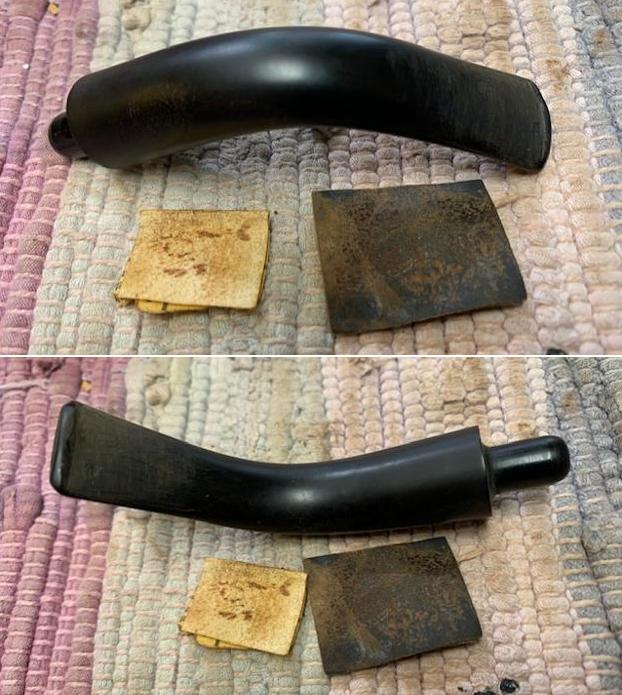
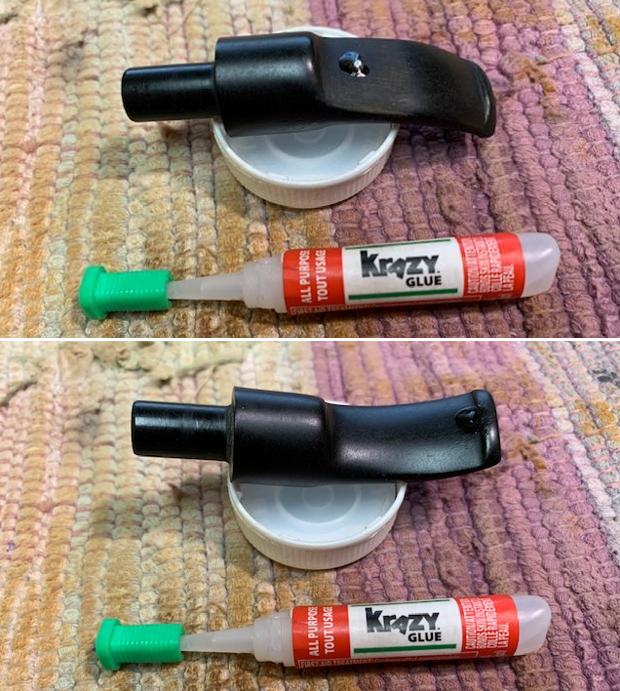
I ran a couple of hard bristled and regular pipe cleaners dipped in alcohol to be sure that the internals of the stem are cleaned out. I sand the entire stem with a folded piece of 220 grit sandpaper to loosen the oxidation from the surface before dunking the stem in to a solution of “Before and After Deoxidizer”. The initial sanding helps in efficient drawing out of the deeper oxidation. I let the stem soak in the deoxidizer solution overnight.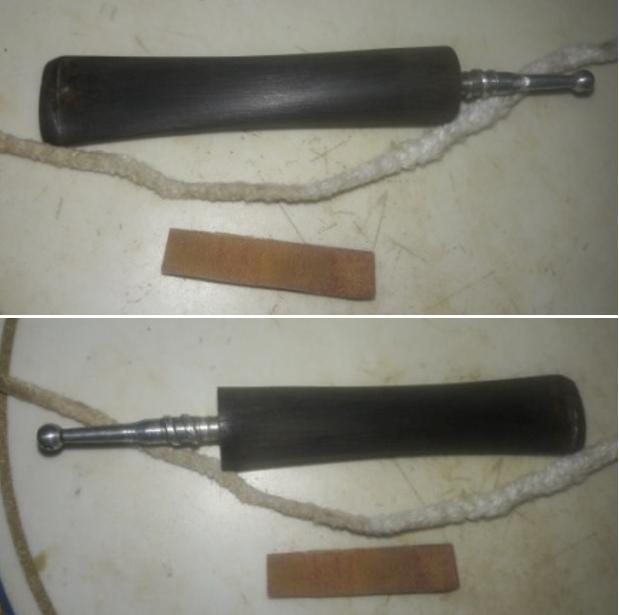
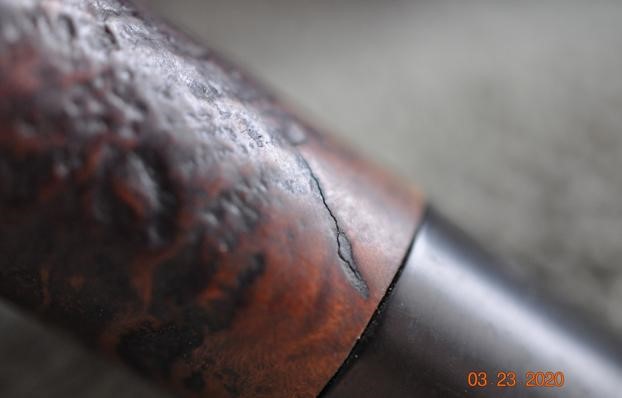
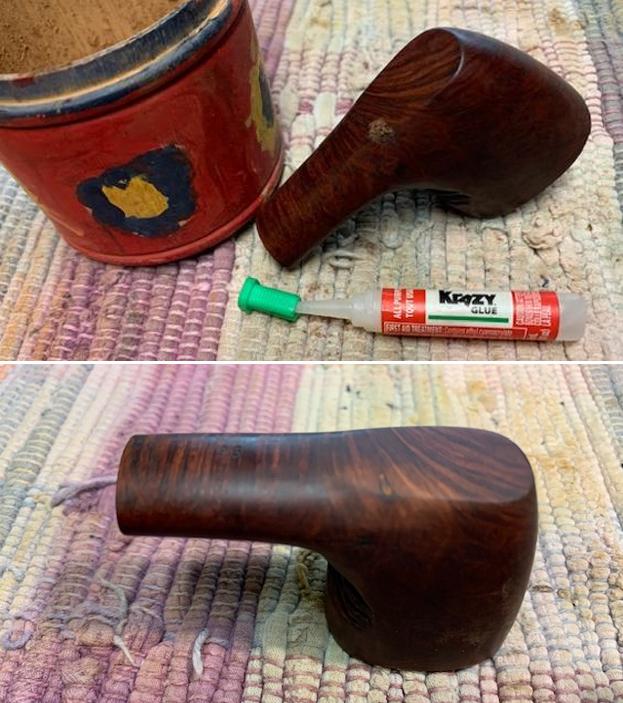
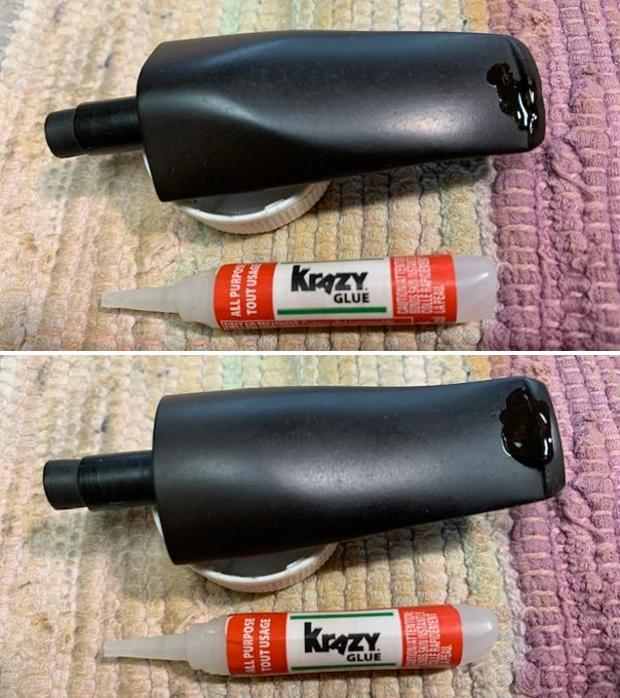
 Since I had some time before I called it a day, I decided to address the damage to the outer rim edges. I filled the larger chipped outer rim edge surfaces with a mix of briar dust and super glue. I would need to top the rim surface to address the issue of numerous dings and scratches on the rim top and during this process the briar dust and CA glue fill would also even out to match perfectly with the surrounding surface. I set the stummel aside for the fill to cure overnight.
 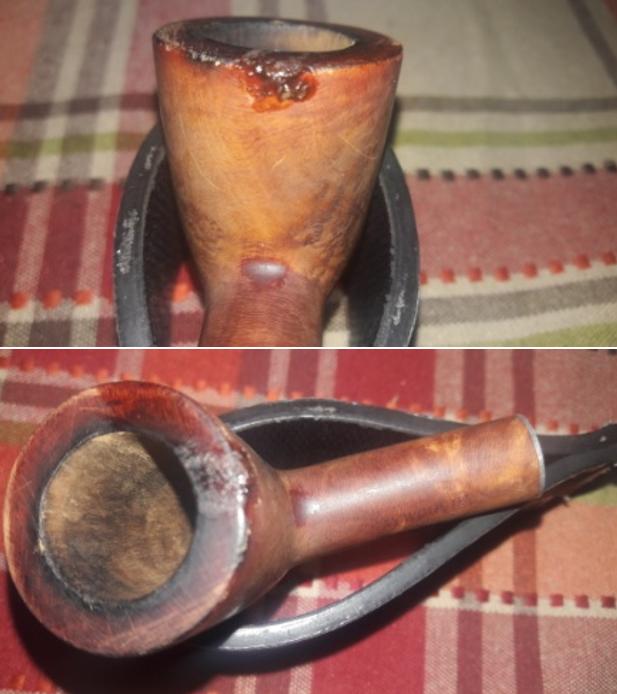 The next morning, I removed the stem that had been soaking in the deoxidizer solution overnight. I cleaned the stem and the stem airway under running warm water and scrubbed the raised oxidation from the stem surface using a Magic Eraser pad followed by scotch brite pad. I cleaned the stem airway with a thin shank brush and blew through the airway to completely remove the deoxidizer solution. I further removed the oxidation by scrubbing the stem with 0000 grade steel wool and applied a little EVO to rehydrate the stem.
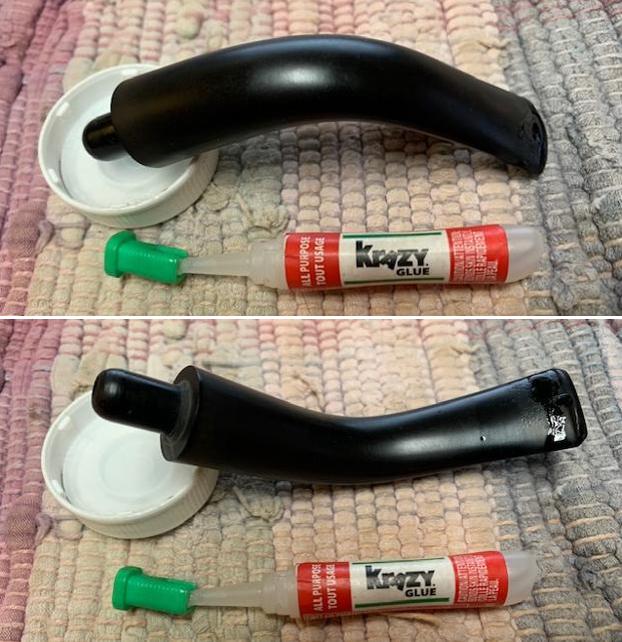
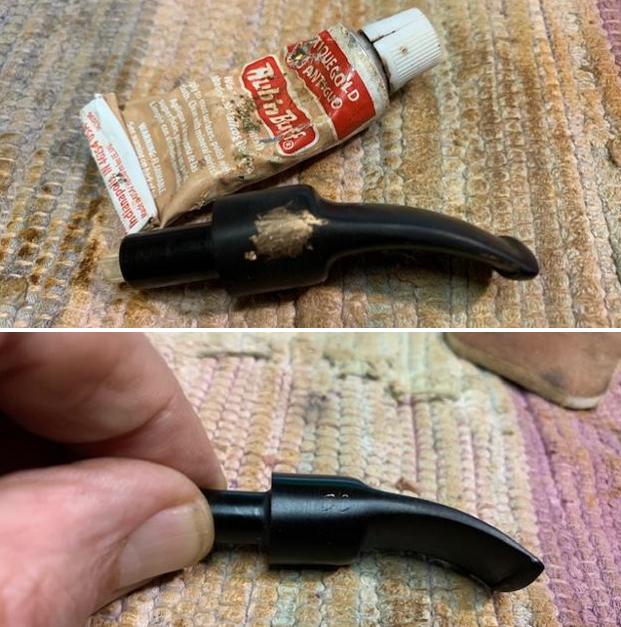
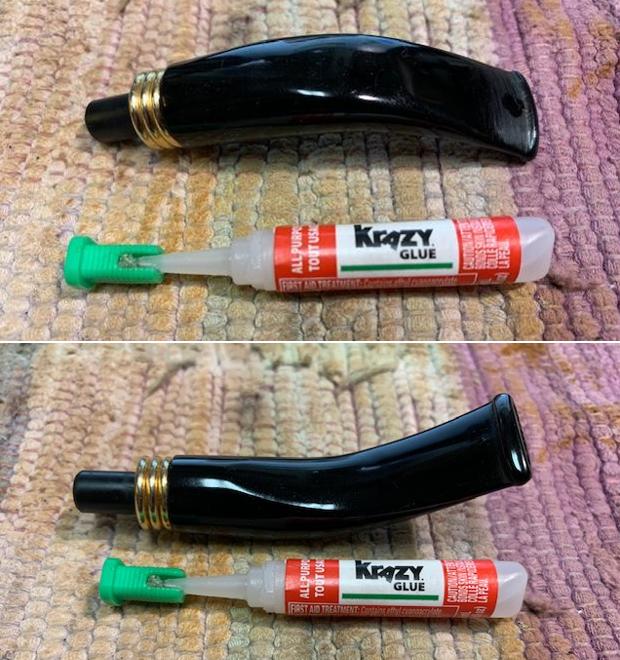
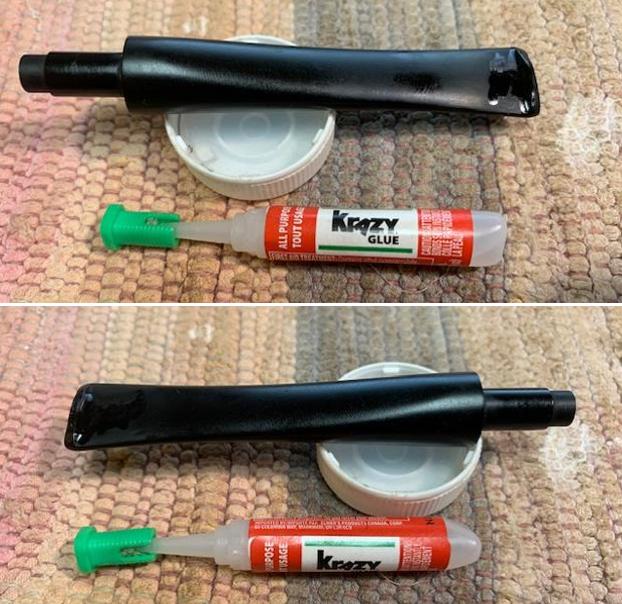
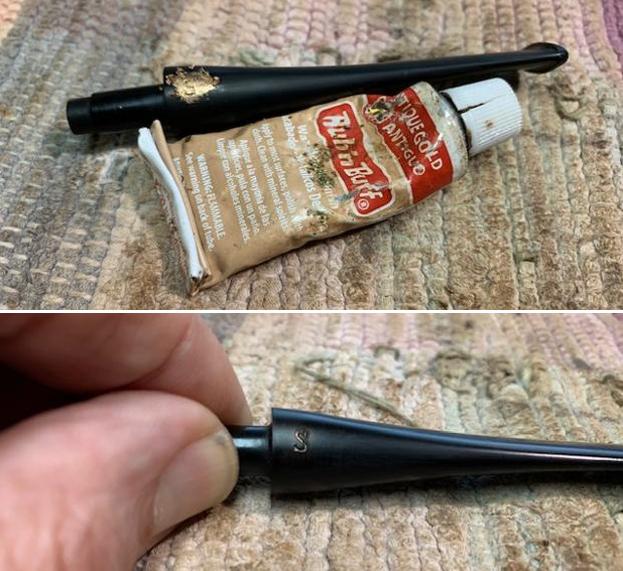
 Next, I filled the tooth indentations in the lower surface with a mix of clear CA superglue and activated charcoal and set it aside to cure. After the glue had partially hardened on the lower surface, likewise, I filled the upper surface tooth marks. Simultaneously, I smeared the button on either surface with the mix of charcoal and superglue and set the stem aside for the mix to harden completely.
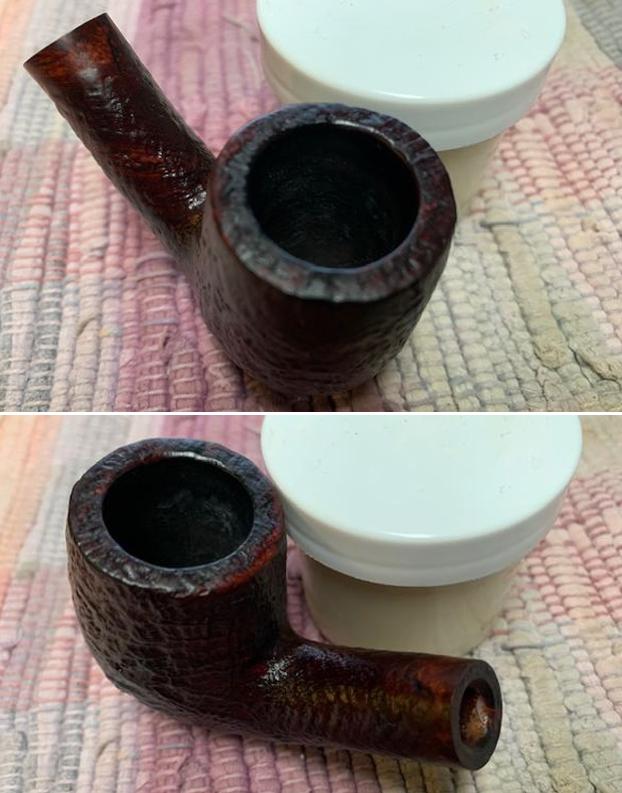
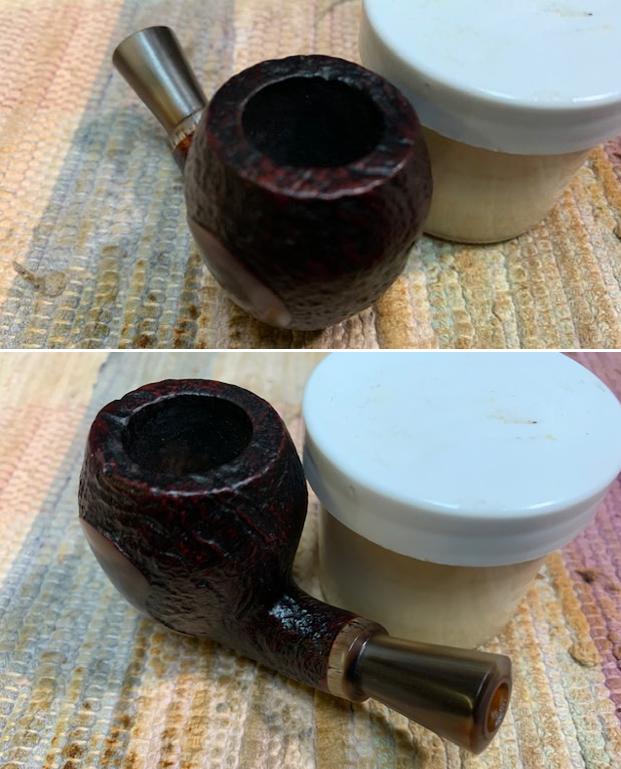
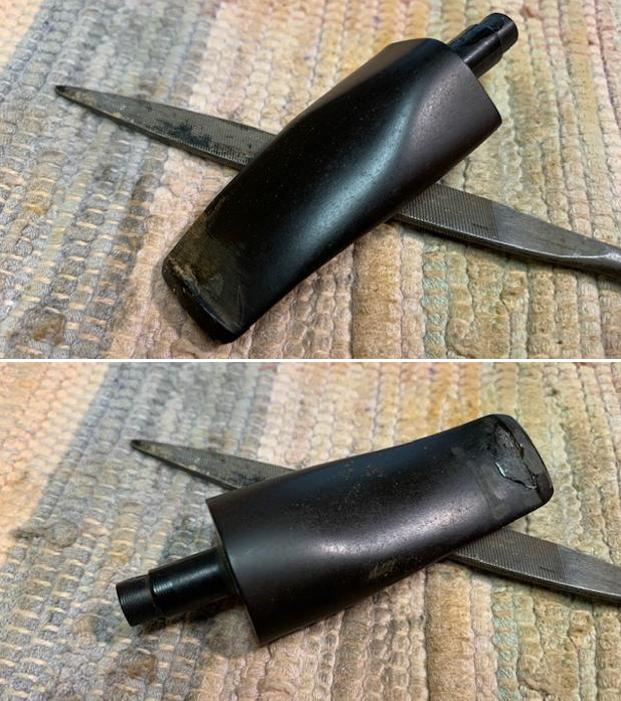
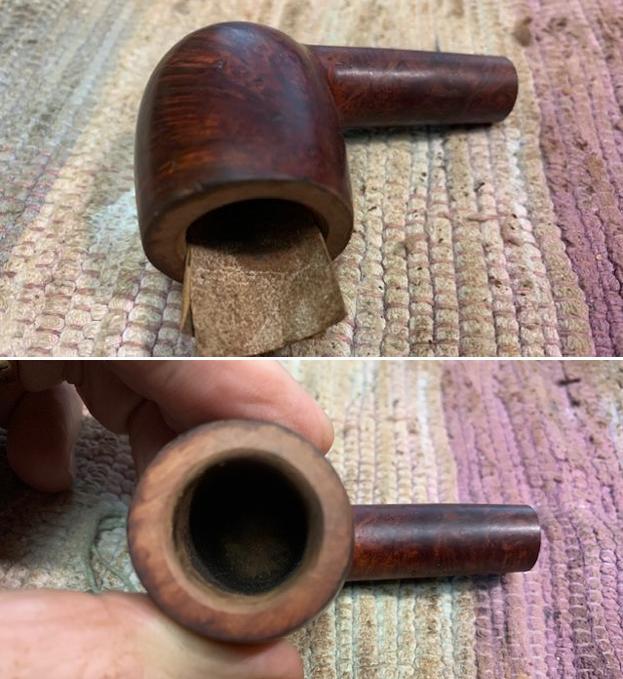
 With the stem fills set aside, I sand the fill on the outer rim edge with a flat head needle file and to further blend the fill with the surrounding briar surface, I sand it with a folded piece of 220 grit sand paper. Next, I top the rim on a piece of 220 grit sandpaper to address the issue of uneven rim top surface and the dents and dings on the rim edge (this is a necessary evil). I frequently checked the rim top for the progress made and stopped immediately once I had achieved the desired results. The rim top looks refreshed with no darkening and charring. The rim edge damage has also been addressed to a great extent.
 I followed up the topping of the rim top with the sanding of the entire stummel surface with a folded piece of 220 grit sand paper. This addressed the minor dents and dings on the stummel that I had initially observed and also evened out the entire stummel surface. I was careful around the stampings on the shank.
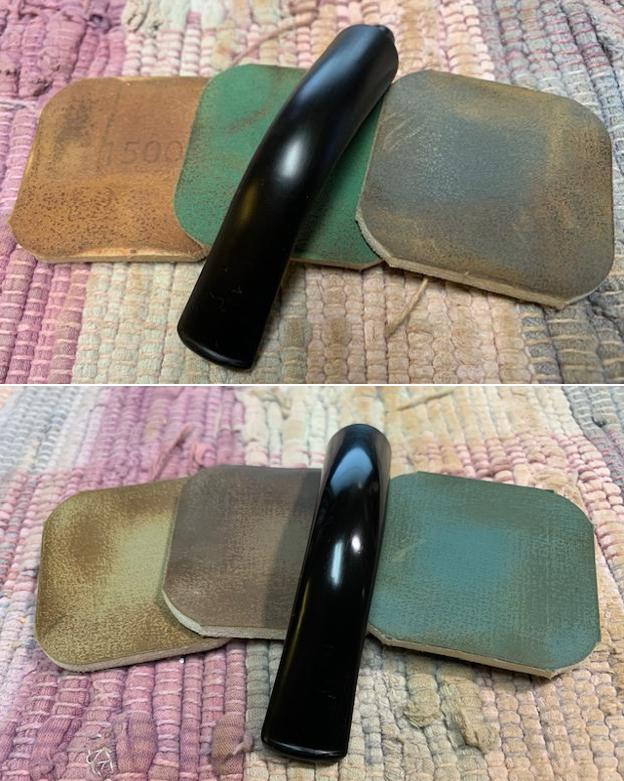
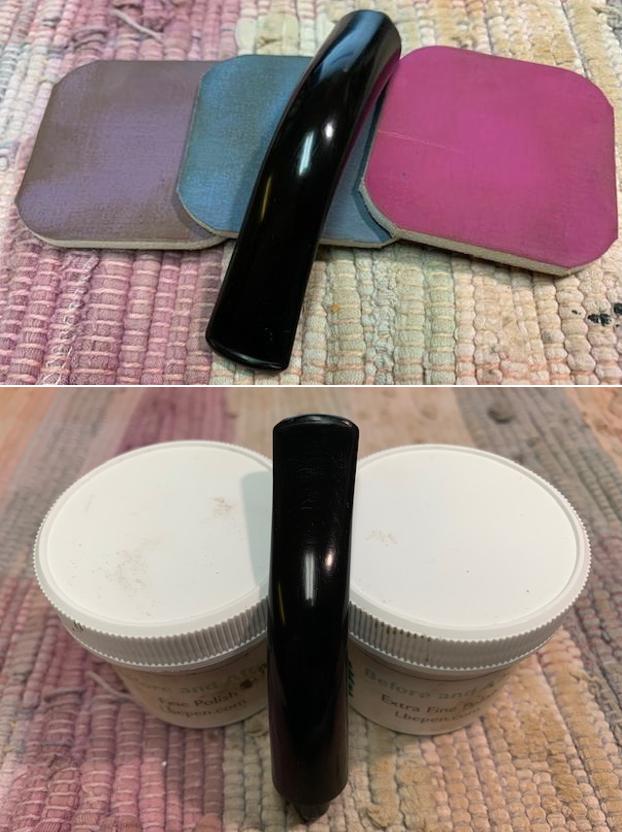
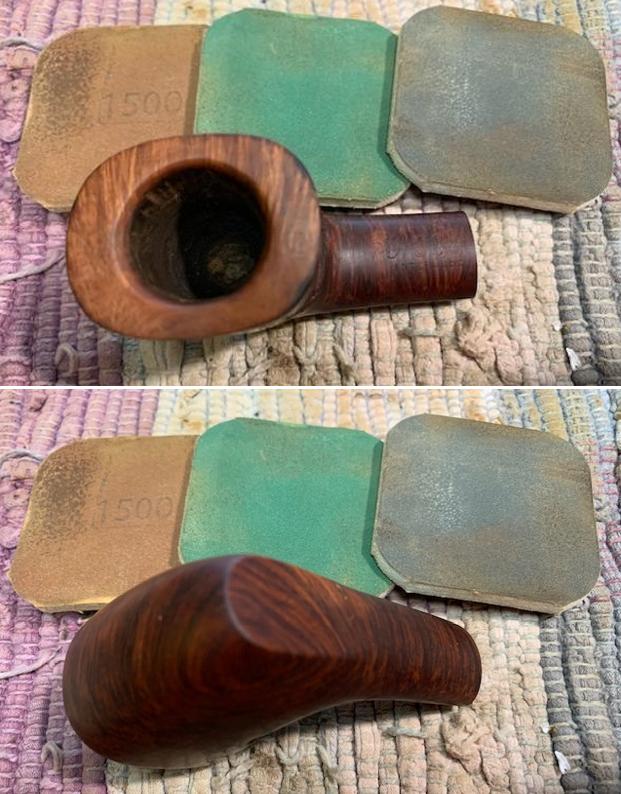
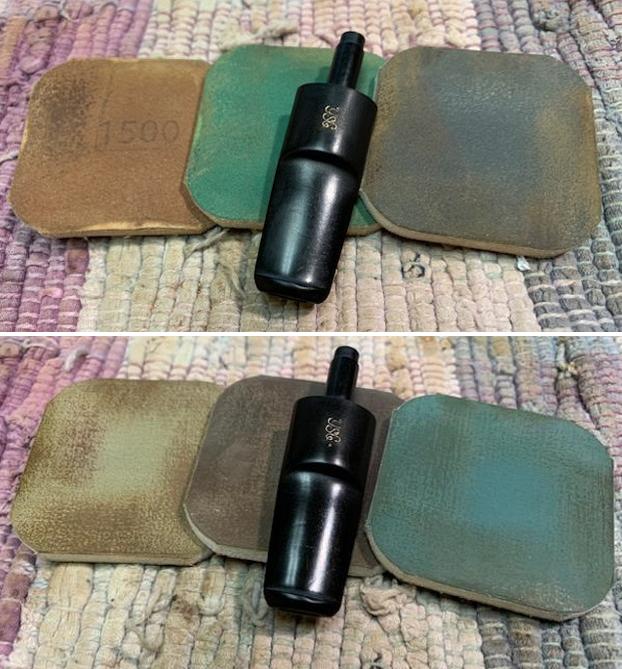
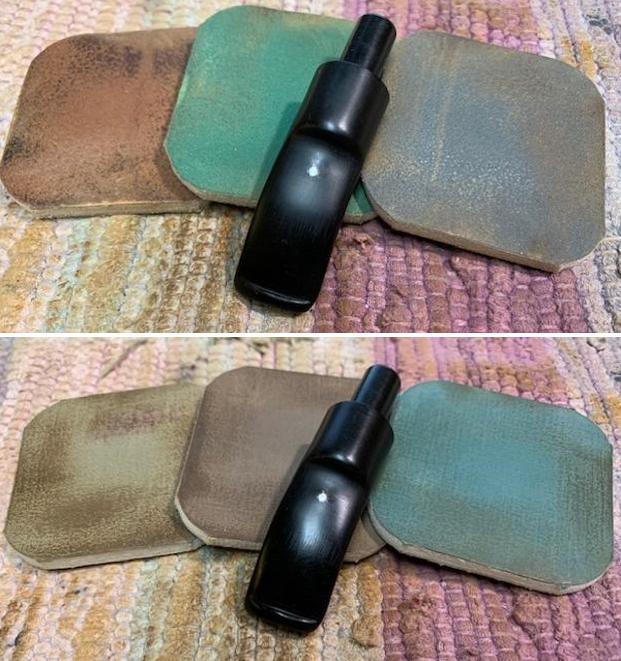
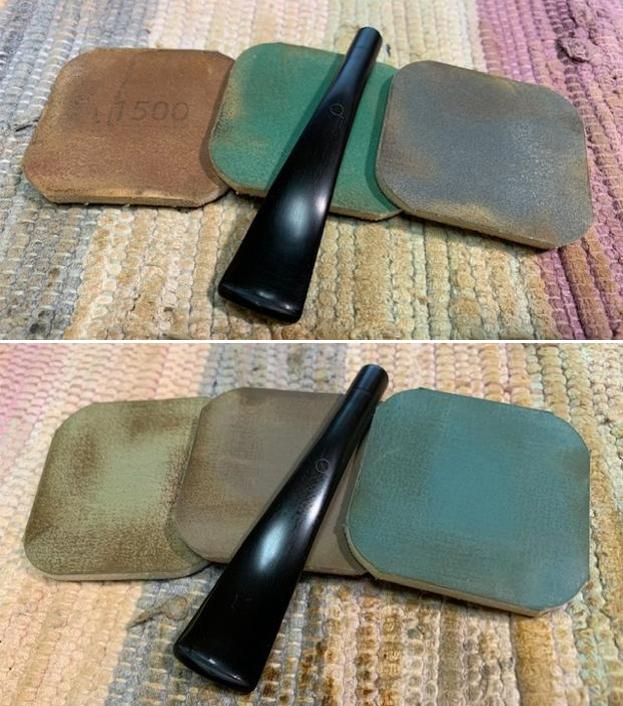
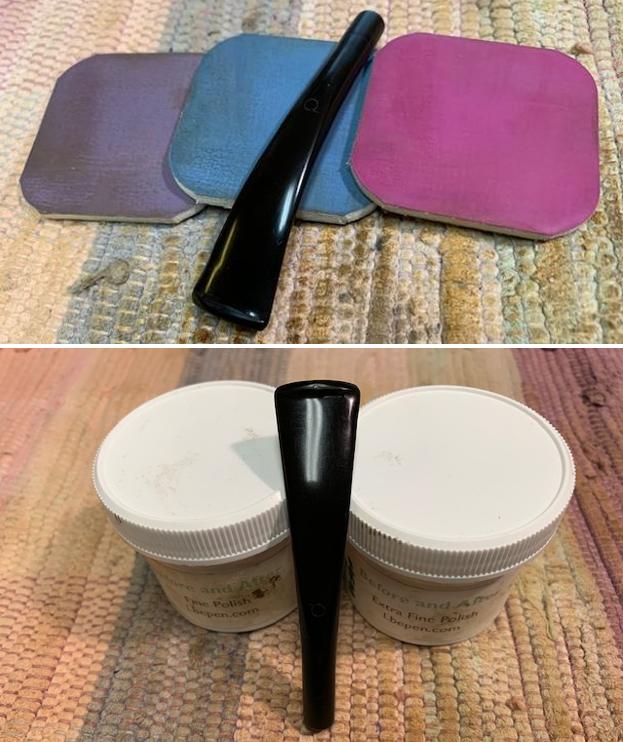
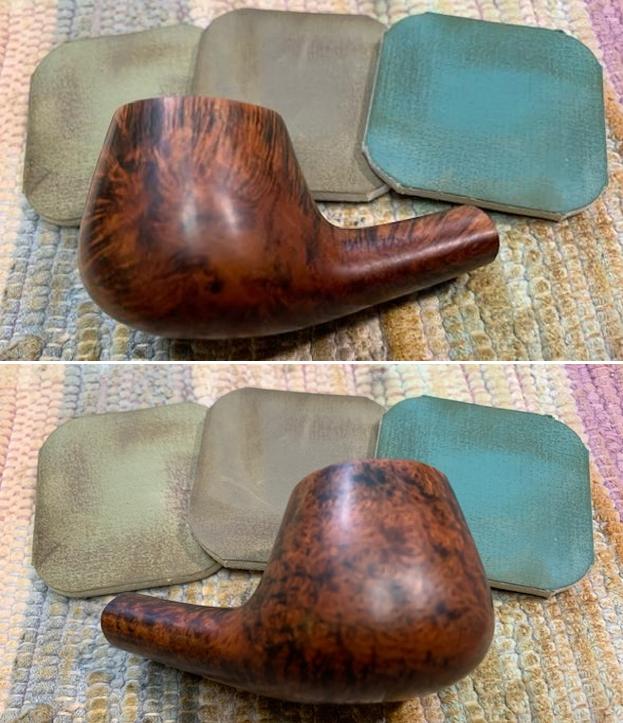
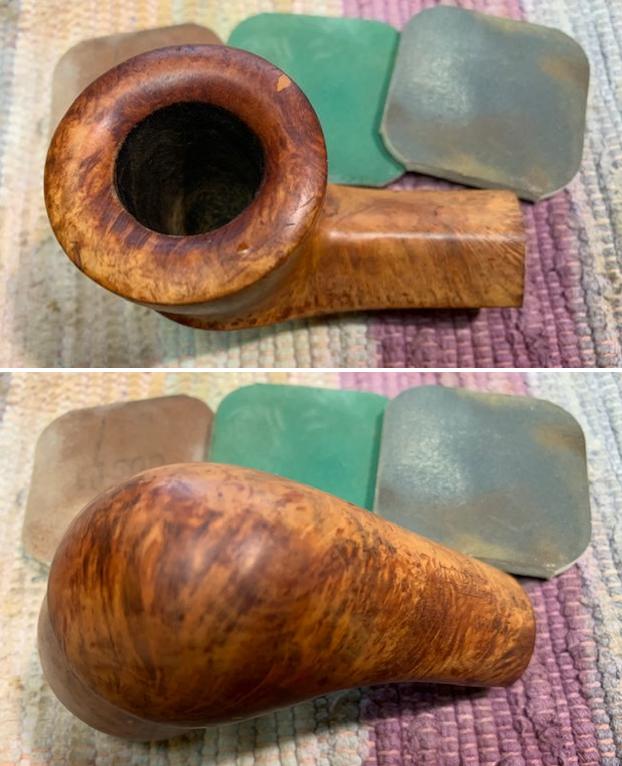
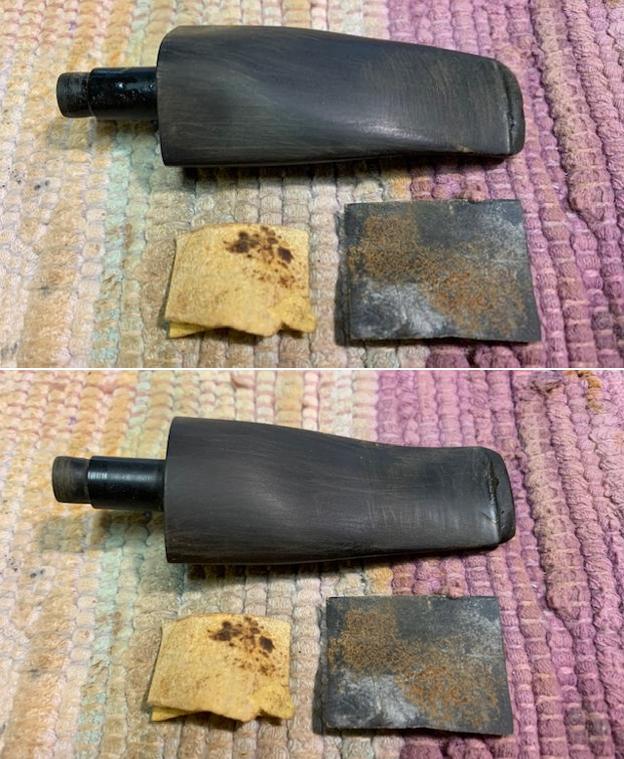
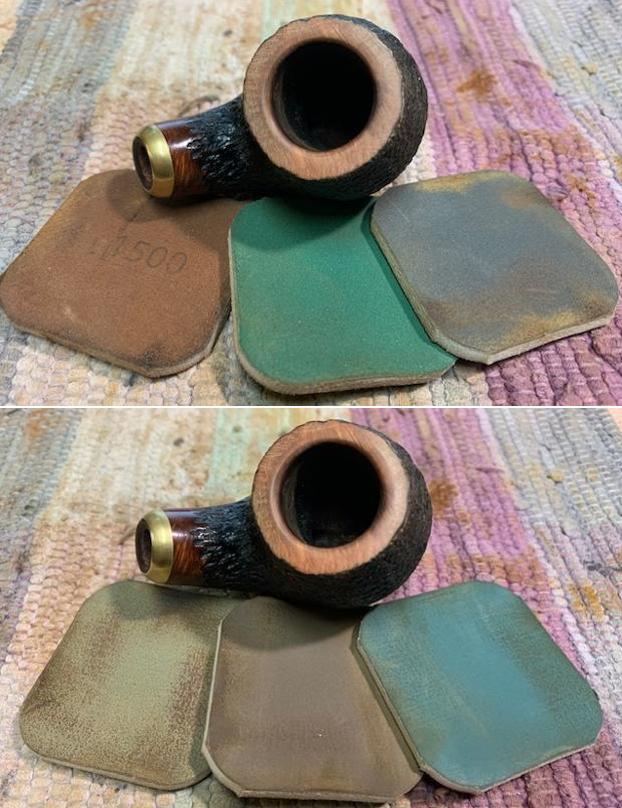
 Thereafter, I moved to the next stage of polishing and revitalizing the entire rim top and the stummel. I polished the stummel by wet sanding with 1500 to 2000 grit wet or dry sand paper and followed it up with further wet sanding with 3200 to 12000 grit micromesh pads. I wiped the stummel with a moist cloth after each wet pad to see the progress and am extremely pleased with the end result.
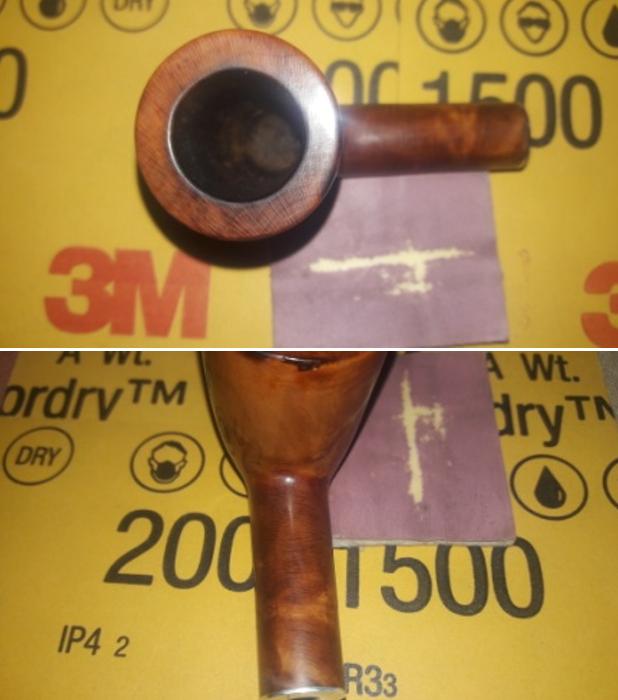
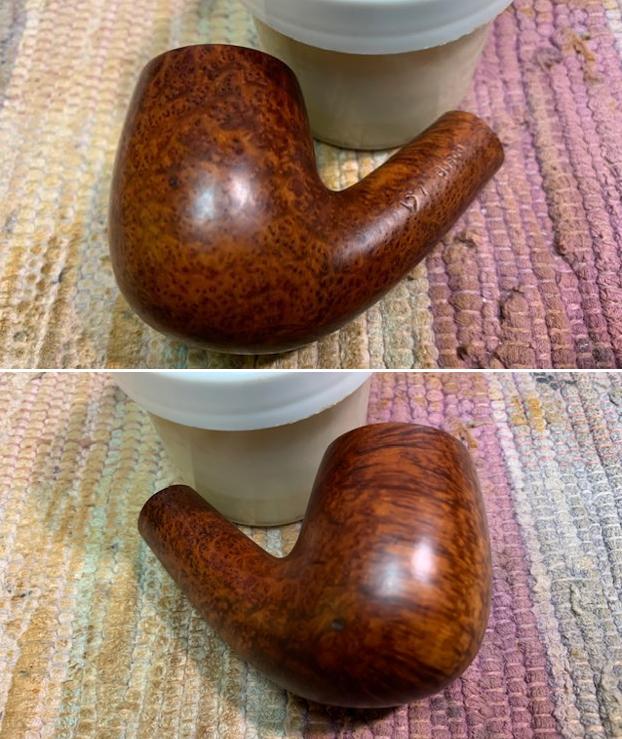
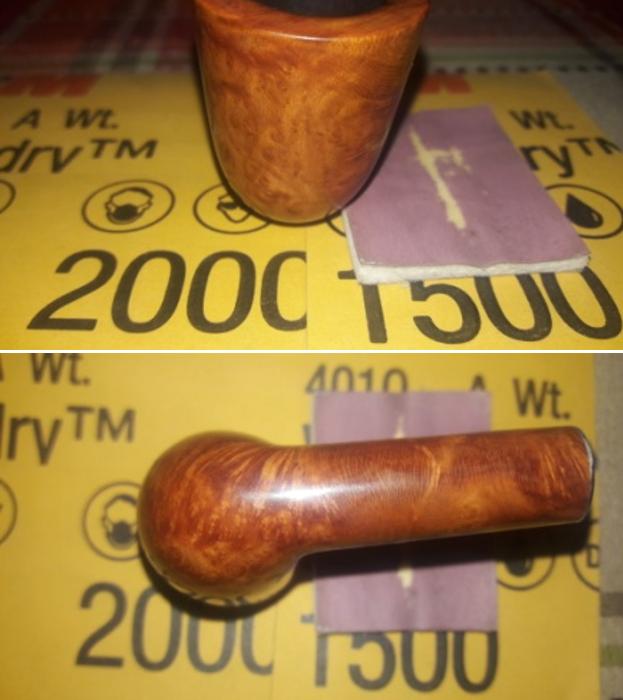 I rub a small quantity of “Before and After Restoration Balm” in to briar and let it rest for a few minutes. The balm almost immediately works its magic and the briar now has a nice vibrant appearance. I further buff it with a horse hair shoe brush.
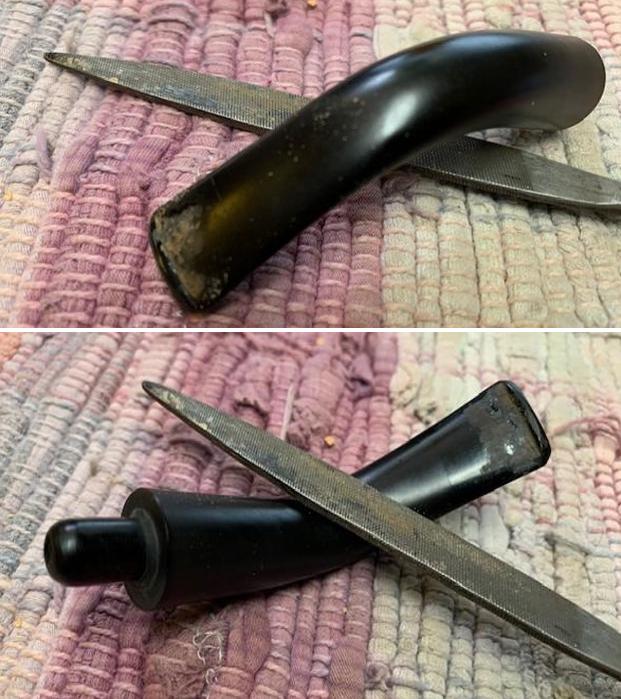
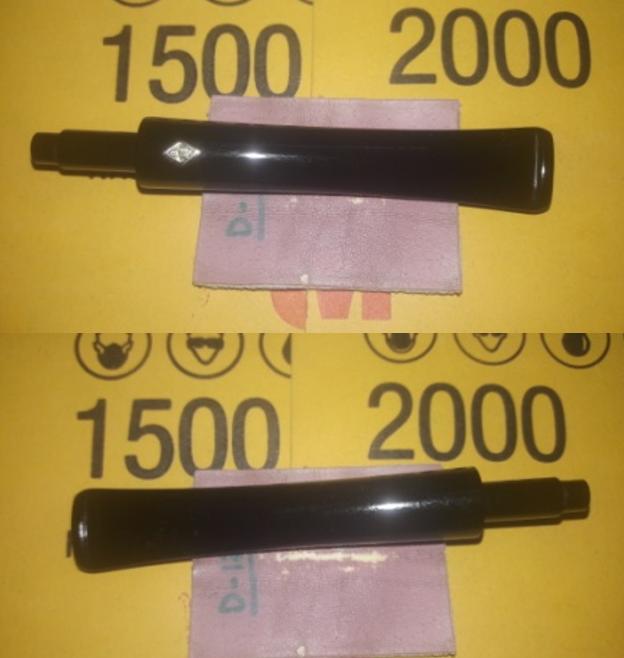
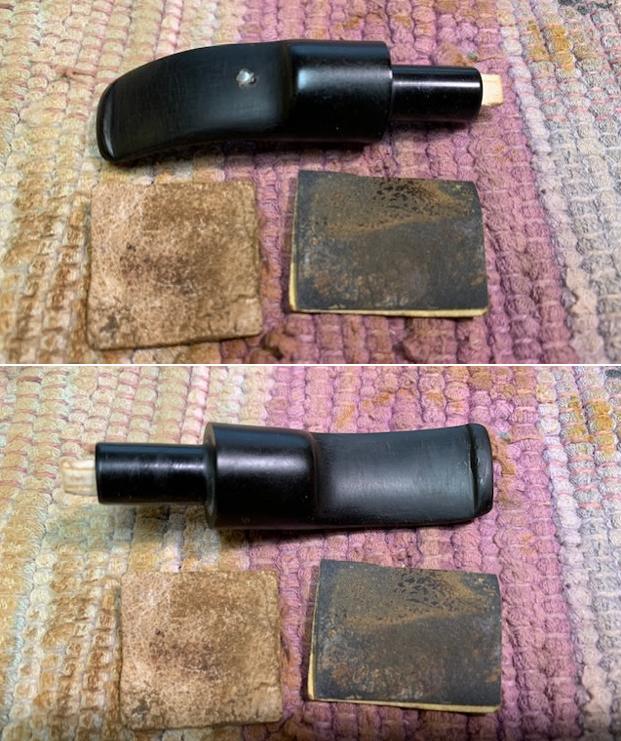
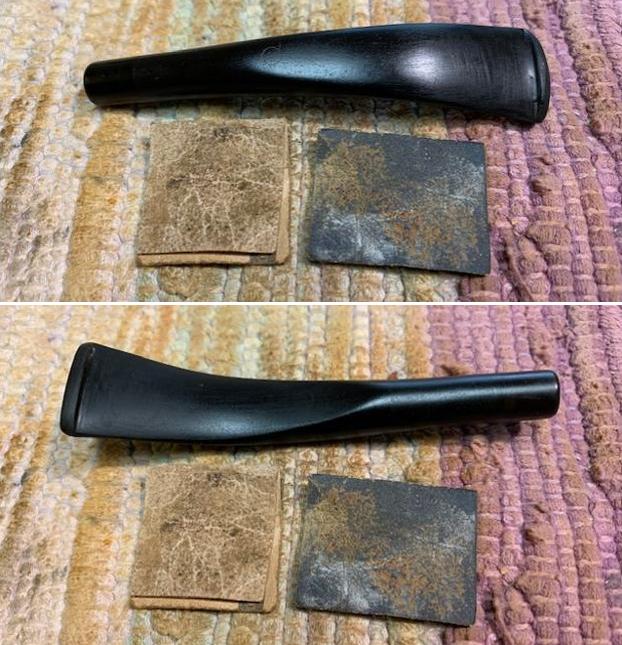
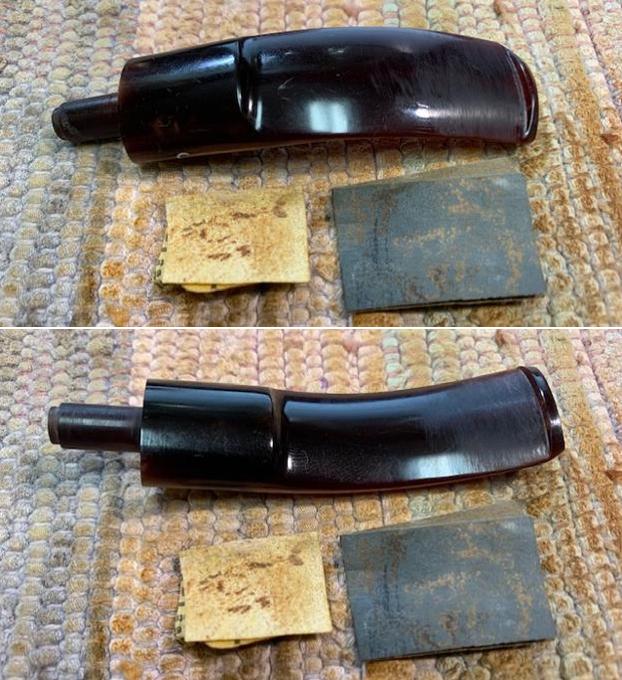
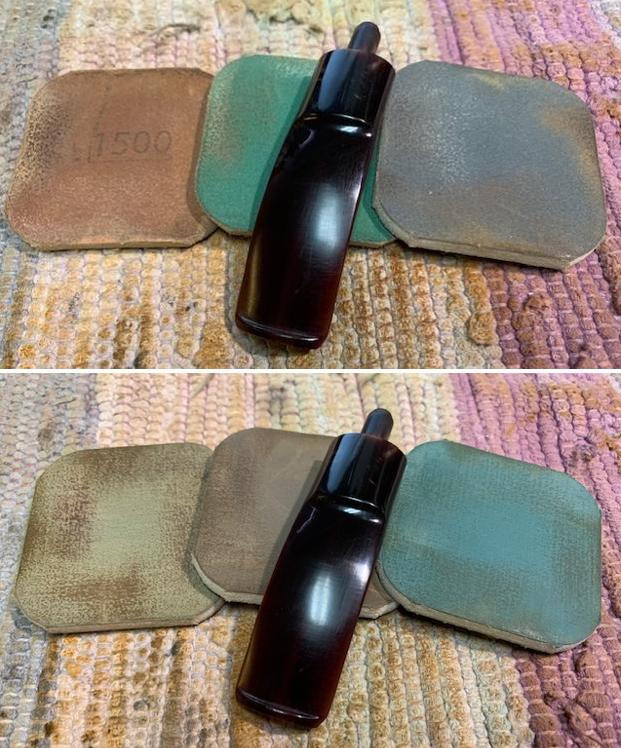
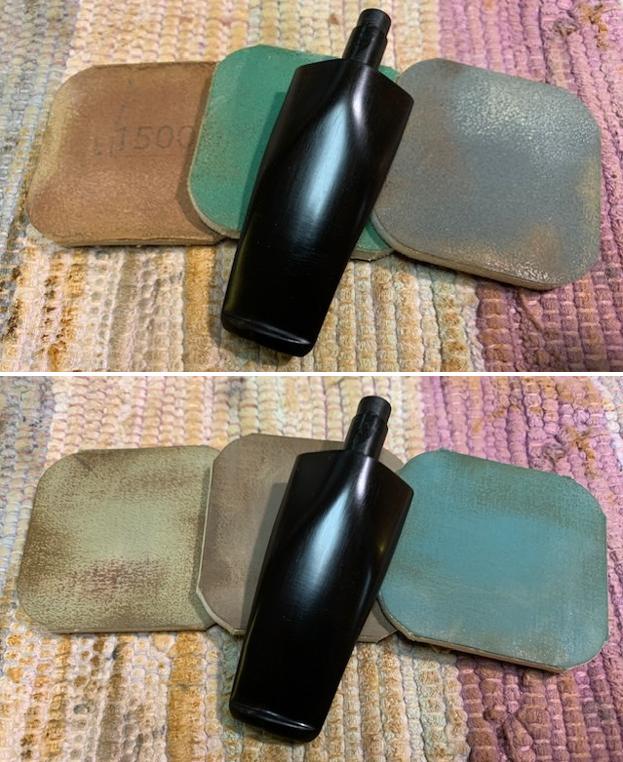
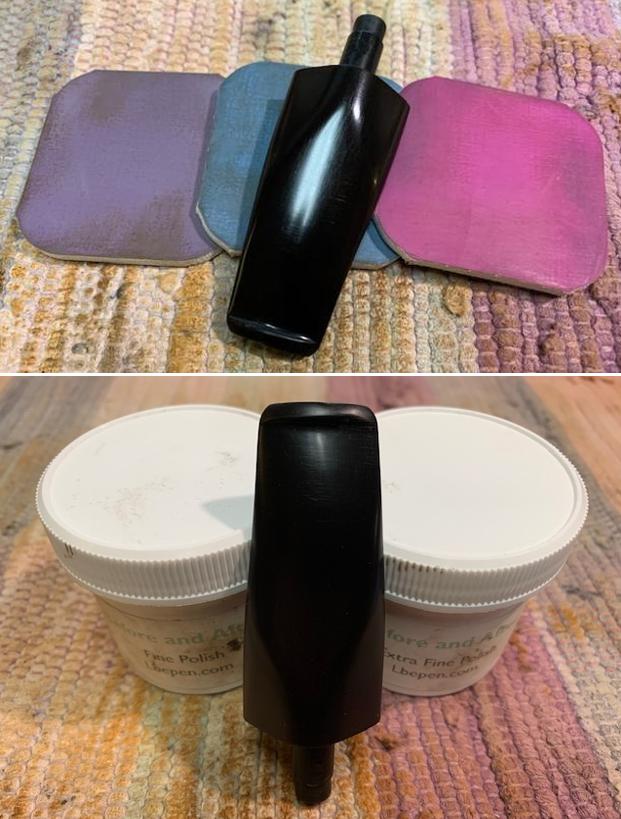
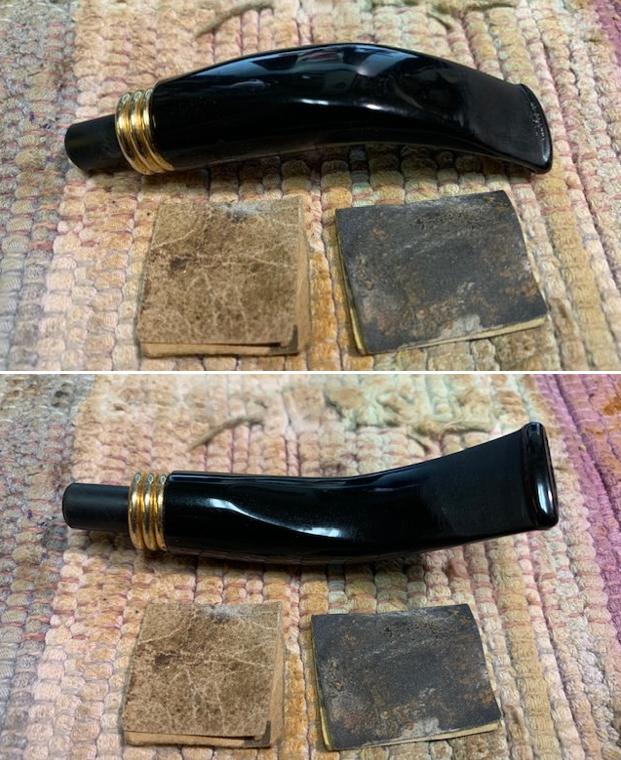
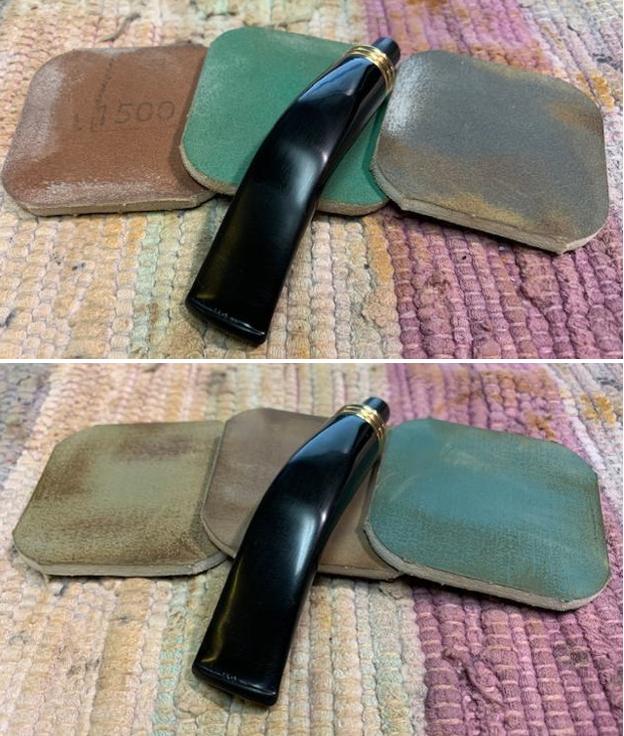
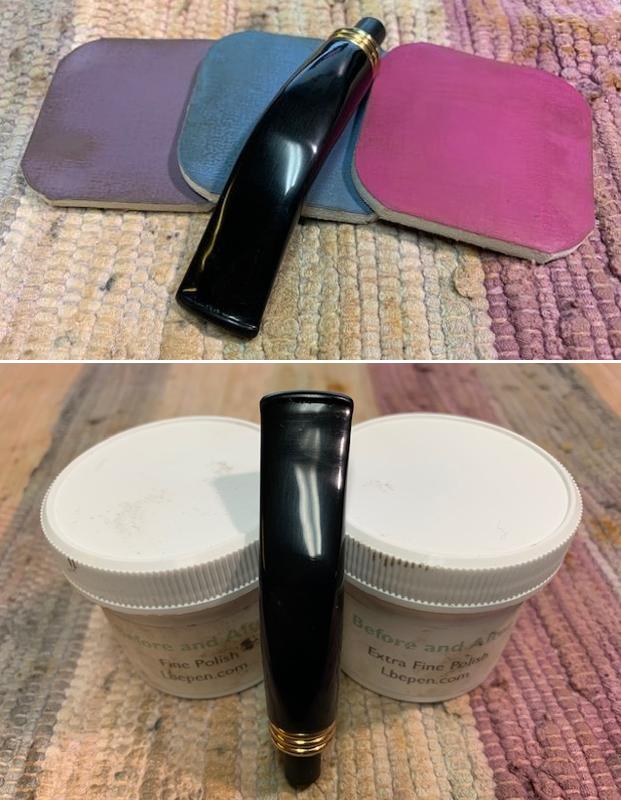
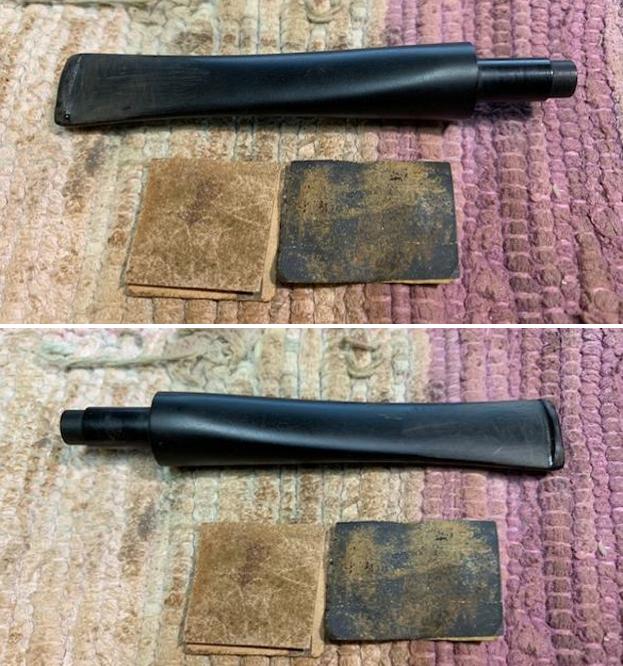
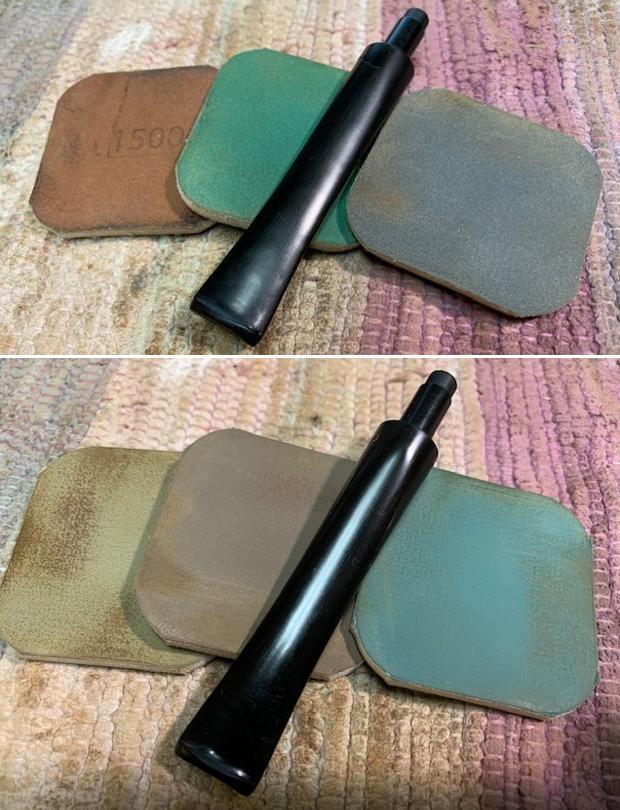
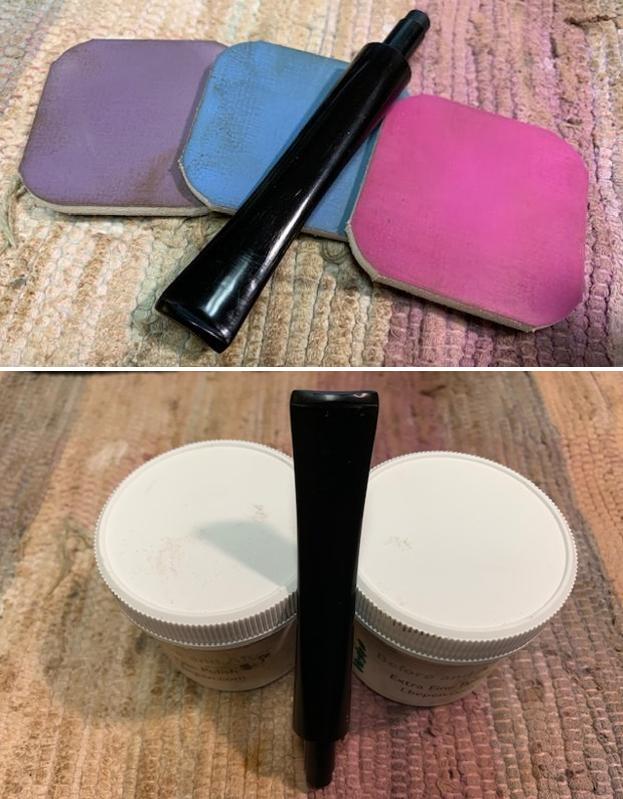
 Now that the stummel refurbishing save for final wax polish is completed, I turn my attention back to the stem. A little bit of filing with a flat head needle file followed by sanding with folded pieces of 220 and 600 grit sand papers got the stem fills all matched up with the stem surface. The buttons and the button edges are now even and crisp. I polished the stem with micromesh sanding pads – wet sanding with 1500 to 12000 grit pads. I rubbed the stem down with Extra Virgin Olive Oil and set the stem aside to dry.
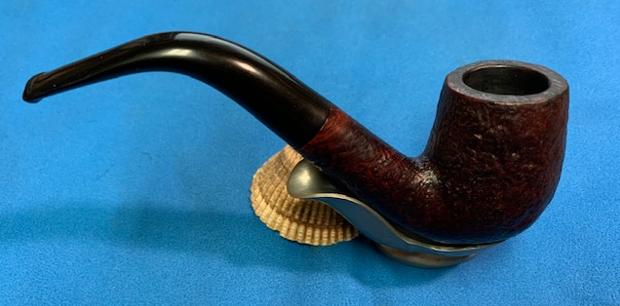
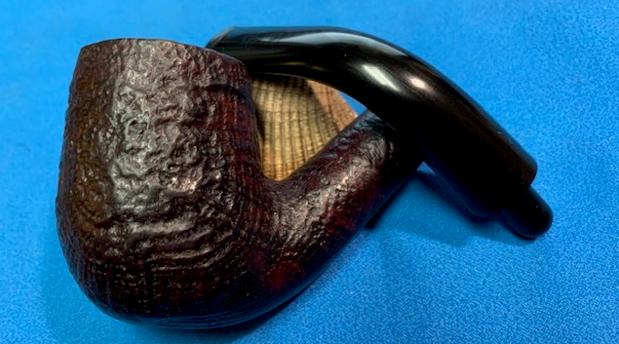
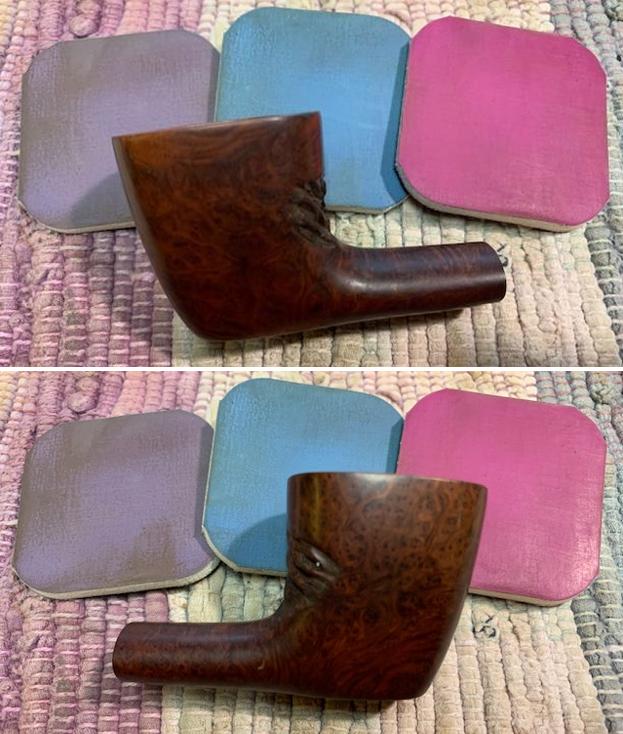
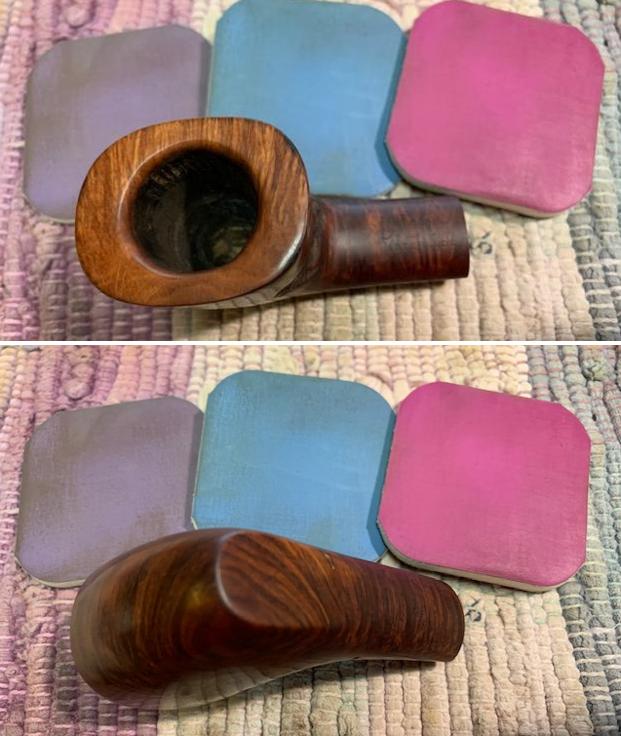
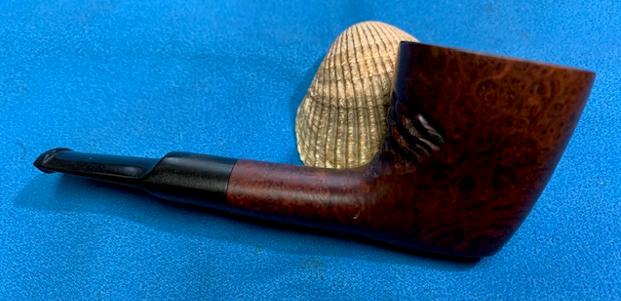
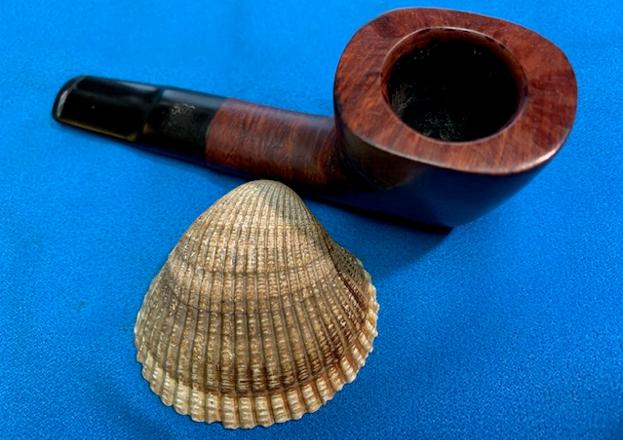
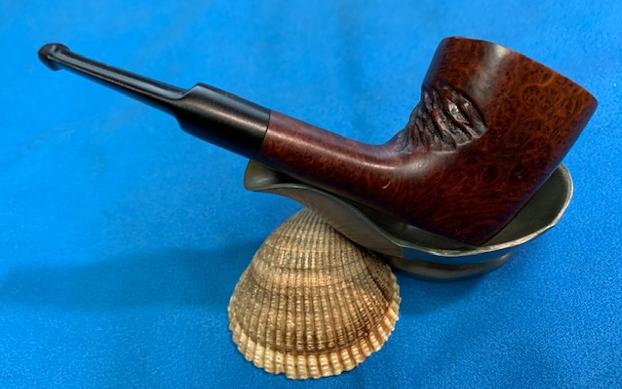
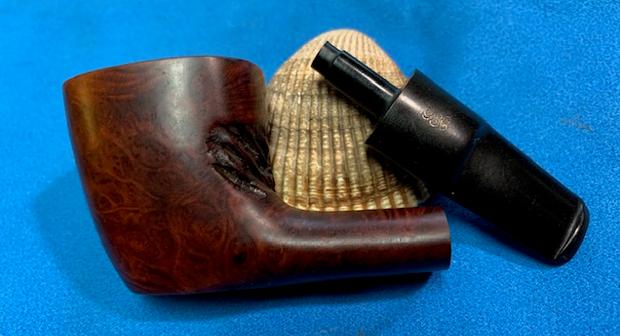
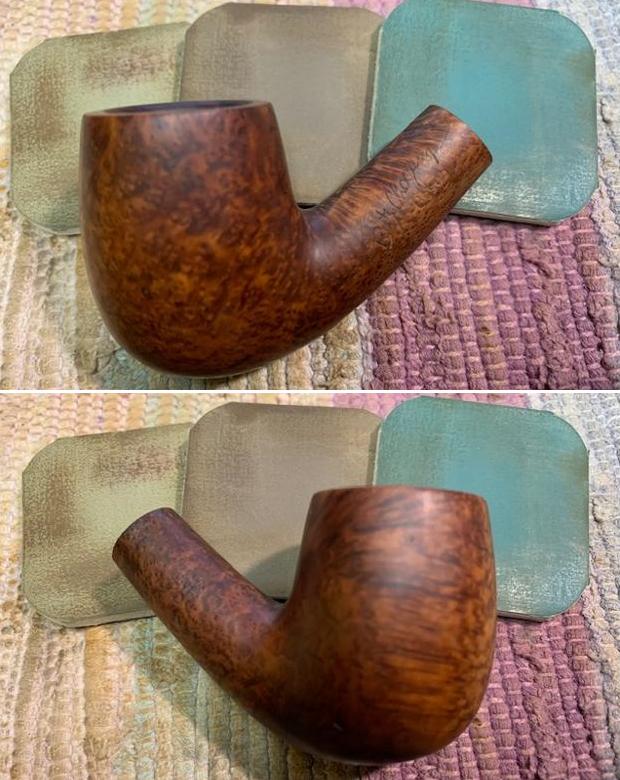
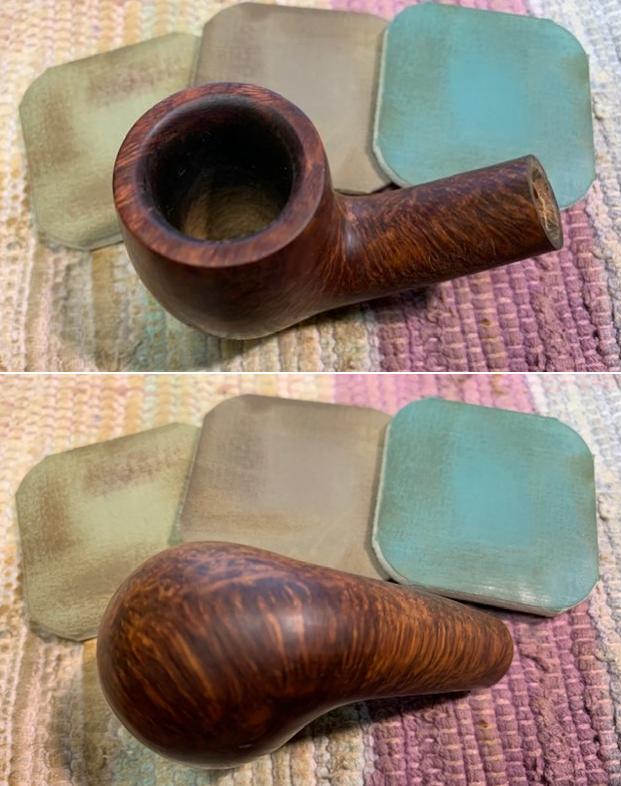
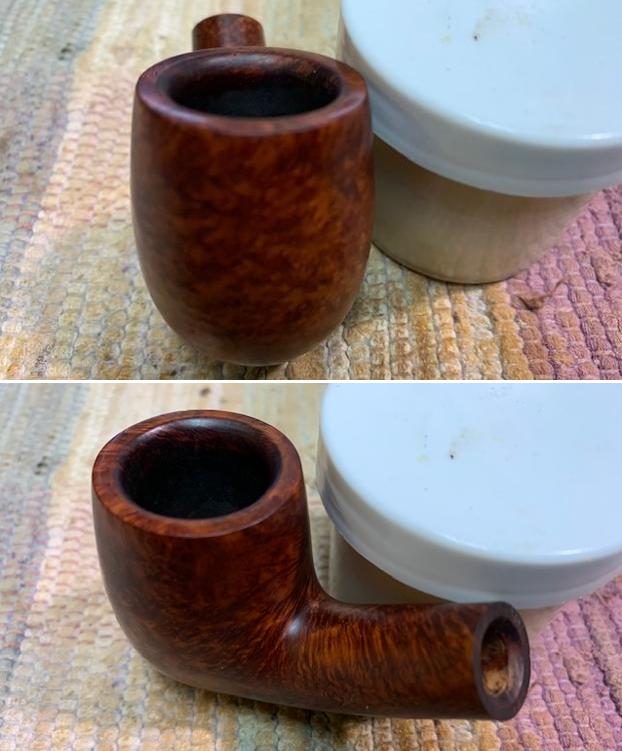
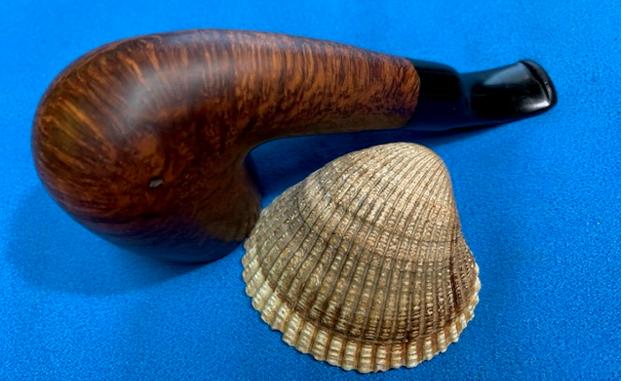
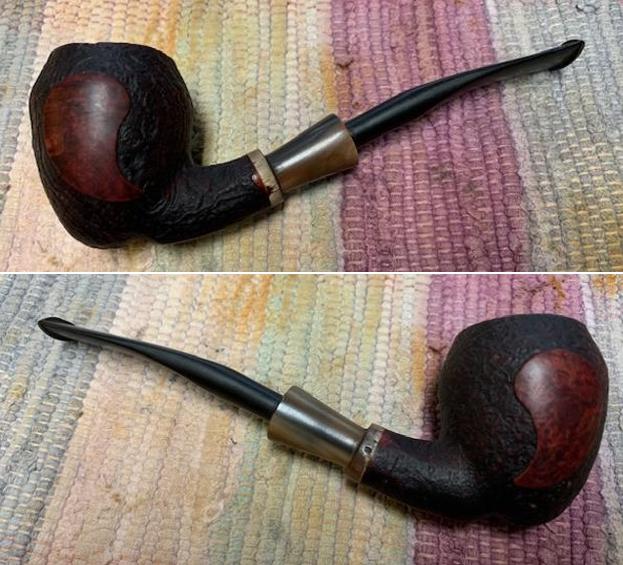
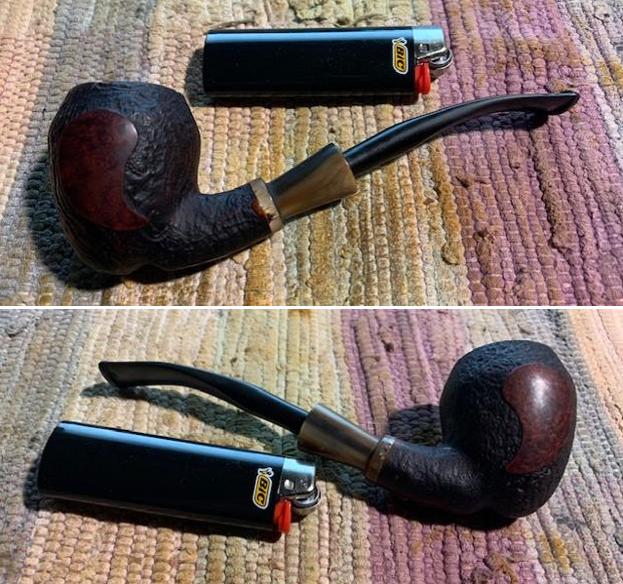
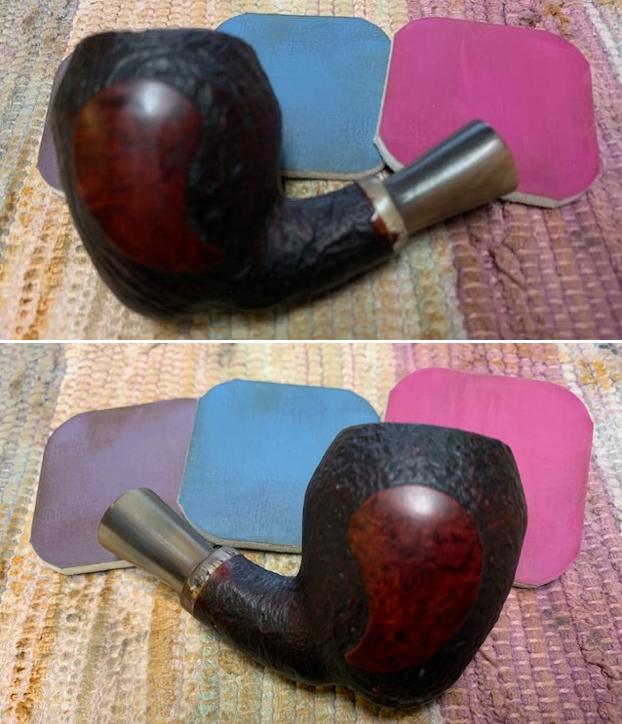
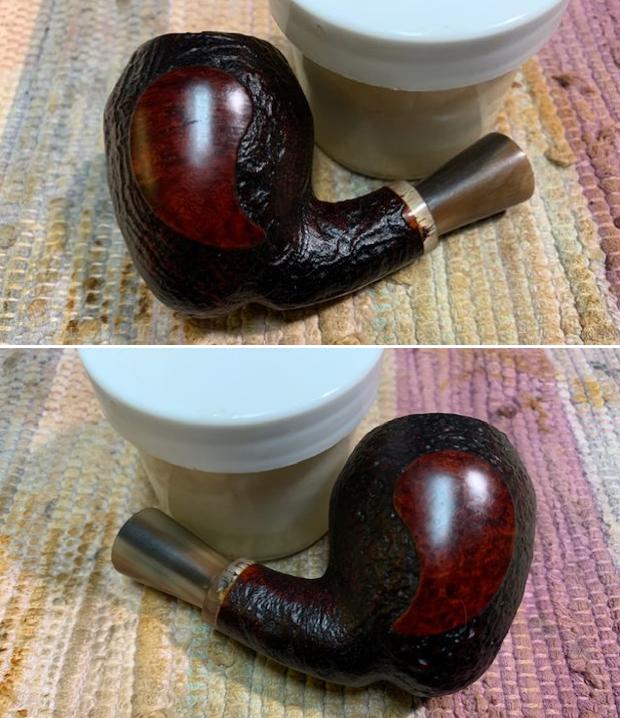
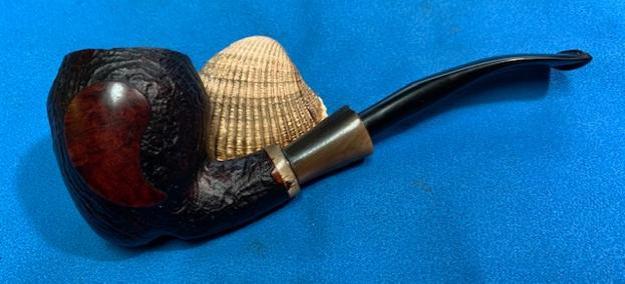
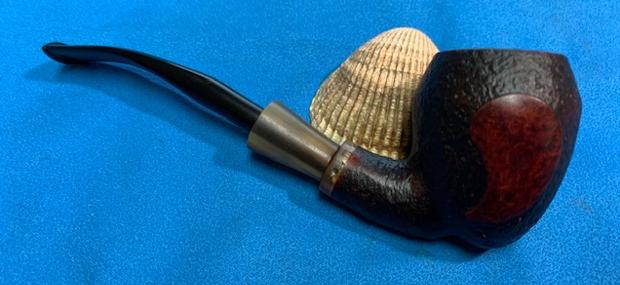
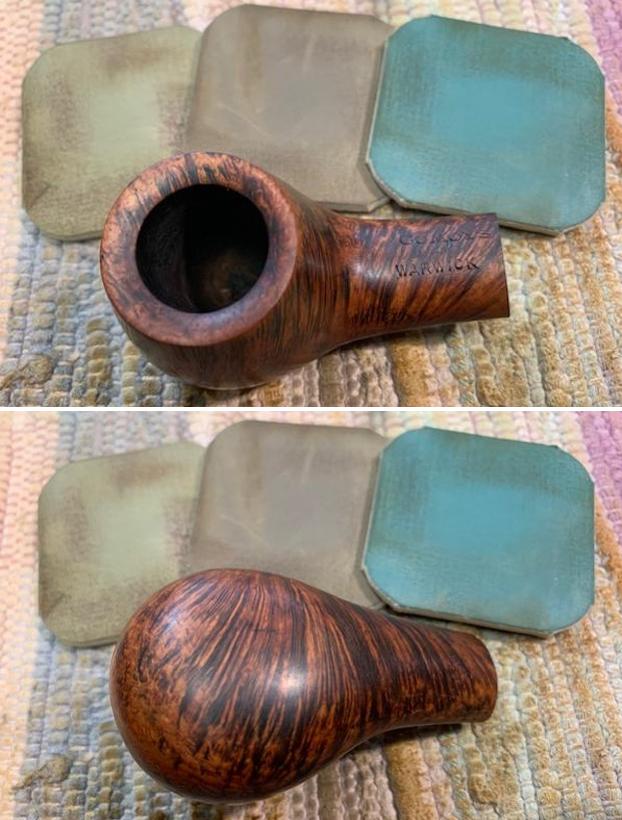
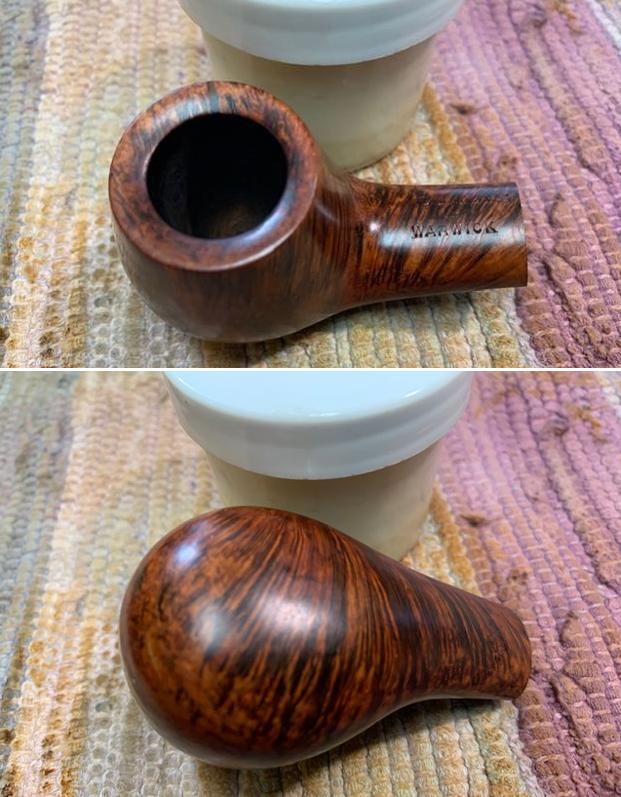
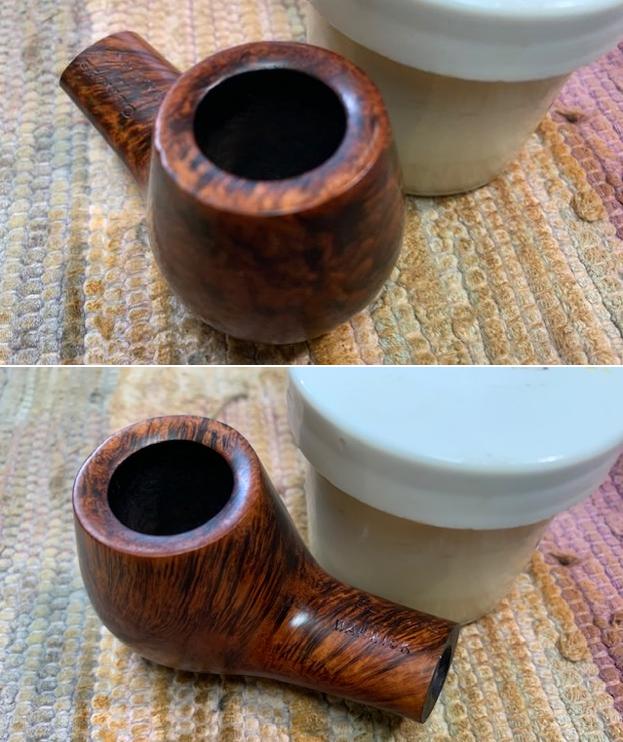
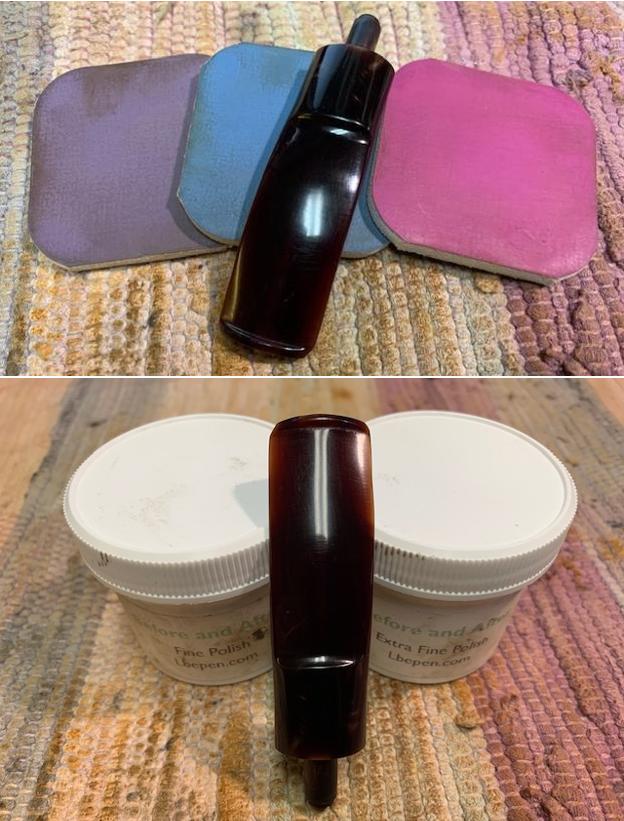
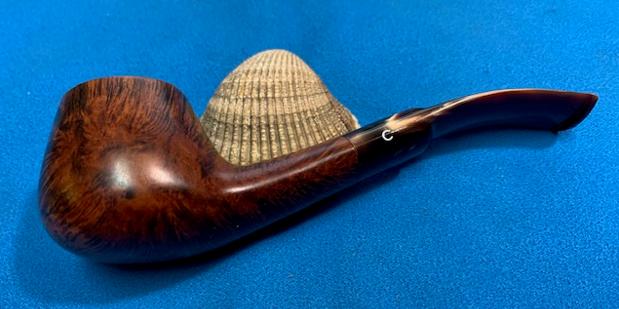
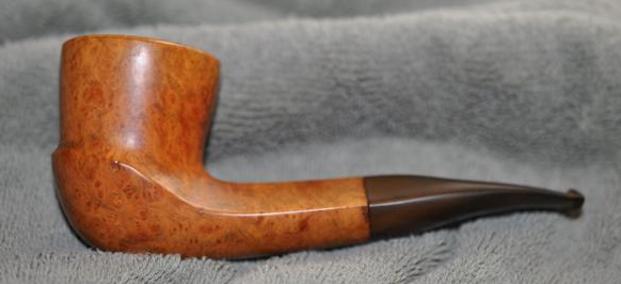
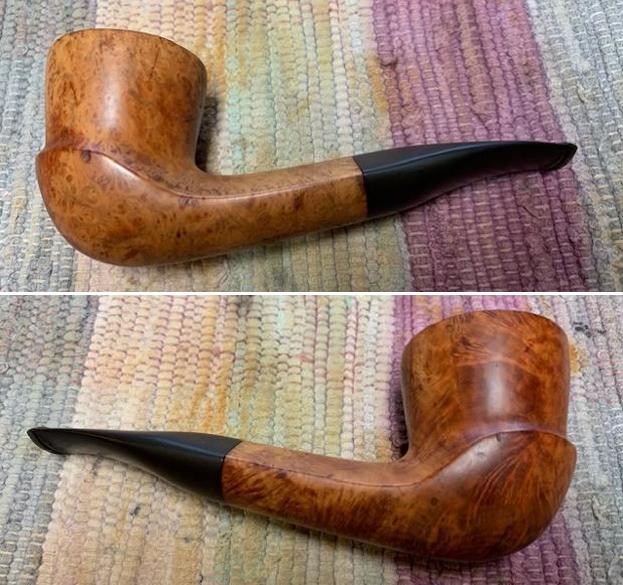
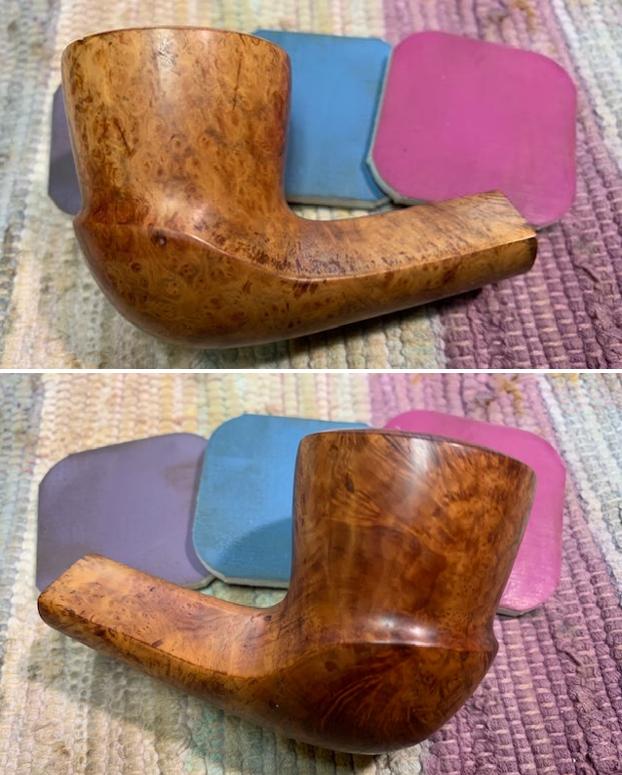
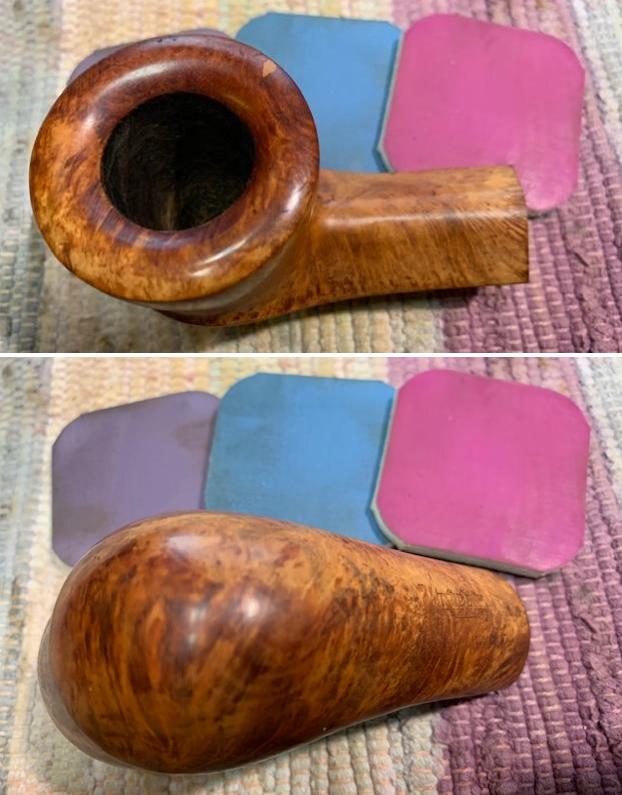
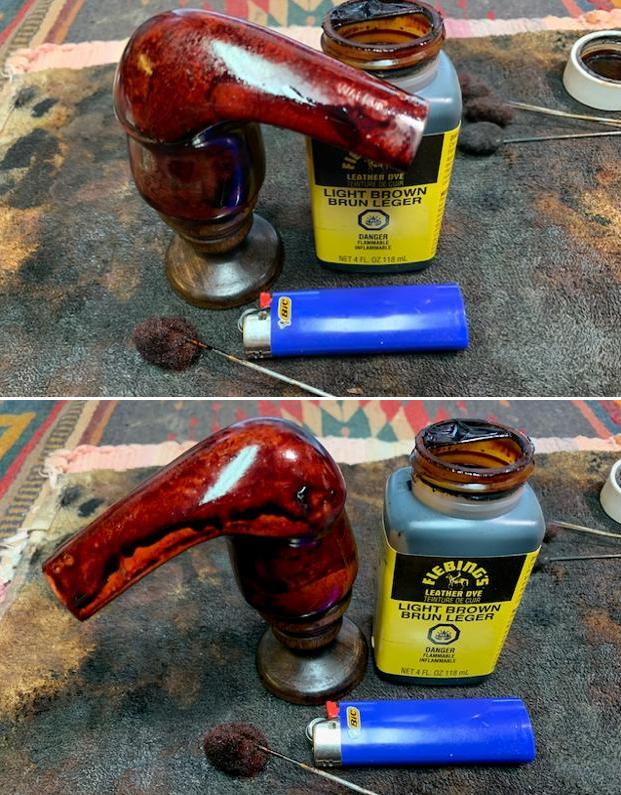
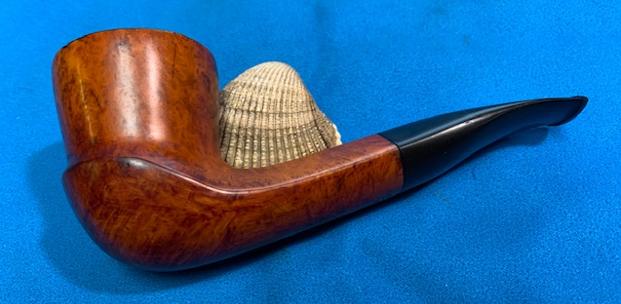
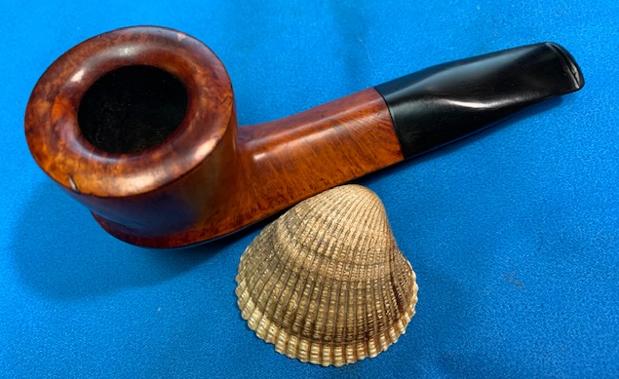
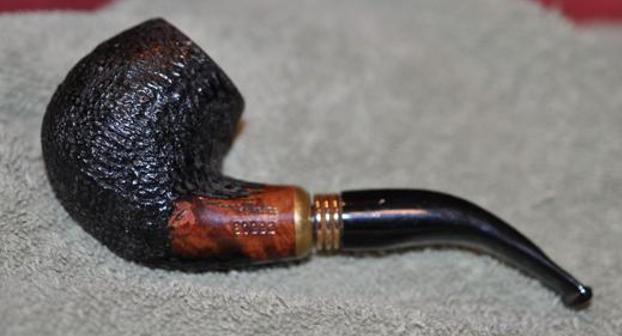
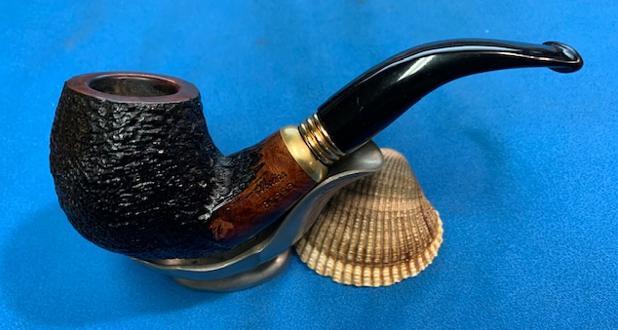
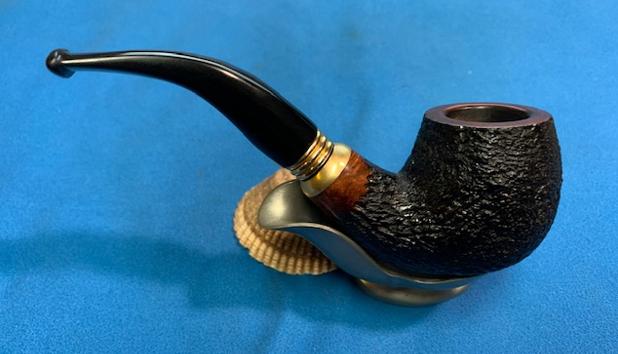
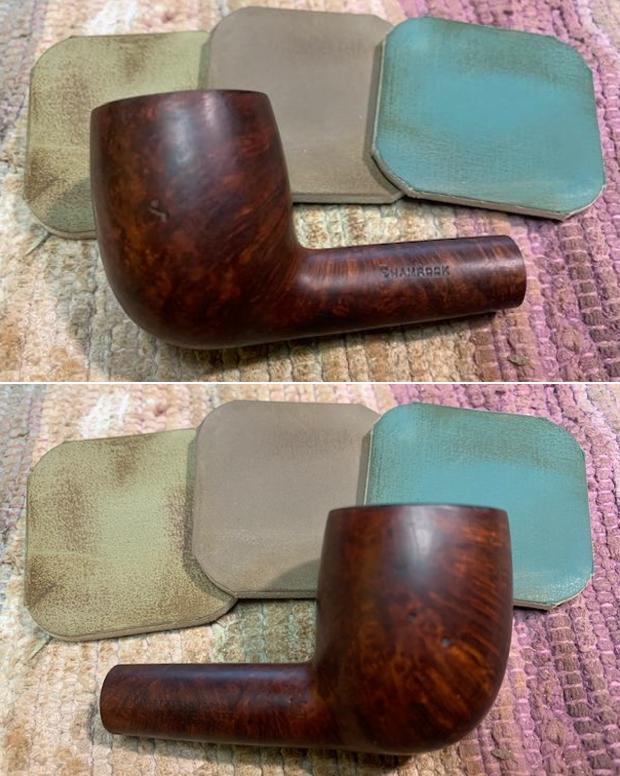
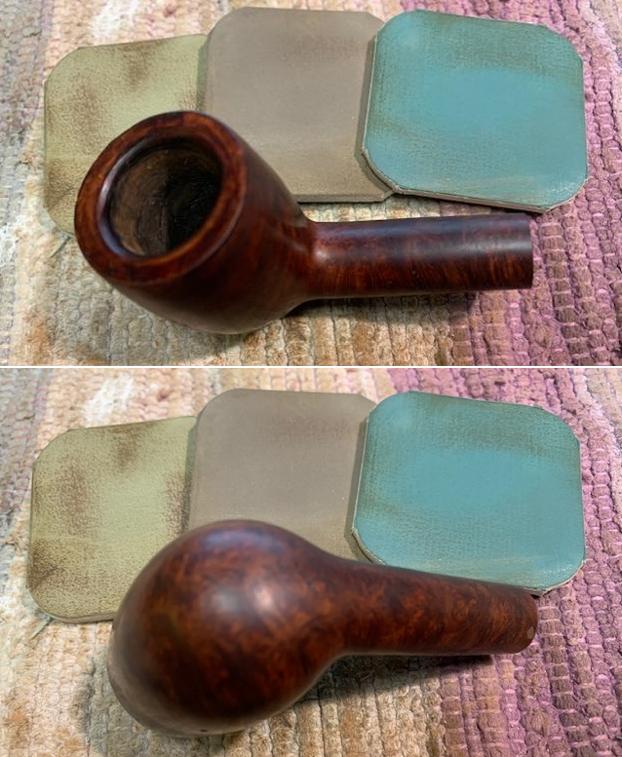
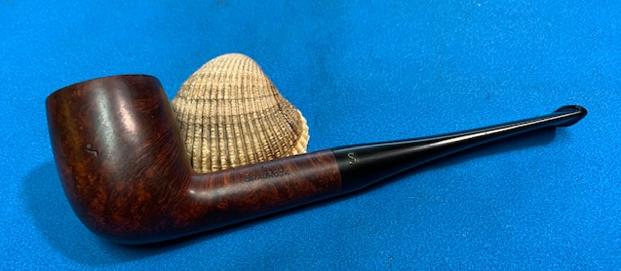
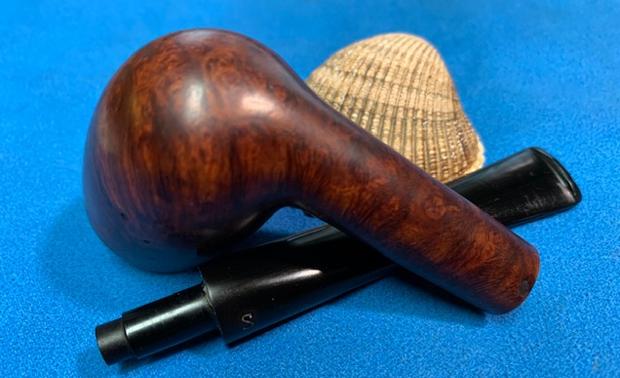
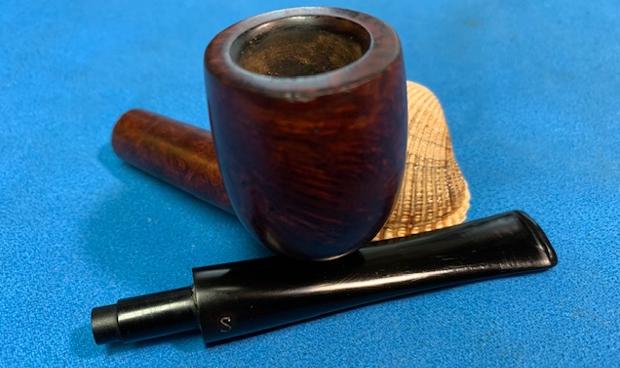
 To finish, I re-attach the stem with the stummel. I mount a cotton cloth buffing wheel on to my hand held rotary tool and applied several coats of carnauba wax over the stummel and the stem. I finished the restoration by giving the pipe a rigorous hand buffing using a microfiber cloth to raise the shine further. The completed pipe, with the natural finish and beautiful grains on the stummel contrasting with the shiny black stem looks lovely, fresh and vibrant; the photographs speak for themselves.
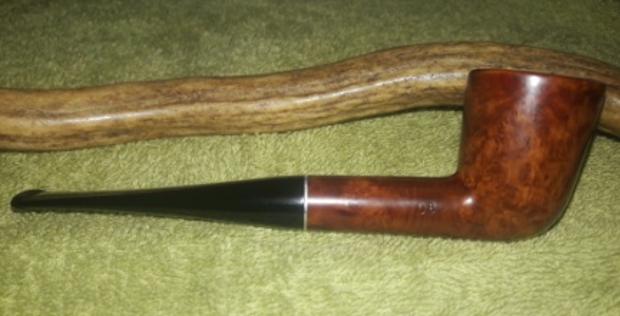
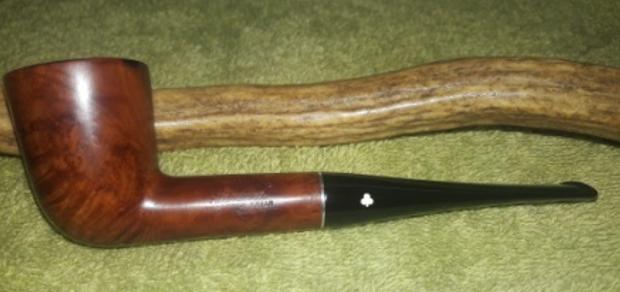


 P.S. The pipe has turned out beautiful, far more luxurious and vibrant in person, than it appears in pictures. The petite size and light weight makes it ideal for a coffee break smoke or enjoying your favorite blend while you are busy at your work table. If this pipe calls out to you, please let me know at deshpandeparesh@yahoo.co.in.
Thank you all for being a part of this journey with me. Praying for the health and safety of you and your loved ones in these troubled times. Stay home, light a pipe and be safe!