Monthly Archives: December 2018

New Life for an Italian Made Folding Pocket Pipe


Blog by Steve Laug

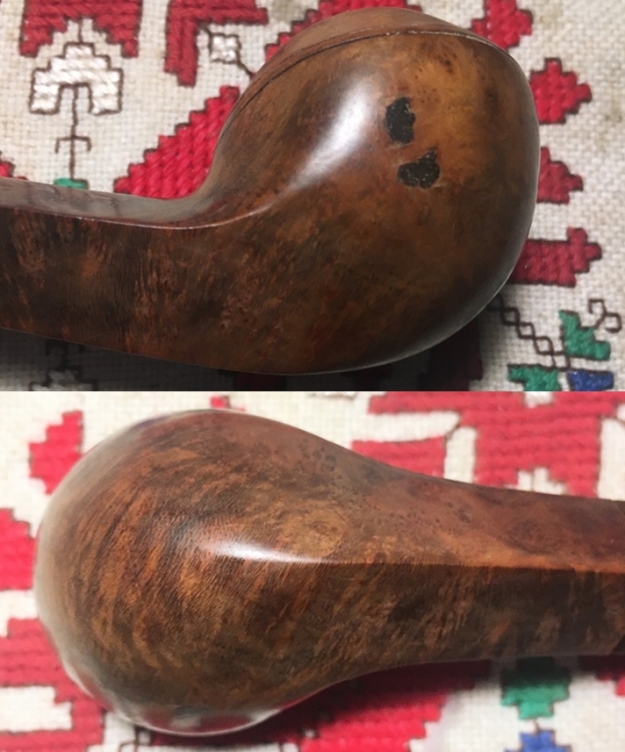
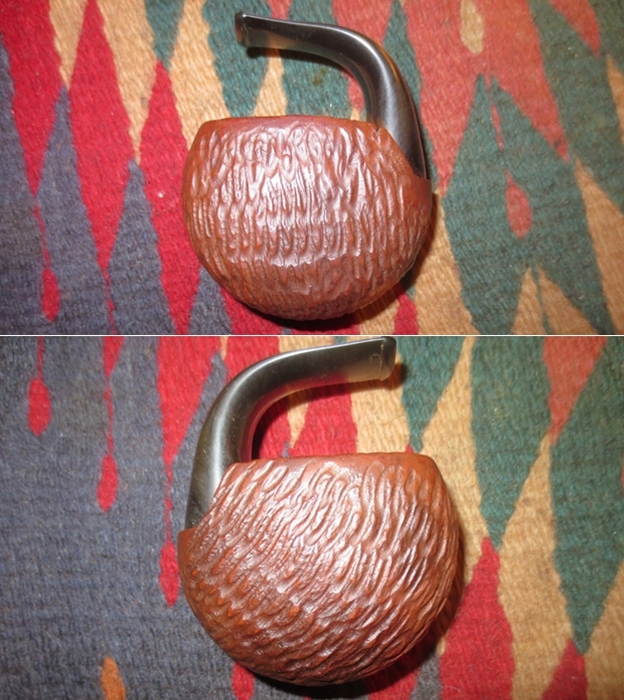
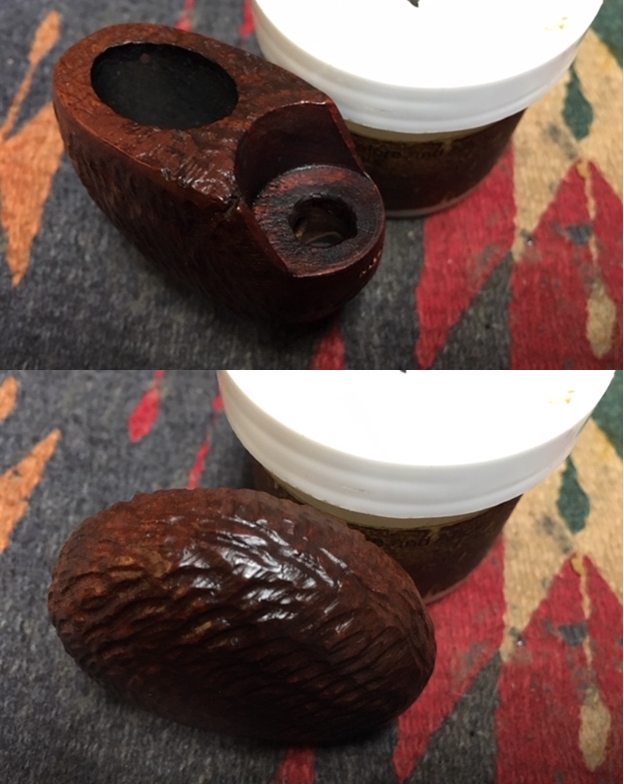
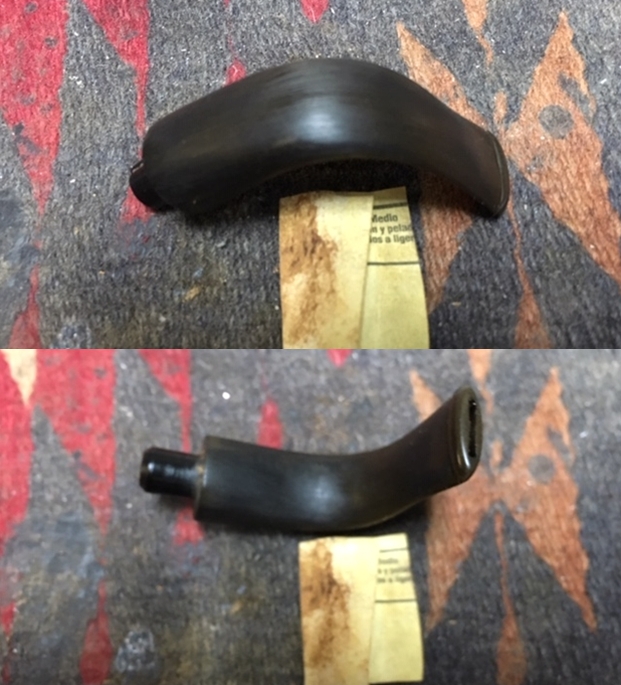
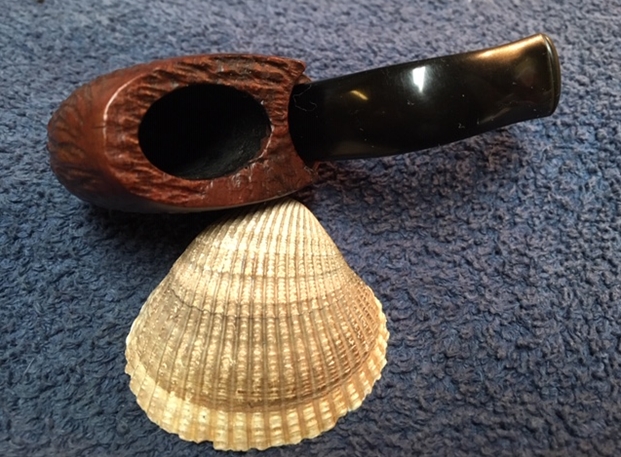
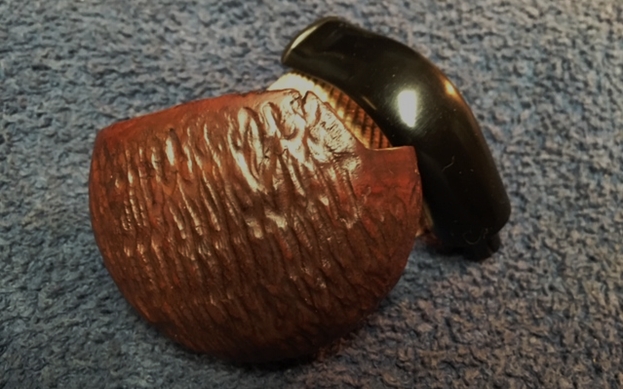
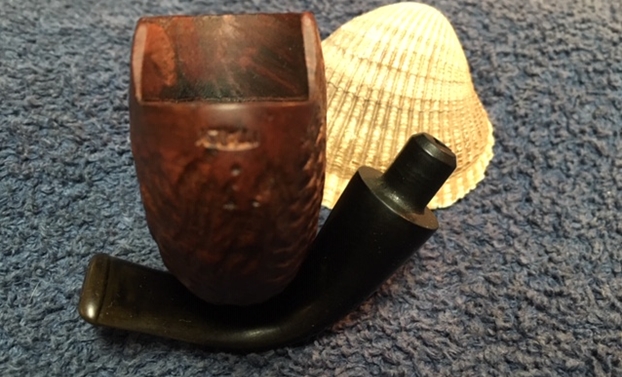
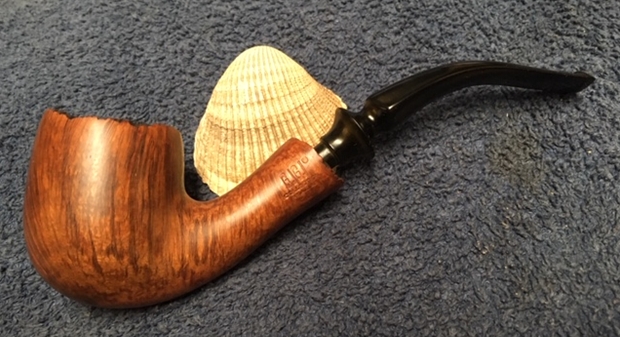
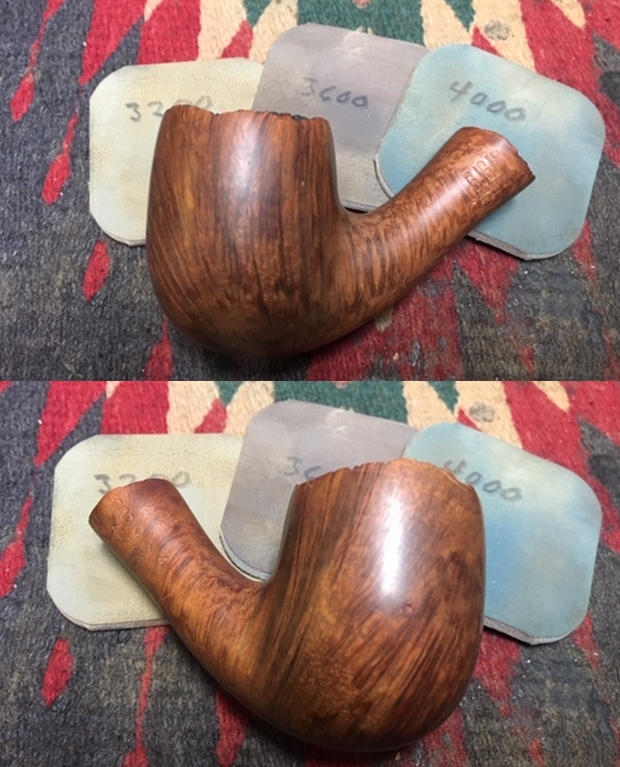
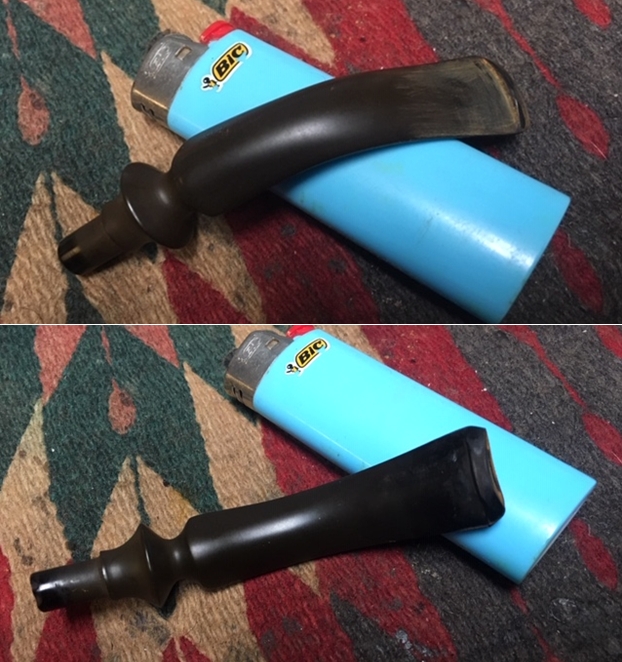
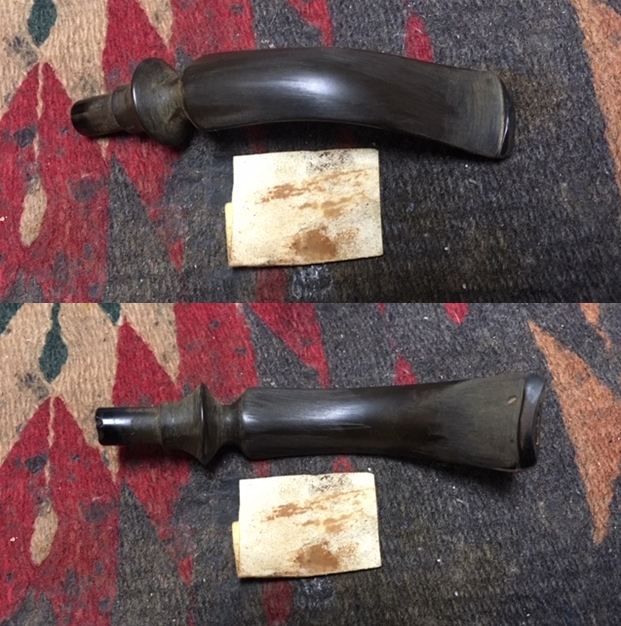
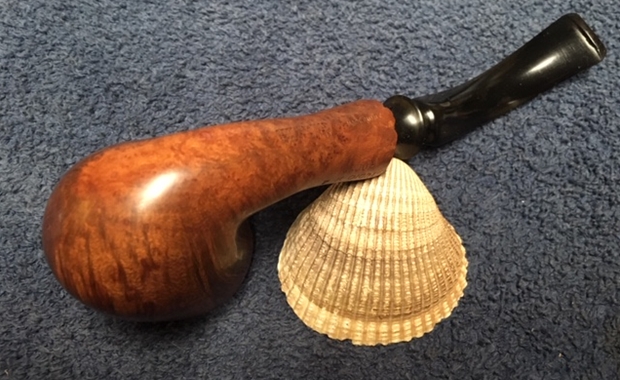
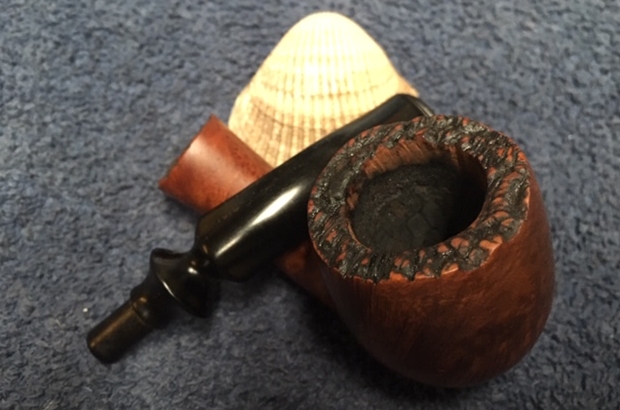
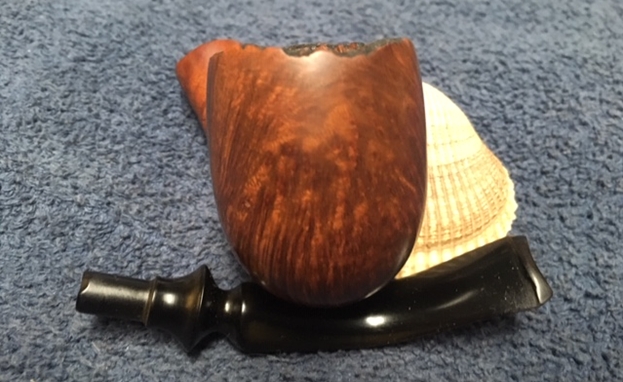
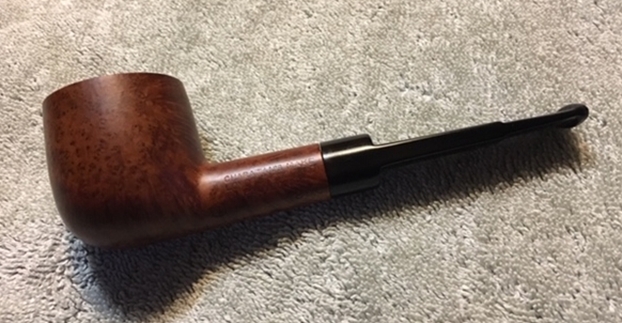
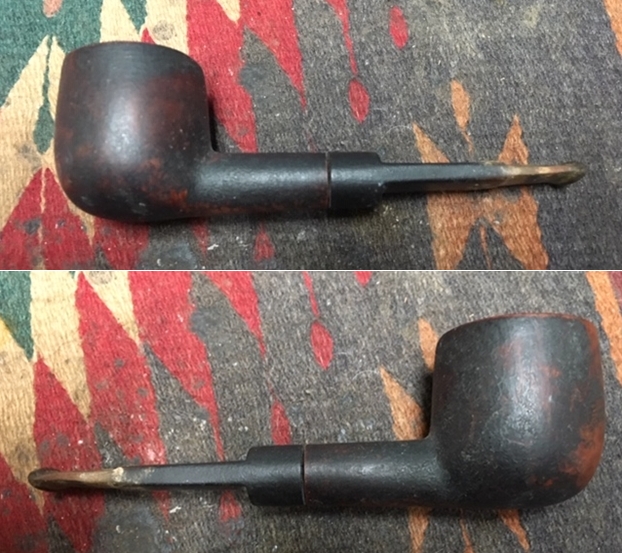
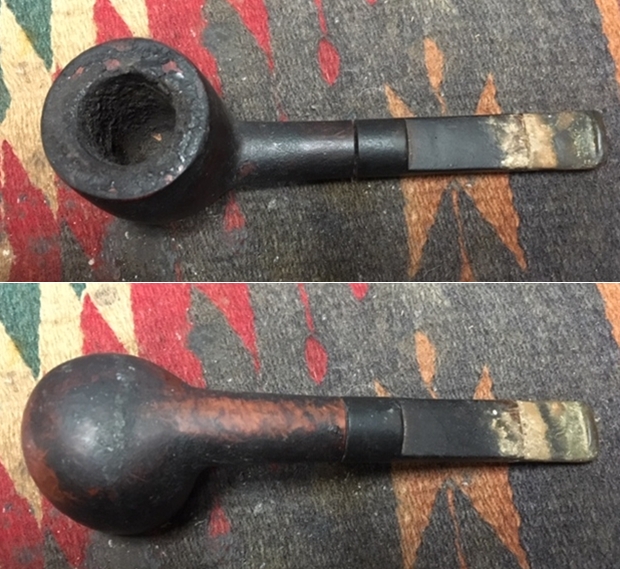
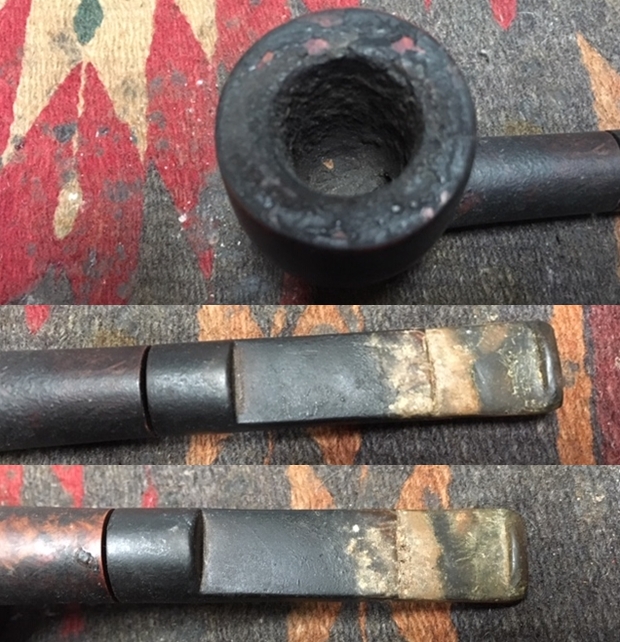
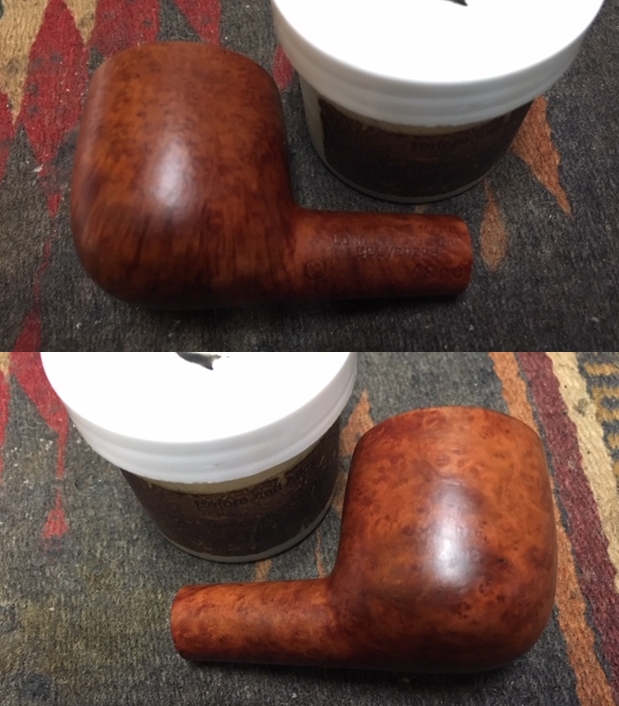
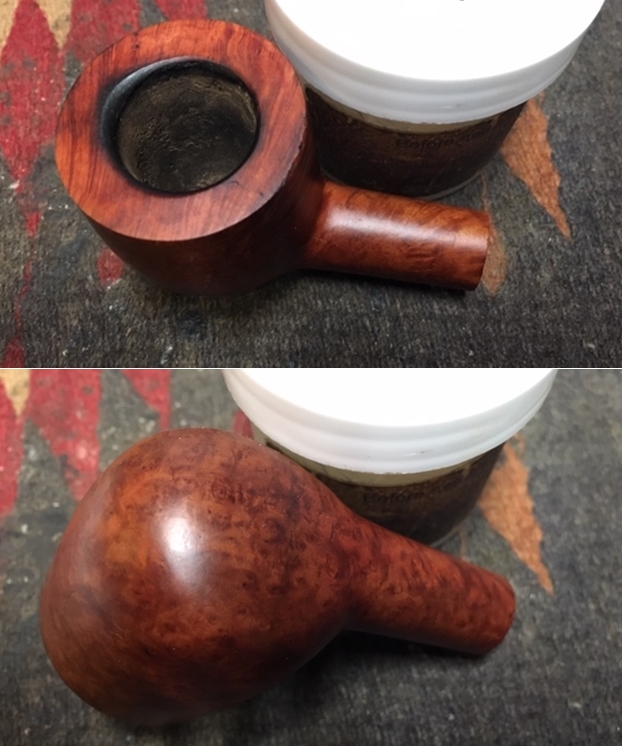
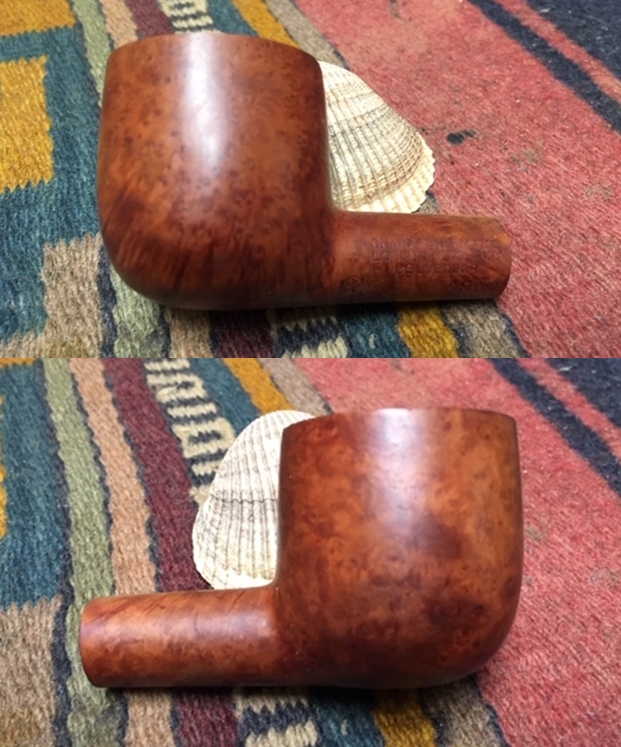
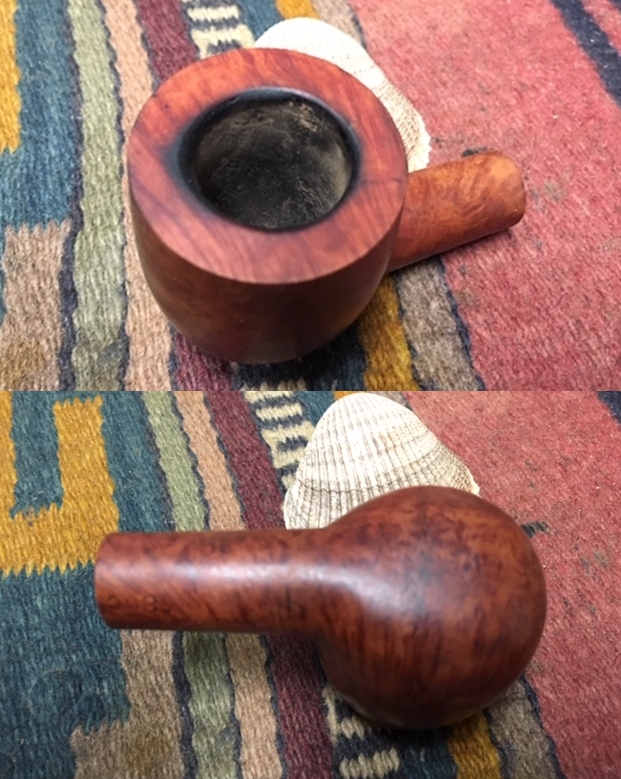
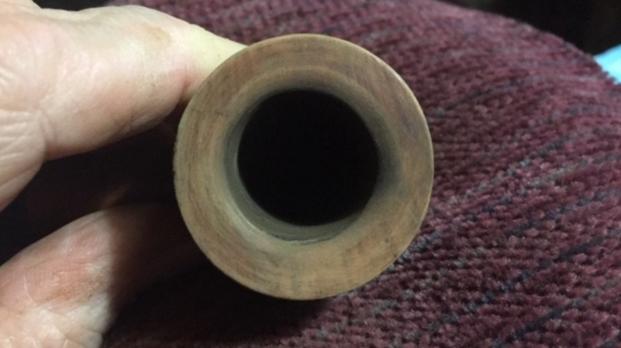
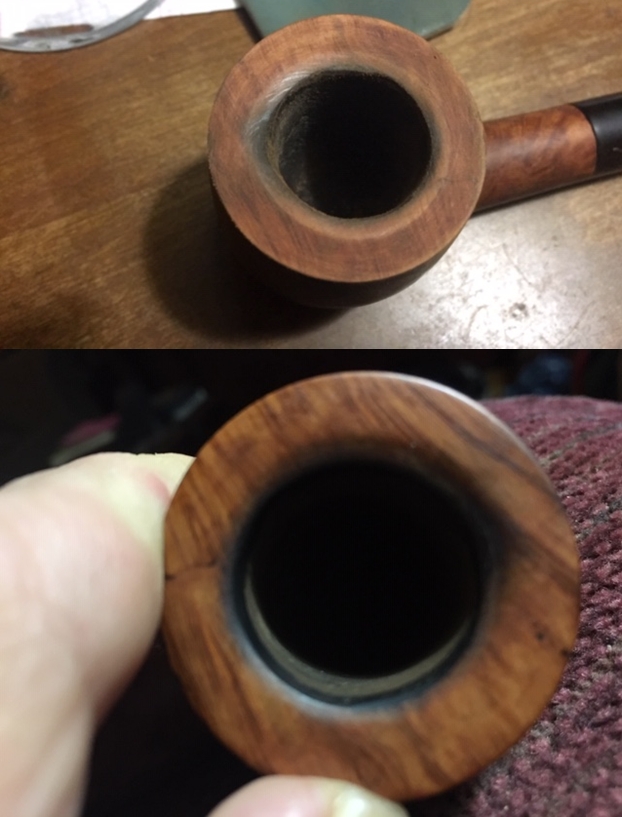
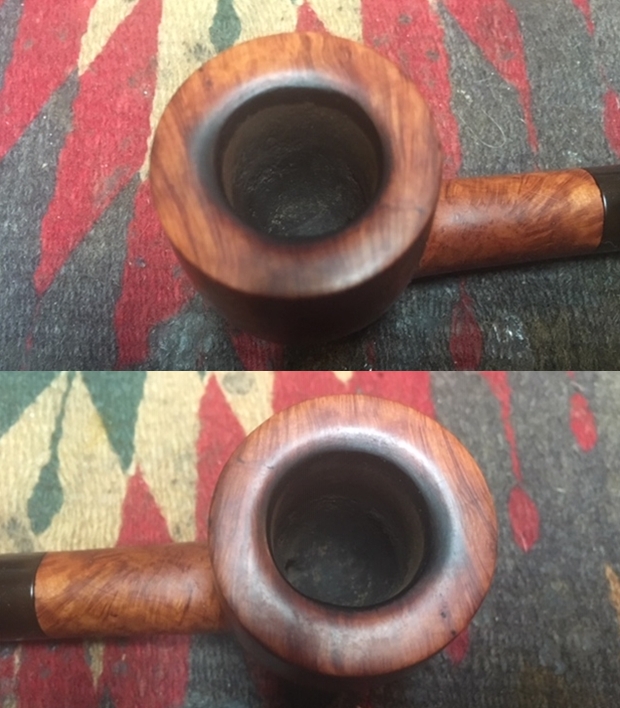
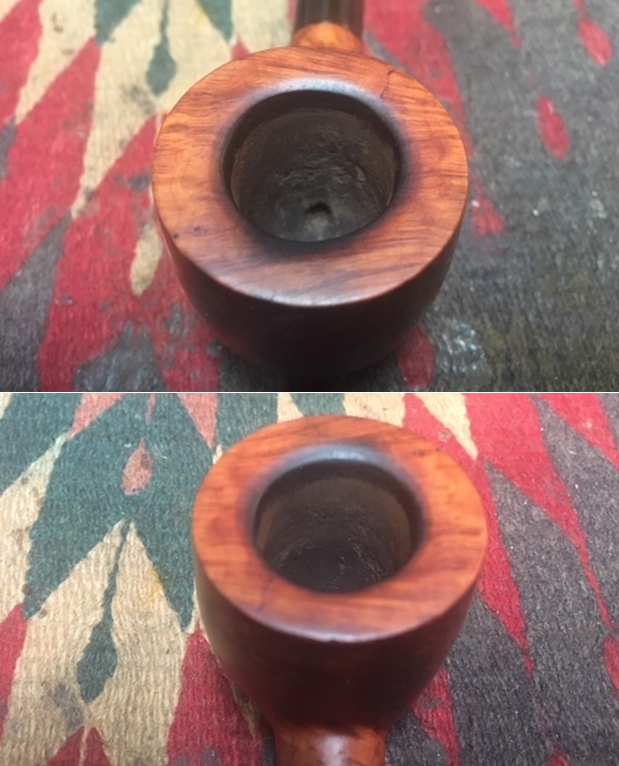
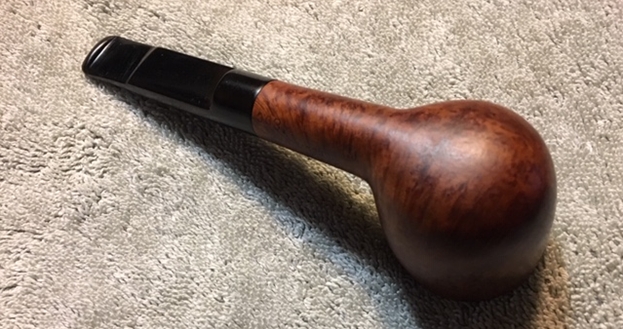
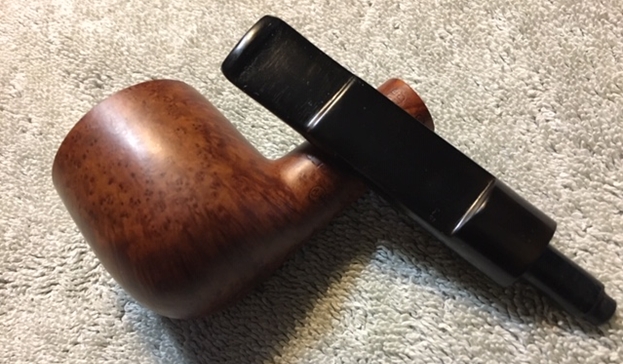
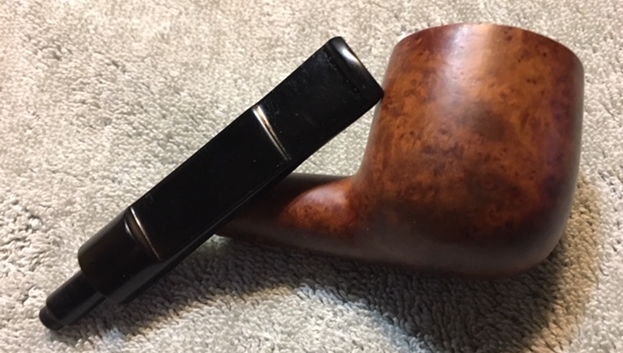
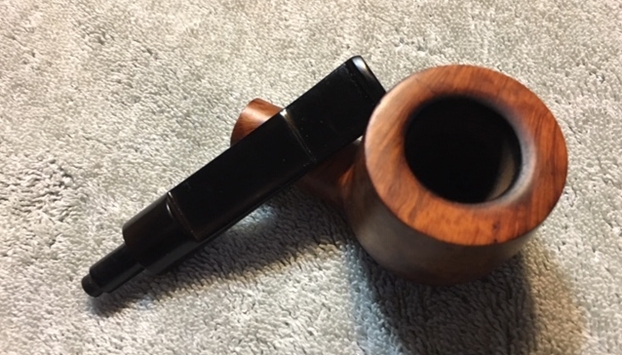
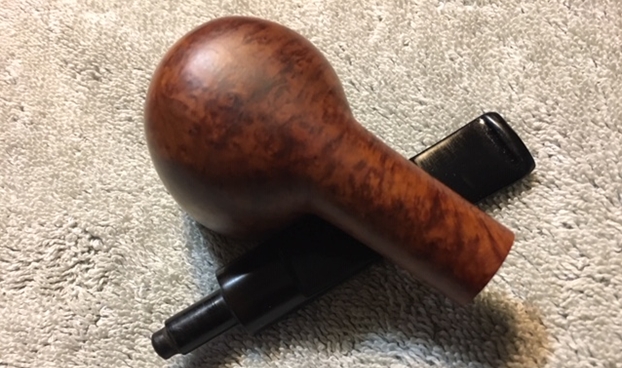
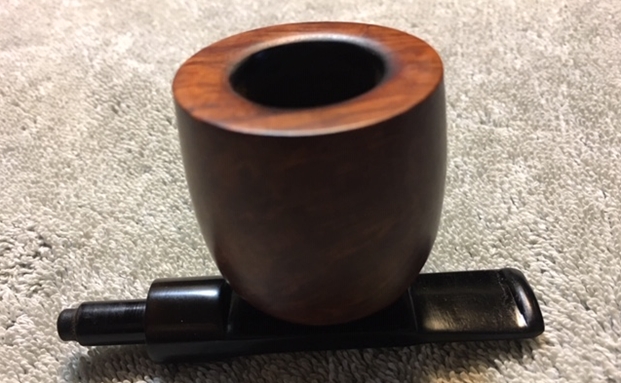
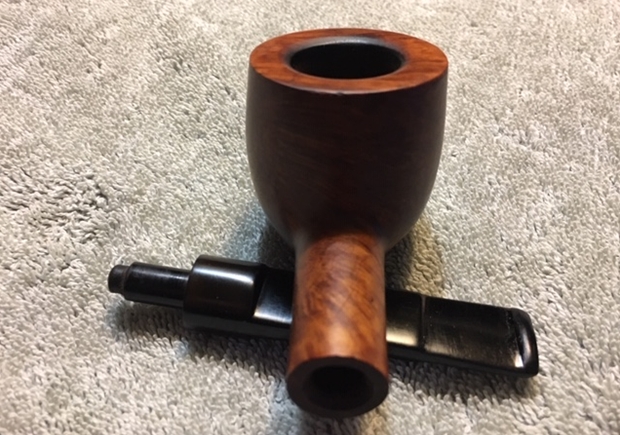
This is the second pipe from on the estate pipes from the pipe shop that had closed here in Vancouver. The entire lot came to me from the estate of an older pipeman whose wife dropped them off at a pipe shop to be cleaned and sold. When the shop closed they came to me. The pipe on the table now was another Italian made rusticated folding pocket pipe. It is stamped ITALY on the end just below the spot where the stem is inserted. There is no other stamping on the bowl. The briar has an interesting rustication pattern to it that flows vertically around the bowl. The bowl had hardly been smoked but the briar was dull and dirty looking. The folding stem is vulcanite and is oxidized. Other than the oxidation it was a clean stem. I took photos of the pipe when I received it. I sent about twenty of the pipes to my brother Jeff in Idaho to work over and clean up. He cleaned up the pipes with his usual thoroughness – reaming the bowl and scrubbing the internals with alcohol, cotton swabs and pipe cleaners. He scrubbed the exterior with Murphy’s Oil Soap to clean off the dust and grime on the finish. When he sent it the pipe was ready to restore. I took photos of the pipe when I unpacked it. The briar was clean and the finish dull. The oxidation on the stem had come to the surface. The first four pictures show the pipe with the stem open and ready to smoke. The next set of photos show the pipe with the stem folded over the top of the bowl for easy stowage in a pocket or a vest pocket. I took a close up photo of the rim top after Jeff had cleaned it up. The look of the rim top and edges is very good. The carved finish on the plateau top is clean and undamaged. He had been able to remove the cake and the lava very well. The bowl looked very good. The plateau on the shank end is also very clean. The stem is also shown and was very clean. The tooth marks on both sides near the button are visible in the photos.The pipe is similar to the Brebbia Version of the Rolex pocket pipe that Paresh posted recently on the blog (https://rebornpipes.com/2018/12/12/sprucing-up-a-sparingly-used-rolex-vest-pipe/). This one is stamped solely Italy so it is not clear who made it.

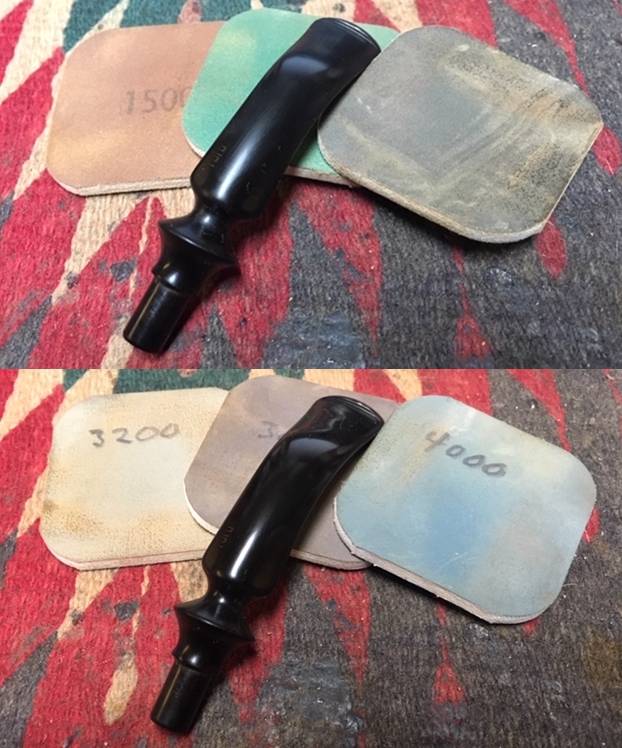
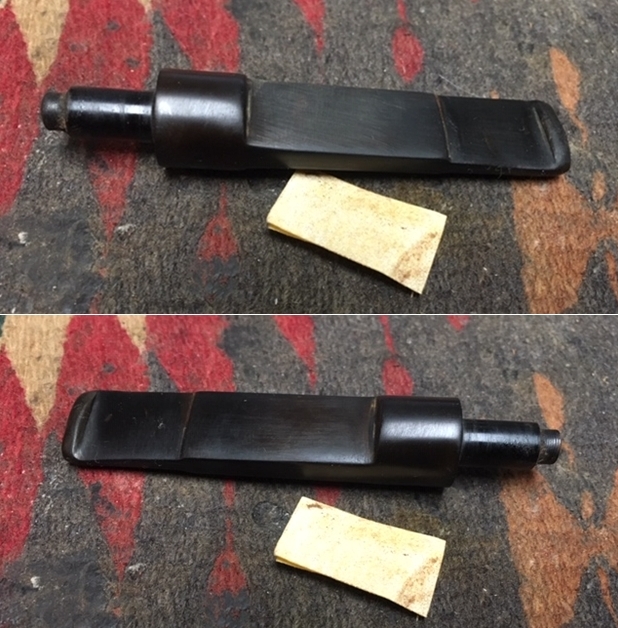
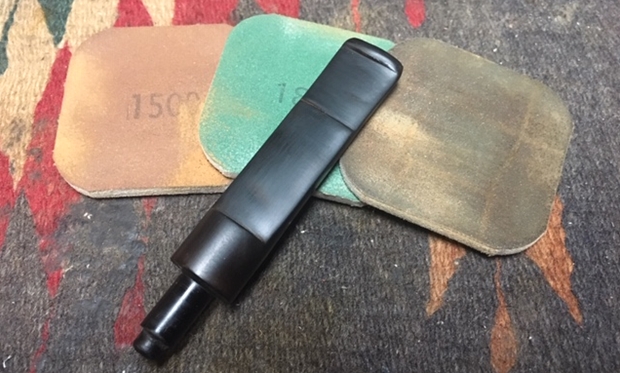
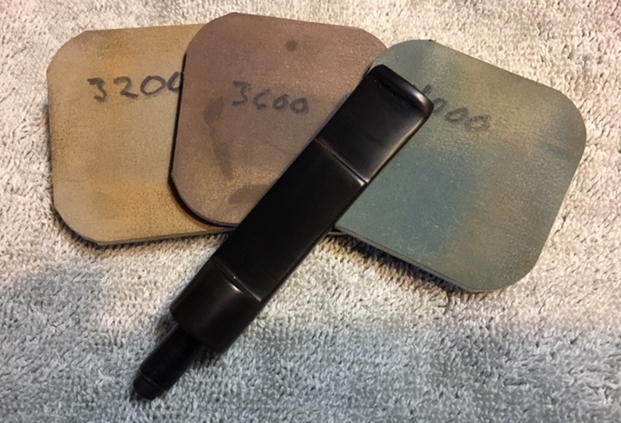
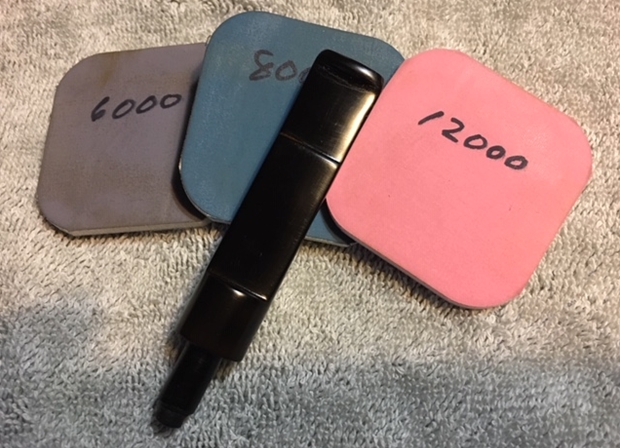
I worked Before & After Restoration Balm into the briar and the plateau on the rim top and the shank end. I worked it into the surface with my fingertips to clean, enliven and protect the wood. I let the balm sit for about 20 minutes and buffed it off with a soft cotton cloth. I took photos of the pipe at this point in the process to show what the bowl looked like at this point. I sanded the tooth marks and the surface of the stem with 220 grit sandpaper to minimize the tooth damage and to remove the oxidation. I was able to remove the majority of the tooth damage other than a few small spots along the button on the top side and the underside. I began the polishing of the stem with with micromesh sanding pads – wet sanding with 1500-2400 and dry sanding them with 3200-12000 grit pads. I wiped the stem down with Obsidian Oil after each pad. When I finished I gave it a final coat of Obsidian Oil and let it dry. The following photos show the stem at this point. I polished the bowl and stem with Blue Diamond to polish out the scratches in the briar and rubber. I gave the bowl and the stem multiple coats of carnauba wax. I buffed the pipe with a clean buffing pad to raise the shine. I hand buffed it with a microfiber cloth to deepen the shine. The pipe polished up pretty nicely. The original patina on the bowl came alive with the buffing and worked well with the polished vulcanite stem. The pipe has a rich look. The finished pipe is shown in the photos below. The shape, finish and flow of the pipe and stem work give the pipe a very classic pocketpipe look. The dimensions of the pipe when folded are Length: 2 ½ inches, Height: 2 ¾ inches, oval bowl that is 1 inch wide x 2 ½ long, Chamber width: 1/2 of an inch, Chamber Length: 1 inch. With the stem unfolded the pipe is Length: 3 ½ inches, Height: 2 inches. The bowl dimensions are the same. Thanks for reading this while I worked on it. It was interesting and unusual piece to restore and I really enjoyed the work.


Restoring a Beat up “Mini Woodart” Pipe #856


Blog by Paresh Deshpande

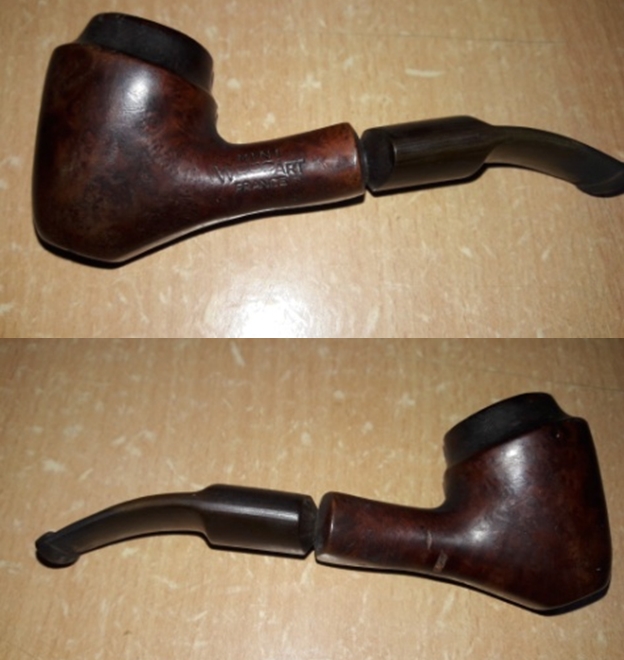
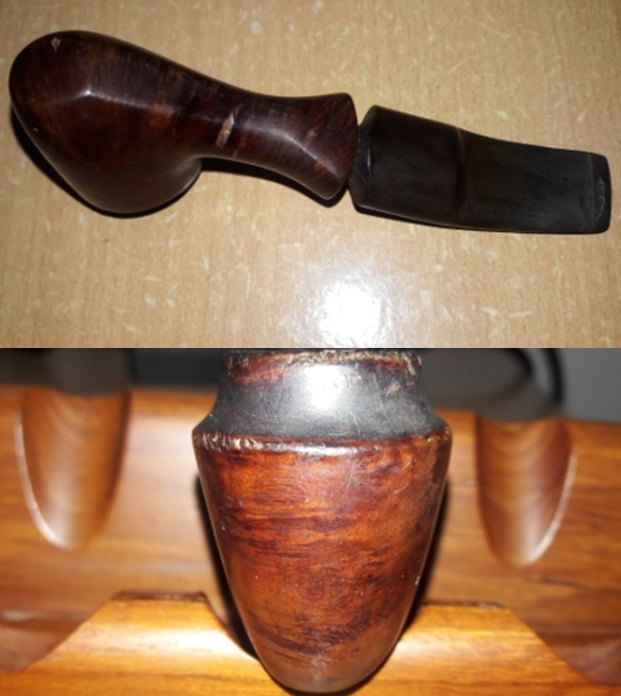
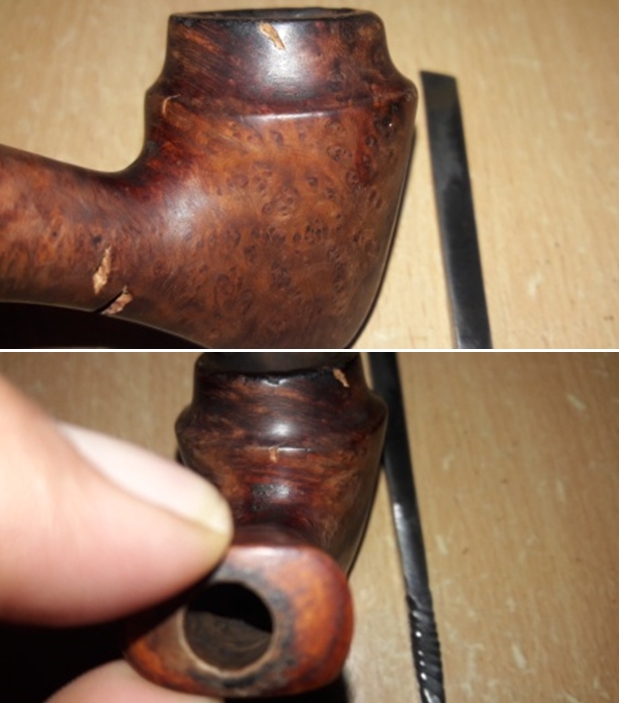
The fourth and the last pipe that I worked on simultaneously was another pipe that I had purchased on eBay along with the Rolex vest pipe. I was attracted to its vase like shape and through all the dirt and grime some beautiful bird’s eye grains peeked and beckoned me for help. The shank end flares out and the chunky, short and broad, 1/4 bent saddle stem with a conical tenon end makes for a very interesting appearance to the overall pipe. The appearance of this beauty was beat, the rim appeared to be damaged and there were a few prominent fills which appeared like blistered wounds. But, nevertheless, it is one handsome, more like cute, looking pipe!!!!

The stummel surface boasted of beautiful swirls of grains interspersed with bird’s eye along the sides of the stummel and shank, while contrasting cross grains adorn the top and bottom of the shank extending to the back and bottom of the stummel. The left hand of the shank is stamped as “MINI” over “WOODART” over “FRANCE”. The bottom of the flared out shank end bears the model number “# 856”. The saddle top of the stem bears the logo of “W” in an oval. This stem logo was revealed later after the stem had been soaked in hydrogen peroxide solution.I could not find any information about this brand on Pipedia.com or rebornpipes or anywhere on the internet. However Pipephil.eu does make a mention of this brand and even has a picture of a pipe with similar stampings (http://www.pipephil.eu/logos/en/logo-w3.html#woodart), but no further information was available!

INITIAL VISUAL INSPECTION
As I had noted earlier, this little pipe was in a sorry and battered state. There is not a single surface on the stummel which does not have either a dent or a fill or a chipped surface. The stummel is covered in oils, tars, sticky grime and dust, through which one can make out the beautiful grains all round. The overflow of lava has not only covered the area between the narrow top portion and rest of the bowl, but has spilled over to the back of the bowl and accumulated in the area where the shank meets the bowl. There are a large number of dents, dings and scratches prominently seen on the edge below the neck of the vase like stummel shape. There are a few major fills in the stummel, the most prominent ones being to the right side on the shank. These will need to be addressed. The bowl is narrow and tapers down towards the draught hole. The chamber has a thin layer of cake, but the appearance indicates that there may be issues with the walls of the chamber. The mortise is full of oils, tars and gunk and restricts air flow. The rim top is where maximum damage is seen through the overflowing lava. The inner and outer edge of the rim is peppered with dings, dents and chips, a result of striking the rim edge against a hard surface while cleaning after a smoke. The bowl is completely out of round with undefined rim edges. This will have to be taken care of without losing too much of briar estate and will be a challenge to achieve desired results. The vulcanite stem is so heavily oxidized that it appears brown in color!!!! The upper surface of the stem has very light tooth chatter towards the button end while the lower surface has a few deep bite marks with damage to the lip edge. This issue should not be a major headache to address. The tenon is filled with oils and tars, restricting flow of air through the airway.THE PROCESS
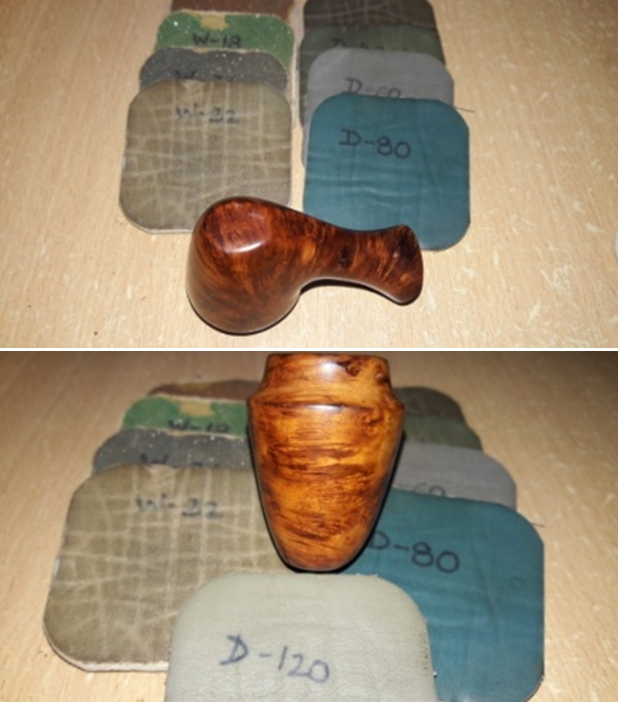
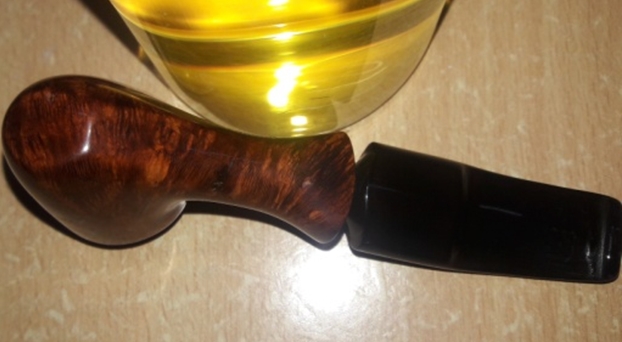
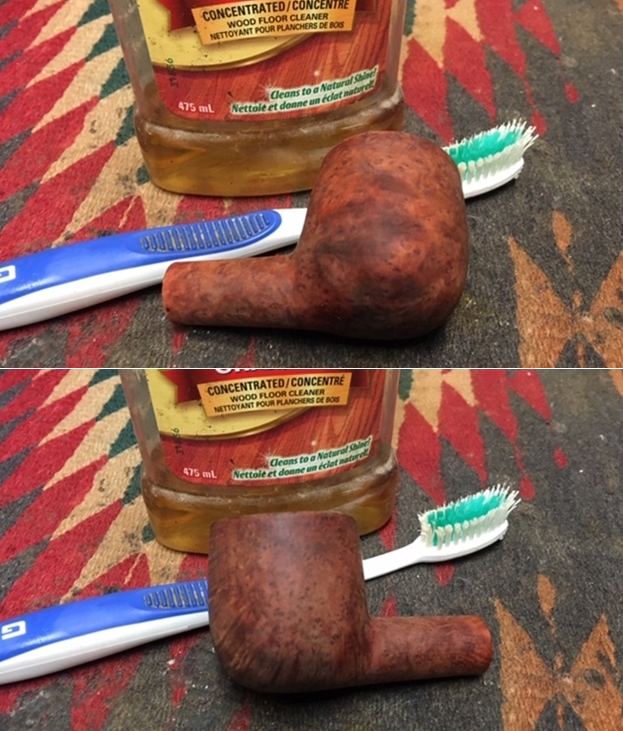
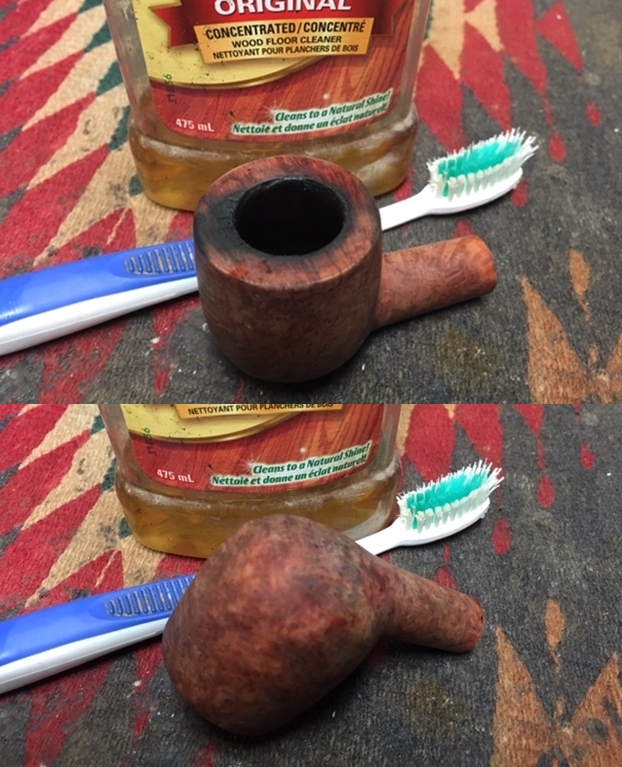
I started this project by flaming both the surfaces of the stem with a Bic lighter to raise the tooth chatter and bite marks to the surface. I followed it by immersing the stem in to the solution of hydrogen peroxide and hot water. Within 20 minutes the stem color changed to greenish brown, a sign indicating that the oxidation has been pulled to the surface. This also revealed the stem logo of “W” encircled in an oval, on the top surface.After the oxidation was raised to the surface, I removed the stem and wiped it with paper napkins. I ran a couple of pipe cleaners through the airway to clean it. Once I was satisfied that the internals of the stem are clean, with a 180 grit paper, I sand the stem surface to get rid of the raised oxidation. I followed it by filling the deeper bite marks and lip damage with a mixture of activated charcoal and CA superglue and set it aside to cure. While the stem was curing, I worked on the stummel. The small size of the chamber dictated that I could only use my smaller sized fabricated knife to remove as much cake as possible. I further sand the chamber walls with a piece of 150 grit sand paper wound on a thin but dry bamboo twig (which are abundant in the jungles in this part of my country) attached with a rubber band. This was followed by 220 and 400 grit sand paper and now we have a smooth and even surface on the walls of the chamber. This process exposed the walls of the chamber and confirmed my initial apprehensions. The chamber walls show a number of heat fissures on both the front wall as well as above the draught hole. I shall address this issue at the end by coating the chamber wall with a mixture of activated charcoal and yogurt. I wiped the insides of the chamber with a cotton pad dipped in isopropyl alcohol. I cleaned the mortise using hard bristled and regular pipe cleaners, dental spatula and shank brush dipped in isopropyl alcohol. I continued with the cleaning of the chamber by giving it a salt and alcohol treatment. I packed the chamber, just below the rim, with cotton balls. I stretched a cotton ball into a thick wick, tapering at one end, and inserted it in to the shank and pushed it as far inside as I could using a straightened paper clip. I find that cotton balls work just fine in drawing out all the tars and smells from the mortise and the bowl. I topped the bowl with alcohol again after 20 minutes when the alcohol level had gone down and set it aside overnight for the cotton and alcohol to do its intended job. The next day, the cotton and alcohol had fulfilled its intended task. I removed the cotton balls and ran pipe cleaners through the mortise to clean out all the loosened tars and gunk. The internals of the stummel is now clean and fresh. I set the stummel aside to dry out. While the stummel was drying, I worked the stem. I covered the stamping on the stem with whitener using a whitener pen. The filling of charcoal and CA superglue had cured and using a needle file, I sand the filling to match the surface of the stem. For a better blending, I further sanded the entire stem with 220 followed by 400 and 800 grit sand paper. This helps to reduce the sanding marks left behind by the more abrasive 220 grit paper. To bring a deep shine to the vulcanite stem, I went through the complete set of micromesh pads, wet sanding with 1500 to 2400 grit pads and dry sanding with 3200 to 12000 grit pads. I wiped the stem with alcohol after each pad and rubbed it down with Extra Virgin Olive oil. The internals of the stem was cleaned out using alcohol and pipe cleaners. The finished stem is shown below. With a sharp, thin knife I removed the entire old and loosened fills and cleaned the surface with alcohol. These are now ready to take on a fresh fill. Now, it was the turn of the stummel to get cleaned up. Using a hard bristled tooth brush dipped in undiluted Murphy’s oil soap, I very deliberately scrubbed the stummel, cleaning the surface thoroughly. I cleaned the rim too. However, the grime, oils and tars covering the stummel and rim surface was so stubborn that I could not get rid of it completely.  The stummel and rim top was dried using paper napkins and soft cotton cloth. I mixed briar dust and CA superglue and filled all the major gashes while the minor ones were filled with clear CA superglue. I set the stummel aside to dry the filling.After the filling had dried out overnight, I sand the filling with a flat head needle file to match the surface of the stummel.Before sanding the entire stummel to match the fills and clean the stubborn grime, I decided to address the out of round and charred rim top by topping the rim top on a 220 grit sand paper. I was careful not to sand too much to maintain the original profile of the stummel. Topping also helped in reducing the dents and chipping to the outer edge of the rim. The rim top, after topping, looks much better.However, the inner edge profile was still uneven giving the bowl an out of round appearance. Also the outer rim edge had a few dents, chips and scratches. I addressed these issues by creating a bevel on the inner and outer edge of the rim. The results are pleasing to the eye.The issue of damaged rim was addressed to a great extent at this stage. However, the issue of addressing the large number of dent, dings and scratches prominently seen on the edge below the neck of the vase-like stummel shape still remains. I decided to reduce/ eliminate, if possible, these dents and dings by steaming them out. I heated my fabricated knife over the flame of a candle, placed a wet Turkish hand towel over the marked areas and steamed out the dents by placing the heated knife over the towel. Though some dents were still visible, these were greatly reduced when compared to before steaming.Thereafter began the arduous, painstaking and time consuming process of matching the repairs by sanding the entire stummel with 220 followed by 400 and 800 grit sand papers. I was able to match all the repairs and dents and dings on the lower edge of the stummel by upward sanding motion while moving up from heal and downward motions while moving down from the rim top. I was satisfied with the appearance of the stummel after this sanding. I wanted to highlight the grains seen and further blend all the repairs carried out to the stummel. To achieve this aim, I sand down the stummel and rim top using micromesh pads, wet sanding with 1500 to 2400 grit pads and dry sanding with 3200 to 12000 grit pads. The stummel now has a deep shine with grains popping out with magnificent contrast. I rub a small quantity of “Before and After Restoration Balm” in to briar and let it rest for a few minutes. The balm almost immediately works its magic and the briar now has a nice vibrant appearance. I further buff it with a horse hair shoe brush. To finish, I re-attach the stem with the stummel. I mount a cotton cloth buffing wheel on to the Dremel (actually it is not the brand machine, but a local machine which is similar).  I set the speed at about half of the full power and applied White Diamond compound to the entire pipe. I wiped/ buffed the pipe with a soft cotton cloth to clear it of any leftover compound dust. I then mounted another cotton cloth wheel on to the polishing machine and applied several coats of carnauba wax. I finished the restoration by giving the entire pipe a rigorous hand buffing using a microfiber cloth to raise the shine further.The completed pipe looks lovely, fresh and vibrant; the photographs speak for themselves. The beauty, size and shape of this pipe compel me to wonder if this pipe could once have been nestled in the hands of a lovely lady in Paris. If only the pipe could tell the story of its journey till date…Cheers!! PS: – Once I had finished with all the buffing and polishing, only one issue remained to be addressed; heat fissures on the walls of the chamber. I coated the walls of the chamber with a mixture of activated charcoal and yogurt. Once dried, this will speed up the formation of cake and protect the chamber from a burn out.

Sprucing up a Sparingly Used “Rolex” Vest Pipe


Blog by Paresh Deshpande

The third pipe that I worked on simultaneously is a small folding “Rolex” vest or pocket pipe which I had purchased on eBay. I generally avoid making purchases on eBay as I am not sure as to what I shall land up with. I know there are all kinds of checks and balances on the site to prevent fraudulent transactions and various guarantees protecting the buyer, but still the fear of unknown prevents me from making purchases. However, in this case, I found the pipe interesting with the asking price to my liking and the seller had advertised it as rarely used and from the pictures, it appeared so. I decided to add it to my collection and made the purchase.

A long wait of 43 days followed and finally the pipe was received by my wife as I was away at my duty station. She immediately gave me a call to confirm receipt and sent me pictures of the pipe. She confirmed that the received pipe was indeed in excellent condition and would not require much work. This coming from her allayed all my fears about the overall transaction. A few months later, I went on some well earned leave and on return bought it with me to restore.

This round and flattened pipe has vertical thinly wired rustications running from the heel of pipe to the rim. The right side of the surface has a smooth surface in the center which bears the only stamping seen on this pipe. It is stamped as “ROLEX” over “BRUYERE” over “ITALY”. The bottom of the smooth surface has a stamp picturing a gnome. There is no other stamp on the stummel or the stem.I searched the internet for some information on this pipe and also on dating this pipe. I visited Pipedia and learnt that Rolex vest pipes were made by Brebbia of Italy. However, I hit a jackpot when I visited rebornpipes which really has a wealth of information on nearly every pipe ever made and served on a platter!!! It is here that I became aware that it is the picture of a gnome that adorns this pipe and that the gnome was the logo Brebbia used to put on its pipes from 1953 to 1956 (https://rebornpipes.com/2016/08/24/an-interesting-brebbia-silver-as1-square-shank-brandy/). Thus, is it possible to assume that this Rolex vest pipe was made between the years 1953 to 1956?????

INITIAL VISUAL INSPECTION
As is commonly seen on rusticated or sandblasted pipes, the crevices in these will be filled with dust, dirt, oils, tars and grime from all the years of smoking and storage. This Rolex vest pipe is no exception to this observation. The tight vertical rustications are filled with dust. The fact that the vertical rustications are dirty and filled with dirt is accentuated more due to a very dark reddish brown stain on the smooth patch on the stummel which bears all the stampings seen on this pipe. The briar is looking nice and a little TLC will further enhance its appeal.The bowl is oval and pinched at either end along the length of the pipe. The chamber is filled with a thin layer of cake which should make for an easy clean. However, the shape of the bowl and chamber will prevent the use of a regular pipe reamer. I would not be able to even sand it with a sand paper pinched between my fingers. Improvisations will have to be made to remove the cake build up. The short mortise is relatively clean and air flow is open and free. The rim top has the same thin wired rustications and is filled with dirt and dust. The inner and outer edge of the rim is in pristine condition with no dings or dents. The full bent vulcanite stem is so heavily oxidized that it appears greenish brown in color!!!! There are two major bite marks on the lower surface of the stem. The upper surface has a little debris stuck near the bottom of the lip. These issues should not be a major headache to address. The lip edge on both side is crisp and without any damage. The quality of vulcanite is good.THE PROCESS
As I had written in my write-up on John Bessai, I had learnt the use of Hydrogen Peroxide and hot water solution to raise the stem oxidation to the surface. Since I had decided to use this method, I had immersed stem of this pipe along with the stems of the John Bessai and Mini WoodArt pipes to make maximum use of the solution. Before I immersed this stem in the solution, I flamed both the surfaces of the stem with the flame of a Bic lighter. This helped in raising the deep bite marks on the lower side of the stem to the surface. The result of this flaming was so fantastic, that there were little or no traces of any tooth indentation on the lower and upper surface. This was followed by immersing the stem in to hydrogen peroxide solution. Within 20 minutes the stem color changed to greenish brown, a sign indicating that the oxidation has been pulled to the surface.I used a 180 grit sand paper to sand out the raised oxidation and rubbed a little Extra Virgin Olive oil in to the stem surface. I wiped the stem again and worked on it with micromesh sanding pads – wet sanding it with 1500-2400 grit pads and dry sanding with 3200-12000 grit pads. Between each set of three pads I rubbed the stem down with extra Virgin Olive Oil and also gave it a final rubdown after the 12000 grit pad. I set the stem aside to dry while I worked on the bowl. I cleaned the stem airway with pipe cleaners dipped in isopropyl alcohol. I removed the cake from the chamber by scraping it with my smaller sized fabricated knife. I found the chamber to be solid and without any heat fissures or cracks. To finish the chamber, I wound a piece of 150 grit sand on a thin but dry bamboo twig (which are abundant in the jungles in this part of my country) attached with a rubber band, and used it to sand the inner walls. This was followed by 220 and 400 grit sand paper and now we have a smooth and even surface on the walls of the chamber, ready for taking on a fresh layering of carbon cake!! This was followed by cleaning the short mortise with qtips, pipe cleaners and shank brush dipped in isopropyl alcohol. This further eliminated all the traces of old smells from previous usage.

Now, it was the turn of the stummel to get cleaned up. Using a hard bristled tooth brush dipped in undiluted Murphy’s oil soap, I very deliberately scrubbed through all the vertical rustications, cleaning them thoroughly. I cleaned the rim too. The stummel and rim top was dried using paper napkins and soft cotton cloth. I set the stummel aside to dry out naturally. I started work on the stummel which has dried by now. I rub a small quantity of “Before and After Restoration Balm” in to briar and let it rest for a few minutes. The balm almost immediately works its magic and the briar now has a nice vibrant appearance. I further buff it with a horse hair shoe brush. To finish, I re-attach the stem with the stummel. I mounted a cotton cloth buffing wheel to the Dremel (actually it is not the brand machine, but a local machine which is similar). I set the speed at about half of the full power and applied White Diamond compound to the entire pipe. I wiped/ buffed the pipe with a soft cotton cloth to clear it of any leftover compound dust. I then mounted another cotton cloth wheel on to the polishing machine and applied several coats of carnauba wax. I finished the restoration by giving the entire pipe a rigorous hand buffing using a microfiber cloth to raise the shine further.The completed pipe looks lovely, fresh and vibrant; the photographs speak for themselves. Thank you for having the patience to reach this far while reading the write up.

Rejuvenating a Captivating Savinelli Punto Oro Corallo di mare 510ks Rusticated Bulldog


Blog by Dal Stanton

This exquisite line of Savinelli Punto Oro Corallo di mare came to me in a single Lot of 66 that I acquired off the eBay auction block.  As I’ve referenced several times before, the Lot of 66 has been very good to me and this pipe confirms this again.  I included a picture of the Lot of 66 below with an arrow marking the Savinelli.  Looking at this picture reminds me of many pipes that have found new stewards and some that have made it to my own personal collection!  Only one regret – the two clay pipes immediately below the Savinelli Punto Oro Bulldog did not make it in the transit from the seller.  Overall, I am very pleased!This Savinelli Punto Oro got the attention of a Texan named Charles in my online collection called For ‘Pipe Dreamers’ Only!.  He contacted me about commissioning the pipe and was hoping to get it by his 50th birthday on December 2.  My first thought was, what a great present for yourself!  Sweet!  Secondly, I thought about the other commissioned pipes in the queue for which other pipe men and women were patiently waiting.  Regretfully, I explained this to Charles and he insisted that I not bump anyone out of the line – I appreciated that!  As I’ve worked the queue down, I have communicated to Charles letting him know the progress and I told him that I knew I wouldn’t have it to him by his birthday, December 2, but I felt very confident that he could celebrate the New Year with this Savinelli.  Well, tomorrow is December 2, and the Savinelli is now on my worktable.  Here are pictures that drew Charles’ interest and why he was willing to wait – by the way, Happy Birthday Charles! The nomenclature is stamped on a smooth briar panel on the lower left of the diamond shank.  It reads, ‘SAVINELLI’ [over] PUNTO ORO [over] 510ks [over] ITALY.  To the left of the COM is the Savinelli stamp.  The stem has a single dot on the upper left panel of the diamond saddle stem. Ever since I started restoring pipes and came into contact with my first Savinelli restoration, a Tortuga, I have appreciated this Italian pipe name.  Before and after WW II, when Italian pipe production was known more for volume than for quality, and not considered by many in the same league with other European pipe makers, Achille Savinelli Jr.’s gravitas took shape to make Savinelli one of the premier names in pipe making today.  This clip from the Pipedia Savinelli article summarizes this well:

Savinelli Pipes began production in 1948 and, although the pipes were of a superior quality and unique in their aesthetic, the brand wasn’t an immediate success. Few new brands are. It takes time for the public to catch on. Retailers were skeptical of placing Italian pipes alongside their best sellers from England or France, and customers, in turn, were hesitant to purchase a Savinelli over pipes by already established, foreign brands. Achille Jr. stood by his product, however; he knew it was only a matter of time before the world realized that these pipes were of a far superior quality, capable of competing with even the most well-established pipe manufacturers in the world. As it turns out, he was right. In less than a year, Savinelli pipes gained prestige in markets all across the world—heralded for their delicate balance of innovation and tradition, of form and function. Savinelli pipes were placed alongside the likes of Dunhill and Comoy’s in tobacconists from the United States to Europe, and, in time, this exposure modified Italy’s reputation; it was not only the premier exporter of briar, but now a premium source of fine briar pipes. (Picture courtesy of Doug Vliatchka)

The shape number listed as a 510ks is an interesting version of the well-known and loved Bulldog shape.  I’ve taken a clip of the 2017 Savinelli Shape chart from the middle of the chart.  This section conveniently shows the 510ks in the center, 3rd pipe down.  Comparing this style of Bulldog to the other two Savinelli Bulldog styles (623 & 624ks) pictured below, the right lower two pipes, the differences are interesting.  The 623 and 624ks are more what I would call traditional or classic Bulldog shapes.  Whereas the 510ks, is taller with a more distinct volcano shaped cone.  It’s an interesting variation and I like it.

The Punto Oro (Gold Point) name is a higher quality line produced by Savinelli.  From the same Pipedia article above, the discussion was the quality of briar used in the manufacturing of Savinelli pipes.  This helpful anecdotal information about the Punto Oro line was made in the article:

This focus on quality begins with sorting, which is conducted in two distinct steps. In the first stage, an artisan sorts through a massive pile of briar blocks, the quality of which can range from complete scrap to pristine gems destined to become Punto Oros or Giubileos.

Perhaps the most interesting information I found on Pipedia was the special Punto Oro edition that Lot of 66 had provided me – the Corallo di mare, or ‘Coral of the Sea’ line.  Of course, the most striking and unique characteristic of this pipe is the amazingly pronounced and expressive rusticated light hued briar.  Pipedia provided an undated page of a catalog of the Savinelli Punto Oro Corallo di mare line.  I include the entire page here:The information block on the bottom is a gold mine of information about the characteristics of this unique briar.   It is described as porous like Block Meerschaum – which is interesting because when I first saw this pipe, I mistook it for Meerschaum until I got a closer look. As with Meerschaum, the claim is that this briar does not need to be broken in.  Yet, most interesting to me was the description of the pigmentation also being like Meerschaum – the more one smokes it the more the pipe will darken into the honey yellow patina.  Fascinating!  This bit of information gave me a new perspective and appreciation for the vintage of the Savinelli Punto Oro Corallo di mare that Charles had commissioned.  The patina on the pipe was a sign of its aging and vintage, as with a Meerschaum pipe.  I take another picture of the briar to show this patina. Wow!The pipe is generally in good condition but needs extensive cleaning.  The chamber has very light cake buildup, but the rim is darkened some by what I believe to be from the lighting practices of the former steward.  The backside of the rim has some scorching.  There is additional darkening from oils and grime.  The stummel is darkened from the patina development from the information related above, but it should lighten some when cleaned in the extreme ridges and peaks of the rusticated briar surface. The stem doesn’t appear to have much oxidation and the bit has very little tooth chatter.  I’m hopeful that this restoration will be more of a refresher!

With a much better understanding of the quality and characteristics of the Savinelli Punto Oro Corallo di mare Bulldog before me, I begin the restoration by adding the stem to a soak of Before & After Deoxidizer along with other pipes and their stems, that have already completed the restoration process.  I let the Savinelli’s stem soak for several hours. After several hours, I remove the Savinelli stem from the soak allowing the Deoxidizer to drain and again pushing a pipe cleaner through the airway to remove the fluid.  I then wipe of the raised oxidation with a cotton pad wetted with isopropyl 95%.  I follow this by wiping the stem with light paraffin oil which cleans it further and revitalizes the vulcanite.Now turning to the stummel, I use undiluted Murphy’s Oil Soap and a bristled tooth brush to clean the rusticated surface with its myriads of nooks and crannies!  I also use cotton pads on the smooth panel and rim.  For the rim, a brass wire brush helps to remove the lava flow.  I find that the tight crevices on the shank are the most uncooperative and I use a sharp dental probe to break up the compacted dirt.  The first picture below shows the compacted crud – the whitesh hue on the shank in the grain is dirt. After a lot of scraping and brushing, finally, I rinse the stummel with cool tap water and it looks great.  The first 4 pictures are before, and then after. Now, after cleaning. Well, I don’t normally do what I just did.  I was so taken with the rusticated finish that I forgot my usual practice of reaming the chamber before cleaning the externals.  Well, back tracking, I use the Pipnet Reaming Kit to clean up the very light cake in the chamber. I quickly discover that there is no cake really to ream with the blade heads, so I graduate quickly to scraping the walls and reaching down to the floor of the chamber with the Savinelli Fitsall Pipe Tool.  I follow by sanding the chamber with 240 grade paper wrapped around a Sharpie Pen and finish by wiping the carbon dust from the chamber with a cotton pad wetted with alcohol.  That was a quick chamber clean up and the pictures show the progress.  After clean, I inspect the chamber walls and it looks great – no heating problems are evident. Next, I turn to the internal cleaning of the mortise and airway.  I discover again, that this pipe has been cleaned well.  I expend one pipe cleaner and cotton bud and I’m convinced that the internals are clean – this doesn’t happen often, but thank you!Before turning to the stem, I decide to push forward with the one noticeable challenge on this stummel – the charred rim.  The conundrum is, if I sand it off by introducing a gentle internal rim bevel, I sacrifice a bit of that valuable rusticated rim real estate which I hate to do.  I scrubbed it well earlier with a brass wire brush which cleaned the rest of the rim nicely, but the inner rim is charred and there isn’t a remedy for that.  The charring is on the front right and the back left – diagonally.  I take another close-up picture from the steward perspective to show what I’m seeing.  Taking the conservative route, I decide to use the brass wire brush again.  I dip the brush in Murphy’s Soap, concentrating on the scorching, I scrub.  Amazingly, after some time, the scorched, damage briar starts giving away and I see more healthy briar.  You can still see where the most damage was (third pictures – lower right), but it will not draw as much attention to itself after the stummel is completed.  I may still need to sand a bit on the inner rim lip, but not a lot.  The pictures show the progress.  I’m amazed. I turn to the stem and use the heating method to deal with the very light bite dents on the bit.  I take a close-up of both the upper and lower bit to show what I see.  Using a Bic lighter, I paint the areas with the flame to heat and then expand the vulcanite which hopefully reclaims its lost space or at least, minimizes the compressions.  Painting the bit with the open flame of the Bic works like a charm as the compression are greatly minimized allowing me easily to sand out the dents using 240 grit paper.  While sanding, I also use a flat needle file to freshen the button lips.  In order to erase the scratches of the filing and 240 sanding, I wet sand the entire stem using 600 grade paper and follow this by sanding/buffing with 0000 steel wool. Pressing forward with the stem restoration, using micromesh pads 1500 to 2400 I wet sand and follow by dry sanding with pads 3200 to 4000 and 6000 to 12000.  Between each set of three I apply Obsidian Oil to revitalize the vulcanite.  I love the gloss pop of the vulcanite after the micromesh cycles! With the stem drying, I look again at the stummel.  There is a light dark ring on the inner lip of the rim persisting.  It’s not a lot and I address it simply using 240 grade paper tightly rolled.  I do not really introduce a bevel but clean the residue scorching and it cleaned up quickly. There is only minor briar erosion on the inner rim where it was scorched – see second picture below on the left. I’ve been looking forward to this phase of the restoration, refreshing of this Savinelli Punto Oro Corallo di mare – Sea Coral.  This unique rusticated finish needs a bit more consideration regarding the approach toward finishing it.  The surface does remind me of coral (and maybe a bit of elephant skin!) and the light hue of this Corallo di mare line evident in the Savinelli advertisement I included above confirms this.  I take some additional close-ups focusing on the hue and texture. Here’s the question which reveals a concern.  The honey brown hue shows the patina of this briar as the information above described.  At this point in the restoration, with other pipes, I might apply Before & After Restoration Balm to enrich the briar.  My concern is that this might overly darken the light complexion of this Savinelli’s briar and I don’t want to do this.  If the briar is more porous than regular briar, as the Savinelli information indicates, it might ‘drink up’ the Balm and a darkened briar might result.  Ok, I’m curious.  I decide to test a spot to see what happens.  I isolate applying a small amount over the smooth nomenclature panel to the shank edge – the edge has some rustication, but not as pronounced as the forward part of the bowl.  Here is the result.It does darken the briar but wow!  The result is a deep honey hue which to me, enhances the appearance. I decide to apply the Balm to the entire surface, but very sparingly.  I put a very small amount on my thumb and rub the Balm into the rusticated surface very briskly and aggressively spreading it across the briar surface.  I also use a bristled tooth brush to brush the area thus helping to deliver the Balm into the crevices.  After completing the application, I again rub the surface aggressively with my thumb to make sure the Balm was spreading evenly over the surface.  I then use a 100% horsehair Kiwi shoe brush to brush the surface to lift the excess Balm and to buff it up.  The result to me looks good – I think.  It’s time to turn out the light and I let the stummel dry through the night.The next morning, I reunite stem and stummel and take a good look – liking what I’m seeing!  I mount a cotton cloth buffing wheel to the Dremel, setting the speed at about 40% full power and I apply the abrasive, Blue Diamond compound.  As I do this, I know I’ll have to pay the piper later – the compound will gunk up in the rustication and it will take a good bit of effort to remove it.  Even though I know this to be the case, I apply the compound because I like the textured highlights and nuanced shading that will result from the fine abrasion.  It will also light the hue which I like as well.  One additional benefit is that it teases out the grain of the briar in the rustication.  The application of Blue Diamond compound on the gnarly surface eventually obliterates the cotton buffing wheel and I switch to a new one.In this picture below, you can see the leftover compound residue which I’ll need to remove, but also look closely at the rusticated mountains – the grain is peaking out.  Doing this kind of detail work even on a rusticated surface transforms presentation subtly – like moving from a regular TV screen to a high definition display.Using a toothpick, sharp dental probe and a bristled brush I painstakingly AND patiently work on cleaning the briar surface of the leftover compound dust.  It’s a bear of a job, but to me, the results are worth it, at least in this case! Before waxing, again I use the horsehair brush on the rusticated surface and I give the bowl and stem a buffing with a felt cloth to remove the residual compound dust.

In the interest of full disclosure, as I finished the Blue Diamond process, I became increasingly dissatisfied with how dark the stummel had become after my application of Before & After Restoration Balm.  The rusticated surface lost the light hue that I believe characterized the Corallo di mare line.  What to do?  I failed to take pictures, but what I ended up doing was plopping the entire stummel in a soak of isopropyl 95% for a few hours to remove the applications on the surface.  I wasn’t sure that the alcohol soak would do the job and I wasn’t sure if it might damage the patina.  After a few hours I removed the stummel and after drying, I simply buffed the surface with a clean cotton buffing wheel on the Dremel.  Amazingly, the surface buffed up to a lighter hue that resembled the original.  I was thankful and relieved.

After the grand detour and experiment, I next mount another cotton cloth wheel, increase the speed of the Dremel to about 50% full power and strategically apply carnauba wax to the Savinelli Punto Oro. I increase the speed to provide more RPM and therefore more friction to heat and dissolve the wax, so it is received by the surface more evenly.  I avoid wax buildup as I slowly work the wax into the surface, rotating the Dremel’s buffing wheel to agree with the flow of the rusticated pattern I’m working on.  This takes a good bit of time methodically to work through and cover the surface.  I apply a few coats of wax to both stem and stummel and then buff up the surface using a horsehair brush and then a rigorous hand buffing with a microfiber cloth.

My, oh my.  When I complete a project like this, I marvel at what comes from the many processes the restoration brings to bear.  The rusticated surface on this Savinelli Punto Oro Corallo di mare emulates a coral landscape.  I the intricate design of the rustication process holds my attention as I study the contours.  The light hued briar is also eye catching and unique and my decision to soak the stummel in alcohol to clean it I believe was spot on.  Charles, from Texas, commissioned this pipe from the collection, For ‘Pipe Dreamers’ Only! and he will have the first opportunity in ThePipeSteward Store to bring this Savinelli home to Texas.  This pipe benefits the Daughters of Bulgaria – an effort here in Bulgaria helping women and girls who have been trafficked and sexually exploited.  Thanks for joining me!


Decking out my Grandfather’s Battered Pre-transition Barling # 1354.


Blog by Paresh Deshpande

In one of a first, I had decided to work on four pipes simultaneously. Well, honestly, it was a decision which was forced on me due to extraneous circumstances that I had created for me. It so happened that after having discussed with my mentor, Mr. Steve, I decided to work on a John Bessai creation from my Grandfather’s collection. As I was turning the John Bessai in my hands, I felt that there were not very many major issues involved in its restoration and the small Barling’s, also from my old man’s collection, appeared to be a straight slam dunk of a restoration. Thus, I decided to work on both simultaneously, which appeared doable. However, things turned in to a challenge when I was just surfing YouTube on pipe restoration topics. In one of the videos, Hydrogen Peroxide and water solution was used to raise the oxidation to the surface and subsequent cleaning of the same was a breeze. I decided to try out this method and in order to make max use of the solution; I dunked stems of two more pipes in to it. Now I have four pipes in line to restore. I can still manage the restorations; it is the write ups that are a huge challenge for me as Mr. Steve will vouch for the delayed submissions.

The Barling’s Make pipe on my work table is a quaint little billiards with beautiful and very tightly packed birdseye grains on either side of the bowl and shank, extending over to more than half of the front of the stummel. Equally tightly packed cross grains are seen on the front left and back of the bowl and also on the upper and bottom surface of the shank. It is stamped on the left side of the shank as “BARLING’S” in an arch with block capital letters over “MAKE” in a straight line over the numeral “1354”. The right side of the shank bears the spaced out stamp “S M” towards the bowl shank junction. The vulcanite saddle stem bears the trademark Barling stamped in cross on the upper surface of the saddle and “Barling” over “Design” in a cursive hand on the lower surface of the saddle.  Even though there are quite a few Barling’s in grandfather’s collection, this beauty is the first of the Barling’s that I am trying to restore. To know more about the brand, the lines offered by the maker and attempt to date this pipe, I visited Pipedia which has a wealth of neatly cataloged heading-wise information on Barling’s pipes. Here is the link and the snippets of relevant information that I picked up https://pipedia.org/wiki/Barling#Model_Numbers:

Model Numbers:

Also according to Tad Gage, the only four-digit number that denotes a Pre-Transition piece begins with “1,” which was used for pipes sold in England. Any other four-digit Barling pipe is a Transitional piece– (Tad Gage in P & T magazine).

Model numbers were occasionally stamped below the logo as early as the late 1920’s.

Other Nomenclature:

The “MADE IN ENGLAND.” stamp was in use in the 1930’s thru 1962. As with all things related to Barling nomenclature there are variations. Sometimes there is no “MADE IN ENGLAND.” stamp. Examples exist with a “MADE IN LONDON” over “ENGLAND” stamp. And, there are examples with “MADE IN ENGLAND” with no period after the word “ENGLAND”.

Size Stampings:

Up to 1926 and possibly beyond, Barling used specific, completely unrelated, model numbers to designate the various sizes of a specific shape. They produced pipes in three sizes, small, medium, and large.  

Barling’s published price lists show that they continued to offer pipes in only three sizes, small, medium, and large until 1941. That’s it, small, medium, and large. So when someone claims that they have a 1930’s EL, EXEL, or other size, they are mistaken.
In 1941 the published range of sizes expanded. Going from the smallest to the largest, they are SS, S, S-M, L, EL, EXEL, and EXEXEL. There is no “G” for giant. Giant pipes, or magnums, which are oversized standard billiards, were not stamped “G” but are commonly identified by collectors as such because they are obviously large relative to even EXEXEL pipes, and carried no size stampings (Gage).

Size stamps were rare before WW2, but we do an example from 1925 that we will discuss later as it is part of a forgotten class of Barling pipes.

Patent Stamps:

In addition to the stampings on the briar, Barling stems had stampings that relate to specific periods. In 1935 Barling received a patent for a stem design that radically improved airflow as well as cooling of the smoke.

Pipes made in 1934-5 may have the words “Reg’d Design” on the underside.

Following the granting of the patent in 1935, Barling stems featured the following patent numbers:

REG’D 98 046 – US patent number – 1936 – 1949 • REG’D 42/8968 – WW2 production – 1942 – 1950 • REG’D 754 068 – WW2 production • Barling Design – 1950 – 1962

 Not all pipes have this stamping on the underside of the stem, but its presence is a good indicator for the period of manufacture, assuming that the stem is original.

Throughout their history Barling continued to innovate in the area of stem and bit design.

From the above information, it is conclusively assumed that this piece is from the Family era/ Pre- transition period and was made somewhere during 1950s to 1960s. The minimalist stampings indicate that this pipe was intended to be sold in the local markets.

INITIAL VISUAL INSPECTION
The chamber shows a nice even build up of a thick cake which makes it difficult to comment on the condition of the inner walls of the chamber. There is a thick overflow of lava and completely covers the rim top and further spills over on to the stummel surface. The condition of the inner edge of the rim and rim surface will be ascertained only after chamber has been reamed down to its bare briar. The outer rim, however, is damaged and has a number of chips and dents, probably caused due to hitting the bowl against a hard surface to remove the dottle! Criminal, to say the least! The surface of the stummel is covered by the overflowing lava, which in turn has attracted a lot of dirt and grime over a period of time. The stummel surface is peppered with numerous dents and dings, more so towards the heel of the bowl, probably caused due to careless and uncared for storage for the last 40-45 years!!!! It will be a big decision whether to address these dents and dings by abrasive sanding method and loose the patina which has developed on the surface, or let them be. Well, I shall cross the bridge when I reach it. The mortise is surprisingly clean and air flow through it is open and full. The vulcanite stem is heavily scratched, but not oxidized. Some light tooth chatter is seen on both surfaces of the stem towards the lip with one deep bite mark on the upper surface. This issue should not be a major headache to address. The lip edge on both sides is crisp but lightly damage. The quality of vulcanite is good.THE PROCESS
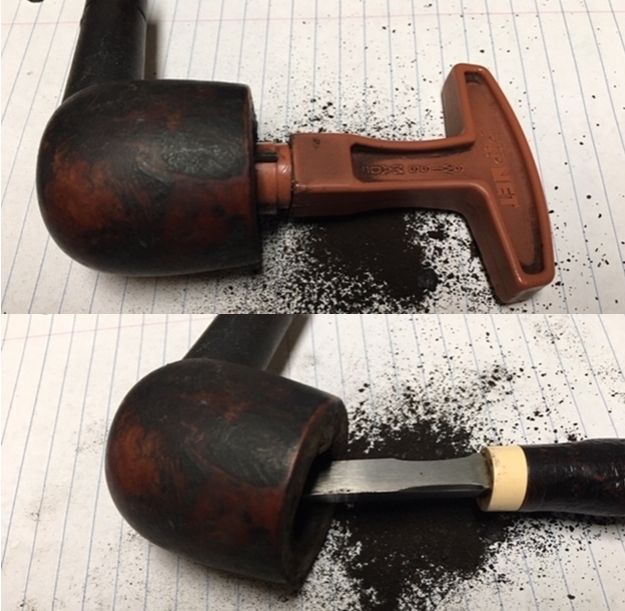
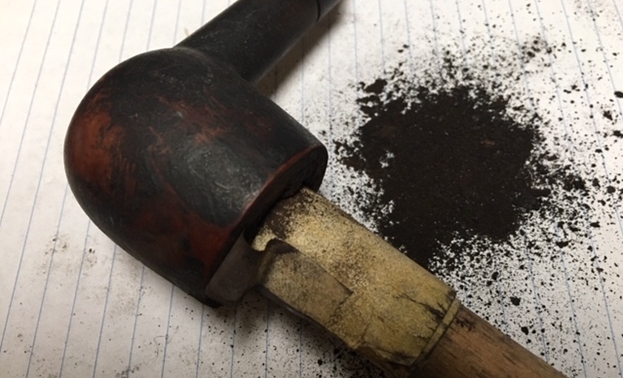
I did not soak the stem of this pipe in the Hydrogen Peroxide solution as I was not sure how it would affect the stamping and so decided to play it safe. I flamed the stem surface of the stem with a Bic lighter to raise the tooth indentations and scratches on the stem. The heat from the flame of Bic lighter causes the vulcanite to expand and regain its natural shape, reducing the marks. The tooth bite marks which were visible after the flaming were filled with a mix of activated charcoal and clear CA superglue and I set it aside to cure overnight. I reamed the chamber with size 1 head of a PipNet reamer and followed it with a size 2 reamer head. To reach the areas where the PipNet reamer could not reach to remove the carbon cake, I used my smaller fabricated knife and scraped out all the remaining cake. I further use a folded piece of 180 grit sandpaper to sand out the last traces of remaining cake and expose the walls of the chamber to ascertain that there are no cracks/ heat fissures. I wiped the chamber with a cotton pad dipped in isopropyl alcohol to remove the carbon dust left behind by all the reaming and sanding process. The walls of the chamber were solid with no damage. I gently scraped the rim top surface with a sharp knife to remove the lava overflow. This was followed by cleaning the mortise with cue tips, pipe cleaners and shank brush dipped in isopropyl alcohol. This further eliminated traces of old smells from previous usage. The old smell was still prevalent, though greatly reduced. To completely eliminate the smell, I decided to resort to alcohol bath. I packed the chamber, just below the rim, with cotton balls. I stretched a cotton ball into a thick wick, tapering at one end, and inserted it in to the shank and pushed it as far inside as I could using a straightened paper clip. I topped the bowl with isopropyl alcohol using a syringe. I know that it is generally a practice to use Kosher salt for this procedure, but since Kosher salt is not easily available here, and when available, it’s very expensive, I use cotton balls. I find that cotton balls work just fine in drawing out all the tars and smells from the mortise and the bowl. I topped the bowl with alcohol again after 20 minutes when the alcohol level had gone down and set it aside overnight for the cotton and alcohol to do its intended job.The next day, the cotton and alcohol had fulfilled its intended task. I removed the cotton balls and ran pipe cleaners through the mortise to clean out all the loosened tars and gunk. The internals of the stummel is now clean and fresh. Now, it was the turn of the stummel to get cleaned up. Using a hard bristled tooth brush dipped in undiluted Murphy’s oil soap, I very deliberately scrubbed the surface of the stummel. I cleaned the rim too. The stummel and rim top was dried using paper napkins and soft cotton cloth. I am not very happy the way the rim top appears at this stage with all the charring and uneven inner and outer rim edges. This needs to be addressed. I set the stummel aside to dry out naturally. While the stummel was drying, I worked the stem. I covered the stampings on the stem with whitener using a whitener pen. The filling of charcoal and CA superglue had cured and using a needle file, I sand the filling to match the surface of the stem. For a better blending, I further sanded the entire stem with 220 followed by 400 and 800 grit sand paper. This helps to reduce the sanding marks left behind by the more abrasive 220 grit paper. To bring a deep shine to the vulcanite stem, I went through the complete set of micromesh pads, wet sanding with 1500 to 2400 grit pads and dry sanding with 3200 to 12000 grit pads. I wiped the stem with alcohol after each pad and rubbed it down with Extra Virgin Olive oil. The internals of the stem was cleaned out using alcohol and pipe cleaners. The finished stem is shown below. After cleaning the rim top with Murphy’s oil soap, I had observed that the rim top surface was charred and the inner edge was uneven, presenting a very sorry appearance. I topped the rim on a 220 grit sand paper, checking frequently till I was satisfied that the charred surface was greatly reduced. The inner edge is still uneven, though much better than before topping, it will need to be addressed.Next, I decided to address the dents and dings on the stummel surface and on the rim outer edge. Using a whitener pen, I marked all the major areas with dents and dings as I had decided to leave the minor ones as they were. I heated my fabricated knife over the flame of a candle, placed a wet Turkish hand towel over the marked areas and steamed out the dents by placing the heated knife over the towel. Though some dents were still observed, these were greatly reduced when compared to before steaming.The steaming method had raised to the surface all the major dents and dings. However, the outer and inner edges of the rim were still uneven. I took a piece of used and worn 180 grit sand paper, folded it and pinching it between my thumb and forefinger, created a slight inner bevel on the inner edge of the rim. Using the same technique, I created a light bevel on the outer edge. Now the rim surface and both its edges appear clean, even and well rounded.Steaming out the dents and dings from the stummel surface had necessitated that the surface of the stummel be evened out by sanding. I had an option of using more abrasive 220 grit sand paper followed by micromesh pad cycle and loose the patina or straight away go to the micromesh cycle. Using the more abrasive sand paper, minor dents and dings would be further addressed but I would lose the old sheen which the briar has taken over the years.  I decided on keeping the old sheen and went straight for the micromesh cycle. The old patina and the minor dents and dings would add to the vintage look of the pipe, which it was. I wet sand the stummel with 1500 to 2400 grit pads and follow it up by dry sanding with 3200 to 12000 grit pads. I rub a small quantity of “Before and After Restoration Balm” in to briar and let it rest for a few minutes. The balm almost immediately works its magic and the briar now has a nice vibrant appearance. I further buff it with a horse hair shoe brush. To finish, I re-attach the stem with the stummel. I mounted a cotton cloth buffing wheel to the Dremel (actually it is not the brand machine, but a local machine which is similar).  I set the speed at about half of the full power and applied White Diamond compound to the entire pipe. I wiped/ buffed the pipe with a soft cotton cloth to clear it of any leftover compound dust. I then mounted another cotton cloth wheel on to the polishing machine and applied several coats of carnauba wax. I finished the restoration by giving the entire pipe a rigorous hand buffing using a microfiber cloth to raise the shine further.The completed pipe looks lovely, fresh and vibrant; the photographs in this case, do not do justice to the appearance of this beautiful little pipe. Thank you for having the patience to reach this far while reading the write up.

A Fresh Breath of Life for a Unique Creation by “John Bessai”


Blog by Paresh Deshpande

The next pipe that I decided to work on, and duly approved by Mr. Steve, is a pipe that was carved by an iconic pipe carver from USA who had carved pipes in the back room of his tobacco shop by hand. This pipe carver was lost to history, being marginalized and lost to the world, since his creations were in very small numbers and restricted to local sales only. This pipe carver is an integral part of American pipe making history and is now being revisited and revived by some experienced and knowledgeable pipe restorers and pipe collectors, notably Mr. Andrew Hross, who has carried out a detailed mapping of the pipe maker, his creations, dating his pipes based on stamping and pipe models. Mr. Steve has himself worked on a couple of these rare pipes and has included them in his personal collection!!!! Well, I think I have been able to rouse enough curiosity regarding this pipe carver in the minds of the reader and now to reveal the name……… The carver that I have been rambling about is John Bessai!!

Since having completed the restoration of an antique 1902-20’s era GBD with Albatross wing bone extension and horn stem from my Grandfather’s collection, I reverted back to Mr. Steve for selection of my next project. I have realized that he always suggests the most unique pipe, from the ones presented to him, for my next project and this time around he selected this John Bessai Rhodesian pipe with a suggestion that I should first read the blog on a couple of pipes from the same maker that he had previously worked on. I did exactly that and I realized that I have in my possession a rare and collectible pipe to work on.

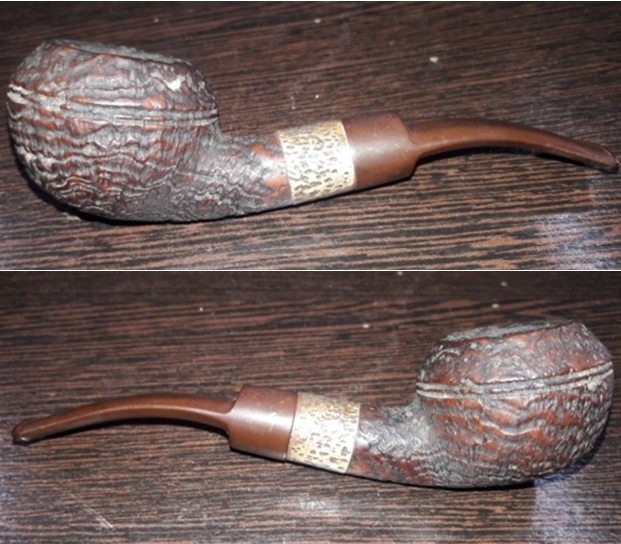
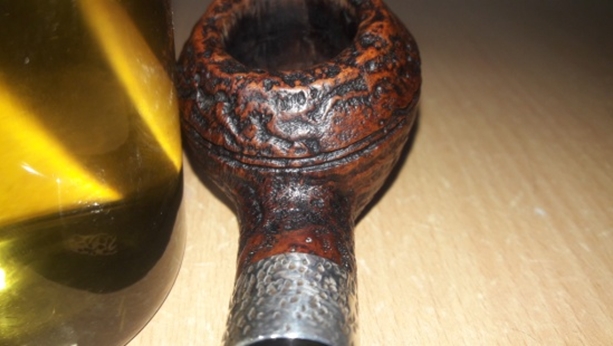
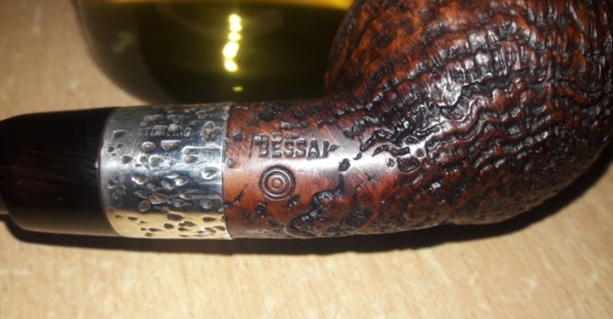
This pipe has the classical Rhodesian shape with a cap which is differentiated from the rest of the stummel by a double ring. It has beautiful sandblast pattern all over the stummel and over the round shank, save for a small smooth portion on the right side of the shank which bears all the identification marks of this pipe, and on the rim top which looks amazing. It is stamped on the right side of the shank as “…BESSAI”, the initial part of the stamping is unclear, over bull’s eye symbol. The shank end is adorned by ½ inch hand rusticated Sterling silver band, which has developed a patina with age. It is stamped as “STERLING” in block capital letters, on the right side, in-line with the shank stampings. It would look classic once cleaned up. The stem is devoid of the trademark “JB” logo. Mr. Steve has researched this pipe maker and would make an interesting read for anyone, even remotely, interested in pipe history. Here is the link to his write ups: https://rebornpipes.com/2014/07/14/restemming-and-restoring-a-john-bessai-special-diamond-shank-bent-brandy/

This is the link to his second John Bessai project: https://rebornpipes.com/2012/08/21/reworking-a-john-bessai-pipe/

These write ups not only helped me in gaining knowledge about the pipe maker that John Bessai was, but also helped me know about dating the pipes that he had created. I have produced relevant extracts, though there is a wealth of information, from Mr. Steve’s write ups which include facts about dating as researched by Mr. Andrew Hross.

John Bessai was a long time pipemaker, repairman and tobacco shop owner who operated his pipe shop at the “Old Arcade” in Cleveland, Ohio. The shop was opened in approximately 1898. It was a small 2-room shop where he hand-crafted his own pipes in the back room and could work when customers were not there. Like so many other shop made brand, John Bessai’s limited production was quickly acquired by regular customers and thus his craftsmanship remained little known outside of Ohio and the Midwest. While his name is known by pipe collectors in the Midwest, his work is seldom seen elsewhere! He died before 1969. Nevertheless, John Bessai left behind a small number of classic shaped pipes; all were made on-site. They are praised worthy of collecting and reflecting skills well beyond most American pipe makers. John Bessai’s logo “JB” appeared as one letter as the “back” of the “J” and the “back” of the “B” share a single line. The logo was stamped on the stem and on the left side of the shank. His son Herb Bessai took over the business and also continued making pipes. He closed the shop in about 1978.

Pipes offered by John Bessai Pipe Clinic:
Most of the pipes that were offered by the John Bessai Pipe Clinic were fairly standard in shape… I would say most of the pipes Bessai offered were smooth pipes. My assessment would be 90% smooth and 10% rusticated / sandblasted…

Stampings and rough dating of John Bessai Pipe Clinic Pipes:
Which pipes did John make and which ones did Herb make/finish? All Bessai pipes carry his standard large JB stamp either on the stem or shank or both. Typically the JB on the stem is within a circle.

All pipes created by John Bessai’s hands reportedly contain the miniscule ‘jb’ stamp on the shank or body of the pipe. I have older pipes in my possession that do not contain this stamp (condenser, old stamps, etc) that were clearly shop made pipes. I feel he started using the tiny ‘jb’ stamp in the 50s to early 60s.

Dating / Circa era Bessai Pipes:
If the pipe carries a stamp stating Cleveland, O U.S.A. it’s considered an older production pipe (pre1960s). I’ve not seen any newer pipes with that stamp.

Bullseye stamping usually indicates an earlier pipe as that stamp seems to have been abandoned pre1960 as well.

Thus, from the above information, it is safe to suggest that the pipe presently on my work table is fairly rare as only 10% of the pipes made by John Bessai were rusticated or sandblasted and was made prior to 1950s as this one too does not have the famed “JB” stamp and bears the “Bull’s-eye” stamp on the shank.

INITIAL VISUAL INSPECTION
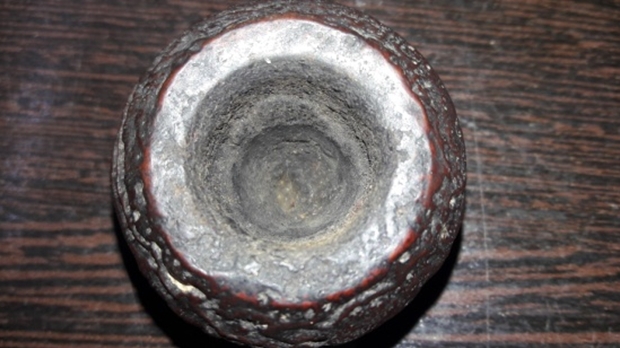
The bowl is nicely rounded and wide at the rim with a depth of about 1 1/5 inches. The chamber is so filled with cake that I am unable to reach the bottom of the bowl with my little finger. The build-up of the cake is more heavy on the bottom half of the bowl. The condition of the inner walls of the chamber can be commented upon after the cake has been taken down to the bare briar.The mortise is full of oils, tars and gunk and air flow is restricted. The rim top is also rusticated which can be seen through the overflowing lava. The inner and outer edge of the rim appears to be in pristine condition with no dings or dents. However, exact condition can be ascertained only after further cleaning. As is commonly seen on rusticated or sandblasted pipes with some serious age on them, the crevices in these are always filled with dust, dirt, oils, tars and grime from all the years of smoking and storage. This one is no exception to this observation. The grooves of the sandblast are filled with dust while the small smooth right side of the shank which bears the stamping is covered in dust and grime. The fact that the grooved patterns are dusty and filled with dirt is accentuated more due to a very dark reddish brown stain on the stummel and the shank. The briar is looking lifeless and bone dry and has taken on black hues. The twin bore, ¾ bent vulcanite stem is so heavily oxidized that it appears brown in color!! Some heavy tooth chatter is seen on both surfaces of the stem towards the lip with one deeper bite mark on the upper surface. This issue should not be a major headache to address. The lip edge on both sides is badly chewed off with heavy bite marks and would need to be reconstructed and reshaped. However, the quality of vulcanite is superior to other vulcanite stems that I have handled before.The hand rusticated sterling silver band has developed a patina due to oxidation. This will have to be addressed.

THE PROCESS
During one of my YouTube surfing sessions on pipe restoration techniques, I came across a video which showed the use of Hydrogen Peroxide and hot water solution as an alternate method to tackle oxidation on a vulcanite stem. I decided to adopt this method to tackle heavy oxidation seen on this stem. Before proceeding with this method to get rid of the oxidation, I wanted to raise the tooth chatter and bite marks to the surface. Using a Bic lighter, I flamed the surface of the stem. This helped in raising some of the tooth chatter and bite marks to the surface as vulcanite has a property to regain its original shape on heating. The remaining tooth chatter and bite marks would be addressed subsequently.I mixed Hydrogen Peroxide and hot water in the ratio of 1:2 in a plastic bowl and immersed the stem of this pipe along with two other stems of the pipes which are in line for restoration. Within two minutes, the color of the stem changed to a dirty greenish brown color indicating that the oxidation is being pulled to the surface. I removed the stems from this bath and scrubbed it clean with “MagiClean” sponge. I followed it up by cleaning the internals of the stem. I used 220 grit sandpaper to sand the stem and removed all the oxidation that was raised to the surface. This step further reduced the tooth chatter and bite marks present on the stem. I addressed the deeper tooth chatter and bite marks by filling them up with a mix of activated charcoal and CA superglue. I applied a slightly thick layer over the lip which I will later sand down to create a defined edge. Once I had applied the mix, I set it aside to cure overnight. While the stem filling was left aside for curing, I worked on the stummel by first reaming the chamber with size 2 of PipNet reamer head, followed by size 3 head. I further scraped the chamber walls with my fabricated knife to remove the remaining carbon deposits. Once the cake was reamed back to the bare briar, I used a 150 grit sand paper followed by 220 grit sand paper to remove all the traces of remaining cake and also to smooth the inner walls of the chamber surface. Finally, to remove the carbon dust, I wipe the chamber with a cotton pad wetted with isopropyl 99%. This was followed by cleaning the mortise with cue tips, pipe cleaners and shank brush dipped in isopropyl alcohol. This further eliminated traces of old smells from previous usage. However, I must admit that I was still not very happy with the internal cleaning of the stummel and shank. The old smell was still prevalent, though greatly reduced. To completely eliminate the smell, I decided to resort to alcohol bath. I packed the chamber, just below the rim, with cotton balls. I stretched a cotton ball into a thick wick, tapering at one end, and inserted it in to the shank and pushed it as far inside as I could, using a straightened paper clip. I topped the bowl with isopropyl alcohol using a syringe. I know that it is generally a practice to use Kosher salt for this procedure, but since Kosher salt is not easily available here, and when available, it’s very expensive, I use cotton balls. I find that cotton balls work just fine in drawing out all the tars and smells from the mortise and the bowl. I topped the bowl with alcohol again after 20 minutes when the alcohol level had gone down and set it aside overnight for the cotton and alcohol to do its intended job.The next day, the cotton and alcohol had fulfilled its intended task. I removed the cotton balls and ran pipe cleaners through the mortise to clean out all the loosened tars and gunk. The internals of the stummel is now clean and fresh. Now, it was the turn of the externals of the stummel to get cleaned up. Using a hard bristled tooth brush dipped in undiluted Murphy’s oil soap, I very deliberately scrubbed through all the grooves of the sandblast, cleaning them thoroughly. I cleaned the groove in between the cap ring with a sharp knife tip. The stummel was dried using paper napkins and soft cotton cloth. I set the stummel aside to dry out naturally. While the stummel was drying, I worked the stem. The fill had cured and with a flat head needle file, I worked on the filling till I had achieved a rough match with the surrounding surface. For a better blending, I further sand the entire stem with 220 followed by 600 and 1000 grit sand paper. This helps to reduce the scratch marks left behind by the more abrasive 220 grit paper. To bring a deep shine to the vulcanite stem, I went through the complete set of micromesh pads, wet sanding with 1500 to 2400 grit pads and dry sanding with 3200 to 12000 grit pads. I wiped the stem with alcohol after each pad and rubbed it down with Extra Virgin Olive oil. The finished stem is shown below. Once I was satisfied with the stem restoration, I started work on the stummel which had dried by now. When I had another look at the stummel after it had dried, I was not very pleased and satisfied with the way the rim top had cleaned up. I again cleaned it with Murphy’s oil soap and scotchbrite pad till the rim top was nice and clean. I rubbed a small quantity of “Before and After Restoration Balm” in to briar and let it rest for a few minutes. The balm almost immediately works its magic and the briar now has a nice vibrant appearance. The only surface on the stummel that remained to be spruced up was the Sterling silver band at the shank end. Abha, my wife, had suggested that I should try using Colgate toothpowder to bring back the shine on the Sterling silver band. She had tried this on her jewelry with amazing results. I rubbed the silver band with Colgate toothpowder and the results are truly amazing.I mounted a cotton cloth buffing wheel to the Dremel (actually it is not the brand machine, but a local machine which is similar).  I set the speed at about half of the full power and applied White Diamond compound to the entire pipe. I wiped/ buffed the pipe with a soft cotton cloth to clear it of any leftover compound dust. I then mounted another cotton cloth wheel on to the polishing machine and applied several coats of carnauba wax.I finished the restoration by giving the entire pipe a rigorous hand buffing using a microfiber cloth to raise the shine further. The finished pipe is shown below. This is indeed a beautiful pipe which feels great to hold in your hand and the classy looks add to its overall appeal. I was wondering how my grandfather, who had never traveled to US, let alone to Ohio, ended up with one of John Bessai’s creations????? If only this pipe could recount and narrate its story from Ohio to India…Thank you for your read and as usual, any suggestions/ comments are always welcome. They help me progress on my journey into the pipe world.

Breathing Life into a GIGI Collection Italia Studio X 40288


Blog by Steve Laug

It was time to go back to working on the estate pipes from the pipe shop that had closed here in Vancouver. The entire lot came to me from the estate of an older pipeman whose wife dropped them off at a pipe shop to be cleaned and sold. When the shop closed they came to me. The pipe on the table now was an Italian made with a bit of a freehand look to it. It is stamped GIGI over Collection Italia on the left side of the shank. On the right side it is stamped Studio X 4 over 40288. On the underside of the shank it is stamped REGD. NUMBERS over 256267-386165 followed by Made in Italy. The briar has some nice straight and flame grain around the bowl with what looks like faux plateau on the top of the bowl and the shank end. The bowl had a thick cake in it with an over flow of lava on the rim top. The plateau type finish was filled in with lava and was a real mess. It was hard to know what the rim edges looked like with the thick coat covering it all. The briar was dull and dirty looking. The freehand style stem is vulcanite and is oxidized. It had a turned portion near the tenon and the stem itself was oval. There was calcification and tooth chatter and marks damage next to the button on both sides. I took photos of the pipe when I received it. I sent about twenty of the pipes to my brother Jeff in Idaho to work over and clean up. He cleaned up the pipes with his usual thoroughness – reaming the bowl and scrubbing the internals with alcohol, cotton swabs and pipe cleaners. He scrubbed the exterior with Murphy’s Oil Soap to clean off the dust and grime on the finish. When he sent it the pipe was ready to restore. I took photos of the pipe when I unpacked it. The briar was clean and the finish dull. There were some small fills on the left underside of the shank and bowl that needed to be repaired. I took a close up photo of the rim top after Jeff had cleaned it up. The look of the rim top and edges is very good. The carved finish on the plateau top is clean and undamaged. He had been able to remove the cake and the lava very well. The bowl looked very good. The plateau on the shank end is also very clean. The stem is also shown and was very clean. The tooth marks on both sides near the button are visible in the photos.  I was unfamiliar with the brand so I did some searching online and found some basic information on Pipedia. I quote in full:

Luigi “Gigi” Crugnola was born in 1934, the same year Giorgio Rovera founded a company in his own name in Varese, Italy along with partners Angelo and Adele Bianchi, who also happened to be Luigi Crugnola’s Uncle and Mother, respectively. The company produced pipes for 30 years, largely exported to America and elsewhere in the world. Crugnola took over the company in 1964 with the death of Angelo Bianchi, changing the name soon after to his own nickname Gigi, and continues to run the company today. The vast majority of Gigi pipes continue to be made for export (https://pipedia.org/wiki/Gigi).

I turned to my other go to website, Pipephil. The site included a photo of the carver and confirmed the information that I had read on the Pipedia site. It gave the contact information for the pipe company. It is as follows: Gigi Pipe Via Rovera, 40 21026 Gavirate Oltrona al Lago (VA) The link is – http://www.pipephil.eu/logos/en/logo-g3.html.

From that I learned that the pipe was made by Luigi “Gigi” Crugnola and was made after he took over the company in 1964 and changed the name of the brand. I also learned that the majority of the pipes were made for export from Italy so it was not unusual to find one in Canada.

Armed with that information I decided to start on the bowl. I repaired the fills on the underside of the bowl and shank with clear super glue. Once the glue dried I sanded it with 220 grit sandpaper to blend the repairs into the surface of the briar. The fills looked much better with the darkening that occurs with the glue repairs than they did before my work. The photos below show the repaired areas.I polished the briar with micromesh sanding pads to smooth out the surface of the briar and blend the repairs into the rest of the bowl. I wet sanded it with 1500-2400 grit pads and dry sanded it with 3200-12000 grit pads. I wiped it down with a damp cloth after each sanding pad. I worked Before & After Restoration Balm into the briar and the plateau on the rim top and the shank end. I worked it into the surface with my fingertips to clean, enliven and protect the wood. I let the balm sit for about 20 minutes and buffed it off with a soft cotton cloth. I took photos of the pipe at this point in the process to show what the bowl looked like at this point. I used a Medium Walnut Danish Oil Finish to touch up the repaired area and the rest of the bowl. The walnut stain really makes the grain pop on the briar. I hand buffed the bowl with a soft cloth to polish the briar. I buffed it lightly on the buffing wheel using Blue Diamond on the wheel. I took photos of the bowl after buffing. The grain is really standing out on the bowl at this point. It is beautiful. I took photos of the stamping at this point because it really stood out now.I set the bowl aside and turned my attention to the stem. I used a Bic lighter to paint the surface of the vulcanite with the flame. The heat of the flame raised the tooth marks around the button edges. It raised the bite marks significantly but a repair would still need to be done. As I worked on the stem I noticed that it was faintly stamped on the right side of the stem near the turning with the words GIGI.I sanded the tooth marks and the surface of the stem with 220 grit sandpaper to minimize the tooth damage and to remove the oxidation. I was able to remove the majority of the tooth damage other than a few small spots along the button on the top side and the underside.I filled in the tooth marks with superglue spreading it with a toothpick. I set it aside to dry.Once the glue repairs cured I sanded them with 220 grit sandpaper to smooth out the repairs. I sanded them to blend them into the surface of the rubber. I began the polishing of the stem with Denicare Mouthpiece Polish to work on the oxidation. I polished the stem with micromesh sanding pads – wet sanding with 1500-2400 and dry sanding them with 3200-12000 grit pads. I wiped the stem down with Obsidian Oil after each pad. I gave it a further polish with Before & After Pipe Stem Polish – both Fine and Extra Fine. When I finished I gave it a final coat of Obsidian Oil and let it dry. The following photos show the stem at this point. I polished the bowl and stem with Blue Diamond to polish out the scratches in the briar and rubber. I gave the bowl and the stem multiple coats of carnauba wax. I buffed the pipe with a clean buffing pad to raise the shine. I hand buffed it with a microfiber cloth to deepen the shine. The pipe polished up pretty nicely. The original patina on the bowl came alive with the buffing and worked well with the polished vulcanite stem. The pipe has a rich look. The finished pipe is shown in the photos below. The shape, finish and flow of the pipe and stem work give the pipe a very classic look. The dimensions of the pipe are Length: 6 inches, Height: 2 inches, Outside diameter of the bowl: 1 1/2 inches, Chamber diameter: 3/4 of an inch. Thanks for reading this while I worked on it. It was interesting and unusual piece to restore and I really enjoyed the work.

Farida’s Dad’s Pipes #7 – Restoring a Charatan’s Make Belvedere 48DC Pot


Blog by Steve Laug

I am back working on one of the two pipes that are left in the lot that came from the estate of an elderly gentleman here in Vancouver. I met with his daughter Farida almost a year ago and we looked at his pipes and talked about them then. Over the Christmas 2017 holiday she brought them by for me to work on, restore and then sell for her. There are 10 pipes in all – 7 Dunhills (one of them, a Shell Bulldog, has a burned out bowl), 2 Charatan Makes, and a Savinelli Autograph. I have restored all but three of them – a Dunhill Shell and the two Charatan’s Makes. His pipes are worn and dirty and for some folks they have a lot of damage and wear that reduce their value. To me each one tells a story. I only wish they could speak and talk about the travels they have had with Farida’s Dad.

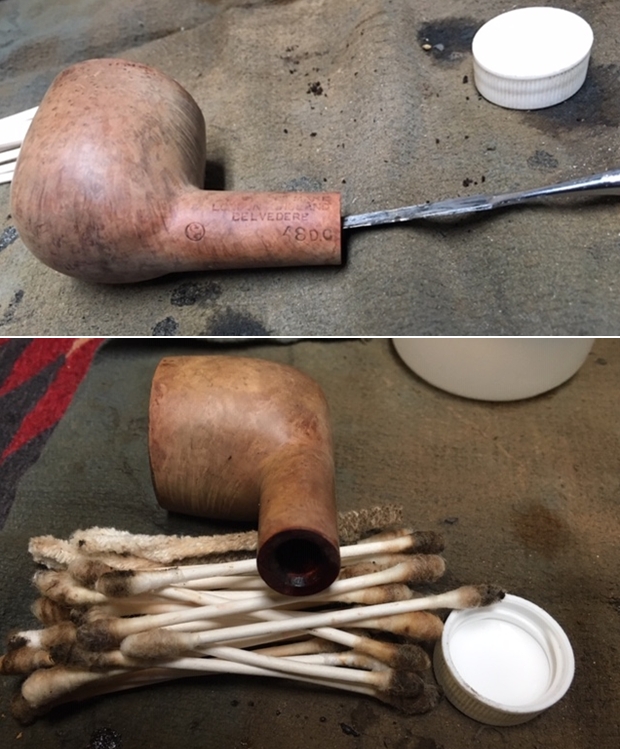
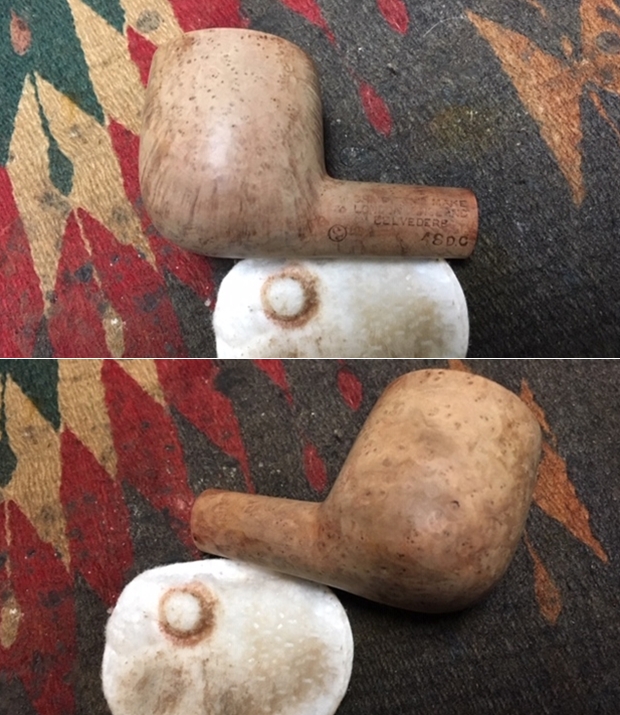
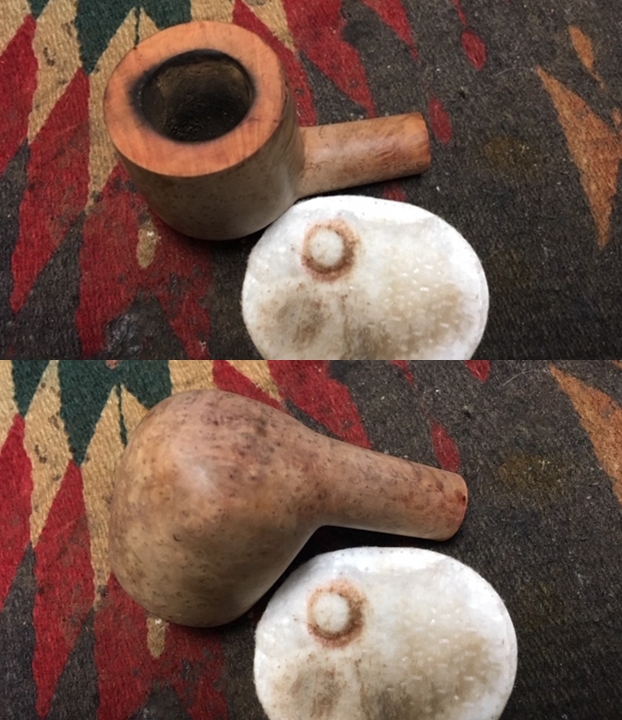
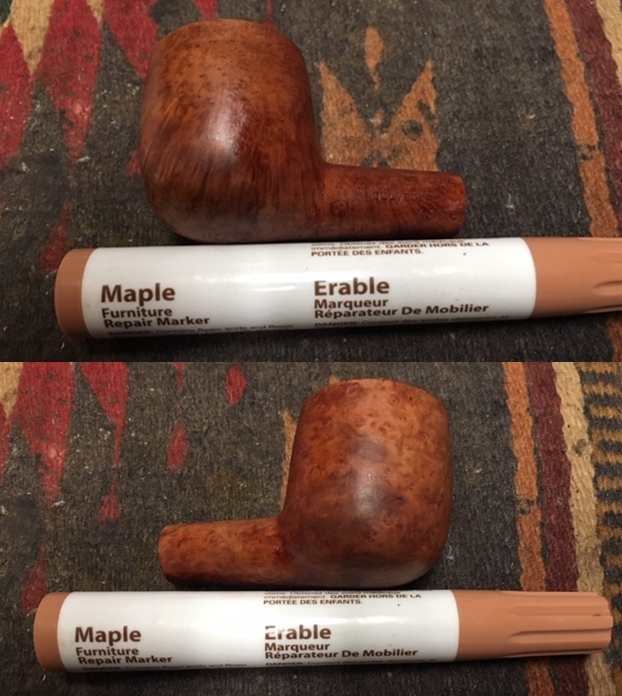
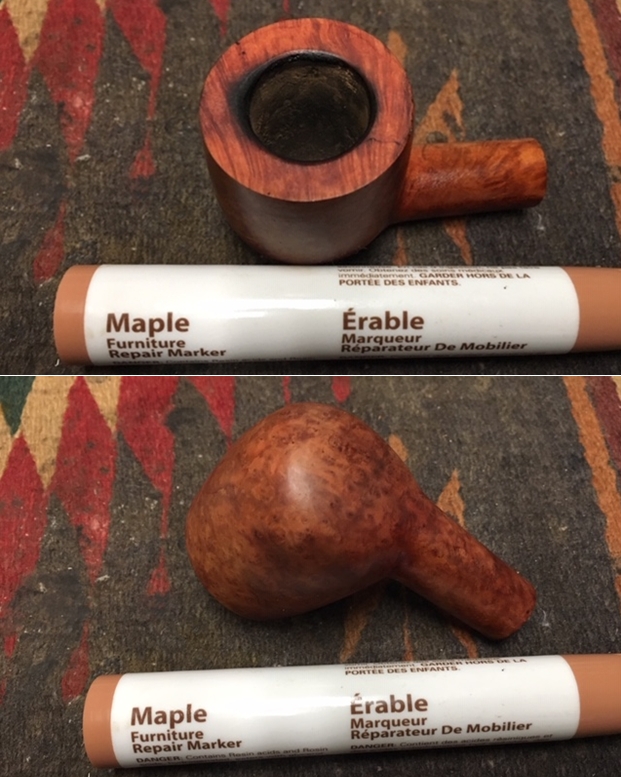
The pipe I am working on is a Charatan’s Make Belvedere. Whenever I see that stamping I am taken back to a US sitcom that I used to watch in the 80s called Mr. Belvedere. It was about a butler, Lynn Aloysius Belvedere who worked for an American family called Owens. Throughout the series, Mr. Belvedere serves as a mentor of sorts to Wesley as well as to the other children. Being a cultured man with many skills and achievements (having even once worked for Winston Churchill), he also comes to serve as some sort of “counselor” to the Owens clan, helping them solve their dilemmas and stay out of mischief (https://en.wikipedia.org/wiki/Mr._Belvedere).

The stocky and solid look of this cultured Charatan’s Make Belvedere is built almost as solidly as Lynn Aloysius Belvedere. When it came to me it was worn and tired looking. I have already caused a lot of discussion on the cleanup of this pipe on the Facebook Tobacco Pipe Restorers Group. The ongoing debate of Restoration vs. Preservation filled a lot of airtime on the group. I do not care to relive or recount that as I am only following the directives of the daughter of the original deceased pipeman. She wanted them restored to usable condition so others can carry on her father’s love of these pipes. She is quite happy with the finished results and others of his pipes are now all over the world being enjoyed by the next generation of pipemen.

When first looked at the pipe here is what I saw. The bowl on the pipe was thickly caked and the cake had flowed over onto the smooth finish on the rim top forming hard lava that made the top uneven. It was hard to know if there was damage to the inner and outer edges of the rim and I would not know until I removed some of the grime. It looked like there was some burn damage on the top toward the front of the bowl but it was hard to know. The outer edge looked far better than any of the other pipes in this collection when I started. The finish was invisible under the thick coat of oils and grime that covered the bowl and shank. In fact at this point I had no idea what the stamping looked like because it was covered. I have wondered as I cleaned the other pipes in this lot if the oily build up was a combo of the life lived in the Antarctic. The stem was oxidized and very dirty but otherwise in good condition. There was a thick sticky, oily substance on the surface of the stem that I could scrape with my fingernail. There were tooth marks and chatter on both sides in front of the button. The stem would not seat properly in the tenon do to the tars in the shank. I took photos of the pipe to show what it looked like before I started the cleanup work. I took close up photos of the bowl and rim top as well as the stem. You can see the condition of the rim top and bowl in the first photo. The outer edge appears to be in decent condition under the grime and lava. The inner edge looks ok but there looks like some damage on the front. I won’t really know the full story until I remove the thick lava overflow on the surface. The stem had tooth chatter and some bite marks on the top and the underside of the stem just ahead of the button.It has been a while since I have worked on the remaining pipes that belonged to Farida’s Dad. I thought it might be helpful to remind us all of the background story of these pipes. Here is the material that I quoted in previous blogs. I have included both the written material and the photo that Farida included of her Dad.

When I wrote the blog on the Classic Series Dunhill and thinking about its travels, Farida sent me an email with a short write up on her Dad. She remembered that I had asked her for it so that I could have a sense of the stories of her Dad’s pipes. Here is what she wrote: My dad, John Barber, loved his pipes. He was a huge fan of Dunhill and his favourite smoke was St. Bruno. No one ever complained of the smell of St. Bruno, we all loved it. I see the bowls and they’re large because he had big hands. When he was finished with his couple of puffs, he would grasp the bowl in the palm of his hand, holding the warmth as the embers faded. The rough bowled pipes were for daytime and especially if he was fixing something. The smooth bowled pipes were for an evening with a glass of brandy and a good movie. In his 20s, he was an adventurer travelling the world on ships as their radio operator. He spent a year in the Antarctic, a year in the Arctic and stopped in most ports in all the other continents. He immigrated to Canada in the mid-fifties, working on the BC Ferries earning money to pay for his education. He graduated from UBC as an engineer and spent the rest of his working life as a consultant, mostly to the mining companies. Whatever he was doing though, his pipe was always close by.

She sent along this photo of him with his sled dogs in the Antarctic sometime in 1953-1954. It is a fascinating photo showing him with a pipe in his mouth. He is happily rough housing with his dogs. As a true pipeman the cold does not seem to bother him. Thank again Farida for sending the photo and the story of your Dad for me to use. I find that it explains a lot about their condition and gives me a sense of who Dad was. If your Dad was rarely without a pipe I can certainly tell which pipes were his favourites.As I looked over the pipes I noted that each of them had rim damage and some had deeply burned gouges in the rim tops. The bowls seemed to have been reamed not too long ago because they did not show the amount of cake I would have expected. The stems were all covered with deep tooth marks and chatter and were oxidized and dirty. The internals of the mortise, the airway in the shank and stem were filled with tars and oils. These were nice looking pipes when her Dad bought them and they would be nice looking one more when I finished.

Here are the links to the previous six blogs that I wrote on the five pipes that I have finished. The first was a Dunhill Shell oval shank pot (https://rebornpipes.com/2018/02/04/restoring-a-1983-dunhill-shell-41009-oval-shank-pot/). The second was a Dunhill Classic Series Shell Billiard (https://rebornpipes.com/2018/02/08/faridas-dads-pipes-2-restoring-a-1990-lbs-classic-series-dunhill-shell-billiard/). The third pipe was a Savinelli Autograph (https://rebornpipes.com/2018/02/15/faridas-dads-pipes-3-restoring-a-savinelli-autograph-4/).The fourth pipe was a Dunhill Red Bark Pot that was in rough shape (https://rebornpipes.com/2018/03/10/faridas-dads-pipes-4-restoring-a-dunhill-red-bark-pot-43061/). The fifth pipe was a Dunhill Root Briar Bent Billiard (https://rebornpipes.com/2018/07/07/faridas-dads-pipes-5-restoring-a-dunhill-root-briar-56-bent-billiard/). The sixth pipe was a Charatan’s Make Distinction https://rebornpipes.com/2018/08/22/faridas-dads-pipes-6-restoring-a-charatan-make-distinction/

Today, I went back to the remaining two pipes in the collection today and chose to work on the Charatan’s Make – a pot shaped pipe. It was dirty so it took a bit of cleaning on the shank to read the stamping. On the left side of the shank it is stamped Charatan’s Make, over London, England over Belvedere. Under that at the bowl shank junction is a cursive L in a circle denoting a Lane era pipe. To the right of the stamping near the shank stem junction it is stamped with the shape number 48DC. The DC refers to the Double Comfort style stem. The smooth finish was sticky with oils and thick grime. The bowl felt oily to touch.

To try to figure out the era of the Charatan’s pipe I was working on I turned to the pipephil website, Logos and Stampings. There is some really helpful information on each of the lines of Charatan’s Make pipes that entered the market. Here is the link to the section of the site that I turned to, http://www.pipephil.eu/logos/en/logo-charatan.html. There is an alphabetical listing of the lines but the Belvedere they showed had a stem made for a 9mm filter while the one I have is a nonfiltered pipe. The site did give a short history of the brand. I quote the portion that is most pertinent.

The brand was founded in 1863 by Frederik Charatan. When his father retired in 1910, Reuben Charatan took over the family business. All the pipes were handmade until 1973. The brand name has been overtaken by Dunhill in 1978 and sold in 1988 to James B. Russell Inc.(NJ, USA). During the period 1988-2002 Charatans were crafted by Butz Choquin in St Claude (France). Dunhill re-purchased Charatan brand name in 2002 and Colin Fromm (Invicta Briars, Castleford) followed up on freehand production.

I turned to Pipedia to see if I could find more information on the brand and possibly a link to the Distinction line (https://pipedia.org/wiki/Charatan) but once again in the general article it was not listed.  It did give a little more historical information. I quote the pertinent parts and have highlighted in bold the sections that give information on this particular pipe.

In 1863 Frederick Charatan, a Russian/Jewish immigrant, opened a shop in Mansell Street, located in the borough of Tower Hamlets, London E1, where he began to carve Meerschaum pipes. These pipes got very popular soon, and thus Charatan moved to a bigger workshop in Prescot Street, just around the corner. Here he began to make briar pipes which should make the name famous the world over. Charatan was the first brand to make entirely hand-made briars from the rough block to the finished pipe including the stems. The nomenclature “Charatan’s Make” refers to this method of production and was meant to differ Charatan from other brands who “assembled” pipes from pre-drilled bowls and delivered mouthpieces.

Being the undisputed No. 1 in English pipemaking, Charatan was approached by Alfred Dunhill who was unsatisfied with the quality of the pipes he imported from France. During 1908 – 1910 Dunhill bought pipes from Charatan paying exorbitant prices to ensure he had some of the very best pipes for sale in England. In 1910 he lured away Joel Sasieni, one of Charatan’s best carvers, and opened his own small pipe workshop on 28 Duke Street. On the retirement of his father in 1910 Reuben Charatan took over the family business…

…The pre-Lane period (prior to 1955) and the Lane era pipes (1955 to until sometime between 1979 – 1984) are of primary interest the collector. The Lane era is often quoted as beginning about 1950… Charatan records are almost non-existent before Lane due to a factory fire, making it difficult to date pre-Lane pipes. Charatan used 4 basic grades prior to 1950: Supreme, Selected, Executive, and Belvedere. After 1950 Herman Lane’s influence began, and the grades started to expand. In 1955 Lane took over sole distributorship of Charatan in the US. In 1957 he introduced the Supreme S. Most of his other introductions were from the 60’s and early 70’s…

The section called Miscellaneous Notes had some interesting information.

Charatan records indicate the DC (Double Comfort) bit was introduced in the 50’s, but some report seeing them in earlier production. Still others indicate they were introduced by Lane in 1960. Regardless, the DC bit is not an accurate way to date a pipe because many Charatan’s were made with regular and saddle type bits throughout the “Lane Era”…

…The Lane Trademark serif and circled L indicates the pipe is from the “Lane Era” (approx. 1955 to 1979 -1984?), however it appears that both the English factory or Lane themselves sometimes, or perhaps even often forget to stamp the L on a pipe. The Charatan factory was known for inconsistencies, especially in stampings. Therefore, although an L on the pipe definitely defines it as a Lane Era pipe, the lack of it could simply mean the pipe missed receiving the stamp from the factory. The lack of the trademark could also mean the pipe was destined for the European market.

I continue digging further into the dating of the pipe, but what I had found was a good start for me. If some of you would like to try your hand at dating it more accurately as to the time period it came out you might want to check out the article on Pipedia on Dating Charatans (https://pipedia.org/wiki/Dating_of_Charatans). I had enough for me to start working on the pipe itself and see what lay beneath the heavy tars and oils.

Like most work the refurbisher does this one walks a fine line between restoration and preservation. The deciding feature with this pipe was the wishes of the family. They wanted the pipe to be cleaned and smoked by someone who could carry on the pipe man’s legacy of their Dad. I understand that it meant changing the current state of the pipe to bring it back closer to the way it was when their father bought it. I reamed the bowl with a PipNet reamer. I used two of the four cutting heads to clean out the cake. The bowl was thickly caked I started with the smaller of the two and worked my way up to the second which was about the same size as the bowl. I cleaned the remnants with a Savinelli Fitsall Pipe Knife and scraped it back to bare briar. I finished by sanding the inside of the bowl with a dowel wrapped in sandpaper. I scraped the top of the rim with the edge of the Savinelli Fitsall Pipe Knife to remove the lava. I scrubbed the exterior of the bowl and shank with a tooth brush and Murphy’s Oil Soap to break through all the grime. I rinsed the bowl under running water to remove the grime and grit. I repeated the process until I had the bowl clean. I took photos of the cleaned exterior of the bowl to show where things stood at this point in the process. I topped the bowl on a topping board with 220 grit sandpaper to remove the damage to the top surface of the rim and clean up the damage to the edges. I did not have to remove a lot and repeatedly checked it to make sure that I had removed enough but not too much. I wanted to take the rim top down until the burn damaged area was smooth and minimized. The second photo shows the remaining burn mark at the front of the bowl. I used a folded piece of 180 and 220 grit sandpaper to bevel the inner edge of the rim until I had removed most of the damage on the back inner edge.With the externals clean it was time to clean out the mortise and shank and airway into the bowl and the airway in the stem with alcohol, cotton swabs and pipe cleaners. I scraped the mortise with a dental spatula and a pen knife to loosen the tars before cleaning. I worked on the bowl and stem until the insides were clean. I wiped down the exterior of the bowl with alcohol on a cotton pad to remove any remaining oils and grimes from my cleaning of the bowl and rim. Once the alcohol evaporated the briar was very dry but also very clean. I restained the bowl with a Maple stain pen to match the colour that was original on this pipe. The rim top matched the rest of the bowl. When the stain dried I wiped the bowl down with alcohol to even out the stain on the sides and top of the bowl. I rubbed down the briar with Before & After Restoration Balm. I worked it into the smooth finish to clean, enliven and protect the new finish. It also evened out the stain coat and gave the stain a dimensional feel. I let the balm sit for a little wall and then buffed it with a horsehair shoe brush. I buffed the bowl with a cotton cloth to raise the shine. I buffed the bowl with Blue Diamond on the buffing wheel to raise the shine and smooth out the finish. I took photos of the pipe at this point to show the condition. I was still not happy with the burned edge toward the front of the bowl and figured I would give it a light bevel to smooth it out and make it less noticeable. The next series of photos tells the story on this. Though I know some will find this damaging to the bowl to me it removes the significant char on the front edge of the bowl and gives it a refined look.  I polished the rim top with micromesh sanding pads – wet sanding with 1500-2400 grit pads and dry sanding with 3200-12000 grit pads. I wiped the rim down with a damp cloth after each pad. The rim was really looking better. I gave it a light coat of a walnut stain to blend it in with the rest of the bowl colour. The photos below tell the story. I set the bowl aside and turned my attention to the stem. I sanded out the tooth chatter on both sides with a folded piece of 220 grit sandpaper. I polished the stem with micromesh sanding pads – wet sanding with 1500-2400 grit micromesh sanding pads and dry sanding it with 3200-12000 grit pads. I rubbed the stem down with Obsidian Oil after each pad. When I finished I gave it a final rub down with the oil and set it aside to dry.  With the stem polished I put it back on the pipe and lightly buffed the bowl with Blue Diamond. I buffed the stem with a more aggressive buff of Blue Diamond. I gave the bowl several coats of Conservator’s Wax and the stem several coats of carnauba wax and buffed the pipe with a clean buffing pad to raise the shine. I hand buffed it with a microfiber cloth to deepen the shine. The pipe polished up pretty nicely. The finished pipe is shown in the photos below. This is the seventh of Farida’s Dad’s pipes that I am restoring from his collection. I am looking forward to hearing what Farida thinks once she sees the finished pipe on the blog. This Charatan’s Make Belvedere Pot shaped pipe will soon be on the rebornpipes store if you want to add it to your rack. The dimensions are Length: 5 ¼ inches, Height: 1 3/4 inches, Outside diameter of the bowl: 1 1/2 inches, Chamber diameter: 7/8 inches. Thanks for walking through the restoration with me as I worked over another of her Dad’s pipes. I have one more of his pipes to work on –a Dunhill Shell Billiard with a saddle stem.

Refreshing a Comoy’s Made in London, England Bent Bulldog


Blog by Dal Stanton

I saw this Comoy’s Bent Bulldog as a charity listing on eBay for the Akron Art Museum, in Akron, Ohio.  The seller, like me, was providing pipes for a good cause and I like that.  I also liked the Bulldog I saw in the pictures the seller provided and by the description, it seemed the seller was a pipe person.  The nuts and bolts description:

A classic bulldog! About 5 1/4” long, bowl is 1 1/2” tall, 1 5/8” wide tapering to 1 1/8” at rim. ID 13/16”, depth 1 5/16”. Marked on one side of shank COMOY’S, other side MADE IN LONDON ENGLAND in circular fashion 4097, beneath shank a capital H. A capital C stamped on side of bit. No other marks detected.

Diamond saddle bit is well-seated push fit, cleaned and polished, showing some bite wear but no holes through. Some oxidation as well. Stummel is well hand worn and smoothed, some dings and scratches, scorch on rim, light cake in bowl. Though the pipe is smokable as is, this one has the possibility of being a real beauty with some TLC!

I took the gambit dangled in the last sentence regarding this Bulldog’s possible condition with some TLC.  My bid on the auction block was sufficient, I supported the Akron Art Museum, and now this Comoy’s Bent Bulldog is on the worktable here in Sofia, Bulgaria, on track to benefit the Daughters of Bulgaria, my favorite cause.  This was the second pipe that Stephen commissioned along with a Custom-Bilt Rusticated Panel.  Here’s the picture I saw on eBay which got Stephen’s attention in the For ‘Pipe Dreamers’ Only! collection:Now on my worktable, I take more pictures to get a closer look at the condition of this Comoy’s Bent Bulldog. The nomenclature on the Bulldog’s diamond shank is clear.  On the upper left shank is stamped ‘Comoy’s’.  The right upper shank has encircled, ‘MADE’ with ‘IN’ in the center and ‘LONDON’ on the bottom.  Underneath the circle is ‘ENGLAND’ in straight script.  To the right is shape number ‘409 7’.  Underneath this on the lower right shank panel is stamped ‘H’.  All indicators of the nomenclature point to a Cadogan era pipe which began in 1979 with the merger absorbing Comoy’s.  The simple ‘C’ stem stamp confirms this without the classic 3 piece inlaid ‘C’.  The shape number of 409 has historically indicated a Bulldog on earlier shape charts with a slight quarter bend.  The addition of the ‘7’ on this Bulldog I’m not clear on this, except that during the Cadogan era they added a 4th number to the shapes according to the Pipepedia article on shapes. I would say that this Comoy’s Bent Bulldog has been lovingly enjoyed over the years.  He’s got quite a few scrapes and bruises for the wear, mainly on his dome and circling the double grooves.  I took quite a few pictures of these above.  I’ll need to do some repairs especially on the back side of the dome where there are several small concentrated dents.  The front of the rim has been scorched from lighting practices it appears.  The dome grooves need to be cleaned and I detect a few chips of briar on the back-right side along the grooves.  Also, of interest are two huge fills on the right side of the bowl as it tapers down.  I’ll need to take a good long look at these.  The stem has oxidation and typical tooth chatter and compression dents on the button lip and just before the button.  The former steward was a clencher.
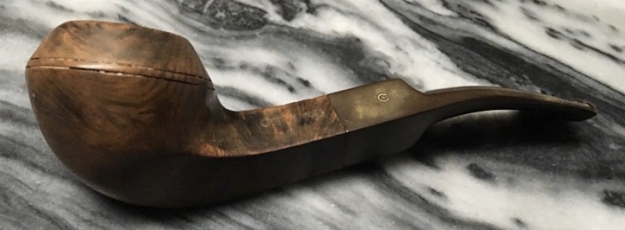
I begin the restoration of this Comoy’s Bulldog by placing the stem in a soak of Before & After Deoxidizer along with other pipes and stems in the queue.  Whoops, I include the original seller’s pictures – I forgot to take pictures of the original stem’s condition before putting the stem into the soak. After some hours of soaking, I remove the Bulldog stem and using a cotton cloth wetted with alcohol, I wipe down the stem removing the raised oxidation.  I follow this by wetting a cotton pad with light paraffin oil (mineral oil) and continue to wipe off the oxidation and the oil helps rejuvenate the vulcanite.After the soak wiping and the stem dries, I can still detect oxidation on the stem which requires more attention.  Before I start sanding the stem, I use Before & After Fine and Extra Fine Polishes to work on the oxidation.  It is advertised to continue the raising process of oxidation.  I start first with the Fine Polish by putting some on my finger and rubbing it in the vulcanite.  I also work it in well around the ‘C’ stamping to clean it more.  After applying, I allow it to stand for some time and then wipe off.  I do the same with the Extra Fine Polish.  After I’ve finished, I still see a deep greenish hue indicating the oxidation is still holding on.  The last picture below tries to capture what I see with the naked eye – it doesn’t do a very good job! One more noninvasive approach to the oxidation I’ll try.  I scrub the stem surface using Magic Eraser.  After working the white sponge over the entire surface, it did do a good job.  More oxidation was removed, but not enough to make me happy!  I still see oxidation especially on the ‘saddle’ of the saddle stem.  The pictures show the progression.Next, I sand the stem starting first with 240 grit paper.  I do not like going through the fine tune buffing with micromesh pads and start seeing oxidation!  So, I sand the entire stem, avoiding the Comoy’s ‘C’ stamping.  I also use at disc to sand against at the stank side of the stem.  The disc helps to guard against shouldering the stem so that the edges are not sharp as the stem joins the shank.  This sanding is primarily for dealing with the oxidation.  In the pictures below, you can see the bit area compressions that are left untouched by the sanding.Before proceeding further with the sanding of the stem, I use the heating method to raise the compressions in the vulcanite in the bit area.  Using a Bic lighter, I paint the bit and button to heat the vulcanite which causes it to expand.  The hope is that this will cause the indentations perhaps to go away or lessen in their impact so that they will then sand out more easily. After painting the bit with the open flame, it helped to minimize some, but it did not erase the dents and compressions on the bit and on the button lips.  I follow with a flat needle file to file the button to refresh and shape the edges.  I follow again with 240 grit paper continuing to sand the dents on the bit.  Using the Bic lighter to raise the dents helps and I’m able to sand out all the dents and compressions from biting. Before proceeding further with the sanding of the stem, I use the heating method to raise the compressions in the vulcanite in the bit area.  Using a Bic lighter, I paint the bit and button to heat the vulcanite which causes it to expand.  The hope is that this will cause the indentations perhaps to go away or lessen in their impact so that they will then sand out more easily. After painting the bit with the open flame, it helped to minimize some, but it did not erase the dents and compressions on the bit and on the button lips.  I follow with a flat needle file to file the button to refresh and shape the edges.  I follow again with 240 grit paper continuing to sand the dents on the bit.  Using the Bic lighter to raise the dents helps and I’m able to sand out all the dents and compressions from biting.  Next, I wet sand the entire stem using 600 grade paper and follow this by buffing with 0000 steel wool. One last thing at this point before turning to the stummel, I give the stem a coat of light paraffin oil to help revitalize it.  I put the stem aside to absorb the oil and dry. With the stummel in hand, I begin the internal cleaning by reaming the light cake build up in the chamber.  I use 3 of the 4 blade heads available from the Pipnet Reaming Kit.  I then use the Savinelli Fitsall Pipe Tool to reach the hard to reach places in the chamber.  I then sand the chamber with 240 grade paper wrapped around a Sharpie Pen followed by wiping the bowl with a cotton pad wetted with alcohol to clean the carbon dust left behind.  Inspection of the chamber reveals some heat fissures on the floor of the chamber.  There also appears to be a small fissure creeping up just above the draft hole.  I take a few pictures that show what I’m seeing.  Are these fissures severe enough to warrant a durable patch or perhaps apply a pipe mud to enhance the growth of a protective cake?  That’s what I’ll be considering.  Continuing the cleaning, I use undiluted Murphy’s Soap on the external briar surface.  To work on the grit lodged in the grooves I use a bristled tooth brush.  I also use a brass wire brush to work around the dome and rim to clear away the old oils. Using a sharp dental probe, I painstakingly clean both dome groves, scraping packed dirt out.  I’m careful not to jump ‘track’ out of the grooves and scratching the briar surface.  The picture shows the cleaning progress. With the externals cleaned up, I turn now to the internal mortise and airway.  Using pipe cleaners and cotton buds dipped in isopropyl 95% I go to work. I quicken the work by scraping the mortise with a dental spatula.  In time, the cotton buds and pipe cleaners were coming out clean.  I’ll continue cleaning later using a kosher salt and alcohol soak.Turning again to the stummel surface, the rim and dome cleaned up well but show the dents and pockets from knocks and drops.  There remains a scorched area at the front of the rim/dome area.  There are small chips in several places around the circumference of the dome grooves.  I believe they’re all too small to patch, but with sanding I’m hoping that most should disappear or be minimized.  The most daunting aspect of the briar landscape is a huge, double fill patch on the right lower side of the stummel.  I take two pictures of the fills to show the position and a super close-up to show the appearance of the fills.  I poked the fills with a dental probe and both fills are rock solid.  Yet, as the close-up picture reveals, there are small air pocket holes in the fills and gaping around the fills.  I’ll leave the fills in place but touch them up with thin, clear CA glue and then sand to blend.  These fills will pretty well drive the boat regarding the finished look of the Comoy’s Bulldog.  The finish needs to be darker in order to mask the fills as much as possible, though even a dark stain will not hide these giants.   Looking again around the dome grooves, on the back-right quadrant there may be at least 2 candidates for a patch before sanding.  I take a picture of this area.  To the top left of the groove chips, there are also a few small holes that I’ll fill with a spot-drop of CA glue.  In this picture there are also two other small fills that seem to be in good shape.Before I begin sanding and patching, I start from the top and work my way down!  Topping the stummel will re-define the rim and address the front quadrant of the rim/dome where the former burn damage has thinned the rim.  I take some pictures to show these issues and mark the start. I put 240 grade paper on the chopping board and rotate the inverted stummel several times, checking as I go to make sure I’m staying level and not leaning into soft spots in the briar. When enough of the top is removed, I then switch the paper to 600 grade paper and turn the stummel a few more rotations. I take pictures to show the progress.  Now to the patching party!  I first wipe the stummel with a cotton pad wetted with alcohol to clean the area. I start with the two large fills by spot dropping a small amount of thin CA glue over the fills and spreading the glue over the entire fill – filling the pockets and gaps.  To move the work along faster, since these are not ‘weight bearing’ patches, I use an accelerator to quicken the curing process.   For the groove patch, I insert a piece of an index card into the groove to create a flow barrier for the CA glue.  I then spot-drop a small amount of CA glue slightly above the chip and draw the glue over the chipped area with a toothpick.  Again, I use an accelerator to solidify the glue.  After a few minutes, I pull the index card away and use a sharp dental probe to make sure the groove is clear of CA glue seepage.  Next, I apply small drops to four other small pits near the grooves and above them – again, I use an accelerator.  I decide also to apply a small drop to the right of the primary groove repair.   The repairs look a mess now, but I’m hopeful that the sanding will prove to reveal a more pleasing surface!Next, I begin the filing and sanding of the two large fill patches down to the surface level.  I use a flat needle file to do this initially when the patch mound is more distinct, then follow with 240 grade paper as the sanding nears the briar surface.  The gaps and pits in the original patch filled nicely, blending better with the surrounding briar.To both clean and sharpen the grooves at the groove patch repair, I insert 240 grade paper into the groove itself.  The groove is only large enough to accommodate a single sheet, so I must flip the paper to sand both the upper and lower edges of the groove.  I use a sawing motion with the paper while in the groove and I flex the paper up to apply a little more sanding action to the groove edge.  This technique does a good job redefining and cleaning up groove edges, especially at the point of the CA glue repair.After filing, sanding the groove patch repairs, and ‘groove sanding’ the groove repair looks great!  The patch has blended, and the groove is cleaner and smarter.Next, I move on to filing and sanding the 4 patches to the left of the groove repair on the dome.  I file the patch mounds down until near the briar surface and then take over with 240 grit paper.  I sand the area of the patches to blend.  It looks good – not pristine, but much less ragged!  The battered stummel is showing some signs of life!I follow by ‘groove sanding’ this area.  I like the results of this technique, so I decide to continue the groove sanding around the entire circumference of the dome for both the upper and lower grooves.  Since I’m able only to do one directional sanding on the grooves, it requires four circuits around the dome to do the job!  I refined the technique as I work – by flexing the paper somewhat I can sand more directly chips encountered on the groove edge as I slowly work around the dome.  The pictures show the groove sanding progress and results – much cleaner and crisper for this Comoy’s Bulldog! I continue preparing the external briar surface by sponge sanding starting first with the coarse sanding sponge.  I then use a medium grade sponge then finish with a light grade sanding sponge.  I avoid totally the upper shank panels with the nomenclature.  Sanding sponges help to clean the surface of the minor nicks and cuts and soften the look without an overly intrusive sanding effect.  The pictures show the results of the 3 sponges. As I sponge sand the dome of the Bulldog, I notice a chip in the inner lip of the rim that became more distinct during the sanding process.  To erase this small divot, I introduce a very gentle inner bevel to the rim using 240 grade paper rolled.  This dispatched the divot quickly. Earlier, I avoided using the sanding sponges on the nomenclature panels in order not to diminish the Comoy’s stampings.   I do want to clean the panels more to rid the old residue finish before applying a fresh stained finish.  To remove the old finish and to clean the panel I apply acetone to a cotton pad and wipe the panels.  This does the job. With the time of my departure for the work day rapidly approaching, I continue the internal cleaning of the mortise and airway using a kosher salt and alcohol soak.  After forming a wick by stretching and twisting a cotton ball, I insert it down the mortise and airway using a stiff wire.  The wick acts to draw out the tars and oils.  I then add kosher salt (no aftertaste) to the chamber and place the stummel in an egg crate for stability.  With a large eyedropper, I add isopropyl 95% to the chamber until is surfaces over the salt.  After a few minutes, after the alcohol has absorbed into the chamber, I top off the alcohol and set the stummel aside to soak for the day.Arriving home several hours later, the soak did the job of finishing the internal cleaning.  I clean the expended salt from the chamber with paper towel and shank brushes as well as blowing through the mortise.  I run an additional pipe cleaner and cotton bud wetted with alcohol to assure the internals were clean.  They are, now moving on!Before proceeding further with the external stummel preparation, I’ve come to a decision point regarding the chamber issues that I saw earlier.  The floor of the chamber has heat fissures which the first picture shows.  The second picture shows the fissure immediately above the draft hole.  The upper chamber shows some heating issues with small, more normal chamber wear.  Earlier, my question had been, do the fissures on the floor of the chamber need a more durable response than simply applying a pipe mud mixture to enhance the growth of a protective cake?  The floor of the chamber has experience overheating issues and I believe at this point would benefit from applying J-B Weld to prevent further damage and to reinforce the resistance of the chamber floor.J-B Weld comes with two components that are mixed together and once mixed harden to form a heat resistant bond.  I’ll mix a small amount and apply it to the floor of the chamber then spread it over the area, including above the draft hole, filling the fissures with the Weld.  After it hardens and cures, I’ll sand the excess. I first wipe the chamber with alcohol and put a pipe cleaner through the airway to block seepage into the draft hole.  After I mix J-B Weld components in equal parts, I apply a small amount on the floor of the chamber and spread it with a dental spatula and my finger. I rotate the pipe cleaner so that it is not stuck but I leave it in place – I don’t want to pull it out while the J-B Weld is wet leaving the mixture in the mortise.  I put the stummel aside for the J-B Weld to cure.  After the repair cured overnight, I take a picture of the sanding process using 240 grade paper wrapped around a Sharpie Pen.  I concentrate on removing the excess J-B Weld so that all that is left of the weld is what has filled the fissures and cracks. The next pictures show a much healthier chamber.  At the floor of the chamber in the first pictures and concentrating on the area immediately above the draft hole in the second picture, you still see what appears to be rough spots, but it is now smooth to the touch in large measure.  The Weld filled the cracks and reinforced the area.  The application of J-B Weld and the additional sanding on the floor and the walls of the chamber cleaned it up nicely.  Putting the stummel aside, I take the stem and wet sand using micromesh pads 1500 to 2400.  I follow by dry sanding with pads 3200 to 4000 and 6000 to 12000.  Between each set of 3 pads I apply Obsidian Oil to revitalize the vulcanite. With the stem waiting in the wings, I continue with the stummel by wet sanding with micromesh pads 1500 to 2400.  I follow this by dry sanding with pads 3200 to 4000 and 6000 to 12000.  I take pictures of both sides of the stummel to show the huge fills on the right side.  If it weren’t for these unavoidable fills, the fantastic recovery the stummel has made would encourage me to leave the original, natural grain finish in place.  The briar surface had many issues, but the results of the micromesh sanding reveal a very attractive grain presentation.  The next step is to apply a dark stain to the Comoy’s Bulldog that will serve to help mask the issues prevalent on the surface.  Without question, my plan is to apply Fiebing’s Dark Brown Leather Dye to the stummel surface.  I assemble all the needed components on the table to apply the stain.  First, using a sharp dental probe I carefully dig out and scrape the dome grooves to make sure the debris is gone.  After wiping the stummel with alcohol to clean and prepare the surface, I fit the stummel with a cork I’ve fashioned as a handle inserted into the mortise.  Next, I heat the stummel with a hot air gun to expand the briar grain.  This aids the briar in absorbing the dye pigment.  Using a folded over pipe cleaner, I apply the dye to the stummel.  After a thorough application, I flame the stummel with a lit candle and the alcohol-based aniline dye combusts and sets the dye in the grain.  After a few minutes, I apply the dye again and flame again to make sure there is an even coverage.  I then set the stummel aside for the dyed stummel to rest. After resting for several hours through the night, it’s time to unwrap the fire-crusted Comoy’s stummel.  Over time, I have developed my own techniques for use with the Dremel since this is my main and only work horse tool on the 10th floor flat of a formerly Communist block apartment building!  My usual method for ‘unwrapping’ has been with the use of a felt buffing wheel, which is more abrasive than cotton, applying Tripoli compound.  I love this technique because the result reveals a more brilliant grain pattern as it lightens the grain veins leaving them in contrast to the softer briar wood which absorbs more of the dye.  However, I have found that using the felt buffing wheel lightens the entire stummel.  With the large dark fills on this stummel in need of remaining masked for better blending, I use a cotton cloth buffing wheel with Tripoli compound to unwrap the flamed crust.  The softer cotton wheel isn’t as abrasive and leaves a darker dyed hue on the briar surface.  After mounting a cotton cloth wheel on the Dremel, I set the speed at the lowest RPM and I apply Tripoli to the stummel. I take a couple staged pictures to show the contrast between the flamed crust and the surface that has been ‘unwrapped’ and buffed with compound.  After completing with the Tripoli, I wet a cotton pad with alcohol to wipe the stummel not so much to lighten but to blend the new stained finish. Next, I rejoin the stem and stummel to apply Blue Diamond compound.  I discover that the junction between the tenon and mortise has loosened through the cleaning process – a common thing in my experience.  To remedy this, I take a drill bit the next size larger than will fit through the tenon airway.  I use a Bic lighter and heat the tenon and after a bit, the vulcanite tenon becomes supple and allows me gradually to insert the drill bit end into the airway.  This expands the tenon and tightens the connection.  This works like a charm!  With the stem now fitting snuggly, I continue to apply Blue Diamond to the stummel and stem.  I mount a cotton cloth buffing wheel to the Dremel and increase the speed to about 40% full power.  I apply Blue Diamond compound to both stem and stummel.Before moving on to applying carnauba wax to the pipe, I have two more projects to do.  The first is to apply white acrylic paint to refresh the Comoy’s ‘C’ stamping on the stem.  The second is to apply pipe mud to the chamber.  I decide to do the latter first.  After the repair done to the chamber, to enhance the healthy development of a protective cake (which should be maintained at about the width of a US dime coin) I use a mixture called pipe mud – a combination of cigar ash and water.  This mixture, once applied to the chamber and dries, hardens to create a starter surface for the cake to develop.  My colleague, Gary, who lives in Plovdiv, Bulgaria, is the cigar man who saves his ash for my use. Thanks, Gary!  I mix some water with ash in a plastic dish and mix it with my pipe nail until it starts to thicken. At this point, I apply it in the chamber with the nail and my finger.  It doesn’t dry quickly so there’s time to spread it evenly over the chamber.  After spread, I insert a pipe cleaner through the draft hole to keep it clear of the mud.  I then put the stummel aside in the egg cart for the mud to cure. Turning now to the Comoy’s ‘C’ stem stamp, I put a drop of white acrylic paint over the ‘C’ and absorb the excess with a cotton pad and ‘dob’ it out so that the paint thins and dries.  I then use a toothpick’s flat edge to gently scrape the excess paint off after it dries.  I have to reapply paint a few times to get it right.  The pictures show the process. After allowing the pipe mud to cure, I rejoin stem and stummel and once more, run the sharp dental probe in the grooves around the circumference of the dome then buff the pipe with a felt cloth clearing away the compound dust before applying wax.  I then mount a cotton cloth buffing wheel to the Dremel, keep the speed at about 40% full power and apply a few coats of carnauba wax to the pipe.  I finish the restoration by using a microfiber cloth to give the pipe a rigorous hand buffing to raise the shine.

I’m pleased with the results of this Comoy’s Made in London, England, Bent Bulldog.  The restoration was fought in the trenches!  The many repairs done to the stummel surface came out well, though the two large fills are still evident, but not as overt. The dark brown dye came out beautifully and the groove patches and repairs have all but disappeared.  I’m glad I also addressed the heat fissure issues in the chamber.  This Comoy’s Bent Bulldog will provide many more years of service to a new steward.  Stephen commissioned this Comoy’s and will have first opportunity to acquire it in the Pipe Steward Store and this pipe benefits the Daughters of Bulgaria – women and girls who have been trafficked and sexually abused.  Thanks for joining me!


Comoy’s 283 Grand Slam Restoration


By Al Jones

The 283 is an iconic Rhodesian shape for Comoy’s and one of my favorites. Later in the Comoy’s catalog, this shape number switched to the 440, but no explanation is provided for that change. This one popped up on Ebay and I was able to strike a deal with the seller. The ad had only a small number of fuzzy pictures but to my eye, it showed promise. This one was a Grand Slam, but with some nomenclature details I’d not seen on previous models that I had restored.

Having recently worked on a Comoy’s Grand Slam, I noticed that there was some significant differences on the nomenclature. Below is the stamping on the 283. I posted a thread on the PipesMagazine.com forum asking for some help on dating this particular pipe. Member “doctorbob”, a frequent contributor in the British section offered the following comments, which helps date the pipe to an early post-WWII period. The round, “Made In London” England was used from the mid 40’s to the late 1970’s (up to the transition point).

The second pipe is most likely a very early post-war pipe. The difference in patent numbers was not era based, instead Comoy’s used the appropriate stamp for the recipient market (2001612 was the US patent). The second pipe was intended to be sold in the UK. The time overlap between that particular COM and the patent stamping was apparently quite short.

To further add, the US patent for the ‘Grand Slam’ apparatus was approved in 1935 and expired in June of 1953. US market pipes after that would not have born the patent stamp. The UK patent was roughly contemporary.

It is not known with ANY certainty when the Made in London England stamp started, but it is commonly accepted to have begun being used in the 1945-1950 time frame

?

?

The pipe was in very good condition as received. The stem was oxidized, but with no serious teeth marks. There were several dings around the bowl. There was some rim darkening, but the beveled edge was largely intact. There was very little cake build up in the bowl.

I reamed the cake and soaked it with alcohol and cotton balls. While the bowl was soaking, the stem was soaked in a mild solution of Oxy-Clean, with a dab of grease on the C.

Following the soak, I used a piece of 2,000 grade sandpaper to lighten the rim darkening, followed by 8,000 grade micromesh. I used an electric iron and a wet cloth to steam out some of the dents in the briar.

The stem was mounted and oxidation removed with 800, 1,000, 1,500 and 2,000 grade sandpaper, followed by 8,000 and 12,000 grade micromesh. It was then buffed with White Diamond and Meguiars Plastic Polish. The bowl was buffed with White Diamond and several coats of Carnuba wax, showing great care around the nomenclature.

Below is the finished pipe.