Blog by Steve Laug
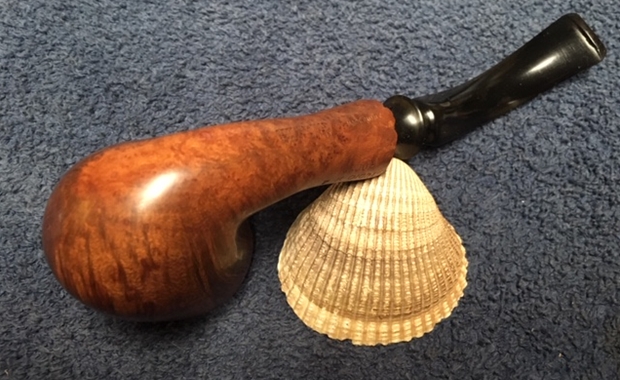
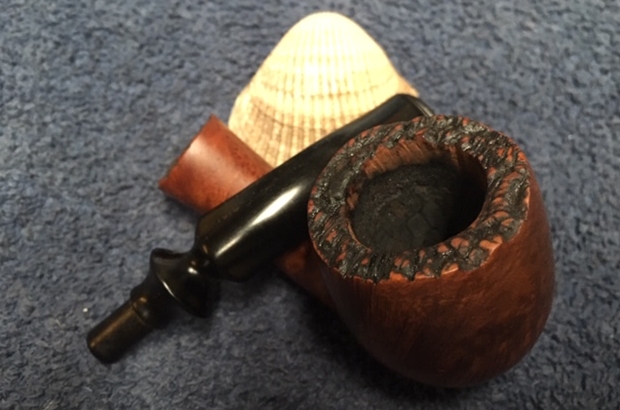
It was time to go back to working on the estate pipes from the pipe shop that had closed here in Vancouver. The entire lot came to me from the estate of an older pipeman whose wife dropped them off at a pipe shop to be cleaned and sold. When the shop closed they came to me. The pipe on the table now was an Italian made with a bit of a freehand look to it. It is stamped GIGI over Collection Italia on the left side of the shank. On the right side it is stamped Studio X 4 over 40288. On the underside of the shank it is stamped REGD. NUMBERS over 256267-386165 followed by Made in Italy. The briar has some nice straight and flame grain around the bowl with what looks like faux plateau on the top of the bowl and the shank end. The bowl had a thick cake in it with an over flow of lava on the rim top. The plateau type finish was filled in with lava and was a real mess. It was hard to know what the rim edges looked like with the thick coat covering it all. The briar was dull and dirty looking. The freehand style stem is vulcanite and is oxidized. It had a turned portion near the tenon and the stem itself was oval. There was calcification and tooth chatter and marks damage next to the button on both sides. I took photos of the pipe when I received it.
 I sent about twenty of the pipes to my brother Jeff in Idaho to work over and clean up. He cleaned up the pipes with his usual thoroughness – reaming the bowl and scrubbing the internals with alcohol, cotton swabs and pipe cleaners. He scrubbed the exterior with Murphy’s Oil Soap to clean off the dust and grime on the finish. When he sent it the pipe was ready to restore. I took photos of the pipe when I unpacked it. The briar was clean and the finish dull. There were some small fills on the left underside of the shank and bowl that needed to be repaired.
 I took a close up photo of the rim top after Jeff had cleaned it up. The look of the rim top and edges is very good. The carved finish on the plateau top is clean and undamaged. He had been able to remove the cake and the lava very well. The bowl looked very good. The plateau on the shank end is also very clean. The stem is also shown and was very clean. The tooth marks on both sides near the button are visible in the photos.
  I was unfamiliar with the brand so I did some searching online and found some basic information on Pipedia. I quote in full:
Luigi “Gigi” Crugnola was born in 1934, the same year Giorgio Rovera founded a company in his own name in Varese, Italy along with partners Angelo and Adele Bianchi, who also happened to be Luigi Crugnola’s Uncle and Mother, respectively. The company produced pipes for 30 years, largely exported to America and elsewhere in the world. Crugnola took over the company in 1964 with the death of Angelo Bianchi, changing the name soon after to his own nickname Gigi, and continues to run the company today. The vast majority of Gigi pipes continue to be made for export (https://pipedia.org/wiki/Gigi).
 I turned to my other go to website, Pipephil. The site included a photo of the carver and confirmed the information that I had read on the Pipedia site. It gave the contact information for the pipe company. It is as follows: Gigi Pipe Via Rovera, 40 21026 Gavirate Oltrona al Lago (VA) The link is – http://www.pipephil.eu/logos/en/logo-g3.html.
From that I learned that the pipe was made by Luigi “Gigi” Crugnola and was made after he took over the company in 1964 and changed the name of the brand. I also learned that the majority of the pipes were made for export from Italy so it was not unusual to find one in Canada.
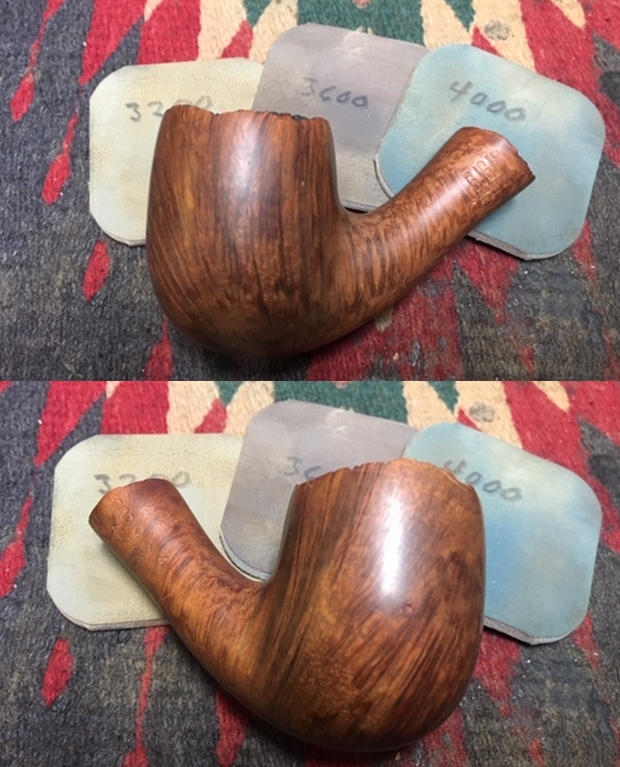
Armed with that information I decided to start on the bowl. I repaired the fills on the underside of the bowl and shank with clear super glue. Once the glue dried I sanded it with 220 grit sandpaper to blend the repairs into the surface of the briar. The fills looked much better with the darkening that occurs with the glue repairs than they did before my work. The photos below show the repaired areas. I polished the briar with micromesh sanding pads to smooth out the surface of the briar and blend the repairs into the rest of the bowl. I wet sanded it with 1500-2400 grit pads and dry sanded it with 3200-12000 grit pads. I wiped it down with a damp cloth after each sanding pad.


 I worked Before & After Restoration Balm into the briar and the plateau on the rim top and the shank end. I worked it into the surface with my fingertips to clean, enliven and protect the wood. I let the balm sit for about 20 minutes and buffed it off with a soft cotton cloth. I took photos of the pipe at this point in the process to show what the bowl looked like at this point.
 I used a Medium Walnut Danish Oil Finish to touch up the repaired area and the rest of the bowl. The walnut stain really makes the grain pop on the briar.
 I hand buffed the bowl with a soft cloth to polish the briar. I buffed it lightly on the buffing wheel using Blue Diamond on the wheel. I took photos of the bowl after buffing. The grain is really standing out on the bowl at this point. It is beautiful.
 I took photos of the stamping at this point because it really stood out now.
 I set the bowl aside and turned my attention to the stem. I used a Bic lighter to paint the surface of the vulcanite with the flame. The heat of the flame raised the tooth marks around the button edges. It raised the bite marks significantly but a repair would still need to be done. As I worked on the stem I noticed that it was faintly stamped on the right side of the stem near the turning with the words GIGI.
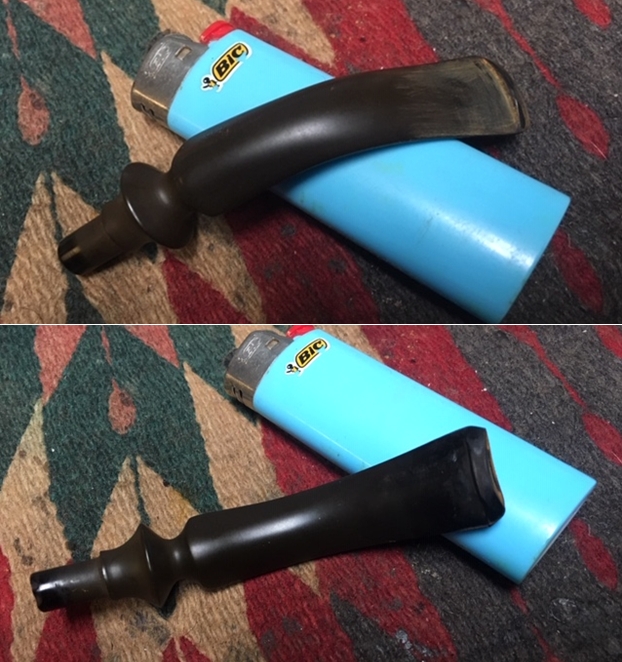 I sanded the tooth marks and the surface of the stem with 220 grit sandpaper to minimize the tooth damage and to remove the oxidation. I was able to remove the majority of the tooth damage other than a few small spots along the button on the top side and the underside.
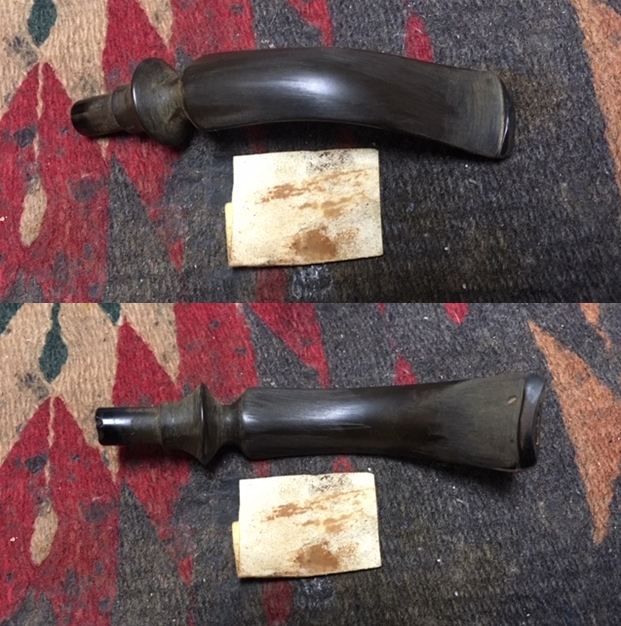 I filled in the tooth marks with superglue spreading it with a toothpick. I set it aside to dry.
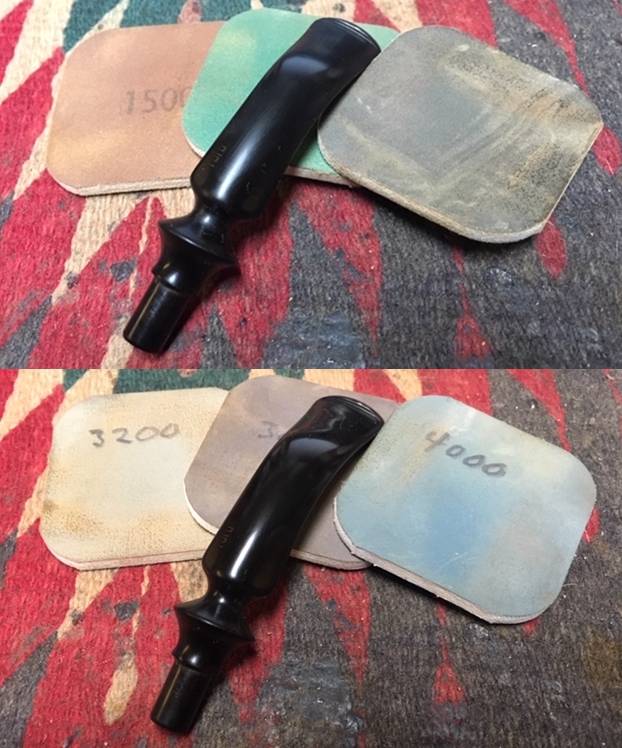
 Once the glue repairs cured I sanded them with 220 grit sandpaper to smooth out the repairs. I sanded them to blend them into the surface of the rubber. I began the polishing of the stem with Denicare Mouthpiece Polish to work on the oxidation. I polished the stem with micromesh sanding pads – wet sanding with 1500-2400 and dry sanding them with 3200-12000 grit pads. I wiped the stem down with Obsidian Oil after each pad. I gave it a further polish with Before & After Pipe Stem Polish – both Fine and Extra Fine. When I finished I gave it a final coat of Obsidian Oil and let it dry. The following photos show the stem at this point.

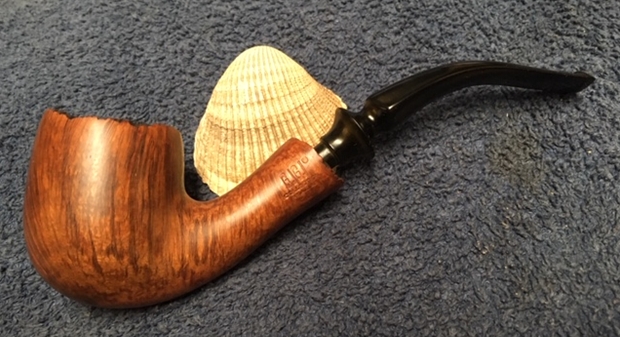
 I polished the bowl and stem with Blue Diamond to polish out the scratches in the briar and rubber. I gave the bowl and the stem multiple coats of carnauba wax. I buffed the pipe with a clean buffing pad to raise the shine. I hand buffed it with a microfiber cloth to deepen the shine. The pipe polished up pretty nicely. The original patina on the bowl came alive with the buffing and worked well with the polished vulcanite stem. The pipe has a rich look. The finished pipe is shown in the photos below. The shape, finish and flow of the pipe and stem work give the pipe a very classic look. The dimensions of the pipe are Length: 6 inches, Height: 2 inches, Outside diameter of the bowl: 1 1/2 inches, Chamber diameter: 3/4 of an inch. Thanks for reading this while I worked on it. It was interesting and unusual piece to restore and I really enjoyed the work.