Guest Blog by Robert M. Boughton
Member, North American Society of Pipe Collectors
http://www.naspc.org
http://www.roadrunnerpipes.com
http://about.me/boughtonrobert
Photos © the Author
“A thick skin is a gift from God.” —Konrad Adenauer (1876-1967), first Chancellor of West Germany
INTRODUCTION
During the course of my serious restorations, and by that I mean the short period of time since I created an online store with the primary goal of selling estate pipes I repair, direct feedback from my local customers has been 100% positive. That, of course, is always gratifying, and I did appreciate it.But those who have read my previous blogs know I am not in the business to be gratified by elliptical, kind words of others. The real motivation is my love of all things tobacco-related and in particular returning a well-used or even battered pipe to its original beauty, or as close as I can come.But being somewhat more thick-skinned than most folks (if everyone grew up in my dysfunctional household, the whole world would have my hide), I always prefer the truth, the whole truth and nothing but the truth. So help me God. That last phrase might better be read, God help me.
In the last couple of months, you see, word has reached me of an alleged problem with the cleanliness of pipes I sold. Now, don’t get me wrong. I only use the word alleged because, having as thick of a head as my dermis and consequent confidence in my work with pipes or on any other subject for that matter, until proven wrong, my impulse was to resist the claim. The problem was that I was not hearing any complaints from customers. Such forthright criticisms might have been disappointing, but being constructive would have been treated as any direct reports: with the professionalism I apply to the daily conduct of my business.
The most unpleasant part of this experience, which as I mentioned went on (and on and on) for a couple of months, was that the feedback I kept getting was not from any friends or fellow pipe club members to whom I sold pipes, but instead from my good friend and mentor, Chuck Richards, who, to my great surprise and initial sadness, was the only person my customers, without exception, seemed to trust with such vital information.
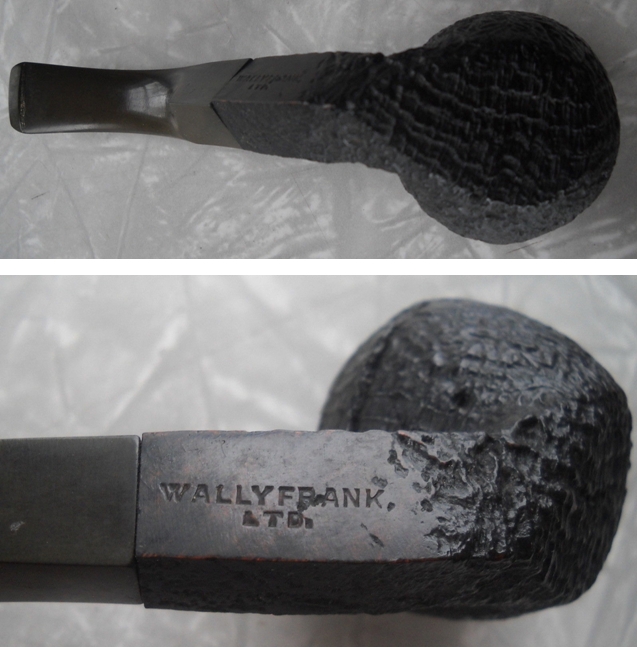
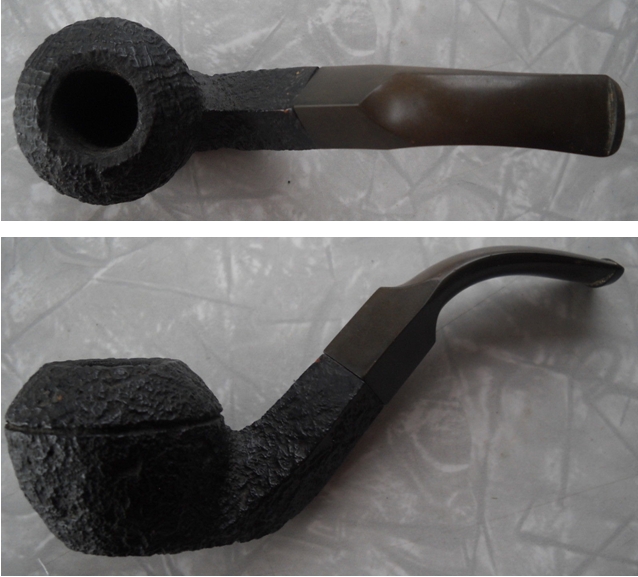
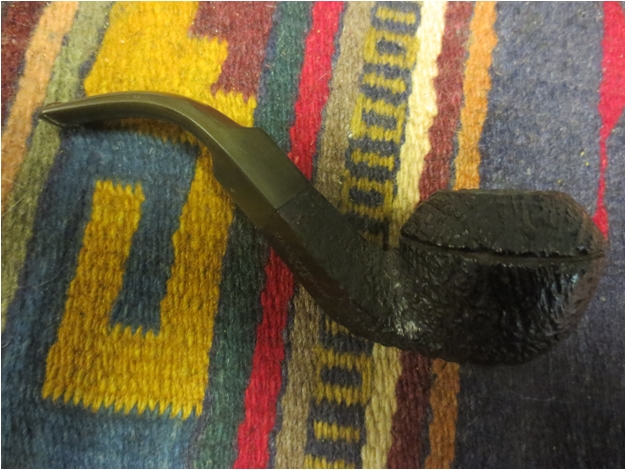
Thus I received the first “word” that I needed to be more careful cleaning my pipes. I can tell you, my pipes almost cleaned themselves when that was all Chuck could say before he was distracted and had to tend to something, giving me just enough time to become more than a tad miffed. Being familiar with Chuck’s occasional terseness, I knew he was only passing on the information and had my interests at heart. Still, my breath grew short, and the heat rose under my collar. Soon enough, I got more details, including the first name of the customer, which I didn’t recognize, and then a description of the pipe – a Londoner black rusticated bent bulldog – that I connected right away to a different first name because I had bent a rule by accepting his check. I realized he went by his second name. Yes, I recalled the pipe and its delighted new owner, when he bought it, with clarity. The nice, rough little black bulldog was one of the few I took from my private collection, having enjoyed it for a while and then allowed it to fall back into a corner, unused and not of particular interest to my personal tastes. Could I have forgotten to clean it? The possibility existed, and although I wanted to remember following my usual routine of cleaning and sanitizing the pipe, I had no blog on which to fall back and check since it was in good condition when I decided to sell it for my growing business and dwindling selection.
Therefore, I explained this scenario to Chuck, and, having the address of the nice older gentleman who had purchased it, went to my bank for a cashier’s cheque in full refund and put it in the mail with a letter of sincere apology. I wrote that I also wished for him to keep the pipe and offered a 20% discount on his next purchase should he choose to give me a second chance. I even asked Chuck, who lived in the same neighborhood and was friends with the man, to tell him not to return the refund, as I knew where he banked and would only deposit it myself.
And so I thought the issue settled – but no. Word of my well-restored pipes with unclean shanks kept coming in, via Chuck. I think it is understandable that my mood simmered until, in time, the situation boiled over. When at last, one afternoon at the tobacconist’s, I grew so heated that I broke out in a sweat, I regret to admit I snapped at Chuck, the only person with the nerve to tell me to my face that a problem indeed appeared to exist. Of course, Chuck was only going by the words of others, but enough instances of the same complaint from a sufficient number of witnesses would convince almost anyone.
“I’m just telling you what I’ve been hearing, and not from one or two people but a good number now,” he said, and the grin, which had never left his face during my account of how many bristly cleaners soaked in Everclear I average per pipe until they come out clean, broke into his full gale force smile. I have always been, was then and suspect I ever will be defenseless against that wonderful expression of delighted amusement. It was, indeed, the best retort to my argument he could have made.
 And that is how Chuck came to explain to me the relative inefficacy of bristles versus the boiled alcohol retort method that he had demonstrated to our pipe group a couple of years ago before I would have even thought of taking notes.
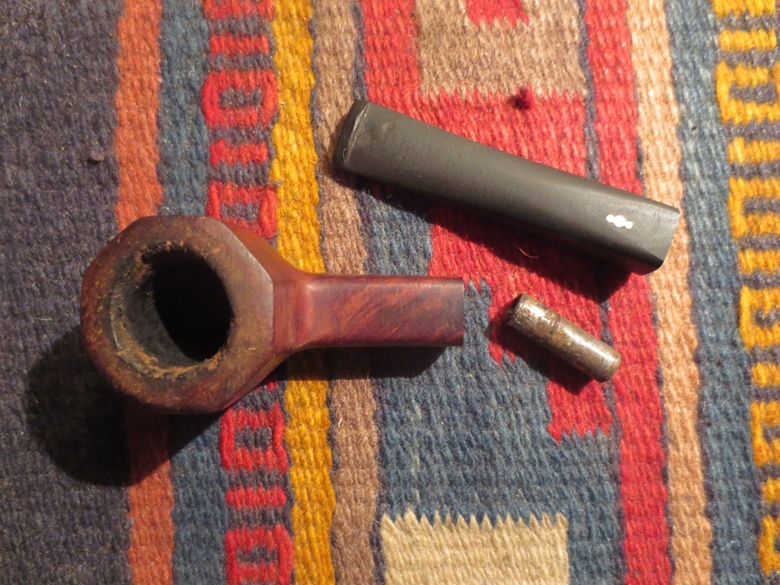
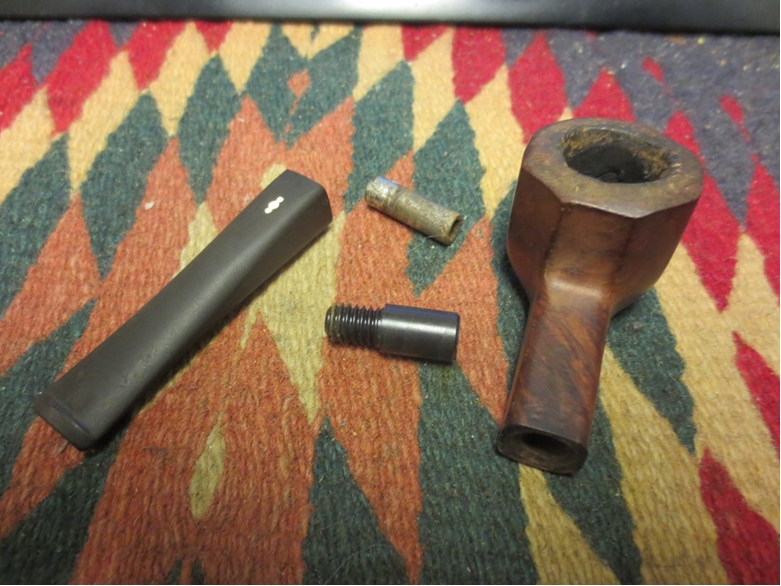
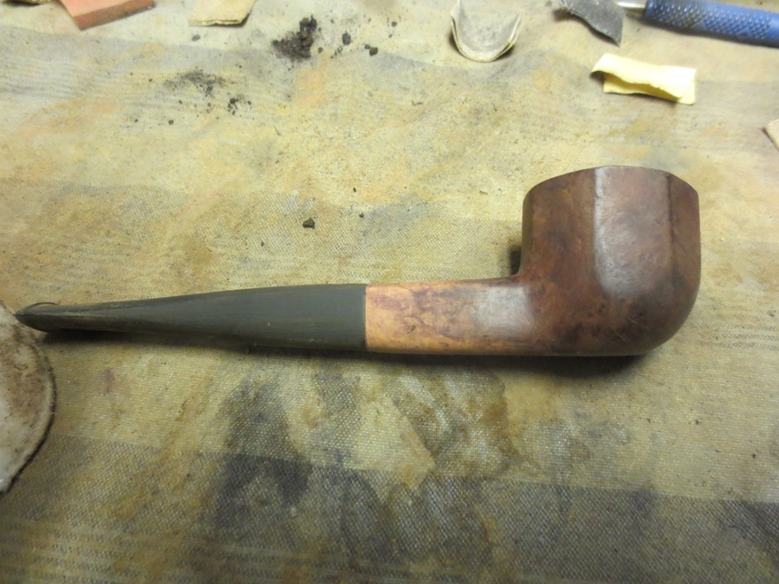
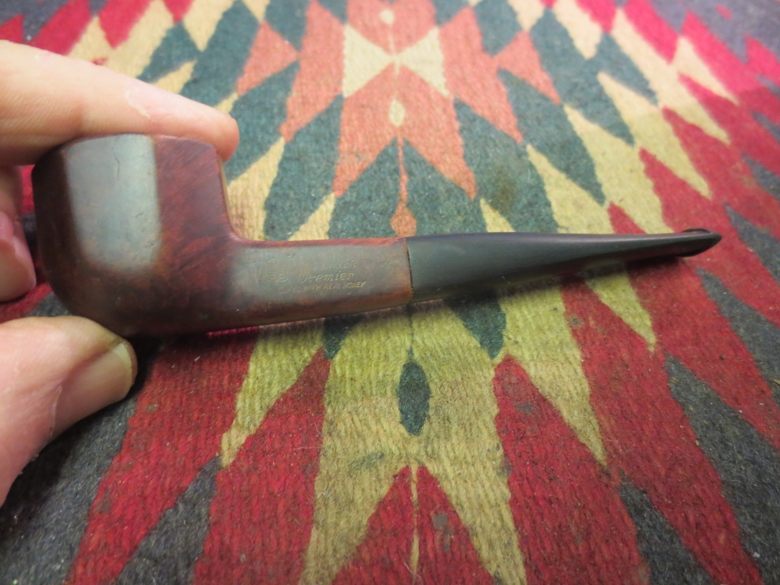
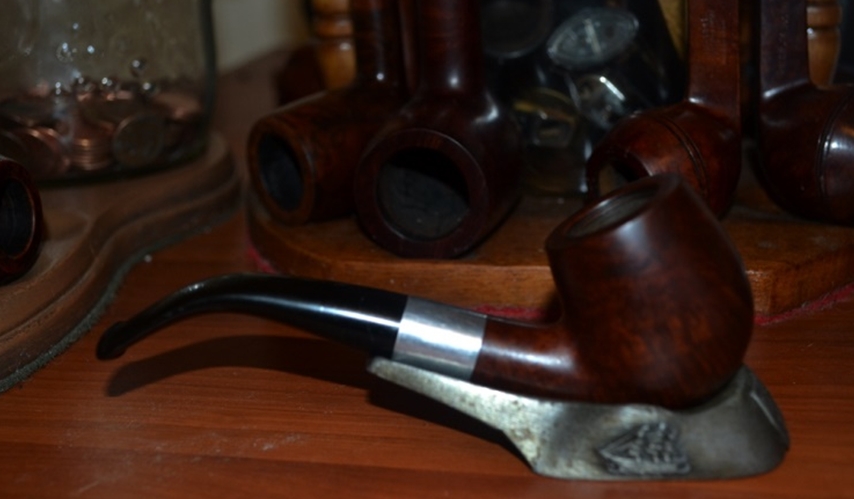
But enough of all that. This blog also concerns the restoration of a Kaywoodie Signet Bent Billiard, including a validation of the retort method by Chuck on the pipe I had thought was finished. I will describe and illustrate that process when the time arrives.
RESTORATION
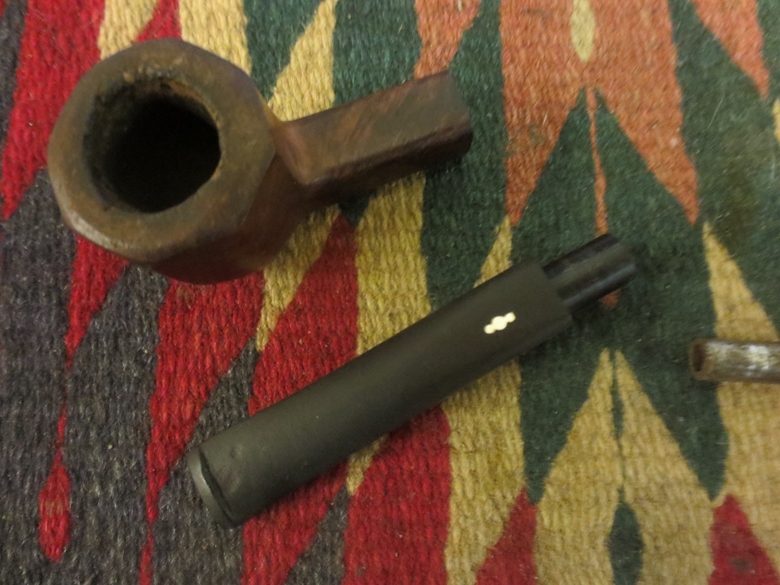
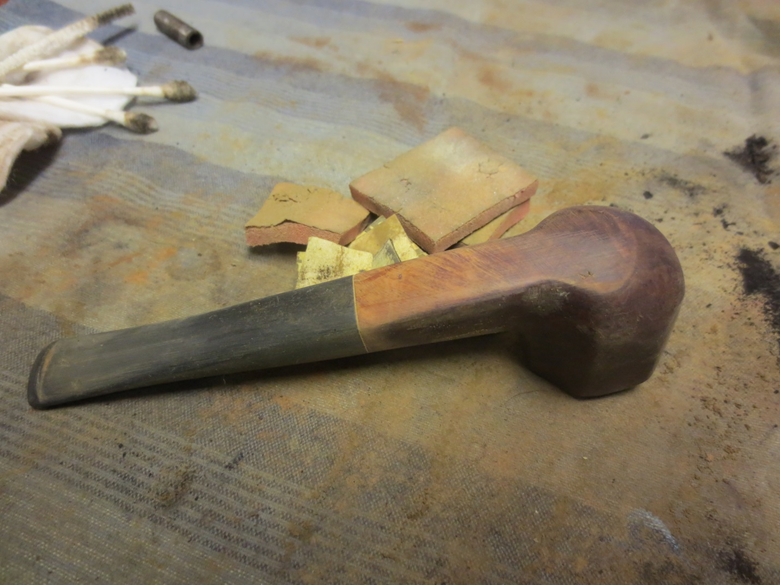
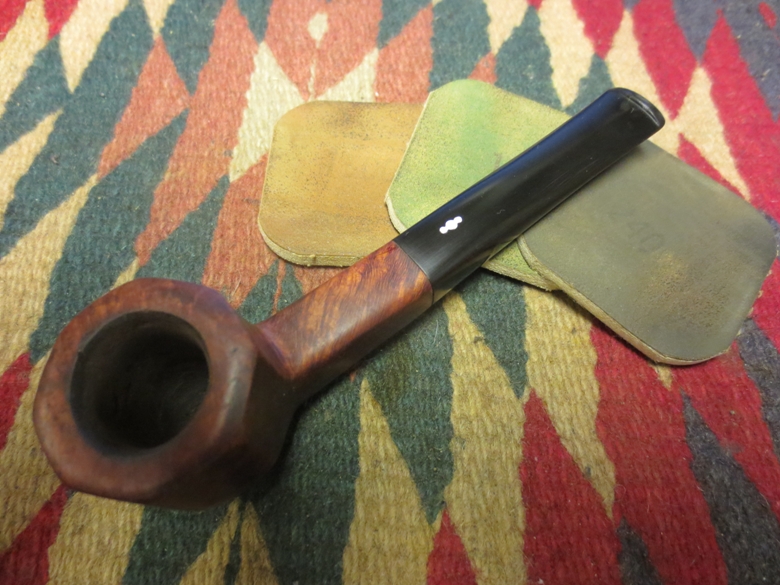
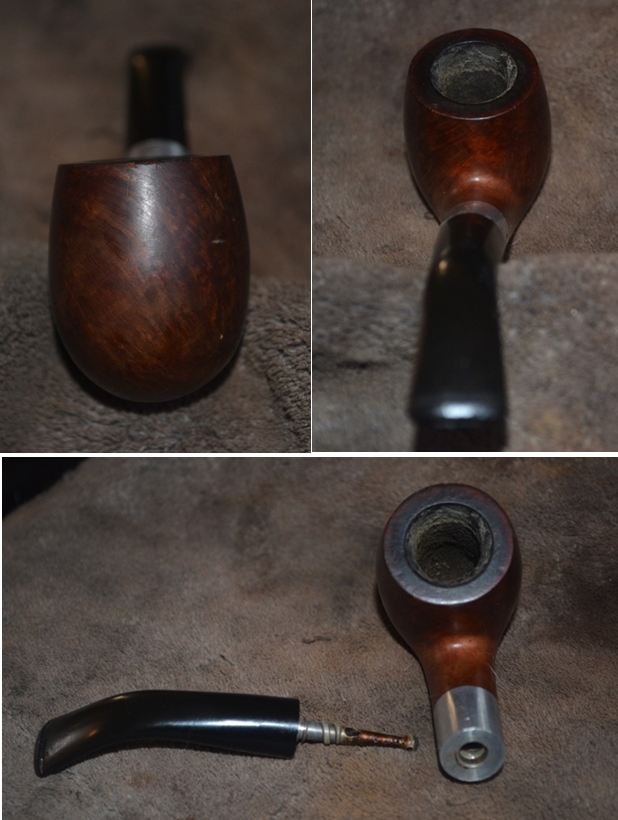
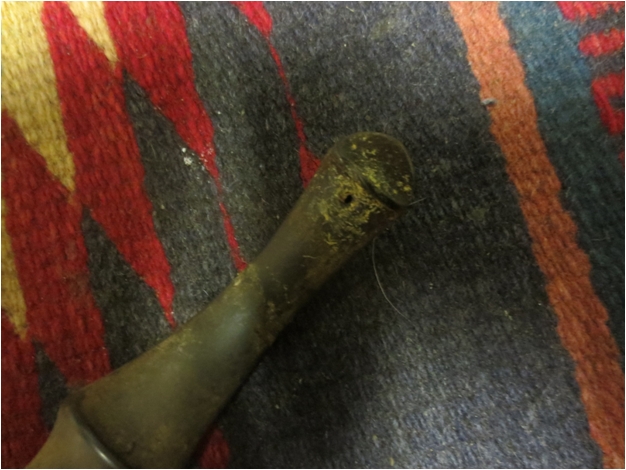
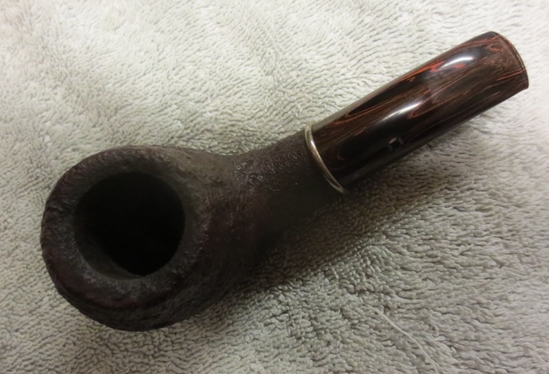
I started this restoration under the impression that it would be just a typical exercise on a better than average estate pipe I bought, with the rim and chamber seeming to be the greatest challenges, except that the other problems (some minor scratches that disappeared with 1500-grade micromesh and deeper blemishes I fixed with high-grit sandpaper) were far fewer than usual.


 I bought a new Castleford five-piece reamer set (with a T-handle and four attachable reamers ranging from 17-23mm) to see if it might be up to filling the boots of my old Senior Reamer, which fell in action during a restoration I blogged not long ago. Choosing the 17mm reamer, I went to work at a slower than usual pace to test the tool that was new to me, and seeing it worked quite well, I finished its part on the chamber.
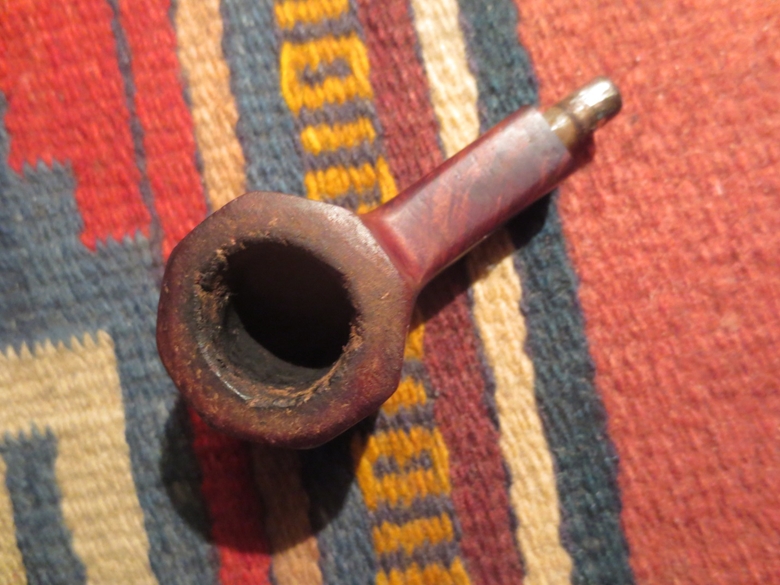
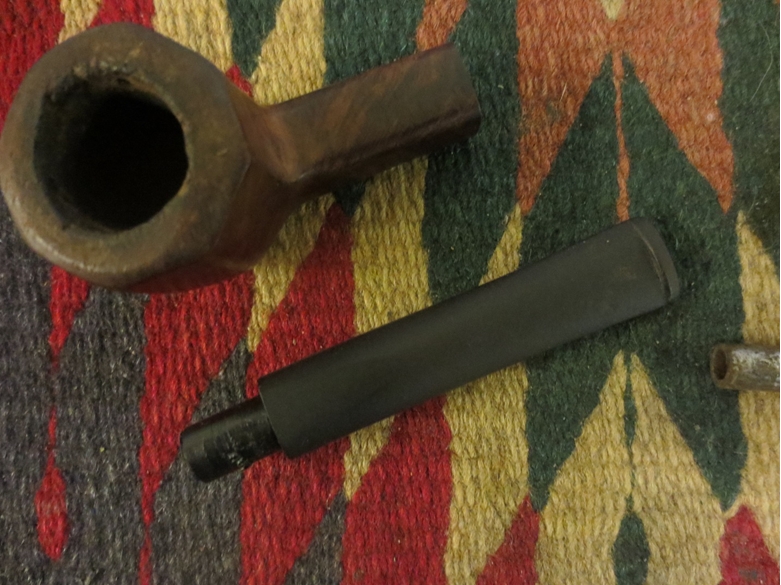
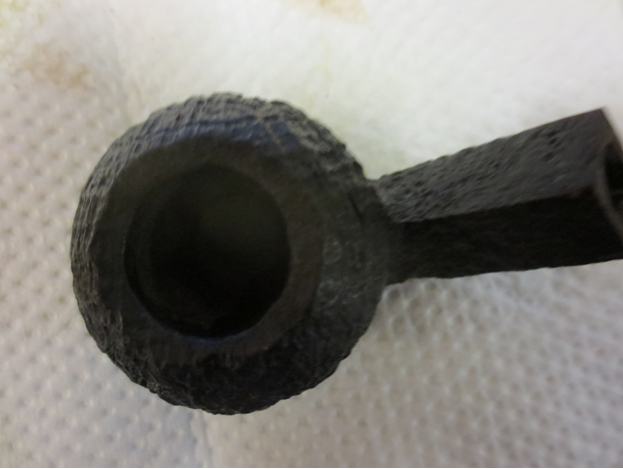
Then I switched to 220-grit paper and sanded the inner wood to a smoothness relative to the mess it was in when I began, tamped out most of the remaining carbon, blew through the shank to clear some of the rest and rubbed a couple of small cotton squares soaked in Everclear around the chamber to pick up all but particles of the remainder. To the touch of a finger that I ran around the walls, the surface was still rough but could be finished later.
The rim burn came off with super fine steel wool, and scratches and pits uncovered from beneath the blackness were easy to deal with using 400-grit paper followed by 600, then micro-meshing using new 1500, 2400 and 3200 pads. After finishing the chamber with 500-grit paper, dumping most of the carbon as I went, I blew through the shank to clear more and soaked a couple of thin squares of cotton cloth in Everclear to scrub the chamber. Only a small amount of residue remained, and to the touch of my finger the sides of the chamber felt silky and polished.
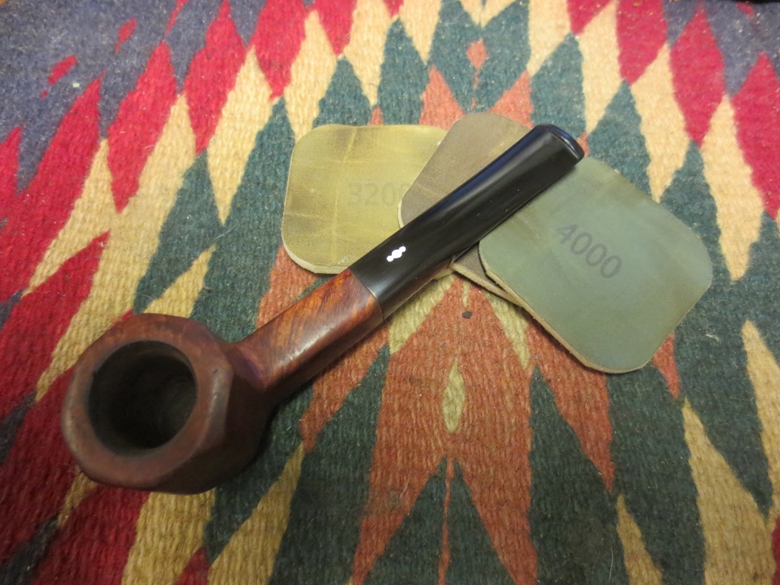
That was when I commenced what was my old way of cleaning the pipe. One after another, I dipped first one end of a bristly cleaner in Everclear and ran it through the shank, then the other end. After more than a dozen cleaners lay filthy in a pile and two more came out white, I repeated the process with the stem, except that it only seemed to require two or three cleaners.
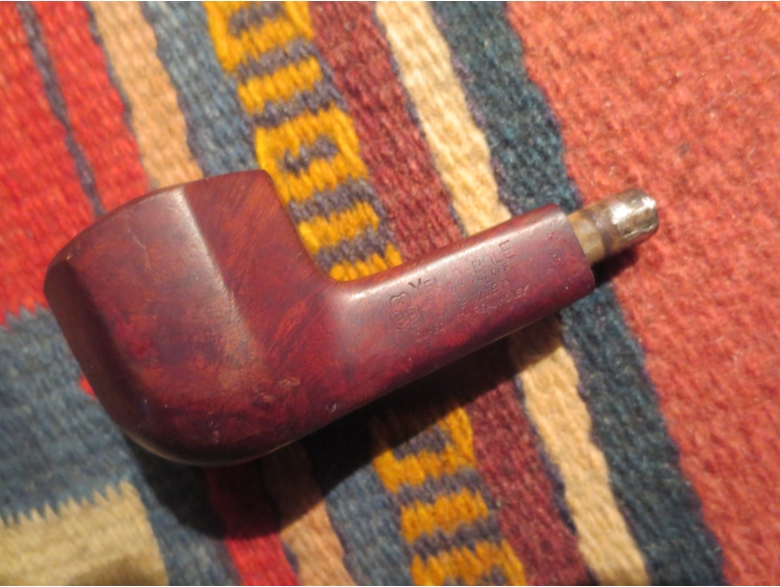
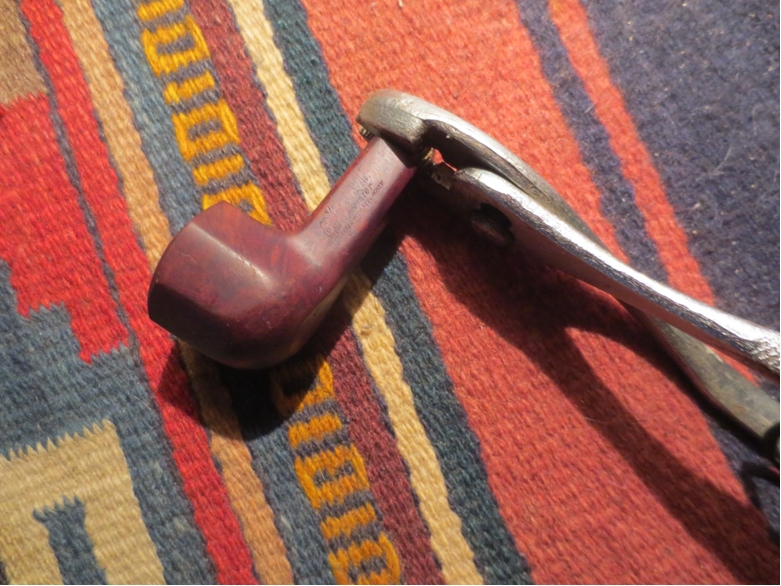
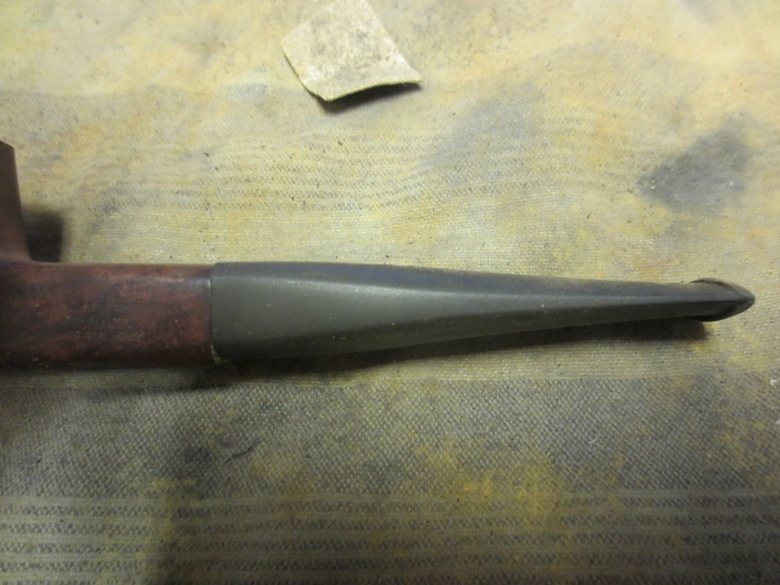
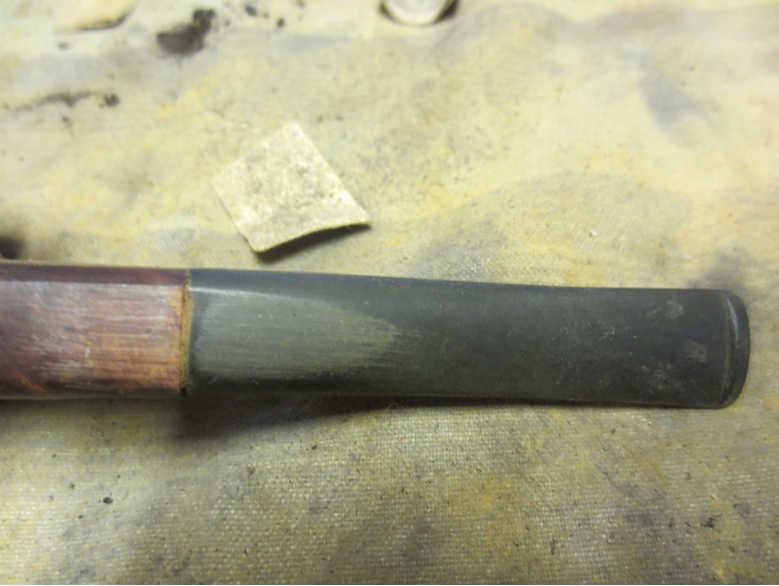
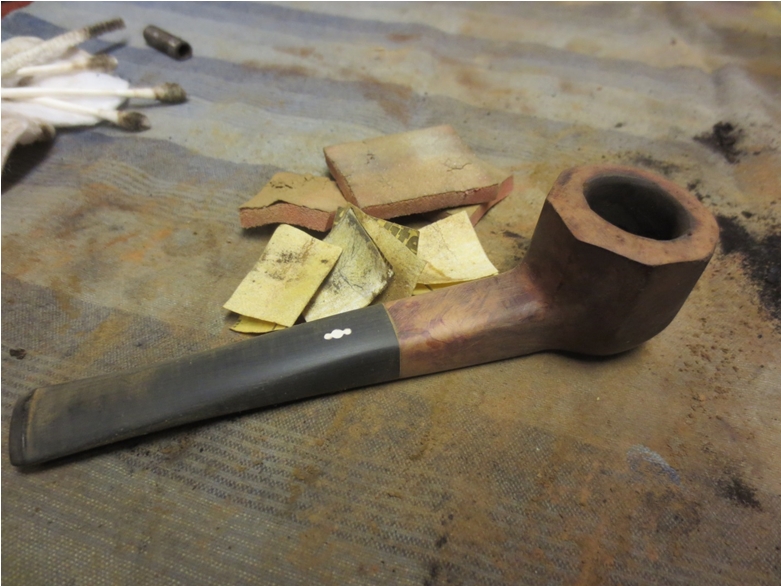
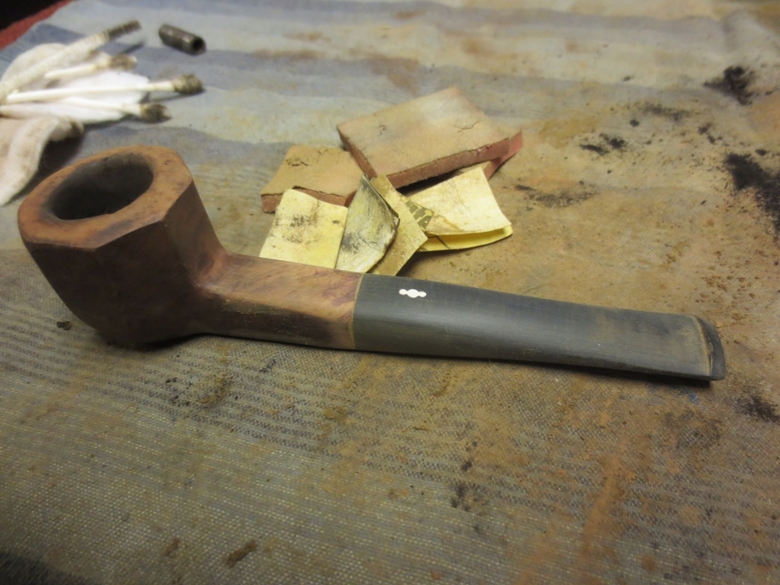
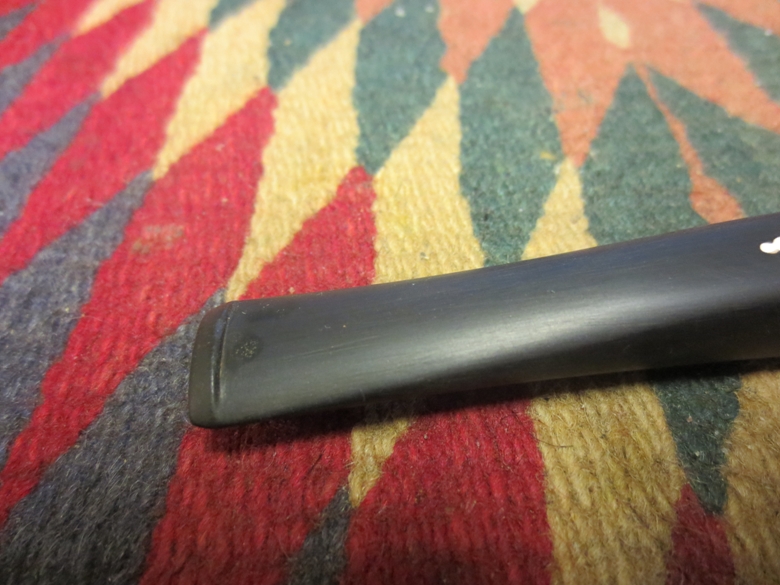
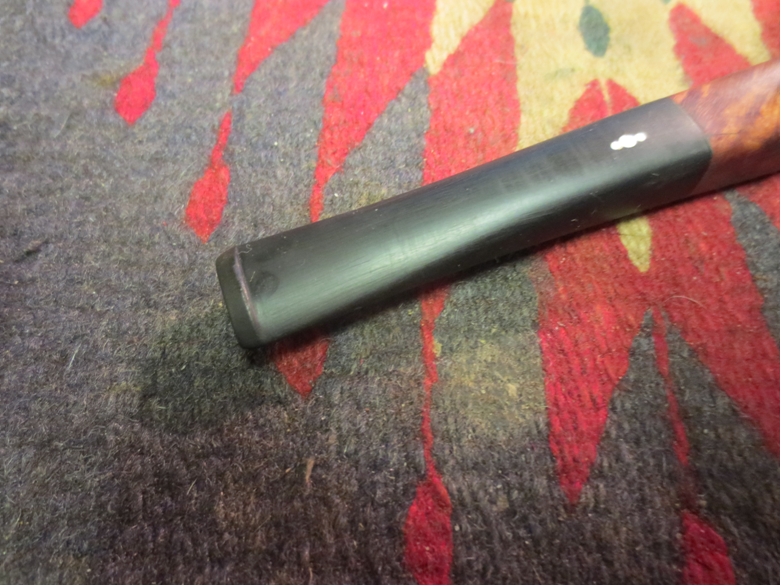
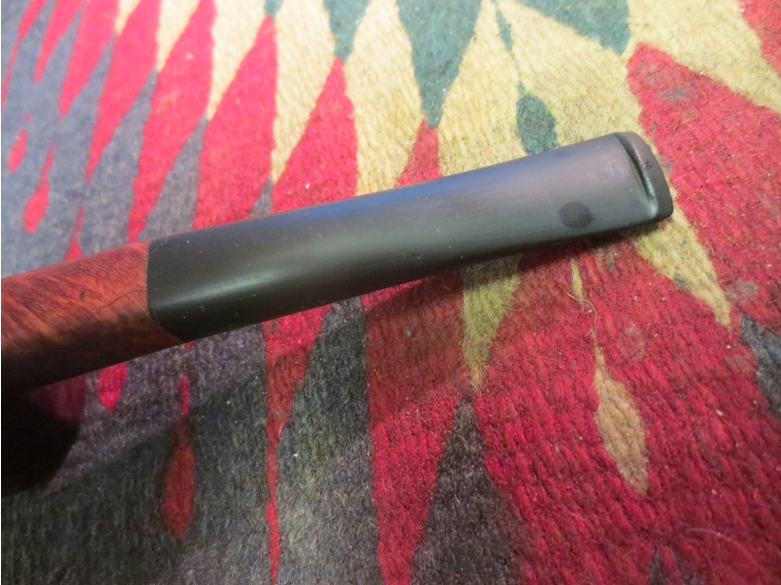
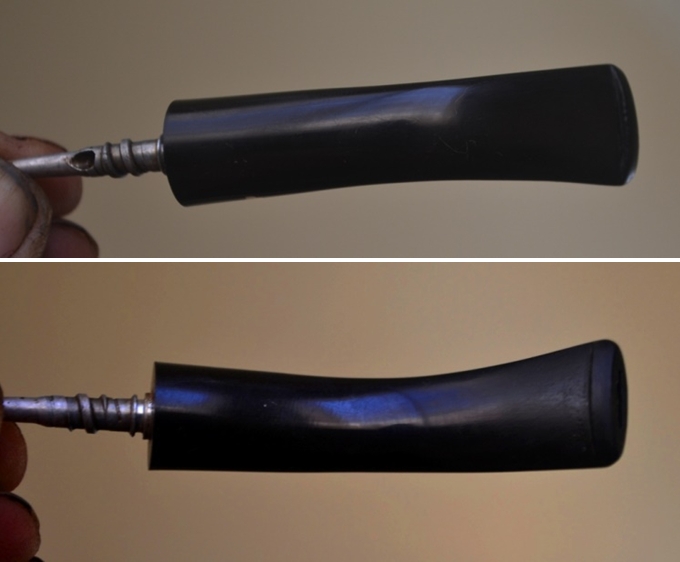
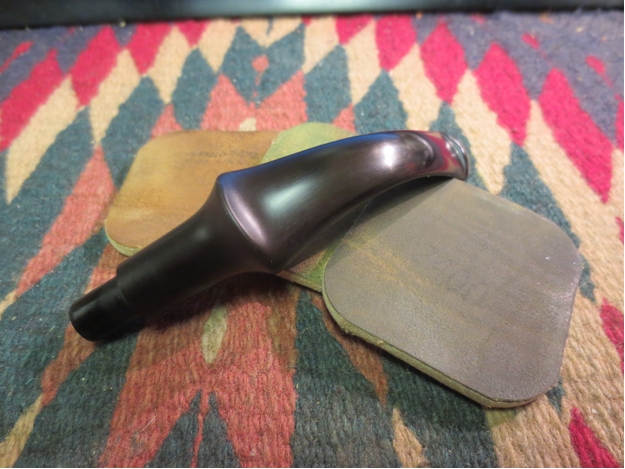
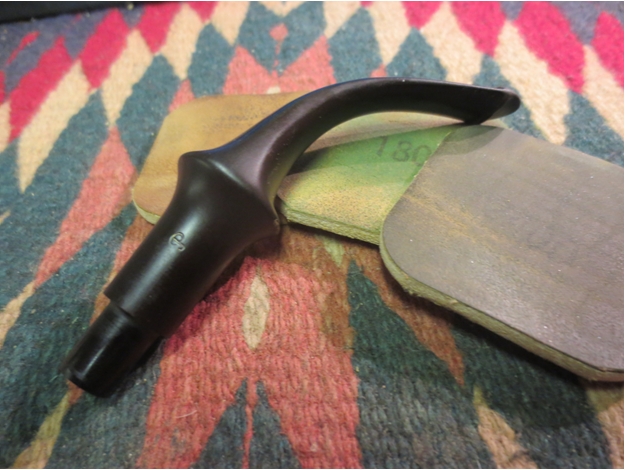
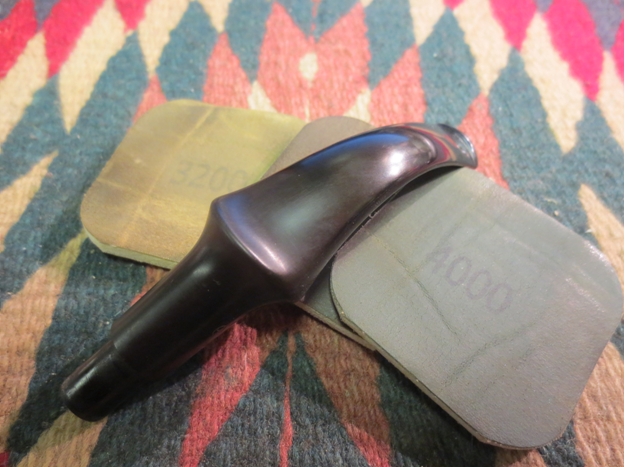
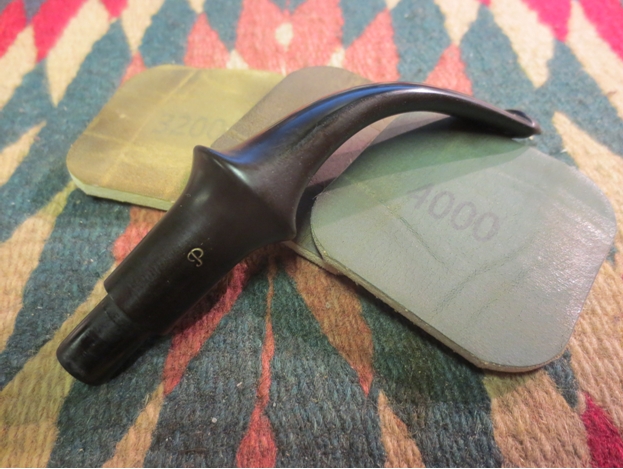
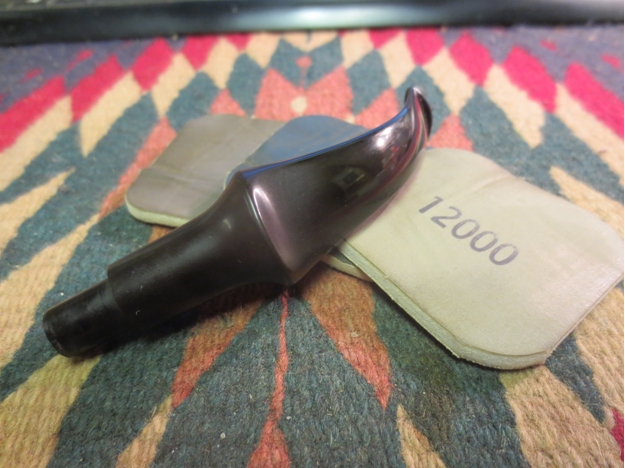
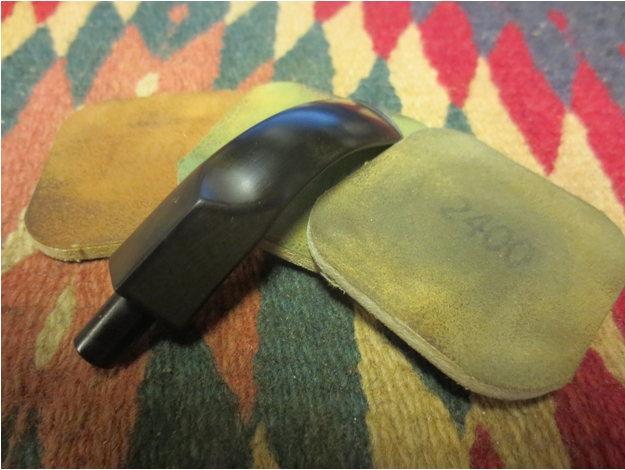
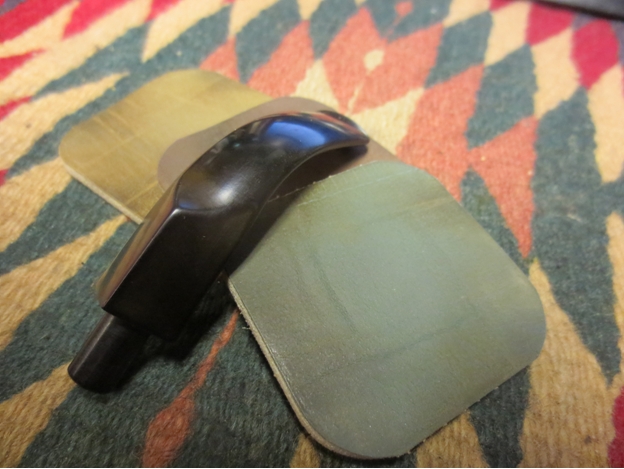
To mix things up, compared to my usual routine, I followed my impulse to finish the stem and be done with it. I started with 600-grade micromesh on both sides just below the bit, and switched to 800, 1000, 1800, 2400 and 3200 micromesh. I buffed it on the wheel with red Tripoli and White Diamond. I sanded small areas of the bowl with 400-grit paper to remove the deeper scratches, dings and pits.
 To remove the marks of sanding from the wood, I used super fine steel wool followed by my normal progression from 1500-3200 micromesh. I followed the same micromesh procedure on the entire bowl and shank.
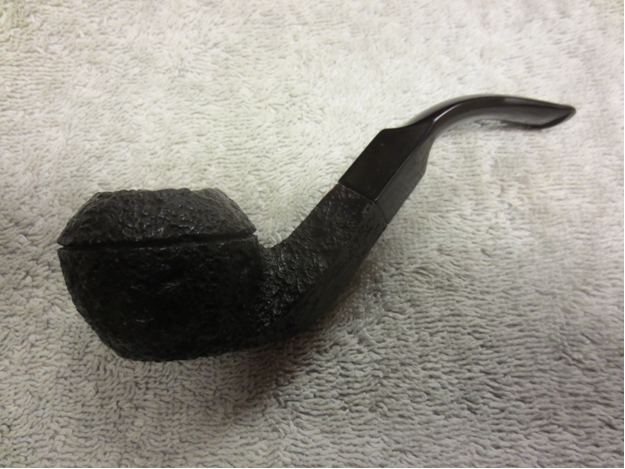
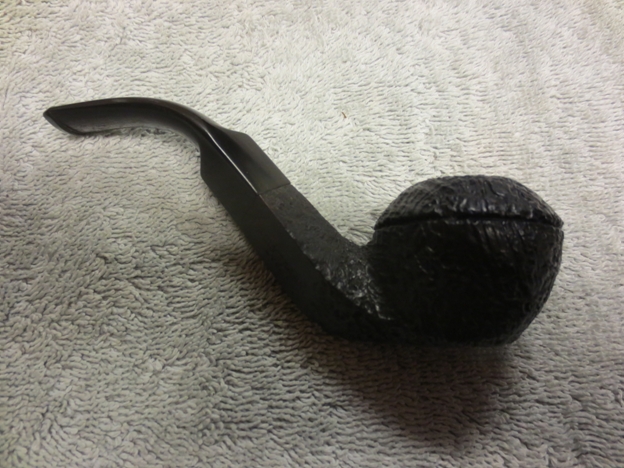
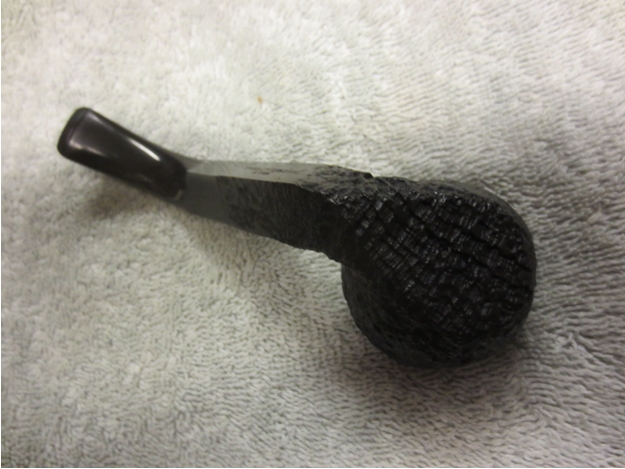
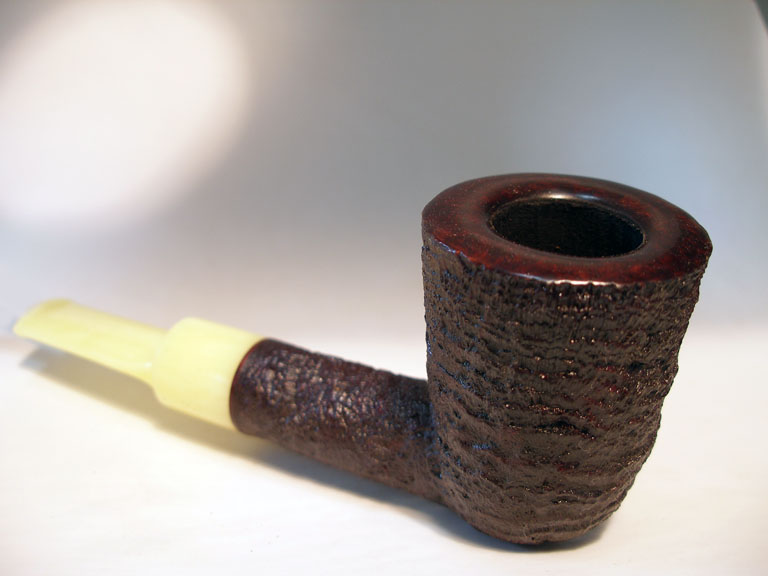
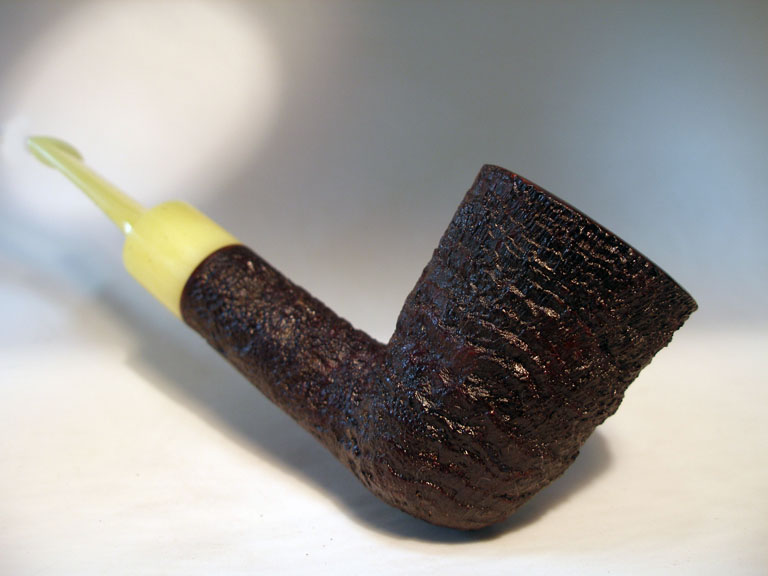
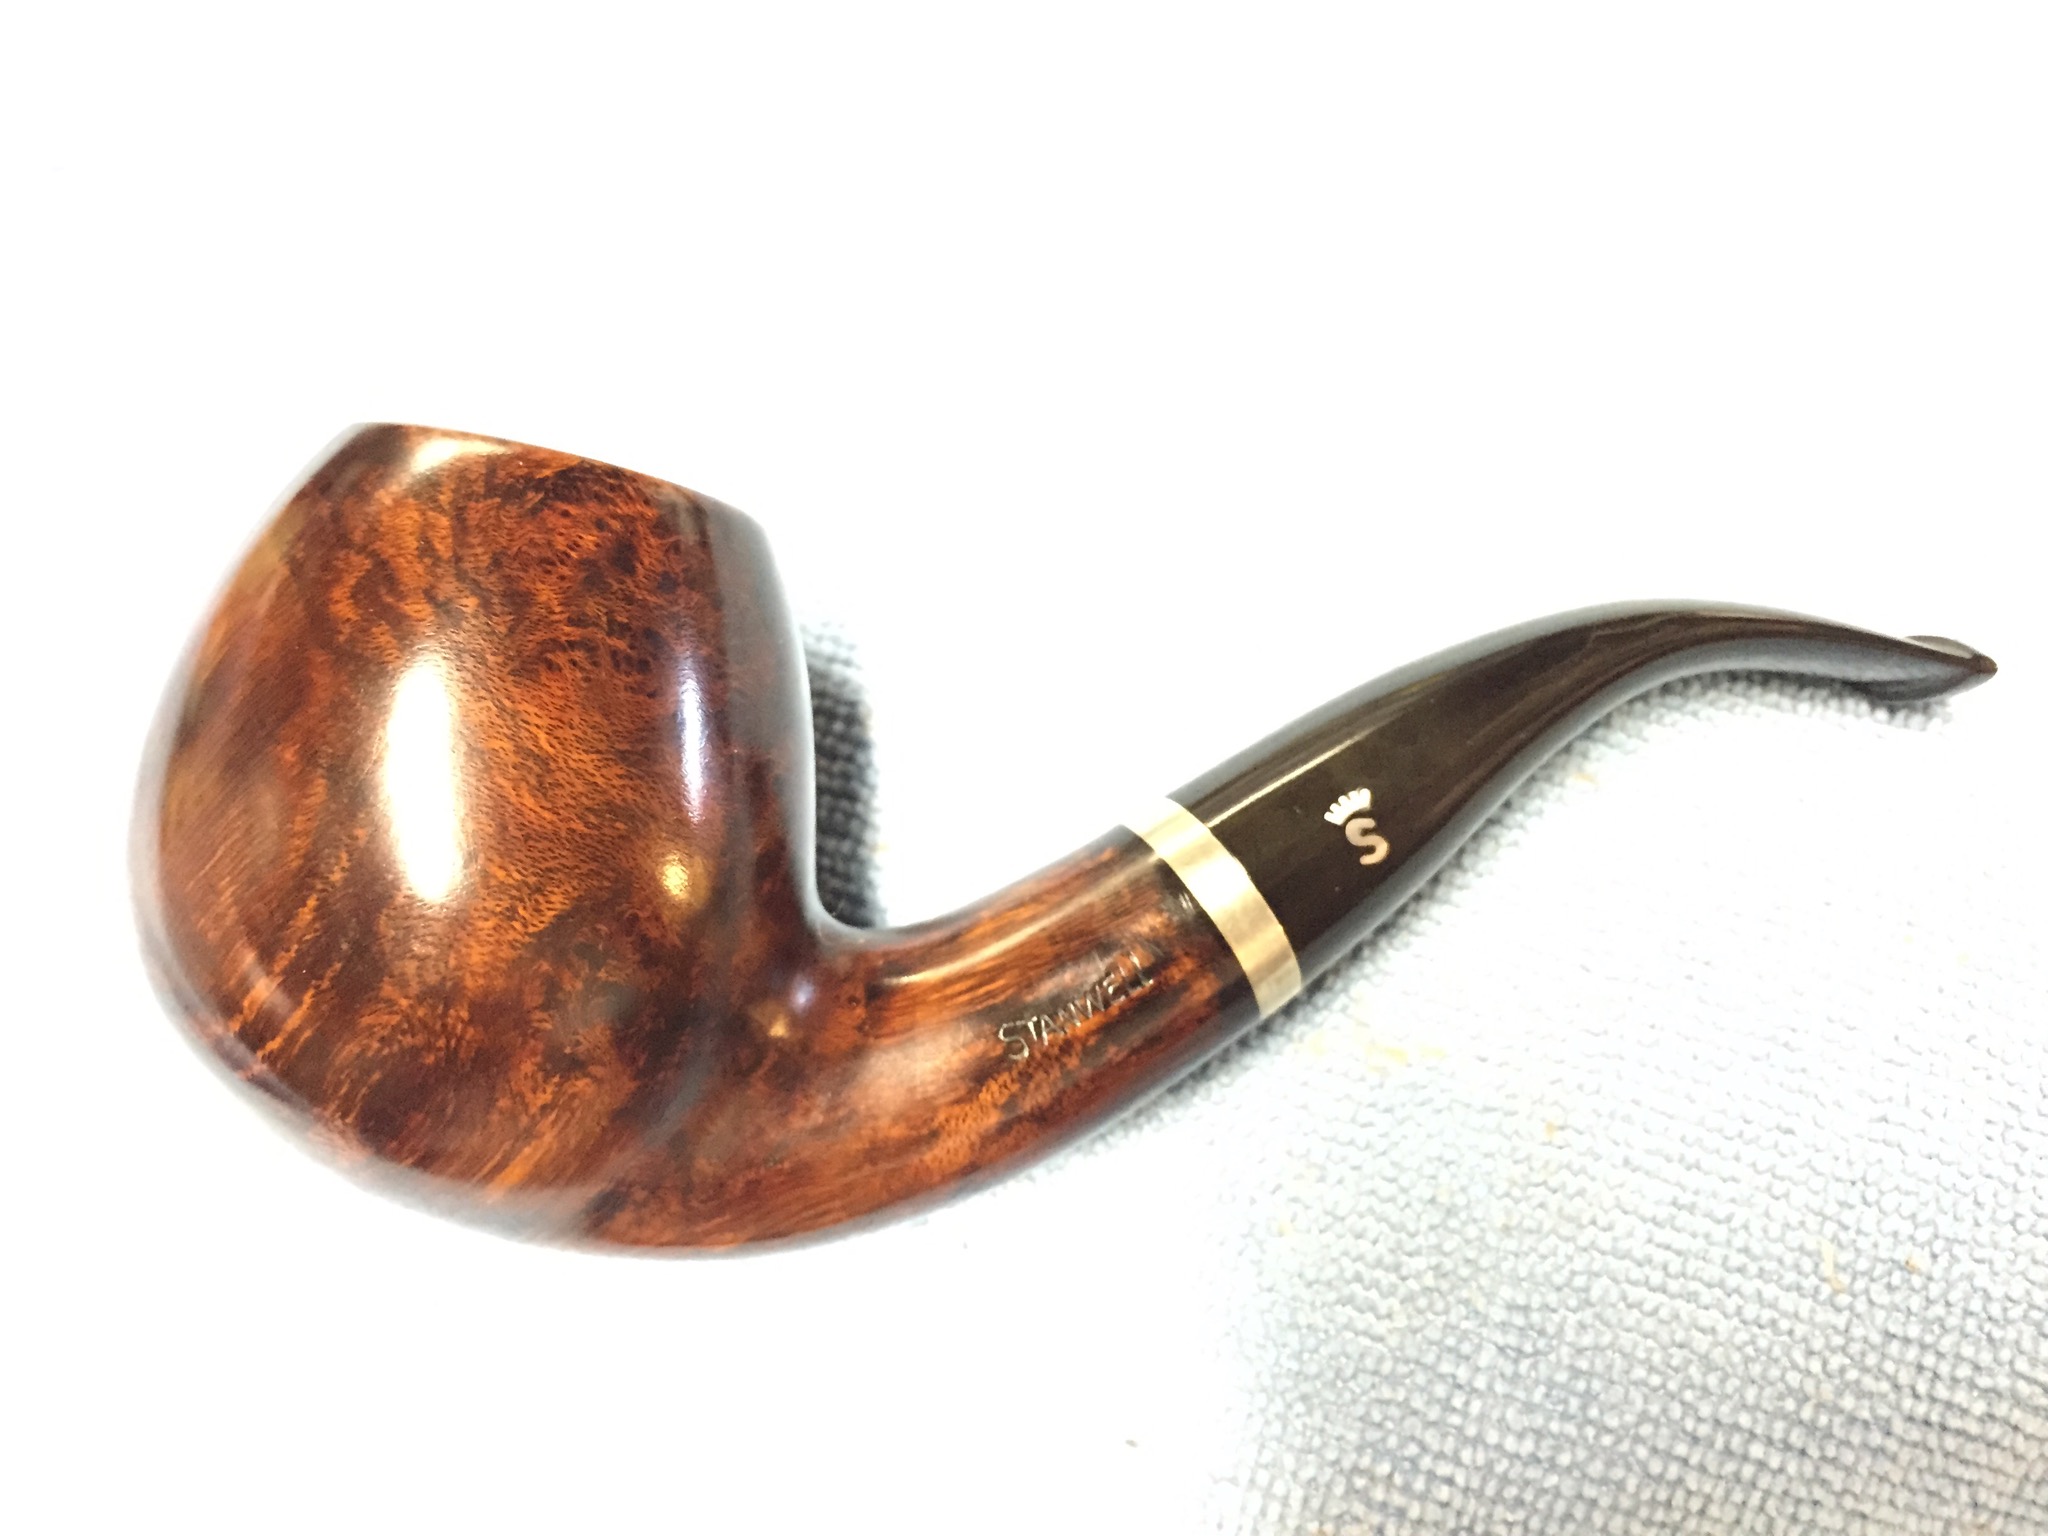
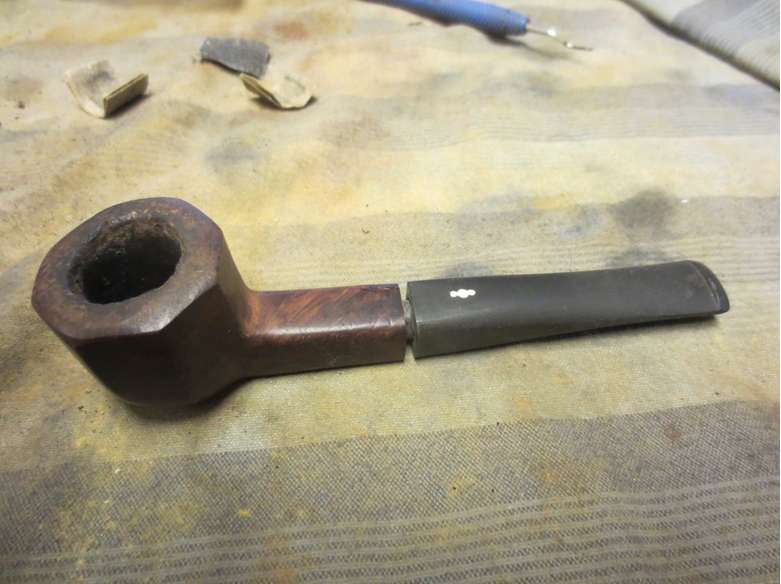
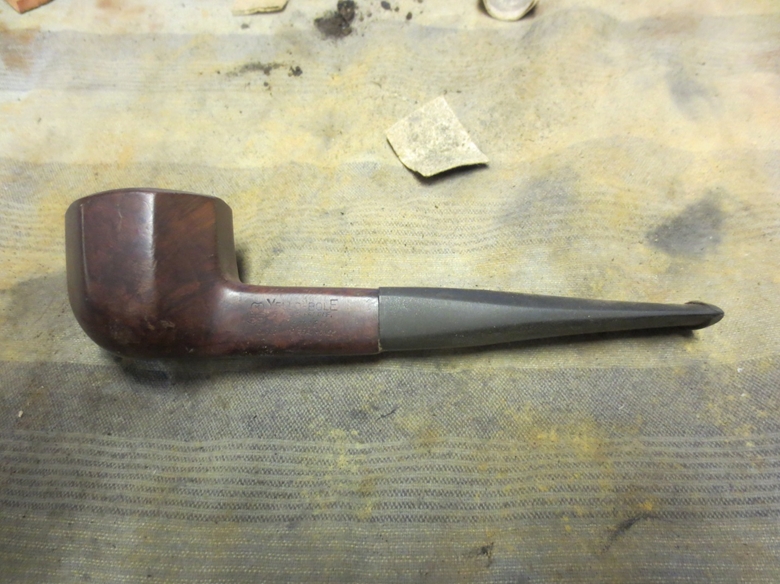
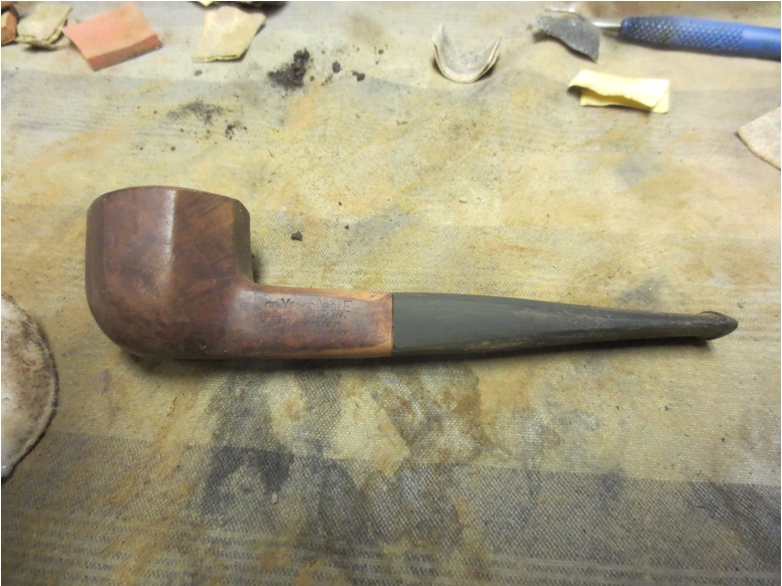
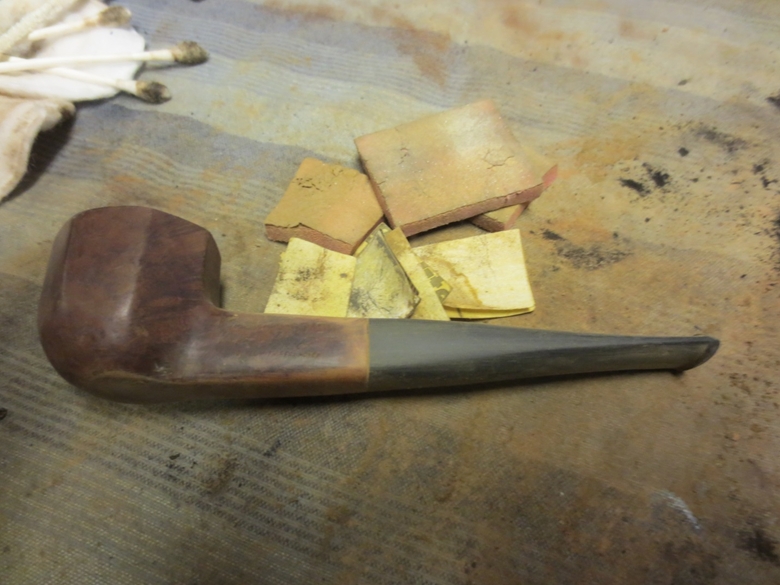
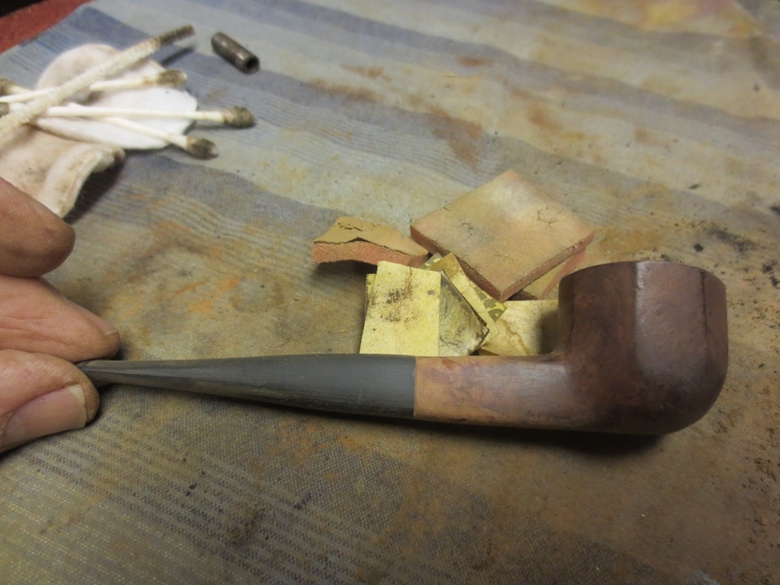
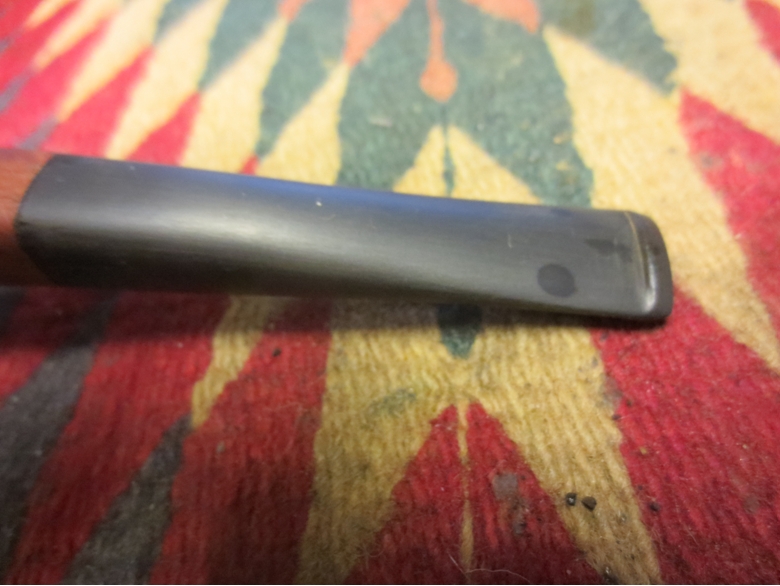
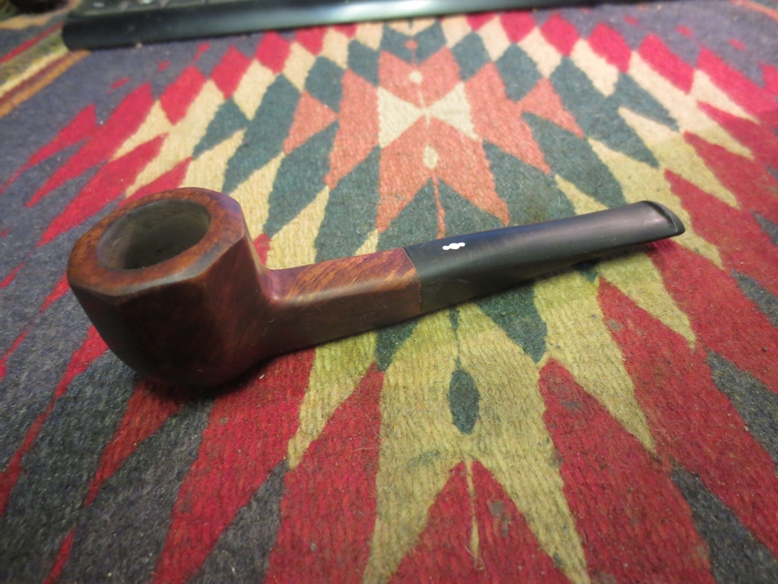
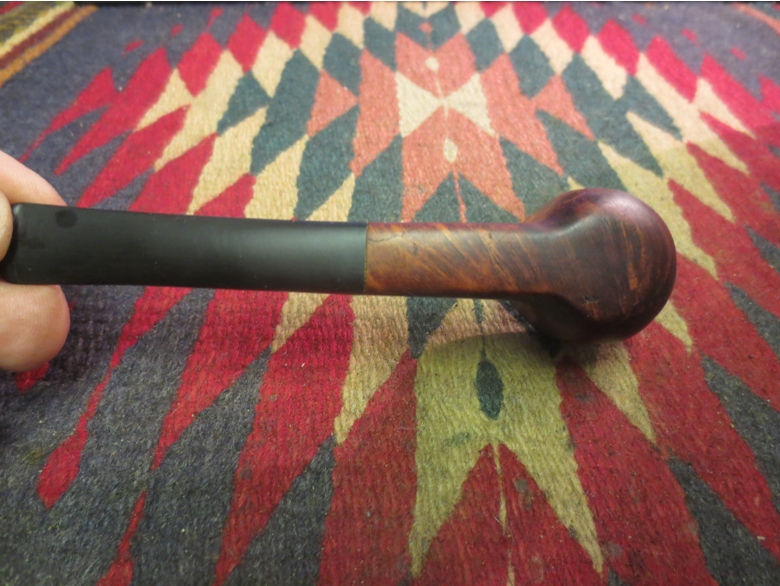
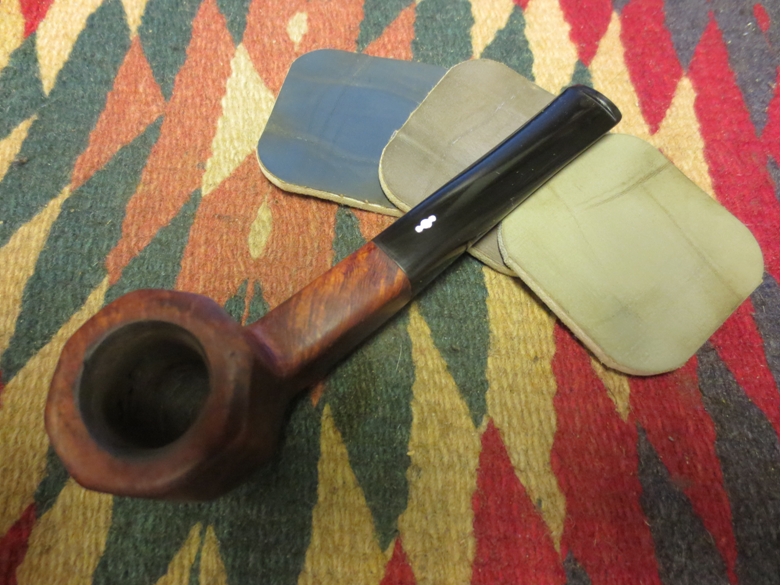
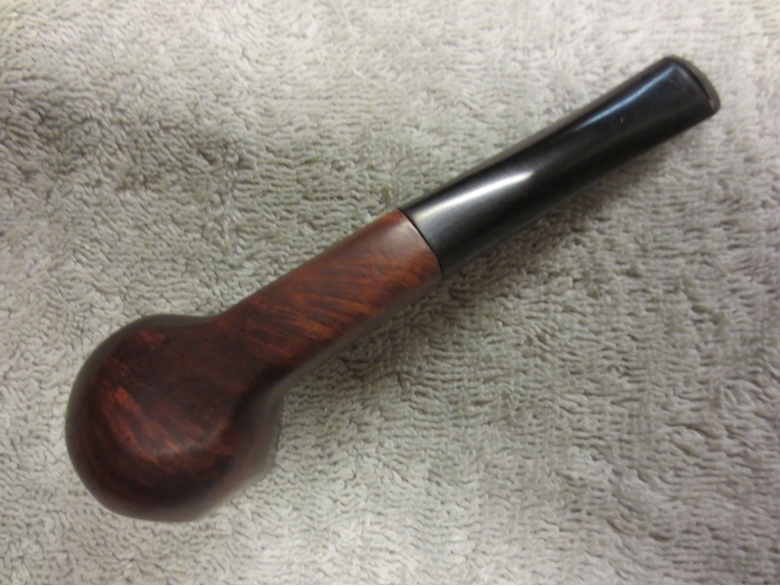
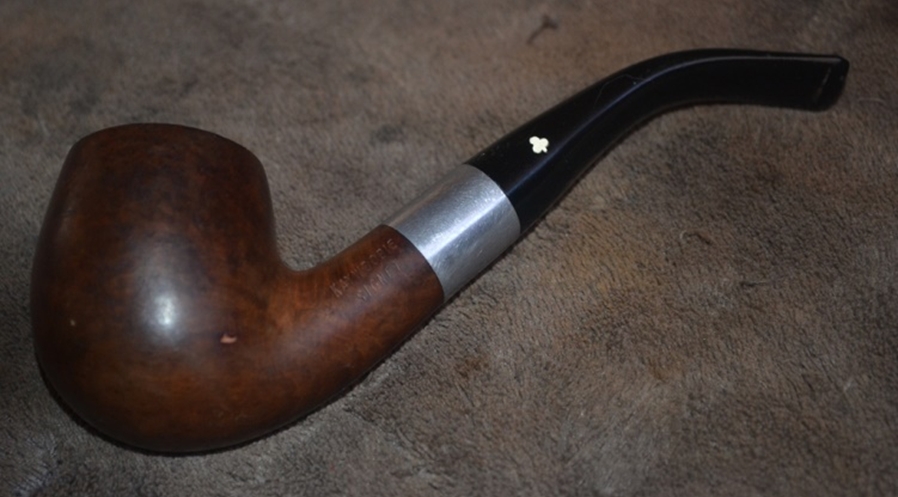
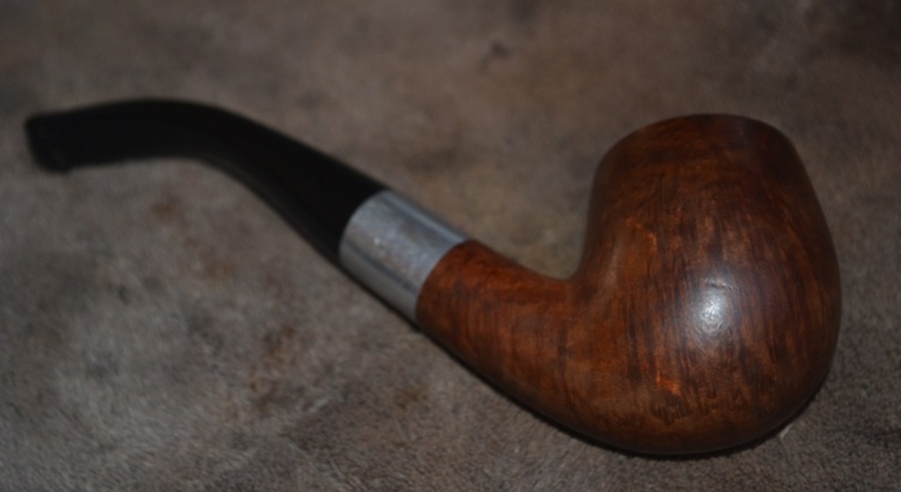
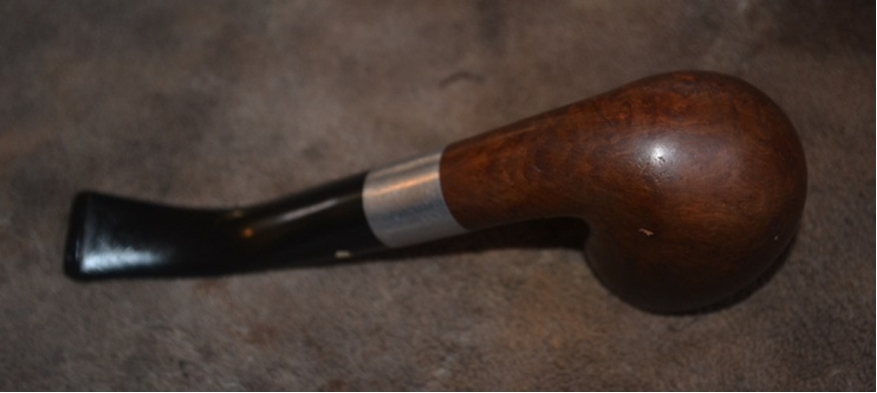
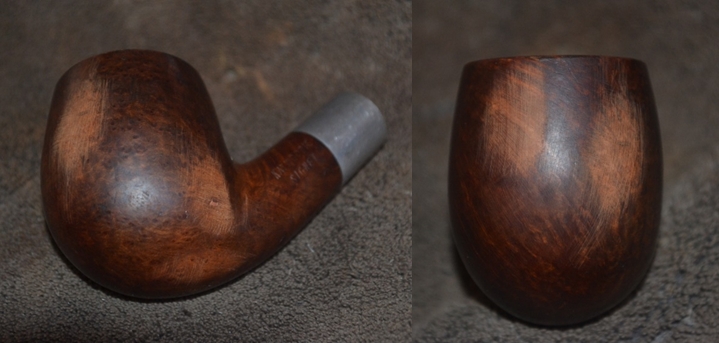
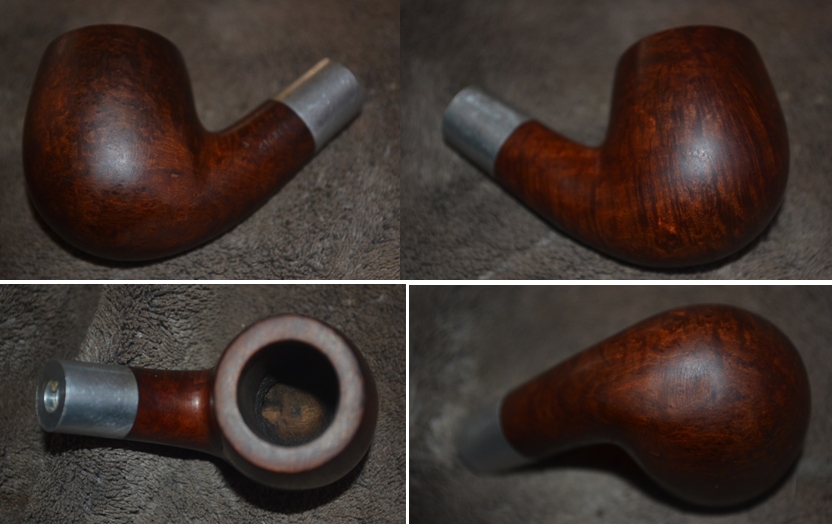
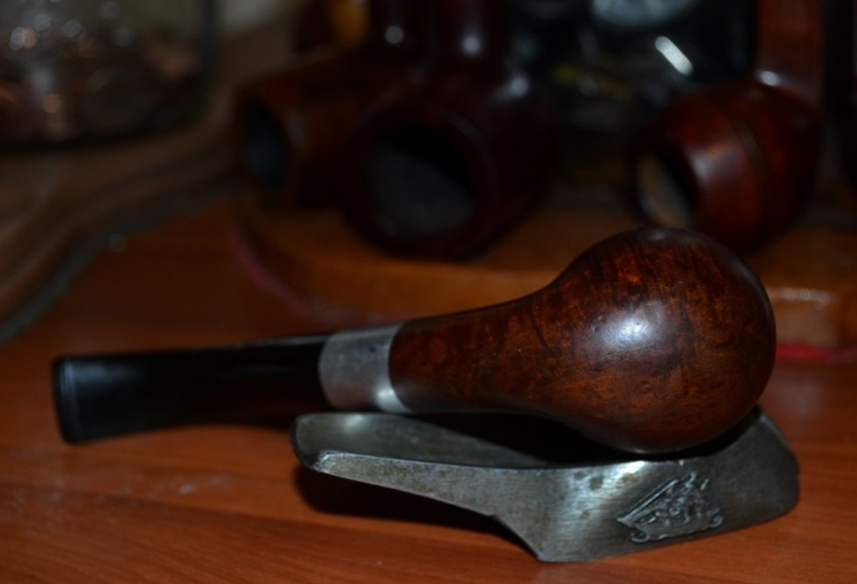
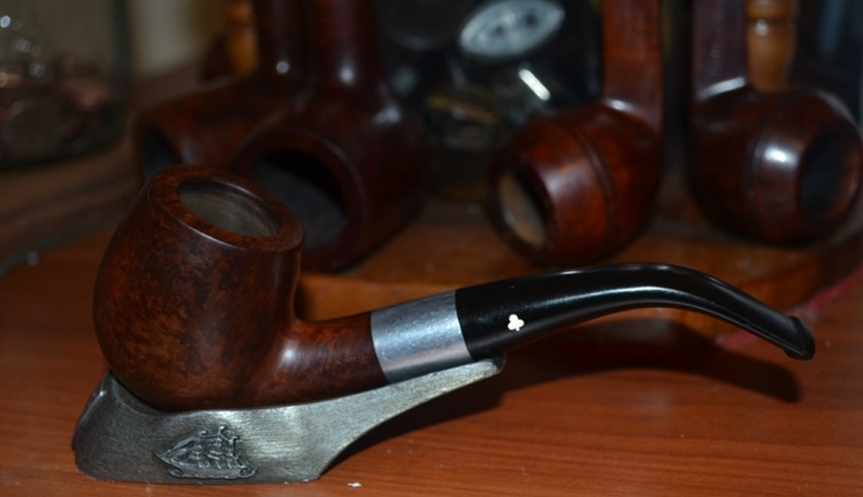
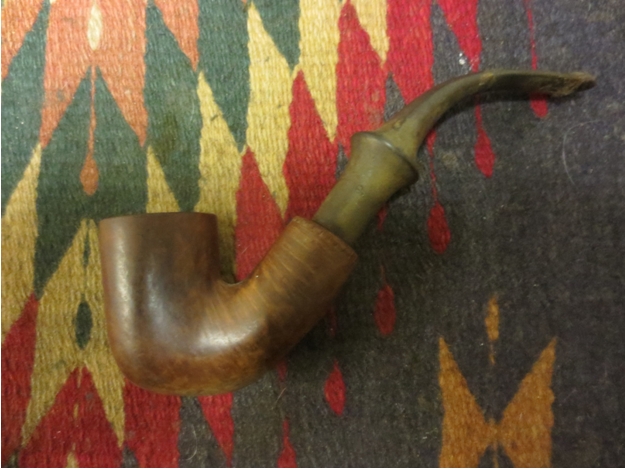
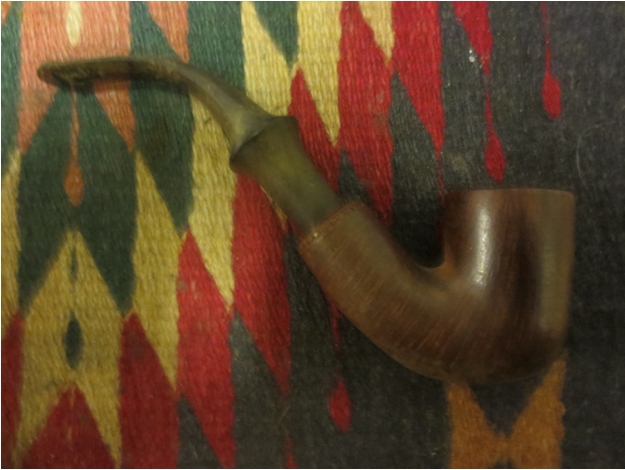
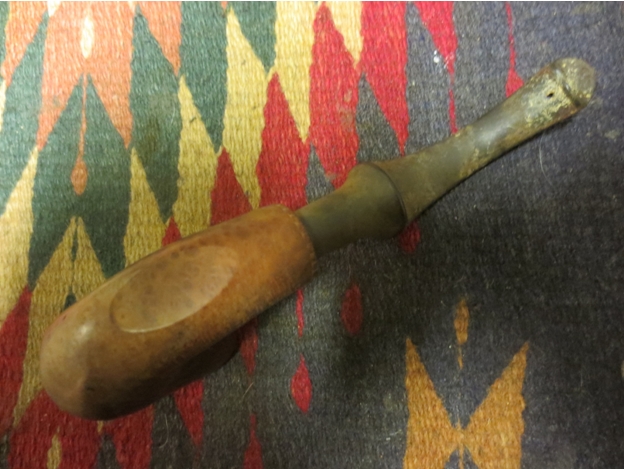
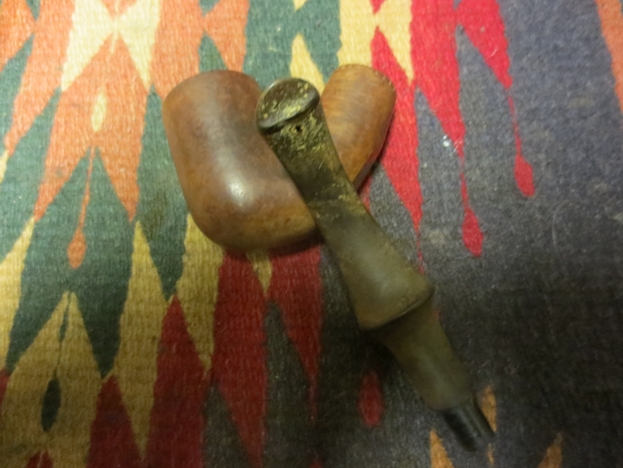
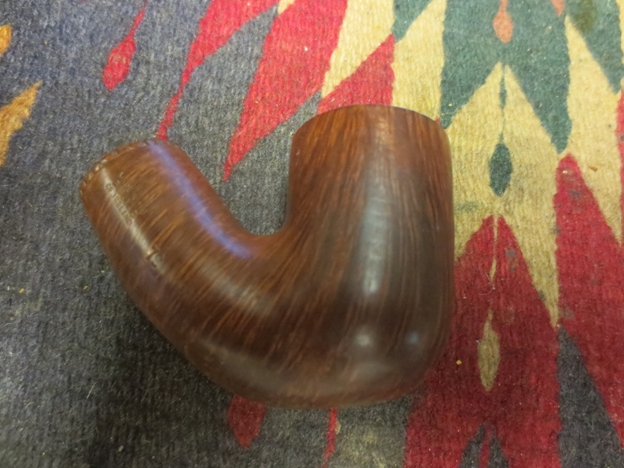
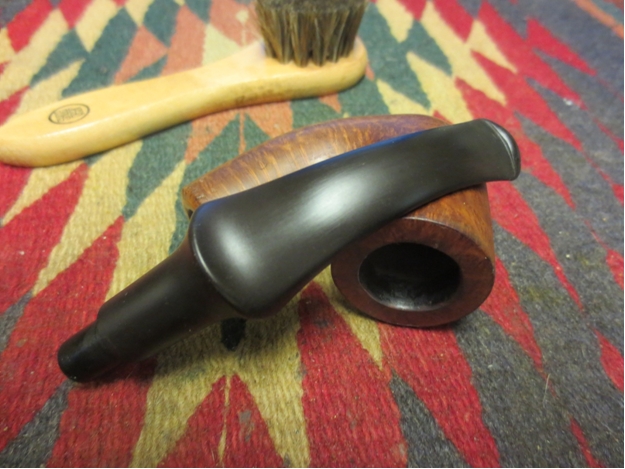
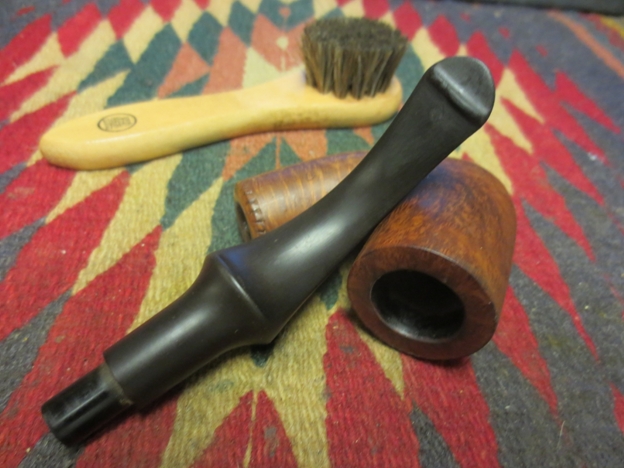
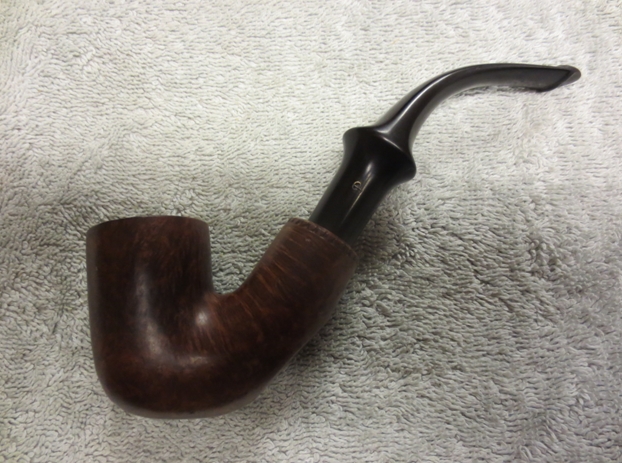
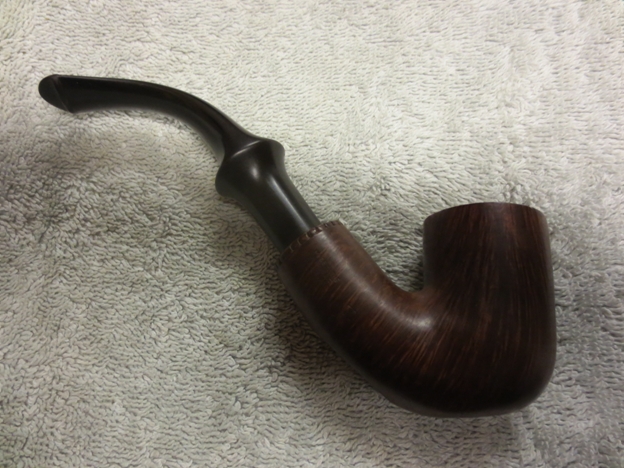
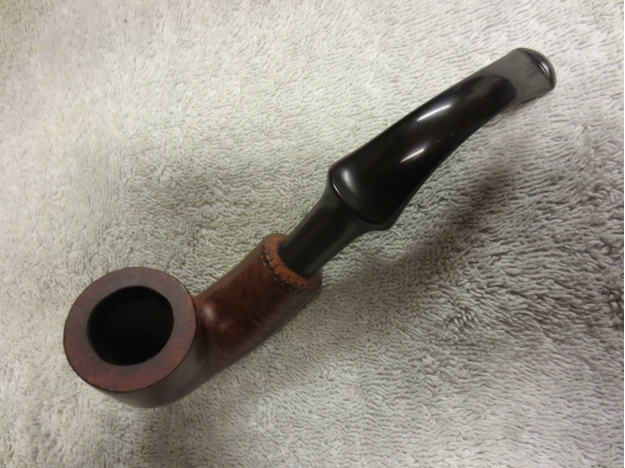
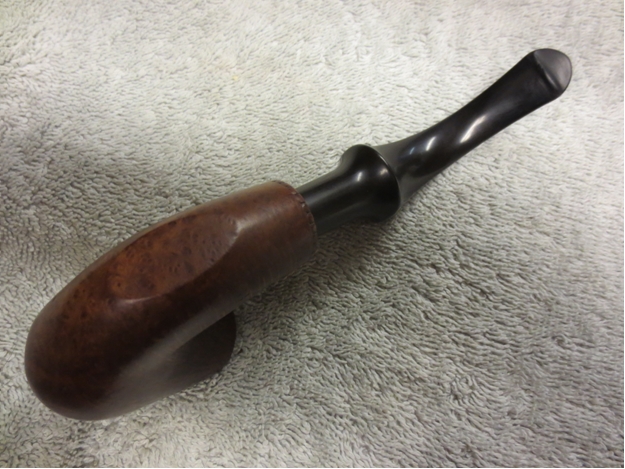
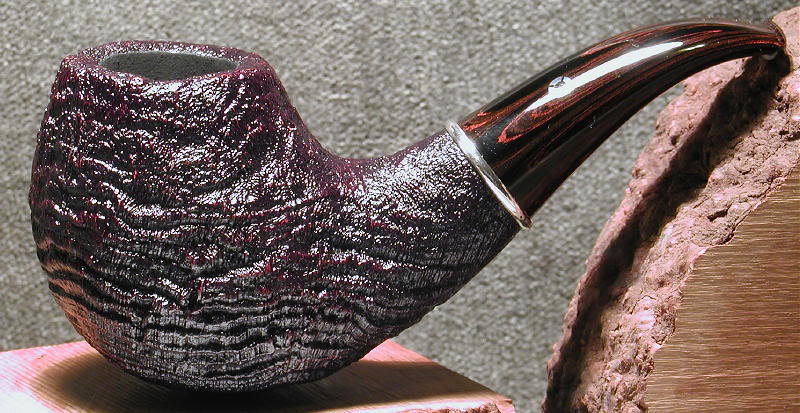
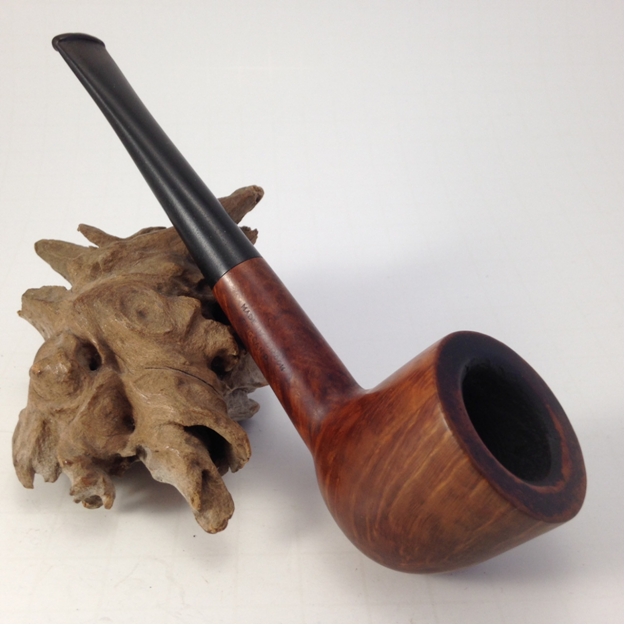
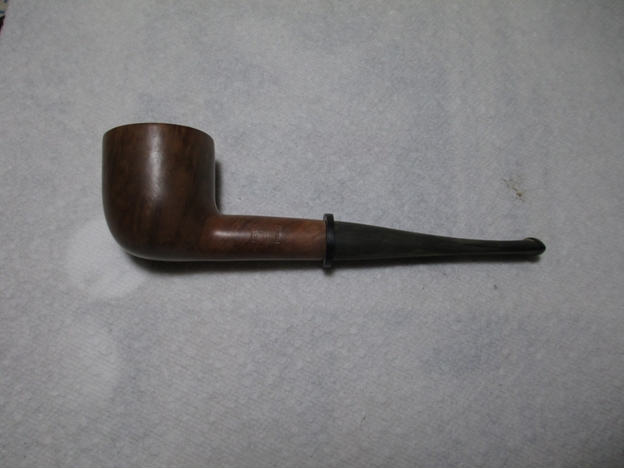
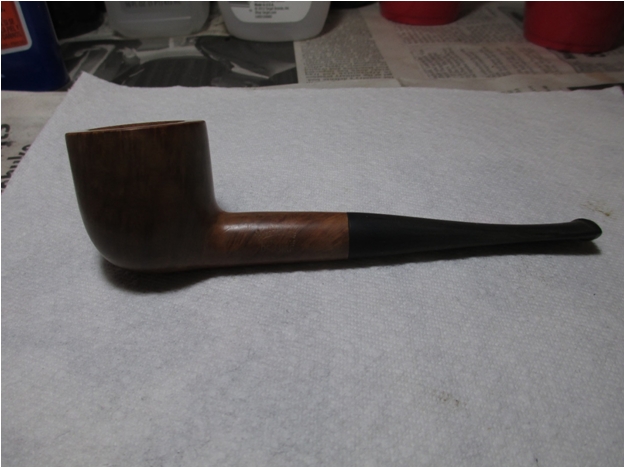
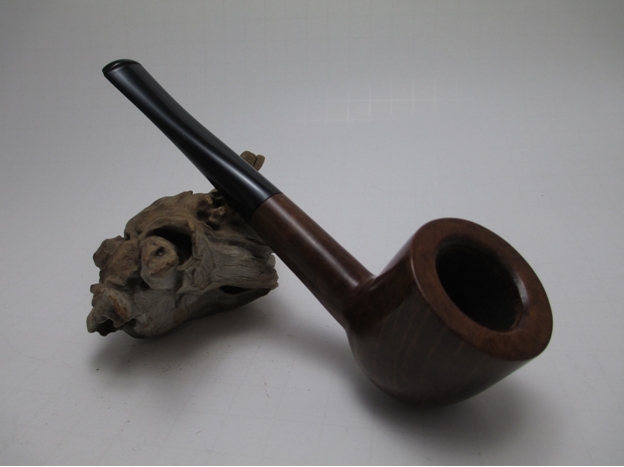
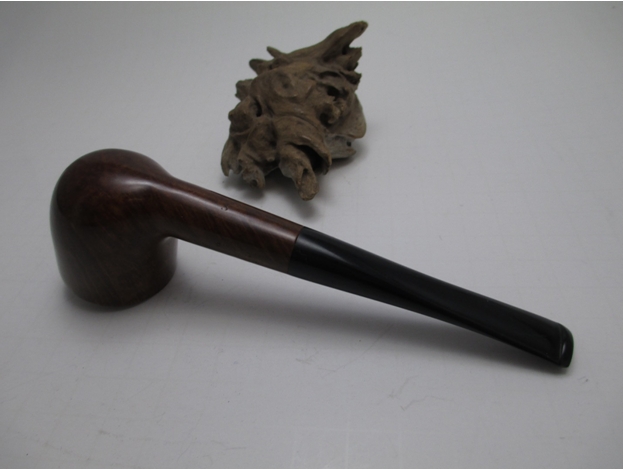
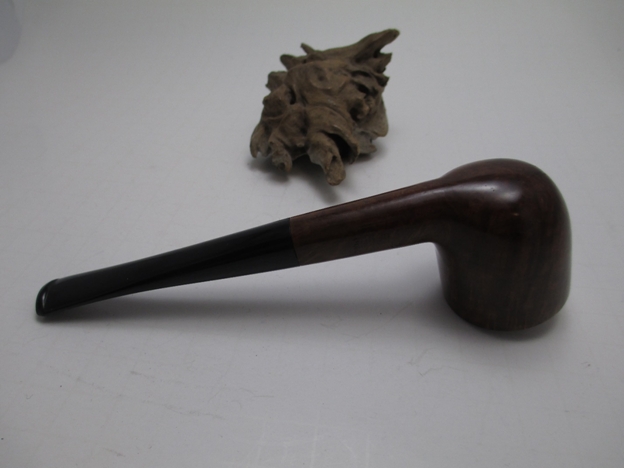
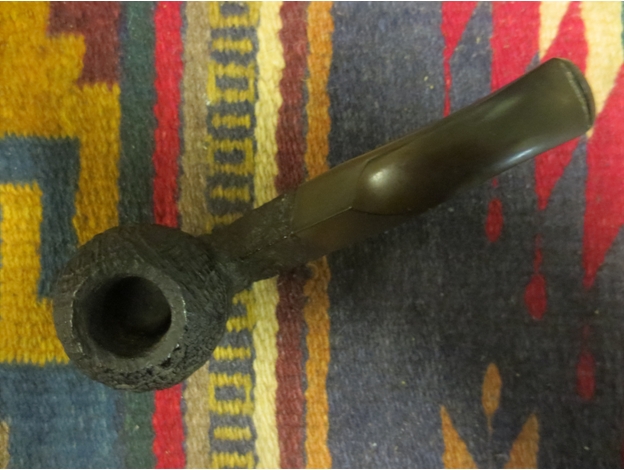
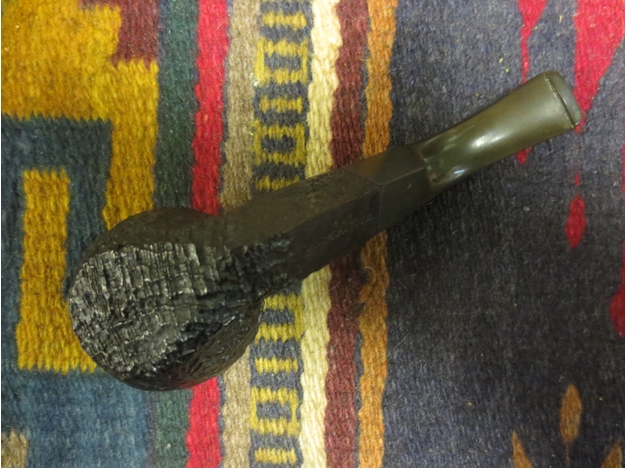
 Finishing the wood with a buff of white and red Tripoli, White Diamond and carnauba, here is what I handed over to Chuck.


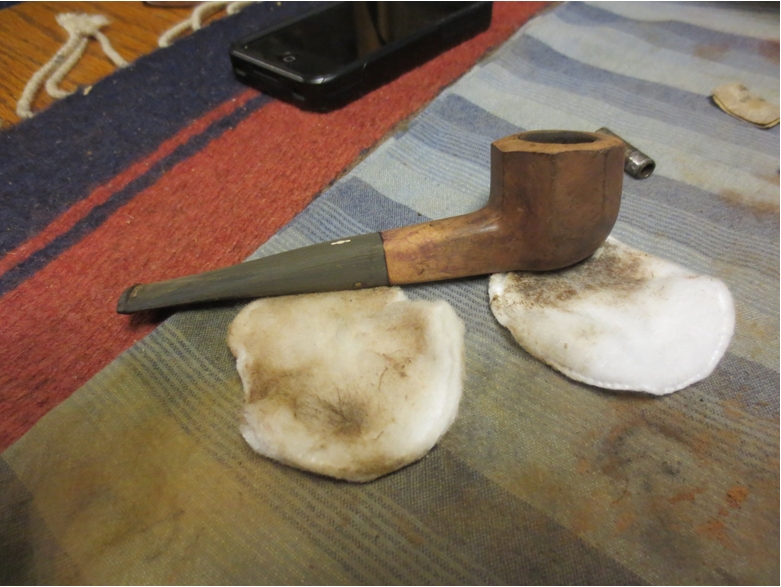
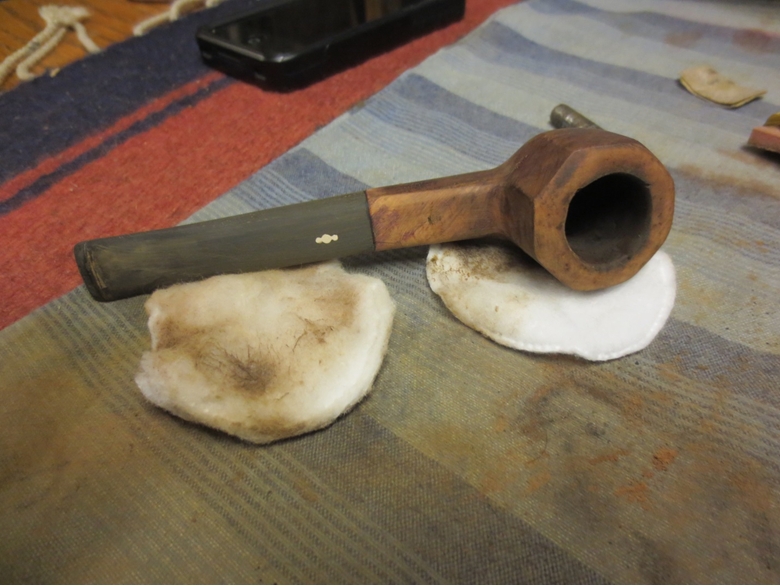
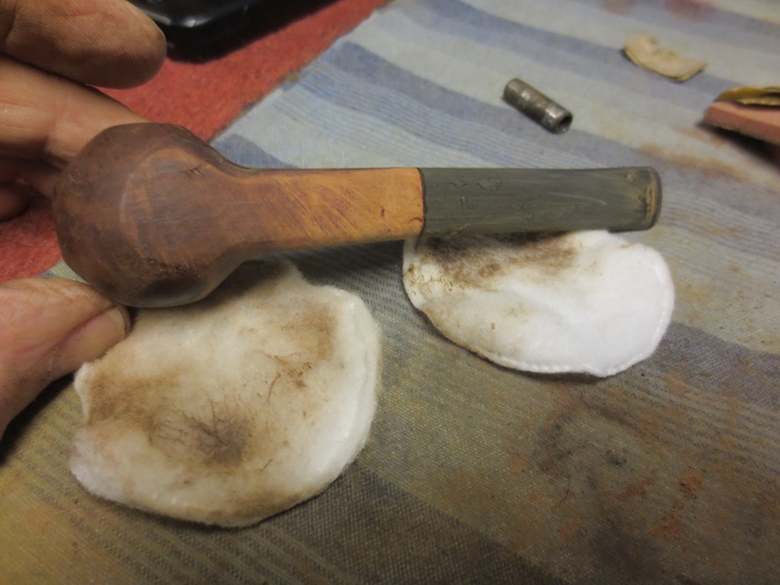
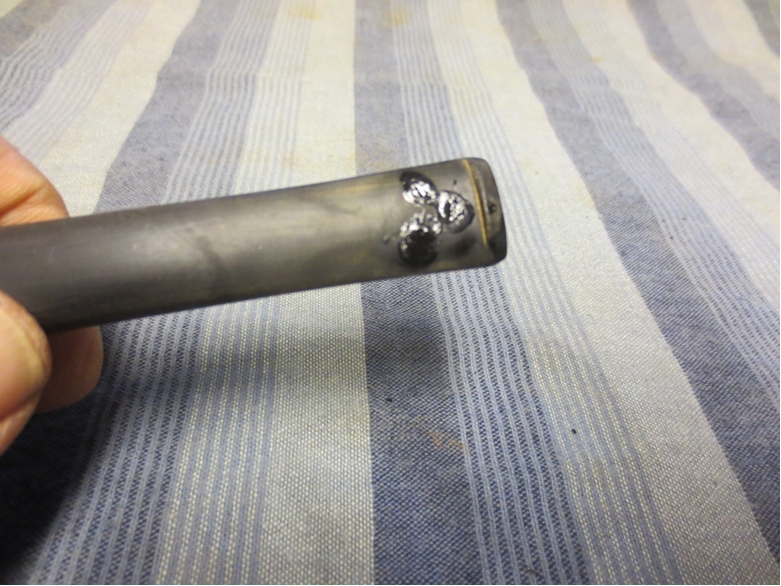
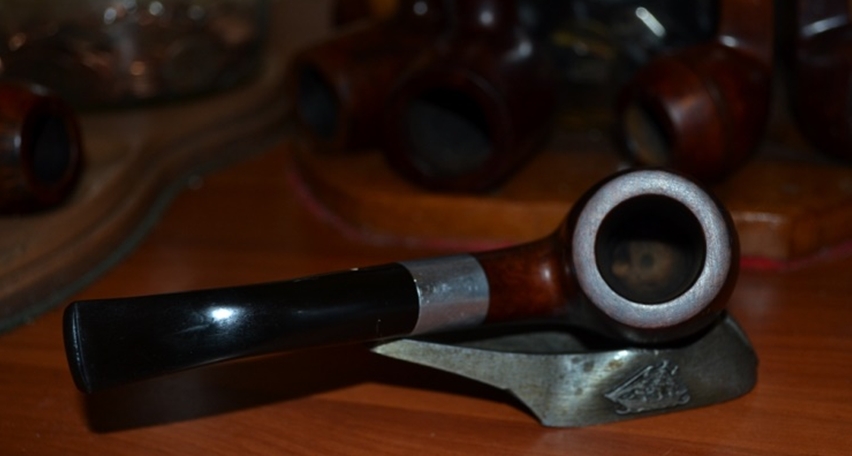
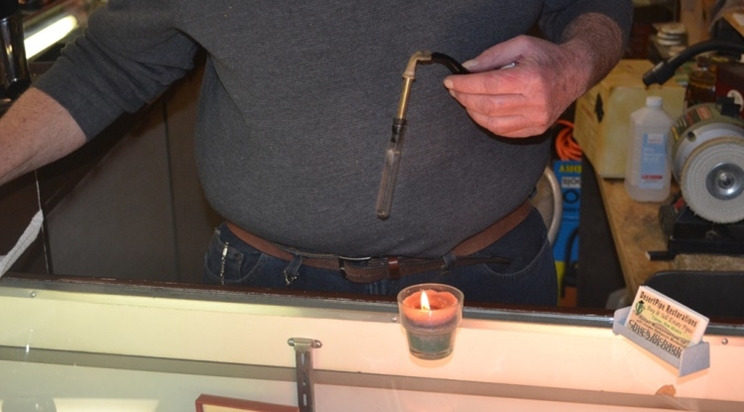
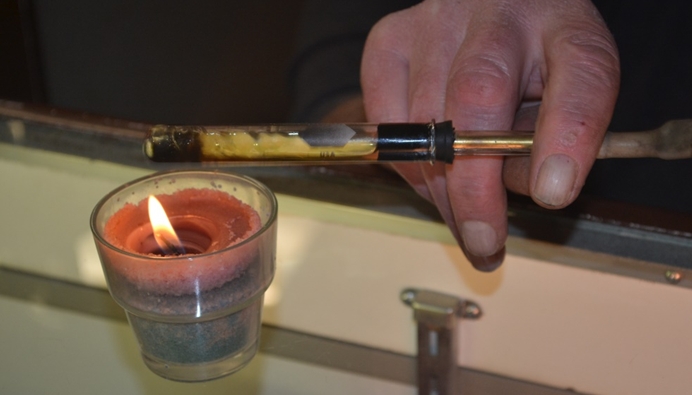
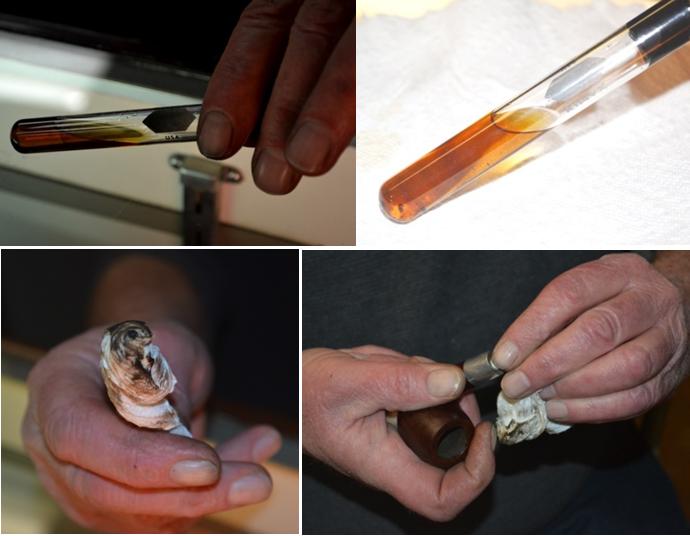
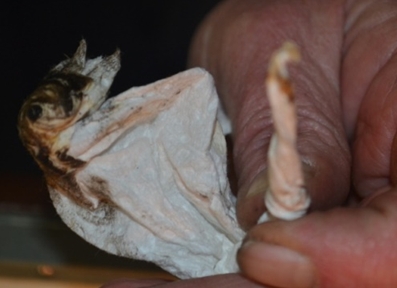
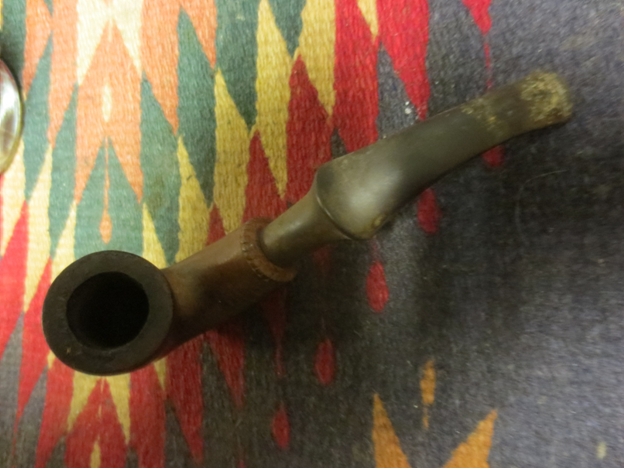
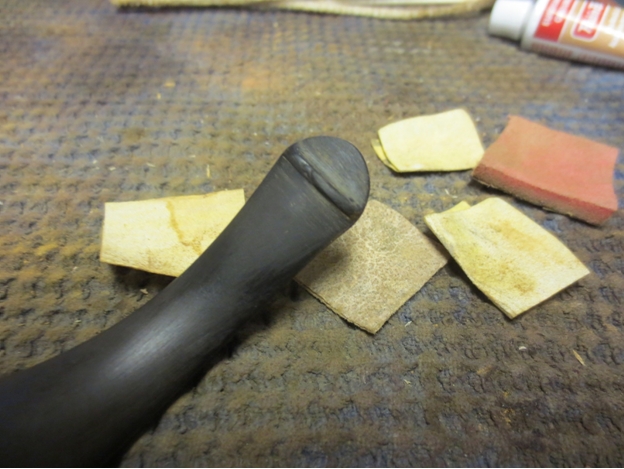
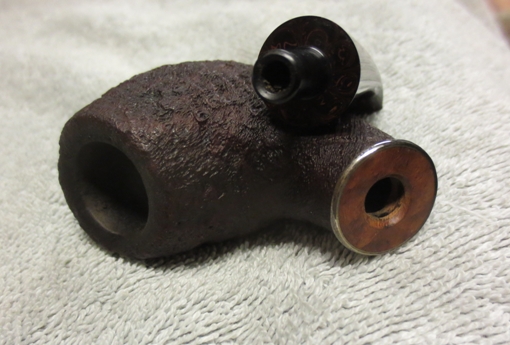
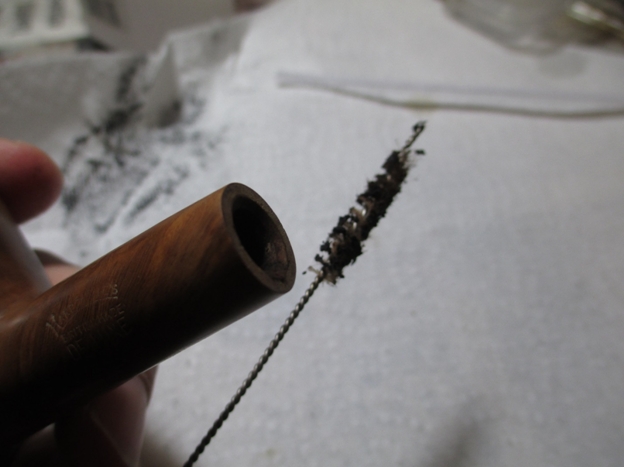
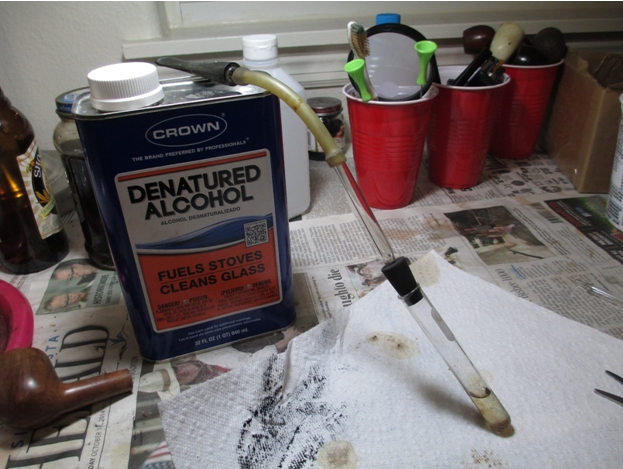
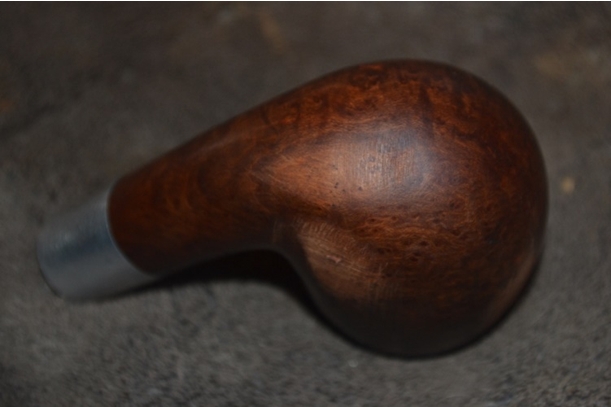
 The time, at last, has arrived for Chuck’s brilliant demonstration and invaluable contribution to the restoration of this Kaywoodie Signet Bent Billiard, and my further education in pipe restoring, shown step-by-step in the following nine photos: 1) Chuck has prepared the pipe by filling the chamber with a piece of a paper towel, having no cotton available. He has also connected the retort’s Pyrex test tube, almost filled with 190-proof Everclear, and plugged with a stopper. The stopper leads to a copper tube which in turn attaches to a rubber passage that is connected to the pipe’s stem. 2)Chuck begins to heat the alcohol in the test tube at the base. 3) The alcohol begins to boil. 4) As the alcohol soon reaches full boil, Chuck tilts the test tube slightly to allow the hot liquid to bubble through the retort apparatus and into the pipe stem, and from there all the way to the chamber. The paper towel begins its rapid transformation from white to nasty brown. 5) When the test tube is empty, Chuck tilts the pipe back enough for the remaining, filthy alcohol to drain back into the test tube. 6) The lighter product of a second run with fresh Everclear. 7) After wiping dry the chamber, this is the residue. 8) Chuck snakes the other end of the piece of paper towel into the shank and twists it.
9) The residue from that.


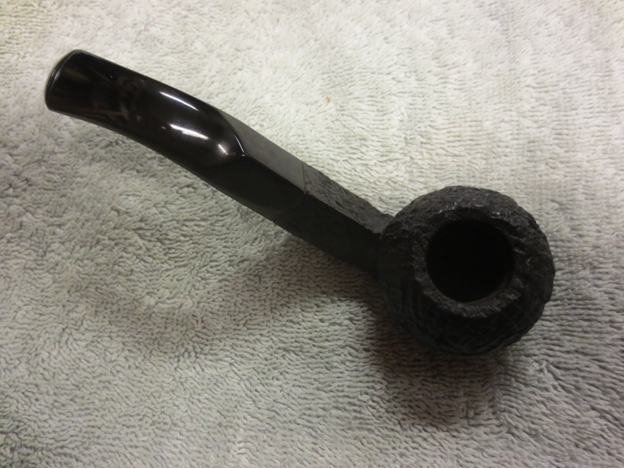
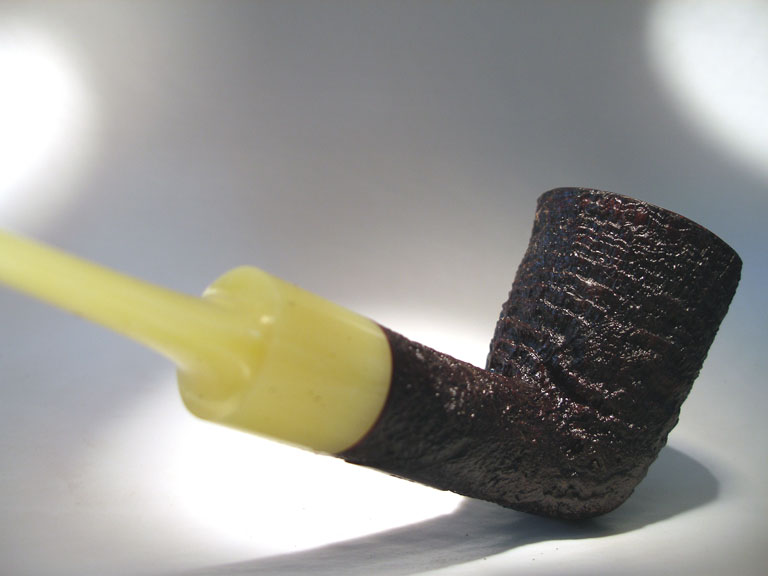
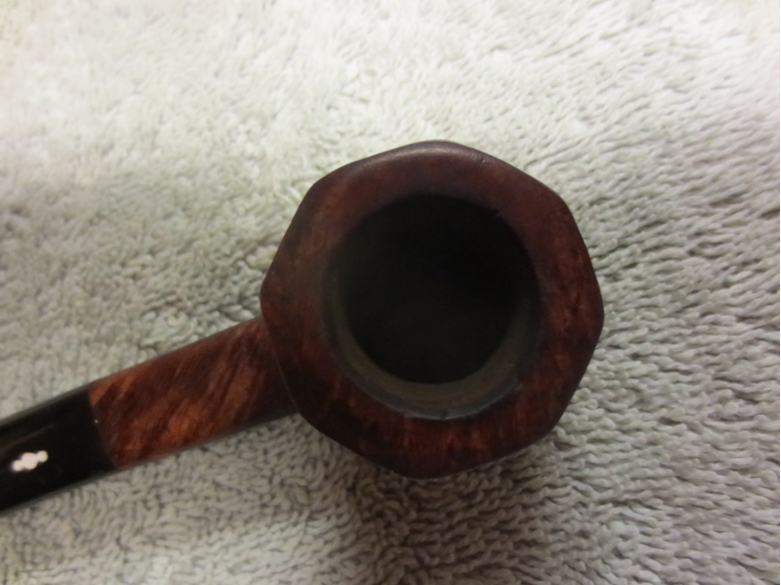
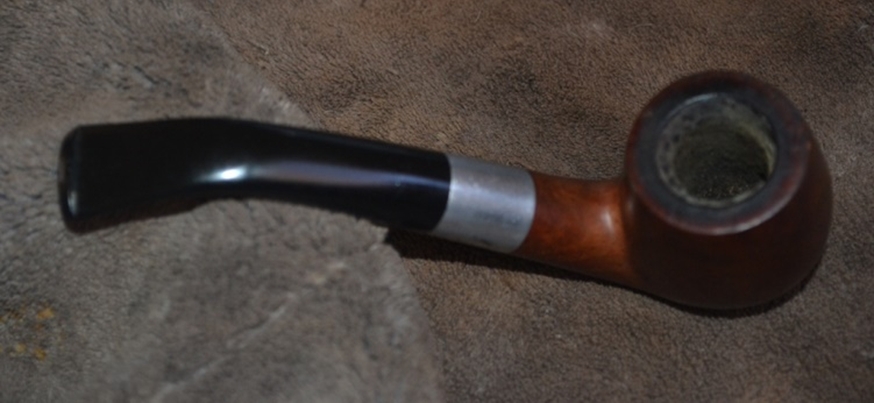
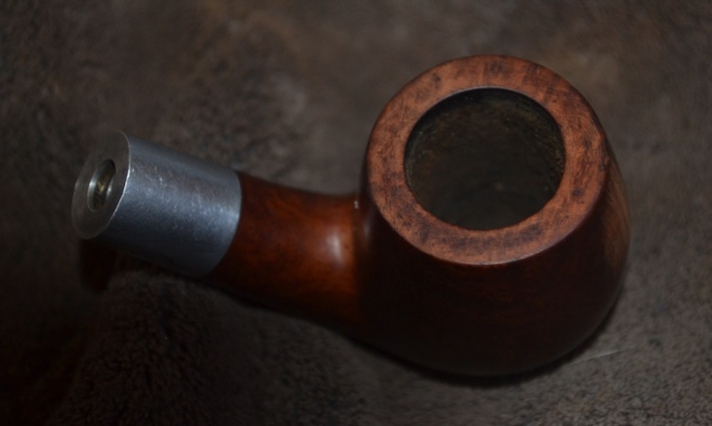
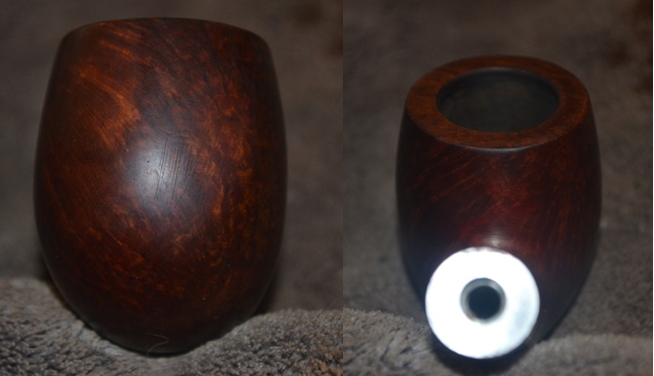
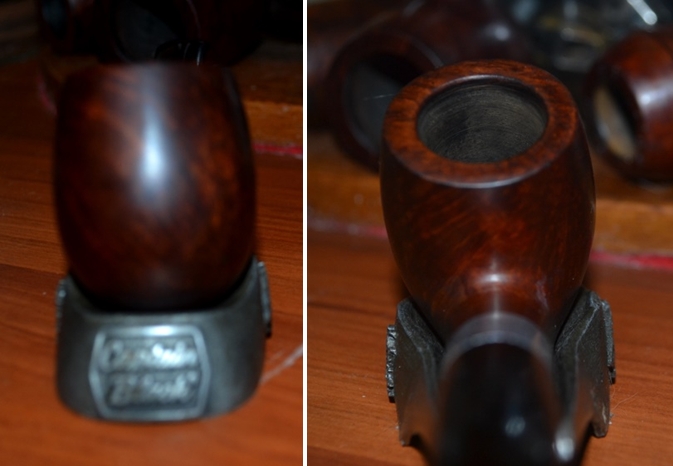
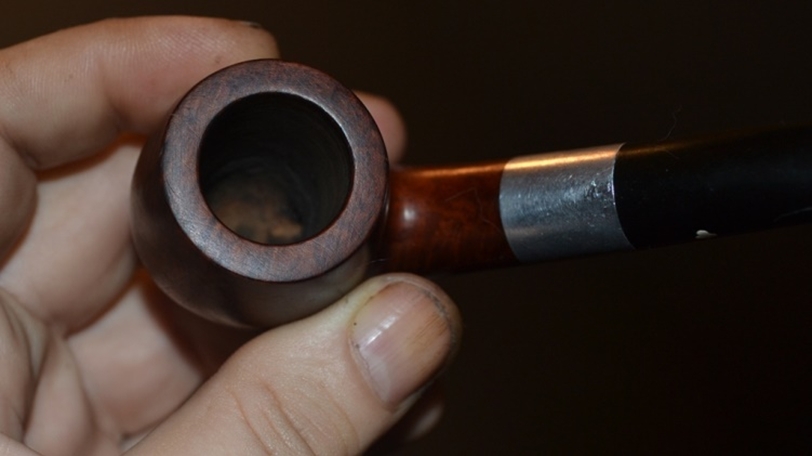
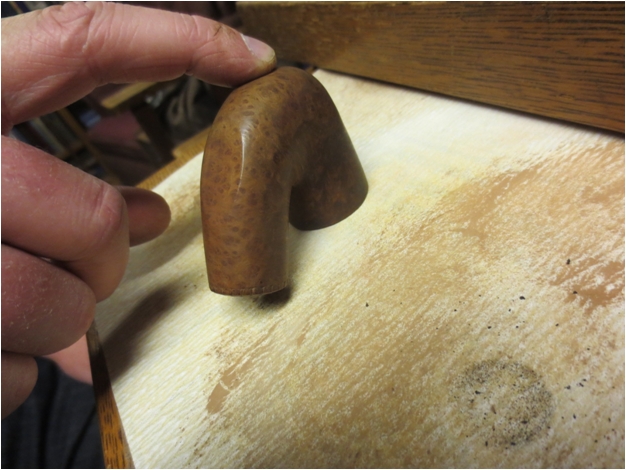
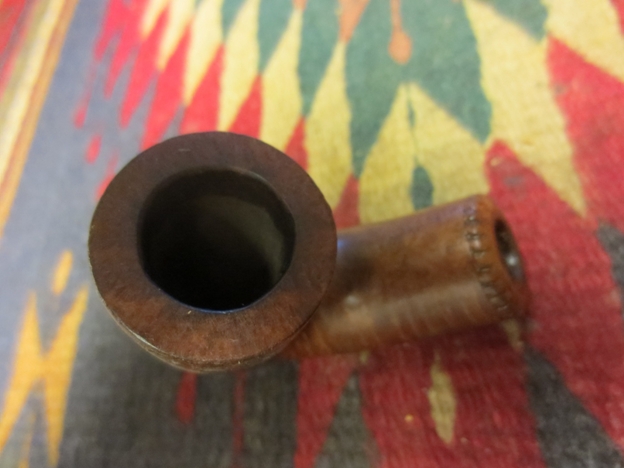
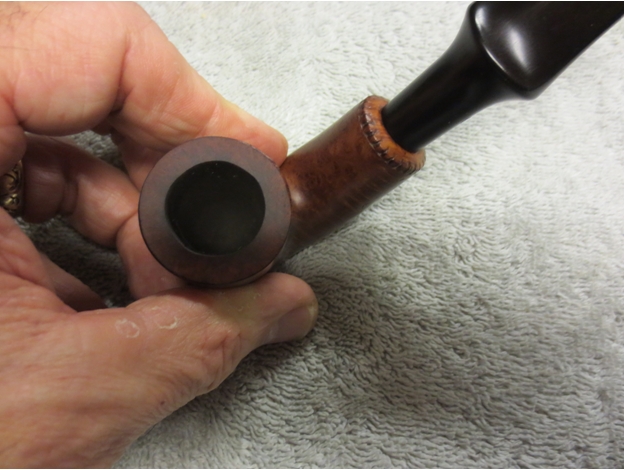
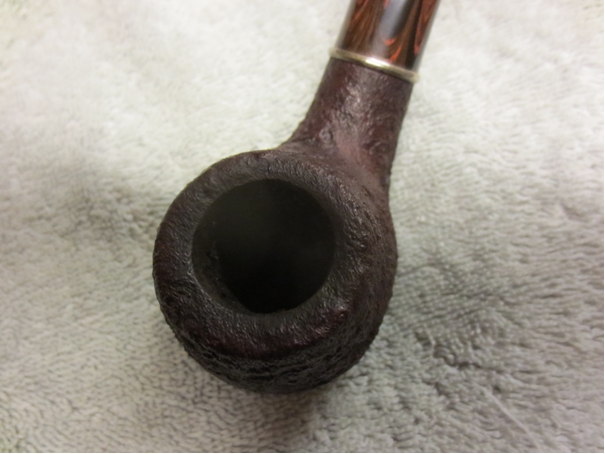
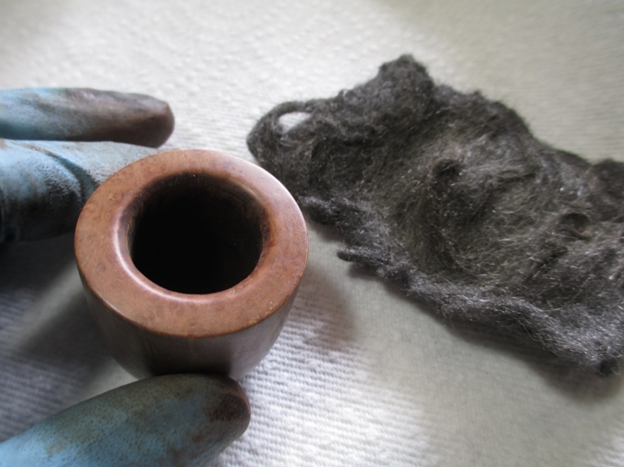
 And I take a close look inside the chamber of the Kaywoodie that is clean all the way to the bottom.
 CONCLUSION
Although my skin is tough, like a fault on the mail of a dragon of legend, my weak spot was pierced. The wound was neither superficial nor deep but still stings a bit, being inflicted as it was by so many of my friends’ and associates’ lack of trust to confide in me. Had my experiences selling restored estate pipes until now been a scientific experiment, an analysis of the data would support the conclusion that friends are unwilling to express their findings of any serious flaws to the one person who could prevent the same mistakes from being repeated.
This reluctance, of course, is created by the risk of hurting the feelings of the friend whose sensibilities the paying customers would rather spare. Such a reaction by the person on the receiving end of the message is indeed real but necessary for a demonstration of true friendship. An unfortunate fact is that too few people understand how criticism is a two-sided razor, one cutting for the positive and the other for the negative. My mind has always been open to constructive, helpful criticism while it shuts like a steel trap against anything senseless and cruel.
Now, thanks to the good but misguided intentions of some of my friends, I am compelled by dual senses of honor and good business to contact everyone who has purchased a pipe from me, in person or online, with a carefully written explanation of the error and an offer of a free correction, postage included. But also thanks to these friends, and in particular my good friend and mentor, Chuck, I now have a backlog of “completed” restores on which I can practice retorting.
So far, they’re coming along well, with some new restores thrown in.
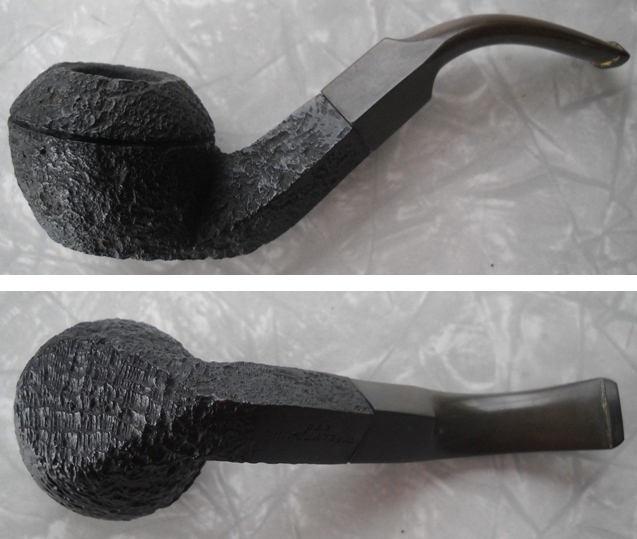
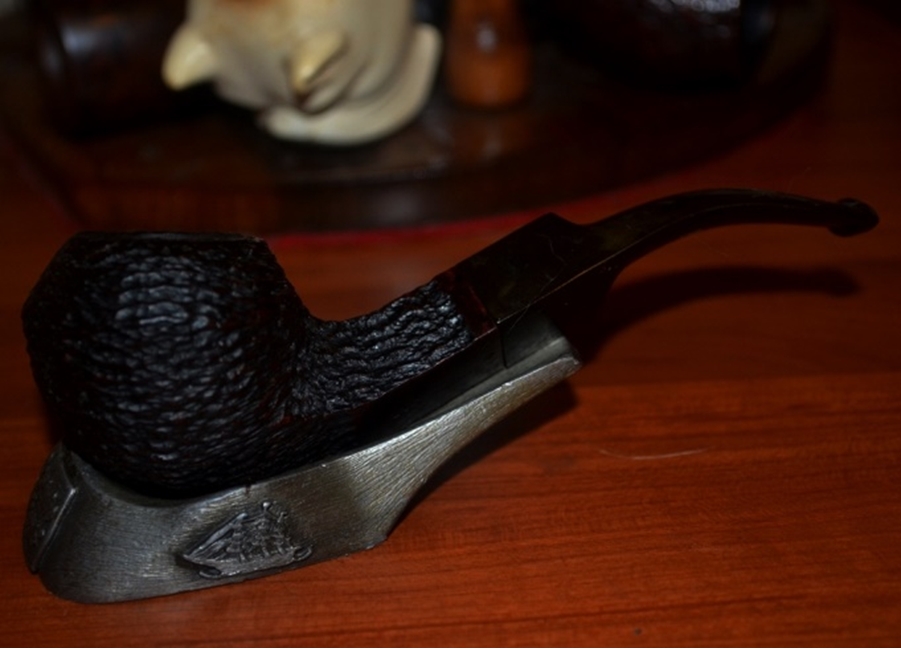
 When the pipe arrived, I opened the box and removed the pipe. The blast was even better than the photos had shown. The stem oxidation was pretty much as shown above. The misaligned stem was no issue as the stem had a push tenon and was only a matter of turning the stem slightly. The airway was open but dirty with tars and grime. The bowl had a light cake that thickened toward the bottom of the bowl. The edges of the shank and the stem were sharp and clean showing that it had not been buffed much in its history. There were a couple of spots on the edge of the rim and shank at the union next to the stem where the stain was worn or missing. The rim itself was dirty with tars. The stem was clean though oxidized with no tooth marks or chatter. The button was crisp and sharp and the slot was an open oval that flared into the stem opening up into the airway like a funnel. I took a few photos of the pipe when I took it out of the box.
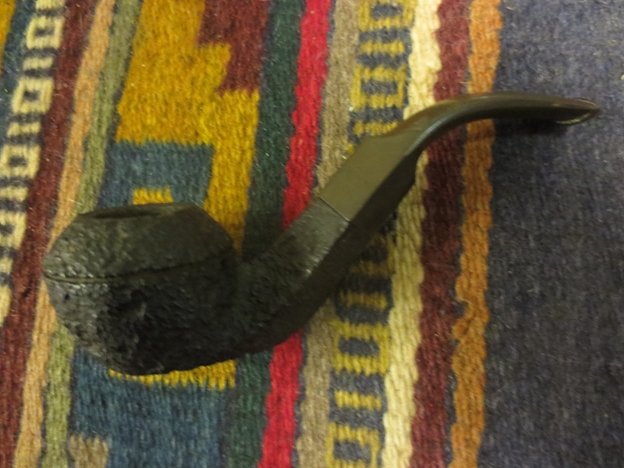
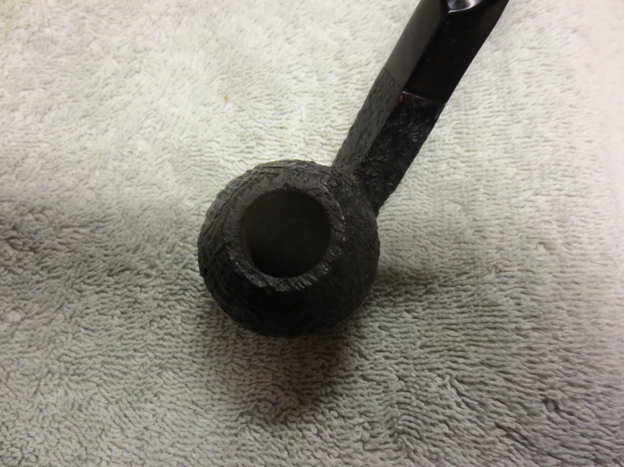
 The photo below shows the situation with the cake in the bowl. It was not centered or evenly built up around the bowl so it would need to be cleaned up and adjusted.
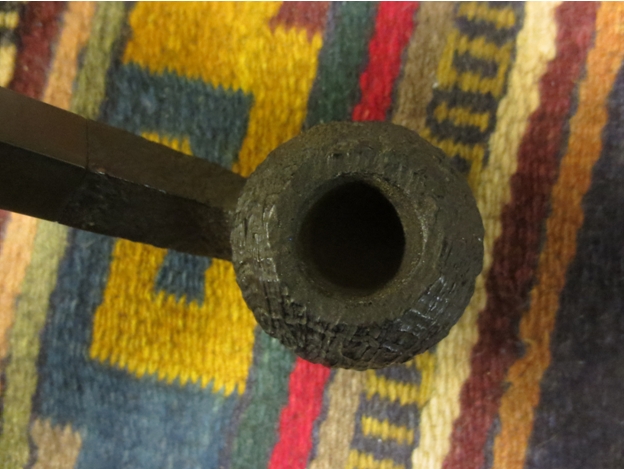 I reamed the bowl with a PipNet reamer and took the uneven cake back to bare wood. I used the smallest cutting head to begin with and worked my way up to the second cutting head. With these two I was able to clean out the cake. The bowl shape is kind of combination of a V and U shape. The sides are U-shaped to about a half-inch from the bottom of the bowl where it shifts to a V shape. I scrubbed the rim surface with a soft bristle brass tire brush to clean off the tars and oils built up there.
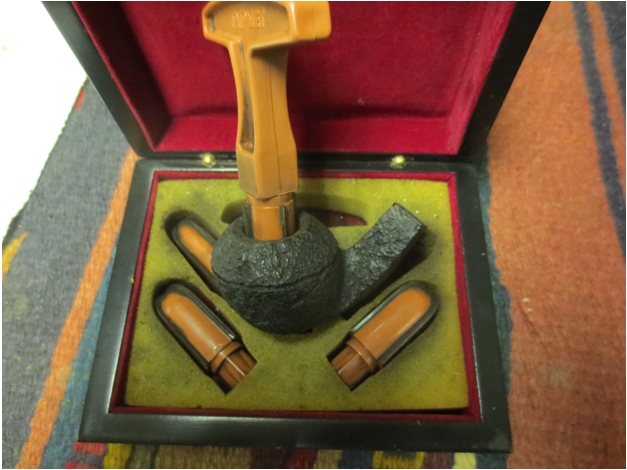
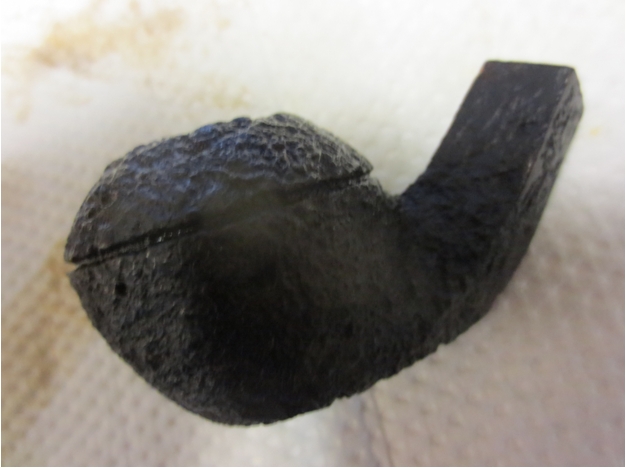
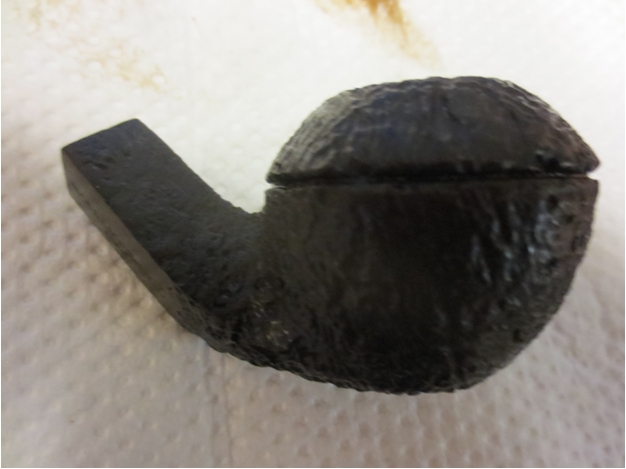
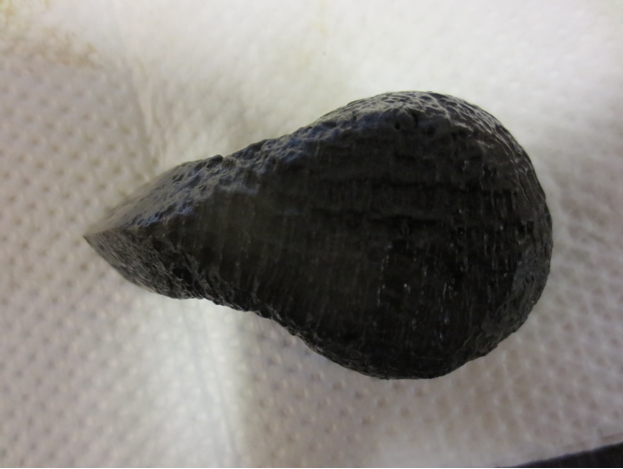
 I scrubbed the bowl and rim with Murphy’s Oil Soap and a tooth brush. Once I had scoured it with the soap I put a thumb over the bowl and rinsed off the soap with running water. The photos below show the pipe after I had scrubbed, rinsed it and dried it off with a soft cloth.
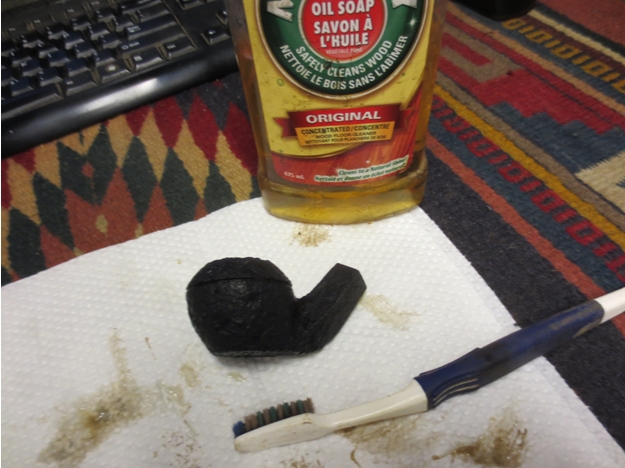
 After cleaning the briar I gave it a coat of Conservators Wax which is a microcrystalline wax cleaner. I buffed it with a shoe brush to bring a shine to the bowl.
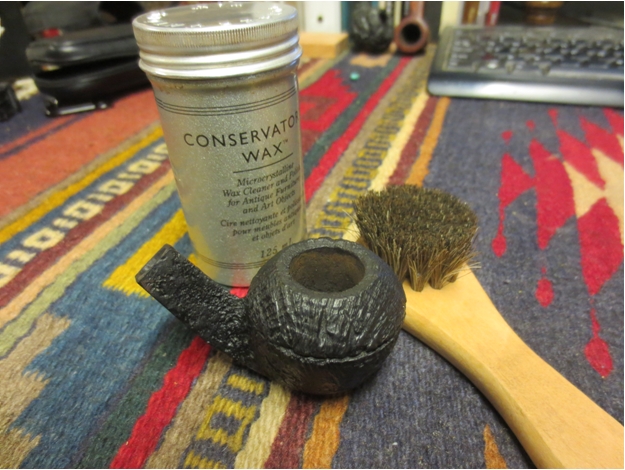 I put the stem in a jar of Oxyclean to soak and raise the oxidation to the surface. I let it sit overnight to soak. I then returned to the inside of the bowl. (NOTE: The reason I give the bowl a coat of wax before cleaning the inside of the shank and bowl is because I want to protect the finish when I am cleaning out the inside).
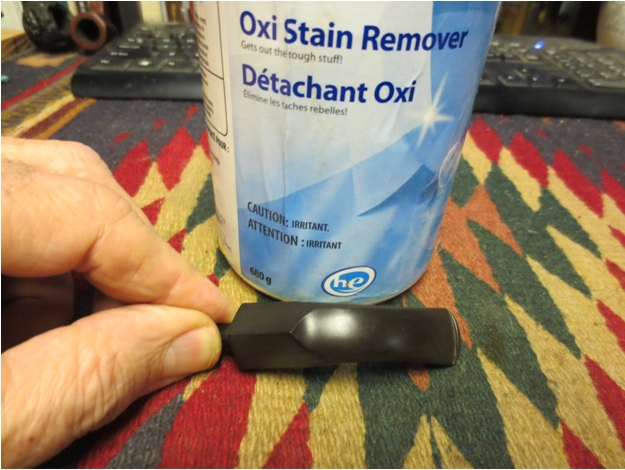
 I cleaned out the shank with isopropyl alcohol and cotton swabs and the airway with pipe cleaners. I cleaned it until the cleaners came out with no grime on them.
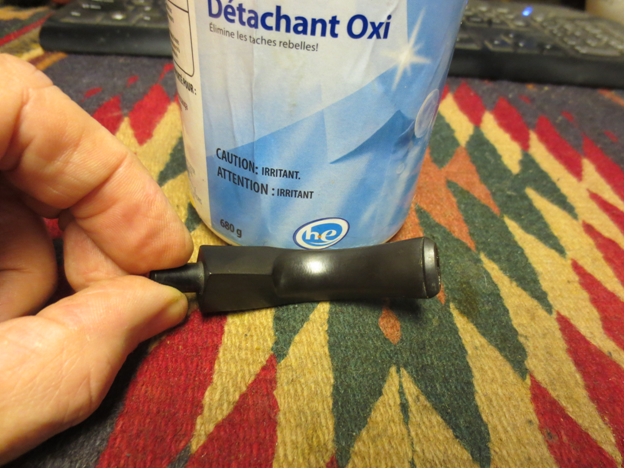
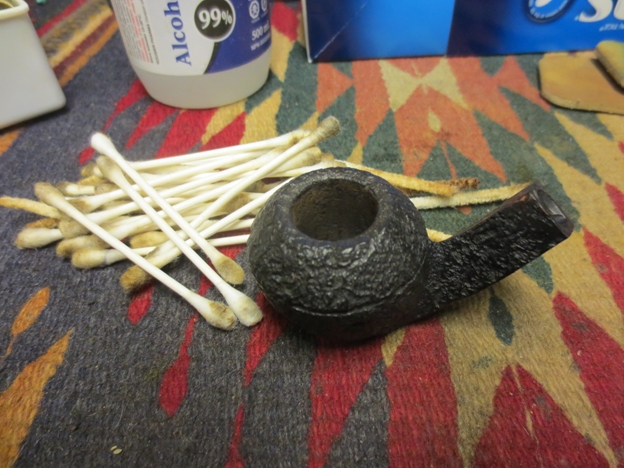 In the morning I took the stem out of the oxyclean and dried it off with a paper towel. The roughness of the paper towel removes the oxidation that has been raised to the surface of the stem. Once it was dry I slipped a plastic washer on the tenon and reinserted it into the shank of the pipe. The washer allows me to sand all the way to the edges of the stem without rounding the edges at the shank junction. I started with a medium grit sanding sponge and worked through a fine grit sponge and fine grit sanding block. I then wet sanded with 1500-2400 grit micromesh pads and dry sanded with 3200-12,000 grit pads. I rubbed down the stem between each group of three pads with Obsidian Oil and then moved onto the next set of three. When I finished I buffed the stem with White Diamond and gave it a final coat of Obsidian Oil and let it sit until it had dried.
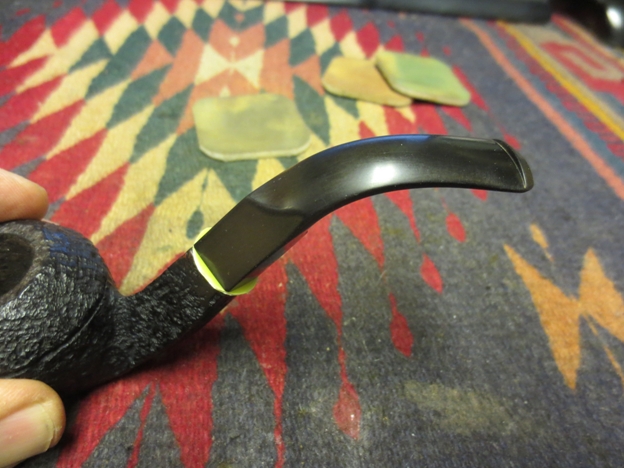
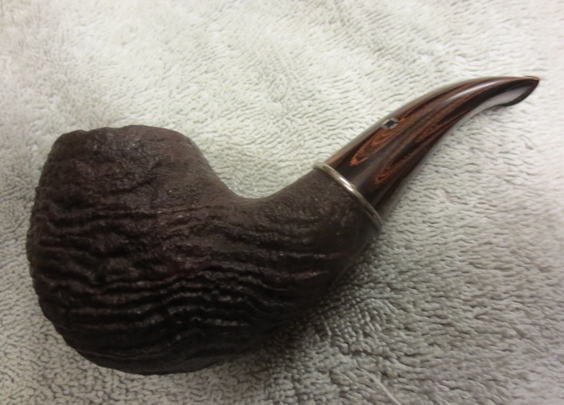
 (NB In the photo below I left the plastic washer in place on the stem while in the two above I removed it for the photo)
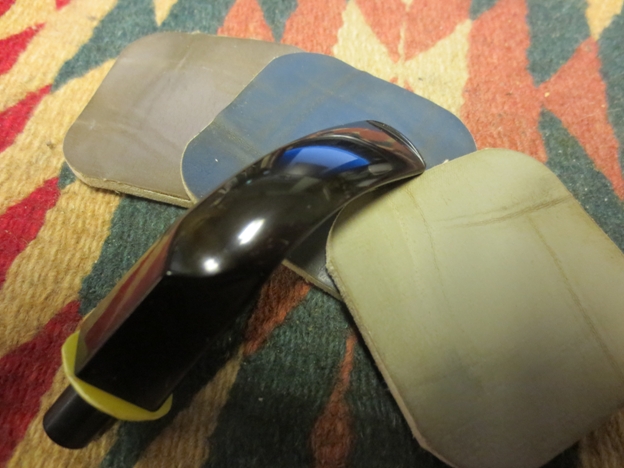 I put the stem back on the bowl and gave it a final buff with a blue polishing bar on the buffer. This polishing compound is a plastic polishing compound (Blue Diamond maybe, can’t remember the name). I finished by giving the bowl a buff of carnauba wax (light touch so as not to gum up the blast finish) and then multiple coats of the wax on the stem. I buffed the whole pipe with a soft flannel buff for the finished shine on the stem and the bowl shown in the photos below. The pipe is ready to be christened with its inaugural smoke this afternoon while I go for a walk in the neighbourhood. I have chosen a Virginia Perique blend called Pilgrim’s Muse that I purchased from the Country Squire Tobacconist. It is a great smoking tobacco with a good flavour.