Tag Archives: Replacing a tenon

Restoring and Replacing a Broken Tenon on a Scandia 263 Danish Freehand


Blog by Steve Laug

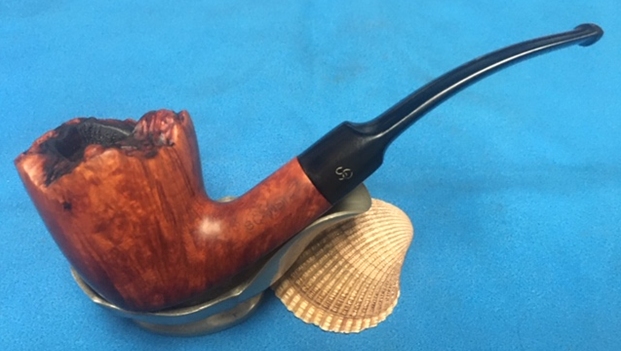
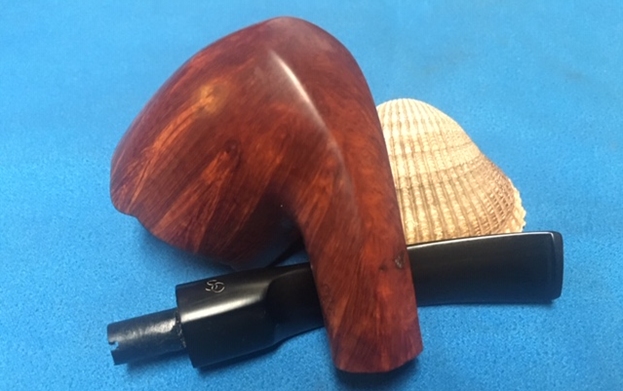
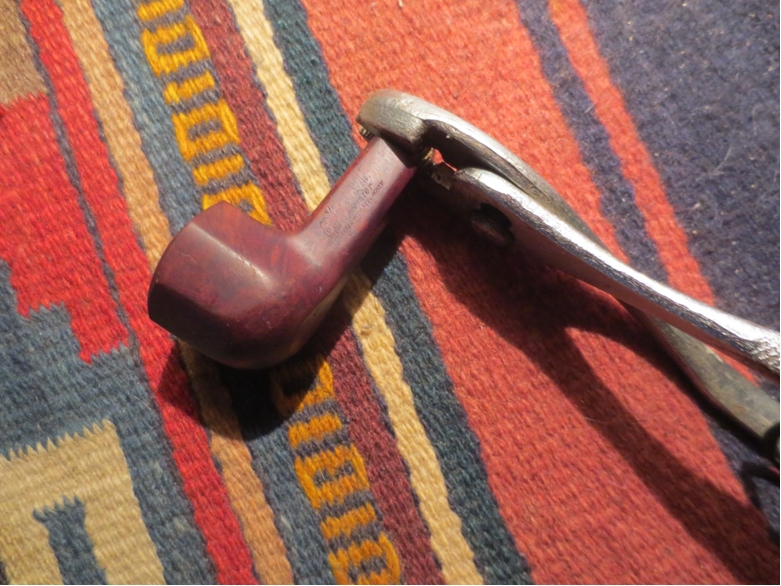
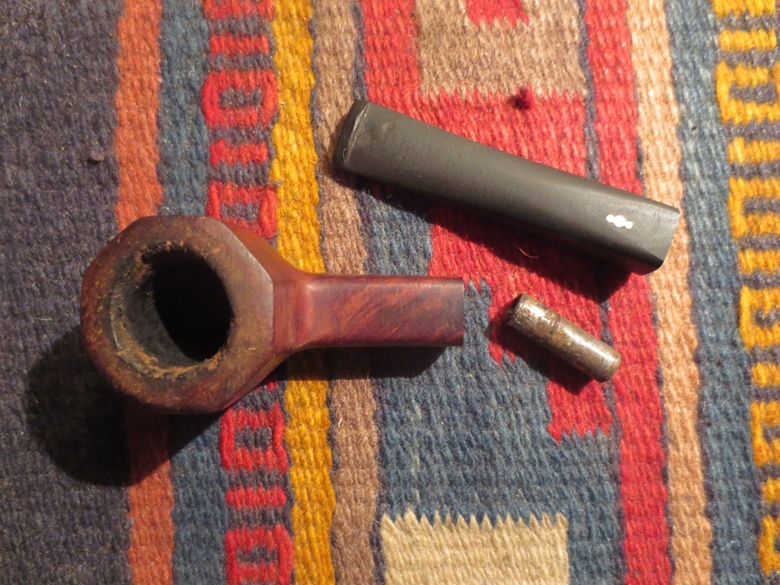
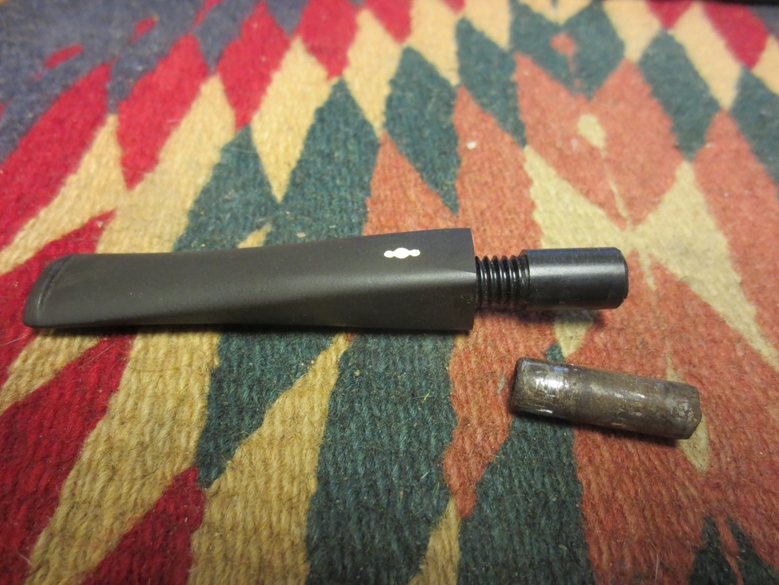
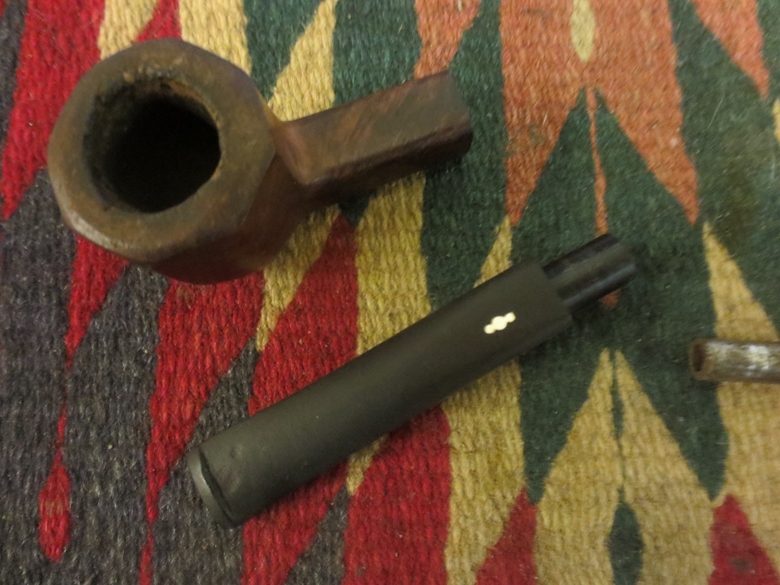
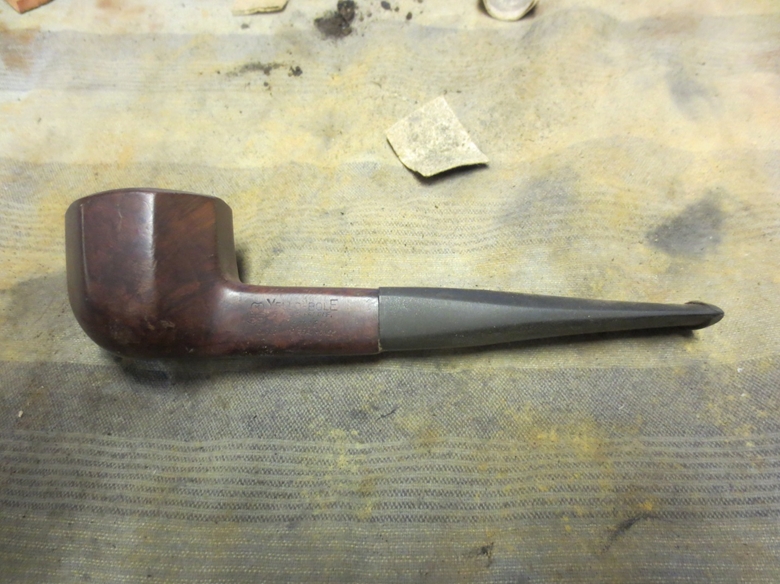
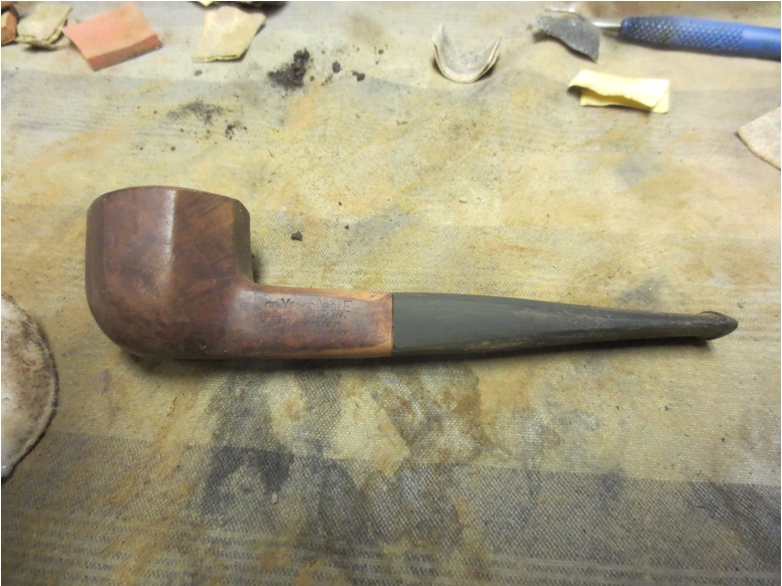
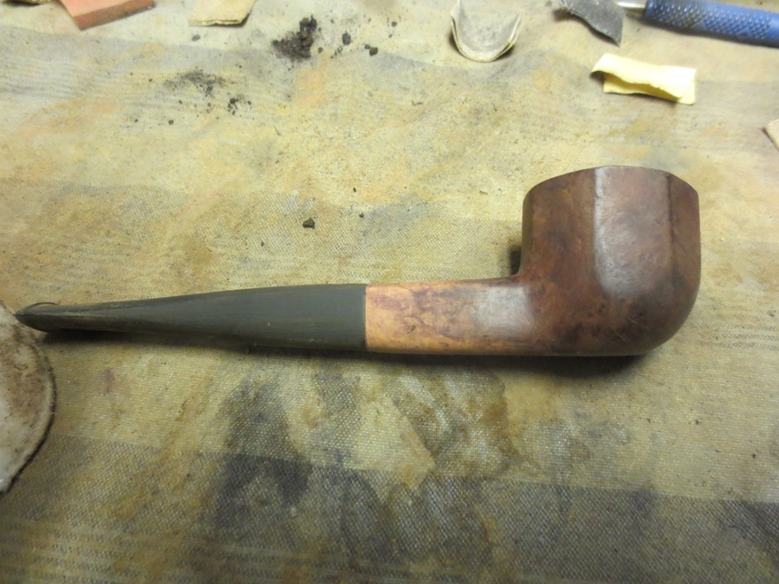
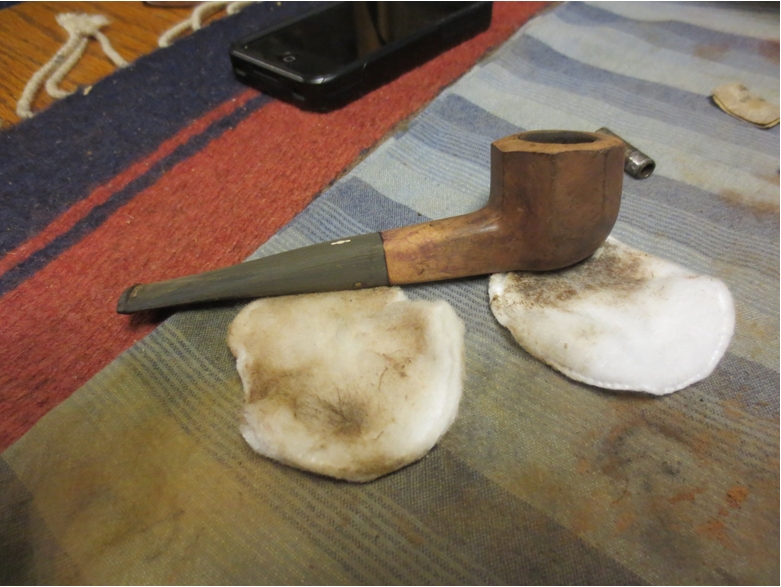
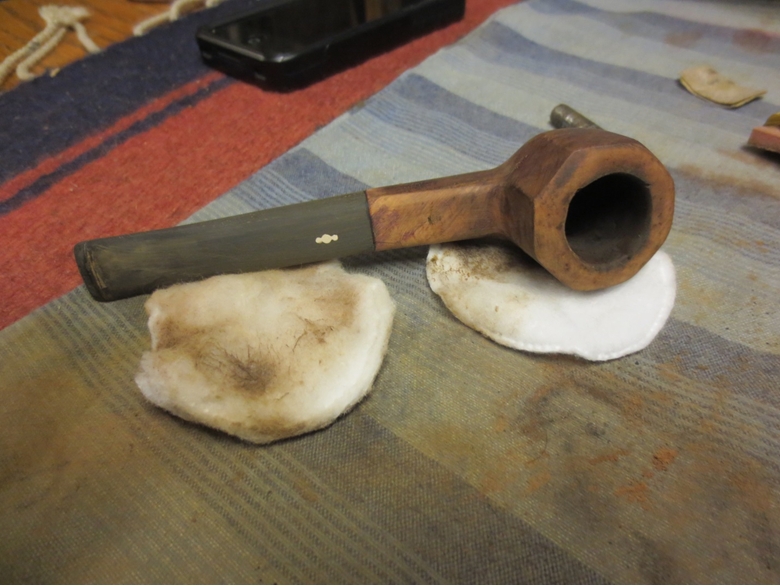
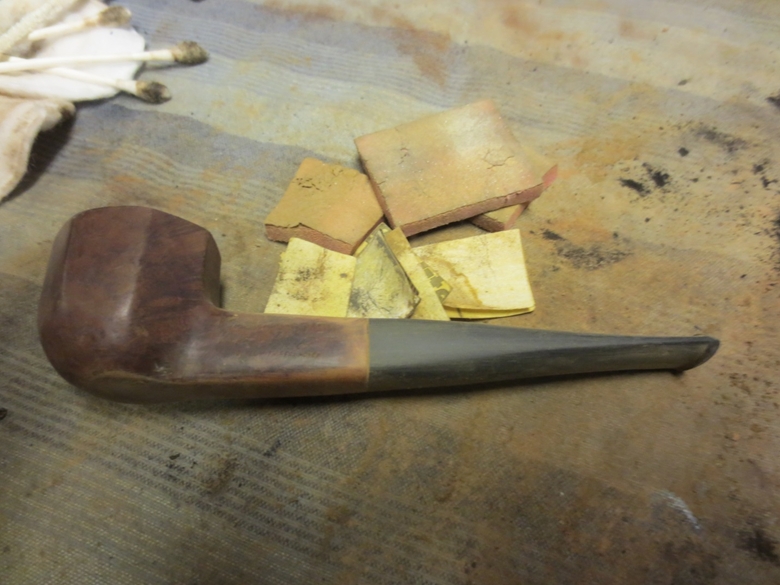
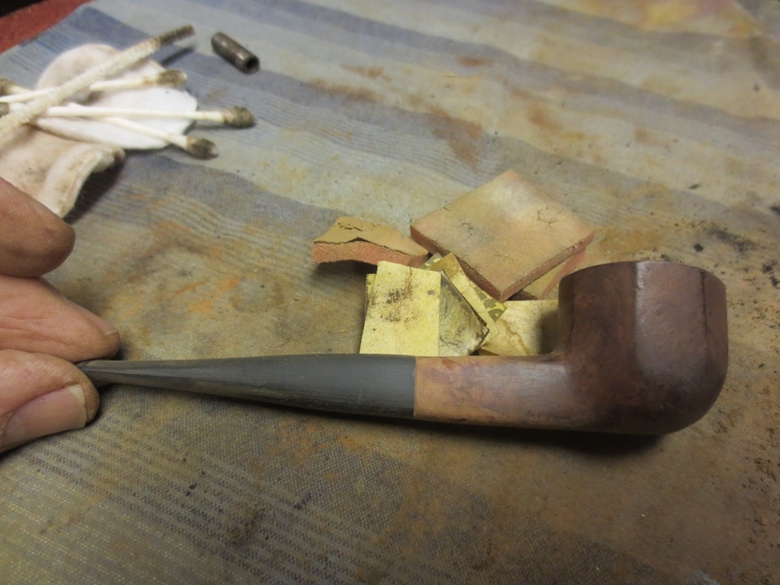
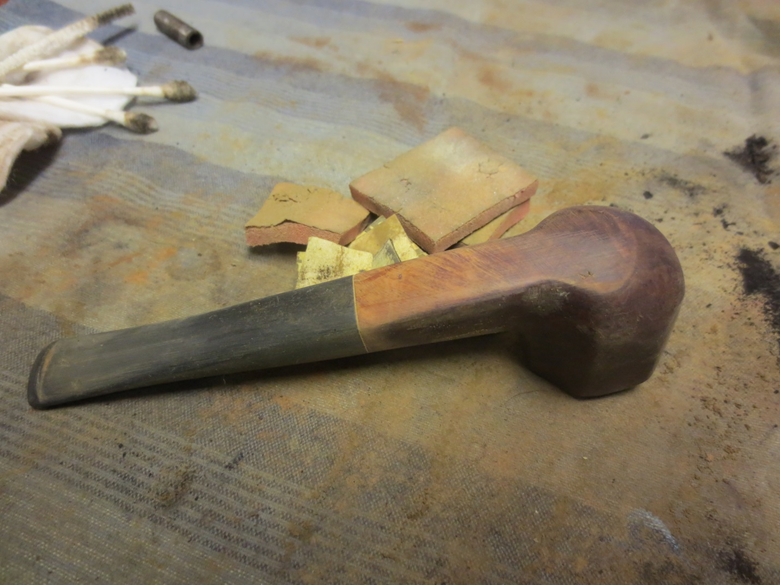
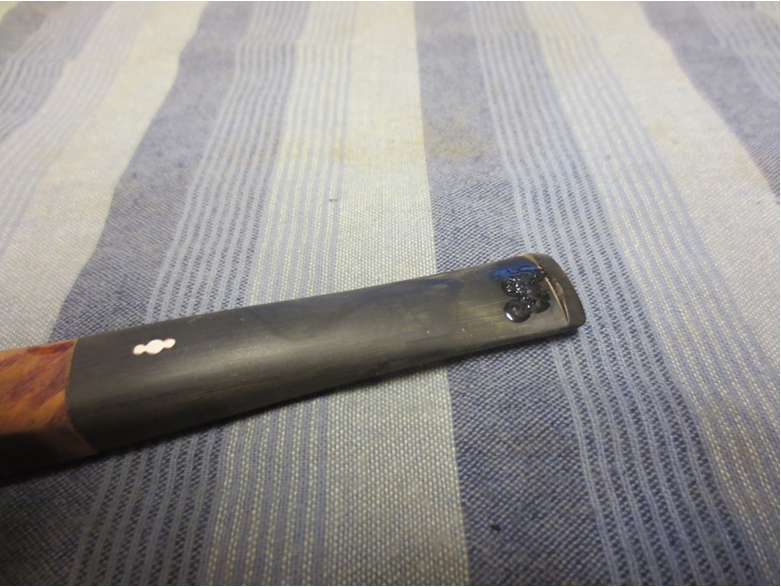
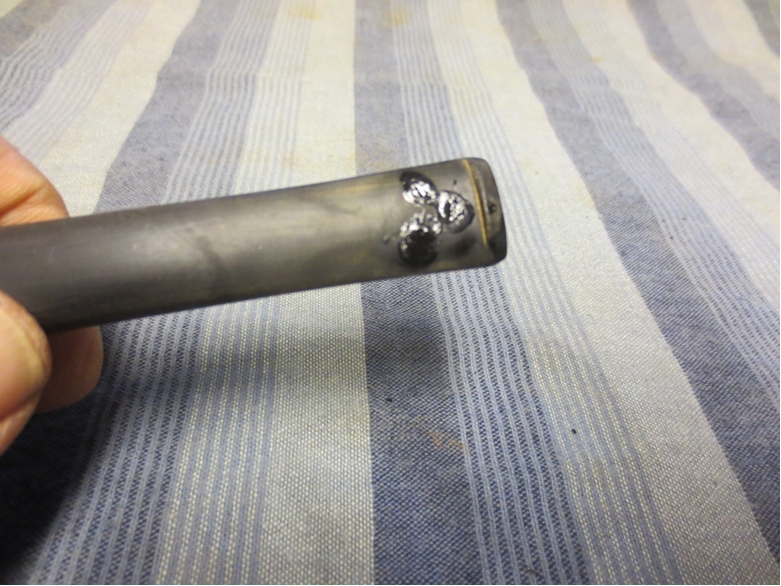
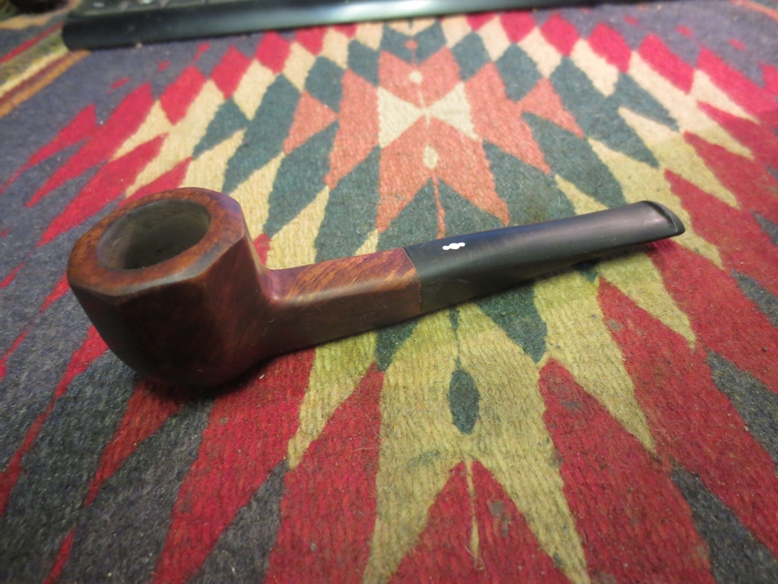
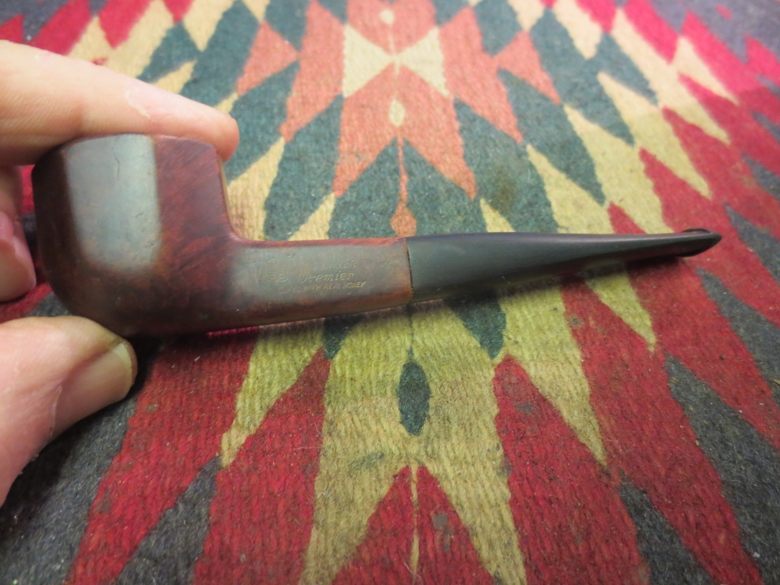
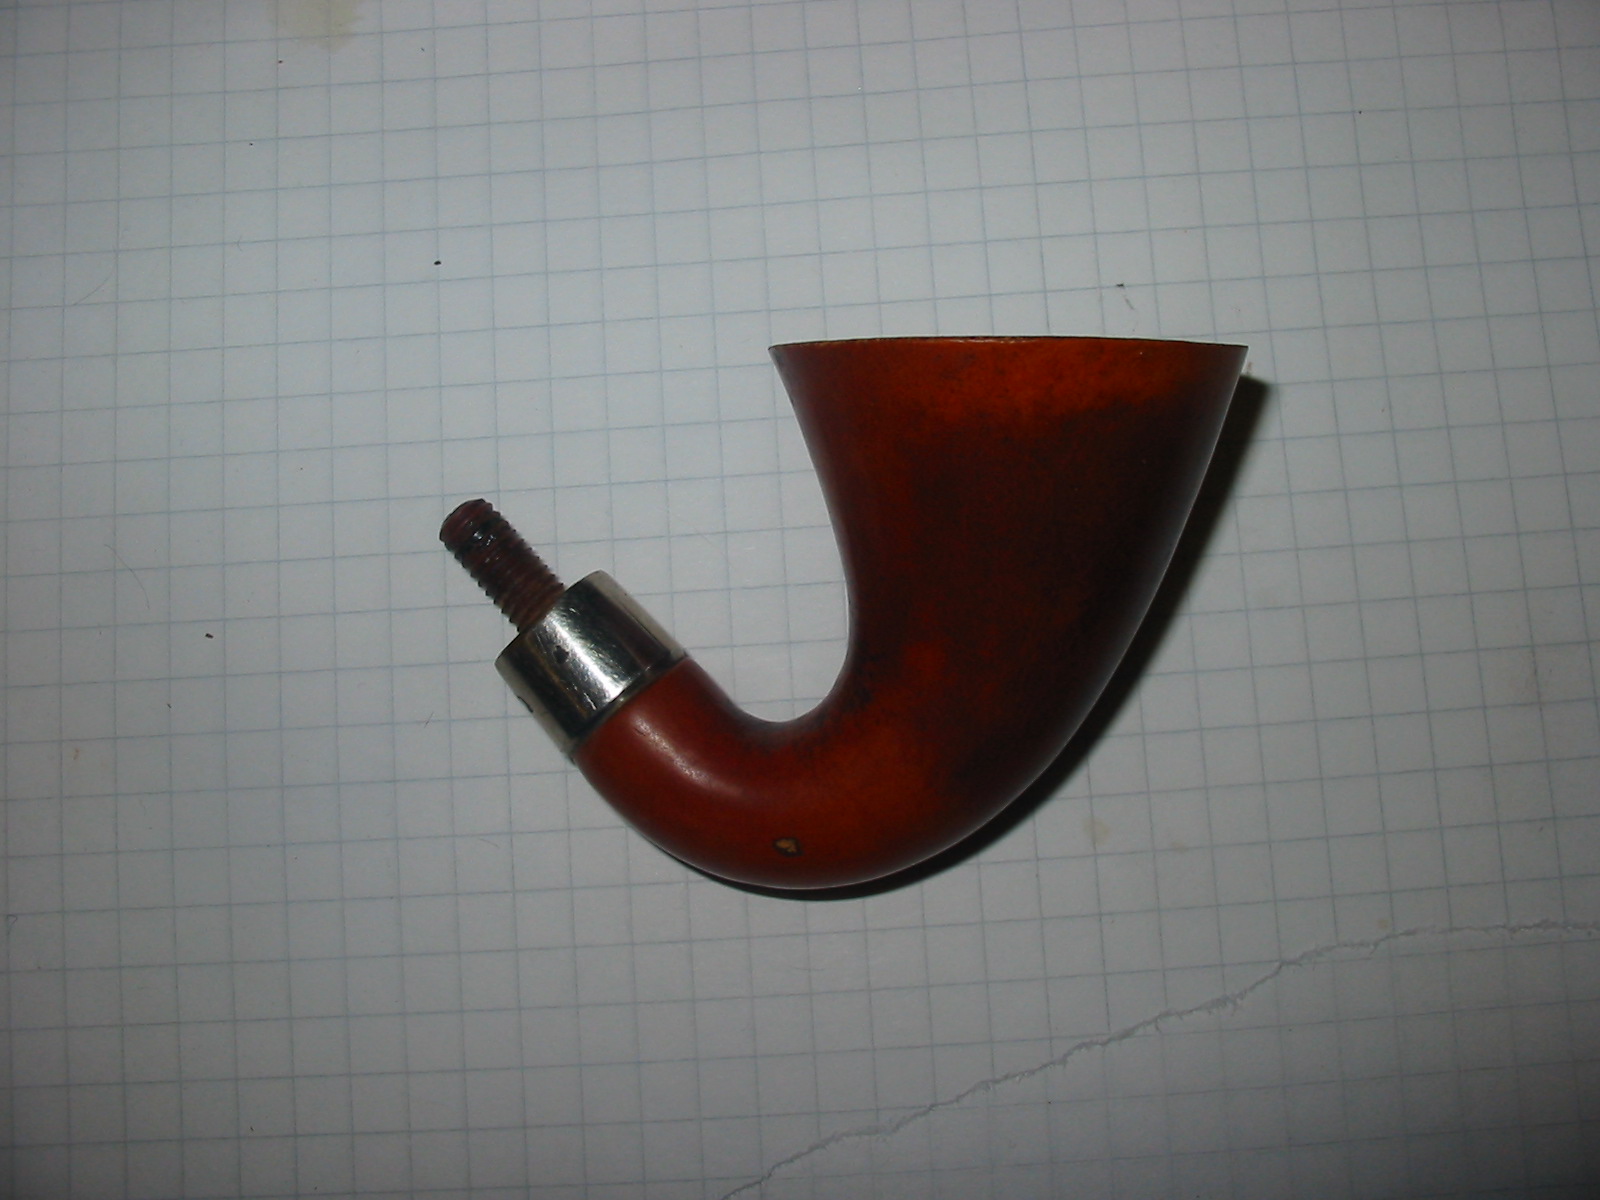
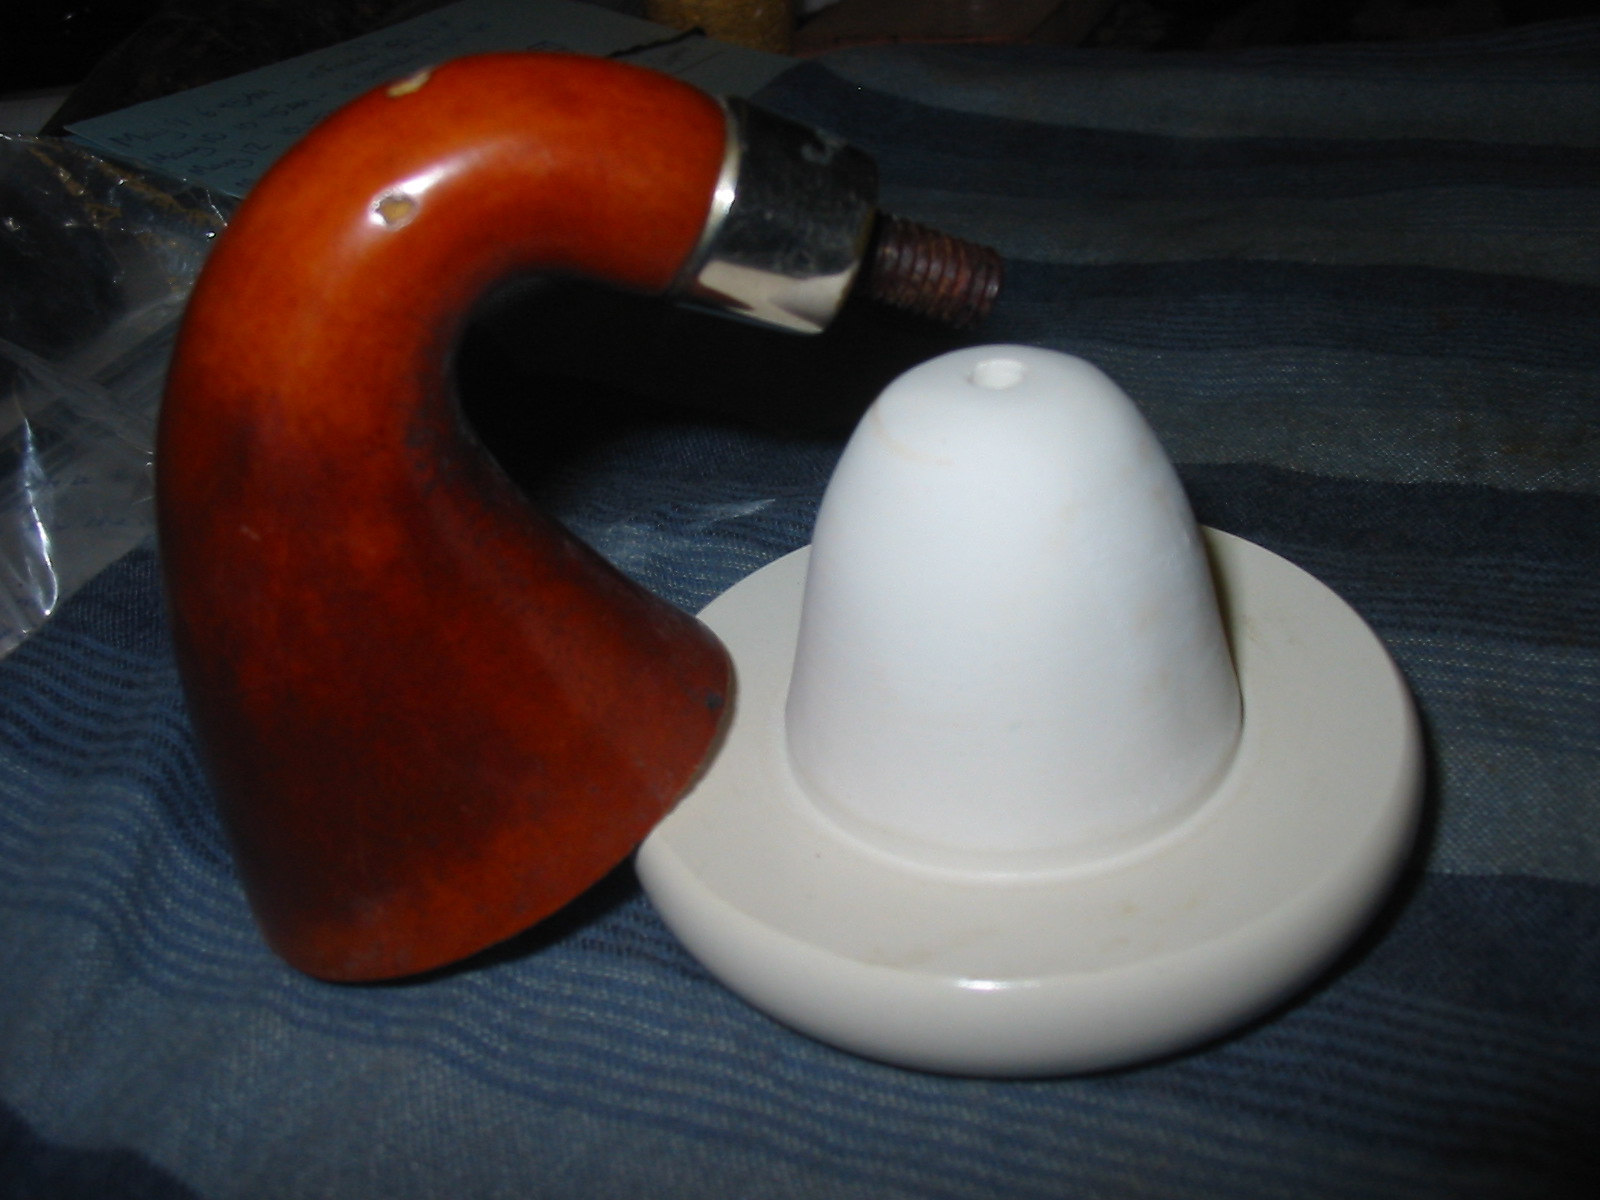
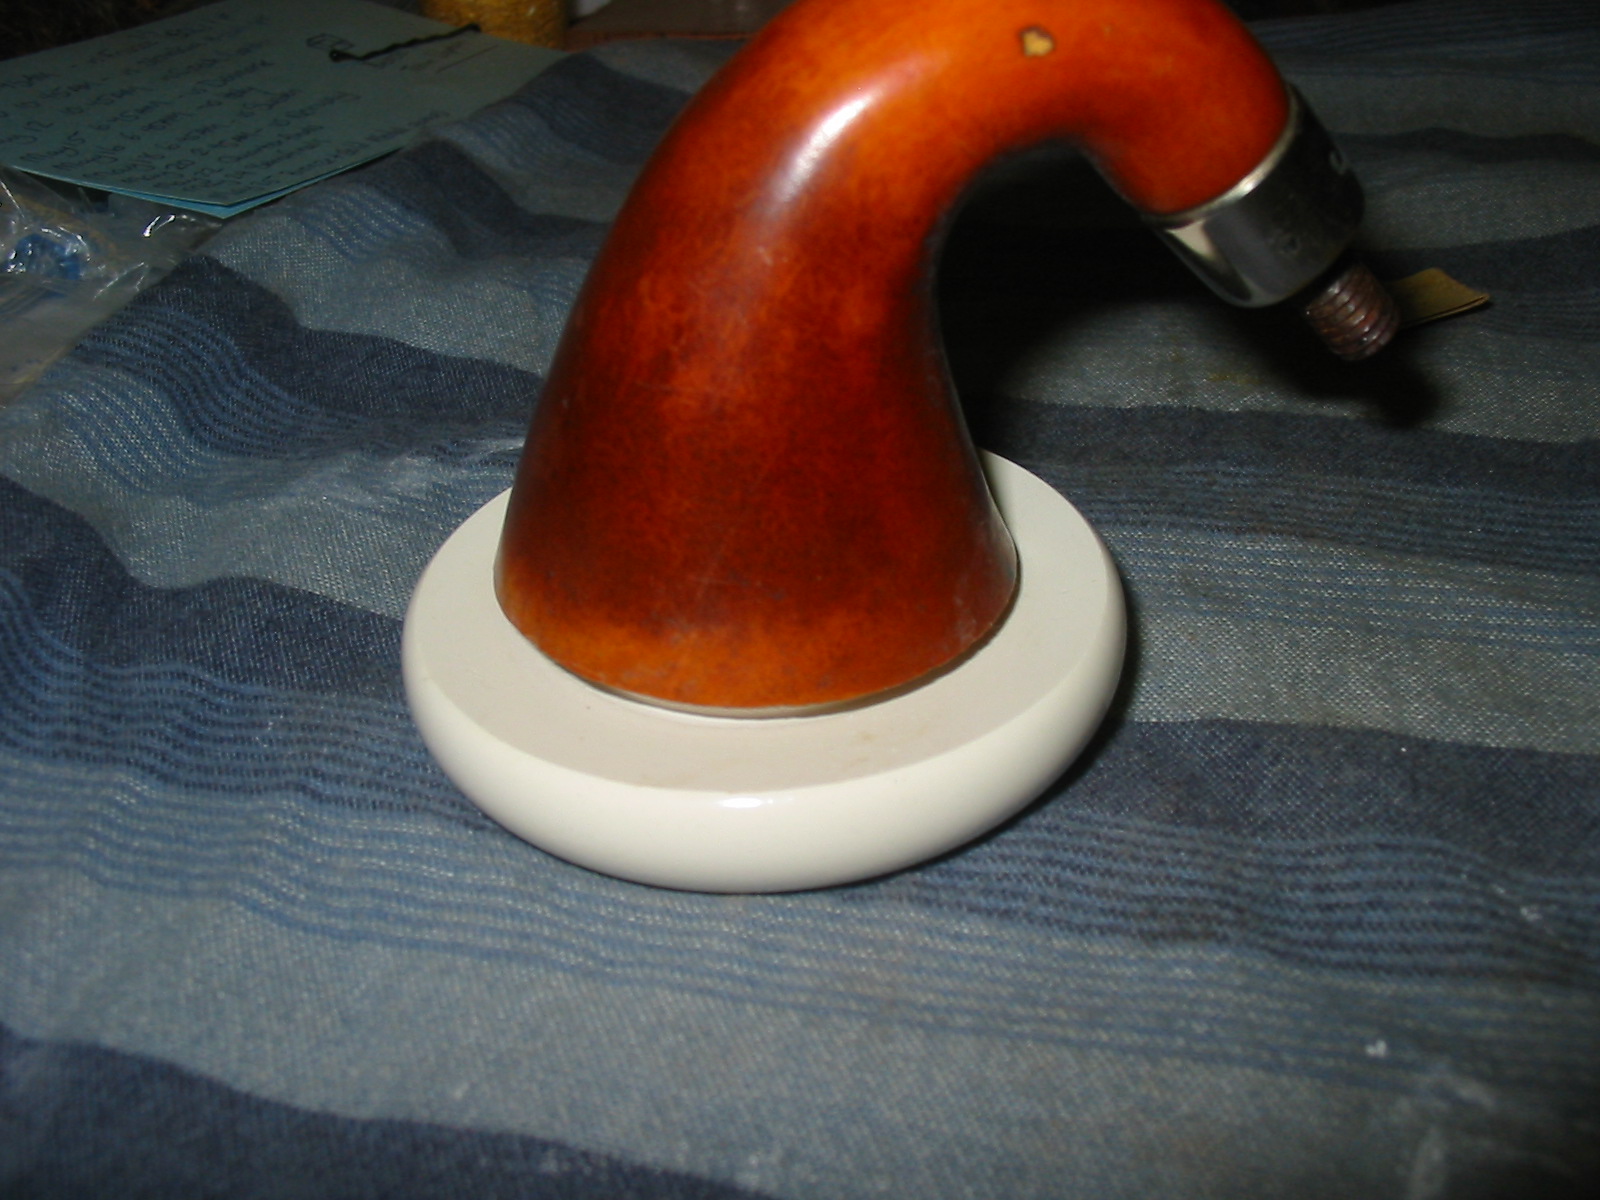
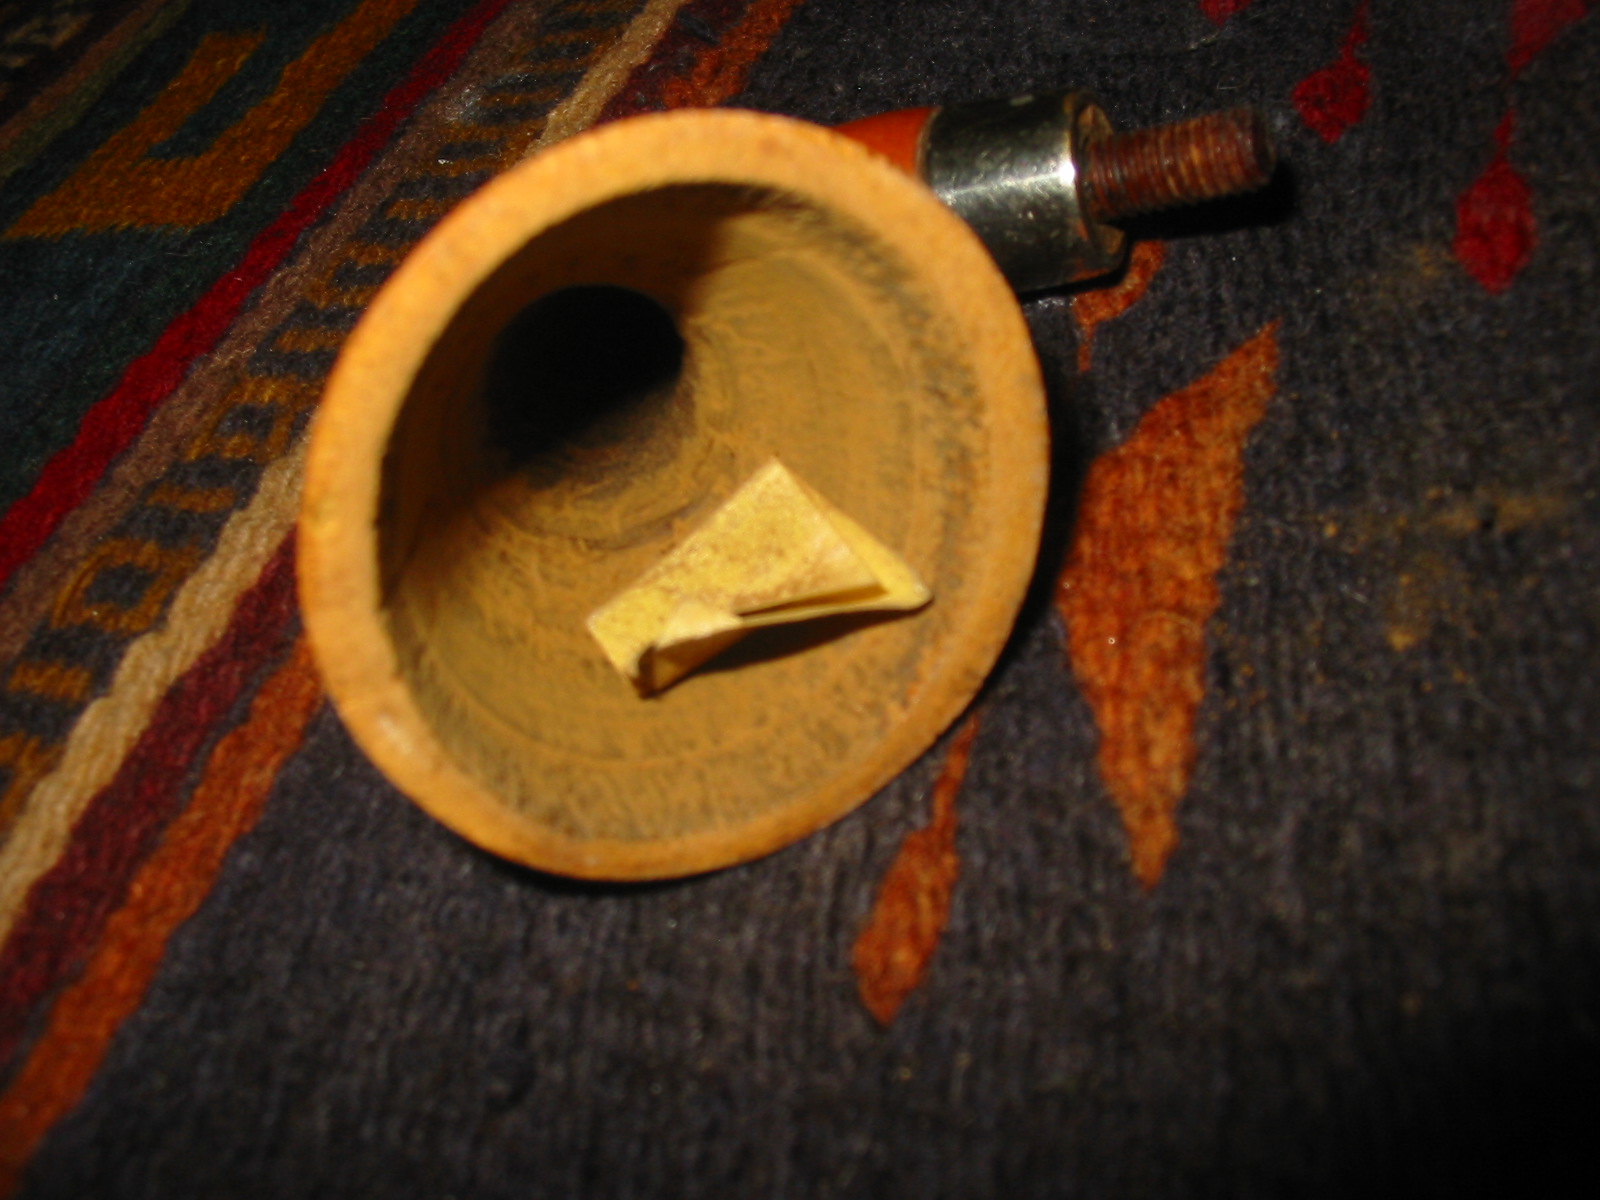
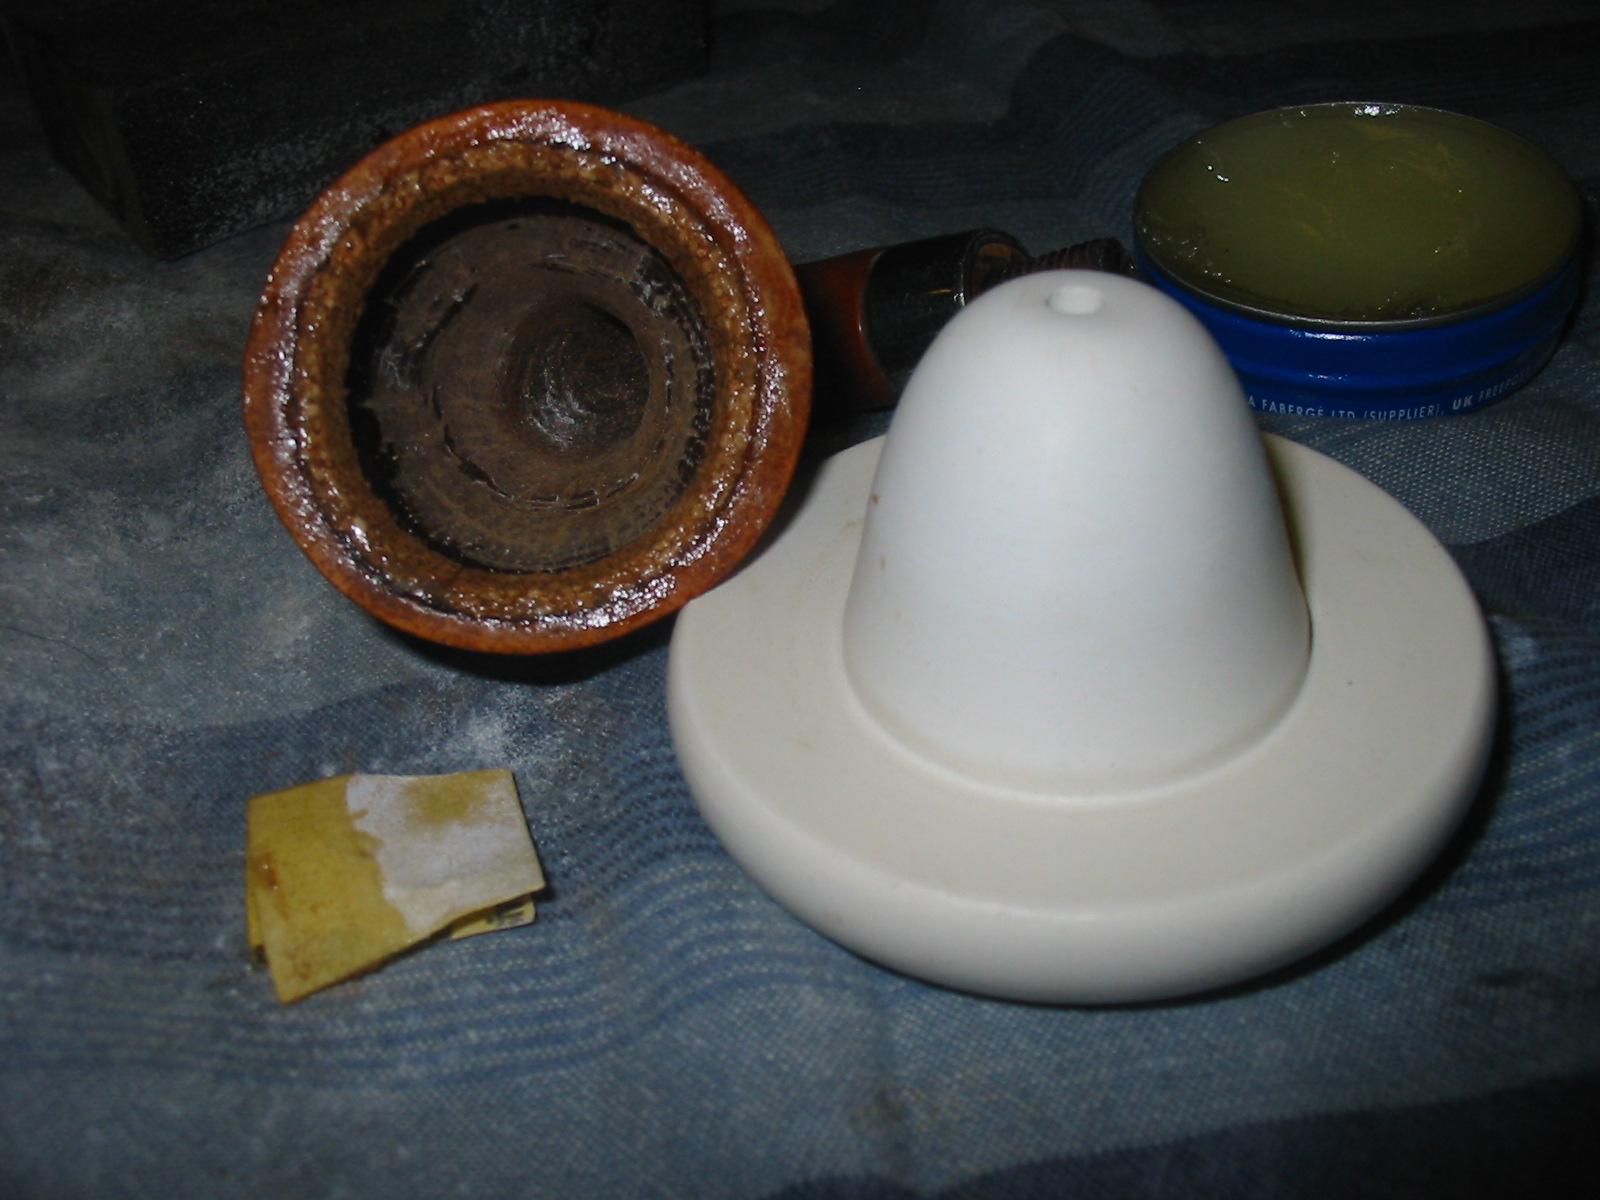
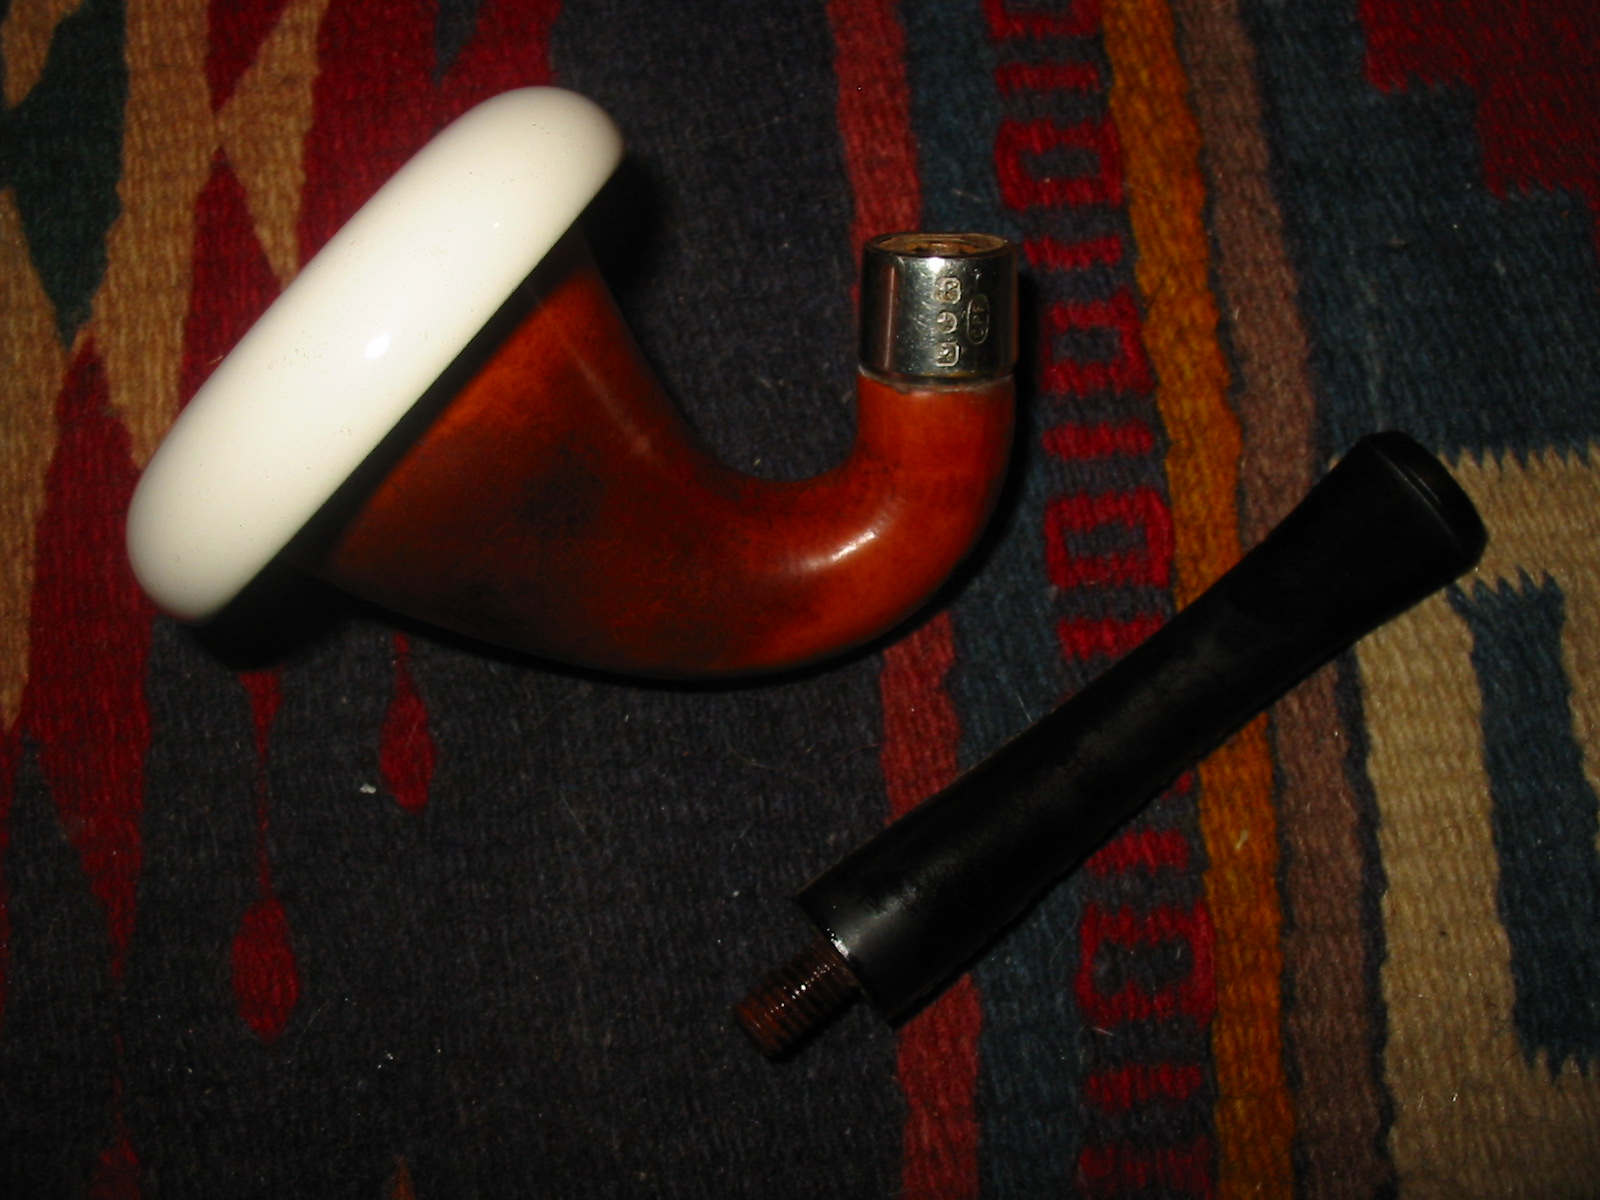
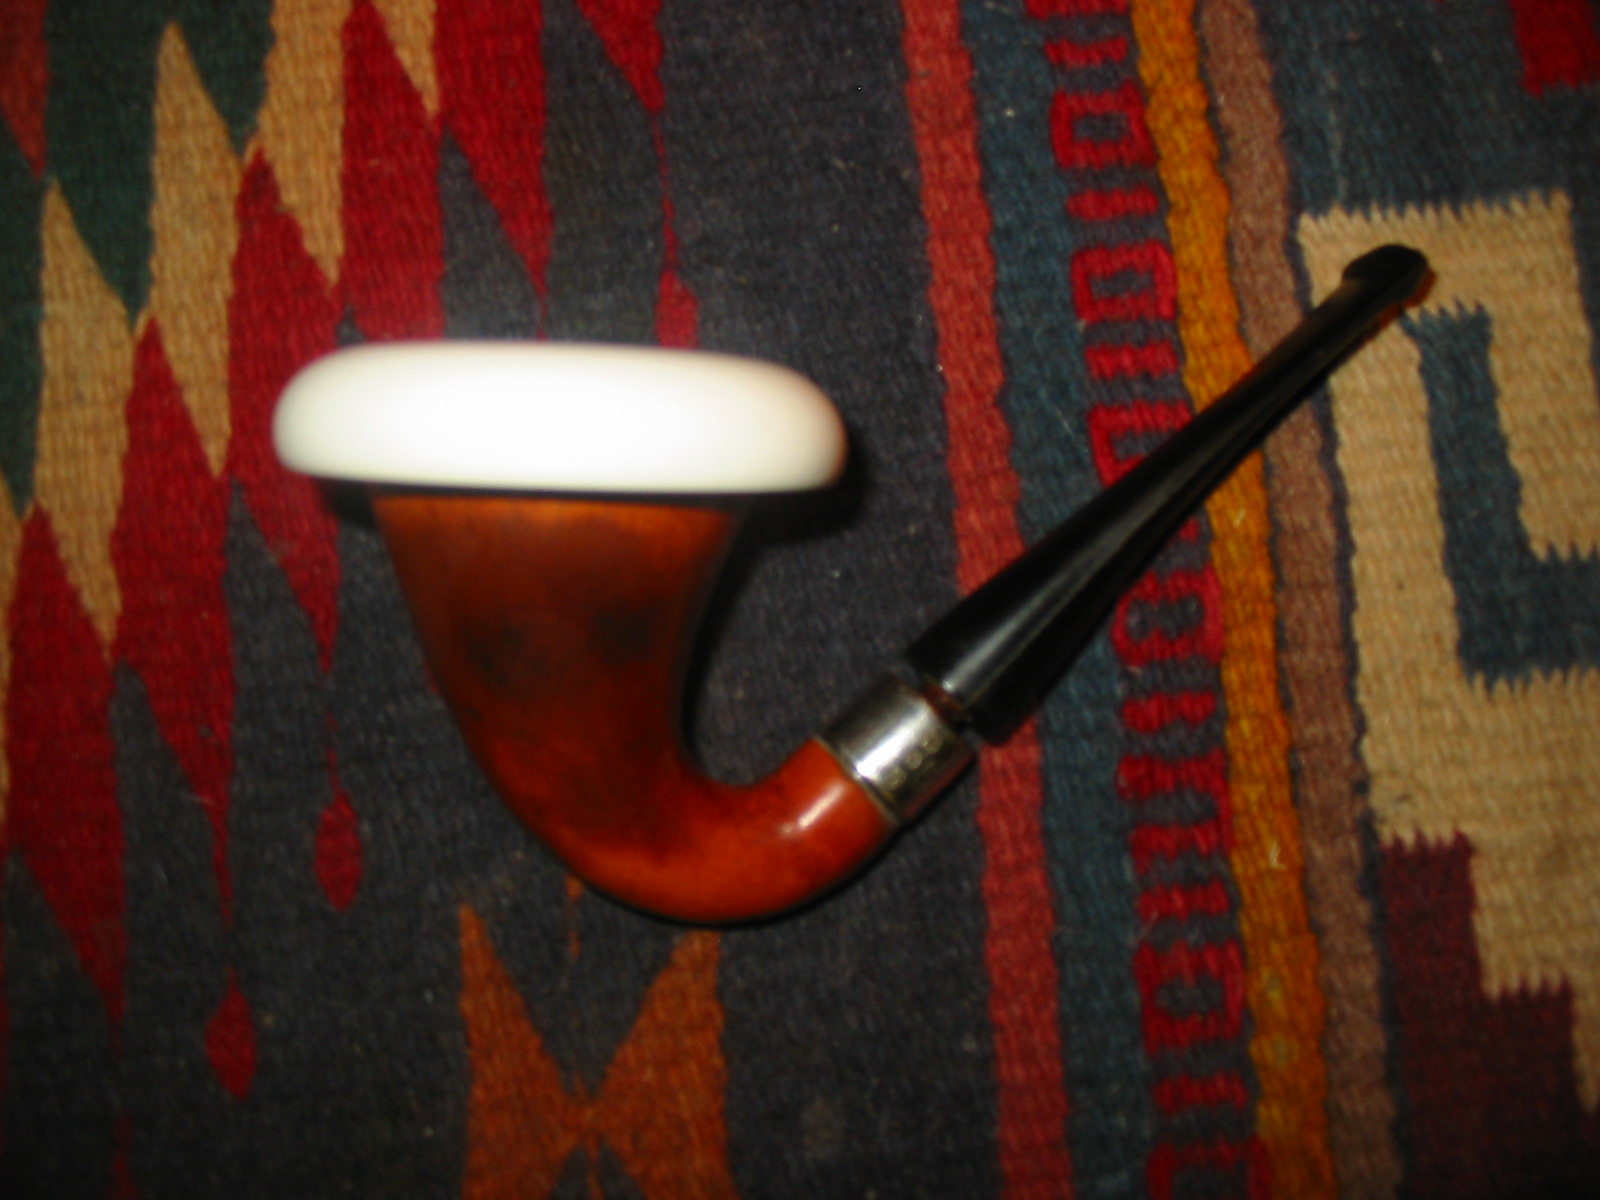
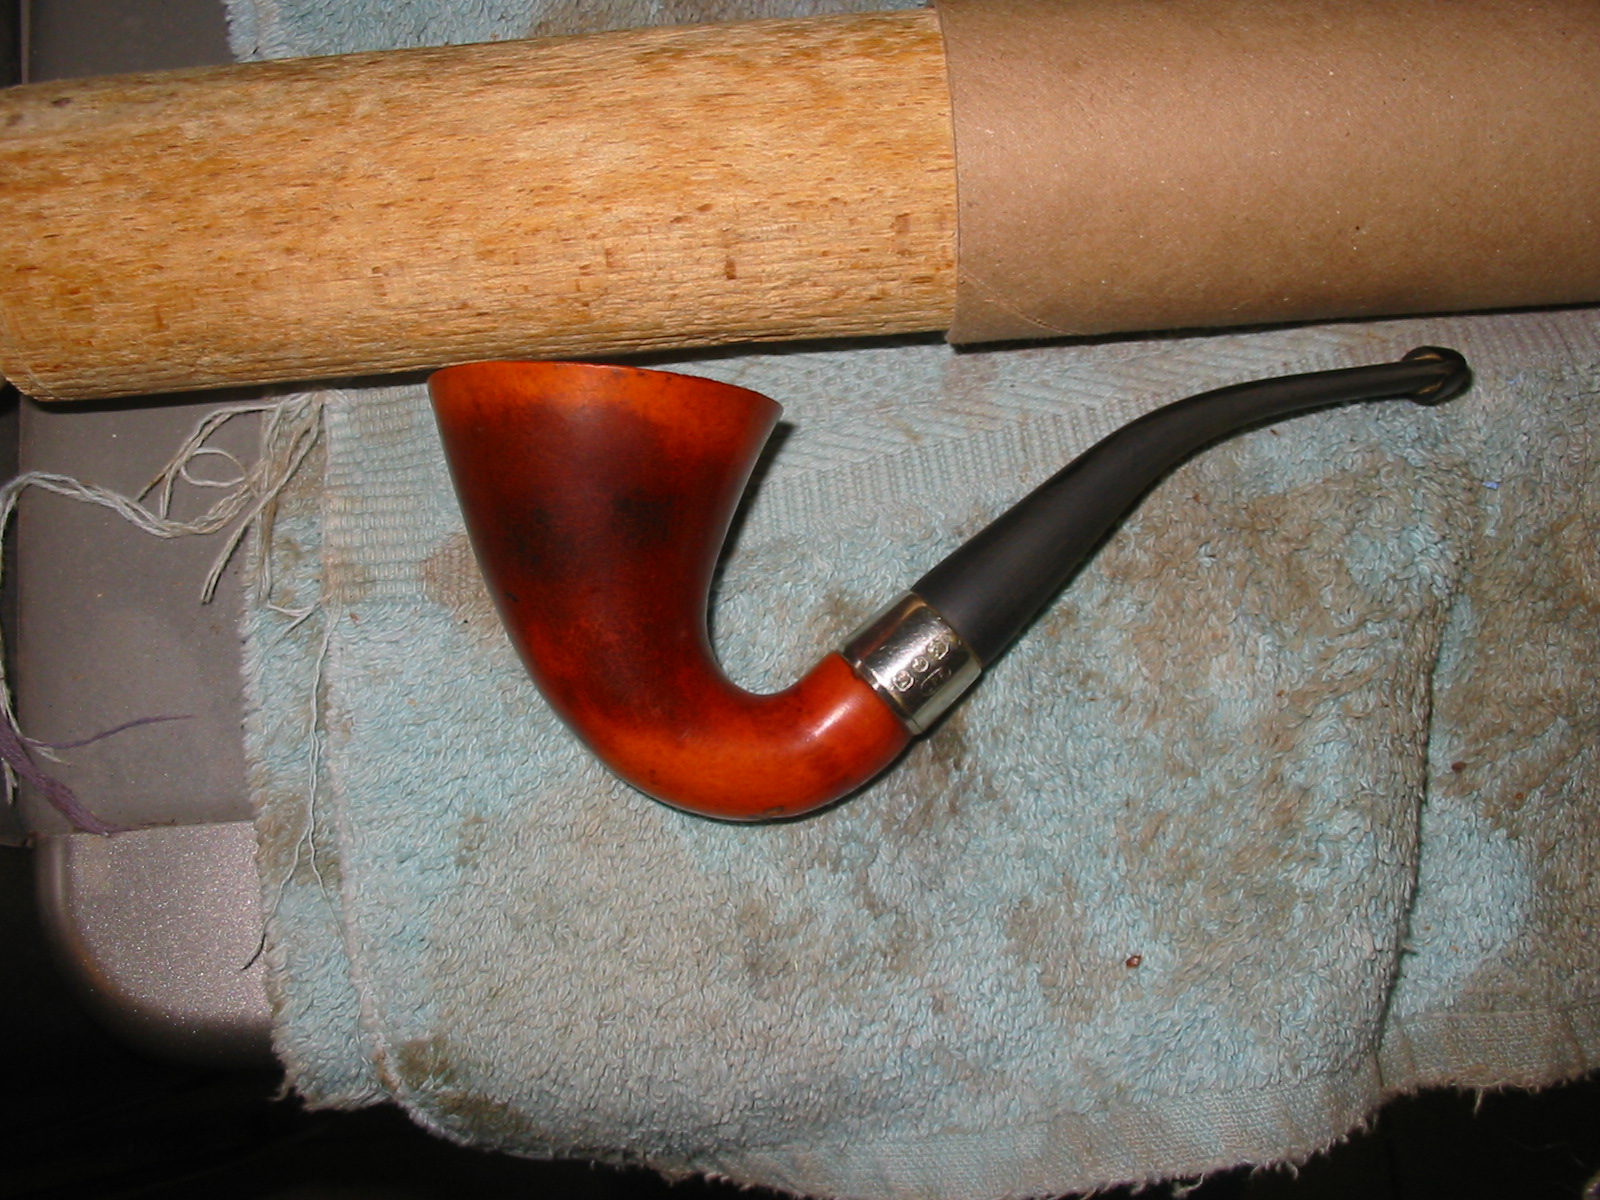
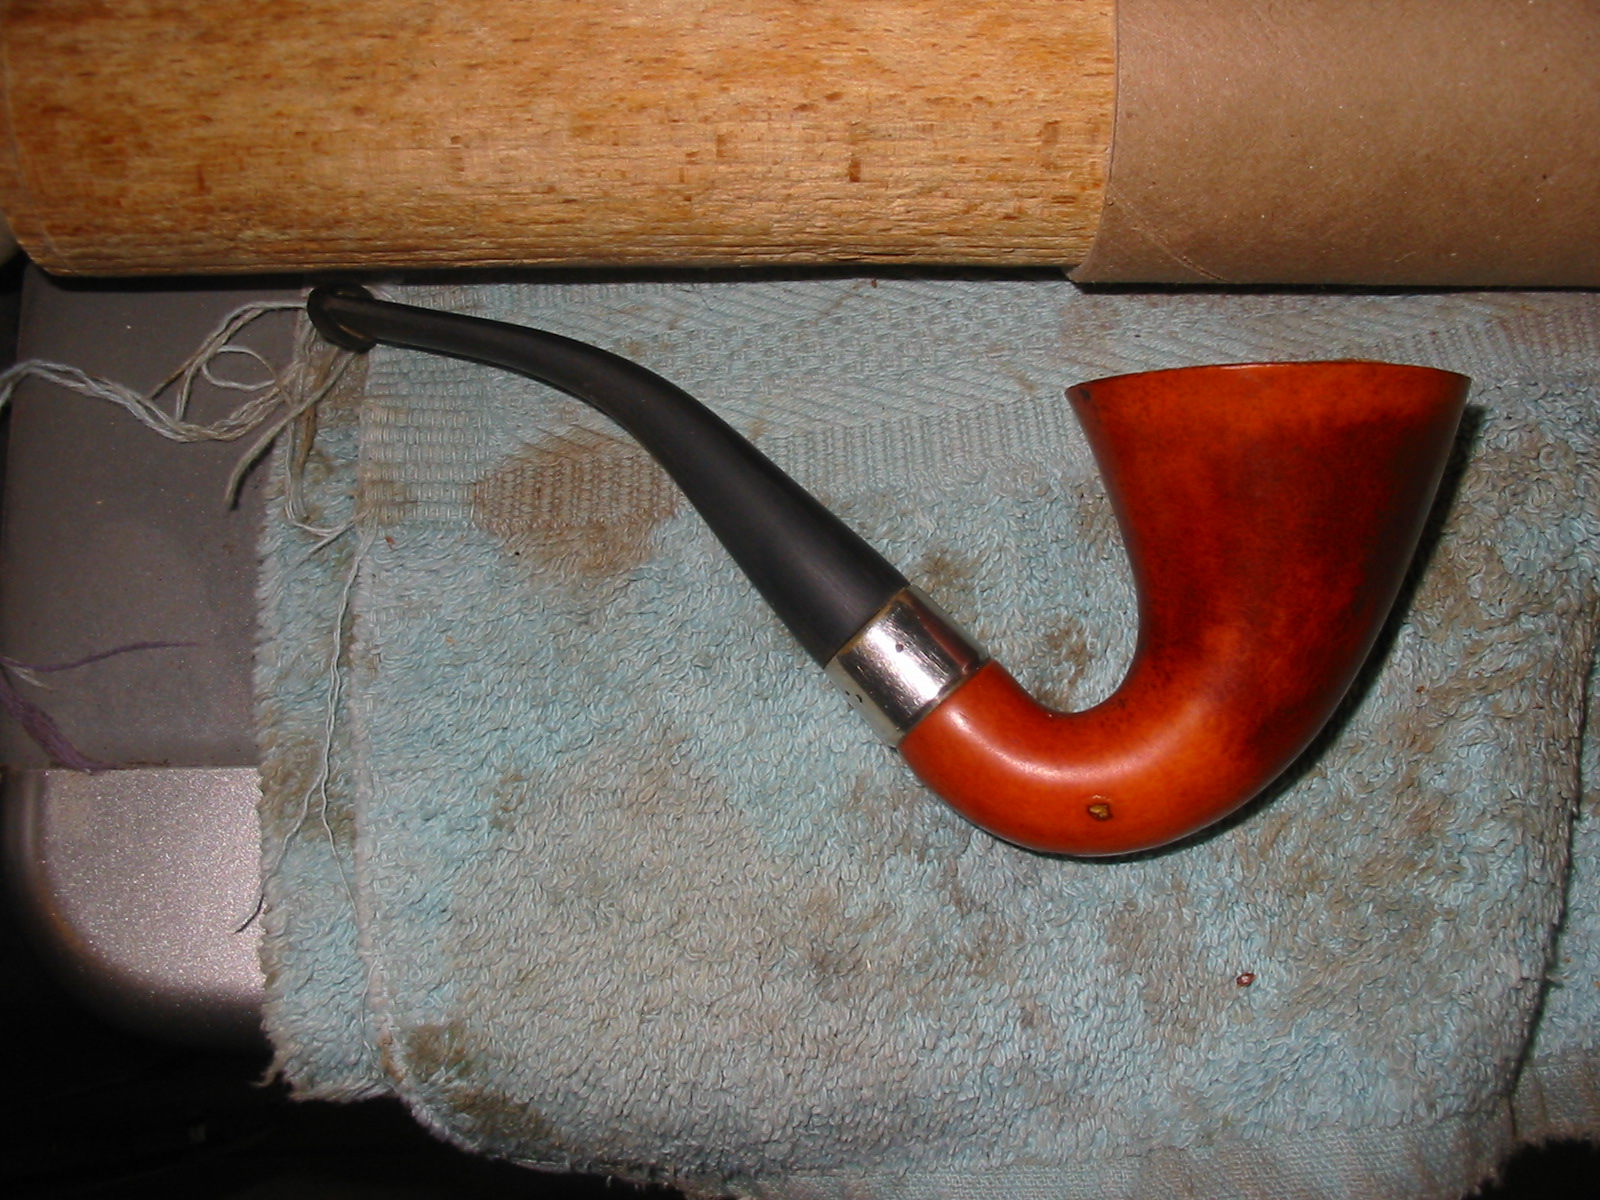
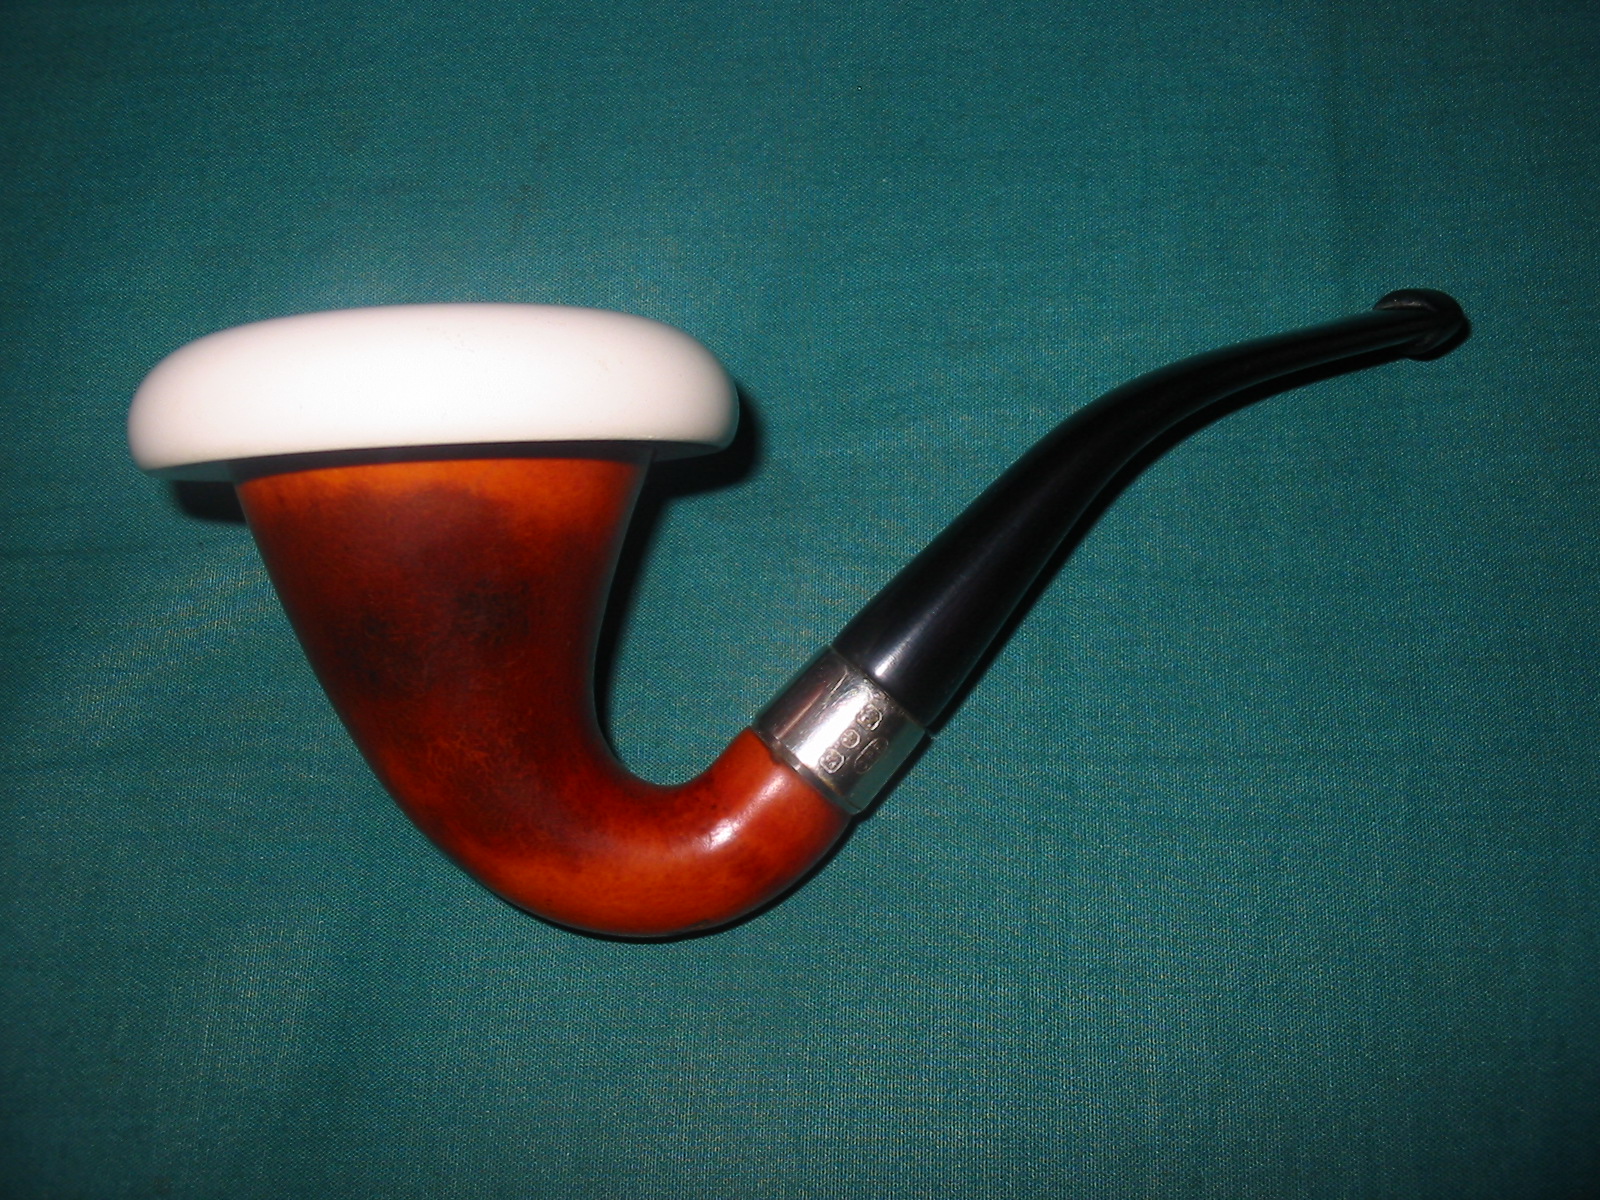
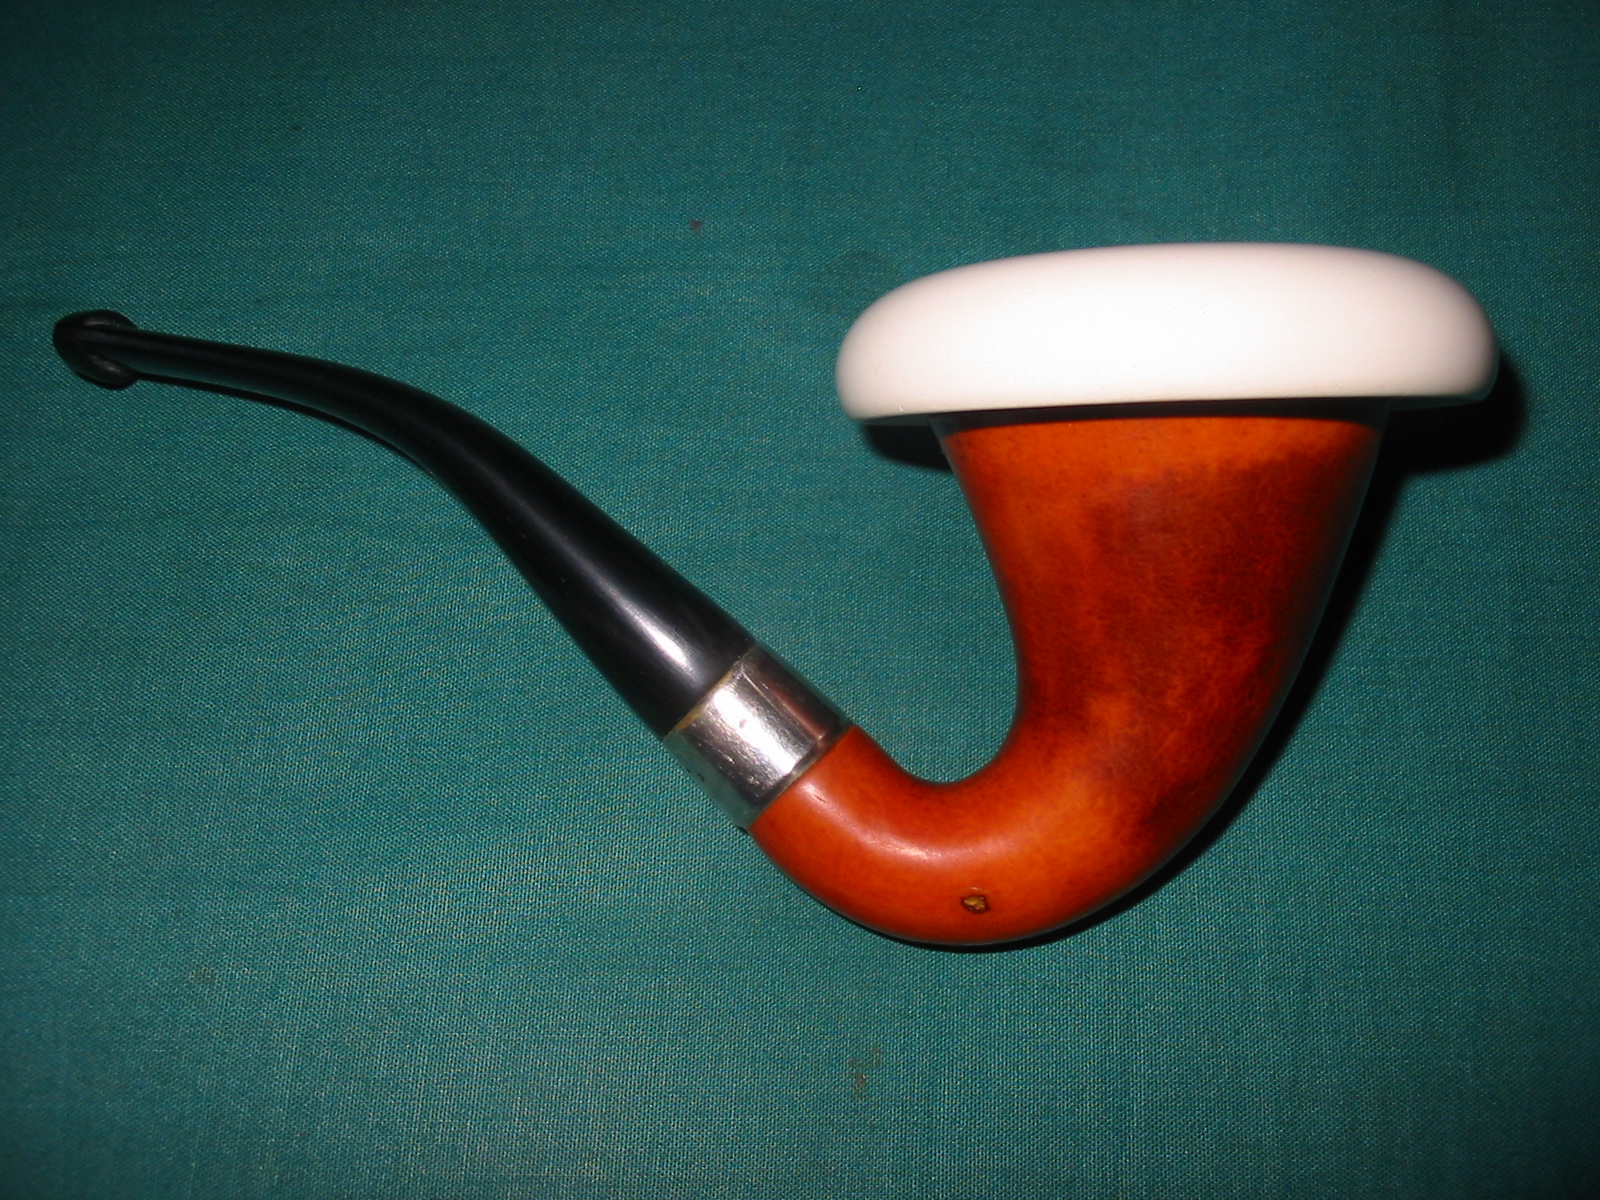
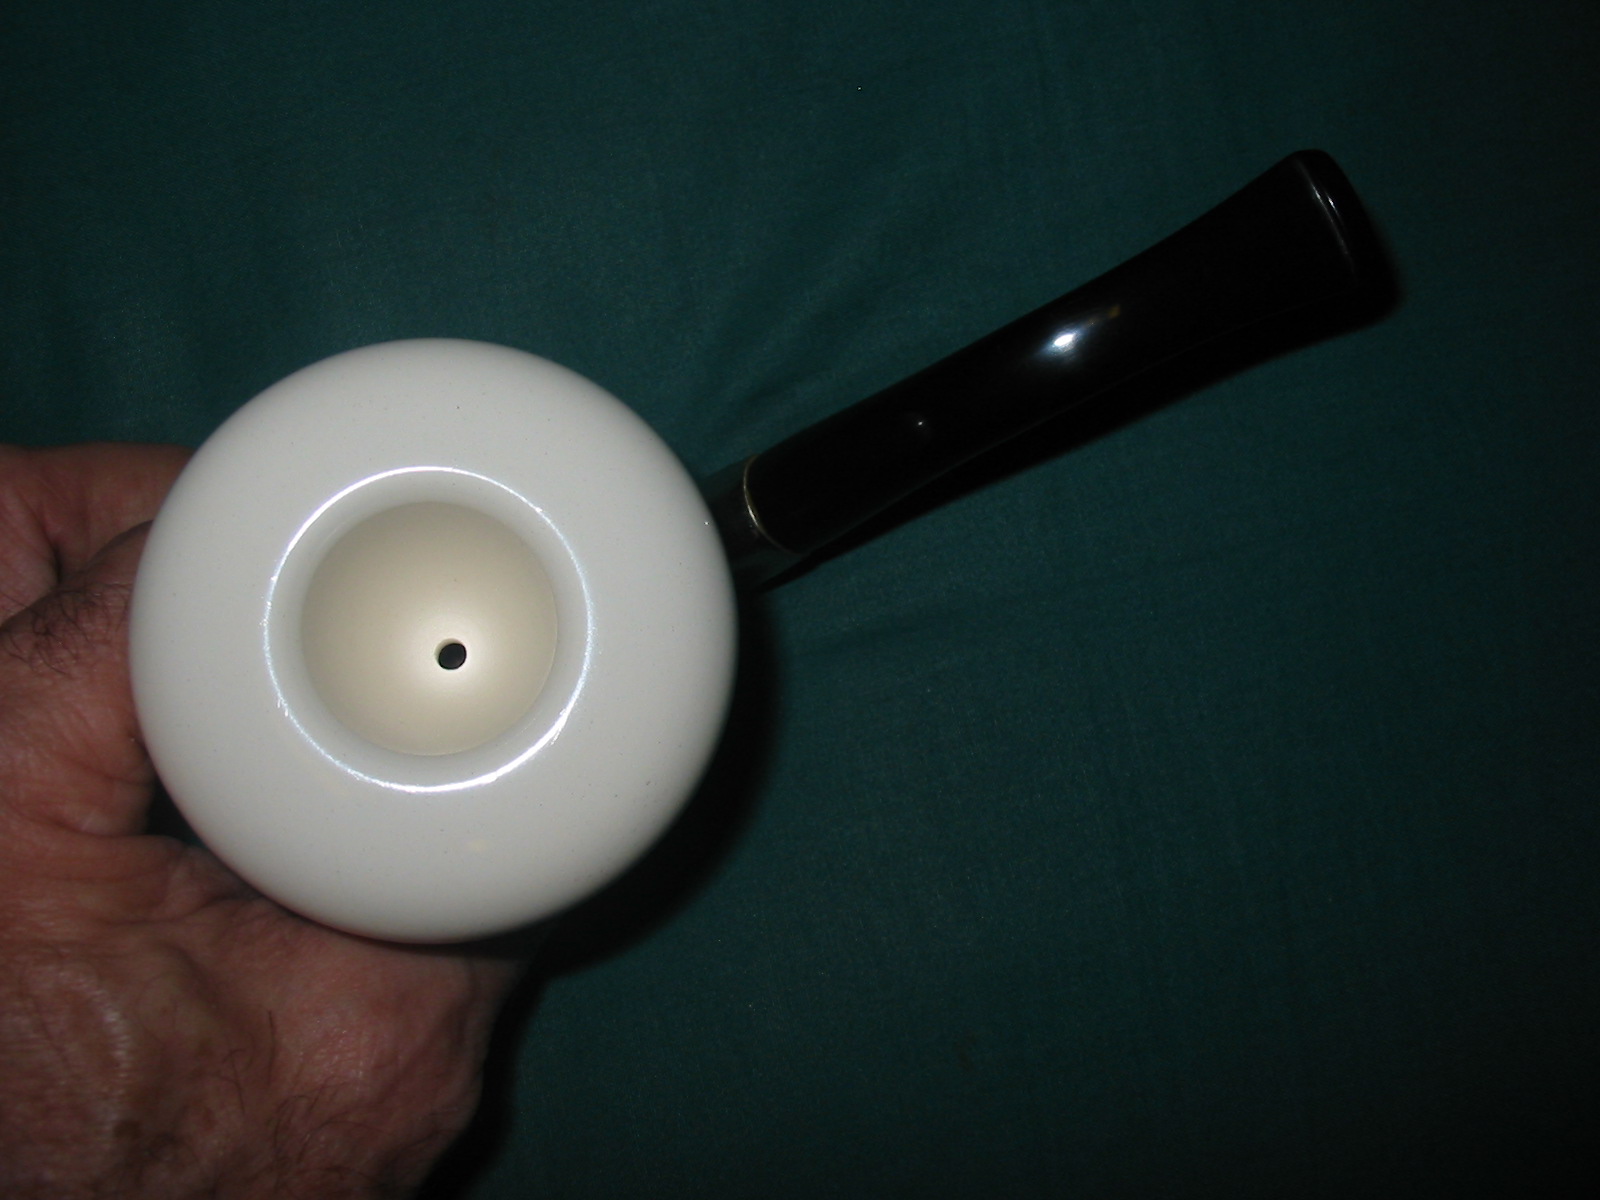
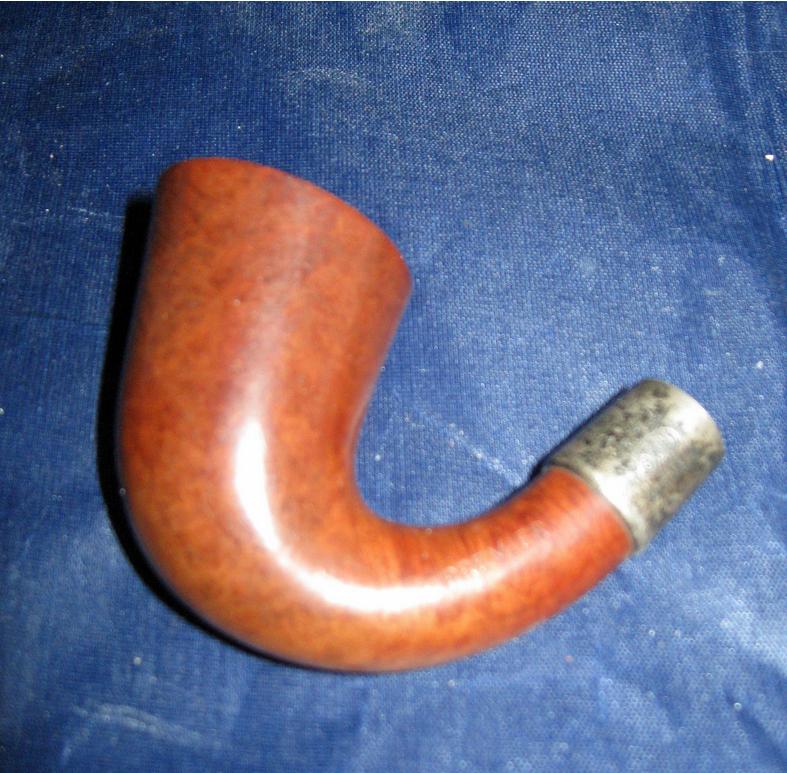
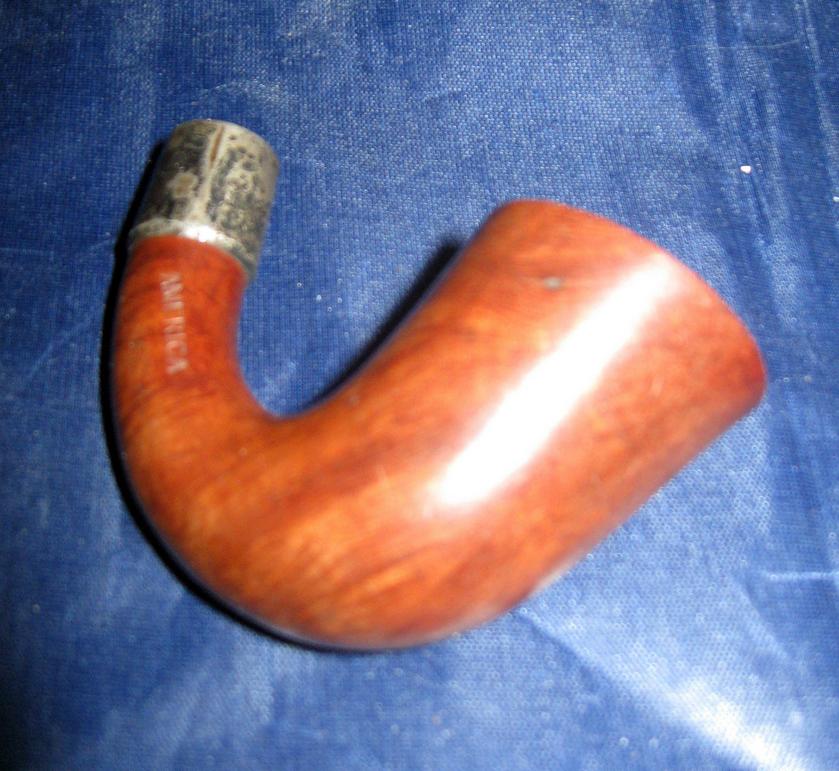
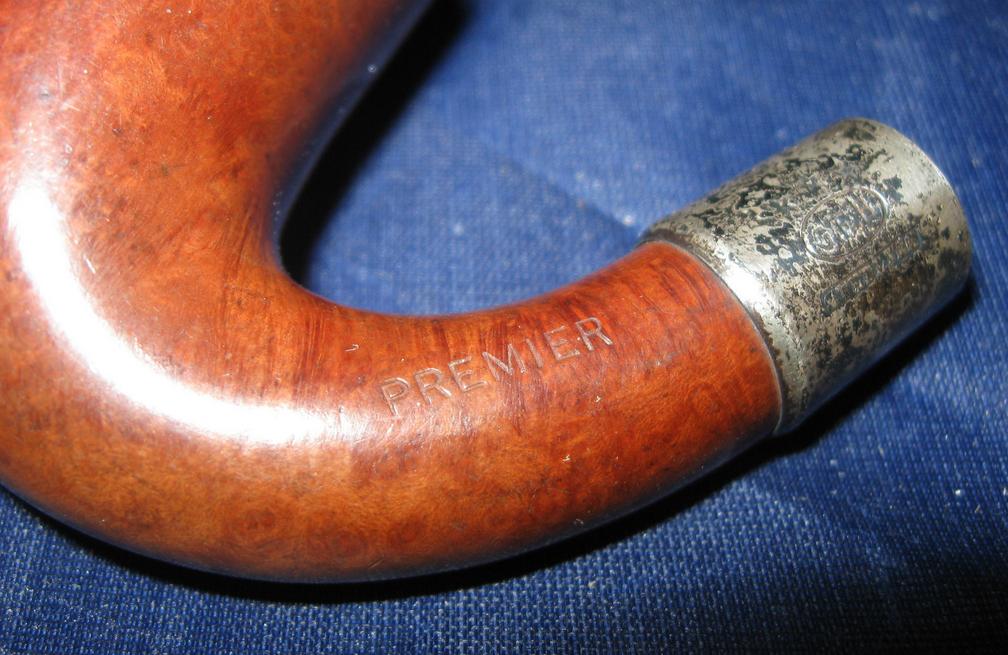
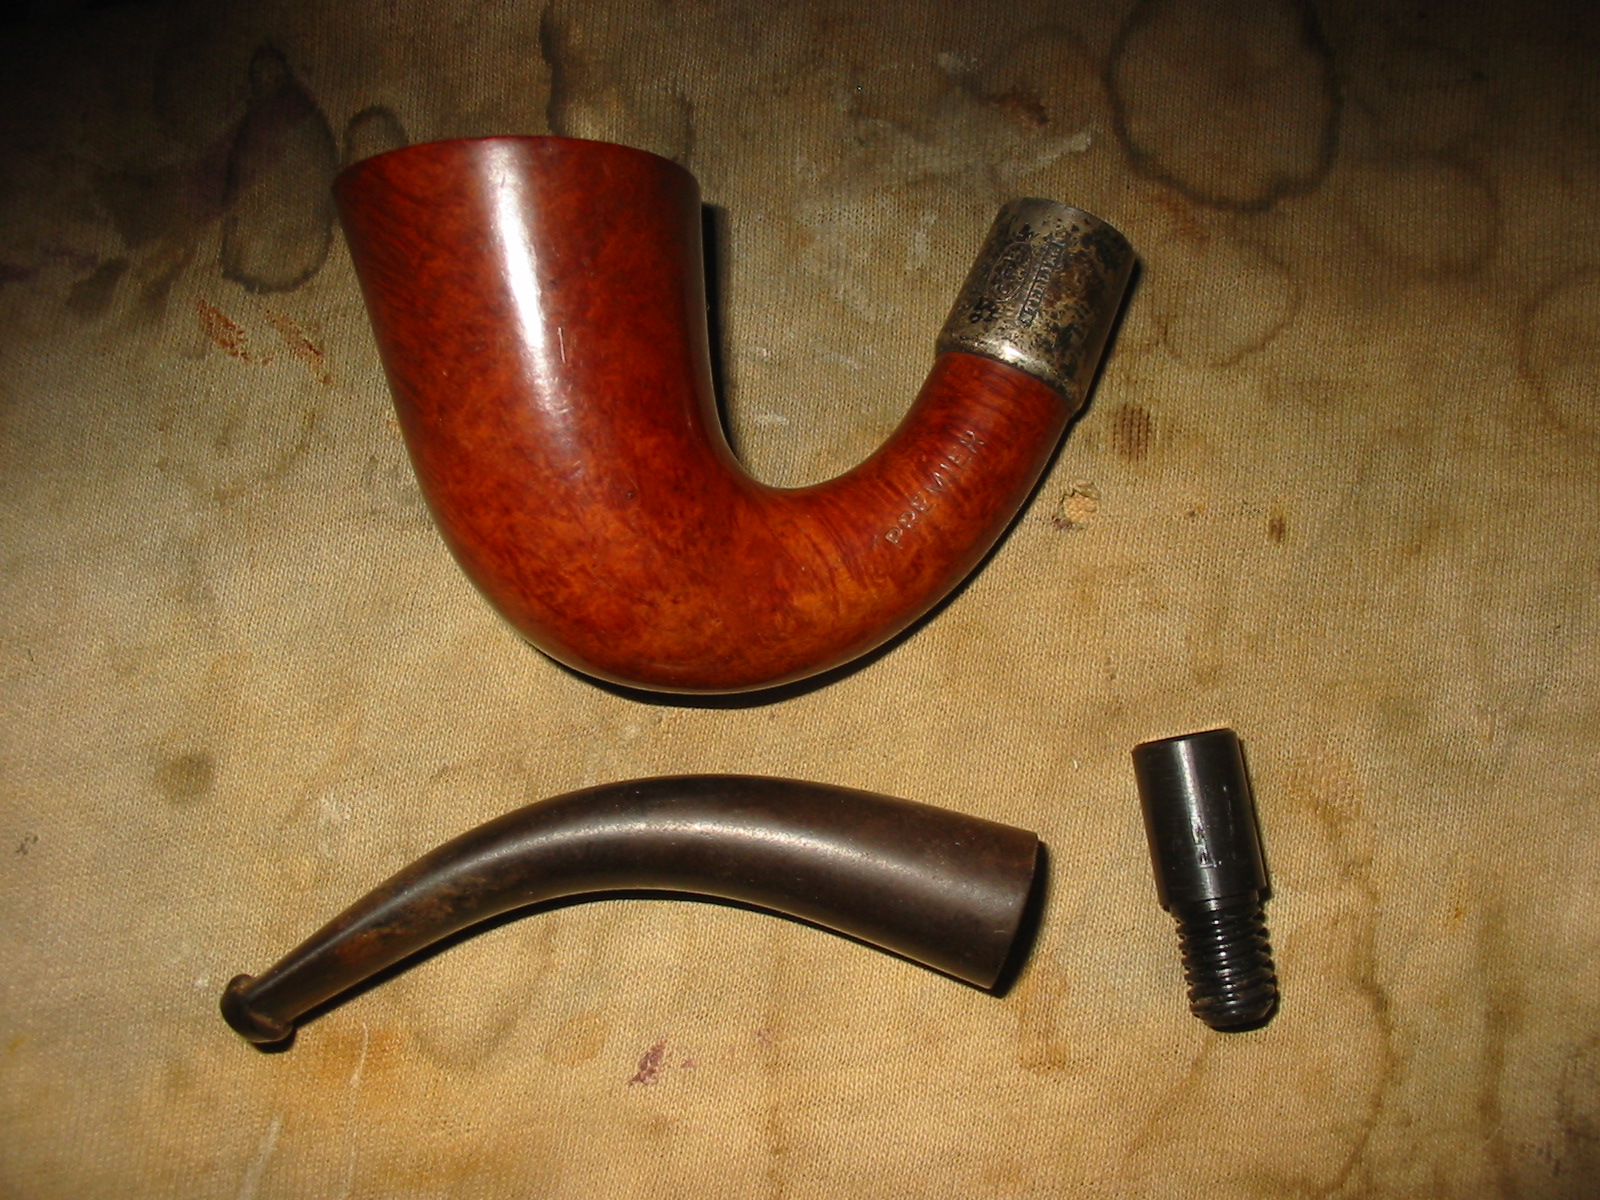
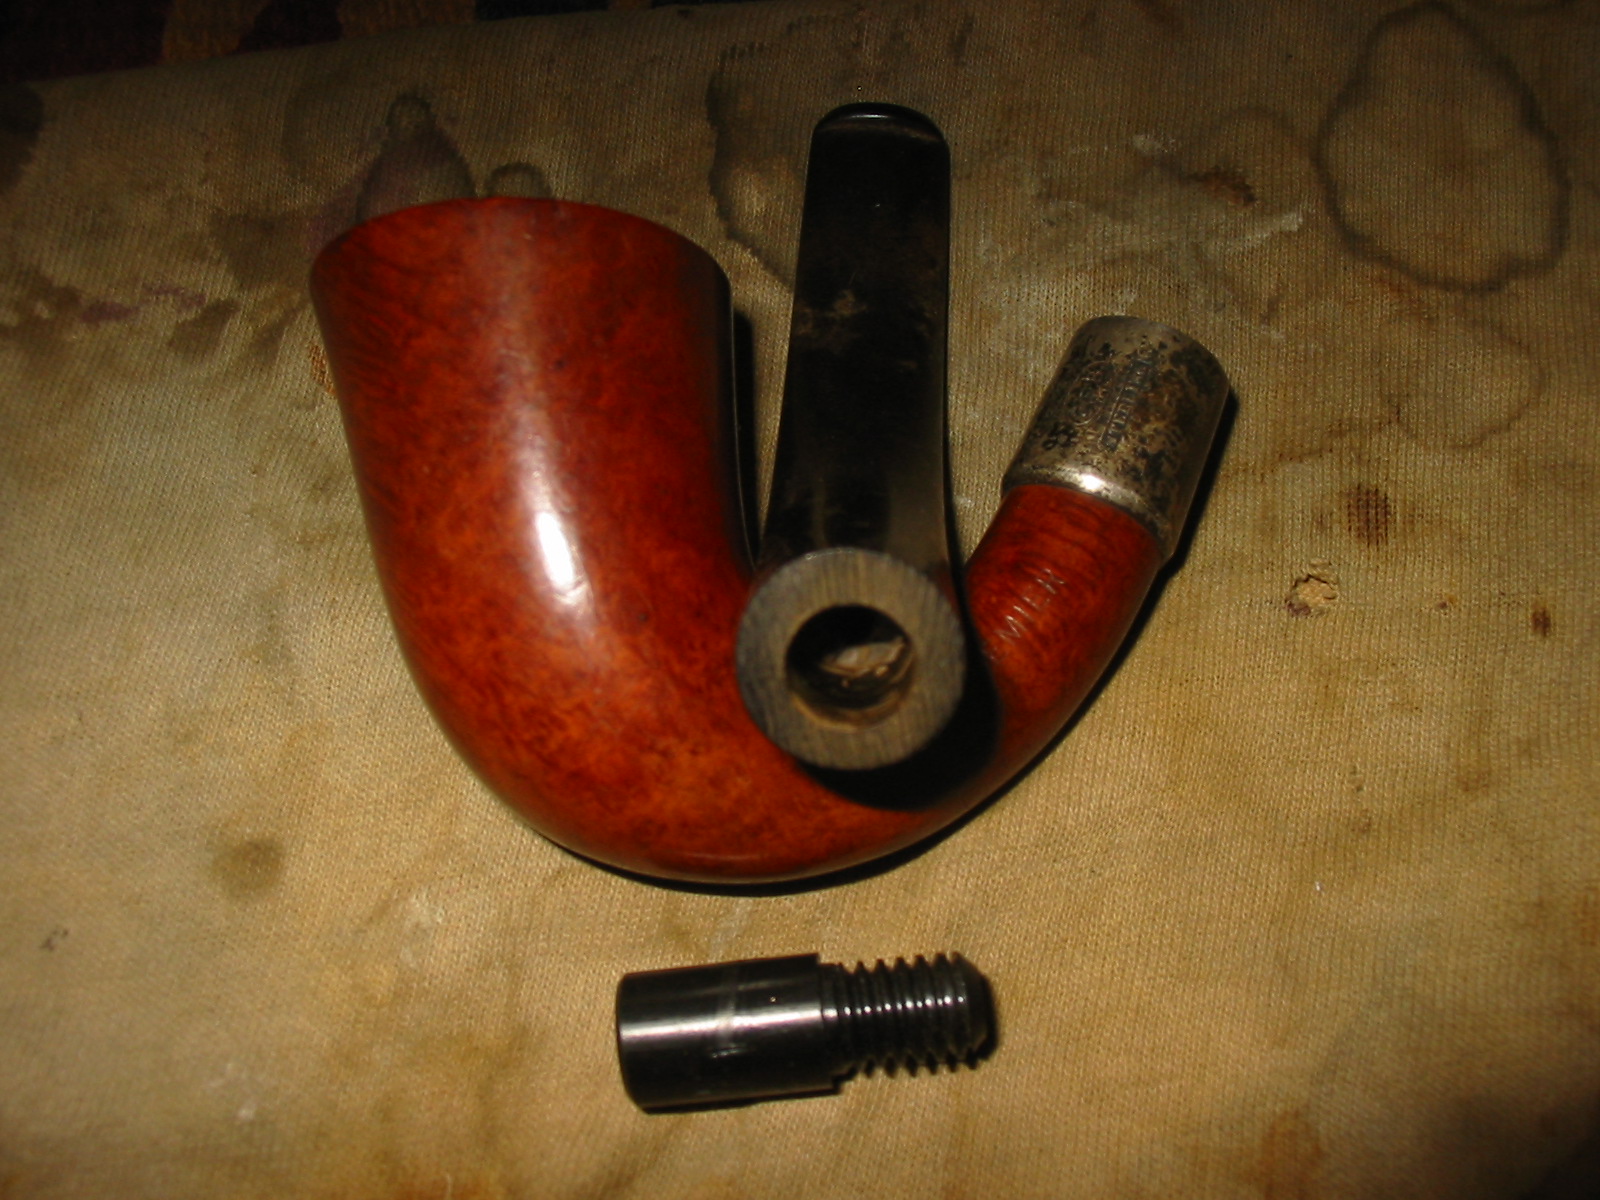
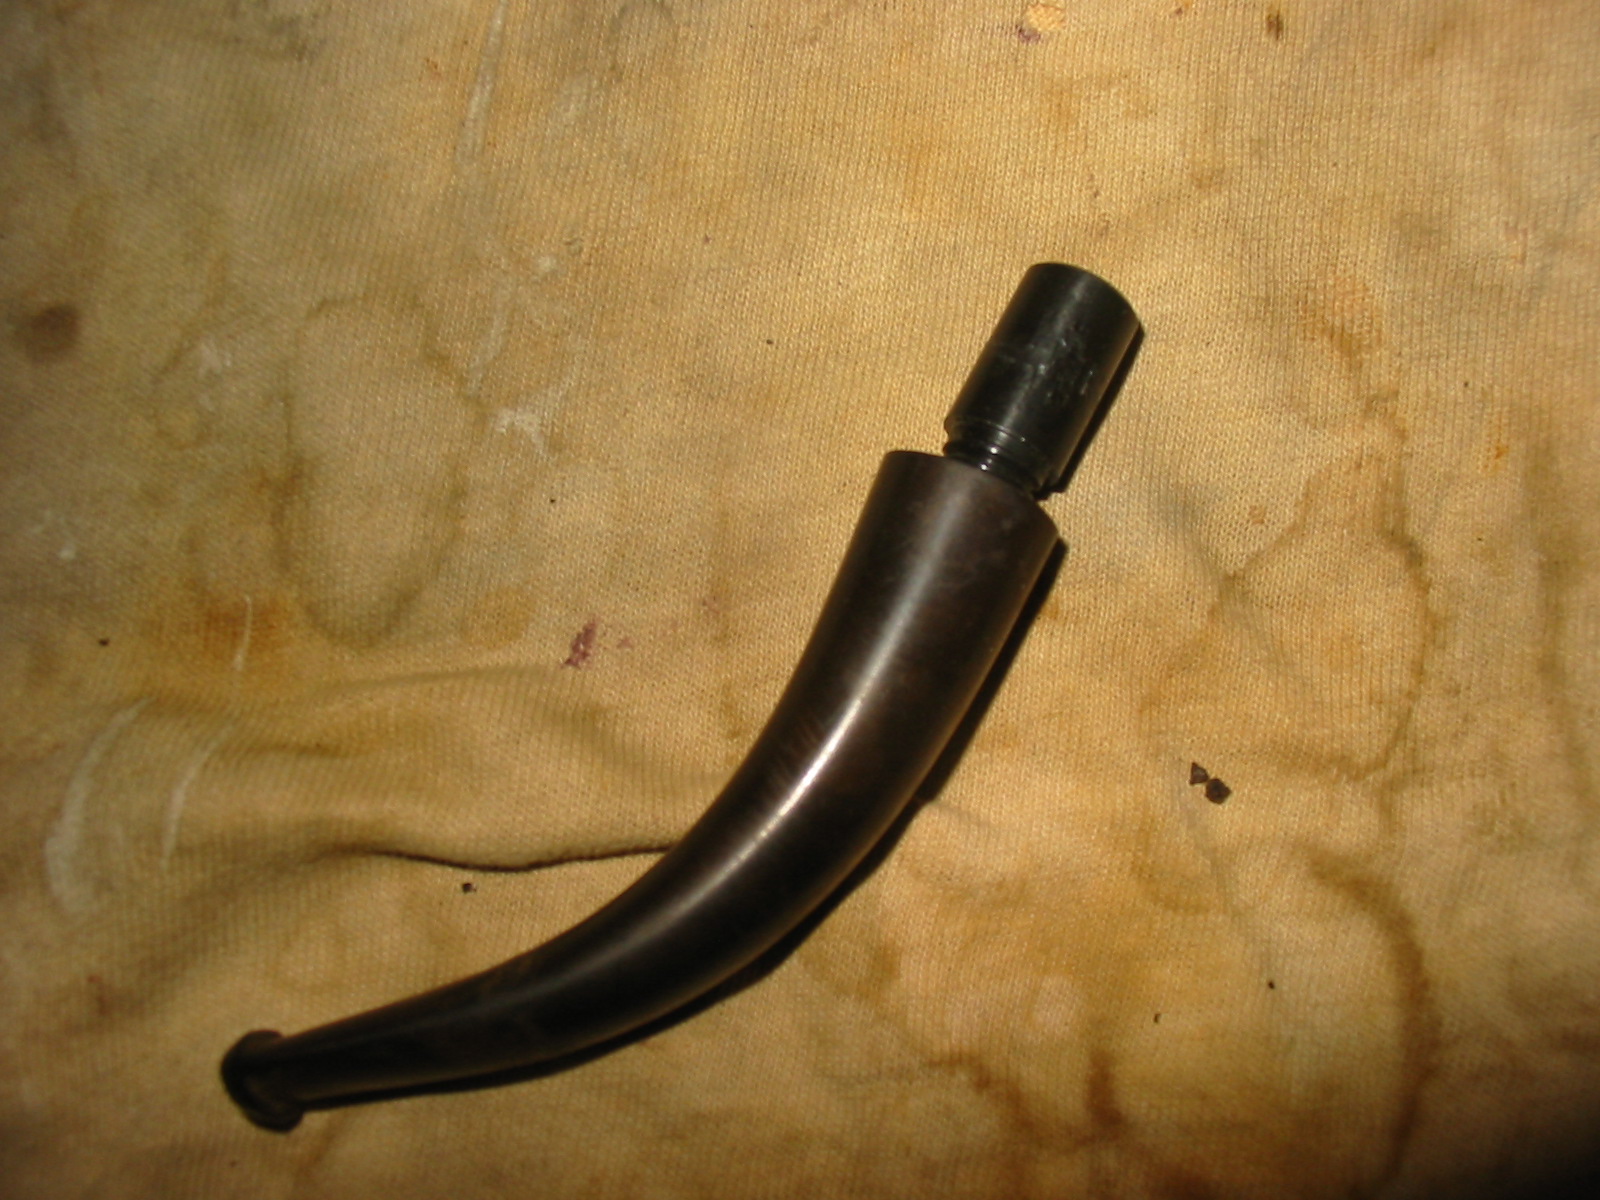
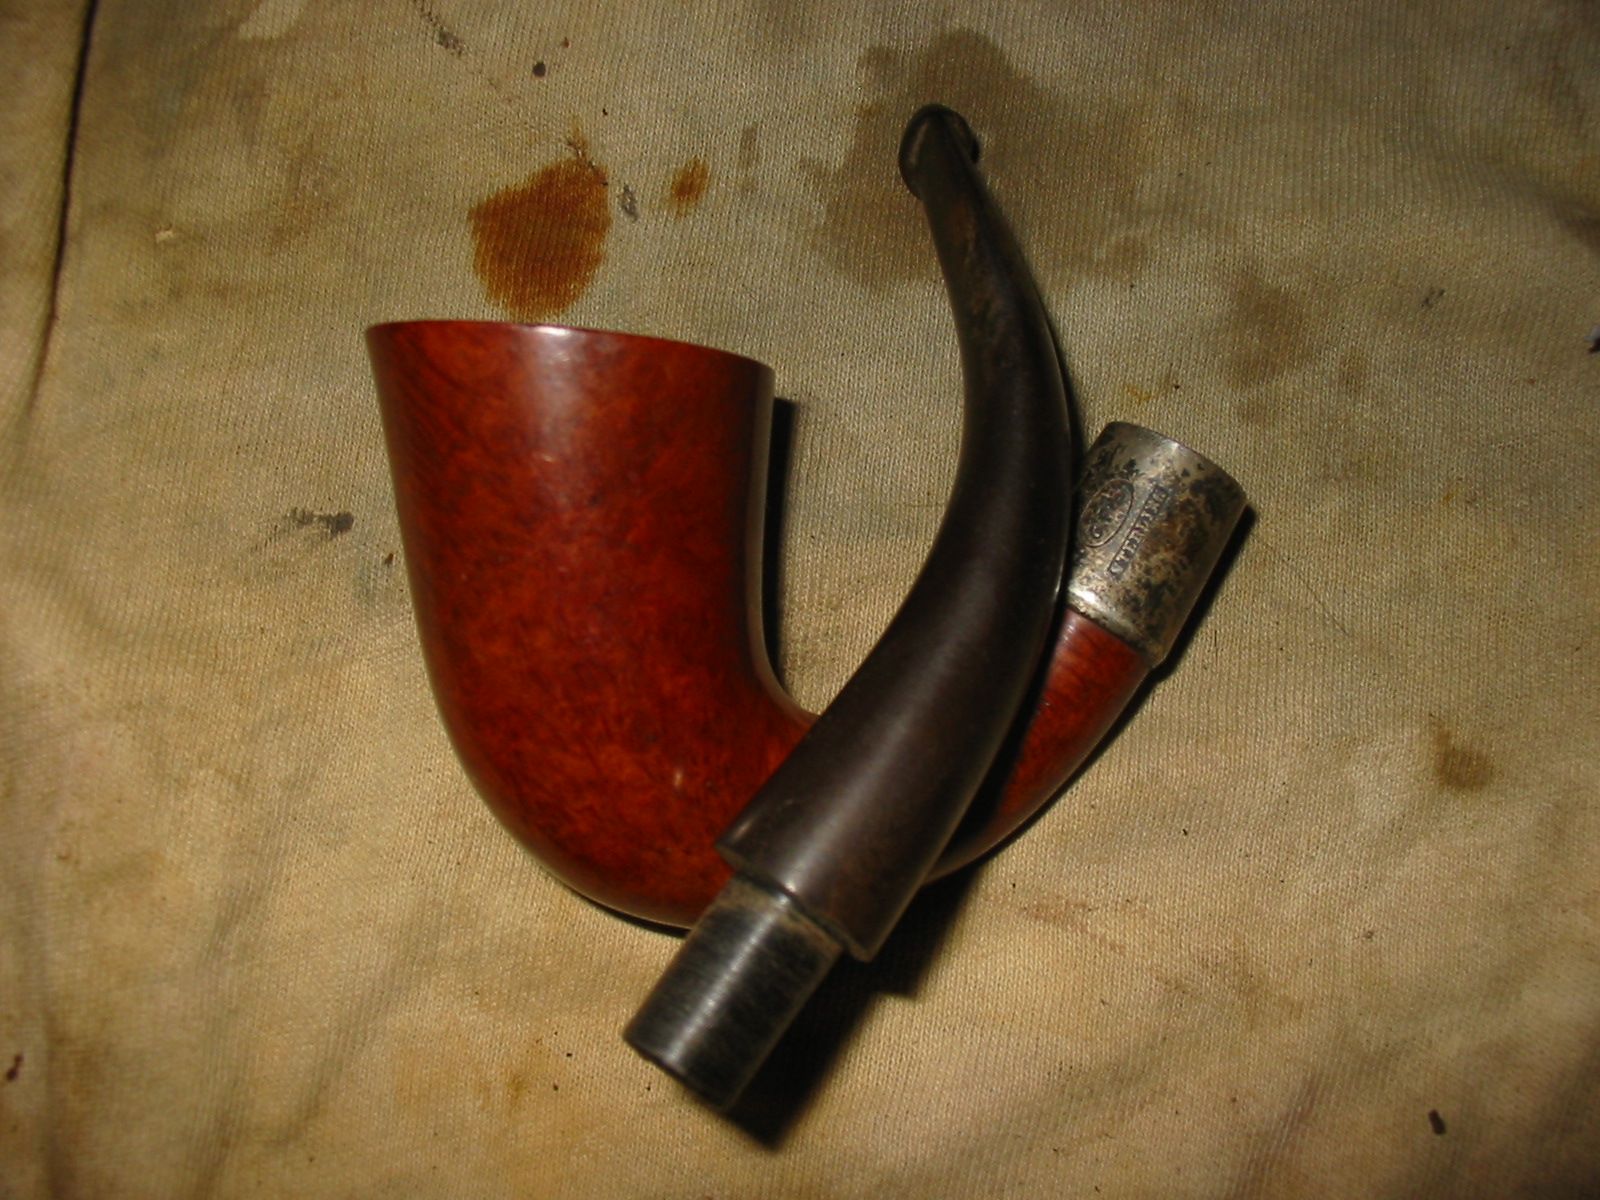
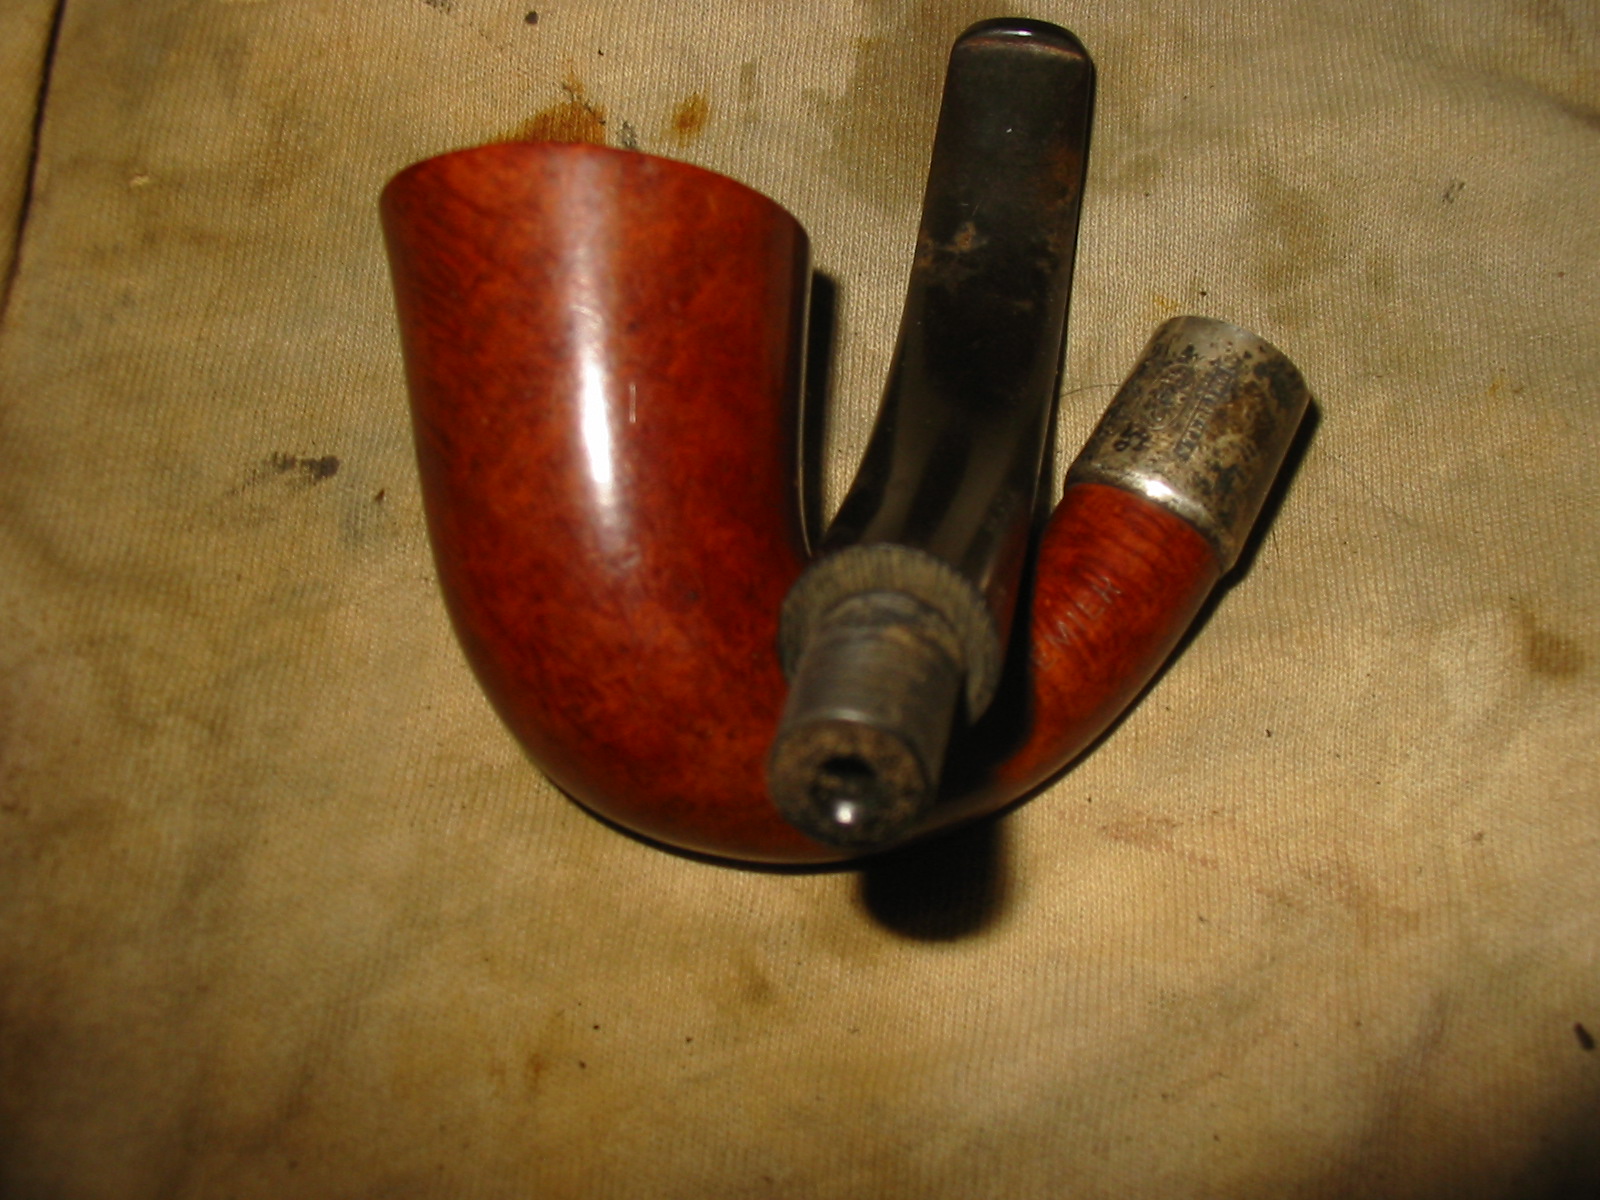
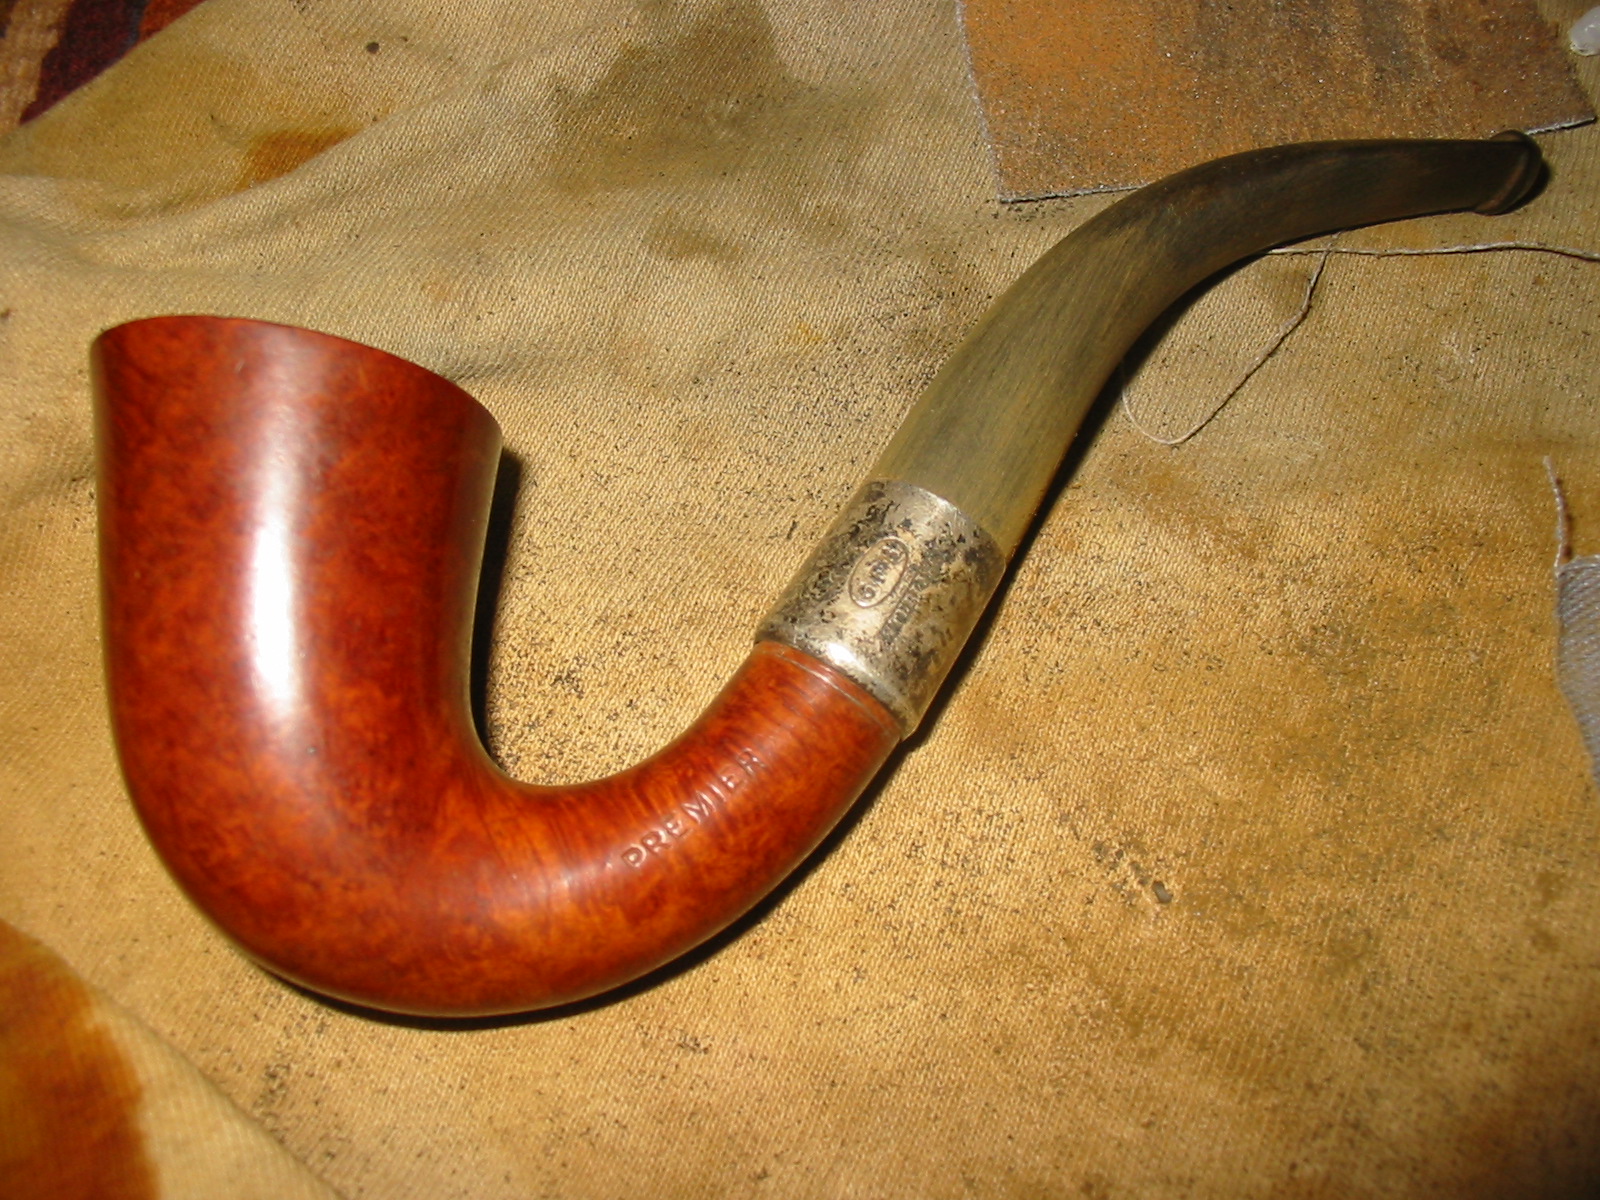
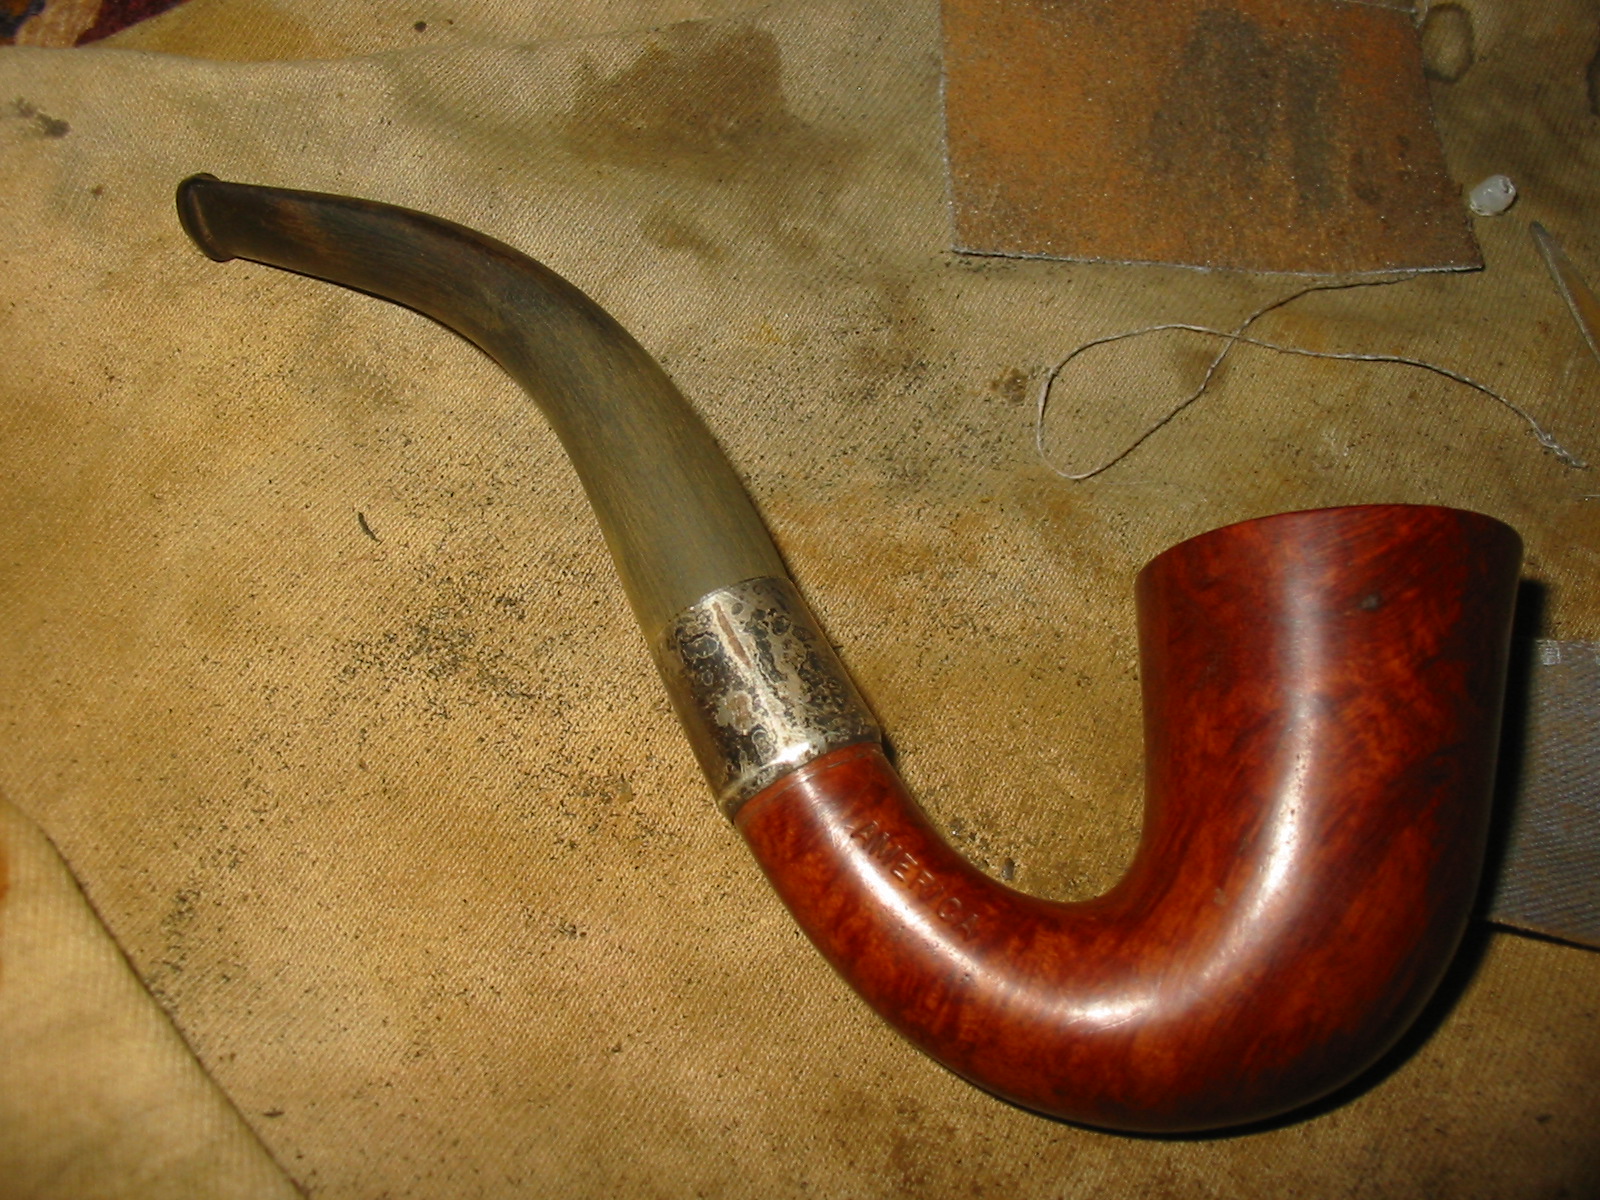
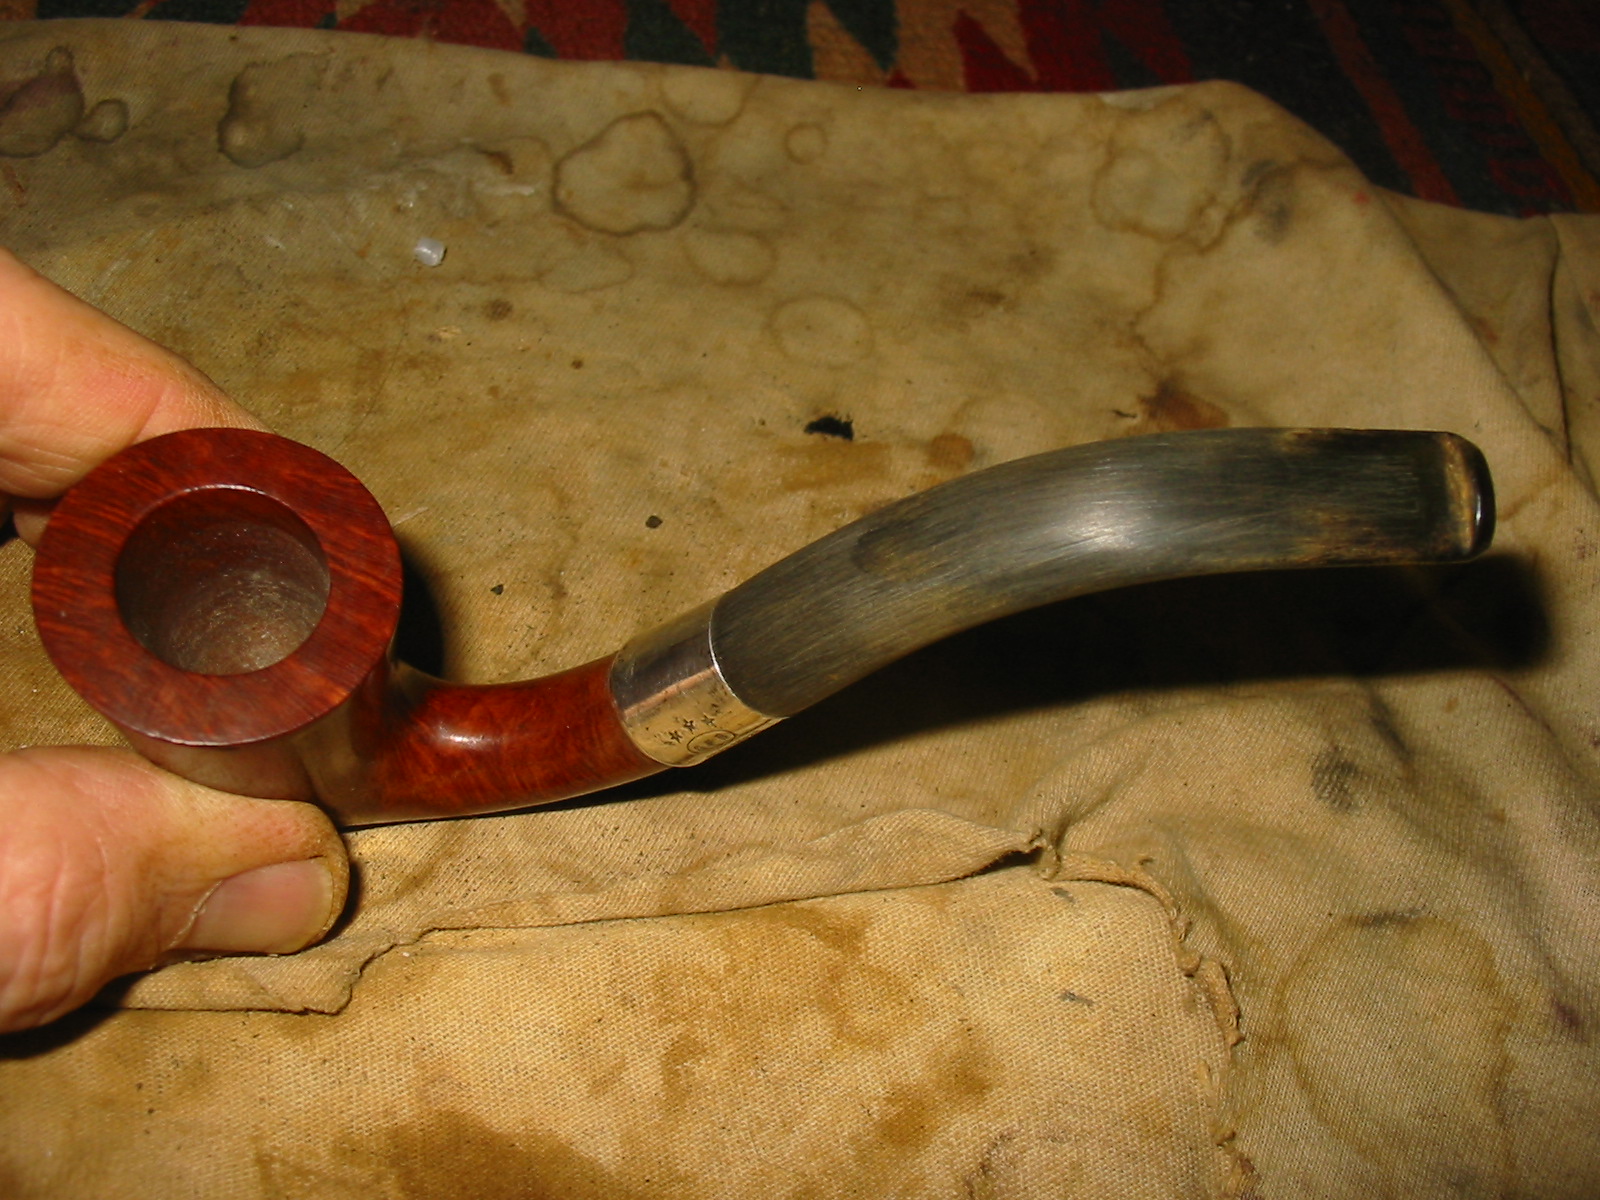
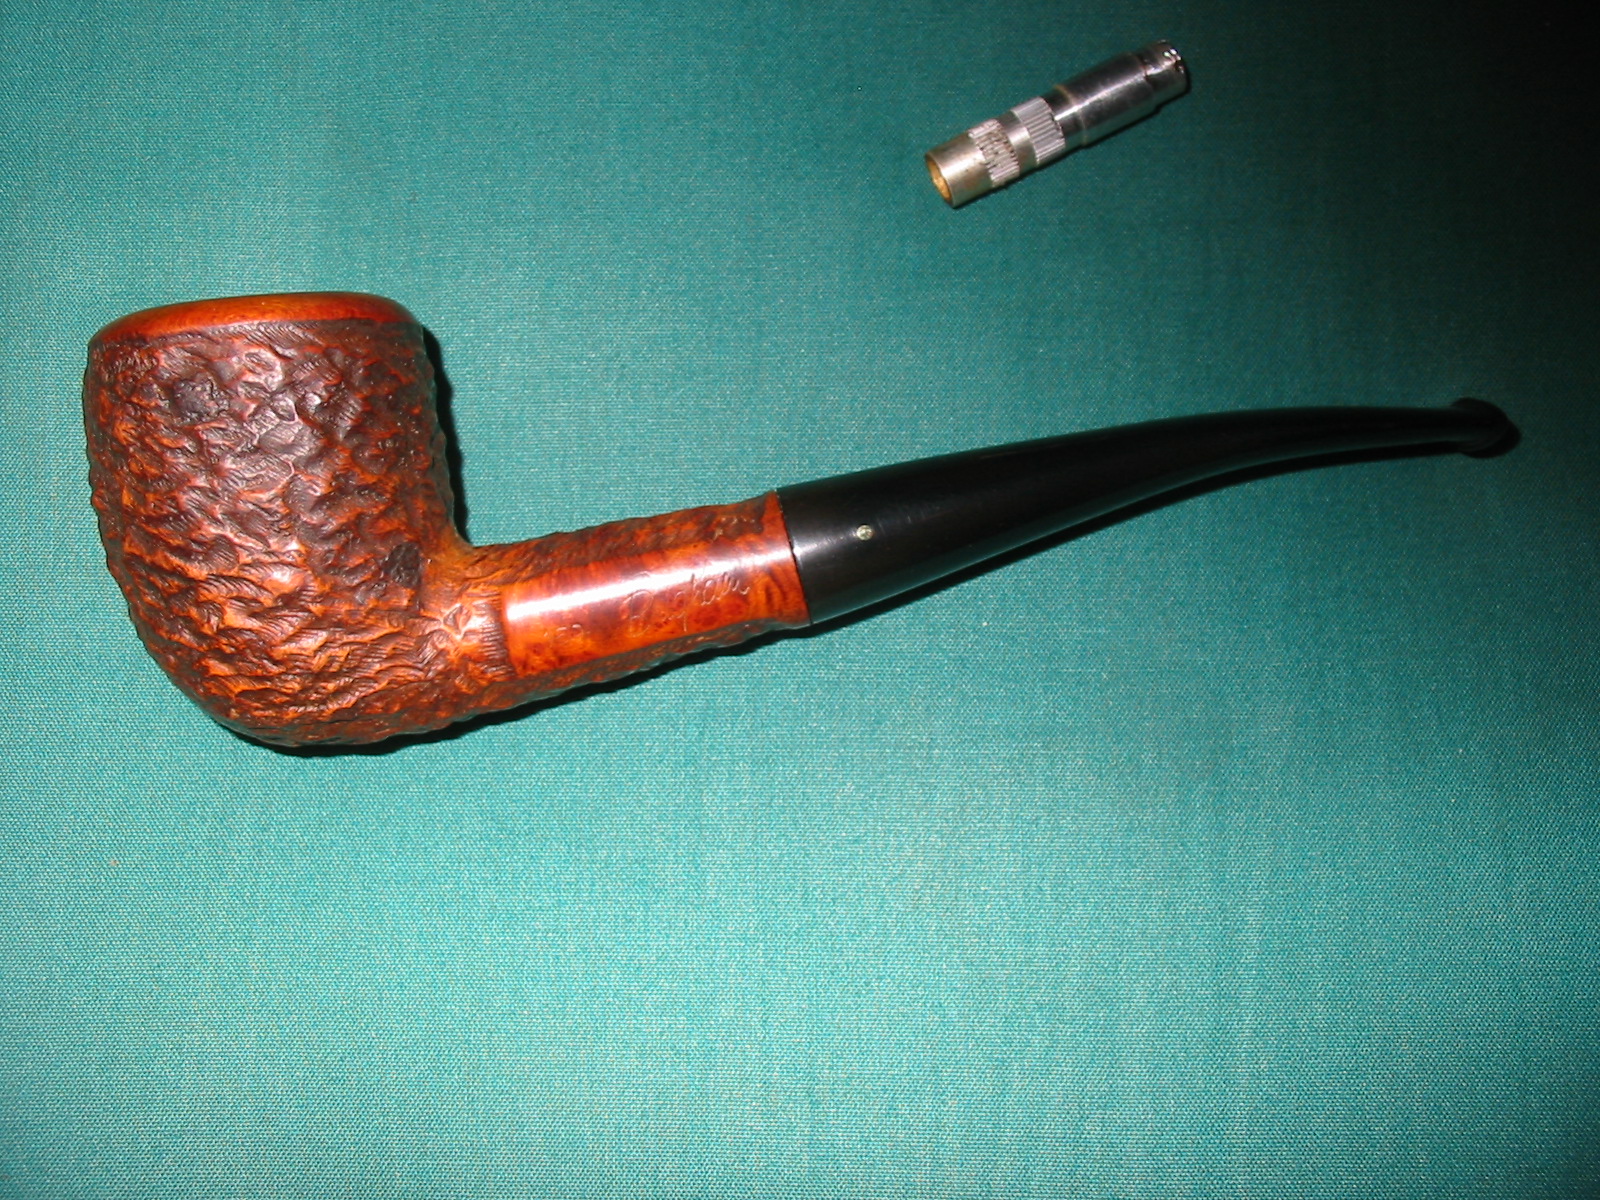
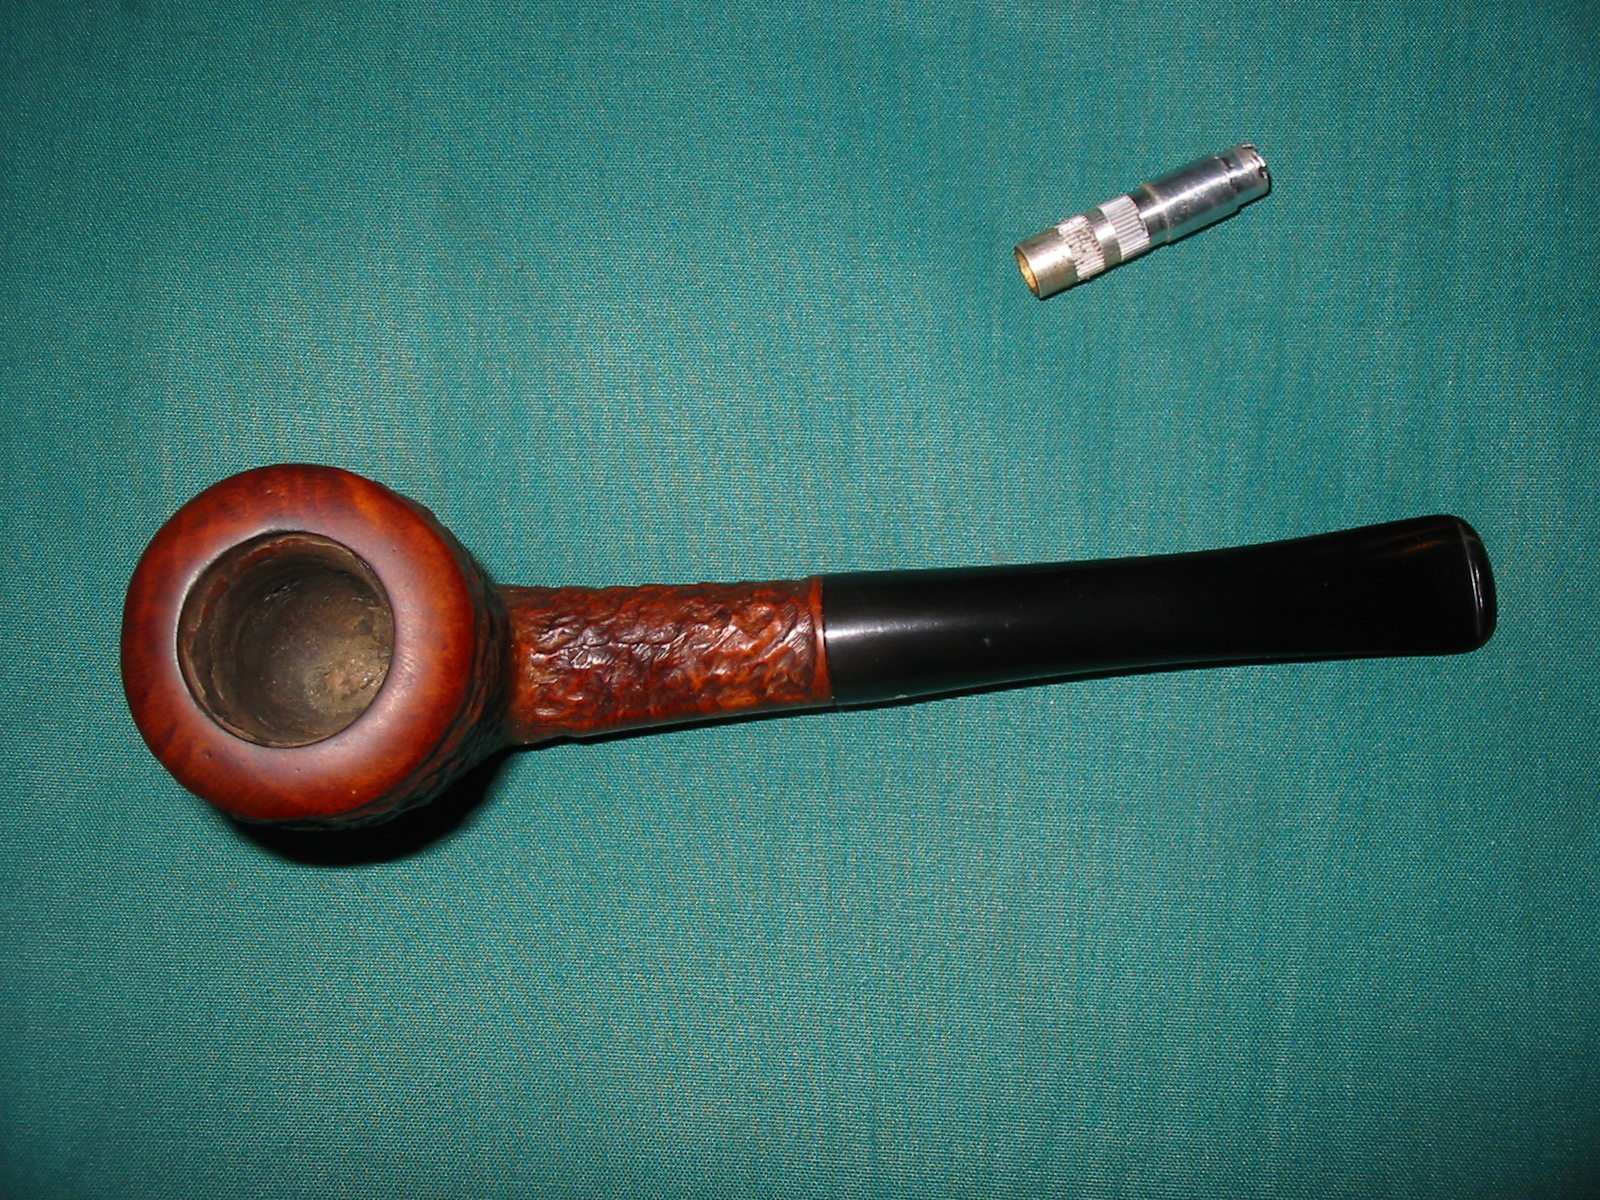
I am currently not taking on anymore restoration work from the internet or groups that I am part of on Facebook because of the large amount of estate pipes that I am working on to sell. But I have my name in at a local pipe shop here in Vancouver, British Columbia to do repair work for the shop as it comes in. there are no other pipe repairers in Western Canada that I am aware of so I feel a bit of an obligation to take care of these folks as they come. Fortunately there are not a lot of referrals but periodically they get pipemen or women stopping by with work – that is where I come in. They give them my number and email and then the repair work is between us. On Wednesday this week I received an email from one of their customers, Ron in Victoria, B.C. about a pipe that had been dropped and had a broken tenon. He described the broken stem and that left me with some questions. I had him send me photos of the broken pipe so I would be sure to have a clear picture of the issues. He said that the shank was not cracked and really the only issue was the tenon. He send the photos below so I could see what he was speaking of. Not too big an issue really – a cleanup and tenon replacement and the pipe would be good to go.After our emails back and forth he put it in the mail to me. It arrived on Friday and I took it out of the box to see what I was going to be dealing with on this pipe. Descriptions and photos are one thing but I like to have the pipe in hand to examine for myself. This is what I saw. The pipe was dirty and dull looking. There was some faint stamping on both sides of the shank. It was stamped Scandia over Made in Denmark on the left side and had the shape number 263 on the right side. There was a very uneven cake in the bowl that was crumbling. The tenon had snapped off almost smooth against face of the stem. The stem had some tooth marks and was oxidized. There was a faint SC on the left side of the saddle. It appeared that someone had tried to glue the tenon back on the stem – unsuccessfully. There was a lot of sloppy glue on the end of the stem and tenon. I took some photos of the pipe as it looked when it arrived. He had taped the broken tenon on the underside of the stem. The bowl itself was dirty with a crumbling cake about half way up the bowl from the bottom. The plateau rim top had tars and some darkening on the right top and edges. There was a large sandpit on the left side of the bowl near the rim and one on the underside of the shank that would need to be dealt with.  
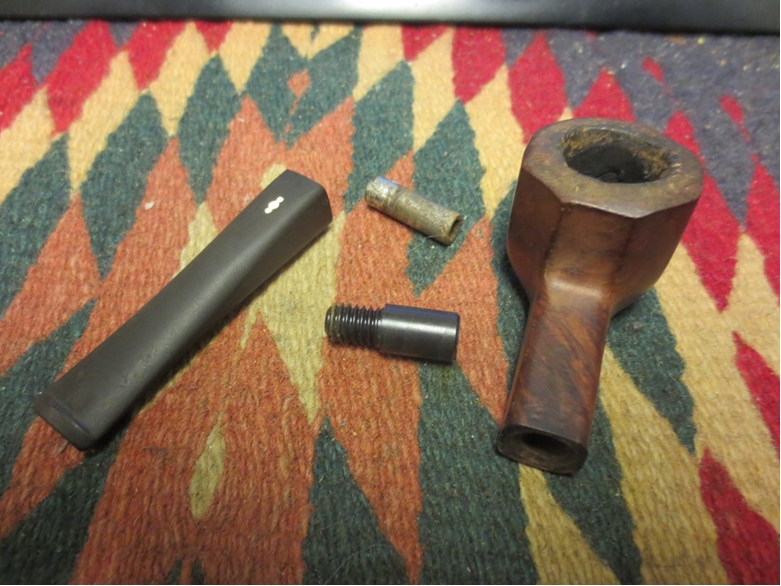
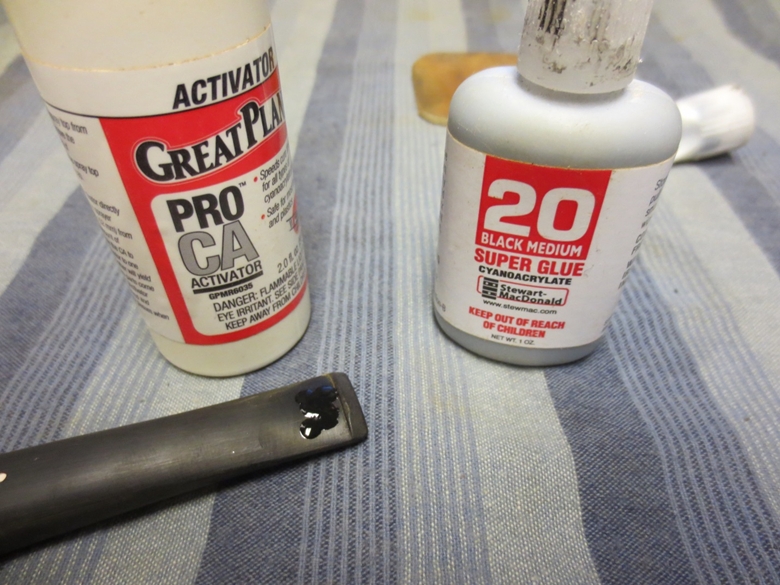
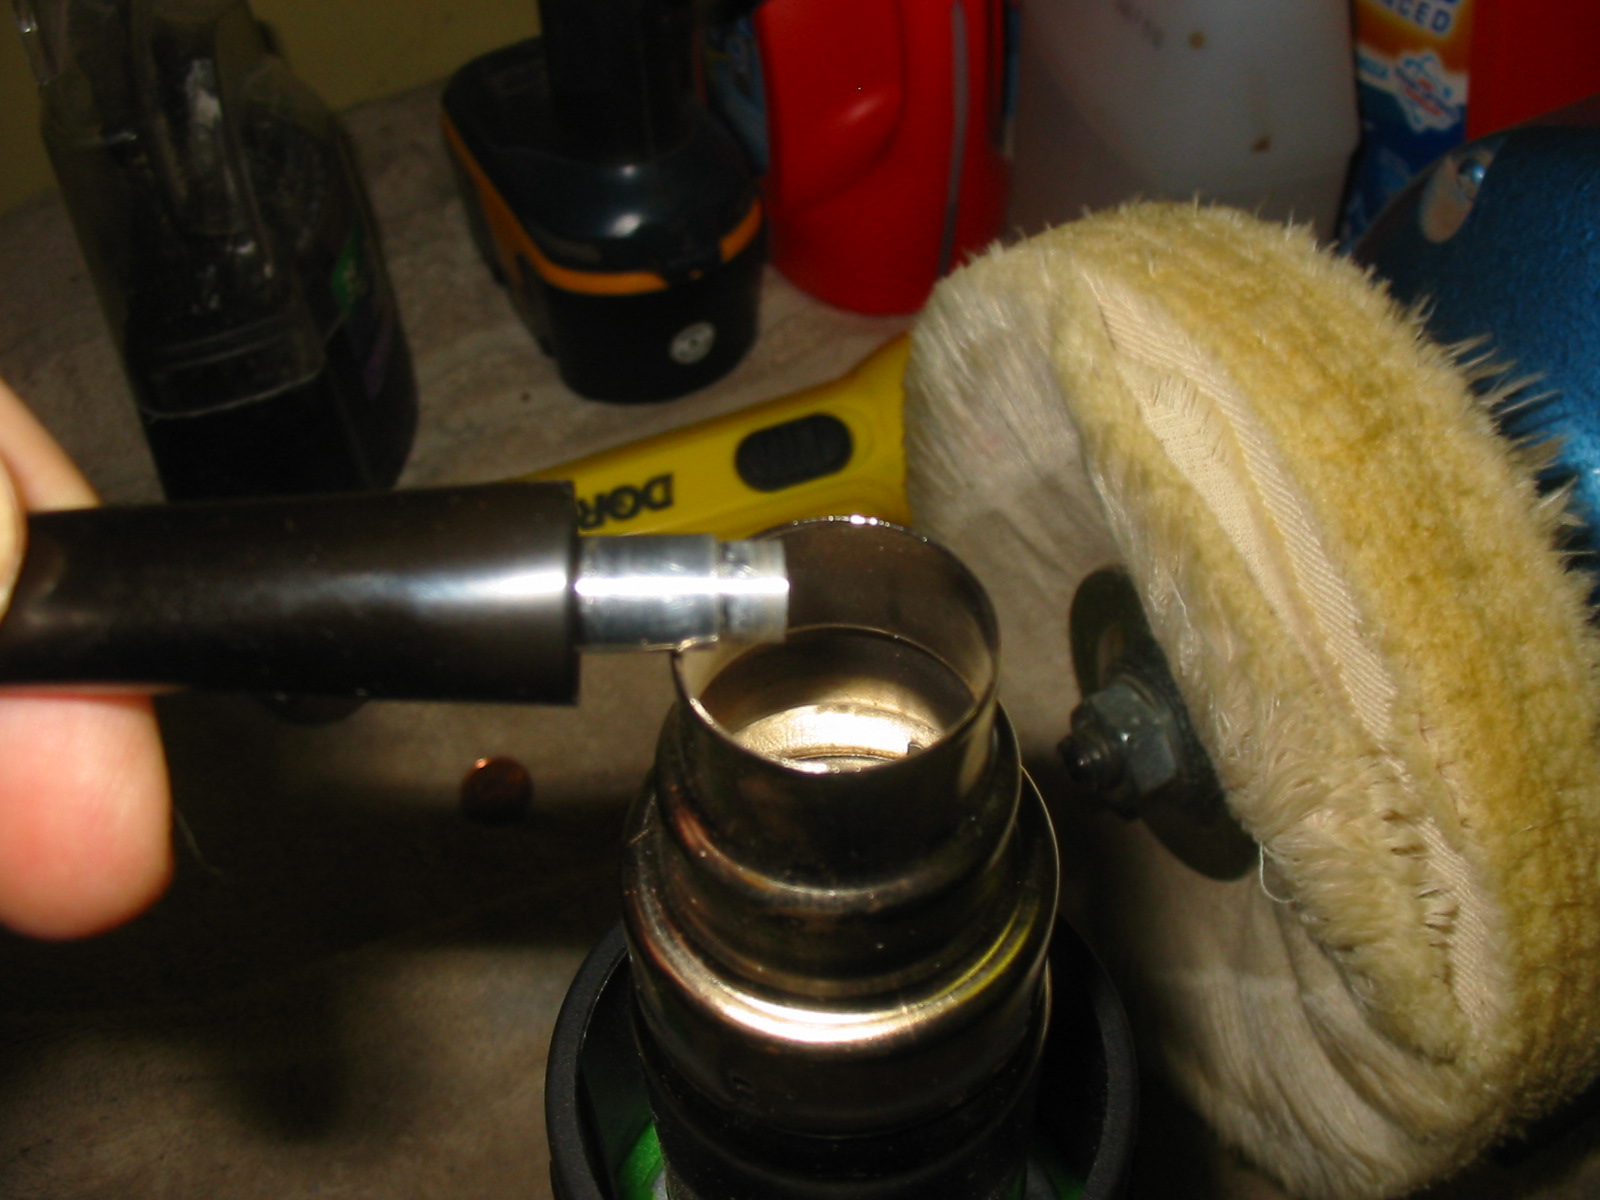
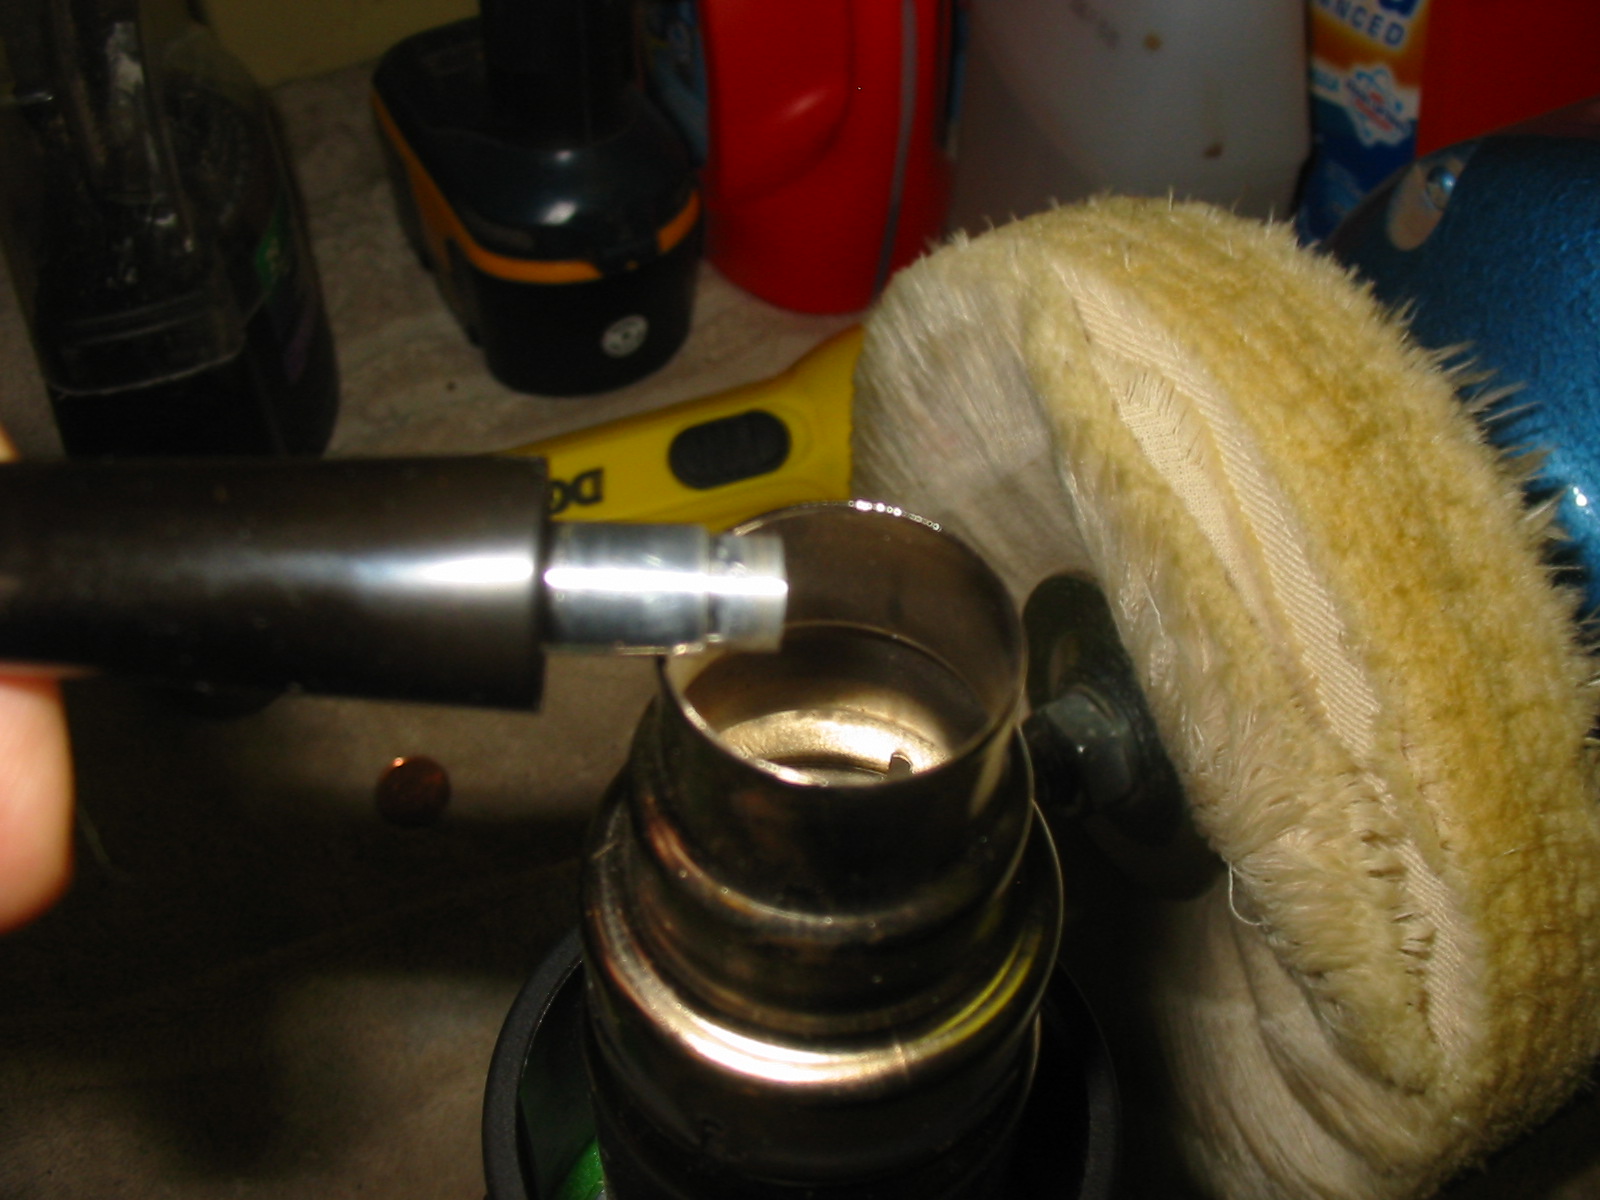
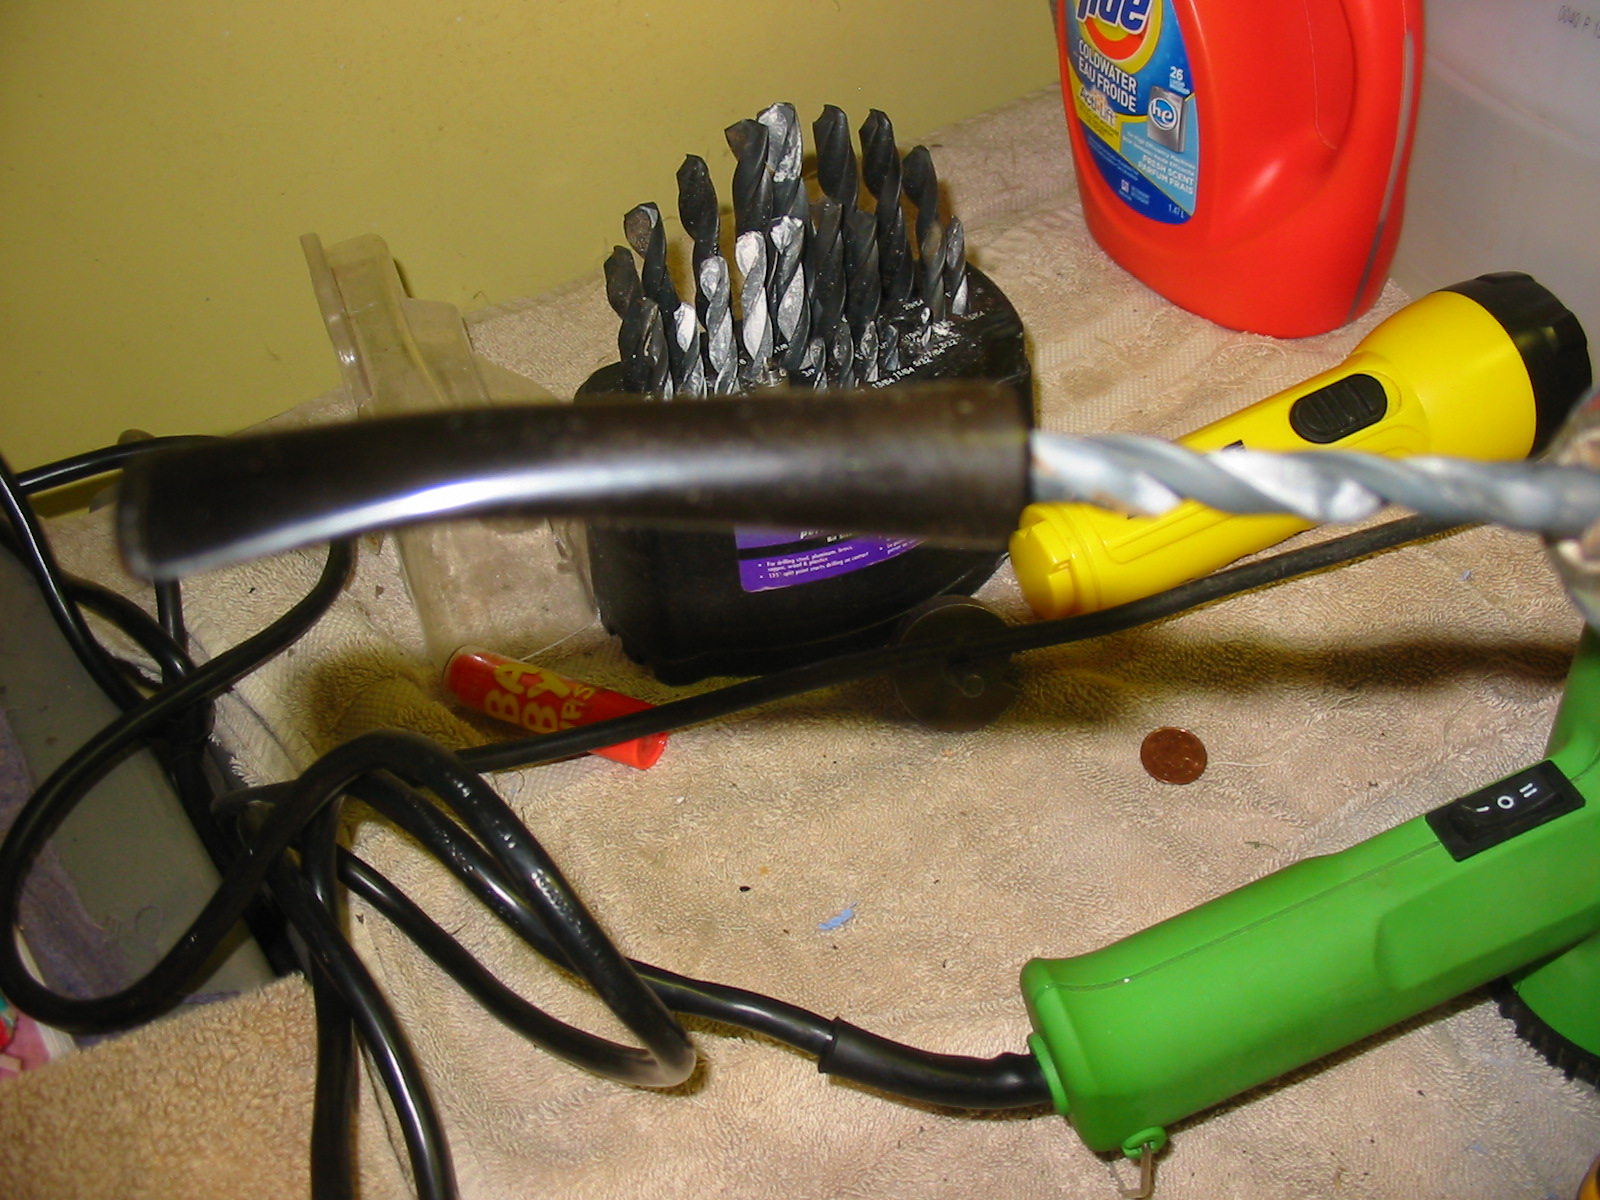
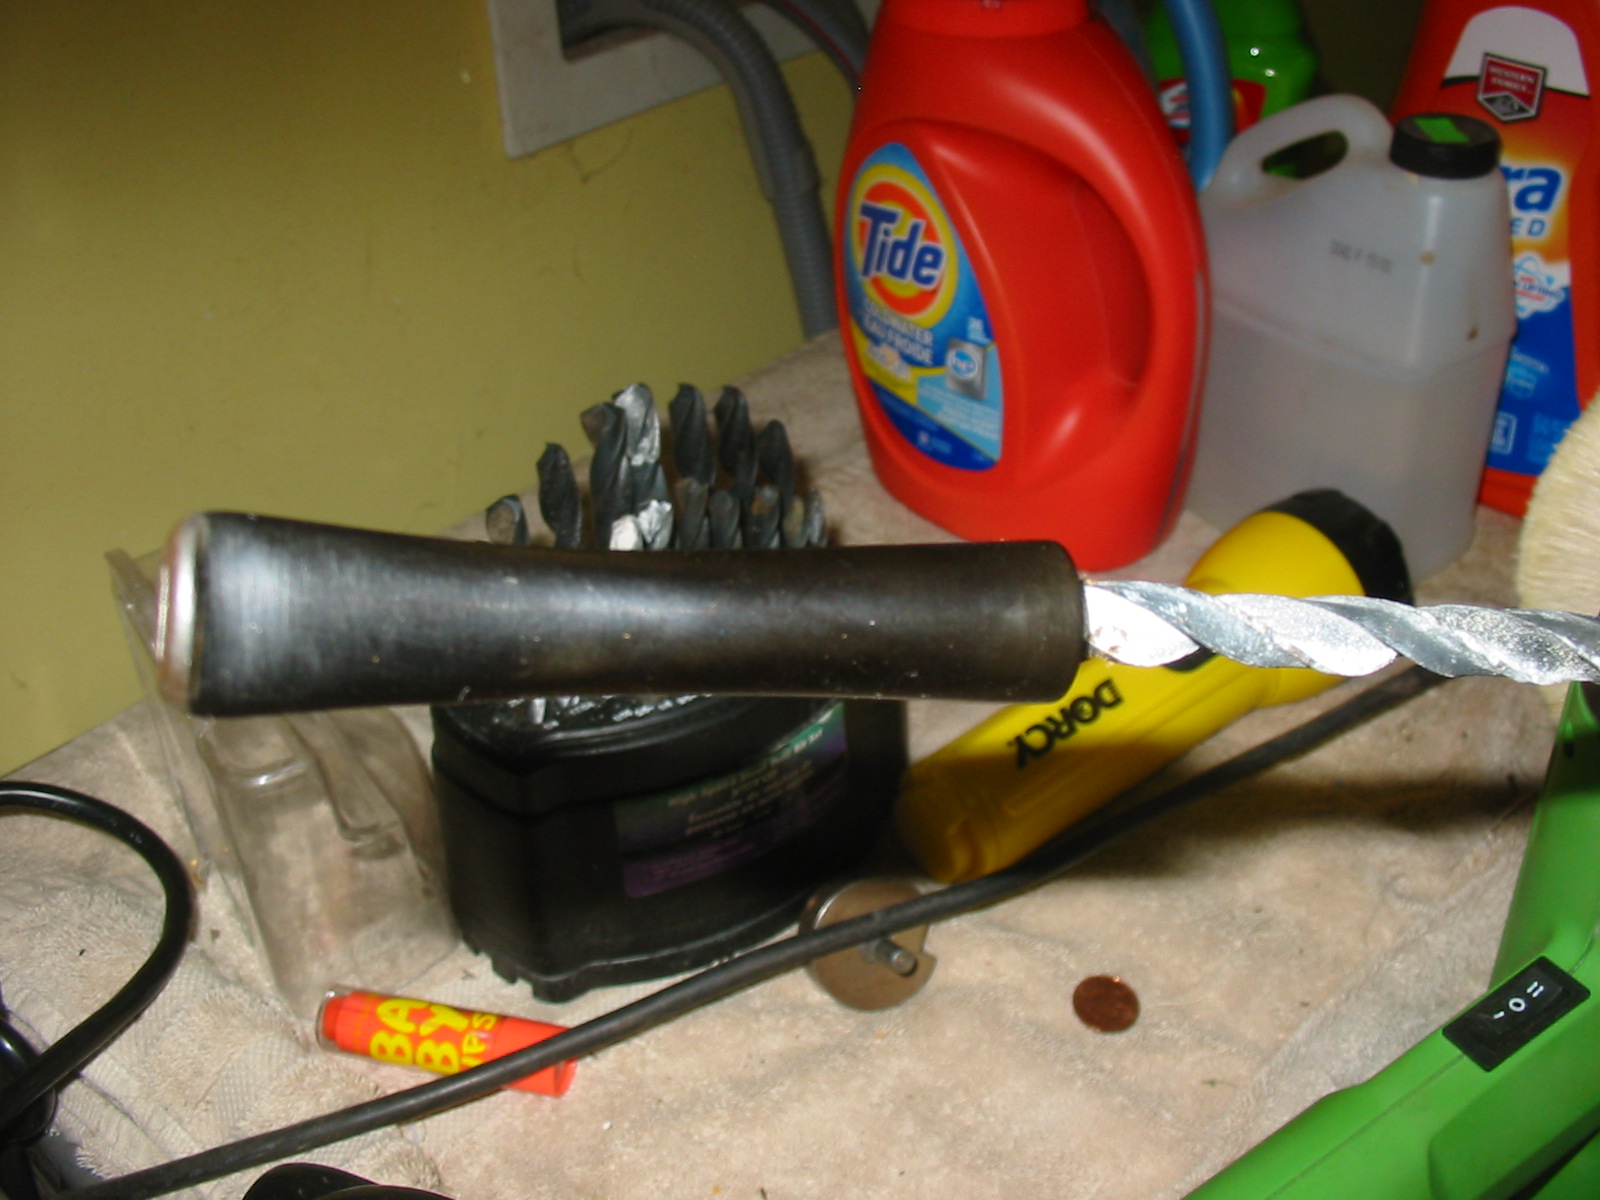
I removed the taped on broken tenon from the stem. I used a Dremel and sanding drum to take down the sharp edges of the old tenon remaining on the face of the stem. I wiped the face down with acetone on a cotton swab to remove the old glue. It was a sticky mess but came off quite easily with the acetone. When it was clean I used a series of drill bits to drill out the airway to accommodate the new threaded tenon. I usually start with a drill bit slightly larger than the airway and work my way up to the one that fits the tenon end. I used my cordless drill and the airway as the guide for each successive drill bit. This keeps things lined up.
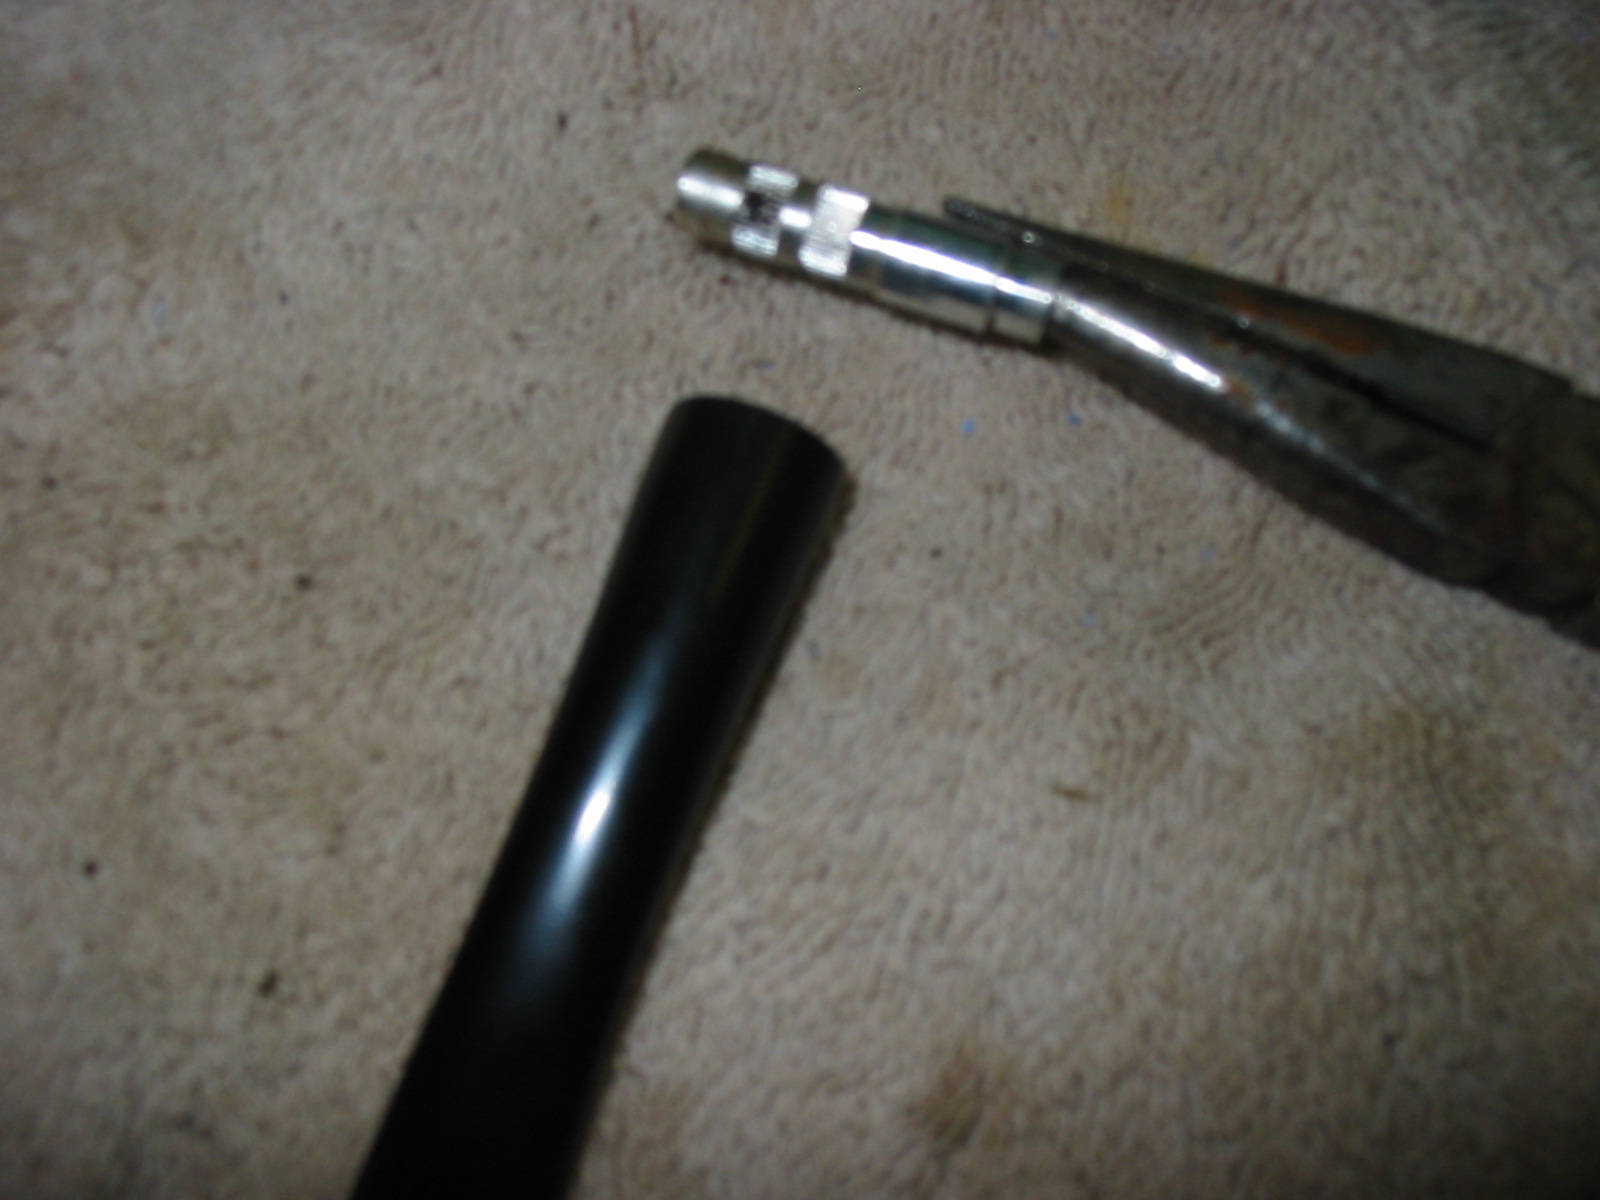
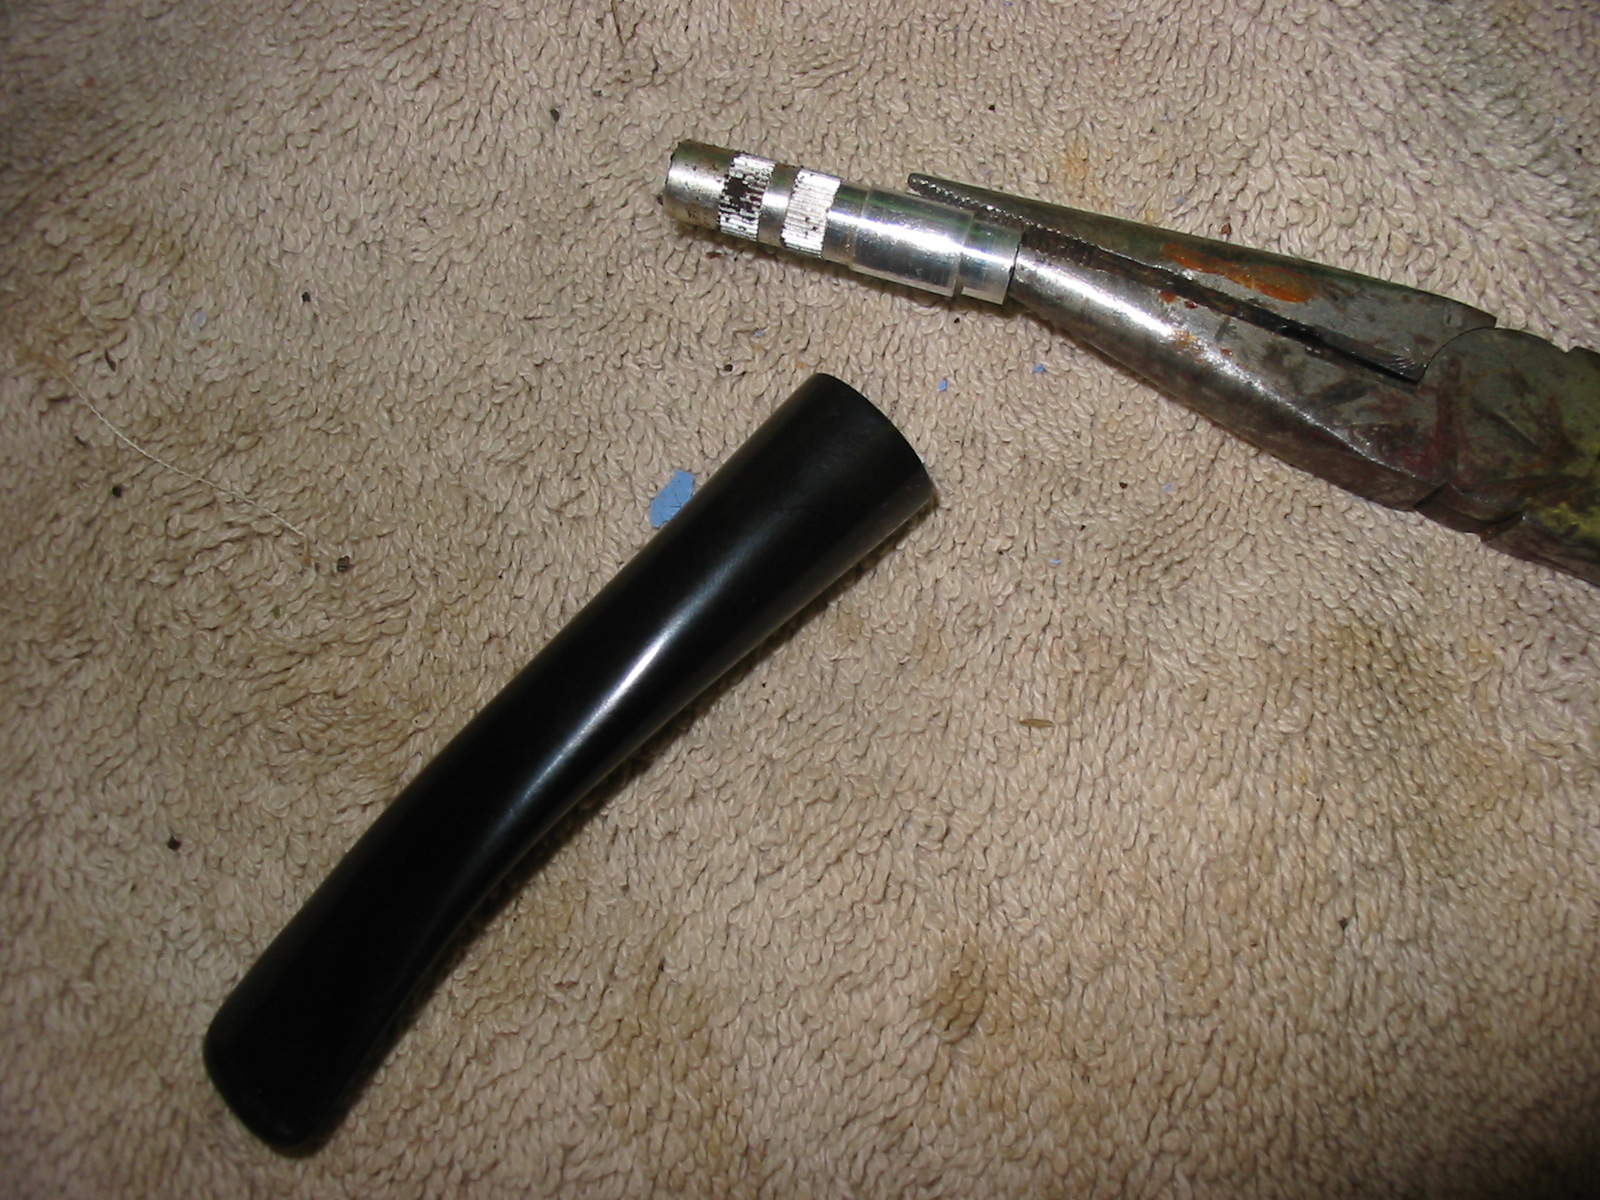
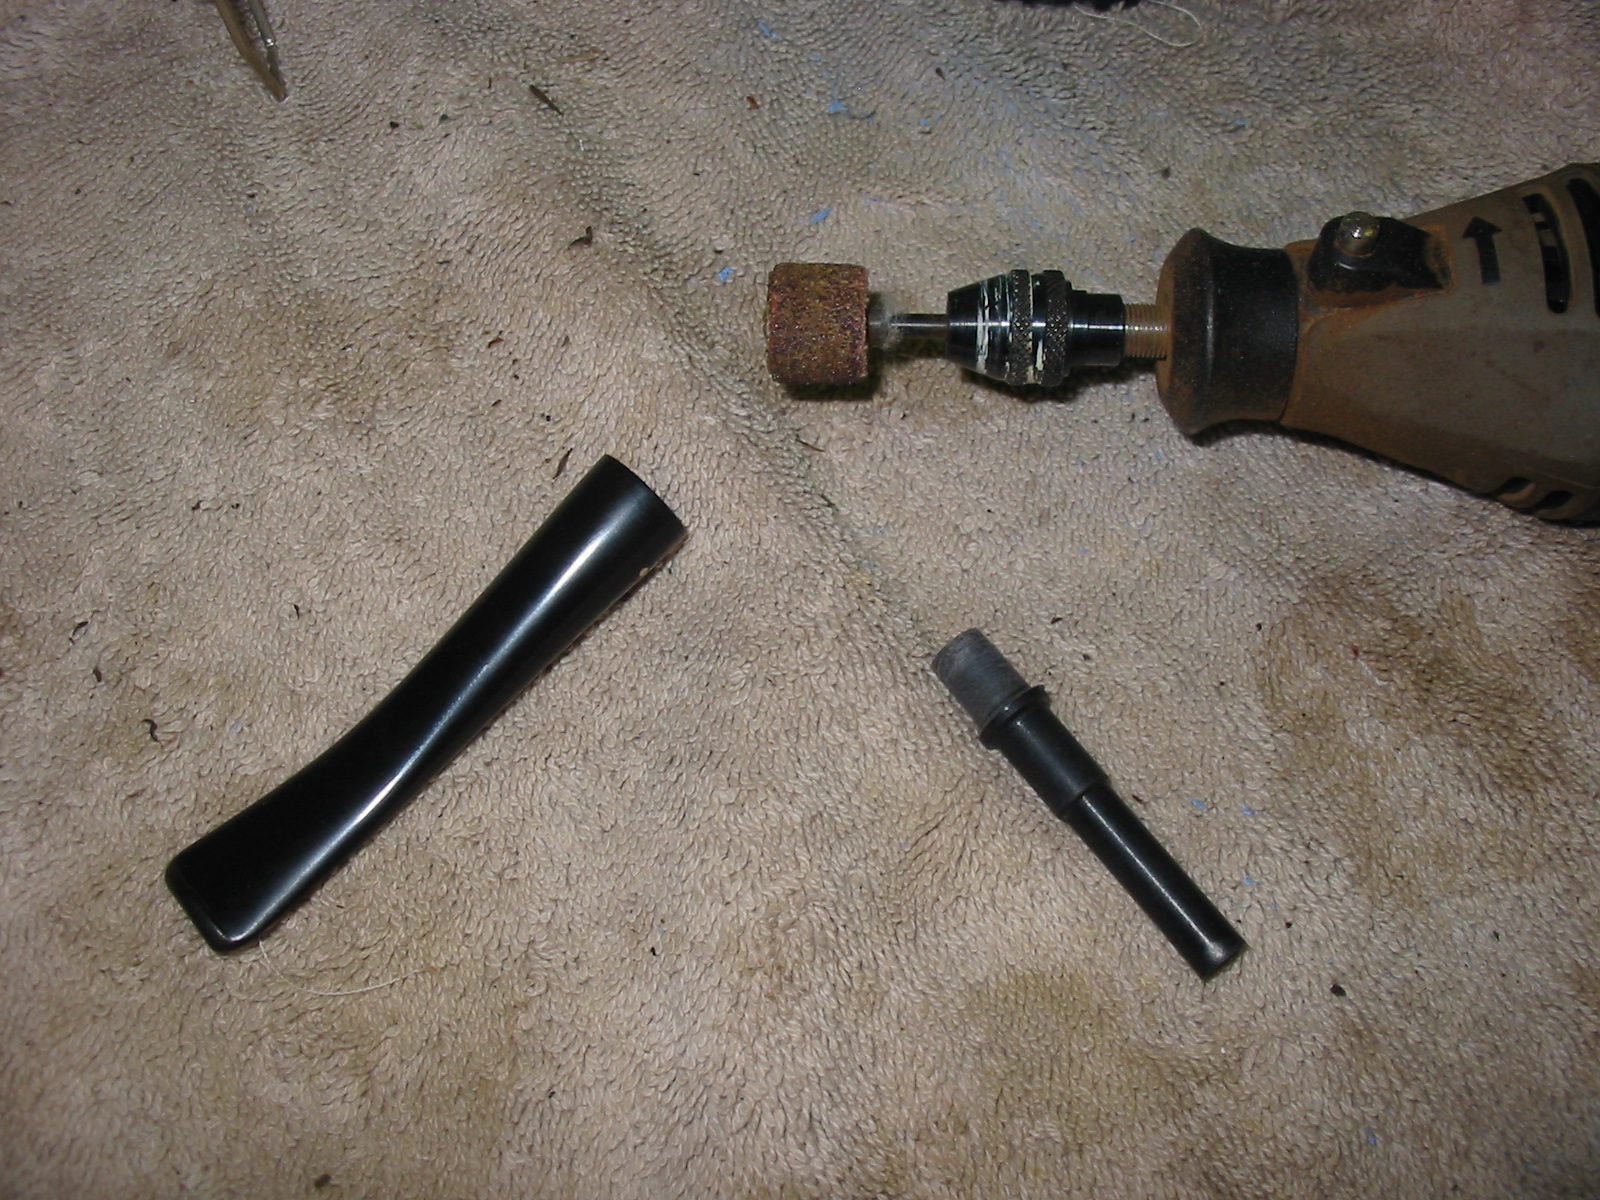
Once I have the airway drilled to accommodate the end of the tenon. I use a tap to thread new airway. The tenon replacements I use have a hip around the middle that I need to take down. I use a Dremel and sanding drum to smooth things out. I also rough up the threads to reduce the diameter to make room for the glue that I use to set the tenon in the stem.
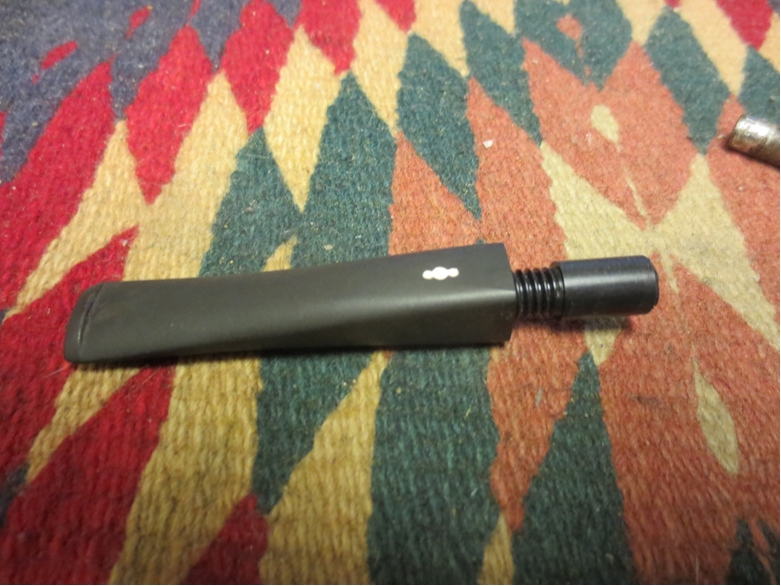
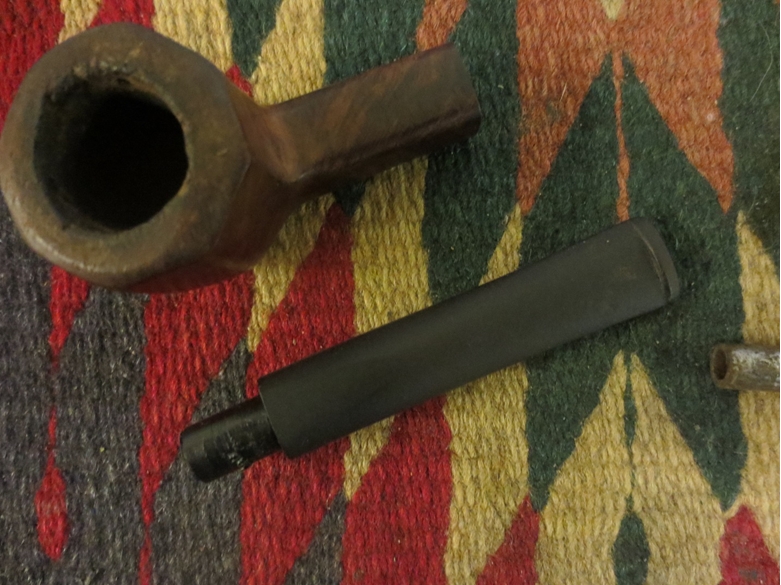
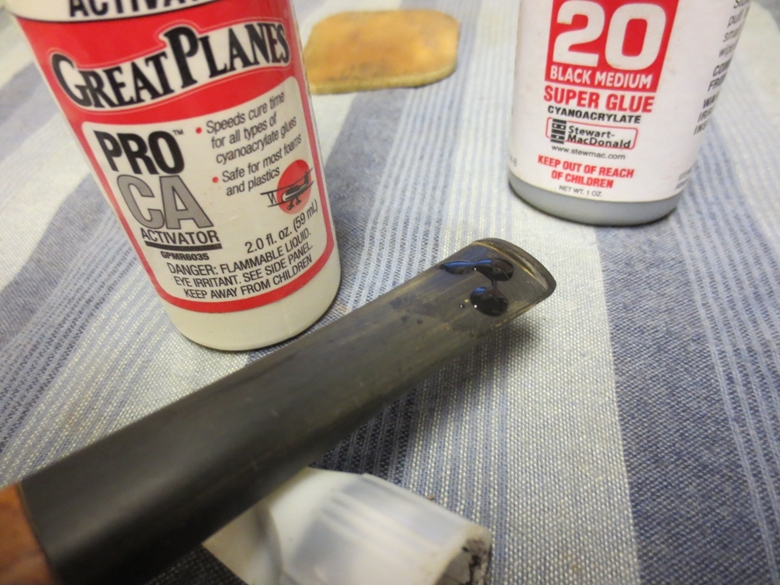
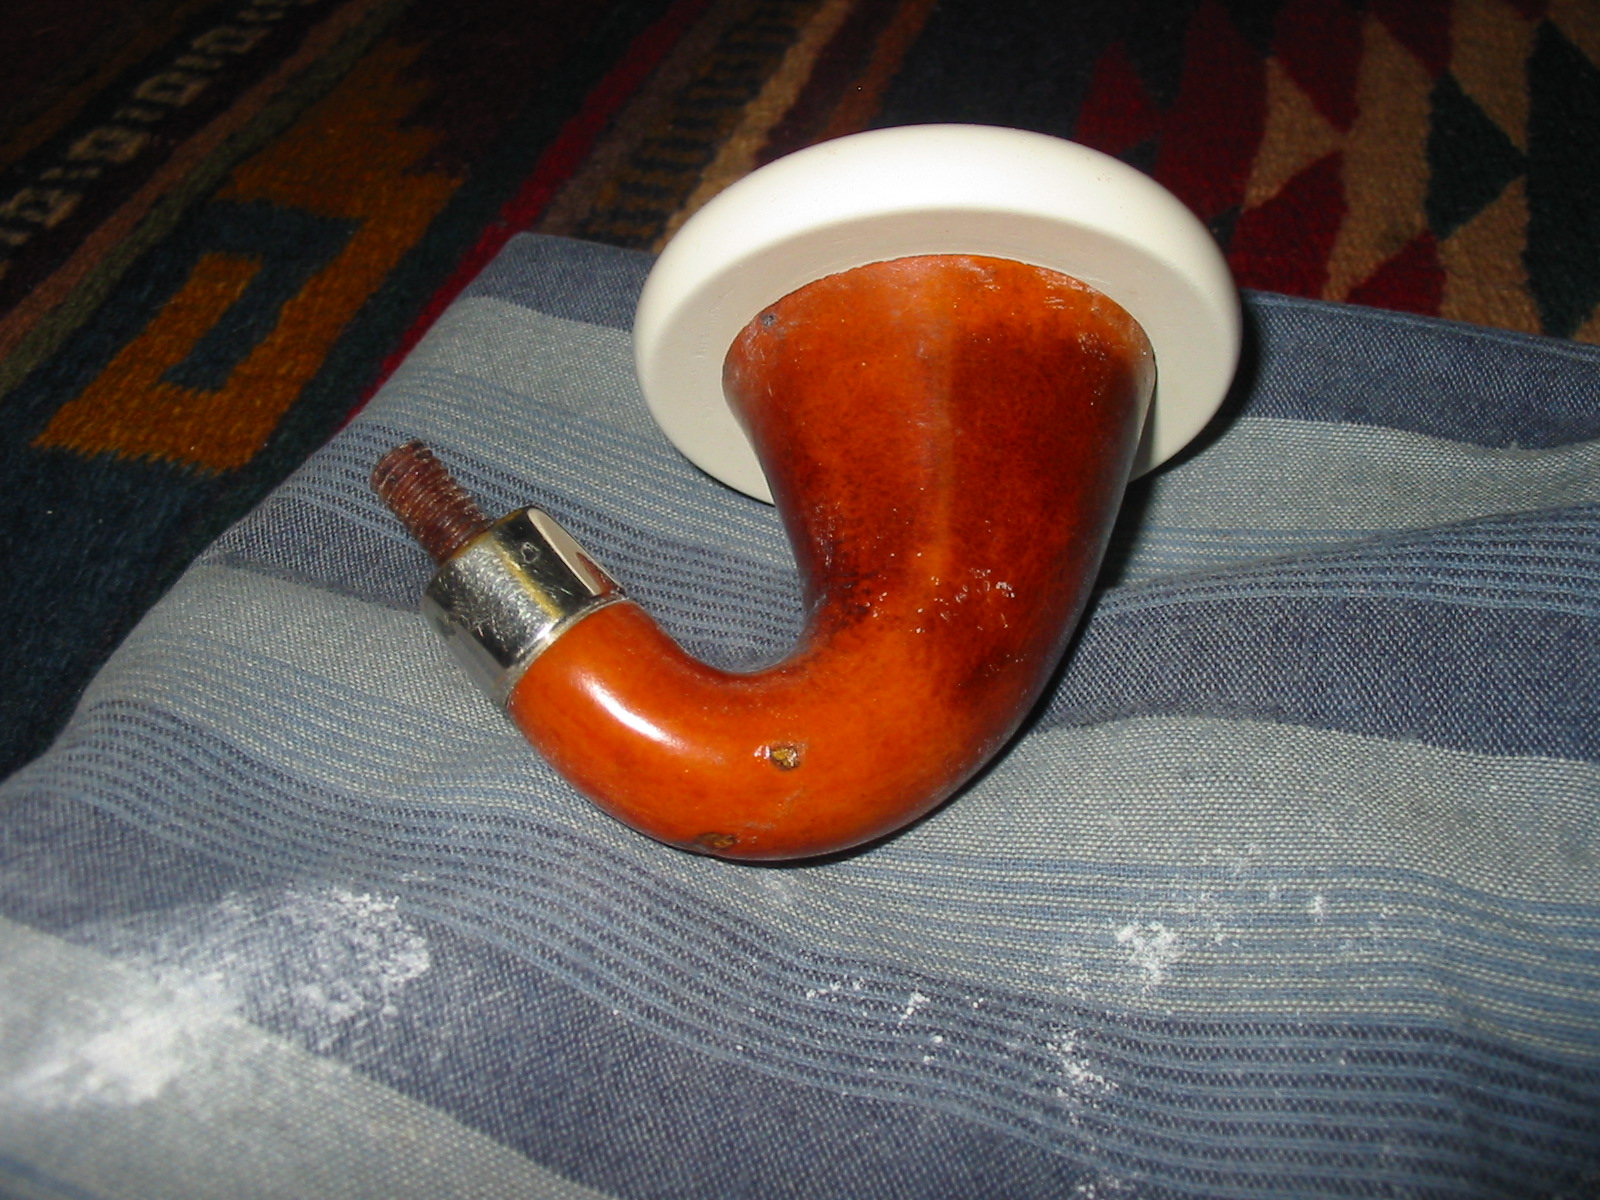
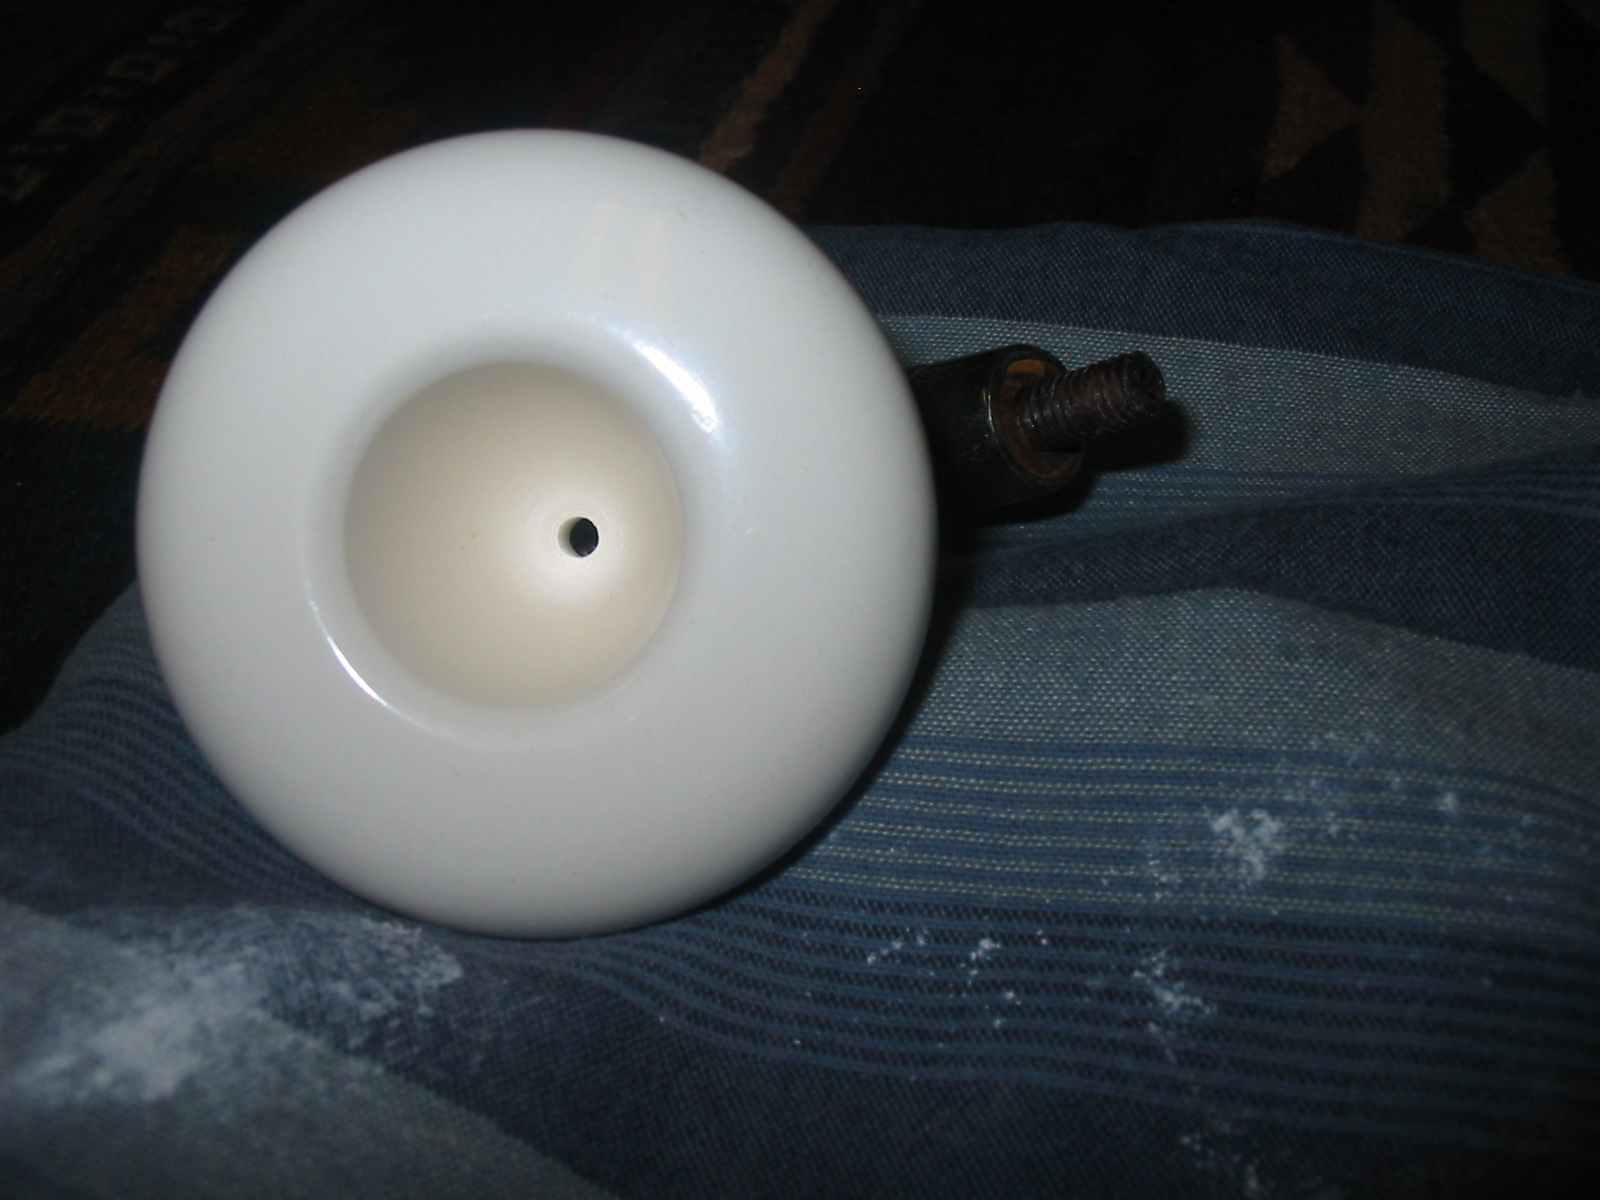
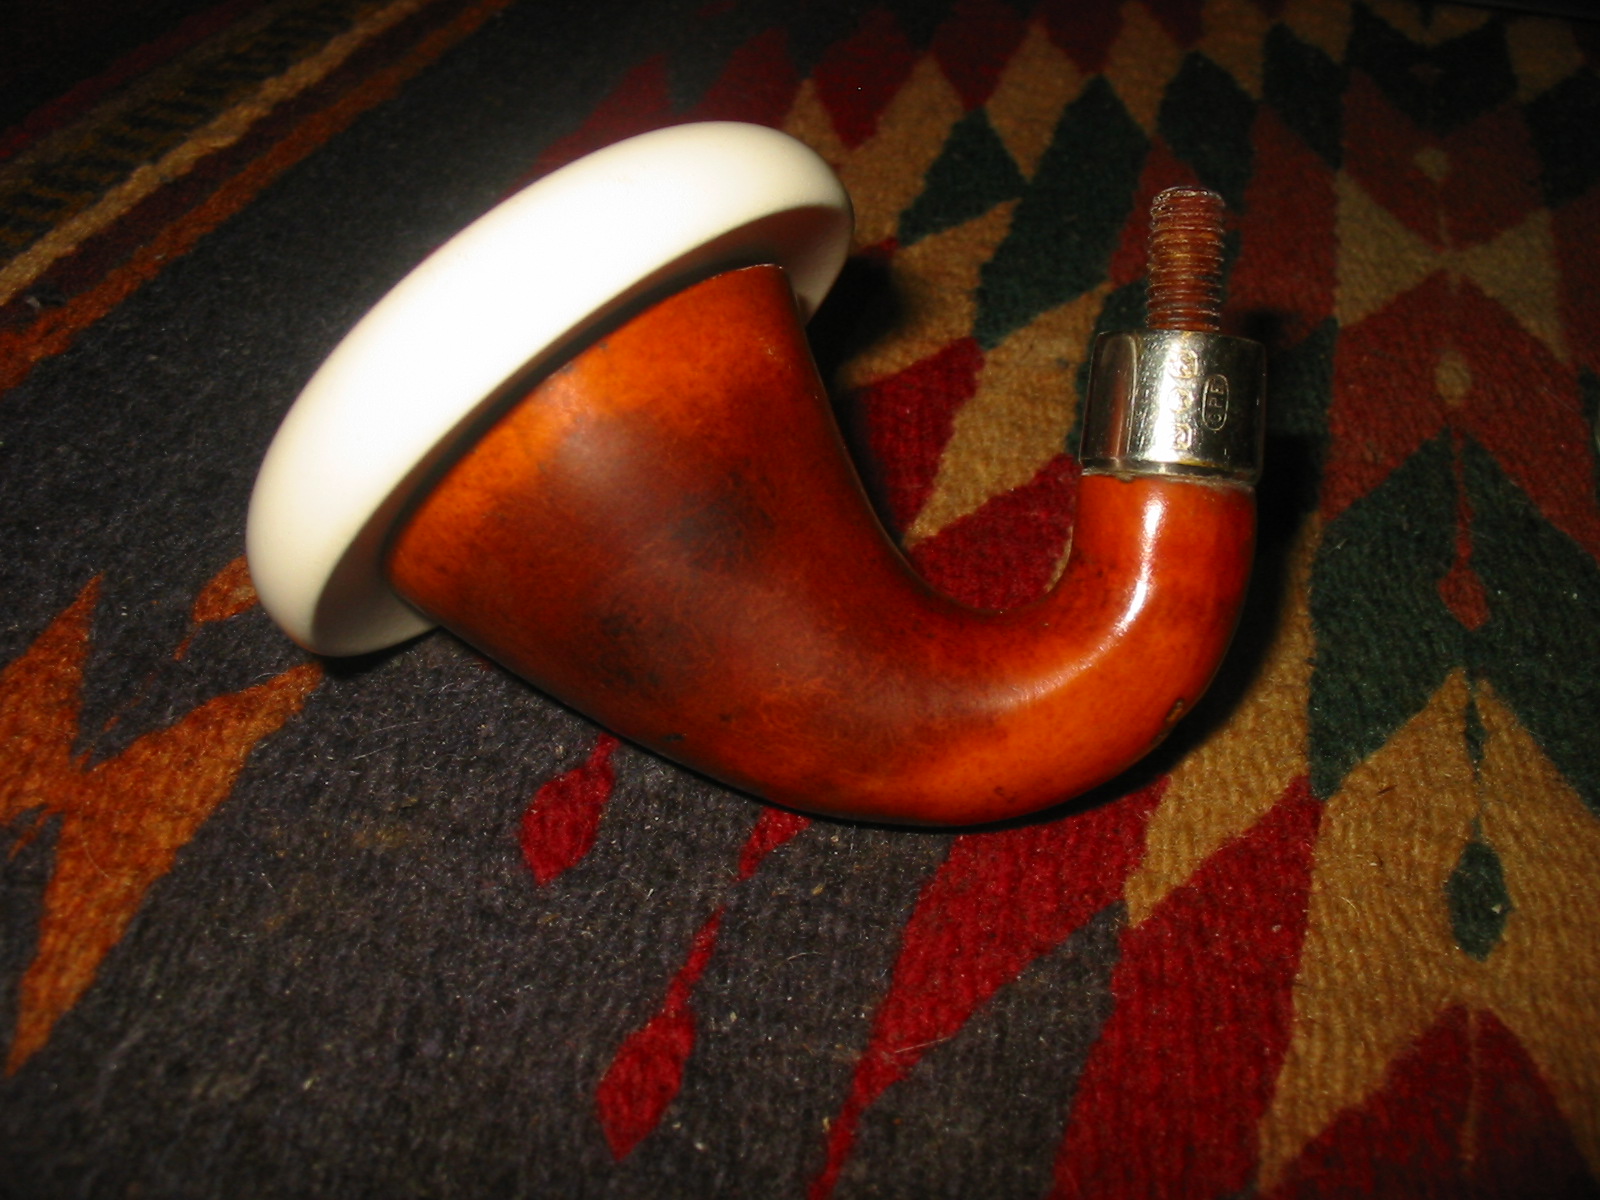
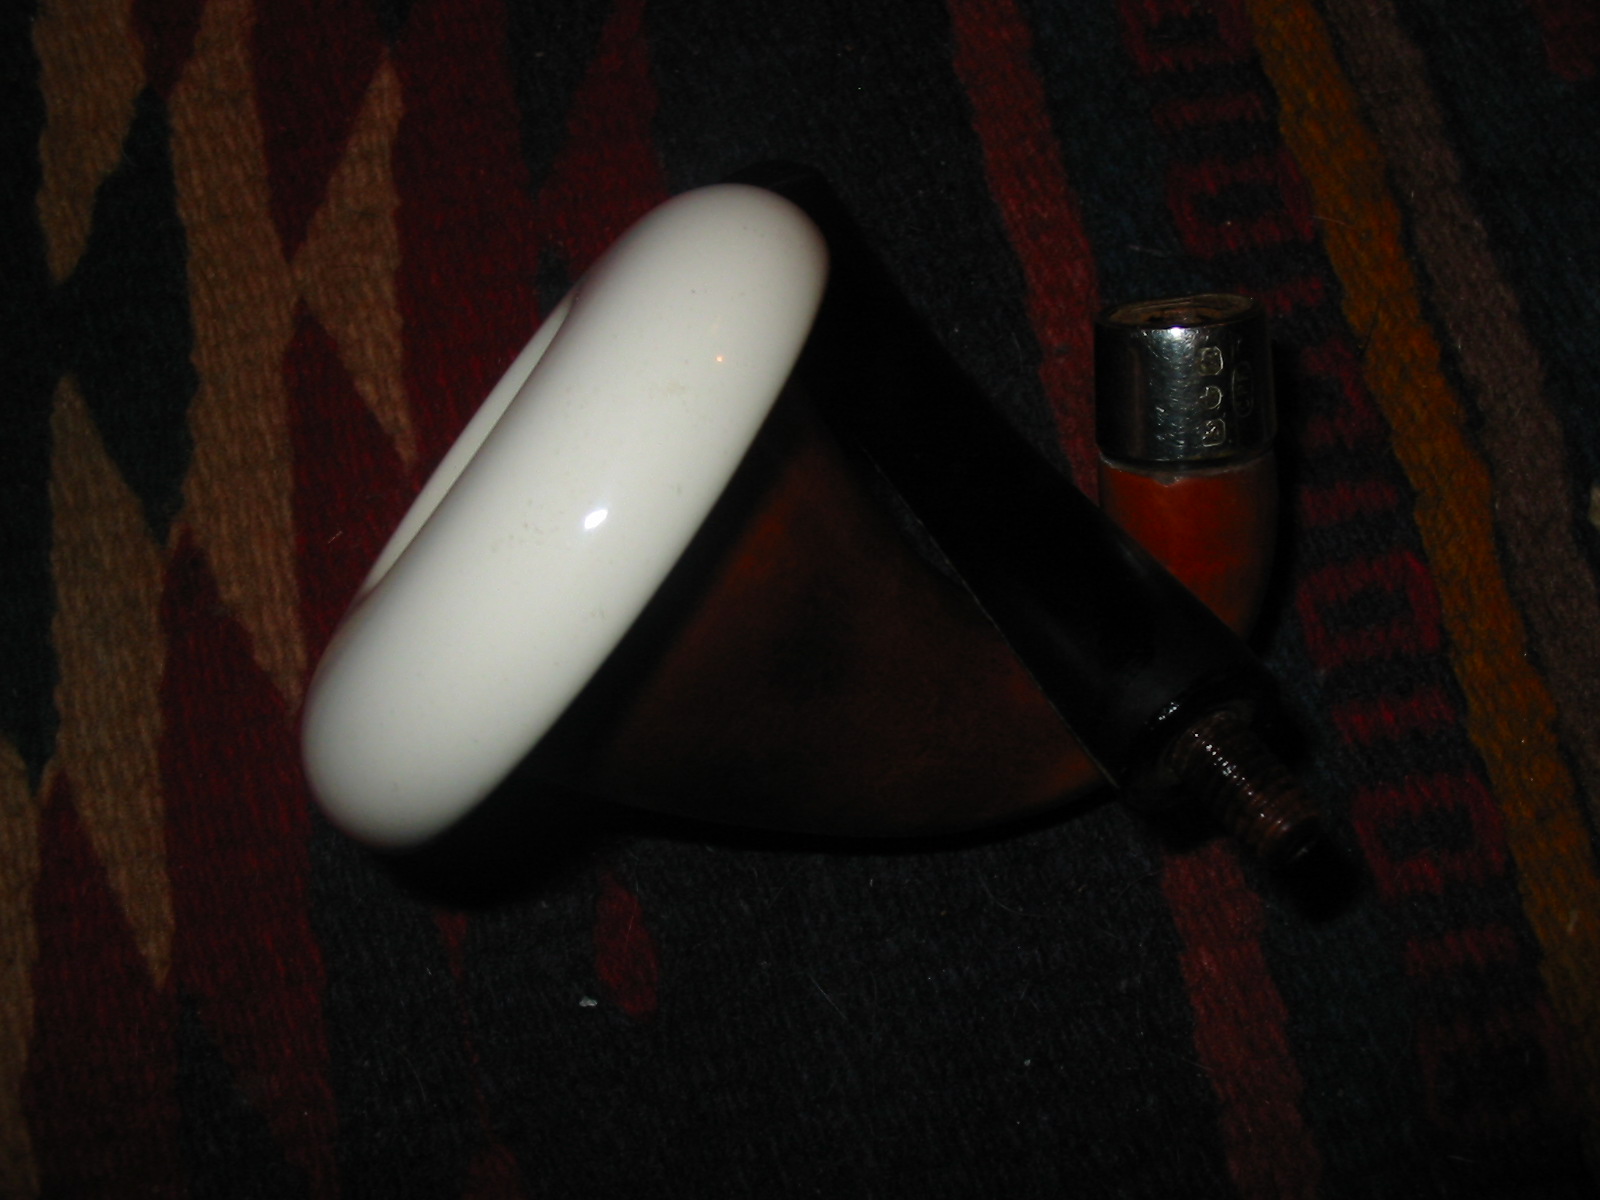
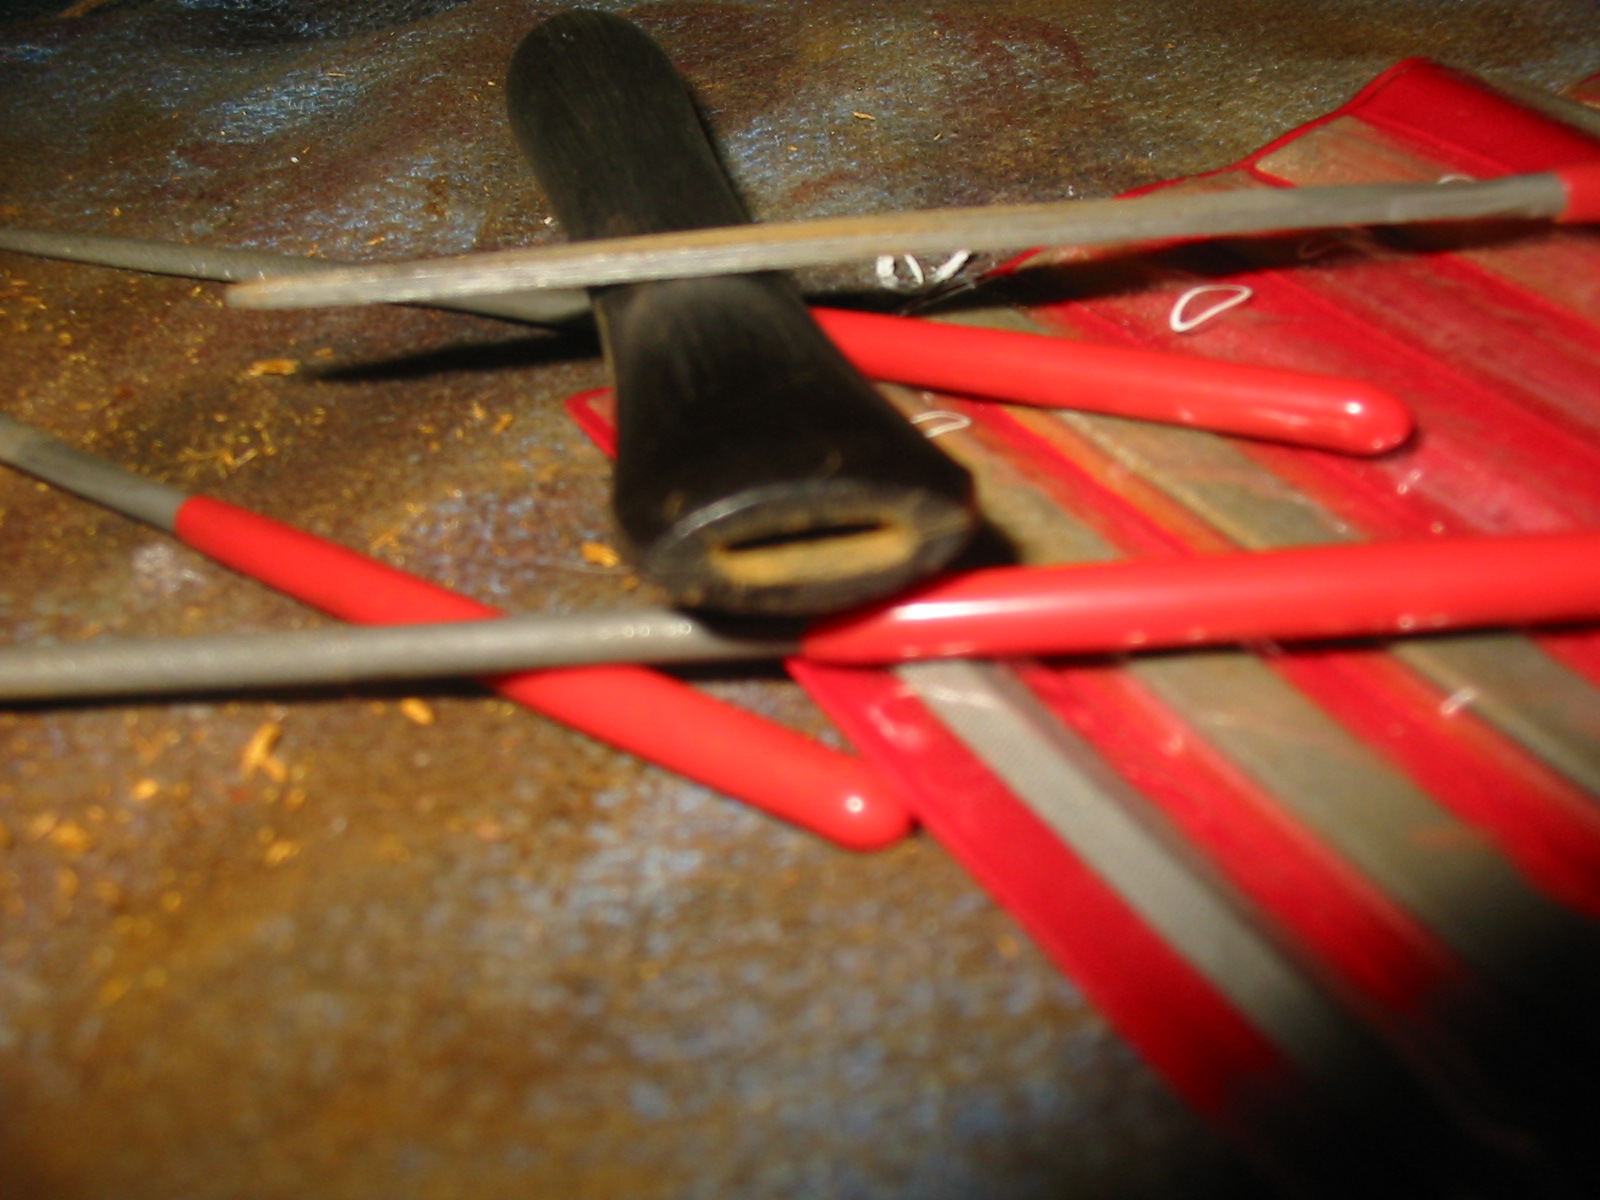
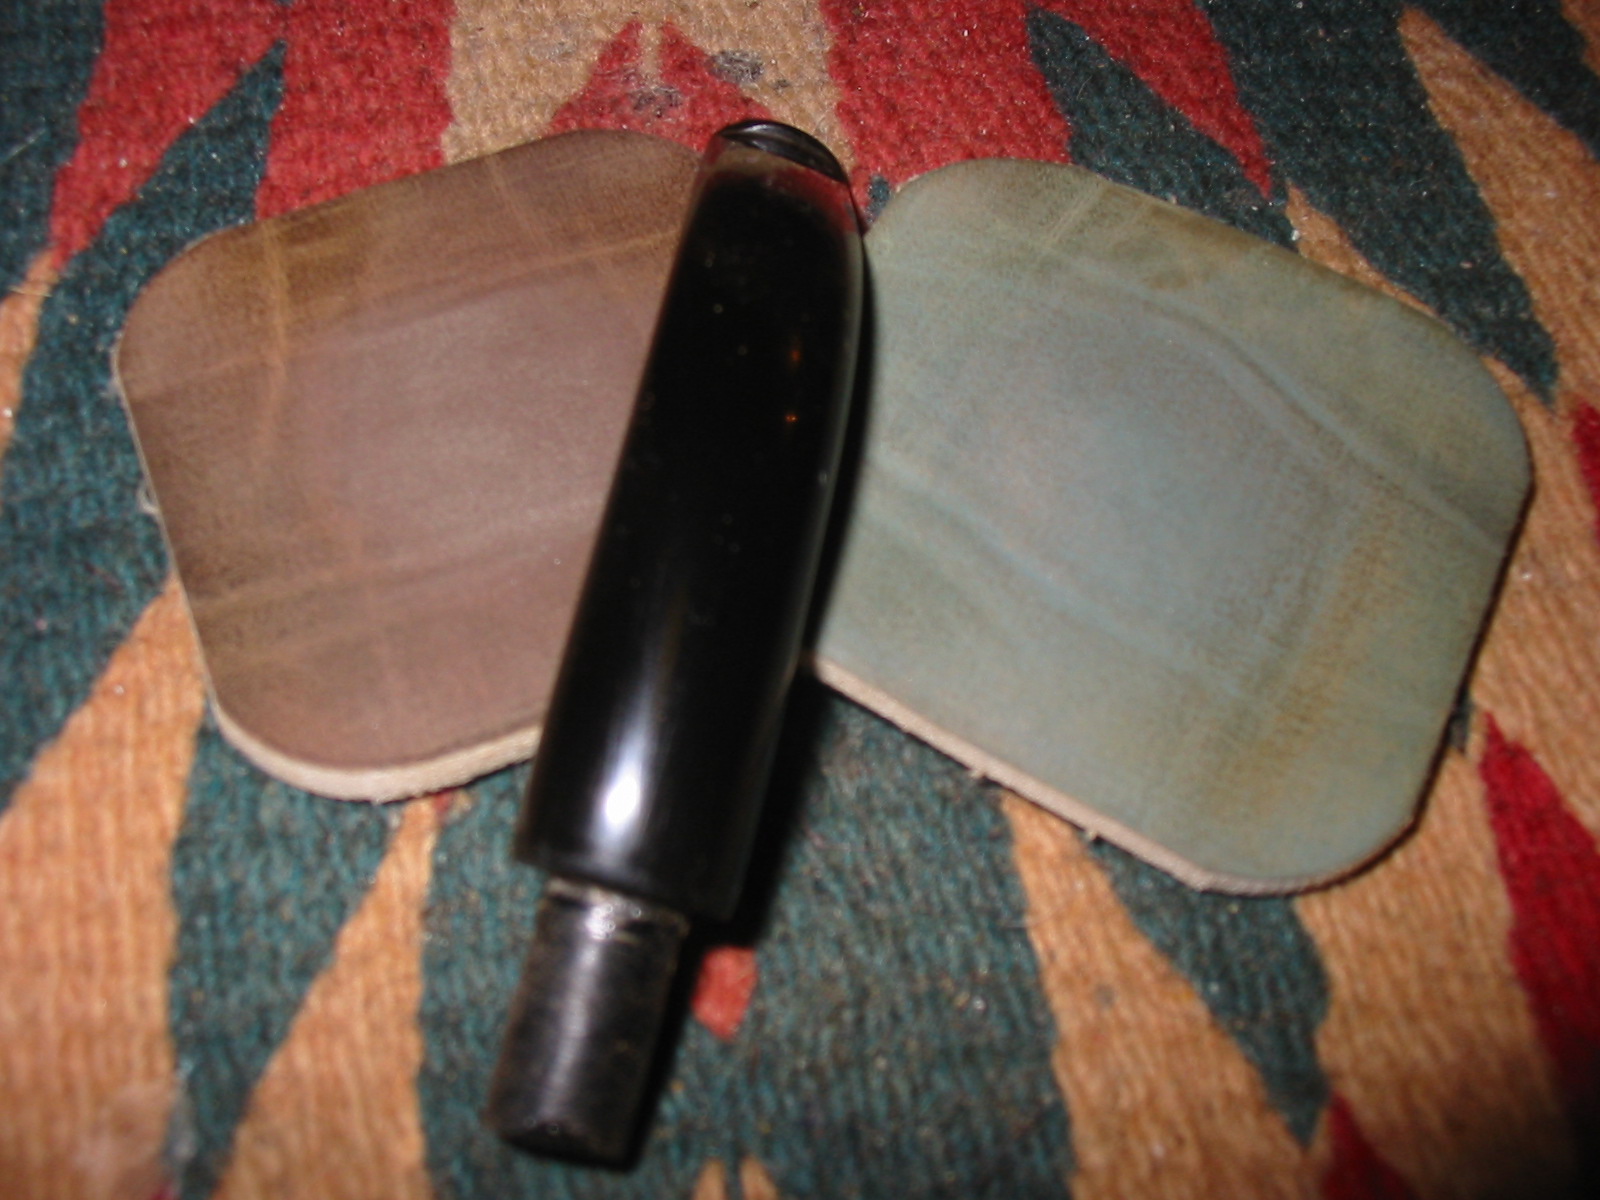
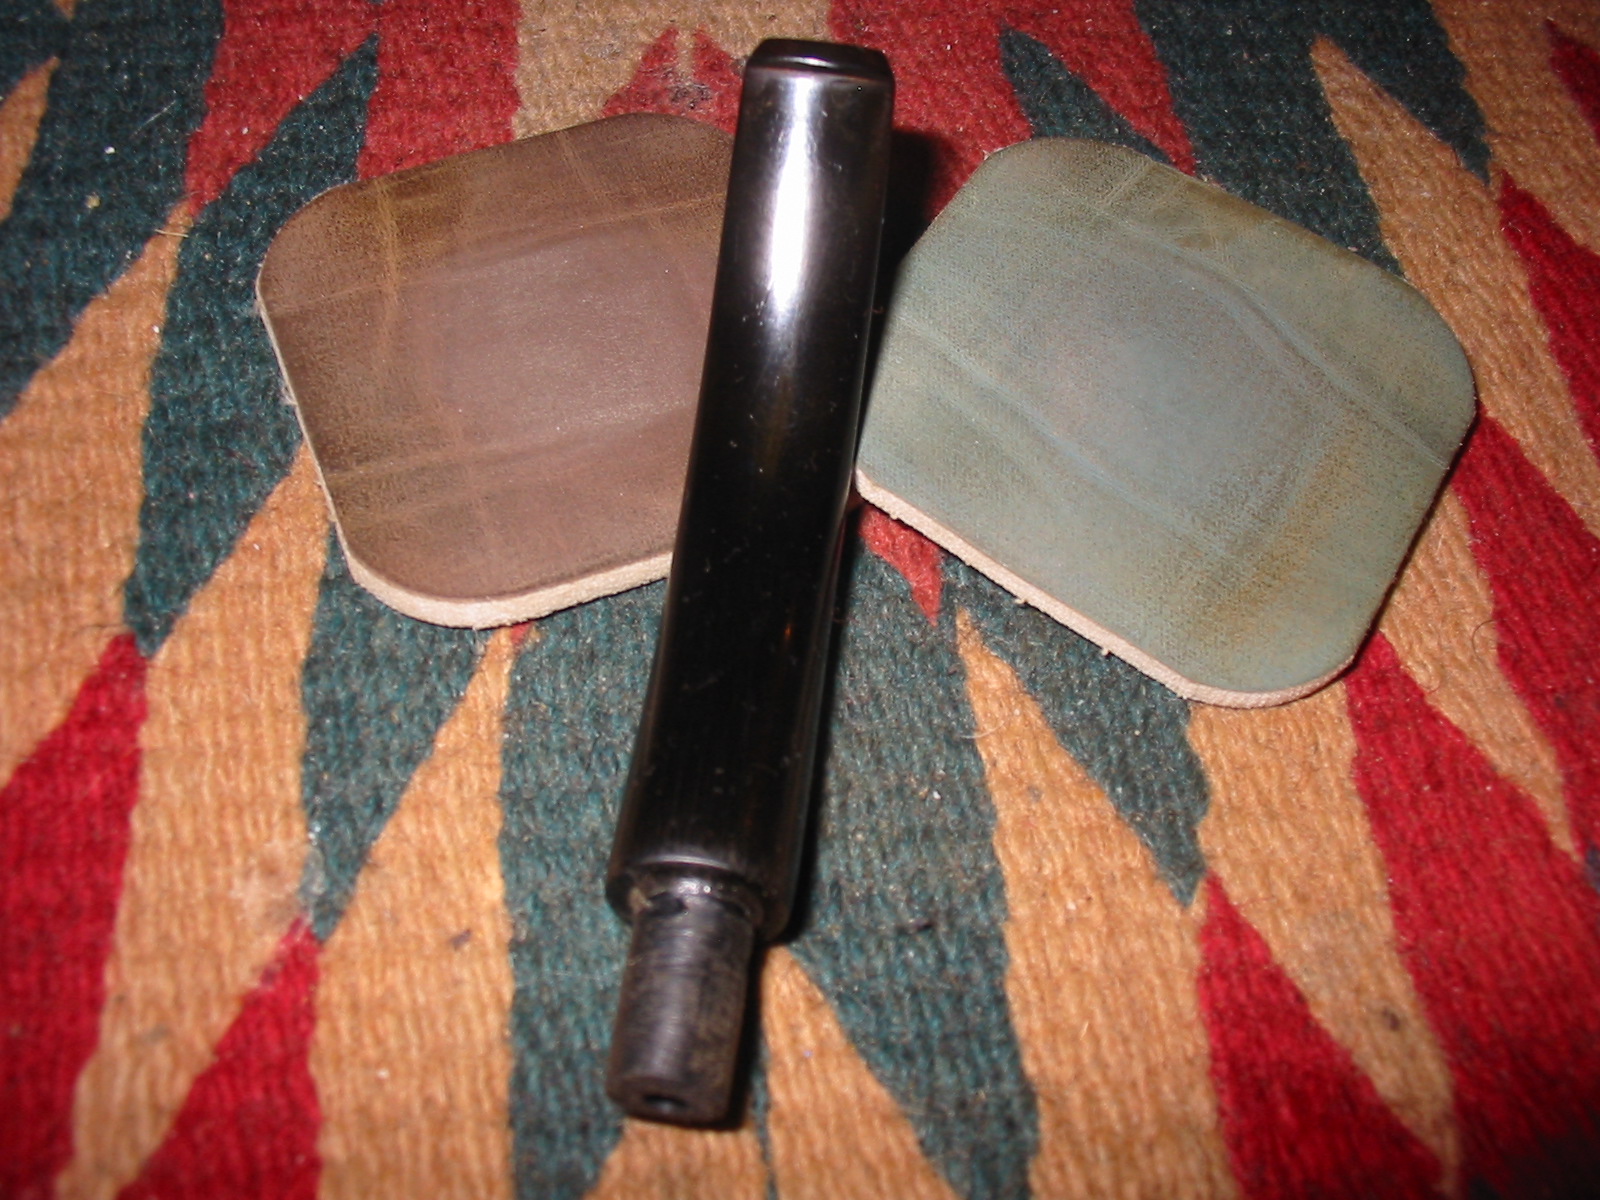
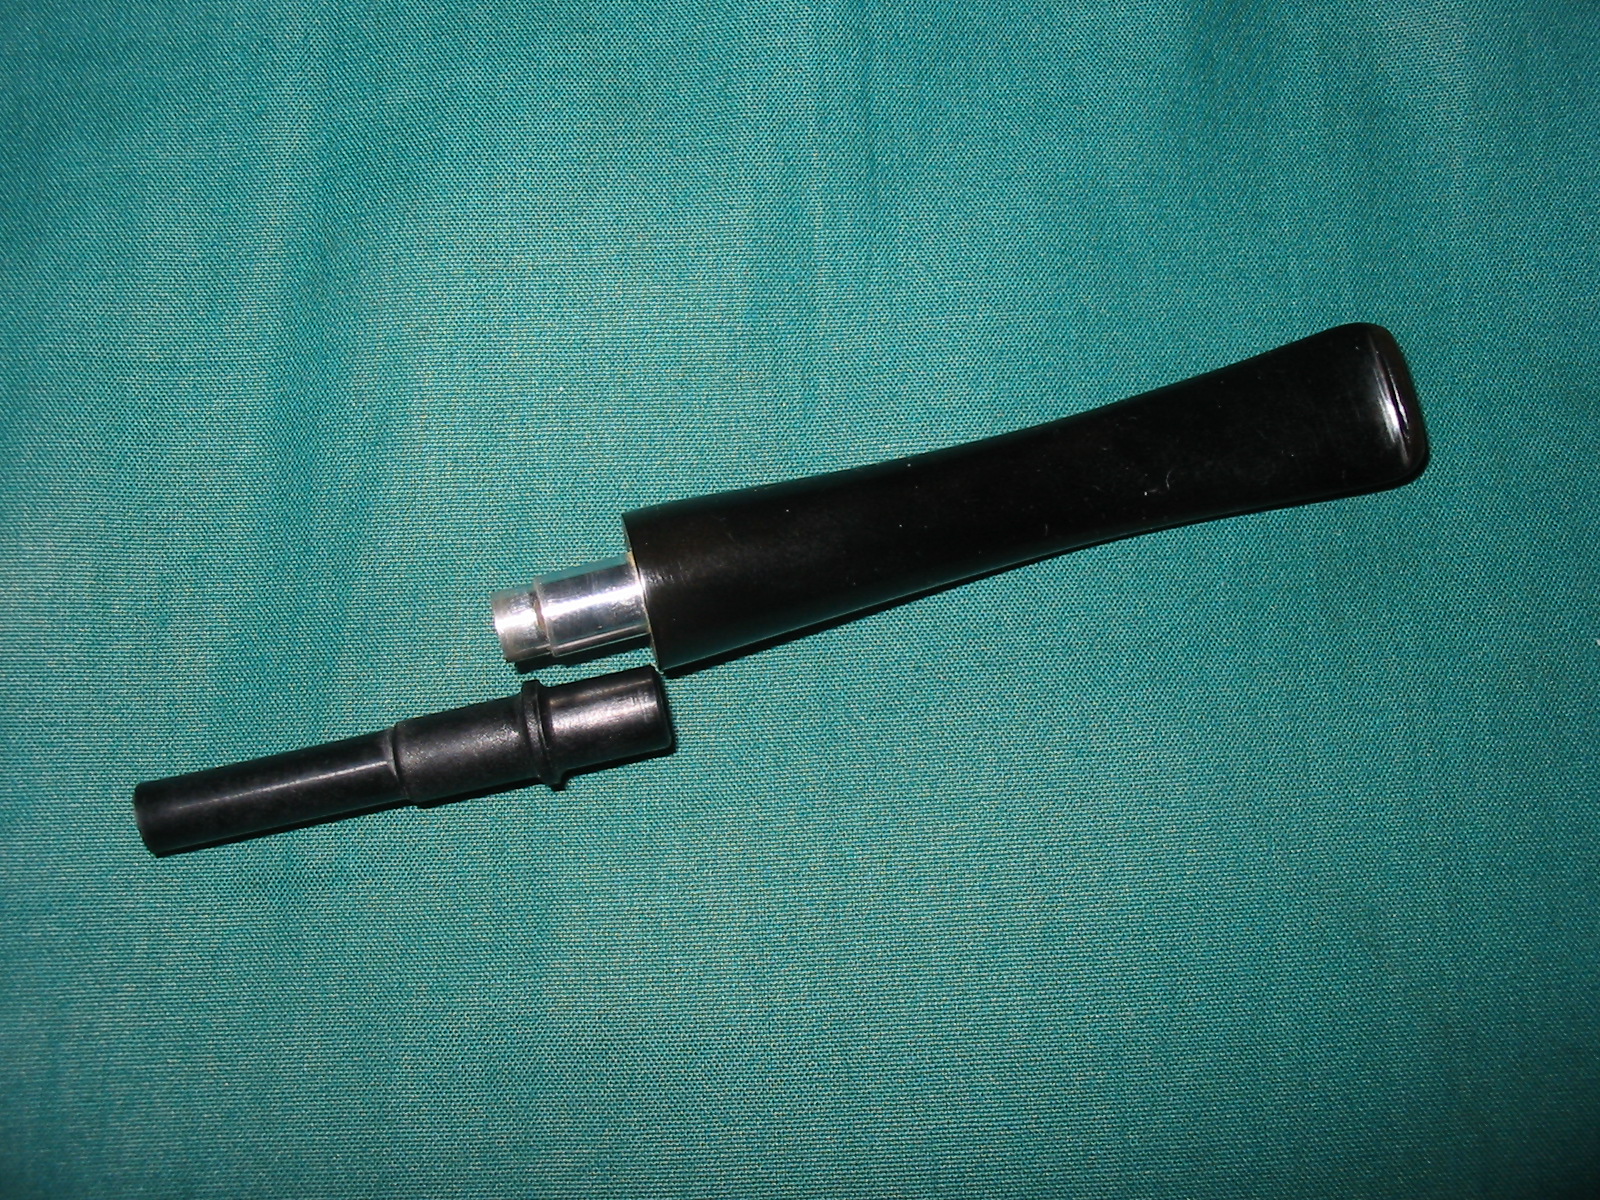
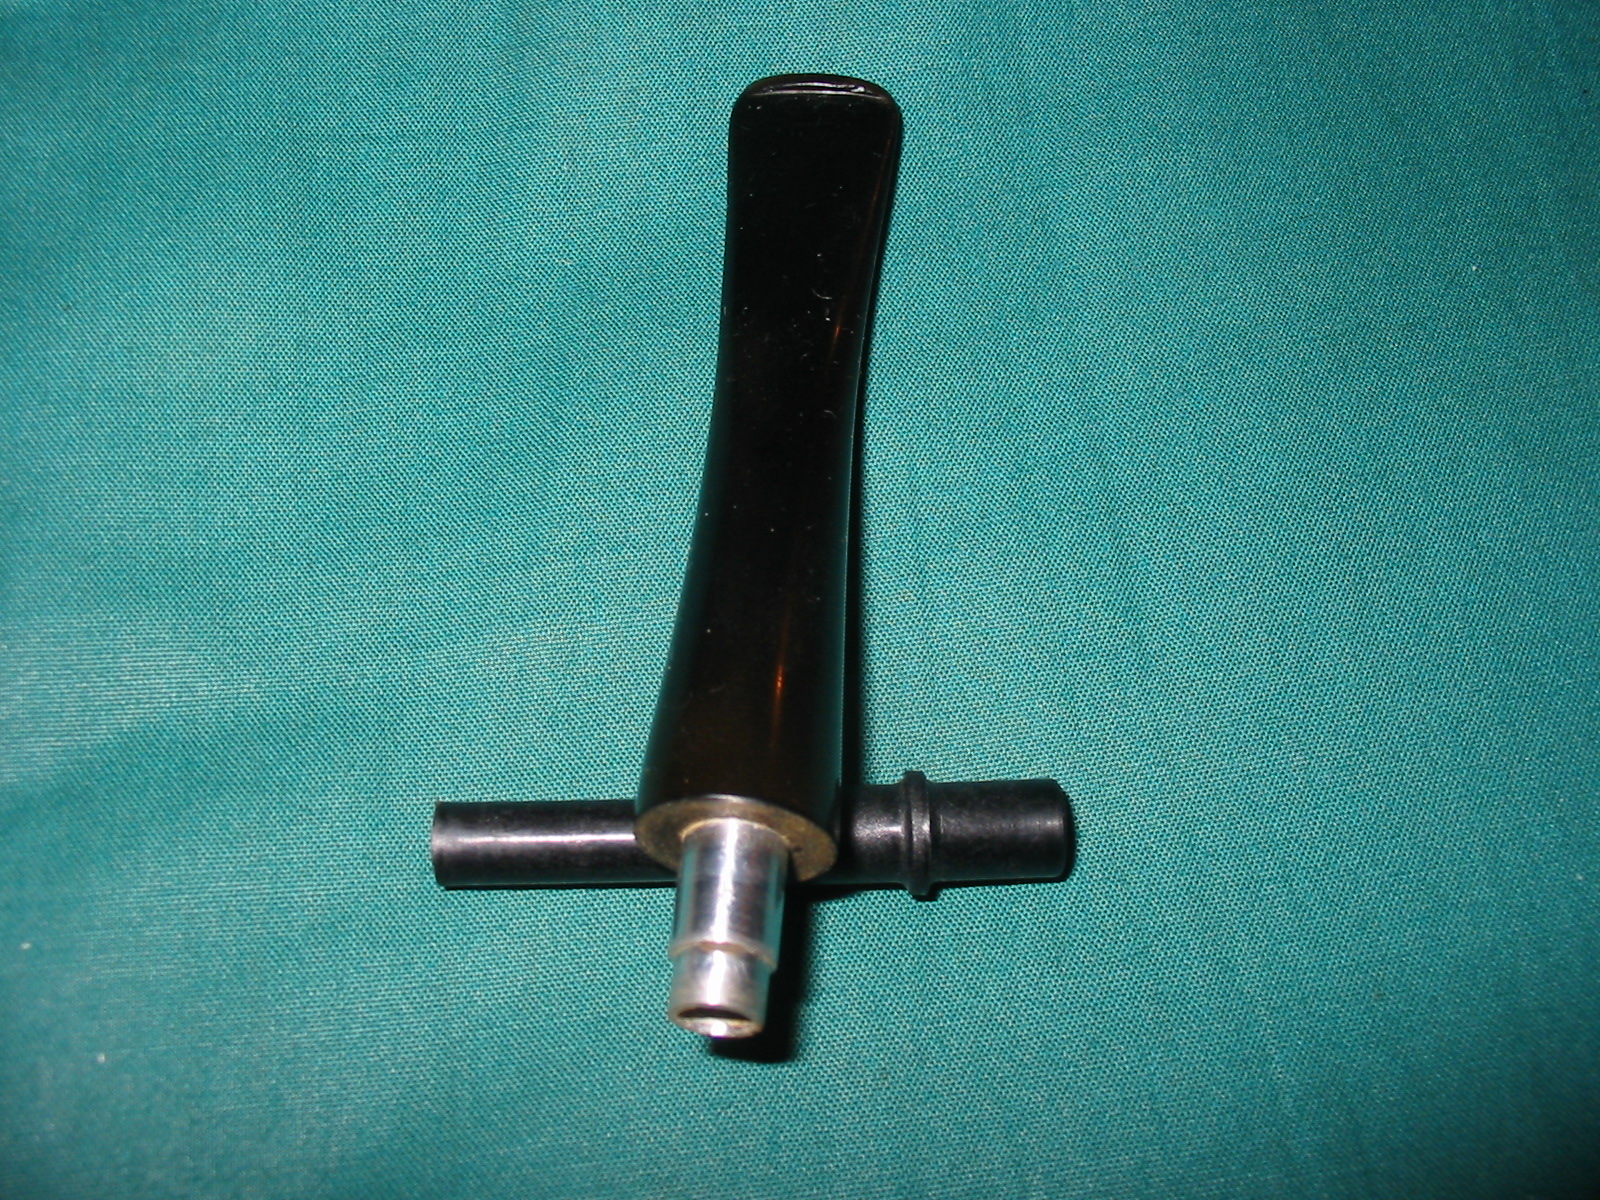
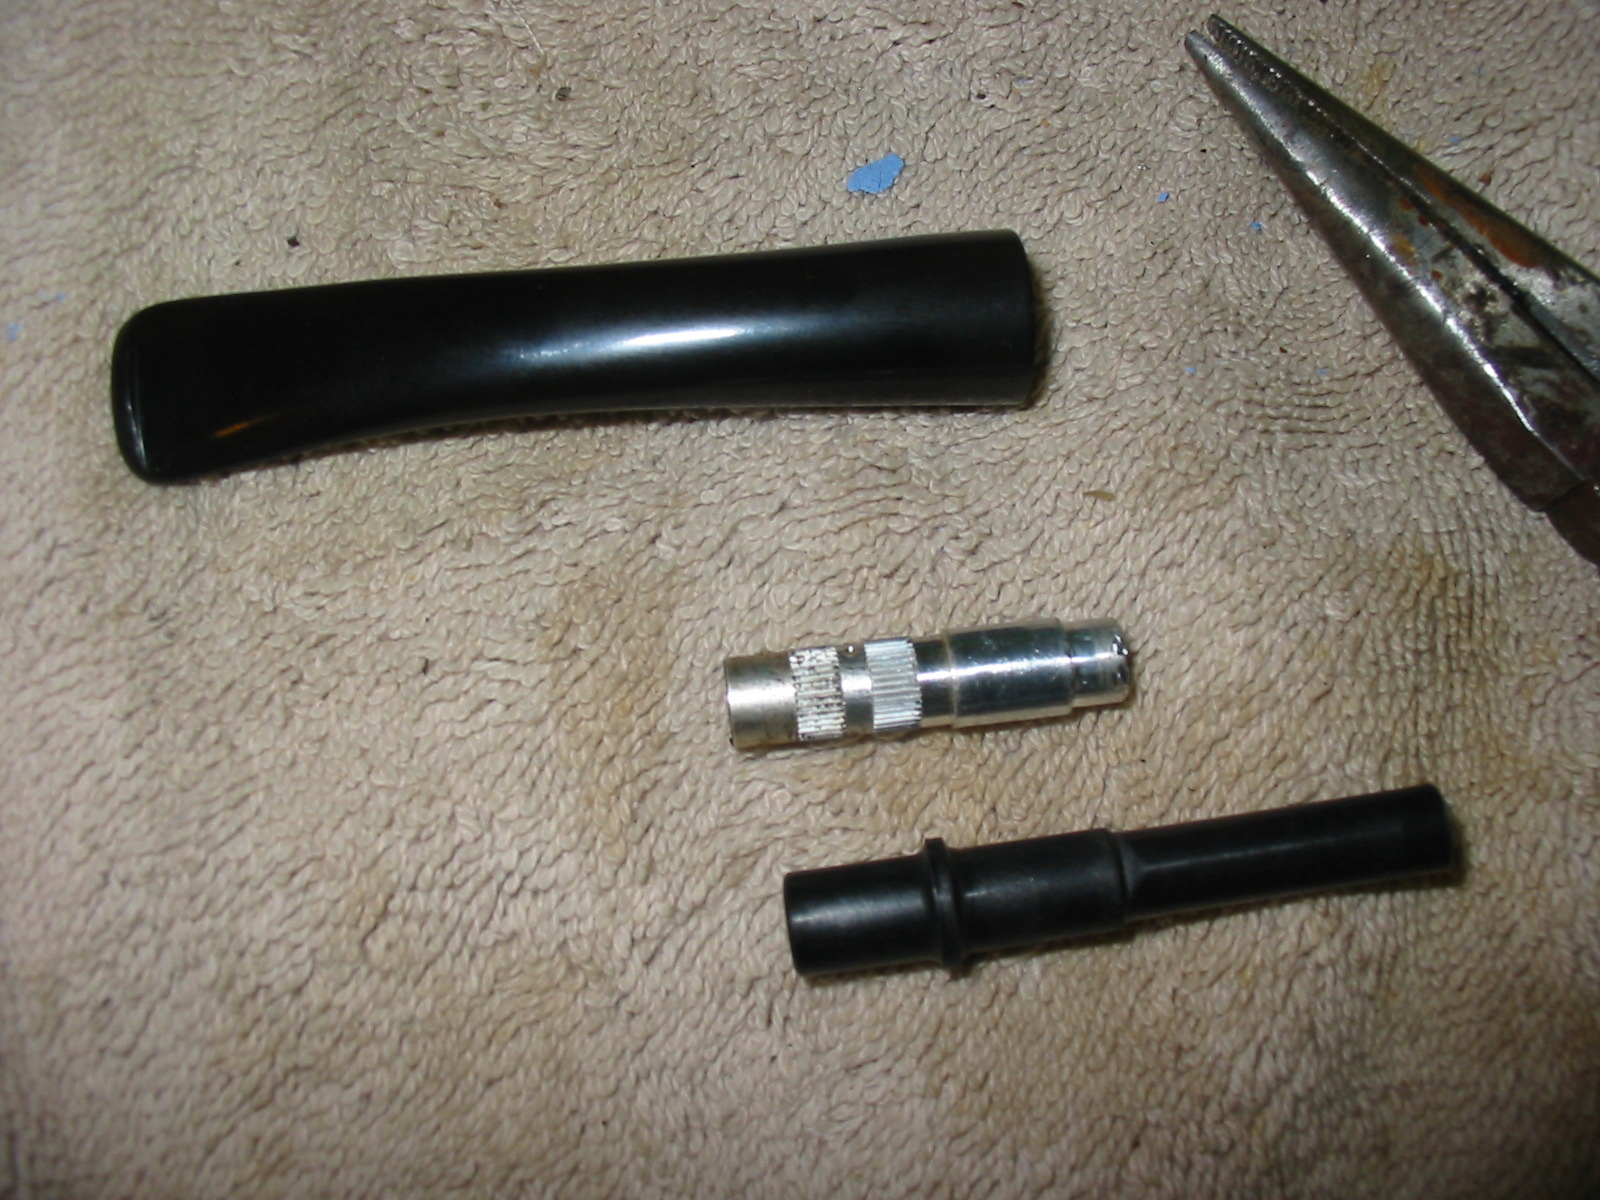
I used a needle file to smooth out the slight ridge at the end of the tenon. I sanded the tenon smooth to clean up the fit. I would further polish it once it was in place in the stem. I dribbled some Krazy glue on the threads and quickly turned it into the stem making sure that the alignment was correct.
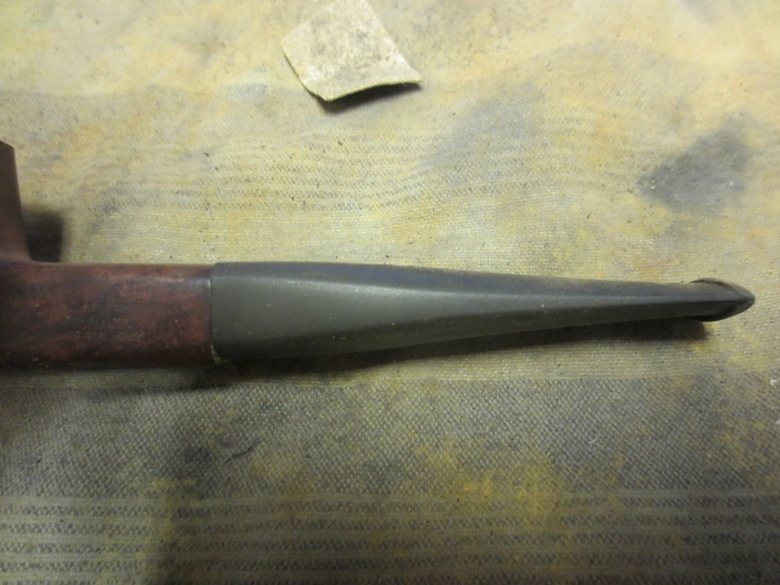
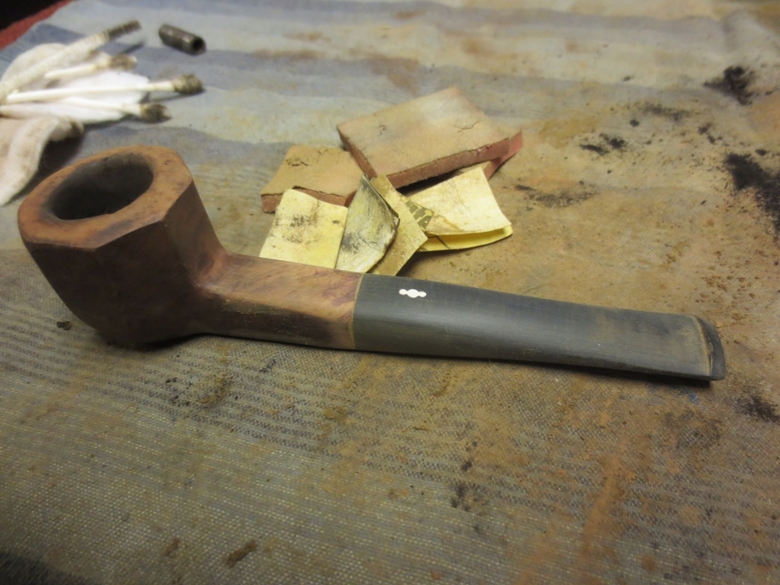
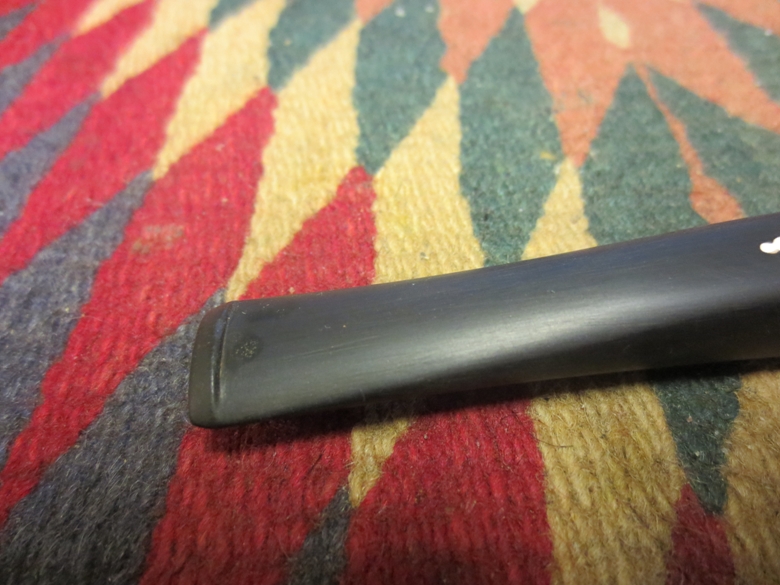
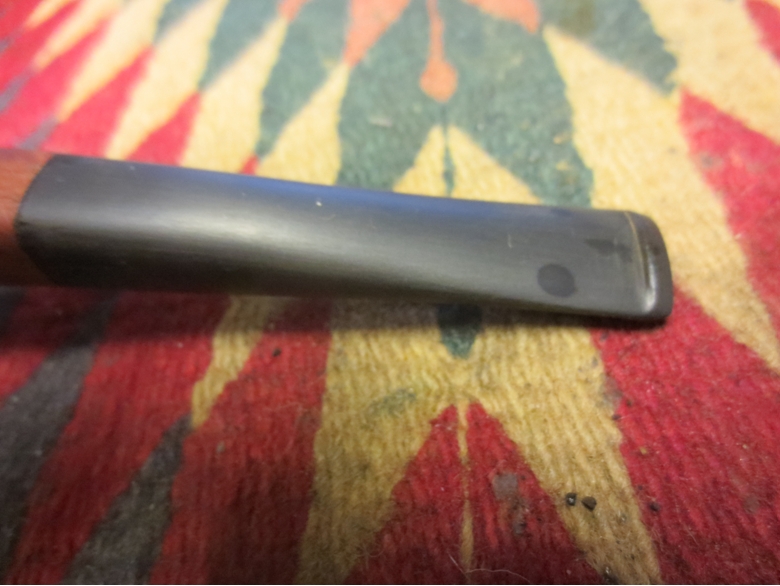
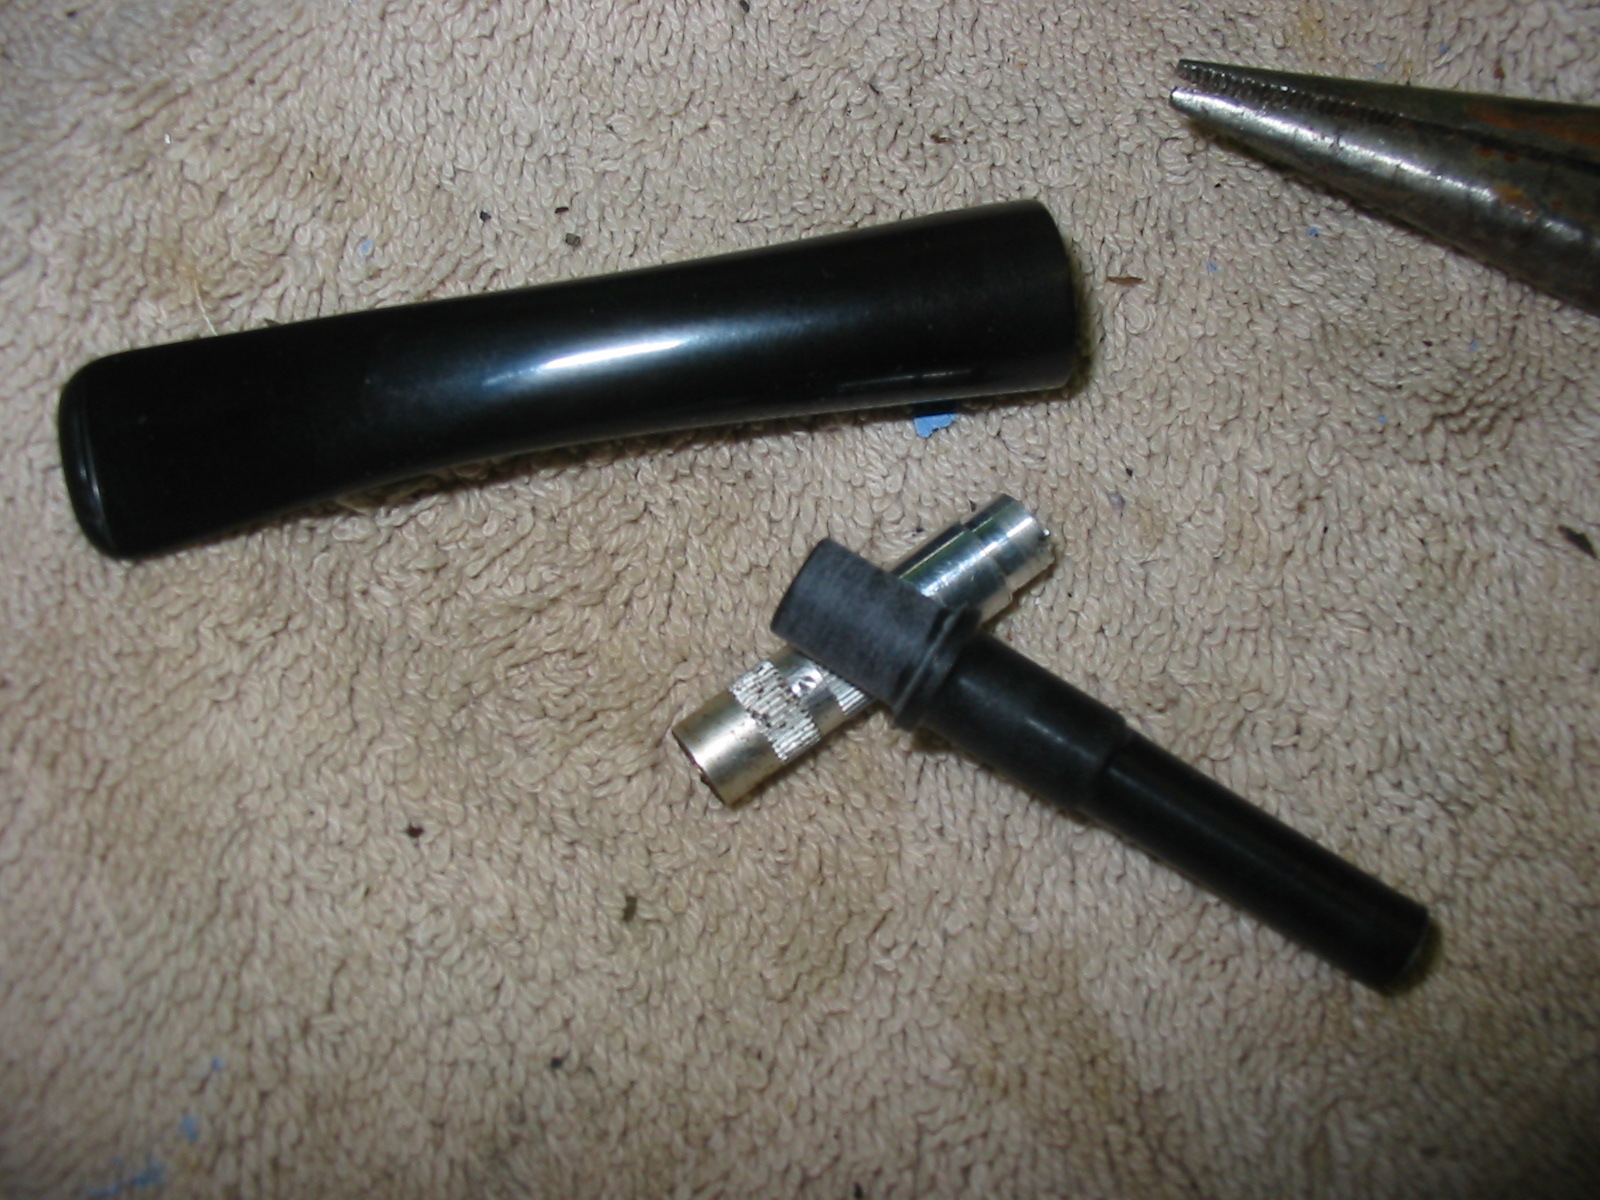
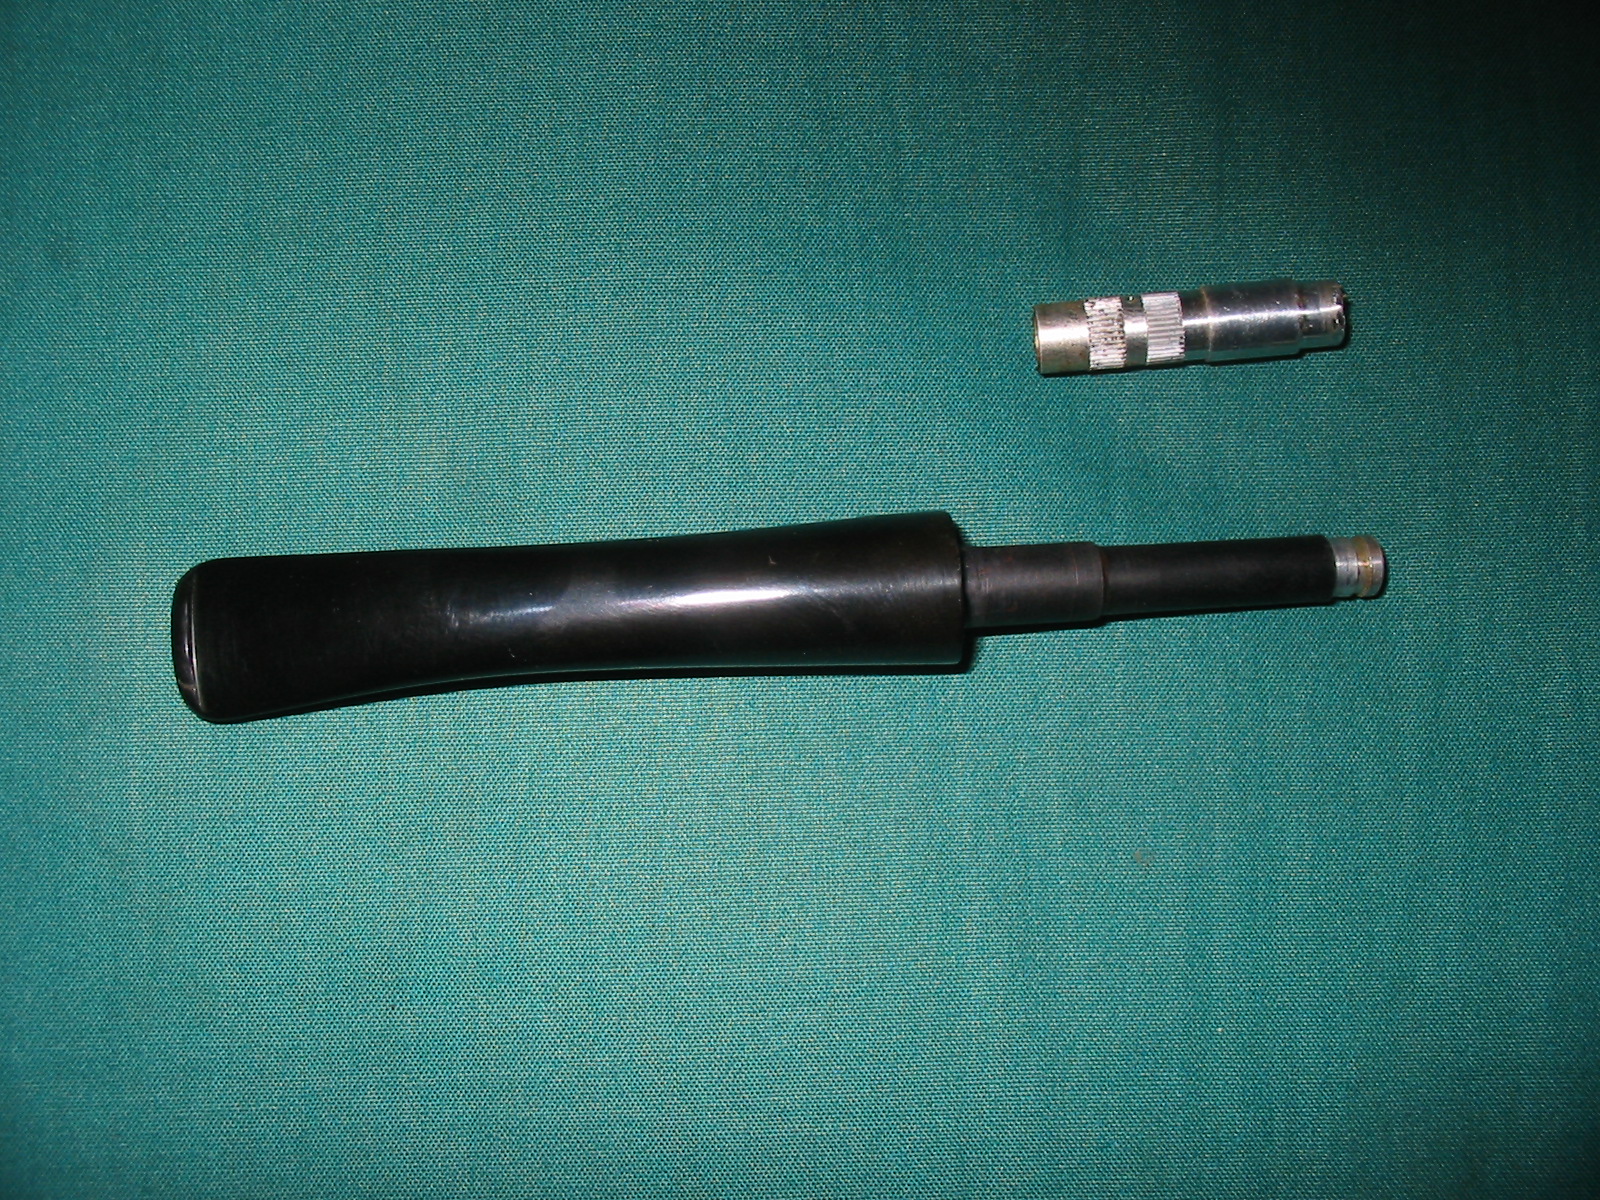
I took photos of the new tenon before I polished and finished it. The tenon is solid and the alignment in the shank is perfect. I set it aside to cure and turned my attention to the bowl.With the stem repaired I remembered that Ron had asked me to give him some background information on the brand so I paused at this point to gather the info. I turned to Pipephil’s site (http://www.pipephil.eu/logos/en/logo-s4.html) to get a quick overview. As expected the Scandia brand is a Stanwell second line. In this case the sandpits make it clear why it has this designation. I have included a screen capture of the pertinent section from the site.I turned then to the section on Pipedia that dealt with the Stanwell Sub-brands the Scandia pipe listed there (https://pipedia.org/wiki/Stanwell#Sub-brands_.2F_Seconds). I followed several other links listed on the article to check who designed this particular shape for Stanwell (https://pipedia.org/wiki/Stanwell_Shape_Numbers_and_Designers). Bas Stevens, a dear friend who know longer is living compiled a list of the shape numbers and their designer. The 263 was not listed there however, I remembered that the shape was actually a Stanwell shape 63. That shape was a Freehand with a plateau top and a saddle mouthpiece and was designed by Sixten Ivarsson.

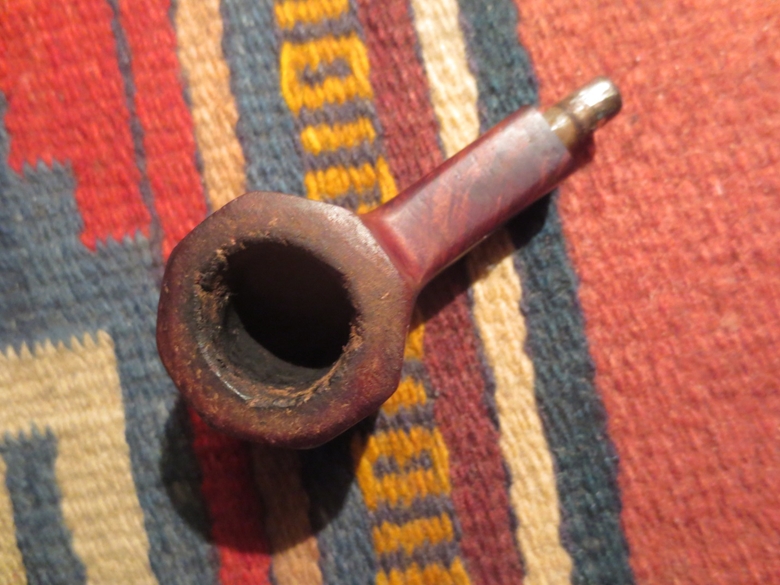
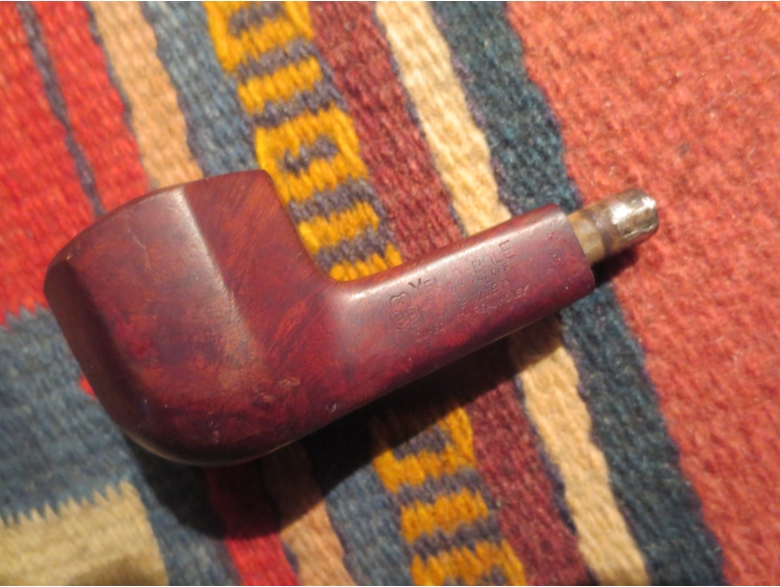
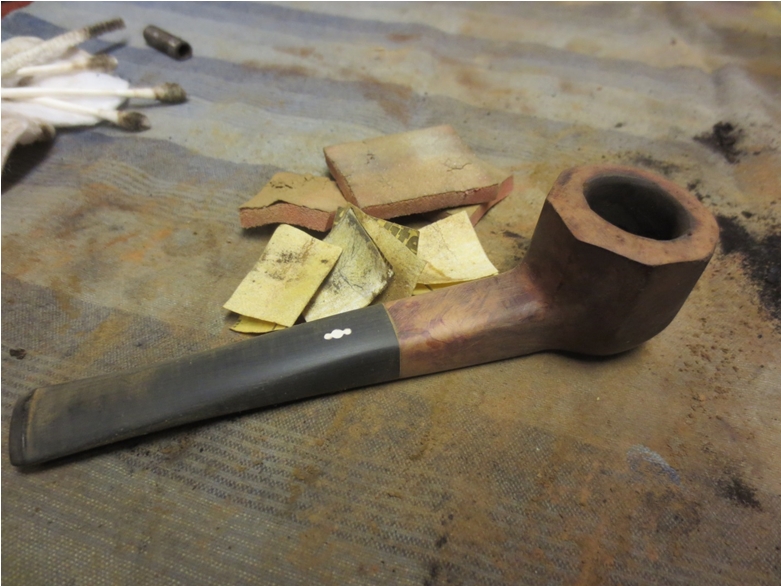
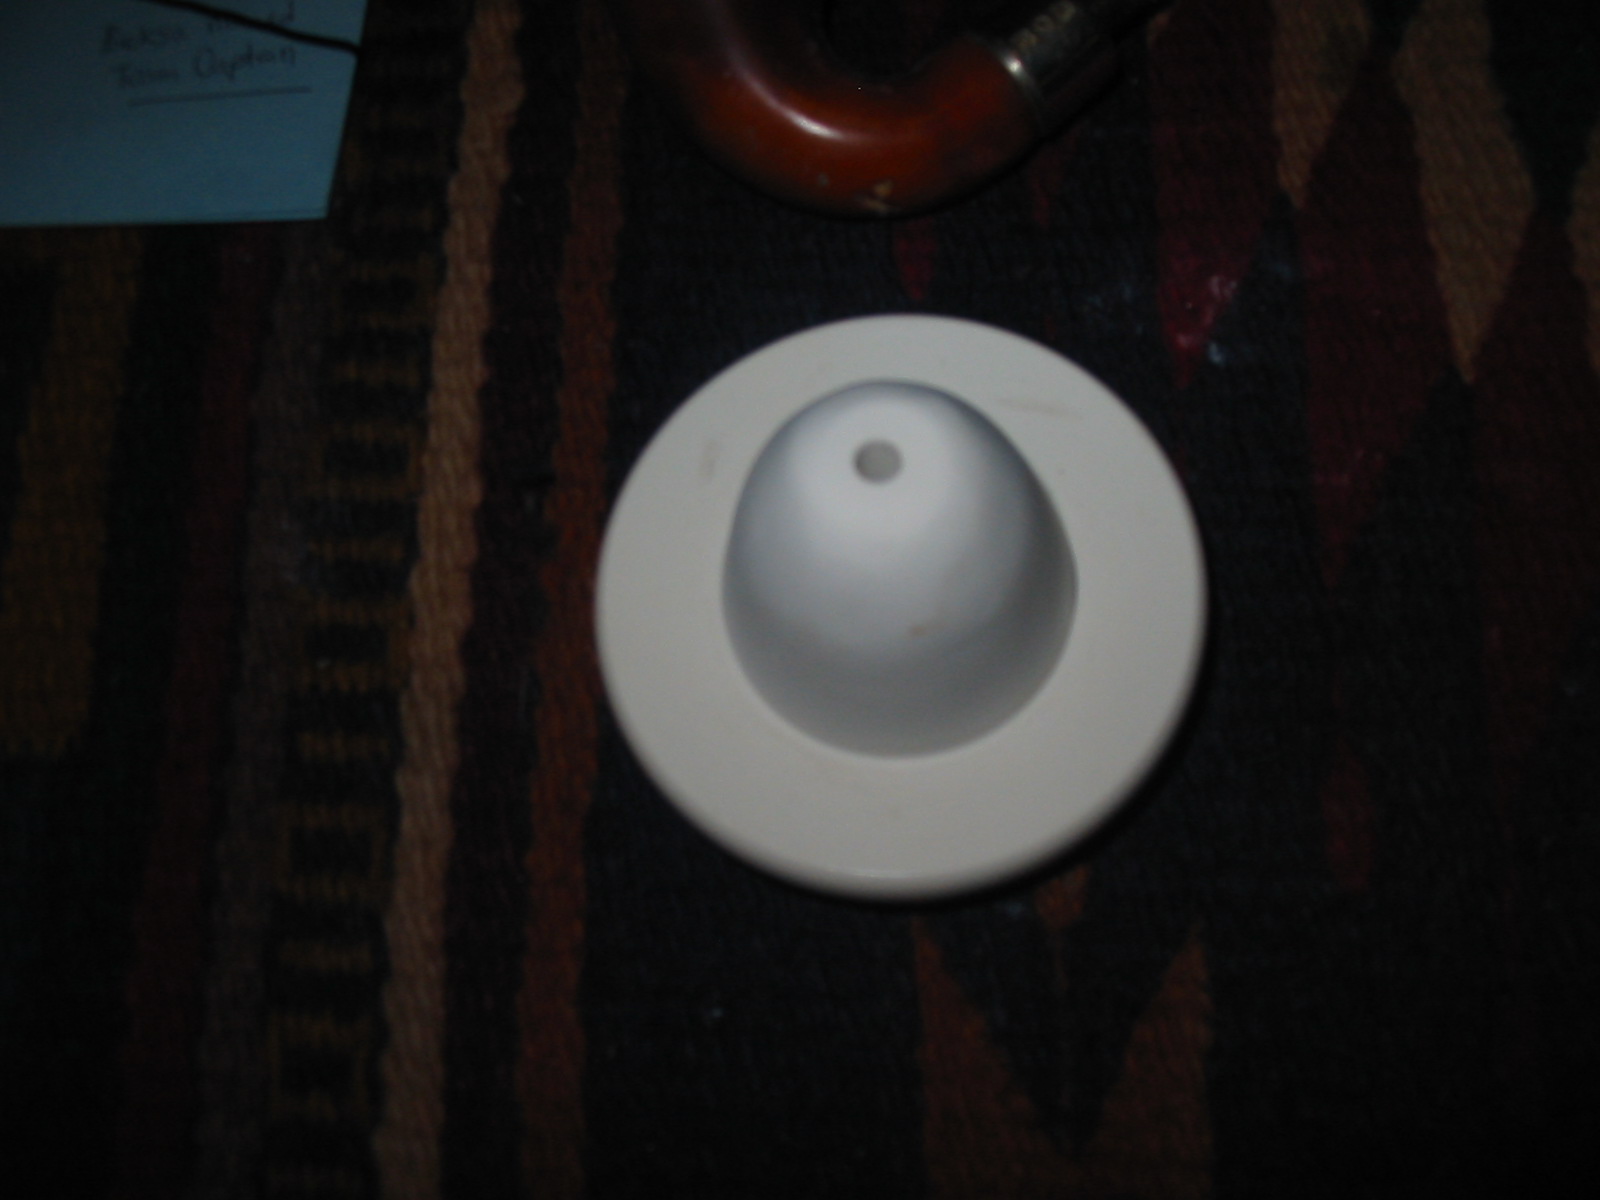
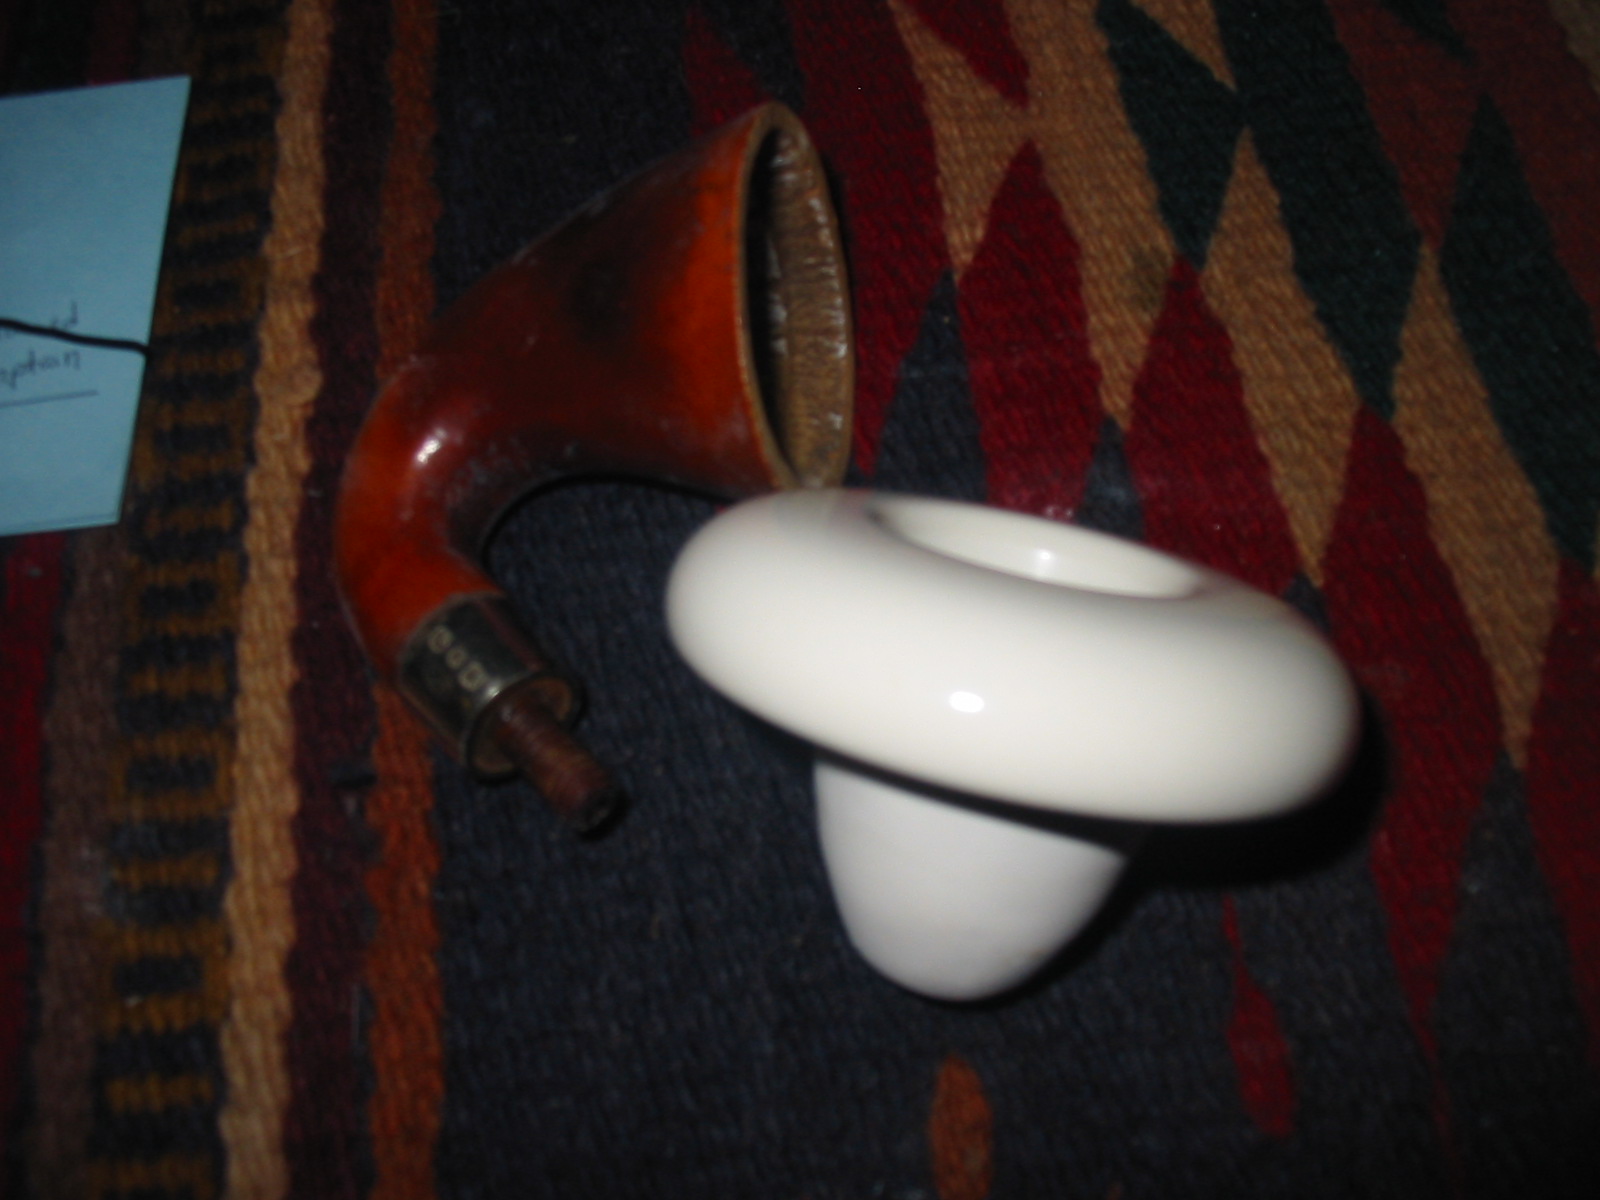
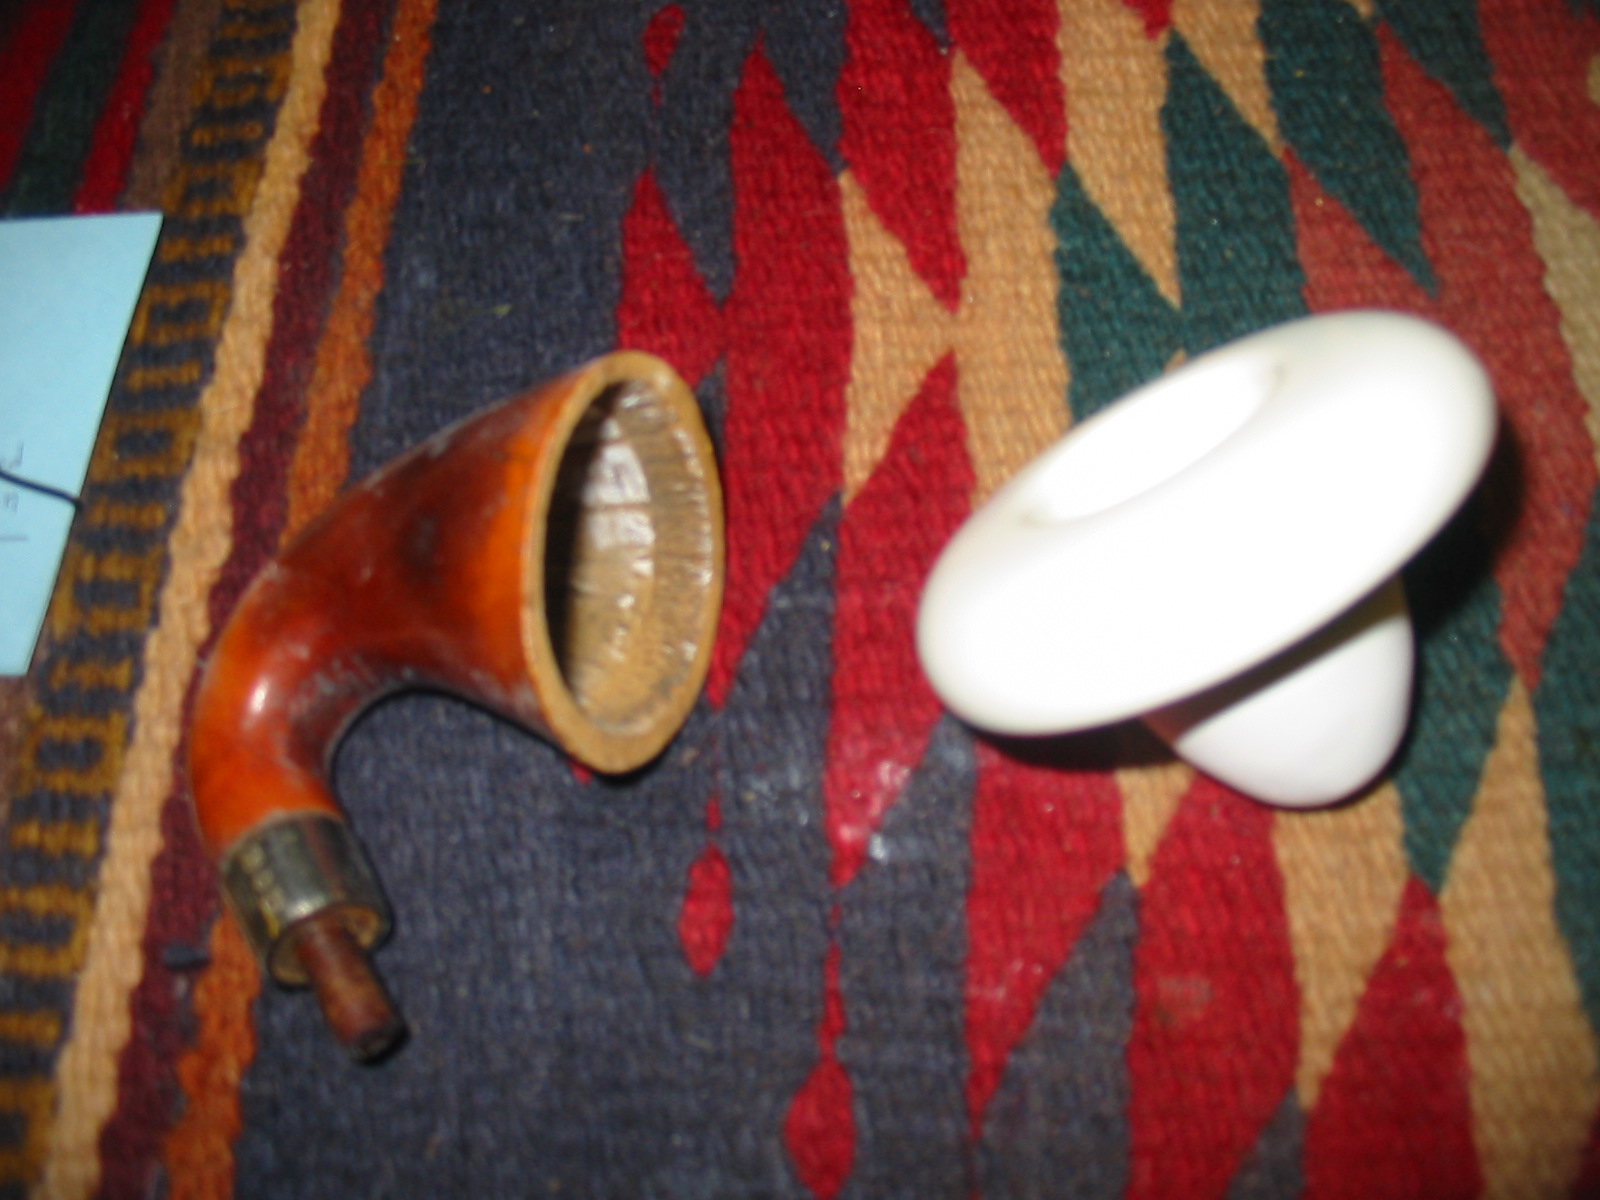
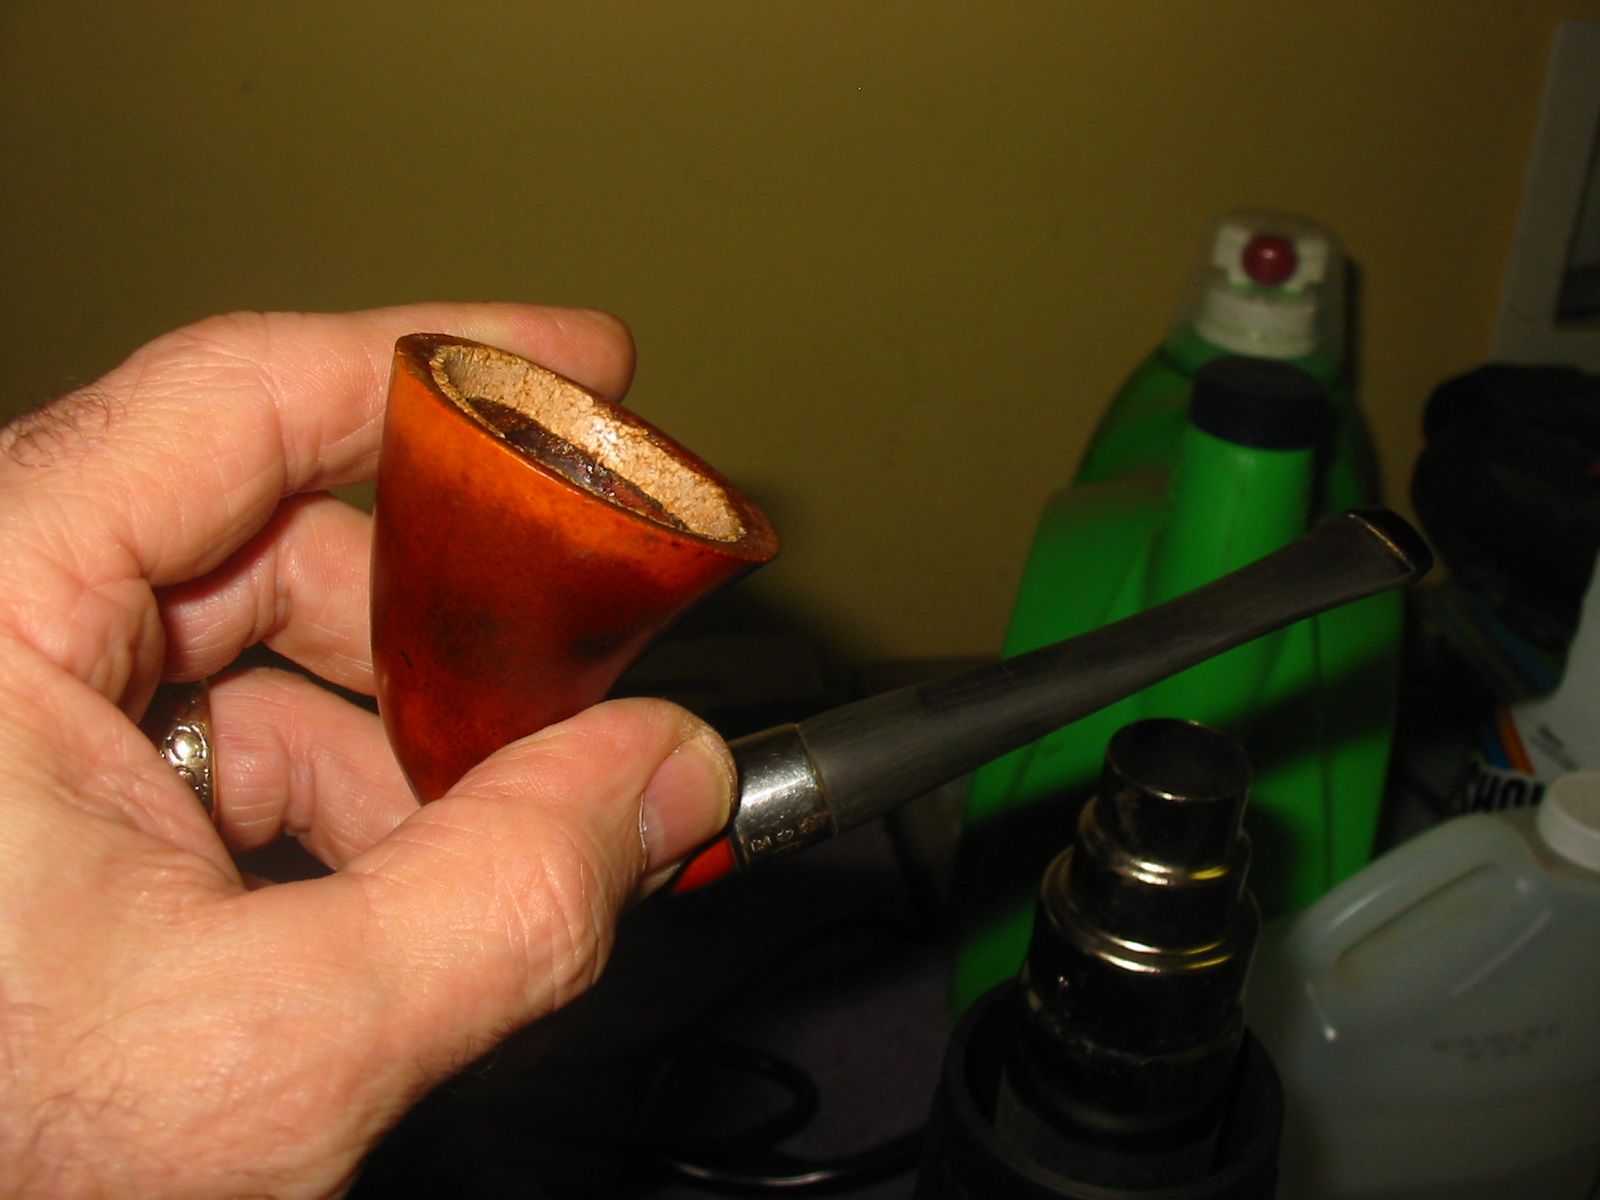
To verify that my memory was correct I did a quick Google search for images of the shape 63 for comparison purposes. I include the photo below with thanks to http://www.Bollitopipe.it for the image (https://www.bollitopipe.it/en/hand-made-polished-royal-guard/18983-stanwell-royal-guard-63-bark-top.html). You can see that the shape is identical so that it is clear that the 263 and the 63 are the same shapes.With the background information gathered and summarized I turned my attention to the cleanup of the bowl. I reamed the crumbling and uneven cake out of the bowl. I left a very thin cake on the walls of the bowl. I cleaned up the small bits toward the bottom of the bowl with a Savinelli Fitsall Pipe knife. I finished by smoothing out the slight cake on the walls with a piece of 220 grit sandpaper wrapped around some doweling. 
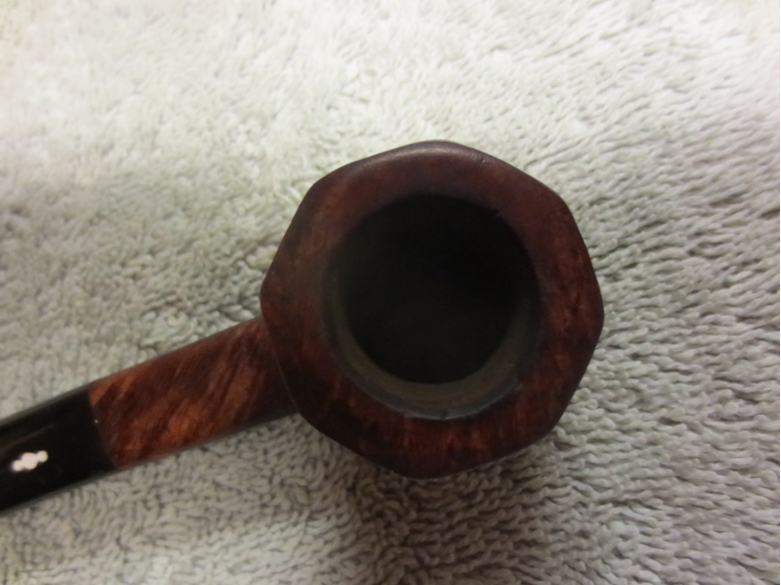
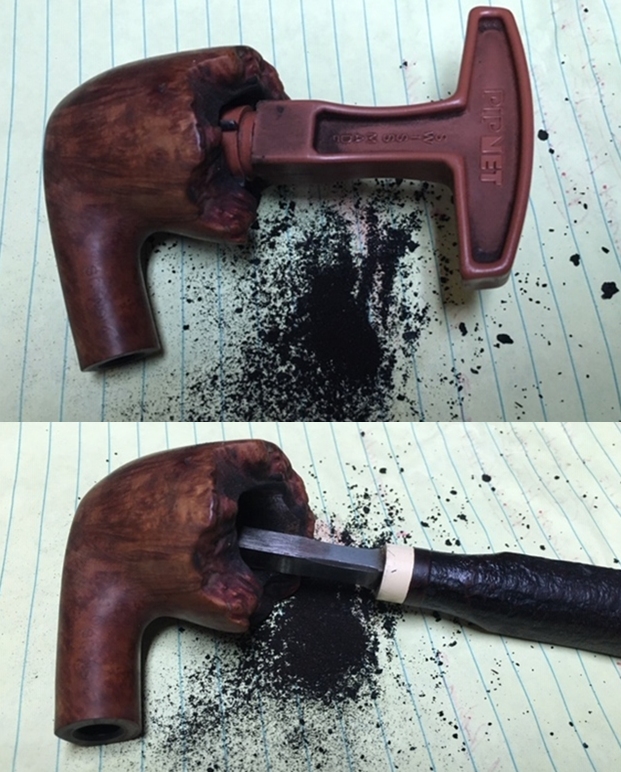
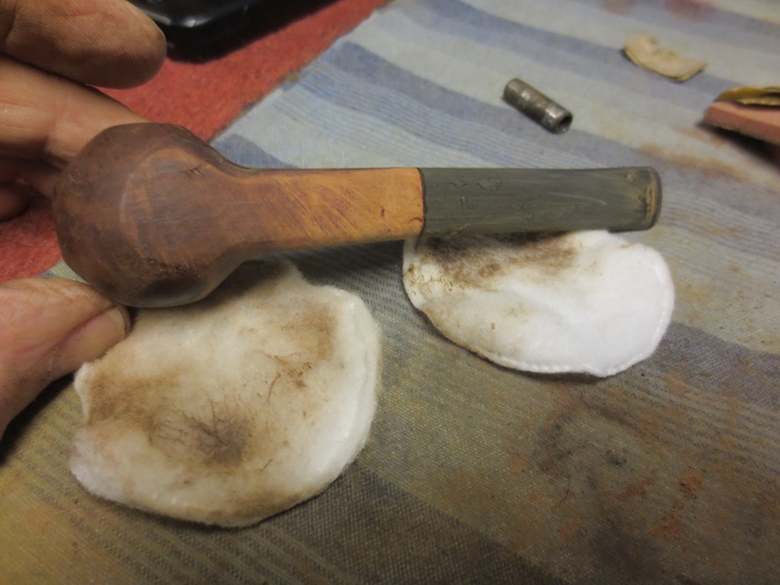
I a soft bristle brass brush to clean off the debris in the plateau finish on the rim top. I was able to remove most of the darkening at the same time. While not flawless it looks significantly better.
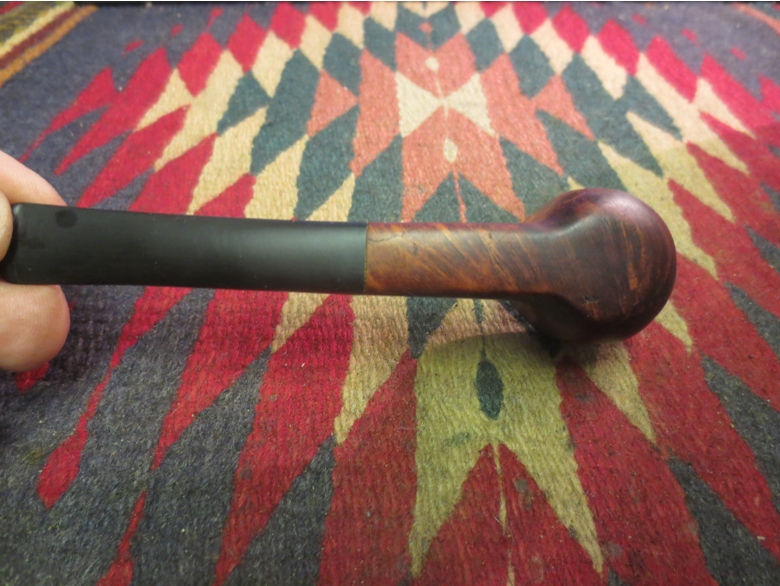
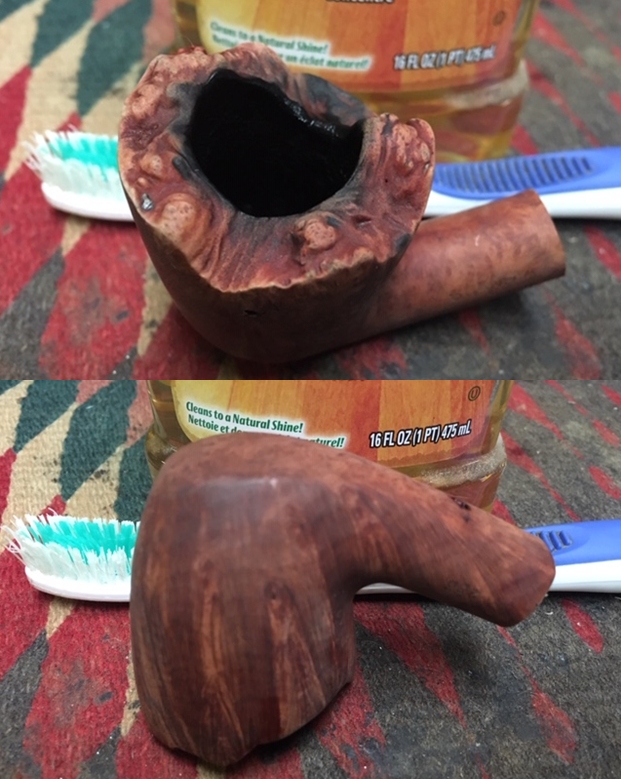
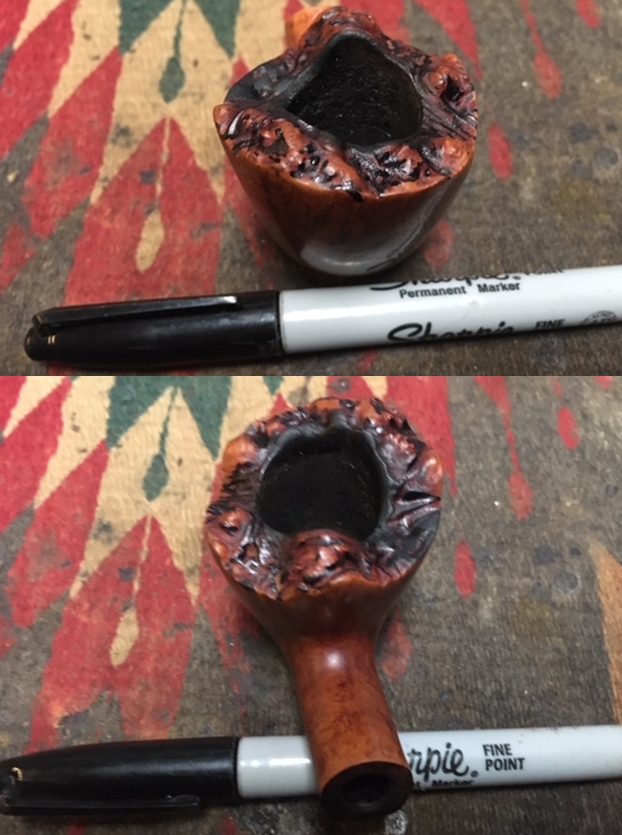
To clean the surface of the briar and remove the oils and dirt I scrubbed the briar with a tooth brush and undiluted Murphy’s Oil Soap. I rinsed off the bowl under warm water and dried it off with a soft cotton cloth. The finish looks much better with stunning grain. The sandpits are quite visible now that the pipe is clean. I repaired the sandpits with a few drops of Krazy Glue. I slightly overfill the pit with the glue as it shrinks as it cures. Once the repairs cured I sanded them with 220 grit sandpaper to blend them into the rest of the bowl. I polished the entire bowl with 400 grit wet dry sandpaper in preparation for the micromesh polishing. 
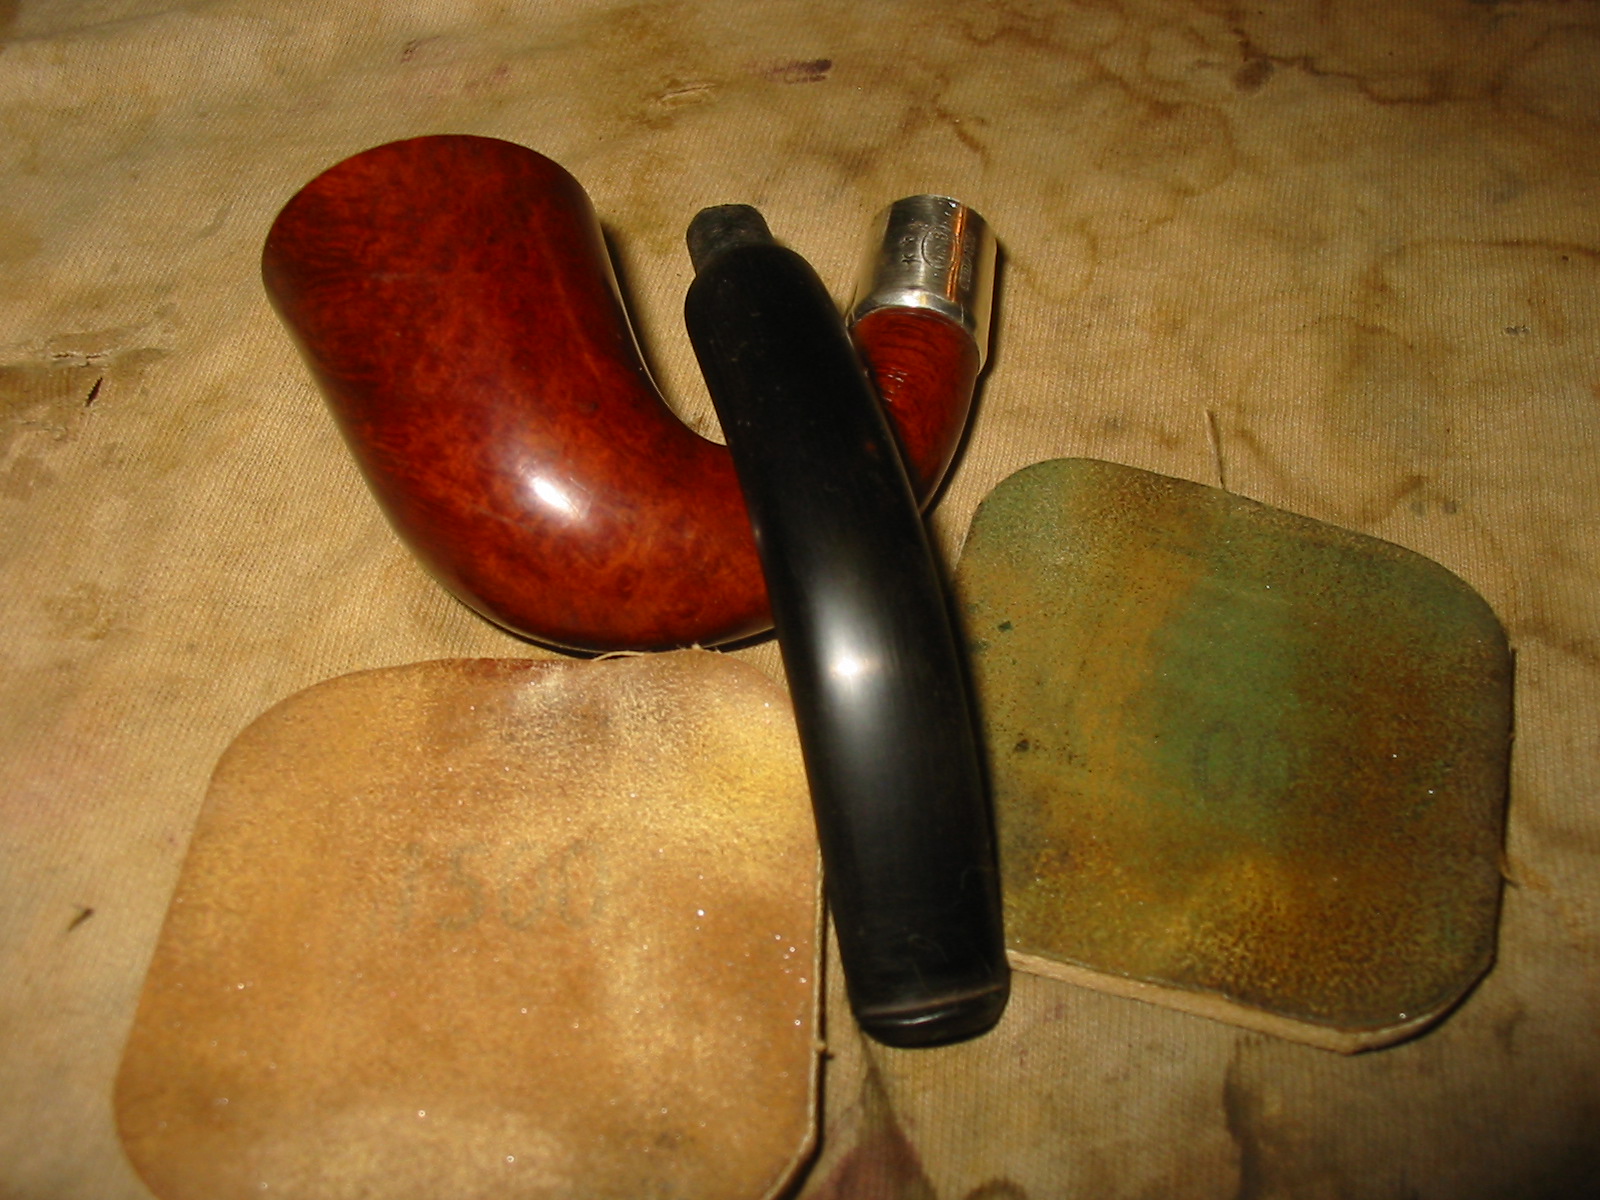
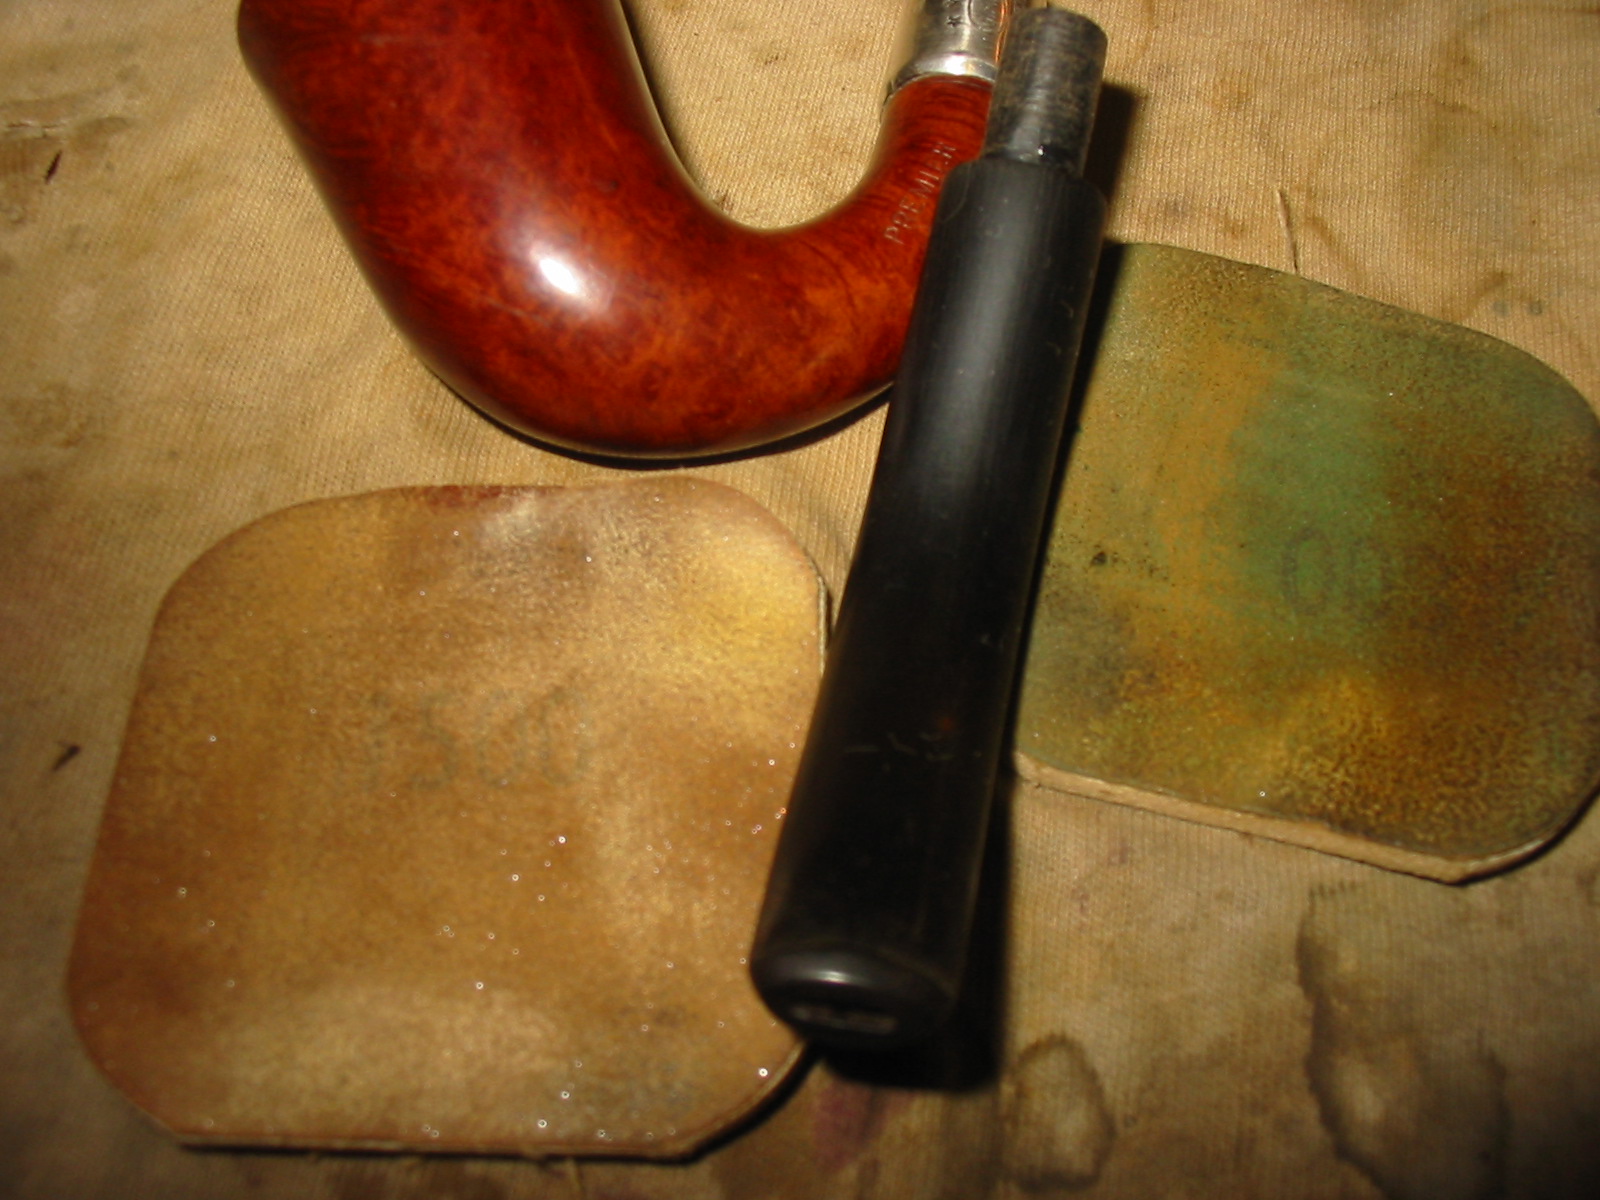
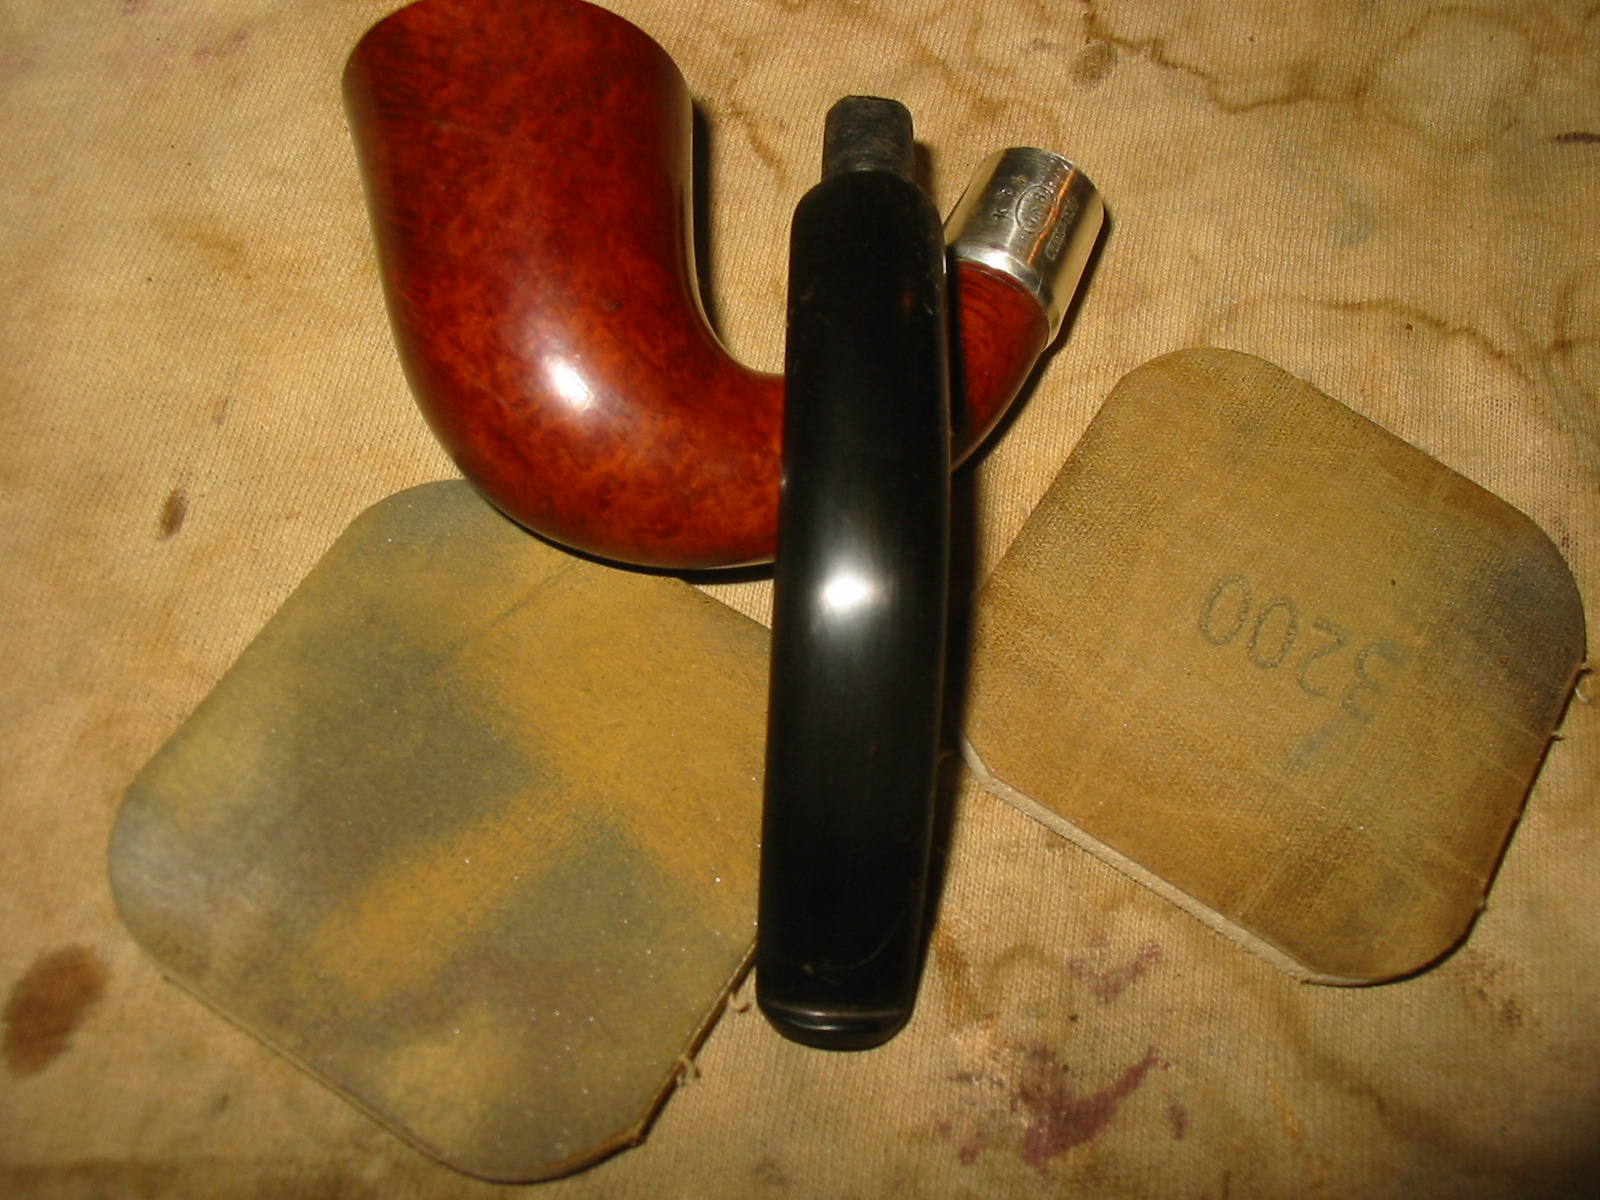
I polished the briar with micromesh sanding pads – wet sanding with 1500-12000 grit pads. After each pad I wiped the bowl down with a damp cloth to remove the sanding dust. The photos tell the story. I used a black Sharpie pen to darken in the deep grooves on the plateau as it would help to mask the darkening on the right and left side of the rim top and it would highlight and give depth to the finish. 
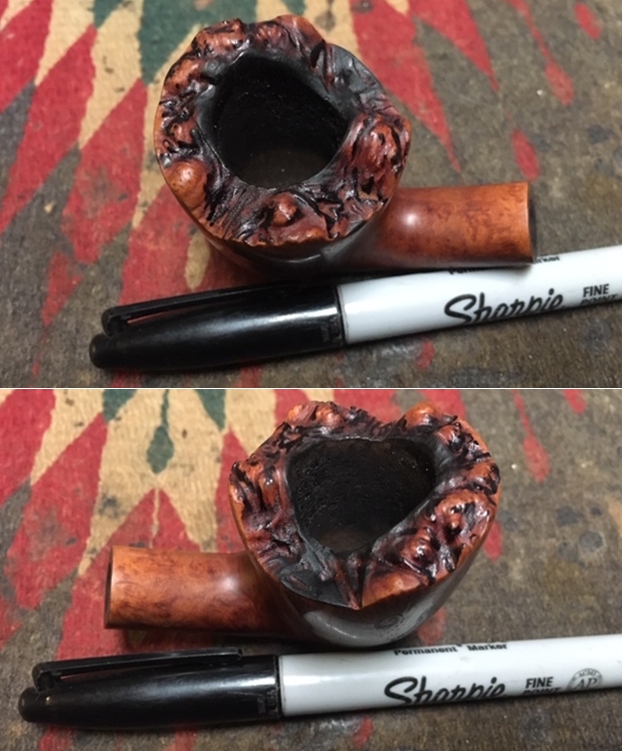
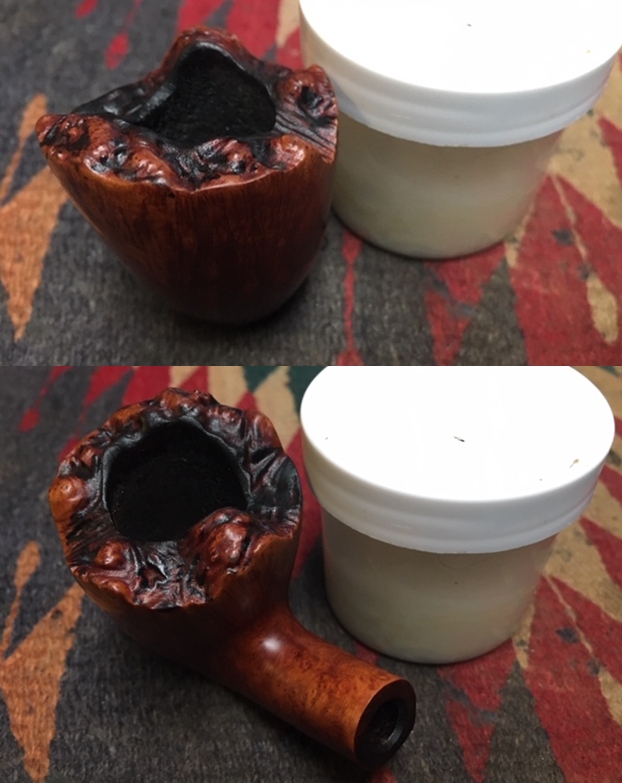
I rubbed the bowl down with Before & After Restoration Balm. I worked it into the surface of the plateau rim top and the rest of the briar with my fingertips and a horsehair shoe brush to clean, enliven and protect it. I let the balm sit for a little while and then buffed with a cotton cloth to raise the shine. I really like watching the Balm do its magic and bring the briar alive. 
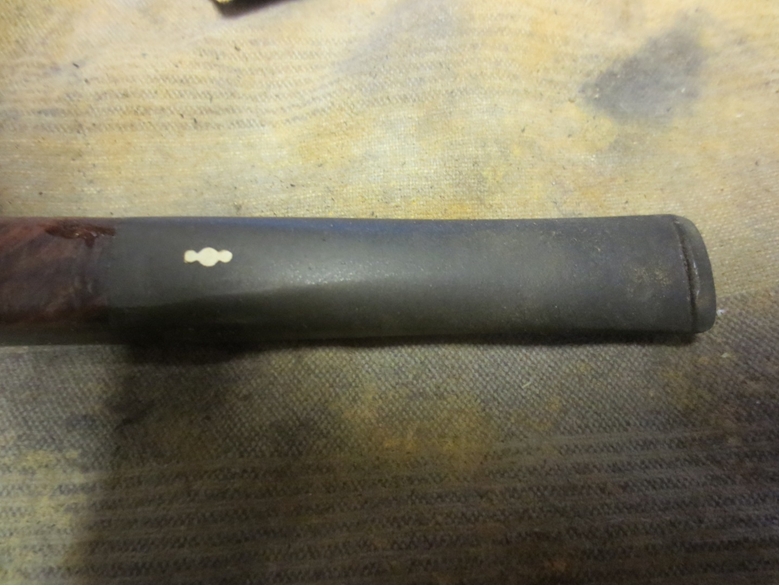
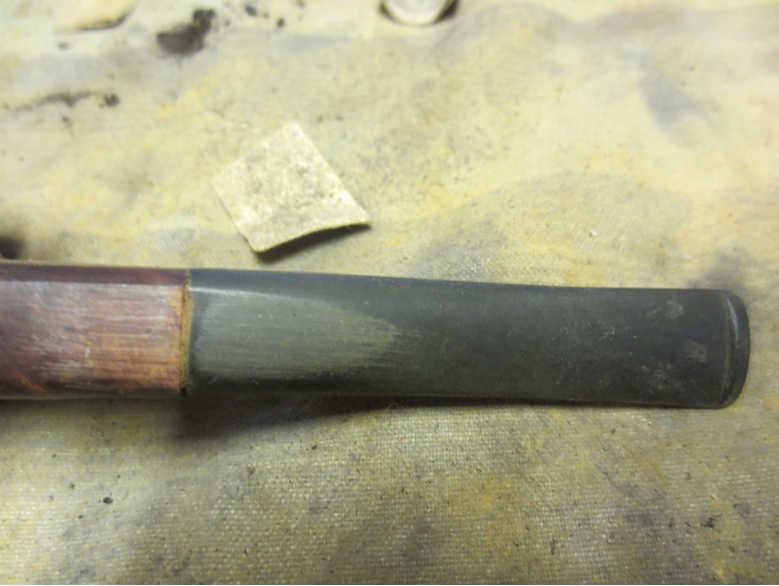
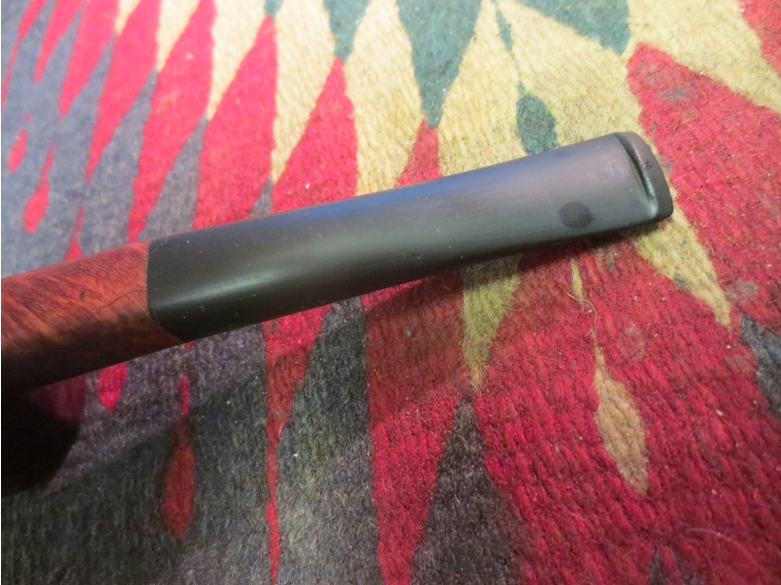
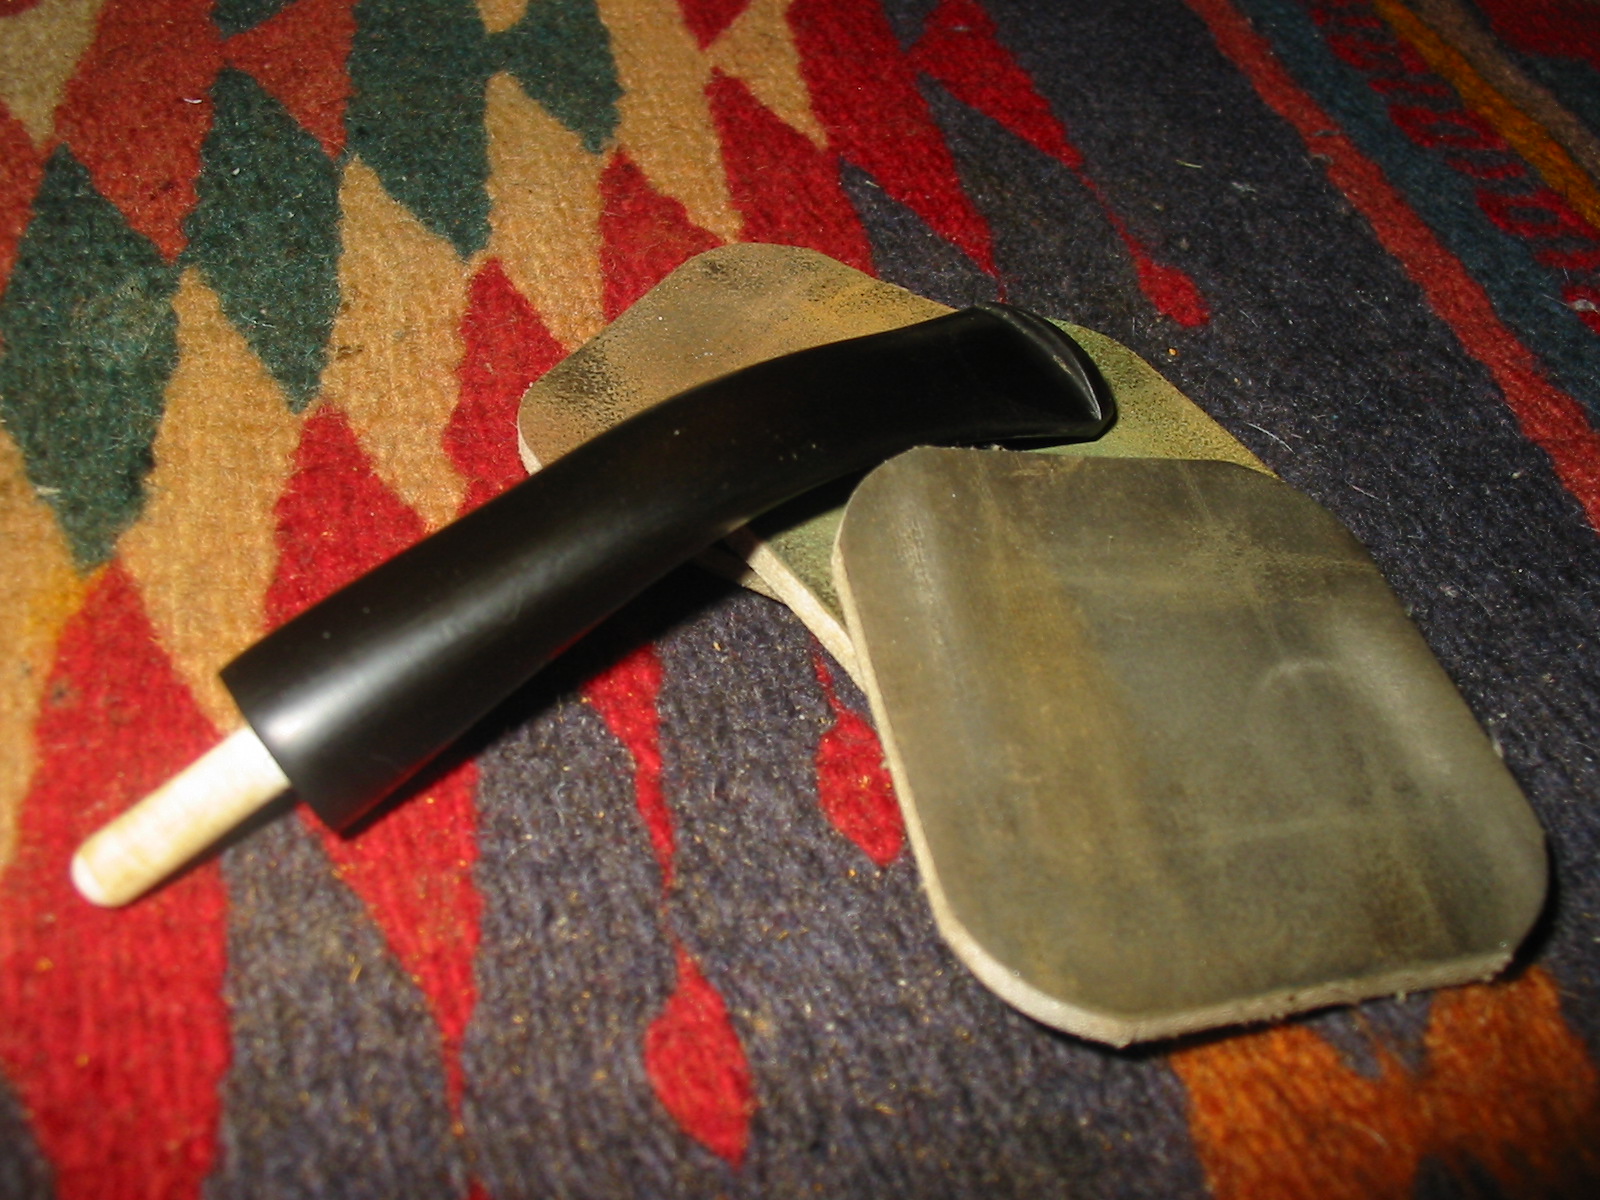
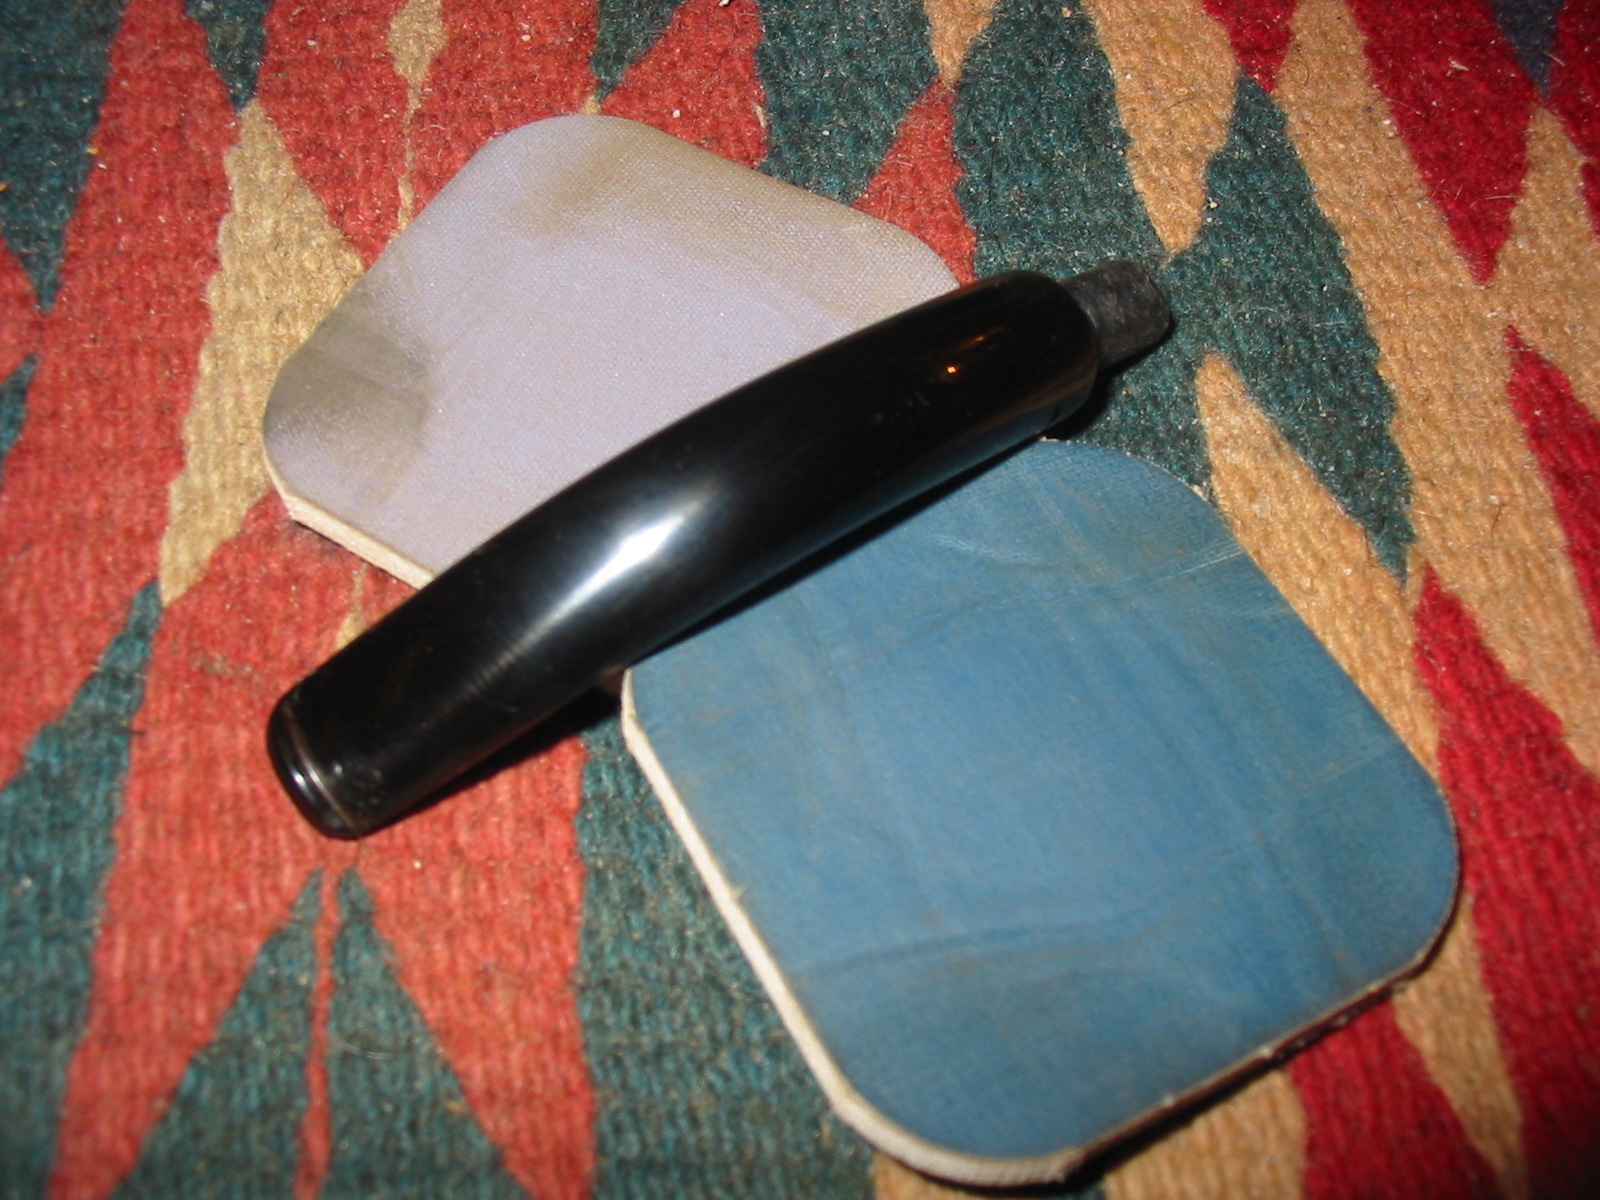
With the bowl finished I turned my attention to polishing the stem. I sanded the surface of the stem with 220 grit sandpaper and 400 grit wet dry sandpaper to remove the remaining oxidation in the vulcanite and the last of the light tooth chatter.  
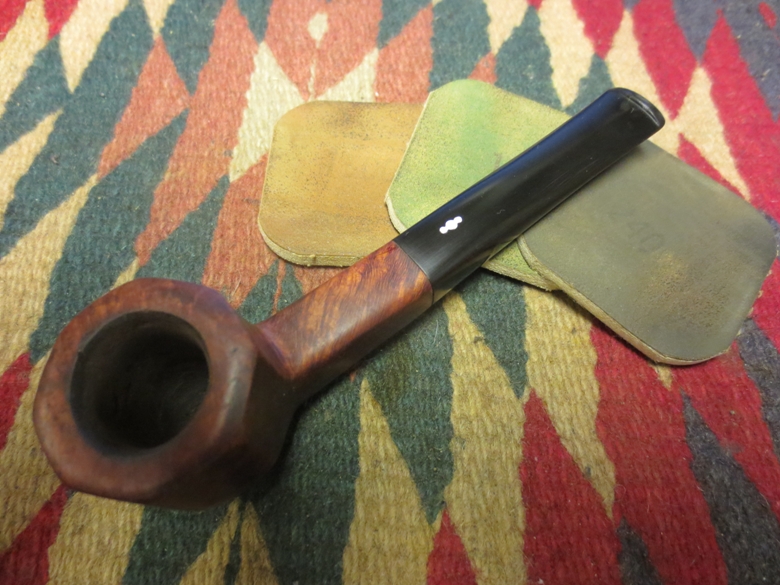
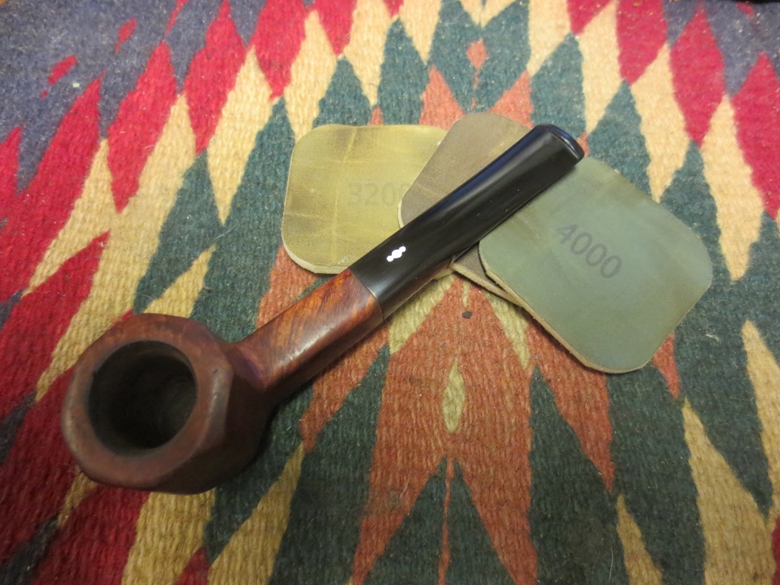
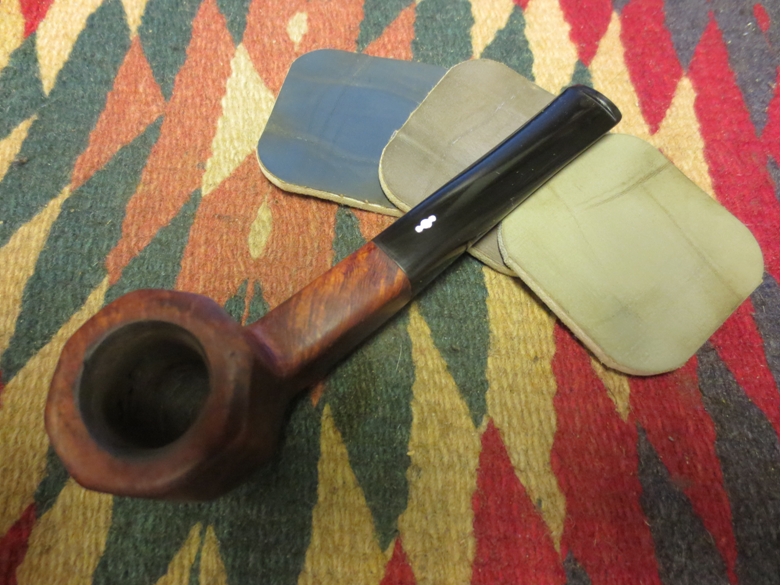
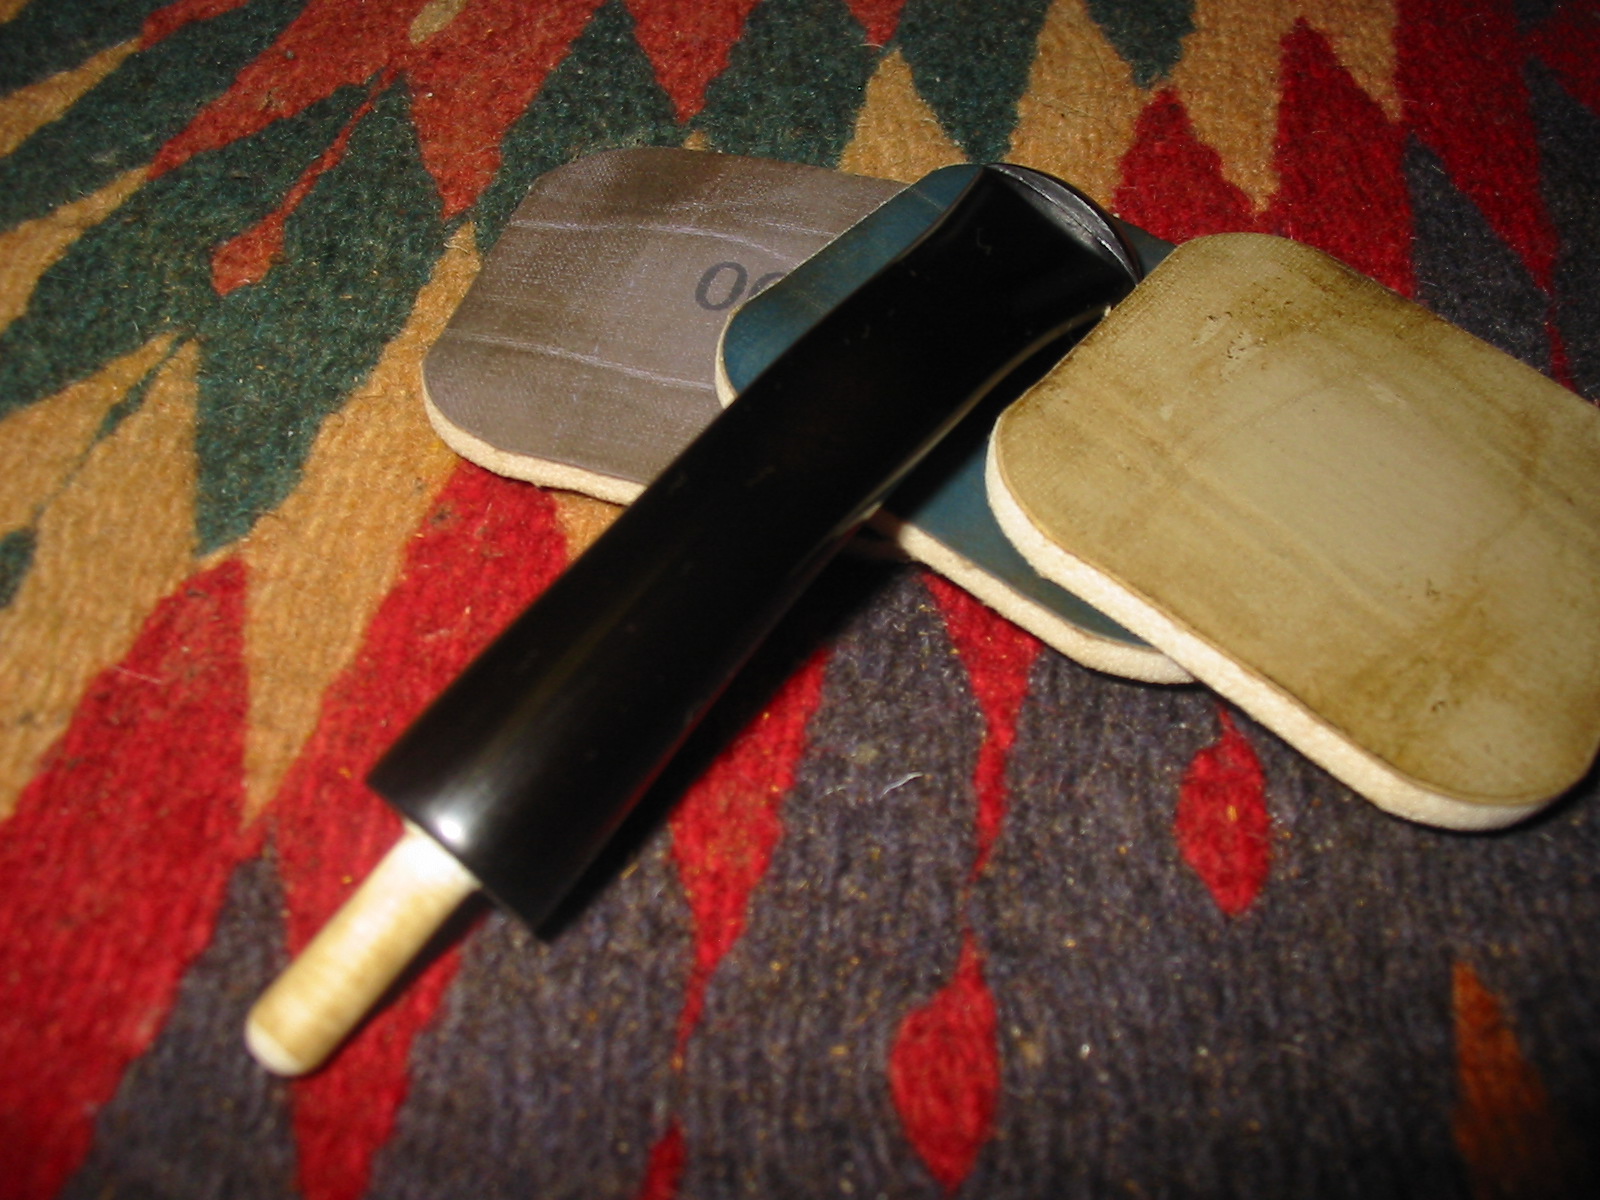
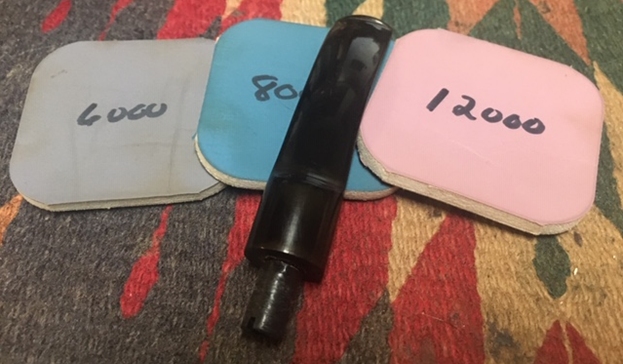
I polished the stem with micromesh sanding pads – wet sanding with 1500-12000 grit pads. I wiped the stem down after each sanding pad with Obsidian Oil. 
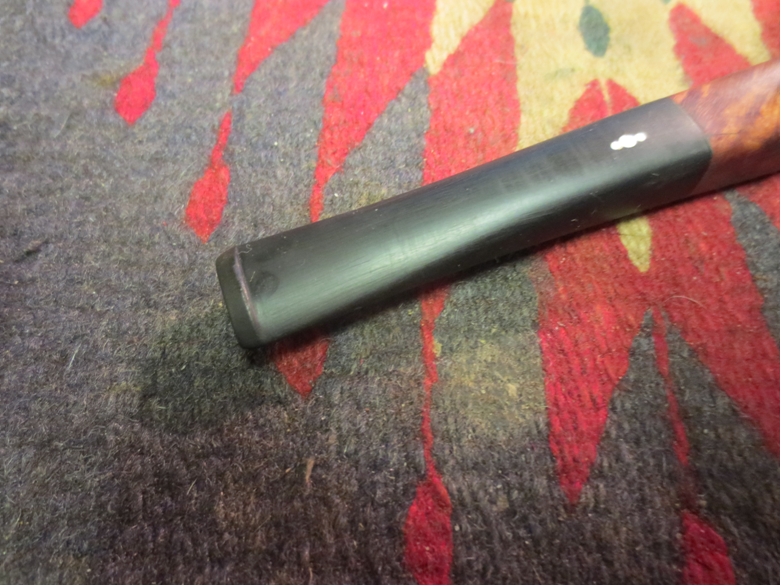
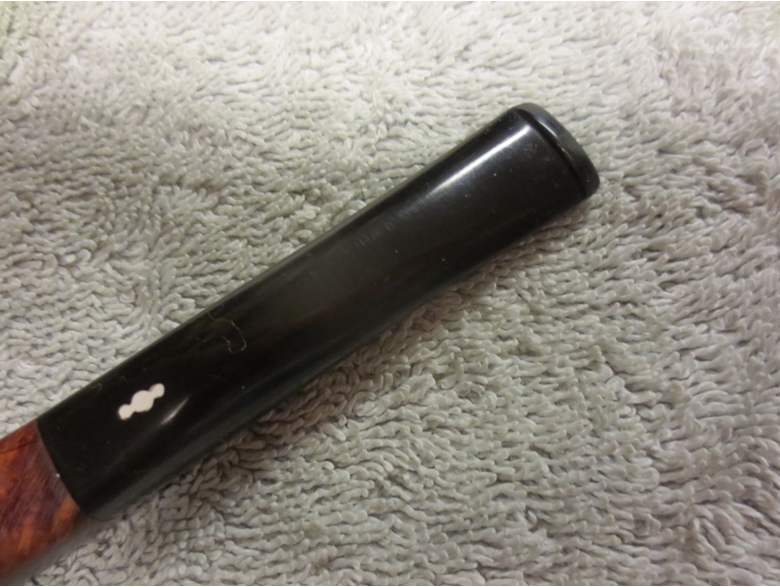
I used some liquid paper to touch up the “SC” on the left side of the stem. I applied it and let it dry and cure. Once it had cured I scraped the excess off with a tooth pick. The “SC” looks very good.  I polished it with Before & After Pipe Stem Polish – both Fine and Extra Fine. Once I had finished the polishing I gave it a coat of a new product I am experimenting with from Briarville Pipe Repair. It is called “No Oxy Oil” and it is made to protect the stem from oxidizing. I set it aside to dry.
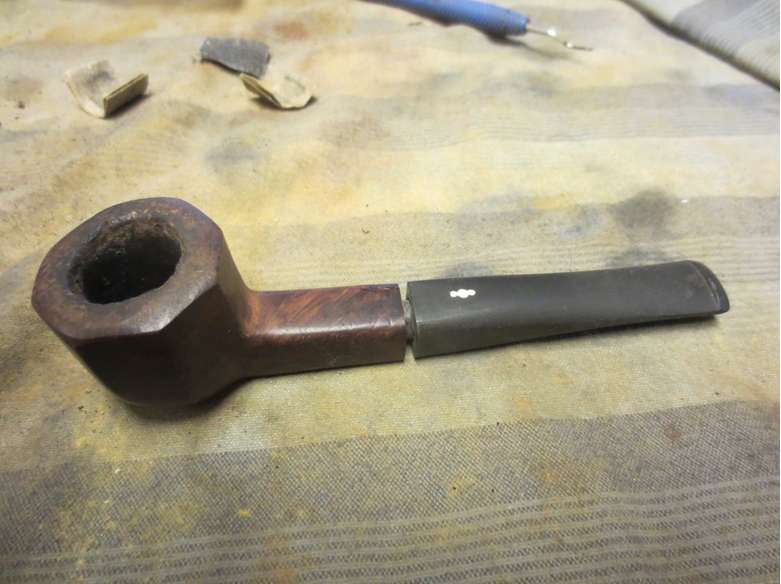
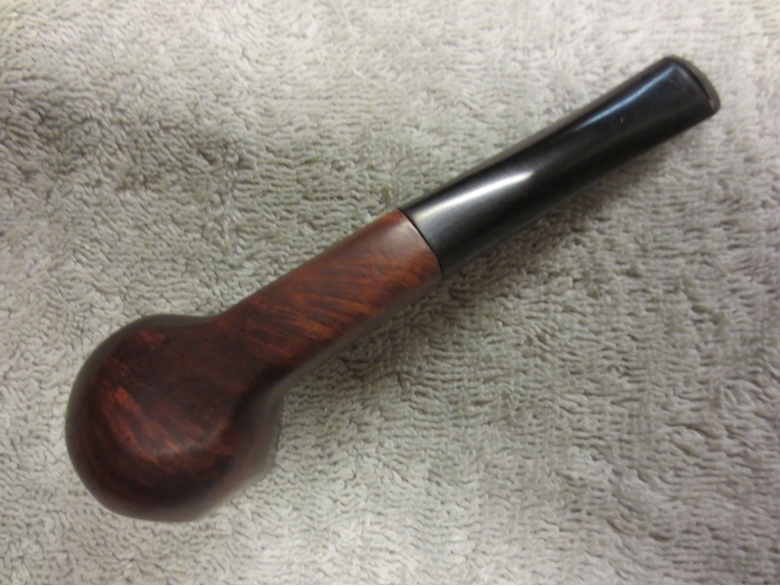
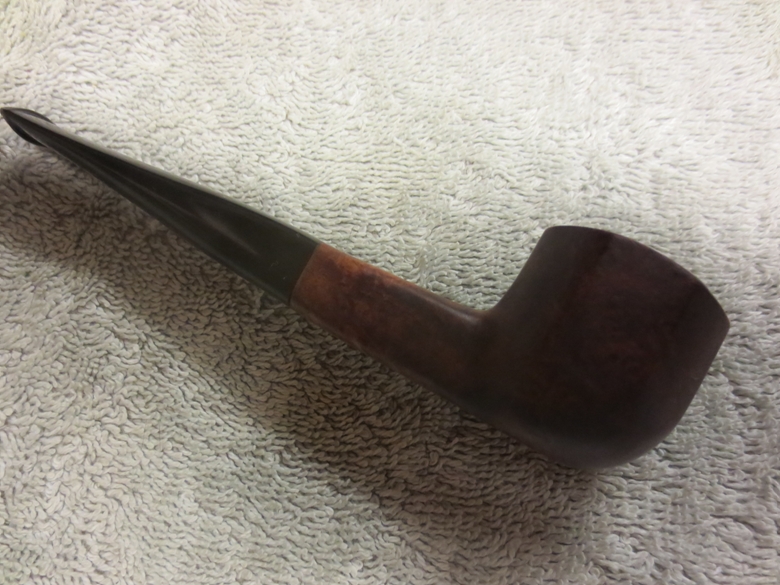
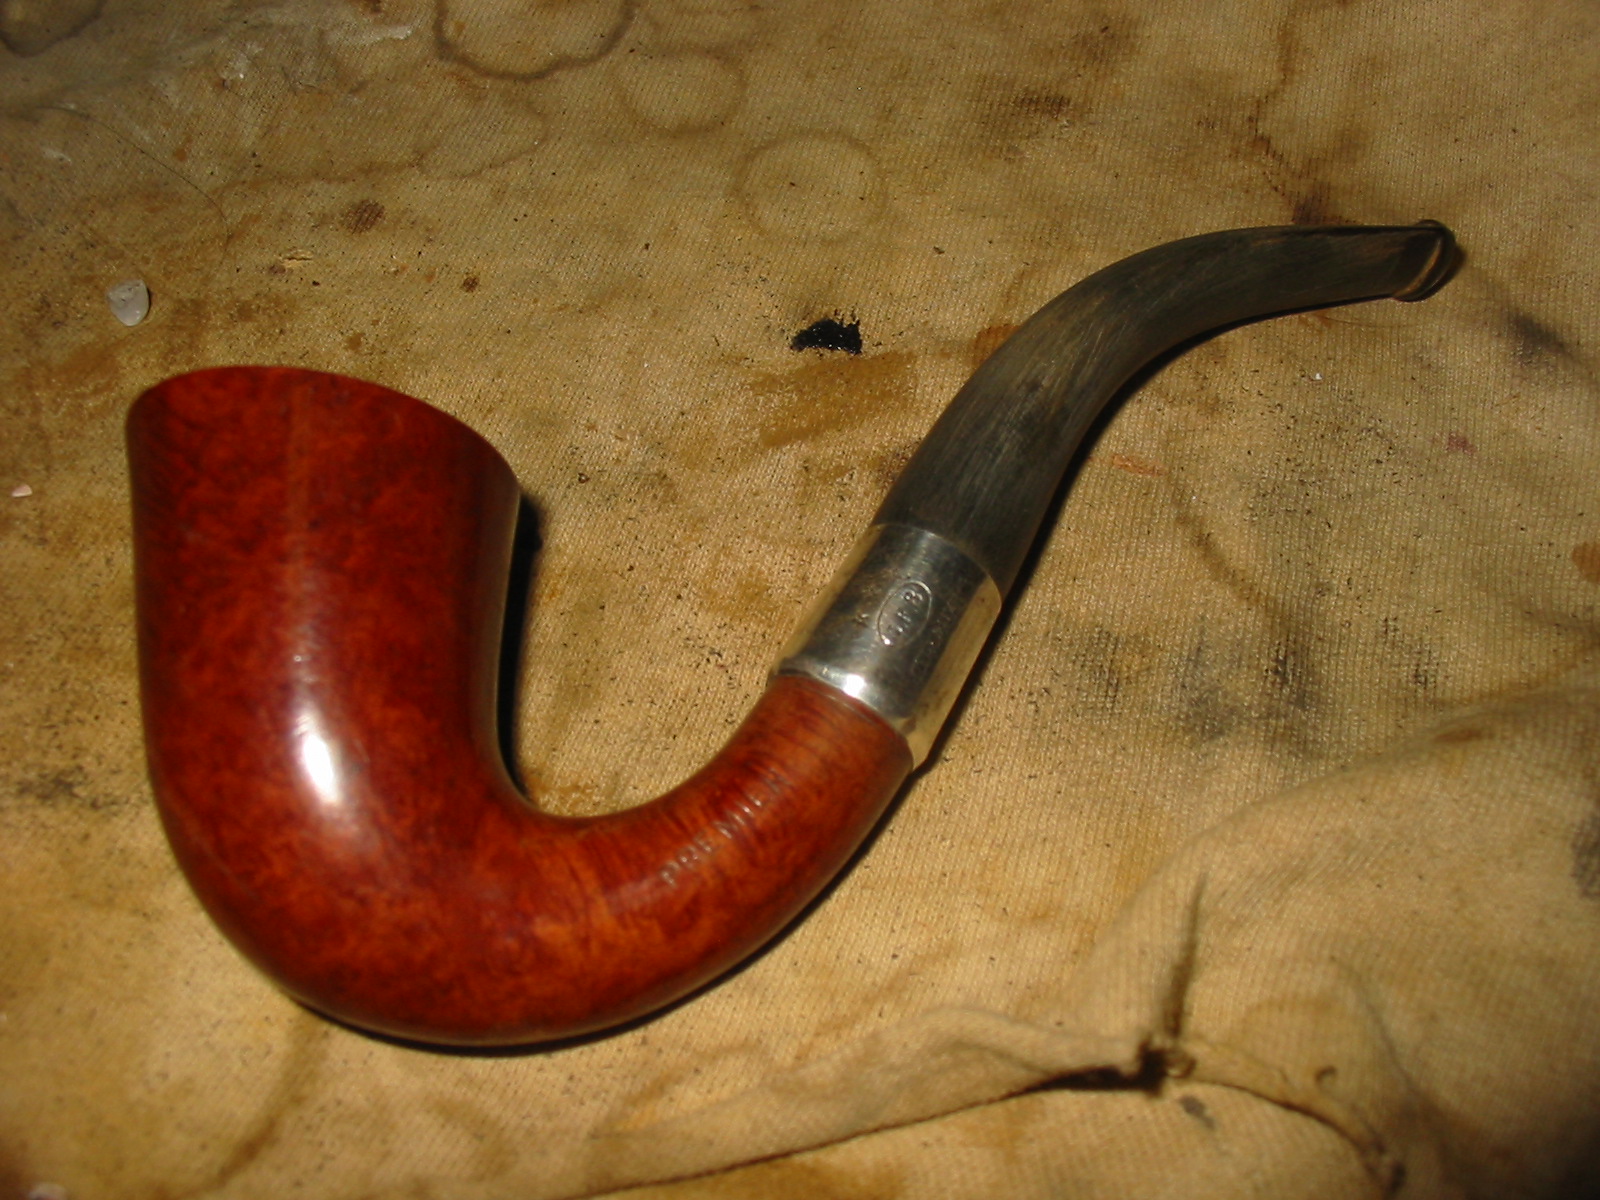
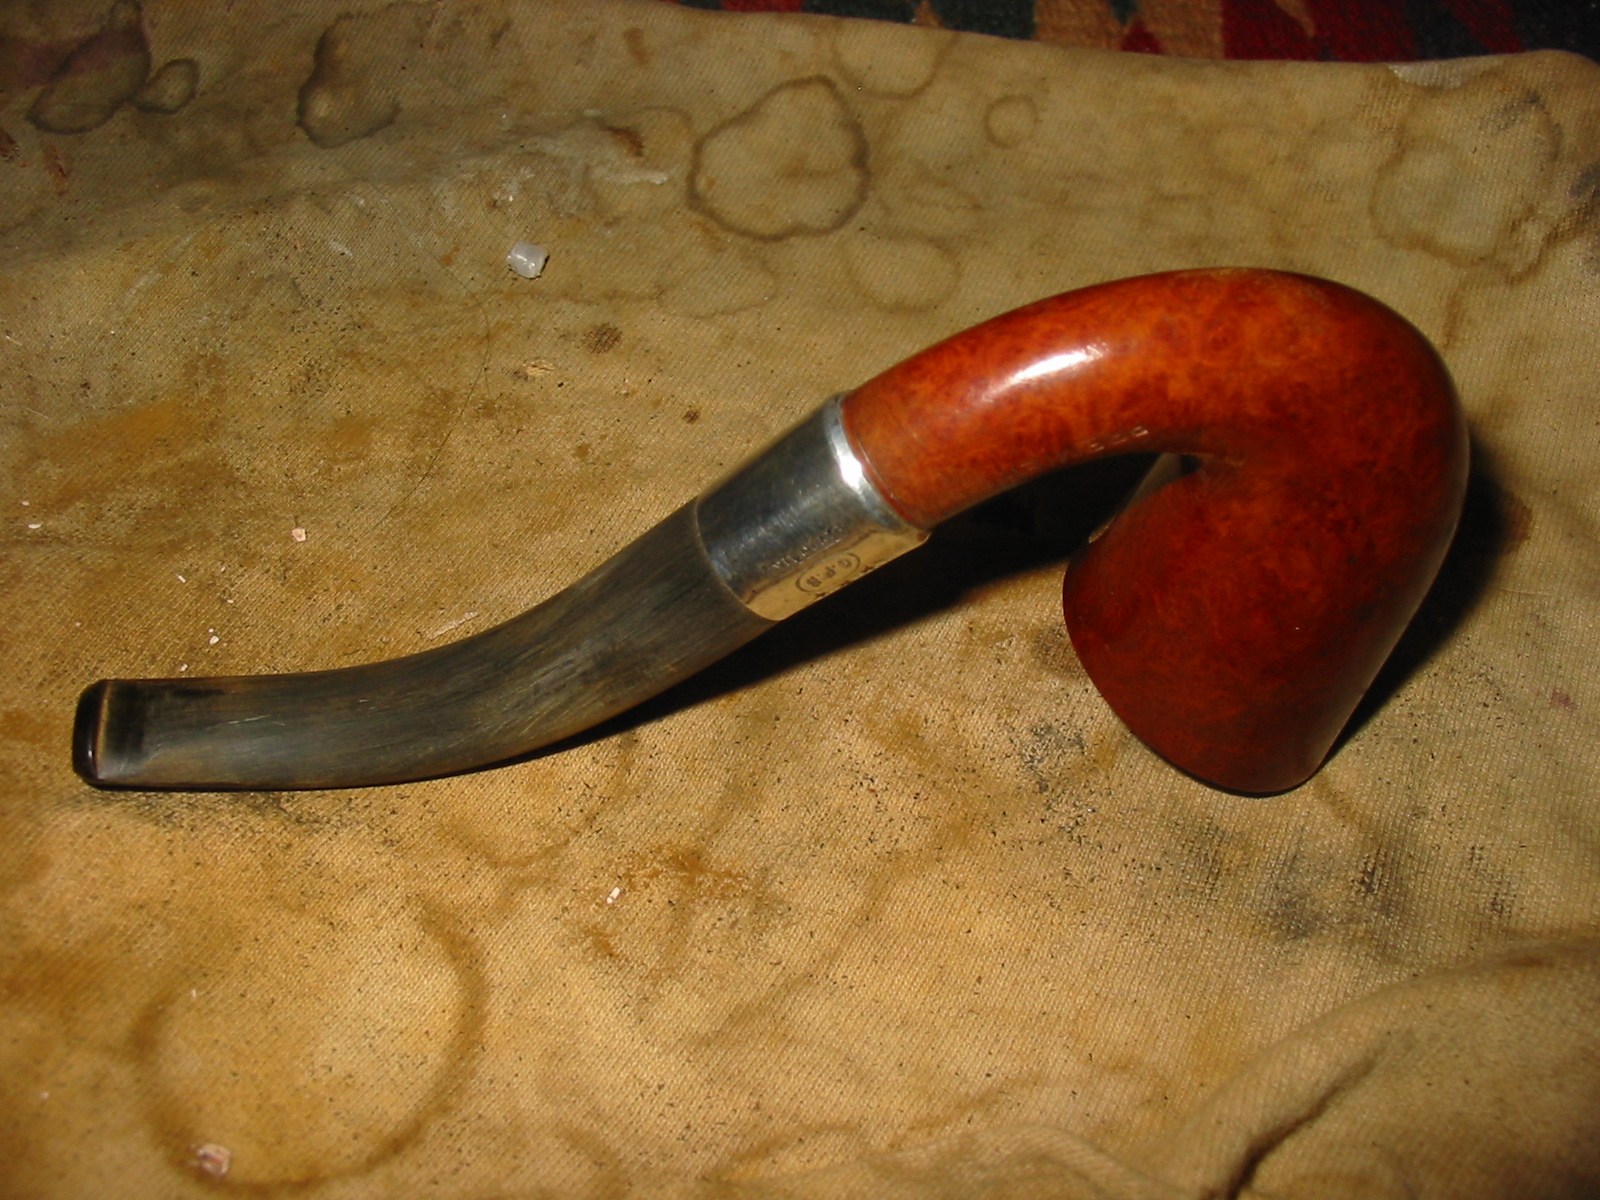
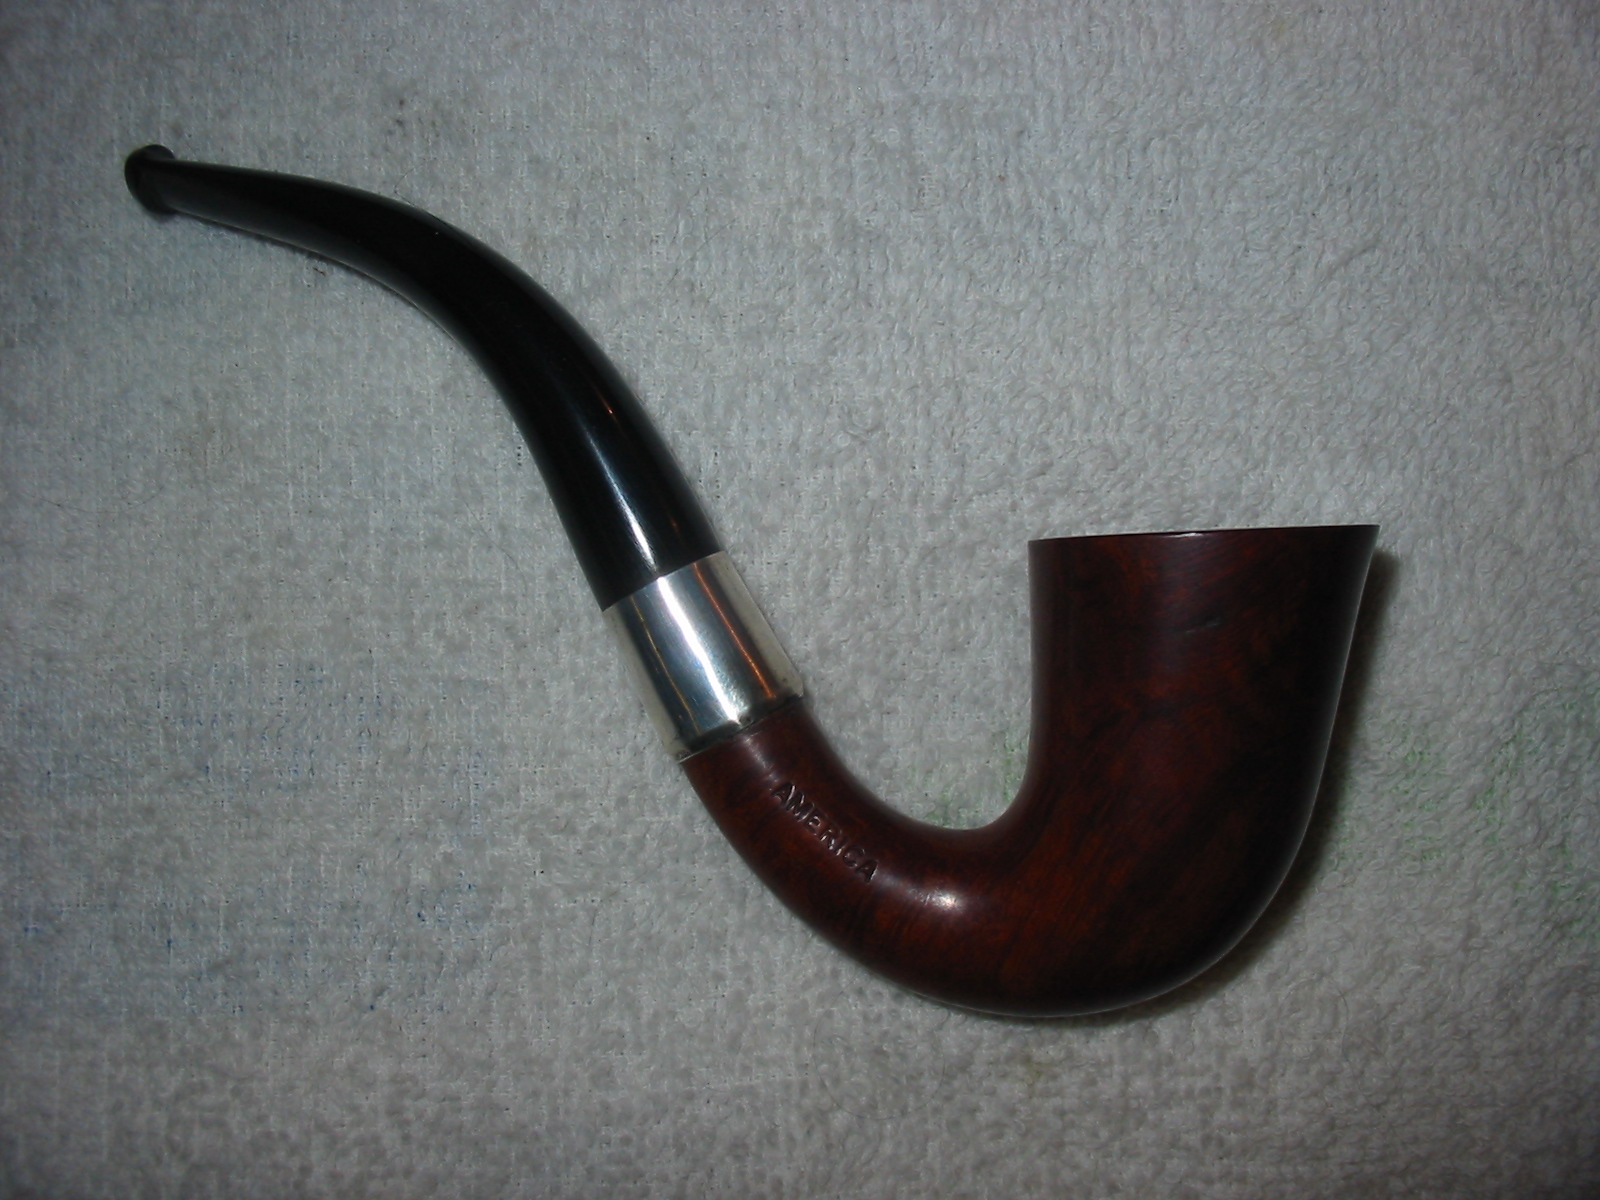
I am happy with how this pipe looks compared to what it looked like when it arrived in pieces. It definitely has that Stanwell look to it – very Danish Freehand looking. I am excited to be on the homestretch with it and took it to the buffing wheel and polished it on the wheel with Blue Diamond to polish out the scratches in the briar and the vulcanite. I gave the bowl and the stem multiple coats of carnauba wax. I buffed the pipe with a clean buffing pad to raise the shine. I hand buffed it with a microfiber cloth to deepen the shine. The pipe polished up pretty nicely. The grain really pops with the wax and polish. The shiny black vulcanite stem is a beautiful contrast to the blacks and browns of the bowl and shank. This Scandia Made in Denmark Freehand was fun to bring back to life. It really is stunning piece of briar whose shape follows the flow of the grain. The pipe is comfortable pipe to hold in the hand. The finished pipe is shown in the photos below. The dimensions of the pipe are Length: 5 ½ inches, Height: 2 inches, Outside diameter of the bowl: 1 ¾ inches, Chamber diameter: ¾ of an inch. This beautiful pipe will be going back to Ron tomorrow. If the mail is as fast as it was bringing it to me he should have it in hand by the first part of the week. I hope that he enjoys this beauty and that it serves him well. Thanks for reading this blog and my reflections on the pipe while I worked on it. This is an interesting one to bring back to life.

The Resurrection of an old KBB Yello-Bole Premier Panel


Blog by Steve Laug

In a recent trade with Andrew Selking I received an older KBB Yello Bole Paneled billiard. When I removed it from the box there was something about the older KBB Panel that grabbed my attention. It was stamped on the left side of the shank with the familiar KBB logo and the Yello-Bole next to it. Underneath that it bore the stamp Reg. US Pat. Off. Directly below that was stamped Premier over Cured with Real Honey. The pipe had been repaired at some time in its ragged existence with what appeared to be a homemade repair job. The tenon had broken somewhere along the line and a previous owner had drilled out the stem and used a piece of stainless steel tubing to make a new tenon. The metal tenon was stuck in the shank of the pipe and the stem just sat loosely on it. The fit of the stem to the shank was off with the stem sitting high and to the right. The previous owner had tried to compensate for the off centered stem by sanding flat spots on the stem sides and bottom that broke the smooth lines of the square shank and stem. There were two small hairline cracks on the shank – top right and bottom left that would need to be repaired once the tenon was removed. The bowl was out of round with damage to the inner edge of the rim and a tarry build-up on the surface. The outer edge rim crown of the bowl was also compromised and would need some work. The stem was not too badly oxidized but it had tooth marks on the top and bottom near the button.YB1

YB2

YB3 Background Information
I wrote about the history of the KBB stamped Yello-Bole Pipes. The following link will give you the details: https://rebornpipes.com/2014/07/21/renewing-an-old-kbb-yello-bole-honey-cured-briar-billiard/
Yello-Bole pipes are one of my favorite older US brands doing the research would be enjoyable. As with other early brands made in the states I have found that older is better. A KBB in a cloverleaf stamp will date them back to the ’30’s. I have found through my reading that the 4 digit shape numbers are older than 2 digit ones. The pipes with the logo on top of the stem are older than ones that have them on the side. That is just some of the information that I found with a cursory read through the forums and a variety of websites.

The SM Frank website http://www.smfrankcoinc.com/home/?page_id=2 gives a wealth of historical information on Kaywoodies, Yello-Boles and the merger between KBB and SM Frank and later Demuth. It was a great read and I would encourage others to give the website a read. I also wanted to find some help in dating my old Yello-Bole Pipes and I came across this link to the Kaywoodie Forum: http://kaywoodie.myfreeforum.org/archive/dating-yello-bole-pipes__o_t__t_86.html . I am including some of the information I found there as it gives the only information that I found in my hunt to this point.
“…there isn’t a lot of dating information for Yello-Bole pipes but here is what I have learned so far.

– If it has the KBB stamped in the clover leaf it was made 1955 or earlier as they stopped the stamping after being acquired by S.M. Frank.
– From 1933-1936 they were stamped Honey Cured Briar.
– Pipes stems stamped with the propeller logo they were made in the 30s or 40s no propellers were used after the 40s.
– Yello-Bole also used a 4 digit code stamped on the pipe in the 30s.
– If the pipe had the Yello-Bole circle stamped on the shank it was made in the 30s this stopped after 1939.
– If the pipe was stamped BRUYERE rather than briar it was made in the 30s.”
Given the above information I discovered that the pipe I was working on was made sometime between 1930 and 1940. Thus it was an early Yello-Bole from the 1930s or 40s.

Restoration Process

I took the stem off the bowl and tried to remove the inserted metal tenon. It was firmly stuck in place and I could not move it even with pliers. I put the bowl in the freezer overnight hoping that the cold would contract the metal and briar differently (as is the case with the varied material and density). In the morning I took it out of the freezer and was able to turn the tenon out of the shank with pliers. Once it was removed it was clear to see that it had not been glued in the shank but merely stuck with the tars and oils of the tobacco in the shank.YB4 I found a threaded Delrin tenon in my box of tenon parts and it was a workable replacement for the metal tenon. I tapped the drilled out hole in the stem and screwed the threaded tenon into the hole. It was a perfect fit. I removed it once again and put some glue on the threads and screwed it into place and let the glue set. The diameter of the tenon would need to be adjusted as it was too big for the mortise. This was actually ideal in that I would be able to adjust the fit against the shank on the sides and the top. The bottom of the shank would take work to make a smooth transition.YB5

YB6

YB7

YB8

YB9

YB10 I sanded the tenon with a Dremel and sanding drum to remove the excess Delrin. I hand sanded it with 180 grit and 220 grit sandpaper to smooth out and fine tune the fit. I spread the hairline cracks with a dental pick and dripped superglue along the cracks and pressed them together until the glue set.YB11 The stem fit in the shank nicely. The photos below show the damage that had been done to the stem in the previous repair. It is especially visible in the photos of the pipe from the side and the bottom. The stem had been modified to the misfit of the previous tenon so work would need to be done to realign the fit against the end of the shank.YB12

YB13

YB14

YB15

YB16

YB17 I sanded the bottom, top and right side of the shank until the transition between the briar and the vulcanite was smooth. The left side was touchier in that I did not want to damage the stamping. I sanded this area while covering the stamping. The trick was to smooth out the transition without making a drastic dip in the briar – it just needed to be re-tapered until it flowed naturally into the stem. Sanding the top of the stem also took care as it had the insert of the white propeller. Too much sanding on the top would damage and compromise the insert. The photos below show the newly sanded and tapered shank/stem. I sanded with 220 grit sandpaper, medium and fine grit sanding sponges and a fine grit sanding block. I sanded the rim and curves of the rim with the same sandpapers. I folded a piece of 220 grit sandpaper and worked on the out of round bowl to clean it up as much as possible.YB18

YB19

YB20

YB21 I wiped the bowl and shank down with acetone on a cotton pad to remove the finish from the bowl.YB22

YB23

YB24

YB25 I cleaned out the bowl and shank with isopropyl alcohol, cotton swabs and pipe cleaners. I cleaned out the stem as well at the same time. I sanded the bite marks on the top and bottom of the stem with 220 grit sandpaper to minimize the damage and remove the tooth chatter. There were still some tooth marks that needed to be repaired.YB26

YB27

YB28

YB29

YB30 I scrubbed the areas around the bite marks with alcohol to clean the sanding dust and grit from around them. I then used black superglue to fill the bite marks and sprayed it with and activator/accelerator to harden it.YB31

YB32

YB33

YB34 When it dried I sanded the filled areas with 220 grit sandpaper to level them out with the surface of the stem. I sanded the stem with a medium and fine grit sanding sponge and a fine grit sanding block to further blend the patches into the stem surface. In the next two photos the patches are blended into the stem but the blackness of the super glue and the blackness of the unpolished stem do not match so they show up as spots on the stem.YB35

YB36 I stained the bowl and shank with a medium brown aniline stain thinned 50/50 with isopropyl alcohol. I wanted a medium brown wash to highlight the grain and show contrast in the finish. The wash provided just what I was looking for.YB37

YB38

YB39

YB40

YB41 I sanded the stem further with fine grit sanding blocks and also sanded the flat areas on the transition between the shank and stem to work towards a more seamless look. The next photos show the smooth transition and the smooth stem. The patches are fading more into the vulcanite of the stem as well at this point in the process.YB42

YB43 I moved on to sand the stem with micromesh sanding pads – wet sanding with 1500-2400 grit pads and dry sanding with 3200-12,000 grit pads. I rubbed down the stem between each set of three pads with Obsidian Oil and then continued sanding. I have found that sanding the stem while the oil is freshly applied allows the grit on the pads to cut into the finish and raise a shine.YB44

YB45

YB46The next two photos show the finished stem. After the final sanding I rubbed it down with Obsidian Oil and let it soak in before polishing it with the buffer. I gave it several coats of carnauba wax. The patches on the stem by this point are fully blended into the vulcanite and cannot be identified.YB47

YB48 The next photo shows the reworked inner edge of the rim to show my repairs on the out of round bowl. I sanded until it was as close to round as I could get it by hand. I bevelled the inner edge of the bowl with the sandpaper to make the transition smooth.YB49 The finished pipe is shown below. Thanks to Andrew for sending me this challenge. I really enjoyed bringing this old timer back to life. It will occupy a special spot in my older American pipe maker collection and join my other KBB Yello-Boles as favourites that I enjoy smoking. I buffed it with White Diamond and gave it multiple coats of carnauba wax and finished by buffing it with a soft flannel buffing pad to raise the shine. All that remains is to sit back and enjoy a bowl of an aged Virginia tobacco and read a good story!YB50

YB51

YB52

YB53

Restoring an old CPF Gourd Calabash Pipe


Blog by Steve Laug

In my grab bag from the antique mall was a gourd calabash bowl. It has the original silver band with the CPF logo stamped on it and some faux hallmarks – an anchor, star and a figure. The CPF stands for Colossus Pipe Factory – a brand I researched and wrote about previously on the blog – https://rebornpipes.com/2013/04/14/so…-on-cpf-pipes/. The hallmarks on the band are an anchor with chain, a star and a figure of a man. From my research these are faux hallmarks. CPF pipes were made in New York and later became linked with KB&B pipes. Here is a link to an old catalogue linking the brand to KB&B that I posted previously on the blog https://rebornpipes.com/2014/03/05/an…cpf-catalogue/. Sadly there are no meerschaum pipes in the catalogue so I cannot ascertain the date for sure. I am fairly confident from comparing the band with others that I have which have similar bands that the pipe can conservatively be dated to the early 1900s or late 1890s. So it is a gourd bowl that has some age on it.
IMG_6432
The bowl came with the band and a threaded bone tenon that was easily removed from the mortise. The gourd had darkened areas around the exterior of the bowl from the hand of the previous owners. There were several nicks in the gourd on the bottom of the shank next to the band and on the right side next o the band. The band had been pressed onto the gourd and it was obvious from the fit and the way it pressed into the shank ahead of it that it was original. The inside of the gourd had hard tars and tobacco oils on the walls down into the shank itself. There was nothing soft or sticky in either the shank or bowl. A pipe cleaner came out clean regardless of whether it was dry or wet. The top edge of the rim was pristine with no dents or nicks. There was a slight crack that ran down about ½ inch on the front of the bowl. I liked the shape of the gourd from the moment I took it out of the bag. It was not oddly shaped but was elegant in both the flare of the bowl and the curve of the shank. It would be well worth bringing back to life.
IMG_6430

IMG_6431
I measured the diameter of the bowl and the diameter of the bone tenon and made a call to Tim West at J.H. Lowe (http://www.jhlowe.com/) with the dimensions to see what he had in terms of a meerschaum bowl and a potential stem for the pipe. He asked for a photo of the bowl so he could have a look before recommending sizes of the stem or bowl. I told him that I was thinking about an amber acrylic a Bakelite stem. Once he saw the pictures Tim talked me out of that and said a vulcanite stem would be perfect for it. I asked if he would tap the stem for me before he shipped it. He said he would do it, no problem. He did a bang up job and sent it along with the meerschaum cup. Both of them arrived here in Vancouver quite quickly. I unpacked the bowl and stem from the box that Tim sent and that was the beginning of the issues that I faced with restoring this pipe. I will spell them out in detail as I write about the restoration of the pipe.
IMG_6747

IMG_6748
I tried fitting the meer cup into the gourd and found that there were several issues that I would have to deal with before it would fit well. The diameter of the bowl was perfect. The mushroom cap was big and draped over the top of the gourd and looked passable to me. The first problem was that the bowl had a lip around the top edge under the cap that was shaped the wrong direction – absolutely the opposite of the angle of the bowl. Because of that ridge the bowl would not sit in the gourd bowl correctly. Secondly I found that even without the ridge the cup was too deep to fit the depth of the gourd. The gourd tapered much more sharply than the meer cup so the bottom of the cup sat high in the gourd bowl. I would need to change the taper on the cup and shorten it so that it would sit in the gourd correctly and I would need to remove the lip around the top under the cap.

I measured the thickness of the bottom of the bowl and the thickness of the walls of the bowl around the cup to make sure I could remove the ridge and shorten the bowl without ruining the meer cup. I was happy to see that I had a lot of room to work with and could easily remove what was needed for a proper fit in the bowl. I used the Dremel to remove the ridge from under the cap edge. It was big enough that hand sanding would have taken a very long time. I took it down to match the rest of the bowl. I also used the Dremel to shorten the bowl. I flattened it out and took off approximately ½ inch. I then hand sanded the bowl with 220 grit sandpaper to reshape it and smooth out the Dremel work. I reshaped the taper of the cup to match the taper of the gourd. I sanded the flat edges of the bottom and reshaped it into a gentle curve. The photo below shows the newly reworked bowl. It fit well in the gourd after all of this work.
IMG_6749

IMG_6752

IMG_6751
I set aside the meer cup and cleaned out the inside of the gourd removing the tars and build up. I washed down the outside with undiluted Murphy’s Oil Soap to remove the grease and buildup on the gourd. I did not want the soap wet as I did not want to wet the gourd. I rubbed the soap on with a cotton pad and scrubbed and removed it the same way. Once it was clean I noticed that the small hairline crack along the front of the bowl was slightly open. I opened it slightly and dripped some super glue in it to bind the crack and clamped it until the glue cured. Fortunately for this impatient man the super glue dries very quickly and I could move on to the inside of the gourd. I sanded it out with a folded piece of 220 grit sandpaper. I was able to reach quite far down into the shank and sanded the ridges of tars and oils out of the bowl. There was a thick ridge at the bottom where the original cup had rested against the walls of the gourd. I used a dental pick to loosen that area and then sanded it smooth. All of this cleaning work served to renew the inside of the gourd but also made a smooth base for the new meer cup.
IMG_6750
I cut a piece of cork to fit the inner edge of the gourd. It had to be trimmed in both height and length to fit properly. I glued it into place with white all-purpose glue. I pressed on it to make sure that it sat tightly against the gourd. This cork would serve as a gasket for the cup and also it fit perfectly against the small crack that I had repaired on the exterior. Together they would bind together the crack and provide a functional repair to that surface.
IMG_6753
Once the glue dried I sanded the cork with 220 grit sandpaper (my go to sandpaper for much of the initial work I do on the pipe). I wanted it to be a smooth pressure fit that would hold the bowl in place. I rubbed down the cork gasket with Vaseline to soften it after the sanding. I find that cork left unused gets dry and brittle and the Vaseline brings it back to life. I pressed the bowl in place to check the fit and found that it still needed some adjustment to sit properly in the bowl. The top edge under the cap needed to be sanded some more to reduce the diameter of the cup.
IMG_6755
I took it out of the gourd and sanded it with the 220 grit sandpaper until it fit correctly. I polished the cup exterior with a fine grit sanding sponge and 1500 grit micromesh sanding pads before pressing it back into the gourd.
IMG_6754
This time it fit was far better. The cup sat in the gourd like they were made for each other. The two photos that follow show the fit and look of the new bowl. At this point the calabash is showing great promise.
IMG_6757

IMG_6756
I cleaned up the mess of the meerschaum sanding dust that was everywhere on my work table. It is a messy fine powder that gets into everything if left to its own devices. Once I had done that I wiped down the exterior of the bowl and cup one more time and took a couple of photos to get a good look at the pipe.
IMG_6758

IMG_6760
With the work on the bowl and cup finished I turned my attention to the stem. Tim’s drilling was spot on. The diameter was exactly what I had sent him – ¼ inch. The second problem I faced with this old calabash was that the bone tenon was not quite the 1/4 inch measurement I gave him. It would not fit in the tapped hole in the stem. I measured it again and found that is was closer to 3/8 inches than a ¼ inch. I re-tapped the stem to 3/8 and was able to thread the tenon into the stem. It looked great and it fit well in the mortise. I glued the tenon in place in the stem with all-purpose white glue and set it aside to cure over night.
IMG_6762

IMG_6763
In the morning I slowly and carefully turned it into the bowl. Things were going really well. It looked like I would need to reduce the diameter of the stem slightly on one side and the top to match the diameter of the shank band. As I was turning it I heard a noise that is dreadful to me and to anyone who has heard it. It generally is not a good sound when you are this far along in a repair and signifies more work. The bone tenon broke in half. It obviously had been cracked and I had not seen that when I examined it. When I had turned it into the shank it had shattered. I was left with the broken half glued into the stem and the threaded half stuck in the shank of the pipe. Talk about frustration. I set the pipe aside and took a deep breath. Now I would have to go back to the drawing board in terms of how to attach a stem. I would have to drill out both the stem and the shank in order to move forward.
IMG_6764
I pulled out a can from my drawer where I keep replacement tenons – threaded Delrin, straight Delrin rods cut to fit as tenons and some push stem conversion kits that had a mortise insert and tenon for converting threaded shanks in old meers to accommodate a push tenon. The conversion kit would work nicely in this situation. I would have to modify the shank of the calabash as the diameter of the mortise insert was too big for the 3/8 inch opening. I had to drill out the end of the gourd and then re-tap it to be able to put the insert in place. The thickness of the shank did not give me much wiggle room so I would only have one chance at this. I was able to drill it and tap it. I mixed the two part epoxy and inserted the mortise in place in the shank.

The tenon was a much simpler to repair. I carefully drilled out the broken bone tenon in the stem and was able to salvage the threads. Once I had blown out the dust from the stem the push tenon screwed neatly into the 3/8 inch tapped end of the stem. I removed it a final time and epoxied it in place. However, it too was not trouble-free. The tenon had a 1/16th inch lip that would not sit in the end of the drilling on the stem. I ended up having to carve it with a sharp knife to remove the lip. In the photo below you can see the epoxied insert in the shank and the tenon in the stem. The insert still needed to be countersunk and cleaned up and the tenon needed to have the lip trimmed away.
IMG_6768
I set aside the calabash until the epoxy set. Once the stem was set I decided to work on the other end of the mouthpiece. It had a very tight slot on the end that was hard to push a pipe cleaner through so I opened that up with needle files. I used a flat oval file, an oval and a round file to do the majority of the work. I finished opening it with a flat angle file to open the top and bottom of the slot.
IMG_6770
When the epoxy had cured I carefully pushed the stem into the shank to check out the fit. The next two photos show the look of the pipe at this point. I removed the stem and countersunk the mortise slightly. I did not want to use a drill and countersink to do the work so I used a very sharp knife and did it by hand. Once it was completed I replaced the stem in the shank and the fit against the band was clean and snug. My initial mission was accomplished. I had not only broken the bone tenon, I had removed it from the shank and stem and converted the pipe to a push stem. There was still work to do but at least I had salvaged the pipe from the damage I had done in my initial repair. Whew…
IMG_6775

IMG_6776
I sanded the stem with a medium and fine grit sanding sponge to remove the scratches left behind by the 220 grit sandpaper. I gave it a light buff with Tripoli on the wheel and then set up a heat gun to bend the stem. I held the stem about three inches above the heat and moved it around as it heated. I have learned that to leave it in one place as you heat it can damage the vulcanite and create more work. Once the stem was pliable I bent it over a wooden rolling pin that I use for that purpose. Lately I slid a cardboard tube over the pin to give a softer, smoother surface to bend the stem over. I had to do it twice to get the bend correct. It takes a bit longer to heat the thicker portion of the stem that needed to be bent so the repeated step made that possible.
IMG_6777

IMG_6778
The finished bend is shown in the next two photos. I still needed to polish the stem before it was finished but the finished look is beginning to appear. The calabash is just about reborn.
IMG_6779

IMG_6780
I removed the stem and worked on it with the sanding sponges and the micromesh sanding pads. I wet sanded with the 1500-2400 grit pads and dry sanded with the 3200-12000 grit pads. Between the wet and dry sanding I rubbed the stem down with Meguiar’s Scratch x2.0 and then buffed it with White Diamond. I finished the sanding and then rubbed the stem with Obsidian Oil. Once it was dry I gave it a quick buff with White Diamond and then gave it multiple coats of carnauba wax and buffed it with a soft flannel buff.
IMG_6782

IMG_6783

IMG_6784
I scrubbed the surface of the gourd with Oil Soap and a light sanding with the fine grit sanding sponge to remove some of the deeper grime and oils in the gourd. I then applied several coats of Paragon Wax and hand buffed the gourd with a shoe brush to raise a shine. I polished the silver band with some silver polish and then reinserted the stem. I gave the whole pipe a final buff with the brush before setting the meerschaum cup in place. The finished pipe is shown in the photos below. It is a deep bowl and should hold a good pack of tobacco. The broad mushroom cap of the meerschaum cup looks good to me. The pipe is ready for its inaugural smoke. Now the only problem remaining is what tobacco to use to christen this restored calabash. Ah well that will sort itself out soon enough. Time to post this on the blog.
IMG_6785

IMG_6786

IMG_6787

IMG_6788

Restemming and Reclaiming an Older, Unsmoked GFB Briar Calabash


Blog by Steve Laug

I bought three unsmoked pipe bowls from the same seller on EBay. One of them was a GFB calabash. With the first of this brand I bought a while back I did some digging on the web and found very little information. So this time I did a bit more searching and I was able to get some information on the brand. Many of the links I found through Google took me to others who were looking for information on the brand. I came across one that gave the information that the GFB brand was an older French Trademark and that it came from Saint Claude, France. With that information I did a more focused search for GFB French Briar Pipes and came across a post that said GFB stood for Great French Briar – that seemed a little farfetched to me so I continued to look and finally came across the following advertisement from a Sears Catalogue. It shows a full page of GFB pipes and the header says GENUINE FRENCH BRIAR. That made much more sense to me and the pipes in the catalogue matched the ones that I have in my collection and the ones that I have seen. For me that gives a better picture into the meaning of the brand letters.

Genuine-French-Briar-Pipes-On-Parade

Armed with this new information I went to work on the GFB Calabash pipe bowl that I purchased. The bowl itself was in astonishingly great shape for being over 100 years old. The pipe was unsmoked – new condition. The bowl was dusty but raw briar. The shank was clean and also pristine. This was an unsmoked – new old stock pipe bowl. The silver band was very tarnished and loose. There was no stem to be found. I wrote to the seller and asked what had happened to the stems for this old timer and two others I purchased from them. I did not receive an answer. The first four photos below are the seller’s photos as the pipe appeared on EBay. The first two are out of focus but give an idea of the bowl shape. The last two give close up photos of the stamping and the clean bowl. It was pretty hard to know the size of the pipe from their information. But it looked to be of similar age as an older 1912 BBB Calabash I have so I put in a bid and won.

GFB1

GFB2

The right side of the shank is stamped America and the left side is stamped Premier. The band has three stars *** over the GFB in an oval and under that is the Sterling stamp. The stamping led me to assume incorrectly that this was an older American made pipe. I was wrong. The stamping America obviously is the name of the pipe.

GFB3

GFB4

I looked through my box of old stems to find one that would be not just a proper fit but of an age that was appropriate to this old pipe. I found one that did not have a tenon, it had either broken or fallen out somewhere along its journey. I have a bag of Delrin threaded tenons that I use regularly for replacing broken tenons. I chose the smallest one as it would fit the mortise with a little bit of work. The stem was oxidized but in good shape with no tooth marks or dents. The button was a slight slot and the stem was quite narrow at the button end. It would look perfect on the pipe once I had the tenon replaced.

IMG_0962

I drilled out the stem so that the threaded tenon would fit into it. I used a tap to thread the stem. The first photo below shows the drilled and tapped stem ready to receive the new tenon. I coated the threads with some black super glue and threaded it into the stem (second photo). The third and fourth photos below shows the tenon screwed into place. The tenon is now repaired. I needed to remove some of the Delrin to reduce the diameter of the tenon to get a good fit on the shank. I used my Pimo Tenon turner to do this. It was a little tricky in that the stem was bent but I proceeded slowly to turn it down until it was close. I finished reducing it by hand until it fit snugly in the mortise.

IMG_0964

IMG_0965

IMG_0966

IMG_0967

Once the stem fit snugly in the shank I needed to reduce the diameter of the stem in order to get a good match with the band on the shank. I sanded it with medium grit emery paper to bring it down to size. The next two photos show the stem in place. At this point the band had not been glued into place. It was still loose, so I removed the stem and used Weldbond white carpenters glue (which is non-toxic) to glue the band in place. I cleaned up the old glue lines on the shank with micromesh sanding pads.

IMG_0972

IMG_0973

The next four photos show the silver band after it had been glued in place and cleaned and polished with some Hagerty Tarnish Preventive Silver Polish. I have used this bottle for years and it works extremely well. I purchased it at a jewelry shop along with a polishing cloth that I used on the band as well. Once the band was polished the hallmarks were very visible. I have described the stamping on the band above. After shining they stood out clearly. I am not able to ascertain a date from the stamping as there are no date stamps. I also polished the bowl with a quick buff of White Diamond on the buffer and then I gave it multiple coats of carnauba wax.

IMG_0975

IMG_0976

IMG_0977

IMG_0978

With the bowl and band finished it was time to work on the stem. I sanded it with 220 and 340 grit sandpaper followed by sanding with a medium grit sanding sponge and then a fine grit sanding sponge. This series of sandpapers and sanding sponges has worked well for me in removing the scratches left by the emery paper as well as the remaining oxidation on the stem. I then sanded the stem with micromesh sanding pads from 1500-12,000 grit to bring out the sheen on the stem and polish it. Between the 4000 and the 6000 grit I polished the stem with Maguiar’s Scratch X2.0 plastic polish. I finished with the last grits of micromesh sanding pads. The next series of six photos show the progressive shine on the stem with the various grits of micromesh.

IMG_0983

IMG_0984

IMG_0985

IMG_0986

IMG_0987

IMG_0988

I buffed the stem and bowl with White Diamond and then gave the pipe several coats of carnauba wax. The finished pipe is pictured below in the last series of four photos. It is amazing that this old pipe has existed this long since it was made and has not been smoked. That will change soon!

IMG_0990

IMG_0991

IMG_0992

IMG_0993

Replacing a Tenon on a Brigham System Pipe


Blog by Steve Laug

I have written about the restoration of this old Brigham one dot pipe in an earlier blog post. https://rebornpipes.wordpress.com/2012/09/17/a-frustrating-brigham-1-dot-rehabilitation/ I was contacted by Brigham in a comment to the post with the following: “Great work! It is nice to see someone put in the extra effort. If you would like a free nylon tenon to replace the aluminum just send us an email at sales@brigham1906.com  I wrote to them after reading this and they sent me the nylon tenon pictured below to replace the metal one that I had remedied earlier by cutting off. You can read the previous post and see why that was necessary. But needless to say it took me until this morning to rise to the challenge of replacing the tenon. There were multiple reasons for this. The first being that I was uncertain as to how the metal tenon was inserted and how it could be removed. Second, the metal end of the maple filter had broken off and was stuck in the bottom of the shank right against the airway which did not allow me to insert the tenon to the full length with the new filter in place. This morning I had a day off so I decided to tackle the replacement. In the photo below you can see the dismantled pipe. The metal tenon is cut back, the maple filter is below that and the new nylon tenon is at the bottom of the picture.

Image

I lined the two tenons up to an idea about the length. I wanted to know how deeply the metal tenon was inserted into the stem. From the look of the new nylon one I was not dealing with a lot of depth to the tenon insert. I still did not know how it was inserted and what held it in place but my guess was glue, similar to what I use to hold Delrin tenons that I have inserted. The next two photos below show the tenon depth. The third photo below shows the maple filter inserted. I was concerned how I would get that length into the shank of the pipe with the metal end cap firmly stuck in the shank.

ImageImageImage

I set up my heat gun on its stand on the top of the washing machine in the laundry room. Pardon the cleaning supplies pictured below around the heat gun. I heated the metal tenon and not the stem. I have found that to heat the stem can damage the vulcanite and it seems to take a long time to heat the glue in the tenon insert. I heat the tenon instead and the heat on the metal carries back into the stem and loosens the glue. The two pictures below show the heating process. It does not take more than 2 or 3 minutes to heat the glue and soften it.

ImageImage

I use a pair of needle nose pliars to gently pull on the tenon. I do not want to damage the tenon because I may want to use it again (you never know when you might use it again so you don’t want to ruin it). I pulled gently and it came out pretty easily. You can see from the next pictures below that the metal was scored in two bands around the insert to provide a grip with the glue and the vulcanite.

ImageImage

Once it was removed I put the old tenon insert next to the new one to measure length and also diameter. I wanted to know how deeply it would sit in the stem and also whether I would need to drill the hole a bit large to fit it correctly in the stem. You can see in the next two photos that the older insert (metal) is a bit longer than the new one. You can also see that the new one has a ridge around the diameter that would sit against the flush edge of the stem. I decided to remove that ridge and to split the difference in the length and insert the tenon end more deeply than the ridge would allow. Once I had removed it I still had some work to do as the hole in the stem was too small in diameter to take the new insert. I started by sanding a bit off of the insert to see if that would help it fit. I quickly saw that in order to fit I would have to remove more material than was wise in the diameter of the tenon end. So I would have to enlarge the hole. The third photo below shows the tenon end after I had sanded it. I still had not removed the ridge at this point as I was more concerned with diameter at the moment.

ImageImageImage

I began with a drill bit the same size as the hole and turned it in by hand to smooth out the walls of the hole. Then I moved up once size of drill bit and used my cordless drill. The trick here is not to hold the bit at an angle and to slowly turn the bit into the stem. I generally start doing this by hand without power. I make the drill stationary and then slowly turn the stem onto the bit. Once I have it started I slowly use the electric drill to take it deeper into the stem. The first photo below shows that process and set up.

Image

The next photo shows the next sized drill bit that I used. I followed the same procedure turning it on by hand first and then finishing with low power on the drill. After this drilling the insert fit tightly and I was ready to remove the ridge on the new tenon. I used my Dremel with the sanding drum to remove the ridge. I used it at a slow speed as I only wanted to remove the ridge and not change the diameter of the end. It did not take long. In the second photo below you can see the Dremel and the tenon before I sanded it.

ImageImage

After sanding the ridge I put several drops of superglue on the tenon surface and inserted it in the stem. The fit was perfect and the joint tight and strong. You have to work quickly once the glue is on the tenon insert as it dries very quickly. To facilitate the pressure fit I inserted the tenon in the shank to give me something to push against. I pushed the tenon into place and in the photo below you can see the fit. Above the newly inserted tenon I also included the old insert in the picture.

Image

Once I had a good fit on the tenon insert it was time to try and remove the stuck metal end cap in the shank. This had given me problems as mentioned in the earlier blog post. This time I decided to use a larger drill bit and see if I could drill it carefully until the metal locked onto the bit and I could then extract it. The first drill bit pulled a major piece of the metal cap out but there still was a piece remaining. I used a larger sized bit and carefully inserted it in the shank and drill at low speed until I felt the metal lock on. Then I extracted the end cap – a ¼ inch piece of metal – from the shank. I finally had gotten it all out of the shank. I then pushed the next filter into the new tenon and inserted the stem into the shank. It was a perfect fit… well almost. I removed it and did a counter sink on the shank with my Buck knife and then the stem fit tightly in place. The three photos below show the finished pipe.

ImageImageImage

Arghh, I Drilled to Far – A Lesson Learned Only Once


I had this interesting old timer in my box of pipes to repair. It is stamped Marxman Jumbo on the underside of the shank. The tenon was broken and stuck in the shank. I pulled the broken tenon with a screw and used it for sizing the new tenon for the pipe. The bowl finish was mottled and dirty so I dropped it in the alcohol bath while I worked on the new tenon.

I decide to use a Delrin tenon that I had here so it meant that I needed to drill out the stem in order to fit the new tenon. This was the first tenon I ever replaced so I proceeded slowly and with caution. I used a drill bit slightly larger than the airway in the stem. I wanted to move up slowly to the size of the tenon without chipping the vulcanite. So far so good. The hole began to open in diameter. In the photo above you can see the diameter of the airway in the stem after the first three drill bits. I had one more to go and the stem would be ready for the new tenon.

I decide to use a Delrin tenon that I had here so it meant that I needed to drill out the stem in order to fit the new tenon. This was the first tenon I ever replaced so I proceeded slowly and with caution. I used a drill bit slightly larger than the airway in the stem. I wanted to move up slowly to the size of the tenon without chipping the vulcanite. So far so good. The hole began to open in diameter. In the photo above you can see the diameter of the airway in the stem after the first three drill bits. I had one more to go and the stem would be ready for the new tenon.

No one had told me about a trick I have since learned to ensure that I do not drill too deeply. The idea is to measure the depth you want the bit to go and to mark the bit with tape so that you do not go beyond that. I had not learned that so I proceeded to drill with the last bit. I was feeling pretty good about the work at this point. It was going well and was centred. I was pleased and thinking this would be a breeze. But I was soon to be disappointed as I felt the drill break through at the place where saddle tapers off into the flat of the stem. I was sick when I felt this happen. I had drilled too deeply and the result was a hole on the top of the stem that all but ruined the repair. So much for my easy fix. In the photo below you can see the white spot on the stem at the spot where the saddle tapers. It was a large hole and I was frustrated. I put the pipe away for awhile and figured I had ruined a perfectly good stem.

Finally one day I decided to see if I could repair the hole. I set the new tenon with epoxy and once it was dry I went to work on the new “air hole” I had drilled in the stem! I filled it with epoxy and vulcanite dust to work a patch. The white spot in the photo above is the resultant patch. It is actually a grey spot. The vulcanite dust and epoxy dried to a mottled grey finish. The hole was repaired but whenever I smoke the pipe I am reminded that in the future I will measure twice and drill once! That grey spot speaks loudly to me. The good news is that the pipe smokes very well.

The finish was shot and the colour of the stain was mottled and uneven. So I when I removed it from the alcohol bath I restained it with a medium brown aniline stain and buffed it gently with White Diamond and then a flannel buff and a light coat of carnauba wax.

Since that day I have replaced many more tenons. I have not repeated the same mistake twice. The point is to learn from the errors not to keep repeating them.  I wanted to pass on what I learned and show the mistake I made to hopefully keep you from repeating my errors. Thanks for looking.