The Father’s Day 2014 Pipes
Leave a reply
Blog by Steve Laug
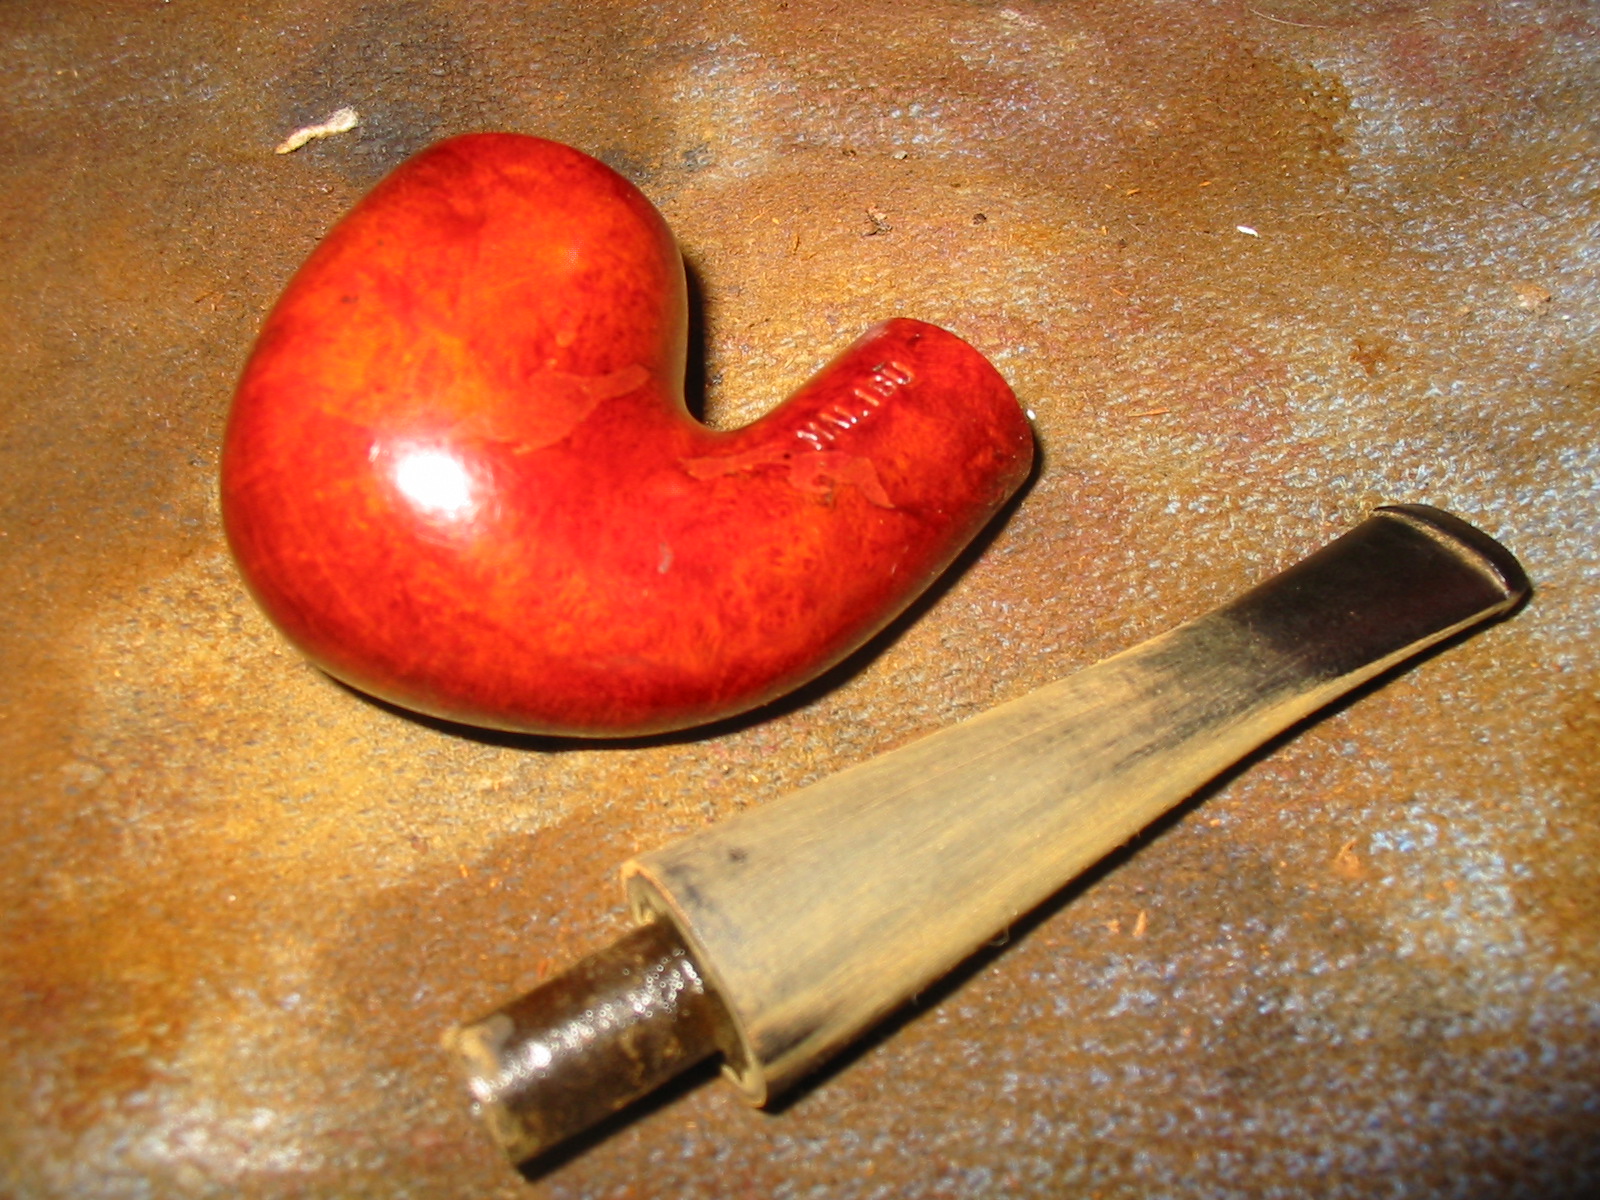
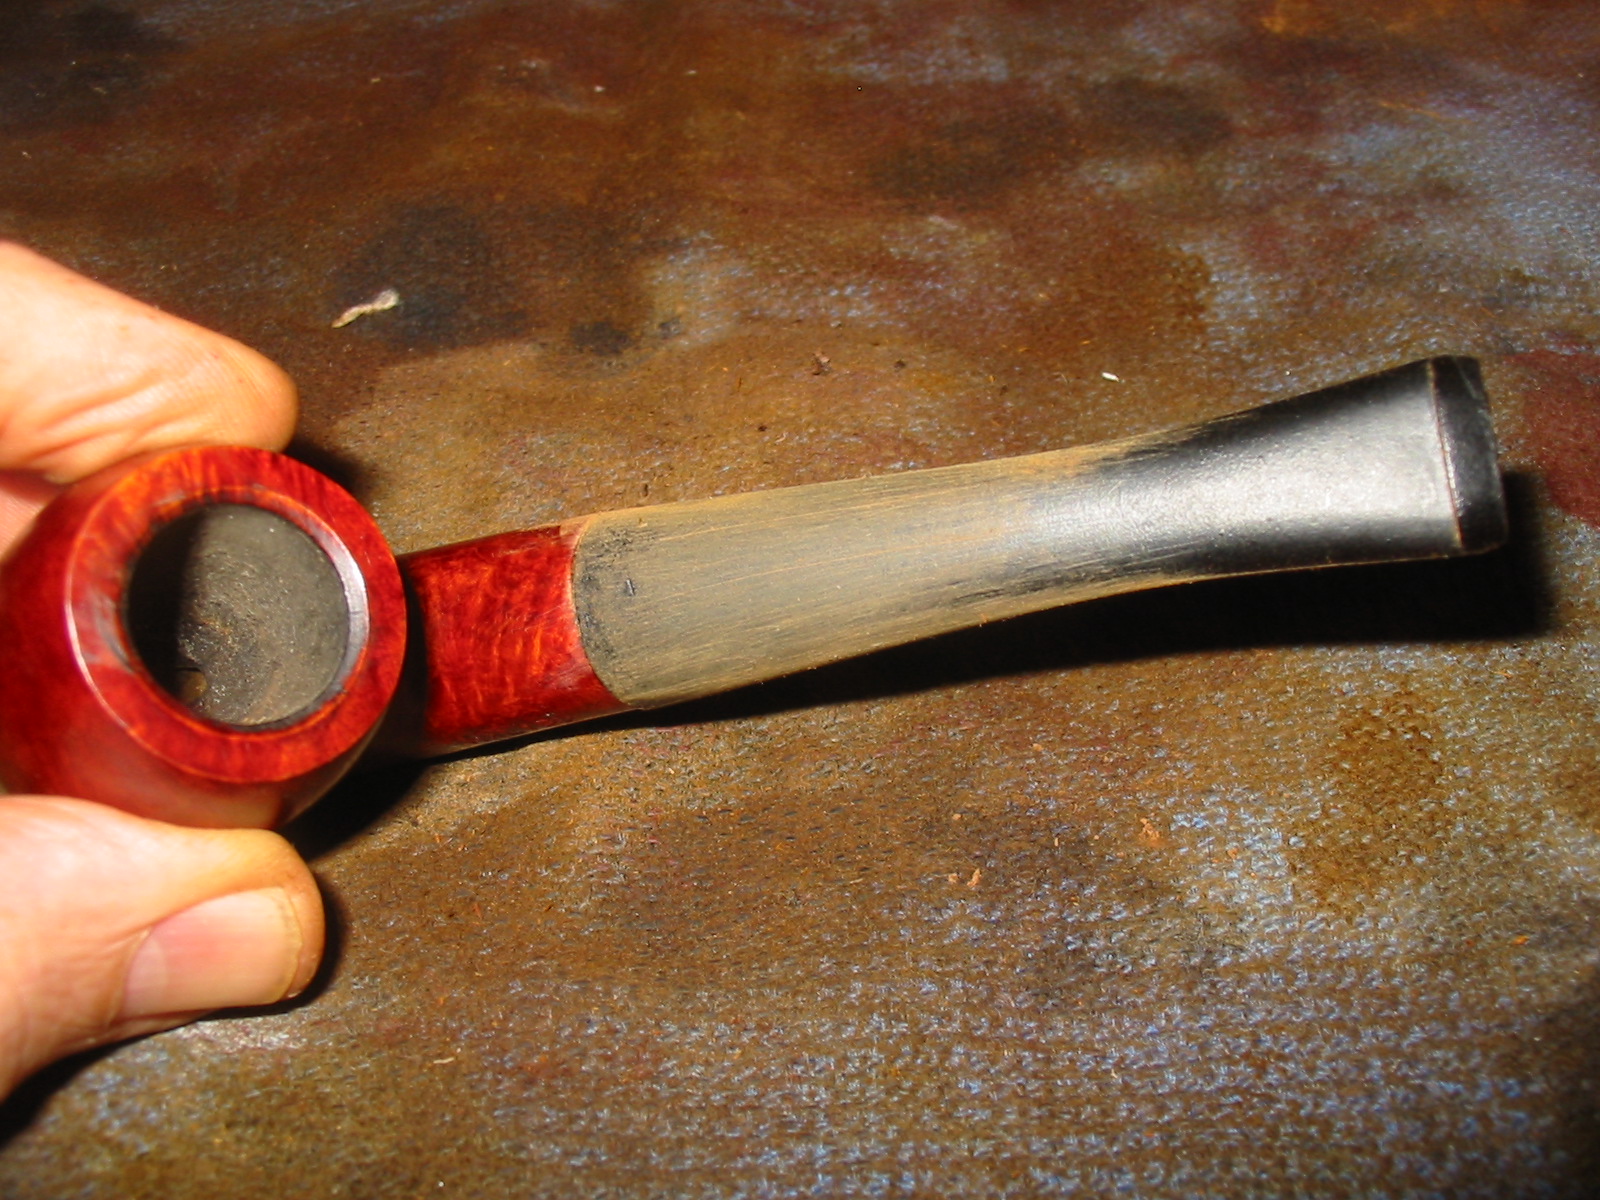
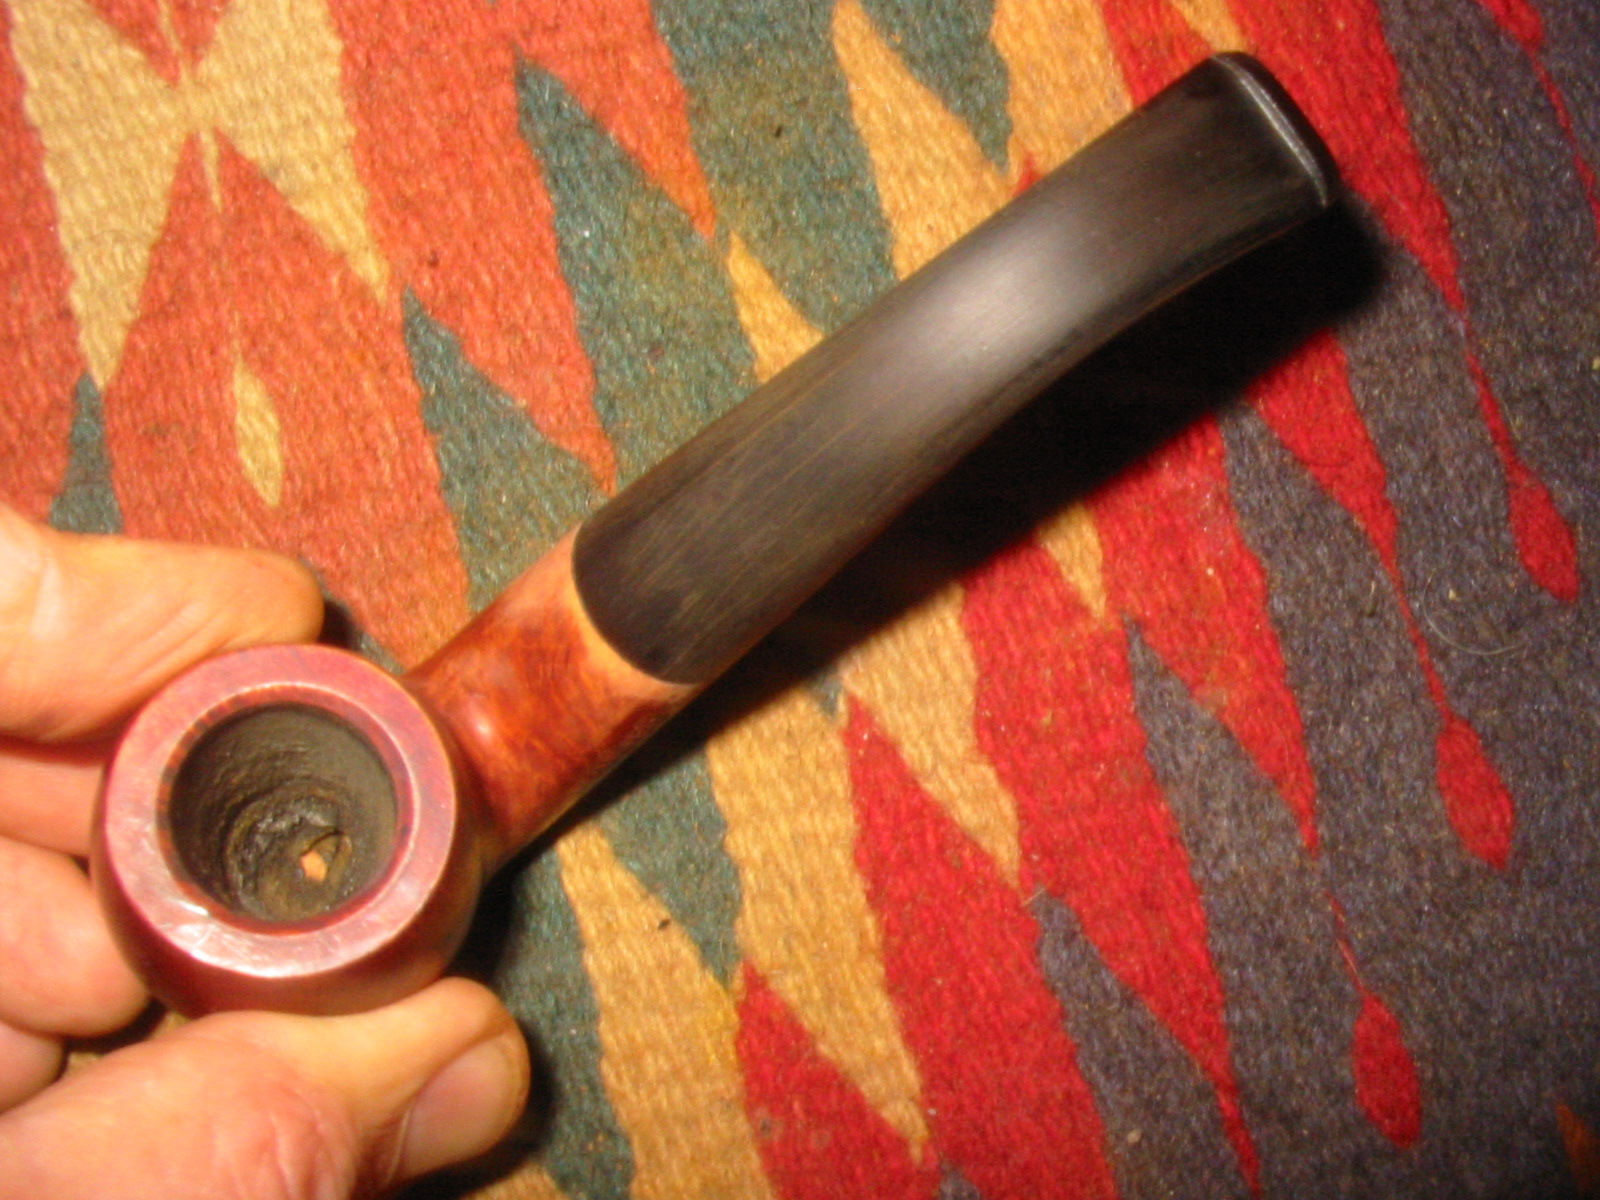
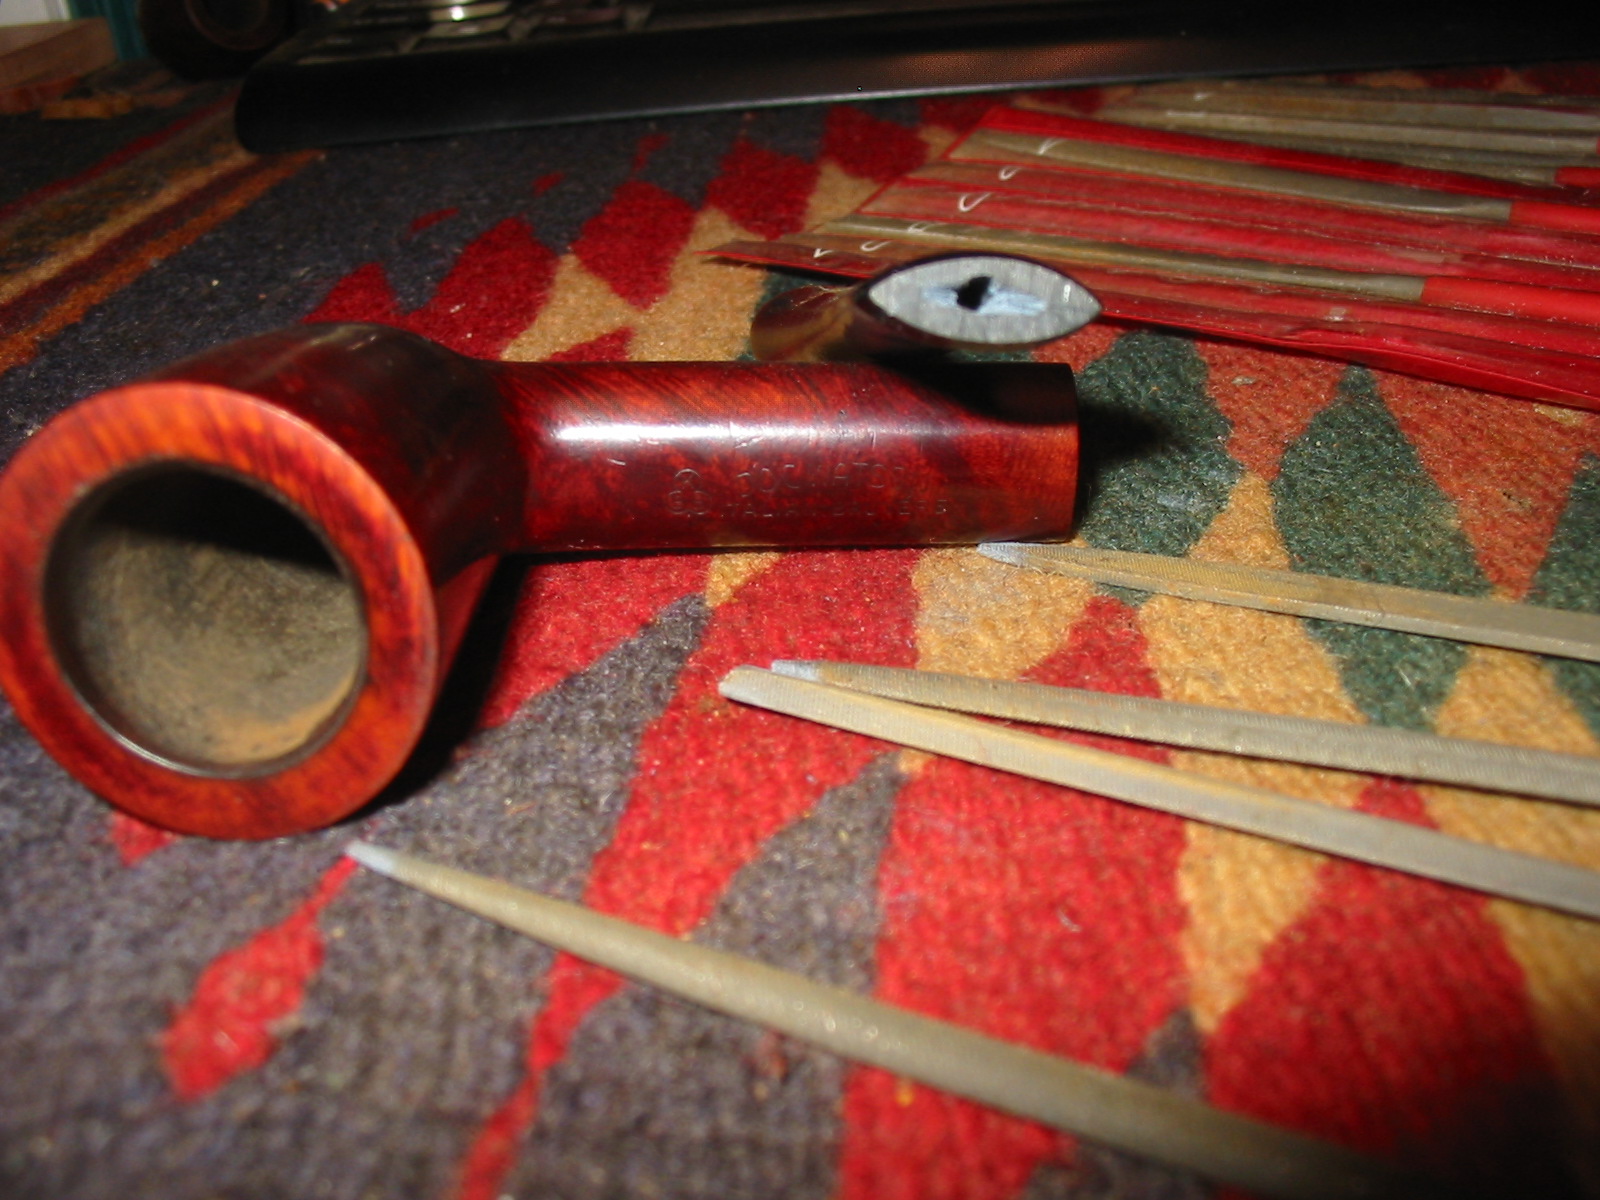
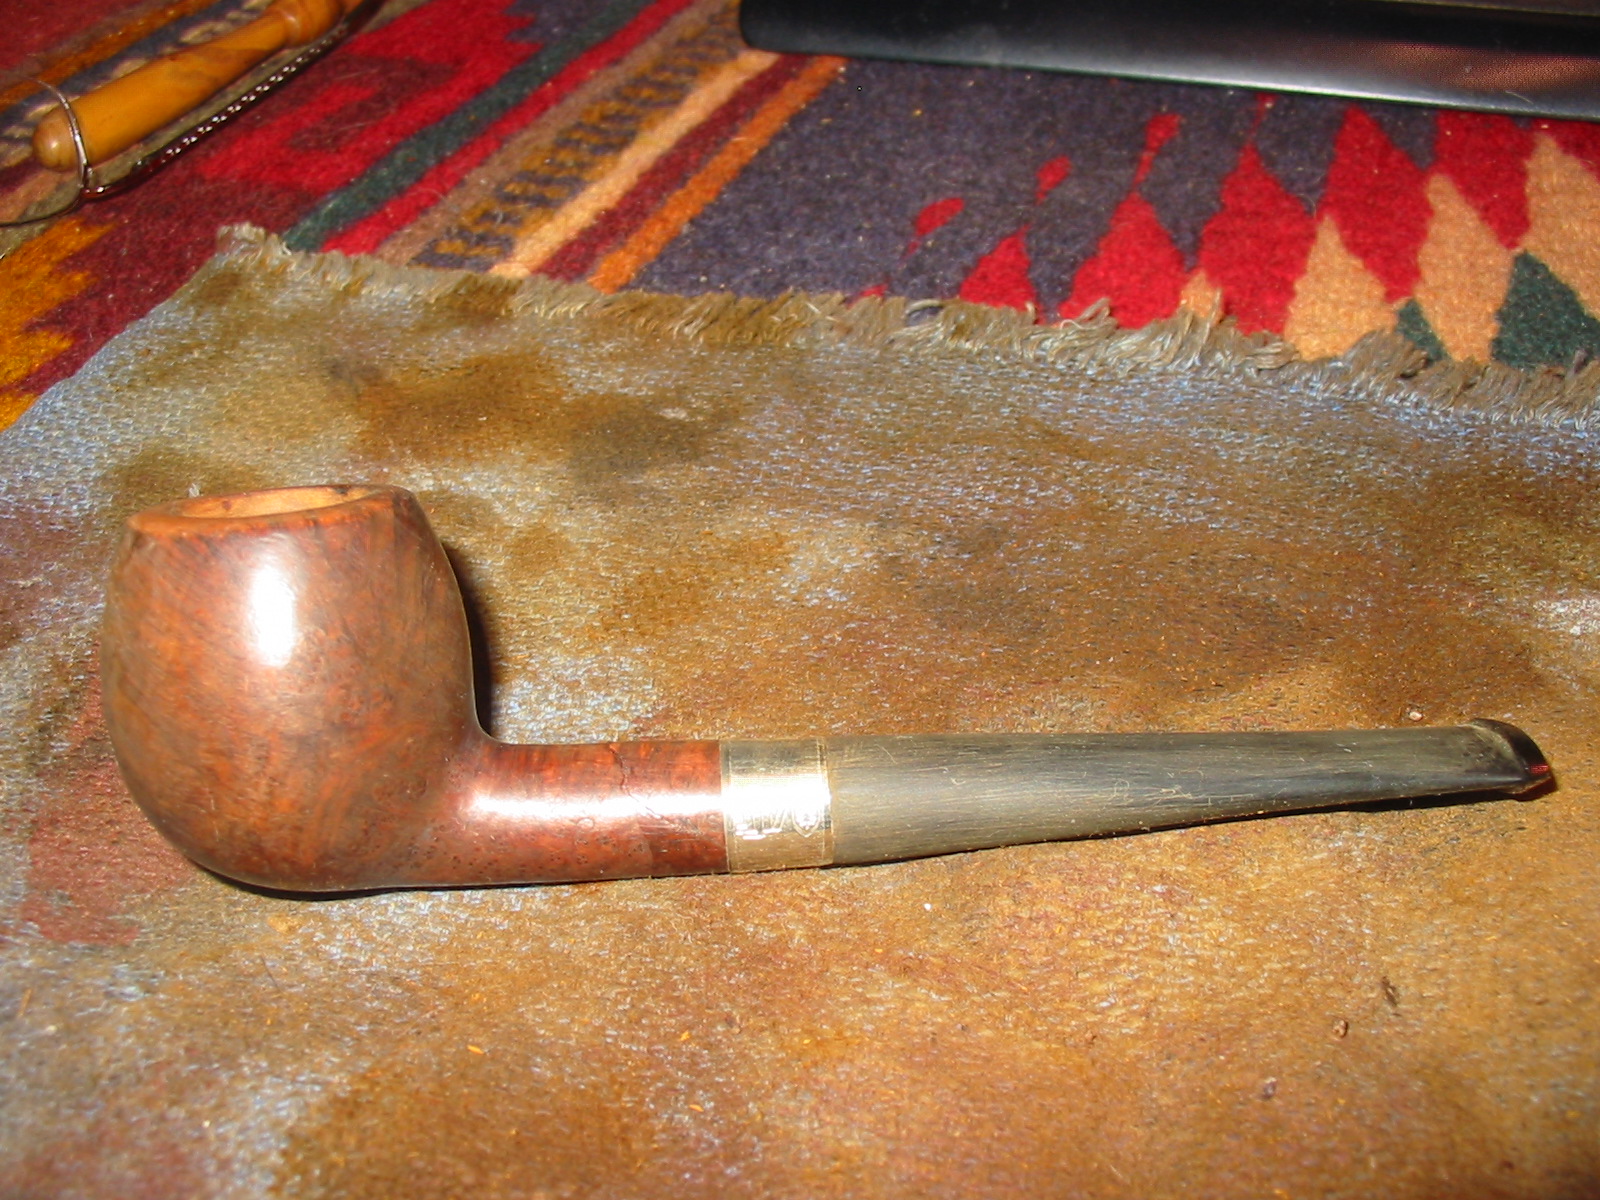
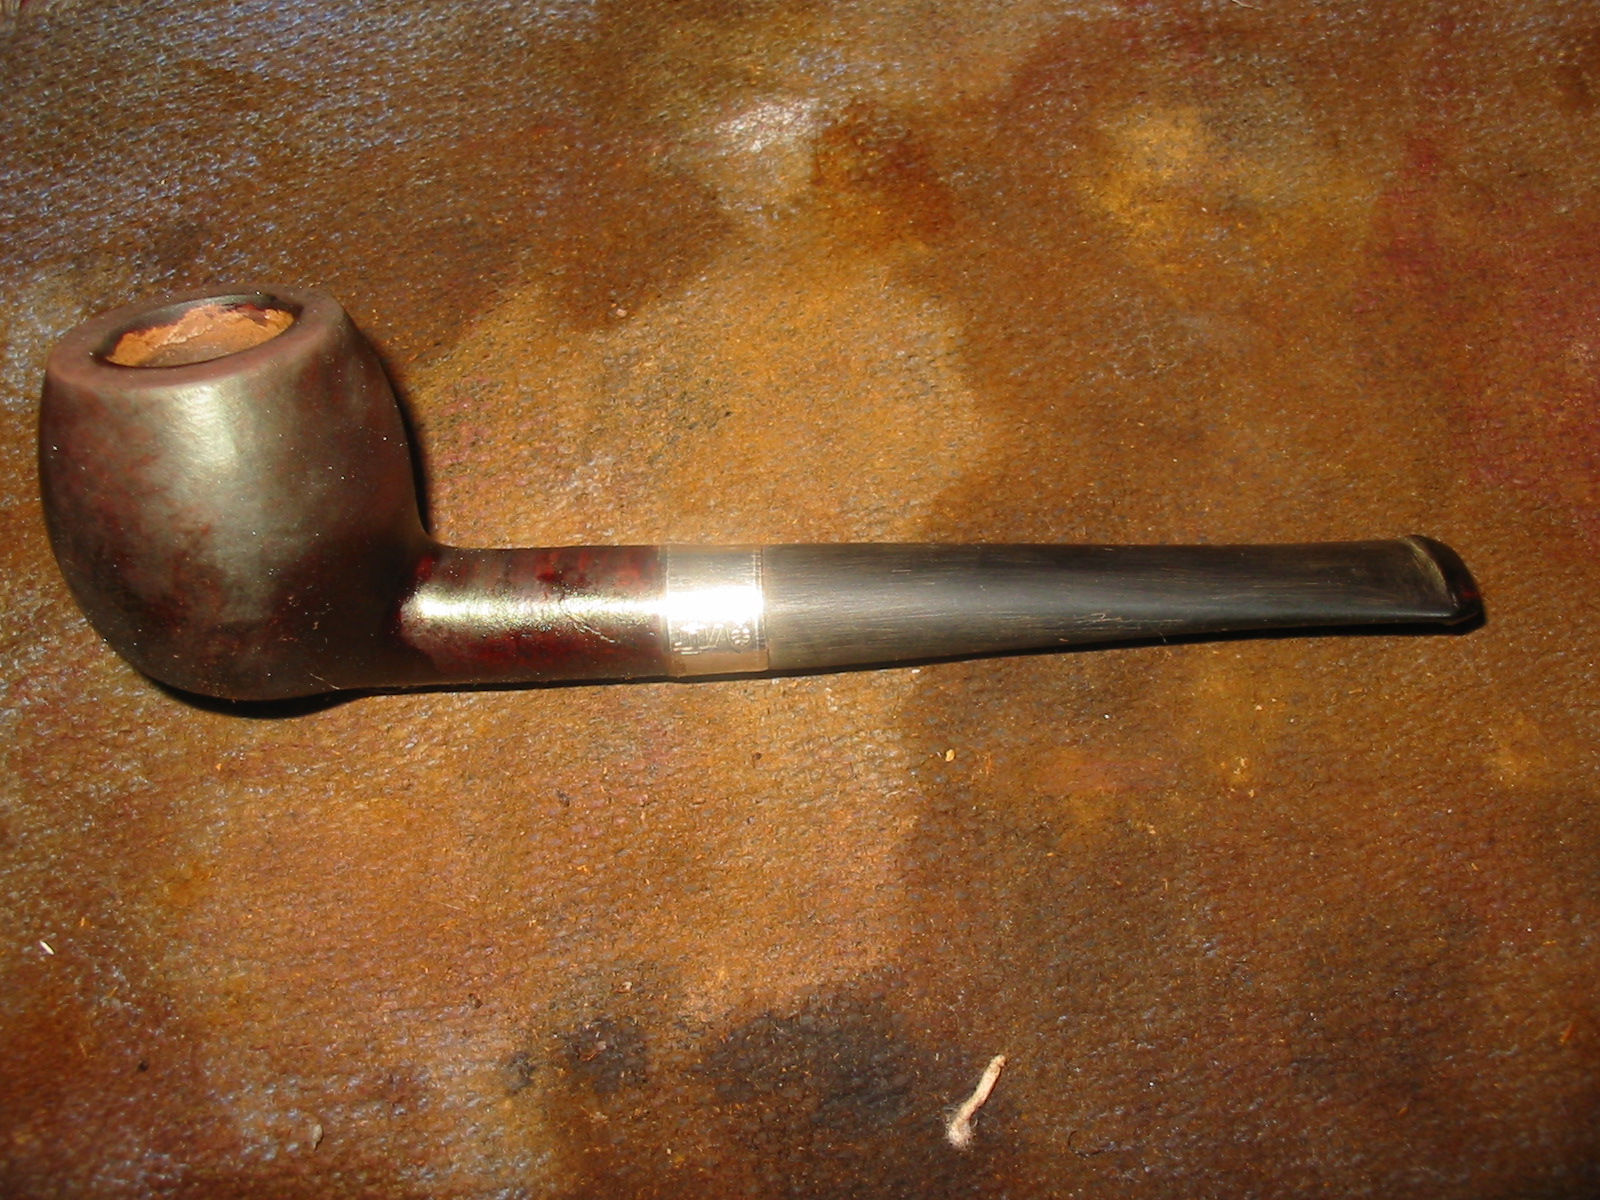
I just finished restoring and restemming an older Yello-Bole billiard. The bowl was stamped with the KBB (no ampersand) on the left side of the shank and next to it is stamped Yello-Bole in capital letters. Underneath is stamped Honey Cured Briar. On the right side of the shank it is stamped 2068B.
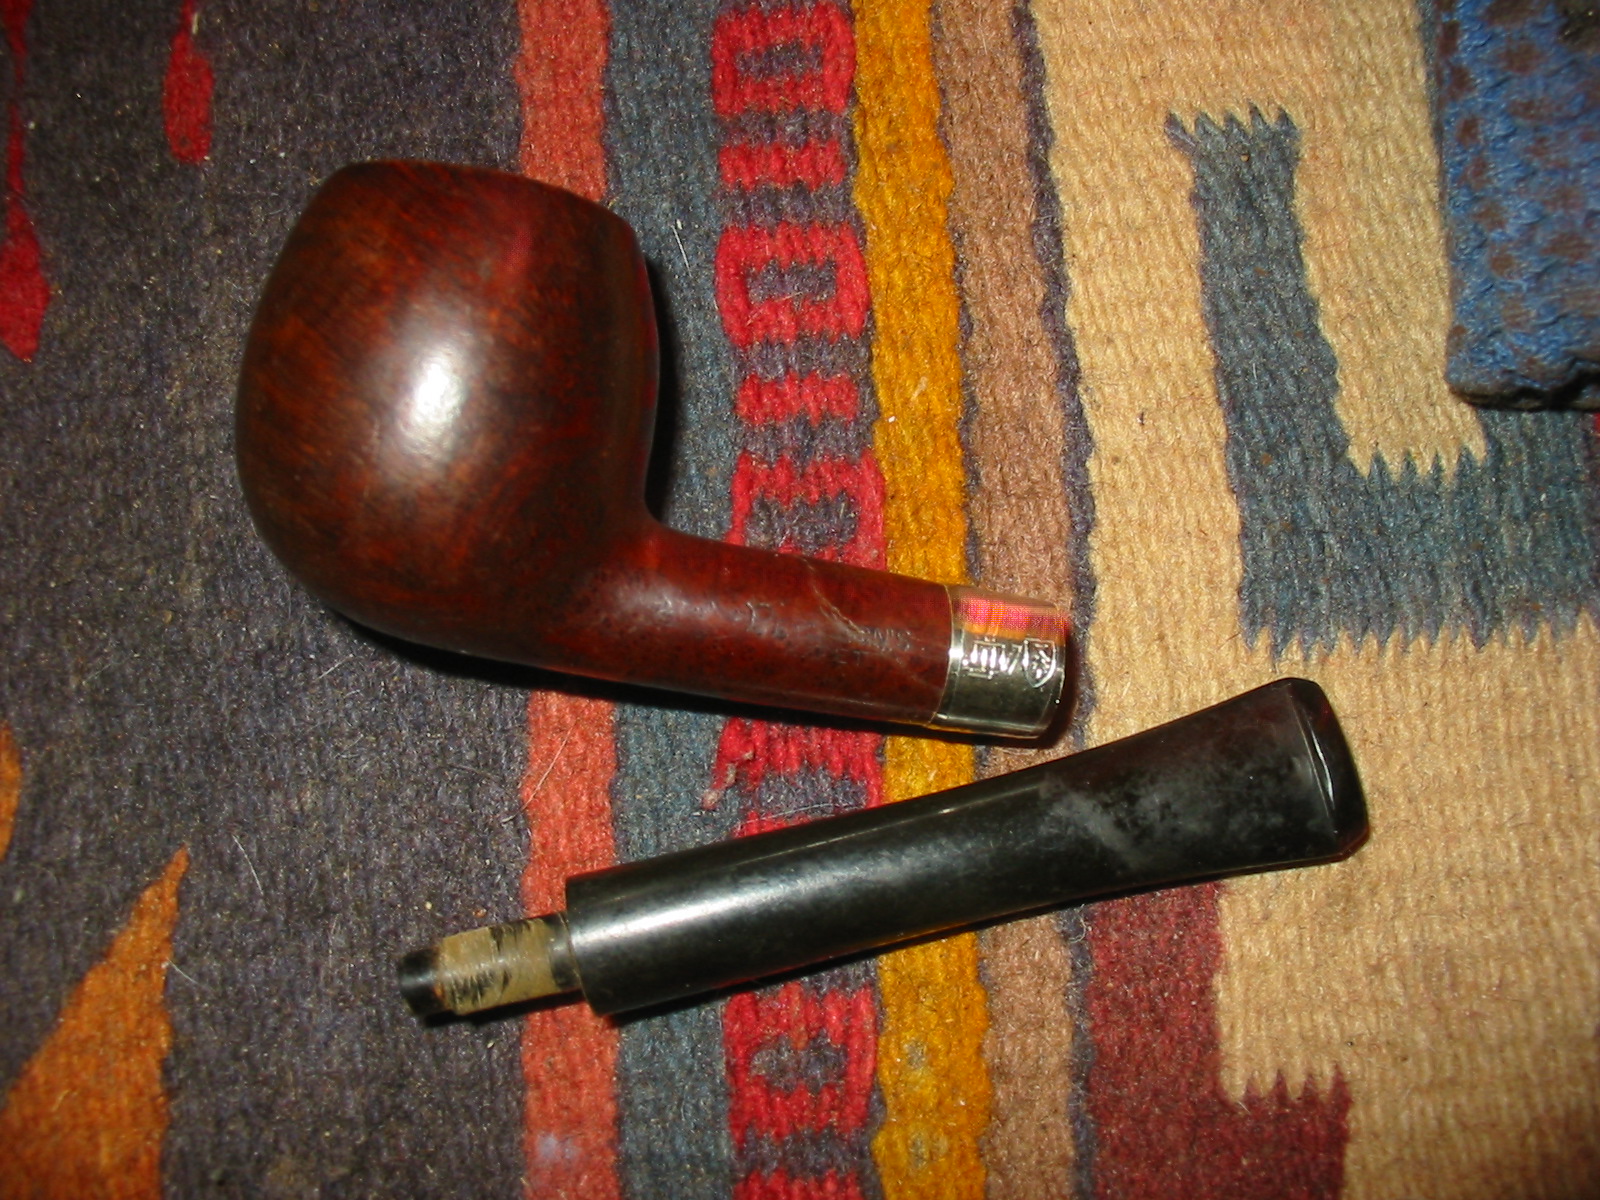
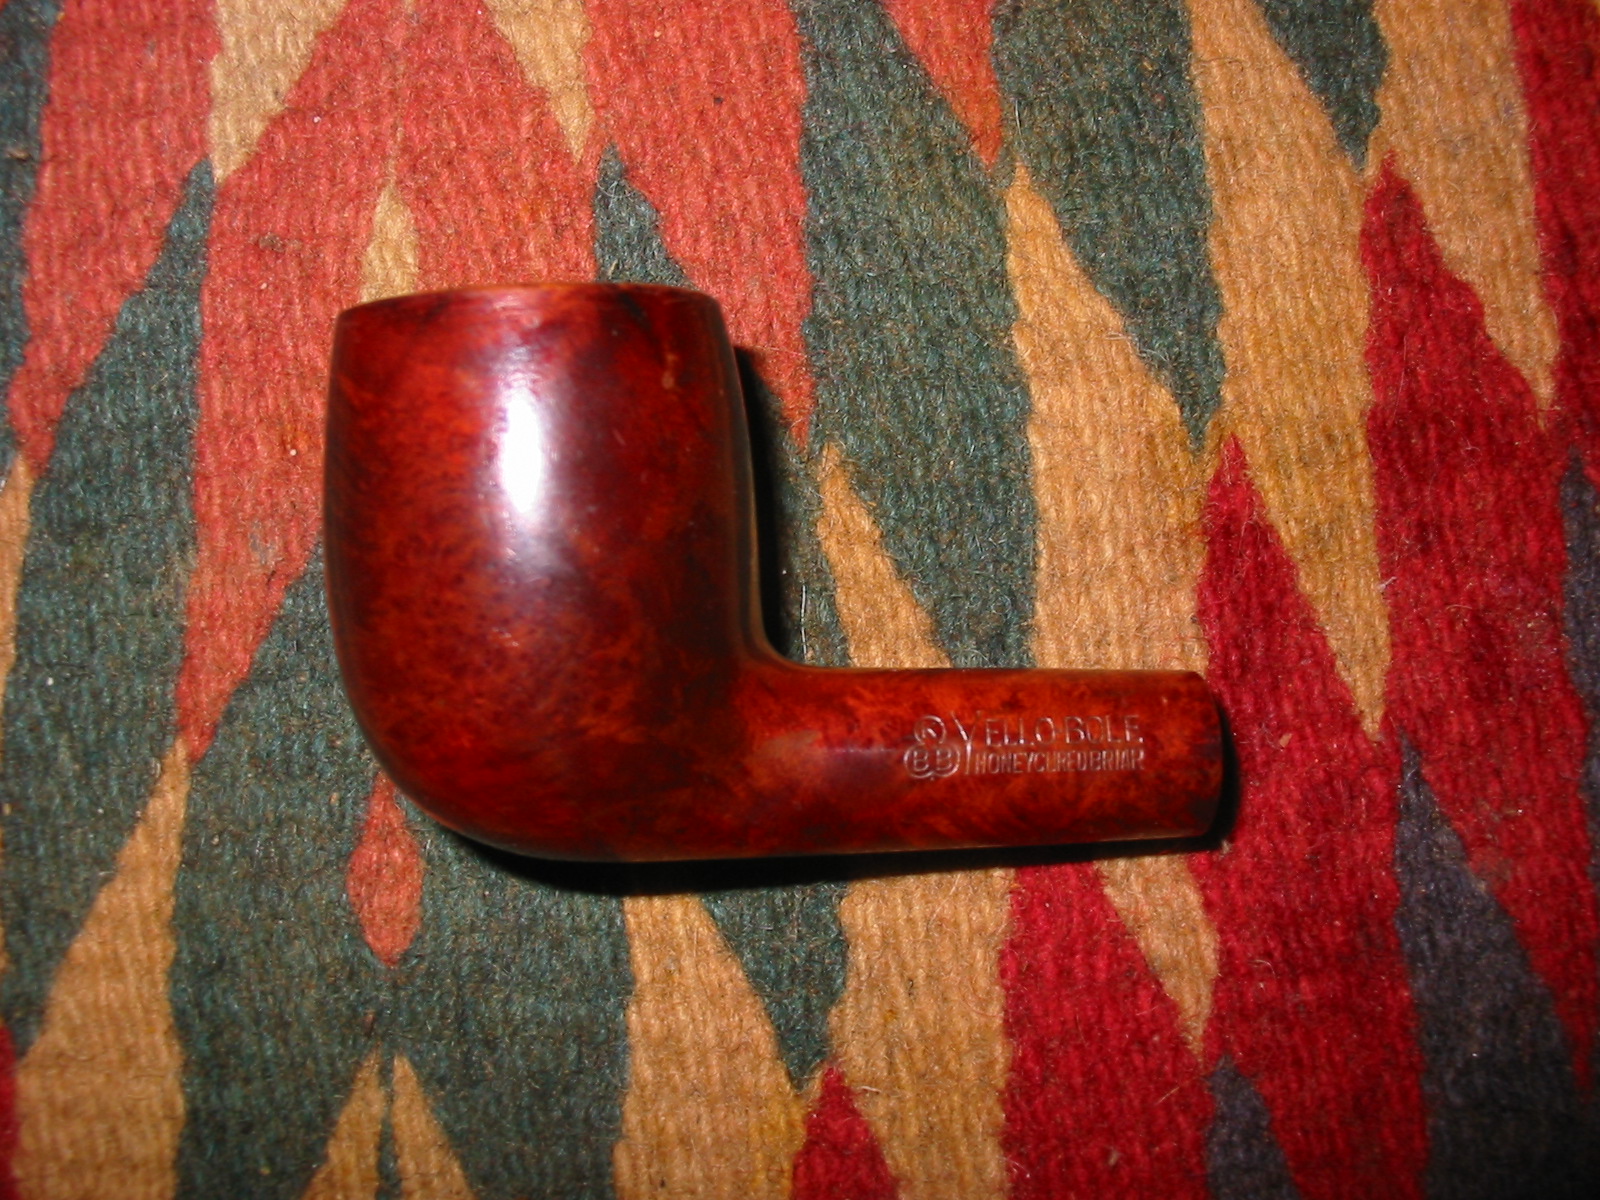 The bowl was in decent shape. The finish had a heavy coat of varnish over the stain but the briar appeared to be quite nice. I could not find any visible fills in the bowl. There was some good grain under the varnish. The rim had been topped and was rounded and crowned. It still had some scratch marks in the wood and also it was stained in a much lighter colour than the rest of the bowl. The stem was missing. It originally had a push tenon stem as the mortise was not threaded. Fitting a new stem would not be difficult but getting proper look to the stem required that I had some idea of the era of the pipe. That pushed me to do a bit of research.
  Since Yello-Bole pipes are one of my favorite older US brands doing the research would be enjoyable. As with other early brands made in the states I have found that older is better. A KBB in a cloverleaf stamp will date them back to the ’30’s. I have found through my reading that the 4 digit shape numbers are older than 2 digit ones. The pipes with the logo on top of the stem are older than ones that have them on the side. That is just some of the information that I found with a cursory read through the forums and a variety of websites.
I found that Kaywoodie would sort shipments of briar and send the culls to be used for Yello-Boles, meaning they got some quality briar. One fellow on the web believes that is why Yello-Bole pipes tend to be smaller over all, working around flaws. He also said that he thinks calling them Kaywoodie seconds is a bit of a misnomer, being that Kaywoodie was one of the largest briar purchasers in the world at the time (’20’s-50’s) and got some fantastic wood.
I came across the SM Frank website http://www.smfrankcoinc.com/home/?page_id=2 and found a wealth of historical information on Kaywoodies, Yello-Boles and the merger between KBB and SM Frank and later Demuth. It was a great read and I would encourage others to give the website a read. The information in the next paragraph was condensed from that site. I found confirmation for the statement above that the Yello-Bole line was an outlet for lower grade briar not used in Kaywoodie production. Yello-Bole’s were introduced in 1932 and manufactured by Penacook, New Hampshire subsidiary, The New England Briar Pipe Company. Advertising from the 1940′s, pictures the Yello-Bole “Honey Girl” and urges the pipe smoker to smoke the pipe with “a little honey in every bowl.” Honey was an ingredient of the material used to line the inside of the bowl. It was said to provide a faster, sweeter break-in of the pipe.
I went hunting further to see if I could find information on establishing dates for Yello-Bole pipes and found that there was not a lot of information other than what I had found above. Then I came across this link to the Kaywoodie Forum: http://kaywoodie.myfreeforum.org/archive/dating-yello-bole-pipes__o_t__t_86.html I quote the information I found there as it gives the only information that I found in my hunt to this point.
“OK so there isn’t a lot of dating information for Yello-Bole pipes but here is what I have learned so far.
– If it has the KBB stamped in the clover leaf it was made 1955 or earlier as they stopped the stamping after being acquired by S.M. Frank.
– From 1933-1936 they were stamped Honey Cured Briar.
– Pipes stems stamped with the propeller logo they were made in the 30s or 40s no propellers were used after the 40s.
– Yello-Bole also used a 4 digit code stamped on the pipe in the 30s.
– If the pipe had the Yello-Bole circle stamped on the shank it was made in the 30s this stopped after 1939.
– If the pipe was stamped BRUYERE rather than briar it was made in the 30s.
That is all I have in my notes right now I don’t have anything on the multitude of stem stampings or any other age indicators. If anyone has more definitive information or other methods of determining date please feel free to post it and I will edit this as I go. I currently have 2 from the 30s and 6 from pre 55 and 2 fairly modern ones.”
One further item was also found on that site. It was just a passing comment in the midst of some information on Kaywoodie pipes. I quote: “The pre-Kaywoodie KB&B pipes were marked on the shank with a cloverleaf around KB&B. Some early Kaywoodies had this same marking on the shank, but the practice was dropped sometime prior to 1936. Yello-Boles also had KBB in the leaf on the shanks, but did not have the ampersand found on Kaywoodies.” (Highlighting is mine)
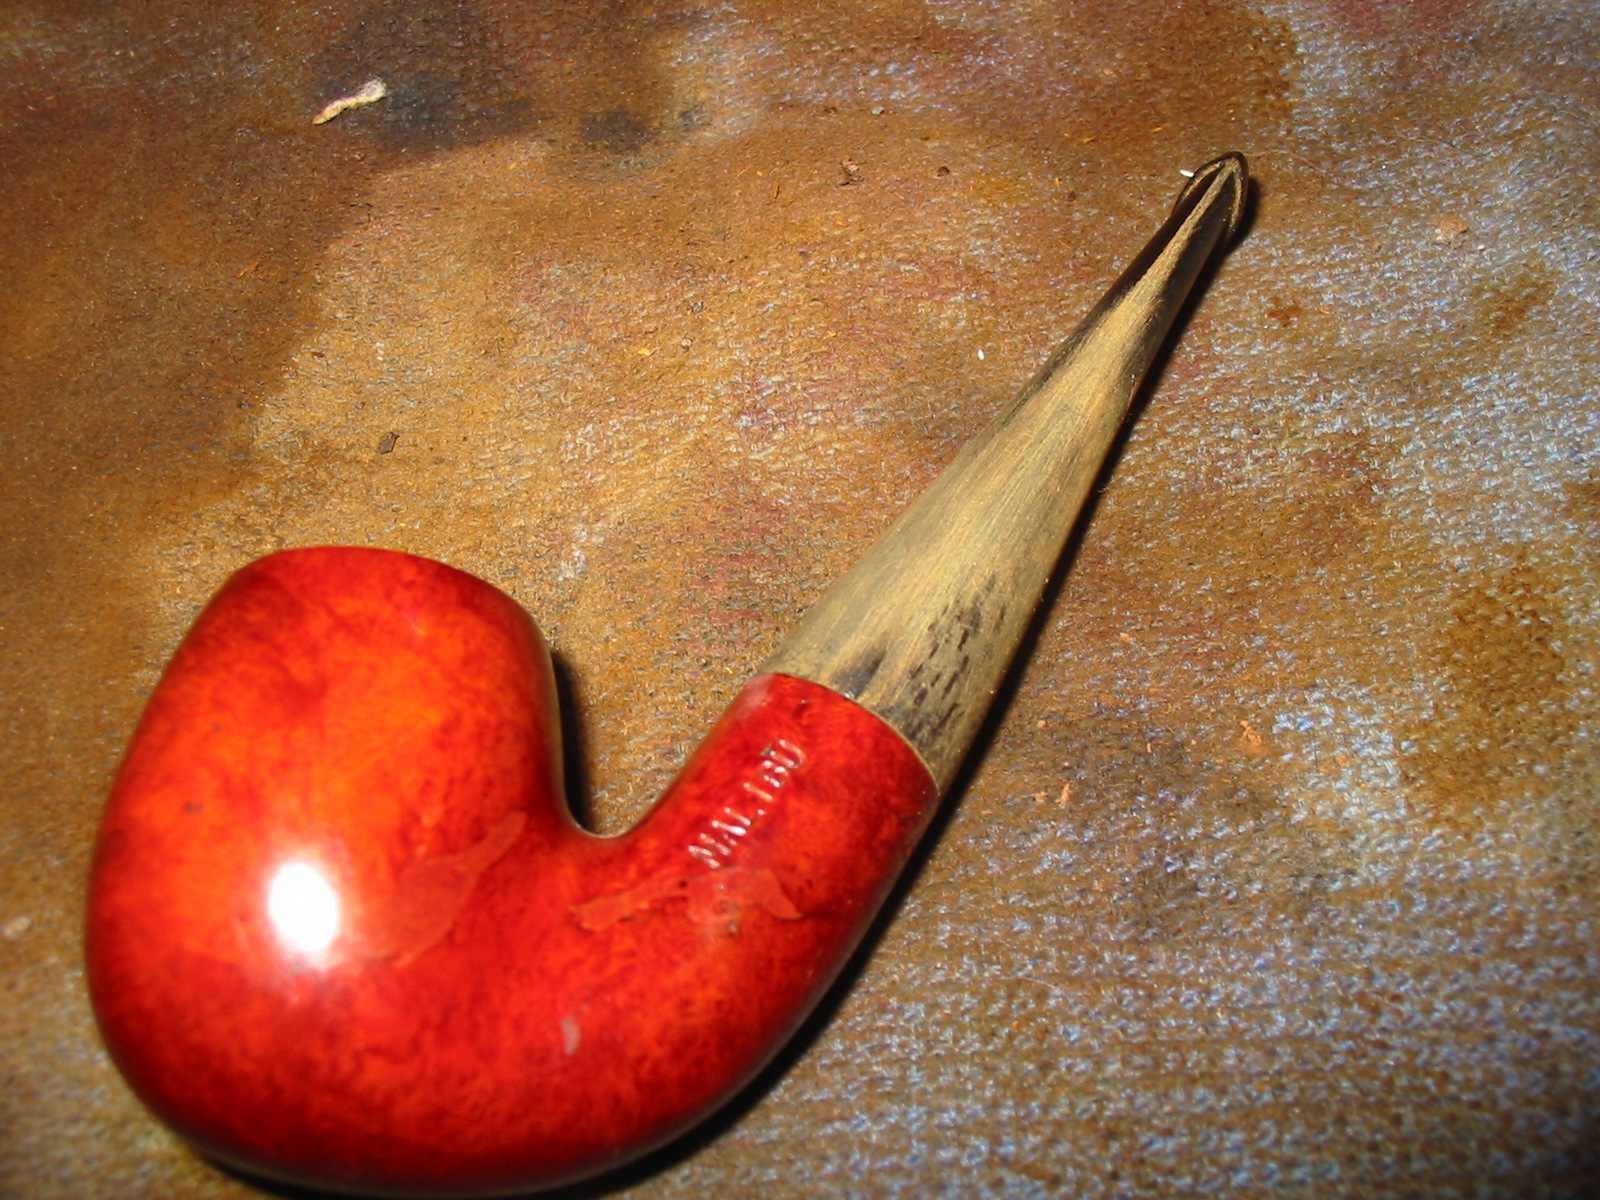
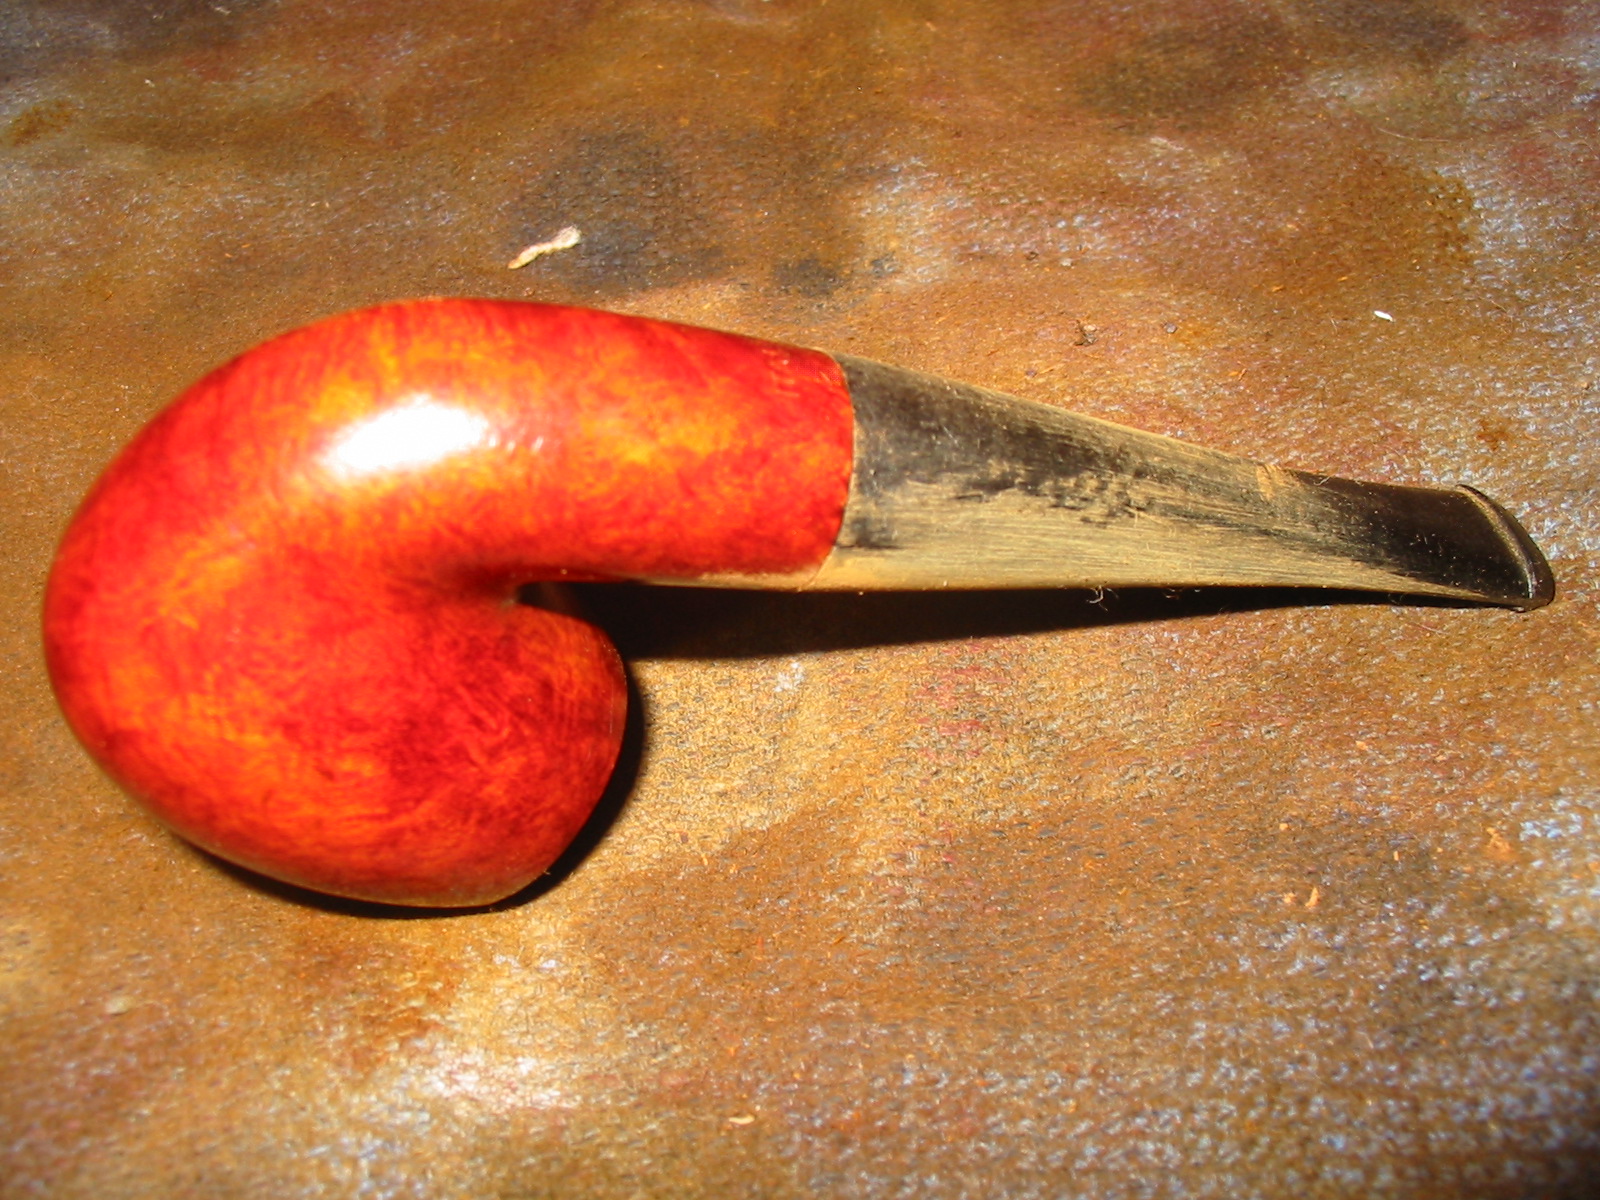
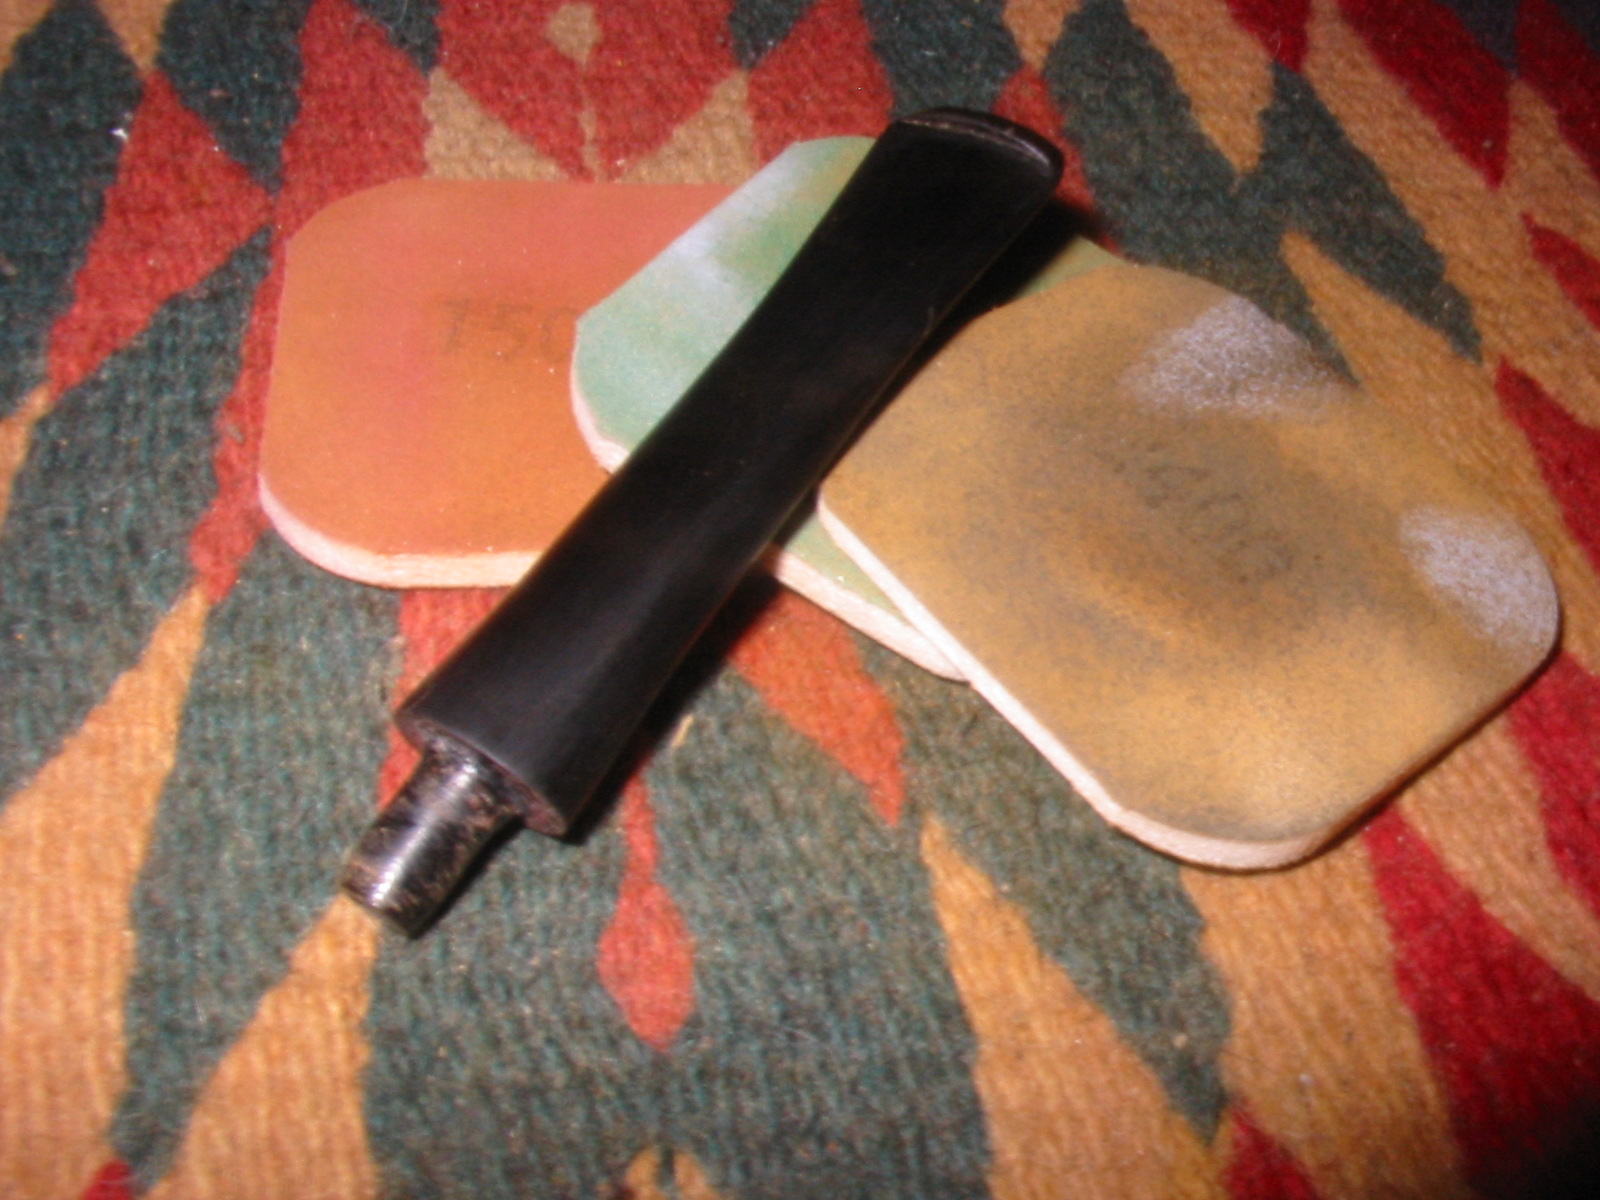
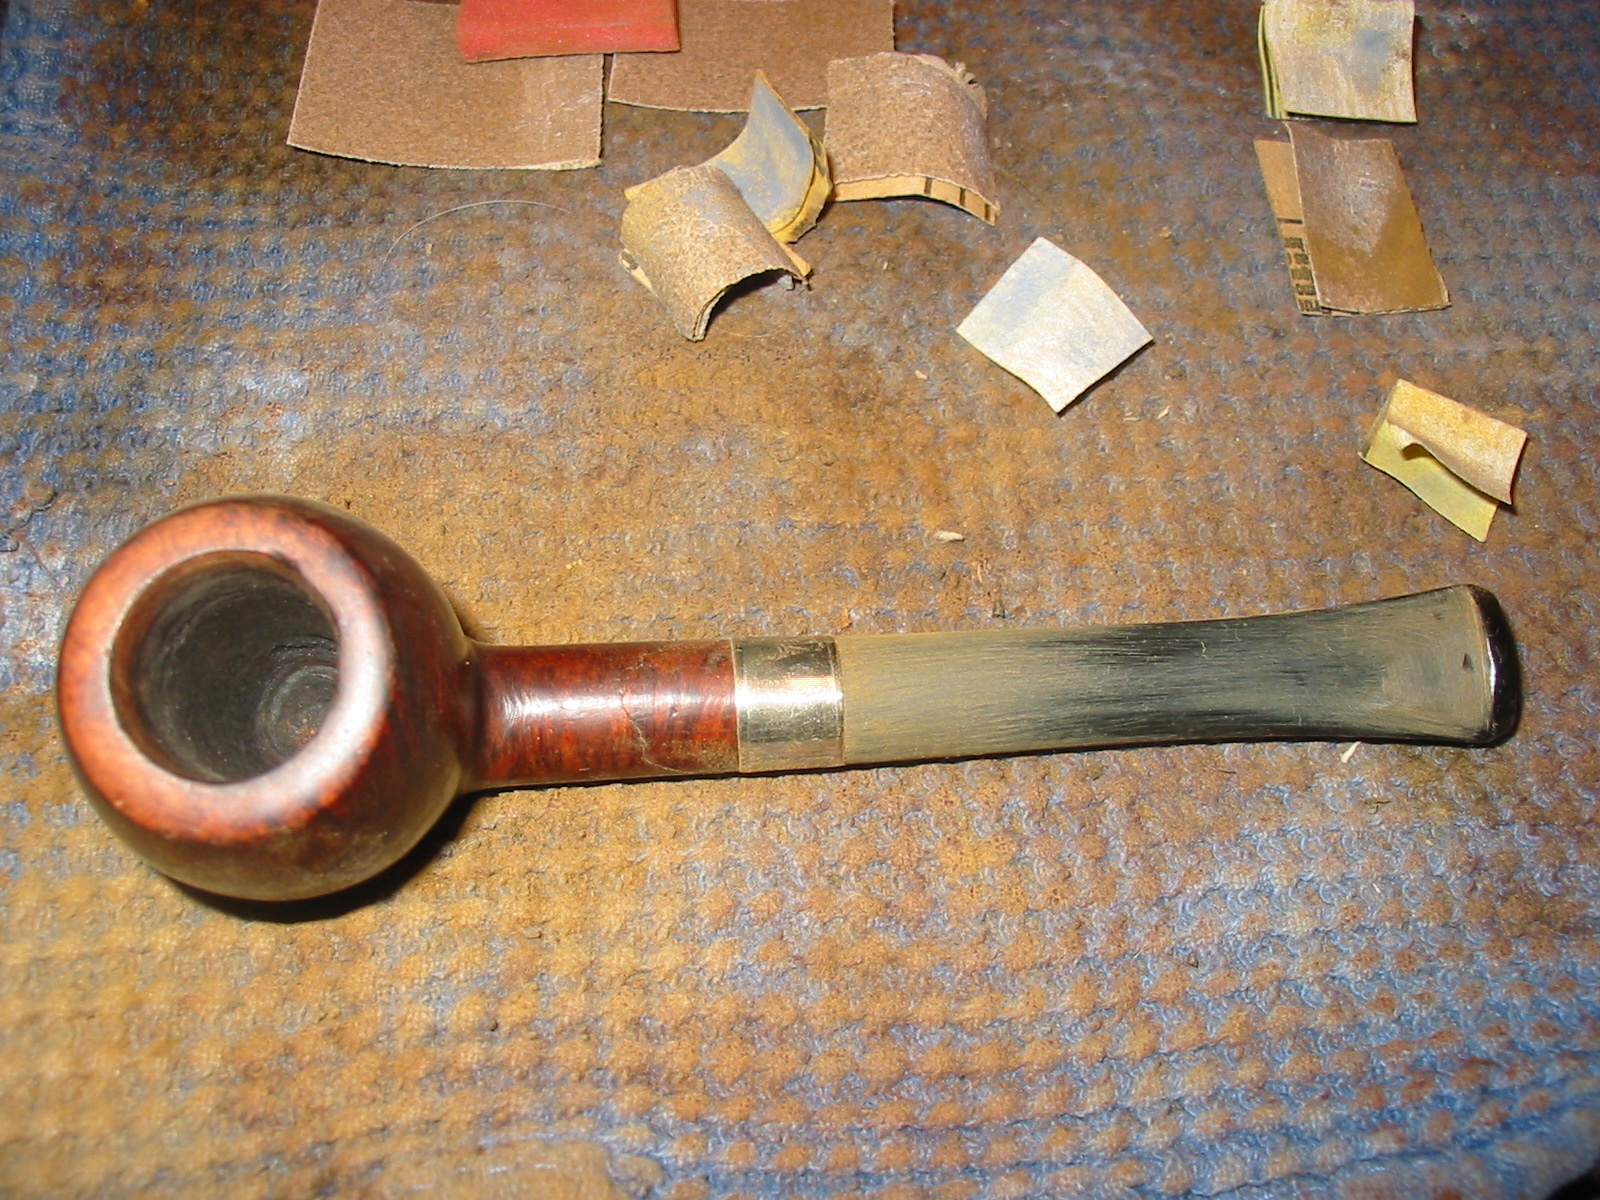
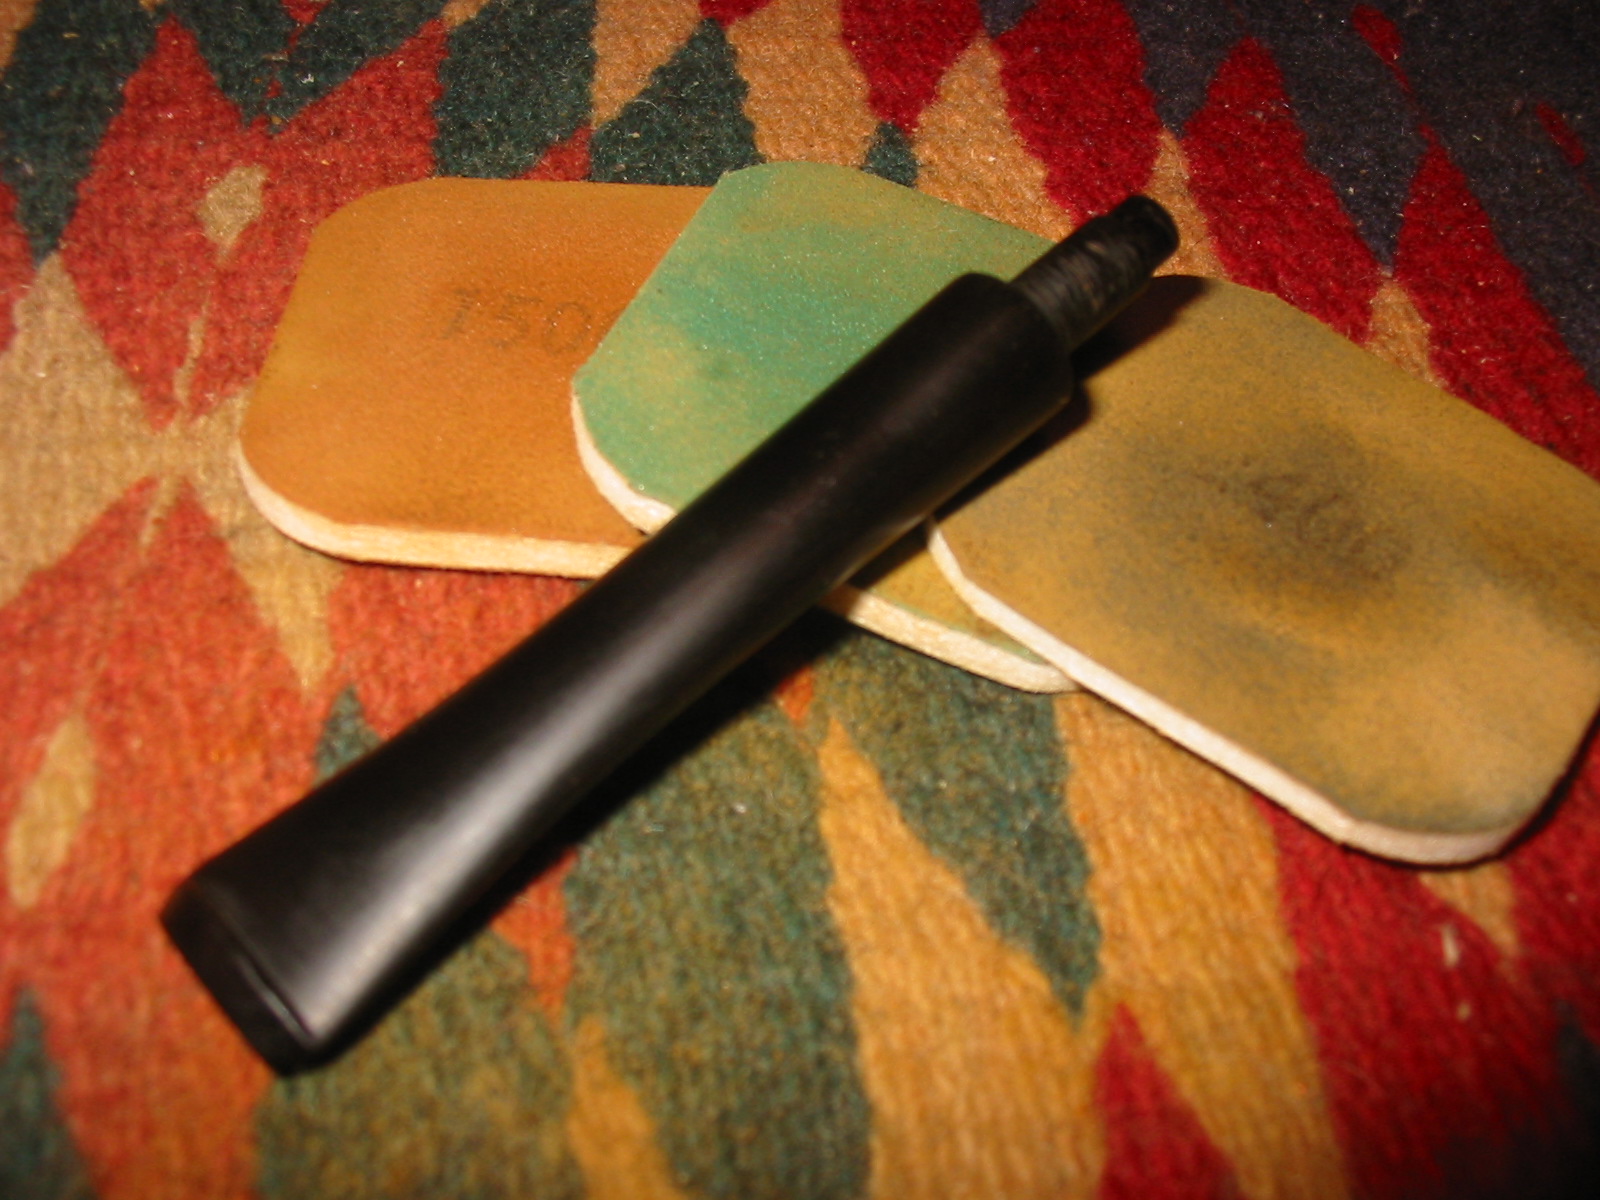
Given the above information I discovered that the pipe I was working on was made sometime between 1933-1936. It was stamped with the Honey Cured Briar stamping on the shank and had a four digit code. Thus it was an early Yello-Bole from the 1930s. With that information I had a fairly clear idea of what kind of stem I needed to fit to the shank. I looked for photos of the pipe online and found none from that era. So I looked at KW stems to get some sense of what the shape of the stem and the slope of the taper would have been like. I found one the shape I was looking for in my can of stems. It had the right taper and look and after turning the tenon I was able to fit it to the shank. The diameter of the stem was slightly larger than the shank on the top and would need to be sanded until the transition was smooth between the shank and stem. 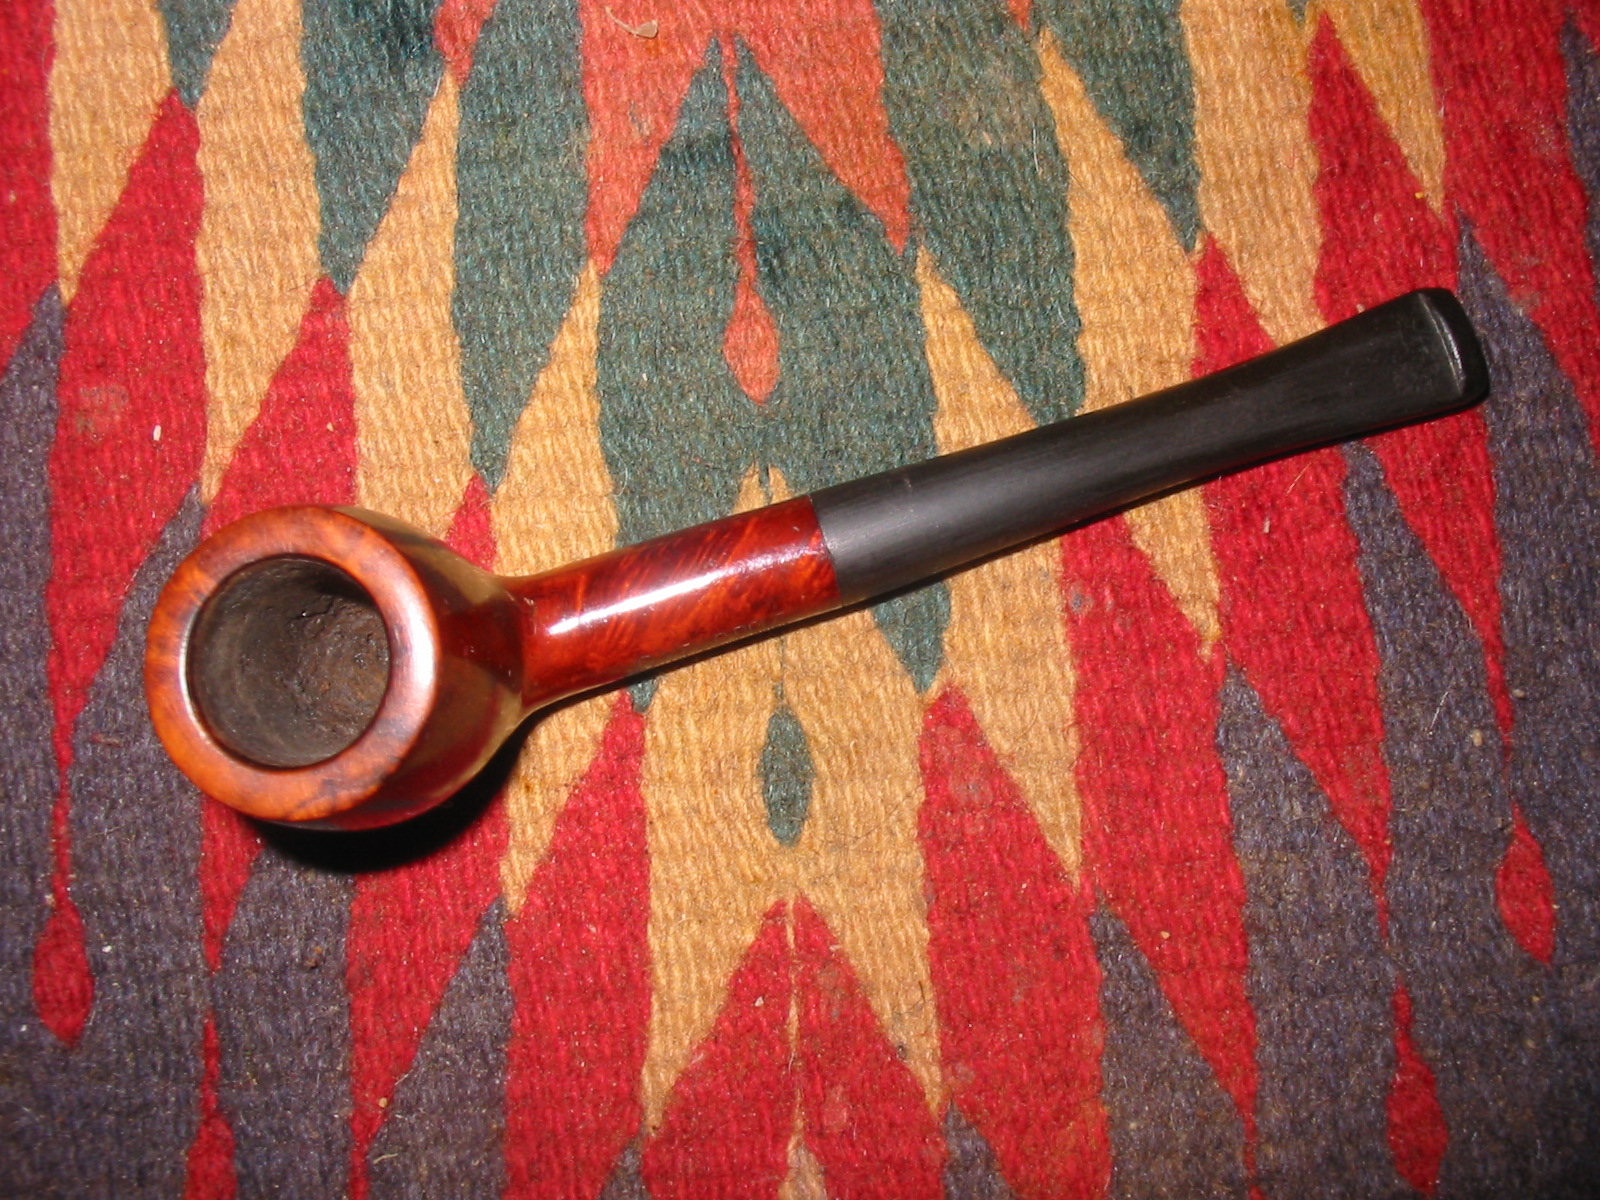 I sanded the stem with 220 grit sandpaper to remove the excess material on the top side. I sanded the shank to make the transition smooth. I planned on removing the varnish and touching up the stain on the rim anyway so to touch up the shank would not be a problem. I sanded carefully so as not to damage the stamping.
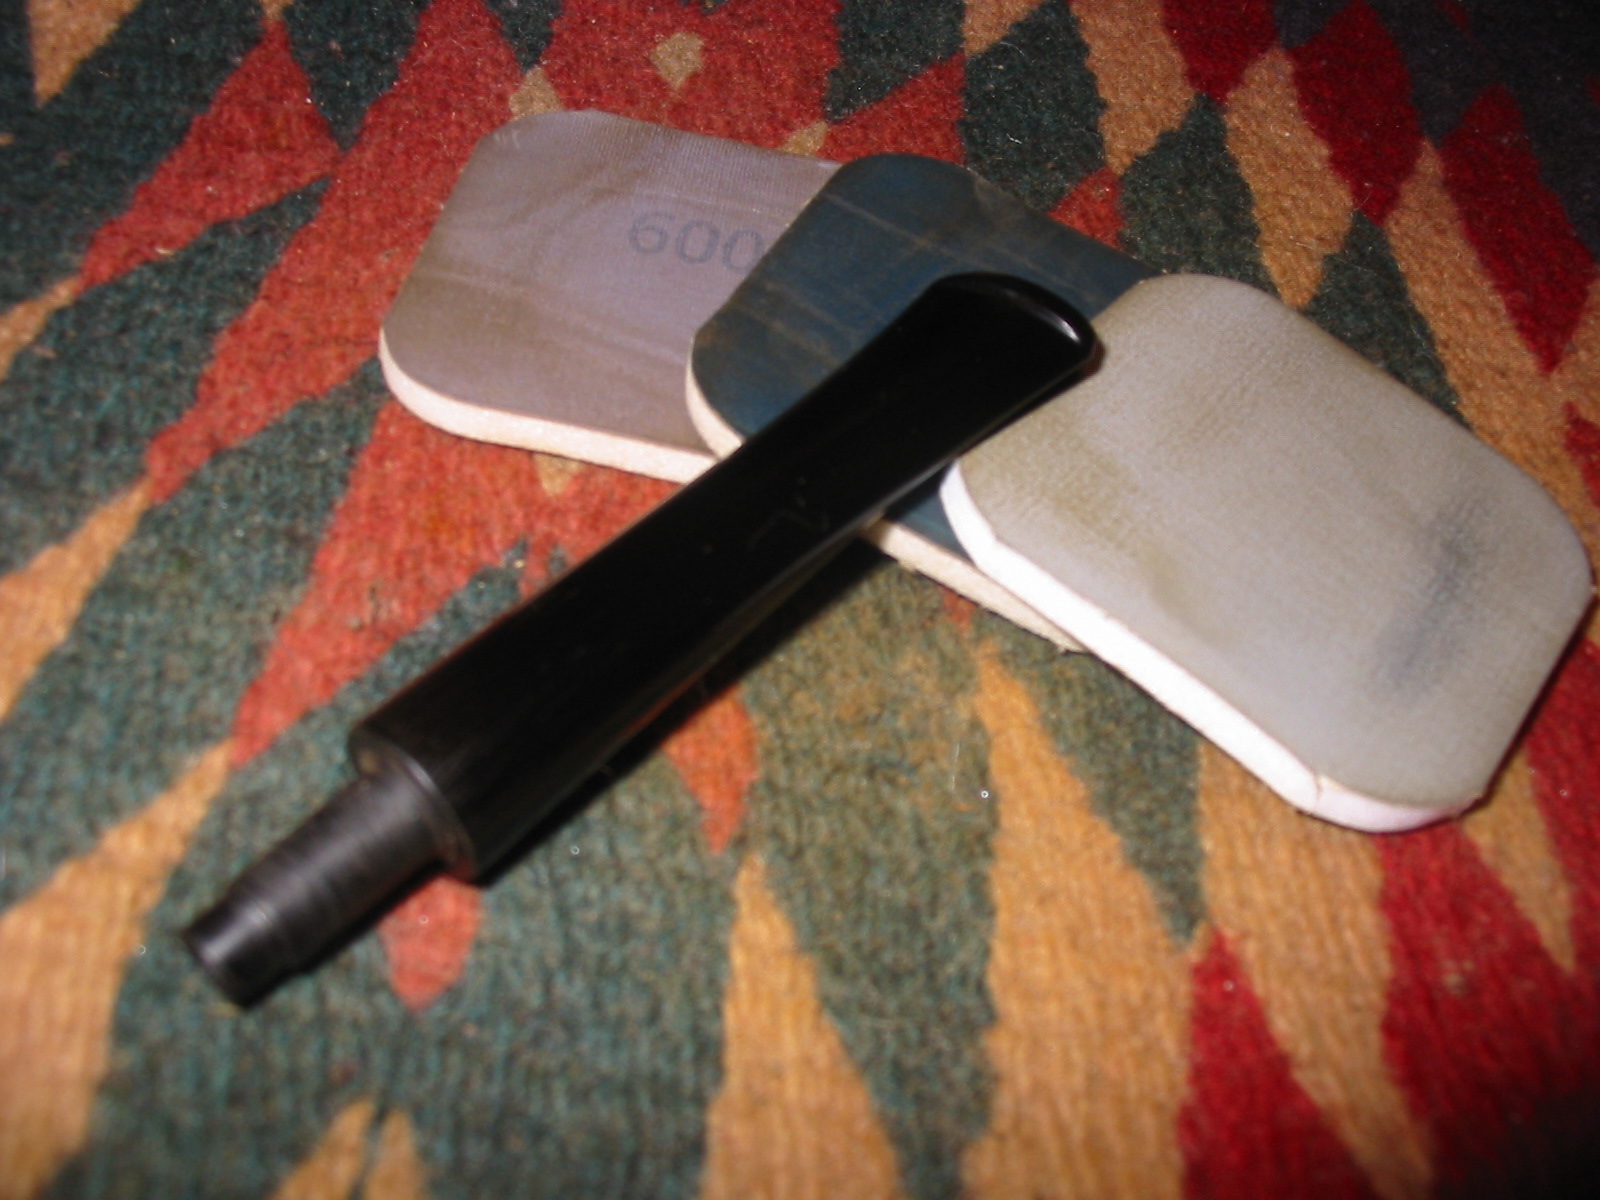
 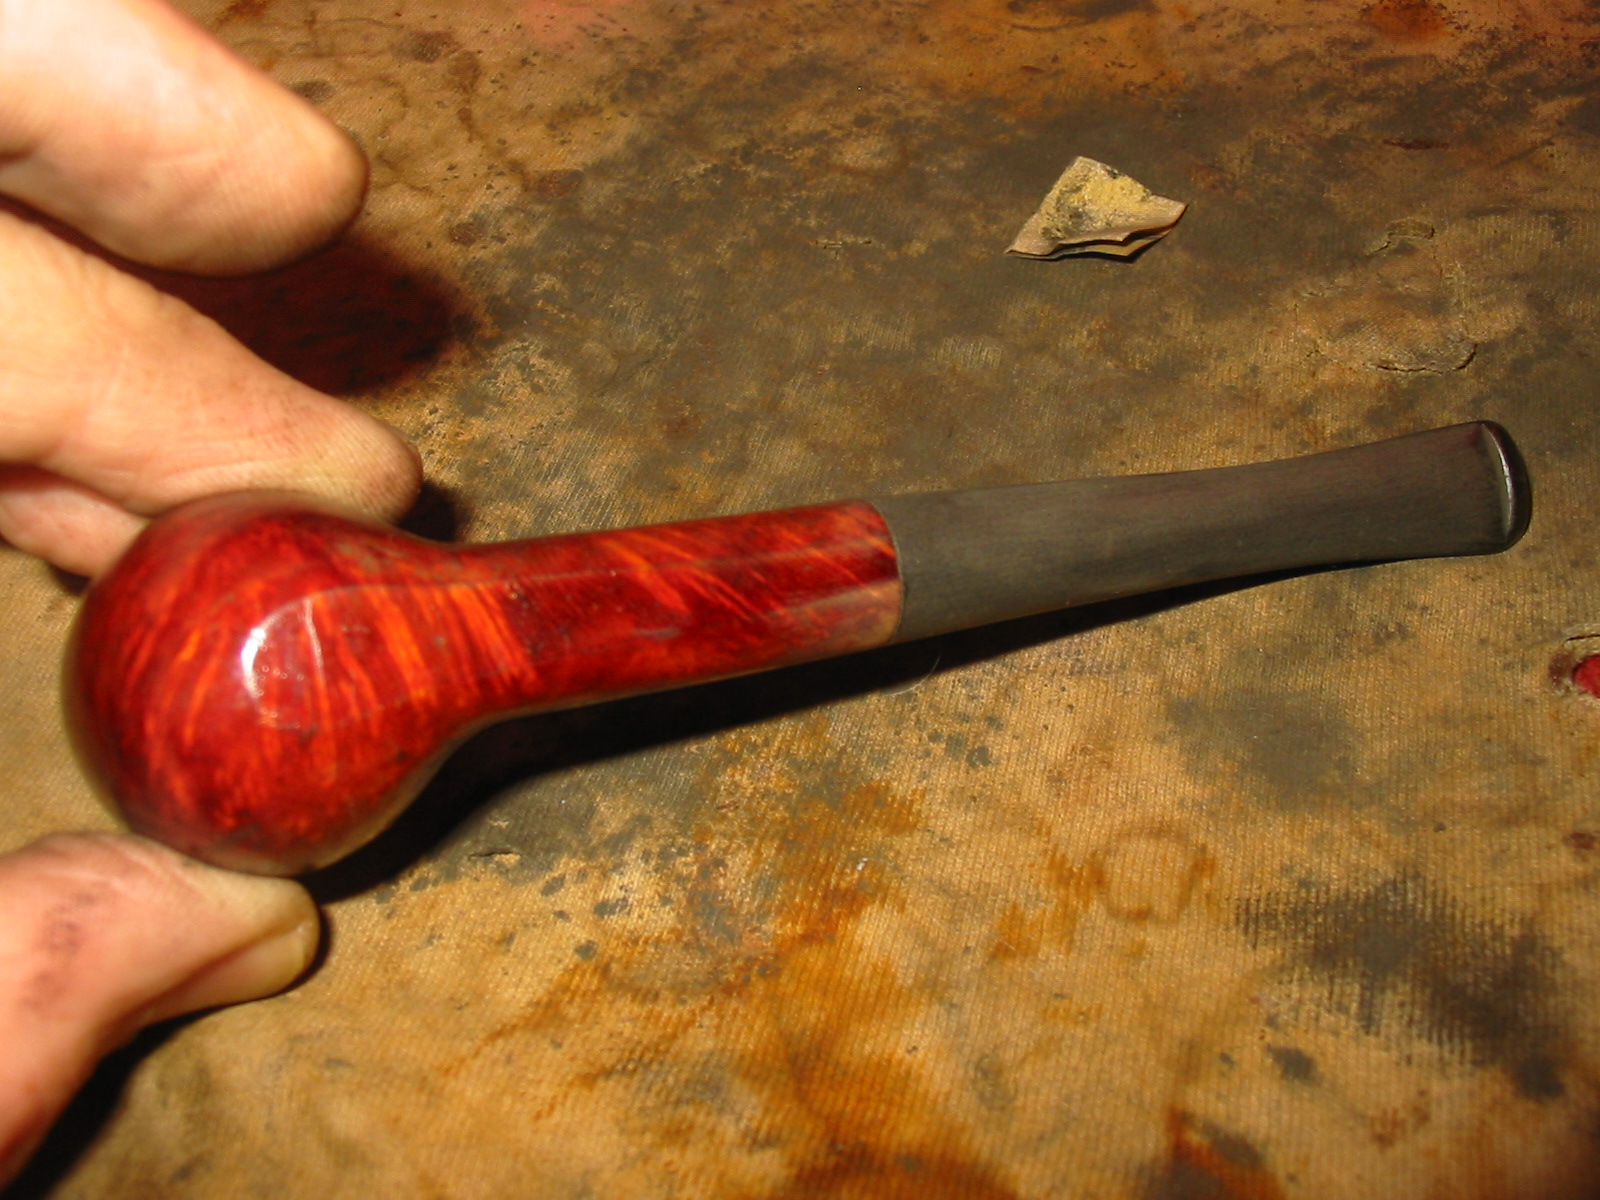 There were some slight ripples in the taper of the stem so I sanded it with a sanding block to smooth out the high points on the taper and even out the line.
 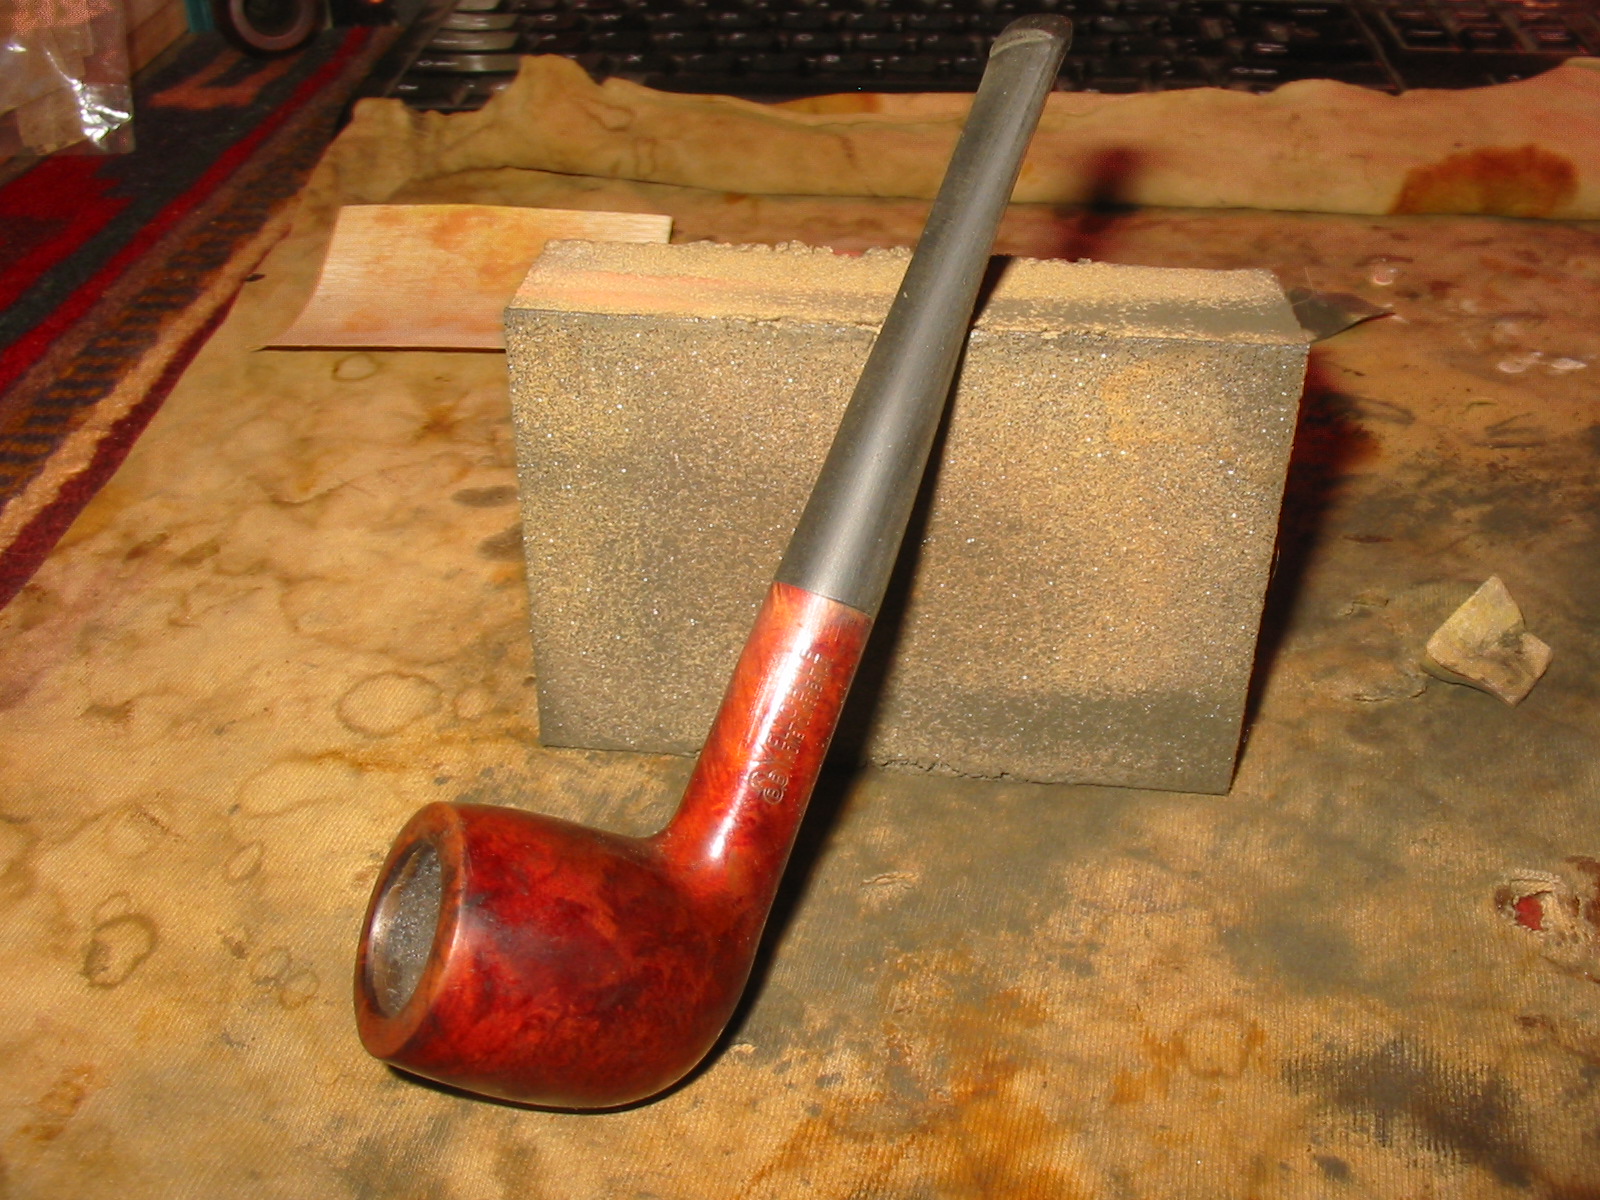 I wiped down the bowl with acetone and cotton pads to remove the varnish and some of the stain coat. I always do that when I am going to do a restain on the rim and shank as I find that it makes the new coat of stain much simpler.
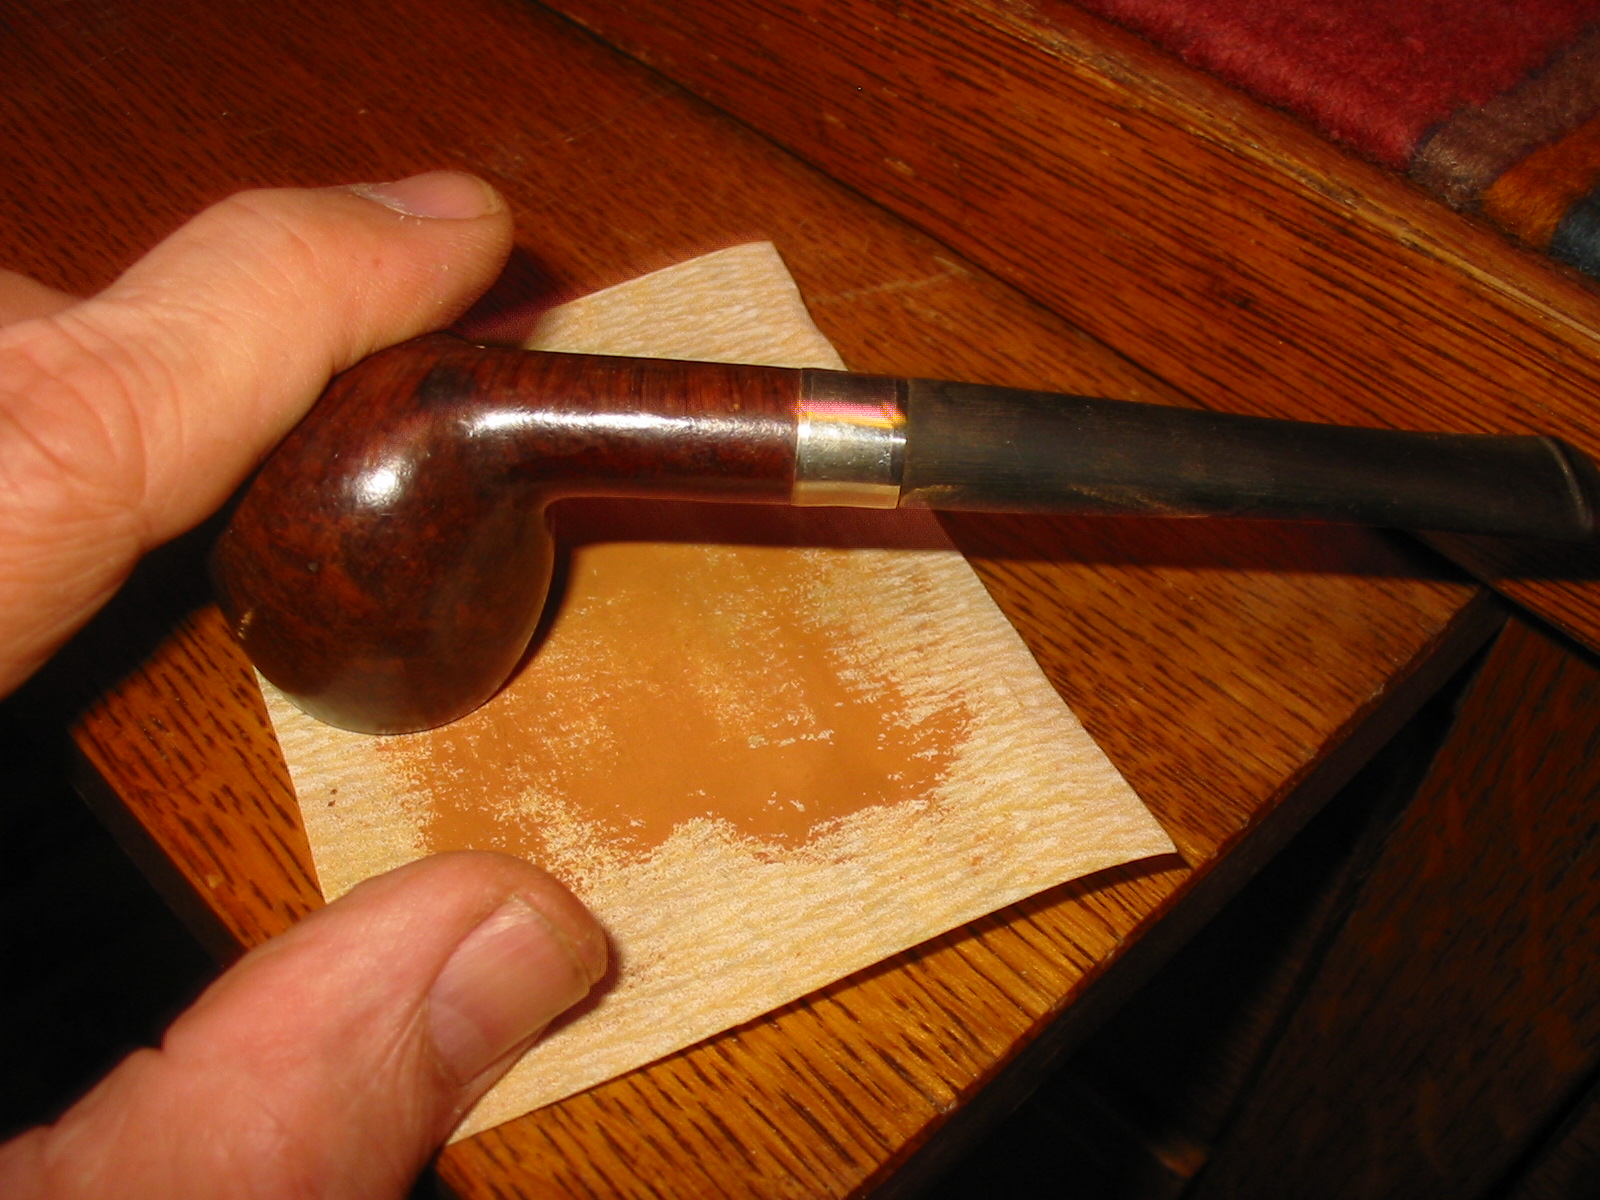
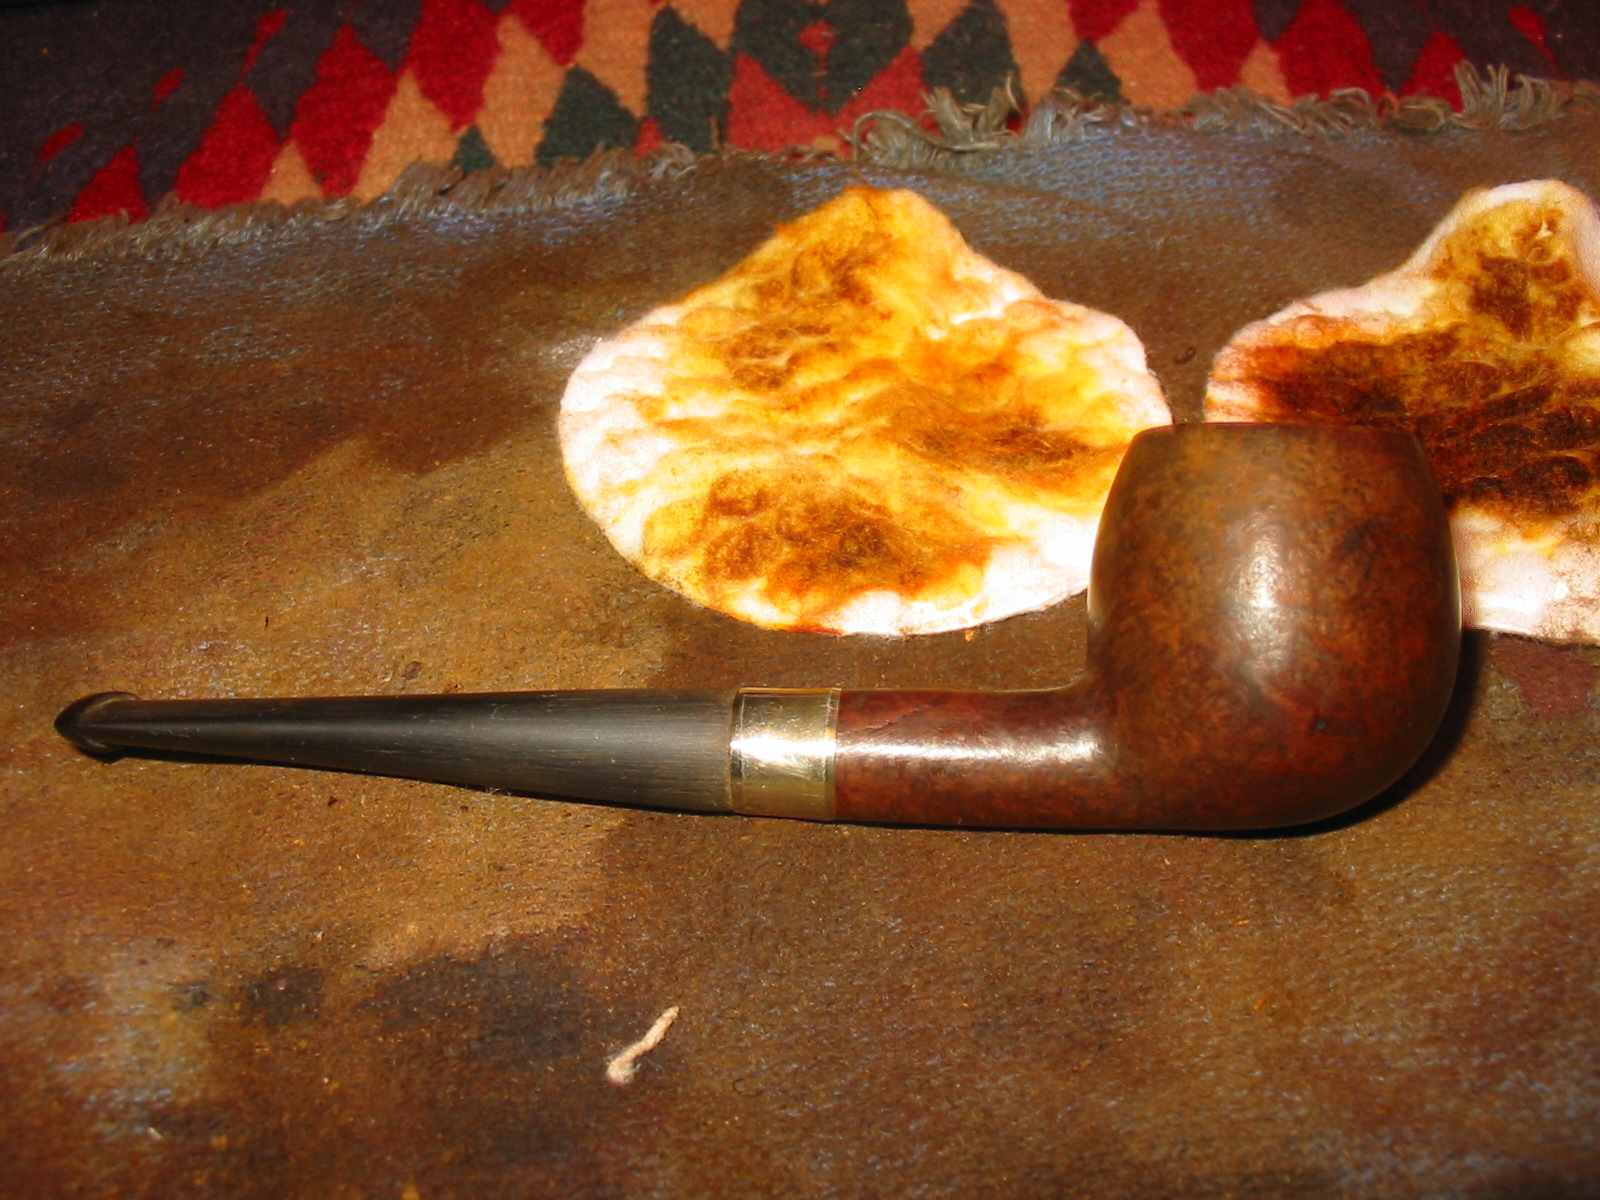
 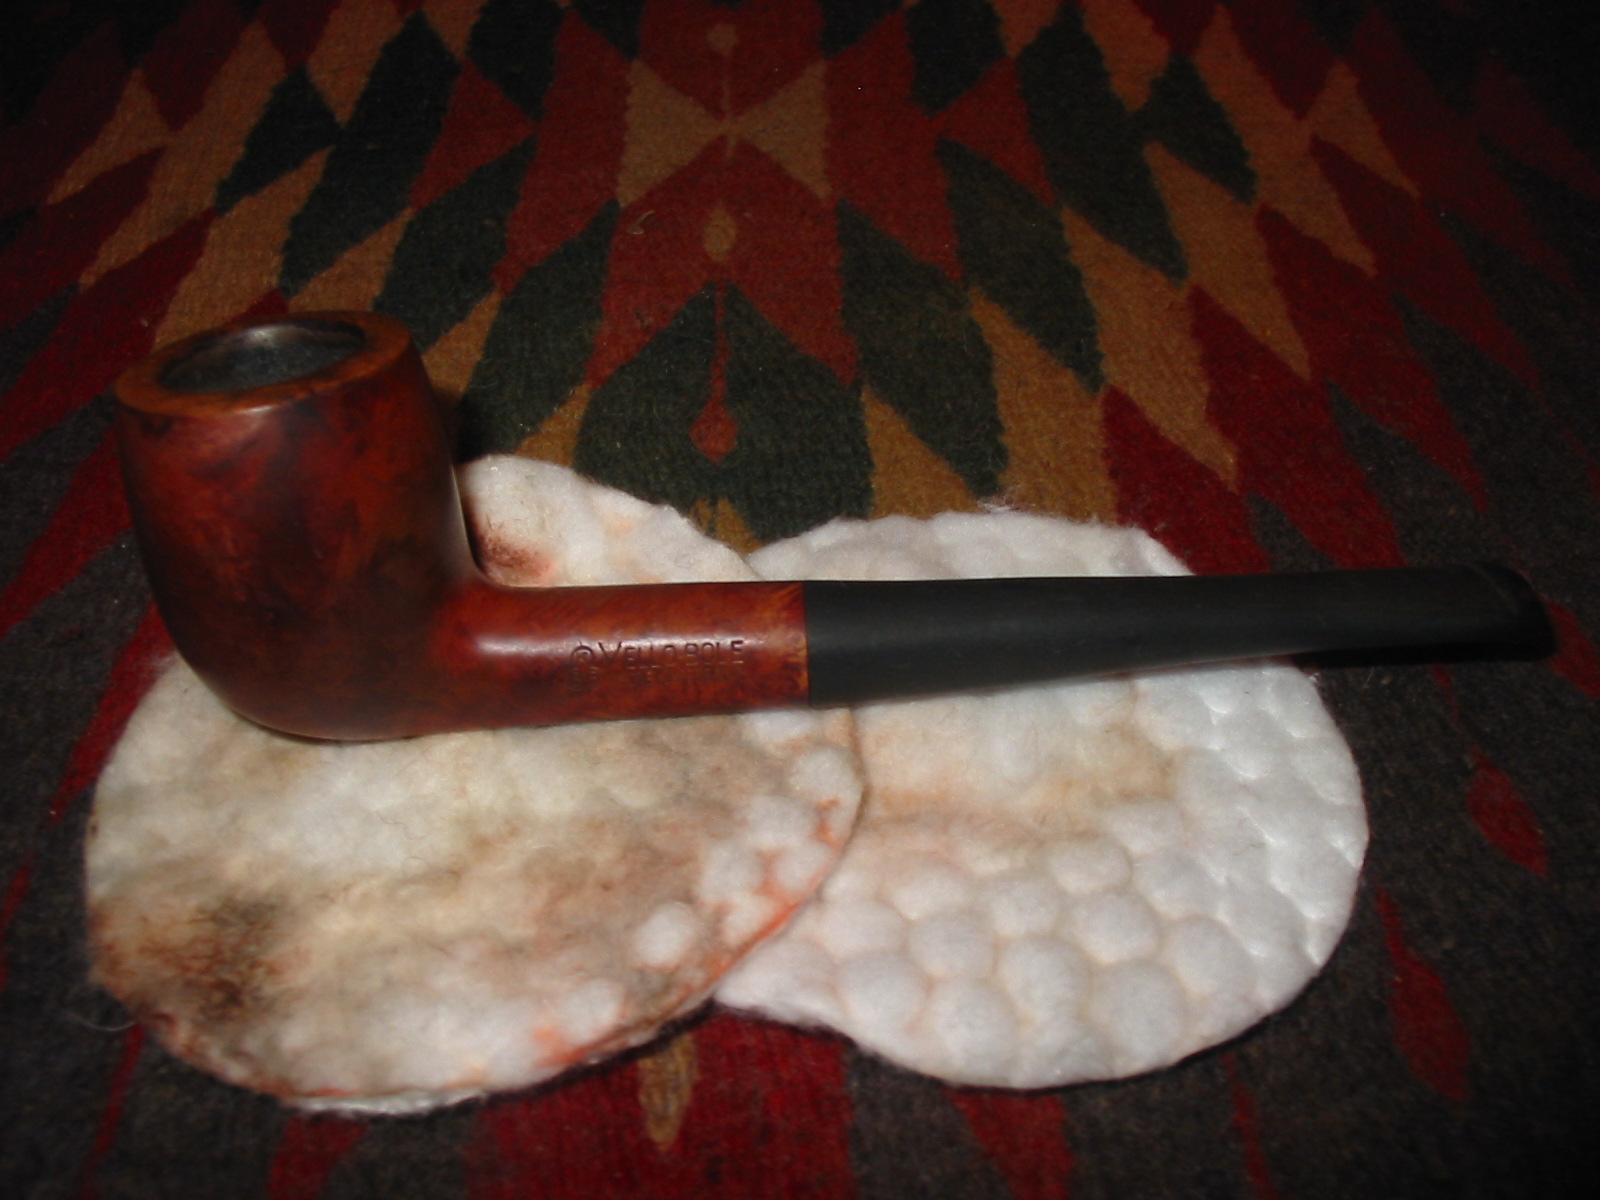 I wanted to remove the crown and rounding of the rim and flatten it out. The original bowls did not have a crowned rim but a flat one so I wanted to repair that and bring it back to its original look. I set up a topping board and 220 grit sandpaper and pressed the rim into the sandpaper and sanded the top flat.
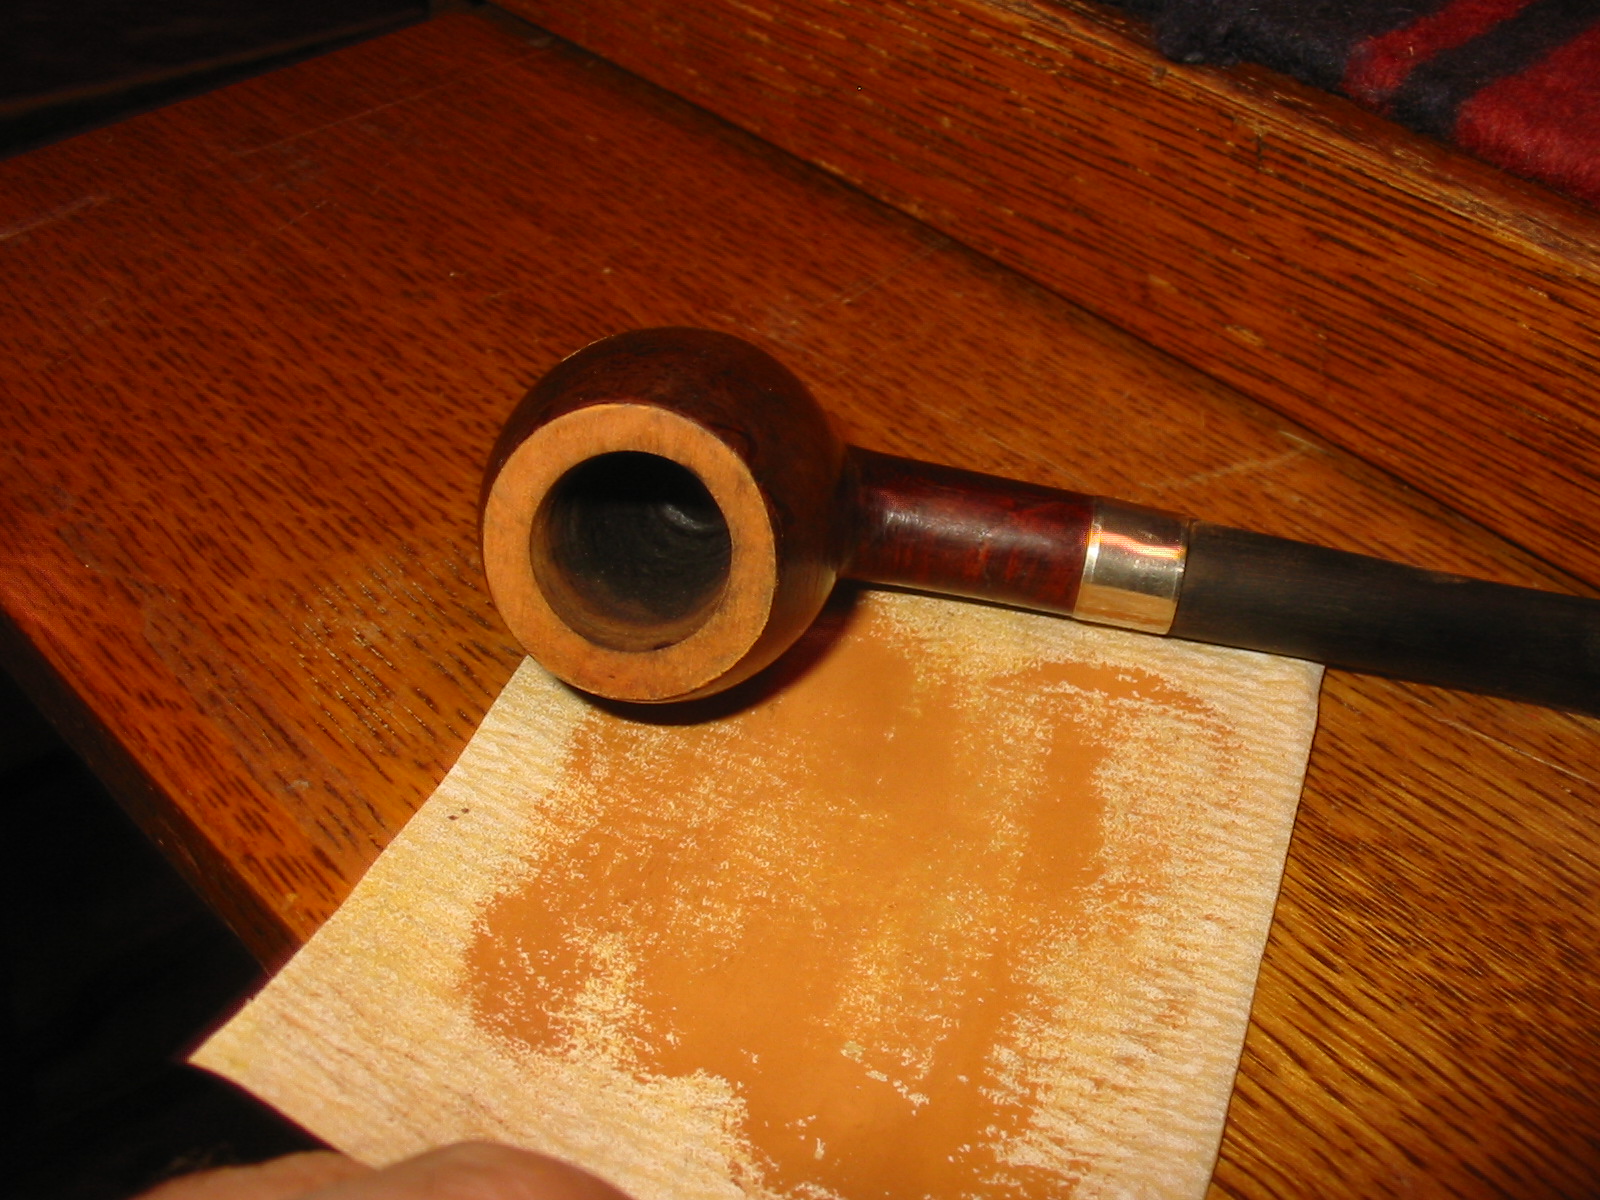
 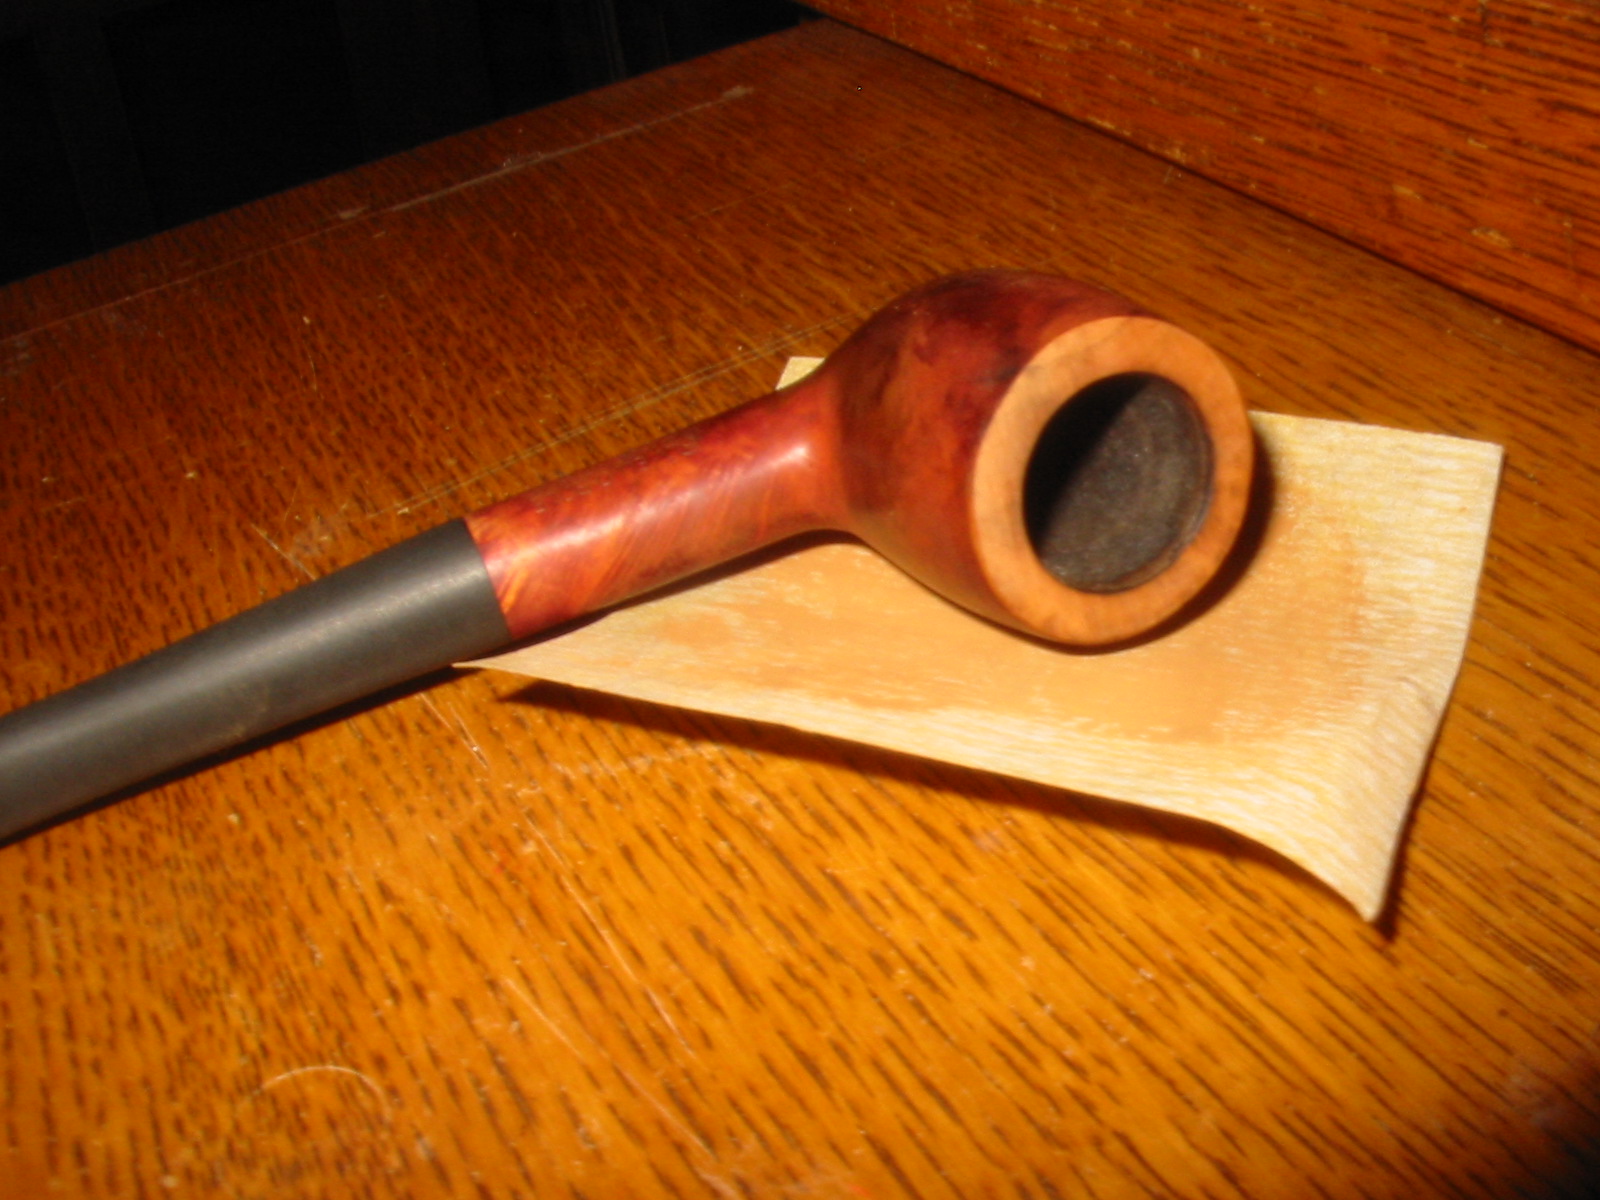 I sanded the rim with a medium and a fine grit sanding sponge and also with 1500-2400 grit micromesh sanding pads to prepare it for staining. I stained the bowl, rim and shank with oxblood aniline based stain, flamed and repeated until the coverage was even. I then buffed the pipe with White Diamond.
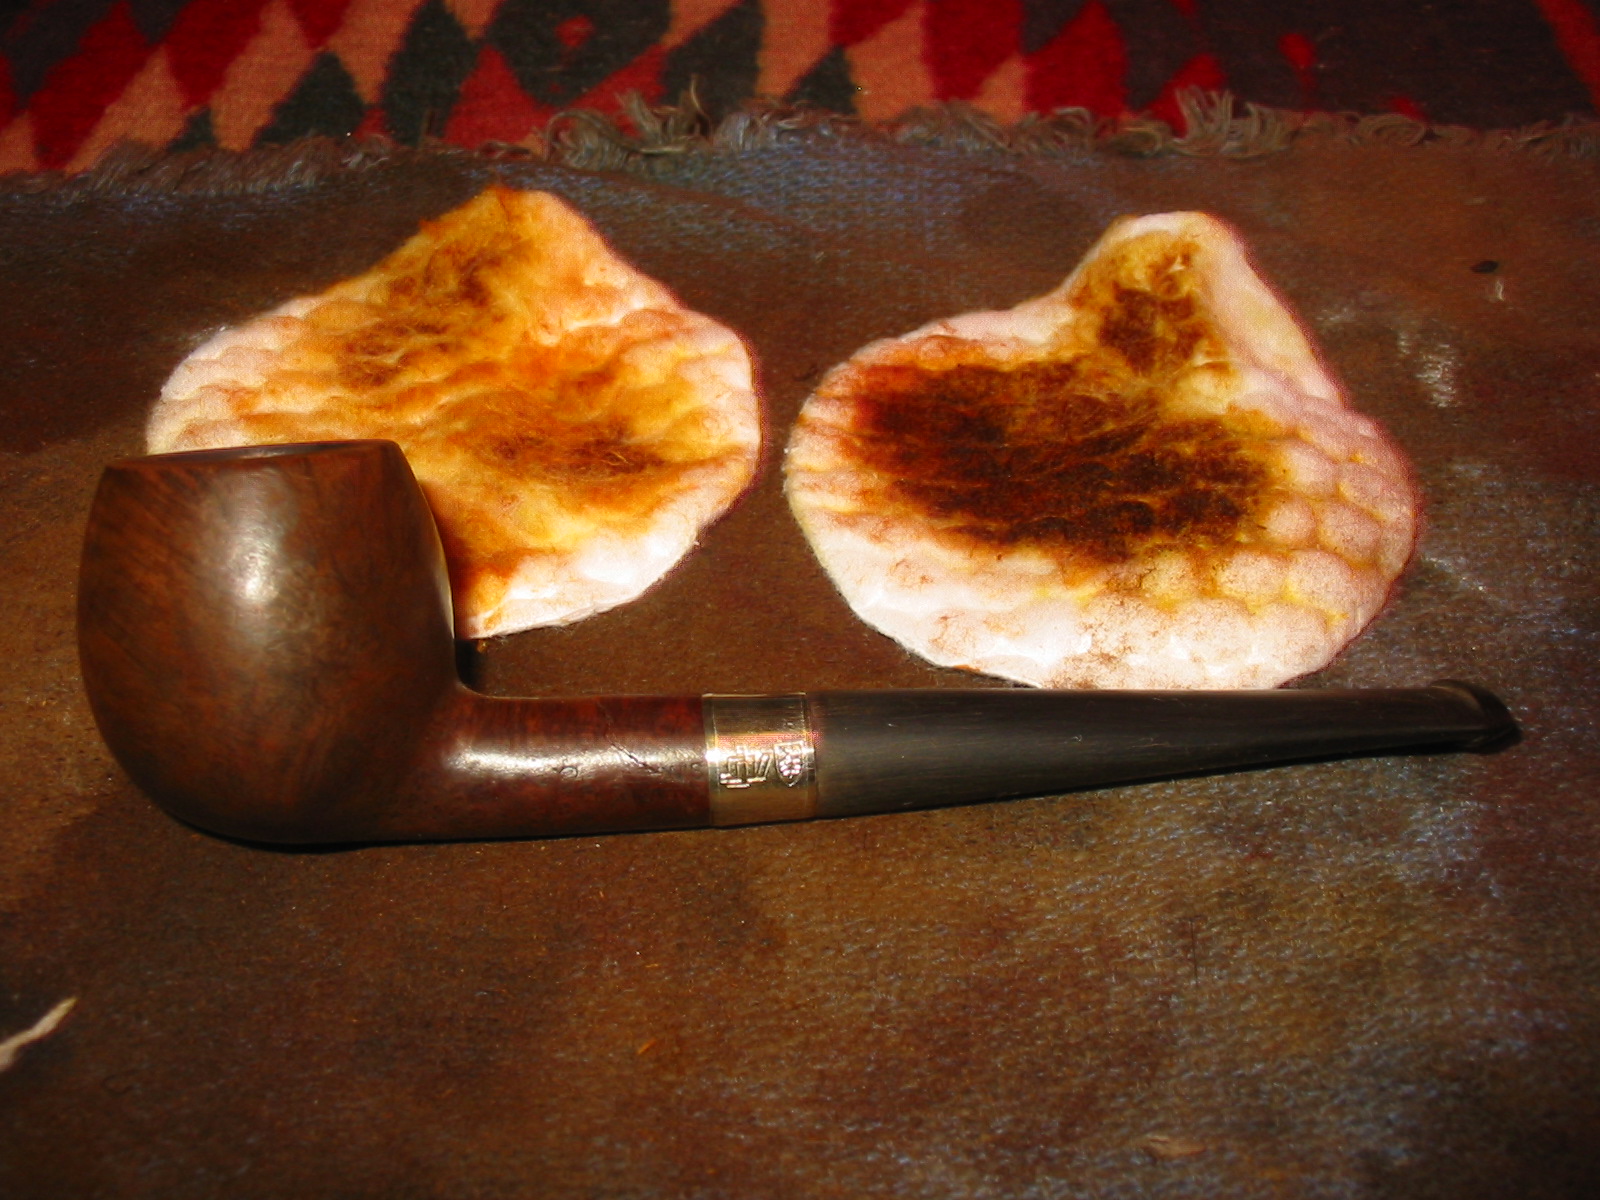
 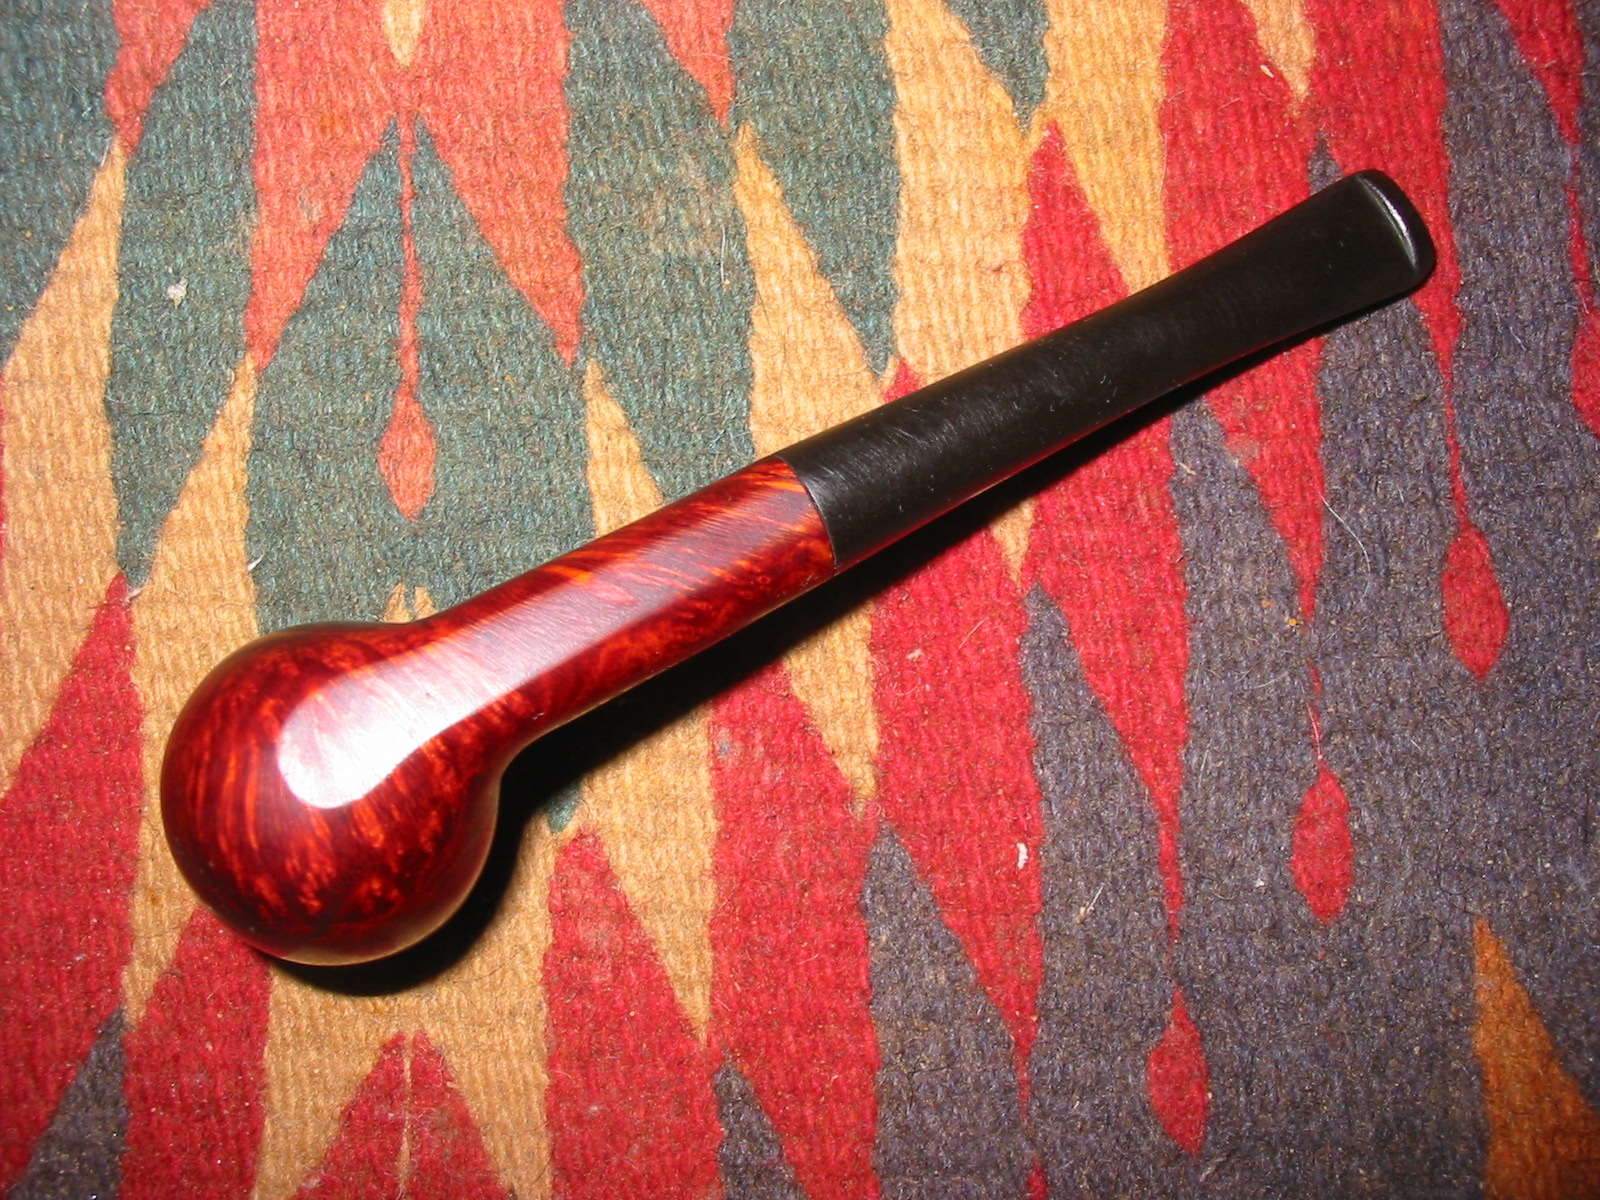 I sanded the stem with medium and fine grit sanding pads once again and then sanded it with the micromesh sanding pads. I wet sanded with 1500-2400 grit pads and 3200-12,000 grit pads. I rubbed the stem down with Obsidian Oil and when it had dried took the pipe to the buffer.
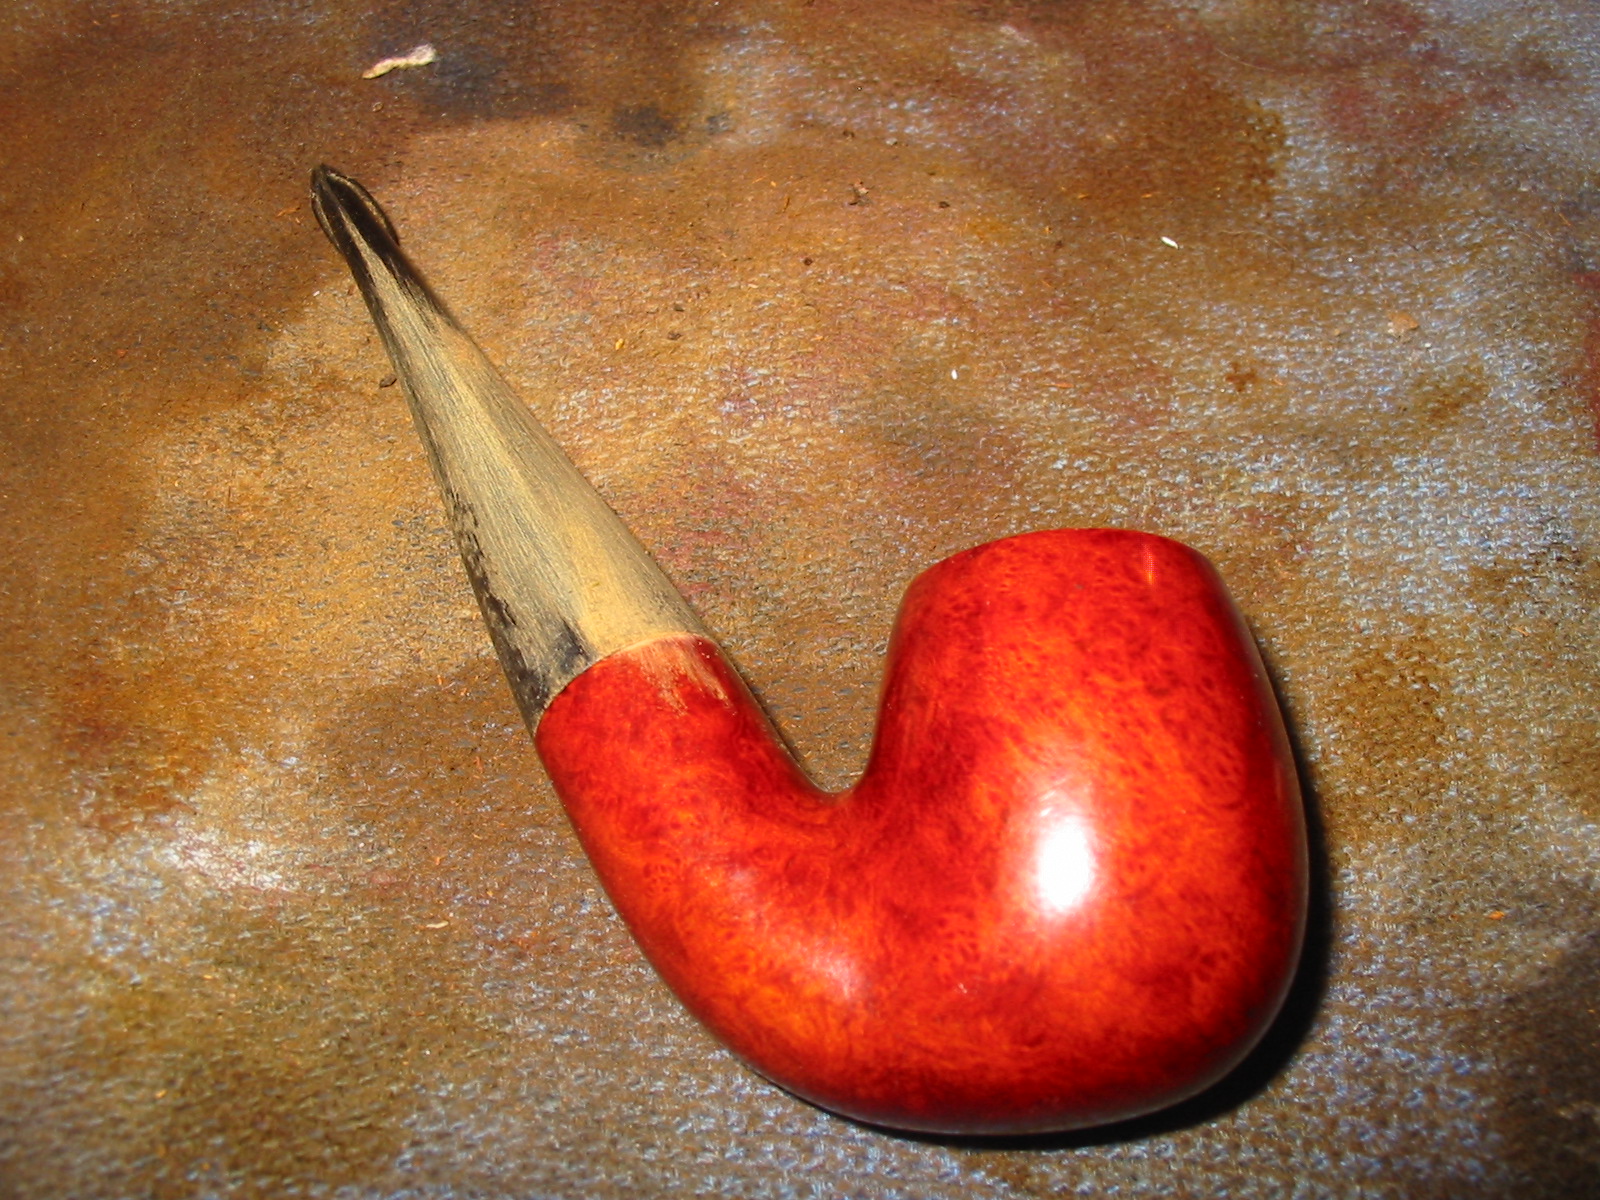
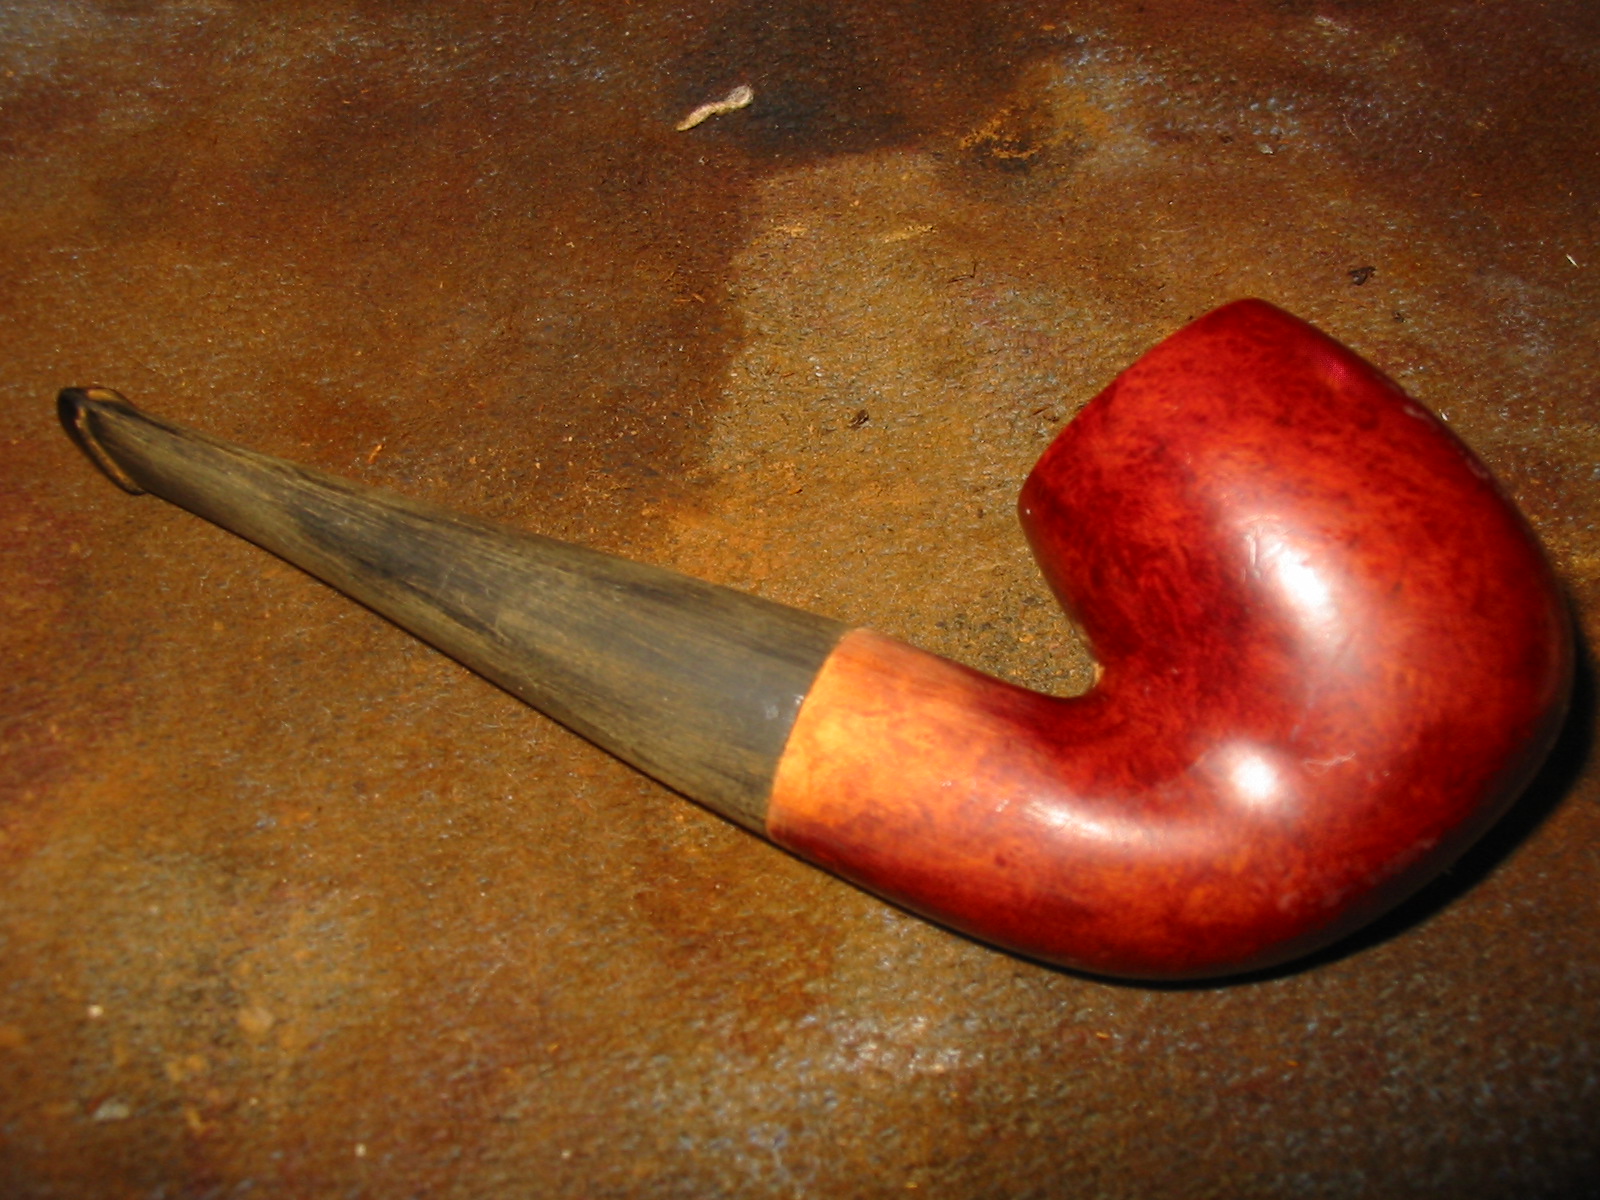
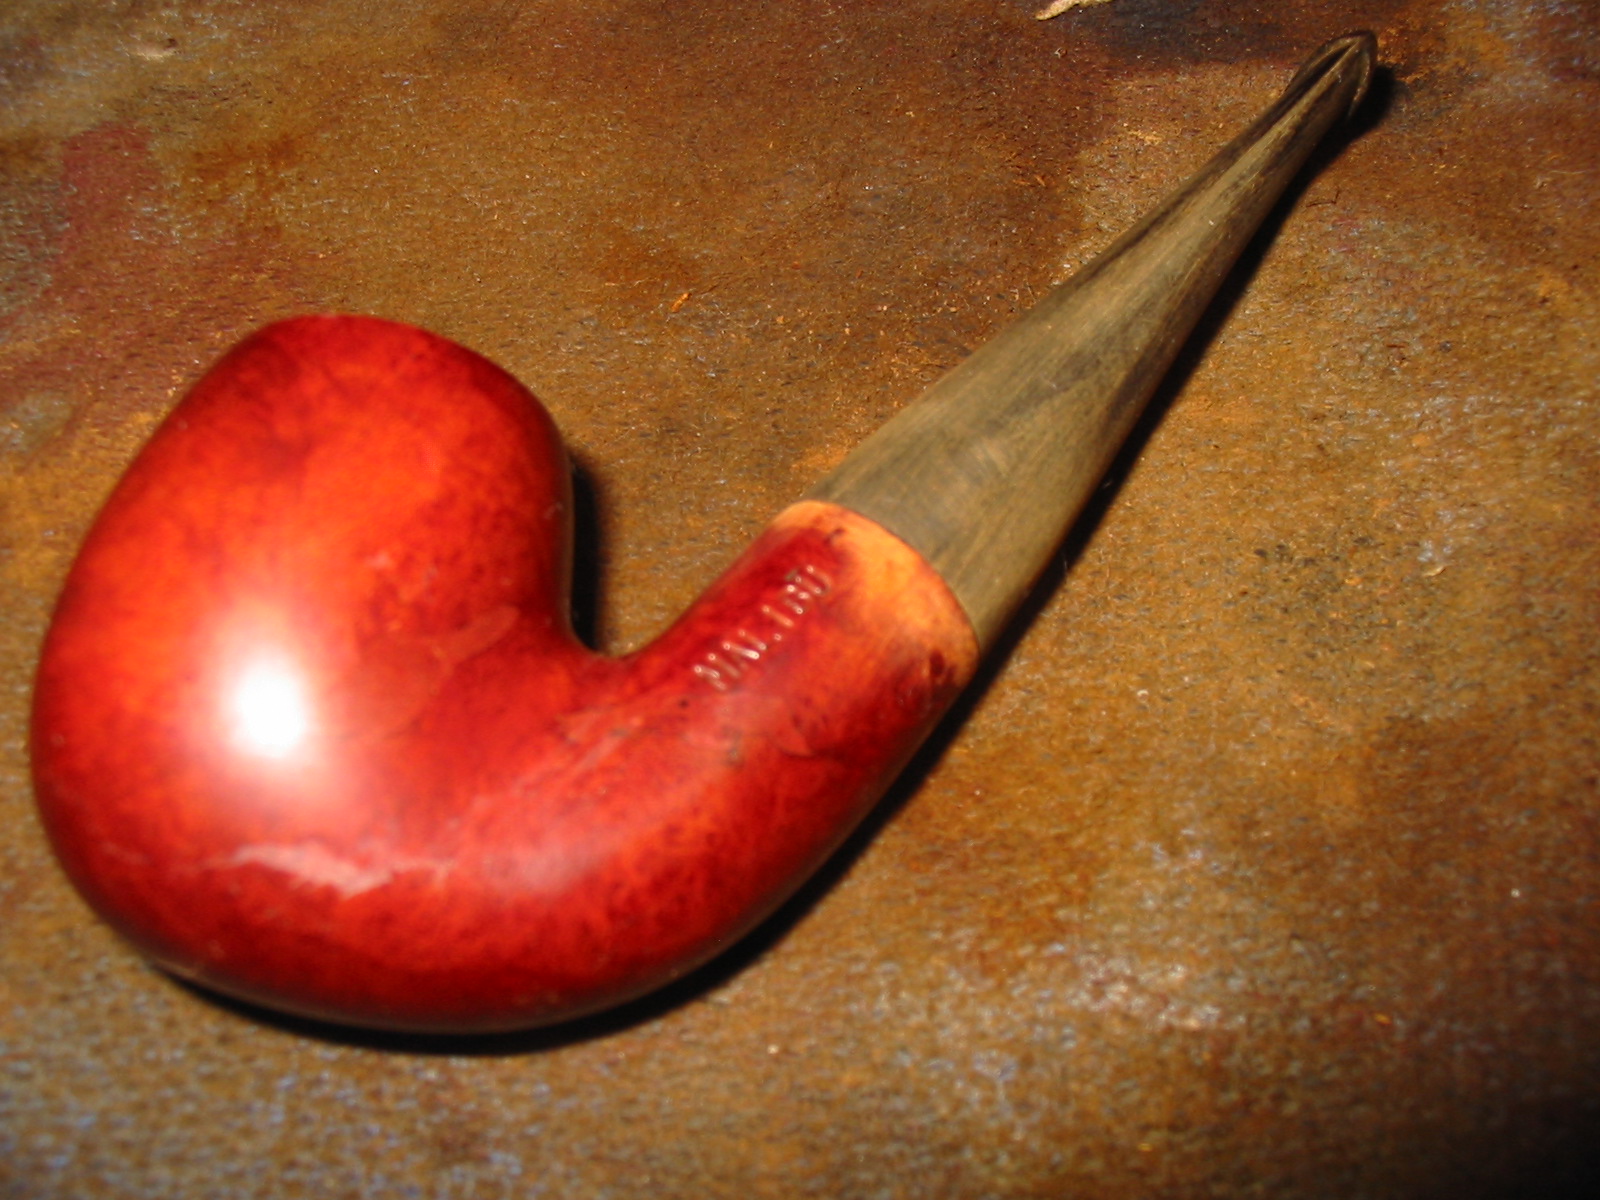
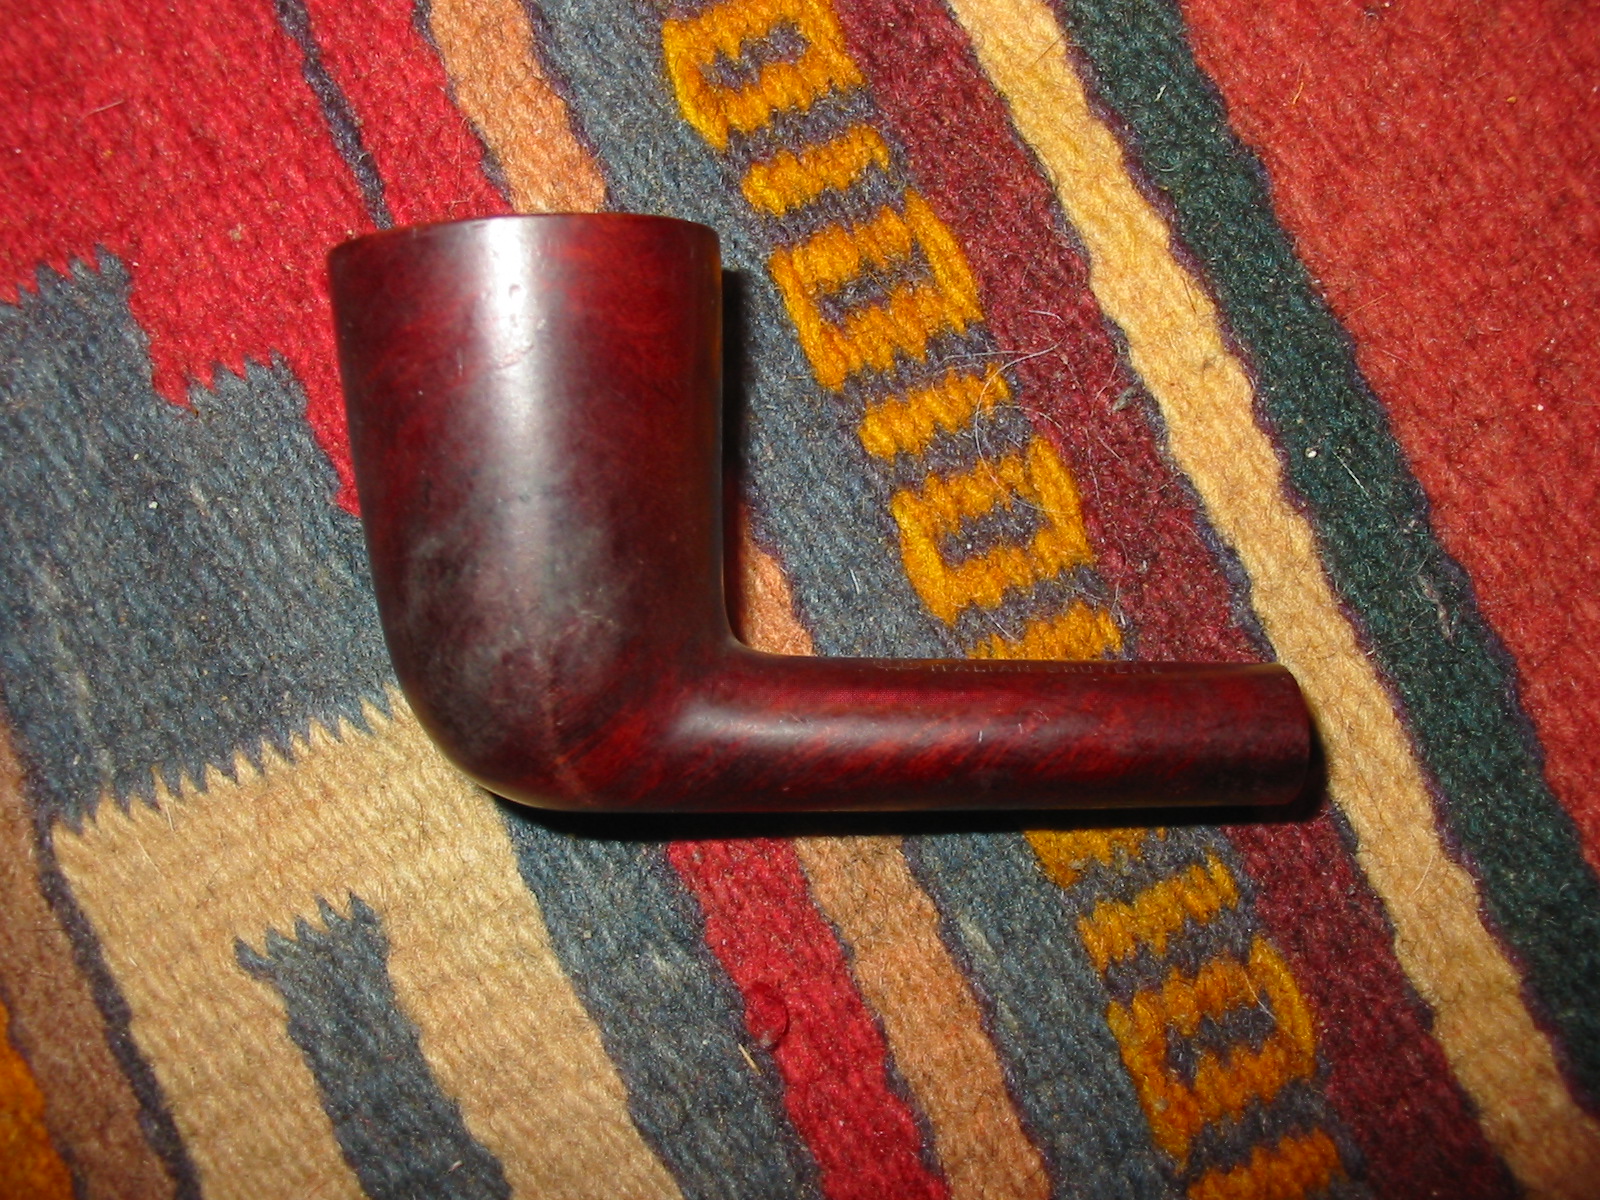
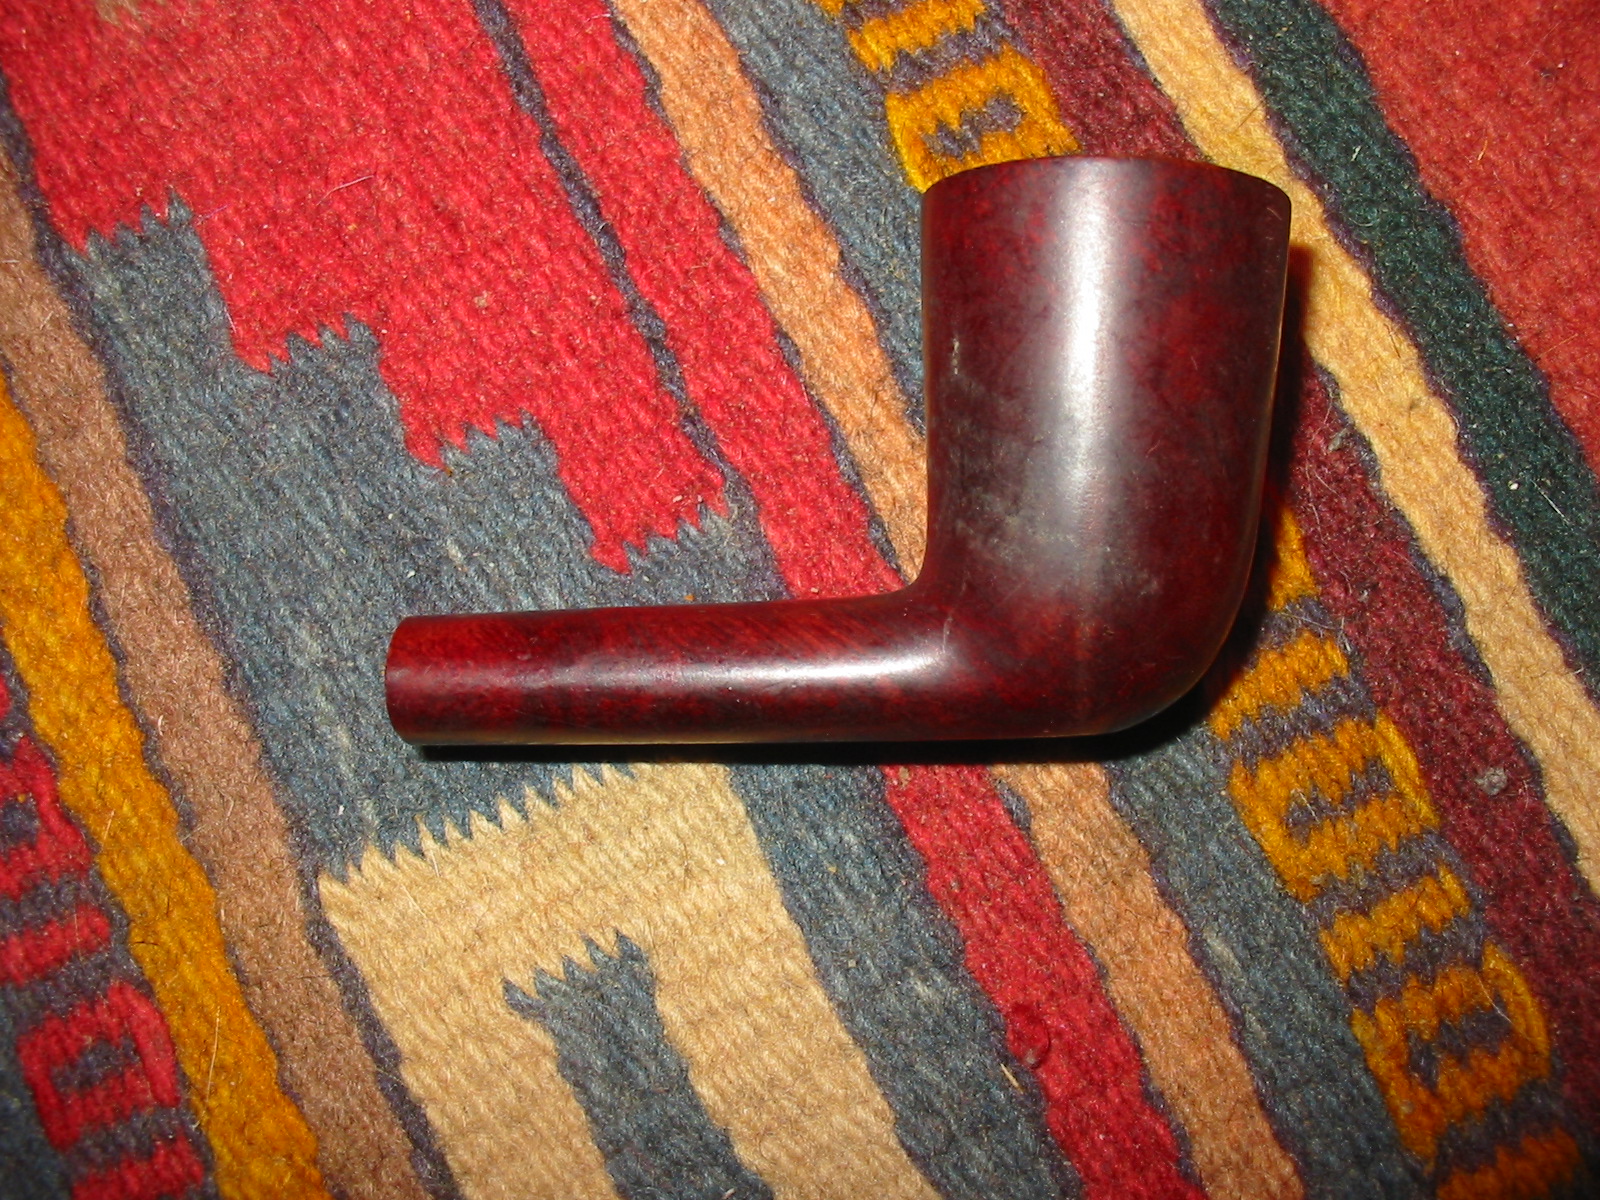
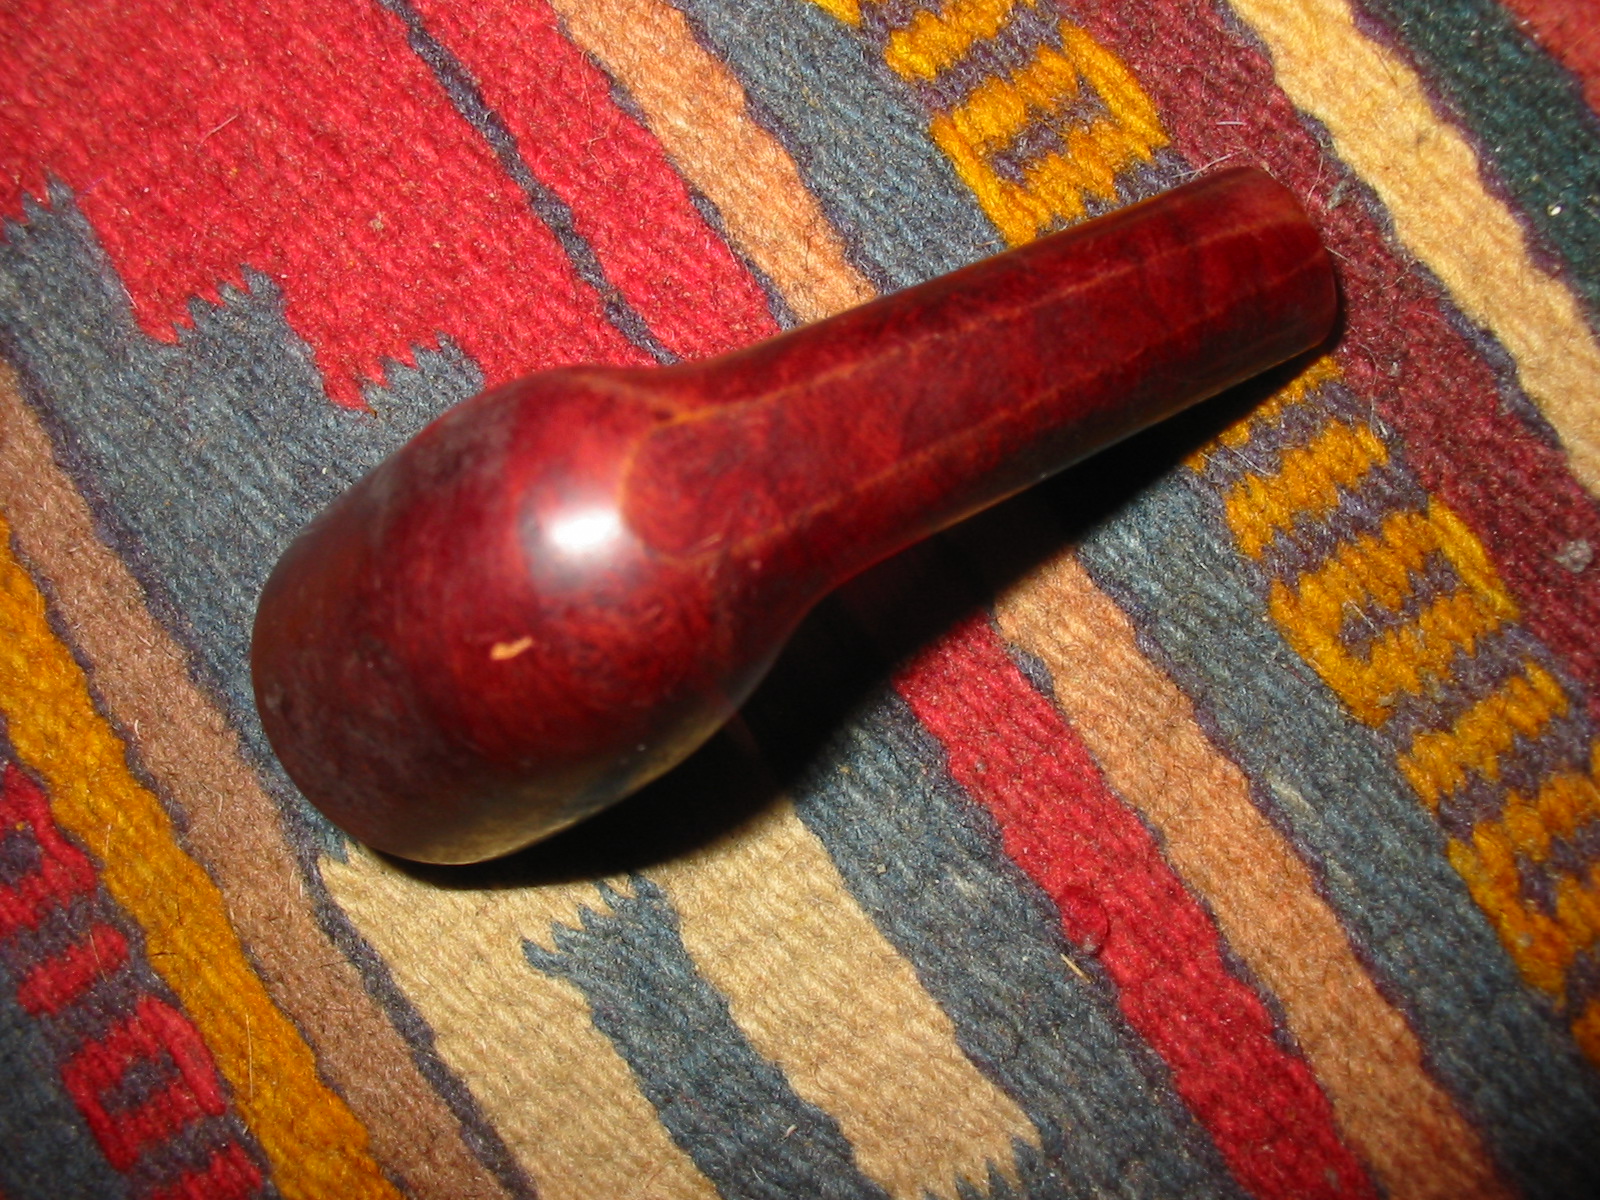
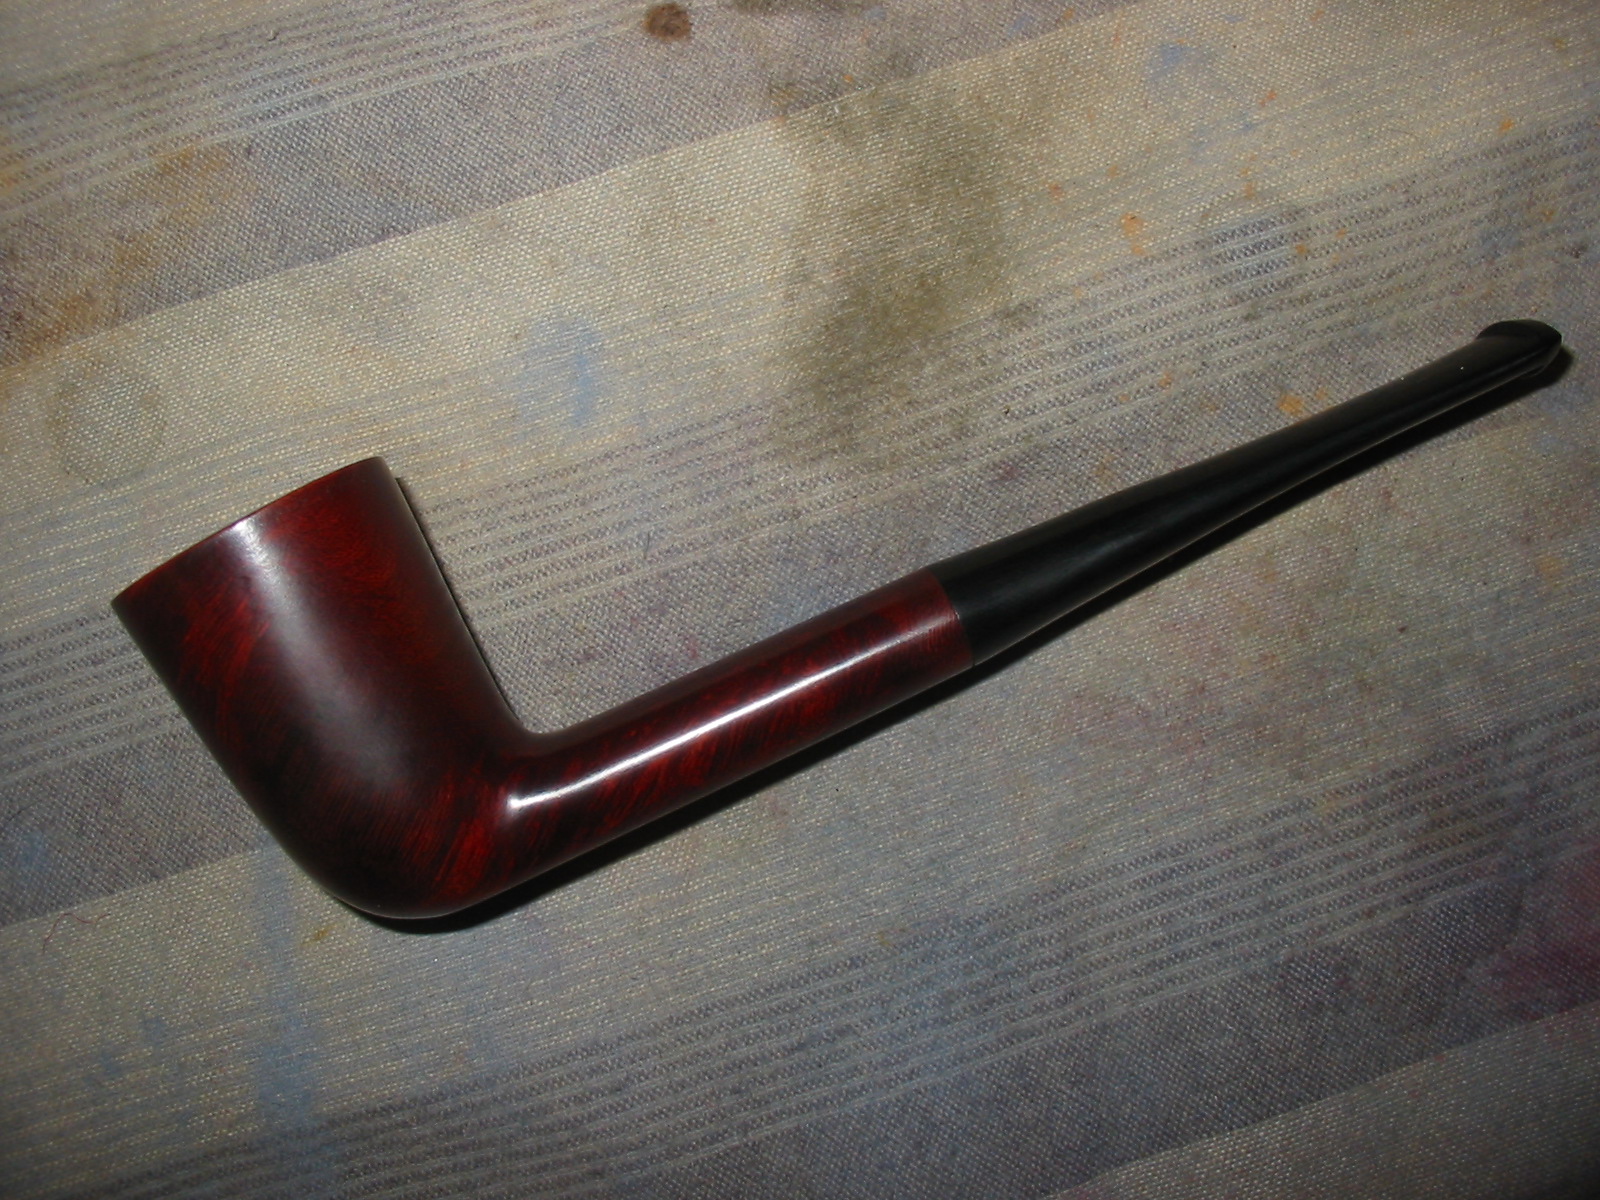
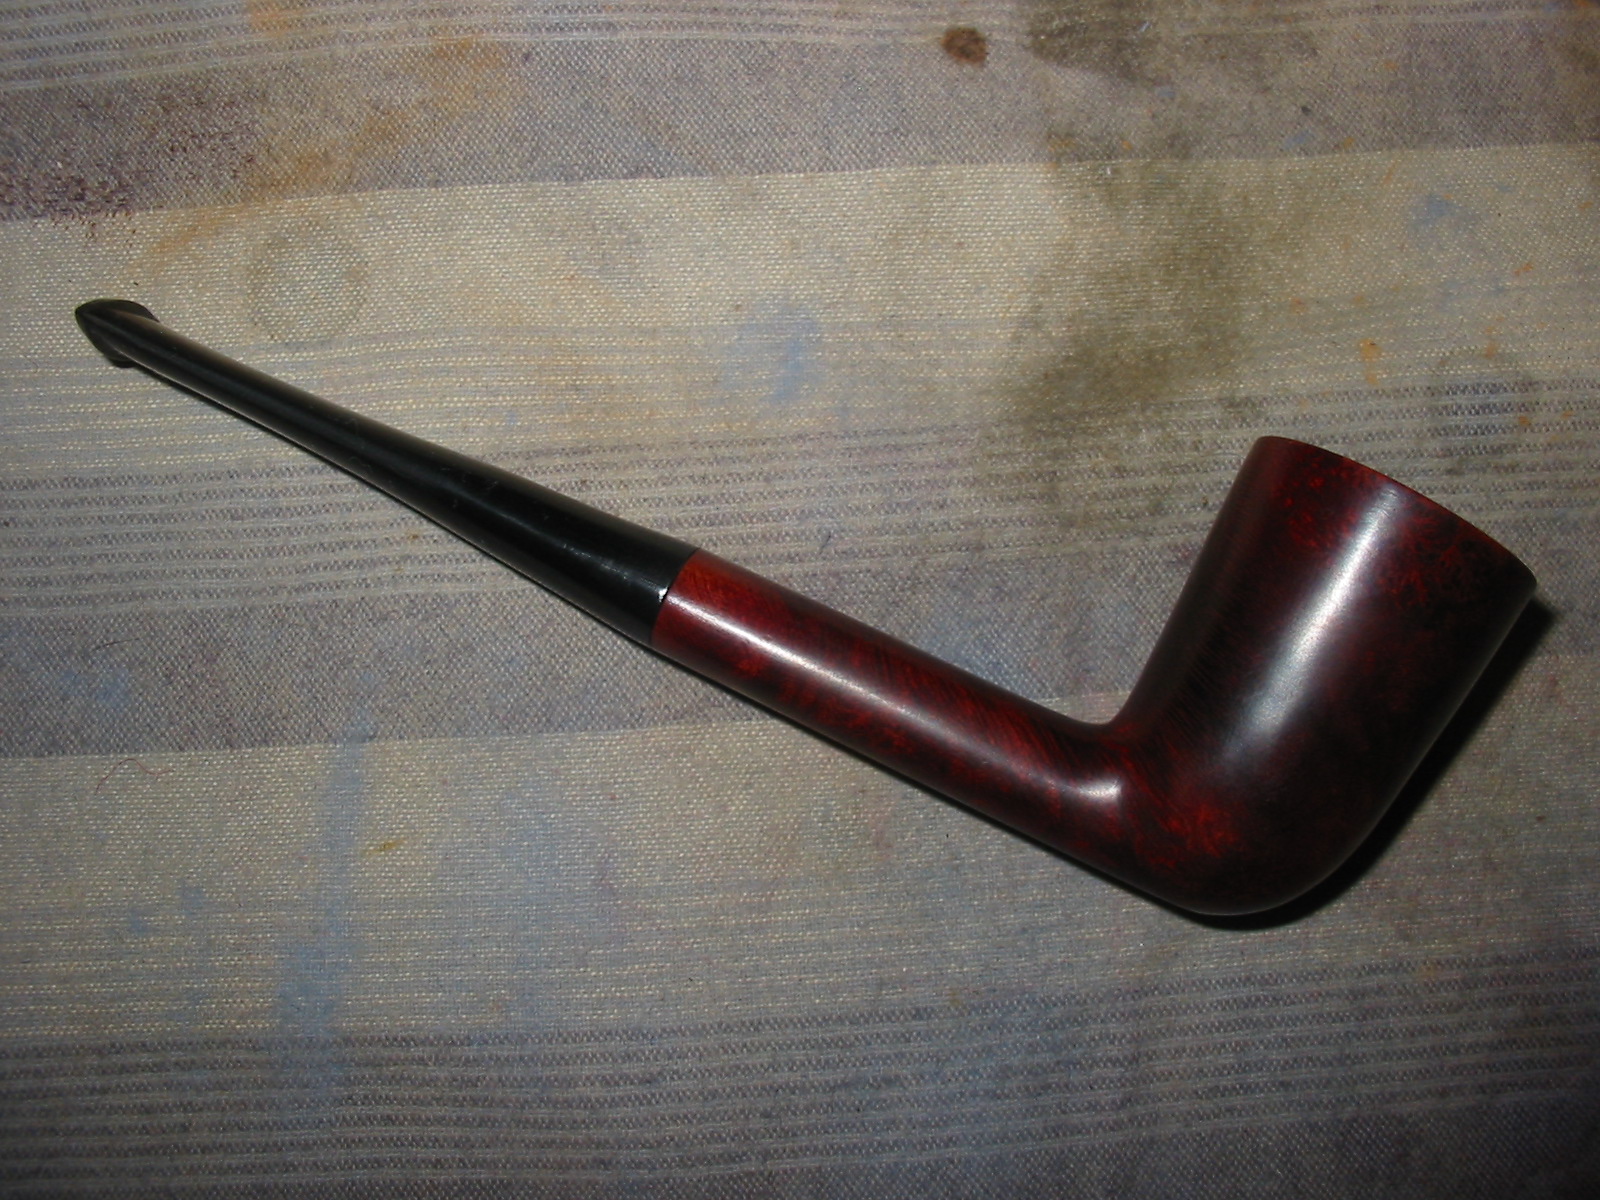
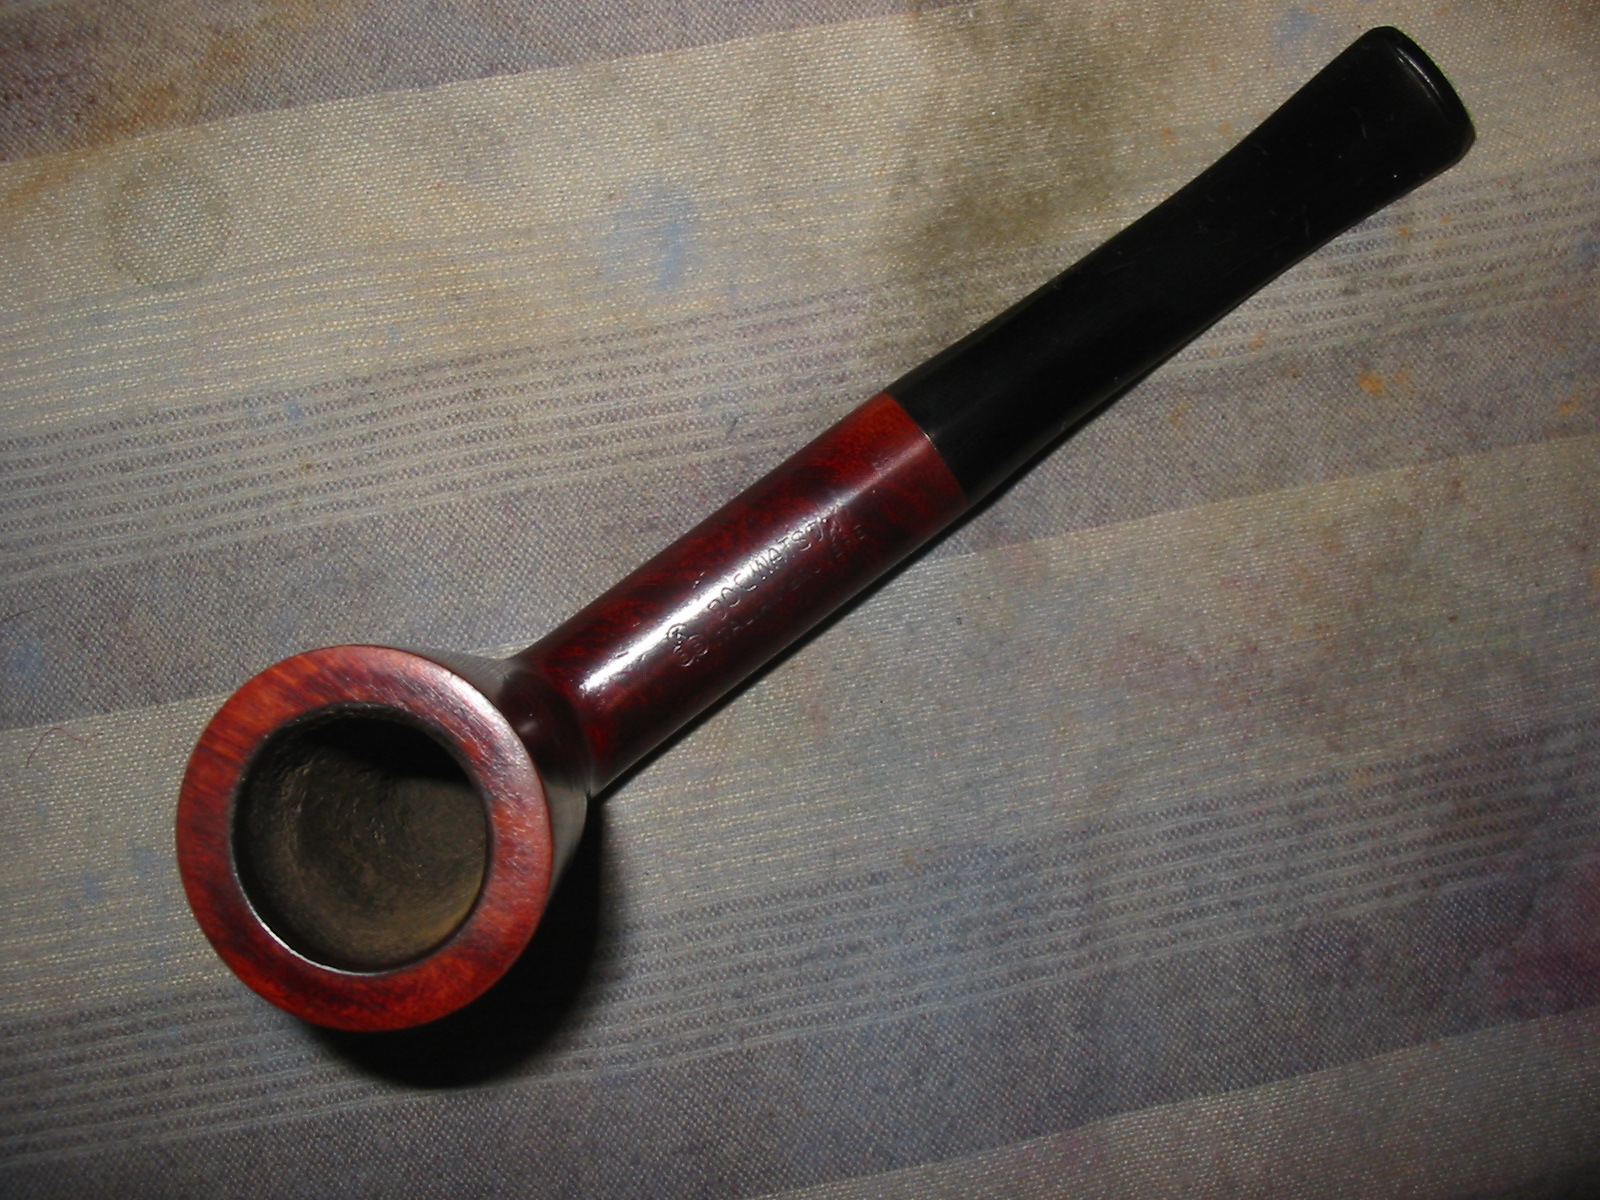
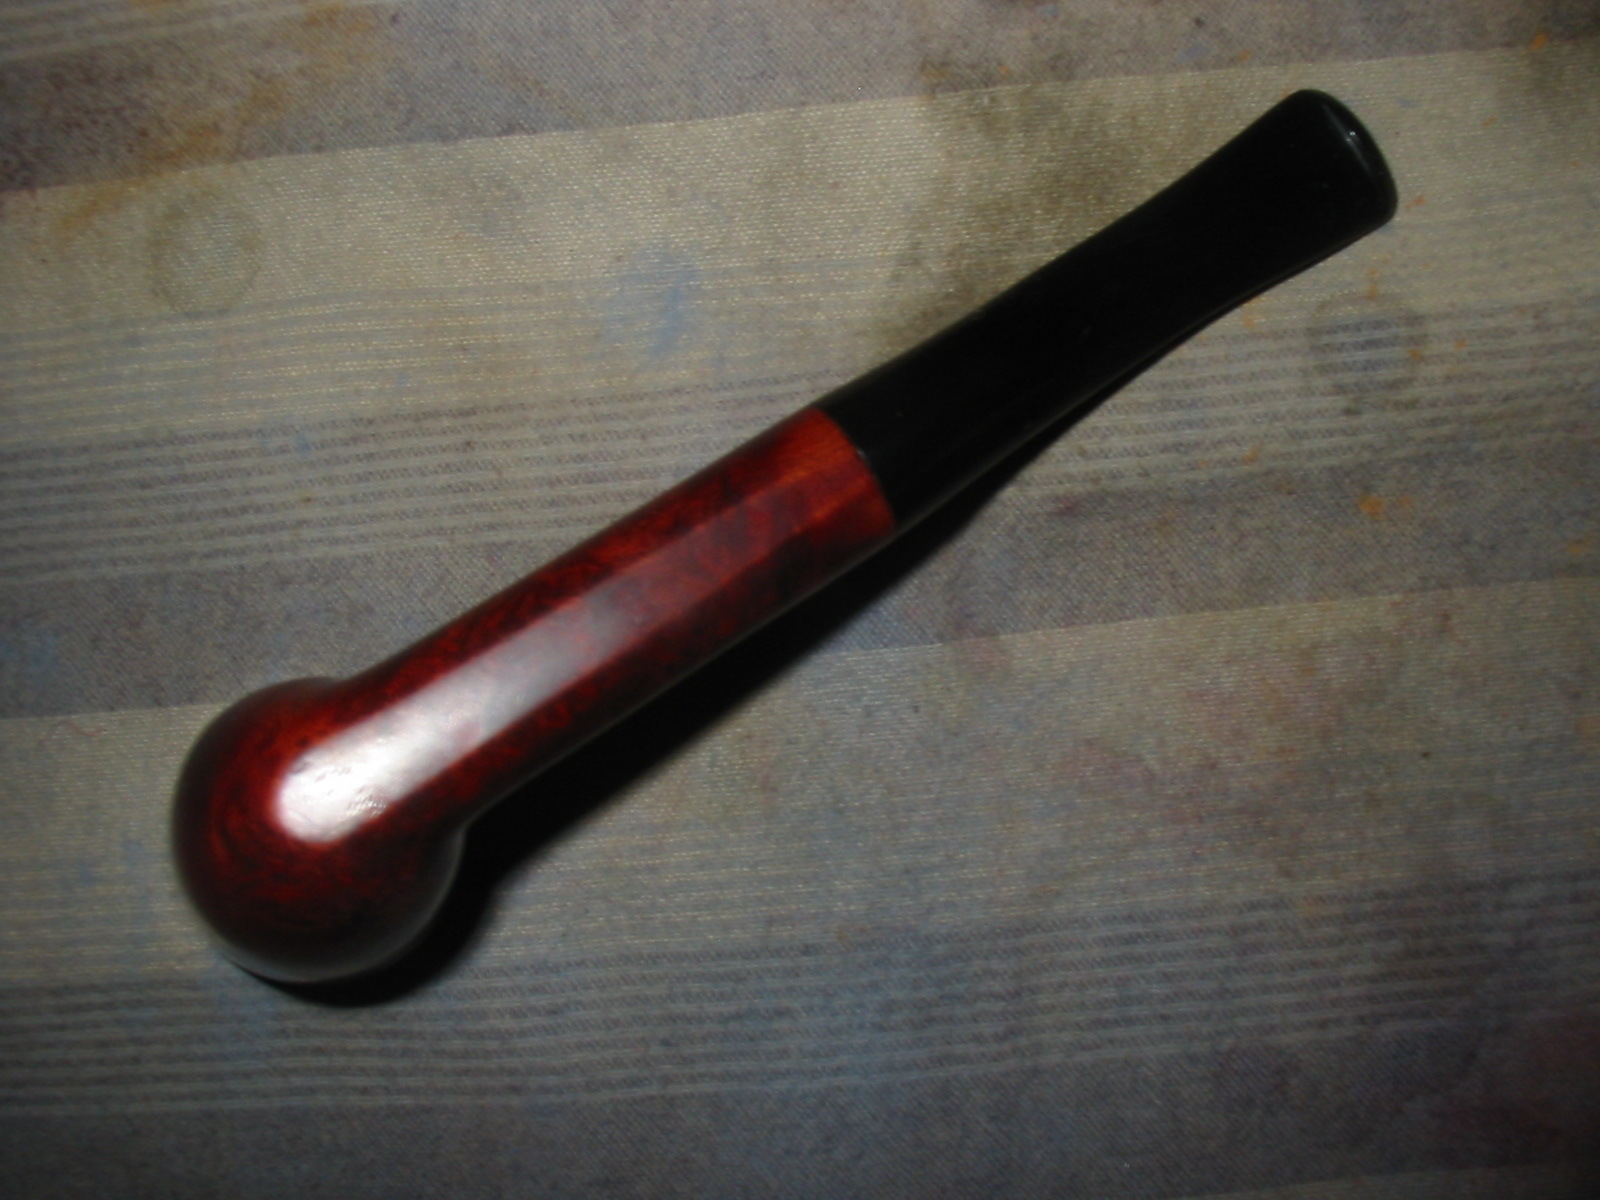
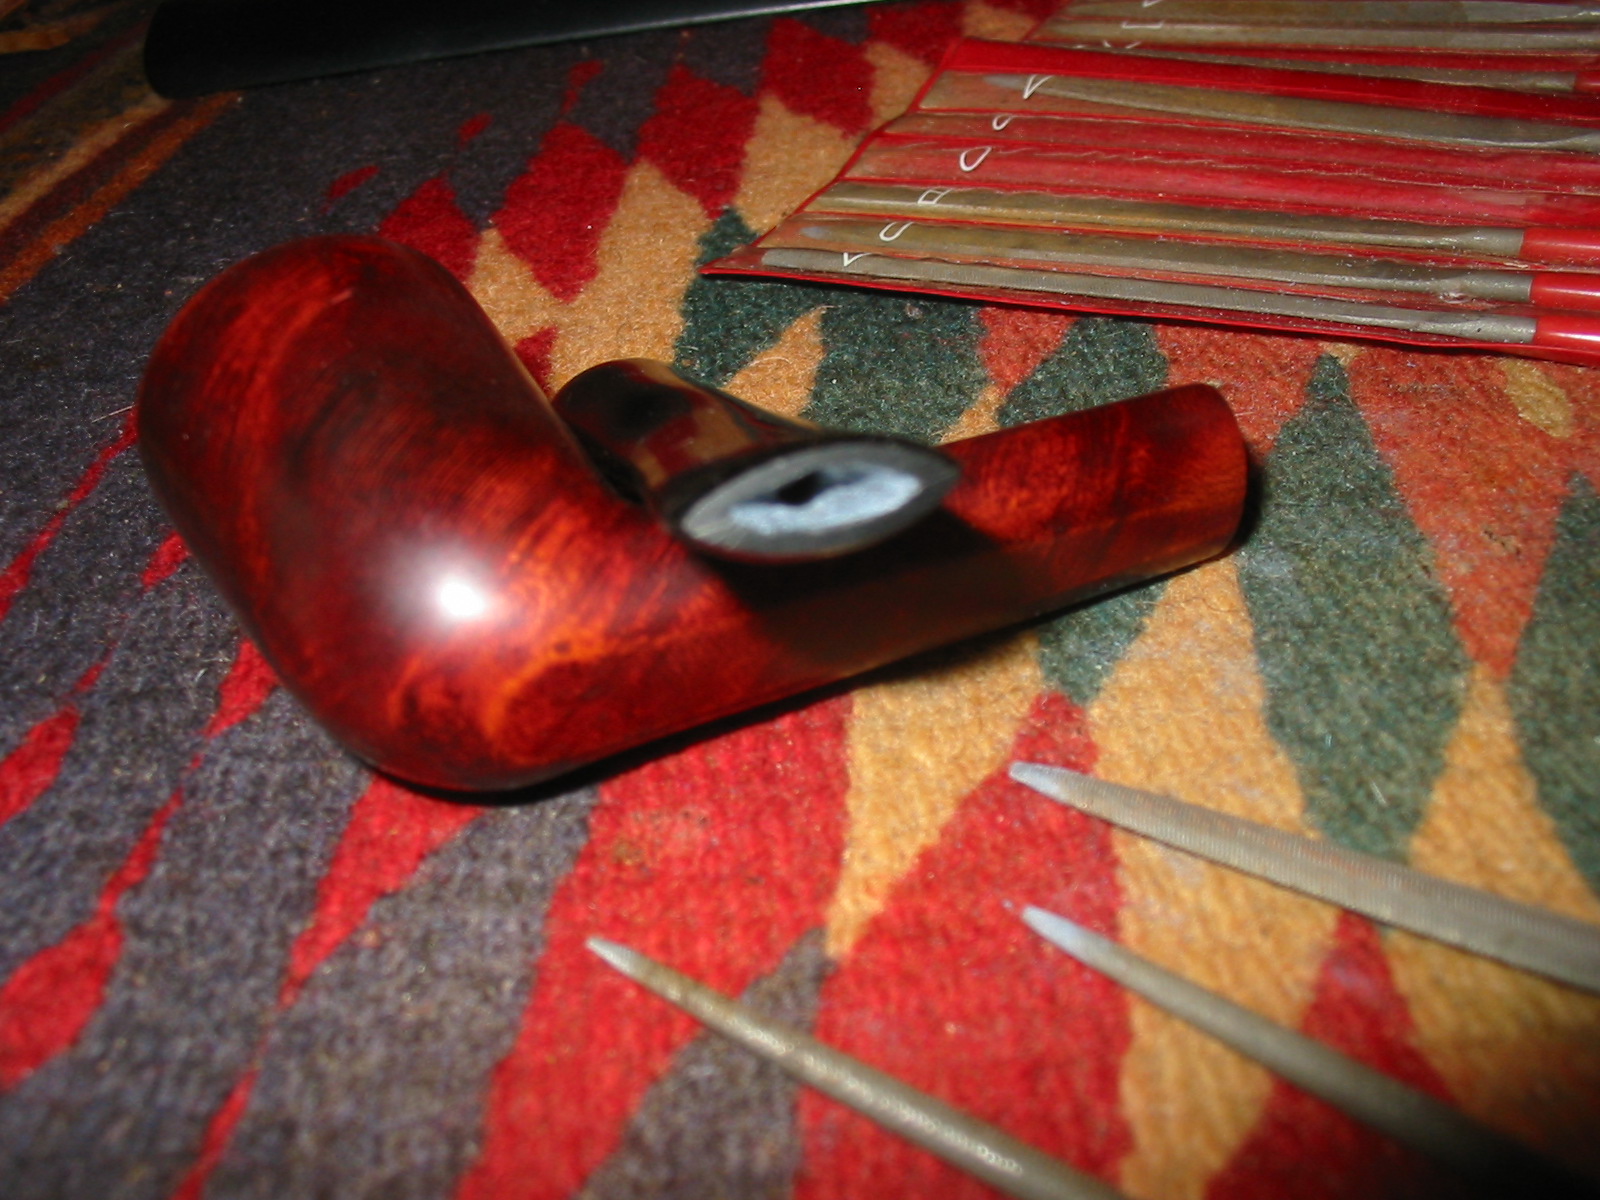
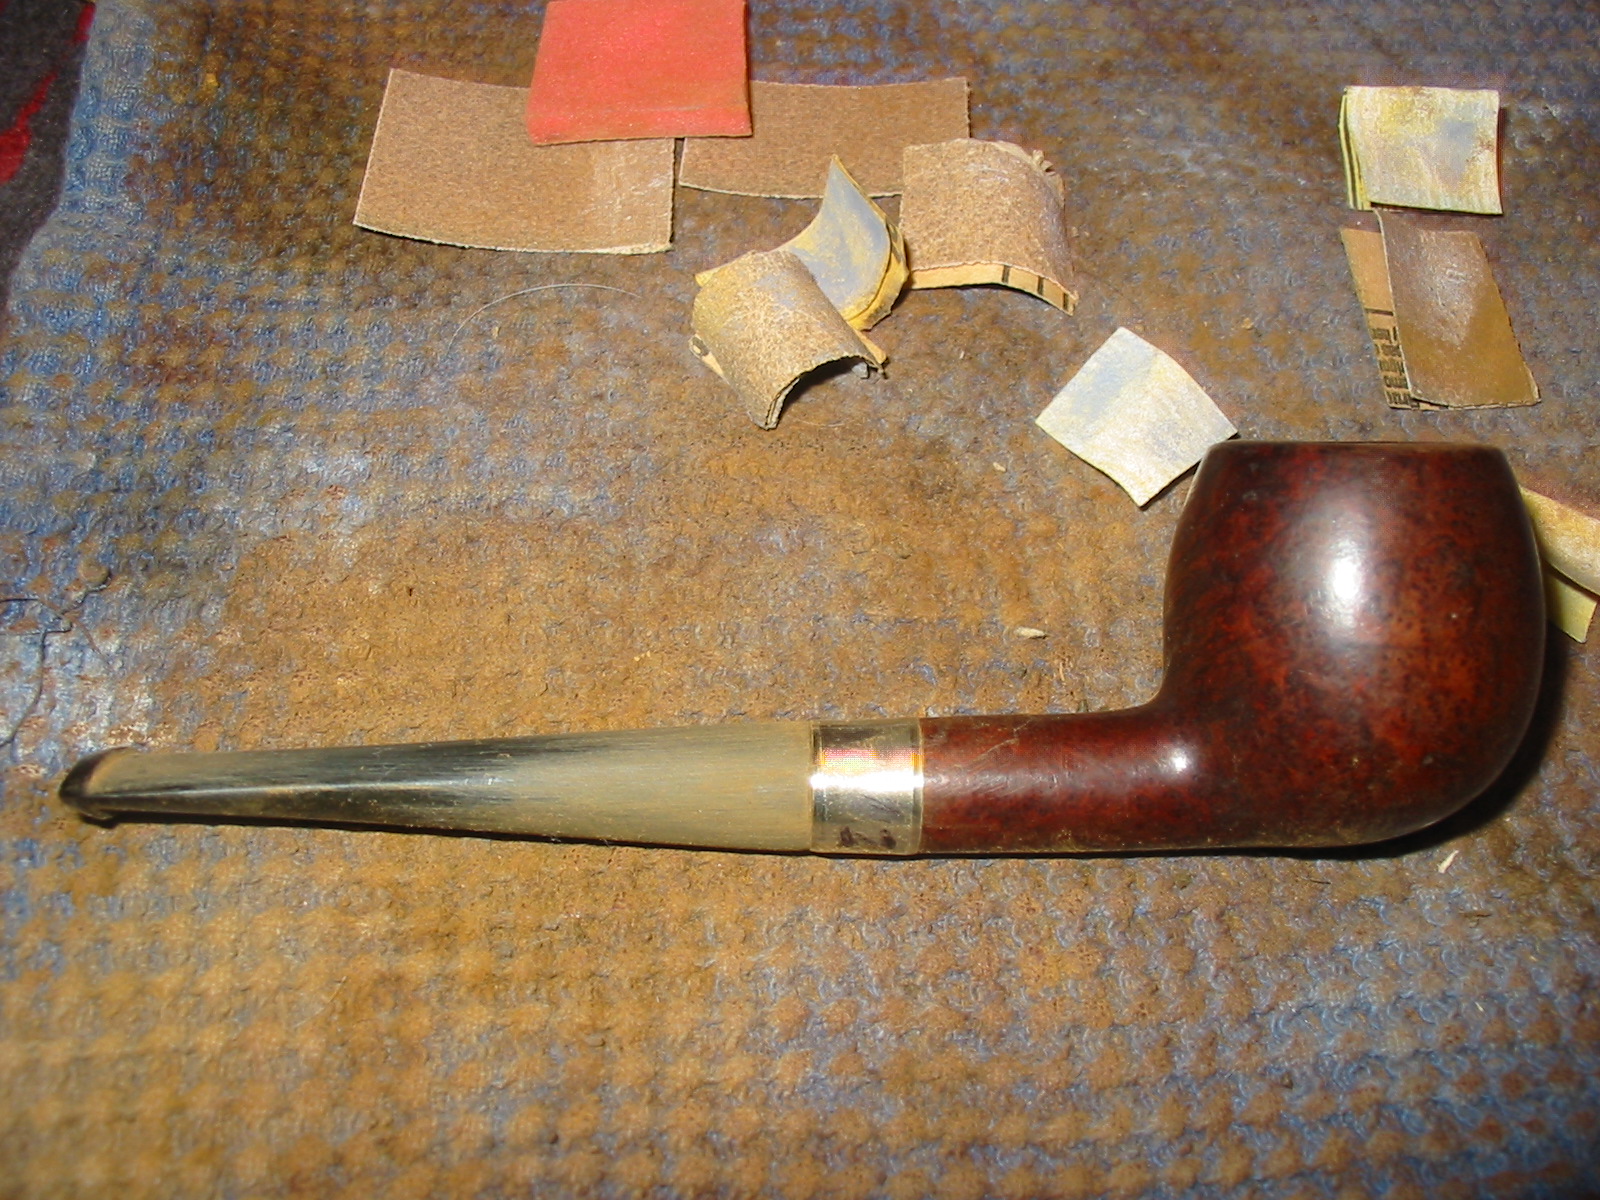
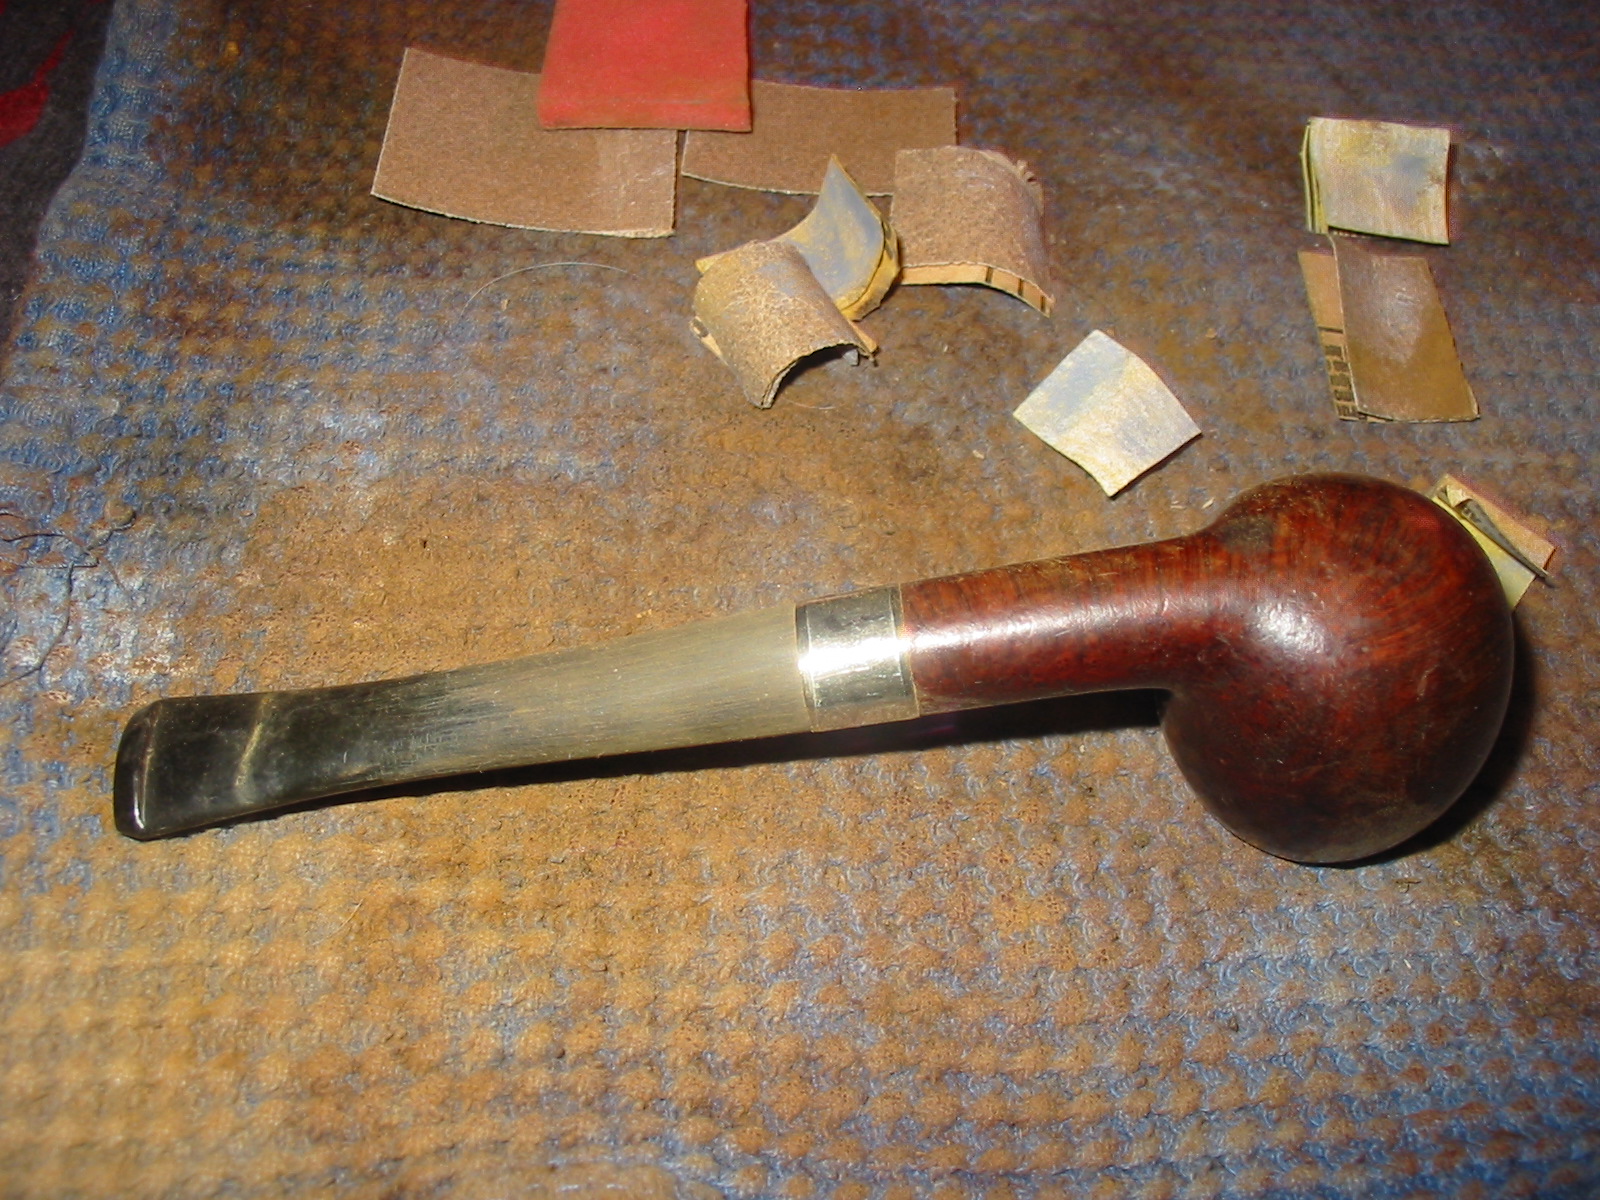
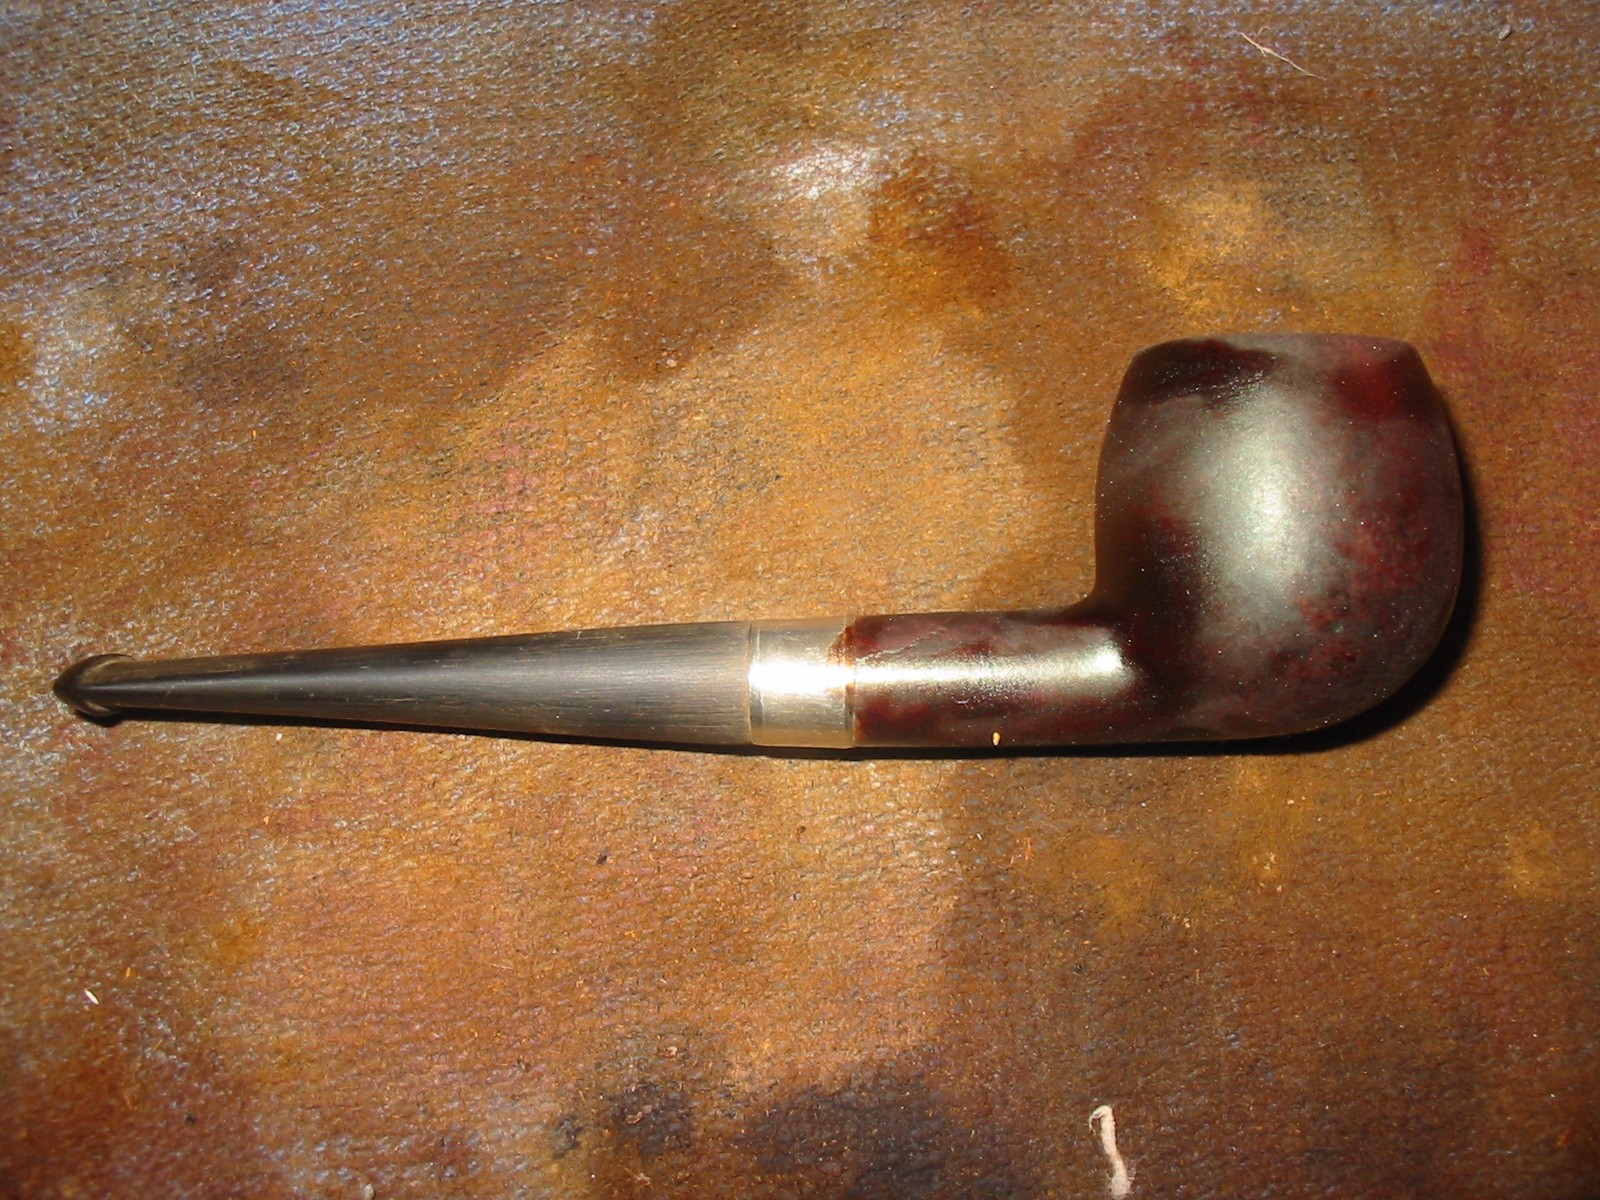
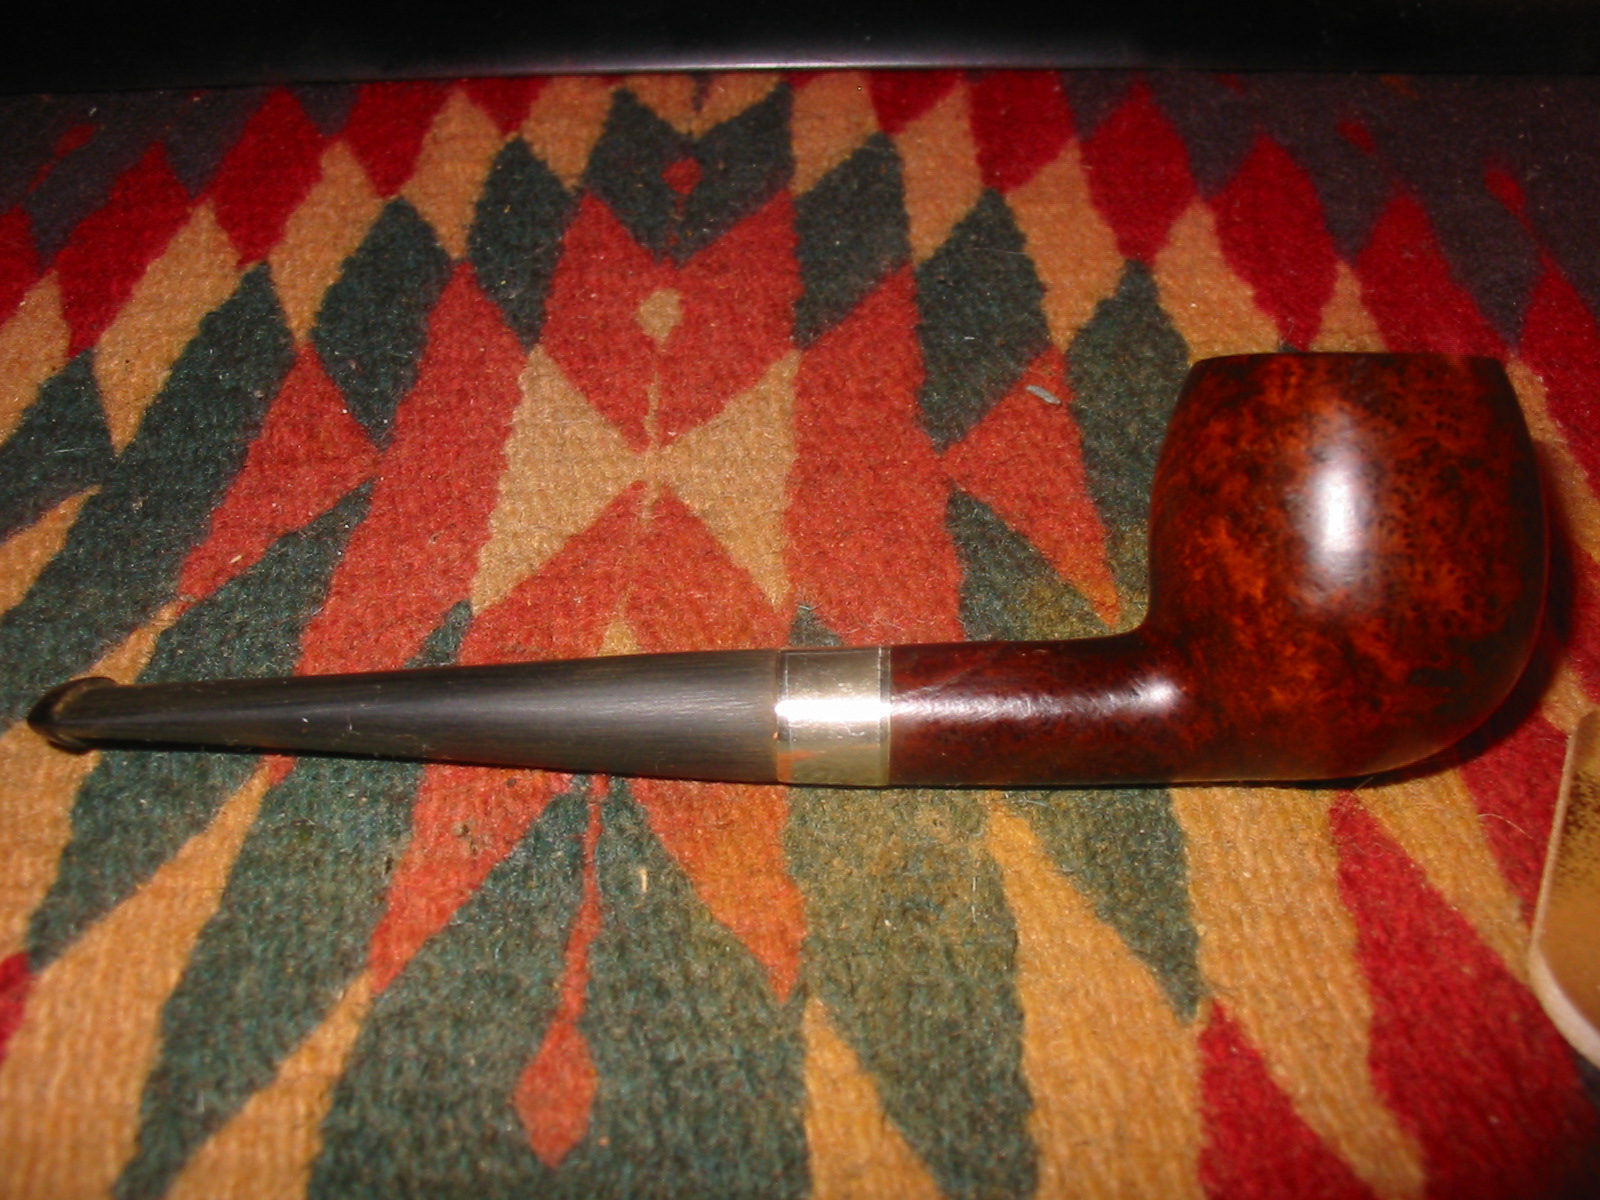
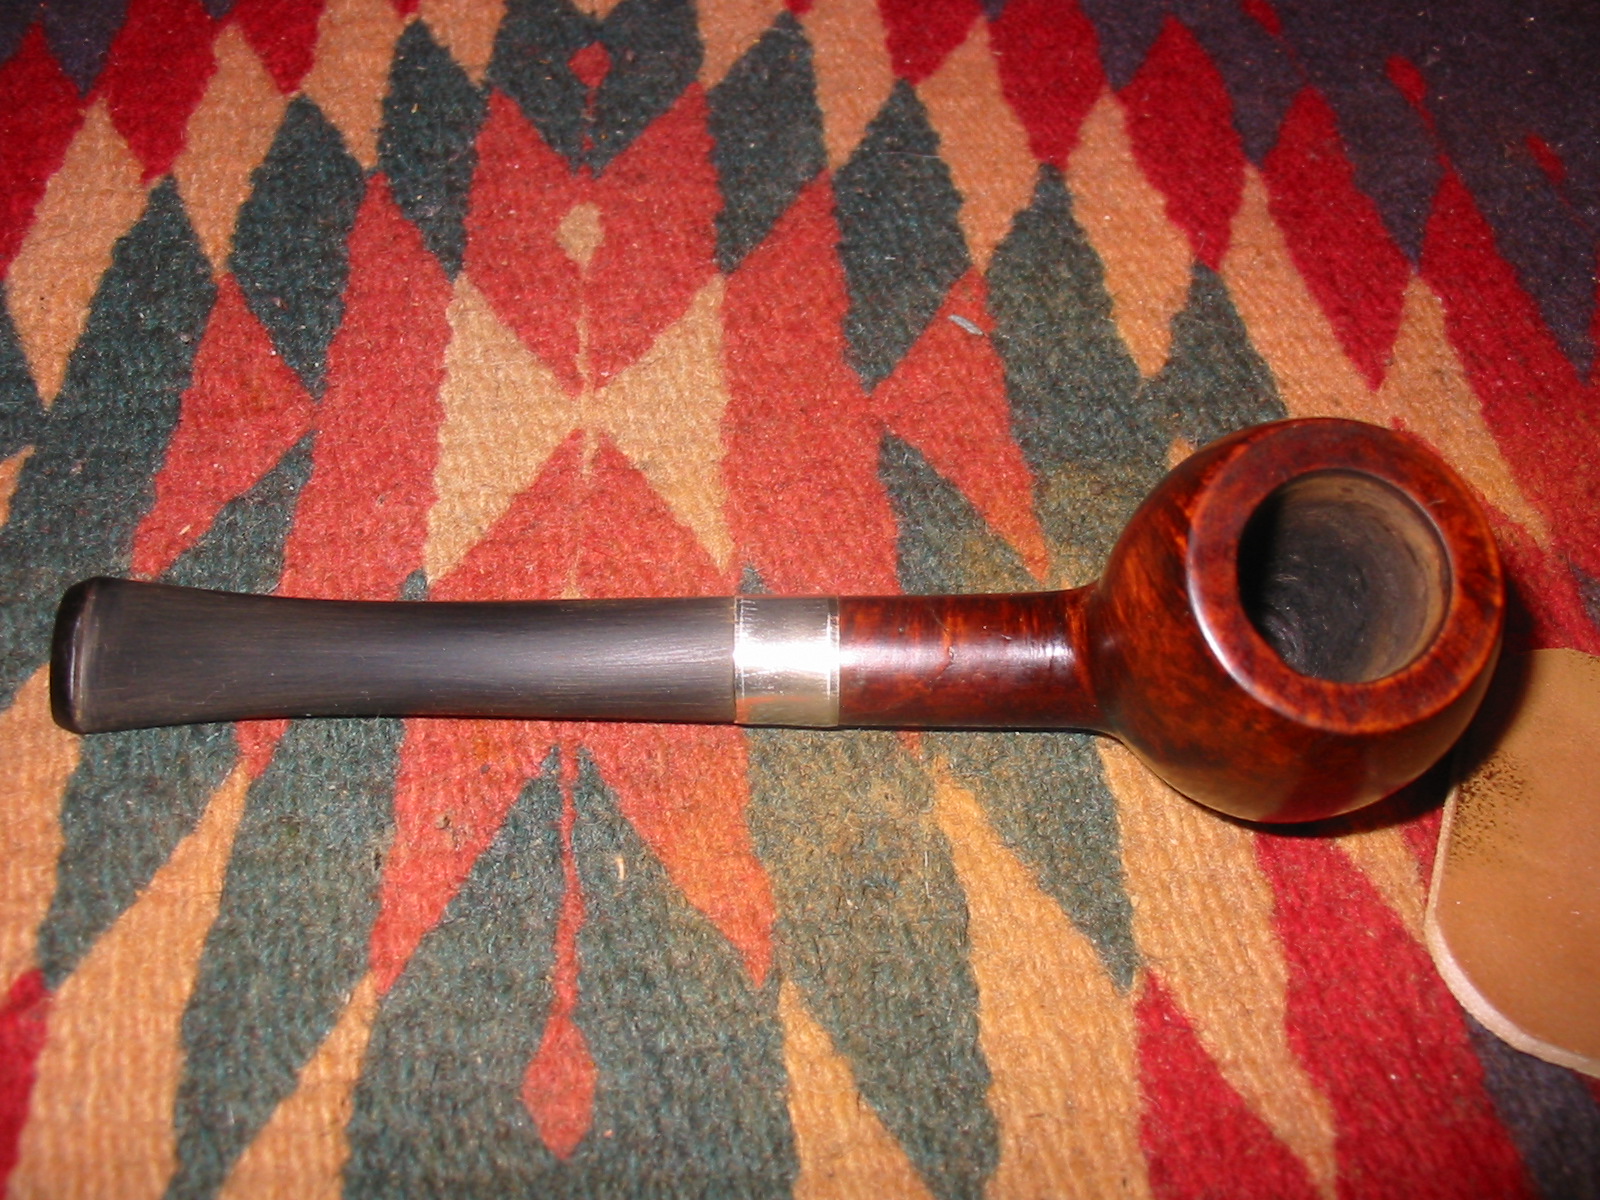
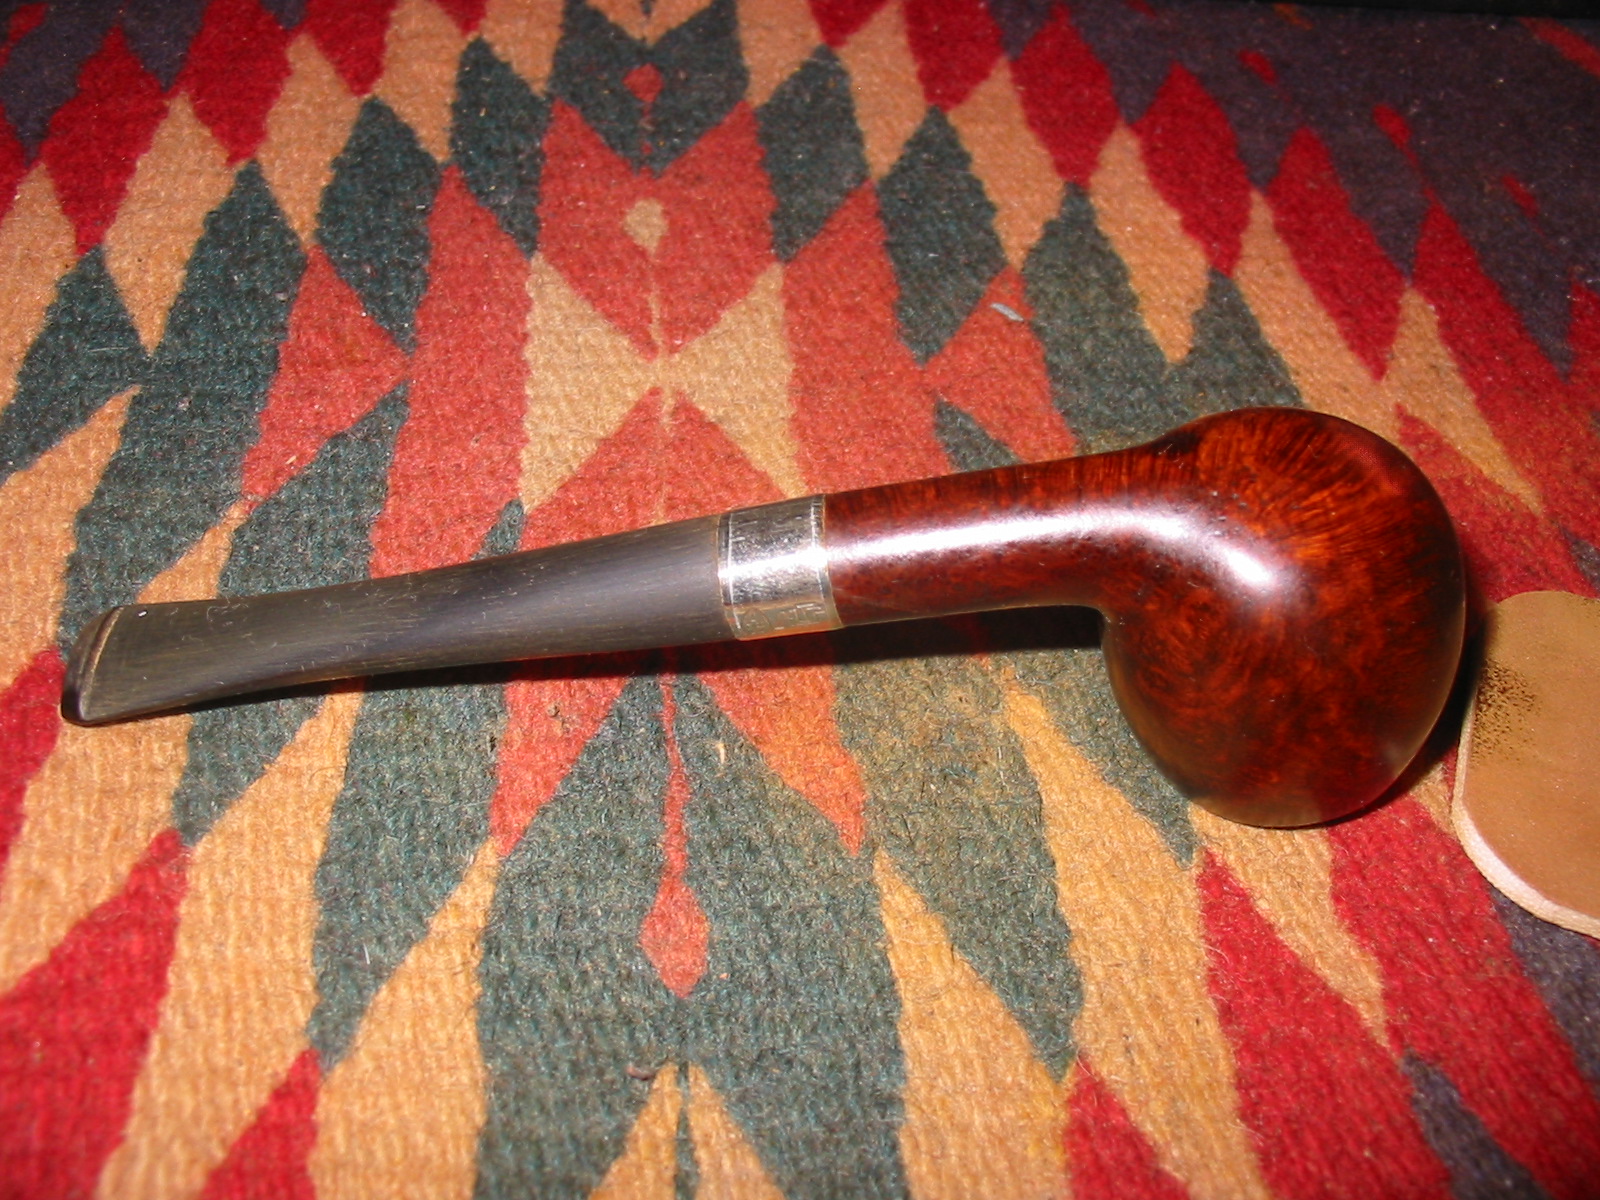
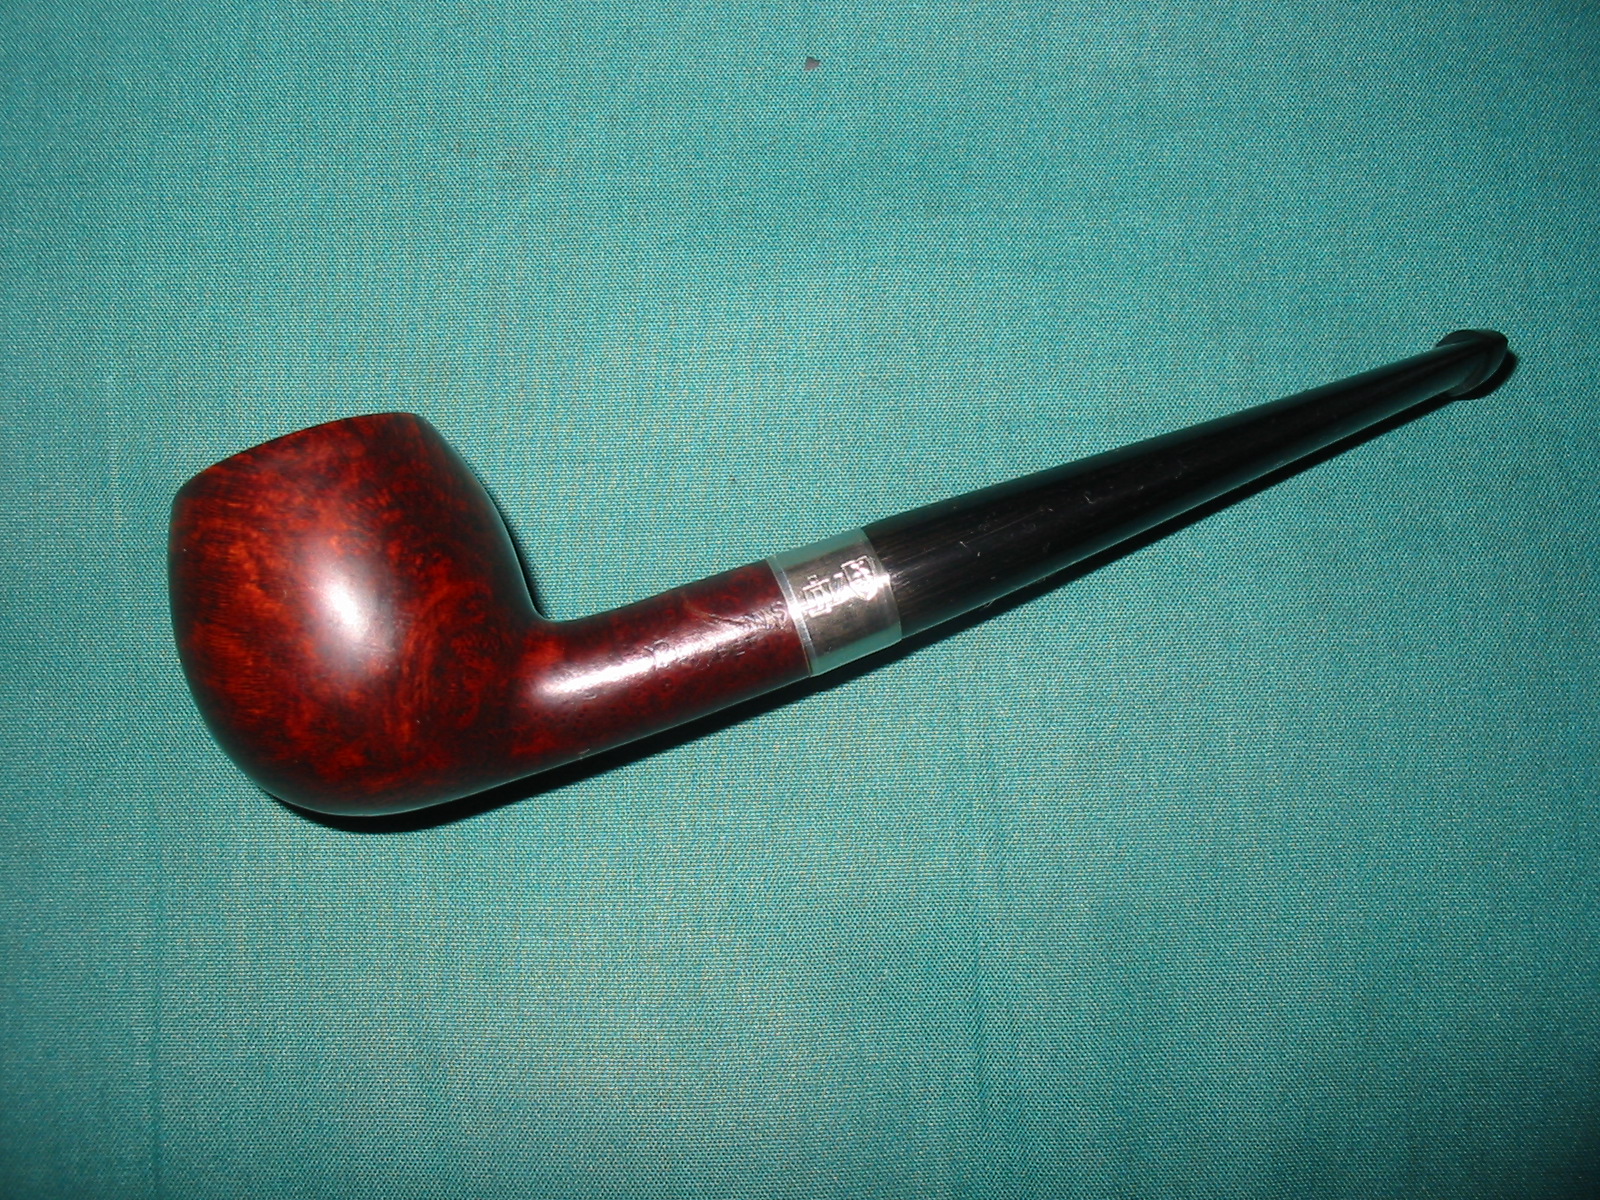
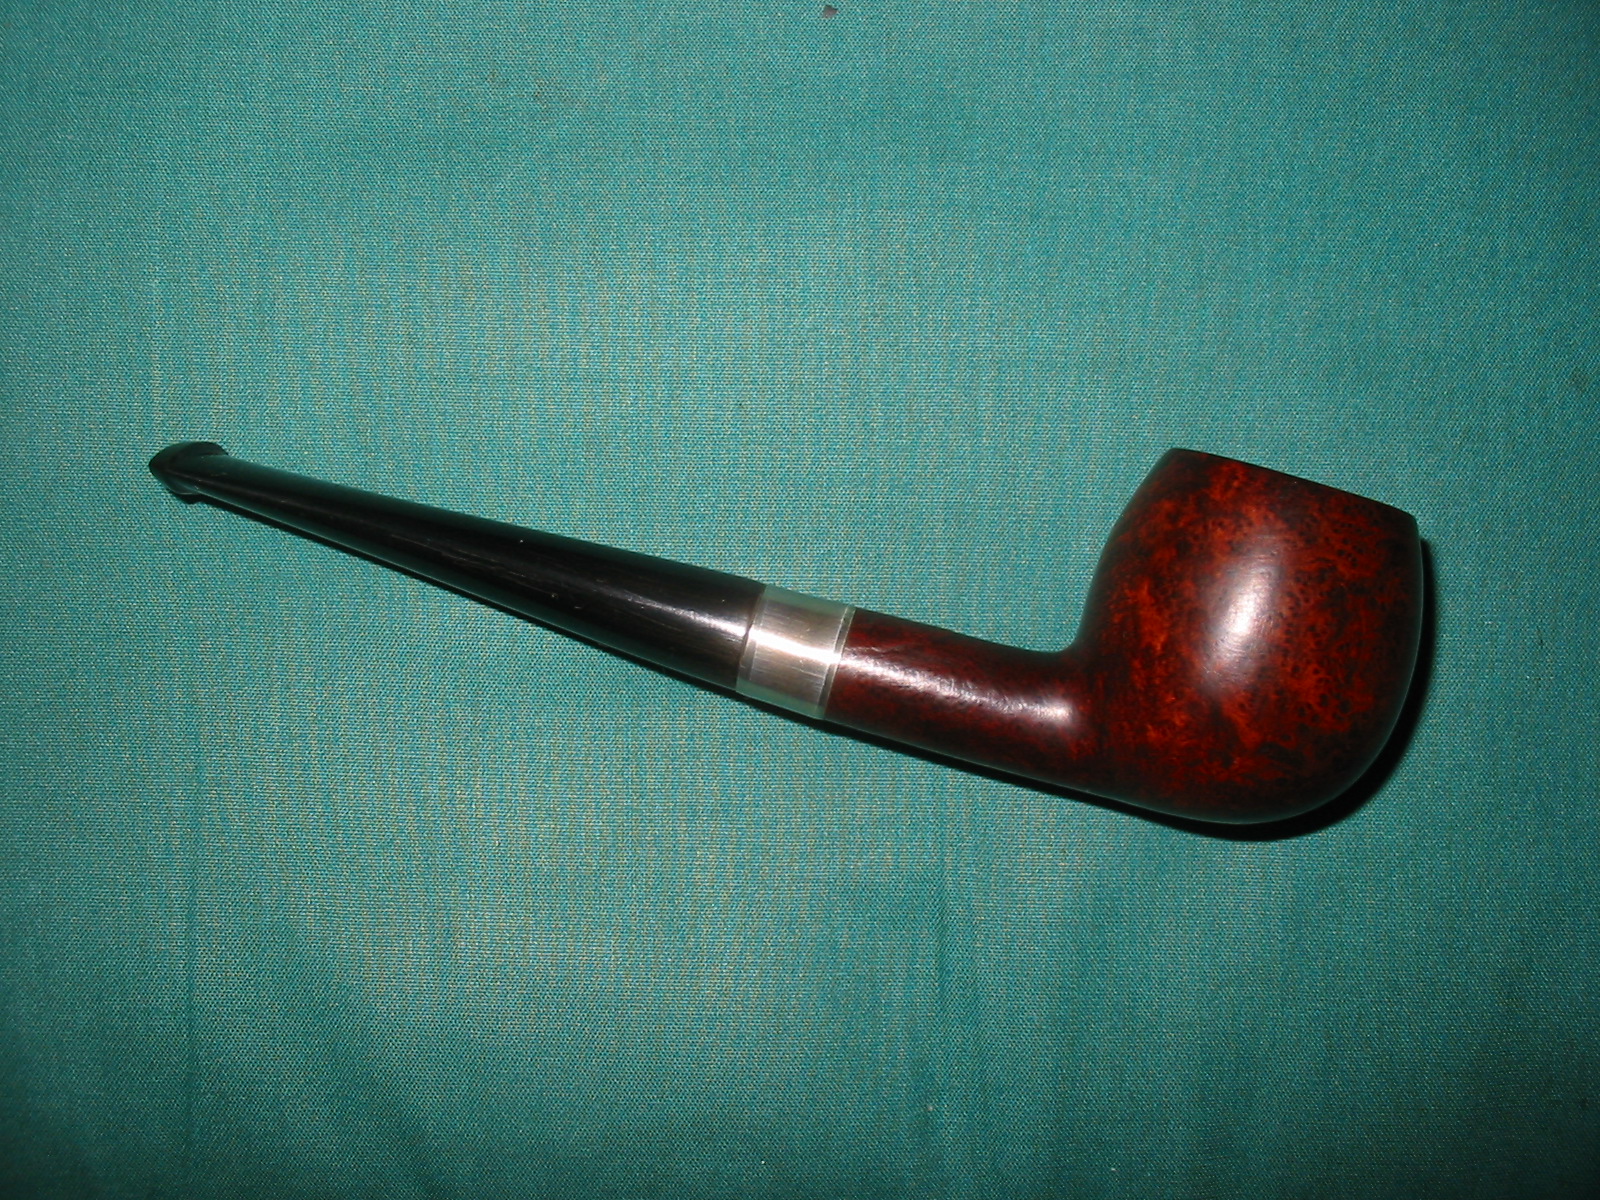
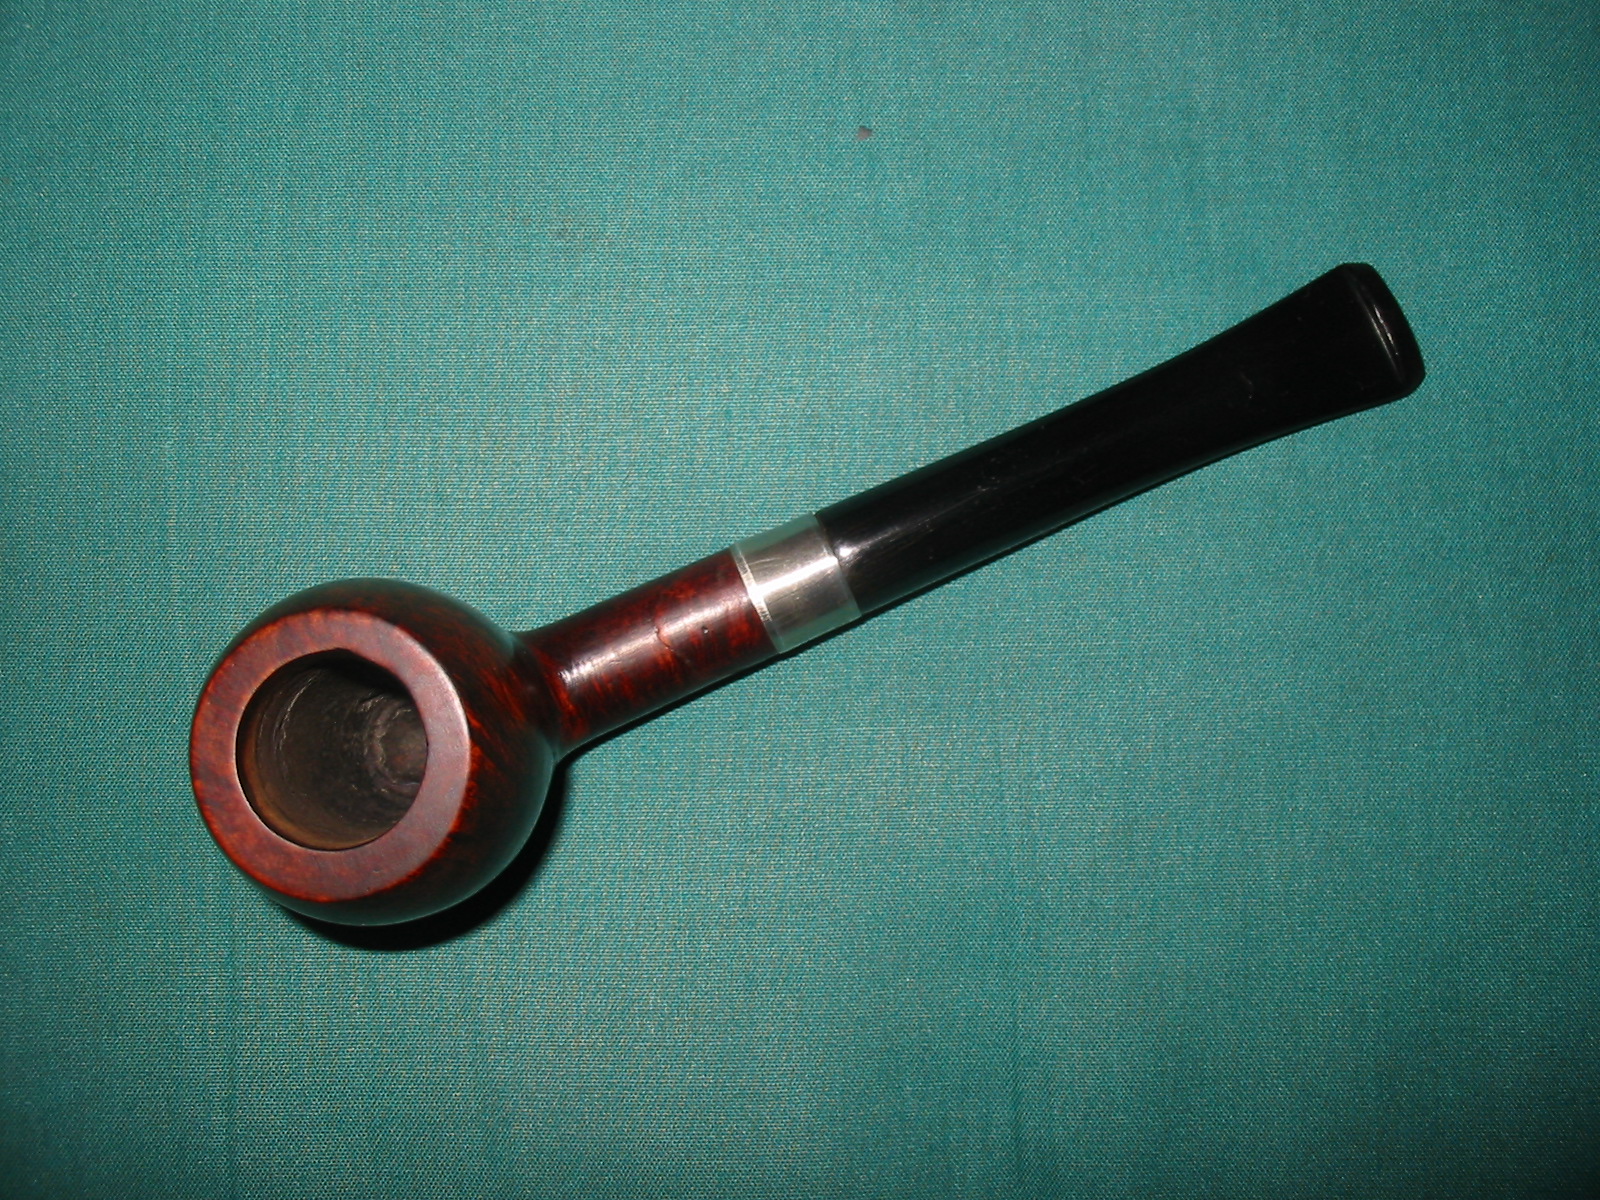
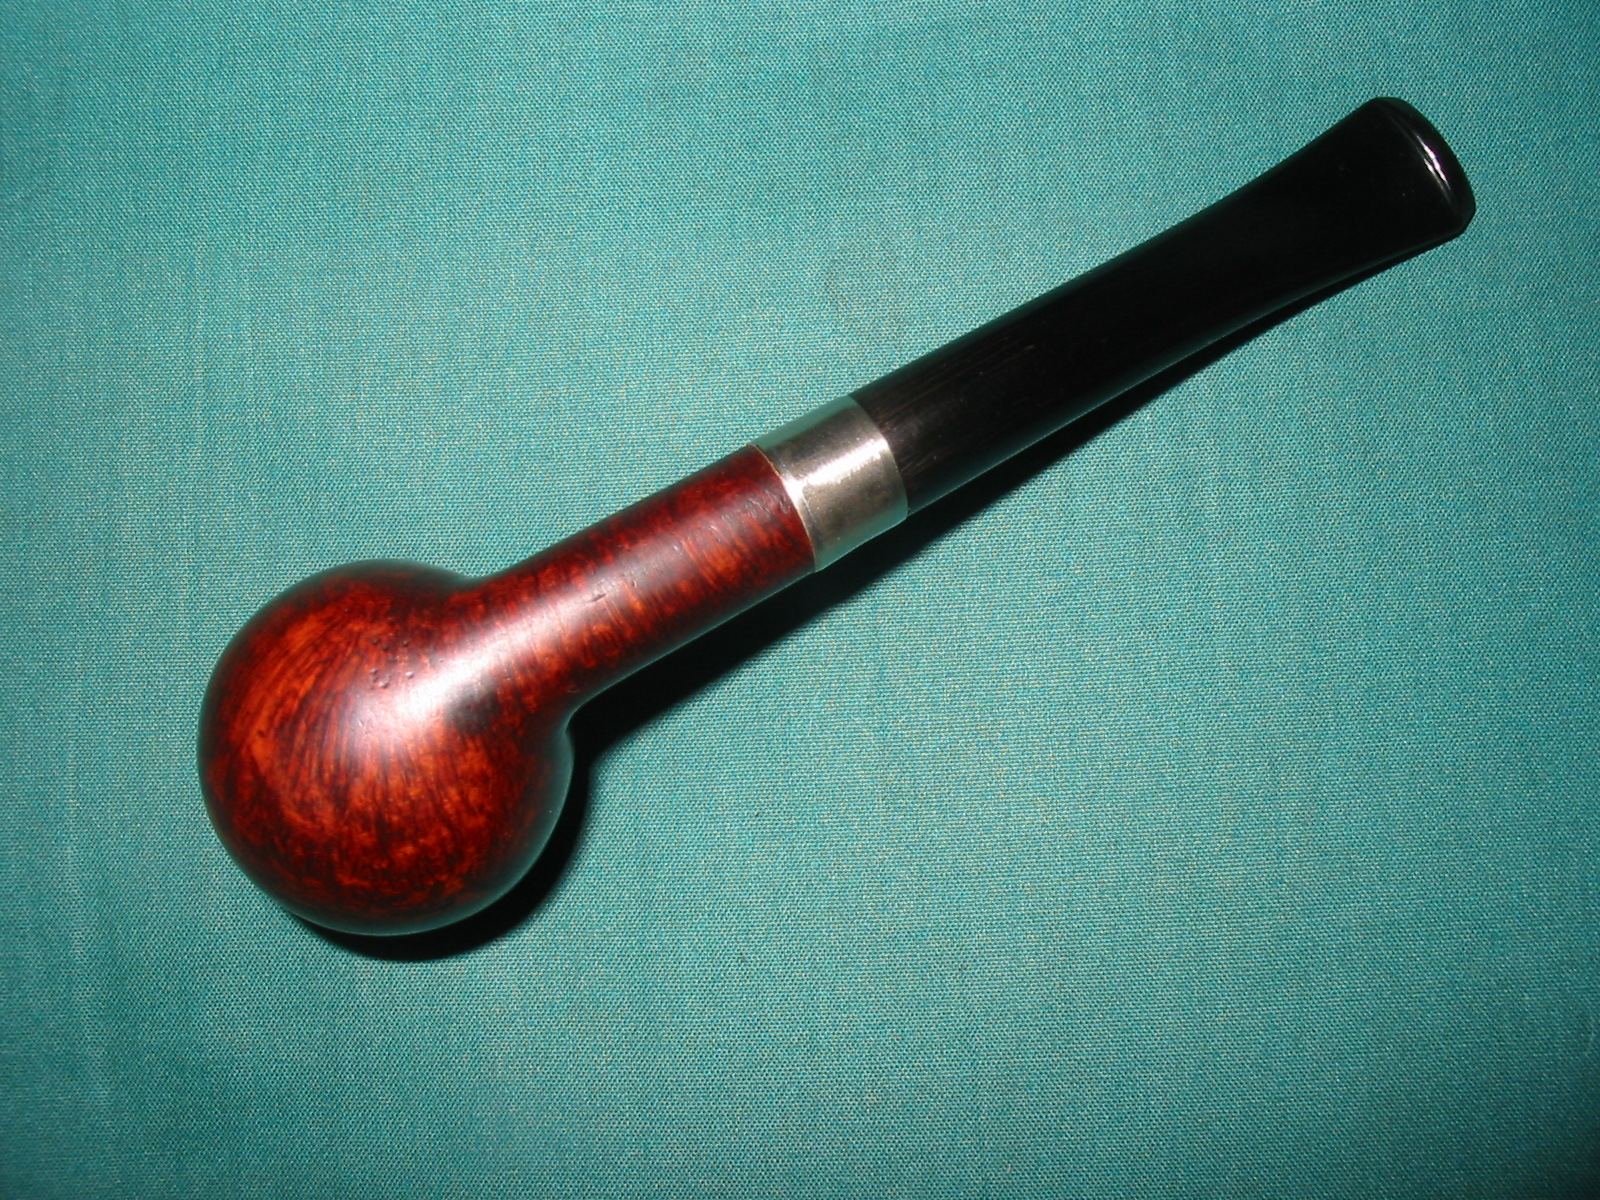
  I buffed the pipe with White Diamond and then gave it multiple coats of carnauba wax, buffing with a flannel buff between the coats. The finished 1930’s era pipe is shown below ready to be loaded and enjoyed for another 80 years. The stain does a great job highlighting the grain on this little pipe. It came out looking like new. The stamping stands out and is still sharp. The stem tapers just right to my liking. It is finished and waiting. Now the only decision left is what tobacco to use to break it in once again.
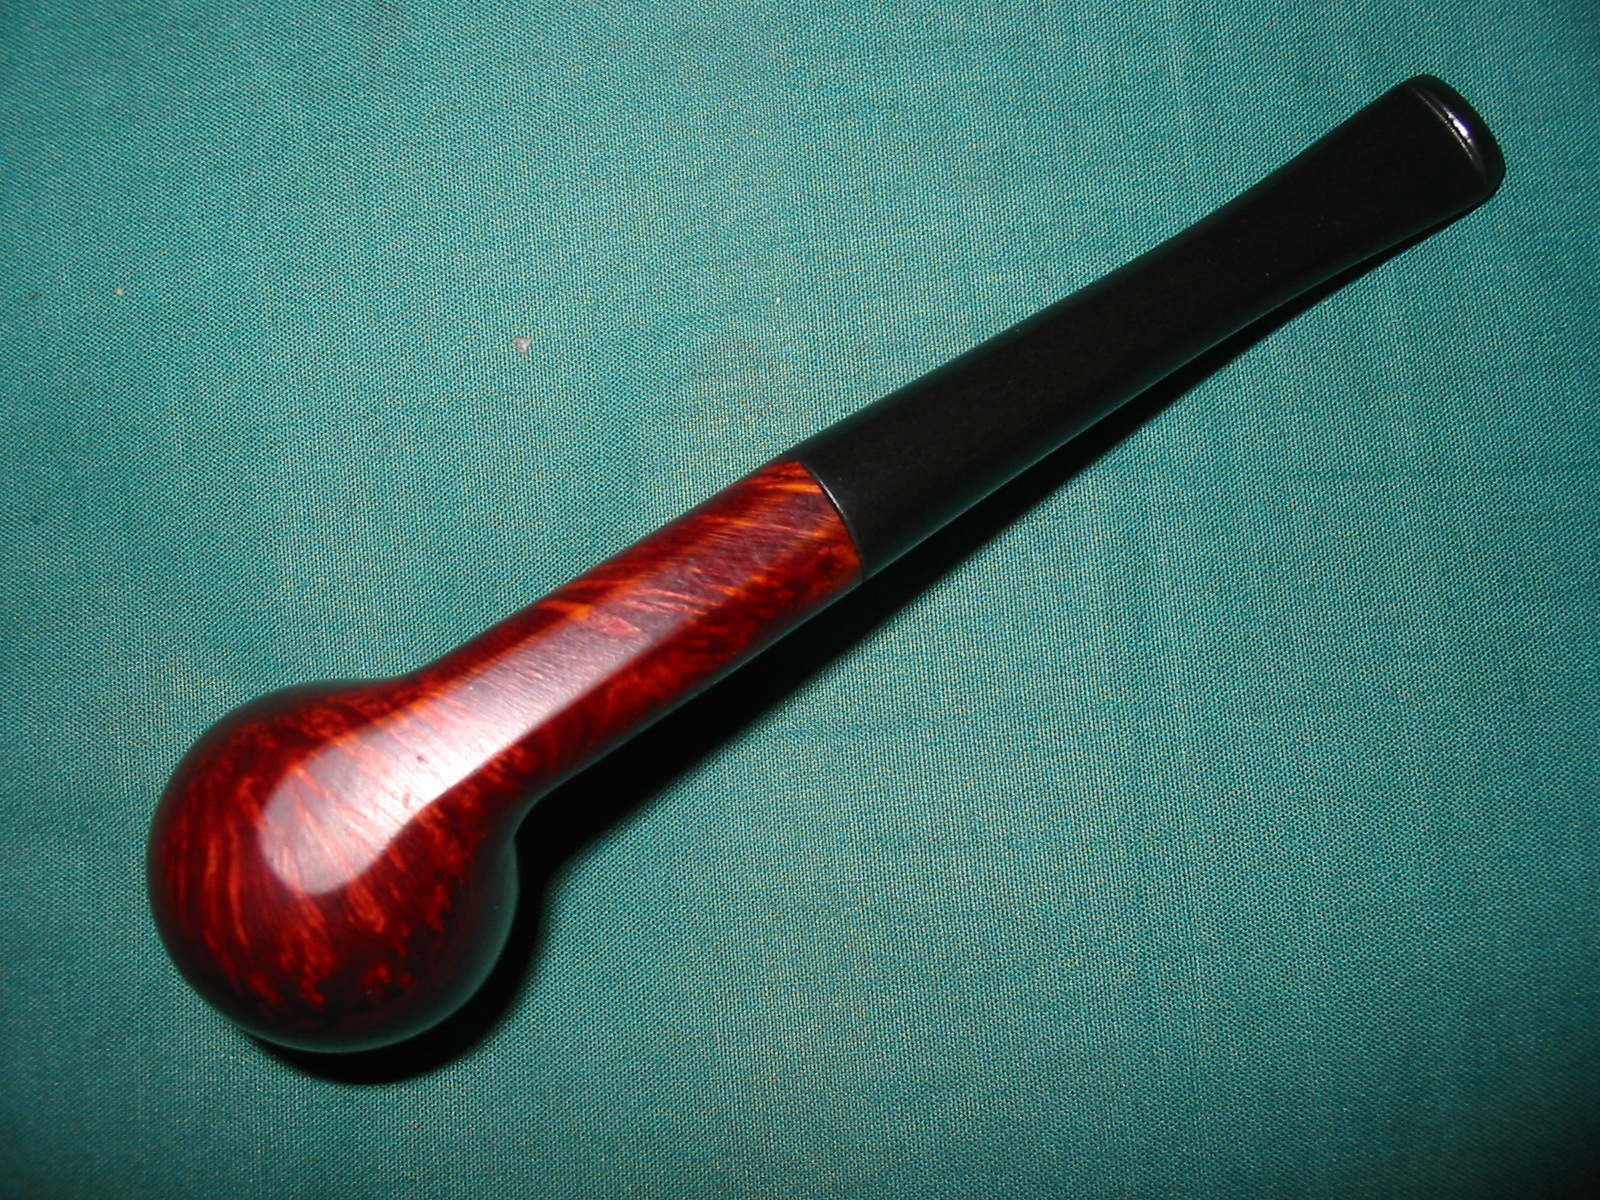
Recently I bought a GBD New Standard 9442 on eBay in which the seller said had been “professionally” cleaned. The photos online looked ok and I bid on the pipe. Upon receipt I was disappointed in the condition. It would not even pass a pipe cleaner.

There was a lot of tar built up in the base of the pipe and the stem was plugged solid. I went through a number of pipe cleaners and cotton swabs to get it cleaned.

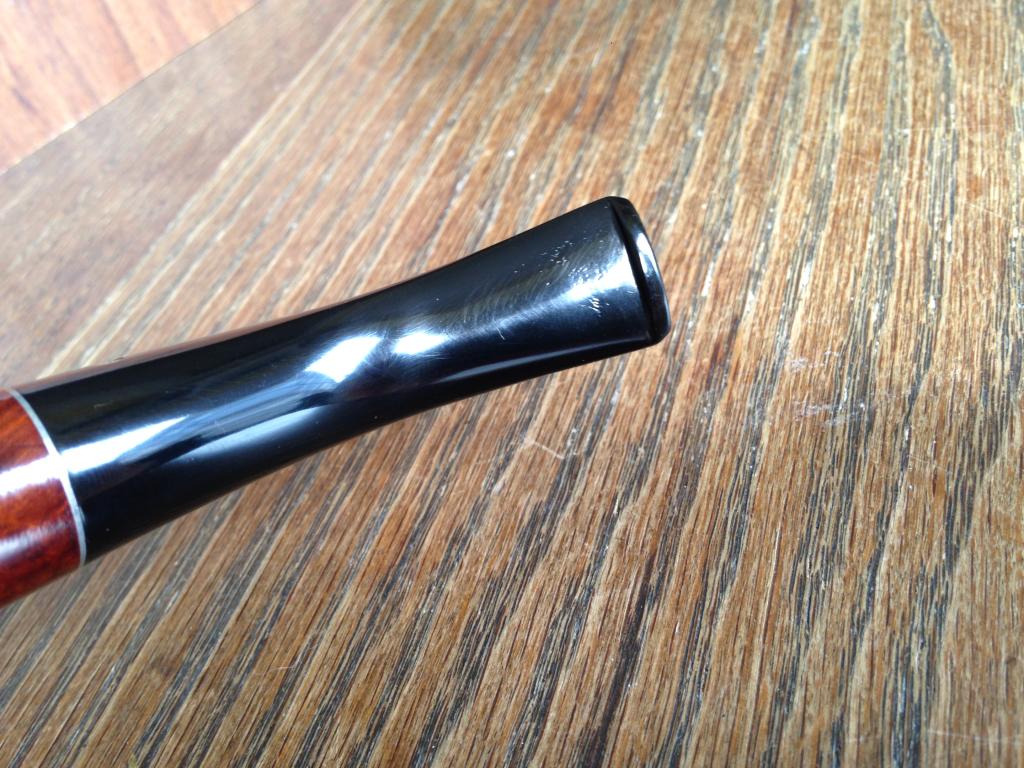
The stem had a couple of tooth marks and a crack in the bottom of the stem. Using the black super glue I tried to fill the tooth marks and repair the crack.

This is an area that I will need much more practice in before I can say it’s good. At this writing the repair I made are primitive but ok. I will continue to practice…
I soaked the…
View original post 52 more words
It is a pleasure to present Pat’s second contribution to the blog. In it he describes his work on an old Kaywoodie in one of my favourite shapes – the 13B. Thanks for the contribution Pat. Keep ’em coming. You are doing some great work.
Greetings friends.
It’s been one heckuva week, one of those weeks where life just seems to take over. As a reward for making it through, I’ve taken a holiday today to restore a beautiful old pipe that has been sitting on my bench for a month or so. This was another $14.00 eBay win, and one I was thrilled about. I started looking for early Kaywoodies about a year ago when I fell in love with the quality of the briar. This lovely little author was in pretty good shape. The drinkless stinger, with 4 holes, and a two digit shape code with one letter dates it to between 1940 and the early 1950s. There was a sizable tooth mark in the top of the stem, a couple smaller bites out of the bottom of the bit, and a few small dings and dents in the bowl. Other than that, the pipe was in pretty good shape.
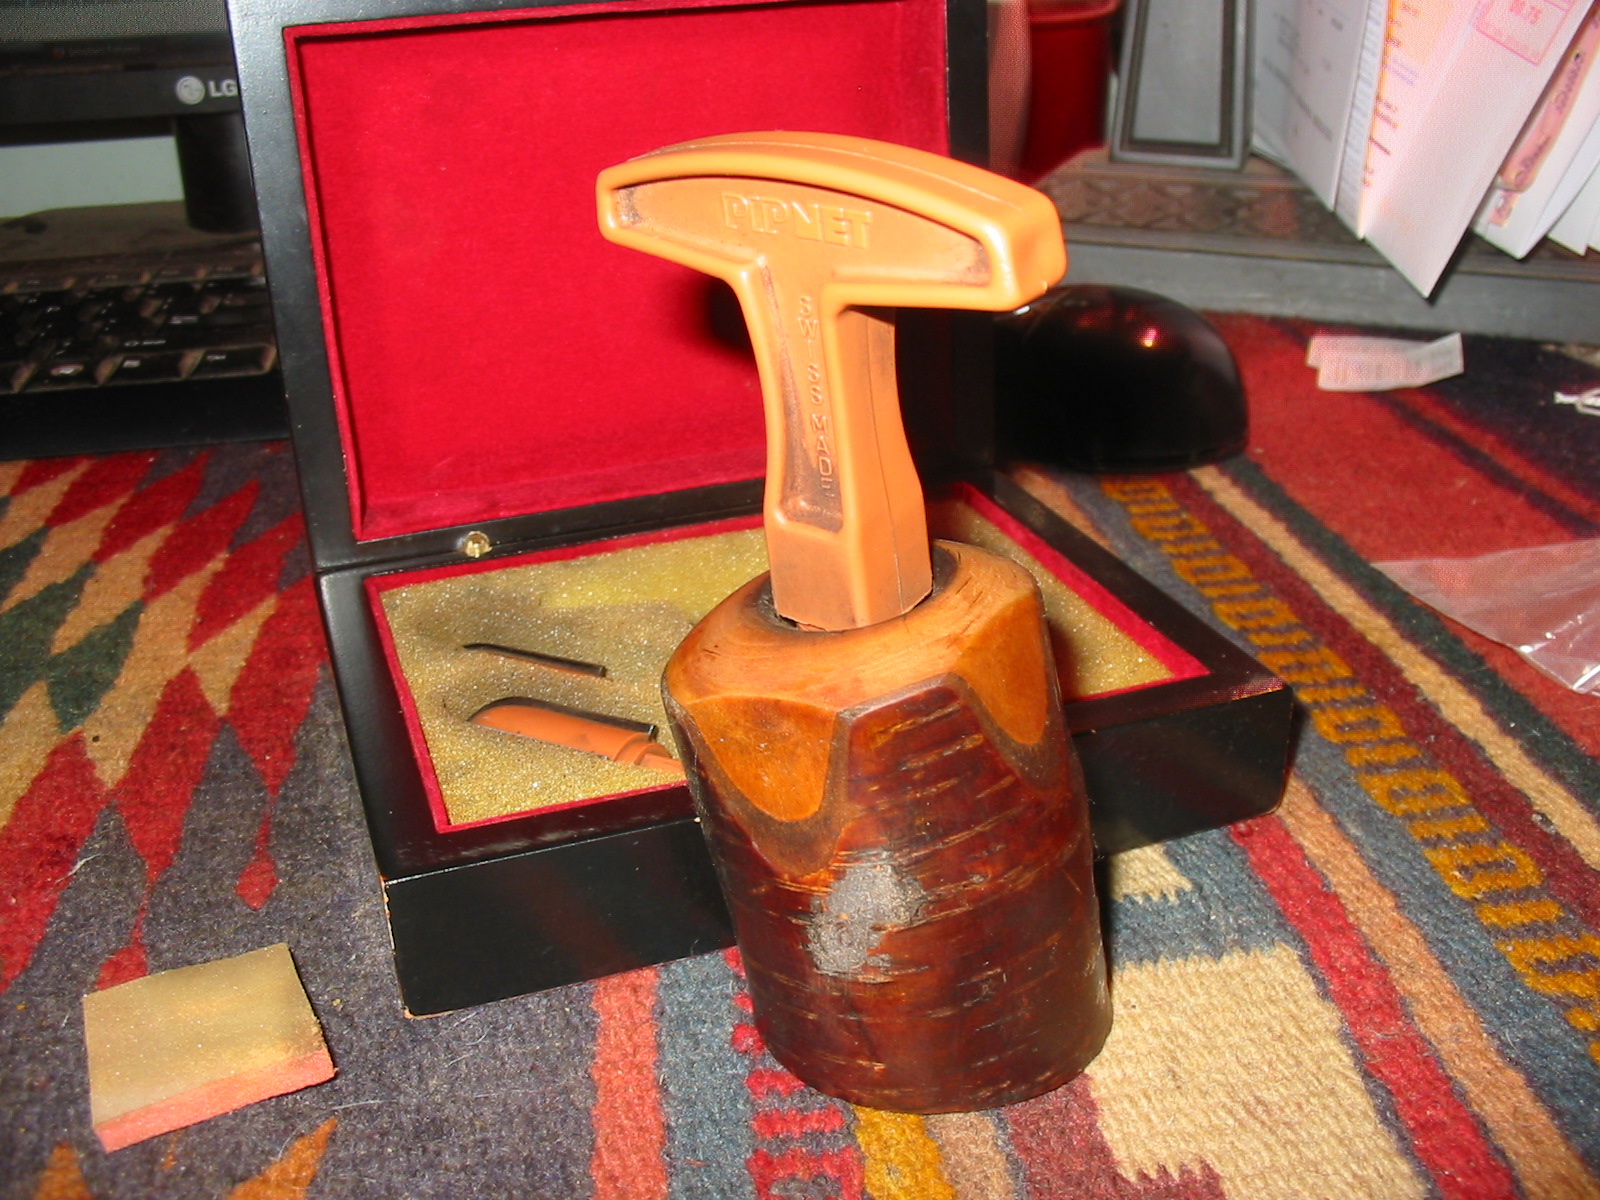
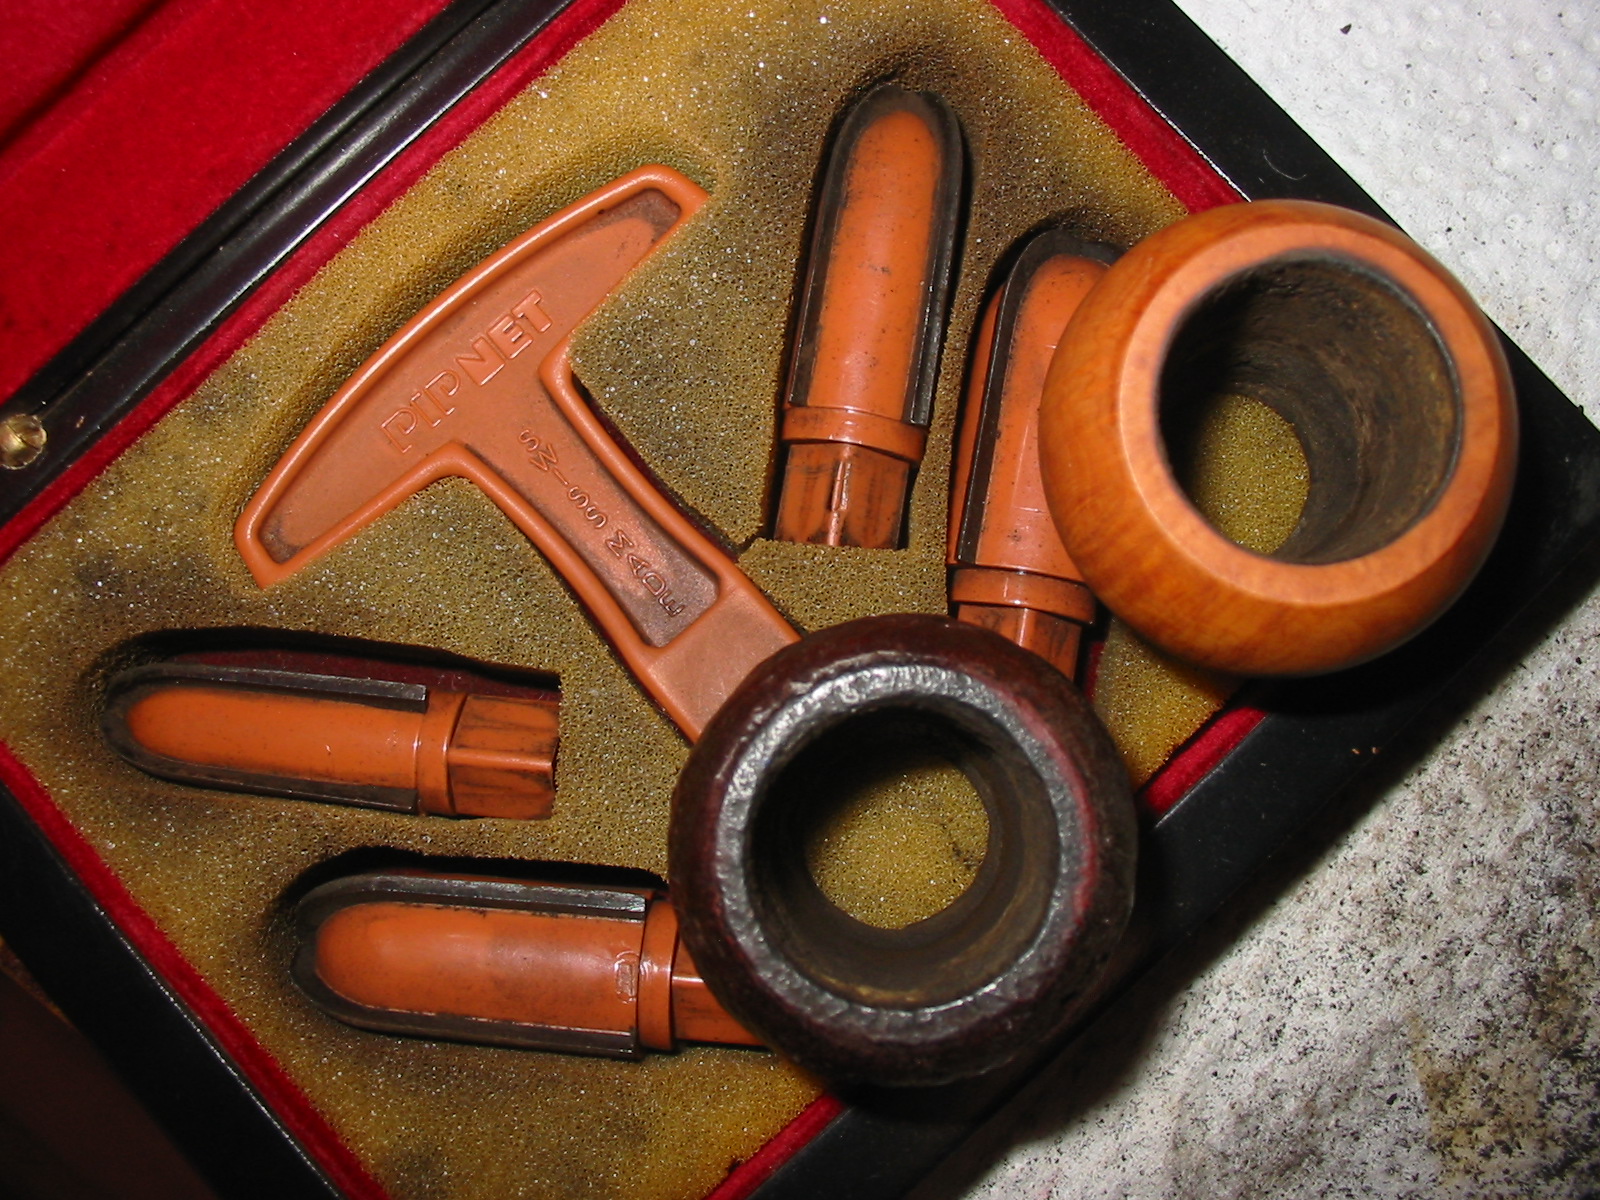
 So I threw the stem in a OxyClean bath, and then took the new PipNet reamer to the cake.
 I then wet a tea towel and set the bowl rim down on the towel for two minutes or so, before using the damp towel to wipe off the rim char and tars.
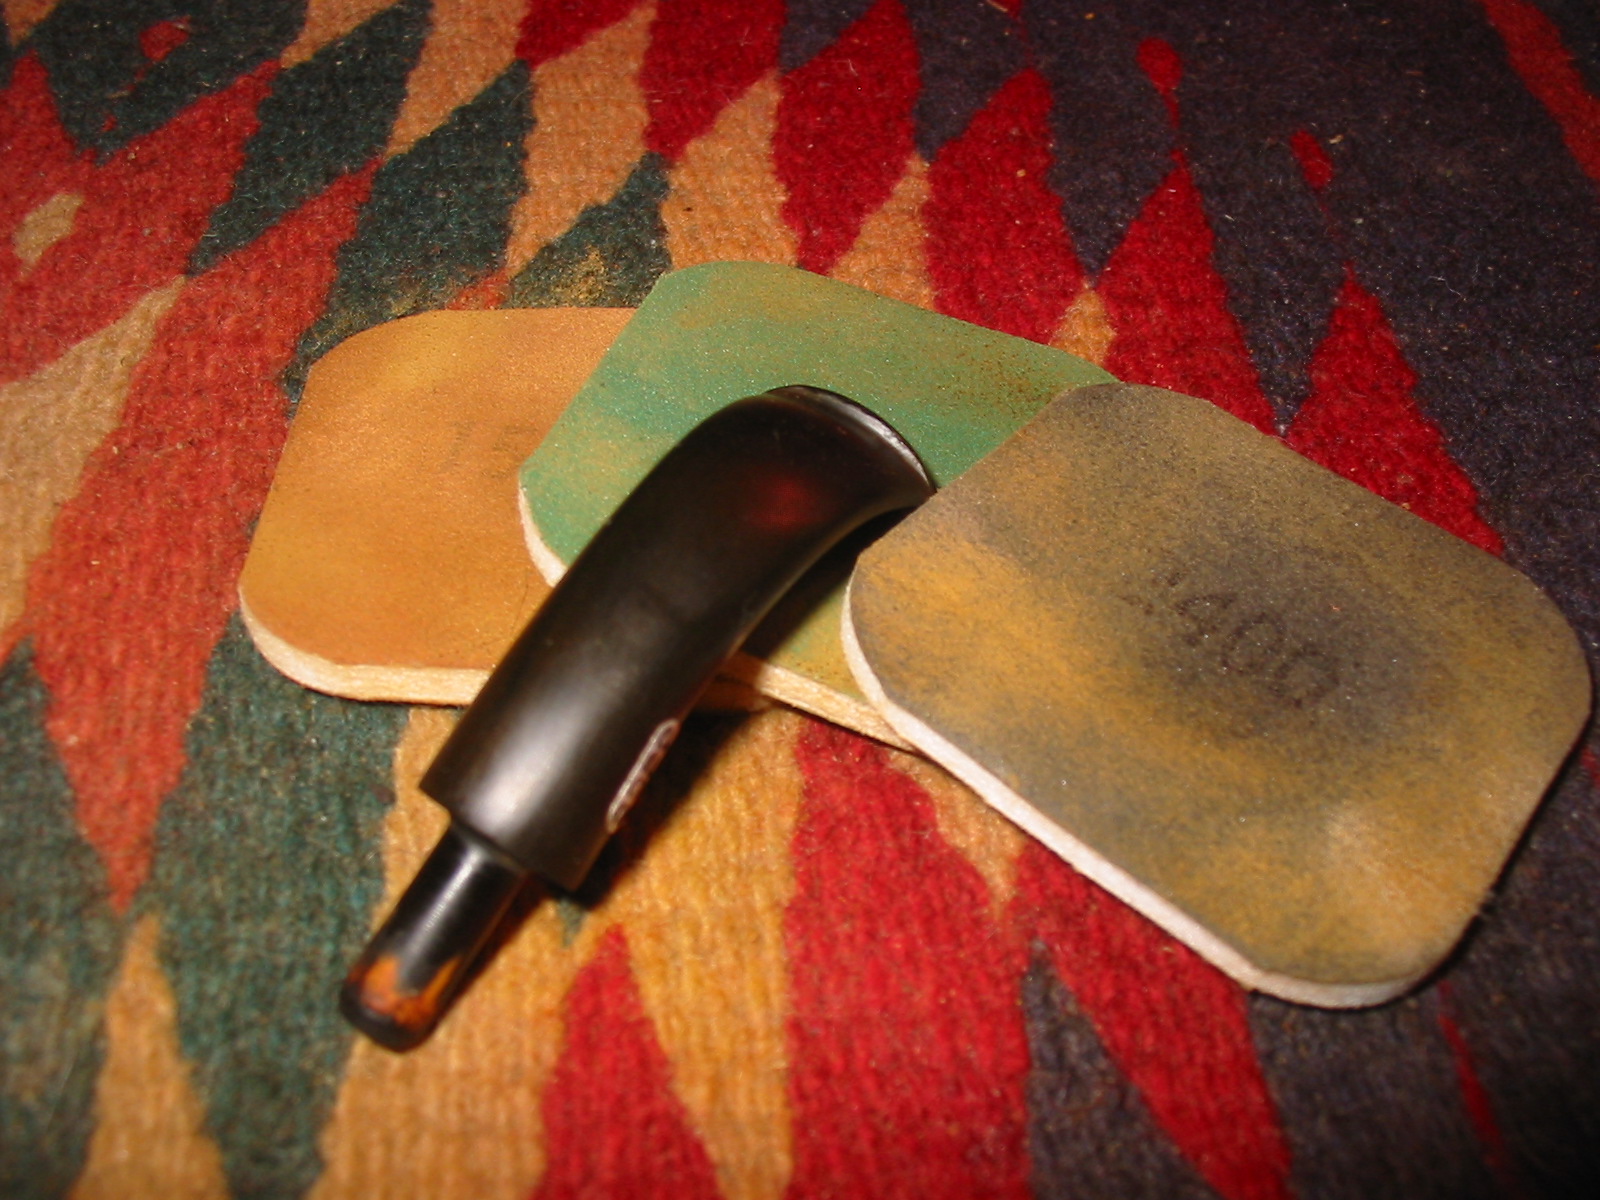
 Once that was done, I wet sanded the stem with 600 and 800 grit sandpaper.
 Then took the heat gun to the stem to work on those dents.
 It took a couple attempts, but they both lifted somewhat.
 Then I took 0000 steel wool to the stinger to clean it up.
 Following the stinger, I elected to do a surface clean of the stummel with acetone and a cotton pad.
 At this point, it was time to make some judgement calls. There was still some rim darkening, there were a couple very minor dents in the bowl, and that tooth mark was still there even after the heat treatment and there was a little bleaching around the top of the bowl. This pipe is for me. I’m a clencher. I elected to leave the tooth mark. I also elected to leave the dents, and do a light tint of the bowl to bring back the colour.
The next step was a date with about fifty pipe cleaners and the same number of bristle cleaners liberally dosed with isopropyl alcohol. After a thorough scrub out, I elected to finish the stem, shank and stummel clean with a retort.
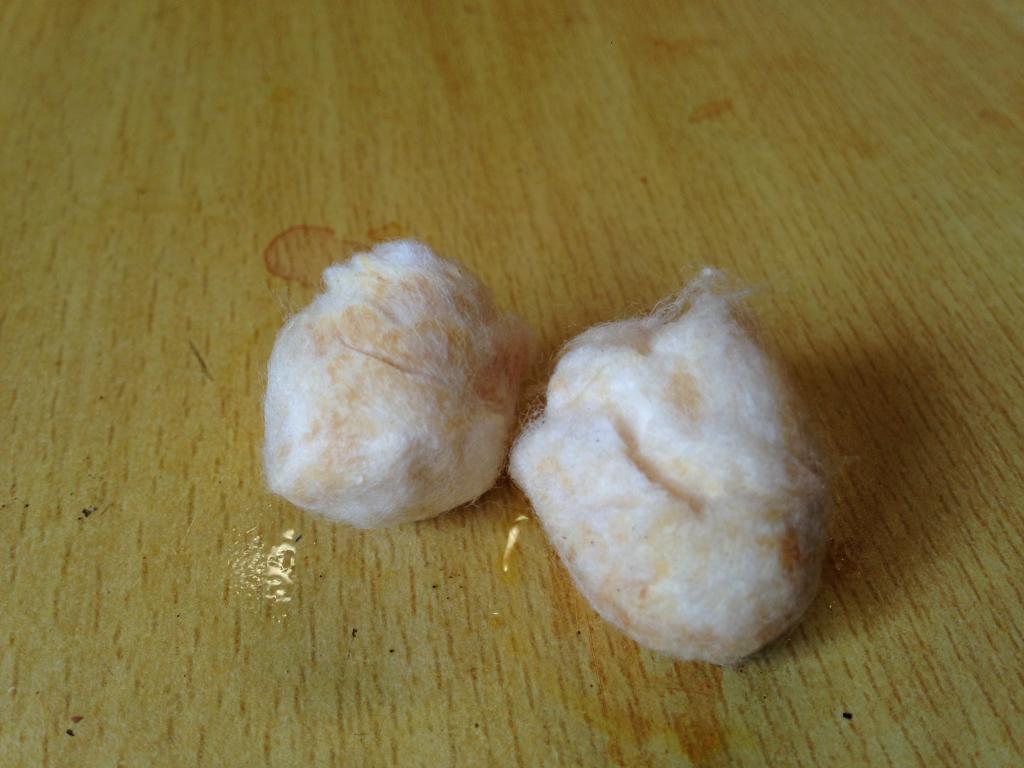
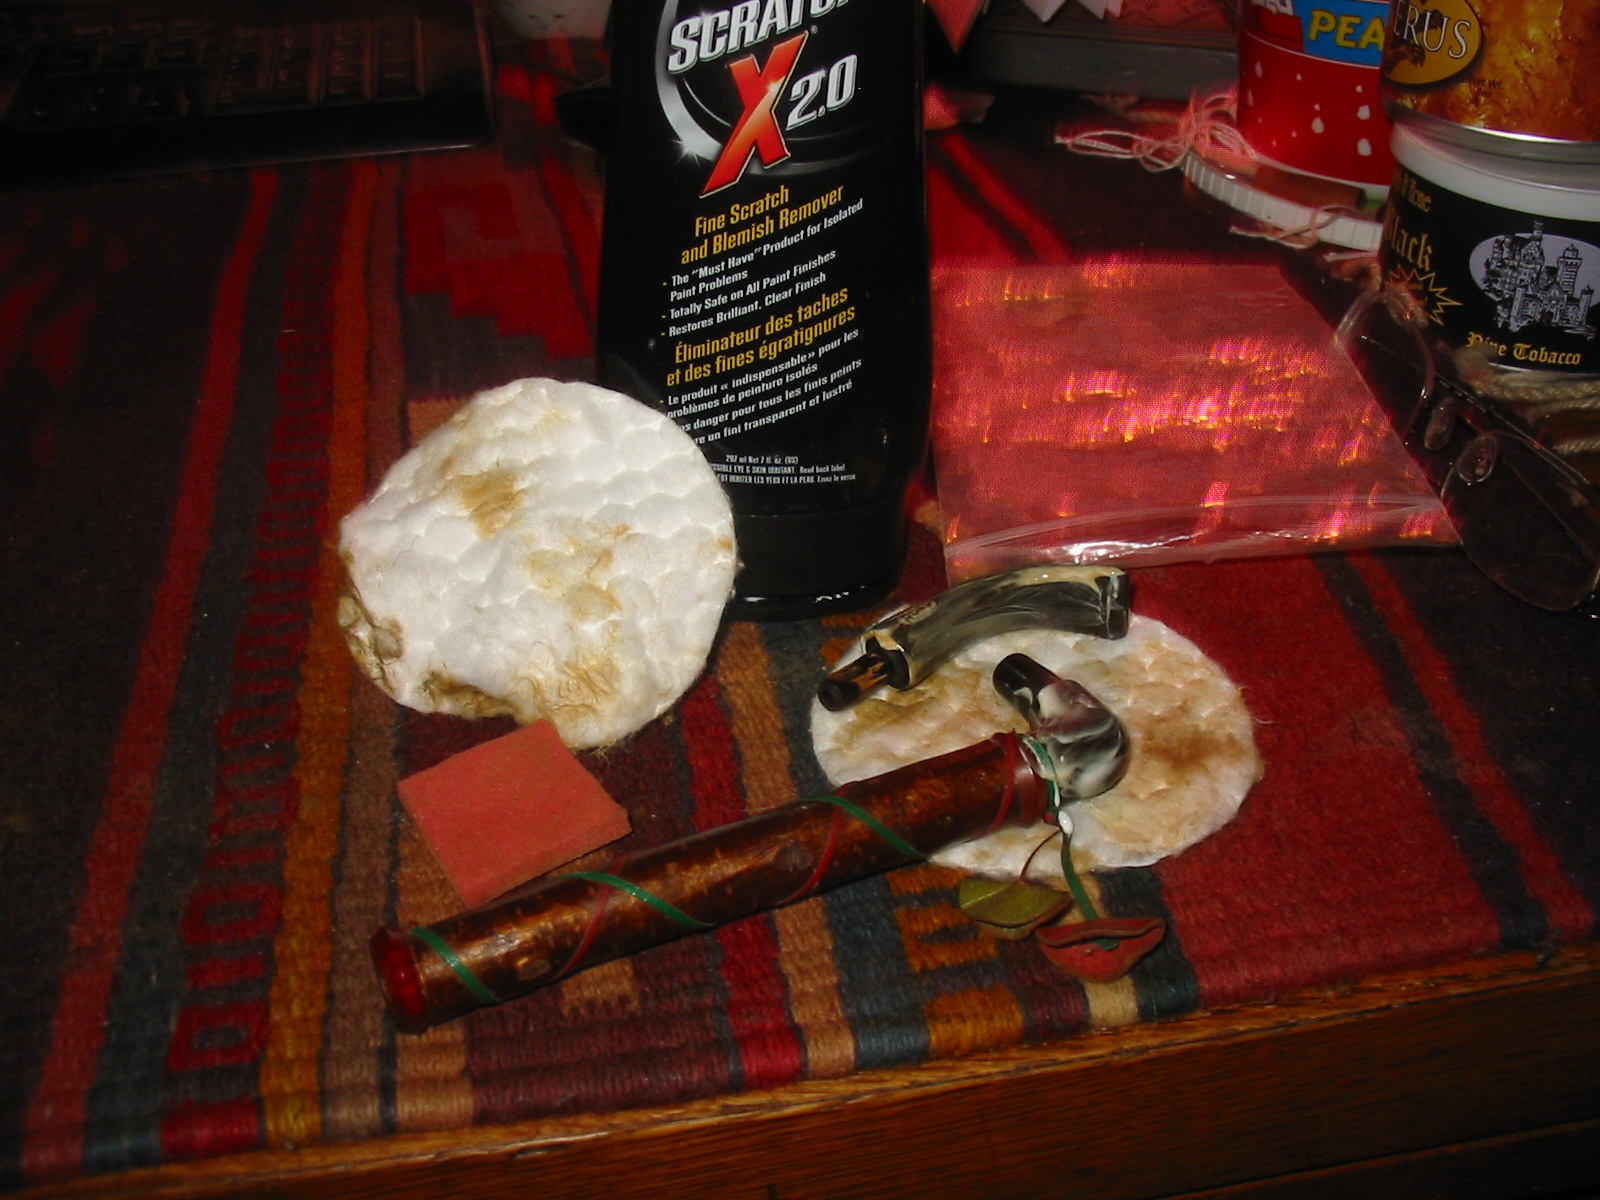
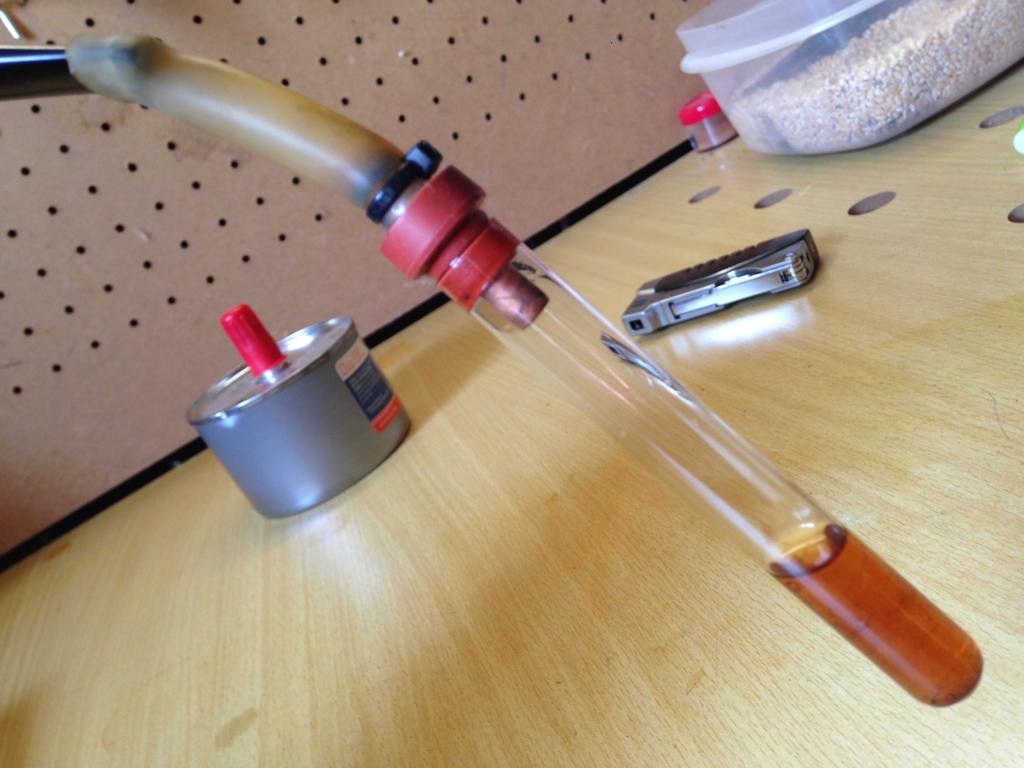 Testament to the fact that isopropyl alcohol and pipe cleaners don’t clean out everything, here are the cotton balls from the bowl post retort.
 Post retort, I added two drops of Fiebing’s Light Brown to about half an eye dropper of 99% isopropyl alcohol. I do this to create tints. I don’t always want to restain a pipe, the tint allows me to blend the stain and bring colour back to the bleached areas of the stummel.
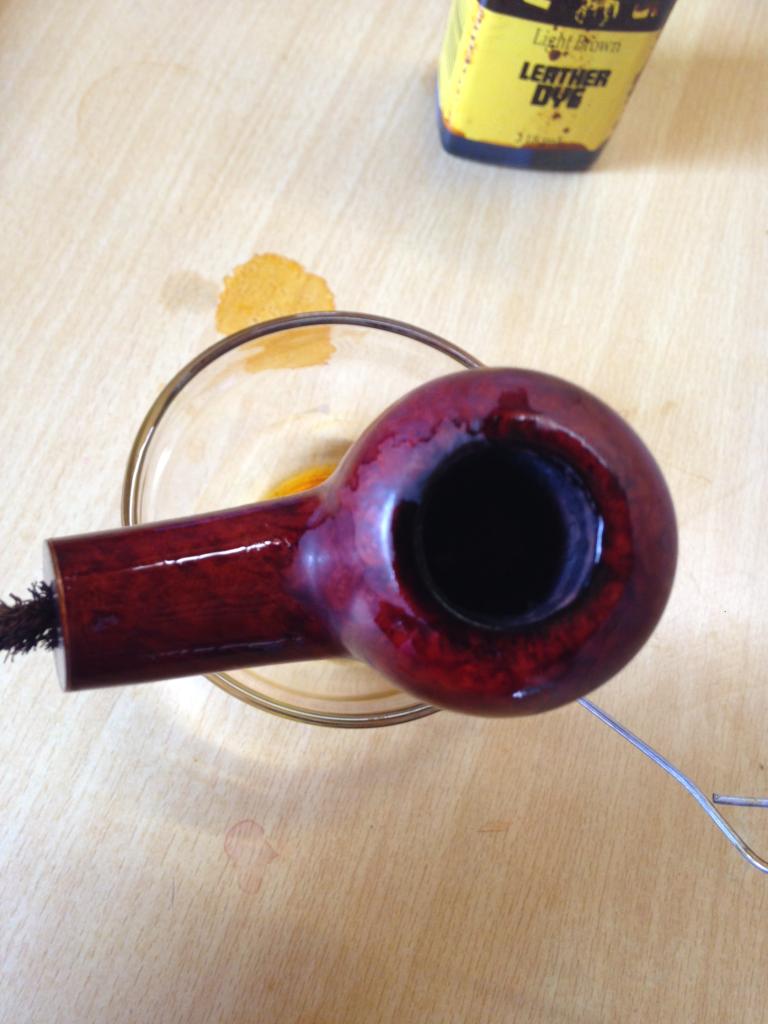 After adding the tint, I used a cotton ball with isopropyl alcohol to wipe down the stummel and even out the tint.
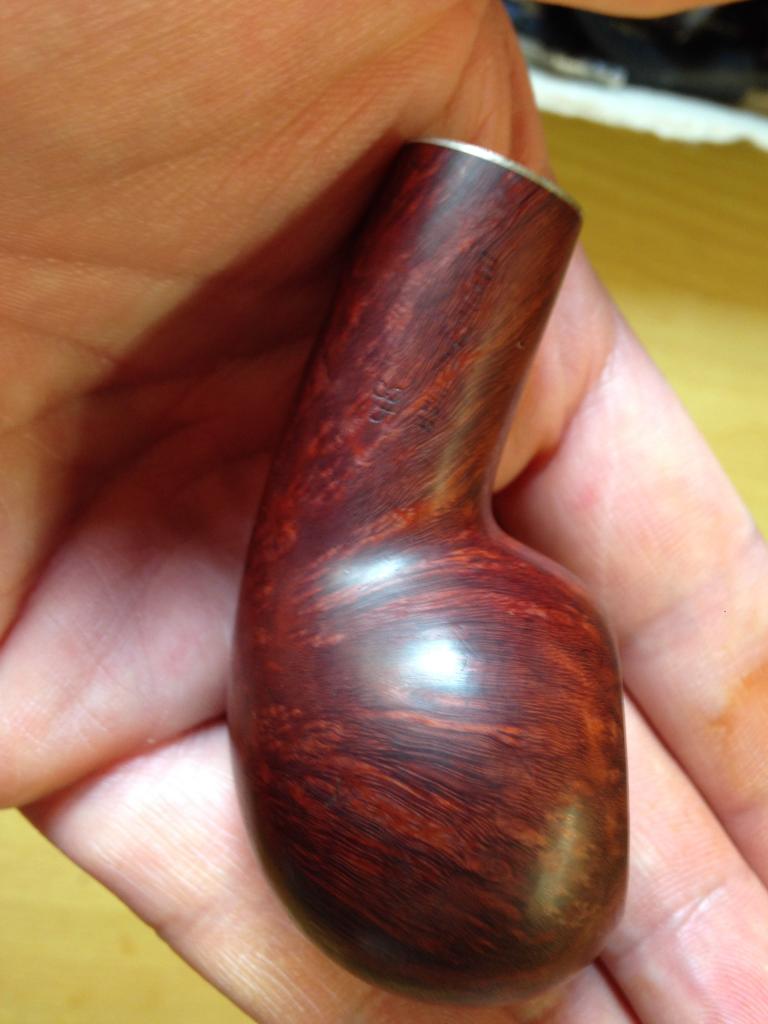 Then the pipe went to the buffer. First with white diamond…
 Then with Carnauba…
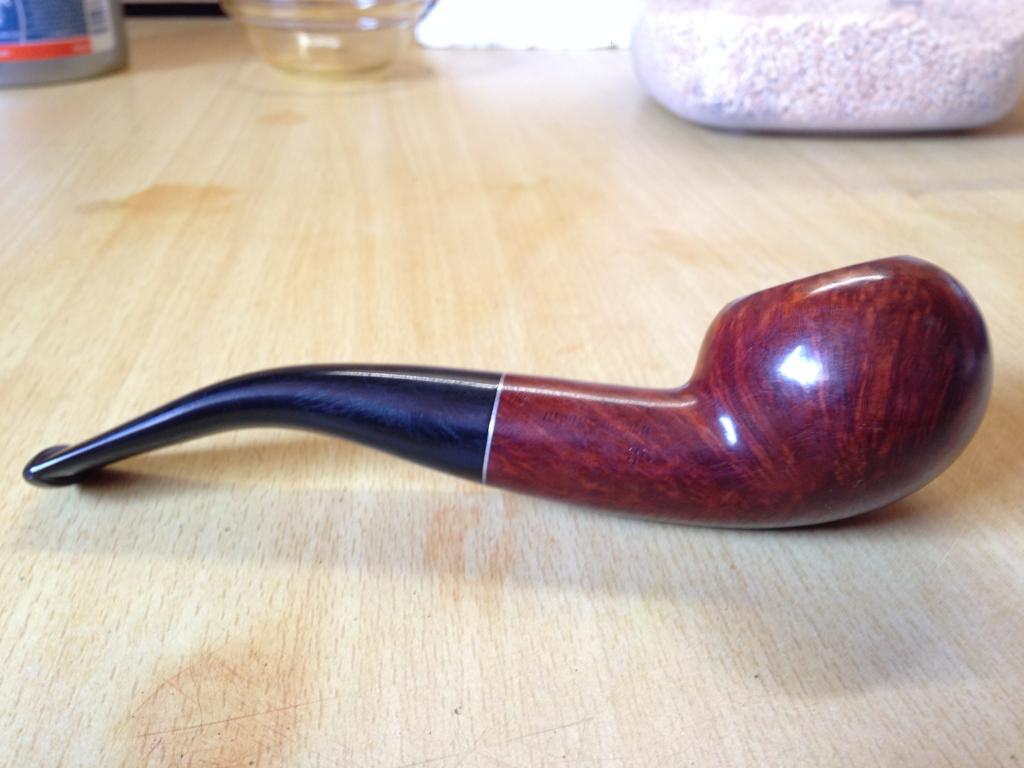
 Then after a wipe down with a Dunhill Pipe Wipe…
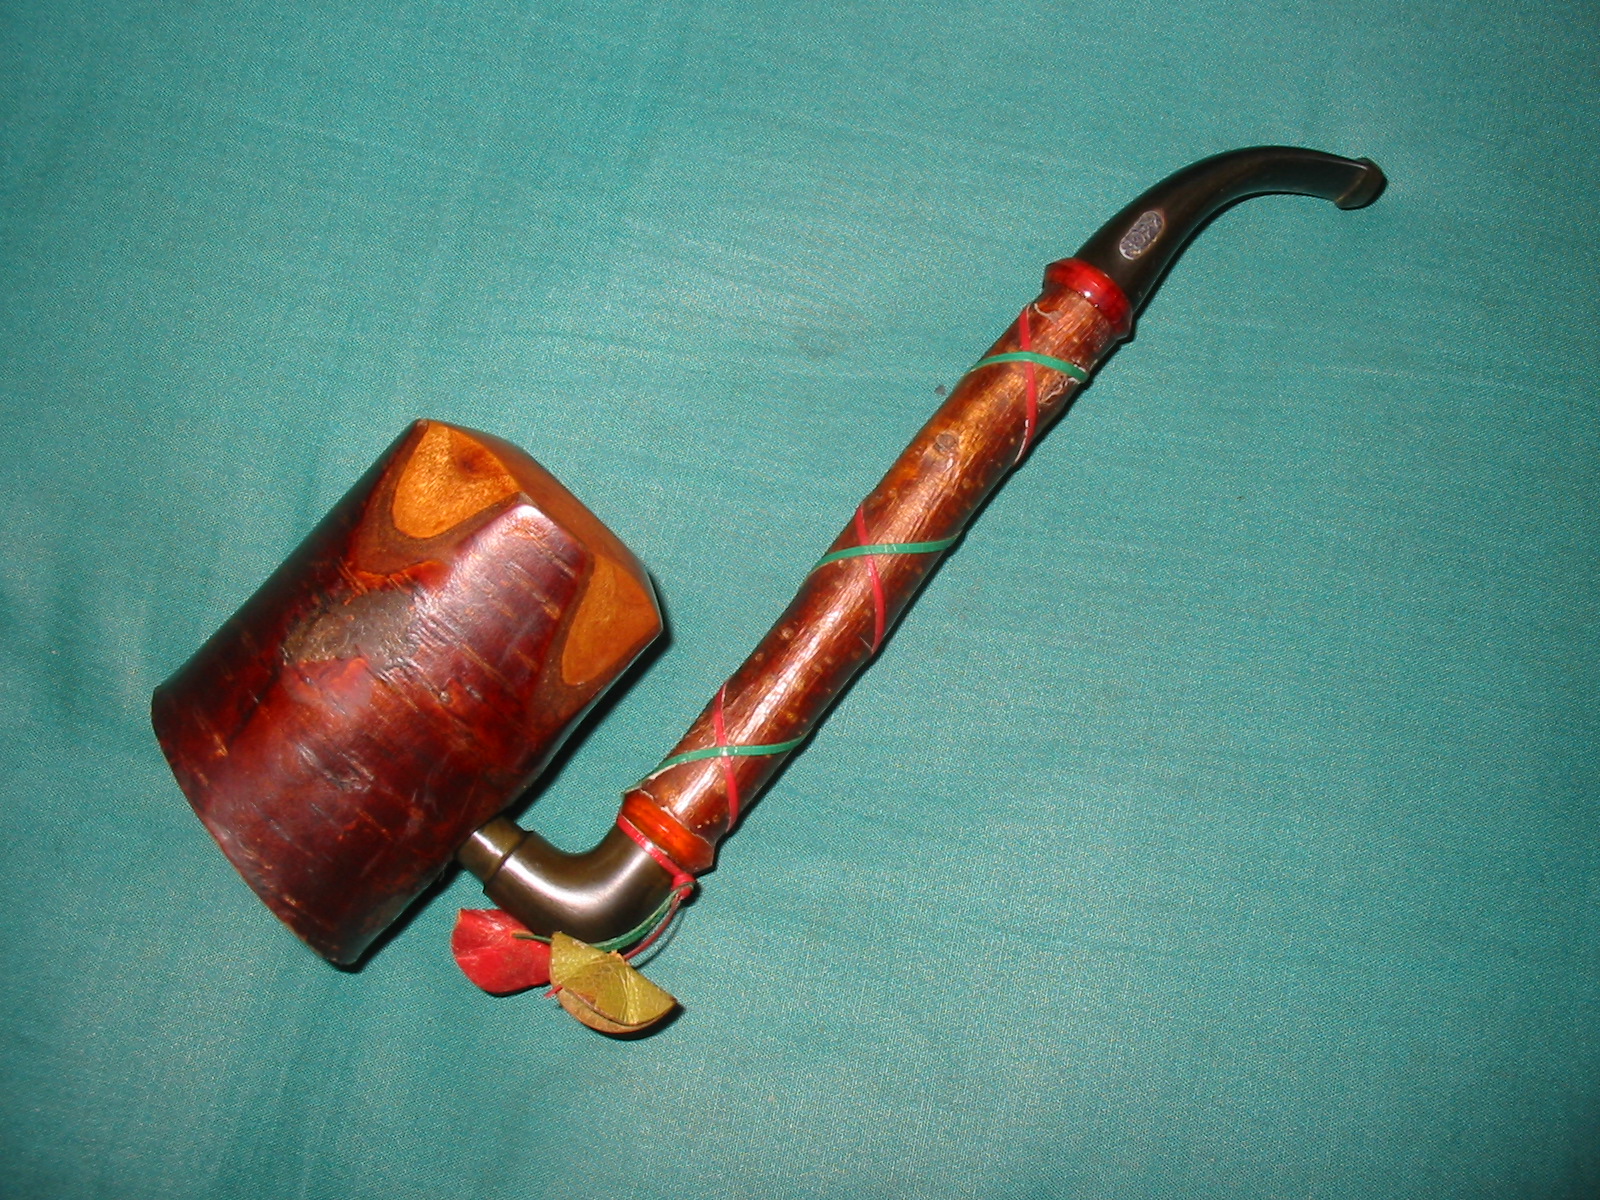
 I love this pipe. I’m thrilled to have it, and can’t wait to smoke it.
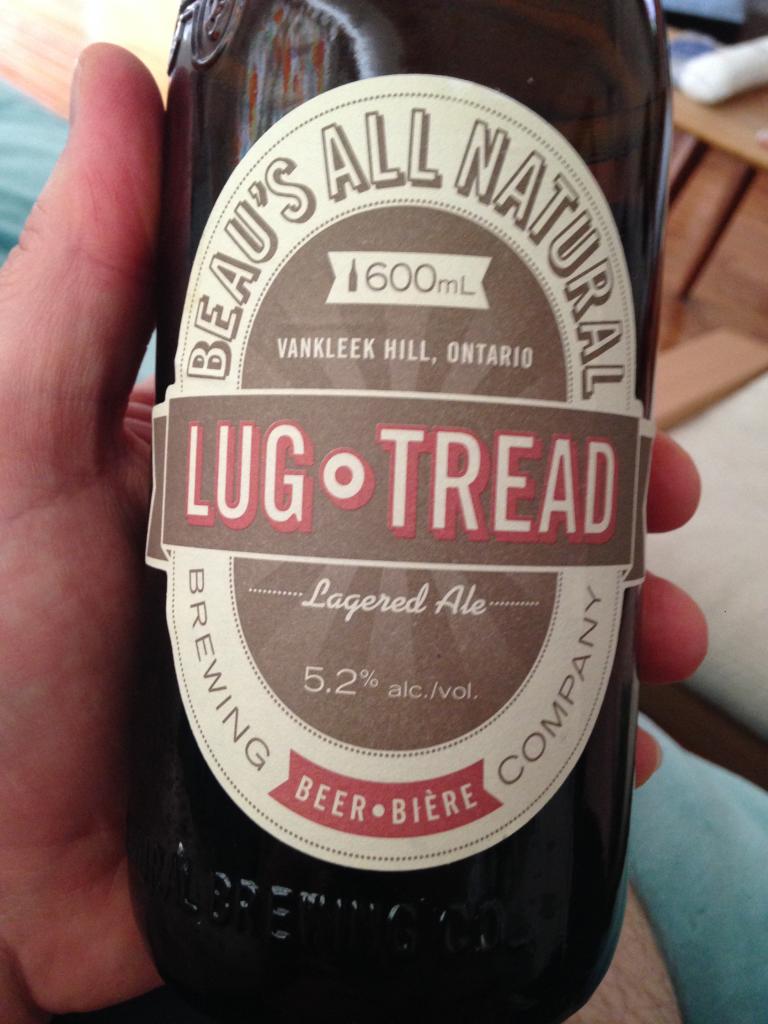
Right now I’m having one of these to celebrate.
 As always, thanks for looking, and feel free to toss any tips my way.
Blog by Pat Russell
It is a pleasure to have Pat Russell posting on rebornpipes. I have been reading about and observing Pat’s refurbs on Pipe Smokers Unlimited (PSU) for a while now and thoroughly enjoyed his attention to detail. I enjoy seeing what challenges he takes on and how he creatively deals with them. Pat posted this comparison of the Castleford and PipNet reamers on PSU and I wrote him a quick email to see if he could post it here on the blog as well. He graciously consented to have it here. Have a look at the Thanks to Contributors page here on rebornpipes to read more about Pat and the other contributors to the blog. Without further introduction here is Pat’s first contribution to the blog.
I was gifted a PipNet Reamer by a good friend who also restores pipes. A lovely gesture which provides me with the chance to share a side by side comparison.
 I’ve only ever used the Castleford Reamer. When I started doing restoration work I read as much as I could on reamers and which offered the most control. The PipNet Reamer was well reviewed by many, including here by Steve Laug https://rebornpipes.com/2012/05/31/my…rs-a-review-6/ and it came out on top. My problem was access, when I was building up my kit I couldn’t find one. So I opted for a Castleford Reamer set. I liked that it had four fixed blade heads, that it was unlikely to slip and seemed to afford some control.
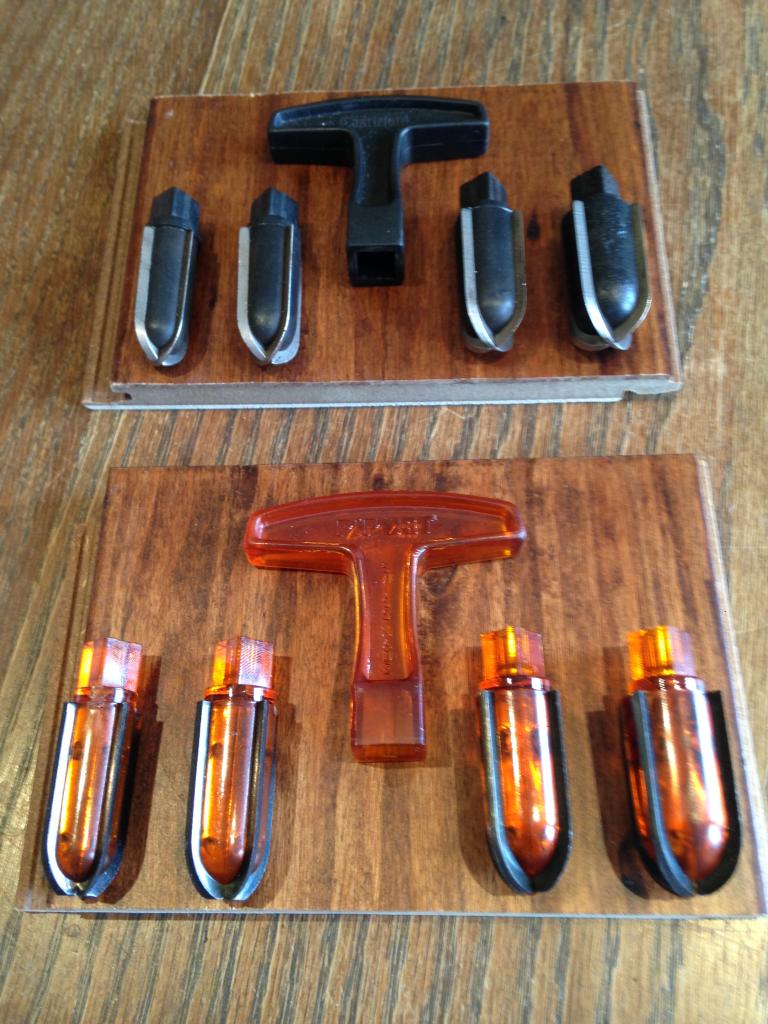
 I’ve used my Castleford Reamer for over 70 pipe restorations, and it was coming to the end of its life. So not only was this spontaneous gift a surprise, it was a fortuitous one. The problem with my Castleford set was that the plastic which is used to make both the reamer and the handle is soft and it wears down. Two of my four reamer heads for the Castleford are so stripped now, that they won’t stay in the handle. The PipNet does indeed seem to be made of a stronger/sturdier acrylic than the softer plastic of the Castleford.
 Here is a closeup of one of the reamer blades from my Castleford. You can see the wear in the centre and on the edges of the toothless side of the blade which is inserted into the handle.
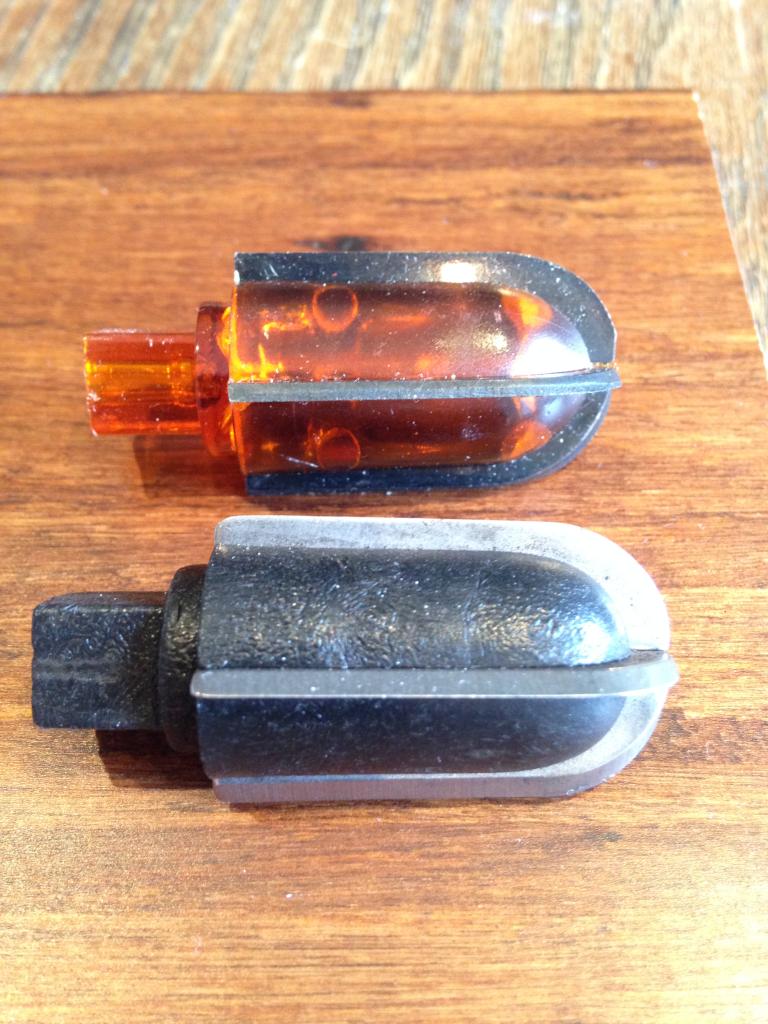
 Aside from the material difference, the blades of the PipNet are thicker, and one-sided. There is definitely more material in the blades of the PipNet, and the mass of the blade seems to make for a smoother cut through cake. The thinner steel blades of the Castleford blades seem to catch on cake more easily.
 The other piece that I like about the PipNet Reamer is the extra length in the handle. It affords just a little more purchase and mechanical advantage.
 I look forward to the next 70 pipes with the PipNet, and will report back on how it performs. But if the first seven are any indication it and I are going to be long friends.
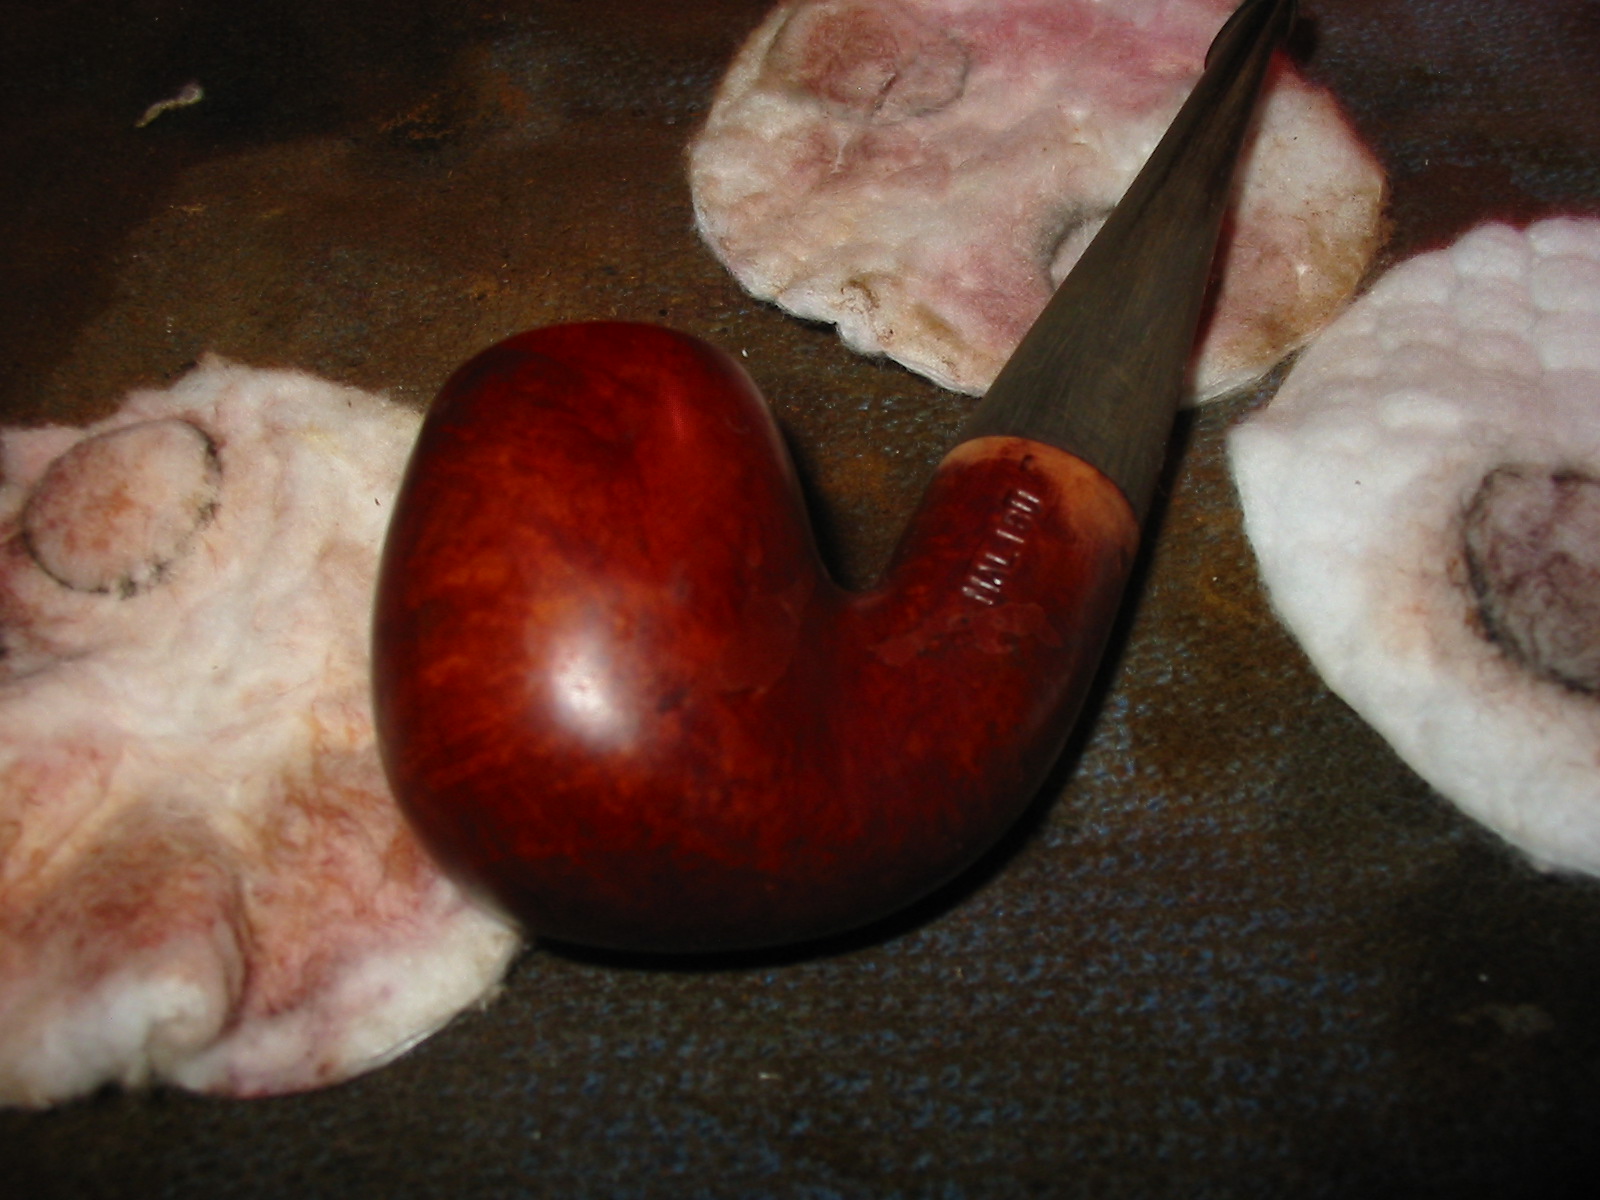
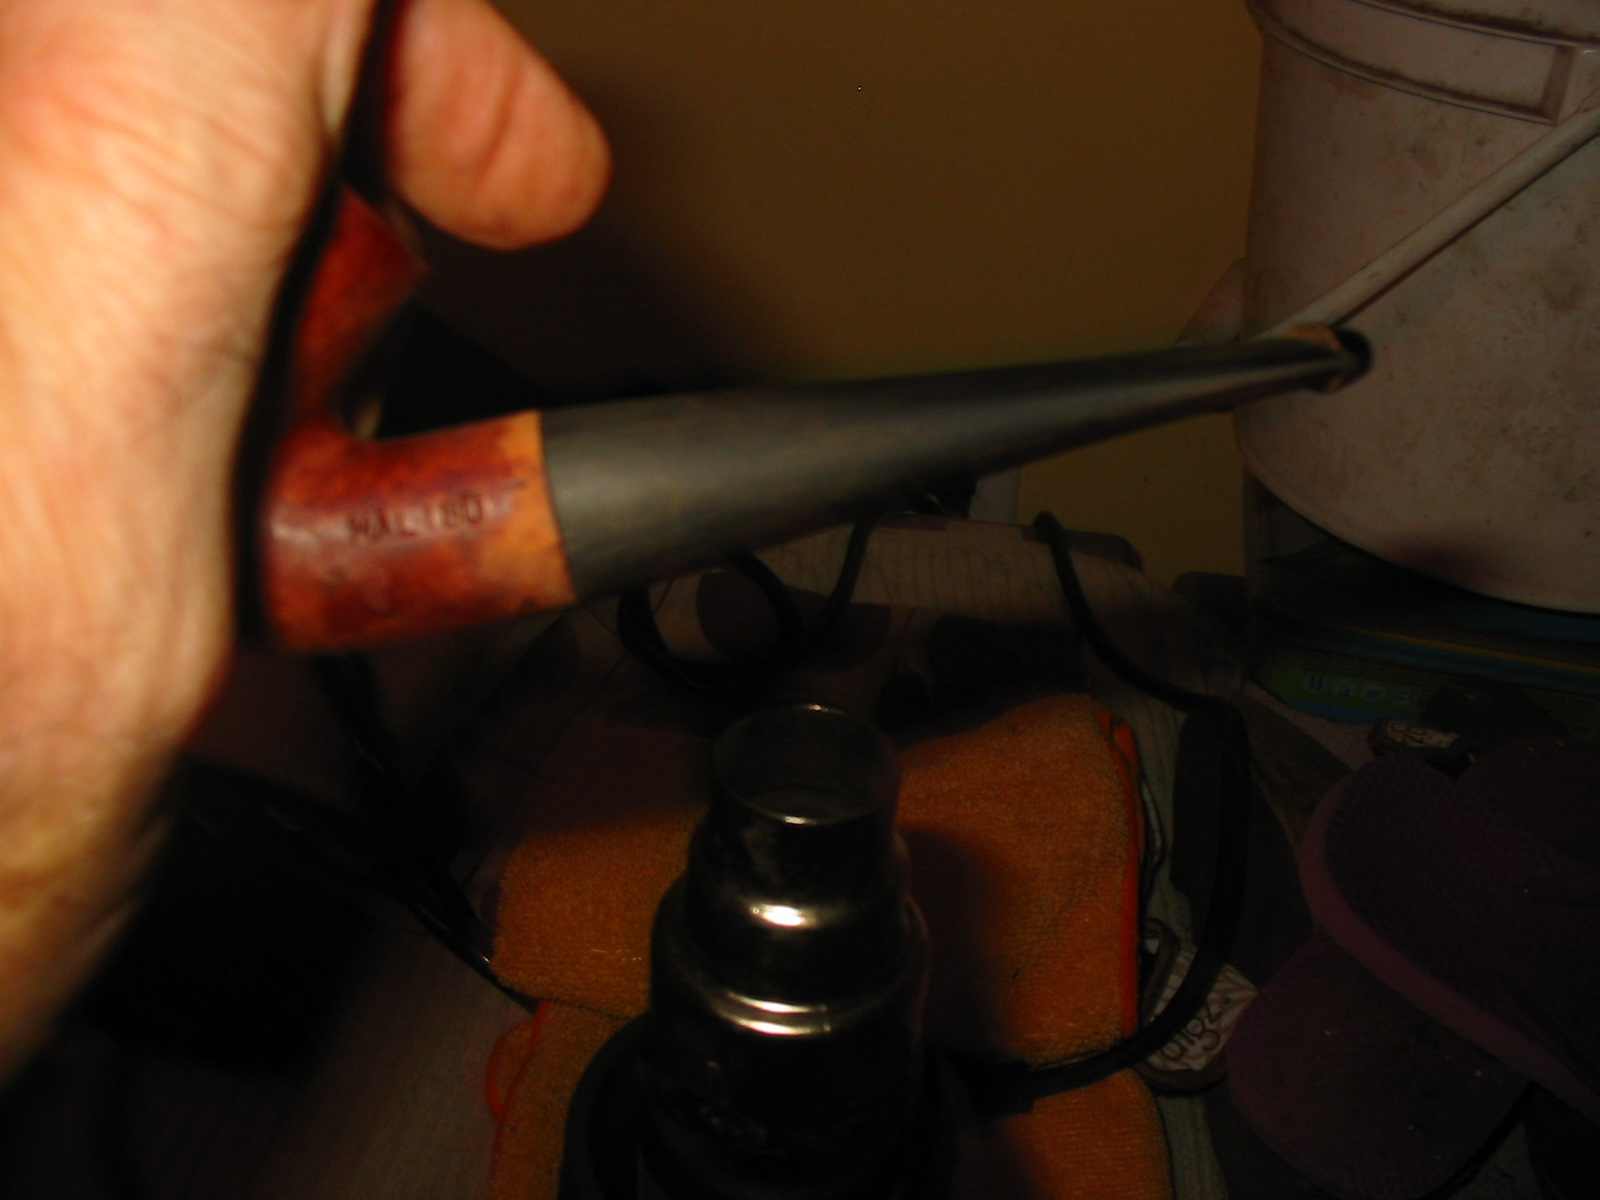
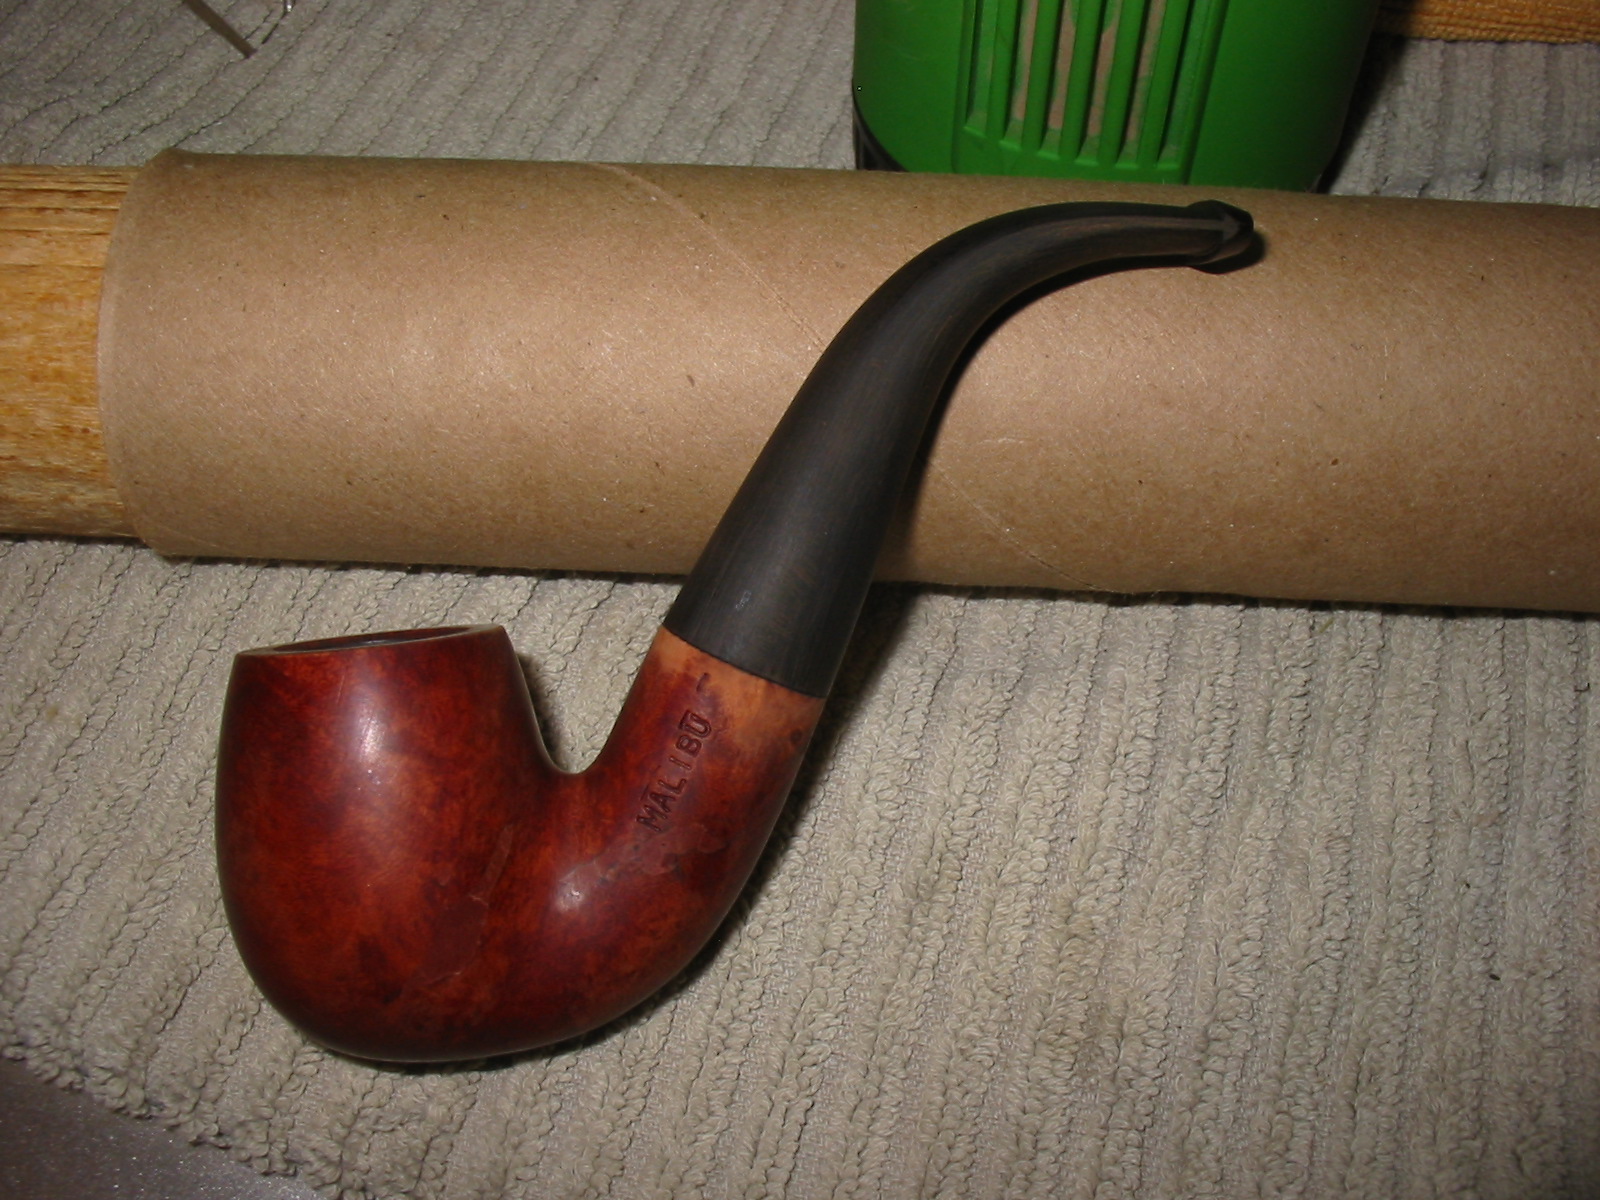
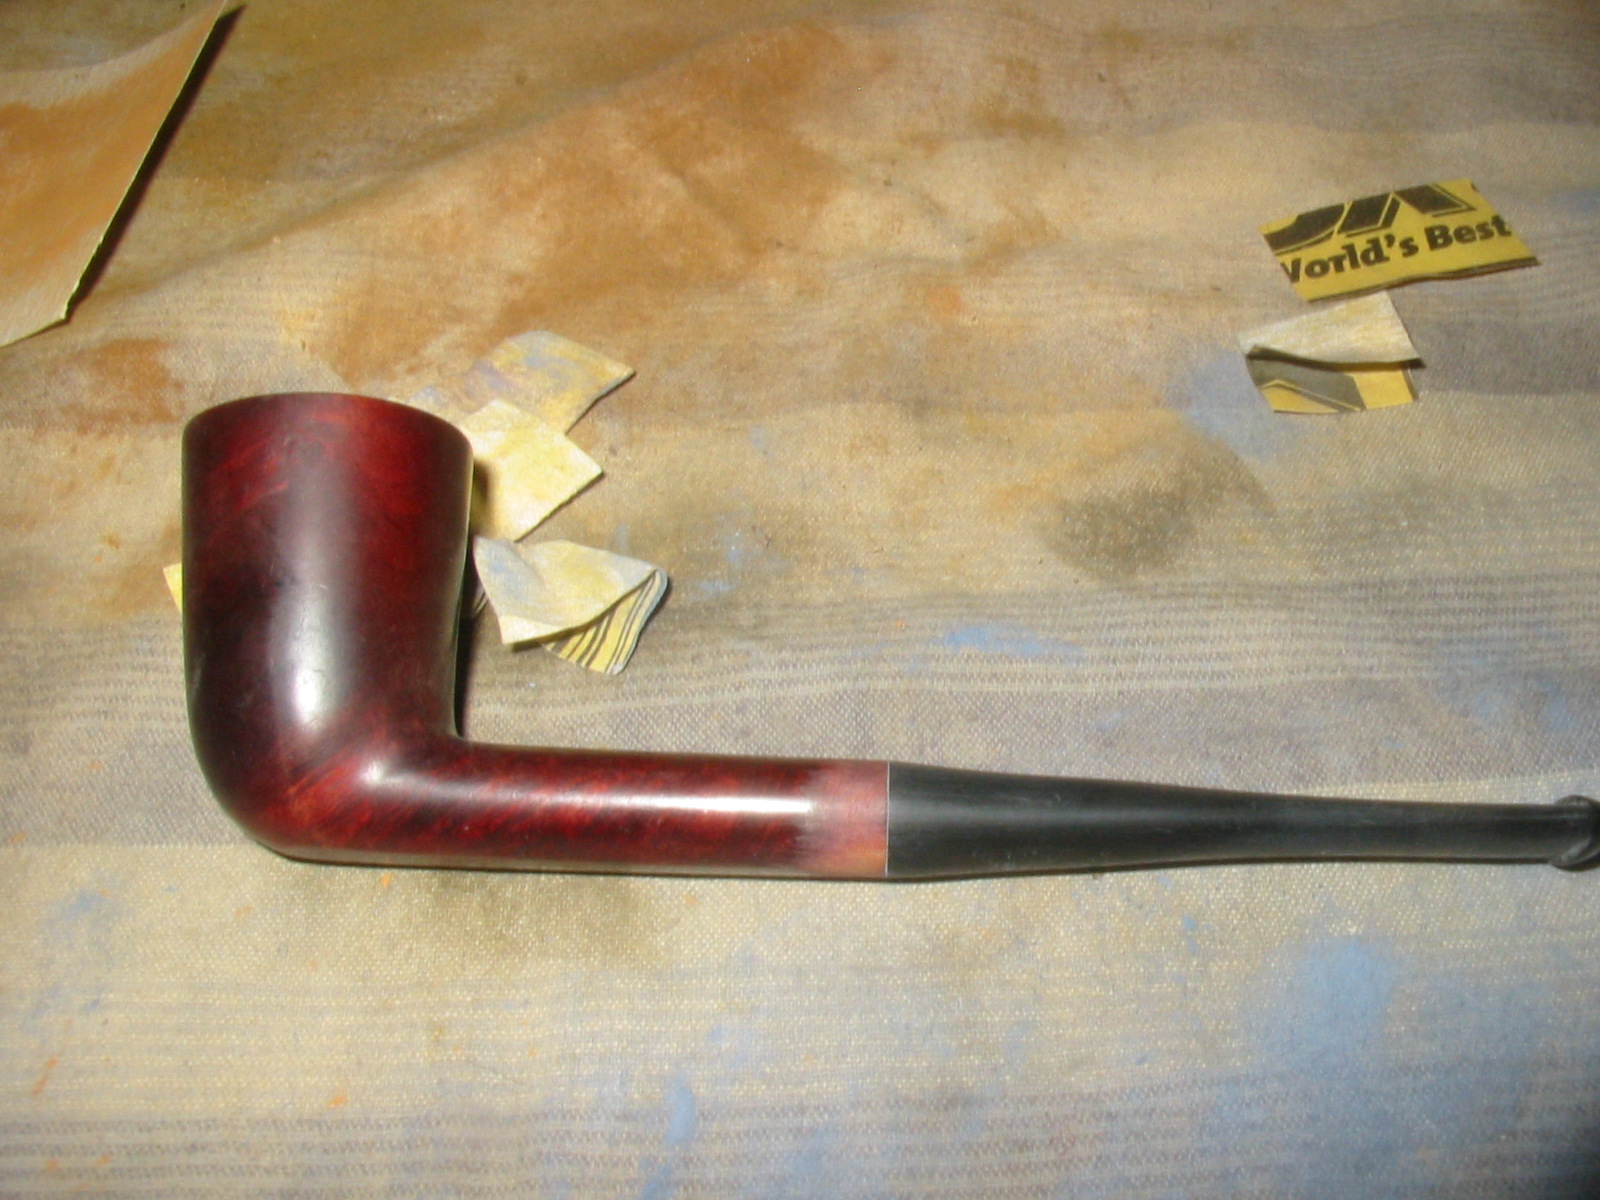
The next pipe from the gift box of bowls was a bent billiard stamped MALIBU on the left side of the shank and Italy on the underside. There is no other stamping on the pipe. I searched the internet for information on the brand and also looked in the book Who Made That Pipe and there found that the pipe was made by Savinelli. I emailed Savinelli but have not yet received a confirmation of that information. I will update this post as soon as I hear from them. In the meantime I worked on the bowl. It was in decent shape though covered by a thick varnish coat that gave it a perma-shine. The bowl and shank were dirty but had not been smoked enough to build up a cake or tars. The rim was in excellent shape and the finish other than being very plastic looking was clean. In the first photo below you can see the two large fills that were on the bowl and shank on the left side. The first is on the side of the bowl, just ahead and below the bend. The second is on the shank next to and below the stamping. They seemed to have taken the stain and though they are visible are not a bright pink. There was no stem with the pipe so I found the one in the photo below that would fit the shank with a little work.
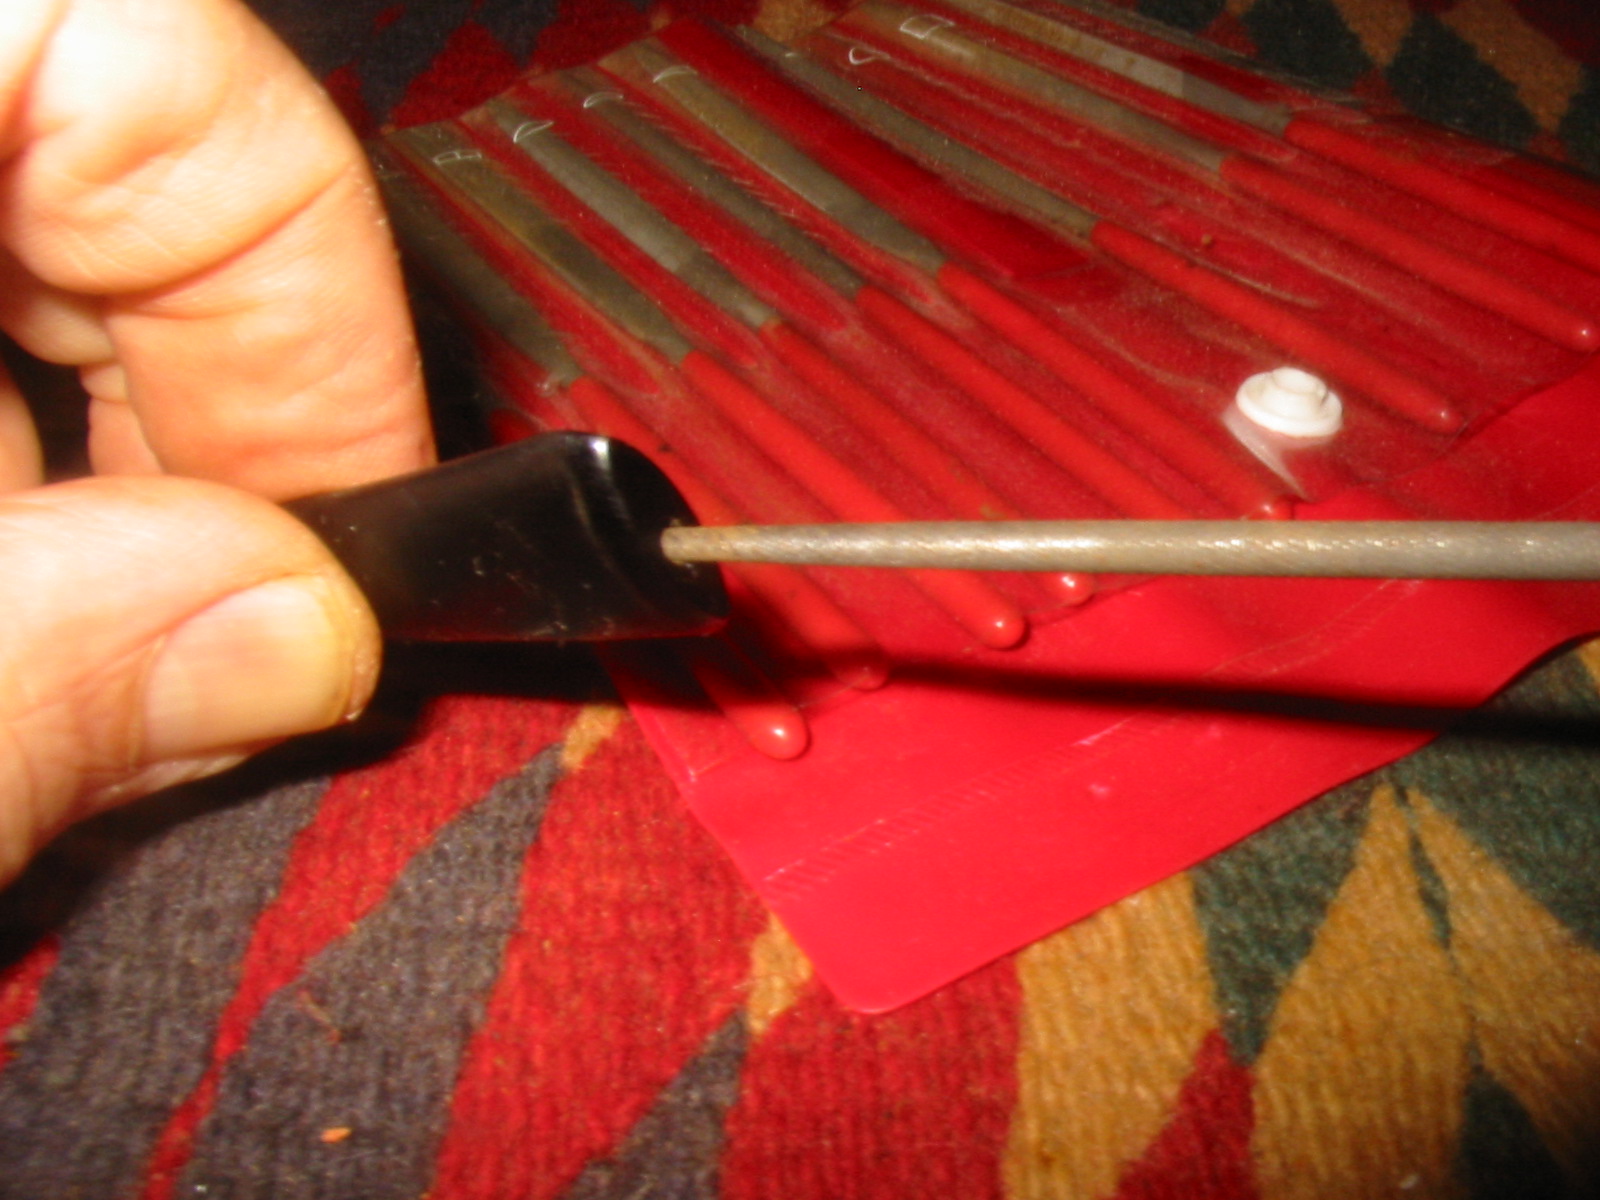
I turned the tenon down with a PIMO Tenon Turning Tool and then sanded some of the seams that still showed on the side of the bowl. The diameter was very close to being the same – I had to make a few adjustments on the top and the right side to get a seamless fit.
I sanded the stem in place and sanded the shank at the same time. I needed to remove the varnish coat anyway so I figured it would be okay to sand the shank at the same time. I did not want to reduce the size of the shank – merely that of the stem and then match them. I find that if I do that with the stem off the shank it is easy to round the edges of the stem. With it in place and using a sanding block I can get a smooth transition. I also work to restain the sanded area of the shank to match the bowl.


Once the transition was smooth I wiped down the bowl with acetone to remove the varnish coat. It took some scrubbing with acetone wet cotton pads. I was finally able to break through the finish with the acetone.

I sanded the bowl and shank, carefully avoiding the stamping, with a medium and a fine grit sanding sponge. I sanded the entire bowl and shank and then wiped the bowl down with isopropyl alcohol to remove the sanding dust.


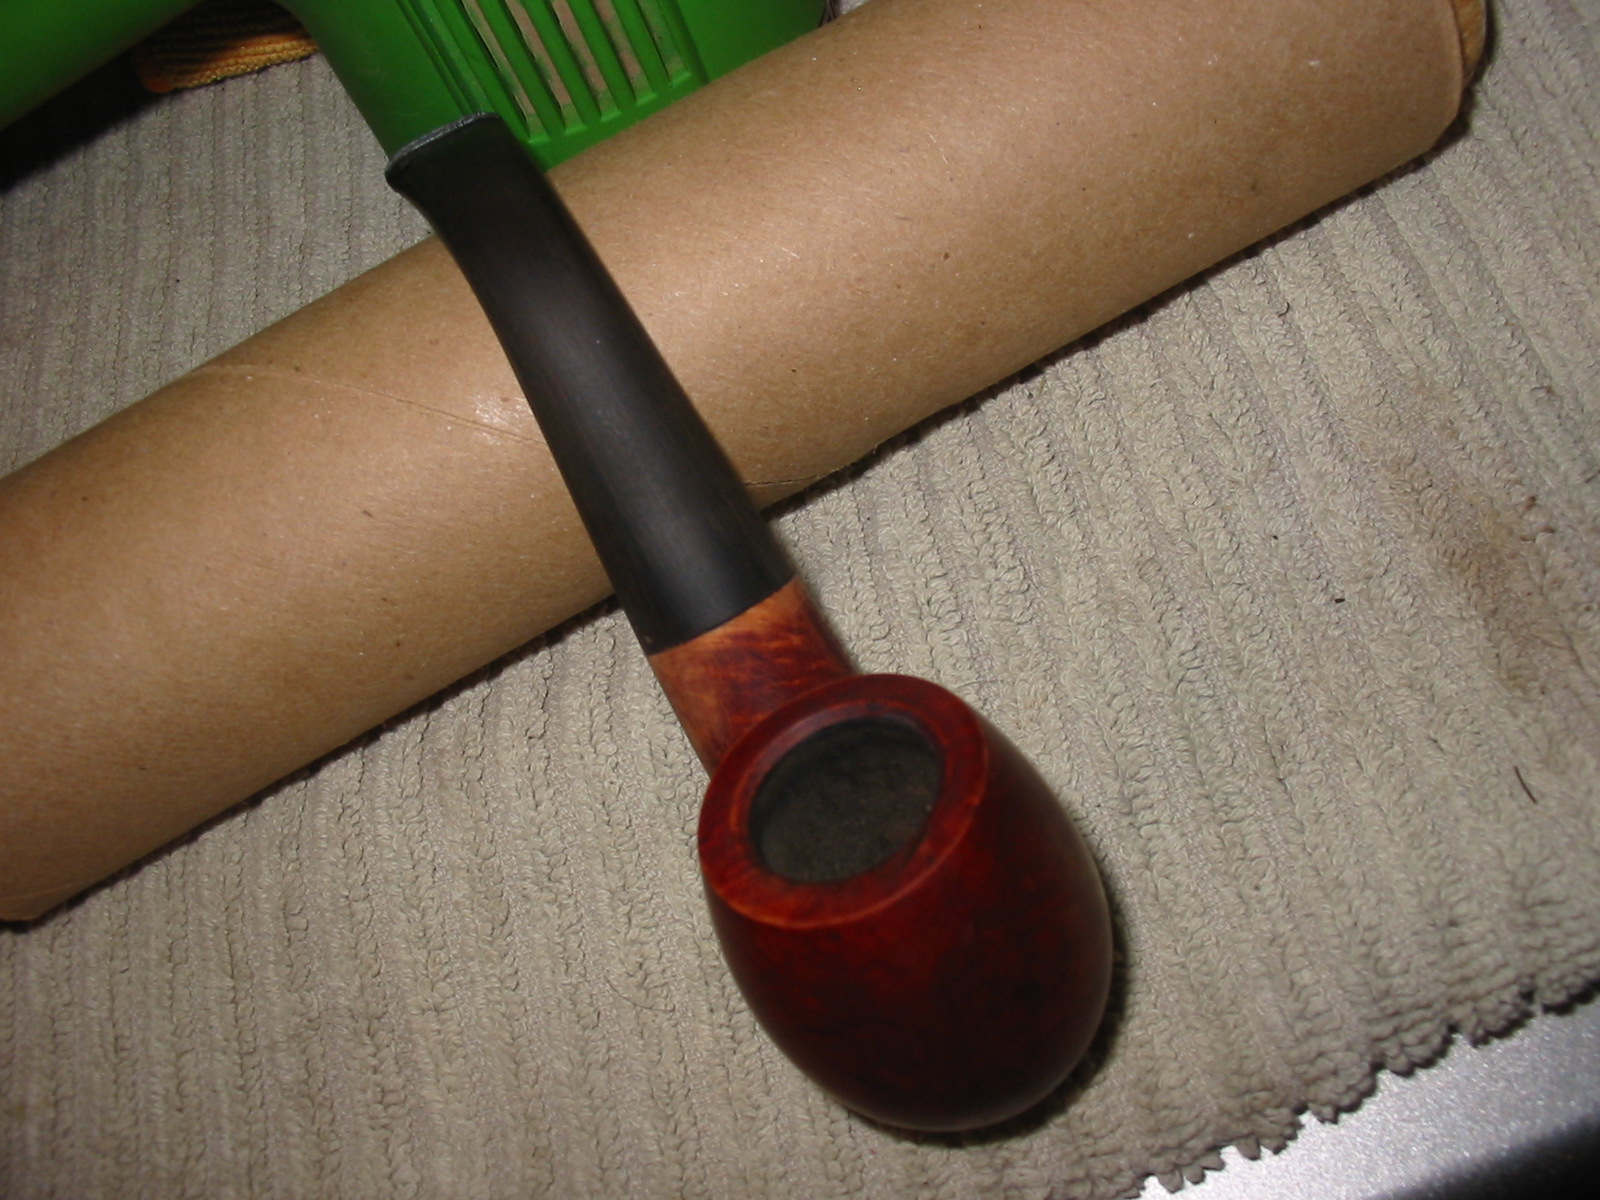
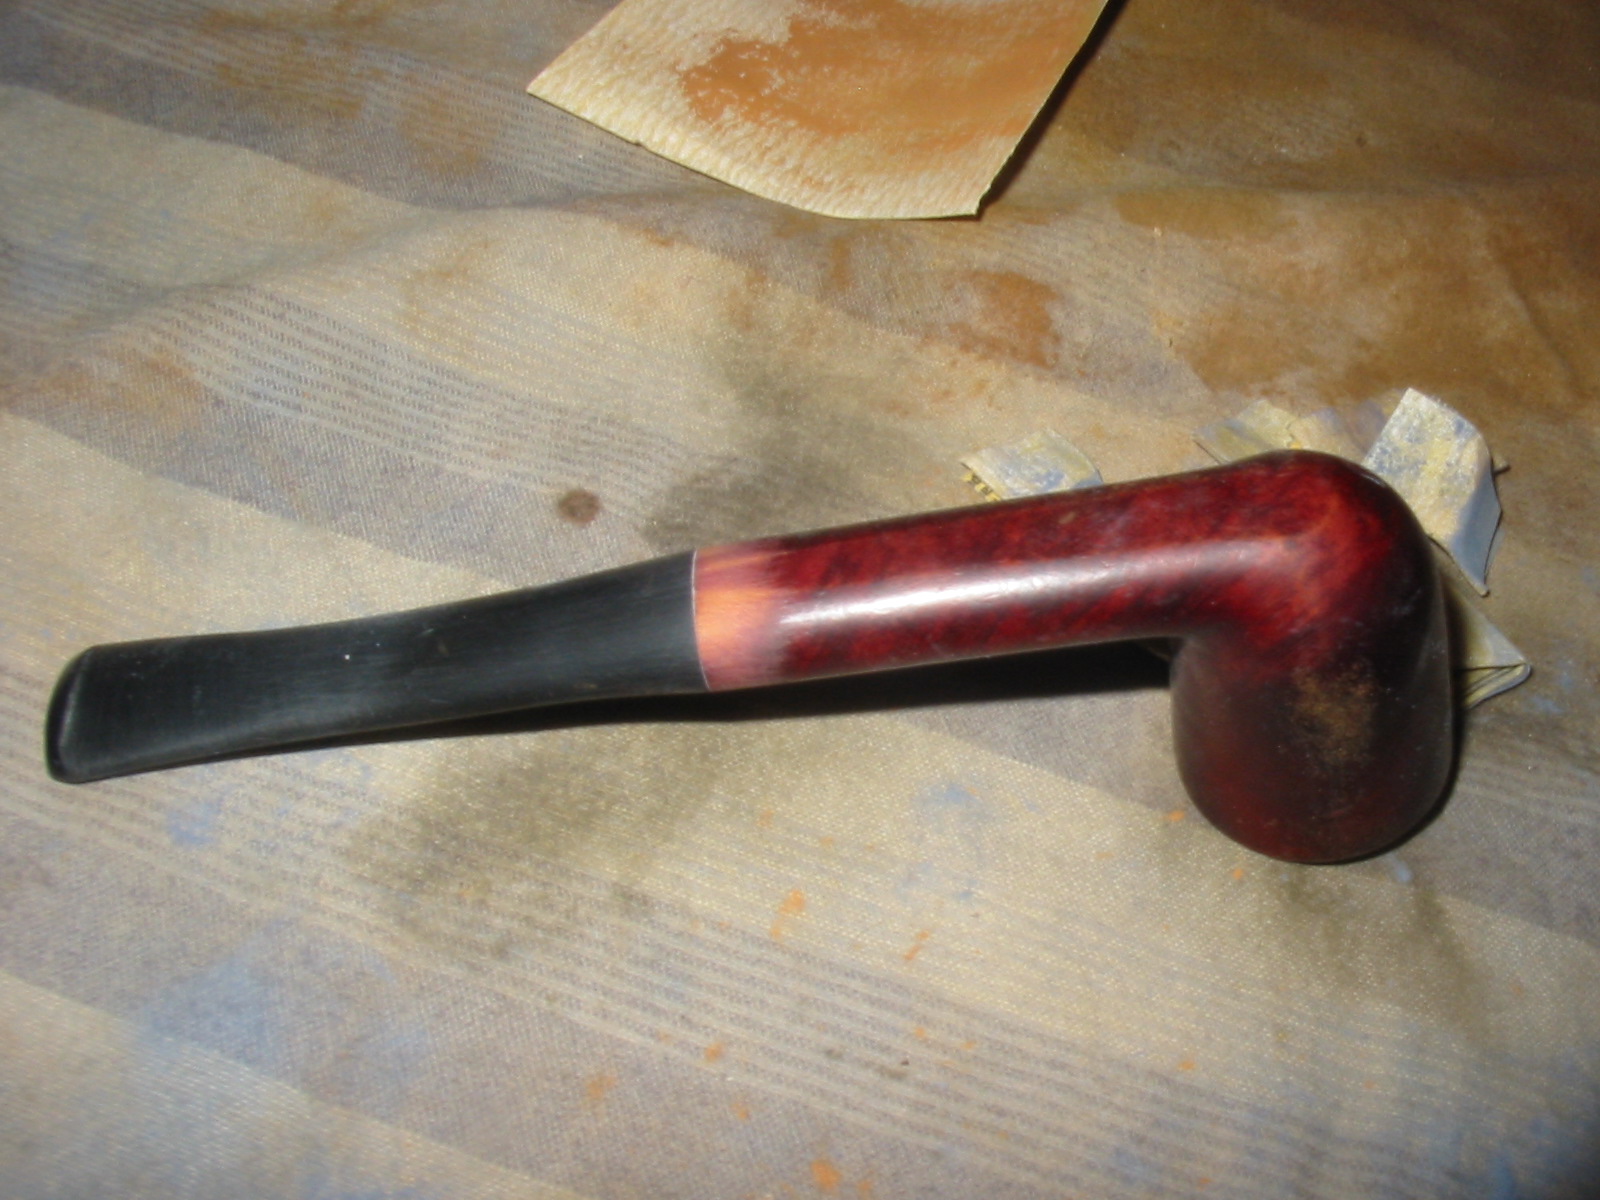
I sanded the stem with the same sanding sponges and removed the majority of the scratches left behind by the sandpaper. I set up a heat gun and heated the stem to soften it so I could bend it. When it was pliable I bent it over a rolling pin with a hard cardboard tube over it to smooth out the wood. I bend it until the stem looks right with the bend in the shank and then use cool water to set the bend.
With the bend set I took it back to the worktable to sand the bowl to even out the existing finish and the stem.
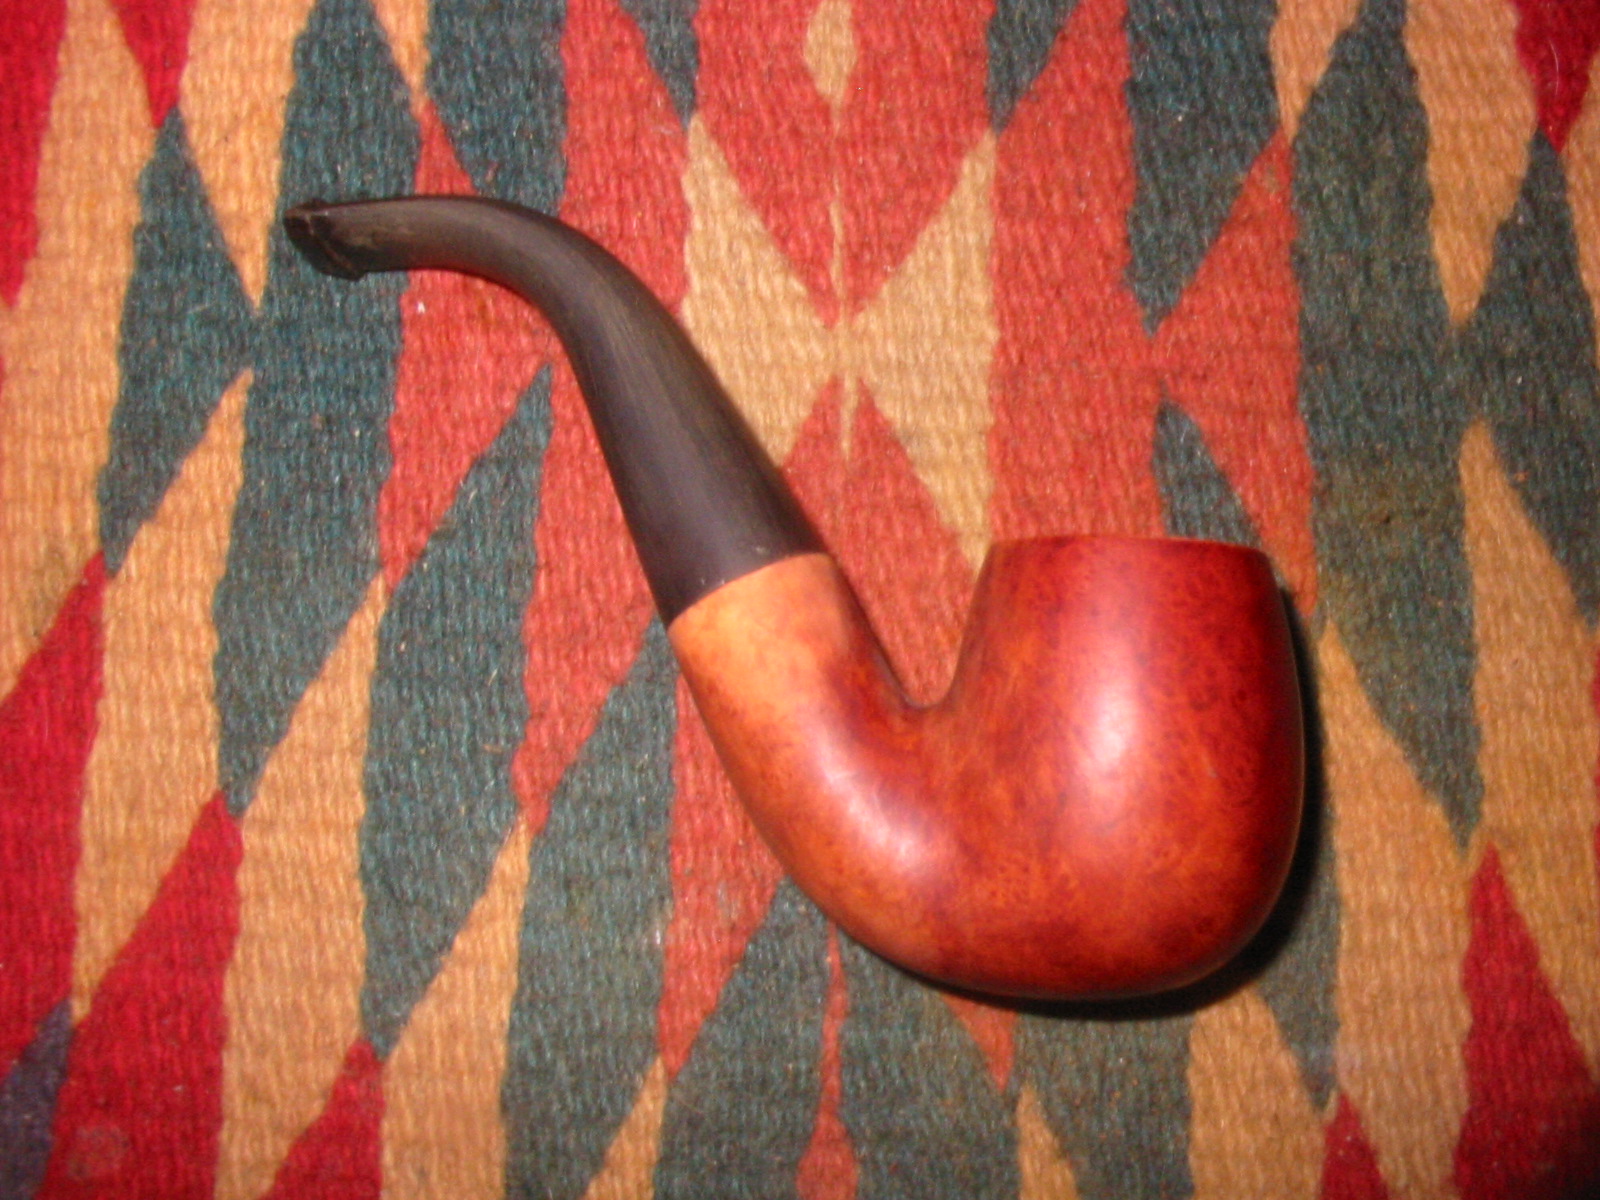
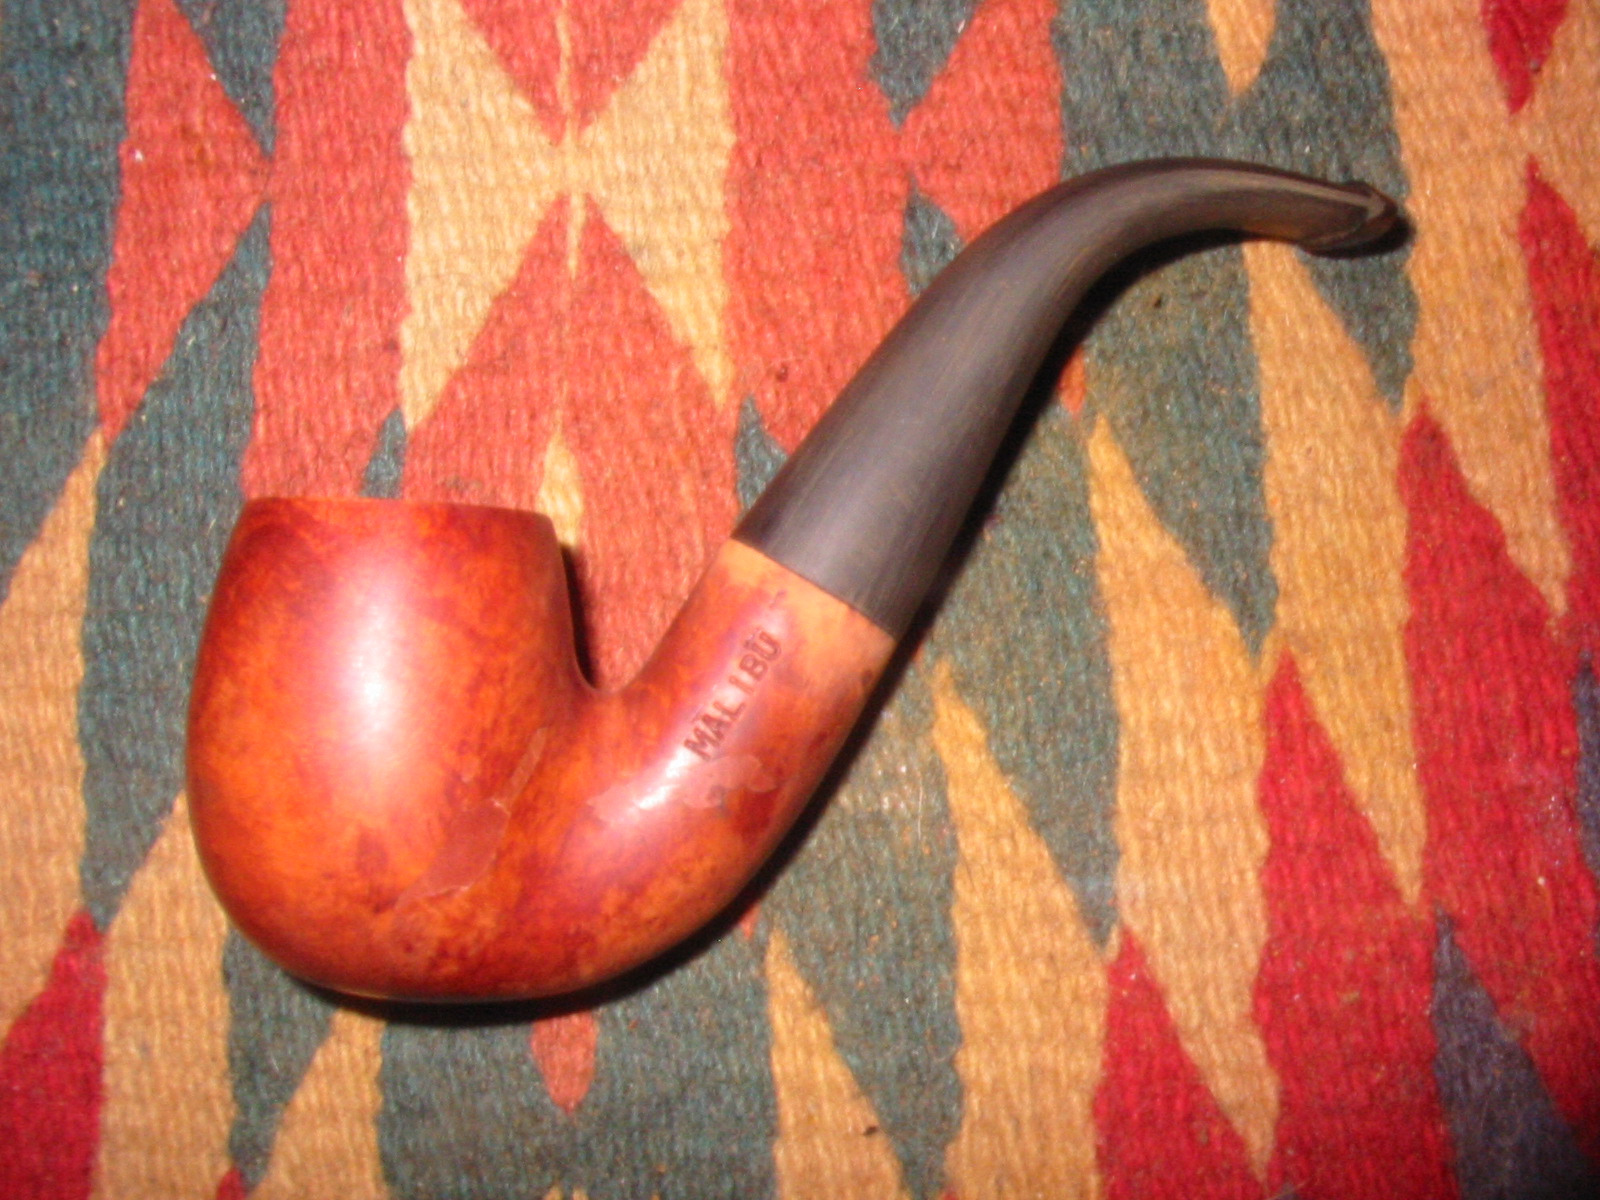
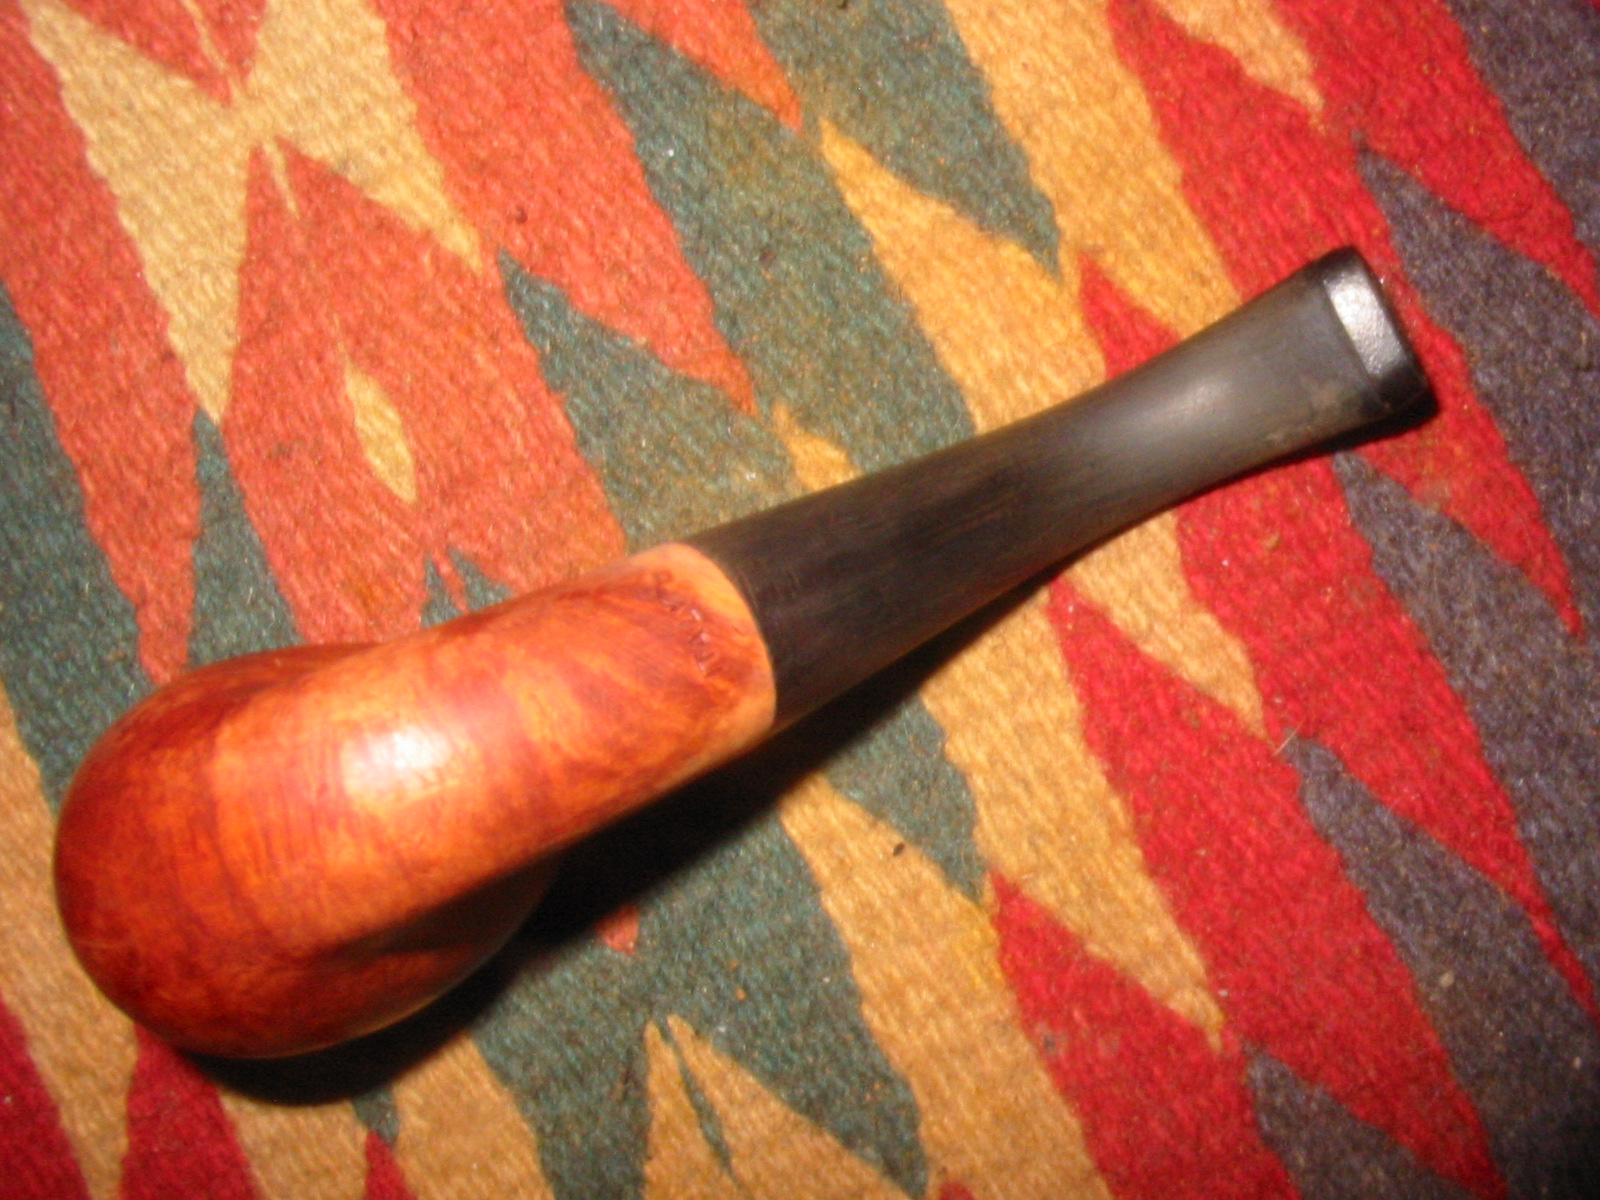
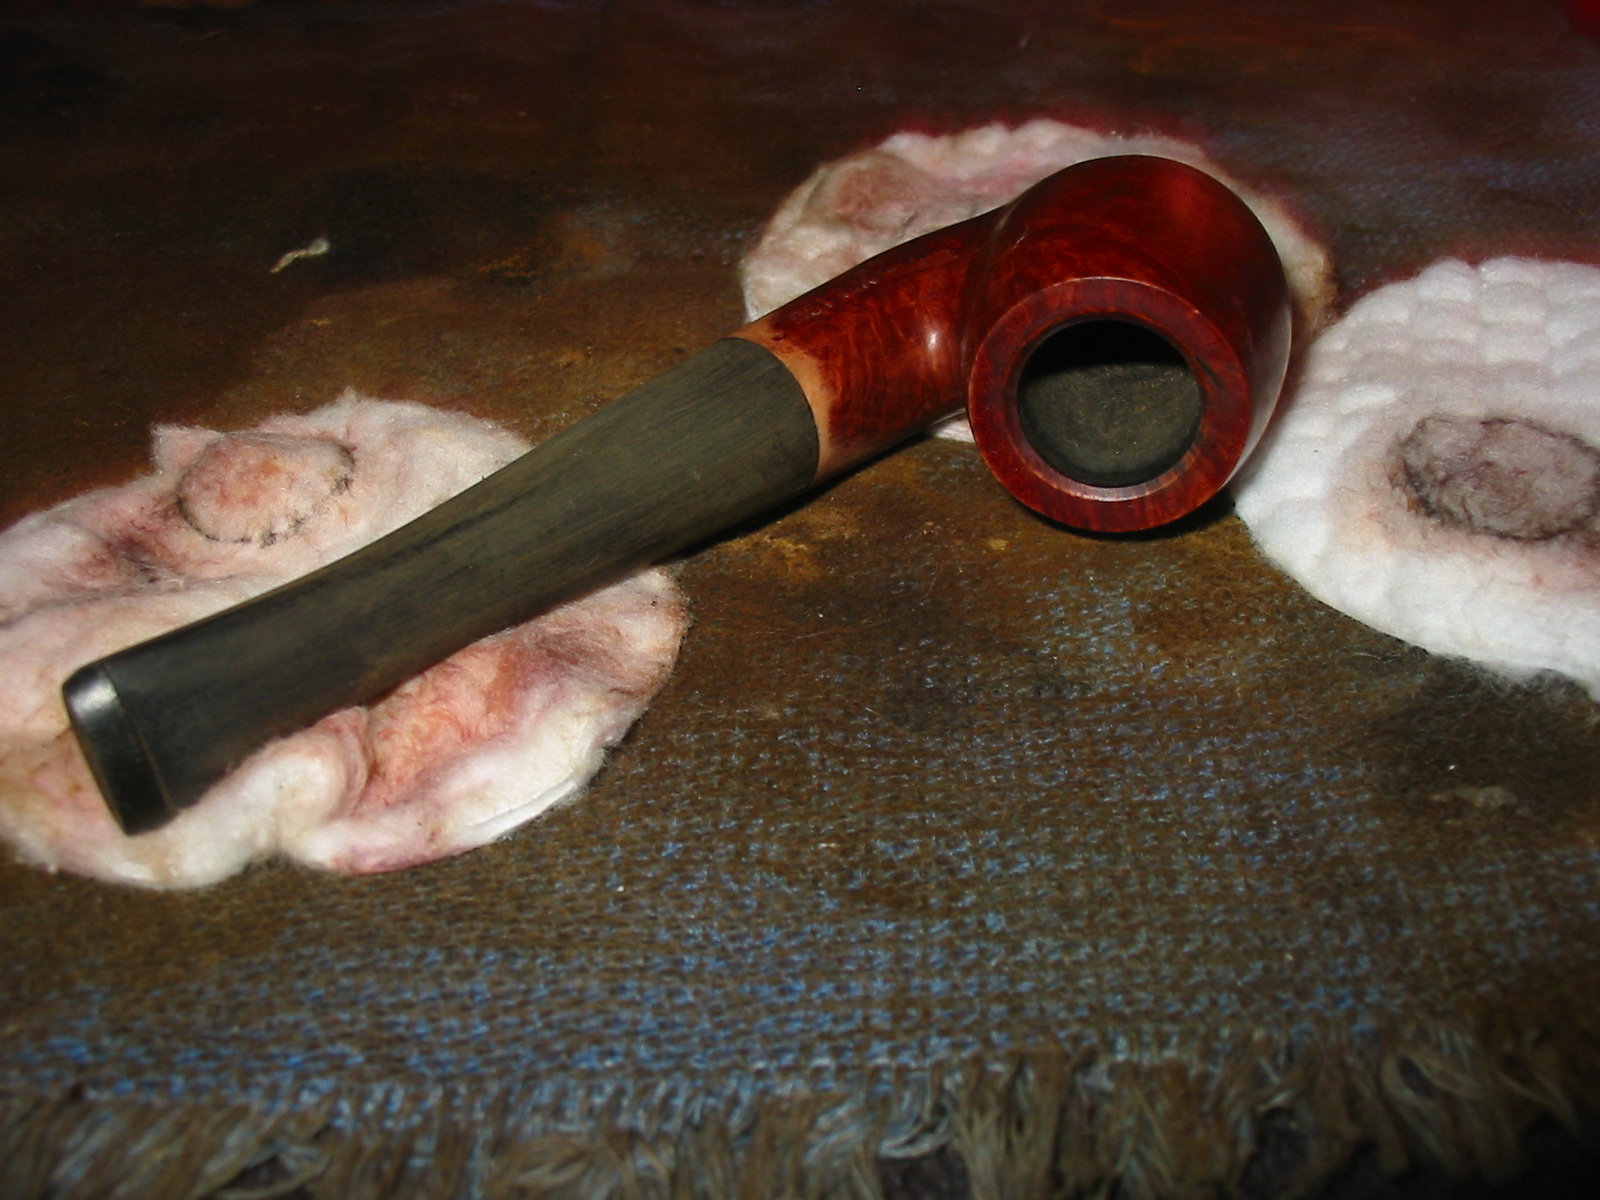
I stained the bowl with a medium brown aniline stain, flamed it and repeated the process. I sanded the stem with the usual battery of micromesh sanding pads – wet sanding with 1500-2400 grit pads and dry sanding with 3200-12,000 grit pads. I rubbed the stem down with Obsidian Oil between each set of three pads and then as a final rub down once I had buffed the stem with White Diamond. I buffed the entire pipe with White Diamond and then gave the bowl and stem multiple coats of carnauba wax – buffing with a soft flannel buff between coats of wax. The finished pipe is shown below. The fills on the left side are still visible but the blend into the bowl is quite good. It is tolerable. The pipe is cleaned, refinished and ready for the rack of the next pipe man who will smoke it.


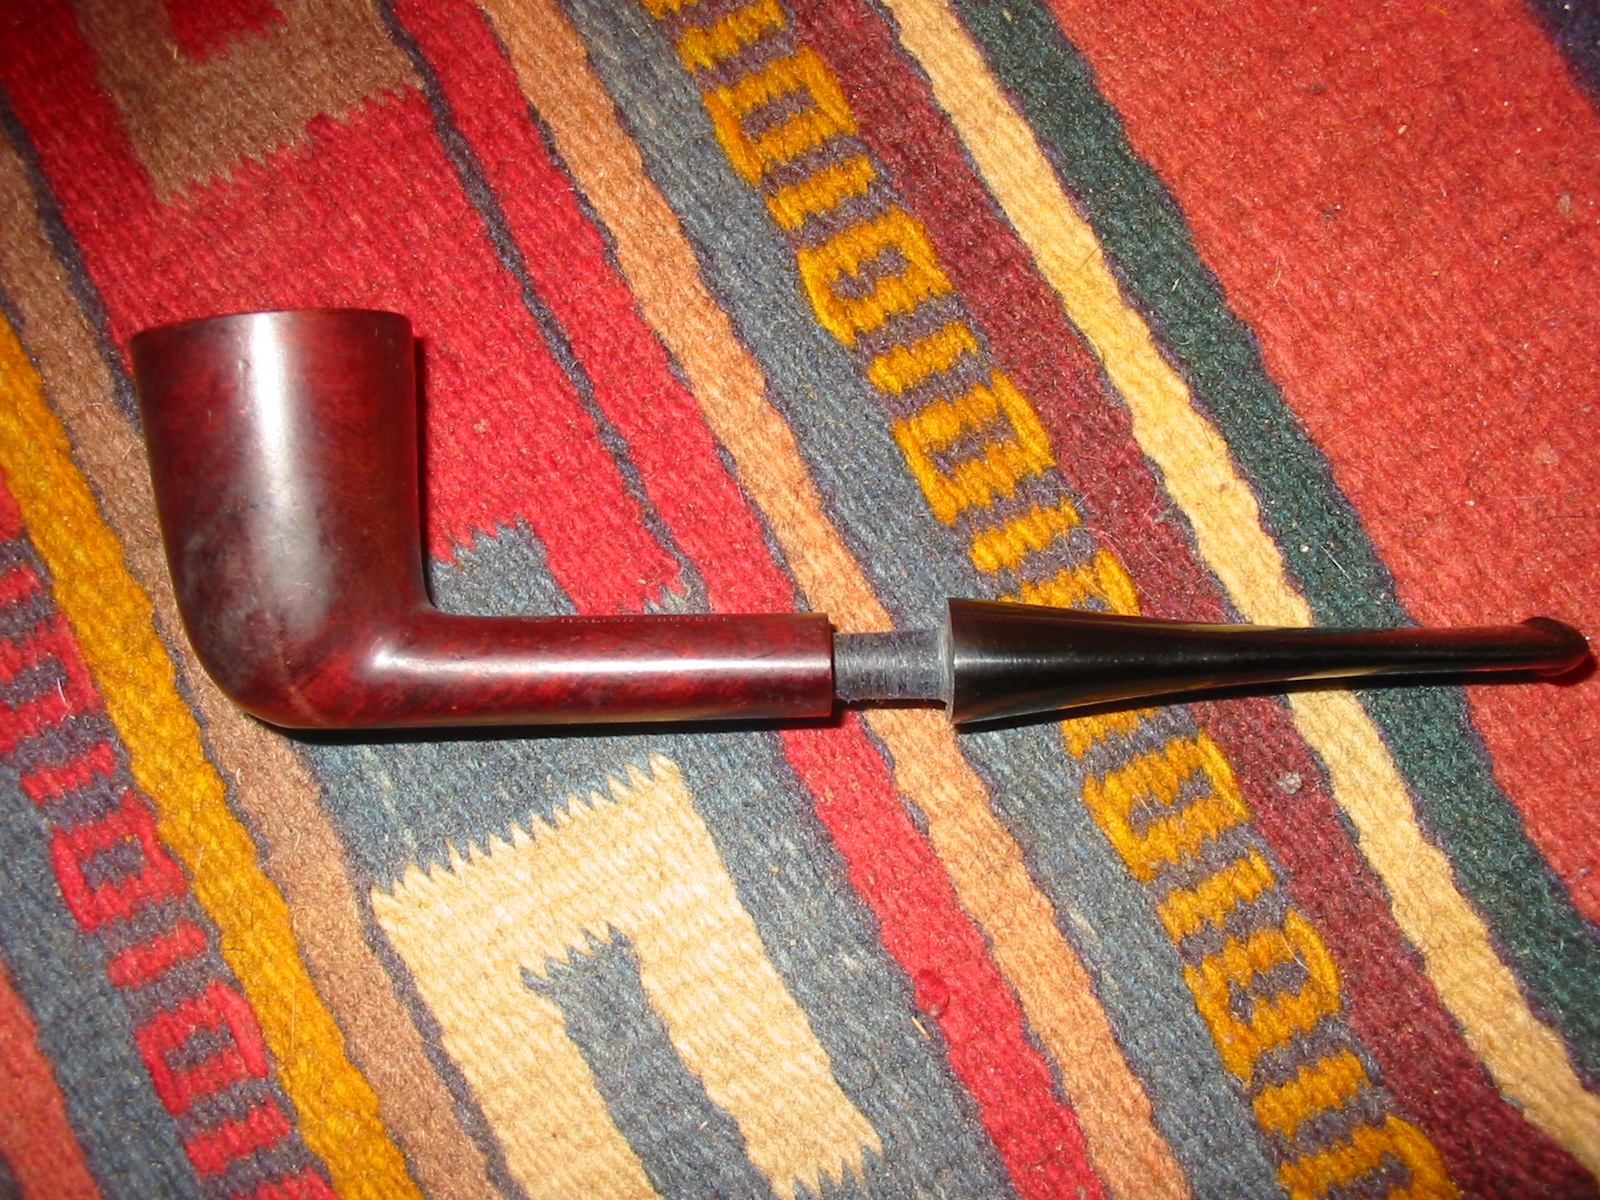
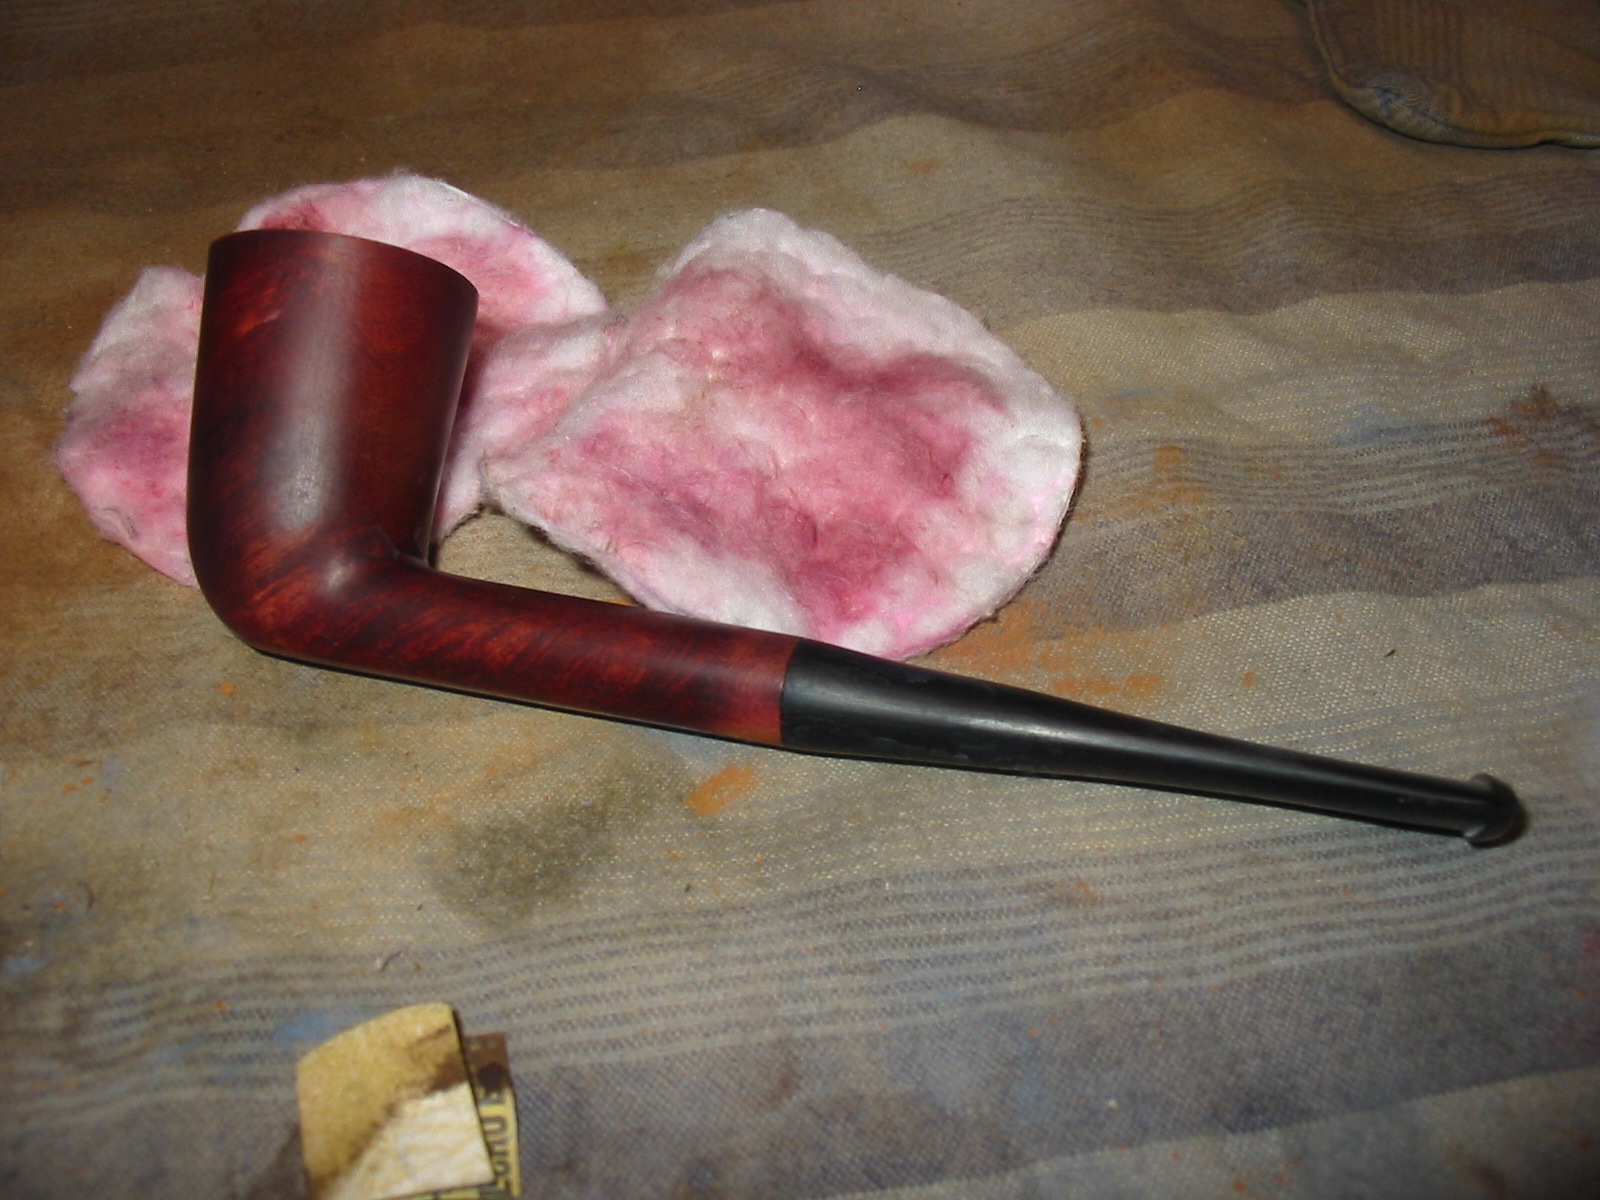
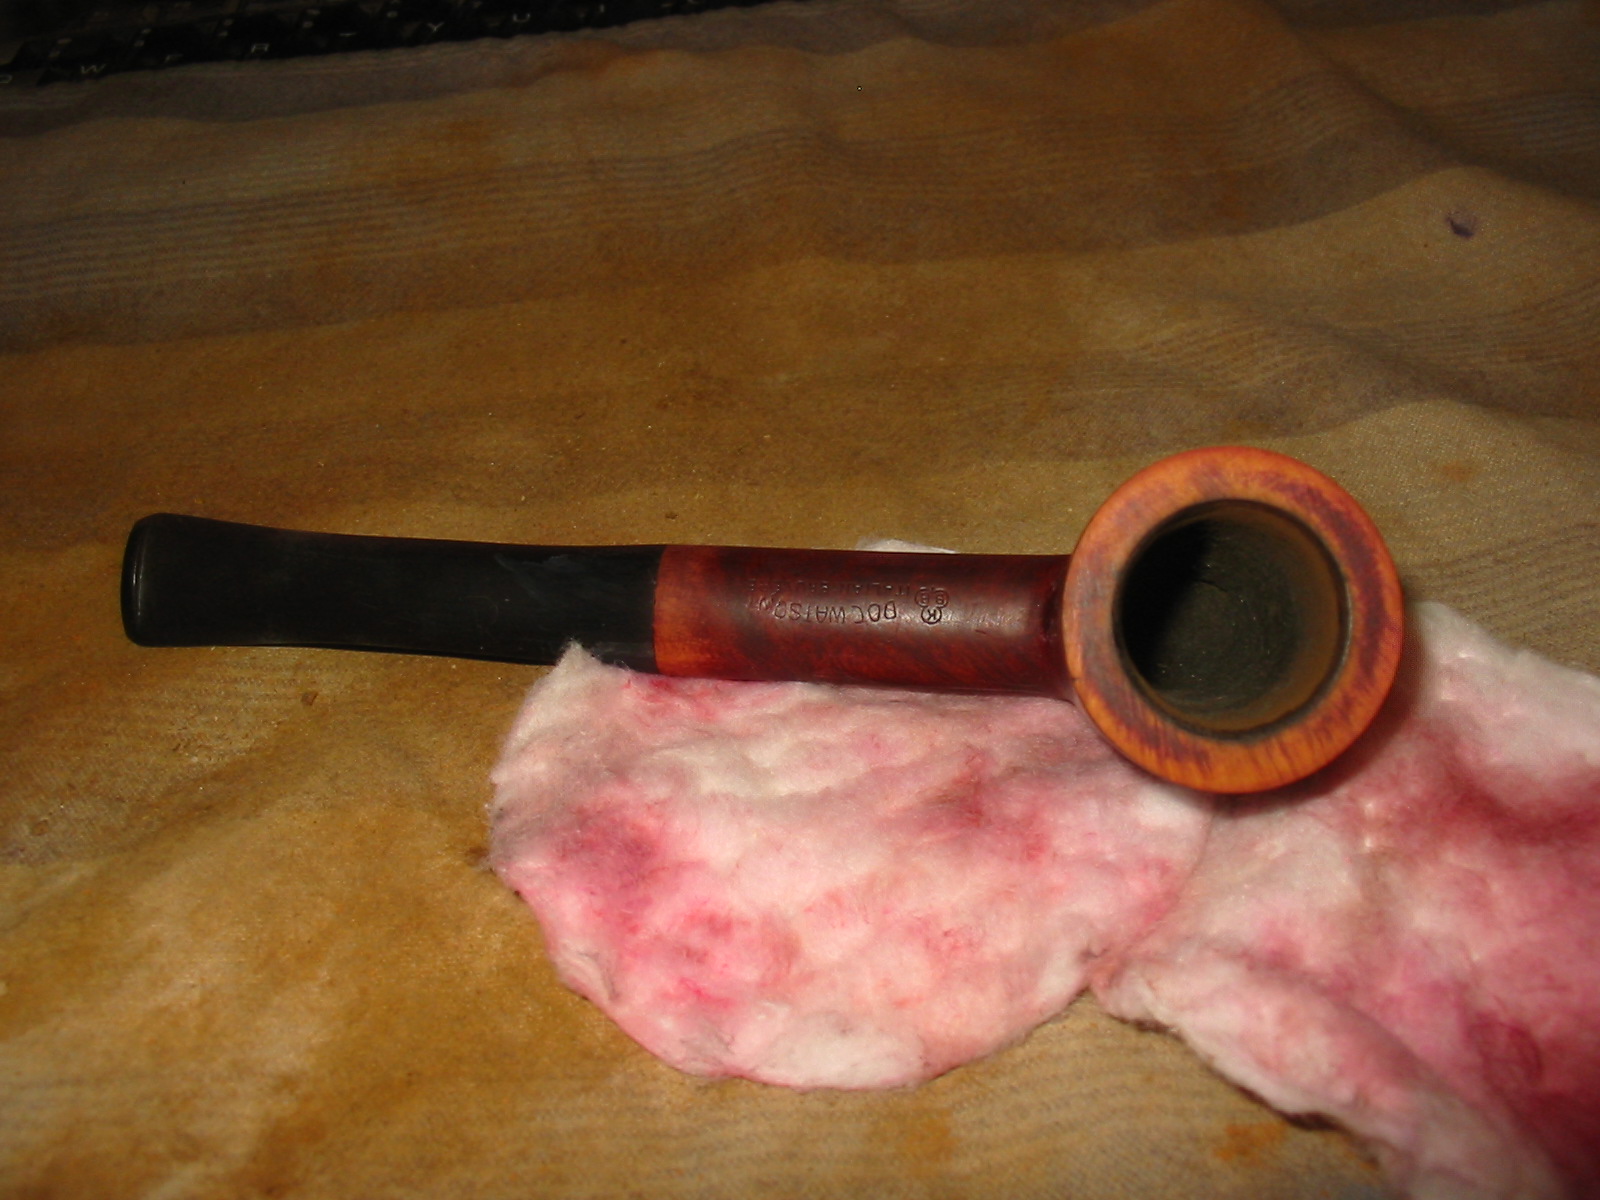
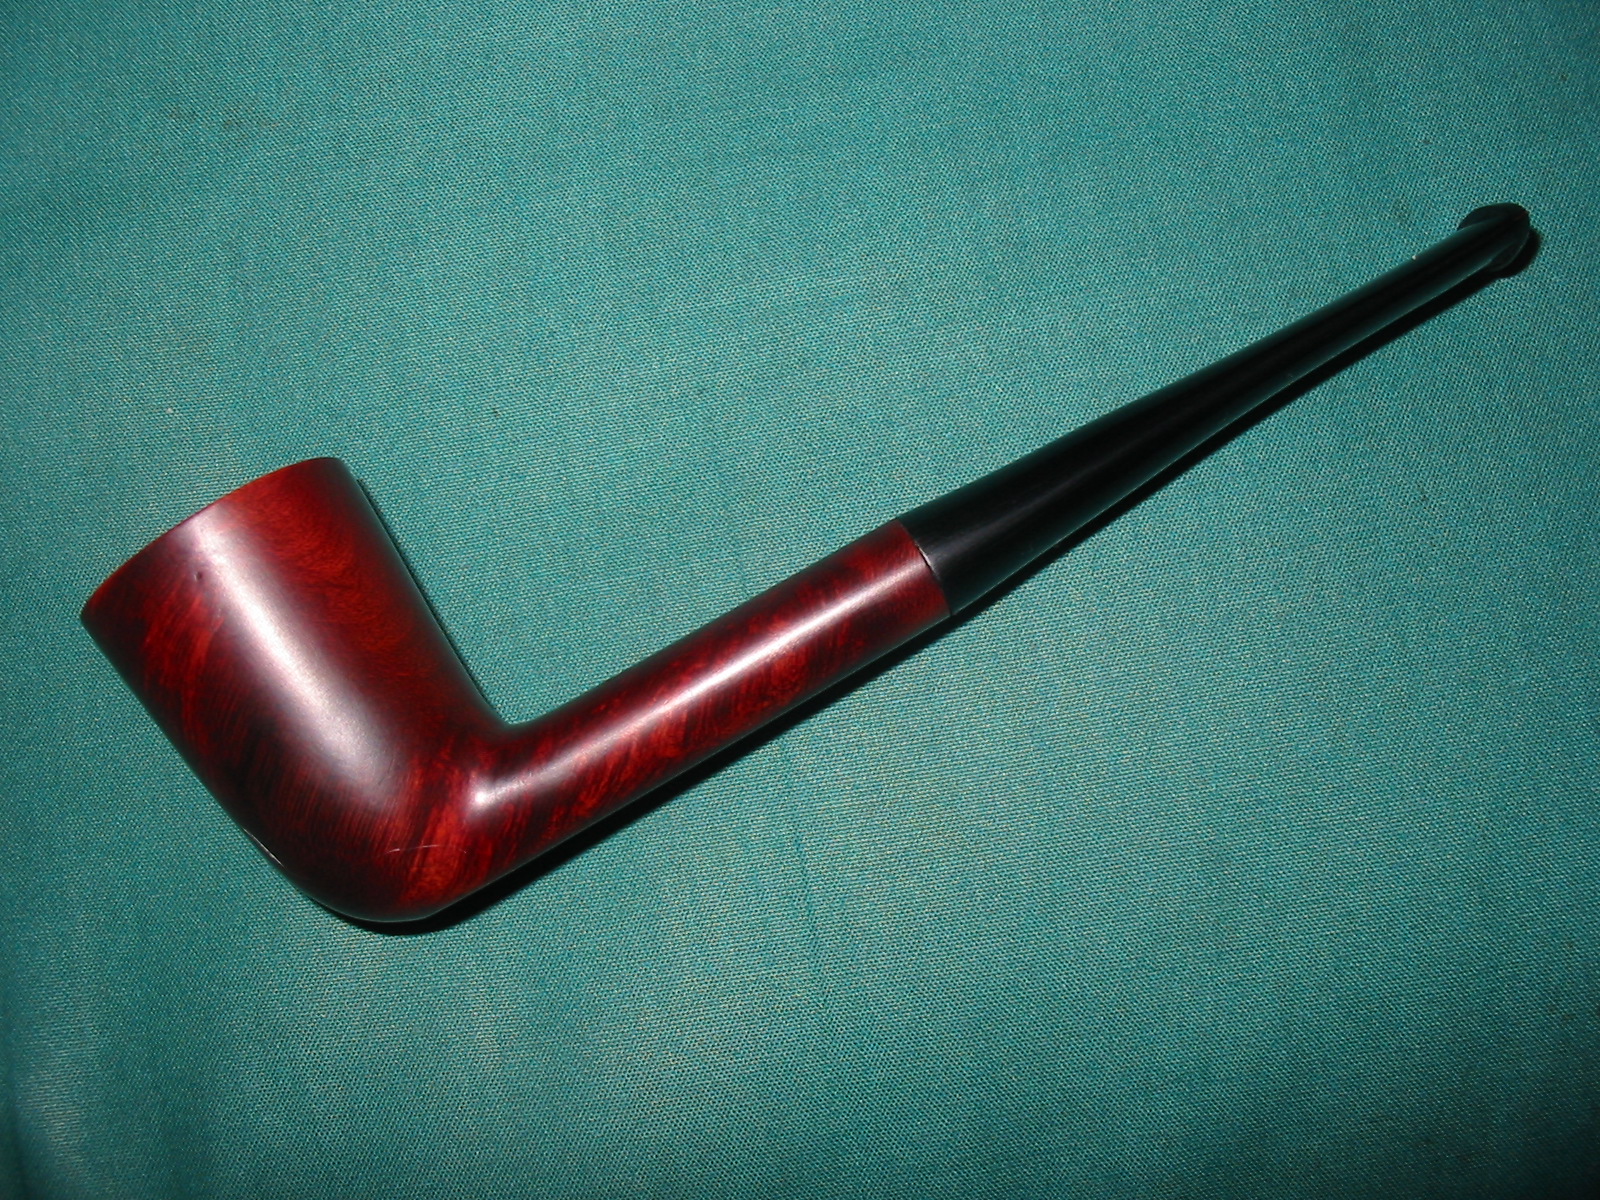
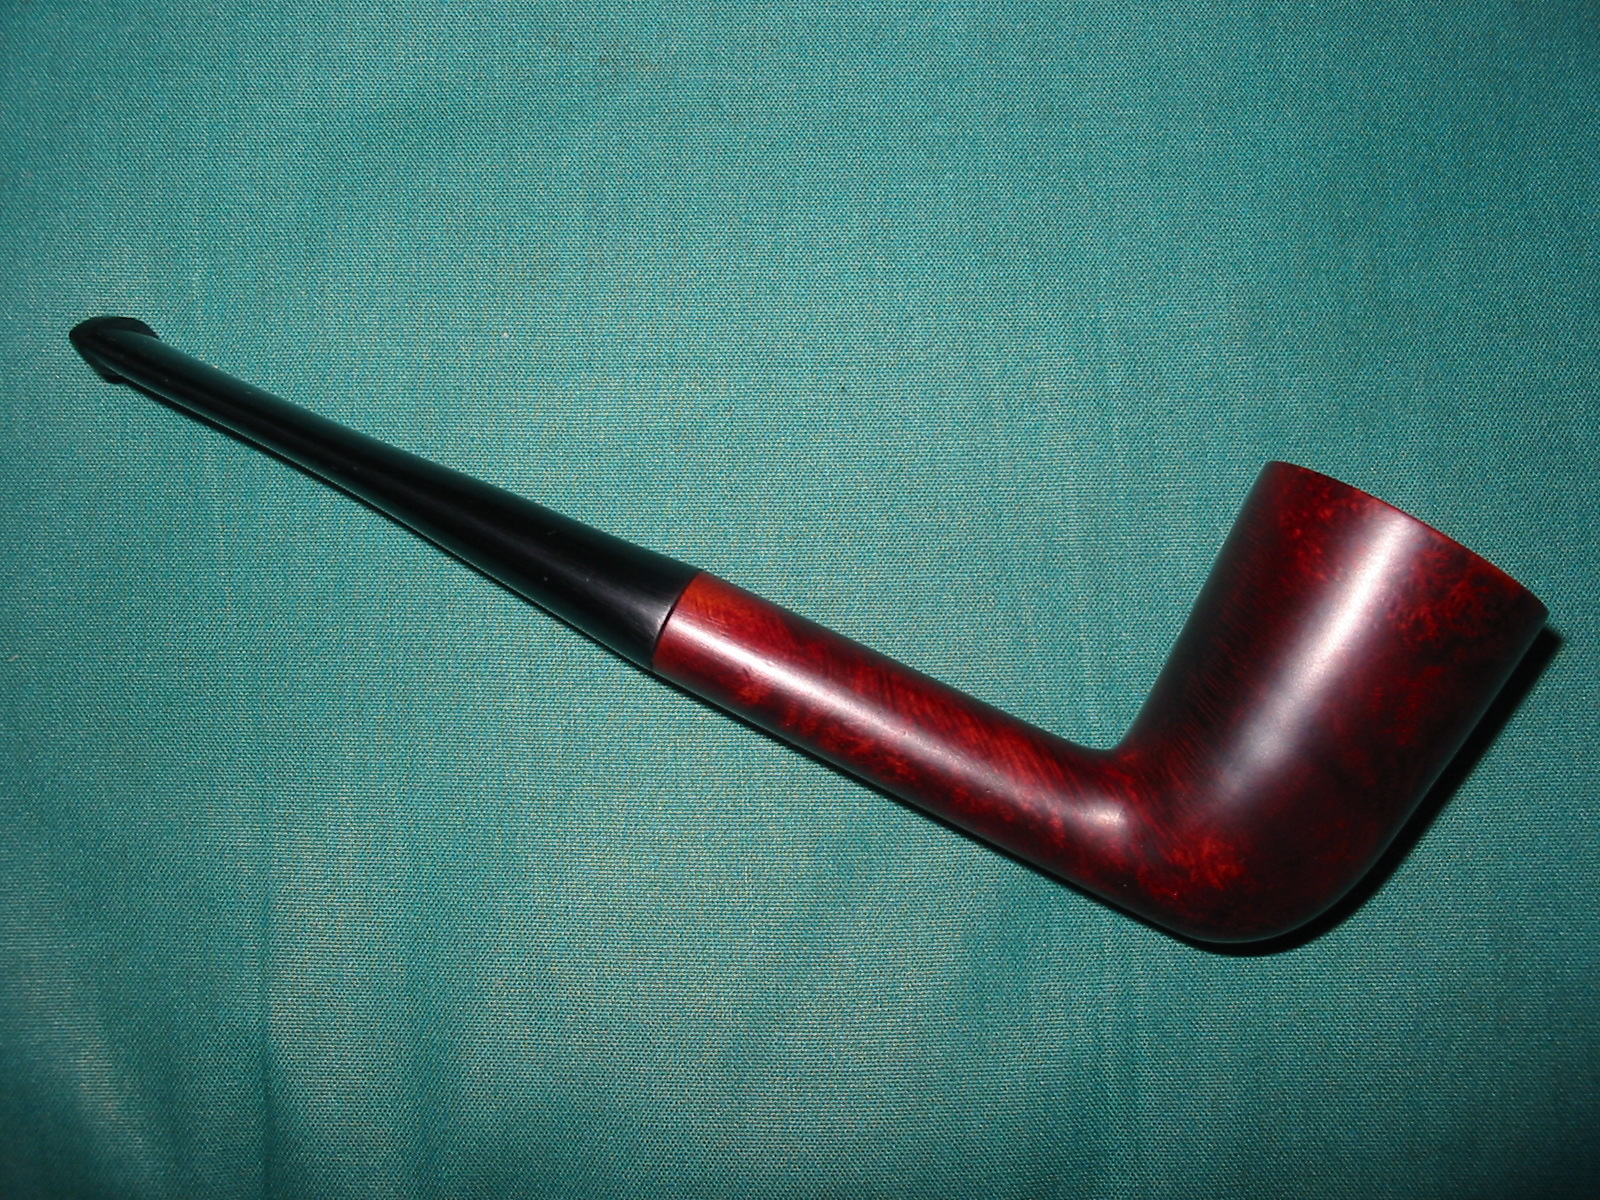
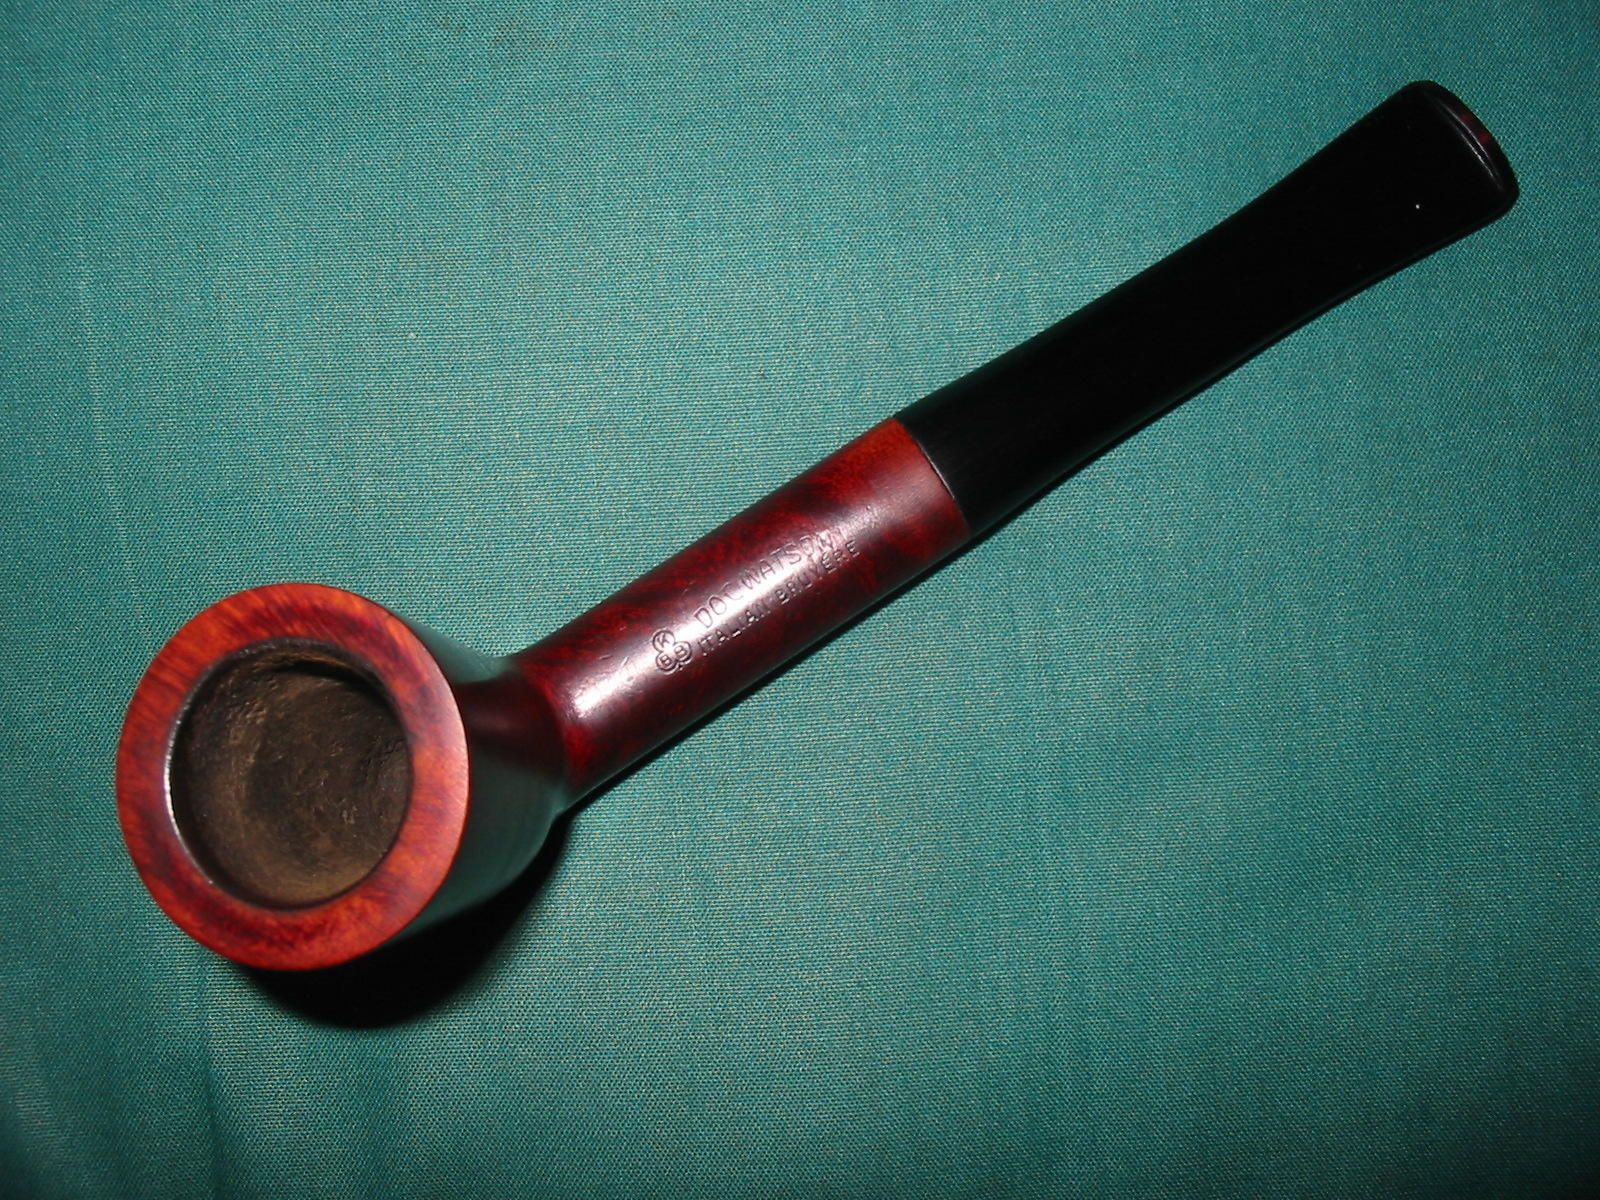
Yet another of the gift bowls was on the work table today. It a delicate Dublin shaped bowl that is stamped on the top of the oval shank with KBB in the cloverleaf and next that Doc Watson in an arc over Italian Bruyere. There are no other stampings on the bowl or shank. I was intrigue to work on this old pipe as Doc Watson was one of my favourite musician/singers. I enjoy his guitar playing and singing. I have no idea if this pipe is connected to him in any way but the name brought back memories of small concerts when I lived in Southern California. The finish was dirty and the briar darkened on the left and right side of the bowl where it was held in the hands. Oils and soil from the hands of the previous smoker had darkened the bowl. It had a dark oxblood stain that hid the grain of the briar. There was a small nick on the bottom front of the bowl that did not go too deep into the briar. The rim was darkened and had a buildup carbon and oils that would need to be cleaned. The bowl had a light uneven cake and the shank was dirty.

I had a new oval Lucite stem in my stem can that would work well for this bowl. The slot in the button had not been cut or shaped. The diameter of the stem was slightly larger than the shank so it would need to be shaped. The tenon was too longer so it would need to be shortened to fit in the shank.

I used a Dremel to sand the diameter of the tenon and shorten it. When I had the fit close I sanded it by hand to assure a snug fit in the shank.

I initially sanded the excess diameter on the stem with the Dremel and a sanding drum. I followed that by sanding with 150 grit sandpaper to smooth it out and bring it closer to matching the stem. I When I had the fit close I sanded the shank and stem together with 220 grit sandpaper to make the transition absolutely smooth.


I wiped down the bowl with acetone on cotton pads to remove the finish. I find that when I break down the stain I can actually bleed it into the sanded portion of the shank. This colours the shank and makes it easier to apply the next coat to the whole bowl.


I sanded the bowl and shank with 1500-2400 grit micromesh sanding pads. Then wiped it down a final time with isopropyl alcohol.

I stained the bowl with a oxblood aniline stain, flamed it and repeated the process. It covered the pipe very well.
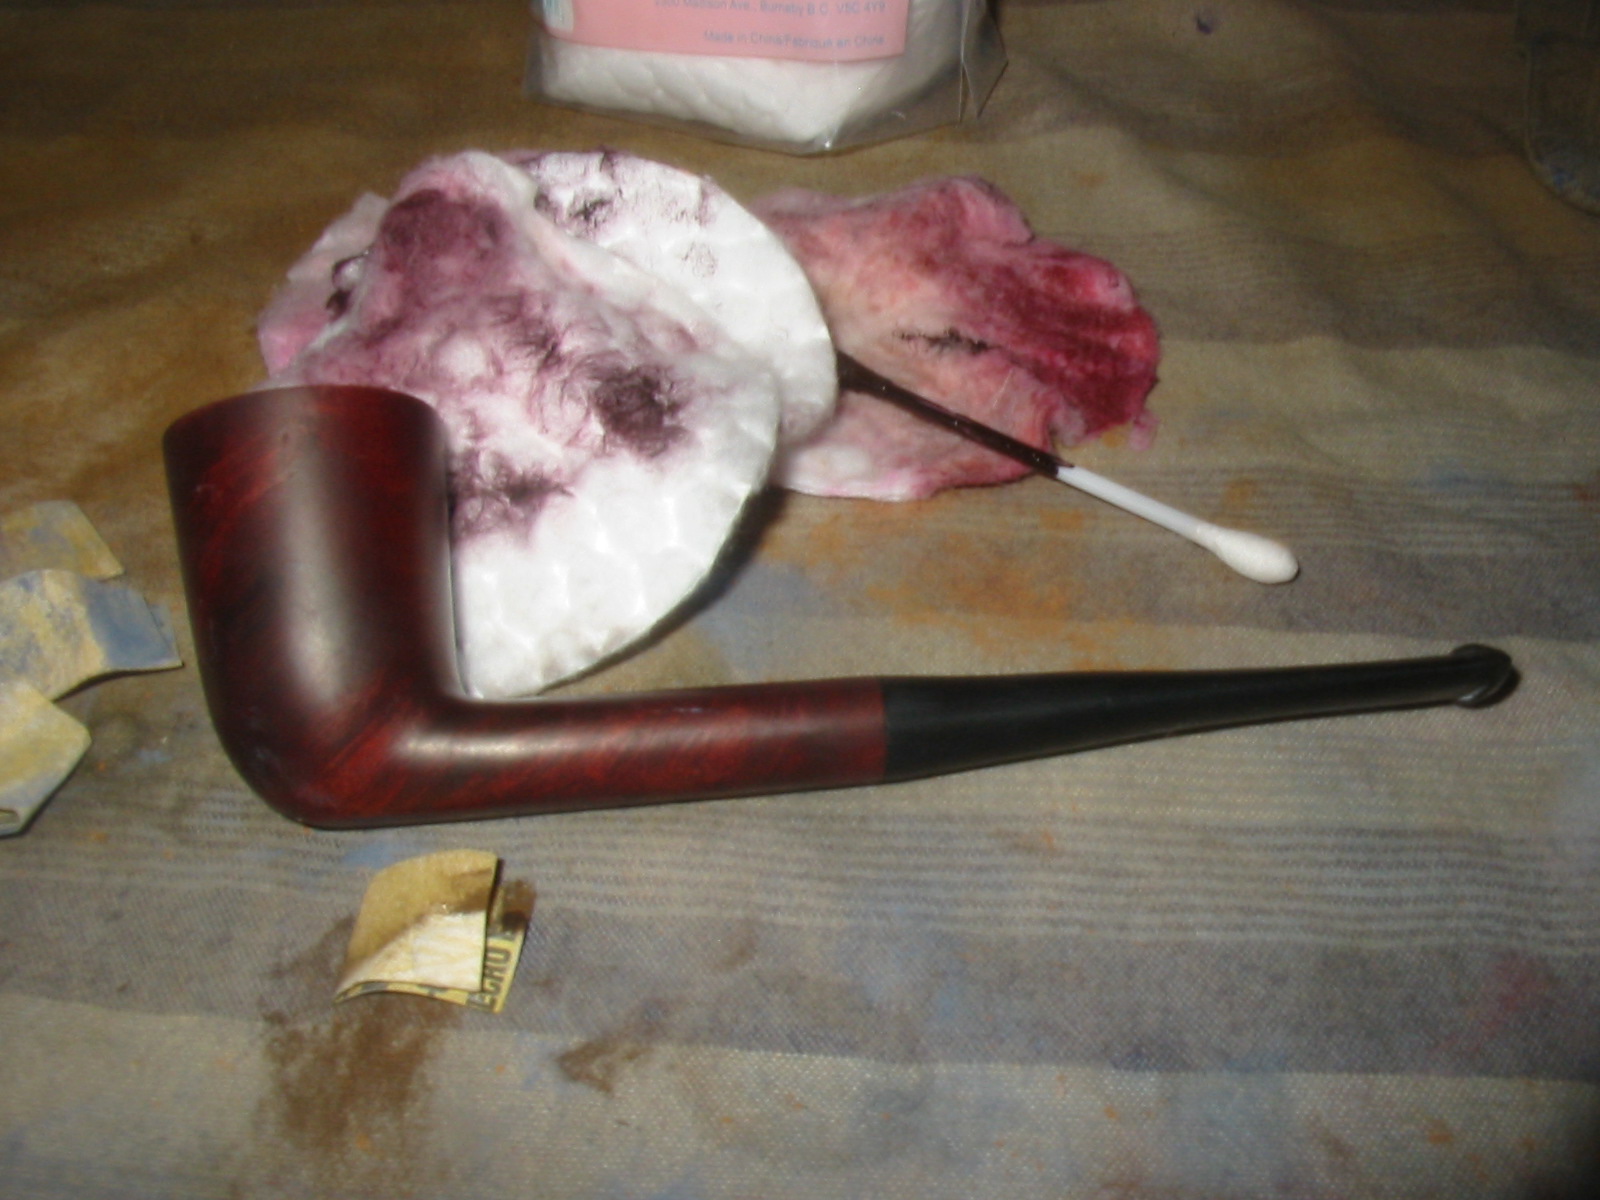
When it had dried I buffed the pipe with White Diamond to polish it. The bowl was ready to be buffed with carnauba but I waited until I had worked on the stem then I would buff them together.
I sanded the stem with my usual array of micromesh sanding pads. I wet sanded it with 1500-2400 grit pads. I then worked on the slot. I wanted to have a wide open oval slot in the button so I used needle files to open the airway in the end of the stem. I used flat, round and oval files to open it and then a folded piece of sandpaper to polish after filing.

I dry sanded the stem and the end of the button with 3200-12,000 grit pads. To remove some of the scratches left on the button I also started again and wet sanded with the 1500-2400 grit pads. When I had finished sanding I polished it with Obsidian Oil and let it dry. The Oil does not soak in like it does on vulcanite but provides a lubricant that works well when I buff the Lucite stem with White Diamond.


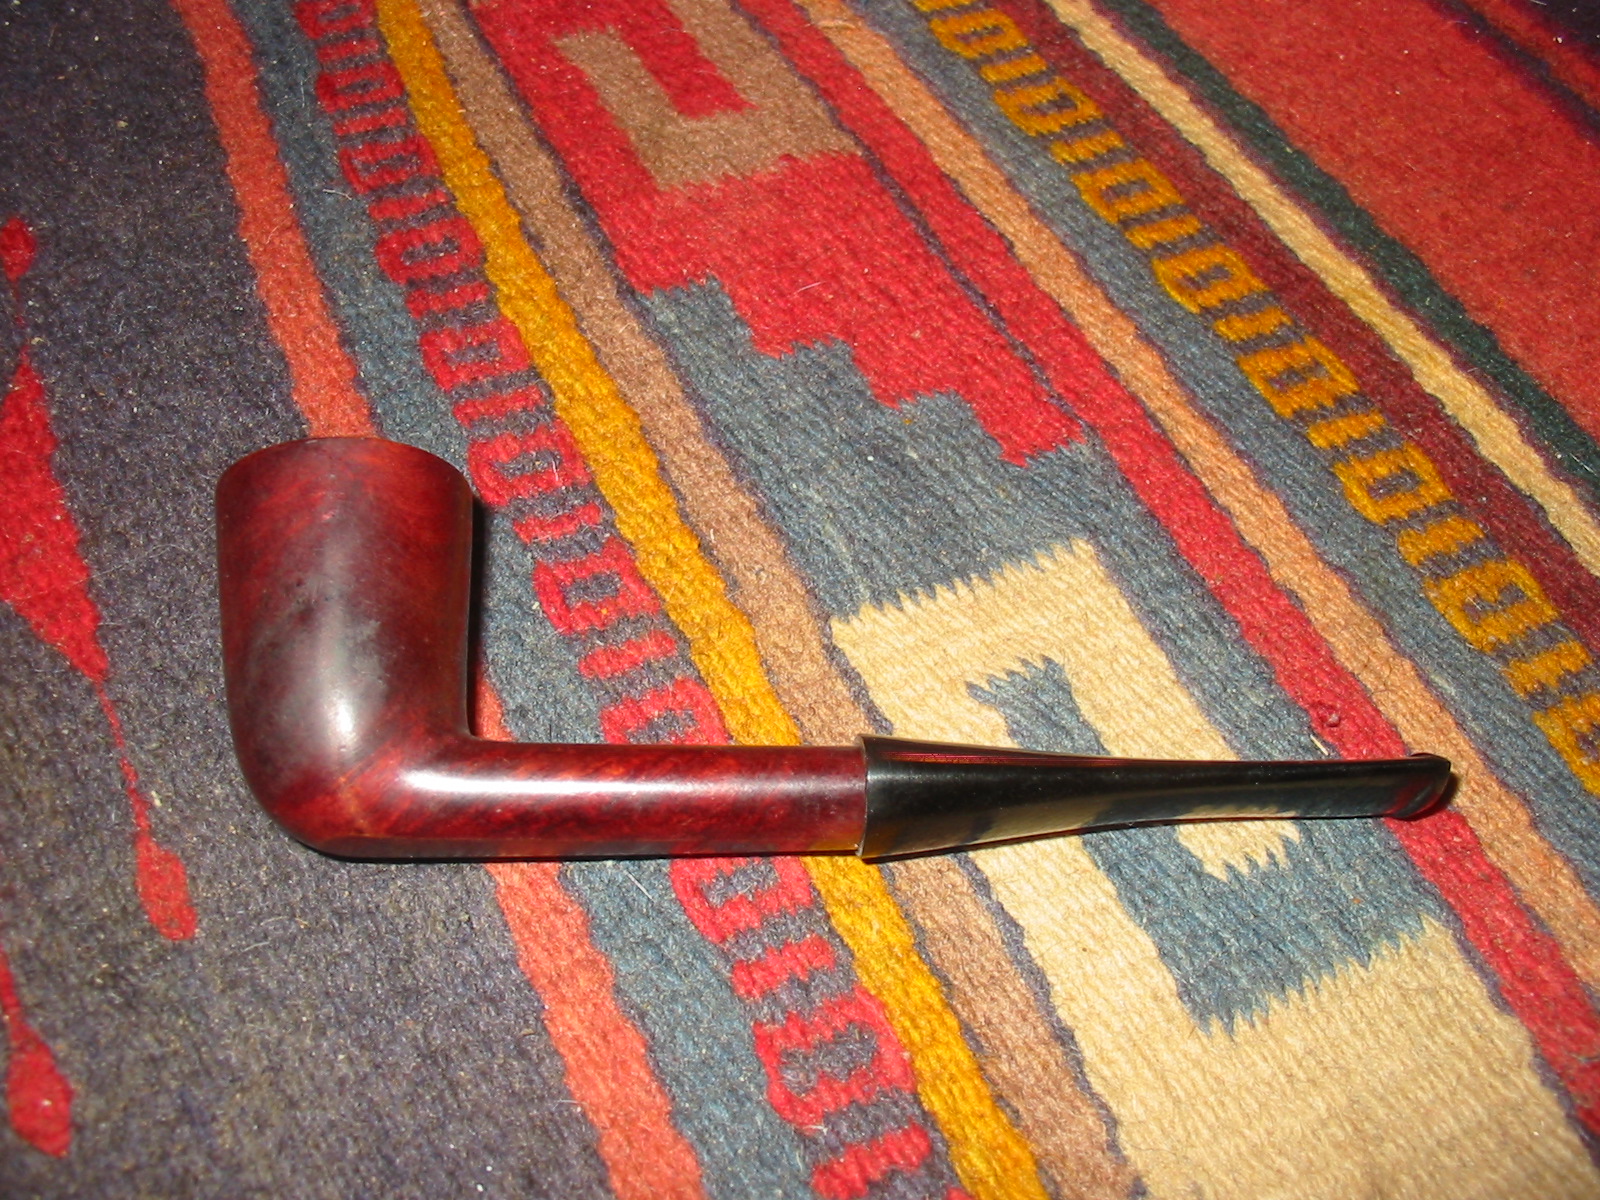
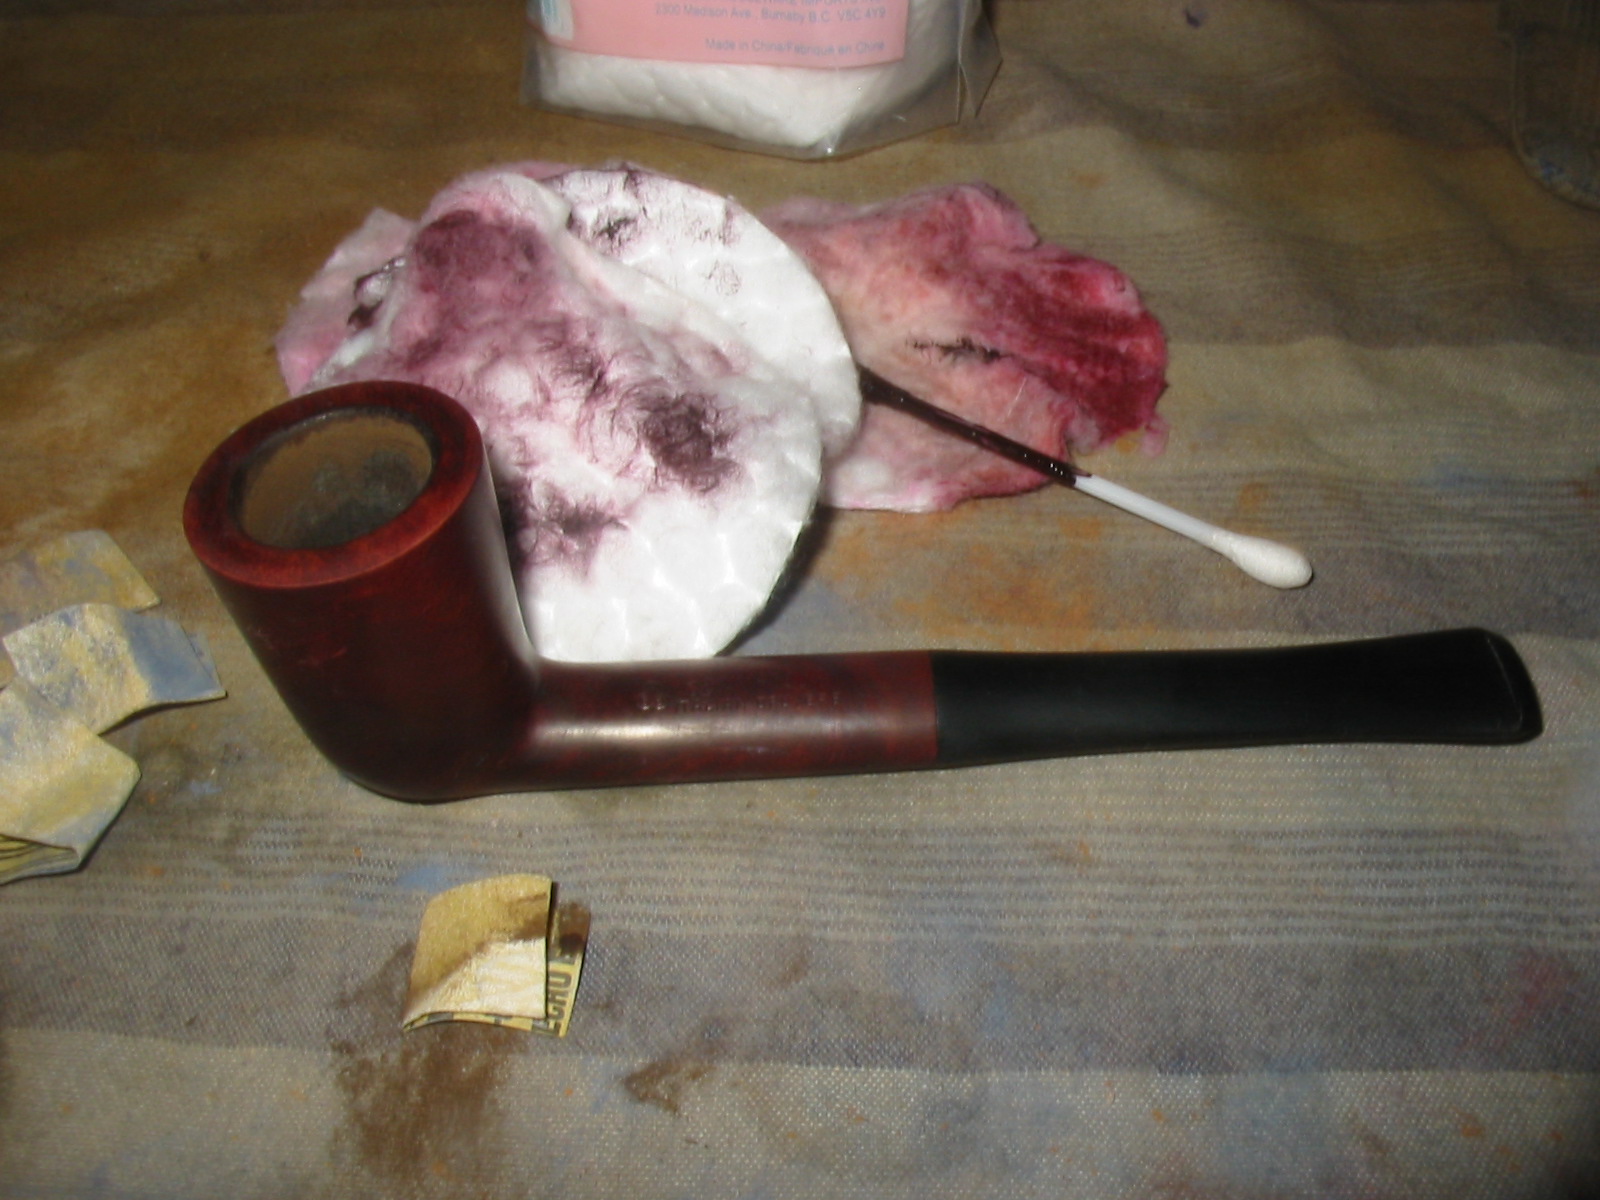
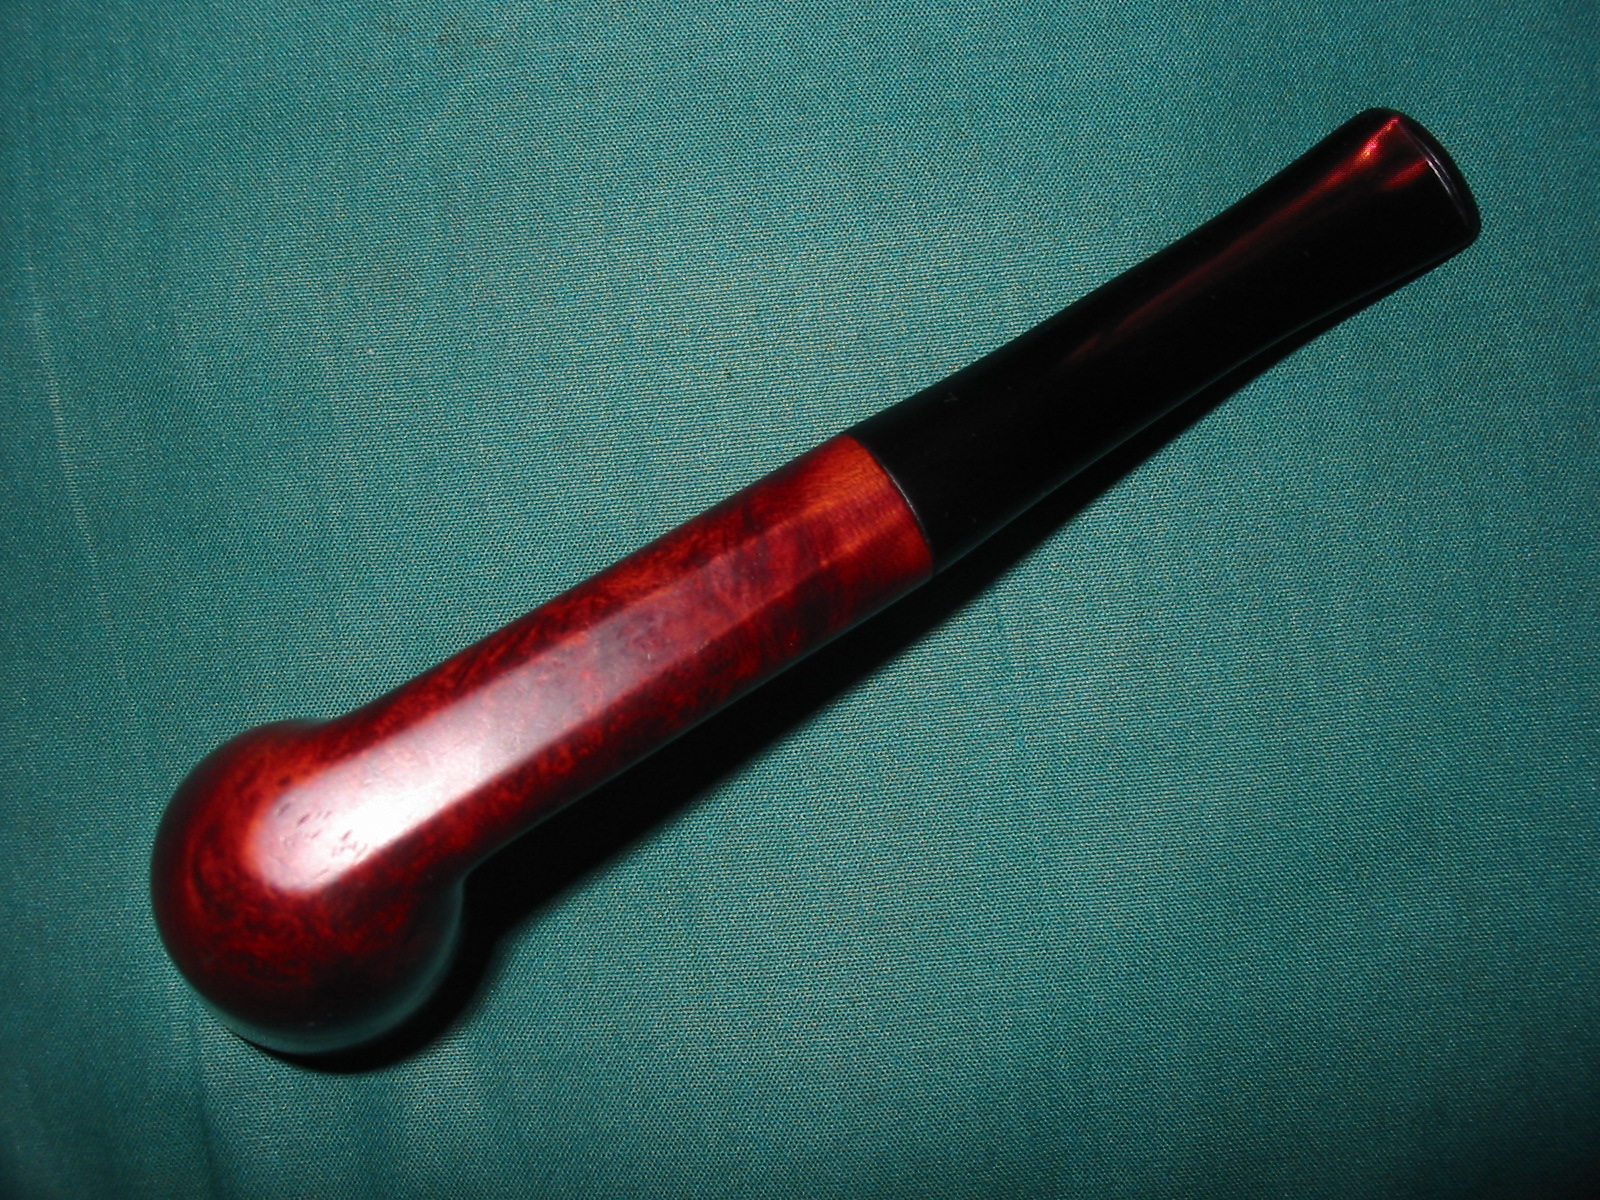
I buffed the bowl and stem with White Diamond and then gave it multiple coats of carnauba wax, polishing it with a clean flannel buff between coats. When finished the pipe looks like it must have the day it left the KBB factory. It is cleaned, restored and ready to smoke. The finished pipe is shown below.
In the gift box that I received there was an old worn bowl that had a thick coat of grime on the finish. The shank was cracked and had been repaired but still showed. There was stamping on the shank but it was illegible without magnification. The bowl had been reamed but was out of round. It had been topped at some point but had not been flattened it had an odd crown and was quite a bit lighter than the rest of the bowl. The briar itself was quite nice under the grime. The right side of the bowl had some birdseye grain while the rest was mixed grain. The rim also had birdseye grain on it. I used a magnifying glass to look at the stamping – low and behold it was stamped Peterson’s (with a forked P) over Kapet on the left side of the shank. It was faint but clearly readable with light and magnification. The right side was even more worn but I was able to make out that it was stamped Made in London England. The shape number was not readable. There was not a stem with the bowl but I had one that would work in my box of stems.

I cleaned up the shank area with a wipe down with acetone on a cotton pad. I wanted to avoid covering the remaining stamping with the band but wanted a band that would strengthen the repair that had been made to the cracked shank. I heat the band and pressed it into place on the shank. I also sanded the tenon on the stem so that it would fit the shank.

With the new band in place I cleaned up the tenon and pushed the stem into the shank. I sanded the stem with 220 grit sandpaper to remove the tooth chatter and also to adjust the diameter of the stem at the band. I wanted it to fit evenly against the band so that looking at the pipe from the end view there would we equal silver all the way around the stem junction.

When I had the fit against the shank and band correct I sanded the stem with a medium and a fine grit sanding sponge to clean up the scratch marks. I also used a folded piece of sandpaper to work on the inner edge of the rim to bring it back to round. I wiped down the bowl with isopropyl alcohol on a cotton pad to remove the grit and buildup on the bowl and lighten the bowl to match the current colour of the rim. Even though I would later end up topping the bowl I knew that the lightening of the stain would make the restain much simpler.


I cleaned the inside of the shank and stem with cotton swabs, pipe cleaners and isopropyl alcohol until the cleaners went in and came out the same colour. The photo below shows some of the building pile of cleaners that were used to get the pipe clean.

I set up the topping board and 220 grit sandpaper and twisted the rim into the sandpaper until I had the top of the bowl flat once again. I took out the rounded/crowned rim that had been done earlier and squared it up with sharp edges once more.
I sanded the rim with the sanding sponges and also with 1500-2400 grit micromesh sanding pads to remove the scratches. I stained the bowl with a dark brown aniline stain with several more applications of stain to the rim to achieve a match with the bowl. I applied, flamed and repeated the process of staining until I got an even coverage on the bowl and rim.

To make the stain less opaque I washed it down with alcohol on cotton pads. I wanted to remove enough of the stain to make the grain visible.

I sanded the bowl with 1500-2400 grit micromesh sanding pads to further lighten things. I buffed the bowl with White Diamond, while avoiding the light stamping. I rubbed the bowl down with a light coat of olive oil. The result was exactly what I was aiming for. The reddish brown tint of the briar came through beautifully.

I sanded the stem with the medium and fine grit sanding sponges and then went on to sand with my usual array of micromesh sanding pads. I wet sanded with 150-2400 grit pads and dry sanded with 3200-12,000 grit pads. I rubbed the stem down with Obsidian Oil between each of the three groups of micromesh pads. The Oil penetrates deeply into the vulcanite and makes the sanding simpler. The oil that sits below the surface lubricates the surface and the micromesh cuts into the vulcanite to clean up the scratches.

I gave the stem a final coat of Obsidian Oil and when it dried I buffed the bowl and stem with White Diamond. I gave both multiple coats of carnauba wax and between the coats I buffed it with a soft flannel buff. I hand buffed the bowl with a shoe brush. The finished pipe is shown in the photos below. It is not a large pipe – a mere 5 ½ inches long and 1 3/8 inches tall. The bowl is in good condition and cleaned and ready to smoke. This should make a great little Virginia pipe.
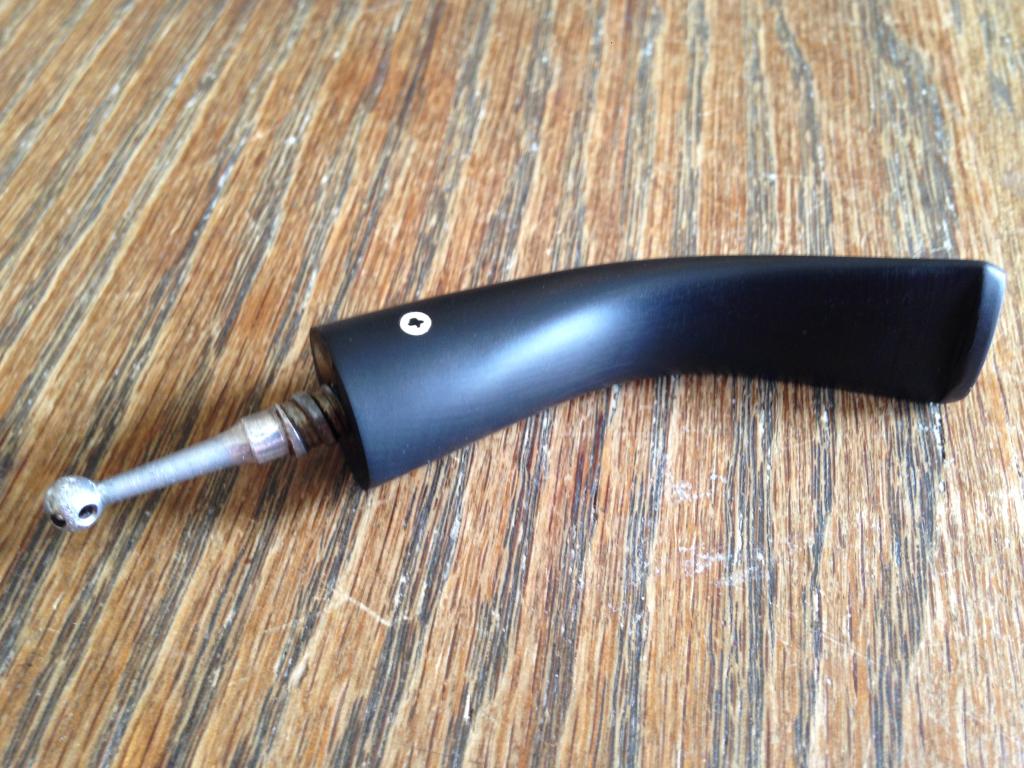
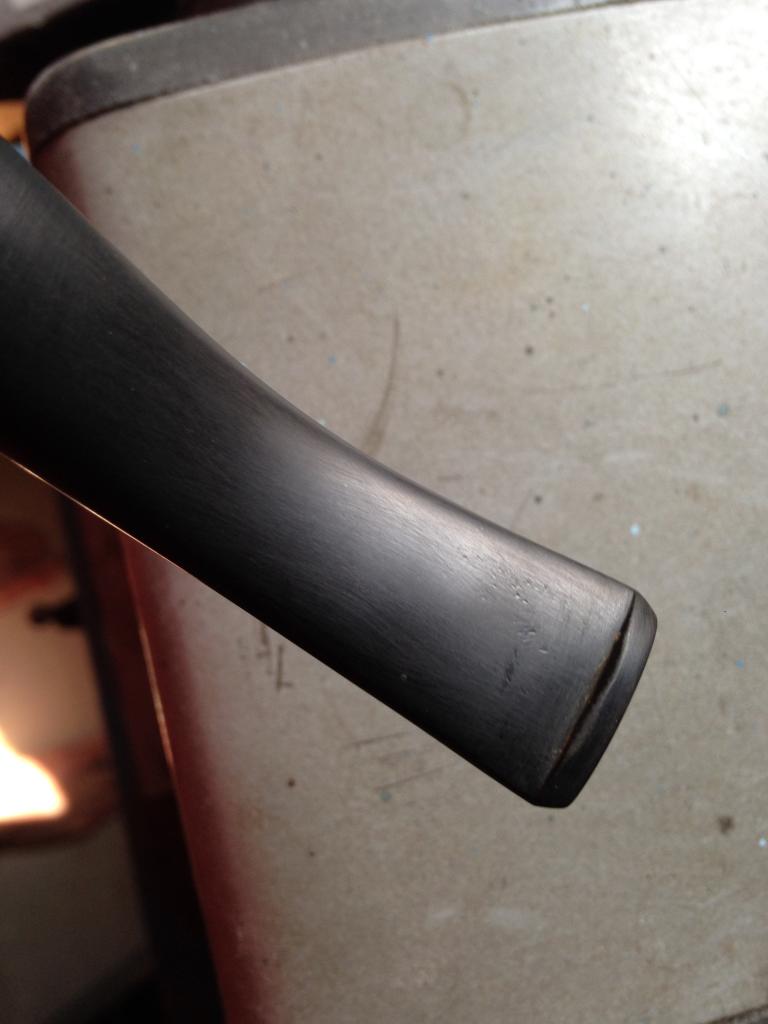
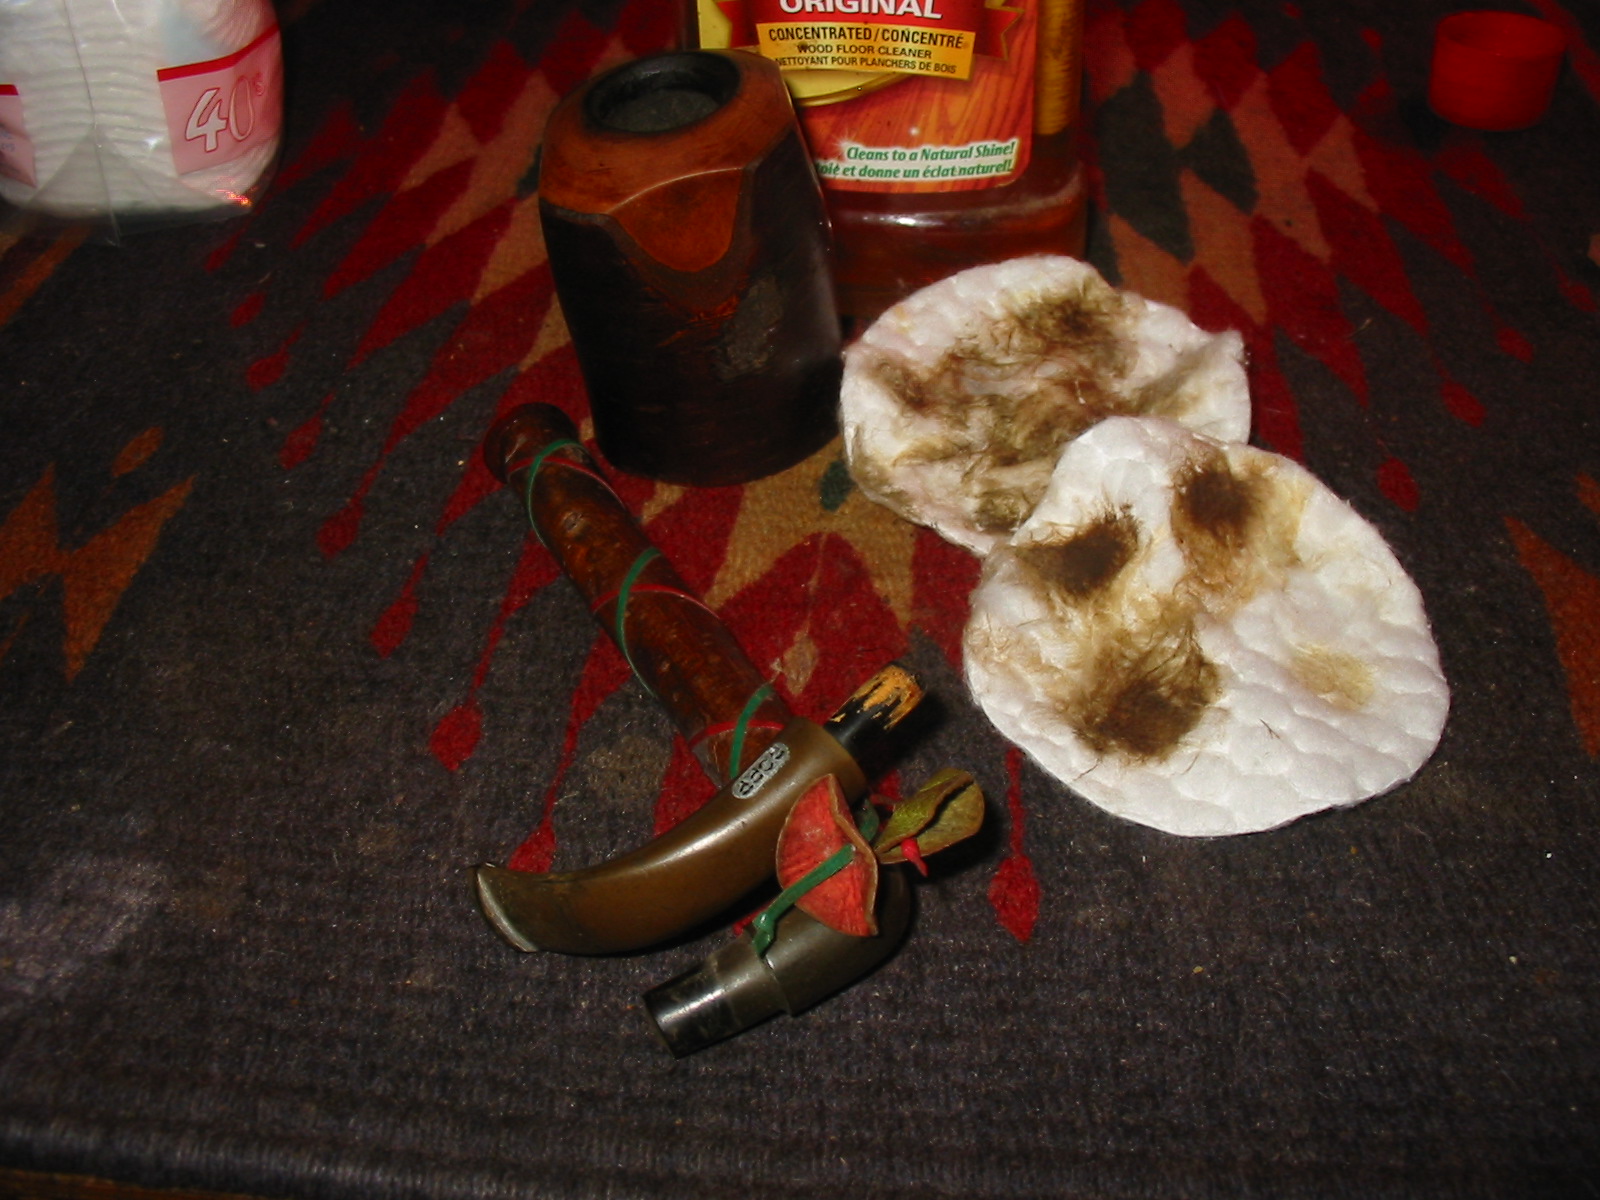
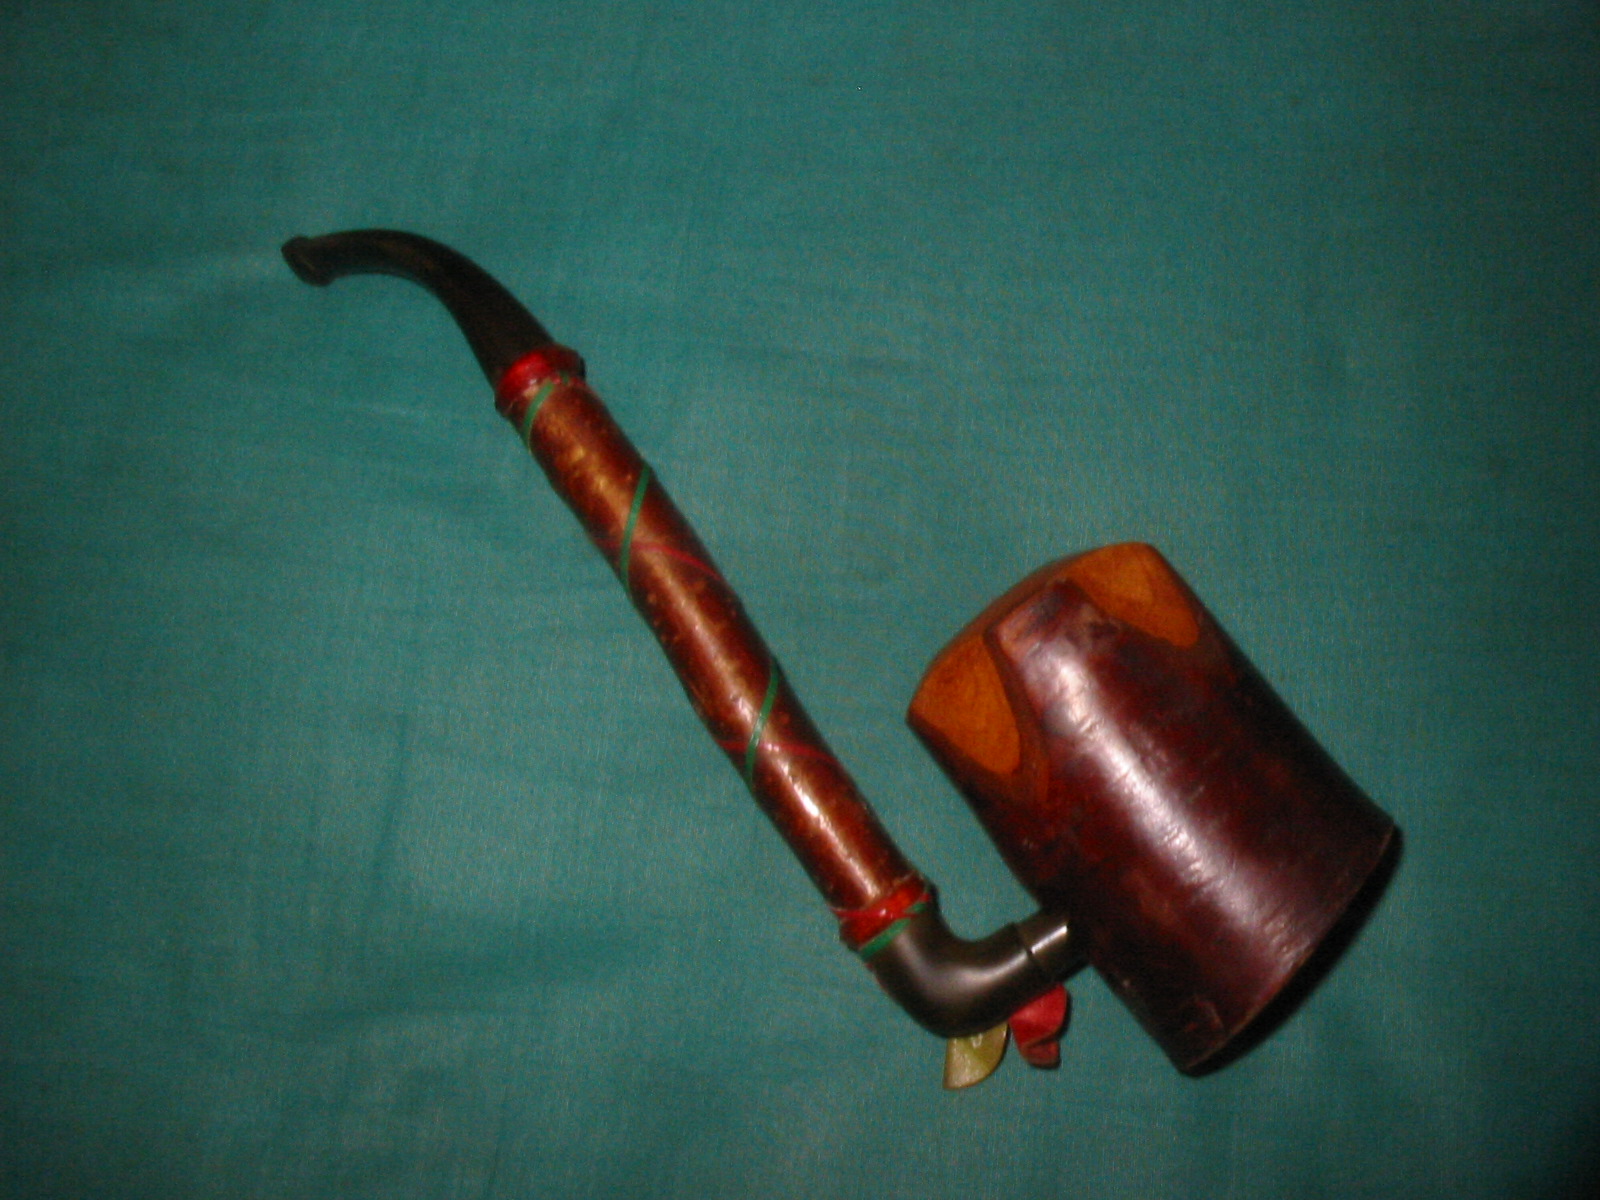
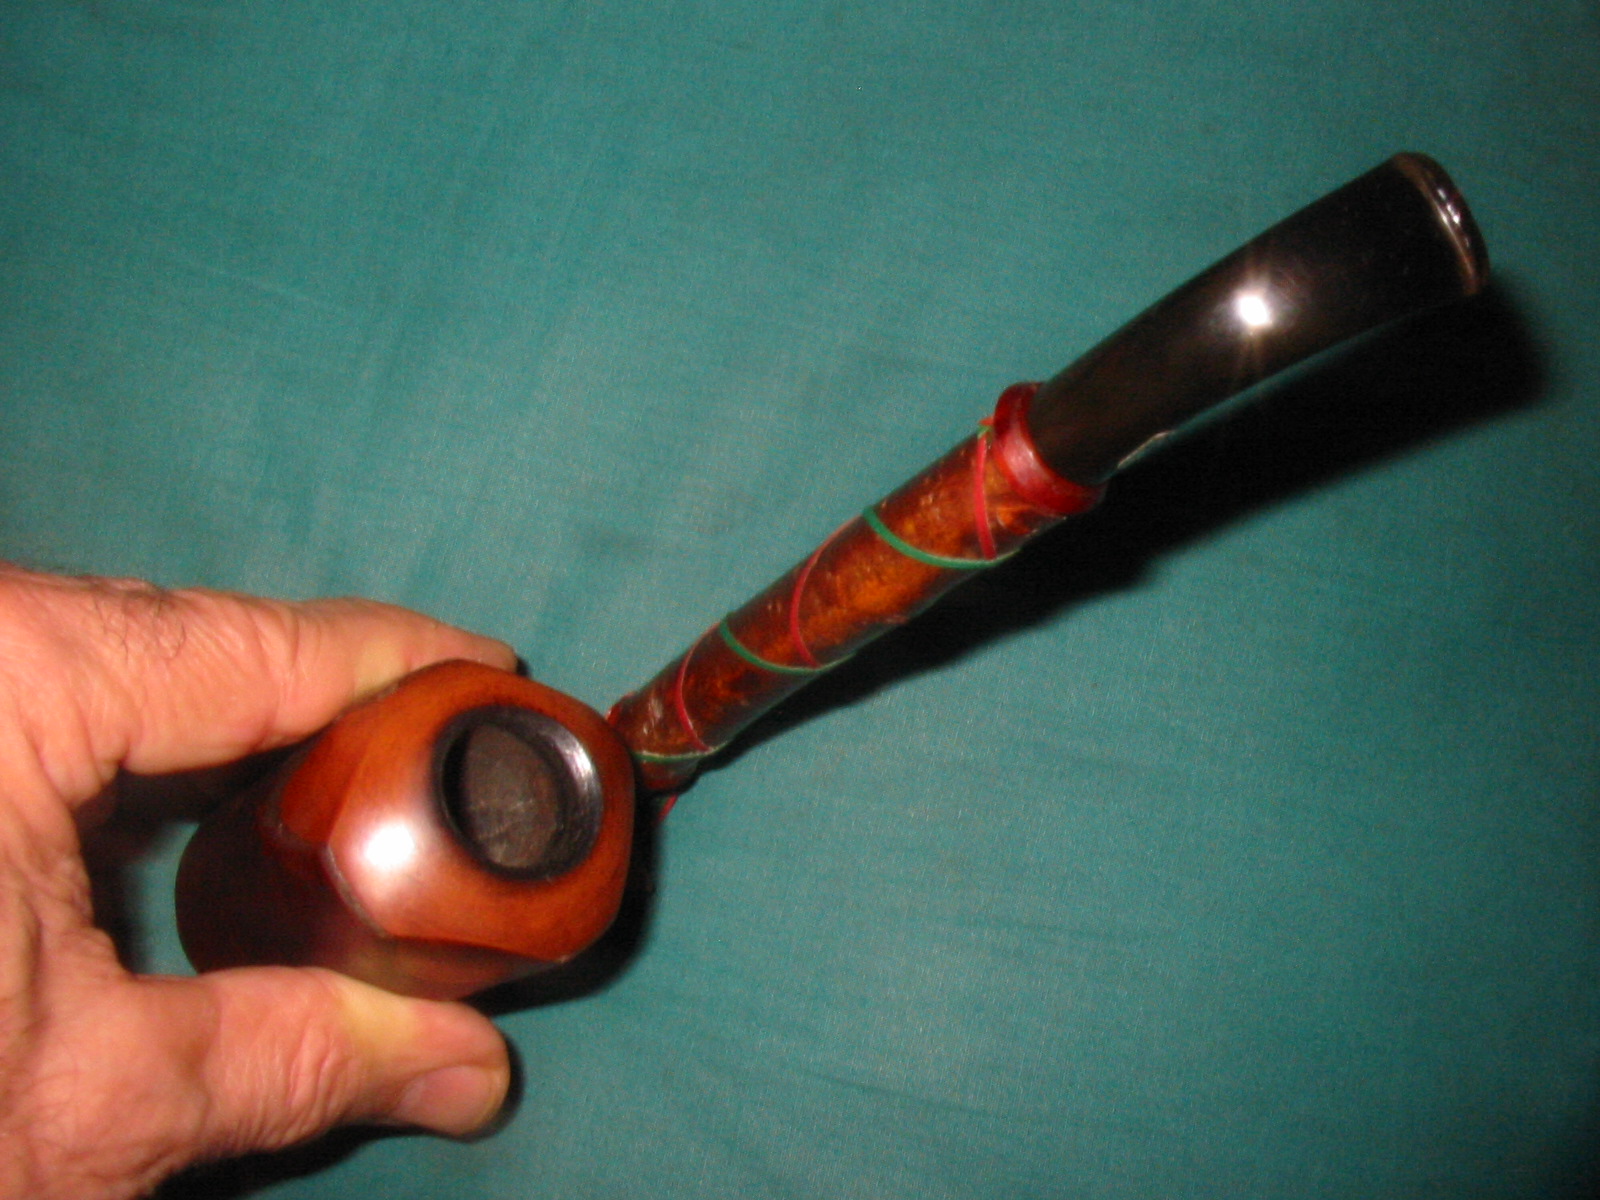
Yet another one of the pipe bowls that came to me in the gift box was a Ropp Cherrywood. It is stamped on the bottom of the bowl on a polished smooth portion, Ropp over Everest over Made in France. The wood was dirty and tired looking but still solid. The bowl was caked but not burned. The rim had a carbon buildup on it but was not burned or scorched. The drilling on the pipe was perfect. At first I thought that only the bowl had been included and I was scheming about the kind of stem to put on this one. But in the bottom of the box I found the original stem. It had a vulcanite 90 degree angle portion attached to the end of a cherrywood branch that fit snug in the hole in the bowl. At the other end of the cherrywood branch/shank was the stem. It bore the Ropp emblem and was badly oxidized. There was some tooth chatter on the stem near the button on the top and the bottom. The tenon on the stem had been coated with a brown wax to ensure a snug fit in the shank.

I scrubbed the exterior of the bowl and rim with Murphy’s Oil Soap and cotton pads to remove the dirt and grime that had built up on the bark and wood. There were several places where the bark had a pitch build up on the outside that had hardened and was black. I was able to scrub away all of the carbon buildup on the rim and bring it back to the natural colour.
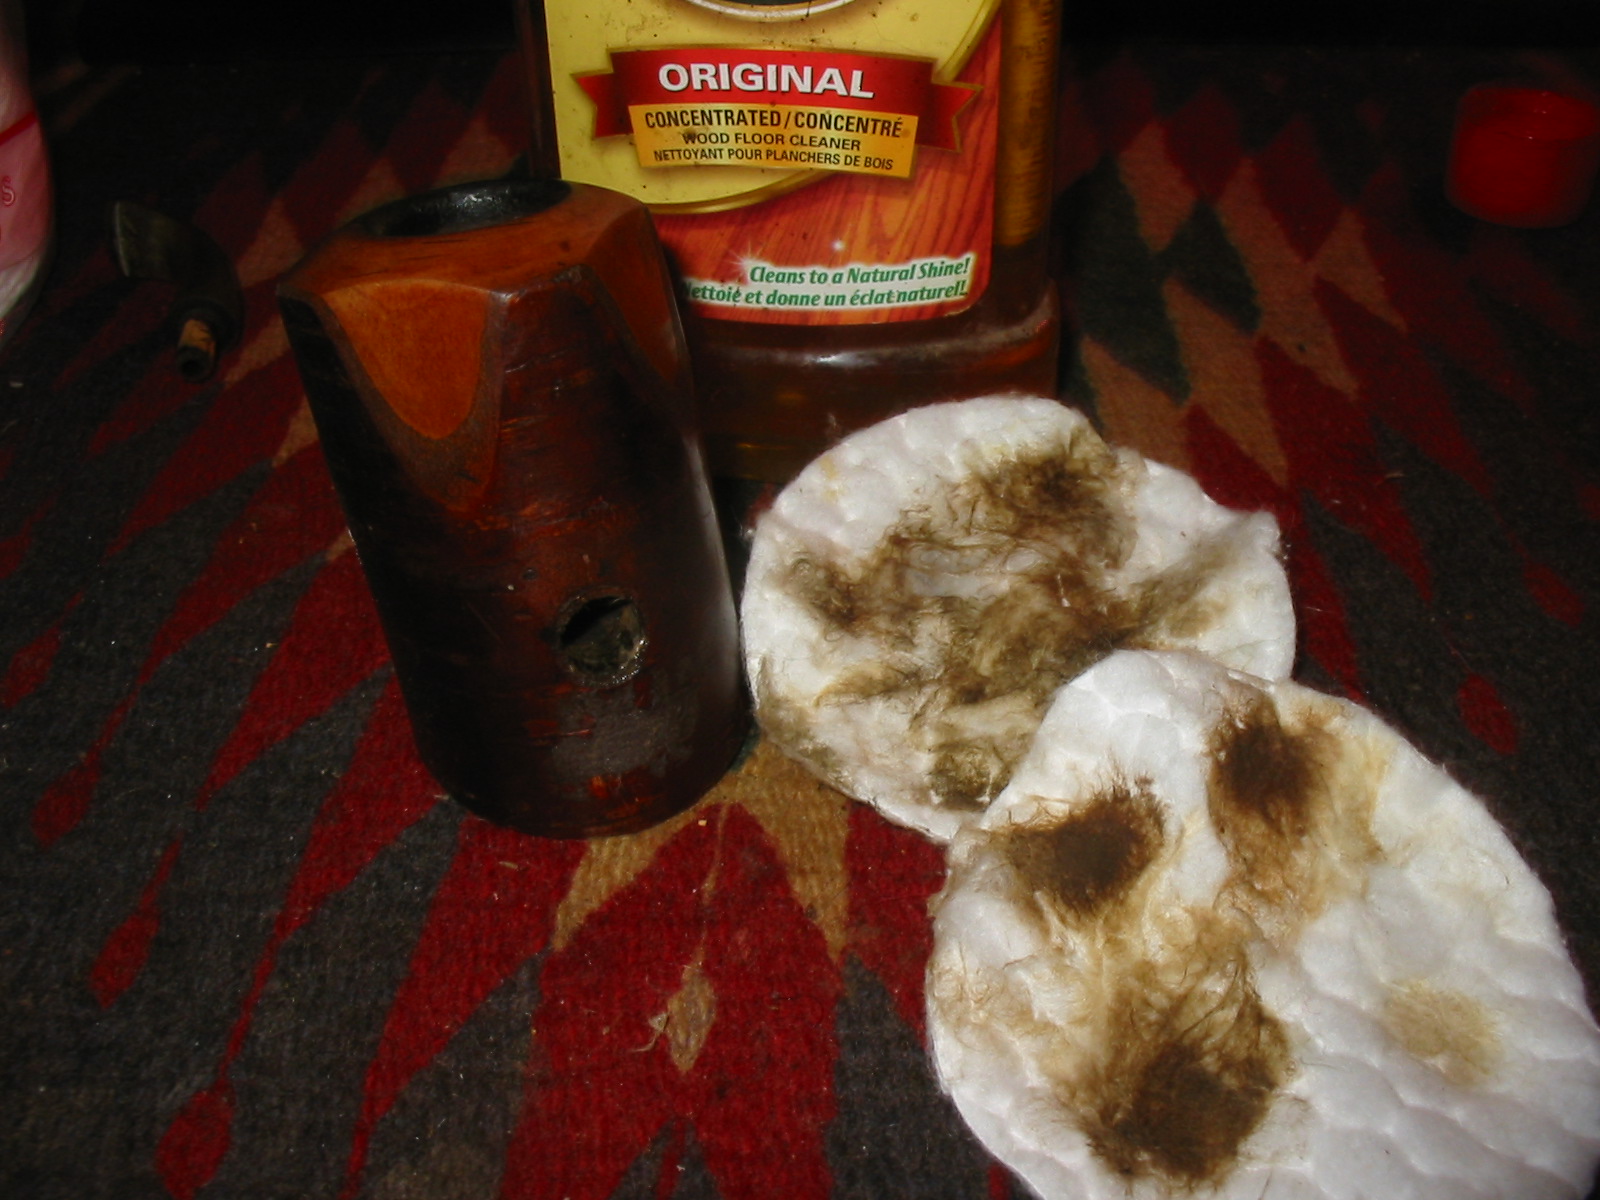
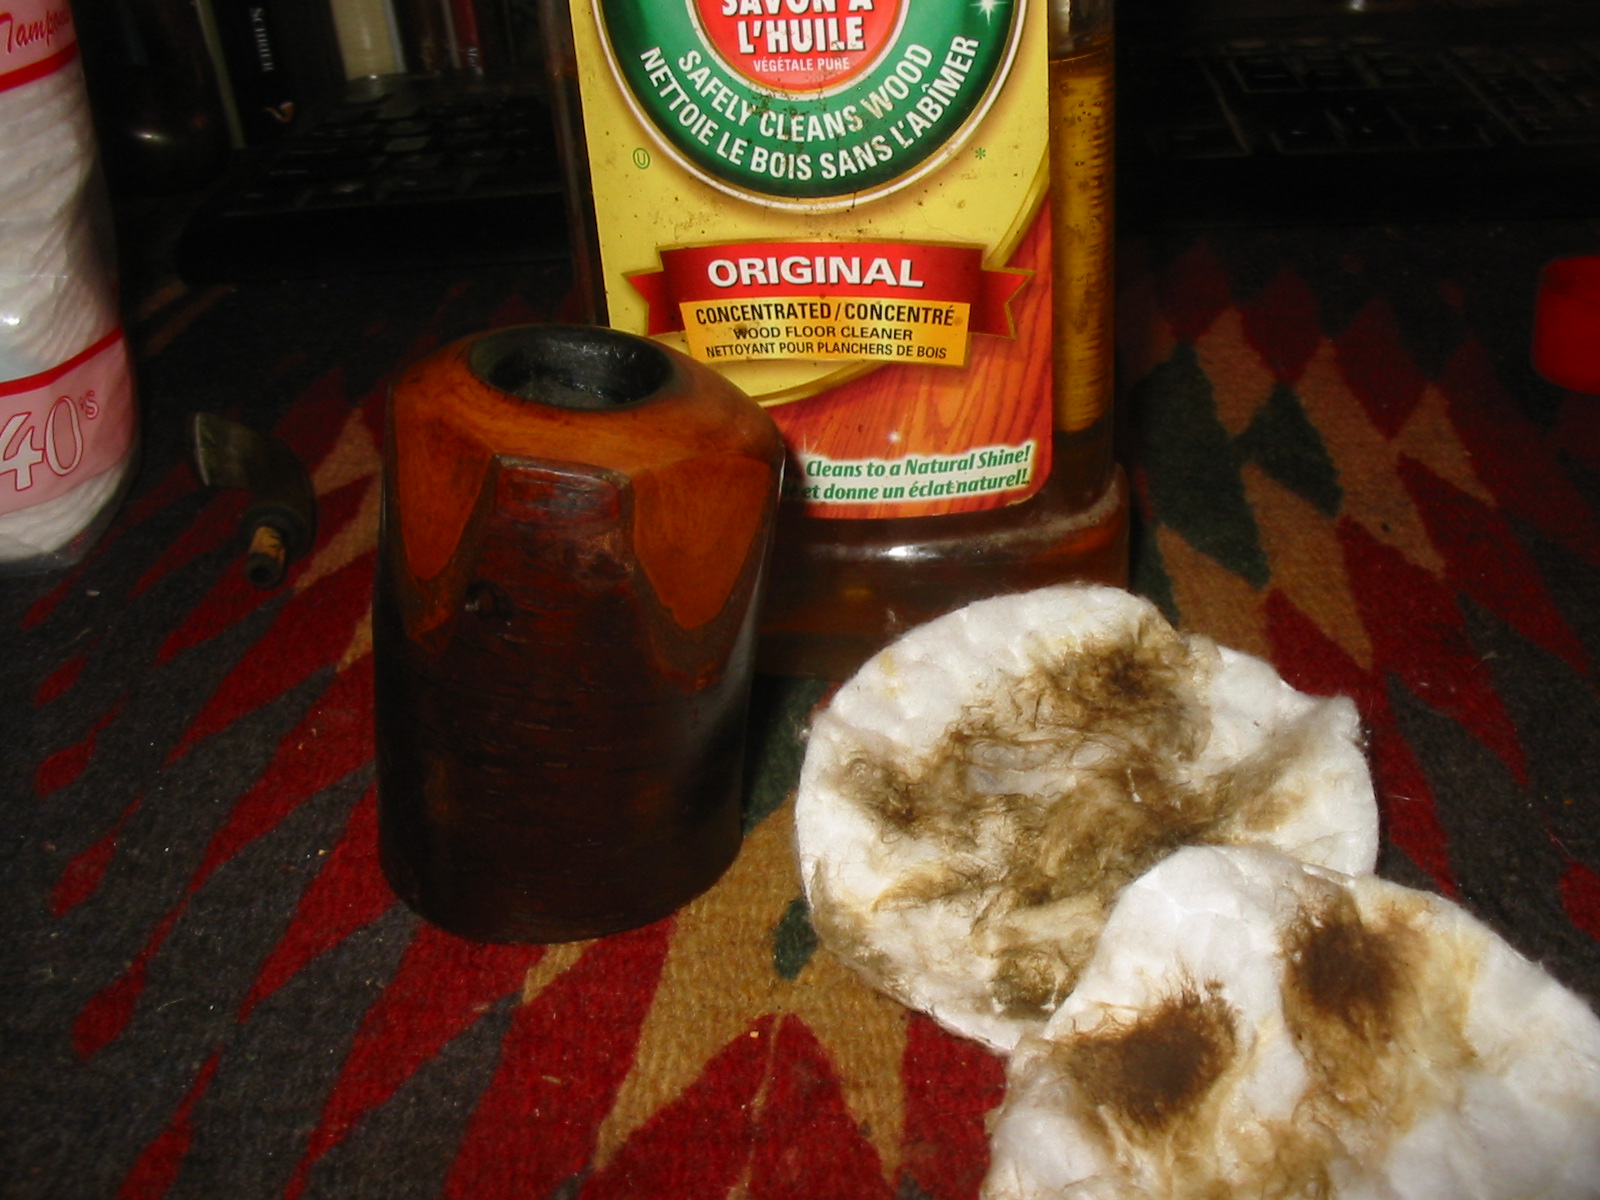
I scrubbed the shank carefully with oil soap on cotton pads so as not to damage the leather wrapping that was on it. There were two cords – one red and one green that were interlaced around the length of the shank. A plastic ring was glued on the shank on both ends to anchor the leather cords. On the bowl end of the shank there were two roundels of leather that acted as tassels.
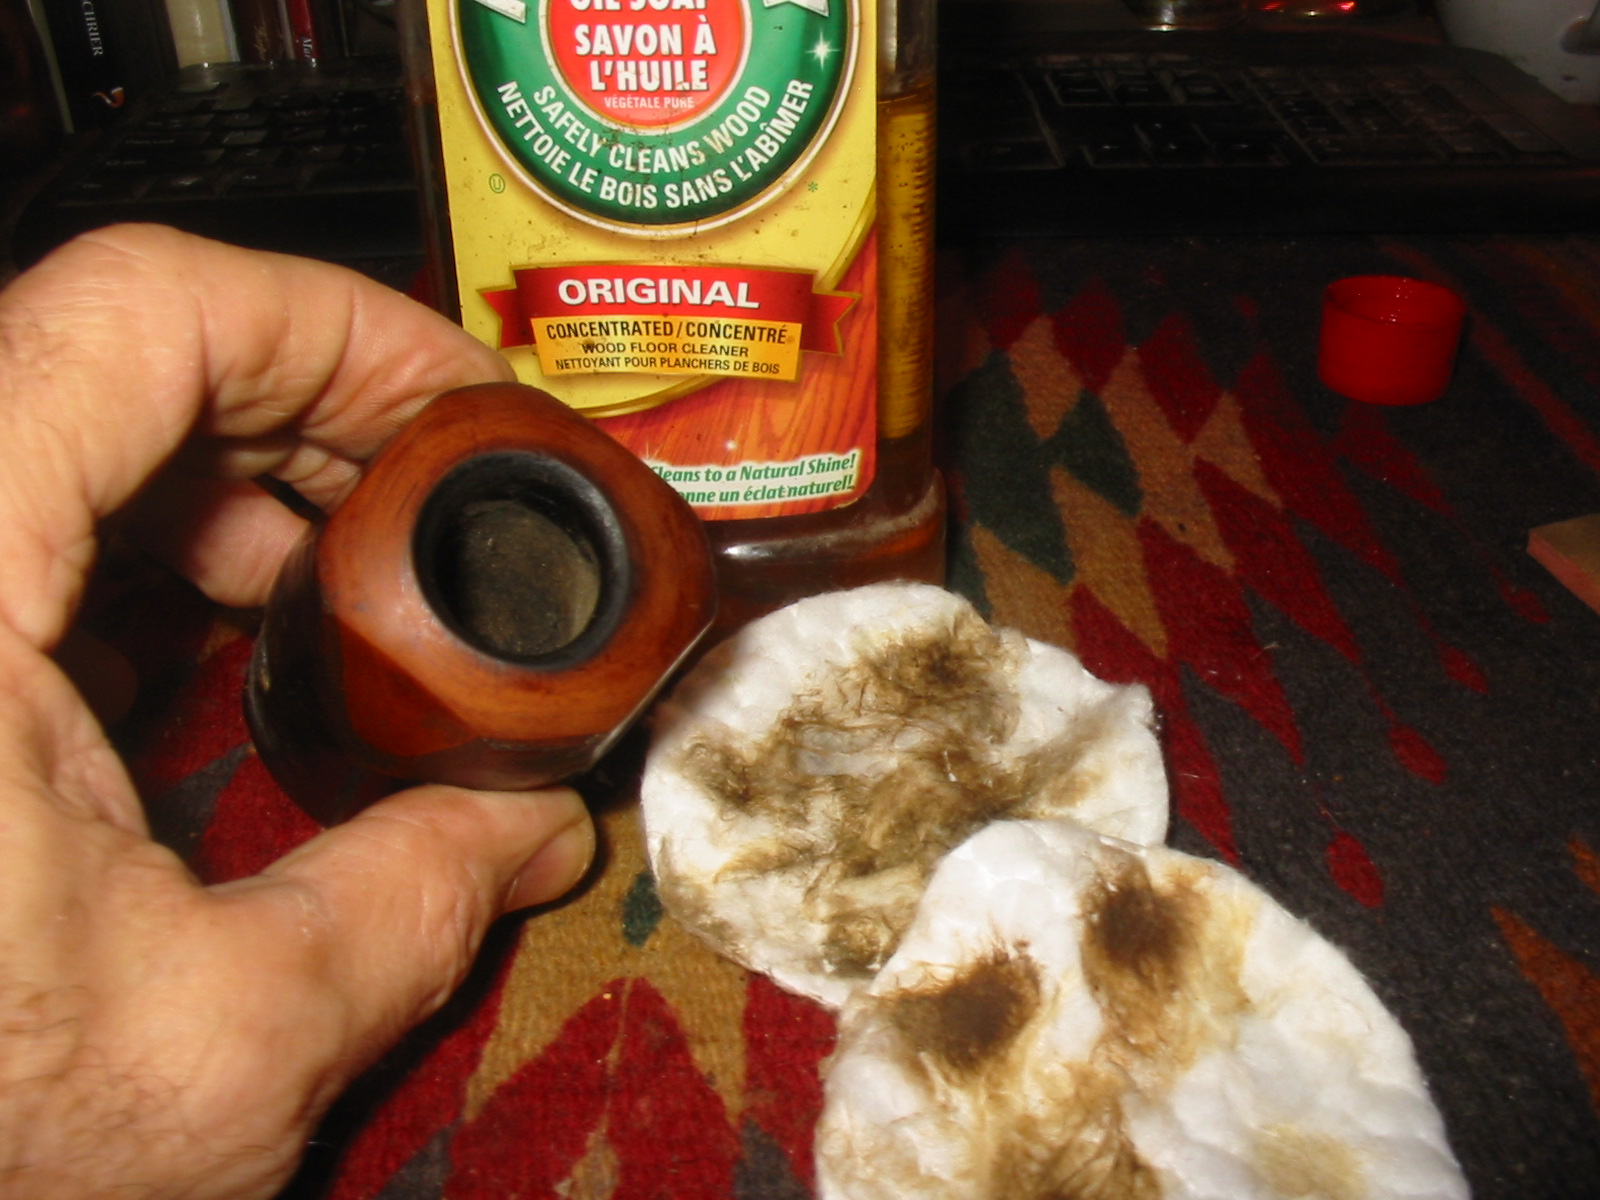
I reamed the bowl with a PipNet reamer. I find that the heads of this reamer fit most of the bowls that I work on. I cleaned out the ash from the bowl and then swabbed the bowl out with cotton swabs and alcohol. I also cleaned the airway on the bowl with cotton swabs.
The 90 degree angle vulcanite connector between the bowl and shank was oxidized. It was hard to sand with micromesh pads or sanding sticks so I used a fine grit sanding sponge to break up the oxidation and then scrubbed it with Meguiar’s Scratch X2.0 – a plastic polish to remove the oxidation. It took a lot of scrubbing to get through the oxidation. I applied the polish with my finger and when it had dried scrubbed it off with cotton pads. While I worked on the connector I also applied the Scratch X2.0 to the stem and let it sit.
I sanded the stem with 220 grit sandpaper, medium and fine grit sanding sponges and then with the usual array of micromesh sanding pads. I wet sanded with 1500-2400 grit pads and dry sanded with 3200-12000 grit pads. I buffed the stem with White Diamond. I left some of the wax buildup on the stem once I found that to remove it made the stem very loose.


I buffed the bowl and stem with White Diamond and then gave it several coats of carnauba wax and buffed it with a soft flannel buff. I hand waxed the shank with Halcyon II and then a shoe brush. The finished pipe is shown below. I am looking forward to experiencing a smoke in a Ropp Cherrywood Oom Paul.

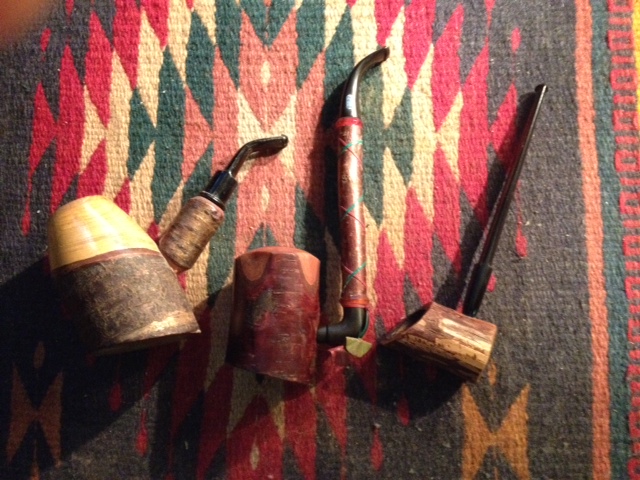
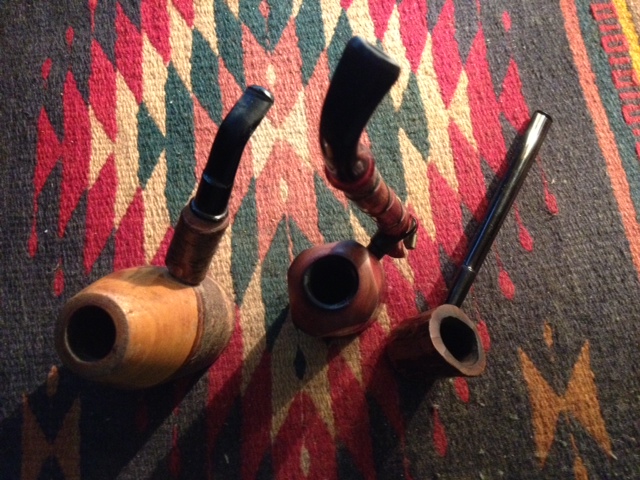
The final two photos were taken with my cell phone to show my Ropp Threesome – a Volcano, the Oom Paul and the newest Frankenpipe that I wrote about earlier. They make an interesting subset of my pipe collection and now they occupy shelves in my study. I think in the long run at least the two larger pipes will be primarily display items (though I plan to try them all out at least once).
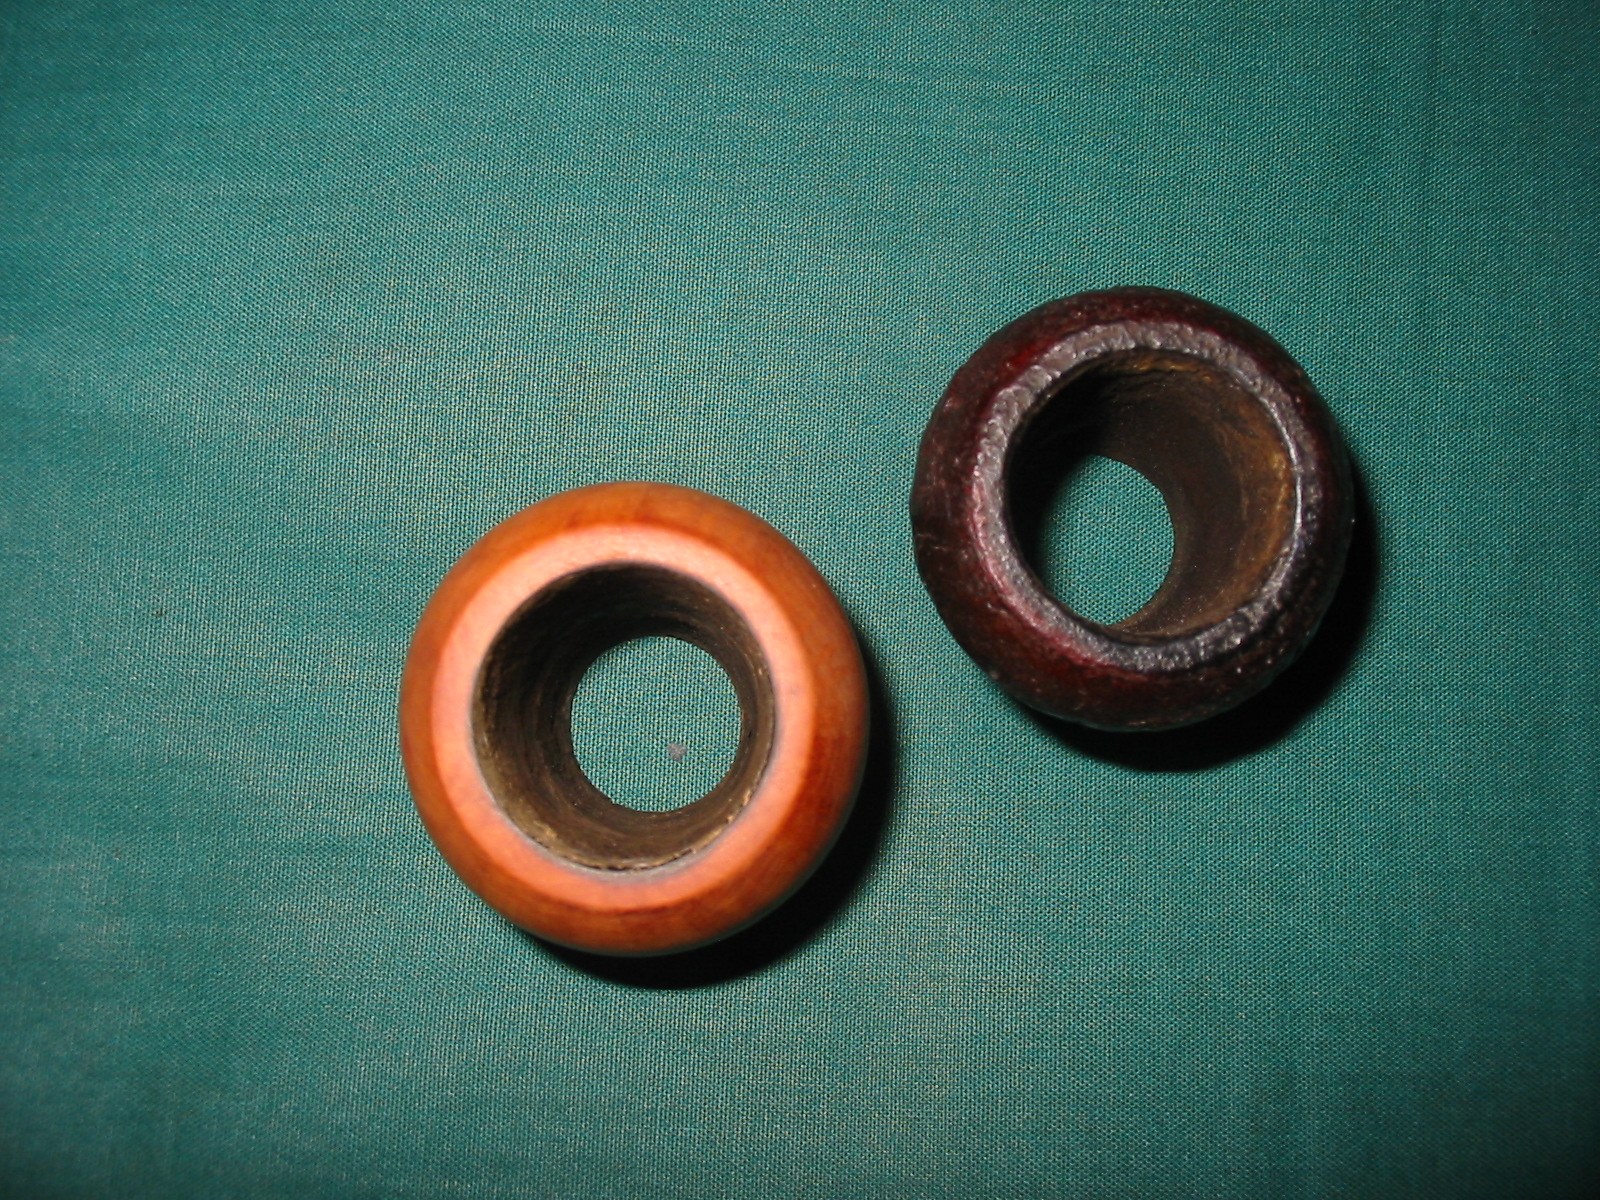
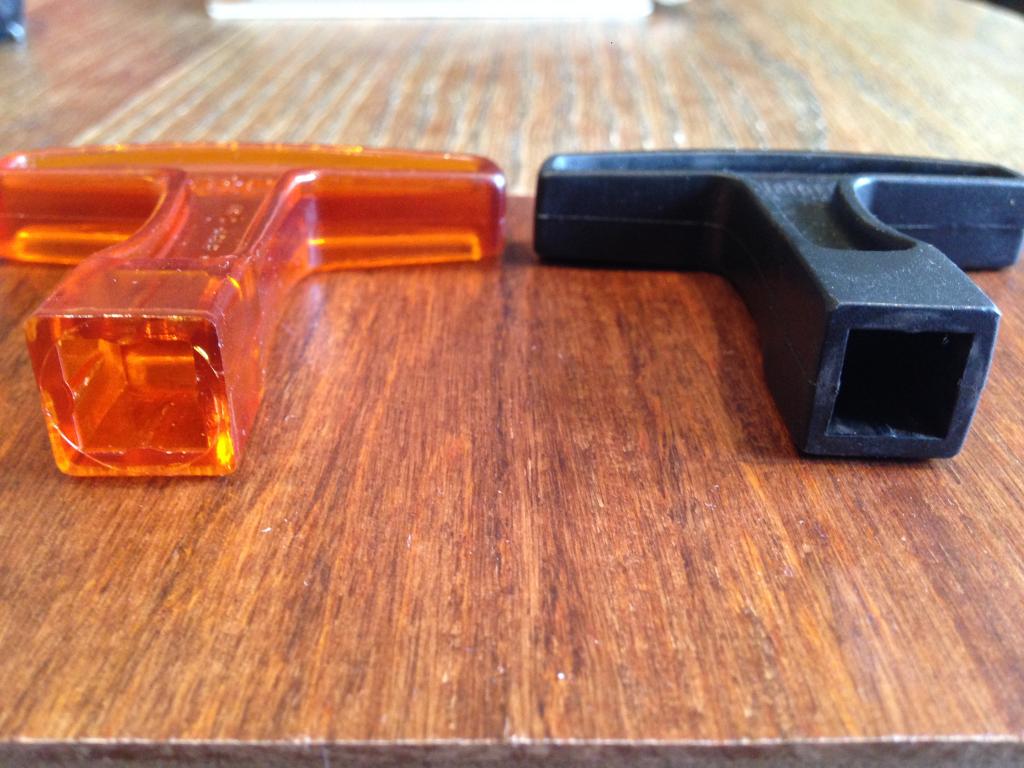
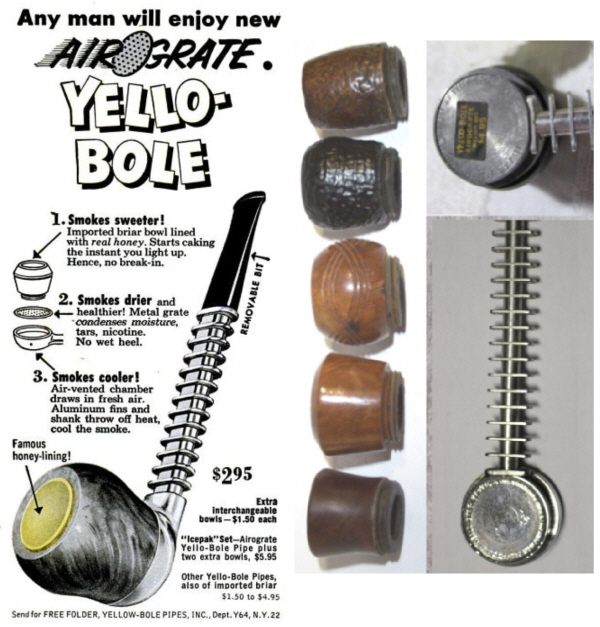
In my gift box were two pipe bowls that I initially thought were Falcon or Grabow Viking bowls but when I took them out and examined them I was surprised to see that instead of the usual bottom of the bowl found on those two brands there was a lack of a bottom of the bowl. That is correct there were just two briar tubes with a hole on the top and a hole on the bottom. I had not seen anything like that before and I have cleaned up a lot of different metal pipes. I had no idea what I was dealing with. I looked over the bottom hole to see if they had somehow been modified but it was clear that they had been manufactured this way. The bowls both had a cake but the cake on both was not even and it was crumbling. The rims on both were dirty and had a carbon buildup. The bottom threaded portion was tarry and dirty as well and the rim on the bottom of the bowl was also caked with carbon and tars. Both bowls had a varnish coat. The one on the sandblast bowl was in pretty good shape but the one on the smooth bowl was flaking. Both would need to be removed as I did not like thick varnish coats on the bowls I refurbish and smoke.

The fact that I had not seen these kinds of bowls before was motivation to me to see if I could find out what kind of pipe they came from. I wanted to see if I could then find a stem and base unit for them. I searched the net to see what I could find. My go to resource for metal pipes is Smoking Metal http://www.smokingmetal.co.uk/index.html . I use the resource when I am researching information on any metal or metal style pipe. Tony Pringle has done a masterful job of collecting and cataloguing as many metal pipe variations as he can possibly get his hands on. He continues to add pipes to the collection and is open to information sent by other metal pipe smokers and collectors. I turned to Tony’s collection for information. Since I did not know the name of the pipe I was looking for I went to the Photo Index. I went through many photos before I came to the end of the photos. There in the Y section I finally found what I was looking for – the Yello Bole Airograte pipe. There I saw photos of the bowl style that I had in my hands.
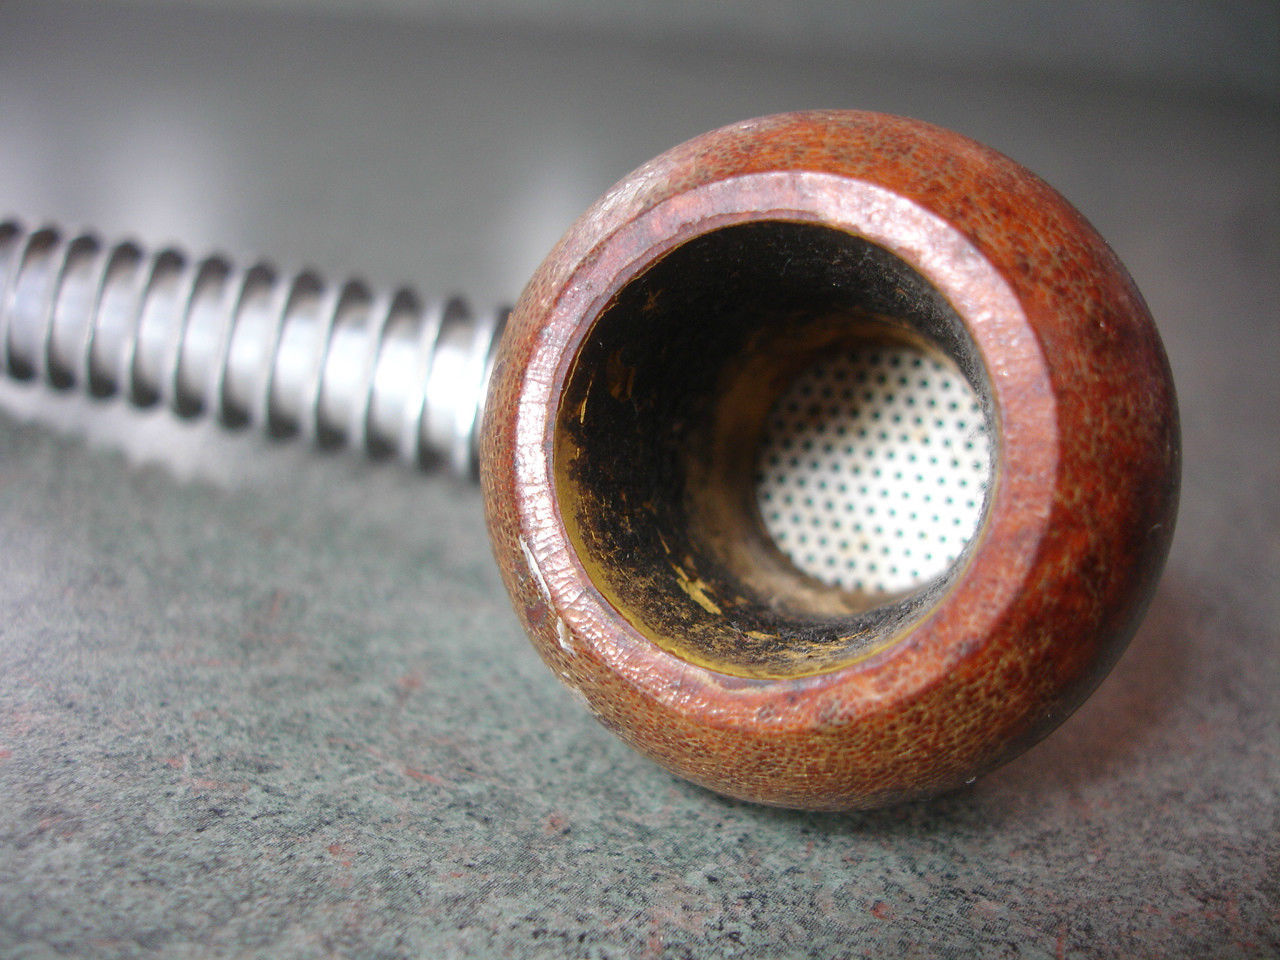
From there I did a Google search on Airograte pipes and found quite a bit of information. I found the advertisement below that showed the basic break down drawing of the way the bowl functioned. I also saw what the base and stem looked like. In the second photo below I saw more clearly how the system worked. A screen/grate sat on an inset shelf in the base and the bowl screwed over the grate and into the base. The grate was what the tobacco sat on when packed in the bowl and smoked. The holes in the grate kept the tobacco shards from going into the airway. The base collected the moisture from the smoke before delivering a smooth dry smoker the pipe man.

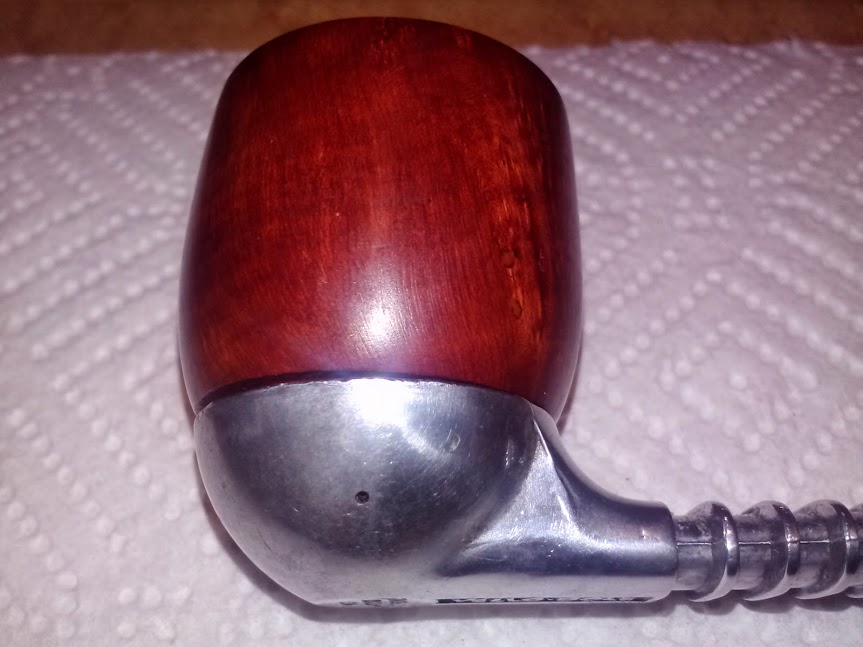
I posted on both Smokers Forums and Pipe Smoker Unlimited (PSU) Forums to see if anyone had a Yello Bole base unit that they would be willing to trade. I also searched on Ebay and found a few but all had extra bowls or were priced beyond what I wanted to pay for one. The one thing they did was show clearly the look of the pipe with the bowl in place.
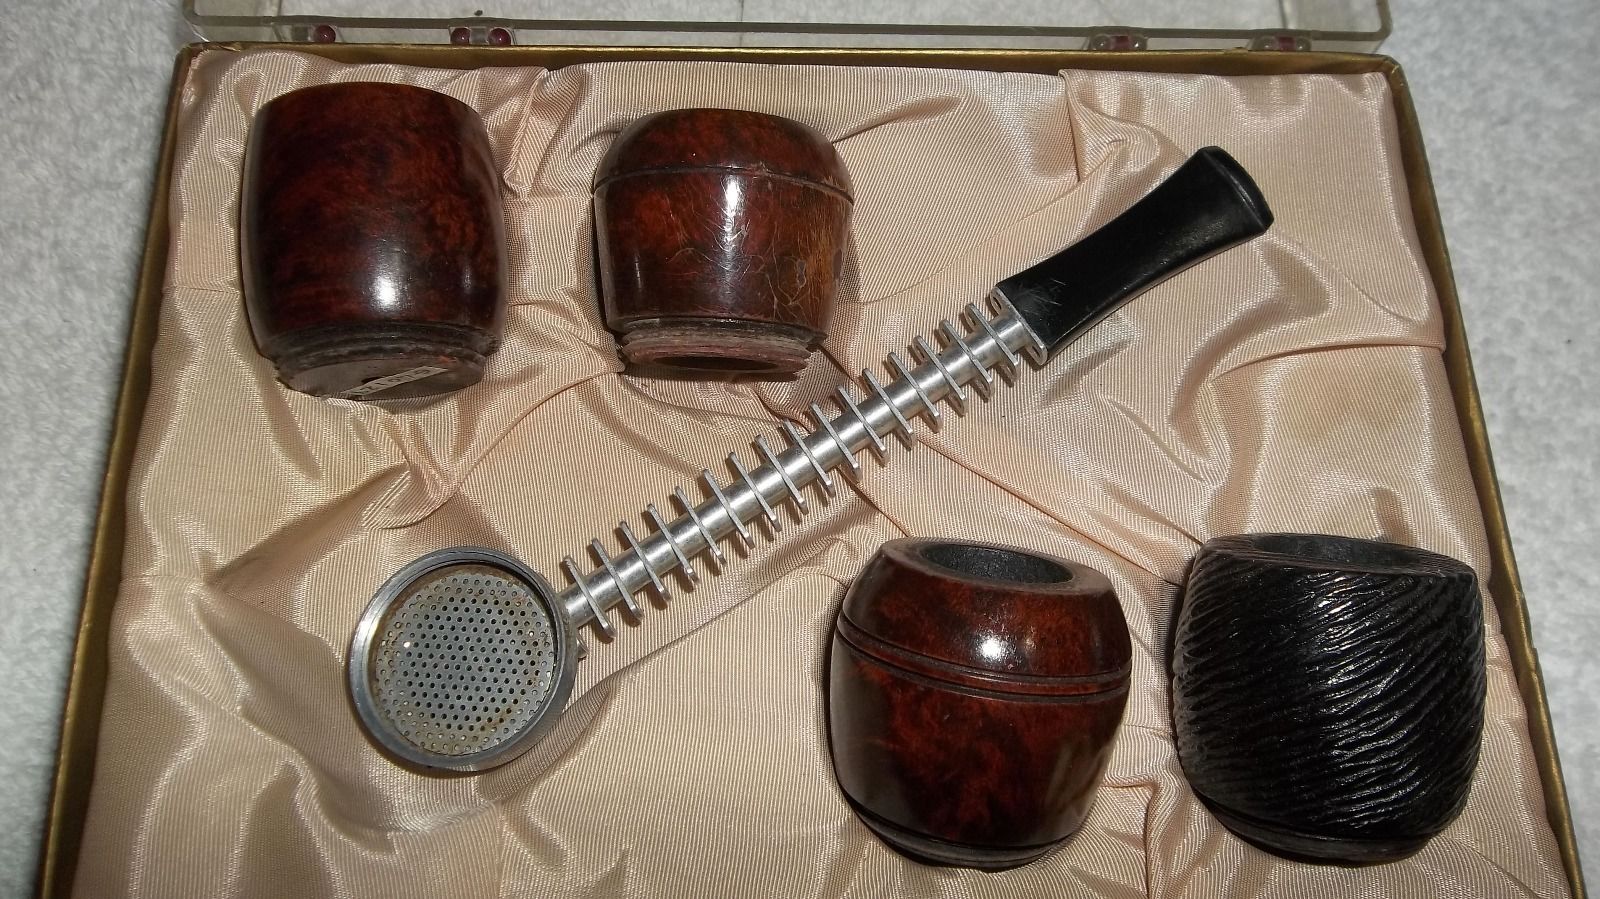
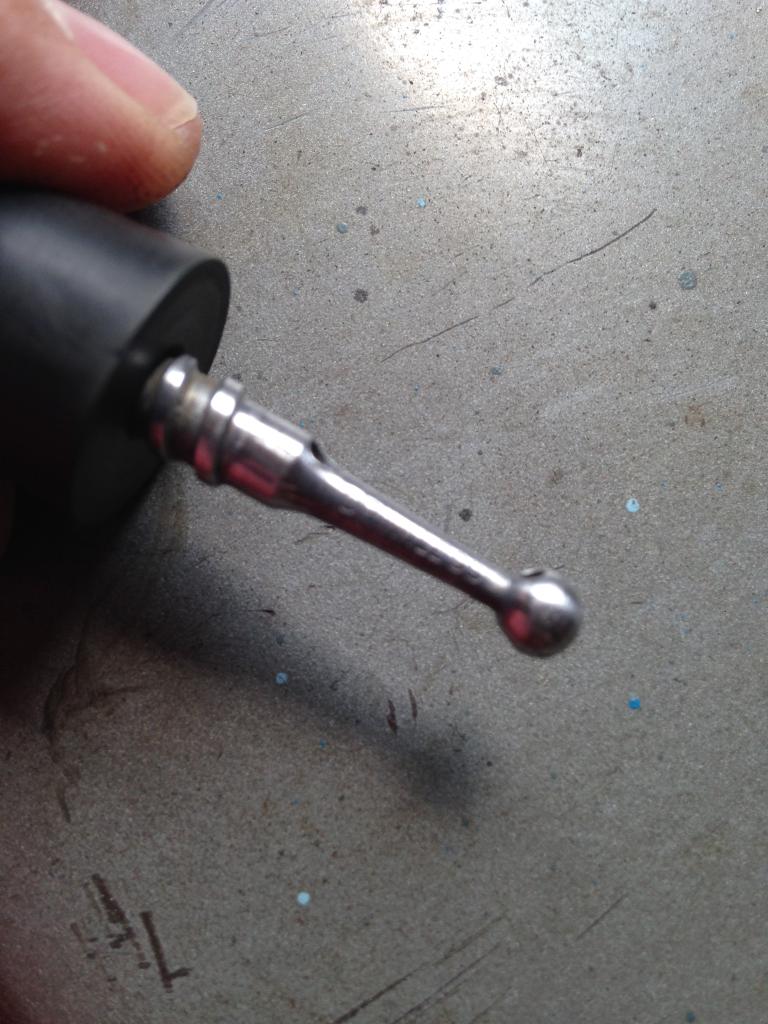
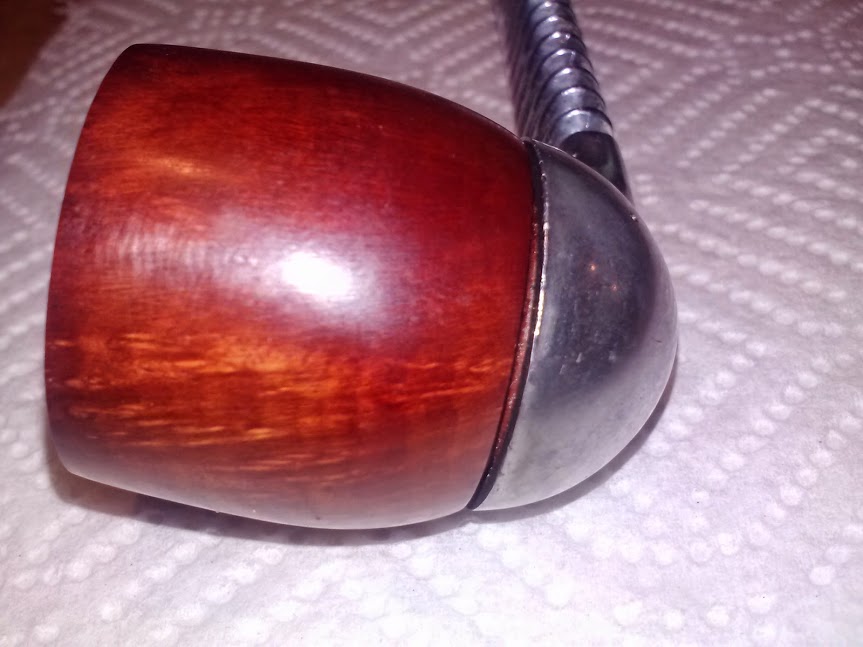
While I was prowling on Ebay one of the members on PSU, Father Tom no less, sent me a private message saying that he had one that I could have. We dickered back and forth and he shipped the base to me and I shipped a refurbished poker to him. I have included two photos of the pipe and base that Tom has sent. Now the wait begins. Thanks Tom, I look forward to seeing what this old-timer smokes like once I have the parts all in one place.
So while I am waiting I cleaned up the two bowls. I reamed them both with a PipNet reamer. That was an interesting experience. I held them over the ash can and twisted the reamer to scrape away the carbon. The ash fell out of the hole in the bowl bottom. I cleaned the rims with cotton pads and Murphy’s Oil Soap to remove the buildup and tars that covered both. I scrubbed the sandblast bowl with a soft bristle tooth-brush and cotton swabs. In the photo below the newly cleaned rims are visible.
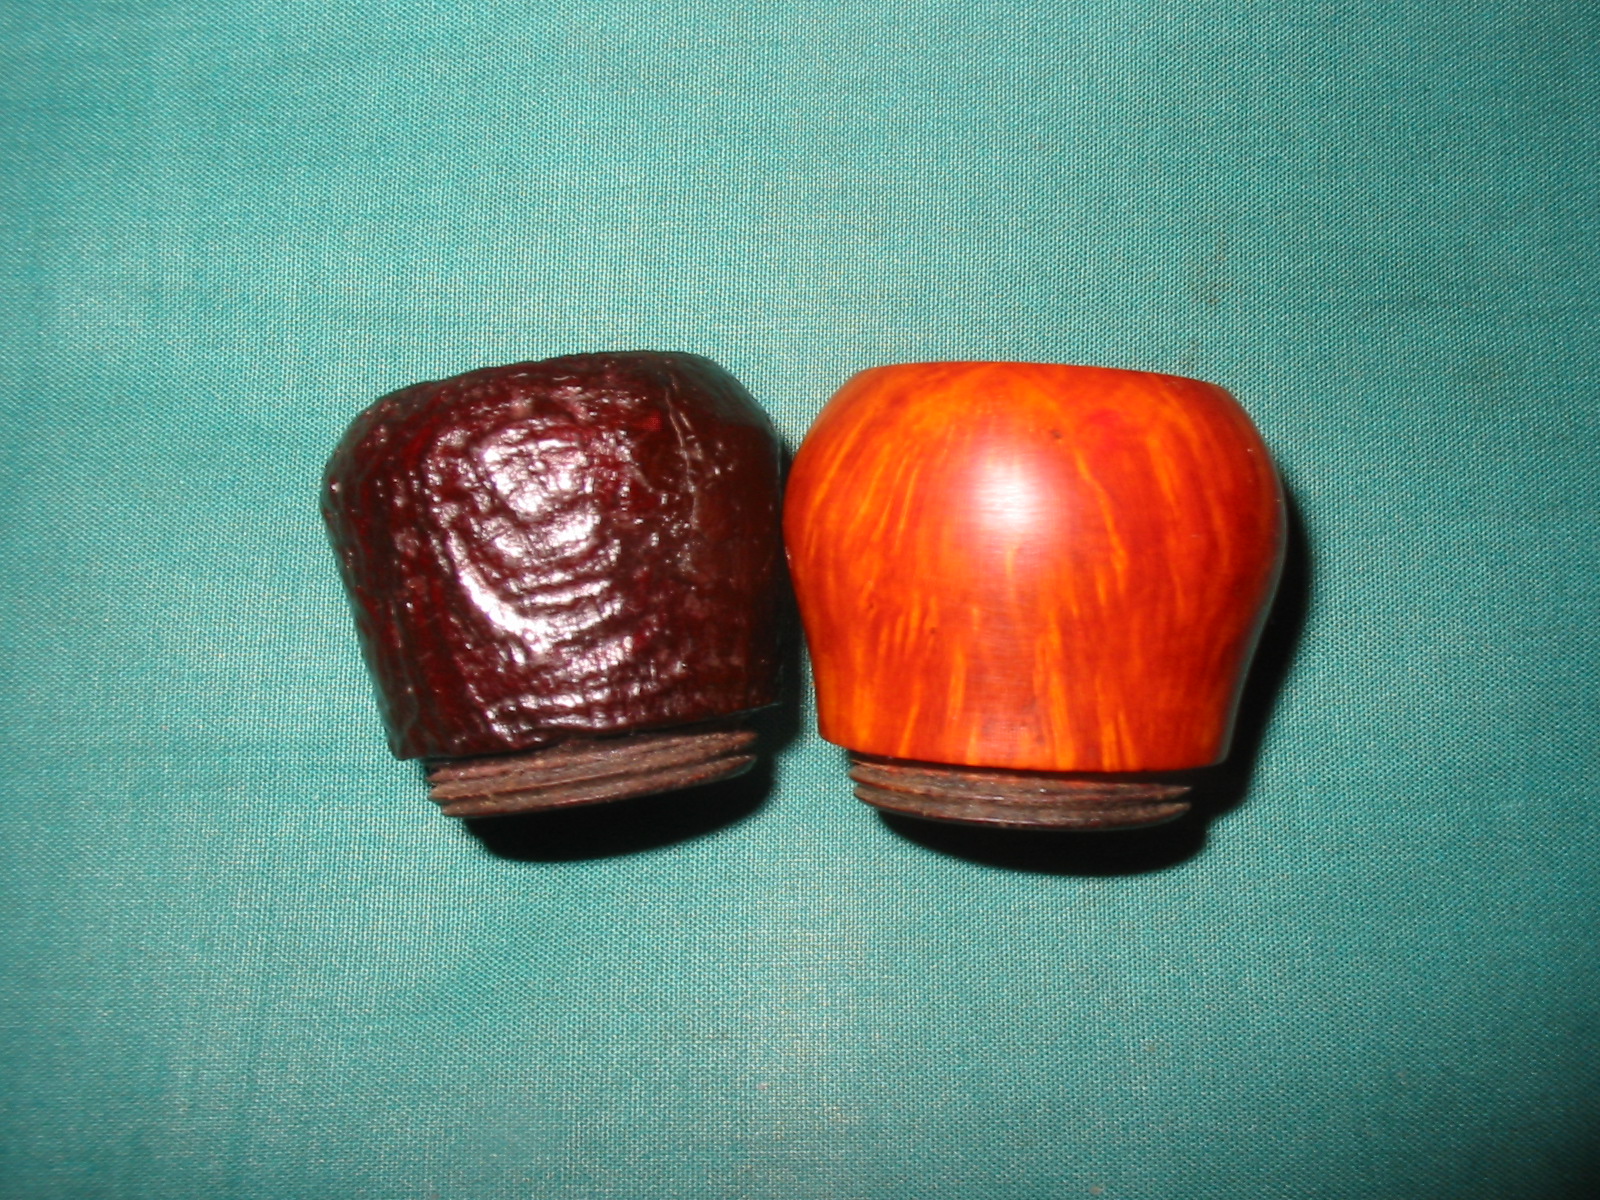
I scrubbed the bowls with acetone on cotton pads to remove the varnish coat. It took quite a bit of scrubbing but I was able to remove the varnish from both bowls. The briar on the smooth bowl is flawless and quite nicely grained. On the inside of both bowls once I had cleaned them the familiar yellow coating was visible and gave confirmation to my deduction that they came from a Yello Bole pipe.

I scrubbed the bottom rims with alcohol on cotton swabs until they were both clean. I gave them both a light sanding with a medium and fine grit sanding sponge.

I buffed the bowls with White Diamond and gave the smooth bowl several coats of carnauba wax and buffed it with a soft flannel buff. I put Halcyon II wax on the sandblast and used a shoe brush to buff it once it had dried. The finished bowls are shown below. I decided to leave the smooth bowl unstained to see how it will colour during use. I couldn’t wait to work on them or to write this up until the base comes. But once the base arrives I will take some photos of the bowls in place. Until then I will wait – and try to be patient for Canada Post to get the package to me.