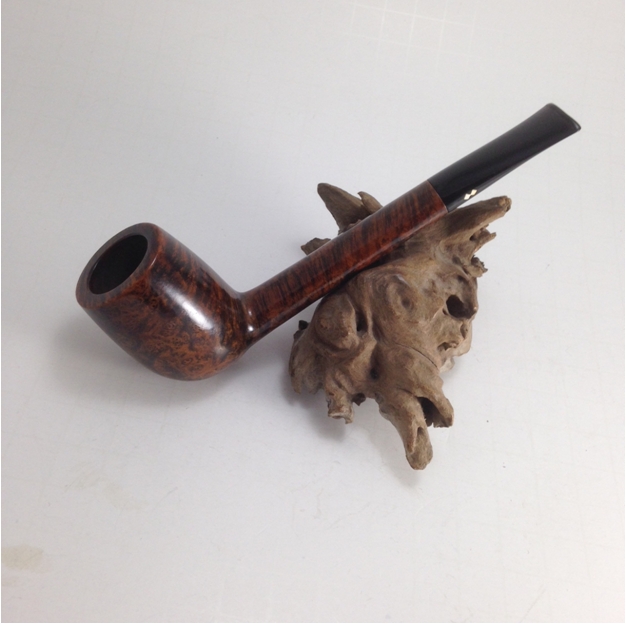
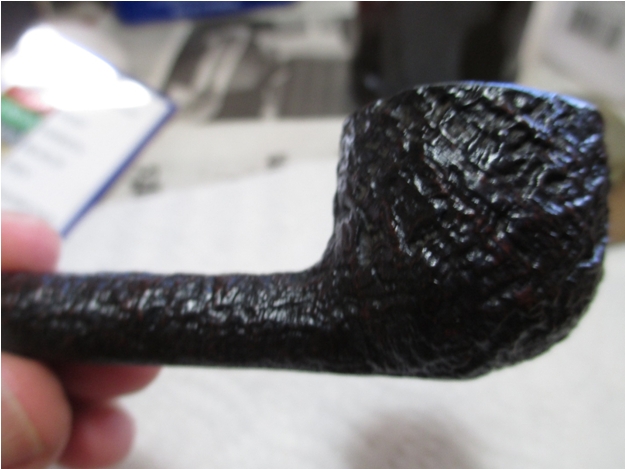
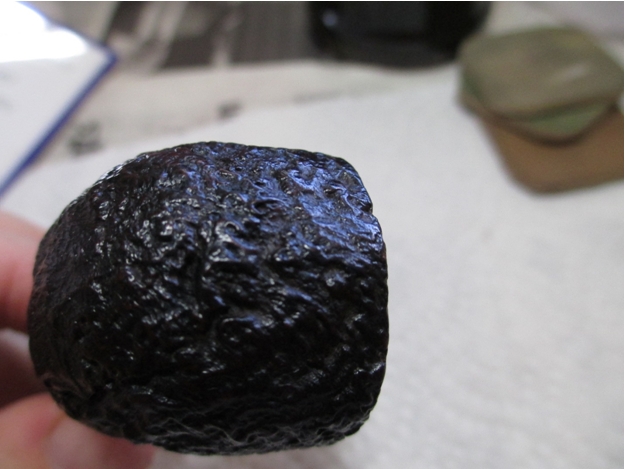
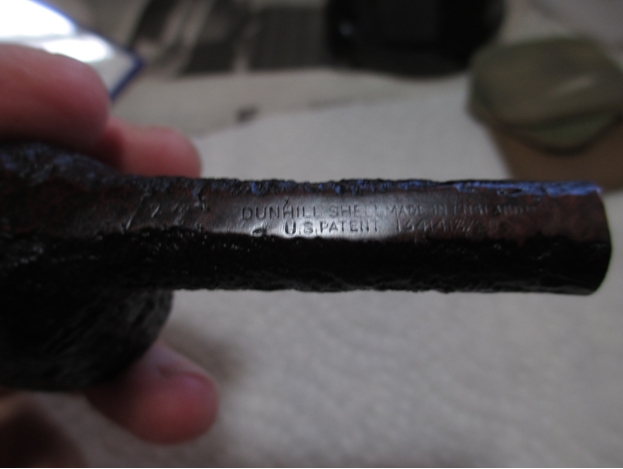
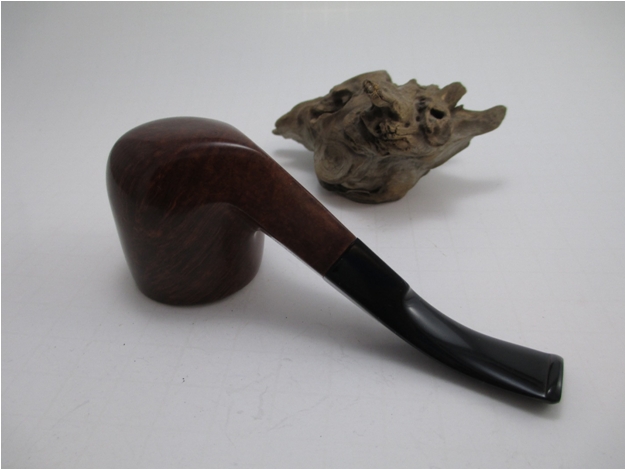
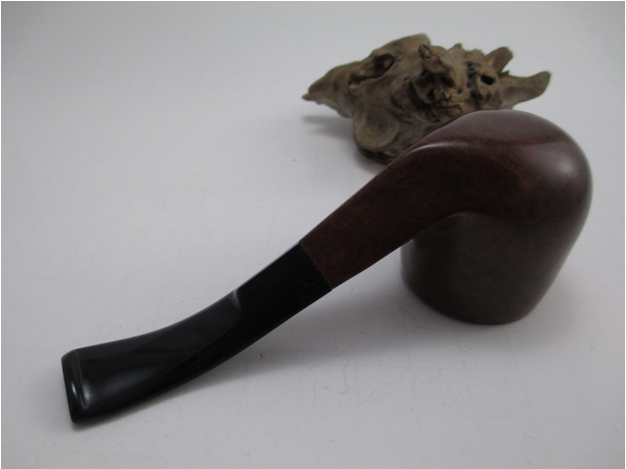
Tag Archives: waxing a stem

Restoring pleasant lines on a damaged stem – home grown hack job repaired


Blog by Steve Laug

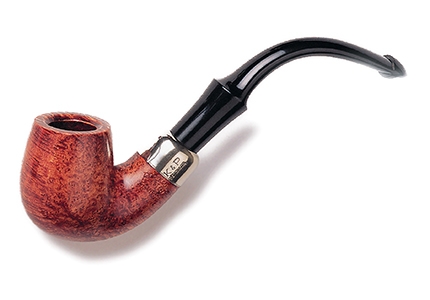
I have wanted to focus a blog on reshaping a damaged stem for a while now but did not have either the stem or examples I needed to document the process. The Everton pipe I restored recently provided the example and it was a matter of documenting the process in a broad way that was applicable to whatever stem you may have that needed to be reworked. So while the photos may be the same as those used in that blog on the Everton the documentation regarding the stem reshaping and restoration is a newly written blog.

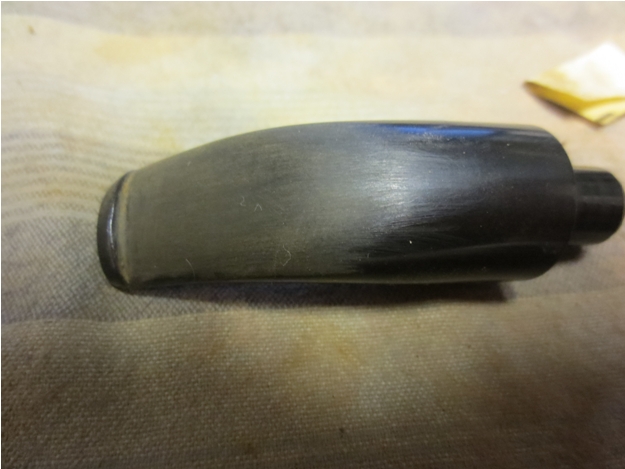
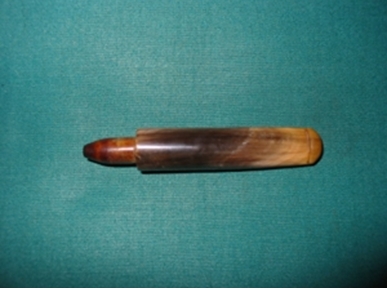
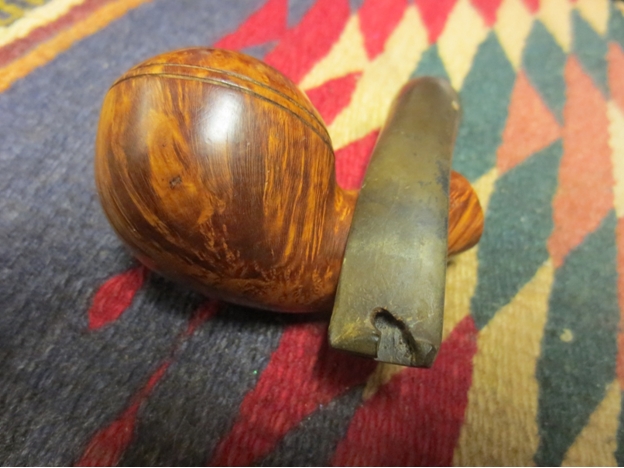
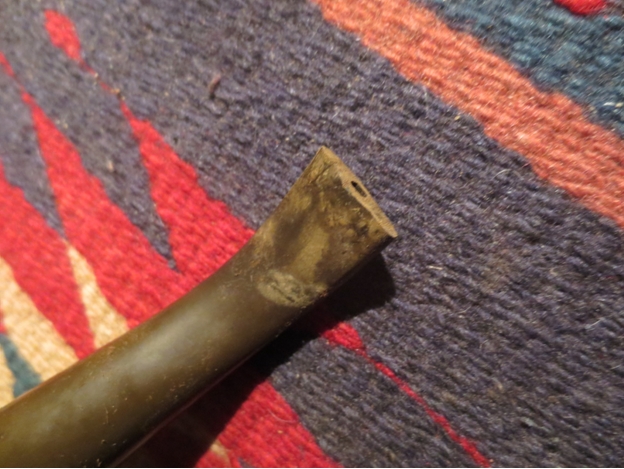
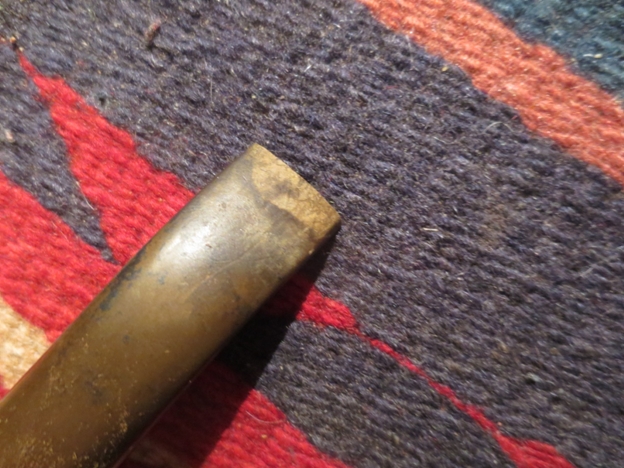
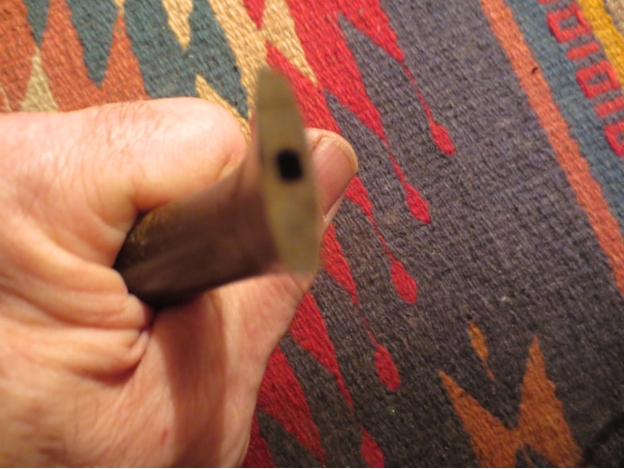
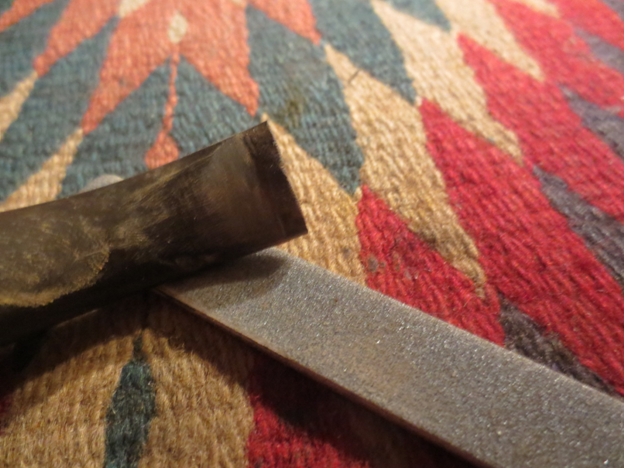
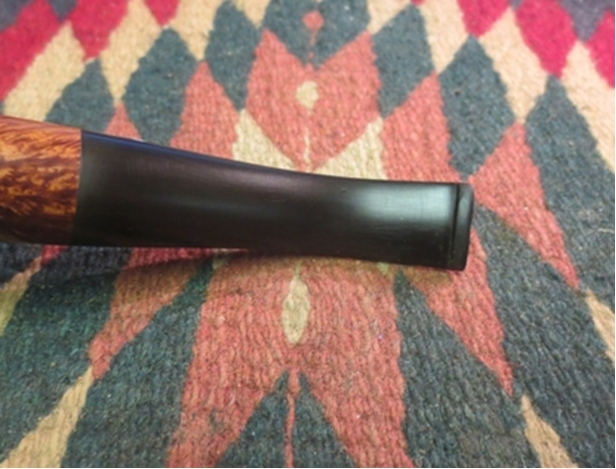
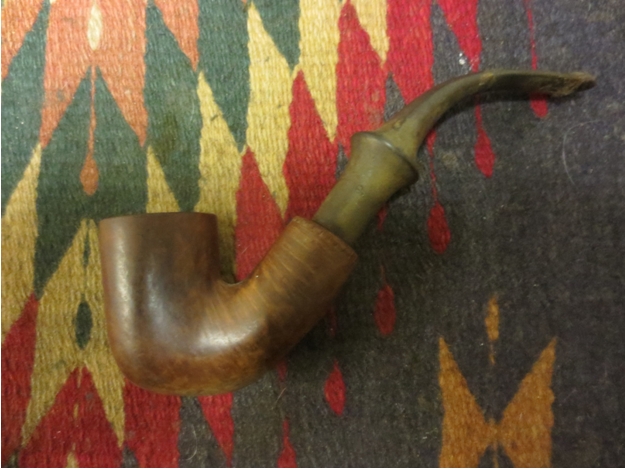
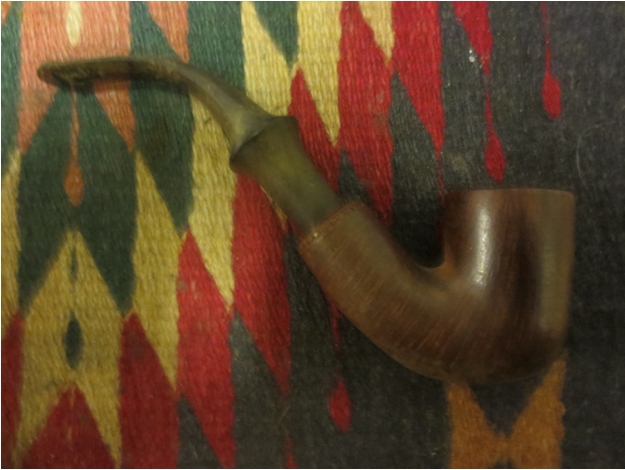
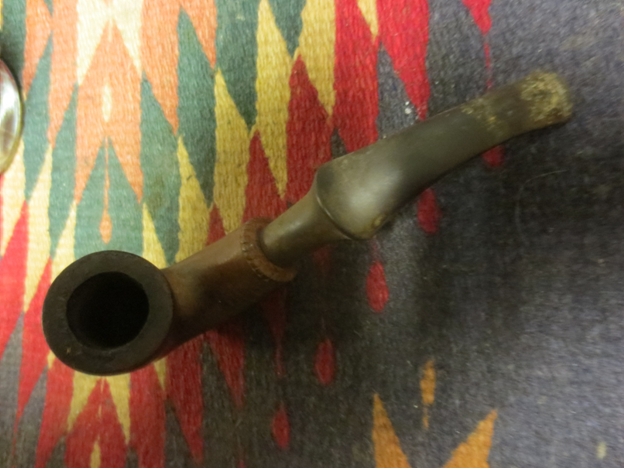
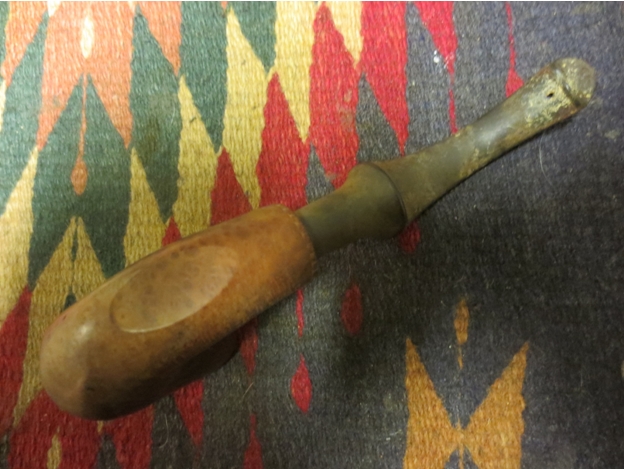
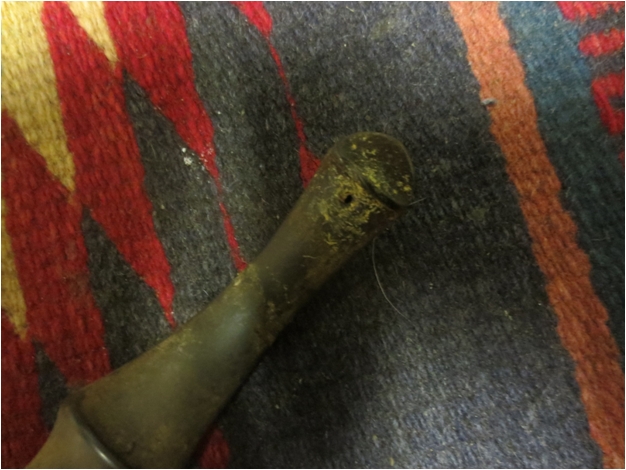
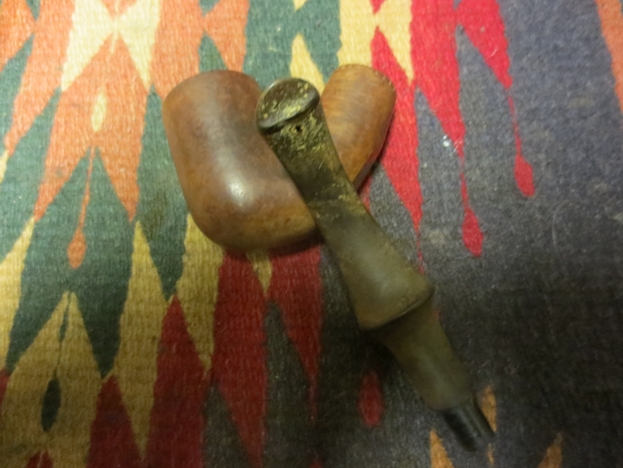
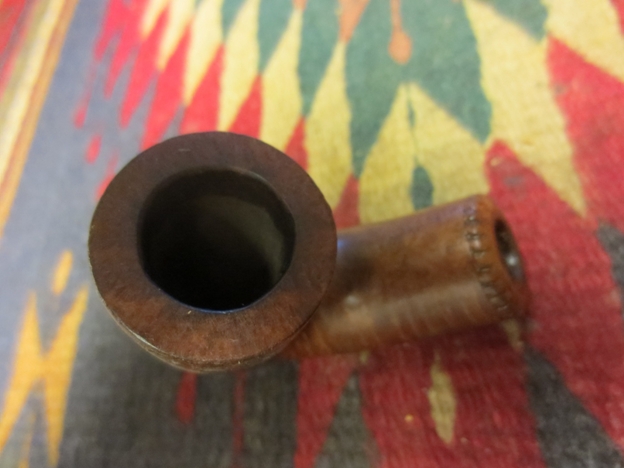
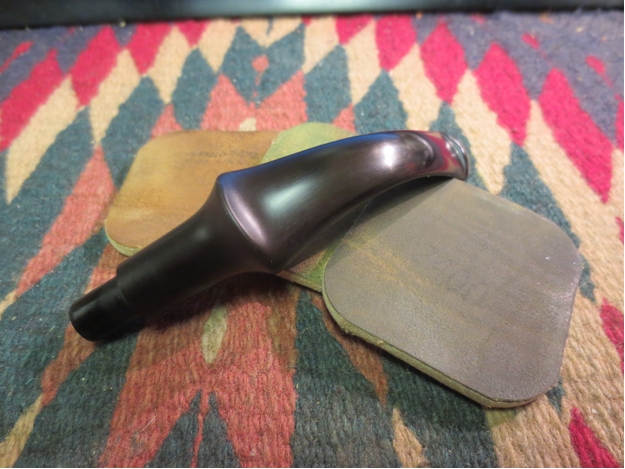
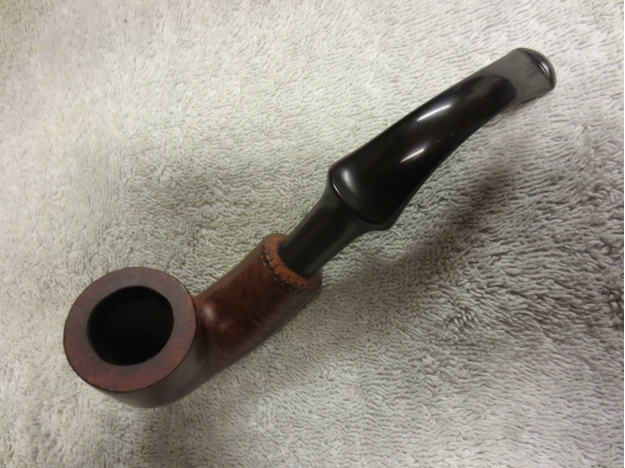
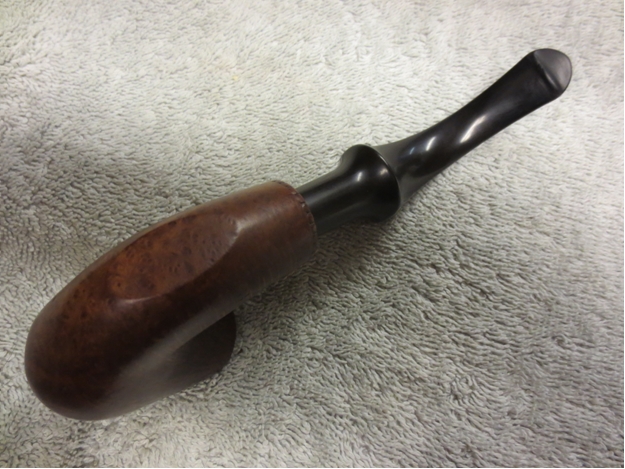
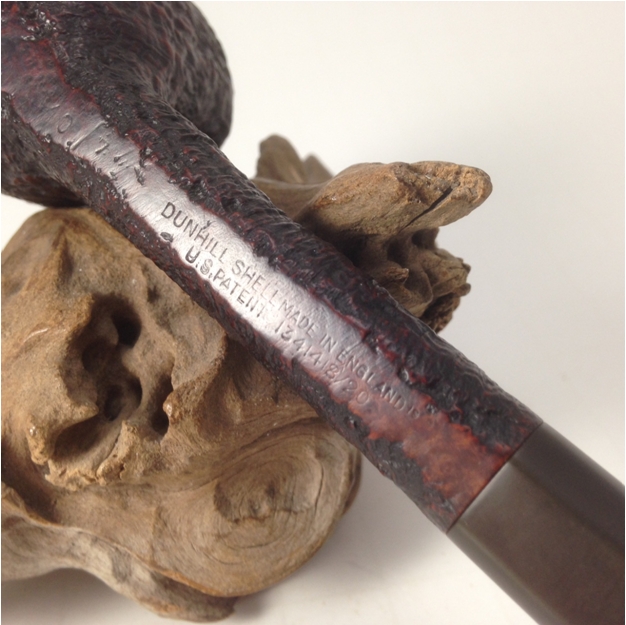
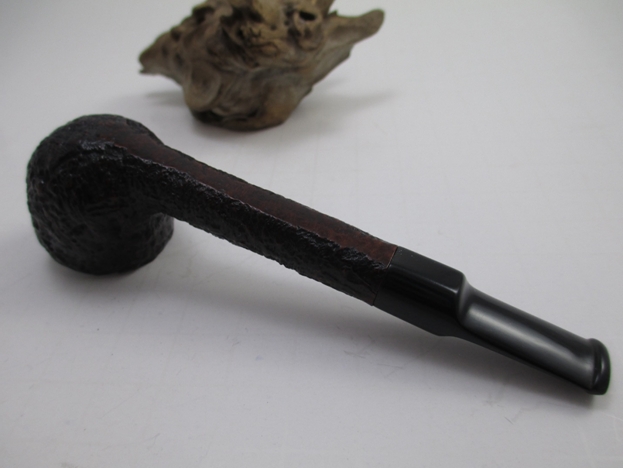
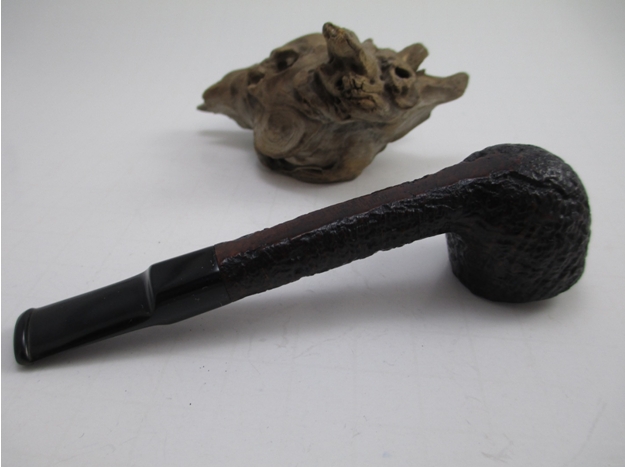
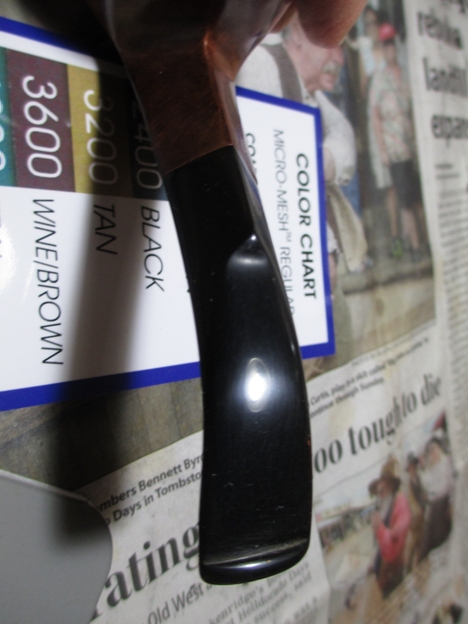
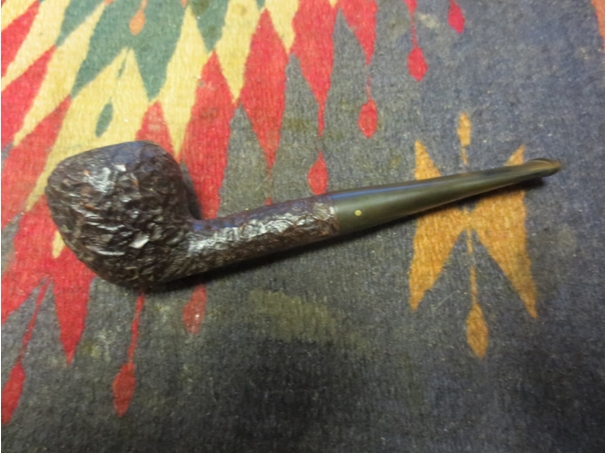
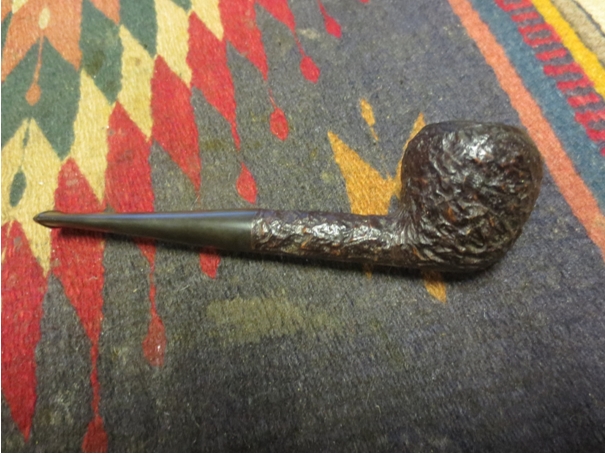
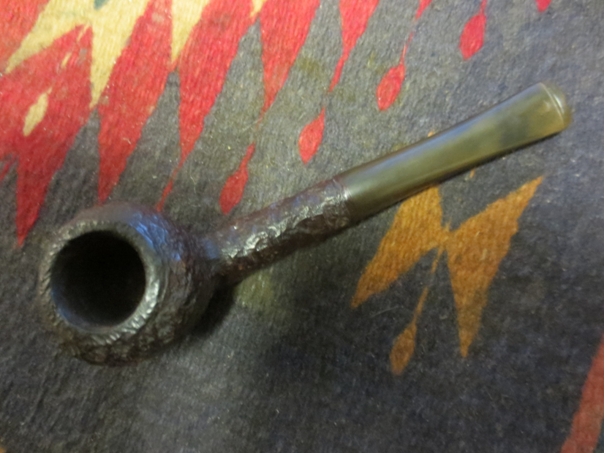
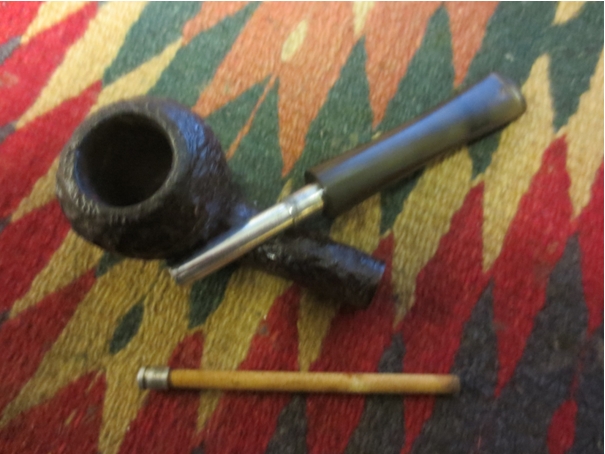
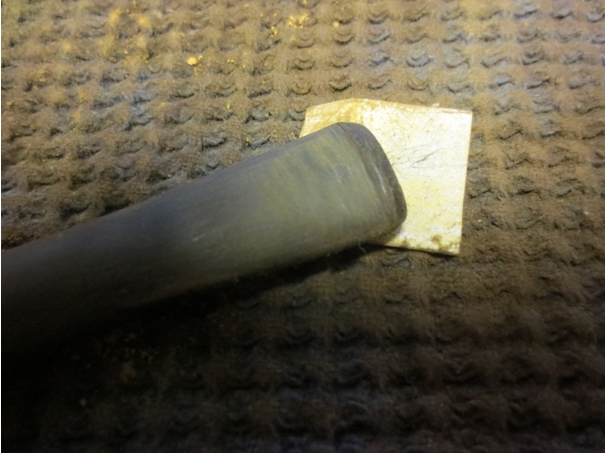
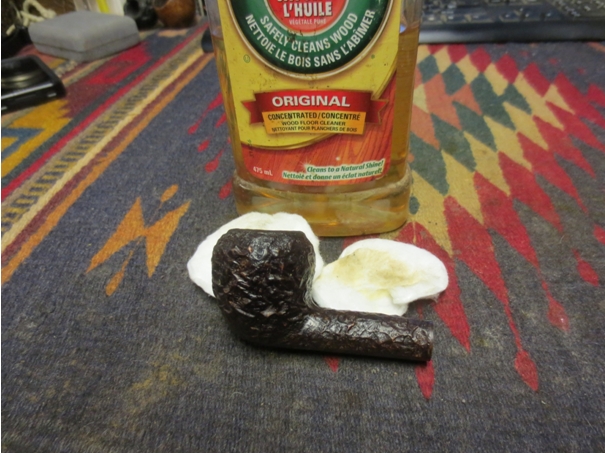
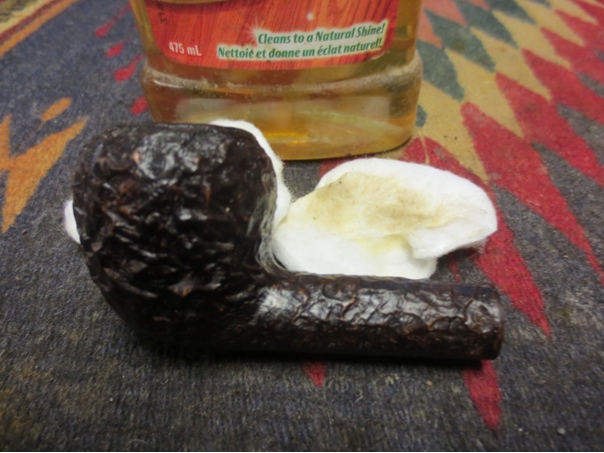
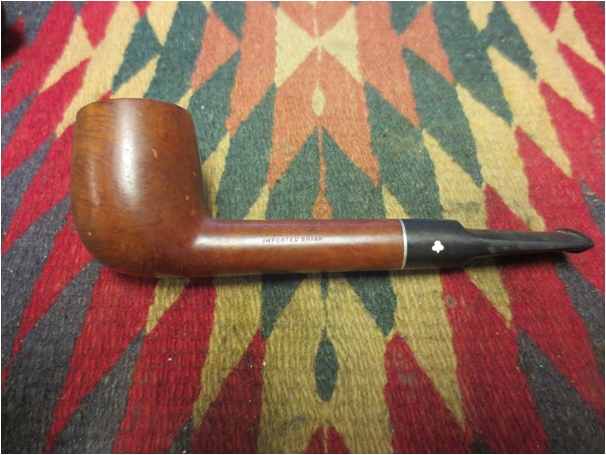
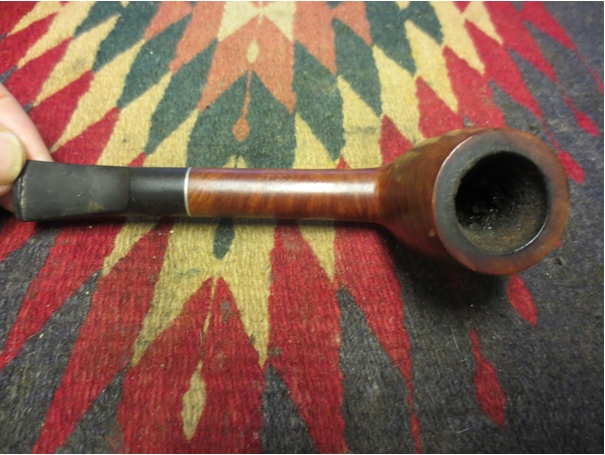
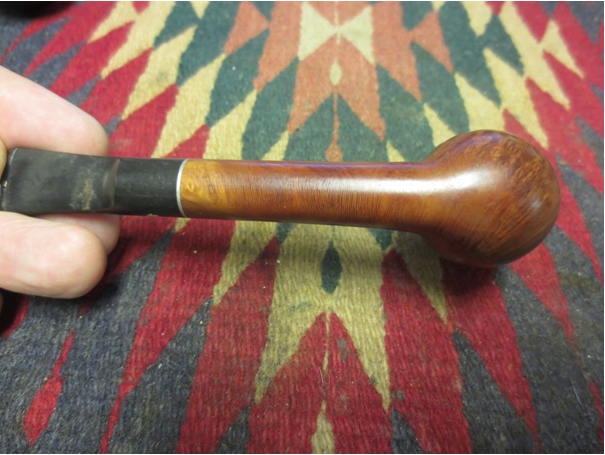
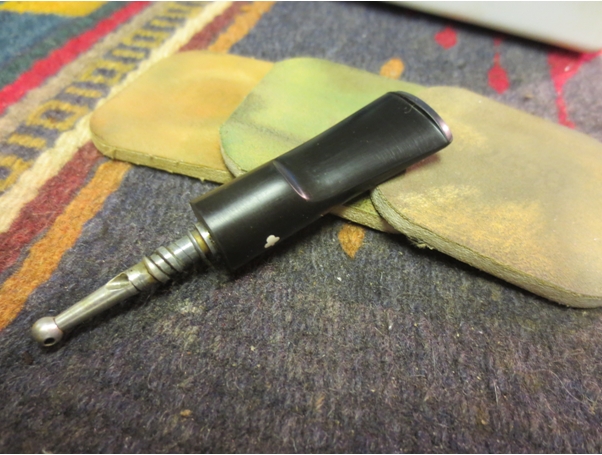
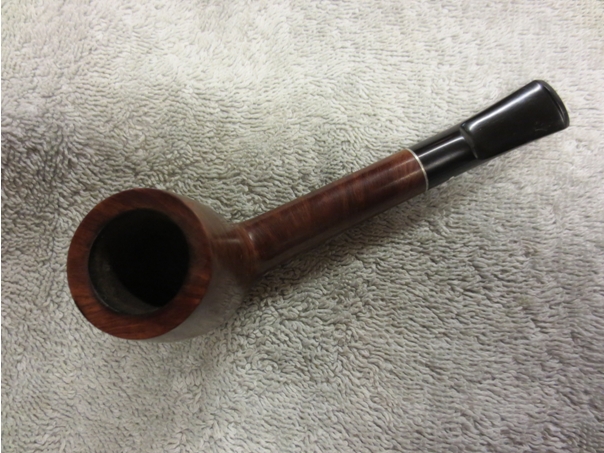
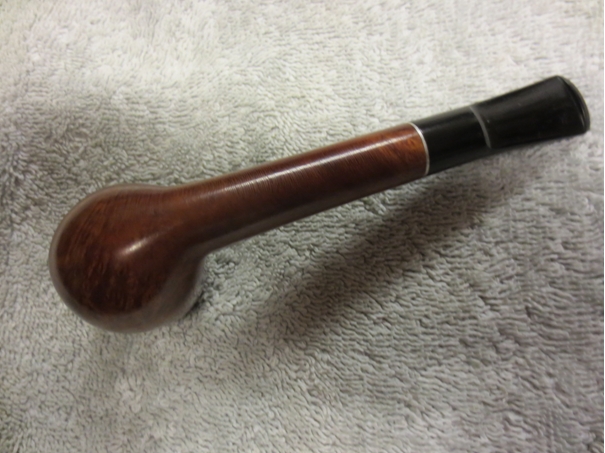
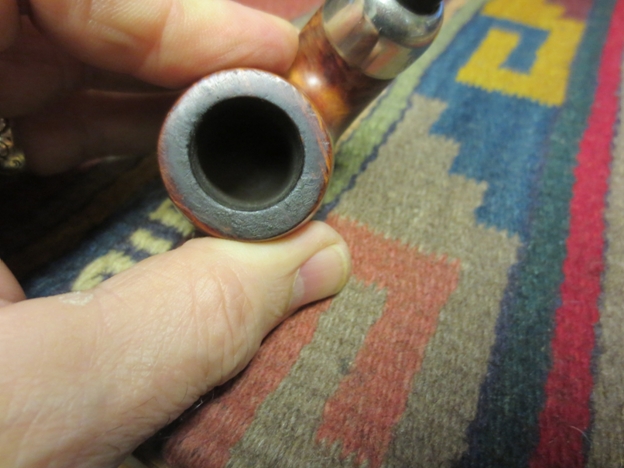
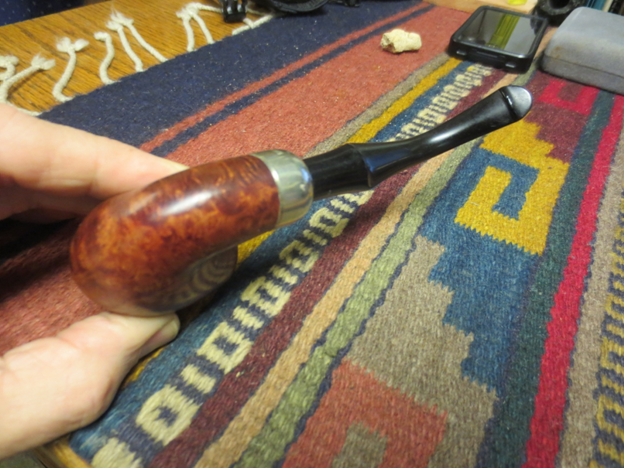
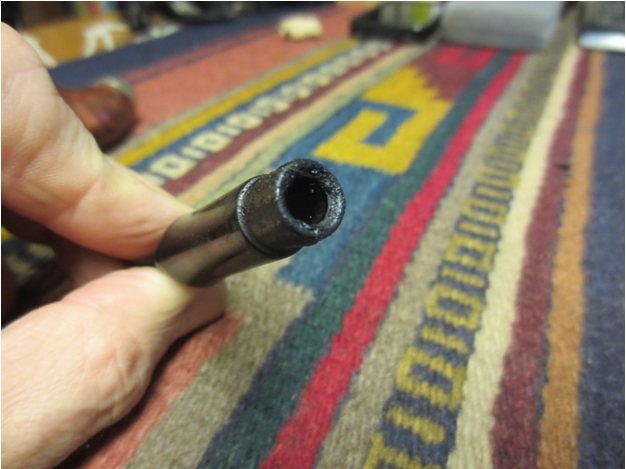
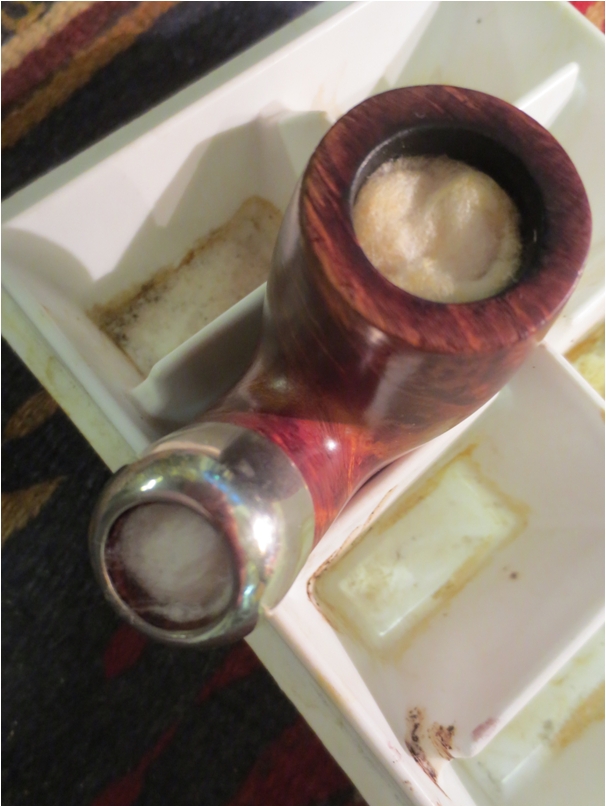
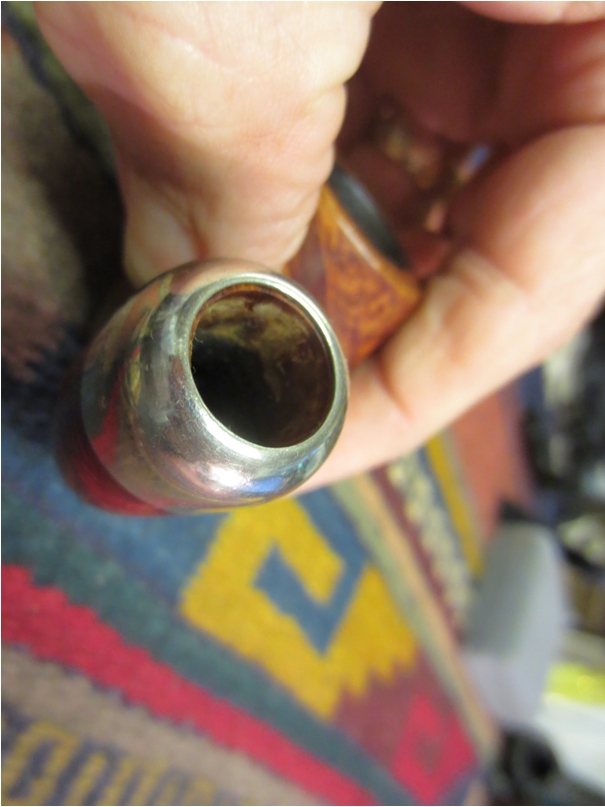
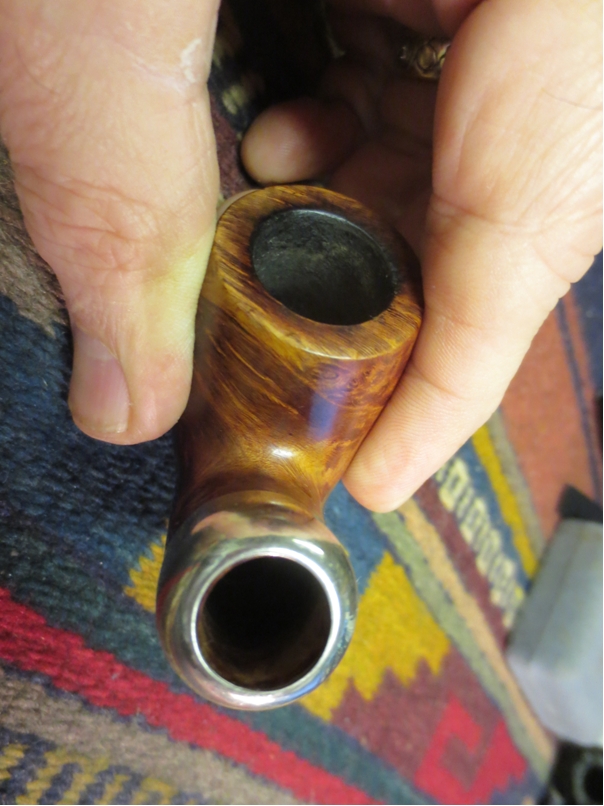
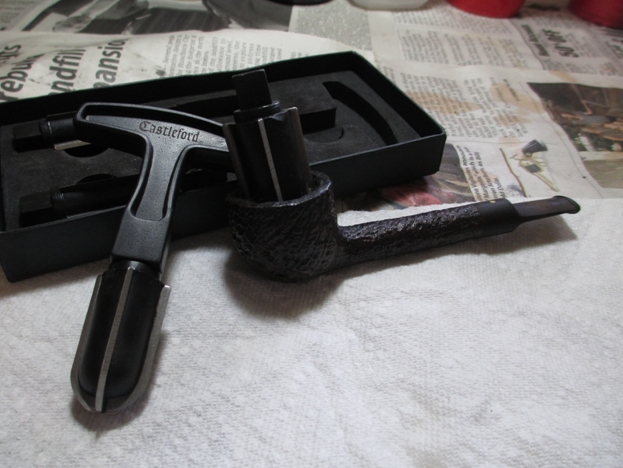
If a stem is too thick to your liking please don’t afflict the kind of horror on it that this older BC pipe experienced at the hands of a previous owner. Obviously the stem felt too thick to his liking and he took matters into his own hands. Hey, what’s to lose? It is just a matter of cutting back the thickness to the degree it meets the expectations right? Wrong! In many, many ways that is just wrong. It is far more than just hacking off material to get the “right” thickness. The taper needs to be adjusted, the flow and lines of the pipe stem need to be considered in the process. Trying to keep the surface smooth and not rippled are just some of the challenges. Well, this individual figured that cosmetics, flow and appearance made no difference whatsoever as long at the thing felt better. In my mind the cosmetics are not mere accoutrements to the functionality they actually facilitate the functionality. A smooth surface in the mouth feels better and is far more sanitary that the rough ridged and hacked surface visible below.Everton6 
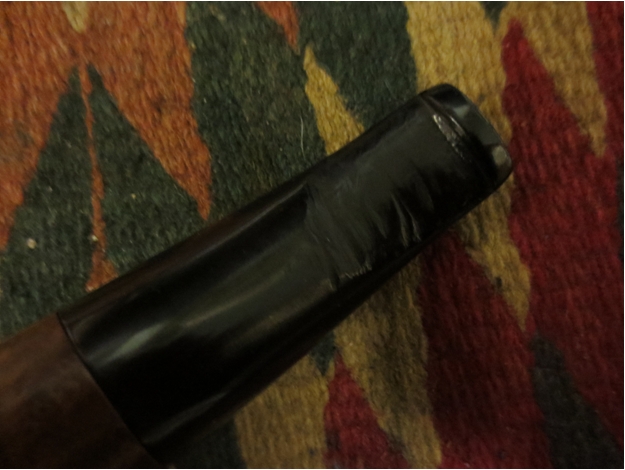
The stem “surgeon/hacker” had inflicted far more damage to the underside of the stem that he had to the topside. But both bore marks of his inordinate attention. The top of the stem had a flattened appearance that ruined the crowned look of the old vulcanite stem. It had deep gouges and marks from files and knives but the “hacker” had partially smoothed these out. Against the button there were some deep marks. It was a sheer miracle that the hard rubber was high quality and did not oxidize over time.Everton7 
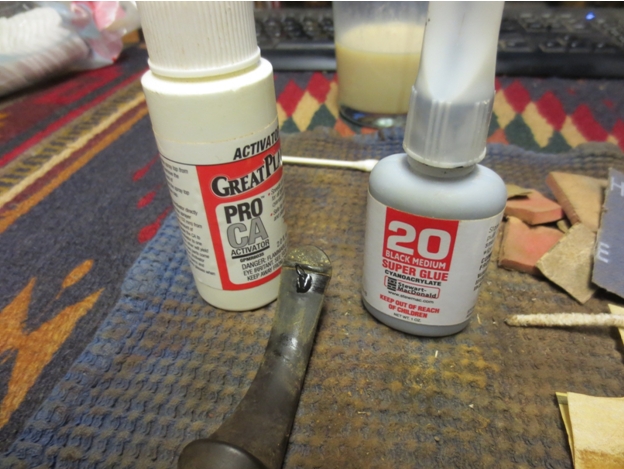
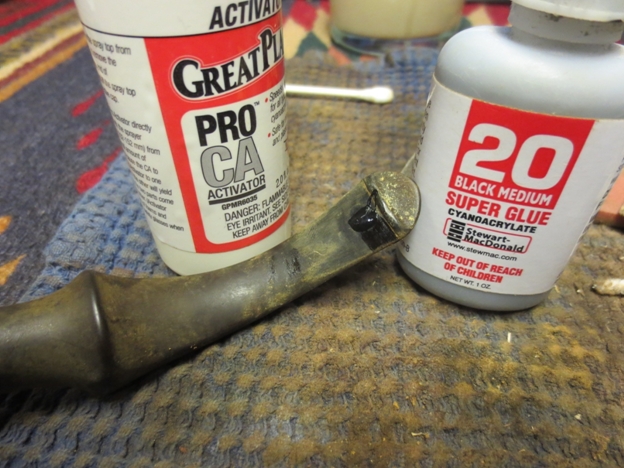
To address this kind of issue with a stem looking at repair you are left with two options – repair or reshape. To repair would involve filling the surface grooves with black superglue or epoxy and vulcanite dust. To reshape would involve more work in changing the profile of the stem to remove the damage, to retaper the stem and flow to make the transitions smooth. The choice of method really is affected by the thickness of the stem material. Would there be enough meat to the stem to allow for reshaping and reinventing the stem without compromising the strength and integrity of the stem?

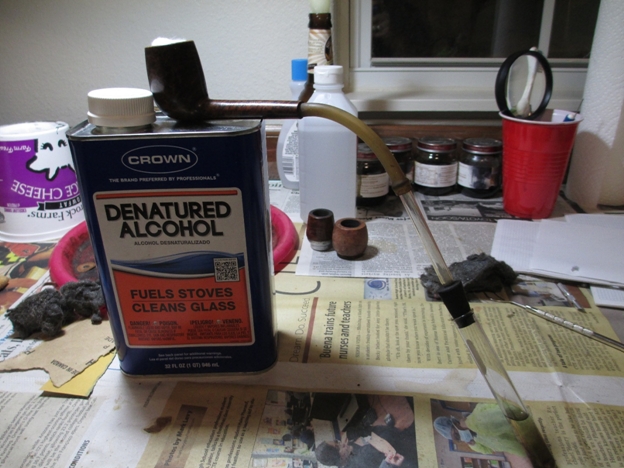
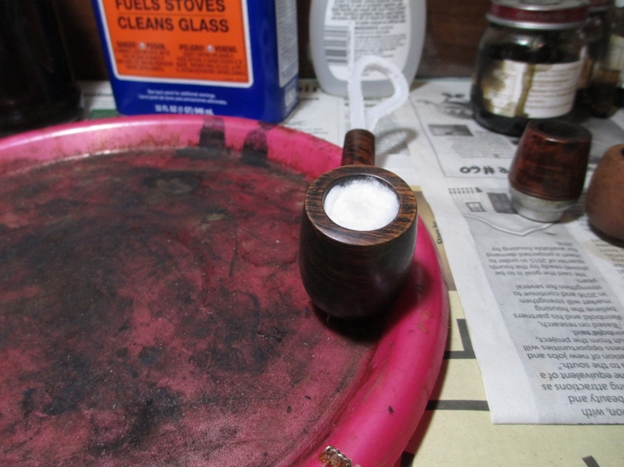
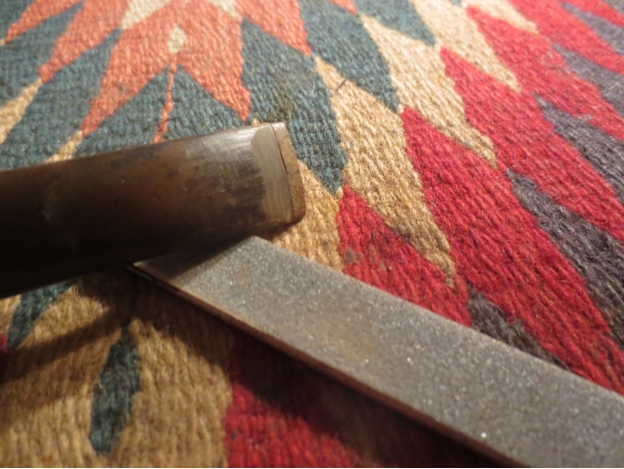
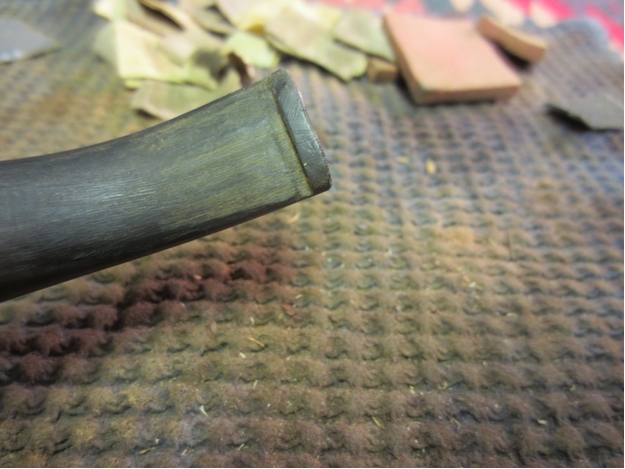
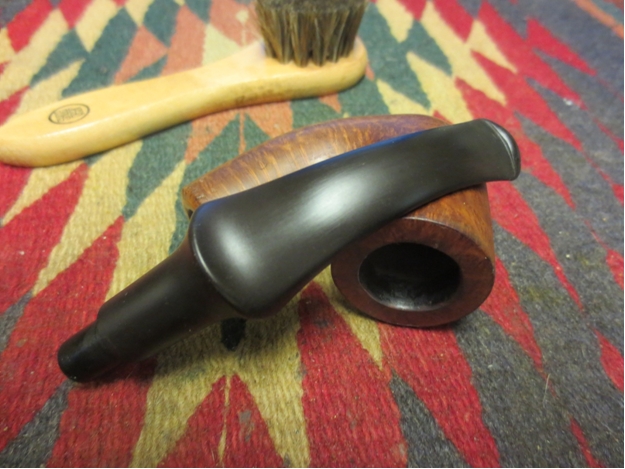
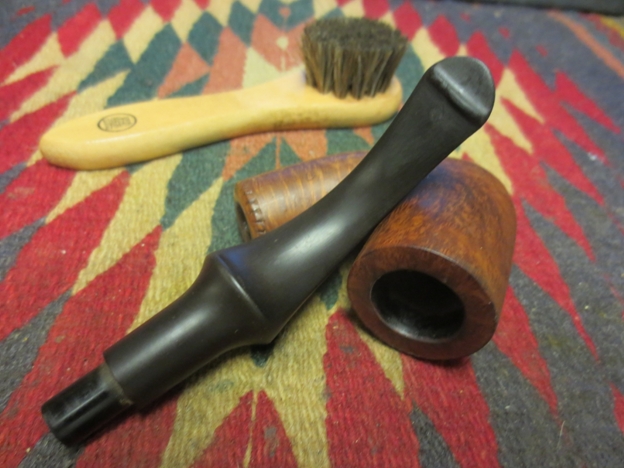
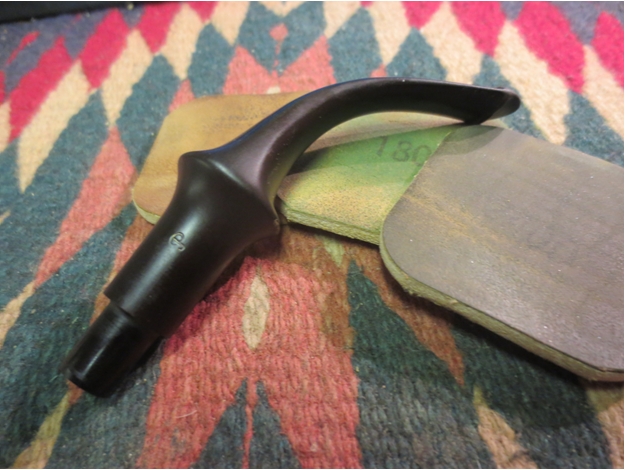
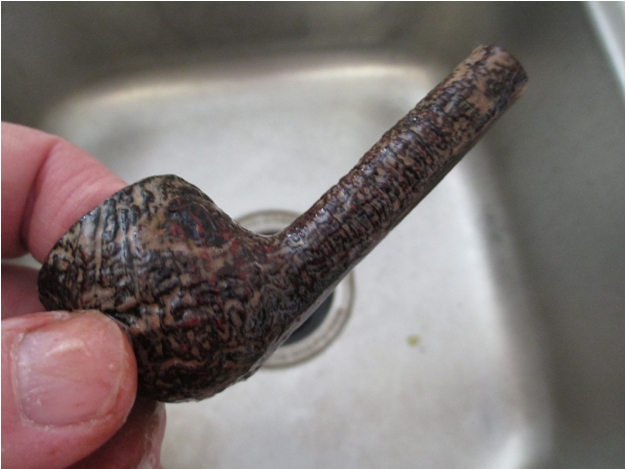
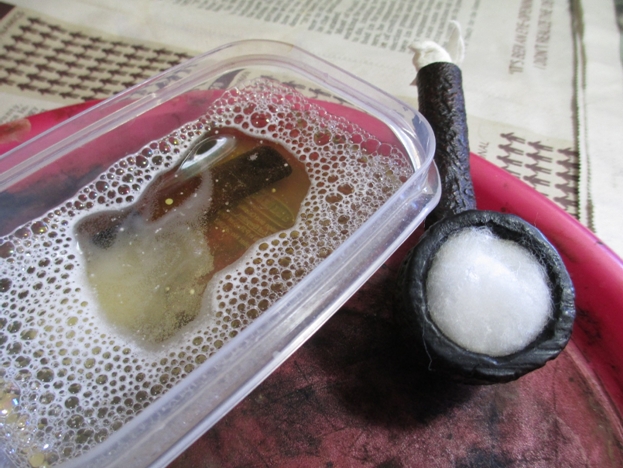
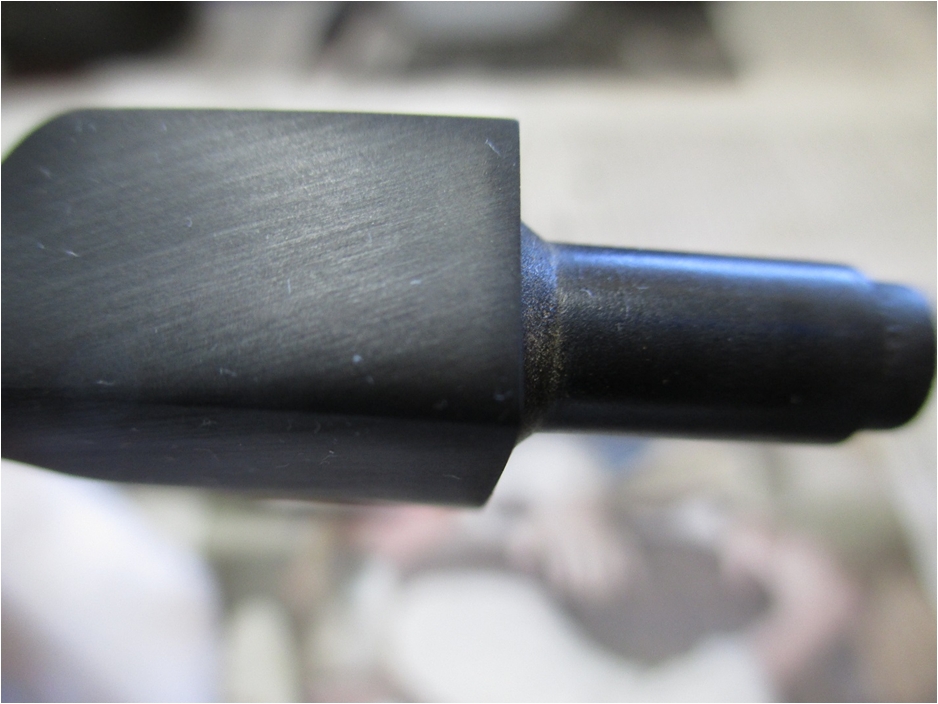
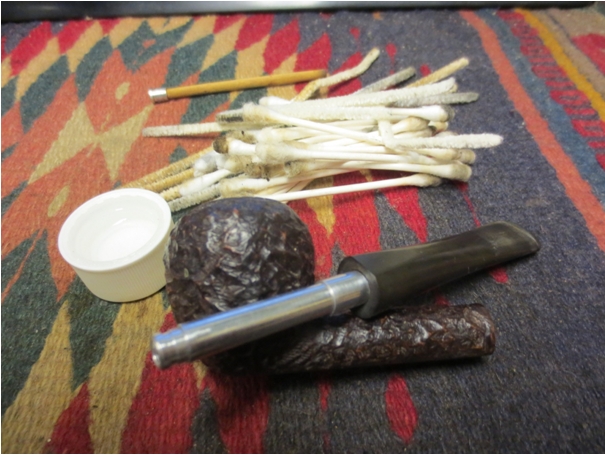
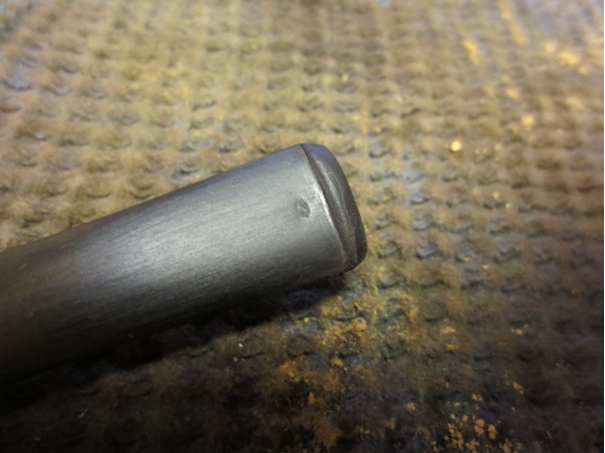
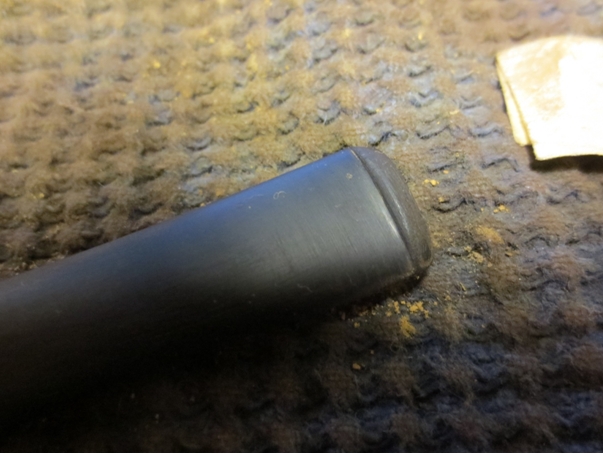
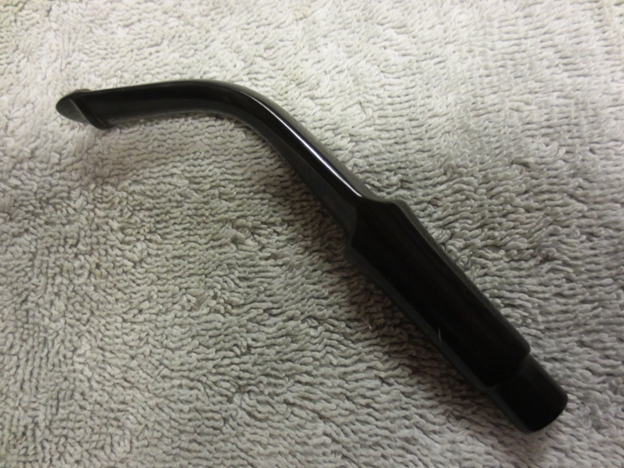
Because of the thickness of this stem I decided to reshape it rather than repair it. Even the deepest gouges could be removed and the look and flow of the stem adjusted to look very close to the original. The adjustments would also make the thickness in the mouth better. I started the process with 180 grit sandpaper. Some would think that grit was overkill but the overall damage to the stem surfaces demanded this drastic grit to cut deeply enough to remove the damage. I sanded it enough to remove the surface cuts on the top and bottom sides. In the photos below of the underside and topside of the stem the deep gouges remain and are visible. You can see the angularity and randomness of the cuts that had been made. Add to that the lighter cuts that are gone with the initial sanding and you have some idea of the ugliness of this hack job.Everton9

Everton10 
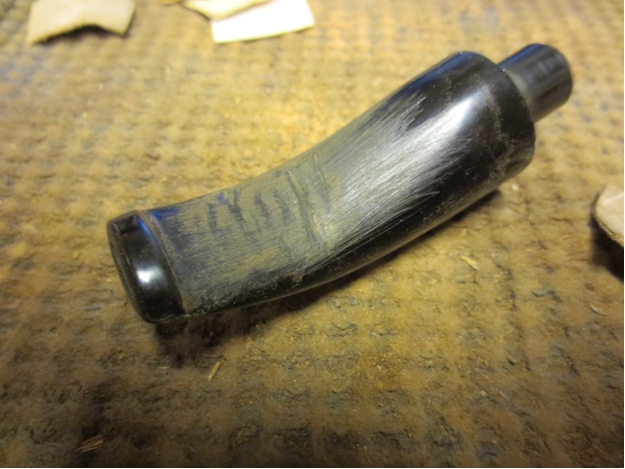
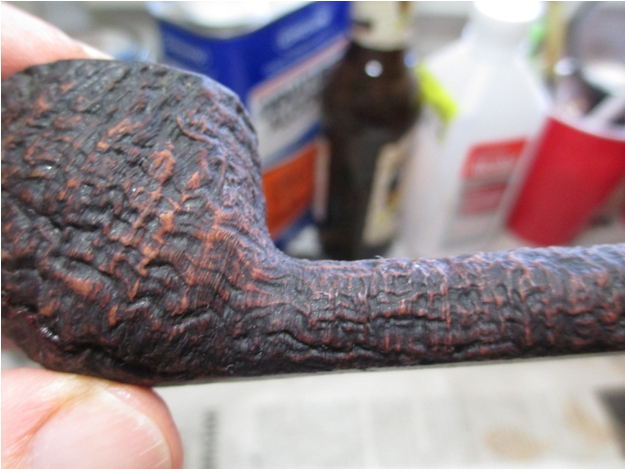
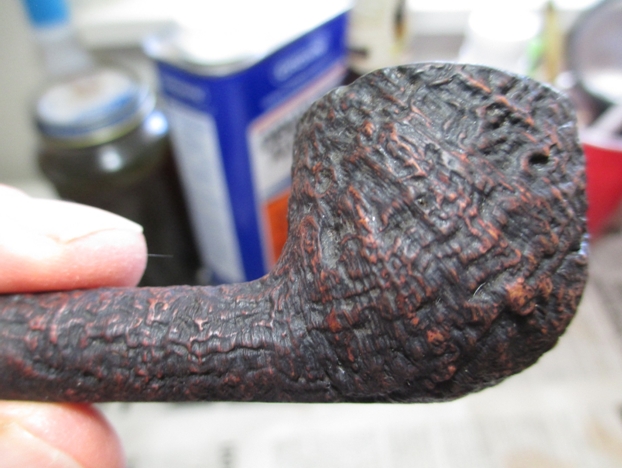
I continued to sand with the 180 grit sandpaper until the majority of the gouges were smoothed out. There were still several that would require more work with a higher grit of sandpaper.Everton11 
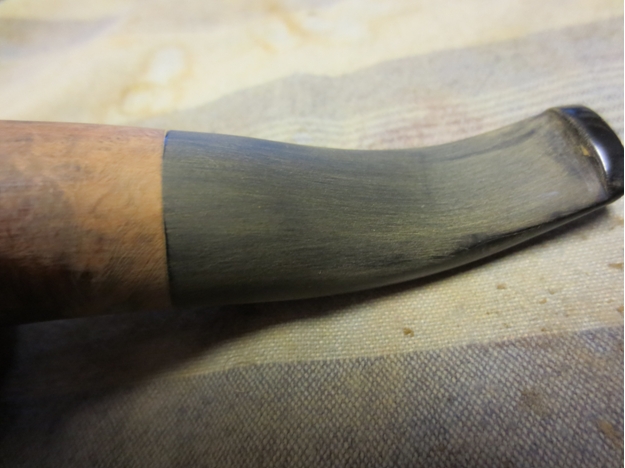
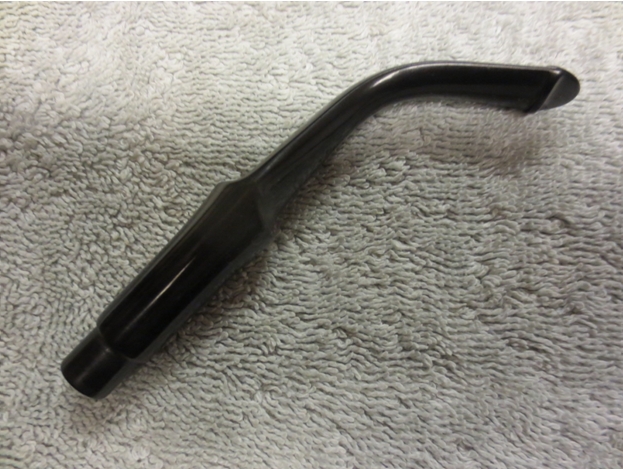
I moved on to sanding the stem with 220 grit sandpaper. I moved up this amount because there was still significant damage to remove but also because that incremental step up in grits really minimizes the scratches left behind by the 180 grit paper. The next two photos show the change after sanding with the 220 grit paper. The grooves on the underside have all disappeared save one deep gouge that will soon disappear. The ones on the topside are all gone and the surface is once again curved, tapered and smooth.Everton12

Everton13 
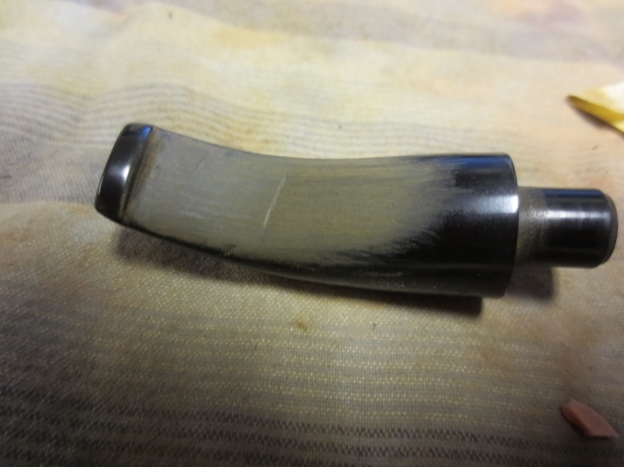
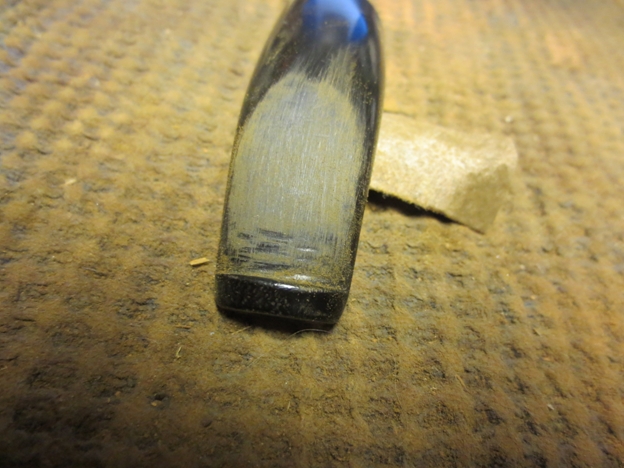
I worked on the groove on the underside of the stem with the 220 grit paper until it was gone. I also worked on the tapered edges of the stem to remove the cuts and gouges along the edges and smooth out the taper. The two photos below show the transition from the groove being gone and the edges being rough to a smooth flowing underside of the stem – gouge-less and well tapered.Everton14

Everton21 
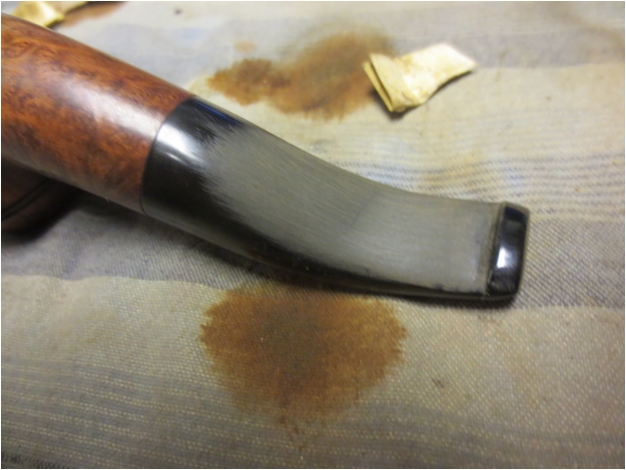
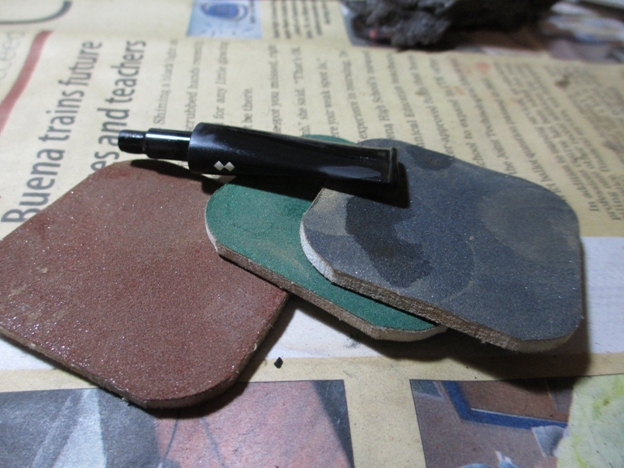
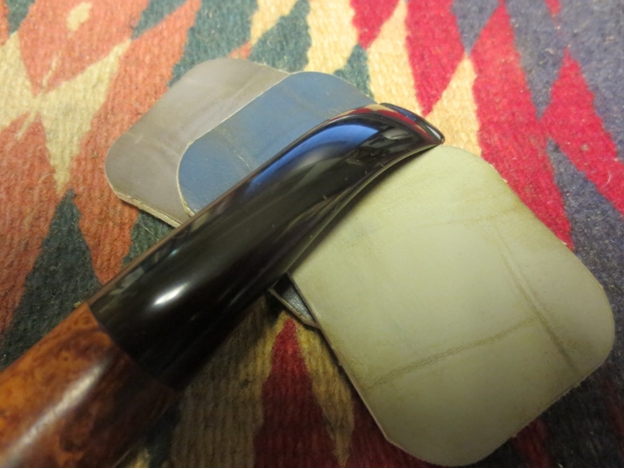
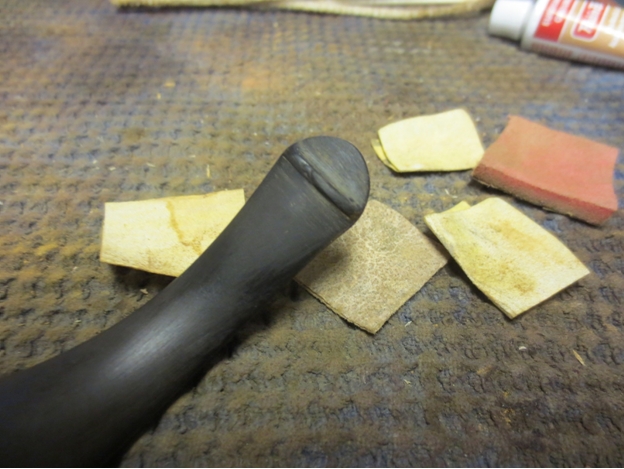
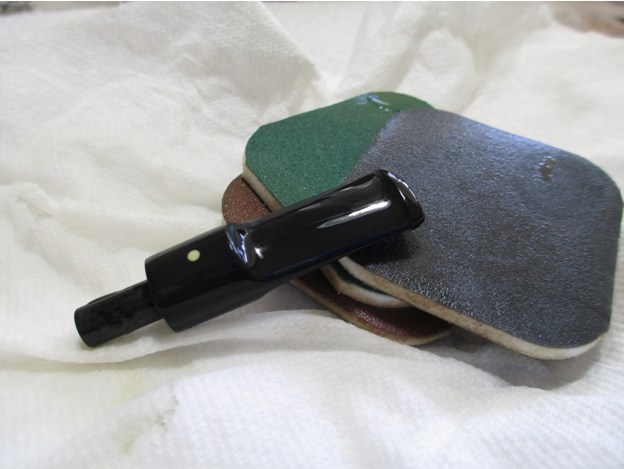
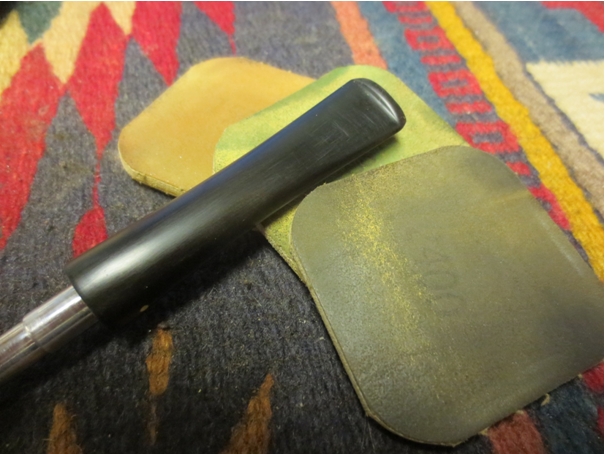
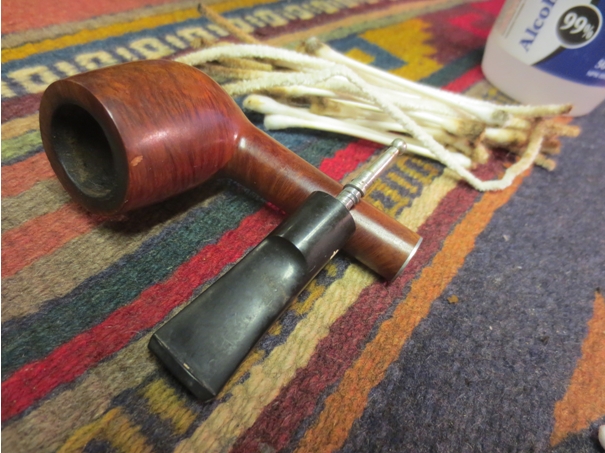
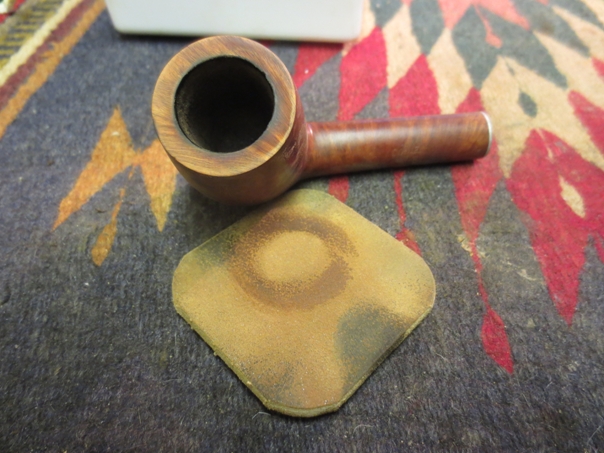
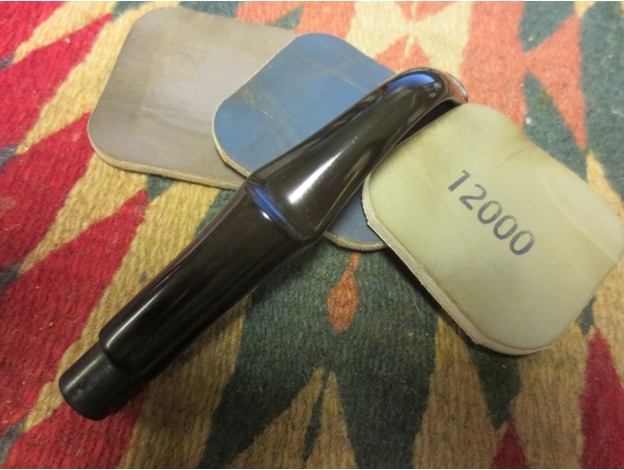
With the rough shaping done it was time to fine tune the reshaping. In the next step of the process I use a medium and fine grit sanding sponge to smooth out the flow and lines of the stem. I cut the sanding sponges into 1 inch squares to allow me to work closely against the button and follow the curve of the stem. These sanding sponges remove the scratching left behind by the 220 grit paper and move the stem a step closer to polishing. While I only show one photo of this step it is probably one that I spent the most time on. It is important to work the surface to remove as much scratching as possible before polishing the stem with micromesh sanding pads. The initial reshaping took about 45-60 minutes. This sanding took 60-80 minutes to complete. It is easy to remove damage but hard to not create more damage in the process of its removal.Everton22 
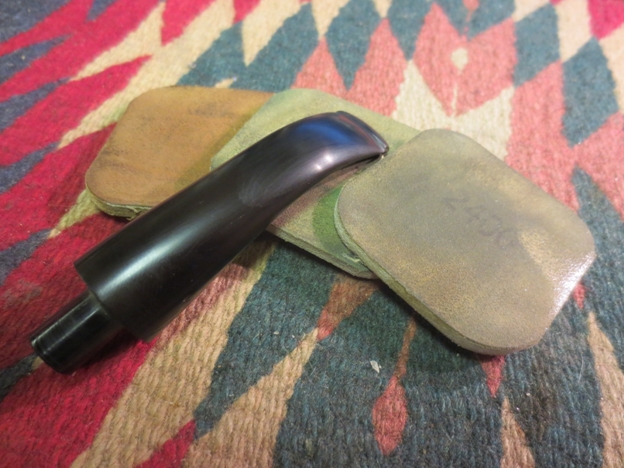
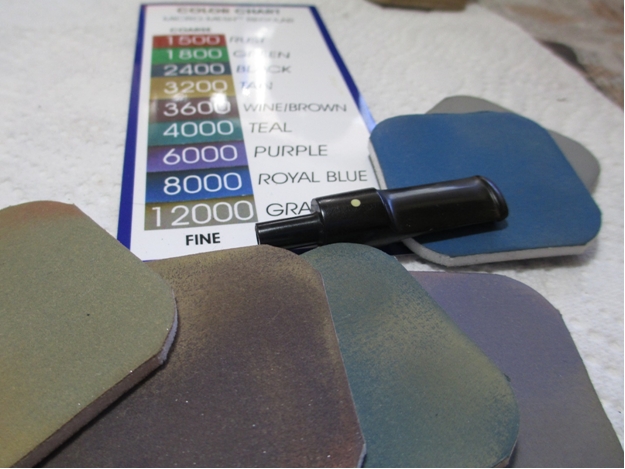
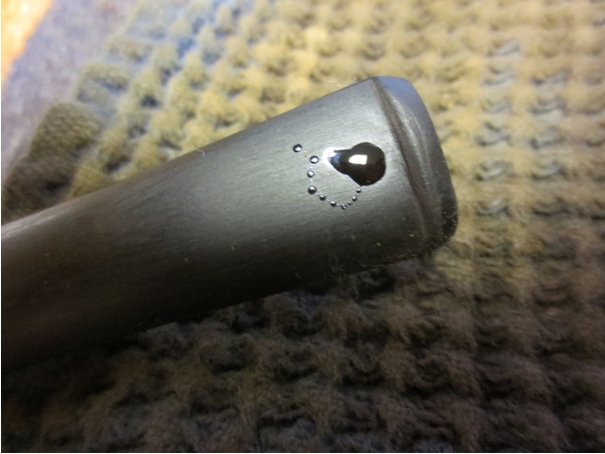
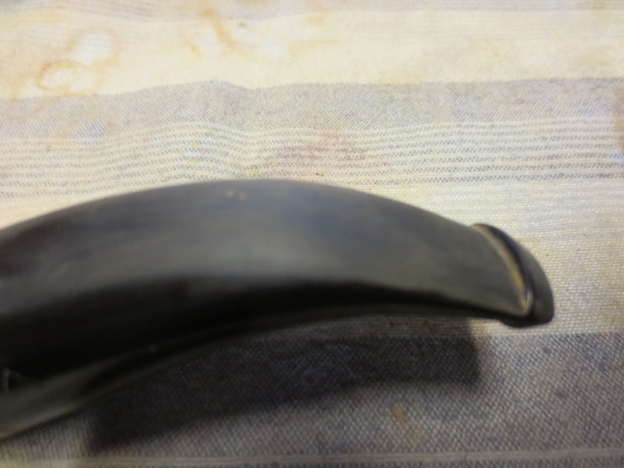
With reshaping completed and the surface scratches minimized with the sanding sponges it was time to move to the polishing phase of the process. For this I use micromesh sanding pads. I wet sand with 1500-2400 grit pads. This involves a small bowl of water near at hand when I am sanding with the pad. I used to dip the pad in the water and then sand with the wet pad. Now I dip the stem itself into the water and sand the wet stem. I shifted the method as I found that with repeated dipping the pads began to fall apart and separate from the foam core centre. I rubbed the stem down with Obsidian Oil before moving to the dry sanding step of the polishing.Everton37 
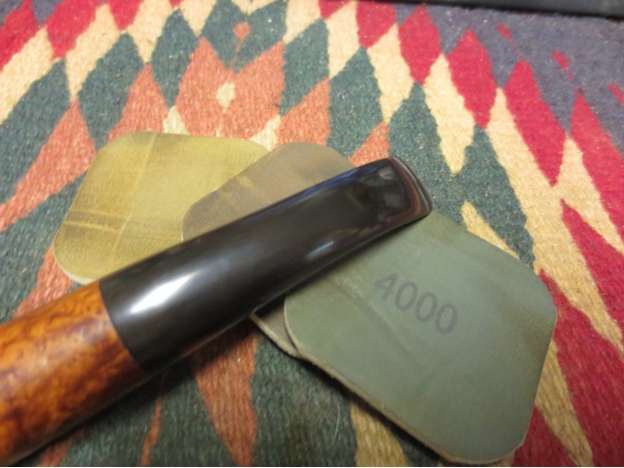
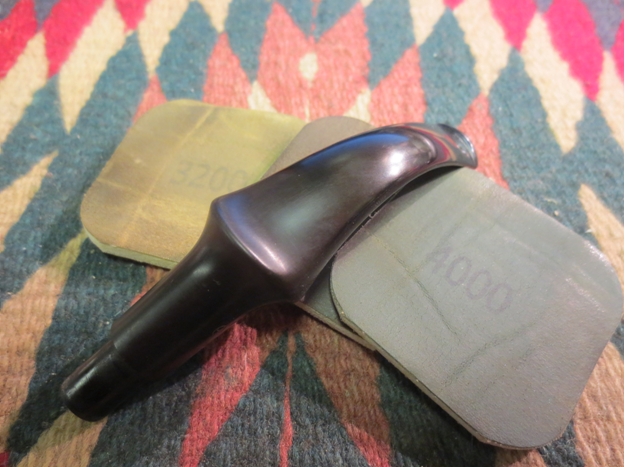
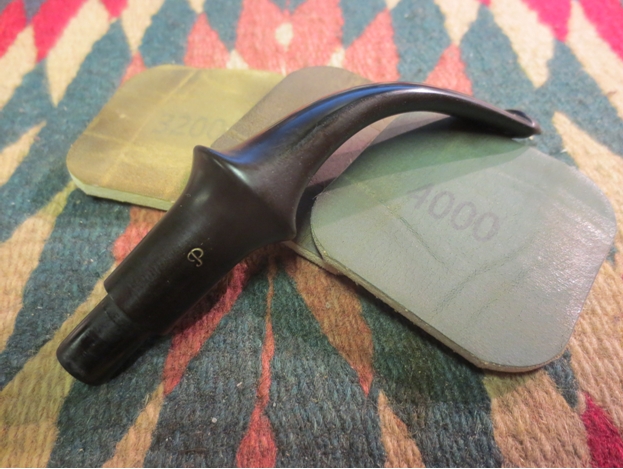
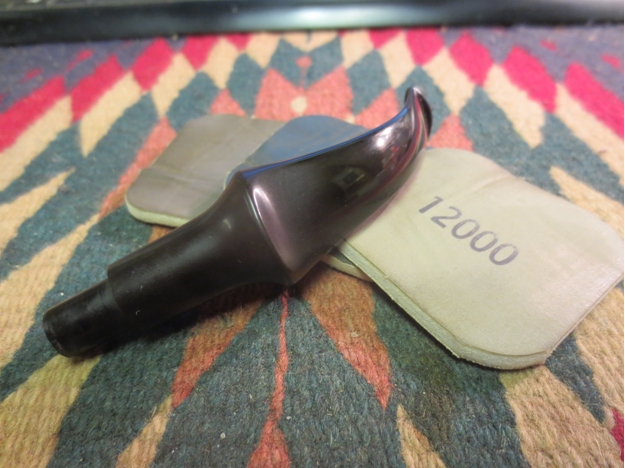
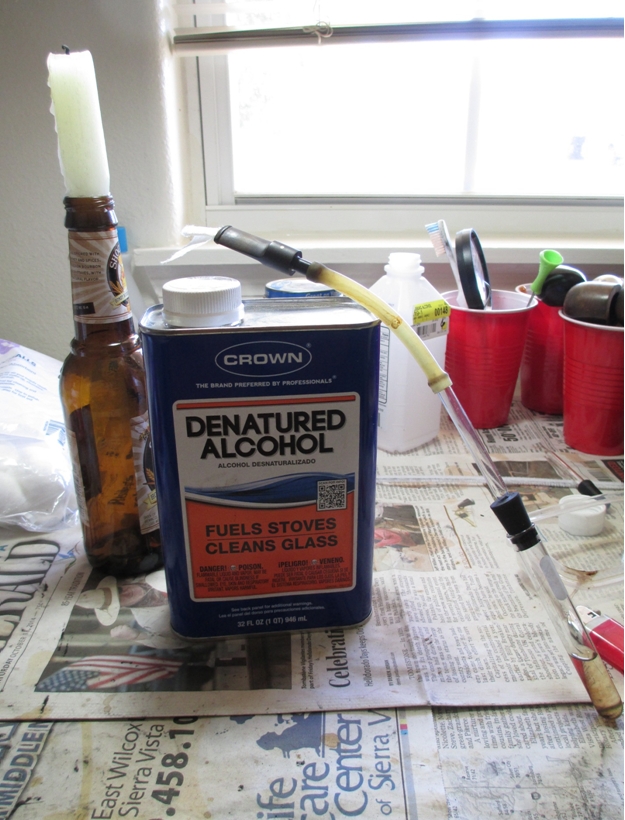
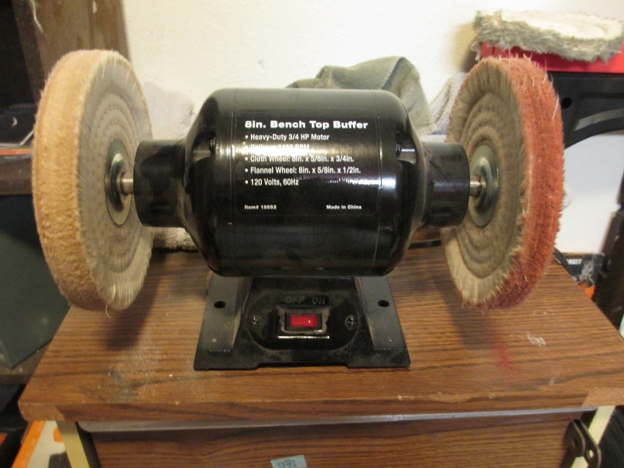
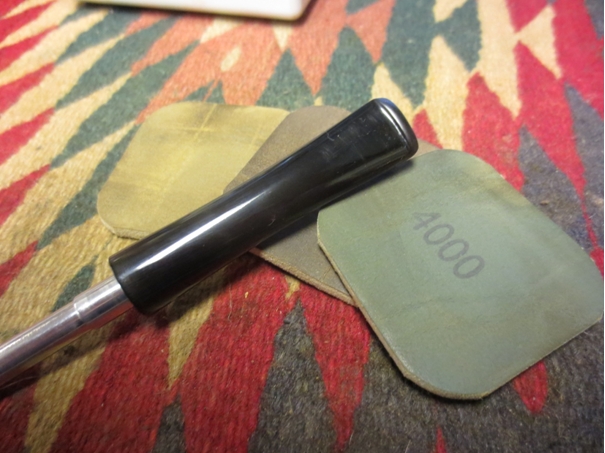
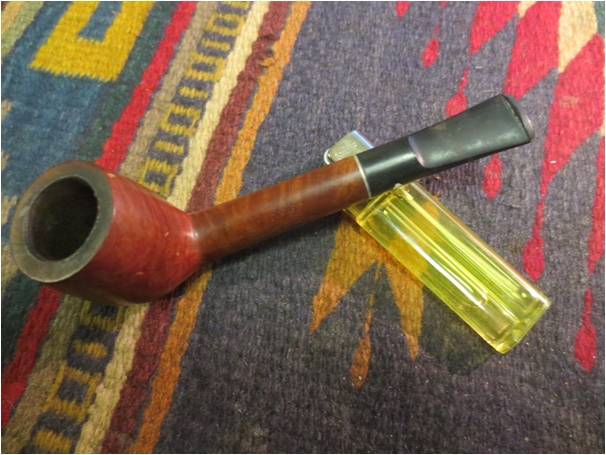
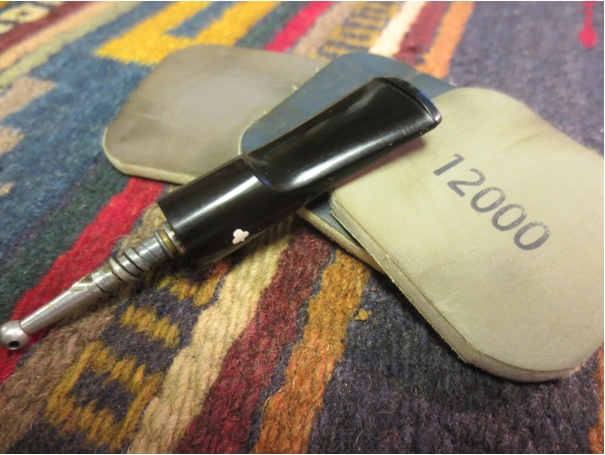
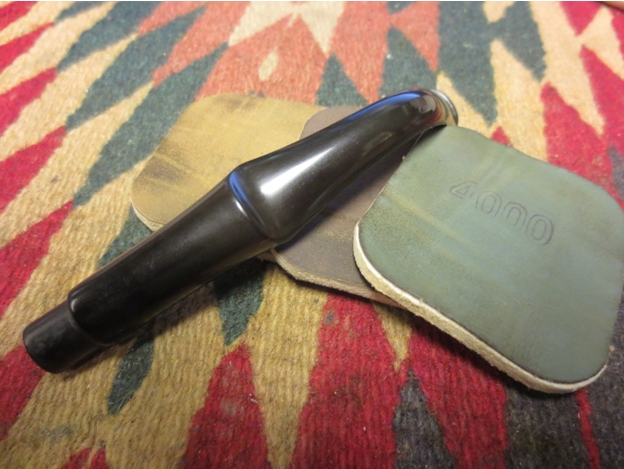
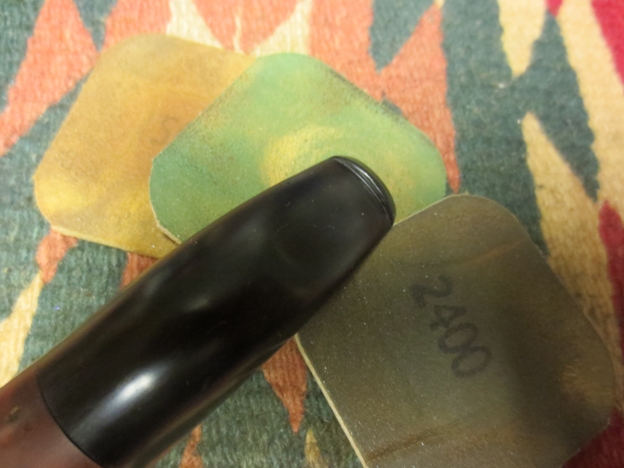
I dry sanded the stem with 3200-12,000 grit micromesh sanding pads. Each successive grit of pad really heightens the polish and shine on the vulcanite. I rubbed the stem down with Obsidian Oil after using the 4000 grit pad. I then sanded it with the final four pads and finished with a final coat of the oil. Everton38

Everton39 
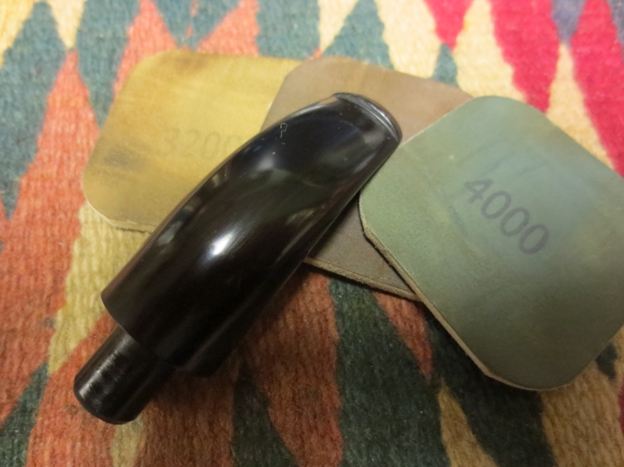
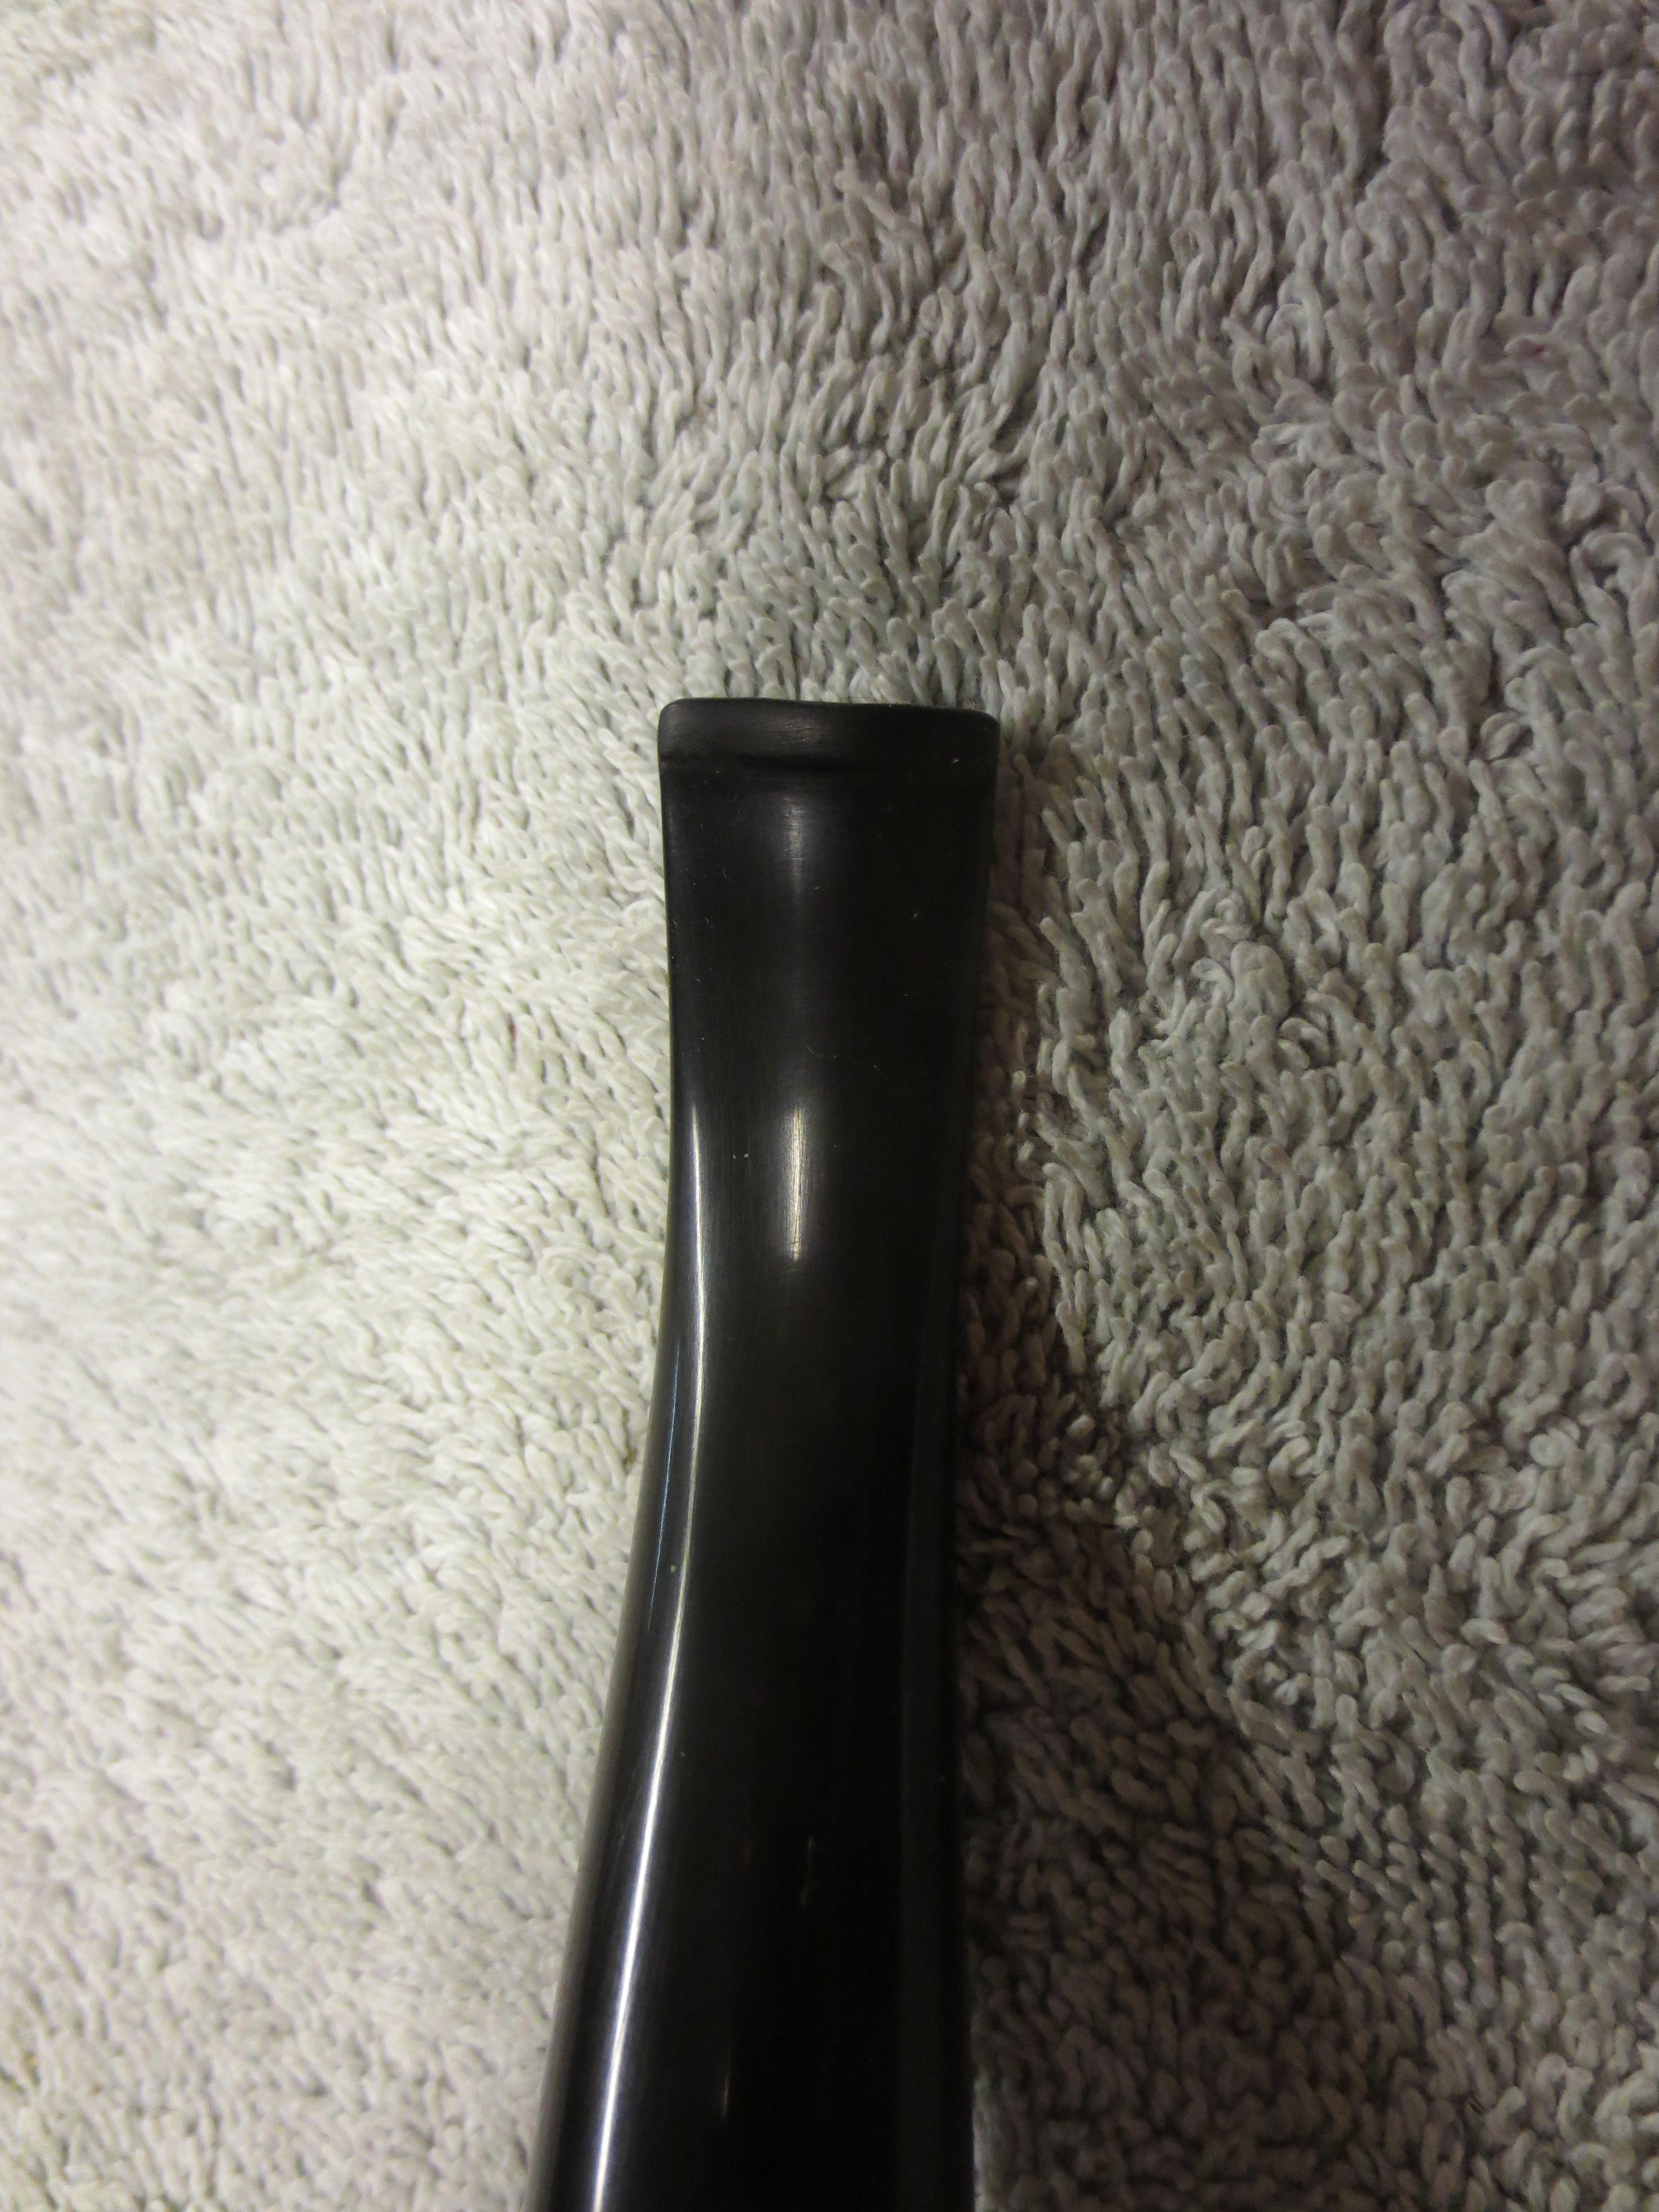
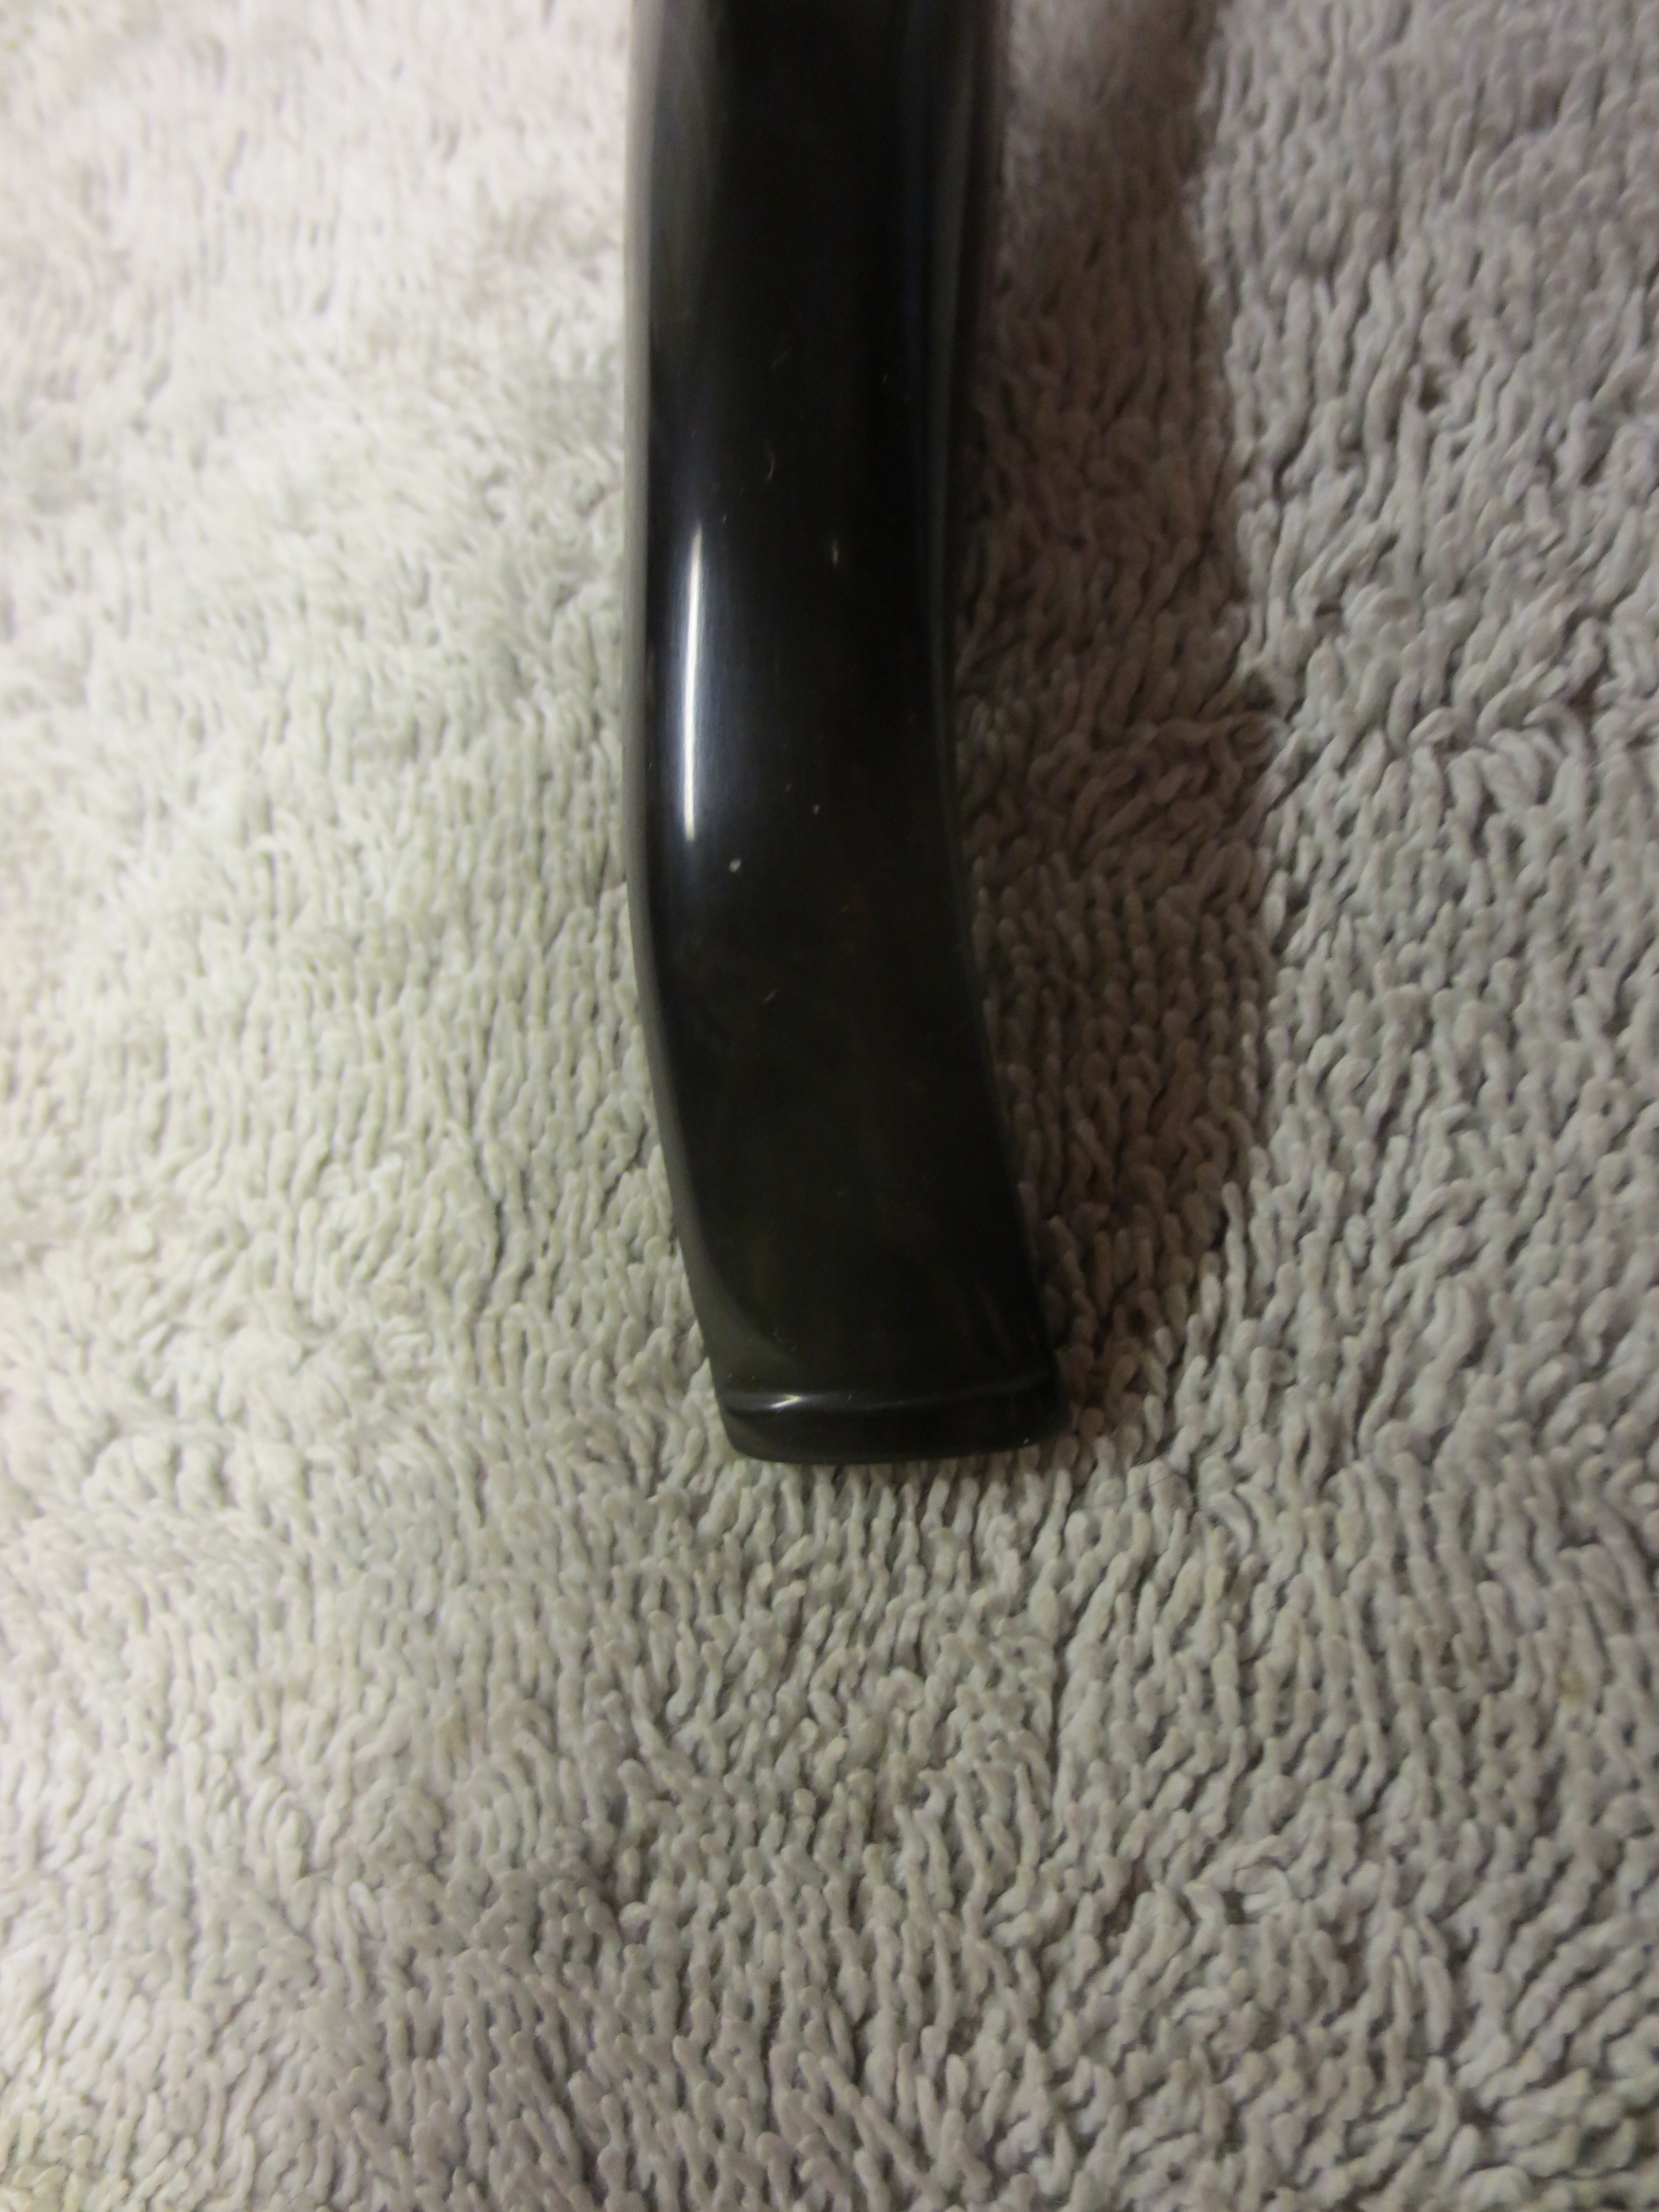
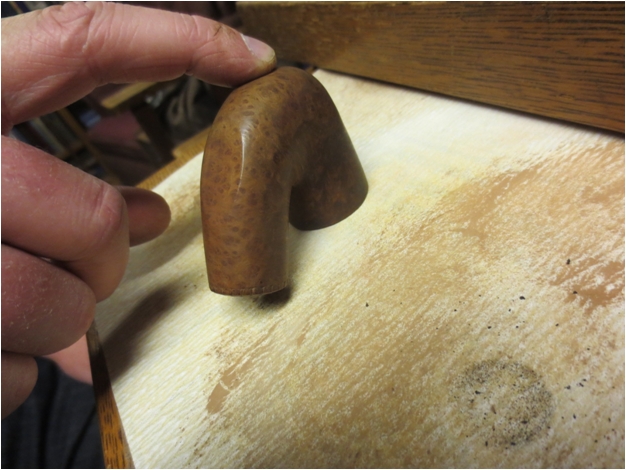
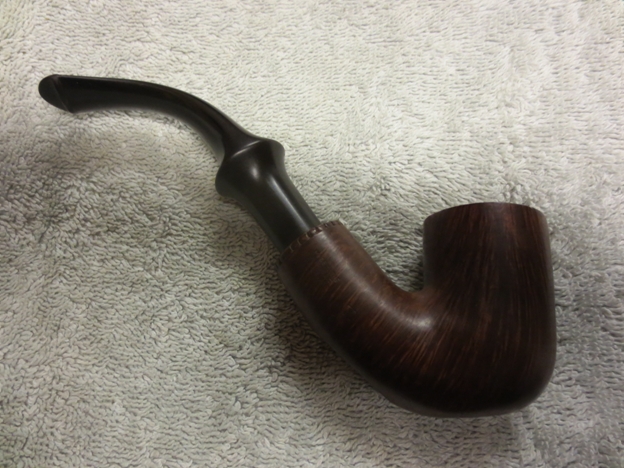
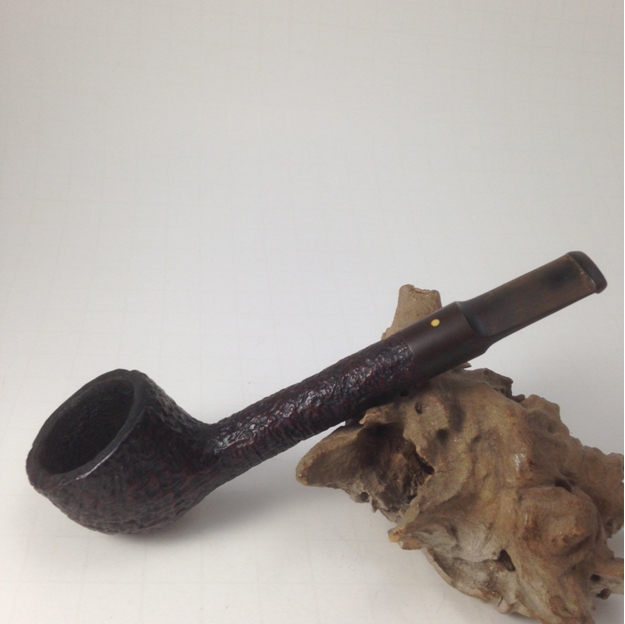
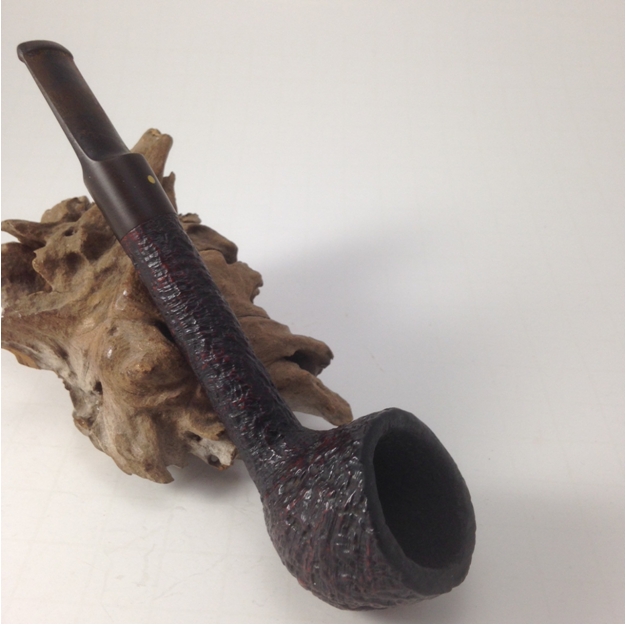
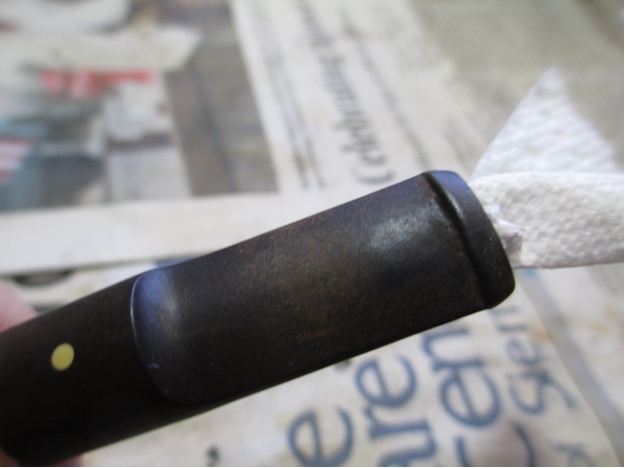
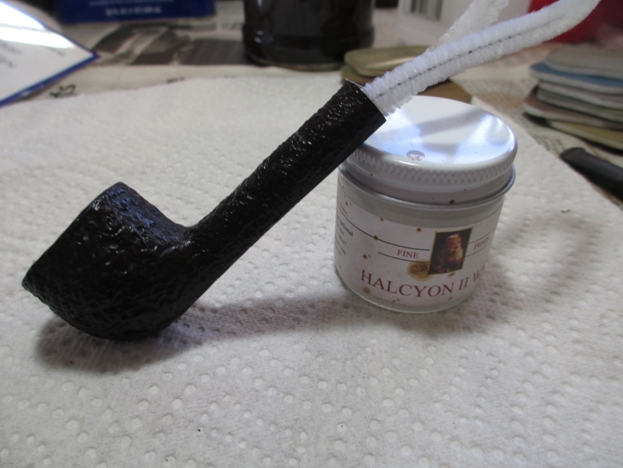
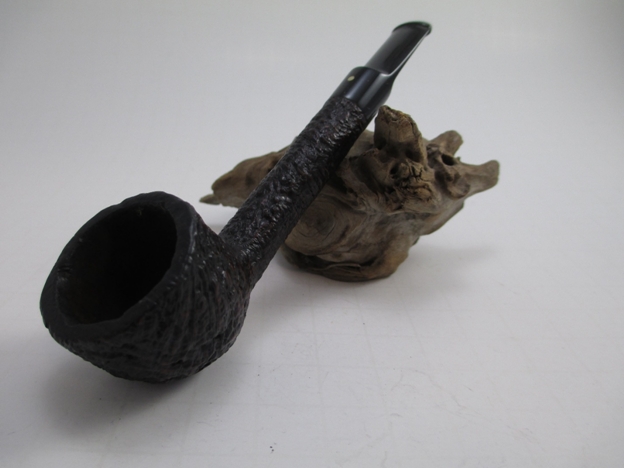
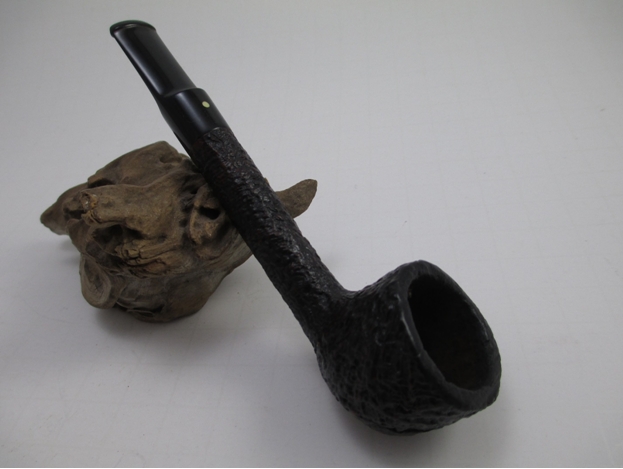
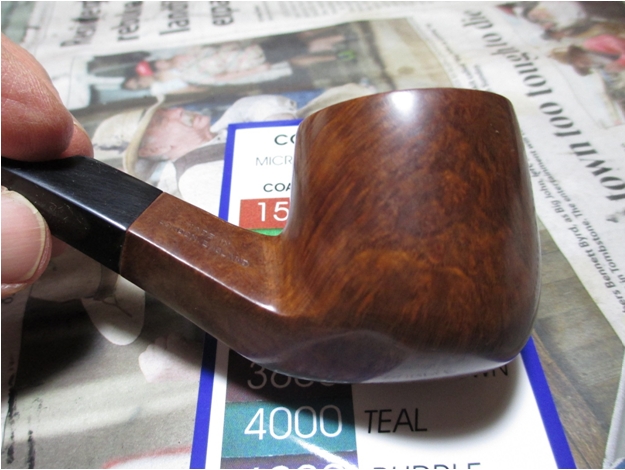
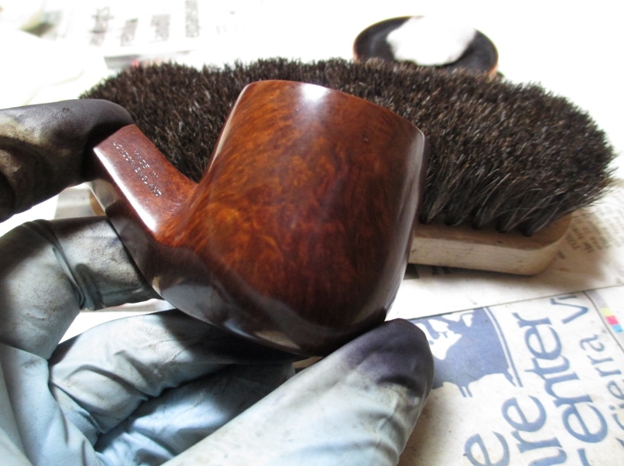
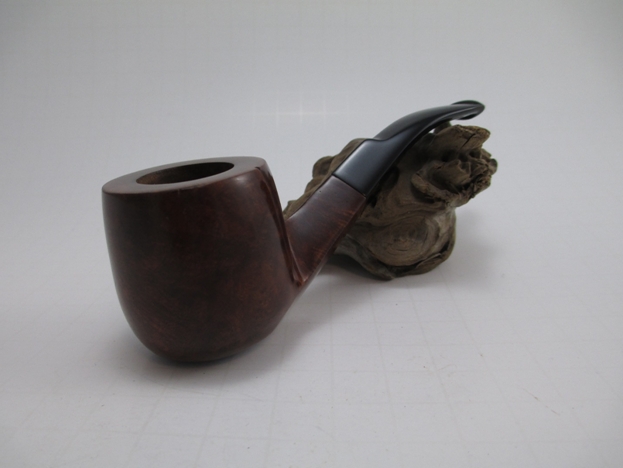
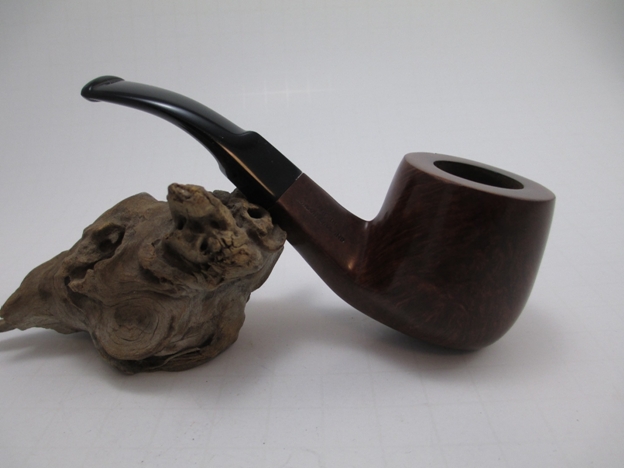
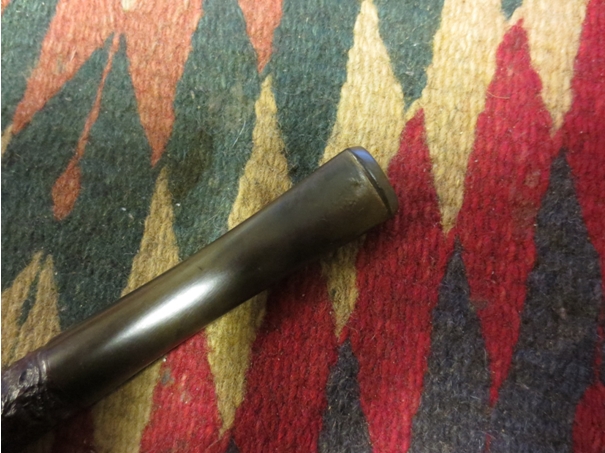
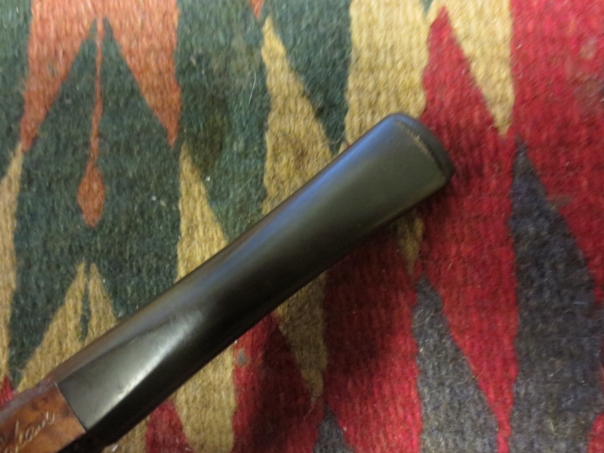
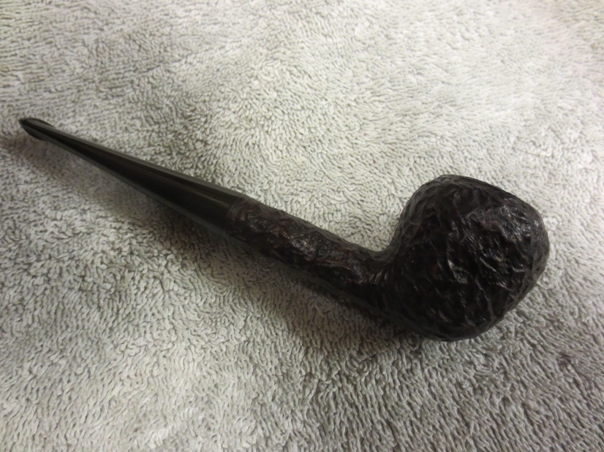
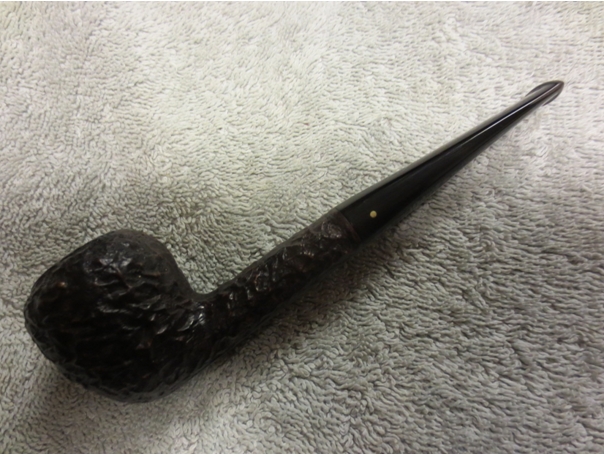
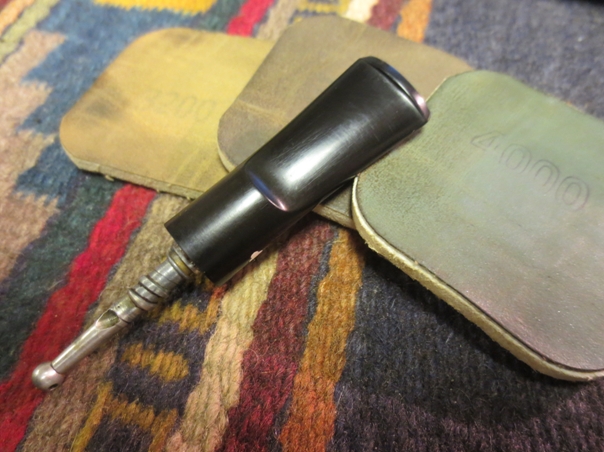
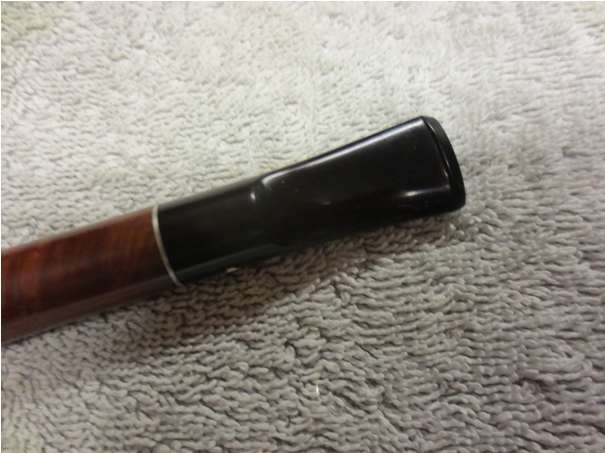
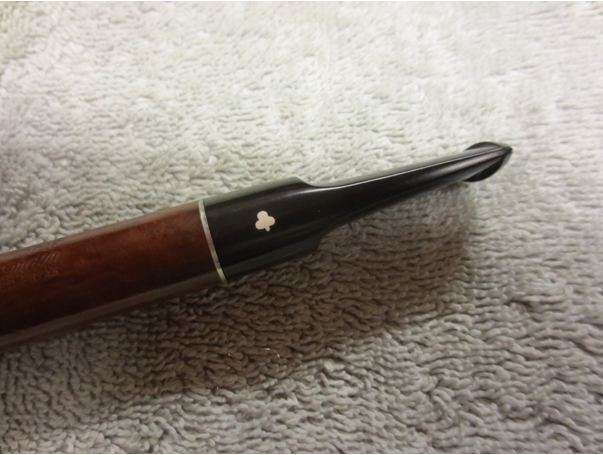
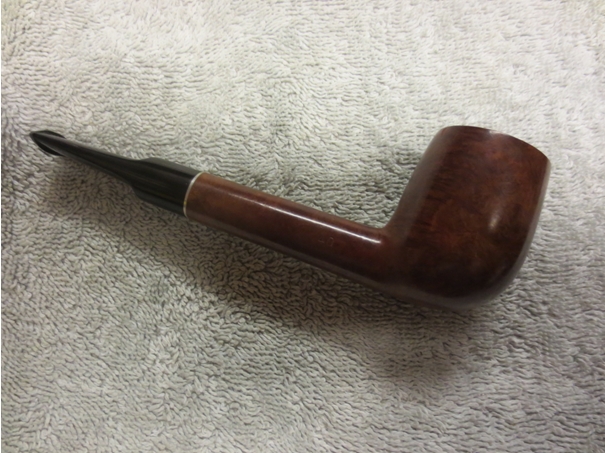
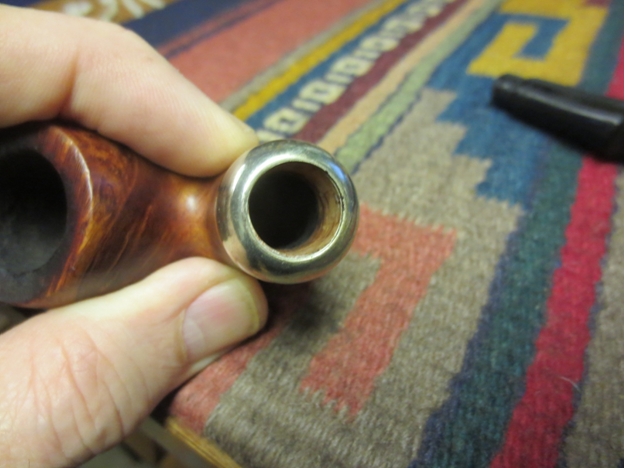
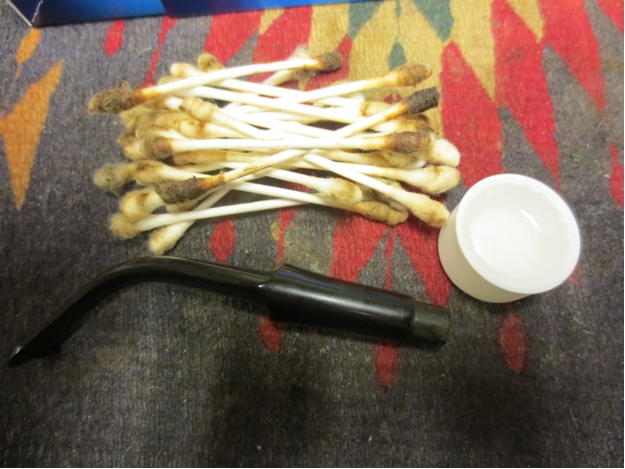
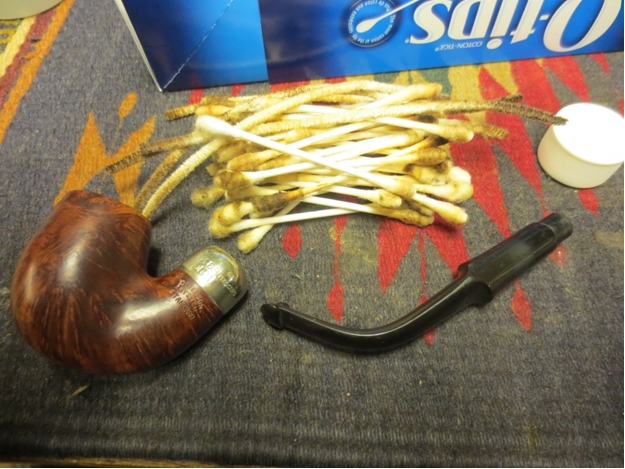
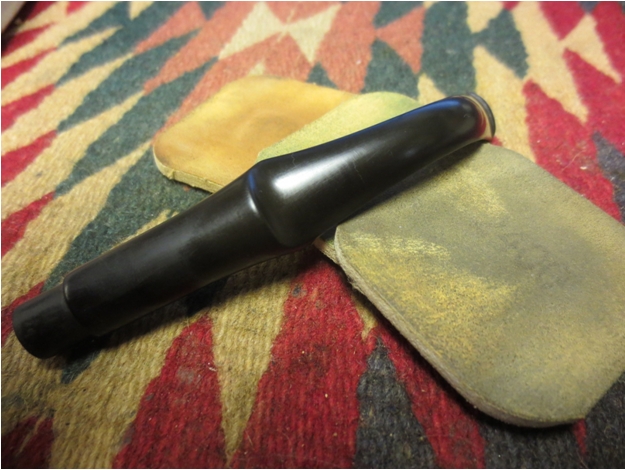
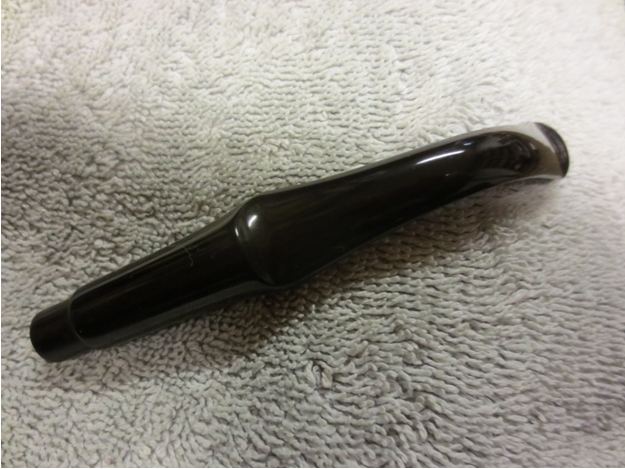
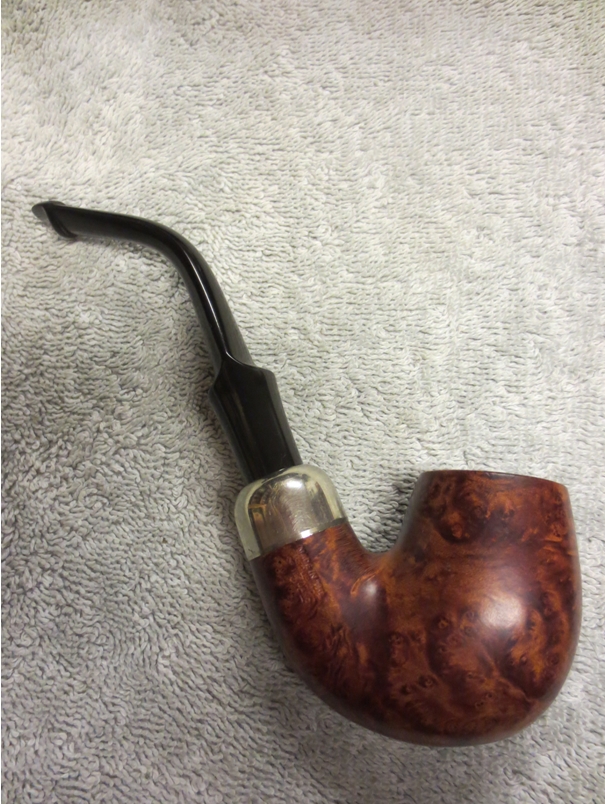
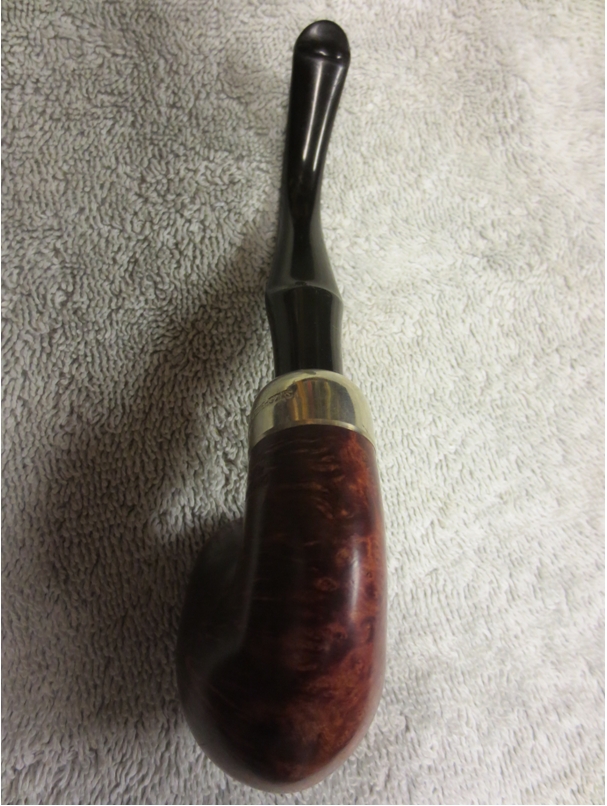
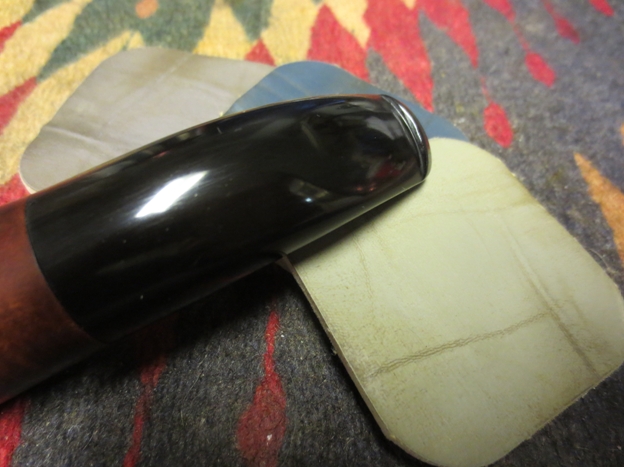
Once it had been absorbed and the stem was dry I buffed the stem with White Diamond. In the bright light of the flash several scratches are still visible from the sanding process on the underside of the stem. I buffed this section with red Tripoli and then back to White Diamond to further erase these scratches. The final photos of the stem show a stem whose taper has been reshaped, whose lines and flow restored and whose stem has been given a finished look. It took patient sanding and reshaping to move the stem from its original corrugated shape to this final polished look but in my mind it was definitely worth the effort. It is also clear that the proper choice or reshaping had been made.Everton40

Everton41 
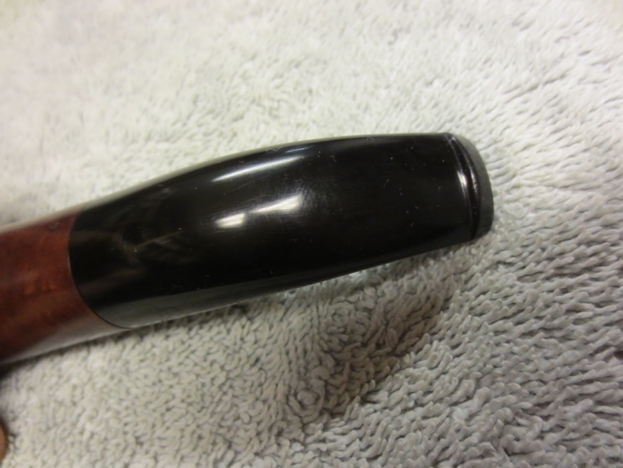
If you should decide to reshape a stem why not aim for doing even better work in shaping and polishing the stem. Never leave a stem in the condition this one was in when I received it. While it was terrible I have seen worse and in the back of mind are residual memories of having inflicted terror to a lesser degree on several of my early restemming jobs. Work hard to reshape a stem to a place where it looks like it was made that way at the factory.

Reworking a horn stem on a Regent Pipe


Blog by Steve Laug

I restored this old horn stem on June 9, 2012 and fit it to an old horn-shaped bowl I had in my box. The bowl is stamped The Regent arched around a star. I wrote about the restoration of the stem and the bowl previously in this post: https://rebornpipes.com/2012/06/09/refurb-on-an-old-the-regent-fit-a-horn-stem-7/ I love the translucence of the horn material. I trimmed off excess horn material to fit the end of the shank. The first photo shows the stem when I started.Regent1 The next three photos show the stem after I had trimmed it to match the diameter of the shank band.Regent2

Regent3

Regent4 This holiday season I find that I am out of pipes to restore – I have finished the last of the ones in my box. So during the doldrums of no pipes to refurbish I spent time looking through my collection. I took on the horn stem pipes to look at. I posted on PSU – Pipe Smokers Unlimited – Forum about horn stem pipes. I have quite a few in my collection as I really like the look and feel of a well restored horn stem. I posted the above photos and really did not like the overall look of the stem. It did not seem to flow with the lines of the bowl. In those days I was just starting out on restoring horn stems and I was fearful of ruining the old stem so I did not shape it as aggressively as I do now. I don’t know if it fearlessness or just stupidity but I still am not careless in the work.

I took the pipe out of the cupboard and reworked the stem. I sanded the stem with 220 grit sandpaper to match the angle of the shank – top and sides. I wanted to take out the bulging look, the pinch at the shank stem union. I took off quite a bit more material until the flow looked better and the bulge was gone. I worked to also straighten the sides of the stem from that junction to the button on the end of the stem. I sanded it with medium and fine grit sanding sponges and a fine grit sanding block to flatten angles from shank to button. I finished by wet sanding with 1200-3200 grit sanding pads and then buffed the stem with White Diamond. I took it back to the work table and dry sanded it with 3600-12,000 grit micromesh sanding blocks. I rubbed it down with Obsidian Oil and then gave the bowl and pipe several coats of carnauba wax. I finished by buffing it with a soft flannel buff until it shone.

The finished pipe is shown below. I like the new look of the stem far better than the previous fitting. The pipe is sitting on my desk now and will be in my rotation for this weekend.Regent5

Regent6

Regent7

Regent8

Refurbishing a Heritage Heirloom


Blog by Andrew Selking

I recently stumbled across the Heritage line of pipes. These pipes were made in the Kaywoodie factory, but on a completely separate line. Heritage pipes were Kaywoodie’s answer to Dunhill. According to one of their brochures, Heritage pipes were made from “briar burls seasoned and cured for up to 8 months,” with only “one briar bowl in over 300 selected to bear the Heritage name.” “Heritage stems are custom fitted with the finest hand finished Para Rubber stems. Mouthpieces are wafer thin and concave.”

The Heritage line began in the early 1960’s, with the trademark issued in 1964. The line was started at the request of Stephen Ogdon, (who worked for Kaywoodie in 1962). Mr. Ogdon had previous experience working for Dunhill, either running the New York store or working for Dunhill North America. Mr. Ogden was made President of Heritage Pi pes, Inc., Kaywoodie Tobacco Co.,Inc. and Kaywoodie Products Inc. as well as a Vice President of S.M. Frank & Co. Heritage Pipes were produced from 1964 until 1970 (Source Kaywoodie.myfreeforum.org).

Here is a copy of the Heritage brochure. (Courtesy Kaywoodiemyfreeforum) heritage1_zps888f5f2b heritage2_zps0d4dc760 heritage3_zpsef2358c6 The pipe I found was the number 72 Medium Canadian, oval shank. Interestingly, the one thing the Heritage line shared with Kaywoodie was the size and shape numbers. Unlike Kaywoodies, the Heritage pipes are normal push tenons.

When the pipe arrived, it had some tar build up on the rim and a thick layer of cake.Andrew1

Andrew2 The stem had some oxidation, but minimal chatter.Andrew3

Andrew4

Andrew5 The finish was in nice condition, so I decided to forgo the alcohol bath and attempt to keep the original finish.Andrew6

Andrew7 The first thing I did was ream the bowl. I used my Castleford reamer and was delighted to find that the cake was very loose, mostly old tobacco, and it easily cleaned back to the wood.Andrew8 Next I decided to find out how the bad the rim was under the tar build up.Andrew9 After a light buffing with 0000 steel wool, the tar was gone and I could see a pristine rim.Andrew10 Since I was on a roll, I decided to re-tort the shank.Andrew11 I normally show pictures of a brush loaded with gunk, but in this case the brush came clean on the first pass. I proceeded to use some q-tips and fuzzy sticks on the shank. Most of the tar came off with the first couple of q-tips, after that it was just a matter of a few more and the shank was clean.Andrew12 Since I didn’t soak the bowl in alcohol, I decided to soak it with some alcohol soaked cotton balls.Andrew13 While the bowl soaked, I retorted the stem.Andrew14 It was just as clean as the shank (this was the first fuzzy stick I passed through after the retort).Andrew15This was the cleanest “dirty” pipe I’ve ever had. Since the stem was so clean inside, I skipped the Oxyclean bath and tackled the oxidation. I used my normal progression of 400 grit wet/dry sandpaper with water, followed by 1500-2400 grit micro mesh pads with water.Andrew16 The finish seemed really dark, probably the result of oil from the previous owner’s hands, so I used some 0000 steel wool and acetone to clean the outside of the bowl and shank.Andrew17 The steel wool worked well on the bowl, so I skipped the 1500-2400 grit micro mesh and started at 3200. I used a progression of 3200-12,000 grit micro mesh for the bowl and stem in preparation for the buffing wheel.Andrew18 After an uneventful spin on the buffer, here is the finished pipe.Andrew19

Andrew20

Andrew21

Andrew22

Andrew23 This line of pipes might be one of the best kept secrets out there. I find that the quality of the stem compares to Dunhills and the wood is spectacular. I highly recommend these pipes.heritage4_zpsdc6295ef

Cutting back a broken stem – rescuing a potential cast off


Blog by Steve Laug

When I recut the button on a recent Peterson Shamrock stem I thought I would use the opportunity to go into more detail on how I cut back the stem and shape a new button on the end of the cut off. The photo below shows the state of the stem when I received it. While I had other options in terms of repair of the stem I decided to cut it back.Shamrock7 I have a Dremel that is my go to tool for cutting off a stem. Others use a saw – coping or hack saw, but I use the Dremel. The photo below shows the sanding drum that I use. It is pretty coarse sandpaper and makes short work of trimming back the vulcanite or Lucite of a stem. The trick is to hold the stem and the Dremel steady while you work the end of the stem against the sandpaper.F2DF829HZI92Z2B.MEDIUM Over time I have learned to hold it steady and work the cutting line straight. I take off all of the damaged material so that I have some thickness on the top and bottom of the stem that will accommodate a new button without making the stem too thin in the process. In this case I removed the funneled portion of the airway in the button and what remained was the round airway that would need to be reshaped. The line across the stem is pretty straight considering I do it by eyeballing it rather than using a straight edge.Shamrock13

Shamrock14

Shamrock15 The next step in the procedure is to cut a straight line equidistance on the top and the bottom of the stem that will be the sharp edge of the button. The outer edge is slightly rough in the photos but that does not matter as that edge will be bevelled toward the airway in the shaping process. I use a flat blade needle file with a square edge for this initial cut.Shamrock16

Shamrock17 Before I put the flat blade needle file away I use it to shave some of the material that is directly ahead of the sharp line of the button and begin the tapering process. I follow that up with an emery board to get a feel for the look of the stem and to assess how much material I will remove in the process.Shamrock18

Shamrock19 The next step in the process is to shave more of the material away and adjust the angles of the stem to the button. I use a needle file with a knife shaped blade and draw it across the stem toward the button edge. As I draw the file toward the button it peels the material away. I work it from the point on the stem that I have picked as the place where the new taper will begin. I lightly draw it across the upper portion and deepen the cuts the further I go down the stem. I clean up the sharp edge with the straight file once again. I cut a groove in the material next to the button edge that sets the depth of the bottom of the taper. I work the stem angles until they taper directly into the button and the groove disappears. I used 220 grit sandpaper to clean up the file marks and smooth out the transition of the angles to the button. At this point the definition of the button is finished. All that remains is to shape the button and clean up the marks on the material.Shamrock20

Shamrock21 I used the oval needle file to open and flare the edges of the airway to open the airways. Once I have the funnel cut I use a folded piece of sandpaper to clean up the file marks in the slot and smooth out the end of the button. I also use the sandpaper to shape the button and taper and round the edges to make the button oval and smooth.Shamrock22

IMG_3126 I worked the curve of the underside of the stem to make a smooth and clean angle that matched the curve of the bottom of the bowl of the pipe. I used 220 grit sandpaper, medium and fine grit sanding sponges to reshape the curve. The next two photos show the curve and the shape of the button on the cut off stem.Noname

IMG_3073 Once the shaping was finished I sanded the stem with micromesh sanding pads. I sanded the blade and the button and slot area of the stem at the same time. I wet sanded with 1500-2400 grit sanding pads and dry sanded with 3200-12,000 grit pads. I polished the stem with red Tripoli and White Diamond on the wheel and then gave the stem multiple coats of carnauba to polish and raise the shine.Shamrock31

Shamrock34

Shamrock33

Shamrock32 The finished stem is shown below. The goal in the process is to return the stem as near as possible to its original shape and condition. The button shape is determined by photos or by the remnant of the stem prior to being cut off. The buffed and polished stem should look as close as possible to a factory cut stem. While I have done many of these I still feel like I am in the process of learning. The key to the whole thing is to move slowly, carefully and methodically until the stem is finished. Then sand some more and polish some more… I can’t tell you how many times I have gone back after several months of smoking the pipe and doing a bit more reworking until I am happy with the feel in the mouth.IMG_3091

IMG_3092

Reviving a Peterson Dunmore 79 with my Son in Law


Blog by Steve Laug

This past weekend my son in law came over with the Peterson Dunmore pipe that he had purchased on a recent pipe hunt in the US. He picked it up for $15USD so it was a good purchase. We finally got around to working on it. In a previous post on the Dunmore line I had found that the line from Peterson really is a stripped down pipe. The one that we worked on this weekend was in essence a system pipe. The lack of a ferrule is made up for by a stylized carving around the shank end. The stem sits snugly against the end of the shank but is not flush with the diameter of the shank. The saddle on the stem has a slightly different flair than a regular Peterson pipe. It had a Plip stem. It bore the stamping Peterson’s over “Dunmore” on the left side of the shank and Made in the Republic of Ireland and the number 79 on the right side of the shank.Dun1

Dun2

Dun3

Dun4 The pipe was in pretty decent shape under the grime and tars on the bowl and rim. It had some beautiful birdseye grain under the grime that would really stand out with a bit of work. The rim was damaged along the back outer edge with small nicks. The build up on the rim was hard and uneven. The bowl itself was out of round and would need to be adjusted. The stem was oxidized but under the oxidation on the saddle it bore the stylized P stamp. The top of the stem near the button had a few small bite marks and some tooth chatter. The underside of the stem near the button had a pin hole in it that would need to be patched.Dun5

Dun6 While my son in law, Lance worked on the bowl scrubbing and cleaning it I worked on the stem. I sanded it with 220 grit sandpaper to clean up the tooth marks. I wiped it down with alcohol to clean the areas around the hole. I daubed Vaseline on a pipe cleaner and inserted it from the tenon end of the stem and then used black superglue to repair the hole. I gave it several coats of glue to build up the repair, sprayed it with accelerator and let it dry between applications. Once I had the patch solidly in place I set it aside and let it cure. After curing for about 30 minutes I sanded the patch with 220 grit sandpaper to blend it into the surface of the stem. I sanded it with a medium and a fine grit sanding sponge to remove the scratches and further blend it. Dun7

Dun8

Dun9 Lance worked on the bowl while this was going on. He washed down the bowl with acetone on cotton pads to remove the grime and the remaining finish on the pipe. He softened the buildup on the rim surface and then lightly topped the bowl to remove the damage and the buildup. Once it was smooth, he sanded it with a fine grit sanding sponge and then wiped the bowl down with another wash of acetone.Dun10 We gave the bowl a coat of medium walnut stain mixed with Danish Oil and rubbed it onto the bowl and off again with a soft cotton pad. The bowl looked good when I had finished wiping it down and buffing it with a shoe brush. The grain is quite stunning.Dun11

Dun12

Dun13 I buffed the stem with red Tripoli and White Diamond to remove more of the oxidation. I rubbed it down with some Obsidian Oil and set it aside for the pictures below. At this point in the refurbishing the stem is looking quite good. I still need to sand with micromesh pads and then reapply the gold in the P stamp on the left side of the stem.Dun14

Dun15 I wet sanded the stem with 1500-2400 grit micromesh pads and then dry sanded with 3200-12,000 grit pads. In between each set of three pads I wiped the stem down with Obsidian Oil. I finished by buffing the stem with White Diamond and then gave it multiple coats of carnauba wax and buffed it with a soft flannel buffing pad.Dun16

Dun17

Dun18 After sanding it with 3200-4000 grit pads I used a gold paint and applied it to the P logo on the stem and then sanded it again with the same three grits of pad.Dun19

Dun20 I put the stem back in the shank and buffed the entire pipe with carnauba wax and with a soft flannel buffing pad. The finished pipe is shown below. The first four photos give a close up look at the bowl so that you can appreciate the beautiful grain on the pipe. The last four photos show the pipe in its entirety. It is truly a stunning piece of briar with no fills or pits. It is ready for its inaugural smoke by my son in law. It looks as good as new and the stunning birdseye grain gives the pipe a rich look. I look forward to hearing what he thinks of his restored pipe and even more what he thinks once he has smoked it.Dun21

Dun22

Dun23

Dun24

Dun25

Dun26

Dun27

Dun28

Restoring a 1935 Dunhill Shell – Andrew Selking


Blog by Andrew Selking

This is my second Dunhill Shell, but like everything it has been a learning experience. I saw this orphan about to expire on eBay without a single bid. As they say, a little knowledge can be a dangerous thing. I knew that it was a desirable patent-era Shell and from the markings it was made in 1935. I should have taken the time to look at a Dunhill shape chart, this pipe had been seriously topped. The good news is, I didn’t pay too much for it and it’s a handy little pipe, 4 15/16 inches long and .7 of an ounce! No wonder the stem didn’t have any tooth marks.

So here’s what the pipe looked like before the restoration.Dun1

Dun2

Dun3 The one thing that I really like about the Dunhill Shell pipes is the finish. The combination of deep reddish brown and darker brown/black is very pleasing to look at. That is why I treat rough finish pipes (rusticated, blast, fine line) differently than smooth finish pipes. I took a tip from Steve and use Murphy’s Oil Soap, which is made from vegetable oils and specifically formulated for wood. I took a small amount of the soap and applied it directly with a toothbrush.Dun4

Dun5 As you can see the Murphy’s Oil Soap did remove some of the finish, but not nearly as much as the alcohol bath would have. The soap also removed the decades of accumulated grime. If you don’t take care to clean the outside of the pipe no amount of wax will make it shine.Dun6

Dun7 My next step was to start the stem soaking in Oxyclean and soak the bowl with denatured alcohol. I packed the bowl with cotton balls, plugged the shank with some rolled up paper towel, and used an eye dropper to soak the cotton.Dun8 After the cake loosened up, I reamed the bowl. This bowl is huge, I used my two largest reaming heads to clean it out.Instead of doing the retort multiple times, I used q-tips dipped in denatured alcohol followed by pipe cleaners. (I don’t technically use pipe cleaners. I use “fuzzy sticks”. That’s the innocuous name given to pipe cleaners used for crafts.) To maximize each cleaner, I used scissors to cut the dirty section off. As you can see I ended up with a decent size pile of q-tips and fuzzy sticks.Dun12 Next I turned my attention to the stem. I did the retort first, then used pipe cleaners to finish the job. Fortunately since the stem is so short, it didn’t take long to clean. You will notice that I packed some paper towel into the end of the stem. Occasionally when you use the retort, the alcohol will boil over and spray everywhere. That does not endear you or your eccentric hobbies to your significant other, especially when the resulting mess makes the wall look like a Jackson Pollock painting.Dun13

Dun14

Dun15 I usually take extra time on stems as nice as this one. Instead of using 400 grit wet/dry I started out with 1000 grit wet/dry and water. It takes longer, but the last thing I want to do is change the profile of the stem or damage any of the details by using a lower grit sand paper. After the 1000 grit I used 1500-2400 grit micro mesh pads with water.Dun16 While the stem dried, I began the staining/waxing process. In an attempt to replicate the Dunhill finish, I used the brown shoe polish followed by a thin layer of black shoe polish. The heat gun helps melt the wax so that it gets into all of the crevices and the brush brings out a nice shine.Dun17

Dun18

Dun19 Here is what the bowl looked like after the application of the second coat of wax and buffing with the brush.Dun20

Dun21

Dun22

Dun23 Since shoe polish is a soft wax, I protect all of my rough finish pips with Halcyon II wax. I applied the wax with my finger tip (a little goes a long way) and let it dry for about 10 minutes. After the wax dried, I buffed it out with a soft cloth and applied a second coat. (The pipe cleaner is so I can hang the bowl up to dry.)Dun24 Finally I finished sanding the stem, using a progression of micro mesh pads from 3200-12000 grit followed by a quick spin on the buffing wheel with some carnauba wax.Dun25 Here is the finished pipe.Dun26

Dun27

Dun28

Dun29

Dun30

Dun31

Giving New Life to a Briar Squire Bent Pot – Andrew Selking


Blog by Andrew Selking

This is the second article by Andrew that I have the pleasure of posting on the blog. It is about a well restored Briar Squire bent Pot. Andrew does some beautiful work and it is a pleasure to read and see the results of his work. Thanks Andrew.

I did not get as many pipes completed as I planned this past weekend, my honey-do list was longer than anticipated. However, I could not resist finding the time to fix up a Briar Squire bent pot with a diamond shank. According to Pipephil.eu, the Briar Squire was a brick and mortar tobacco and pipe shop located in Crystal Lake, IL from 1977 to 1983. I assume they had their pipes made by an outside pipe maker. Whoever made this pipe did a nice job. There were no fills in it and judging by all the angles on the stem that was hand cut as well.

The previous owner kept the bowl very clean, but the stem had some tooth marks and calcification on the end. I dropped the bowl into the alcohol bath and went to work on the stem with the 400 grit wet/dry with water. As you can see in this picture, there is still some faint oxidation left.Briar1 I readdressed the oxidation with the 400 grit until it was gone. I find that it helps to dry the stem when you think you’ve reached the point where the oxidation is removed.Briar2 I then proceeded to use the micro mesh, 1500-2400 grit, with water.Briar3 Next I turned my attention to the bowl. The rim had some tar build up, which I tried to remove with distilled water.Briar4 The water helped, but there was an area of stubborn tar that just wouldn’t come off. Since I didn’t want to remove all of the finish, I used 1500 grit micro mesh to top the bowl.Briar5 I used 1500-2400 grit micro mesh without water on the bowl, then 3200-12000 grit micro mesh on the bowl and the stem.Briar6 The last few levels really do a nice job of polishing both wood and vulcanite.Briar7

Briar8

Briar9

Briar10

Briar11 Next it was time to apply the wax/stain. For red/brown colored pipes I use Kiwi Brown. As I mentioned in my previous post, it is very easy to work with and gives a good base shine before the final polish on the buffing wheel. Briar12

Briar13

Briar14

Briar15 After applying the shoe polish, I used the heat gun to melt the wax and buffed it out with a brush. As you can see.Briar16 Finally it was off to the buffing wheel.Briar17 Here are the results. Thanks for looking.Briar18

Briar19

Briar20

Briar21

Briar22

Cleaning Up a Brigham One Dot Acorn 778


Blog by Steve Laug

One of the last pipes I picked up on my recent Alberta trip and the last pipe in my current pile of pipes to refurbish is a little Brigham Canada Acorn or Strawberry shaped rusticated pipe. The shape of the pipe is what caught my attention. And when I had it in hand the size was also a relevant feature. It is a very light weight pipe (don’t have a scale) and it is diminutive in size. The dimensions are: length – 5.5 inches, height – 1.5 inches, bore – .75 inches. The bowl is conical in shape ending well below the entry of the airway into the back wall. Overall the pipe was in decent shape and would be fairly easy to clean up. The finish was dirty and the bowl had a thin cake in it. The stem was oxidized and the inside of the shank was dirty. The stem was oxidized and had one tooth mark on the top surface near the button. On the underside of the stem near the button was a lot of tooth chatter. The stamping on the underside of the shank in a smooth area reads 778 which is the shape and that is followed by Made in Canada and then Brigham in script.Brig1

Brig2

Brig3

Brig4 The next two photos show the tooth marks and tooth chatter on the stem. The tooth dent on the top of the stem near the button was quite deep and would need to be raised with heat and then probably repaired with superglue.Brig5

Brig6The aluminum Brigham tenon system was in great shape and showed no wear or tear on it. In the past I have taken apart these older Brigham pipes with the aluminum tenon and found it pitted and sometimes even eaten away. The filter surprised me in that when I pulled it out it was actually quite clean. The bowl was very clean and the rim was also clean.Brig7 I cleaned out the aluminum tenon and the mortise area with isopropyl alcohol (99%) and cotton swabs and pipe cleaners. I ran them through the shank and stem until they came out clean.Brig8I sanded the stem with 220 grit sandpaper, medium and fine grit sanding sponges and then cleaned the surface with alcohol on a cotton pad. I scratched out the surface with a dental pick to remove any loose vulcanite or grit on the surface. I put several drops of clear superglue in the tooth dent and let it dry until it was hard.Brig9

Brig10Once it hardened and cured for about an hour I sanded it with 220 grit sandpaper to blend it into the surface of the stem. I wanted the surface to be smooth and the super glue bump to be smoothed into the surface. I also sanded it with a medium and fine grit sanding sponge to remove the scratches in the surface.Brig11

Brig12 I sanded the stem with micromesh sanding pads – wet sanding with 1500-2400 grit pads and dry sanding with 3200-12,000 grit pads. In between each set of three pads I rubbed the stem down with Obsidian Oil and let it soak into the vulcanite. I had to repeat the process several times to remove the oxidation near the shank. I buffed it with White Diamond and then gave it a coat of carnauba wax.Brig13

Brig14

Brig15 I set the stem aside and scrubbed the bowl with Murphy’s Oil Soap. I used a soft bristle tooth brush to scrub it and then rinsed it off with running water. I kept a thumb in the bowl to keep the water from getting into the inside of the pipe. I dried it off with a cotton towel.Brig16

Brig17 I rubbed down the bowl with Halcyon II wax and buffed it with a shoe brush to raise the shine and even out the wax. I put the maple filter back in the tenon and then put the stem on the bowl. I buffed the bowl lightly with carnauba wax and then with a soft flannel buff. The finished pipe is shown in the photos below. It is cleaned and ready to smoke. I love the older Brigham pipes like this one and find that they smoke very well. They deliver a cool dry smoke and the Brigham filter system works well to cool the smoke and not hamper the draw or the flavour. Sometime later this week I will load a bowl of Virginia and enjoy the first smoke in this old timer.Brig18

Brig19

Brig20

Brig21

Restoring a Kaywoodie Super Grain 40 Lovat


Blog by Steve Laug

My son-in-law and I went pipe hunting a few weeks ago and this was one of the finds that day. I picked it up in an antique shop in Bellingham, Washington. I think I paid $15 for it. The stem was slightly overturned and would need to be fixed. The stem was clean of bite marks or tooth chatter. The stinger was intact and was a three-hole one so the pipe was newer rather than older. The finish was not ruined. The rim was caked with tars and oils. The buildup was only back side and went to the left side of the rim. The briar had quite a few fills on the sides and back of the bowl. The stamping on the left side was clean and easily read – Kaywoodie over Super Grain over Imported Briar. On the right side of the shank was stamped the shape number 40.KW1 KW2 The inside of the bowl had a light cake that was soft and crumbling. It would need to be reamed back to the bare wood in order to build a hard carbon cake.KW3 KW4 I reamed the bowl with a PipNet reamer and used the smallest cutting head first and then the second cutting head to finish the job.KW5 I removed the stem from the shank so that I could heat the stinger apparatus with a lighter. The black buildup of tars and oils on the stinger was hardened and not easily removed. Once I heated the stinger with the lighter I was able to wipe down the surface with a cotton pad and alcohol. I heated the stinger until the glue in the stem softened and then screwed the stem back into the shank and turned it until the stem lined up with the bowl.KW6 I cleaned the inside of the shank and stem with pipe cleaners, cotton swabs and isopropyl alcohol. The shank behind the metal insert was very dirty. I used the cotton swabs to clear out that area. I scrubbed it out until it was clean. I also cleaned out the airway in the stem the same way until it was clean.KW7 I scrubbed the top of the bowl with isopropyl alcohol on cotton pads to remove the buildup. It was thick so it took quite a bit of scrubbing. To finish removing it I used 1500 grit micromesh sanding pad and water. I was able to get the rim clean and then used a staining pen to touch up the rim.KW8 KW9 KW10 The lightest colour staining pen matched the finish of the bowl perfectly. I gave the bowl and rim a quick buff with White Diamond and then gave it multiple coats of carnauba wax and buffed it to a shine.KW11 I was fortunate that the stem was not damaged with bite marks or tooth chatter. I use micromesh sanding pads to clean up the stem. I wet sanded with 1500-2400 grit pads and dry sanded with 3200-12,000 grit pads until the finish of the stem was smooth. I buffed it with White Diamond to finish the process and then gave it a coat of carnauba.KW12 KW13 KW14 I put the stem back on the shank and then buffed the entire pipe with White Diamond a final time. I gave the stem and bowl multiple coats of carnauba wax and buffed it with a soft flannel buffing pad to raise the shine.KW15 KW16 I touched up the fills with the stain pen and then buffed the pipe bowl with White Diamond yet again. The results were acceptable. I gave the pipe several more coats of carnauba wax and buffed it with a soft flannel buffing pad. The finished pipe is shown in the next series of photos. It is ready to be loaded and smoked – clean and waiting for the next pipe man who will carry the trust to the next generation of pipe smokers.KW17 KW18 KW19 KW20

Cleaning up a Peterson 312 System Pipe


Blog by Steve Laug

The Peterson I picked up on my trip was in great shape externally. The seller at the antique mall had cleaned up the outside of the pipe and polished the stem and bowl. The pipe was clean and shiny. The stamping was very clear on the ferrule and shank. The ferrule was stamped K&P Peterson’s and had three faux hallmarks as usual on the nickel ferrule of Peterson pipes. The shank was stamped on the left side with an arched Peterson’s over System and over Standard. On the right side of the shank the shape number has been stamped over with Made in the Republic of Ireland. The shape number is present under the over stamp and I can read the first two numbers clearly – 31_, but the third number is covered with other letters so it is not readable.Pete1 Pete2 I wanted to figure out the number stamping that lay hidden under the Made in the Republic of Ireland stamping. I went to the Peterson site and looked for the shape charts. I was able to identify the shape as a 312. Here is the link to the shape http://www.peterson.ie/p/5291/312-standard as well as a picture of the shape 312.0002552_312-standard_430 I also found this shape chart of Peterson System pipes on Pinterest and included the link to it here: http://www.pinterest.com/pin/464996730250913354/ I was particularly interested in noting the size variation between the 312 and the 314. While the shapes are very similar the 314 is significantly smaller than the 312.Pete3 The bowl had been wiped clean and had no cake inside. The rim was dirty and darkened with a thin buildup of carbon and oils. The inside rim was clean and the bowl was in round. There were no serious nicks in the bowl edges. The nickel band was polished and undented. The stem was lightly oxidized and had a light tint of brown. There were no tooth marks or bite marks on the stem. The pipe was in good shape and would be one of my easier clean ups. The inside of the shank and sump had a lot of tars built up inside. The airway was also dirty. The seller had used silver polish on the ferrule and there was a white buildup on the inside edges of the shank.Pete4 Pete5 Pete6 The next photo below shows the underside of the bowl and stem. Both the finish and the stem were in great shape with no visible dents or damage.Pete7 The tenon was wide open like it had been made for a filter. It could hold a paper Medico style filter. I have never seen a filter version of the system pipe. I am wondering if the stem is a replacement or possibly it was drilled out to open it up to receive the paper filter. Obviously the internals had not been cleaned. There was a buildup of hard carbon on the tenon end and on the inside of the tenon. It was hard and would not easily be removed.Pete8 I cleaned up the stem and the sump with cotton swabs, pipe cleaners and isopropyl alcohol until they came out clean. I used a lot of pipe cleaners and cotton swabs before it was clean. I softened the carbon buildup on the tenon with alcohol and then sanded it with 220 grit sandpaper and scraped it away with a small blade to remove the hardened carbon.Pete9 Pete10 The bowl and shank had a heavy aromatic tobacco smell so I stuffed them both with cotton balls and used an ear syringe to put alcohol in both the bowl and shank. I set the bowl upright in an ice-cube tray and let it sit while the alcohol and cotton wicked out the oils and tars and sweetened the pipe. By doing this the pipe would be reset and could be smoked with any tobacco without picking up residual tastes.Pete11 Pete12 While the bowl sat soaking I worked on the stem to remove the oxidation. I sanded it with micromesh sanding pads – wet sanding with 1500-2400 grit pads and dry sanding with 3200-12,000 grit pads. I wiped it down with Obsidian Oil between each set of three pads.Pete13 Pete14 Pete15 I buffed it with White Diamond on the buffing wheel. Then I gave it several coats of carnauba wax and buffed it to a shine with a soft flannel buffing pad.Pete16 Pete17 Pete18 Pete19 After the bowl had been sitting for 4 hours I took the photo below and then pulled out the cotton balls. The alcohol had evaporated and left behind a brown/amber residue on the cotton balls. Once the cotton was out I ran a folded pipe cleaner through the bowl and the sump area of the shank. It came out clean. I ran a straight cleaner through the airway into the bowl. It also picked up a slight bit of residue from the soak but it was clean after a few swabs. Best of all the smell of the aromatic tobacco was gone and what was left was a clean new pipe smell.Pete20 Pete21 Pete22 When the shank was dry I put the newly polished stem back in the shank. I gave the pipe a quick buff with some carnauba and polished it with a shoe brush to raise the shine. The finished pipe is shown in the photos below. It has some slight rim darkening from the previous owner but otherwise it is like new. The bowl and shank are fresh and ready to be loaded with a bowl of fine Virginias or some Virginia/Perique. I have some aged 5100 sitting in a jar here ready to smoke and also a small jar of some blending Perique so I may have to mix a small batch just for the inaugural smoke on this pipe…The briar is beautiful and the refurbished pipe came out very nice. I am looking forward to having a bowl very soon – just have to let the bowl dry out and air for a couple of days before I load it up and smoke it. In the meantime I will just look it over and enjoy the beauty of the pipe.Pete23 Pete24 Pete25 Pete26