Blog by Paresh
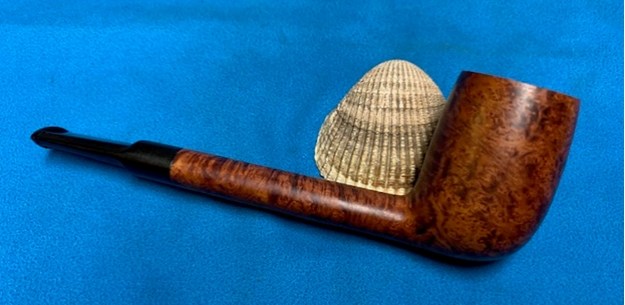
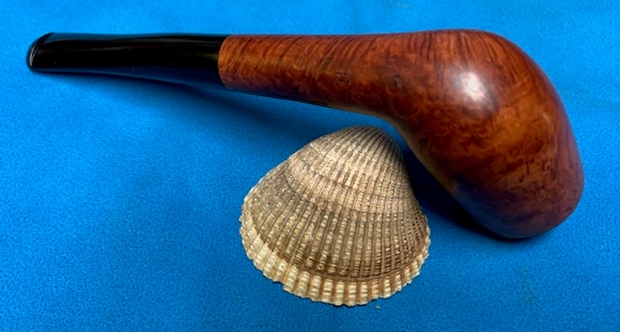
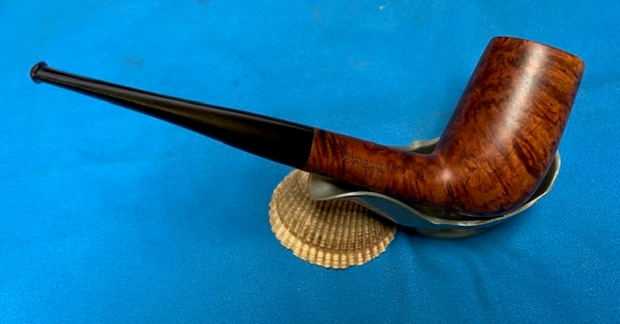
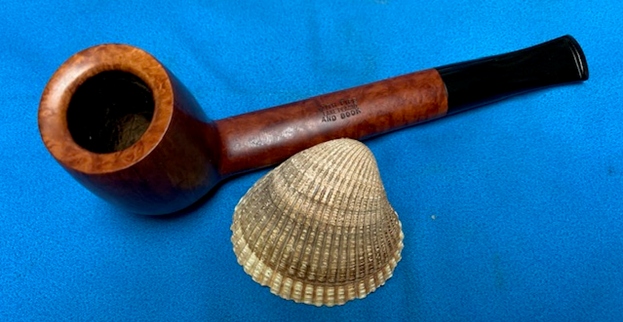
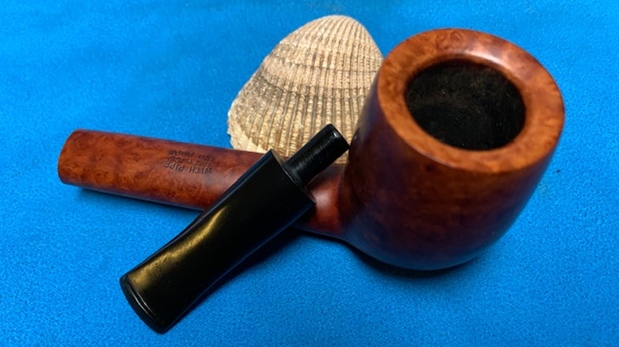
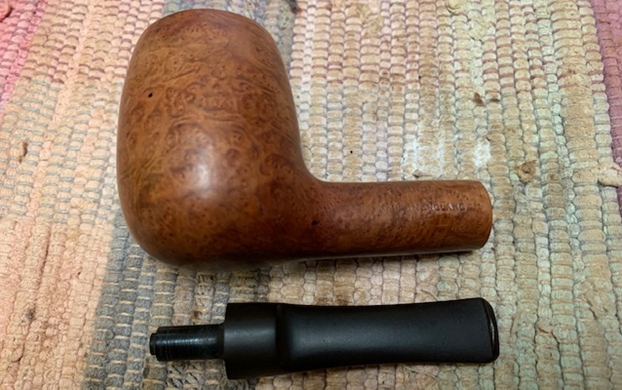
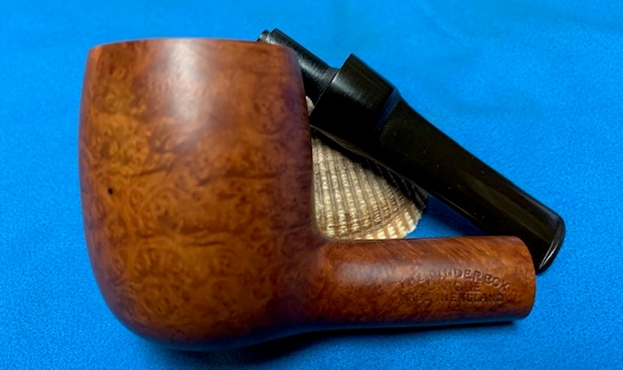
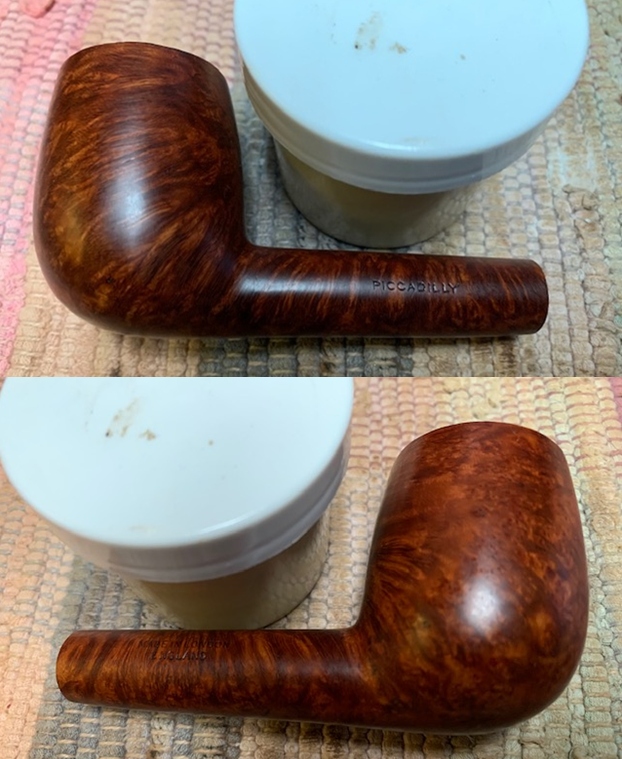
The next pipe that I decided to work on is a classic Zulu shaped pipe with beautiful bird’s eye grain to the sides of the stummel and cross grains to the front, back and over the shank surfaces. This pipe is stamped on the left shank surface as “Barling” in running hand over “4809” over “LONDON ENGLAND” in block capital letters. On the flat top right side of the shank is stamped “T.V.F”. The stampings are all crisp and deep. The trademark Barling cross has been completely buffed off from the saddle top of the Barling styled vulcanite stem. The size, shape and feel of the pipe is solid to the touch.  Barling’s pipe brand has been well researched and chronicled on pipedia.org and by Steve when he worked on many of Barling’s pipes over decades and thus, shall not waste time in repeating the information that is available. I too have carefully read and researched this brand as I do have many pipes that I have inherited and tentatively date this pipe as being an Early Corporate Era pipe. I have based my conclusions based on the following facts that I have read on pipedia.org (https://pipedia.org/wiki/Barling)
Early Corporate Era Nomenclature
A script Barling logo replaces the block “Barling’s Make” logo. Makes sense, no Barlings are making pipes.
The pipes retain the 4 digit model number introduced in mid 1962, but they also introduce a size 1, which means that there are 4 digit numbers beginning with a 1. The model number is placed right below the Barling logo.
The words LONDON ENGLAND are stamped below the model number. The “MADE IN ENGLAND.” Stamp is discontinued. Ye Olde Wood and TVF have both been discontinued. They will return in the mid 1960’s.
Thus, even though it is not a pre-transition piece, this pipe from after mid 1960s, still has the classic shape, draw and feels nice in the hand that Barling’s pipes are so famous for.
Initial Visual Inspection
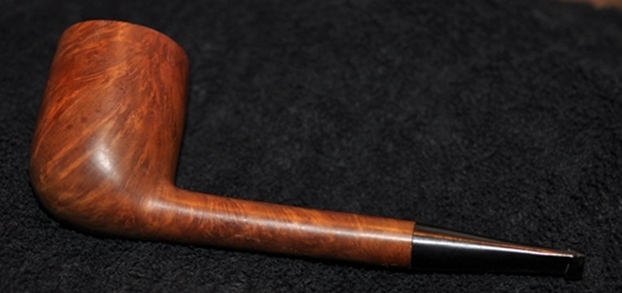
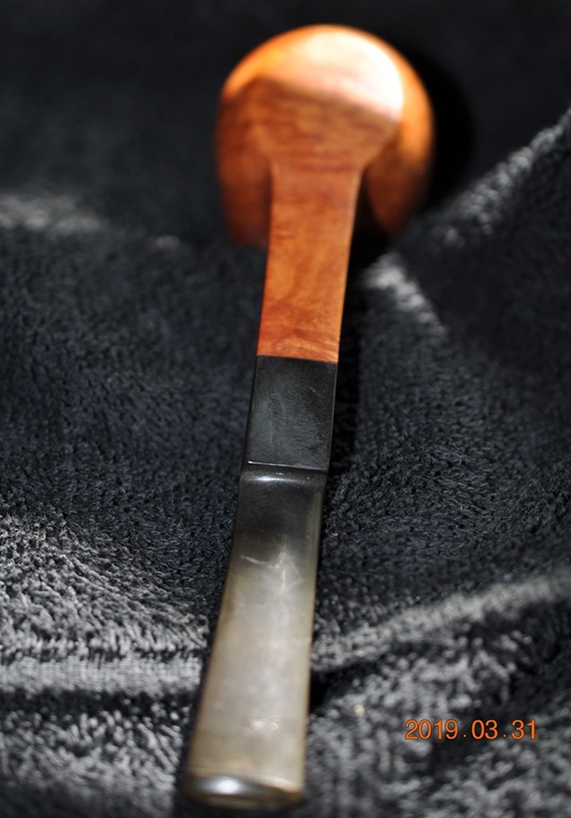
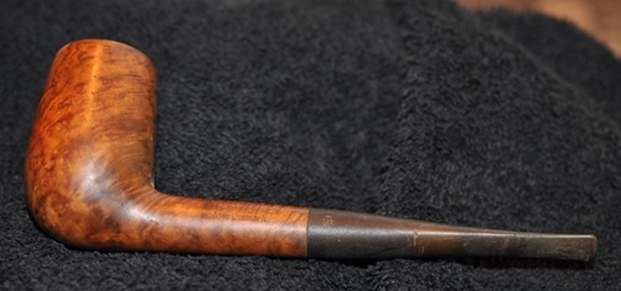
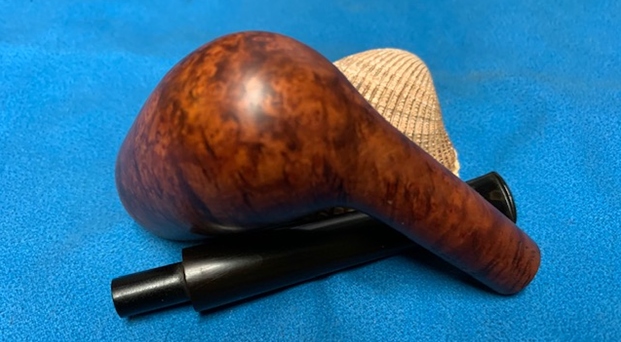
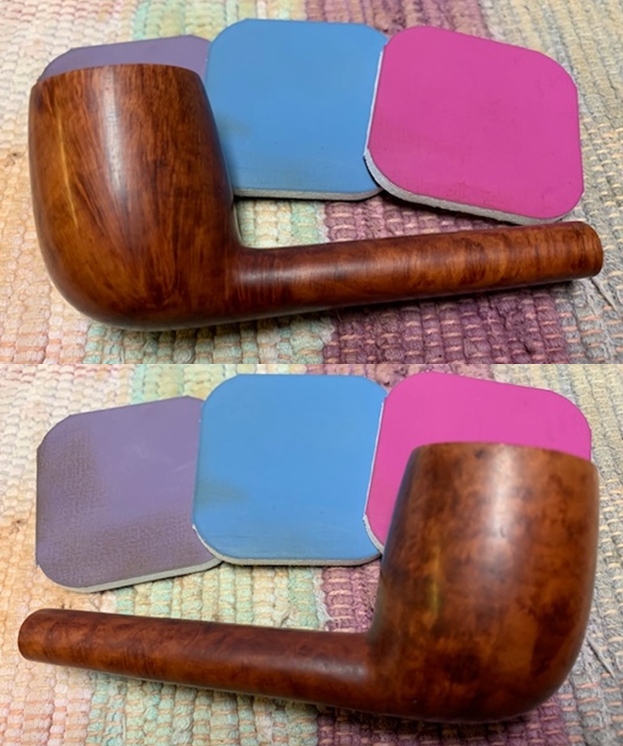
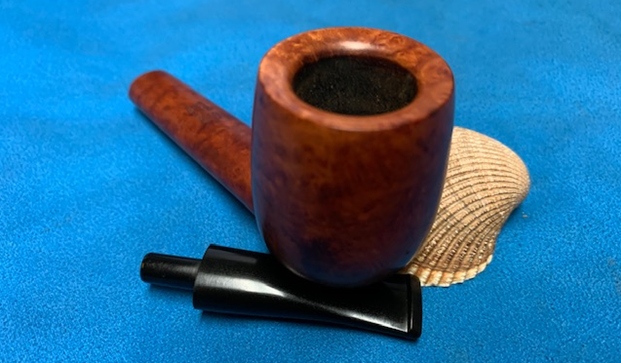
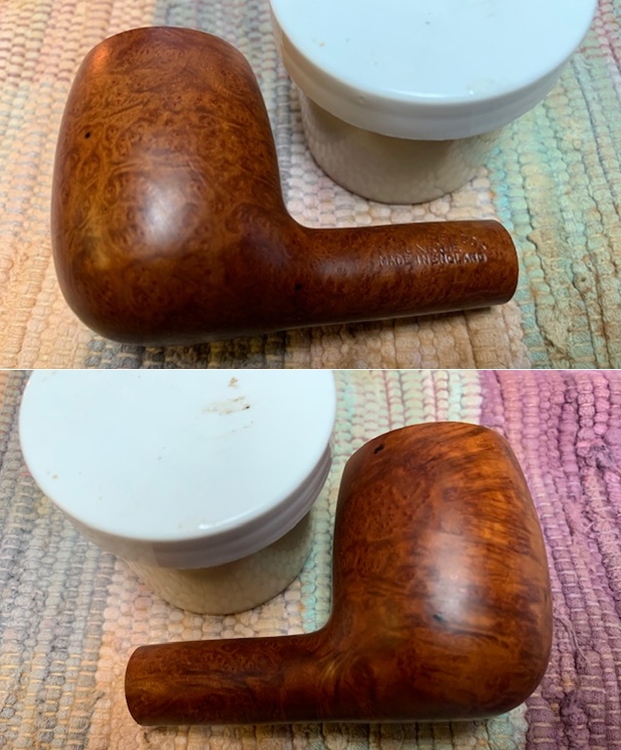
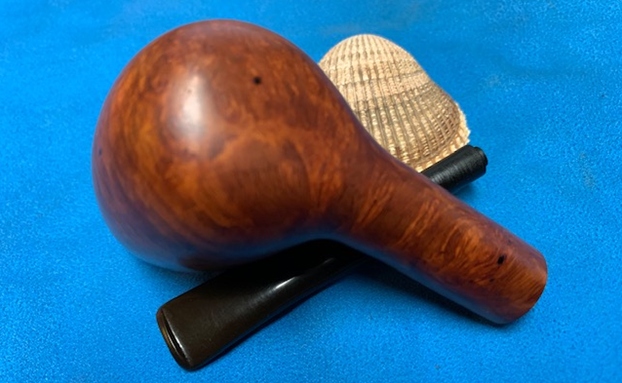
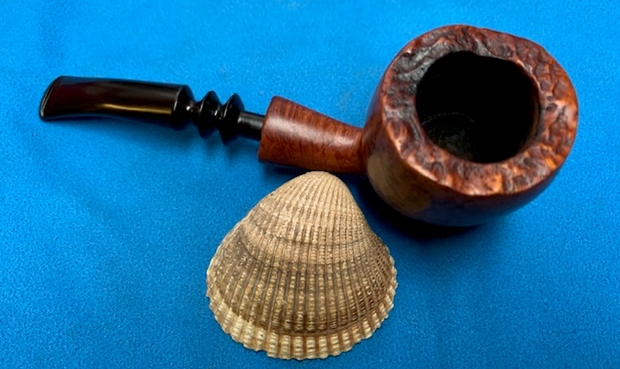
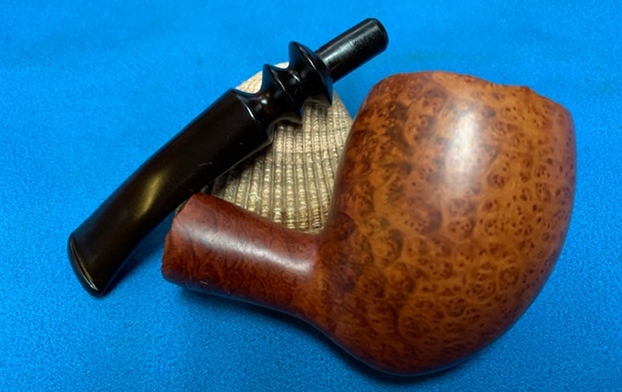
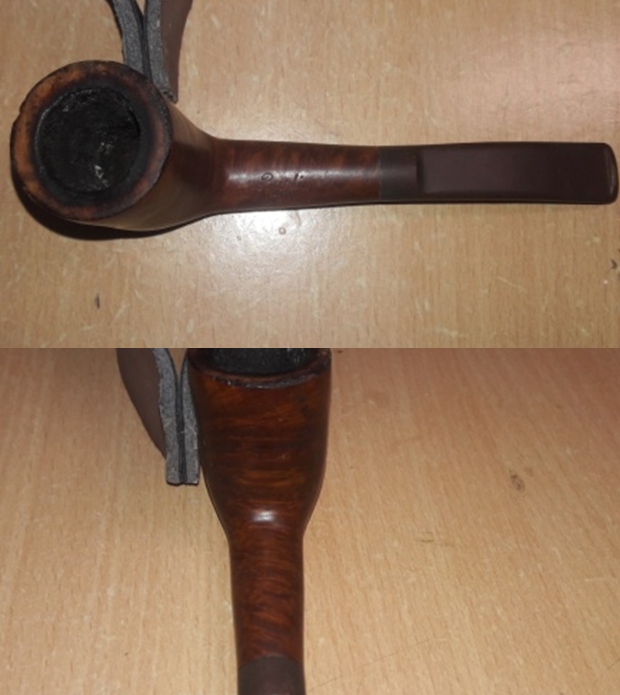
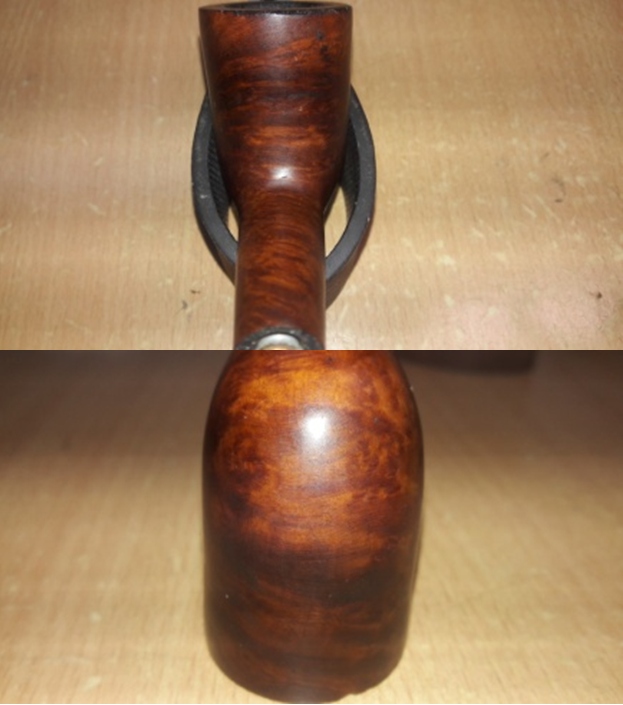
This pipe has a decent medium bowl size with chamber depth of about 1 7/8 inches. The stummel boasts of some beautiful cross grains to the front and back of the bowl and all around the shank and loosely packed Bird’s Eye to the right side of the stummel. The stummel is covered in dirt and grime of the overflowed lava and dirt accumulated over the years of heavy smoking and uncared for attention to cleaning and maintenance. There is a thick layer of cake in the chamber and few severe chips and dings to the rim edges. The stem is heavily oxidized with a perceptible gap between the stem and shank end face. The pipe’s appearance, as it sits on my work table, does not present an encouraging picture.
 Detailed Inspection Of The Pipe And Observations
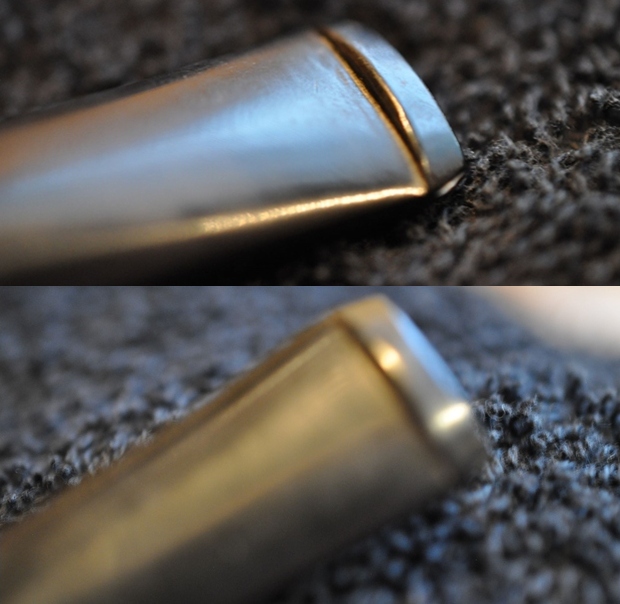
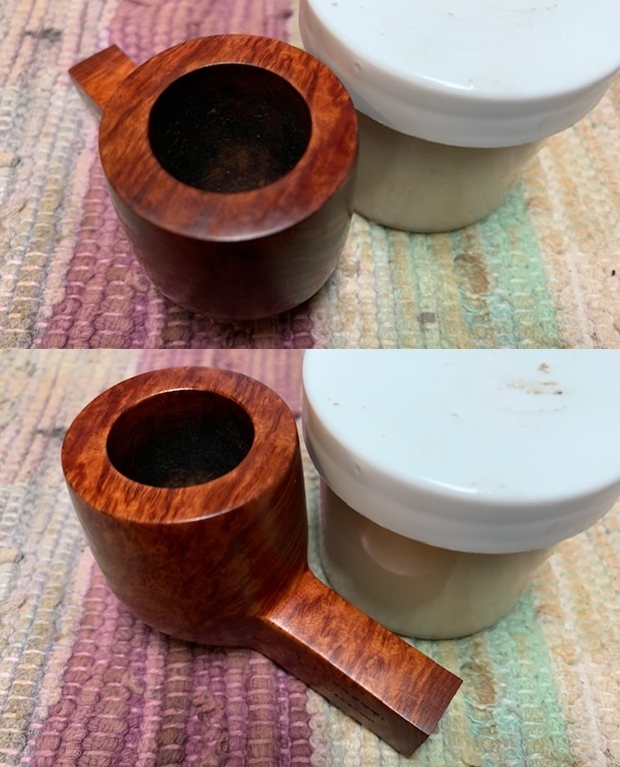
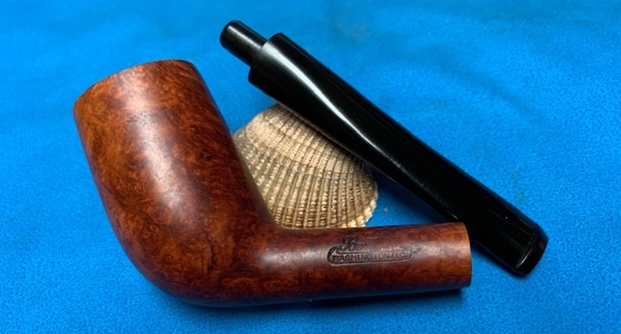
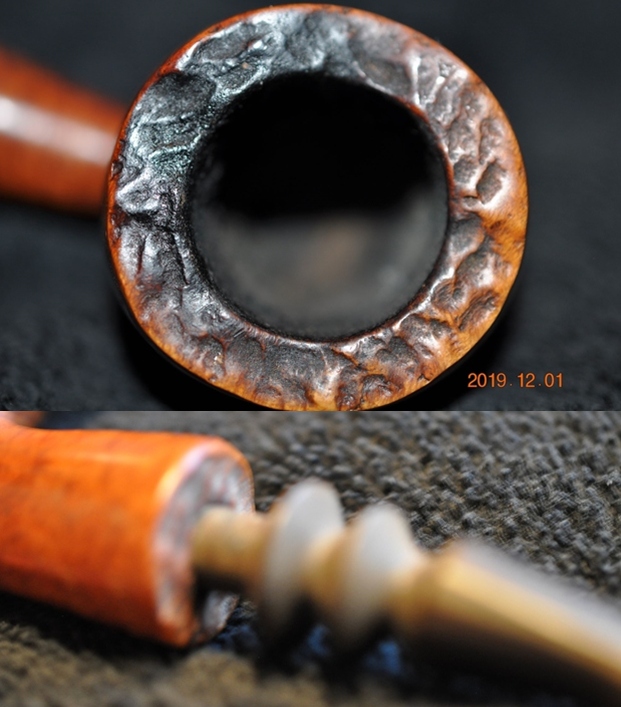
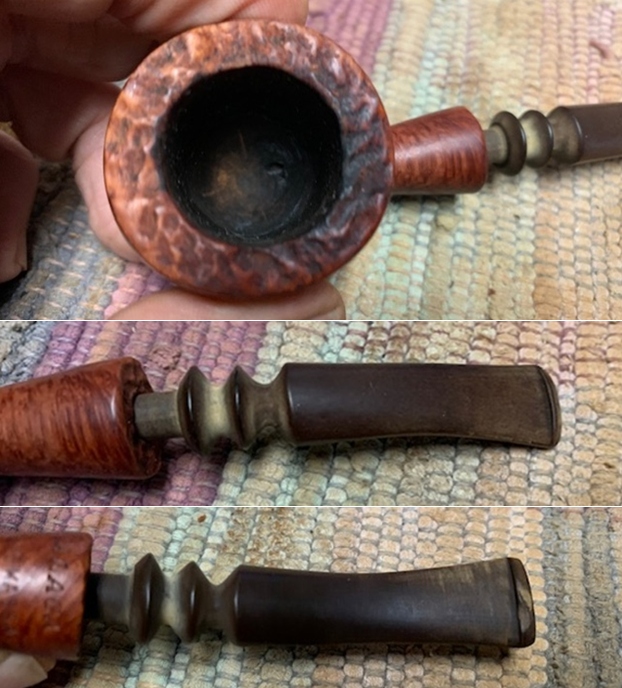
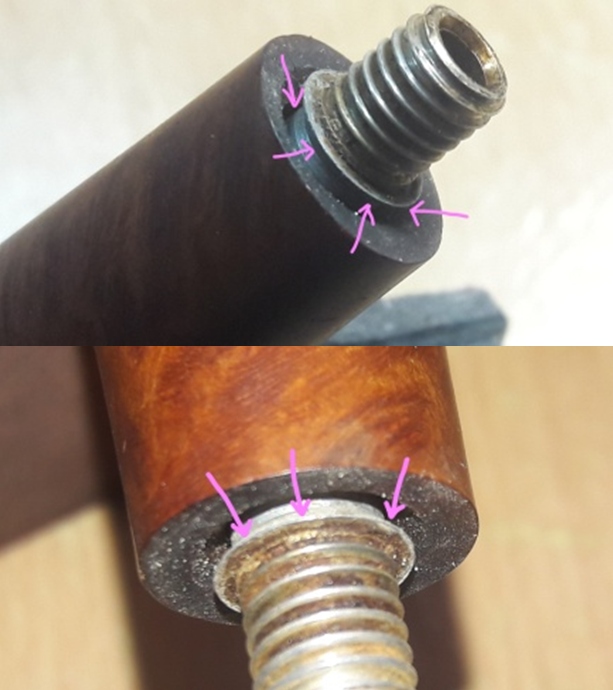
The first thing I noticed was the perceptible gap (indicated with red arrows) between the stem and the shank end face with the stem completely seated in the mortise. I attempted to separate the stem from the shank, but the stem wouldn’t budge. I chucked the pipe in the freezer for about four hours. I tried again and this time the stem turned but with a sinking feeling, I realized that it was not the tenon that was turning but it was the rest of the stem that turned. It dawned on me that the original tenon had been replaced with a threaded one. After a few careful turns, the stem separated from the shank end. The original tenon had been replaced with an aluminum one and the tenon remained firmly embedded in to the shank.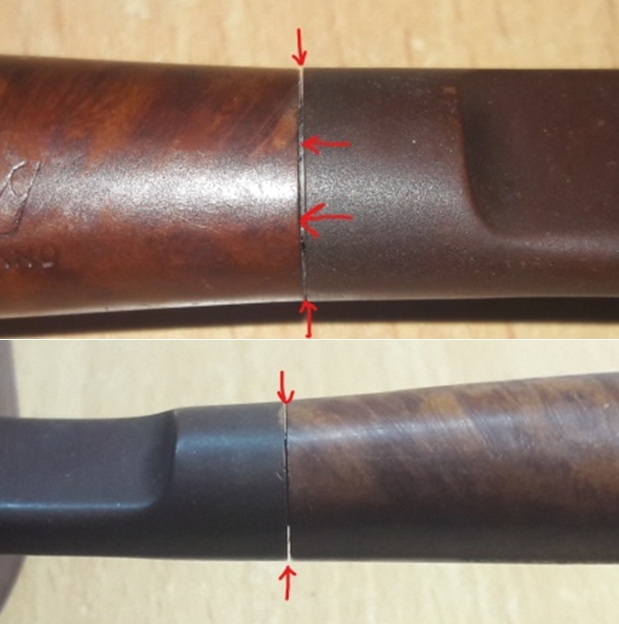 A closer look at the embedded tenon showed prominent outwards protruding shoulders (indicated with yellow arrows) while a matching bevel (indicated with green arrows) had been carved in the saddle at the tenon end of the stem face to accommodate the tenon shoulders. Threads had been tapped in to the saddle for seating the threaded tenon. The gap between the aluminum tenon and the shank face (indicated by pastel pink arrows) is too large. These repairs are well done and have been done by a professional. However, even though the repairs are solid and neatly done, I would rather prefer to have a Delrin tenon over a metal tenon for the reasons of hygiene and ease of maintenance, not to mention the aesthetics of the pipe.
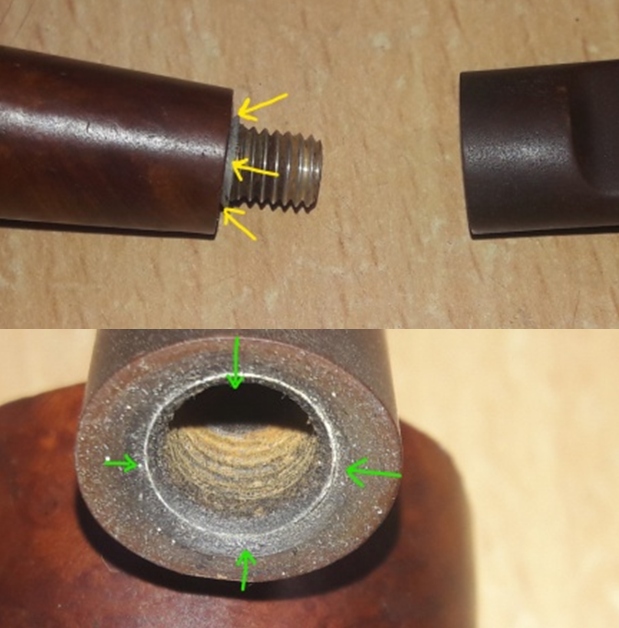
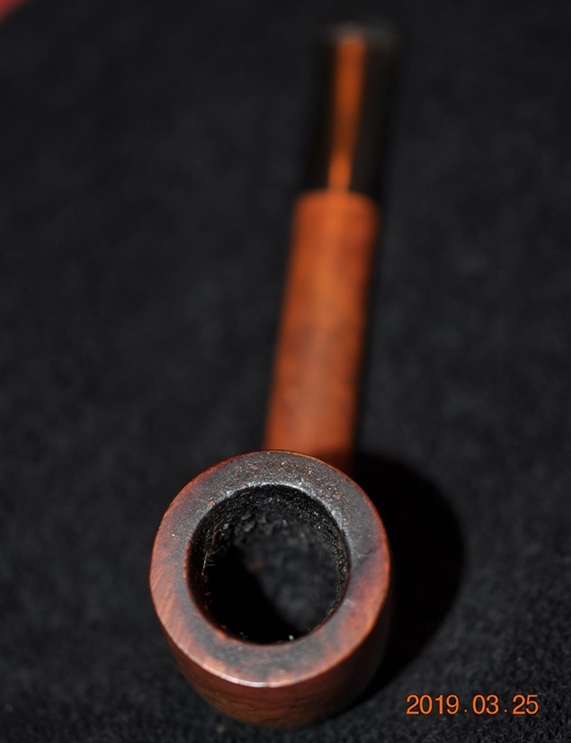
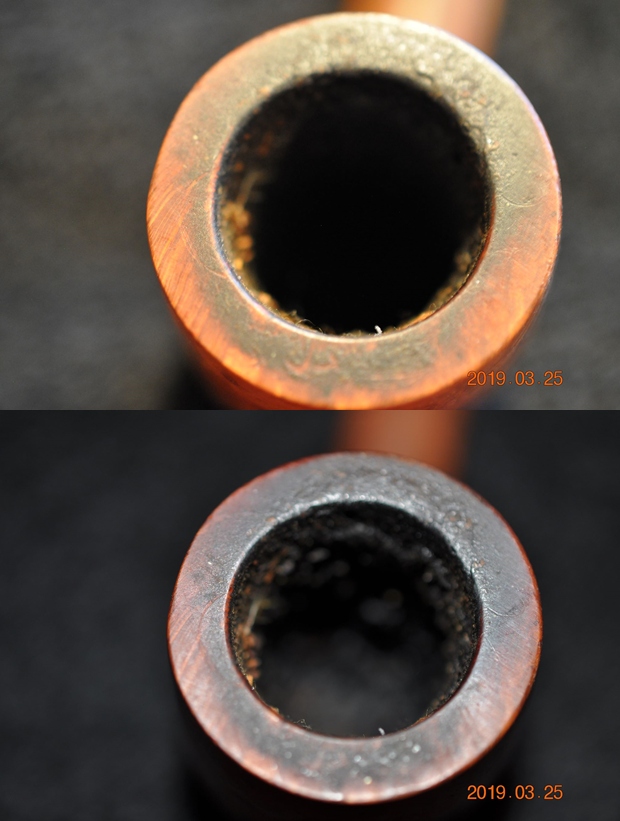
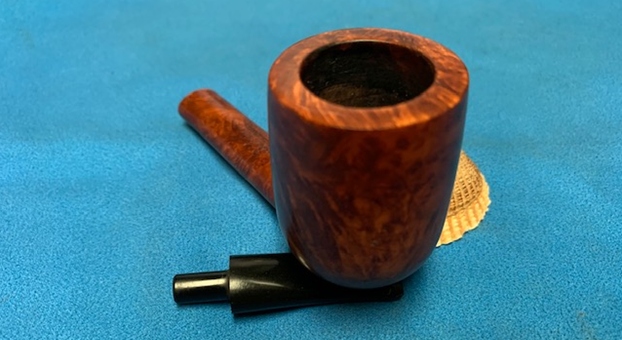
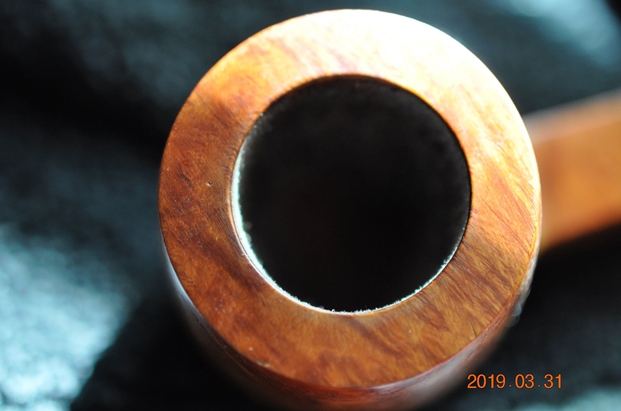
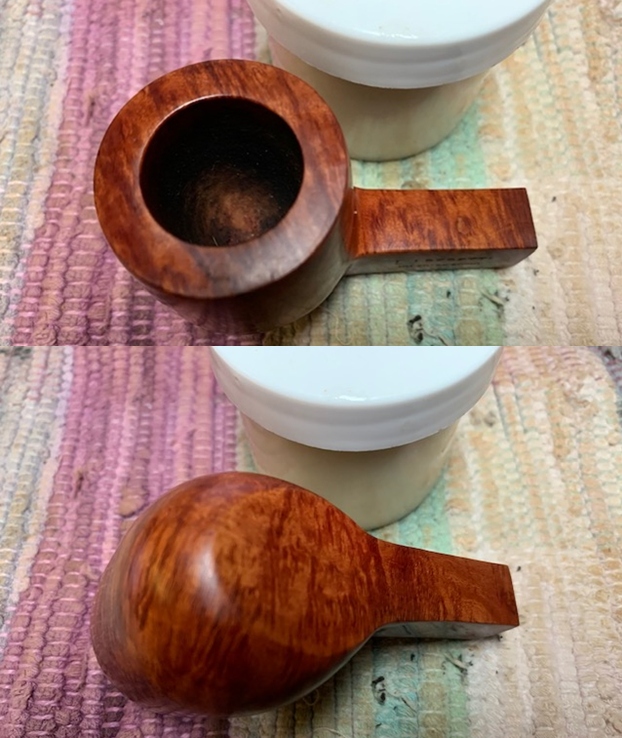
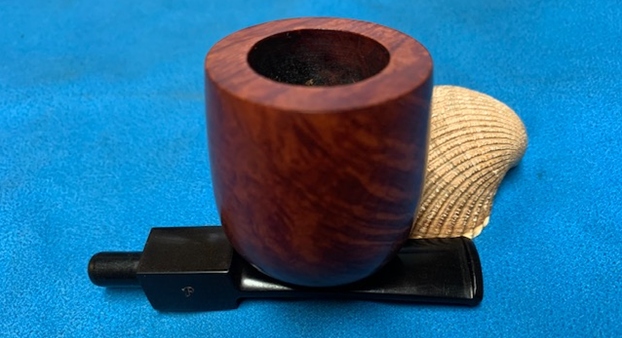
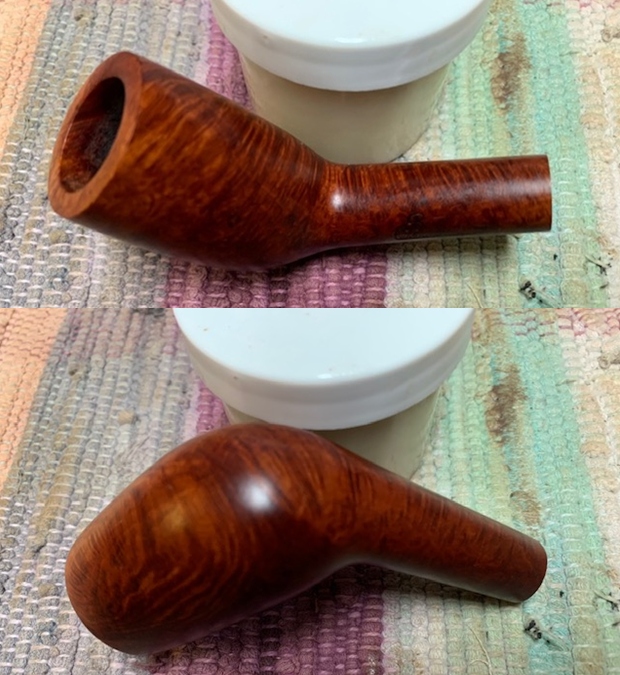
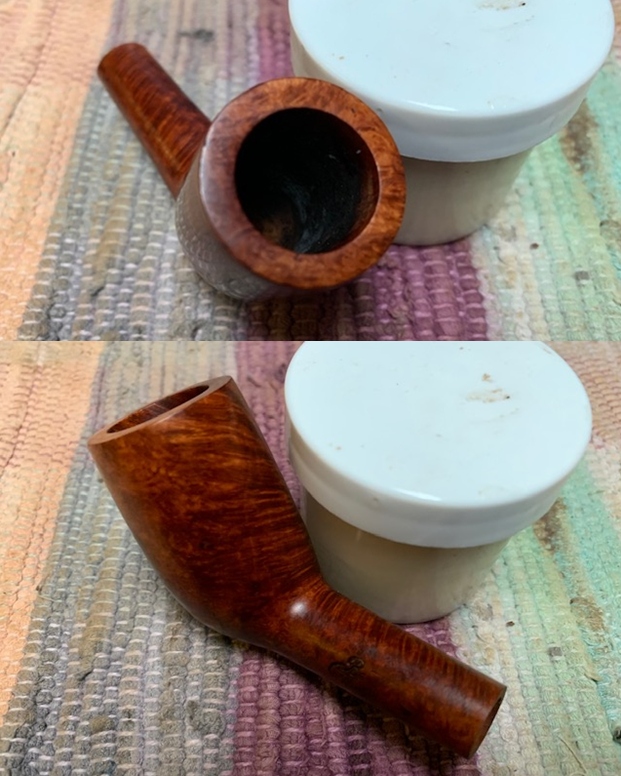
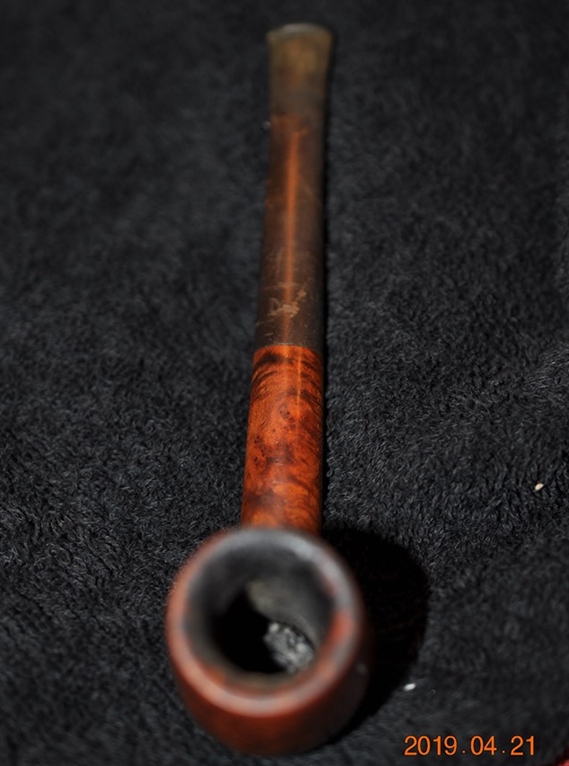
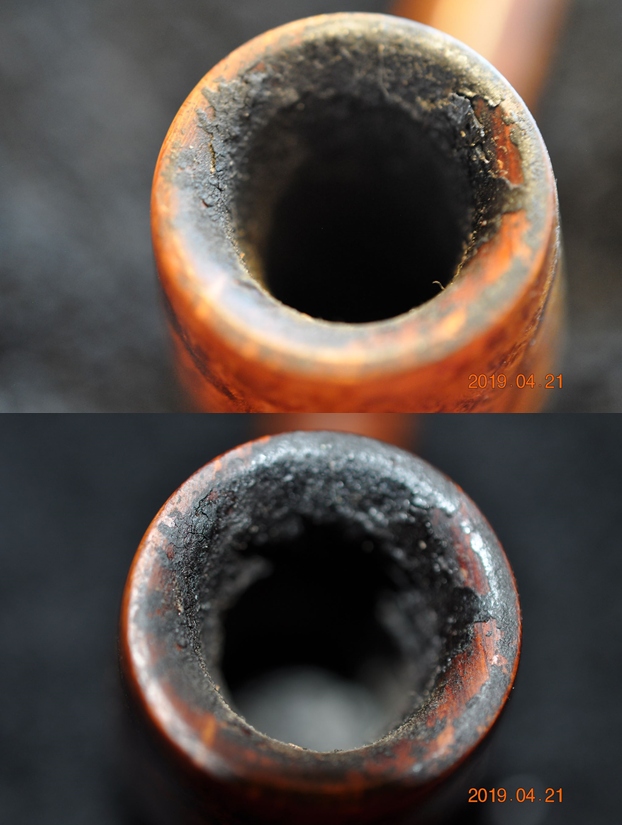
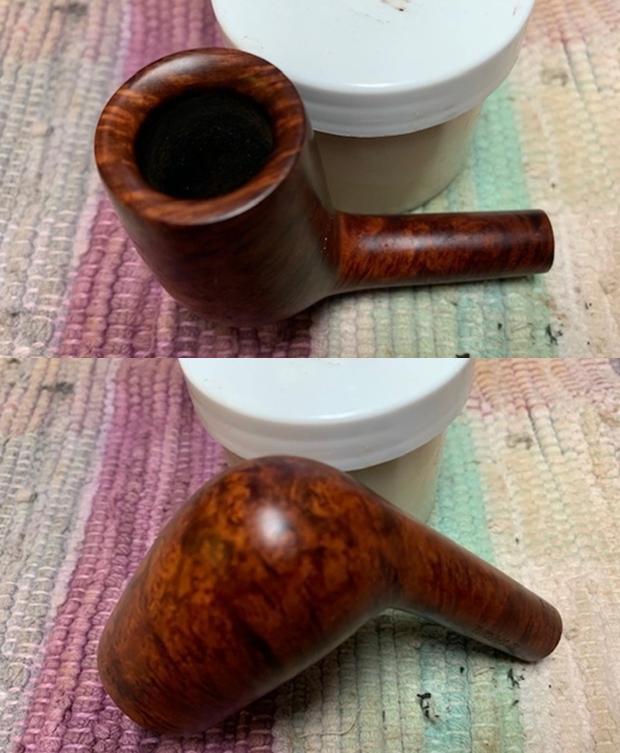
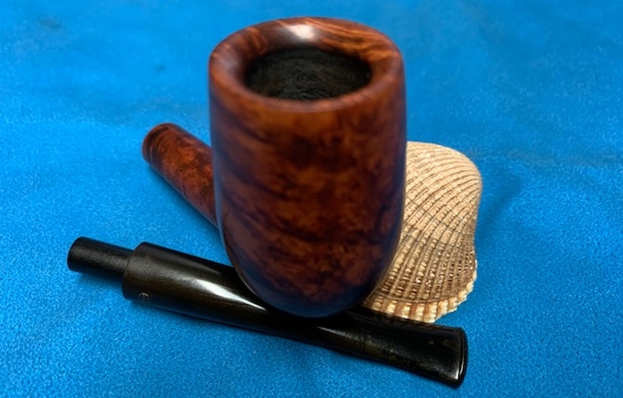
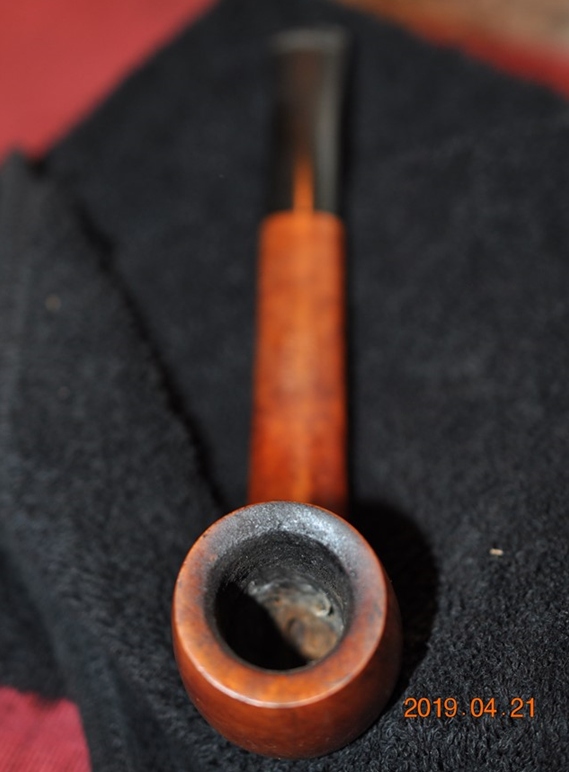
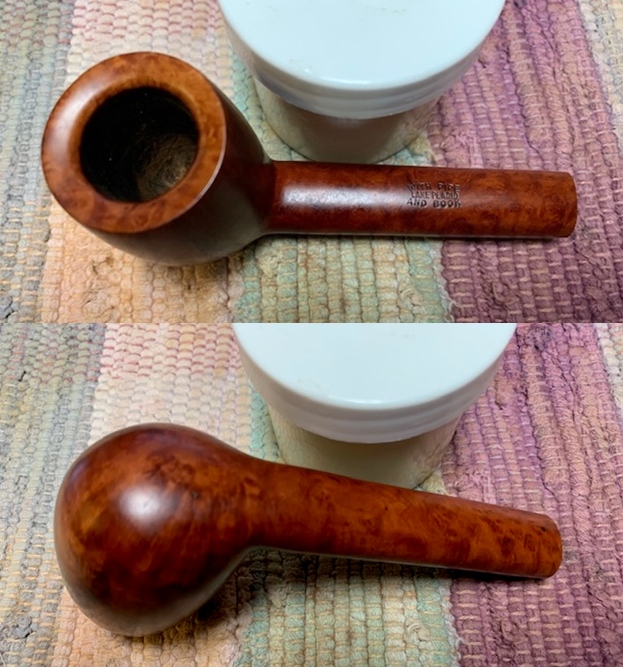
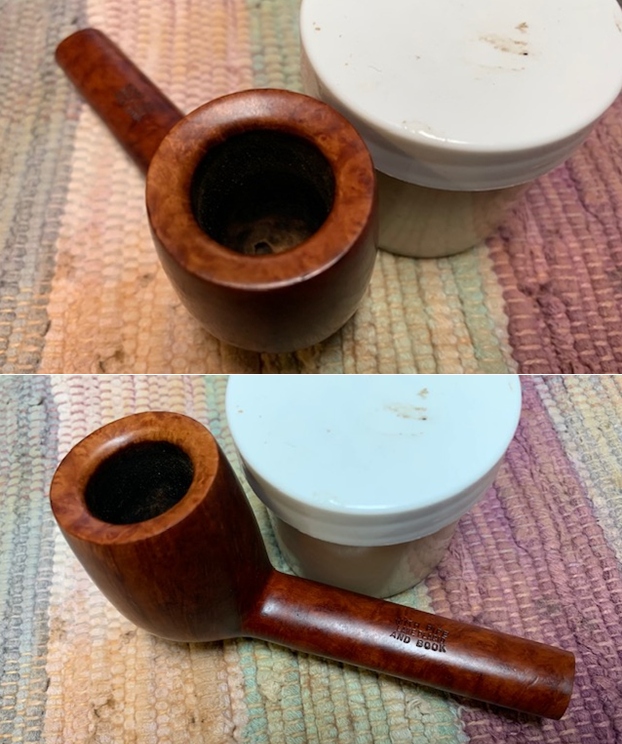
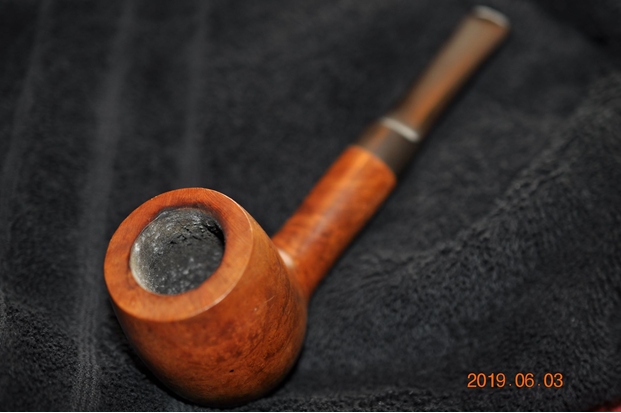
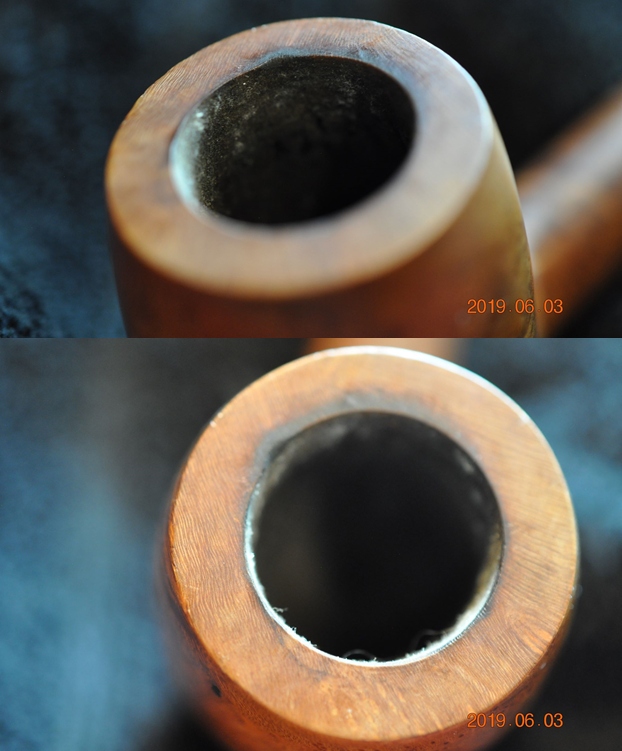
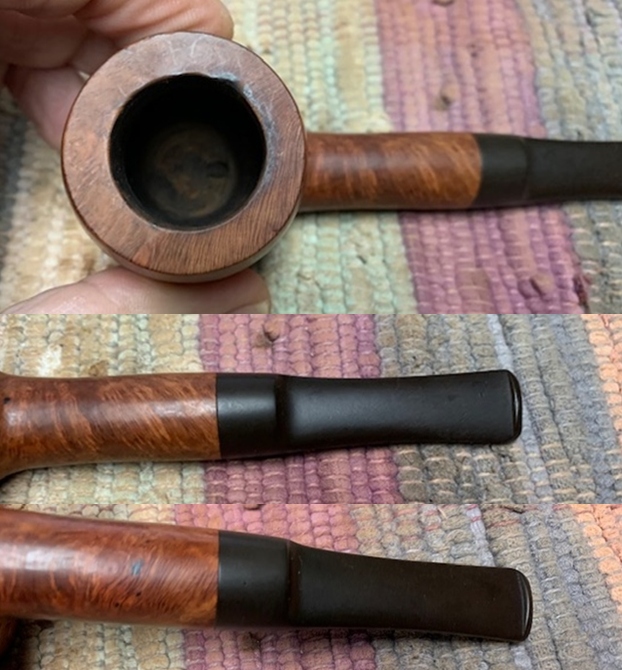
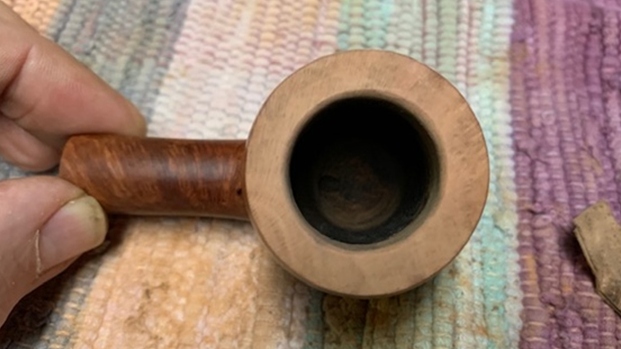
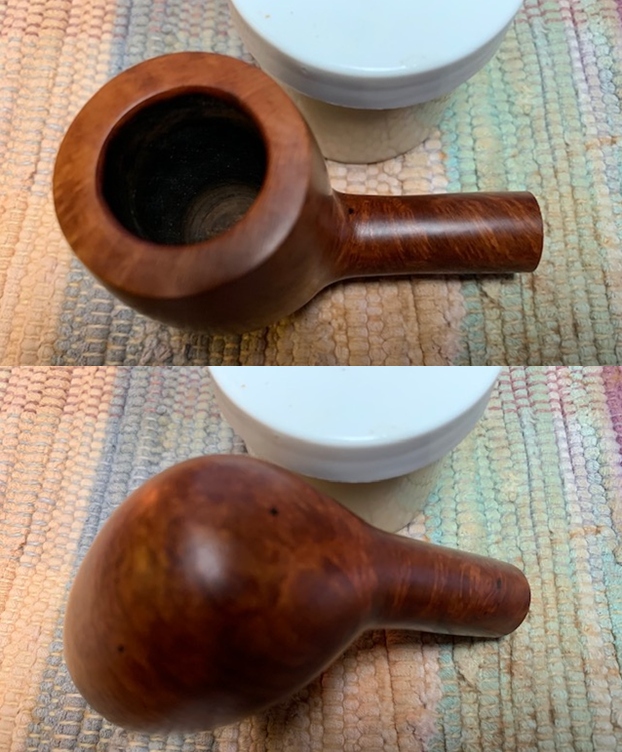
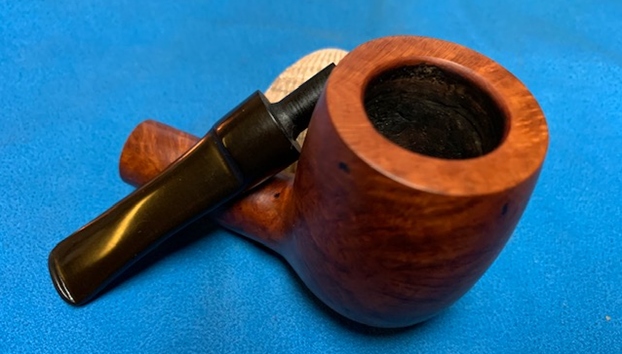
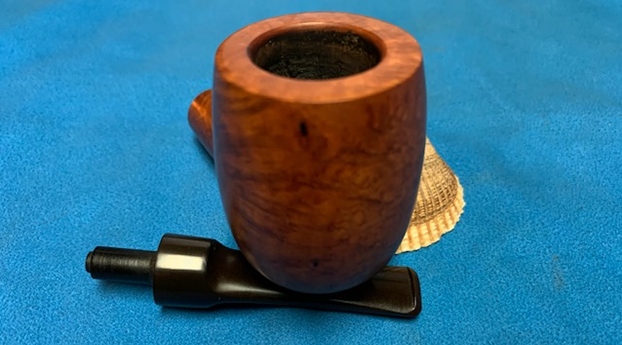
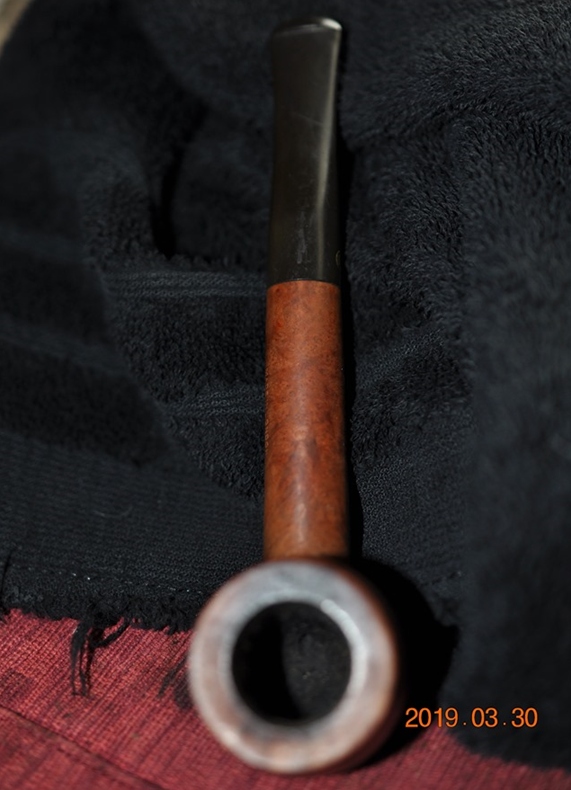
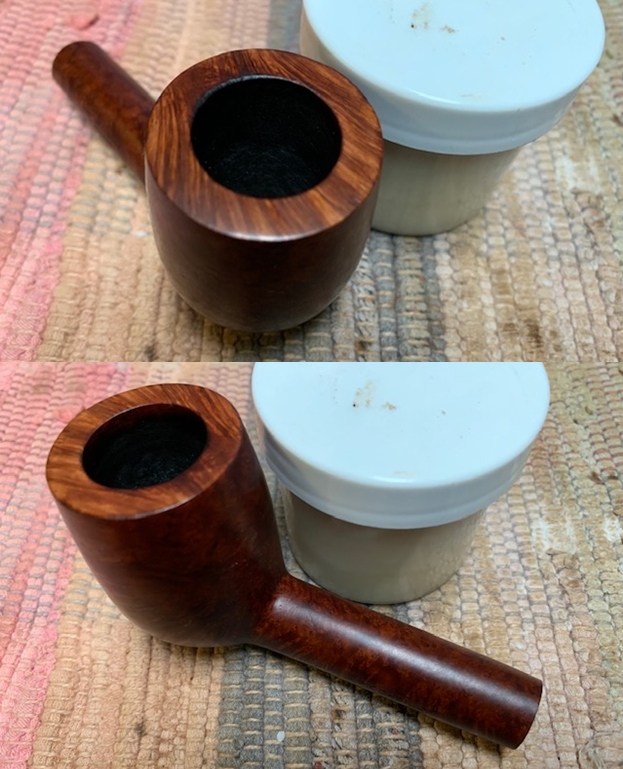
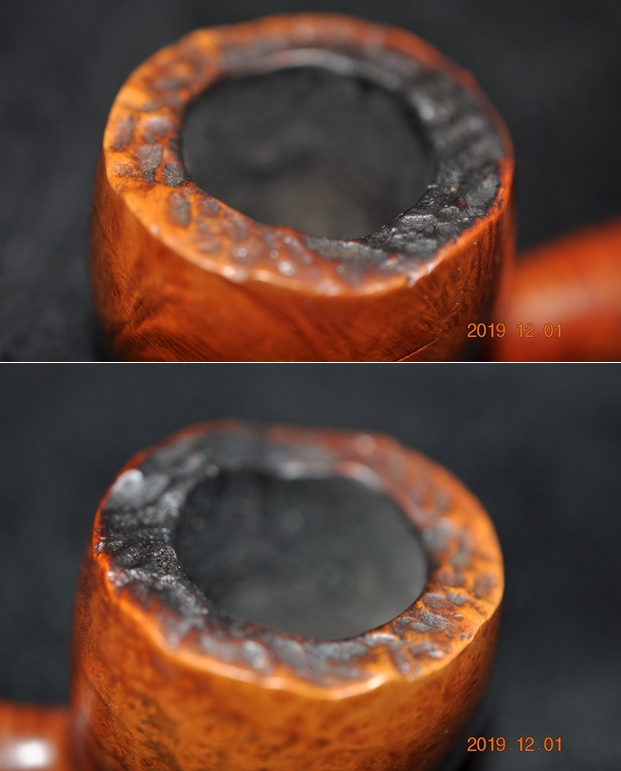
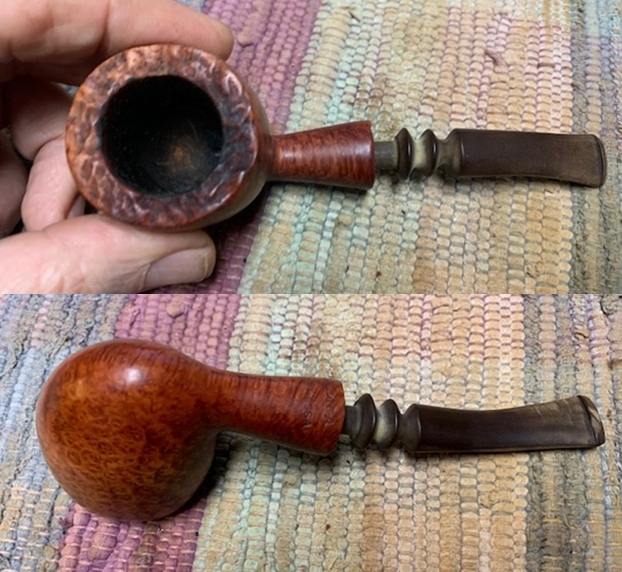
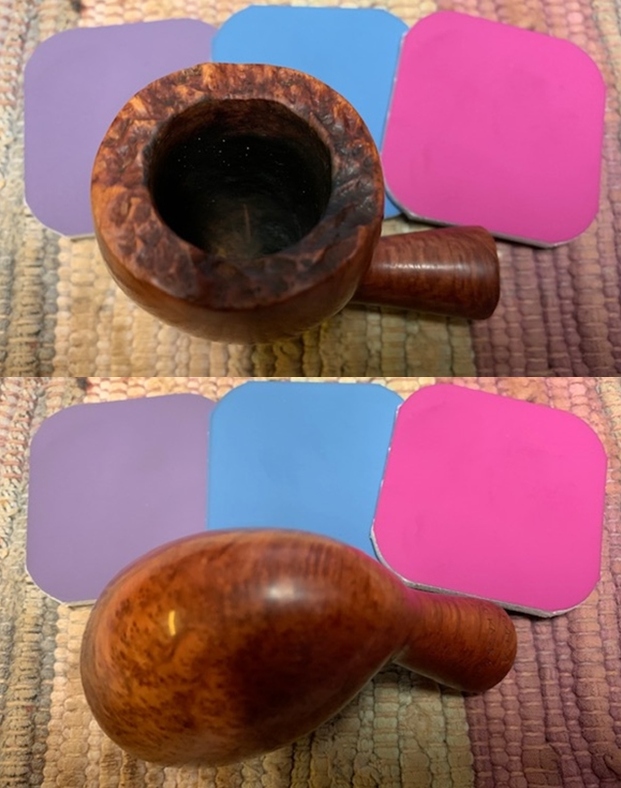
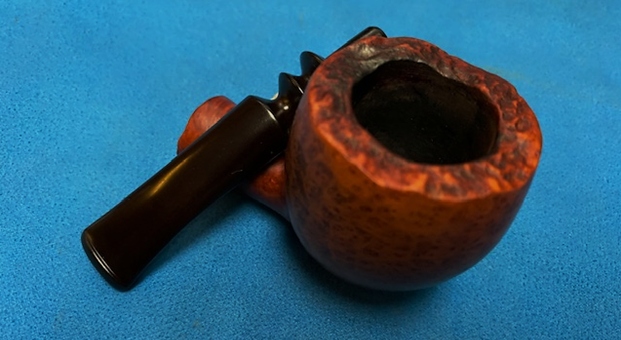
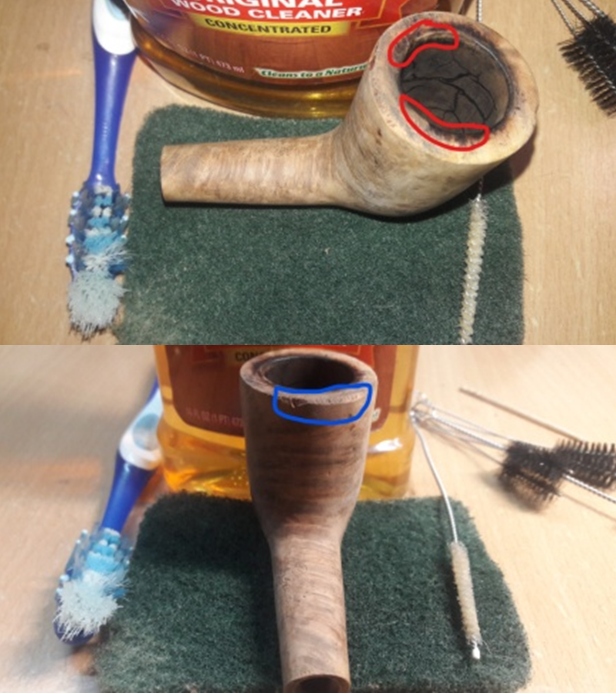
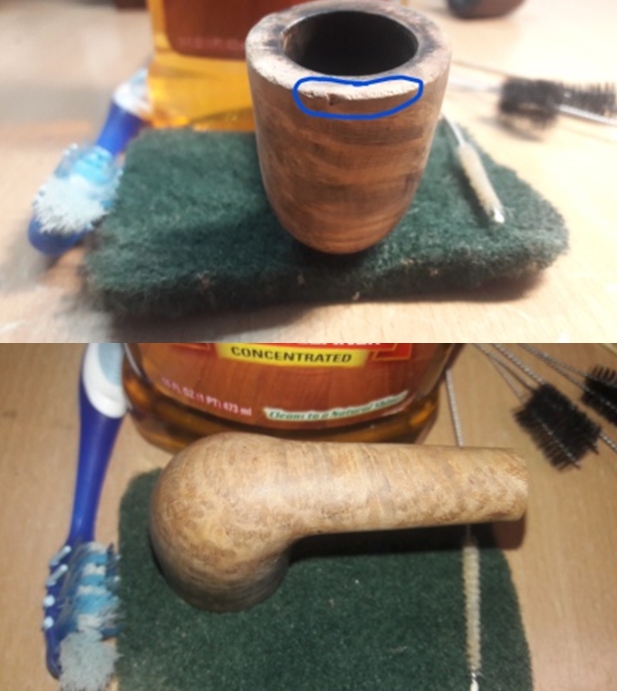
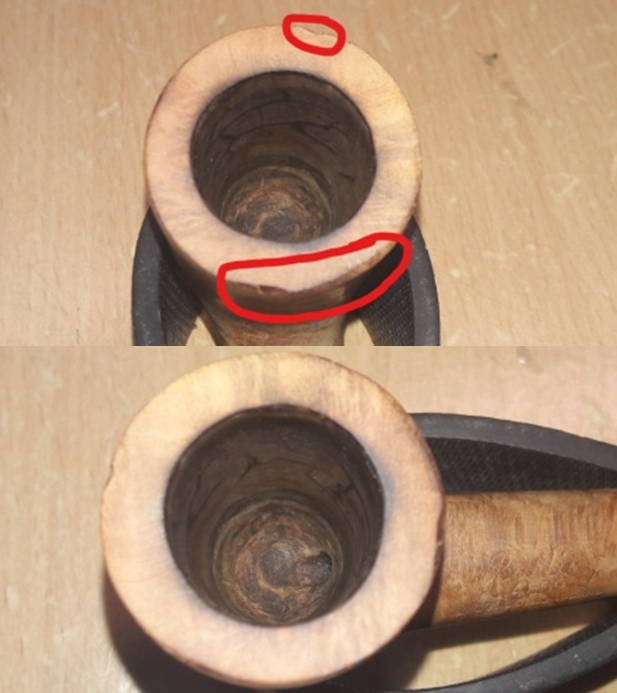
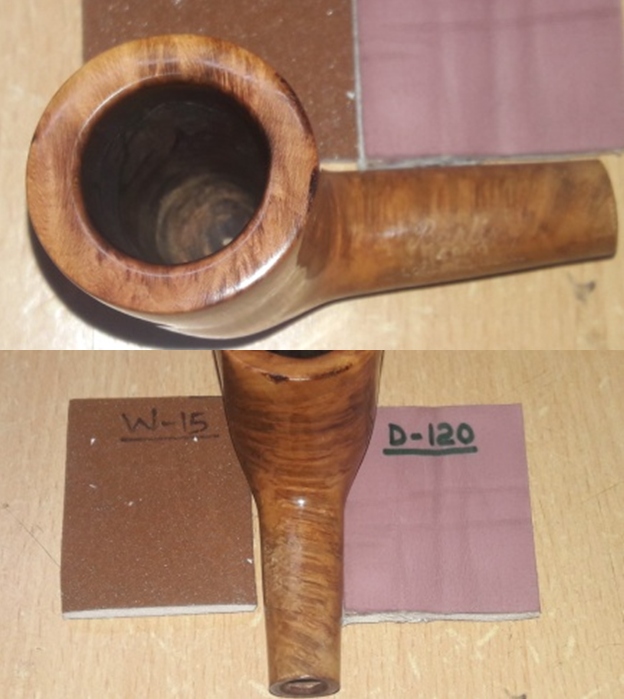
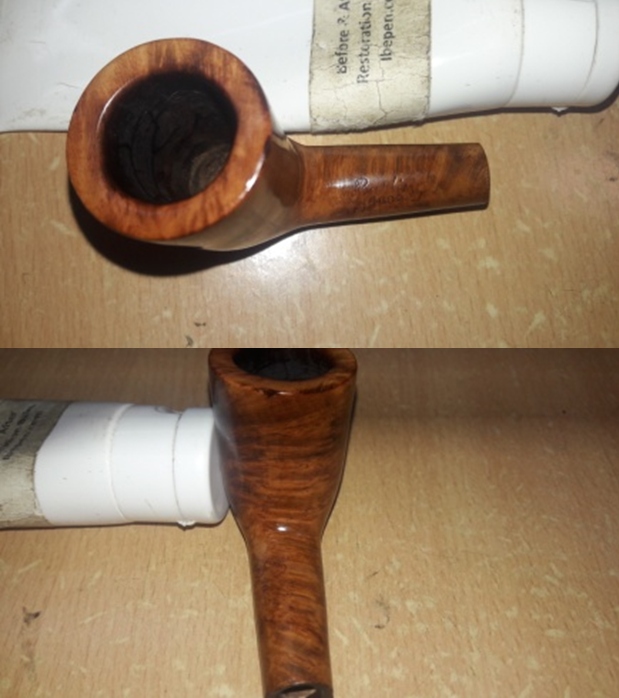
 The bowl has a wide rim that slightly tapers down towards the heel and has a chamber depth of about 1 7/8 inches. The draught hole is at the bottom and center of the chamber and this construction should make it a great smoke. The chamber has an even layer of thick hard cake with a strong ghost smell. The rim top surface is covered with thick lava overflow and has max accumulation in the lower half of the rim top. Through this layer of lava, a few dings can be seen over the rim top surface. The inner rim edge appears dark and worn out all around, however the damage seems to be severe in 8 o’clock and 3 o’clock directions (encircled in blue). The outer rim edge is equally damaged all along the periphery. There are a number of dents/ dings and chipped areas over the outer rim edge but most severe in 6 o’clock, 12 o’clock and 10 o’clock direction (encircled in yellow). The condition of the inner walls of the chamber can be commented upon after the cake has been taken down to the bare briar. The stummel appears solid to the touch all around and hence I do not foresee any serious damage to the walls in the form of burnout/ deep heat fissures/ lines or pits. The dark inner rim edge, in 8 o’ clock and 3 o’clock direction, may be charred further than anticipated and the same will be confirmed after the surface has been thoroughly cleaned. I need to resort to topping the rim top in order to address the damage to the rim top surface. The ghost smells should reduce once the cake from the chamber is removed and the shank has been cleaned.
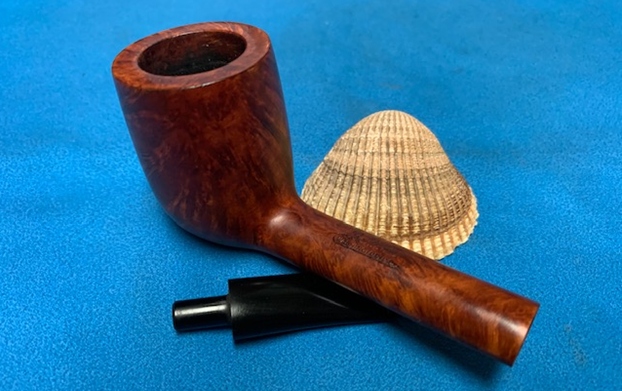
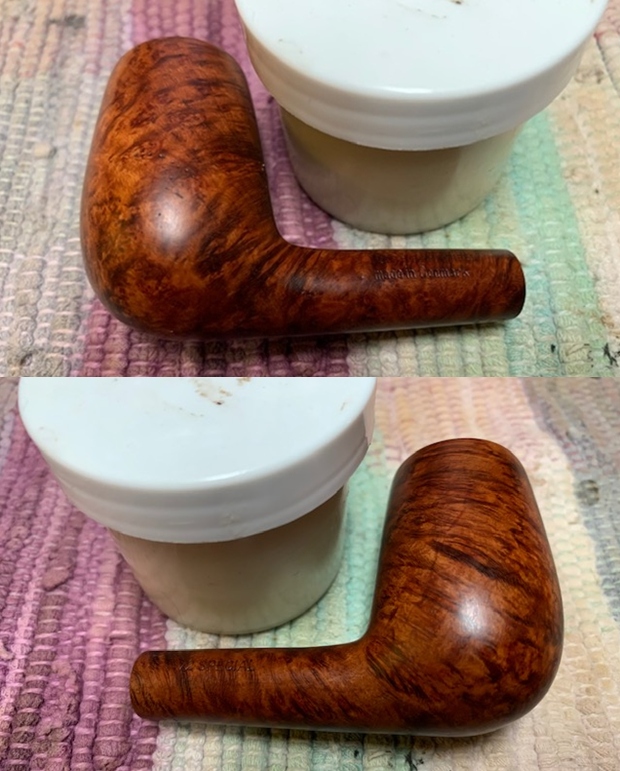
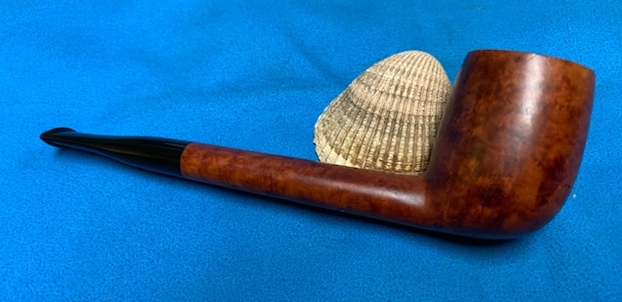
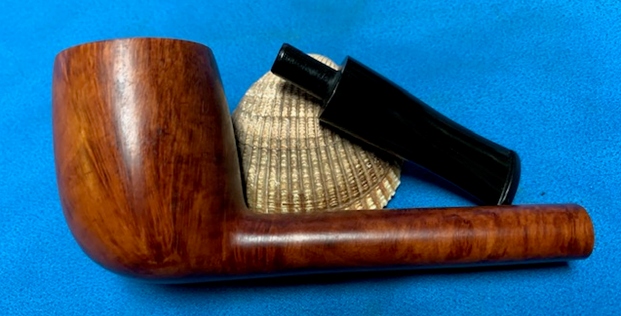
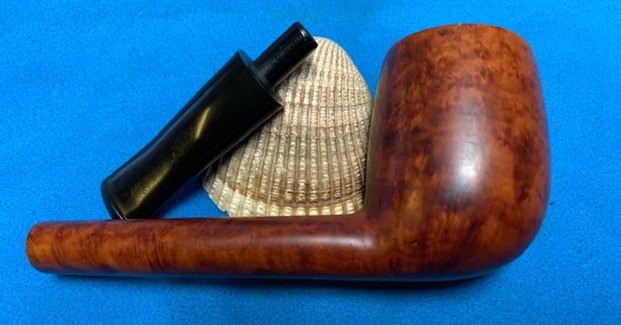
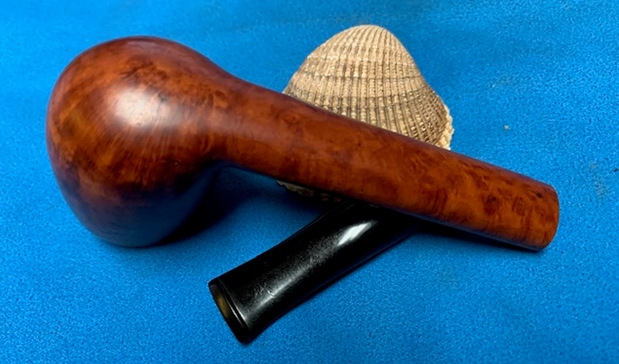
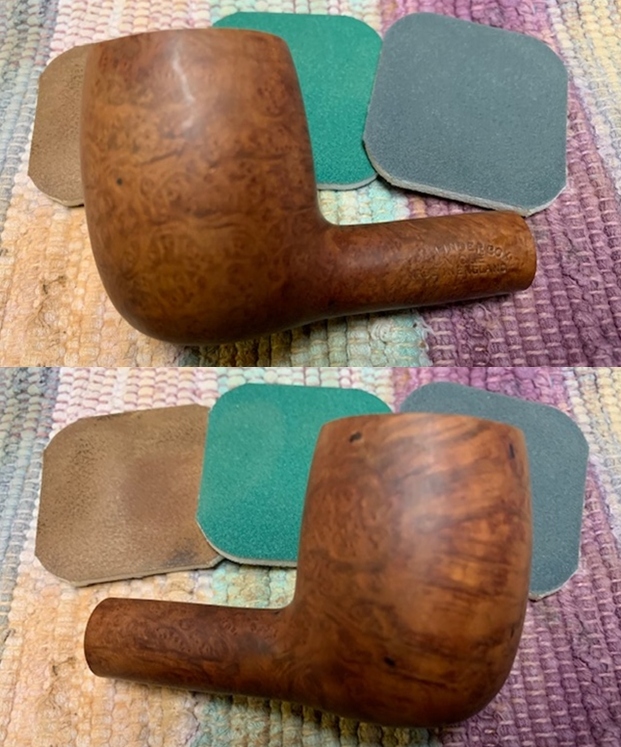
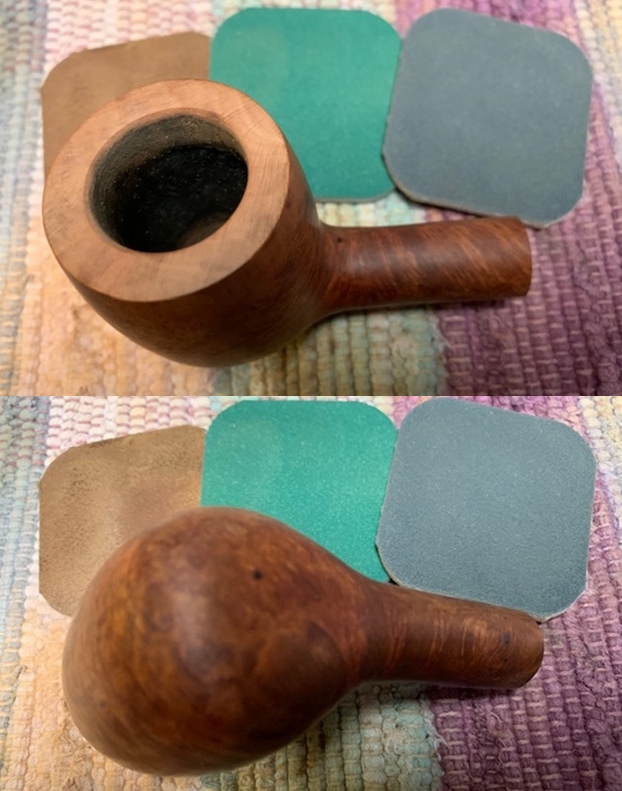
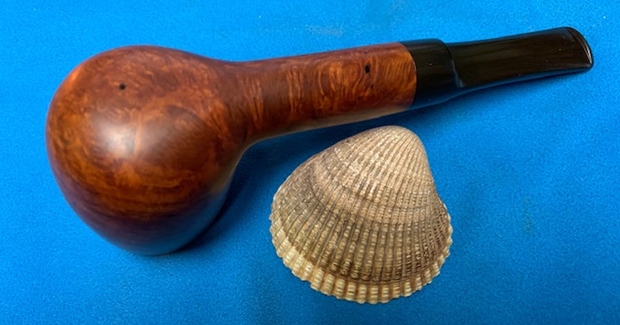
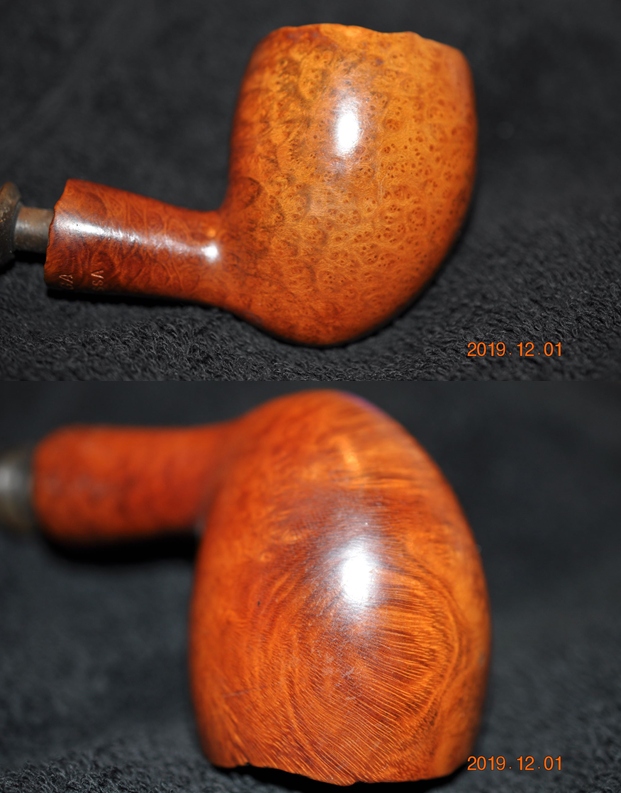
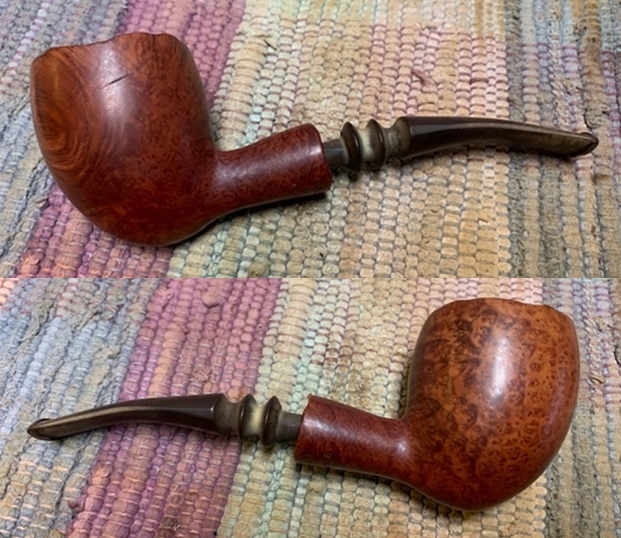
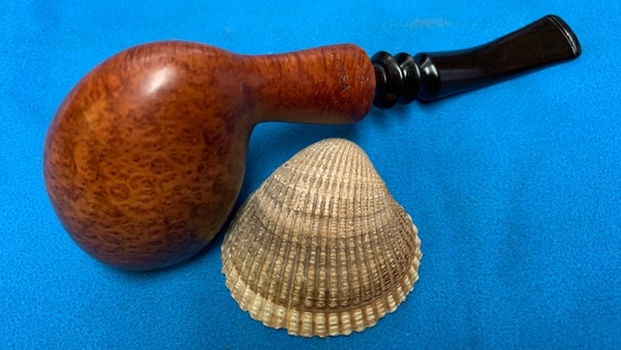
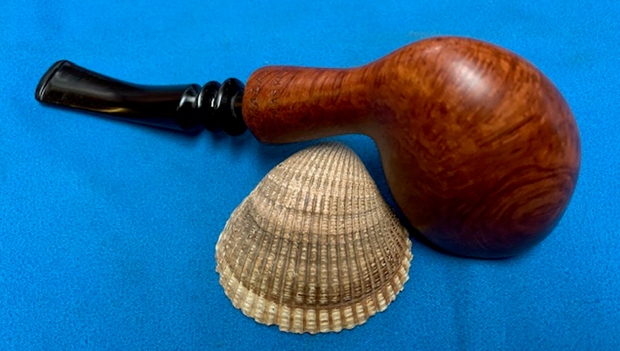
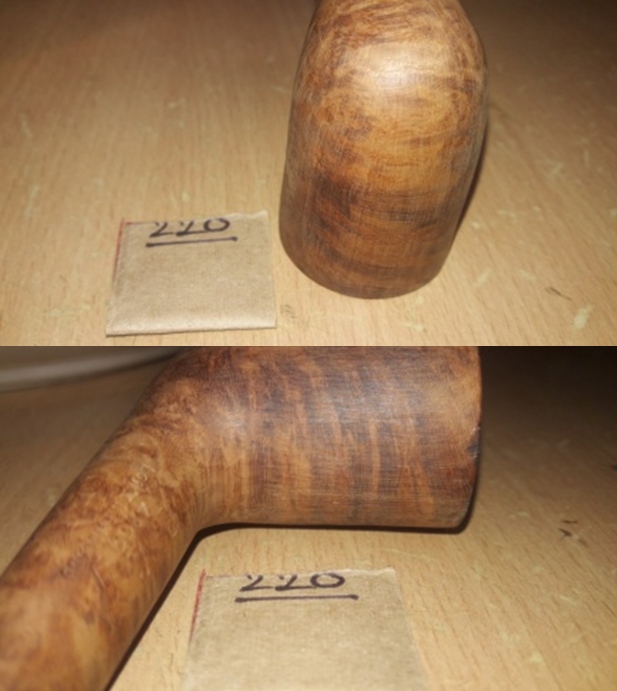
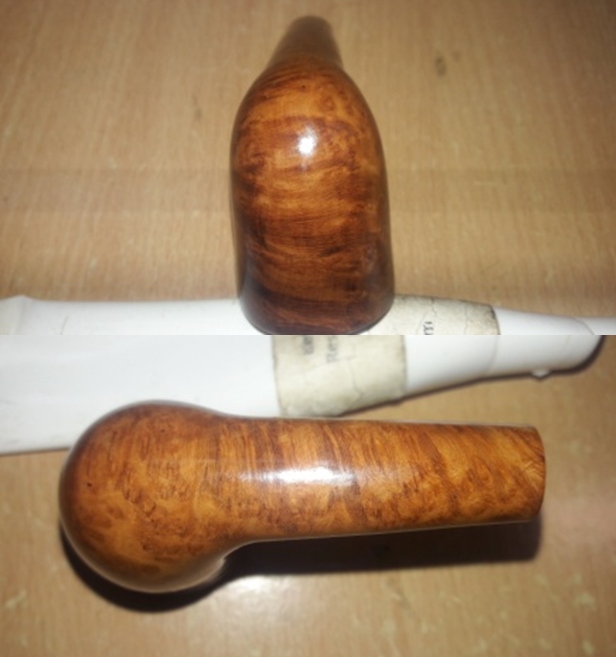
  The smooth stummel has a forward cant in a classic Dublin shape that is broad at the rim that narrows at the bottom/ foot. The shank is oval making it a Zulu shaped pipe. The surface is covered in dust, lava overflow and grime through which one can make out the beautiful cross grains to the front and back of the bowl and shank. There is not a single fill in the briar surface and points to high quality of briar selection for which Barling is renowned. The briar is looking lifeless and bone dry. For a pipe that has been so heavily smoked, there are surprisingly no dents and ding over the stummel surface. Once the stummel has been thoroughly cleaned, any other damage or flaws (which I think there will be none) will come to the fore. Thorough cleaning and rising of the stummel under warm water will highlight the grain patterns. Micromesh polishing will help in imparting a nice shine to the briar.
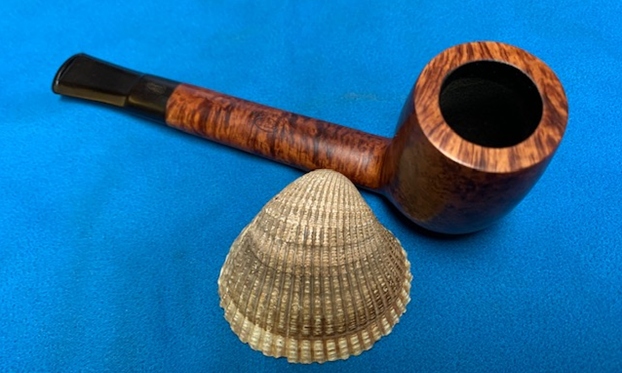
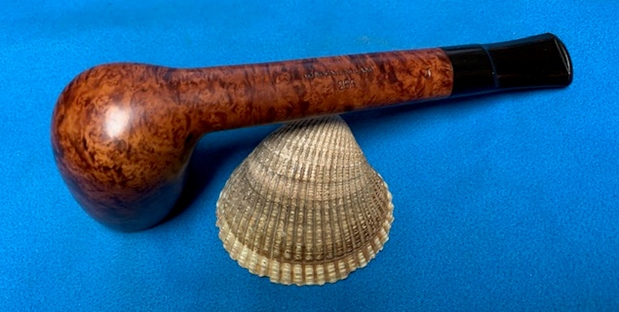
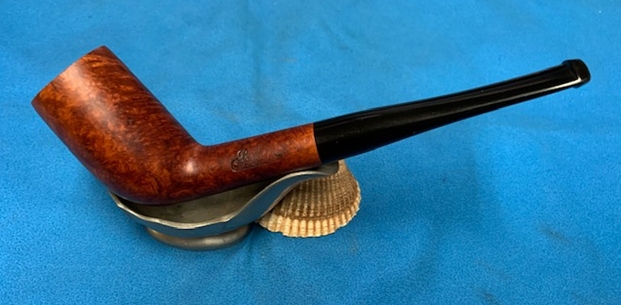
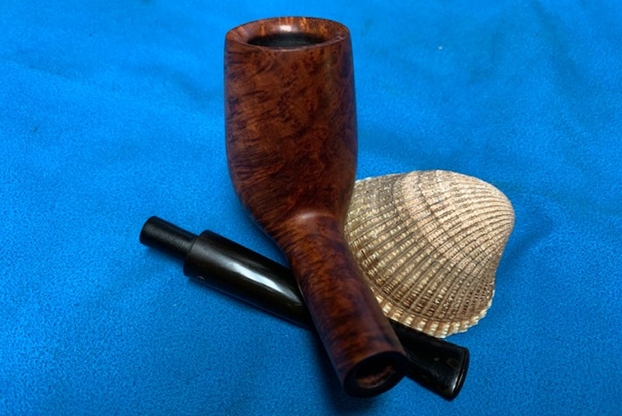
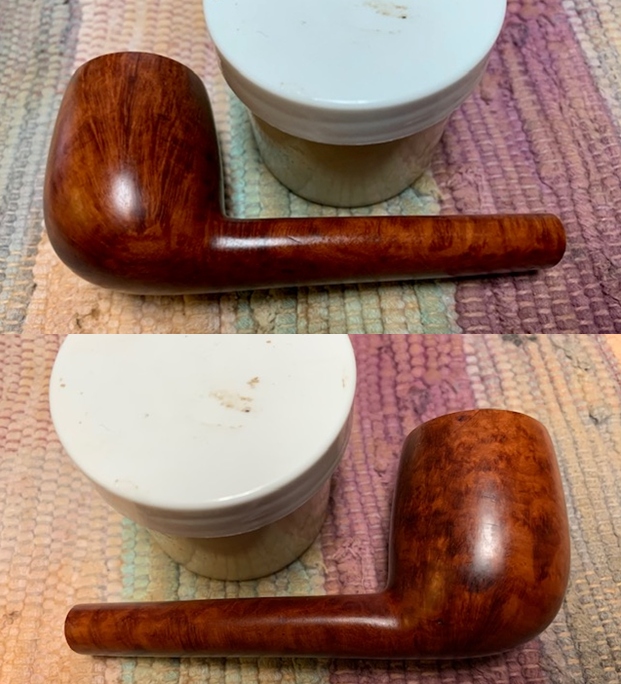
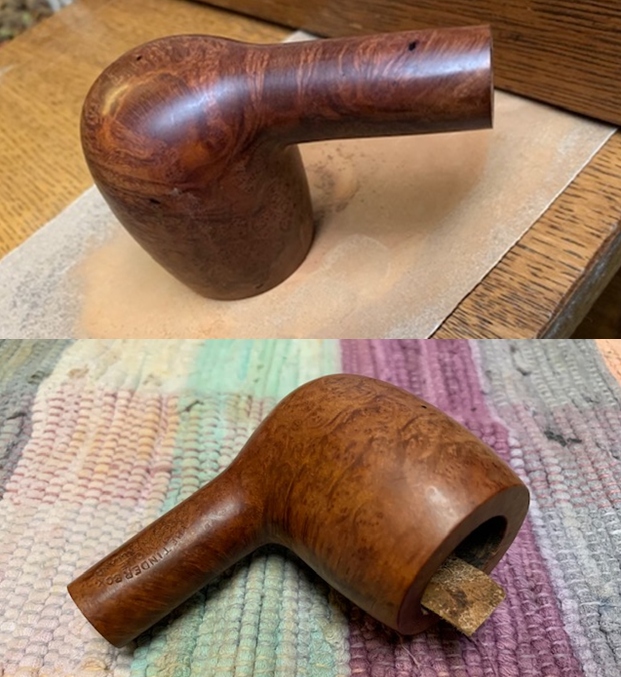
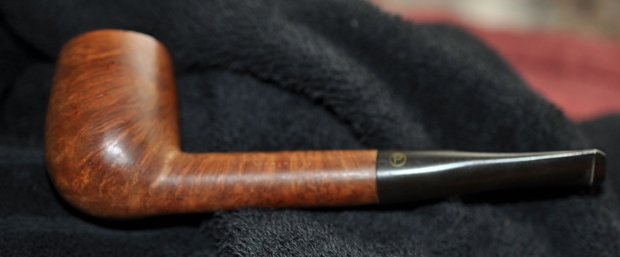
 The entrenched aluminum tenon makes it impossible to observe the insides of the shank and the mortise. However, the overall condition of the pipe in general and the chamber in particular, makes me believe the shank internals will be filthy with dried oils, tars and gunk. The restricted airflow is another pointer to a messy shank internals.
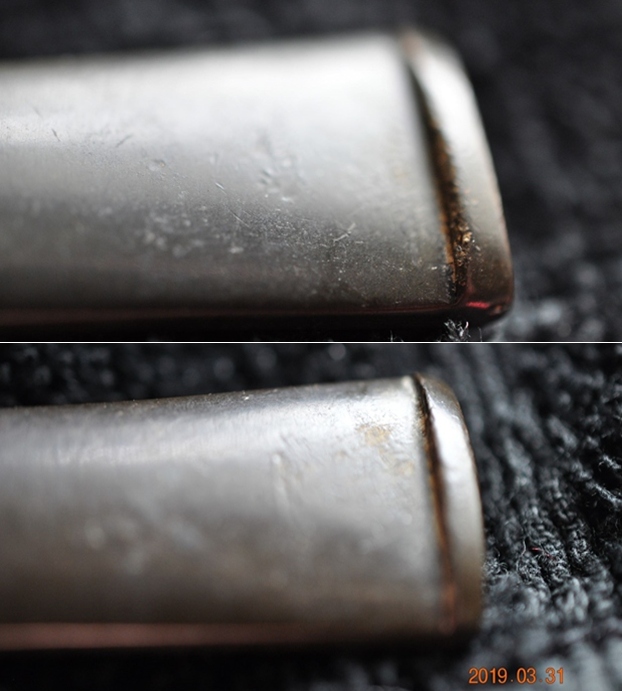
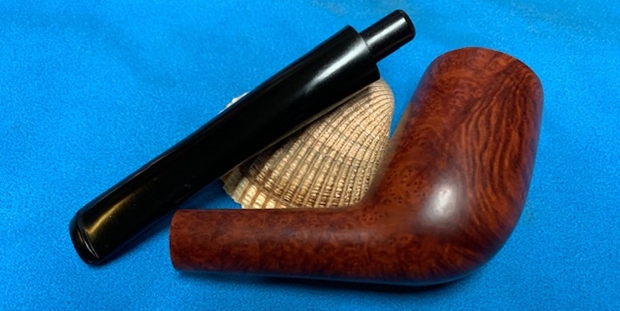
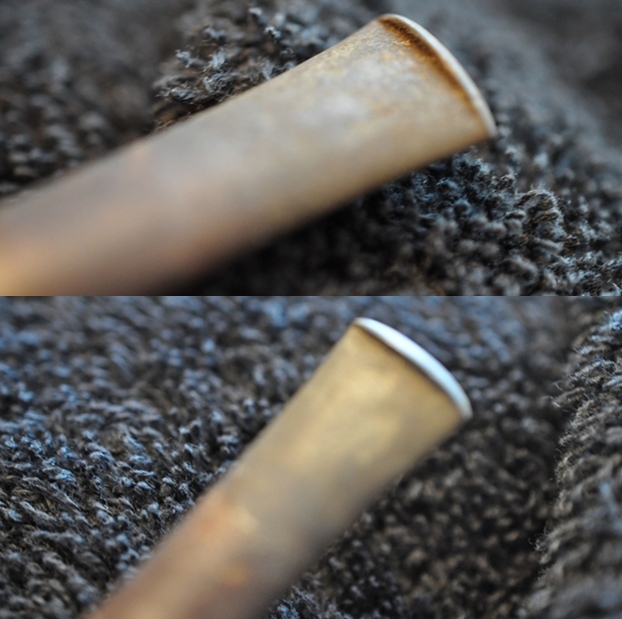
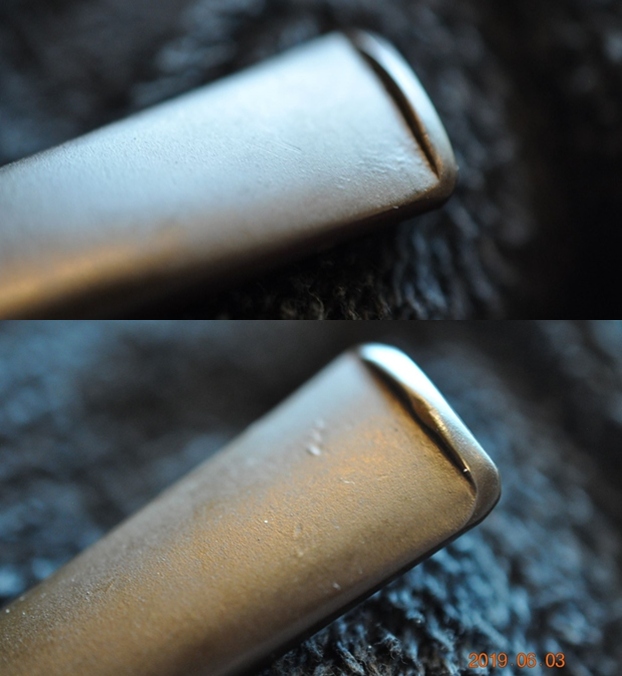
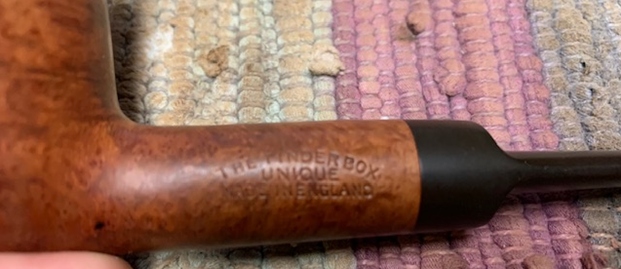
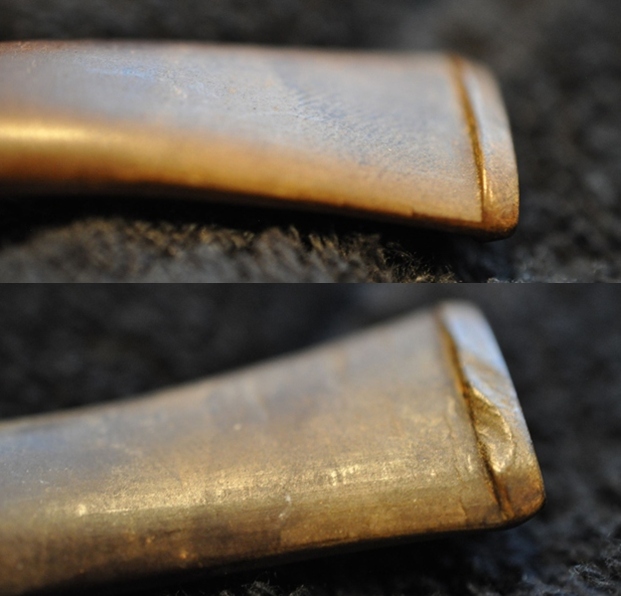
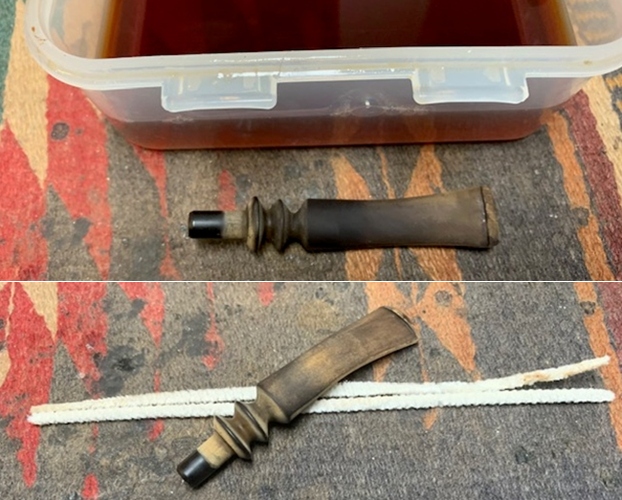
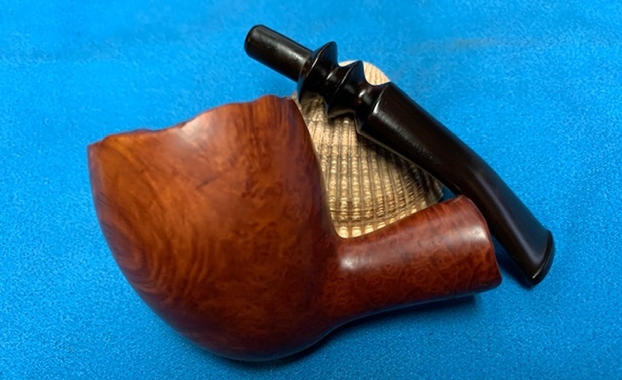
The high quality vulcanite tapered saddle stem is typical Barling with a narrow saddle at the end of a proportionately broad stem. The stem is so heavily oxidized that it appears brownish green in color! The saddle has been widened to house the threaded end of the tenon, is blocked with accumulated ash and oils/ tars that have dried out on the inside. The horizontal slot end is chock-a-block with gunk. The trademark stem logo of BARLING CROSS is completely buffed out. For a pipe that has seen such heavy usage, the stem is in pristine condition with no tooth chatter or bite marks or deformed button edges. Replacing the aluminum tenon with a Delrin tenon is one challenge that will have to be dealt with great care and caution. 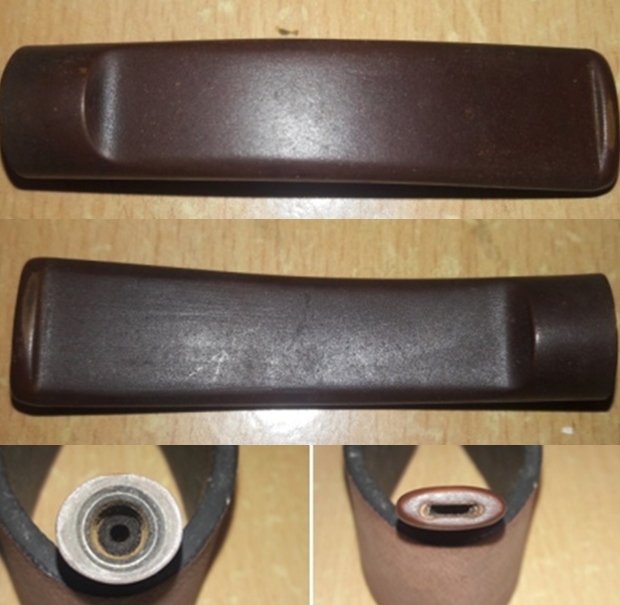 The Process
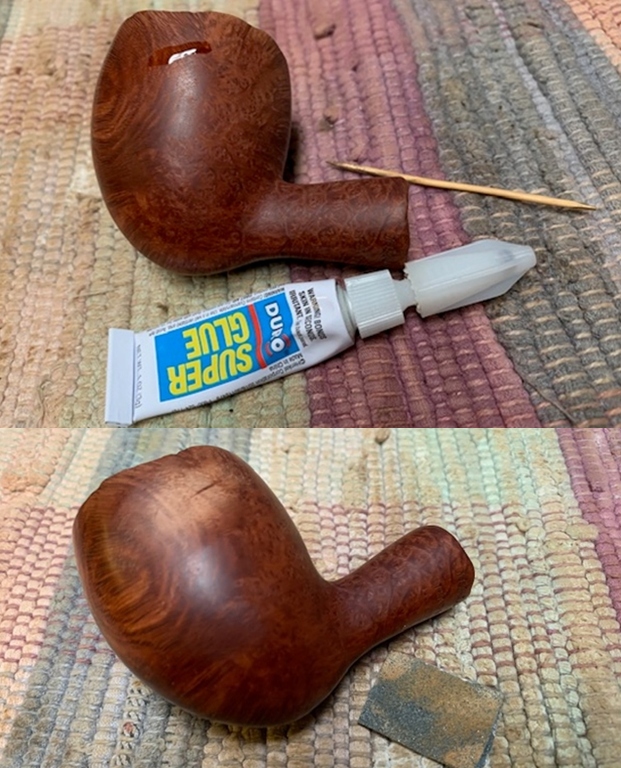
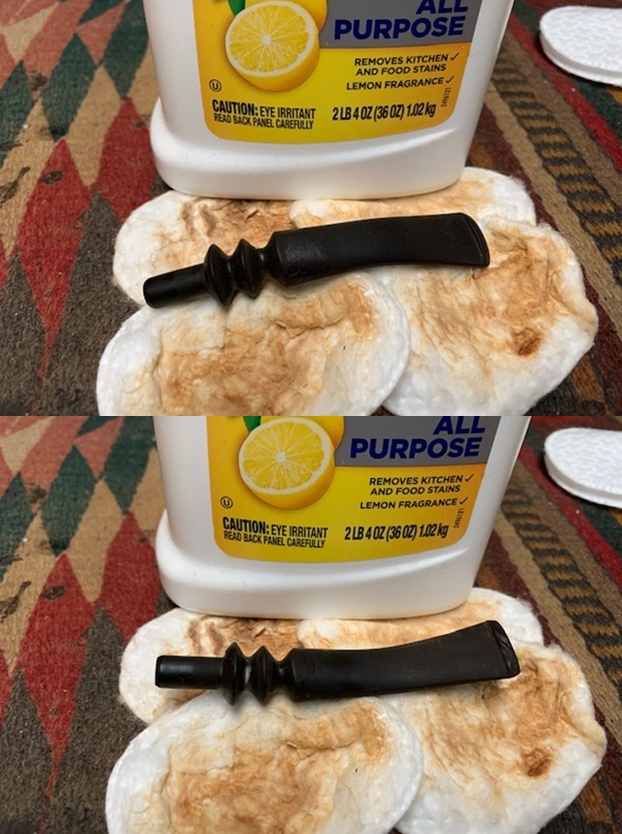
The first issue that I decided to address was that of the tenon replacement. I heated the tenon with the flame of a lighter and thereafter, with nose pliers I carefully dislodged the aluminum tenon from the shank. I selected a Delrin tenon that roughly matched the shank and stem opening. I cleaned the stem opening that housed the threaded end of the tenon using shank brush, pipe cleaners, q- tips and alcohol. With a sharp dental tool, I scraped out all the dried oils and tars and gunk from the stem opening. With the stem opening cleaned up nicely, I shall next check the seating of the new tenon in to the stem.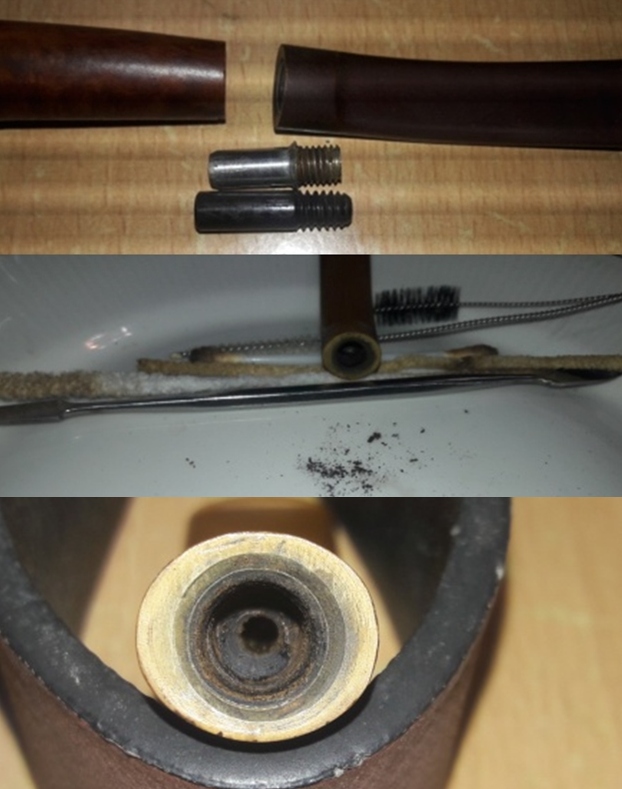 I tried the seating of the new tenon by threading it in to the widened saddle of the stem and, as rarely as it happens, the fitting was perfect. The tenon, however, would need a bit of work for achieving a snug fit in to the shank. The gap (indicated with blue arrows) between the replacement tenon and the stem face bevel will have to be filled and sealed with CA superglue.
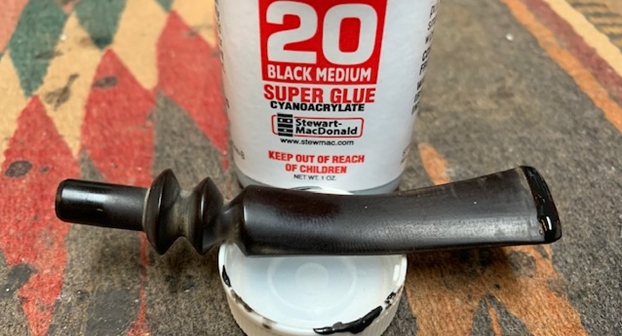
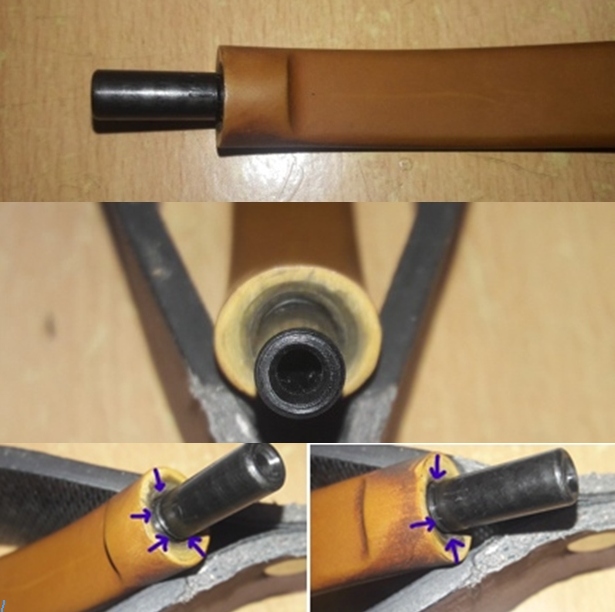 Next I wound a piece of scotch tape around the tapered end of a pipe cleaner and insert it through the tenon in to the stem airway. I applied clear CA superglue to the threaded end of the replacement Delrin tenon and also over the threaded stem opening and turned the tenon in to the stem. I lightly tapped the tenon to seat flush with the base of the wide saddle end wall. I applied superglue in to the gap that was formed between the stem bevel and the tenon and set the stem aside for the glue to cure. The scotch tape wound pipe cleaner prevents the superglue from seeping in to the stem airway and clogging it and also helps in guiding and aligning the airway of the new tenon with that of the stem.
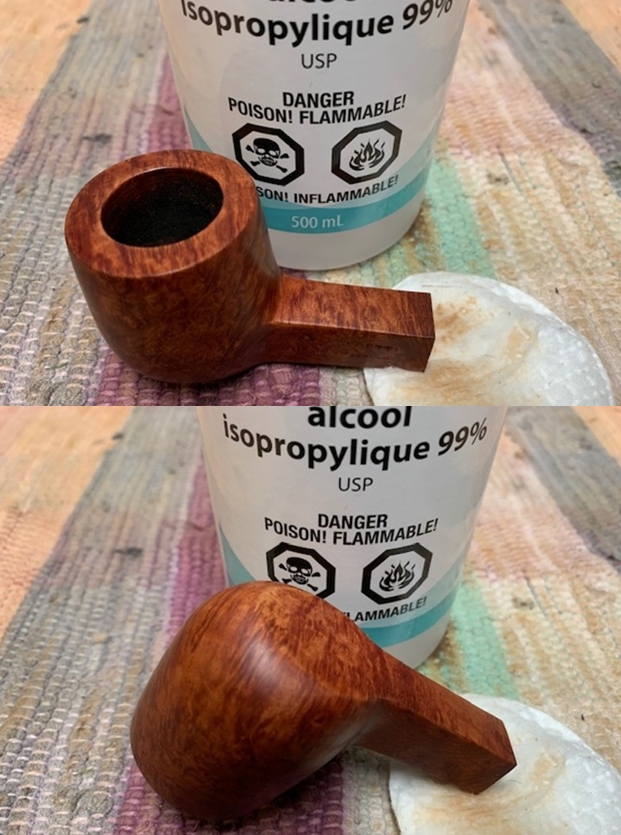
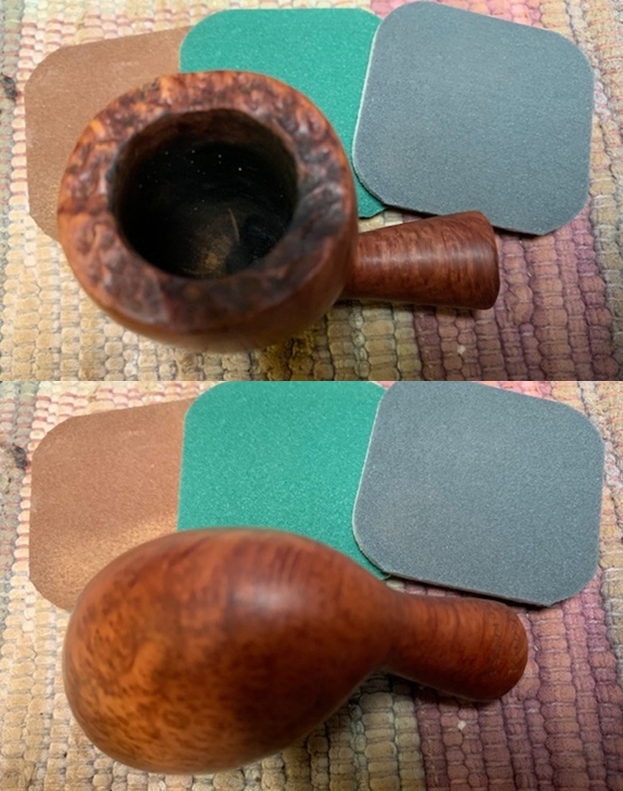
  While the stem repairs were set aside to cure, I worked on the stummel by first reaming the chamber with size 1 followed by size 2 head of a PipNet pipe reamer. I further scraped the chamber walls with my fabricated knife to remove the remaining carbon deposits where the reamer head could not reach. I scraped out the lava overflow from the rim top surface. Once the cake was reamed back to the bare briar, I used a 150 grit sand paper followed by 220 grit sand paper to remove all the traces of remaining cake and also to smooth out the inner walls of the chamber surface. Finally, to remove the residual carbon dust, I wiped the chamber with a cotton pad wetted with 99.9% pure isopropyl alcohol. The inner rim edge was charred in 8 o’clock and 3 o’clock direction which have been encircled in red. I scrapped off the charred briar from these areas and now the chamber is out of round. The chamber walls show a web of minor heat lines which would need to be protected from developing in to major heat fissures that would eventually lead to a burnout. I shall give the inner rim edge a slight bevel to get the bowl back to a perfect round and mask the damage. The ghost smells are considerably reduced and should be eliminated once the shank and mortise internals are cleaned. The rim top surface is still considerably darkened and would need to be thoroughly cleaned to know the exact damage to the surface.
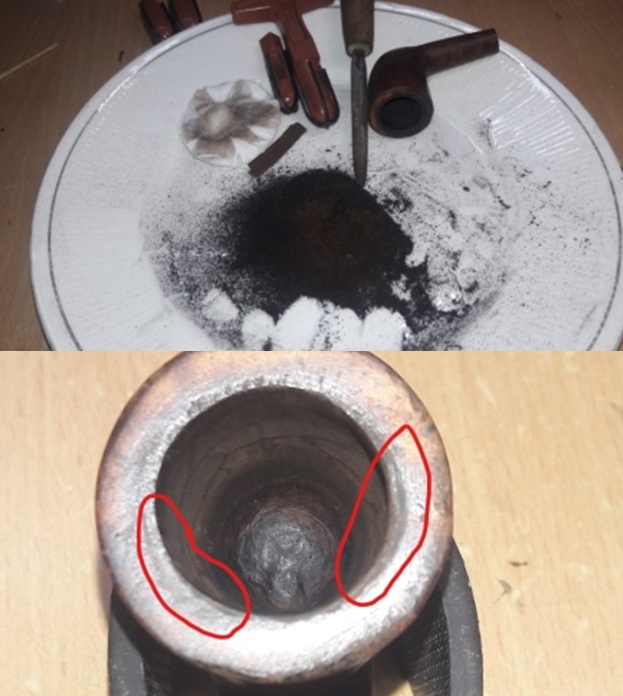
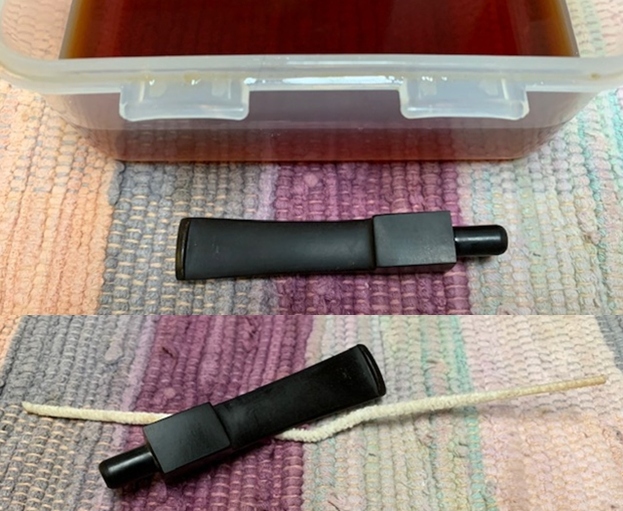
 I followed up the reaming of the chamber with cleaning the mortise using cue tips, pipe cleaners and shank brush dipped in isopropyl alcohol. I scraped the walls of the mortise with dental tool to remove the dried oils and tars. The ghost smells are further reduced and should be eliminated completely when the shank internals are cleaned with shank brush and dish washing soap.
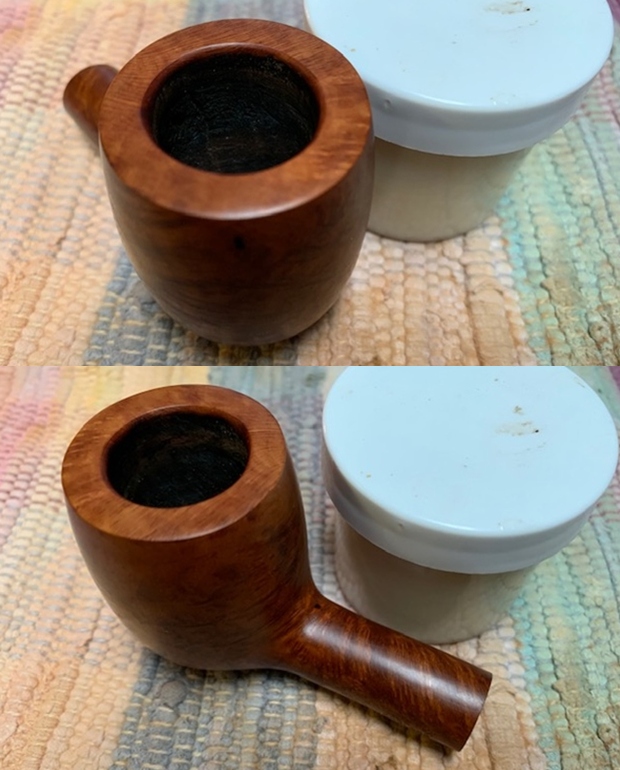
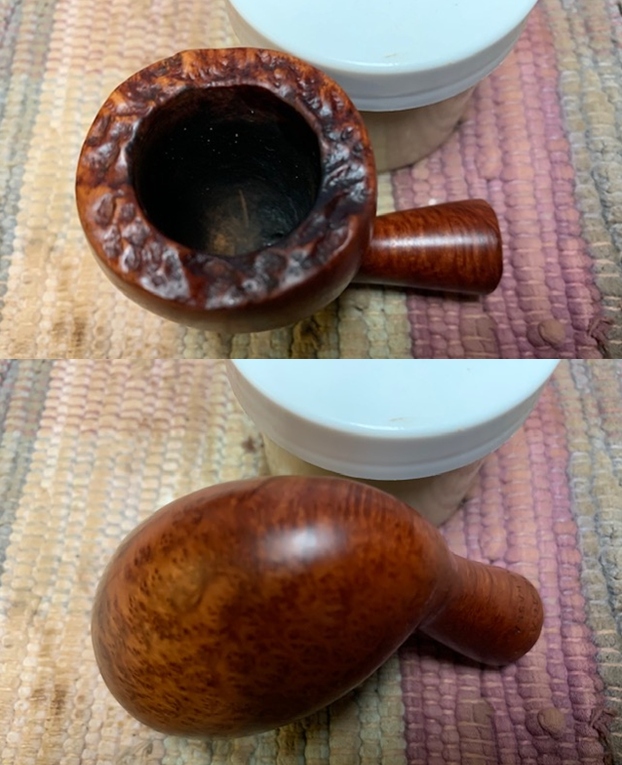
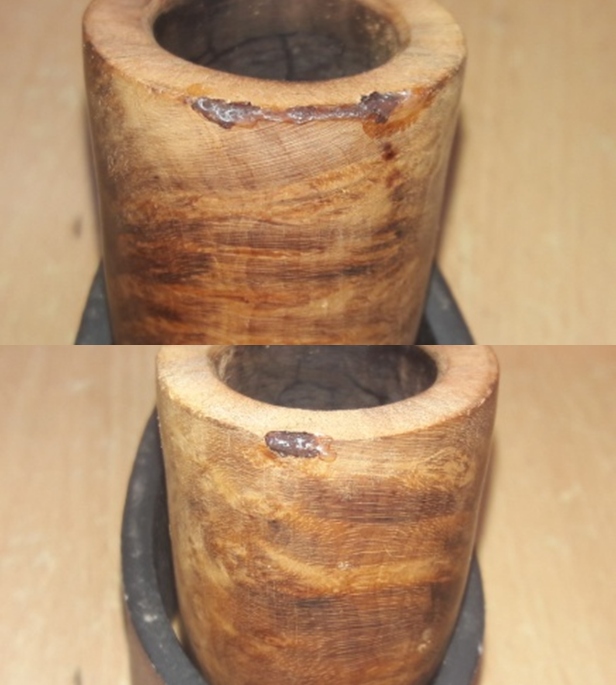
 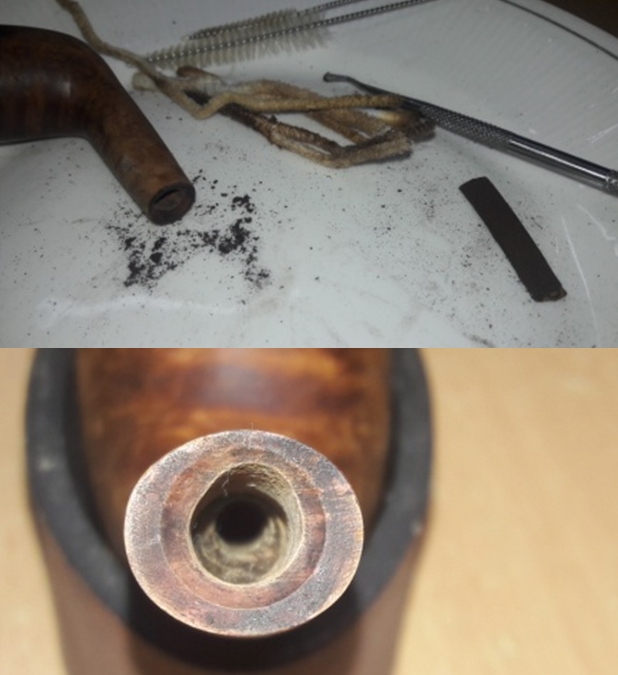 With the bowl internals clean, I move to clean the exterior of the stummel. I used a hard bristled tooth brush and Murphy’s Oil Soap to scrub the stummel and rim top. I washed the stummel under running warm water with anti oil dish washing detergent till the stummel surface was clean. I simultaneously cleaned the shank internals with the detergent and hard bristled shank brush and dried it using paper towels and soft cotton cloth. I set the stummel aside to dry out naturally. As anticipated, this thorough cleaning of the shank eliminated the strong ghost smells from the chamber and now the pipe smells clean and fresh. The stummel surface has cleaned up nicely and the beautiful grain patterns are now on full display. The charring over the rim top surface in 8 o’ clock and 3 o’ clock direction (encircled in red) is significantly deeper than anticipated and the chipped areas (encircled in blue) are far deeper than I thought them to be. I shall have to resort to topping to address these damages.
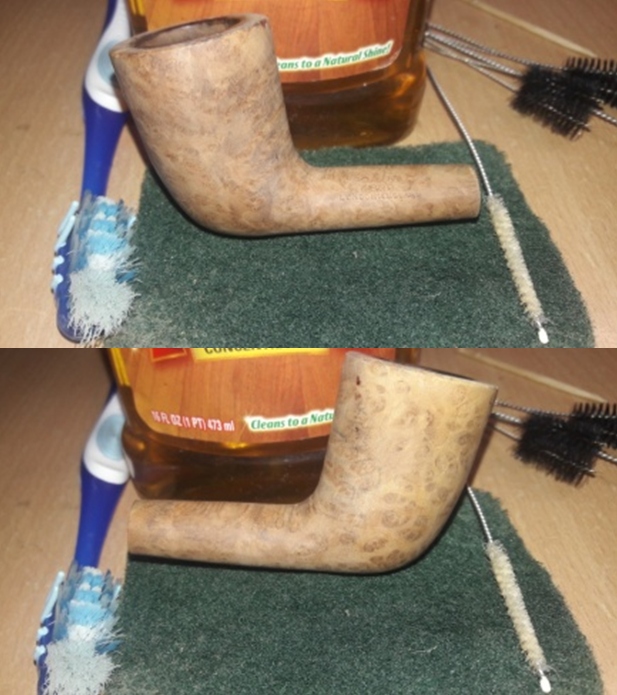
 With the stem repairs still set aside to cure, I continued with the stummel repairs. I topped the rim top over a piece of 220 grit sand paper till I had a smooth even surface and the charred surface in 8 o’clock and 3 o’clock direction as well as the chipped areas on the outer rim edge (encircled in red) were greatly reduced. I am very happy with the appearance of the rim top and rim edges at this stage of restoration. The chipped surfaces over the outer edges that still remain will be filled with a mix of superglue and briar dust. The charred surfaces will be addressed by creating a nice bevel over the inner rim edge.
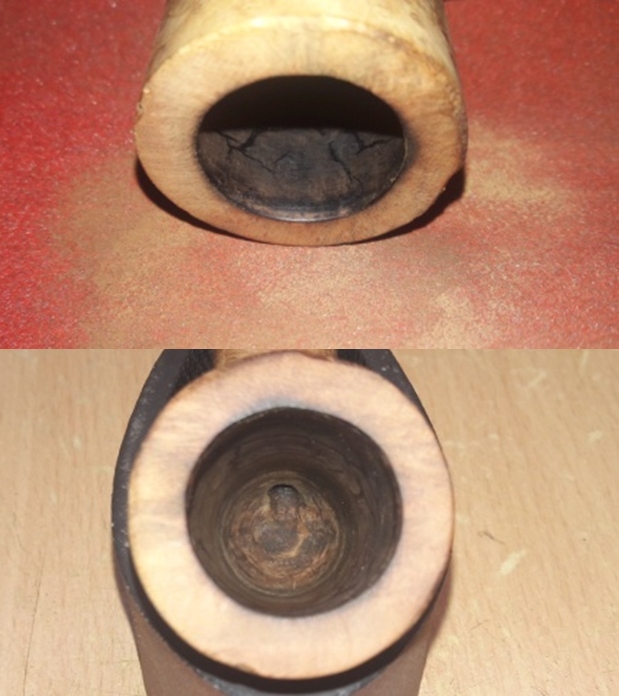
 With a folded piece of worn out 180 grit sand paper pinched between my thumb and forefinger, I carefully gave a bevel to the inner rim edge and addressed the issue of charred inner rim edge. After I was done with the inner rim edge repairs, I filled up the chipped areas on the outer rim edge with a mix of superglue and briar dust and set the stummel aside for the fills to cure and harden. The rim top surface and the edges look very neat at this stage with the bowl in a nice round shape. Once the fills over the outer edges are completely cured, I shall sand and match them with the rest of the edge and if need be, create a slight bevel to further even out these repairs.
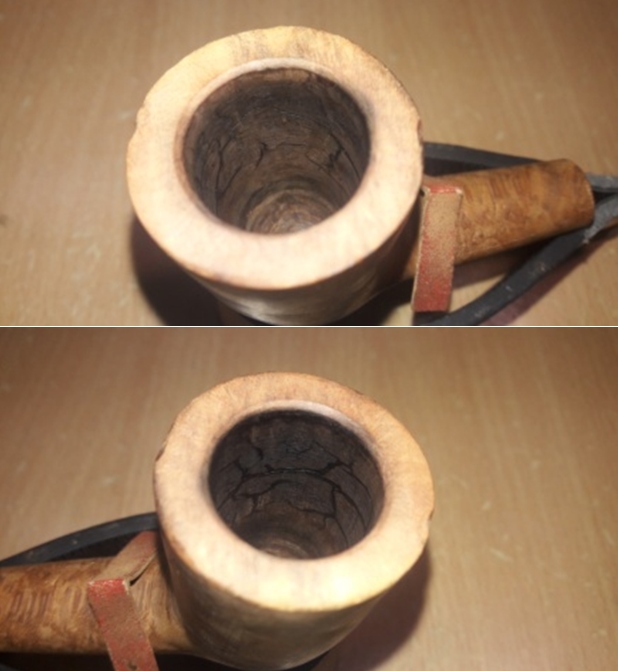
 While the rim edge fills were set aside to cure, I turned my attention back to the stem. The new tenon was firmly attached with the stem and the glue had hardened completely. With a folded piece of 180 grit sand paper, I sand the excess glue from the stem face. With the same piece of sandpaper, I sand the tenon till I had achieved a snug fit of the tenon in to the mortise. One of the important lessons that I have learned in tenon replacement is that one should sand less and check more frequently!! I did just that and checked the seating after every circular cycle of sanding the tenon. Once the seating was snug and perfect, I seated the tenon inside the mortise and realized that the length of the tenon was more than the depth of the mortise. Thus back to sanding board, but this time I sand the tenon face on a piece of 180 grit sandpaper. Checking ever so frequently, I stopped the sanding process when I had a neat and seamless seating of the tenon in to the mortise. I am really very happy with this tenon replacement and the seating is as flush as when it was new!!
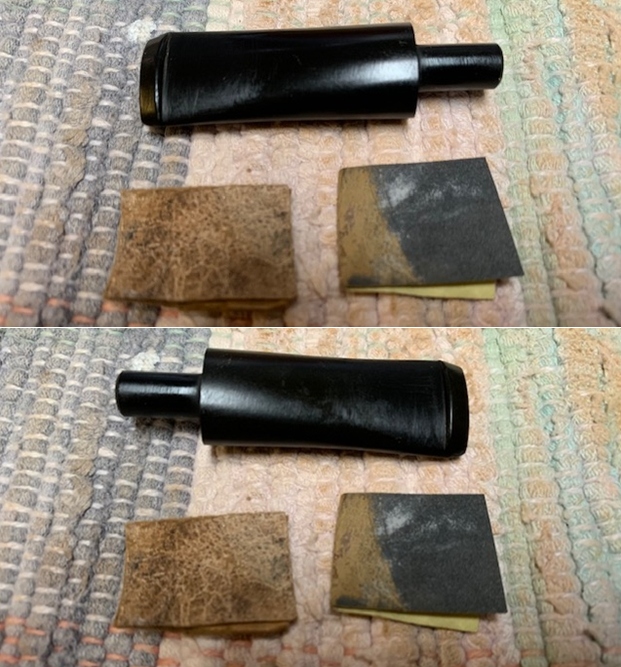
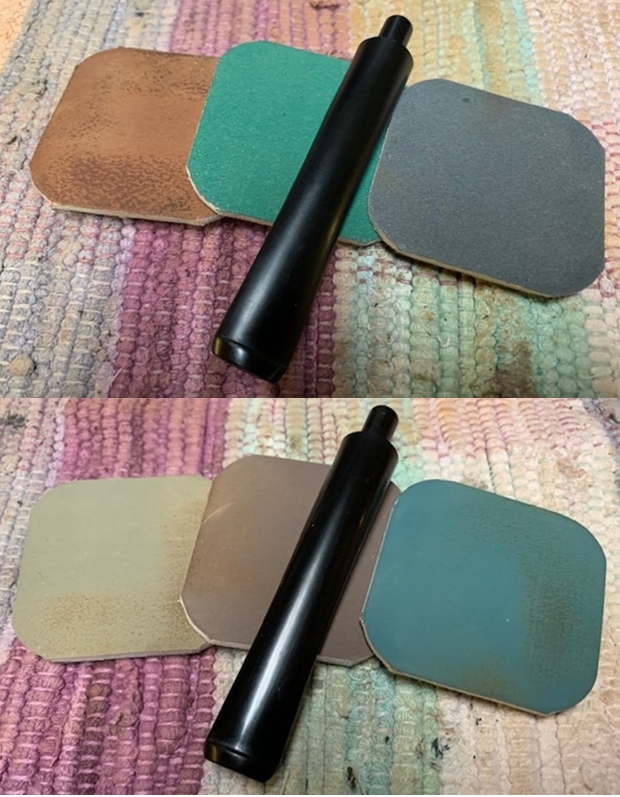
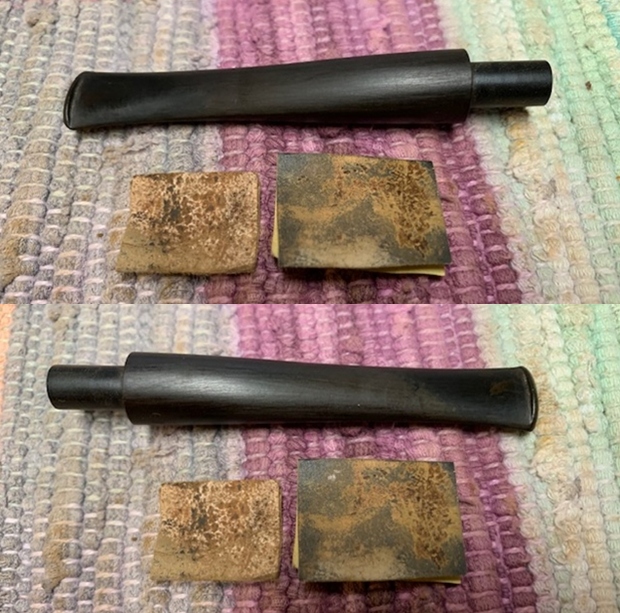
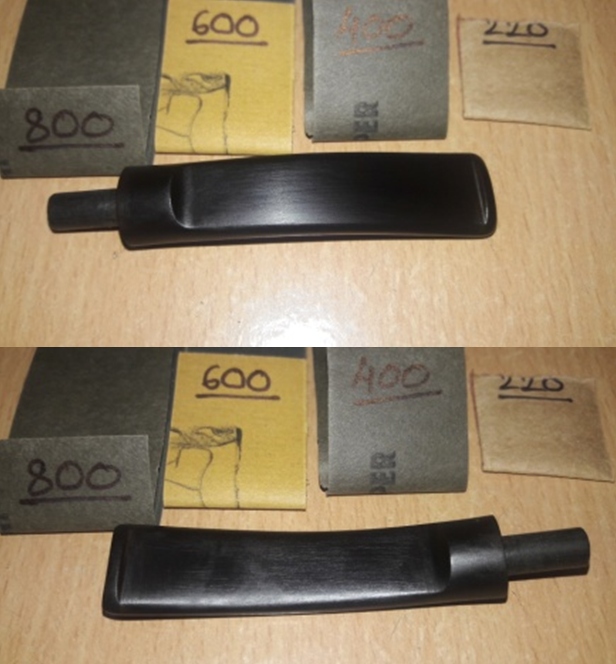
 With the tenon replacement completed to my satisfaction, I moved on to the cosmetic refurbishing of the stem. I wiped the stem surface with Murphy’s Oil soap and a cotton swab. The oil soap removes the loose surface oxidation and leaves behind the deep seated oxidation over the stem surface. Thereafter began the arduous and time consuming process of sanding the stem with 220, 400, 600 and finally 800 grit sandpapers. I rubbed a generous quantity of EVO deep in to the vulcanite and set the stem aside for the oil to be absorbed in to the surface. Did I mention the tons of elbow grease that I had to spend on getting the stem to the state that is seen below? Well, the long and short of removal of oxidation from the stem is that I had to invest about 7 long back breaking hours of efforts. How I miss Abha’s help and the magic of Mark Hoover’s stem oxidation removing solution!!
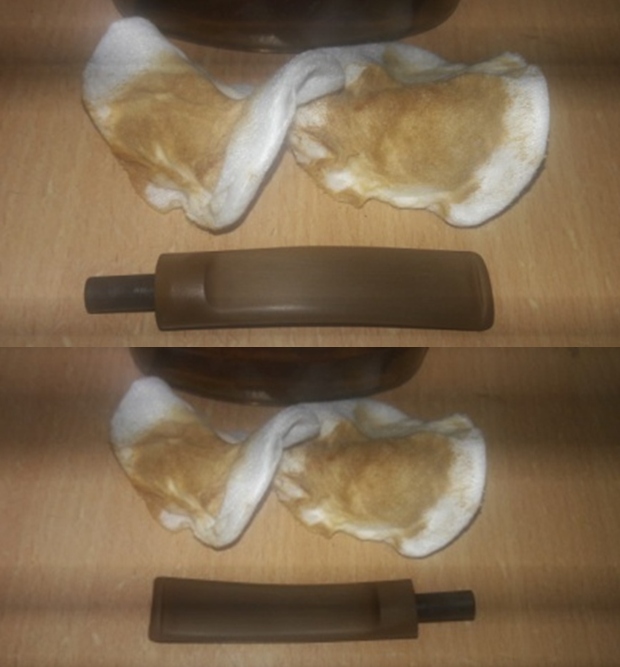
 While I cleaned up the stem, the outer rim edge had cured and with a flat head needle file I sand the fills to achieve a rough match with the rest of the rim edge. I further blend in the fills with a folded piece of 180 grit sand paper. To address the minor dings that remained over the outer rim edge, I created a slight bevel to the outer rim edge with a folded piece of worn out 180 grit sand paper. The repairs have blended in nicely with the outer edge and the the outer rim edge looks nice.
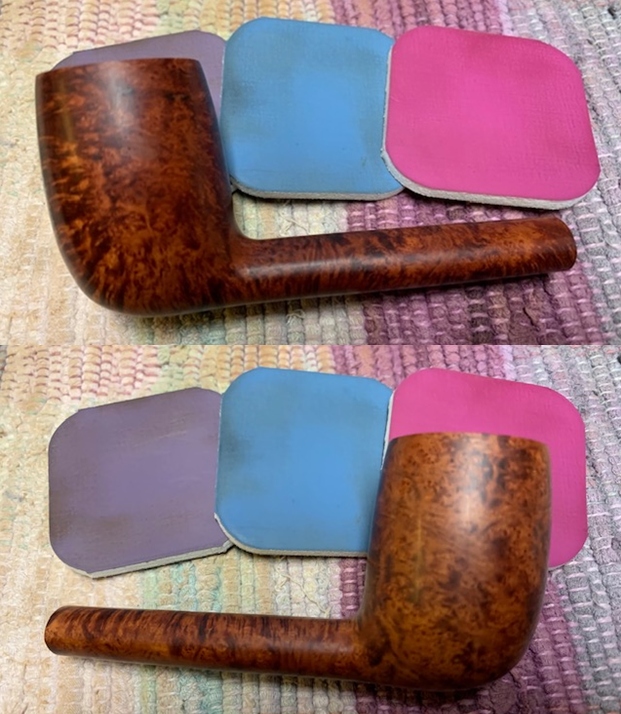
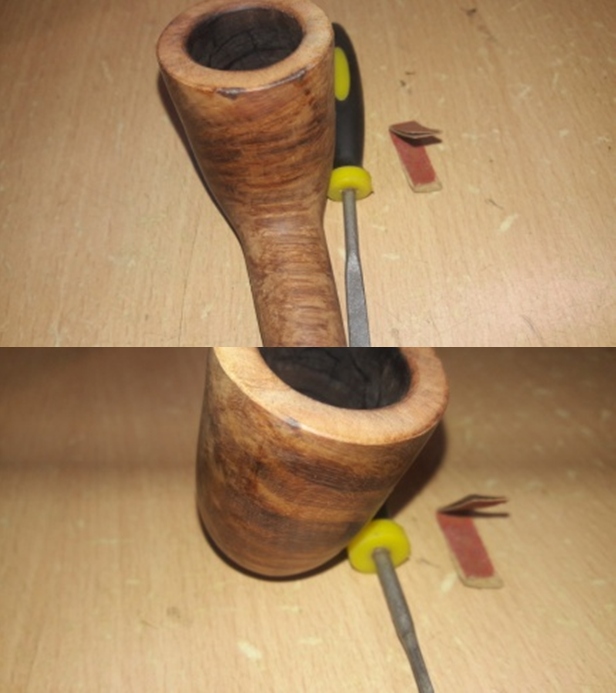 Next, I sand the entire stummel with a piece of 220 grit sand paper to address the minor scratches and dings that would otherwise show after micromesh polishing cycle.
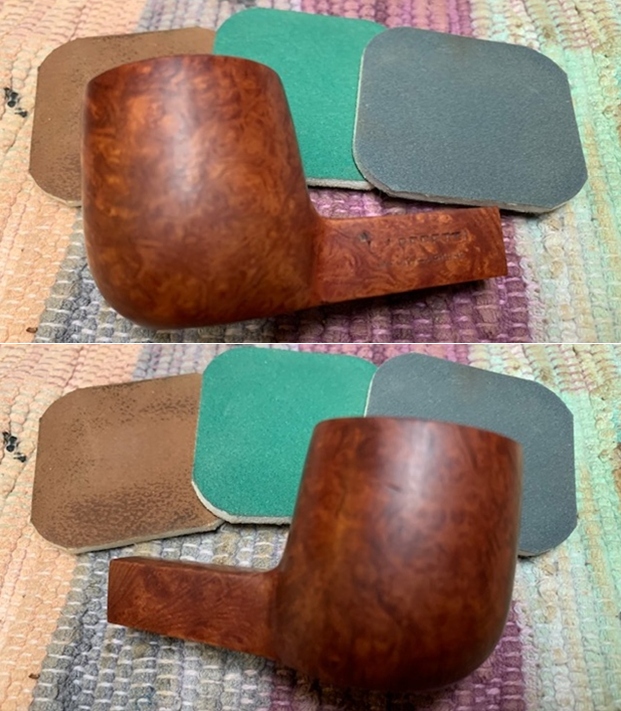
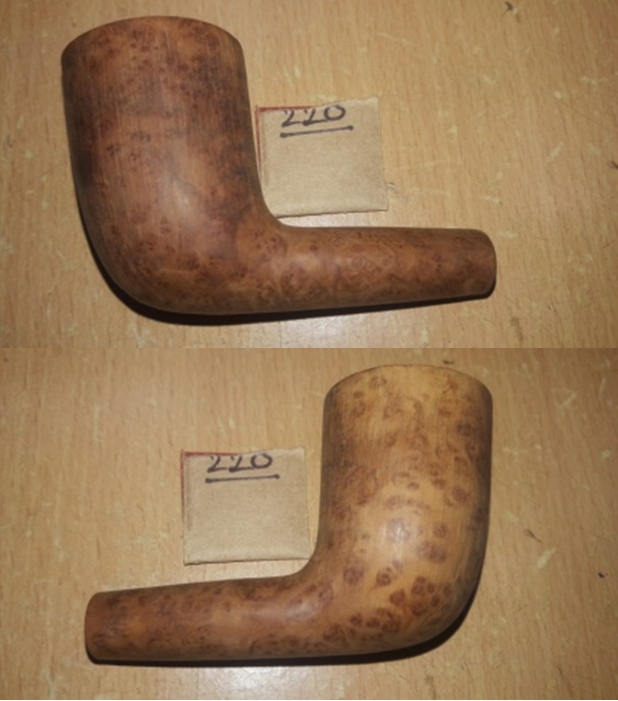
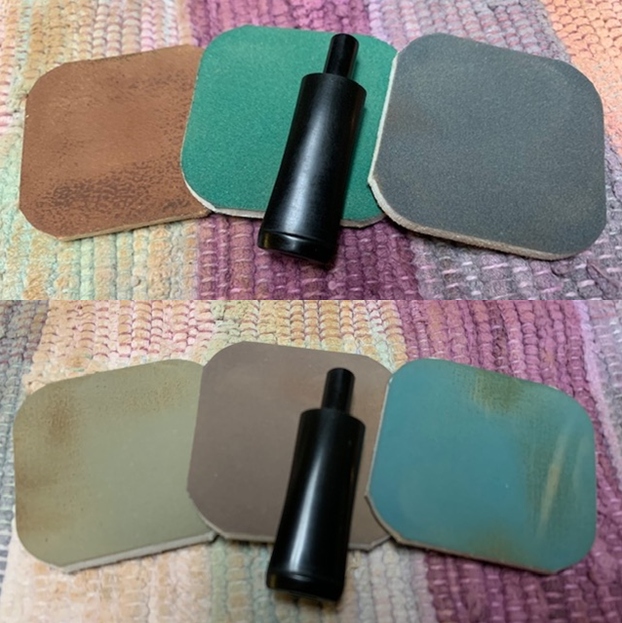
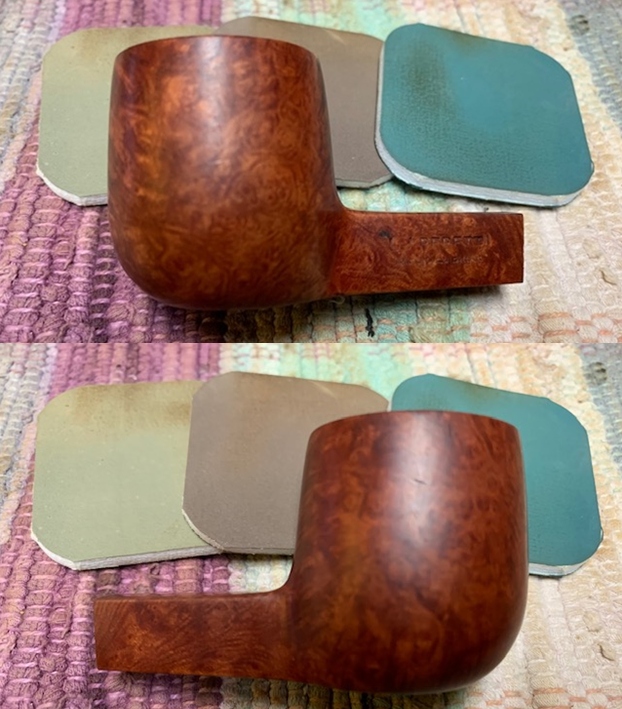
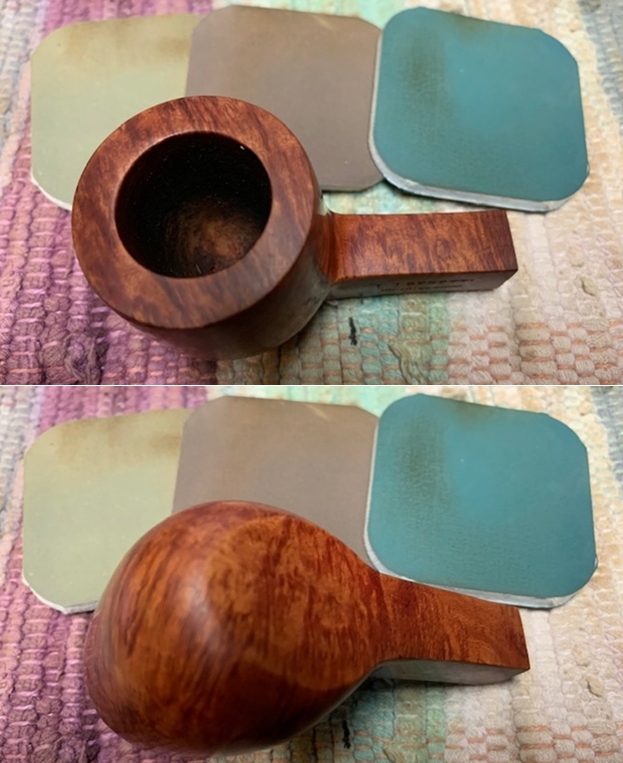
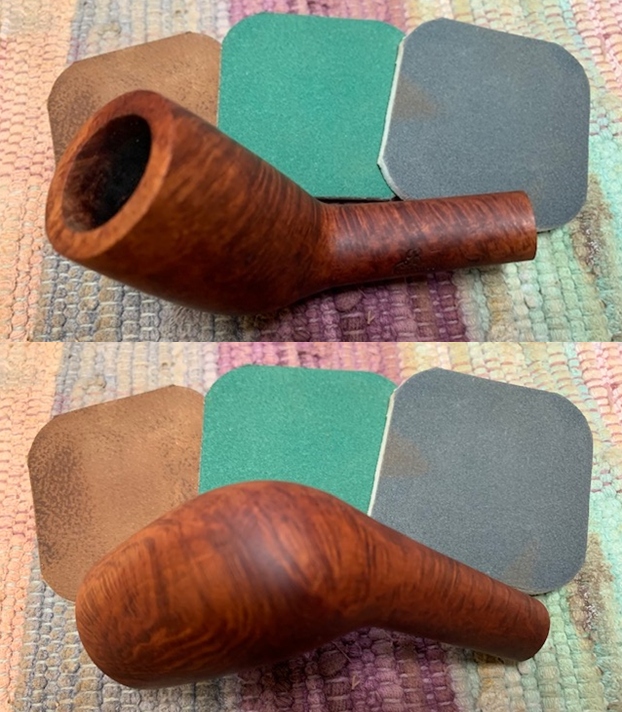
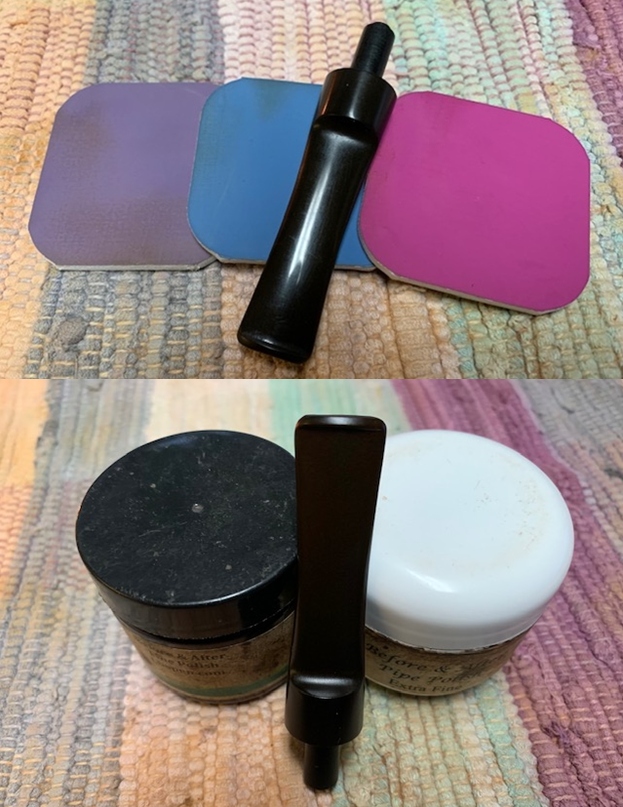
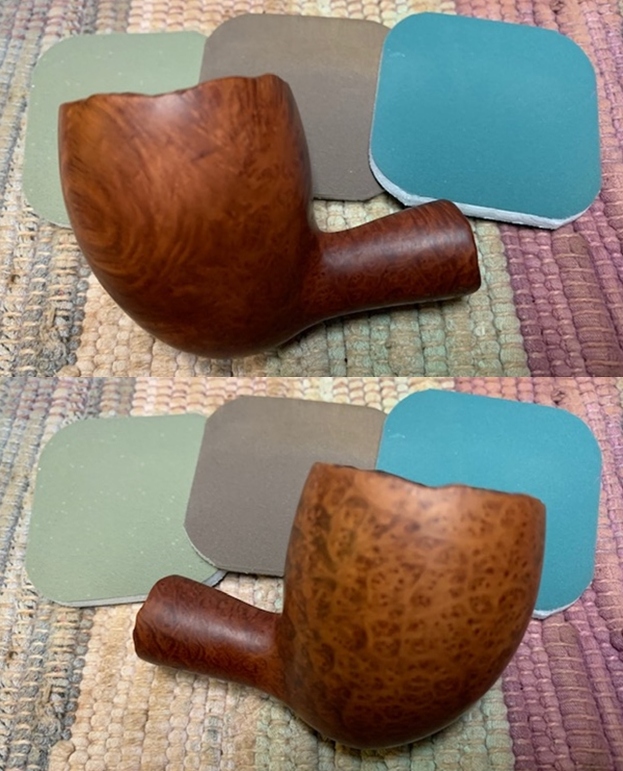
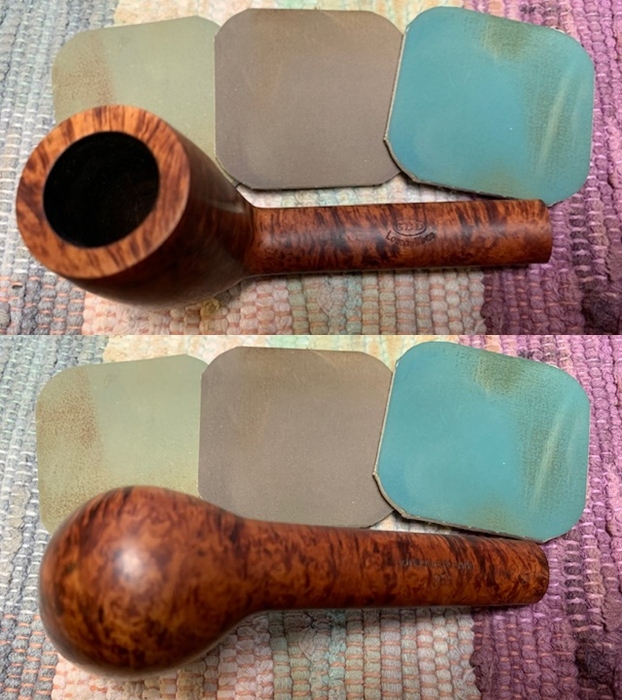
 I followed it by wet sanding the stummel with 1500 to 12000 grit micromesh pads, wiping frequently with a moist cloth to check the progress.
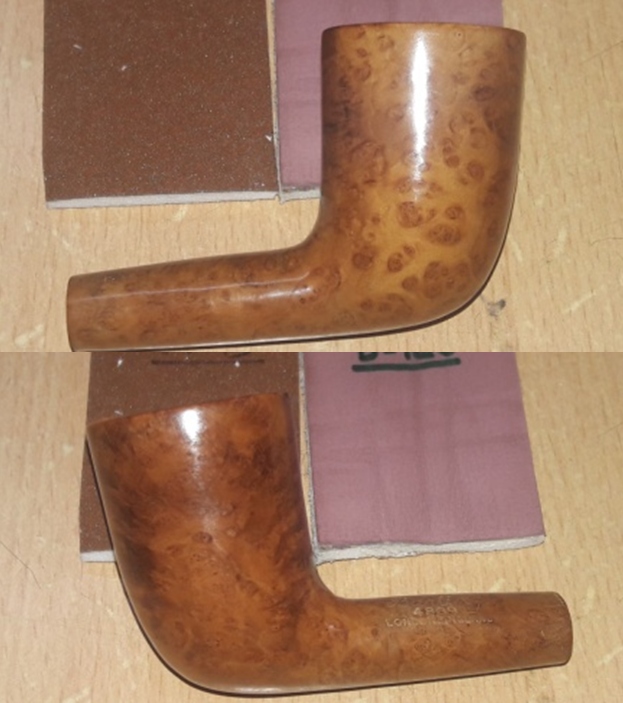
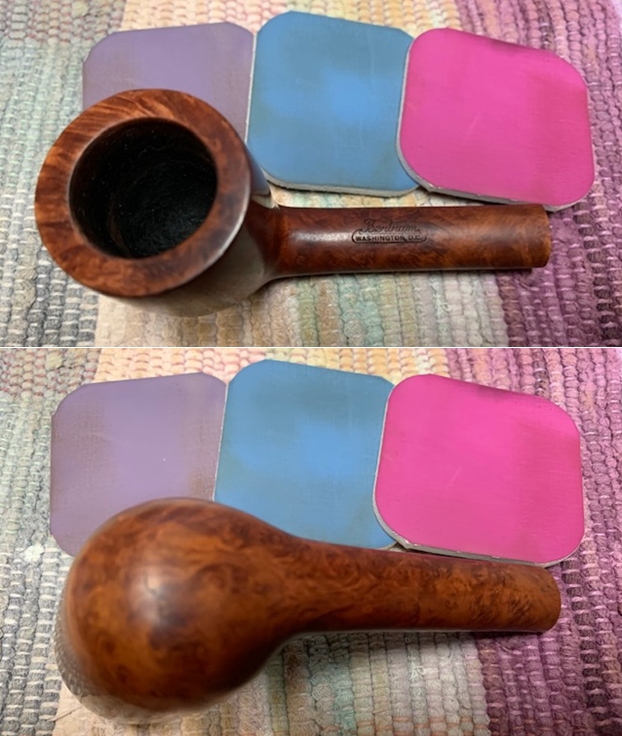
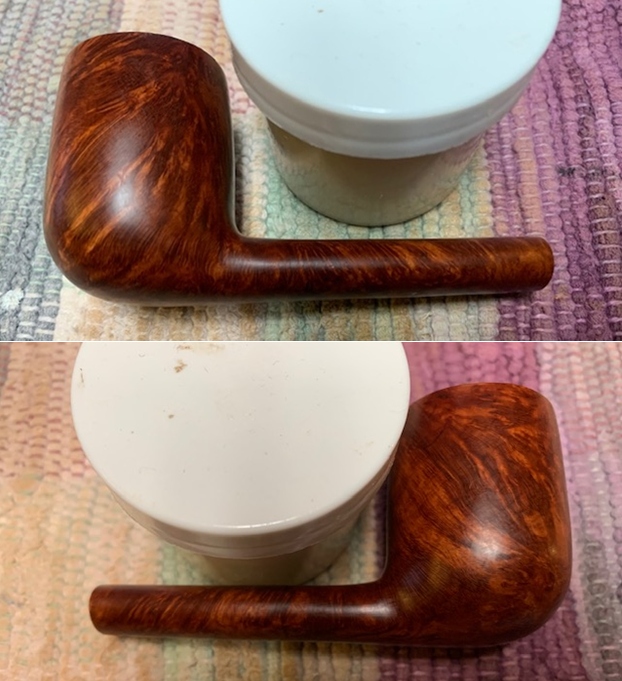
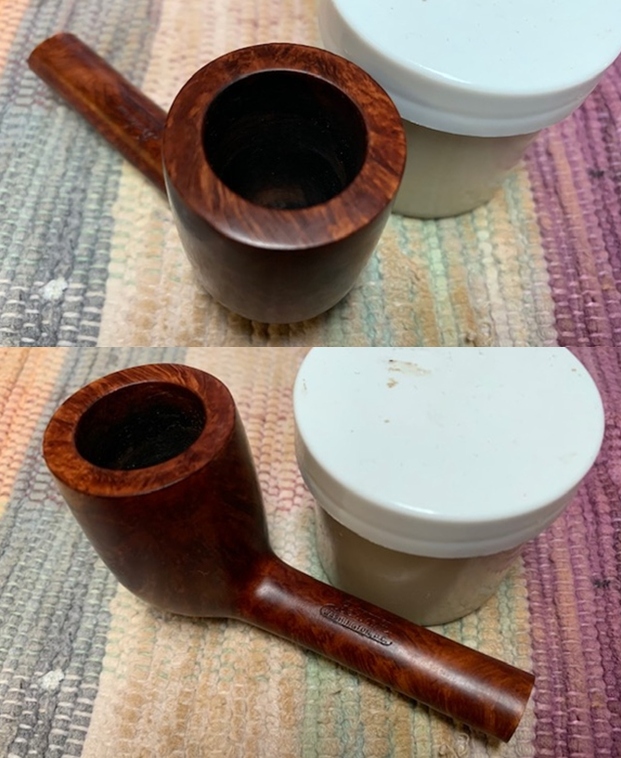
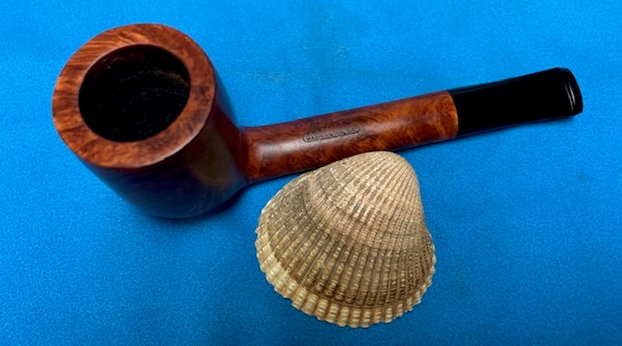
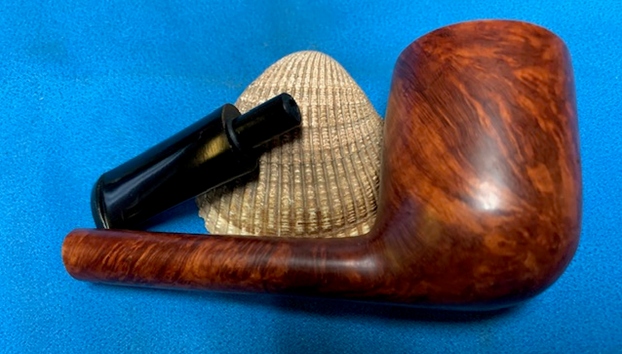
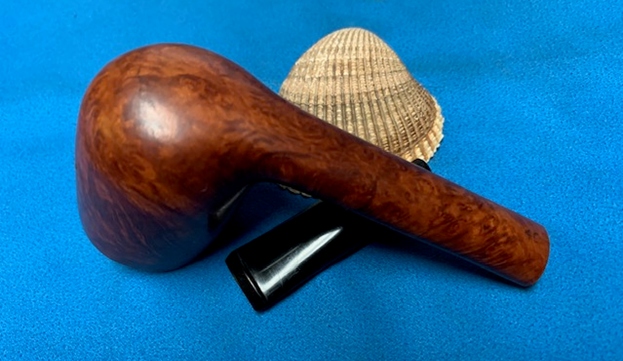
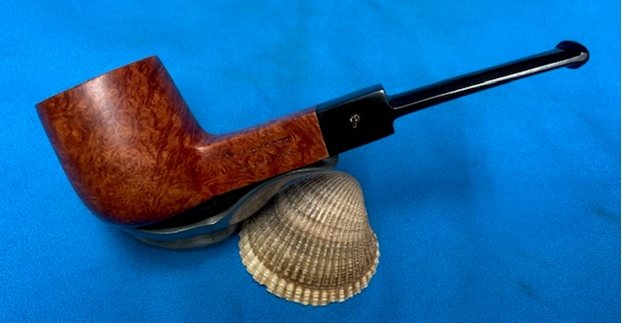
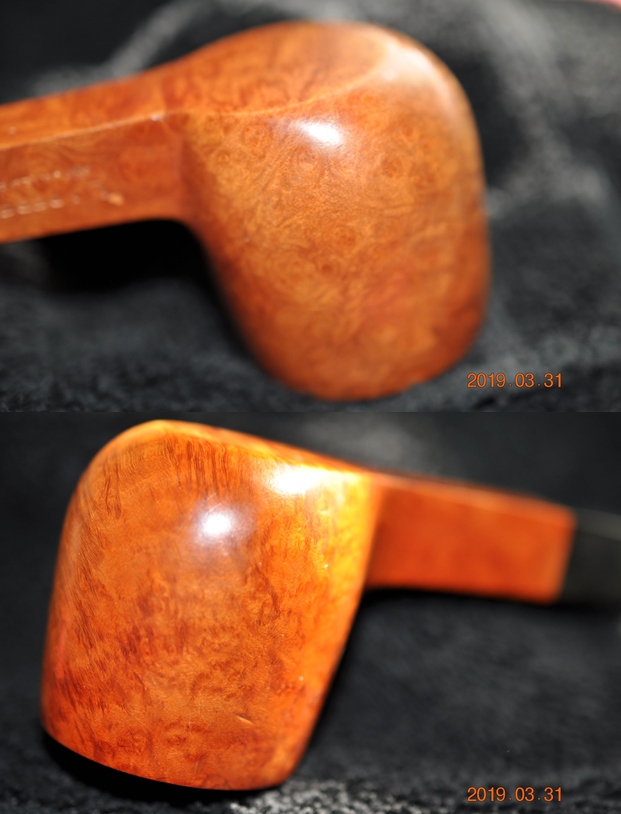
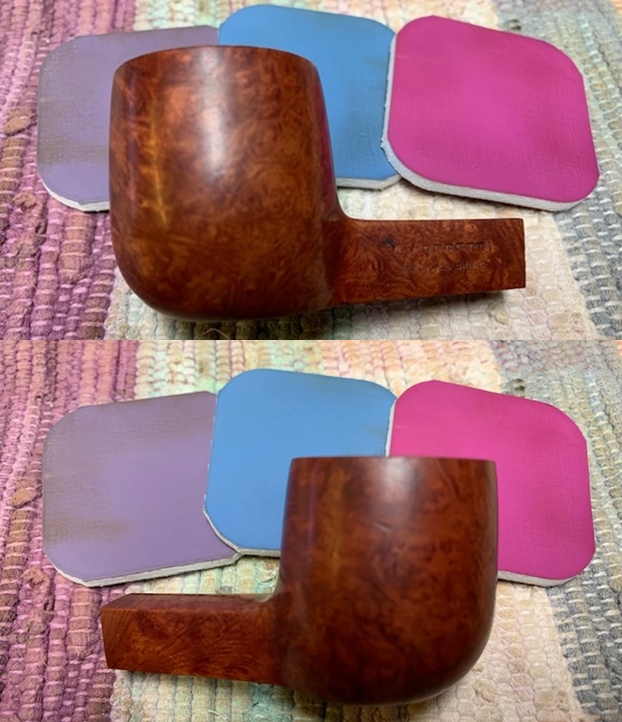
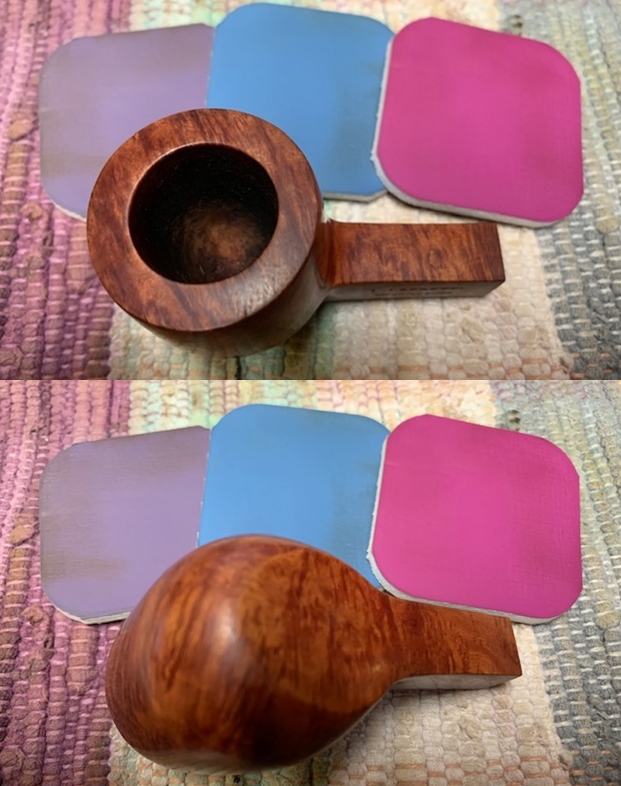
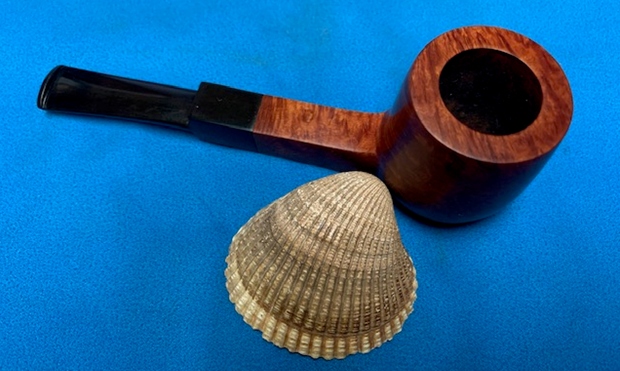
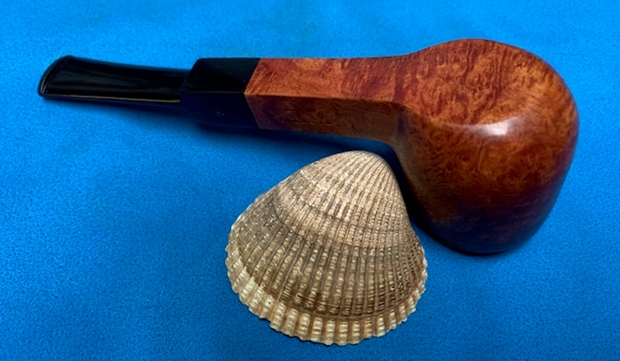
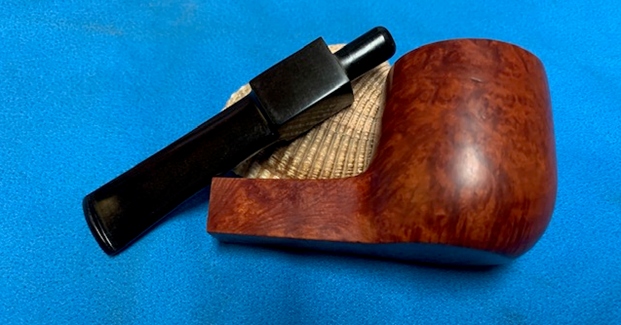
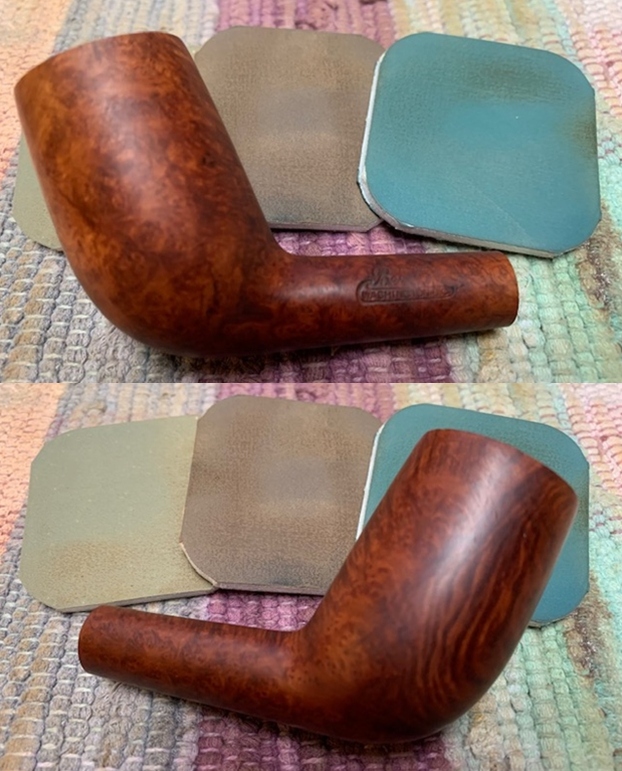
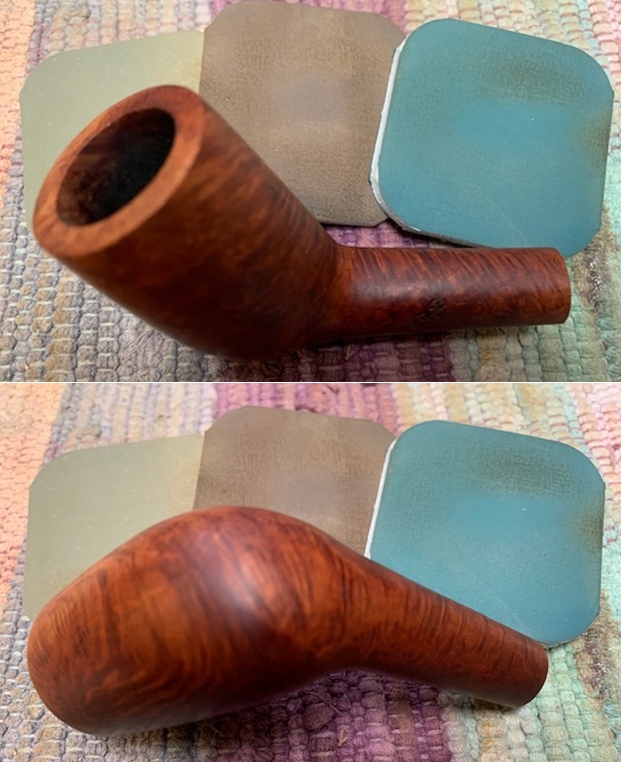
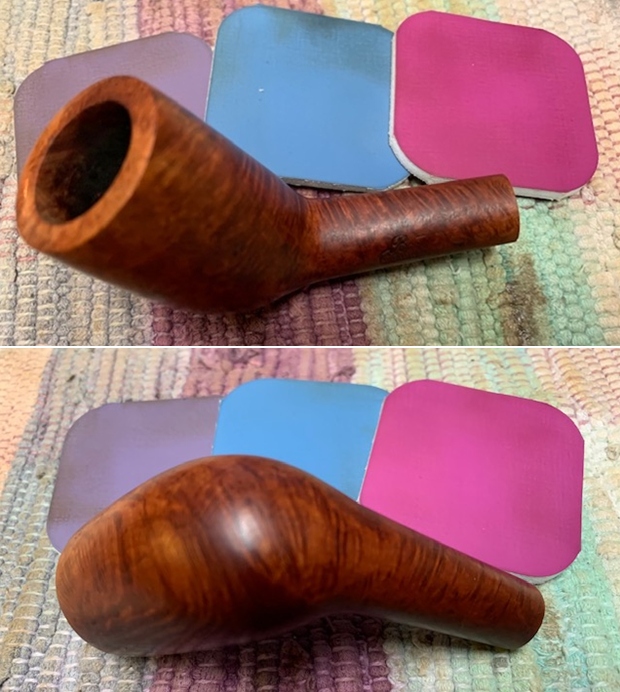
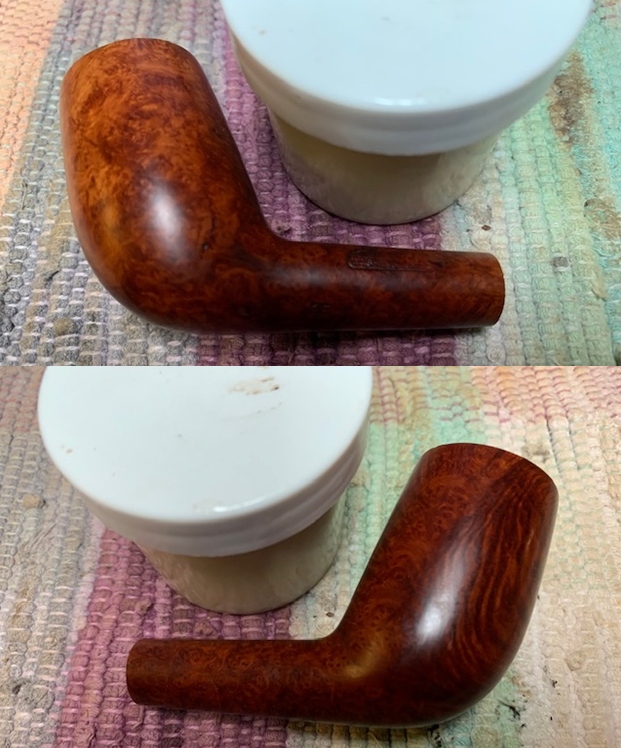
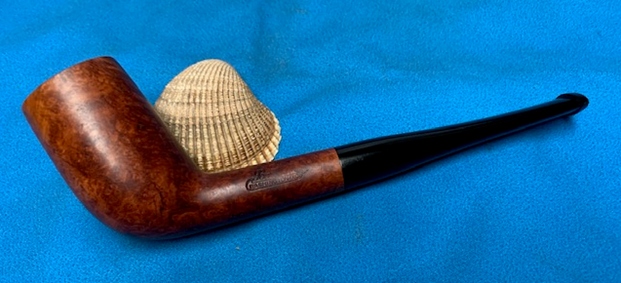
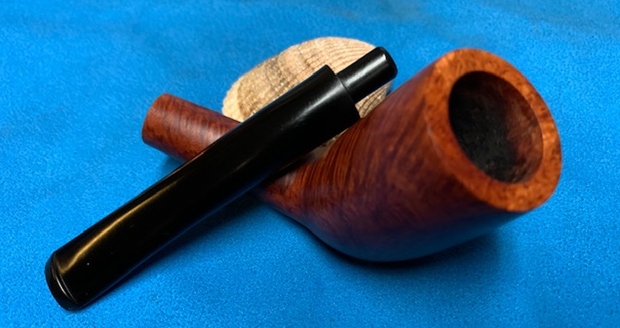
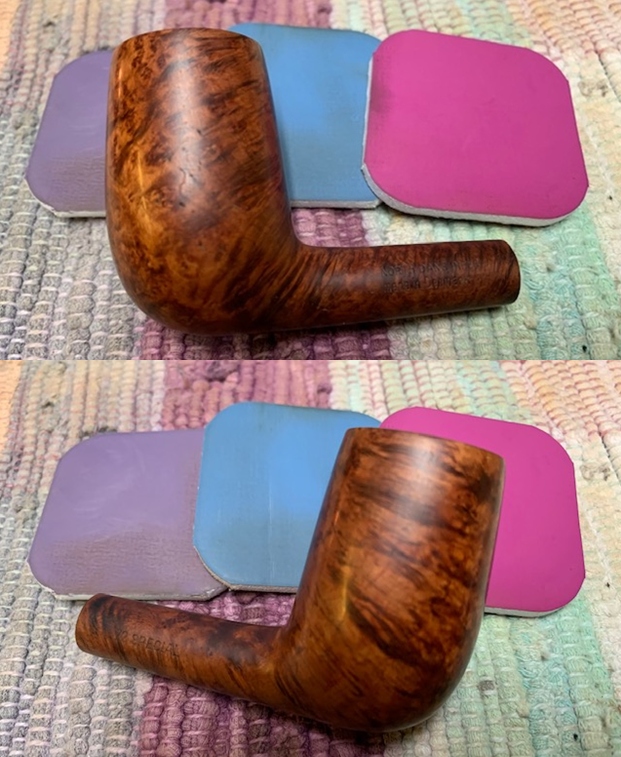
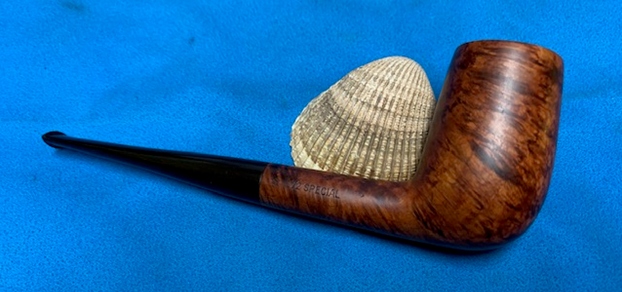
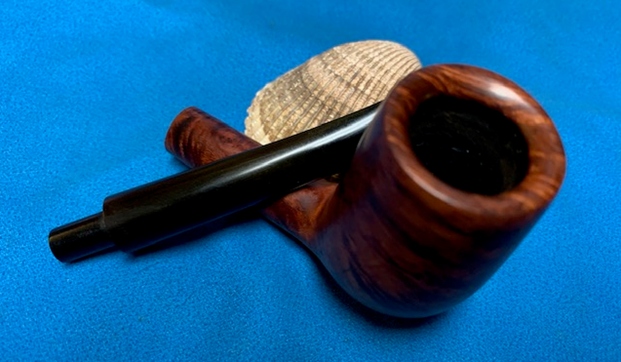
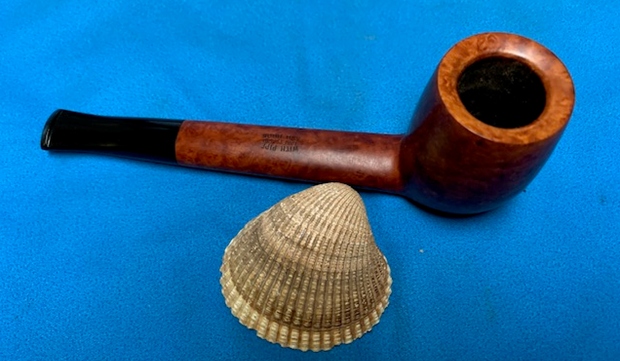
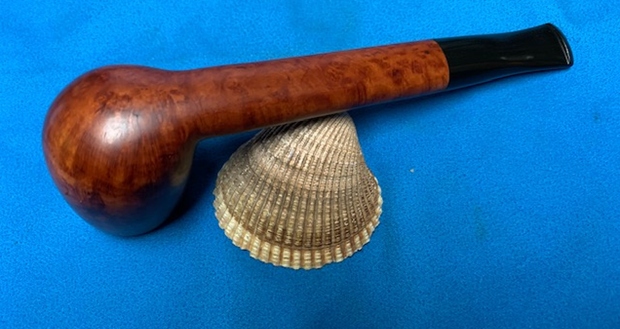
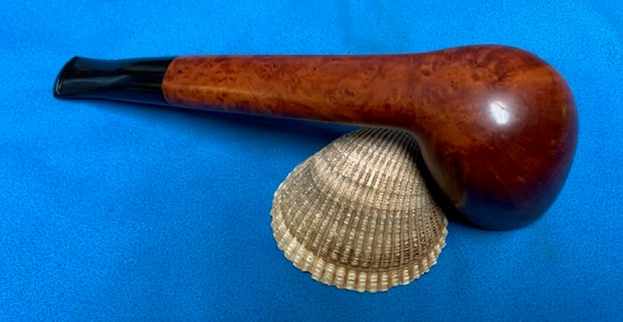
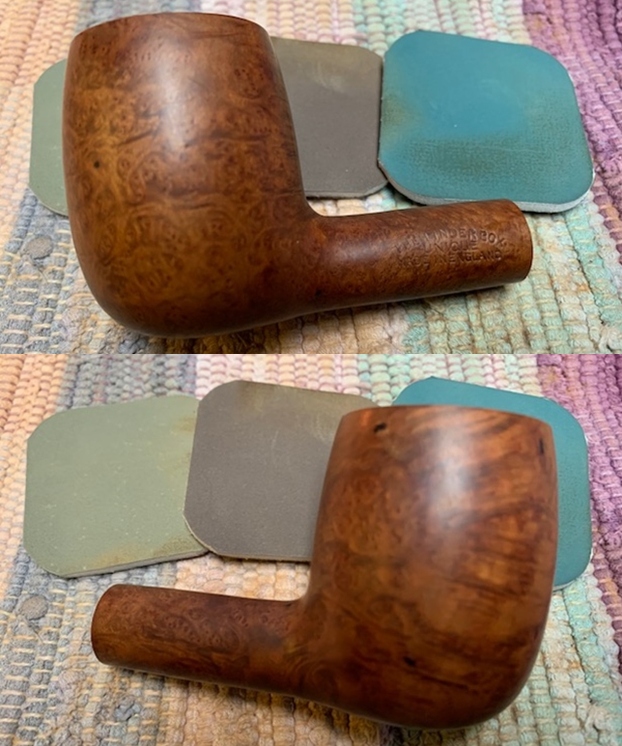
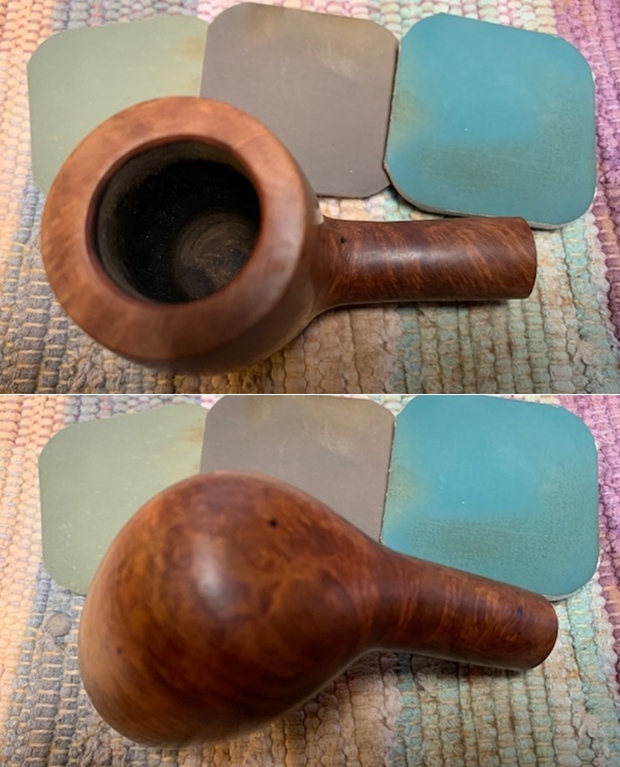
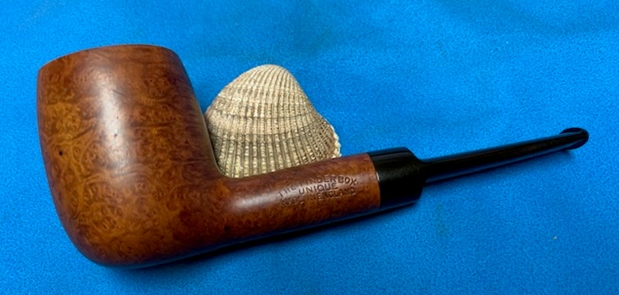
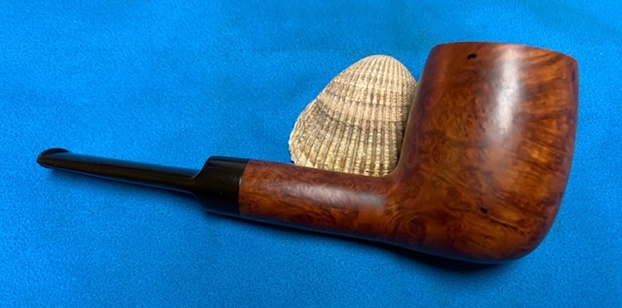
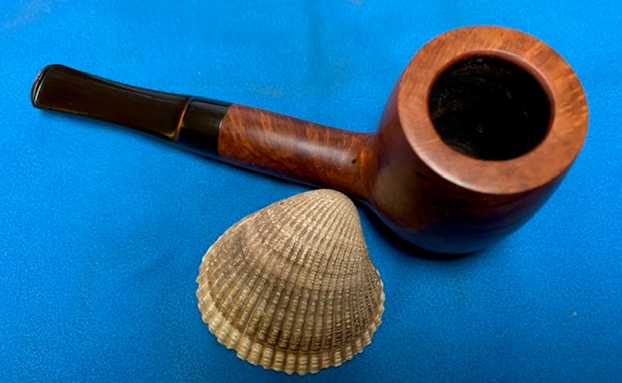
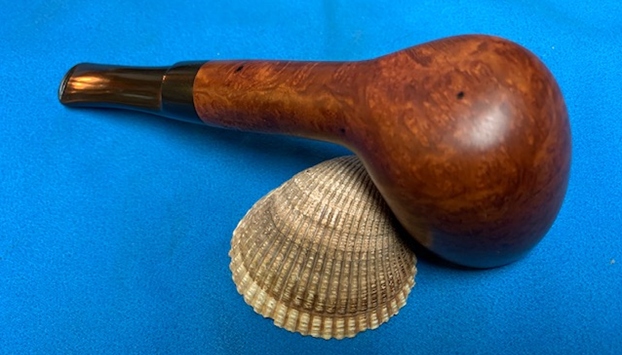
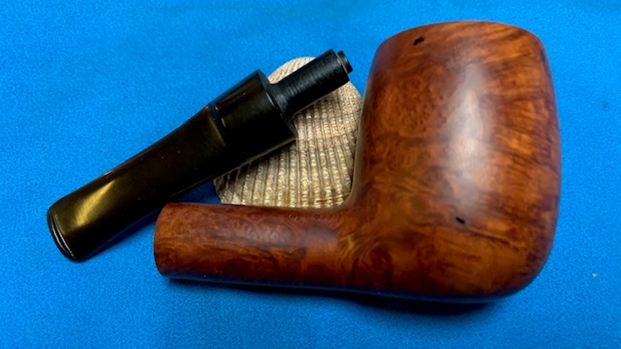
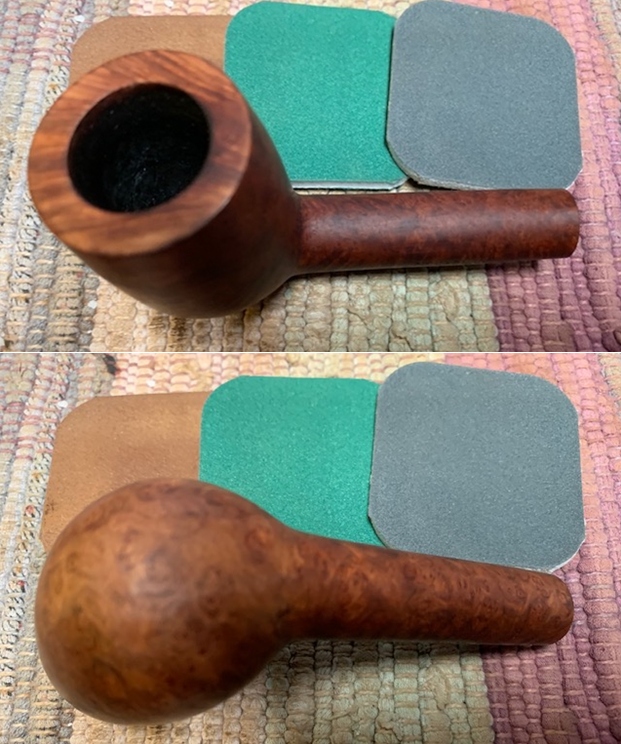
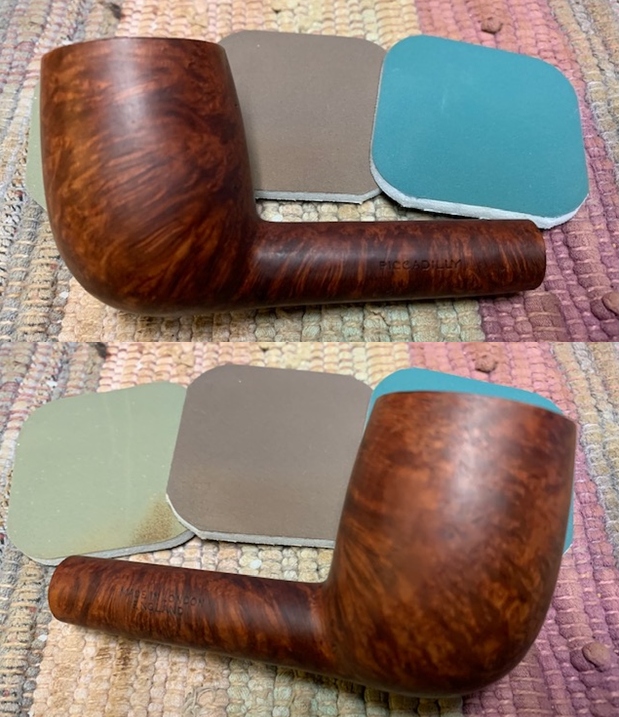
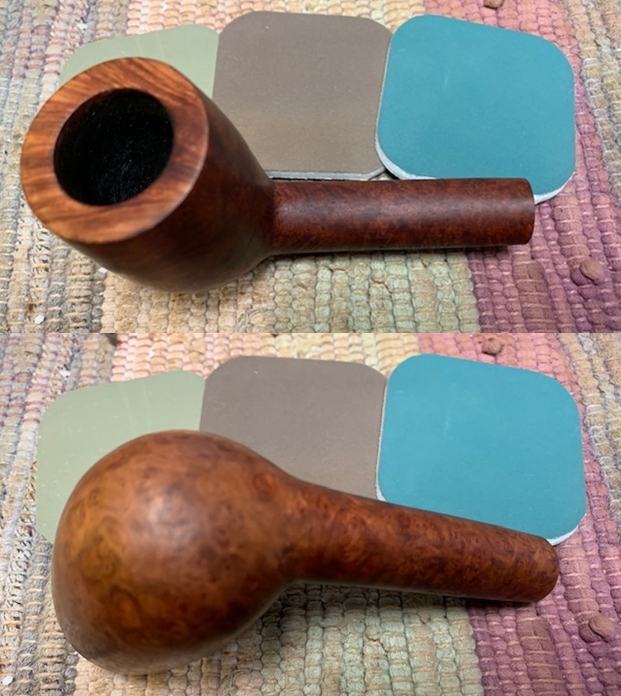
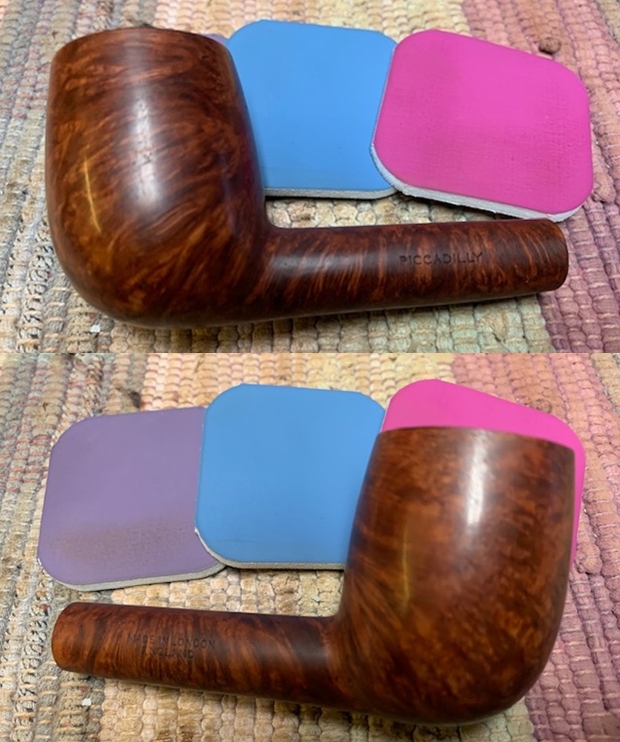
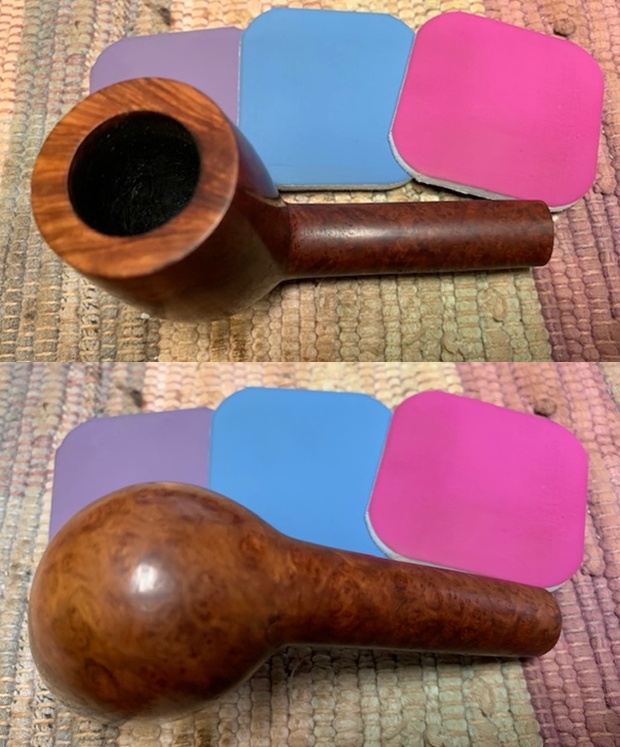
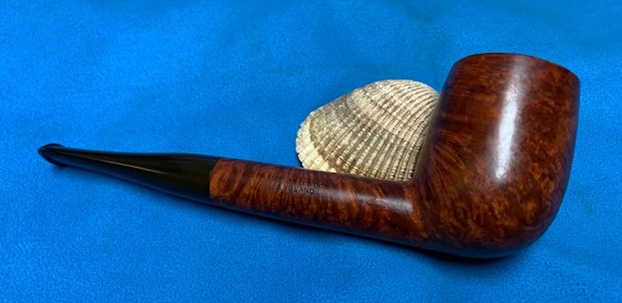
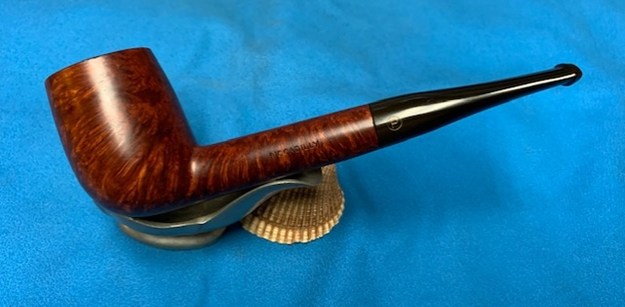
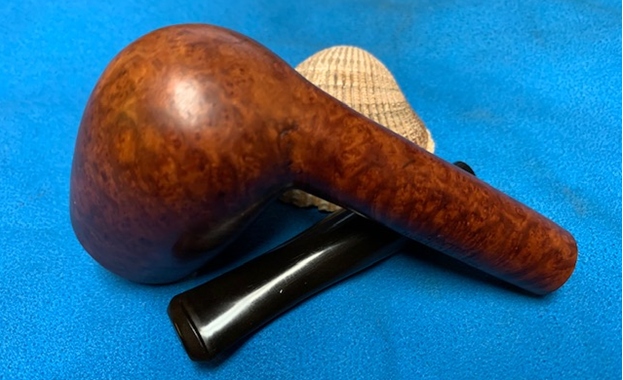
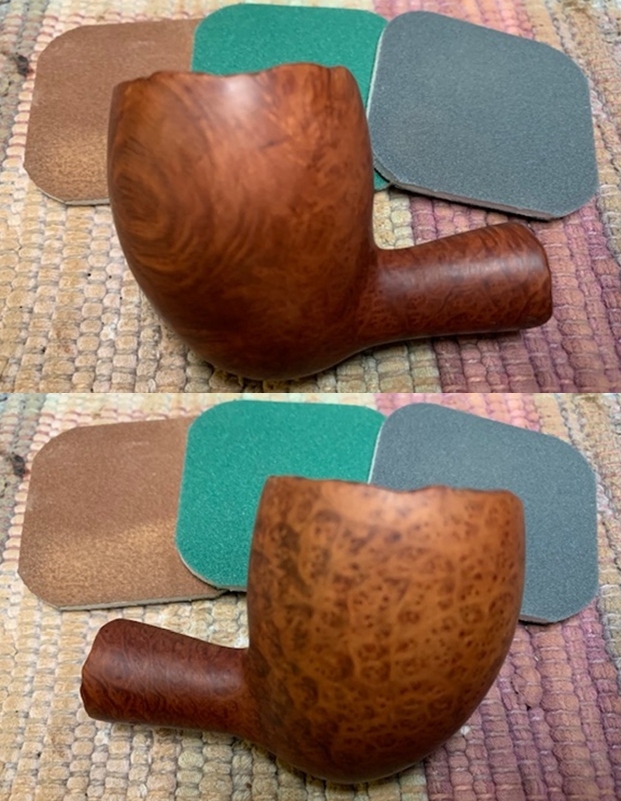
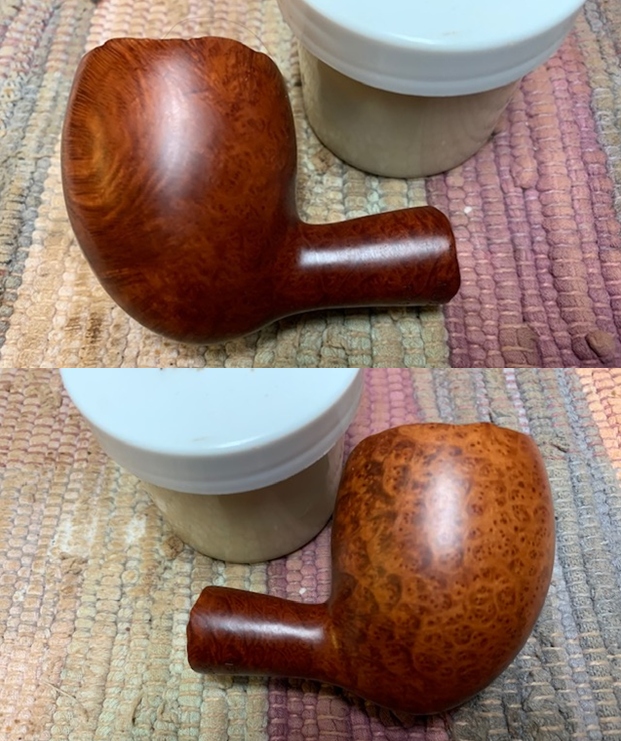
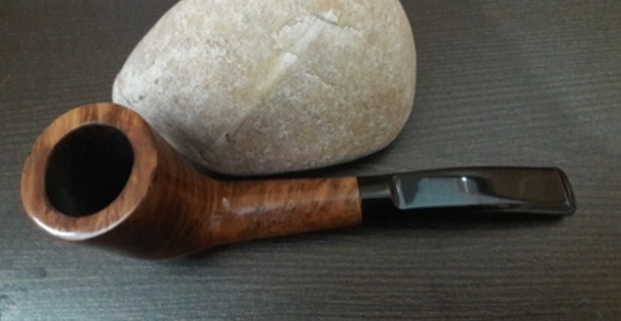
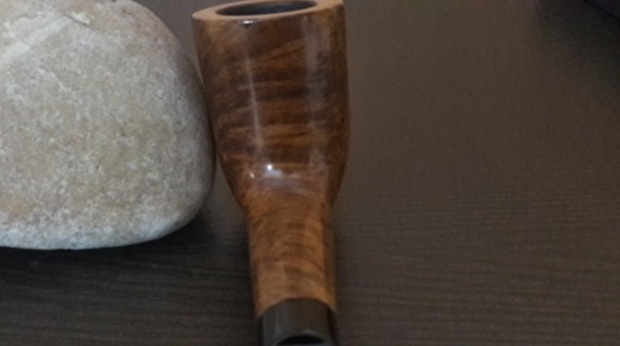
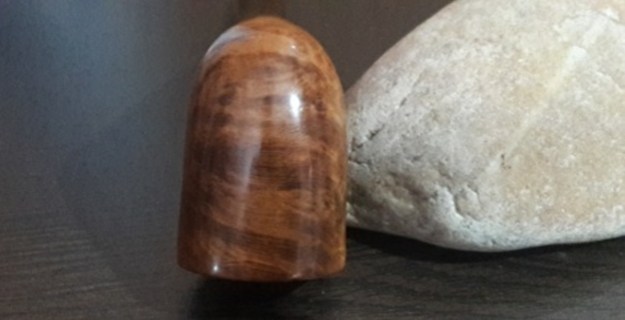
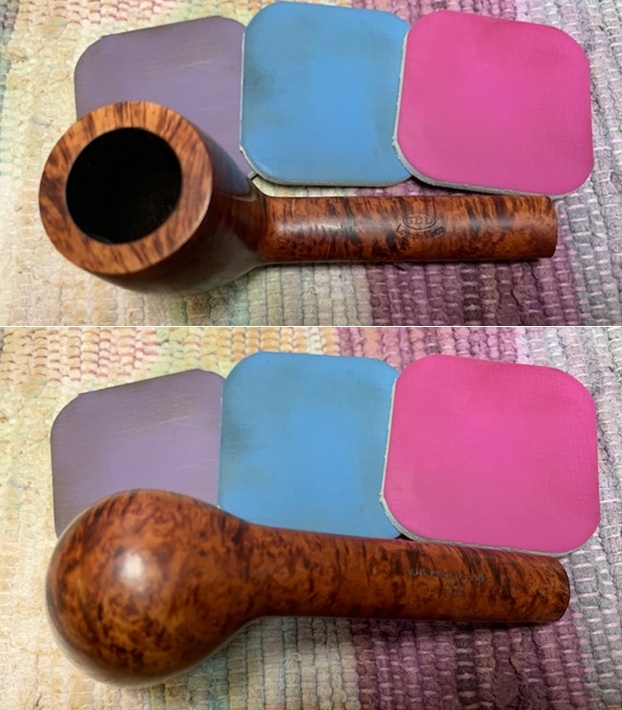
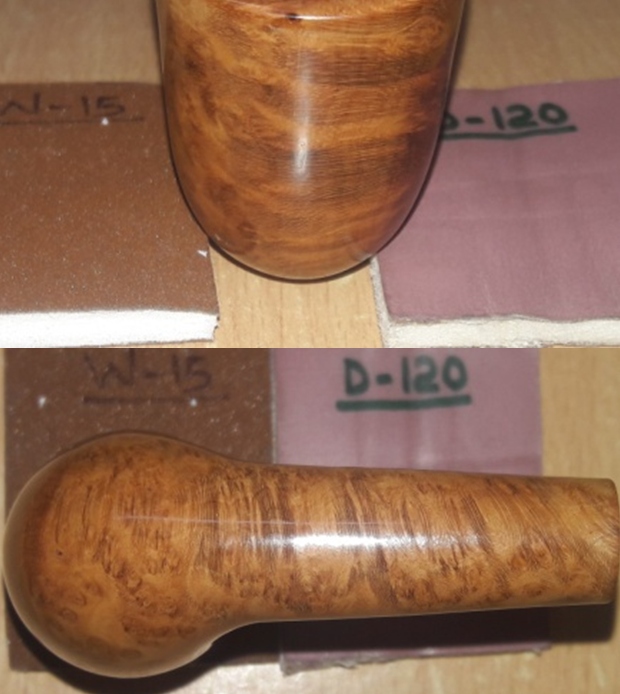 Next, I rubbed a small quantity of “Before and After Restoration Balm” deep in to the briar with my finger tips and let it rest for a few minutes. The balm almost immediately works its magic and the briar now has a nice vibrant appearance with the beautiful grain patterns displayed in their complete splendor. I further buffed it with a horse hair brush and gave a vigorous buff with a microfiber cloth to deepen the shine. The dark browns of the bird’s eye and cross grains spread across the stummel makes for a visual treat. It really is a nice piece of briar.
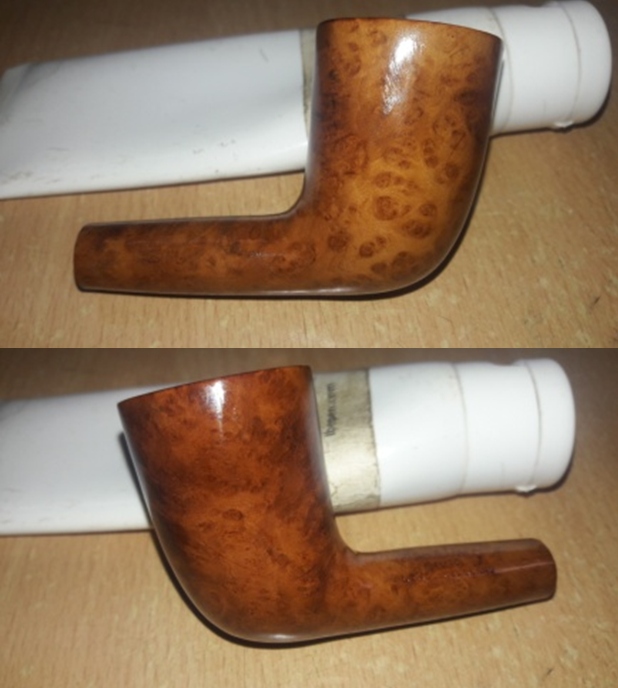
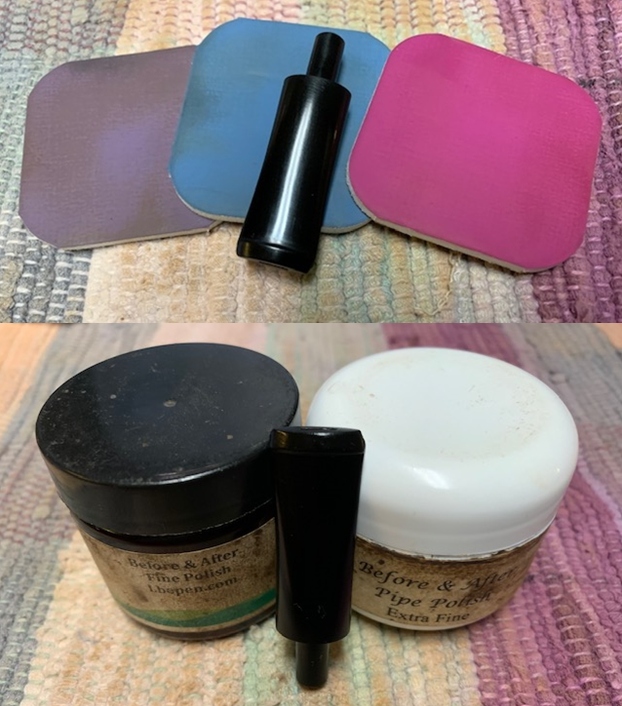
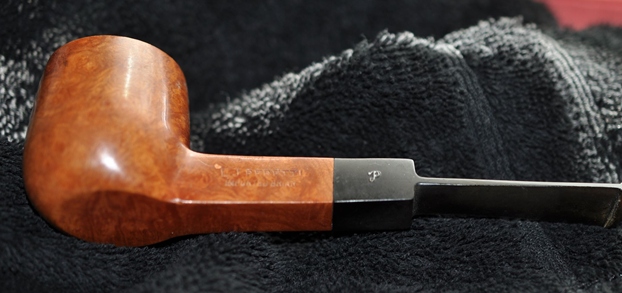
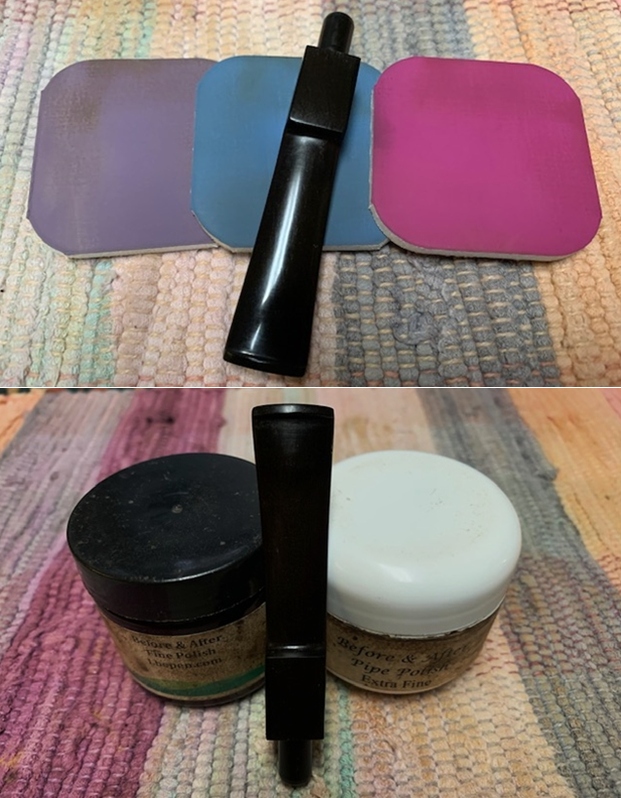
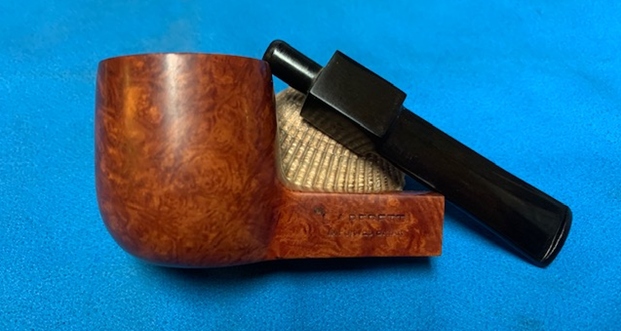
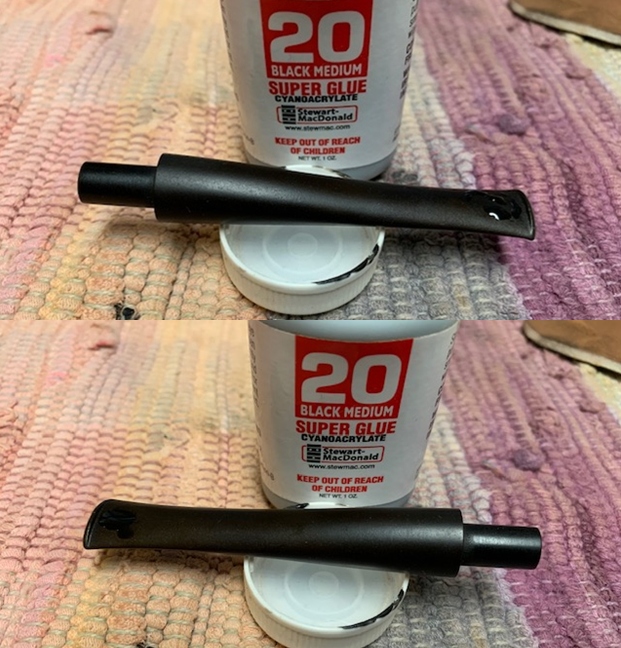
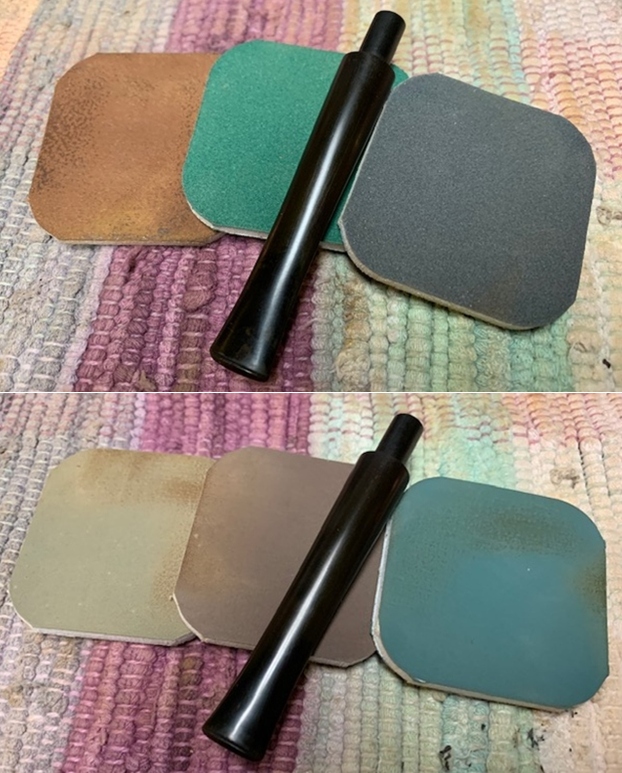
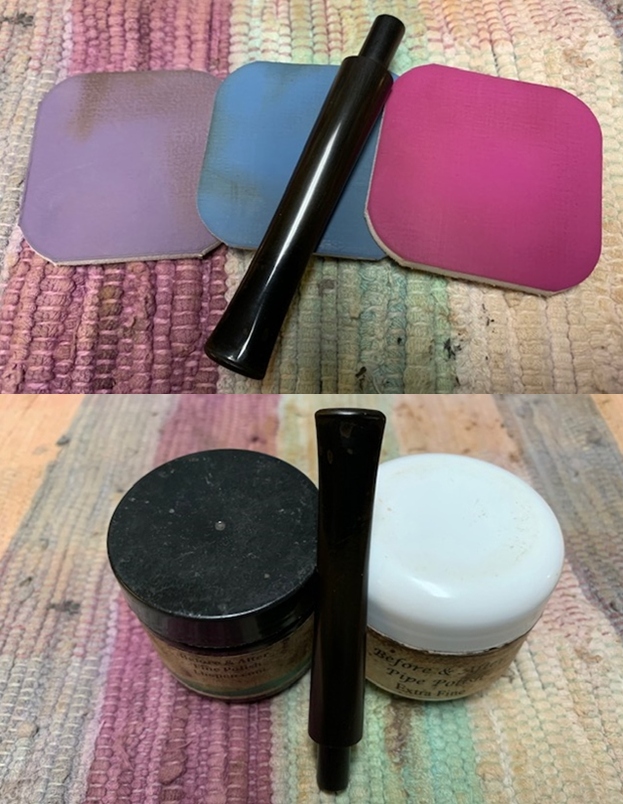
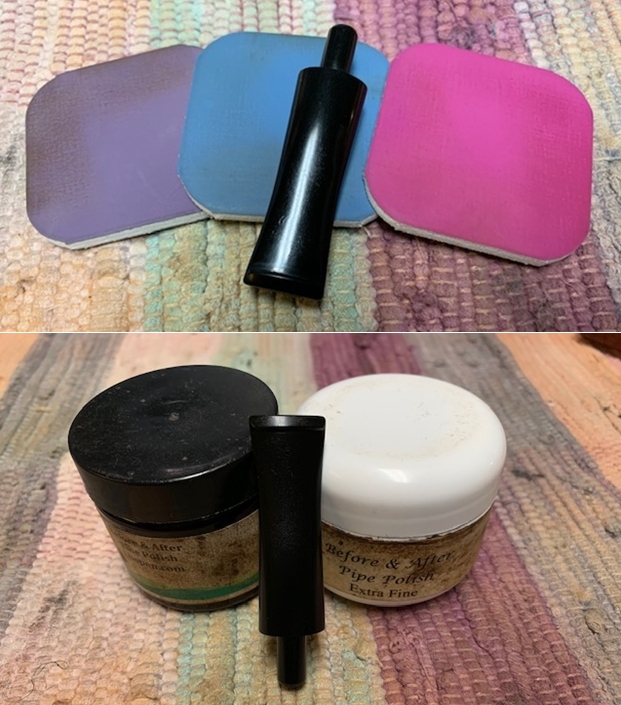
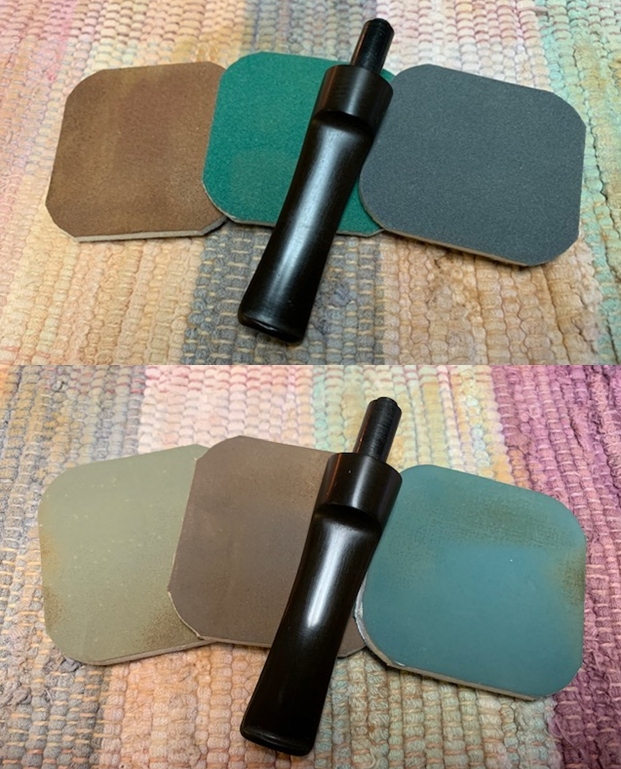
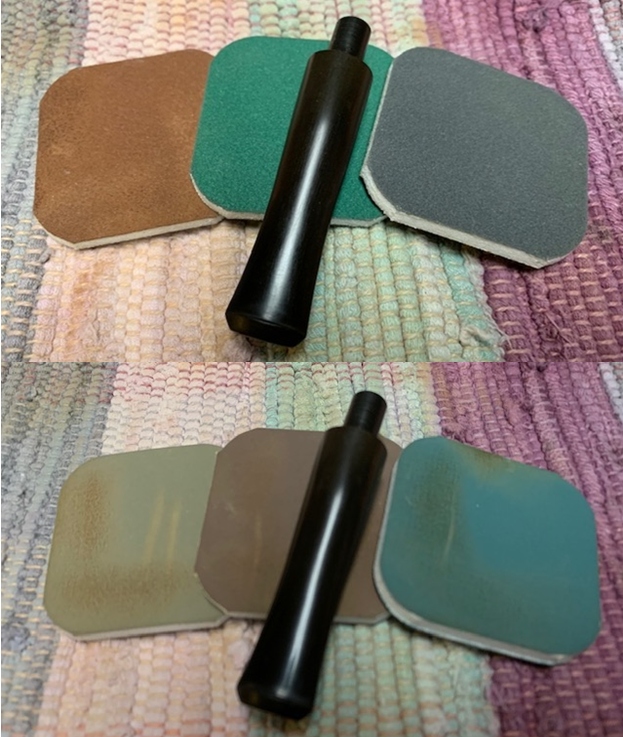
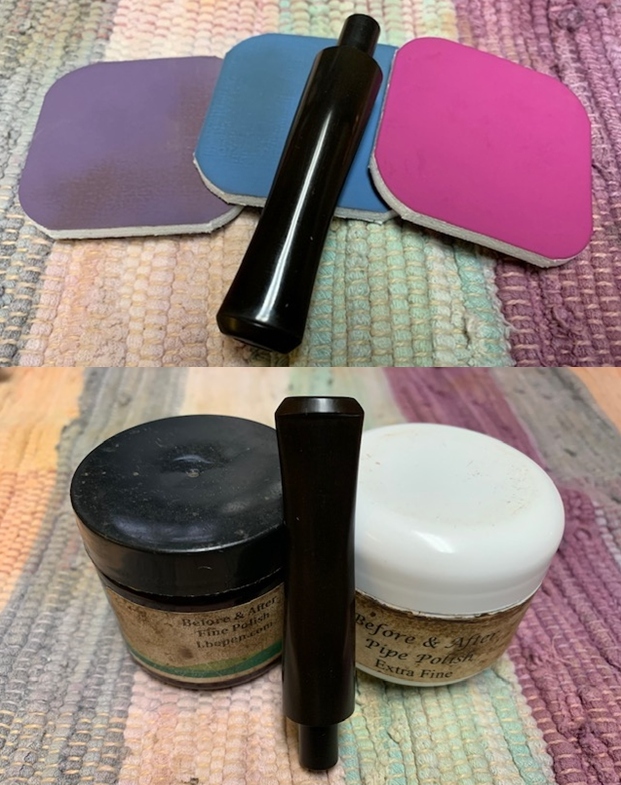
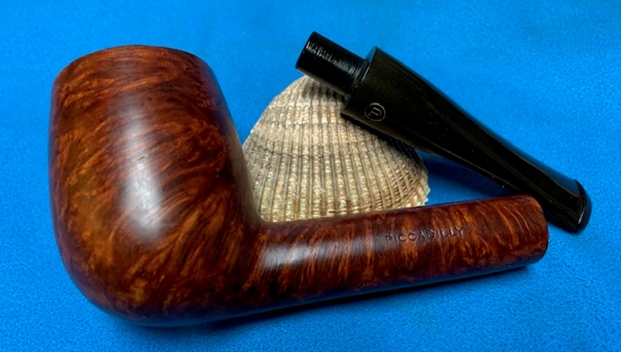
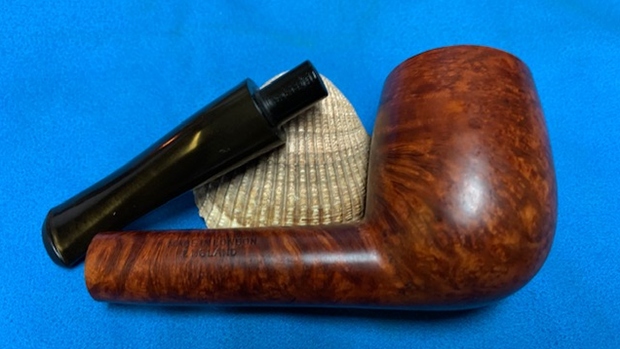
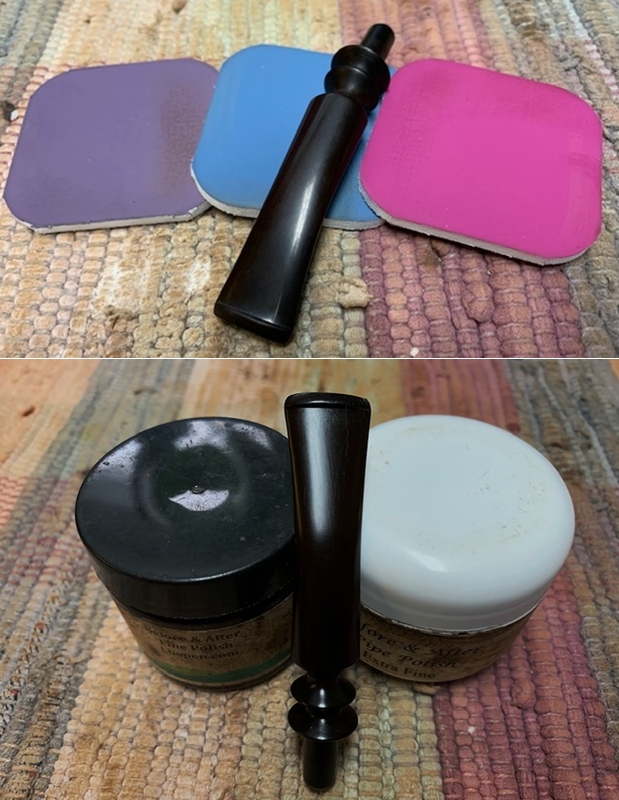
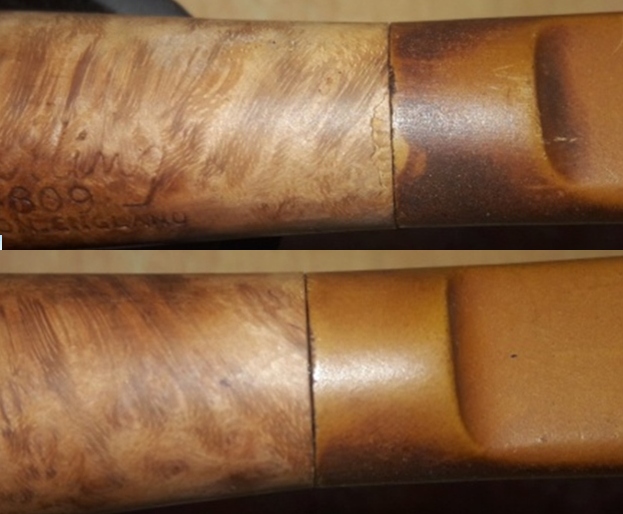
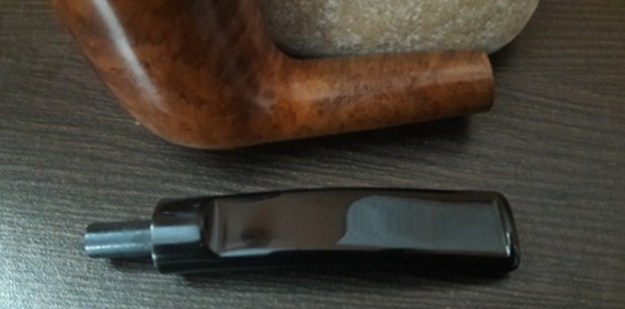
 To bring a deep shine to the vulcanite stem, I polished the stem by wet sanding with 1500 to 12000 grit micromesh pads. I wiped the stem with moist cloth after each pad. I rubbed a little quantity of “Before and After Fine/ Extra Fine” stem polish. This product developed by Mark Hoover helps to remove minor scratches from the stem surface while further eliminating what little oxidation that remained on the stem surface. I rubbed it down with Extra Virgin Olive oil to rejuvenate the vulcanite. The finished stem is shown below. I am pretty pleased with this appearance of the stem.
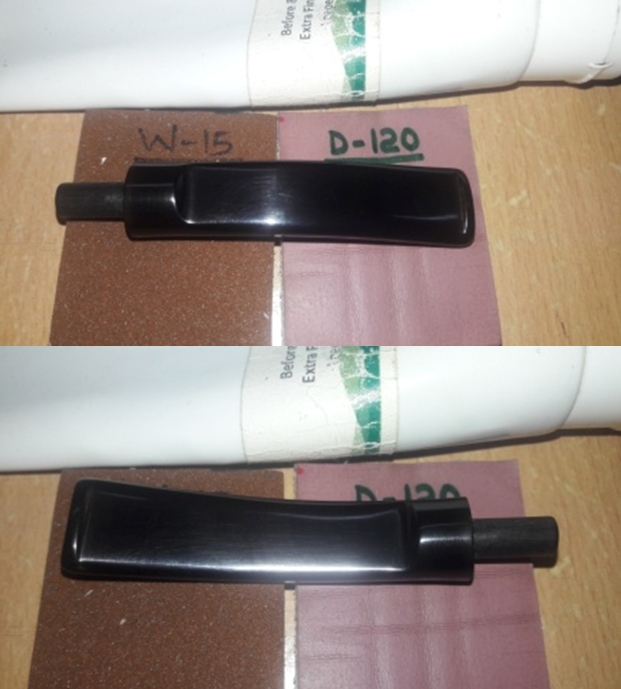 I mount a cotton cloth buffing wheel on to my hand held rotary tool and polished the stummel and stem with Blue Diamond compound. This compound helps to remove the minor scratch marks that remain from the sanding.
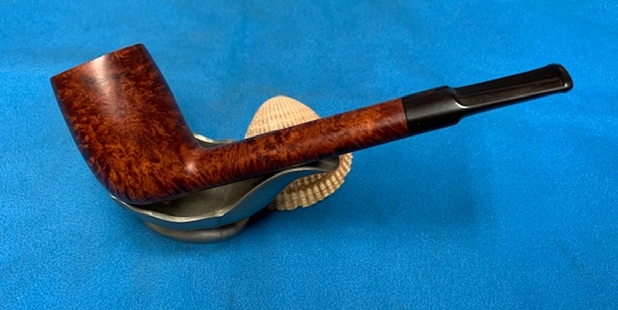
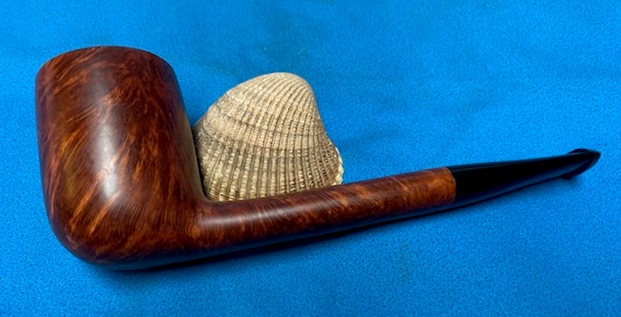
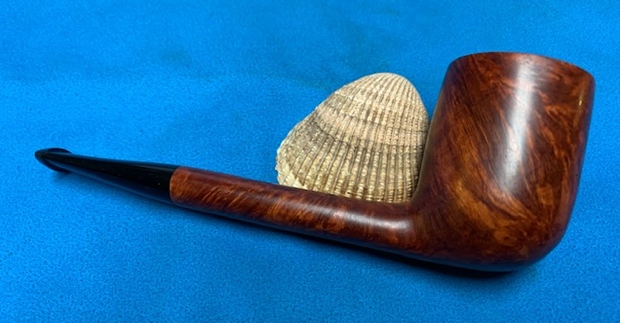
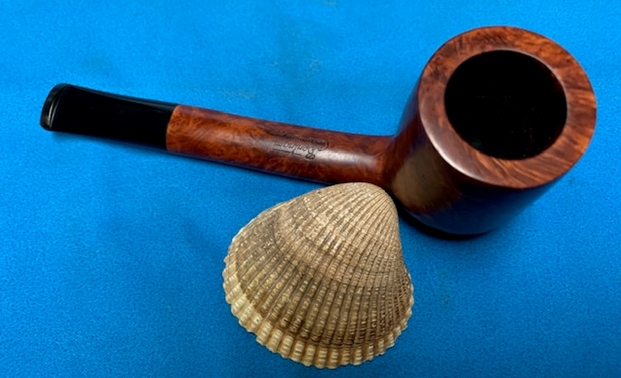
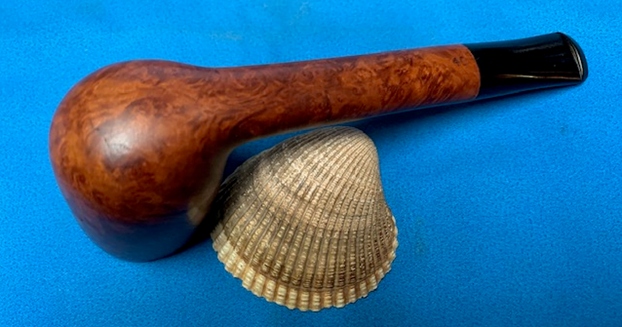
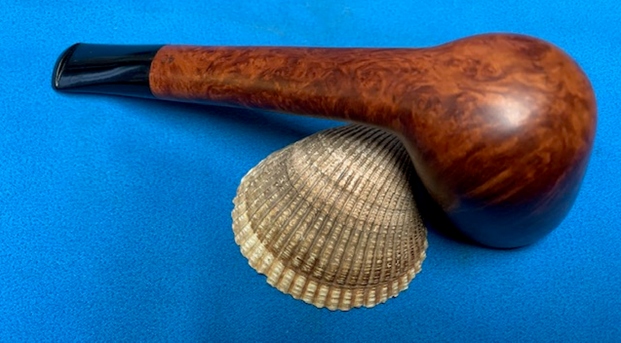
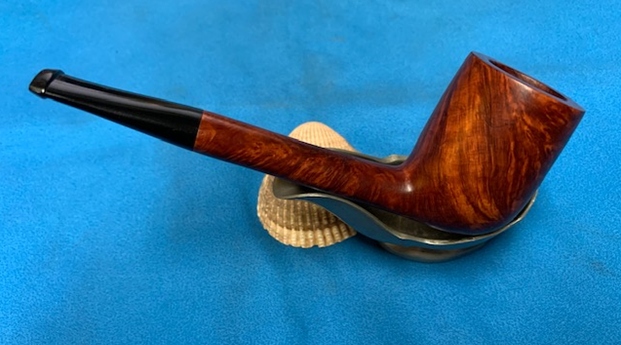
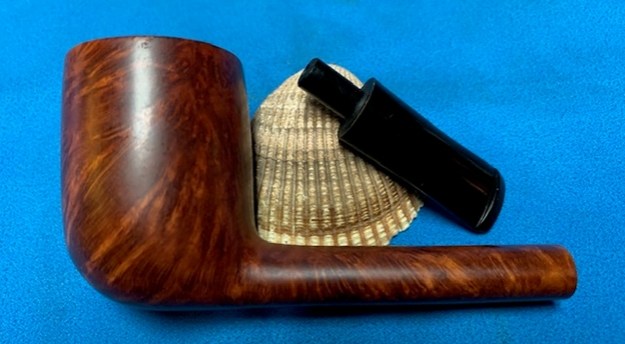
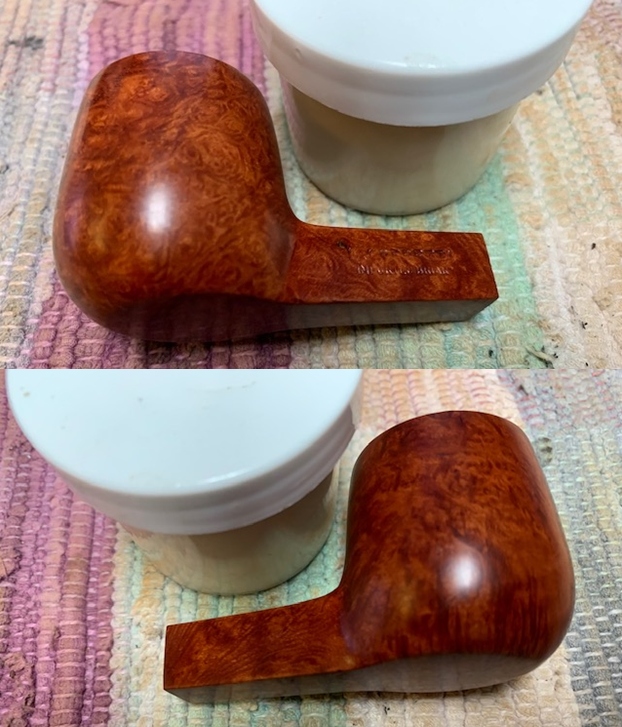
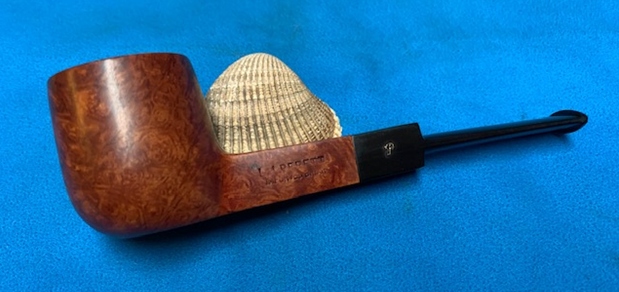
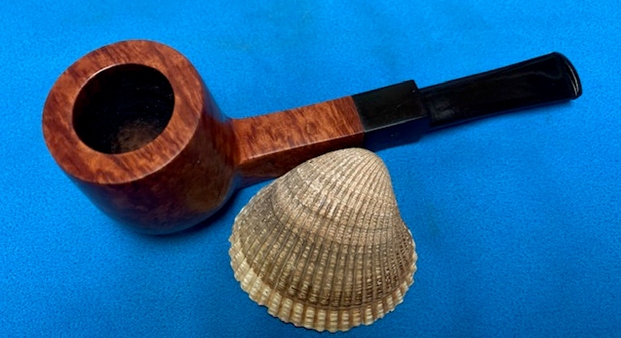
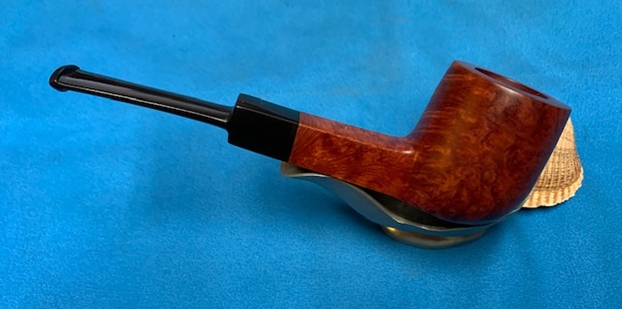
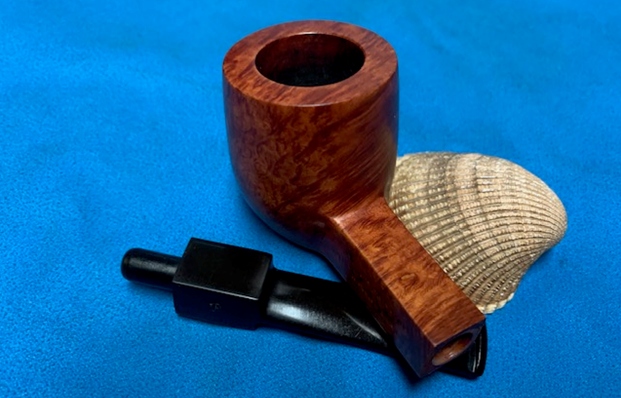
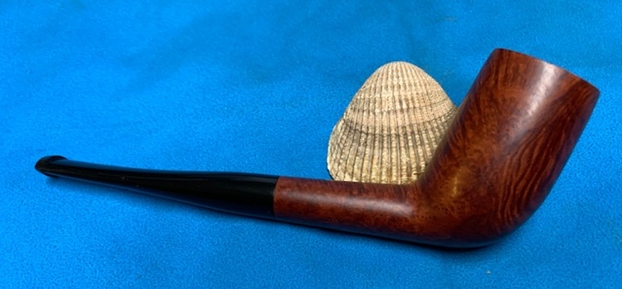
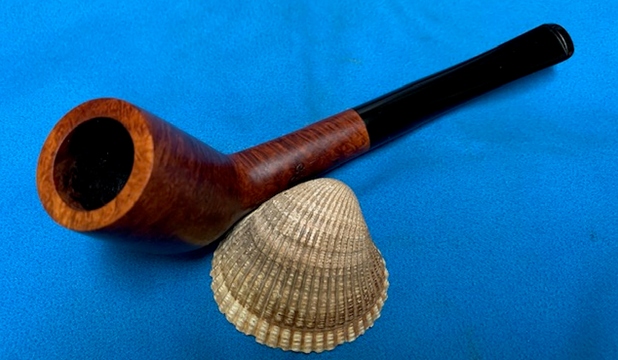
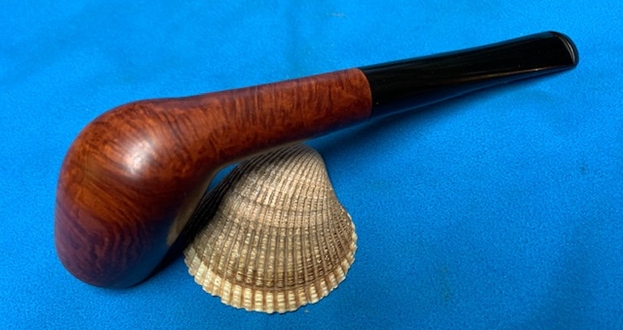
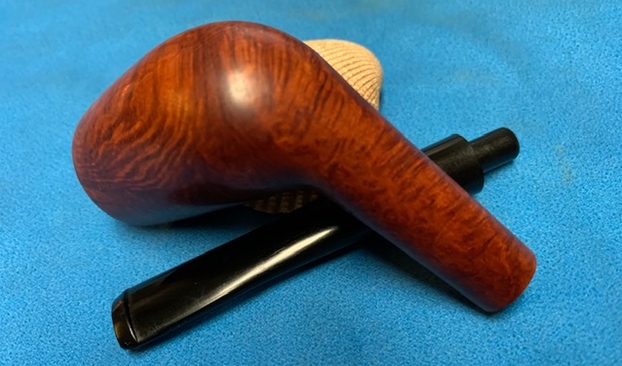
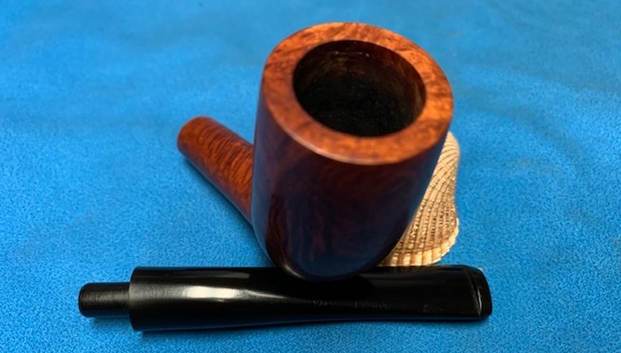
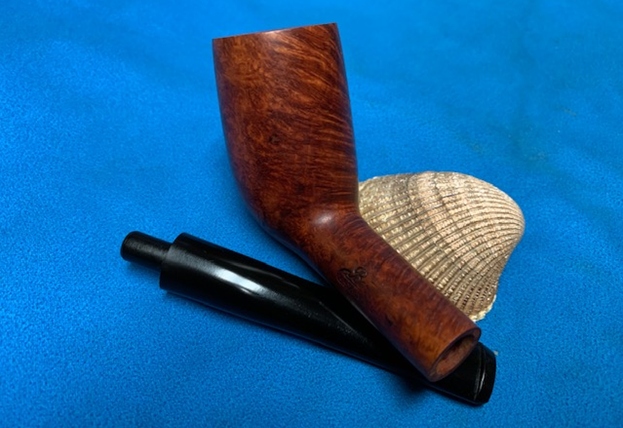
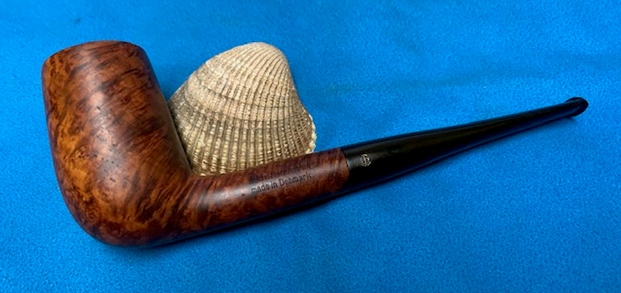
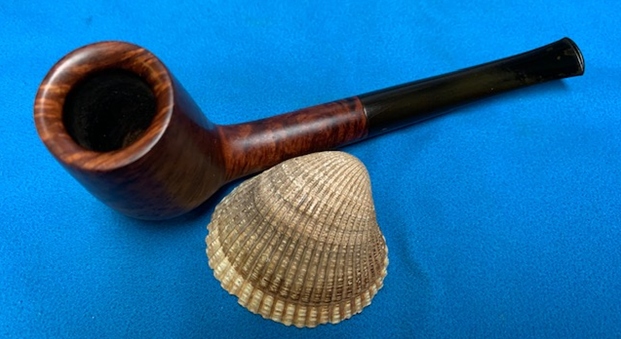
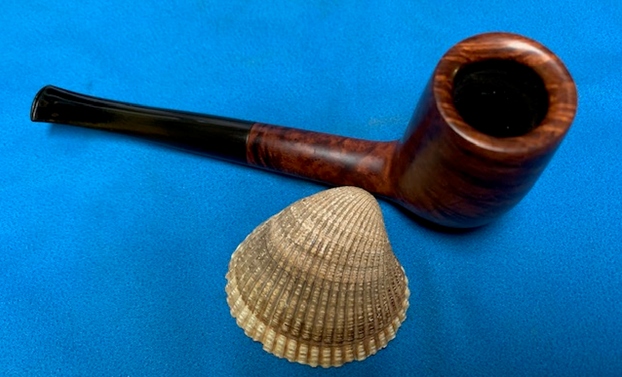
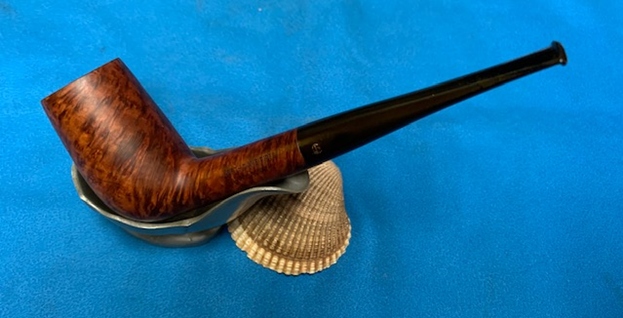
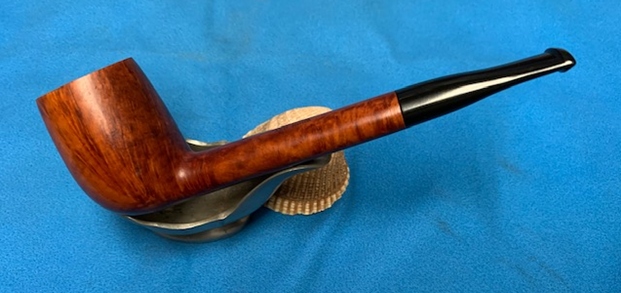
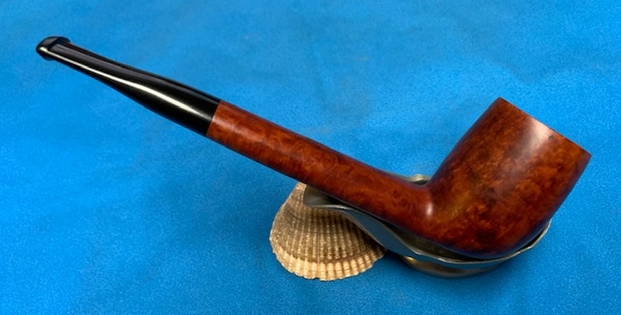
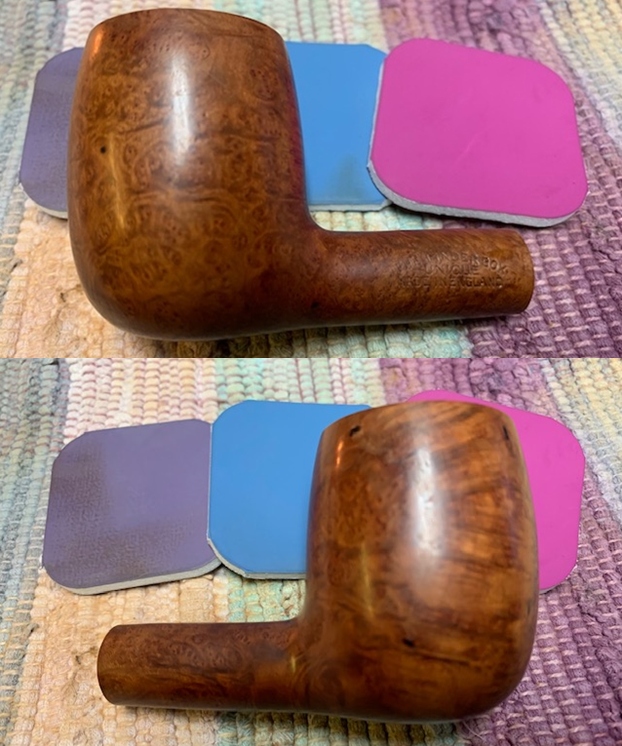
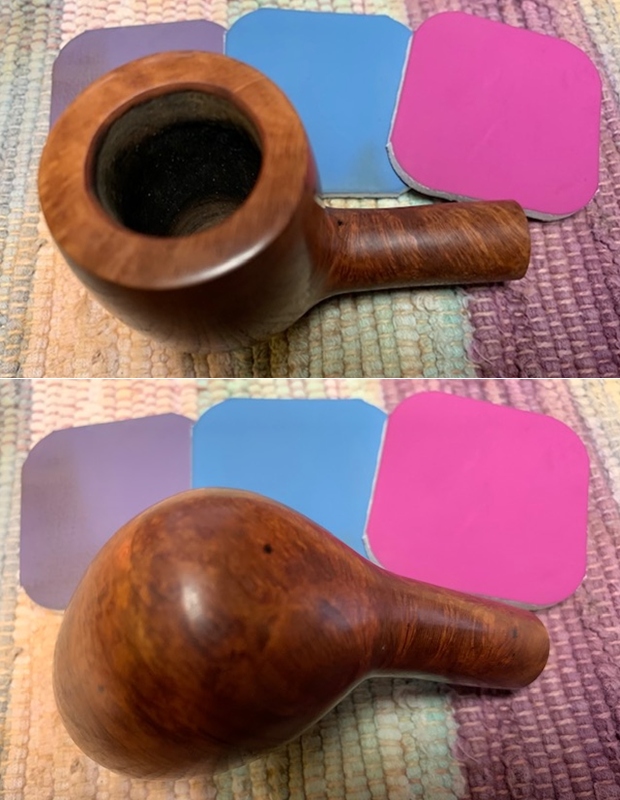
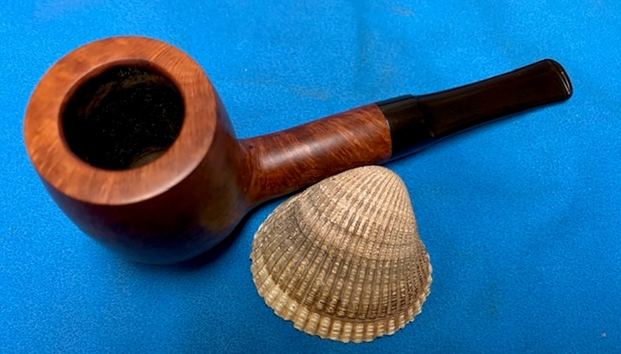
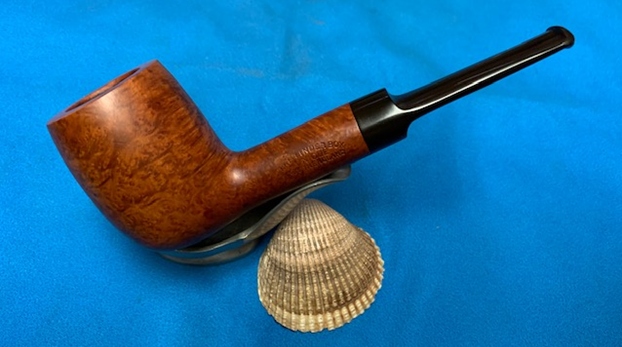
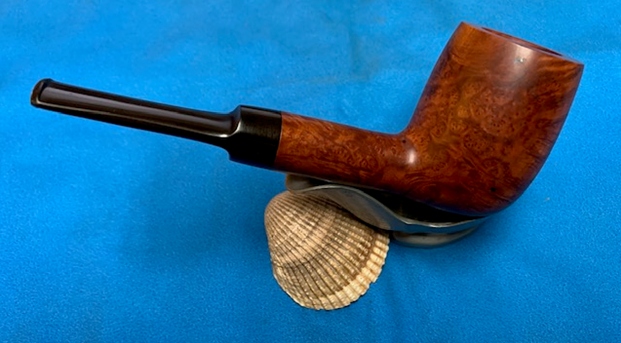
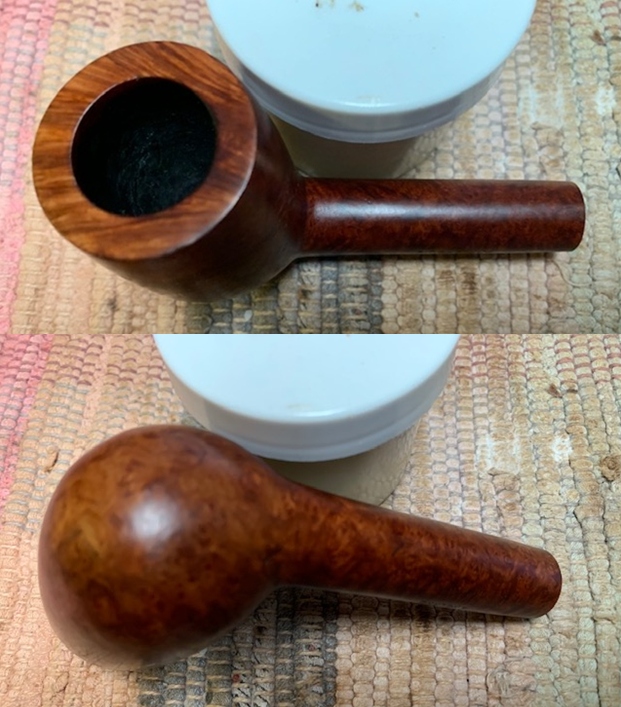
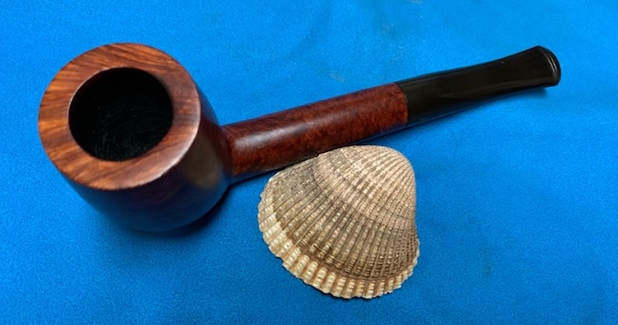
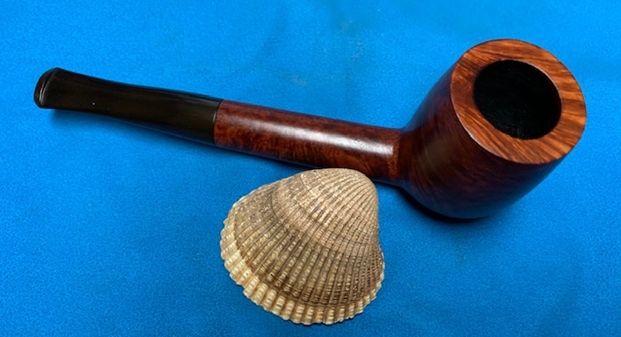
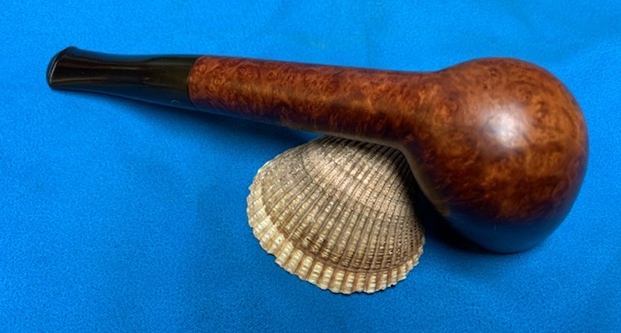
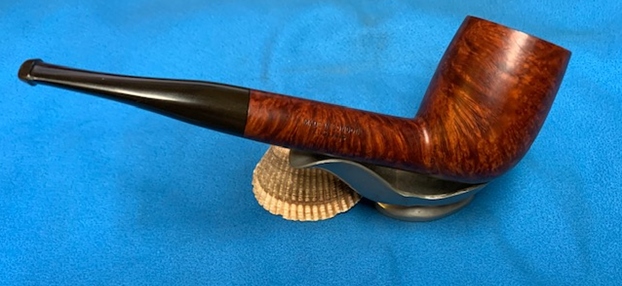
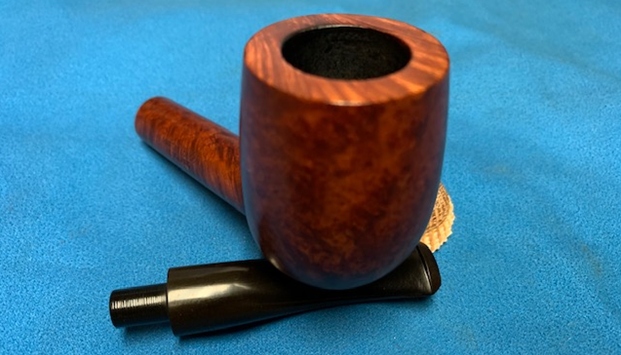
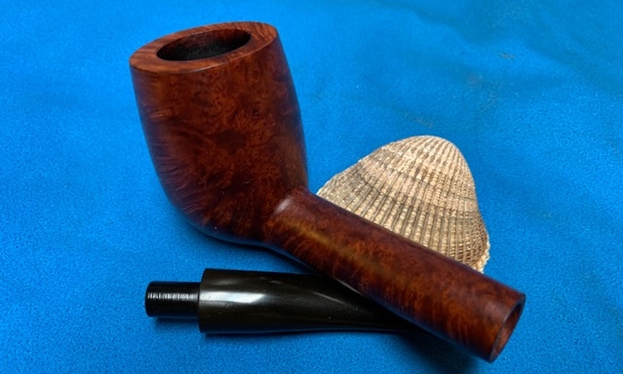
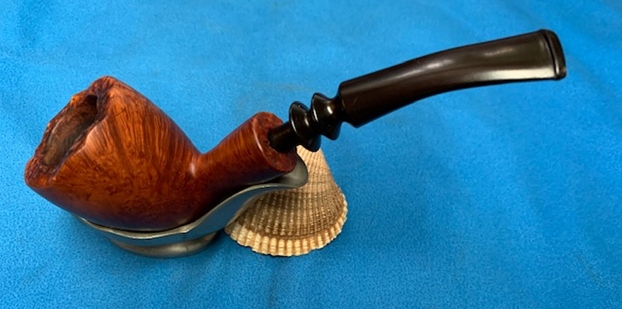
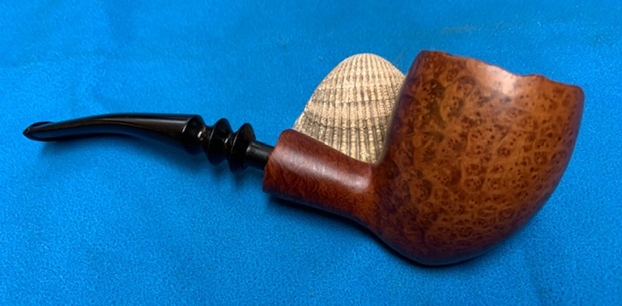
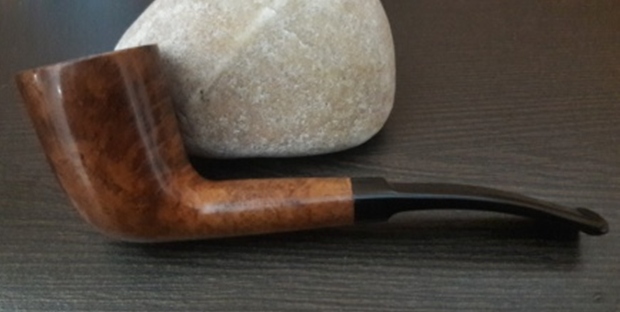
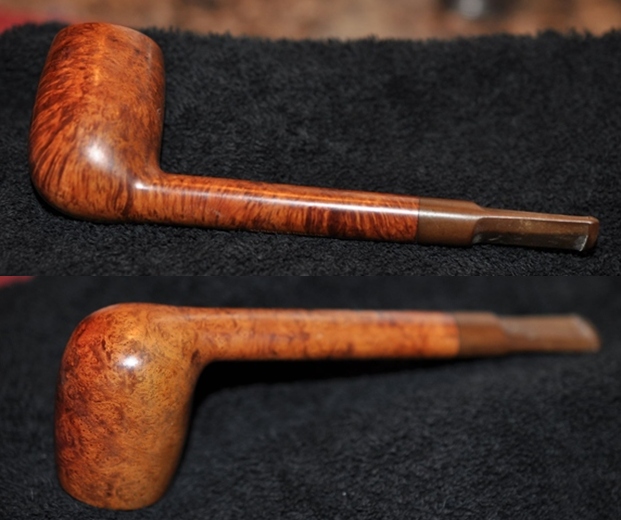
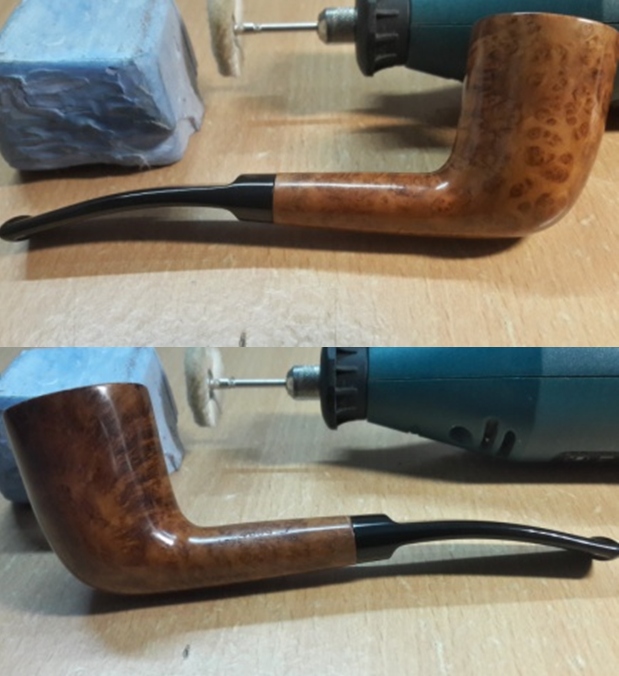 Next, I mount another cotton buffing wheel that I have earmarked for carnauba wax and applied several coats of the wax. I finished the restoration by giving the entire pipe a rigorous hand buffing using a microfiber cloth to raise the shine further. The finished pipe looks amazingly beautiful and coupled with the size, heft and the hand feel, makes it quite a desirable pipe.
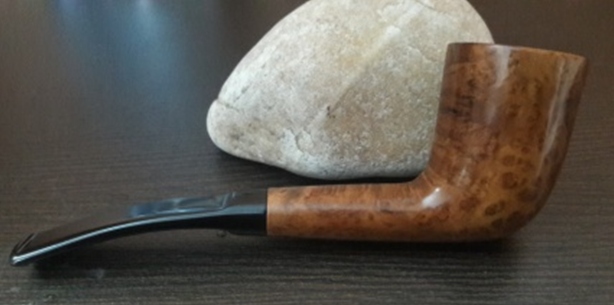

 P.S. I sincerely apologize for the poor quality of pictures that I have clicked of the finished pipe. I am still experimenting with my props, light setting and camera settings to take better quality of pictures to highlight the grains and finish of the completed pipe.
I wish to thank each one for sparing their valuable time to read through this write up and each one is my prayers. Stay home…stay safe!!
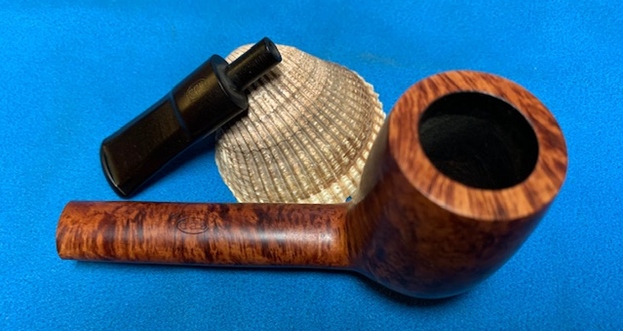
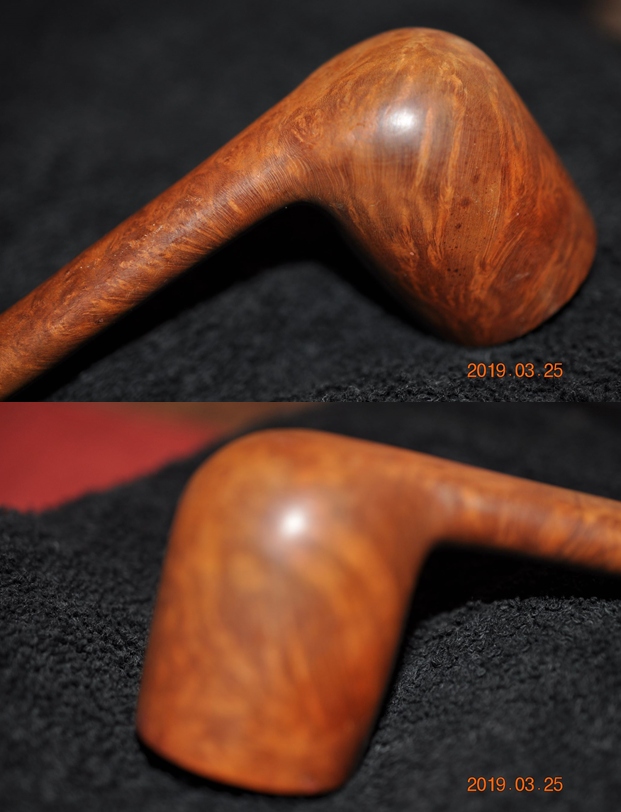
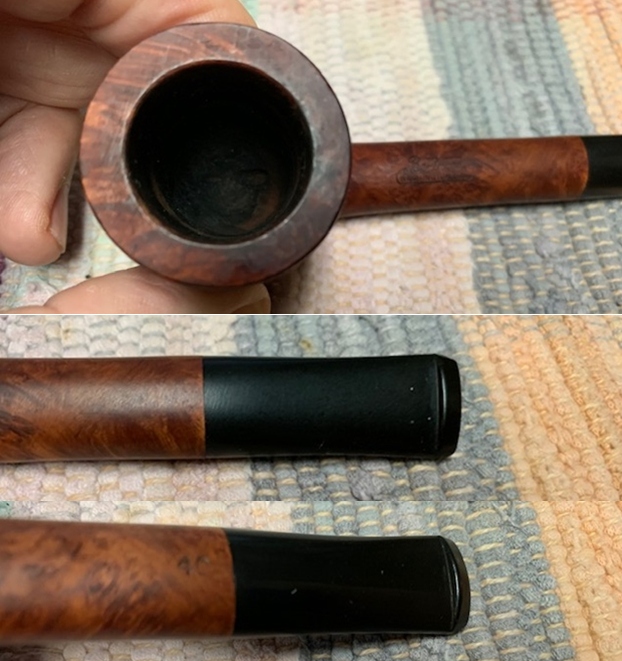
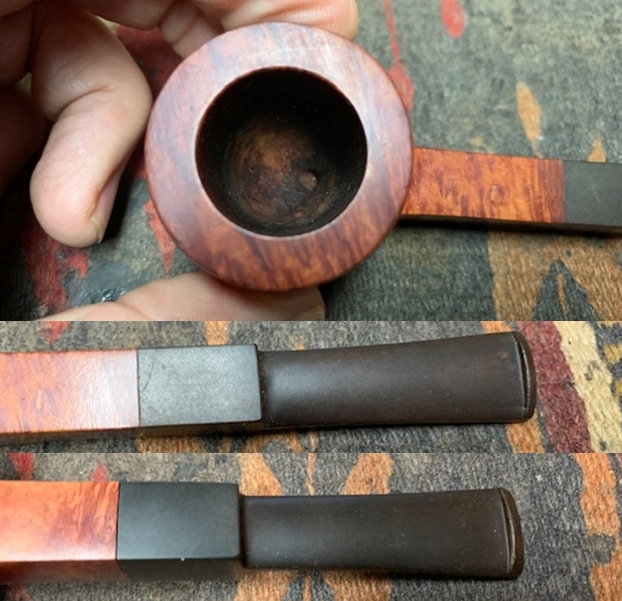
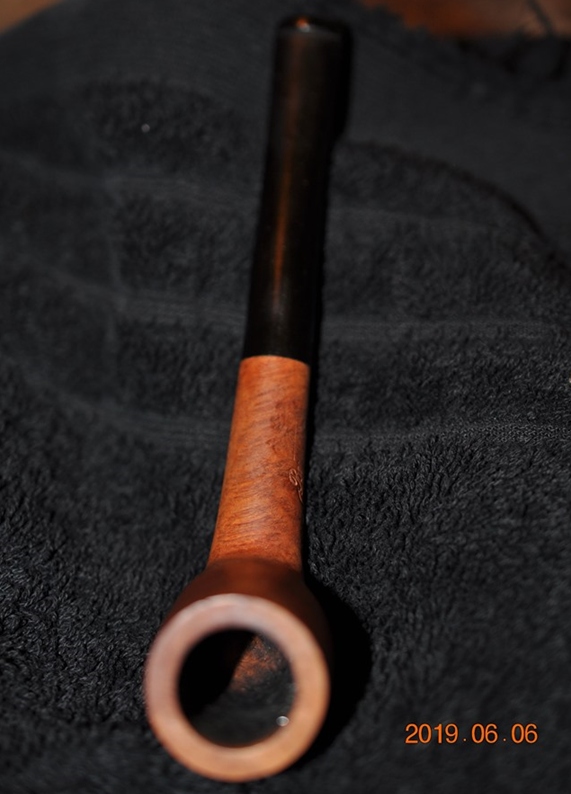
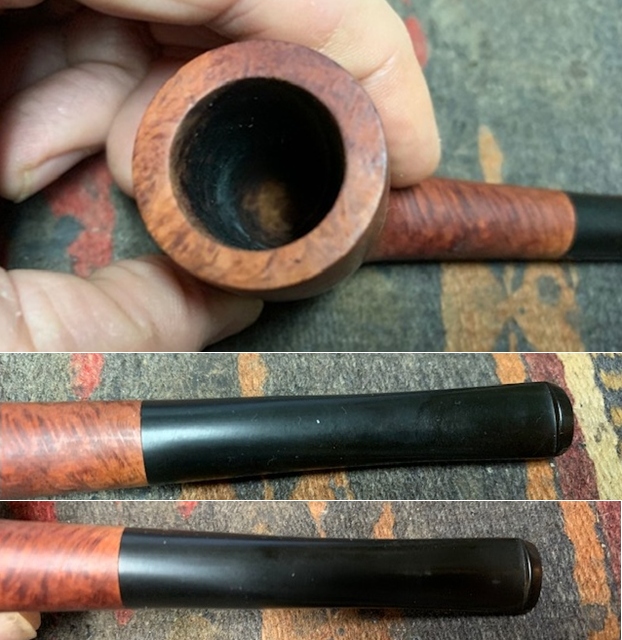
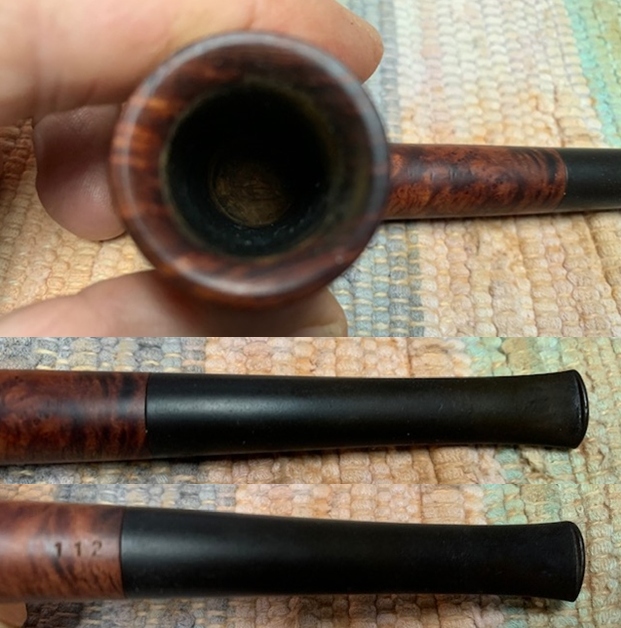
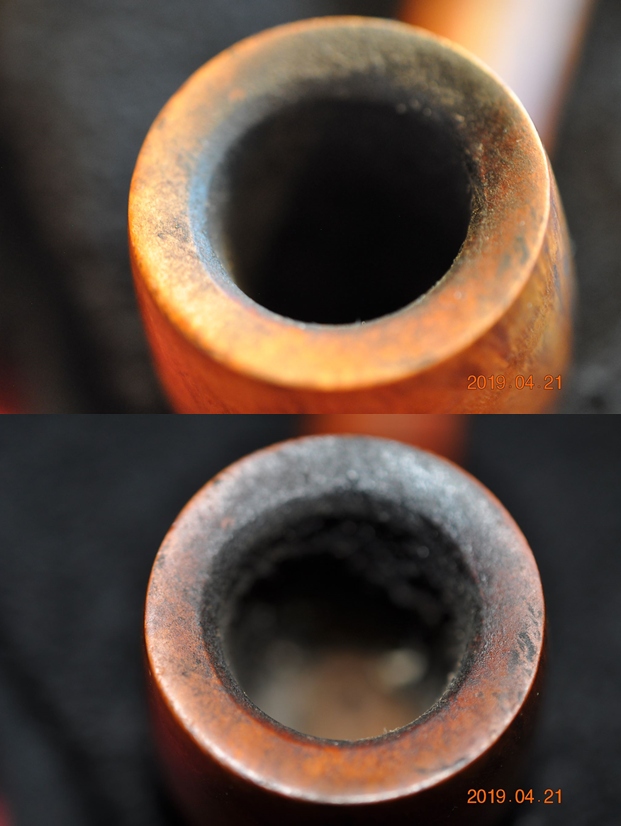
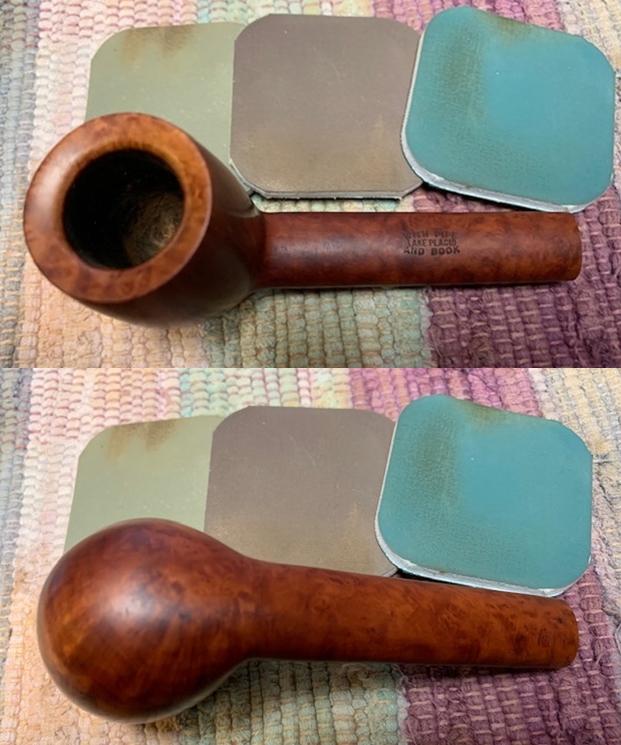
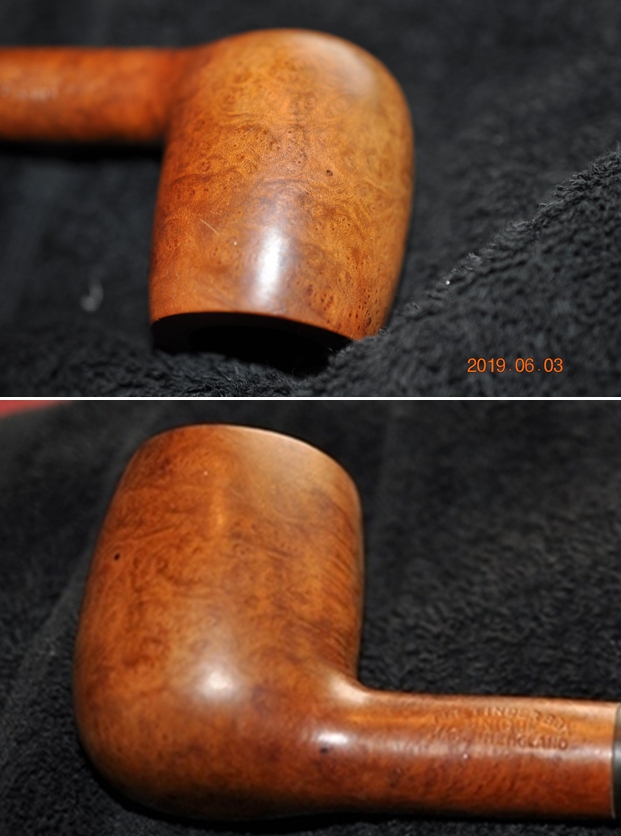
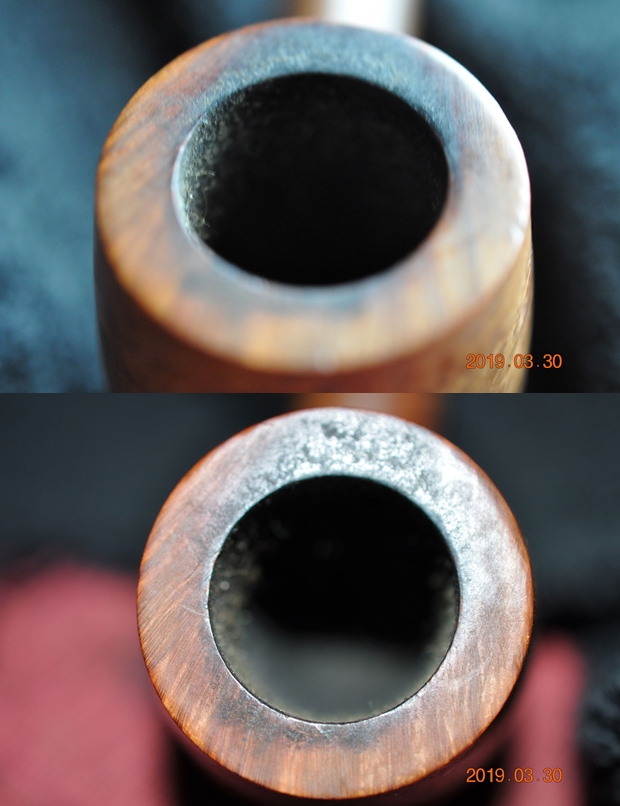
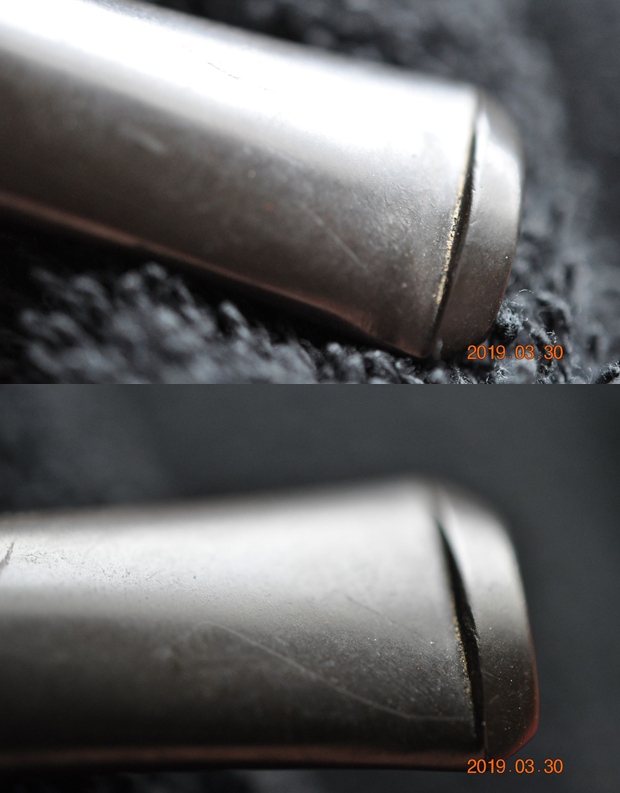
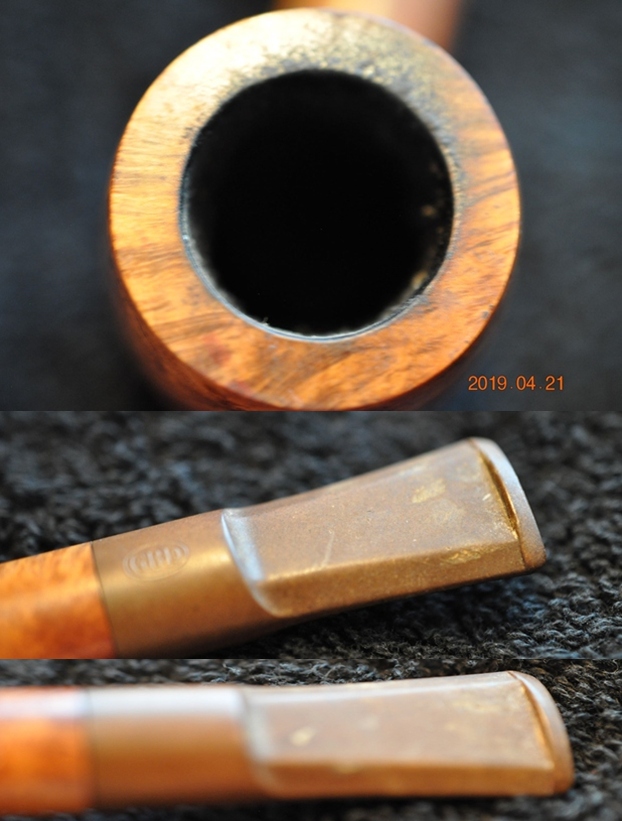
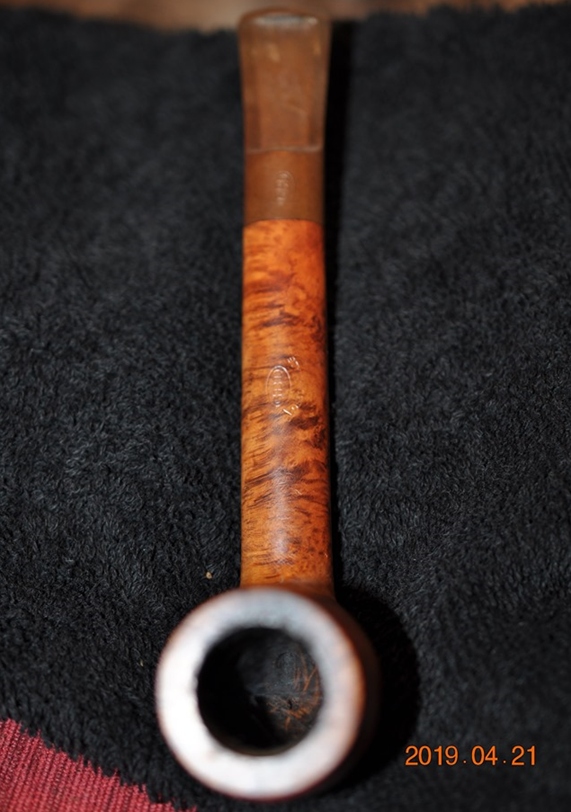 He took photos of the rim top and bowl to give a clear picture of the thickness of the cake and the overflow of lava on the rim top. It appears that there is also some damage to the front inner edge of the bowl in the next two photos. He also took photos of the top and underside of the stem to show the oxidation, calcification, chatter and tooth marks.
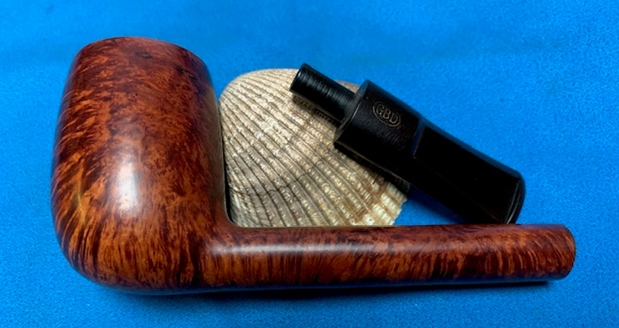
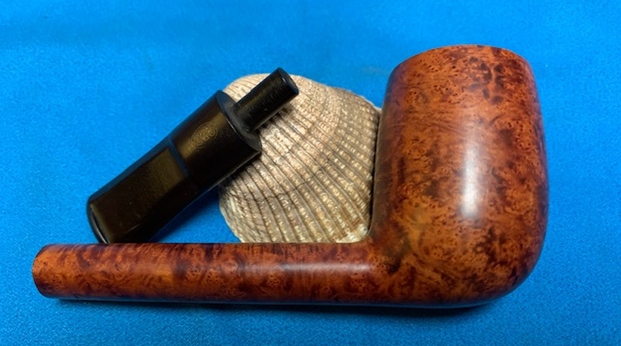
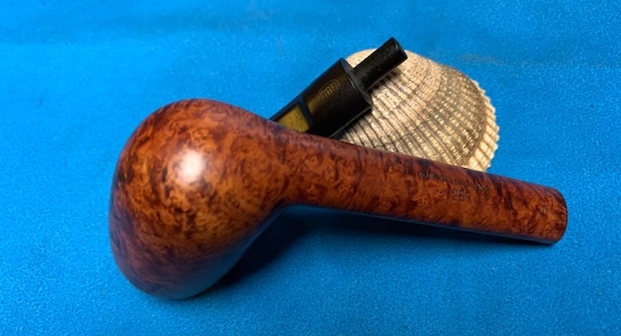
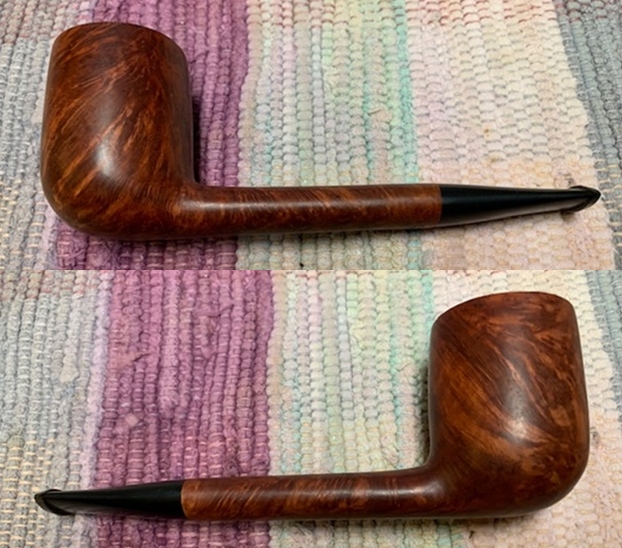
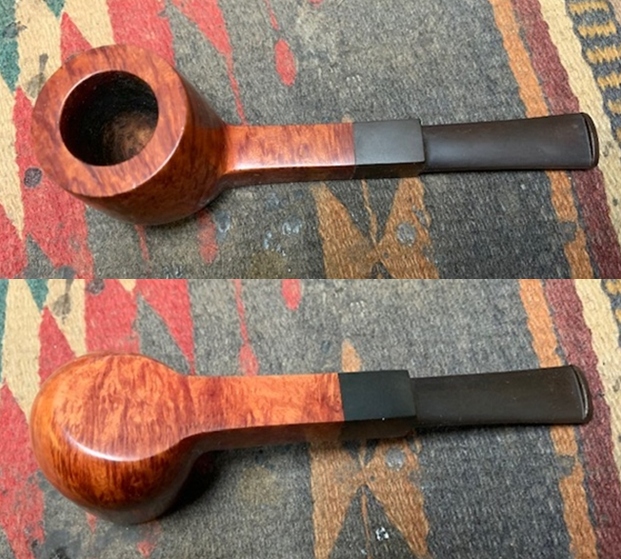
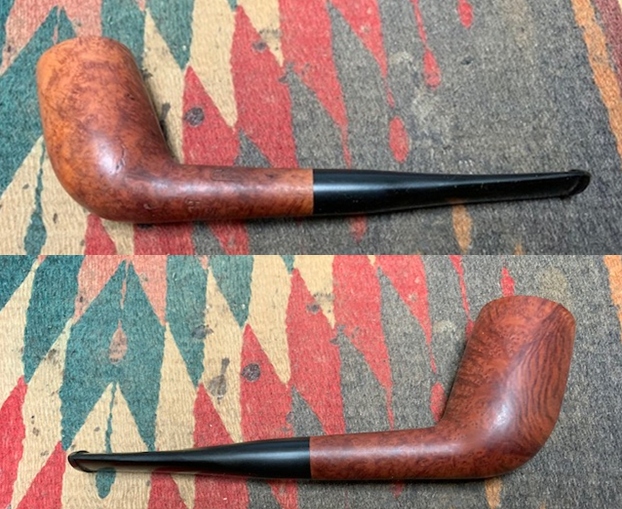
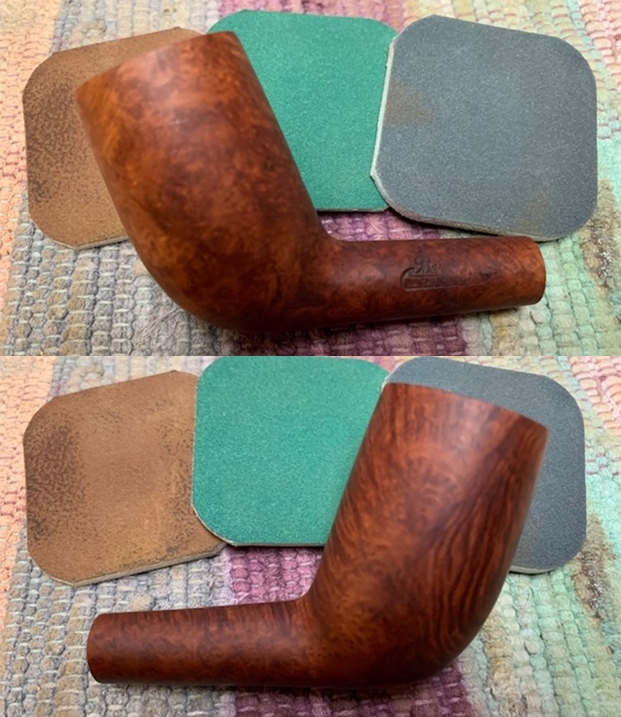
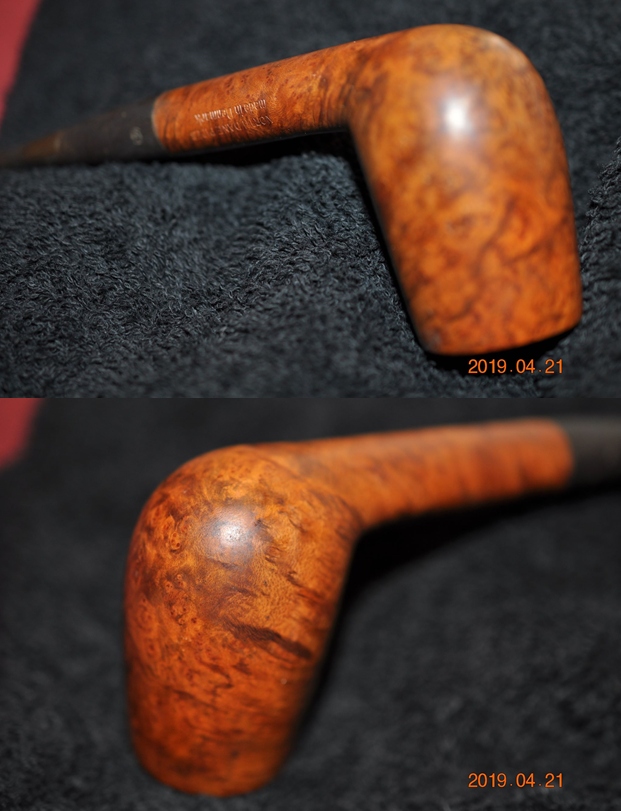
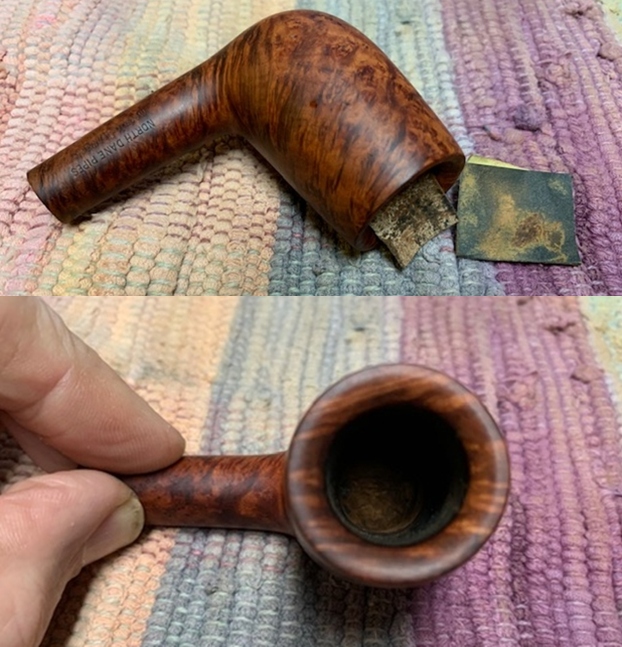
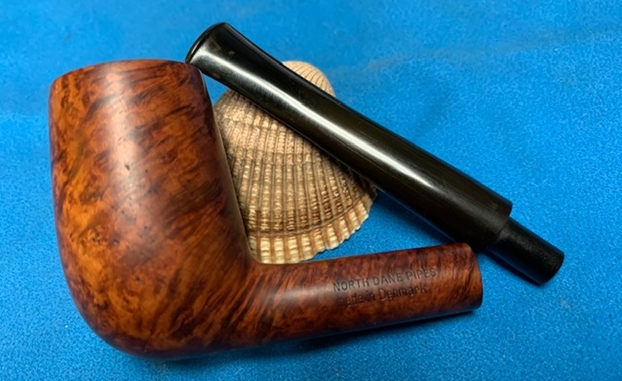
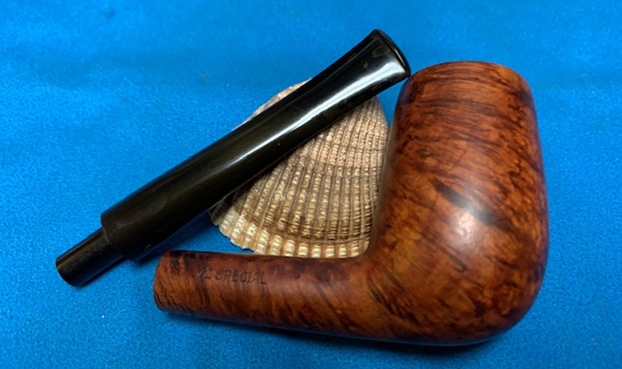
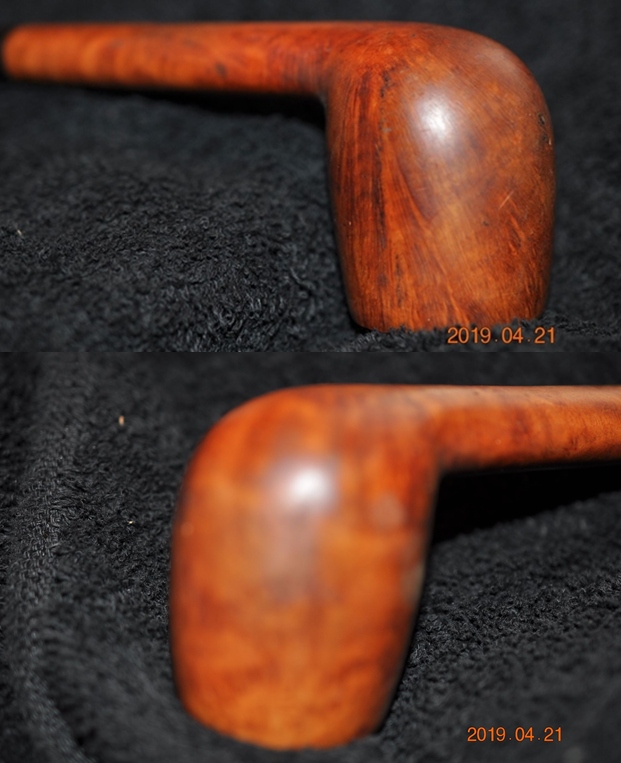
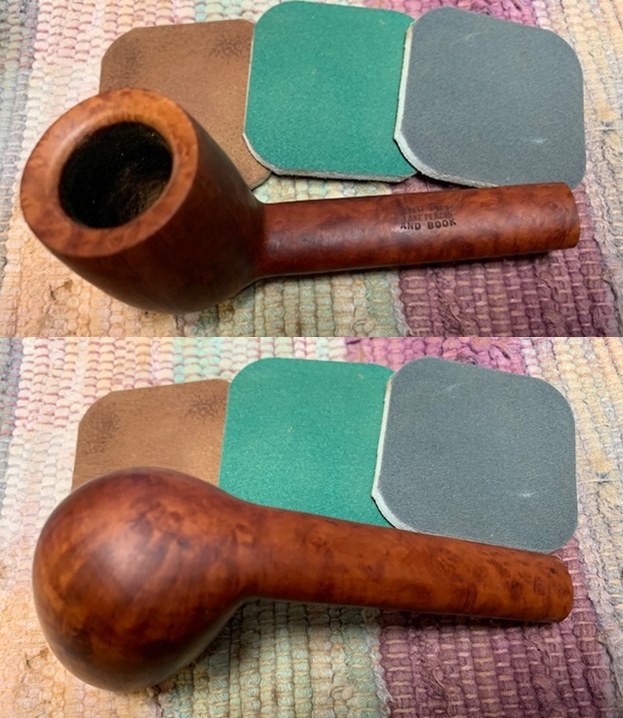
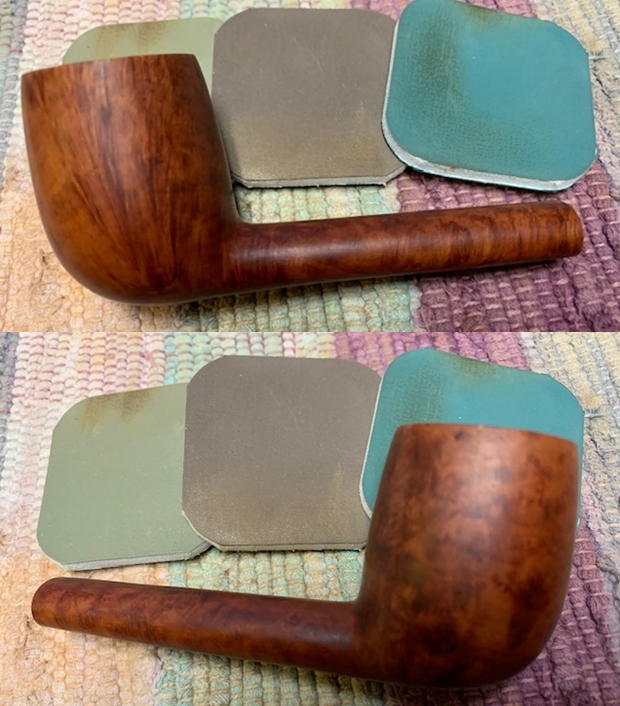
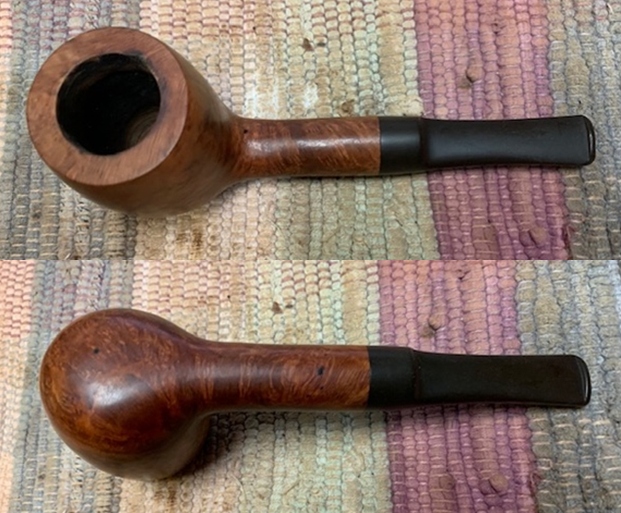
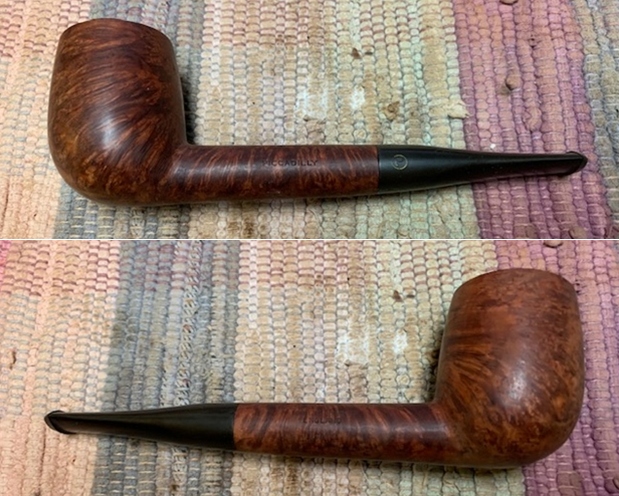
 Jeff took photos of the sides and heel of the bowl to give a picture of what the briar around the pipe looked like. There is some stunning grain under the grime.
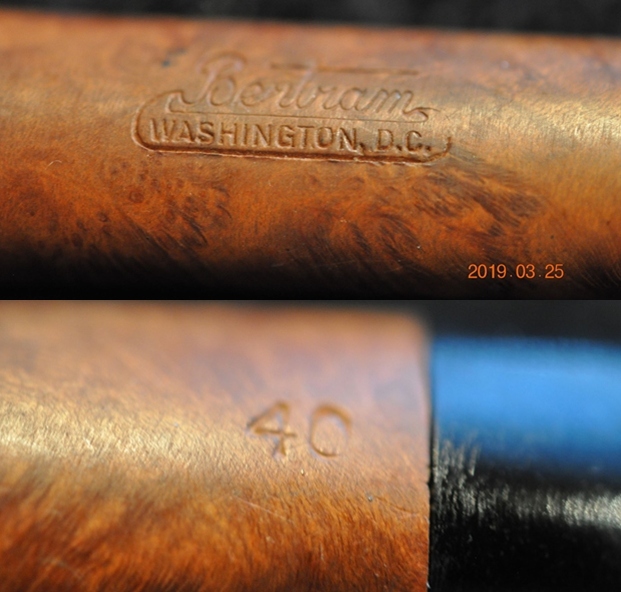
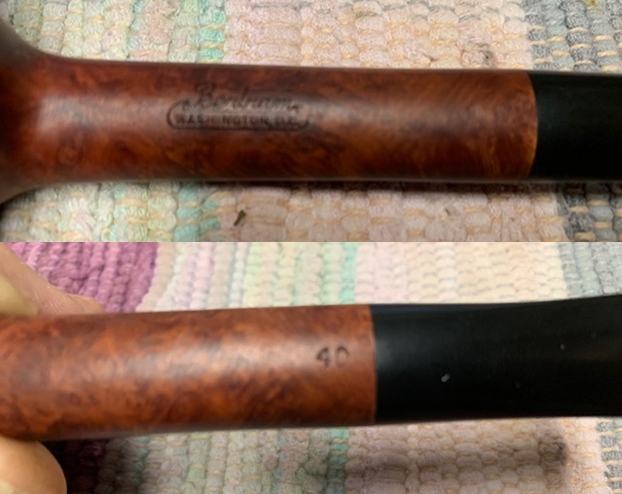
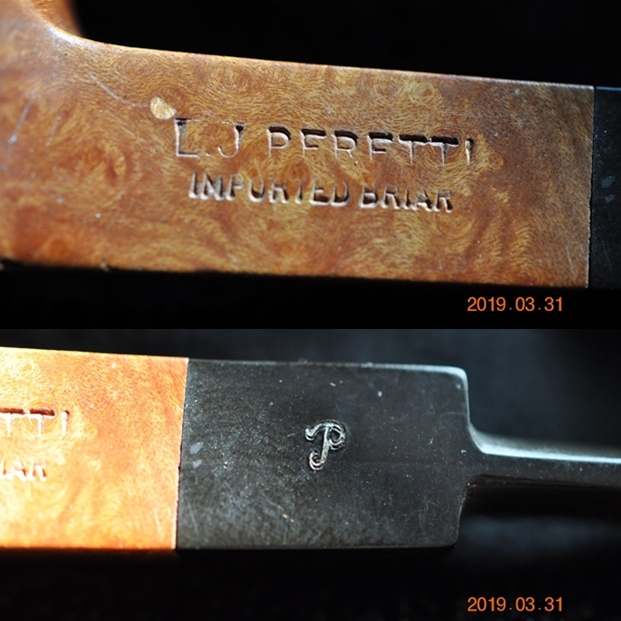
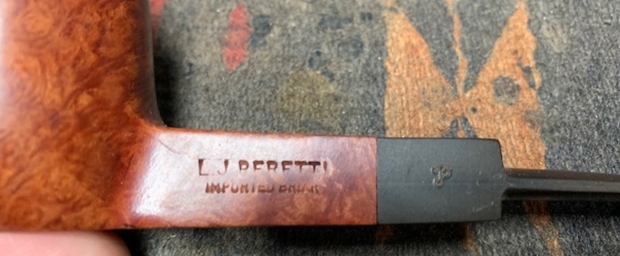
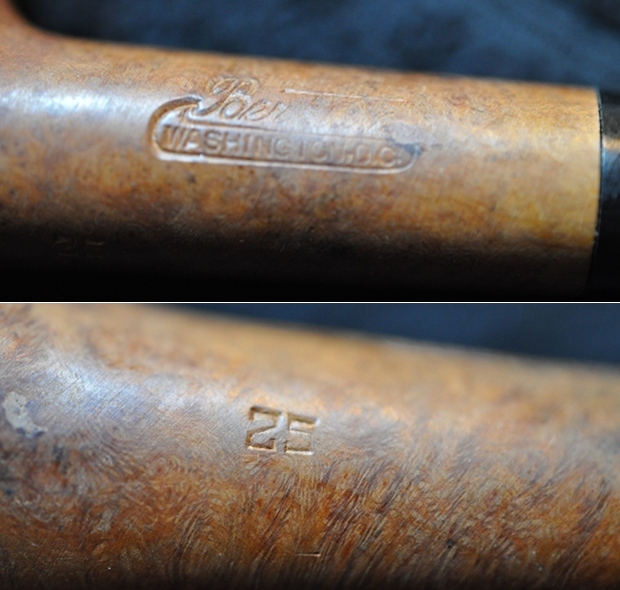
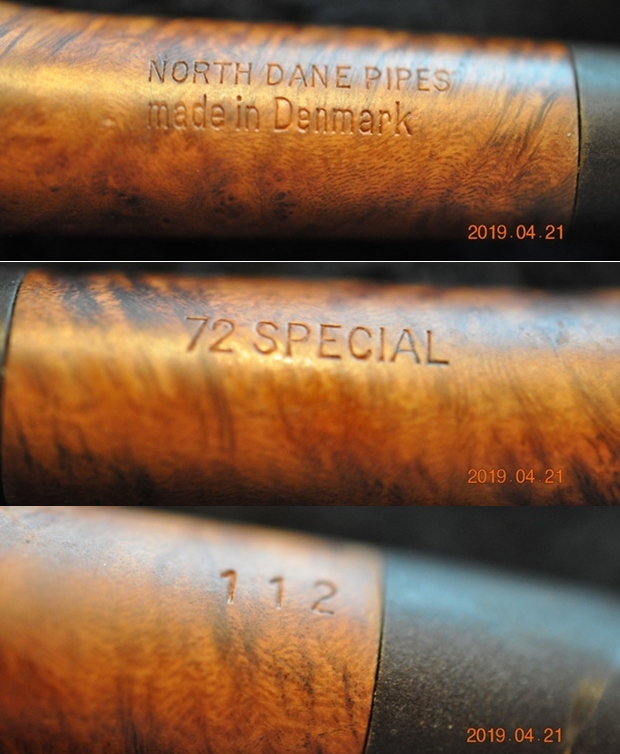
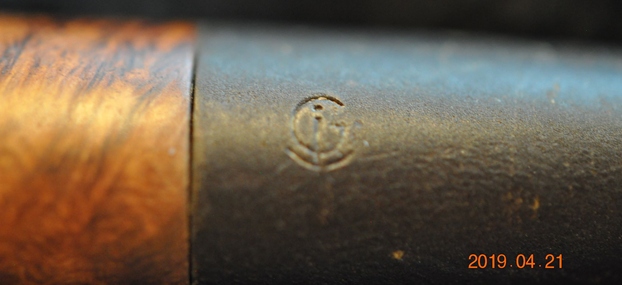
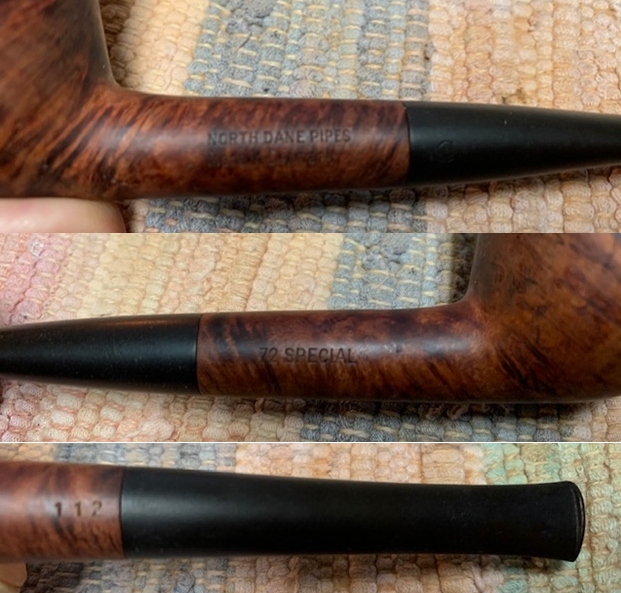
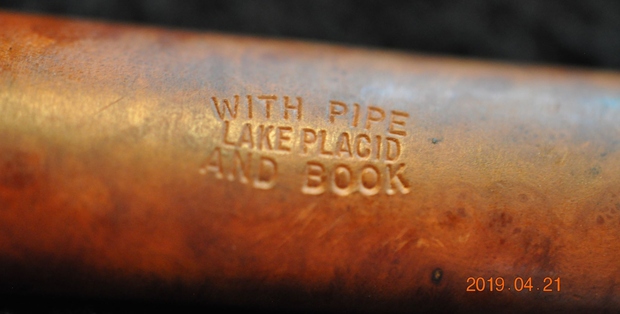
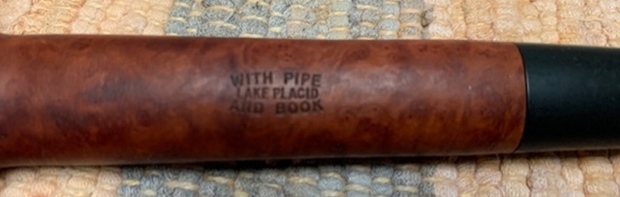
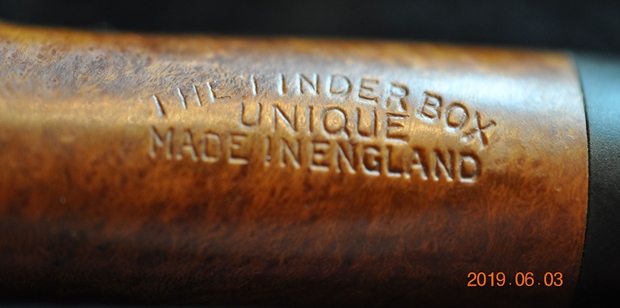
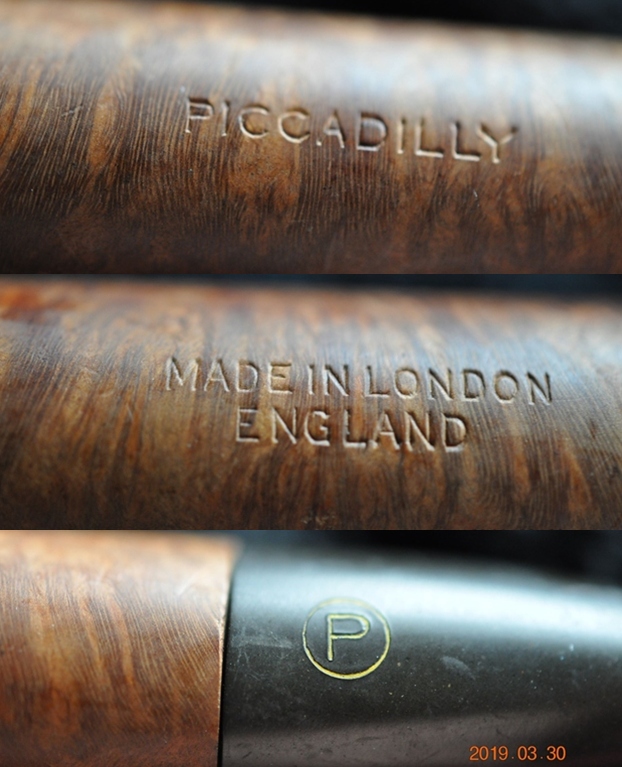
 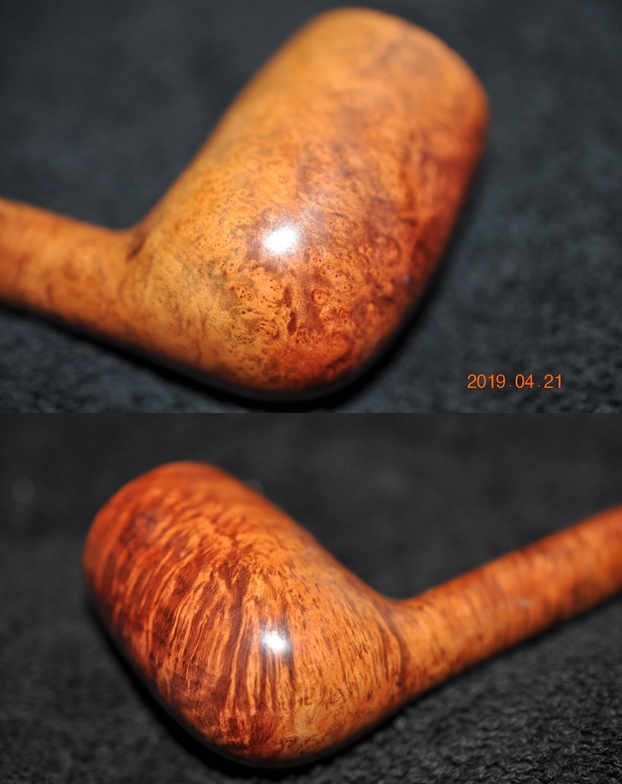 He took photos of the stamping on both sides of the shank. They are numerous and are faint but read as noted above. He also included a photo of the stamping on the top of the saddle stem.
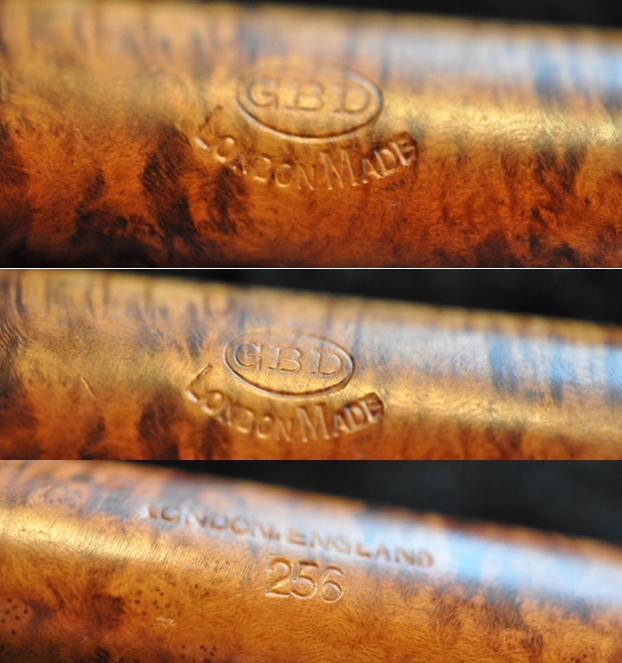
 I turned to Pipedia and followed a link to the GBD Model Information article to see if there was some help there (https://pipedia.org/wiki/GBD_Model_Information). I wanted some information on the London Made line. I include what I found below.
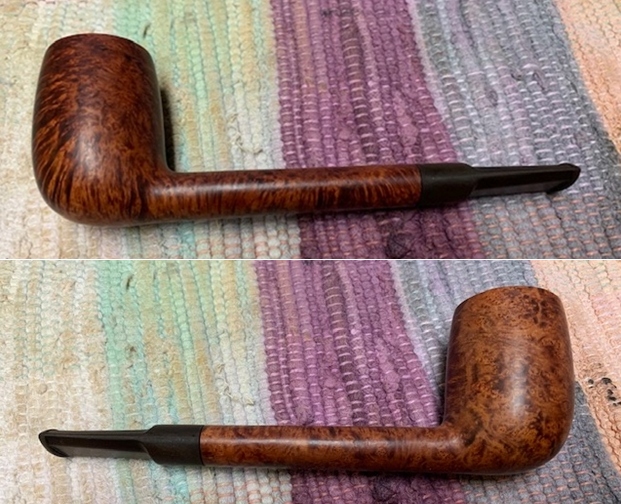
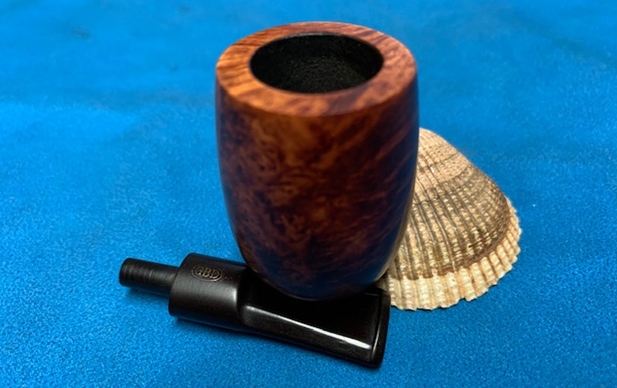
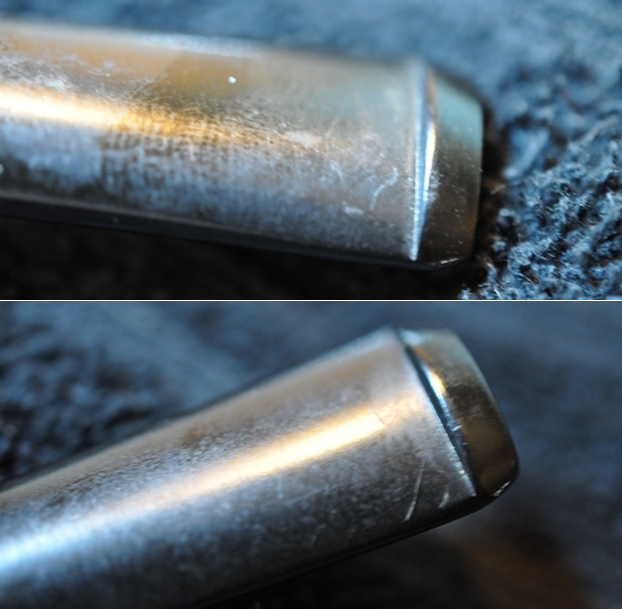
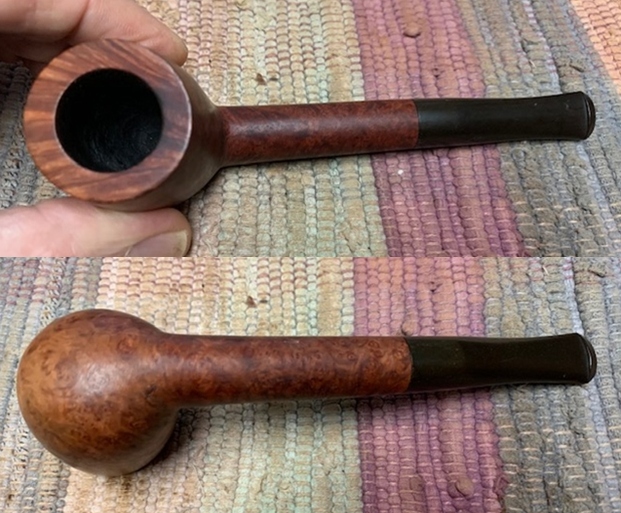
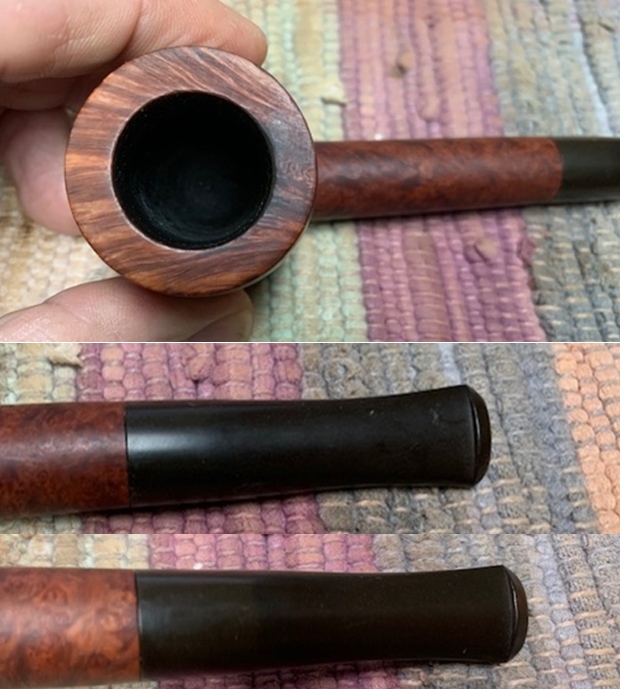
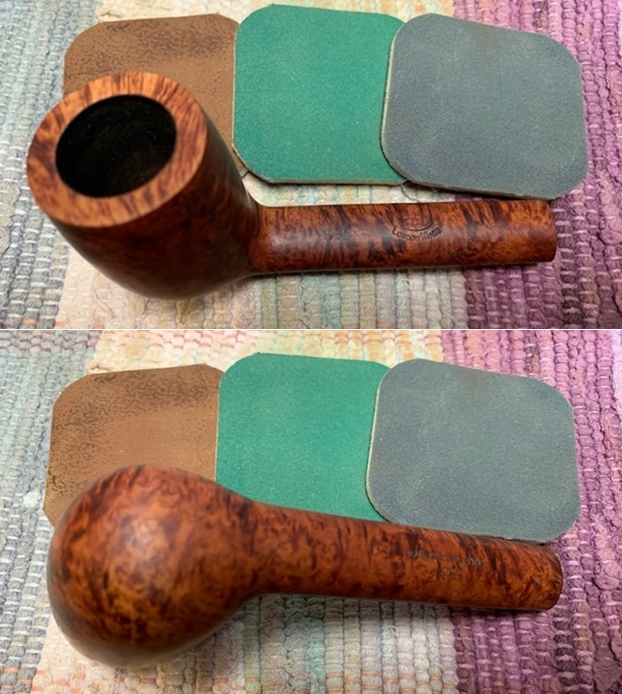
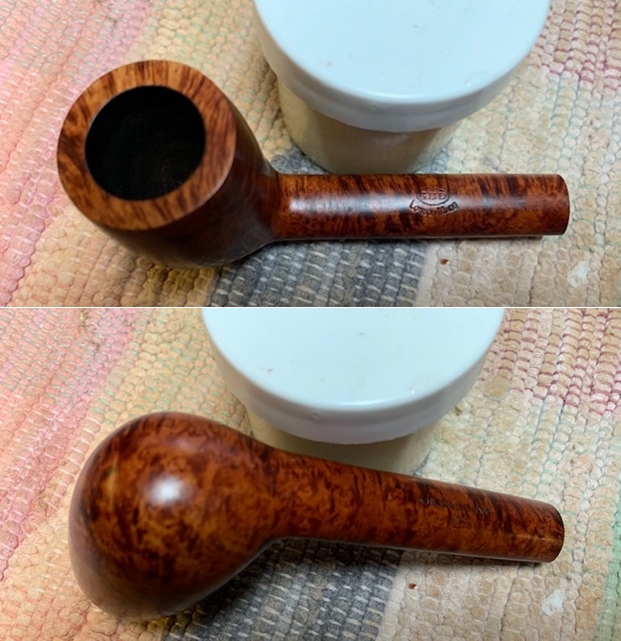
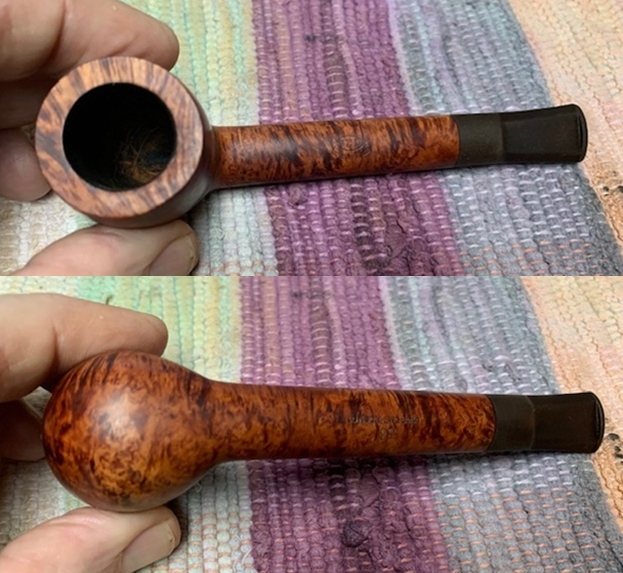 The rim top cleaned up really well with the lava coat removed. The inner edge of the rim showed some damage and burning on the front and back edges. There was also some damage on the rim top at the front.. The stem surface looked very good with some light oxidation remaining and a few tooth marks and chatter on both sides near the button and on the button surface itself.
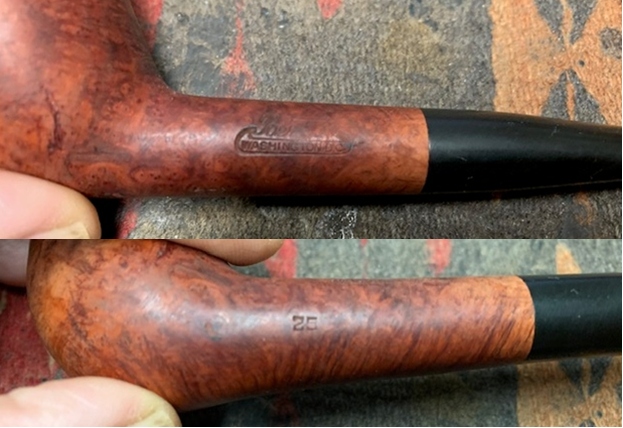
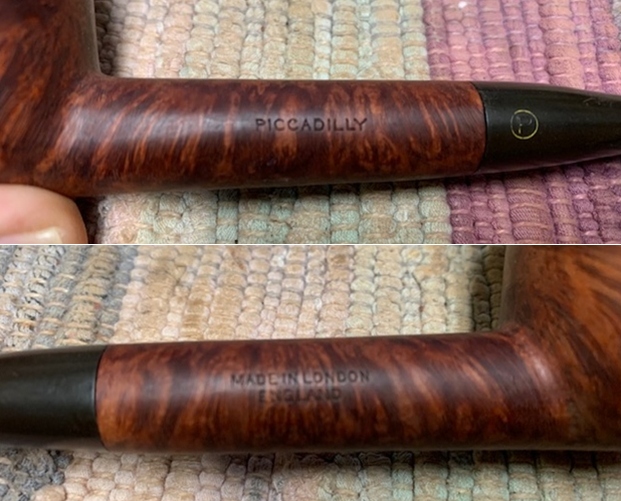
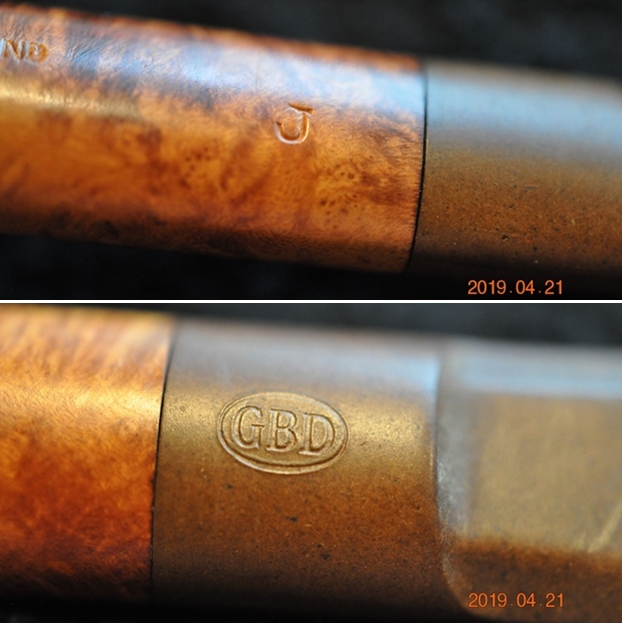
 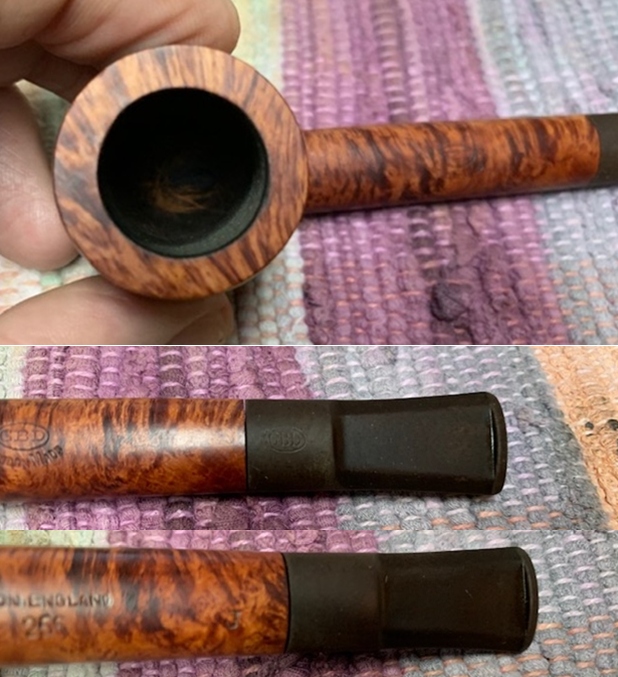 I took photos of the stamping on the top and underside of the shank. It read as noted above.
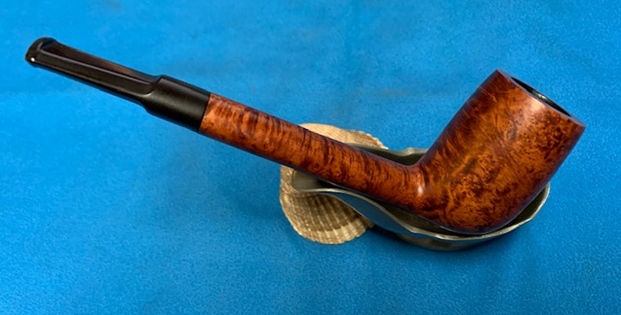
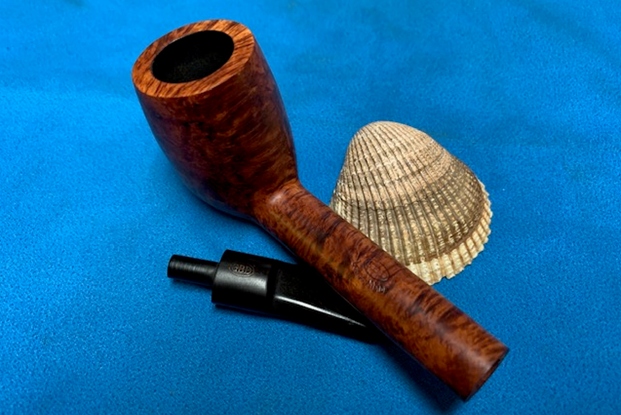
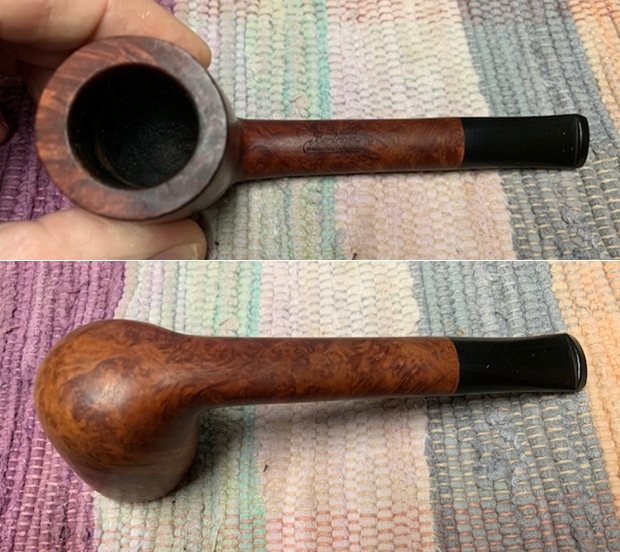
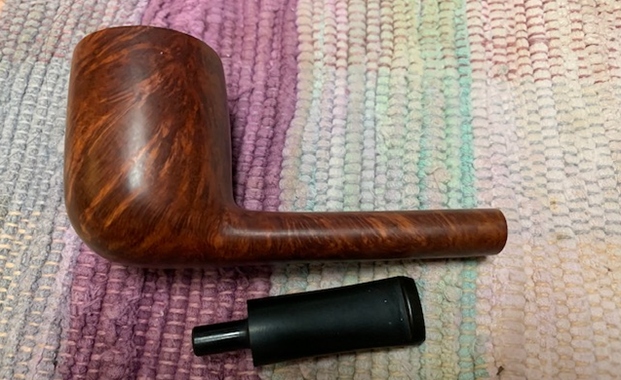
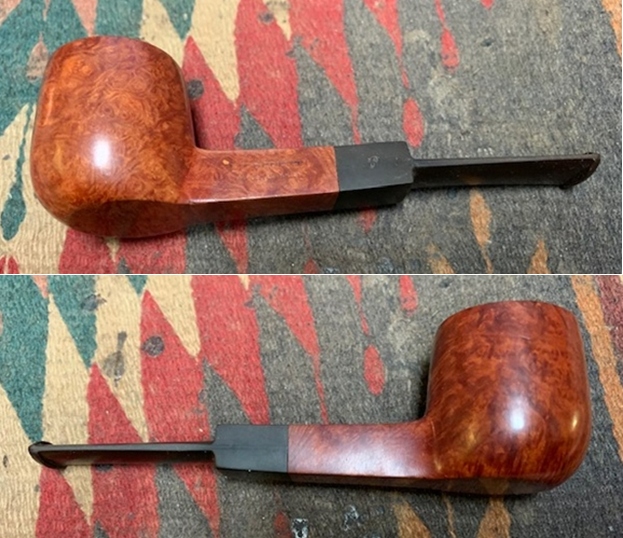
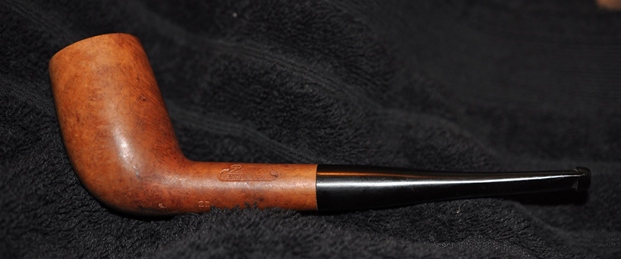
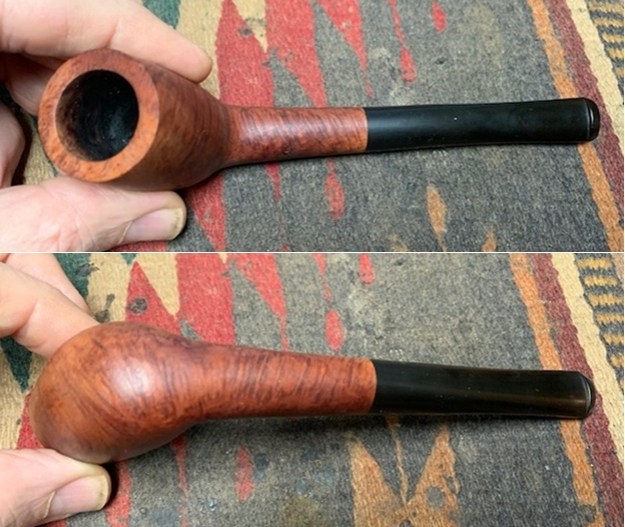
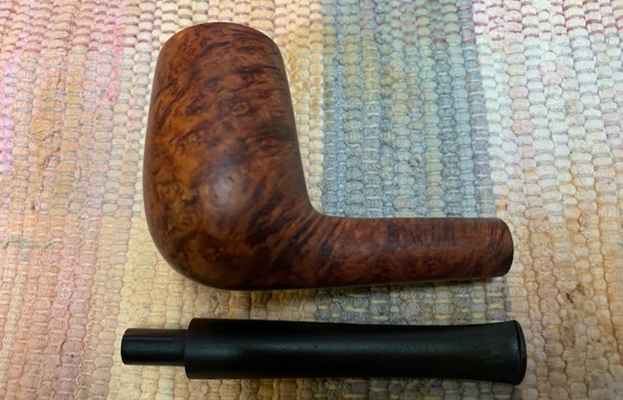
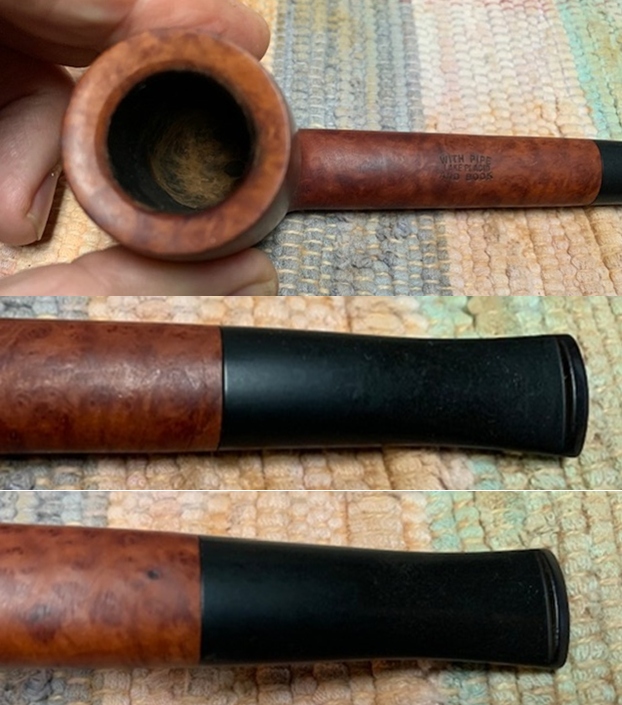
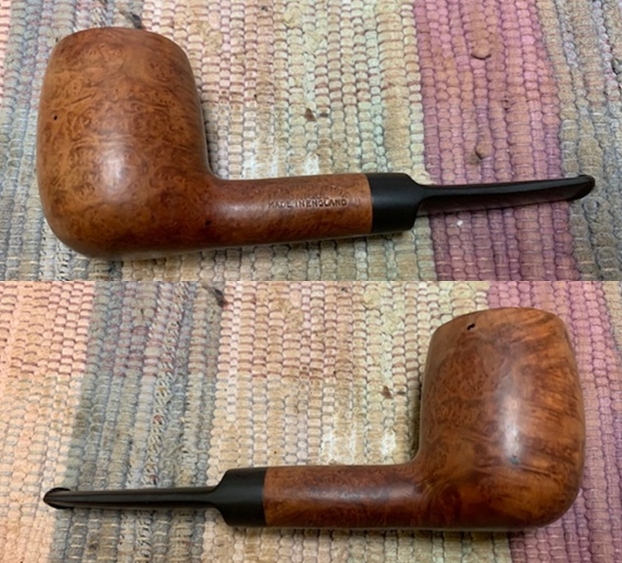
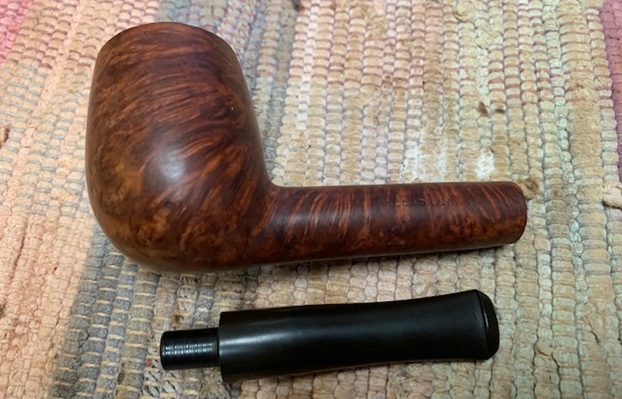
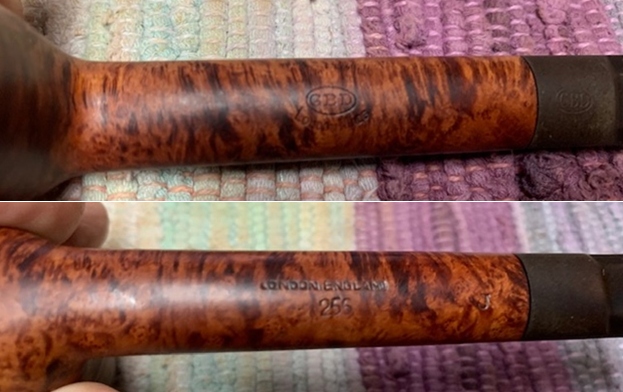 I removed the stem and took a photo of the pipe to give a sense of the whole. It is a well shaped Canadian.
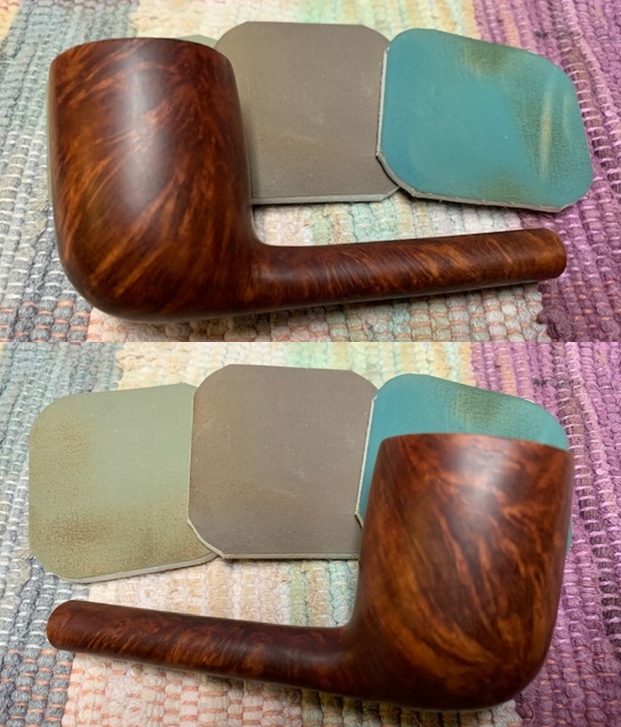
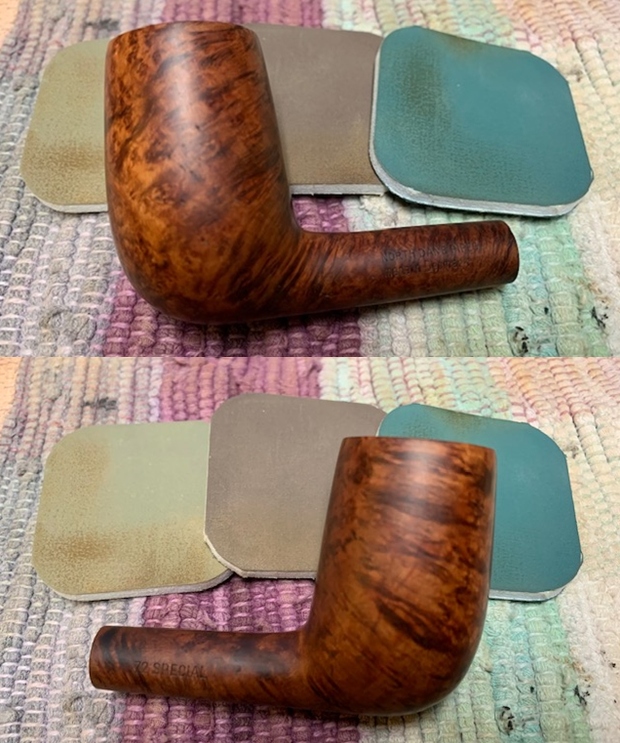
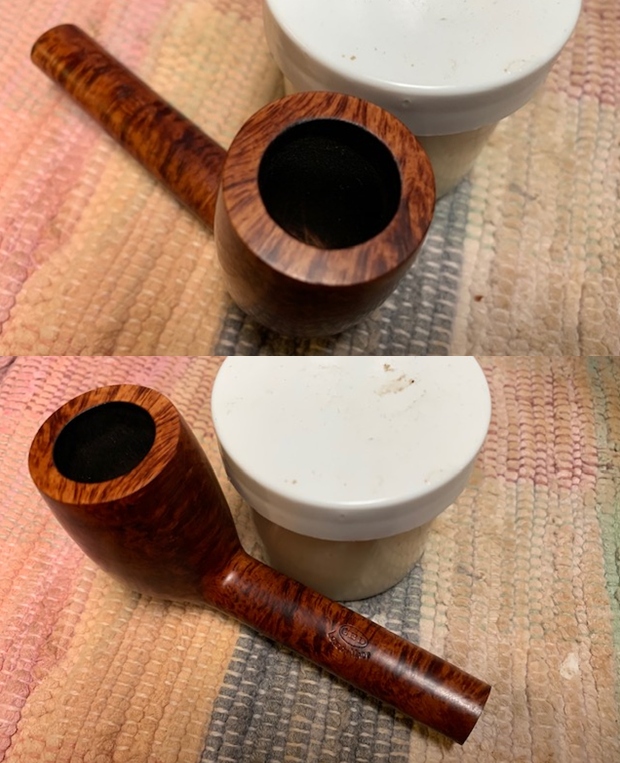
 Now it was time to do my work on the pipe. I polished the bowl and the rim top, sides and shank with micromesh sanding pads – wet sanding with 1500-12000 grit pads and wiping it down after each pad with a damp cloth. I carefully avoided the stamping on the top and underside of the shank so as not to damage the already faint stamping.
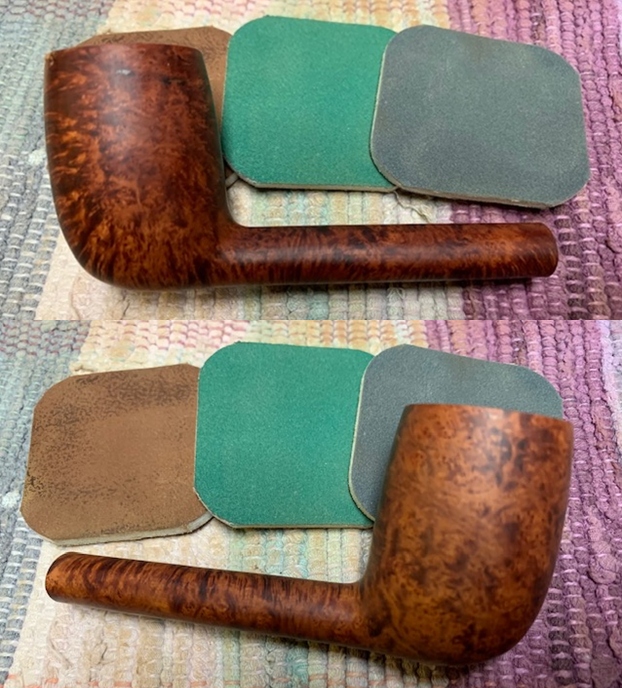
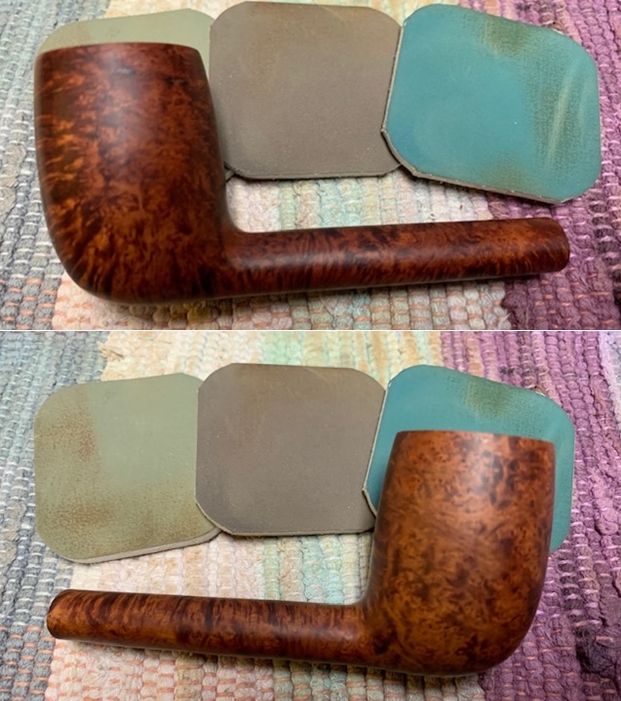
 I rubbed the bowl and shank down with Before & After Restoration Balm. I worked it into the surface of the bowl sides and shank with my fingertips to clean, enliven and protect the briar. I let the balm sit for a little while and then buffed with a cotton cloth to raise the shine.
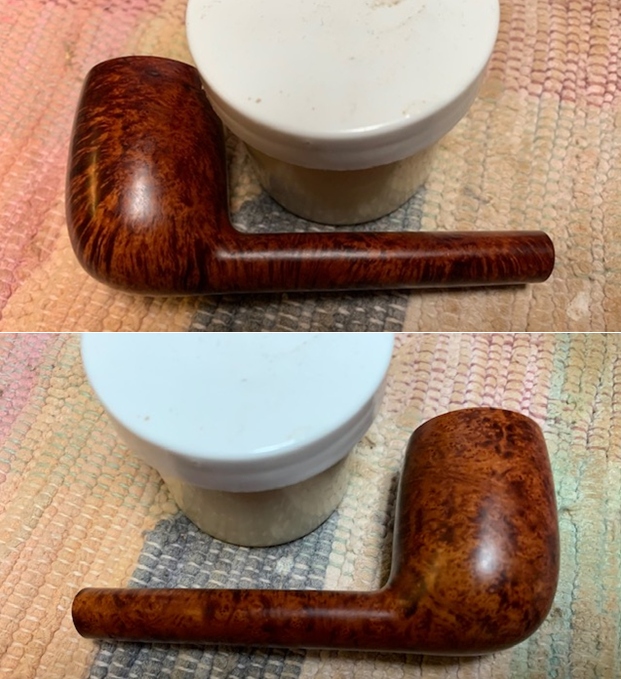
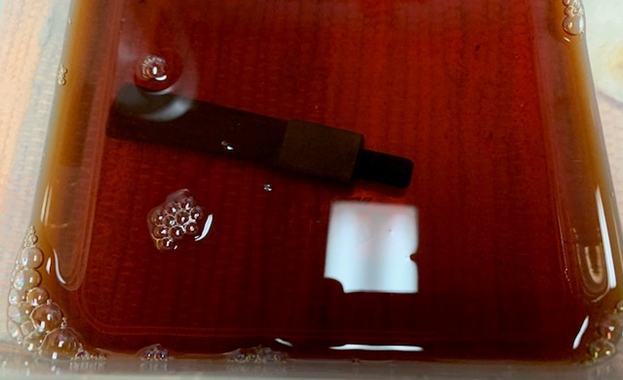
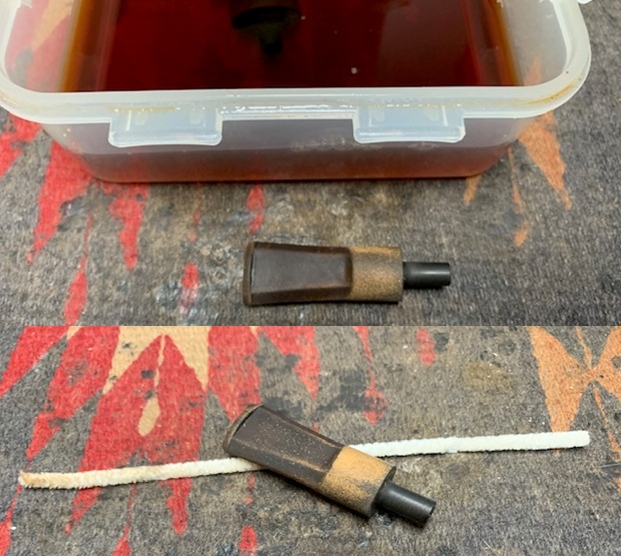
 While I was working on the bowl the stem was soaking in a new product I received from Briarville Pipe Repair – Pipe Stem Oxidation Remover. It is a liquid of about the same consistency as apple juice. The stem sat in the mixture for 2 ½ -3 hours.
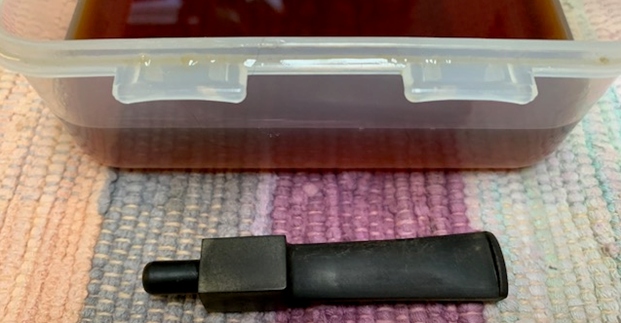
 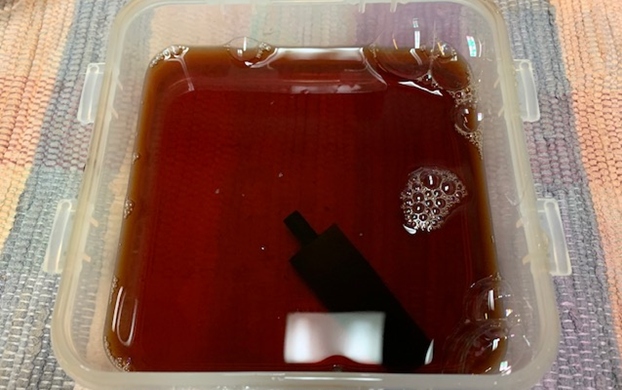 I removed the stem from the bath, scrubbed lightly with a tooth brush and dried if off with a paper towel. There was some oxidation on the top of the saddle and on the edges of the stem remaining. The bath was dark with the removed oxidation of the previous 9 stems. I cleaned out the inside of the stem with alcohol and pipe cleaners.
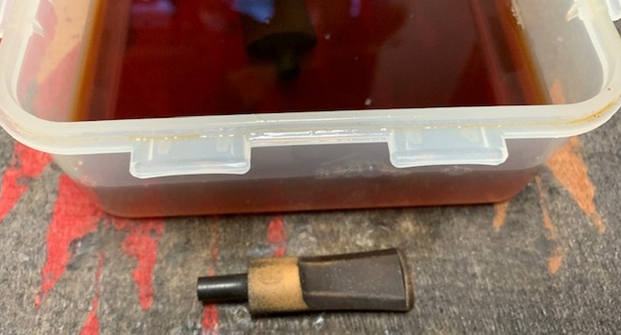
 The nice thing about this new product is that it significantly softens the oxidation that is left behind making it easier to remove. I scrubbed the stem surface of the stem with Soft Scrub All Purpose cleanser to remove the remaining oxidation.
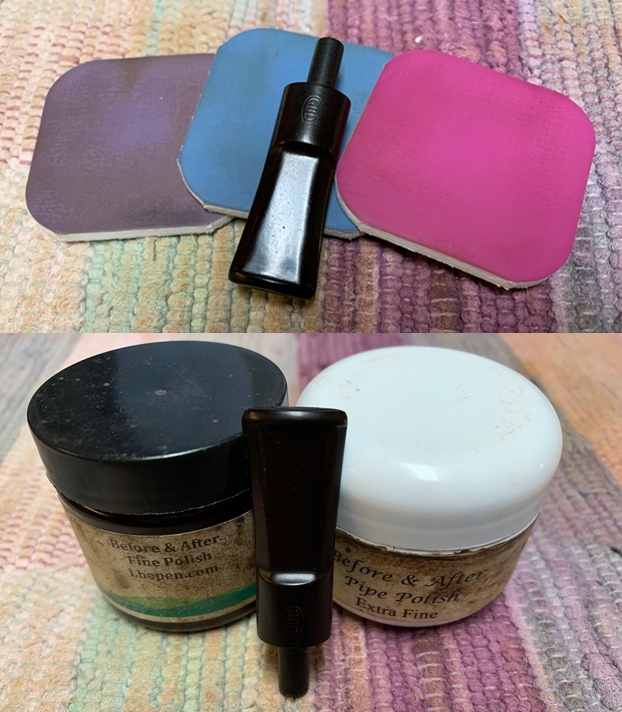
 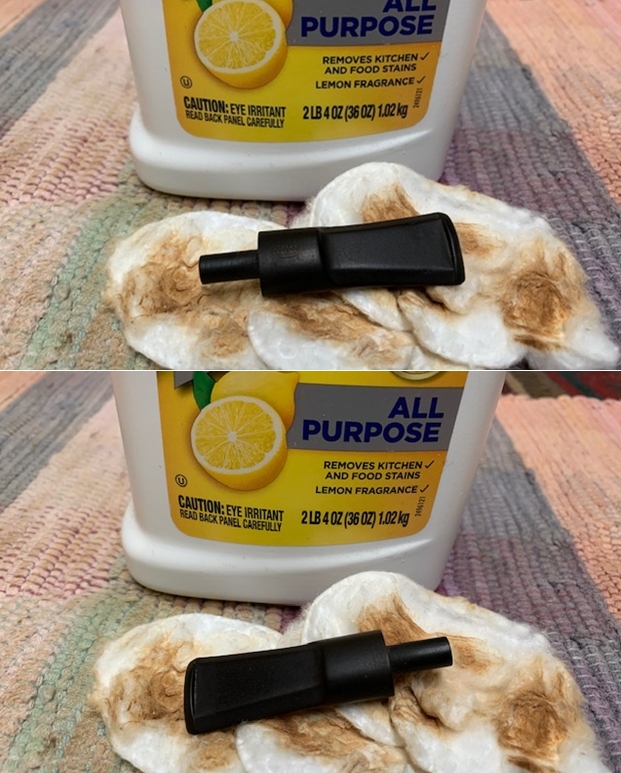 I polished the vulcanite stem with micromesh sanding pads – 1500-12000 grit pads. I wiped it down with a damp cloth after each sanding pad. I used Before & After Pipe Polish – both Fine and Extra Fine to further polish the stem.
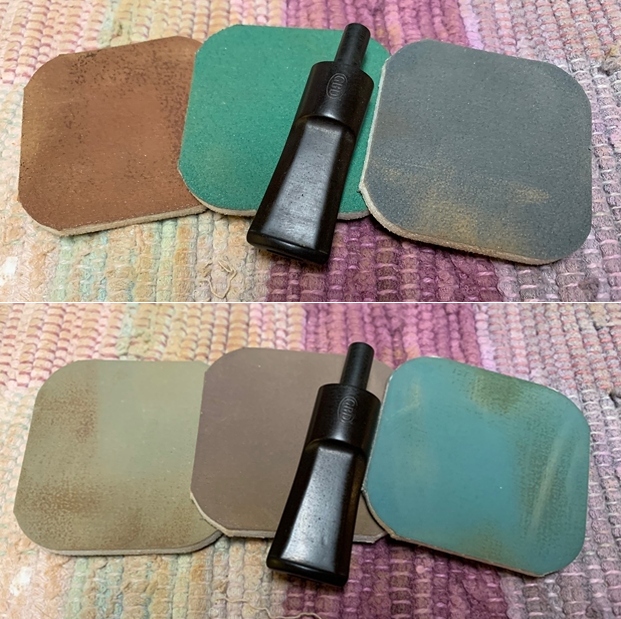
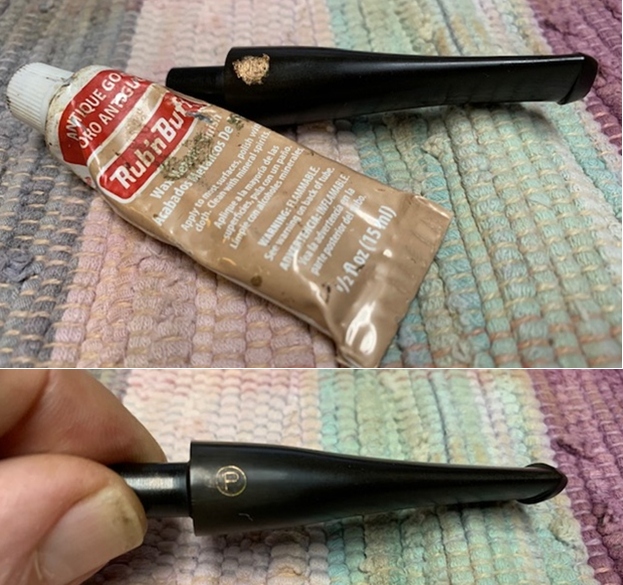
 I touched up the remnants of the GBD oval stamped logo on the stem top with Rub’N Buff Antique Gold. I rubbed the product on the top of the stem and pressed it in the stamping with a tooth pick.
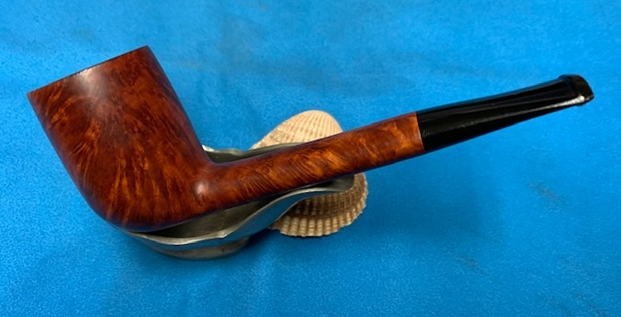
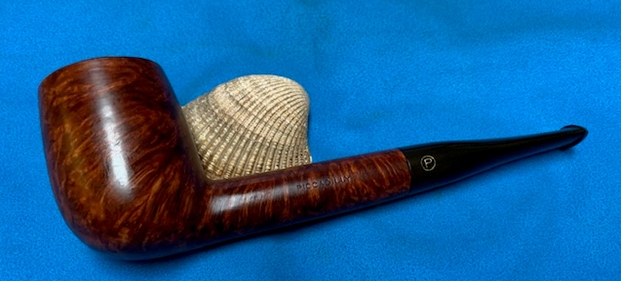
  This gorgeously grained GBD London Made 256 Lumberman with a vulcanite saddle stem is a great looking pipe now that it has been restored. The rich browns of the contrasting stains came alive with the polishing and waxing. I put the stem back on the bowl and carefully buffed the pipe with Blue Diamond on the buffing wheel using a light touch on the briar. I gave the bowl and the stem multiple coats of carnauba wax on the buffing wheel and followed that by buffing the entire pipe with a clean buffing pad. I hand buffed the pipe with a microfiber cloth to deepen the shine. The finished GBD Lumberman is a beauty and fits nicely in the hand and looks very good. Give the finished pipe a look in the photos below. The dimensions of the pipe are Length: 5 ¾ inches, Height: 2 inches, Outside diameter of the bowl: 1 ¼ inches, Chamber diameter: ¾ of an inch. If you are interested in adding this pipe to your collection send me a message or an email. Thanks for reading this blog and my reflections on the pipe while I worked on it. There are many more to come!