Tag Archives: stem work

A Nice, Older Henley Billiard Restored


This old Henley Billiard was made by Masta Pipe Company of England and came to me in pretty clean condition. It is older and the Bakelite stem has an orifice button/airway. You can see from the picture below that the bowl was a little out of round and a small burn on the rim near the shank. It also had an overturned bone tenon. The stem had several gouges and deep scratches. Other than the finish was in great shape and in need of a polish and buff.

I heated the bone tenon as I have described in other blog articles by heating it in a bowl of boiling water. I heated it and screwed it back into the shank and tried to twist it. I repeated the process until it freely turned. I lined it up straight and then ran cold tap water over it to cool it and set the glue again. I cleaned up the dents and gouges with heat to raise them as far as I could and then sanded and filled them with a small amount of clear super glue. Then I sanded them with 400 and 600 grit wet dry sandpaper until they were smooth and polished the stem using micromesh pads up to 4000grit.

I cleaned and reamed the bowl and cleaned the shank with cotton swabs, pipe cleaners and alcohol. I used a folded piece of sand paper to even out the inner edge of the bowl and bring it back into round. I did this carefully so as not to scratch the finish. When I had it back to round it was time to polish it. I put the stem back on the pipe and the entirety was taken to the buffer for a final buff with White Diamond. This one was in relatively good shape other than the stem.

ImageImage

Here is the finished pipe, ready to load and smoke.

ImageImageImage

Refurb on a Two Point Billiard – Gnawed Stem


This is the second Two Point pipe that I had in my box to be refurbished. It obviously was owned by the same pipe man as the little Lovat as evidenced by the matching bite marks. The pipe had an uneven cake in the bowl making the bowl conical even though it was U-shaped in reality under the cake. The rim was dirty and tarred but not damaged with dents or knock marks. The finish was spotty and uneven so the bowl would need to be stripped and restained for good coverage. The biggest problem can be seen in the first two pictures below: the stem was very badly chewed. In the first picture it can be seen that the top of the stem had several deep bite marks and the button was eliminated on the left side. It was more of an upward slope to the tip than the sharp angular edge that was originally there. The round cap of the top of the p-lip button was smoothed out and no longer crowned. In the second picture you can see that the bottom tooth marks and bite throughs had been repaired with what appeared to be epoxy that was fairly caked on the stem tip to the point that the lip line and the button were gone. What remained was a working stem that had no beauty to my eye.

ImageImage

The third and fourth photos show the profile of the button and it can be seen to have been virtually eliminated with the slope of the epoxy on the bottom edge and the chewed top edge. You can also see the state of the finish on the pipe. The spottiness and grime that covered the outside of the bowl are visible. Obviously this was a good smoking pipe that the previous owner cobbed a repair on so that he could continue to enjoy smoking it.

ImageImage

The next two photos are enlarged to show the state of the stems. The first one shows the top of the stem and you can see the two large dents (interestingly they are in the same place as those on the other Two Point pipe).You can also see the wearing away of the edge of the button to a slope. The crown is also flattened. The second shows the underside of the stem and the remaining two dents – one next to the button on the bottom half of the stem and the second inward from that dent. You can also clearly see the epoxy patch that fills the bite through and the button. The usual line that separates the button on the p-lip from the stem is gone. To repair these two surfaces the dents need to be raised and the holes filled to the point where it is possible to cut a new button on the top and the bottom. The crown will need to be built up a bit and the epoxy patch hidden or blended into the black of the stem.

Image

IMG_7946
I decided to work on the top side of the stem first and heated the surface of the vulcanite to lift the dents as much as possible. Once that was finished I filled what remained of the two dents with black super glue (see the first photo below). The dent next to the button I over filled so that I could have room to recut the edge of the button. When the glue had dried I sanded it back with 240 grit sandpaper to even the surface. I also recut the button edge to give it more of a sharp distinction. The sanded top surface can be seen in the second photo below.

Image

Image

On the underside of the stem I decided to recut the button and the line with needle files before I refilled the dents and the epoxy patch. I sanded off the extra epoxy to get the surface smooth and level with the surface of the stem. I used 240 grit sand paper to bring the surface down and the needle files to cut the edge on both sides of the line. You can now see that line in the picture below and there is a definite break between the bottom of the p-lip and the stem. It is a duplicate of the button on the Two Point Lovat.

Image

Once I had that recut the button area I filled the surface of the stem with black super glue as seen in the picture below. I propped it with a pen to keep the surface level as I did not want the super glue to run and pool. I also built up the epoxy patch on the edge of the button as well. Once the glue was dry I sanded the surface and did a bit of work with the needle files to redefine the edges. The second picture below shows the sanded stem with a smooth surface.

Image

Image

I finished sanding the stem with 400 and 600 grit sandpaper and water and then moved through the micromesh pads from 1500-6000 grit. The trick was to build a black coating on the epoxy patch. This took repeated coats of the black super glue. Once that was complete then the stem could be polished by hand until I finished with the bowl refinishing.

While I had been working on the stem the bowl had been soaking in the alcohol bath. Before dropping it in the bath I had wiped it down with a soft cloth and acetone (fingernail polish remover works very well) to remove the finish and the grime. It was time for it to be removed from the bath so that I could work on it. The three pictures below show the bowl after it has dried off from the alcohol bath. It now needed to be sanded with micromesh to remove any surface scratches and the rim needed to be thoroughly wiped down in preparation for the staining. I sanded and then wiped it down with a soft alcohol soaked cloth and set up the staining area.

ImageImageImage

The next four photos show the restained bowl. I used a medium brown aniline based stain (Fiebings Leather Dye) to stain the pipe. Once it was stained I flamed it and buffed it to polish the briar and make the grain stand out. The patterns of birdseye and swirls is quite unique. This is a clean piece of briar – no fills and no problem areas.

ImageImageImageImage

I then put the stem on the pipe and buffed the entirety with White Diamond and carnauba wax to bring it back to a shine. The final four photos show the finished pipe. Pay attention to the stem and button areas as they are now very distinct in the profiles and the build-up on the top and bottom give it back its original shape.

ImageImageImageImage

Using a Buffing Wheel


Blog by Steve Laug

Using cloth buffing wheels to buff the finish on a refurbished pipe can work wonders by smoothing the surface giving the pipe a “like new shine”. However, a disclaimer needs to be stated up front – buffing will not remove scratches or imperfections and buffing can make things a mess if not done properly.

I use The Beall System buffing wheels on two bench grinders that I have stripped down. The system employs a three-step procedure using three different 8 inch buffing wheels. The first wheel uses Tripoli as a buffing compound; the second uses White Diamond (aluminum oxide). The third is used to apply carnauba wax and bring the finish to its final luster. So that I do not have to change the wheels between buffs I use the two bench grinders that I have stripped down. I removed the grinding stone wheels, the guards and left only the arbor on each side. I used the washers from the grinder stones and an extra washer to hold the pads/wheels firmly. I put the pads I use for White Diamond and Tripoli on one buffer and the carnauba and added a fourth clean felt pad on the other. I thus can work down the row – Tripoli, White Diamond, carnauba and then a clean flannel wheel to bring up the shine. The picture below shows the Beall system. It includes three buffing pads – clearly stamped for the product they are designed to apply, one bar each of Tripoli, White Diamond and carnauba. The cylinder standing in the centre is an arbor that can be attached to a single shaft motor so that the wheels can be spun on and off quickly. The long shank in the bottom of the picture is an extension that can be attached to the arbor to give some distance from the motor should you need it. If you use a bench grinder those two parts are not necessary.

Image

The photo below shows the wheels with the mounting screw that can be either screwed into the arbor unit as pictured in the one wheel on the buffer or they can be removed and the pads turned on to the spindles of the bench grinders as I picture in my setup.

Image

The kit can be purchased through the Beall Tool Company through their website at www.bealltool.com or Lee Valley Tools through their online catalogue at http://www.leevalley.com/en/wood/page.aspx?p=20092&cat=1,190,43040,43042 Both sites provide the ability to order individual components of the system. The Beall website also has a description of the system along with instructions. There are links to videos where Jerry Beall gives lessons on buffing.

In the essay below I will describe my set up and how I use it along with some quick reminders for you as you work with your buffer.

MY SETUP

I use two 6 inch bench grinders that I bought from a tool liquidator near my home for my buffers. They are both 1750 RPM motors mounted on a stand with an arbor on each end. The stand that is part of the grinder keeps the wheels above the surface of the work table and at a comfortable height. I place my buffers on my work table so that they are at waist height for ease of buffing and because I don’t want to have to stoop down to buff. I stand to buff because I have more control over the angles which I hold the pipe against the wheel. Each wheel is held in place by a cup washer on each side and a nut that threads on to the end of the arbor. The shaft is the same size as the holes in the buffing wheels so I place the first cup washer on, twist the wheel in place, put a simple washer and then the cup washer on the outside to get a good tight fit. If the wheel is loose it can move around the spindle or shaft and do damage to the wheel and allow it to shift on the spindle.

Image

The blue buffer above is my work horse – the left side holds the White Diamond wheel and the right side the Tripoli wheel. You can see from the picture that the pads have worn down and are the way I like to use them. There are no more loose strings or fabric. The wheels are charged in the picture above with the amount of both products that I use on them. I find that if I over charge them with product it just gums up on the stem and makes a mess of things rather than polishing them.

Image

The yellow buffer above is my secondary or polishing buffer. The wheels are not as worn as the ones on the blue grinder because I use them less frequently in the process of buffing. It is used for the final polishing. The left side is a clean flannel wheel with no product on it. It still loses strings when I buff with it. It is soft and gives the carnauba a real shine. The right side is the carnauba wheel. It too is charged with wax and ready to use. I am careful how much wax I load the wheels with as too much can really make a mess.

When I first mounted the wheels the recommendation that I was given was to “clean” the wheels initially by backing a sheet of 100-grit sandpaper with a small board and touching the sandpaper to the wheel. I chose not to do so, because the description of the mess deterred me. It said that the air around the buffer would be filled with fibers and lint. I decided to live with this while I broke them in with the polishing compounds.

Some people have built enclosures around the wheels to attach a dust collector to catch whatever comes off the wheels. I have added a picture below to show the shield that can be used. It is a pretty elaborate shield. I have used cardboard boxes in the past to catch the lint and dust and the pipes that occasionally fly away! I generally do not use a shield because I find that it was in the way when I work on the pipes. I want a fully open wheel to work with. Besides there was far less debris produced after the wheels were put in service and loaded with compound. I do however put a thick towel or a piece of carpet under the buffer wheel as it picks up the dust, etc. and can easily be vacuumed for cleanup.

ImageImage

The first thing to do when you set up your buffing system is to charge the wheels with buffing compound. They key to remember is that it doesn’t take much for a wheel to be fully charged. Many people overdo on the charging and gum up the wheels and make a mess of the pipes they polish. Less is more is the rule of thumb. With the wheel rotating at speed, touch the bar of compound to the wheel only for a second or two and without forcing the bar into the fabric. The Tripoli is a dark reddish-brown color so you get a visual indication of the amount that’s been applied. With the white diamond and wax, it’s harder to judge. In the picture below you can see the White Diamond on the left, the Tripoli in the middle and the carnauba wax on the right side. Those bars should last a long time. I have found over the 10 + years that I have had my buffer that I had to replace the Tripoli at about year 5, followed a year later by the White Diamond. I still am using the same bar of carnauba.

Image

My suggestion is to do a bit of experimenting with a pipe that you are not afraid to damage or have thrown across the room. Try differing amounts of charge on the Tripoli wheel and note the effect. Begin with “obviously too little” and work your way to “probably too much.”  Do a similar test with the White Diamond and the carnauba wax. If you suspect you have too much charge on the wheel, some of it can be removed by lightly touching the sharp edge of a board to the wheel.

I hold the pipe in my left hand with a thumb or finger in the bowl so that I have a good firm hold on it. Practice buffing the pipe with each of the materials to get a feel for them. Each one is on a slightly different pad so they handle differently and the materials are different in their feel on the wheel. If you happen to put too much of any of the materials on the wheel and the pipe gums up you can wipe it down with Isopropyl alcohol and restart the process. Practice until you are comfortable with the feel of the pipe in your hand.

When you are buffing use a light touch. Pressing the pipe bowl against the wheel with considerable force only increases the heat generated where the wheel contacts the bowl. Pressing it hard against the stem can cause the vulcanite to burn or melt and make more work for you rather than less. A light touch is critical to getting a good finish and polish. Keep the pipe bowl moving as you are buffing, turning it so every surface get a good buff, with the stems the same thing is true so that the heat production is not concentrated in one area. I never buff a pipe bowl and stem separately. The buffer can round edges on the stem or the shank and the junction between the two is permanently damaged and the value and look of the pipe is affected.

A FEW SIMPLE REMINDERS

  1. Pay attention carefully and focus on the work. The equipment can hurt you so be careful! In regard to personal safety, just use common sense. A buffing wheel can grab loose sleeves, long hair, or dangling jewelry very quickly, so pay attention and be careful.
  2. While your safety is a potential hazard the greater one is the wheel can grab the pipe and take it out of your hands in a heartbeat. That is why I hold it the way I do – both hands, one with the thumb or finger in the bowl. This is a real issue; do not take it lightly.
  3. Always keep a firm grip on the pipe. It takes some thought and practice to grip the pipe firmly while applying it to the wheel with a light touch. The tendency is to hold it lightly, in keeping with the light touch.
  4. Be careful when buffing a pipe around the rim and bowl opening because the wheel can grab the edge of an opening.  Also, be alert when buffing near the rim because the reddish powder from the Tripoli and a white powder from the White Diamond gets into the inside of the bowl. It will need to be wiped out carefully with a cotton swab.
  5. The wheels can grab a small-diameter stem because the strings of the fabric tend to wrap around it if you press it too far into the wheel. The safest way to present the stem is with its length pointing in the direction the surface of the wheel is moving.
  6. Don’t try buffing metal bands, stingers or metal caps or rims.  It will work but will permanently discolor the buffing wheels.

Bending Vulcanite Stems


Blog by Steve Laug

I have had several people ask me about the process I use to bend vulcanite stems. I decided to write an essay on the three different processes I have used to bend them. In each method I remove the stem from the pipe for bending. I have the pipe close at hand to check the bend on the stem. Each method has plusses and minuses to it. Each method can create a variety of other problems that need to be addressed if done improperly. For the sake of this article I refer to bending vulcanite. The same three methods can be used to bend Lucite. I have bent them both using all three methods. The methods and warnings remain the same; the potential for oxidation is not applicable.

1. Hot Water Method

METHOD: This is a simple process. I use a small ceramic microwaveable bowl that has straight sides and is about 3 inches deep. I fill it with tap water to the level I want the bend and put the bowl in the microwave. I select high and set the time for two minutes. I have found on my microwave that is where the water will boil. I have put the stem in the bowl in microwave during this heating and I have left it out. I see no significant difference in the application and no damage to the stem. The only significant difference that I can see is the time it takes to make the stem pliable.

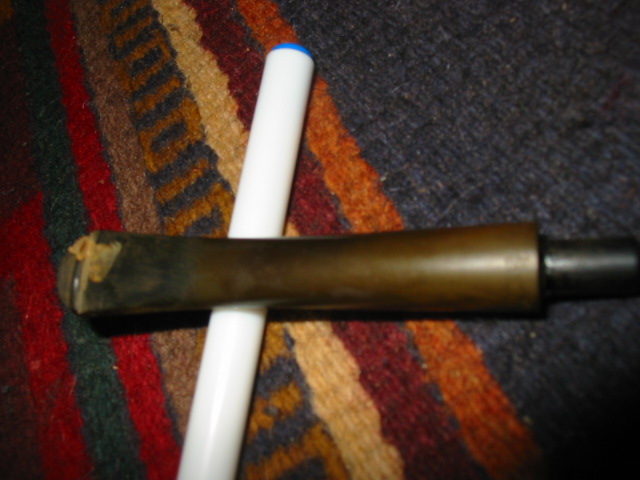
Either way, when the stem is in the water I want it to be covered to the level of the impending bend. I put a pipe cleaner in the stem to keep the airway open and prevent kinking in the stem when I bend it. If the stem is in the microwave, at two minutes it is pretty pliable. If not, I dip it in the boiling water and leave it until it is pliable. This may take repeated dipping and reheating of the water.

Once the stem is pliable I use a small glass spice jar that is round to bend the stem over. It gives me the curve I am looking for in my bends. The jar is a common spice jar, about 1 to 1 ½ inches in diameter. I lay it on its side and bend the stem over it. I know others who use the grip on a baseball bat or a rolling pin. Use whatever works for you in terms of maintaining a smooth bend. I hold the tenon end with one hand and the button with the other and then bend it carefully. I have found out the hard way that just bending it by hand can be problematic and make a very uneven curve or a twisted curve with one side more bent than the other. Once the bend is the way you want it either dip the stem in a cup of cold water or under running water in the sink to set the bend.

PLUS: The plusses are fairly straightforward to this method. Its ease of application is very clear. The evenness of the heat and the bend makes burning the vulcanite a non-issue. The simplicity and lack of a need for special tools makes it a very practical method of bending the stems. I used this method all the time for many years until I purchased a heat gun to use for this purpose. I still find myself going back to it repeatedly particularly with Lucite or acrylic stems. I just works for me so I use it.

MINUS: The minuses are also straightforward. Hot water plus vulcanite is a recipe for oxidation. The heat and the water cause oxidation to raise its ugly head. It seems like the oxidation just leaps to the surface as soon as the water gets hot and touches the vulcanite. It means that in bending the stem, solving one issue, you create a second issue – the removal of oxidation. If you are comfortable with the process of removing oxidation then the method is very usable and it works. If you are not comfortable with that process be forewarned it will oxidize your vulcanite stems.

2. Kitchen Oven Method

METHOD: This also is a simple process. I use one of my wife’s cookie sheets, or baking sheets, to hold the stem or stems. I put the oven rack in the centre of the oven and preheat the oven to 200 or 220 degrees, both temperatures work. Once the oven is heated I place the stem (with the inserted pipe cleaner to keep the airway open) on the cookie sheet and slide it into the oven. Have some oven mitts or hot pads near at hand when it is time to remove the cookie sheet from the oven. Watch the stems so you can tell when they are pliable. It takes very little time, 5 minutes or less usually. You can tell when they are pliable when you watch them (especially after having done this before) but you can check them regularly to see if they are ready. They should be rubbery and soft, easily bent.

Once the stem is pliable I remove it from the oven and hold it with the oven mitts, or if your hands are callused with your fingers (vulcanite is hot and you can be burned so be careful). I have the same small glass spice jar at hand, just as I did in the above method, to use to bend the stem. I hold the tenon end with one hand and the button with the other and then bend it carefully. Once the bend is correct I dip it in cold water or under running water in the sink to set the bend.

PLUS: The plusses of this method are also straightforward. It again requires no special tools to do the work. It allows you to bend multiple stems quickly. It also does not increase oxidation to the stems. This is a relatively new method to me but a fellow refurbisher here in Canada uses it all the time and swears by it. I have tried it and it does work well. There is no mess and no fuss. Cleaning up the stem is very simple afterward. All of the work in removing oxidation and polishing can be done ahead of time and then when complete a simple buff will give the stem a sheen.

MINUS: The minuses are relatively few. The first I ran into was my wife – she was not keen to have me “melt” rubber on her cookie sheets in her oven. I suggest you try this when “she who must be obeyed” is out of the kitchen unless you have your own sheets and oven! Care must be exercised to not leave the stems in too long or they will indeed be a mess – or at least it would seem so. I have not done this because I am overly cautious in keeping an eye on the stems.

3. Heat Gun Method

METHOD: This also is a simple process. I have a heat gun purchased at a home improvement or hardware shop. It has two settings – high and low. For bending stems I set the gun to the low setting. The gun comes with a stand on the handle so I stand it on the worktable with the tip pointing into the air. It also comes with a variety of heads that can be used. I like to focus the heat on the stem so I use one that reduces the end of the gun to a one inch diameter circle. I hold the stem by the tenon, the side I want to bend facing downward, above the heat tip by 4-6 inches and keep it moving back and forth horizontally. You do not want to leave it in one place too long as it will burn the vulcanite or cause it to bubble. (I have used it to also bend Lucite and the same is true with that material.) I check it often to see if it is pliable. It does not take very long, maybe 3-5 minutes, and the stem is very flexible and even begins to droop.

Once the stem is pliable I remove it from the heat and bend it over the same small glass spice jar, just as I did in the above methods. I hold the tenon end with one hand and the button with the other and then bend it carefully. Once the bend is correct I dip it in cold water or under running water in the sink to set the bend.

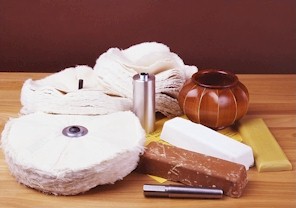
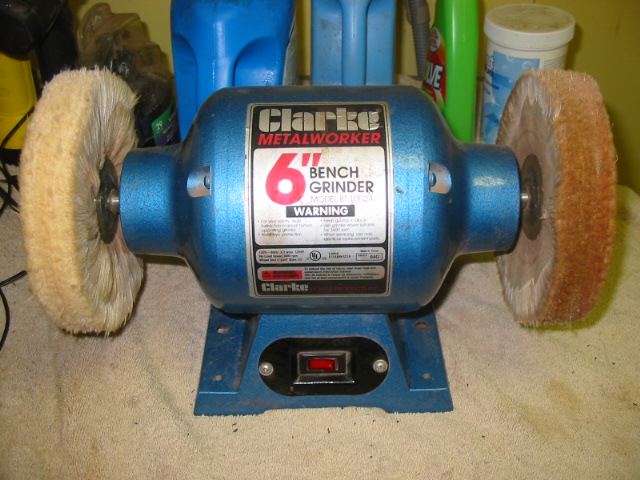
PLUS: The plusses of this method are also straightforward. It is quick, simple and clean. It allows you to bend multiple stems quickly. The stems do not oxidize with the heat or the cooling water. Since I got the heat gun this is method that has become my default method. The stem can go from being bent to being buffed and polished in short order. All of the work in removing oxidation and polishing can be done ahead of time and then when completed it polishes very quickly with a hand buff or on the buffer.

MINUS: The minuses are relatively few but significant. It is critical that the stem be kept the recommended distance from the tip of the gun as vulcanite does burn. It also blisters and bubbles. Take my word for it you do not want to do the work to repair a blistered or burnt stem. Worst case scenario it means recutting a stem. This is the most important minus. Be very careful. The second one is not nearly as critical, but important nonetheless. The soft and pliable vulcanite can easily twist when bending it, so be sure to use a round hard surface to bend the stem over. Also make certain the stem is flat and straight on the surface of the jar so that it is not crooked when bent. This is easily repairable but a pain nonetheless.

I have used all three methods have all been to bend stems. I have used them on both vulcanite and Lucite stems. The point of pliability under heat is slightly different between the two of the materials so times may vary. I am also working at sea level so that may also influence the times and heat points for the various methods. Give one or all of the methods a try. Let us know how it works for you. Post some pictures of the process and the finished pipe. Most of all enjoy yourself in the work of taking care of your own pipe and making its story your own.

Rebuilding a chewed and dented stem with super glue


I just finished reworking this old stem from an Imperial Two Point Made in London Lovat. The stem was very unique in that it is a p-lip design though slotted in the airway. I have a second one that I am working on that has the same stem so I believe this is one of the hallmarks of the Two Point. That being the case I decided to restore the stem rather than cut a new one. You can see the state of the vulcanite from the three pictures below. The first picture is of the top of the stem. There were three major tooth dents in the surface of the stem, two chunks out of the edge of the button and a piece missing out of the edge of the lip of the slot. The second picture is of the underside of the stem. There you can see one major dent from teeth and also several smaller dents. There is also a dent in the edge of the lip of the pipe that has moved the straight line with a dip in it. The third picture shows the slot in the end of the stem, it is a bit out of focus but you can see the missing piece at the left side of the top edge.

ImageImageImage

I used my heat gun set on low to lift the dents as much as possible before working on the stem with sandpaper and superglue patches. I cleaned the surfaces of both the top and bottom of the stem after heating and then sanded them with 240 grit sandpaper to remove oxidation and anything that would prohibit the glue from sticking. In the first photo below you can see the two patches on the dents that remained after heating on the underside of the stem and the work that has been done straightening the line. I decided to work on the underside first as it needed a bit less repair. Once the glue was dry I turned the stem over and patched the top side. In the second photo below you can see the super glue patches on the surface of the stem, the two dents on the edge of the button to build up the edge. Once it was dry I planned on using needle files on both top and bottom to sharpen the edge of the button to a crisp restored look.

ImageImage

The next two photos show the top and bottom surfaces of the stem after sanding with 240 grit sandpaper to bring the glue patches flush with the surface and using the needle files to sharpen the edges of the patched button.

ImageImage

The next picture (I apologize for the blurriness but I think it still is clear enough to see the point I am making) shows the work that was needed to rebuild the lip of the button on the topside where the chip was. I carefully layered in black superglue making sure not to close off the airway. I used a greased pipe cleaner folded in half in the airway of the slot to provide a base to build on. Once the base was buildt I stood the stem on end and gradually layered in super glue to build up the top edge of the slot. The goal was to return it to a smooth rounded crown with a clean straight slot for the airway.

Image

The next two pictures show the build up area on the end of the button. It is a shiny black spot in the photo at the bottom right edge of the button. Each one shows a bit more of the build up to give an idea of the process. I would have to recut the edge of the button on the top side when the build up was complete.

ImageImage

When I had the surface filled to satisfaction I recut the edge of the button with the needle files and also sanded the surface with 240 grit sandpaper and 400 and 600 grit wet dry and water to smooth out the fill. I then proceeded to use my normal list of micromesh pads from 1500-6000 grit to finish the stem. I put the stem back on the pipe and buffed it with White Diamond. I took it back to the work desk and gave it a coat of Obsidian Oil, wiped it off when dry and gave the stem a final coat of carnauba wax. The pictures below show the finished stem. The first one shows the topside and the rebuilt crown of the button. The glare and shadows on the picture do not allow you to see clearly the recut edge but it is straight and clean. The second picture shows the underside of the stem and the crisp straight edge of the button. The final picture is an end shot to show the slot and the curve and flow of the crown of the button.

ImageImageImage

Overall I am pleased with the repair and now have a renewed pipe.

ImageImage

Black Super Glue Repair to a Damaged Stem


Blog by Steve Laug

Using the stem on the little Barling I repaired earlier as an example I thought I would post the process of repairing bite marks with Black Super Glue. The glue is available online at a variety of sources, though I purchased mine from http://www.stewmac.com/shop/Glues,_adhesives.html a company that is a supplier for stringed instrument repairmen. They offer super glue in several colours and viscosities. I order the black super glue from them that comes with whip tip nozzles as I find that it is easy to control the size of the drops used. I also have used the clear super glue and it works very well in several other applications including repairing and replacing fills on older pipes. They also carry a wide variety of micromesh sanding pads and papers. It is a great resource for hard to find items (at least in Canada) that I use regularly in my repairs.

I always seek to repair a stem in the least intrusive manner possible. In the case of the stem below I heated the tooth dents to try and lift them as much as possible before any other method was used. This can be done carefully with a heat gun – I stand the gun on its stand, turn it on its lowest setting and move the damaged part of the stem in the heat about 4-6 inches above the tip of the gun. If it gets too close the vulcanite is damaged through burning. The other method that I have used avoids this problem – it involves putting a cup of water in a microwave and boiling it. Once it is hot place the stem button end down in the boiling water and leave it. Repeat as often as necessary or until there is no more lift on the dents of marks in the stem. Note if the dents have sharp edges, or are cuts, the heat will not lift the dents at all. It also will not work on holes or bite throughs on the stem.

In Photos 1 and 2 the stem is pictured as I received it on the pipe. The first photo shows the top of the stem and shows the damage to the button and the surface – mostly dents. The second photo shows the underside of the stem. It was significantly worse that the top. The dents were very deep and the button was virtually destroyed. At this point it is probably pertinent to ask whether the stem should have been replaced or not. Several things went against doing that in my opinion. The first was that this is an original Transition Era Barling stem. It is hard to find replacements that have the slab look and slight taper on the saddle that are hallmarks of the Barling stem. The second was that the tenon on this one is very tiny. I did not have a tool that allowed me to turn that small of a tenon. Thus I decided to give it a repair. Then of course, if you have followed this blog for long you will understand, there was the challenge. Could I possible restore the stem to at least a semblance of its original “glory” and functionality?  

ImageImage

So with the decision made I turned to work on this stem. I used my heat gun to lift the marks as much as I could on the top and the bottom of the stem. The two pictures below show the effect of the heat on the stems. The first photo shows the top of the stem – the heat actually lifted those bit marks quite a bit. It took out the rounded edges of the dents. What is left was actually sharp edges or cuts from the teeth on the button and on the surface. You will also notice that some of the oxidation burned off in the process. I also sanded the surface with 240 grit sand paper to better see what I was dealing with on this stem. The second photo shows the underside of the stem – the heat lifted the dents significantly but not totally. The sharp edges on the dents still remain, as does the destroyed button and the hole is very visible. I repeated the heating process several times (to be honest I lost count) until there was no more visible improvement in the dents. It was time to prepare for the patching process.

ImageImage

Before I use super glue to patch a hole or fill dents in the stem I prepare the surface to be clean and debris free in order to get a good bond on the glue. I sand the surface with 240 grit to remove the oxidation as much as possible. I want the area under the patch to be black so that the glue matches. Oxidation on the edges of the patch makes that match impossible. Once I have the surface sanded I buff it with Tripoli to take a bit of the roughness out. I don’t want a glossy finish as a little roughness gives surface for the glue to bite into. But I do want it clean. I wash the stem with isopropyl alcohol to remove any debris that still remains, including any of the Tripoli. I use a dental pick to make sure that the edges of the hole are not cracked or broken. Doing this often opens the hole a bit larger but it also removes chips or cracking that will not provide a good base for the patch. I finish the cleanup with yet another wash with alcohol and a cotton swab. The surface should have solid edges to bind to and no extraneous sanding dust or debris that will be in the way of the patch.

On this stem the easiest part to patch was the top of the stem so I started with that part. I used the whip nozzle on the super glue and dripped it on the stem. I smoothed the drop out with the end of the whip. I want the dent and cut to be totally filled so I moved the glue back and forth until it was all covered and then set it aside to dry with the end of the stem propped up to keep the patch level. The first picture below shows the patch after the glue had dried. It formed a solid patch on the stem. I always layer the patch doing multiple layers until I have built up the hole and dent. In this case I also used the glue to build up the button. While the picture does not show it clearly, the glue is actually level with the top of the button and small spots of glue are moved into the dent marks in the button surface itself. In the second photo the stem shows the patch after sanding with 240 grit sandpaper. The object was to get a smooth surface on the stem. The dent marks in front of the button are gone. The brown spot on the stem is some oxidation that has not been sanded out yet. The button is also repaired and you can see a bit of the bulk that is now there. The button will need to be shaped and recut with needle files once the underside of the stem is also patched.

ImageImage

Once I had the top surface of the stem to the point it is pictured above I turned the stem over to work on the underside. This part of the stem was really the challenge on this one. It had deep tooth cuts and a bite through that needed to be repaired. The first step for me was to repair the bite through. I fold a pipe cleaned to fit the flared slot on the button. I greased it with olive oil and inserted it in the slot. I wanted it to be smooth and not pucker through the bite hole, so I tucked it down with my dental pick. Once it was set I put in the first drops of black super glue. Remember at this point I am not work on the surface detail of the holes only the bite through. Once it was patched I went on to fill the other deep dents and marks on the surface and build up the button. I set aside the stem on a level surface and raise the tenon end to keep the bubble of glue level so it would dry.

Once the glue dried I removed the pipe cleaner from the slot. This is always the moment of truth for me – did I grease it well enough that the pipe cleaner did not permanently bond to the slot. In this case it worked perfectly and it came out easily! Whew! Once it was removed I filled the rest of the dent marks with the super glue and also built up the non-existent button. I forgot to take pictures of that step. So the verbal description and the picture of the topside fill will have to suffice. I set the stem aside again and leveled the glue so that it would dry and not run up the stem. Super glue dries very hard and is a lot of work to sand off the surface. Once it was dry I sanded the surface with 240 grit sandpaper once again to level out the surface. The picture below shows the stem at that stage in the process. The fills appear to be white but that is the sanding dust on the surface. You can clearly see the three large patches on the underside of the stem in this picture as well as the rebuilt portion of the button. Again I over filled the patch to the level of the top of the button to provide a solid new surface for me to work with when I recut the button with the needle files.

Image

The next two photos show the result of the sanding process with the 240 grit sandpaper on the top and the bottom of the stem. I wanted to make sure that the patches blended into the surface of the stem. You will note that in the first photo of the top of the stem, that the patch is virtually invisible. Though it is not very clear, I had also recut the button with the needle files to give it a good sharp edge against the surface of the stem. I use wedge shaped file and a rectangular file to cut that edge cleanly and the result is a button that looks original. In the second photo you can clearly see that the patches are fairly well hidden. The one against the button and the large one at the top of the photo were the deepest ones. After this sanding and recleaning the surface I refilled those two spots, let them dry and sanded them again. Once that was completed the underside of the stem looked exactly like the topside of the stem at this point.

ImageImage

I failed to take pictures of recutting the button on the underside of the stem but you can see the new button in the pictures below. I cut and shaped it with the same needle files that I used on the top of the stem. I like the clean angles of a new button so I was aiming for that with just a little wear or rounding to match the age of the pipe. I finished the sanding and polishing of the stem using 400 and 600 grit wet dry sandpaper and then used the normal list of micromesh sanding pads from 1500-6000 grit. I keep a bowl of water close by to dip both the paper and the pads in as I sand as I find it more effective in removing the scratches and remaining oxidation. Once the stem was finished I put it on the pipe bowl and gave it a buff with Tripoli and White Diamond to get a good sheen to the surface. I never buff a stem apart from a pipe as I do not want to damage the stem shank junction by rounding the clean edge of the stem. The top two photos below show the top and bottom of the stem respectively. You can see the repair is complete and the button is very clean and present. The second two photos below show the stem from the right and left profile so you can see the flow of the stem surface – uninterrupted from either side with the tooth dents as before and also the profile of the button. It is distinctive and present. The stem was finished with several coats of Obsidian Oil and then carnauba wax to protect the surface.

ImageImage

ImageImage

The Everyman Pipe from the 1920’s Era


Blog by Steve Laug

This featherweight cutty shaped pipe came from the 1920’s or earlier. I bought it in a lot of that era pipes on EBay and it arrived as pictured below. It is stamped The Everyman Pipe on the left side of the shank and Made in England in a Circle and shape number 195 on the right. When this arrived in the package of the other old timers it was pretty grimy. The bowl needed serious cleaning and the rim was dented and had rough spots. It needed to be topped as steaming it would not raise the broken spots that came from tapping it out. When the surface of the wood is actually broken and not just dented steaming will not raise the grain significantly and the only repair I know is to sand it off and make it smooth and crisp again. The challenge then is to match the stain so the bowl and rim blend.

I reamed and cleaned the bowl and the airway in the shank. The pipe cleaners came out very dark and tarry at the beginning. I decided to use a drill bit the same size as the airway to clean out the gunk before going back to the pipe cleaners. I use a T handle to turn the bit into the shank by hand to remove the tars and open the airway again. I finished cleaning the shank with fluffy pipe cleaners and isopropyl alcohol until they came out clean. I wiped down the bowl with acetone to remove the old wax and the grime from the bowl and then used my topping method – a hard, flat board and an anchored piece of 240 grit sandpaper – and topped the rim. (I have since learned from someone that a good way of doing it is to anchor the sandpaper on a Masonite clipboard and sand the rim that way. It works great.)

Image

The stem needed the most work as it was a round tube of vulcanite. I wonder if it was not made to be like a clay tavern pipe. The previous owner had notched the top of the stem to make it easier to hold with his teeth and keep it from rolling. The notch was a fairly deep V cut that was only on the top of the stem. I used needle files to cut a new button on it and then my Dremel with a sanding drum to taper the stem back to the button. The original had a slight bend in the stem so I left that. The button I shaped for the stem is rounded and crowned to fit the orific airhole like those found on pipes of a similar age. After cutting the button and shaping it, the stem needed a lot of sanding to remove the scratches and oxidation. I used 240 grit sandpaper on the entirety to clean up the deeper scratches and remove the oxidation. I then progressed through the wet dry sandpapers and the micromesh pads until I had a good smooth finish on the stem and a good clean button.

Image

I set the stem aside and restained the rim and bowl to match what appeared to be the original colour of the pipe. I used an oxblood undercoat and a dark brown top coat to get the richness of the original finish. I coated the stem with Obsidian Oil and then inserted it in the shank. Once it was dry I took the pipe to the buffer and used the White Diamond to give it a final buff before giving it several coats of carnauba wax.

The pictures below show the finished pipe with its newly shaped and polished stem:

ImageImageImageImage

Barling Garnet Grain Small Bent Billiard 2034 Given New Life


Blog by Steve Laug

I picked up this little Barling (transition era pipe so the Barling stamping is missing the “s” and is a script) in a lot I bought on EBay. It had a broken stem that was also chewed through on the end and not repairable. The tenon was still in the shank and was exceptionally tight. I put the bowl in the freezer for about 30 minutes and then used a screw to remove the broken piece from the shank. The key here is to not screw in the screw too much or you can crack the shank. I was able to easily pull it out as can be seen in picture 3. The finish on the bowl was rough on the top with tars and some denting. The sides of the bowl also had some denting. I cleaned the top of the bowl and removed the tars. I steamed the dents out of the top and bowl sides.

ImageImageImage

I wiped down the bowl with acetone to remove the grime and the waxes that were on the finish. When I had finished I inspected the shank area because the drilling was off a bit in the shank and the walls were thin near the top left. There were small hairline cracks that went through several places and spidered up to about a 1/8 inch into the length of the shank. I glued those and pressure fit a nickel band on the shank.

I turned the tenon on a recycled stem I had here and fit it on the pipe. I used my Dremel to remove the excess material where the diameter of the stem was greater than that of the pipe. I kept the broken stem near at hand to match the diameter, the flow of the stem and the shape. I used it as a bit of a template to shape the new stem. The three pictures below show the process of shaping the stem from Dremel to hand sanding with 240 grit sandpaper.

ImageImageImage

In the picture below I have finished the initial shaping with the sandpaper and have a good fit. You will notice the lightening of the shank below the band – that is part of the process of sanding to fit the band to the shank. I place the original stem below the pipe in the picture for comparison sake. It is a bit thinner in profile than the new one in this photo. I continued to sand the stem with 400 and 600 grit wet dry sandpaper and water to remove the remaining scratches and grooves that the 240 grit sandpaper left. Once I had them removed I proceeded to use the micromesh pads – 1500, 1800 and 2400 grit to sand the stem smooth. When I finished with those I buffed the stem with Tripoli and White Diamond and finished by returning to the micromesh pads -3200, 4000 and 6000 to polish it. One more trip to the buffer with White Diamond finished the polishing. I gave the stem a coat of Obsidian Oil and removed it and set it aside. It was time to work on the finish of the bowl.

Image

I used an oxblood aniline stain to match the stain to the original Garnet Grain colour. I have done this in the past and compared it to a very nice original Garnet Grain and the colour is a perfect match. Before staining I polished the bowl with the 3200 and 4000 micromesh pads avoiding the stamping on the pipe. I applied the stain with a cotton swab and then wiped it off, applied and wiped it off until I got the colour I wanted. I then flamed it and set it aside to dry. Once it was dry I put the stem on it and took it to the buffer and gave it a buff with White Diamond and carnauba wax.

In the first picture below I put the original stem in to show the damage to the underside near the button. I also put a 1 cent piece, a penny in to give perspective on the size of this diminutive billiard. I am very pleased with the overall look of the pipe. The finish came out as a perfect match to the original Garnet Grain colour.

ImageImageImageImage

Giving New Life to a Barling’s 2729 Fancy Bent Dublin from 1962


I picked up this old Barling’s shape 2729 in a lot I bought on EBay. From what I could find out about it on the internet it came out in 1962. You can see from the pictures the state it was in when it arrived. It was the kind of challenge I like to work on in these old estate pipes. There is a deep satisfaction in bringing them back to life and restoring them to a spot on the pipe rack and the weekly rotation. The finish was gone, though in the grooves of the blast there was some darker brown/red stain. The blast was obscured on the sides and rim by the grime that filled the valleys in it. The rim was intact and not beat up at all – just incredible dirty. The bowl had been lightly reamed and was still round!! The stem was well chewed with deep dents on the edges of the stem and deep dents in the top and bottom. There were also holes chewed through the stem on both the top and bottom as well. The oxidation was very heavy and deep. The Barling’s Cross was all but gone on the stem but under a bright light it was faintly visible so the stem was clearly the original.

ImageImageImage

I took the stem off the pipe to work on and placed the bowl in my alcohol bath for overnight. Before submerging it in the bath I wet it with alcohol and scrubbed it with a small brass tire brush that is readily available at most Wal-Mart stores or online through Amazon. I find that the soft brass does not damage the ridges and valleys on the blast finish but really loosens the grime when used with Isopropyl alcohol. I generally dip the bowl and then scrub it before leaving it to soak. When I remove it from the bath I scrub it once again and wash off the bowl with some fresh alcohol to remove any residual grime. Once the bowl was dry it was utterly lacking any finish. It was ready to restain. I set it aside and turned my attention to the stem.

Image

The stem was a mess on this pipe as I mentioned above. Below are four pictures of it after I soaked it in Oxyclean to soften the oxidation on the surface. The pictures show how reddish brown that oxidation was when I started. I sanded the surface to highlight the bite marks and holes in the stem. The stem was badly chewed and could have been a candidate for replacement but it was an original Barling’s stem so I wanted to see if I could save it and reuse it. I cleaned the surface and picked the grit and grime out of the holes with a dental pick. I washed the surface down with Isopropyl to give a good clean surface. The button was virtually chewed away and there was a fair sized hole on the underside of the stem. The tooth marks were very deep and there was not much to work with in lifting them with heat. This made them a candidate for a patch with black super glue.

ImageImageImageImage

The picture below shows the top of the stem with the black super glue fill in the bite marks and holes. The idea is to slowly fill them and build up the surface of the stem. I also continued to fill them until there was a good slope from the stem surface to the top of the button. Once it was dry my plan was to use needle files to recut the button.

Image

The next picture shows the glue after it has dried and I have done the initial sanding to smooth out the surface of the stem. I still have not recut the button at this point.

Image

The picture below shows the underside of the stem after the glue has dried and I have done the initial sanding on the stem. It is still pretty rough but the holes are filled and the button is built up. Note in this picture the very visible copper tenon on the stem. The previous owner must have broken the tenon and had it replace with this thin copper tubing. The tenon is very delicate on this stem so the copper is actually an interesting fix in terms of durability. I have never seen a repair like that. The tubing was scored and inserted into the stem and held with an epoxy. After the soak in Oxyclean it was loose so I removed it, cleaned it and since it was a good tight fitting tenon/mortise union so I decided to reuse it. It is a wonder that he did not put a copper band around the button end of the stem as well to repair the bite through and tooth marks.

Image

The next two pictures show the stem after sanding the stem surface smooth with 240 grit sandpaper. My purpose in using that grit is to get a clean surface to work with as I move to rework the button on the top and bottom of the stem. I had yet to work on the saddle of the stem in these pictures. I will often save that until the rest is finished.ImageImage

I failed to take pictures of recutting the button on the stem but you can see the new button in the finished pictures below. I cut and shaped it with a flat needle file and a wedge needle file. I like the clean angles of a new button so I was aiming for that with just a little wear to match the age of the pipe. I finished the sanding and polishing of the stem using 400 and 600 grit wet dry sandpaper and then used the normal list of micromesh sanding pads from 1500-6000 grit. I keep a bowl of water close by to dip both the paper and the pads in as I sand as I find it more effective in removing the scratches and remaining oxidation. Once the stem was finished I put it on the pipe bowl and gave it a buff with Tripoli and White Diamond to get a good sheen to the surface. I never buff a stem apart from a pipe as I do not want to damage the stem shank junction by rounding the clean edge of the stem. Once I finished I set it aside and went back to restain the bowl.

I did a bit of research (that is a part of the process I really like) to find out about the original finish and colour of stain used on this particular pipe. I learned that it was more of a reddish tone and really wanted to get close to that reddish brown colour on the finished pipe. I used some oxblood stain and a bit of medium brown stain (both aniline stains) and gave the bowl a coat of the brown first and then flamed it and buffed it. After that I gave it a coat of the oxblood stain and flamed it. I reinserted the stem and took it to the buffer and with a light touch buffed it with Tripoli and White Diamond. I did not want to soften the ridges of the blast but wanted to buff it enough to get a contrast in the stain.

I used some Obsidian Oil on the stem and then Halcyon II wax on the bowl. Once they dried I hand buffed the stem and the bowl with a soft cotton cloth. I added a coat of wax to the stem when it was finished as well. In the pictures below you can have a look at the finished pipe. I took pictures with a .10 cent piece/dime below the pipe to give an idea of the size. It is a dainty little pipe with a pencil shank. I hope to smoke it this week end and enjoy a nice bowl of aged 5100 in it.

ImageImageImageImage

Refurb on a Brigham 2 Dot Lovat


Blog by Steve Laug

I just finished refurbishing this Brigham 2 Dot Lovat that I picked up in the estate pipe rack at a local tobacconist. This one was a challenge, but I loved working on it. It has the standard Brigham style rustication. It was in rough shape. The bowl was incredibly grimy and needed a lot of work. The grime had filled in most of the rustication to the point that it looked worn out and smooth. I soaked and scrubbed it for about an hour using a brass white wall tire brush to scrub out the grime caked on the outside of the bowl. The inside of the bowl was so badly caked that I reamed it back to the wood. Once I had it reamed and the scrubbing of the outside finished I dropped it in the alcohol bath overnight and went to work on the stem.

ImageImageImage

The stem was another story. It was given a soak in OxyClean to soften the oxidation. I find that OxyClean does not remove the oxidation at all, but it does soften it and make working on it much simpler. After the Oxy soak I went to work on the inside of the stem. Where normally there was to be a Brigham filter in the long metal tenon this time it was gone and the tars had built up to the point that the stem was totally closed off. I tried to blow through it but could not get any air through. I used an awl or ice pick to open up the stem and the tenon. Then I worked on it with bristle pipe cleaners and a shank brush. It took a lot of pipe cleaners and alcohol to get it clean. Then the outside was sanded with 400 and 600 grit wet dry sandpaper followed by the run of micromesh sanding pads. Once it was clean and shiny I set it aside and turned my attention to the bowl.

I took the pipe bowl out of the alcohol bath and went to work on it. I used the brass brush one last time to clean off the remaining grime and then dried off the pipe. There was no finish left on the pipe so I restained it with a cherry stain. I reinserted the stem in the shank and took it to my buffer and polished the entirety with Tripoli and White Diamond, finishing with a coat of wax.

ImageImageImage