Tag Archives: stem work

It appeared to be a hopeless case, but was it really?


Blog by Steve Laug

This pipe was posted on Smokers Forums as one that was in rough shape. http://www.smokersforums.co.uk/showthread.php?273-Whew! As soon as I saw it I thought it would be fun to take on as a challenge and see what could be made of it. It was truly in very rough shape. So I put in a low bid on EBay and it was mine. Only the wait remained before I would see what I got myself into.

Worchester Dog

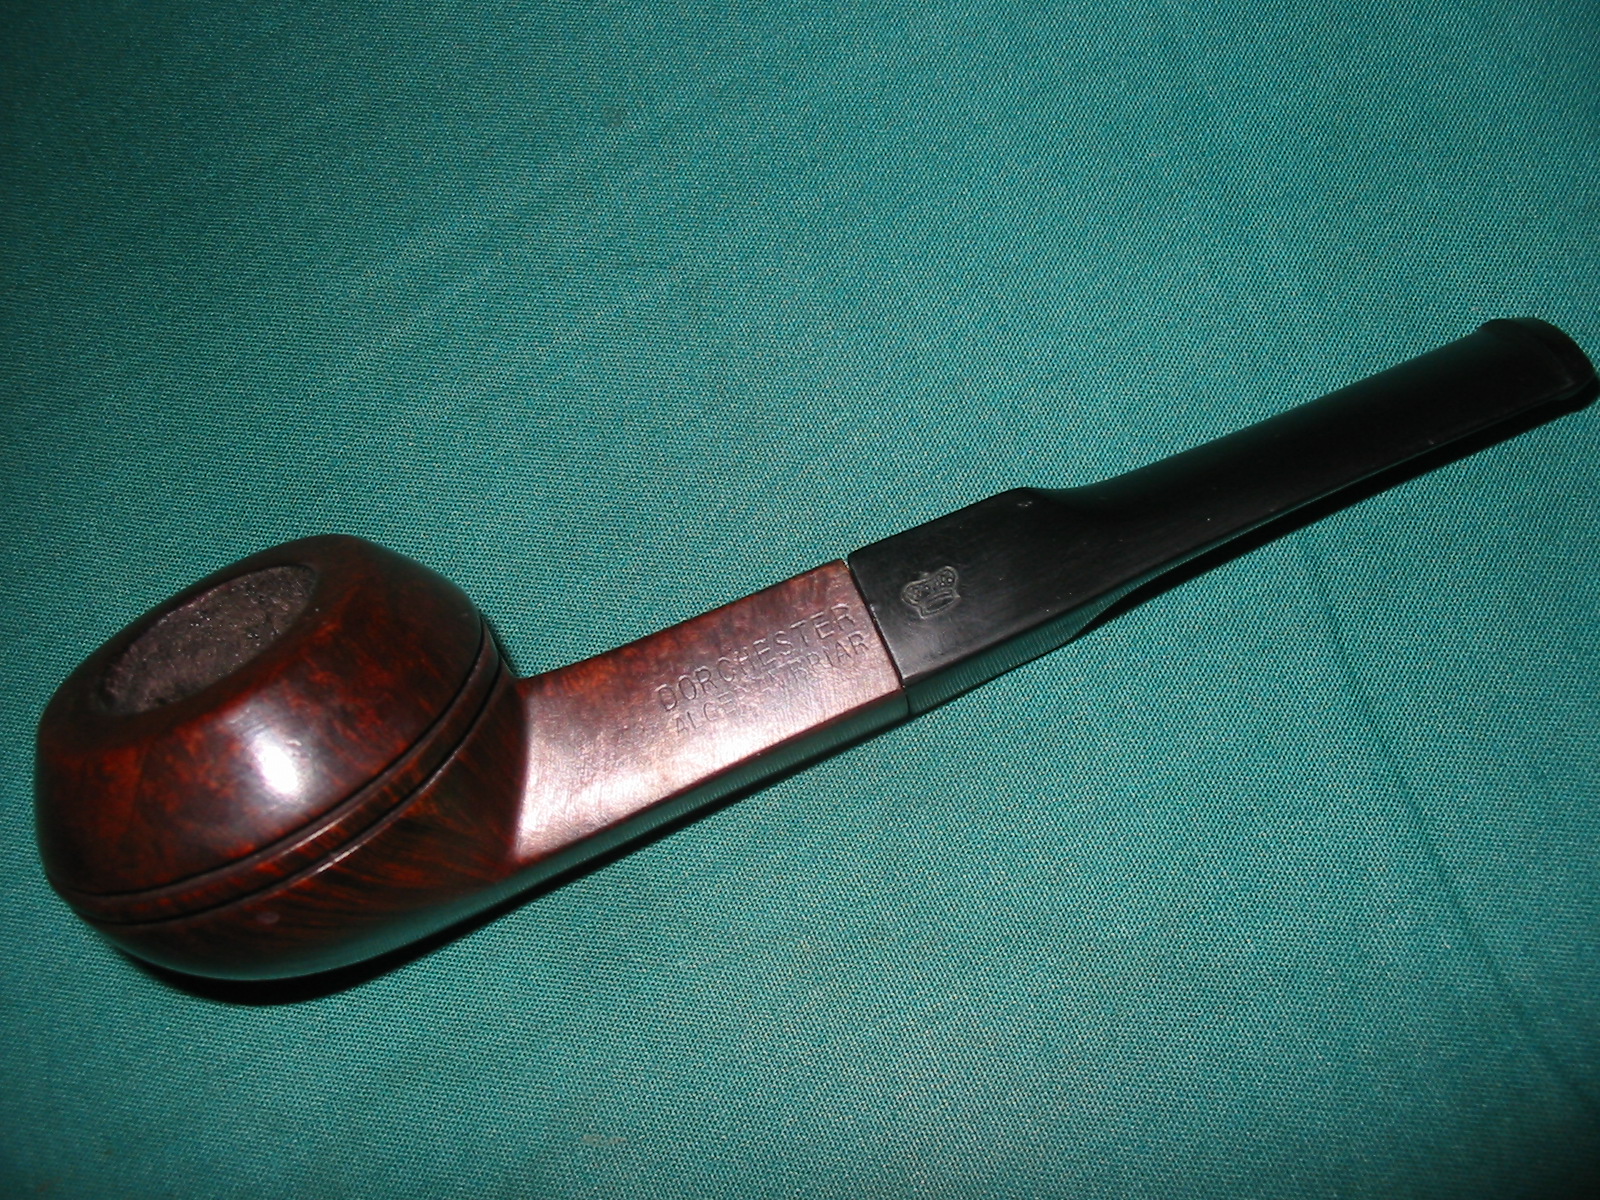
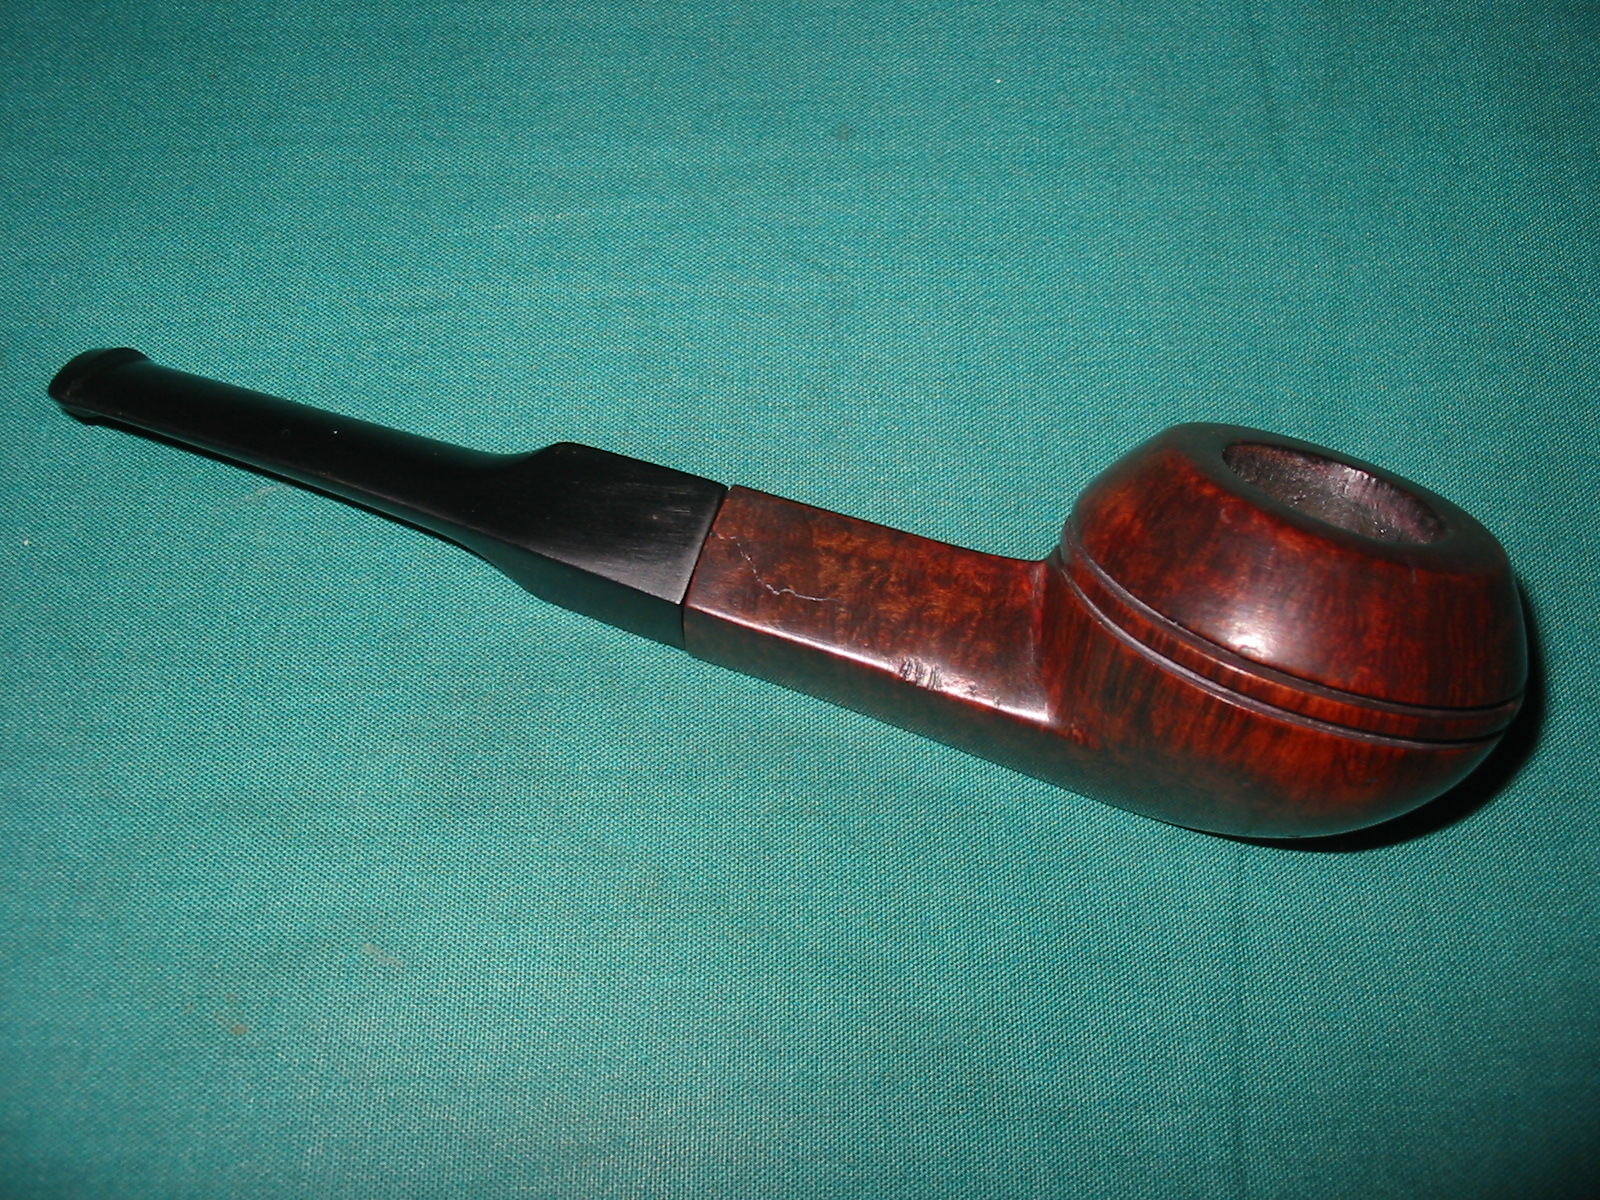
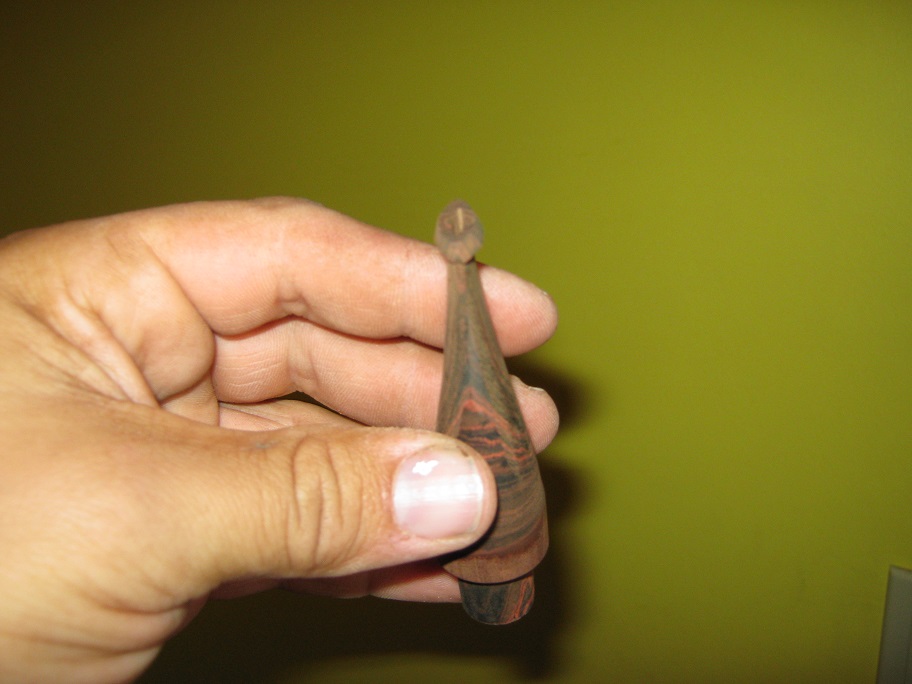
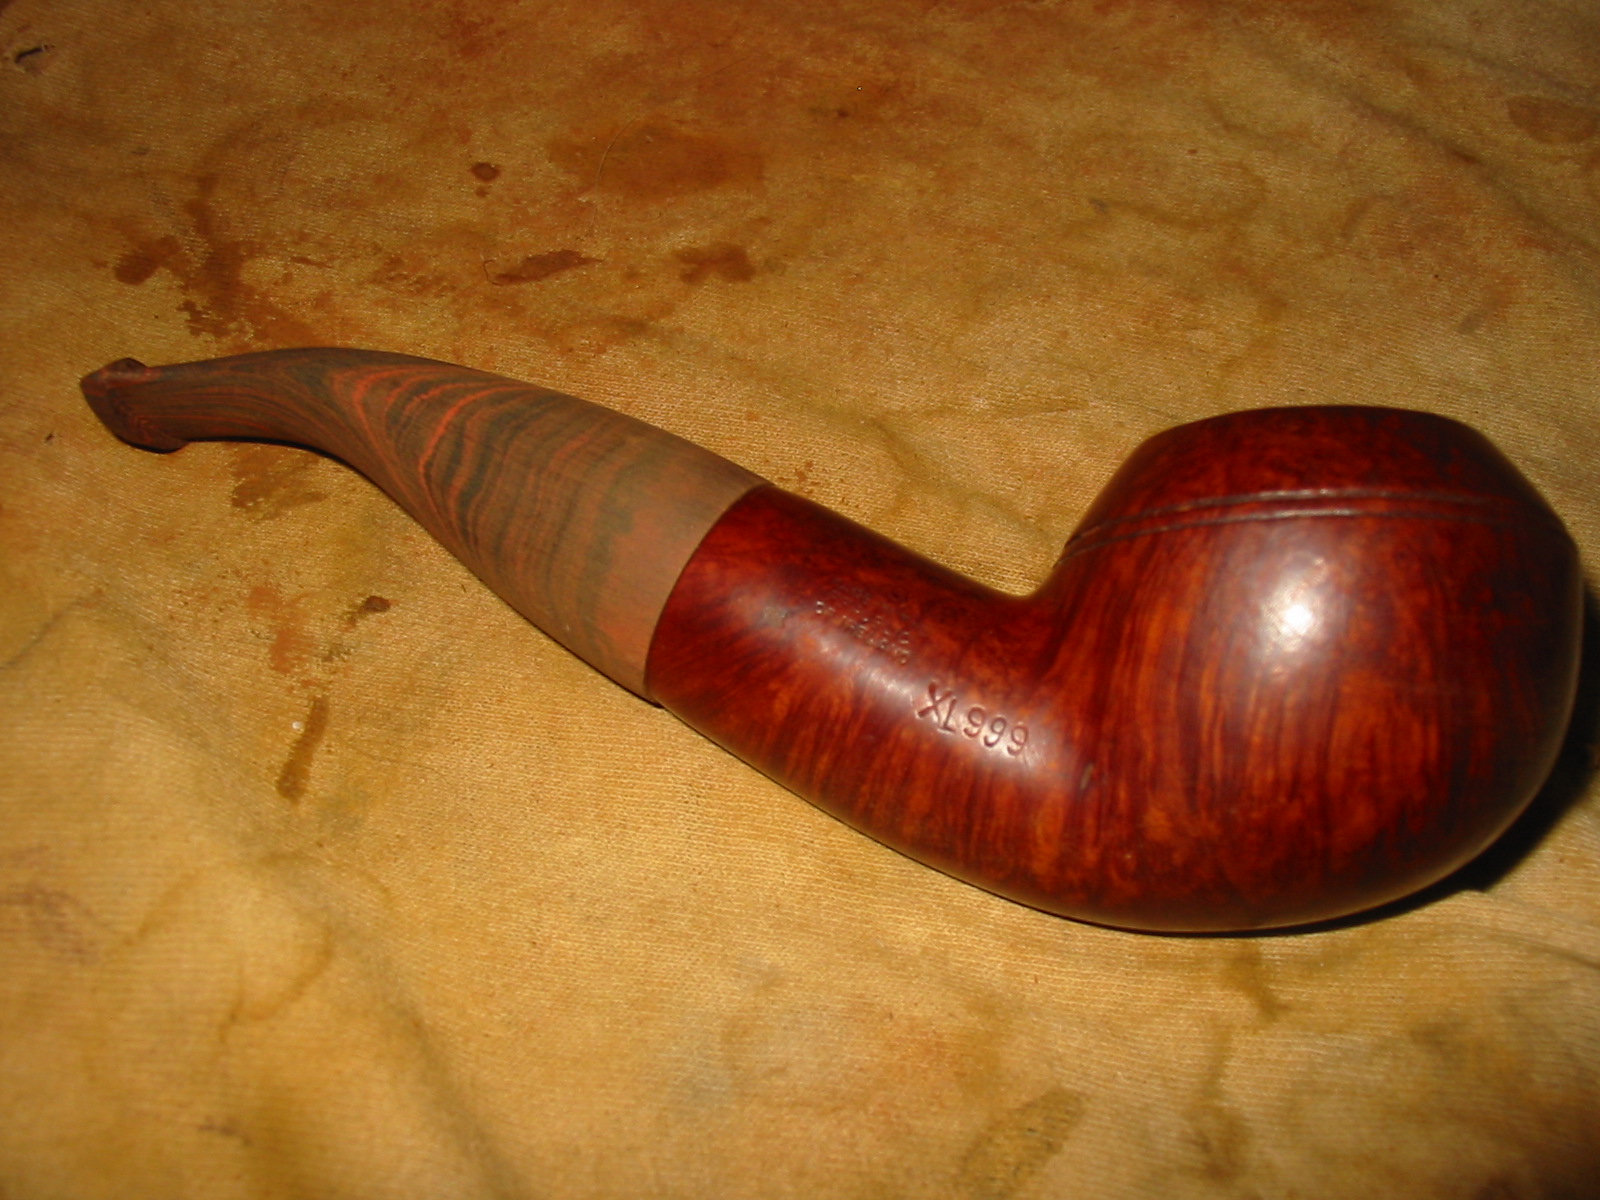
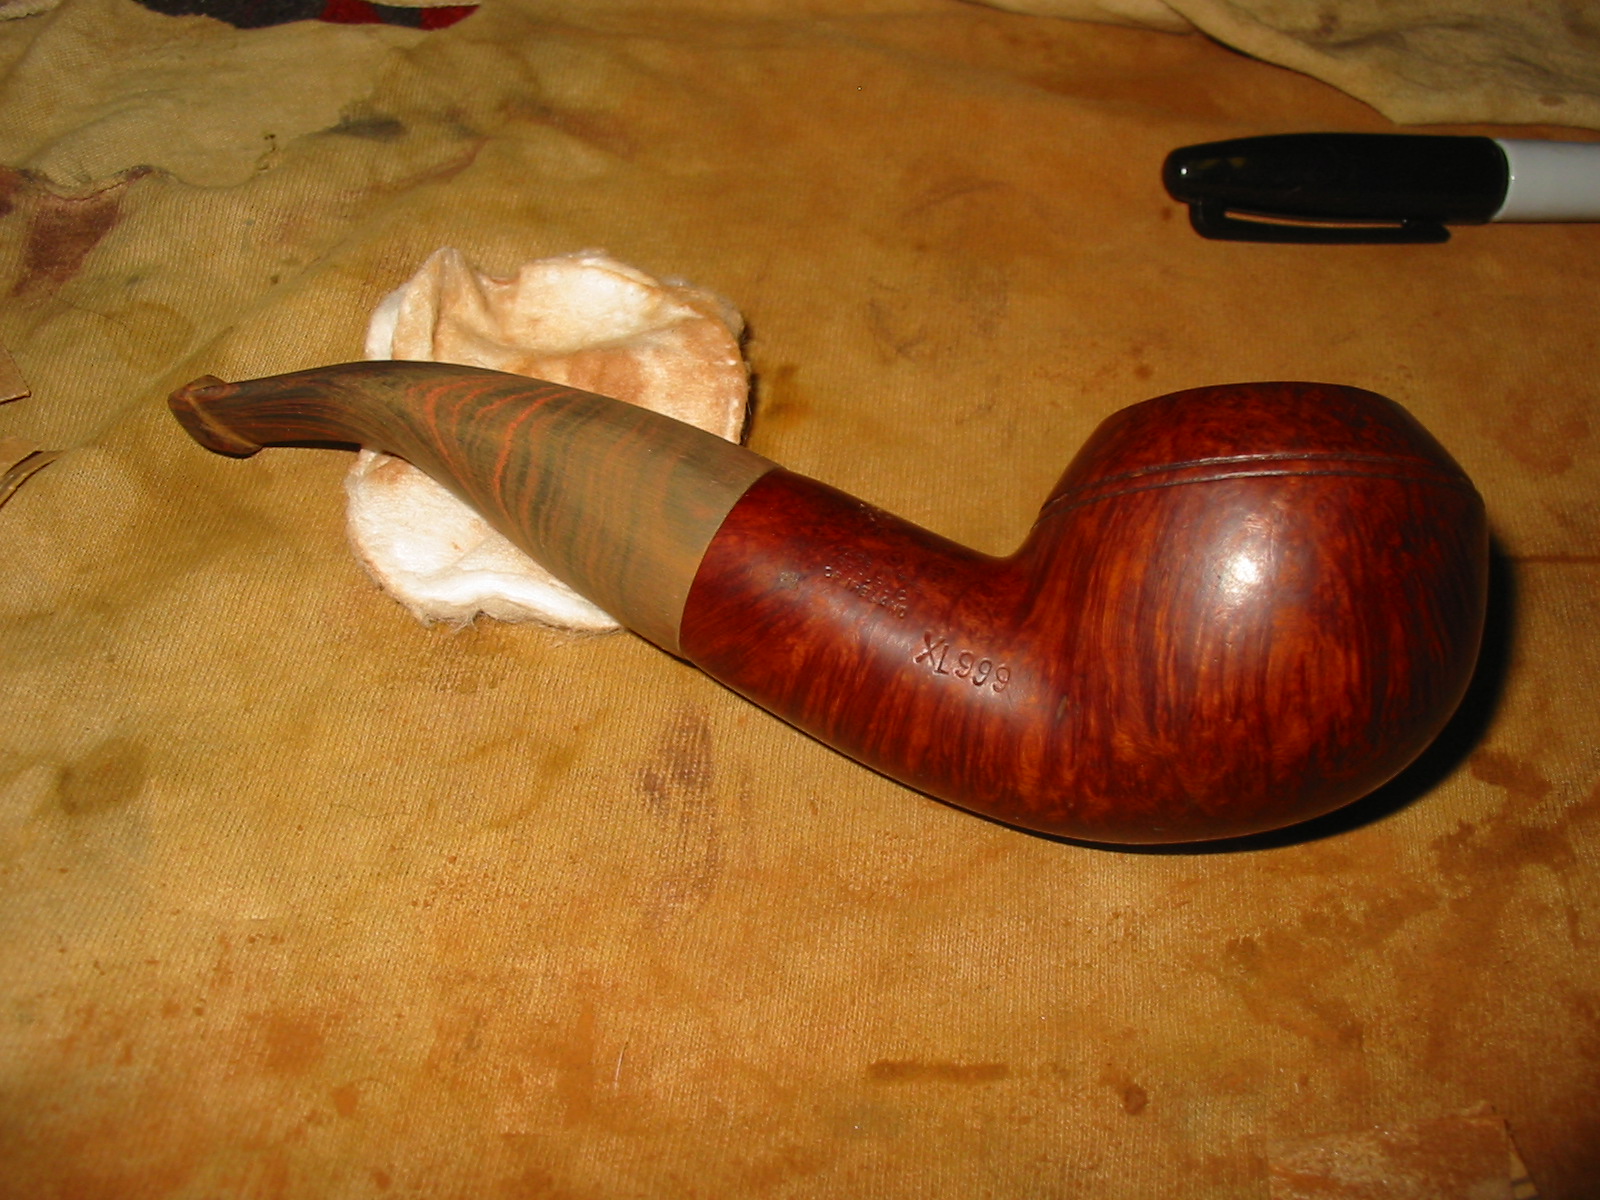
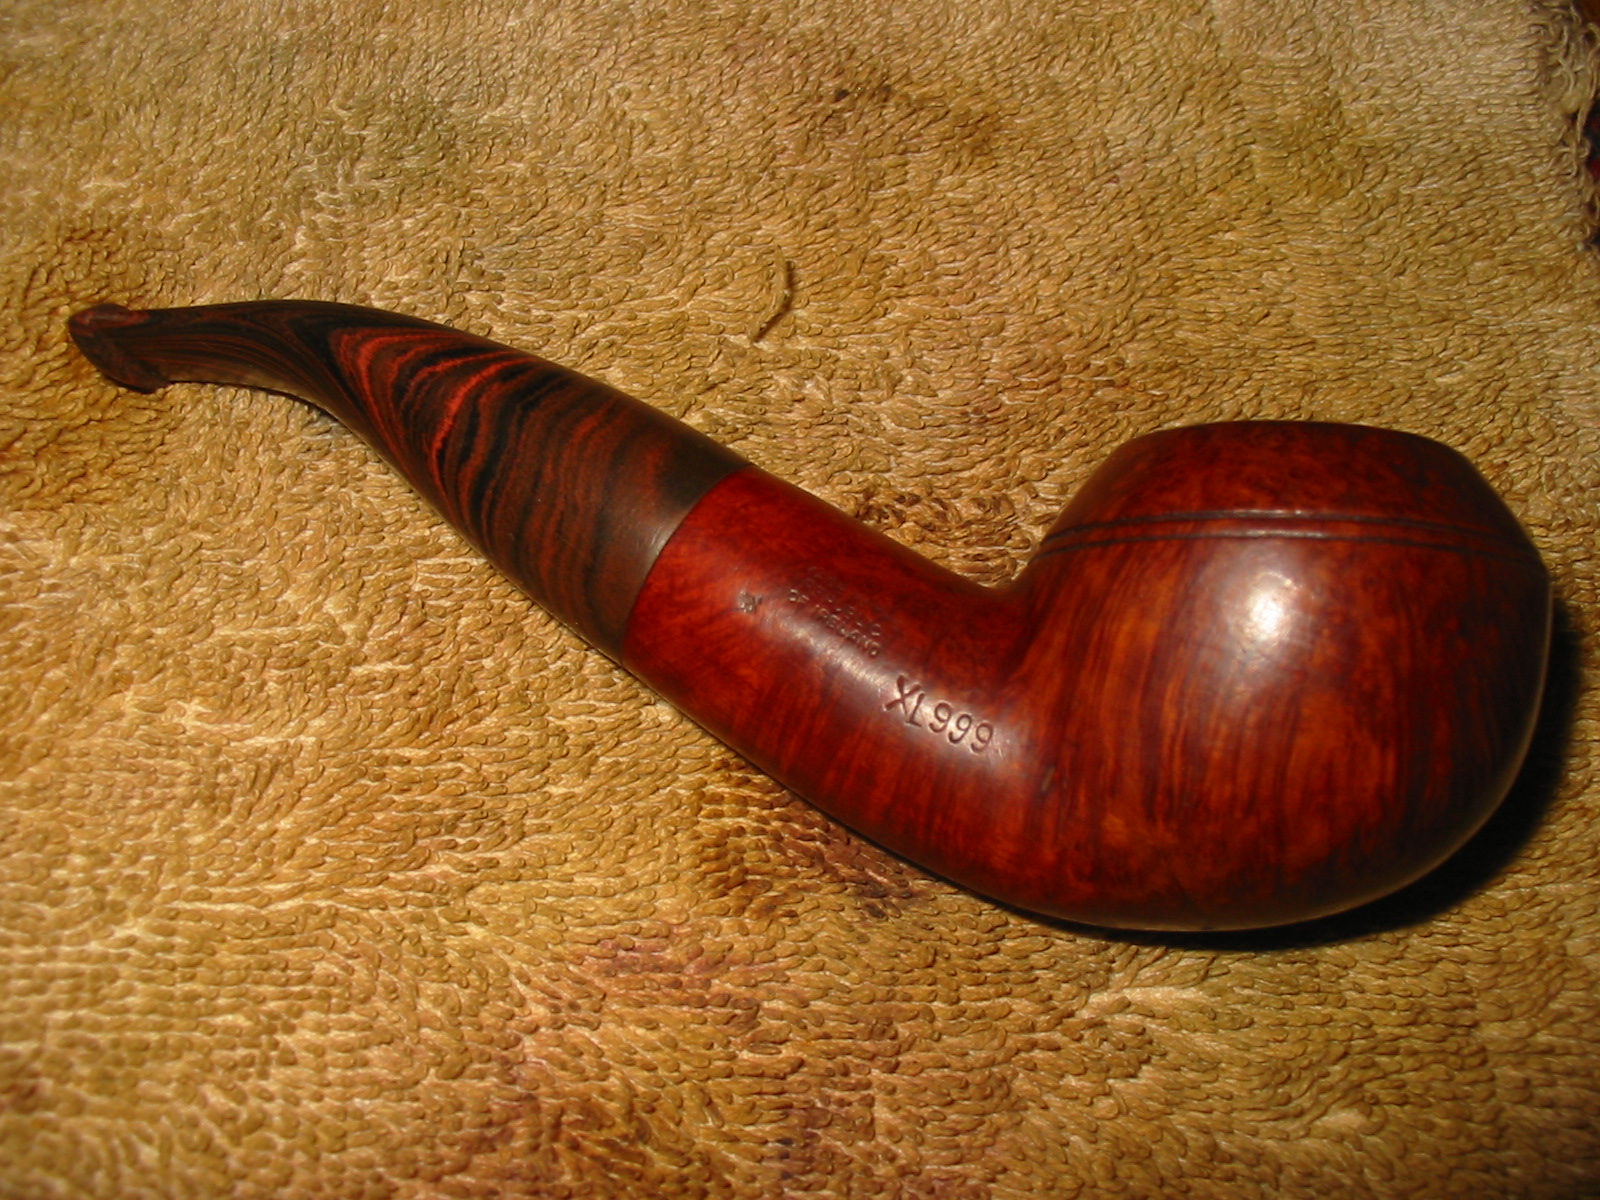
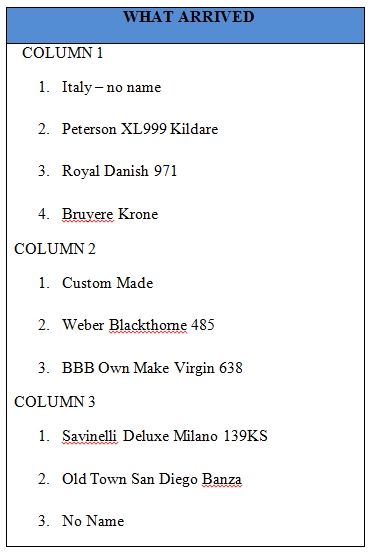
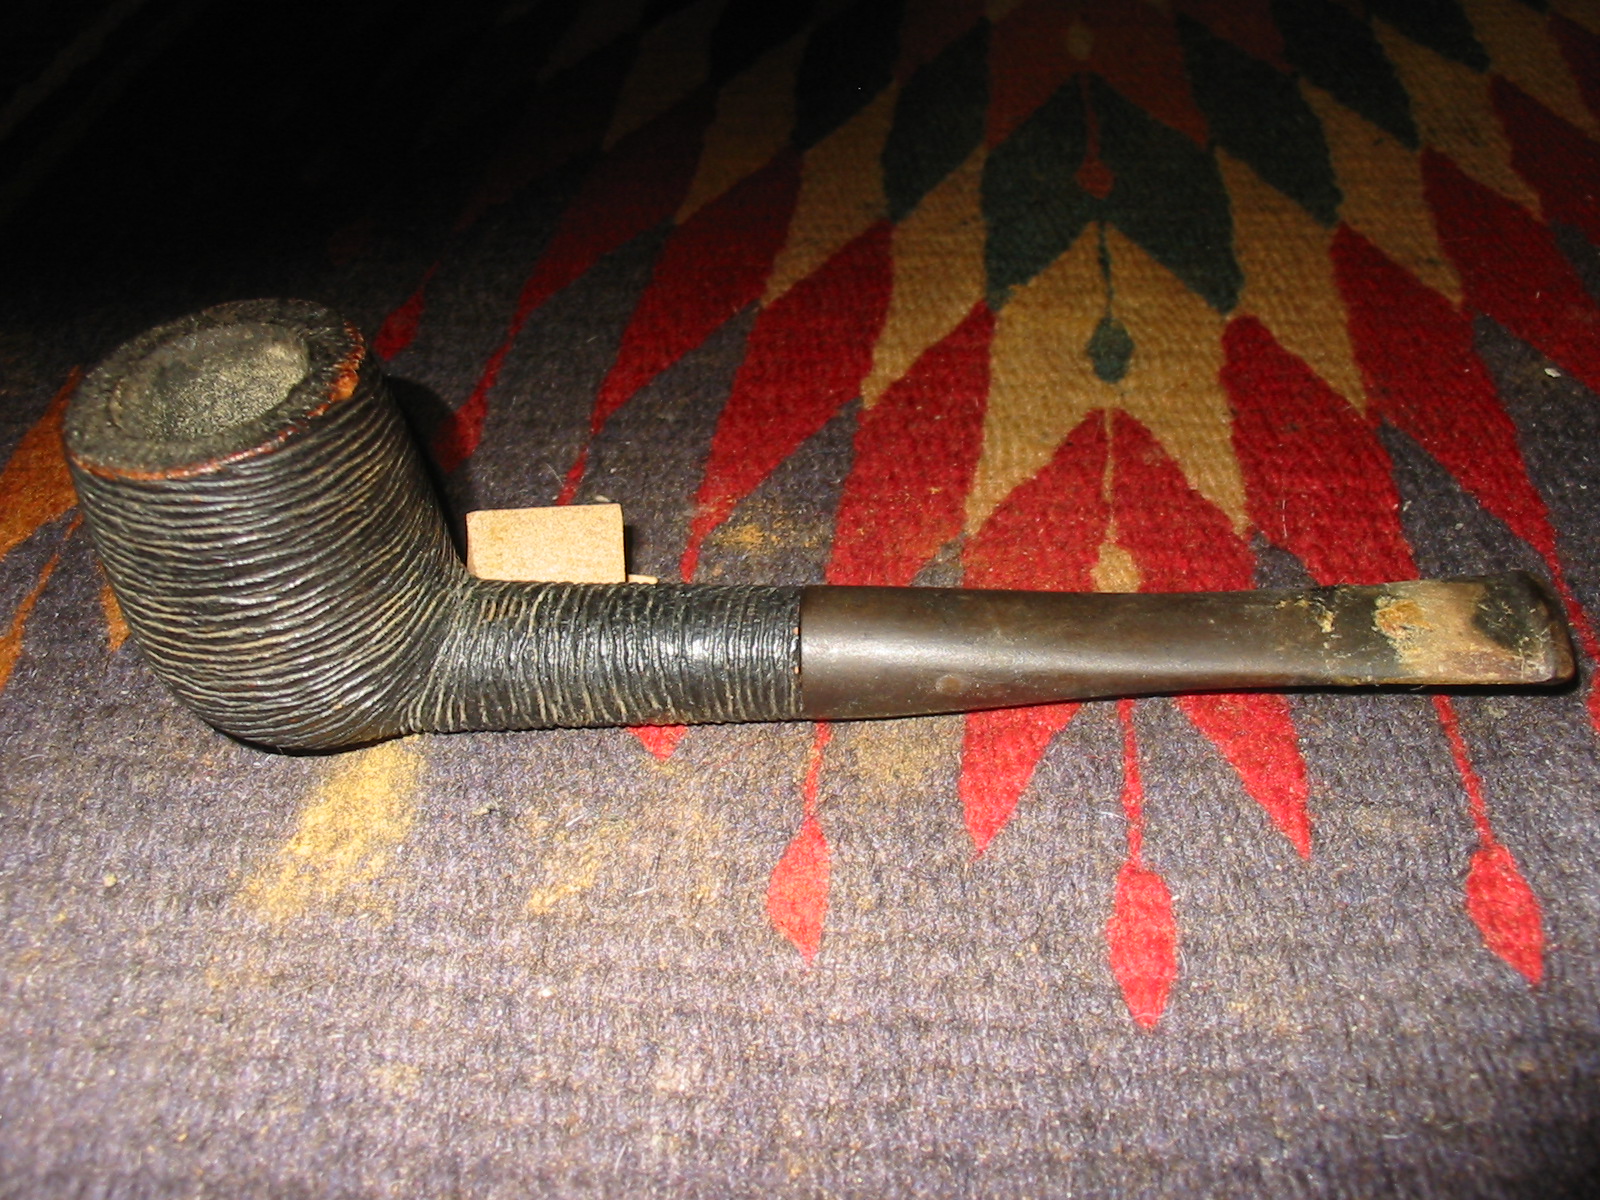
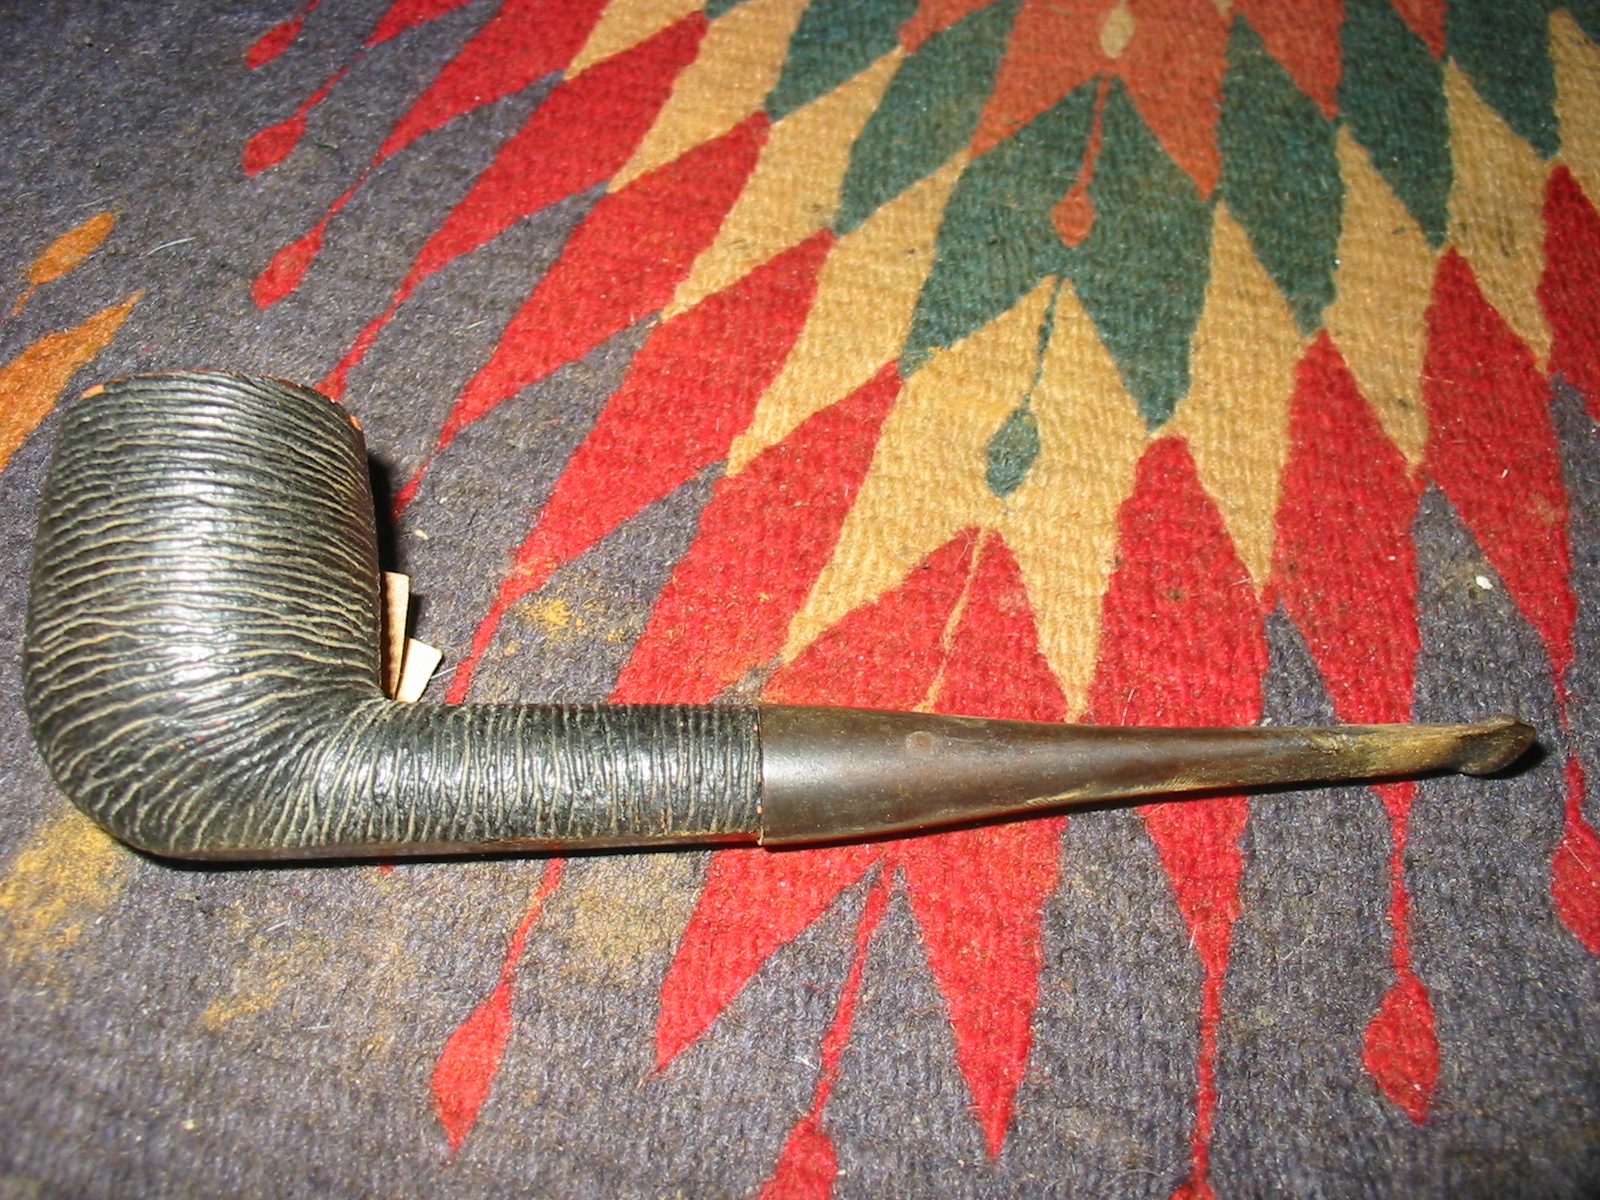
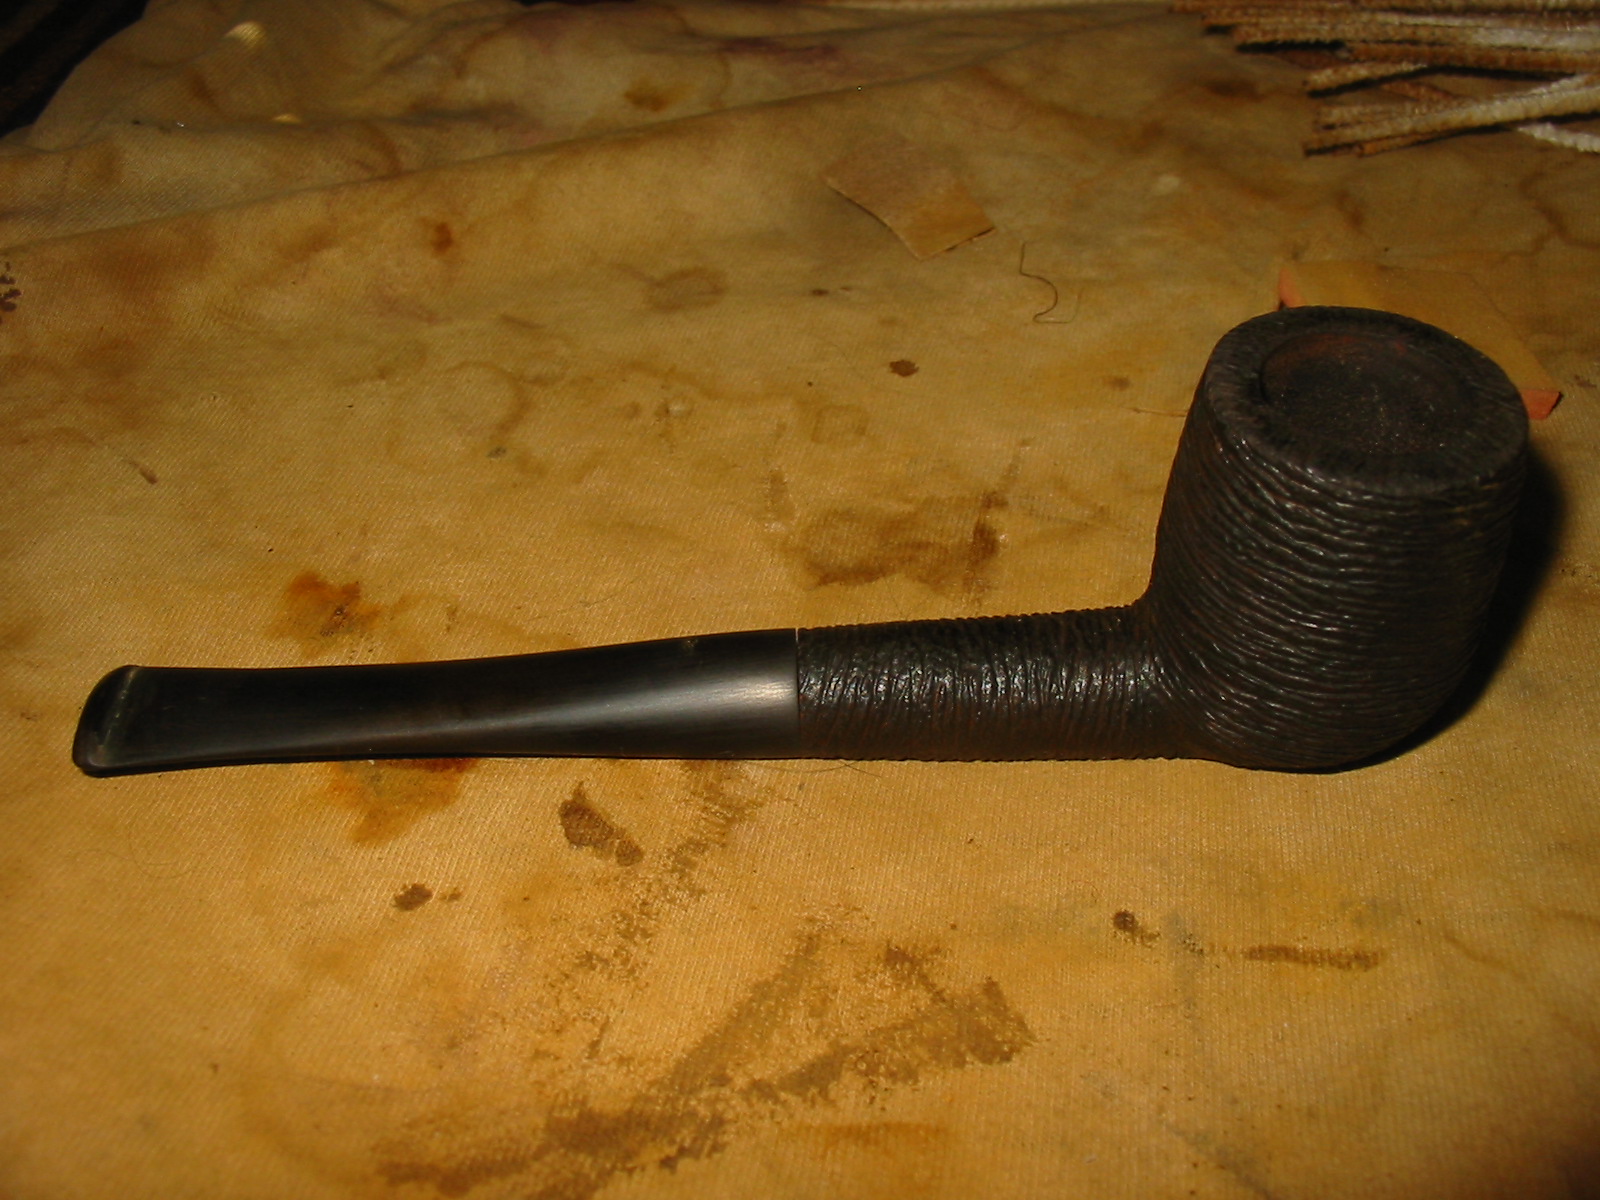
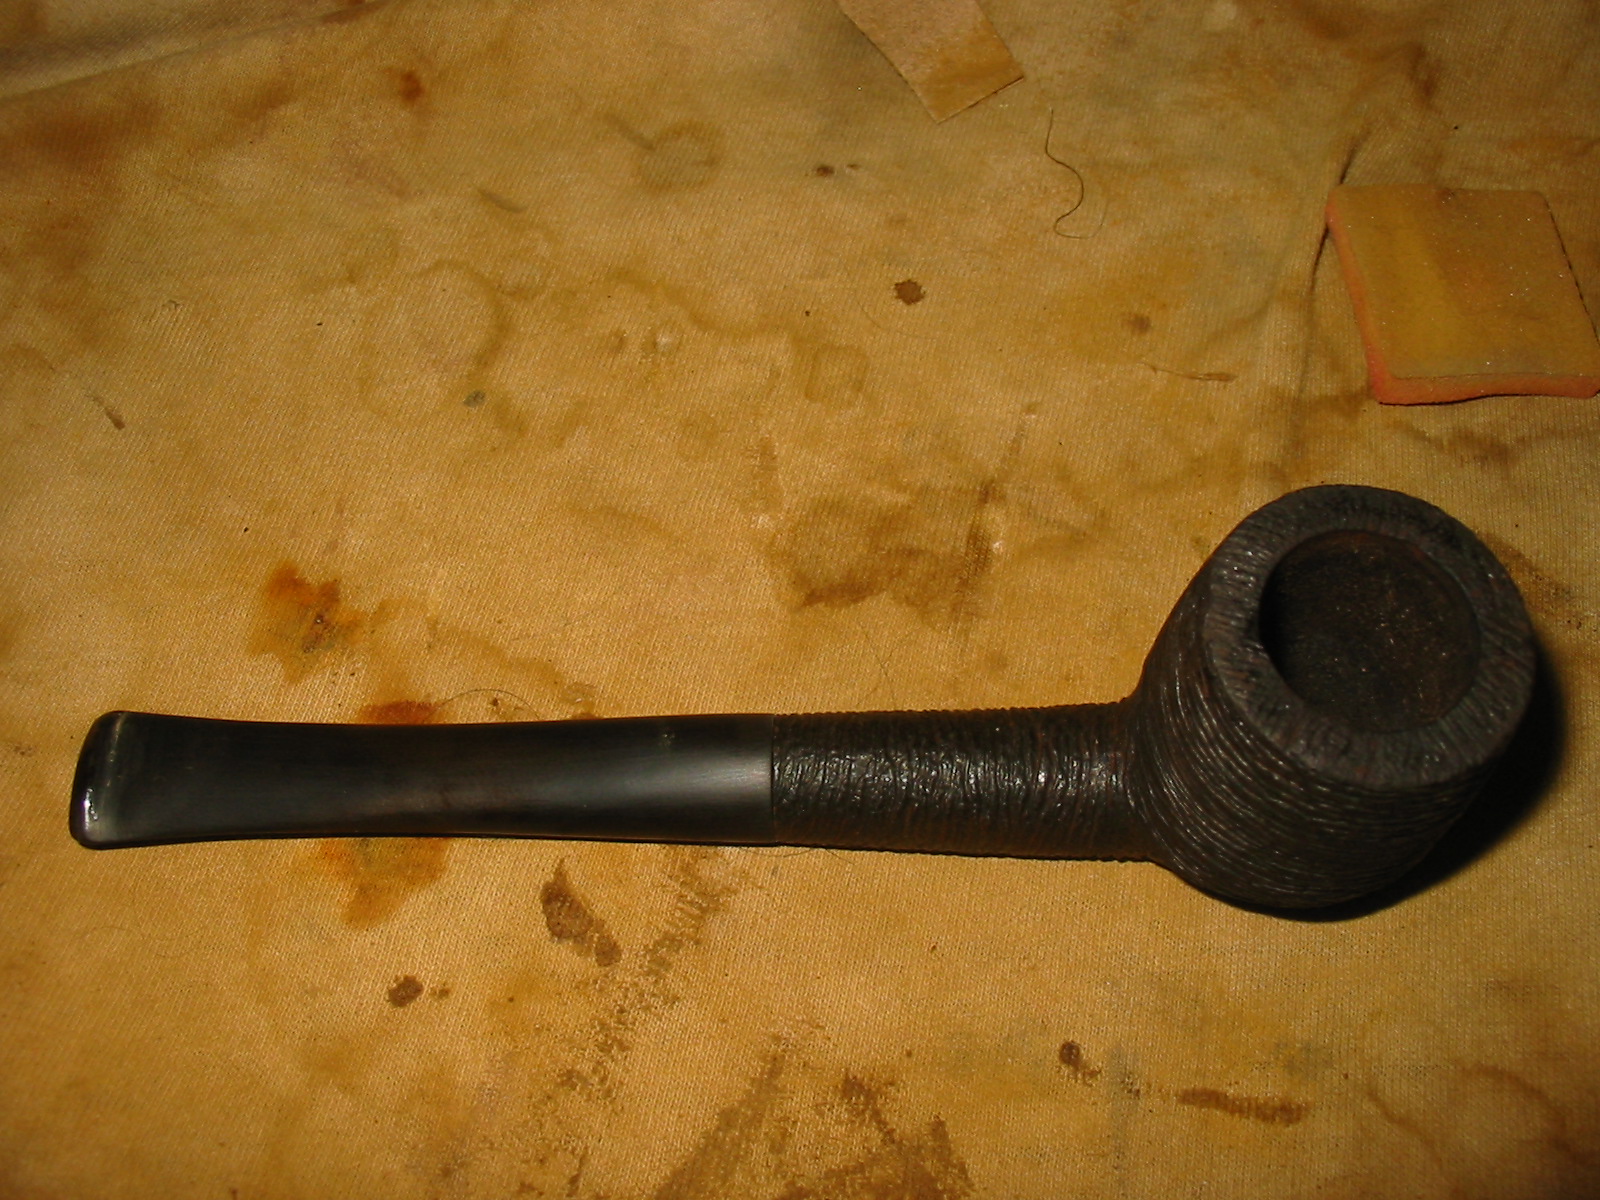
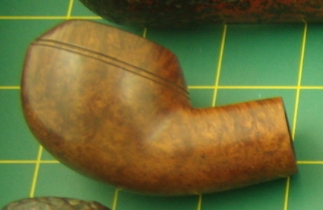
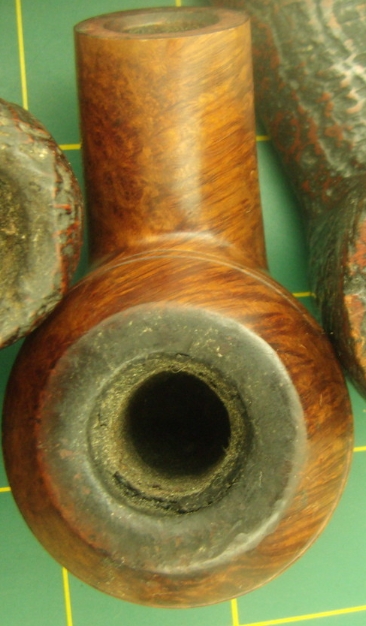
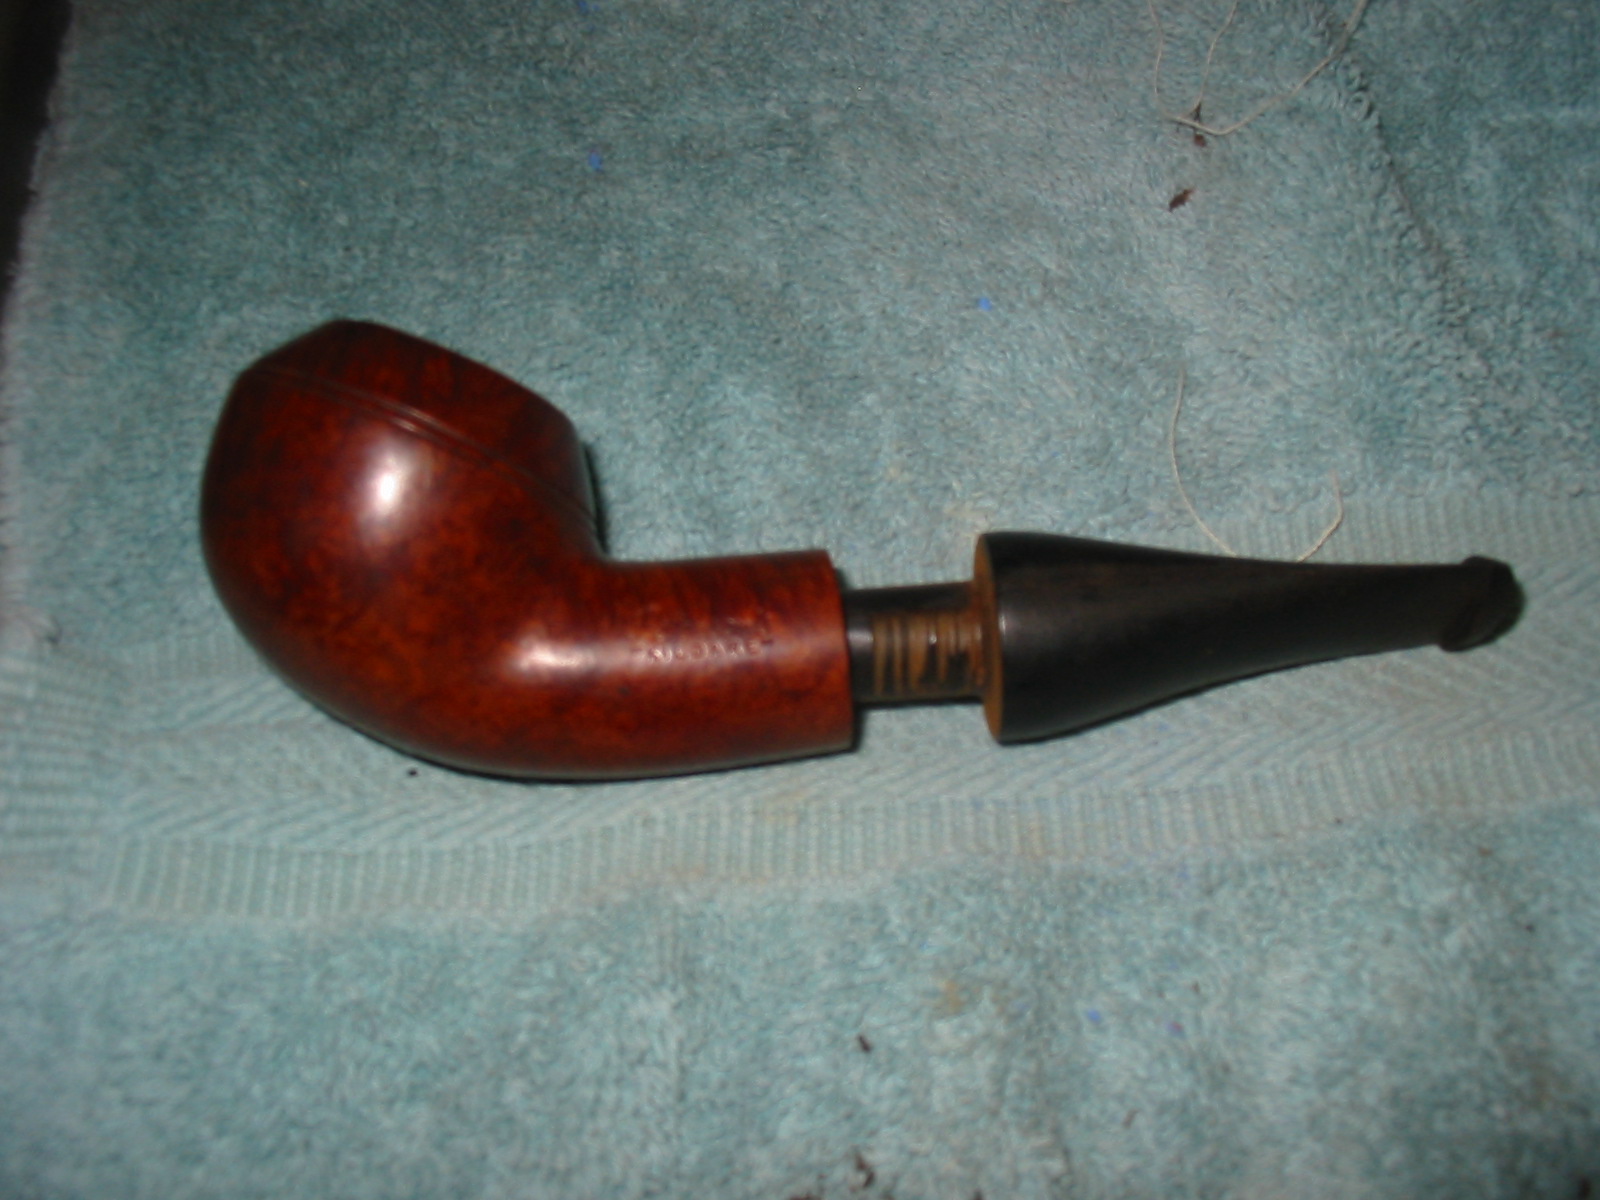
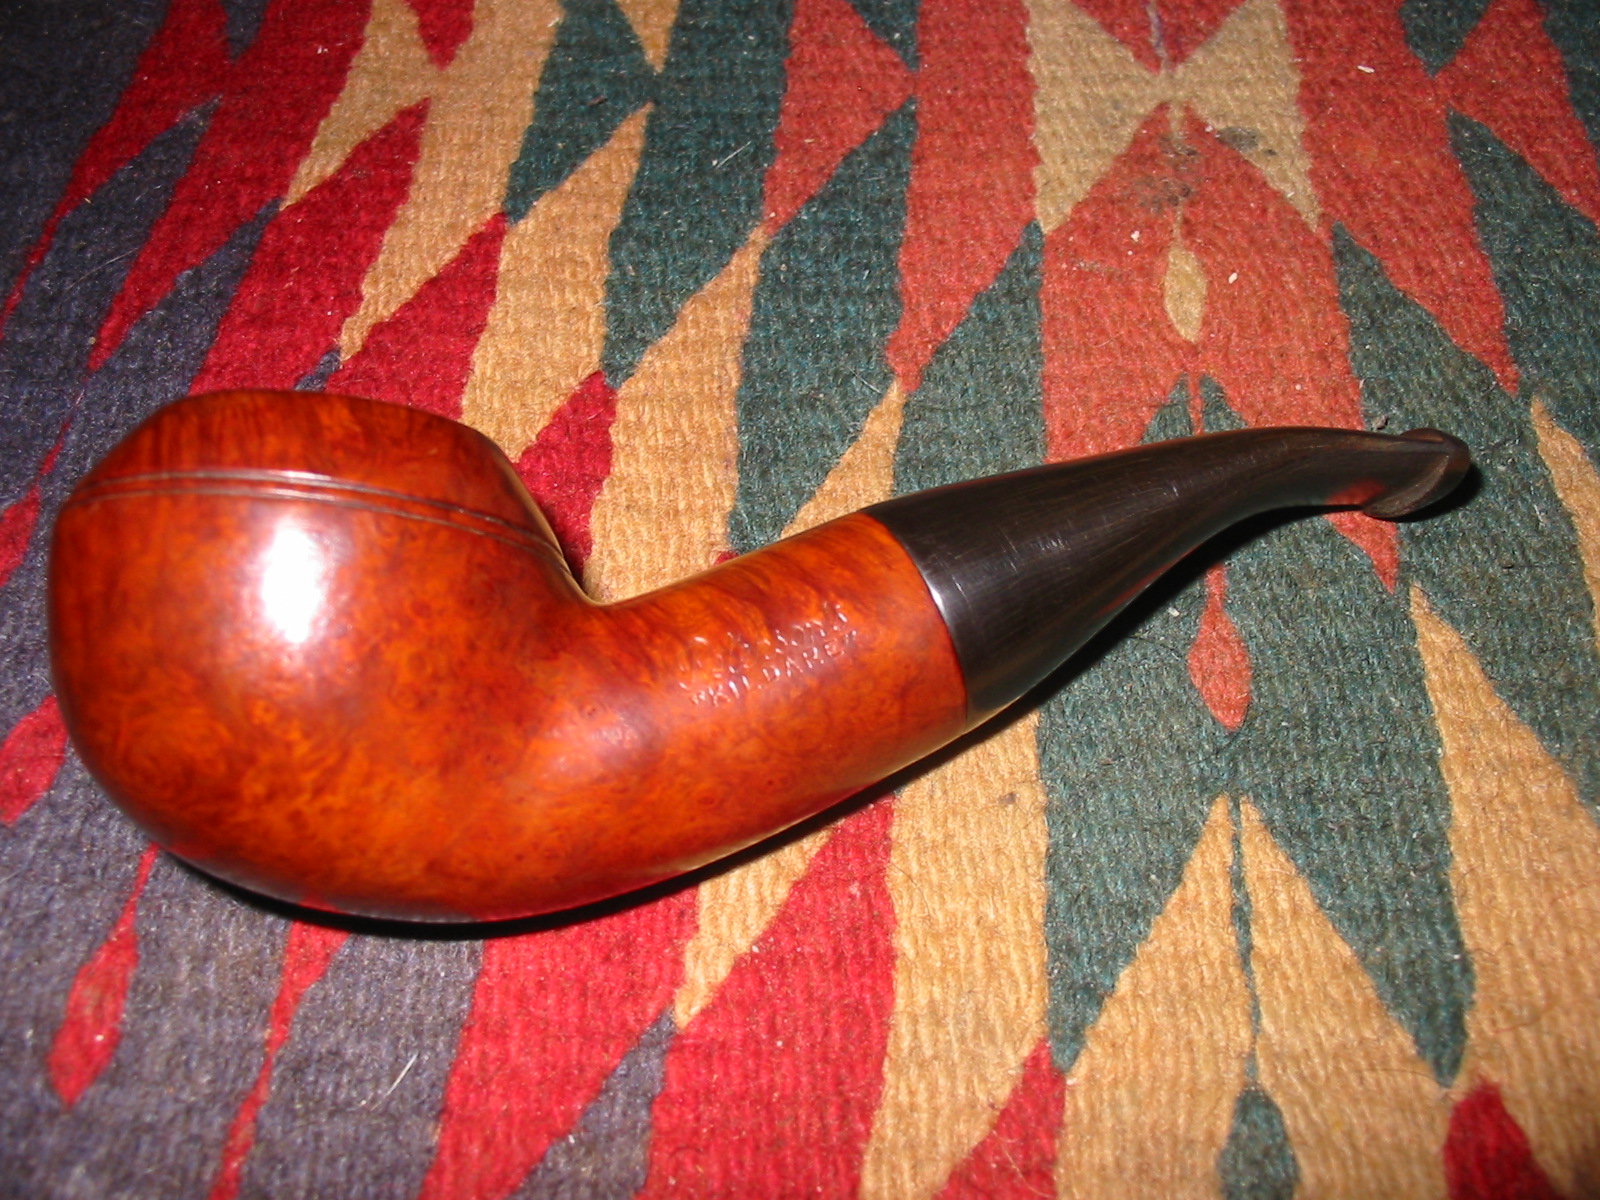
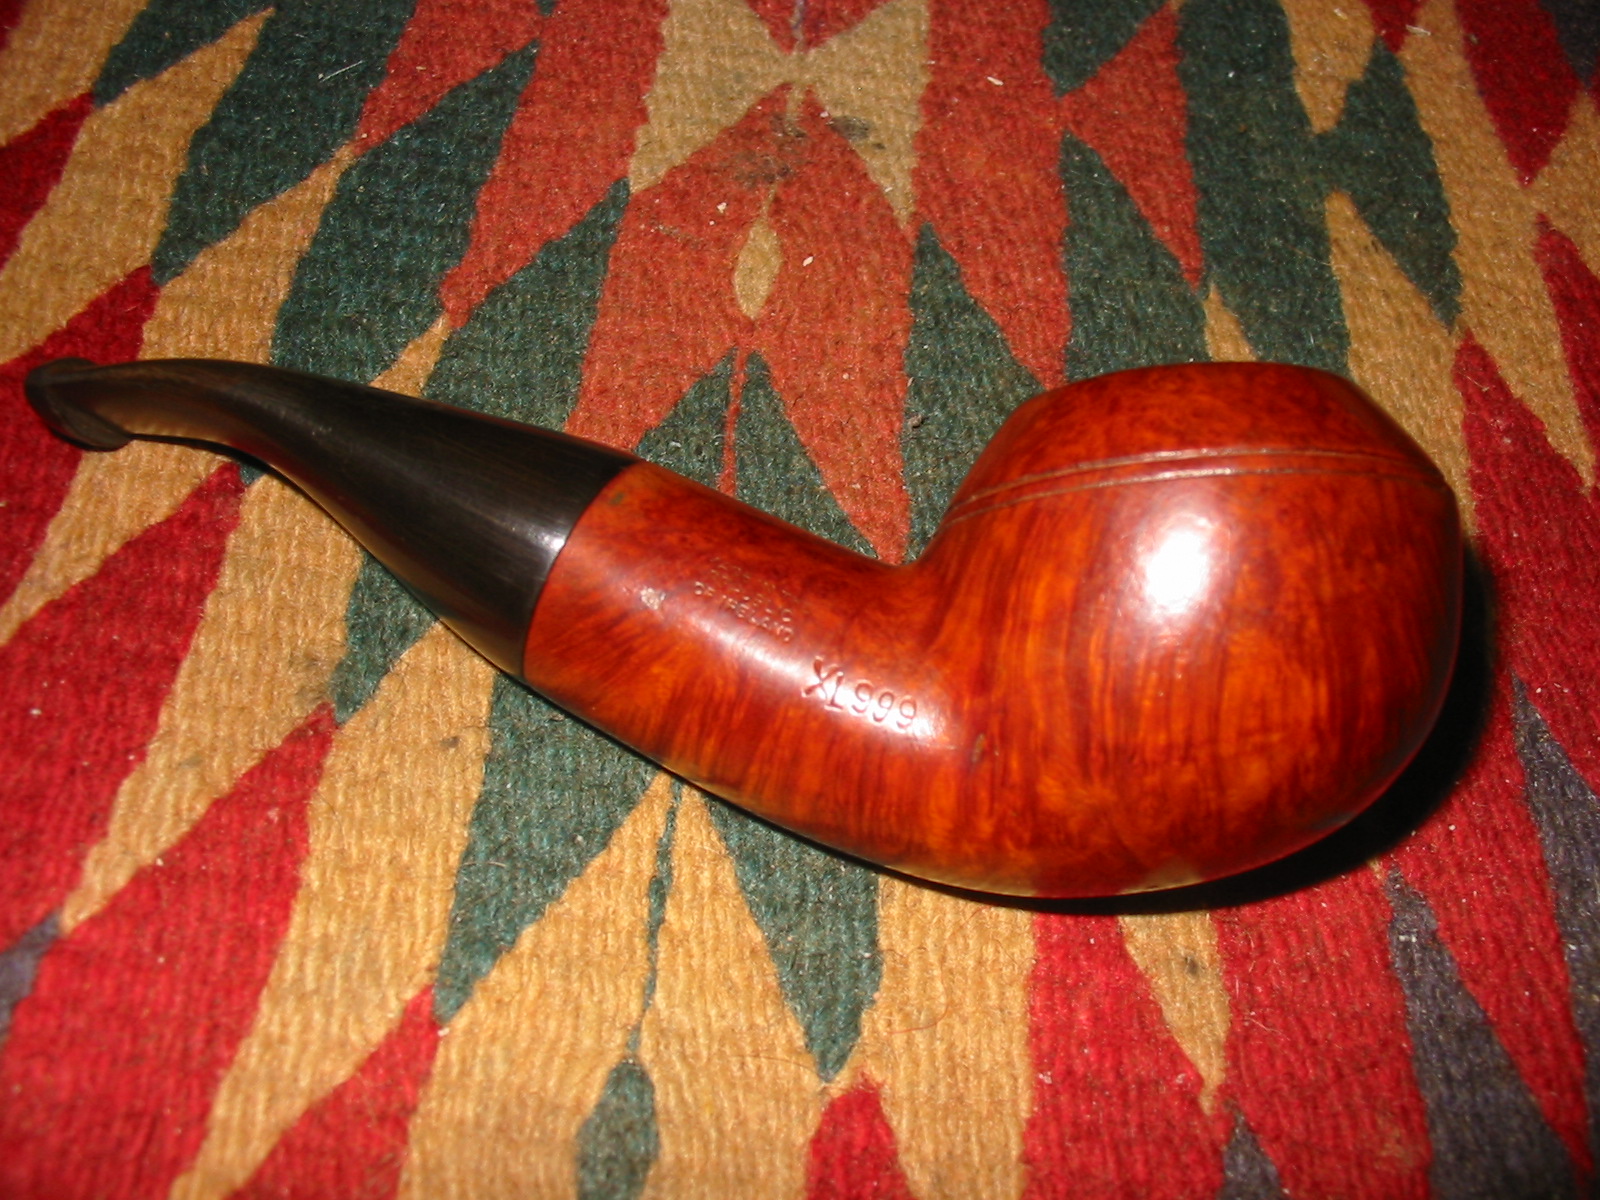
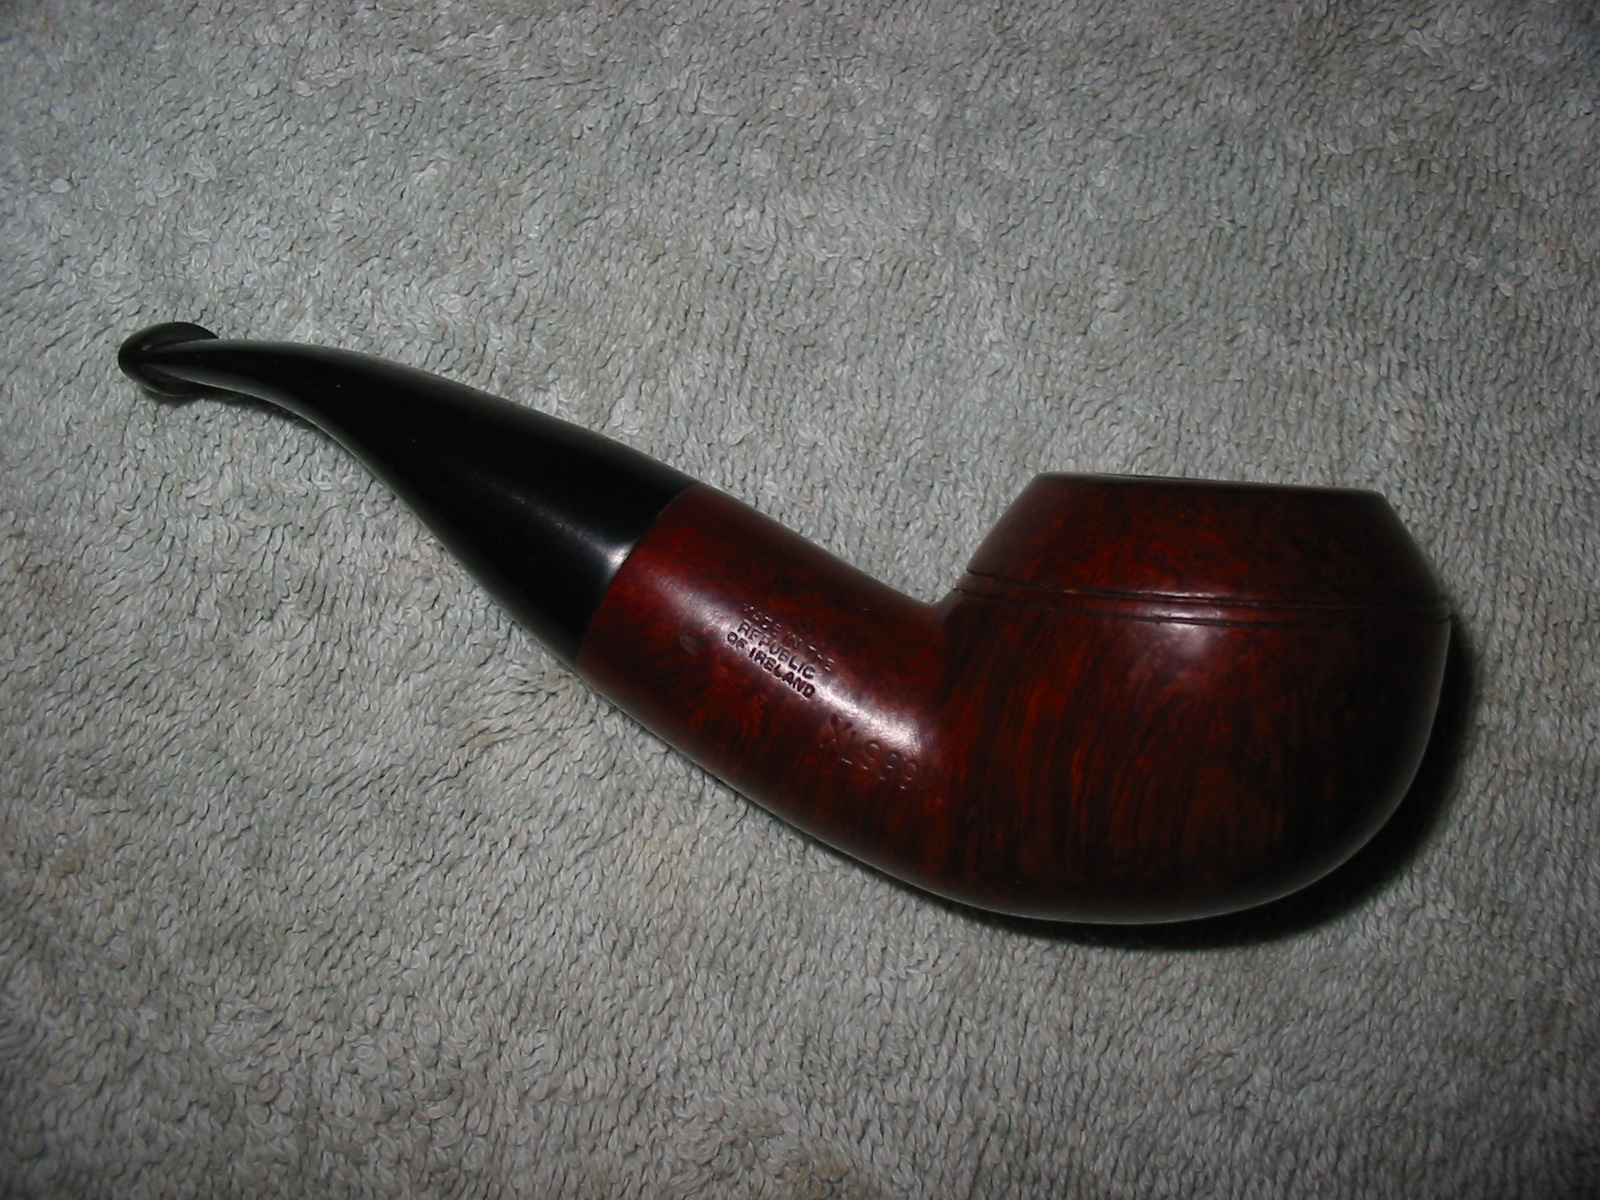
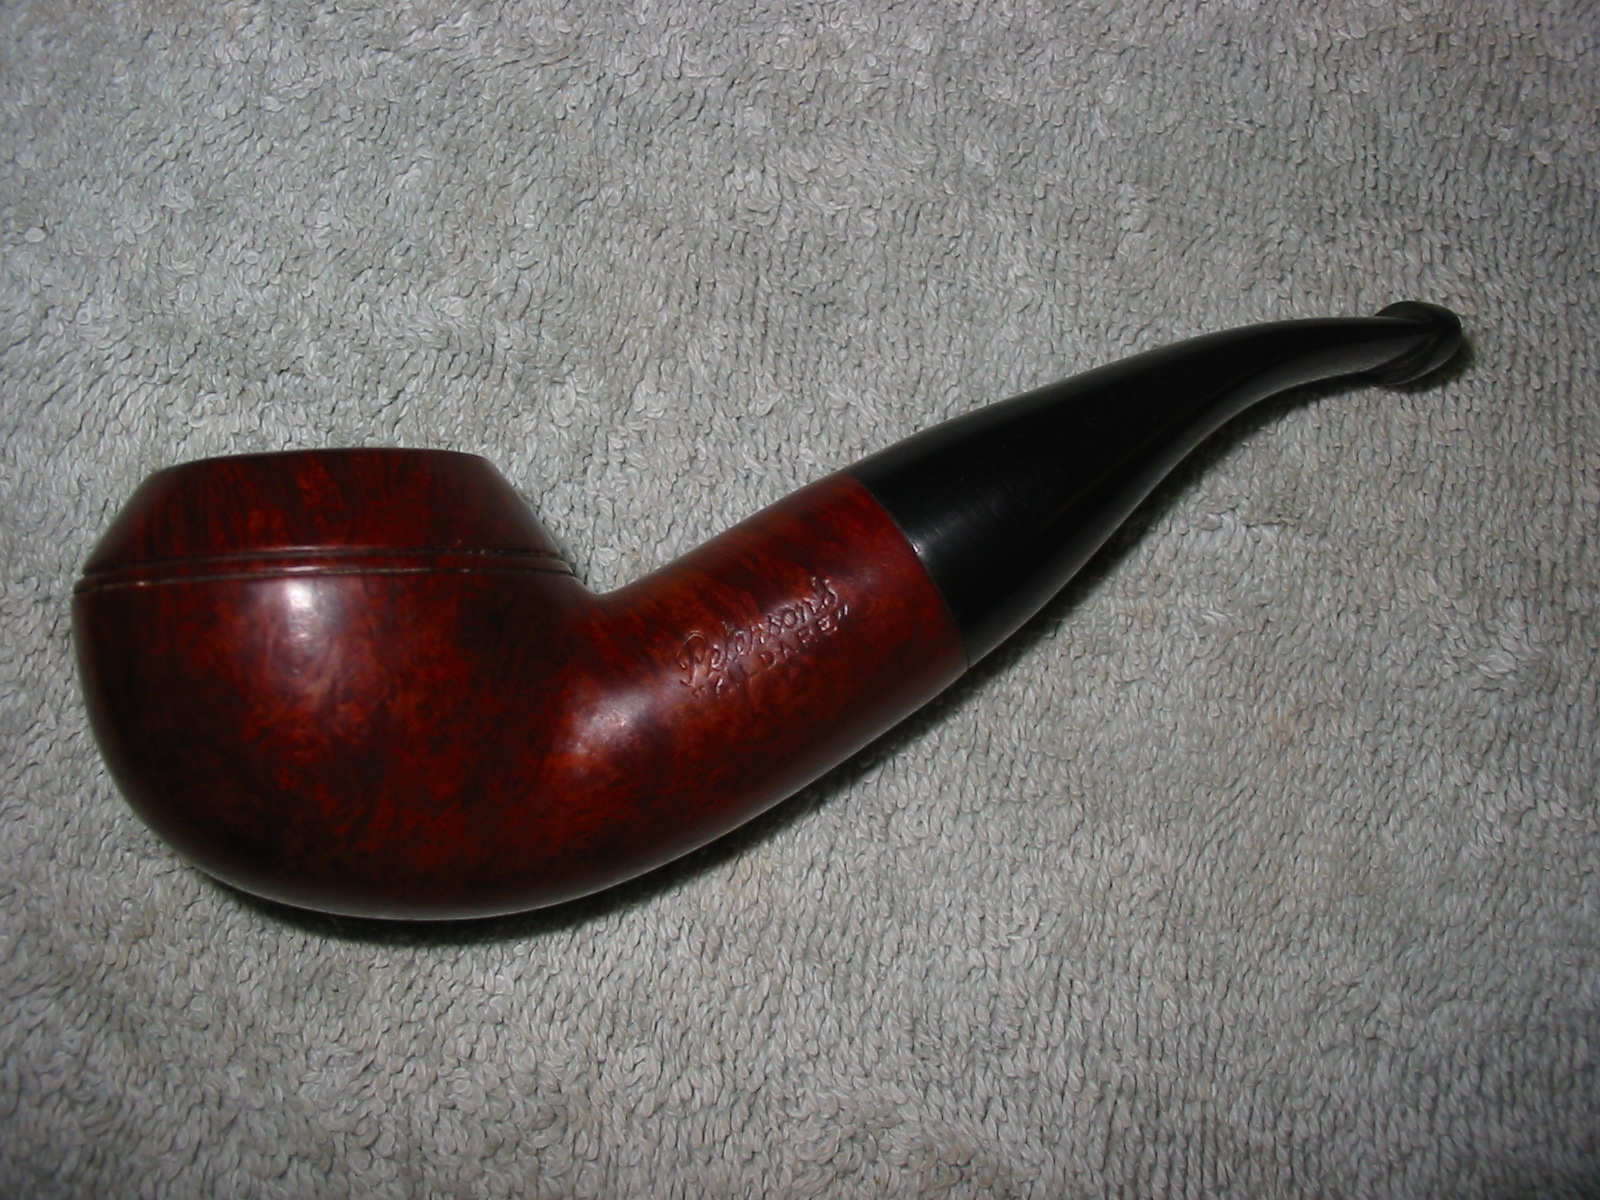
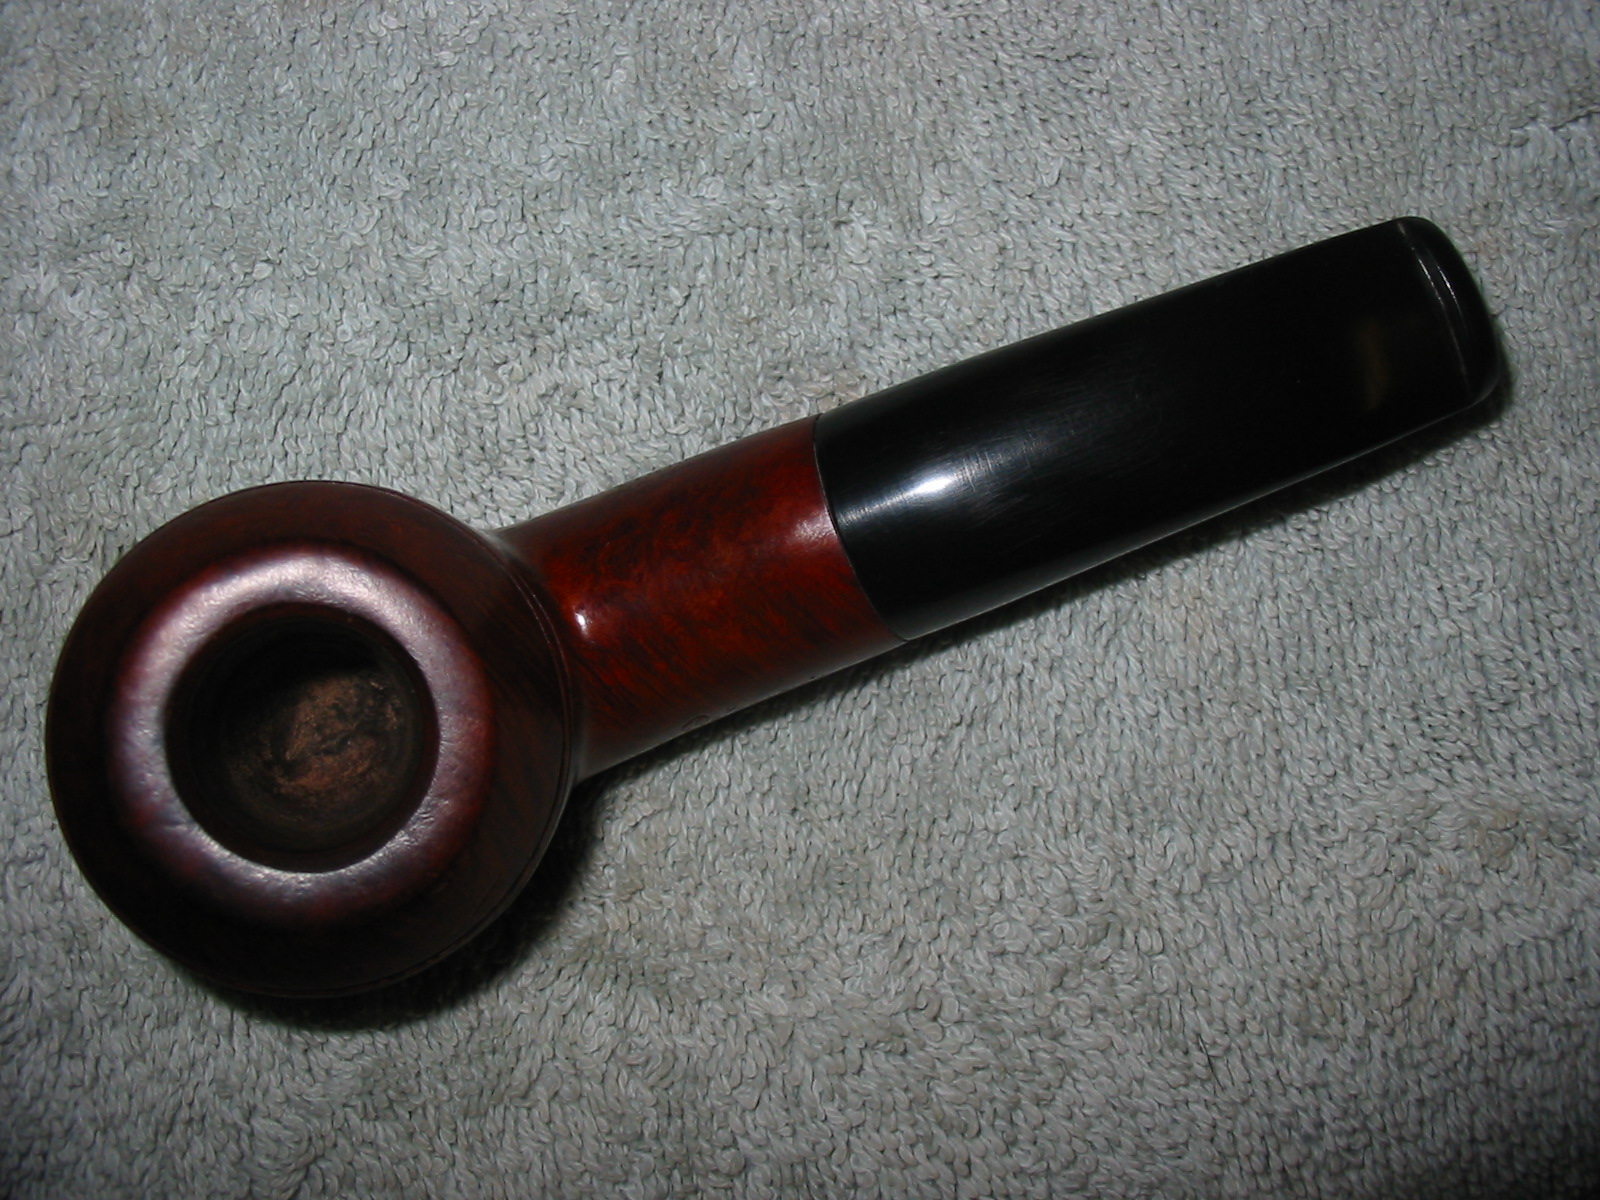
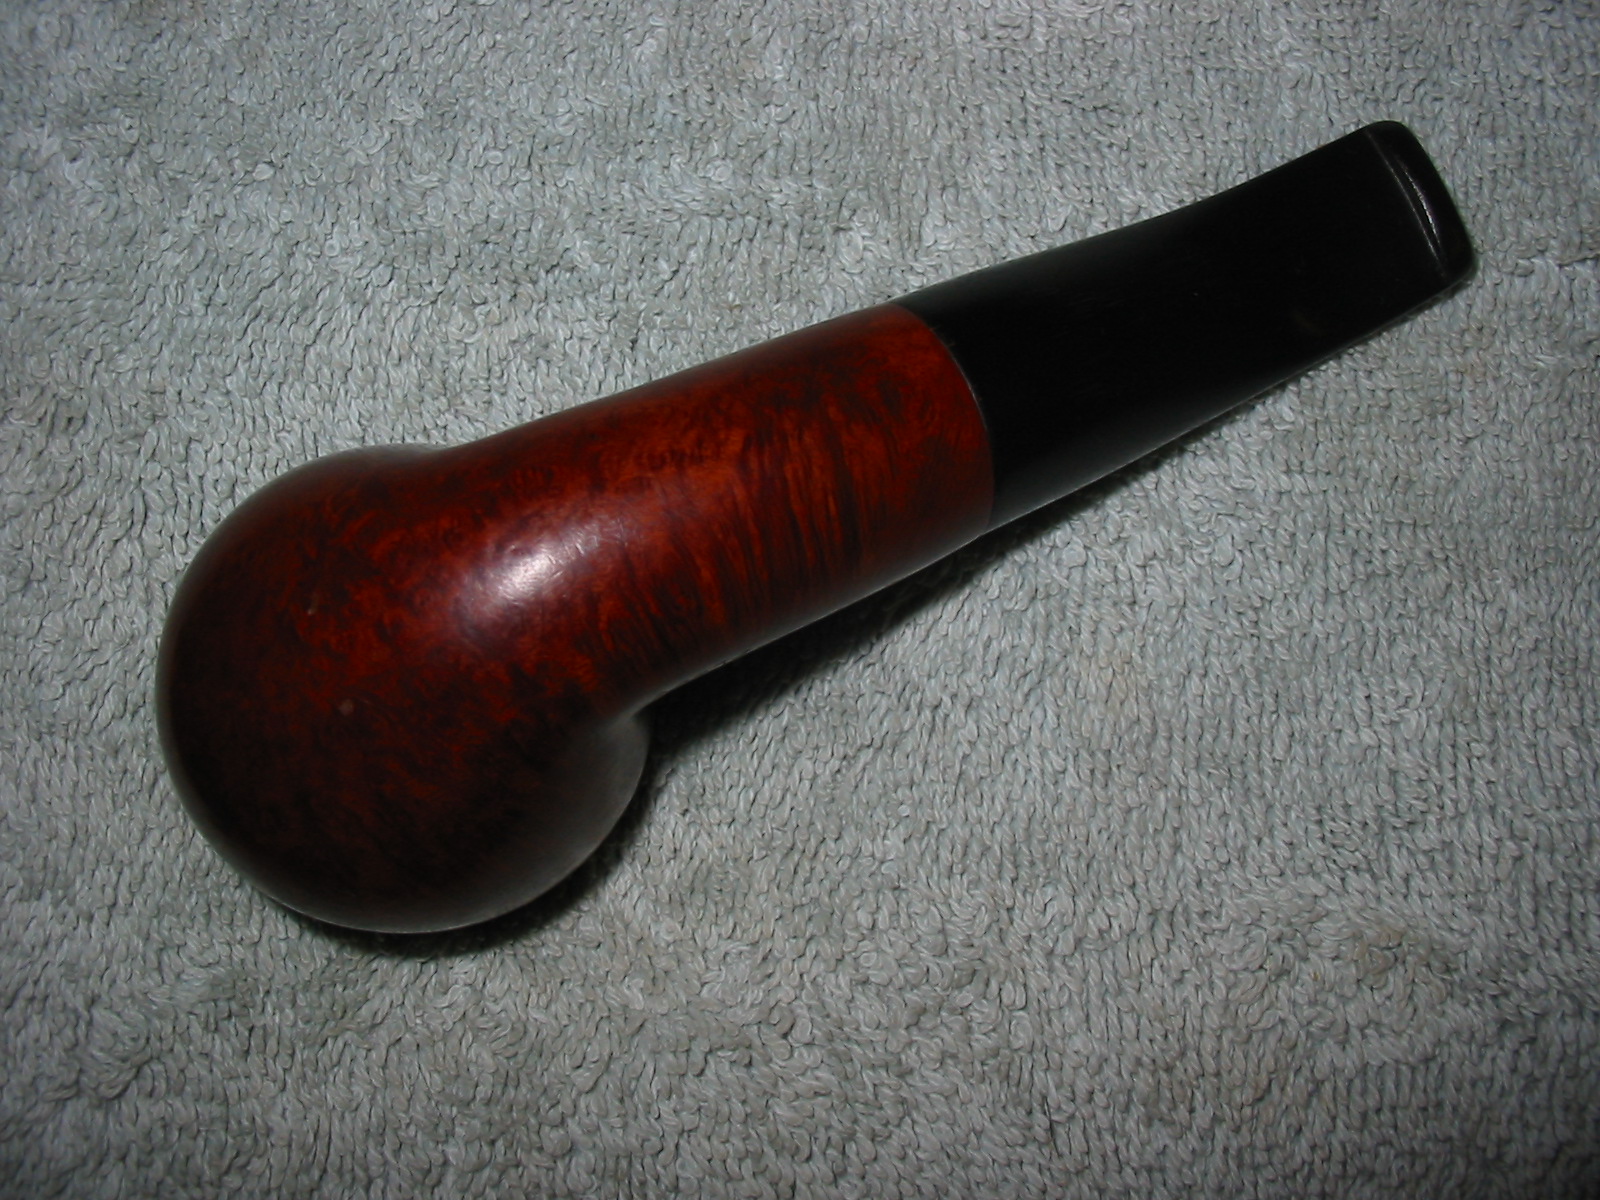
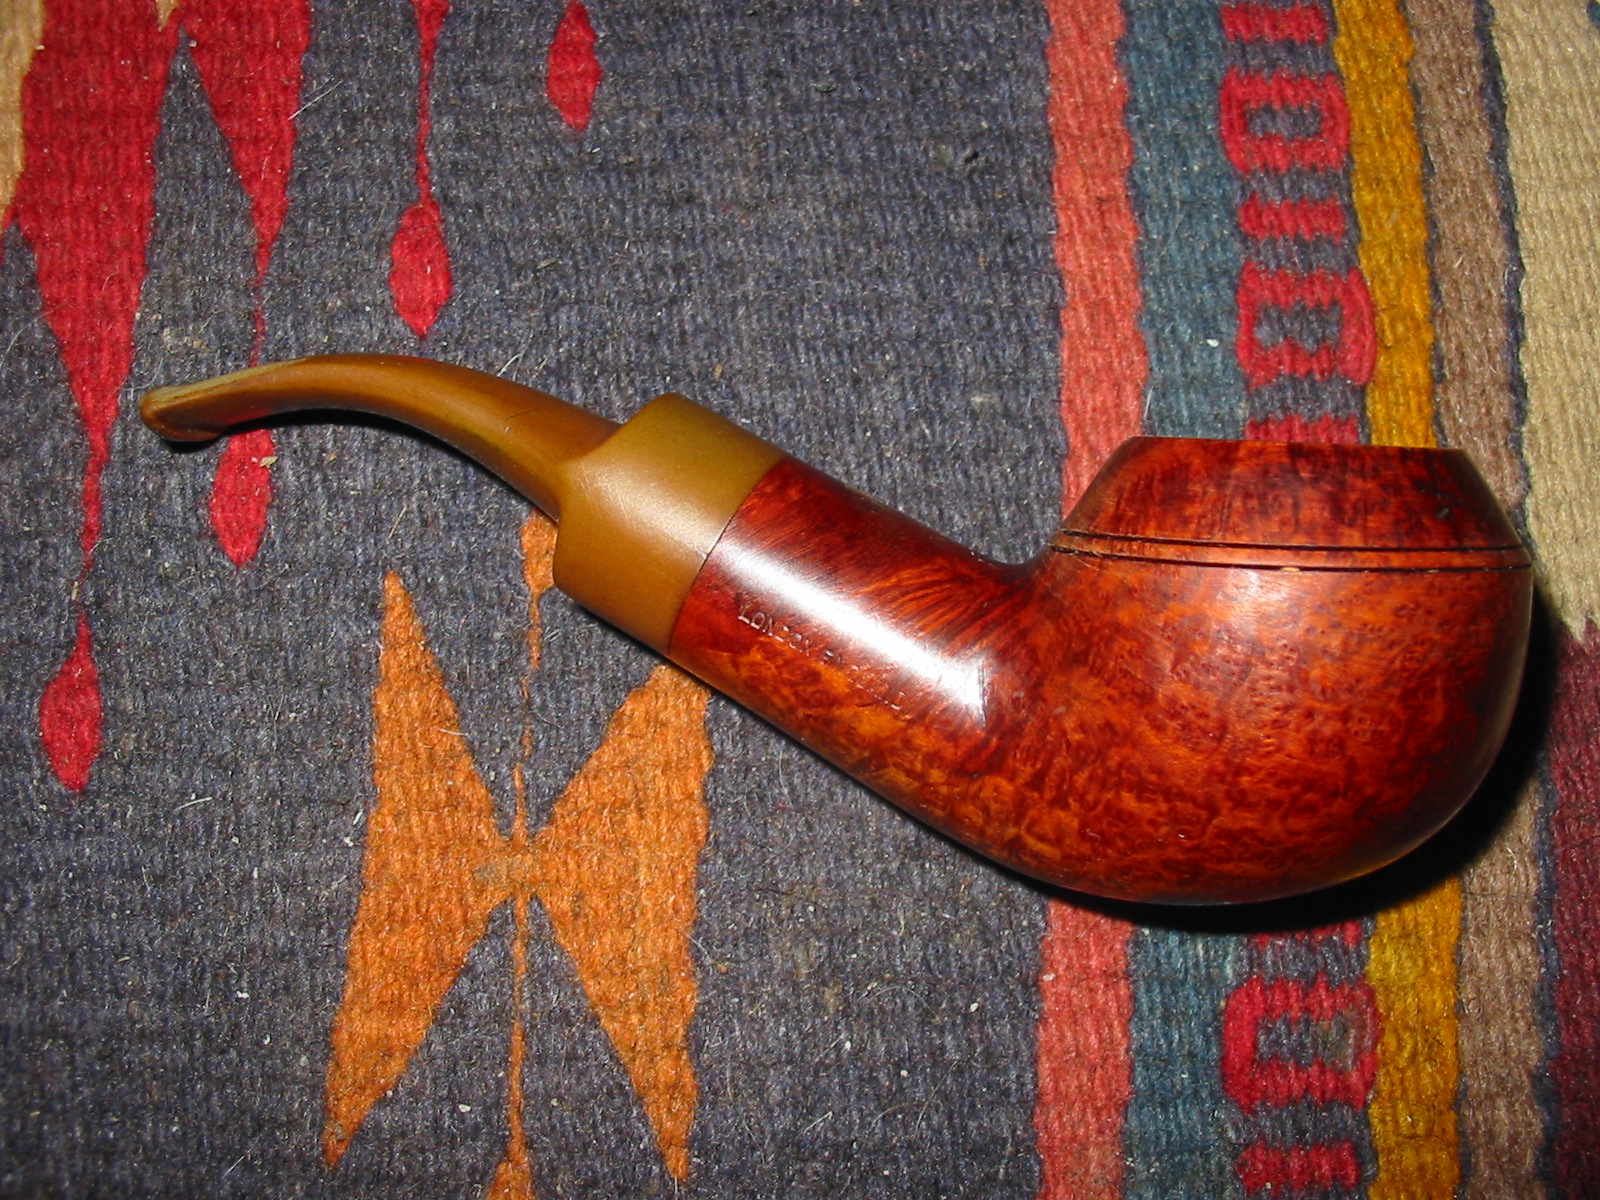
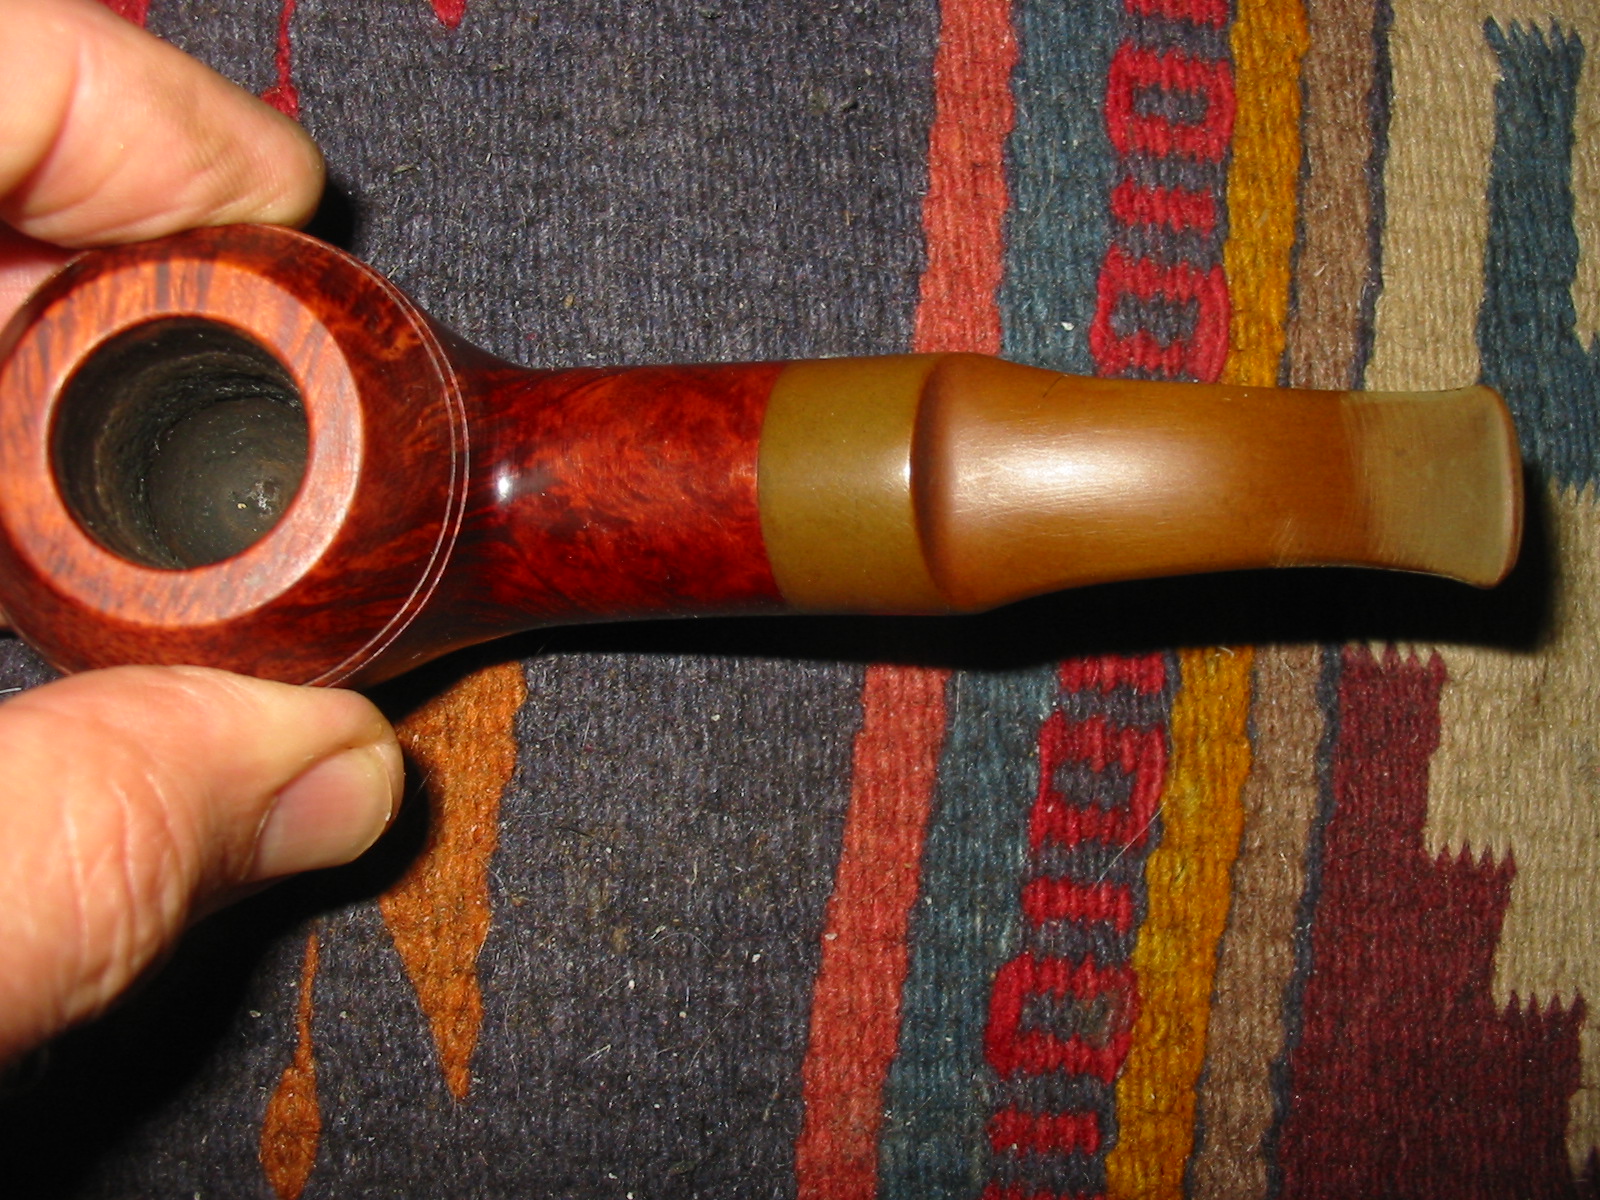
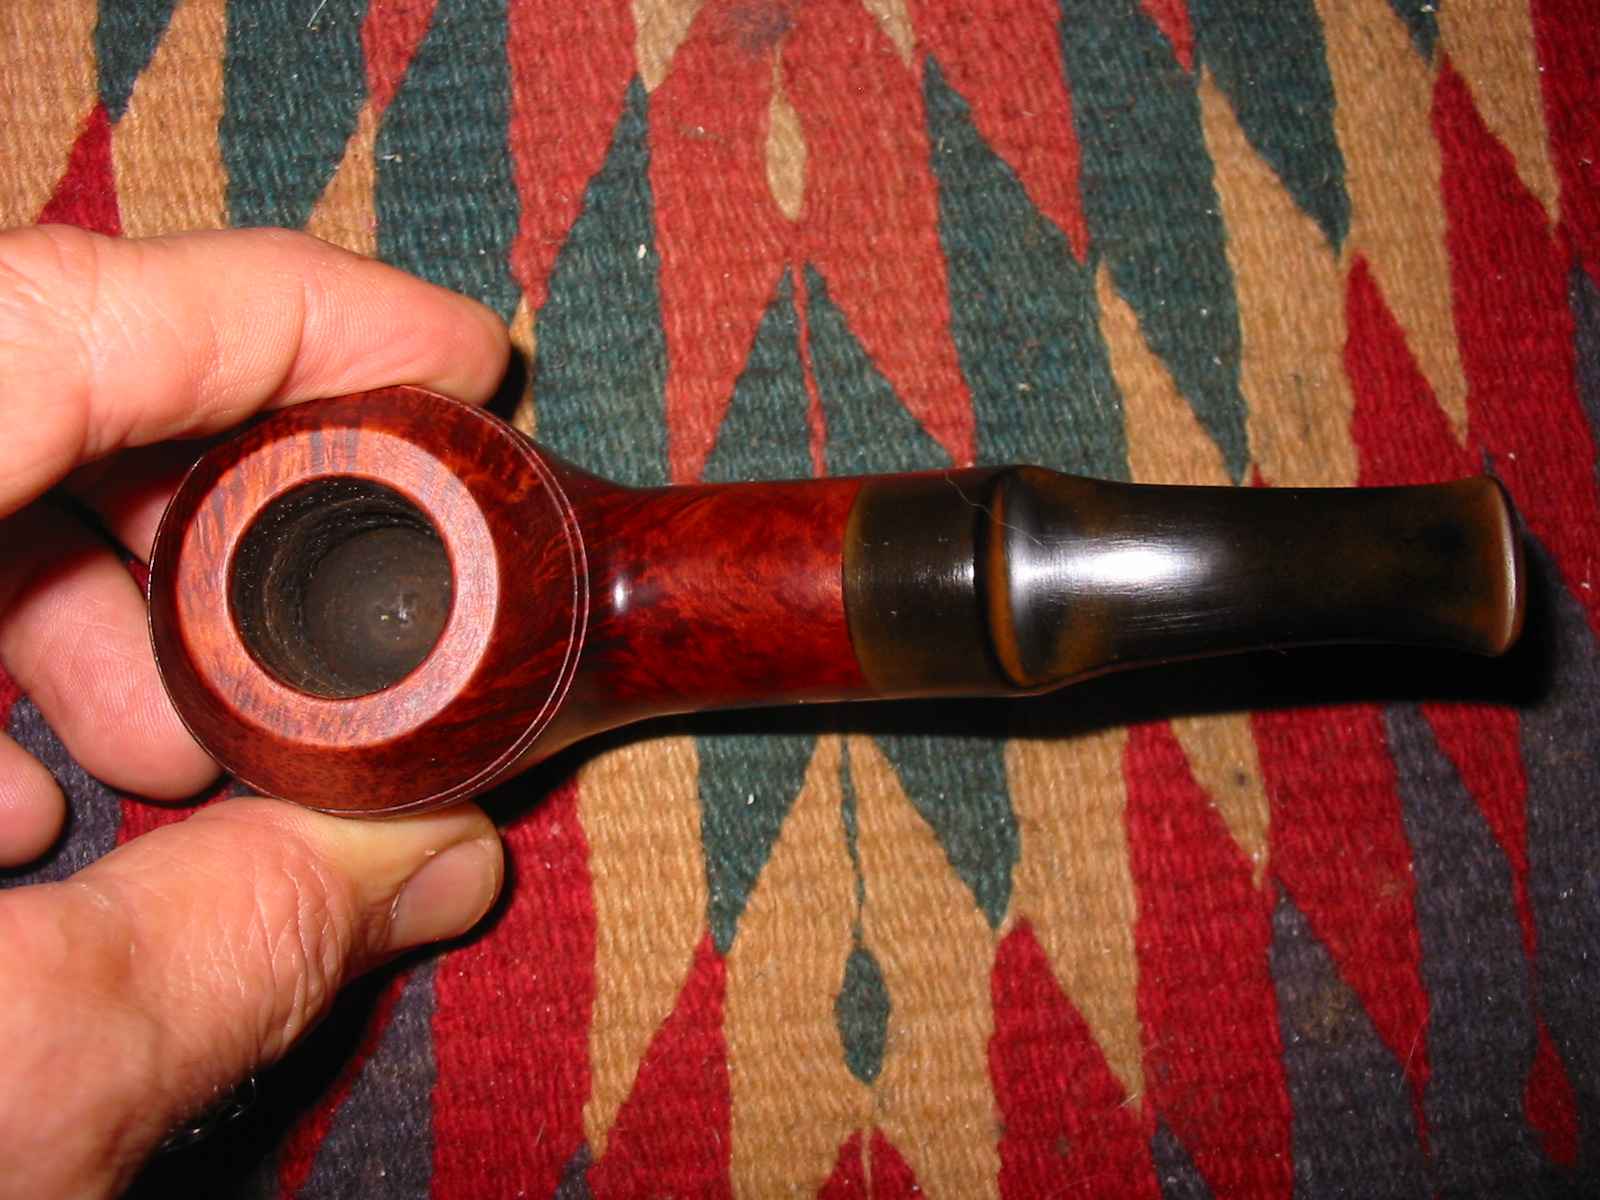
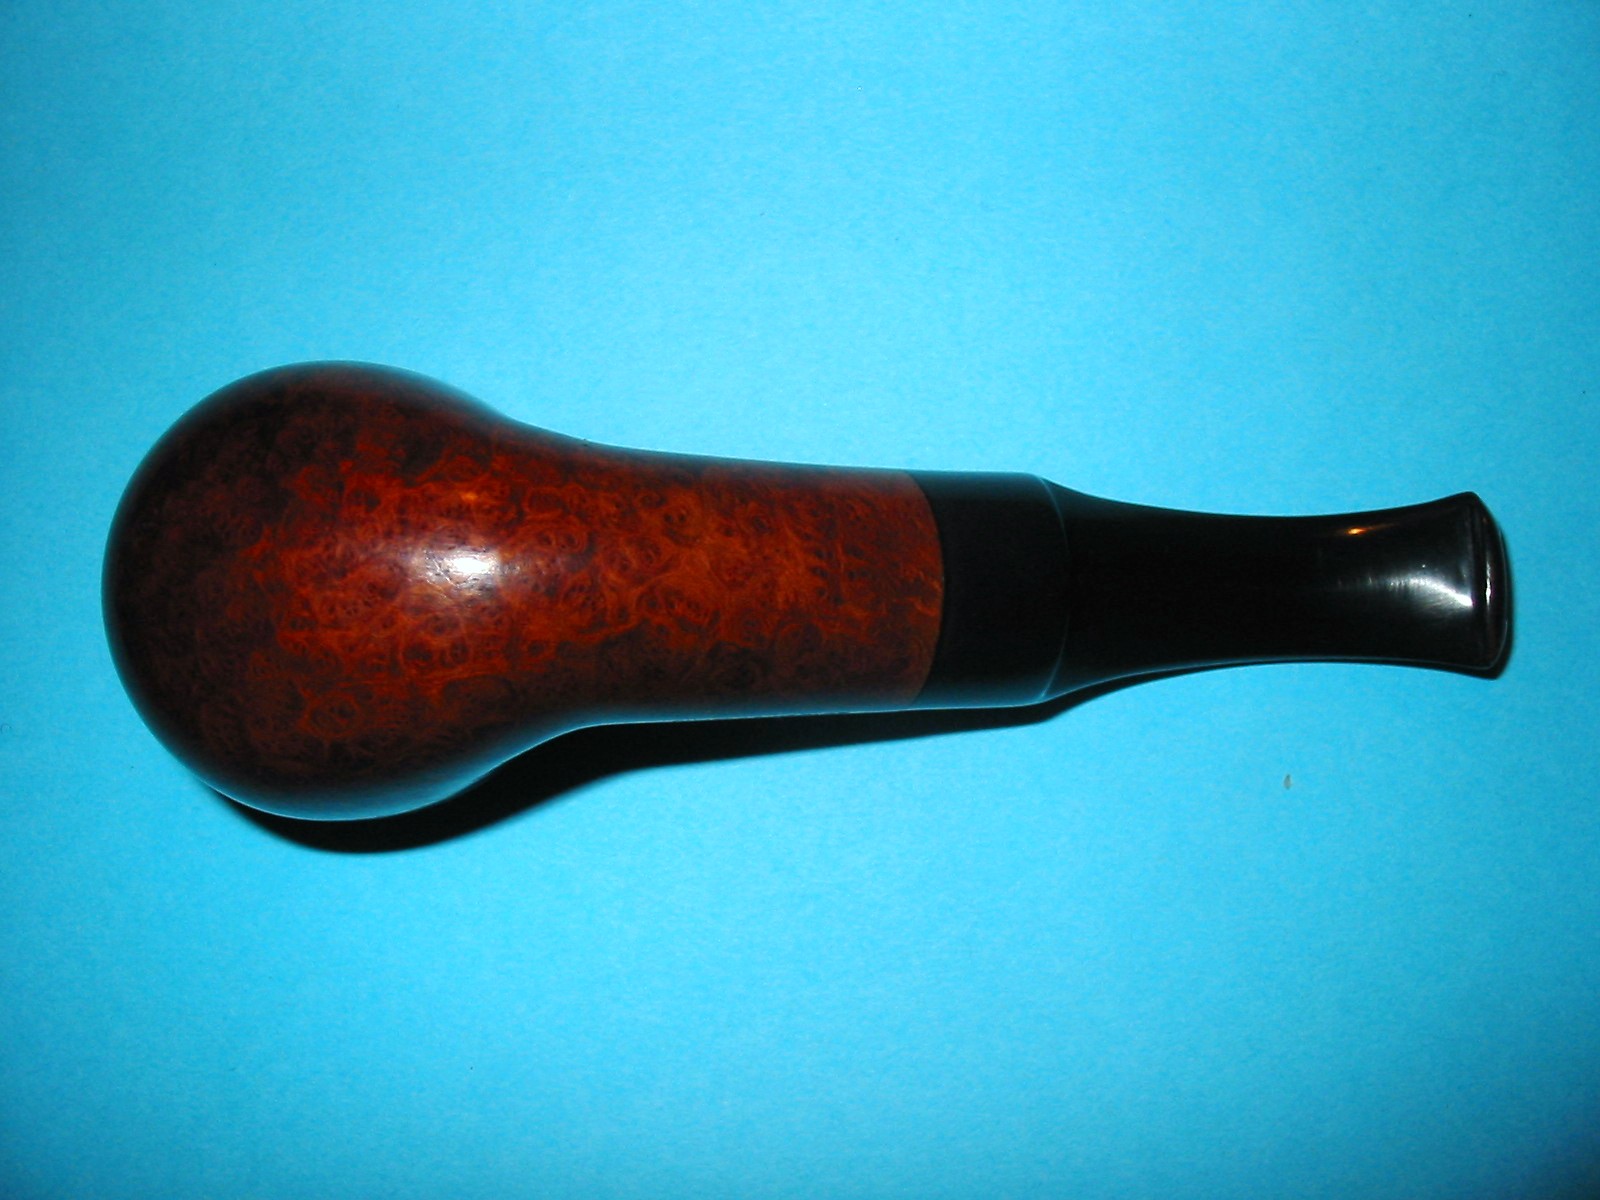
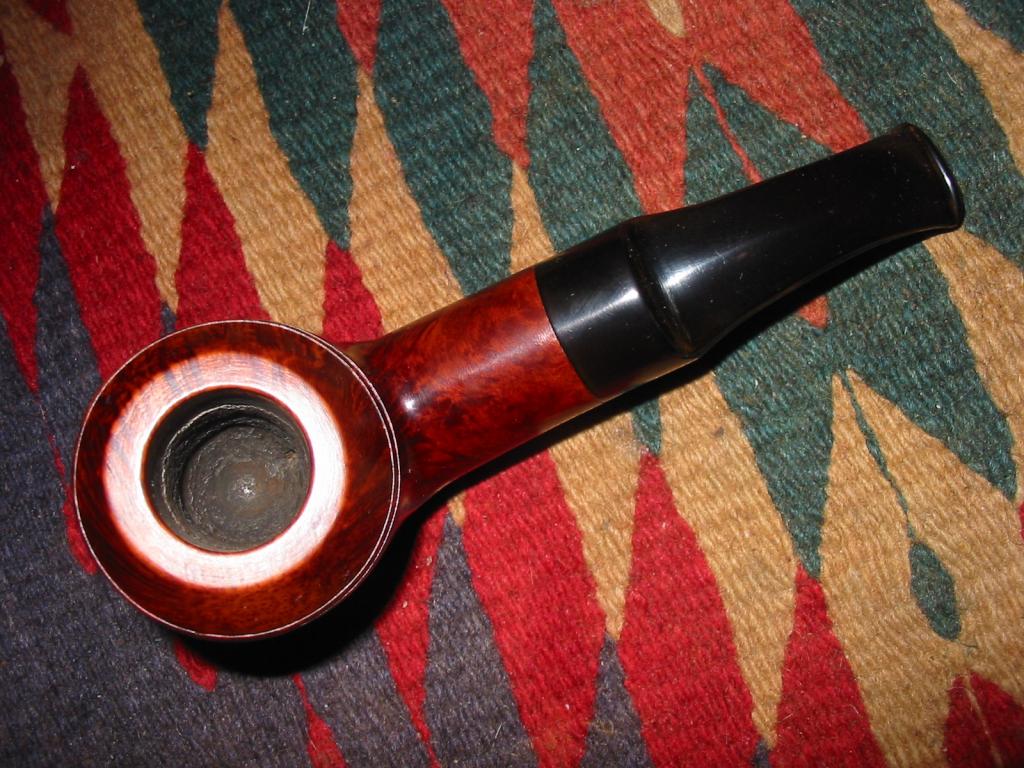
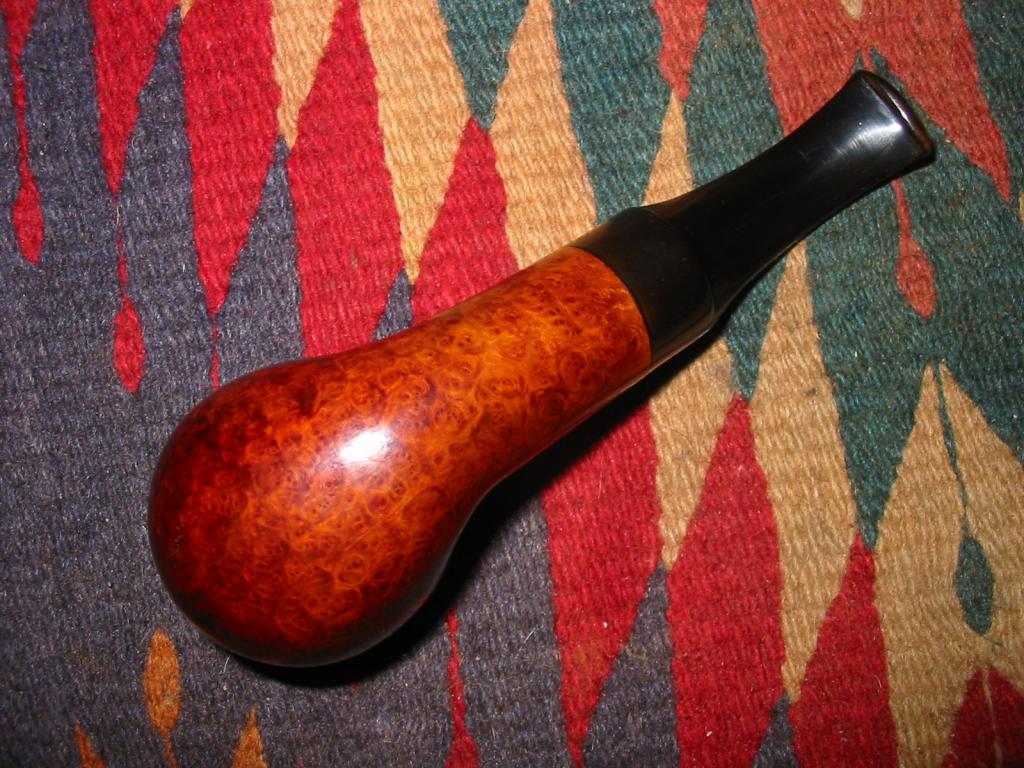
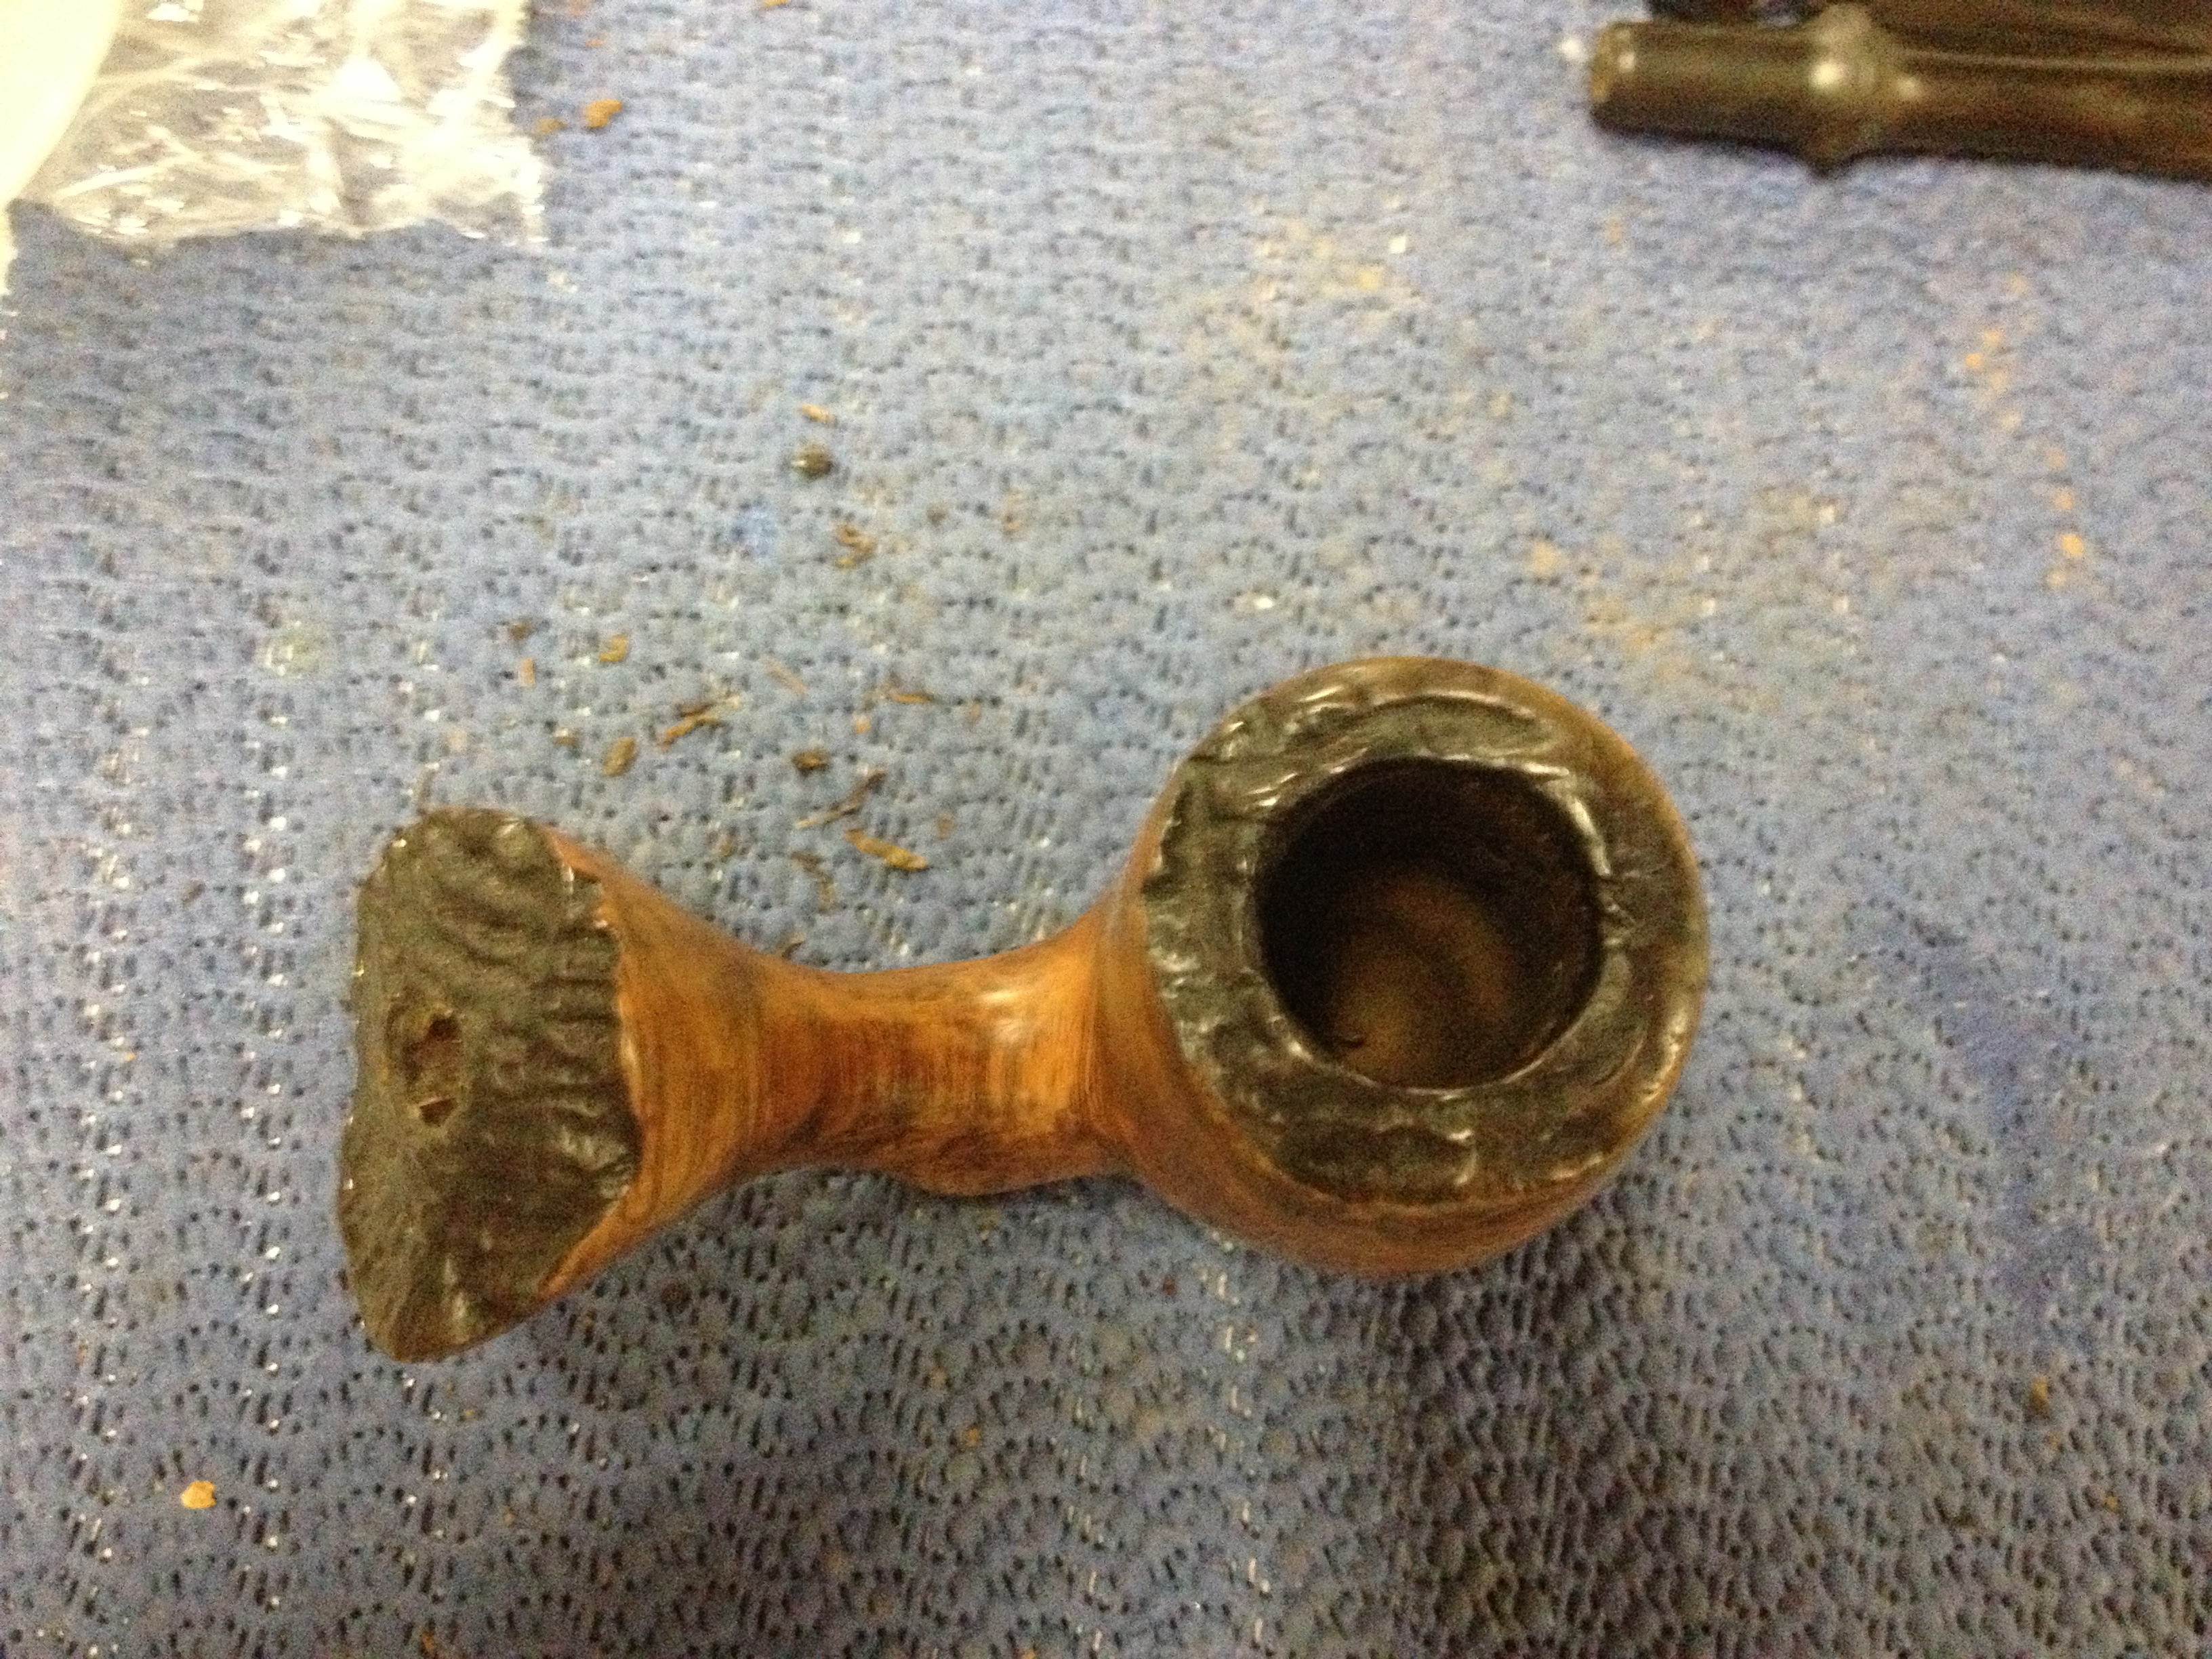
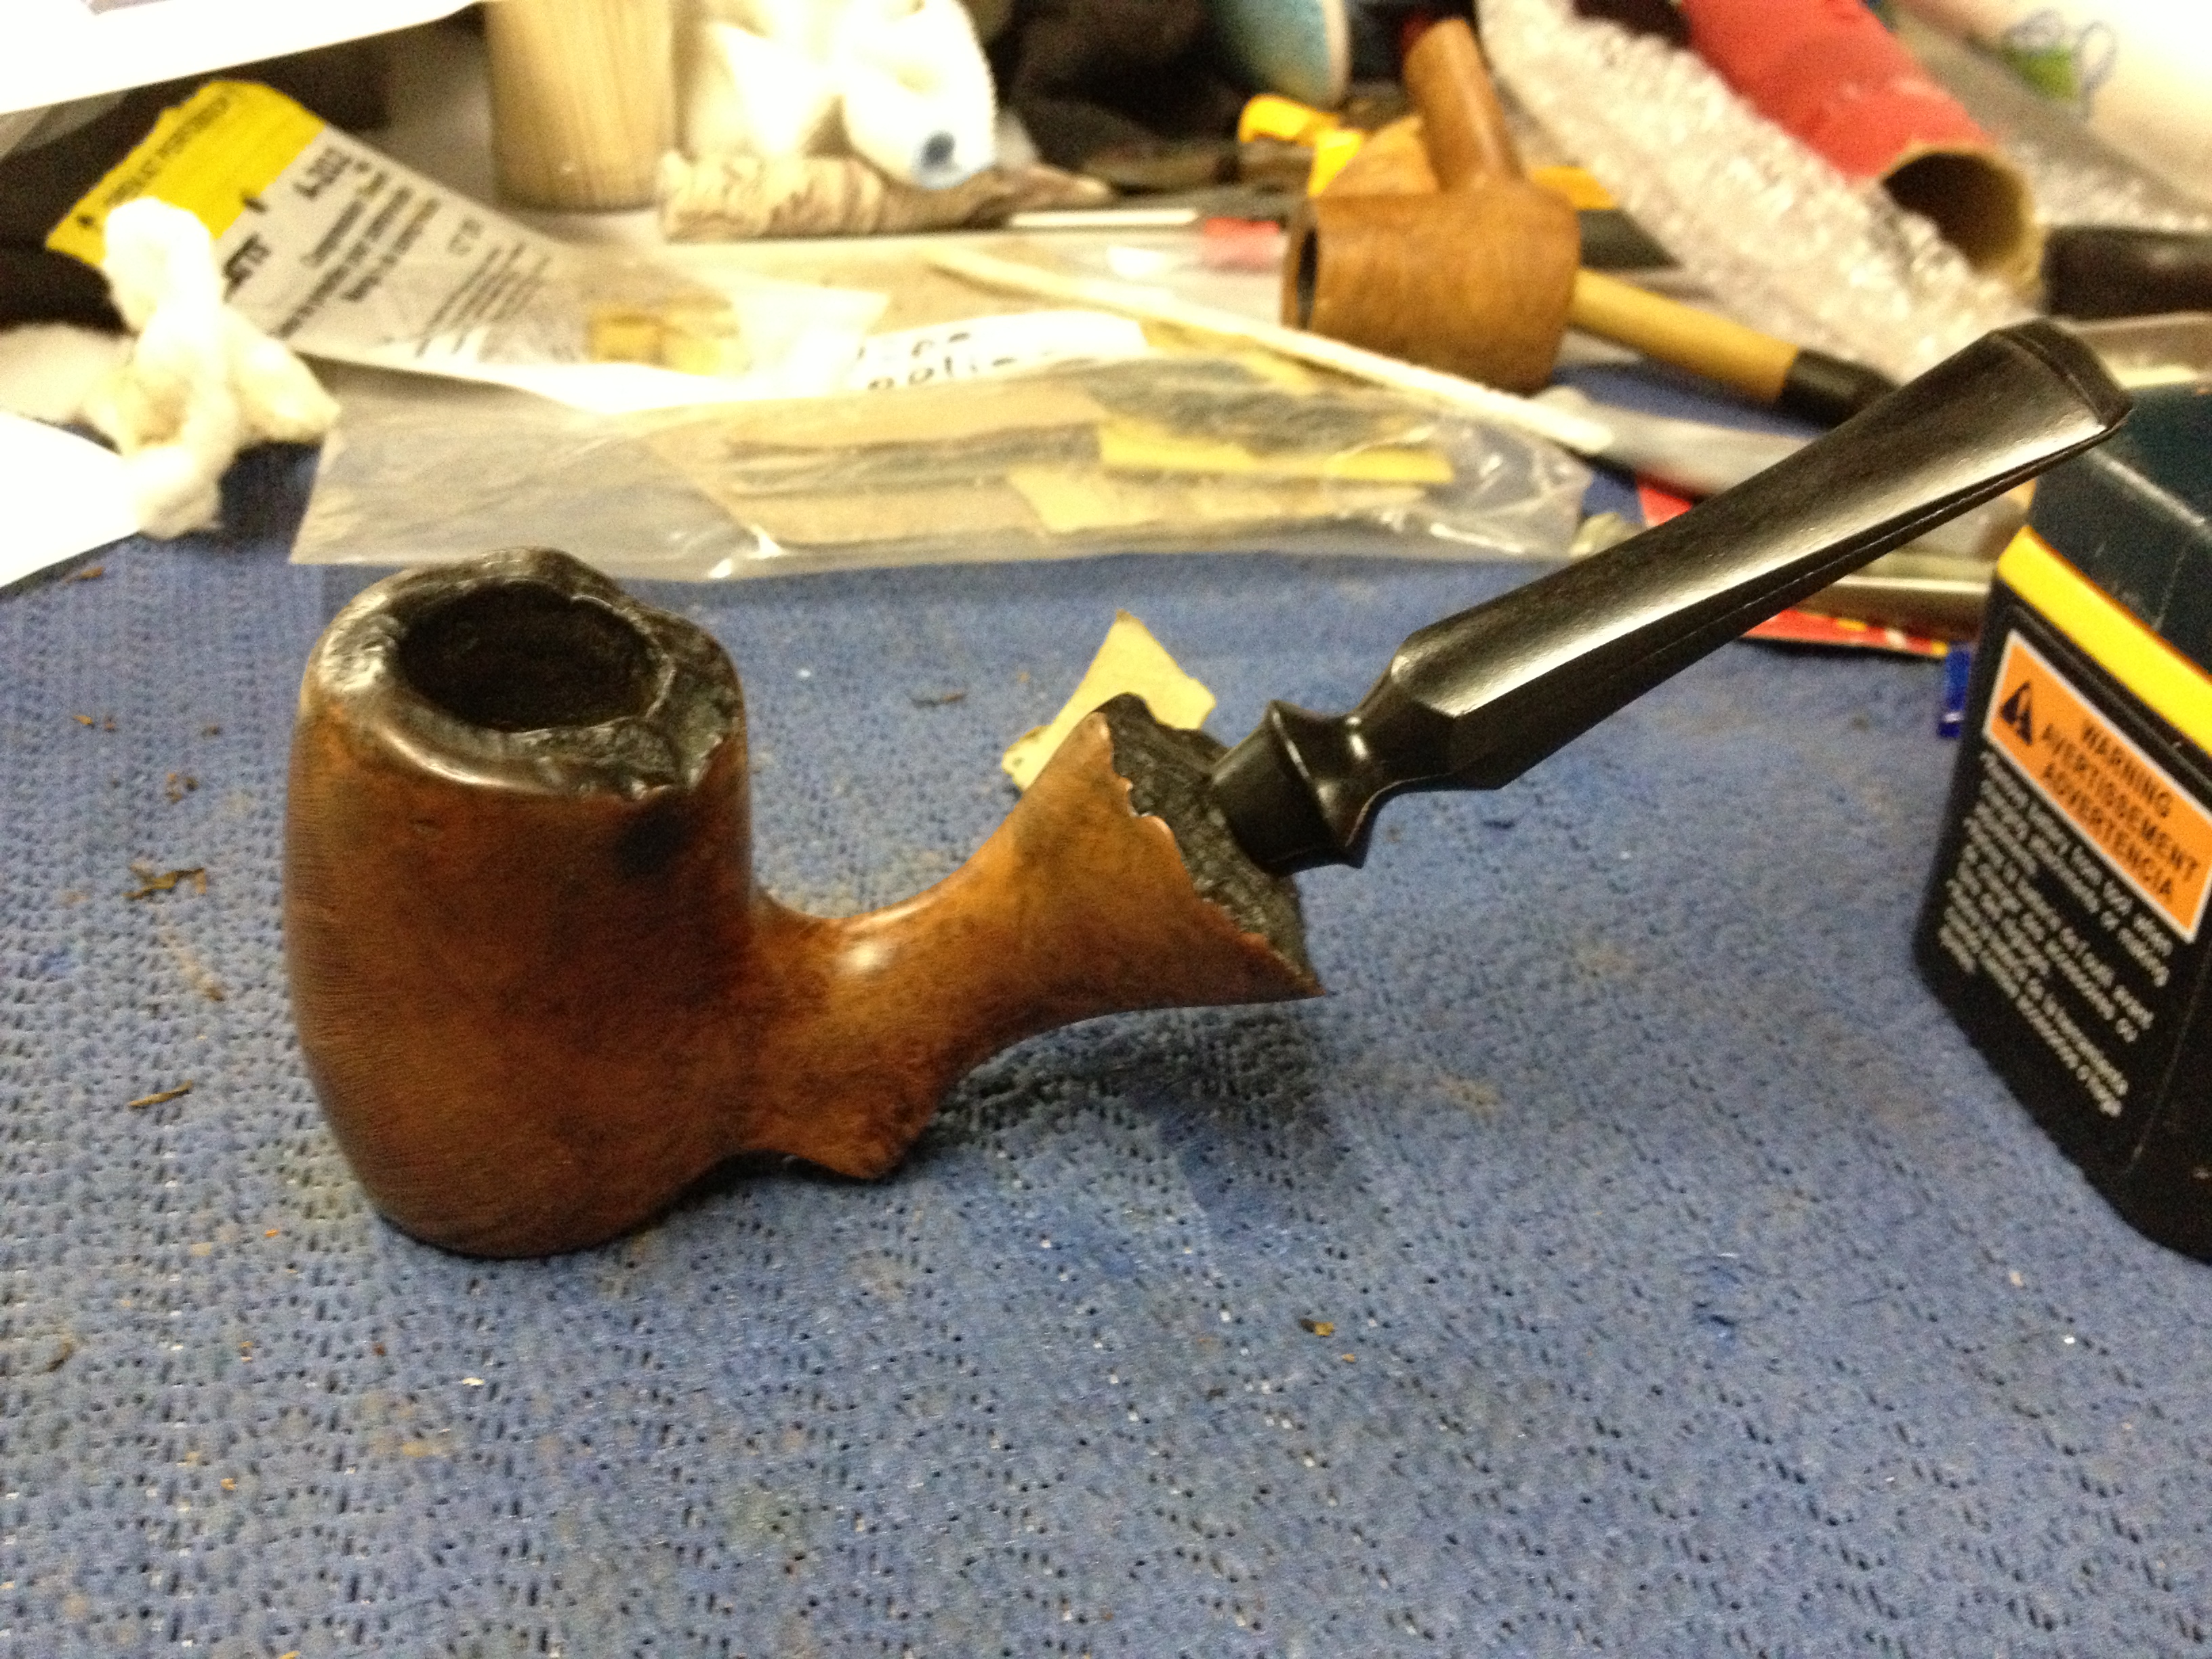
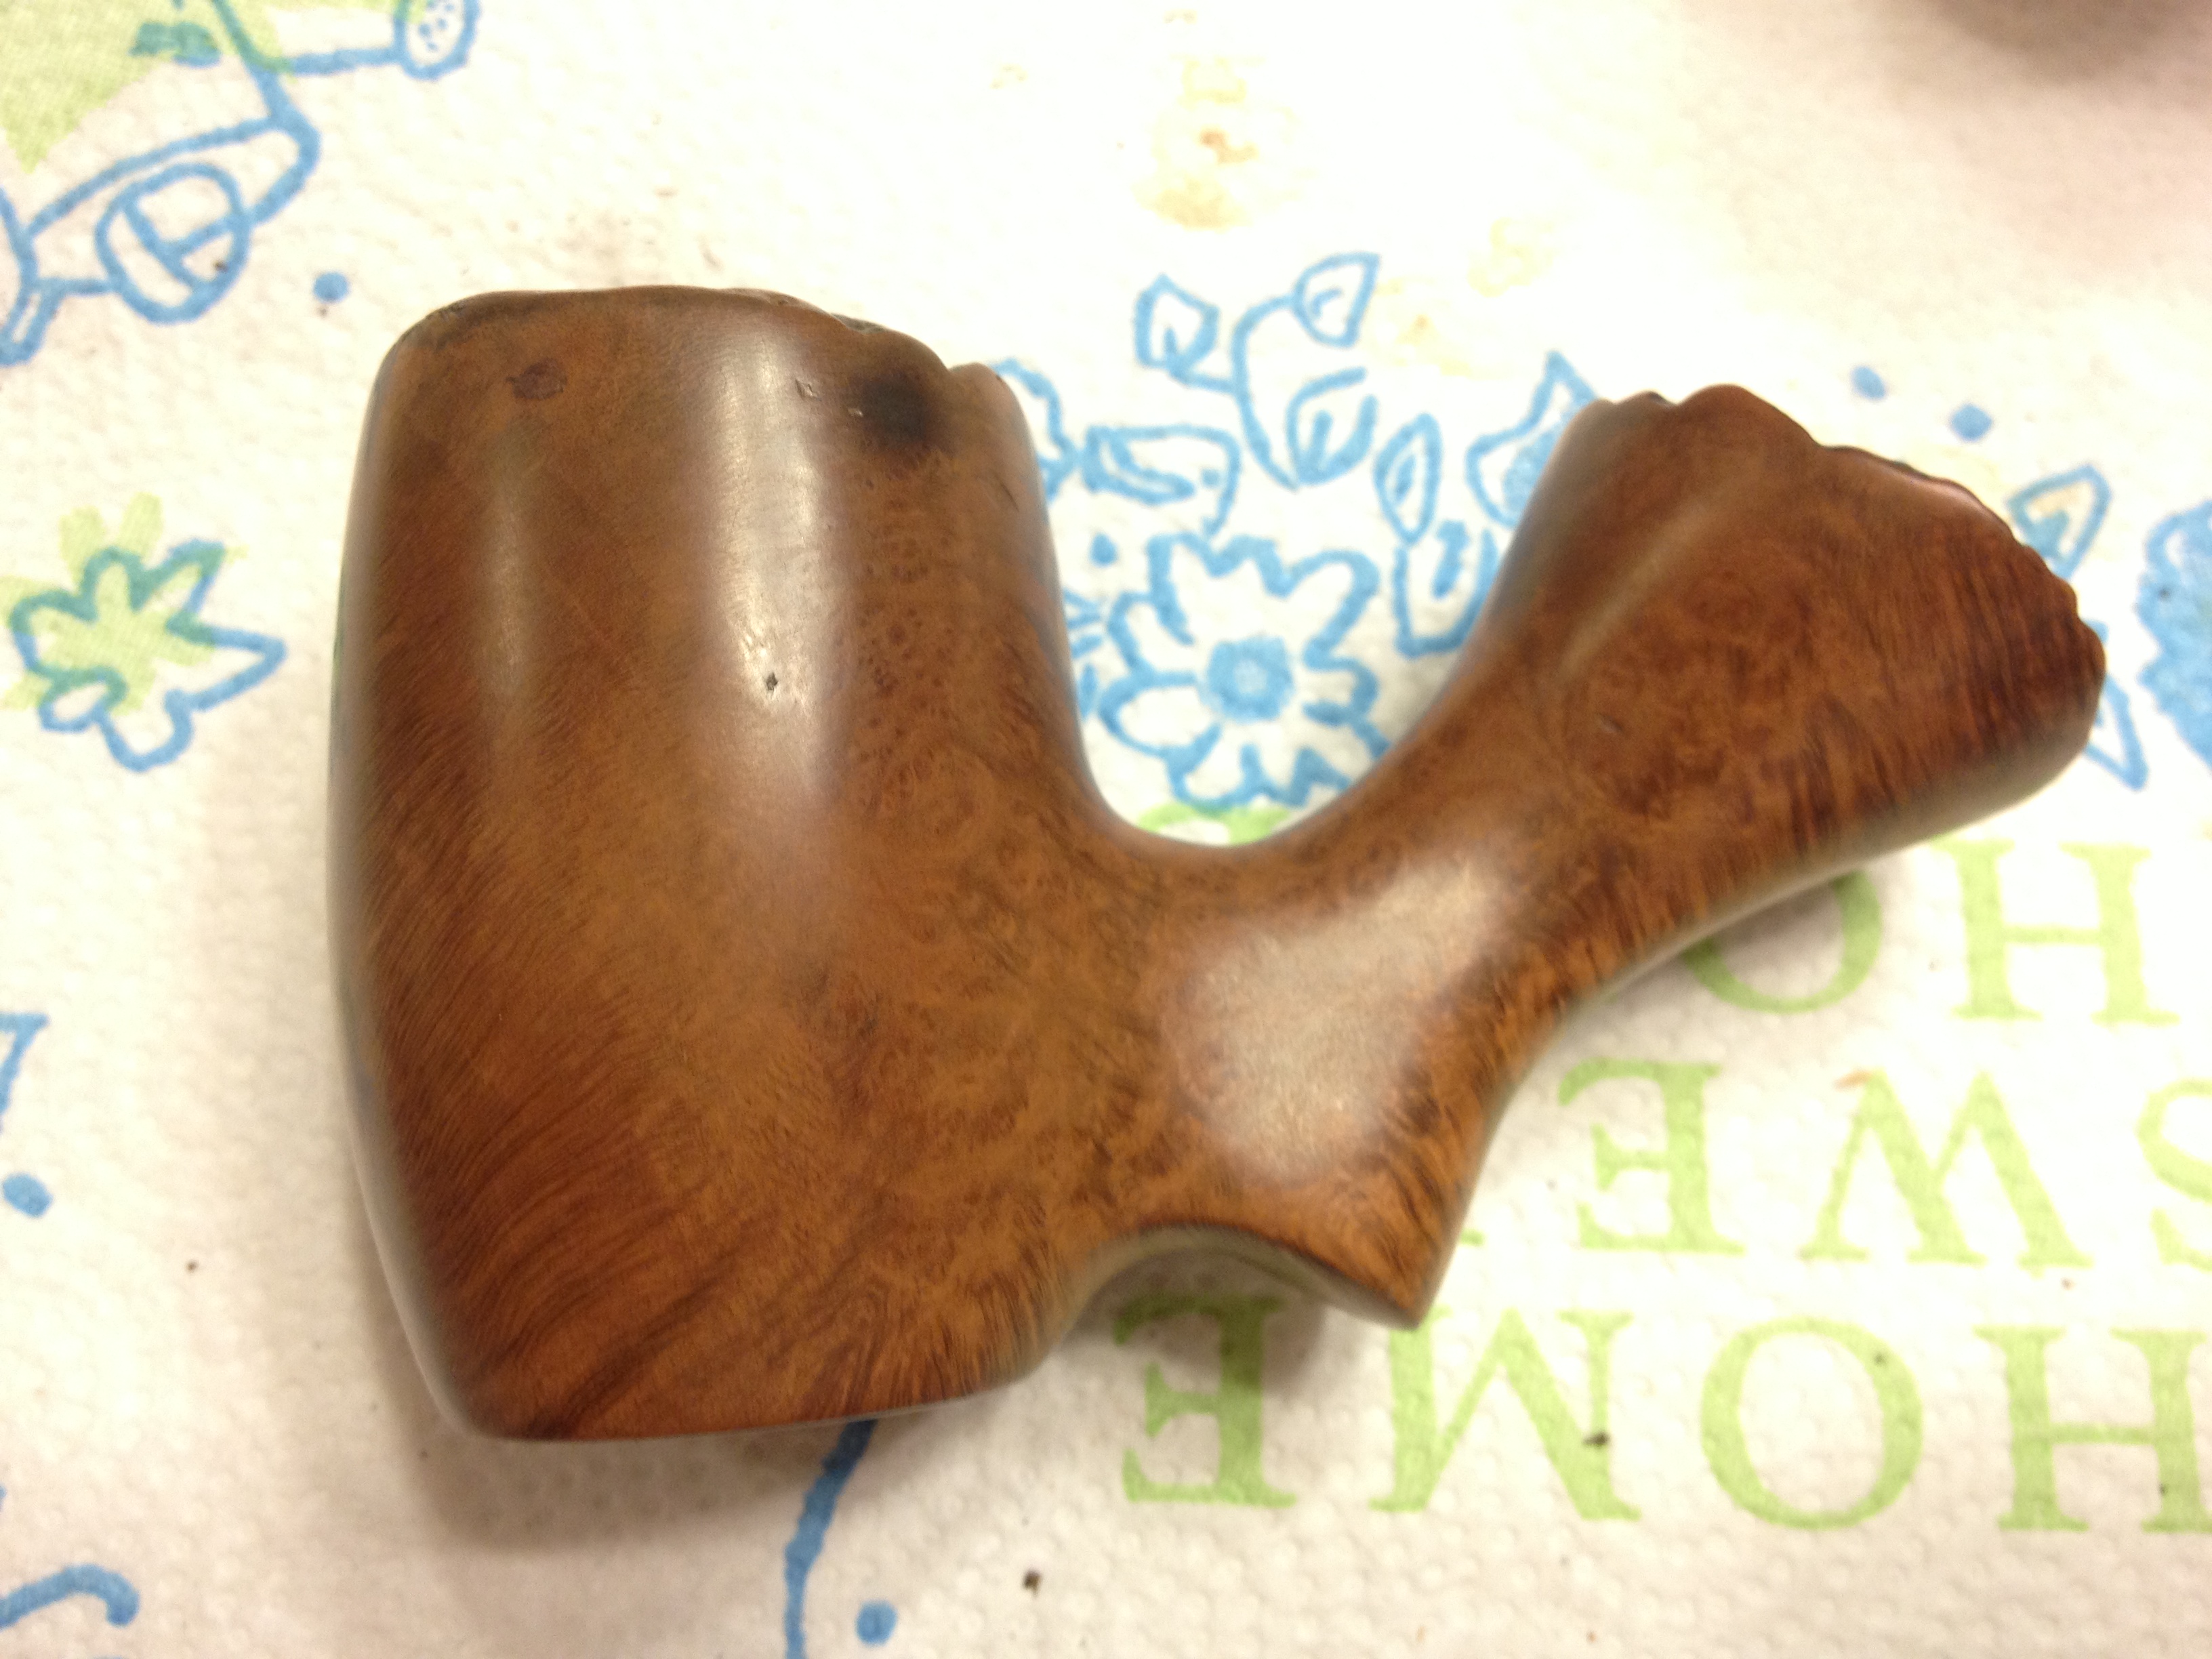
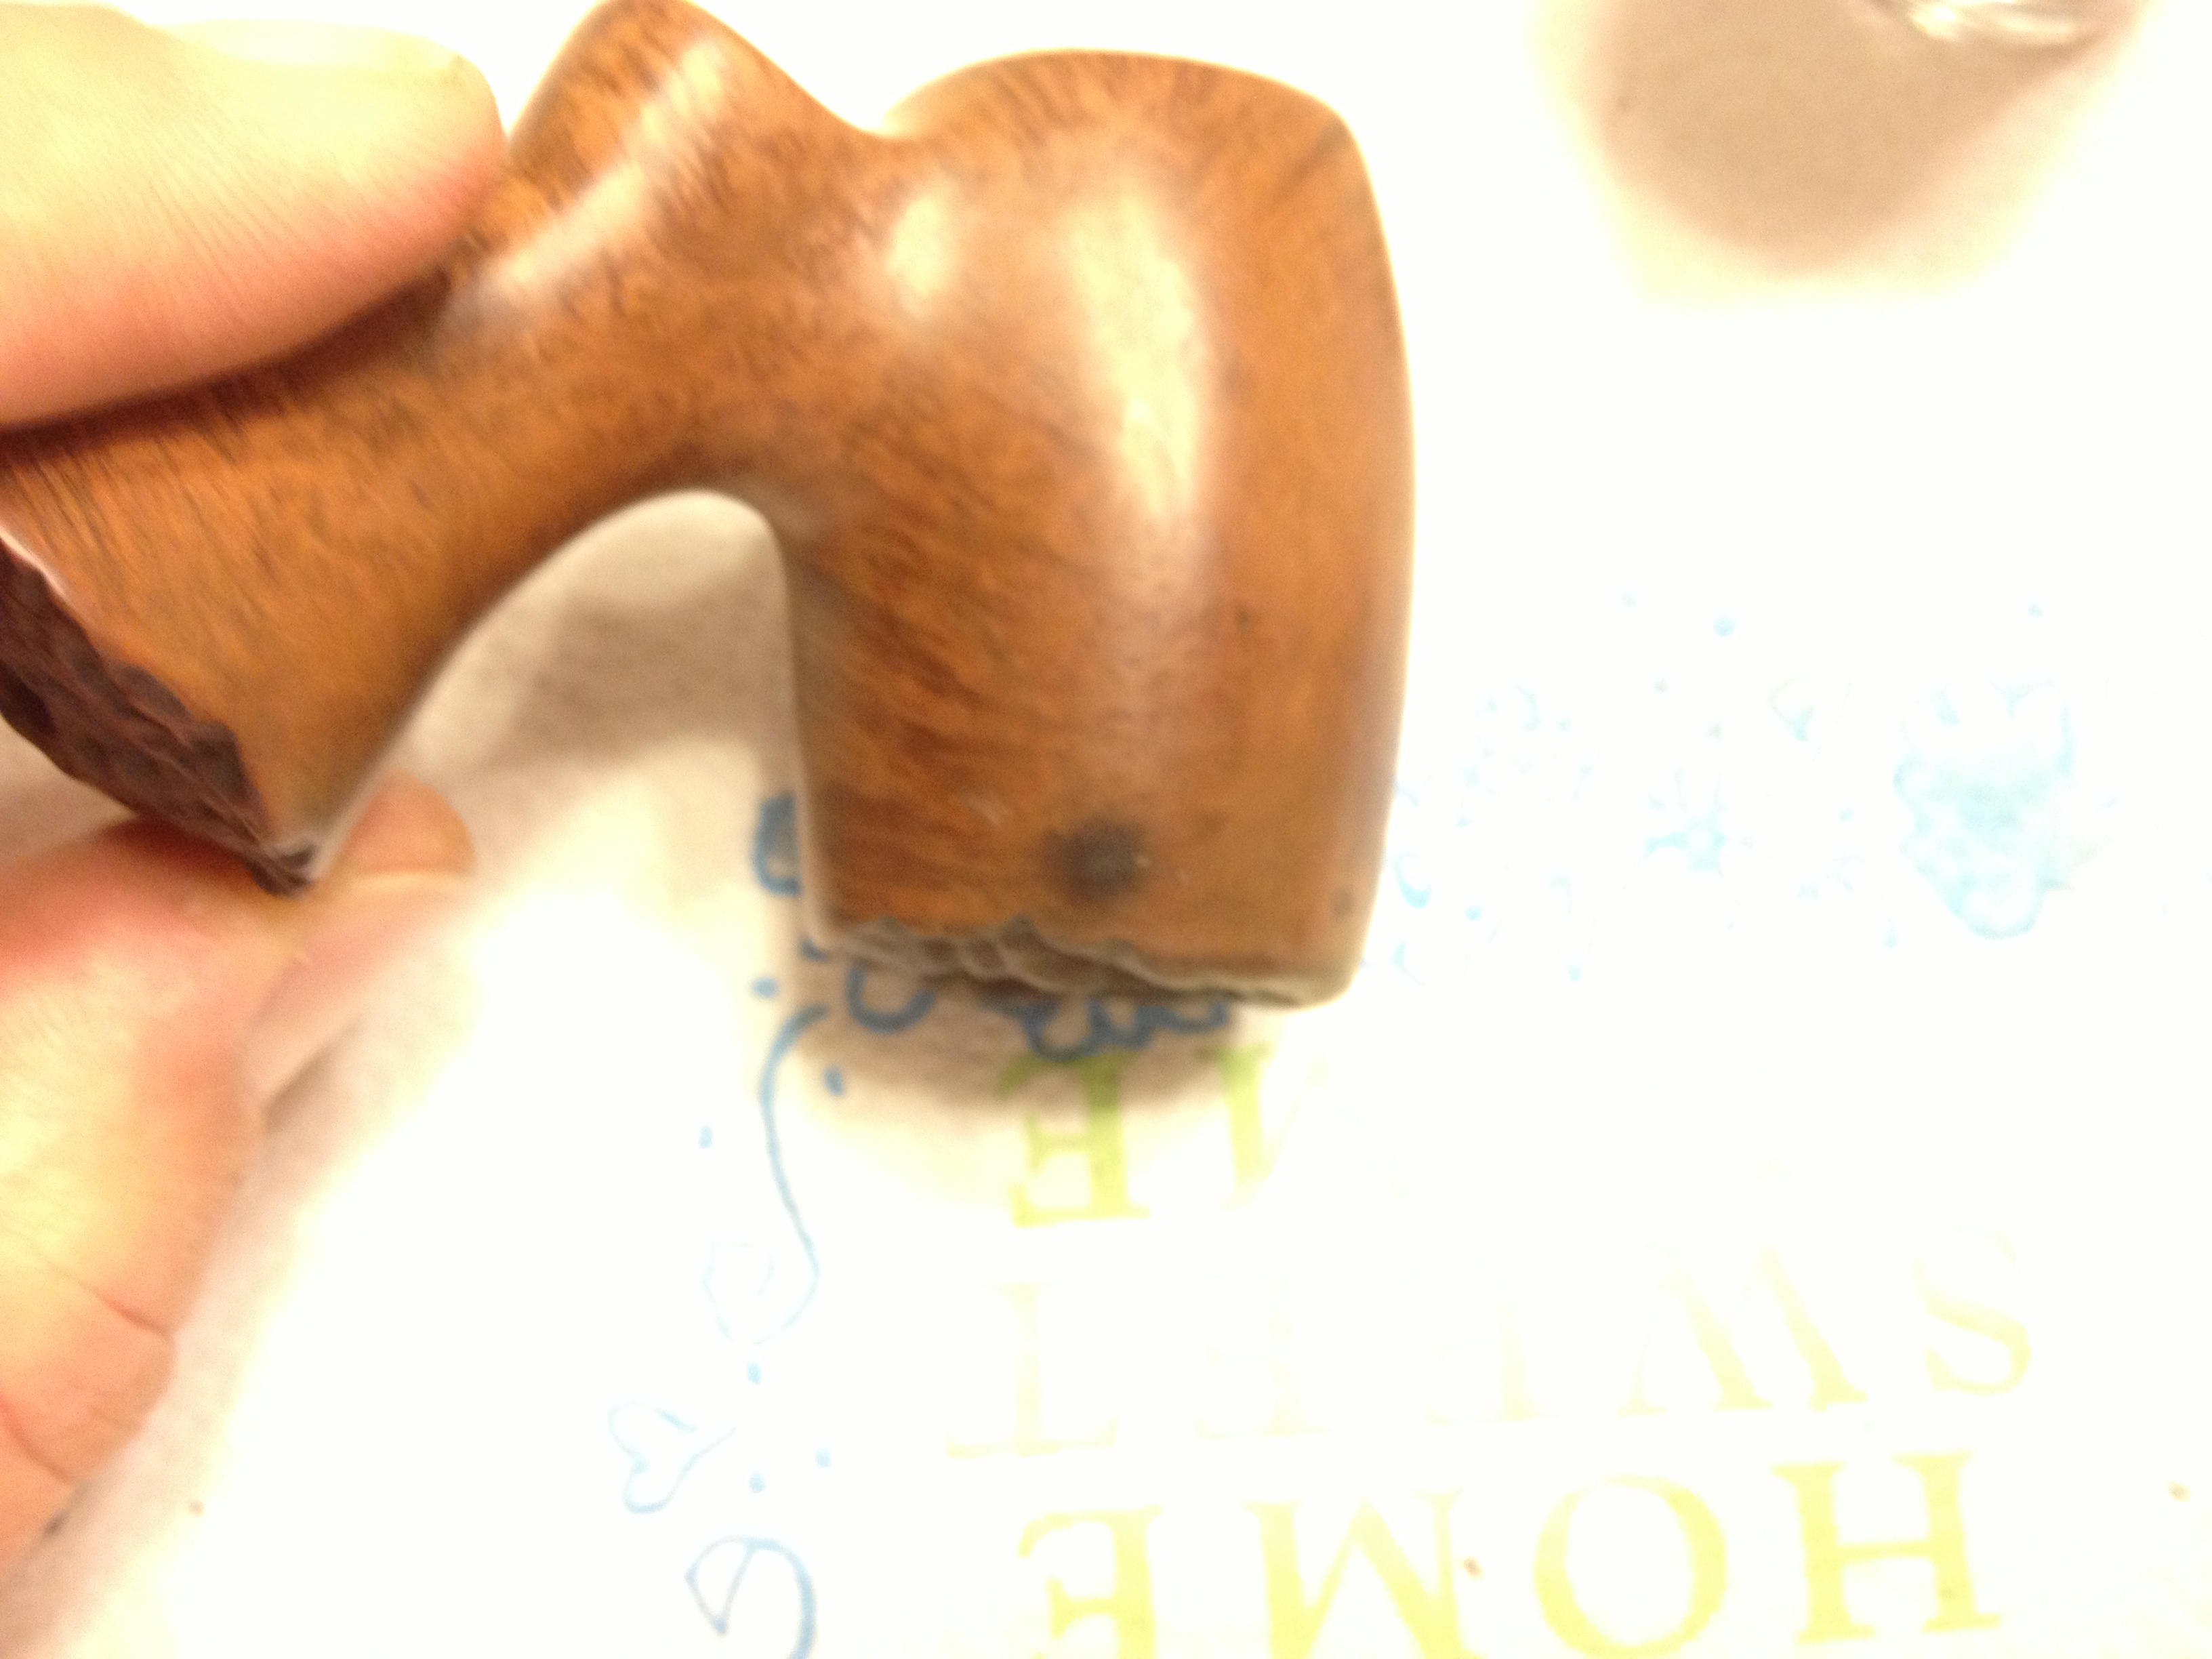
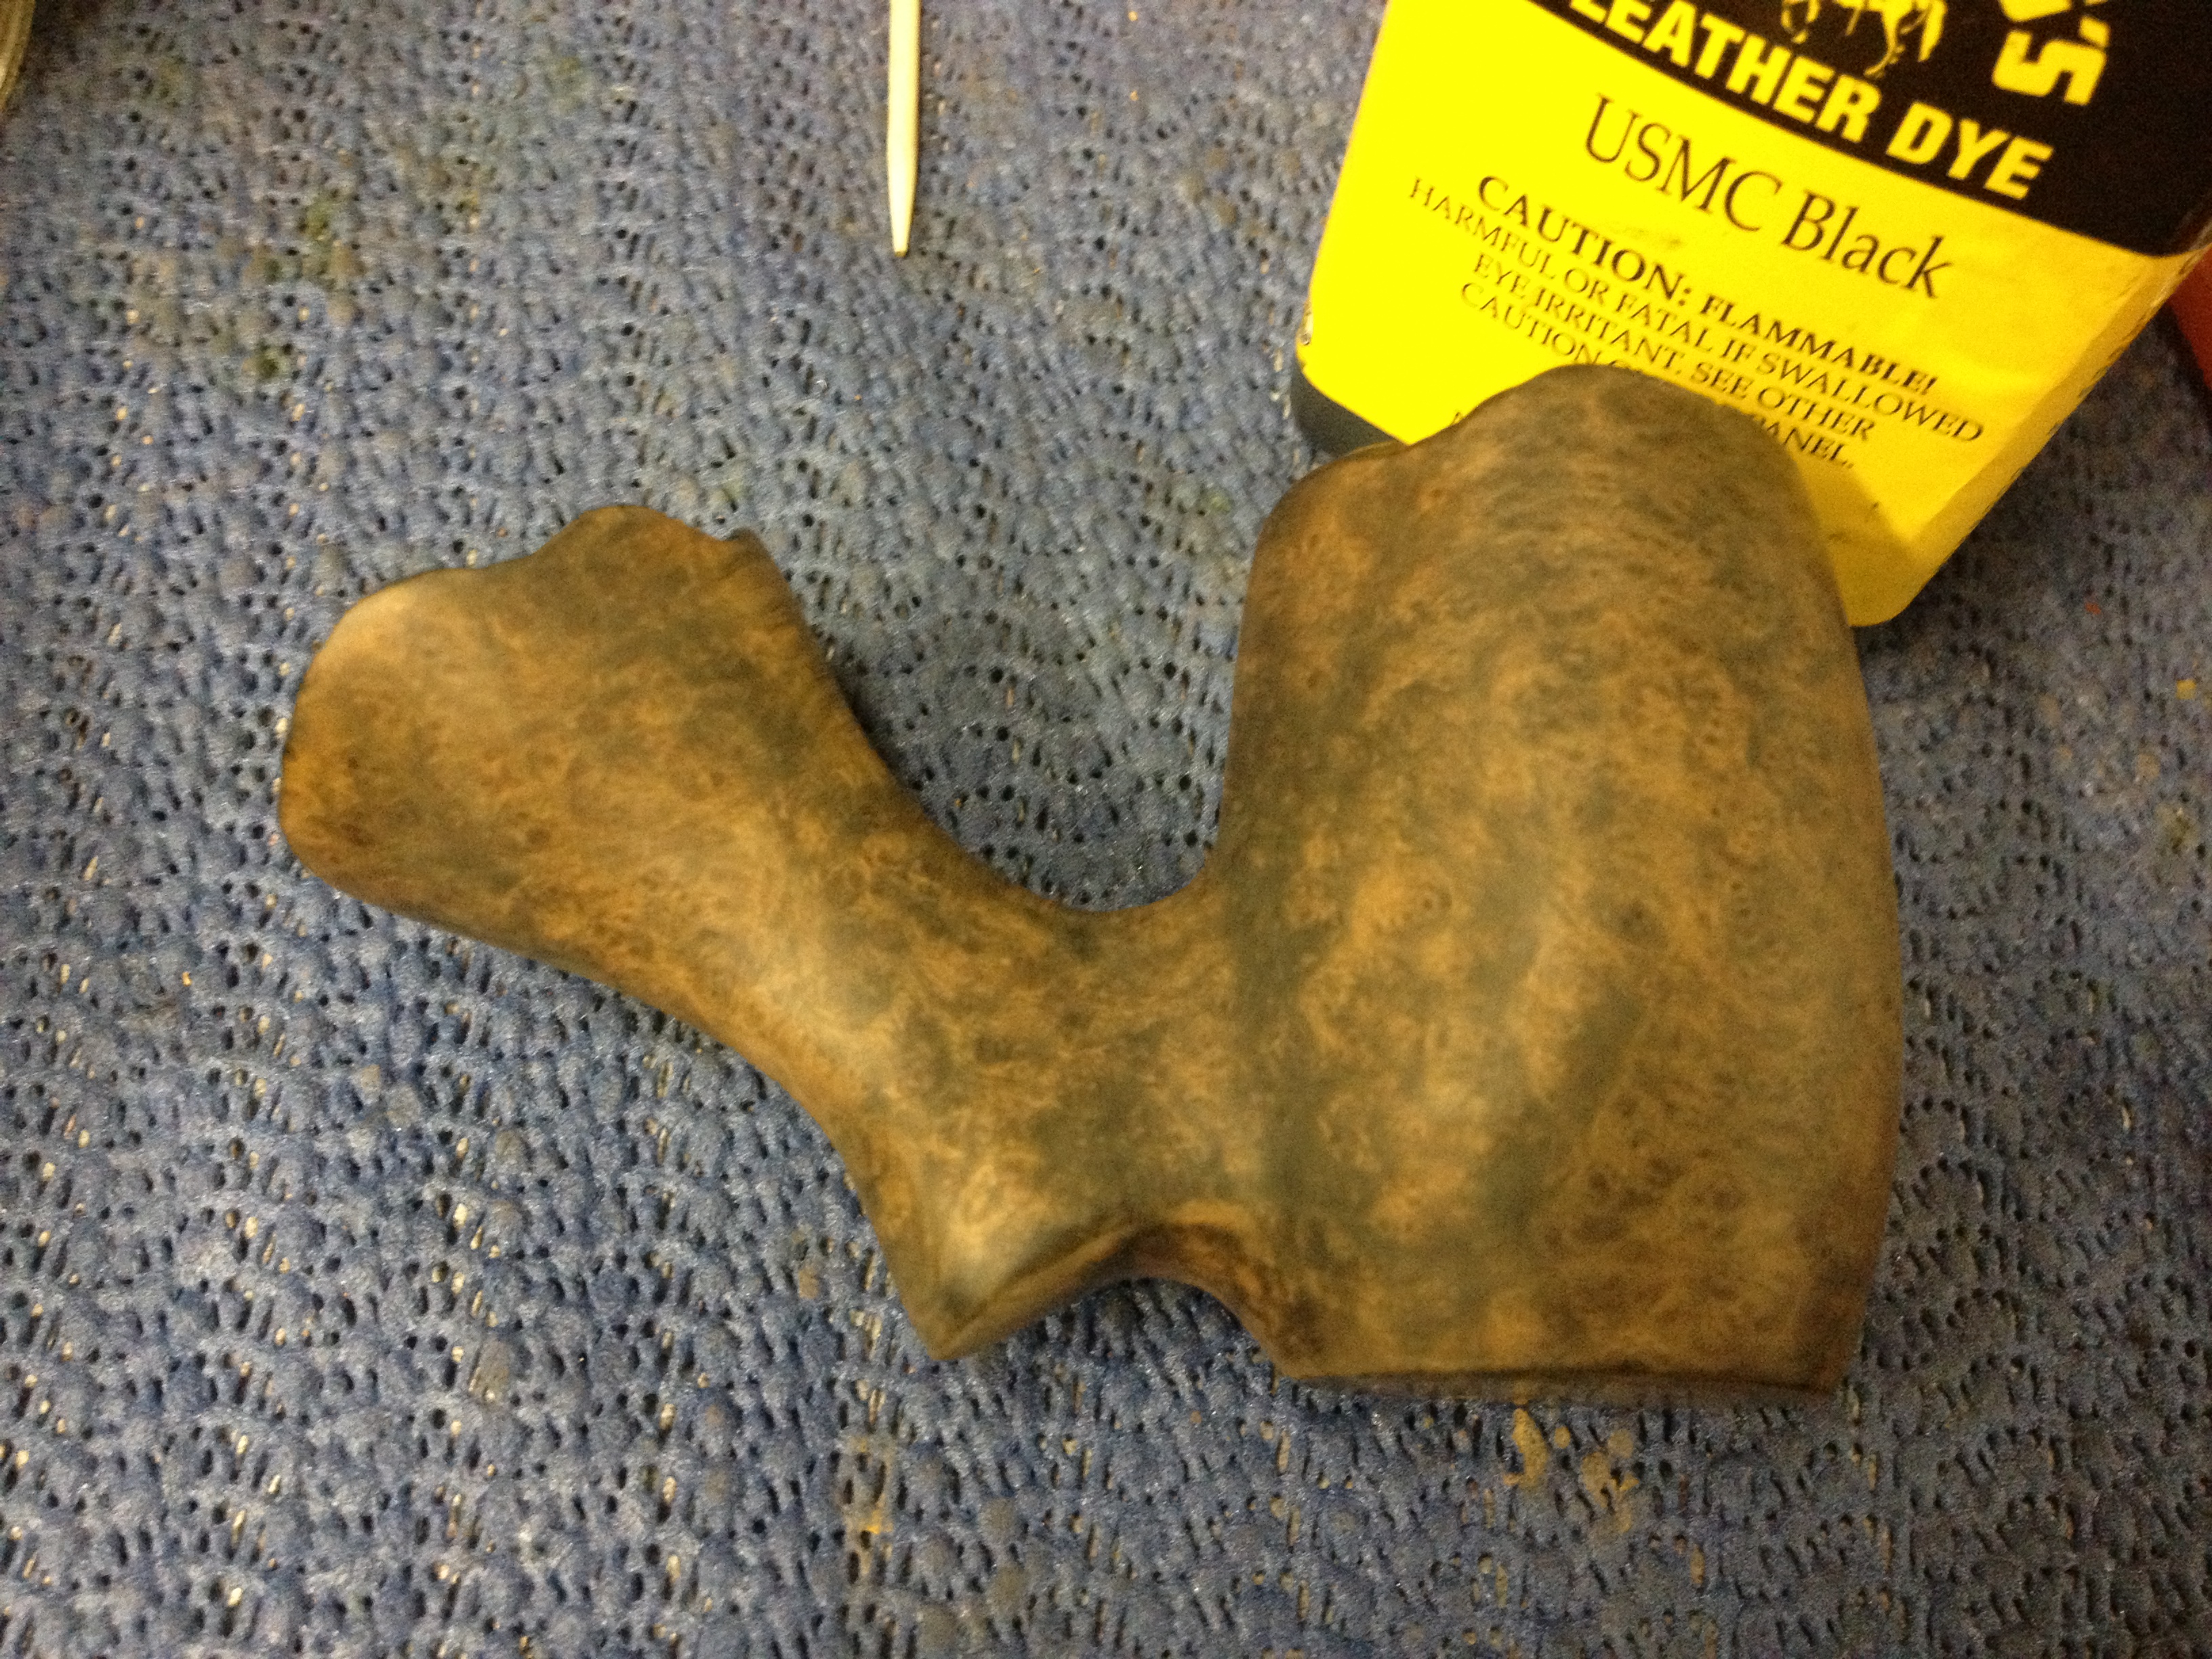
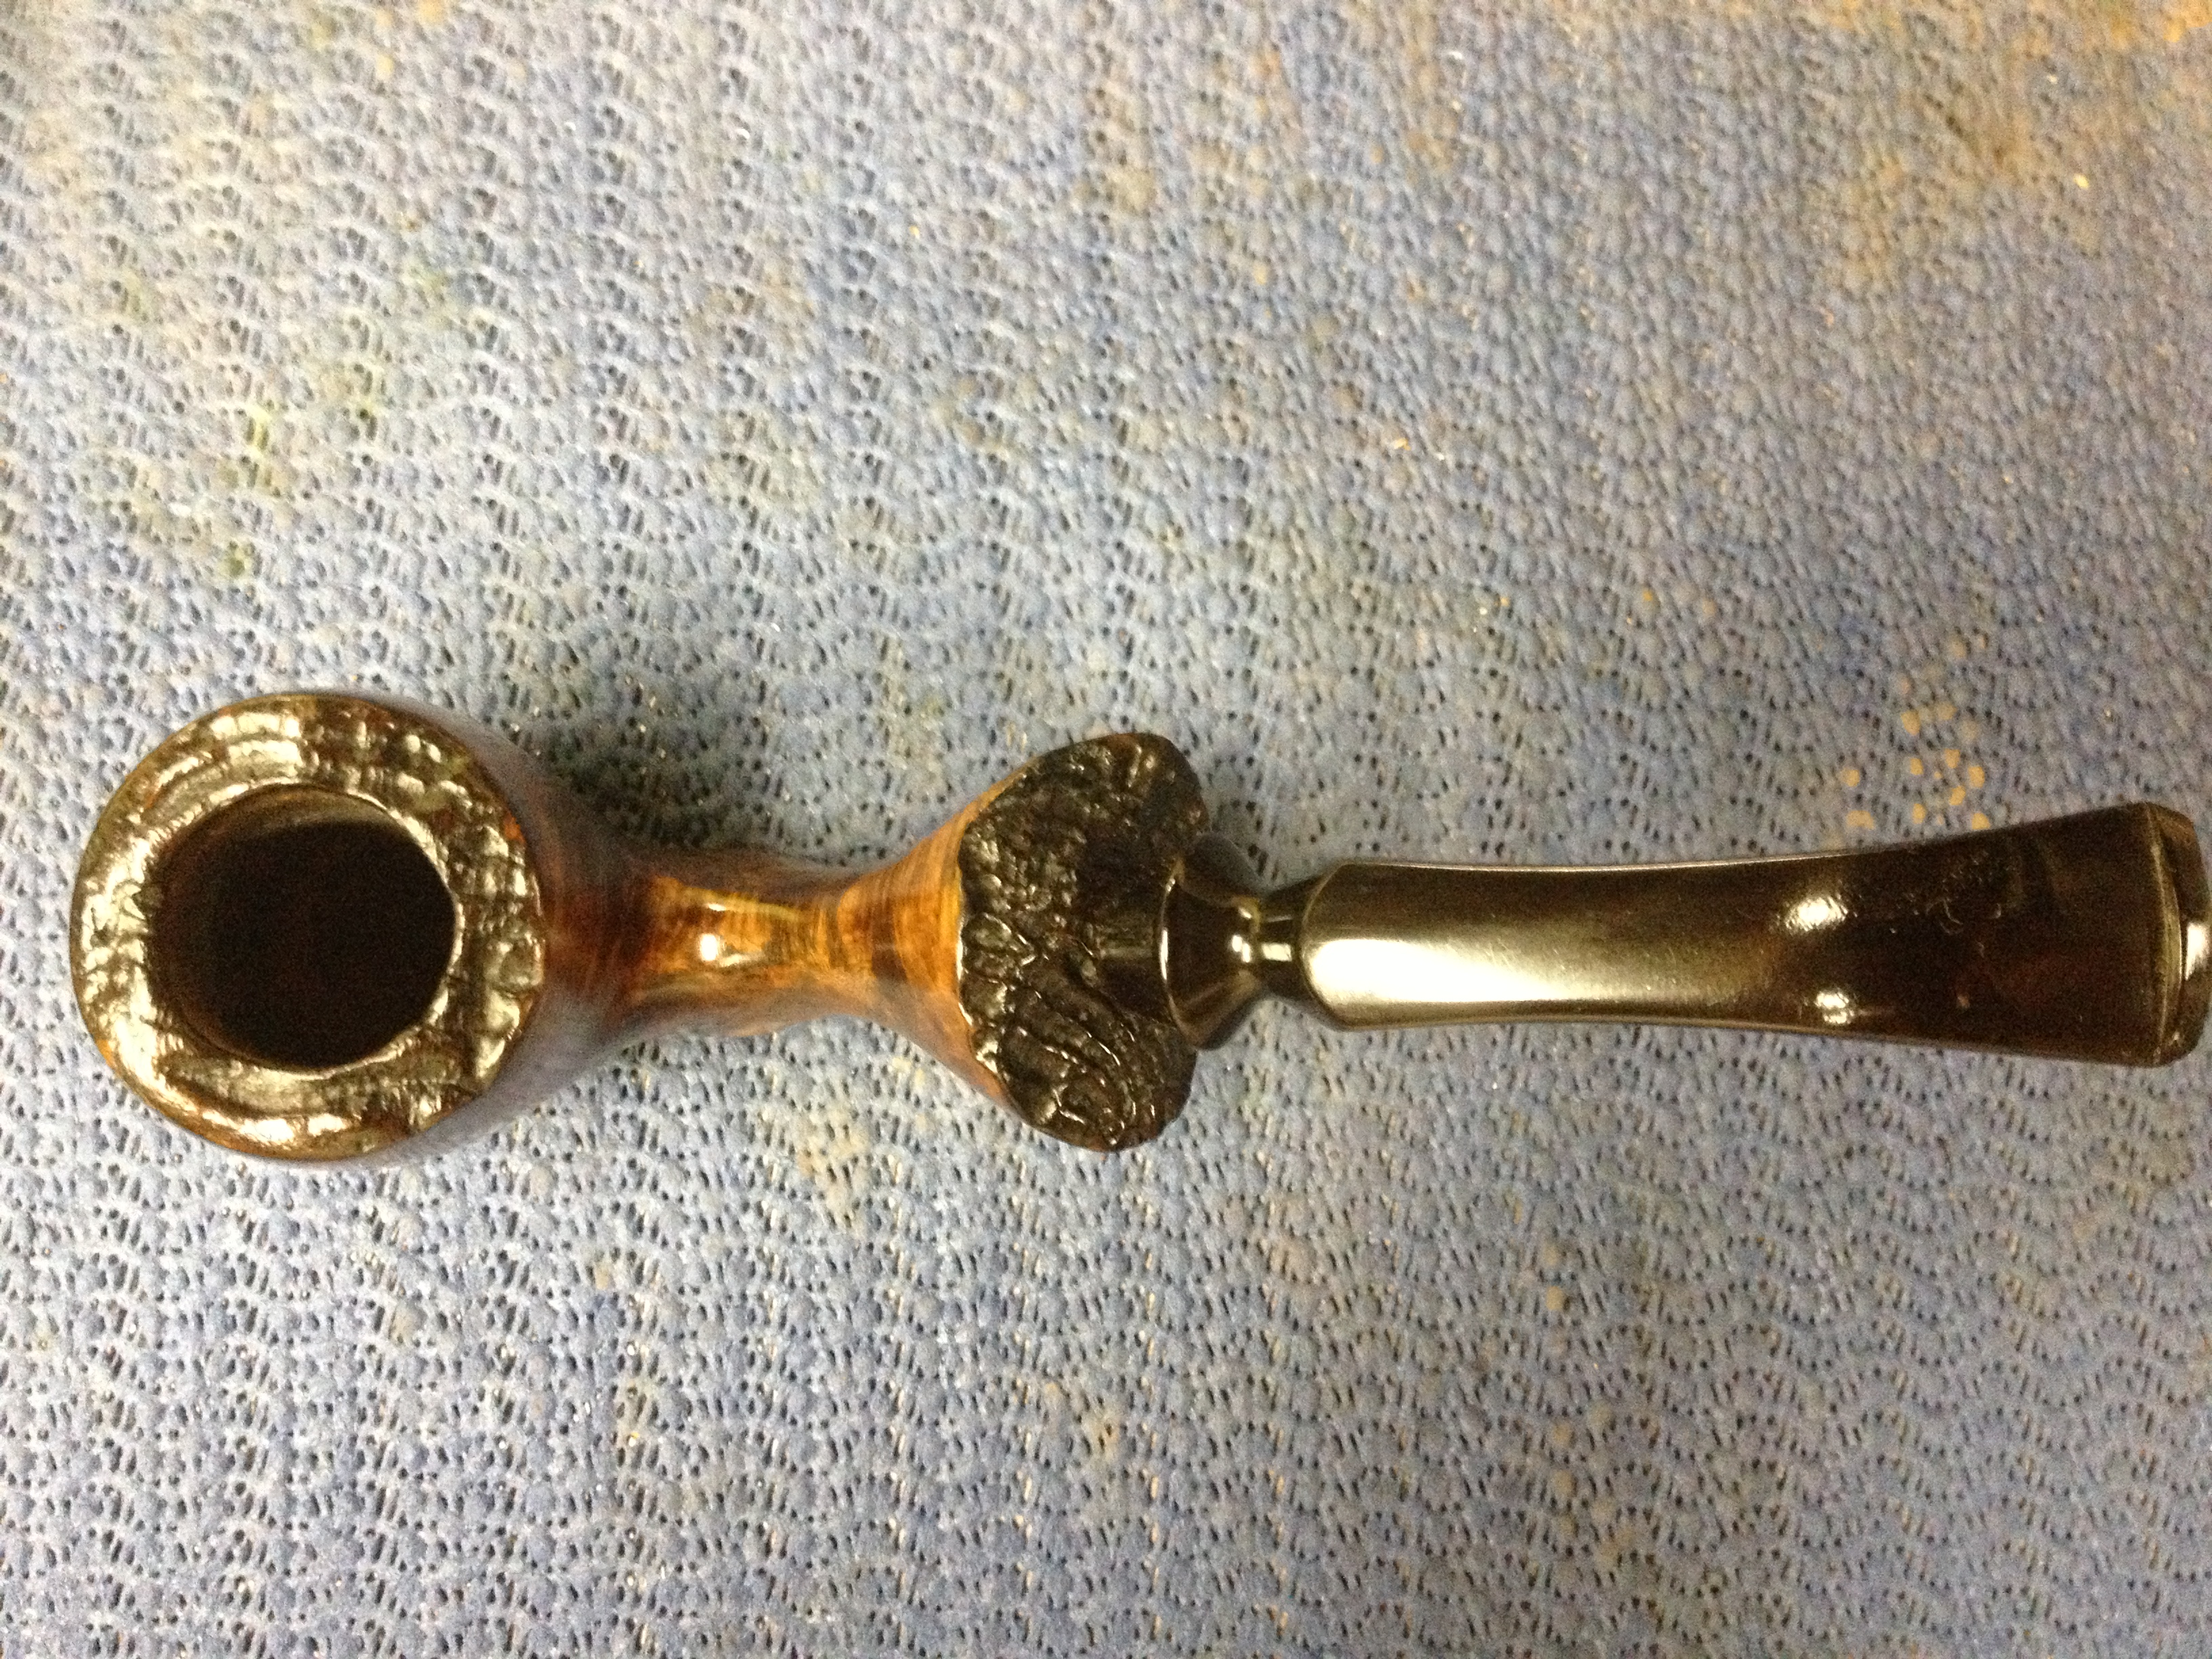
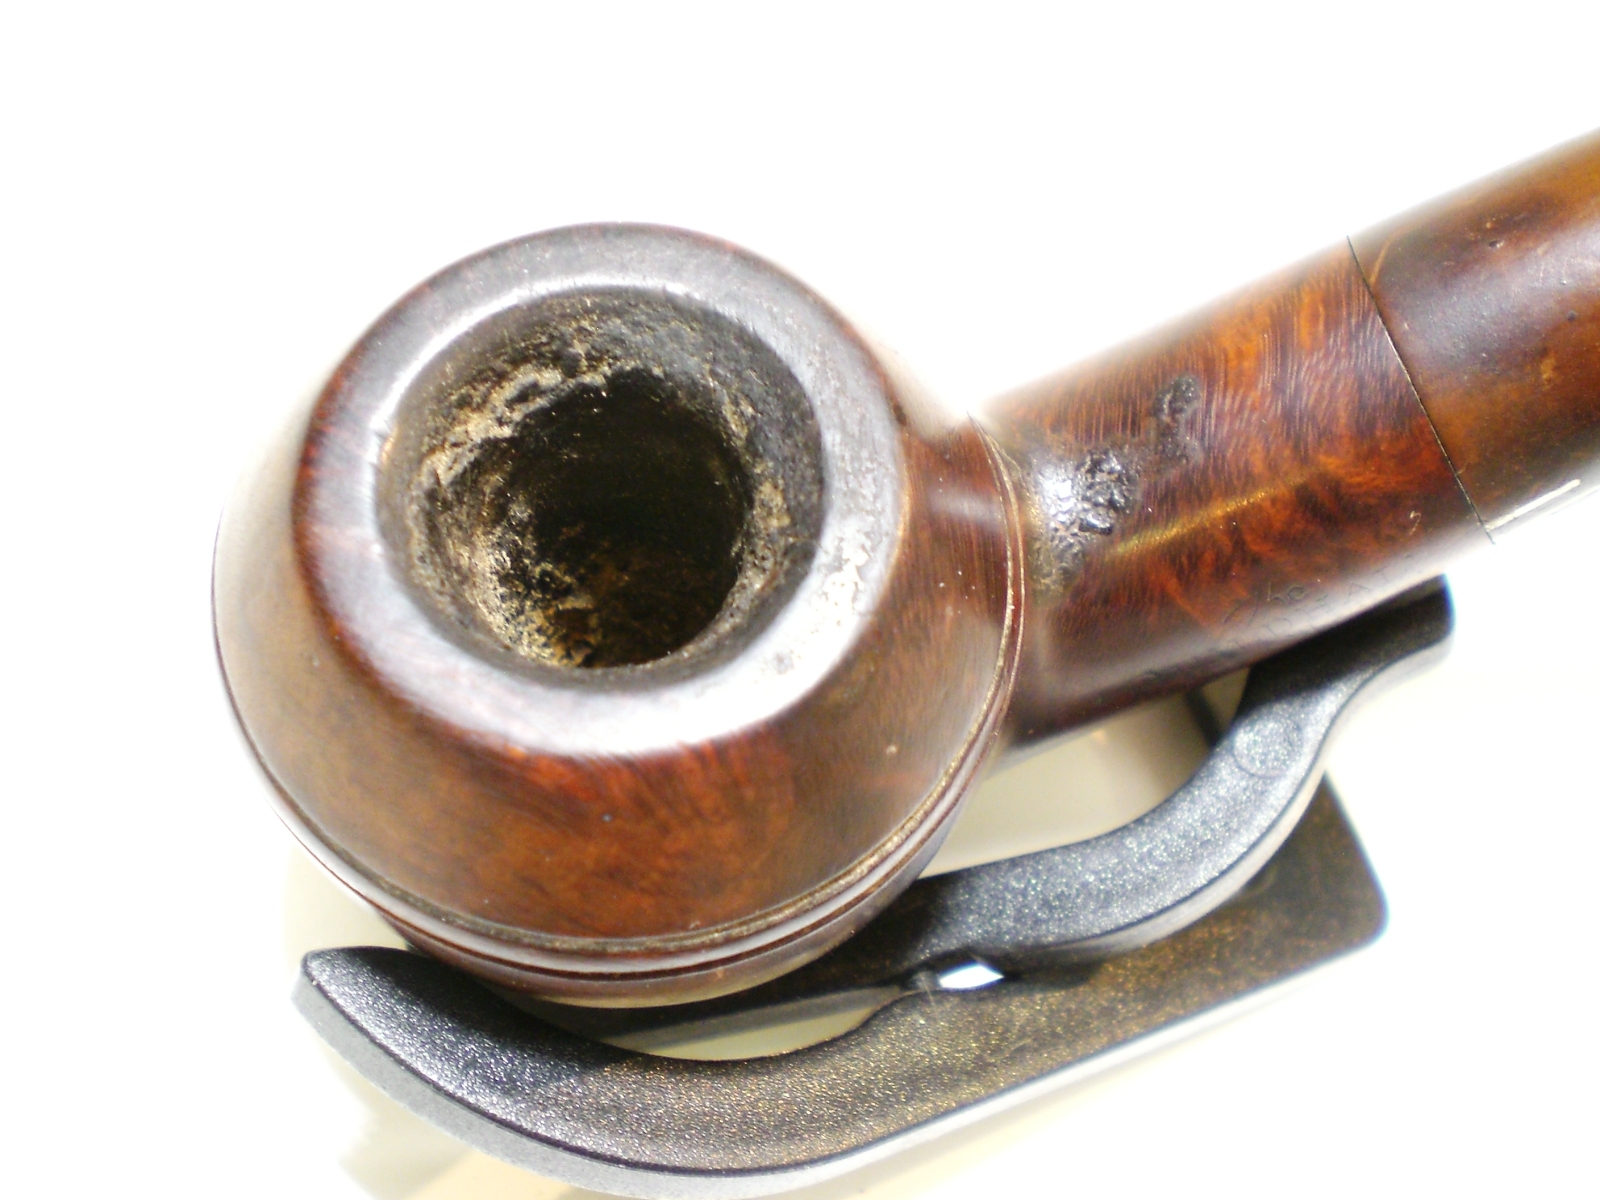
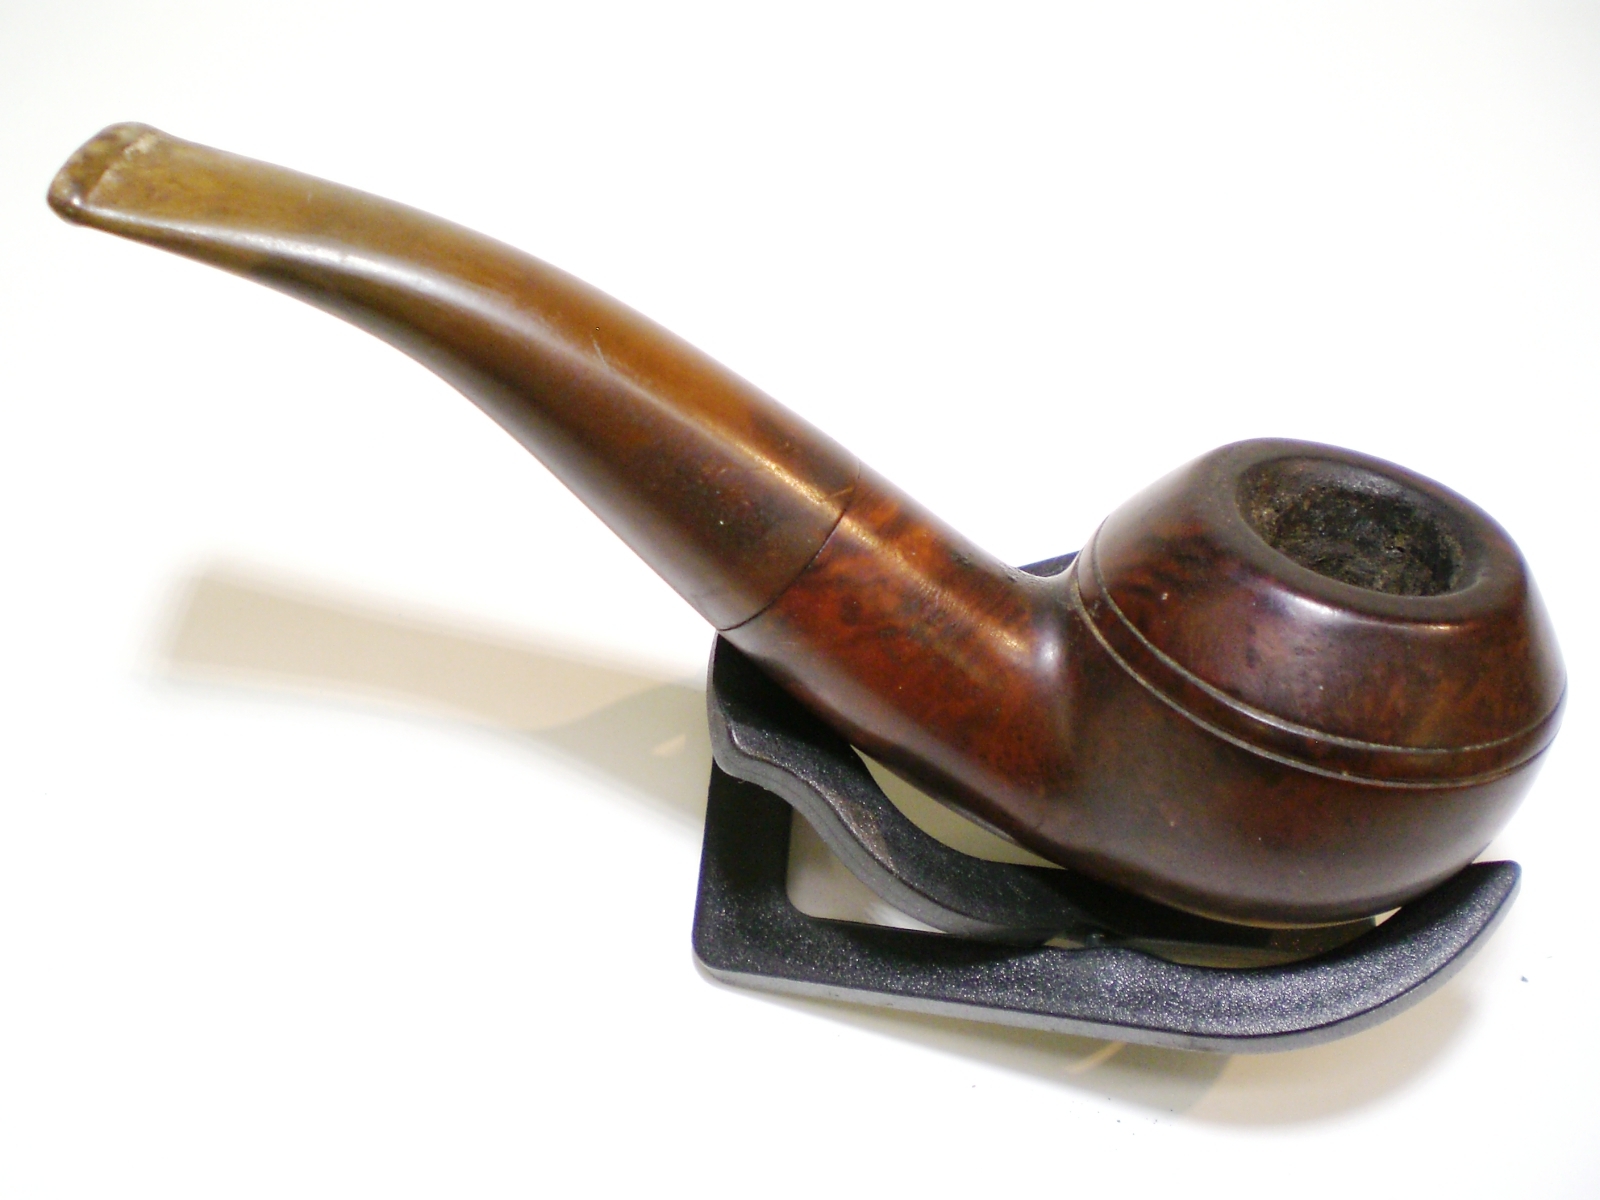
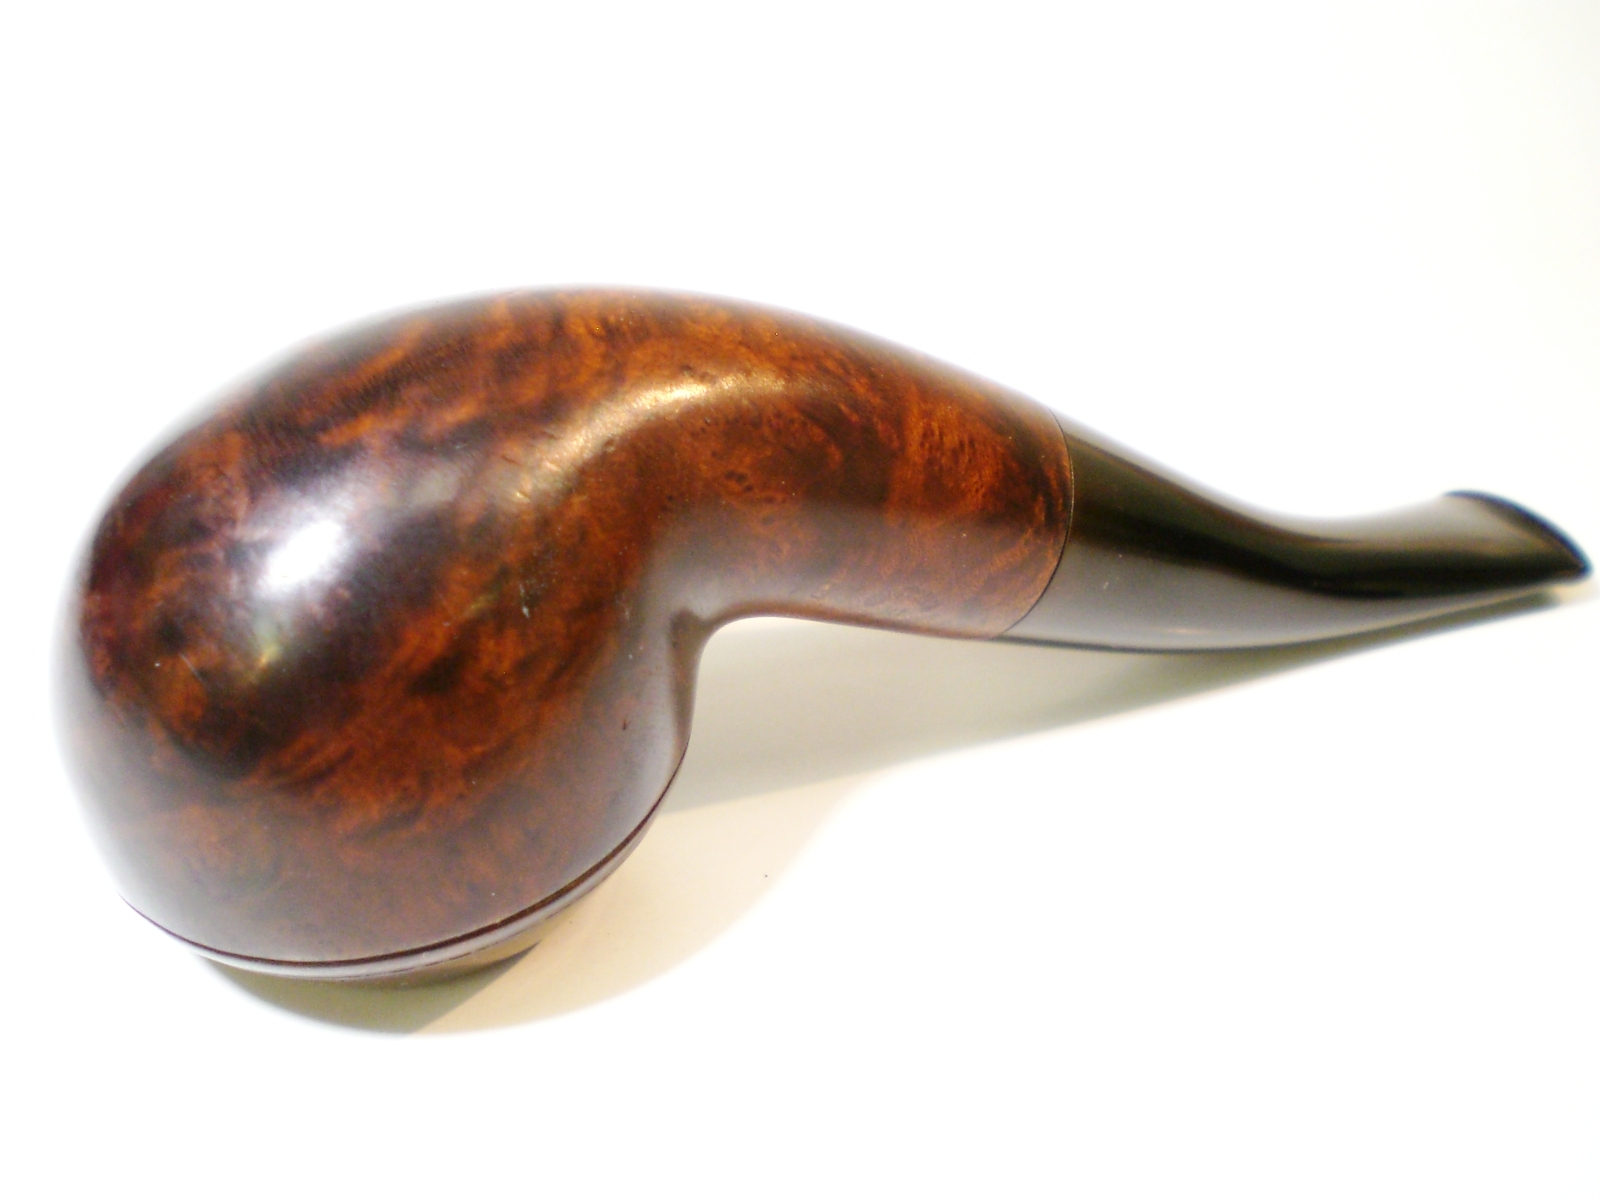
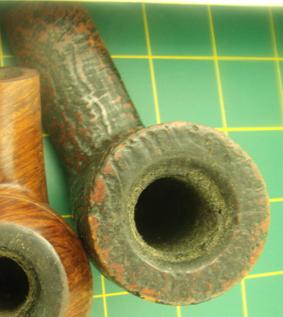
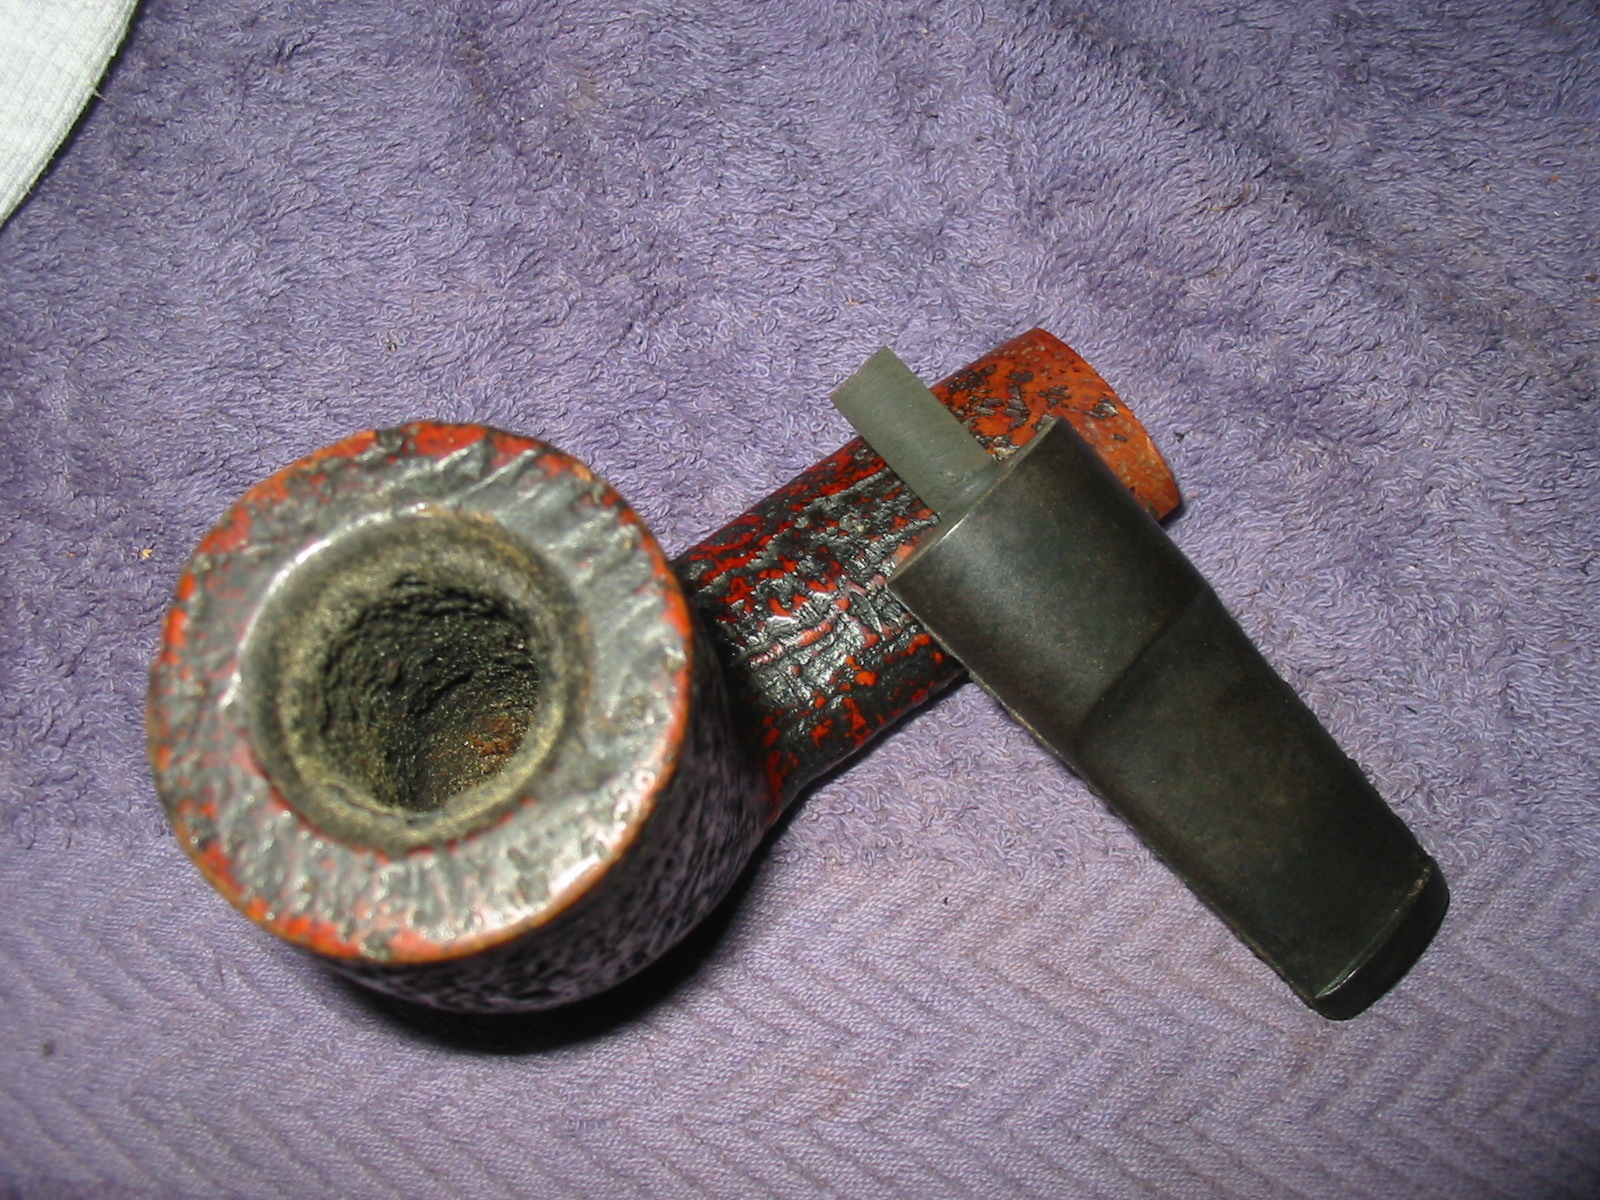
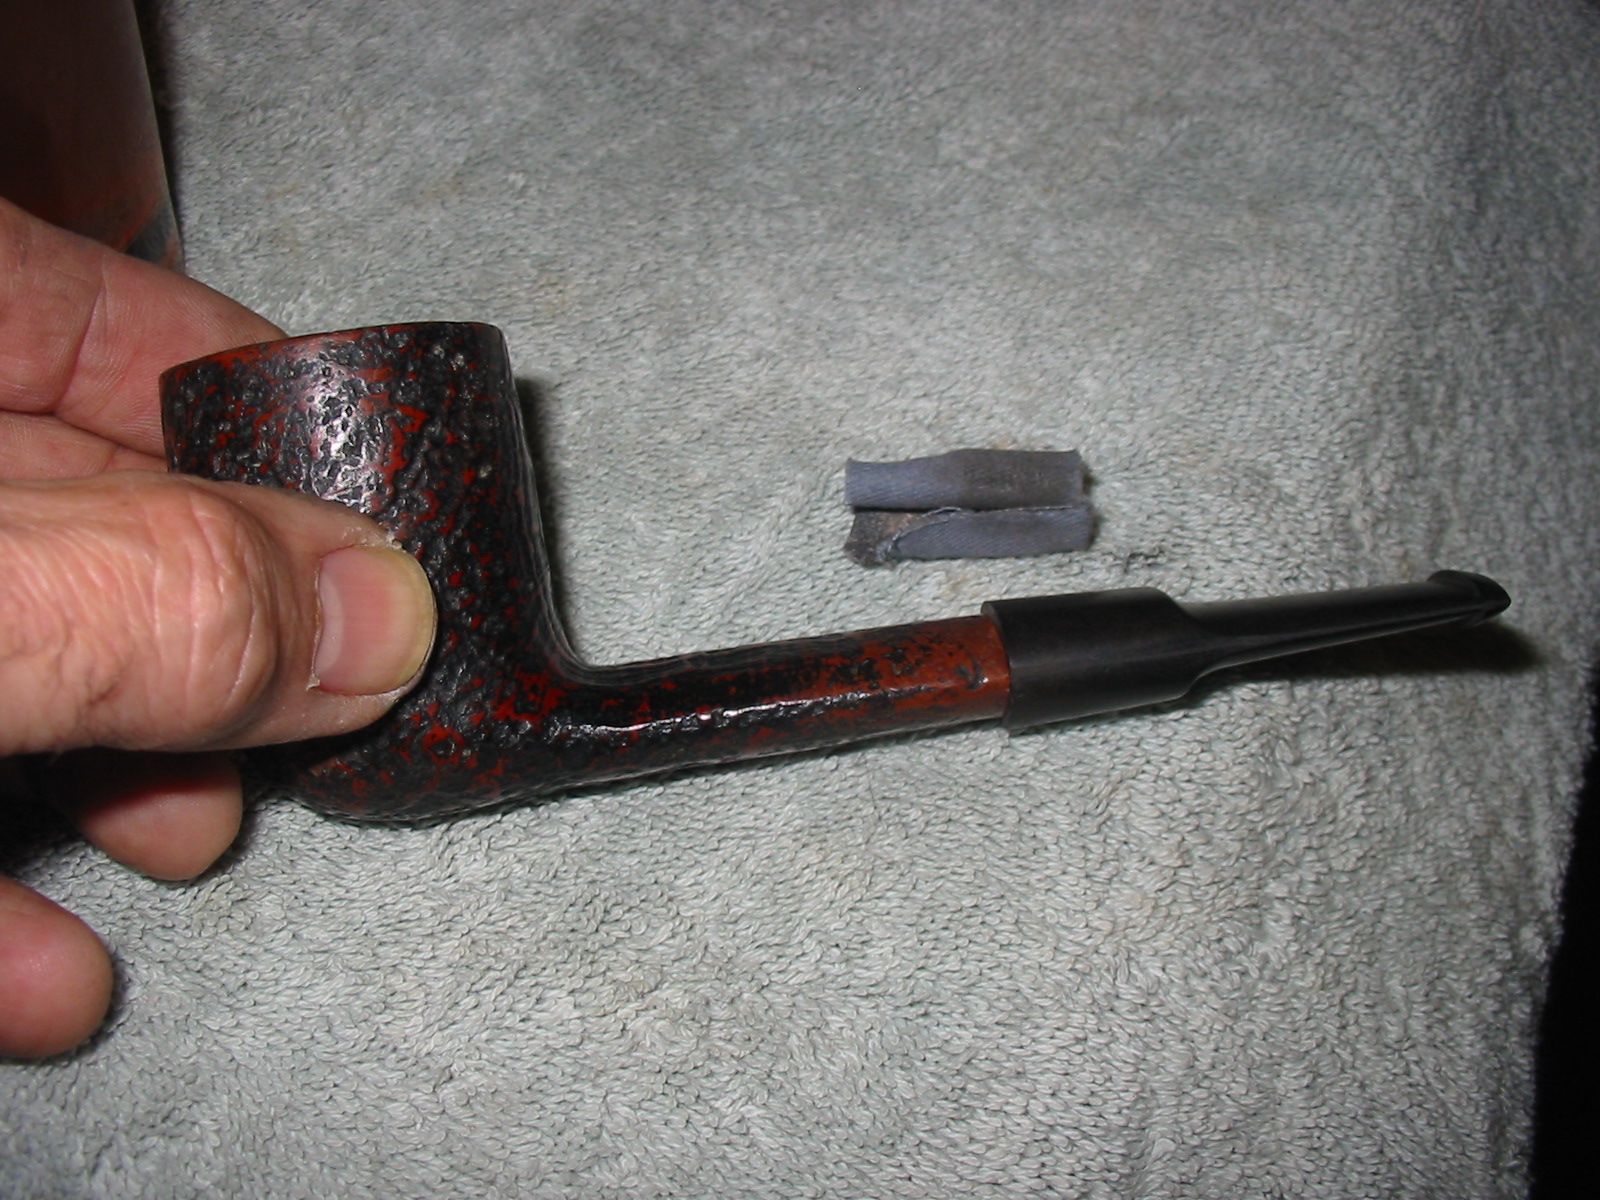
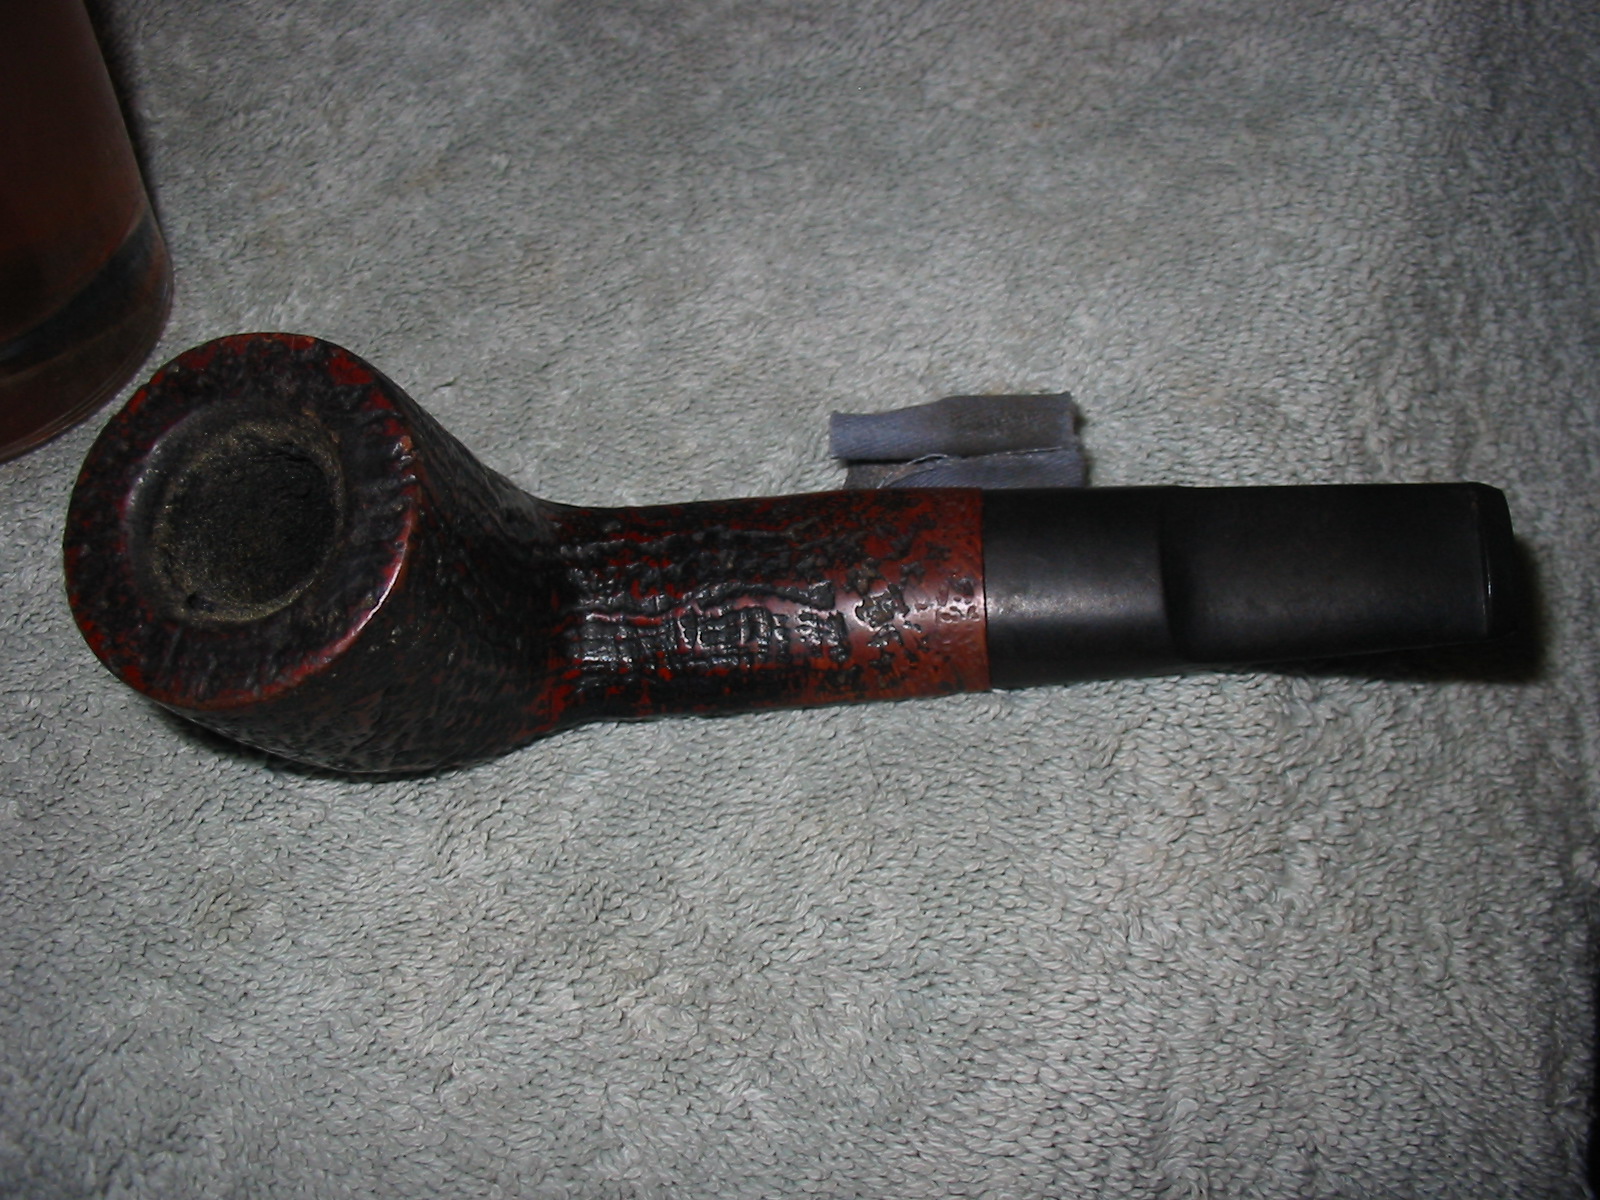
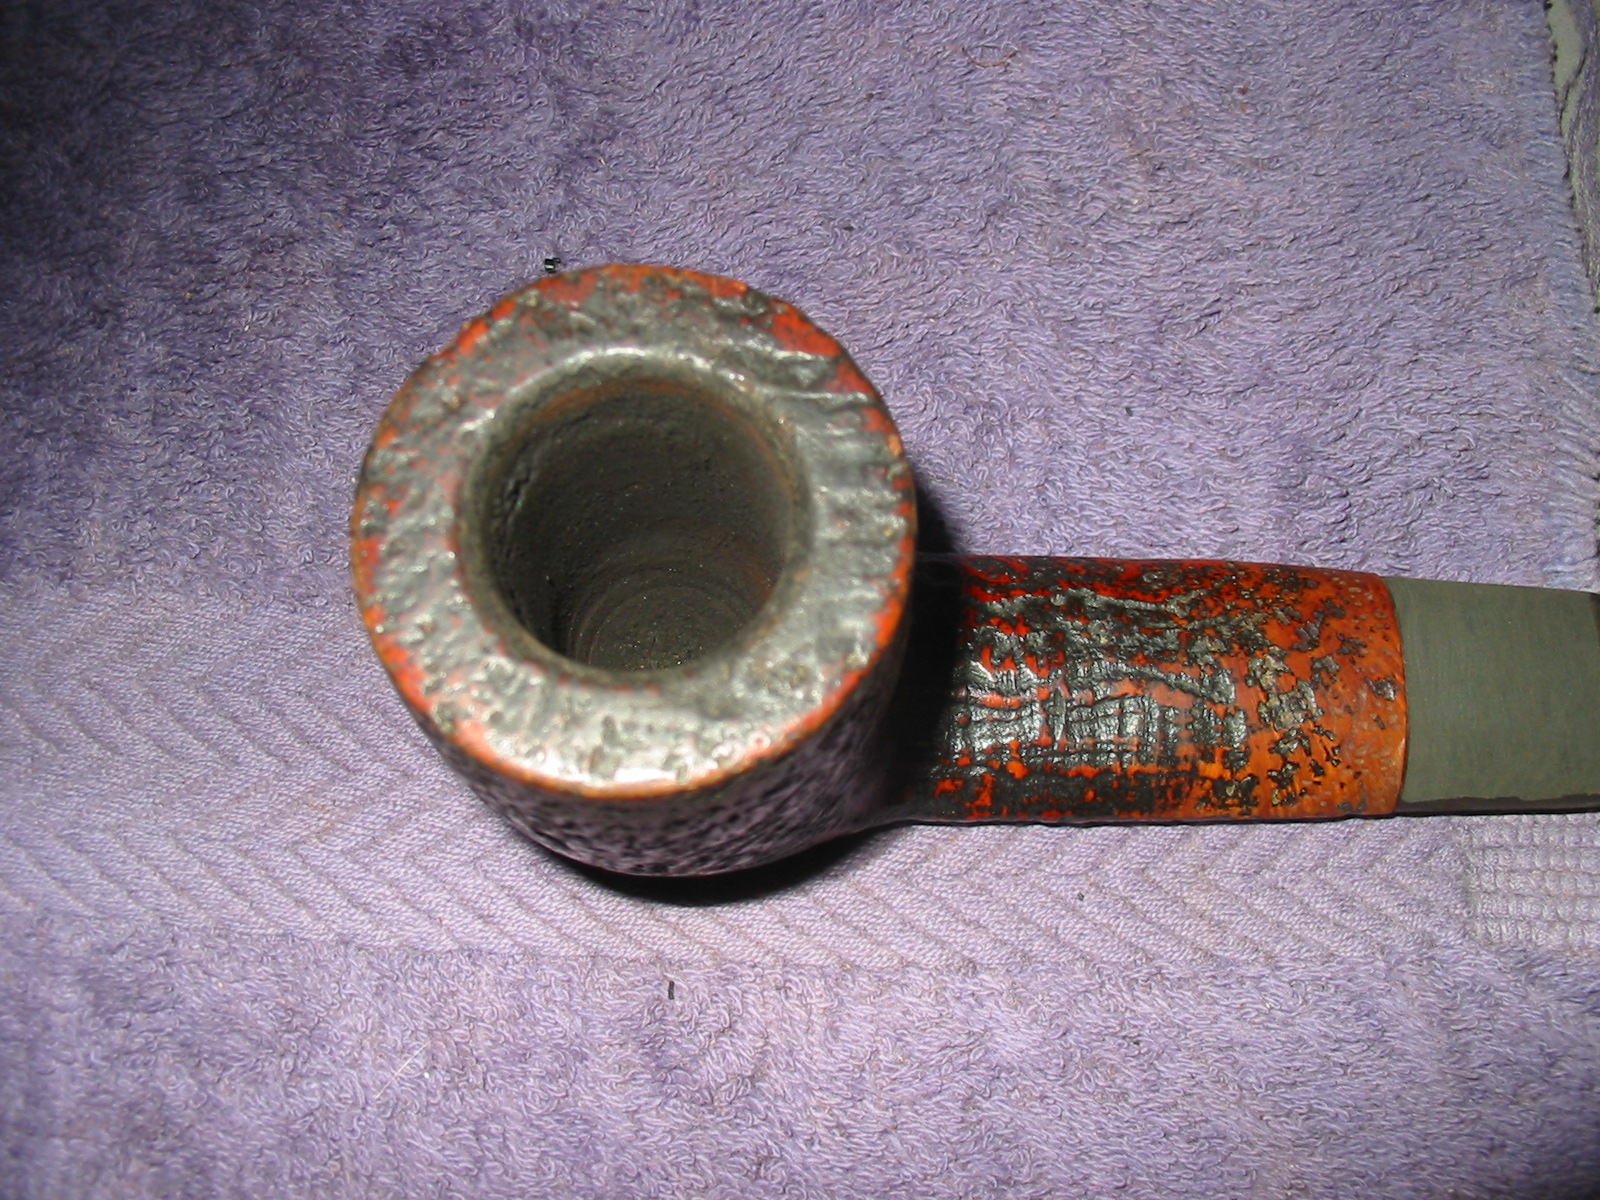
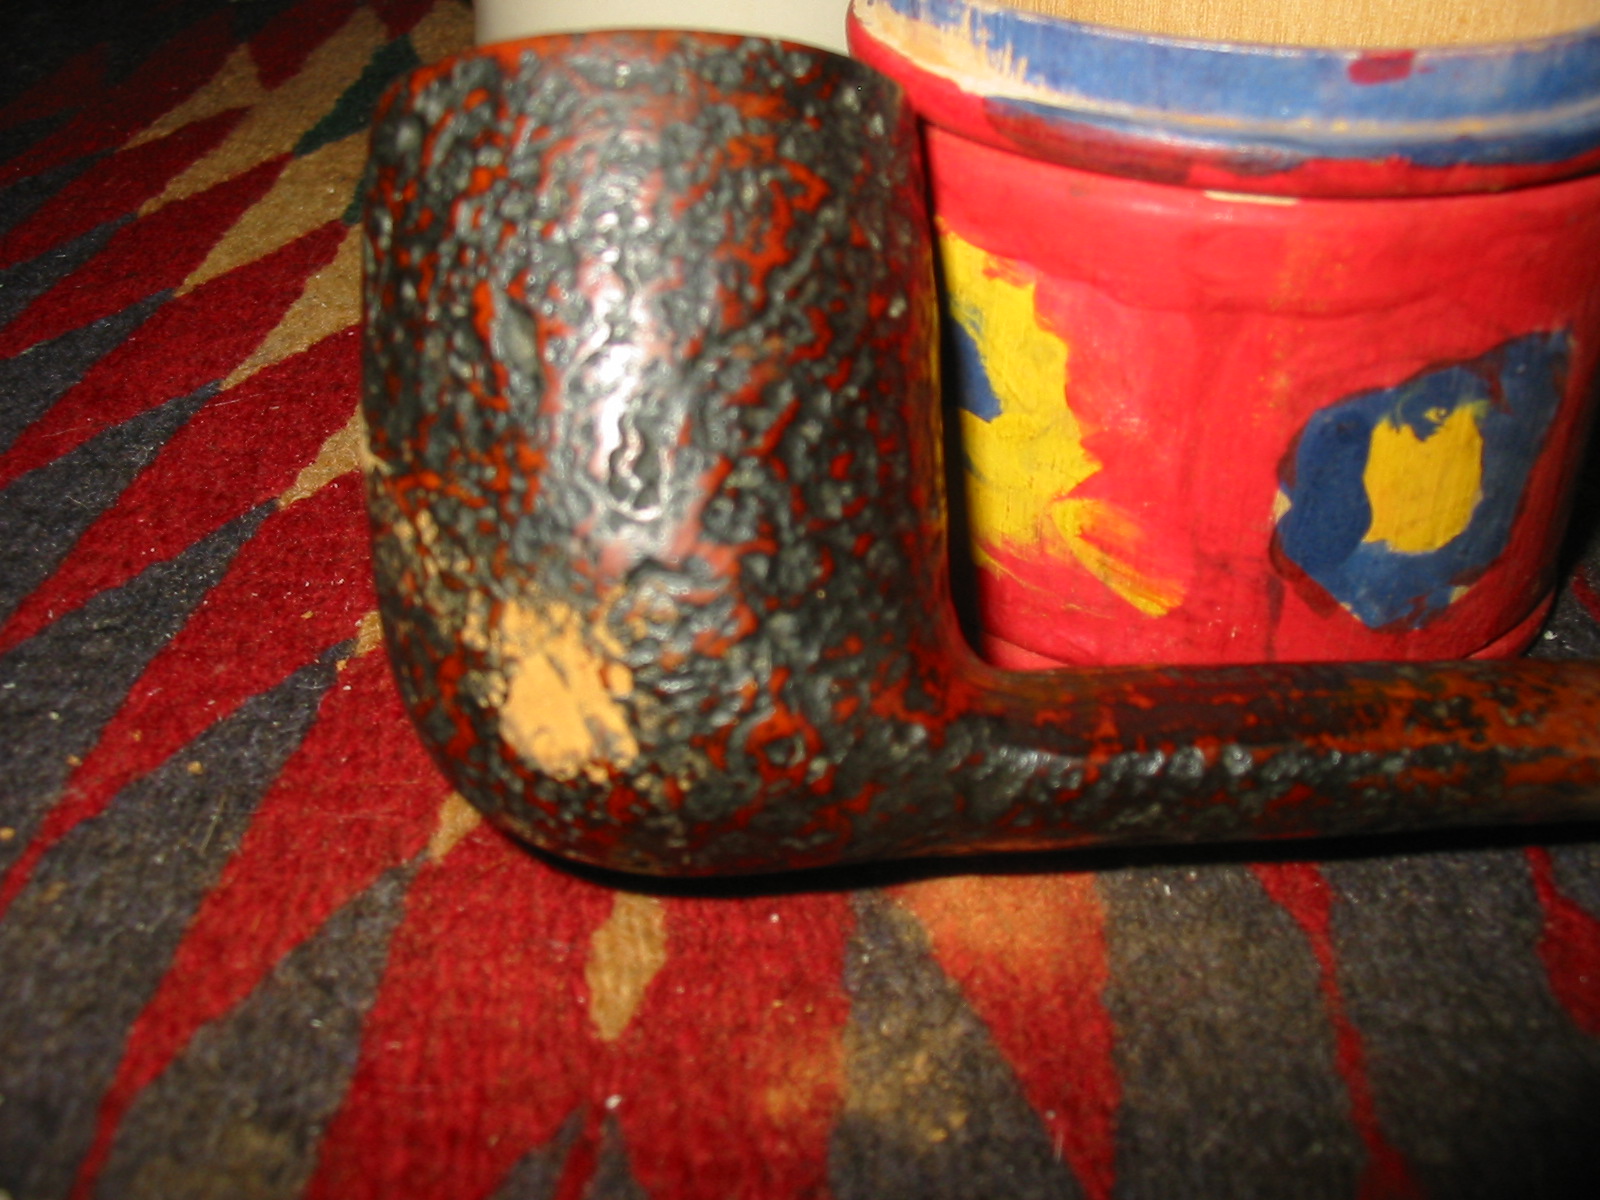
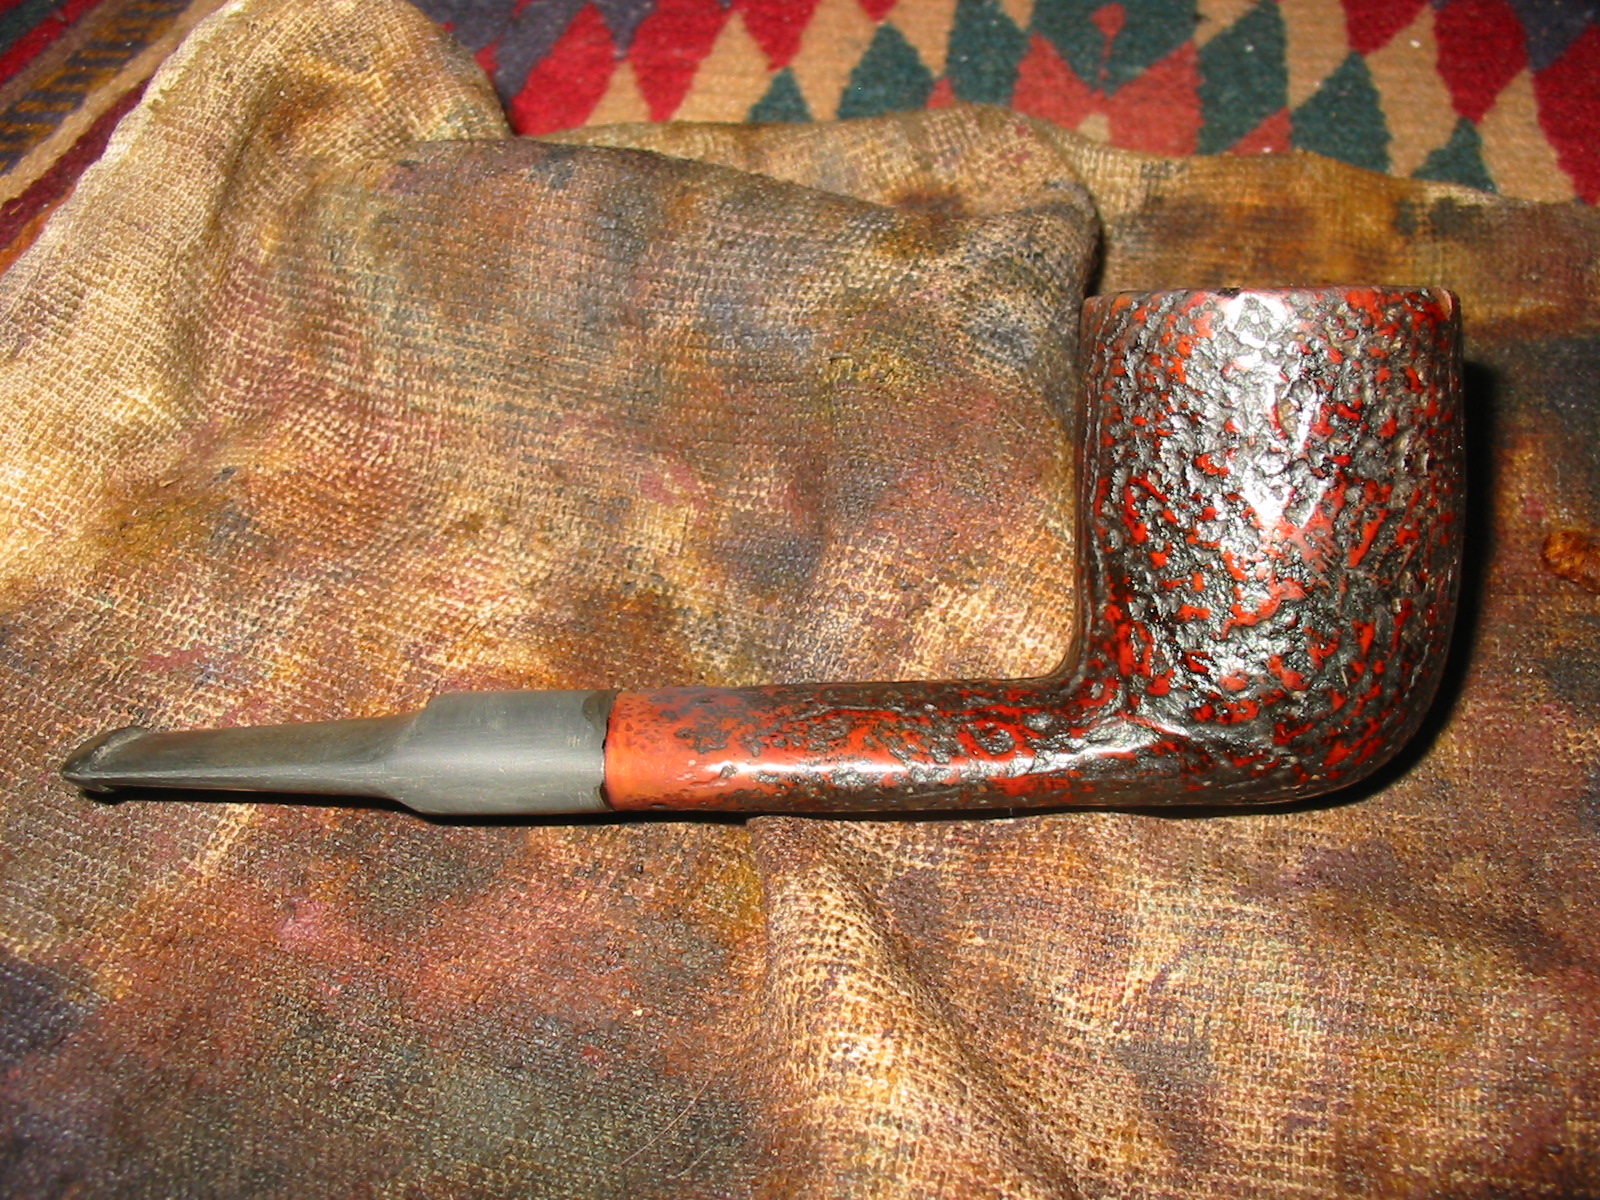
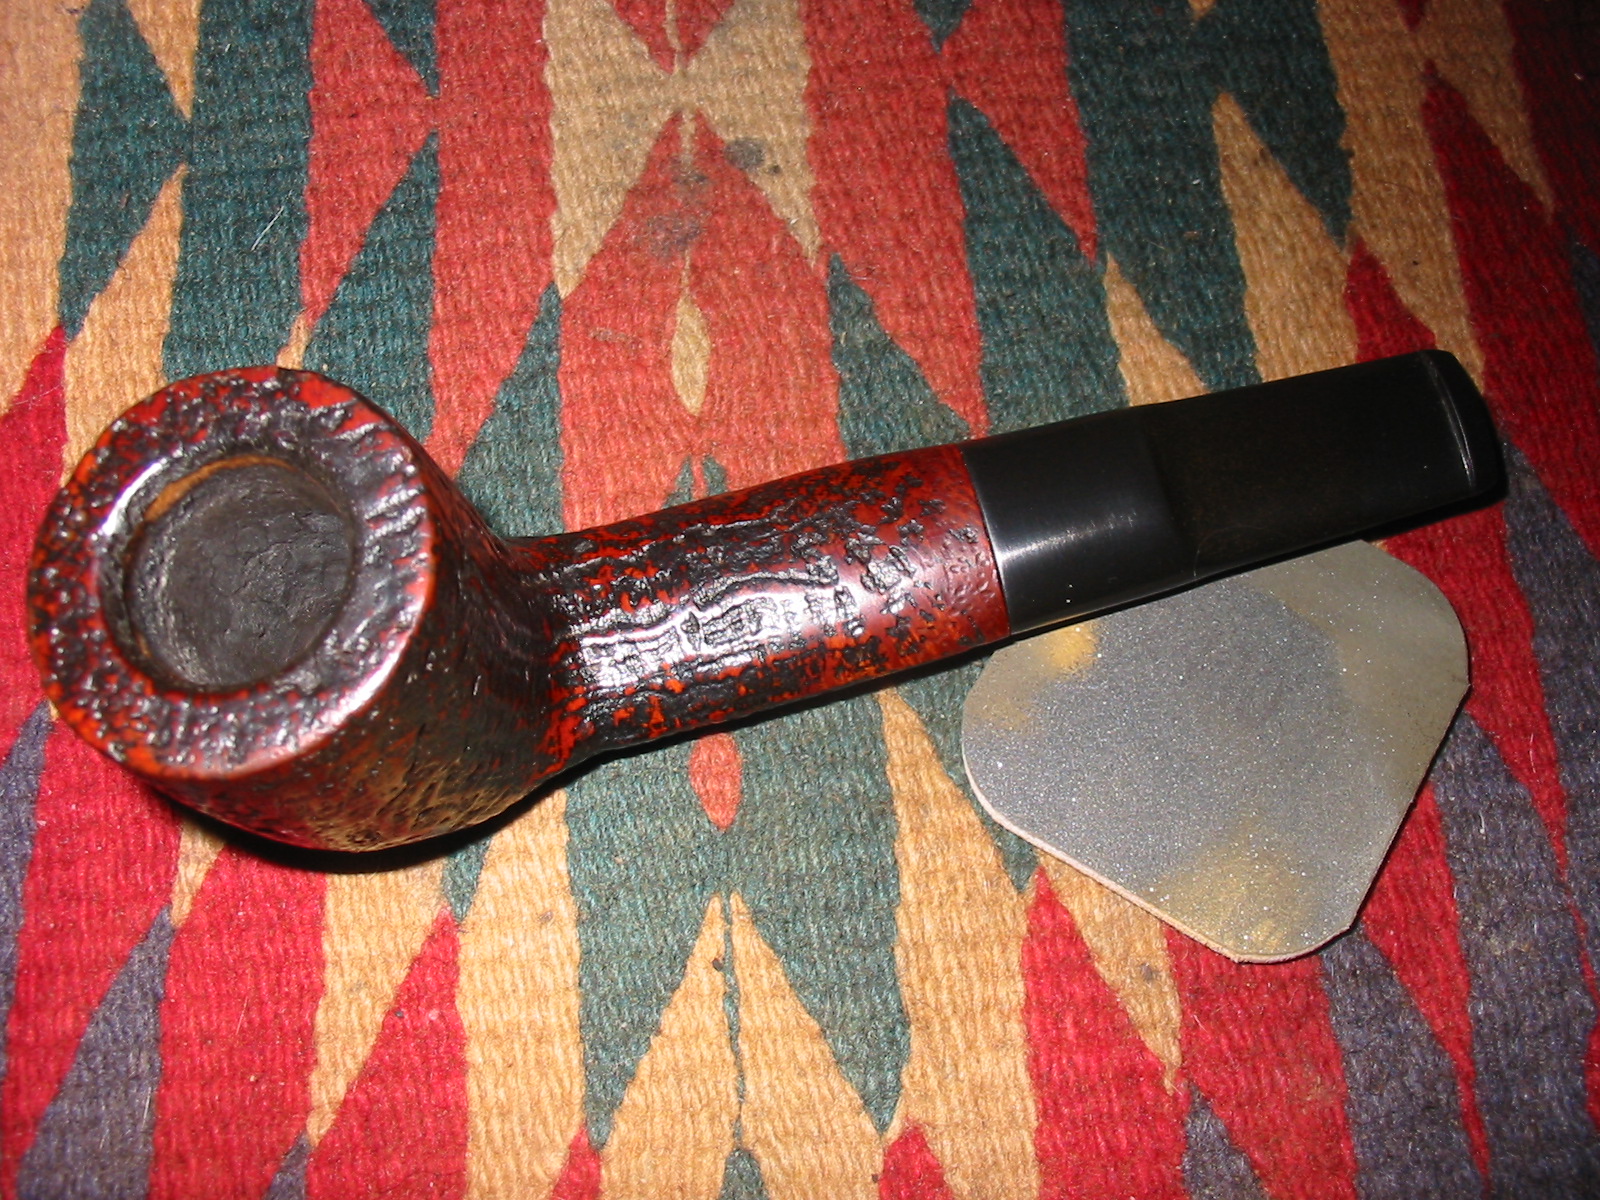
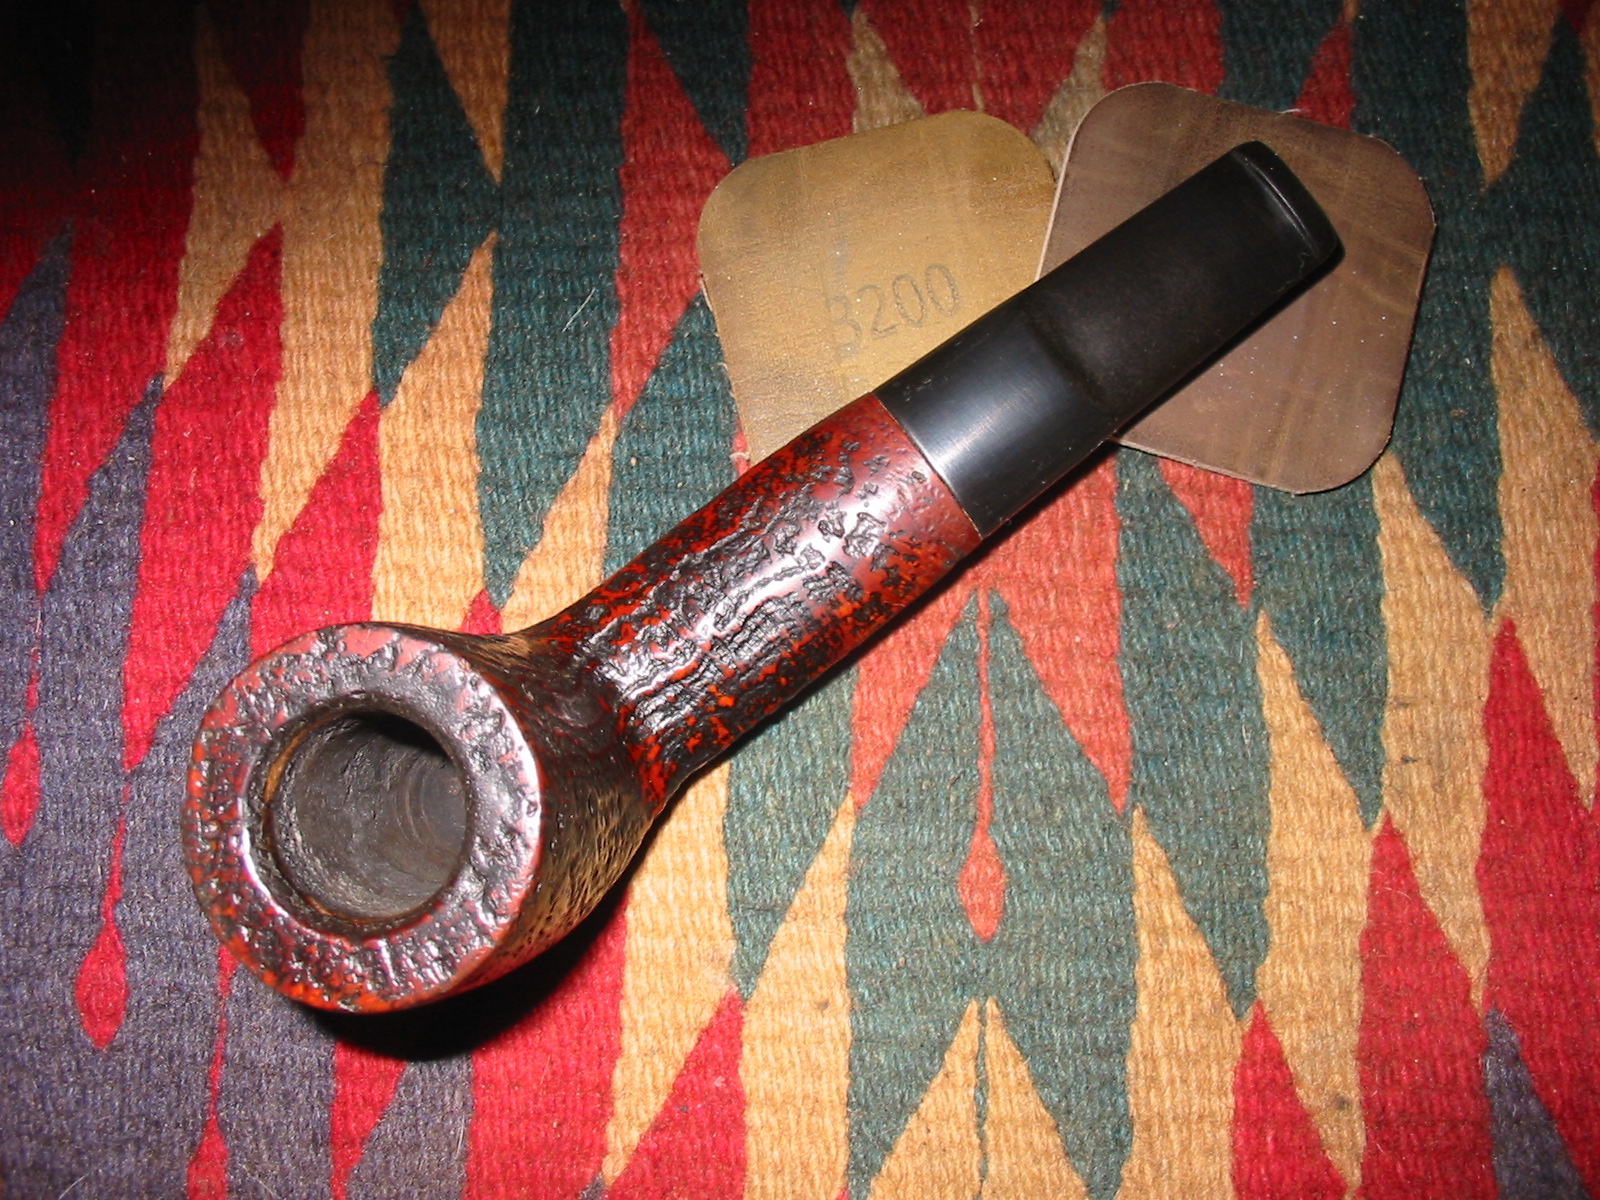
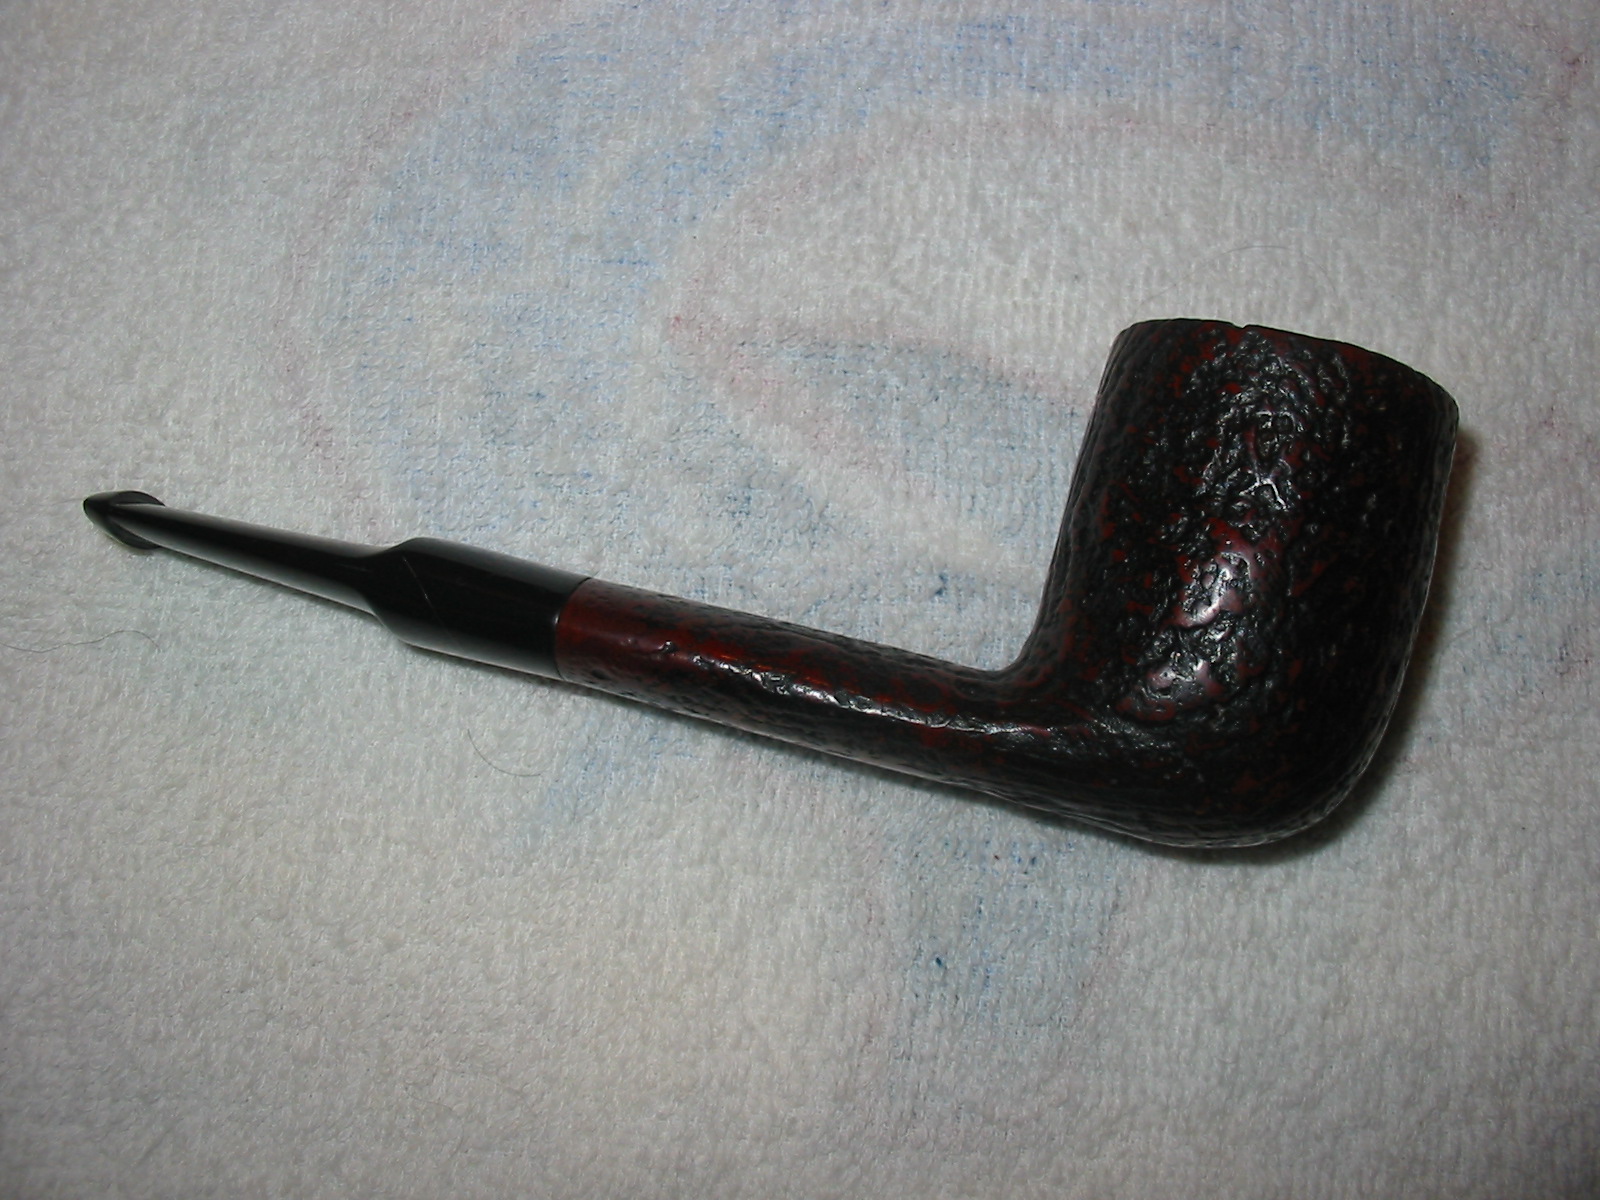
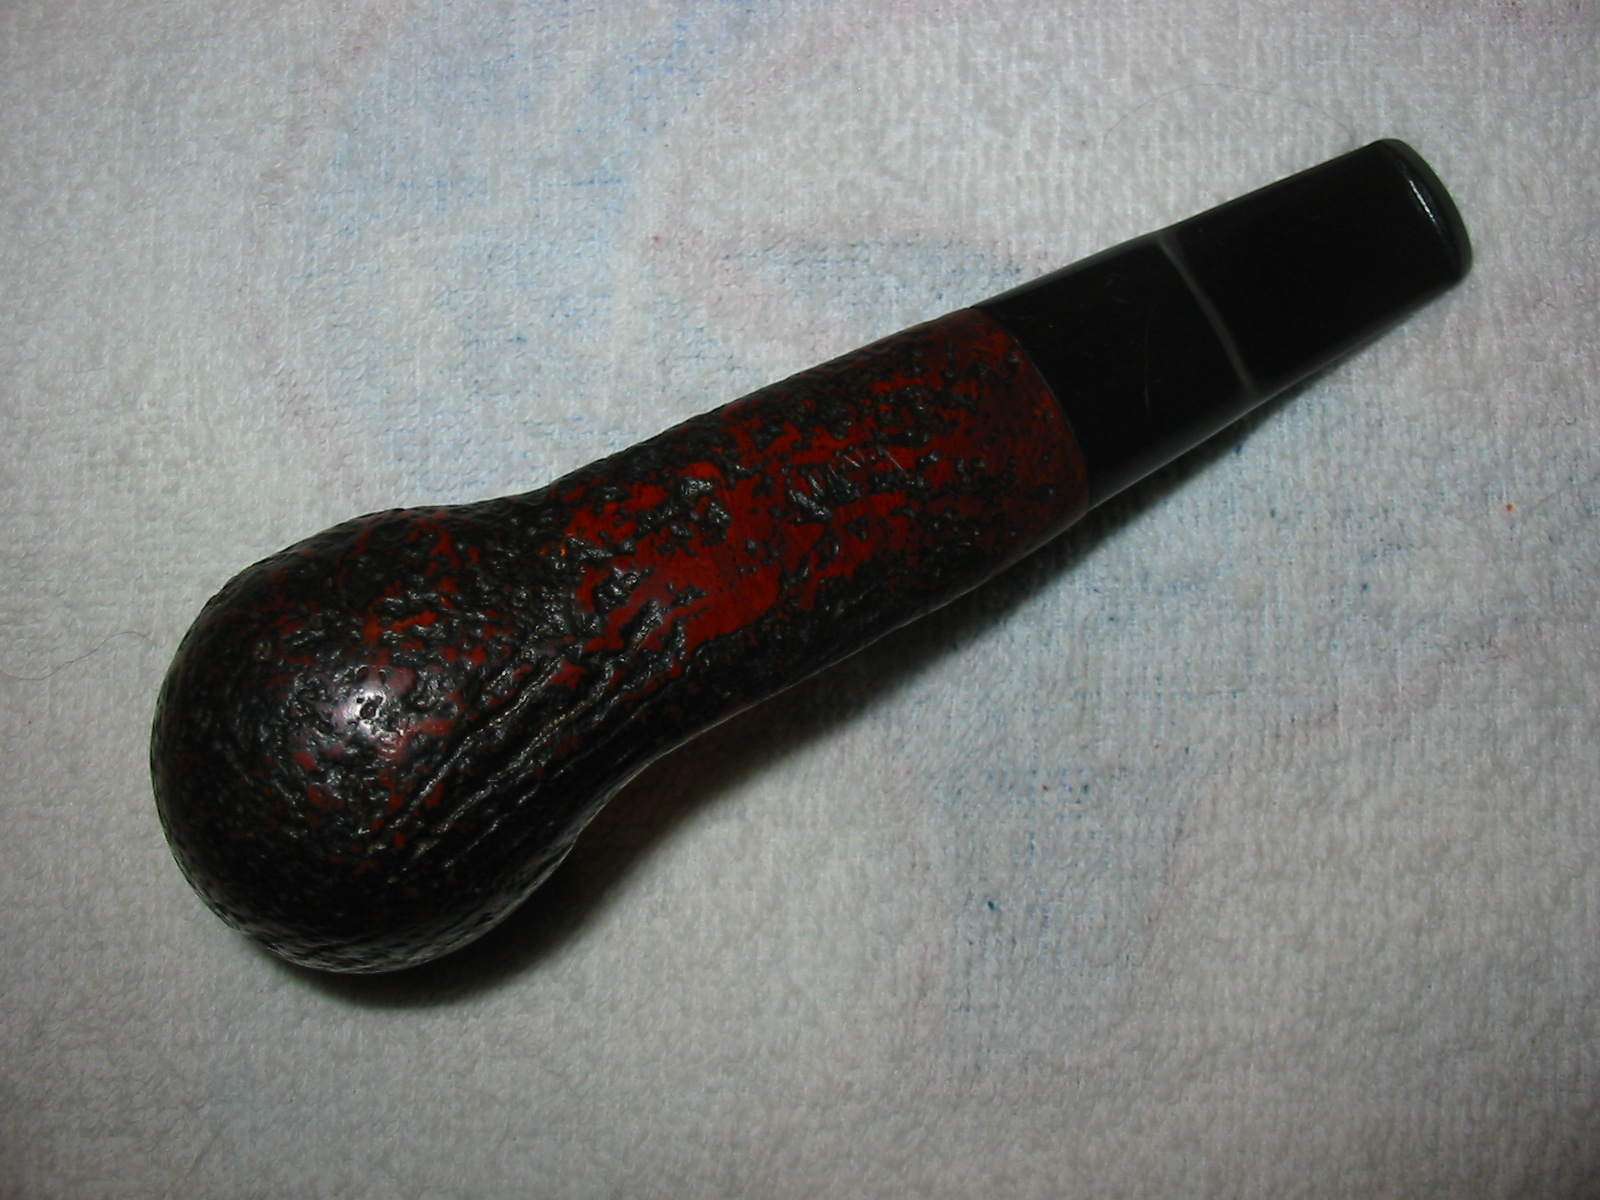
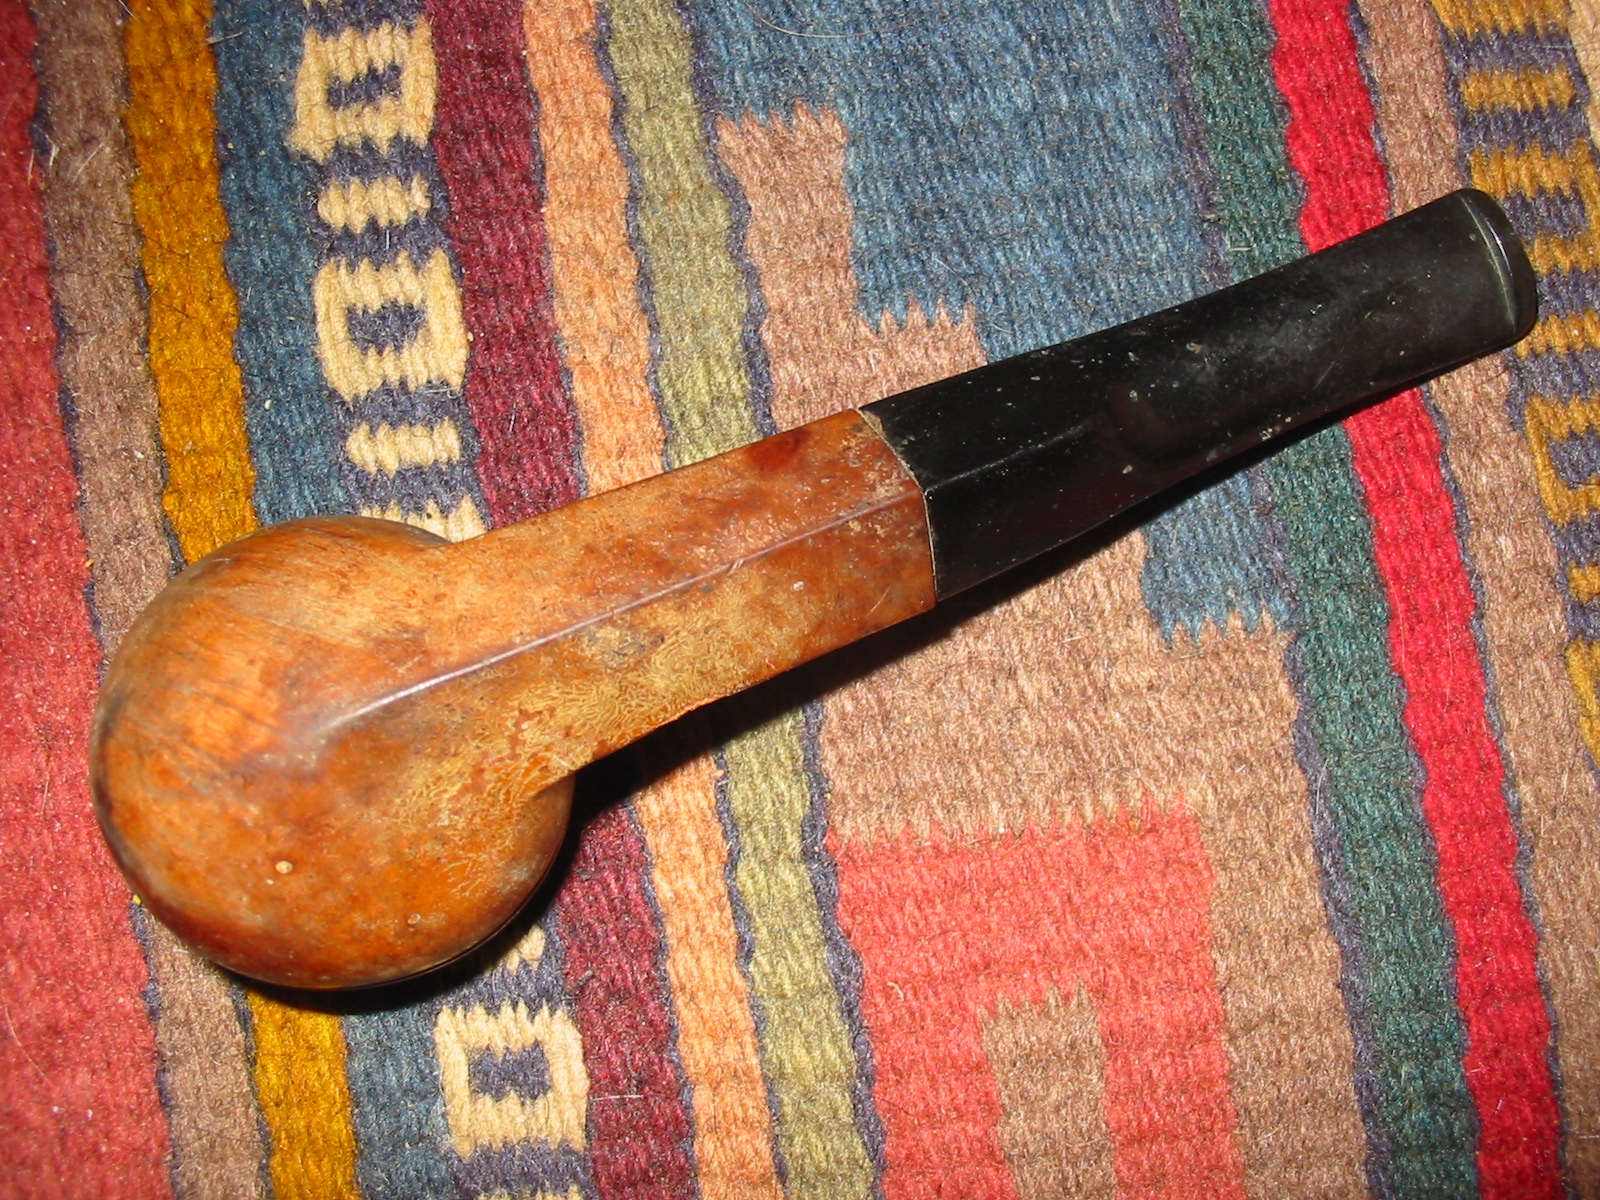
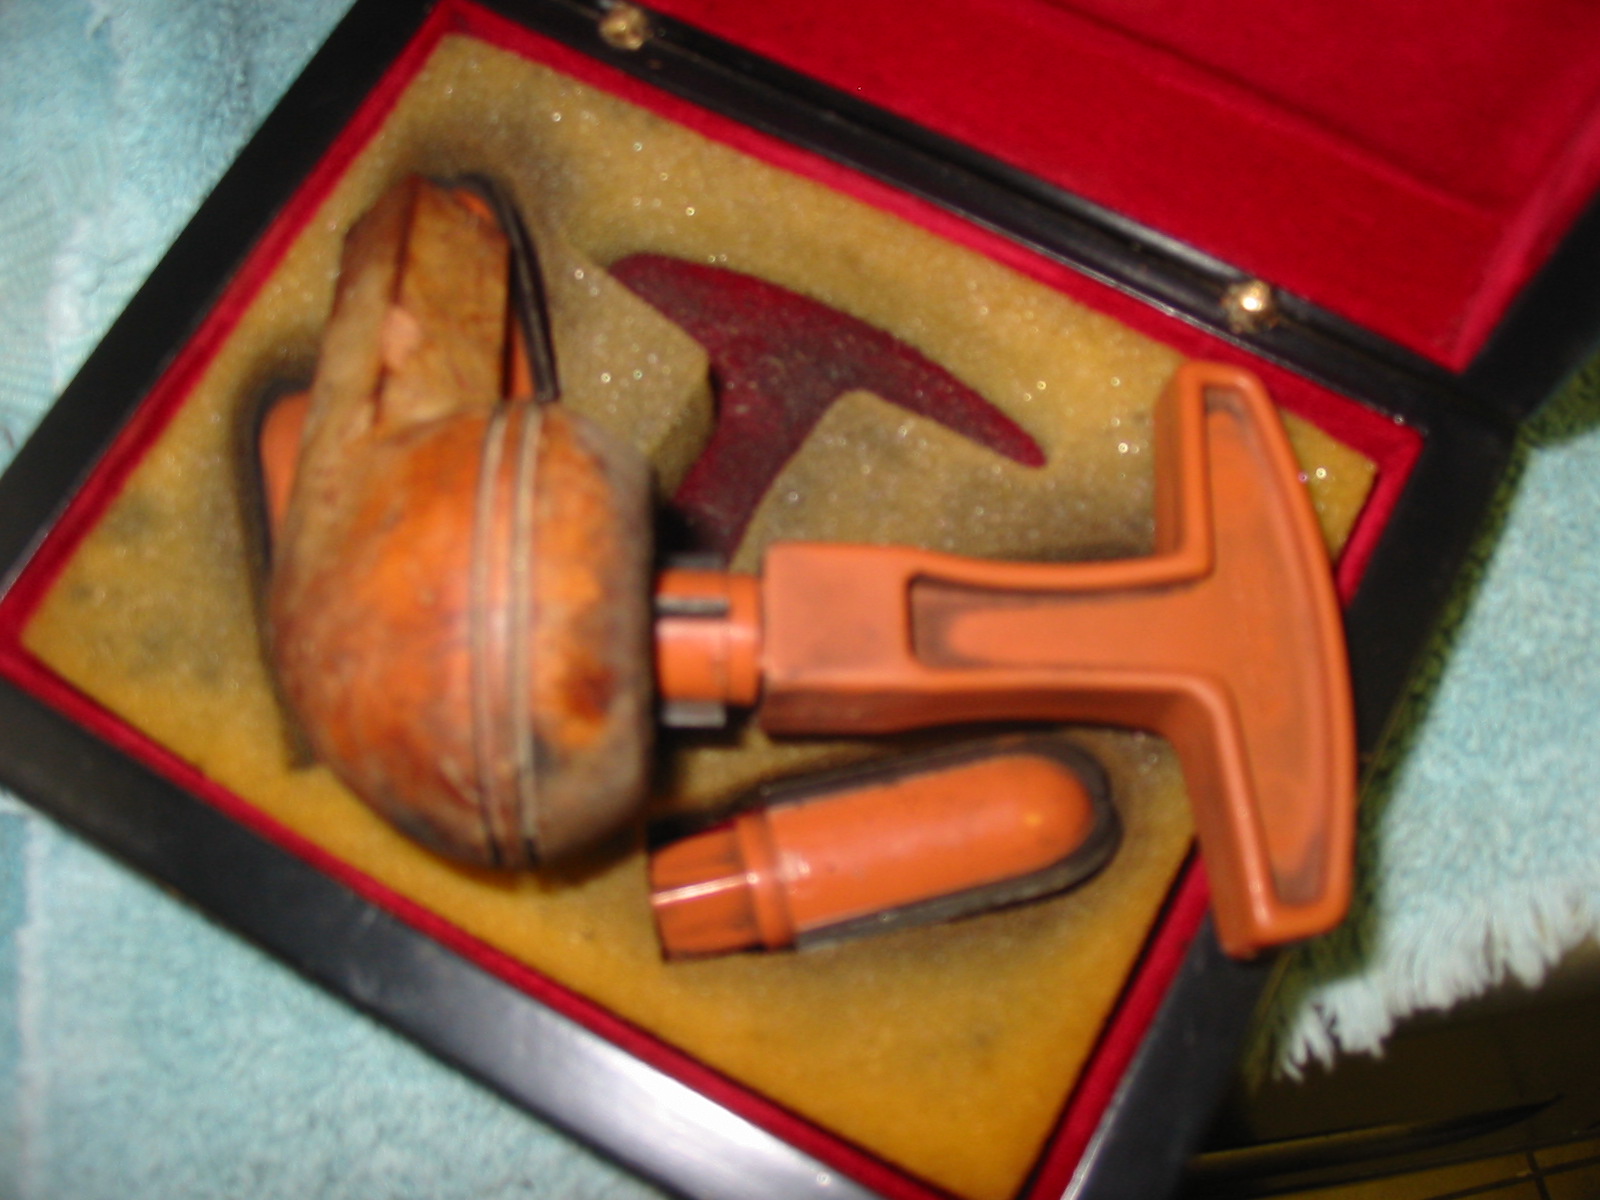
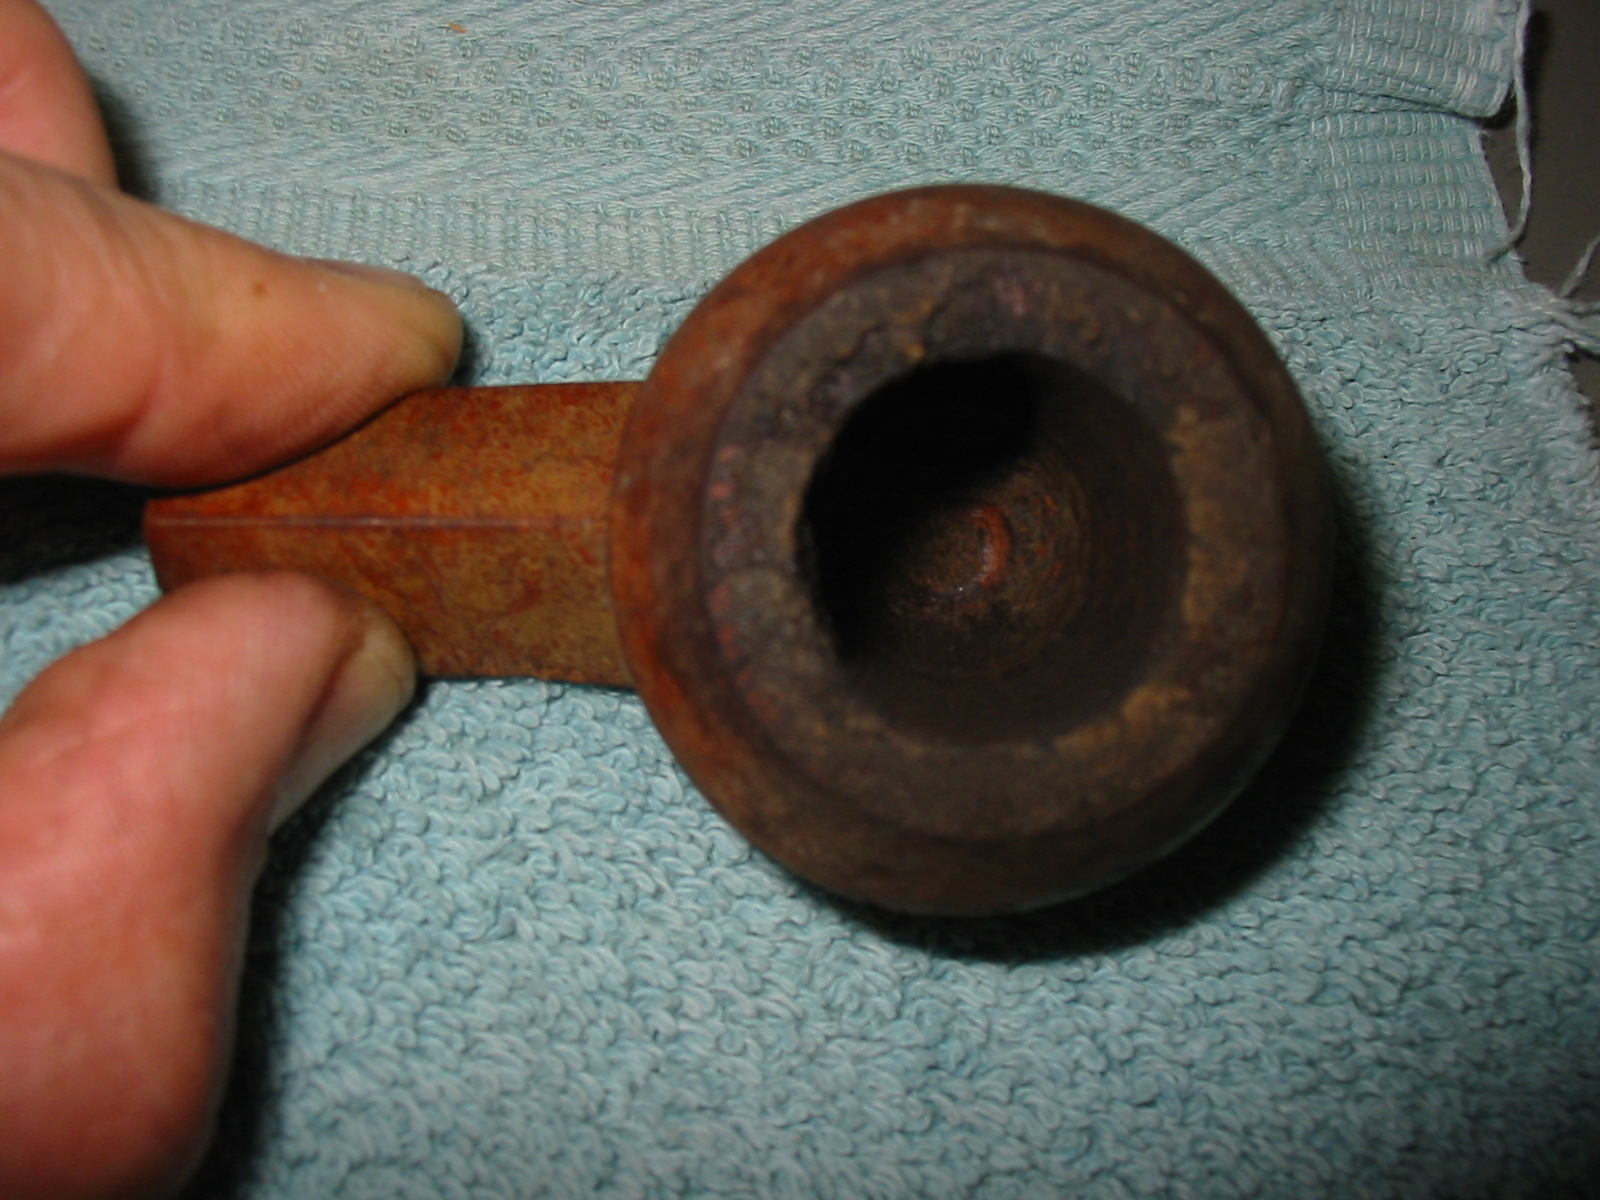
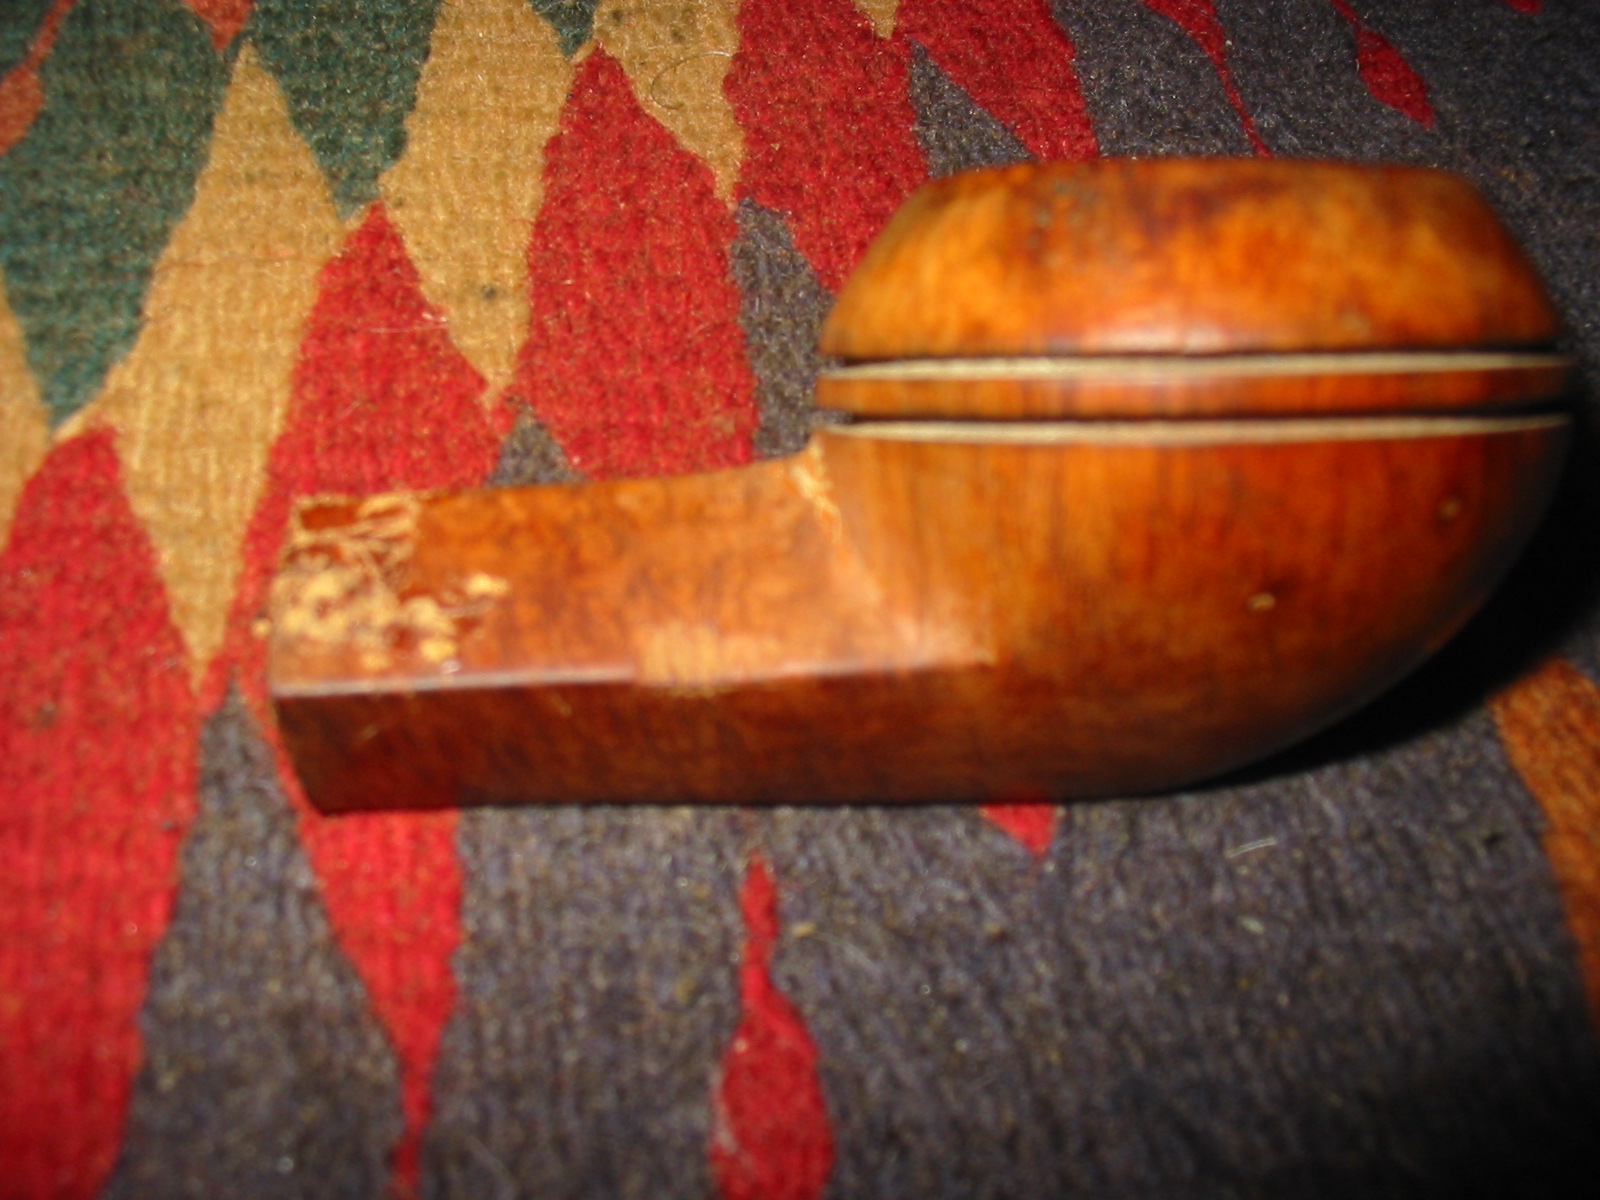
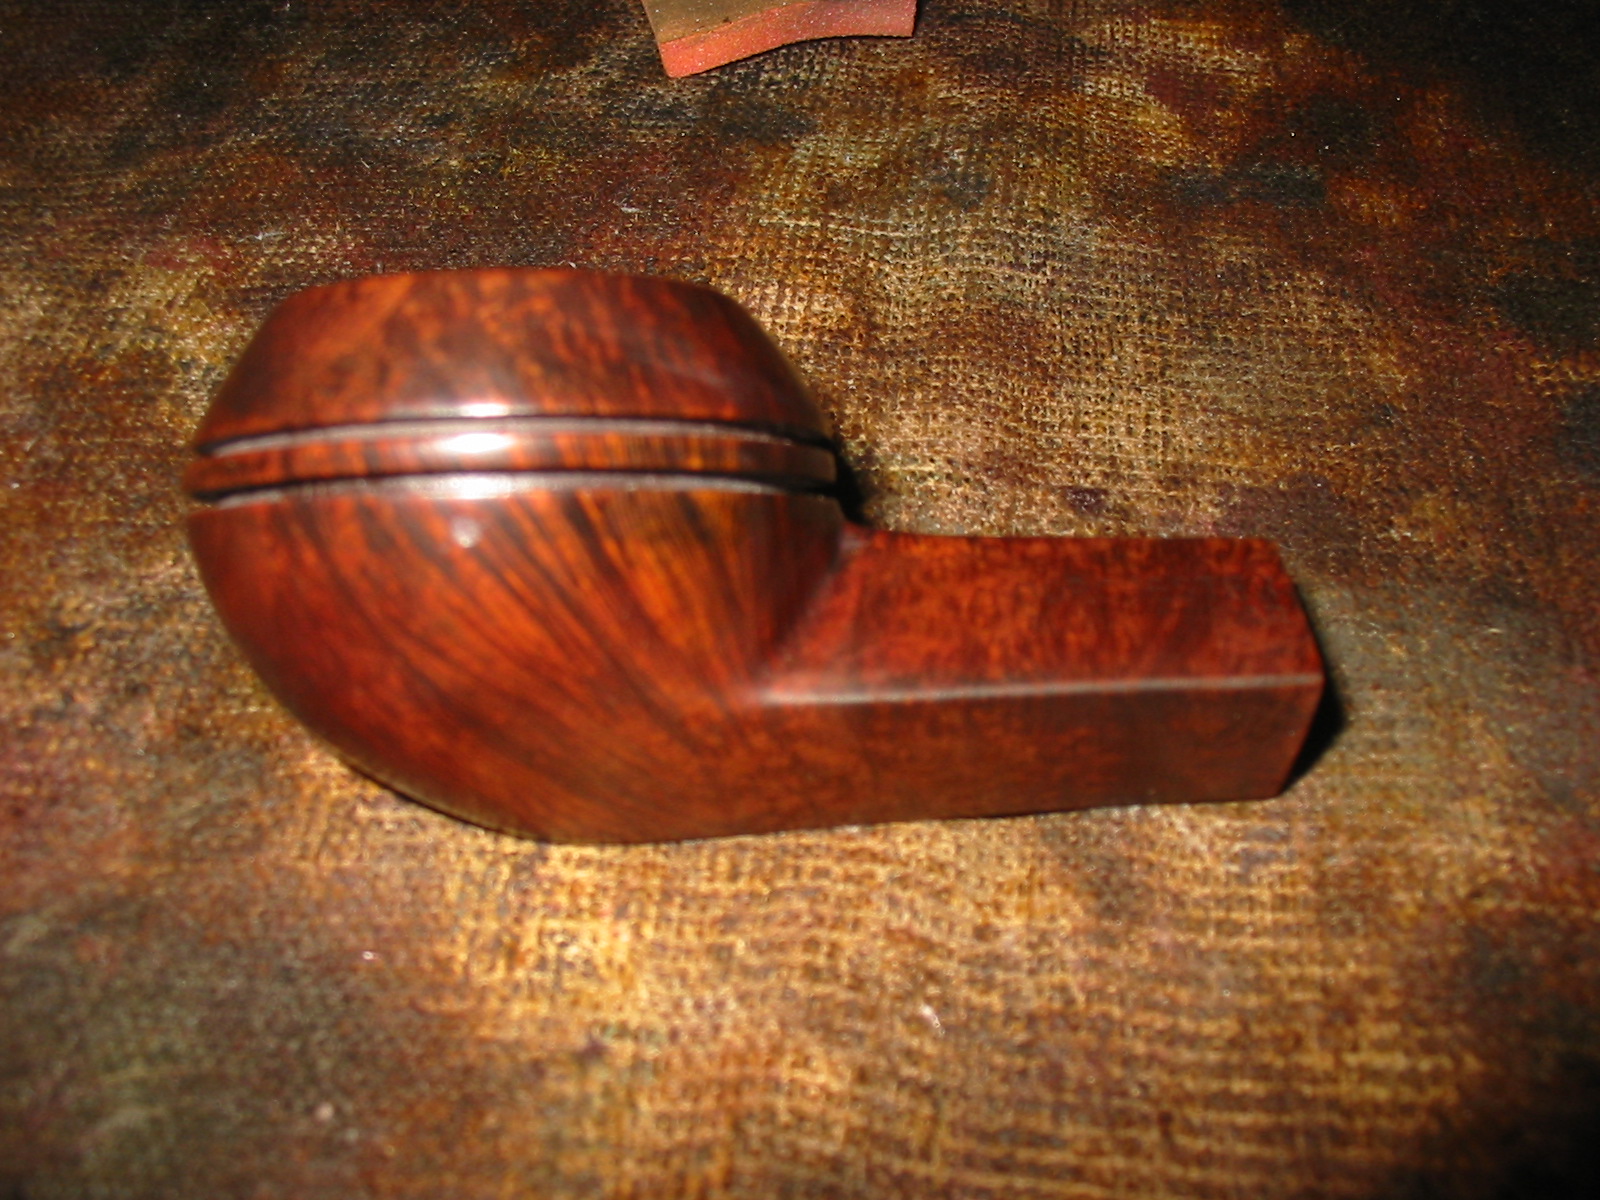
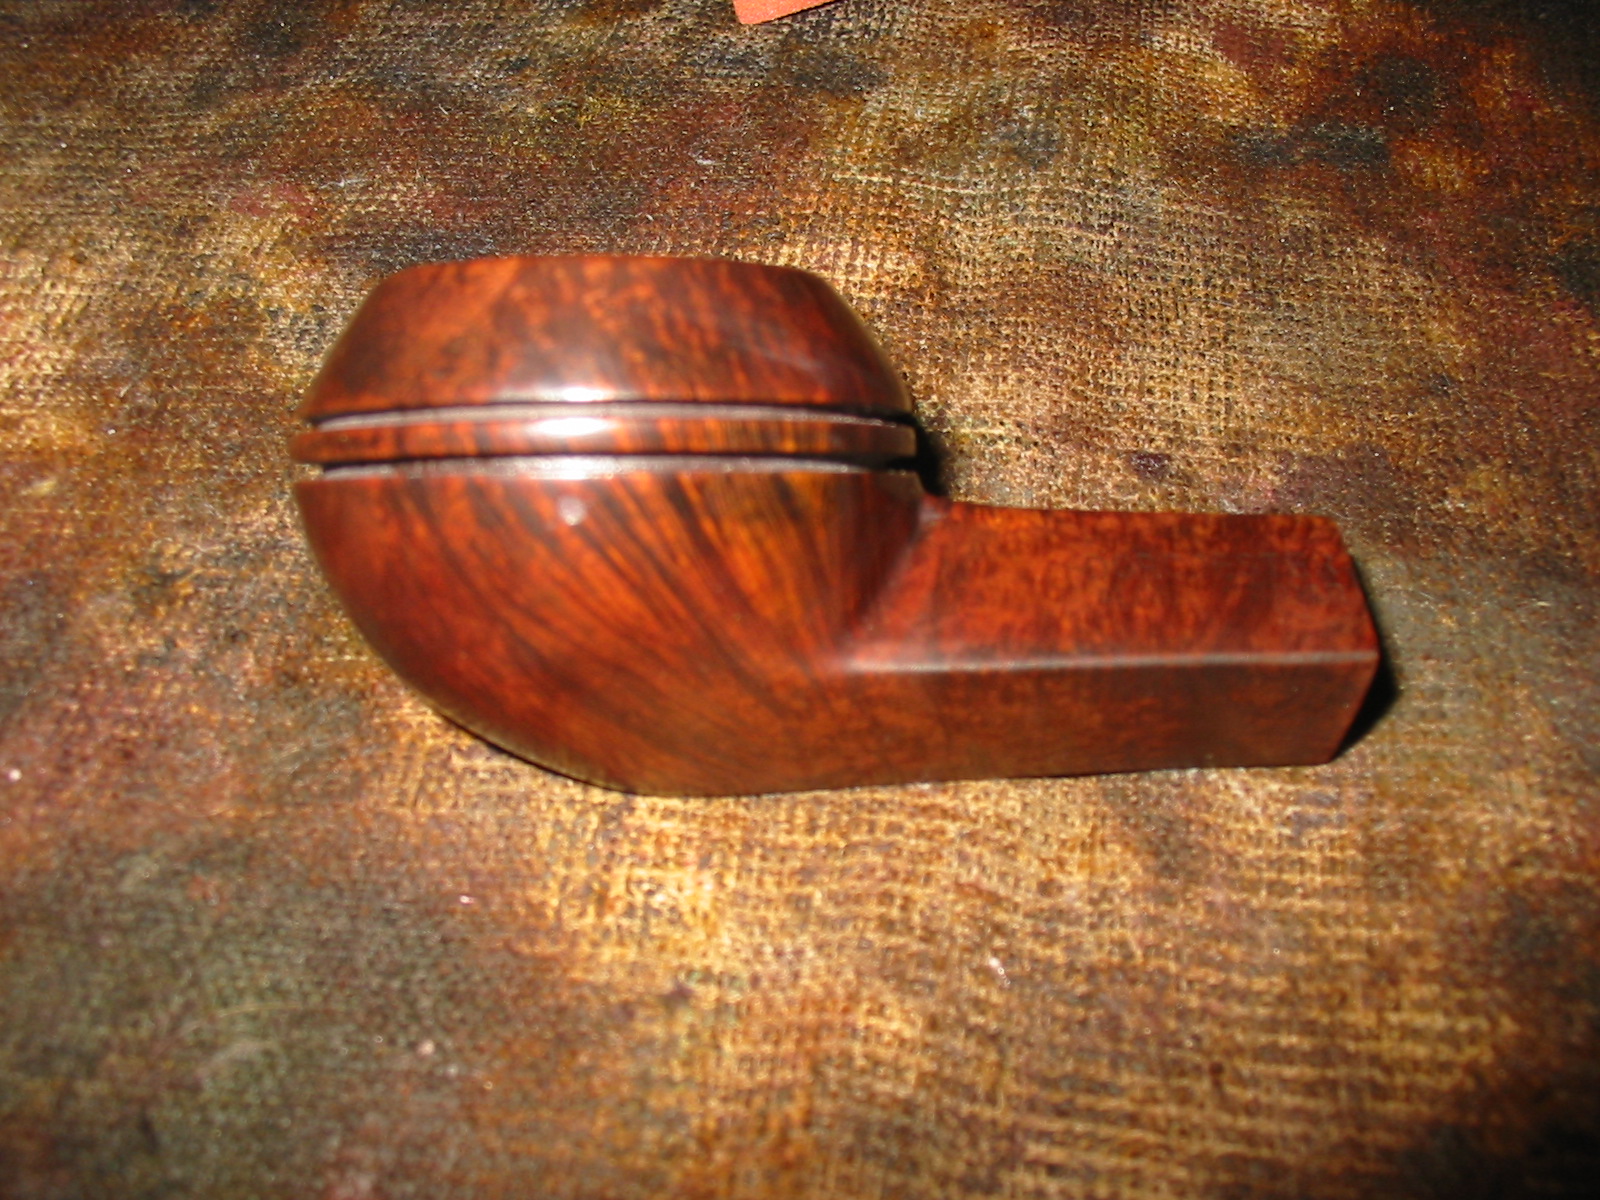
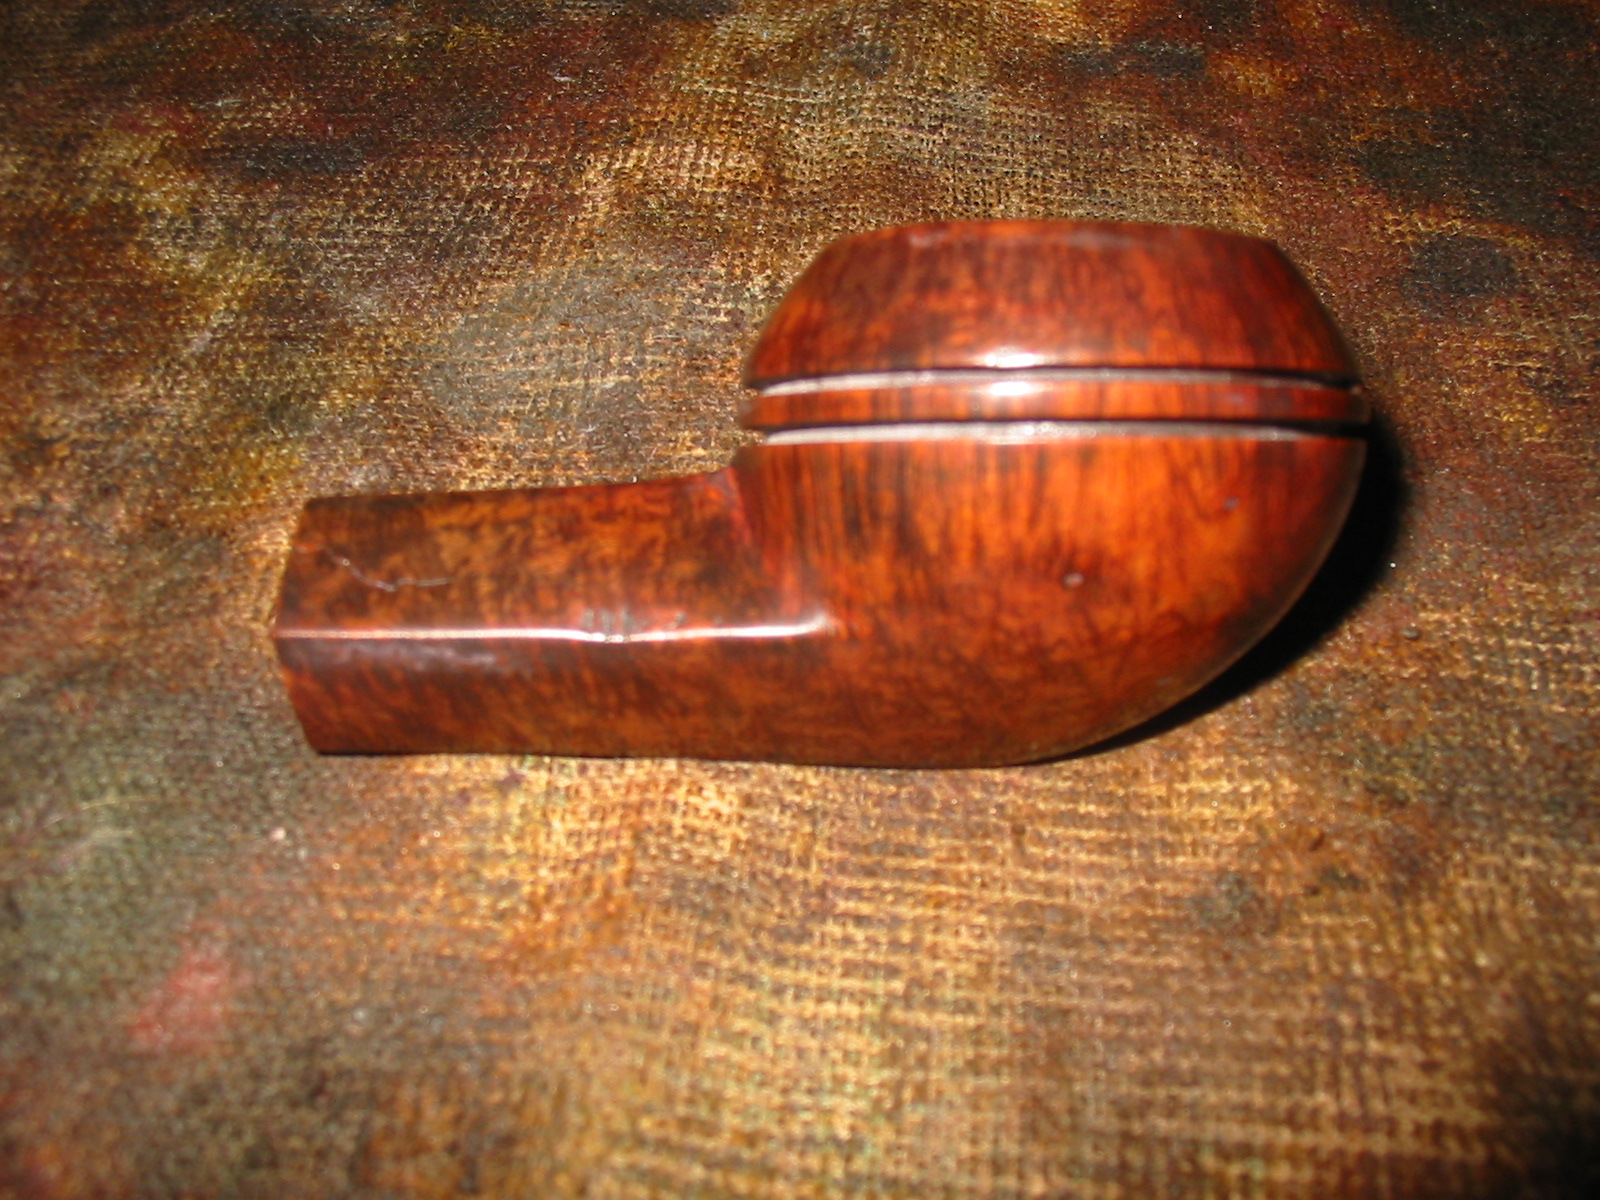
When it arrived I opened the box and took it out to see what I had to deal with on it. The stem was stuck in the shank and it was off center. I made a guess that it was a screw in stem – metal tenon and some kind of condenser. The finish was absolutely ruined. There was an opaque film all over the bowl and shank of varnish that had gone bad. There were crackles in the finish. The shank was crack badly and the shank was no longer square – the crack had expanded away from the angles of the pipe. The rim was invisible and the bowl was caked with a thick cake but upon examination it was full of cracks and crevices rather than a hard cake of carbon. Looking at what I could see of the inner edge of the rim it seemed like it was not damaged – at least not by reaming! There were several burn spots on the outside of the bowl around the rim and left side of the bowl from laying the pipe in an ash tray with a cigarette. It would indeed be a challenge and one that I wondered seriously about for a few moments.

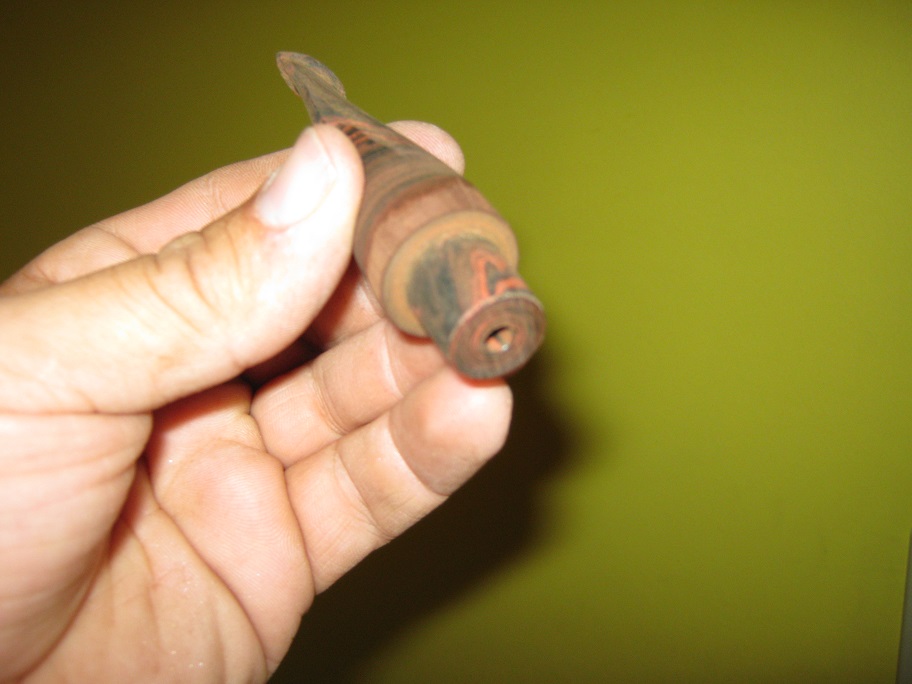
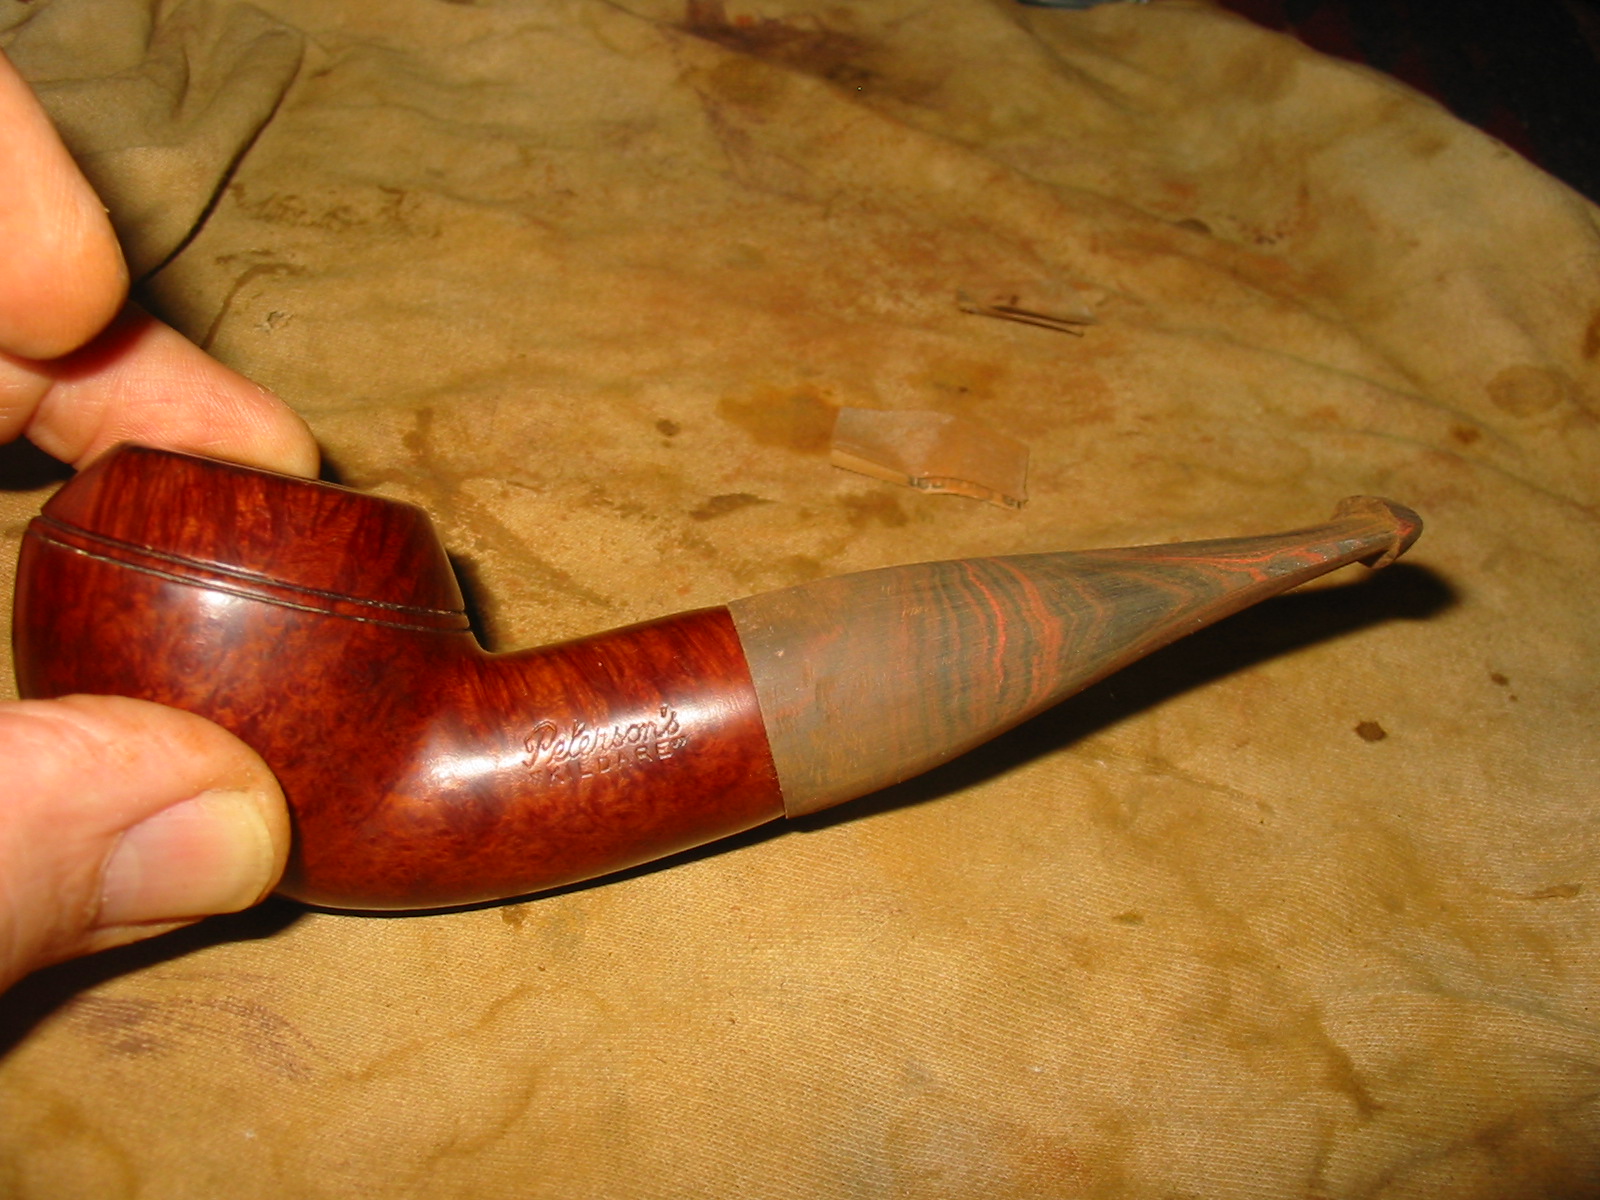
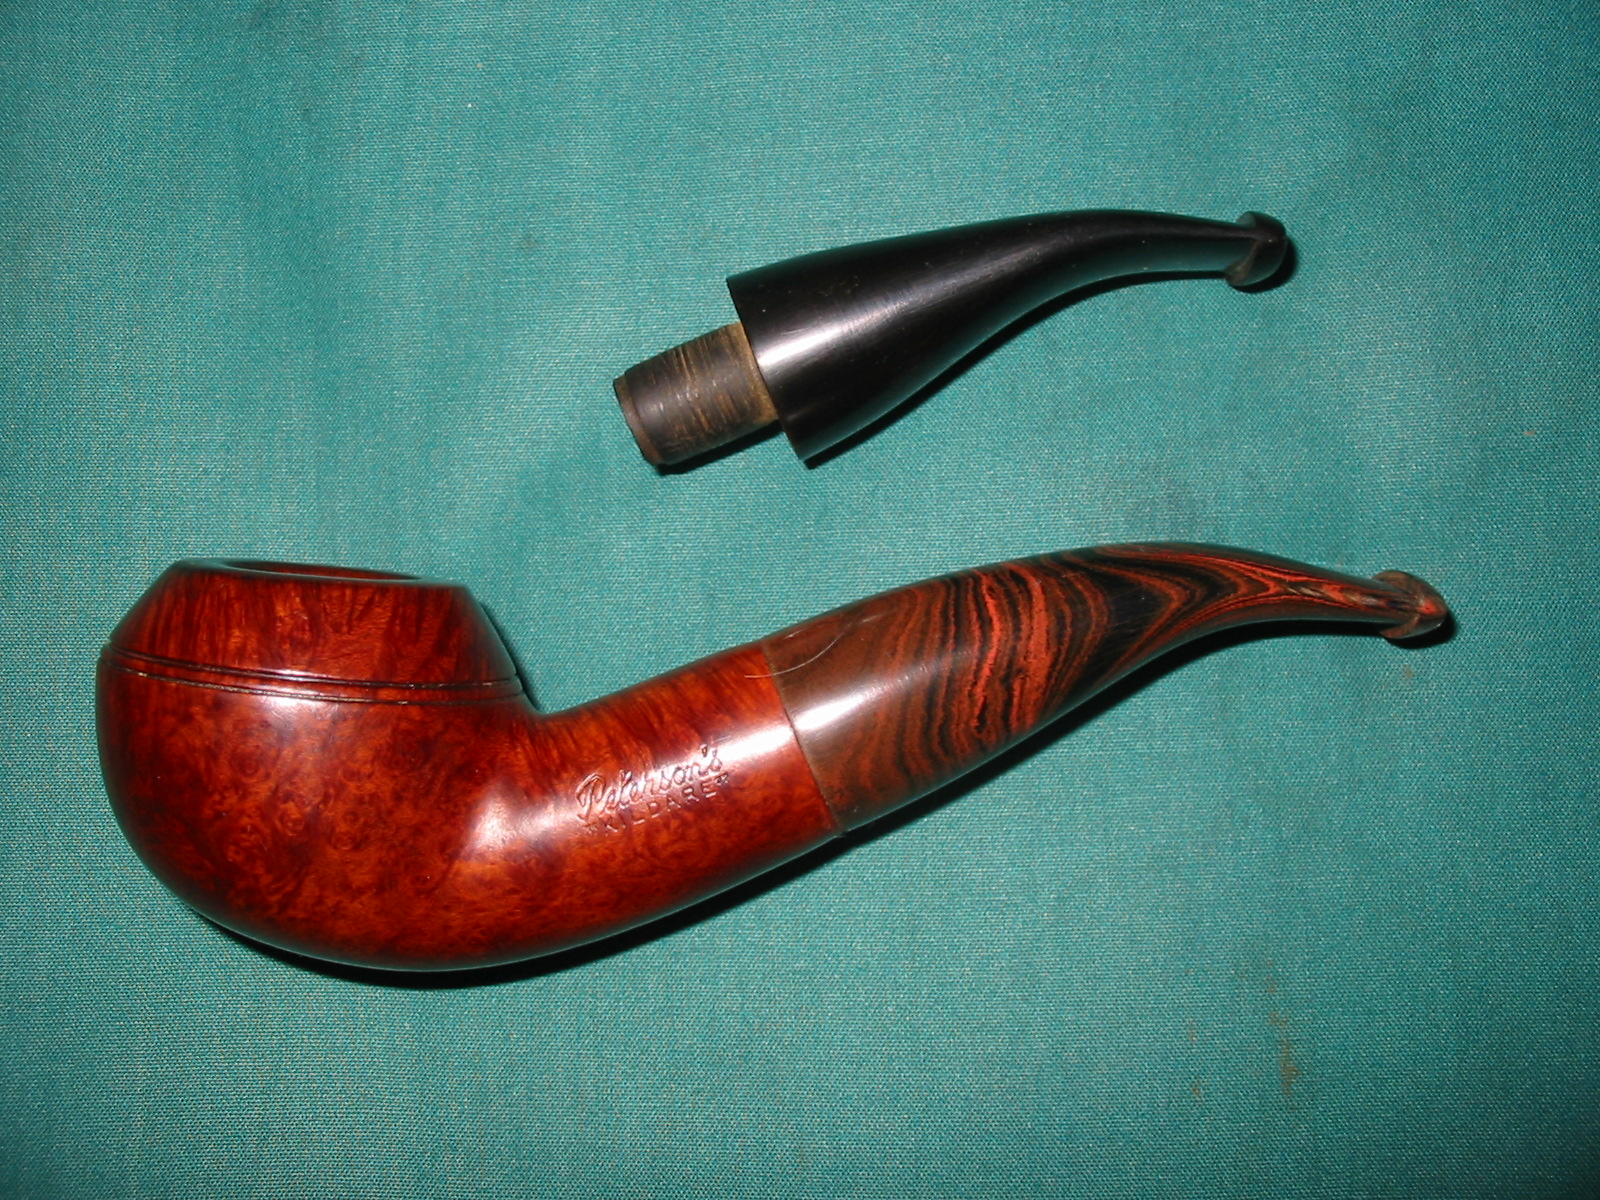
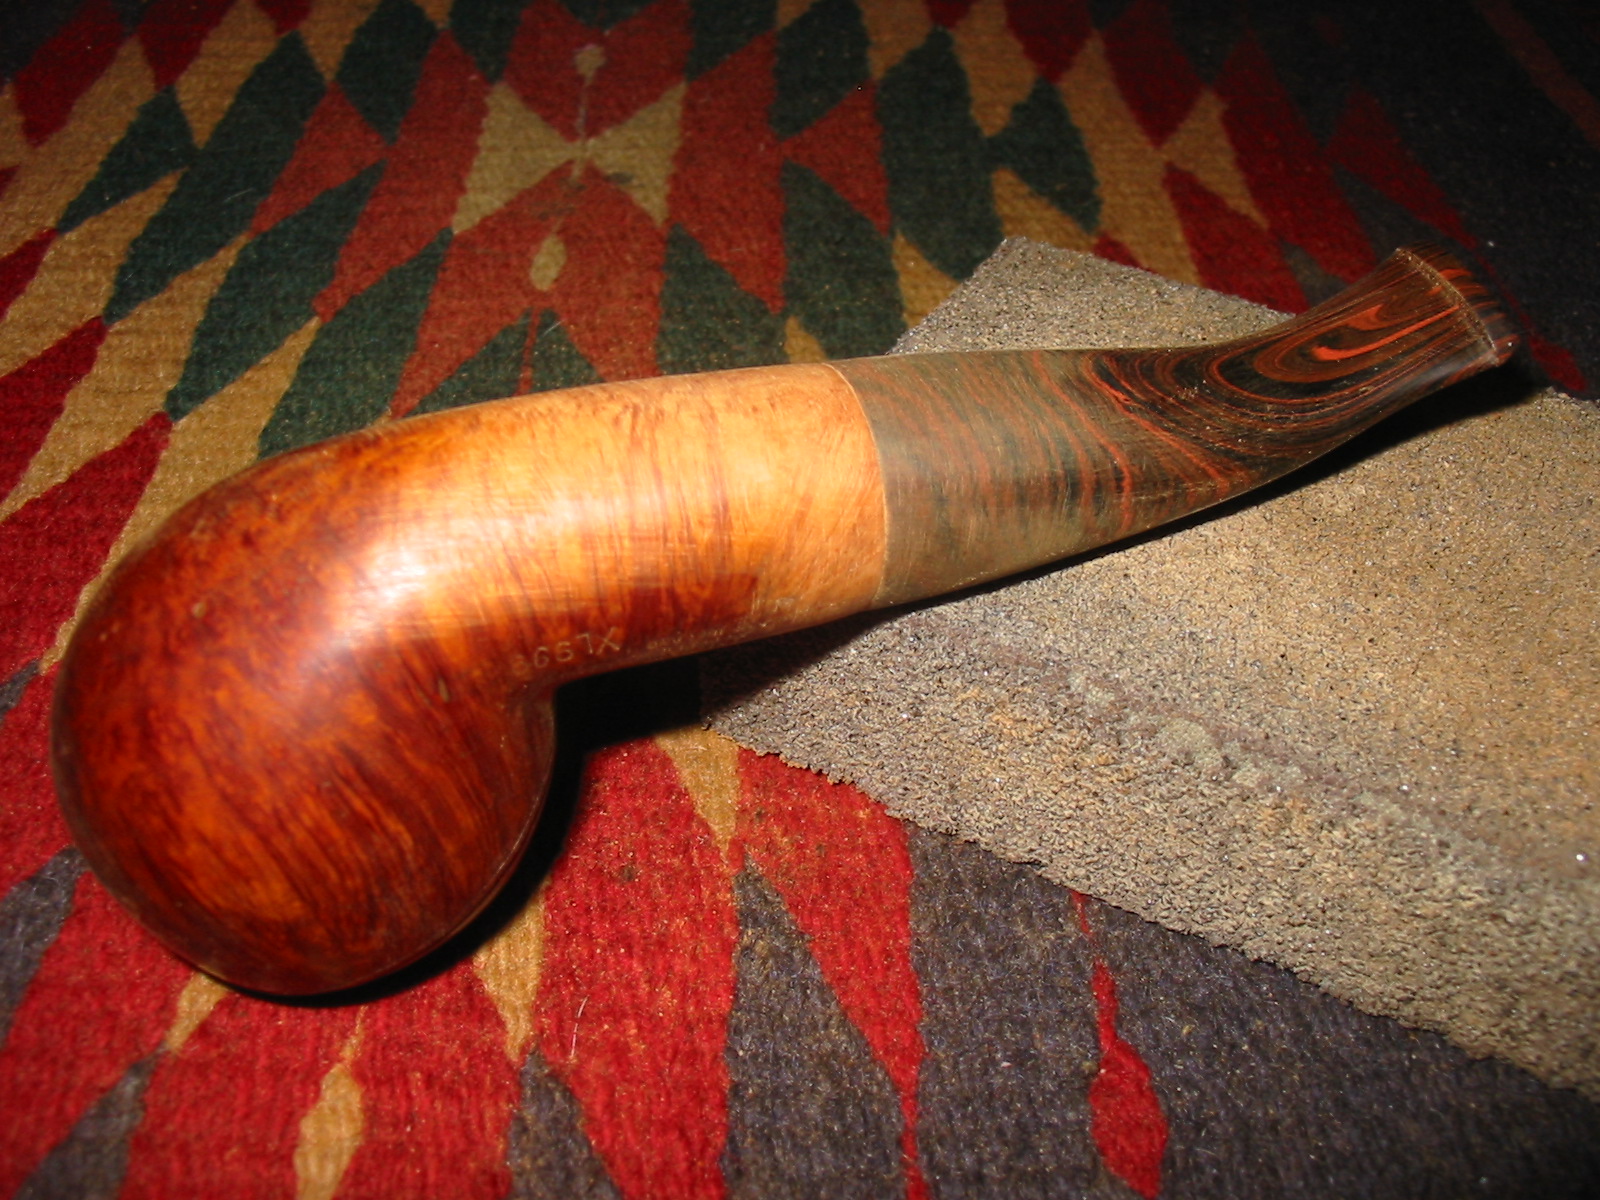
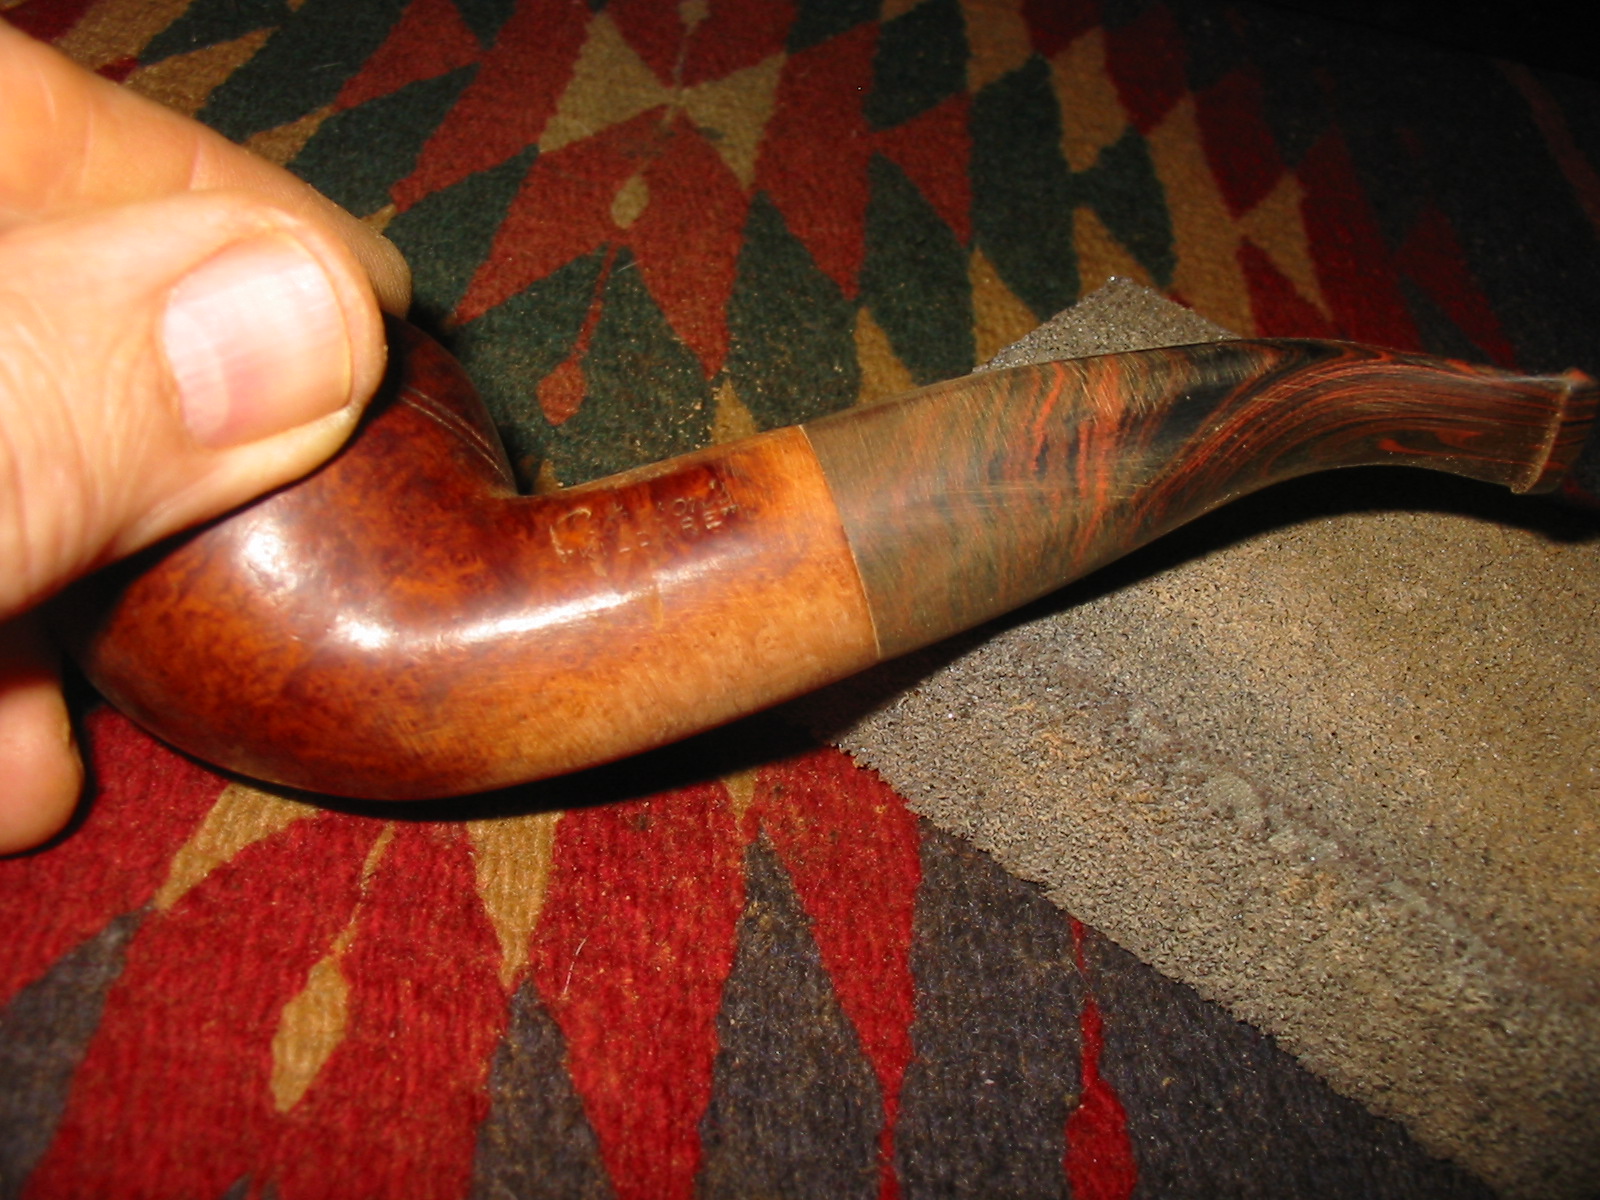
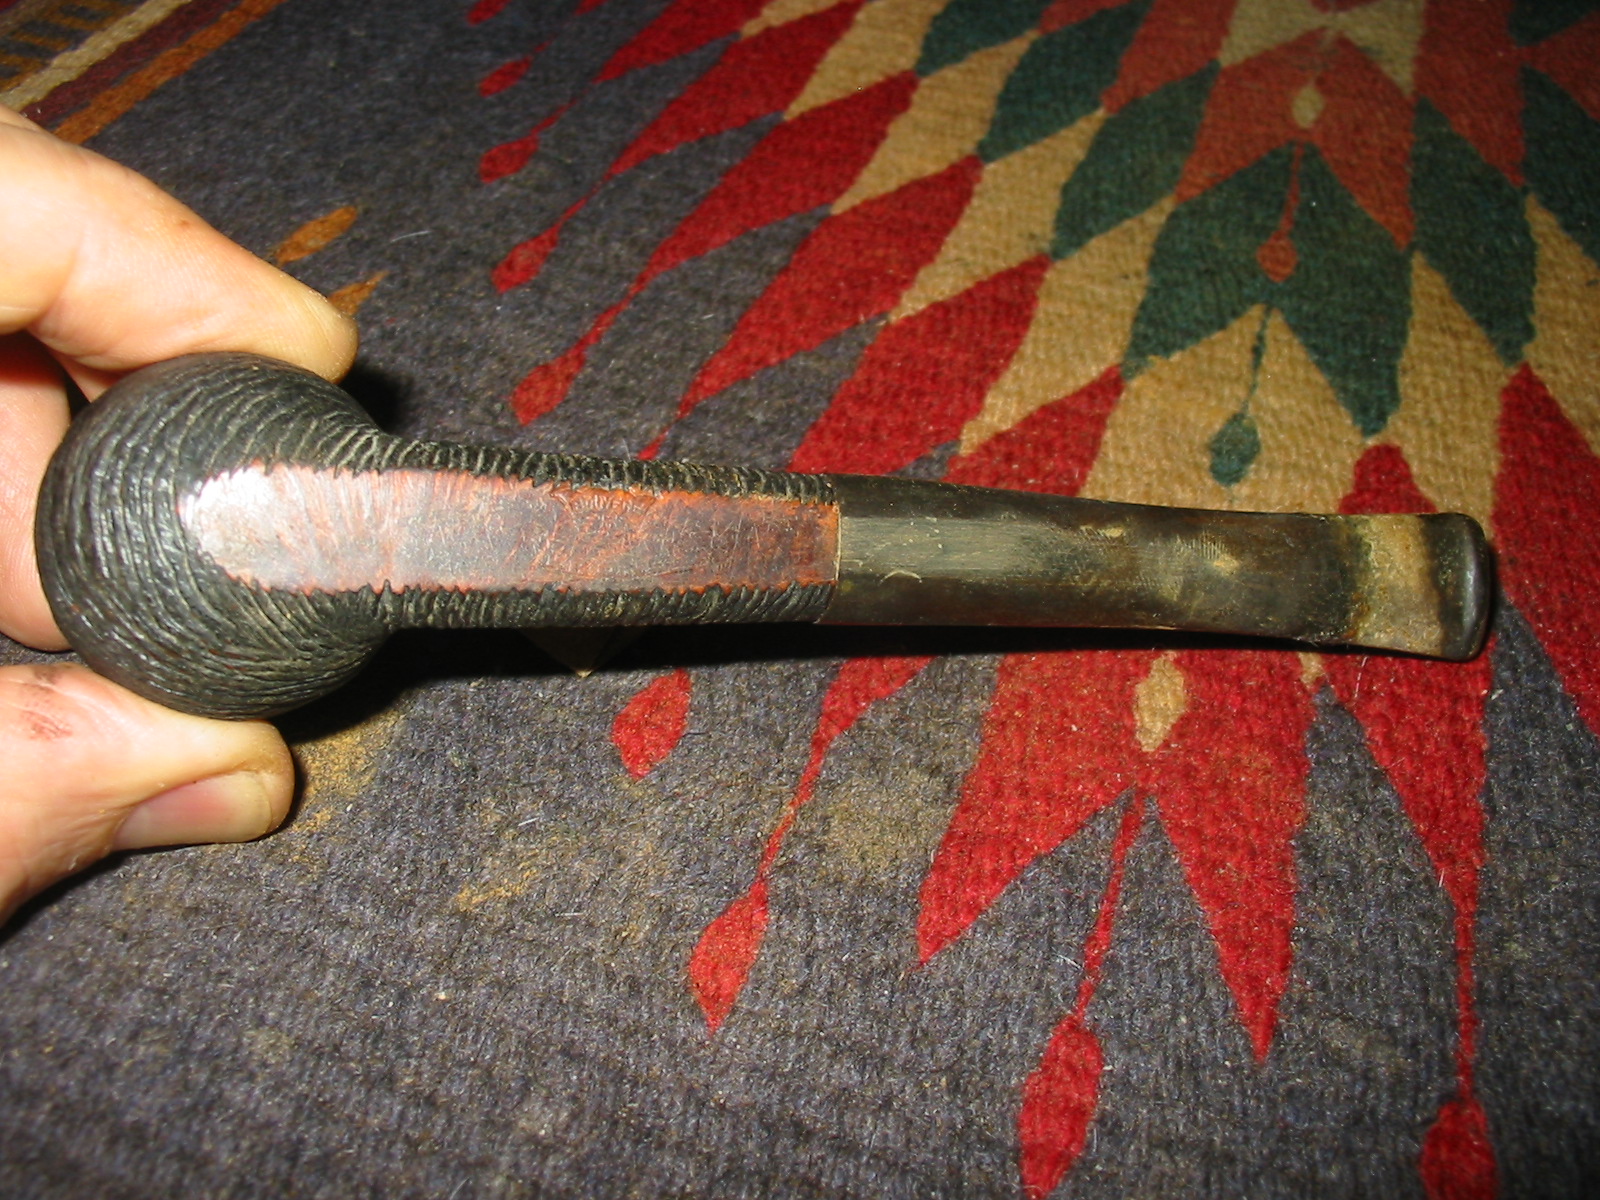
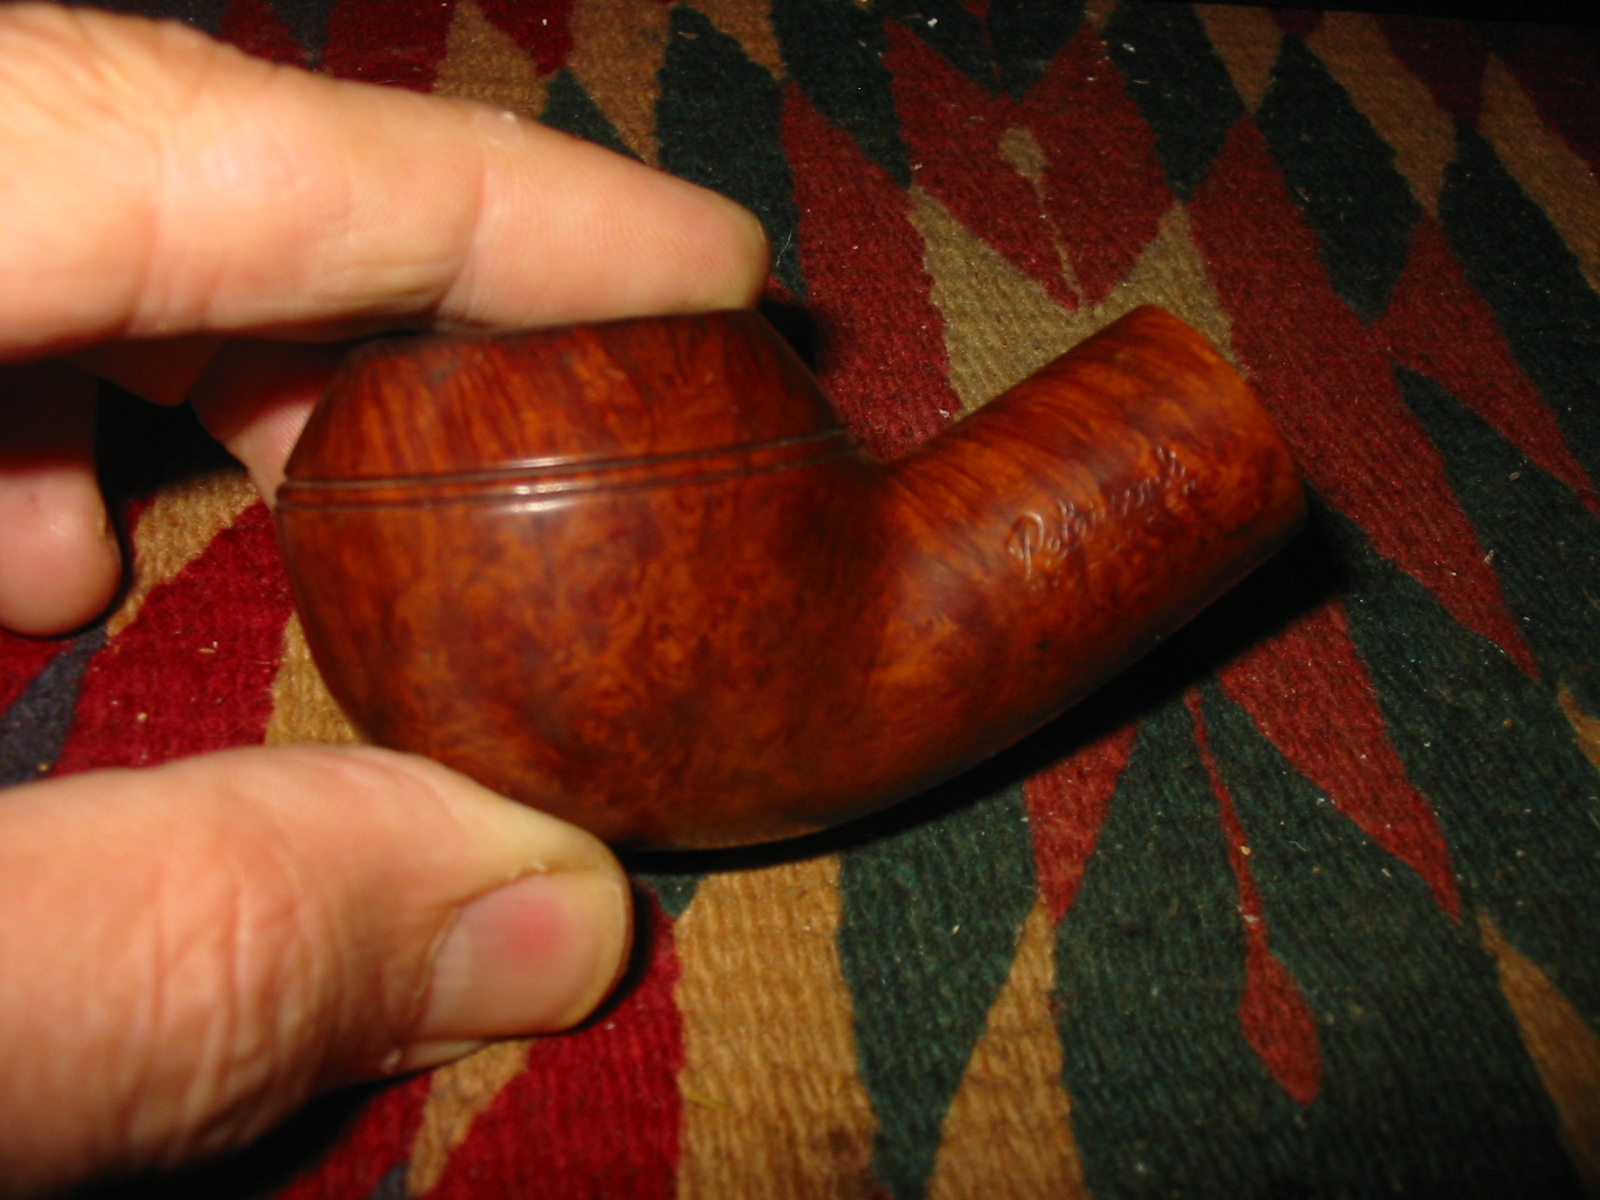
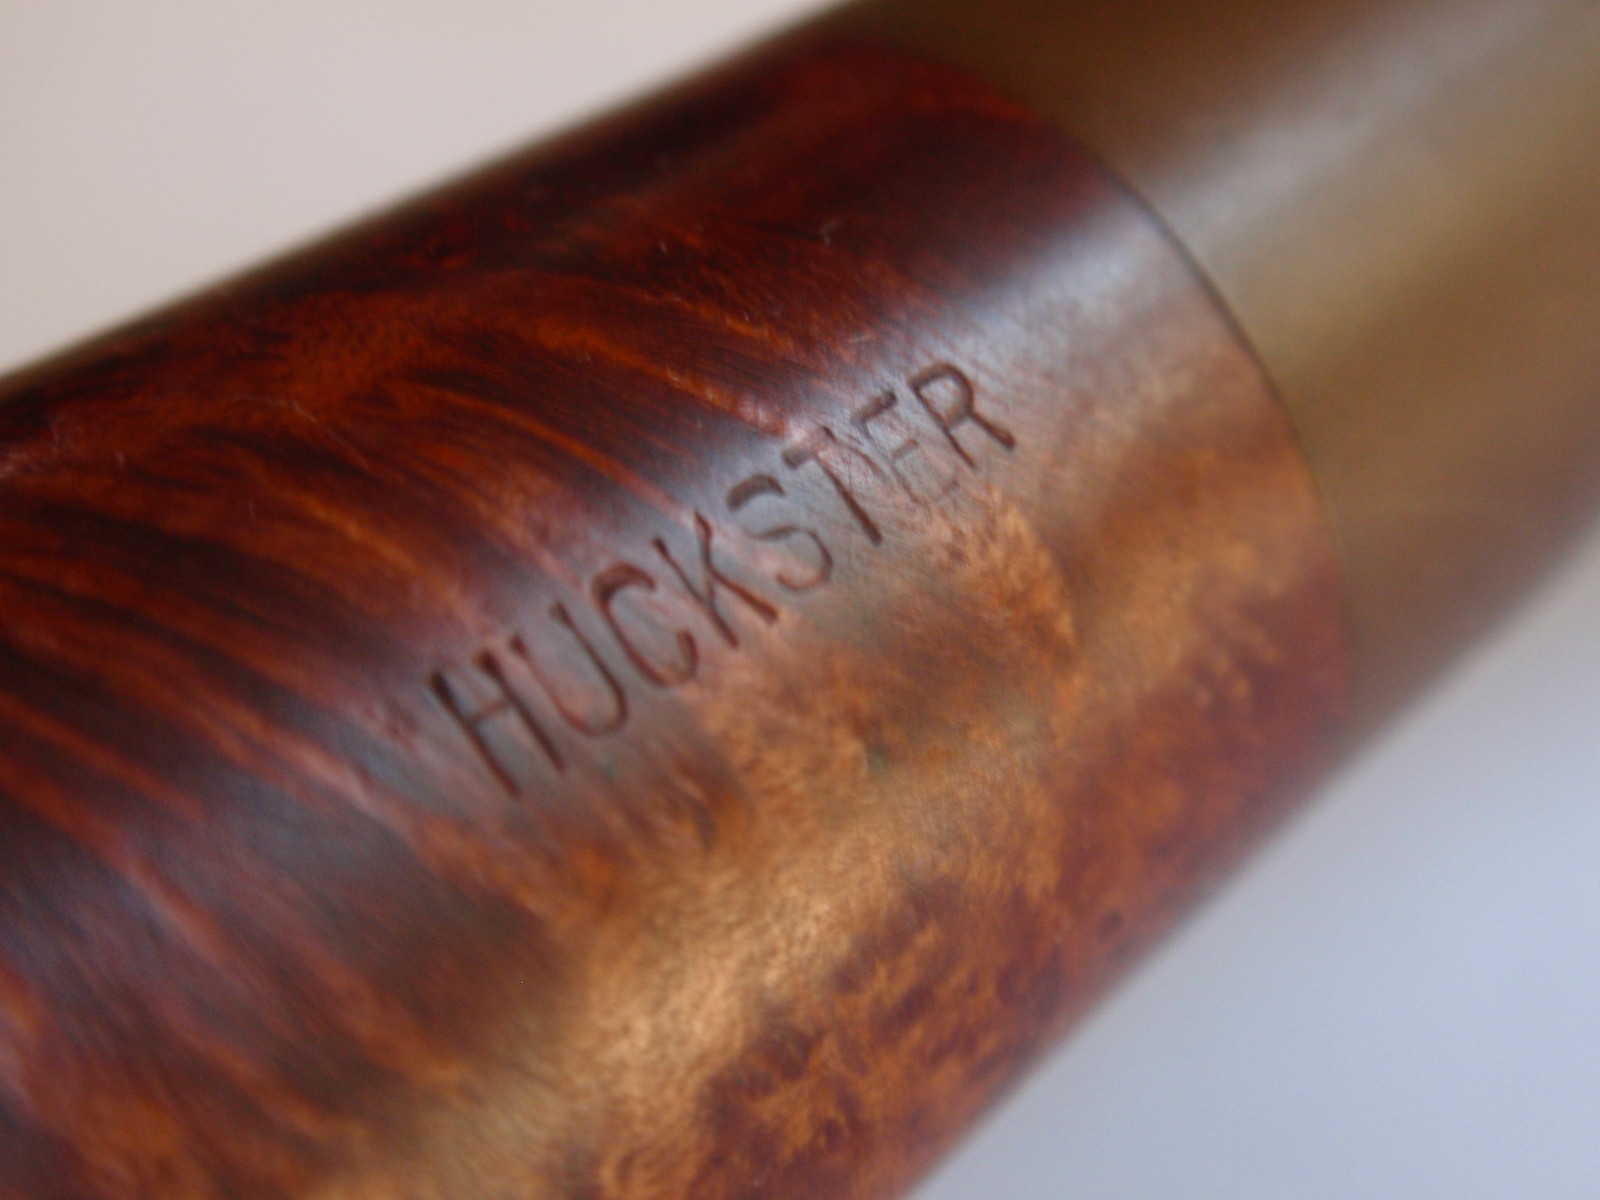
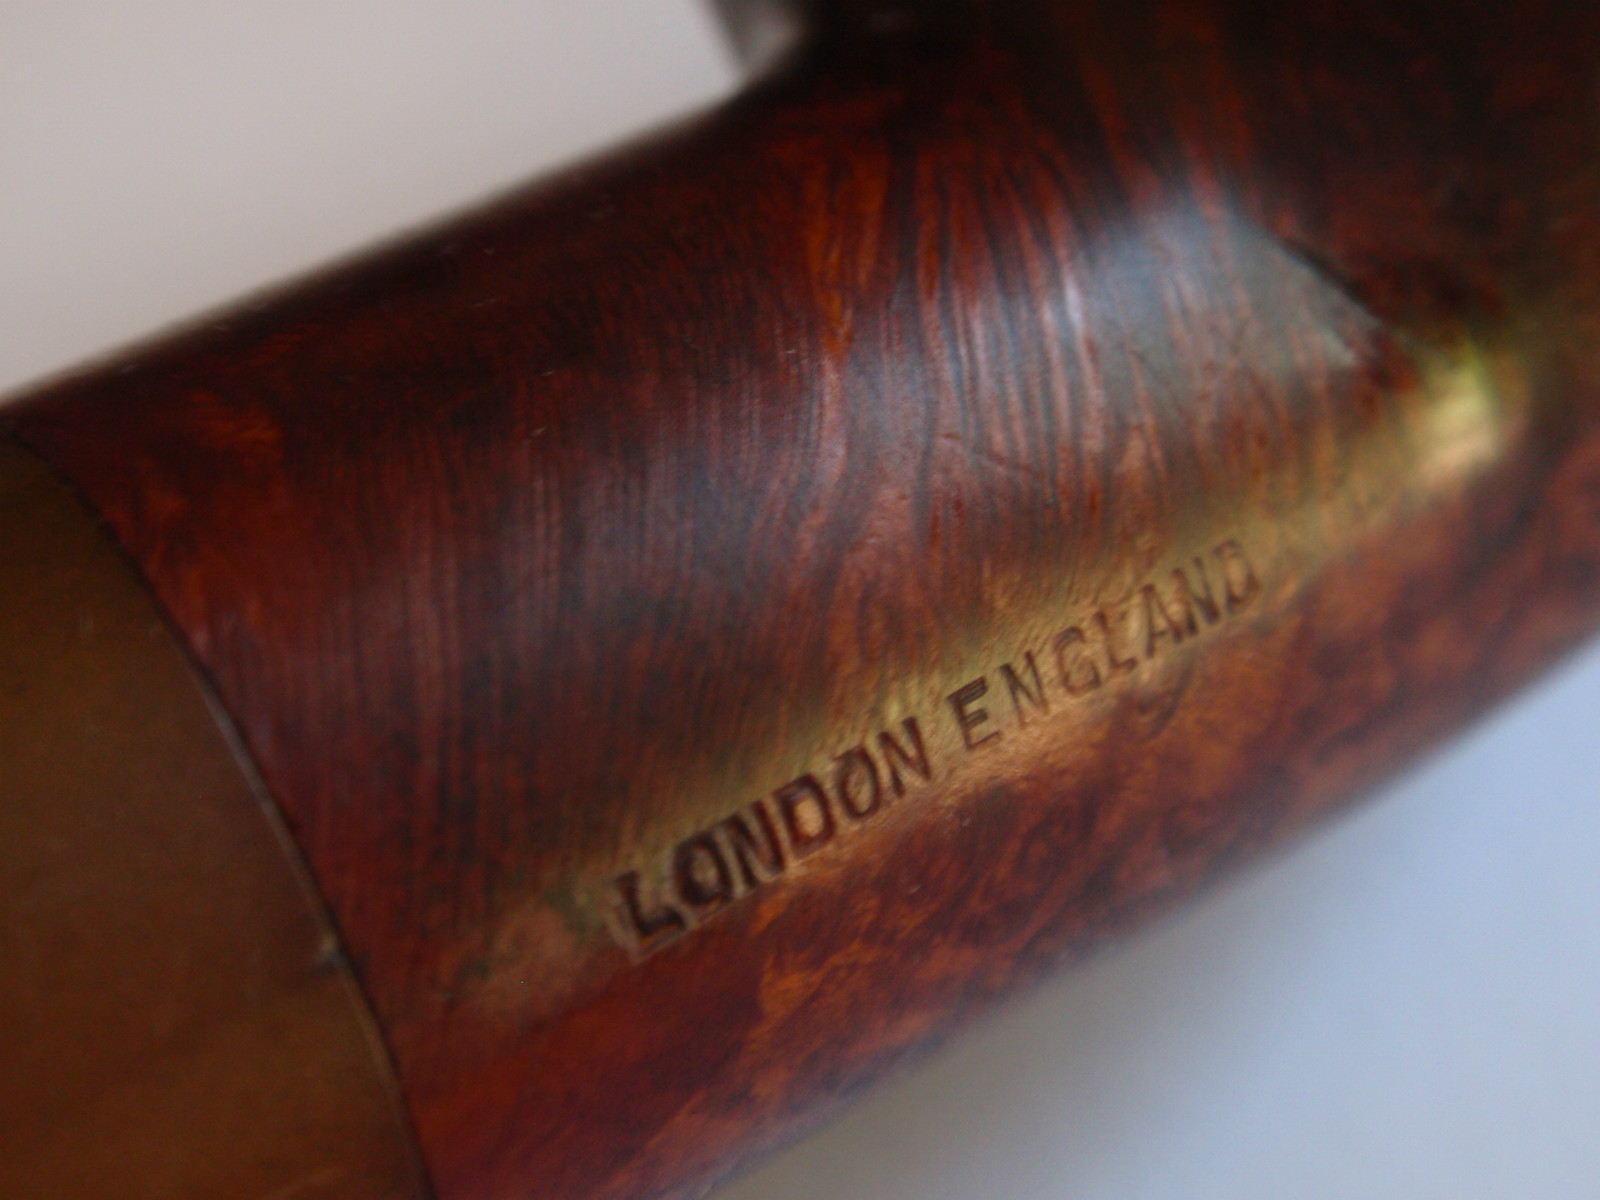
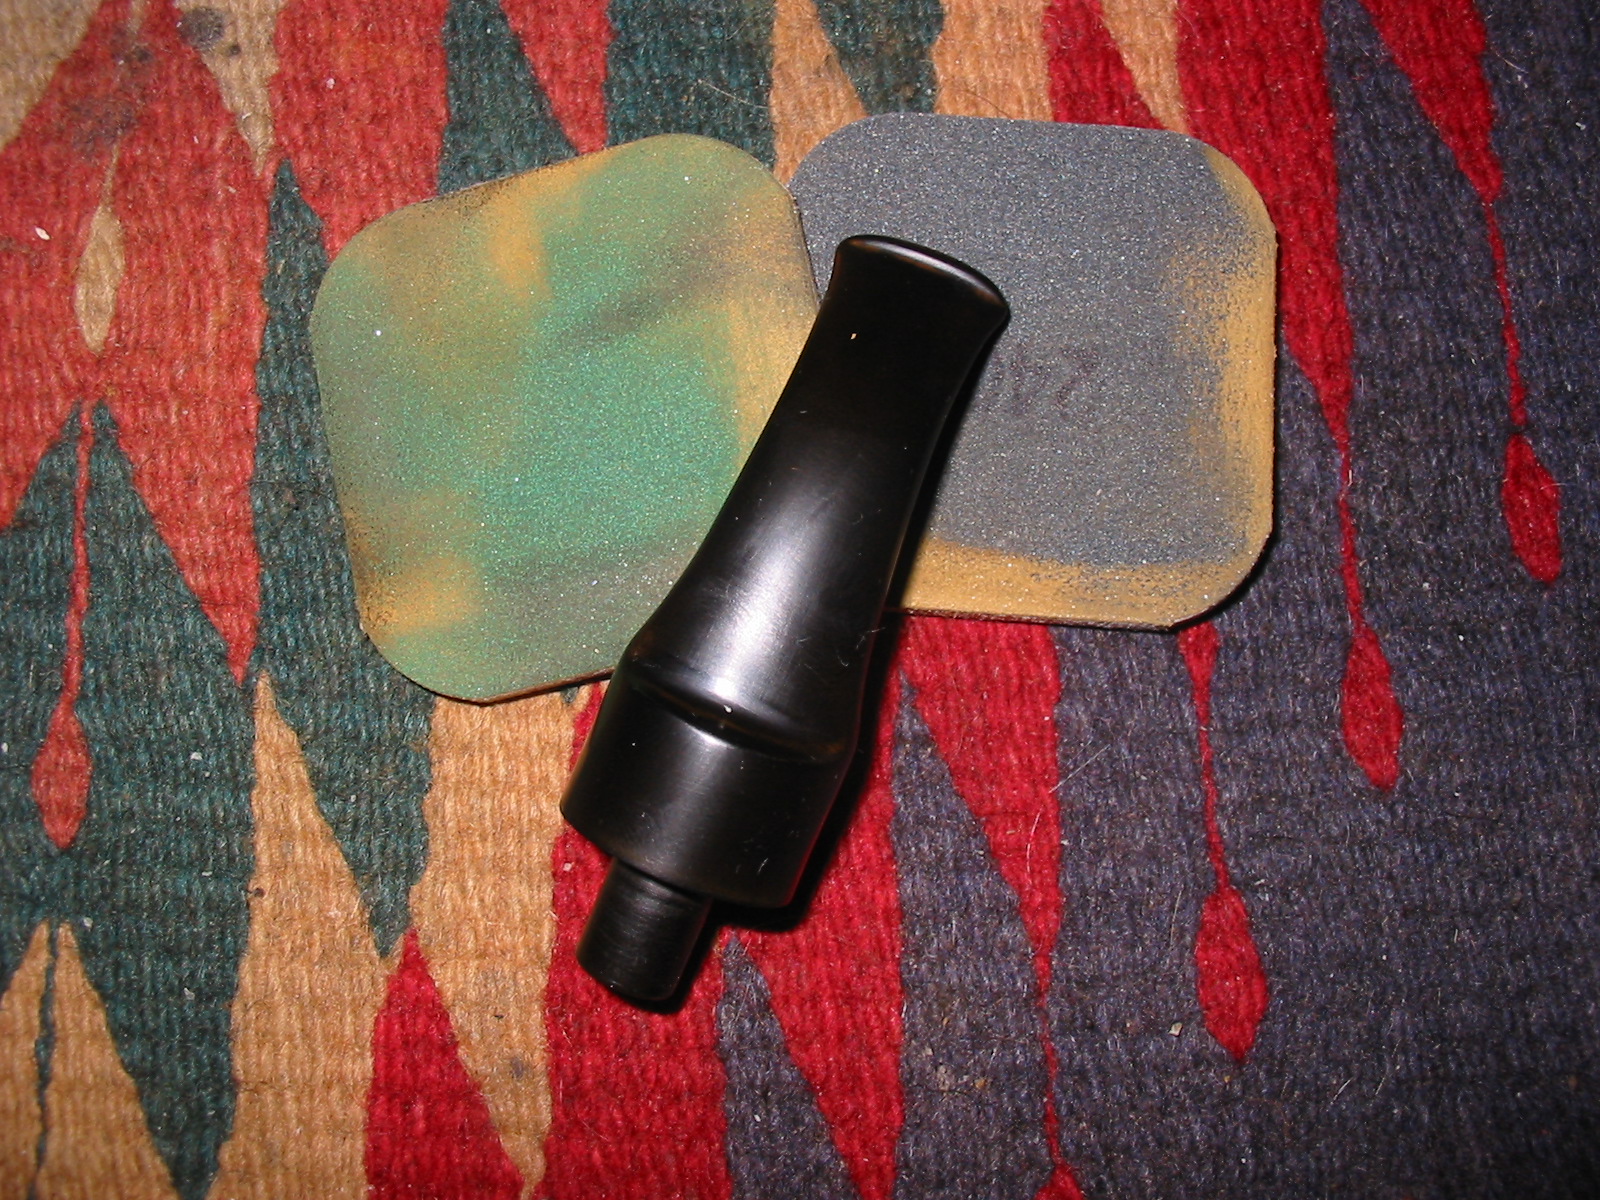
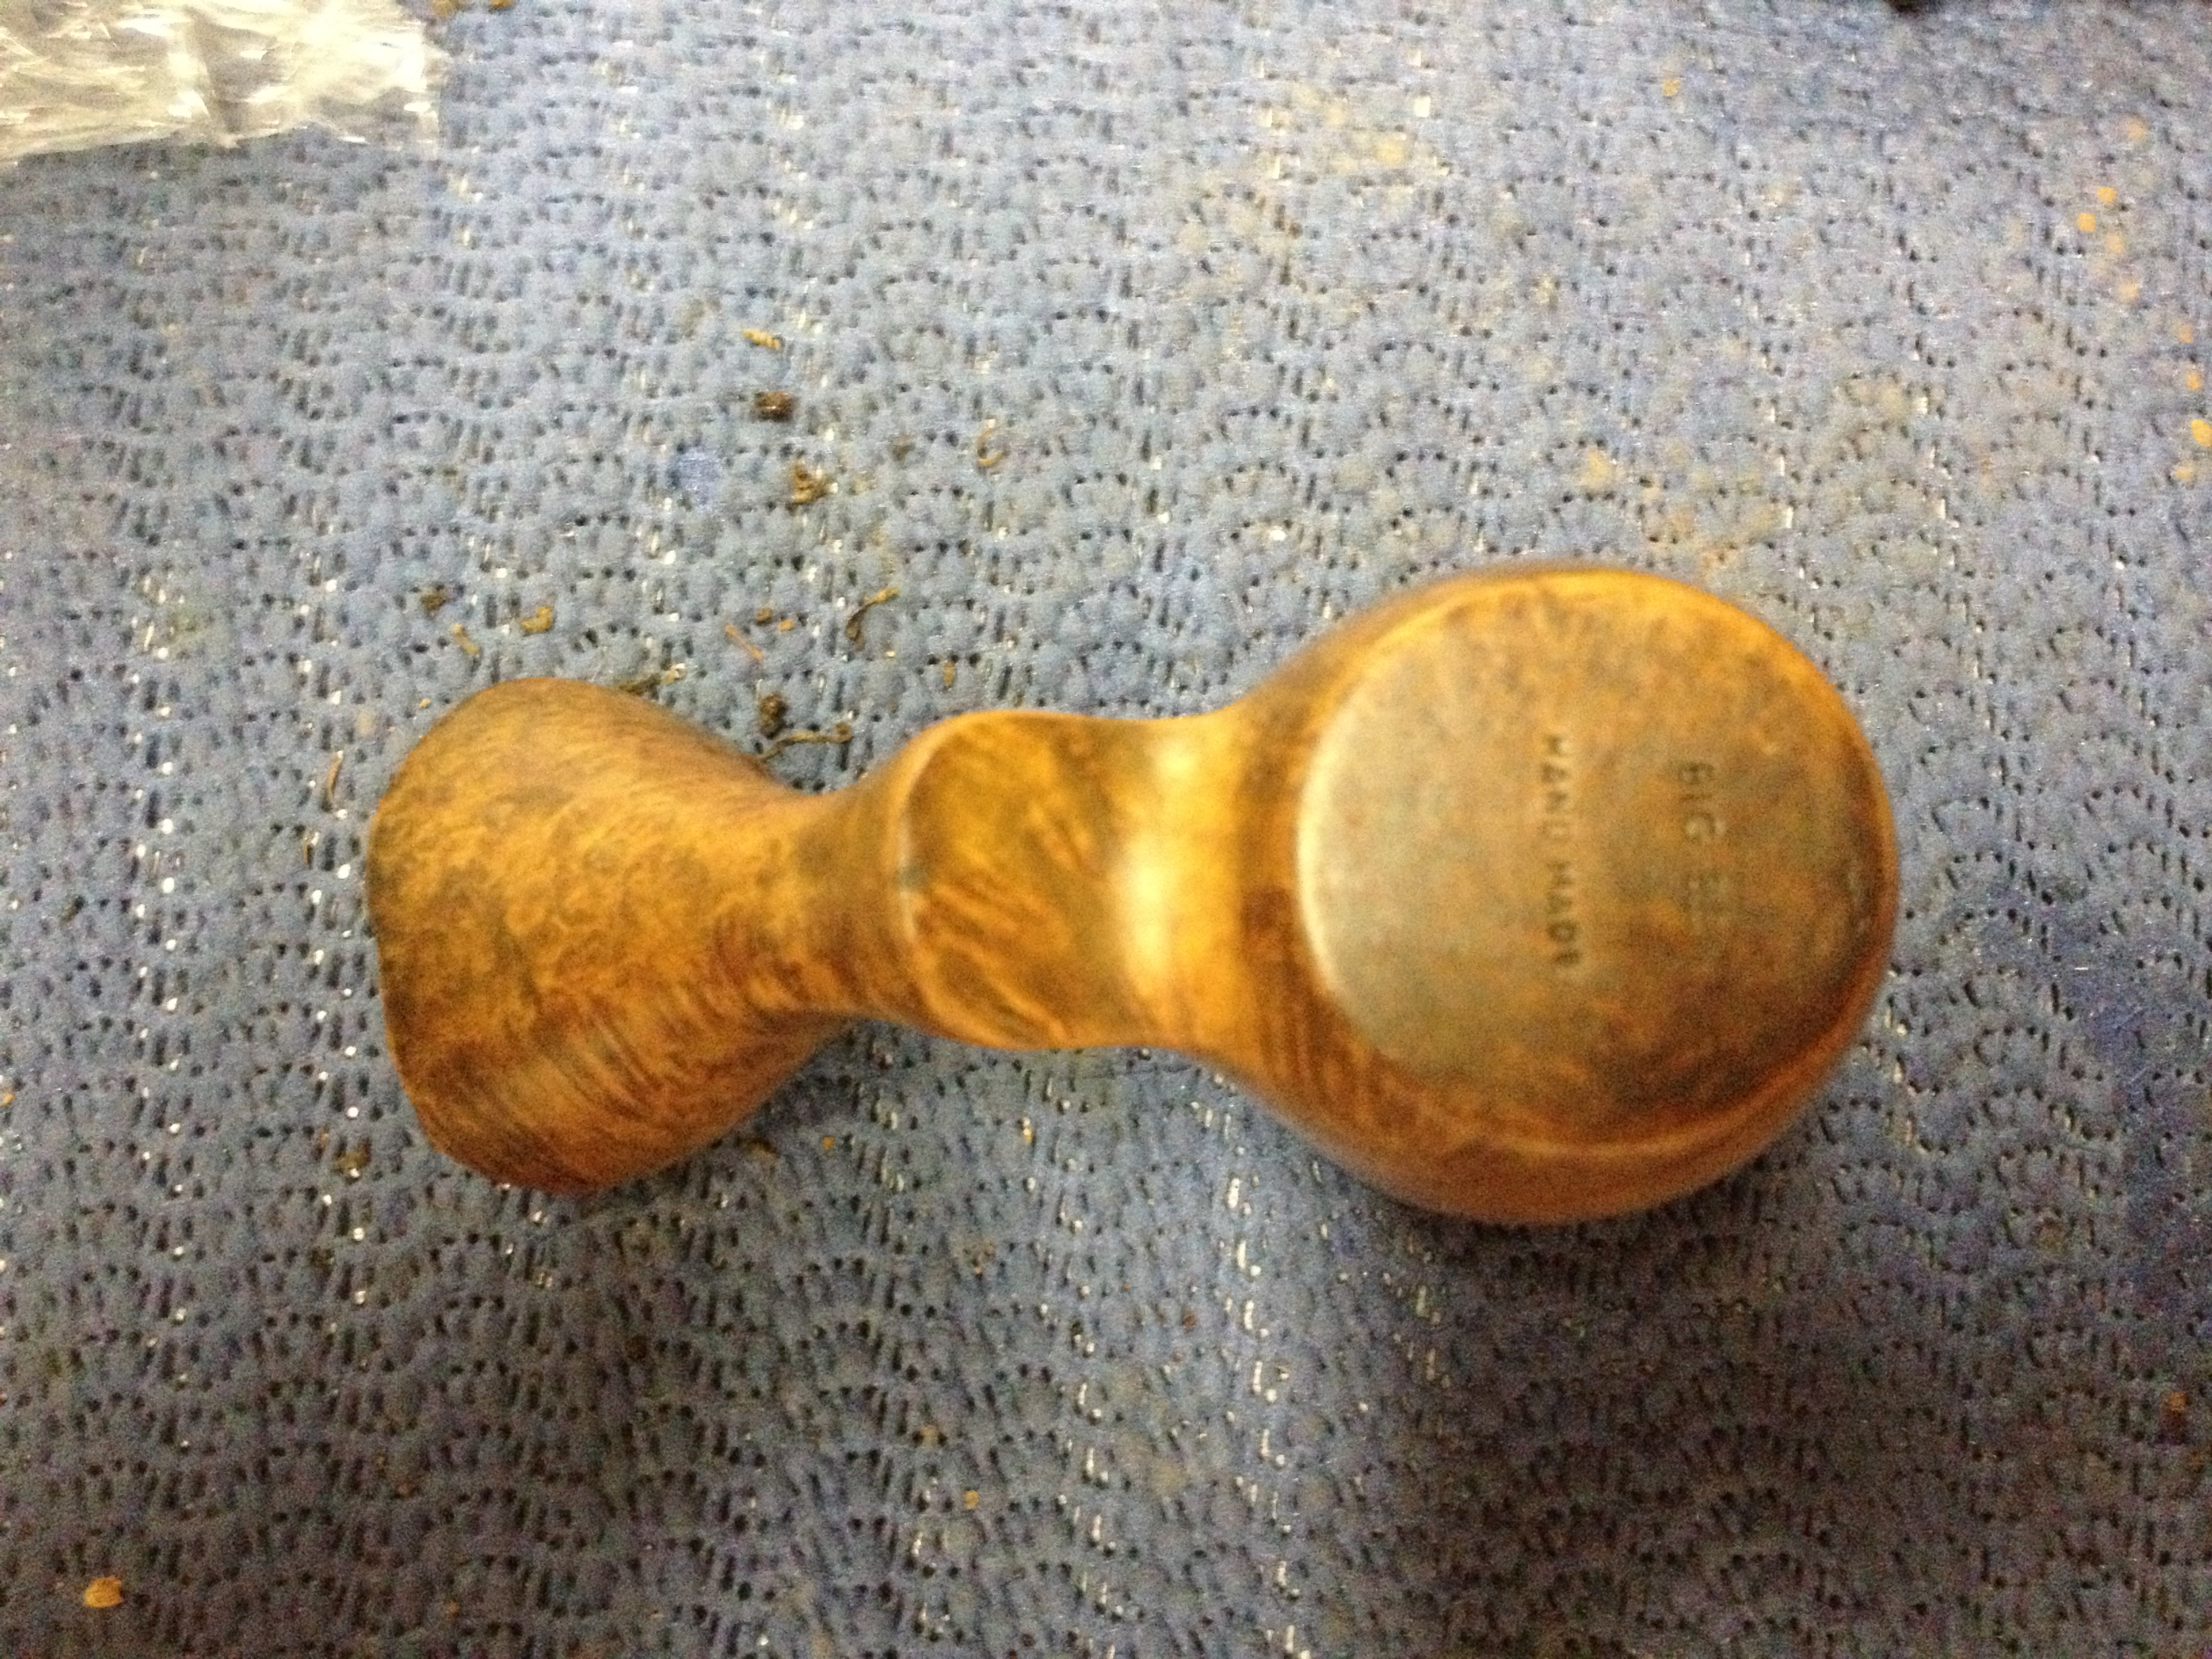
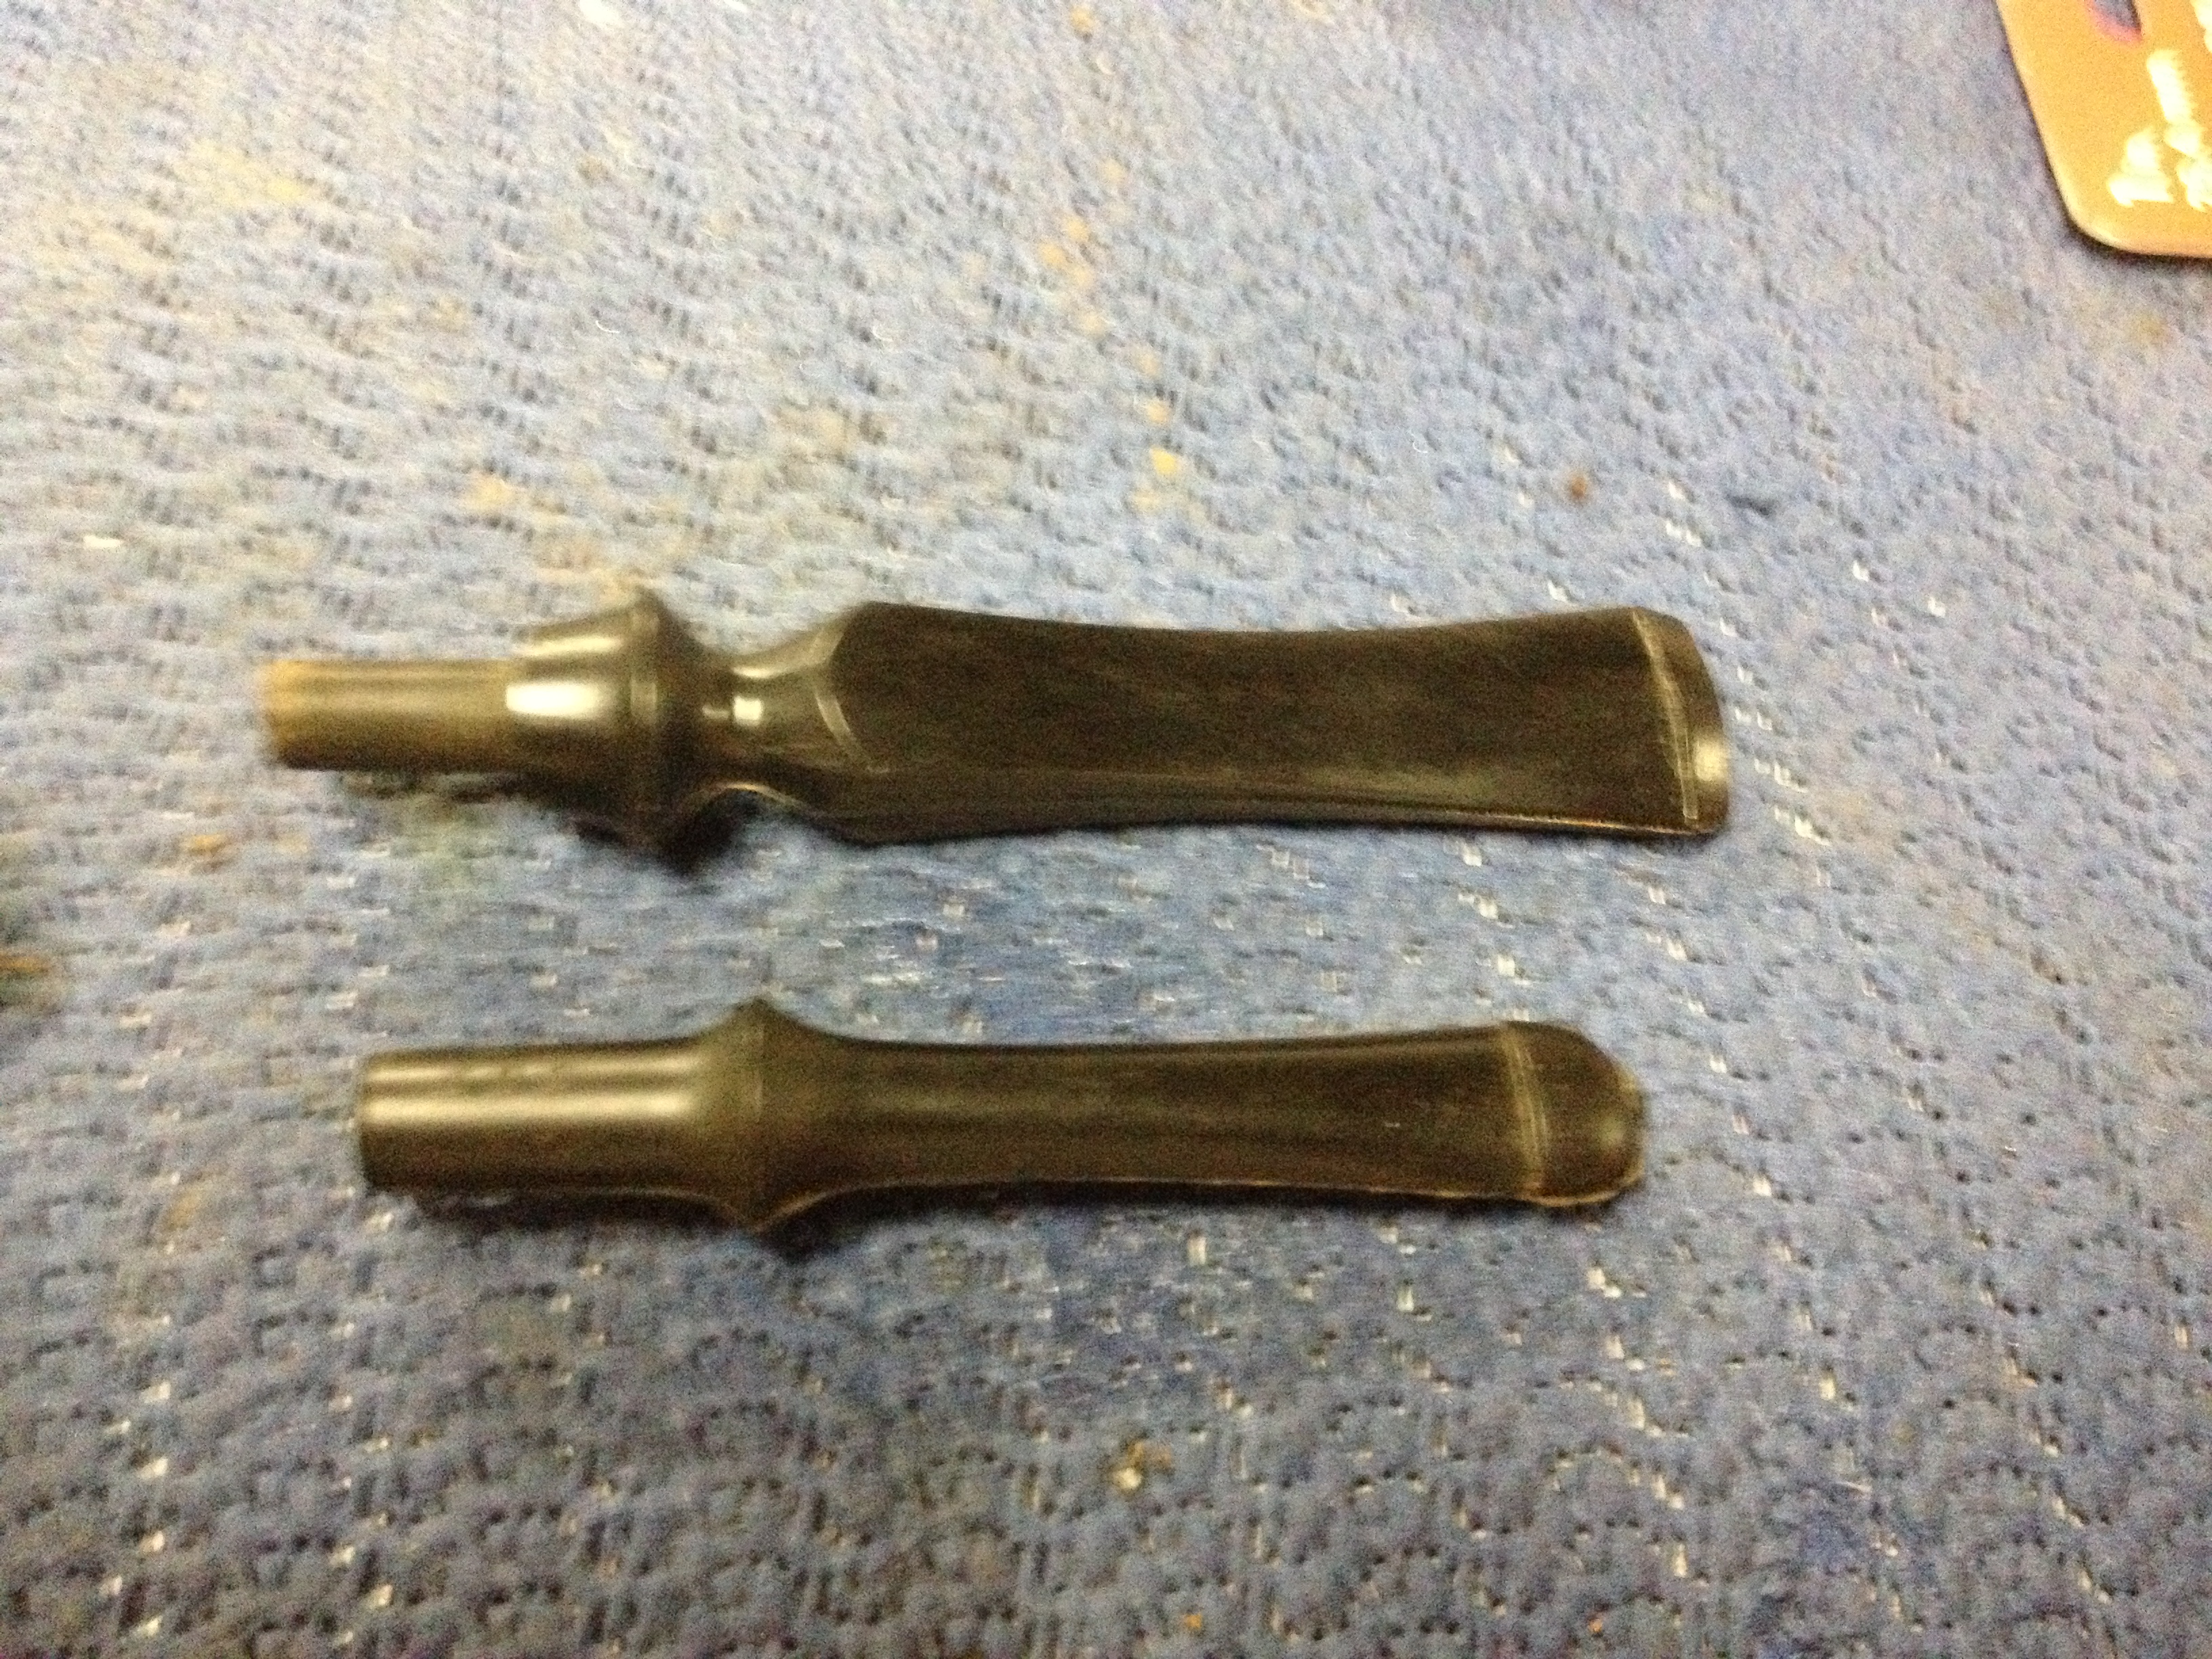
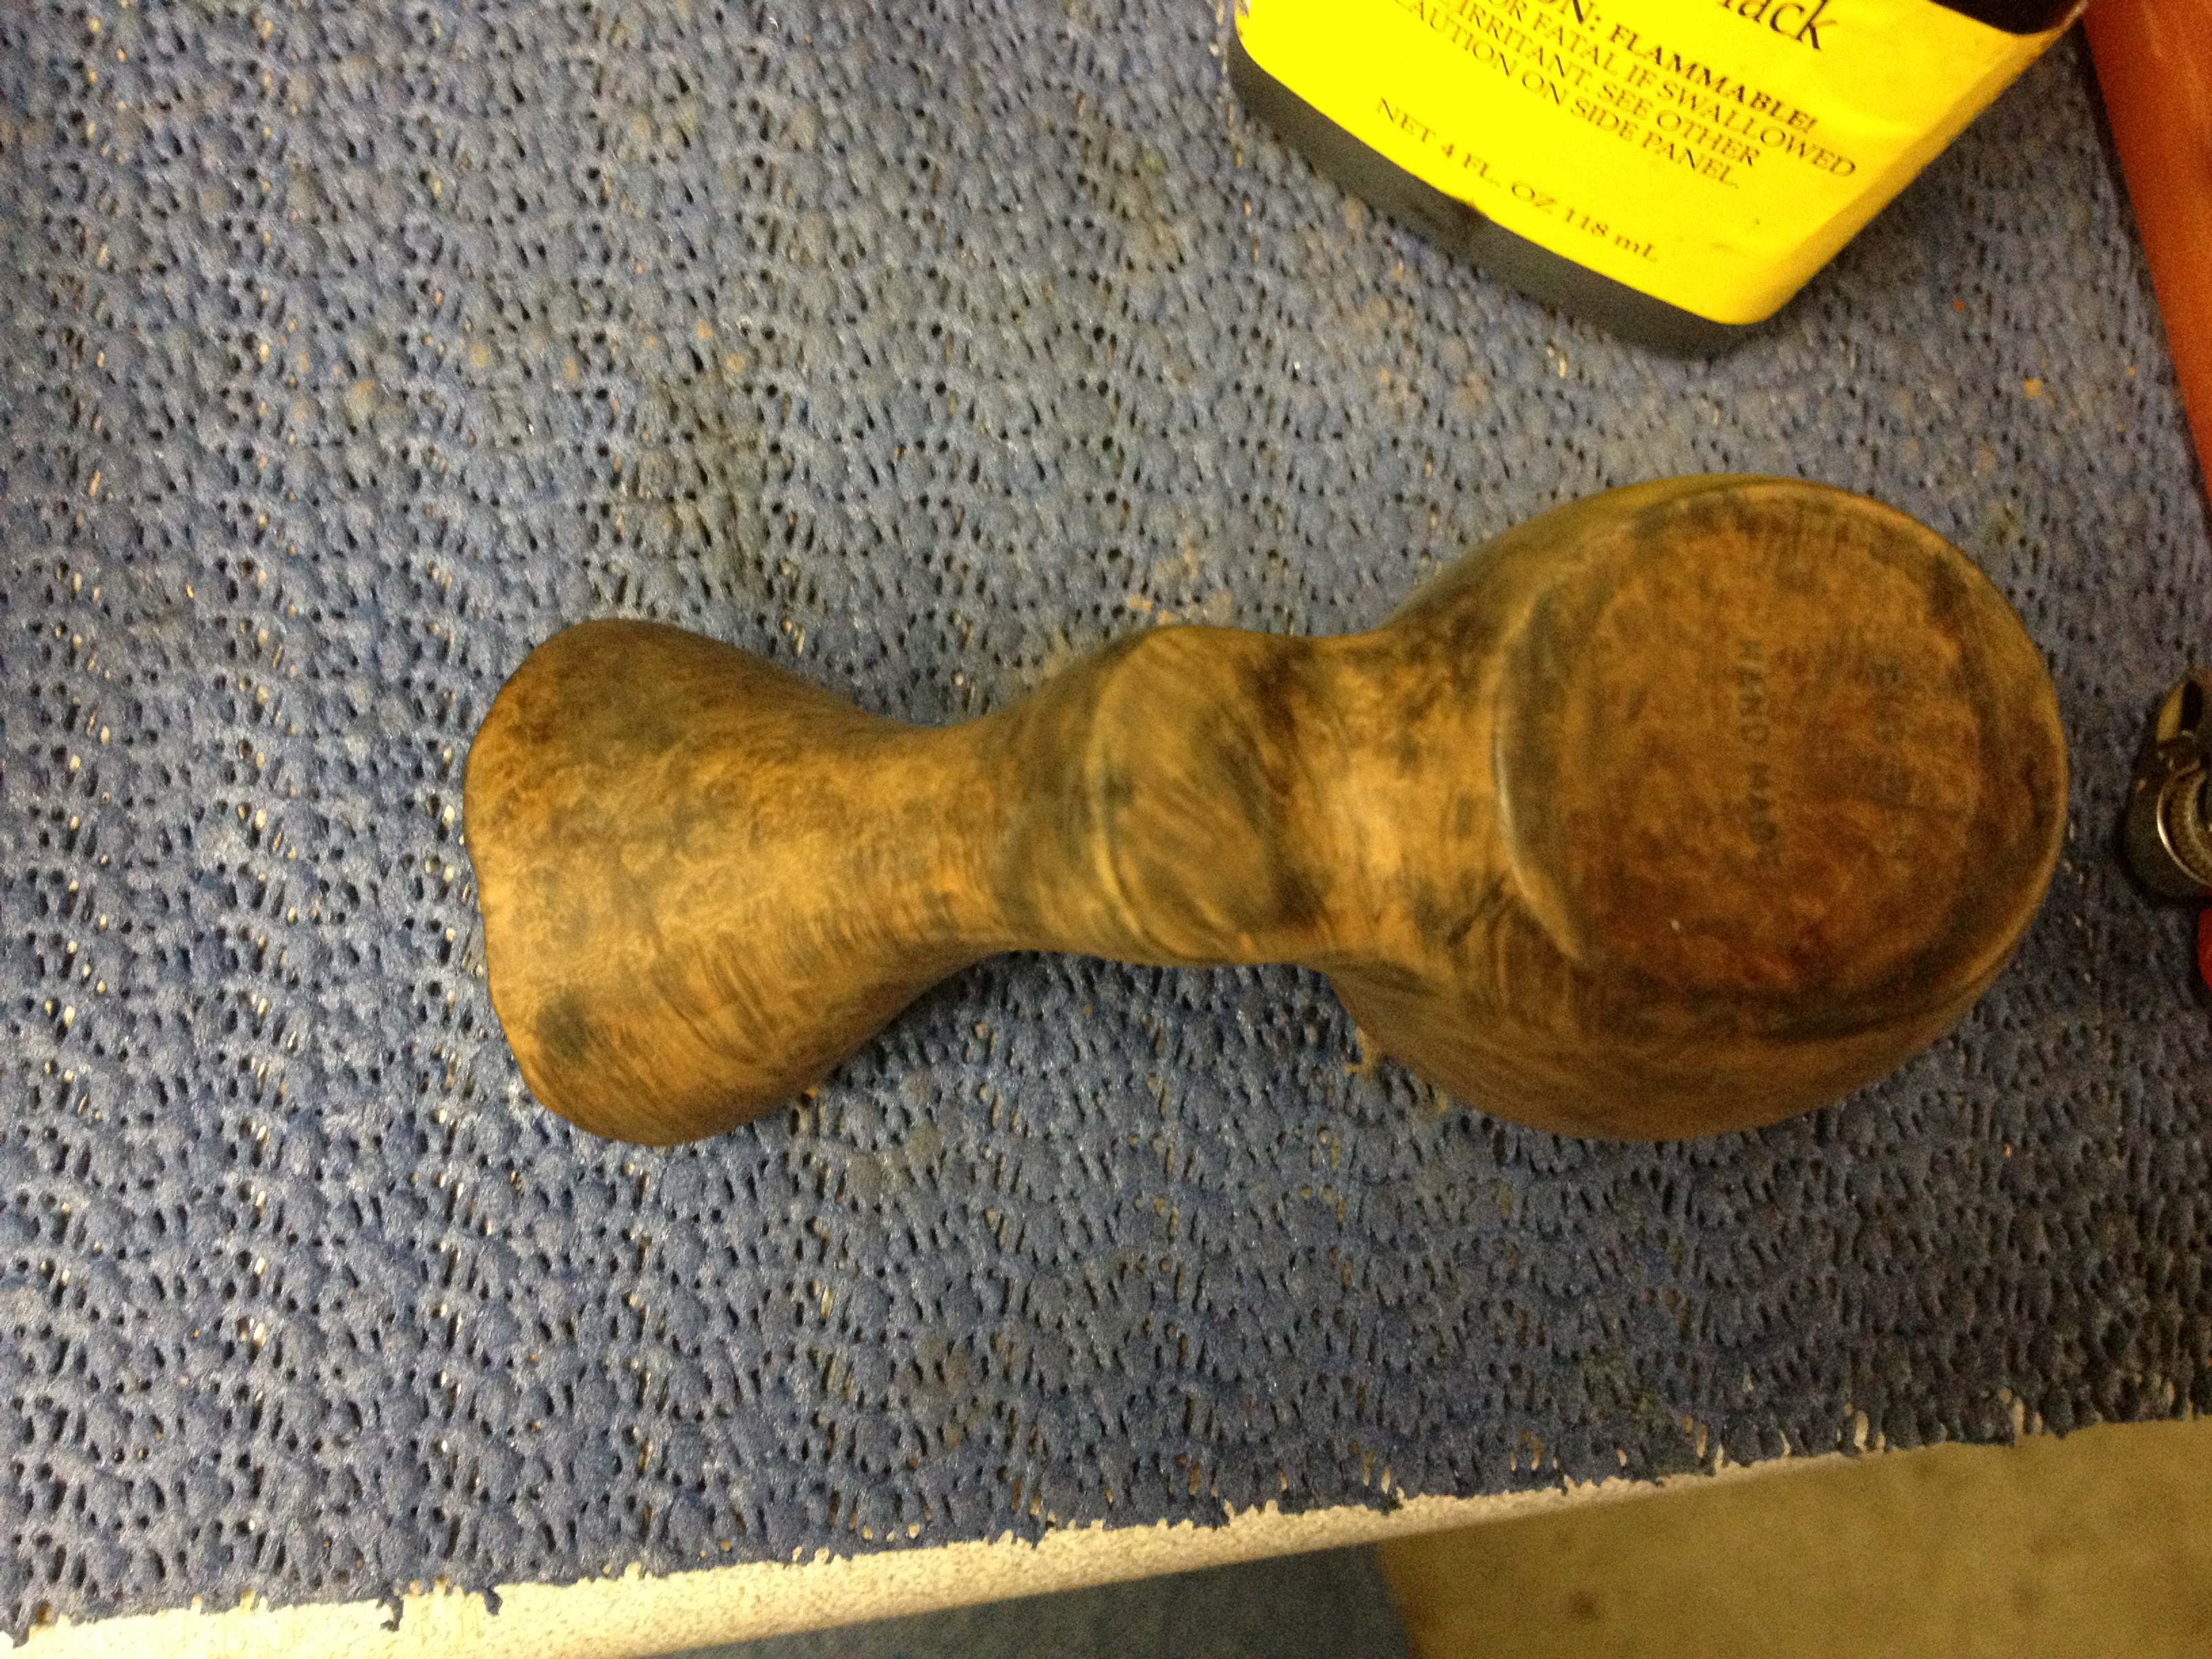
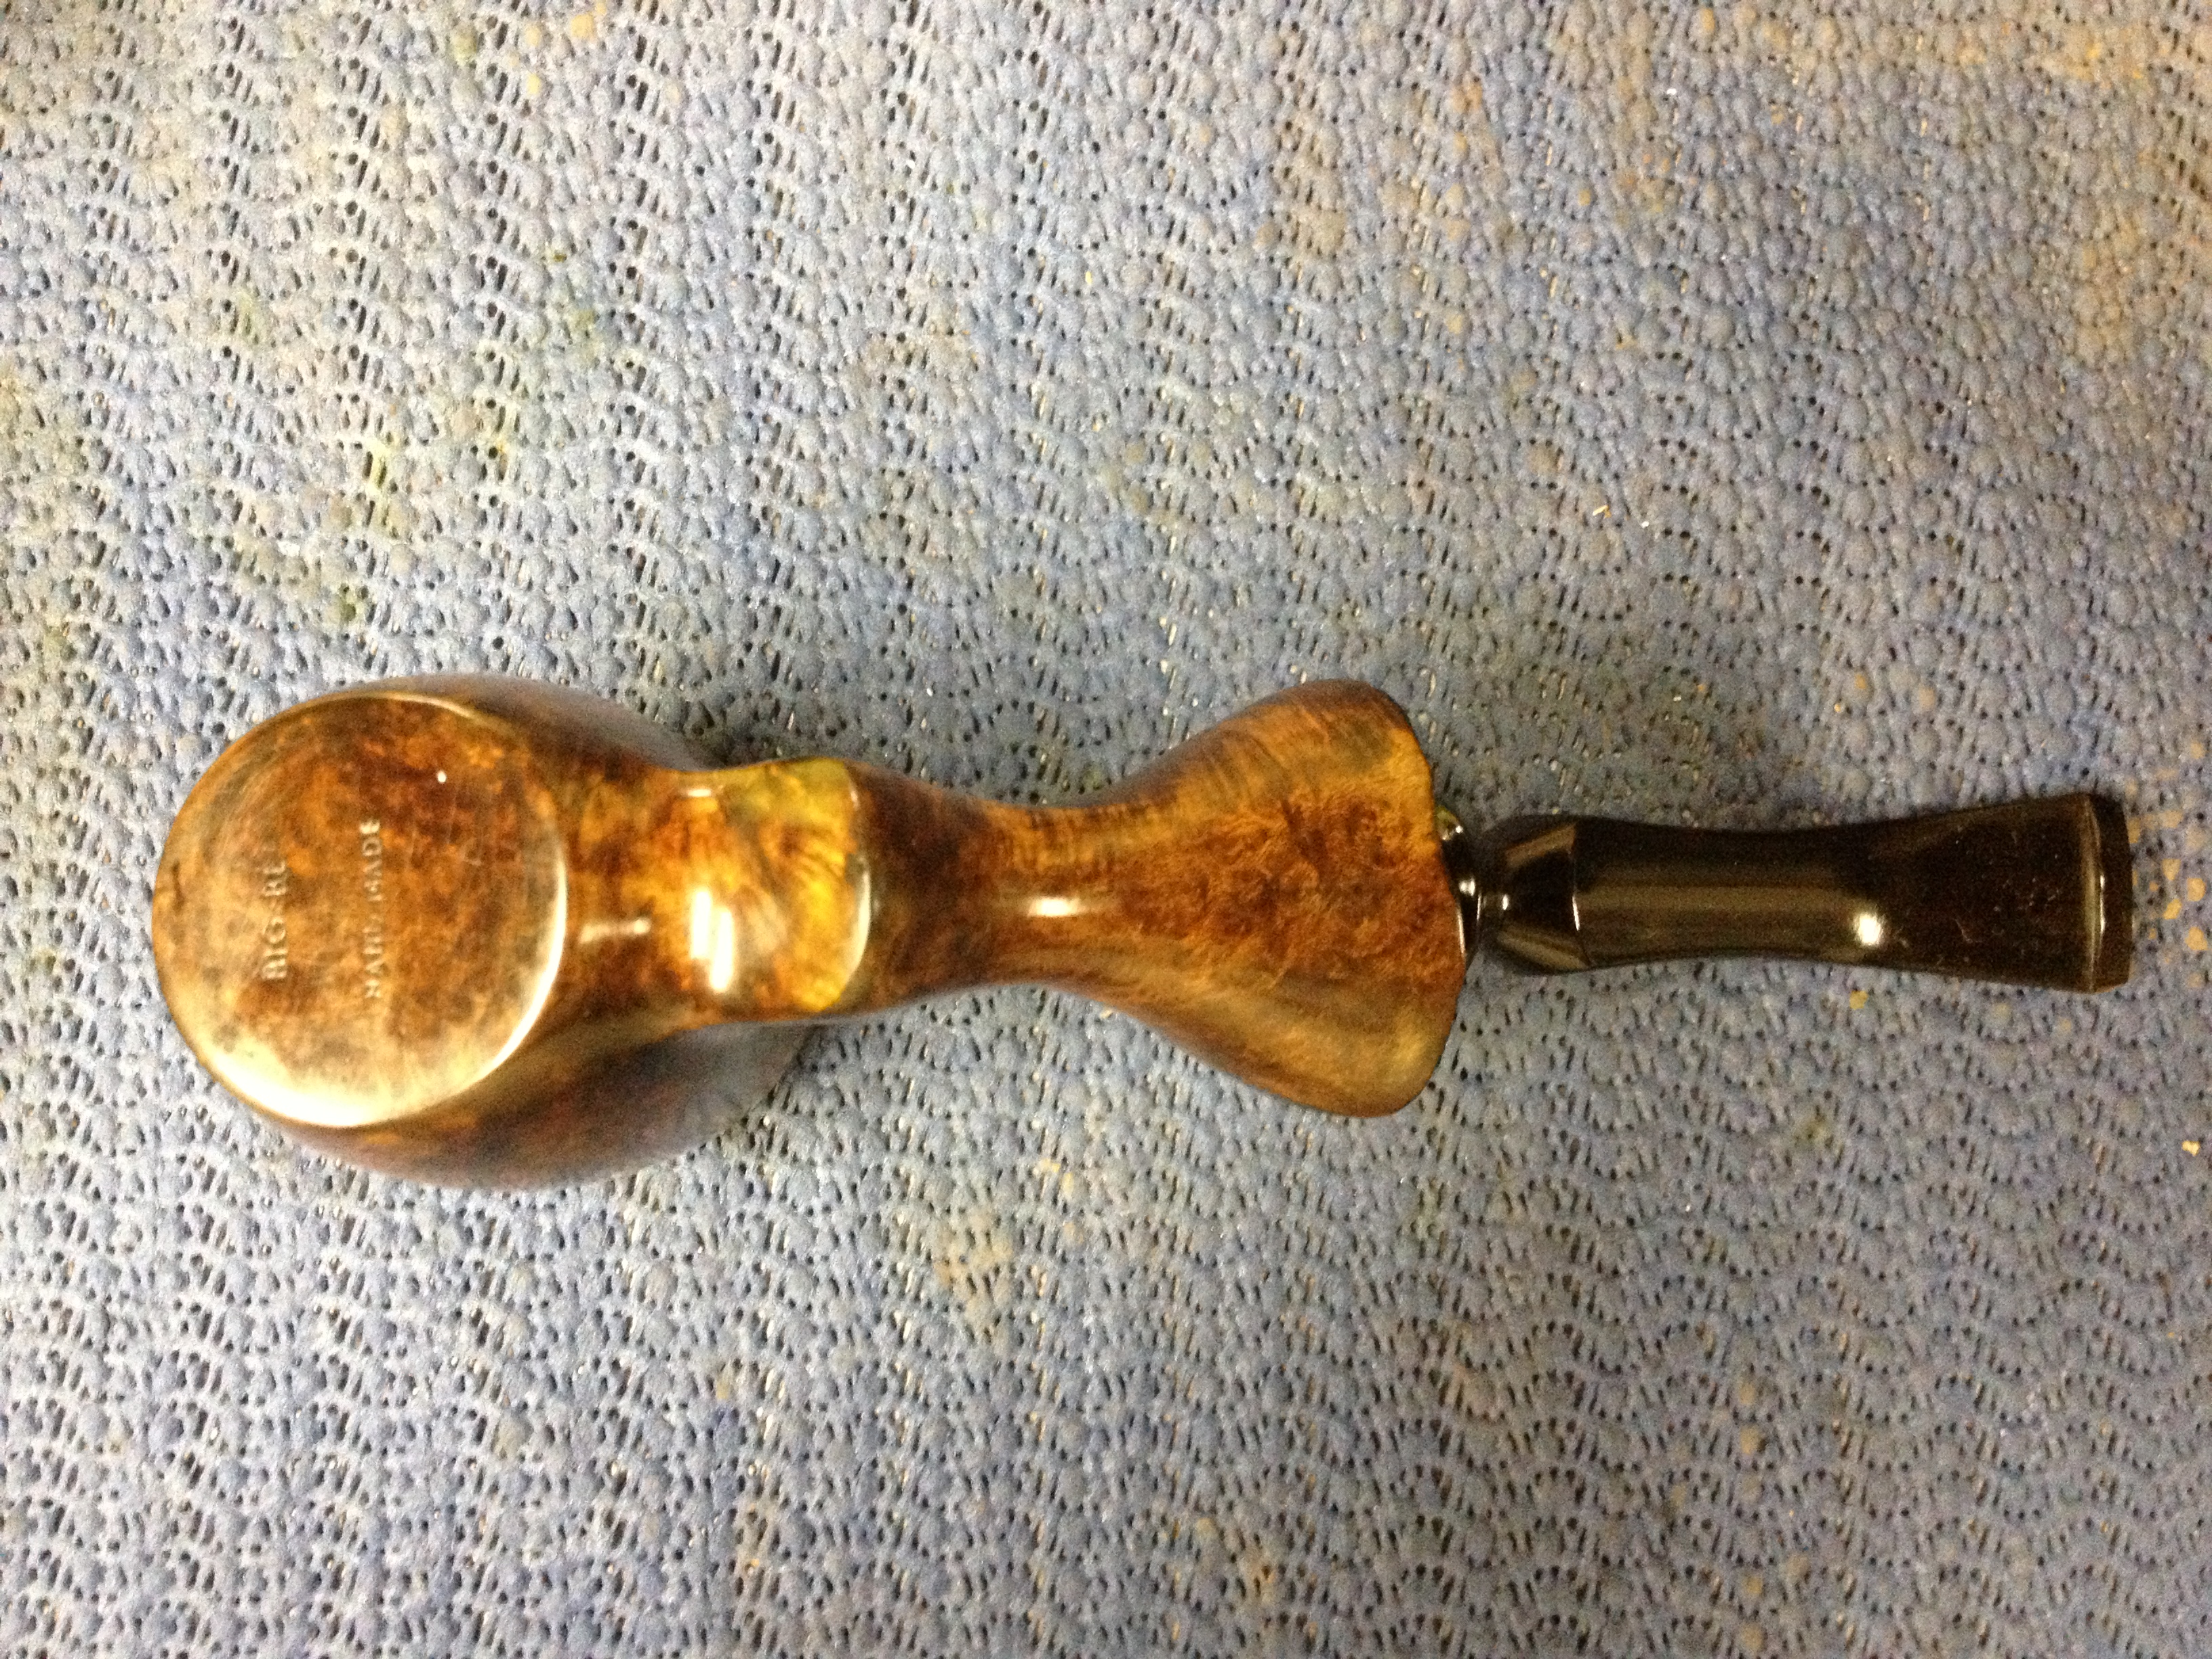
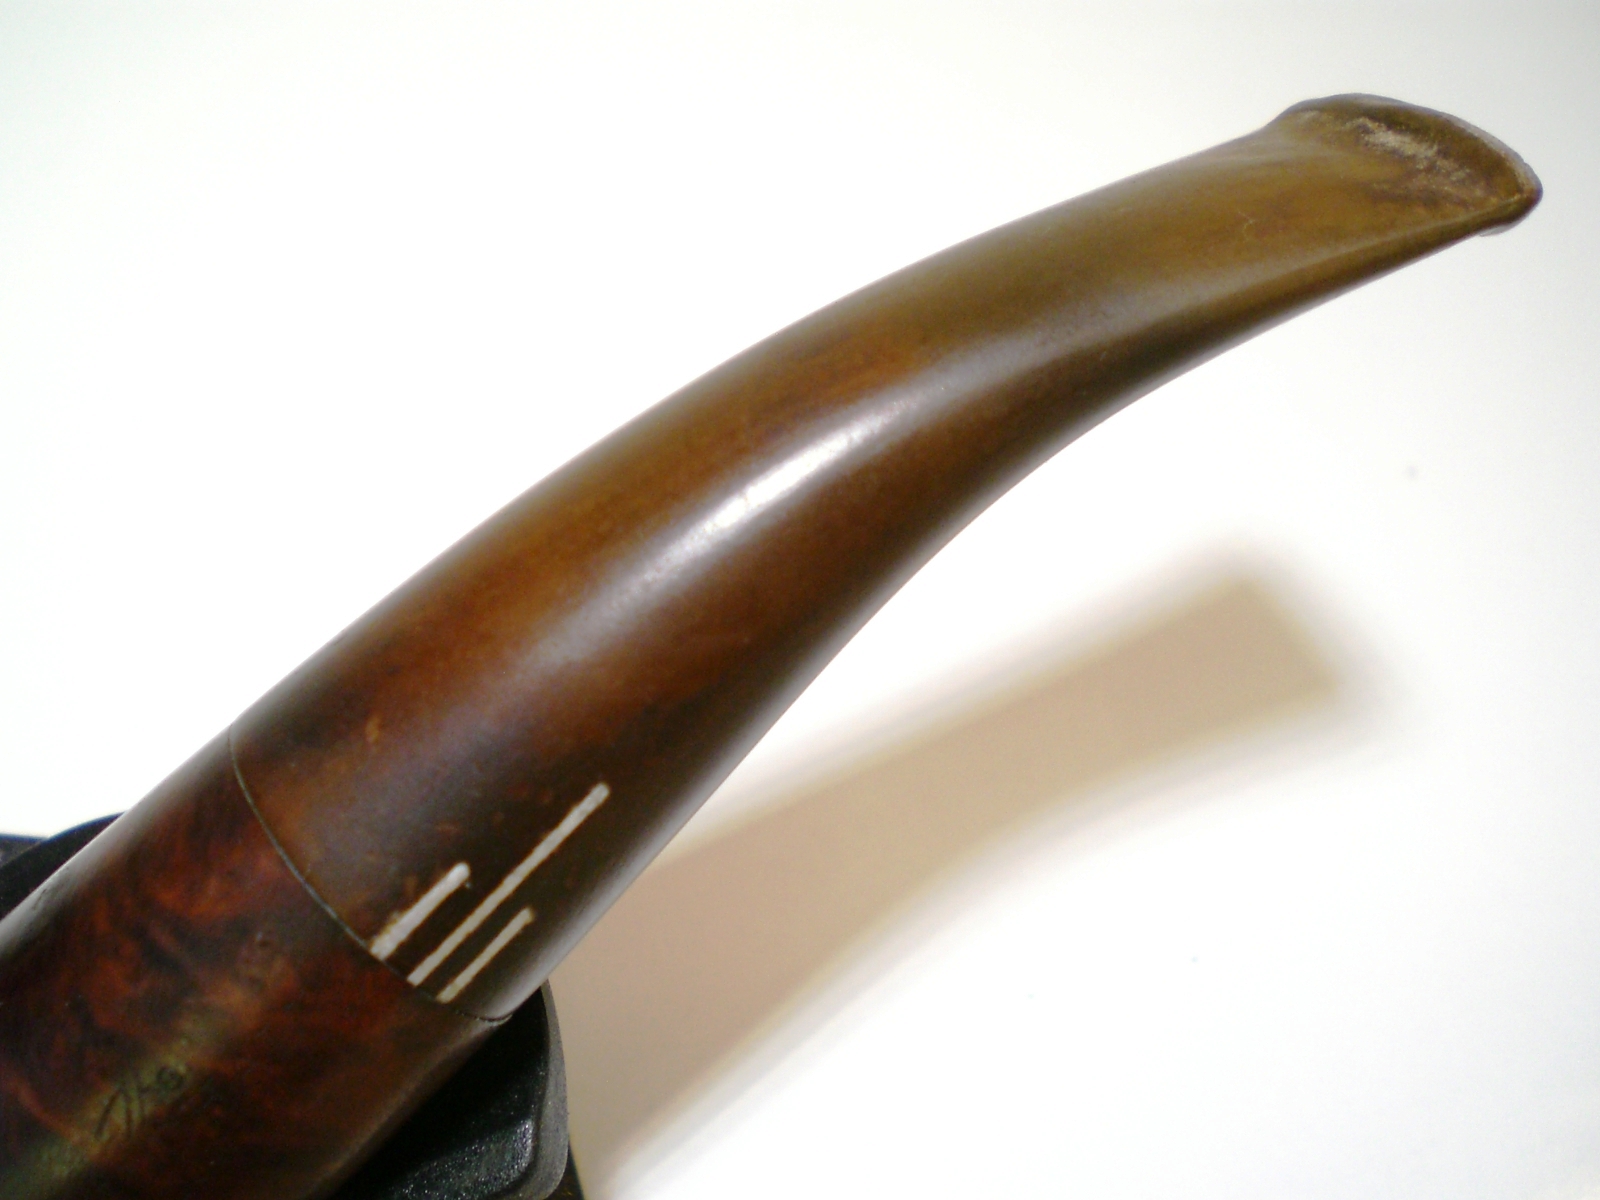
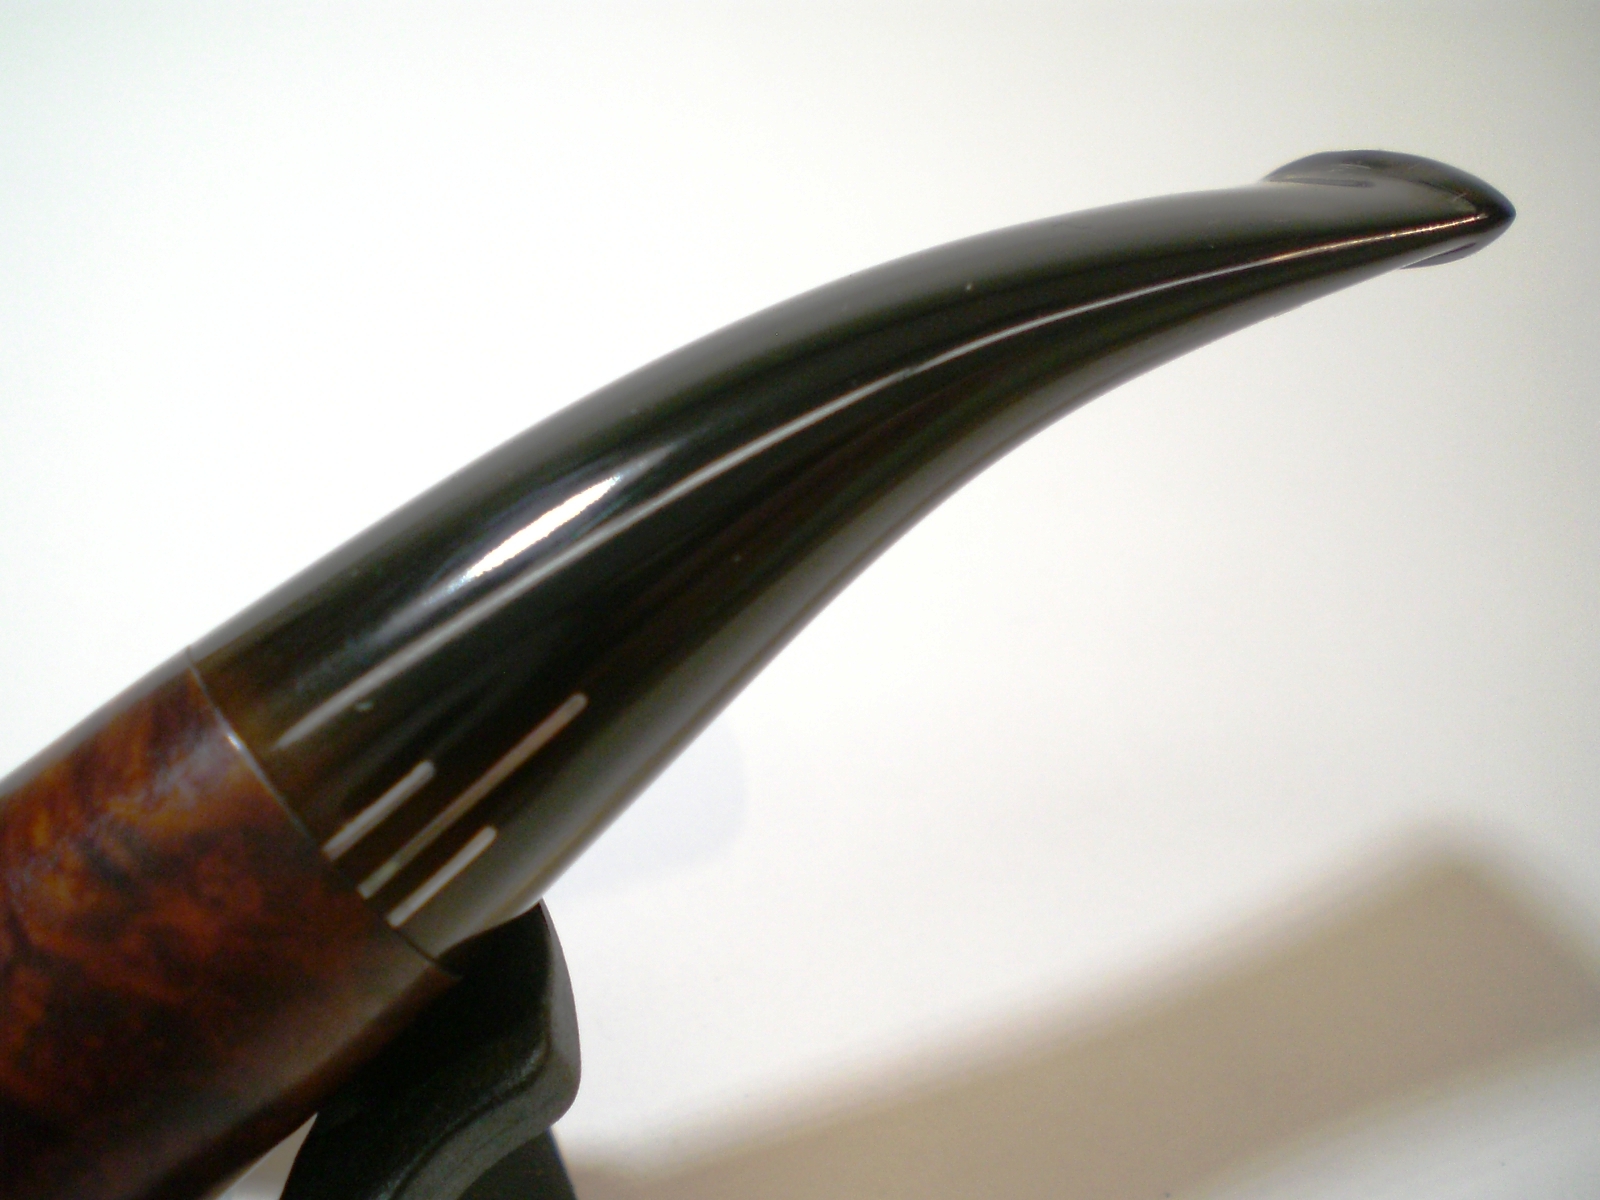
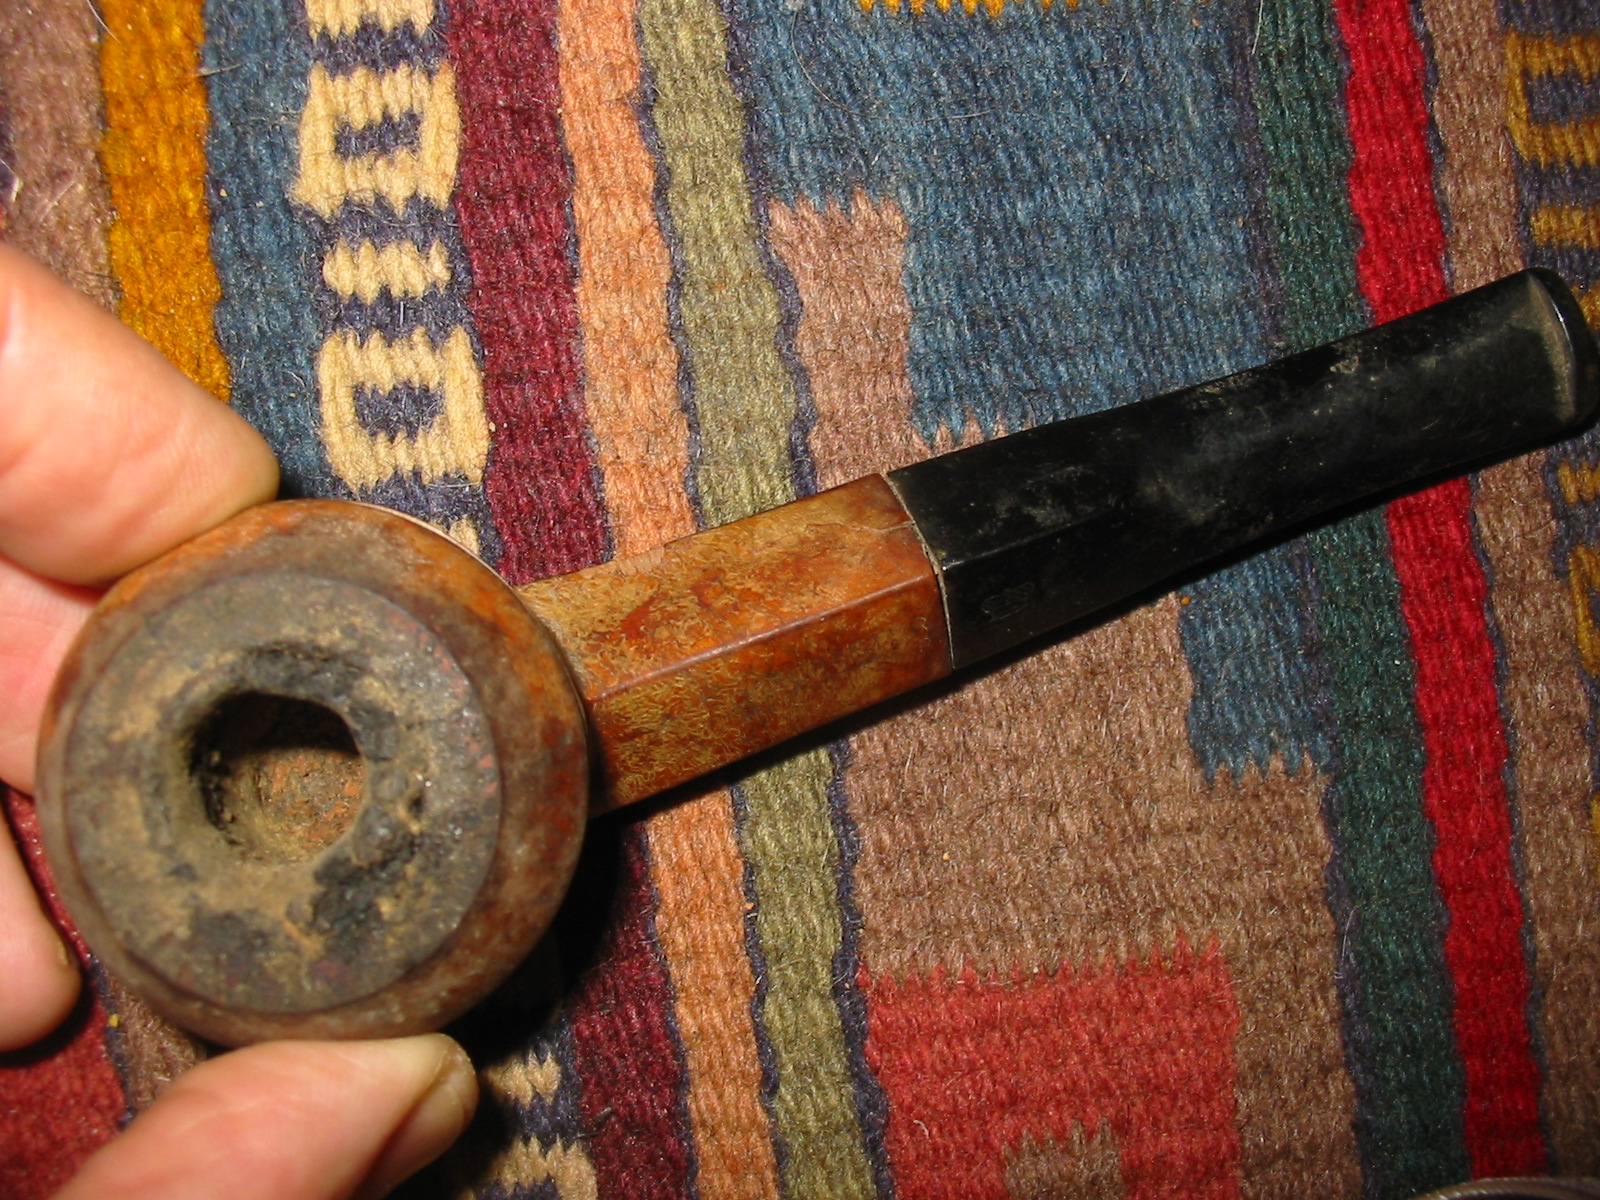
I immediately put it in the freezer for a half an hour to see if I could loosen the stem from the shank. Once I took it out I was able to twist off the stem and remove it from the shank. I took it to my work table and examined it to see what I had to work with. I was quite happy to see that the shank had a metal tube inside that was threaded to receive the tenon. The tube extended into the shank about an inch. This would make a repair on the crack quite simple and not require that I band the pipe. The stem was overturned and the tenon would need to be heated until it was loose and then realigned on the shank. The insert in the shank extended further than the end of the shank and kept the stem from seating correctly against the shank. I also noted that the stamping did not read Worchester as the seller had listed it but that it read Dorchester and underneath that Algerian Briar. There was also damage on the shank near the bowl on the right side where the edge was pretty chewed up by what looked like a pair of pliers used to try and remove the stem from the shank. The slot in the button was clogged with oils and tars so I was assuming that insides were the same way. The stem had white spots on it that at first appeared to be paint but were actually pits in the stem. It appeared to be made of something other than vulcanite. I was not sure what it was but it was not rubber. All of the issues with this pipe, and they were many, but it was very repairable.

IMG_1583

IMG_1584

IMG_1585

IMG_1586

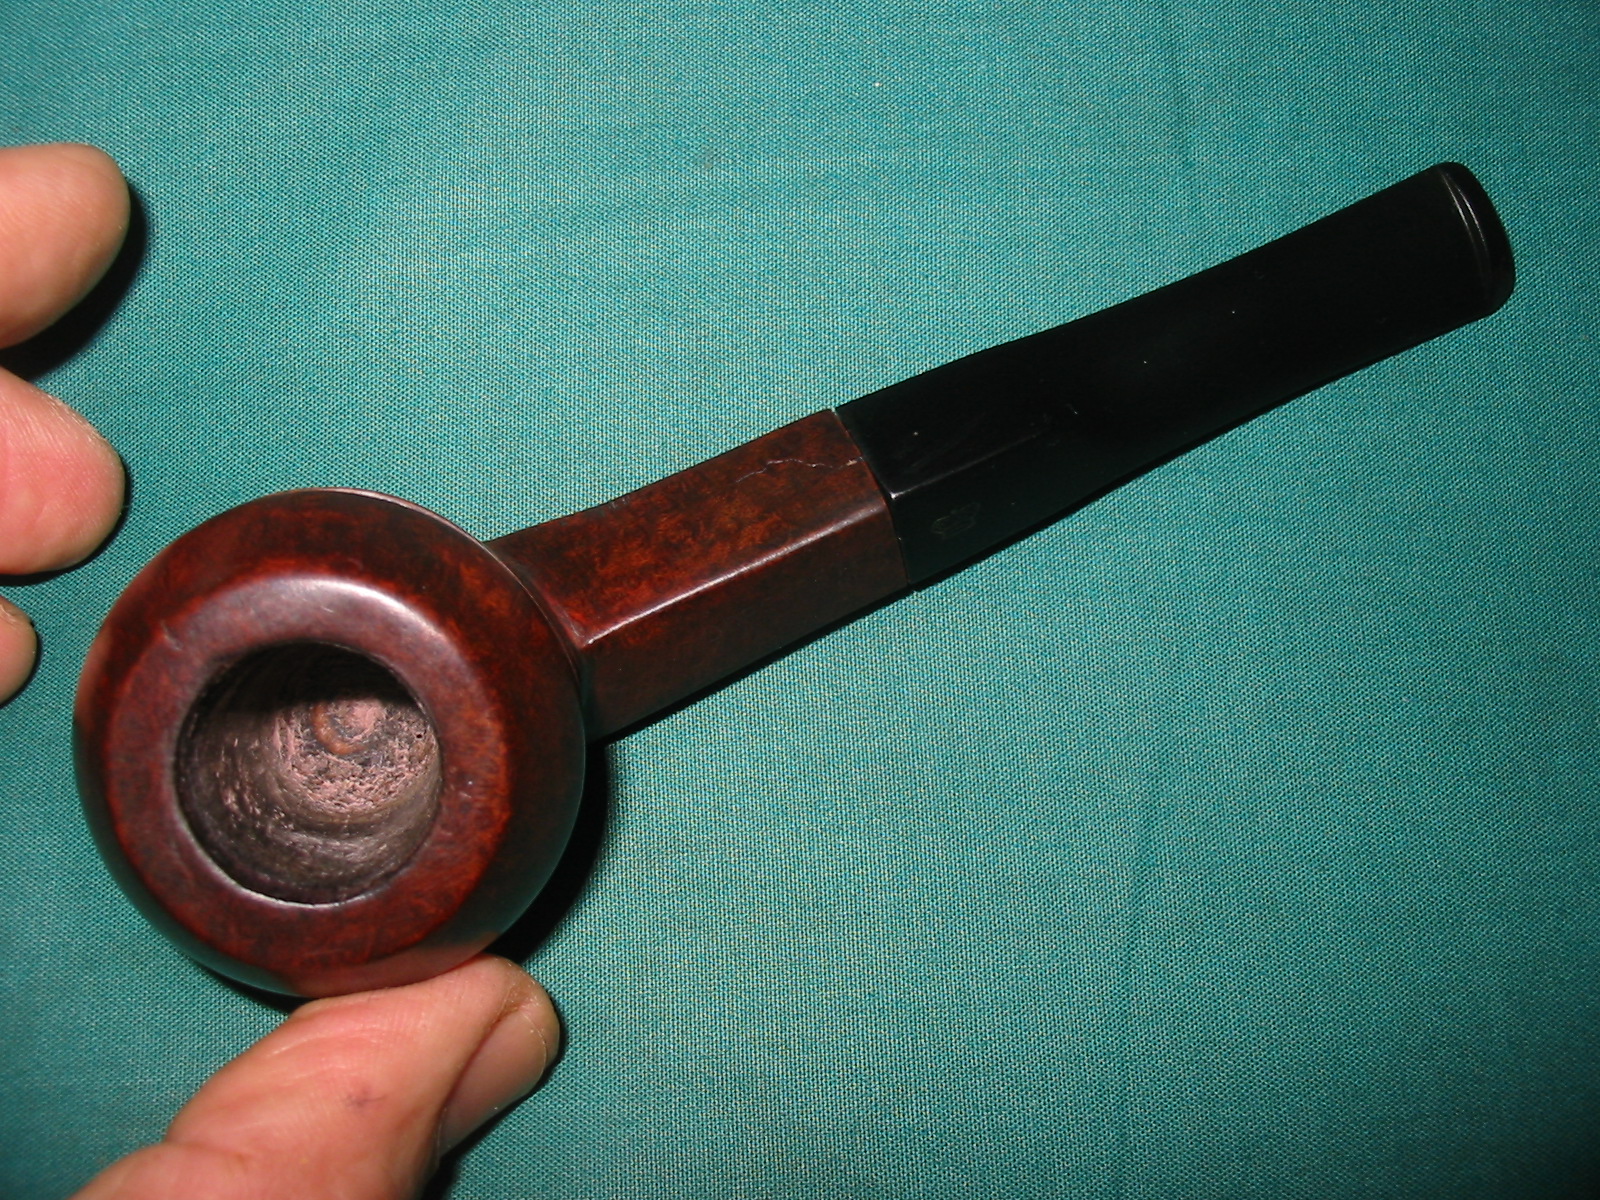
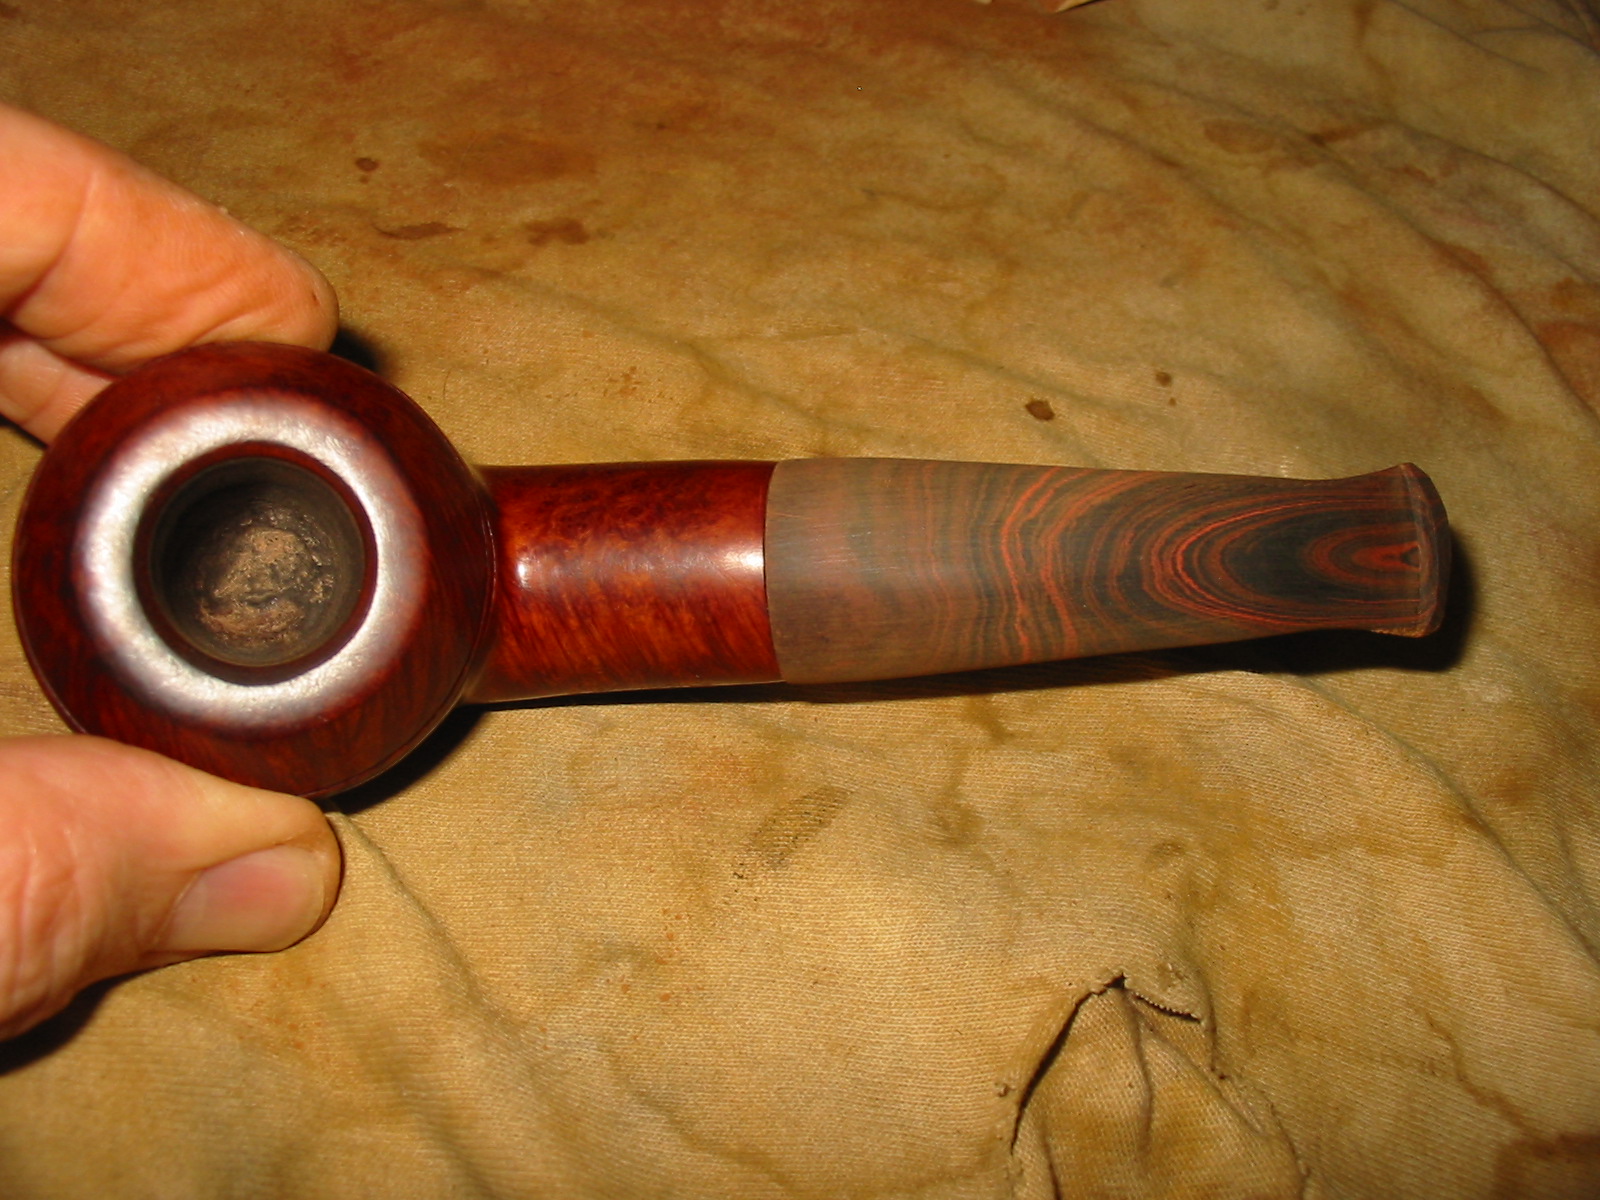
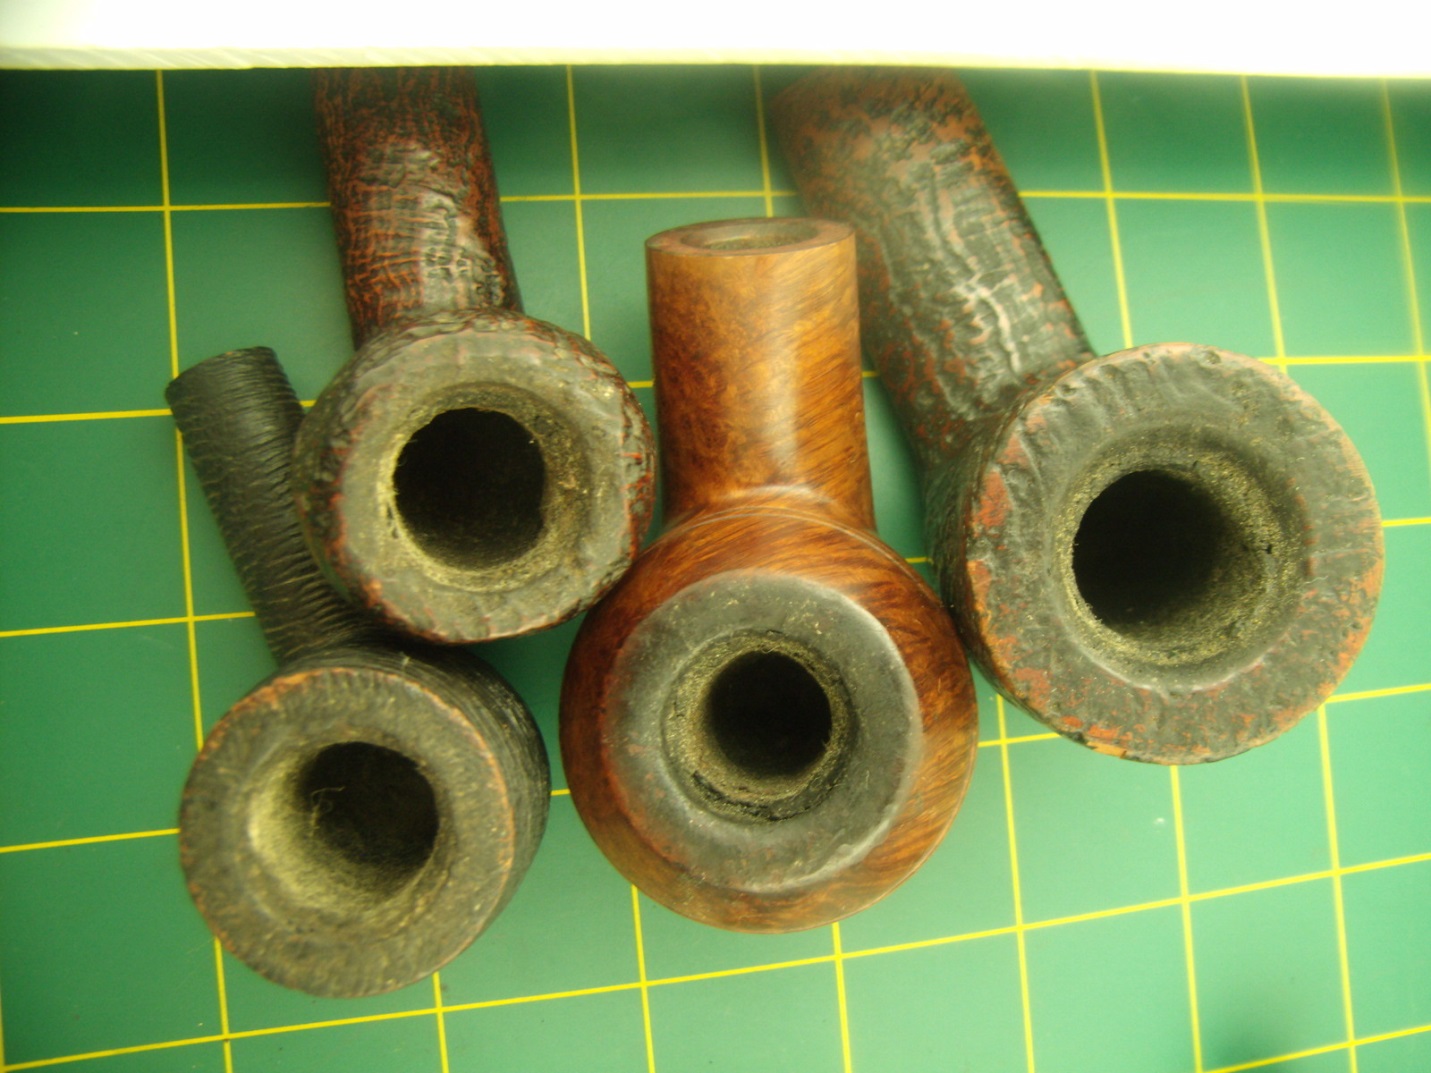
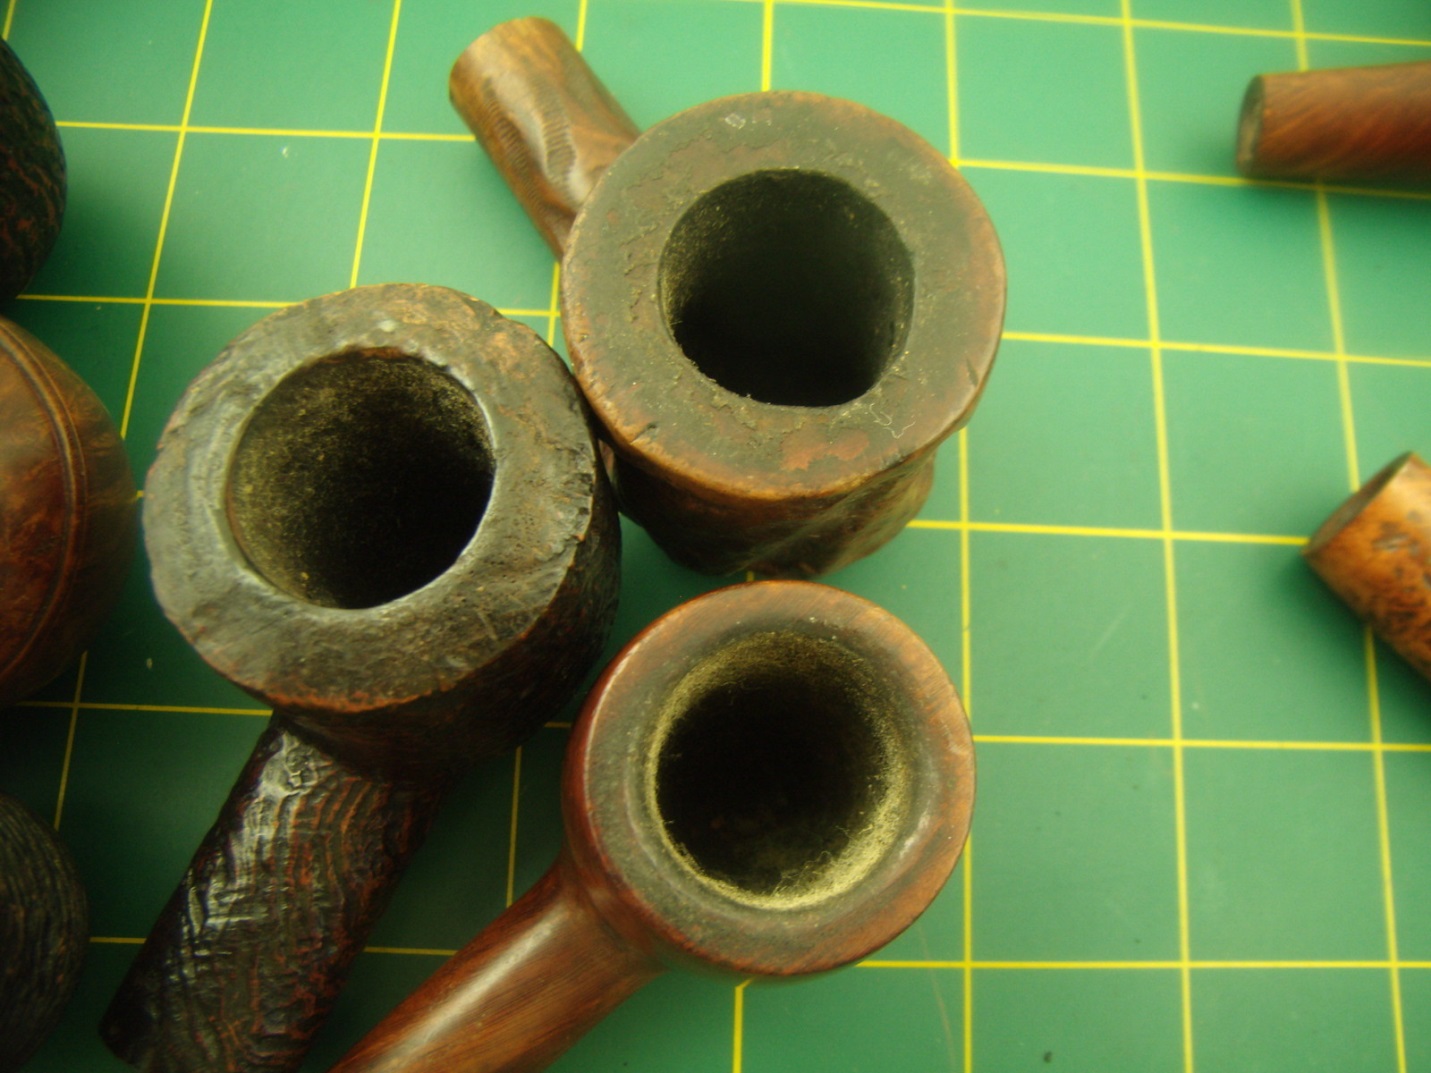
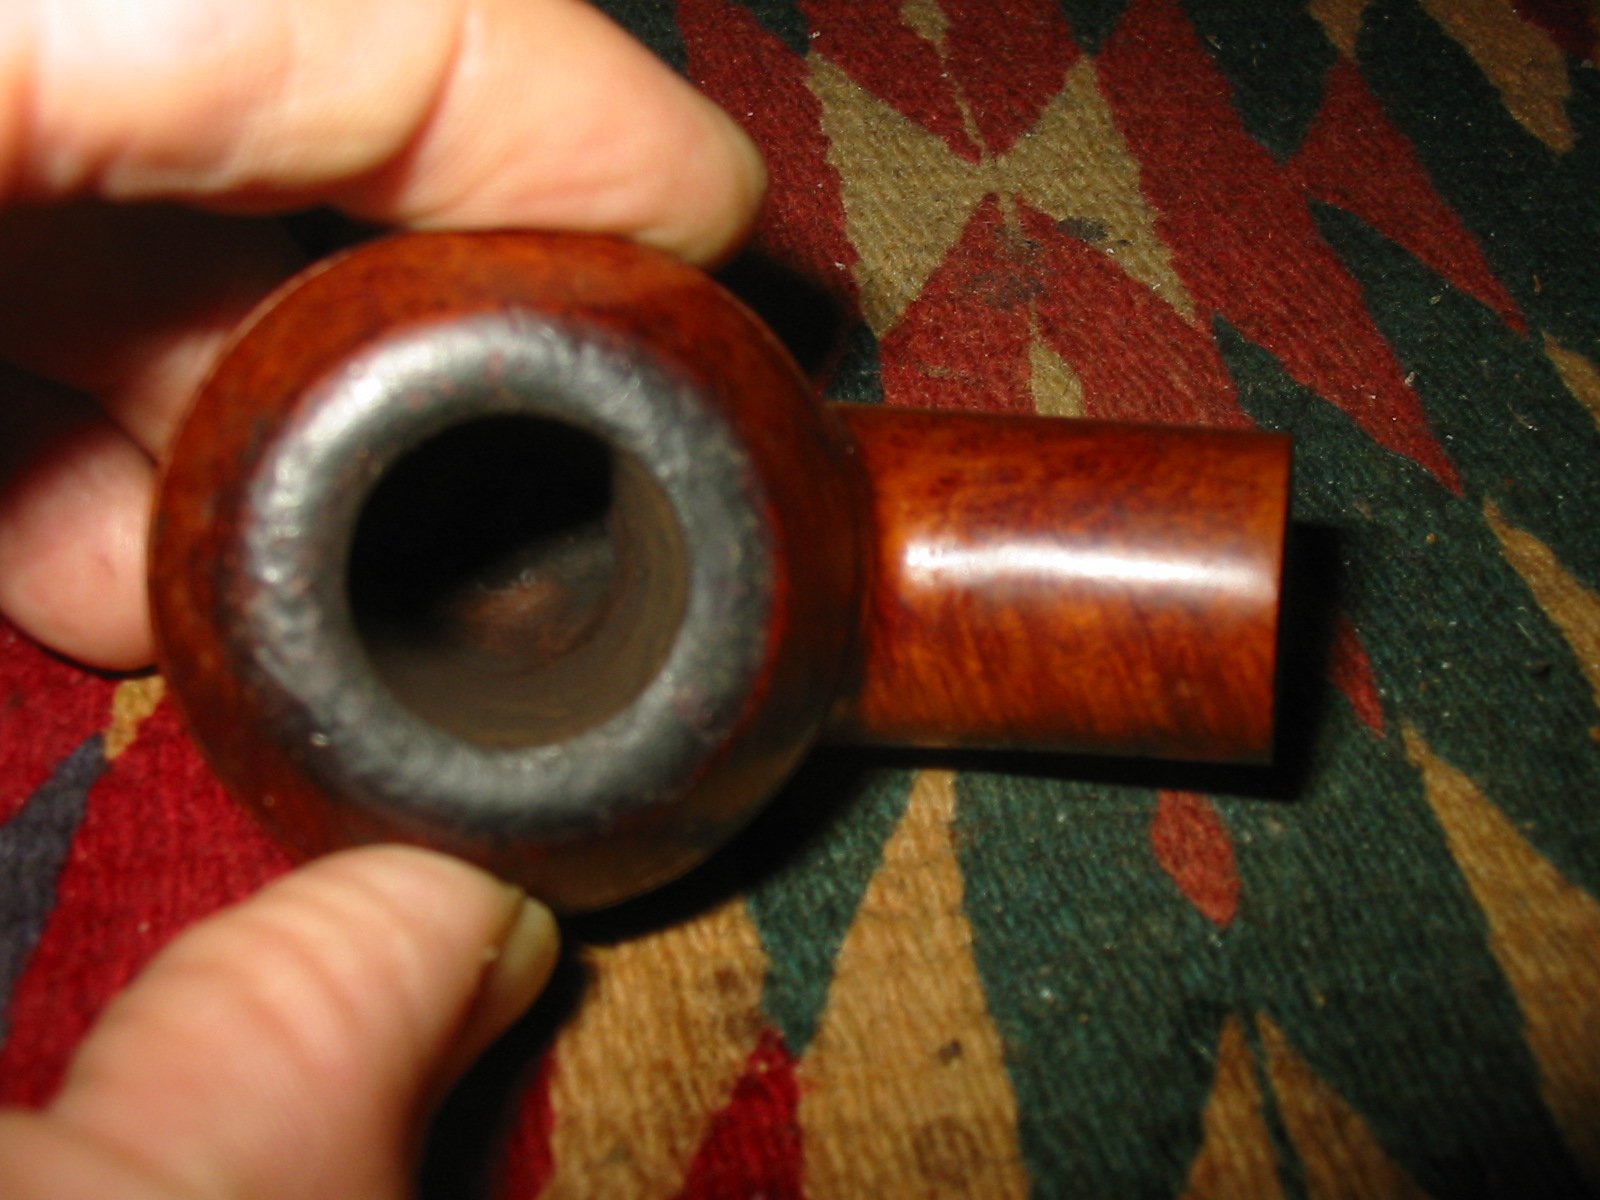
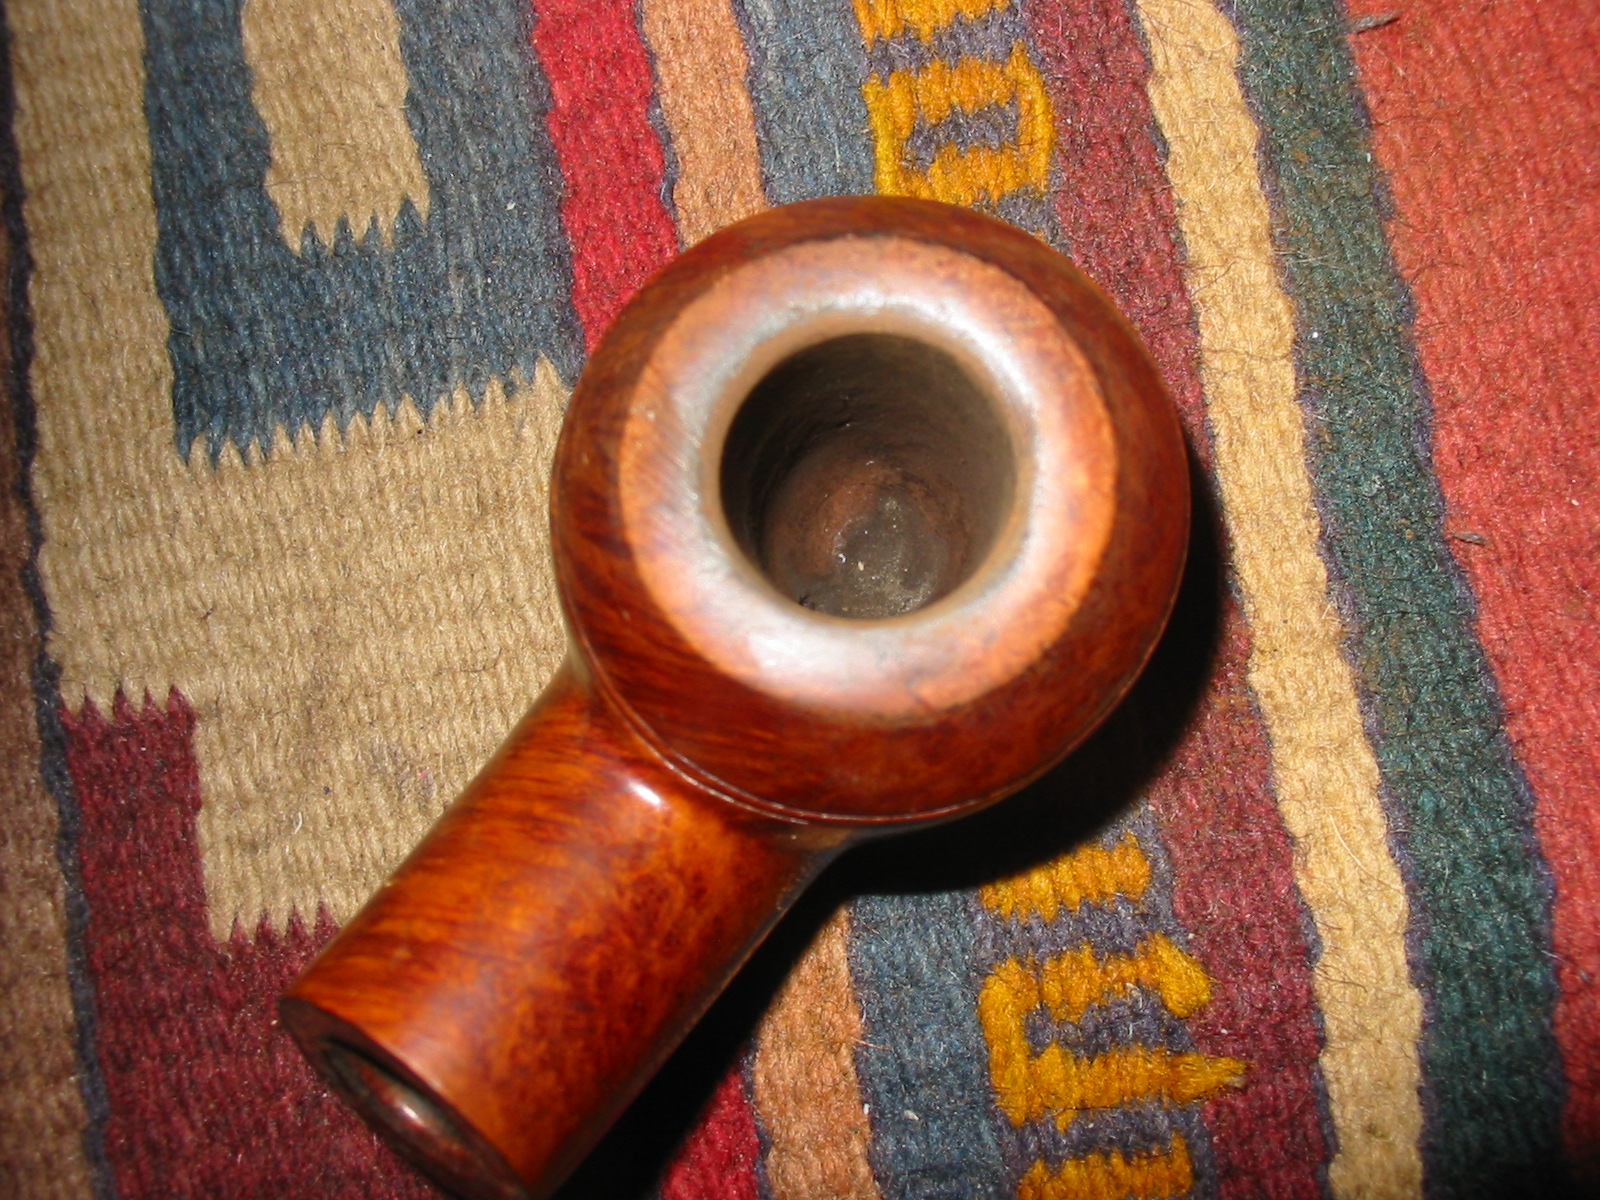
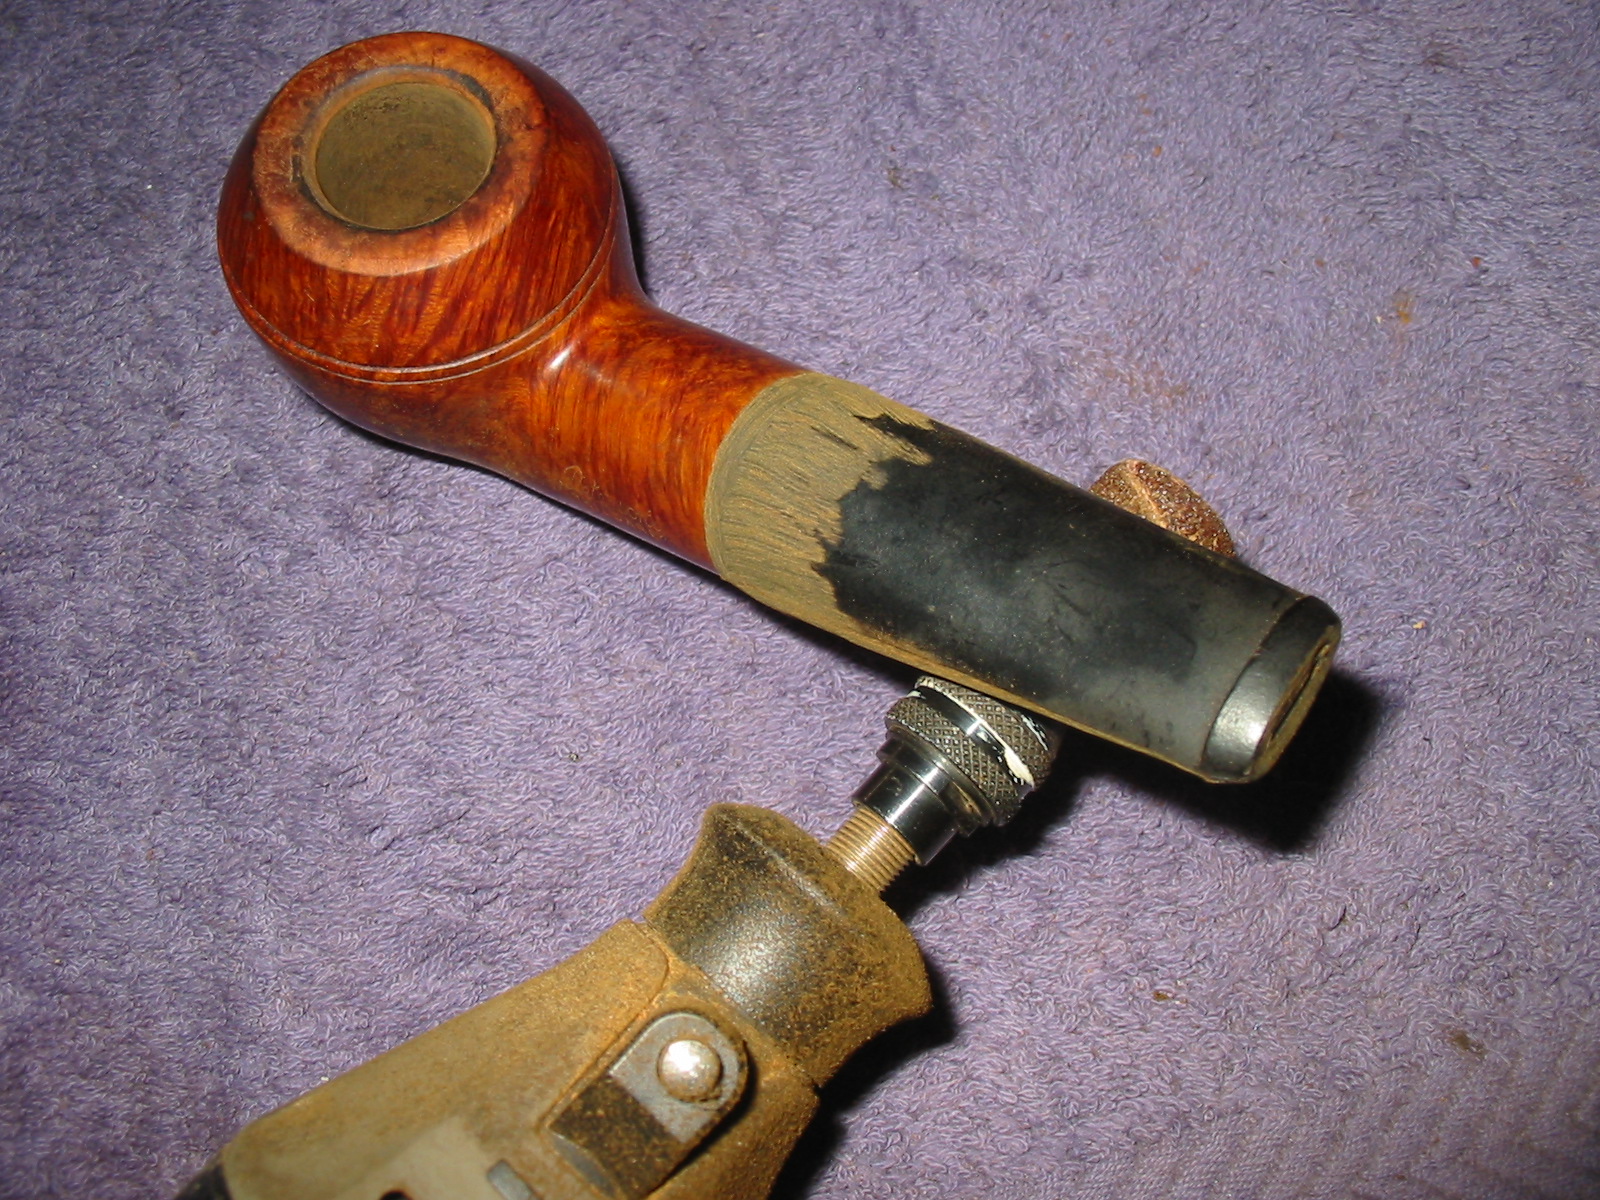
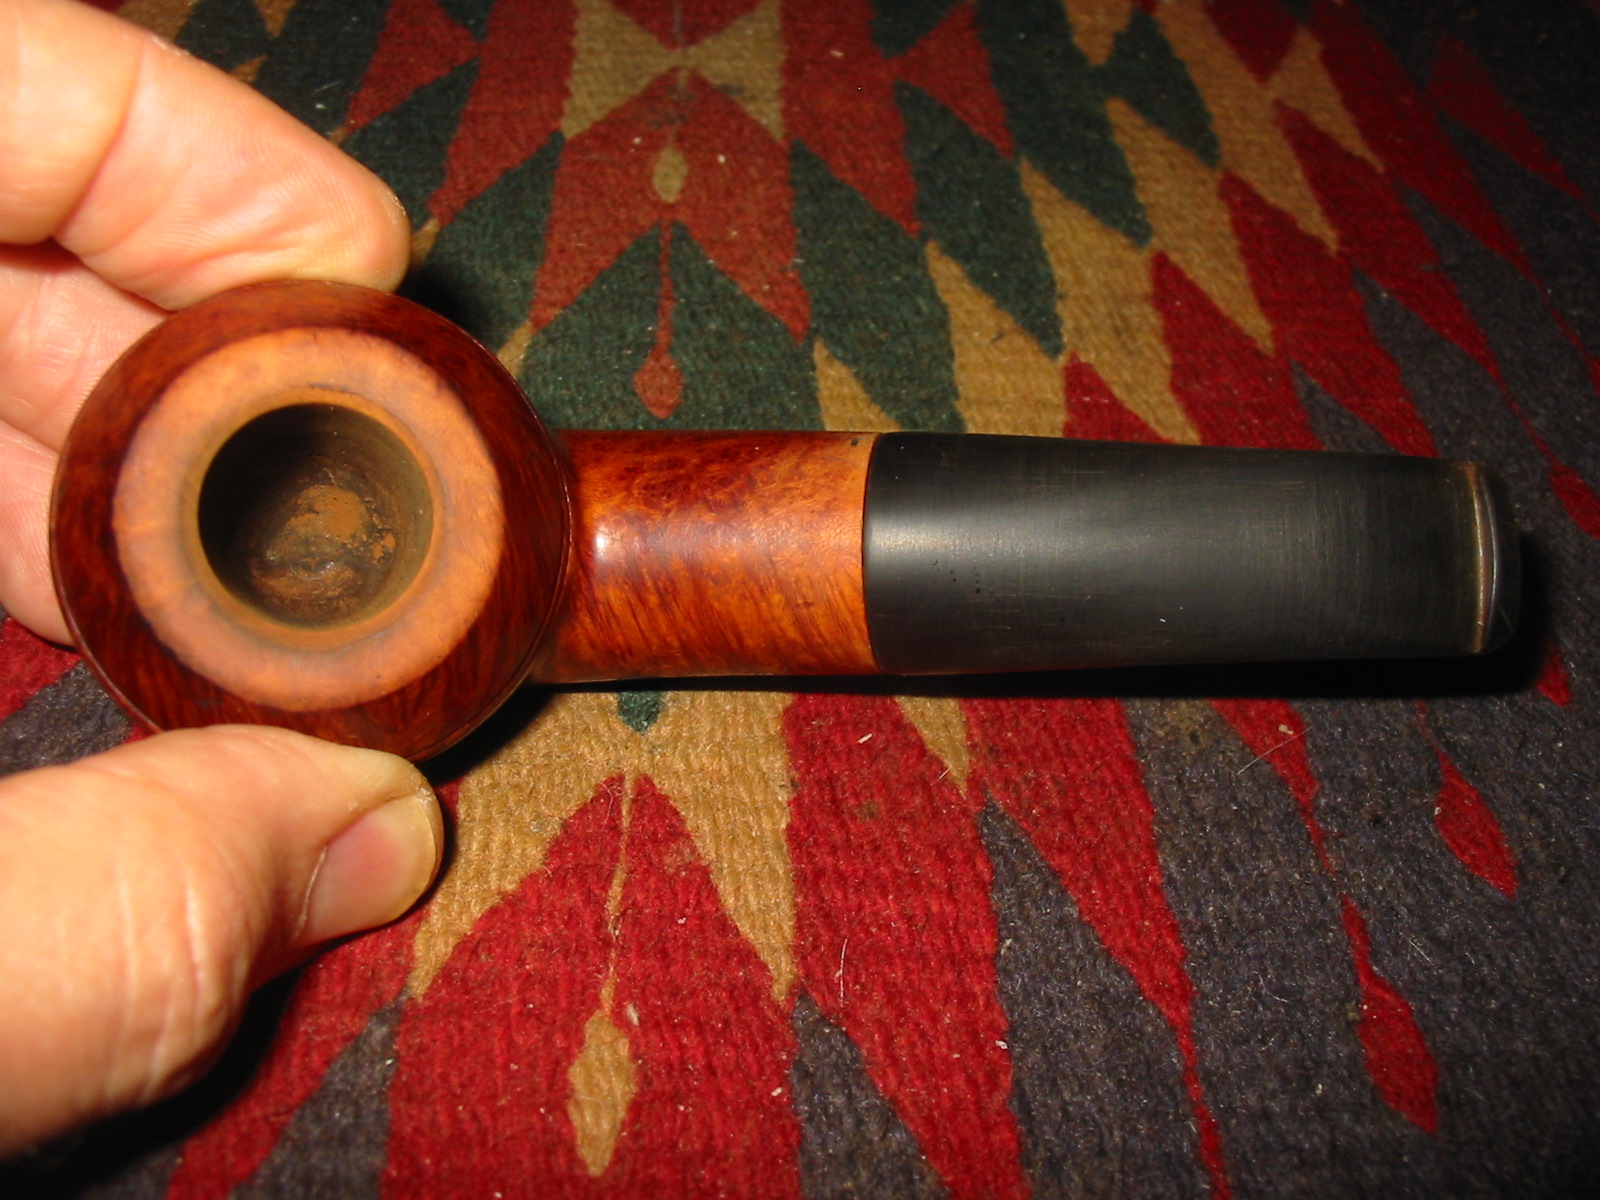
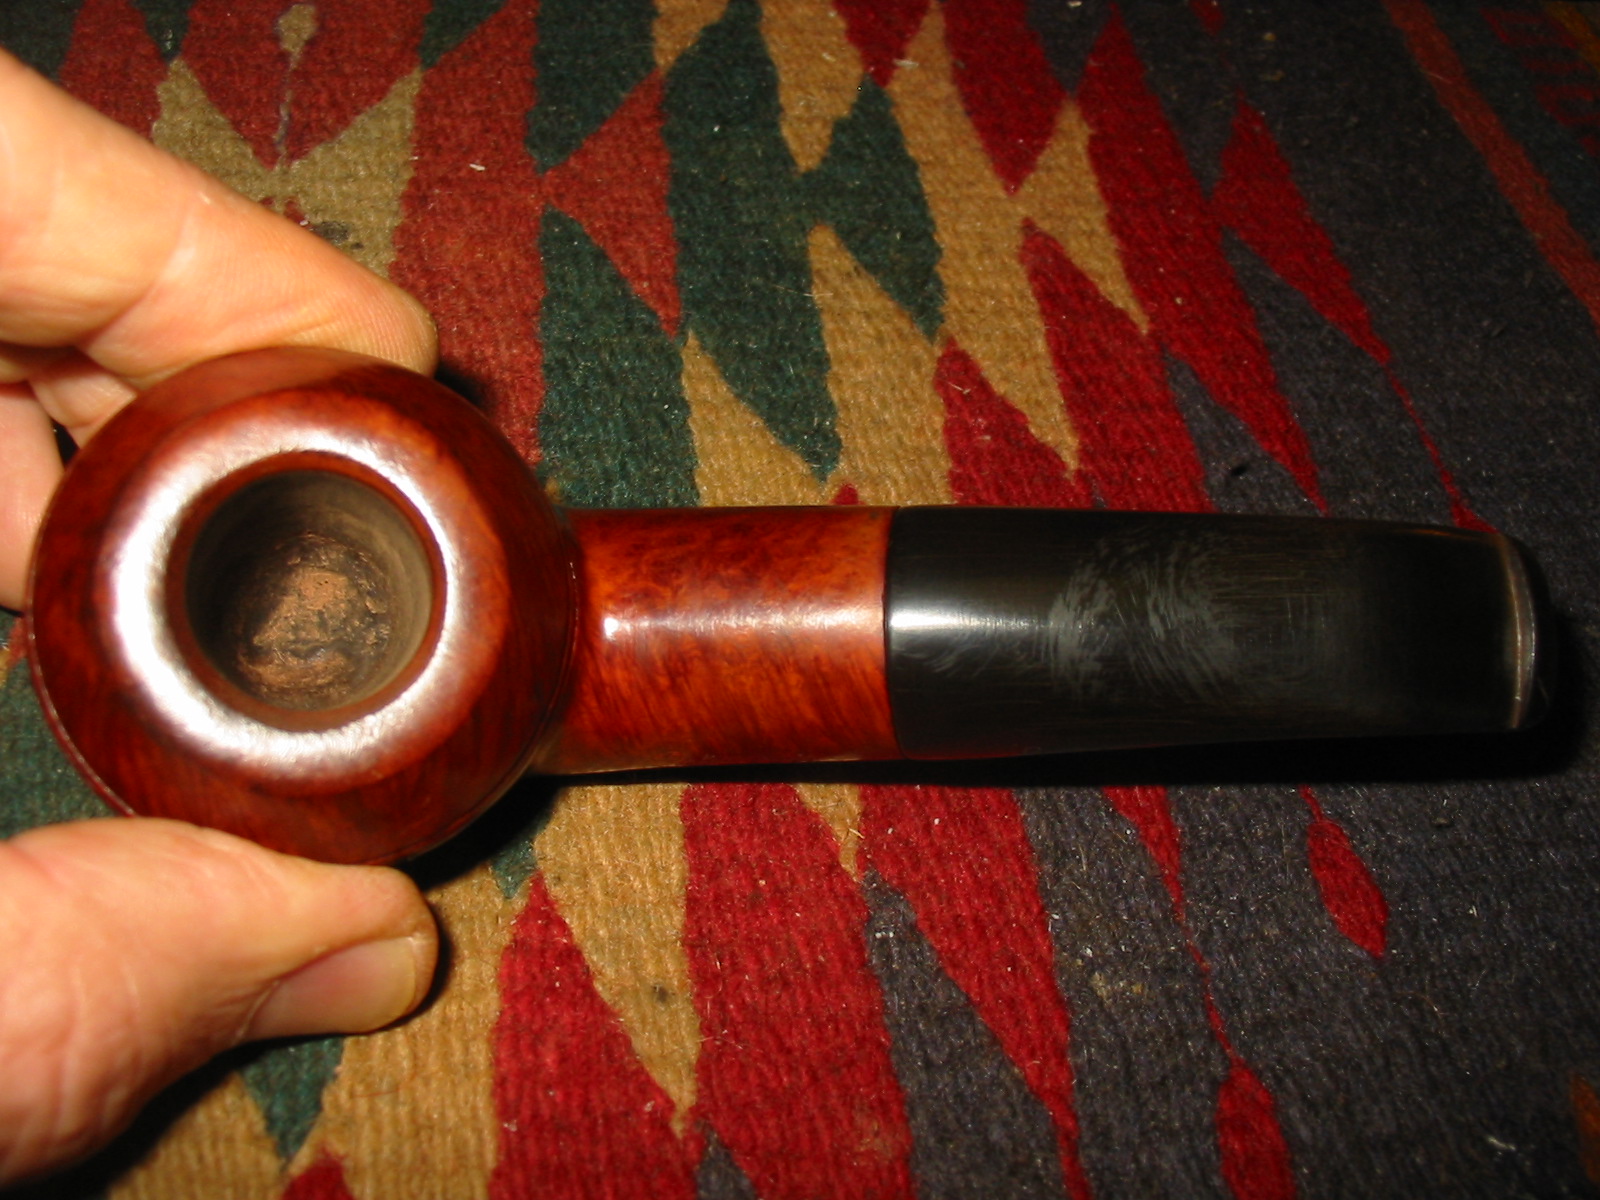
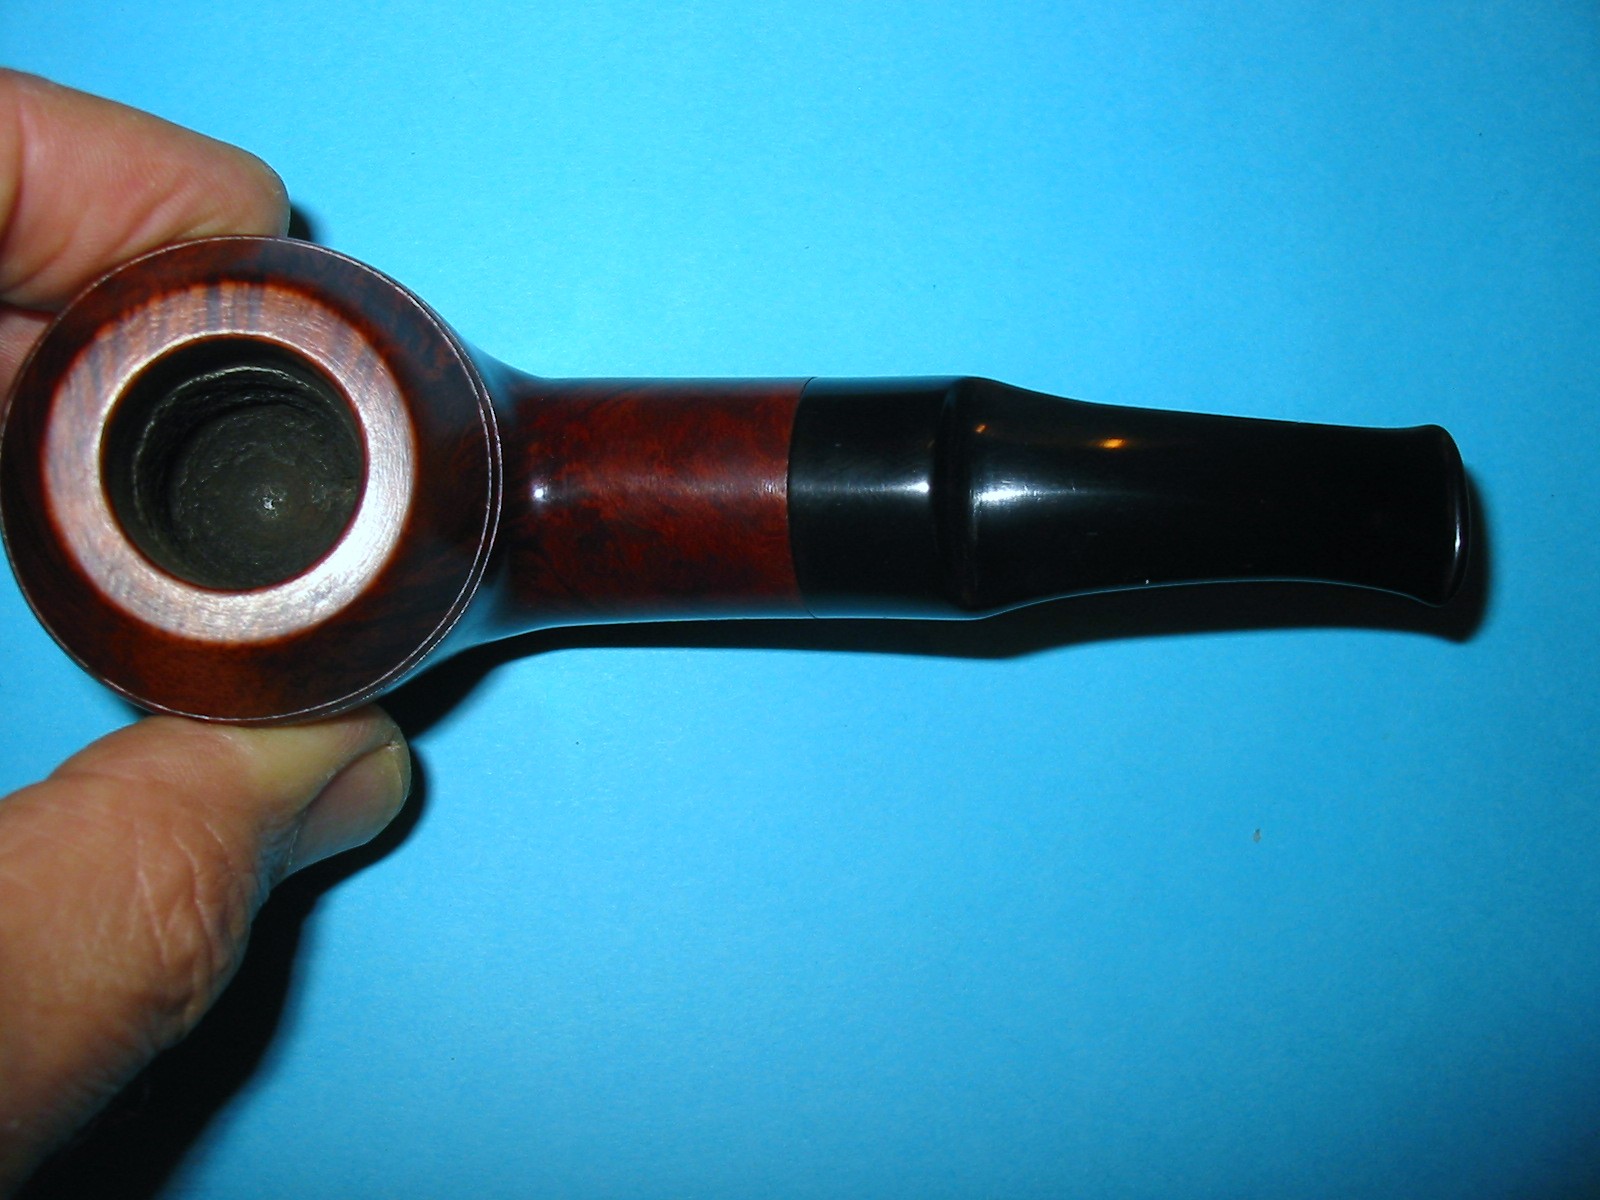
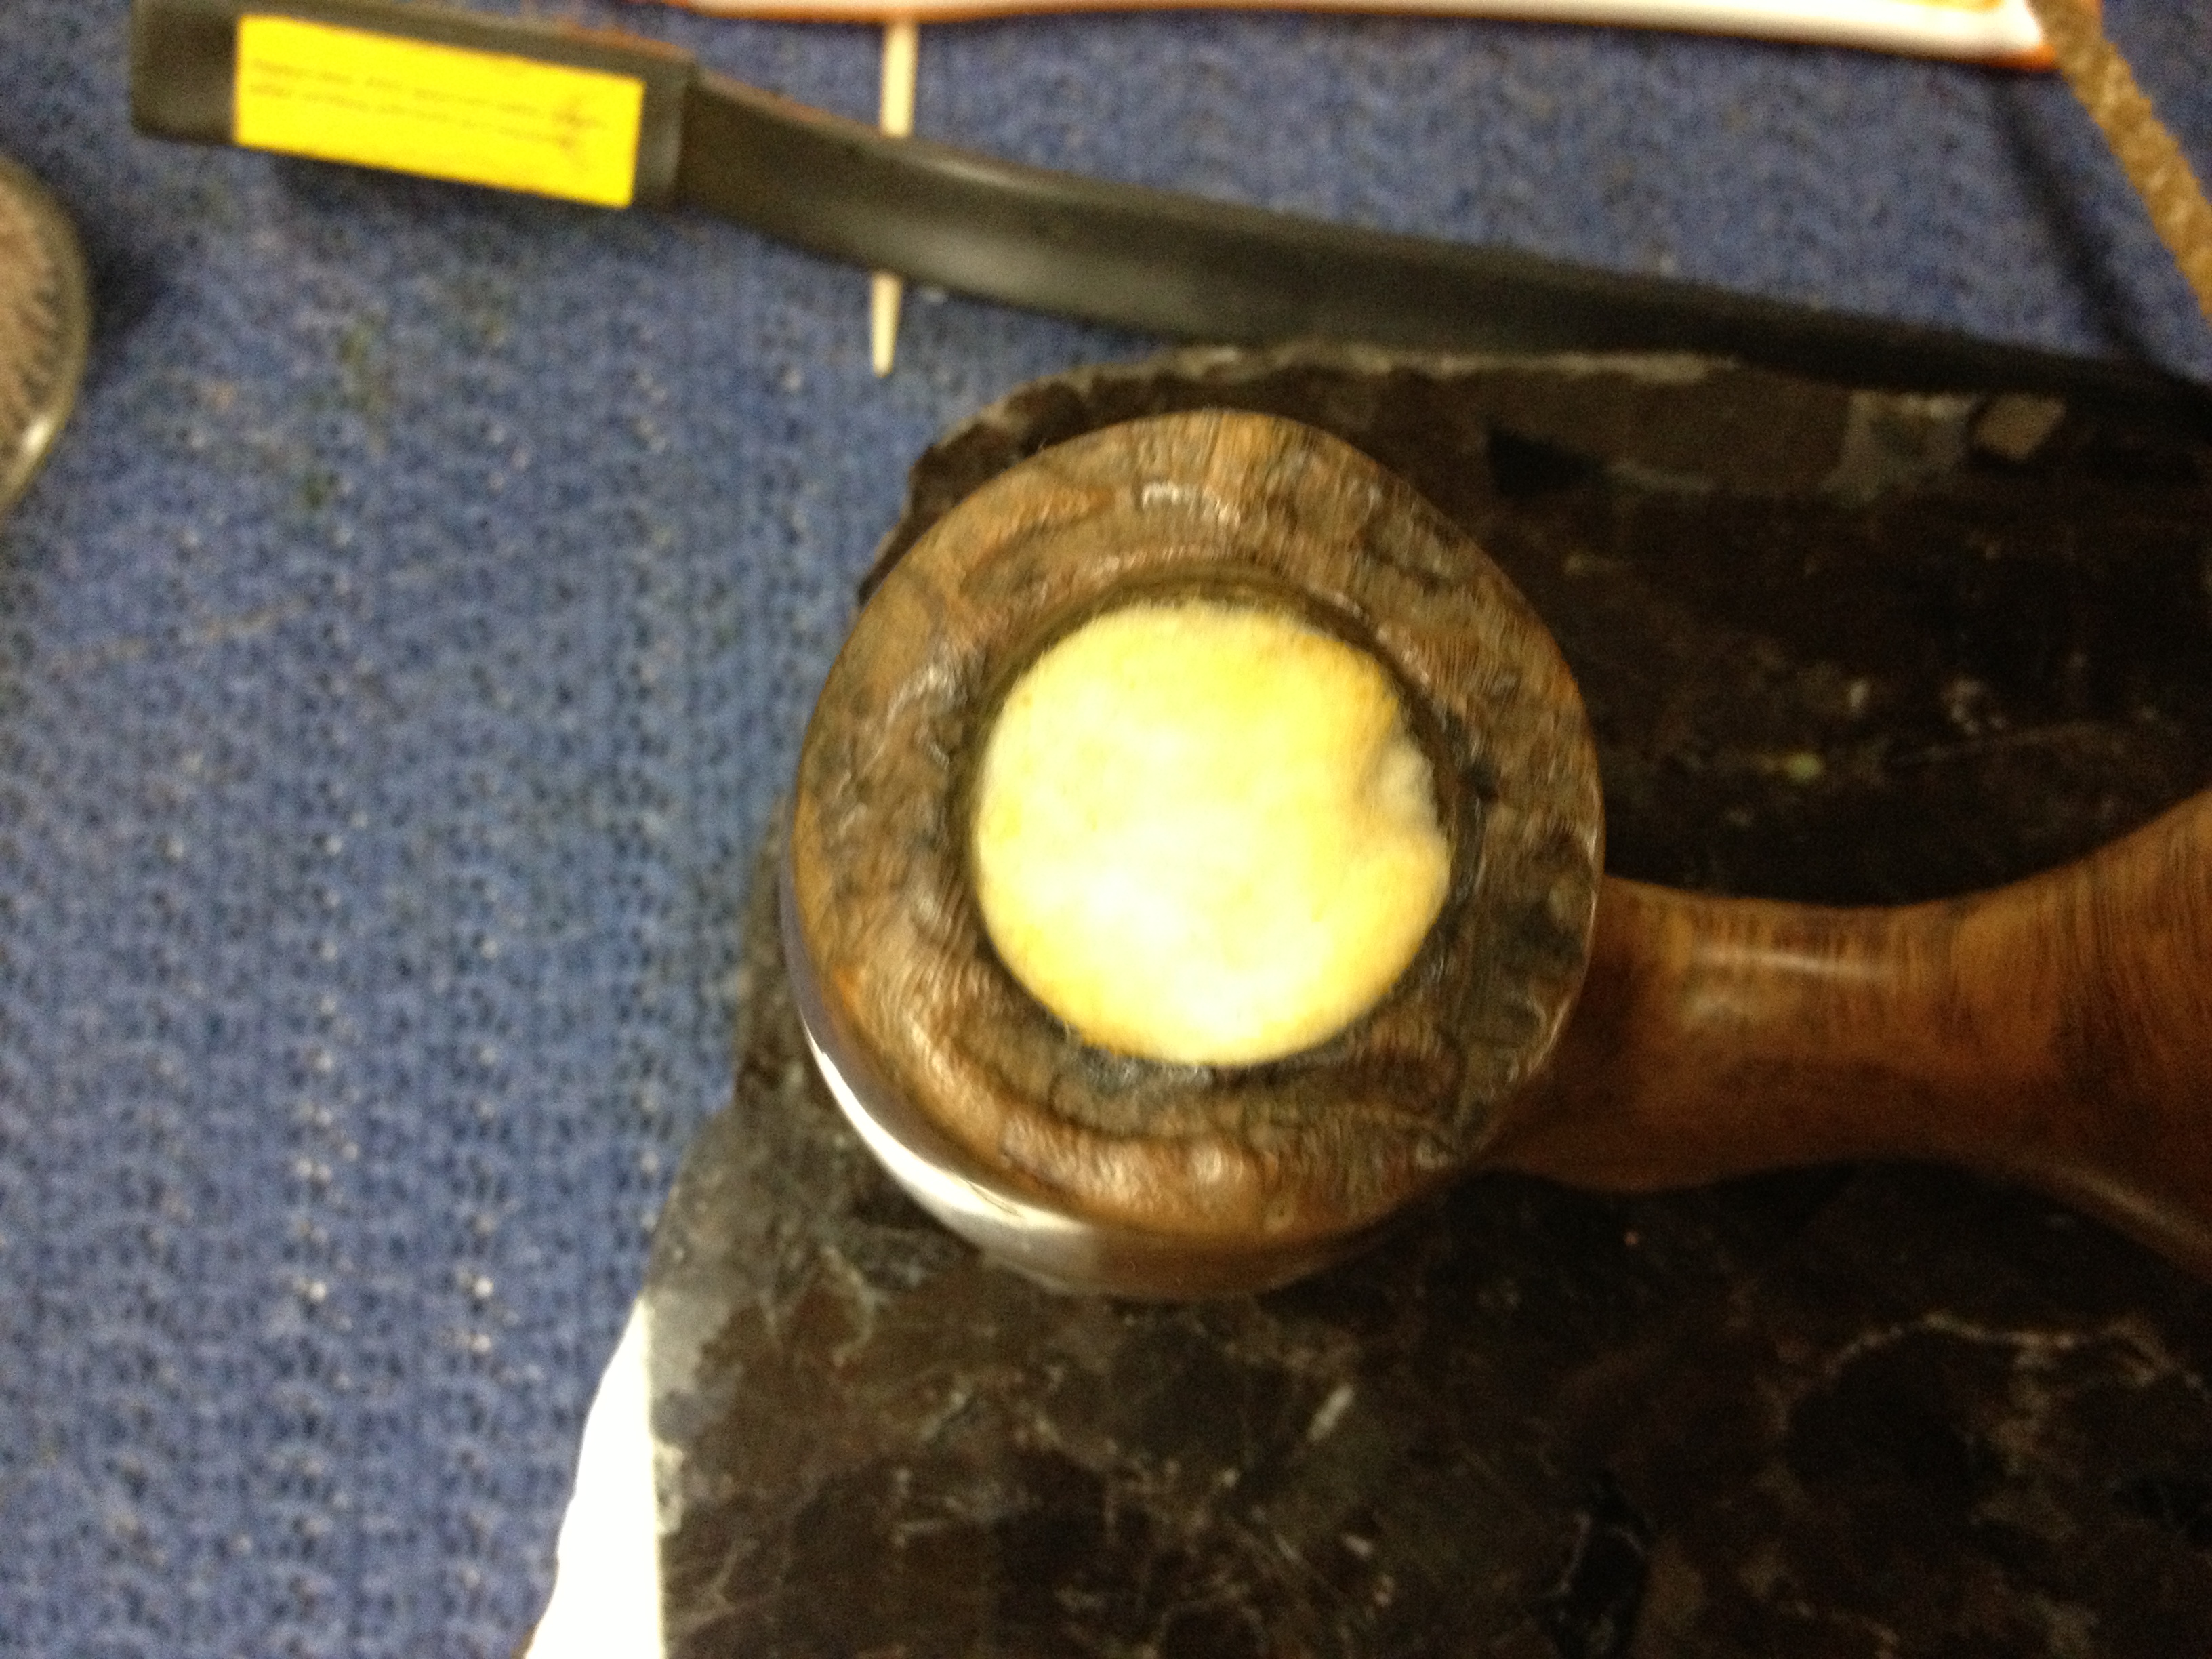
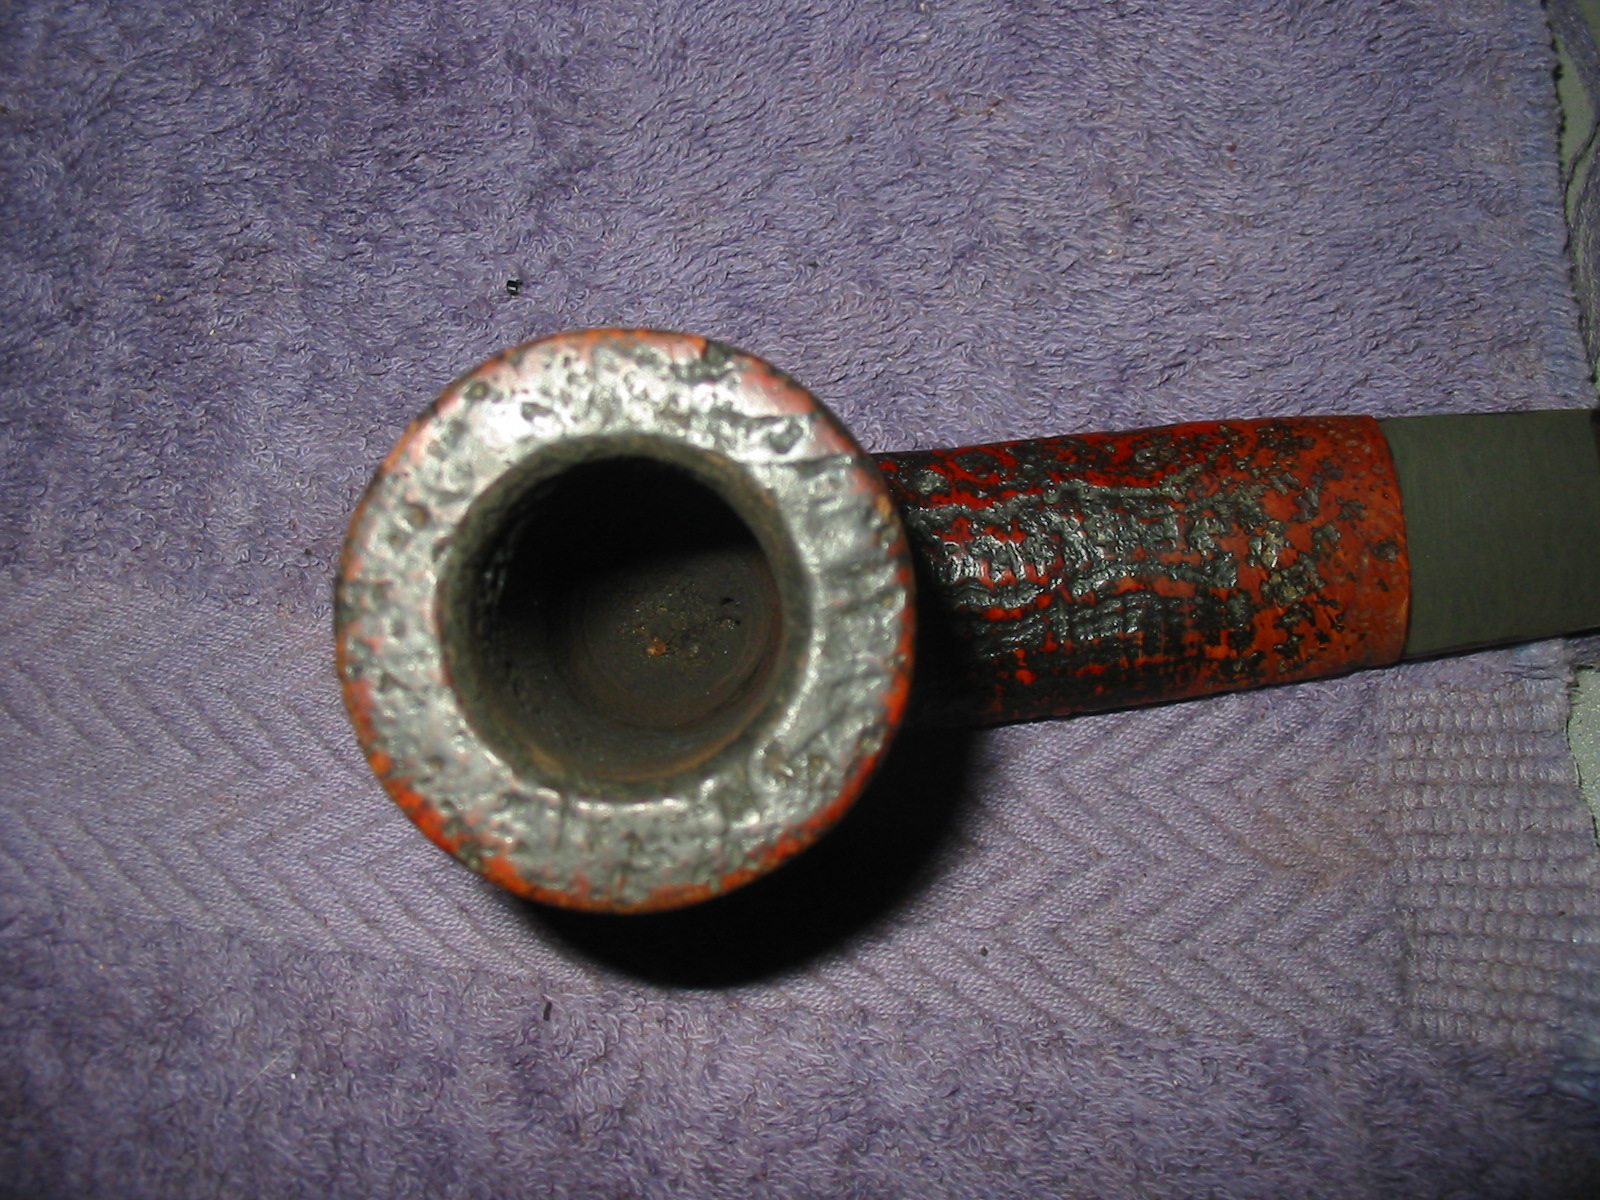
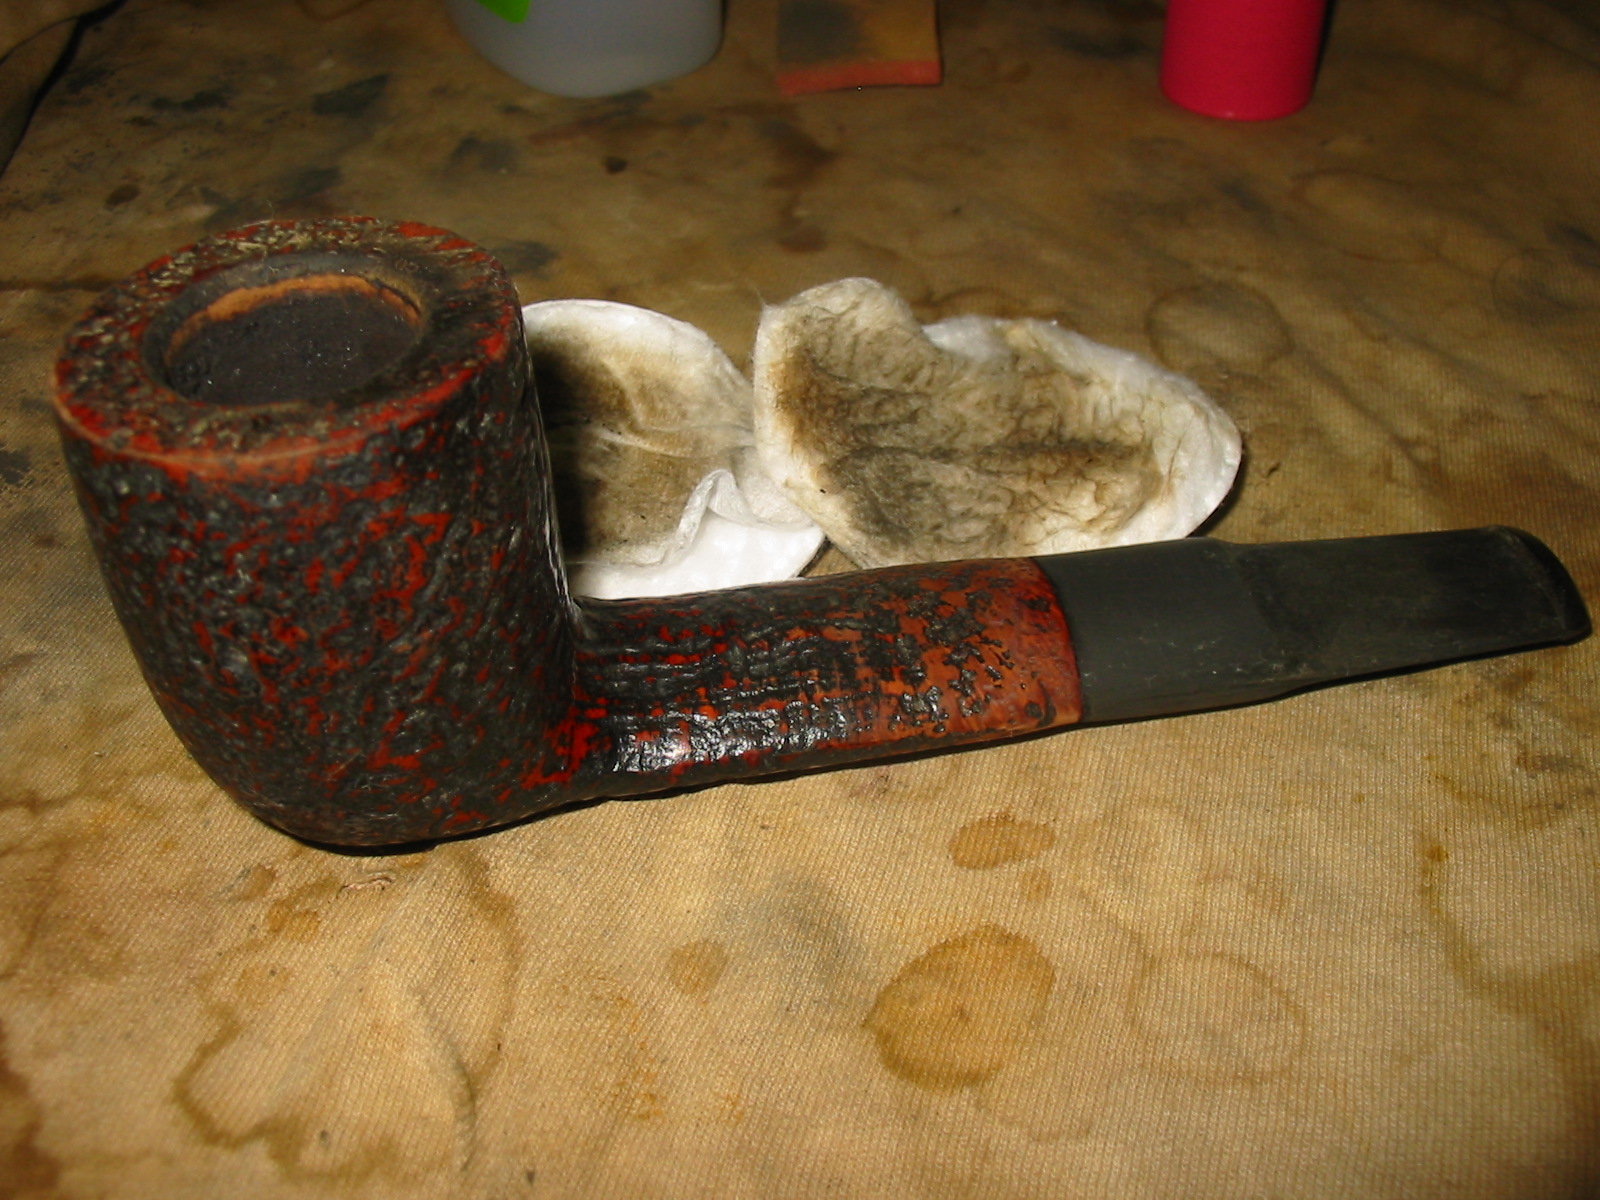
I reamed the bowl with a PipNet reamer using the smallest cutting head first and gradually working up to the diameter of the bowl. I wanted to ream the pipe back to bare briar to give a fresh start and be able to see if there were any burn out issues in the bowl. There were none.

IMG_1588

IMG_1589

IMG_1590

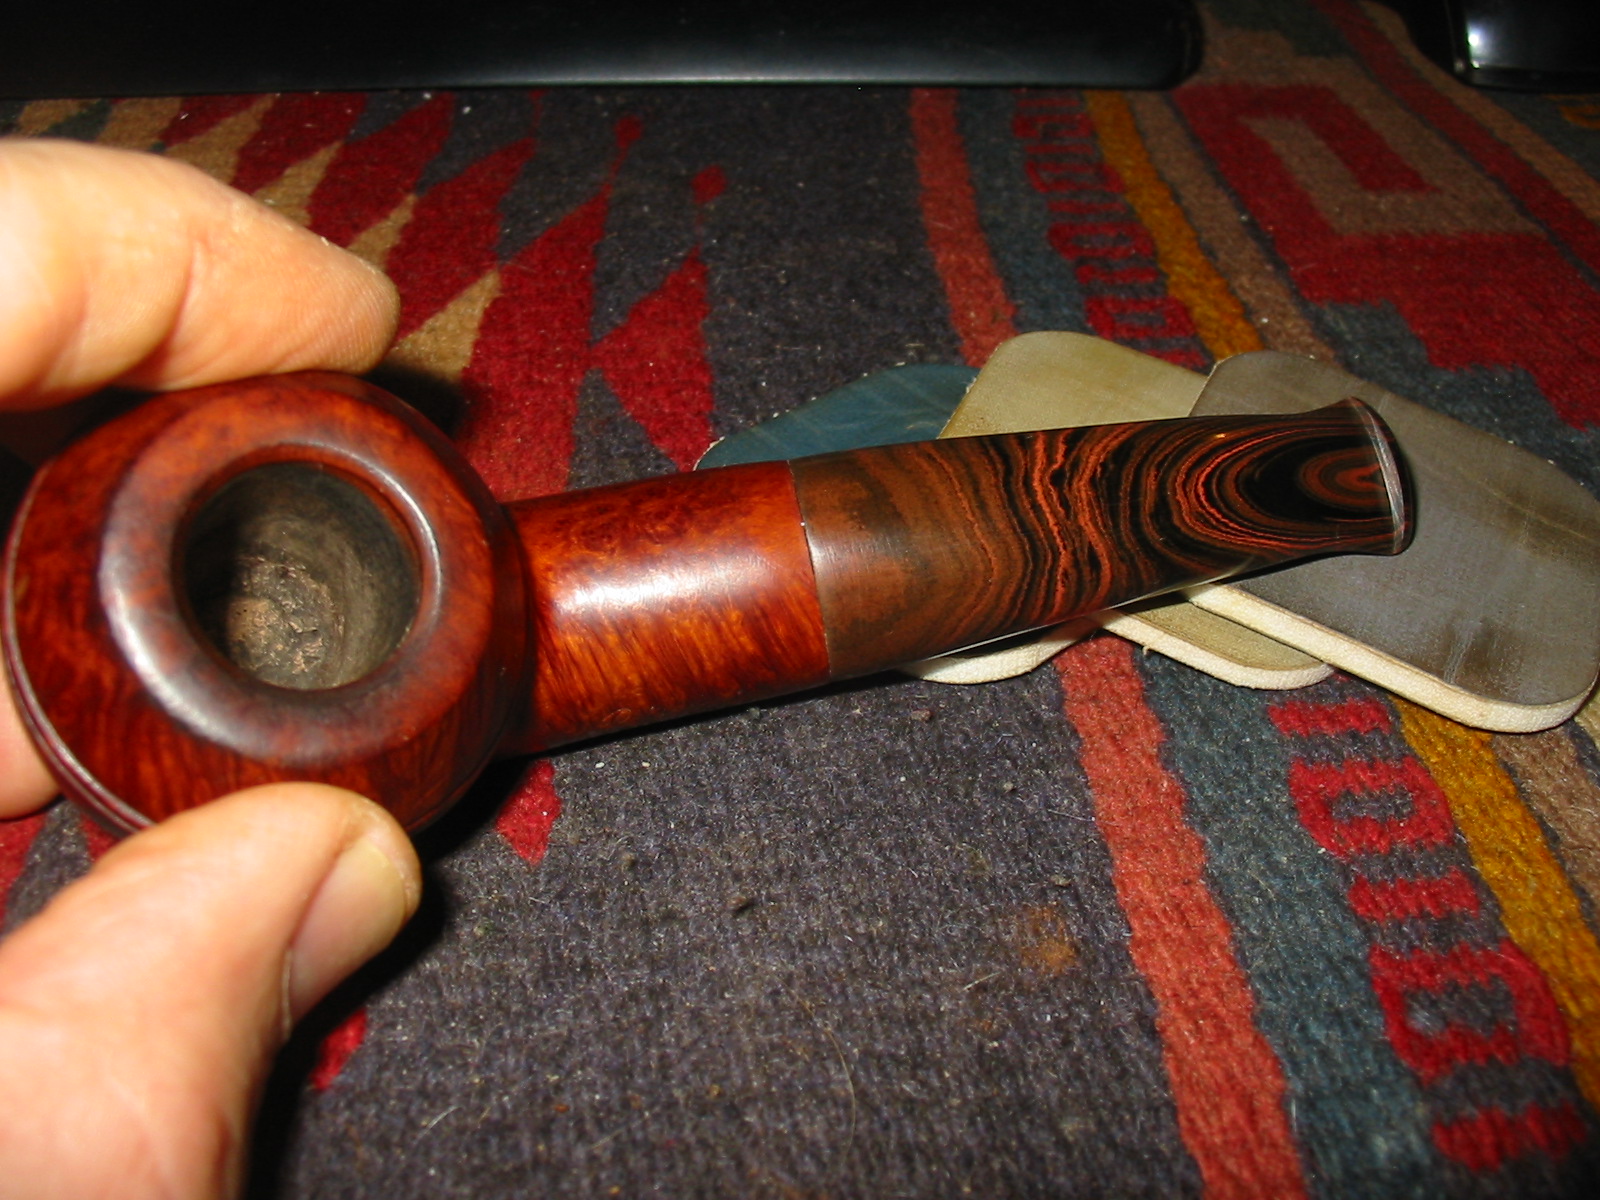
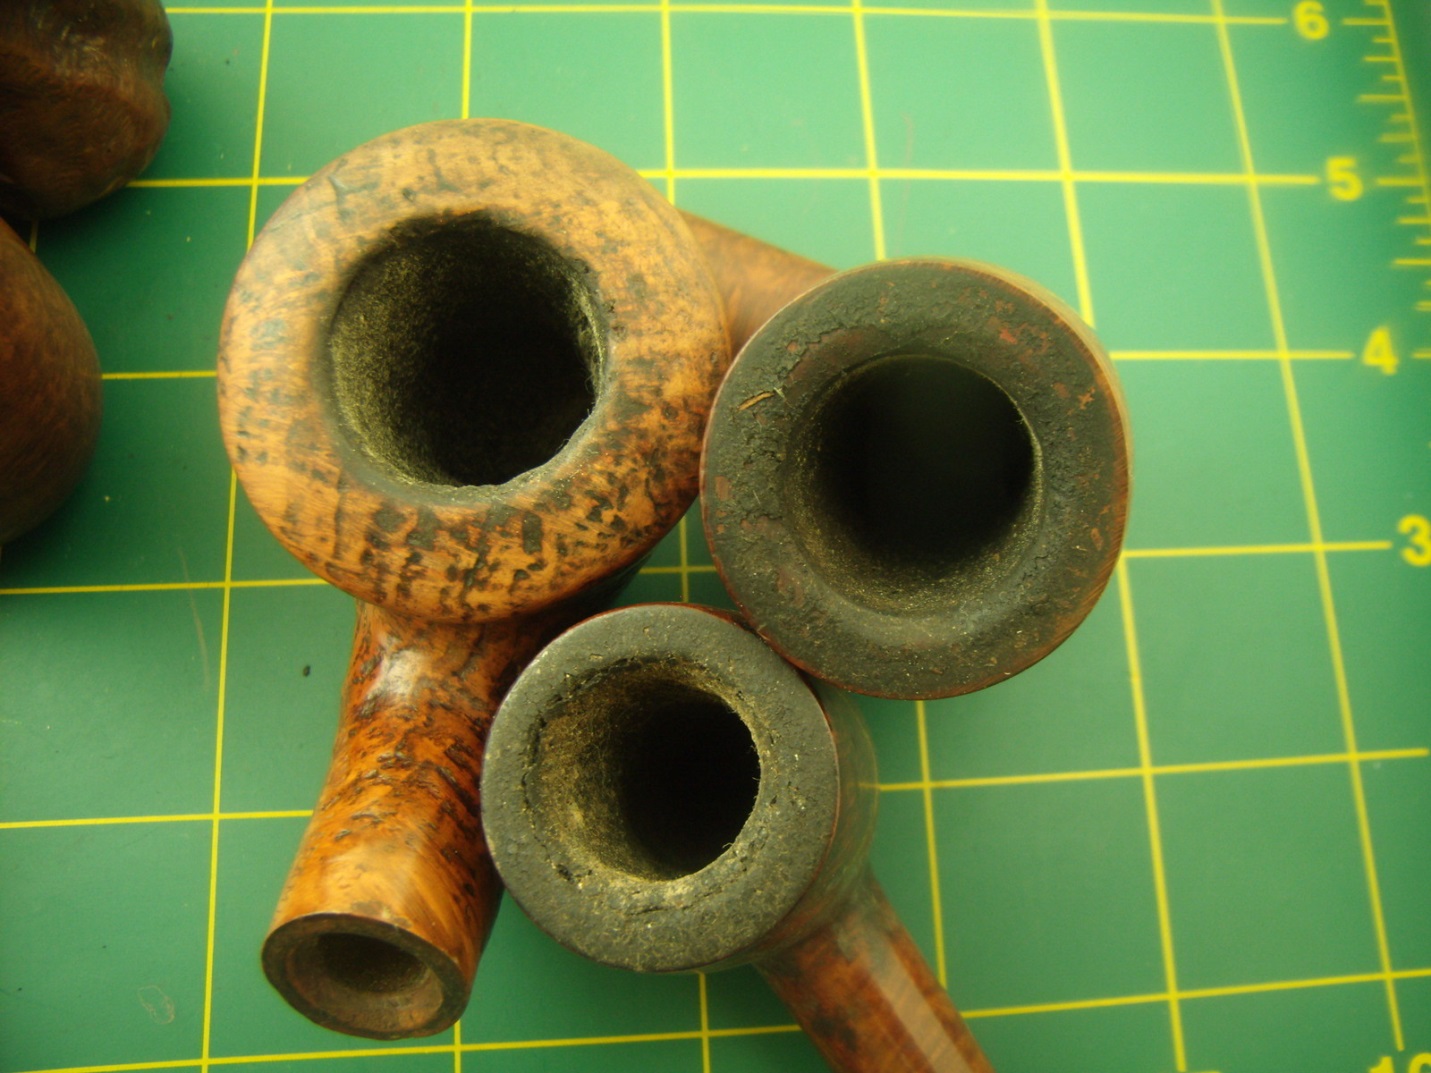
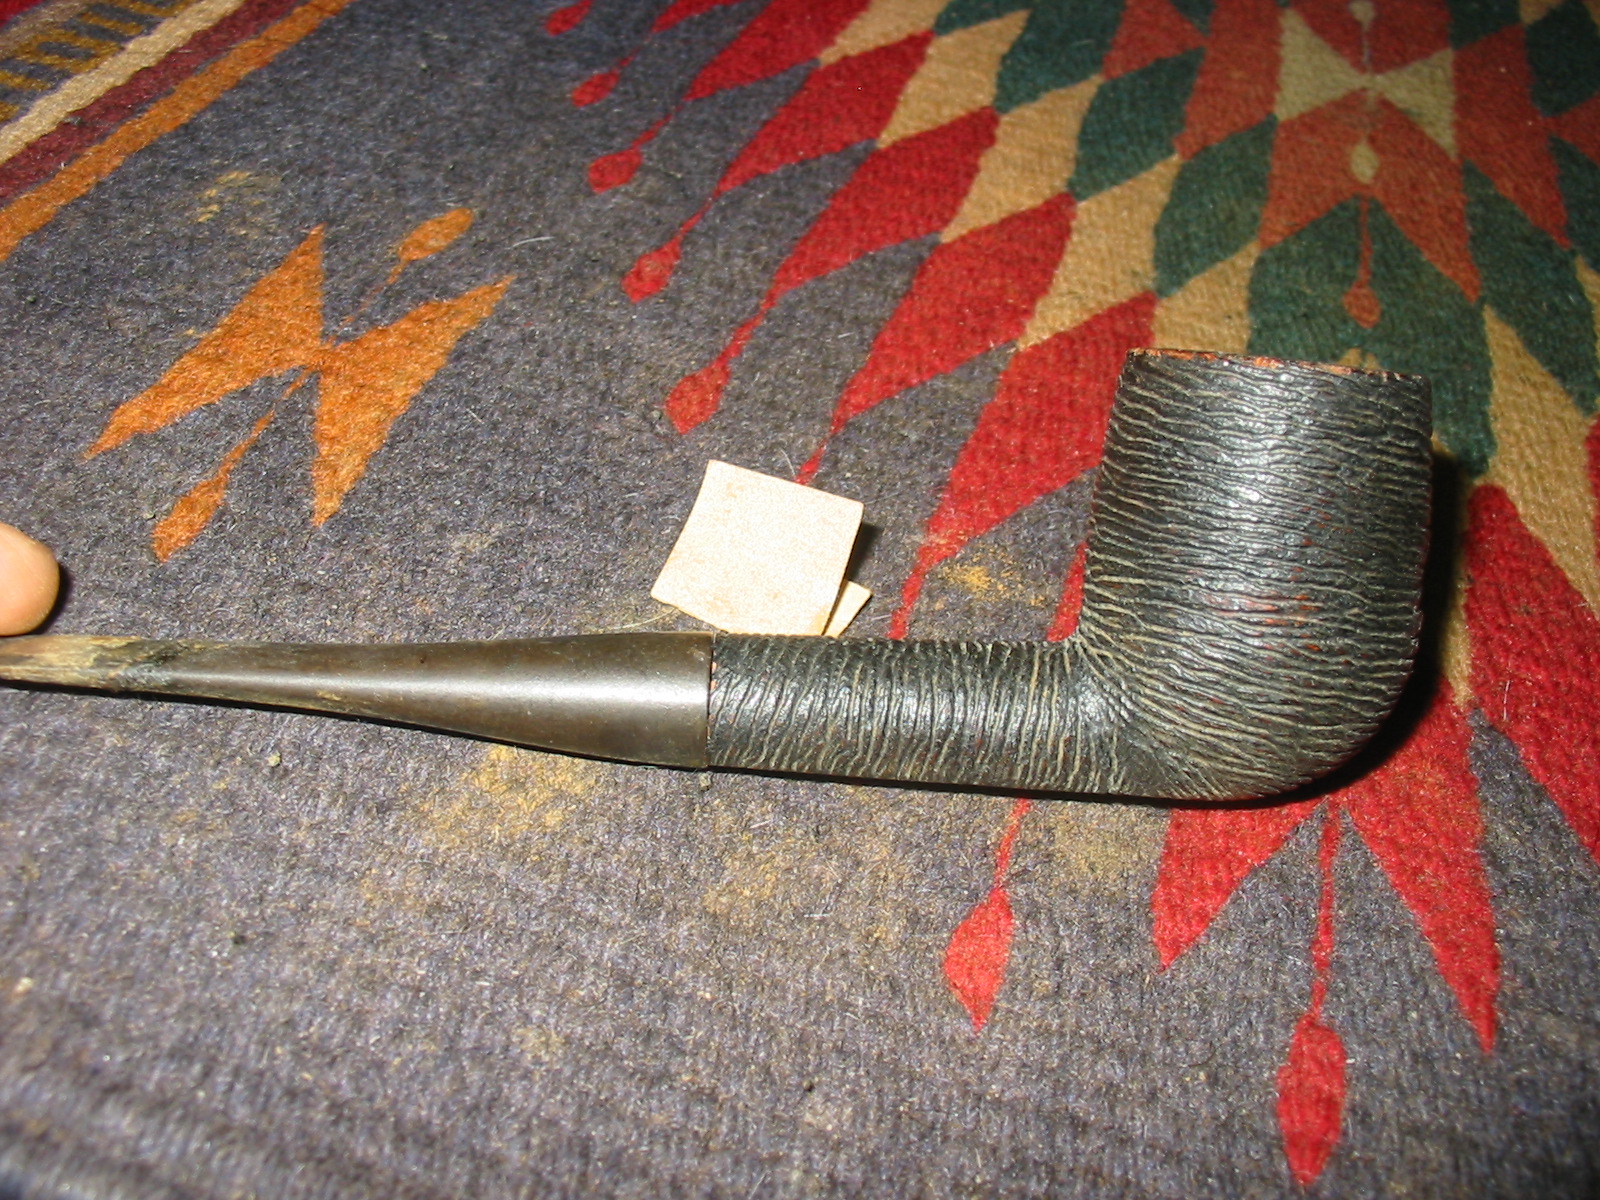
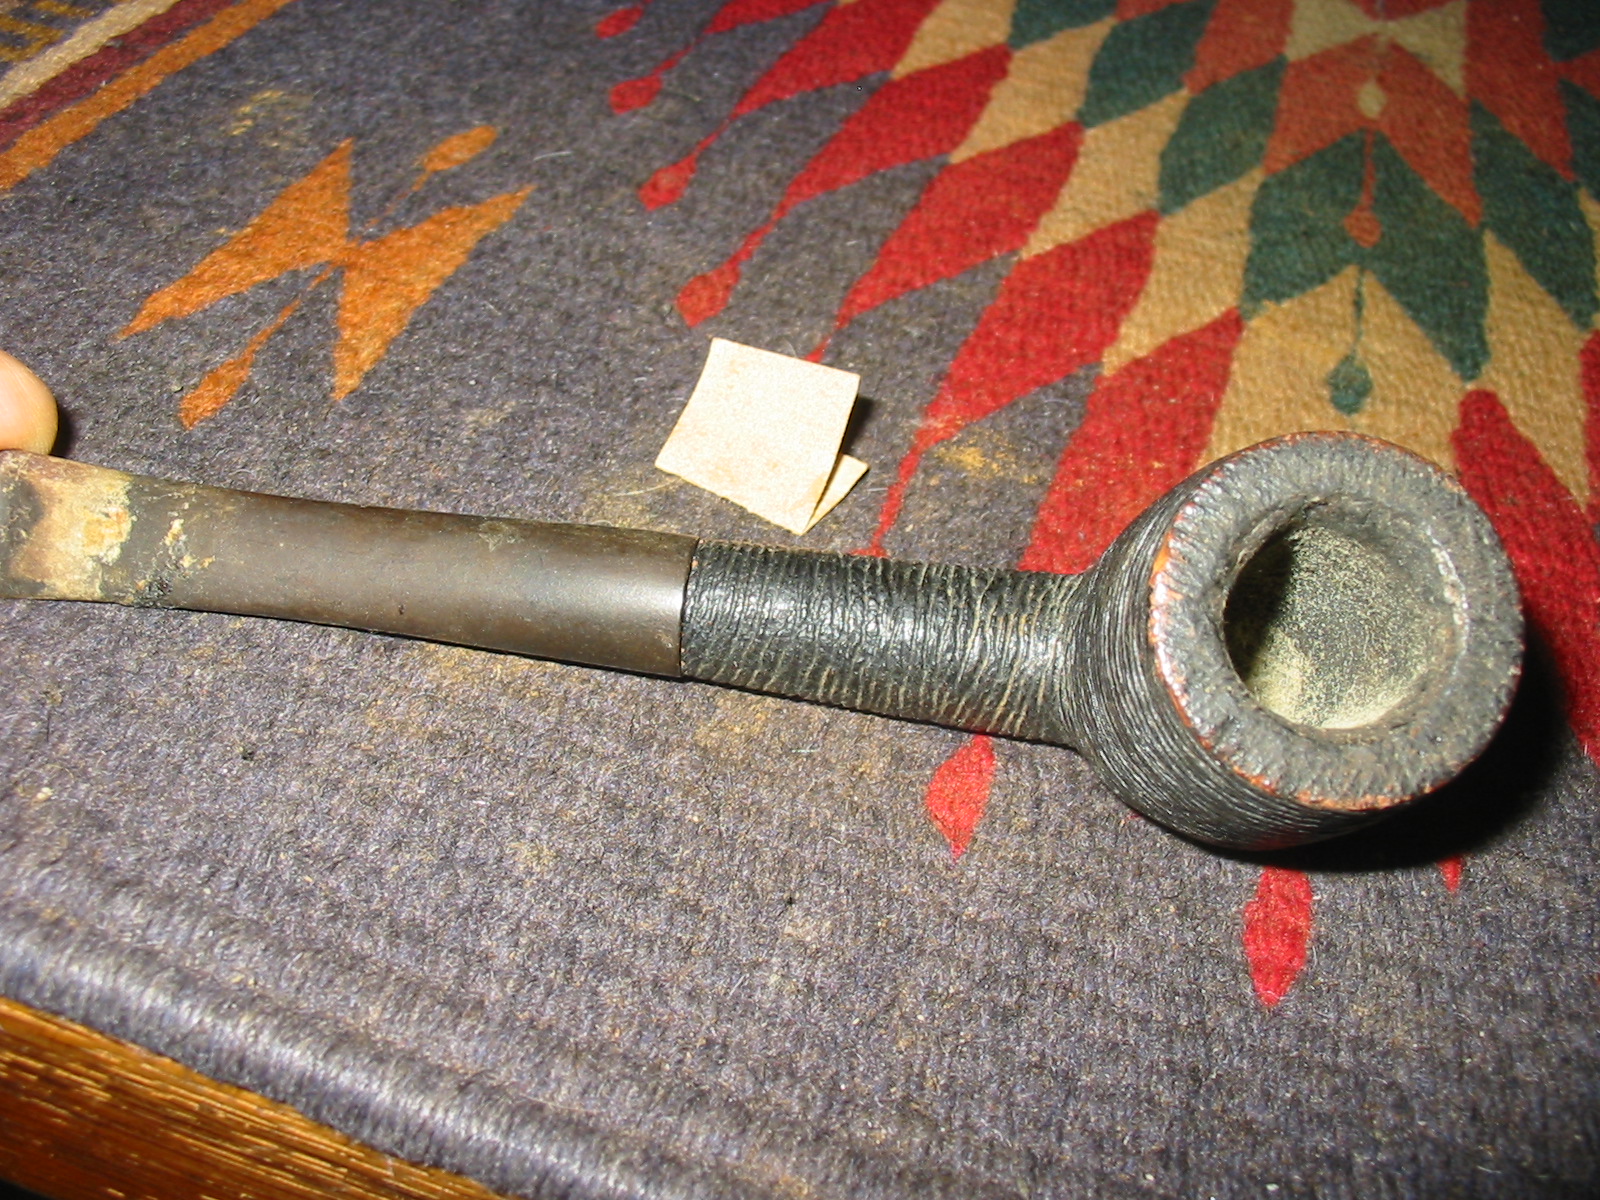
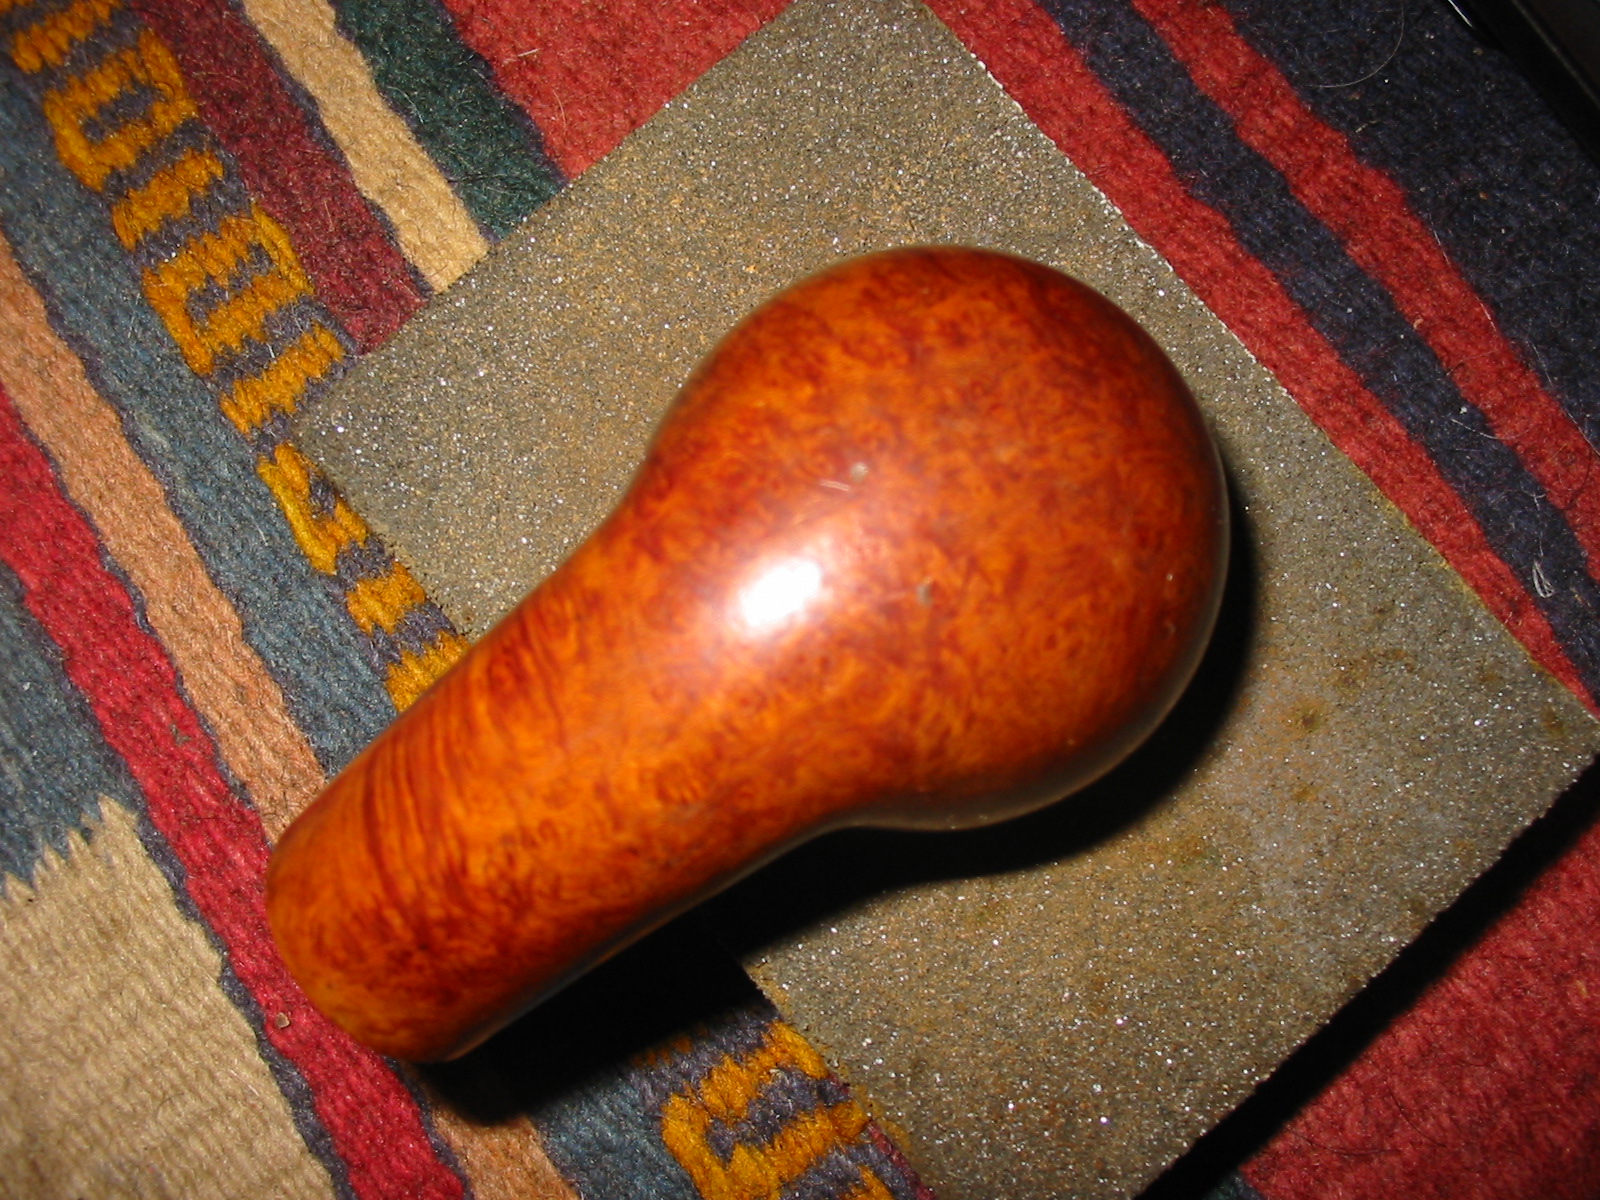
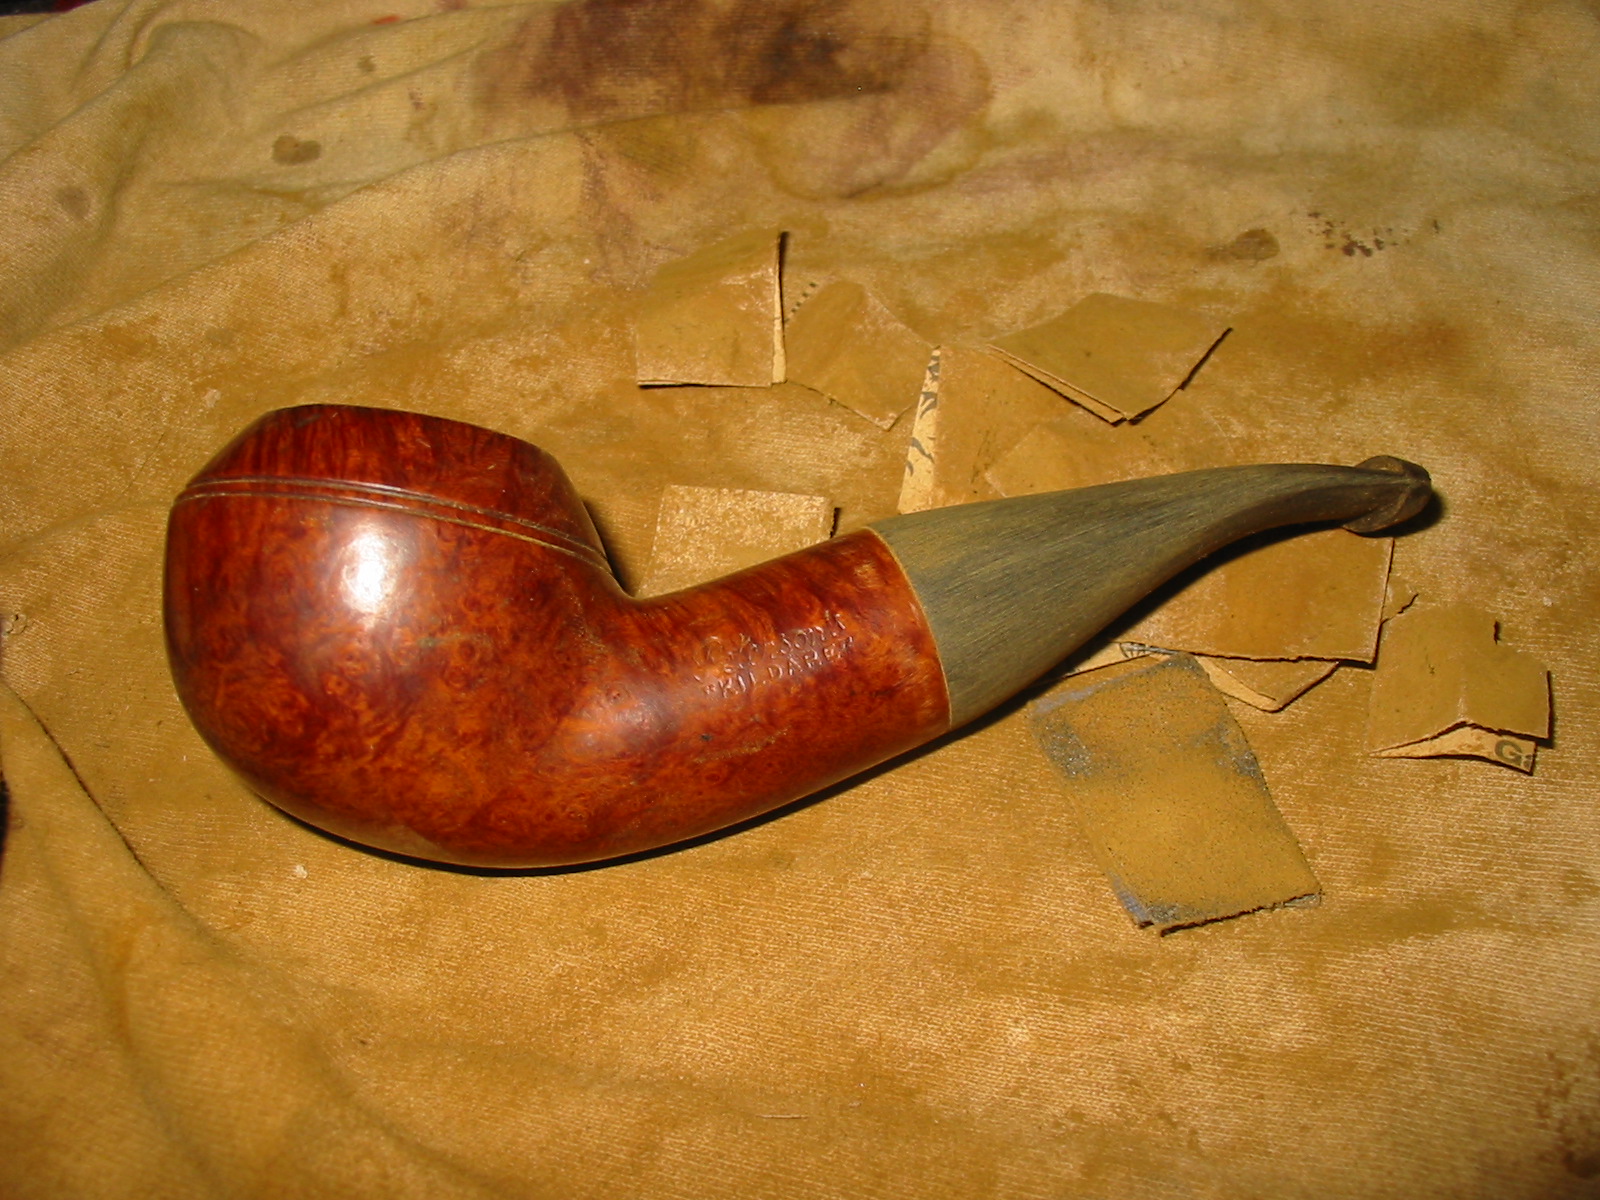
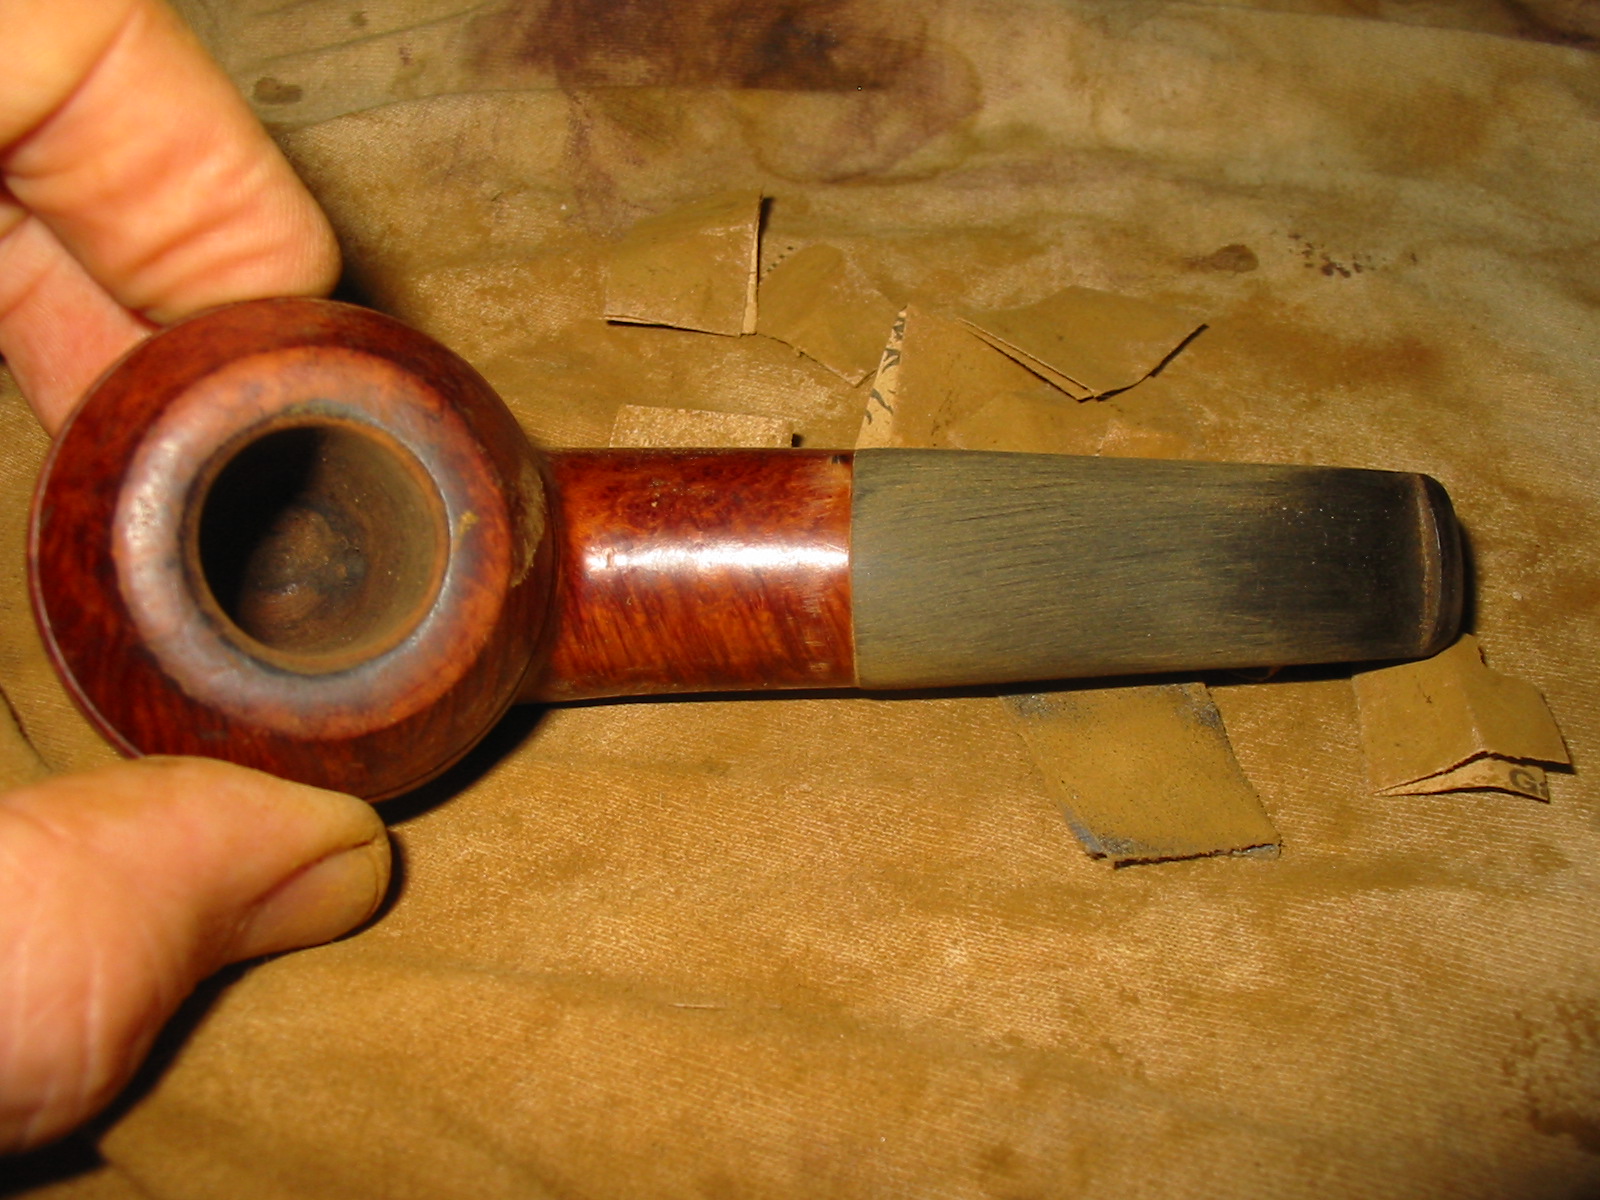
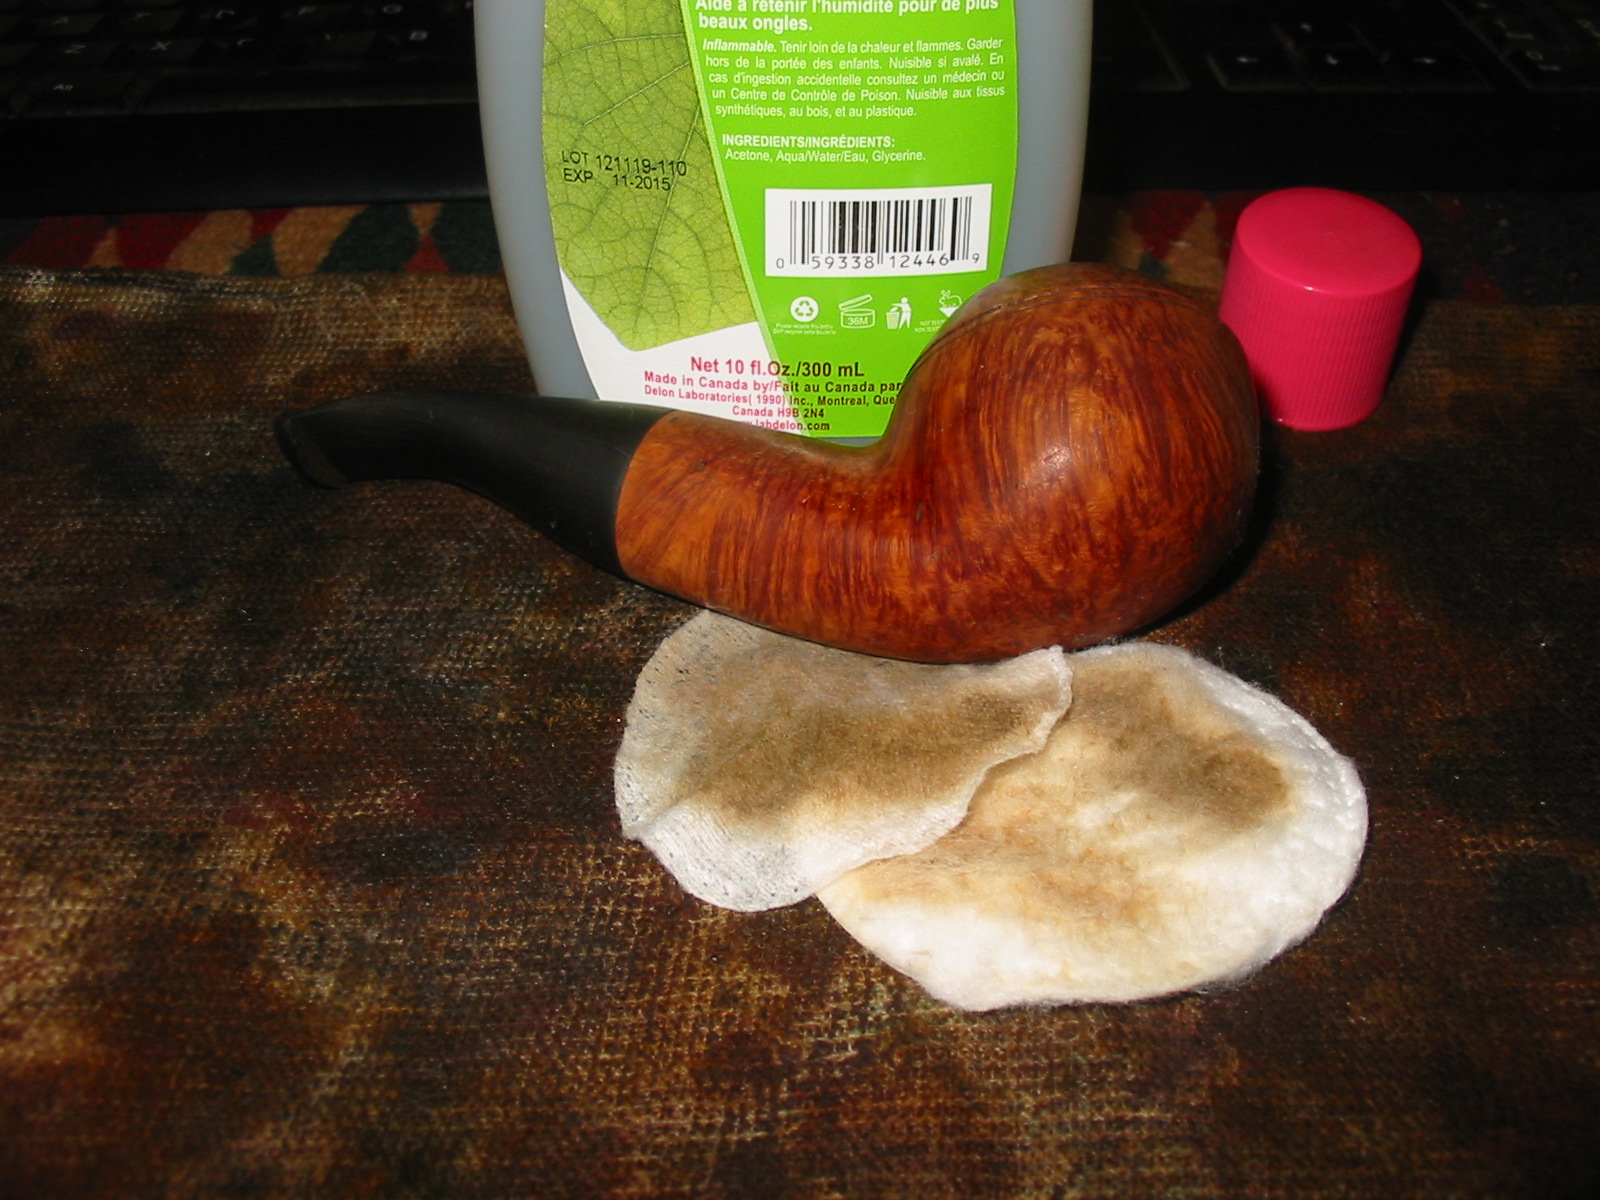
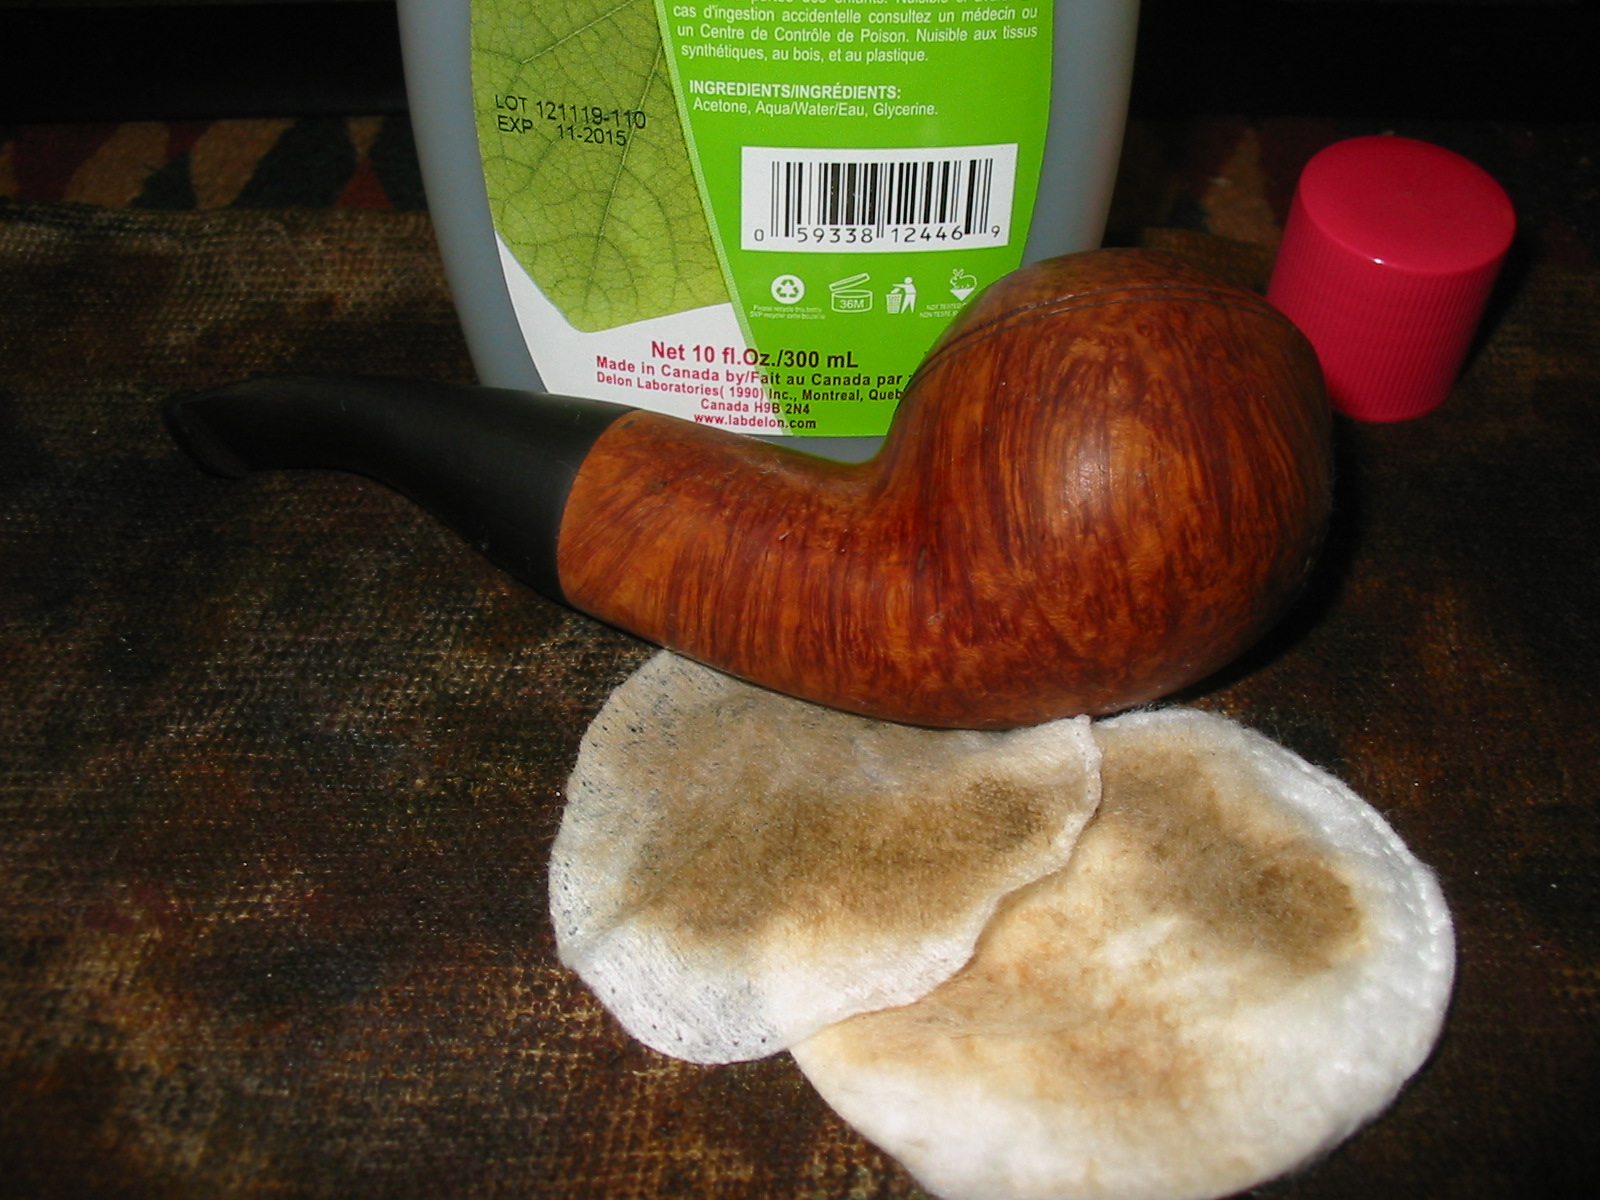
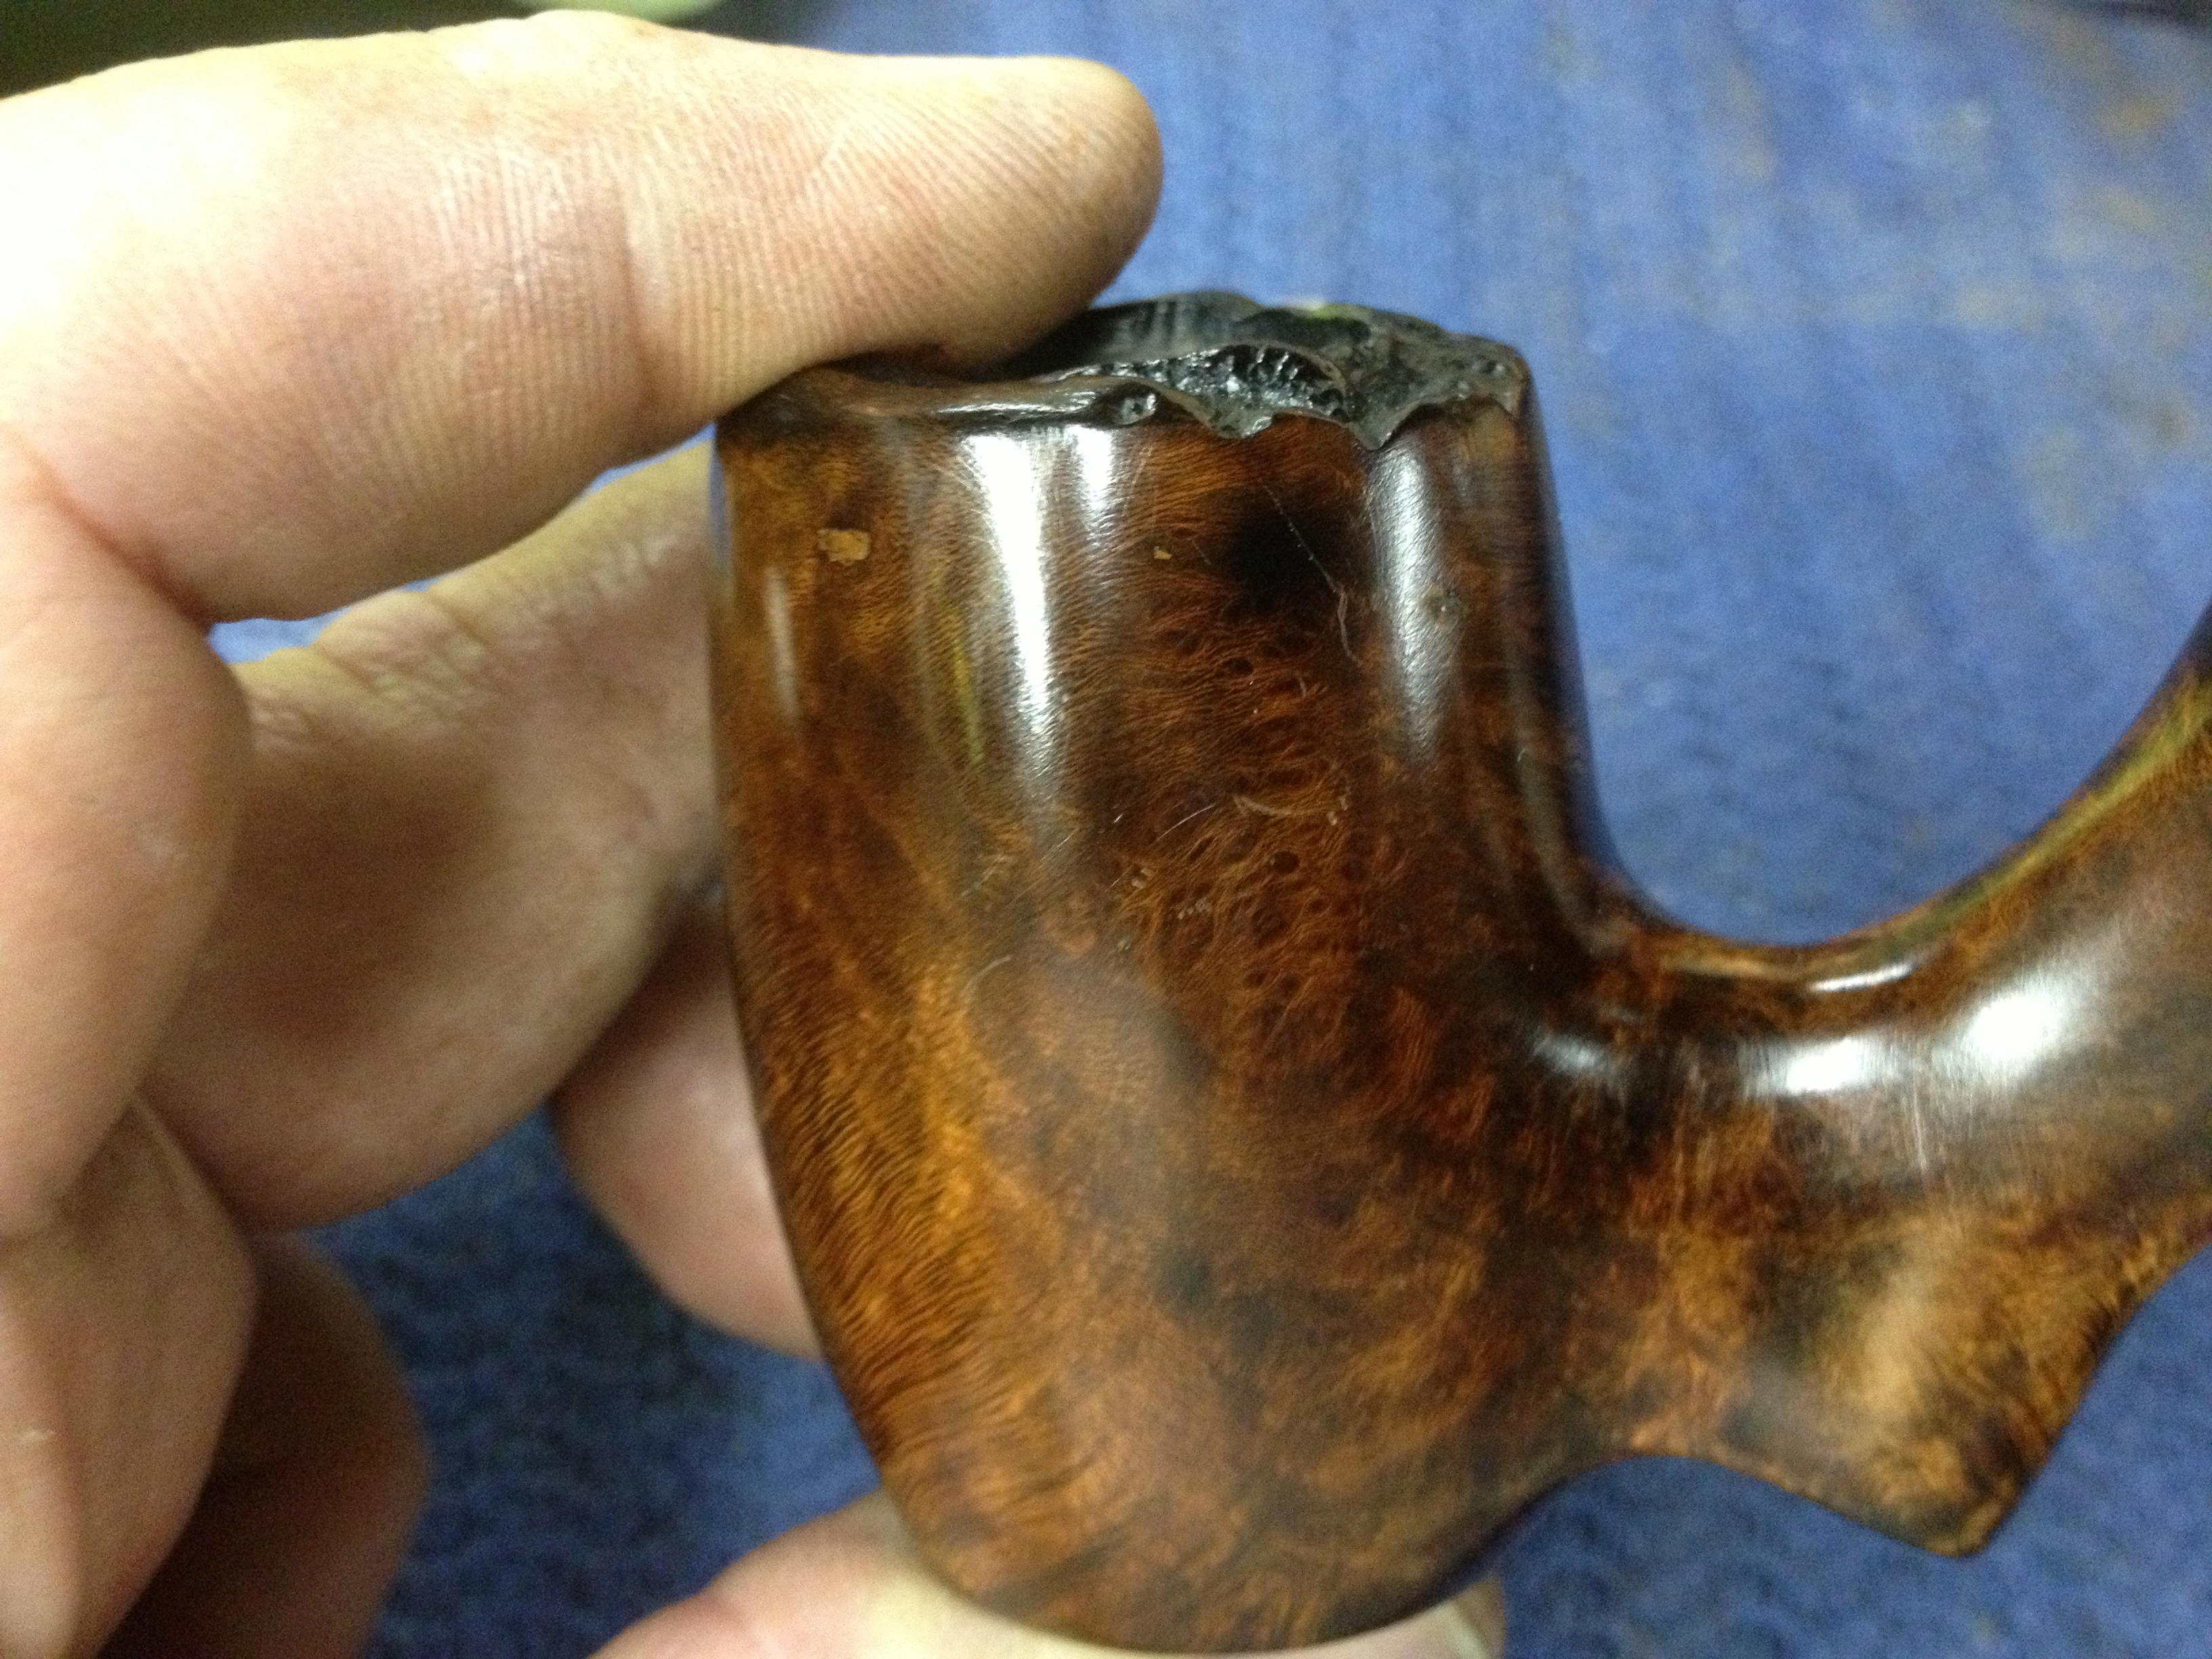
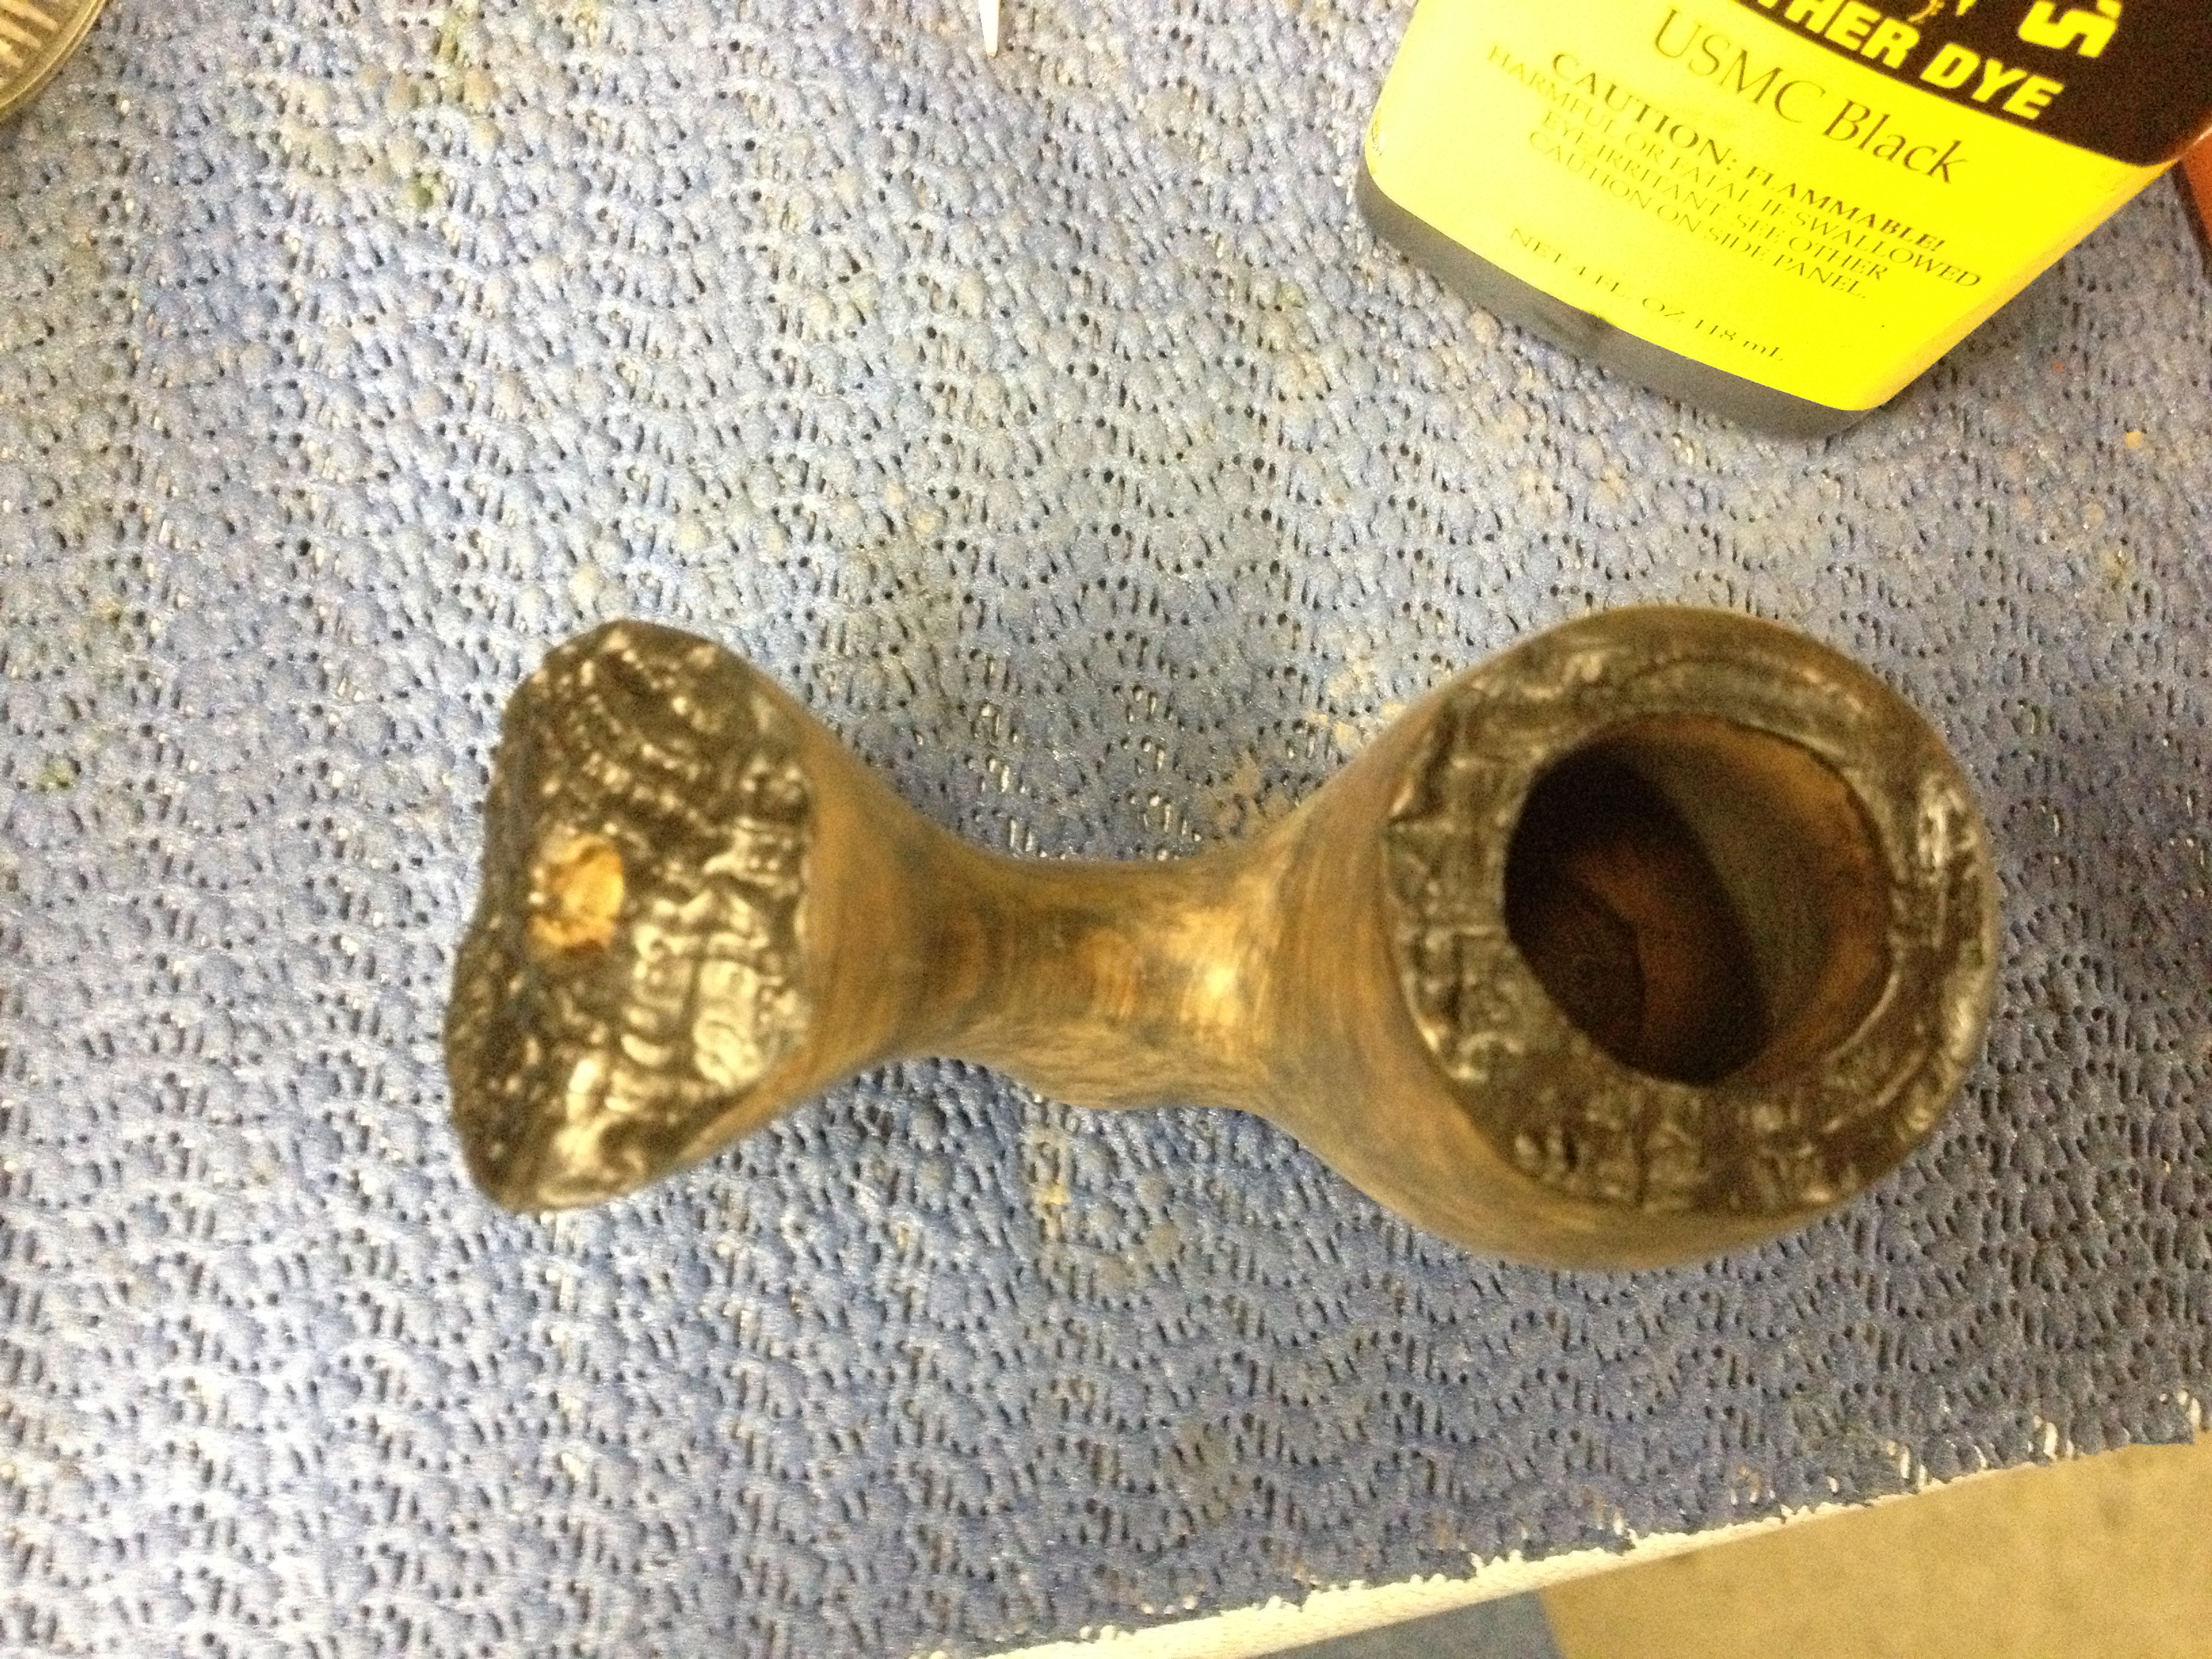
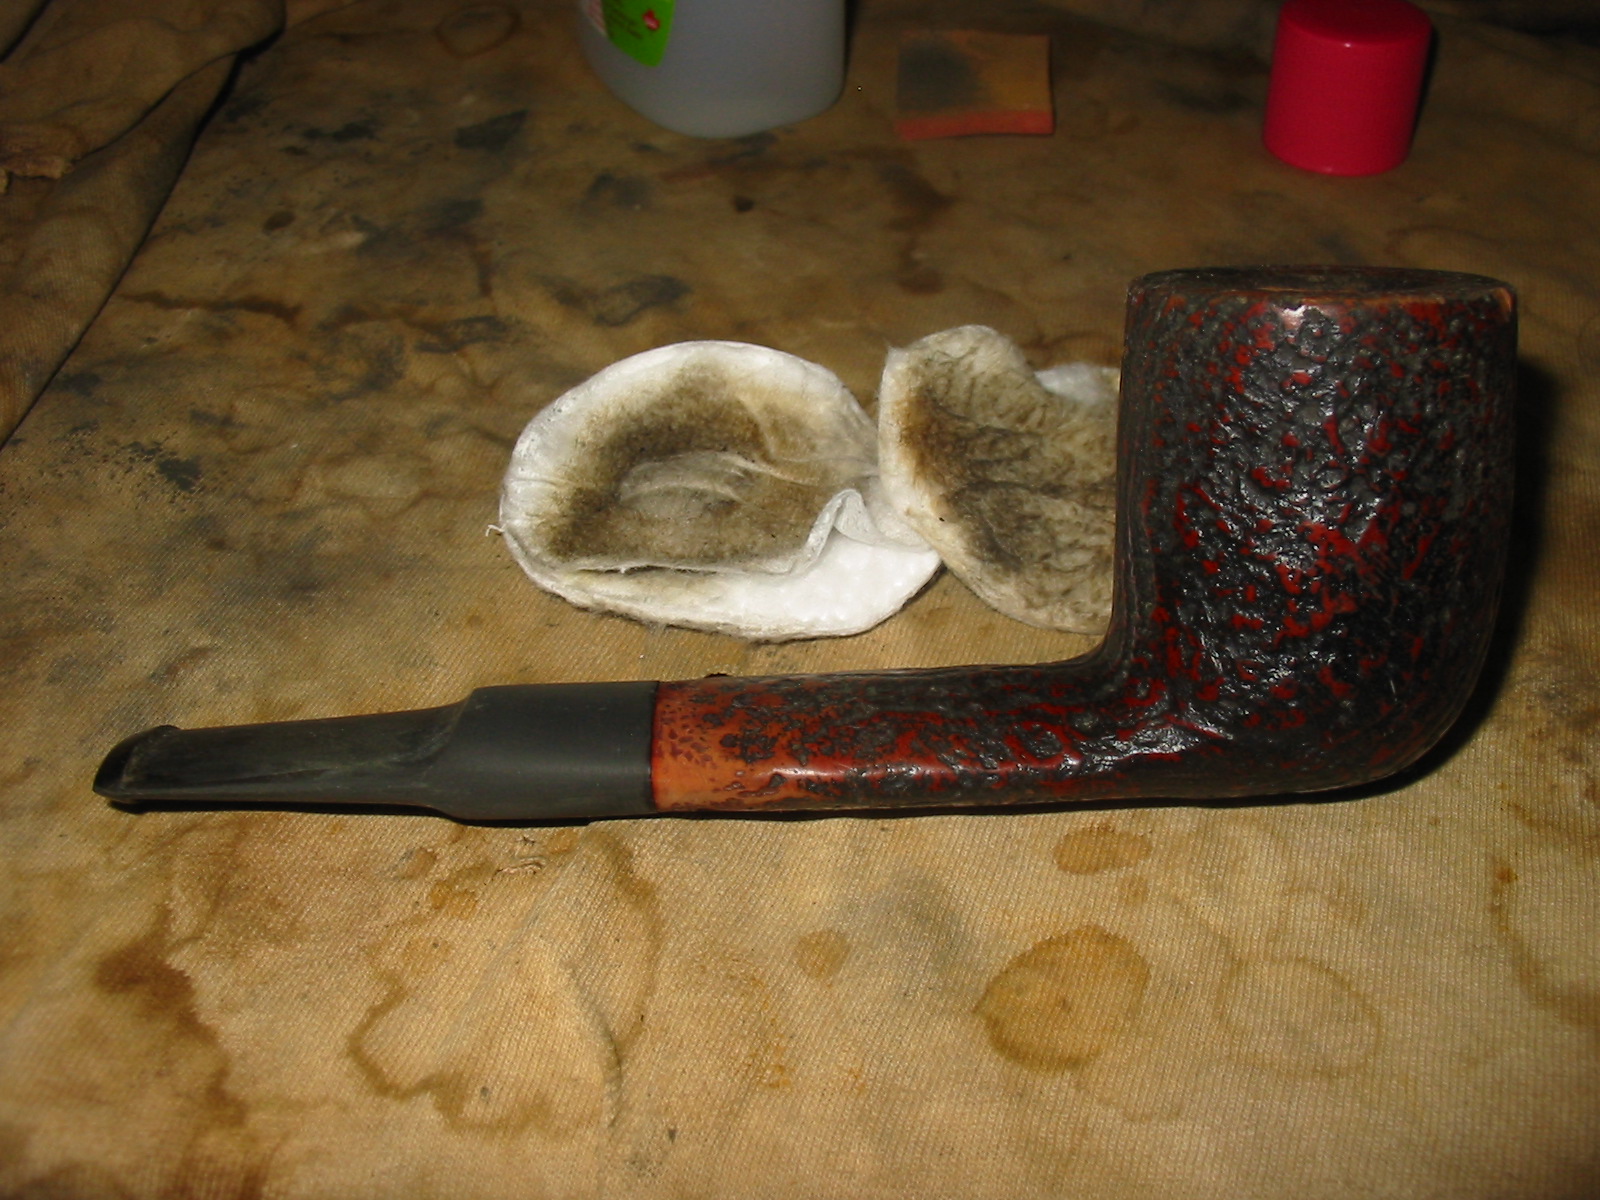
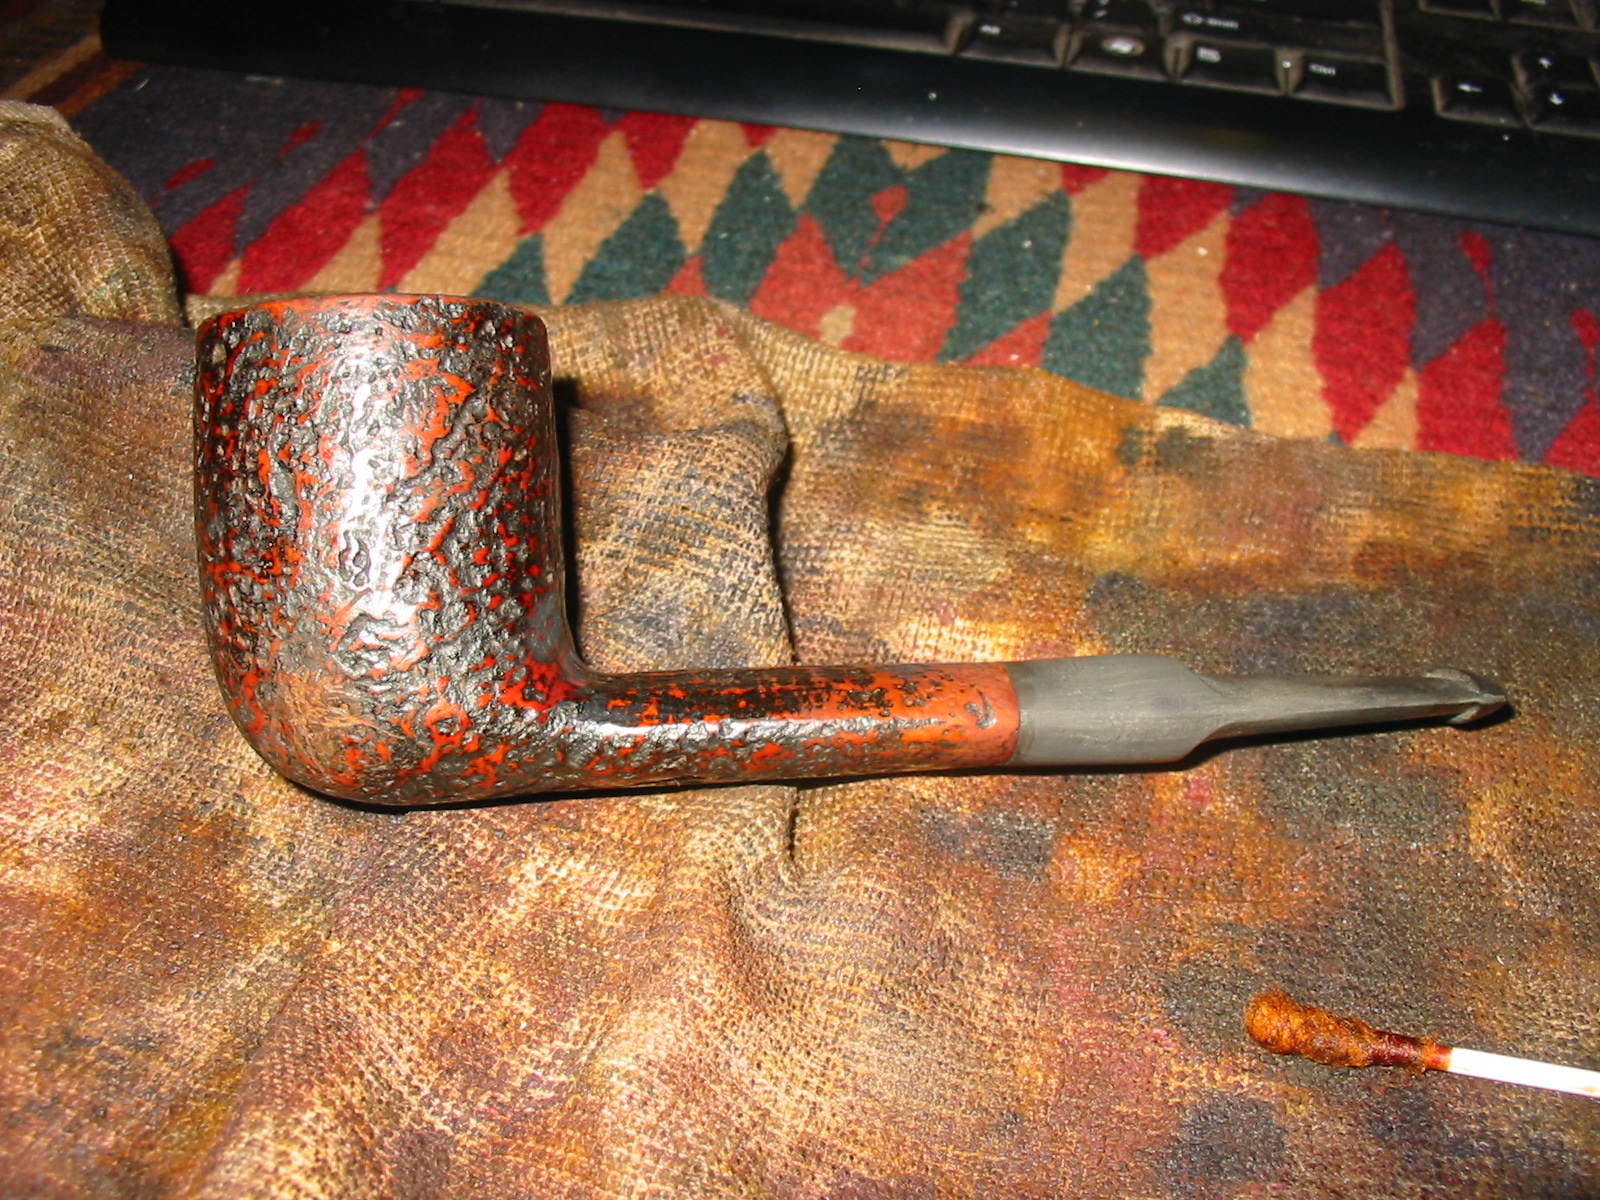
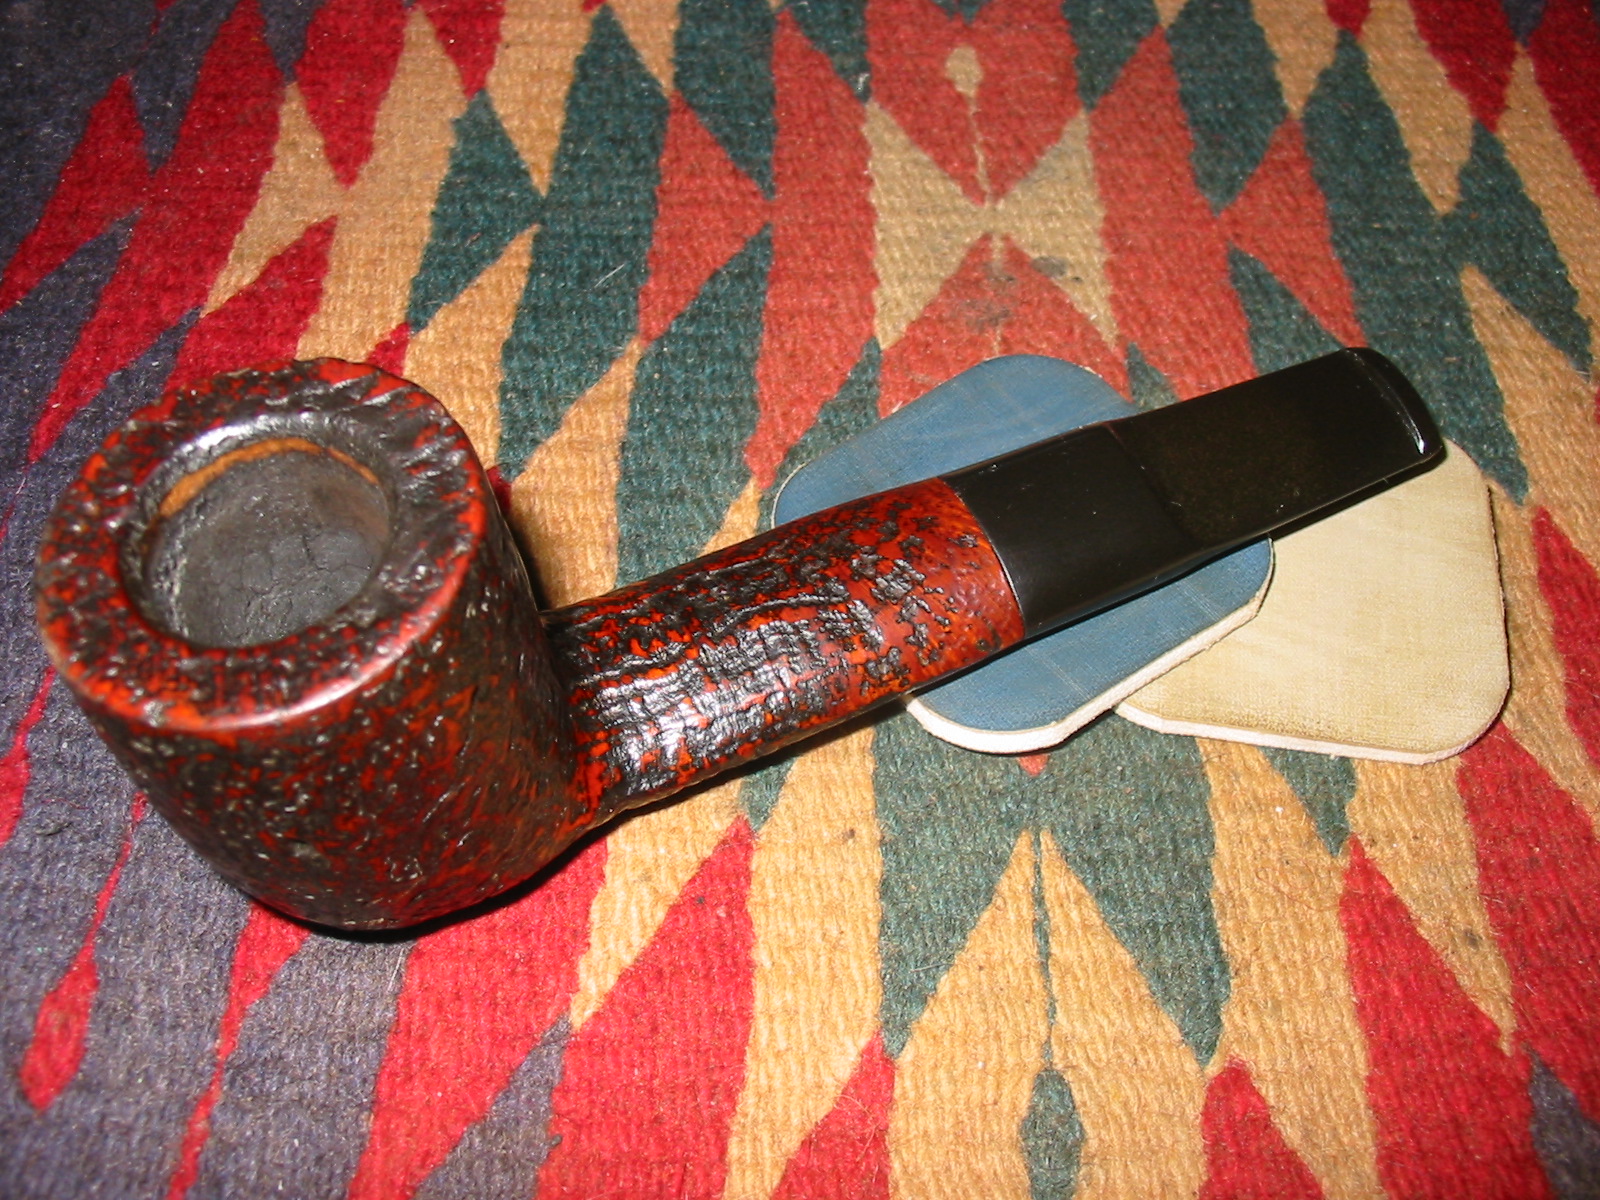
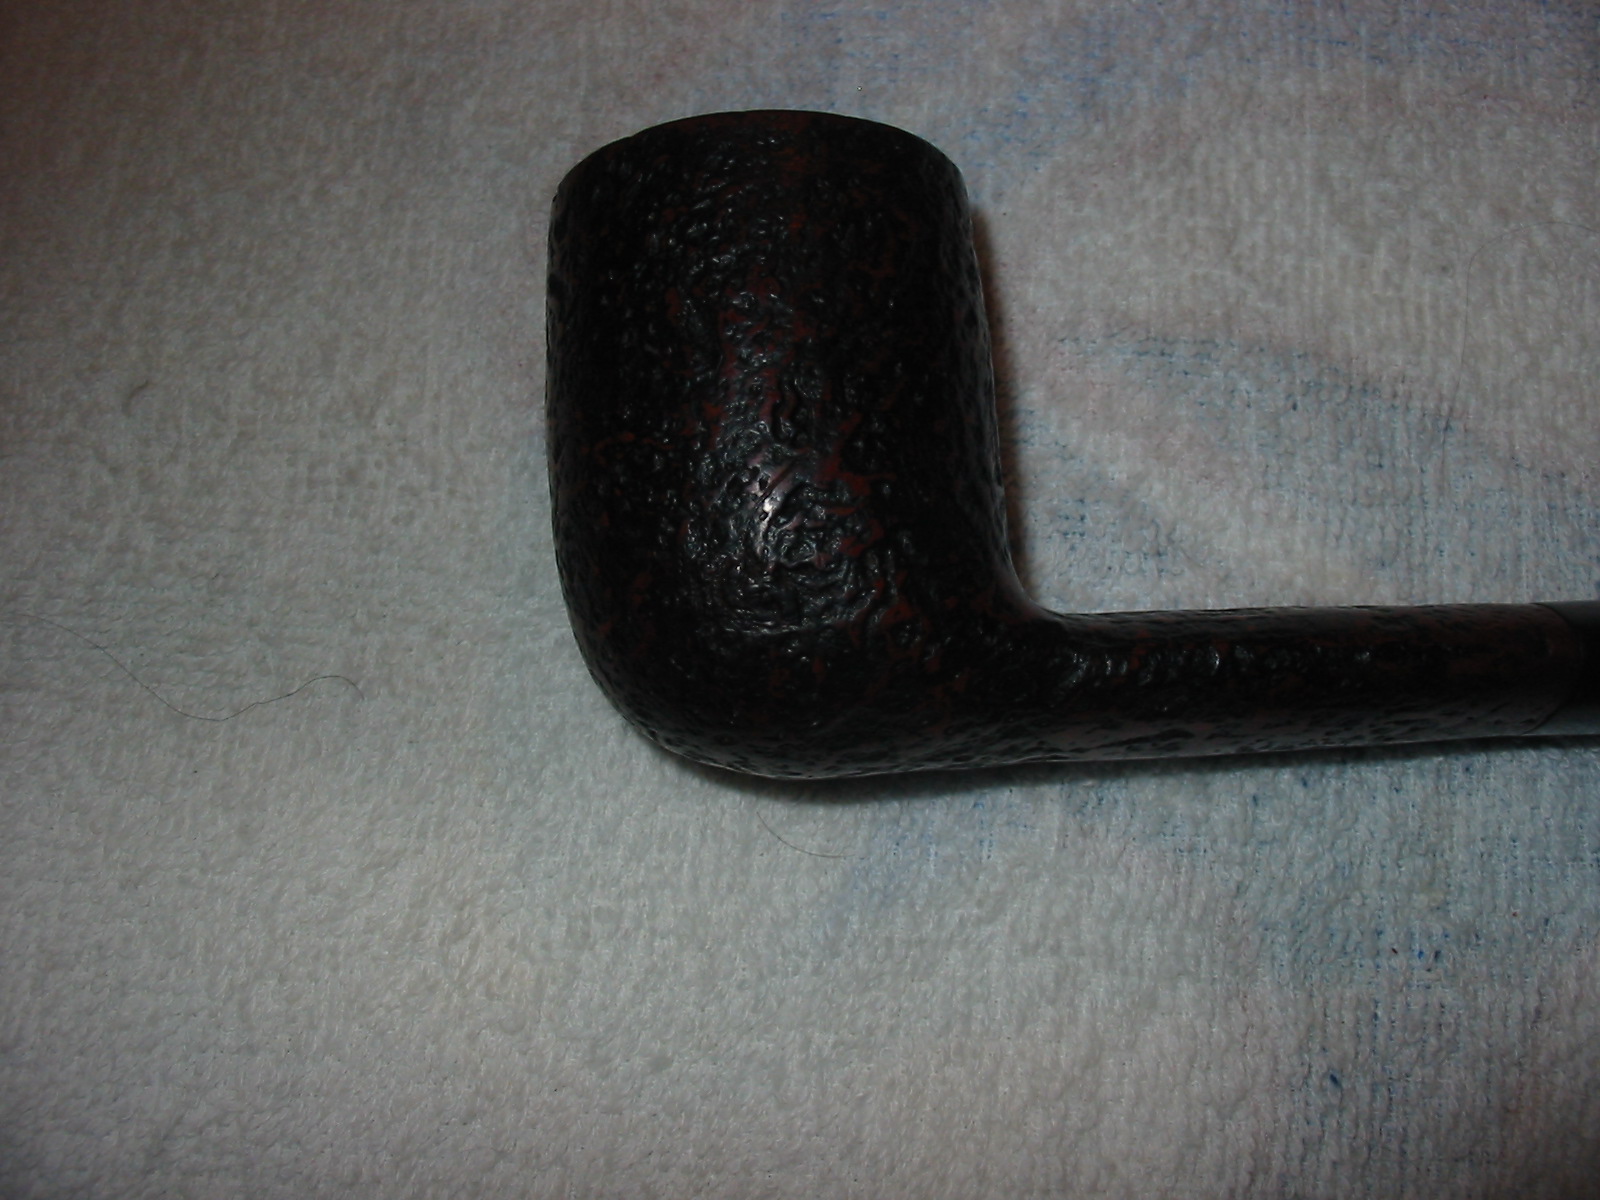
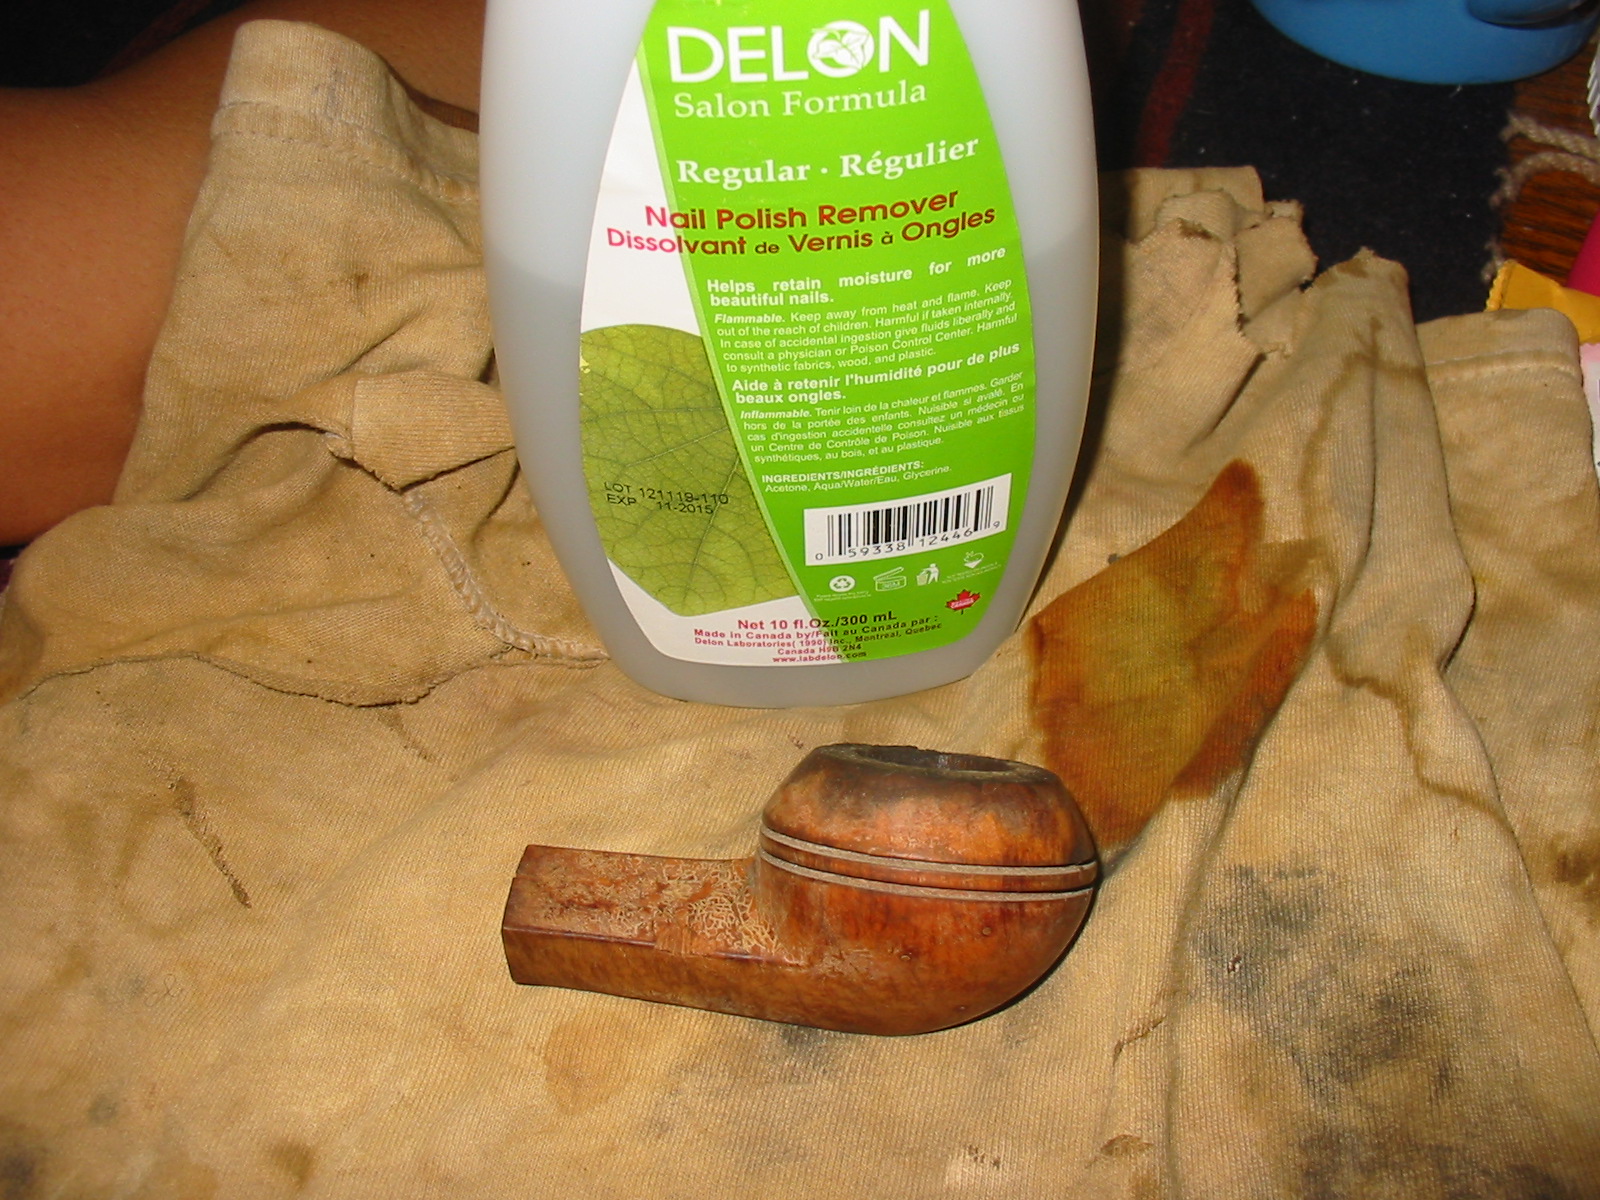
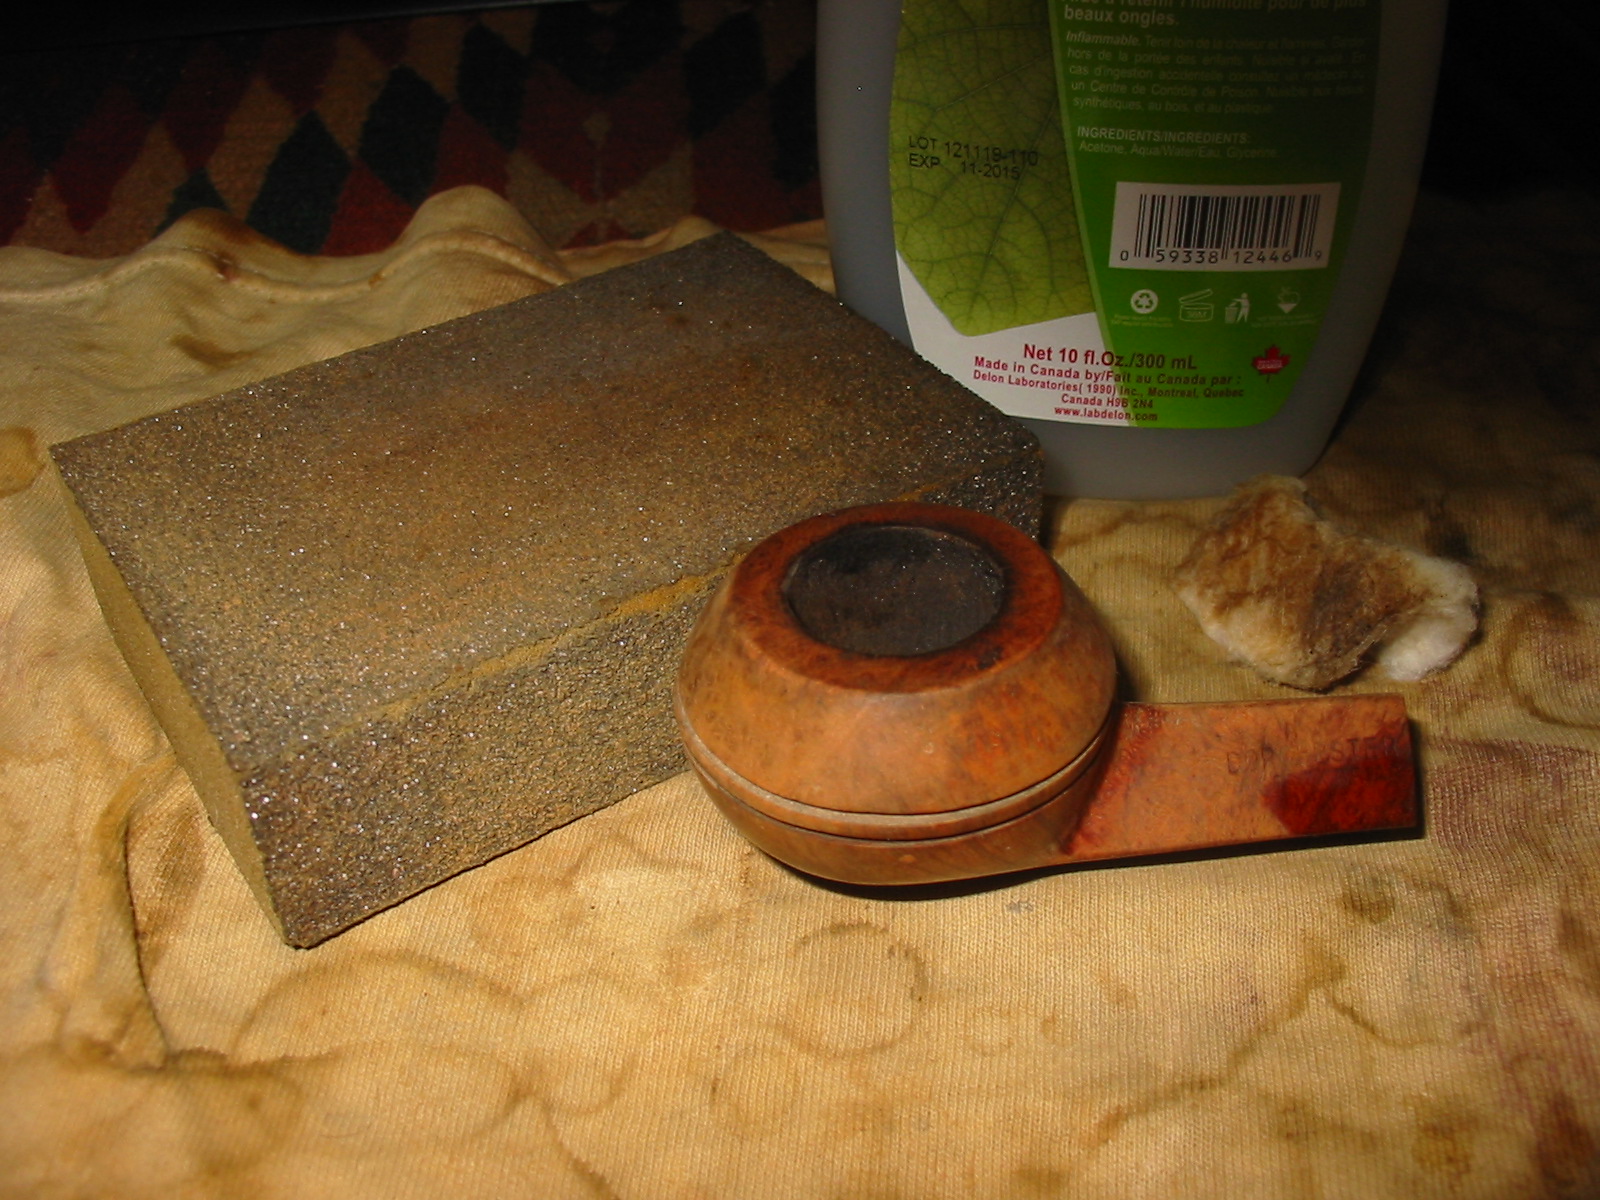
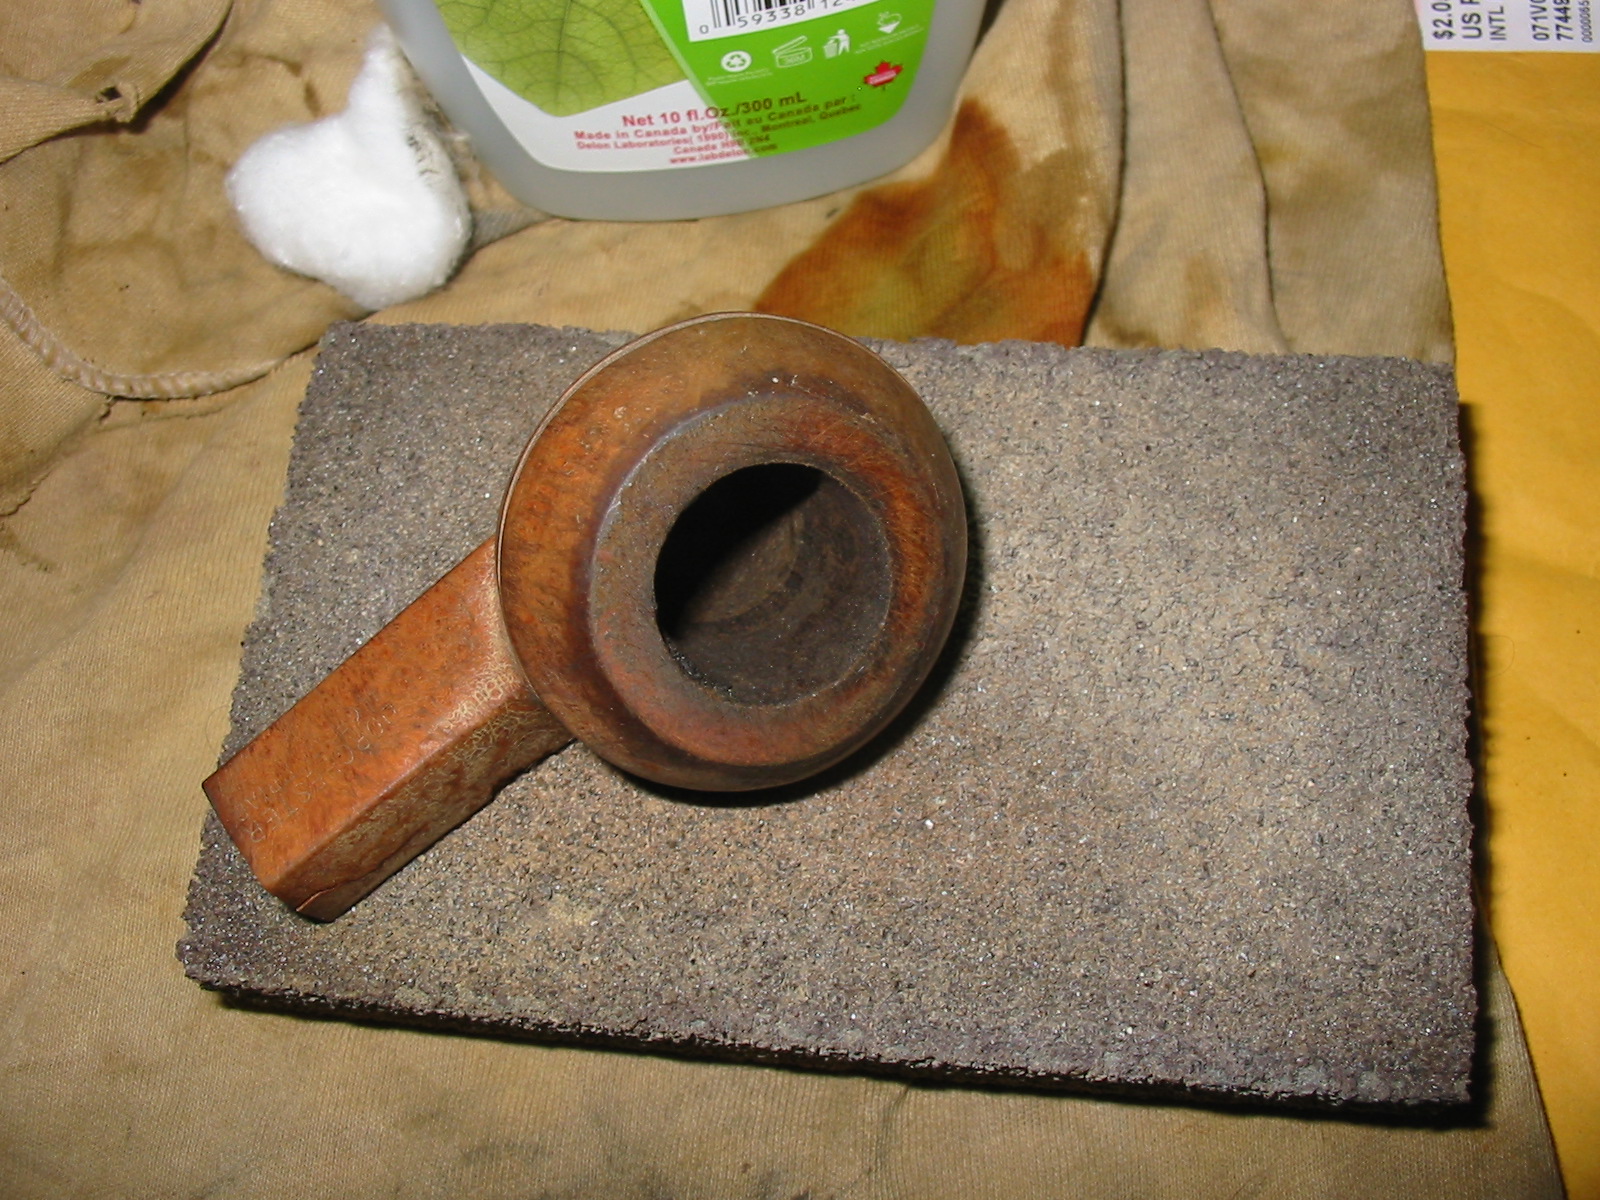
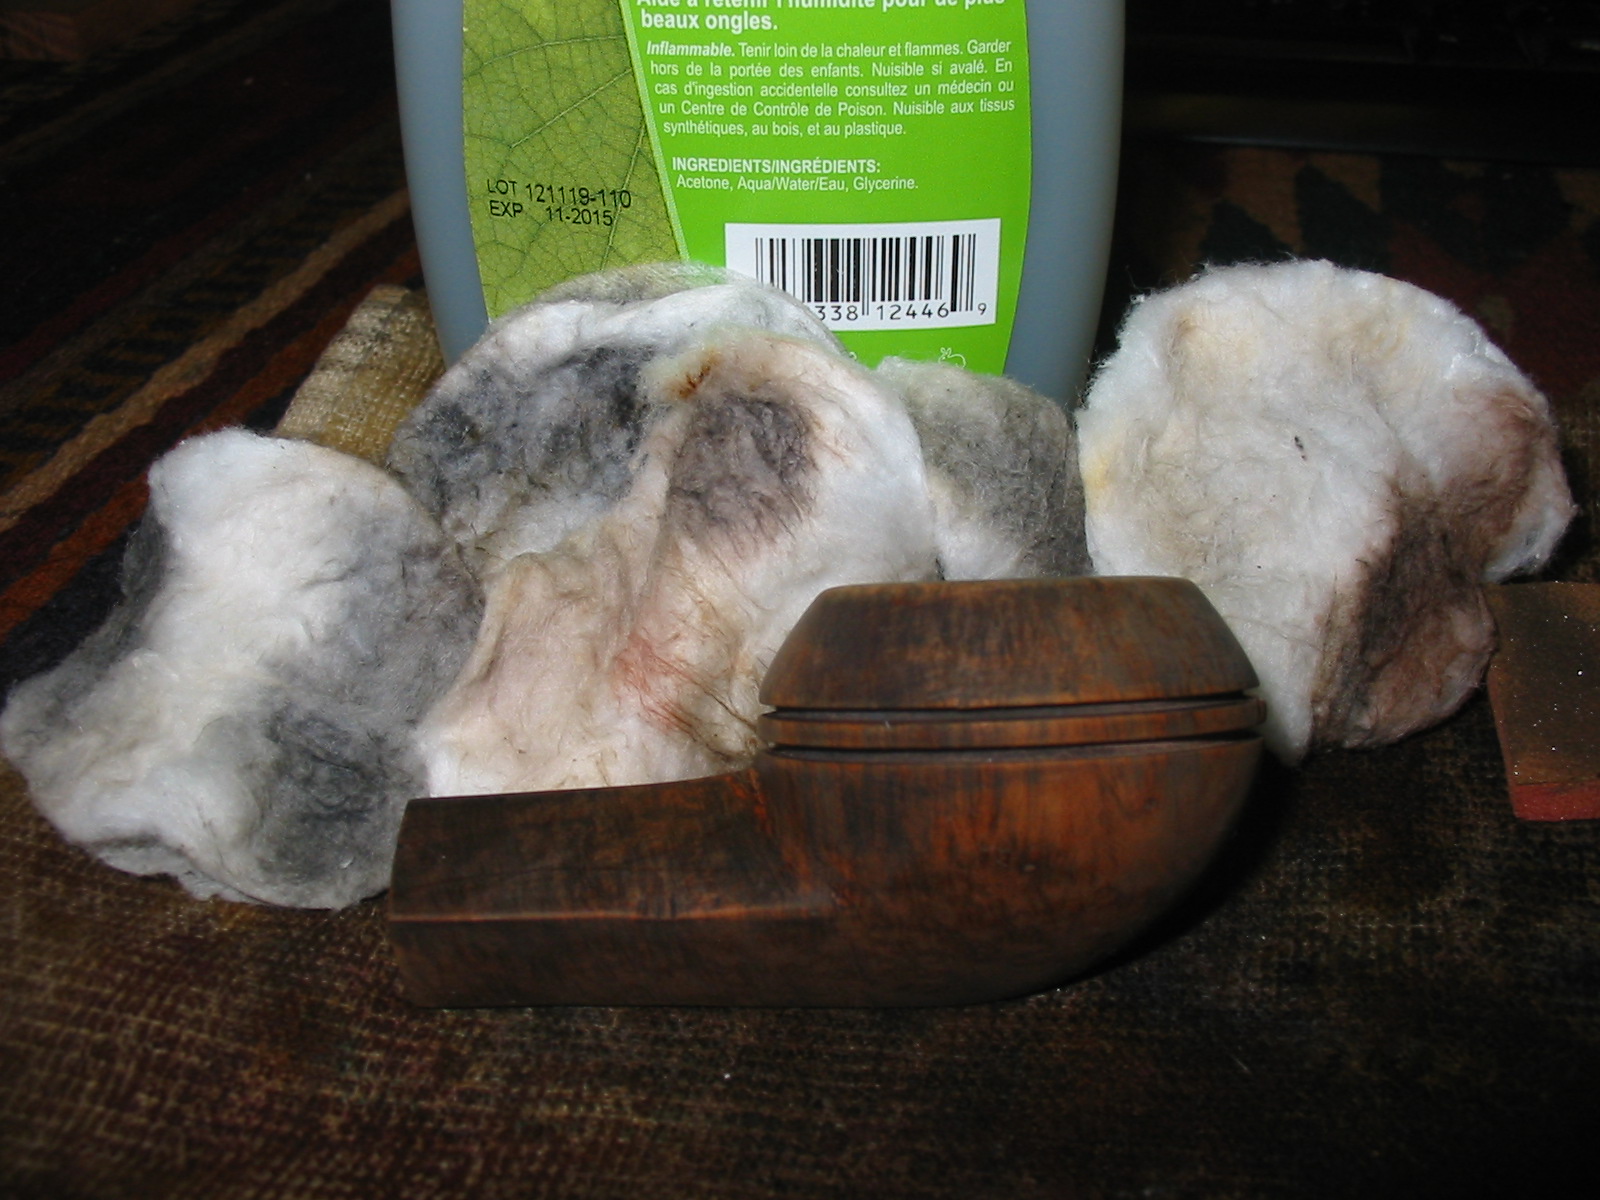
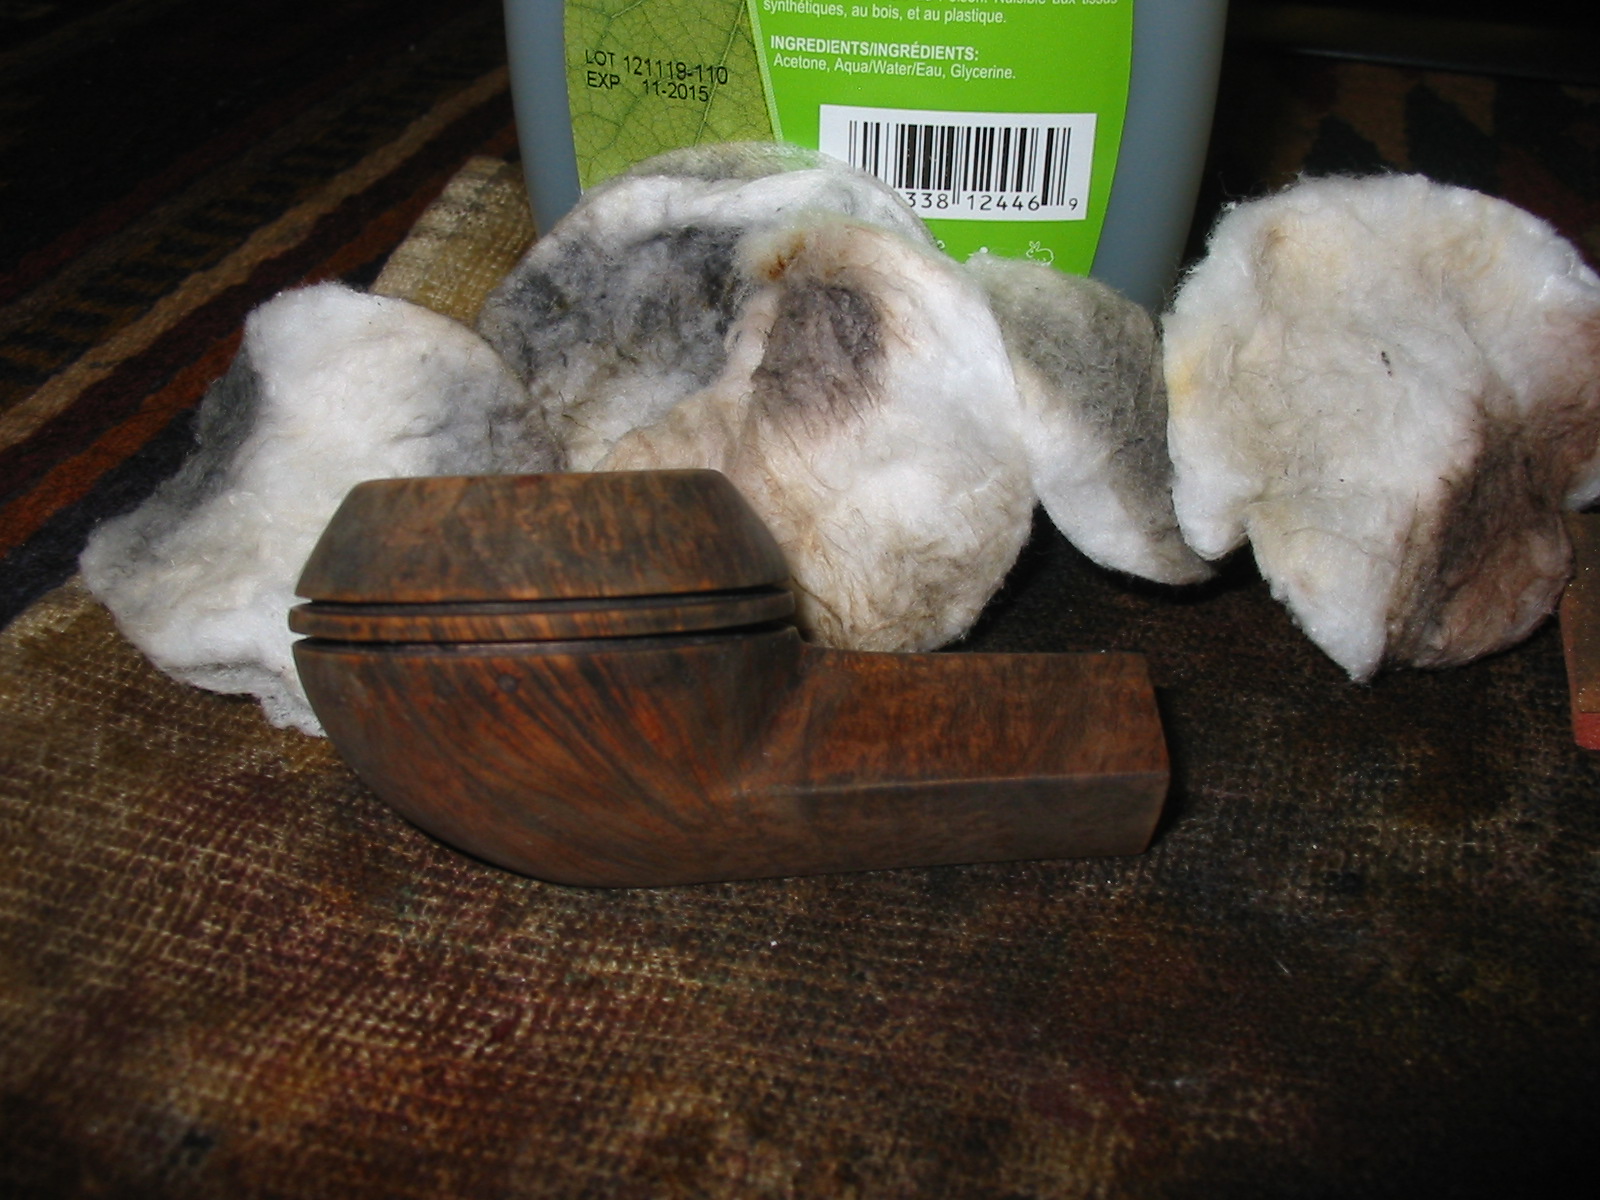
With the bowl reamed and the cake gone it was time to clean the exterior of the bowl and rim. I wiped it down with acetone to remove the finish and break up the crackled varnish that is visible in the above photos. I also lightly topped the bowl with a sanding block to remove the crumbly build up on the rim. I was guessing from my examination that the rim itself was not damaged so a light topping to remove the buildup would be all I would need to do. The next series of photos show the process of wiping down the bowl, topping it and wiping it down a second time after topping. While most of the varnish finish was gone, not all of it would come off with the acetone wash. So in the last picture below you can see the crackly finish on the shank and at the bowl junction.

IMG_1591

IMG_1596

IMG_1595

IMG_1594

IMG_1593

IMG_1592

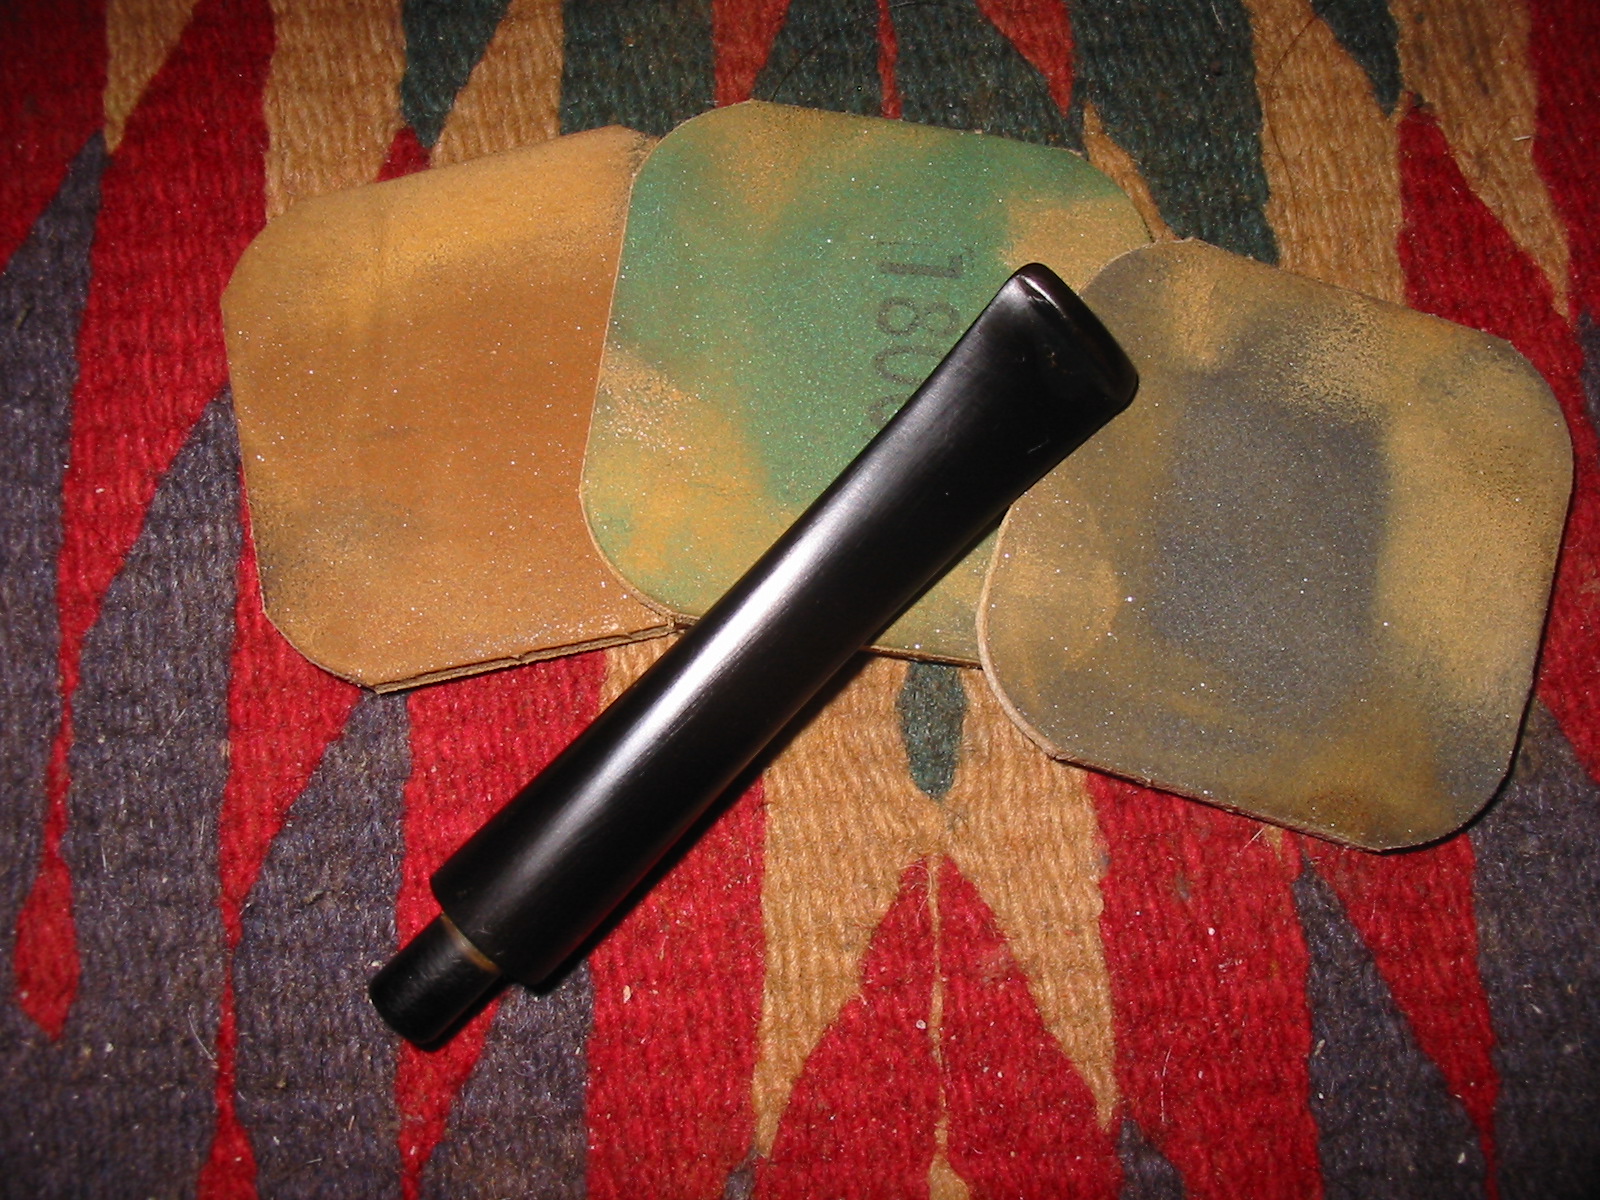
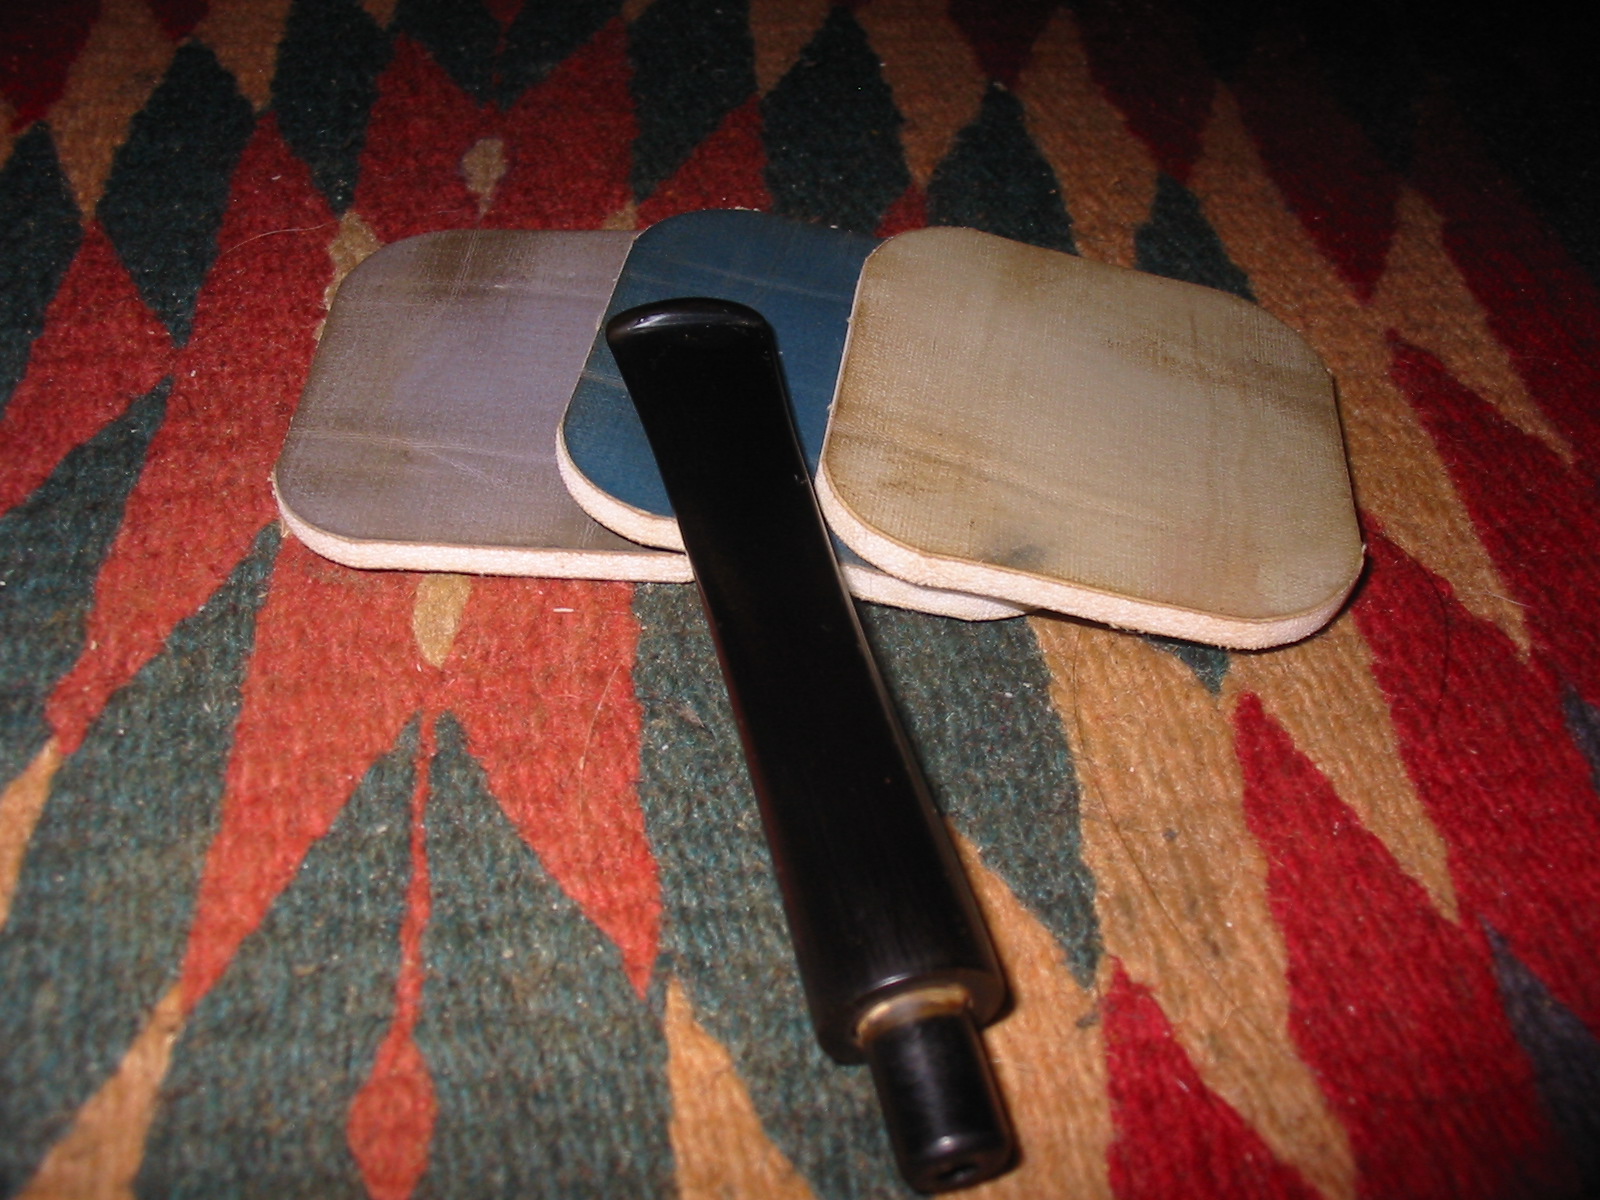
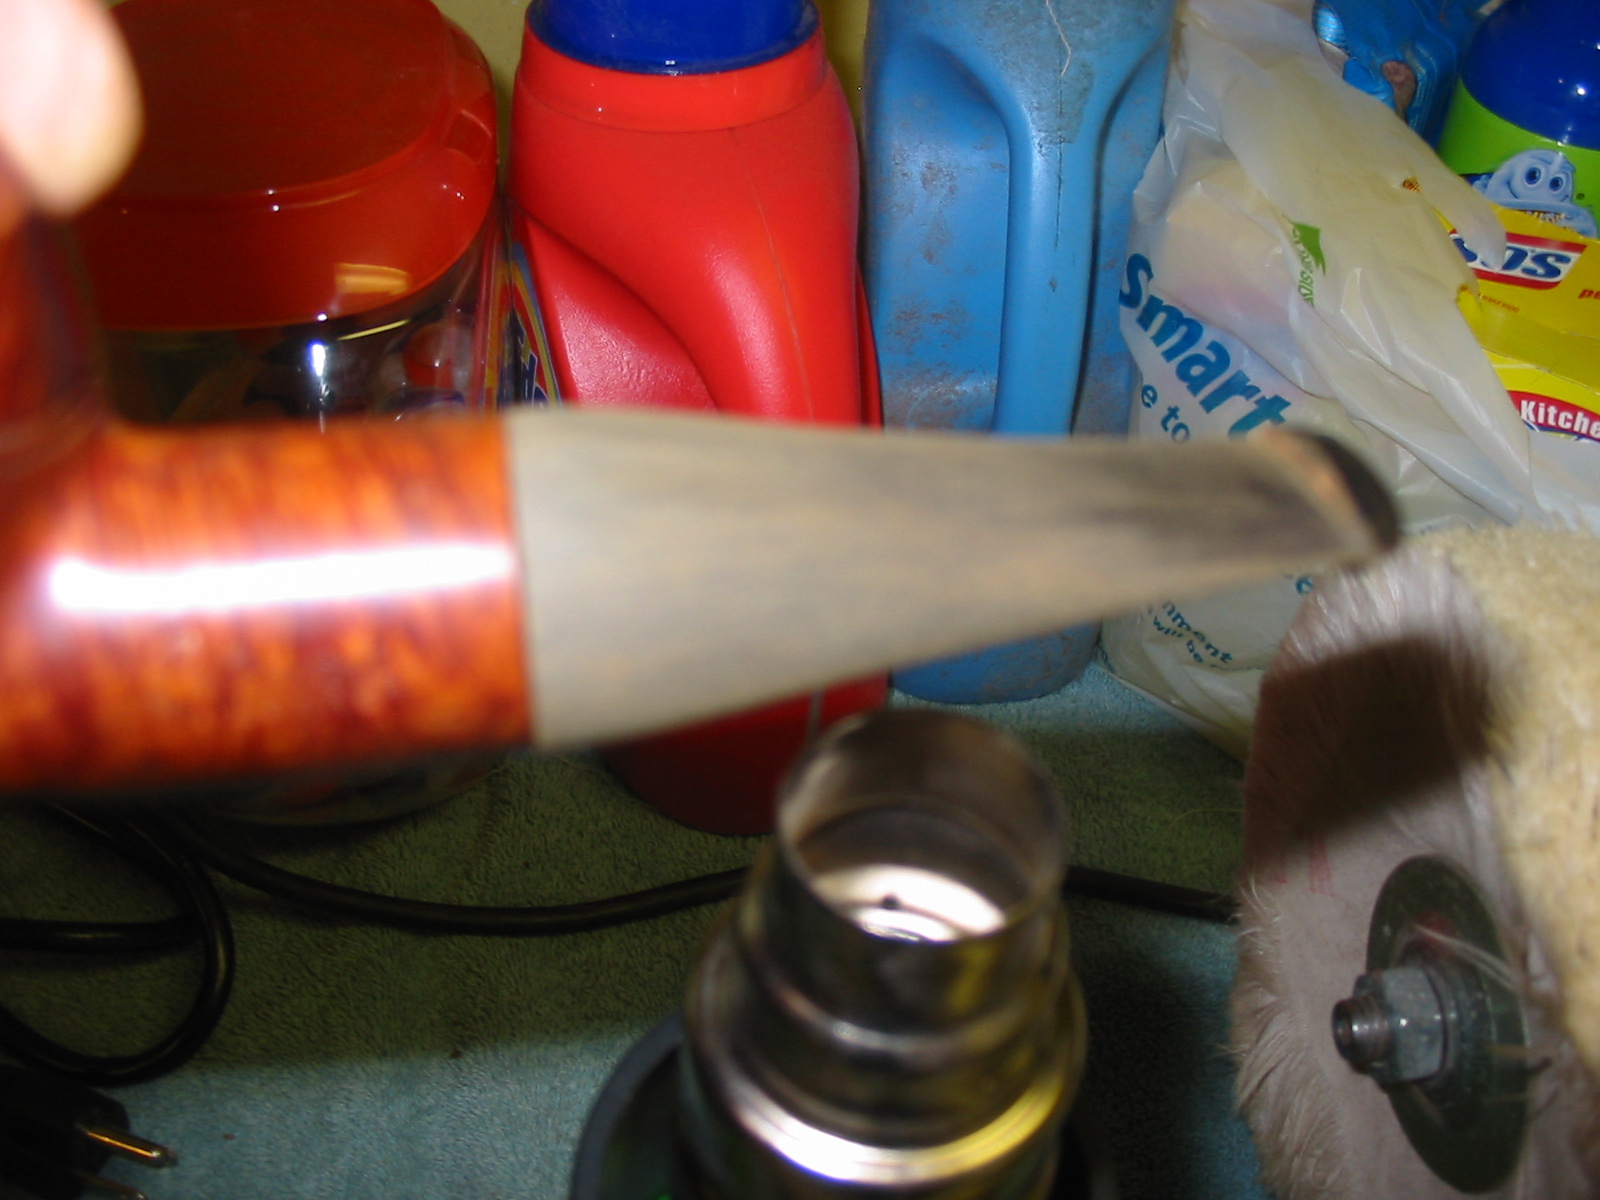
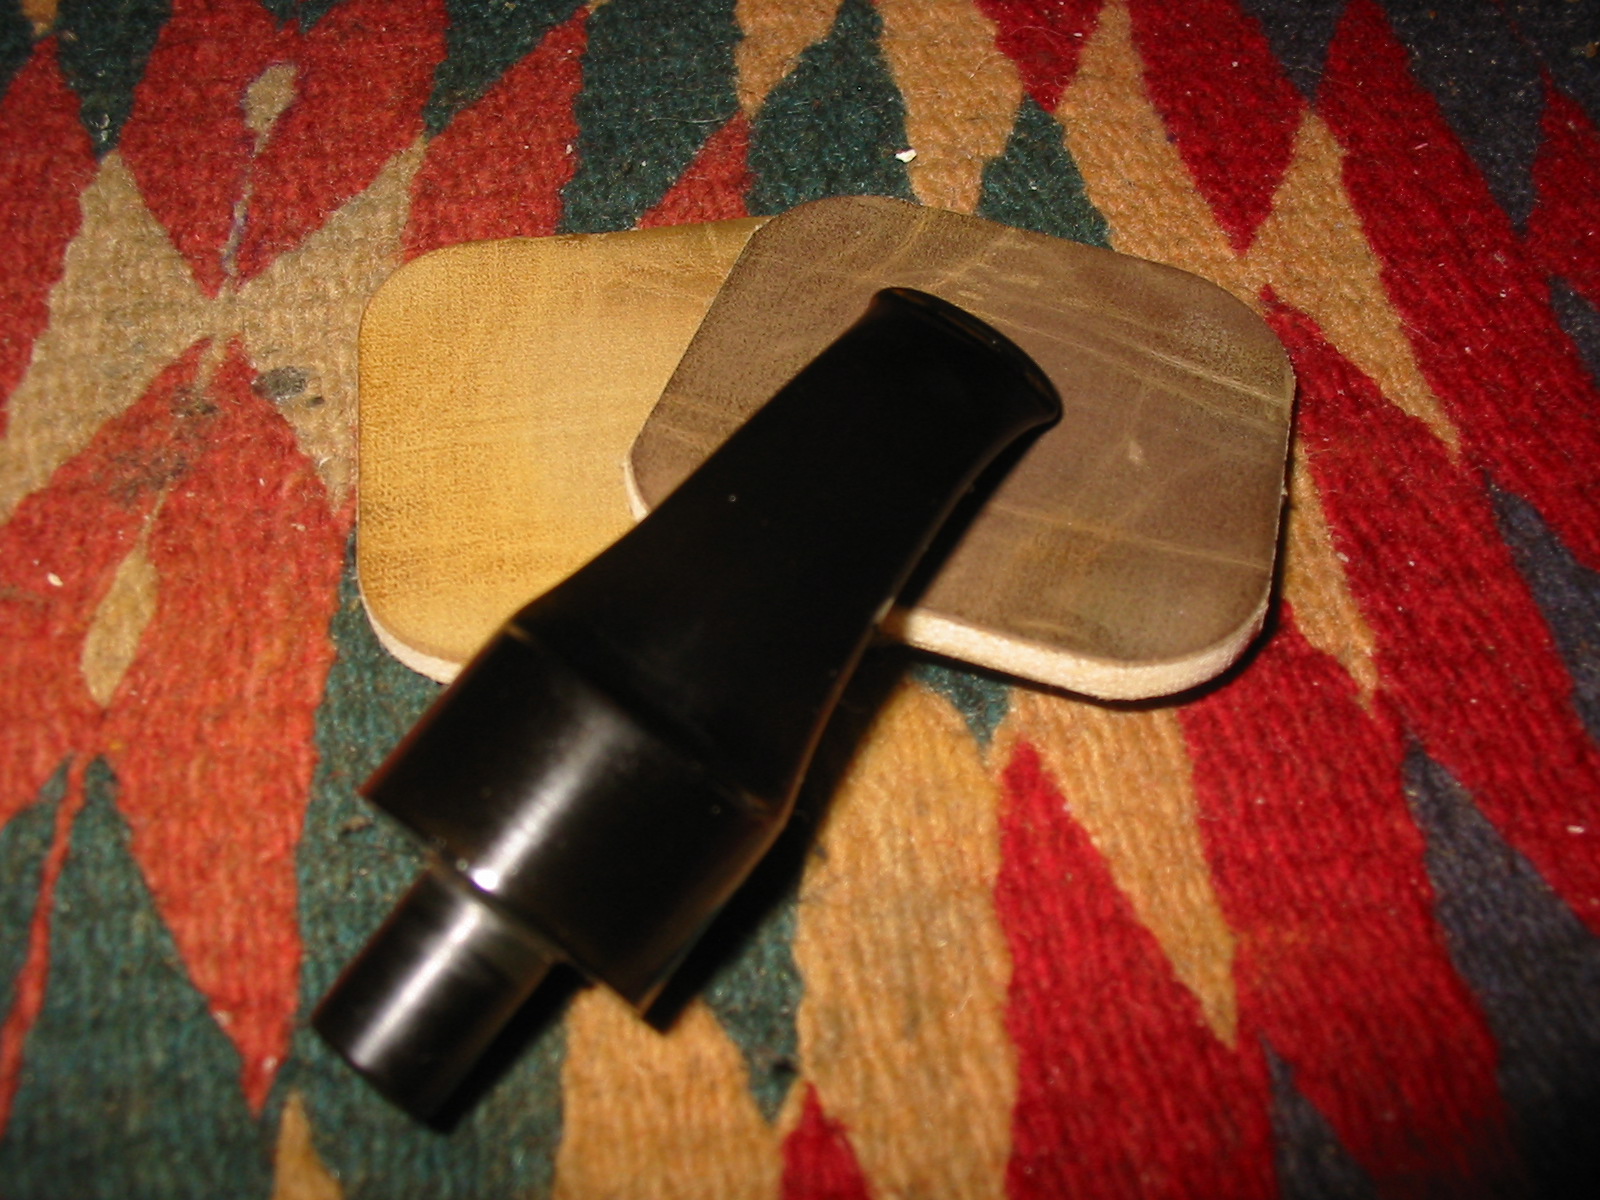
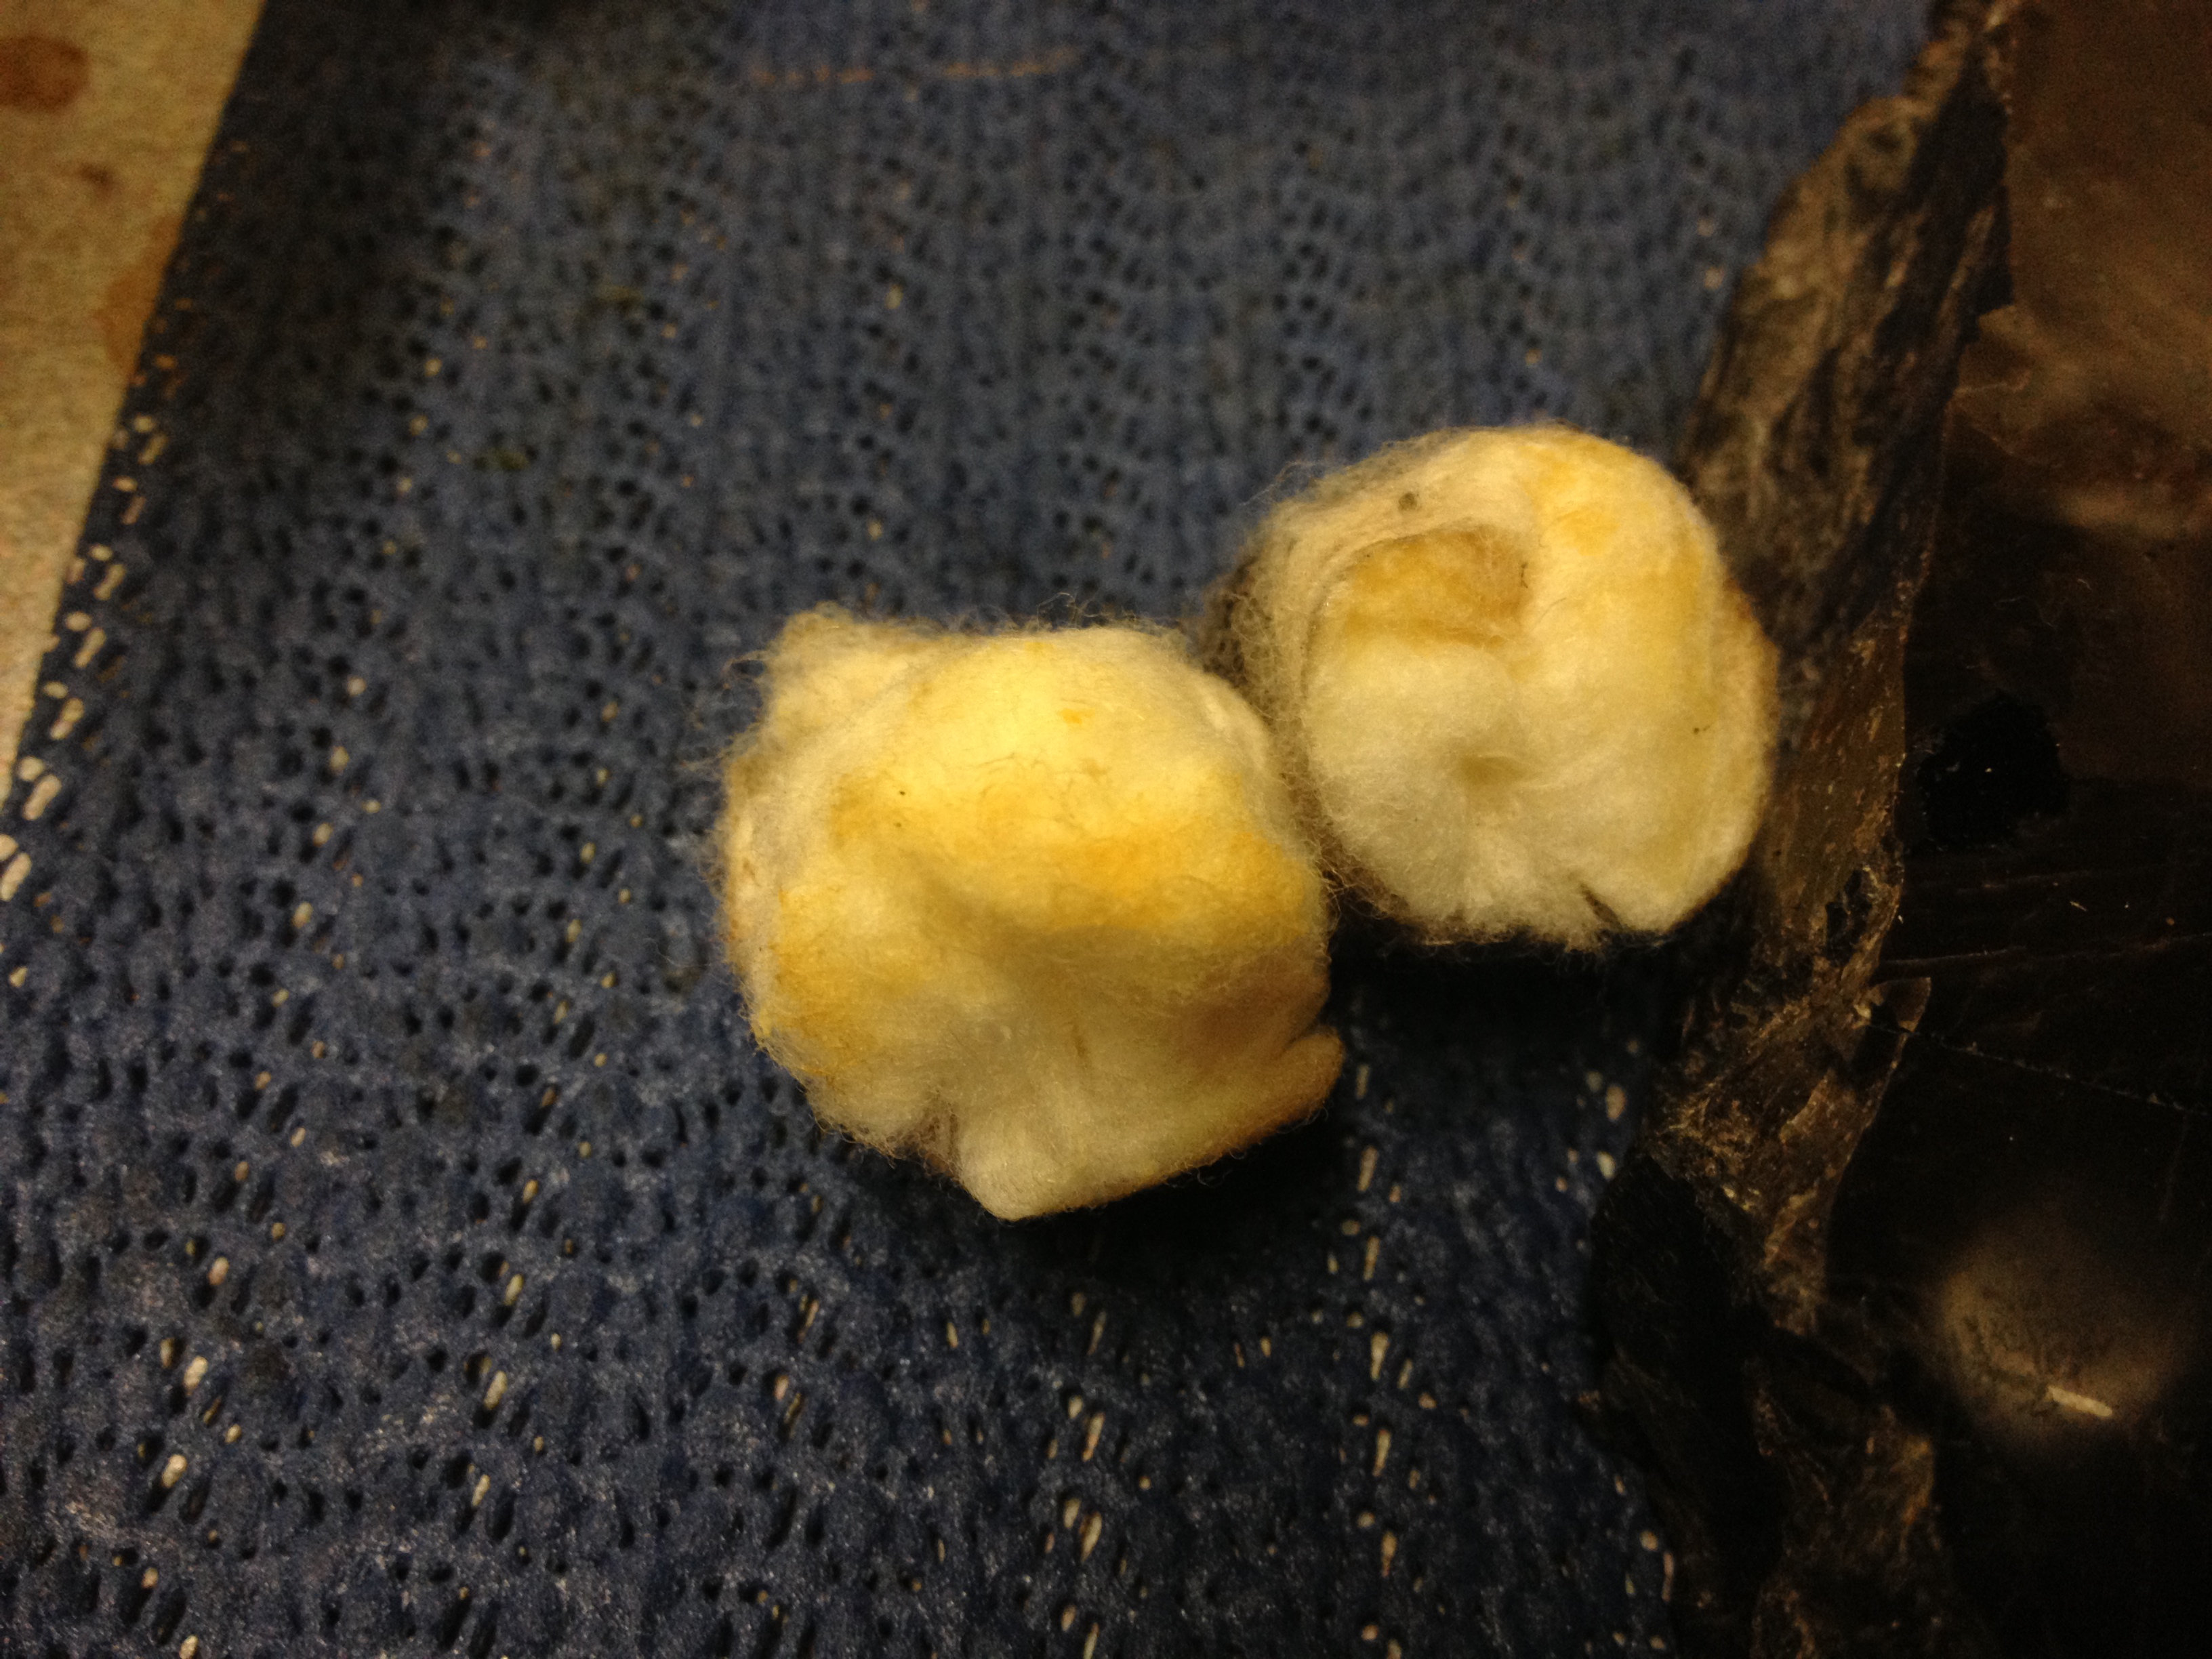
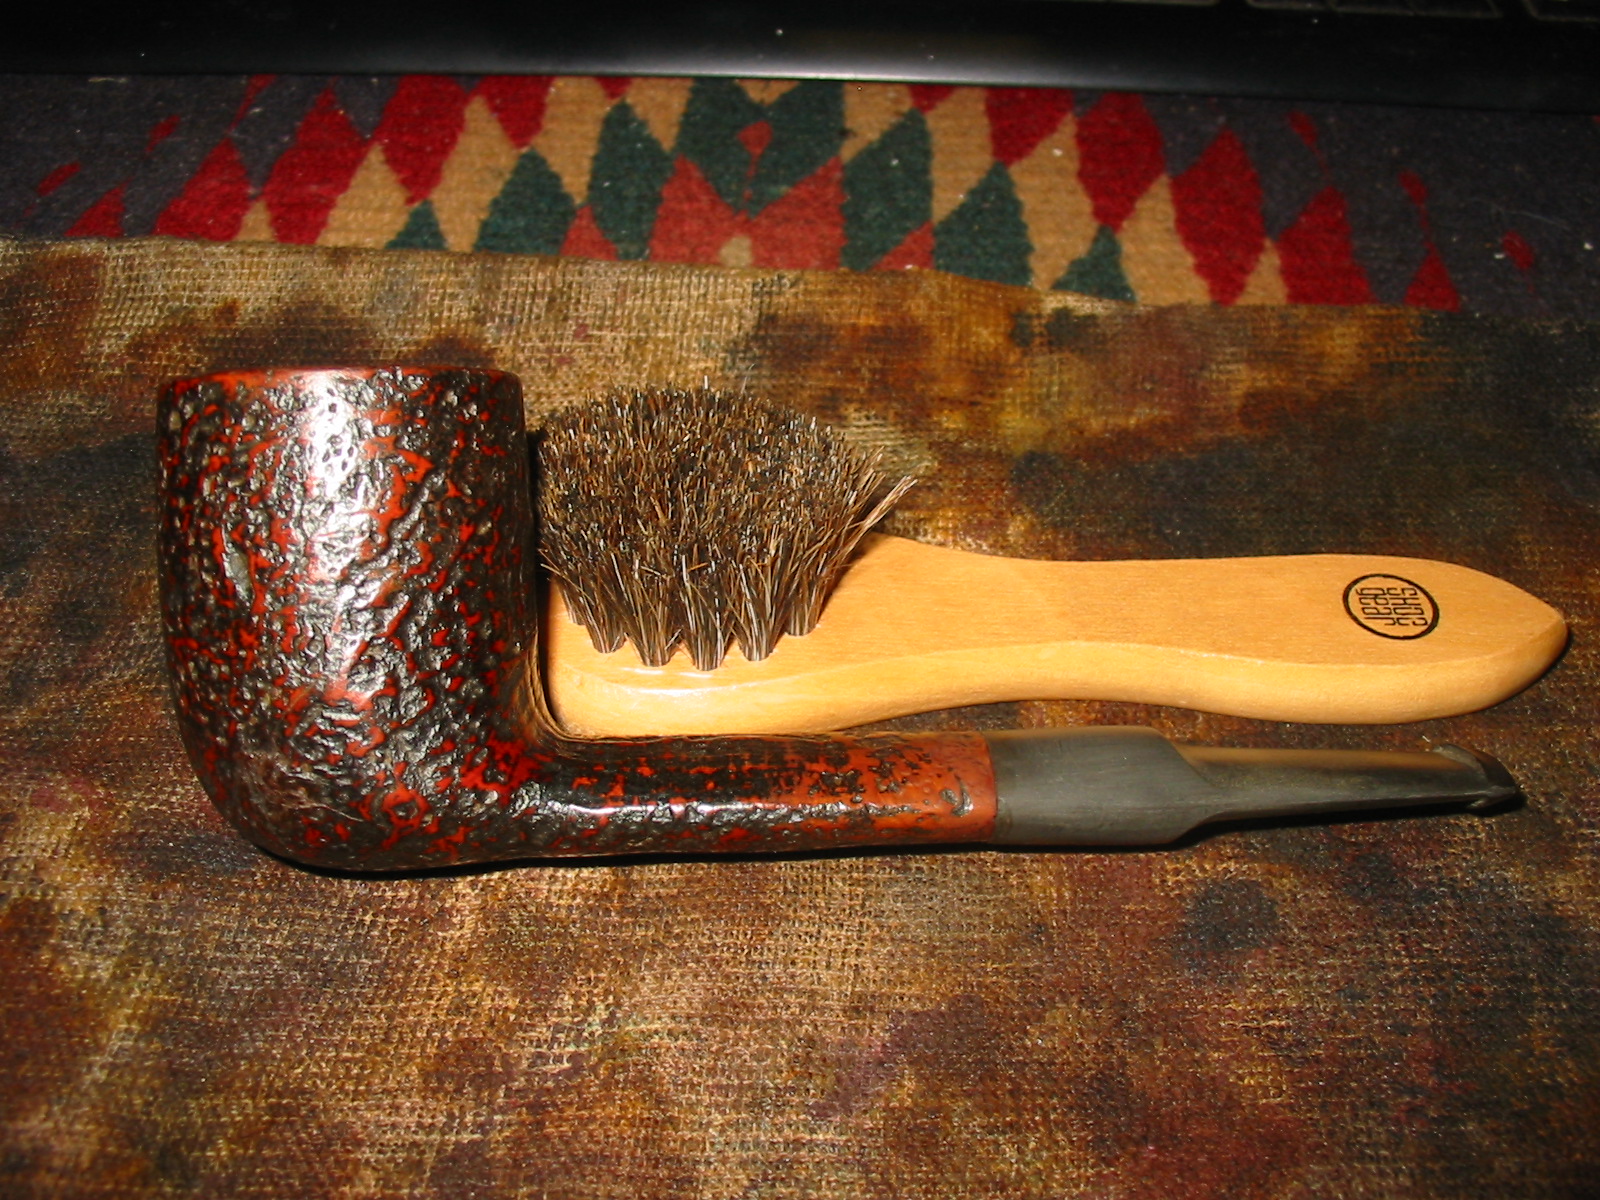
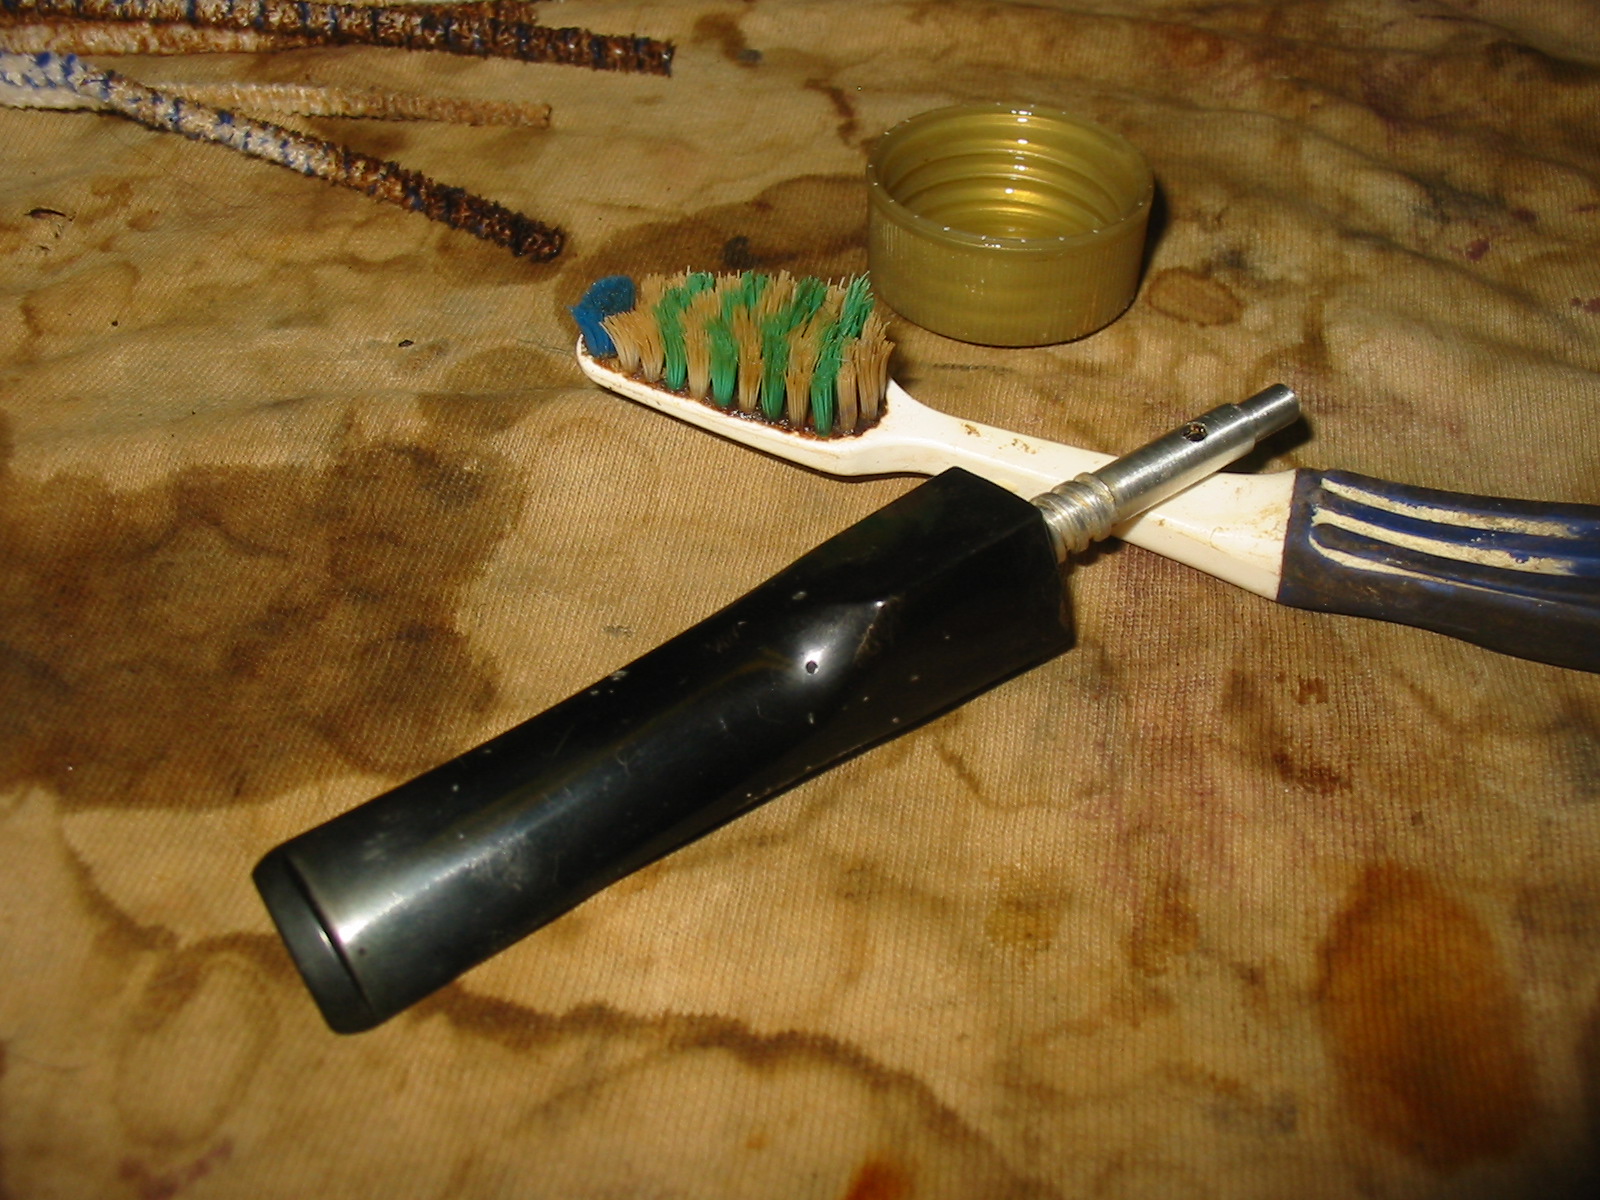
I decided to drop the bowl in my alcohol bath to soak while I worked on cleaning up the stem. I use an alcohol bath to soak the pipe bowl and get underneath the varnish coat. Once it comes out of the bath it is relatively simple to wipe off the remaining finish. While it soaked I scrubbed the stem with Everclear and a soft bristle tooth brush. I scrubbed off the surface grit and grim and also worked on the button and slot to loosen the grit. I scrubbed the condenser as well with the Everclear and also used 0000 steel wool to polish it. I cleaned out the inside of the stem with thick and bristle pipe cleaners. Once it was clean it was time to take the bowl out of the bath.

IMG_1600

IMG_1601

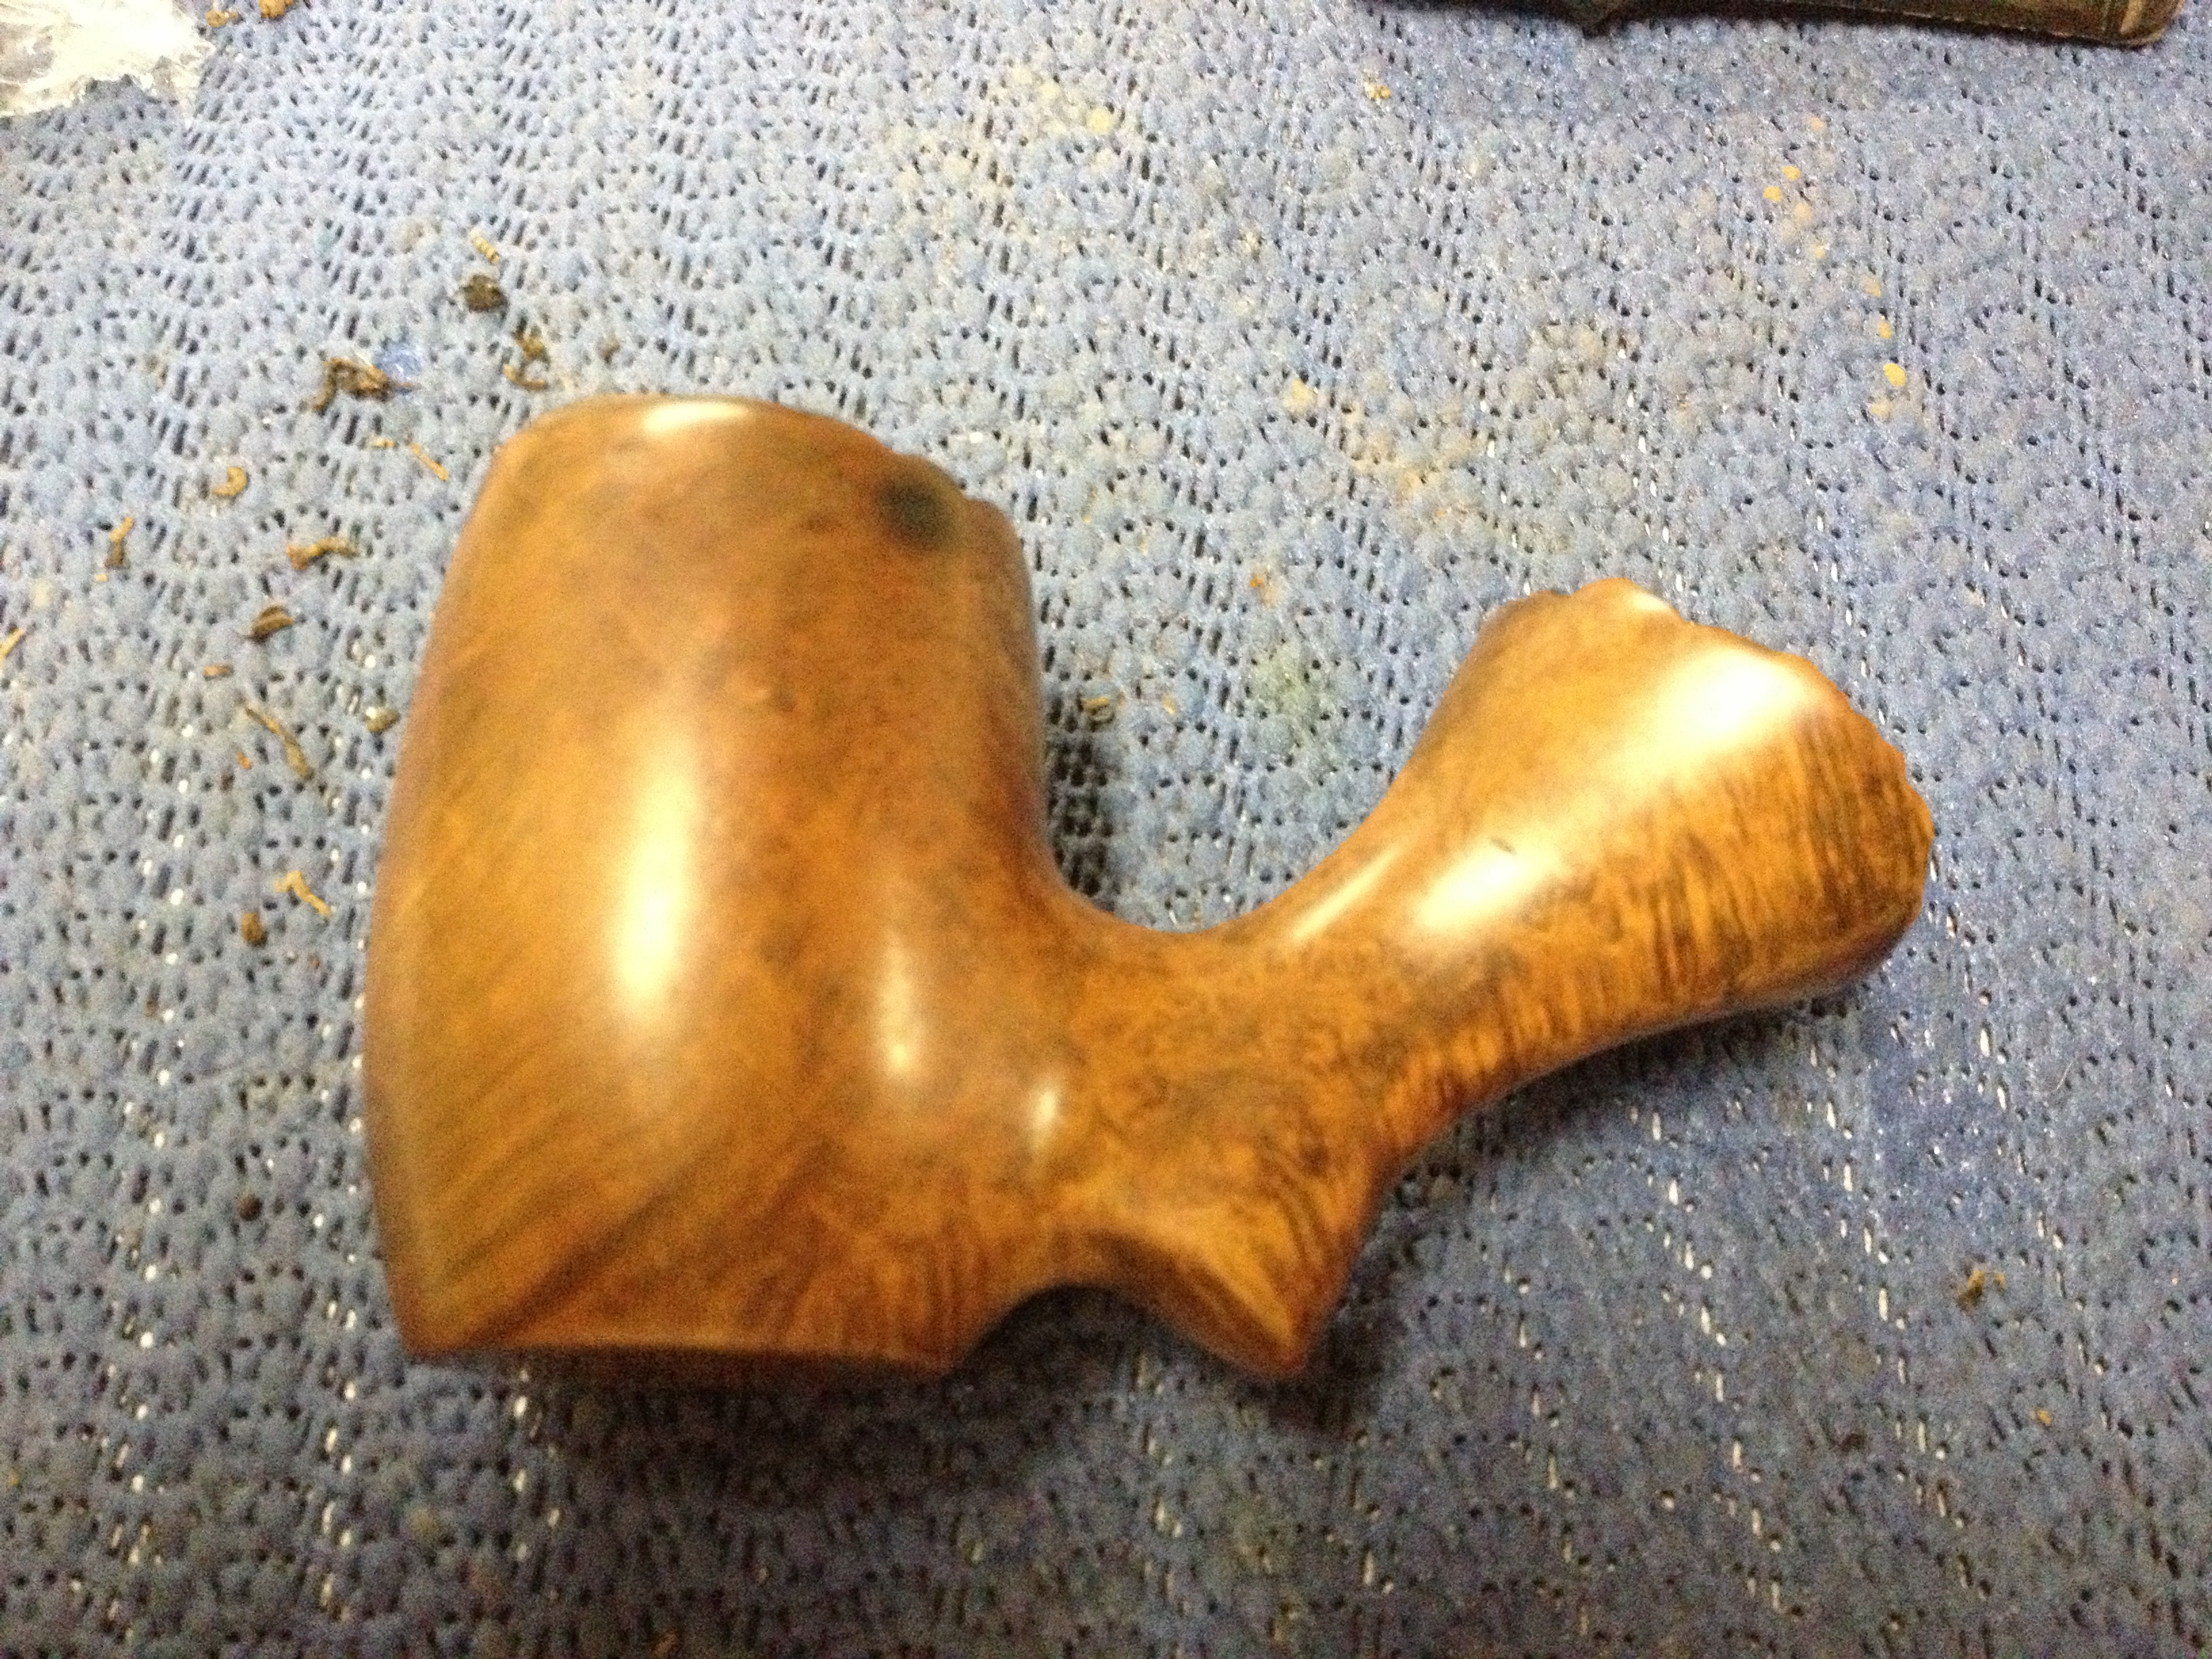
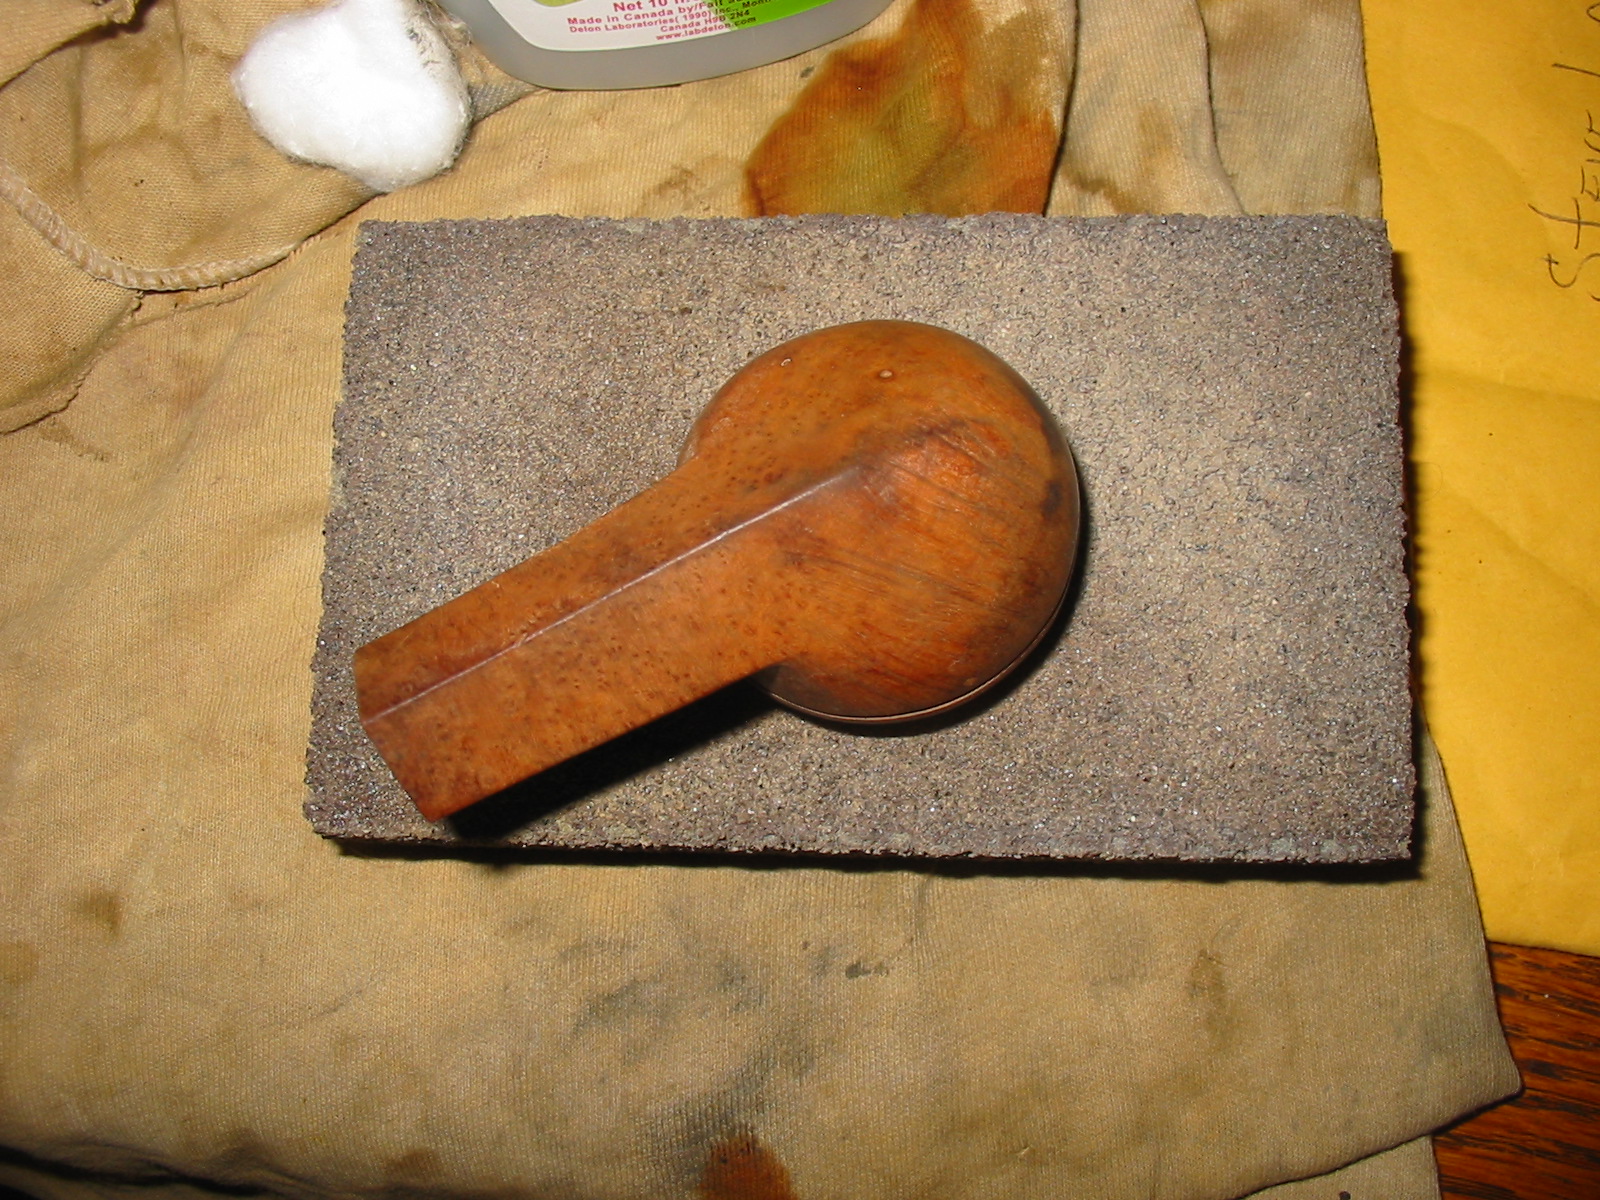
I removed the pipe from the bath and scrubbed it with the tooth brush. I worked on the grooves in the bowl and also at the shank bowl junction. I dried it off and prepared it for work on the cracked shank. The crackled finish was finally gone and the pipe was clean.

IMG_1602

IMG_1603

IMG_1604

I scrubbed the area around the crack in the shank and picked out dust and particles with a dental pick. I dripped clear superglue into the crack and packed in briar dust with a dental pick. I clamped the cracked area and set it aside to cure for about a half hour.

IMG_1613

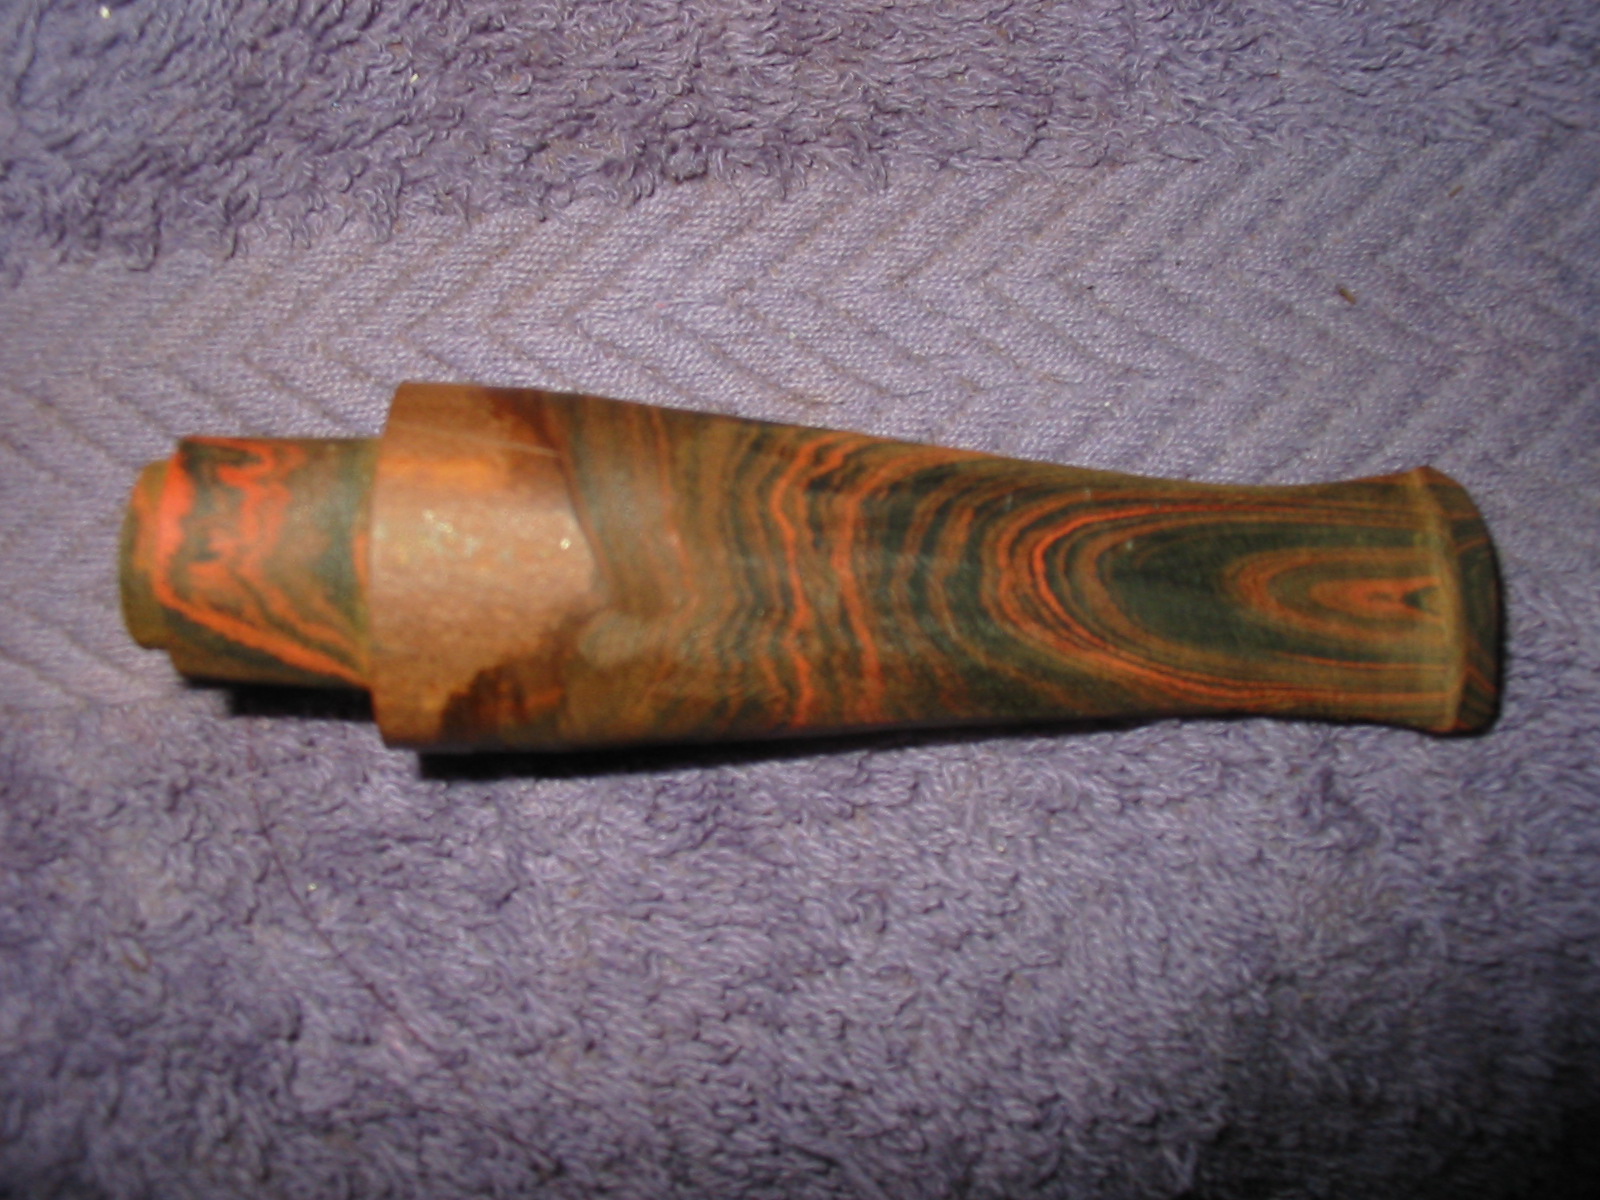
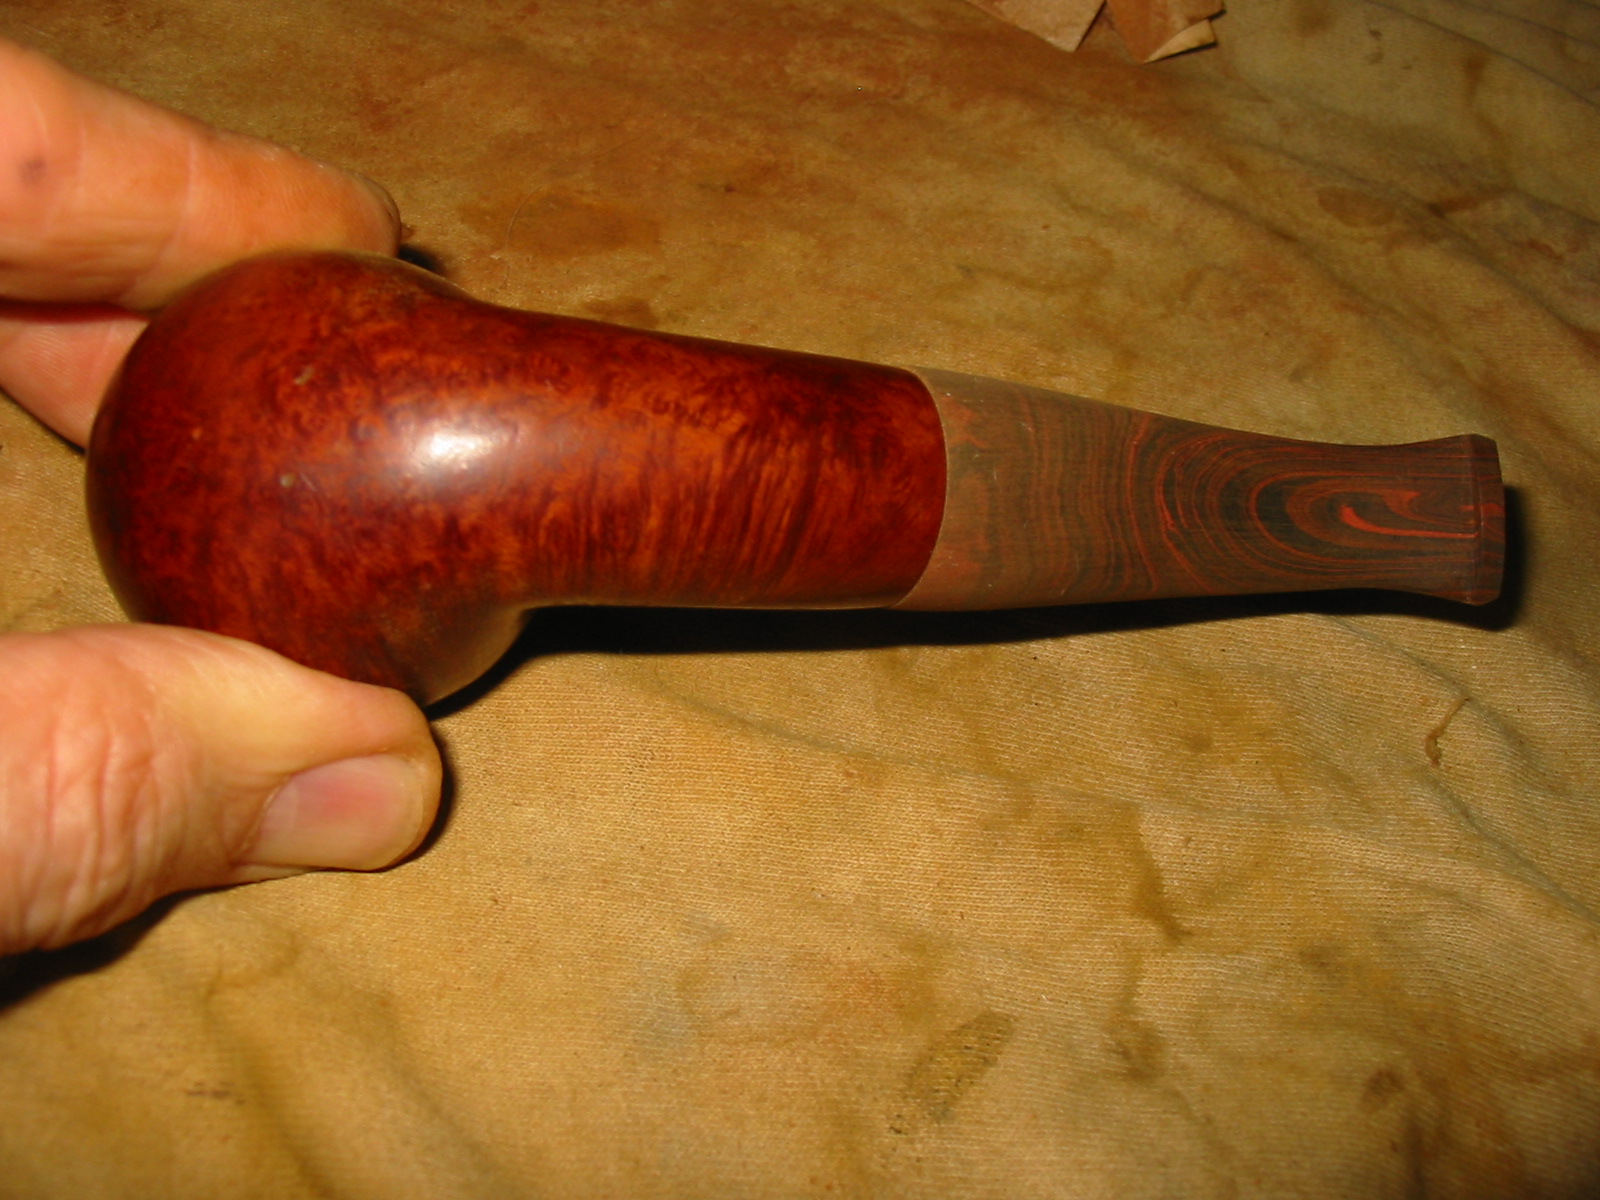
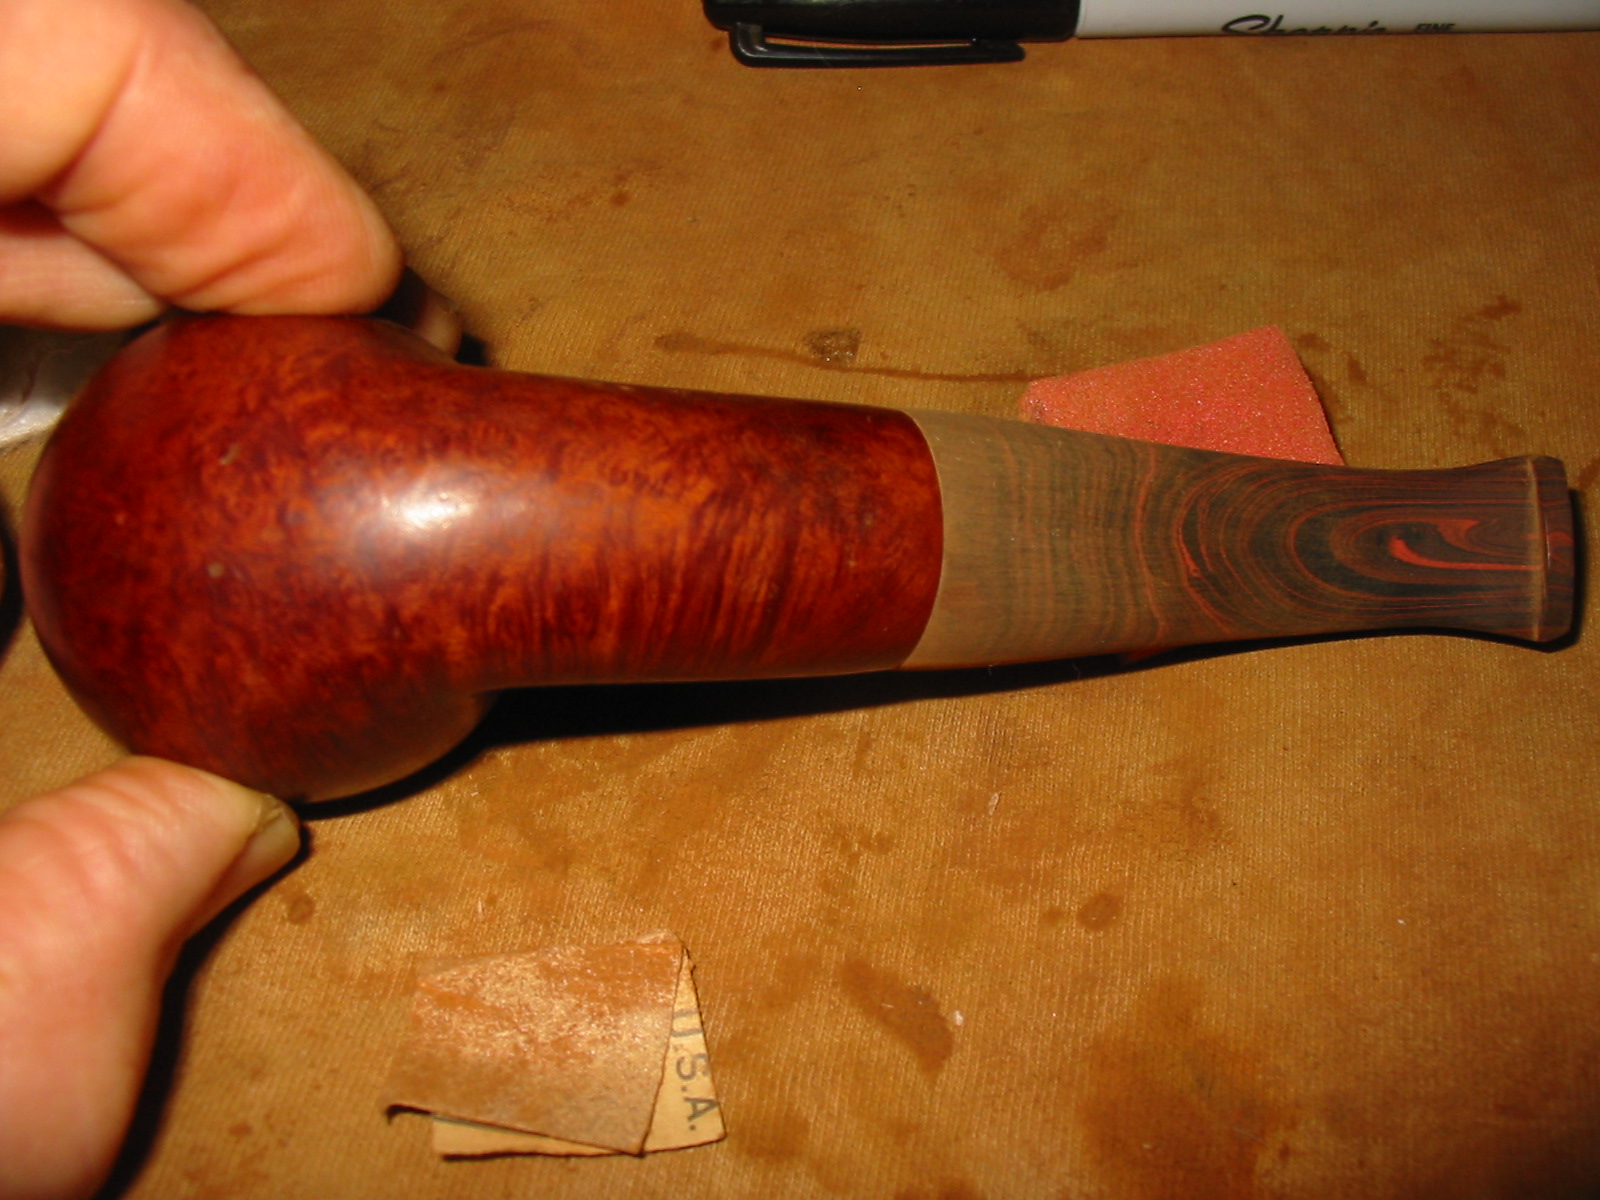
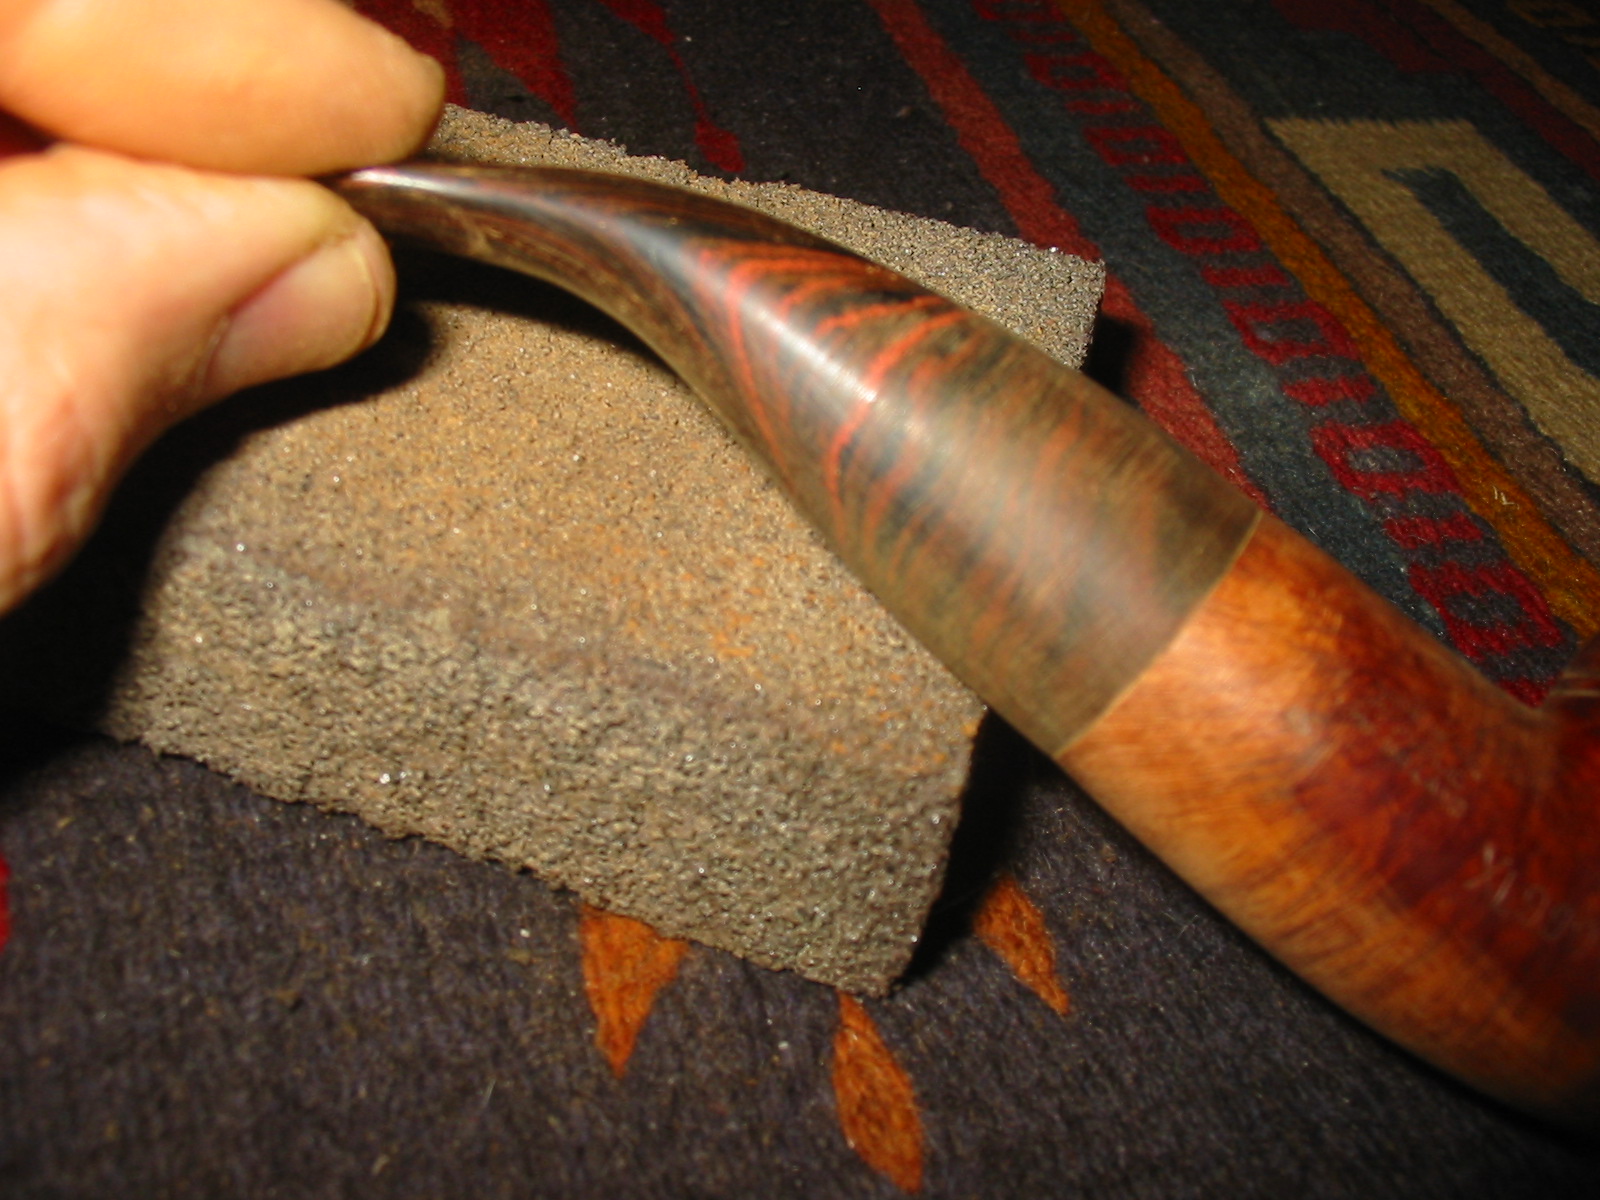
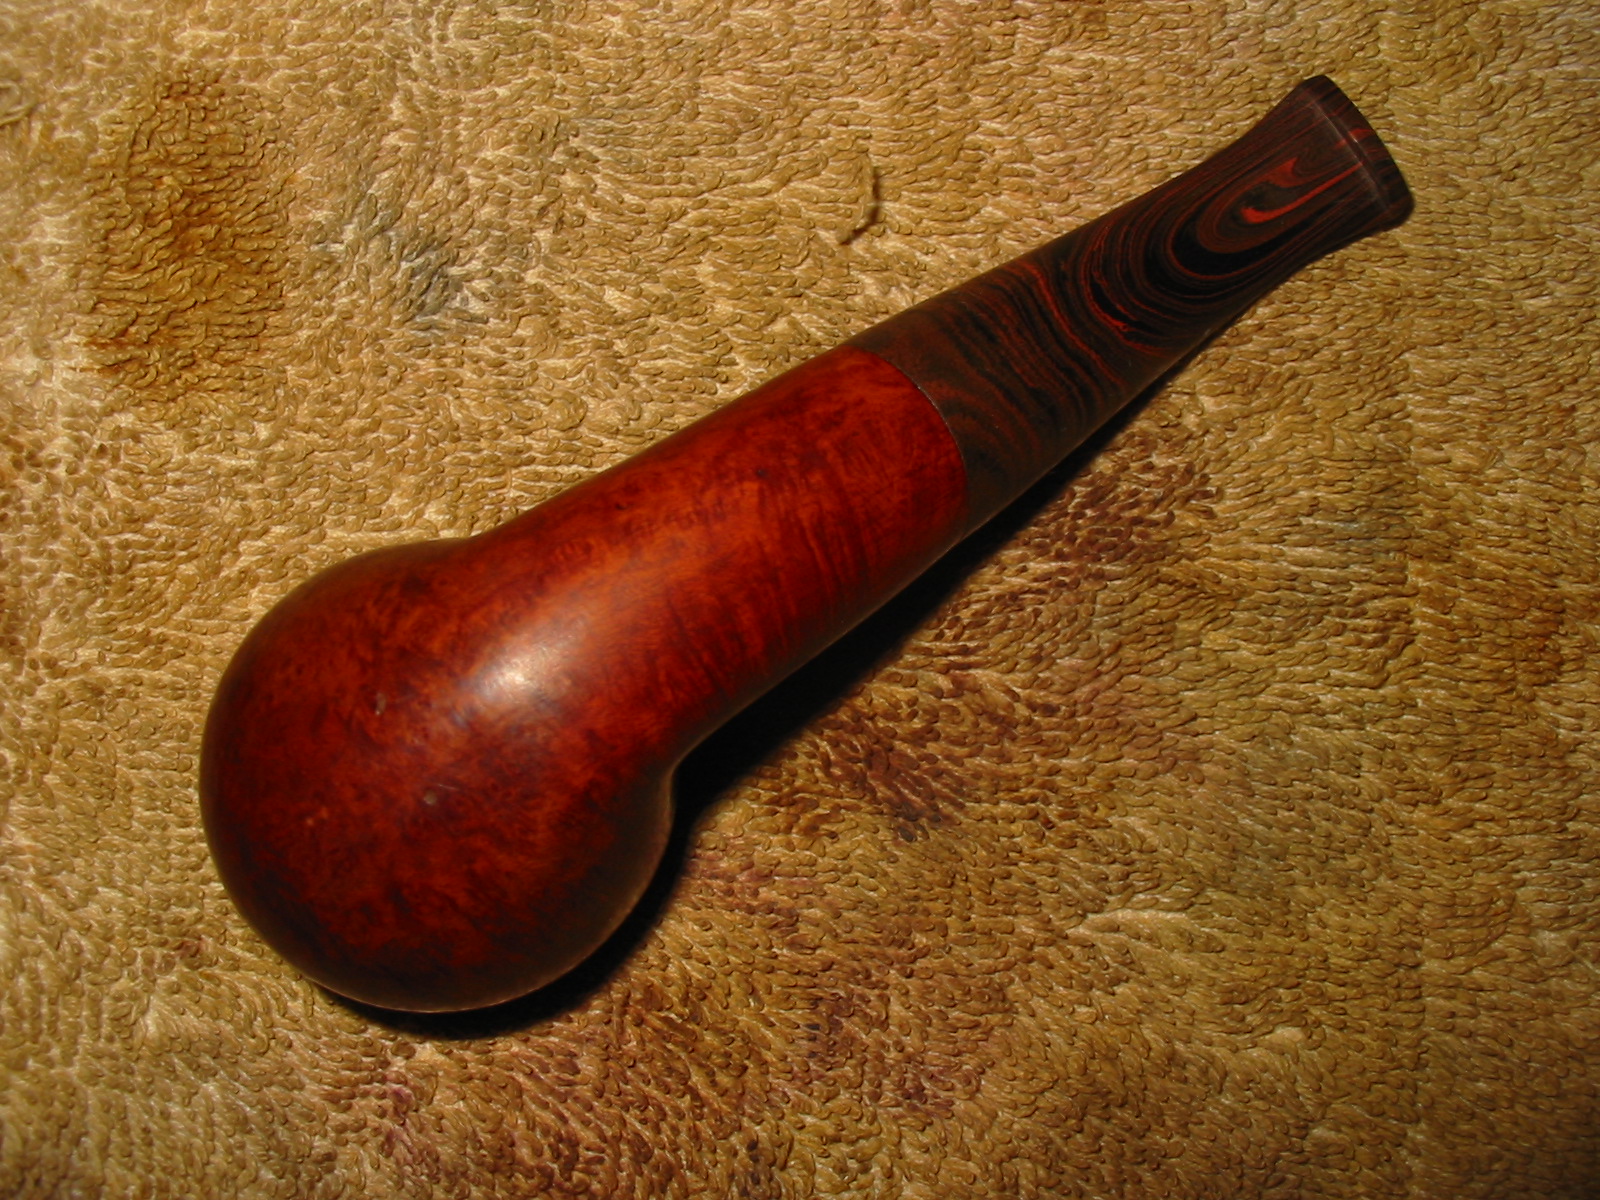
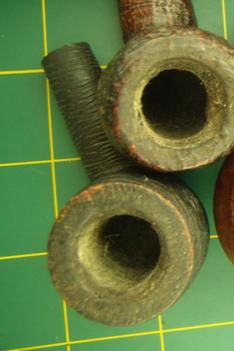
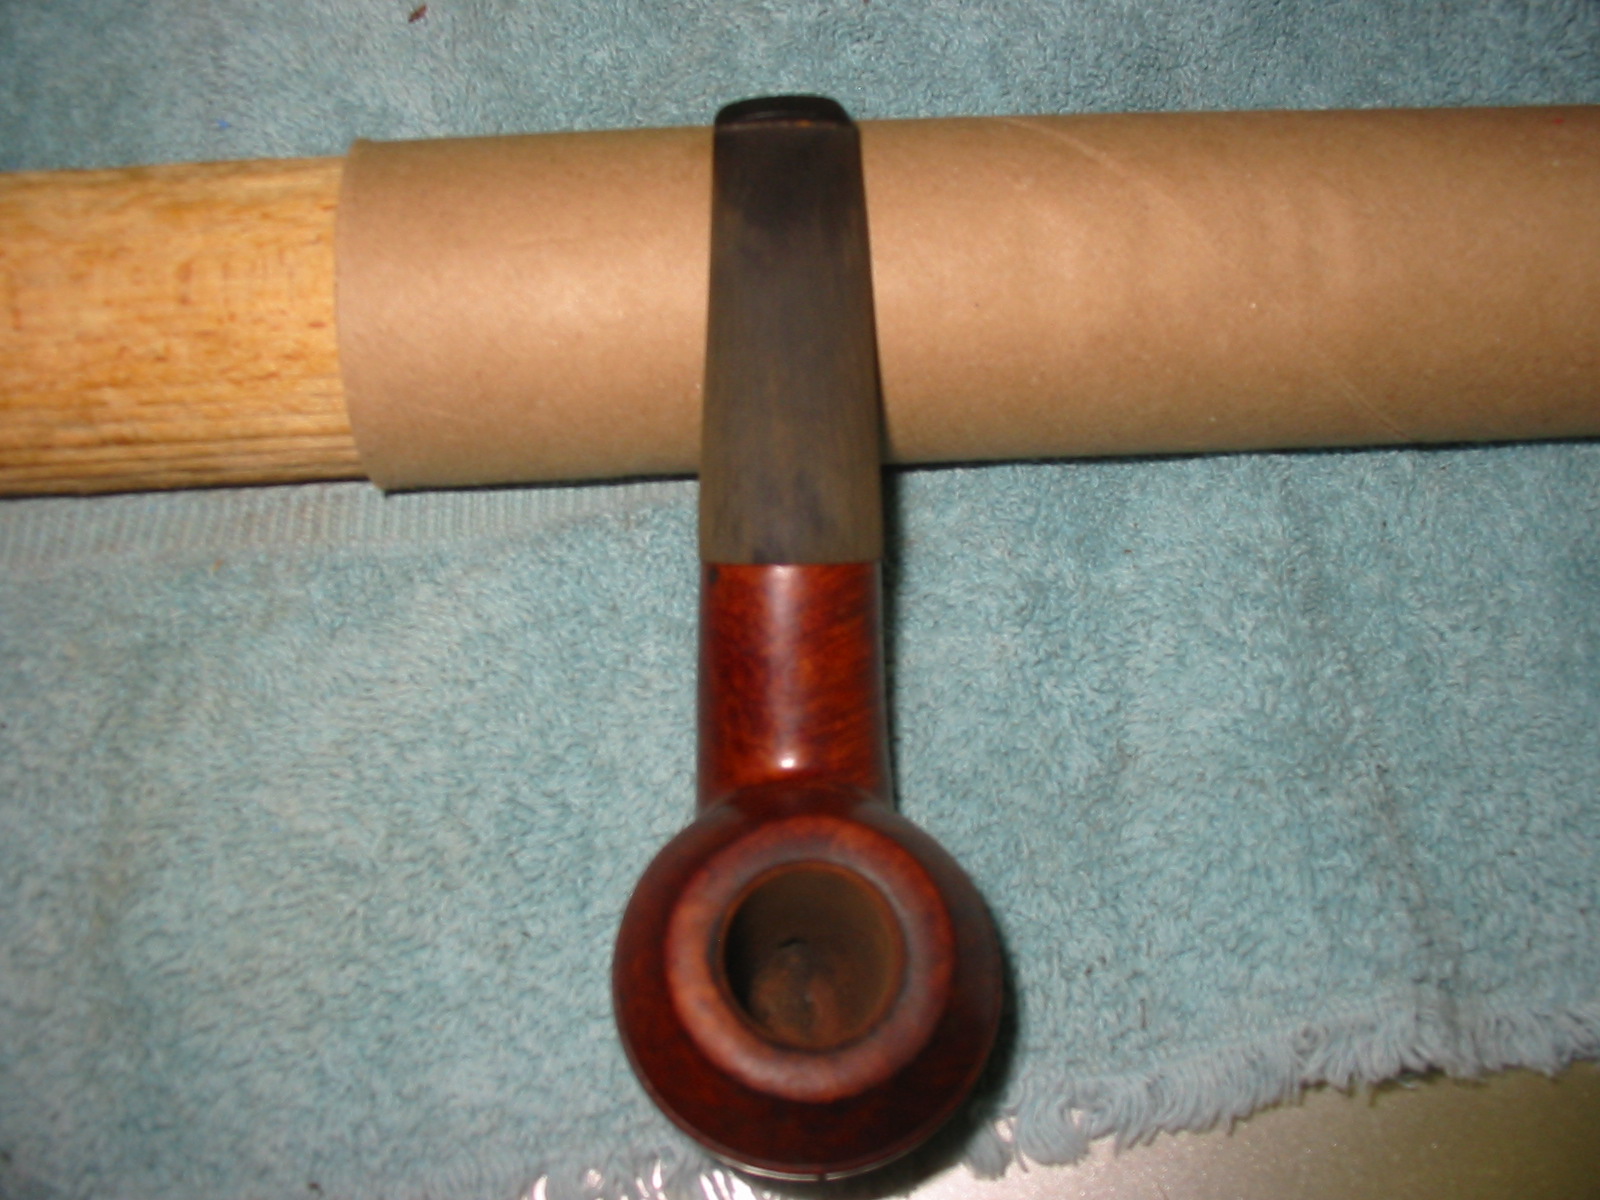
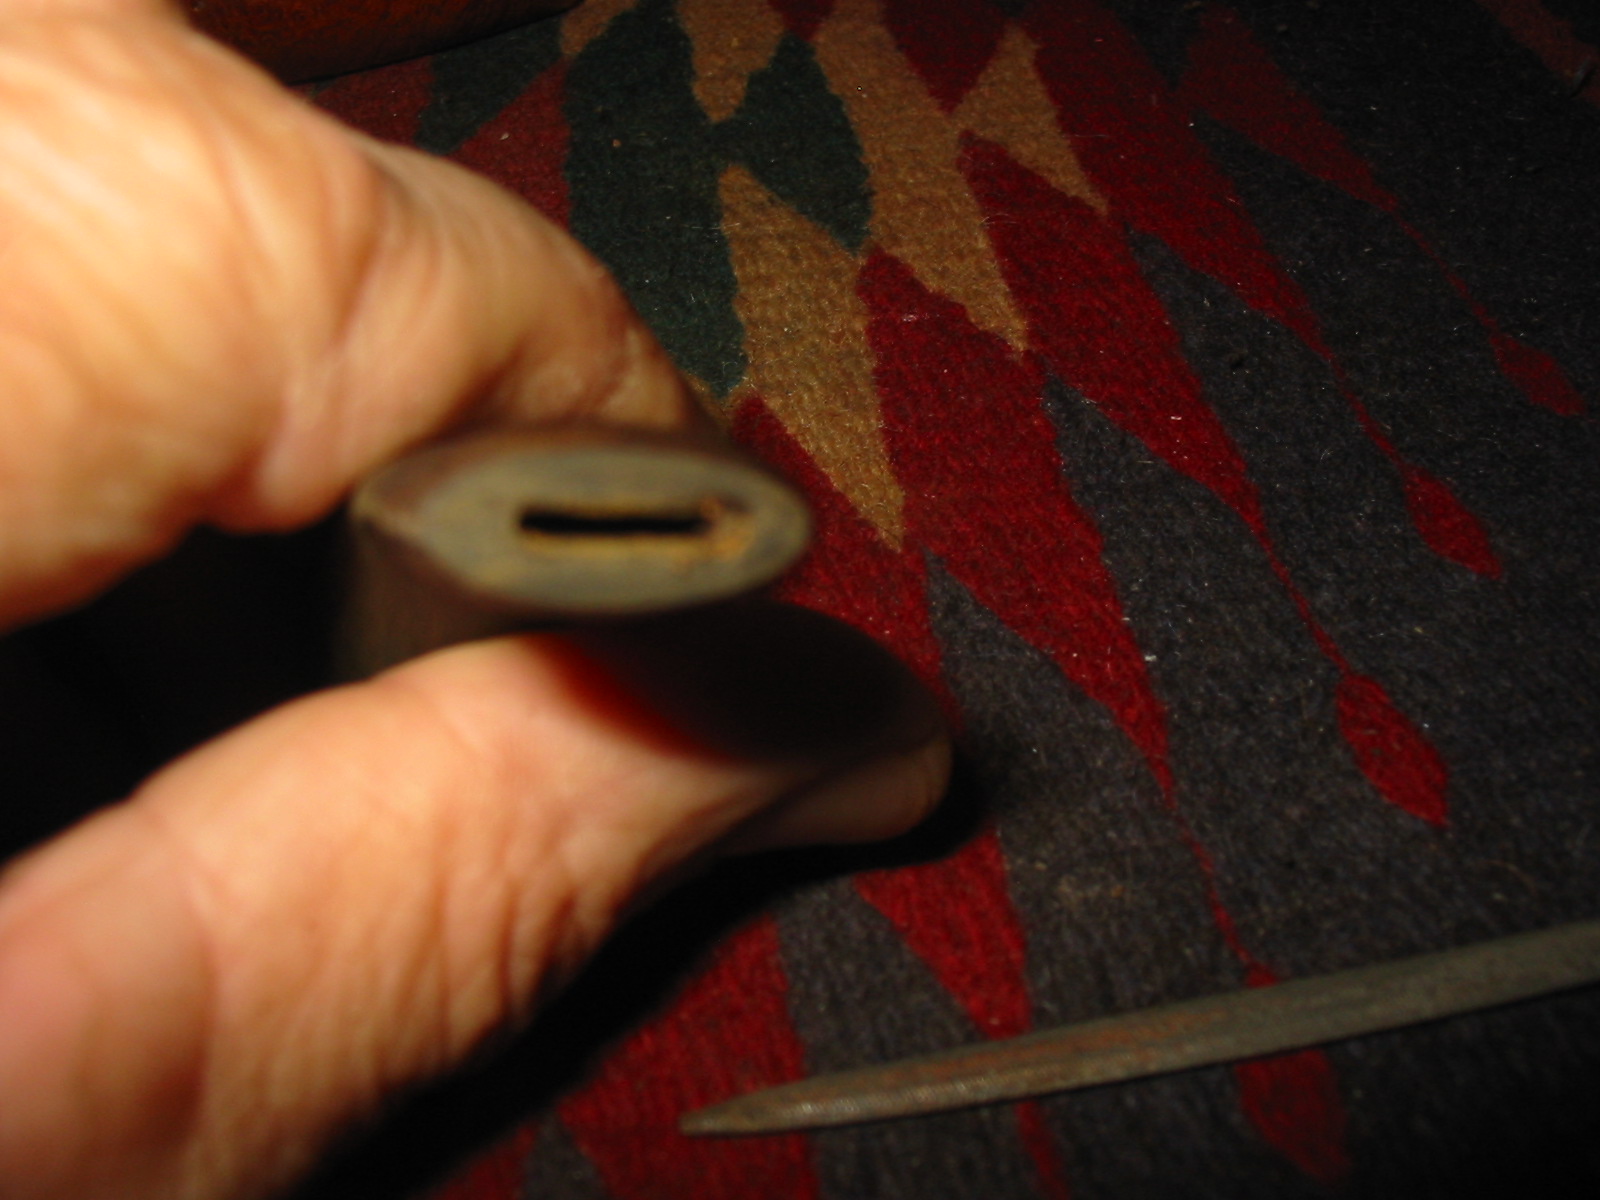
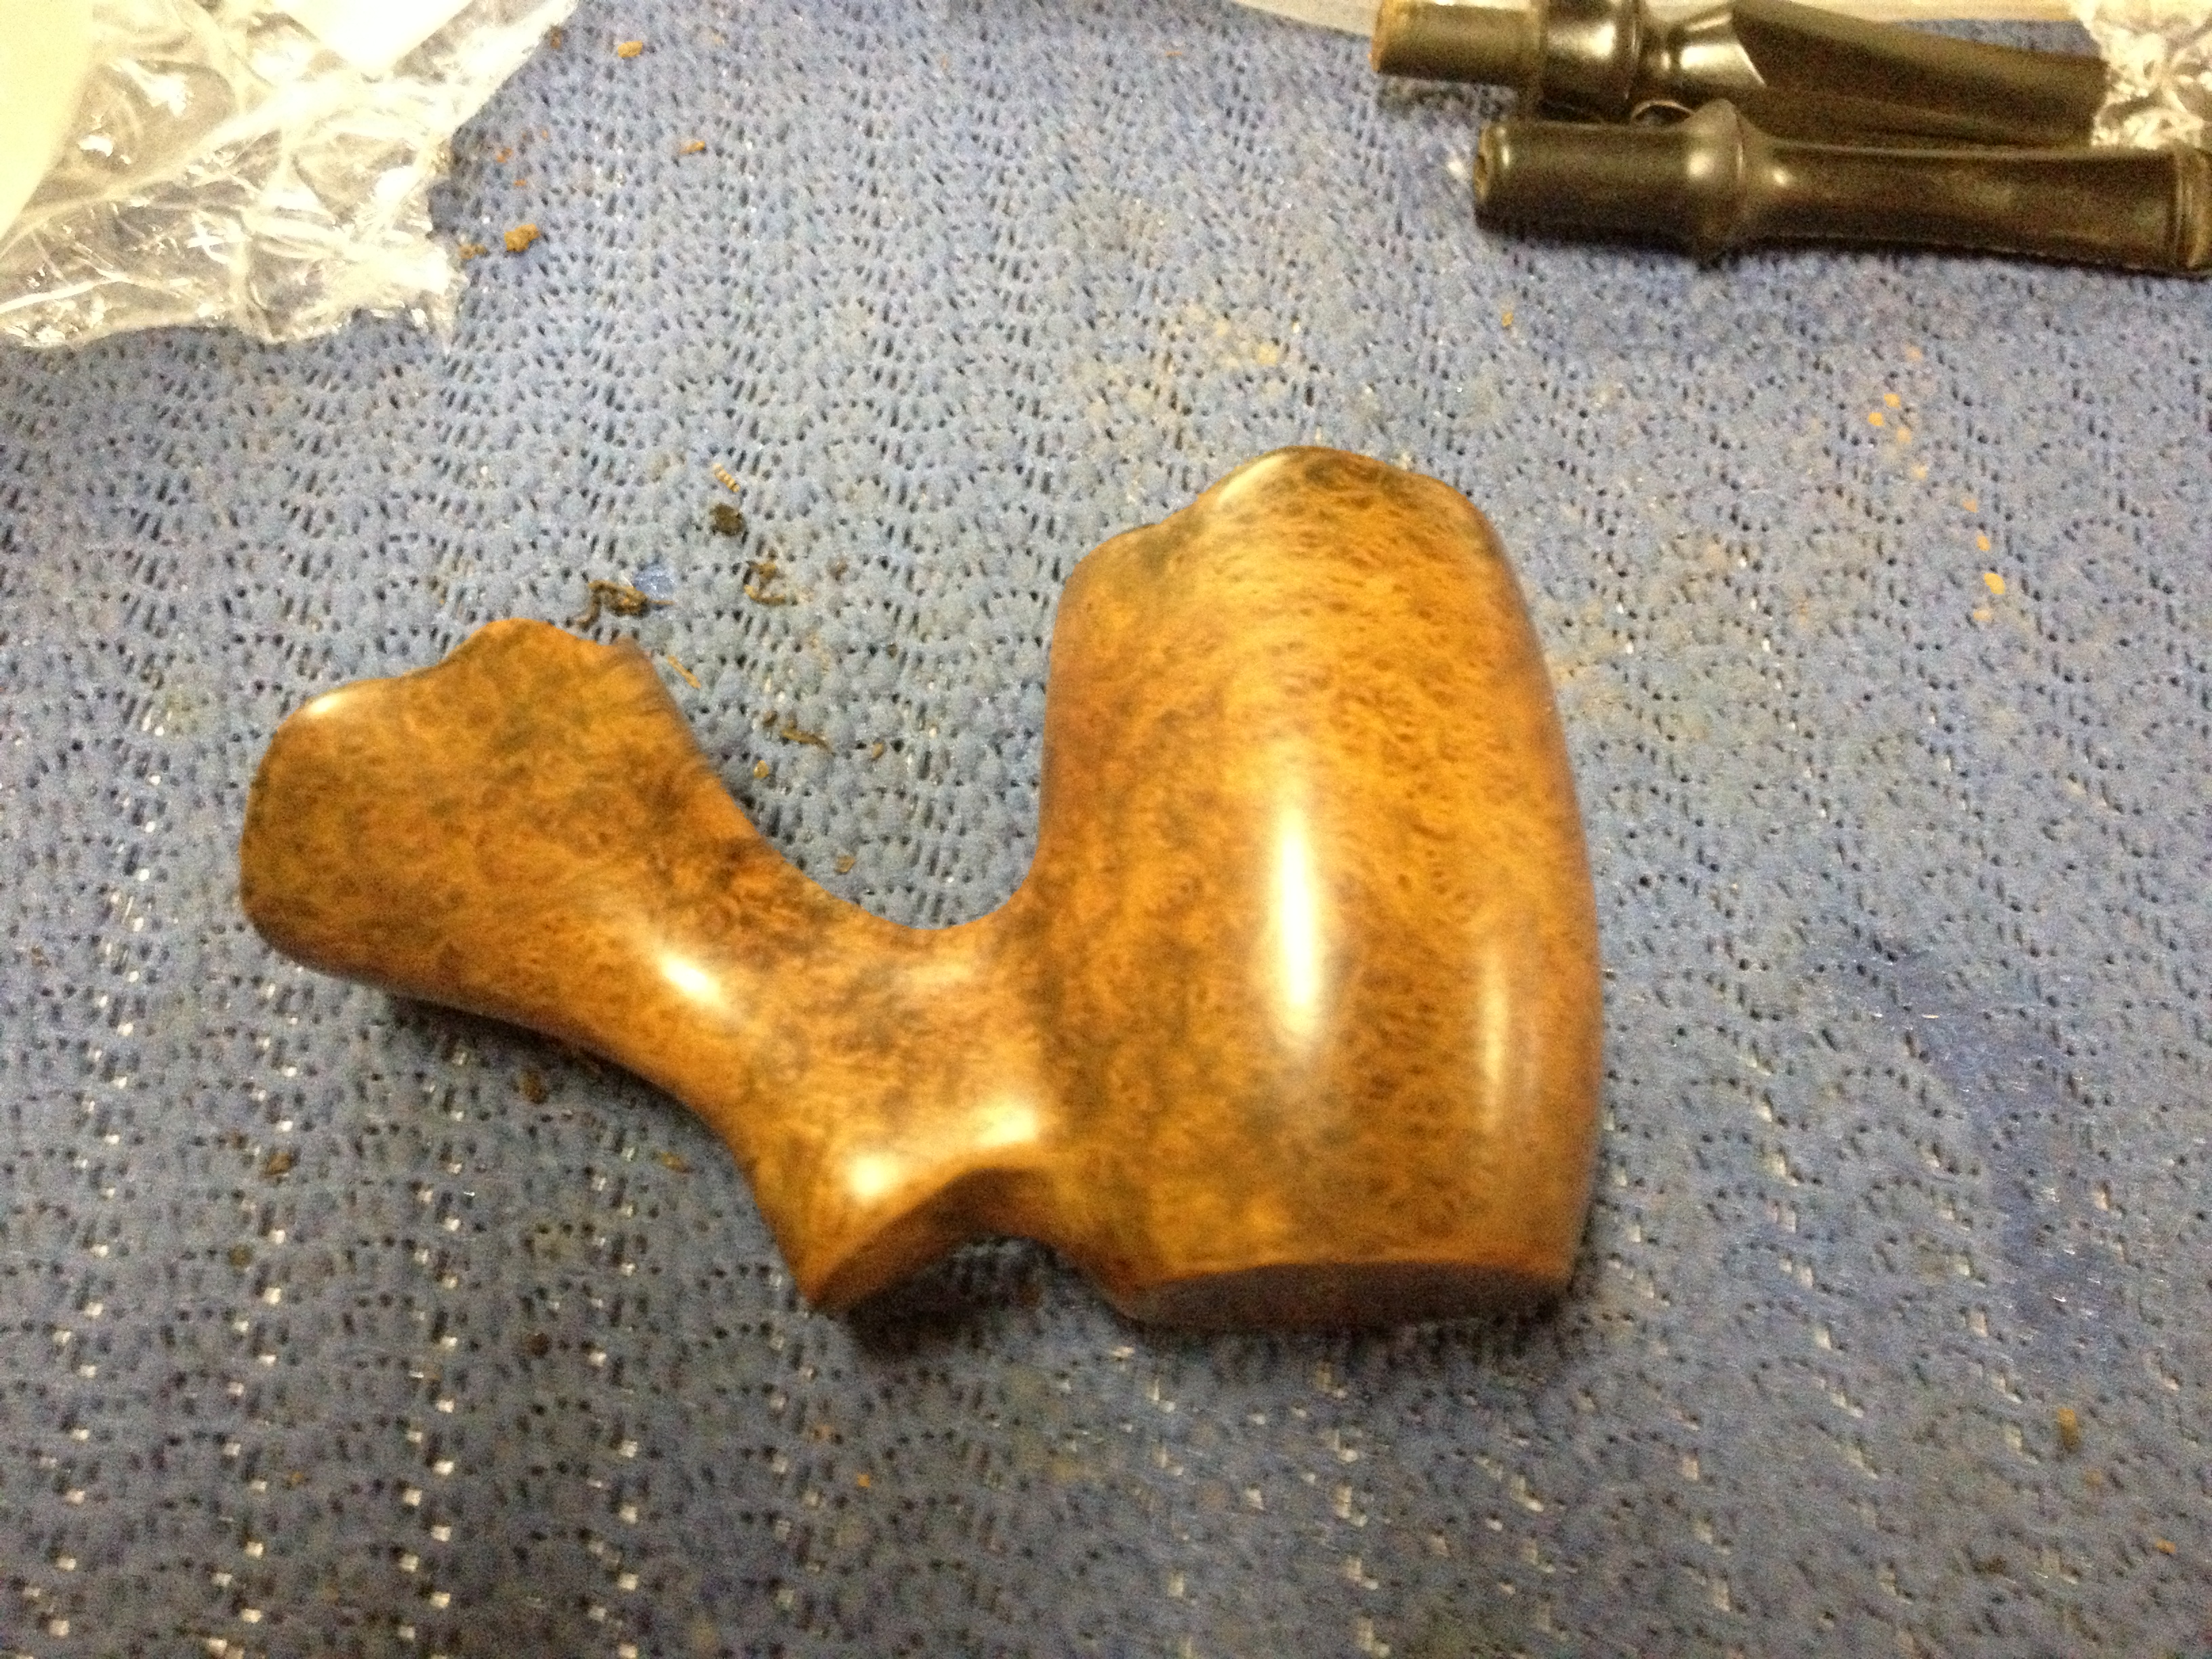
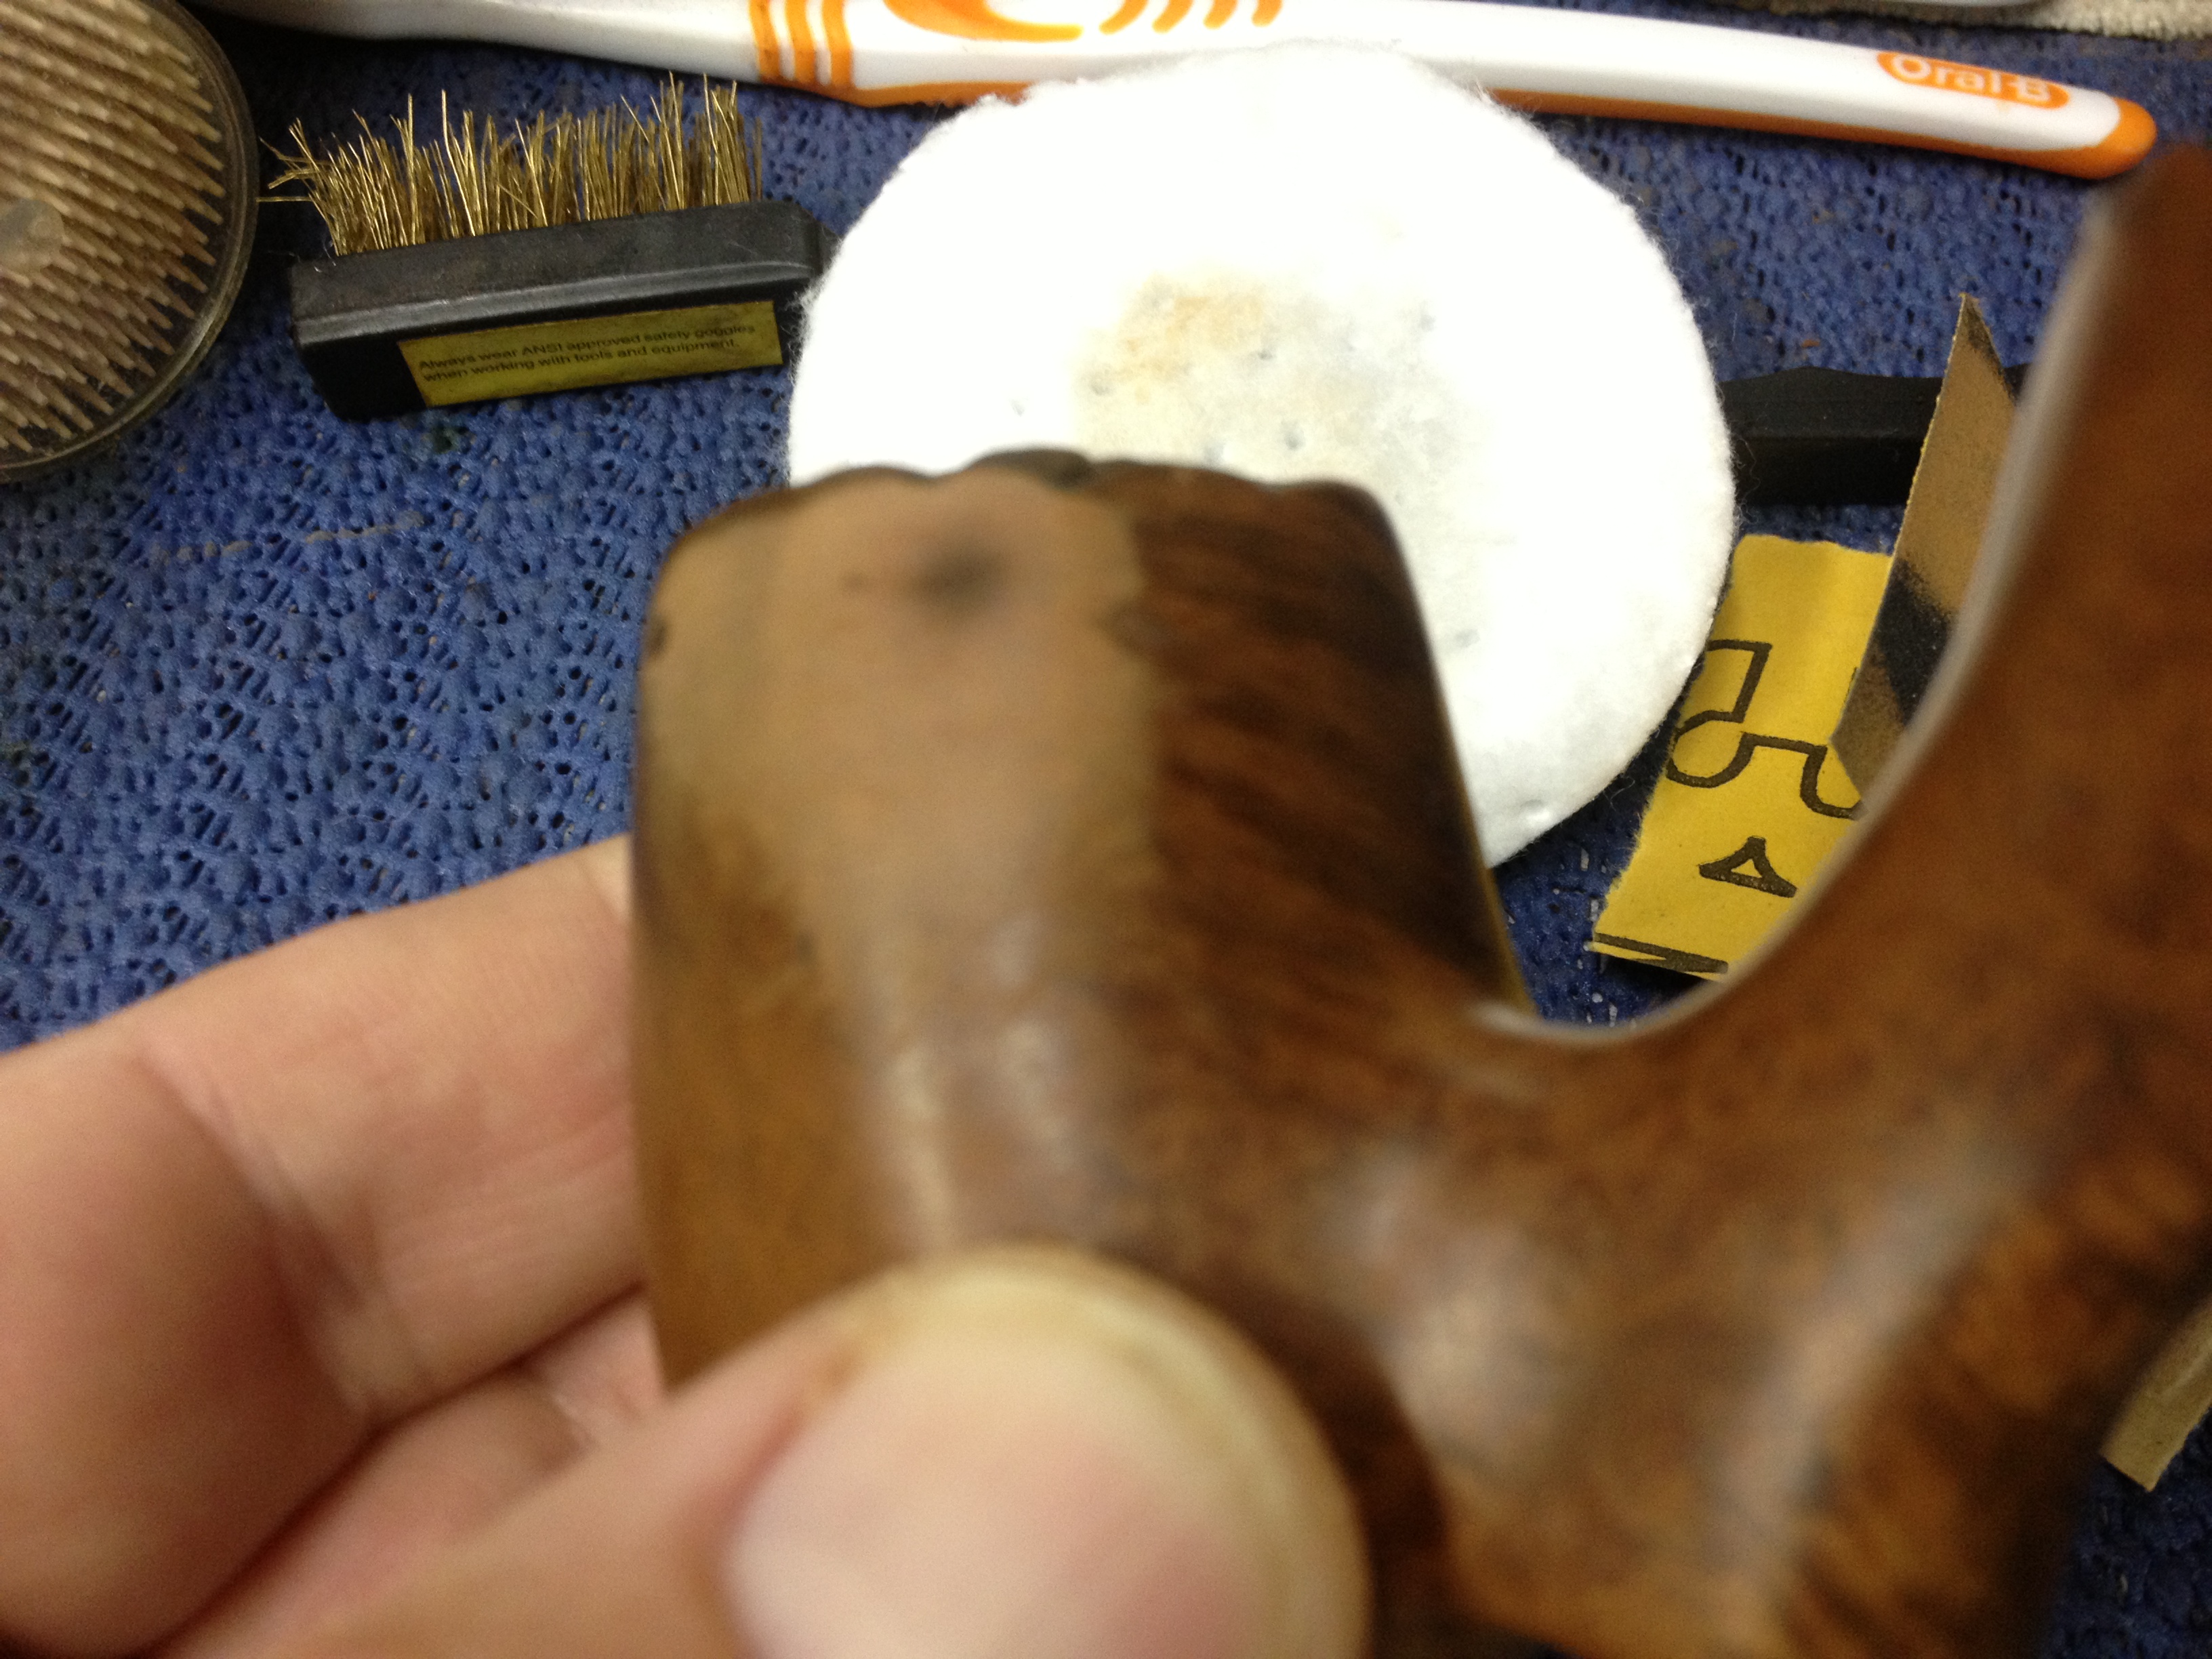
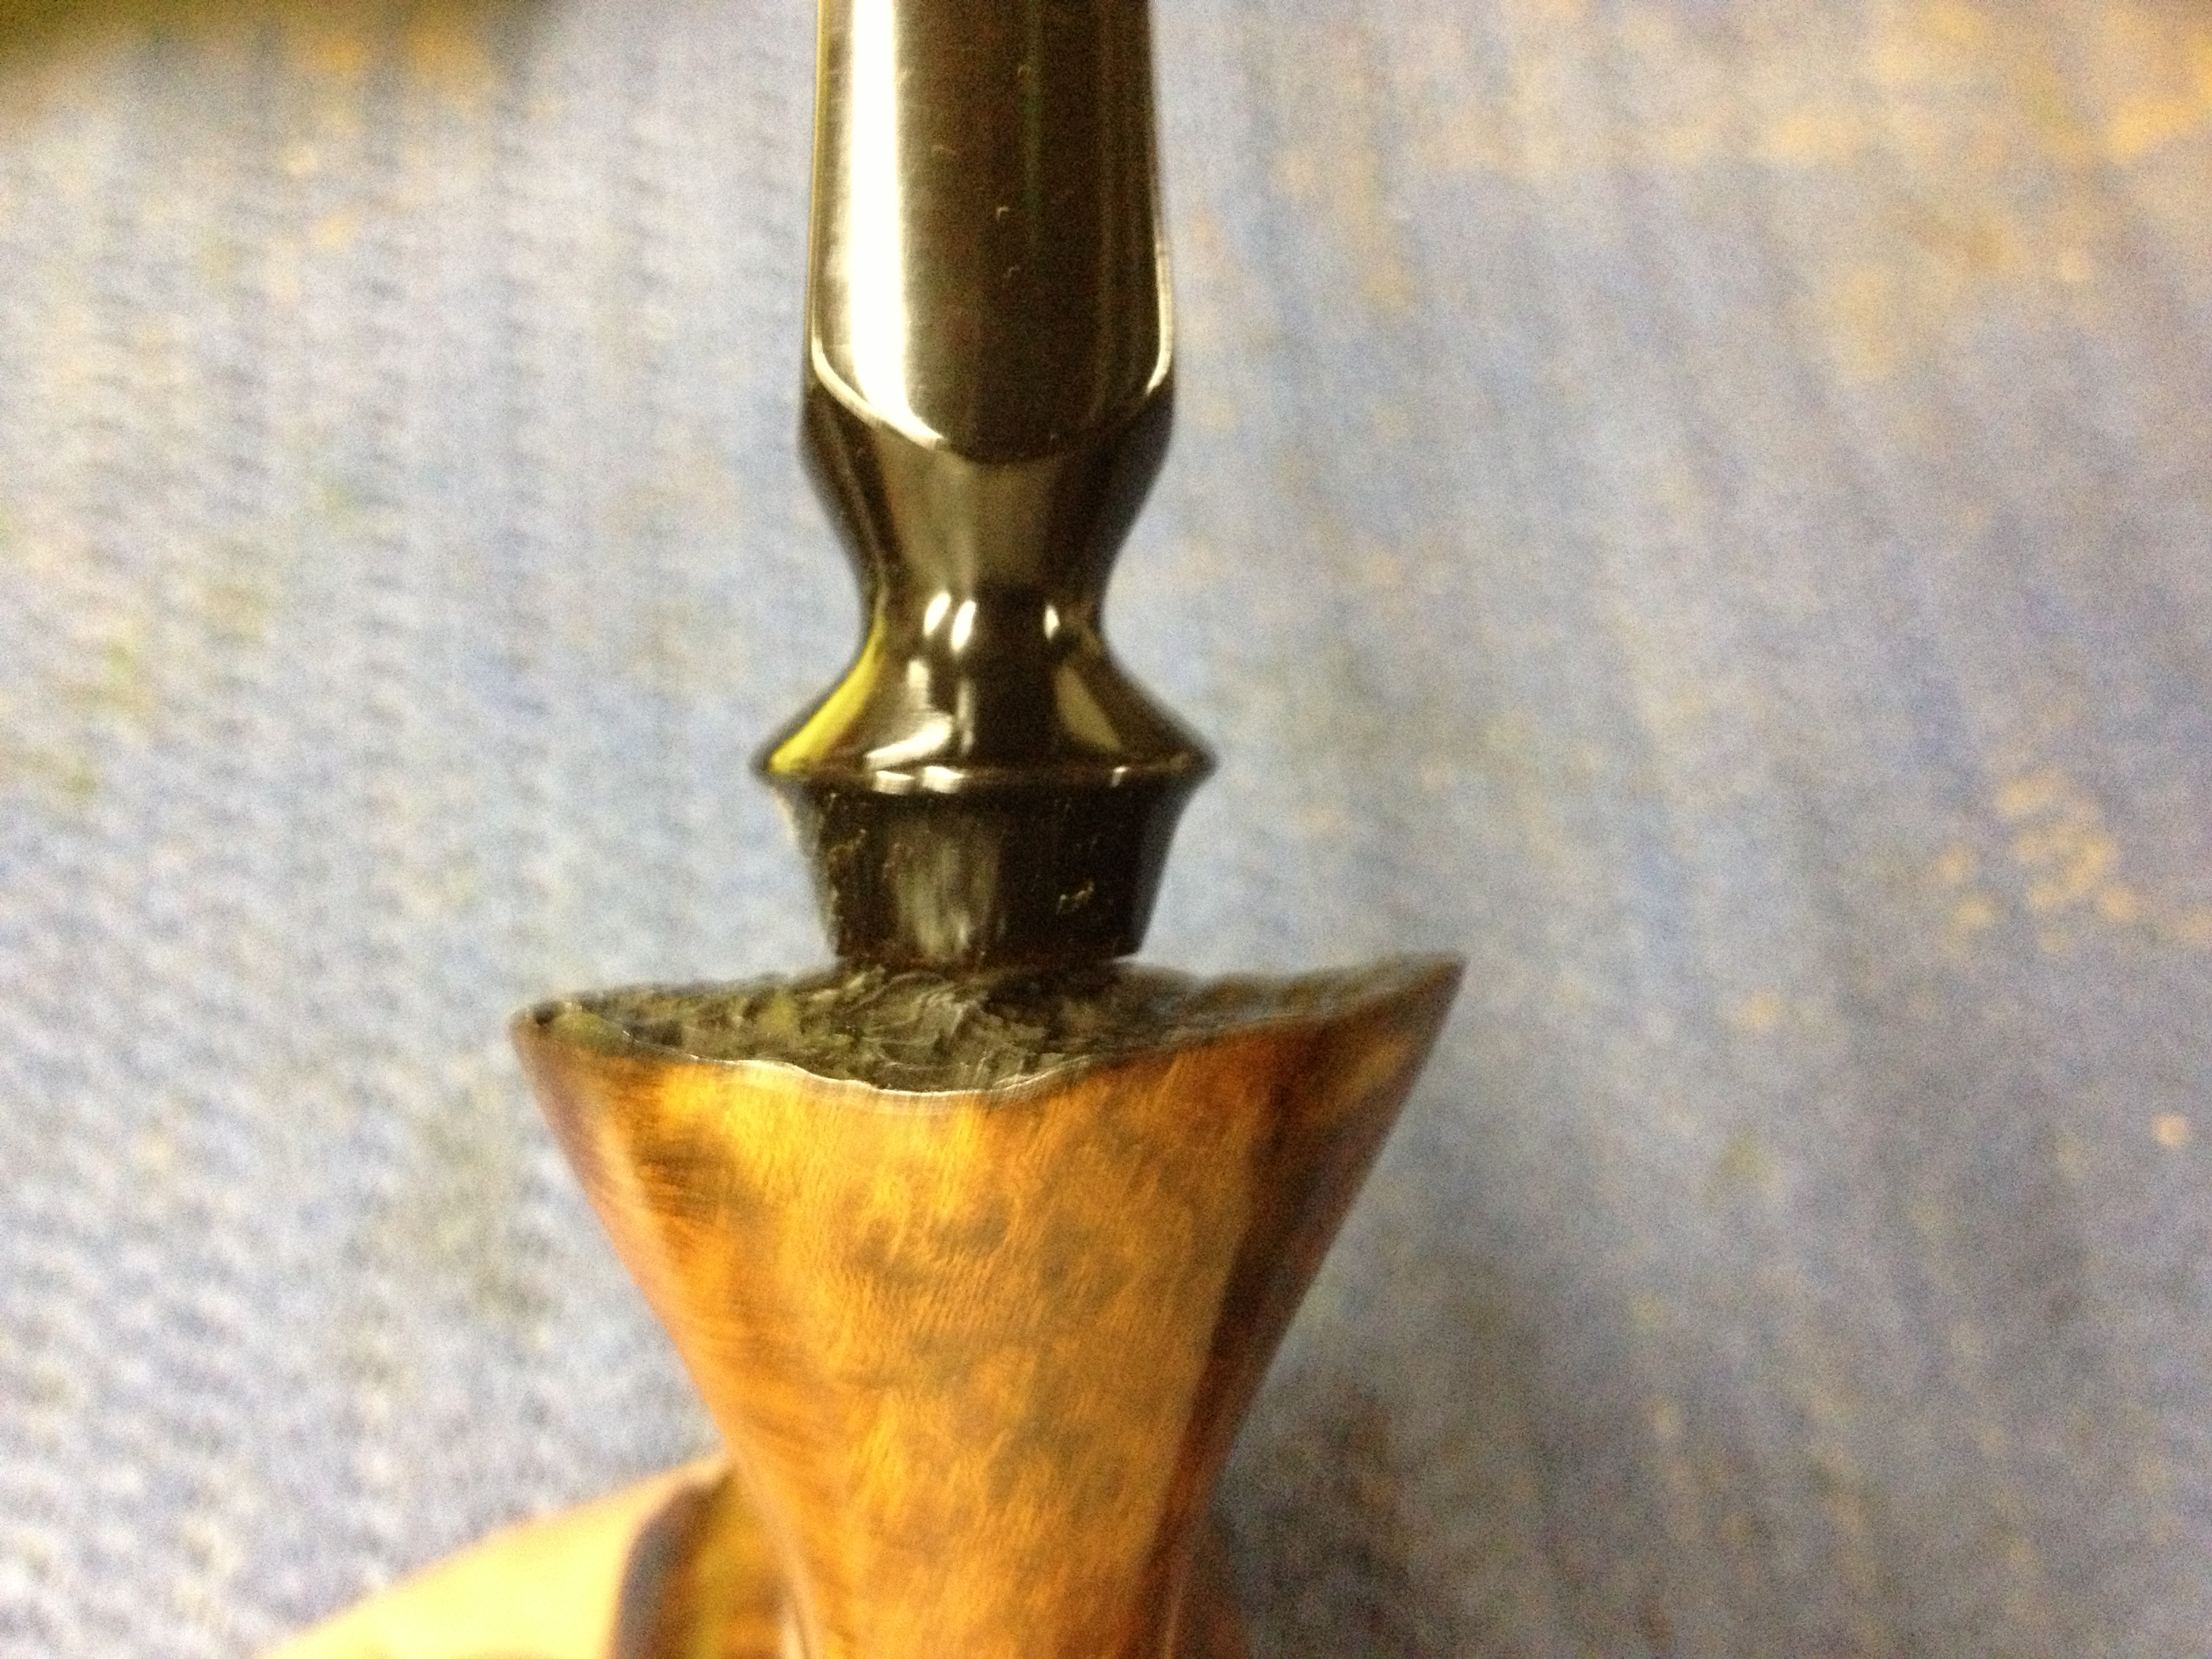
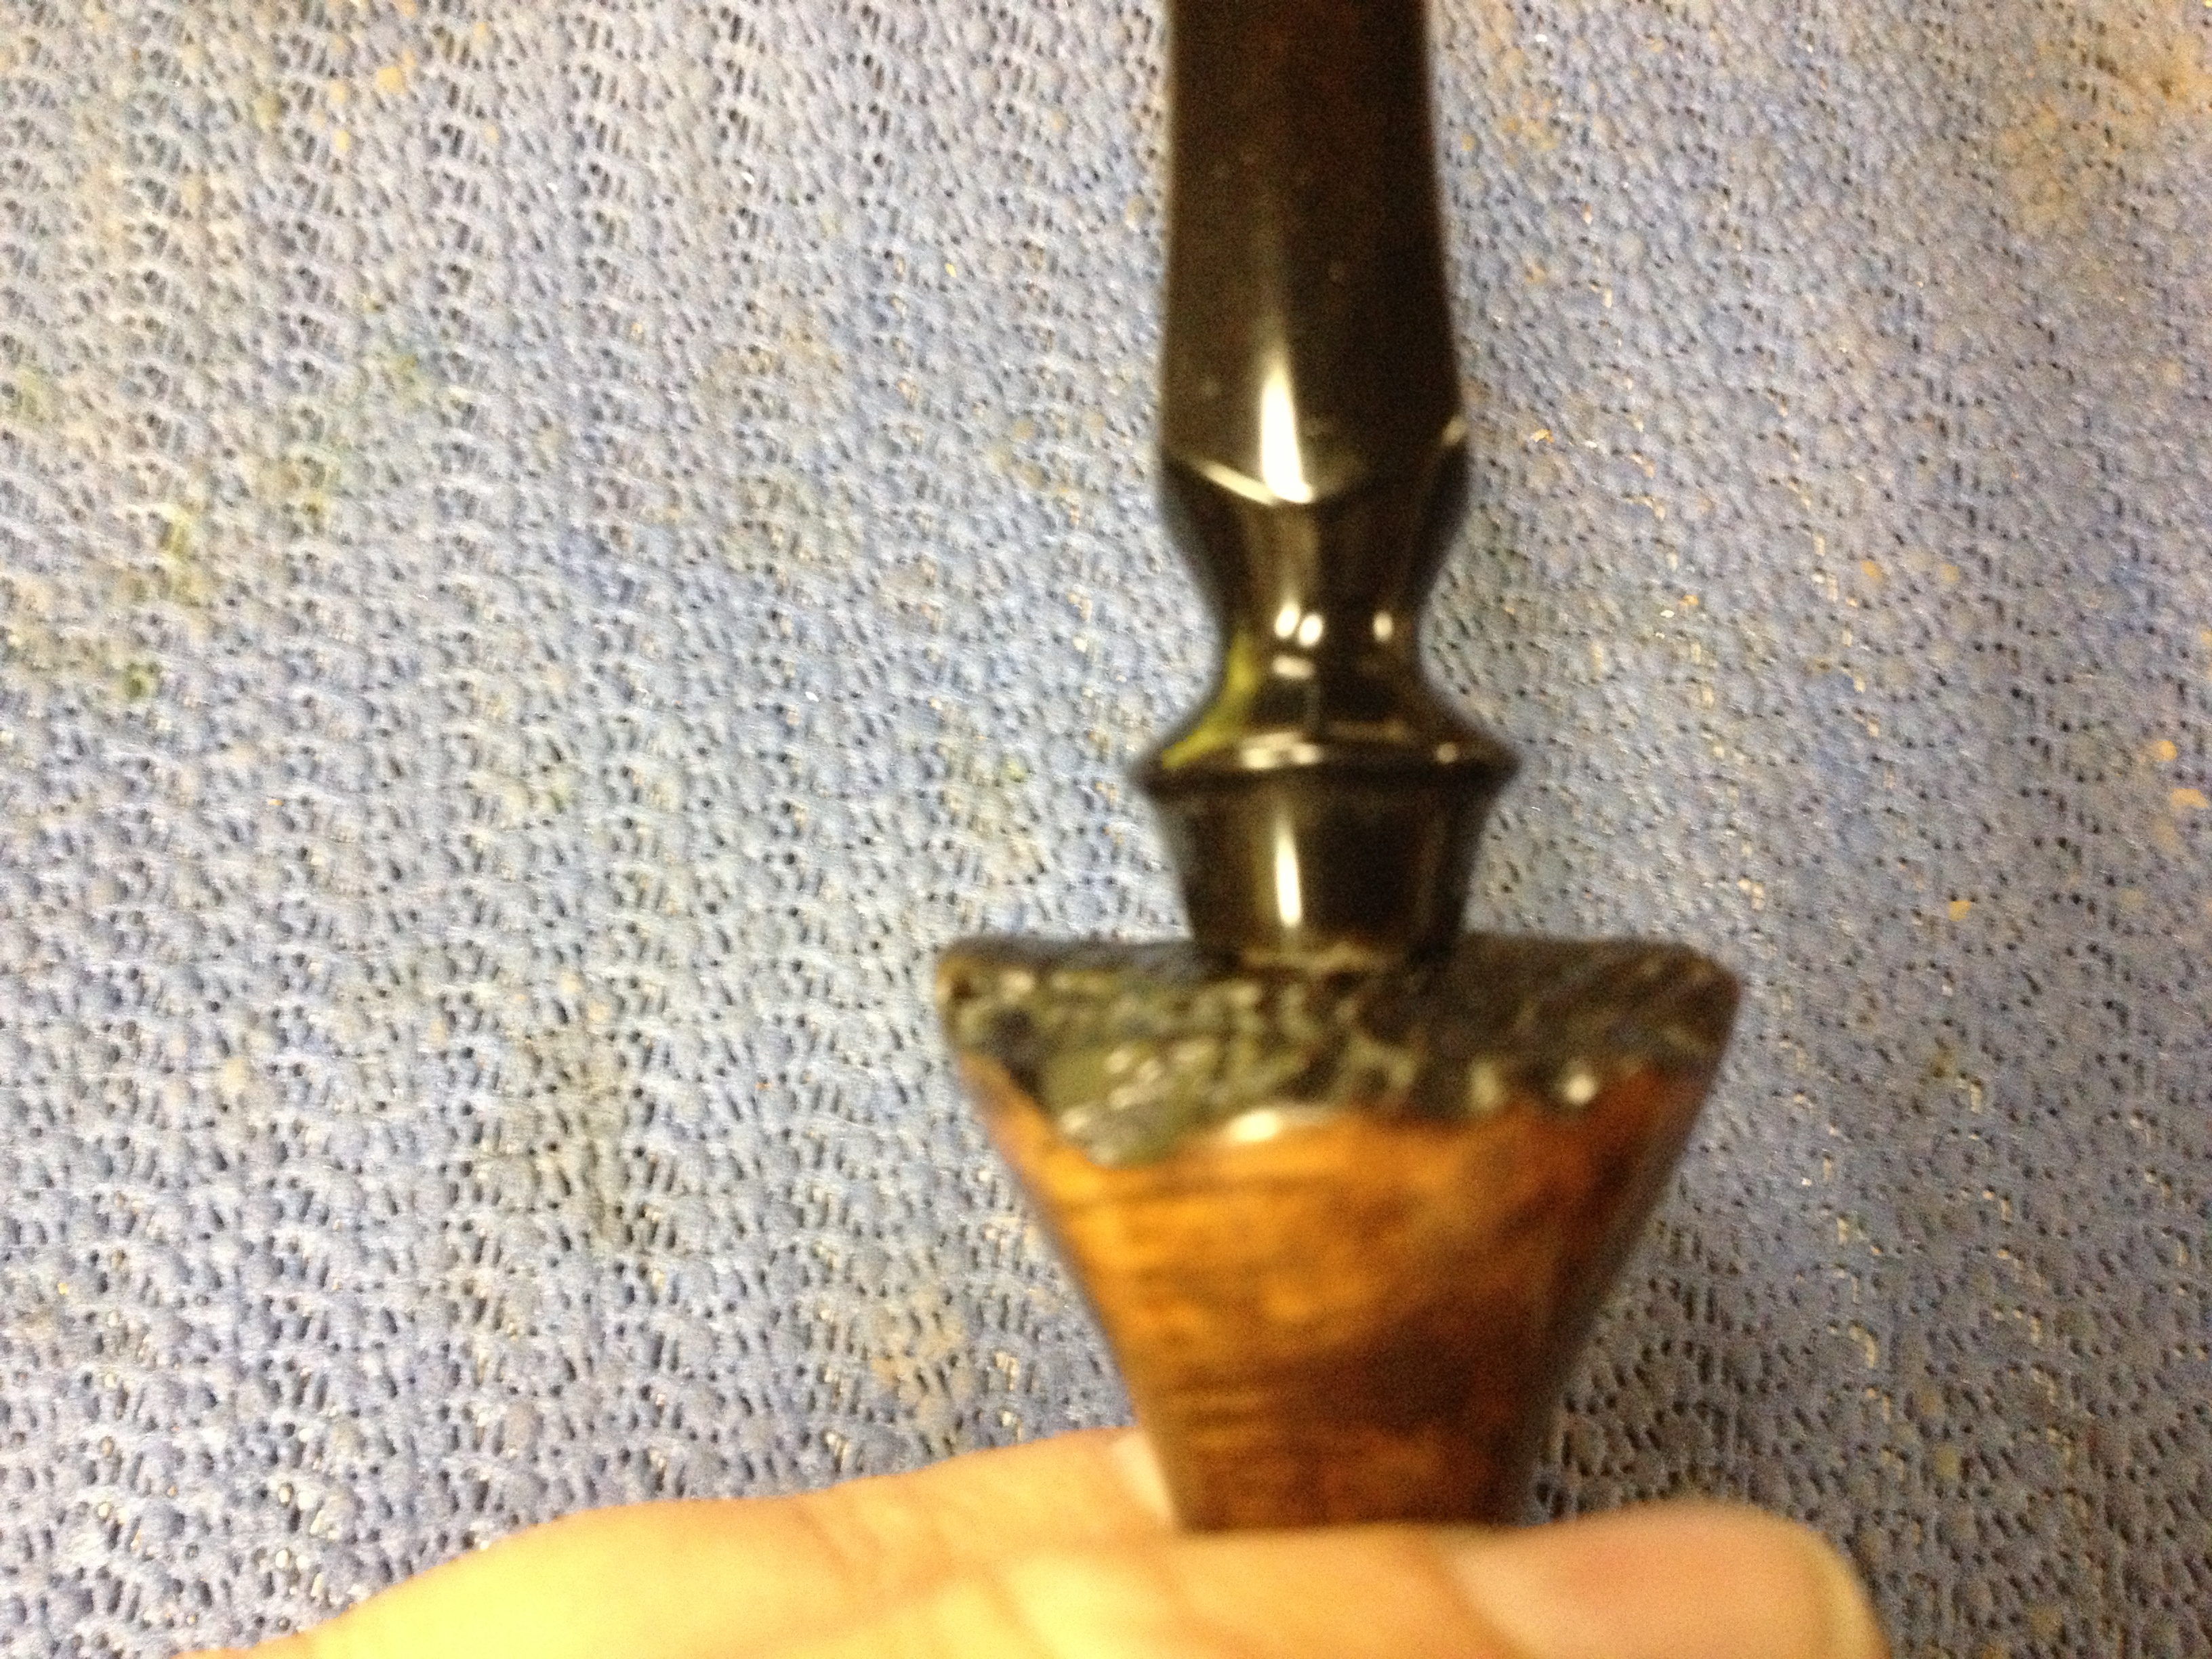
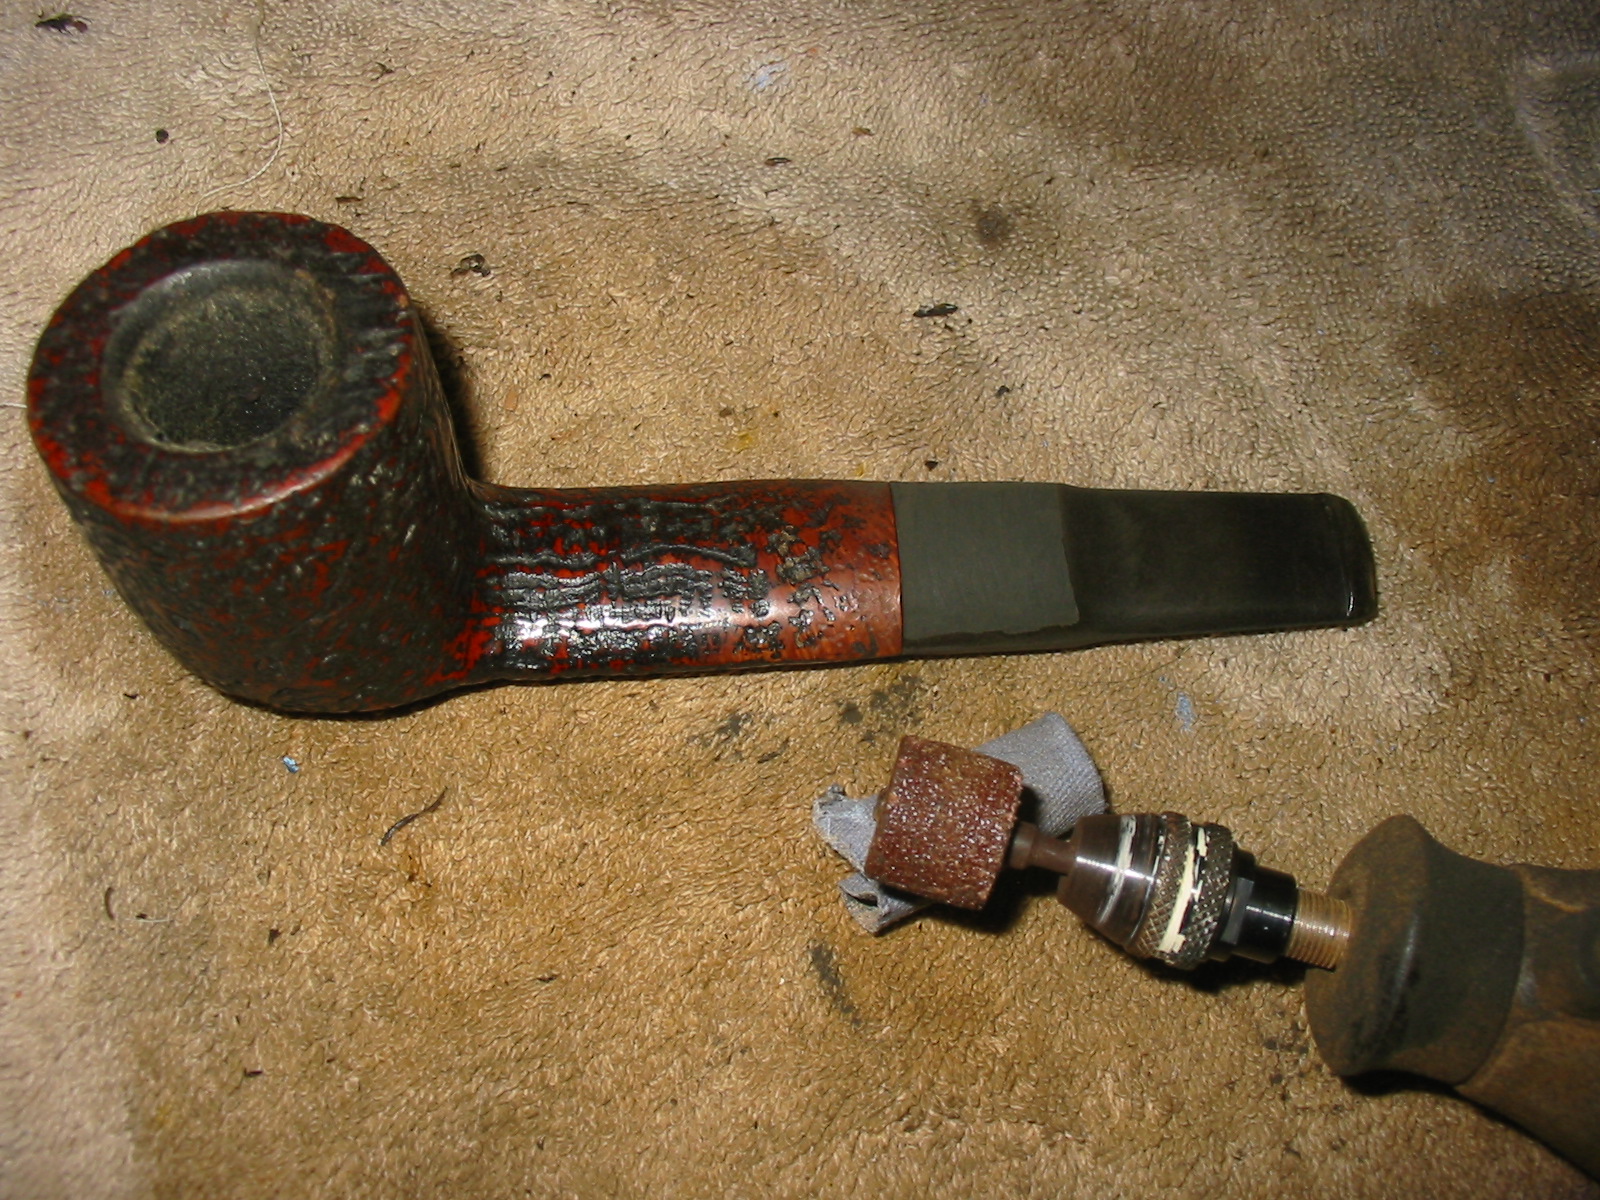
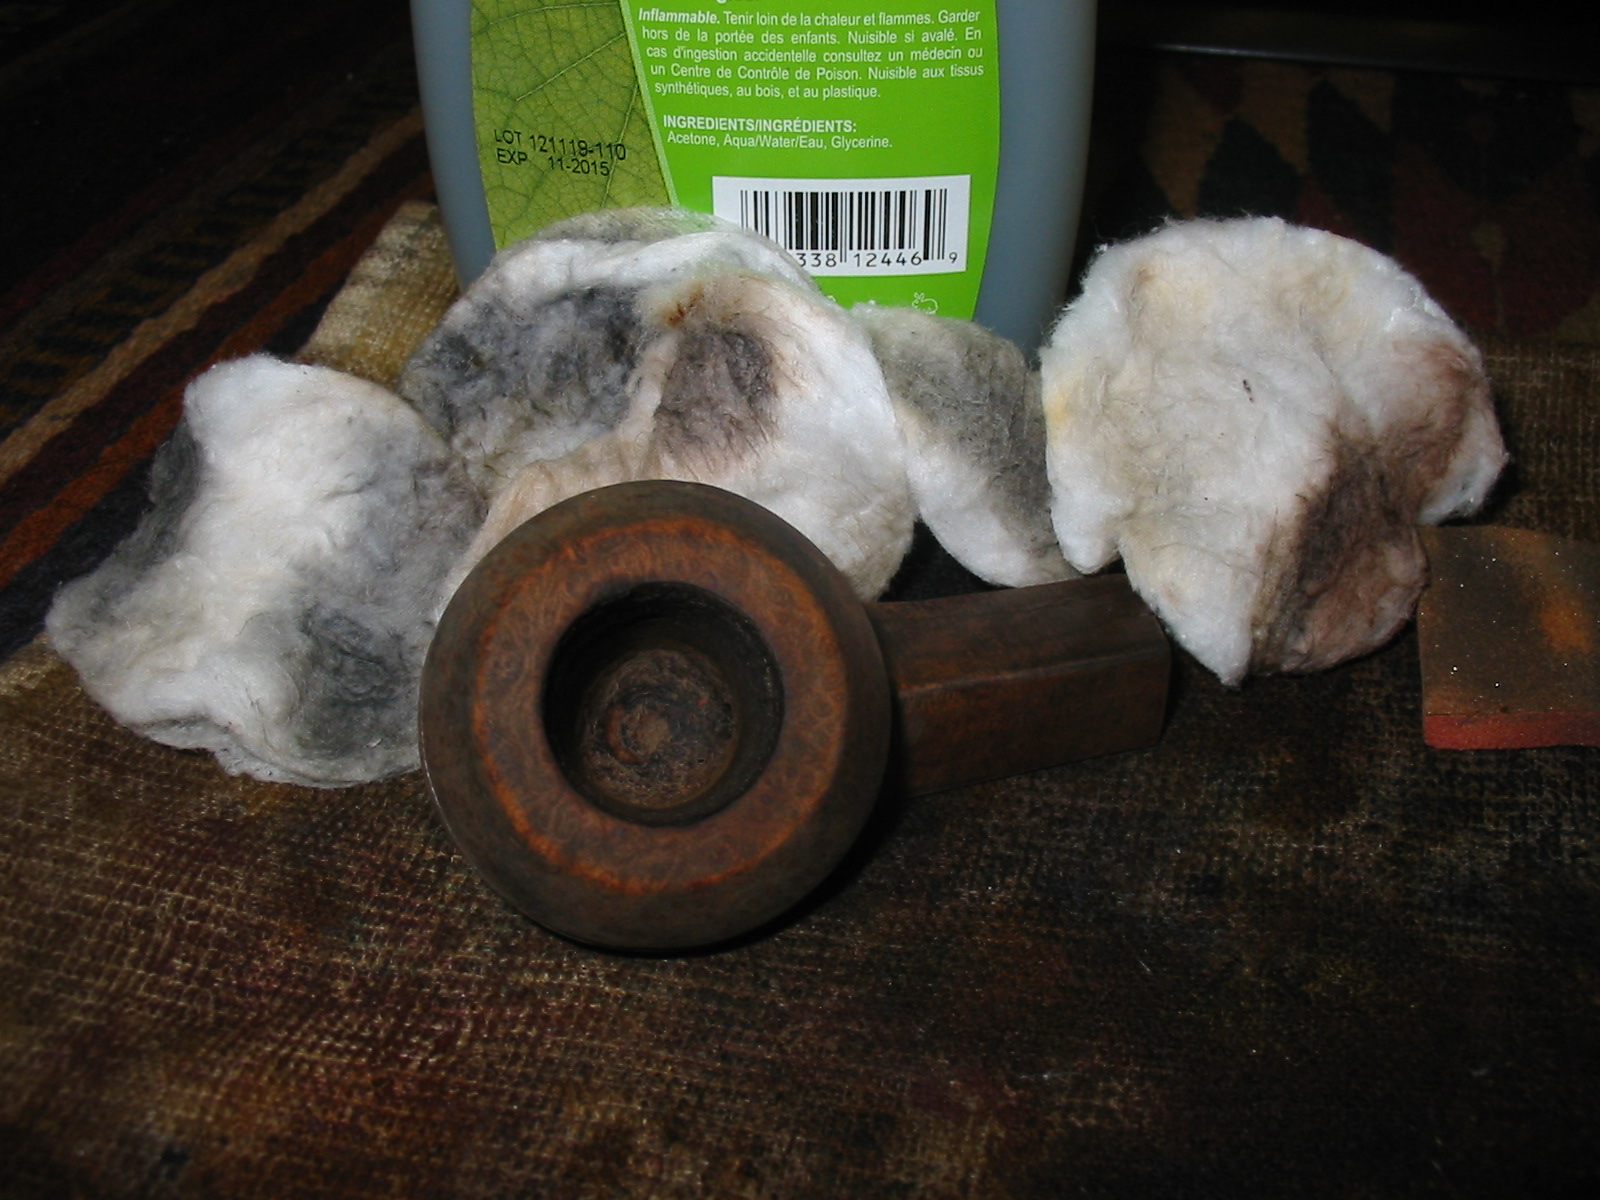
Once I removed the clamp the crack was sealed and the shank was returned to its original shape. I sanded the shank area to remove the excess superglue and the briar dust that was on the surface. The photo below gives a clear picture of the end view of the repaired shank and how it was squared up.

IMG_1614

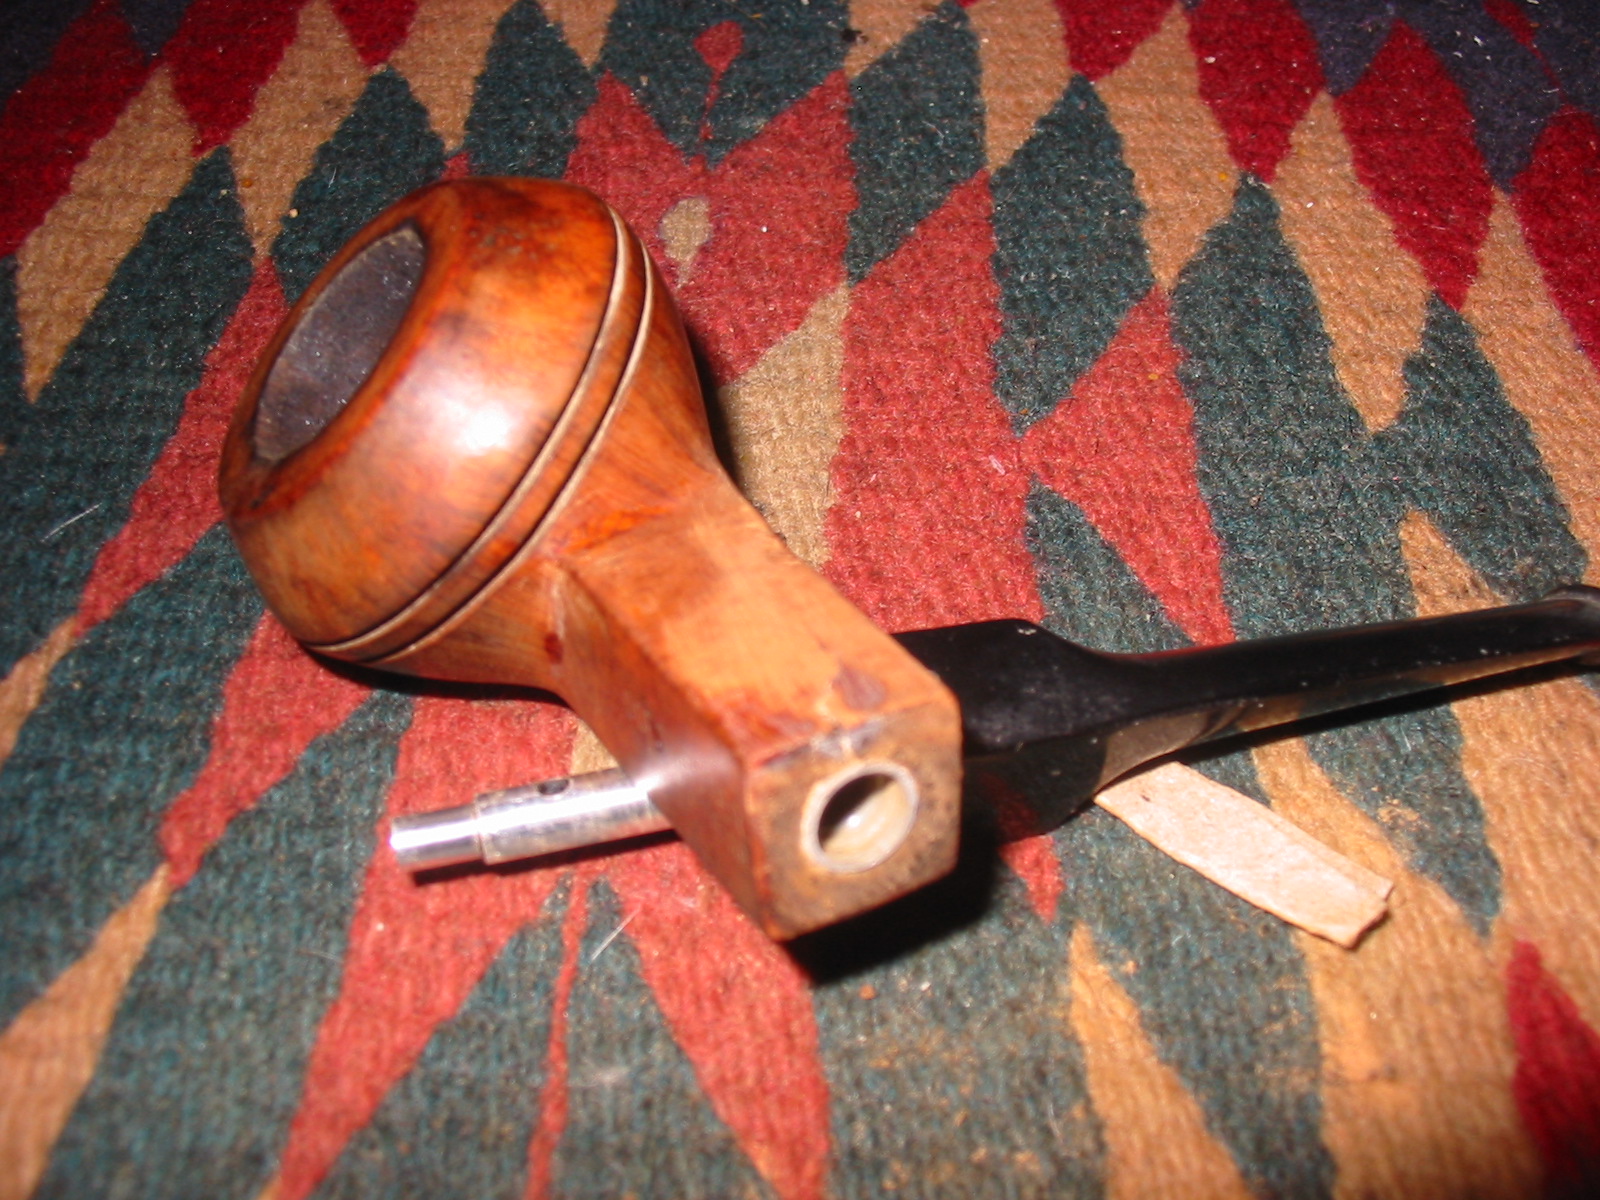
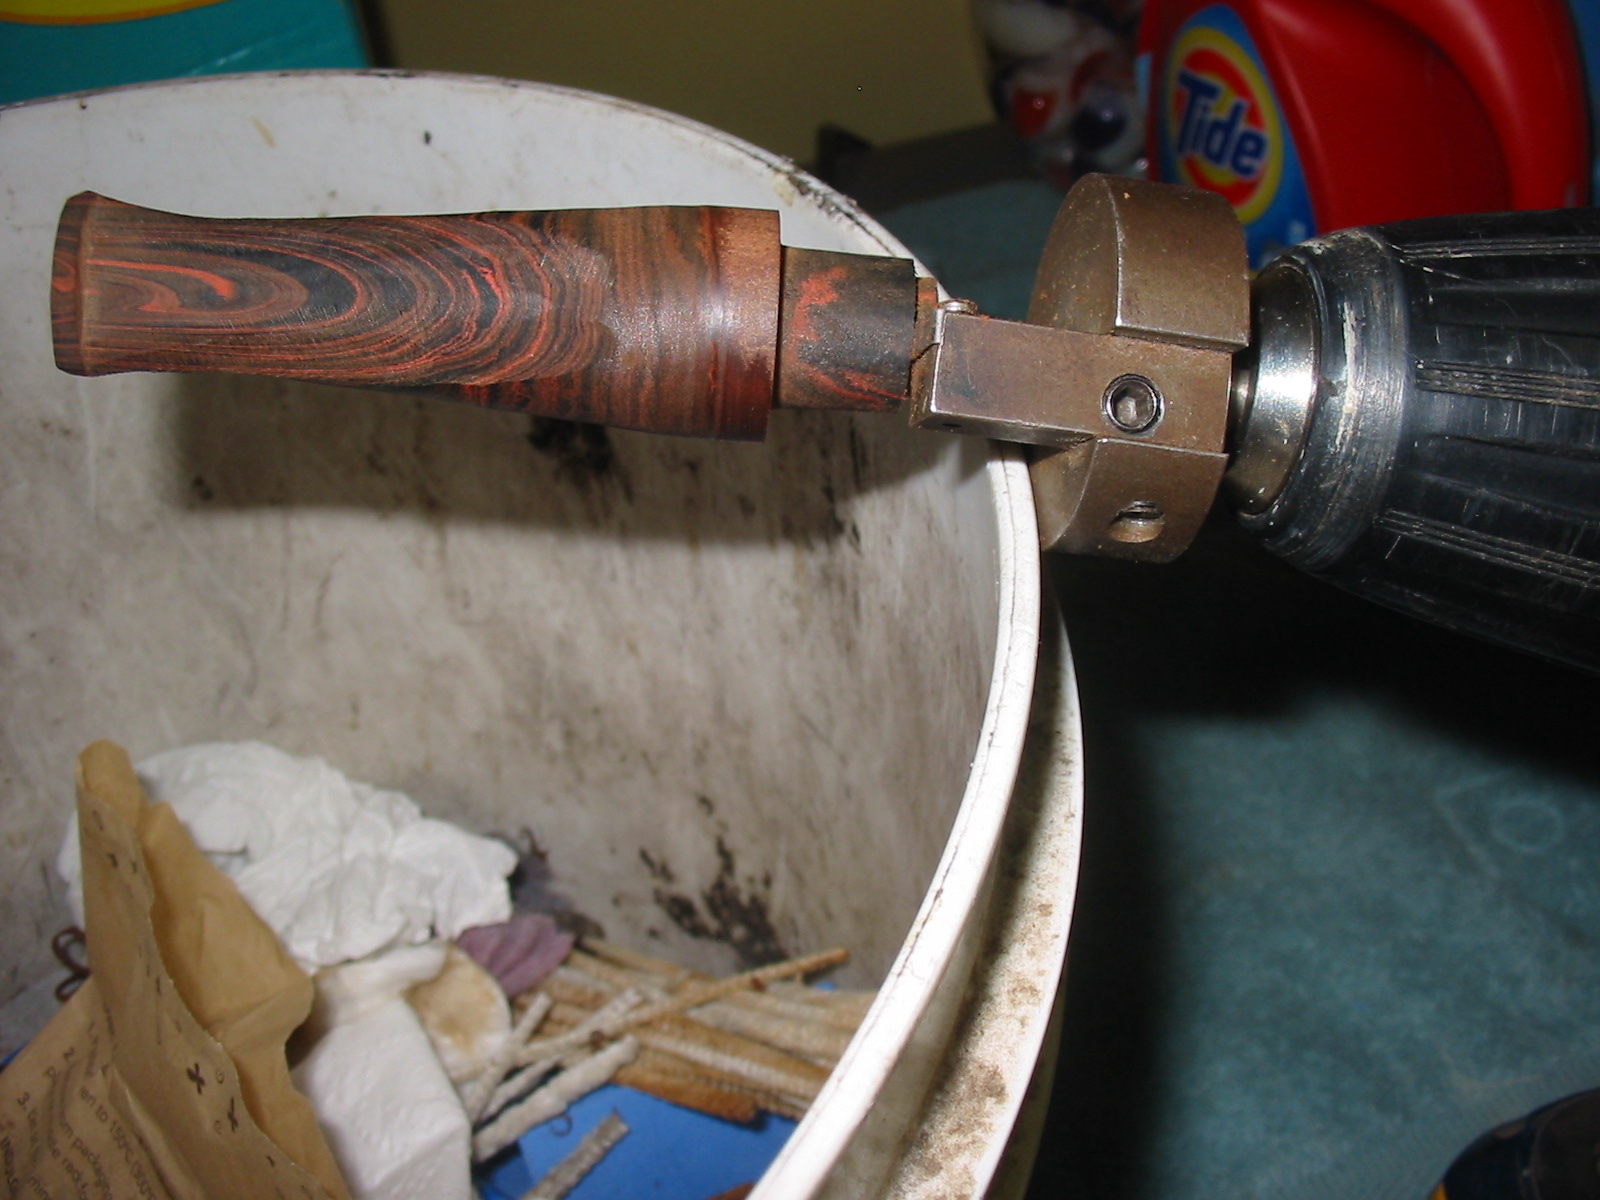
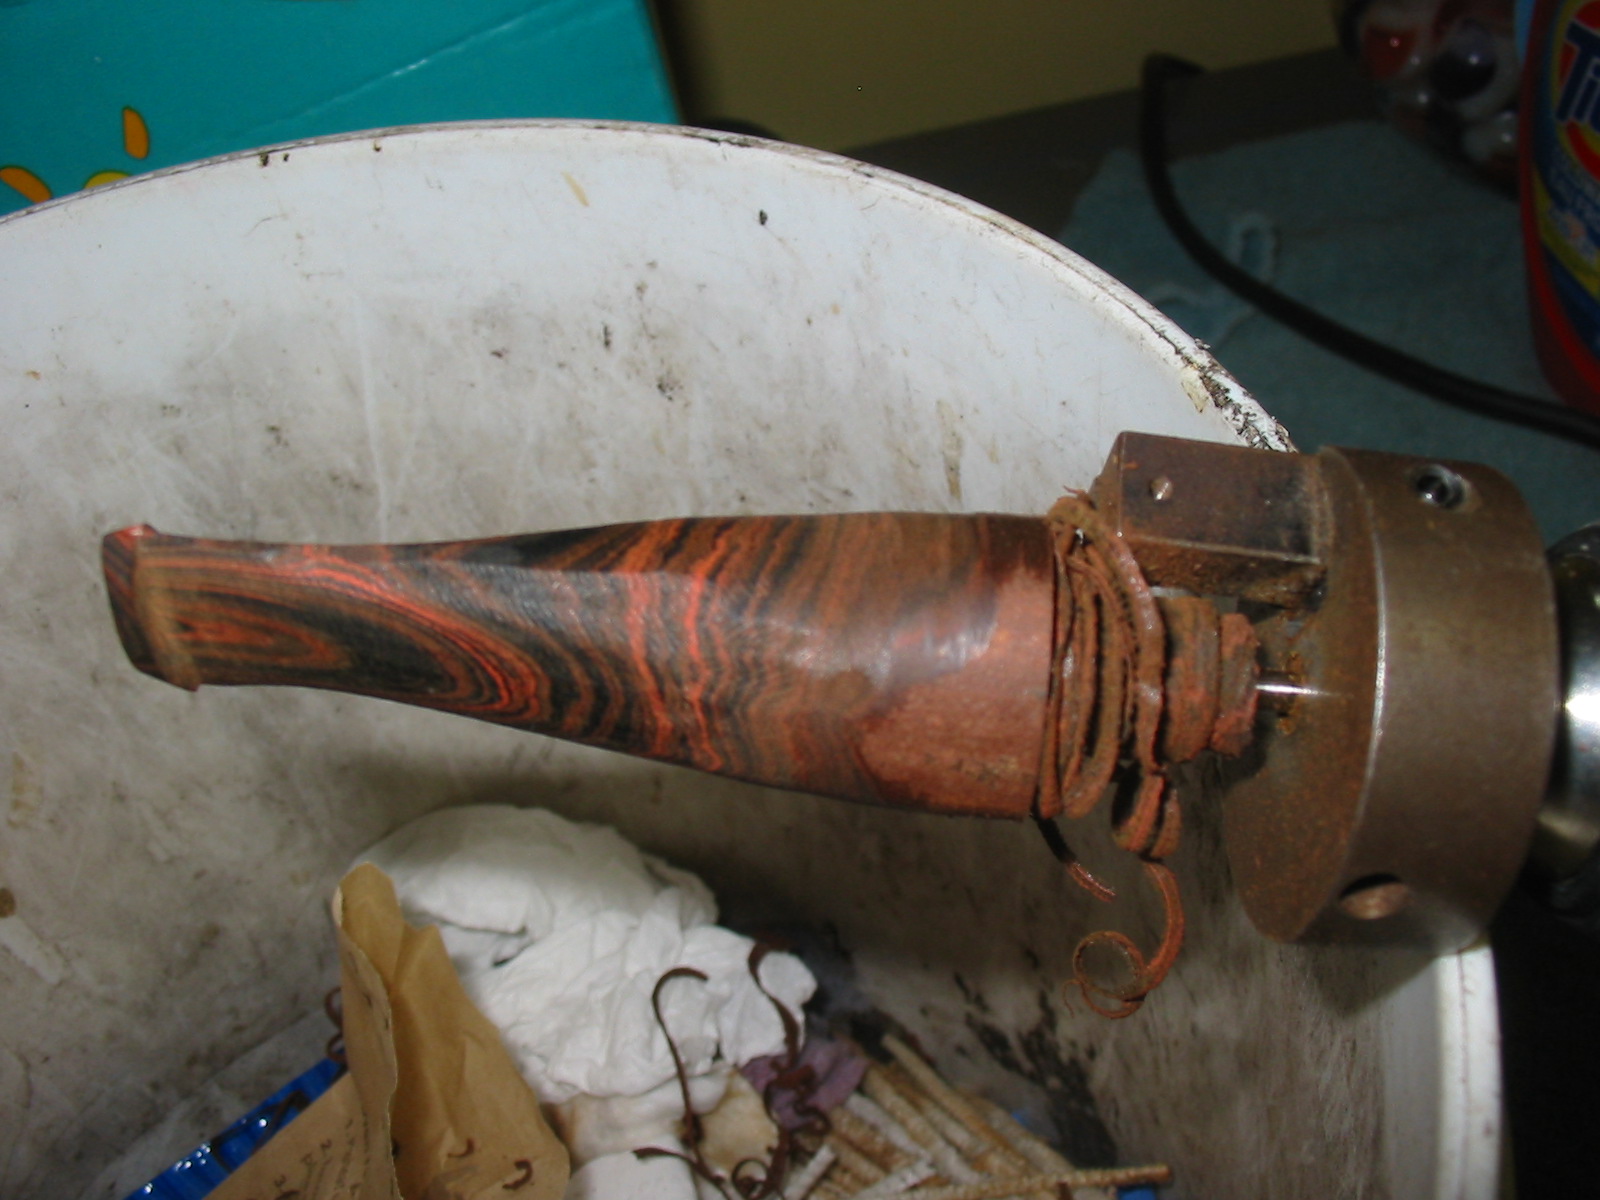
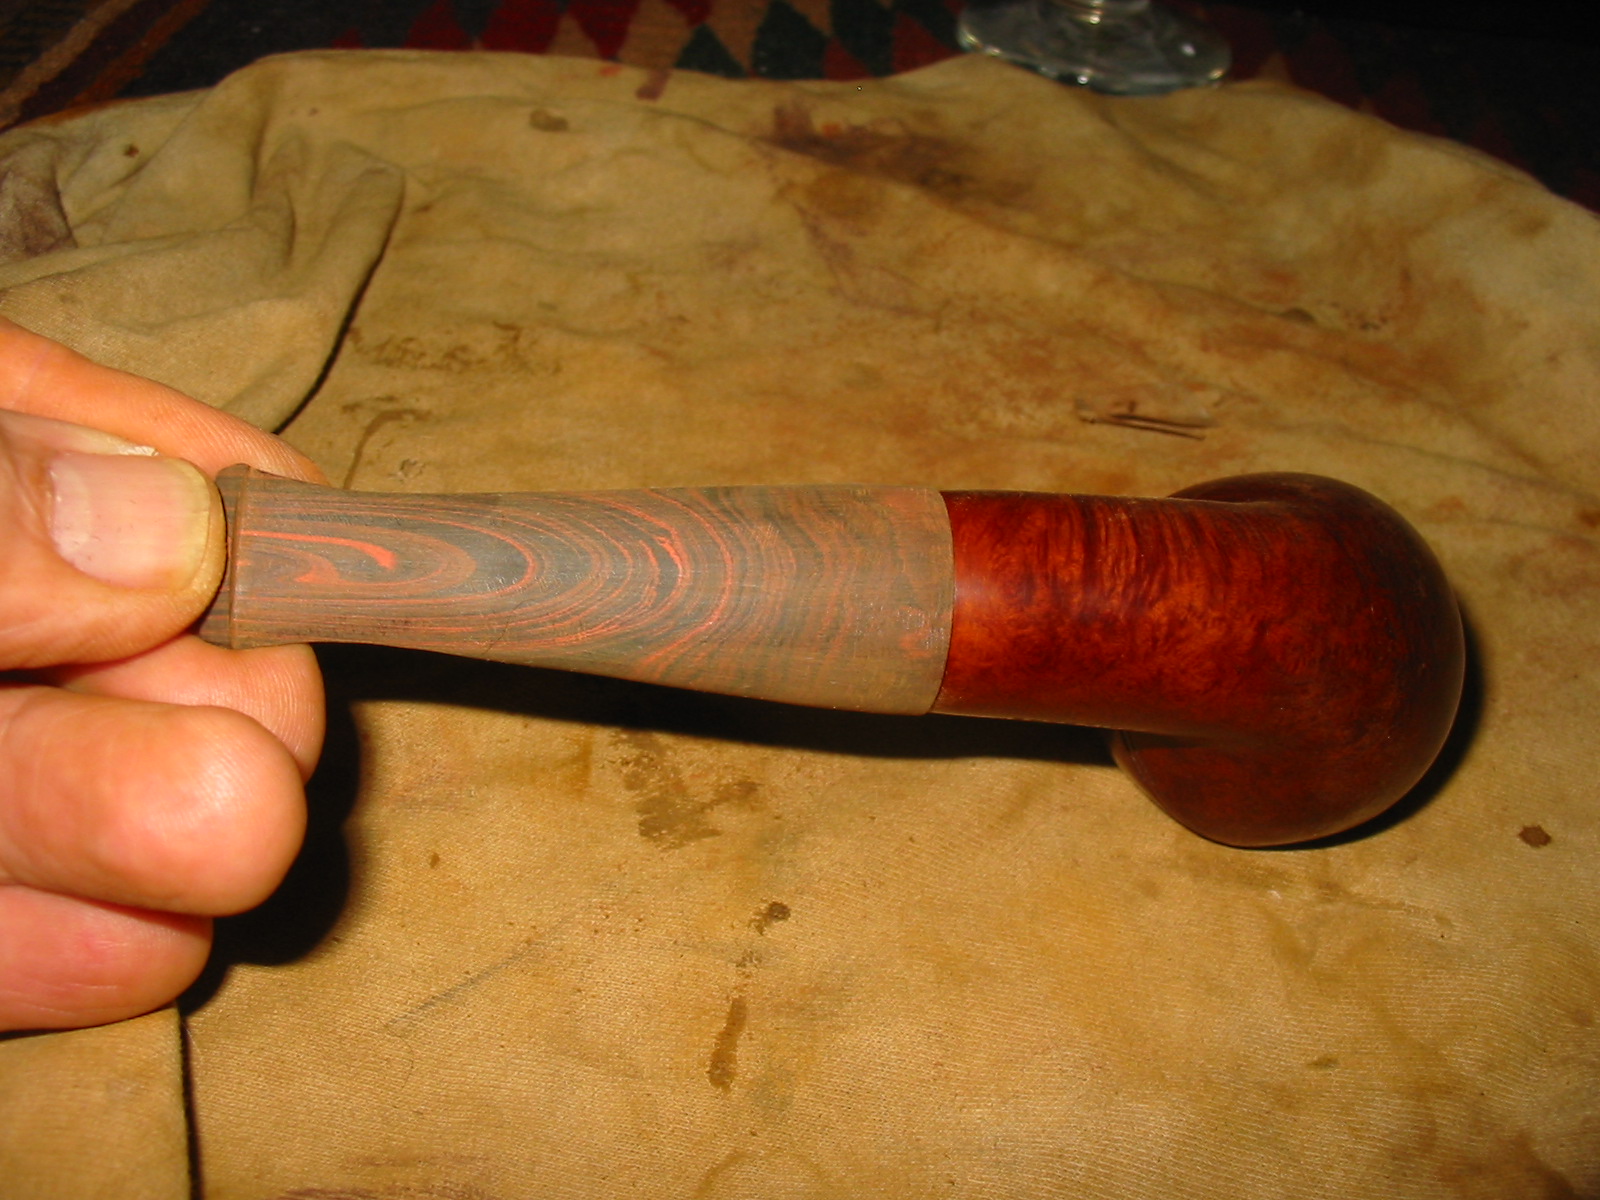
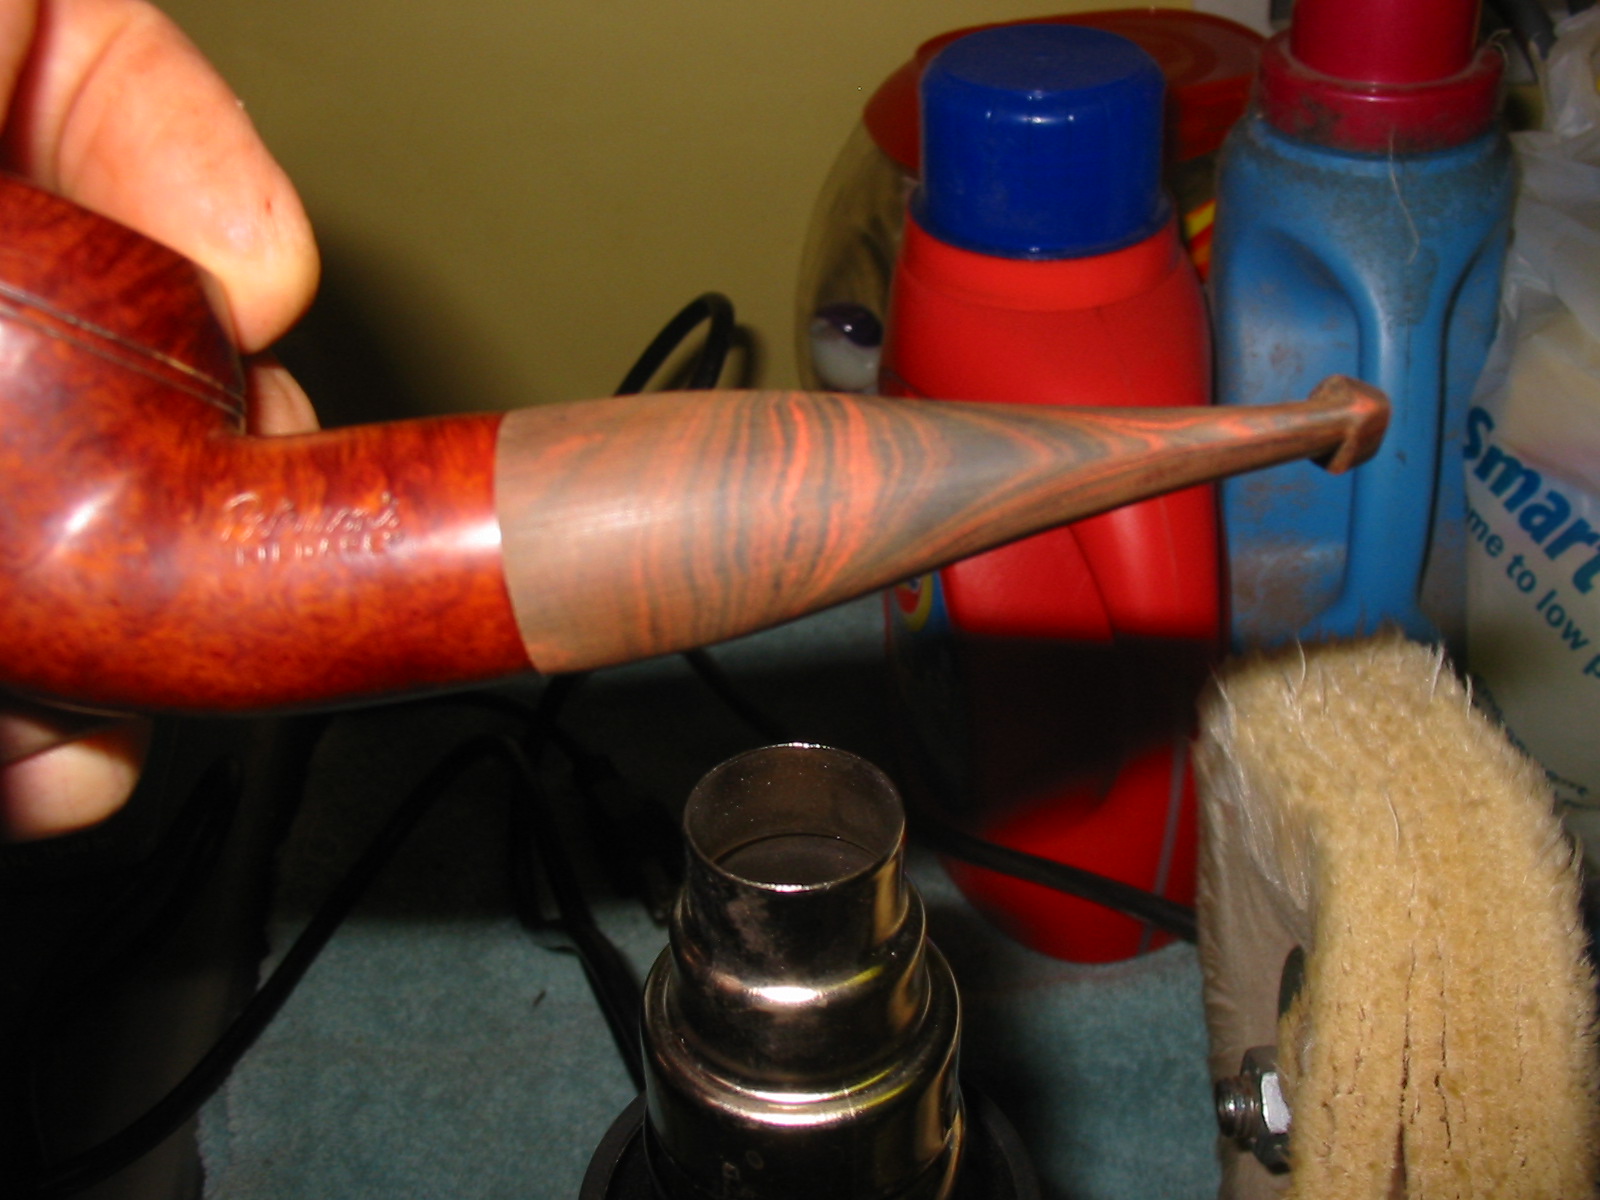
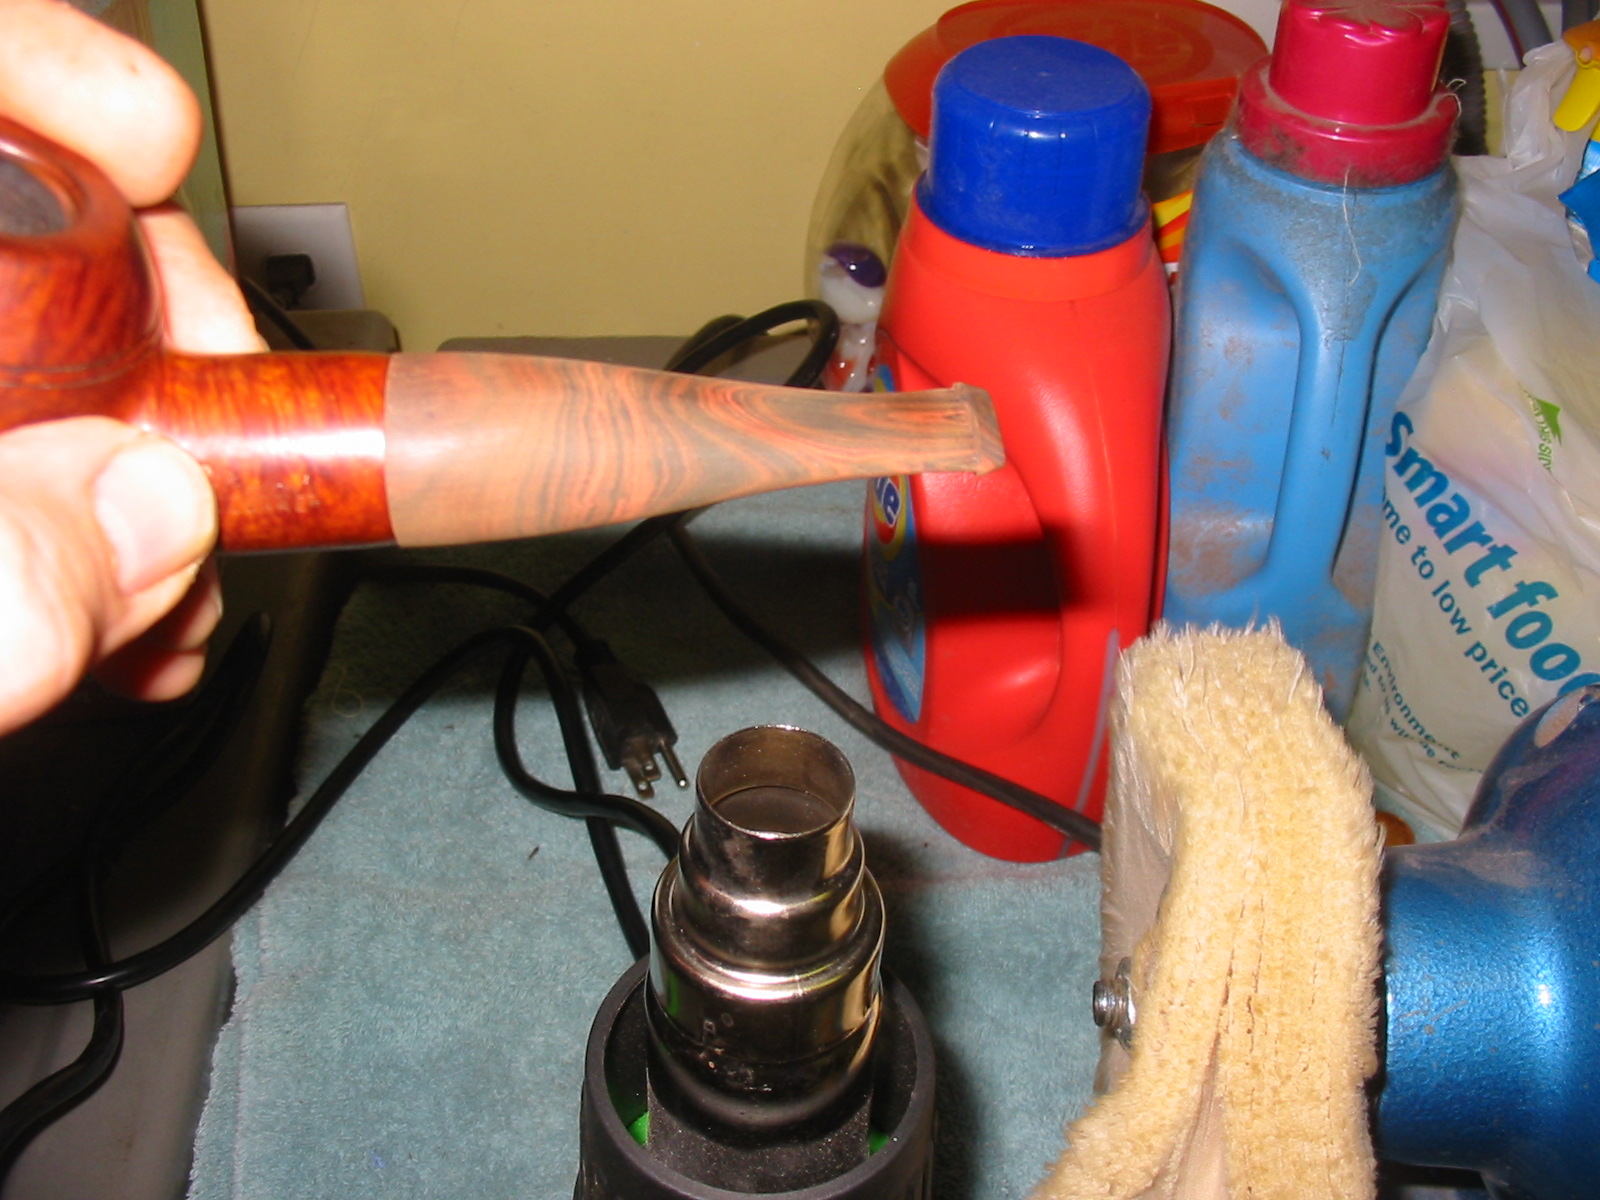
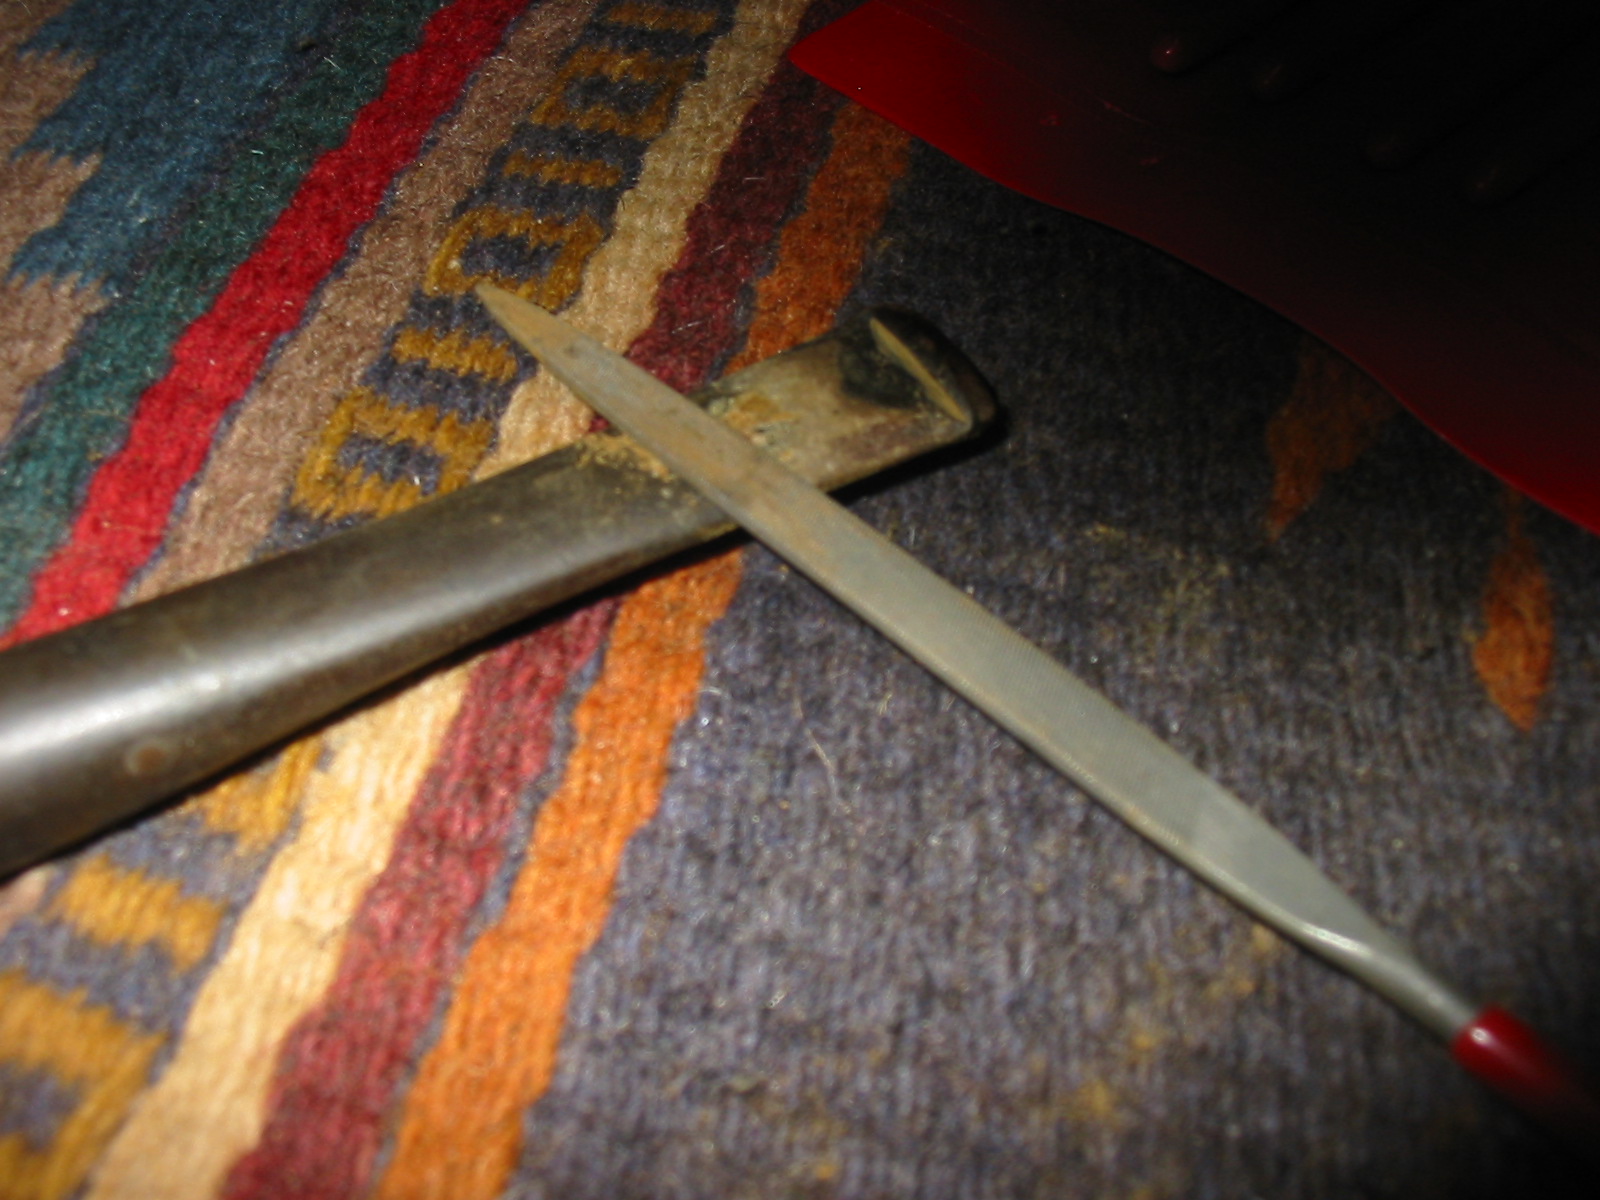
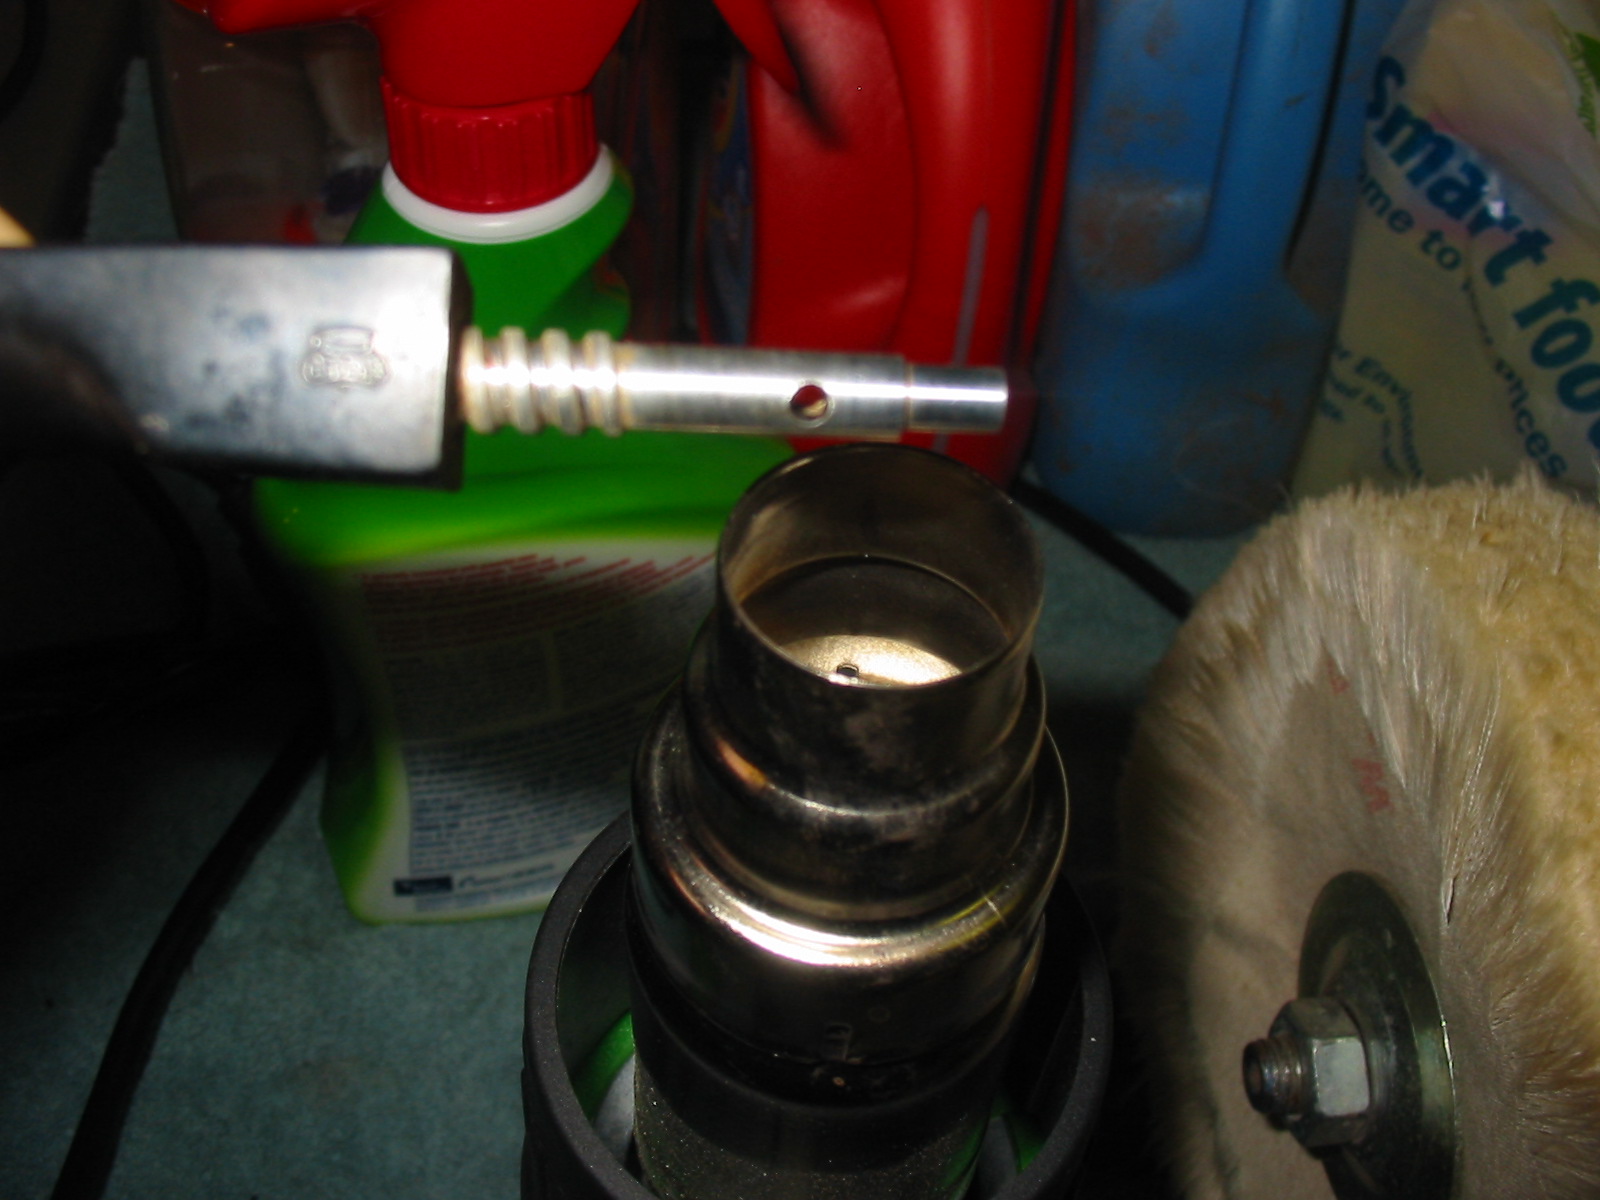
The next step in the repair process was correcting the overturned stem. I removed the stem and sanded the metal end of the mortise insert flush with the shank end. Then I heated the tenon over a heat gun and when it was warm screwed it on to the shank and turned it until it lined up well with the shank.

IMG_1615

IMG_1616

IMG_1617

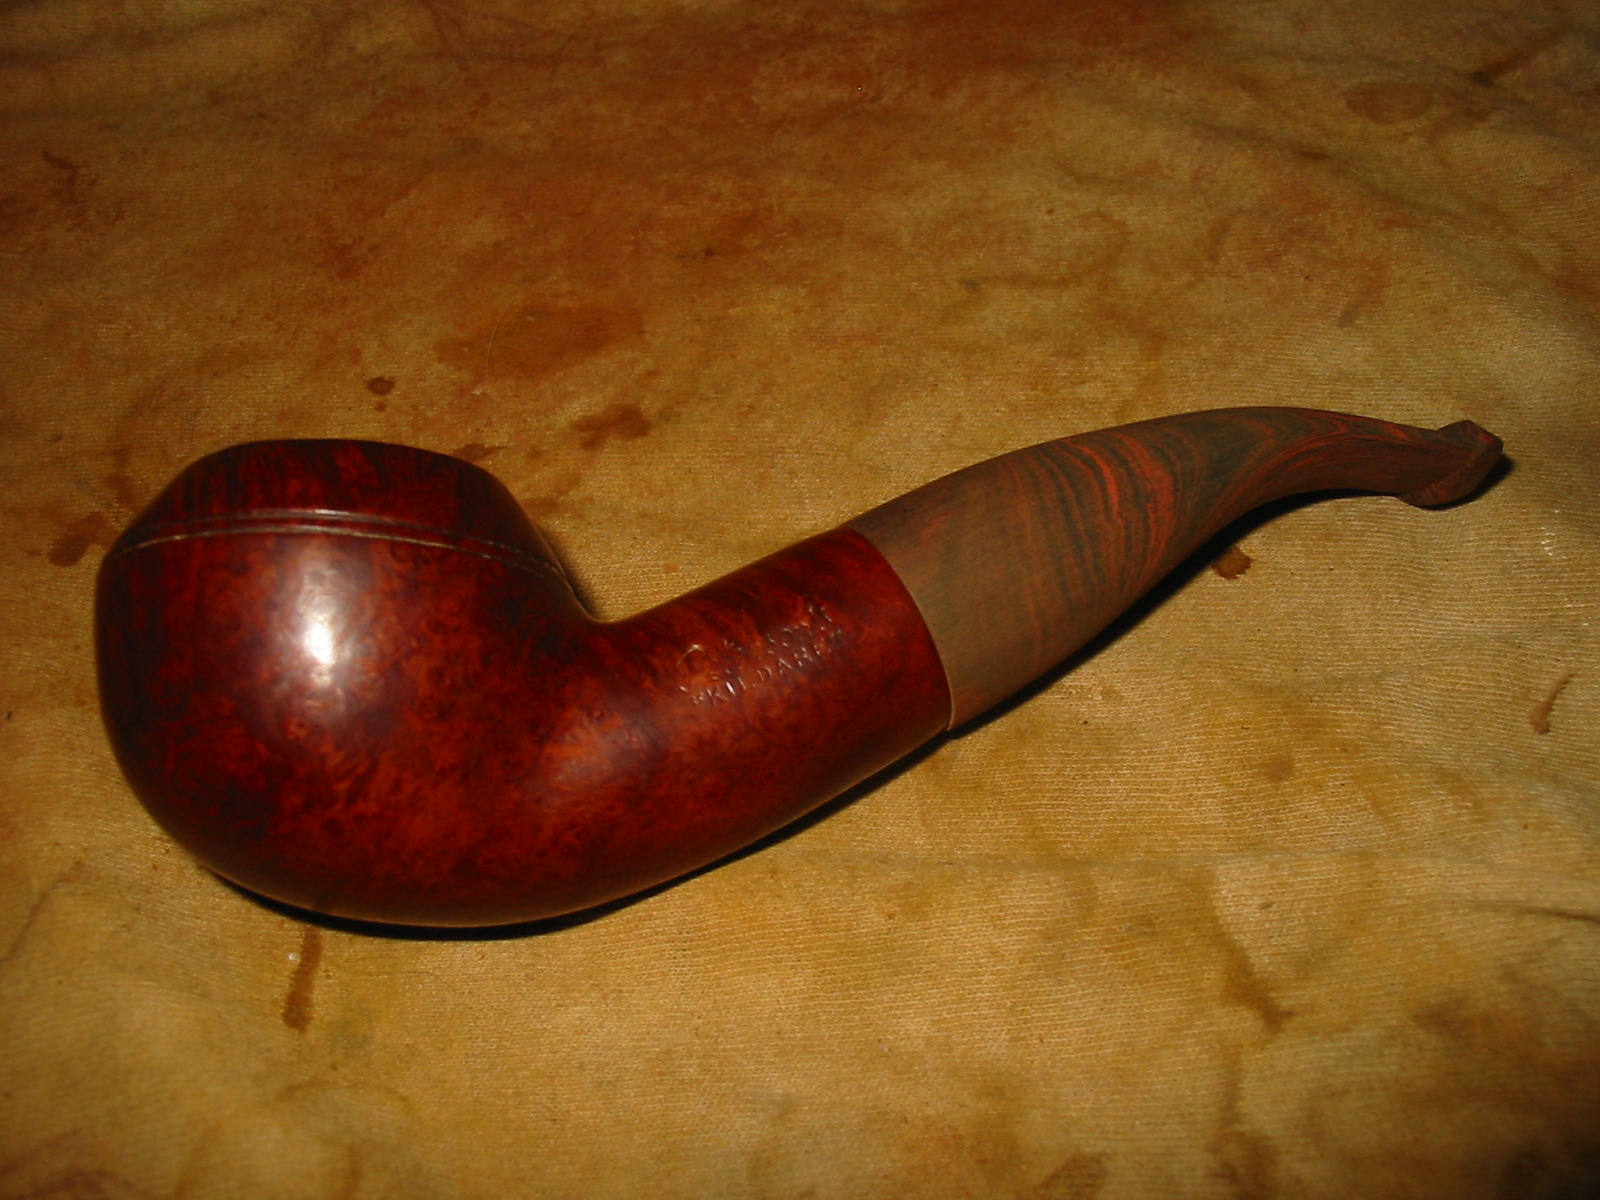
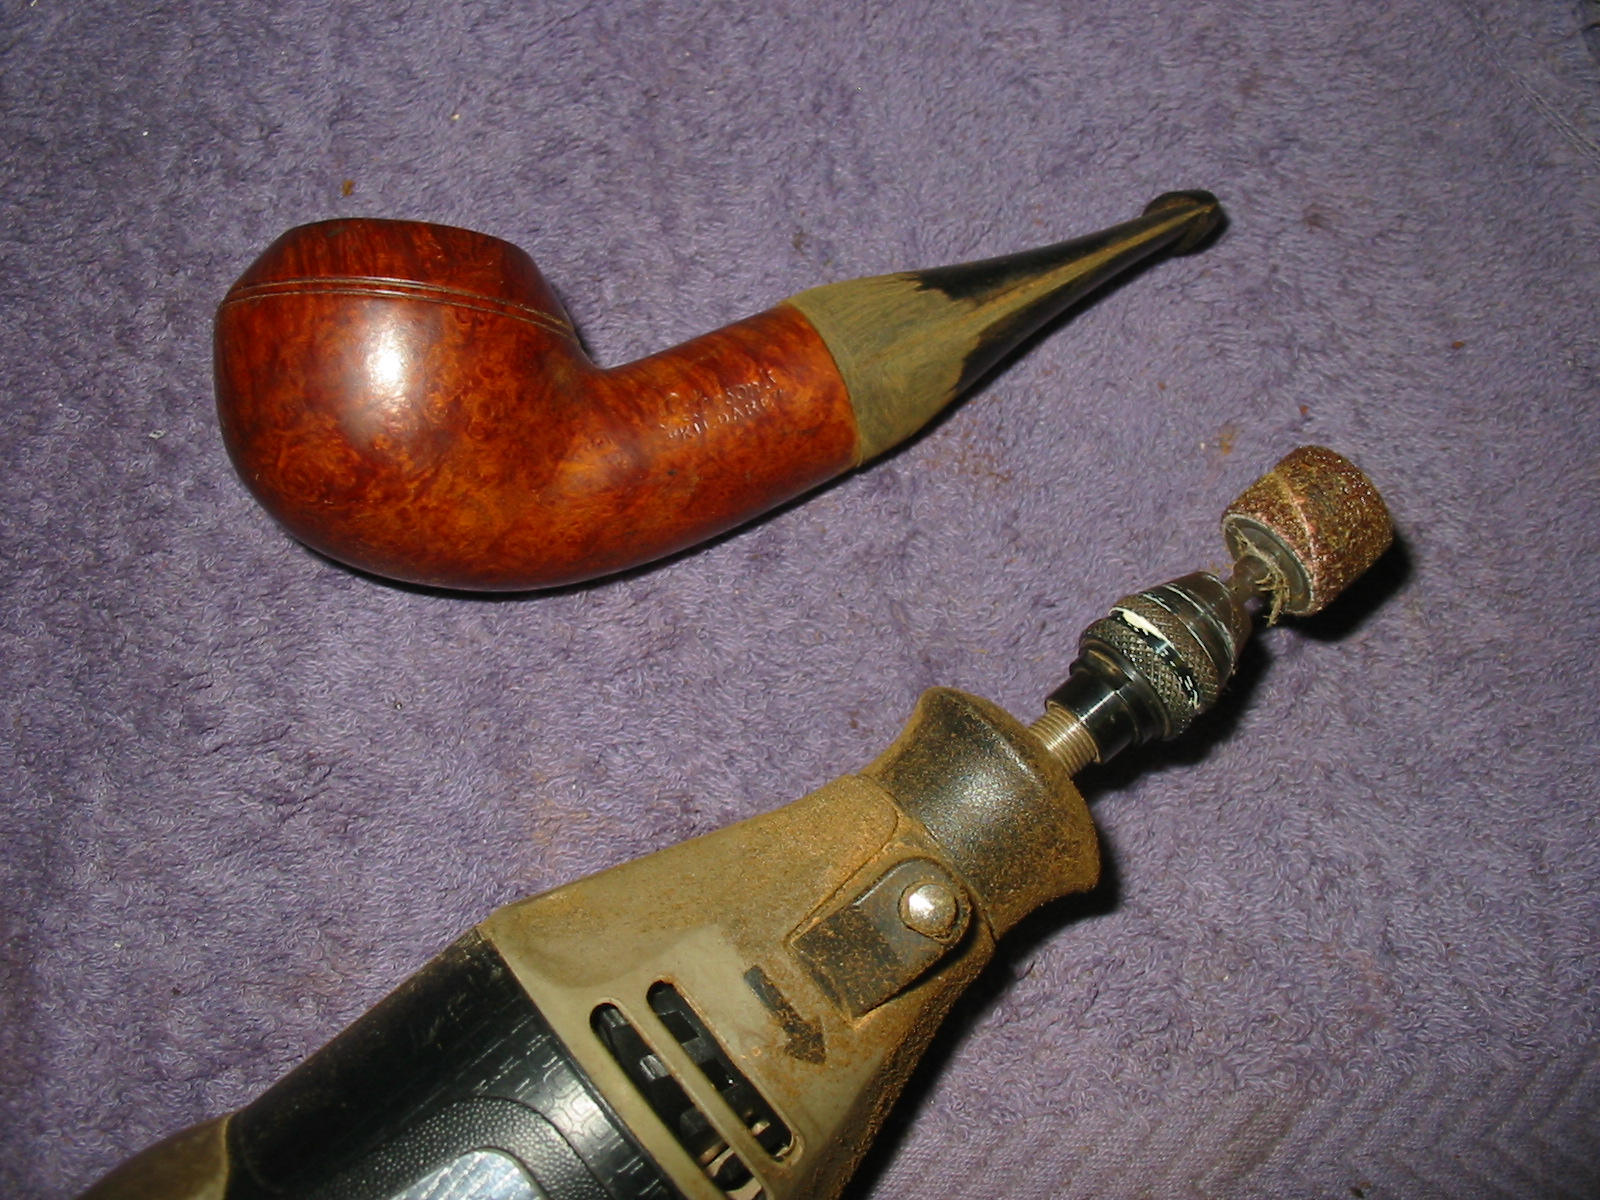
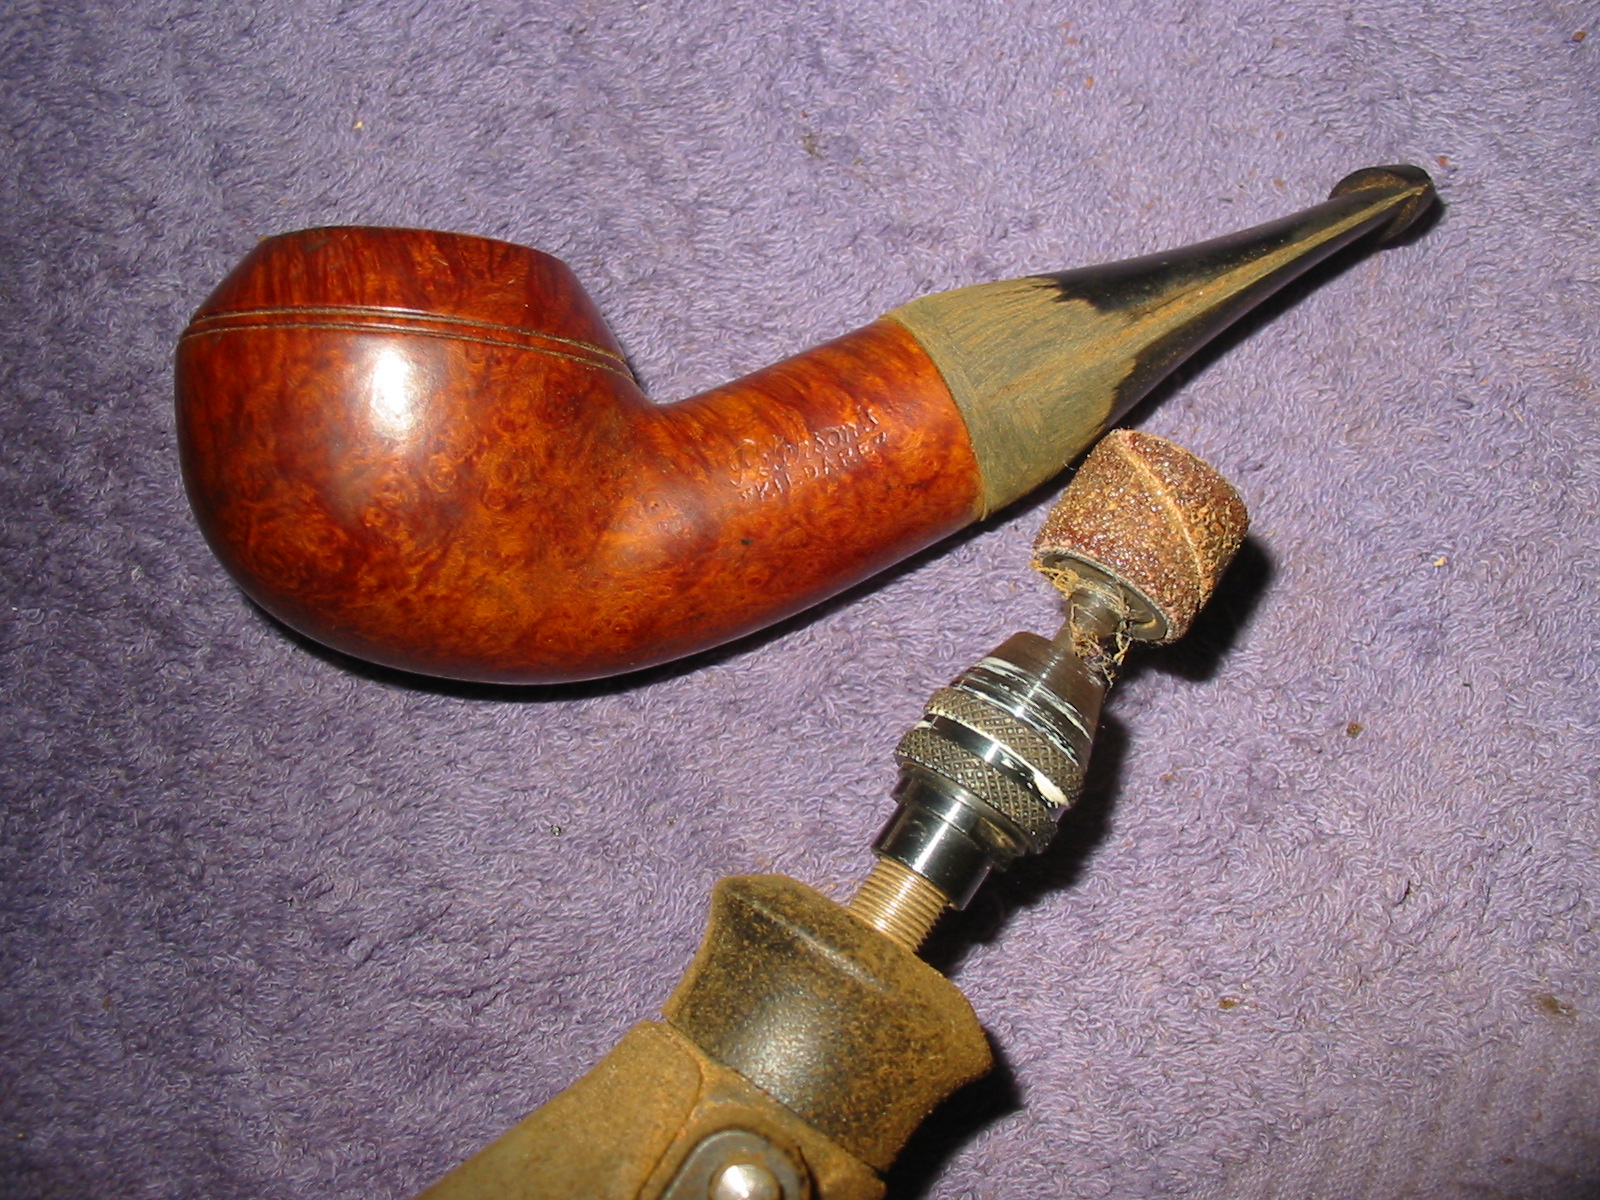
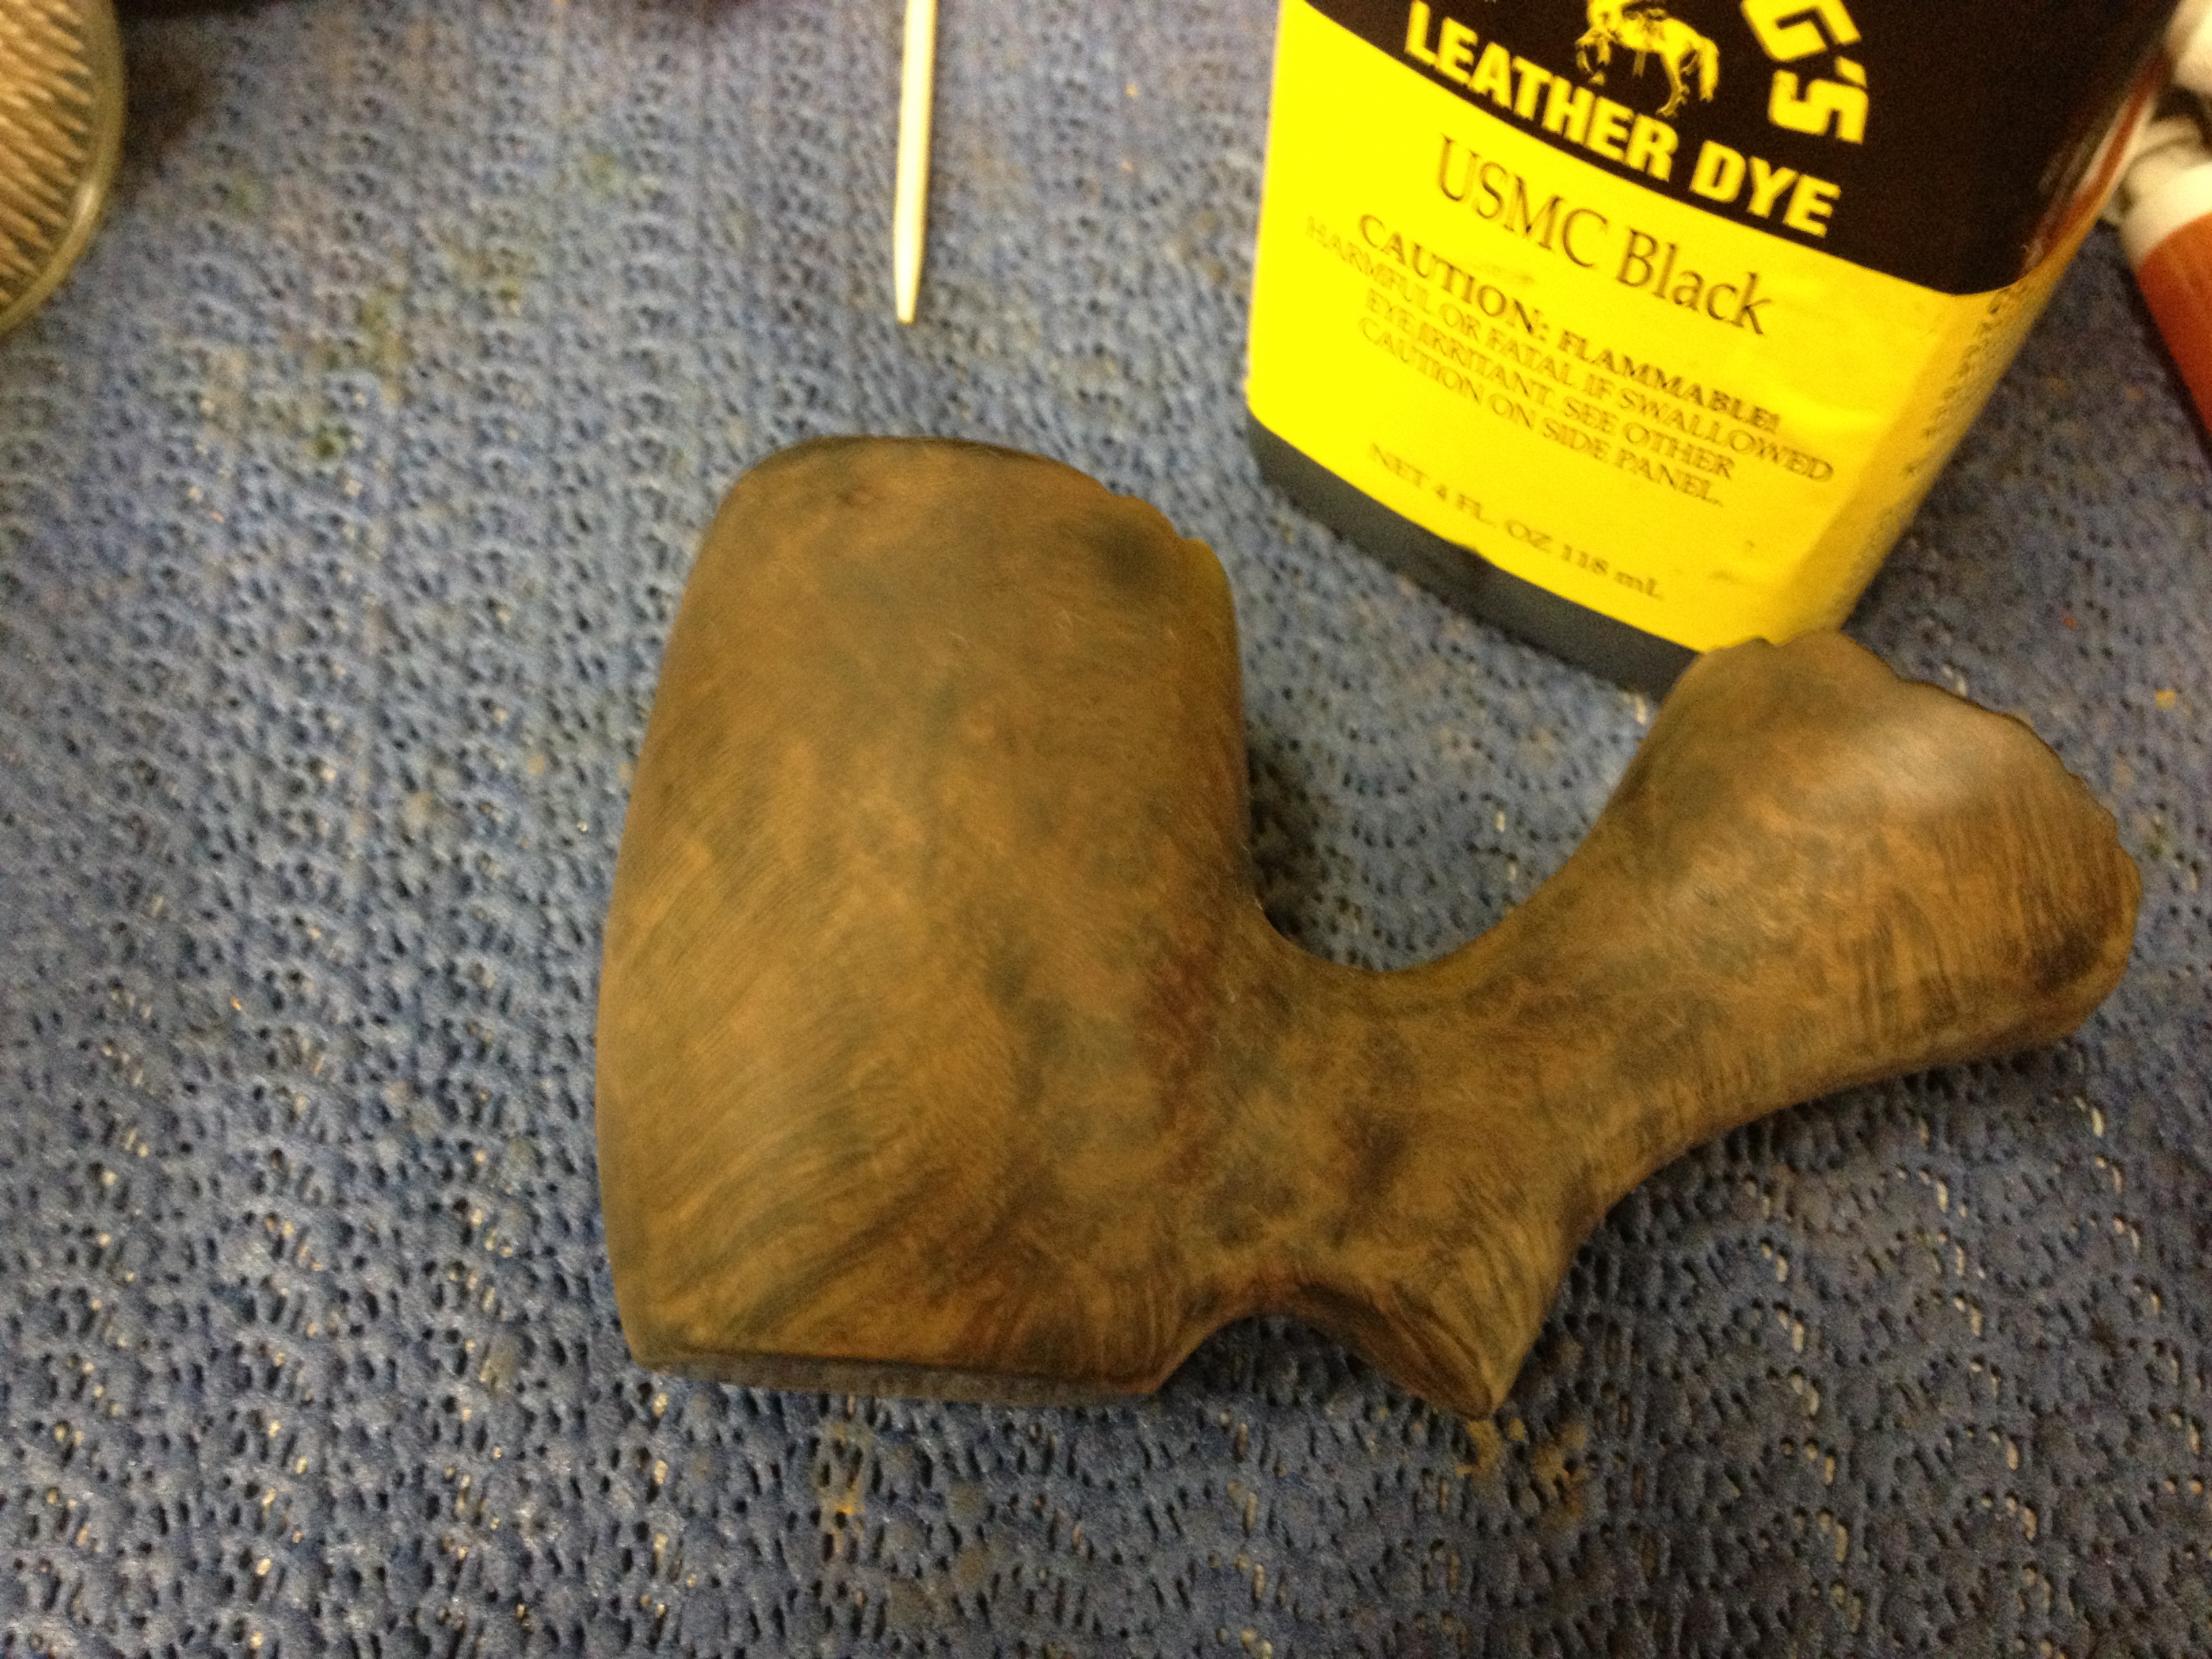
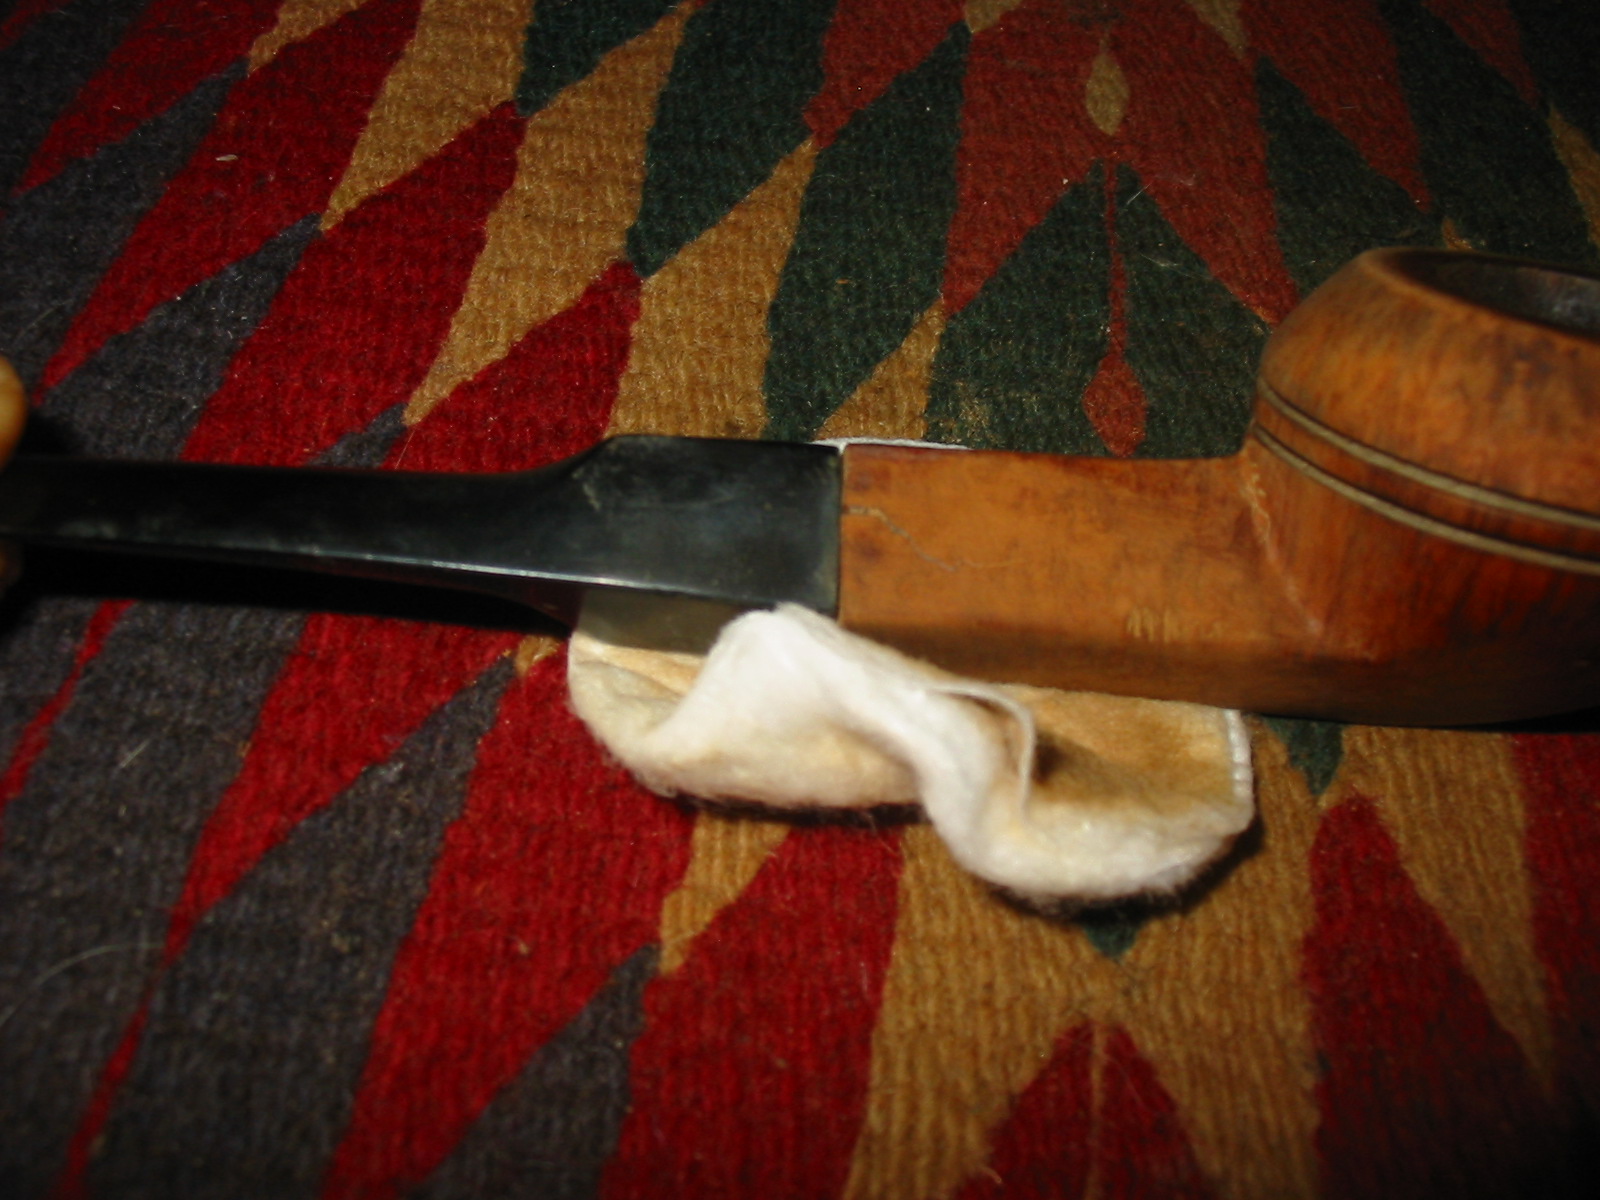
With the stem and shank aligned I sanded the shank area to clean up the damage to the right side where the marks were from someone’s pliers. I also sanded the stem shank junction and the repaired crack with a sanding block until the sides were all smooth in their transition from stem to shank. I wiped it down with an acetone wet cotton pad to remove the sanding dust and prepare it for staining. I used a black permanent marker to cover the fills in the bowl. I have found that when I follow the grain pattern with the marker before restaining the stain works well to mask the fills.

IMG_1618

IMG_1619

IMG_1620

IMG_1621

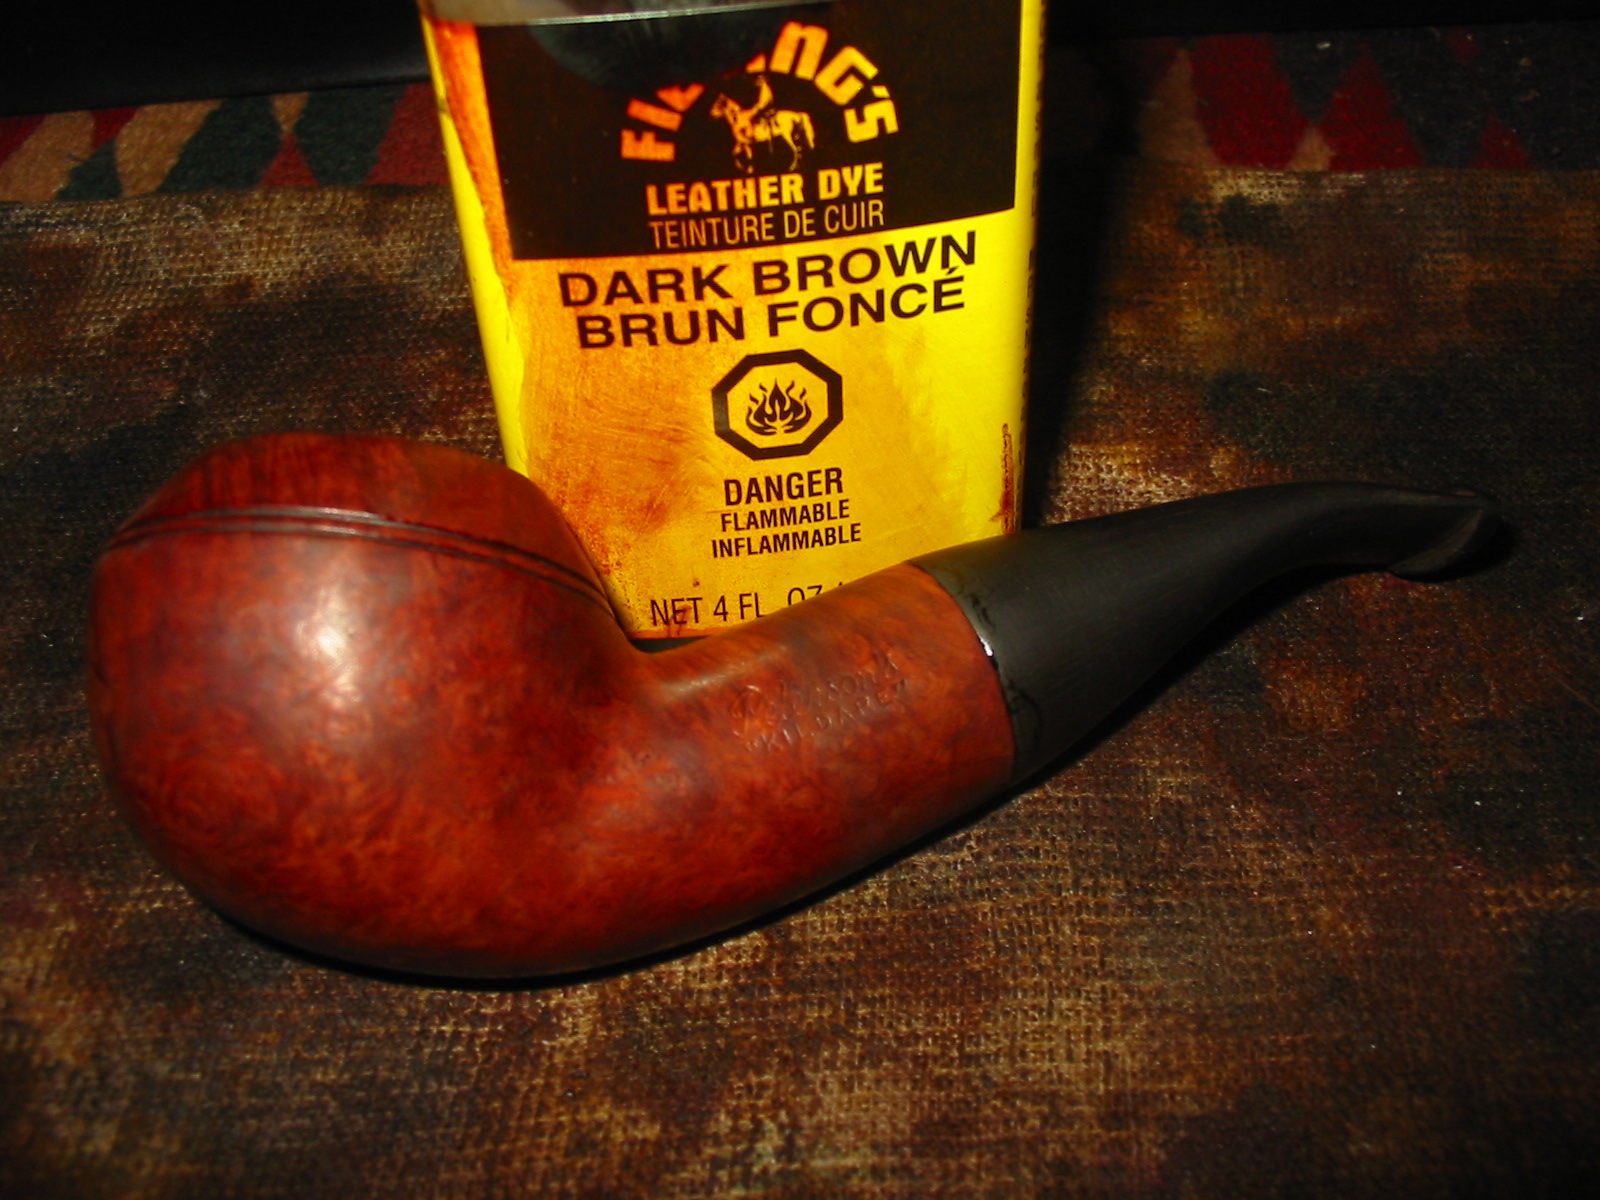
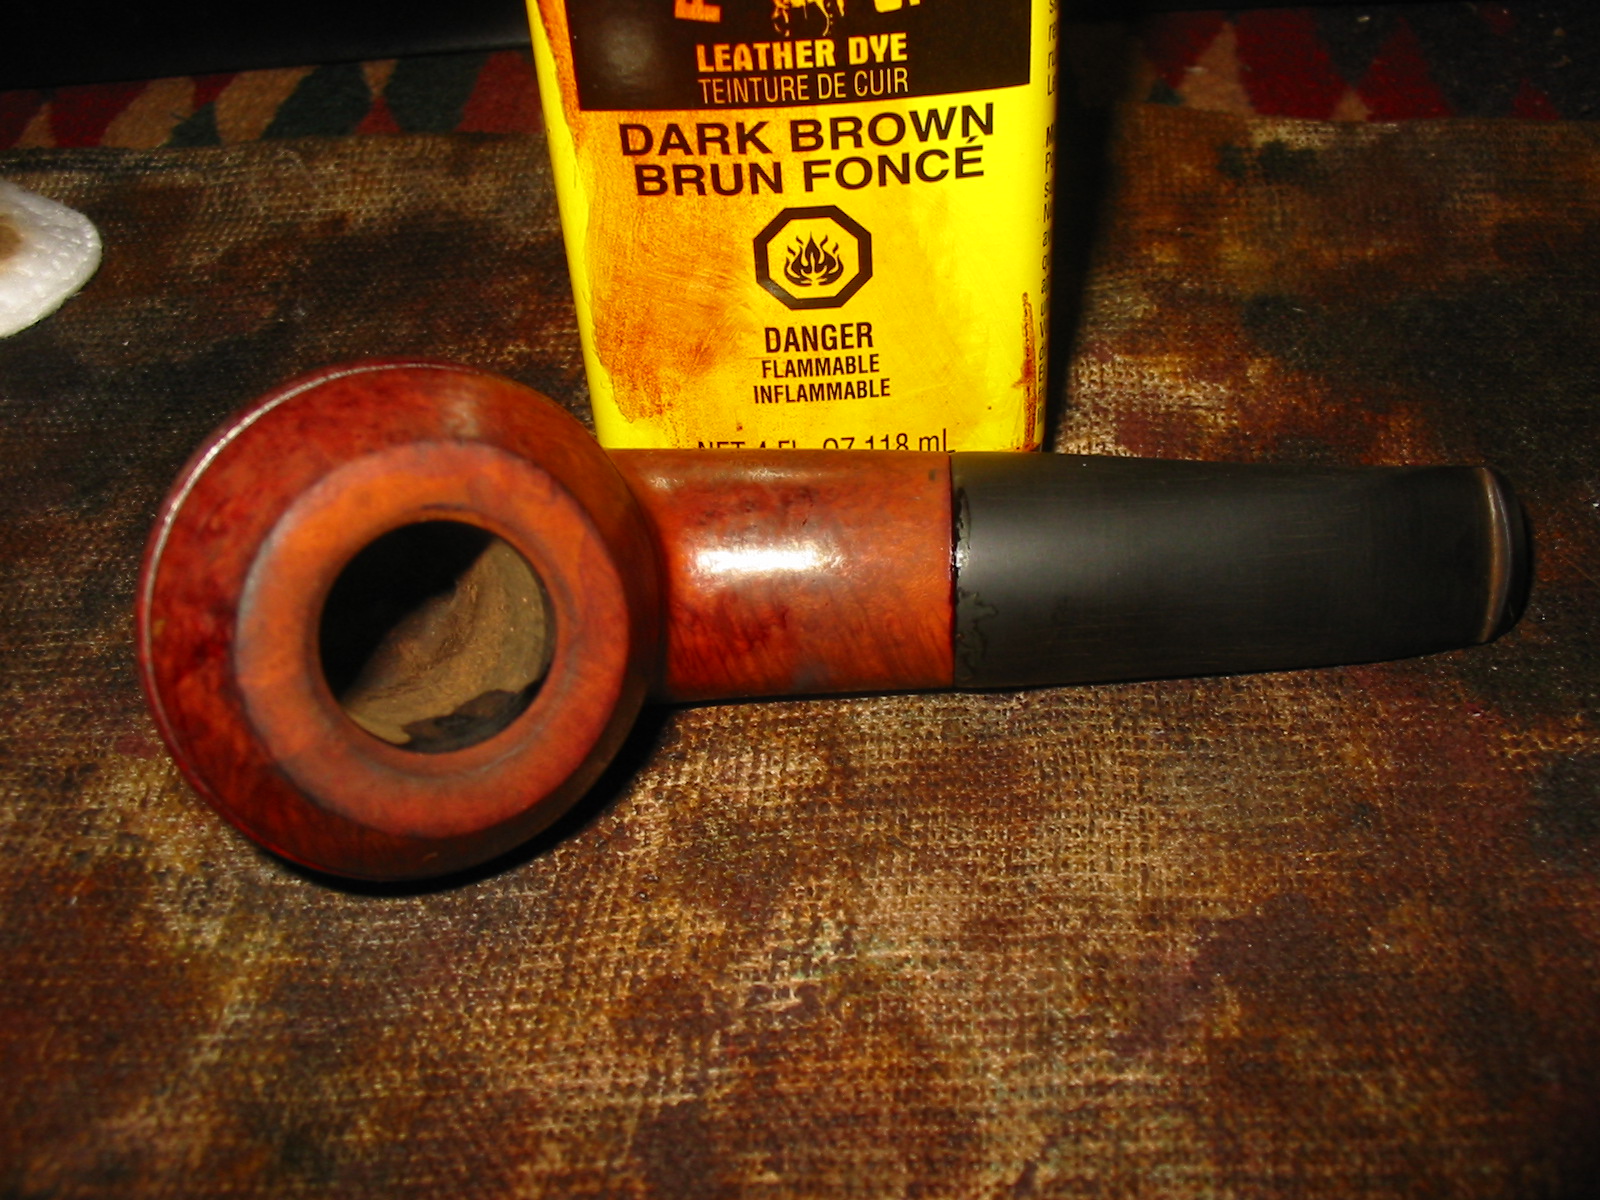
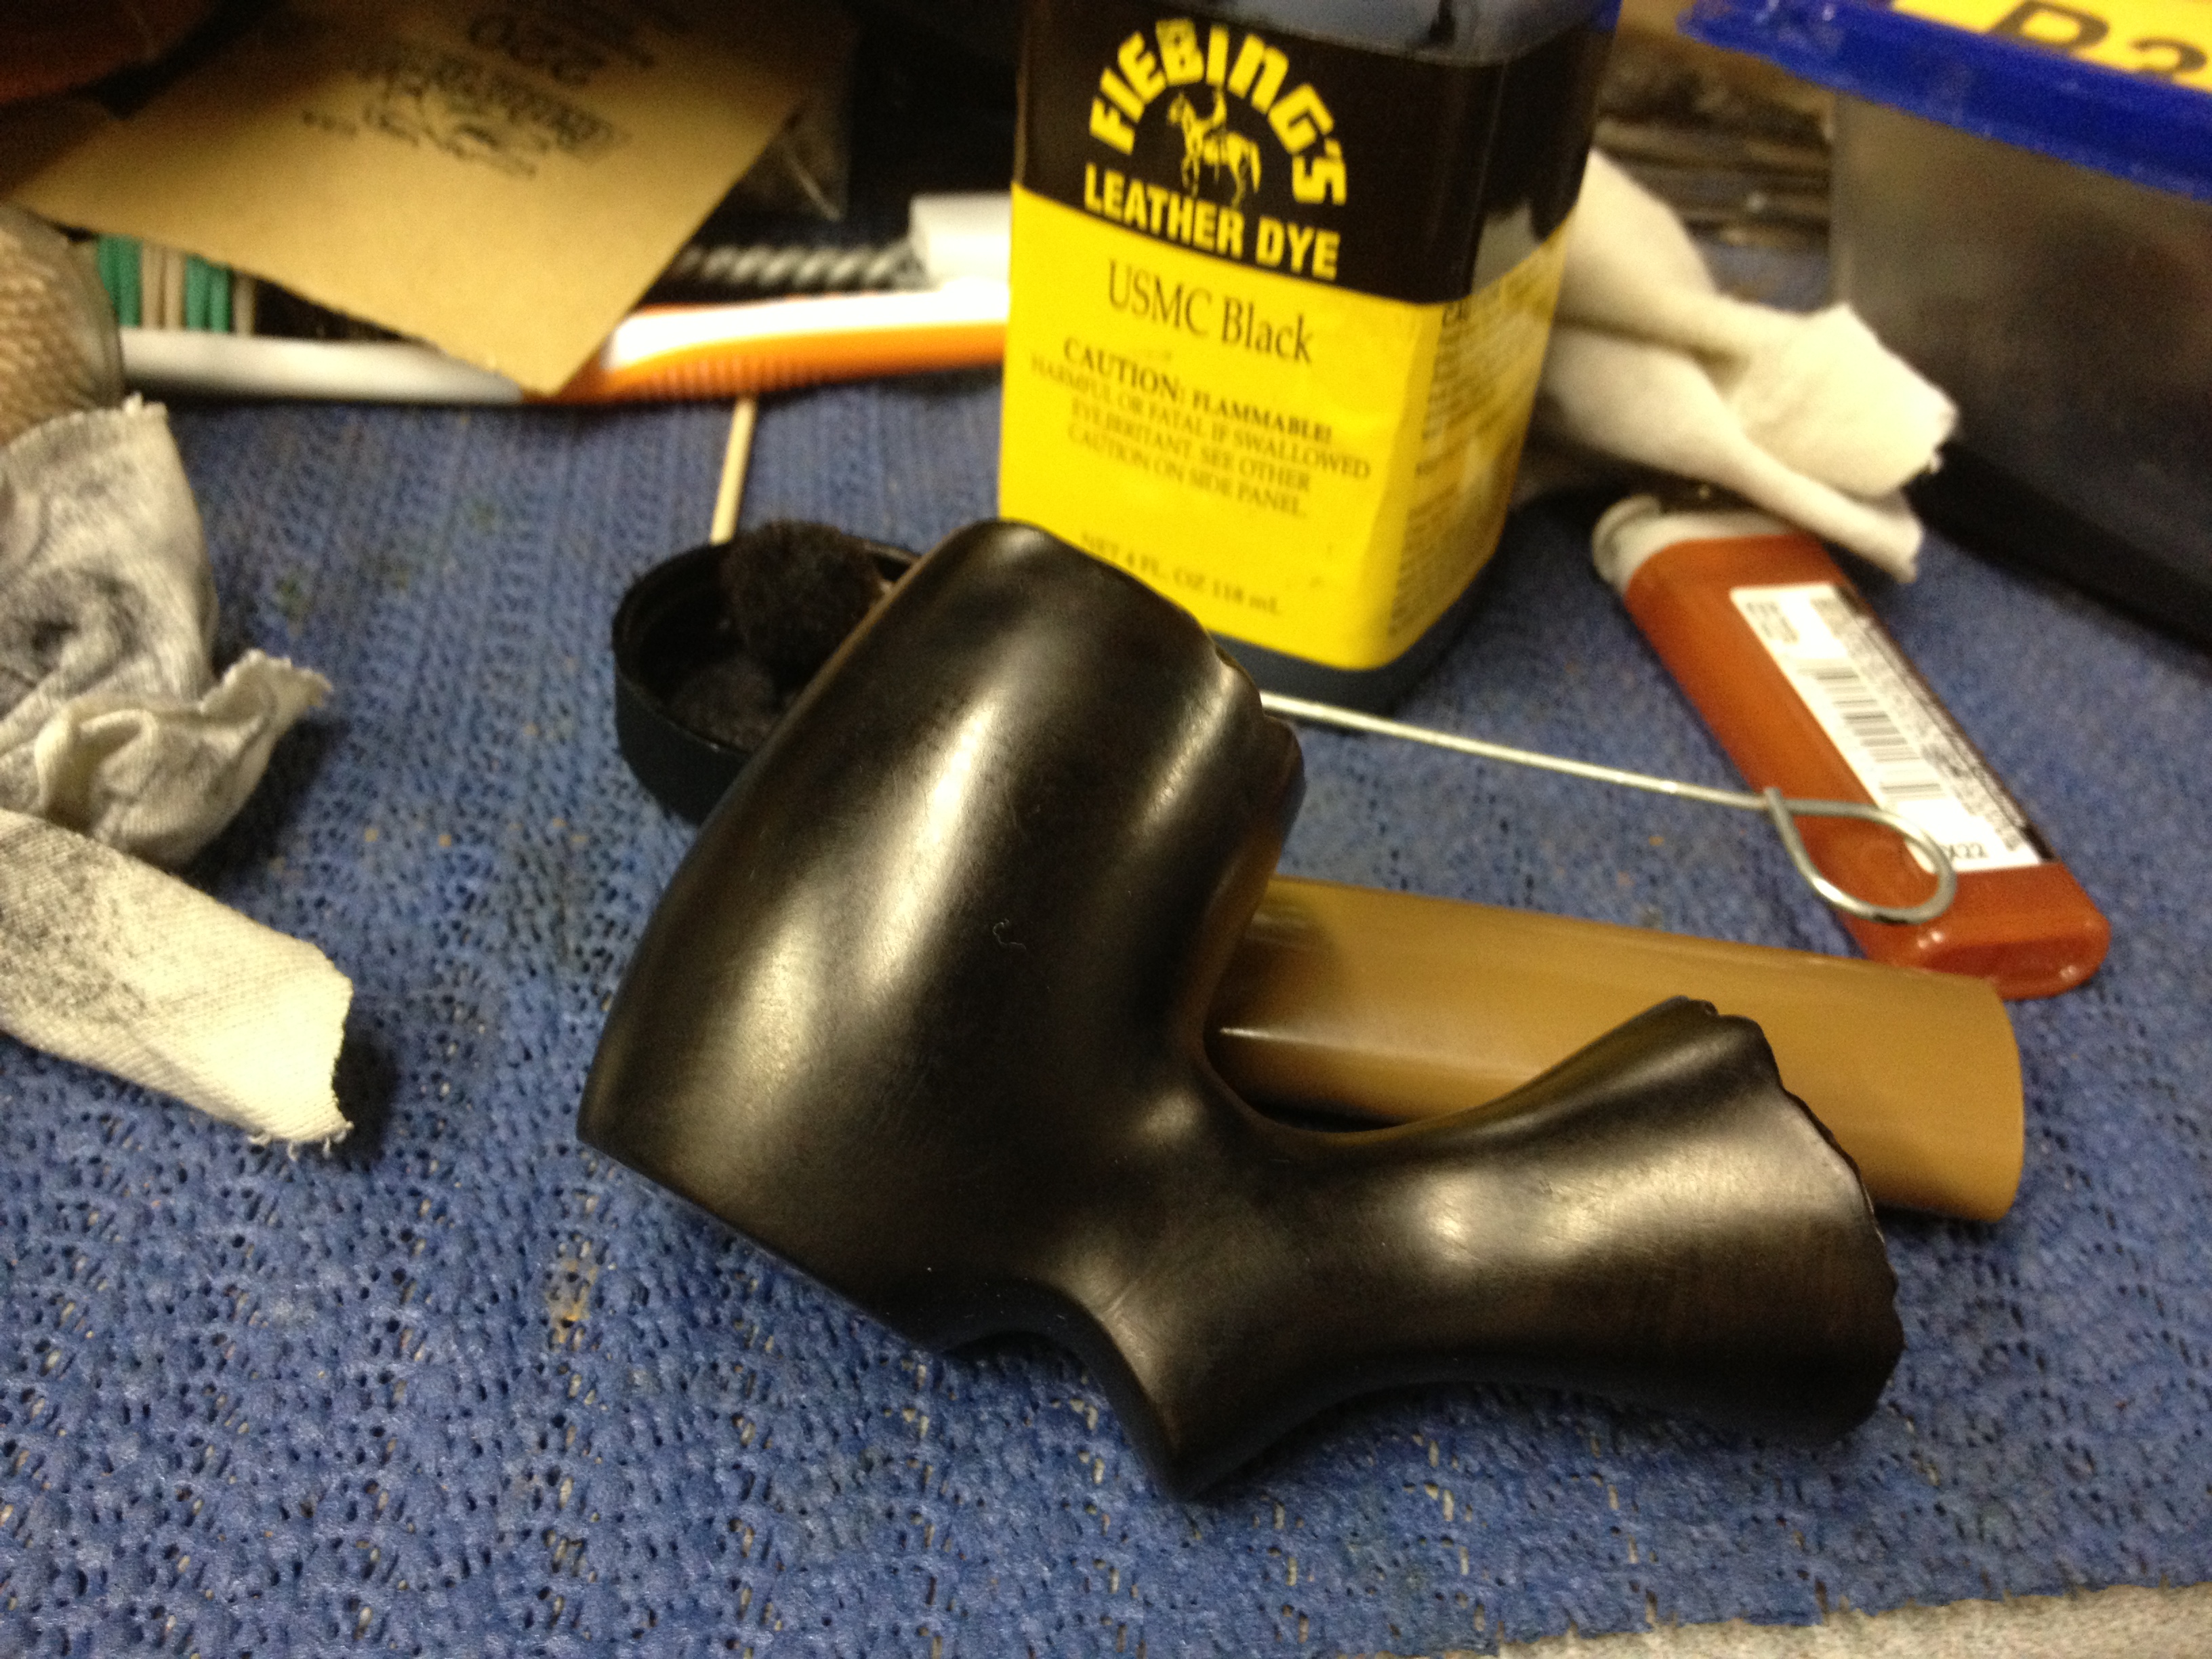
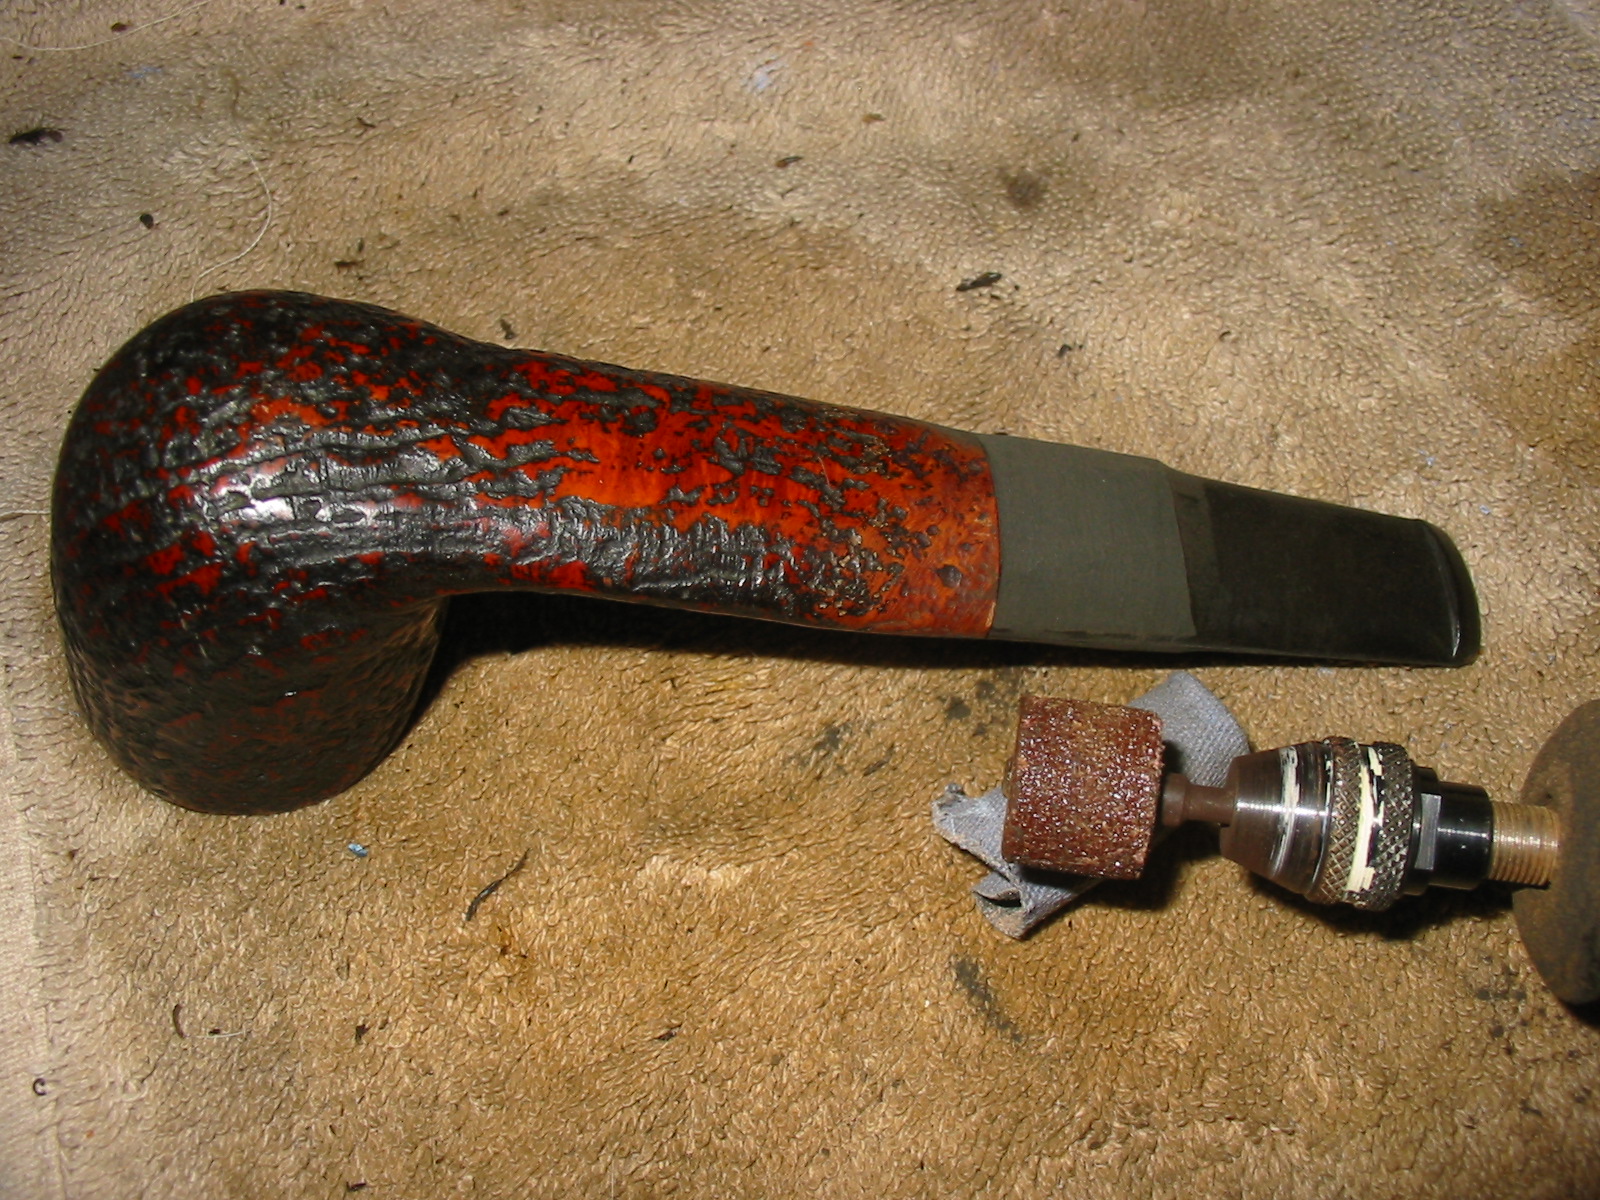
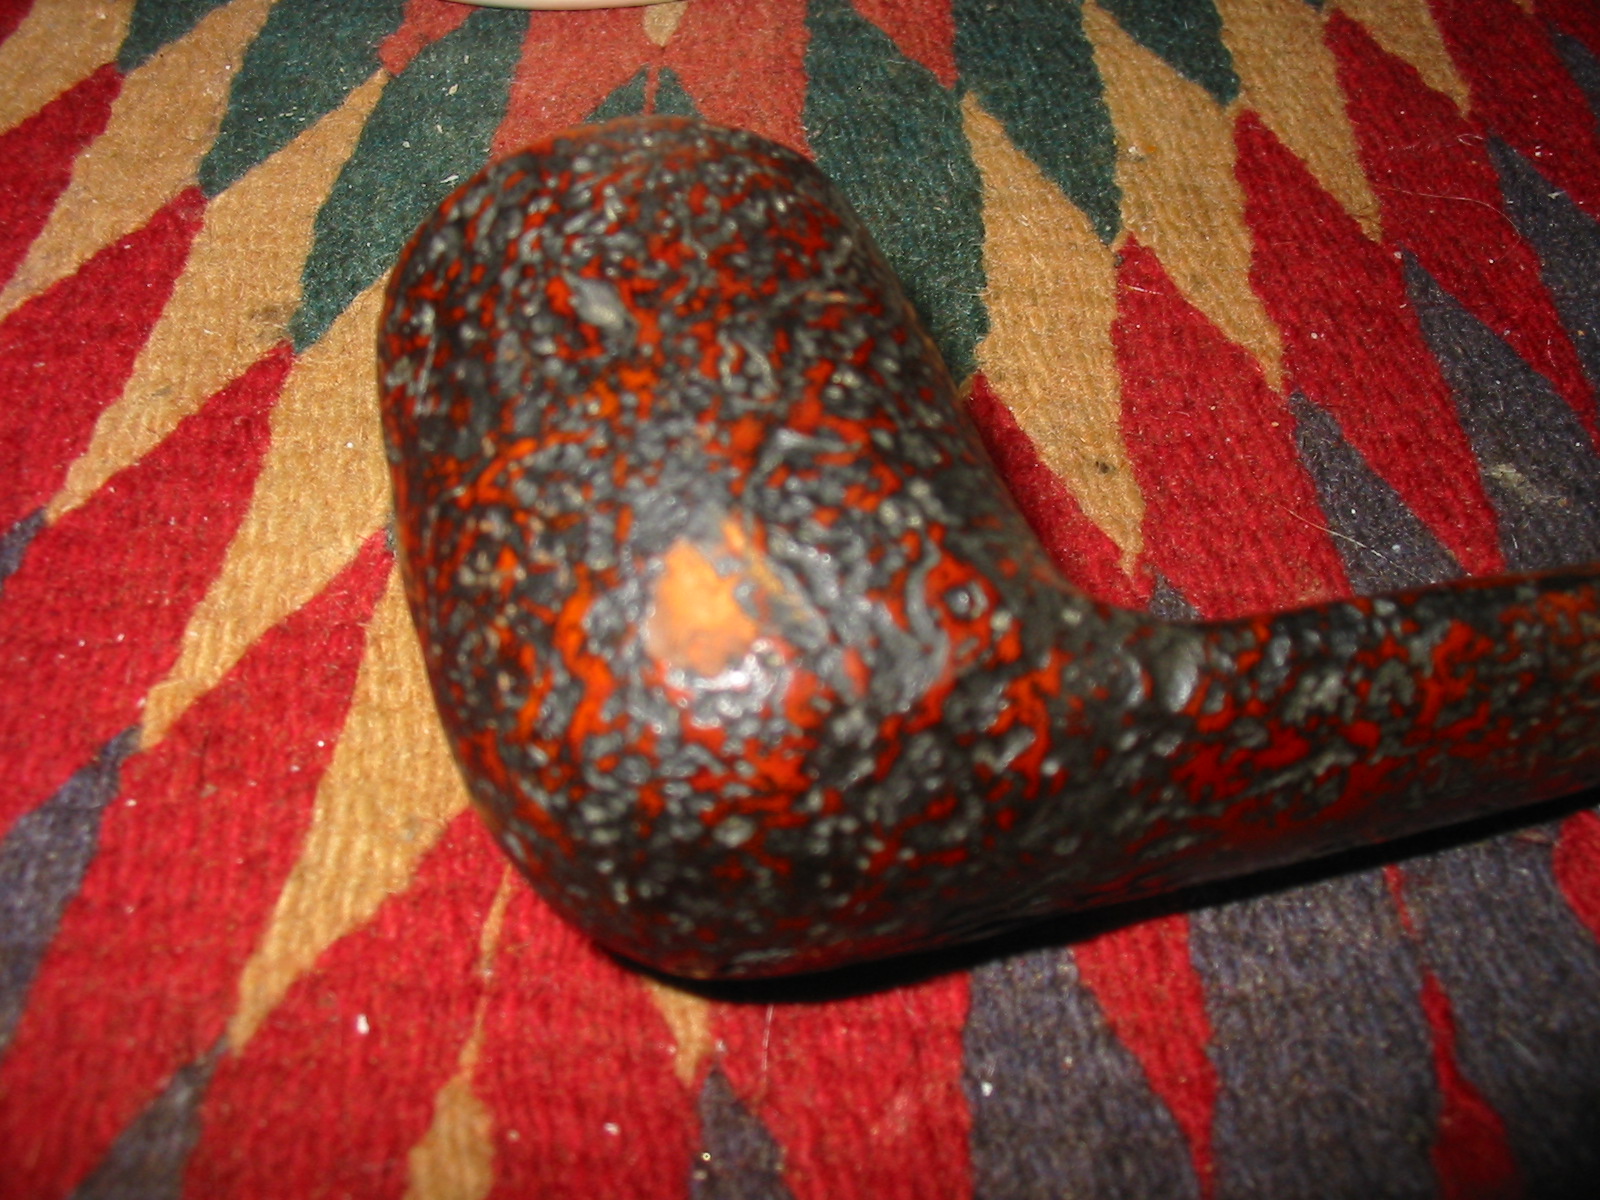
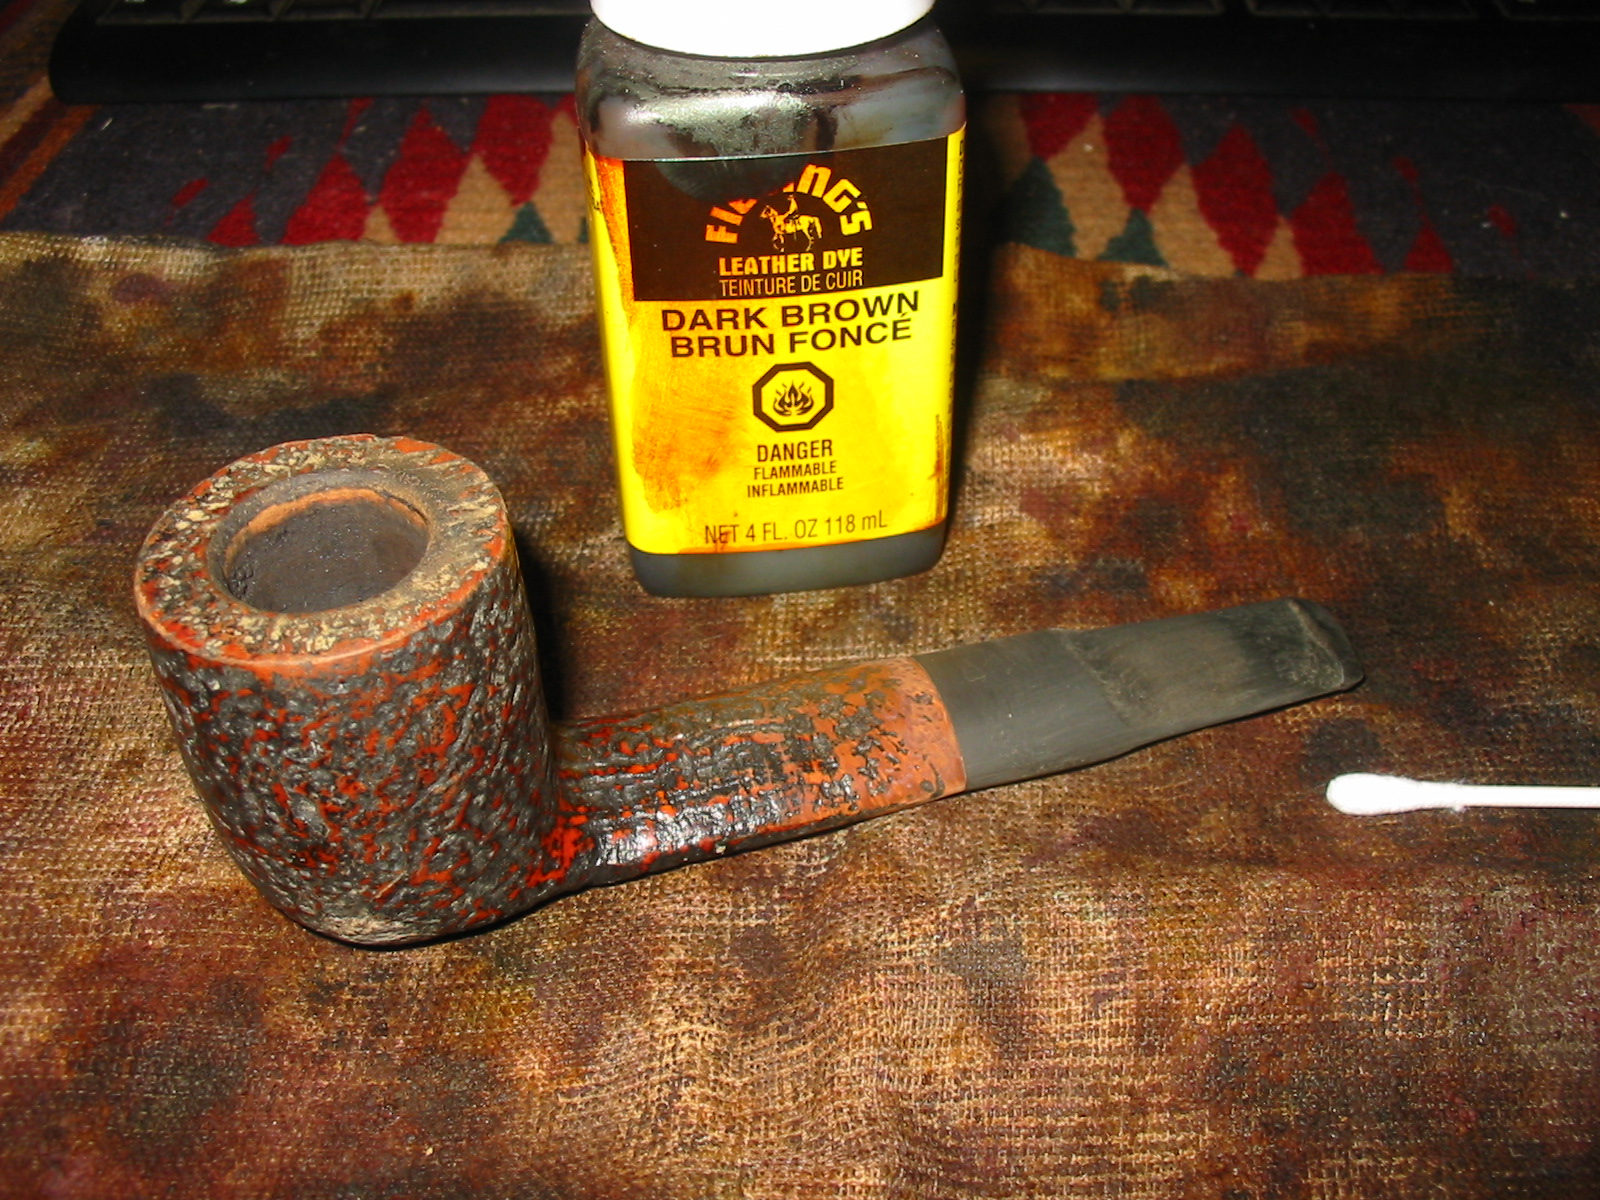
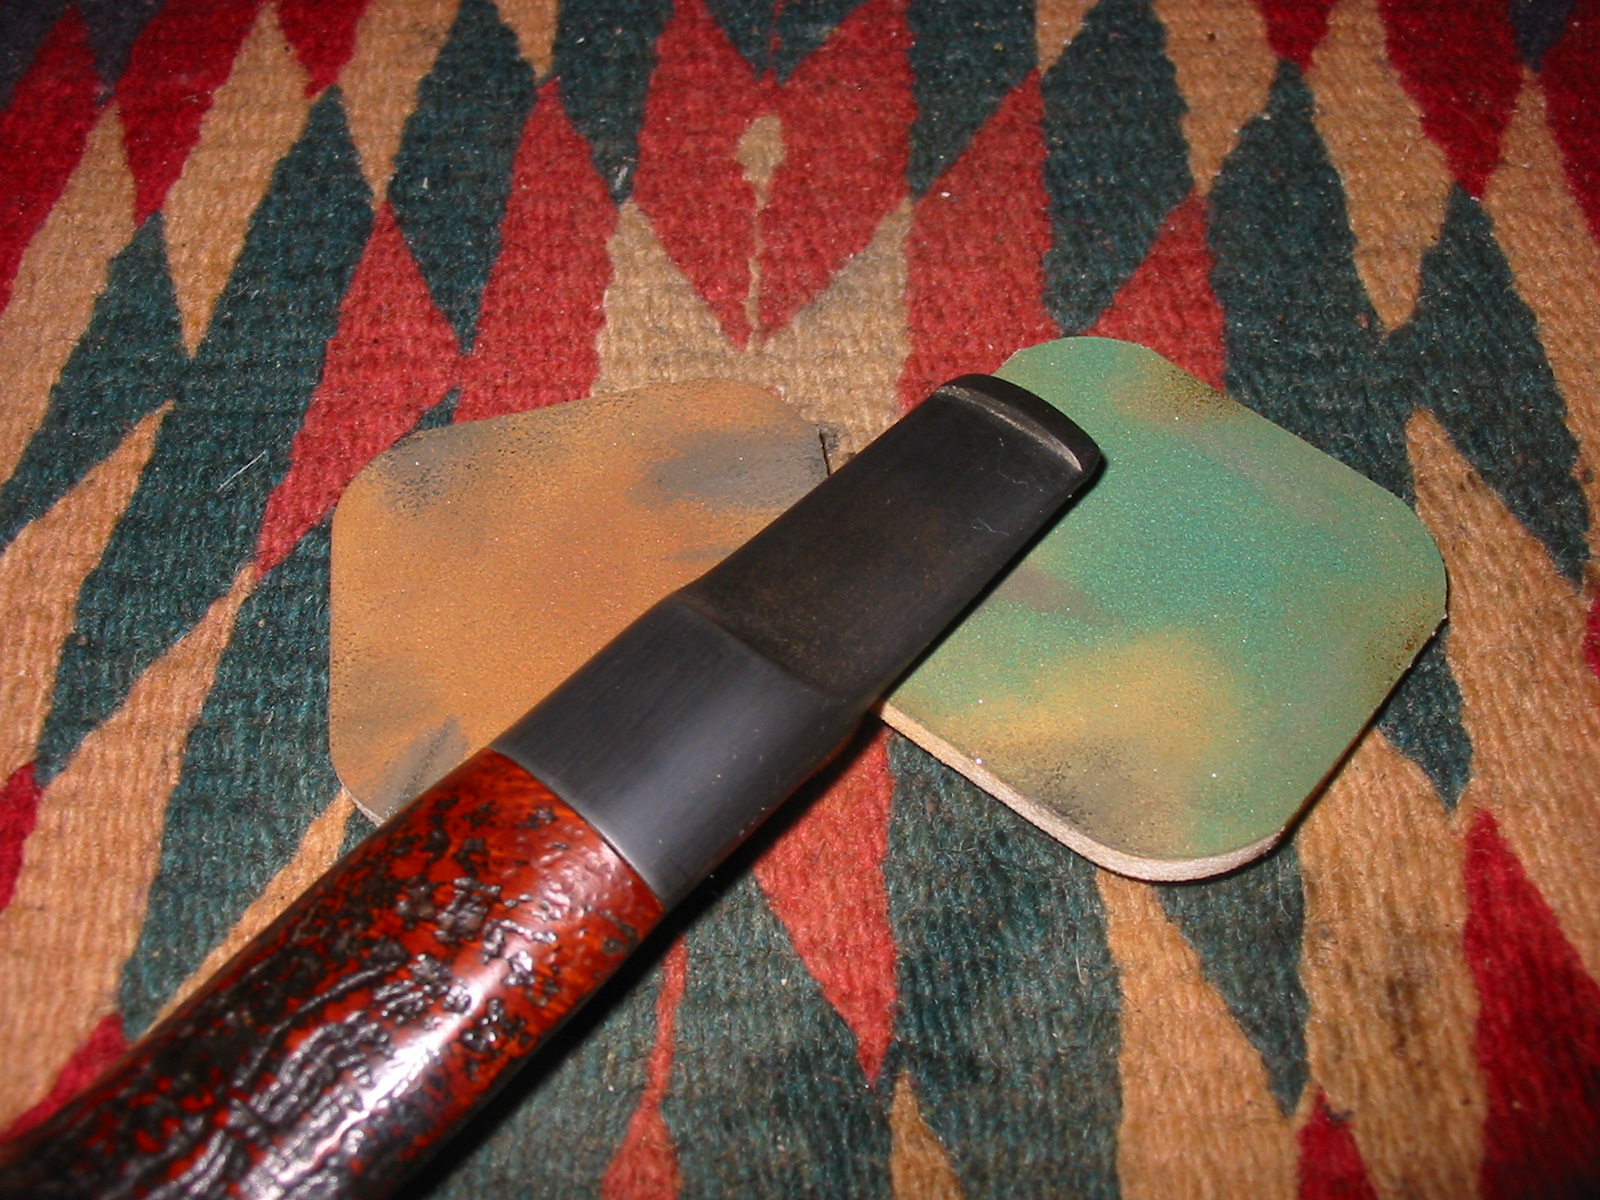
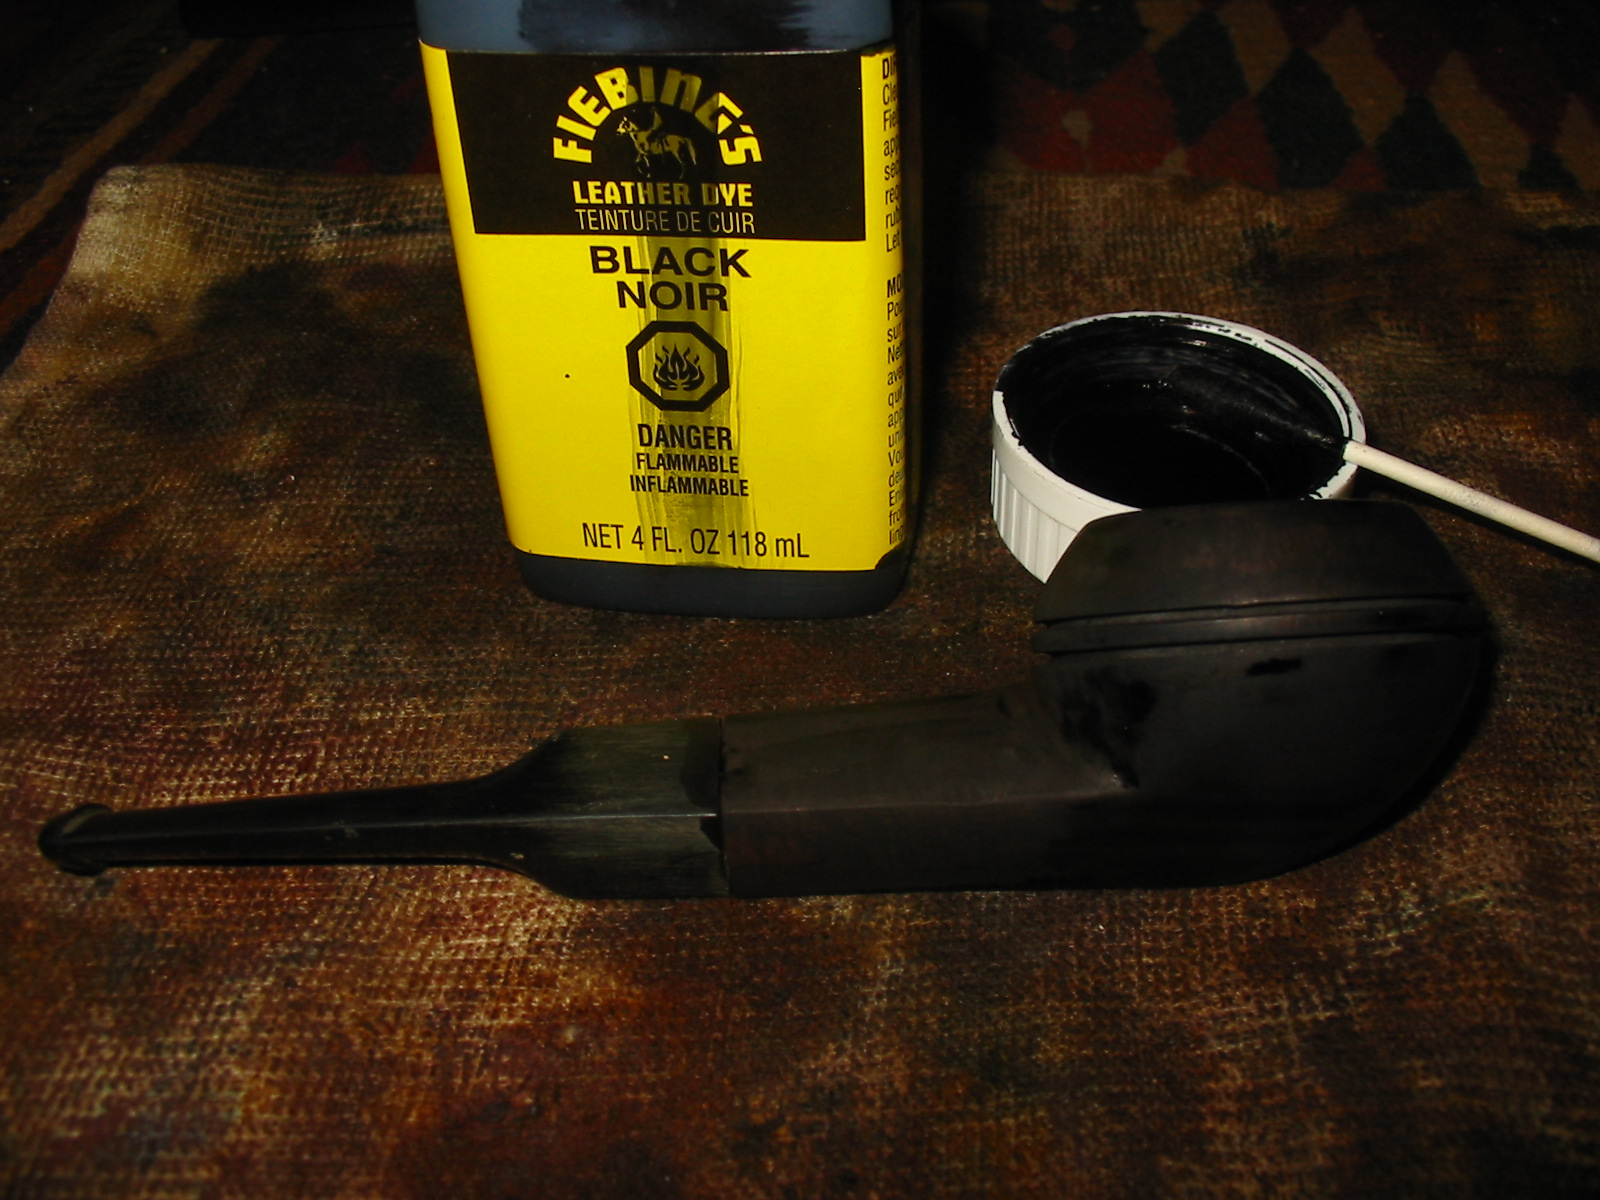
I chose to do a contrasting stain on this pipe, a black understain and an oxblood/mahogany top stain. I heated the briar and then applied a black aniline stain to the pipe. I applied it with a cotton swab and flamed it with a lighter. I reapplied the stain and also flamed it again to set the stain in the briar.

IMG_1622

IMG_1623

IMG_1624

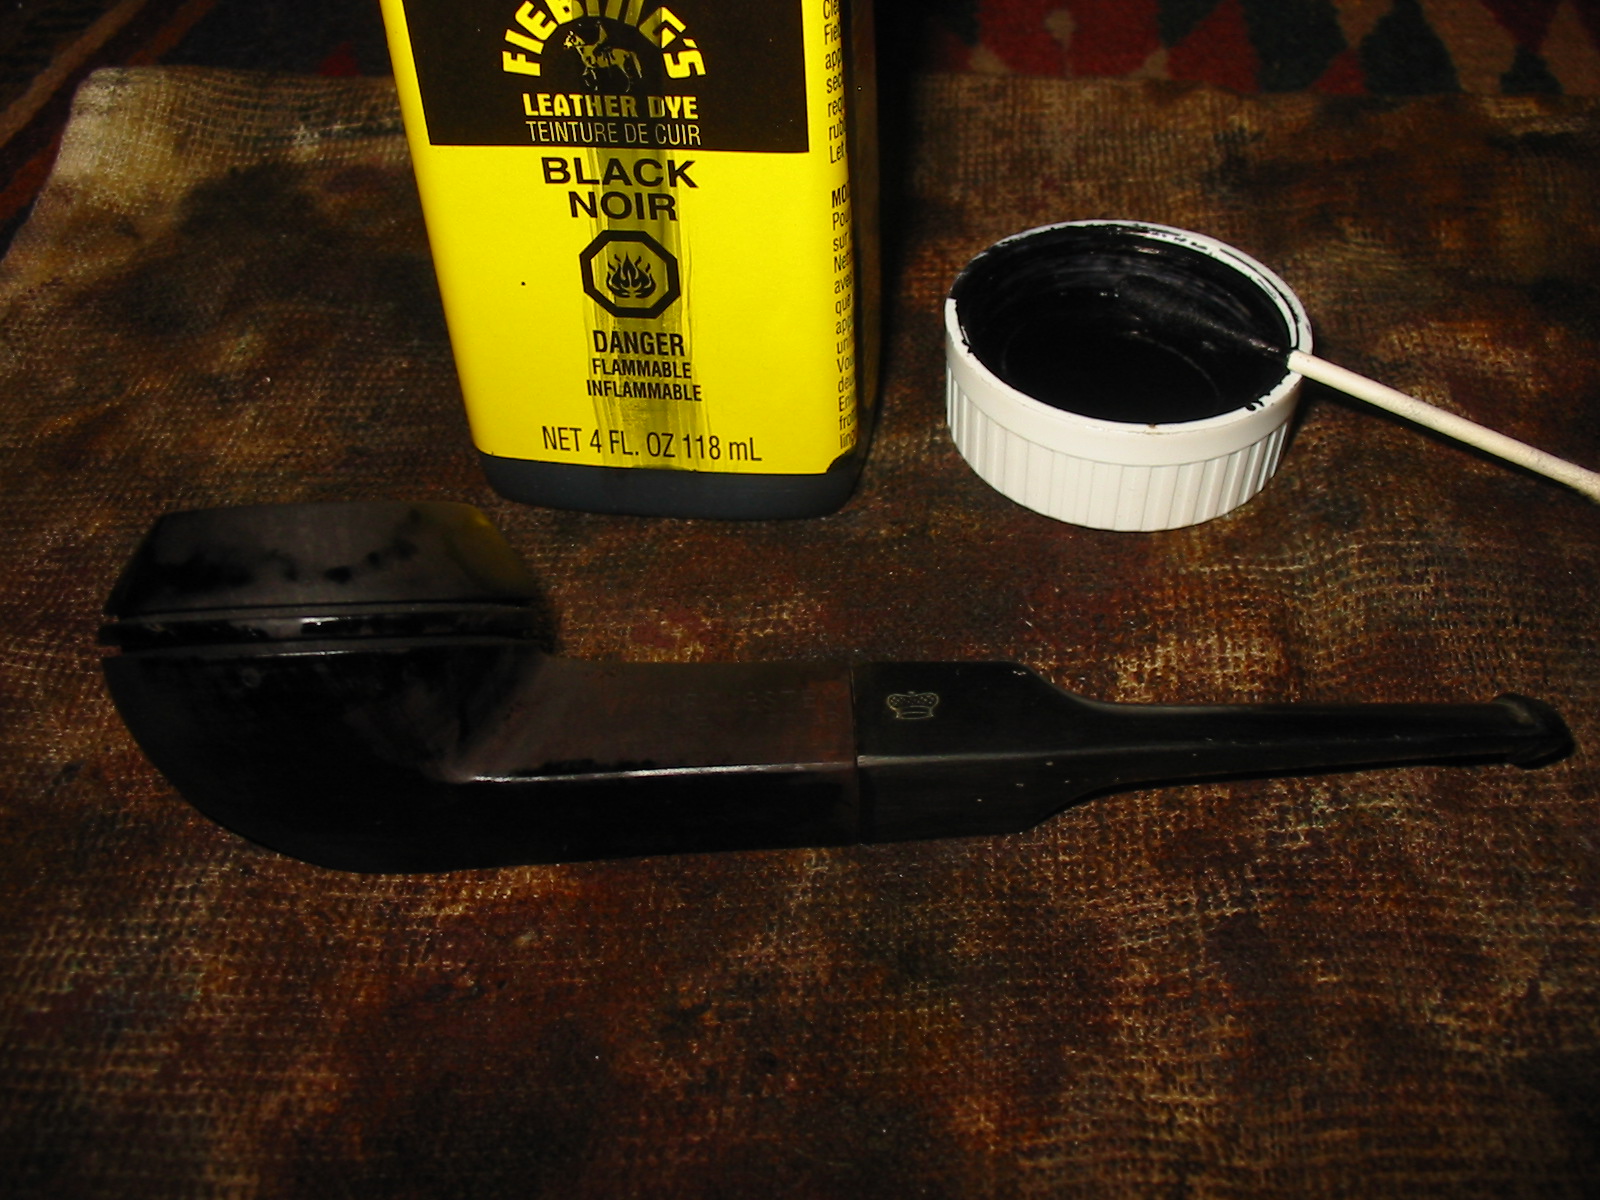
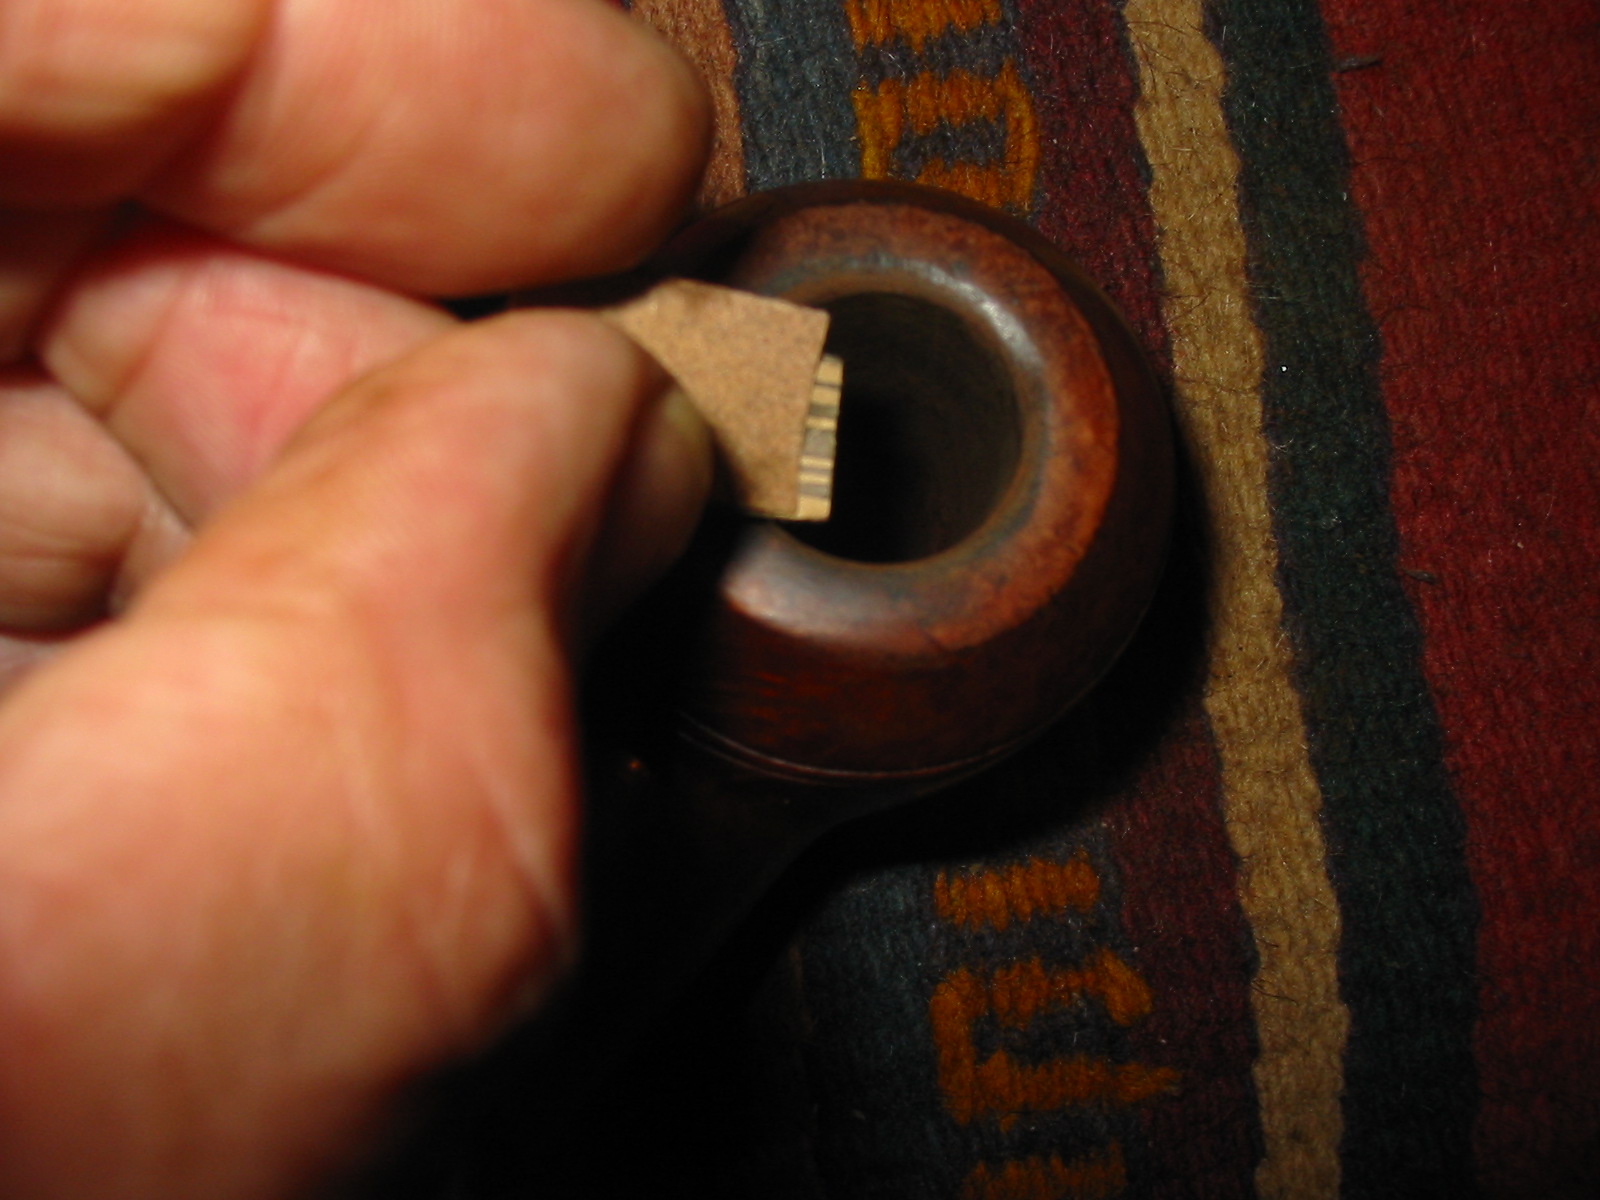
I wiped the bowl down with acetone to lighten the black stain and make the grain stand out on the pipe. I also sanded it with a fine grit sanding sponge.

IMG_1625

IMG_1626

IMG_1627

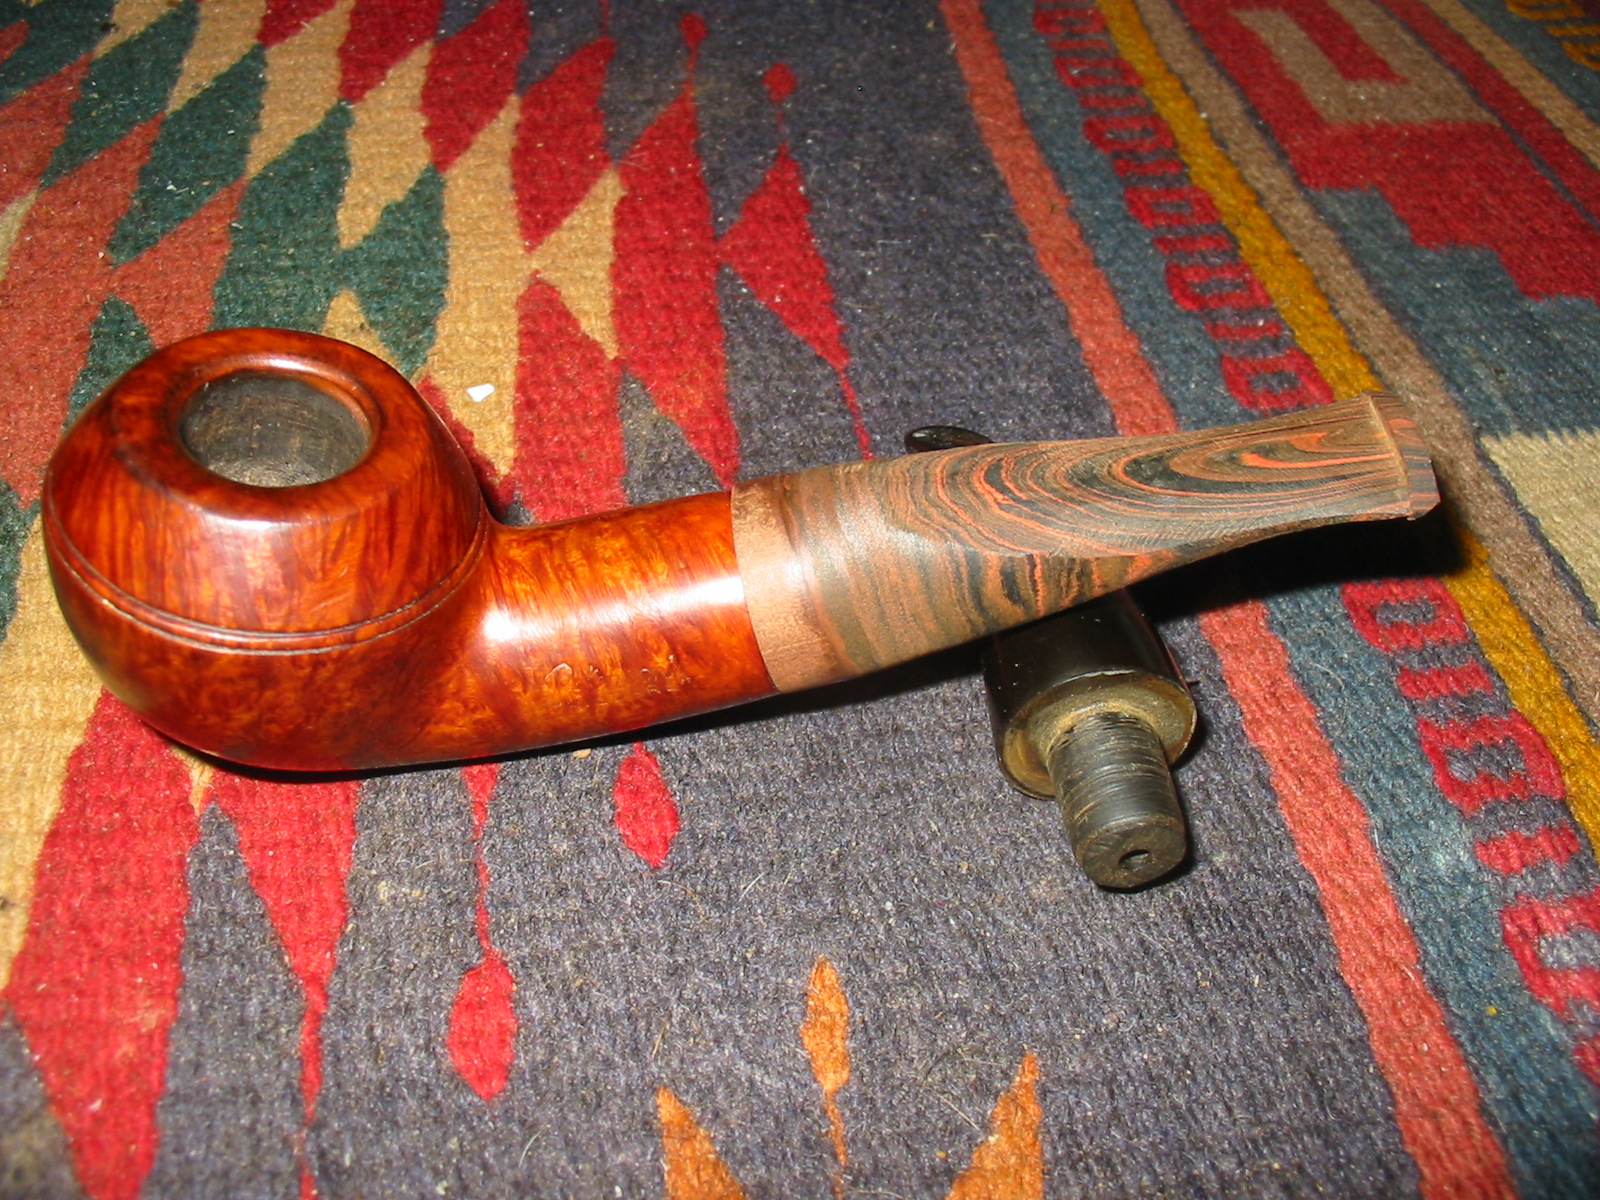
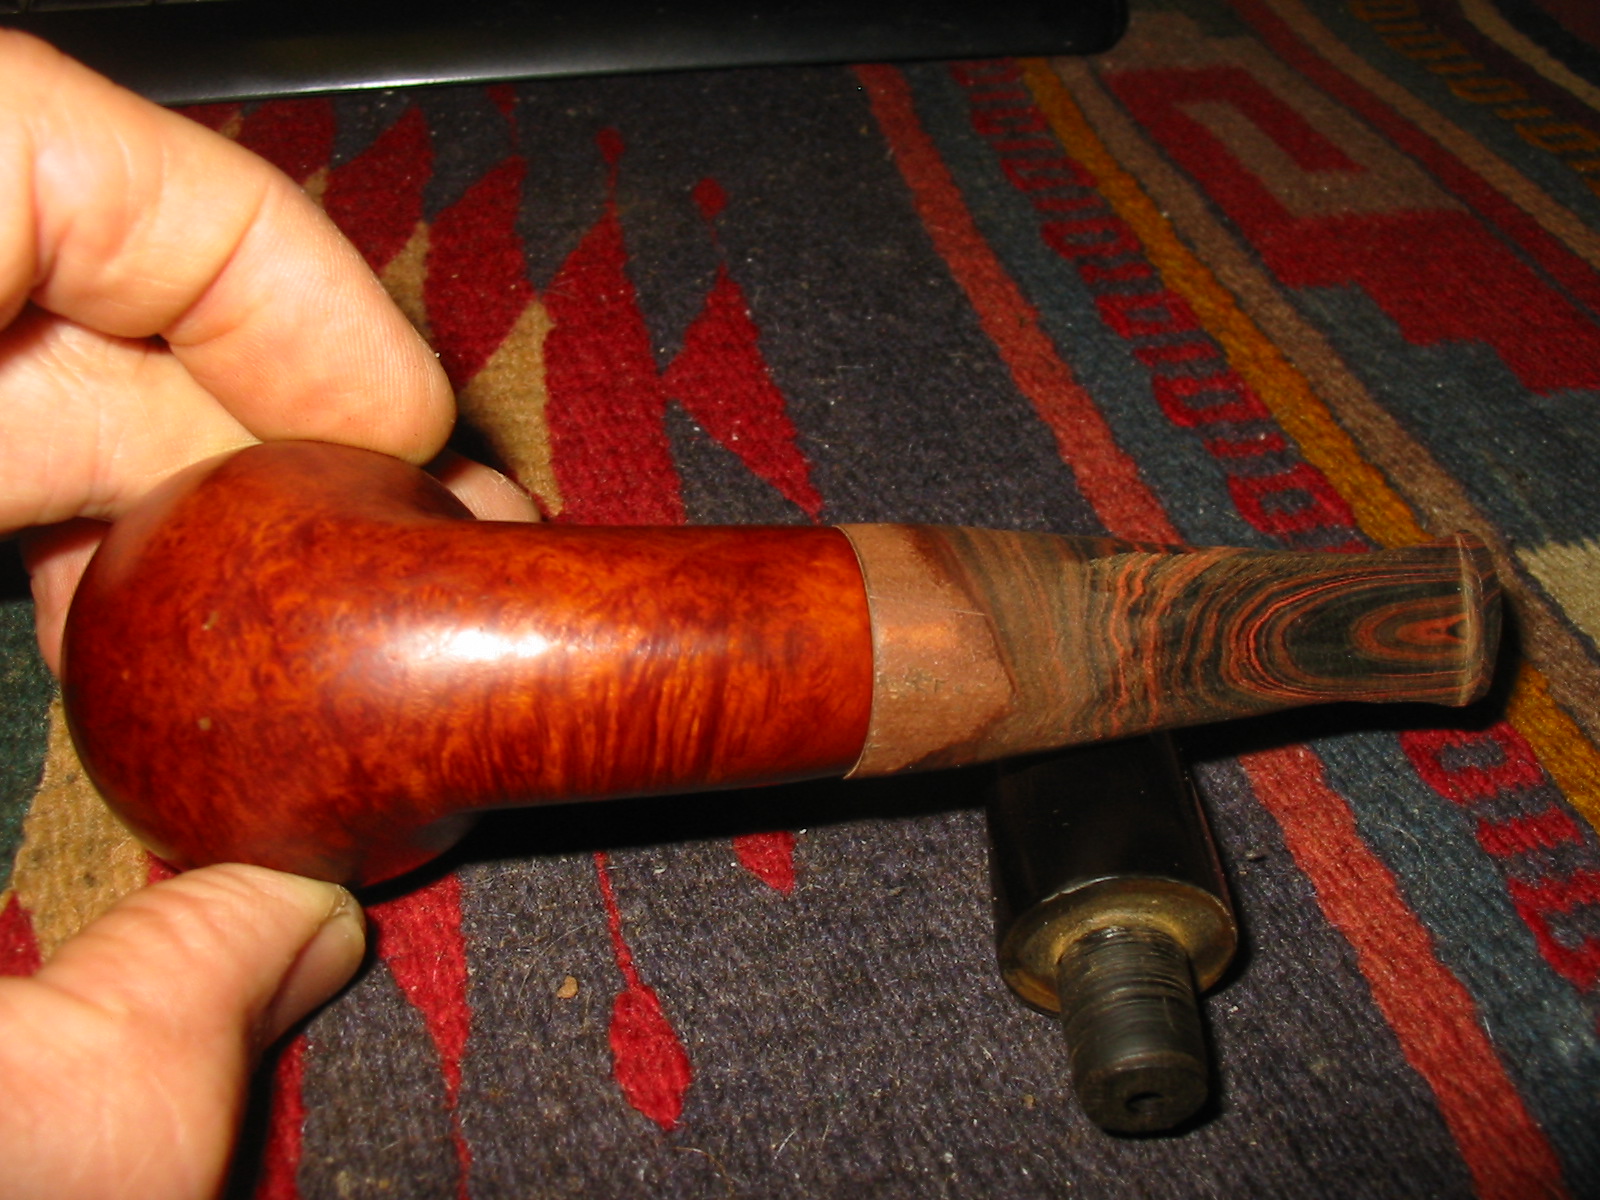
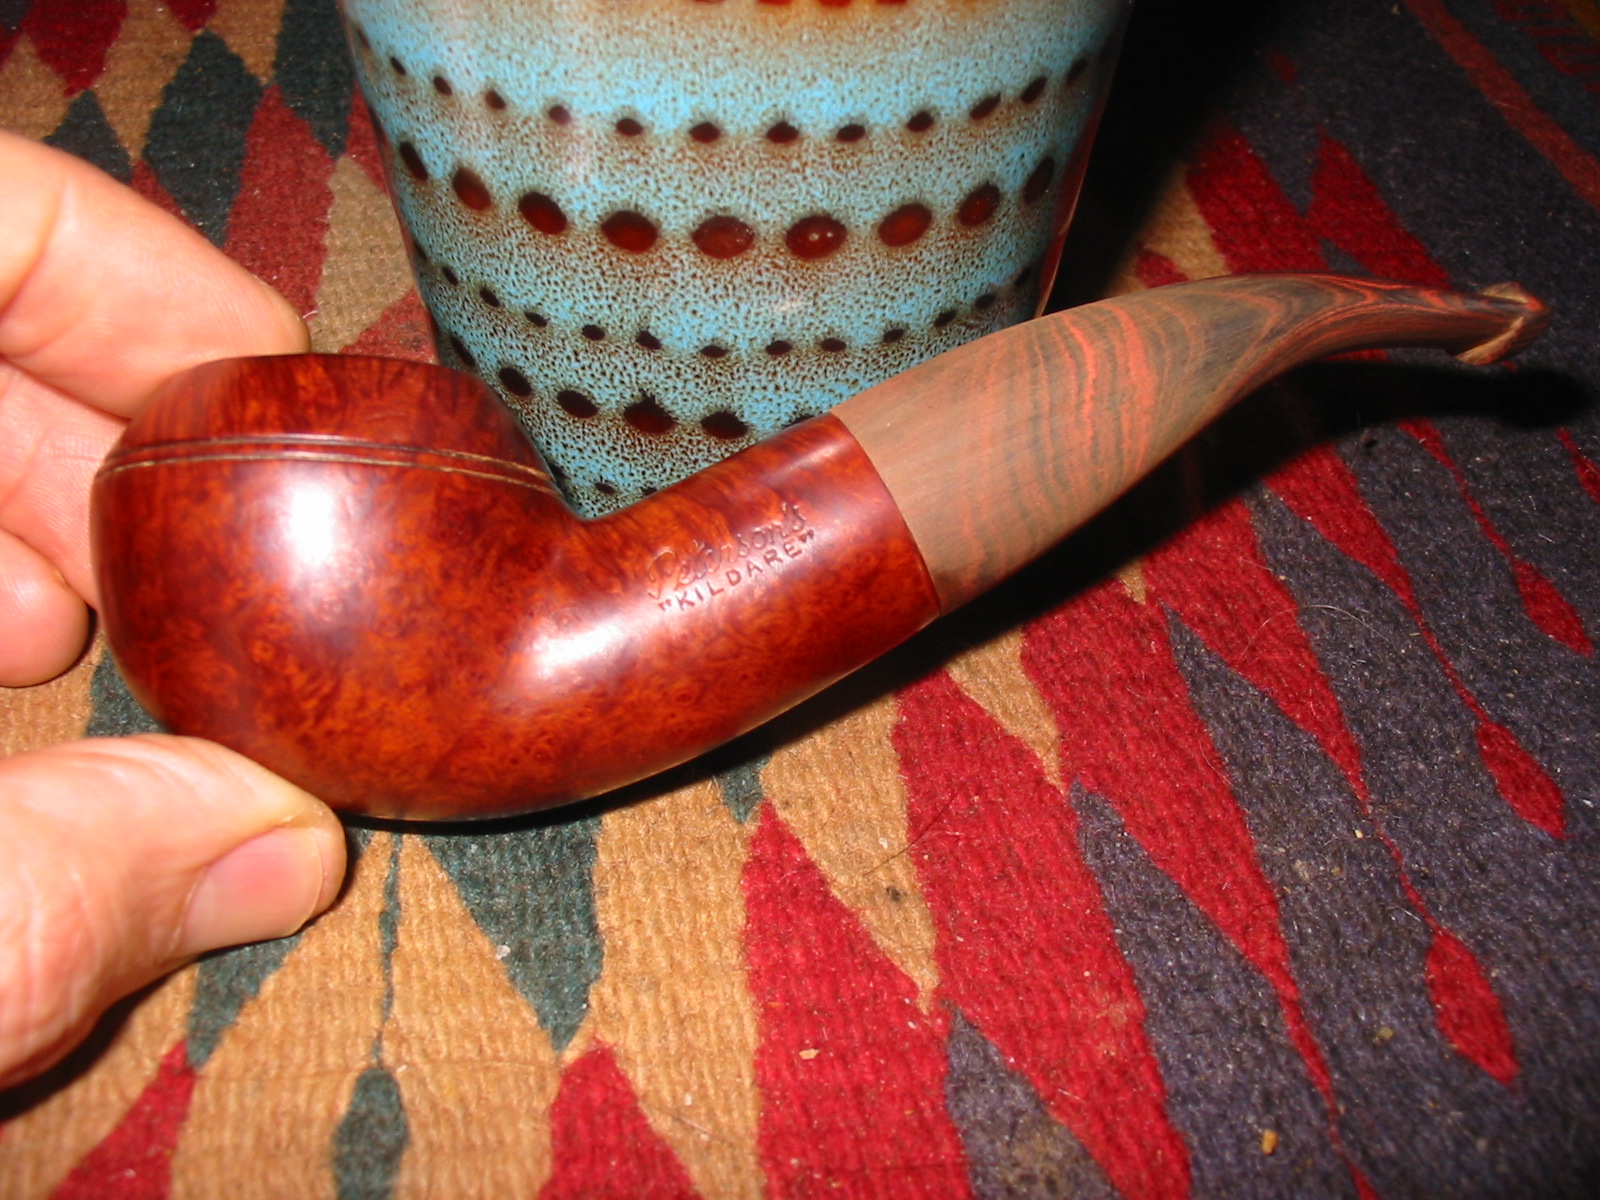
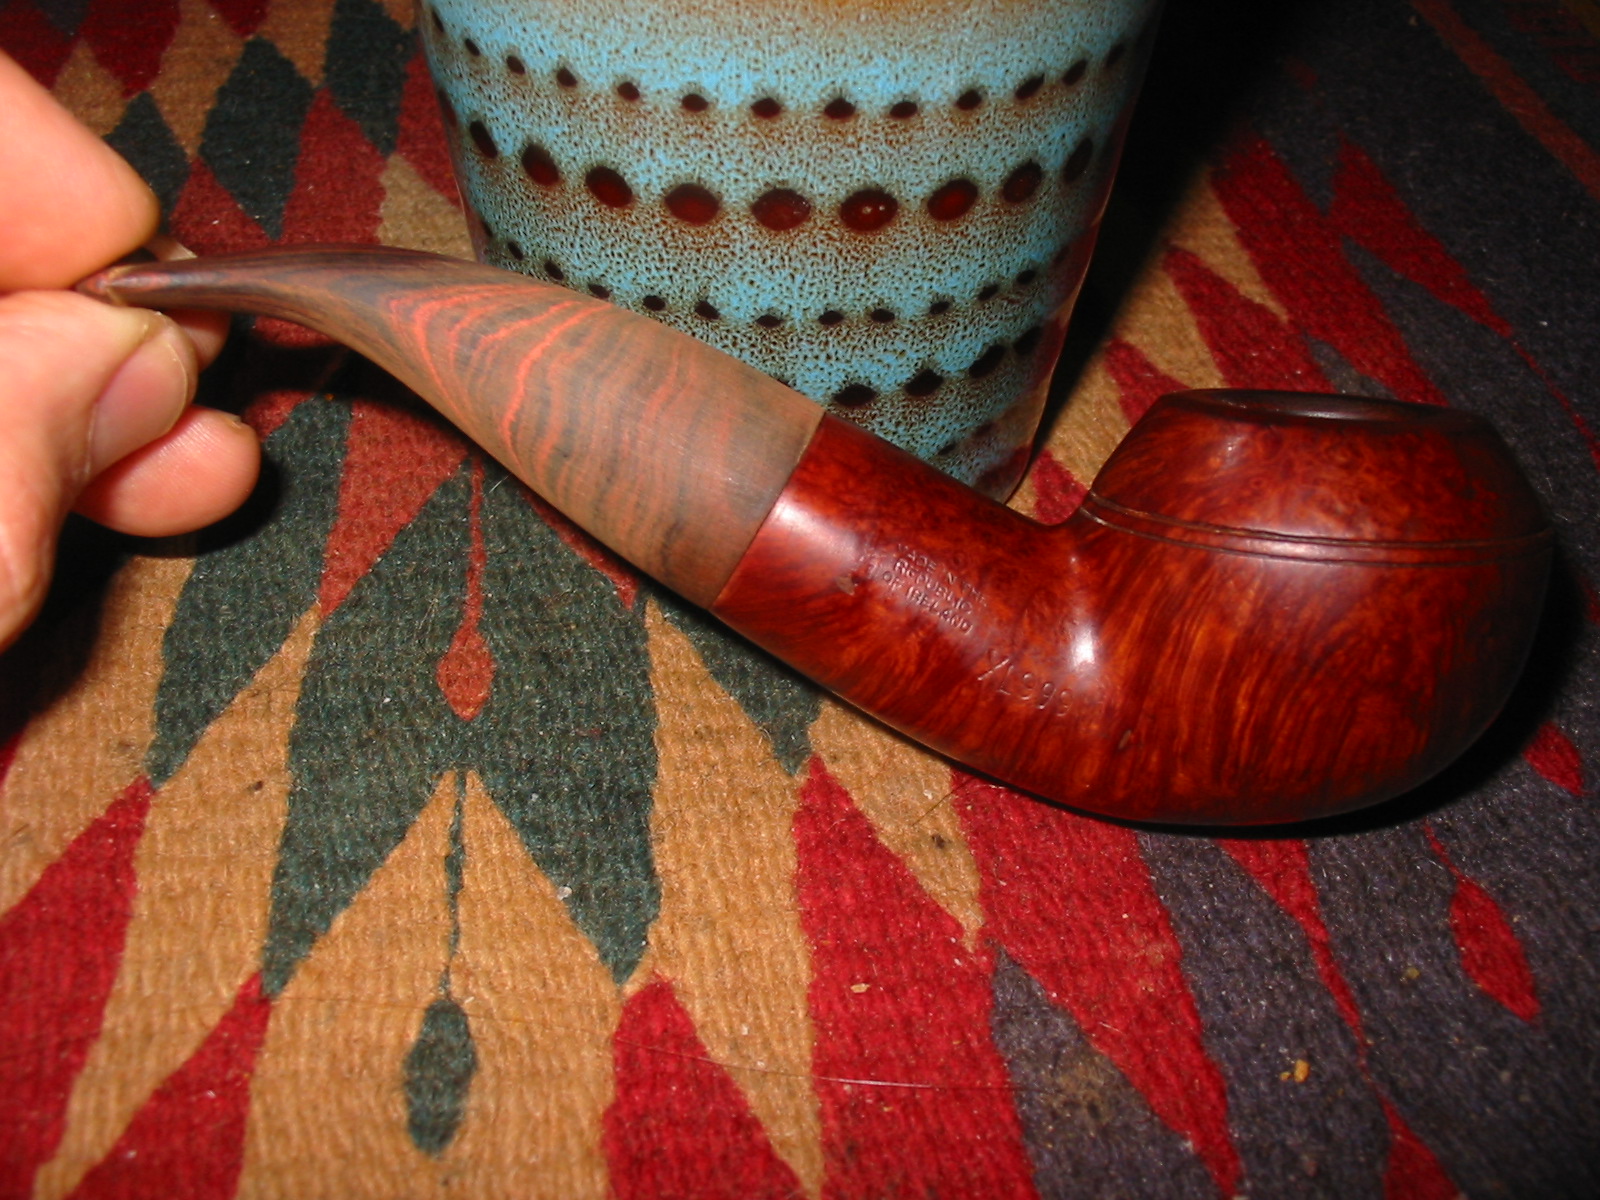
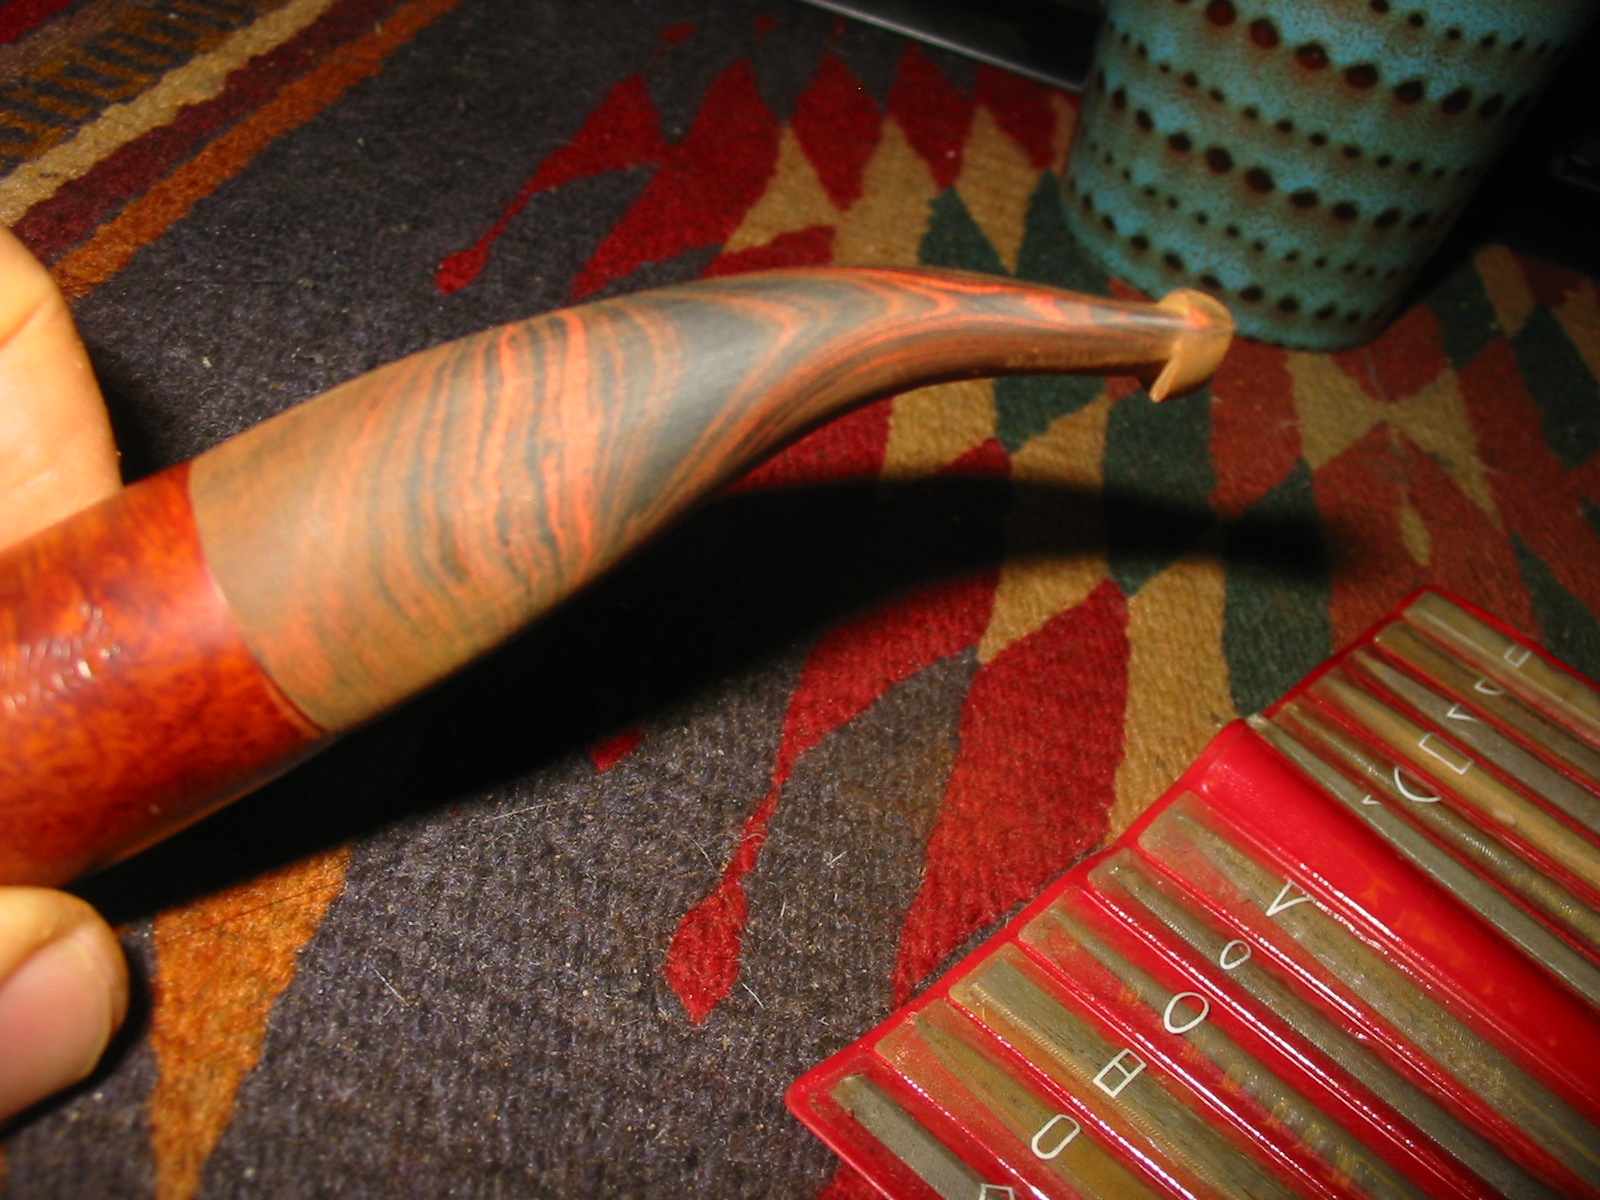
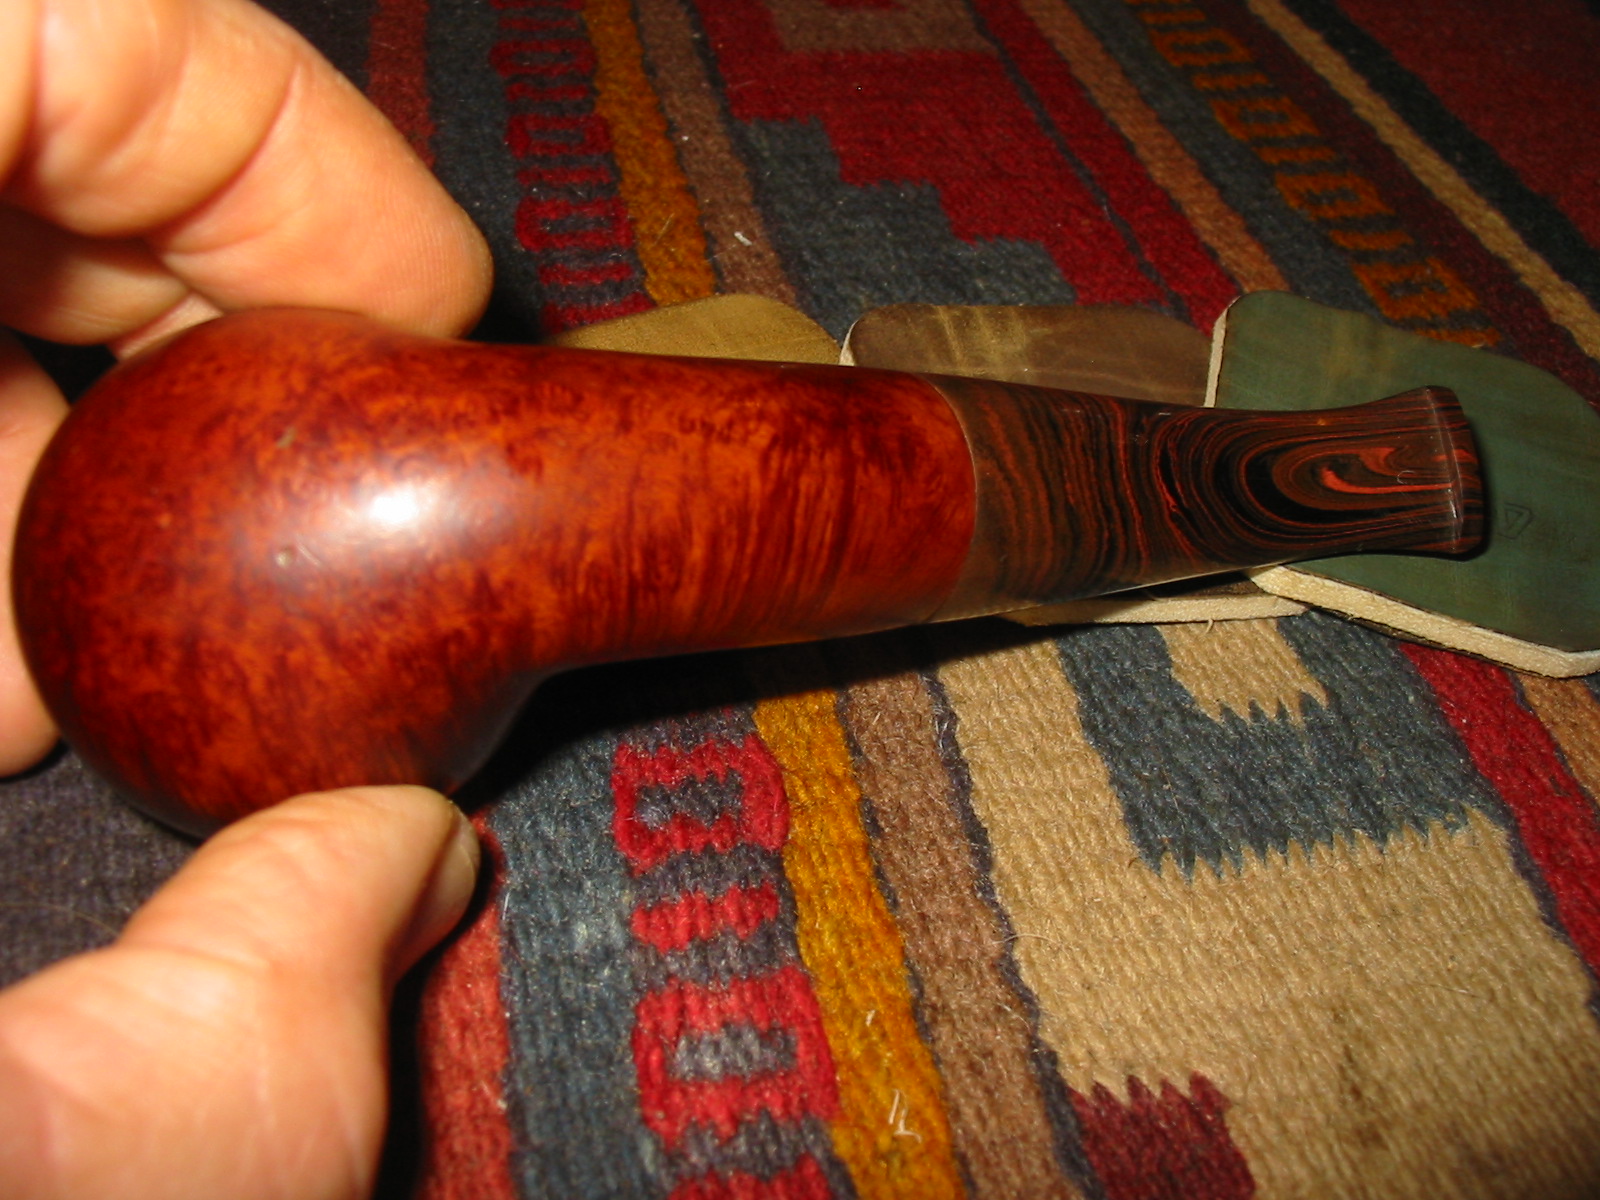
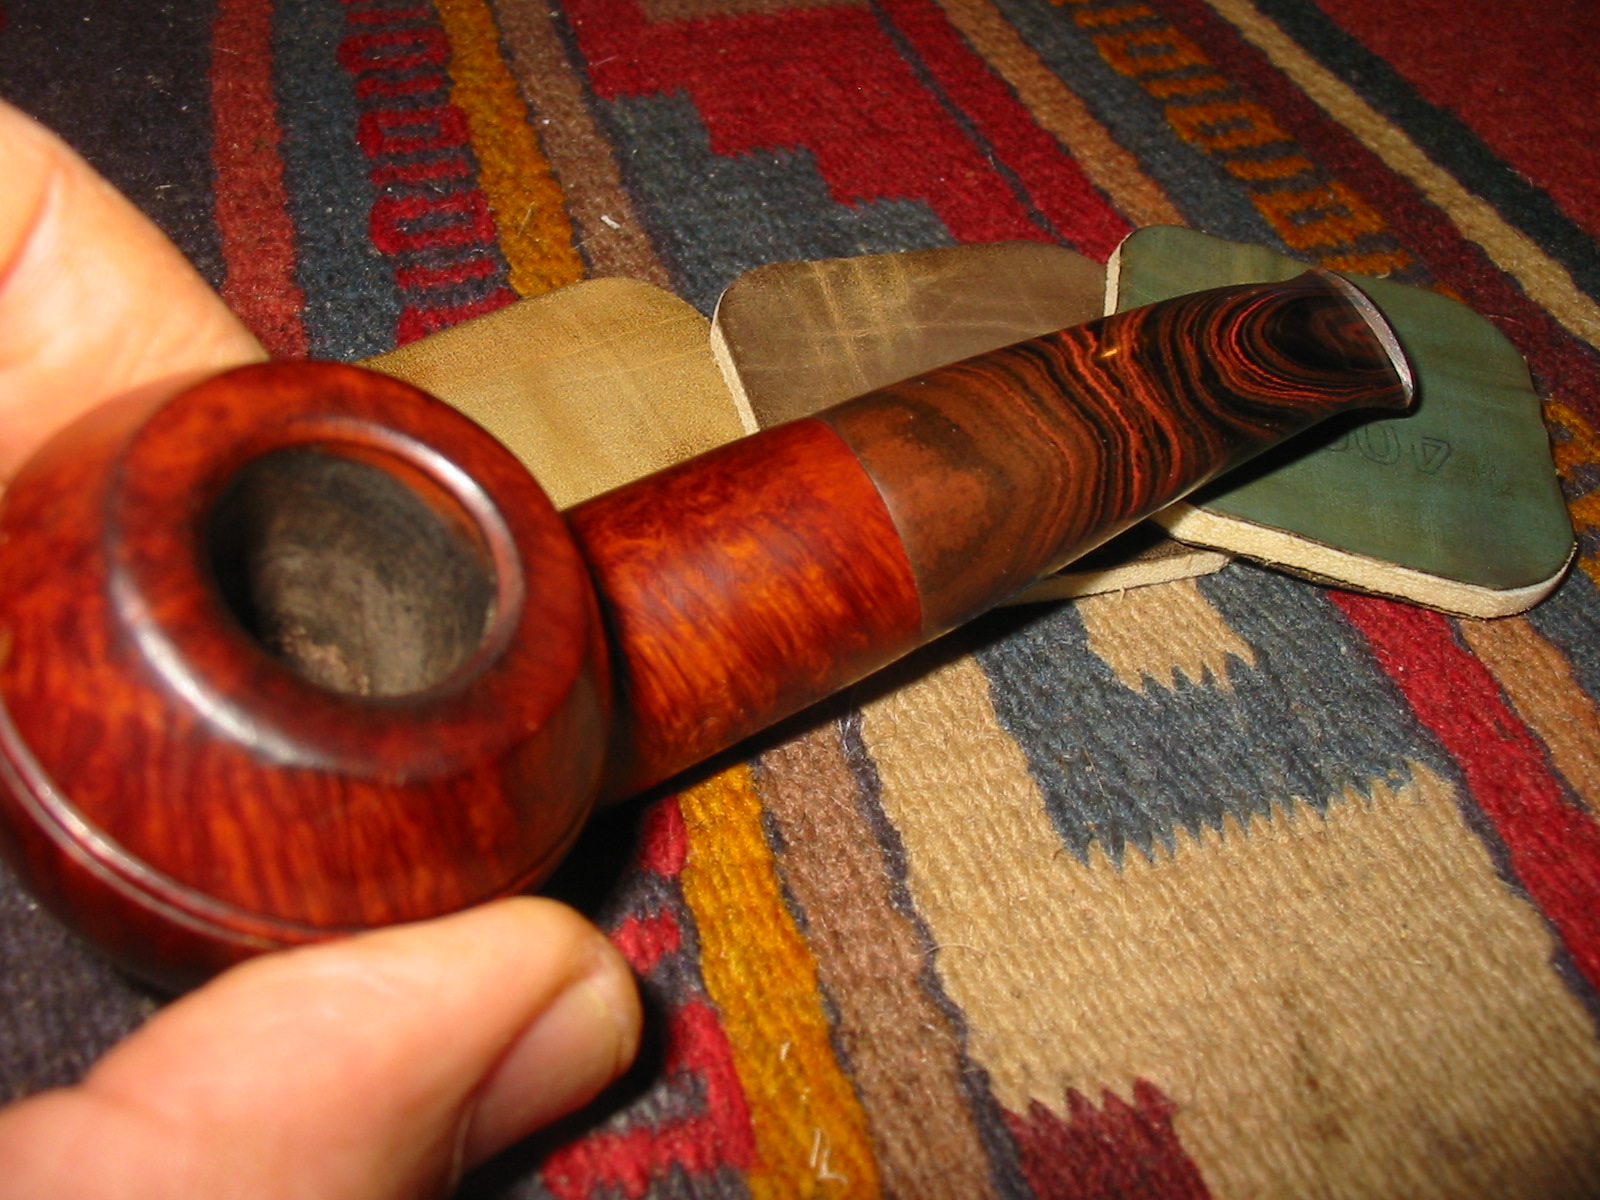
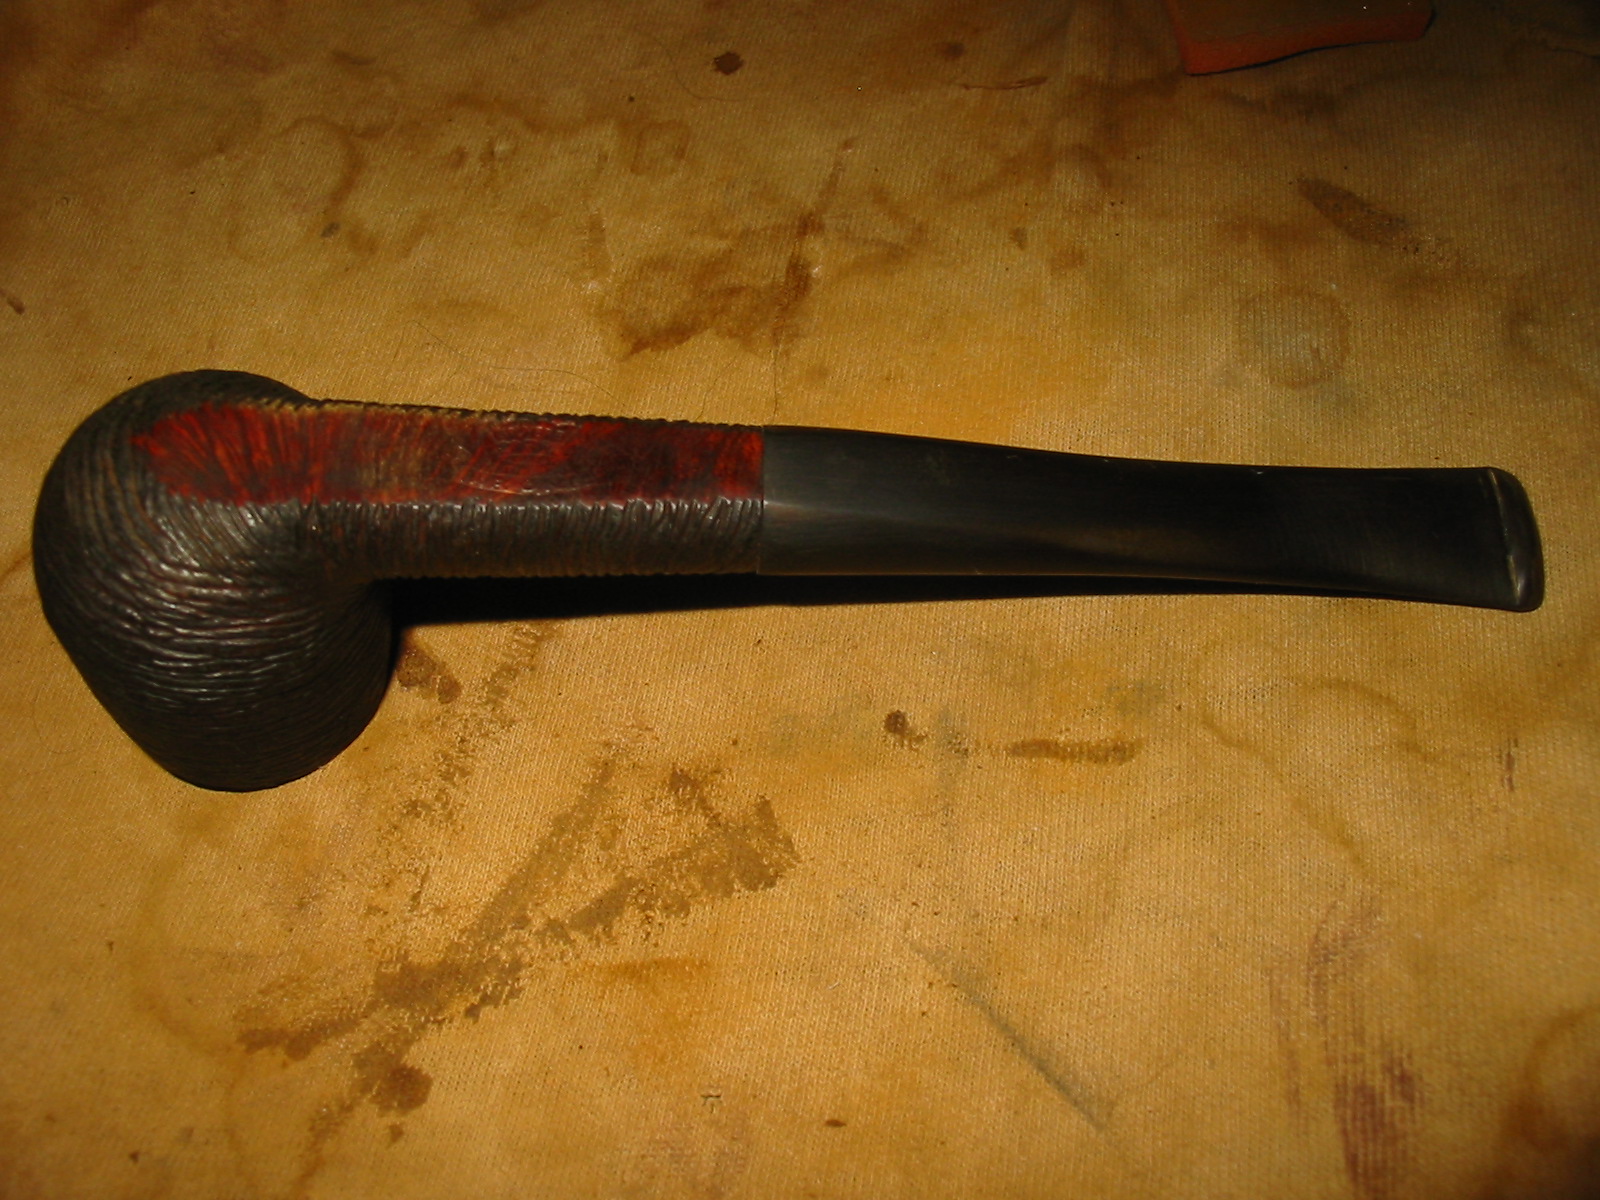
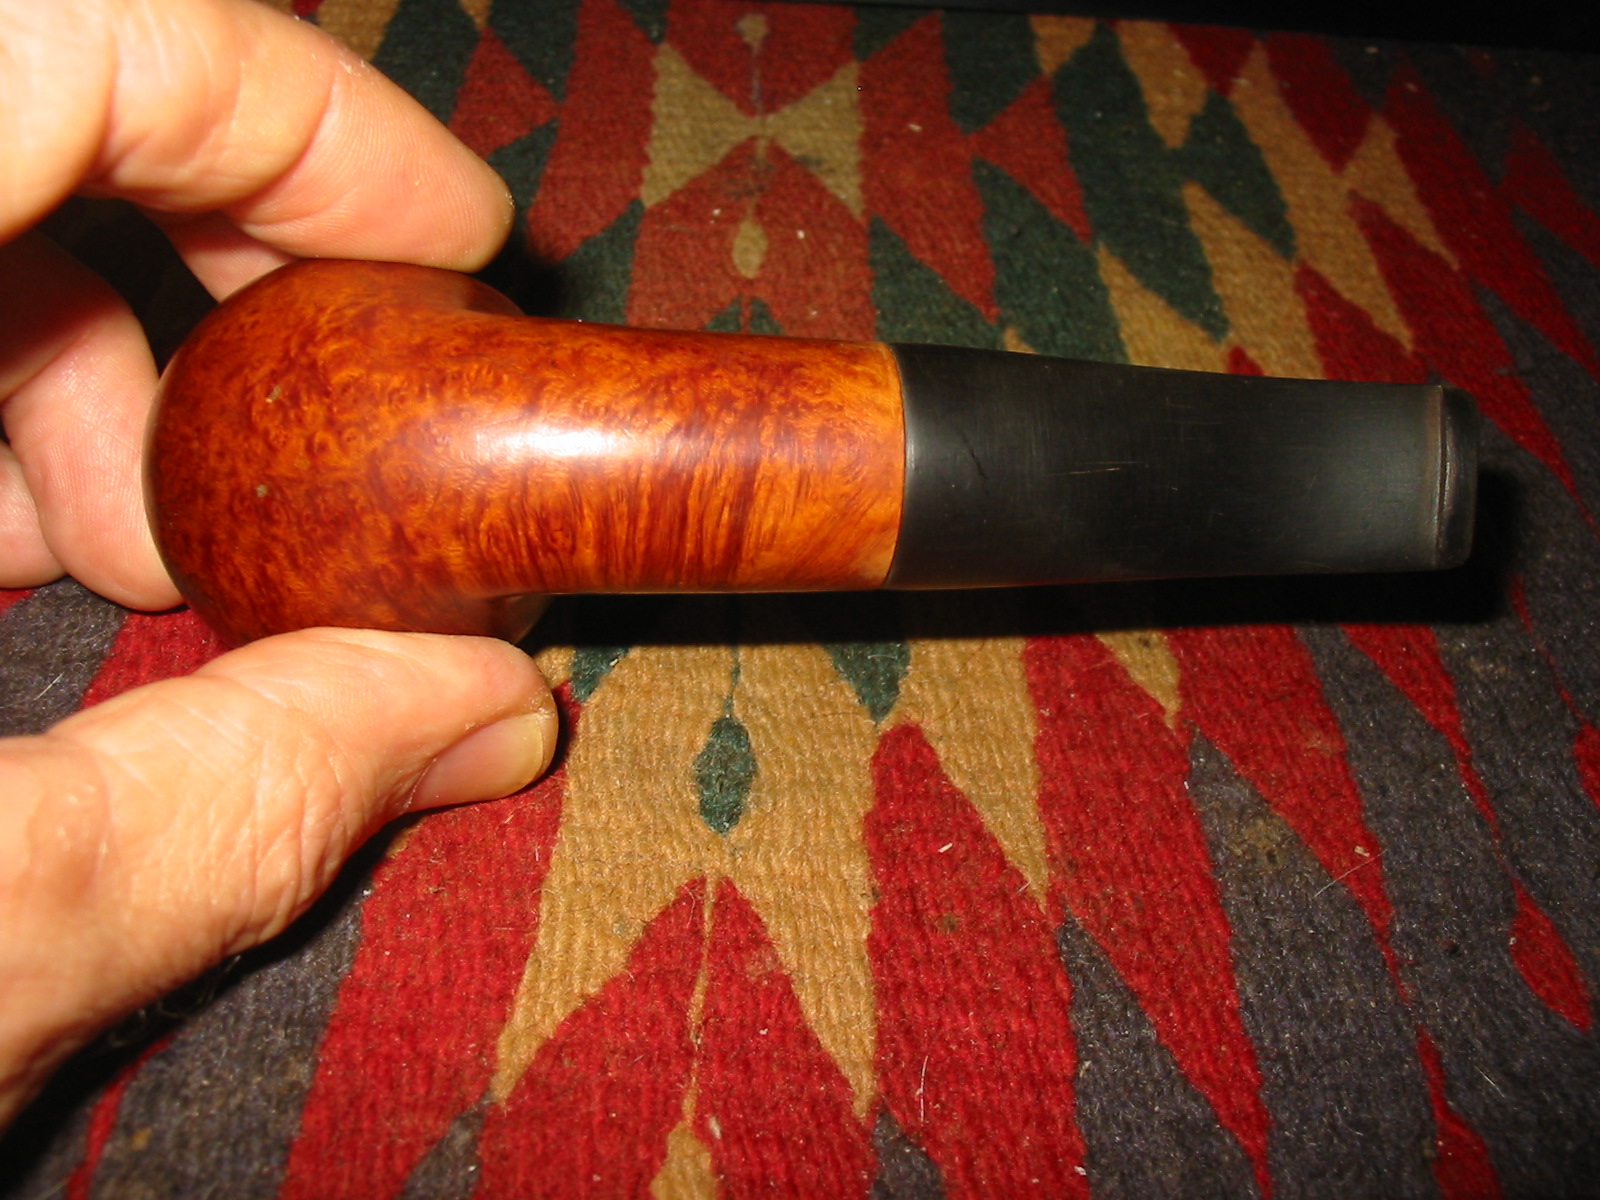
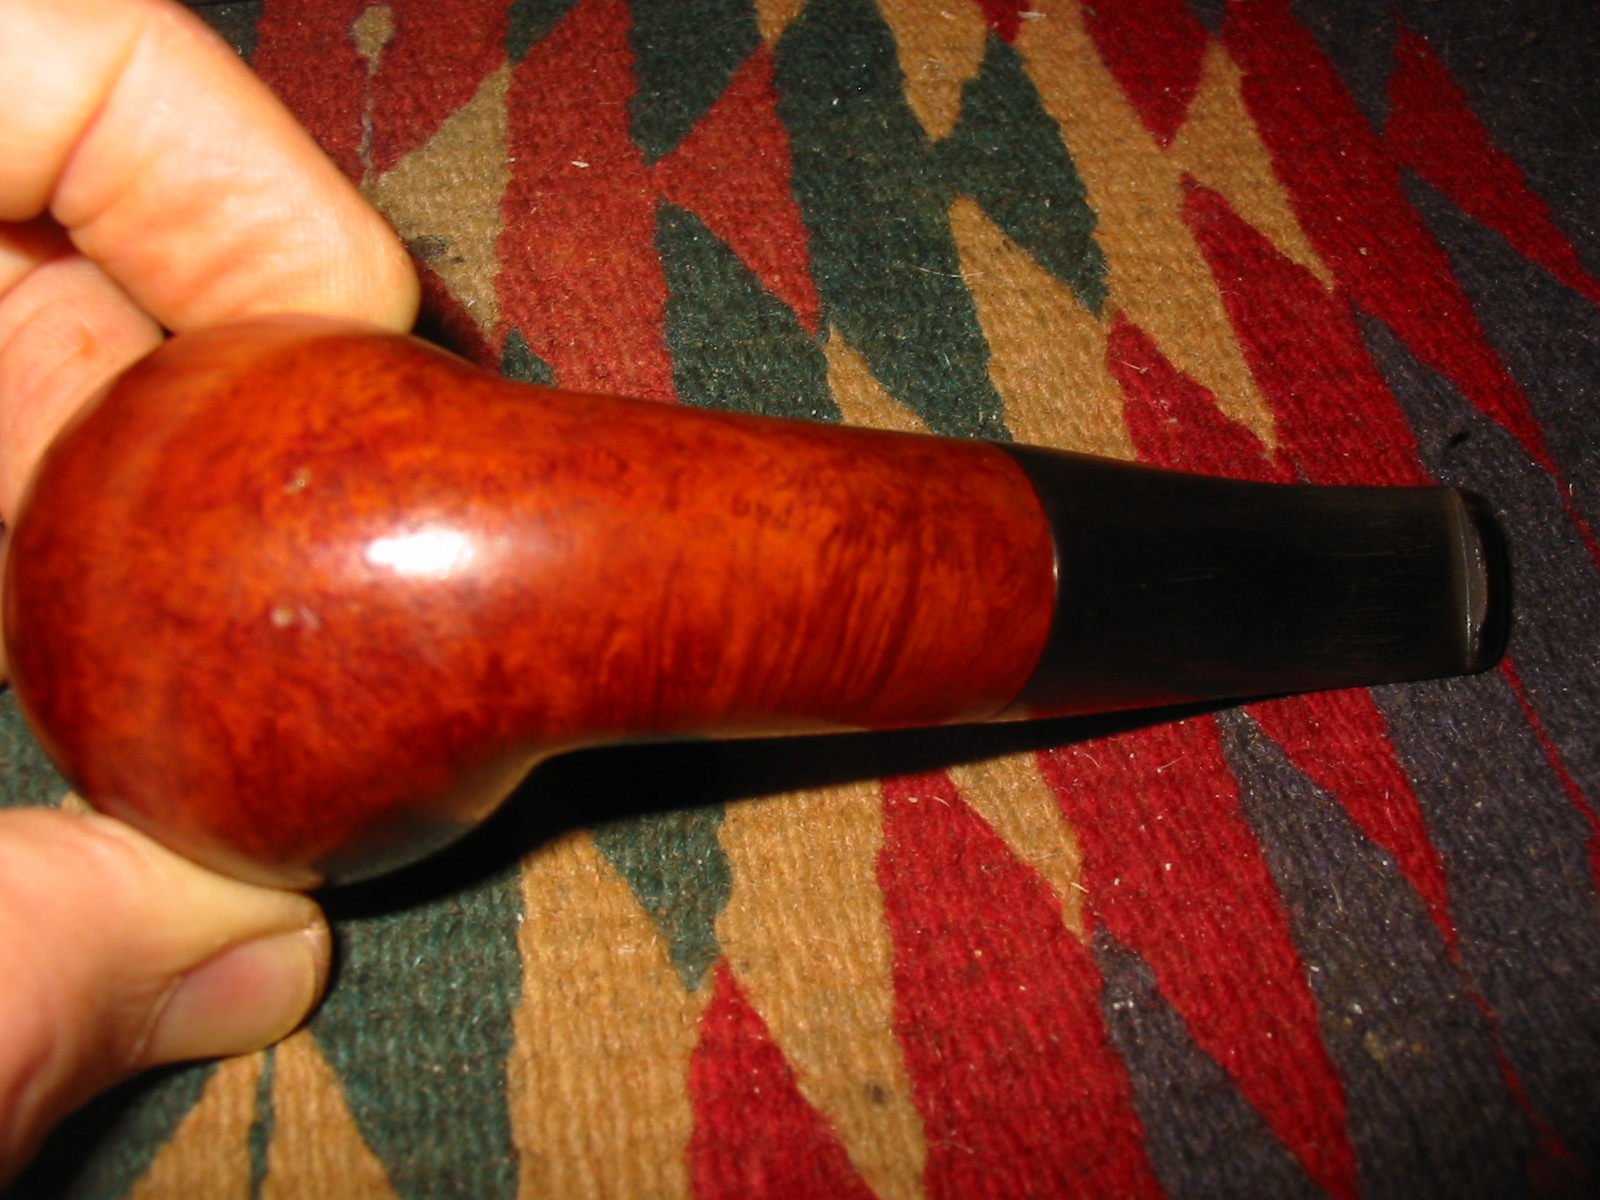
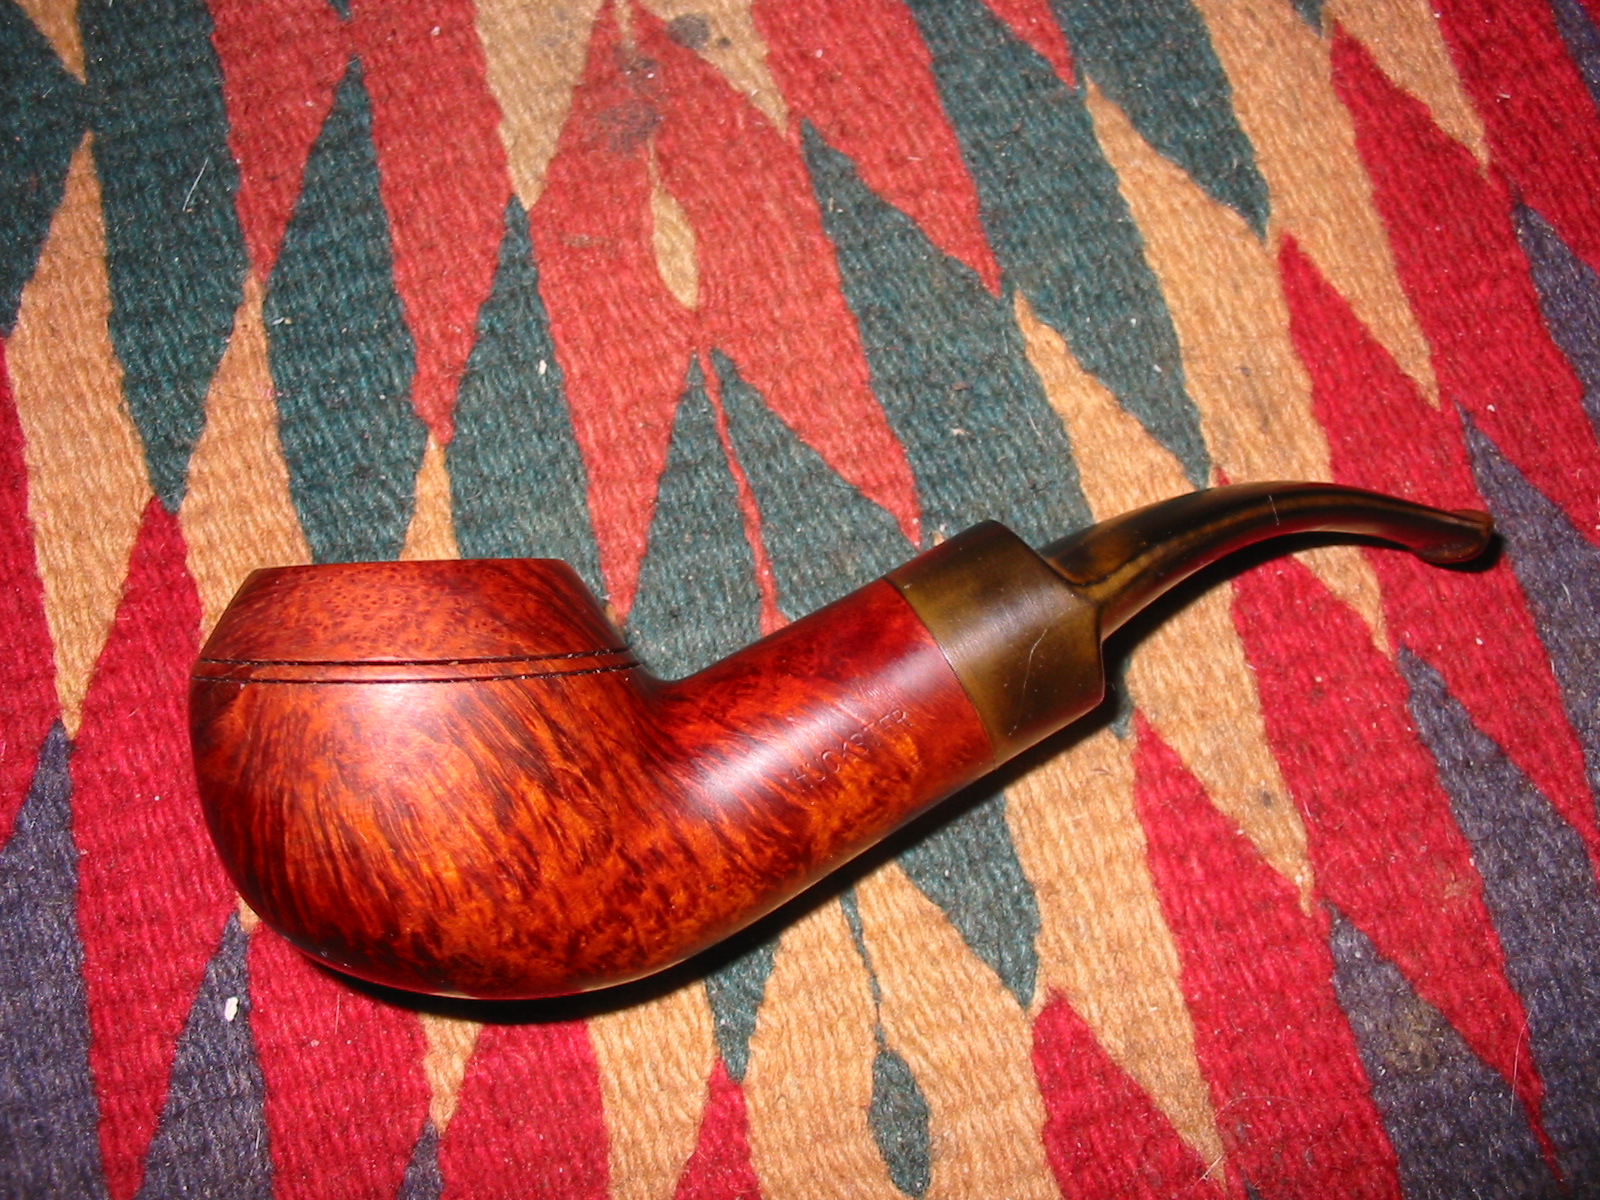
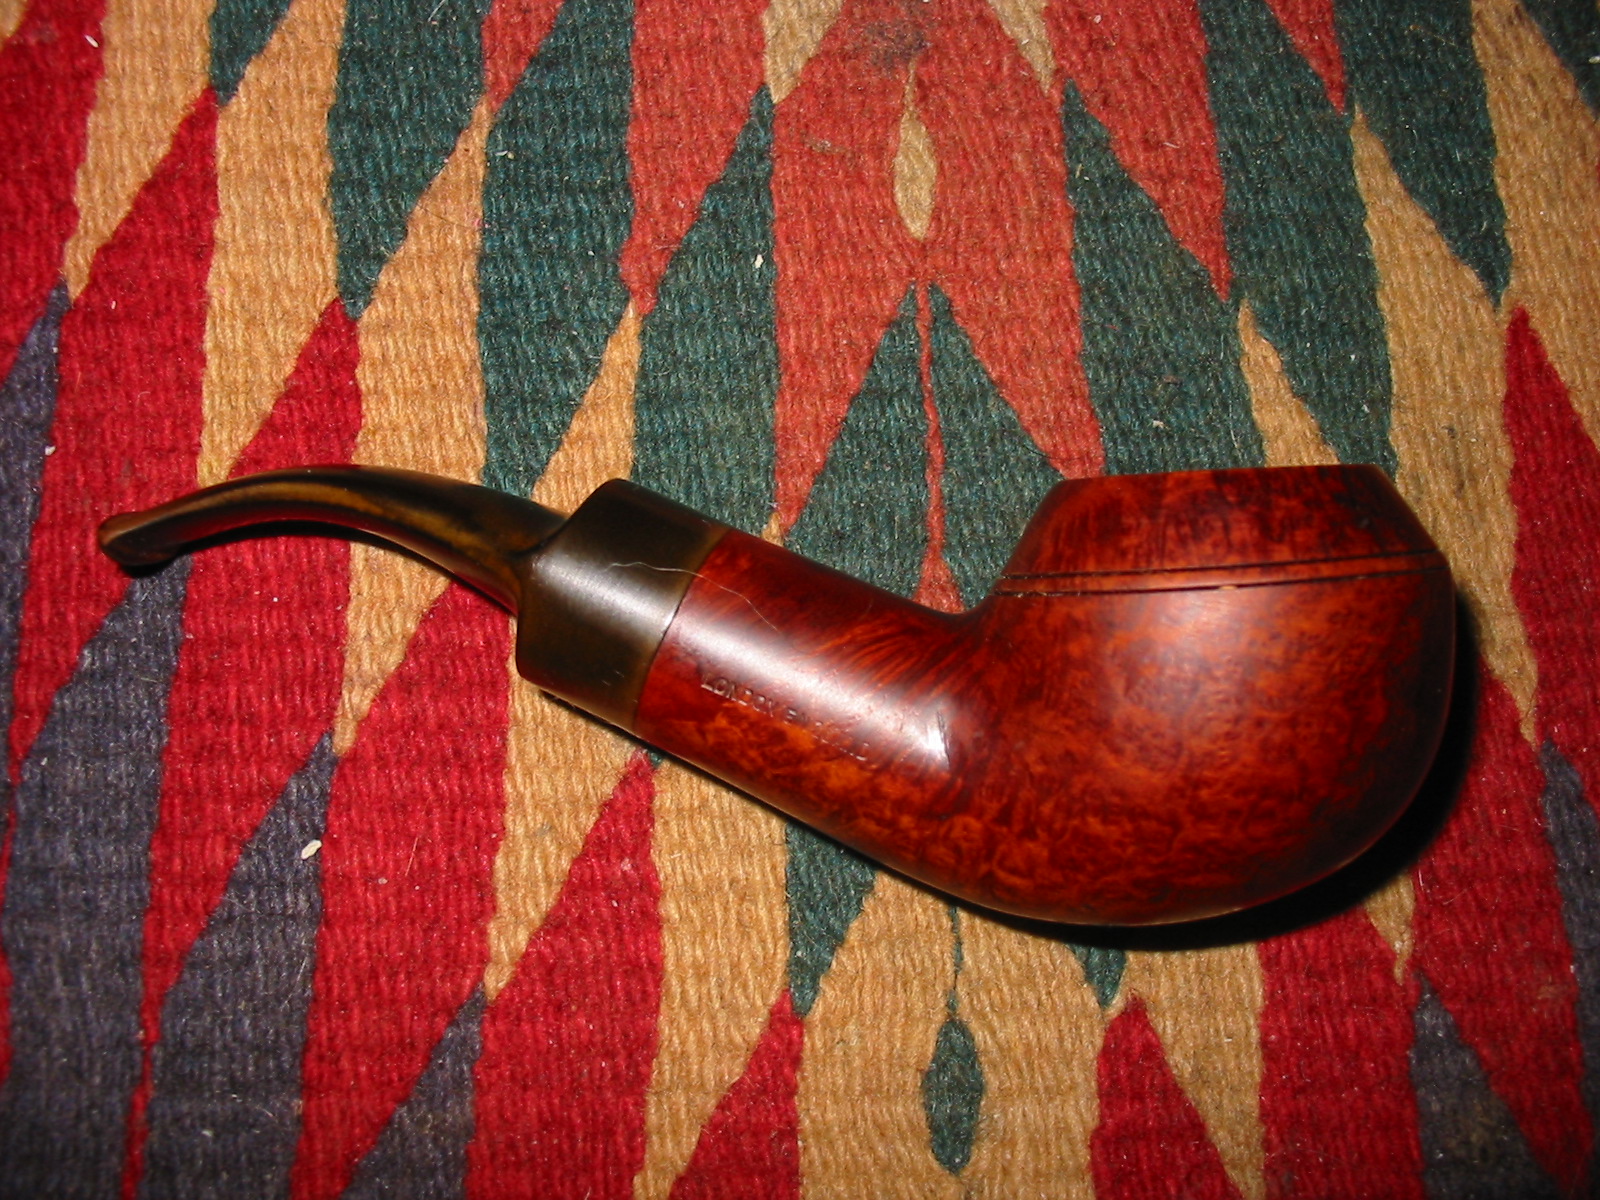
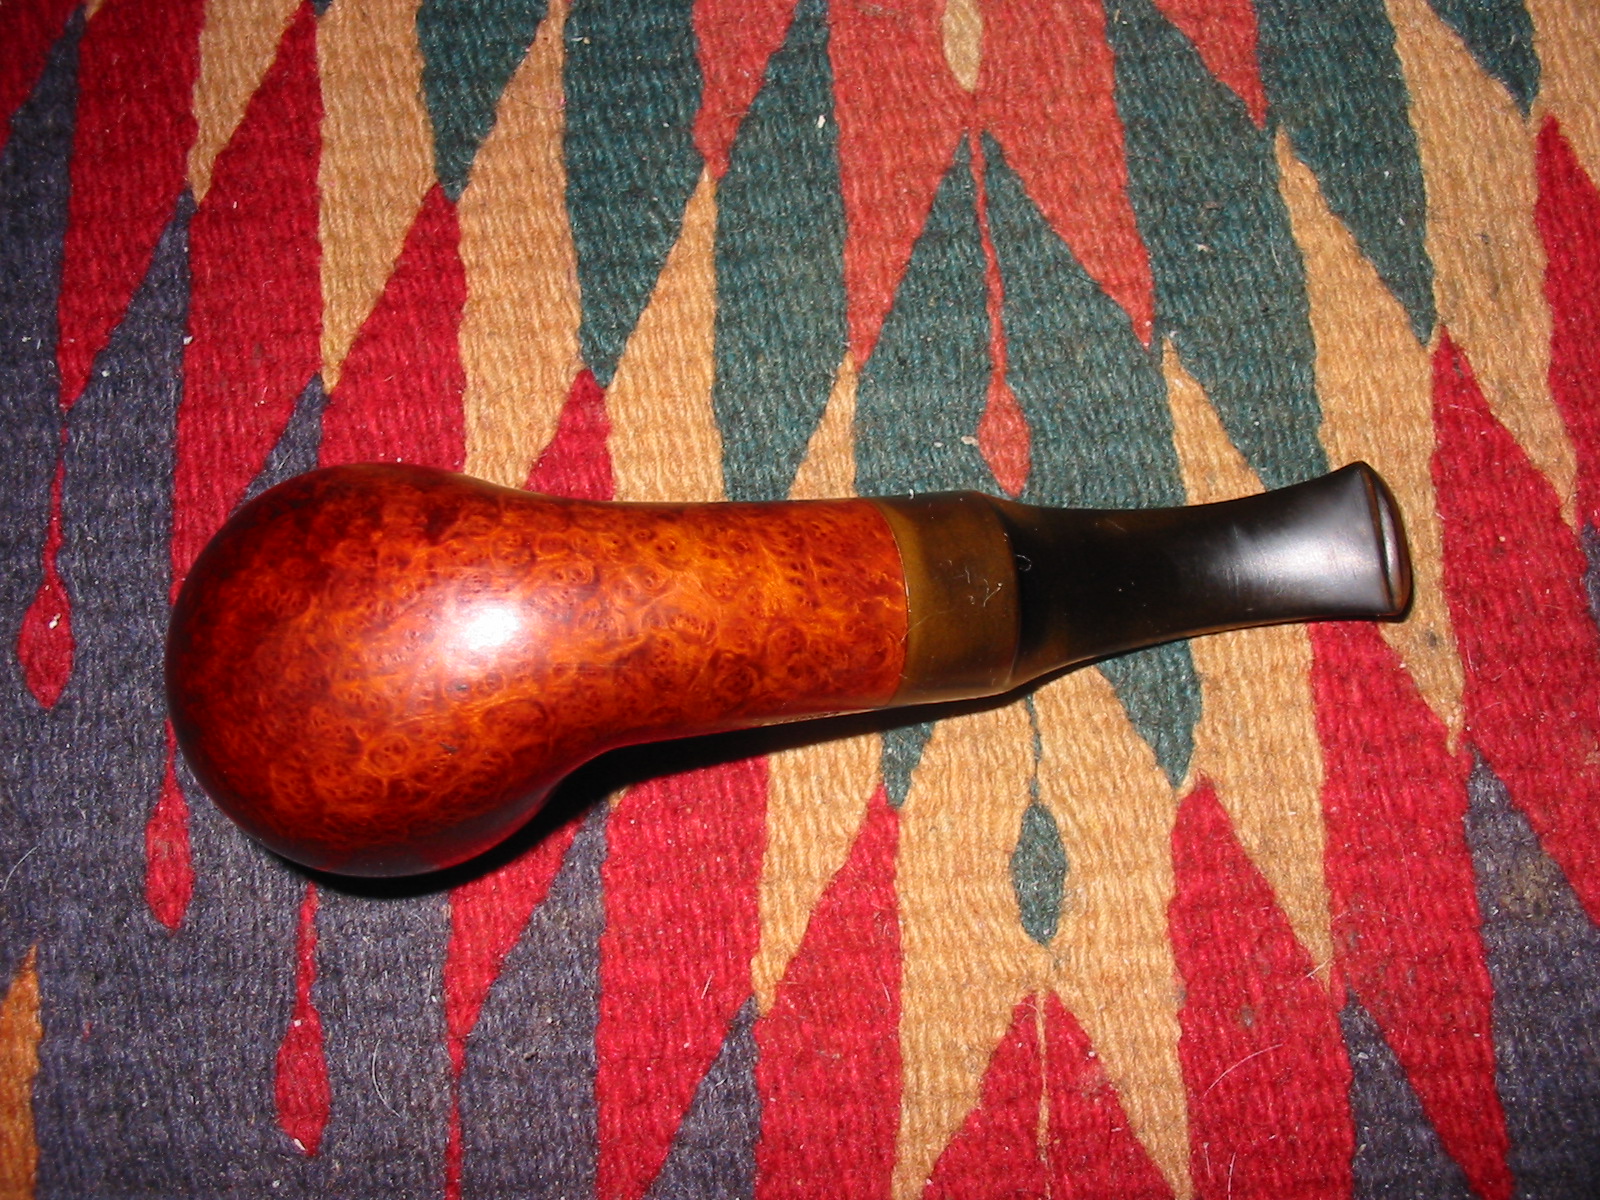
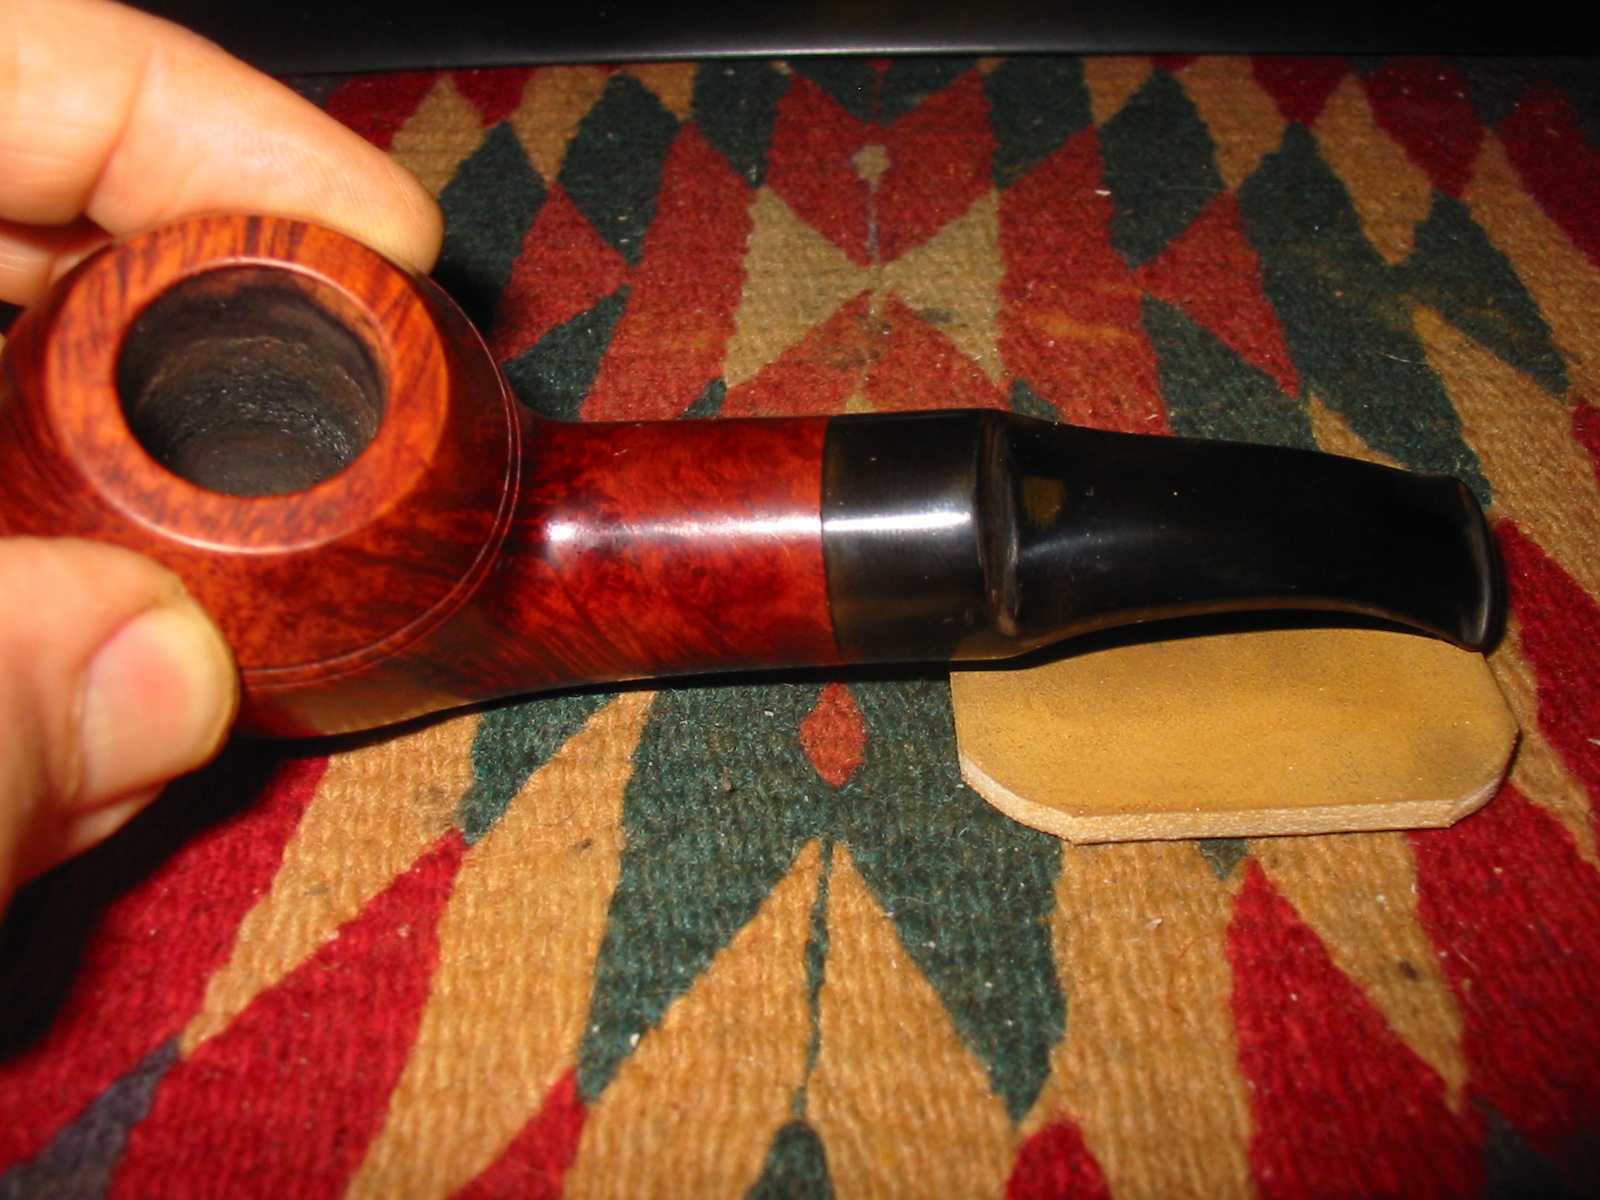
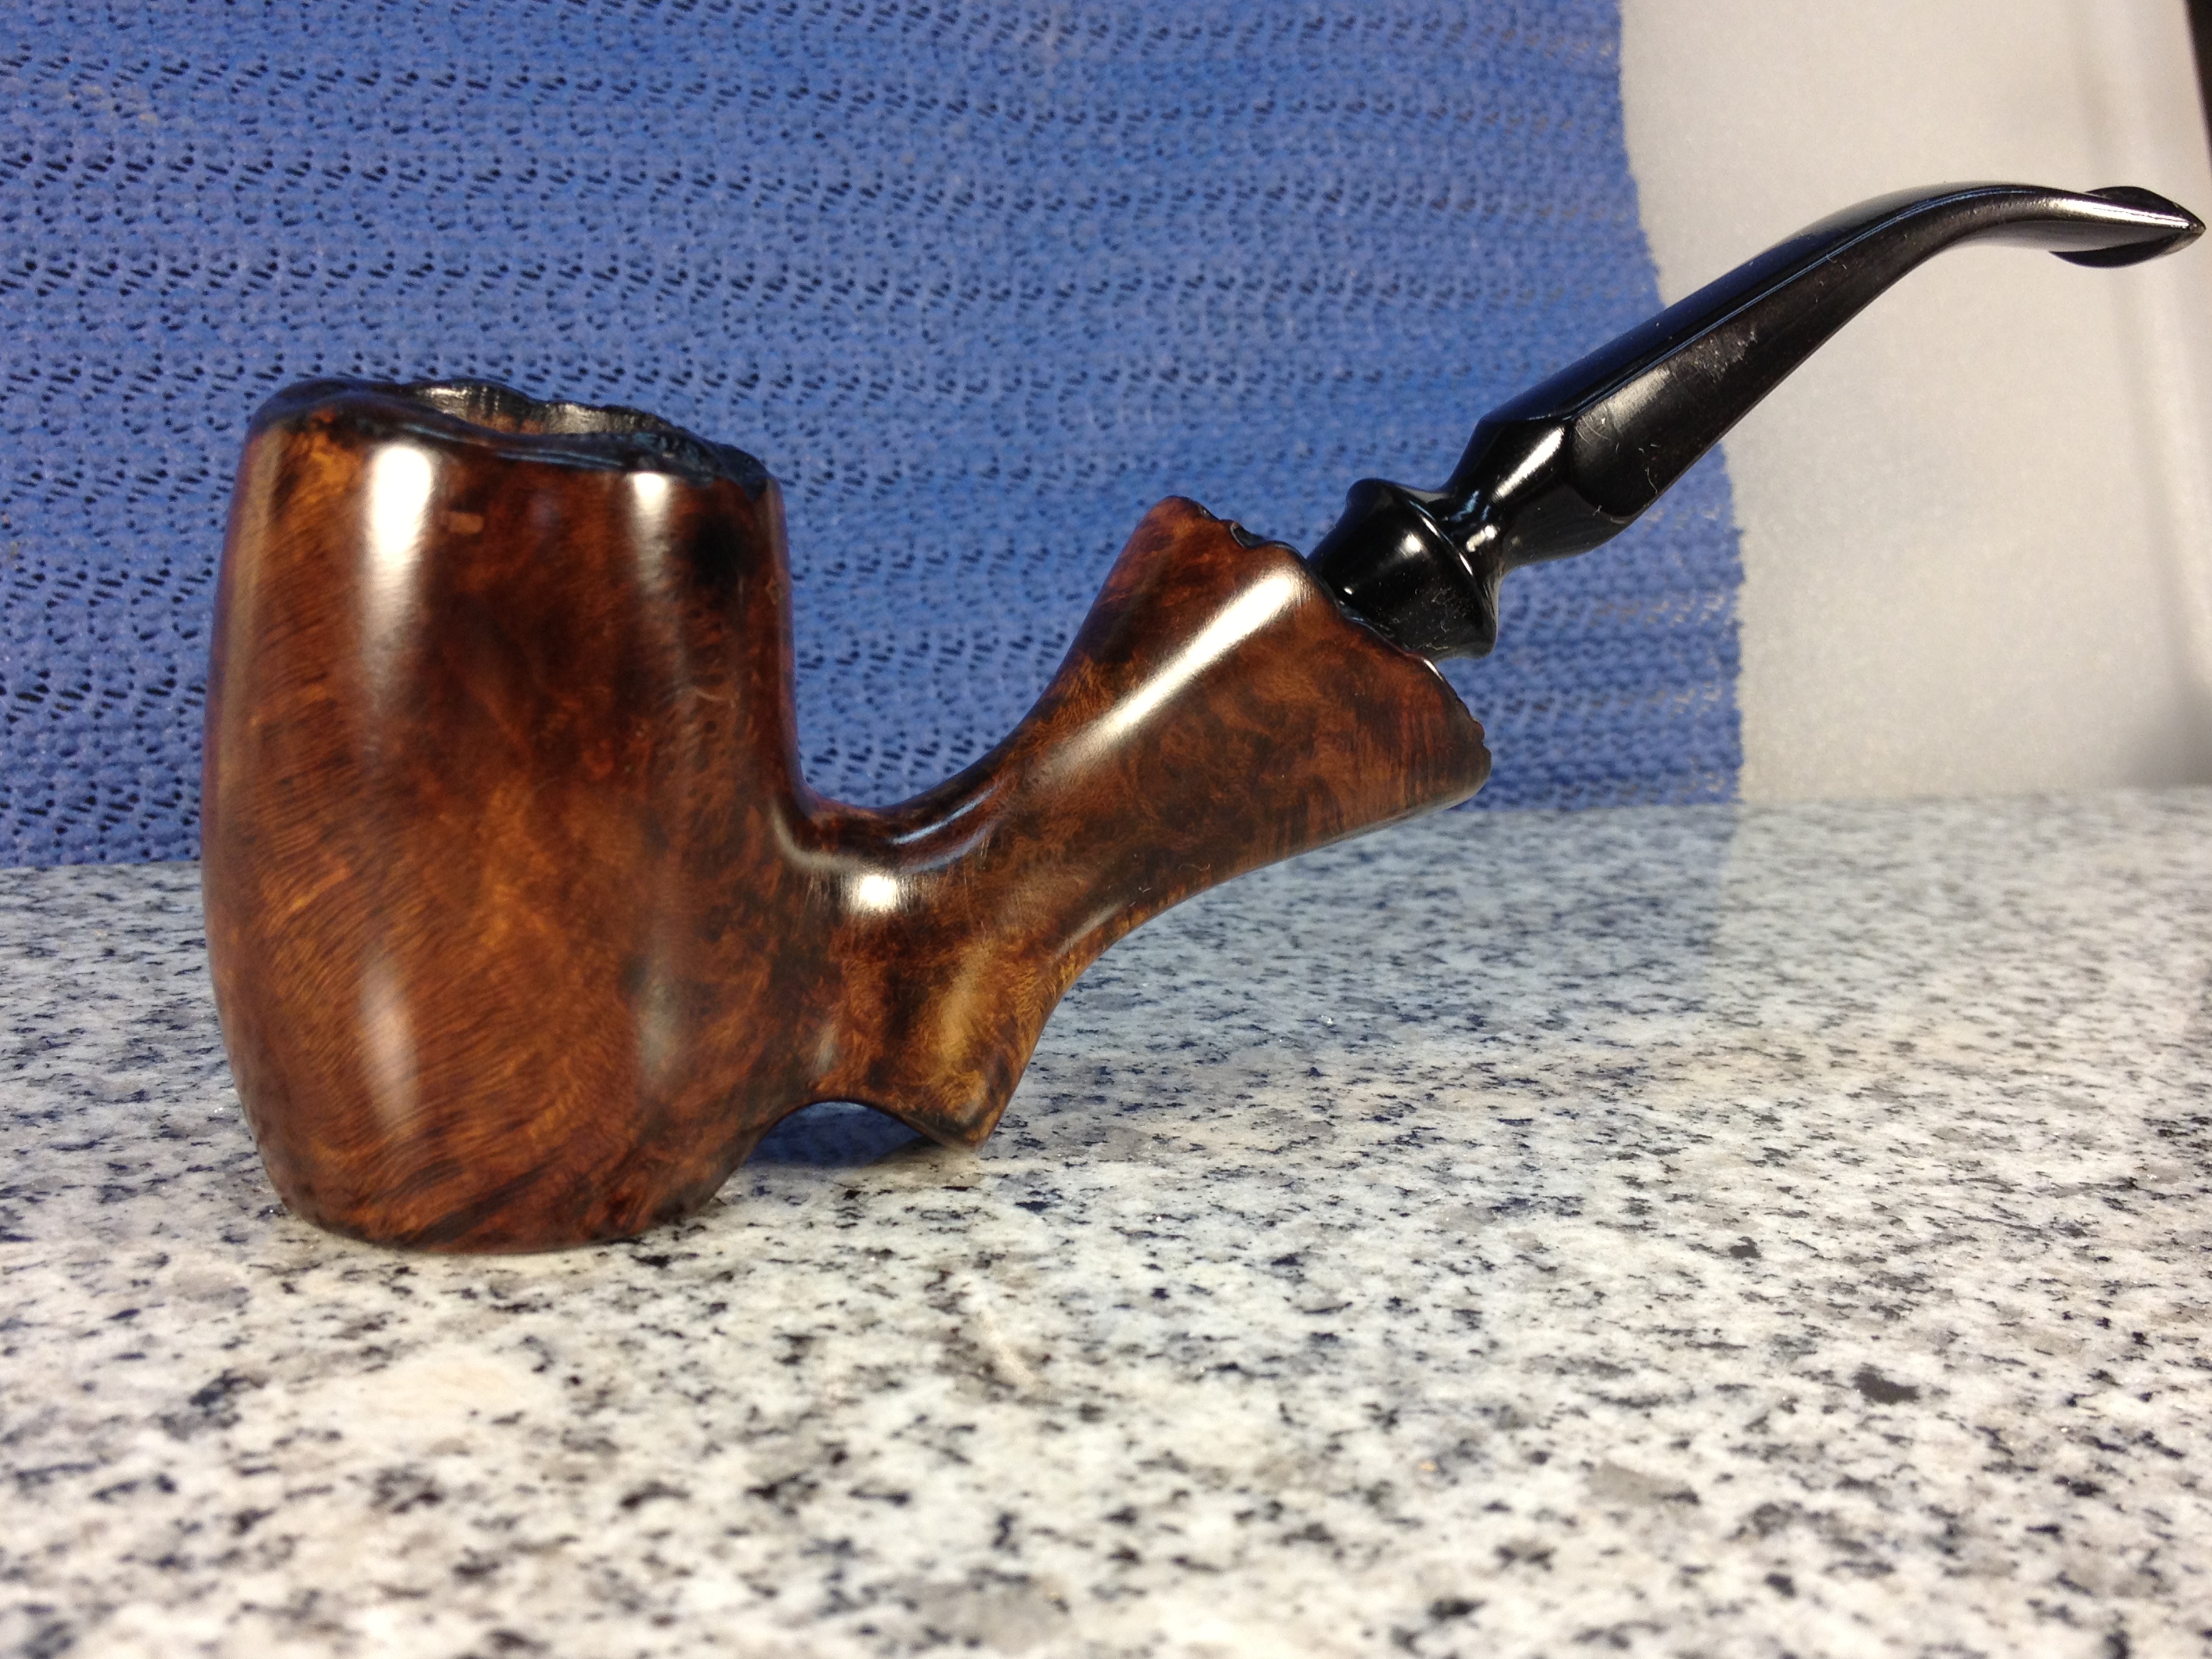
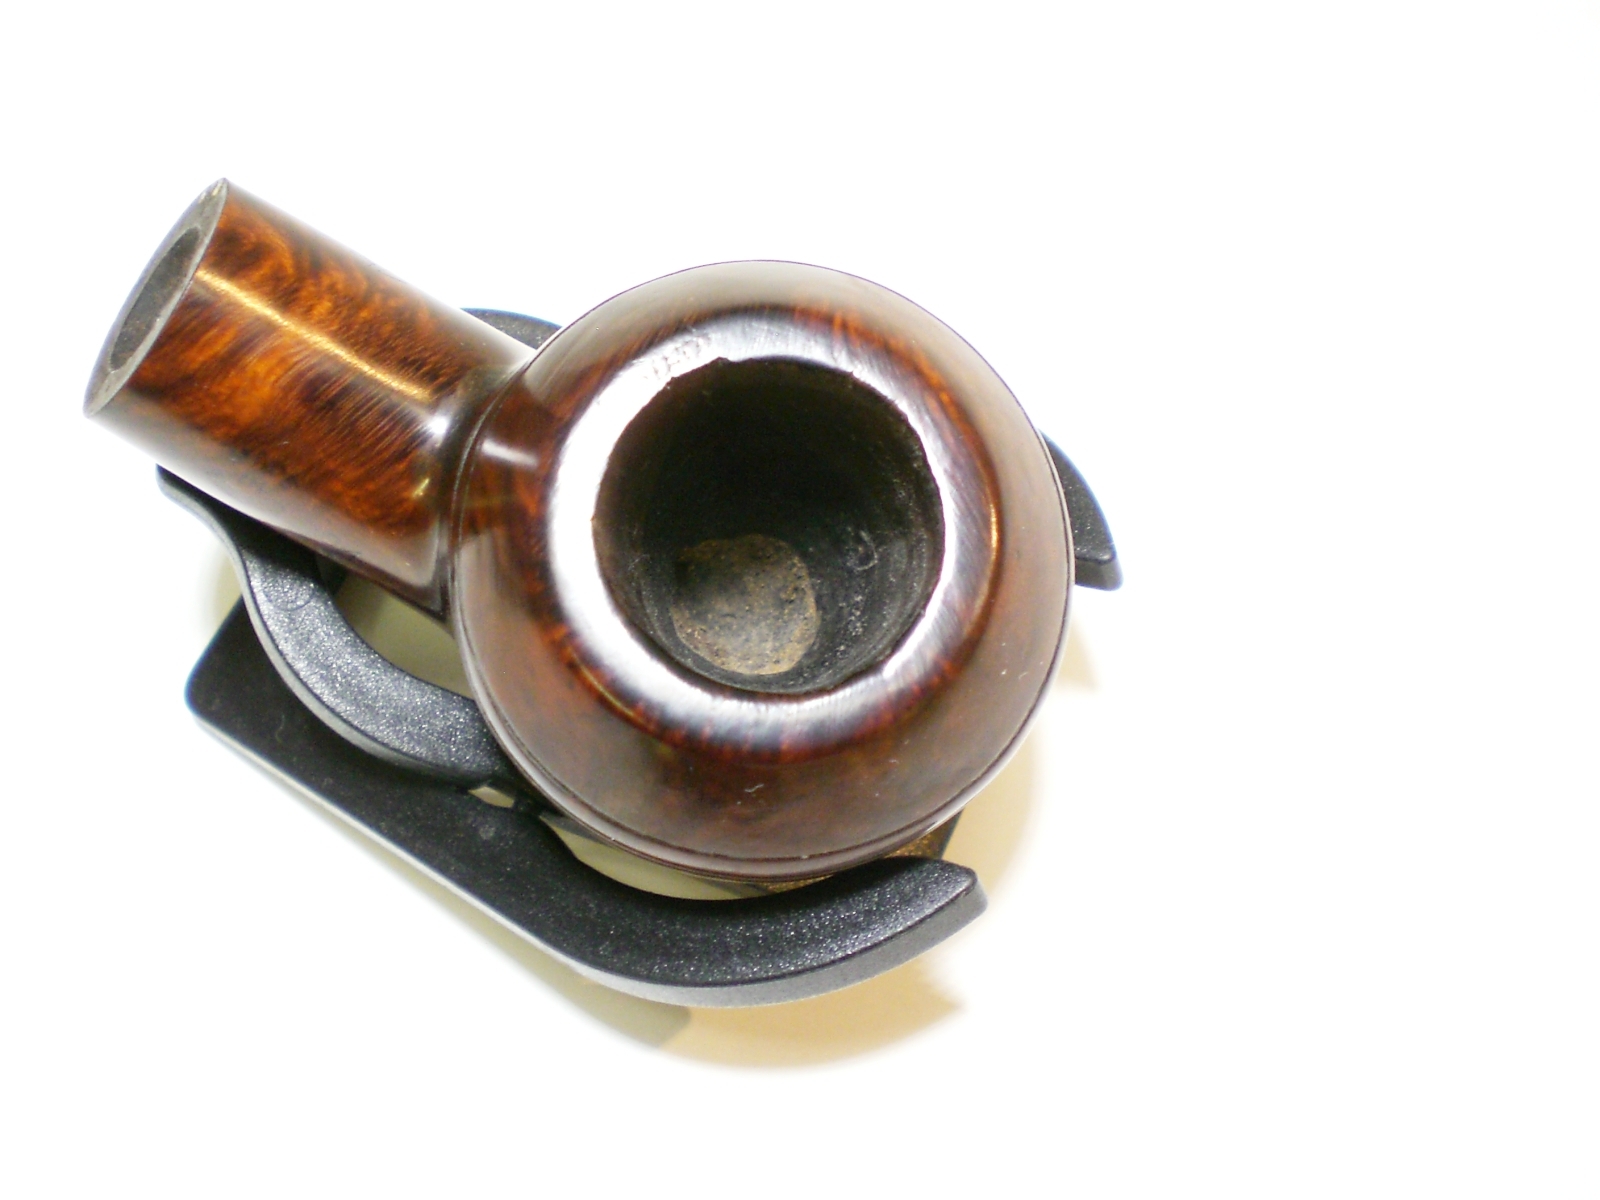
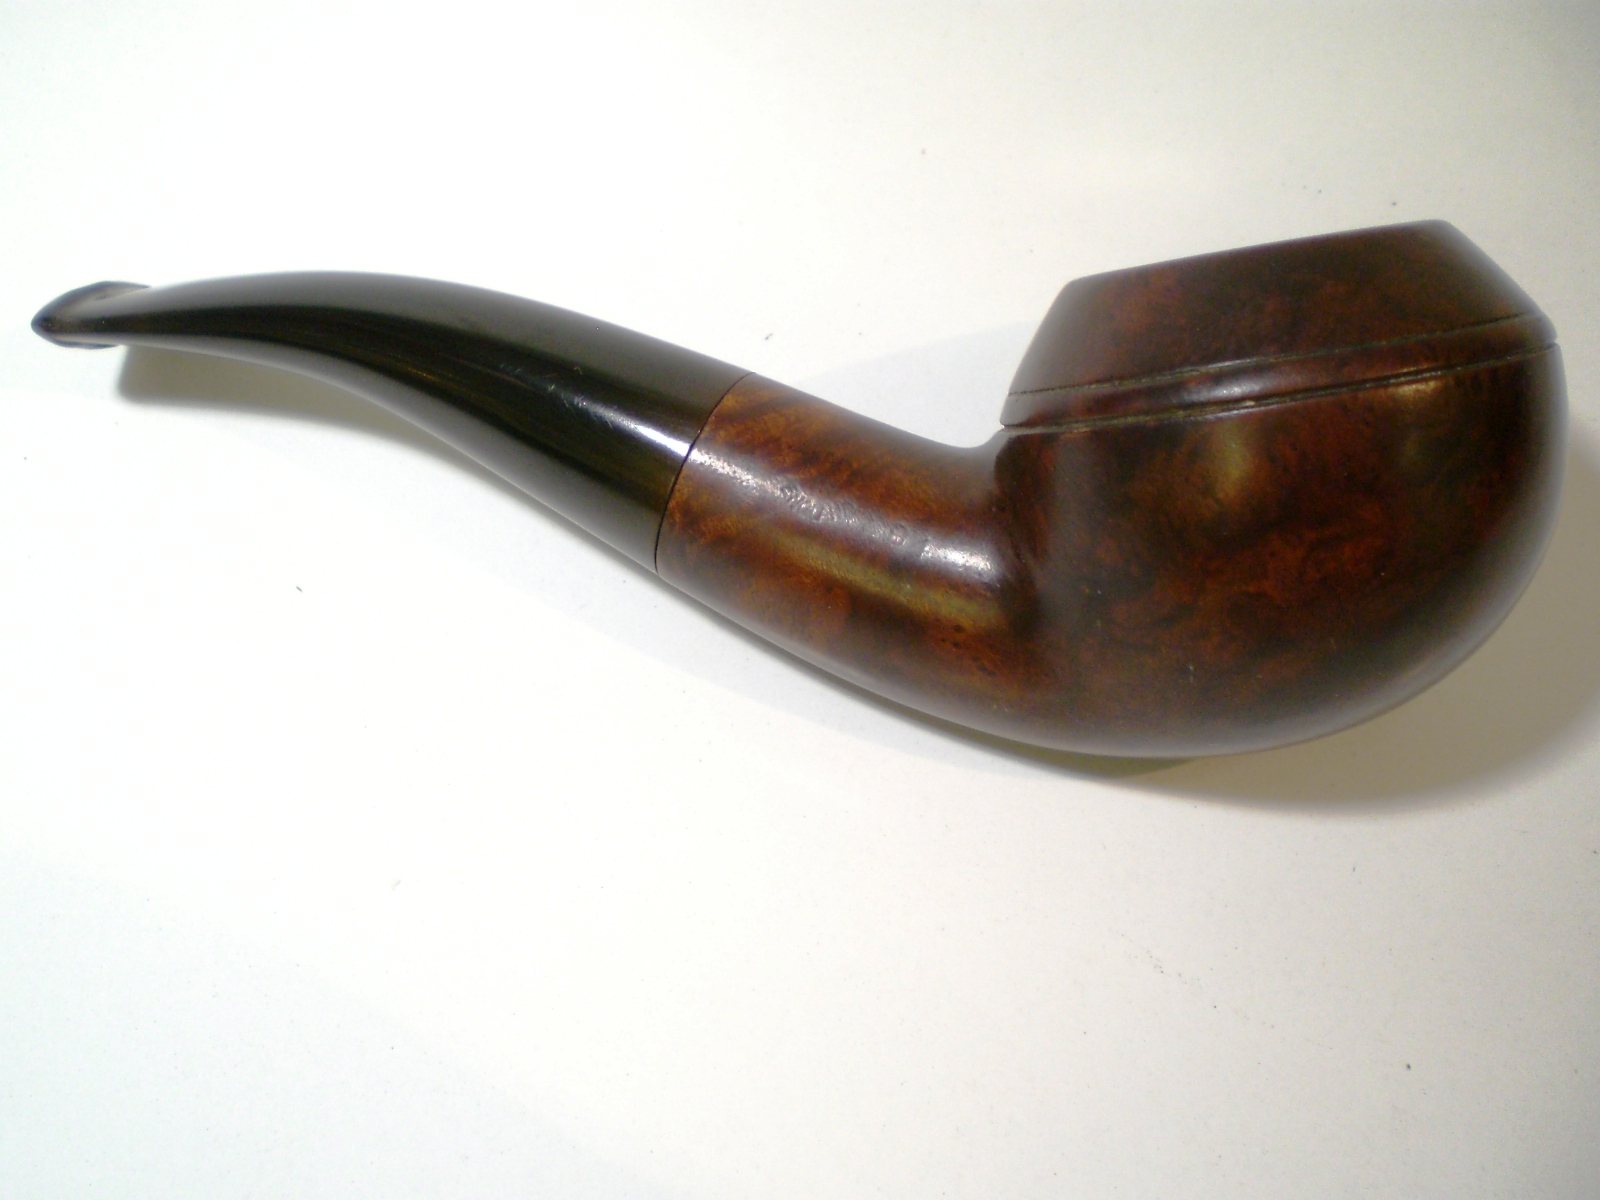
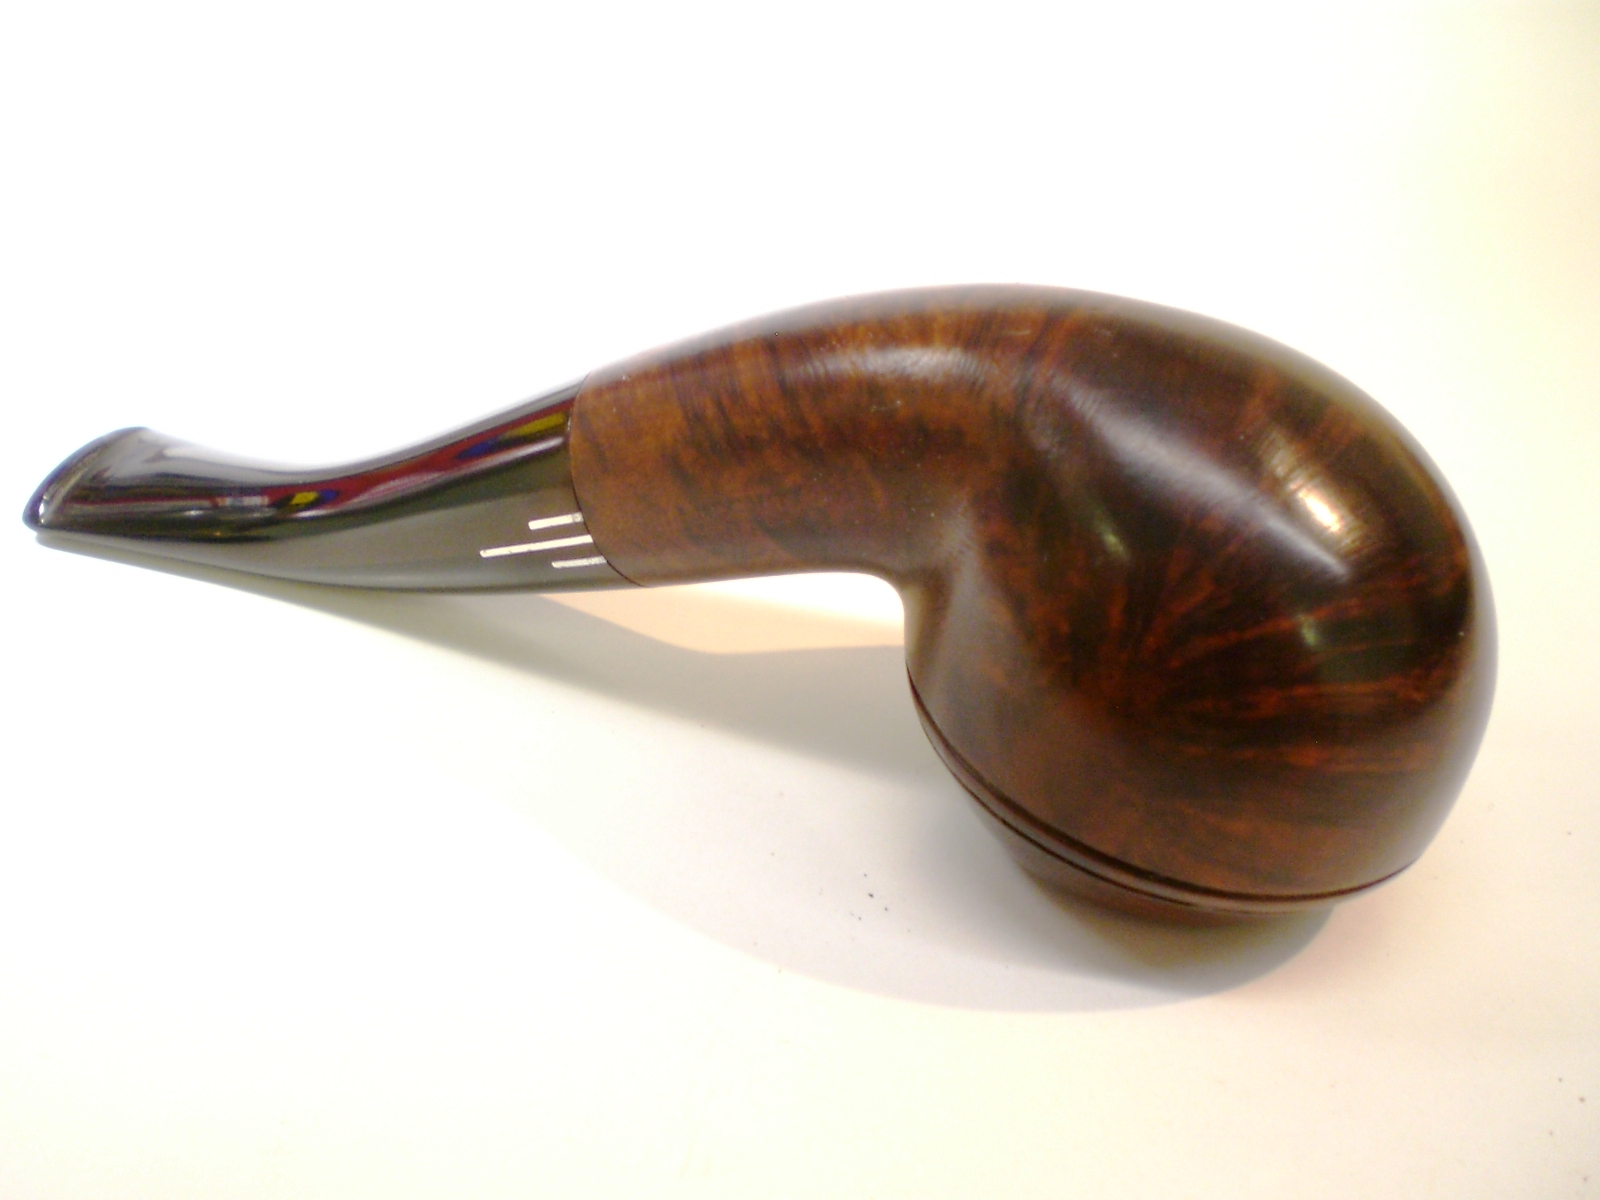
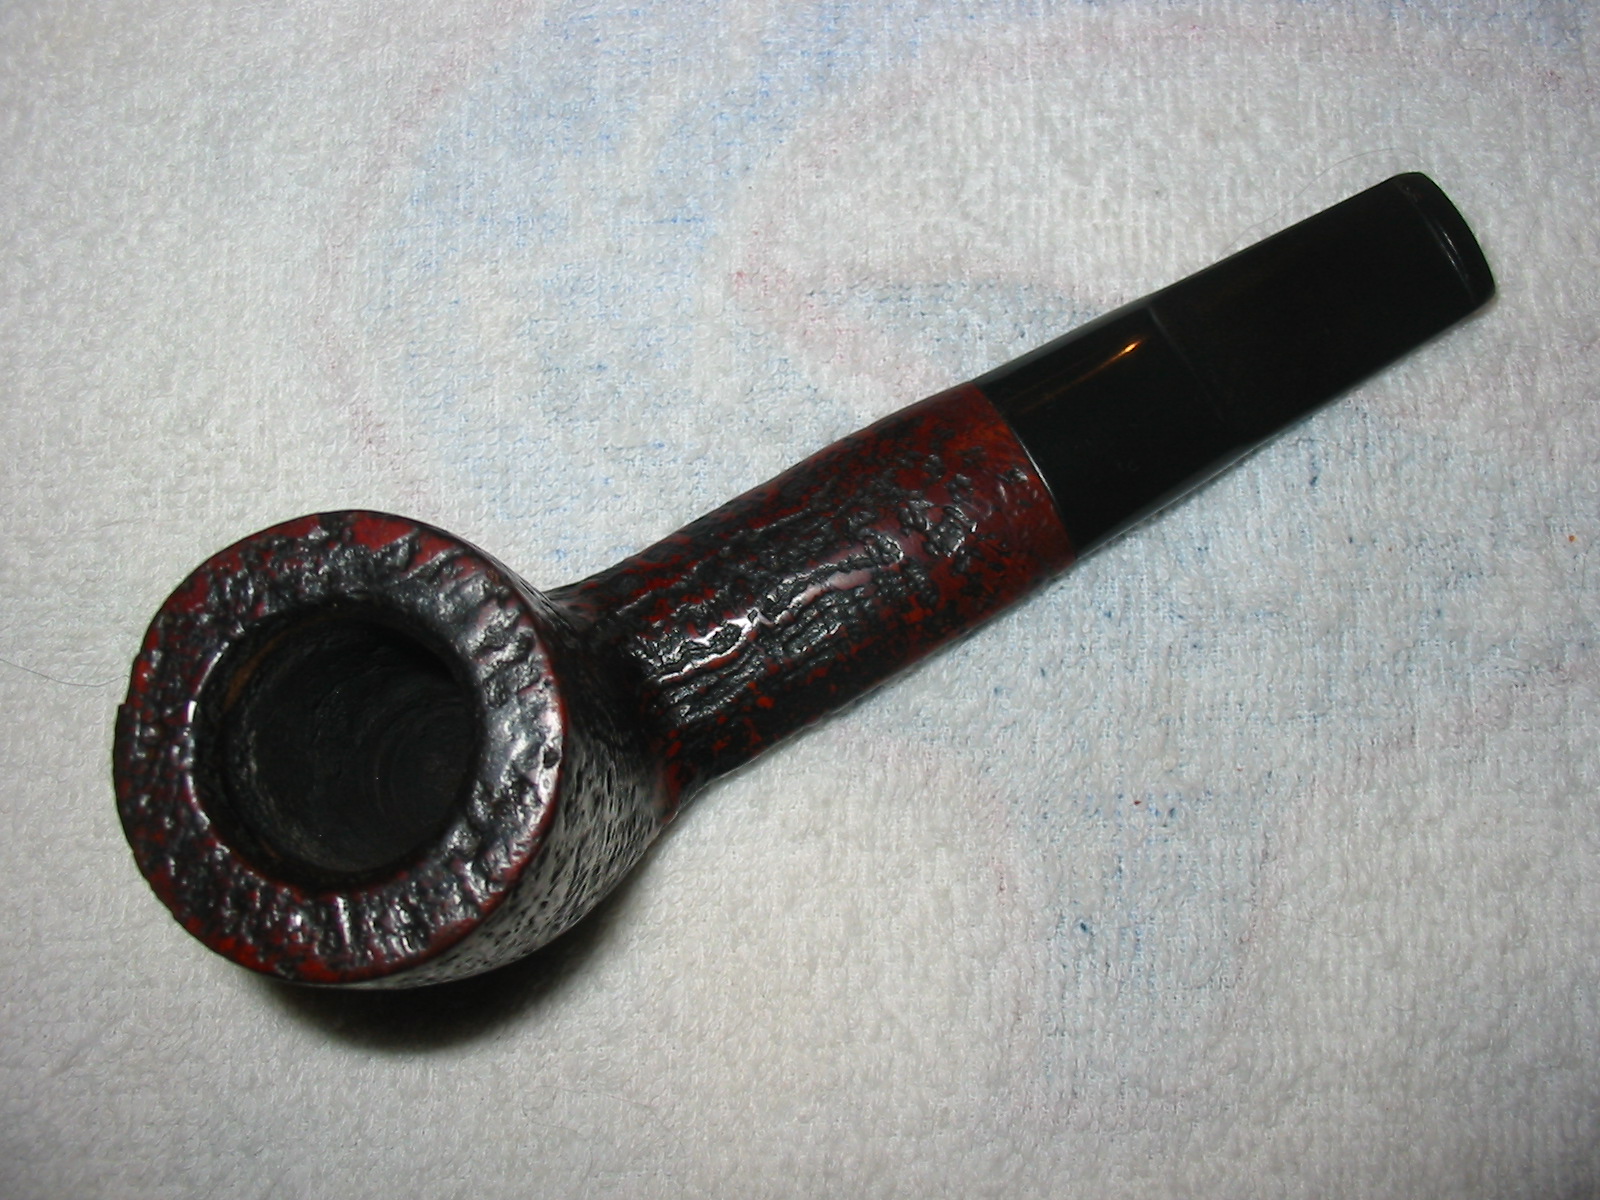
From the above photos you can see the coverage of the black stain and the way in which the black permanent marker blends into the grain of the pipe. I wiped the pipe down repeatedly until it was the colour I wanted before I put on the next coat of stain. For the top coat I chose to use an oxblood or mahogany coloured aniline paste stain. I rubbed it on with cotton swabs and wiped it off with a soft cloth.

IMG_1628

IMG_1629

IMG_1630

IMG_1631

IMG_1632

IMG_1634

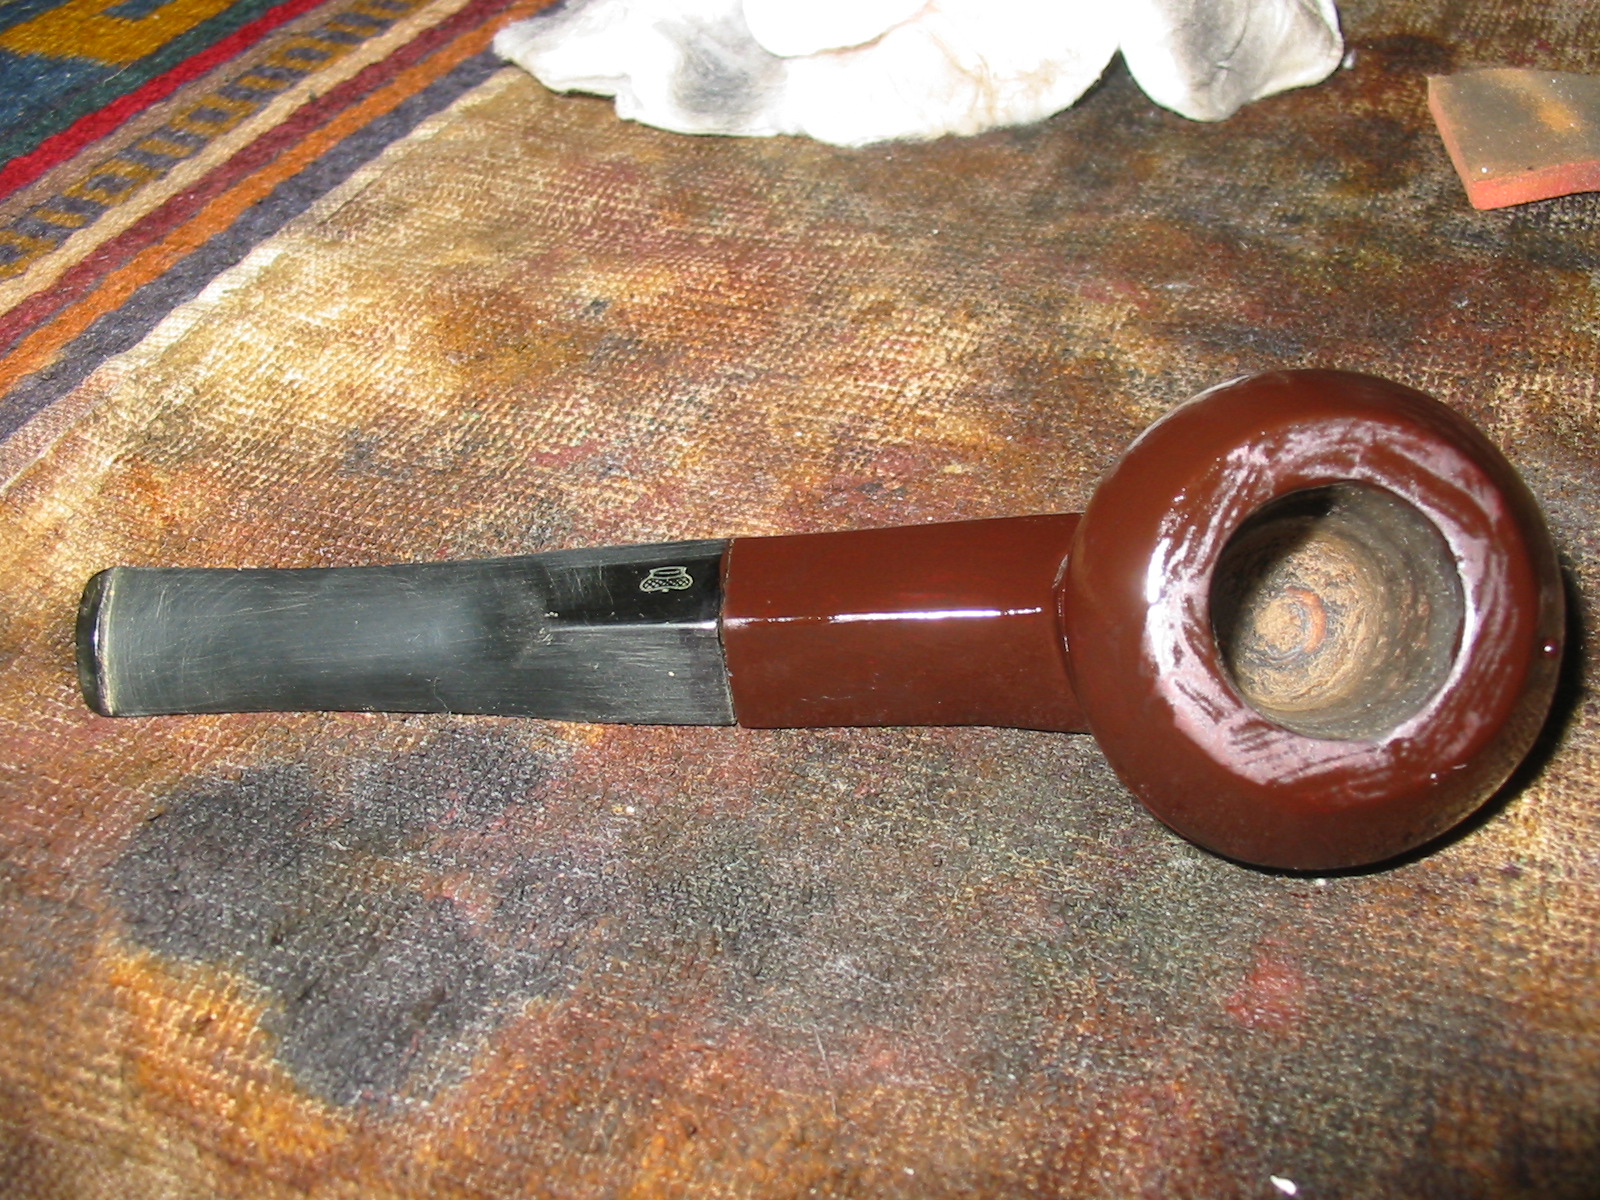
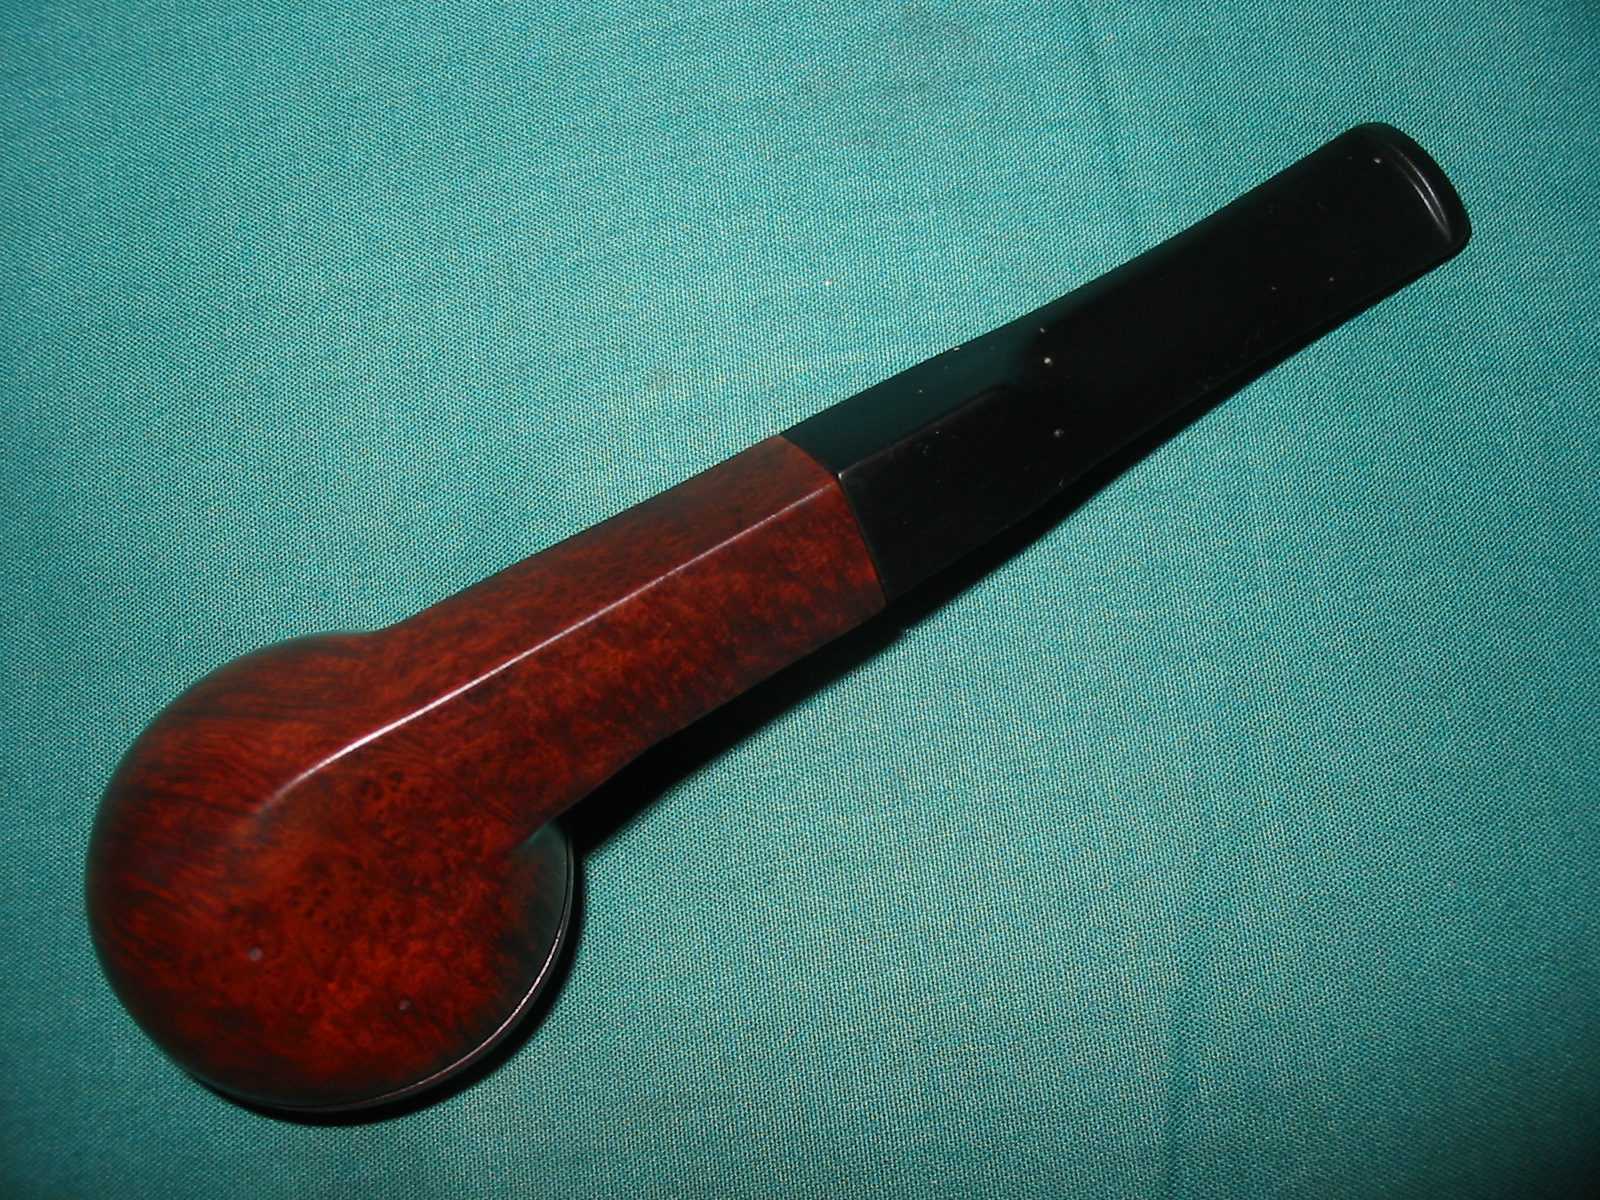
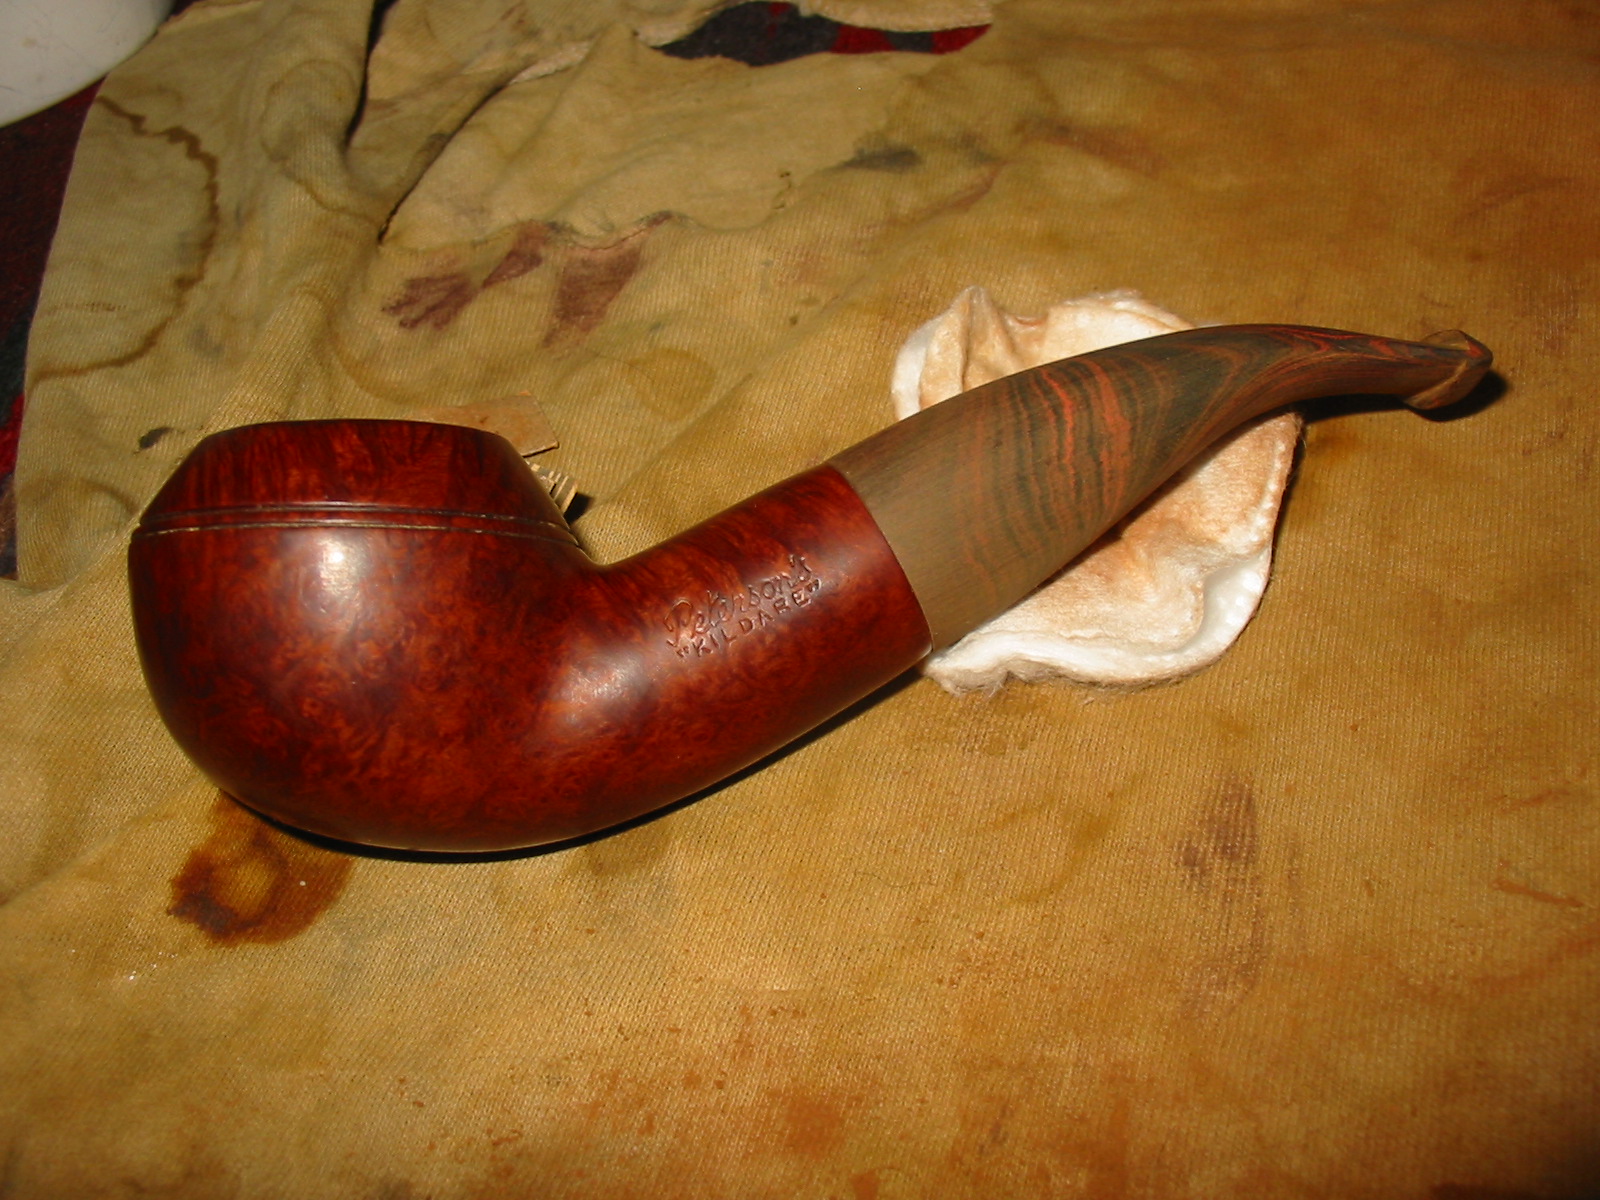
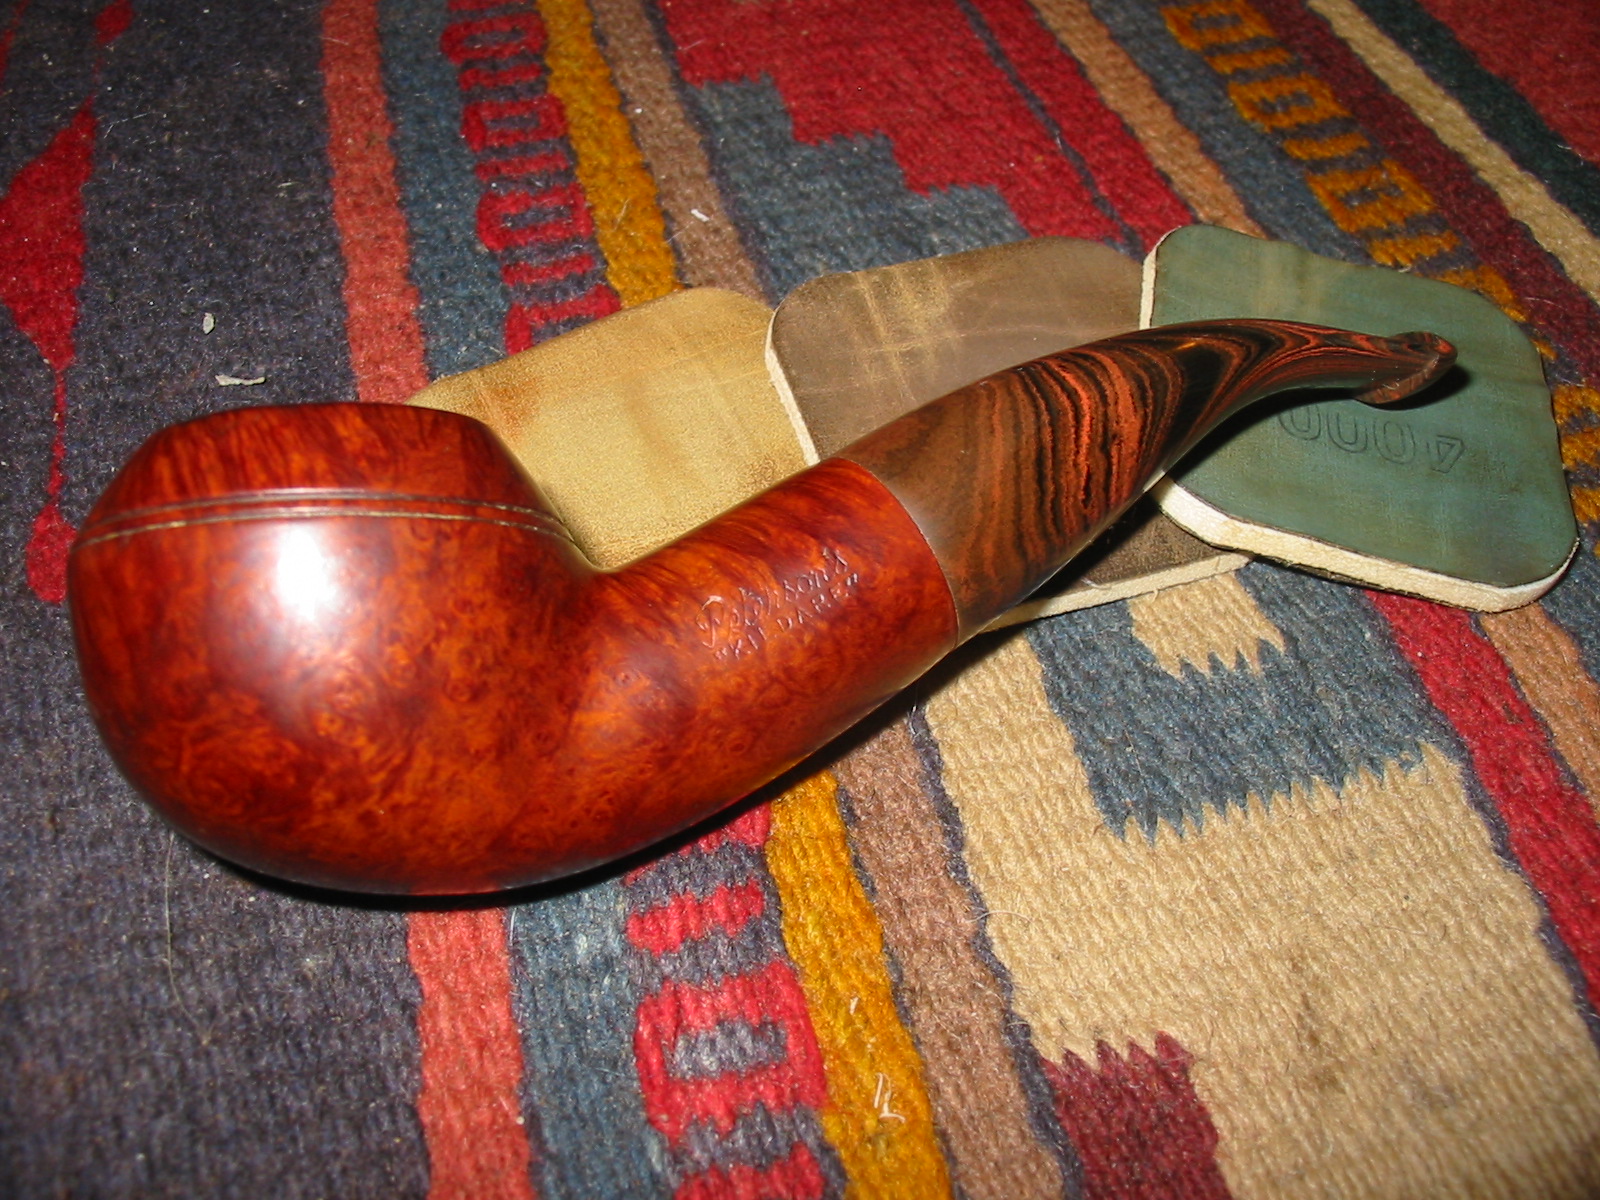
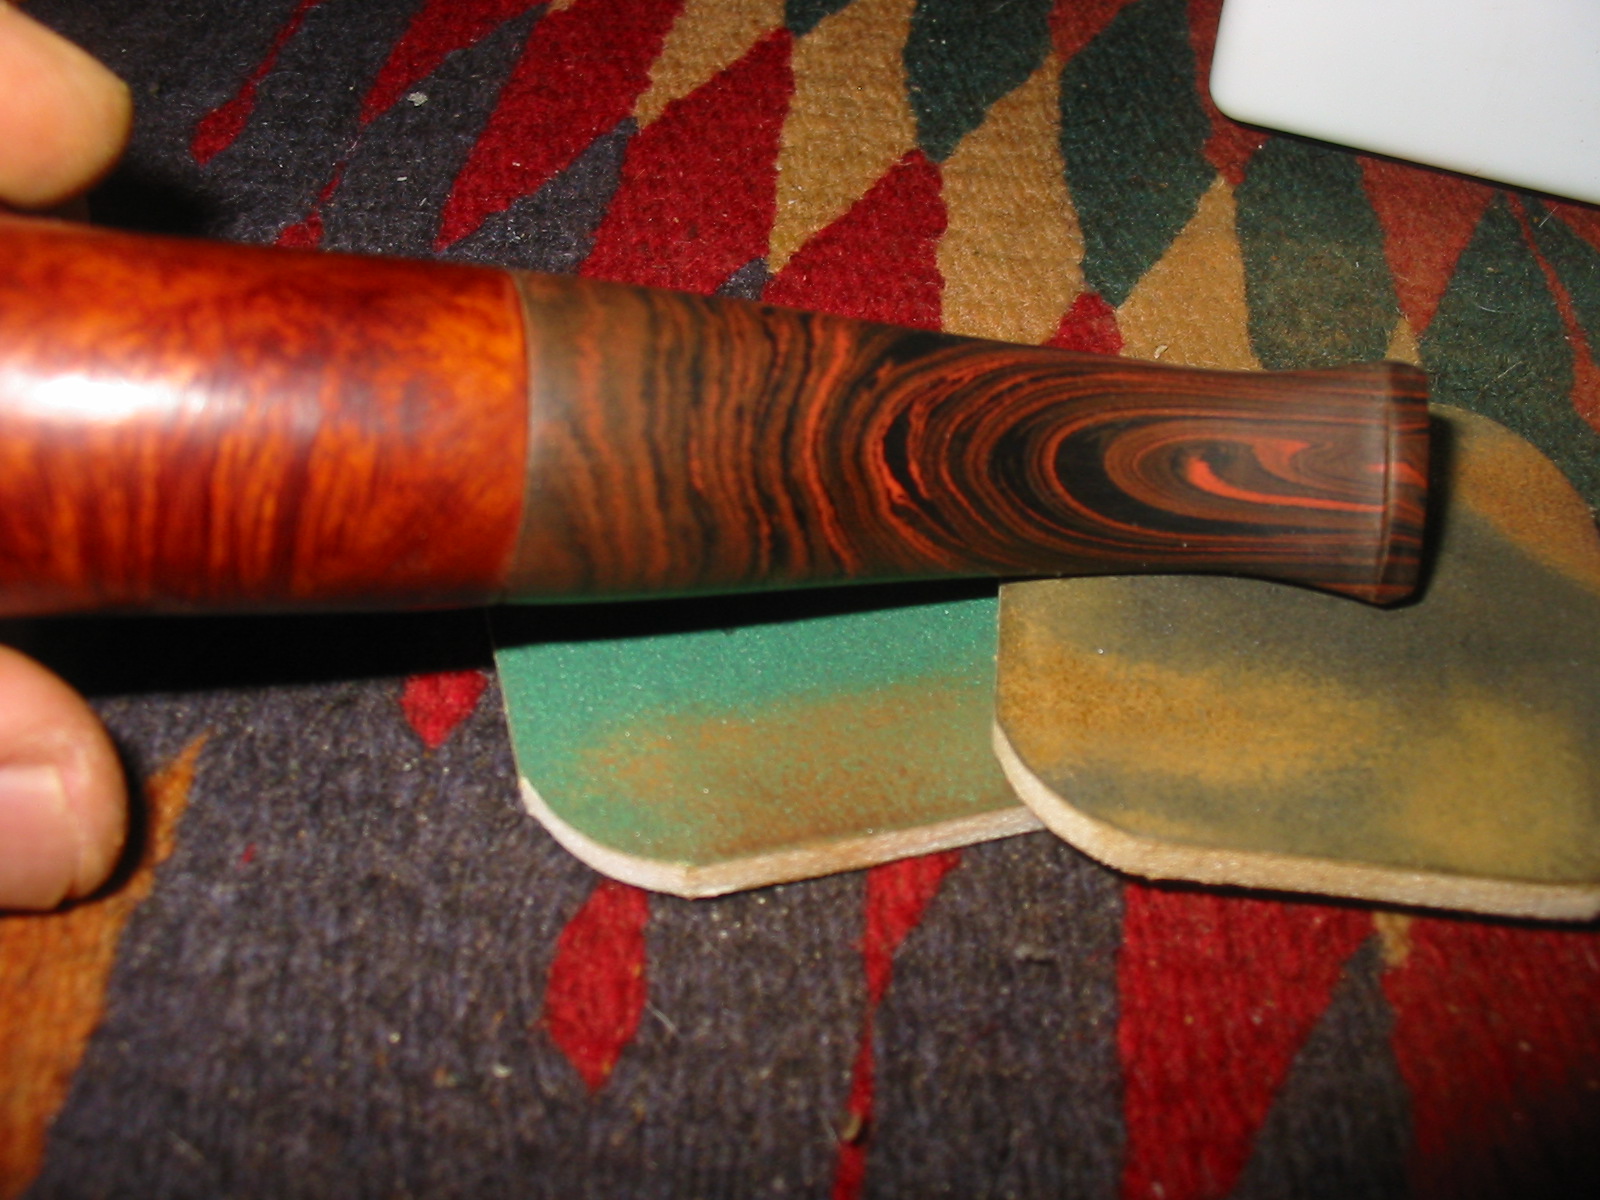
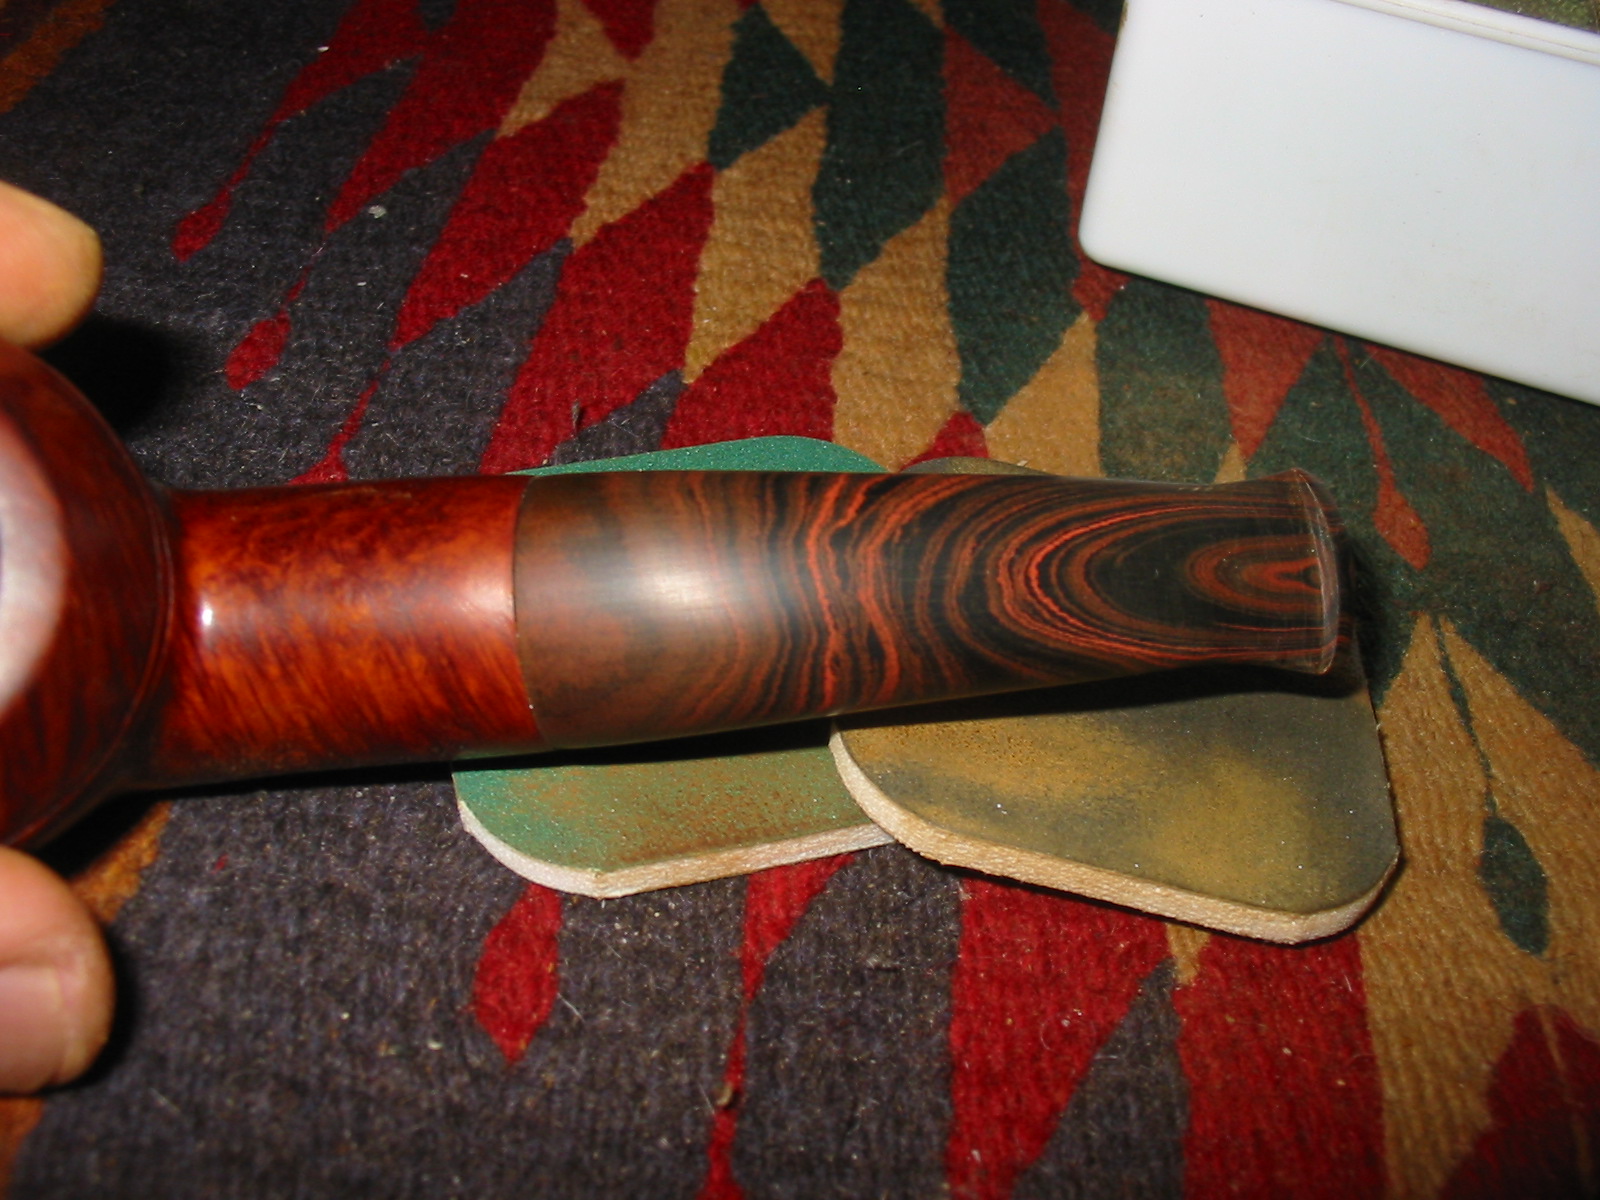
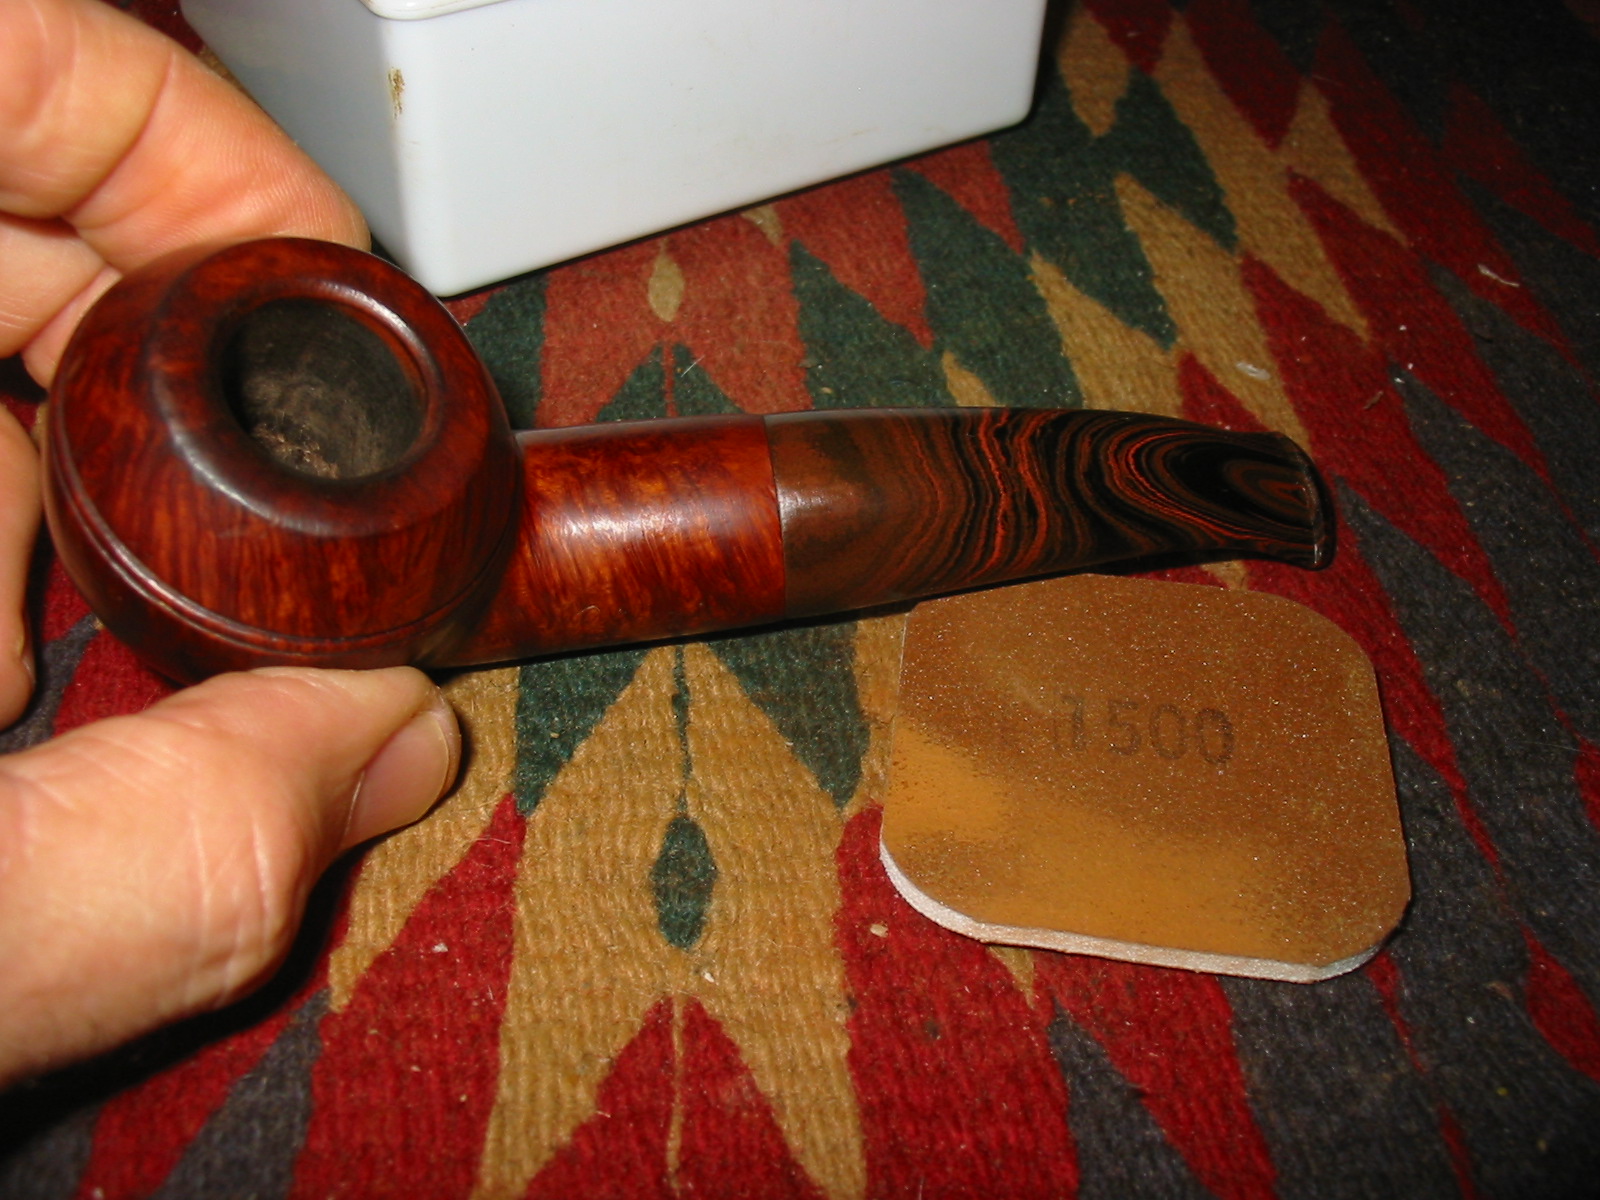
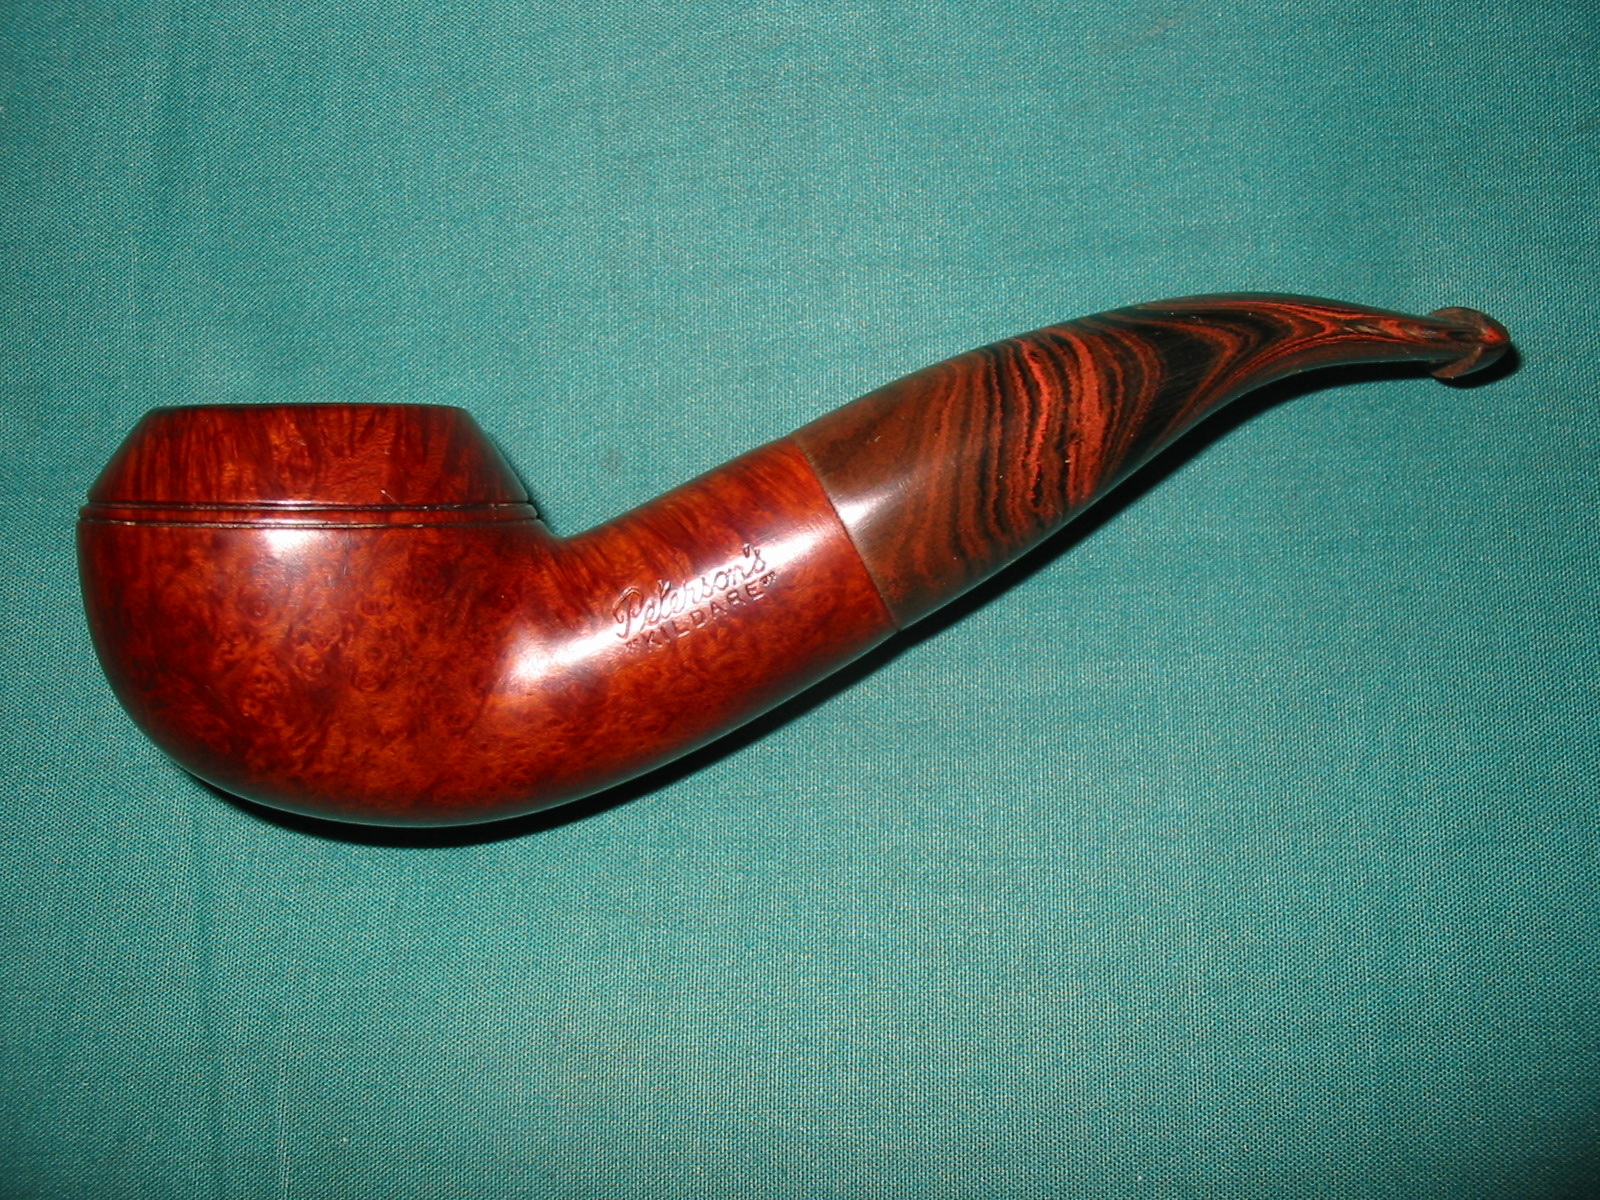
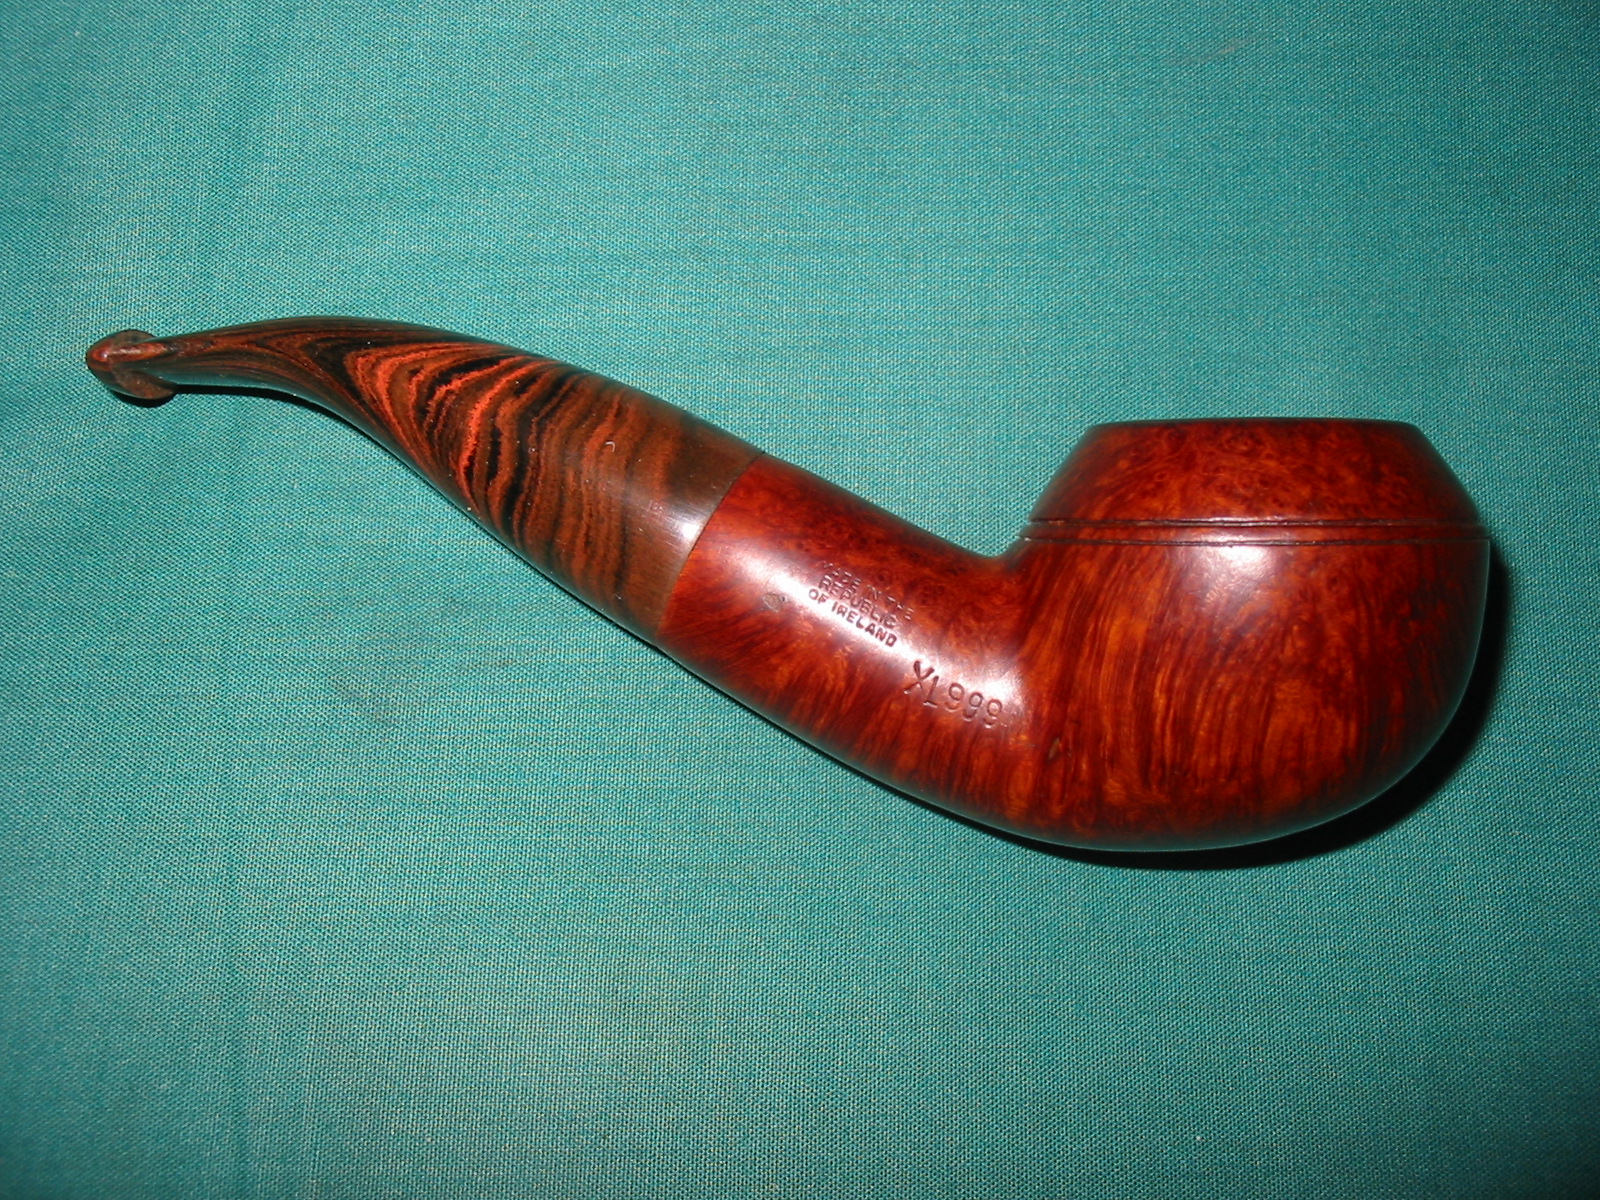
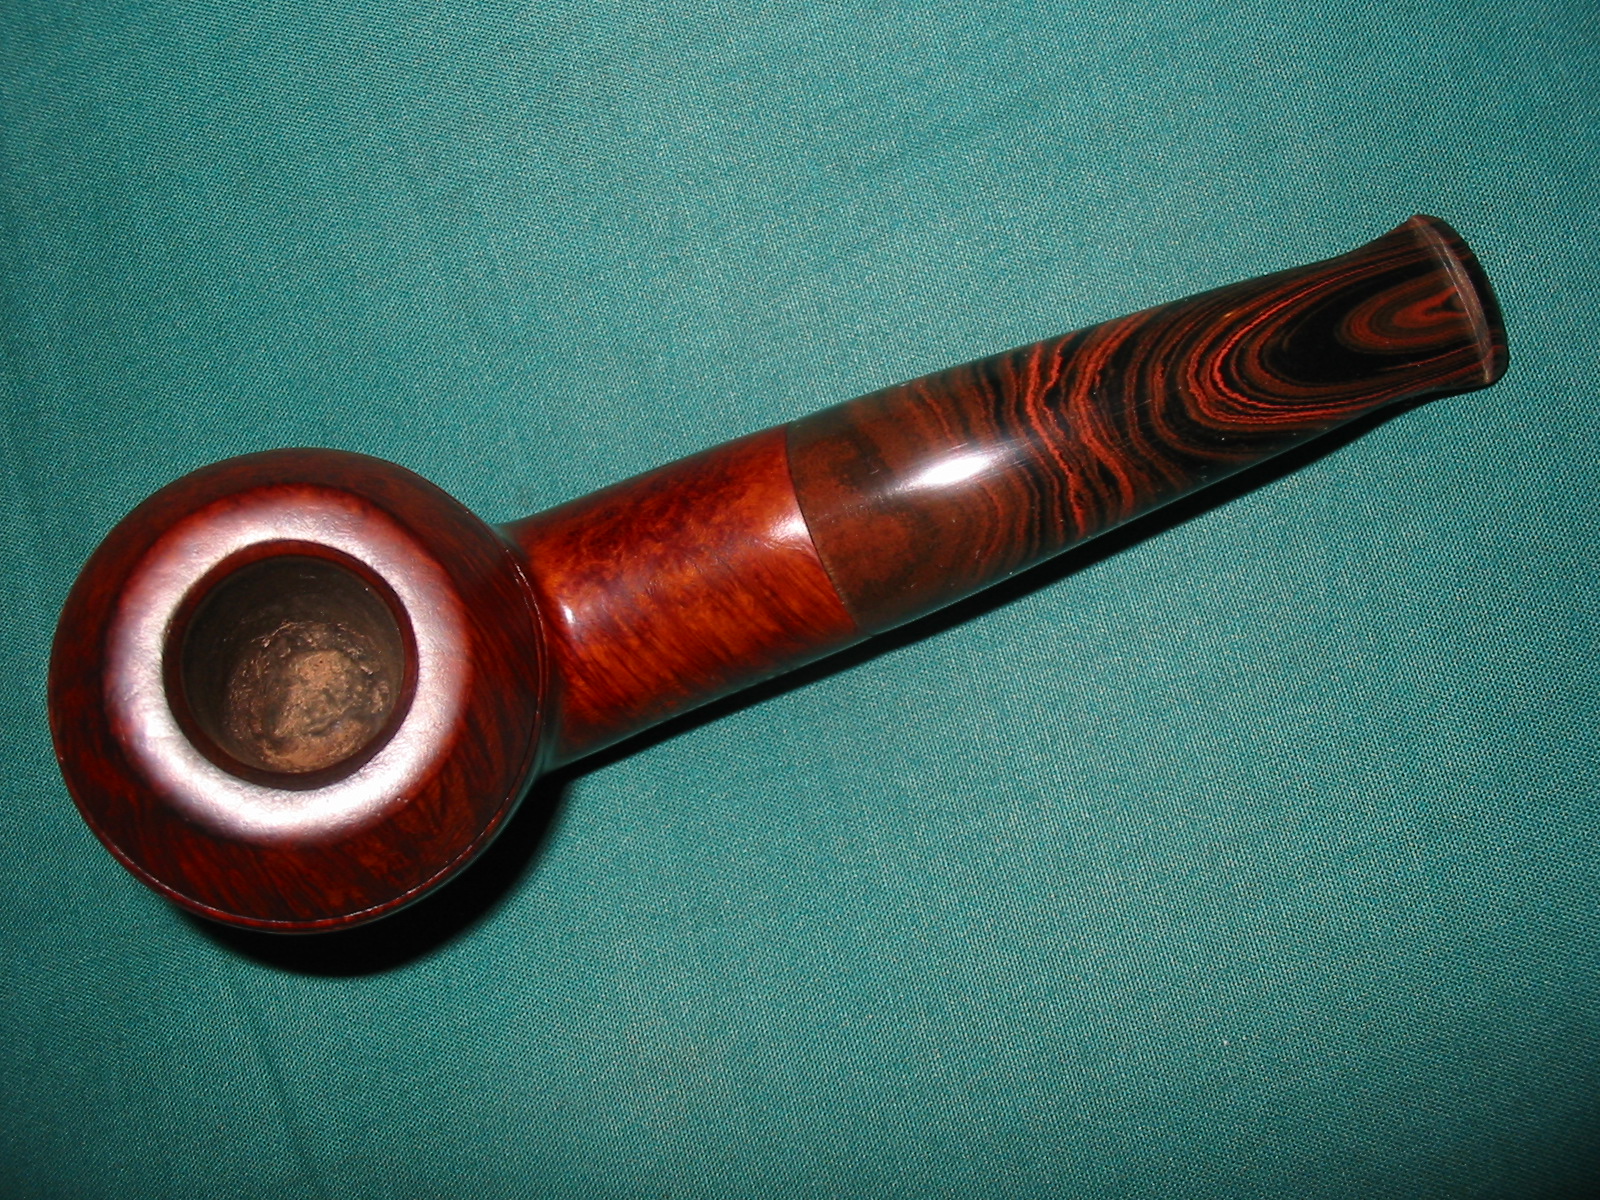
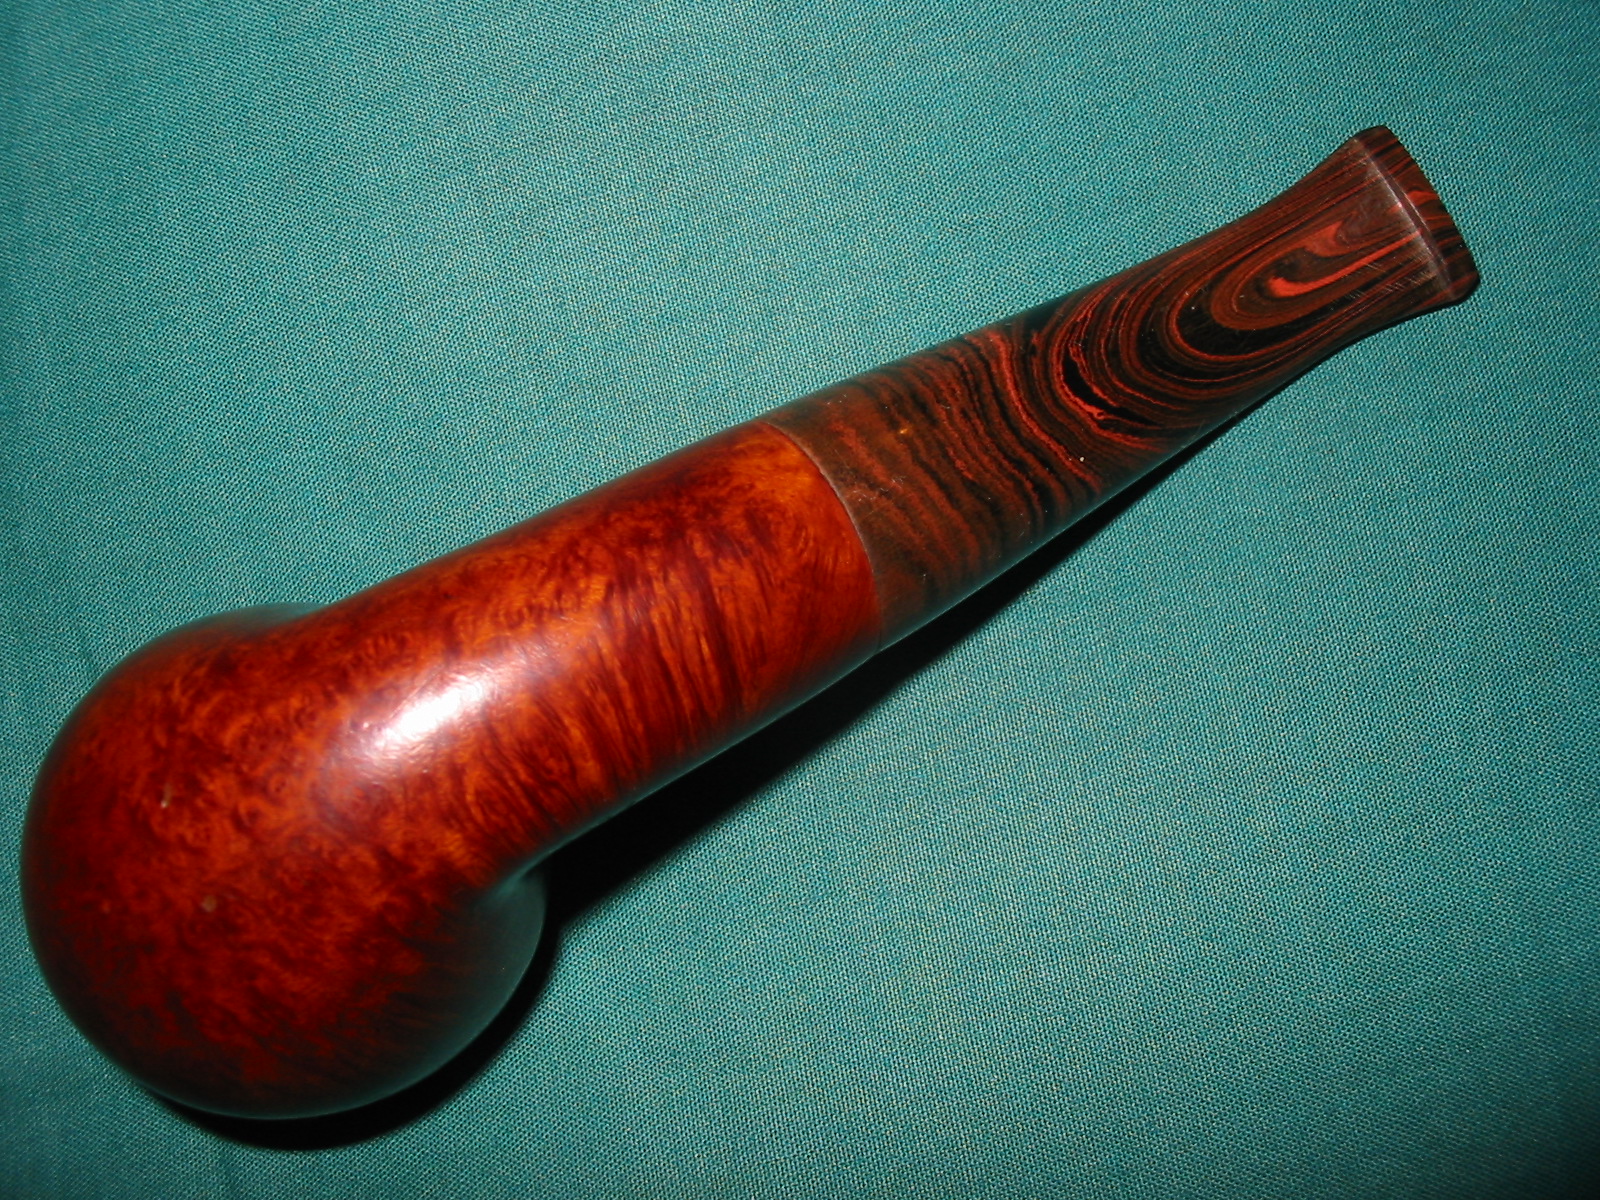
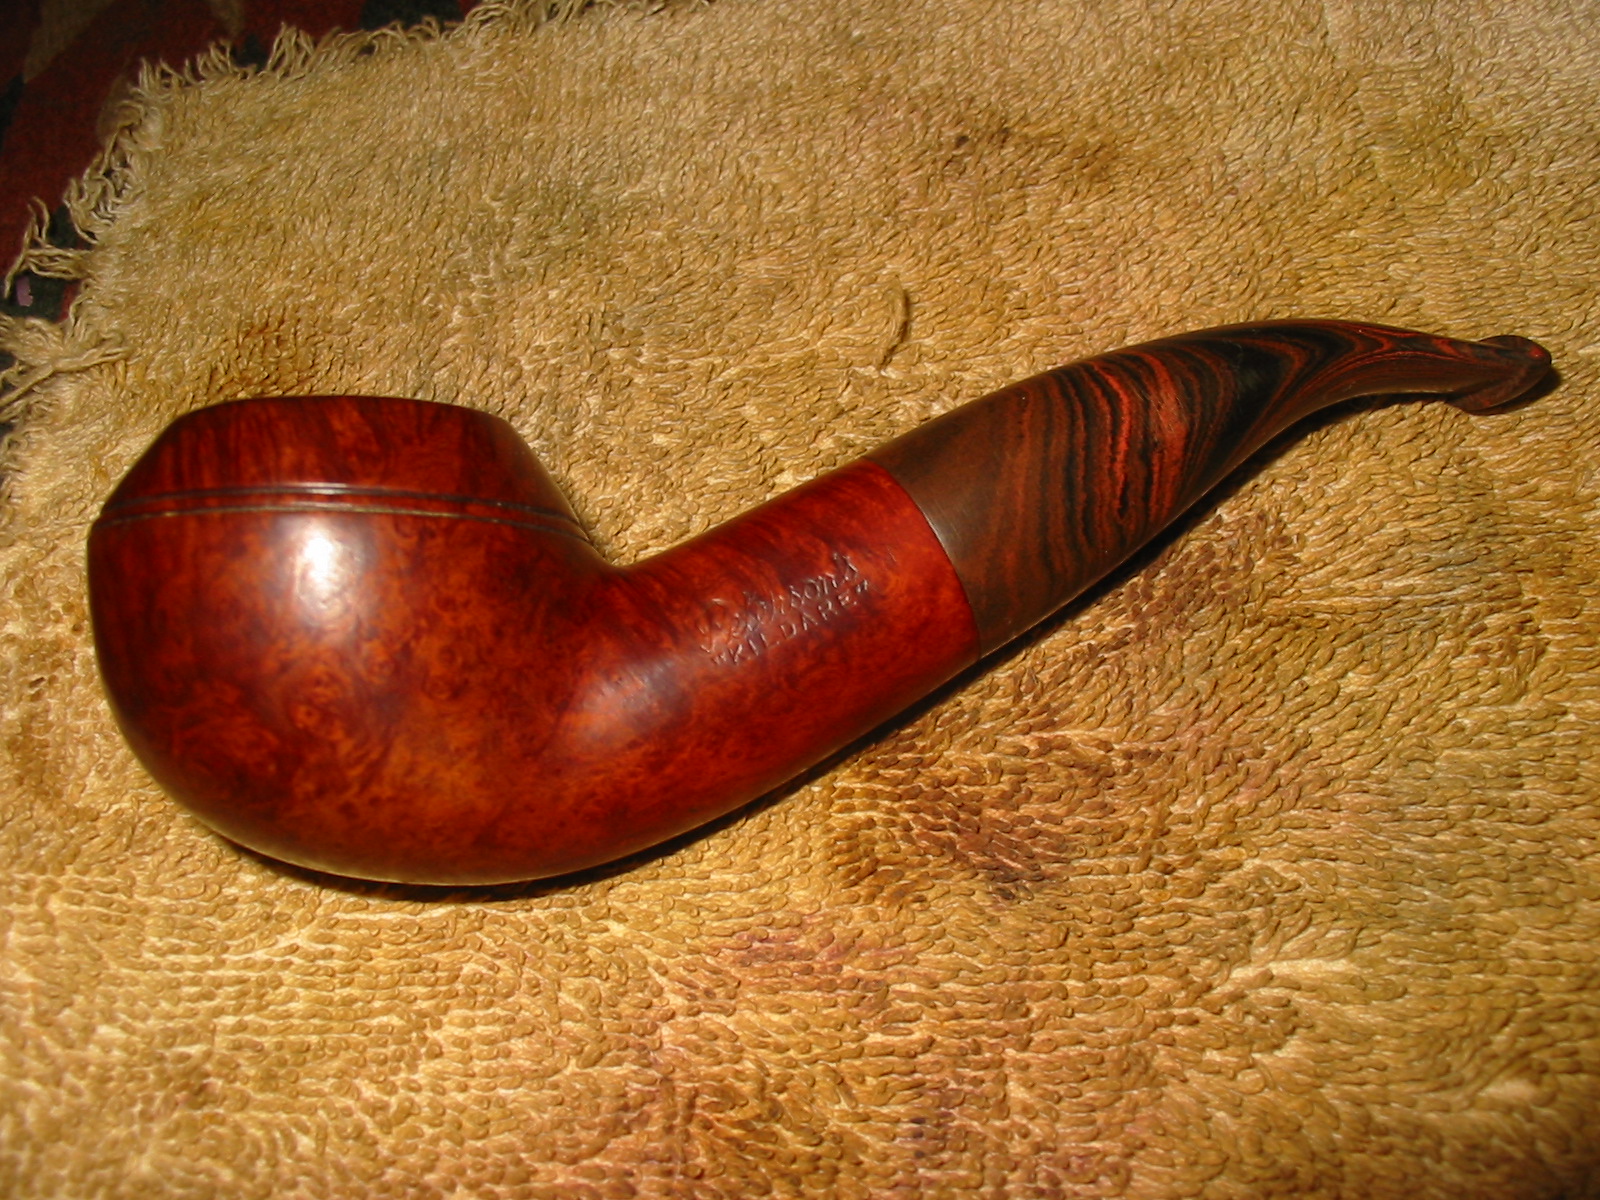
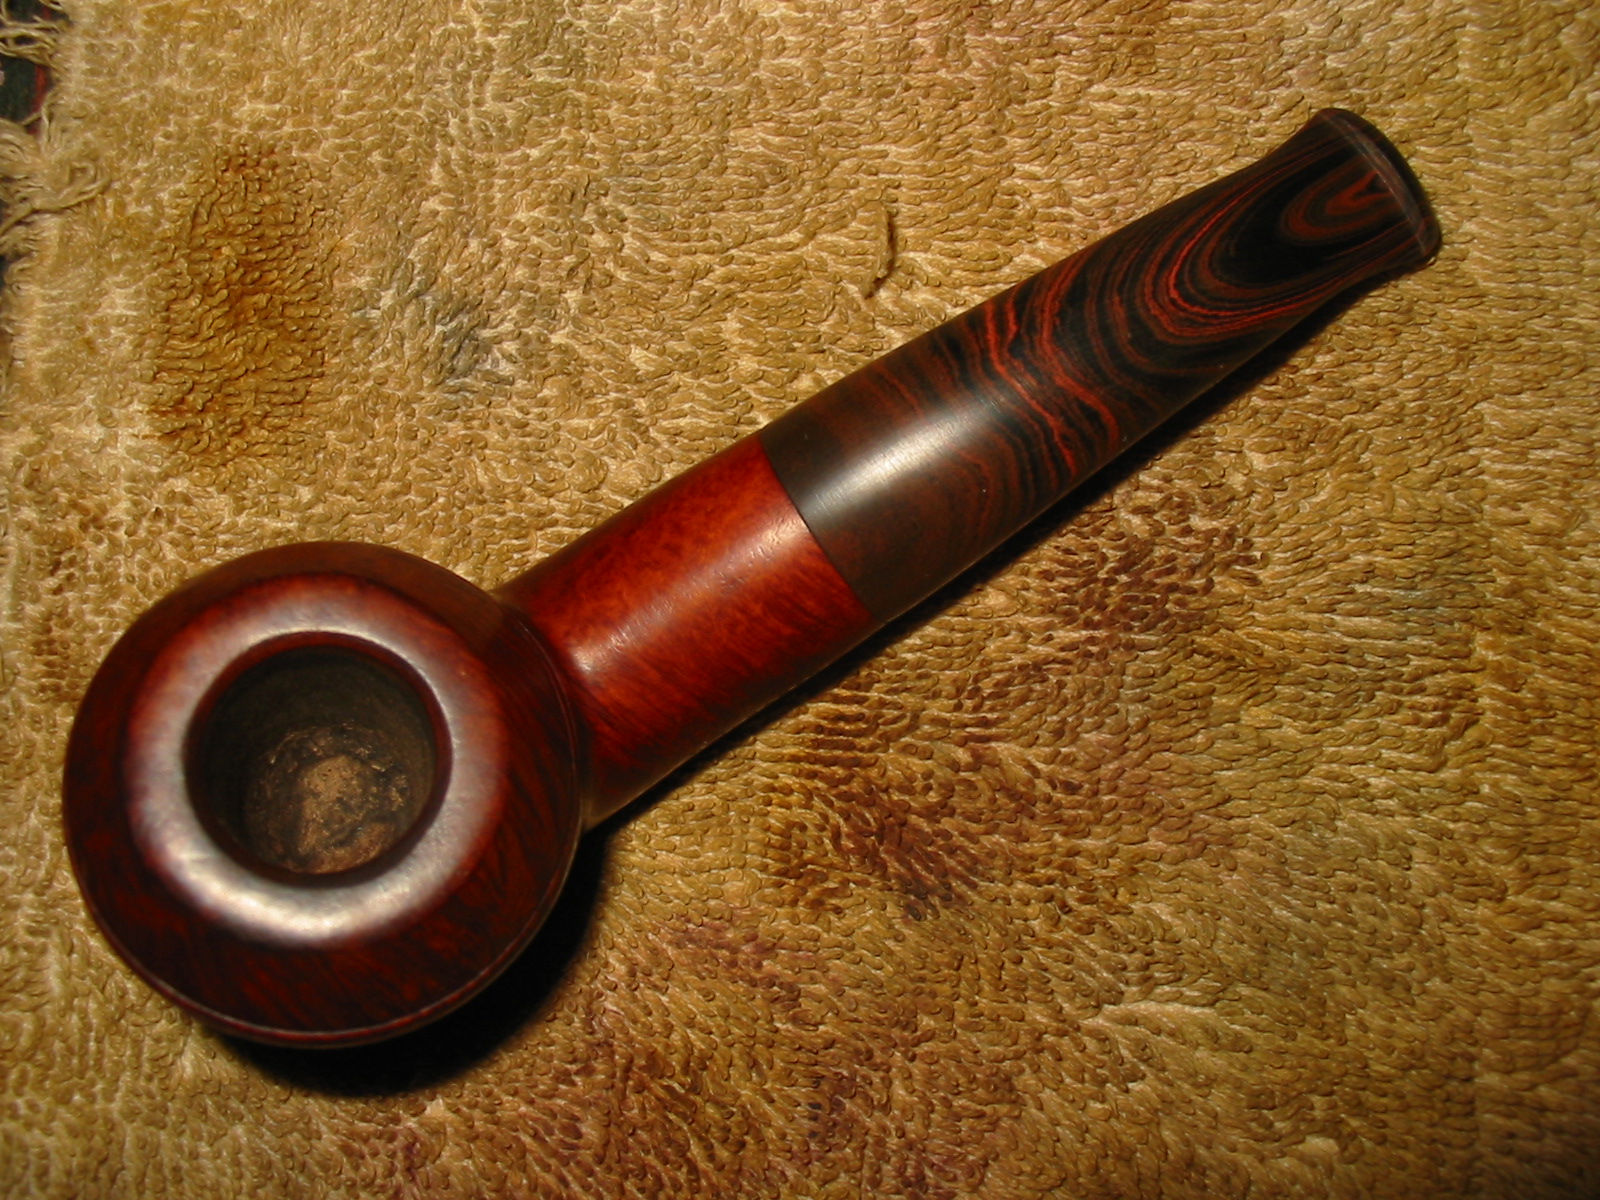
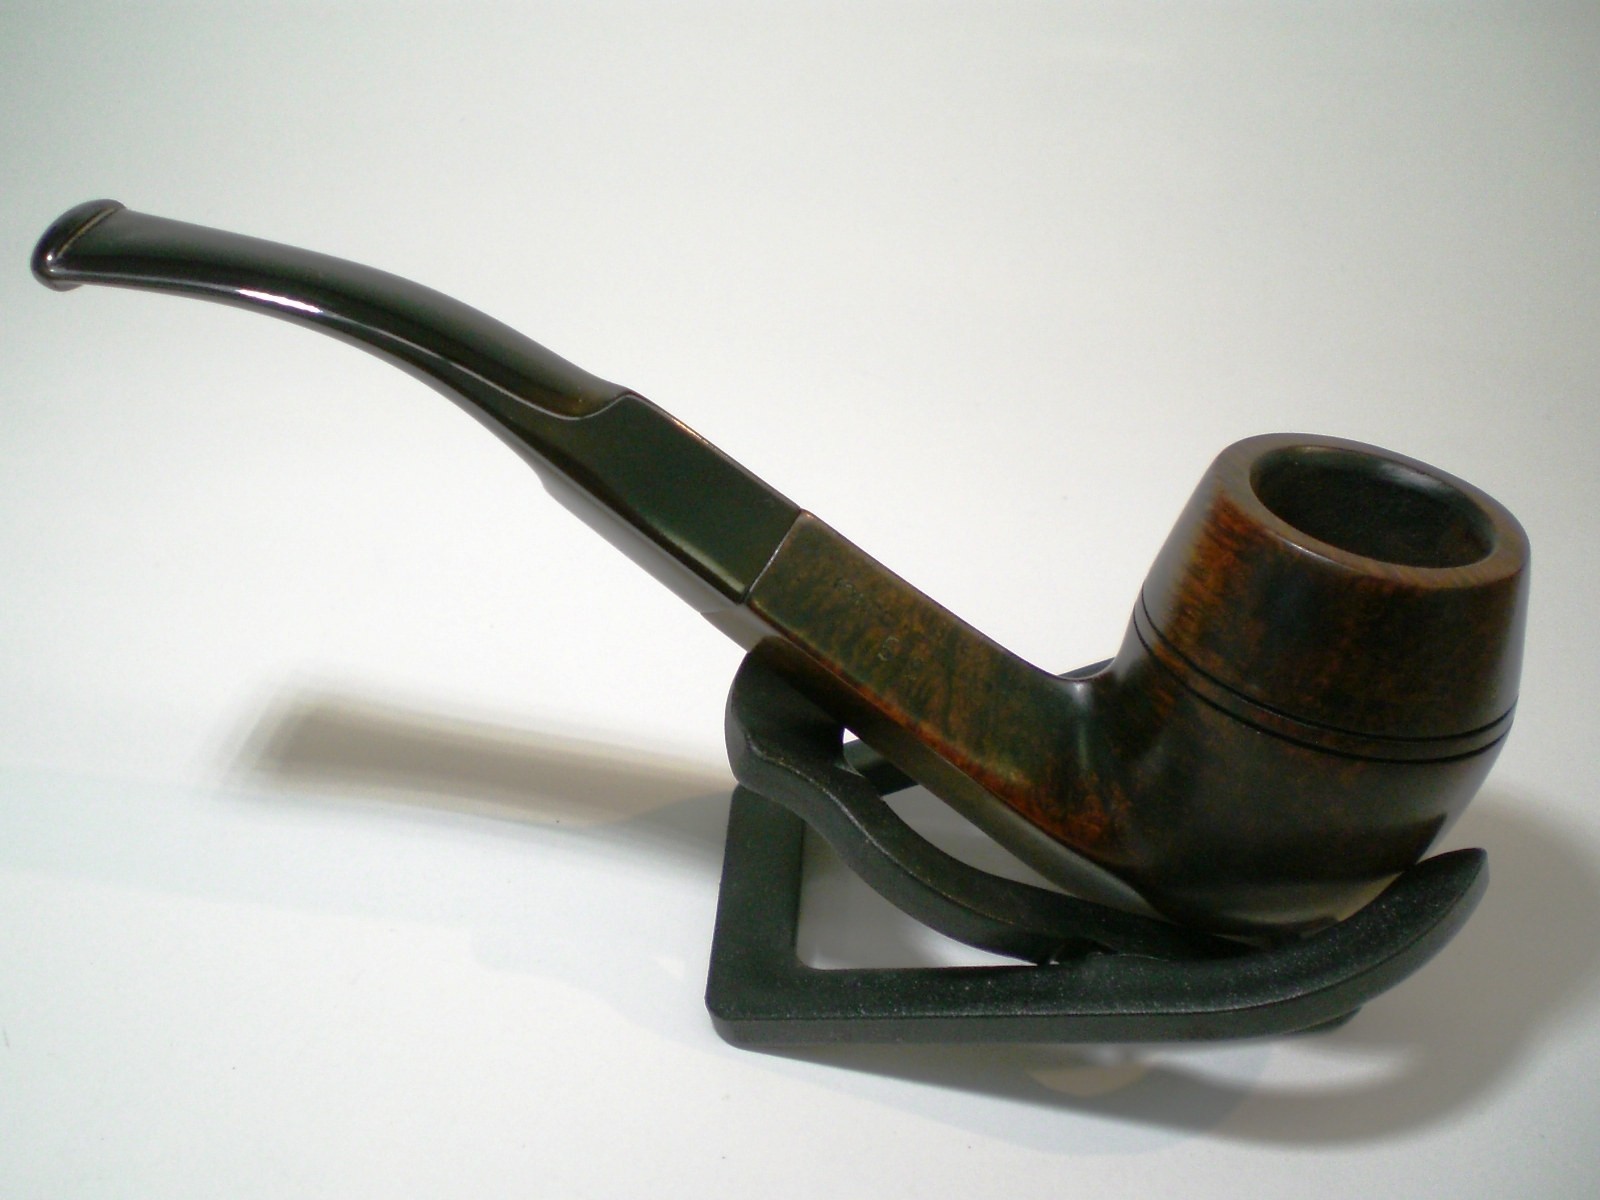
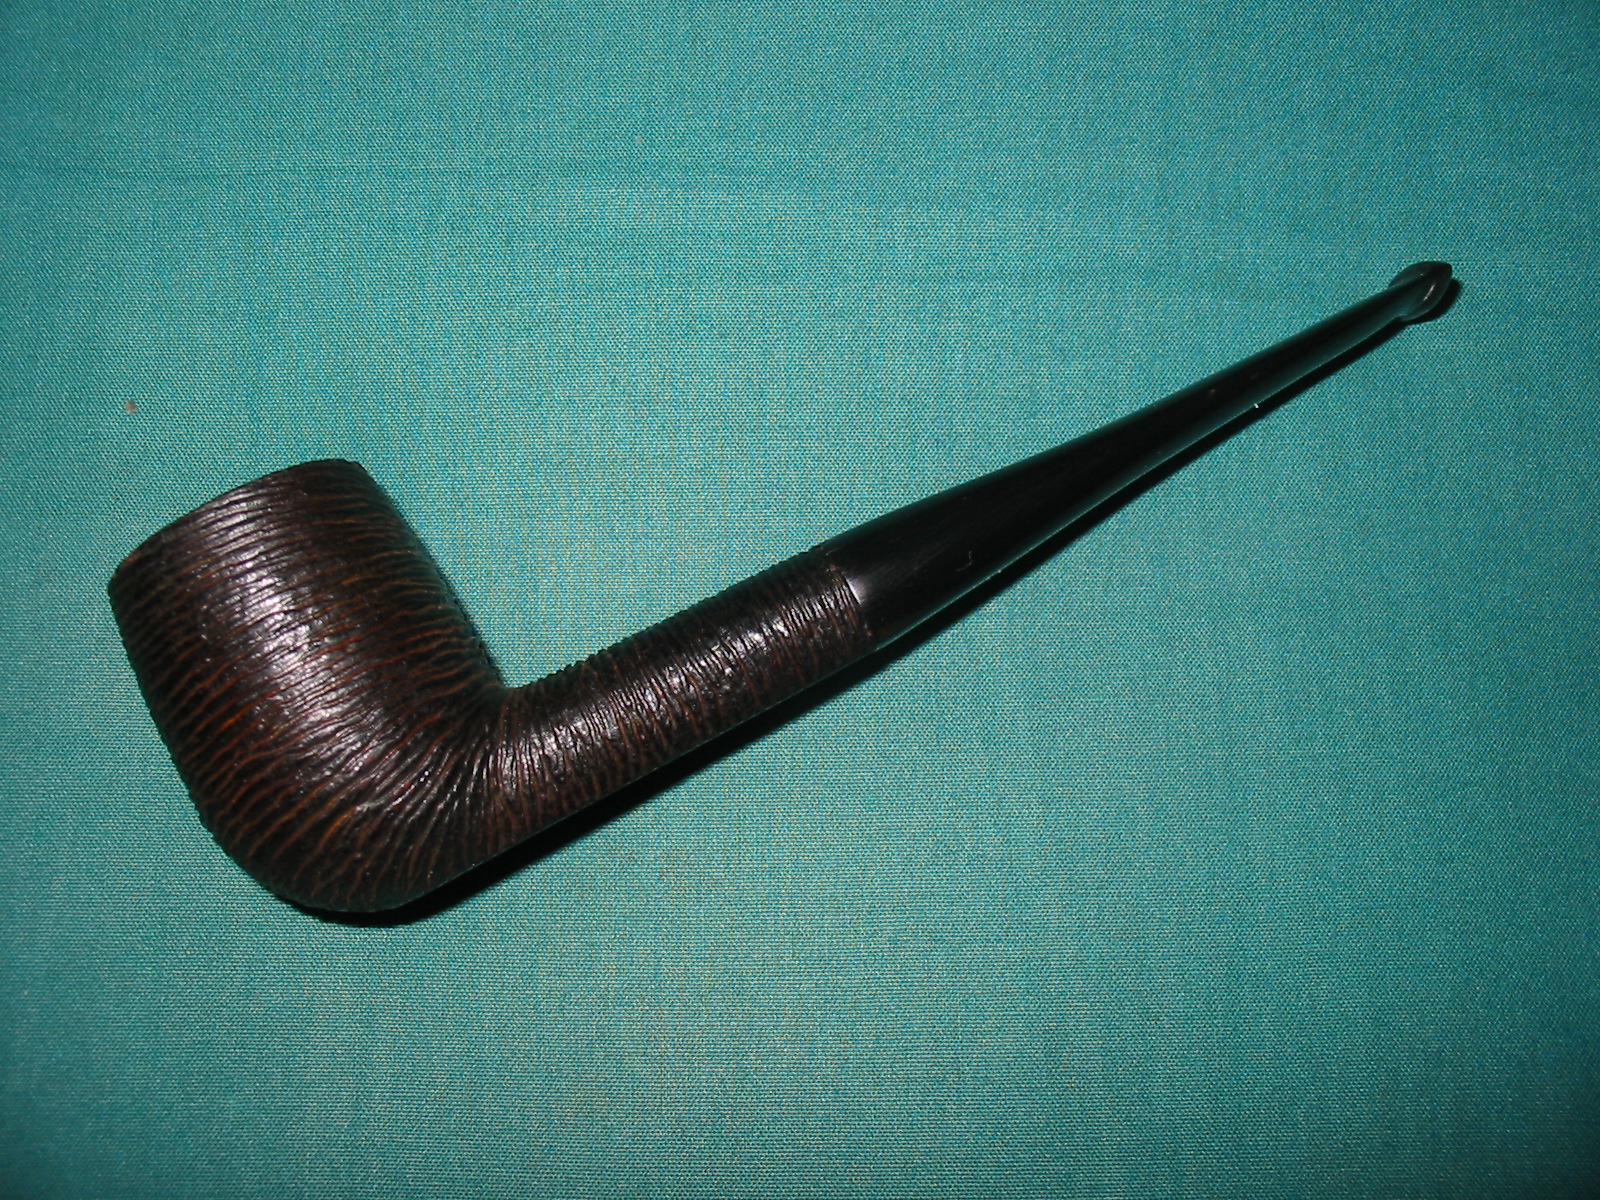
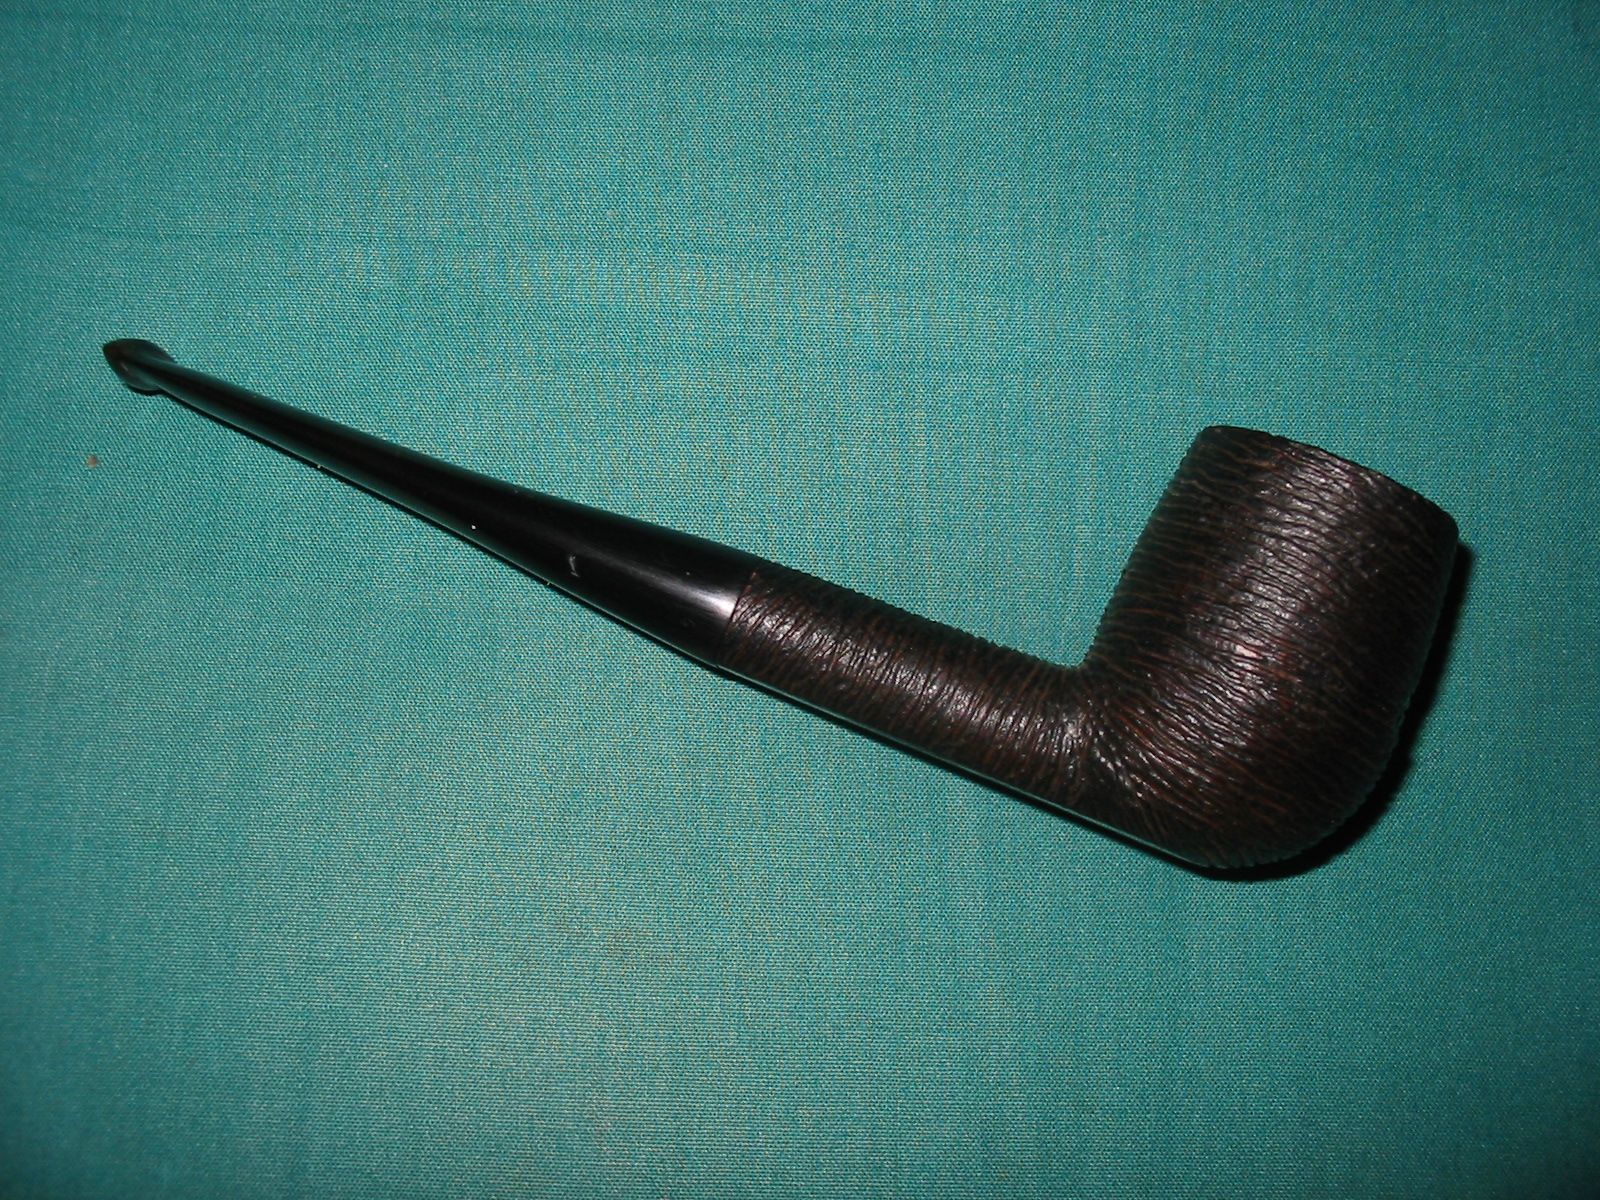
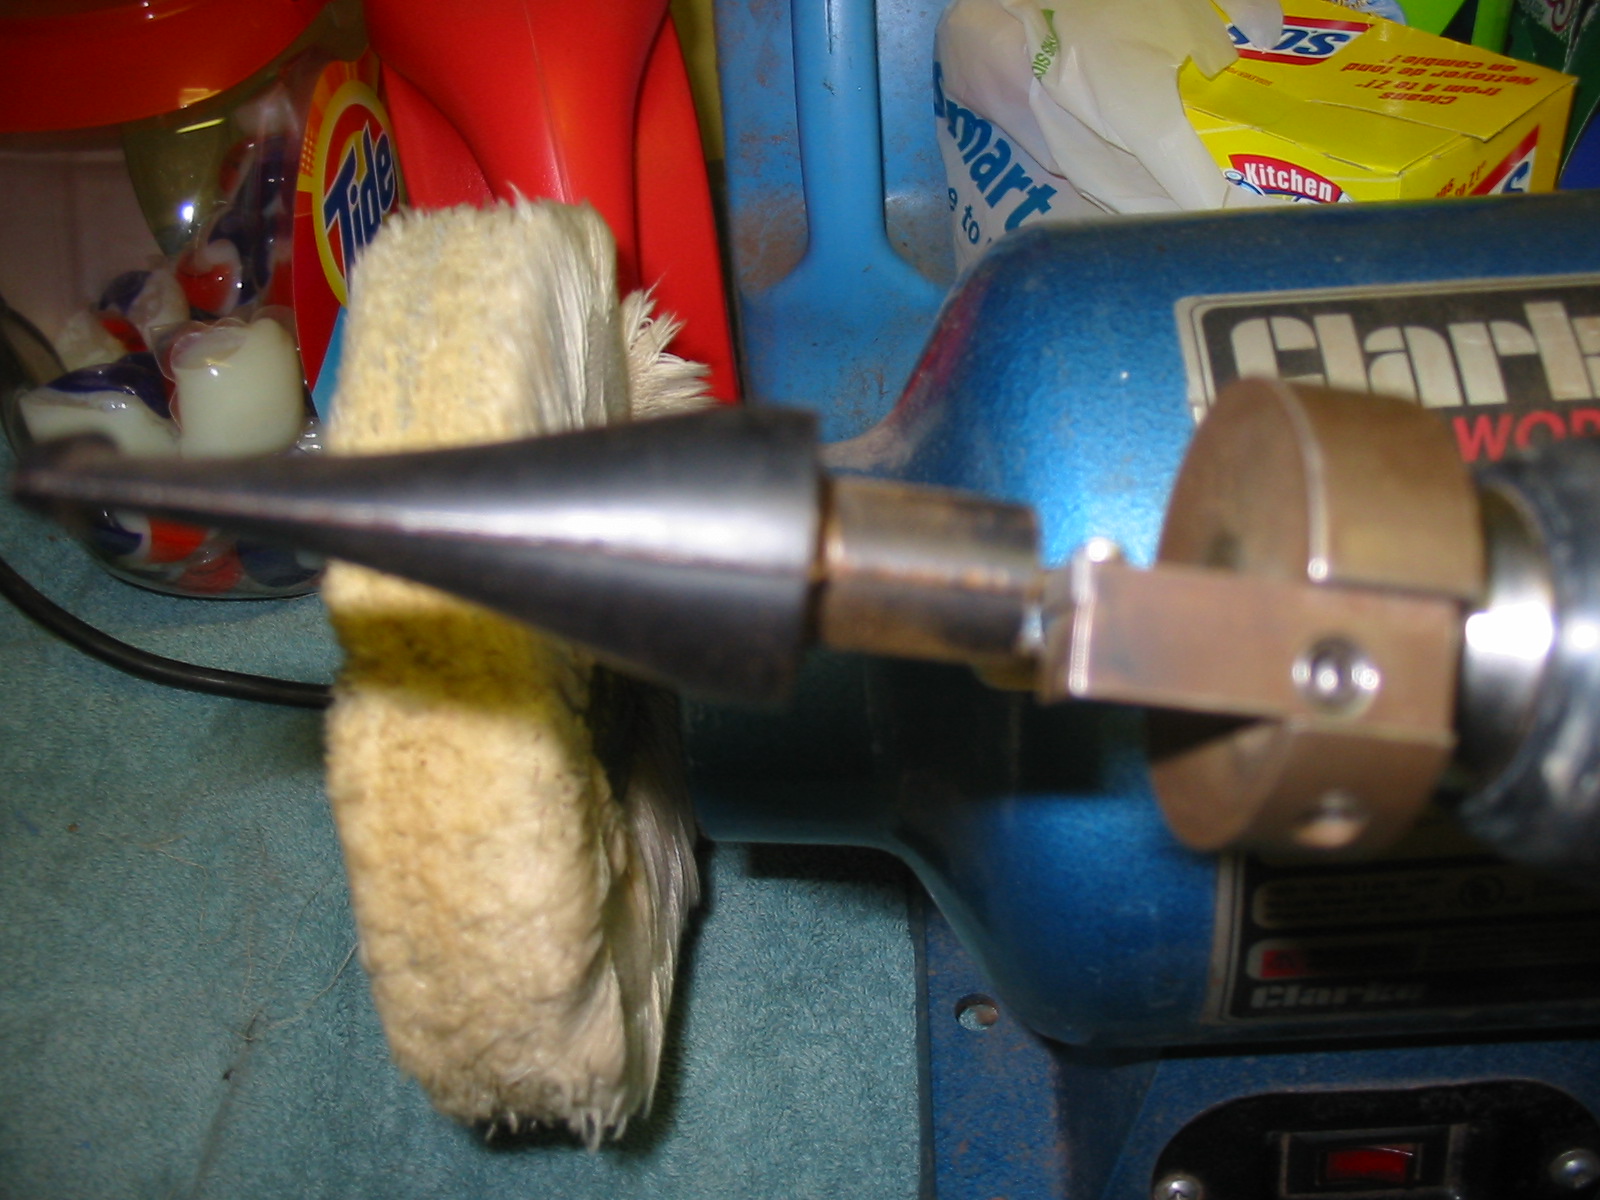
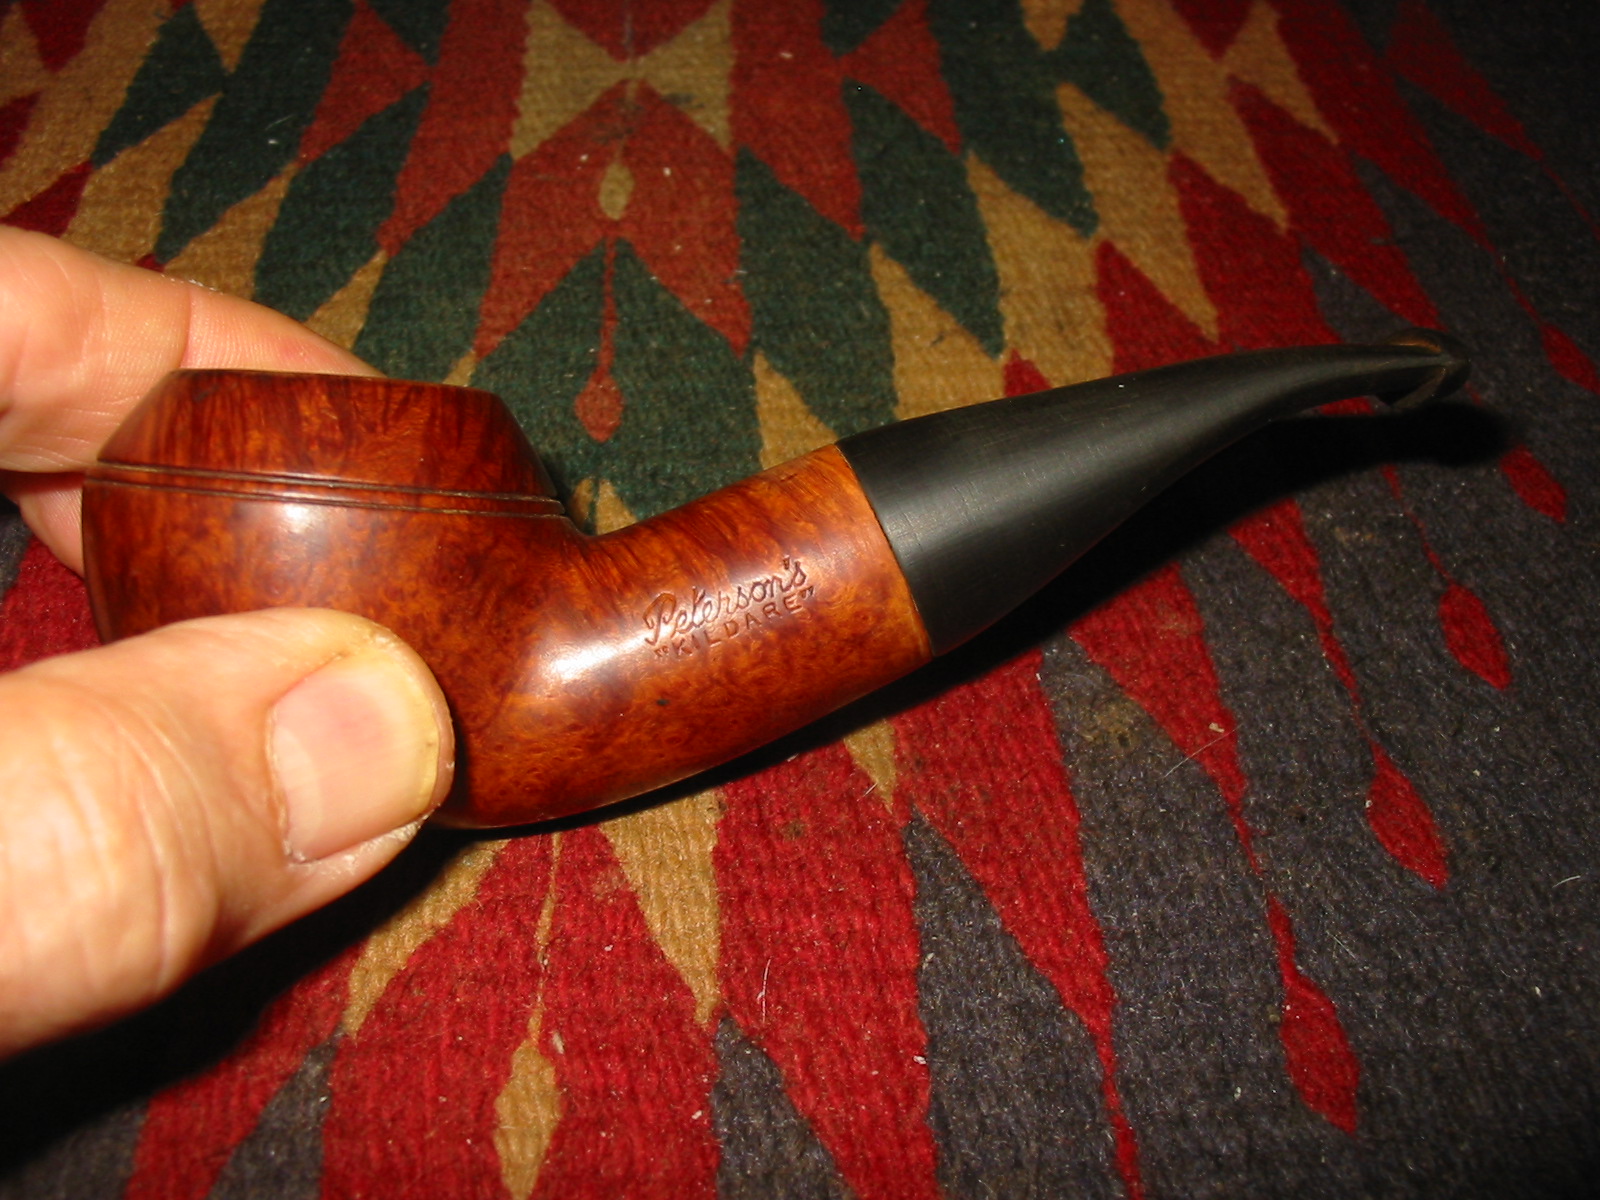
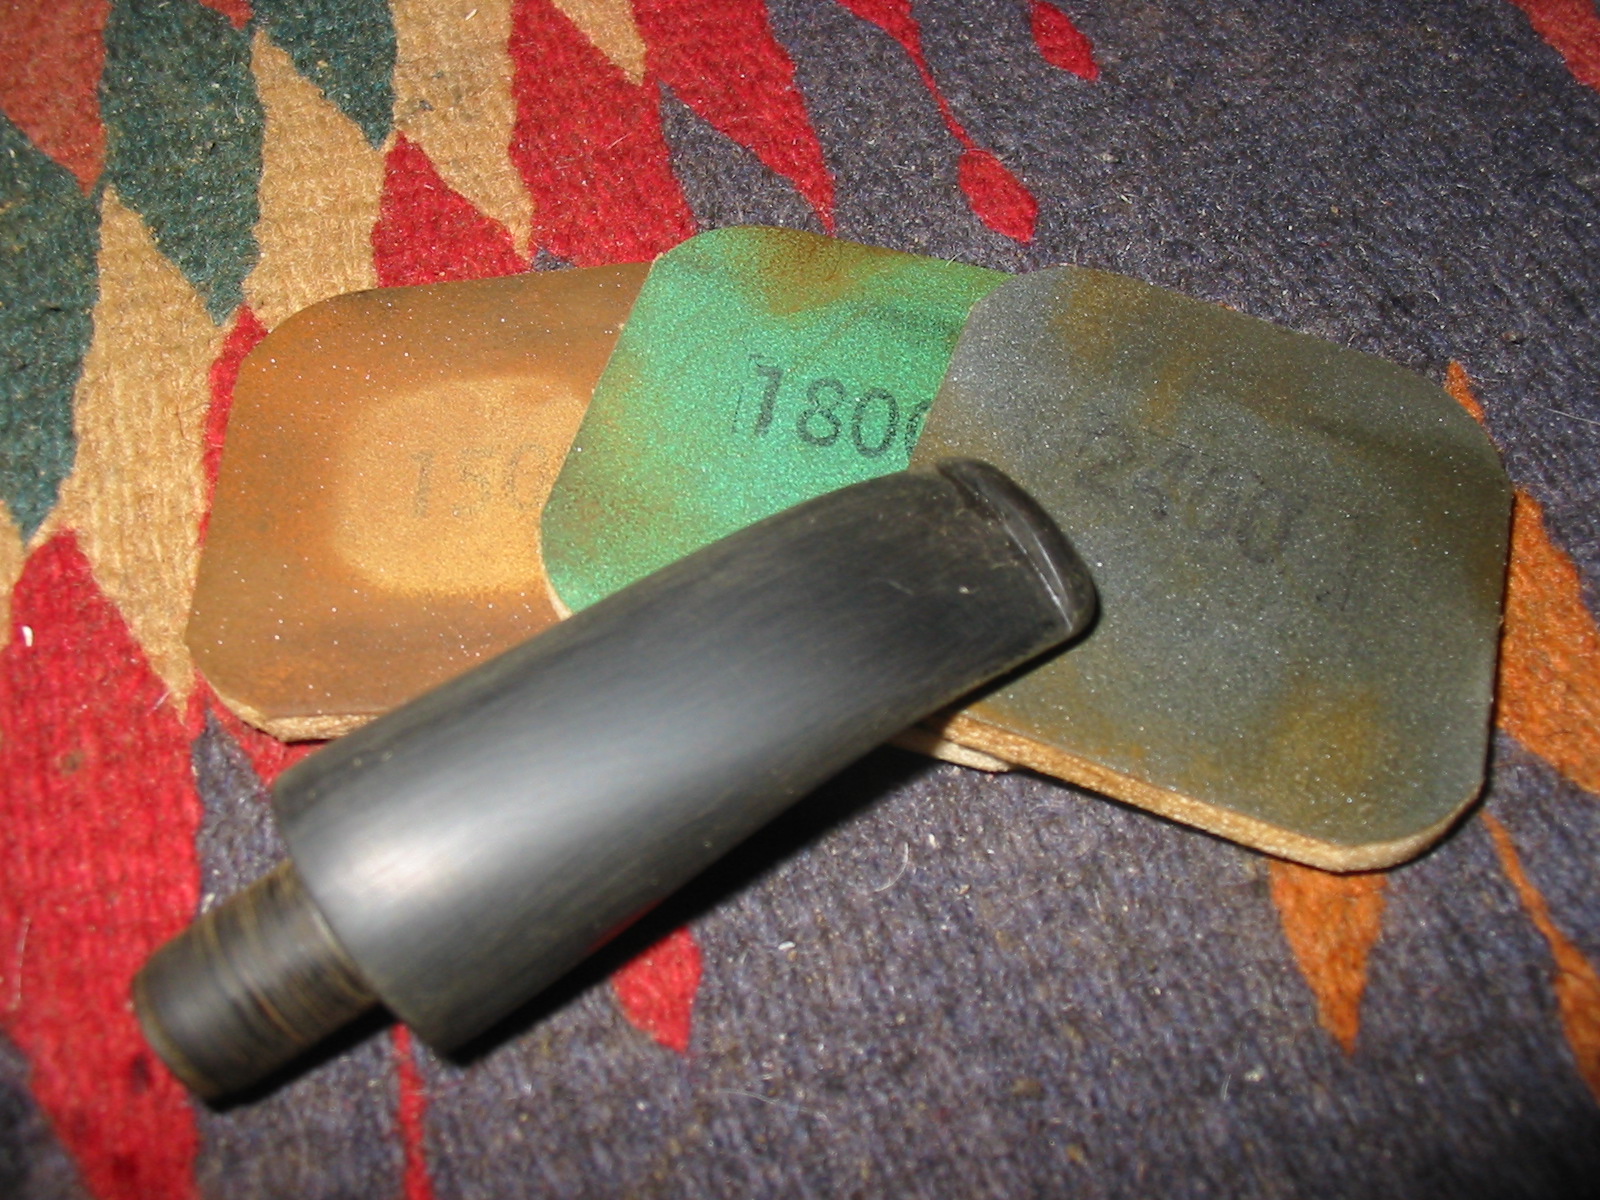
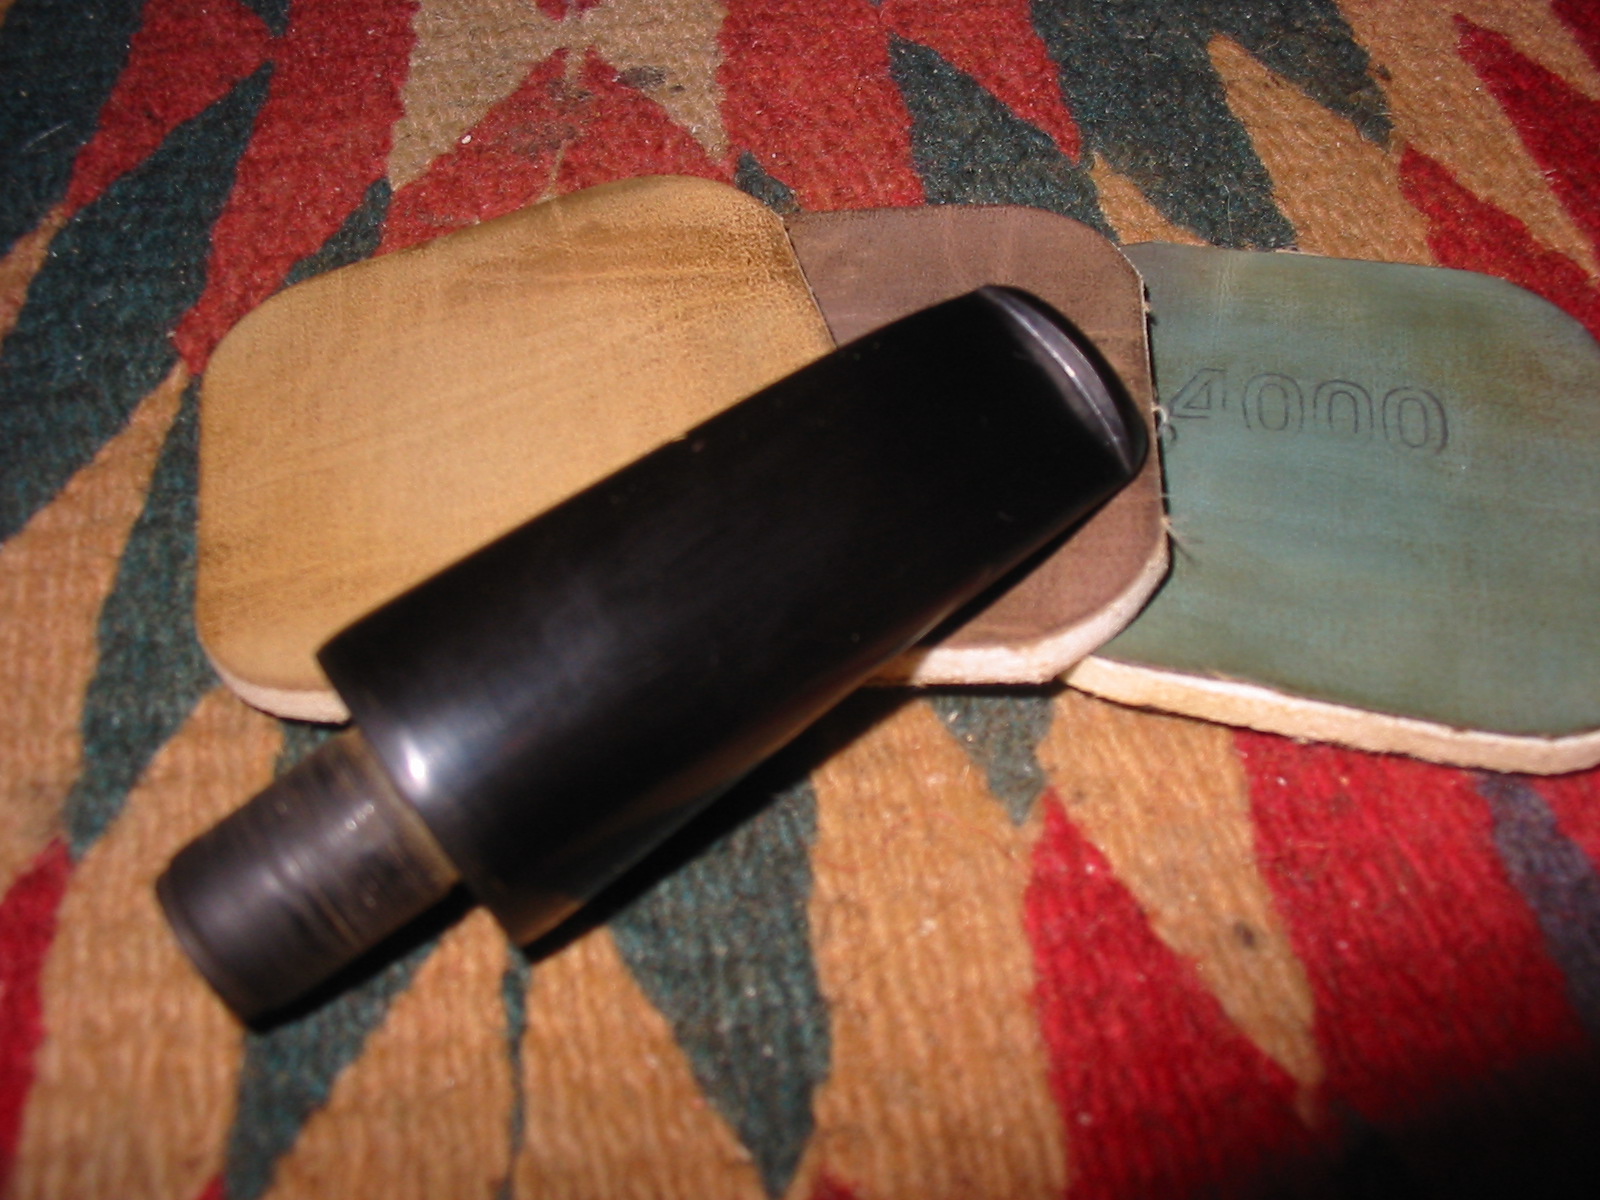
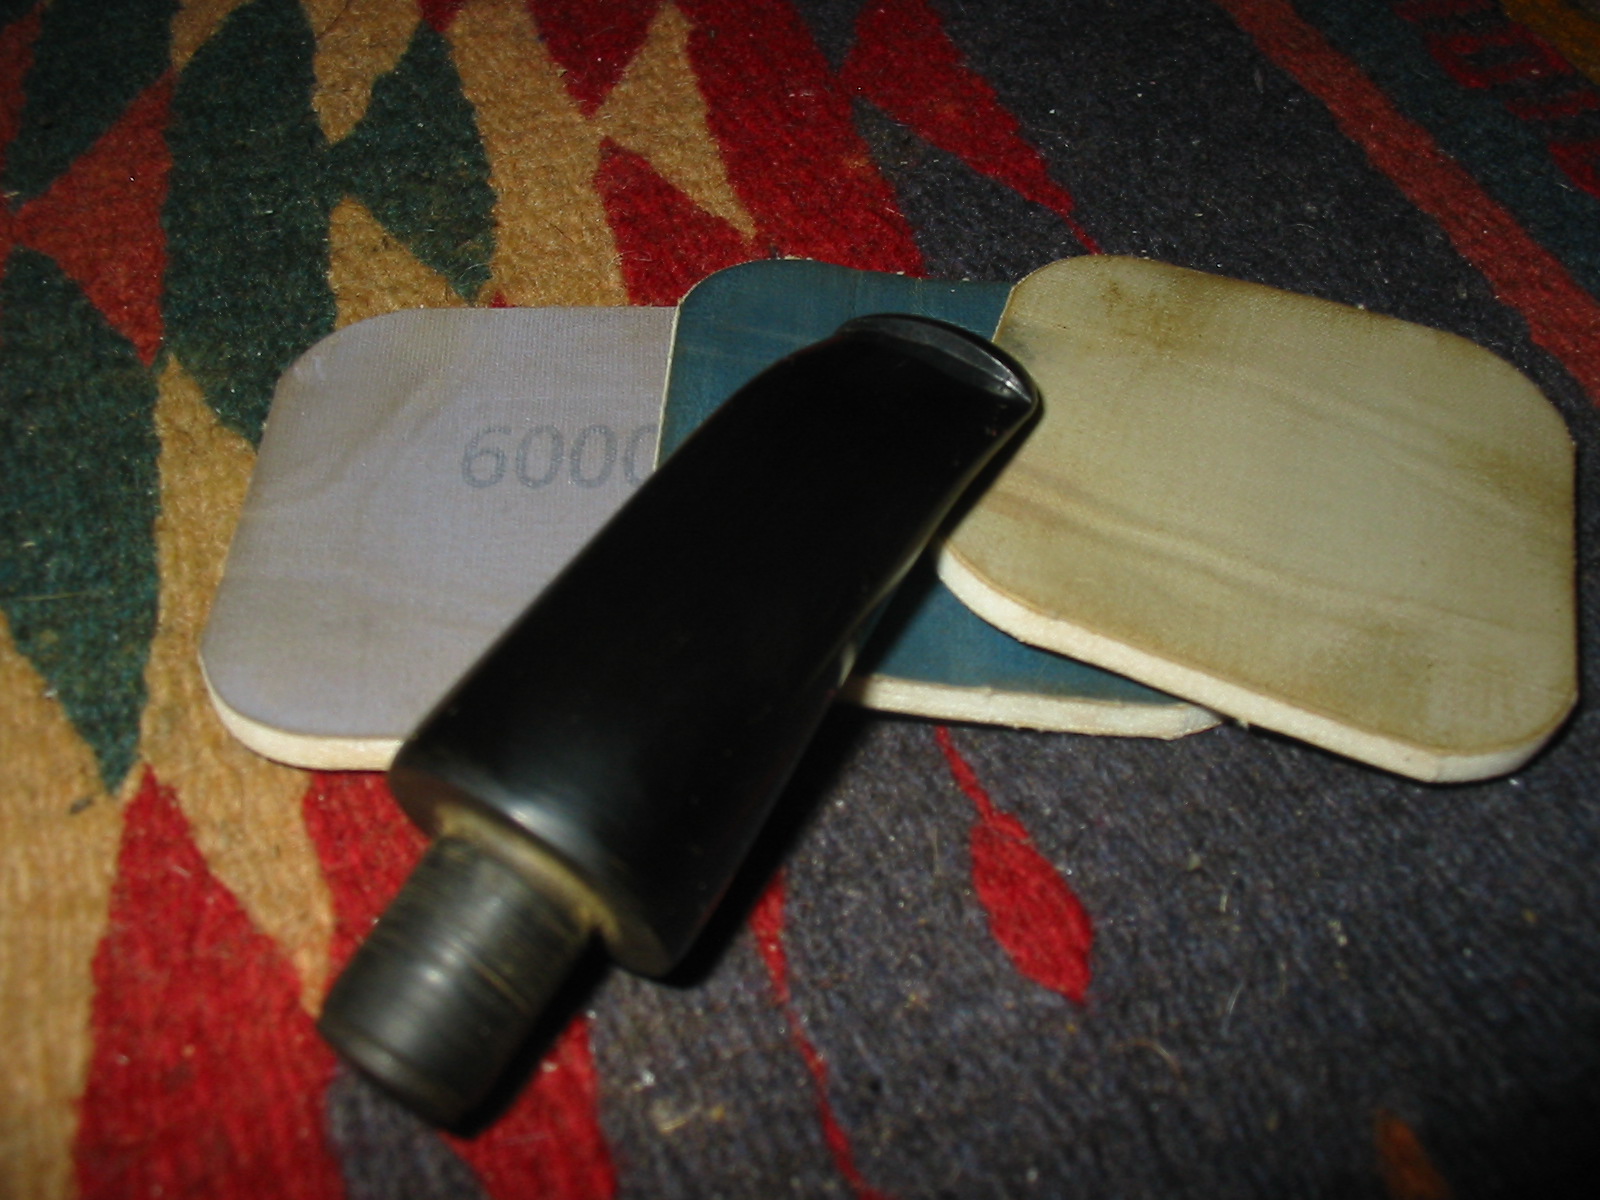
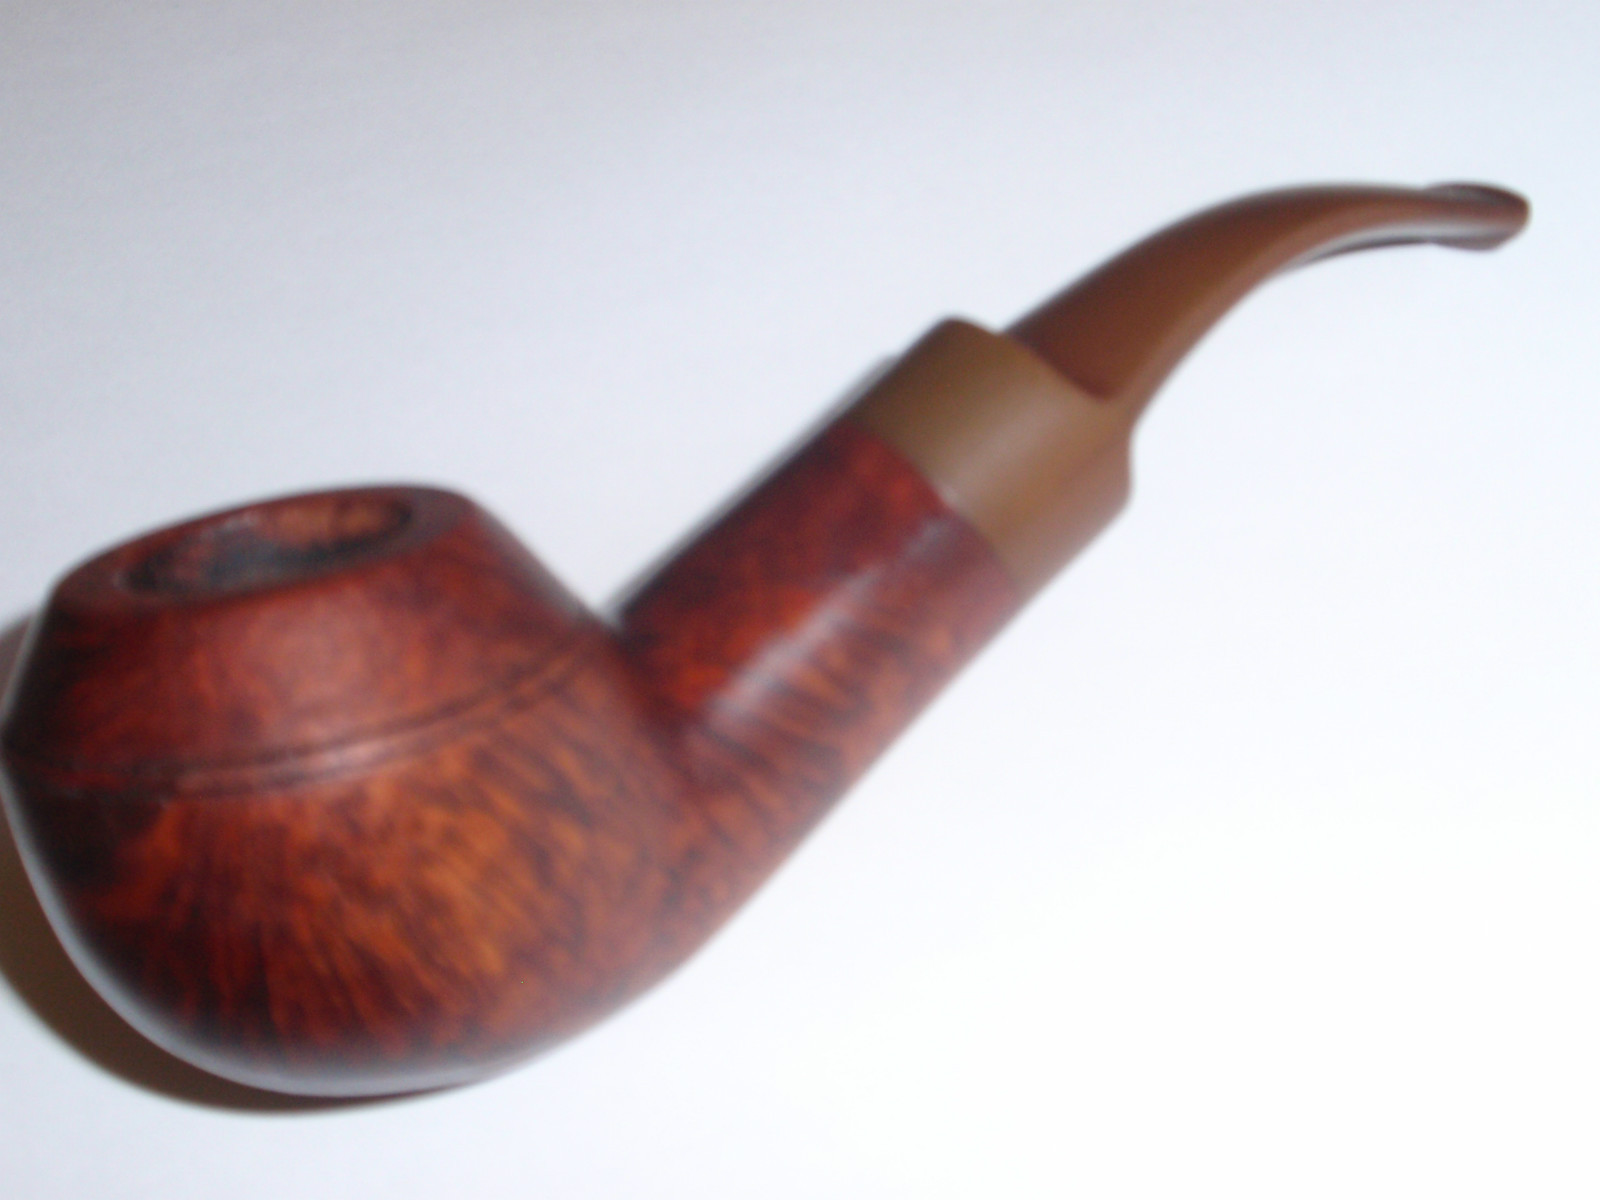
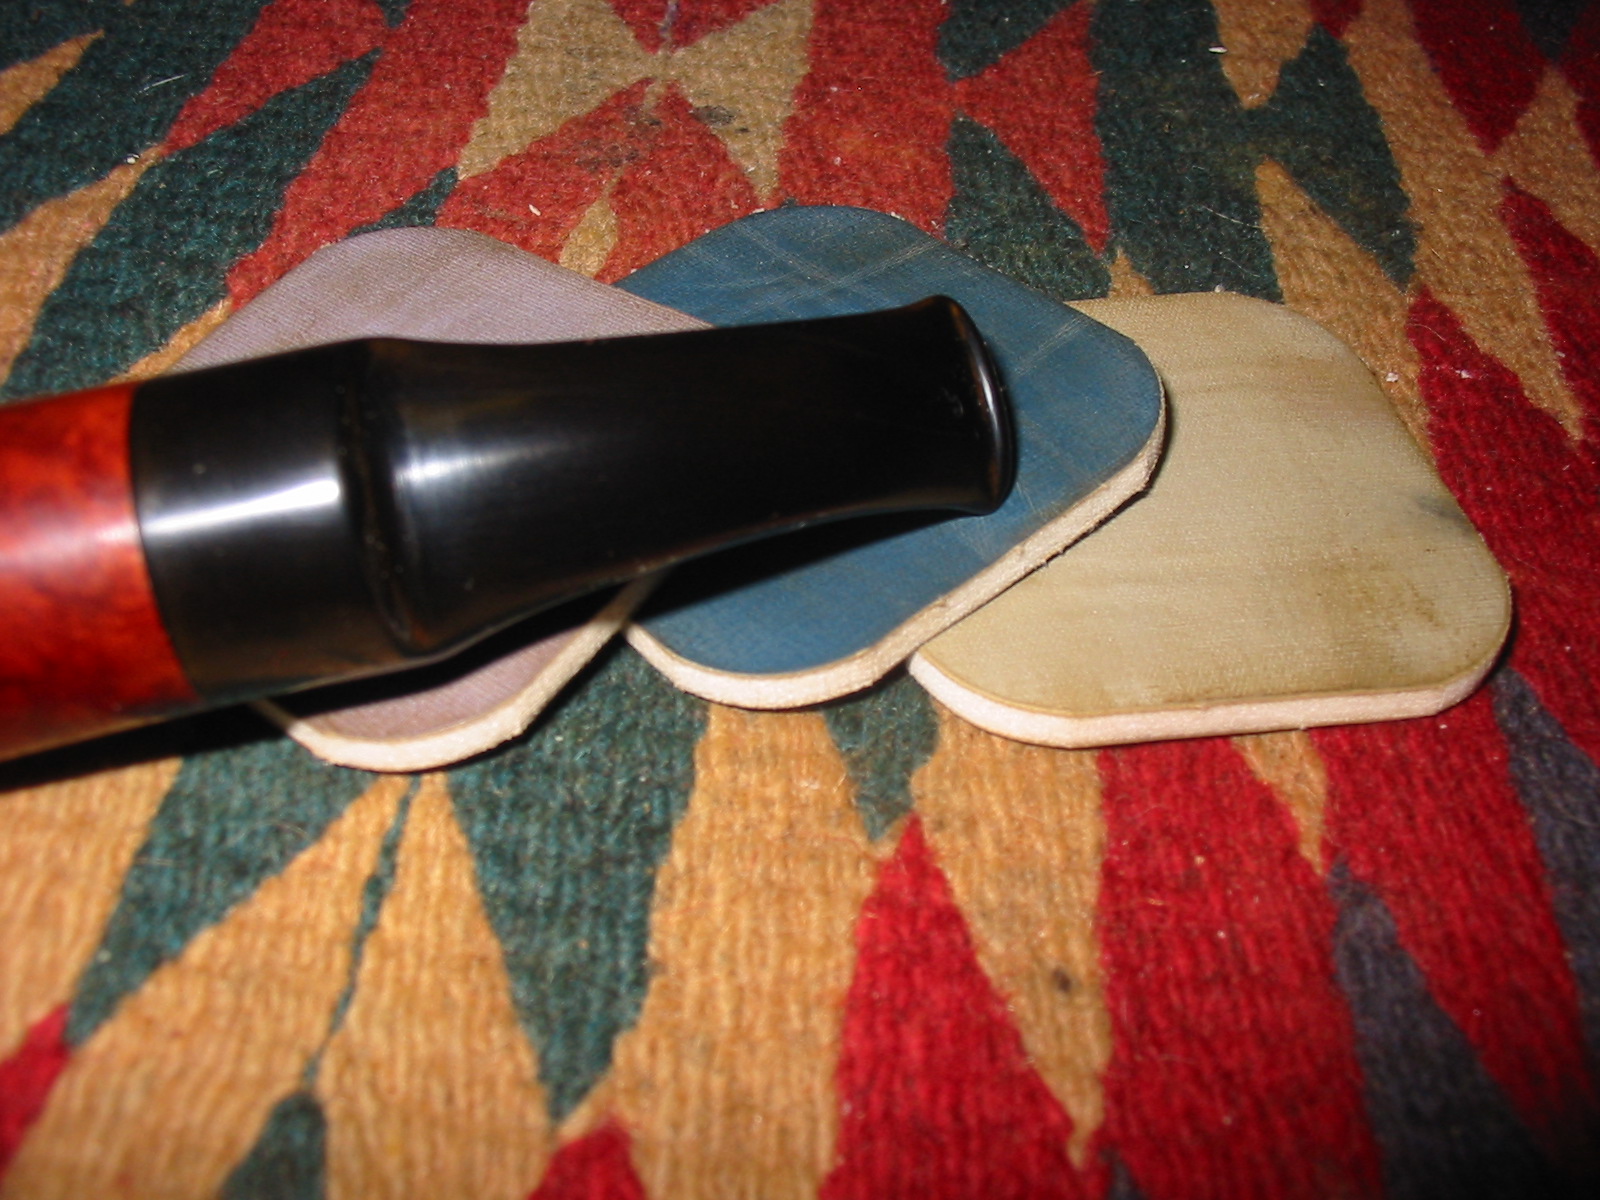
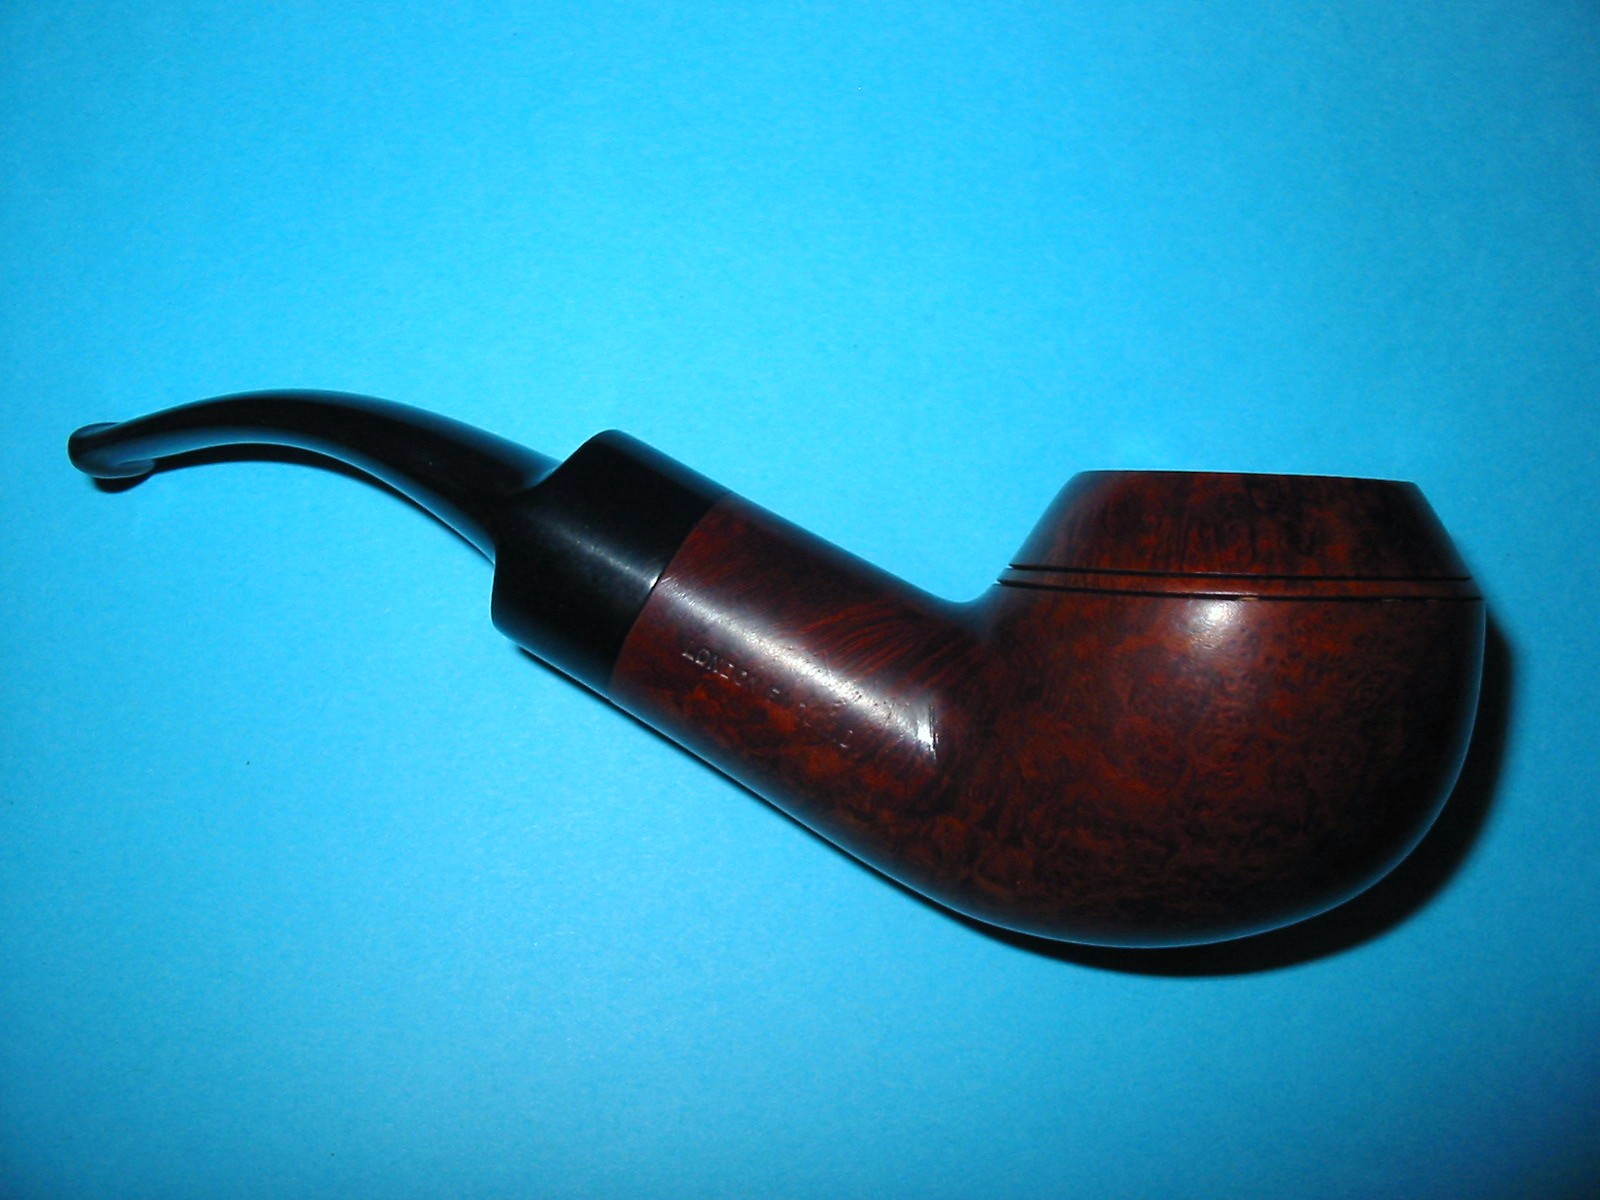
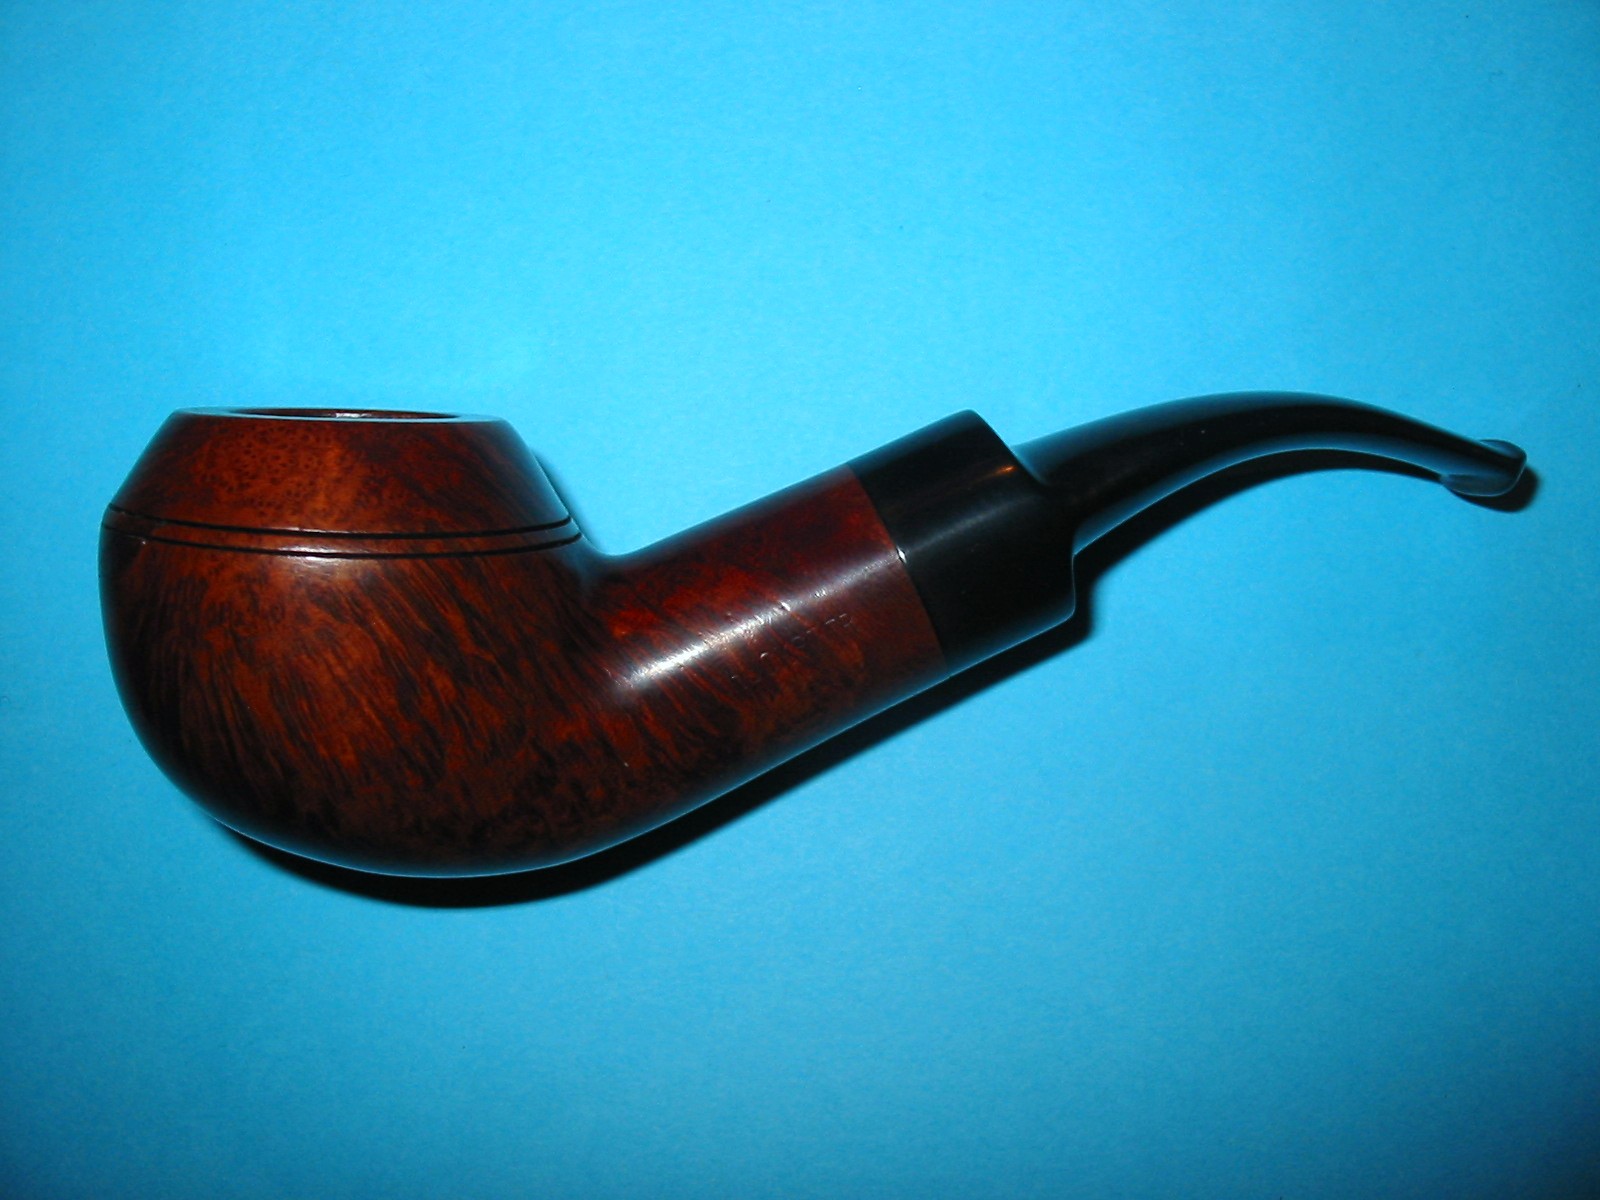
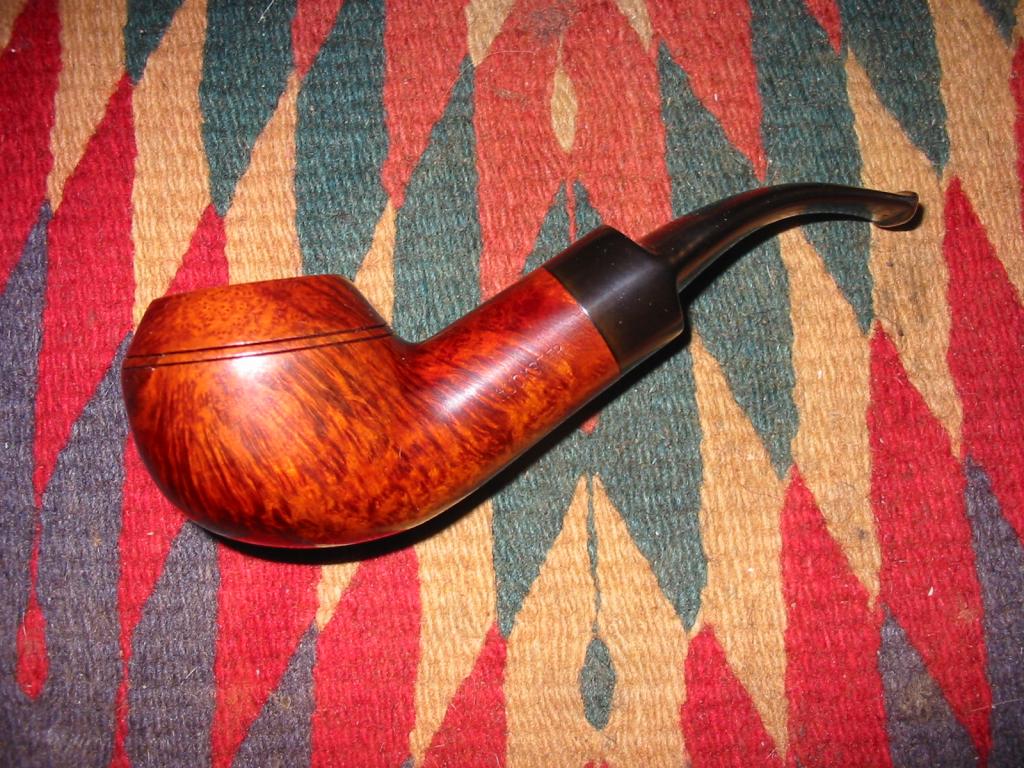
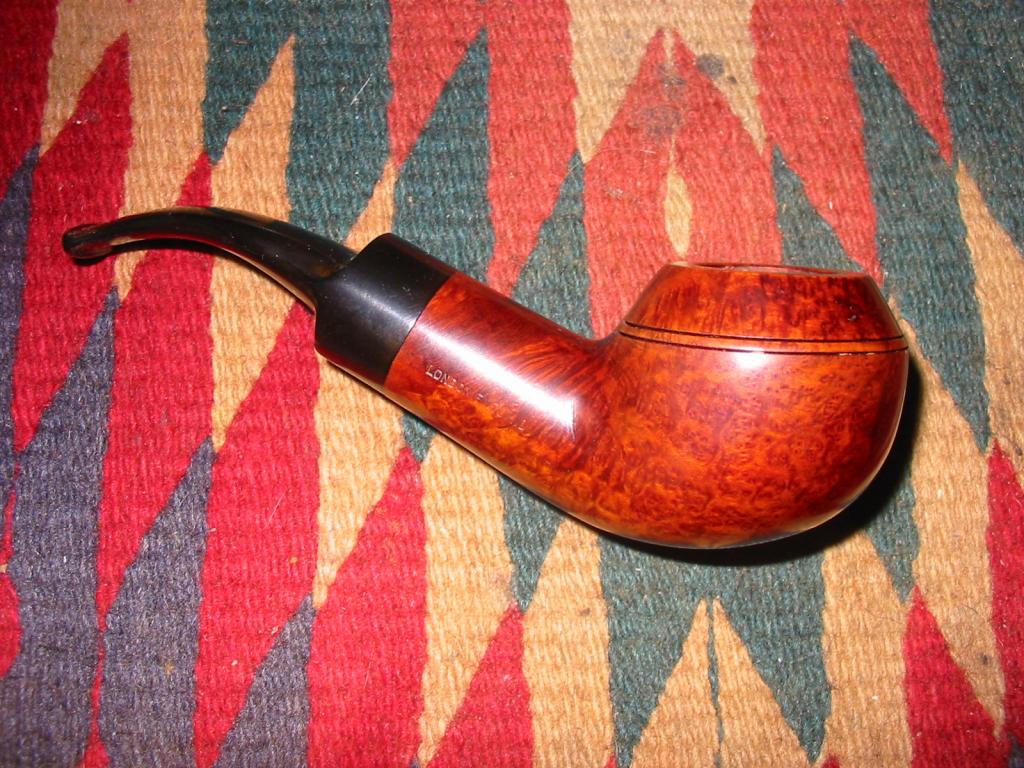
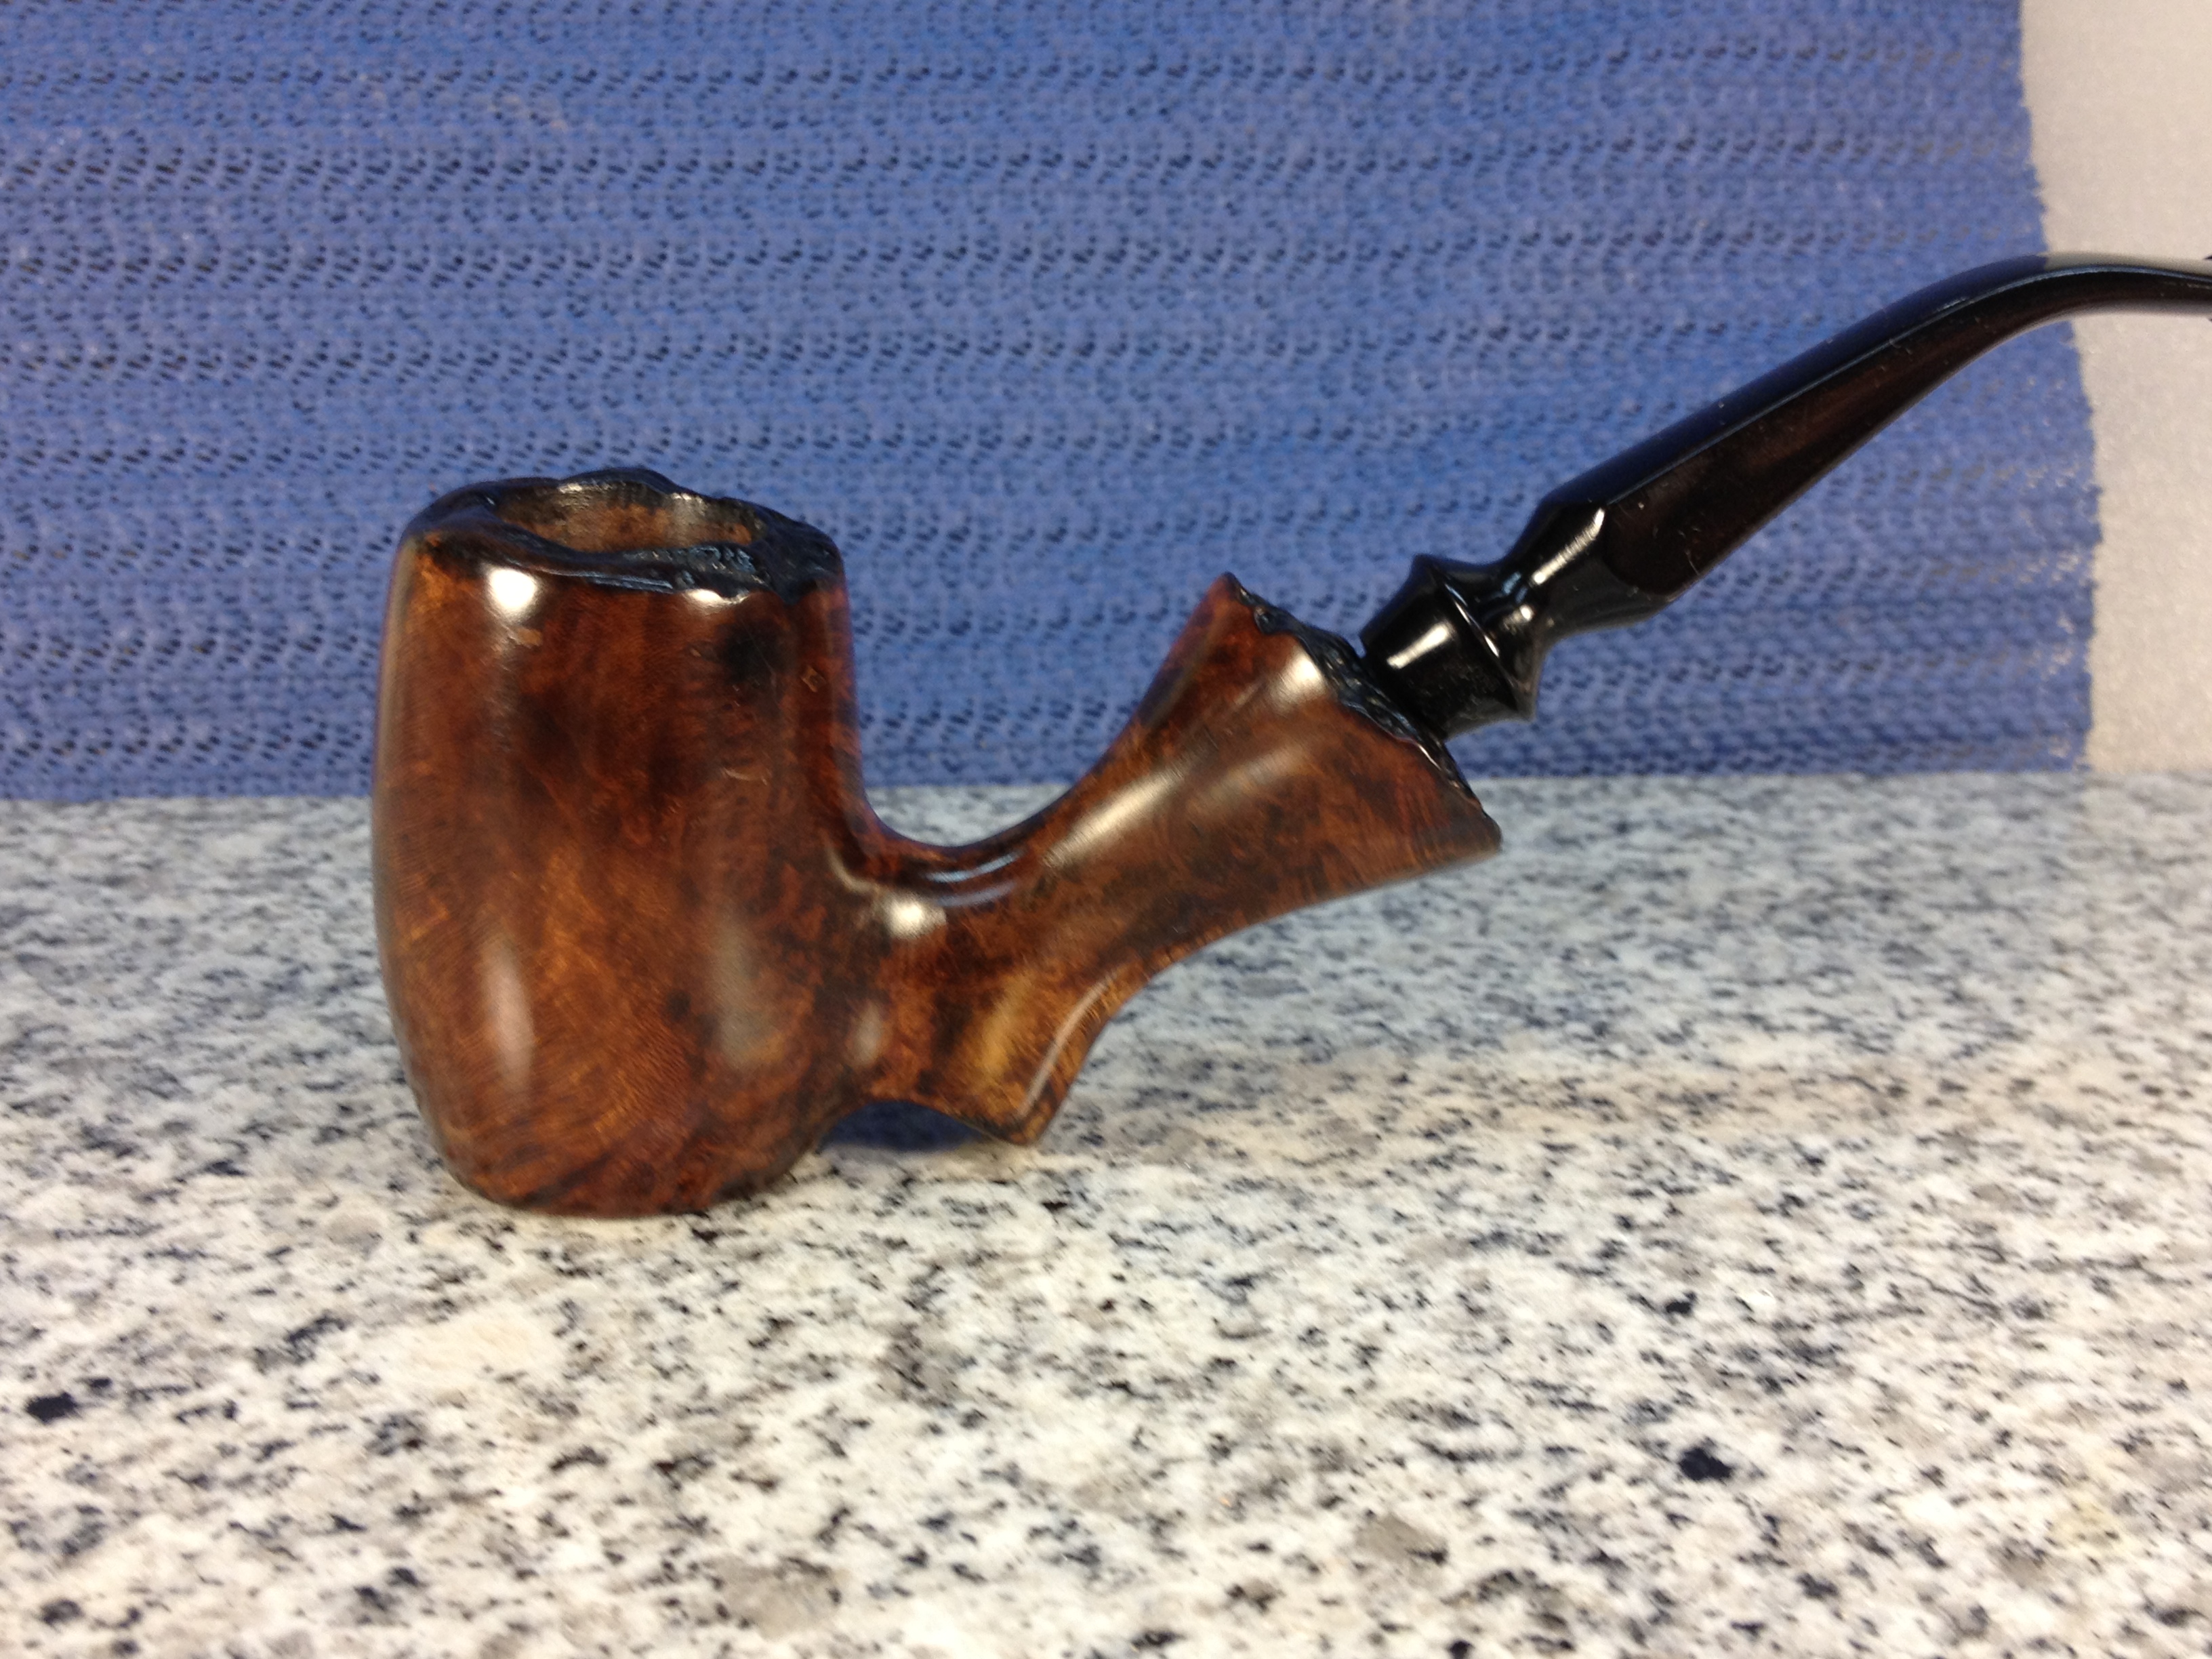
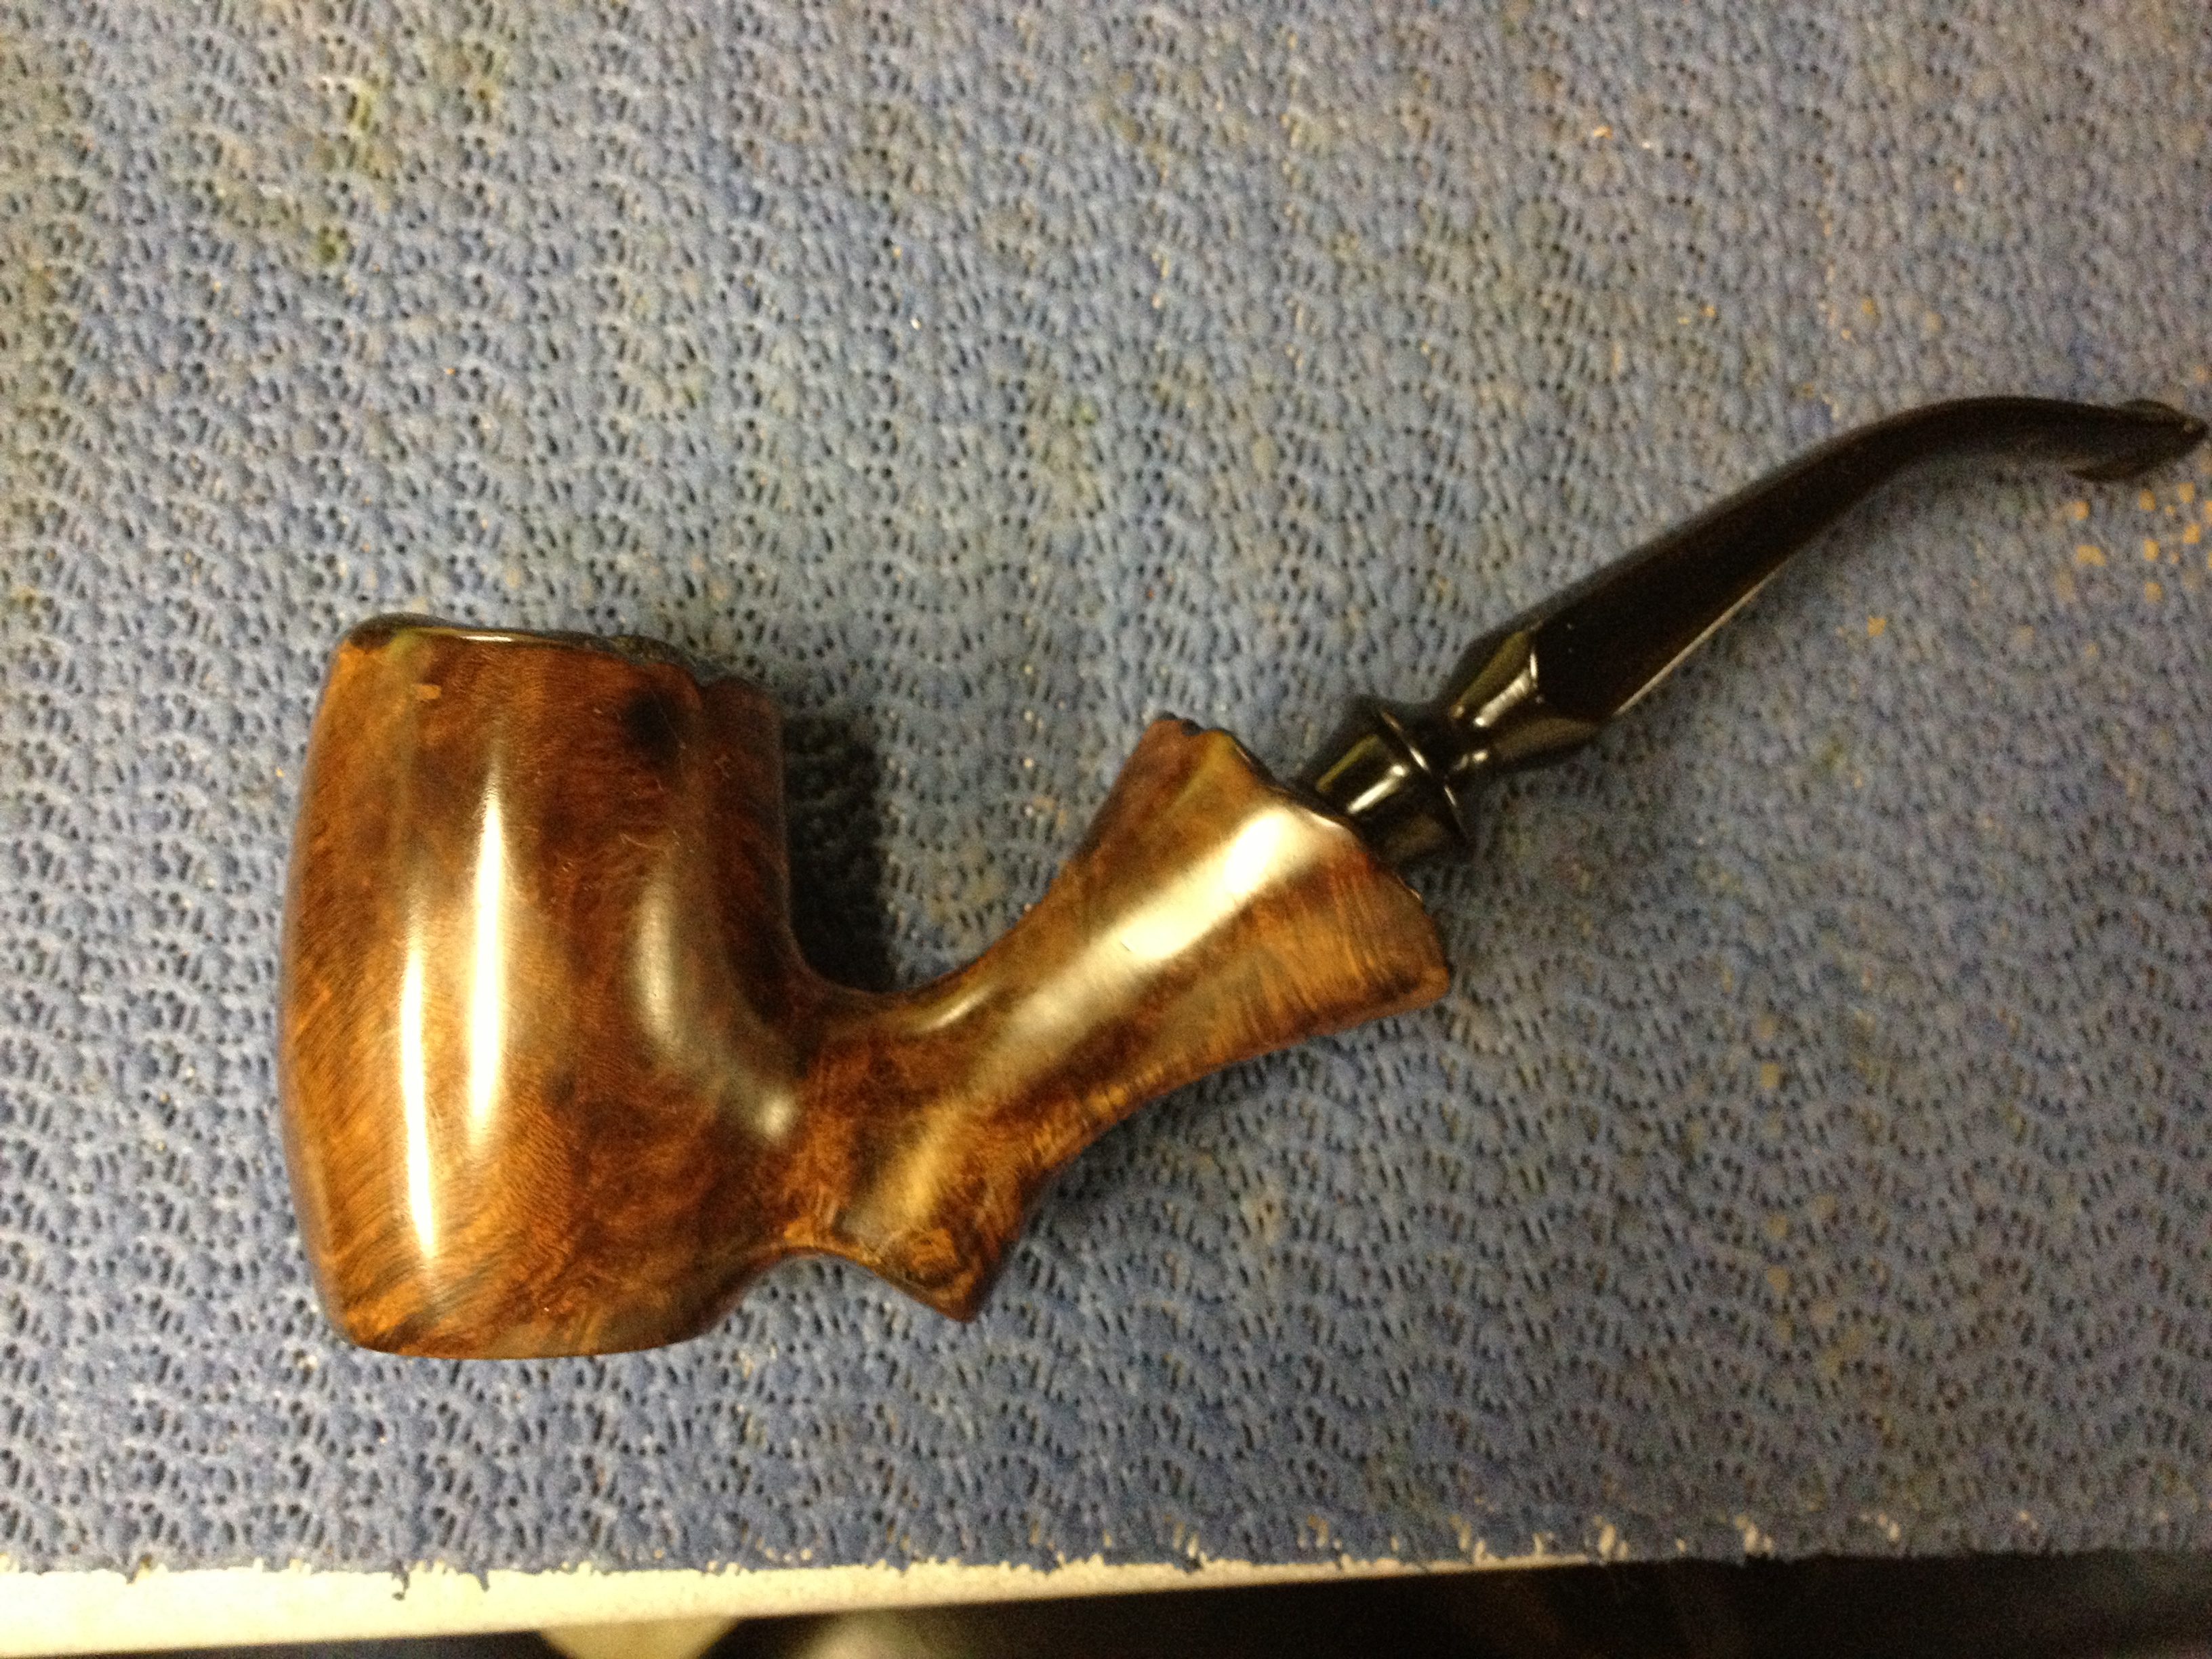
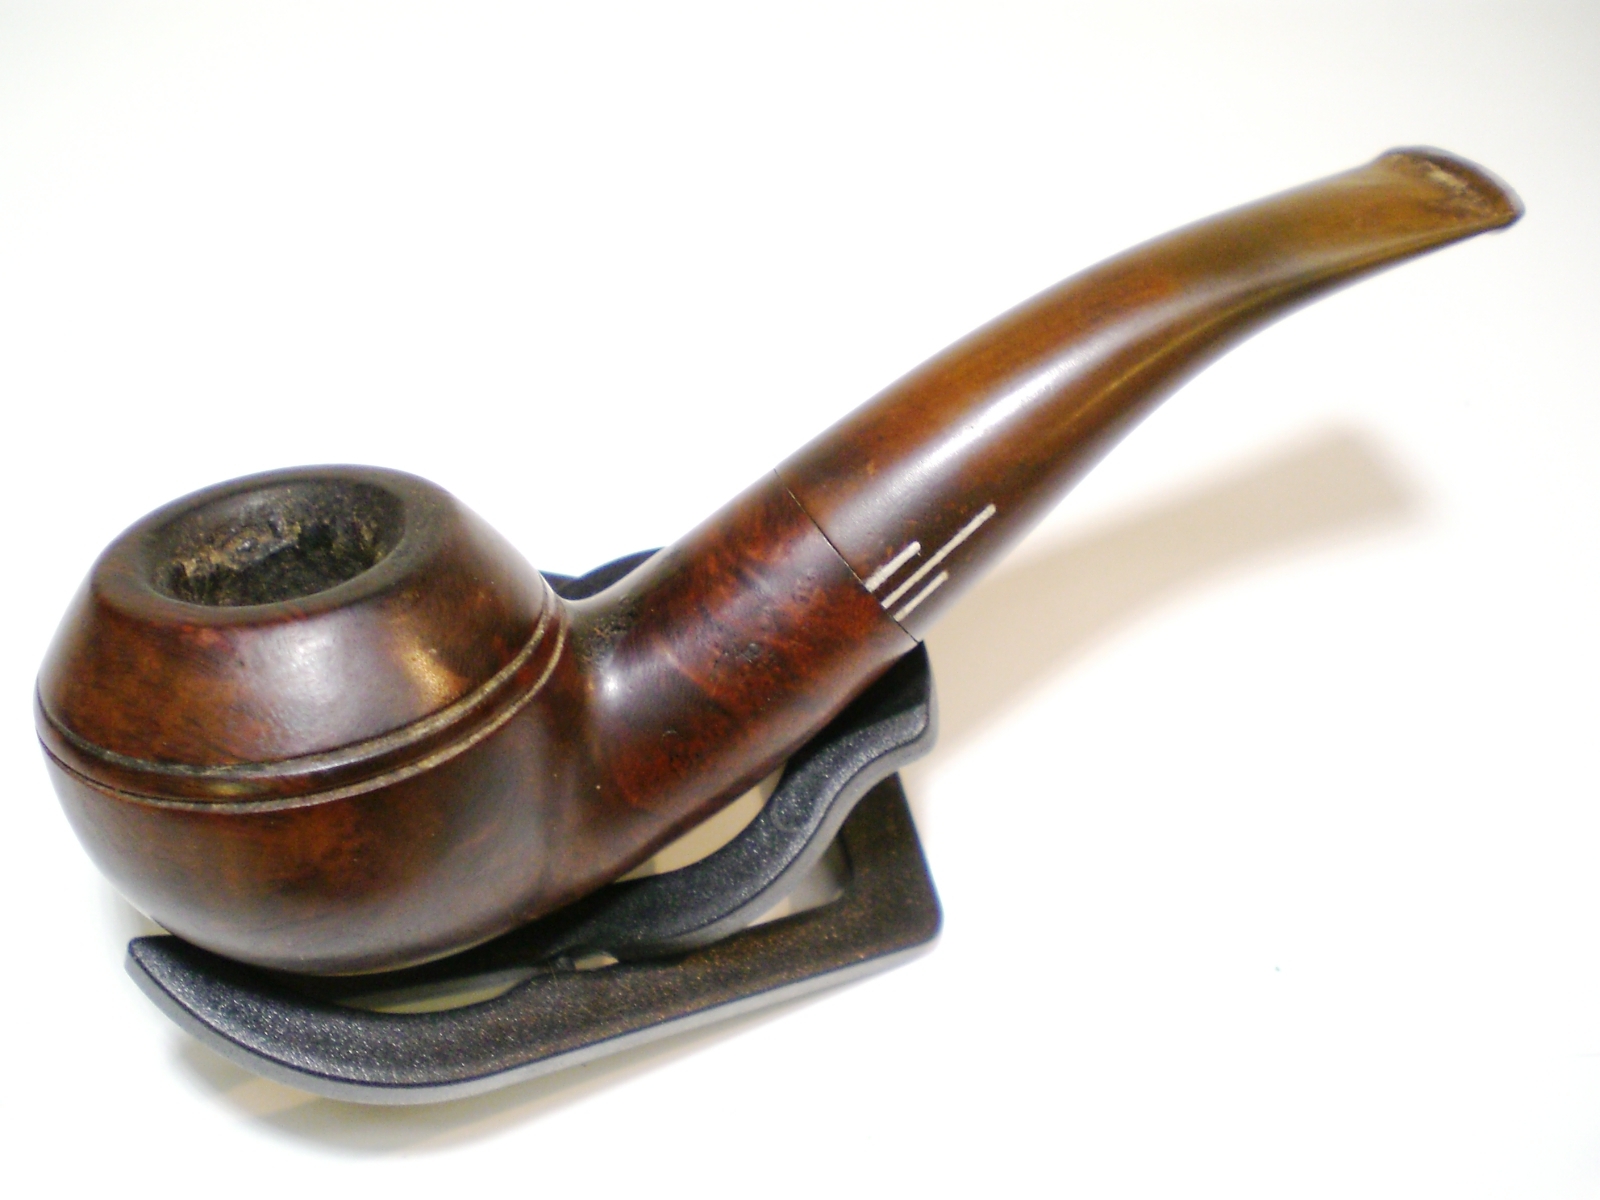
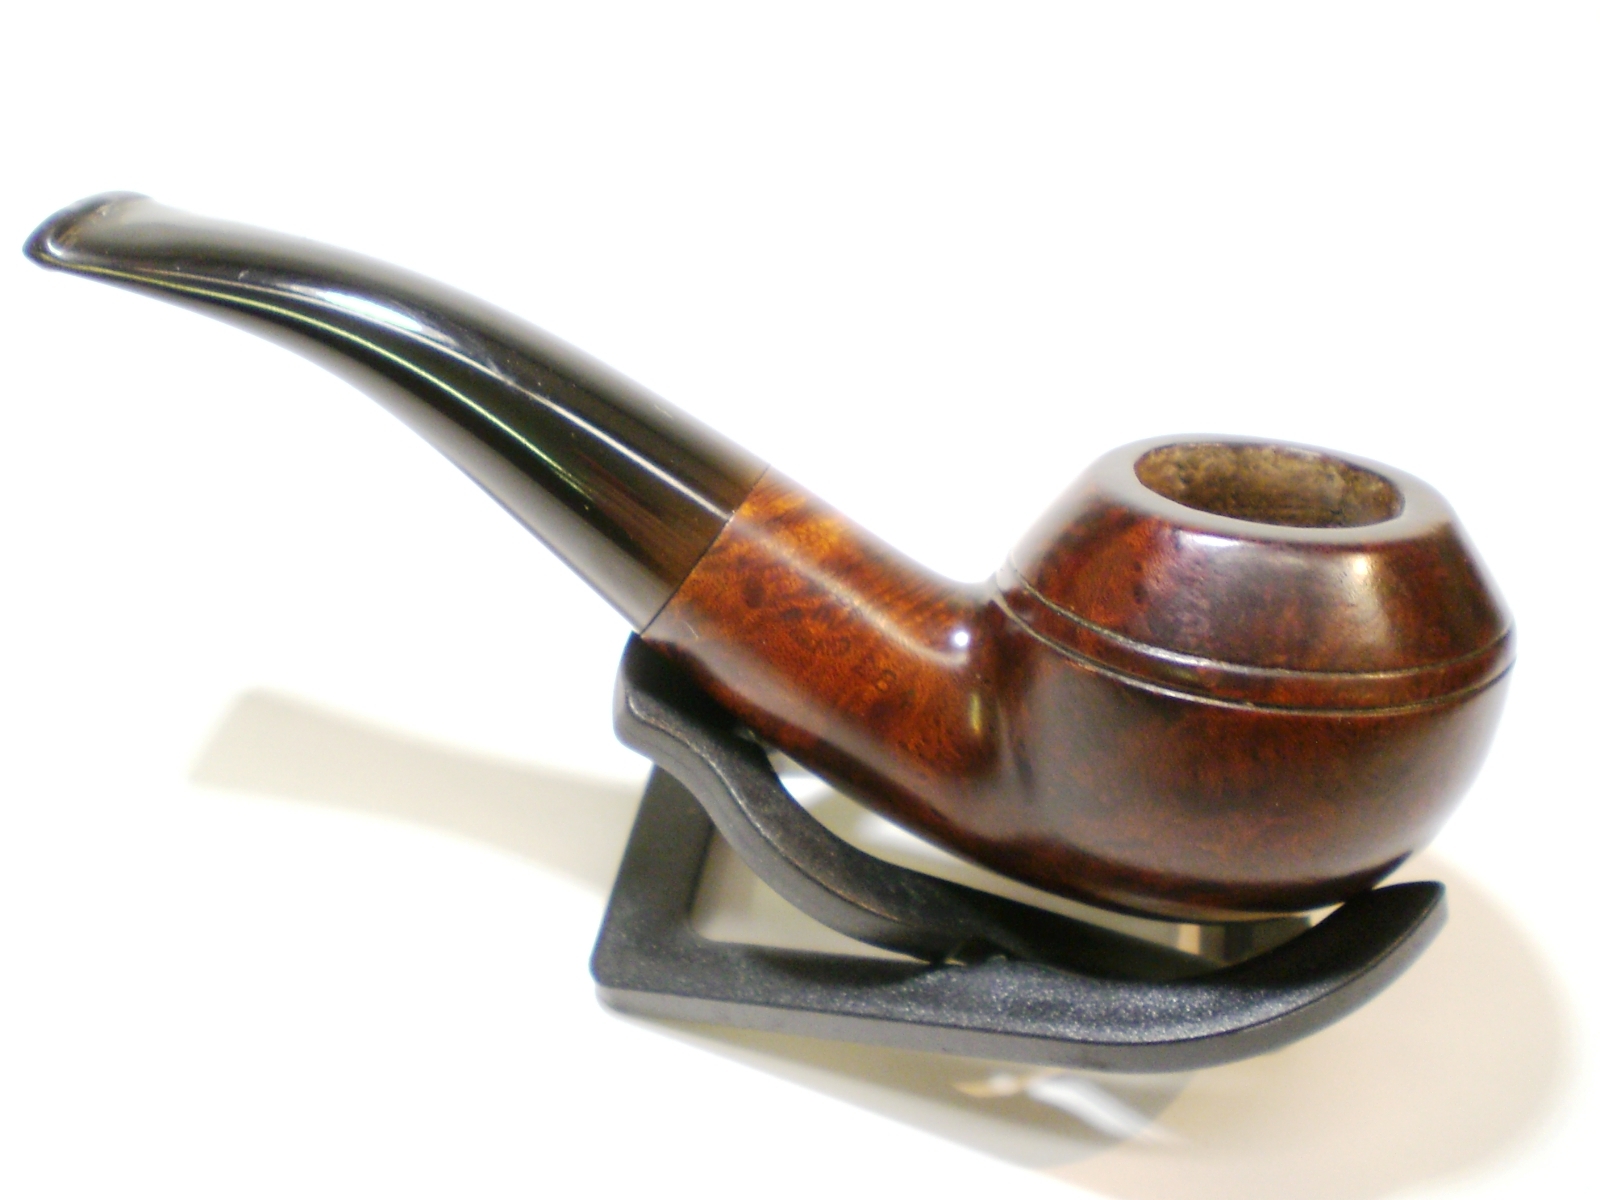
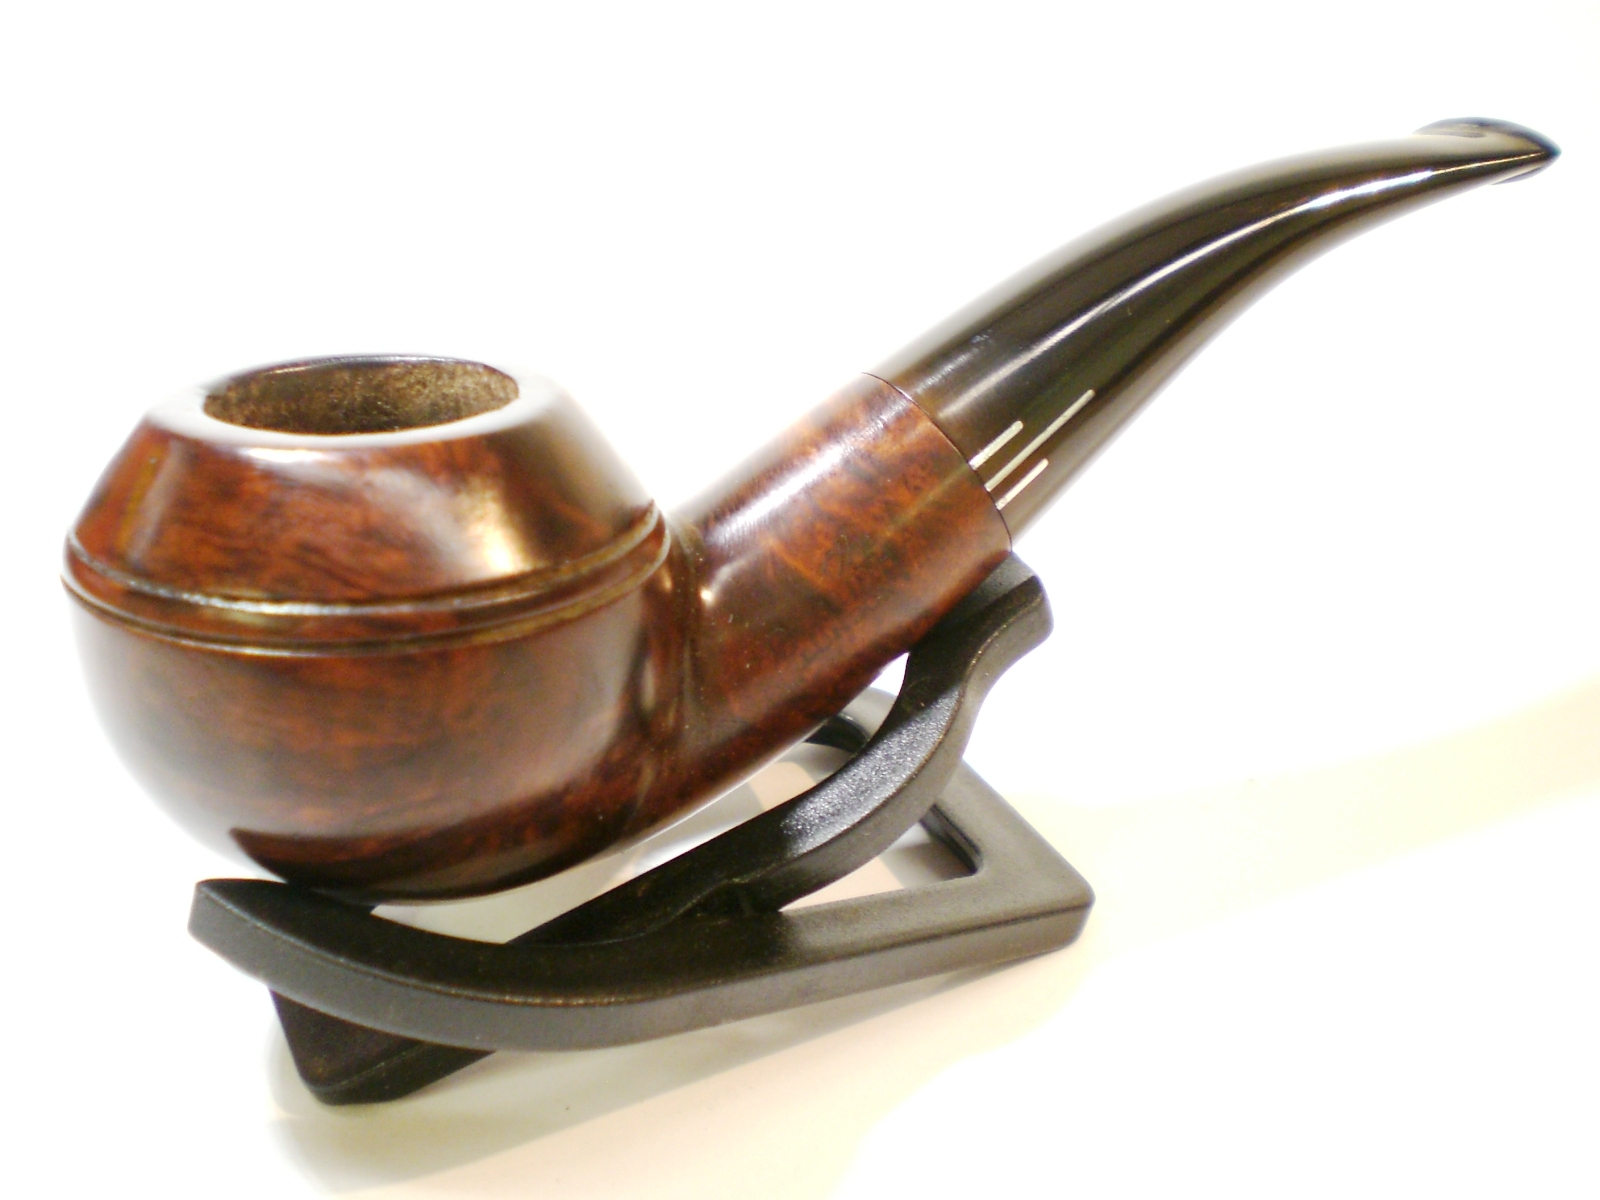
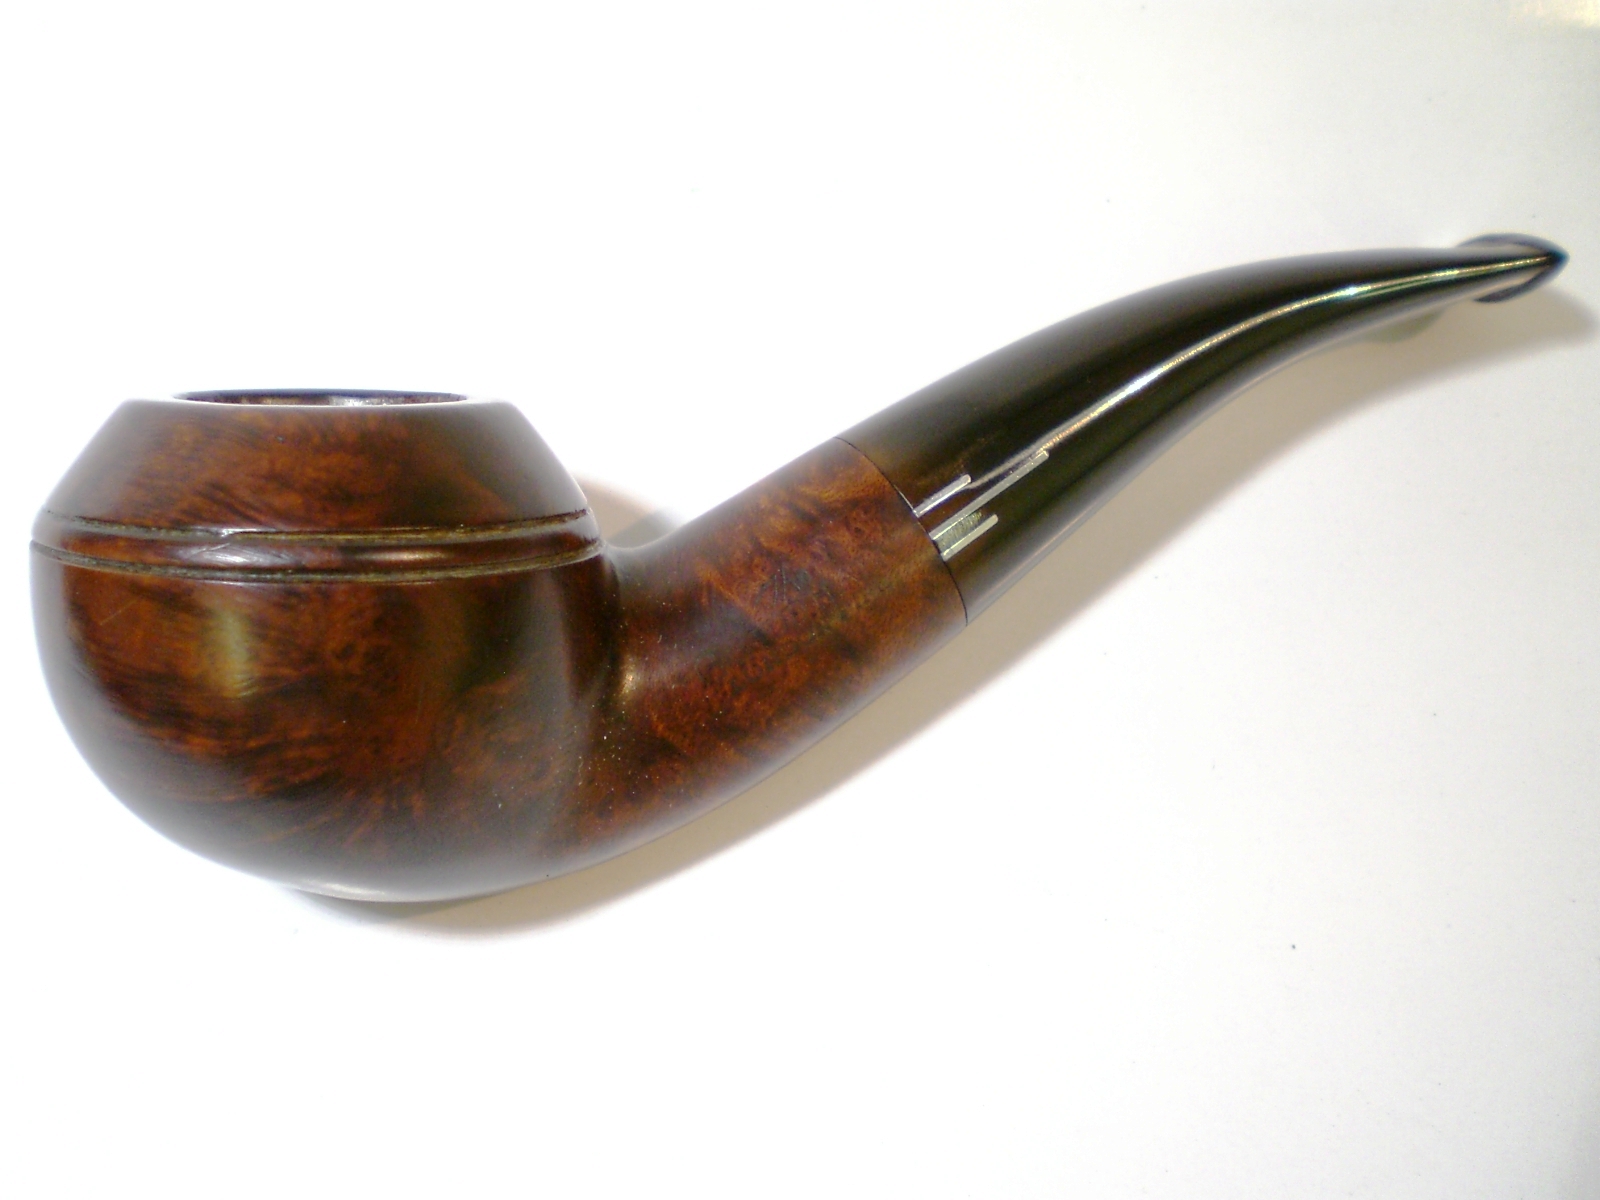
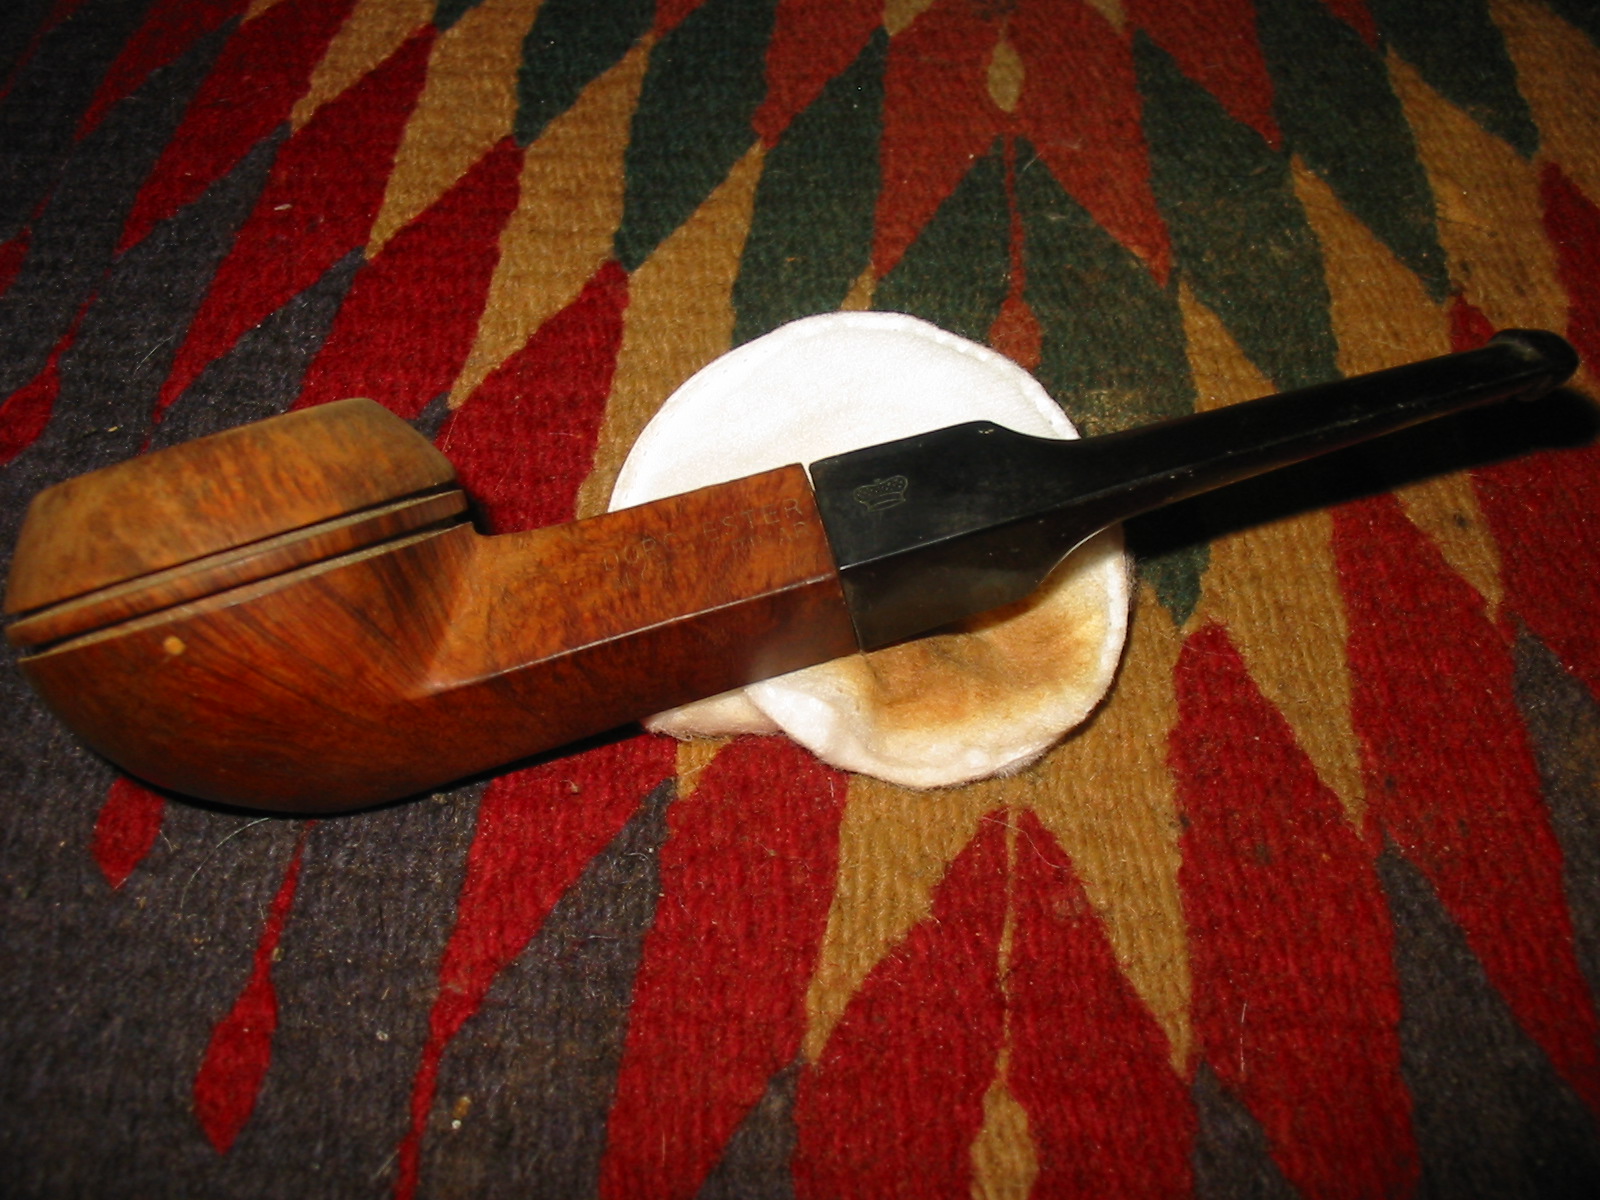
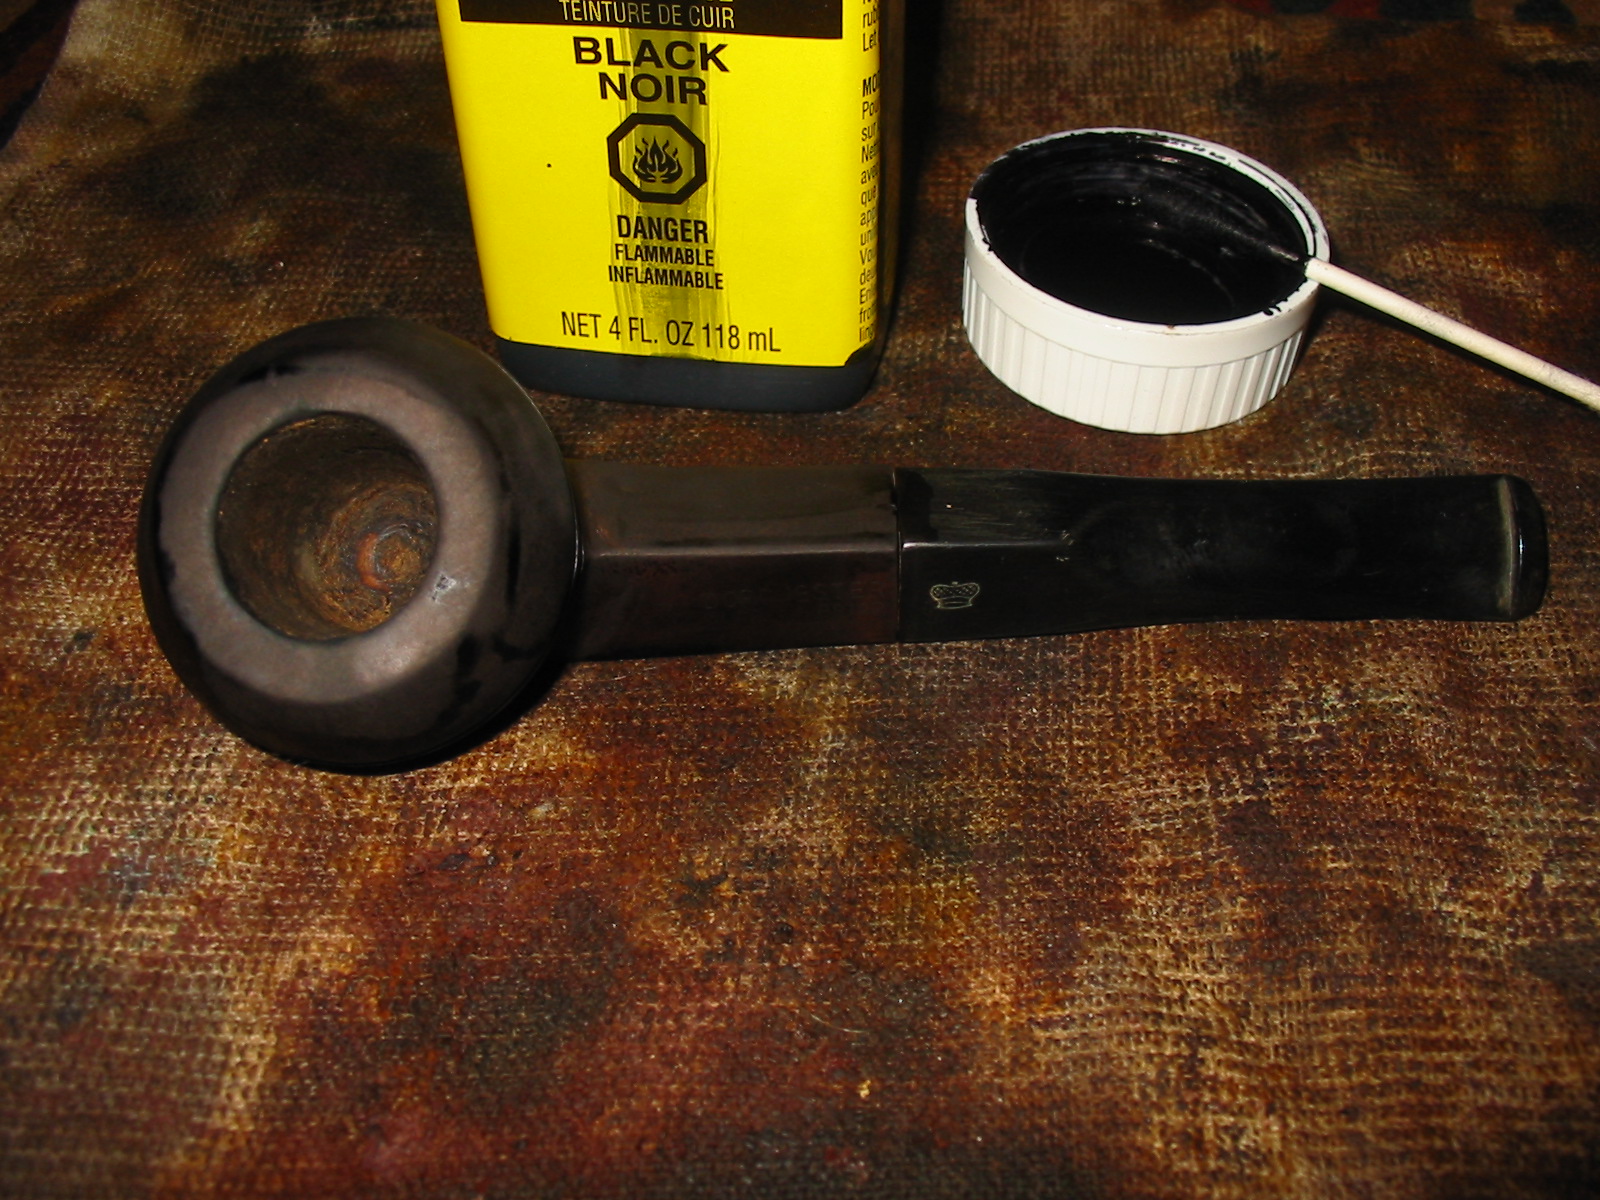
At this point I wiped the bowl down a second time with acetone wetted cotton pads and lightened the reddish finish. The fills are slightly visible but once the pipe is buffed and polished they will be blended in better. I buffed the bowl with White Diamond to remove more of the excess stain and help the contrasting under stain to show. I sanded the stem with a fine grit sanding pad, and then with micromesh sanding pads from 1500-12,000 grit until it shined. I then gave it a rub down with Obsidian Oil and finally with multiple coats of carnauba wax. Here is the finished pipe. It is ready to smoke and will in all likelihood last longer than I will. The lightweight aged Algerian briar evidently made this a great smoking pipe for the previous owner and it will remain that I am sure for the owners to come.

IMG_1636

IMG_1637

IMG_1638

IMG_1639

Restemming the Peterson’s XL999 with a Cumberland Stem


Blog by Steve Laug

I put out a request for a stem for a Peterson’s XL999 stem on various web forums I am on. I was sent several that almost worked but either the diameter of the tenon was wrong or that of the stem itself was off just a bit. I turned a tenon on a stem blank that was sent to me and made a nice looking black stem that I posted pictures of earlier on the blog https://rebornpipes.wordpress.com/2013/07/26/making-a-new-stem-for-a-petersons-kildare-xl999/ but Todd Bannard, who is a pipe maker in Alberta, Canada offered to cut a rough one for me from some rod stock he had available. He did not have black vulcanite but did have some Brindle or Cumberland stock. I sent him the rough dimensions of the stem – I needed tenon material that I could turn to ½ inches and I needed a piece of stock that was 7/8 inches or more in diameter to work with to match the shank. I have shaped stems from straight rod stock in the past so I was not too worried about doing that. However, I got an email from Todd saying the rod stock was ready and he was going to send it off. He sent the following two photos to me to show me what was coming. He did a lion’s share of the shaping work for me. I was amazed at how much work he had done on it. I needed only to turn the tenon and refine the shape and the button once it arrived. The Cumberland is vertical and swirling rather than horizontal and lined. It was intriguing looking and I was excited to see what I could do with it.

IMG_2008

IMG_2009

When it arrived I set up my PIMO tenon turning tool on a cordless drill to cut a tenon that was slightly over ½ inch which was the extent of the tools adjustment. I cut a slight step in the tenon first to get a rough idea on the setting on the tool (Photo 1 below). It was correct so I tightened the adjustments and and cut the new tenon for the stem (Photos 2 and 3 below). Once I had it turned close to size I used a Dremel with a sanding drum and gave it a once around sanding and fit the stem to the shank (Photos 4 and 5 below).

IMG_1538

IMG_1539

IMG_1540

IMG_1541

IMG_1542

I used the Dremel with the sanding drum to also remove excess material from the stem at the shank stem junction. Afterward I sanded the stem with medium grit emery paper to remove the scratches and marks left by the Dremel. I followed up by sanding the stem with 220 grit sandpaper to further remove the scratches. The next series of four photos show the fit of the stem at this point in the process. The pattern of the Cumberland is also very visible. The pinkish swirls would polish into a reddish brown and the darker colour would be a dark brown fading into black throughout the length of the stem.

IMG_1543

IMG_1544

IMG_1545

IMG_1546

Once I had sanded the stem to the smoothness and fit pictured above I heated it to bend it to the finished shape. I set up the heat gun and held the stem over the tip until it was soft enough to bend. Cumberland like vulcanite bends quite easily. What made this one a bit harder was the thickness of the stem where I wanted to bend it. Once flexible I bent it over a rolling pipe and cooled it under running water to set the bend.

IMG_1547

IMG_1548

I continued to sand the stem with 220 grit sandpaper to get a better fit with the shank. I wanted the transition to be smooth between the two parts so it took a lot of hand sanding. I sanded it removed from the shank, checking often for the fit, until it was a smooth fit.

IMG_1549

IMG_1550

IMG_1551

IMG_1552

I sanded with a fine grit sanding sponge to smooth out the scratch marks more thoroughly and to also fine tune the fit. The next series of seven photos show that progress.

IMG_1553

IMG_1554

IMG_1555

IMG_1556

IMG_1557

IMG_1558

IMG_1559

I worked on the button and slot with needle files to thin down the button and to also open the slot. The first photo below shows the slot and button before I started reworking it and shaping it. The second photo, though blurry, shows the button and slot after I had been working on it with the files and sandpaper. The button is thinner and the slot is beginning to open up. Photos three and four show the finished button and slot before buffing and polishing. The button is rounded and shaped, thinner than it originally was and the slot is oval and wide open. I used folded sandpaper to polish the inside of the slot and smooth out the edges. The fifth photo shows the profile of the button when I had finished working on it.

IMG_1560

IMG_1582

IMG_1581

IMG_1563

IMG_1561

I sanded the stem with micromesh sanding pads from 1500-12,000 grit, with each successive grit giving the stem a more finished appearance and removing the scratches from the Cumberland. The next series of ten photos show the progressive shine developing. I included quite a few photos in this section to show the various sides of the stem and the developing clarity of the Cumberland patterns in the stem as it was sanded.

IMG_1564

IMG_1573

IMG_1572

IMG_1571

IMG_1570

IMG_1569

IMG_1568

IMG_1567

IMG_1566

IMG_1565

I took the pipe to the buffer and buffed the stem with White Diamond and Blue polish to further enhance the shine. I gave the entire pipe several coats of carnauba wax and buffed with a clean flannel buffing pad.

IMG_1574

IMG_1575

IMG_1576

IMG_1577

The photo below shows both of the stem that I turned and shaped for the pipe. The black vulcanite one is about ½ inch shorter than the Cumberland stem. Both look very good on the pipe and are comfortable in the mouth.

IMG_1580

After staring at the pipe and handling it yesterday I was not happy with the stem shank union. There were some problems there with a slight taper to the shank that broke the smooth line of the pipe. I took it back to the work bench last night and did some more work on it. I will post the update later today.

Addendum
I took the pipe to work with me today and held it off and on while working on things and ran my fingers over the joint of the shank and the stem. There was a slight hip, with the shank tapering down slightly at the joint and breaking the flow of the lines of the pipe. It bugged me so when I got home I put it back on the worktable. I would have to deal with it and smooth things out. I knew it would take some more sanding and then refinishing the pipe and stem but so be it. I sat down and read the responses to my post regarding this pipe on Smokers Forums and also read my private messages. I had received a private message from bbqncigars (Wayne). I include his message in the paragraph below.

Steve,
Your restorations have been breathtaking. That said, I have a quibble with this pipe. The last 1/16″ or so of the shank exhibits a taper that is out of place with the lines of the rest of the pipe. This could be from over-buffing/sanding pressure on the end of the shank (BTDT). To restore the continuous line from the shank to the tip would require block sanding (might jeopardize the stamping) or removing the taper by shortening the shank. It’s a beautiful pipe and bit, but the bit/shank junction would drive me nuttier until I fixed it.

Yeah, I can be really anal about things I make that other people will see.

Wayne

I laughed when I read his words because they confirmed my own feelings and put into words some of my reserve regarding the restemming of this pipe. I looked at the pipe again and then wrote him back as follows:

Wayne
I agree with you totally! It bugs me as well. It forms a slight hip between the stem and the shank that really bugs me. I know that I am not finished yet either! The stummel came to me with a slight taper that was only clearly seen when there is a stem in place. The black stem has the same problem due to the shank. I have been contemplating hunting down a silver band to do deal with the issue and clean up the lines but we shall see. I could indeed block sand and may do that instead, we shall see. Thank you for your pm. I appreciate it as it has been bugging me.

Thanks
Steve

So after dinner this evening I decided to tackle the repair and remedy the situation. I used a pair of sanding blocks, one coarse and one fine to block sand the shank on the top and the bottom and more carefully along the sides of the shank around the stamping on the pipe. I sanded the briar and the stem material until the lines were smooth from the bottom of the bowl to the end of the stem and the same for the top. I worked on the sides to achieve the same thing. After sanding it with the coarse sanding block I sanded it with the fine grit block to remove the scratches.

IMG_1605

IMG_1606

IMG_1607

I sanded the stem and shank with 1500-12,000 grit micromesh sanding pads to bring back a smooth finish to the stem and the shank. I heated the shank with a lighter to warm the briar, restained it with a dark brown aniline stain that I thinned with isopropyl alcohol – 1 part stain to 2 parts alcohol. I flamed the alcohol and continued to stain the shank until it matched the rest of the bowl on the pipe. I buffed it with White Diamond and then gave it several coats of carnauba wax and buffed it lightly with a soft flannel buff. Tomorrow morning I will give it a careful examination in the light of day and see where I go from there. Thanks Wayne for your help.

IMG_1608

IMG_1609

IMG_1611

IMG_1612

Why I Chose the last Ebay lot of bowls to restem and refurbish


I just finished restoring and restemming the last of the Ebay lot that is pictured below. I thought it might be helpful to reflect on what I look for when I pick a lot of pipes like this on Ebay. There are many lots that I pass over in my hunt for estate pipes but there are some commonalities to what draws me to them and why I bid and win most of the ones I choose.

bowls1

bowls2

When I came across this listing there was no information available as to brands, makers or stampings. I always look for certain shapes or designs that catch my eye and then save the photo and enlarge it to see if I can see clearly any issues with the pipes. I also enlarge the side views to see if I can read any of the stamping that may be present on the pipe. In this lot the stamping was unreadable in the photos so it made me wonder if I would be able to identify them once they arrived. The most I could do was to judge by experience what was present. The seller of this lot included several photos showing both sides and the top of the bowl. Upon examining them carefully in the enlarged pictures I can be relatively certain of the issues that I will find and minimize any unexpected ones.

In this lot there were several there that I thought I could identify, or at least reduce my guesses to two or three possibilities for that shape of pipe. Knowing what I had learned from my examination of the photos I entered a bid for the lot and won. I decided to write down my guesses as to what the pipes were in the photos. I don’t always do that but in this case I wanted to see how close I could come to identifying brand/make and/or country of origin. I looked at the shape, design and finished to make some “educated” guesses as to what they would be when I saw them in person upon their arrival here in Vancouver. The pipes are arranged in three columns in the side photos and each of the top view photos take a column and photograph the group. So I divided my guesses into the same three columns as to what the brands are and see how close I can come once they arrive. In the chart below the left column records my guesses as to the pipes.

ebay lot1

I have included the remainder of the photos that came with the EBay listing so that you can see the same things I saw as I decided to bid on this lot. For a little challenge, try to identify the maker of the pipe before you look at the next chart. I have been working on my ability to identify either country of origin or maker by the shape and finish of the pipe. I find it really helps when I am scanning through EBay to look over pipes there or also when I scan flea markets or rummage shops. It quickly sorts potential pipes I am considering purchasing. I have listed what actually came in the chart below. There were some great old pipes in the lot. All of them have been restemmed and refurbished. All of them have been written up on the blog.

ebaylot2

ebay lot 5

ebay lot 6

ebay lot 7

An Engagement Pipe (GBD 548 Seventy-Six)


My family had a pretty big life event here last week. My daughter came home from New Orleans for a week of vacation, with the boyfriend of two years in tow again. He had called us a few weeks prior to ask permission to marry her, the first of our daughters to get engaged. This young man is quite a gentleman, as you might have guessed (who knew guys still ask for permission?). He and I share a number of interests, including pipes. I enjoyed my week with him and we were able to spend some time in the shop where I shared with him some estate pipe restoration techniques. He left here with a few briars that he cleaned. I miss him and her already.

As they were getting ready to depart, I found this GBD Seventy-Six, shape 548, on Ebay. I later learned it was sold by our own Bob Landry. The pipe had some issues and I was a bit skeptical that a good outcome could result. I’m a fan of the Seventy-Six line and I liked the tall bulldog shape. The bowl top had some chips on it but the tall bowl looked like there was plenty of briar there to top it just a bit. The stem was in great shape, just oxidized and I rationalized that if it didn’t work out, at least I had a brass rondell for the parts box. The big concern was the two burn marks on the briar (photographed and described well by Bob). I knew it would require a restain. Here is the pipe as it was received.

GBD_584_76-Before

GBD_584_76-Before (1)

GBD_584_76-Before (2)

GBD_584_76-Before (3)

GBD_584_76-Before (4)

I reamed the bowl and found it to be in great shape. I used a sheet of 800 grit paper on my flat work bench to top the bowl and work past the damaged area. That fix came out great and the tall bowl definitely lent itself to that repair. Next up, I soaked the bowl in alcohol to remove the stain. This really exposed the burned areas. I tried to sand past them, but that was not possible and I was afraid of putting a flat spot on the bowl, particularly on that right side. This work exposed some other nicks on the bottom of the bowl. I was able to buff/sand out most of those.

GBD_548_76_Work (4)

GBD_548_76_Work (3)

GBD_548_76_Work

GBD_548_76_Work (2)

The GBD Seventy-Six line used a two stain process that I really like, much like Comoys used. I stained the bowl black but must have put it on too heavy, as I had a hard time getting the black off. The plan was to sand off the black, leaving it to highlight the grain and then apply a very light brown stain. I mulled over just leaving it black, but that didn’t set well with me either. I was a bit frustrated at this point and almost bagged the whole project and save the stem for a future project. I left it on the bench for the better part of a week, working on other projects. I decided to soak off the black stain and left it in an alcohol bath for several days. That finally did the trick and afterwards, I sanded the briar smooth with some 2000 grit paper and then 8000 grit micromesh.

GBD_548_76_Work (5)

GBD_548_76_Work (6)

GBD_548_76_Work (9)

GBD_548_76_Work (8)

GBD_548_76_Work (7)

I then applied a very light brown stain using Feiblings Medium Brown heavily diluted with alcohol (20:1 ratio or so?) The combination of the black and brown stain finally hid the burn marks rather well and I was pleased with the outcome. The bowl was then polished with White Diamond and then several coats of carnuba wax was applied.

With the bowl completed, I turned my attention to the stem, which didn’t require nearly as much work. Using a piece of plastic, cut into a round shape I inserted it as a shield between the stem and the briar for the sanding work. I sanded the stem with 800, 1500 and 2000 grit paper, all wet. I then moved to 8000 and 12000 grit micromesh sheets. The stem was then buffed with White Diamond and an automotive plastic polish.

This shows the plastic shield.

GBD_584_76_Work (10)

As I was finishing the pipe and thinking about my daughters marriage, it struck me that there were some similarities in this pipe project and a successful marriage. Like a marriage, at times things don’t always go the way you anticipated and being patient with your spouse or a project always pays off. I sent the pipe off to my future son-in-law with a note welcoming him to our family. I hoped when smoking the pipe, he would remember the week he spent here and his proposal to my daughter.

GBD_584_76-Finished (4)

GBD_584_76-Finished (3)

GBD_584_76-Finished (2)

GBD_584_76-Finished (1)

GBD_584_76-Finished

Restemming a Bruyere Krone Billiard


I am just about finished restemming the lot of pipe bowls I picked up on EBay. This is one of the last two pipes that I have left in the lot below. It is the fourth pipe down in the left column. It has an interesting rustication pattern that reminds of one that is done on Saseini pipes. It is striated around the bowl and then tapers up from the bottom to a striated pattern around the shank. It has a flat bottom on the shank that is smooth and stamped Bruyere in a crown with a large R in the centre of the band on the crown. Underneath the crown is an unfurled banner that is stamped K R O N E. I have no idea of who the maker is or when and where it was made. The stamping is faint so I may be missing a few letters but I think this is an accurate rendering of what is stamped. The finish was pretty dirty with grime in the grooves on the bowl and shank. The rim was caked with a tarry buildup and the grooving on the rim was not visible. There were also place on the finish where the stain was missing and the briar underneath exposed. The inside of the bowl had dust and cob webs and a pretty large cake buildup that would need to be removed. The bowl came without a stem and fitting one would take flattening of the stem on the underside to match the shank.

bowls1

sas

I went through my box of estate stems and found one that was a good fit to the shank. Once the cleanup of the stem was done and a flattening of the underside of the stem the pipe would look like it came with that stem. The stem had a calcified buildup around the button and some tooth marks as well. The oxidation was not too bad but was present.

IMG_1492

IMG_1493

IMG_1494

IMG_1495

IMG_1496

The clean angles of the button against the stem were gone so I recut them with needle files to clean up the edge. I reamed the bowl back to bare briar with a PipNet reamer starting with the smallest cutting head and progressing to the one that was the diameter of the bowl without the cake. Once it was cleaned out I scrubbed down the bowl with Murphy’s Oil Soap and a soft bristle tooth brush to remove the grime. I scrubbed the buildup on the rim with a soft bristle brass tire brush to remove the tars. Once I had scrubbed it I rinsed it with warm water to remove the soap and dried it off with a cotton towel. I wiped down the bowl with acetone on a cotton pad and prepared it to be stained. After heating it with a heat gun I stained it with a dark brown aniline stain. I used a permanent black marker to touch up the raw briar areas where it was scratched or damaged. I reapplied the stain and flamed it. The newly stained pipe is shown in photos 2 and 3 below.

IMG_1497

IMG_1498

IMG_1499

I sanded the stem with medium grit emery paper to remove the calcification around the button and also heated the tooth marks with a Bic lighter to lift them as much as possible. I “painted” the surface of the stem with the flame to burn off the sulfur of the oxidation that I had loosened by sanding. I repaired the tooth marks on both sides of the stem with black superglue and set it aside to dry overnight.

IMG_1500

The next morning I cleaned out the bowl and shank with pipe cleaners, cotton swabs and Everclear. I sanded the stem and the superglue patch with 220 grit sandpaper and then with a medium grit sanding sponge to clean up the scratches in the finish. I put it back on the bowl to get an idea of the overall look of the pipe and see if the diameters of the stem fit the shank. I needed to flatten the bottom of the stem some more to match the bottom of the shank and also removed some more of the material on the diameter of both sides to bring it into line with the shank. Once the stem was well fitted I moved on to sanding with micromesh sanding pads from 1500-12,000 grit.

IMG_1501

IMG_1502

IMG_1503

IMG_1504

IMG_1505

IMG_1506

IMG_1507

I buffed the stem with White Diamond and a Blue polish. I gave the bowl a light buff with White Diamond to bring up the shine. I gave the bowl a coat of Halcyon II wax and buffed it by hand with a shoe brush. I gave the stem multiple coats of carnauba and buffed it on the buffer with a clean flannel buff. I think the pipe came out well. Does anyone know anything about the brand?

IMG_1508

IMG_1509

IMG_1510

IMG_1511

Making a New Stem for a Peterson’s Kildare XL999


The Peterson’s Kildare is the second pipe down in the left column in the photo below. The second and third photos are of the pipe bowl apart from the lot. The externals were in pretty decent shape but the rim has a heavy buildup of tars and the cake in the bowl is quite thick and hard. To give an idea of the thickness of the cake I was unable to put my little finger in the bowl. The shank was quite large – the tenon is ½ inch in diameter for a snug fit in a clean tenon. The shank itself is 7/8 inches in diameter. It is a large mortise and airway. The pipe is stamped Peterson’s “Kildare” on the left side of the shank and Made in the Republic of Ireland XL999 on the right side of the shank. The finish is quite clean. The top will need to be topped to remove the buildup and dents. I also will need to chamfer the inner edge of the rim to repair the damage that is present on the surface of the rim.

bowls1

Pete999

Pete9992

I reamed the pipe with a PipNet Reamer beginning with the smallest cutting head on the T handle and working up to the diameter of the bowl. I carefully ream the cake so as not to damage the bowl roundness or the inner edge of the rim any more than it already is. I emptied the carbon out of the bowl repeatedly until it was clean and empty. I reamed the cake back to bare wood to begin to rebuild on a clean surface. I scoured the bowl and shank with Everclear and cotton swabs and pipe cleaners.

IMG_1379

IMG_1380

Once the inside was clean I decided to gently top the bowl. I used a medium grit sanding sponge flat on the table top and worked the rim against that to remove the buildup of tars. The first photo shows the set up and the second the result of the topping. Very little briar was removed from the rim, mostly tars. The finish however also was removed so the rim would need to be restained. The third photo shows how I used a folded piece of 220 grit sandpaper to bevel/chamfer the inner rim to repair the damage that had been done to the rim.

IMG_1381

IMG_1382

IMG_1383

I sent out several emails and private messages to folks on the online forums to see if I could find a Peterson stem with these dimensions. I received many answers and several possible stems that could work for this pipe. Thanks to those who sent them. For the most part they were either too long or the diameter of the stem was not large enough to fit the shank. Chuck (desertpipe on SF) sent me several that would work. I also have a piece of brindle rod coming that Todd (Sasquatch on SF) was willing to cut for me. So in the end I will have two different stems for the pipe. While awaiting the arrival of the Cumberland stock I decided to turn the tenon on a vulcanite stem blank from Chuck. I turned it with a PIMO tenon tool and fit it to the bowl. The end fit was a ½ tenon for the mortise so I did not need to remove much of the existing vulcanite on the cast stem to make it fit well. To fit the stem on the tool I drilled the airway so that it slid easily over the pin on the tool but did not have too much play. I held the stem and ran the drill over the tenon for a first pass (second photo below) I adjusted the cutting tip and spun it several more times until the fit in the mortise was close. I used the Dremel with a sanding drum to take off more of the material and fine tune the fit (third photo below). I spun it one last time to clean up the face of the stem where it sat against the shank. I want that surface to be smooth and seamless in its fit.

IMG_1427

IMG_1428

IMG_1429

After fitting the tenon to the mortise I used the Dremel with a sanding drum to remove the excess vulcanite on the diameter of the stem. I carefully sand with the Dremel and bring the stem as close to the diameter of the shank as possible without nicking the briar. I also sand down the sides of the stem to remove the casting overrun on the stem and button. The idea is to get as close as possible to the stem diameter and then sand the rest of the fit by hand with medium grit emery cloth and 220 grit sandpaper.

IMG_1438

IMG_1443

IMG_1444

I took the pipe back to my work table and removed the stem and sanded it until the fit was perfect and the marks left by the Dremel were gone. The hand sanding is probably the longest part of the process of fitting a new stem. I sanded it repeatedly with emery paper and 220 grit sandpaper until it was smooth enough to move to the next step in the process. At this point I am not looking for a smooth and perfect fit but one that is getting close. I then heat the stem with my heat gun in order to bend the stem to fit the flow of the pipe. I heated it until it was pliable and then bent it over the rolling pin and cardboard tube that I use for getting the curve of the stem smooth and correct.

IMG_1445

IMG_1446

IMG_1448

I took the pipe back to my table and showed it to my sidekick and helper, Spence for his approval. He gave it a sniff and looked it over. It passed his inspection so I continued to sand and shape the shank/stem union. Lots of pieces of sandpaper and emery paper later the stem is getting closer and closer to a good fit.

IMG_1449

IMG_1450

IMG_1451

The button was very tight and I was not able to push a pipe cleaner through the slot so I opened the slot with needle files and reshaped it into an oval that was open and flared back to the airway in the stem.

IMG_1453

I sanded the stem with a medium grit sanding sponge and a fine grit sanding sponge to remove the scratches left behind by the sandpaper. Each step of sanding brought both the fit and finish closer to the look I was aiming for with the finished stem.

IMG_1460

IMG_1461

IMG_1462

I wiped the bowl down with acetone on a cotton pad to remove the finish and prepare the bowl for a new coat of stain. I have found that if I do not remove the stain then it is very hard to match the rim to the colour of the bowl. With the finish gone the staining is very simple.

IMG_1463

IMG_1464

I thinned the stain, a dark brown aniline stain, with isopropyl alcohol – 1 part stain to two parts alcohol. I had picked a stain that matched the previous colour of the bowl and also matched another 999 Peterson that I have here. I heated the surface of the bowl with my heat gun to warm the briar and open the pores in the wood. Once it was warmed I applied the stain with a cotton swab and repeated until I had good coverage over the entire surface. I flamed the stain, repeated the application and flamed it a second time. Once it was dry I took it to the buffer and gave it a light buff with White Diamond to even out the stain coverage and remove the excess on the surface of the briar. I wiped down the inside of the bowl where the stain ran in with a cotton swab dipped in Everclear.

IMG_1465

IMG_1466

IMG_1467

IMG_1468

IMG_1469

IMG_1470

With the bowl finished and ready to buff it was time to finish the work on the stem. I sanded it with micromesh sanding pads. I wet sanded with 1500-2400 grit and dry sanded with 3200-12,000 grit. Each successive grit brought more of a shine to the stem and removed the scratches left behind by previous sanding.

IMG_1471

IMG_1472

IMG_1473

I worked on the slot with a folded piece of sandpaper to smooth out the surface of the inside. I also shaped it with the sandpaper until I had the look I wanted. The oval slot now easily took a pipe cleaner no matter how fluffy.

IMG_1474

After much sanding and fitting, the vulcanite stem is finished. The pipe is smokeable while I wait for the Cumberland/brindle rod stock to come from Todd. I like the look and feel of the pipe as it is very close in size and design to the GBD 9438 with a tapered stem. The finished pipe is pictured below after buffing with multiple coats of carnauba wax and with a clean flannel buff.

IMG_1488

IMG_1489

IMG_1490

IMG_1491

Reborn Huckster Pipe – Is It a GBD 9438?


When I hear the word Huckster I think of an aggressive salesperson or a promoter, a snake oil salesman or someone not to be trusted. The definition from the dictionary is one who uses aggressive, showy, and sometimes devious methods to promote or sell a product. The stamping on this pipe is HUCKSTER on the left side of the shank. On the right side of the shank it is stamped LONDON ENGLAND. The pipe is clearly either made by GBD or by someone doing an amazing copy of the GBD 9438 shape. The shape is perfect in comparison with my GBDs of this shape number. I have been researching on the internet to see if I can find out who the pipe was made by/for and develop some background on it but so far I have found nothing.

Hukster5

The five pictures below were included in the EBay sale by the seller of the pipe. While they are out of focus they gave me a clear enough picture to place the bid. I was one of a few bidders on this one so I picked it up for a very good price in comparison to that of GBD 9438s. When it arrived I was happy to see that the seller’s photos actually were poor in comparison to the pipe that I held in my hand. The grain is extremely nice – the left side and the bottom of the shank and bowl have some beautiful birdseye grain. The right side has great flame grain. The front of the bowl has a bald spot with a well hidden fill in the grain (In the photos it is just above the lighter spot on the front of the bowl. There were a few dents that would need to be steamed out of the finish but the stain and finish was impeccable. The rim was unblemished with no burn marks. There were a few small sand pits in the bowl above the double rings. The bowl had a slight cake in the bottom half but the shank is clean and spotless with some raw briar that has not been stained with smoking. If it weren’t for the slight cake in the bottom of the bowl it would appear to be unsmoked. The stem was badly oxidized and did have one slight tooth dent on the underside near the button. I think that the seller must have cleaned up the pipe before selling as there were also scratches from sanding on the stem – top and bottom sides.

Hukster1

Hukster3

Hukster4

Hukster6

When it arrived I took the next four photos to show what the pipe looked like before I worked on it. My description above formulated by and large from the photos online was accurate though in fact the pipe was very clean.

IMG_1416

IMG_1417

IMG_1418

IMG_1419

The bowl did not require any work other than a quick cleaning of the shank – more by habit than necessity. The stem on the other hand required a lot of work. I sanded it with a medium grit sanding sponge to break up the oxidation. I also used the flame of a Bic lighter to paint the surface of the stem. The flame from the lighter also raised the slight tooth indent next to the button. This combination of methods removed a large portion of the oxidation as can be seen in the next four photos below.

IMG_1421

IMG_1422

IMG_1423

IMG_1424

I then sanded the stem with micromesh sanding pads. I wet sanded with 1500, 1800 and 2400 grit sanding pads. I wet the pad by dipping it in a bowl of water and then sand the stem with it. Once I had wet sanded with those grits of micromesh I followed by dry sanding with 3200-12,000 grit micromesh pads. The next series of five photos show the progress of the sanding. I took it to the buffer after the wet sanding and buffed it with Tripoli to get an idea of where I stood with the oxidation. I also ran the flame over the hard to get angles on the saddle and against the button to further remove hard to get oxidation.

IMG_1425

IMG_1426

IMG_1430

IMG_1431

IMG_1432

After I was finished sanding with the final grit of micromesh I rubbed the stem down with Obsidian Oil and once it was dry buffed it with White Diamond. I then buffed a final time with a blue plastic polishing bar. I gave the bowl and stem multiple coats of carnauba wax and buffed it with a soft, clean flannel buff to raise the shine on the bowl and stem. The next four photos show the finished pipe.

IMG_1455

IMG_1457

IMG_1458

IMG_1459

Here are a few more shots with a different background
Huckster1

Huckster2

Huckster3

Huckster4

Big Ben Freehand: Re-Stemmed and Reborn


Blog by Greg Wolford

This stummel was gifted to me by a friend from Louisiana. We met via one of the pipe smokers forums probably near a year ago and he recently sent me two stemless pipes, this one and one I have yet to get to, to restore. These are interesting pieces, in my opinion, because of their history, a little of which I will share with you before I get into the “meat and potatoes” of the work.

RJ, my friend, inherited a large quantity of pipes, near 100 if memory serves me. They were given to him by an aunt, I think it was, after her father passed away. Her father was Major in the US Army and served overseas in World War 2 (again, some of these details may be a tad off but they are close enough for our purposes). He was an avid pipe smoker and acquired many of his pipes while deployed overseas.

The Major’s wife was involved in a serious car accident many years ago. Her injuries were serious, leaving her with diminished mental, and to a lesser extent, physical capabilities. THe Major, as they affectionately called the man, took care of her himself after this accident. Sadly, the Major began to develop Alzheimer’s with dementia in his latter years, though he continued to care for his beloved wife; they were separated from their daughter, who gave the pipes to RJ, by miles, geographically.

The Major called his daughter the day after Valentine’s Day, 2005, and told her, quite confusedly, that her mother had gone missing. After much questioning, she called the police, local to her parents, and they dispatched a unit to the couple’s home. Shortening the story some, the Major had, in a state of mental confusion brought on by his disease, killed his wife. He was never found competent to stand trial for the killing of his wife 50-years. As far as I understand it, he was in a mental hospital for the rest of his life. A tragic story to be sure but an interesting one to go along with these unique pipes!

When the stummel arrived it was dull and dirty and, as I said, without a stem. The bottom of the pipe is stamped “Big-Ben” over “Handmade” and the stamping is pretty good overall. Doing a quick search on http://pipephil.eu, it seems that the Big-Ben brand is a brand of the Elbert Gubbels & Sons -Royal Dutch Pipe Factory. Here are a few photos of it before I began any work.

IMG_6726 IMG_6727 IMG_6728 IMG_6729

I actually began this restoration with the stem, finding the pipe a new one that is. I had planned on using an acrylic stem but changed my mind for a couple of reasons: I was turning my first tenon with my brand new Pipe Makers Emporium tenon turner and know that acrylic is more finicky than vulcanite and I thought, after looking at it, that the rubber stem would look better on this stummel.

The PME tenon tool is, by all accounts, essentially the same tool as the one offered by PIMO. I chose the PME tool because it was about $10 cheaper and they happened to have a couple of acrylic stems I liked on clearance for cheap. I plan on writing about my thoughts on the tool in a separate article.

I choose a pre-formed Italian ebonite freehand-style stem for this stummel. To my eye it looked like it would be something very close to what the pipe would have originally had. I took my time turning the tenon down to fit since it was the first time I had done this and I didn’t have another stem like this one to use if I fouled up. After I got the tenon very close with the tool I hand sanded the tenon to get to the final fit; I know from reading Steve’s articles that it is easy to over-turn a tenon and you can’t put the material back on once it is gone! Here is a photo of the stem placed in the stummel after getting it fit:

IMG_6717

I decided to not bend the stem until after I had sanded and polished it. In retrospect, I probably should have bent it before I did all the sanding; there are some very small “marks” on the stem where the bend is now that I had not anticipated. Next time I will bend after the initial sanding is done I think,

I began the sanding with 220 grit sandpaper to take out the casting/molding lines on the sides. I forgot to photograph the stem before I had started to sand it. This shows it early on and beside a smaller ebionite stem from the same lot to try to give you an idea of what the lines looked like from the start:

IMG_6725

I sanded out the marks with 220 then 320 grit paper. The stem had some, but not many, small sots on it that made me decide to go head and use the 320 wet/dry paper on the entire stem. I progressed to 400 grit wet/dry and then micro mesh 1800 through 12000 (I also used the plastic polish several times between grits to make sure I wasn’t missing any scratches). Here is a progressive photo along the way from rough through 12000 grit micro mesh.

IMG_6736

The stem didn’t fit flush at the top and bottom due to the angle of the shank so I had to do a considerable amount of file work to get it almost completely flush to the shank on the top and bottom. At this point I stopped working on the stem and turned my attention to the stummel.

I wiped the pipe down with an alcohol soaked cotton pad. There was little wax left on the pipe and the wipe down removed what remained as well as some surface dirt. While the pipe was wet with the alcohol I could see there was a nice grain hiding under there, one that I hoped to bring out with a contrast stain. But first it would need an alcohol bath. So, I soaked the stummel a couple of in an alcohol bath. When I removed it I realized that the rim had a lot of build up on it; the rim, I thought, was stained black but that was just dirt, grime, and tar, and it was actually not stained black. I then scrubbed the rim with a brass bristle brush lightly to loosen the grime, with not a lot of success so I put the pipe back in the alcohol bath and left it overnight. The next afternoon I removed it from the bath and wiped it down then took it over another container of alcohol that I use for cleaning and dipped in my wire brush and started to scrub gently again. This time I saw much more removal of grime; the extra time in the alcohol has paid off in really softening the buildup. I switched to a toothbrush and scrubbed out all the remaining grime. I found that there were some rim char under there that the gunk had hidden. Below is a photo of before and after the 12-plus hour soak and scrubbing.

IMG_6754

The charring made me decide that the rim would need to be stained black now. The large shank end was stained black so this would match and look good I was sure. But there was also a fairly large burn on the back, left side of the bowl that would have to be addressed. There were two fairly large fills near the burn but I didn’t plan on removing and/or refilling them; I planned on leaving them and seeing how they covered with the contrast stain. I had recently read a post suggesting that fills should be done with carbon dust, not briar dust, and super glue. The idea was that the pipe would darken over time with use and the black fills would blend in more naturally. I don’t know if that is a fact but I thought on this pipe I would stain the existing fills black and see how it ended up looking. Here are a few photos:

IMG_6766 IMG_6770

It was at this point that I decided to clean and ream the pipe. Knowing this pipe had more or less been in retirement for almost a decade, I expected it probably would be fairly dirty; I was right. The alcohol bath had softened the cake some, I suspect, and it was fairly thick and not very even so reaming was definitely in order. I used a Castleford reamer to do the job, using the second largest bit to ream the bowl; the two smaller sizes didn’t touch the cake in this large bowl. After reaming I began to clean the shank, which was terribly gunked up. I used the drill bit-tool on my Kleen-Reem to open up the shank, both with and without pipe cleaners on it. After many pipe cleaners, both on the drill bit and doubled over off of the bit, I finally decided that I needed to do an alcohol and cotton ball treatment; this is the same as a salt and alcohol treatment only you use cotton balls instead of salt. I put two large cotton balls in the bowl and, using an old medicine syringe, I filled the bowl with 91% isopropyl alcohol. Then I took the syringe and filled the shank; since this pipe is a sitter with such a large shank this idea worked very well and was quite easy to do. I topped off the bowl with a bit more alcohol and left it till morning. This is what the cotton balls looked like when I came back the next day:

IMG_6764 IMG_6765

The photos don’t really show how much tar leached out into them; they were really quite brown. The shank was much cleaner now as I went back to it, only taking less than a dozen pipe cleaners to get it clean now.

Back to the burn on the bowl, I started out with some course emery boards to remove some of the charred area. I had three different grits, from a package I bought at the local dollar store, and I worked through all three grits on it. The burn mark was reduced in size a fair amount but would need more, which I planned on doing with sandpaper. I thought the emery boards would be a good way to keep the more coarse sanding confined to a smaller area and it seemed to work fairly well.

IMG_6774IMG_6775

From here I went to 220 grit paper and got out the biggest part of the burn, feathering out the sanding a little, too. I then went to 320 wet/dry paper and sanded the entire pipe, except for the bottom; I didn’t want to sand any where the nomenclature was if I could keep from it. I then moved up to 400 wet/dry paper, wiping ever so often with an alcohol pad to see how the pipe looked, making sure it was smooth and scratch free. After I got the pipe to where I thought it would be good I took it to the buffer and buffed it with black compound; I find that this buffing highlights any small scratches or dents that may have been missed during the sanding. Here is what the pipe looked like at this point:

IMG_6798

I saw one small scratch I had missed so I took the 400 grit paper to it and got that one out, along with lightening the burn mark a bit more. Now it was time to bend the stem.

I heated the stem with my heat gun on low until it was pliable, after putting a pipe cleaner in the stem to keep from closing off the airway accidentally. I had set up my maul as my bending guide on my table. I heated and bent it and eyeballed it; it wasn’t quite what I wanted. So, I heated it again and bent it a little more and looked it over carefully; now it was more to my liking:

IMG_6784 IMG_6783

I used Fiebing’s USMC Black leather dye to the rim and shank end, since I knew these would need deeper penetration of color since they would remain black. I applied the stain, flamed it in and then repeated. I then heated up the stummel, setting the stem aside, to start the contrast staining. I got the stummel nice and warm, wearing leather gloves to protect my hand. I then applied the dye to the entire pipe, flamed and repeated. Next I hand buffed the pipe with an old cotton t-shirt leaving it at this point:

IMG_6788

After the pipe had cooled for 10-15 minutes and was no longer warm I began to sand off the black; I wanted to remove the majority of the black but leave it in the grain areas as much as possible. I also wanted to try to blend in the burn as much as possible. I sanded and wiped it clean with a dry cotton pad until I thought I was getting close to where I wanted it to be; I didn’t want to use an alcohol pad until I had to in order to not lift any stain that I wanted left on the pipe. I think I sanded it over about three times before I wiped it with an alcohol pad. As the dust came off the alcohol wet pipe began to look more like what my mind’s eye had thought it would:

IMG_6789 IMG_6790IMG_6791 IMG_6792

Now I applied a brown stain that I had mixed up earlier for another project; to be honest, I don’t recall what color I used or what I diluted it to. I applied the stain, flamed and repeated. After buffing it off with the old t-shirt I realized it was too dark for what I had wanted so I took an alcohol pad to it and removed some stain. But it was still too dark so back to the 400 grit I went. I sanded it over, wiped with an alcohol pad, and repeated until I was happy with the color; I think it took about four cycles to get it where I left it. I then buffed it off with the t-shirt one last time before heading to the buffer.

I buffed the stummel with Tripoli and then the stummel and stem, separately due to the way this pipe is made, with white diamond. Both parts then got several coats of carnauba wax, buffed on a clean soft wheel and finally hand buffed with my flannel gloves; I don’t know the flannel glove-buff is needed but it seems it adds a little “something” though it may only be in my head. But since it only takes a few extra minutes, and gets any stray threads of the pipe that the wheel may have left, I almost always finish this way.

I am really happy with how this old pipe came out. The new stem was a success, both in fitting it and in the look, and I really like how the contrast staining came out. The rim looks much better now stained black with dye not tar. The fills didn’t hold the stain as well as I’d hoped but are much less noticeable now. And the and burn mark is almost invisible, which really pleases me. The only thing that I am not happy about, really confused about more than unhappy, is that the stem has loosened from the tight fit it had the day I turned it. I don’t know if the humidity (it had been extremely humid here the last two weeks), the alcohol soak, the extended time of separation for stem and stummel or what caused that. Hopefully a few days seated together and/or some use will remedy that. If not, I’ll likely heat and gently expand the tenon a tad to get the fit better. At any rate, here is the final result:

IMG_6802 IMG_6801 IMG_6800 IMG_6799 IMG_6796 IMG_6795 IMG_6794 IMG_6793

Restoration – The Guildhall 284


By Al Jones

I am an admirer of the Rhodesian shape and the Comoy’s Shape 284, a compact Rhodesian, is one of my favorites. Unfortunately that shape doesn’t show up that often and when it does there is strong competition. I found this “The Guidall” shape 284 on Ebay but it was not in great shape, so I took a chance on it. “The Guildhall London Pipe” is a Comoy’s second line with a distinctive three-metal bar stem logo.

As you can see from these photos, the stem was heavily oxidized but it didn’t appear to have any tooth marks. The bowl top was a little misshapen and it had a very heavy cake build-up. Mike, the “Streets of London” social group administrator on the SmokersForums.uk tells me that The Guidall used pre-made stems. This one had a large stinger. I’m not a fan of stingers, so I warmed the metal end of the stinger and pulled it out.

Guidall_284_Before (4)

Guidall_284_Before

Guidall_284_Before (1)

Guidall_284_Before (2)

Guidall_284_Before (3)

I reamed the bowl starting with my smallest Castleford bit and gradually worked up to the full bowl size. There was some damage at the bottom of the bowl that I will have to repair with some “pipe mud” (cigar ash & water). I soaked the bowl overnight with some sea salt and alcohol to remove the tars and residue. The stem was soaked in a mild Oxyclean and water solution. The metal stem logo looked pretty durable, so I didn’t do anything to protect it.

After the bowl soak was completed, I polished the briar on my buffer with some Tripoli and then White Diamond rouge. The briar was in remarkably good condition, considering the way the rest of the pipe was treated over its life. I didn’t detect any fills or other imperfections. You can see the burned out area on the bottom of the bowl, but when I filled it with pipe mud, it wasn’t as deep as it appeared.

Guidall_284_Work (2)

The stem took quite a bit of work to remove the heavy layer of oxidation, which was also in the draft hole. I started with 800 wet grit paper, then progressed to 1500 and 200 grits. I then moved to the micro-mesh paper, with 8000 and finally 12000 grit papers used. The stem was then buffed on the machine with White Diamond rouge. I always use an automotive plastic polish as a final prep. The end of the stem where it meets the briar still has a little oxidation but I was reluctant to sand further for fear of rounding the stem. I may go back and retouch this area. I mixed up some cigar ash I save with just a few drops of water to make a paste called “pipe mud”. I used the spoon on a Czech tool to ladle in the mixture and a small button head bolt to tamp it into shape.

The premade stem feels all right in my mouth, but I have to wait until the pipe mud dries to smoke it. I need a compact pipe for travel use and carry in my one-pipe bag and I’m hoping this one can fit that requirement.

Here is the finished pipe.

Guidall_284_Finished (7)

Guidall_284_Finished

Guidall_284_Finished (1)

Guidall_284_Finished (2)

Guidall_284_Finished (3)

Guidall_284_Finished (4)

Guidall_284_Finished (6)

Italian Made Sandblasted Canadian Brought Back to Life


This pipe is another that came in that EBay lot of bowls that I purchased. Once I was finished with this one I have two more left to restem. It is a large oval shanked pipe with a large bowl. The sandblast is not deep and is particularly shallow on the shank where it meets the stem. The bowl was heavily caked and the finish was dirty and faded. There was a deep divot out of the left side of the bowl toward the bottom. It was a chipped out spot that looked like the pipe had been knocked hard against something when it was dropped. There was also a chip on the edge of the front right side of the outer rim. It is pictured below in the first photo and is the first pipe in column one on the left. The second photo shows the state of the bowl when I started working on it. The cake was hard and thick.

bowls1

Italian I sorted through my box of stems and found a wide oval stem blank that would fit the curves and width of the shank. The first photo below shows the new stem before any work was done on it. The second photo below shows the tenon being turned on the PIMO tenon turning tool. I removed enough material from the tenon to get it close to fitting. I hand sanded it to get a snug fit in the shank. The tenon turner literally peels the vulcanite back to the right diameter. The third photo below shows the newly turned tenon before the hand sanding to fit it in the shank. The fourth photo shows the fit of tenon. It still needed to be shaped to match the diameter of the shank but the fit was good and tight.

IMG_1384

IMG_1385

IMG_1386

IMG_1387

I removed the excess of vulcanite and shaped the stem close to the diameter of the shank with a Dremel with a sanding drum. I carefully worked the drum against the stem and worked to get it as close to the shank shape as possible without damaging the shank. Once I had it close I worked on the fit with emery paper to remove the marks left by the sanding drum. The next series of four photos show the shaping of the stem to fit the shank with the Dremel and the emery paper.

IMG_1389

IMG_1390

IMG_1388

IMG_1394

I reamed the bowl with a PipNet reamer. I started with the smallest head on the T handle and worked my way up to the largest head that would fit the bowl. The next series of three photos shows the reaming of the bowl and the finished reamed bowl.

IMG_1391

IMG_1392

IMG_1393

I cleaned out the divot on the side of the bowl with a dental pick and then packed in briar dust with a dental pick and added drops of super glue. I created a briar dust and super glue fill for the divot. The next series of five photos show the progress of the patch. Once it was filled and even with the surrounding area I used a dental pick to scratch in grooves and crevices to match the sand blasted finish of the surrounding bowl. I wiped down the surface with Everclear and scratched the surface until the finish matched.

IMG_1395

IMG_1396

IMG_1397

IMG_1398

IMG_1399

I wiped down the entire bowl with acetone on a cotton pad to clean up the finish on the bowl and prepare if for the new stain that I would add once the surface was clean. Note how well the patch on the left side of the bowl matched the grain of the sand blast on the rest of the bowl in first photo below.

IMG_1400

IMG_1401

I chose to restain the bowl with a dark brown aniline stain that I thinned with two parts isopropyl alcohol to one part stain. From experimenting I had found that this colour matched the original stain on the bowl. I heated the bowl with a heat gun, applied the stain, flamed it and stained and flamed it a second time. I put more stain on the shank near the stem as the smoother portion of the finish seemed to not hold the stain as well as the blasted areas. There had also been a black under stain on the bowl from the original and the thinned dark brown worked well with that under stain to give some depth to the finish of the bowl. I hand buffed the bowl with a shoe brush to give it the initial shine.

IMG_1402

IMG_1403

IMG_1404

IMG_1405

I sanded the stem with micromesh sanding pads from 1500-12,000 grit to polish the stem. Each successive grit of micromesh deepened the shine of the stem. Between the 2400 and the 3200 grit micromesh I polished the stem with Maguiar’s Scratch X2.0 – a plastic polish that I have used to polish stems. I then sanded with the remaining grits of micromesh.

IMG_1406

IMG_1407

IMG_1408

IMG_1409

IMG_1410

After sanding, I buffed the bowl and stem on the buffer with White Diamond and then gave the stem several coats of carnauba wax on the buffing wheel. I used Halcyon II wax on the sandblasted finish on the bowl and shank. I finished the pipe by buffing it with a clean flannel buff to raise the shine of the wax. The finished pipe is pictured below.

IMG_1411

IMG_1412

IMG_1413

IMG_1414

The final photo below shows the repaired divot on the bowl. It is utterly merged in the side of the bowl and the finish and stain make it invisible.

IMG_1415