by Steve Laug
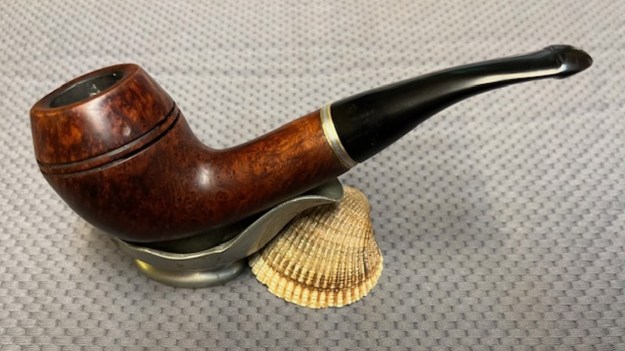
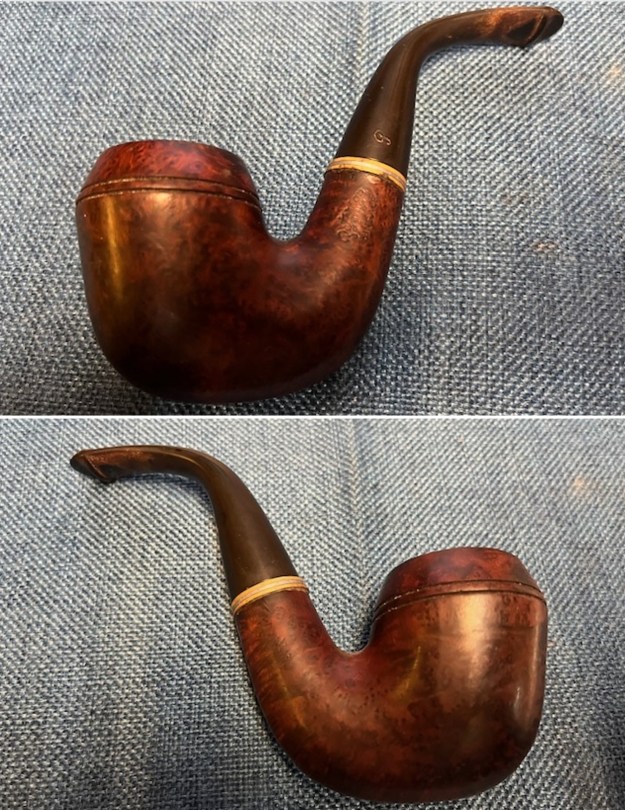
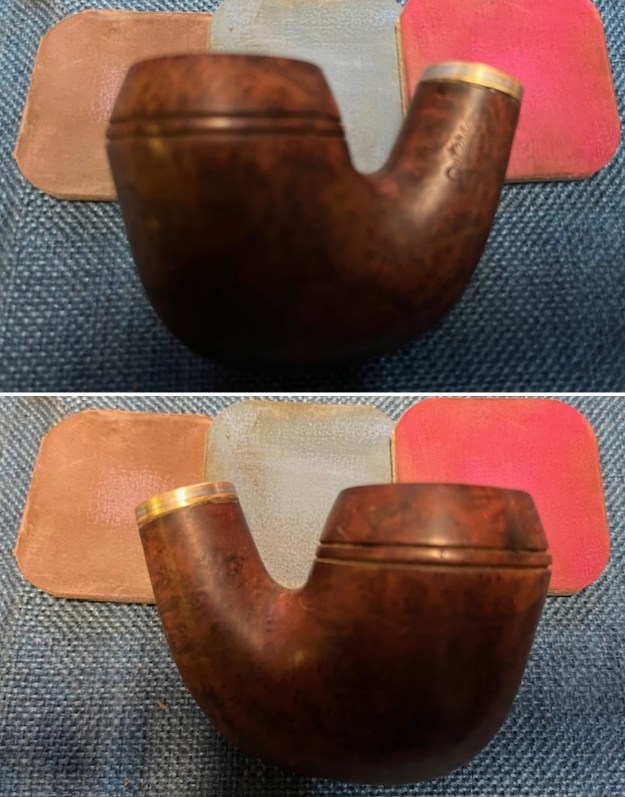
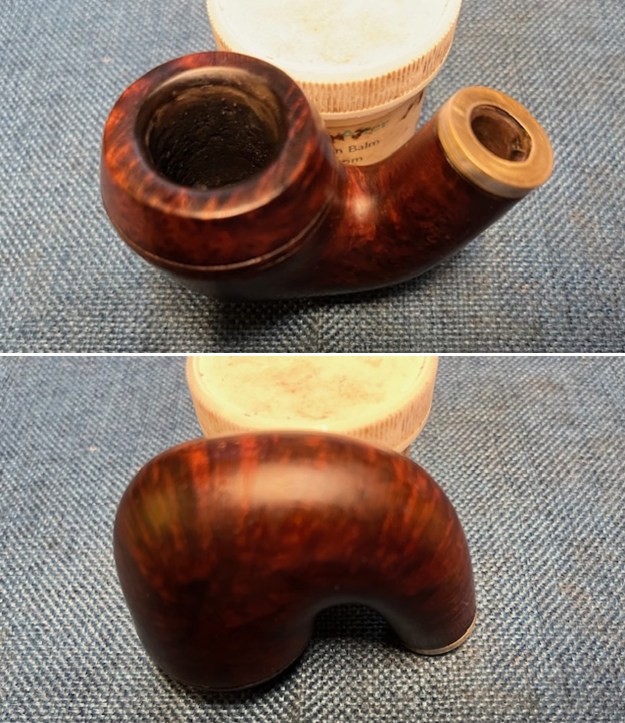
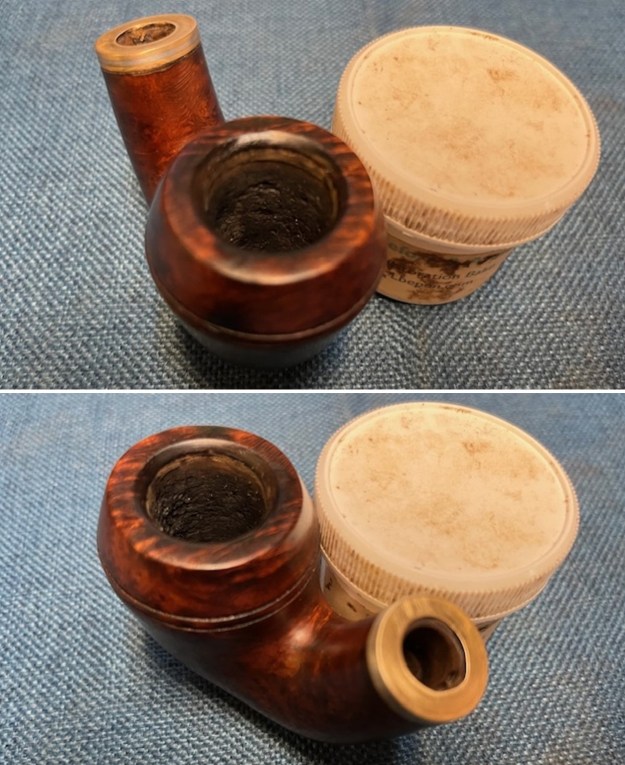
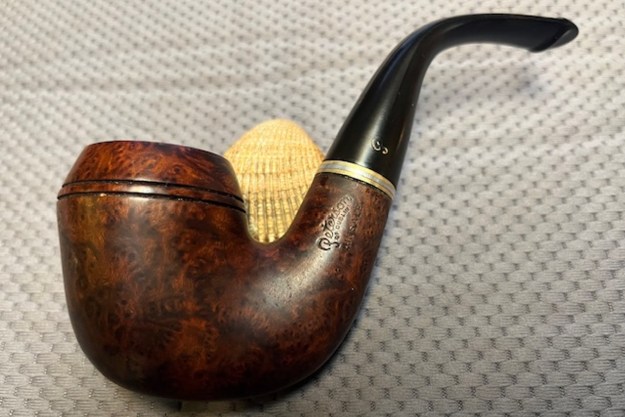
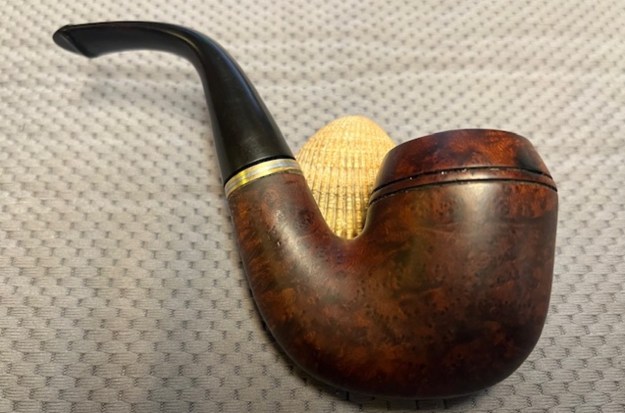
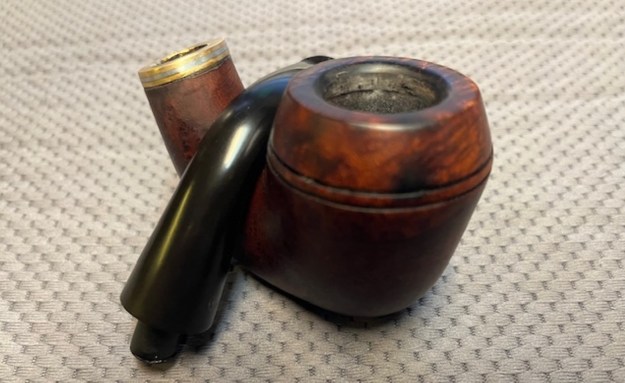
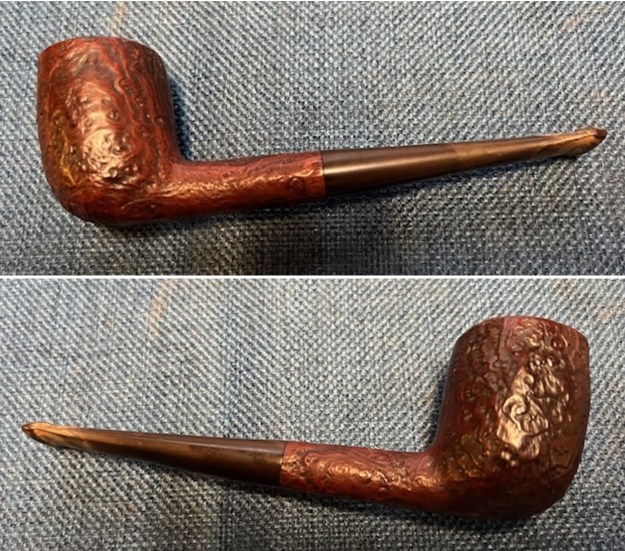
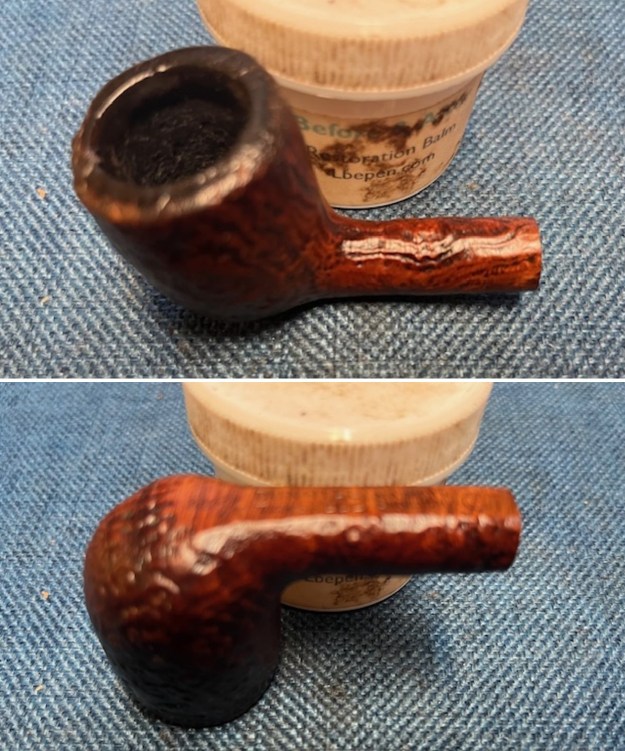
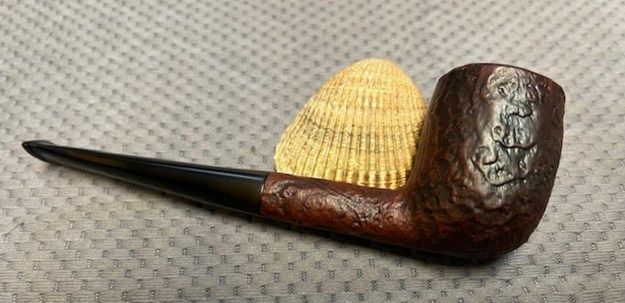
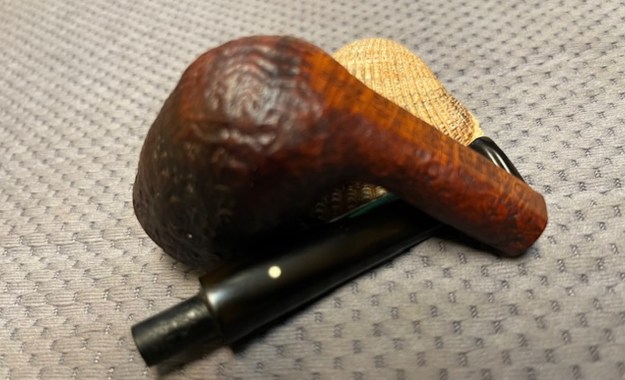
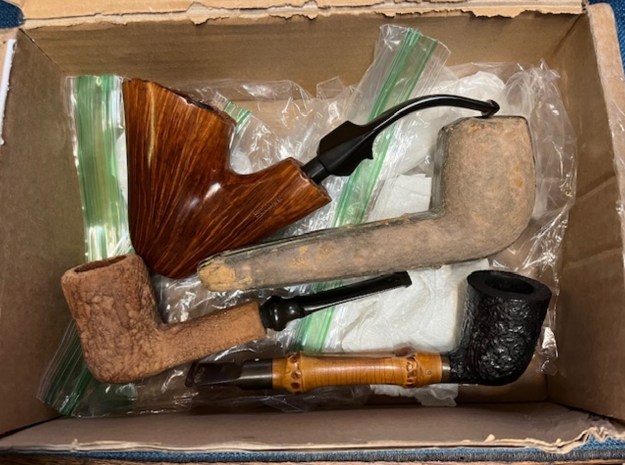
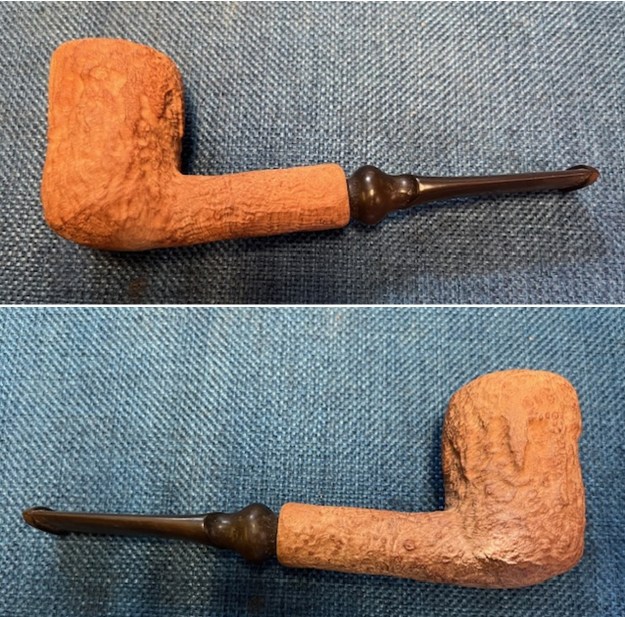
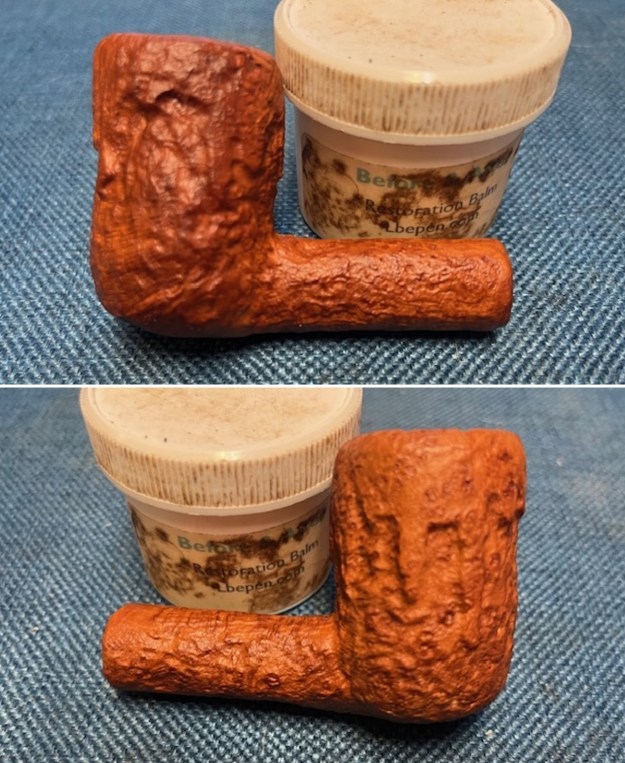
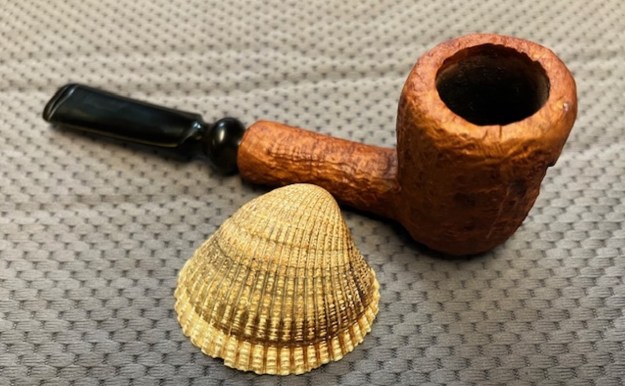
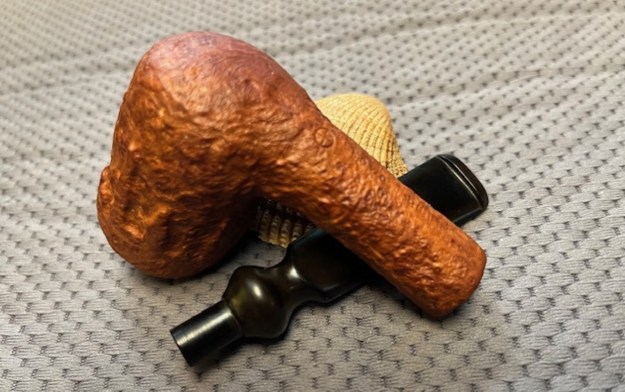
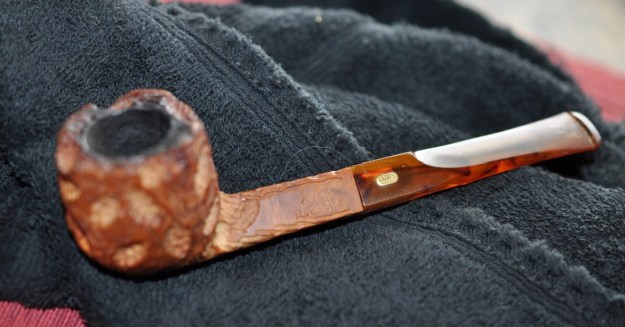
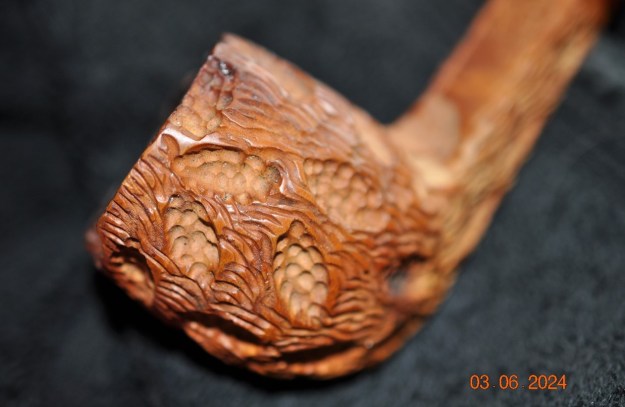
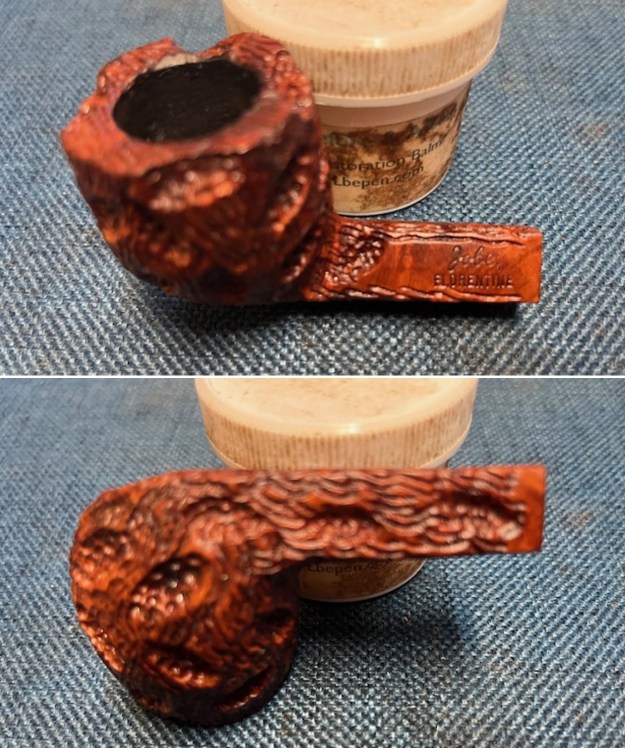
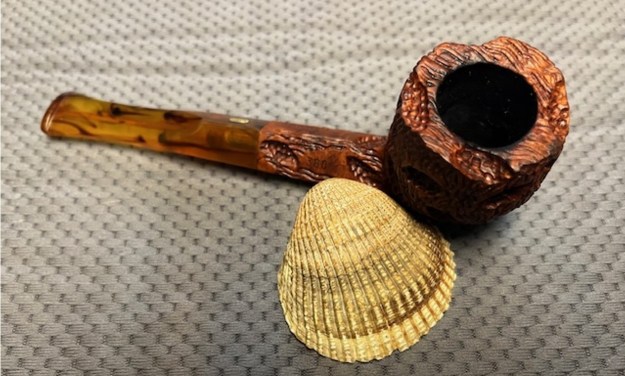
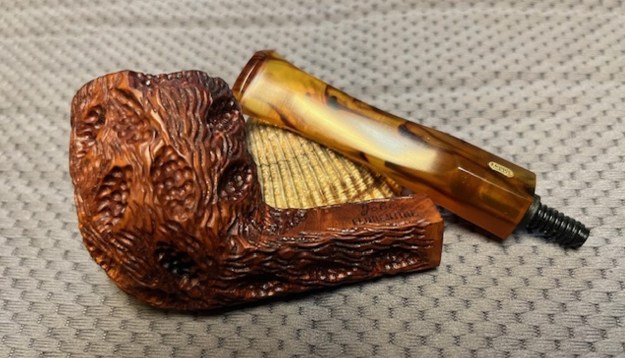
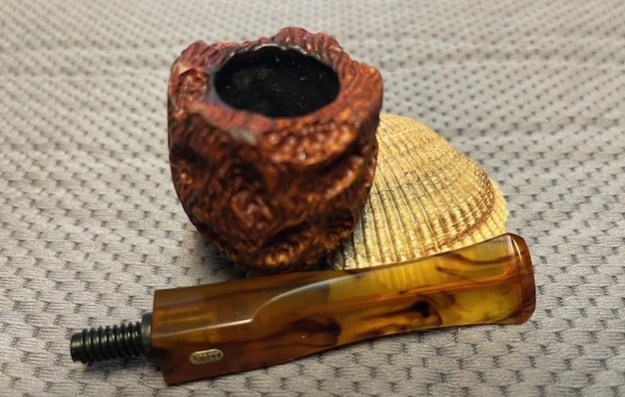
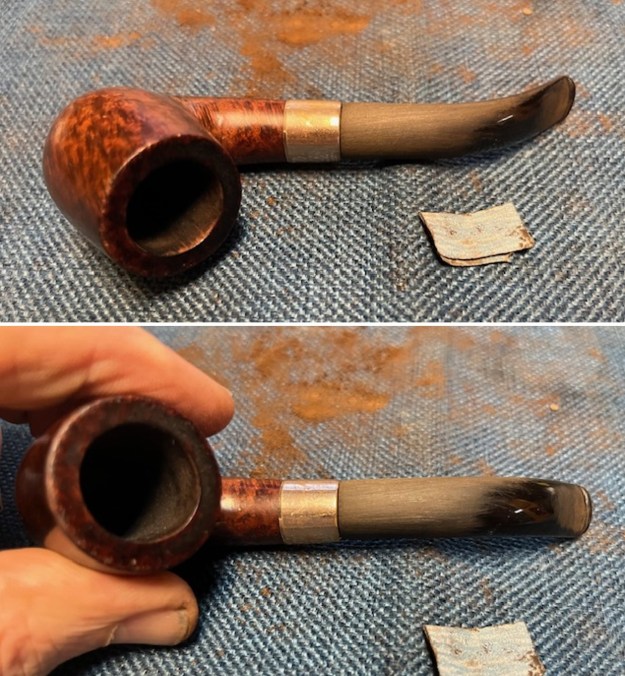
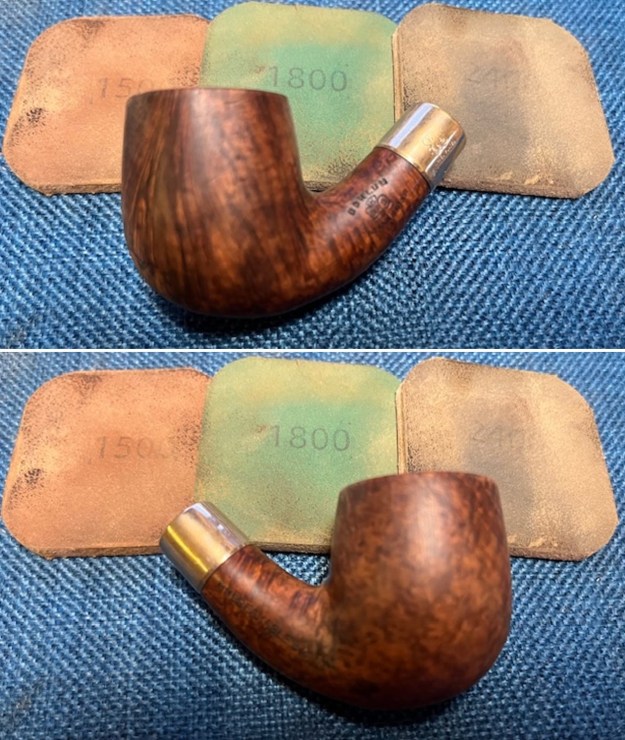
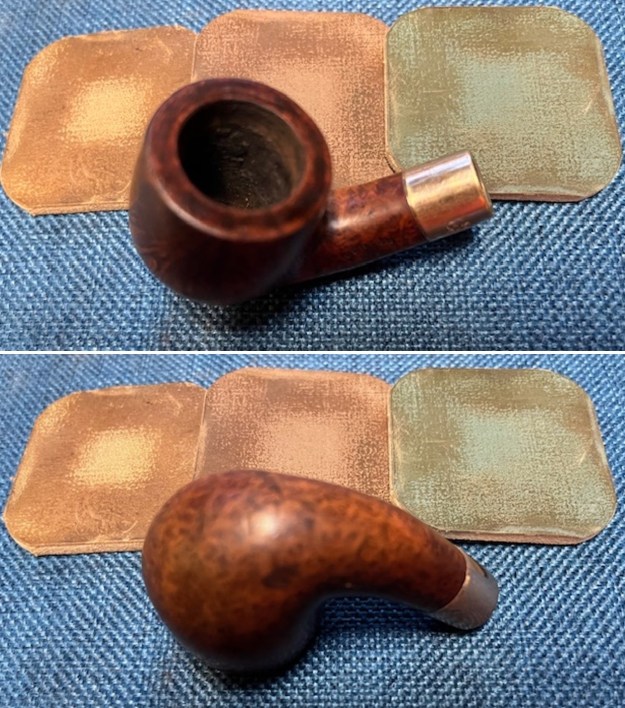
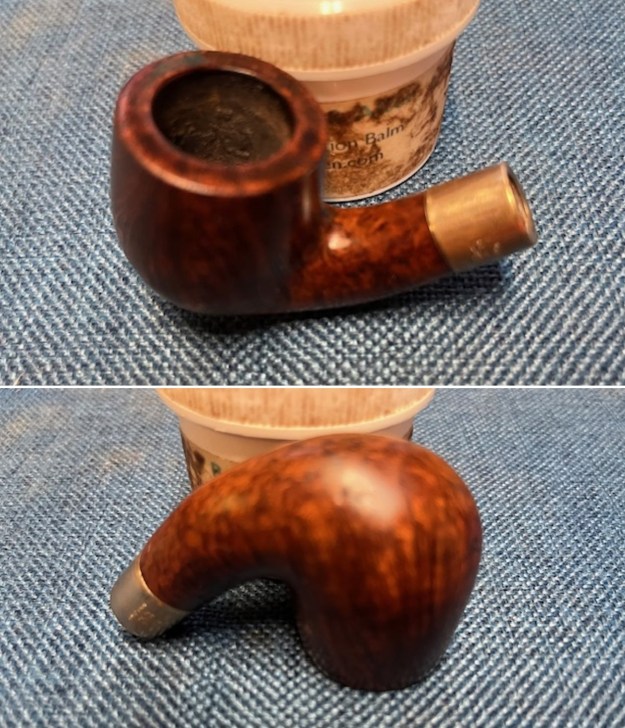
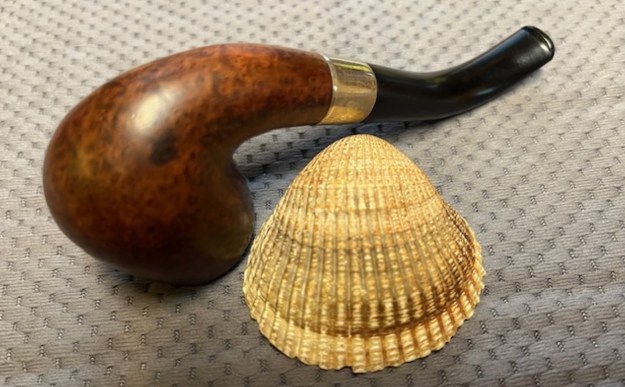
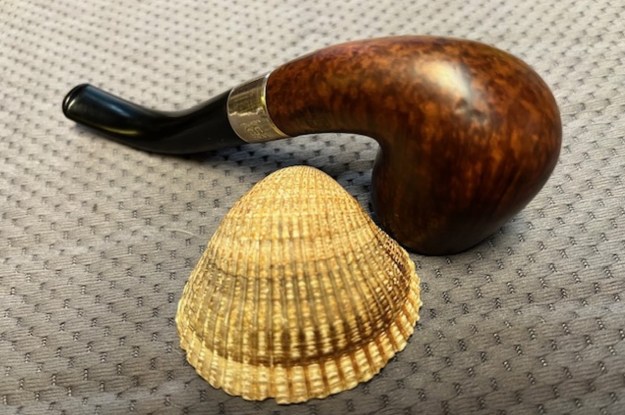
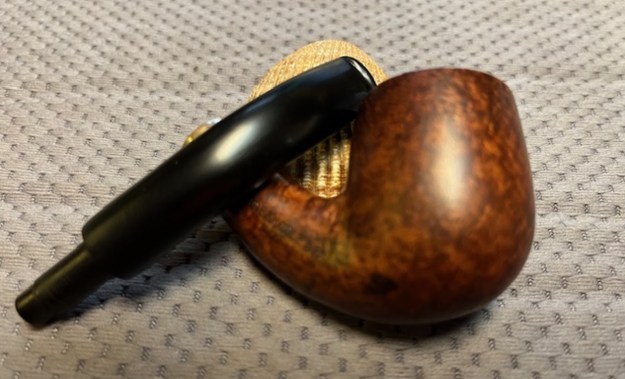
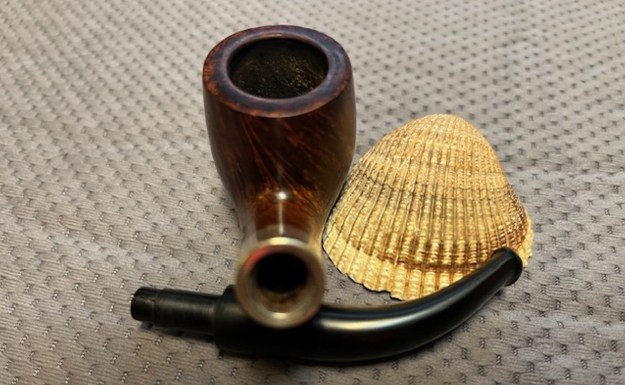
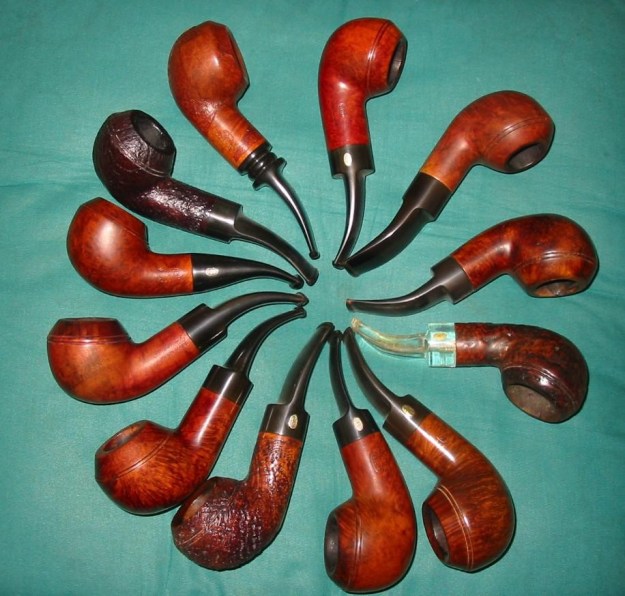
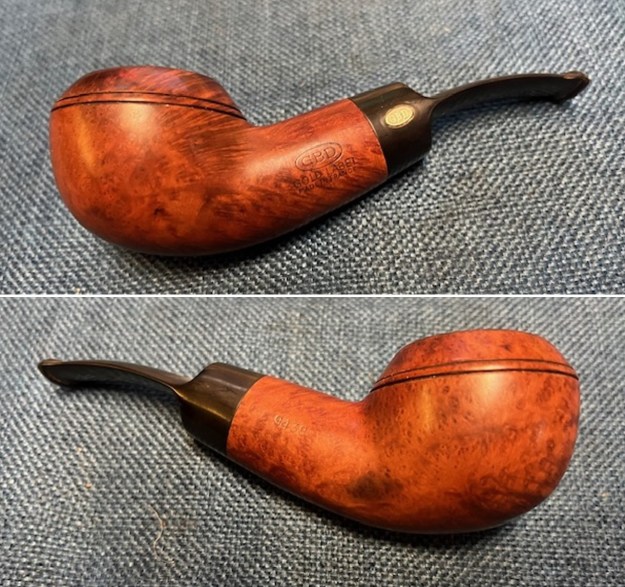
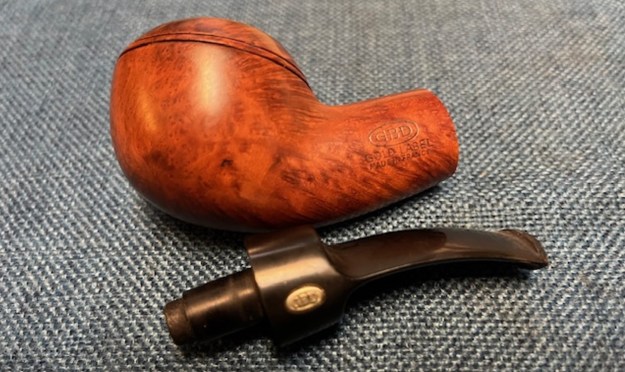
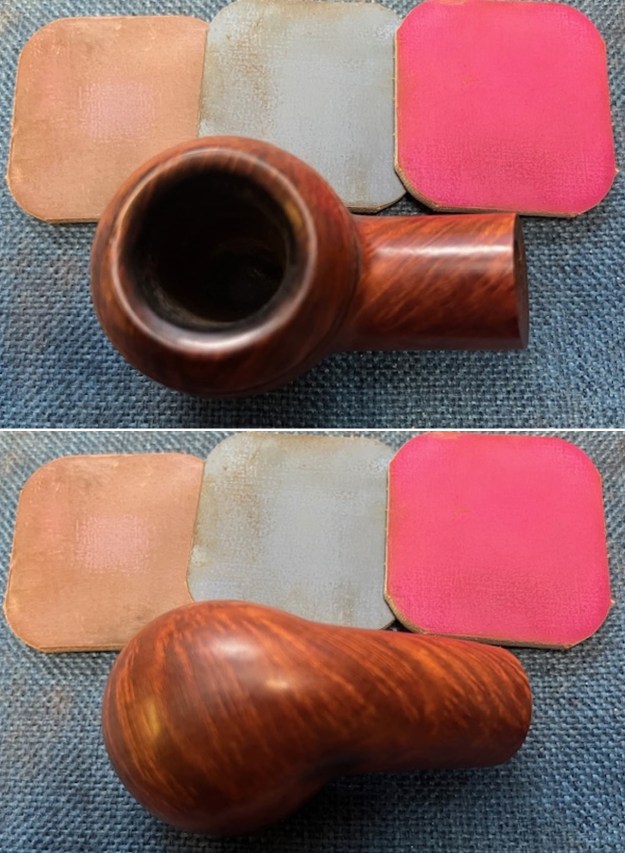
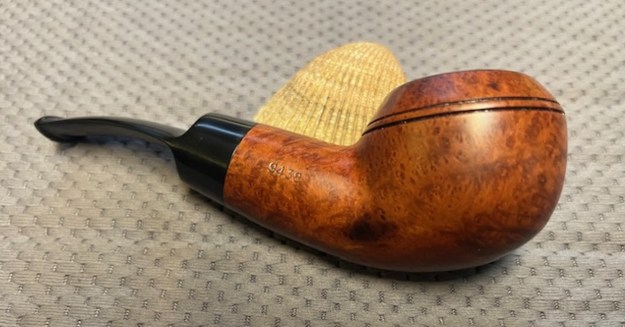
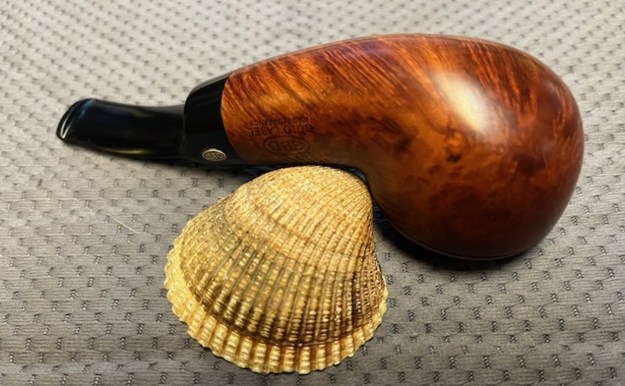
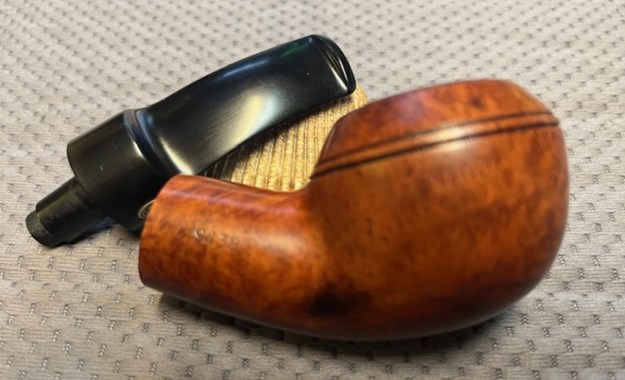
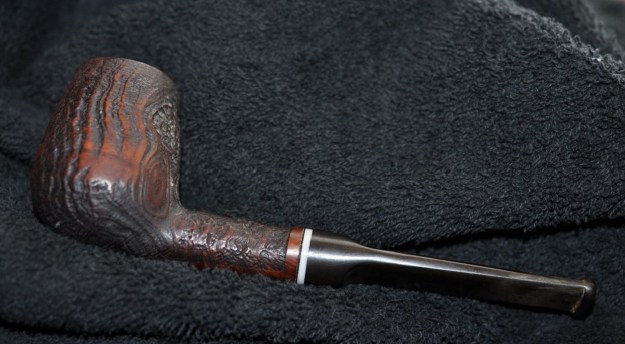
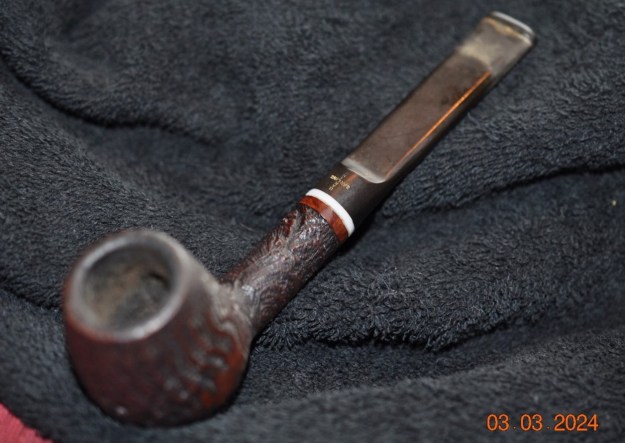
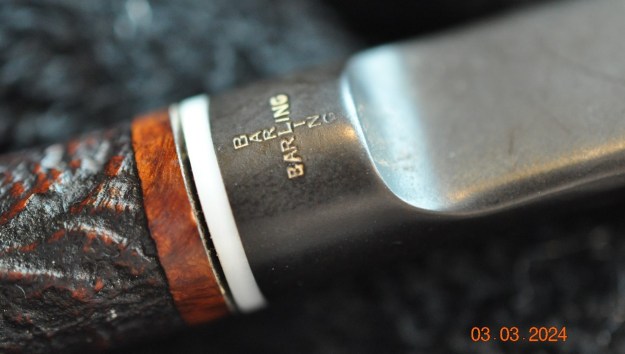
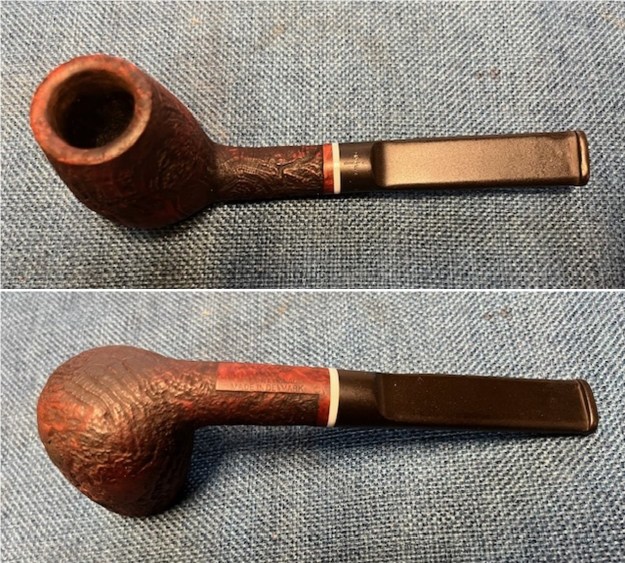
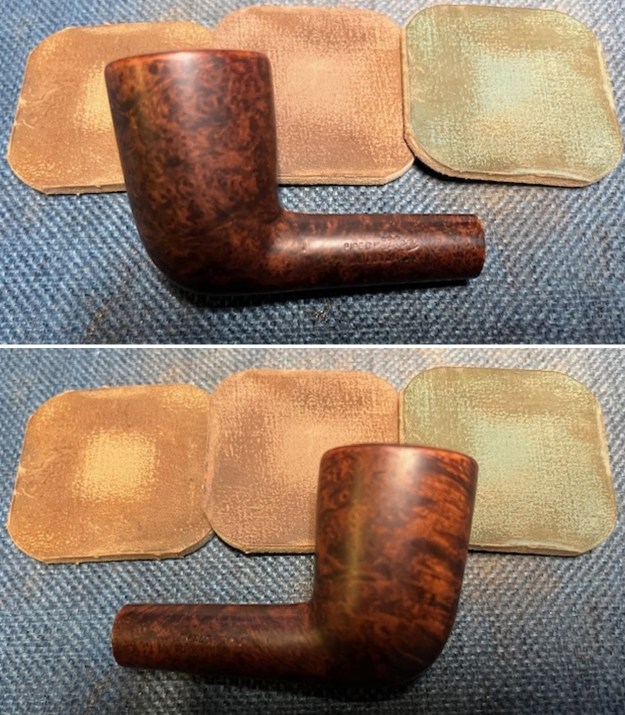
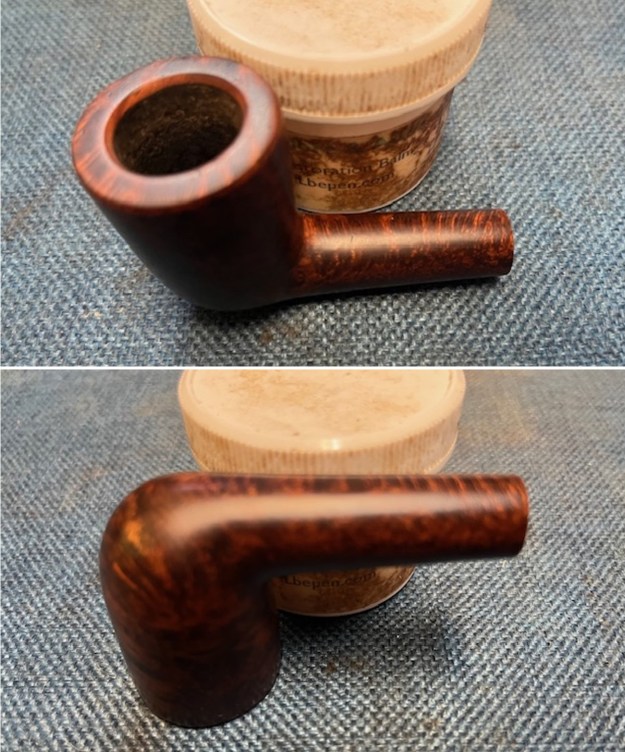
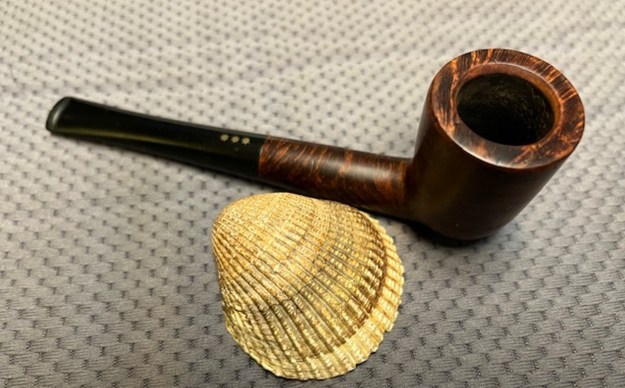
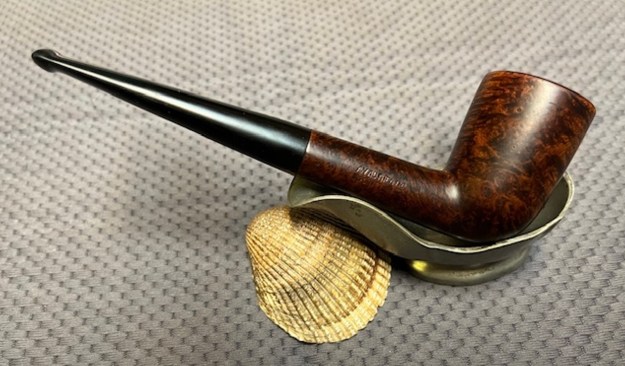
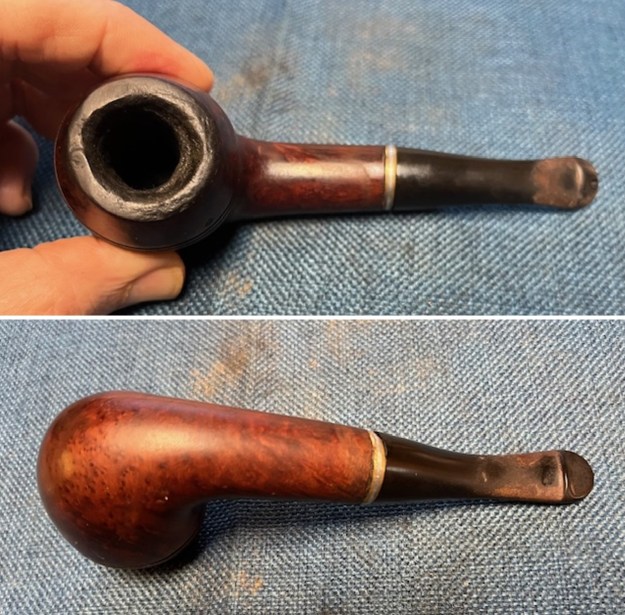
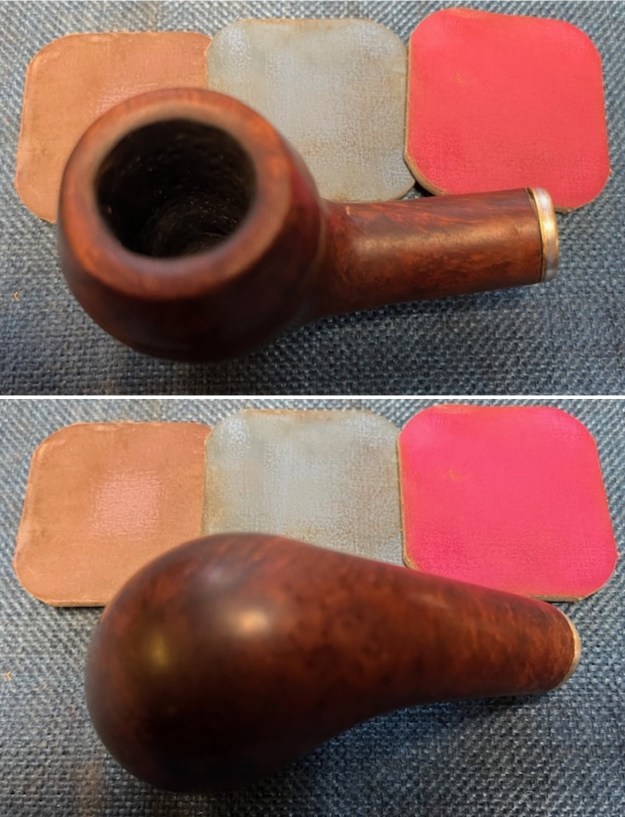
Yesterday afternoon I was visited by a pipe man here in Vancouver named Sergey who had five Peterson’s pipes that he wanted me to work on. They are shown in the photo below. In the left column from top to bottom: Peterson’s of Dublin Kinsale XL17, Peterson’s of Dublin Filter 68, Peterson’s of Dublin Kinsale XL16 Rusticated Pipe. In the right column from top to bottom Peterson’s of Dublin Kinsale XL16 and the bottom pipe is a Peterson’s of Dublin Kinsale XL14. All five pipes were all thickly caked and had thick lava on the rim top. The cake is so thick that I could not put my little finger in the bowl it was so heavily caked. My guess was that the bottom of the bowl was lower than the entrance of the airway into the bowl. The Rusticated Kinsale XL17 also had a burn out in the front bottom of the bowl that would take a lot more time than just a simple clean up. I would know more about the condition of each of the bowls once I had reamed and cleaned them. Sergey was travelling in two weeks and he chose at least two of them that he wanted to take with him on his trip so those would be first. My hope is to try to finish four of the five. The third of these that he wanted is the next one I chose to work on. It was the Peterson’s of Dublin Kinsale XL14.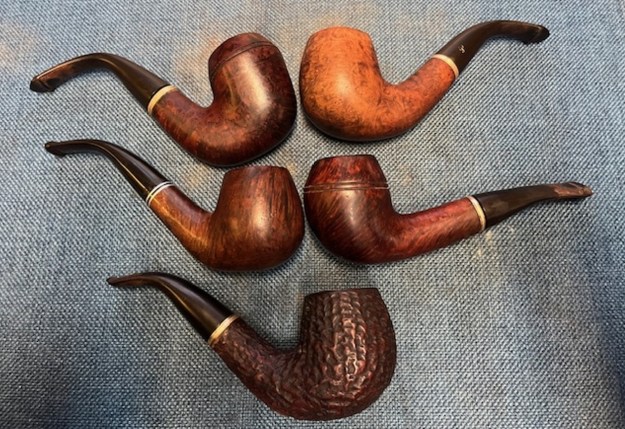 I took photos of the Peterson’s of Dublin Kinsale XL14 before I started working on it. The finish is very dirty with oils and dirt ground into the briar. There are some nicks and flaws around the bowl sides and at least one fill. The rim top is thickly covered with tarry lava overflowing from the heavy cake in the bowl. It had some burn damage on the front outer edge of the bowl and the bowl was very out of round on the inner edge. The cake was thick and heavy all the way to the bottom of the bowl. The vulcanite stem is also very dirty. There was oxidation, calcification and tooth marks and chatter on both sides of the stem ahead of the button and lip edge. The P stamp on the left side of the stem is a gold P that is faint and faded. It also has some damage on the surface around the P.
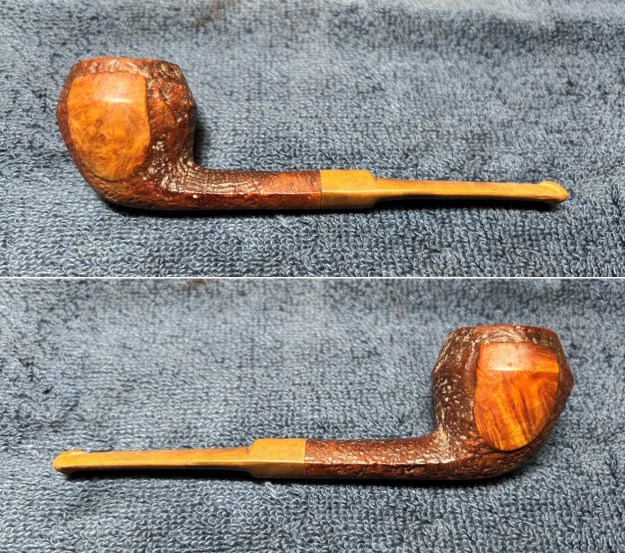
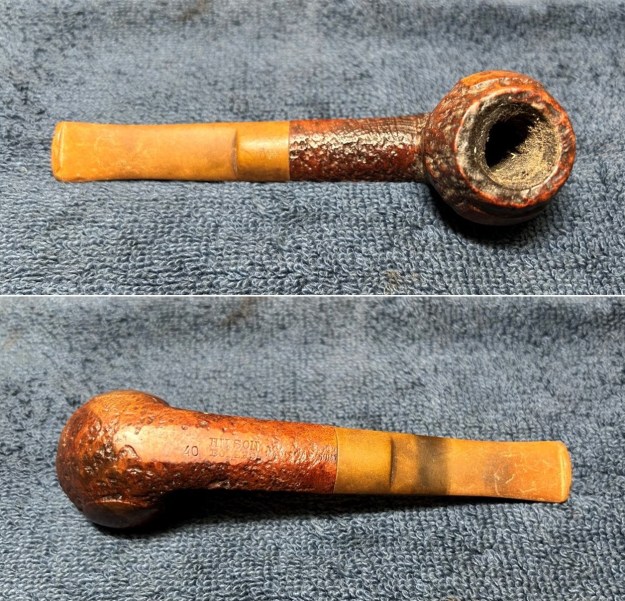
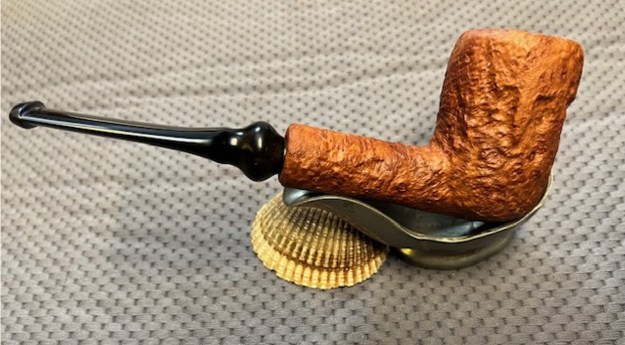
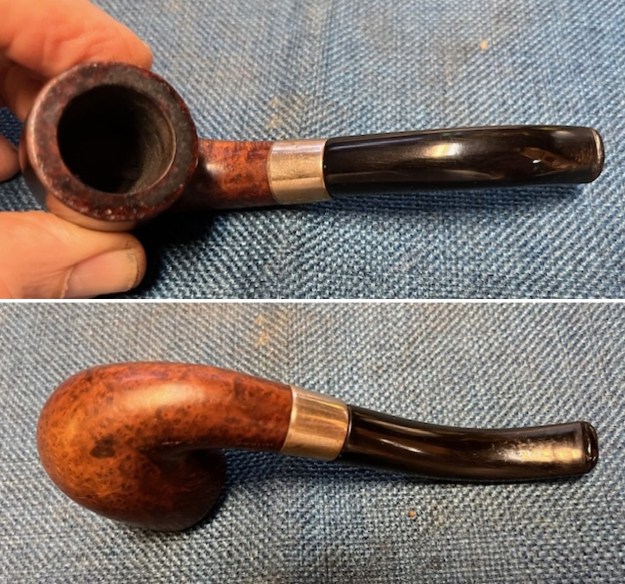
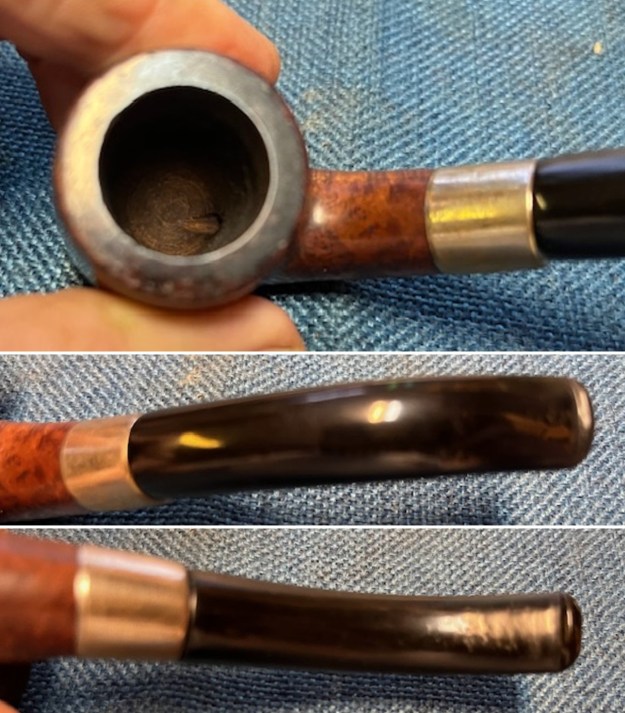
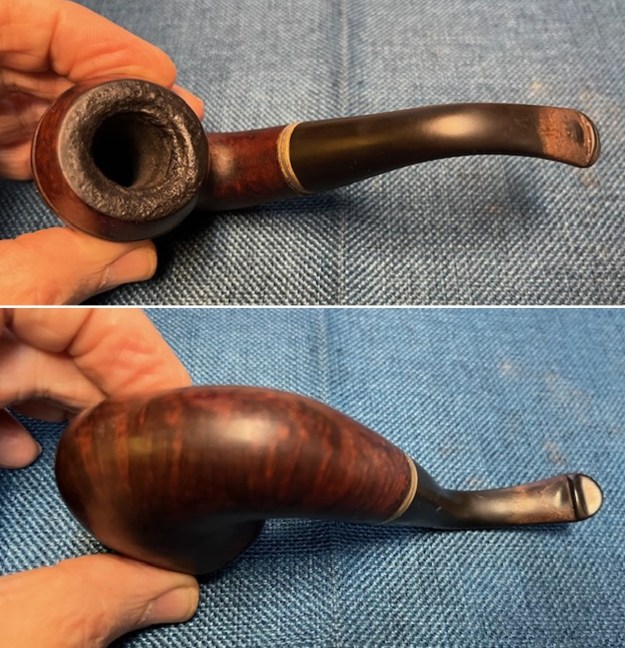
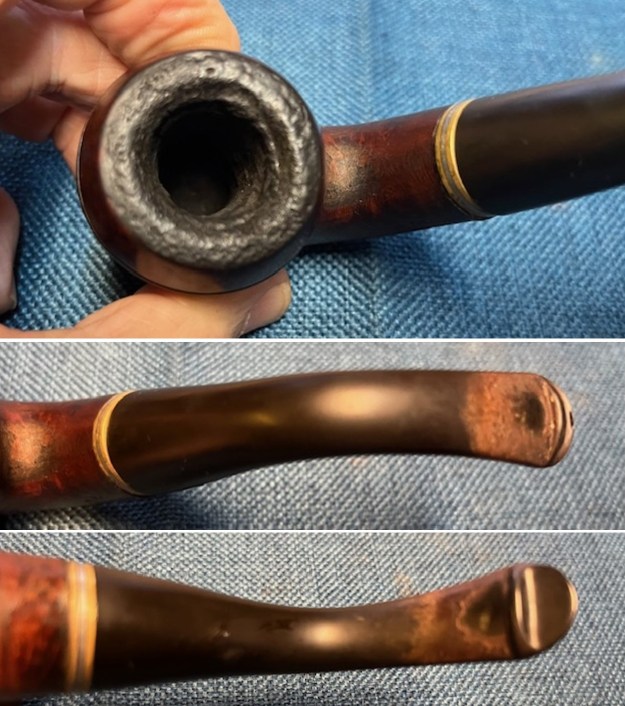
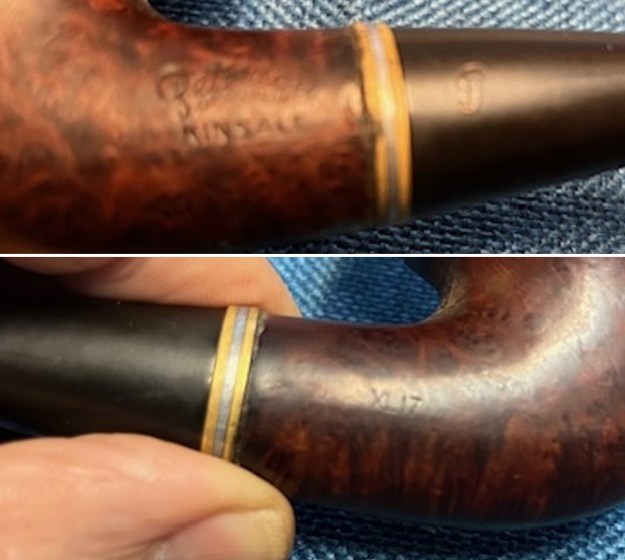
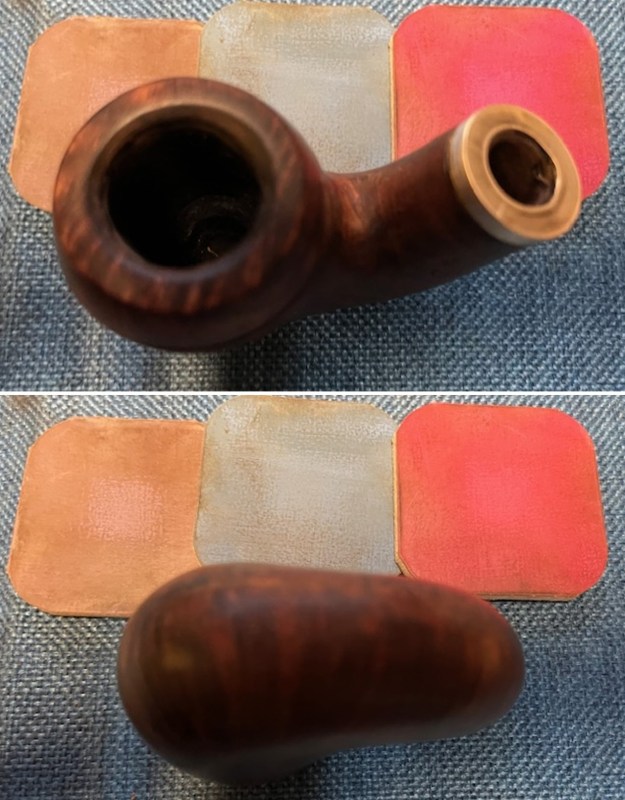
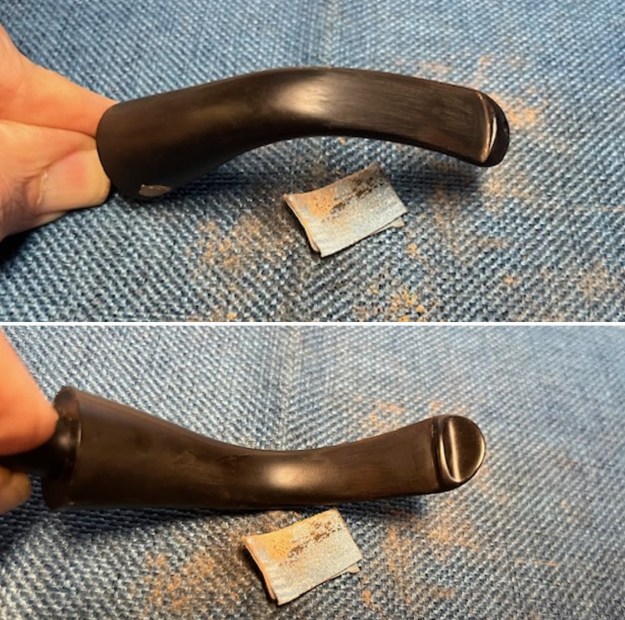
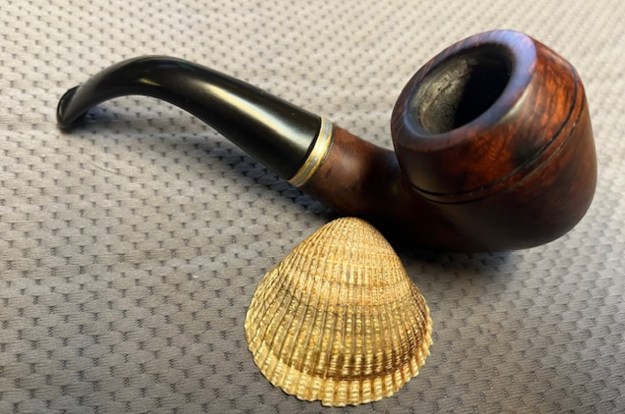
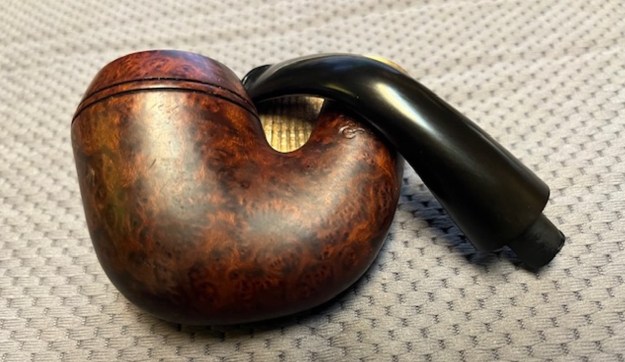
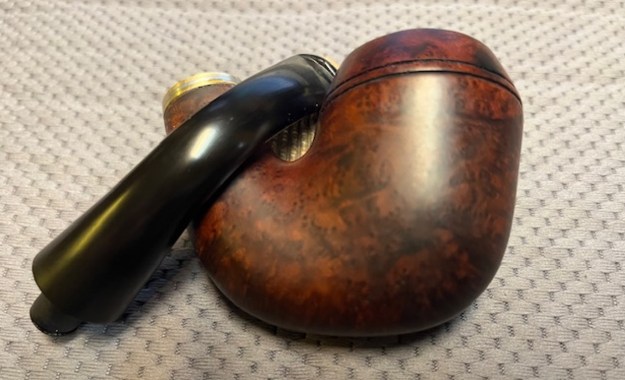
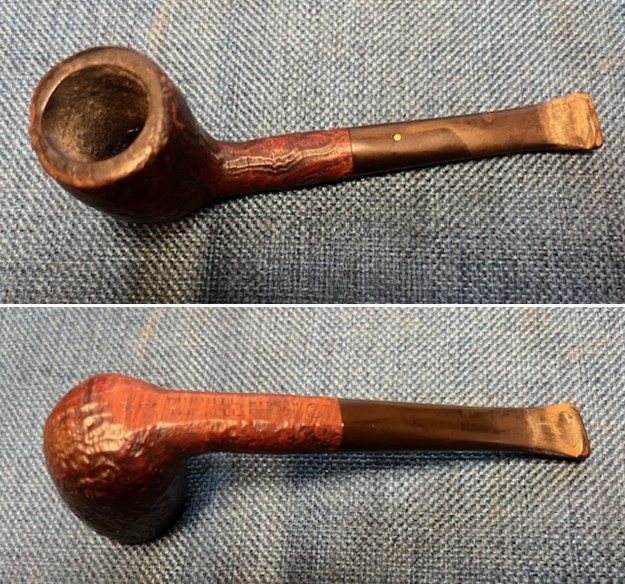
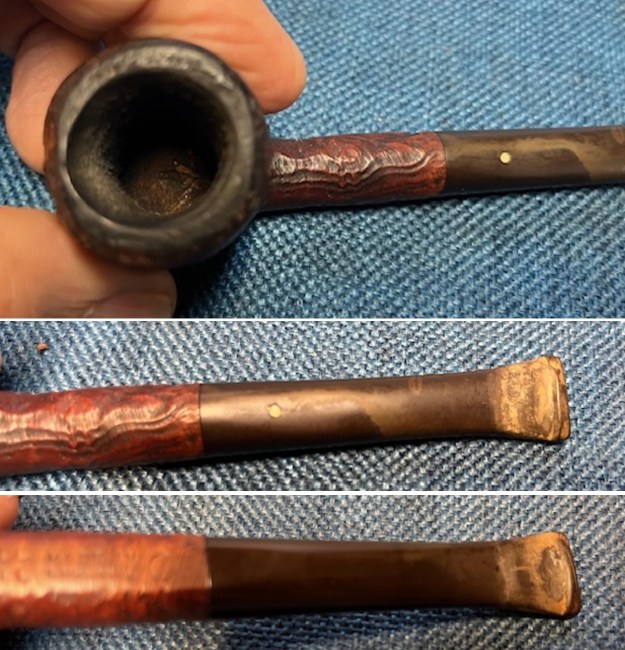
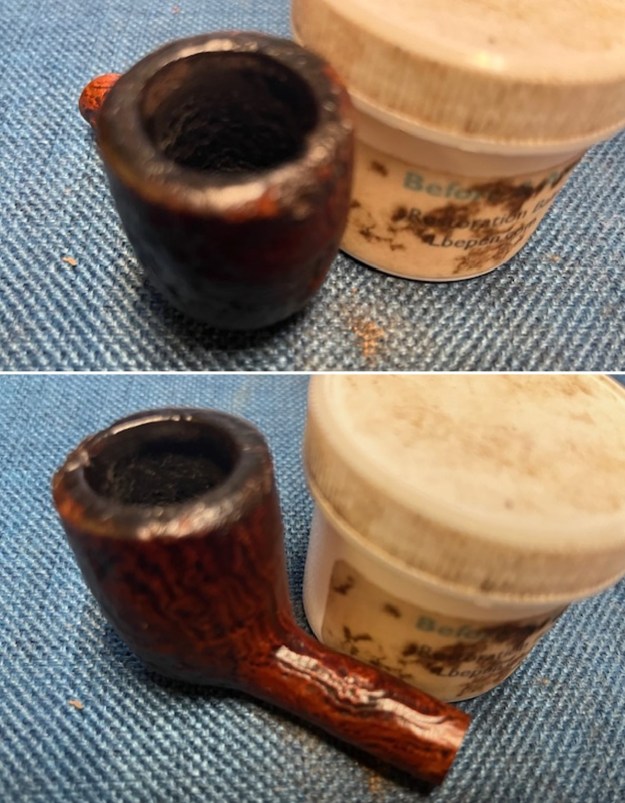
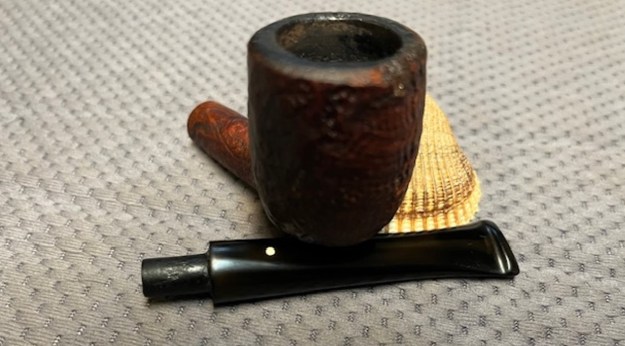
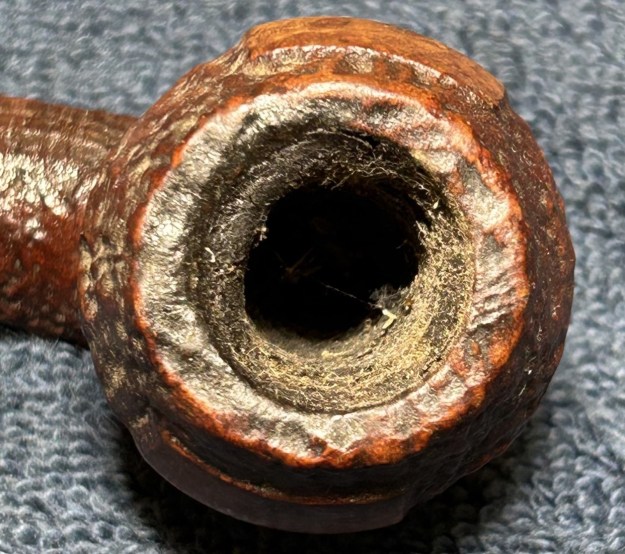
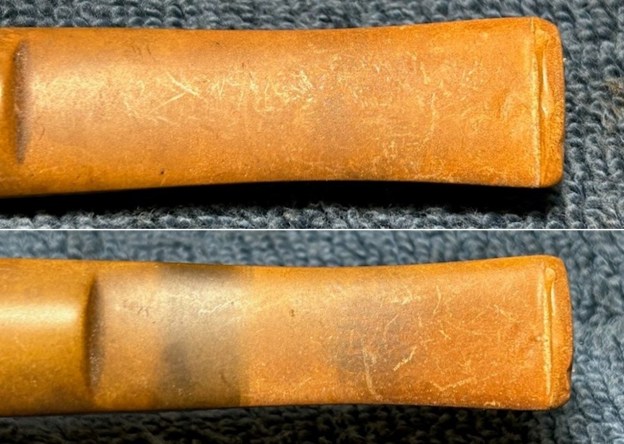
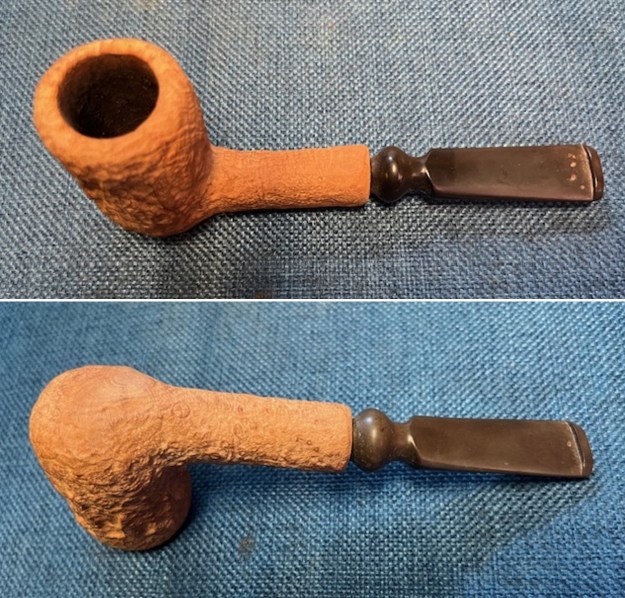
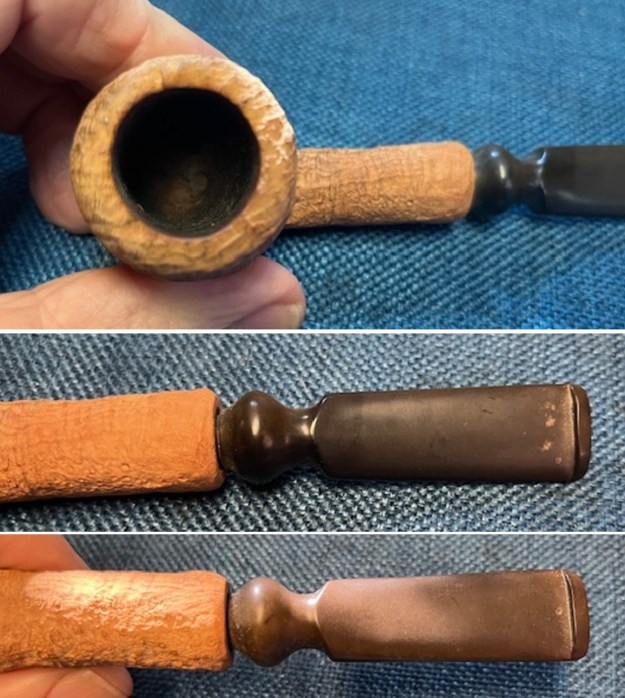
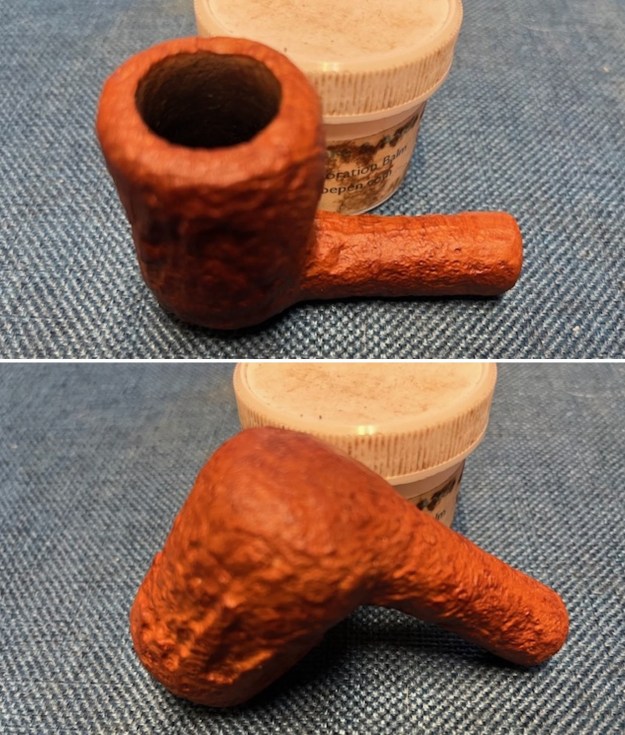
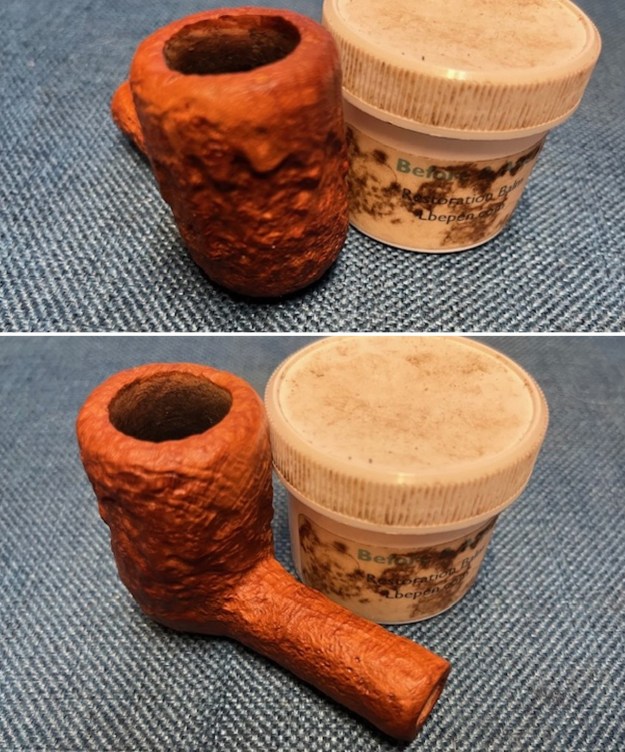
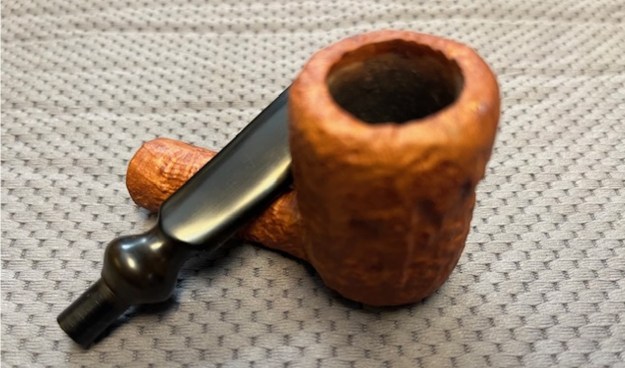
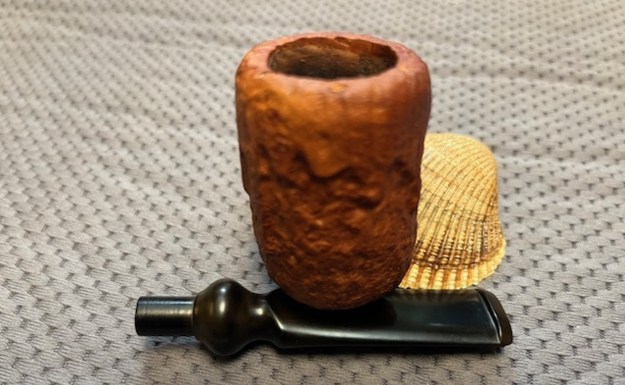
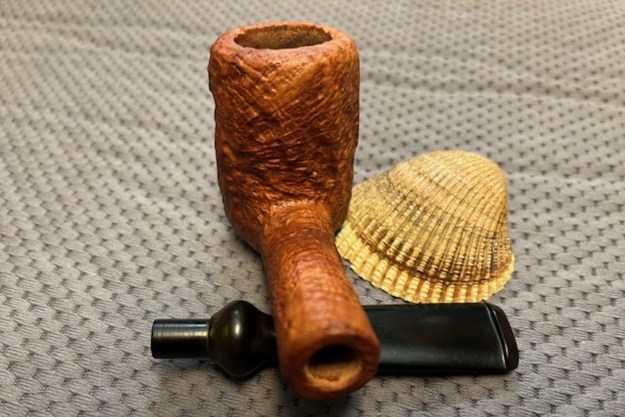
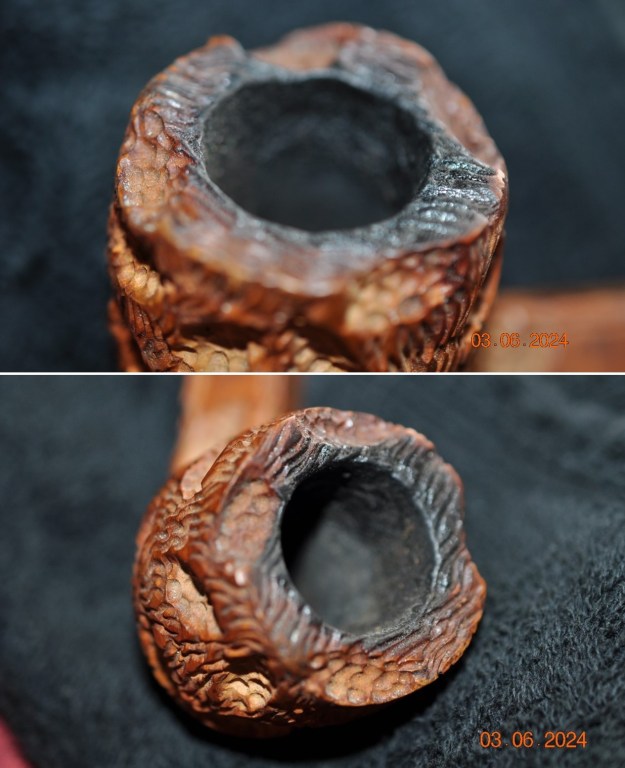
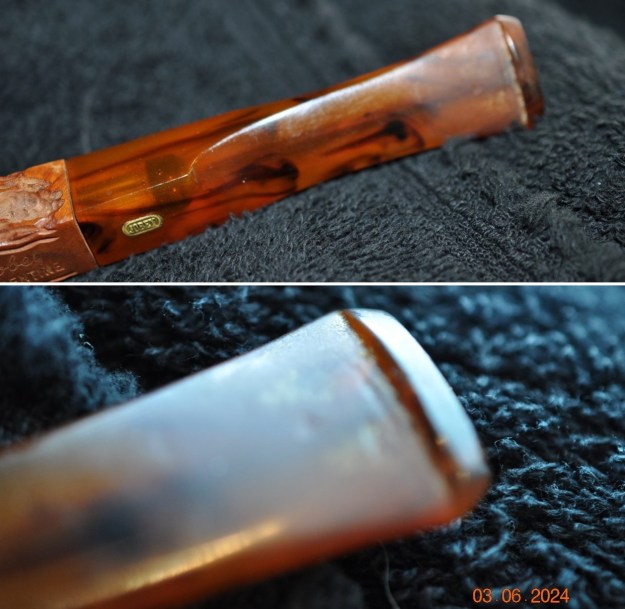
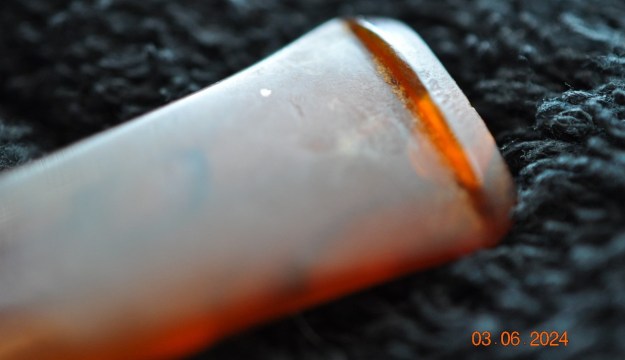
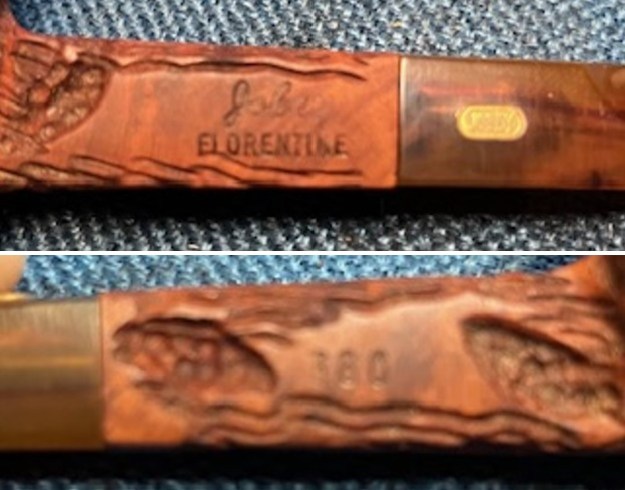
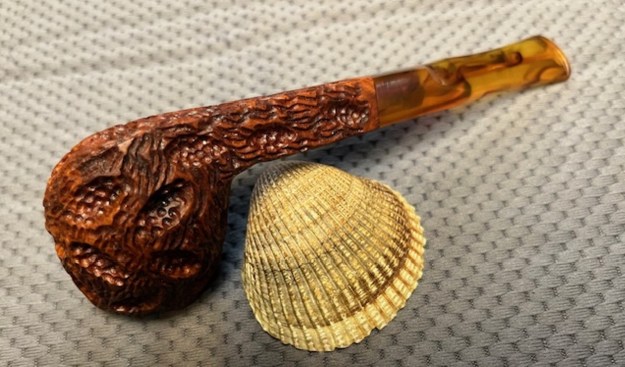
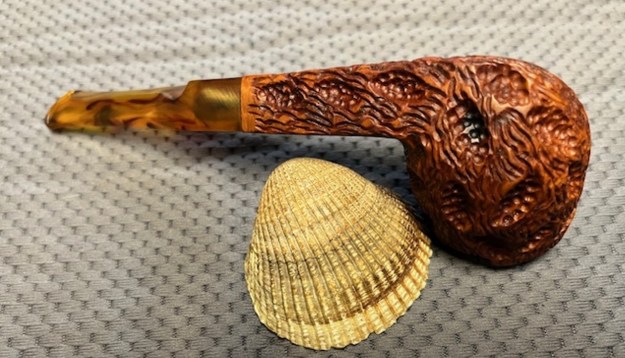
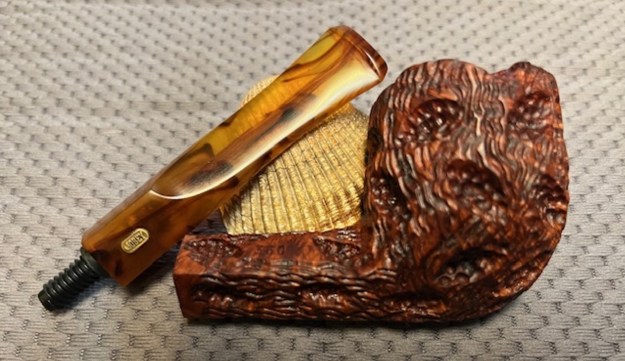
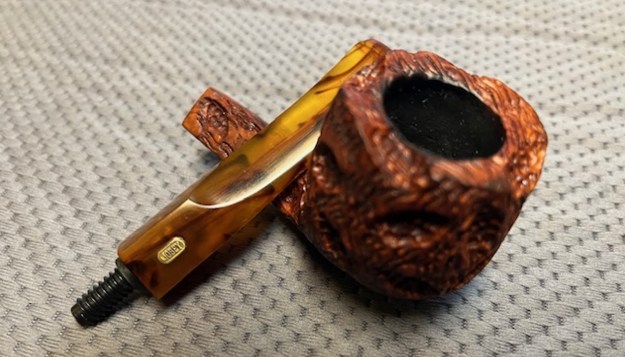
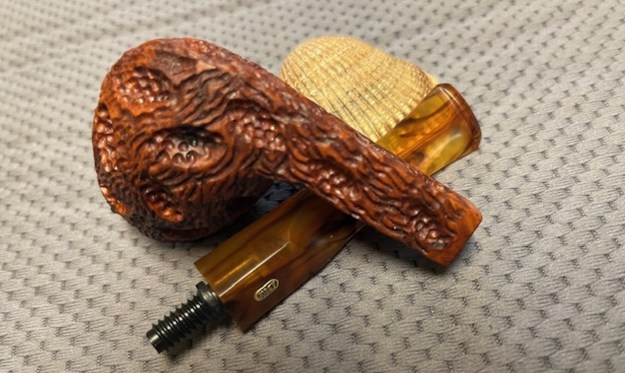
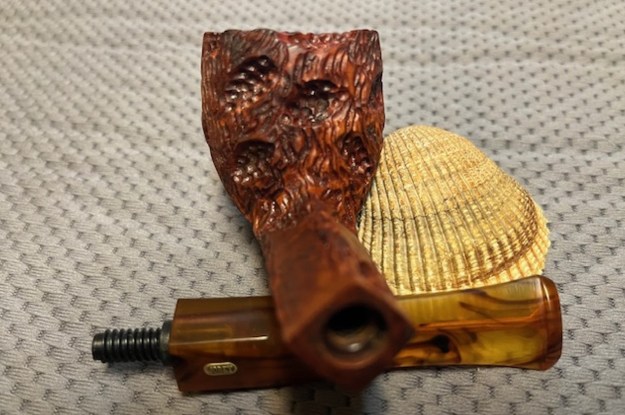
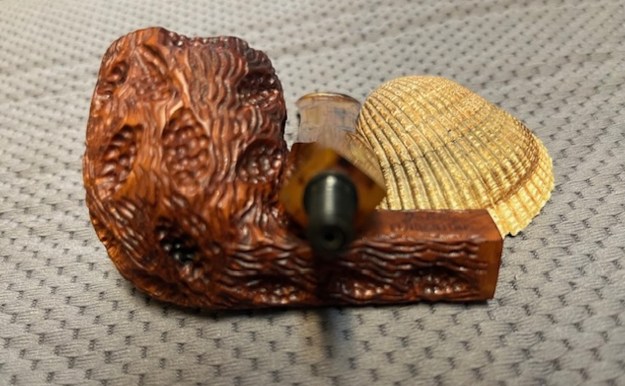
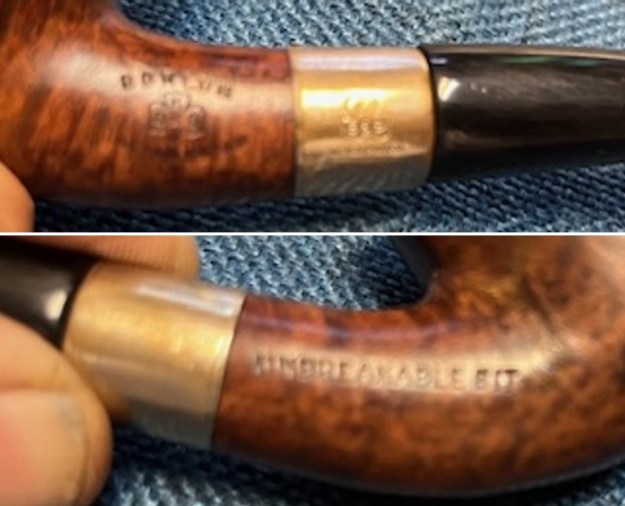
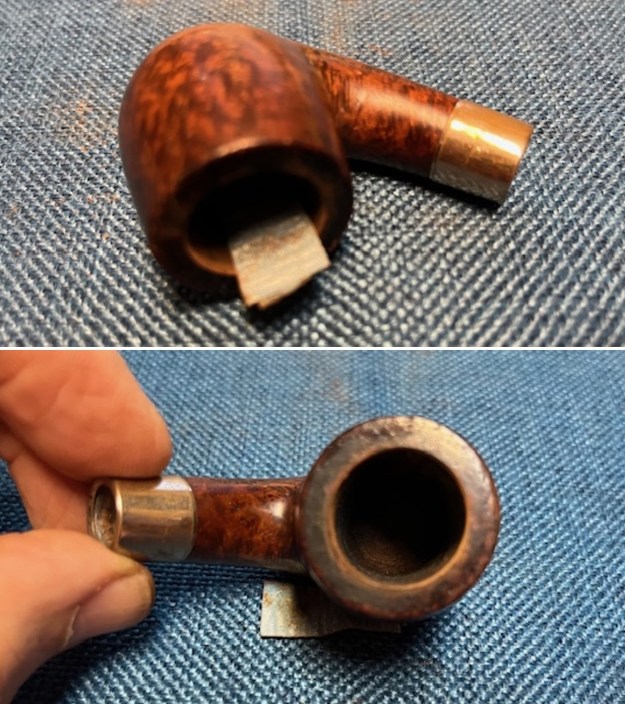
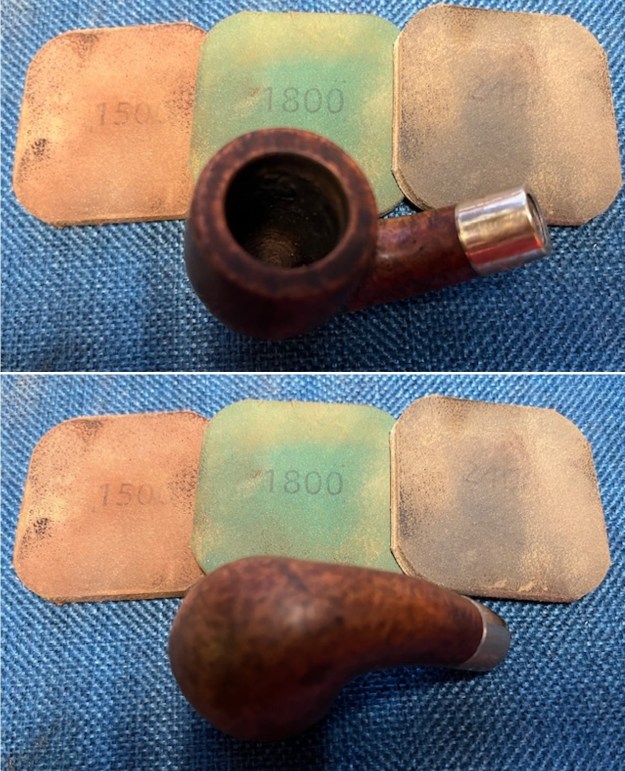
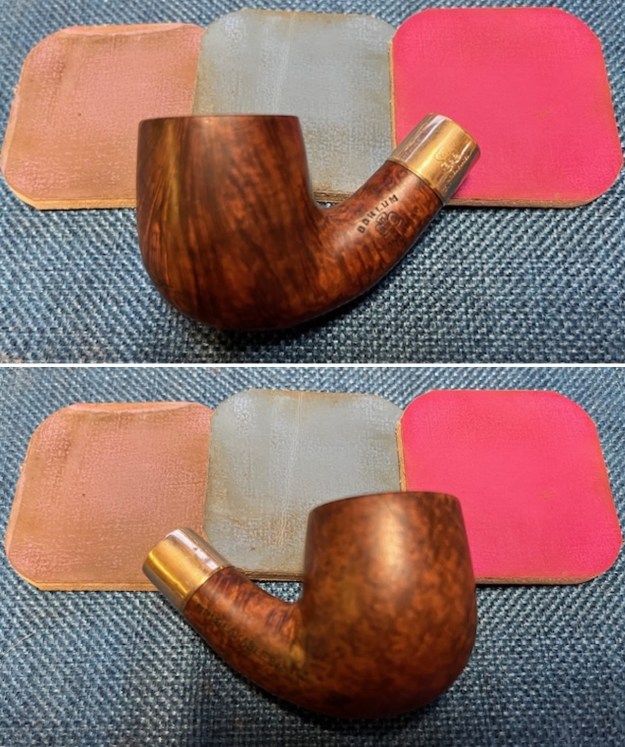
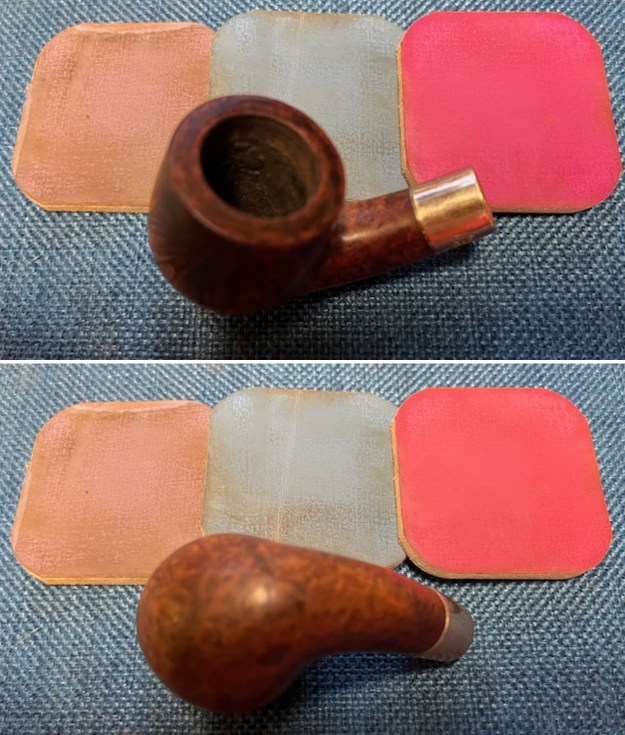
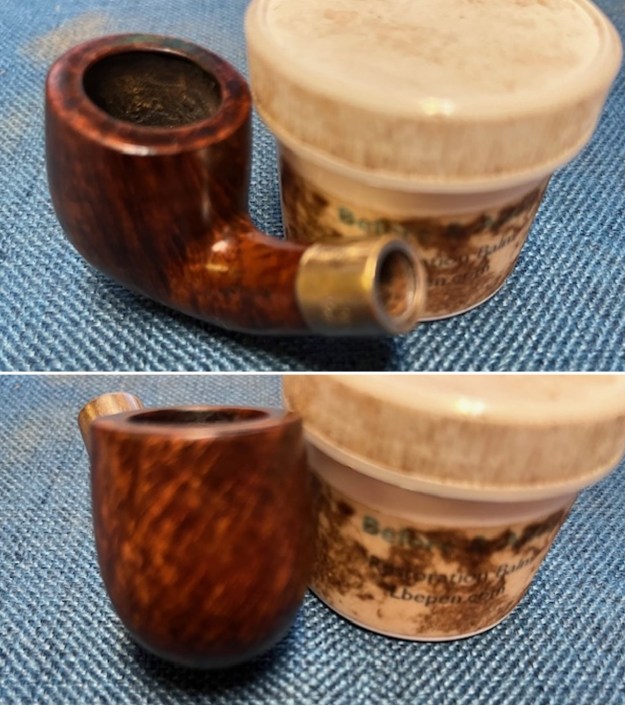
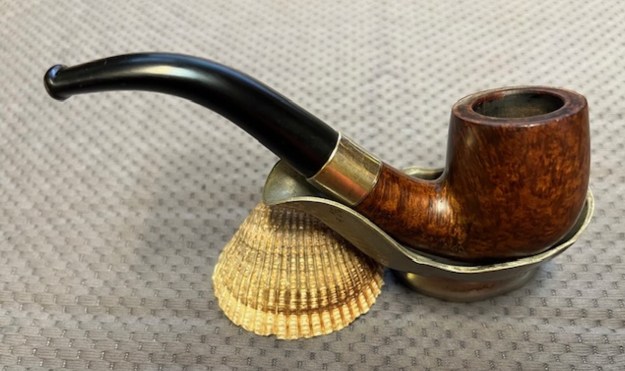
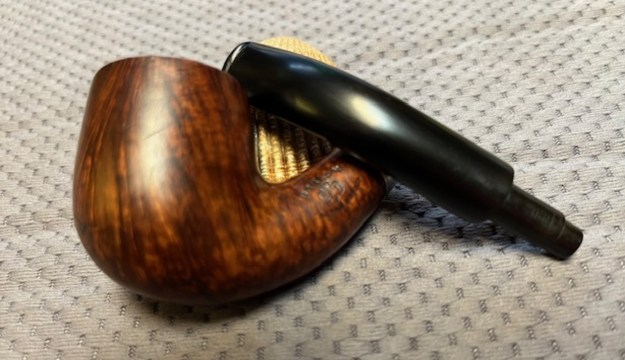
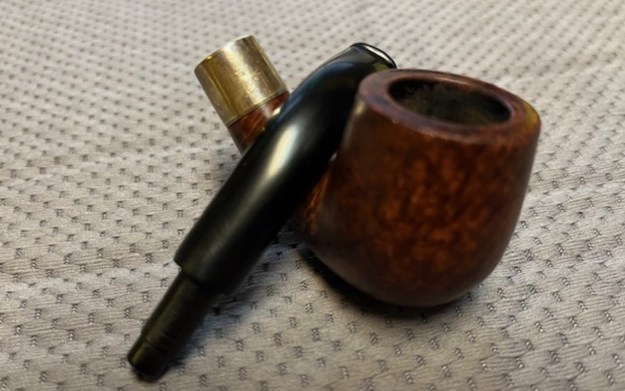
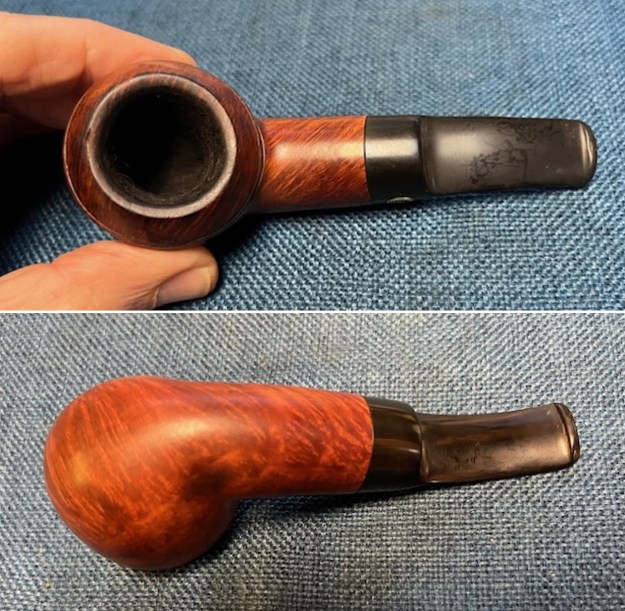
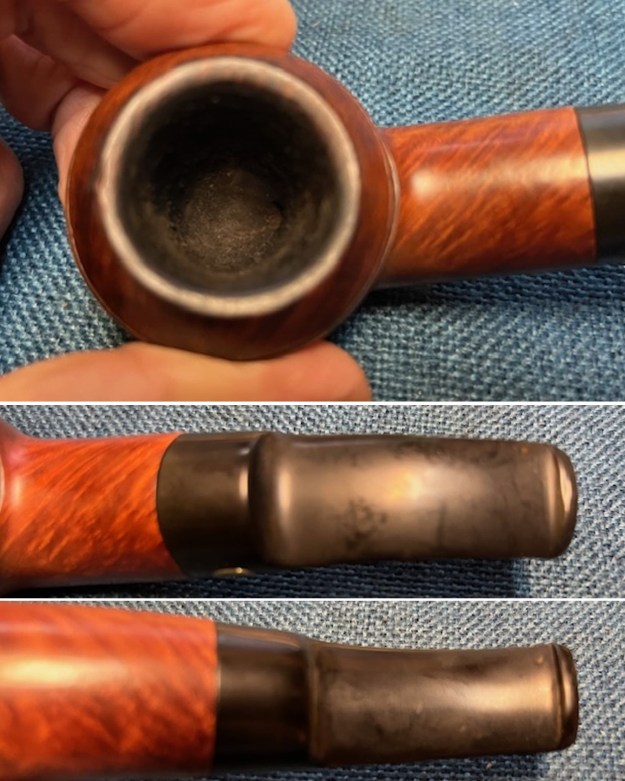
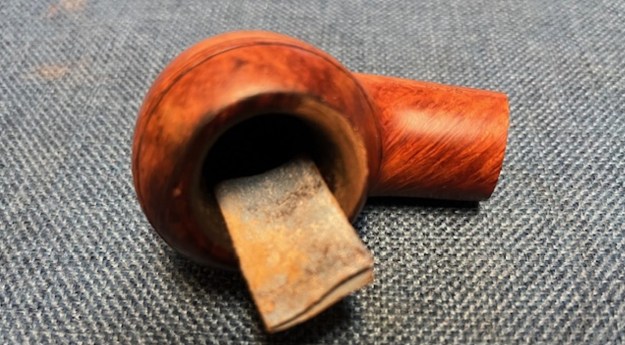
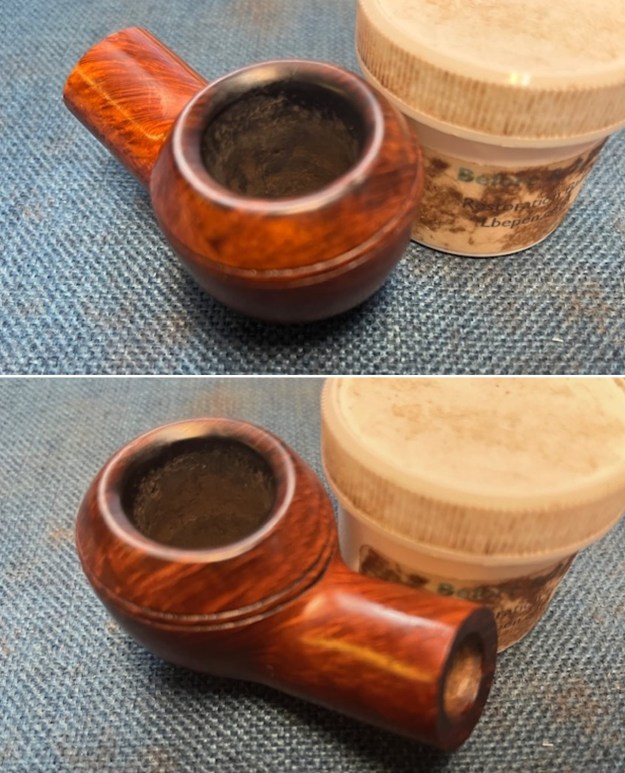
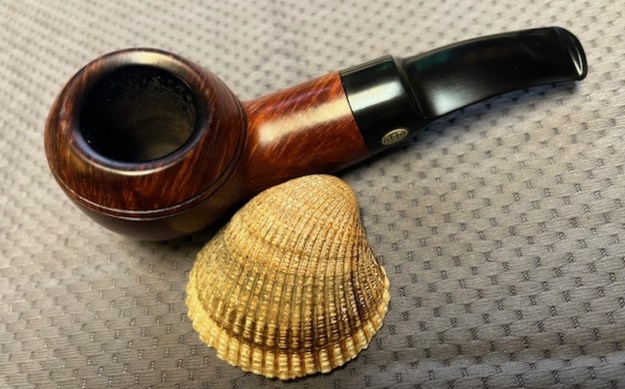
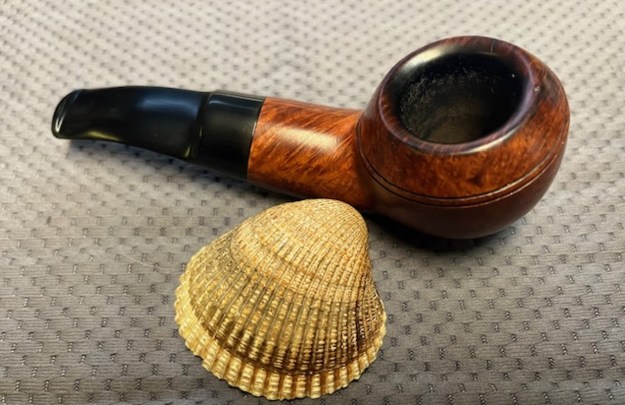
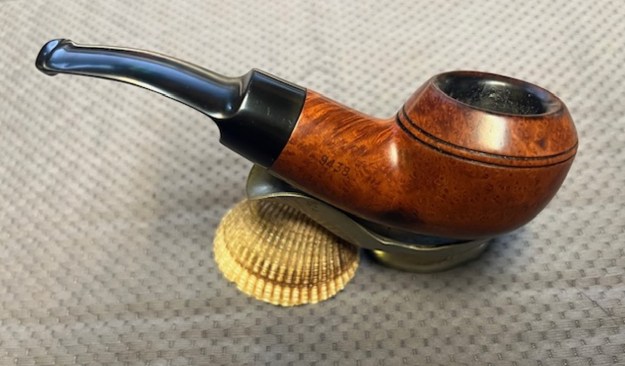
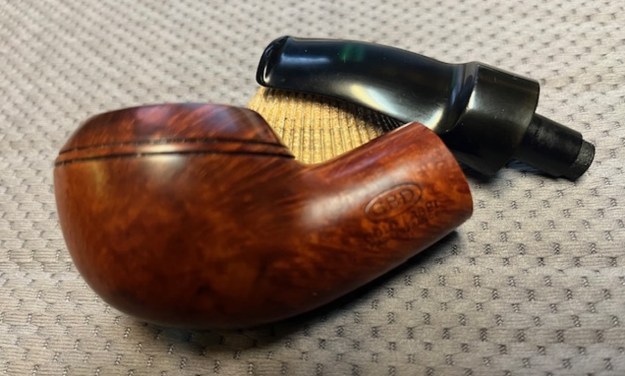
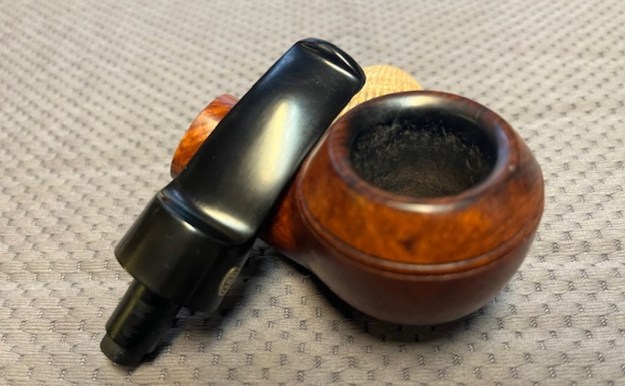
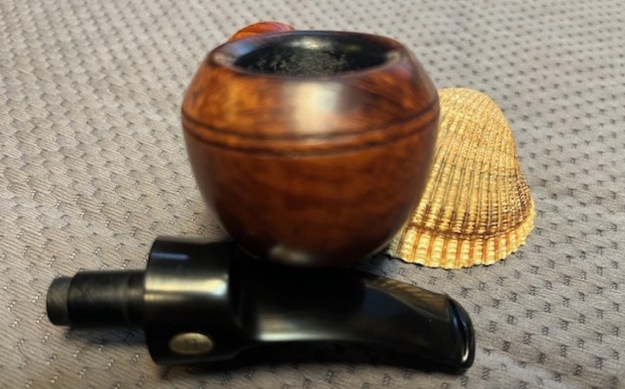
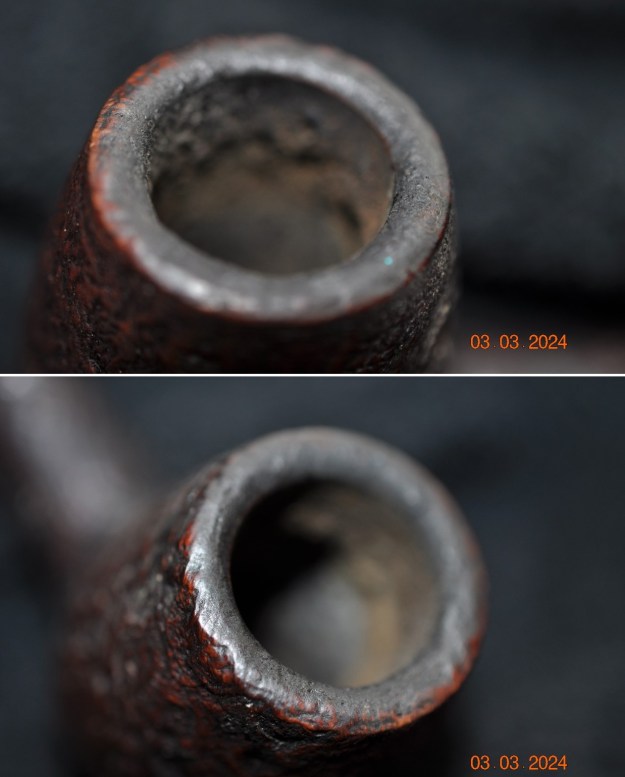
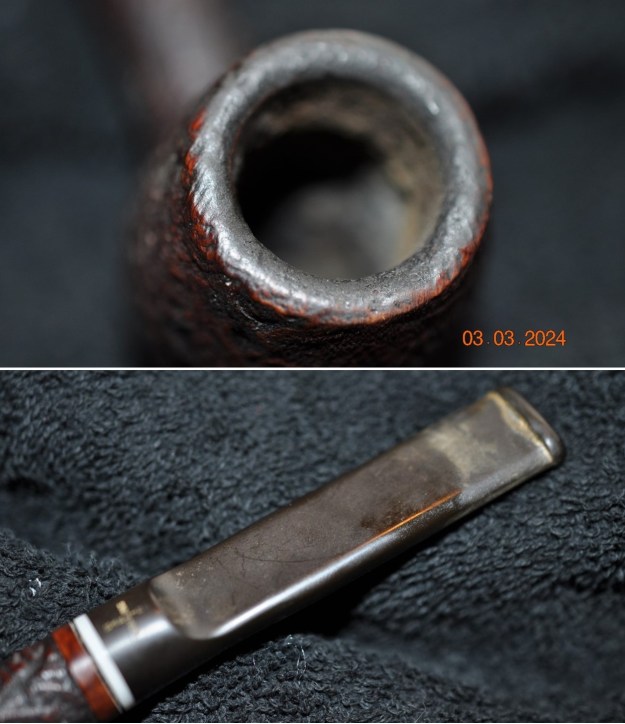
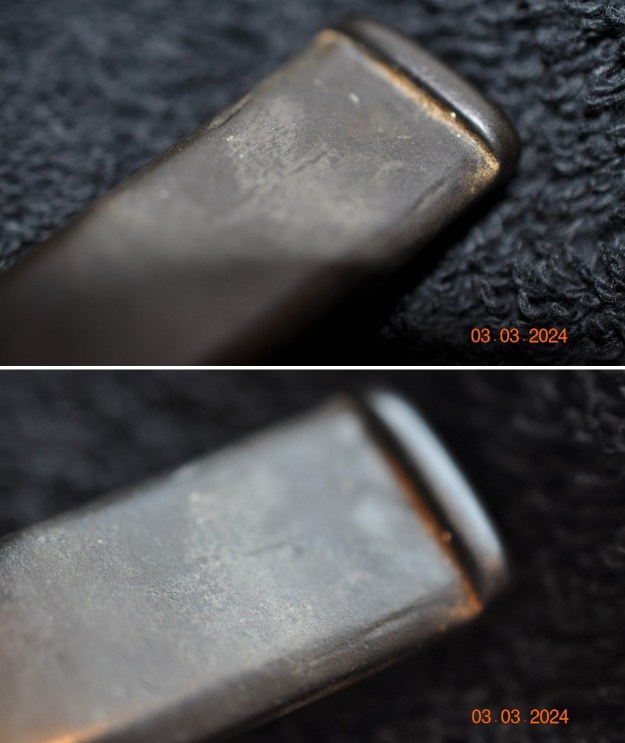
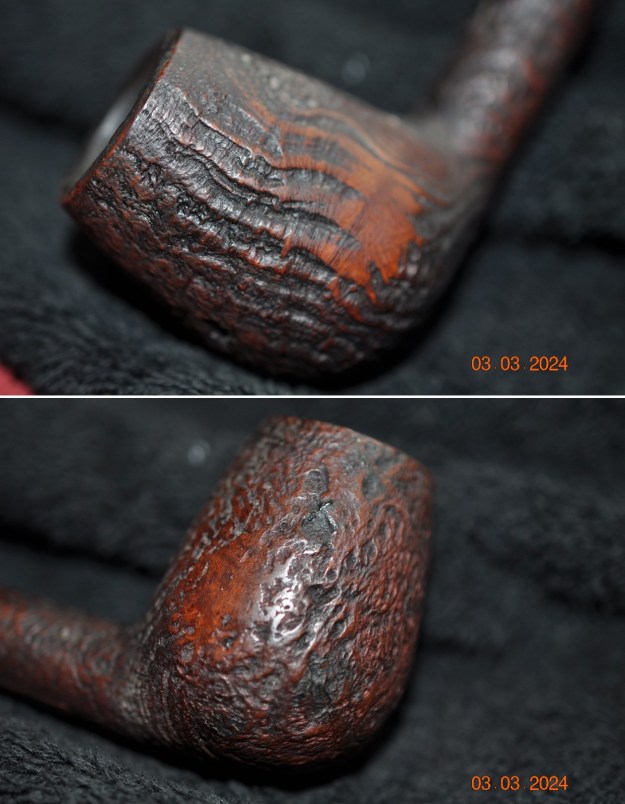
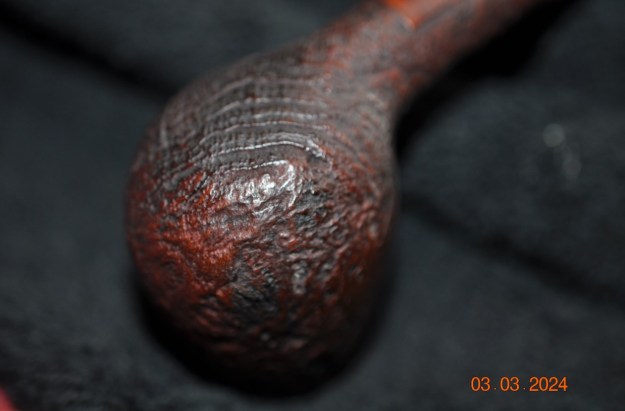
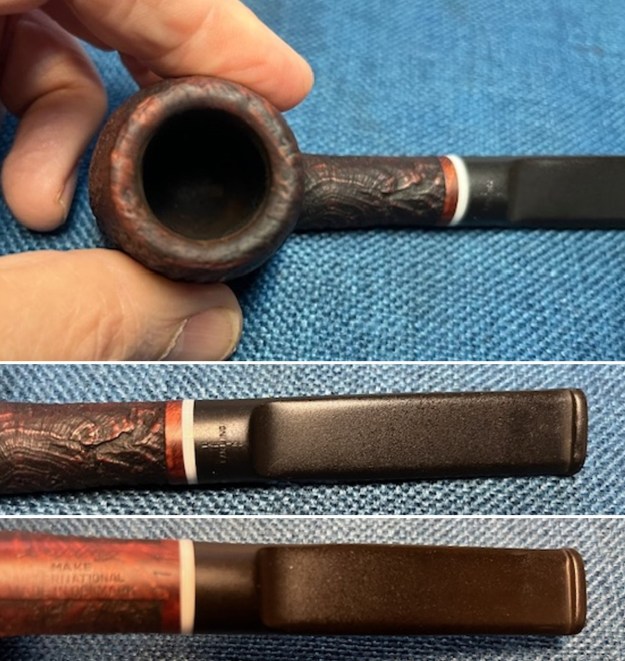
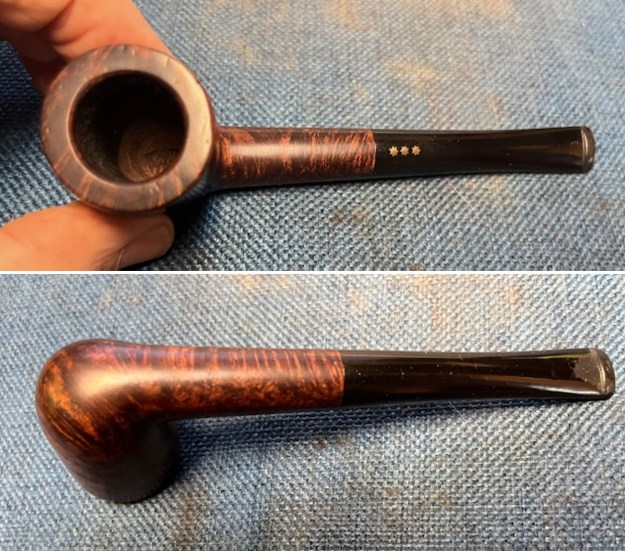
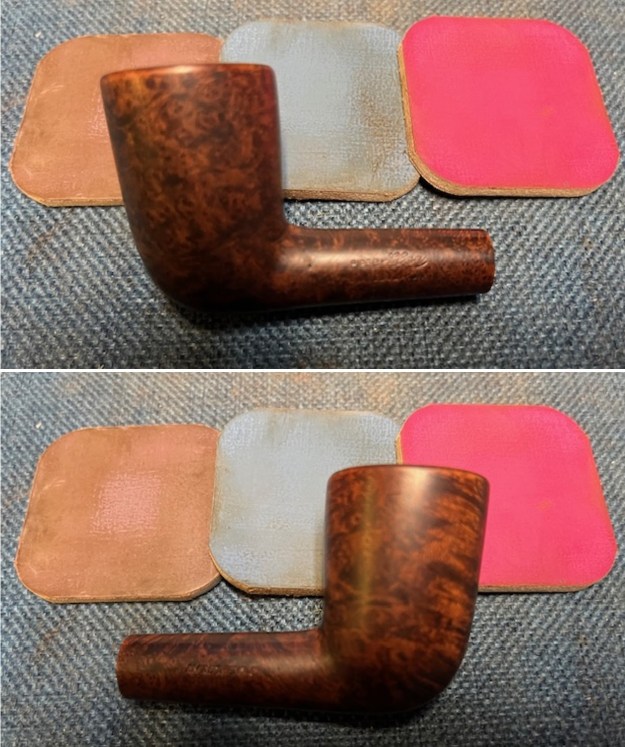
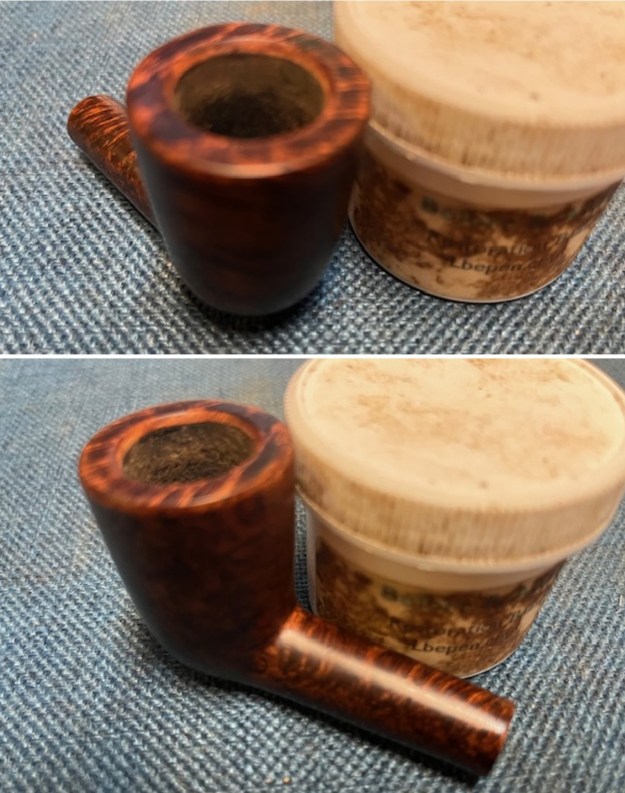
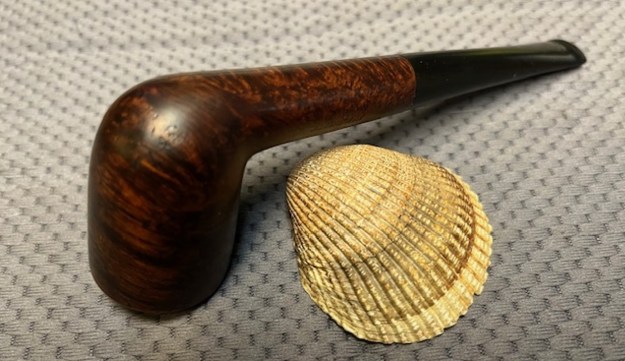
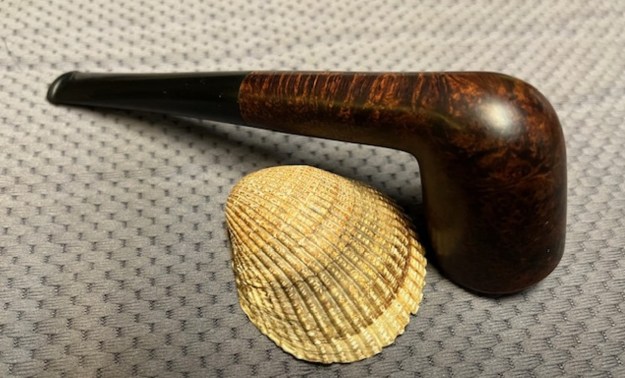
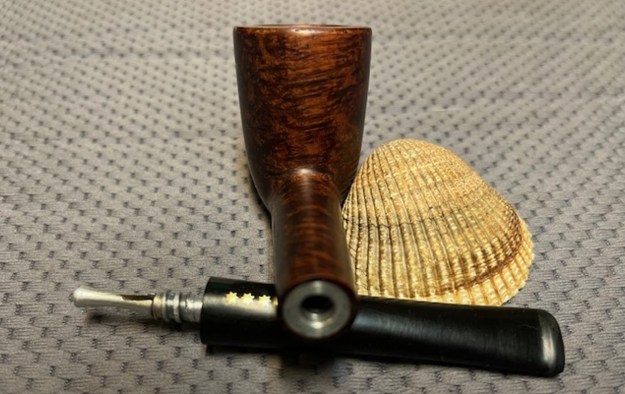
 I took closeup photos of the rim top and bowl to give a sense of the dirty condition of the pipe and the thickness of the cake and lava on the bowl top. The damage to the rim top and edges is very clear in the photos as well. I also took photos of the stem to show the top and underside ahead of the button.
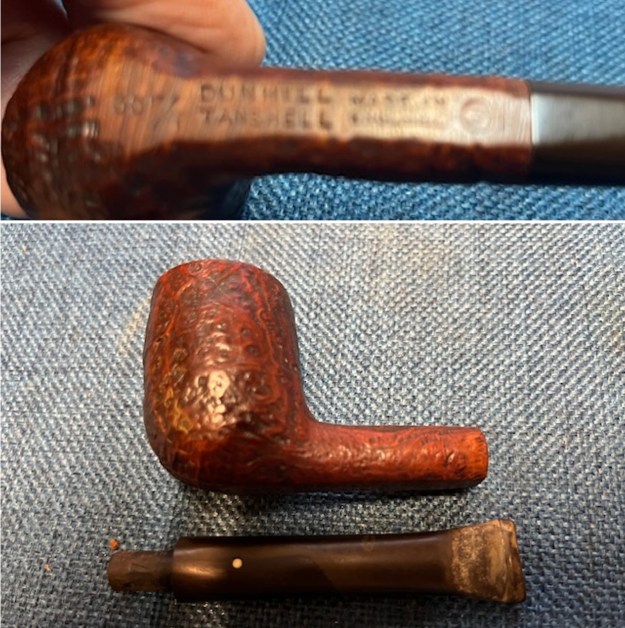
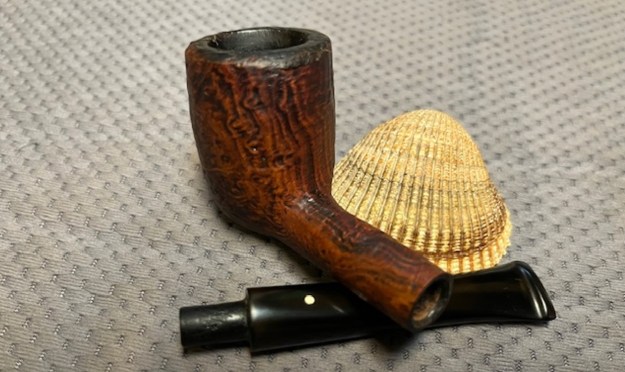
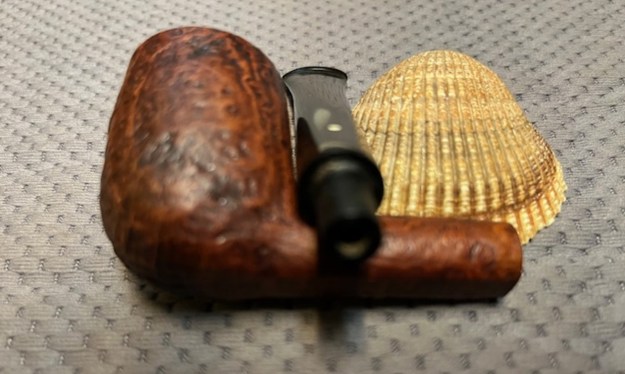
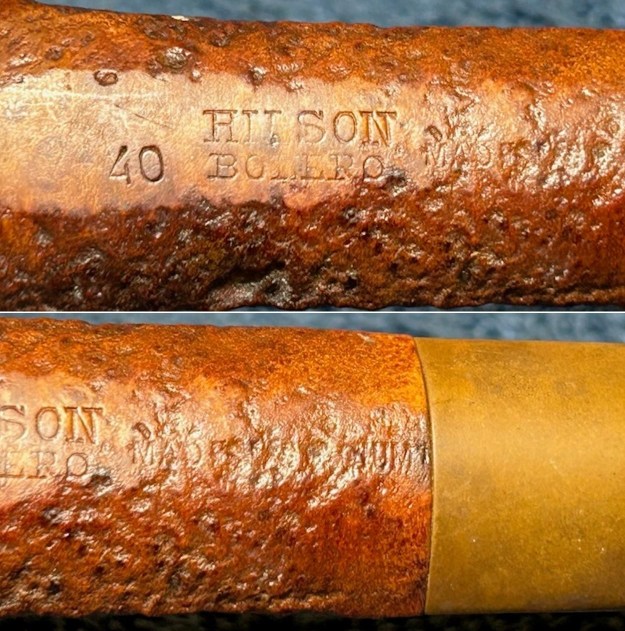
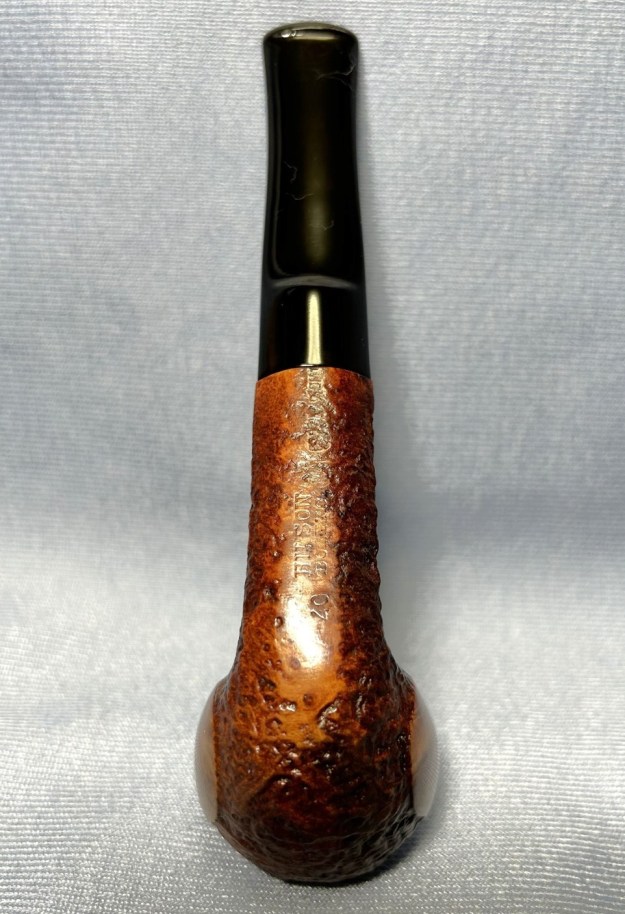
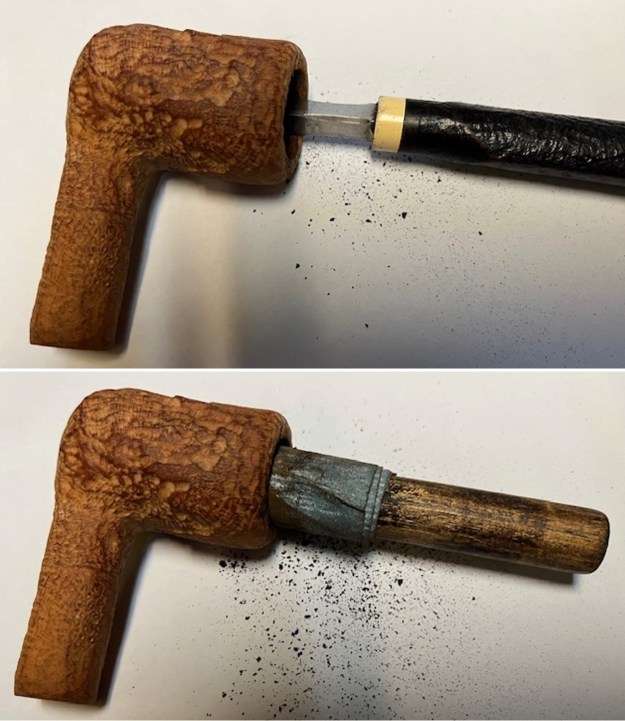
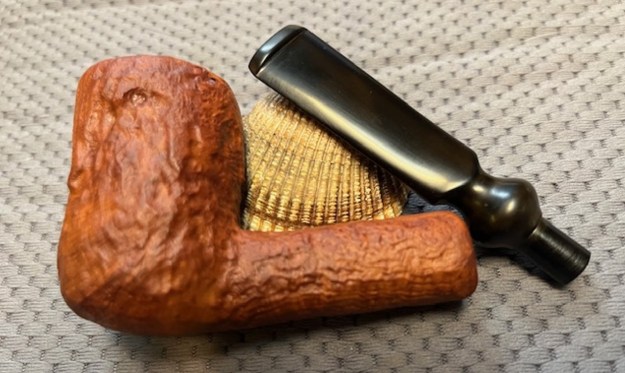
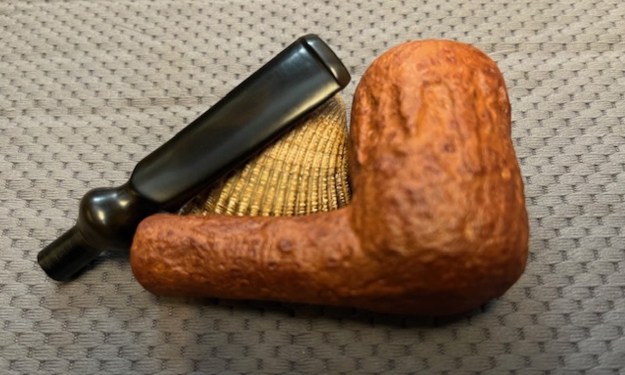
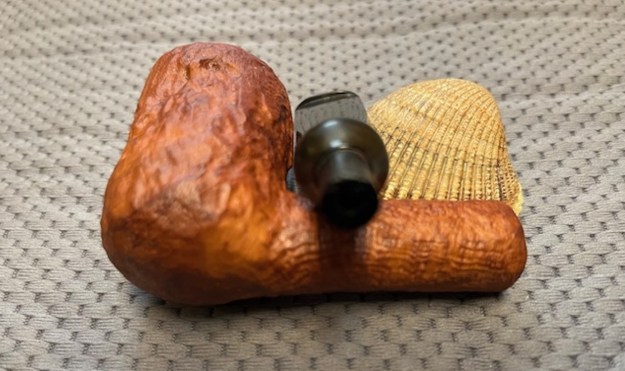
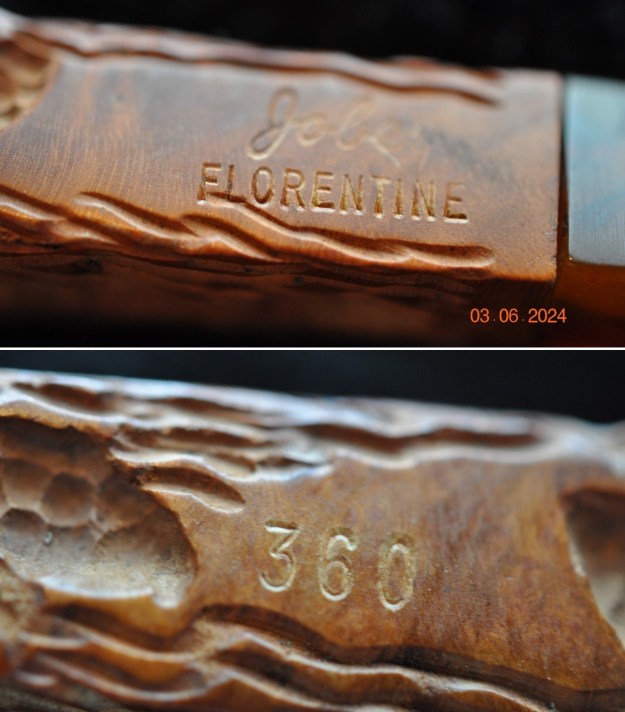
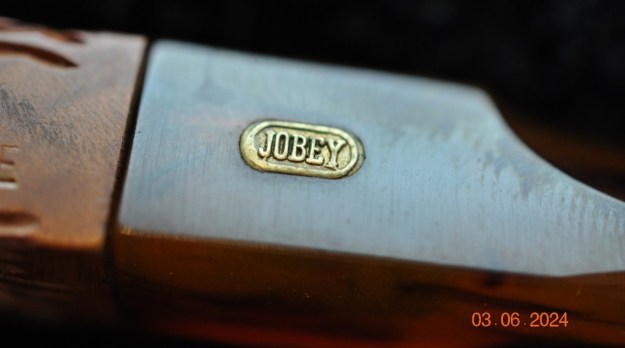
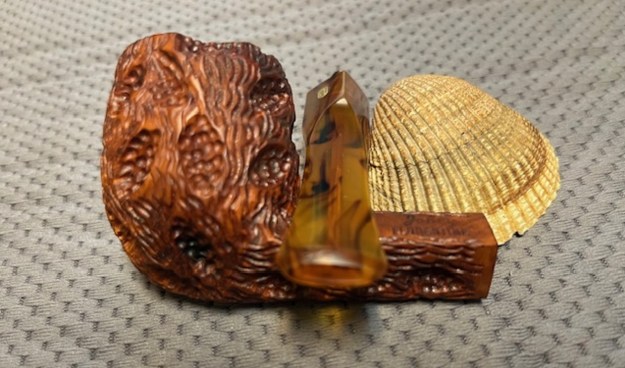
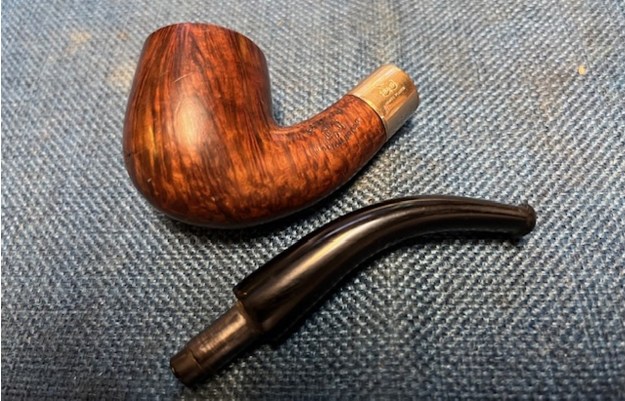
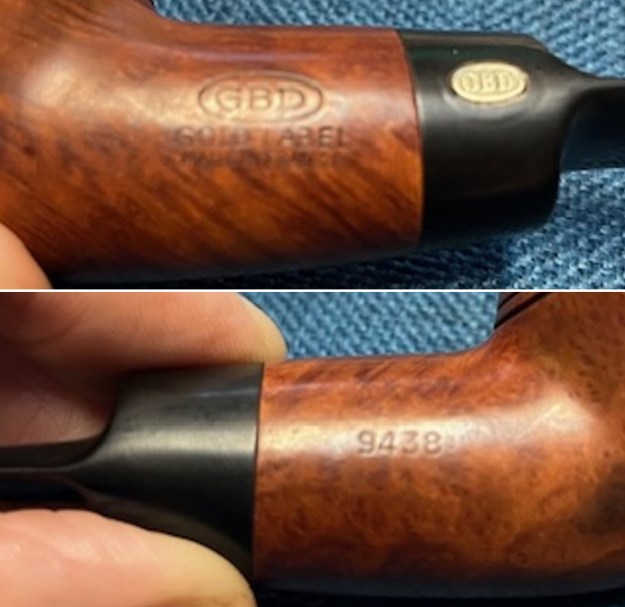
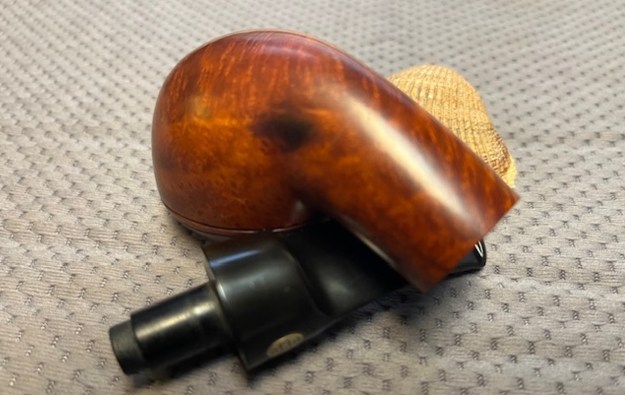
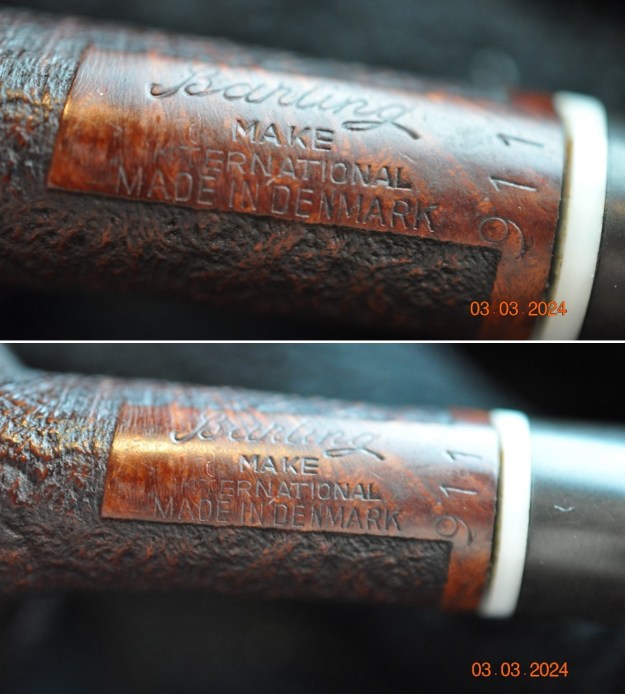
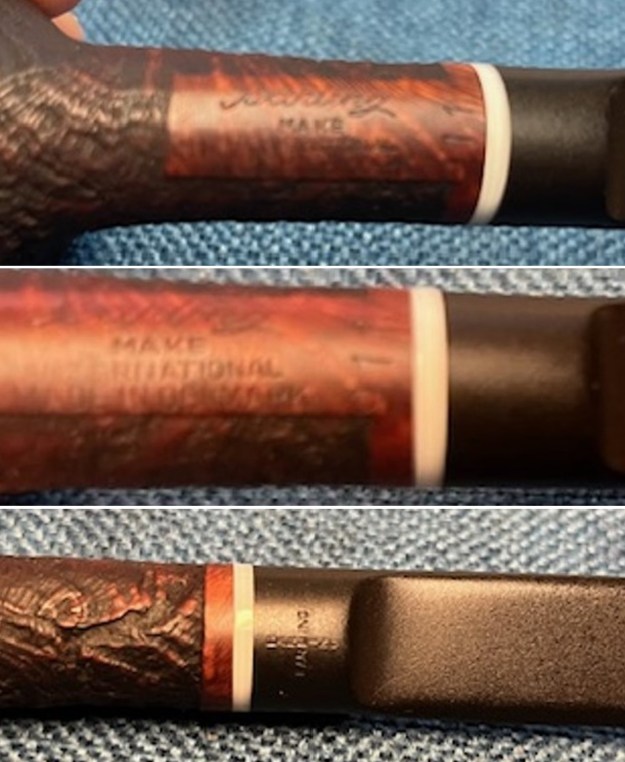
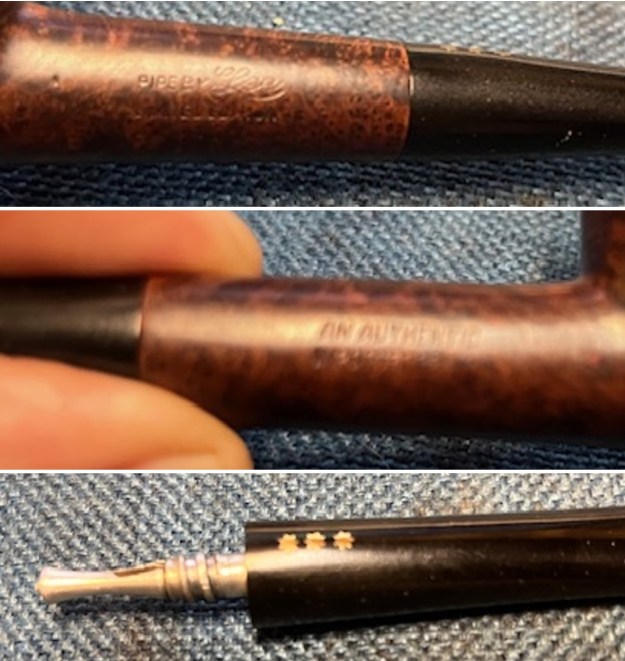
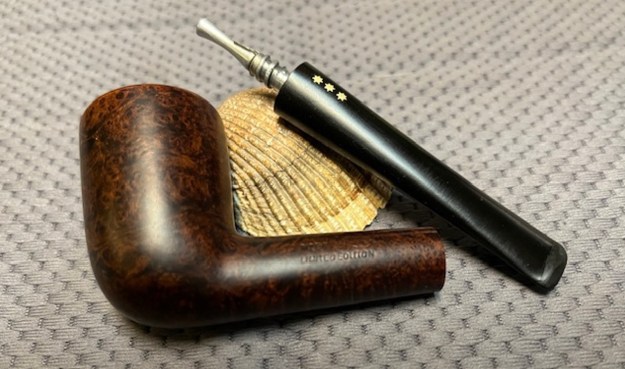
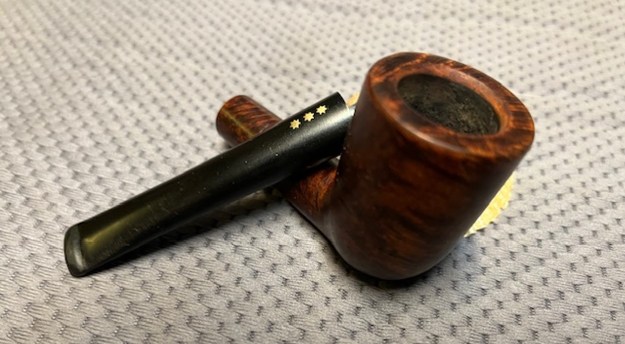
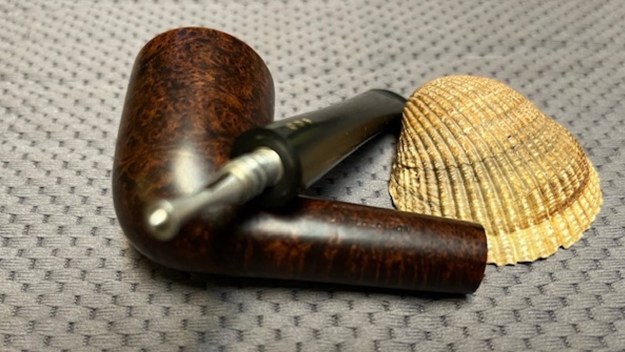
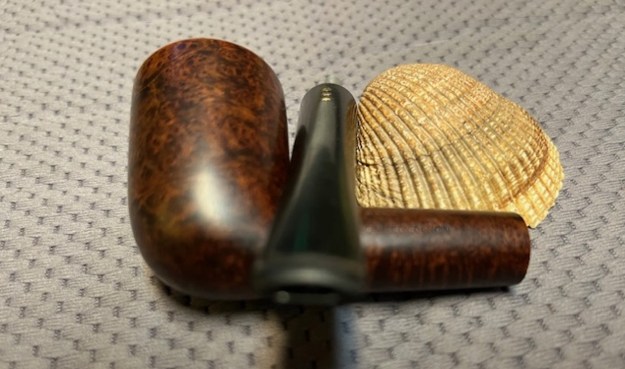
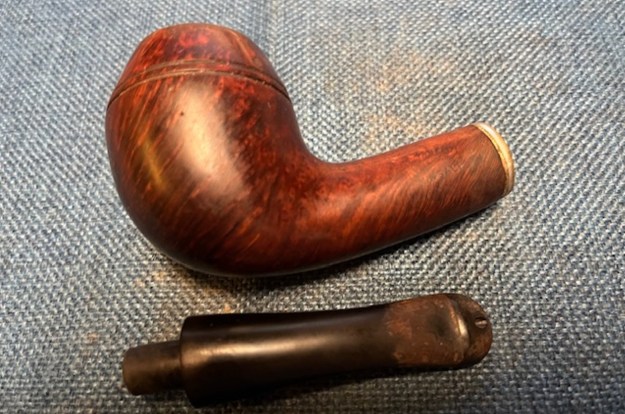
 I took photos of the stamping on the shank sides. It was faint but readable through the grime and debris. It read as noted in the above paragraphs. I also took the stem off the shank and took a photo of the look and proportion of the pipe.
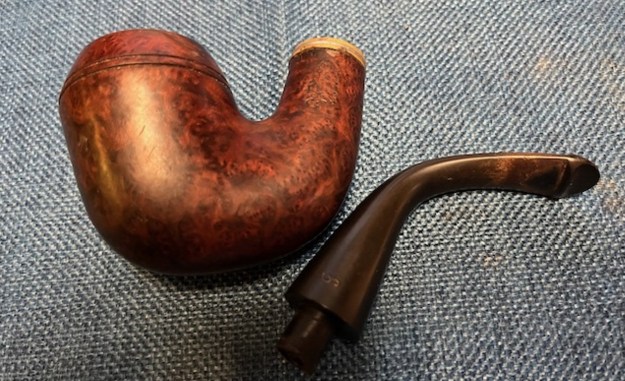
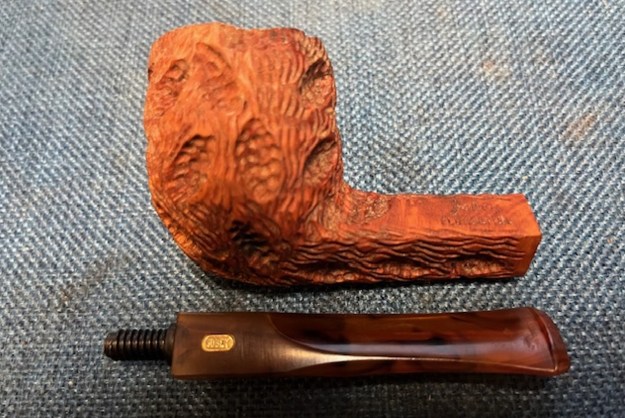
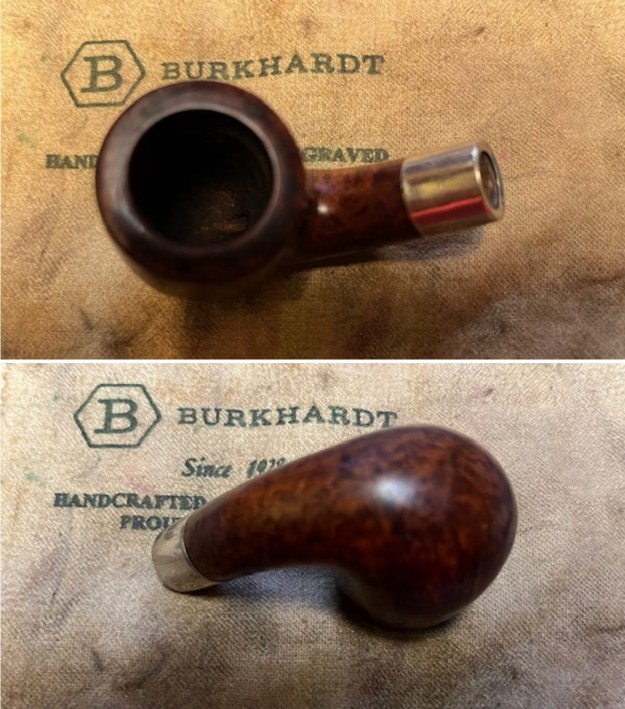
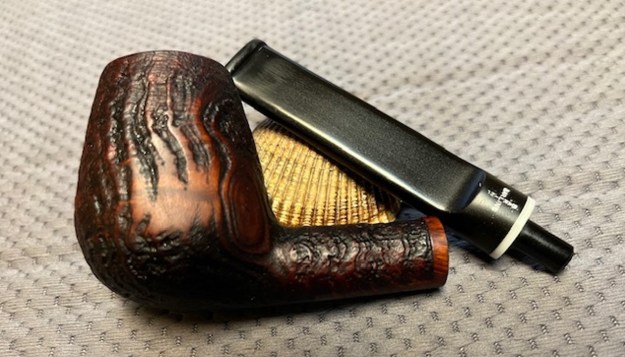
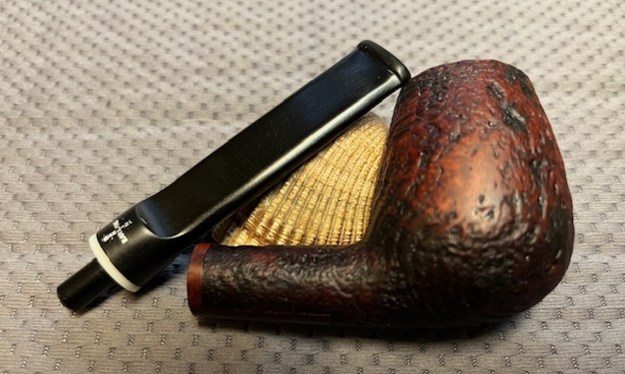
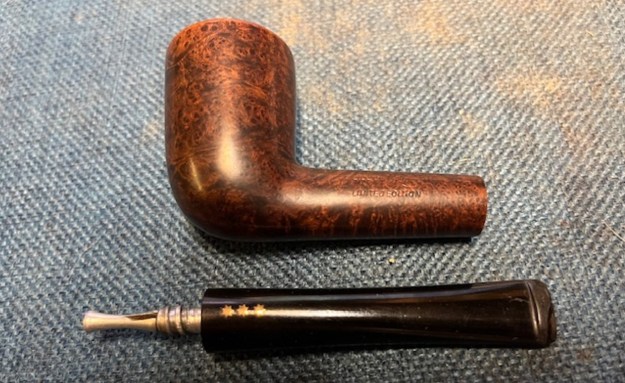
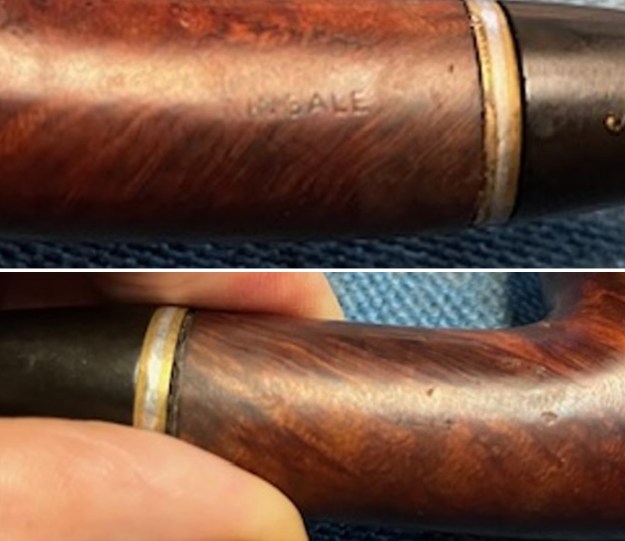
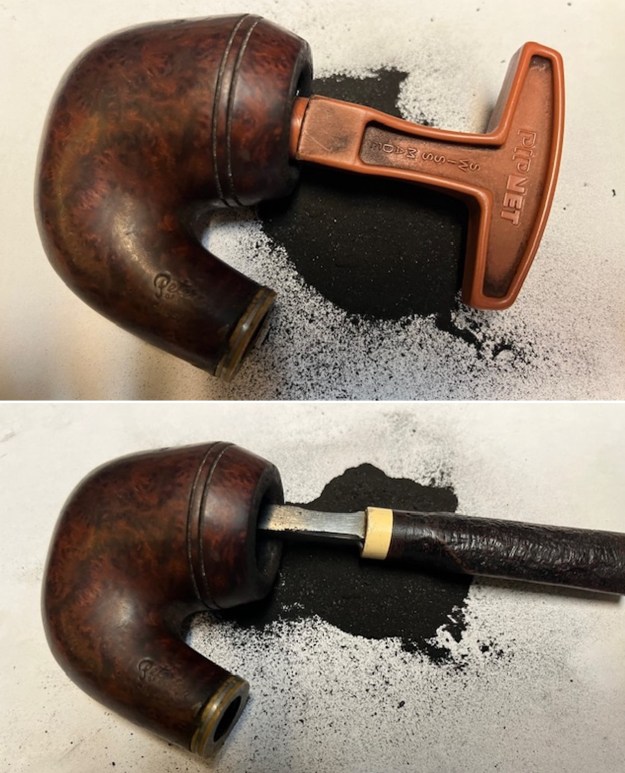
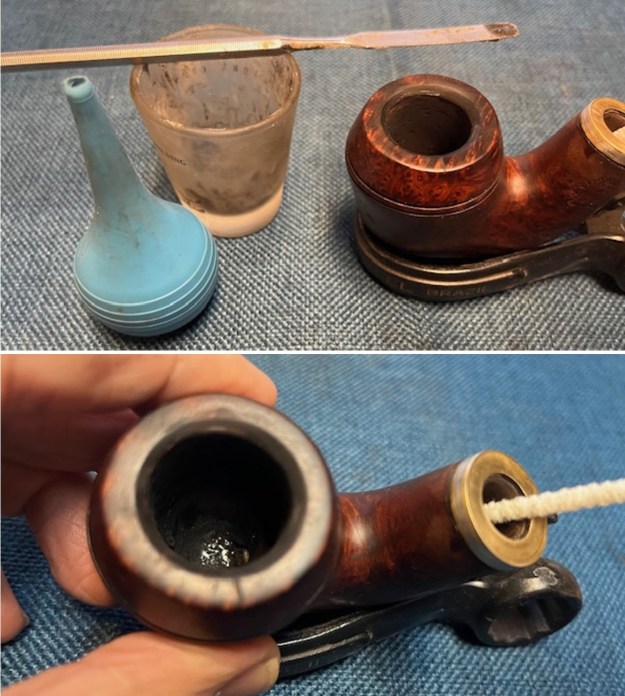
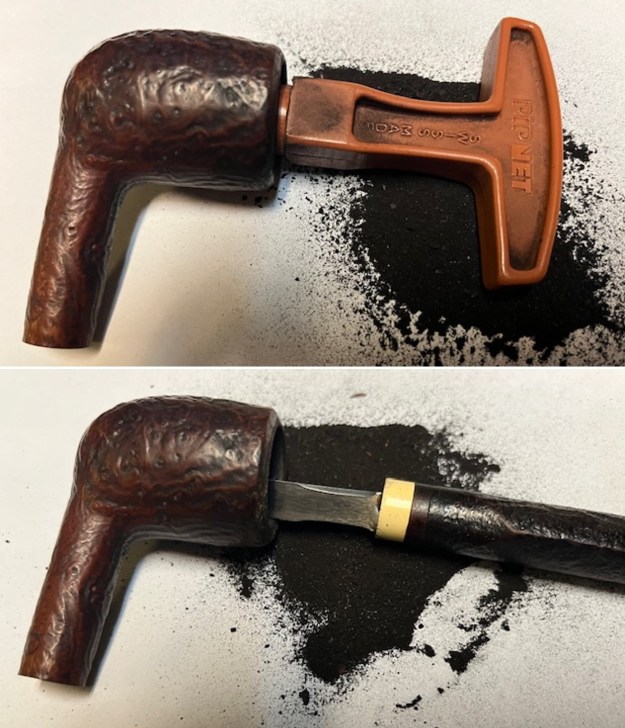
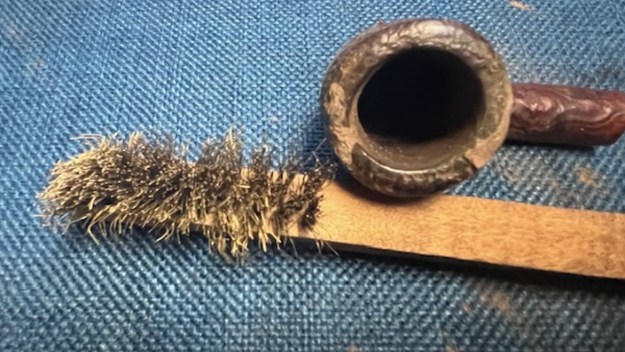
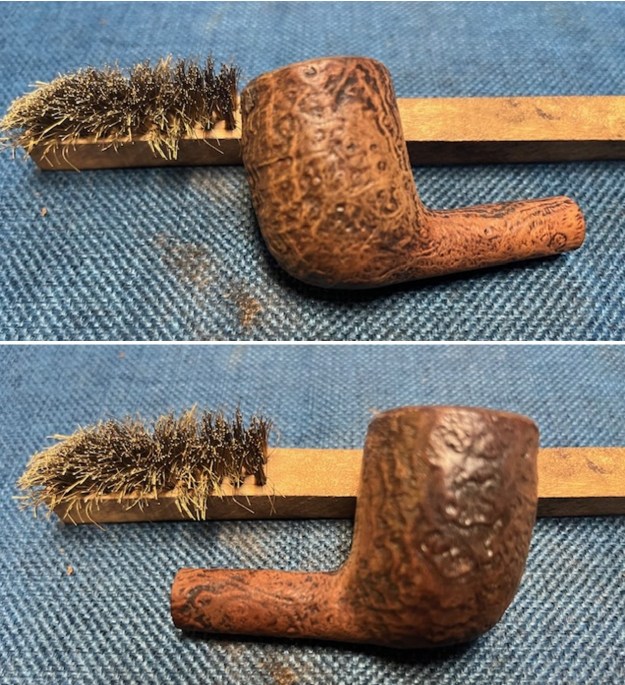
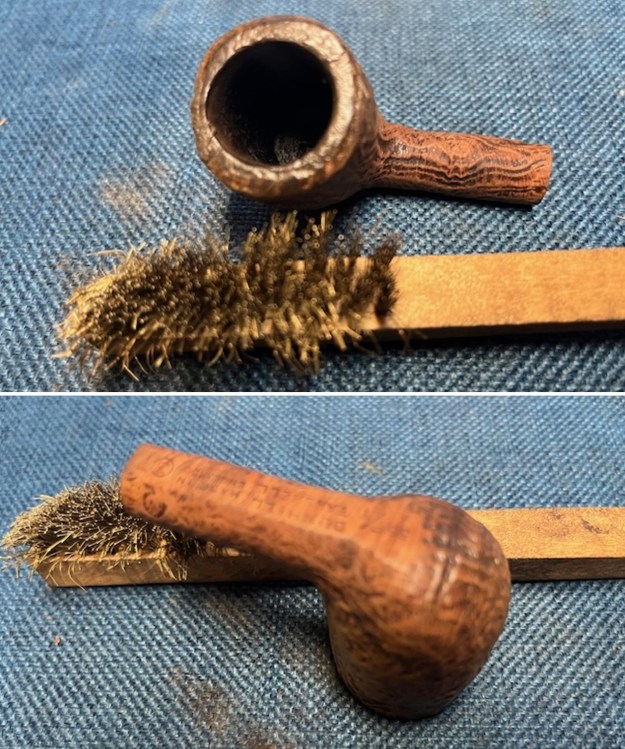
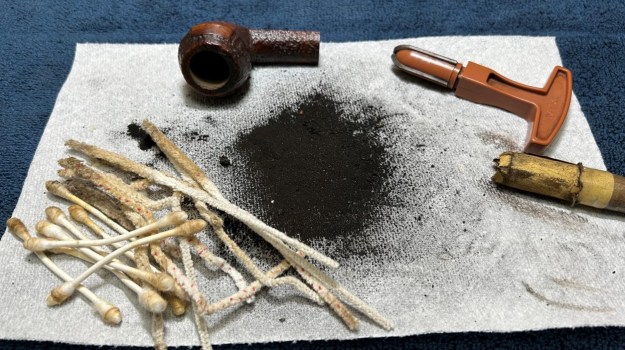
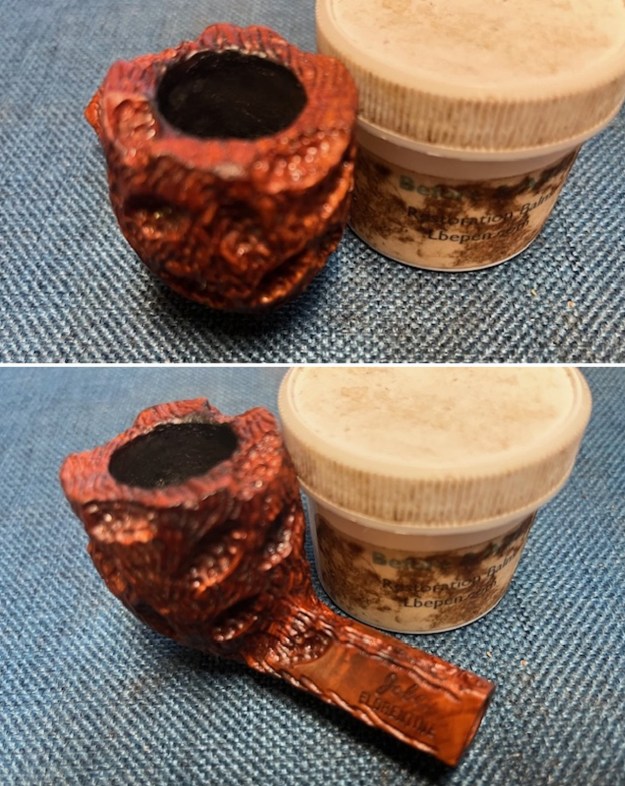
 I started my work on the pipe by reaming the thick cake in the bowl. I used a PipNet pipe reamer with the first cutting head to take back the cake. I followed that with the second and the third cutting head. I was able to remove all of the cake. The cake in the bottom third of the bowl was incredibly hard and took a repeated reaming of that portion. I used a Savinelli Fitsall Pipe Knife to scrape the remainder of the cake out of the bowl and clean up the bottom of the bowl. I sanded the bowl walls with 220 grit sandpaper wrapped around a piece of dowel. With the bowl cleaned out I was able to determine that the bowl bottom was in better condition than the first or second pipe. I would need to build up the bottom of the bowl slightly to the entrance of the airway. It would be further protection for the bottom of the bowl and help it from burning out. The issues with the rim top and inner edge would also need to be addressed.
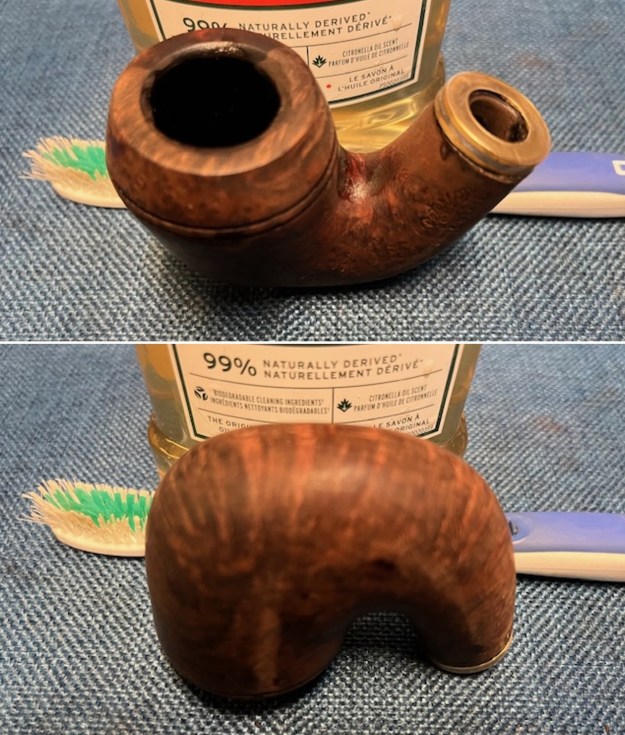
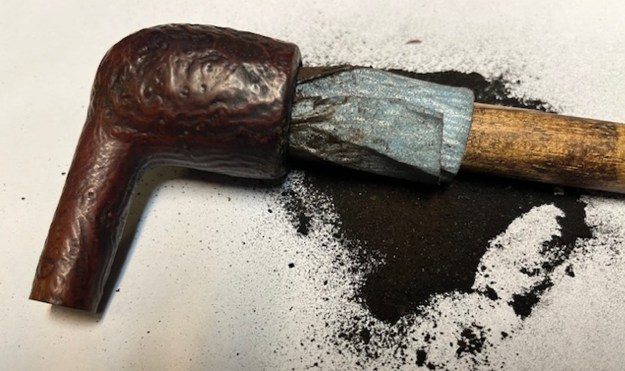
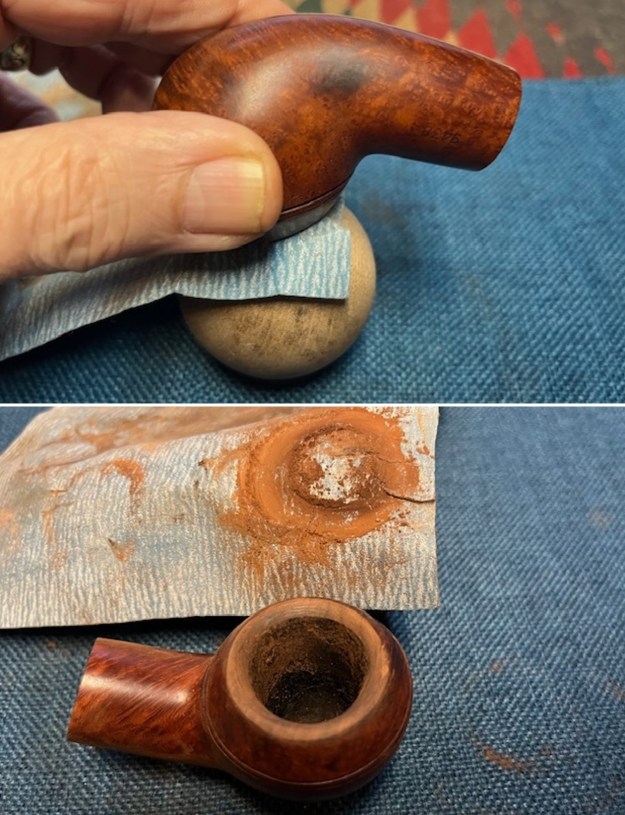
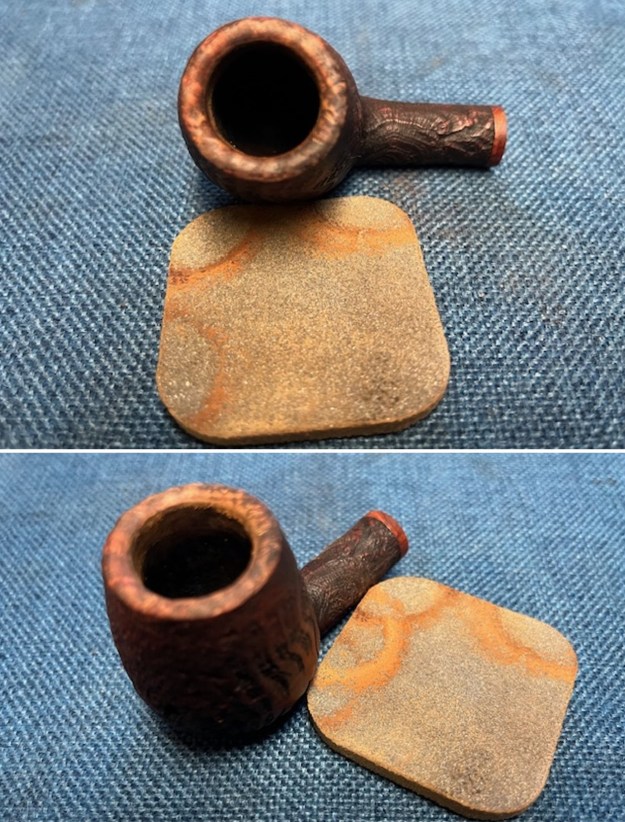
 At this point I decided to address the rim top and edge damage. There was serious damage to the inner edge. The front of the rim top had been burned and had a slight dip in it. The outer edge in front of the burned rim top was also damaged. I wanted the top to be smooth once again and also wanted to bring the bowl back to round. I started by topping the bowl with 220 grit sandpaper on a topping board to smooth out the damage on the rim surface and clean up the outer edge damage. I was able to significantly clean up the damage. The Kinsales that I have worked on for Sergey have all had a slightly bevelled inner edge so I would need to do that with this pipe as well. It would also clean up the out of round bowl a bit more.
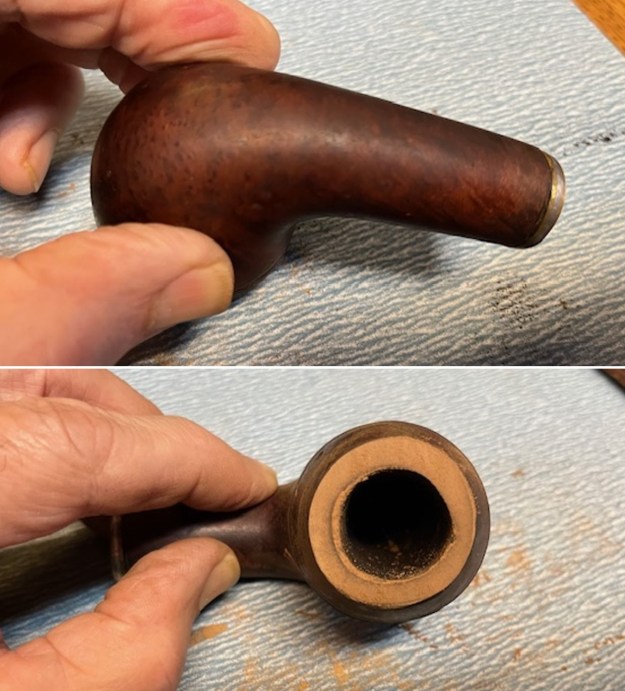 I used a wooden sphere and a piece of 220 grit sandpaper to work on the edge and give it a slight bevel. Once finished it looked much better.
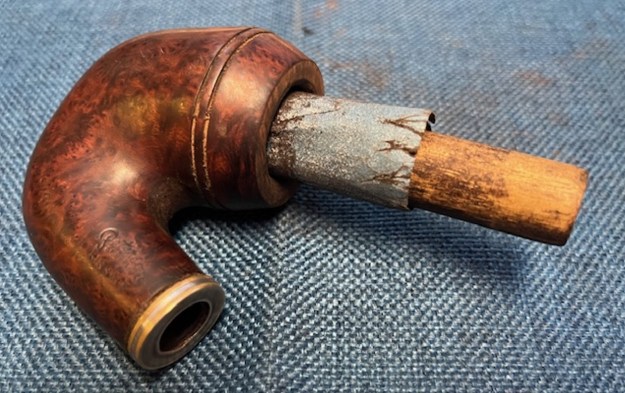
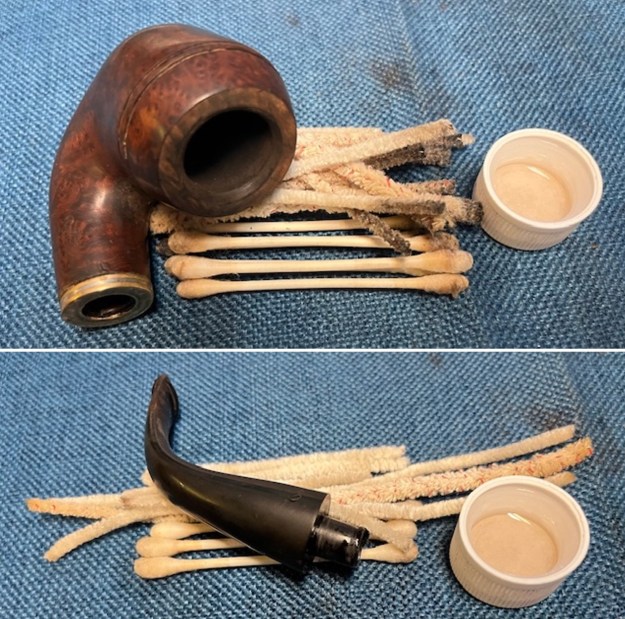
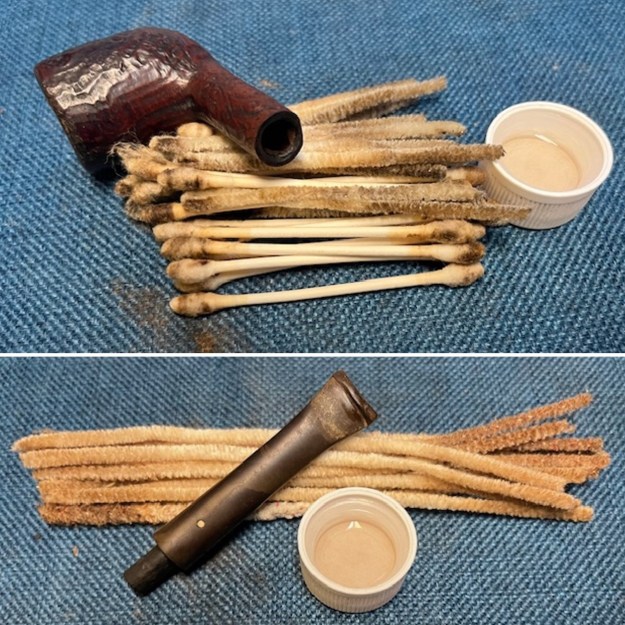
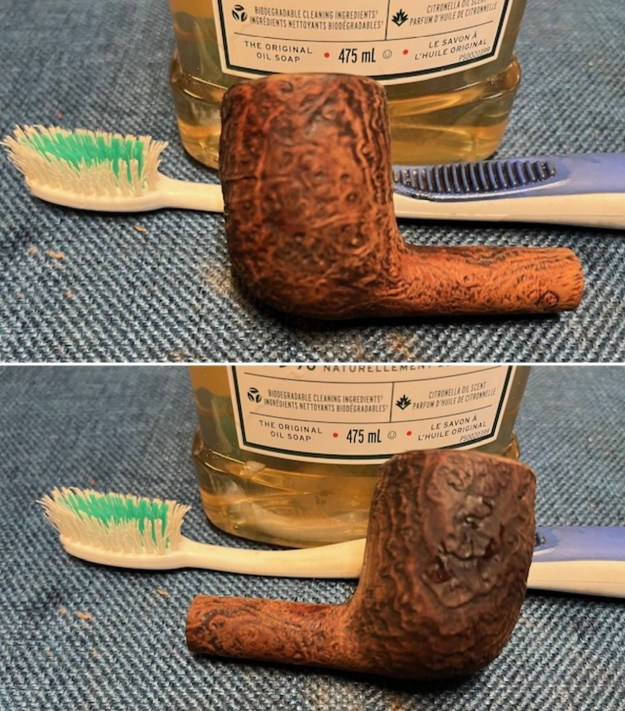
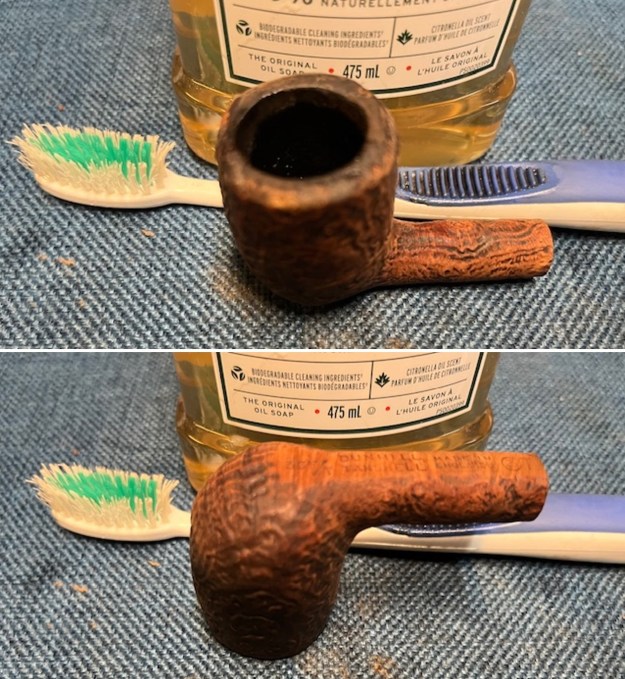
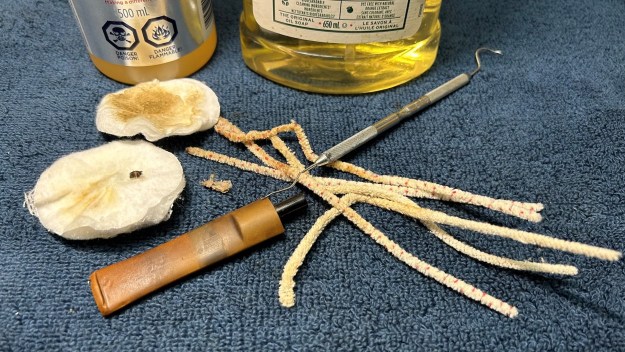
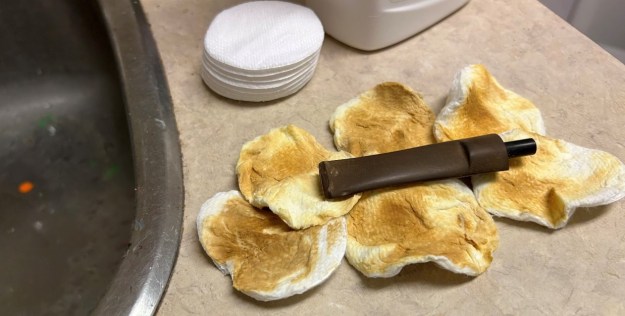
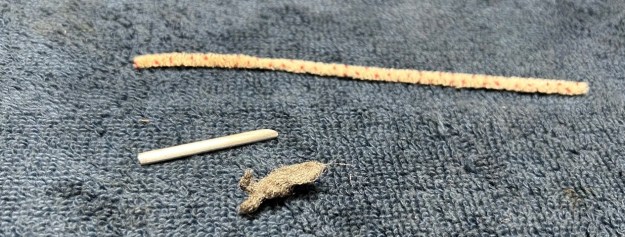
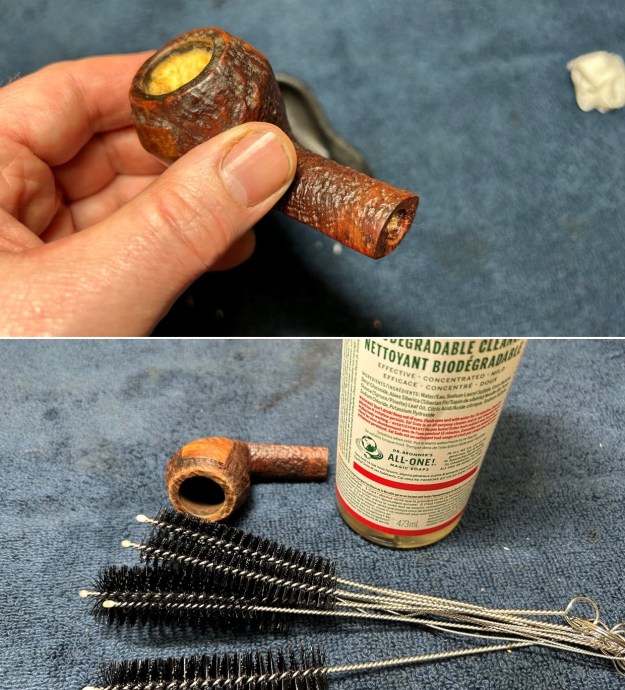
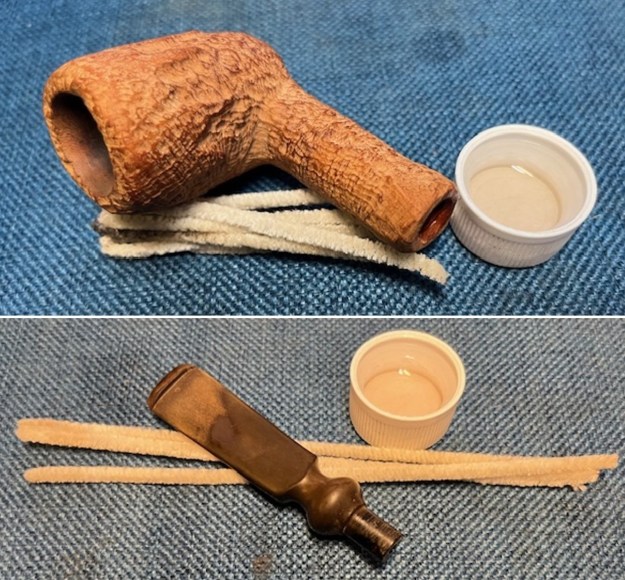
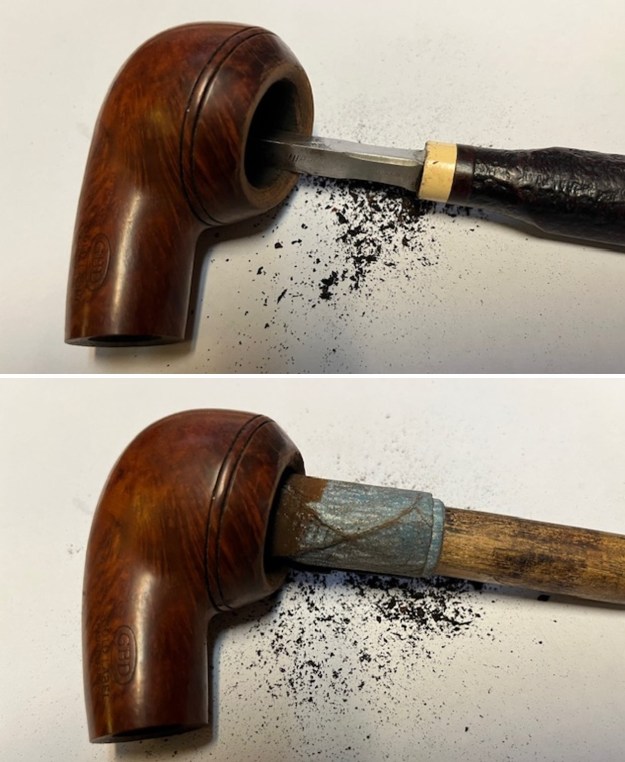
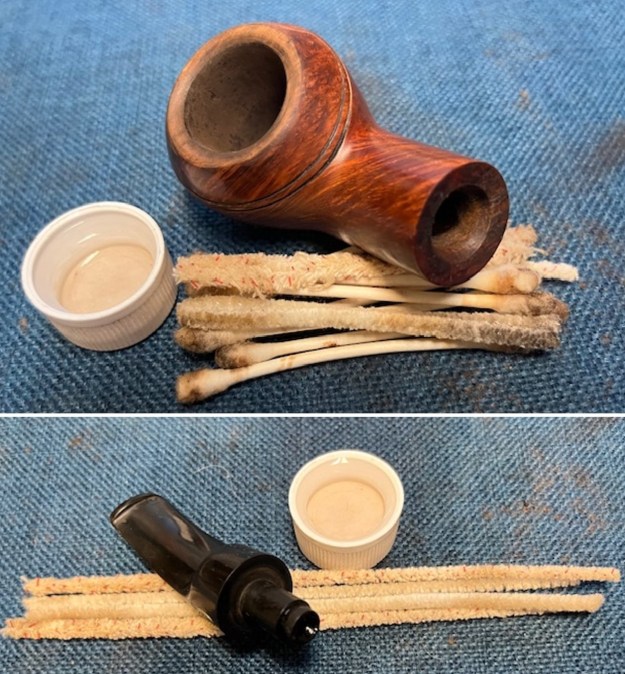
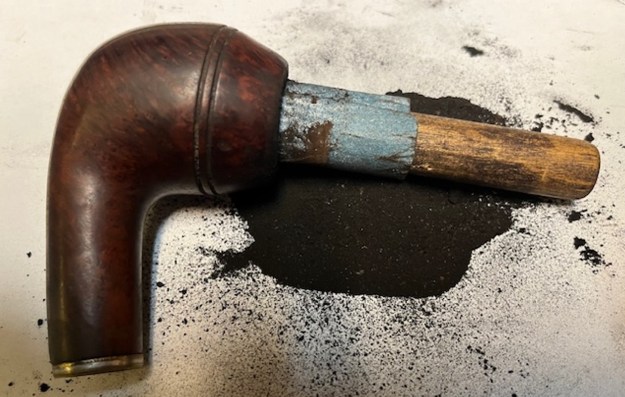
 I scrubbed out the internals with 99% isopropyl alcohol, cotton swabs and pipe cleaners. I worked them through the airway in the shank and stem, the mortise. It took a few cleaners and swabs to really clean it but it is looking and smelling much better.
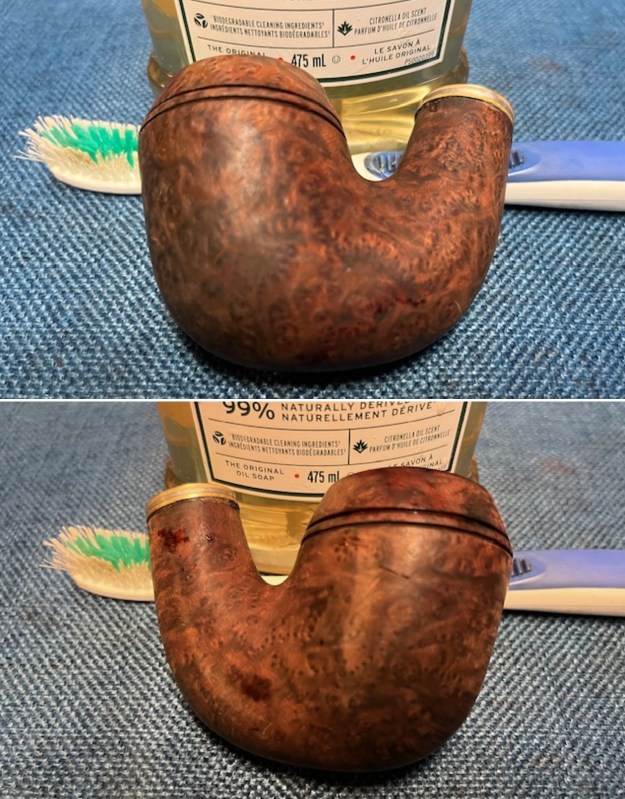
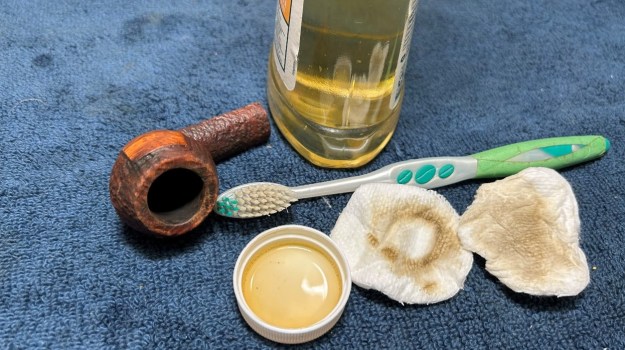
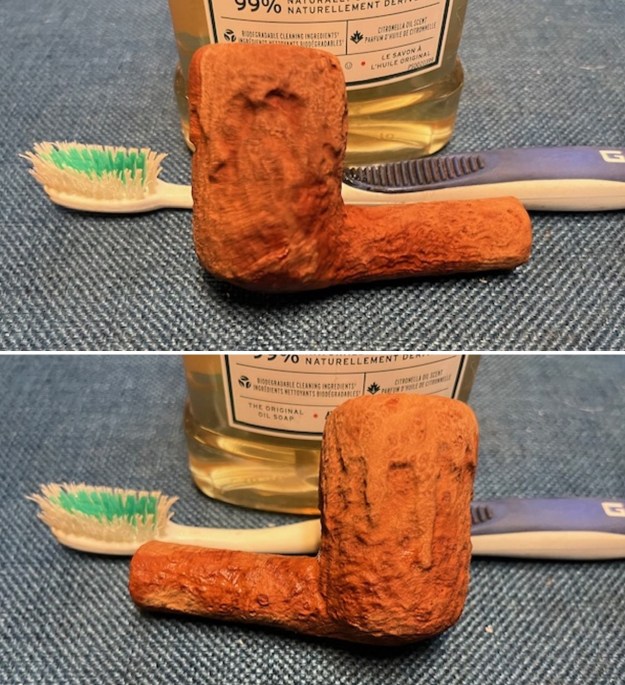
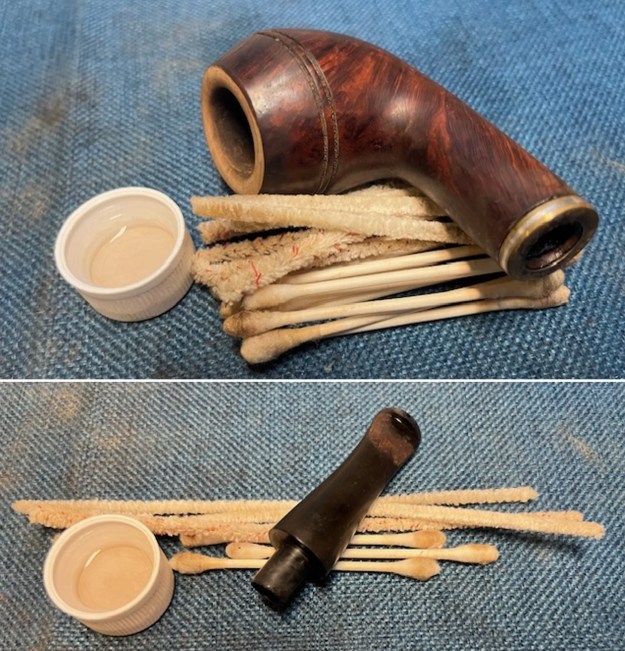 I scrubbed the externals of the bowl and shank with undiluted Murphy’s Oil Soap and a tooth brush. I rinsed it with warm running water and repeated the scrubbing and rinsing process until the pipe was clean and looked better.
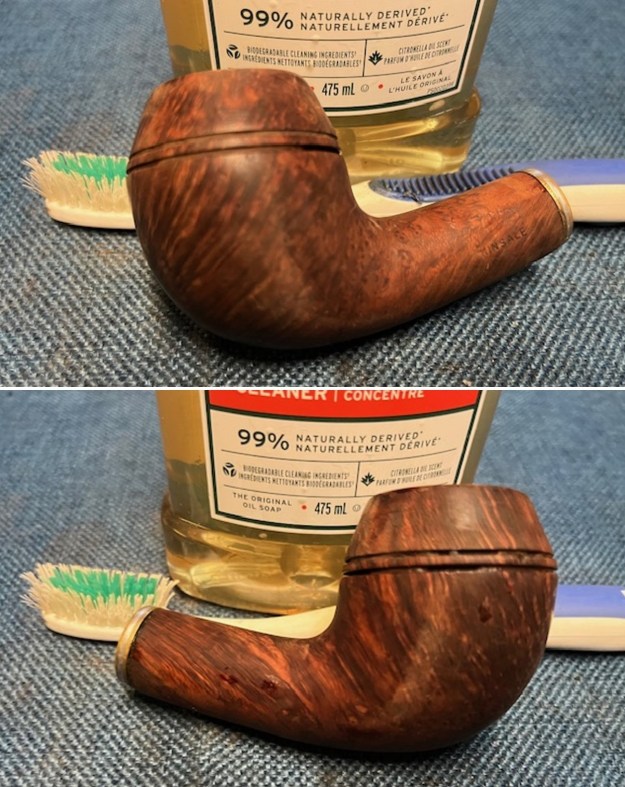
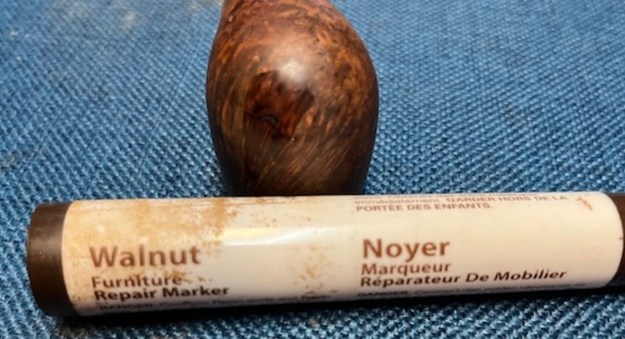
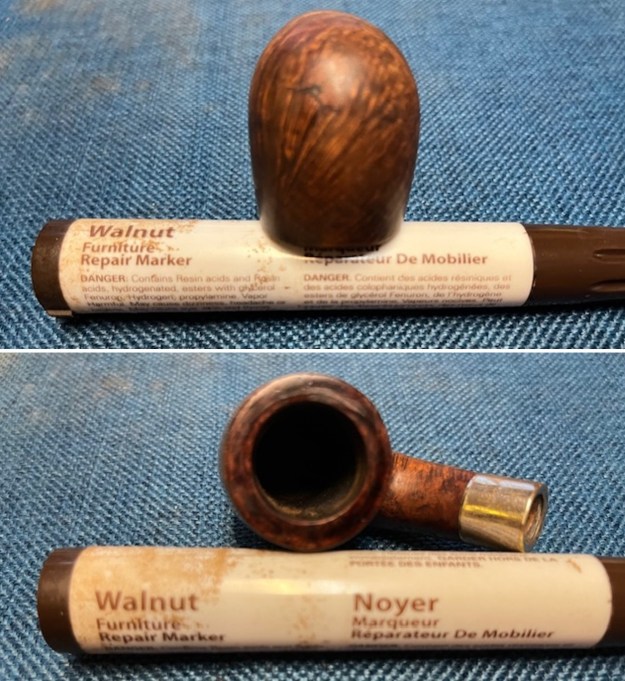
 I used a Cherry stain pen to touch up the rim top to match the rest of the bowl. I did this before sanding the bowl as I would also sand the top at the same time. I think the match was going to be perfect. We would see.
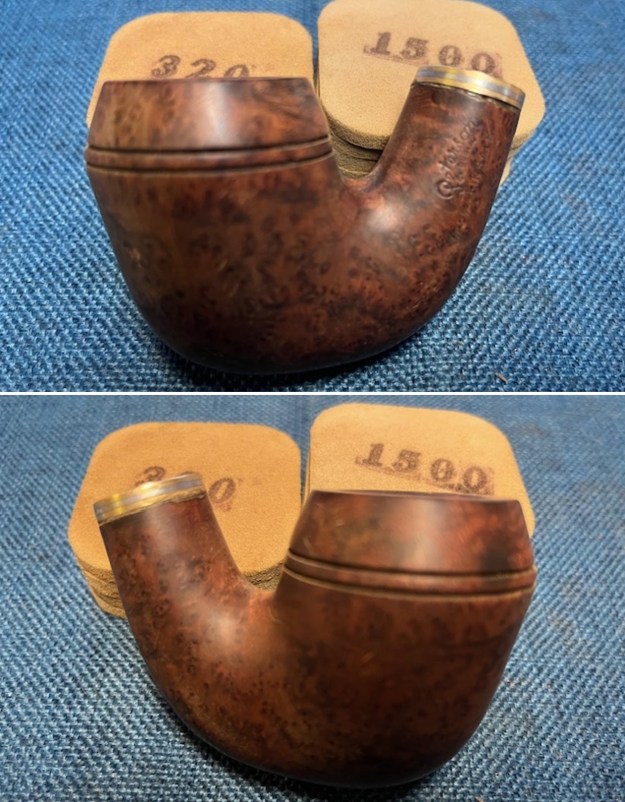
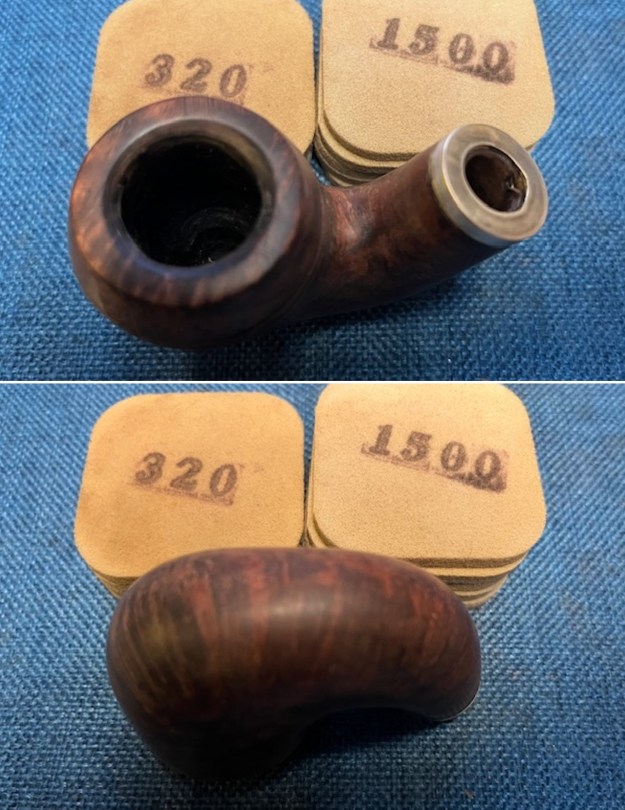
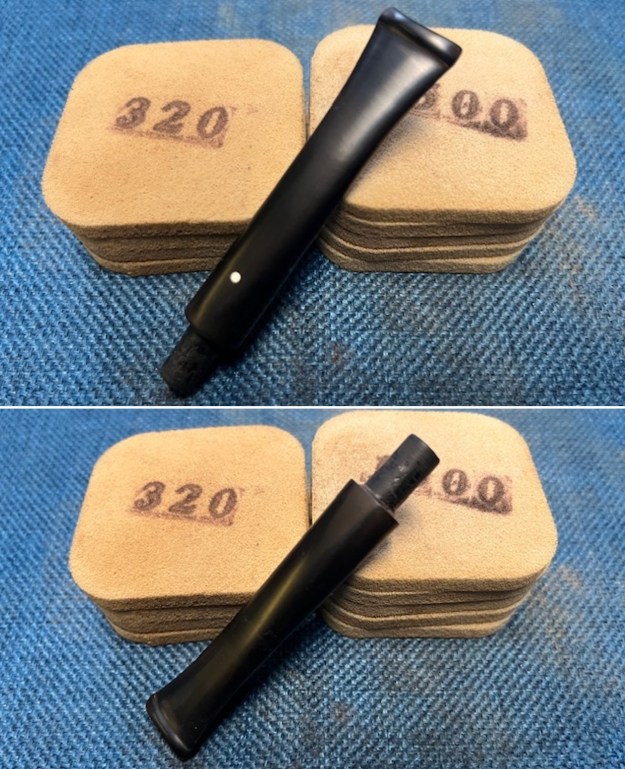
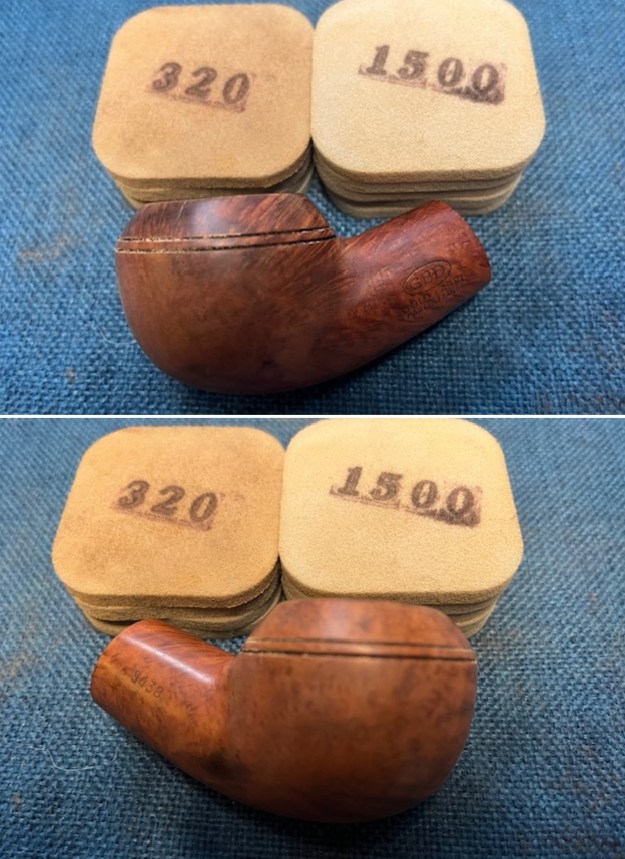
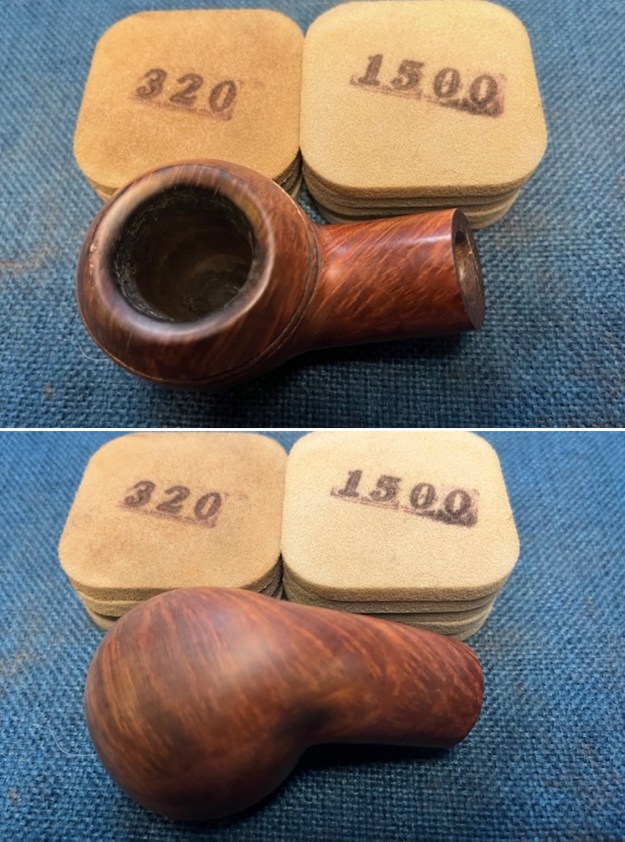
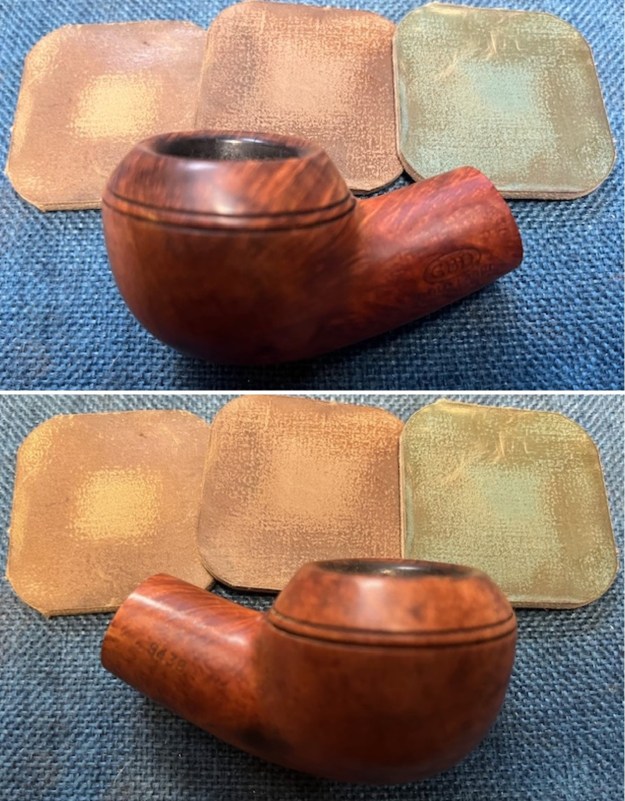
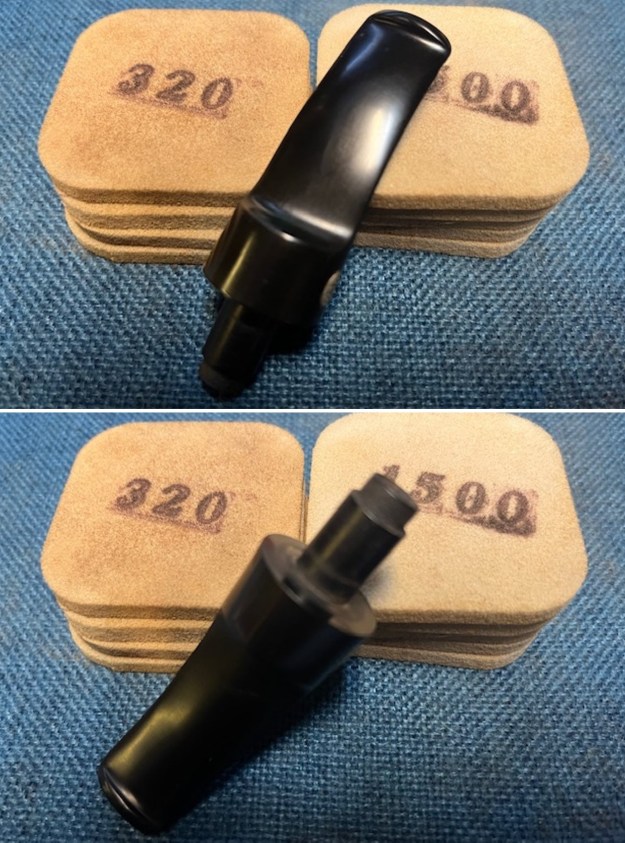
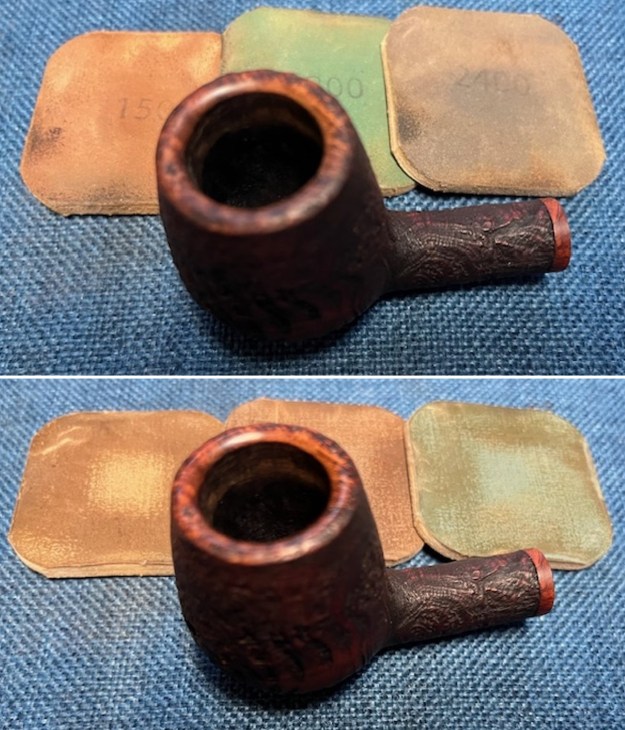
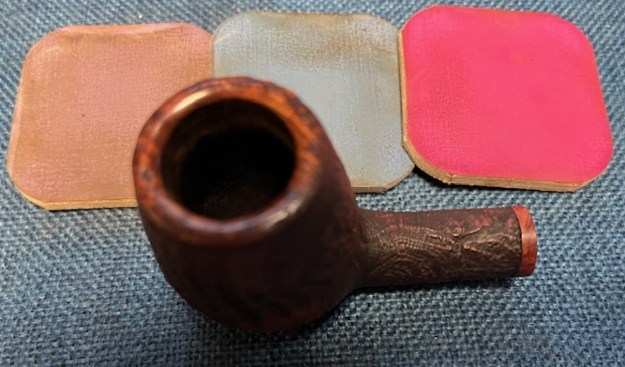
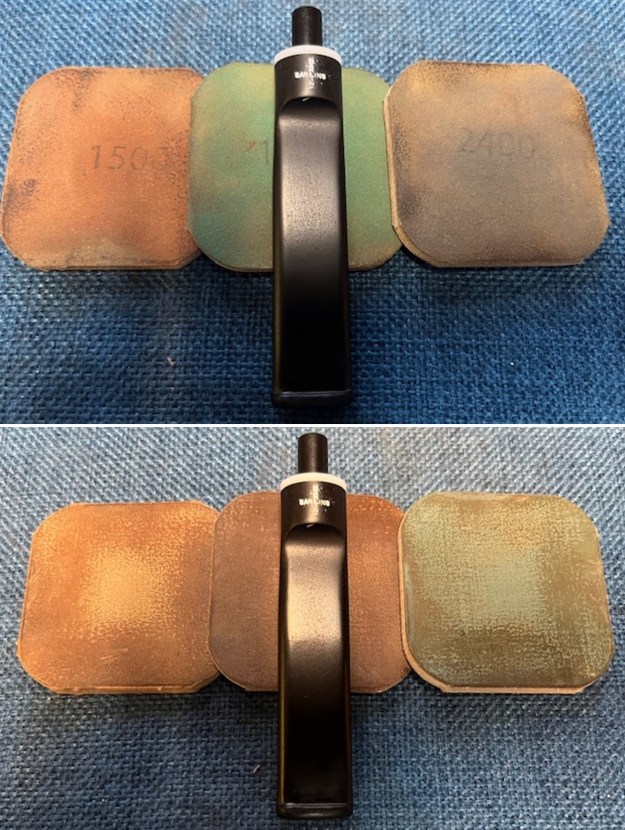
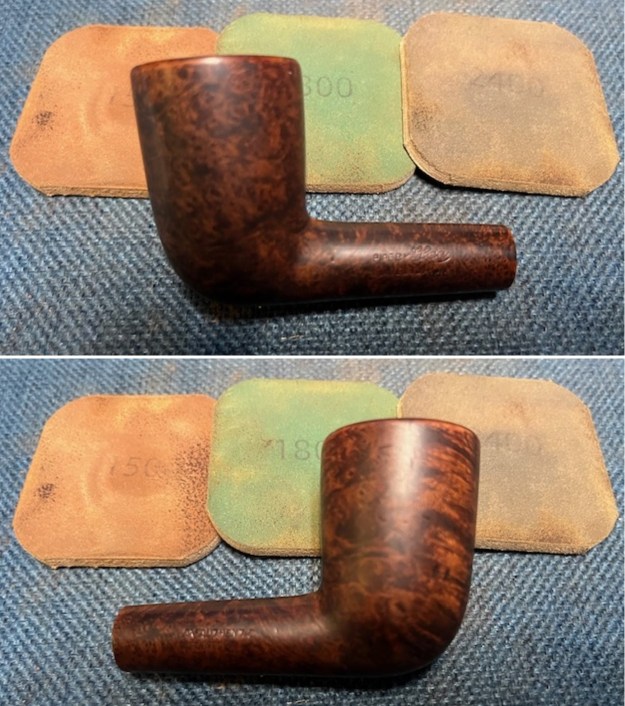
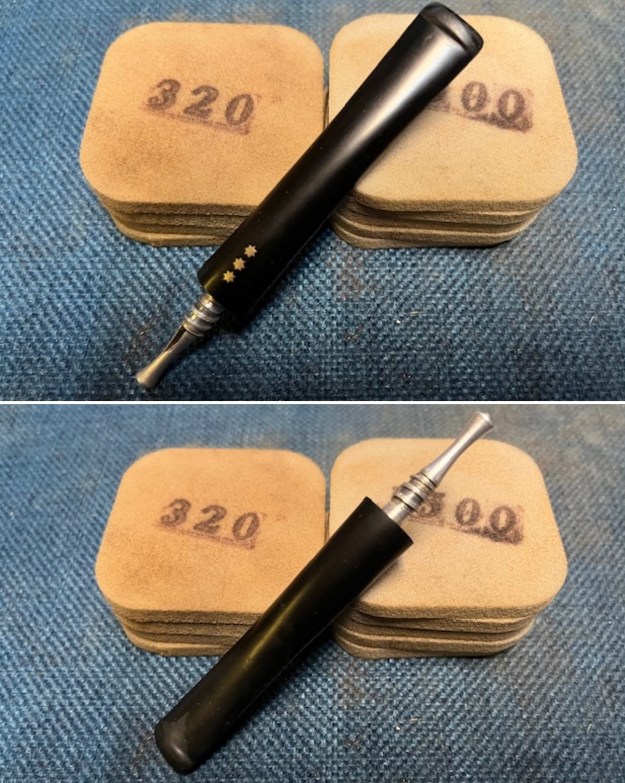
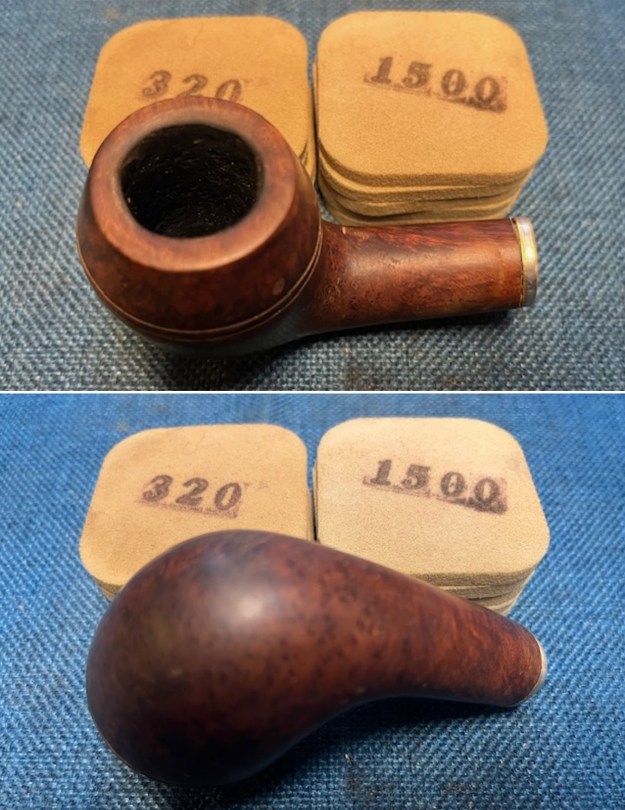
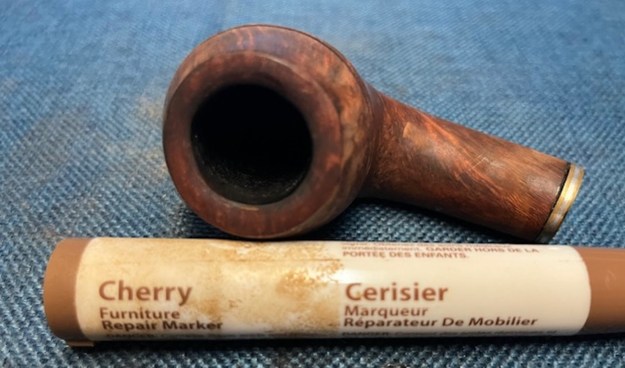 I sanded the bowl with 320-3500 grit sanding pads to remove some of the darkening around the bowl. I wiped it down after each sanding pad with a damp cloth to remove the sanding debris. It really began to look very good.
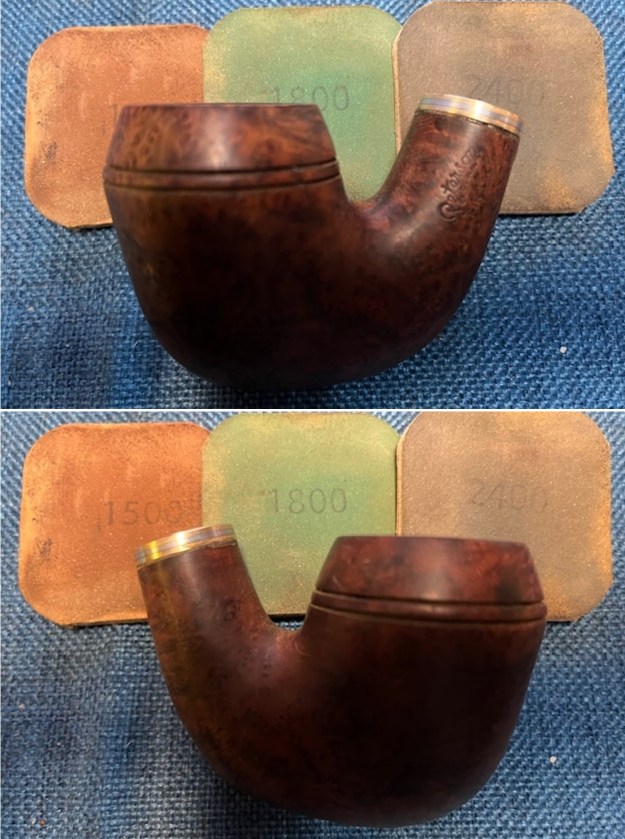
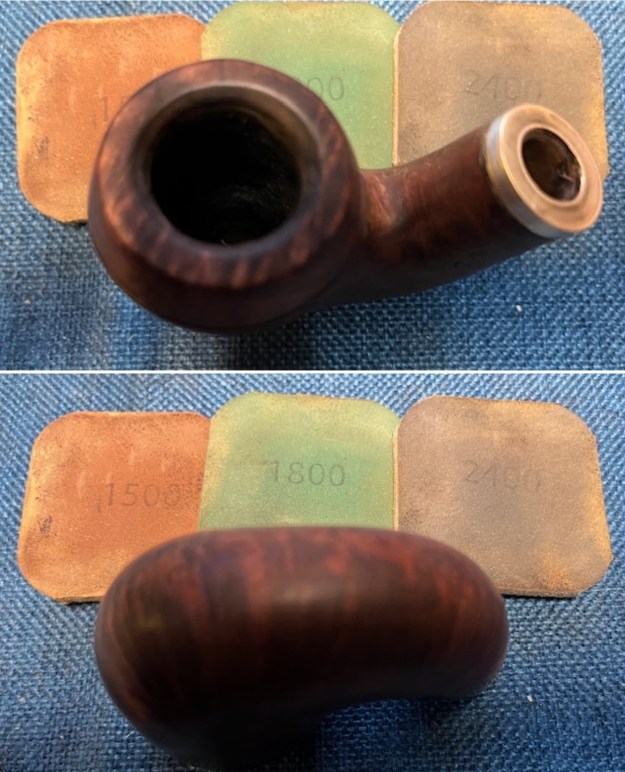
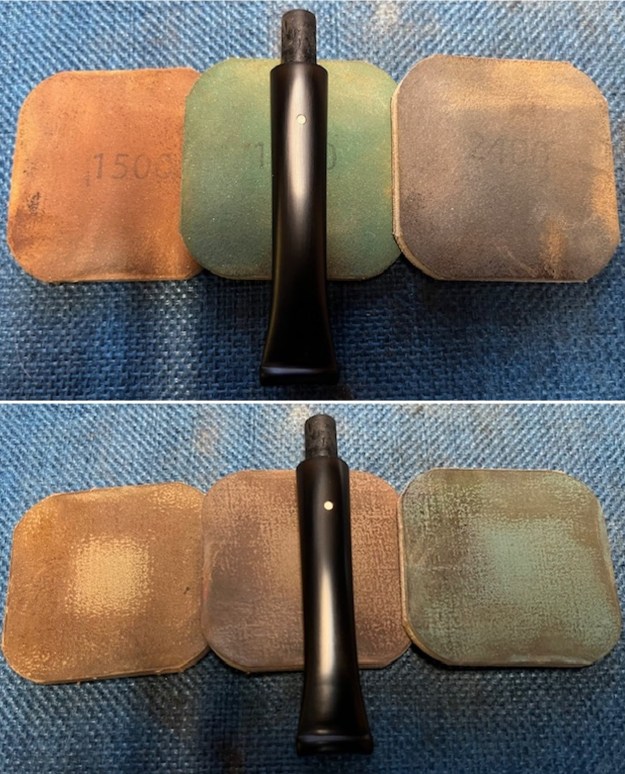
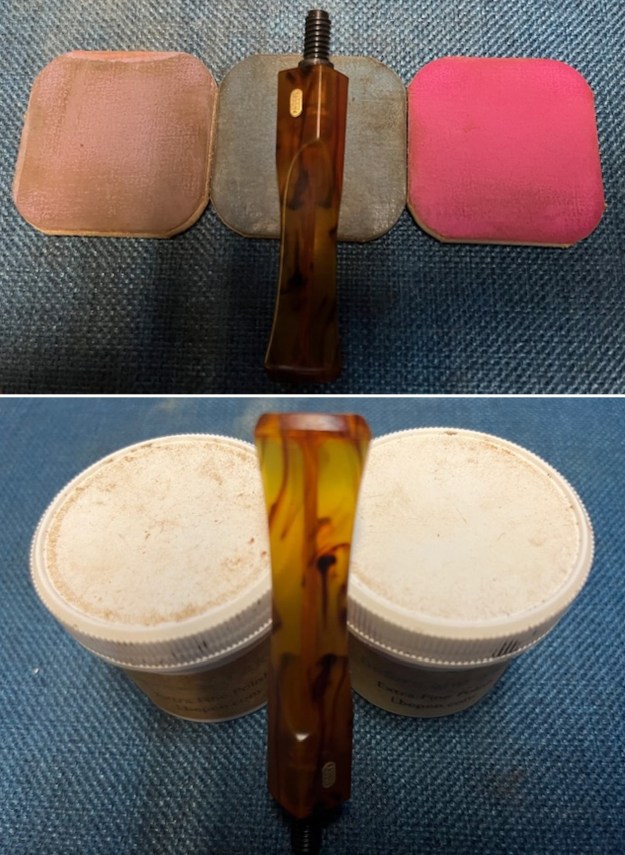
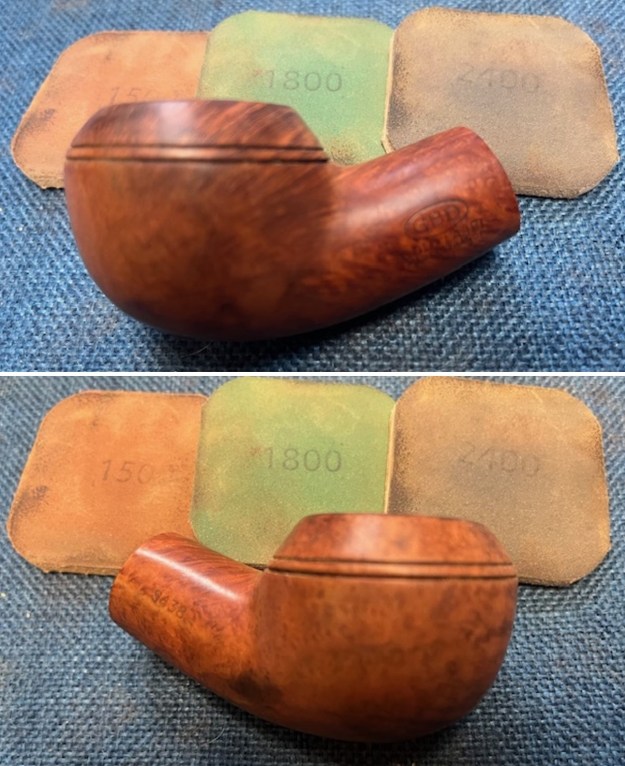
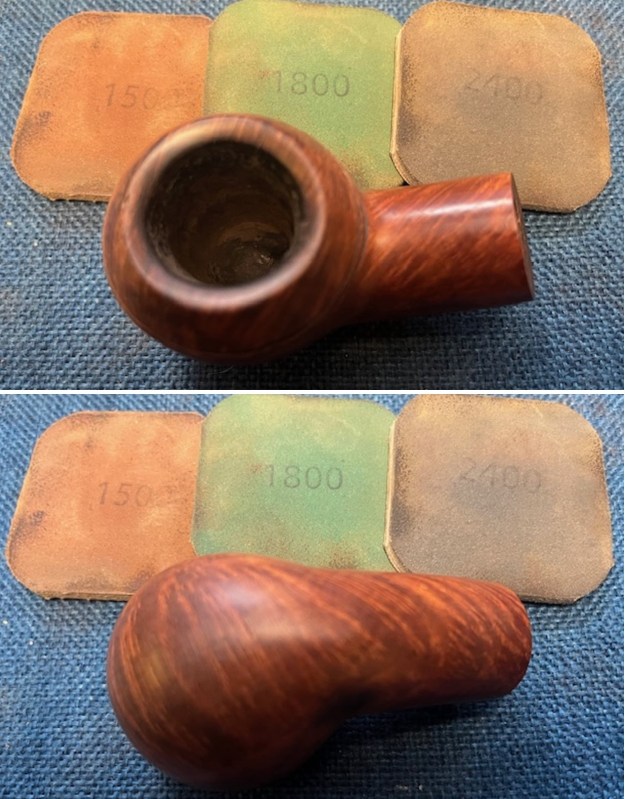
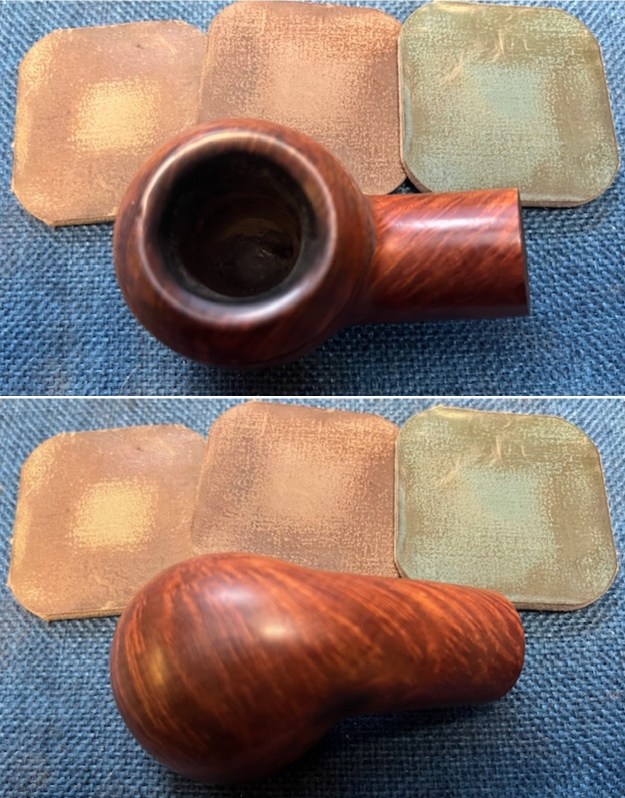
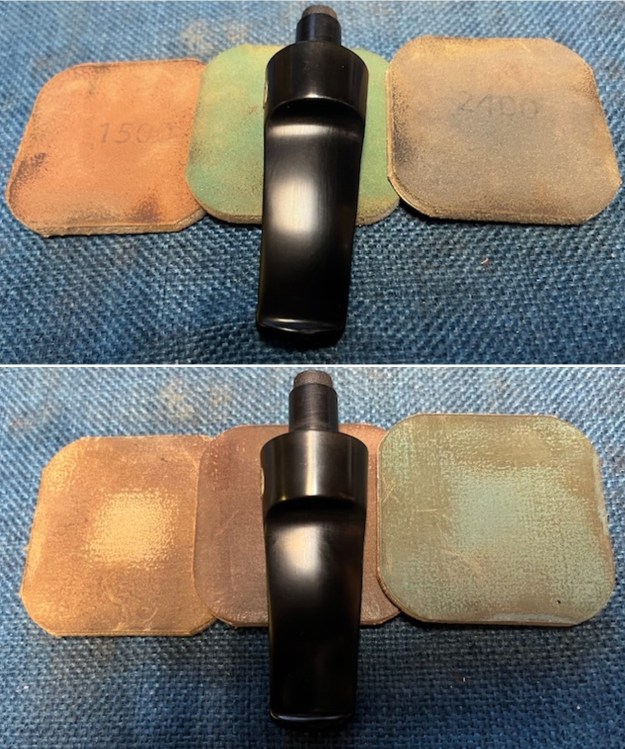
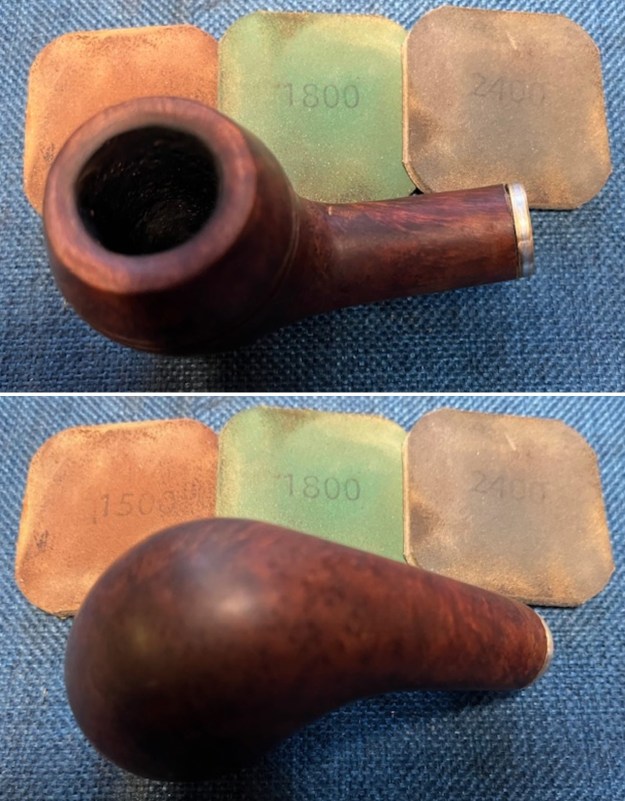
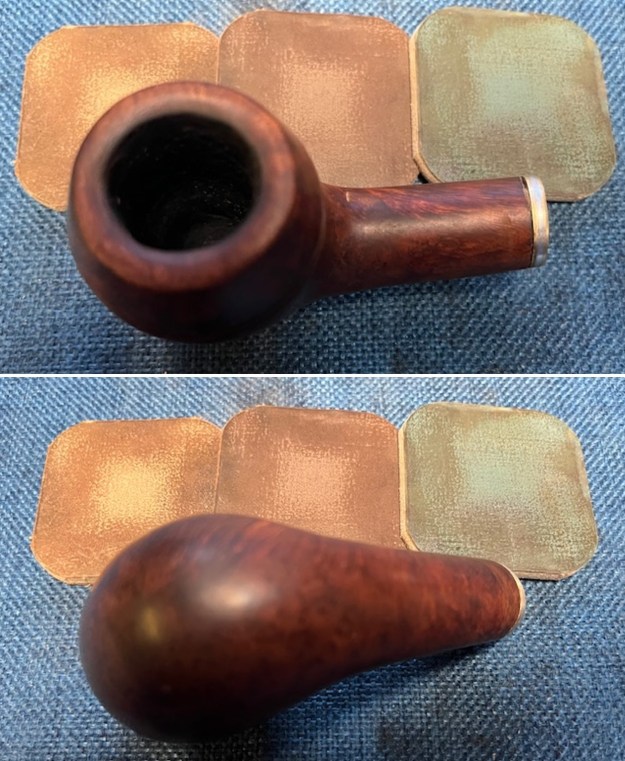
 I polished the bowl with micromesh sanding pads – dry sanding with 1500-12000 grit pads. Each pad gave it more of a shine. I wiped the bowl down after each pad with a damp cloth. By the end the bowl looked very good.

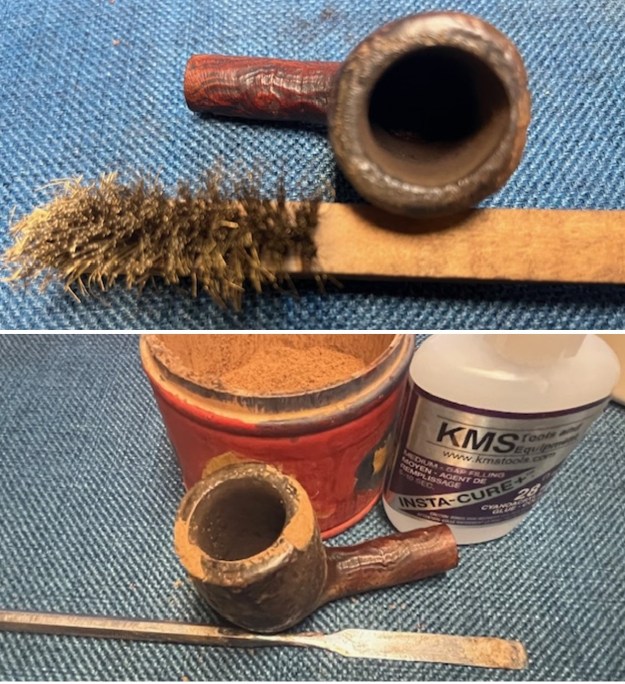
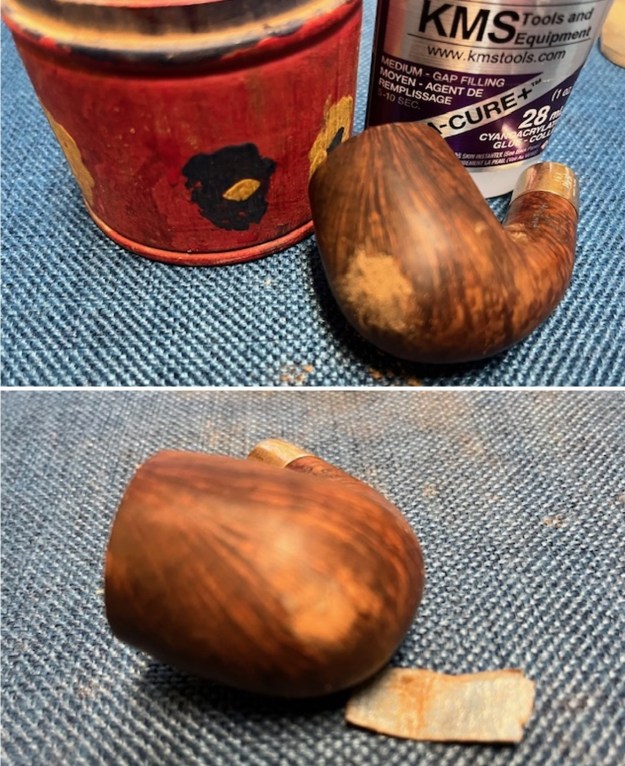
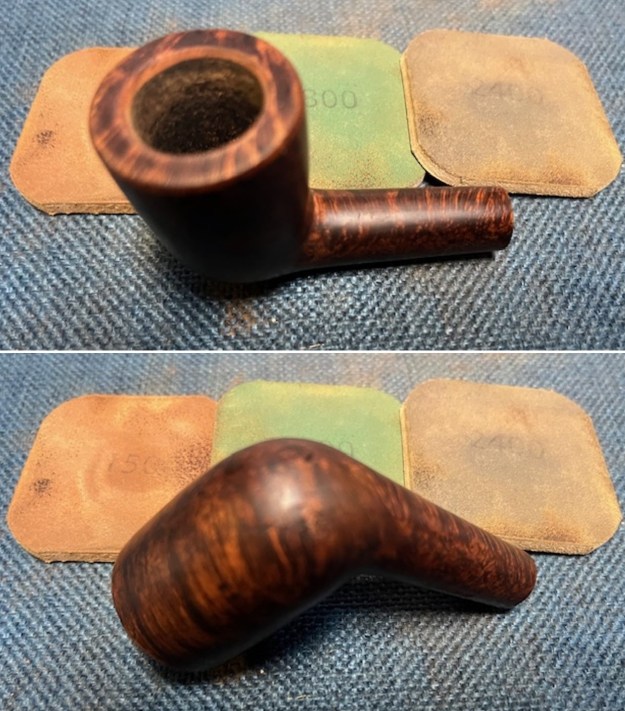
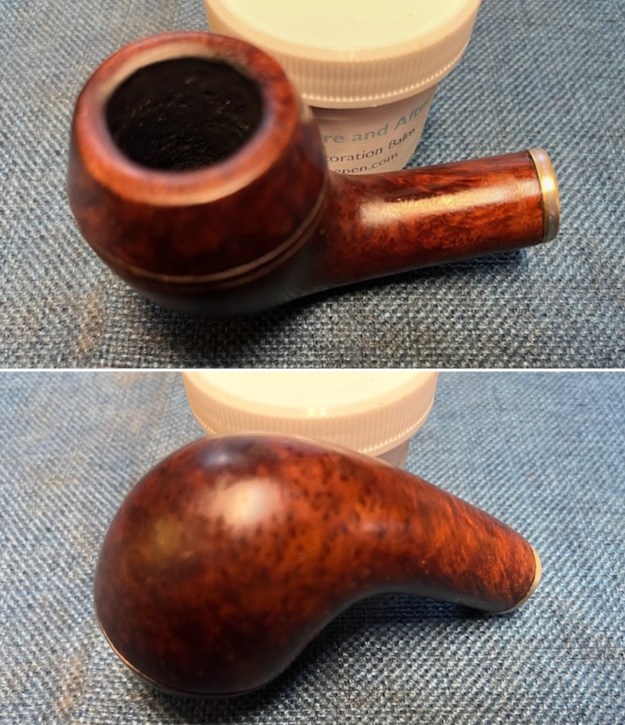
 Once I had I polished the bowl I addressed overly deep bowl bottom. I filled in the bottom with a mix of cigar ash and water to make a pipe mud. I pressed it into place with a tamper to flatten it. I put a pipe cleaner in the airway so that I would only fill it to the bottom of the pipe cleaner. I set it aside to dry and harden. It looks much better. It will take awhile to harden but it should deal with the damage. If it shrinks when it cures I will need to fill it in a bit more.
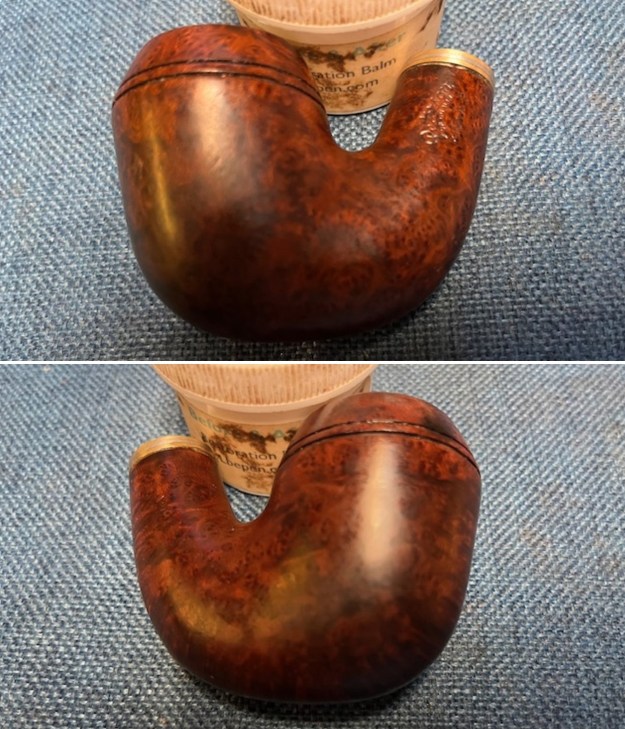
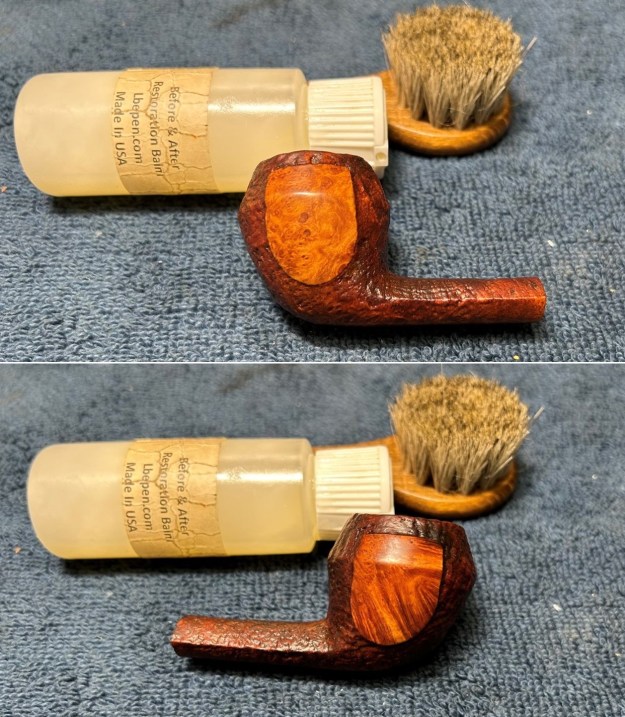
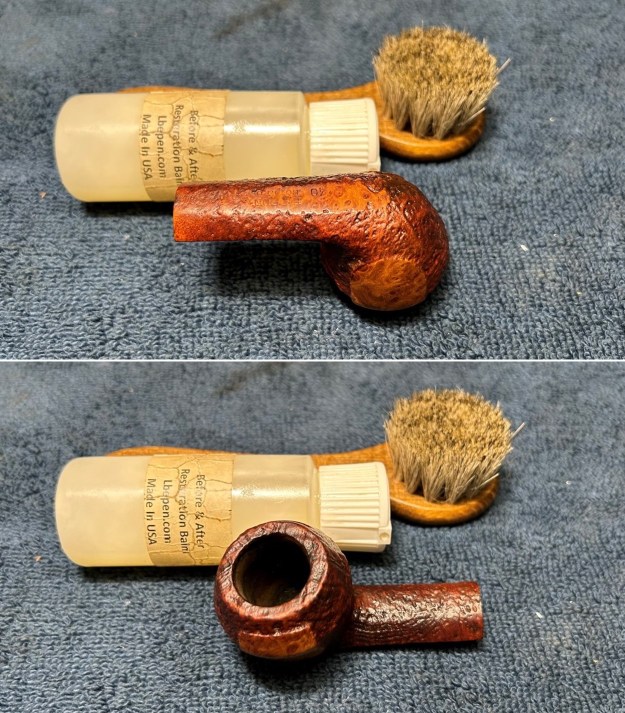
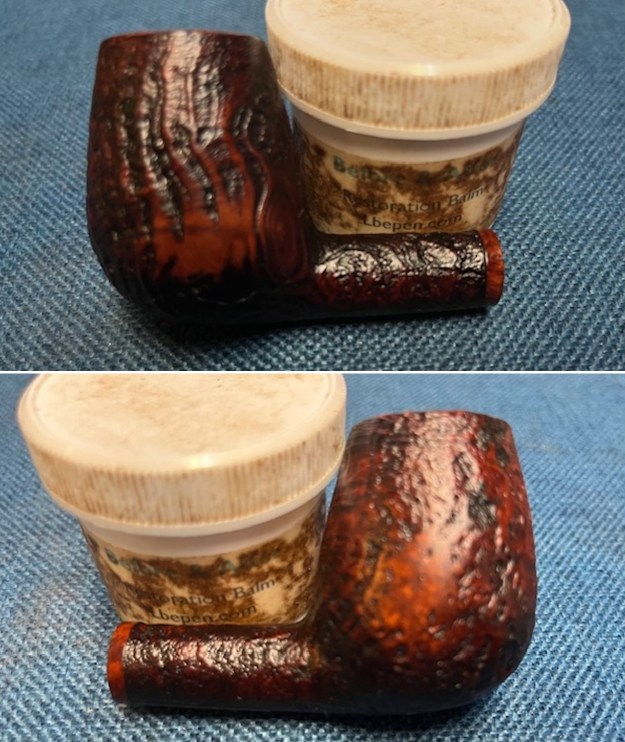
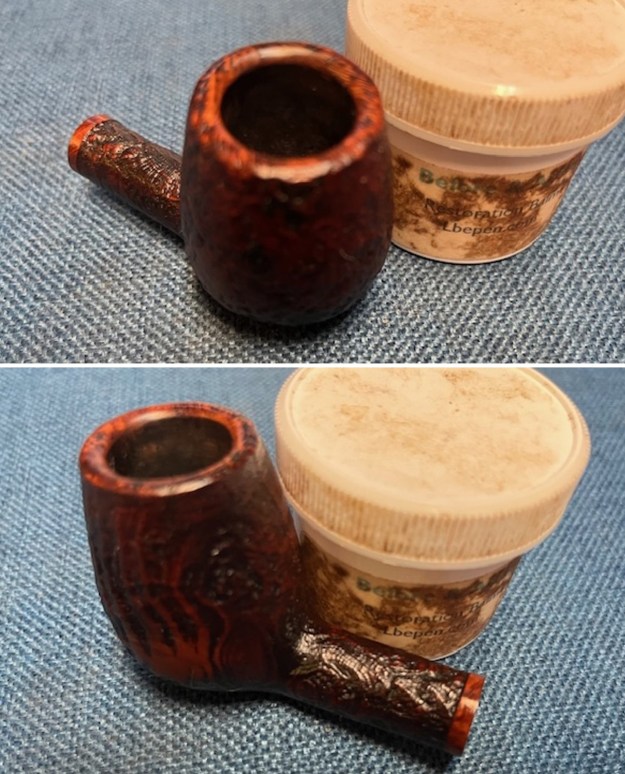
  At this point I rubbed the briar down with Before & After Restoration Balm. I worked it into the briar with my fingertips to work it into the finish. The product works to clean, enliven and preserve the briar. I let it sit for 10 minutes then I buffed it with a cotton cloth to deepen the shine. The briar really comes alive with the balm.
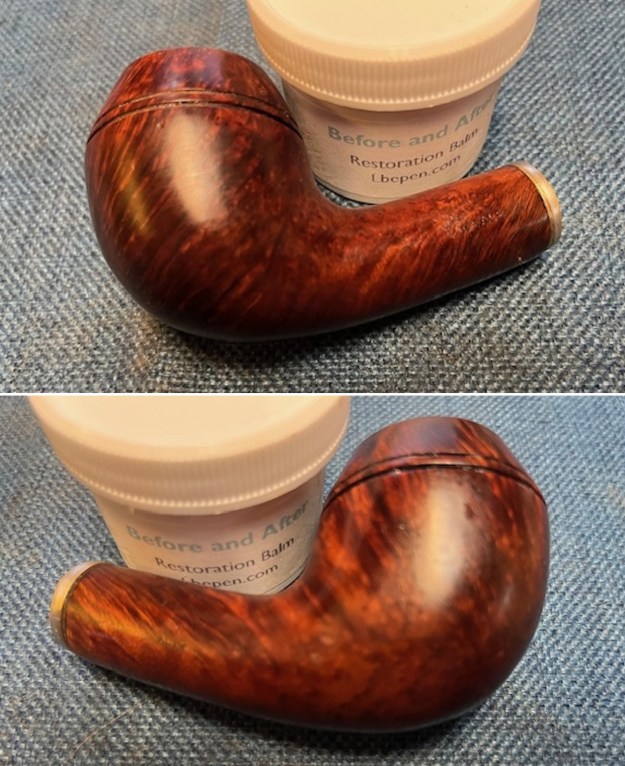
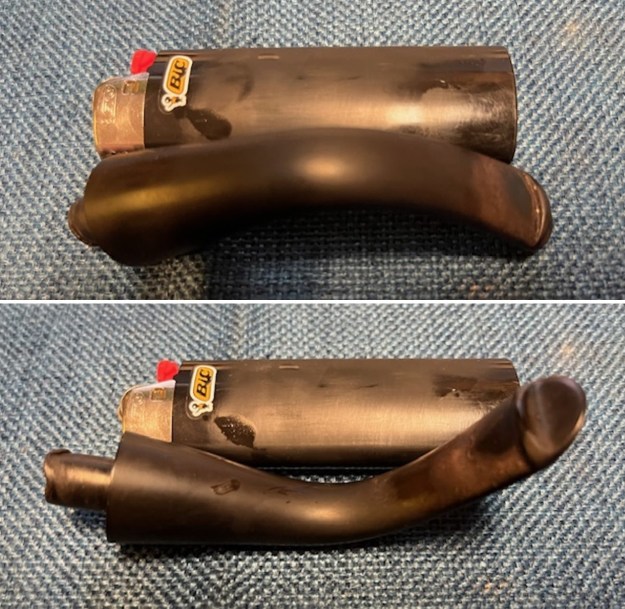
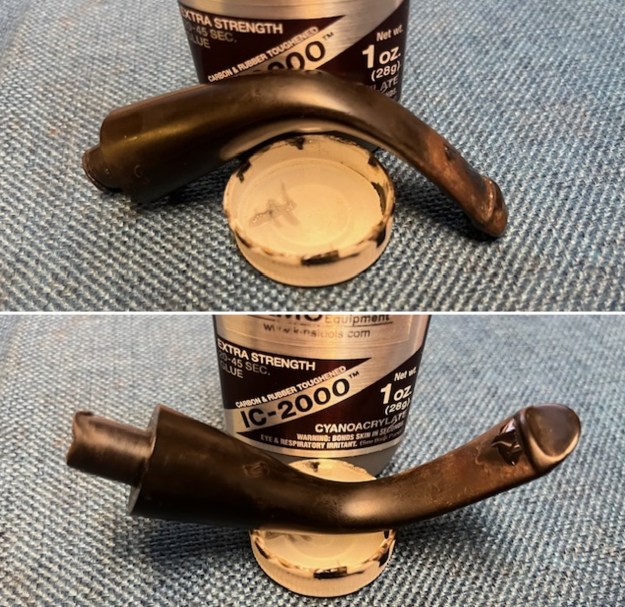
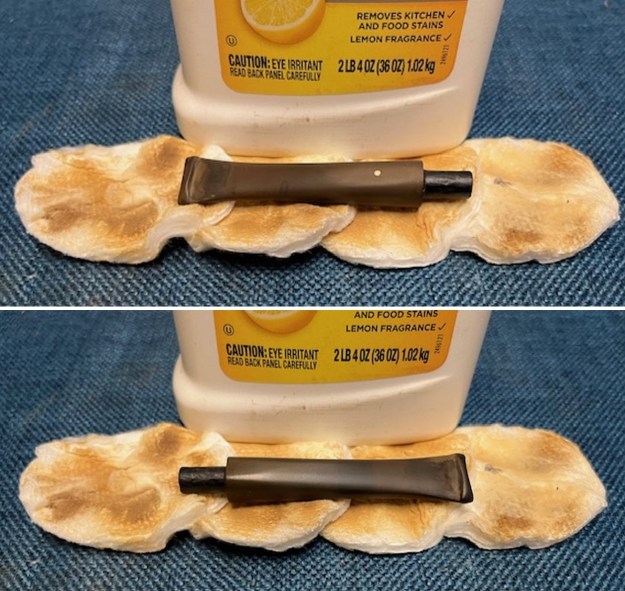
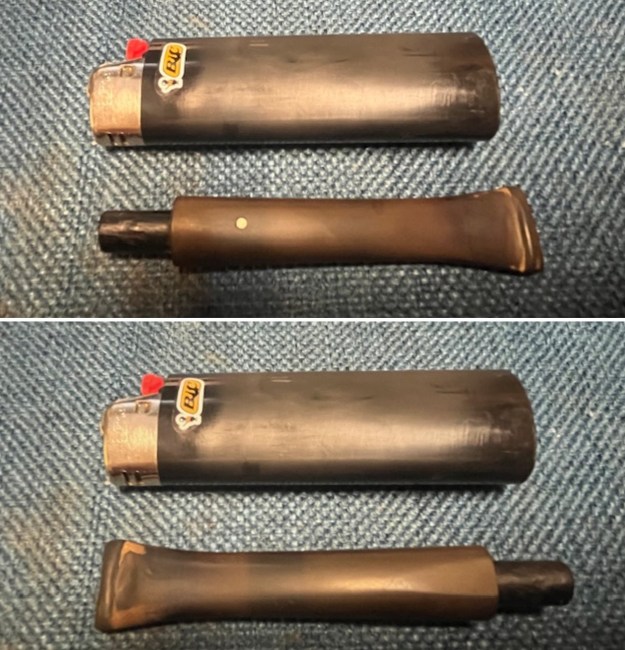
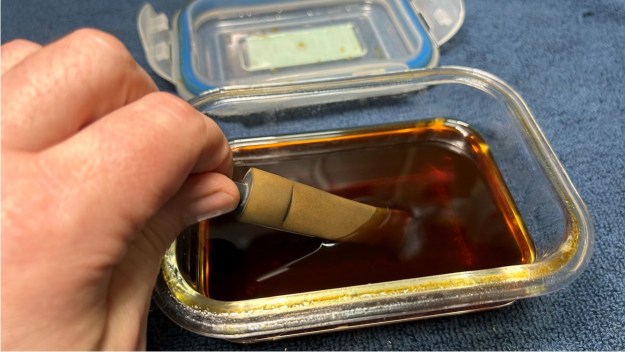
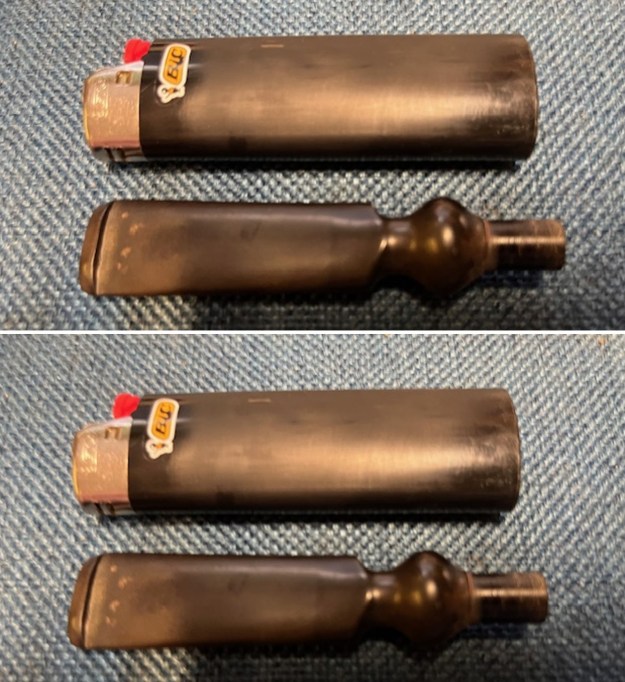
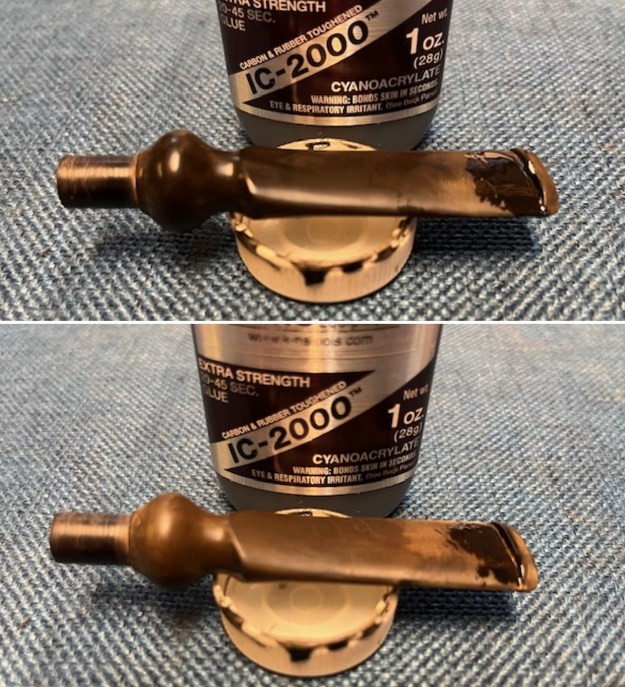
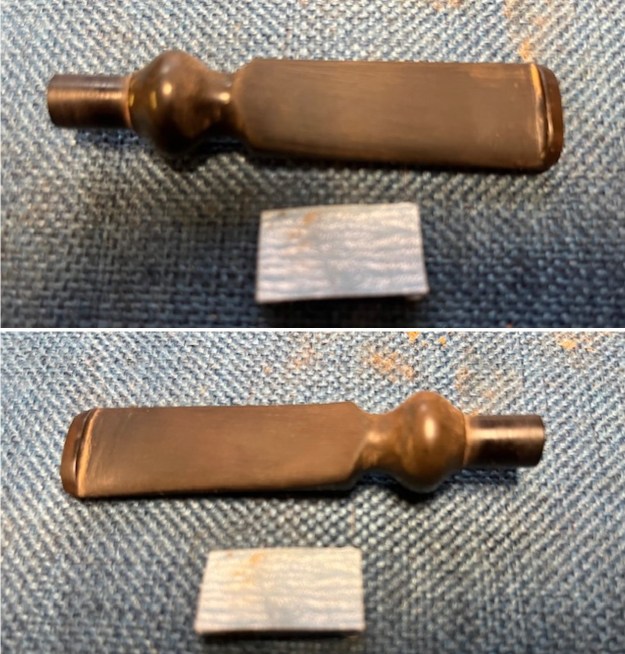
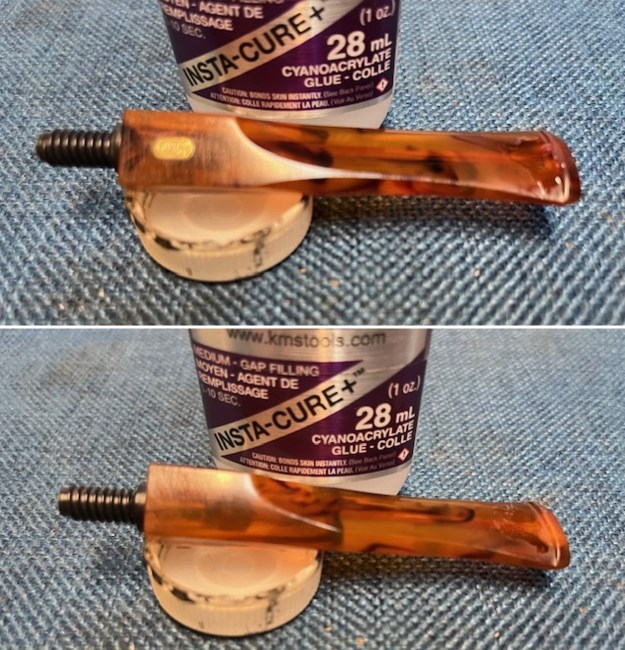
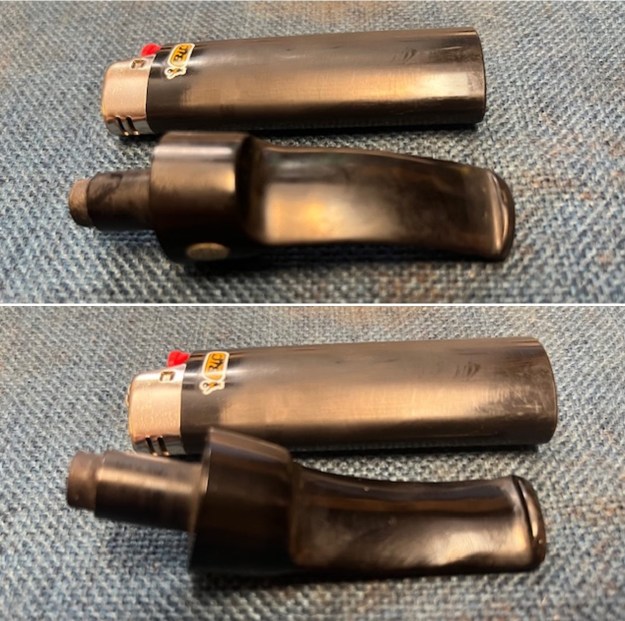
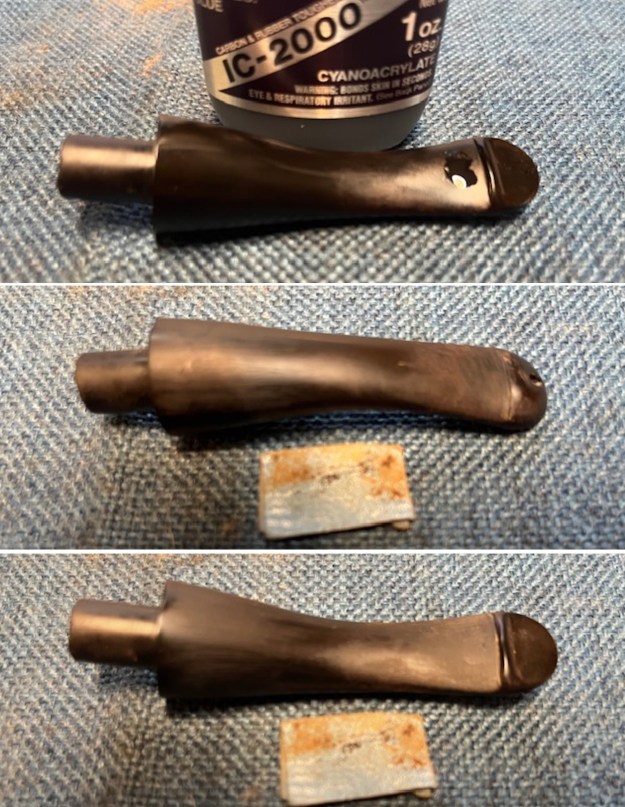
 I set the bowl aside and turned my attention to the stem. I “painted” the tooth marks on both sides with the flame of a Bic lighter. I filled in the two deeper marks on the underside of the stem that remained with black rubberized CA glue and set it aside to cure. Once it had hardened I sanded the with 220 grit sandpaper and smoothed them out.
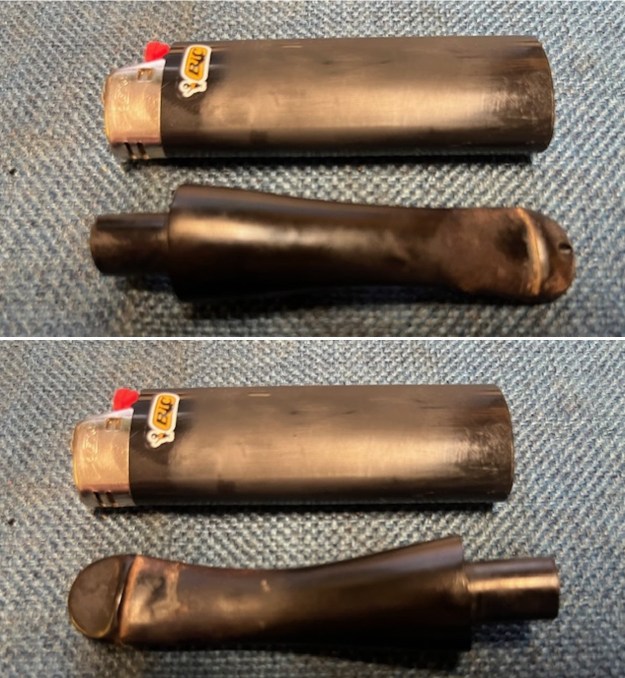
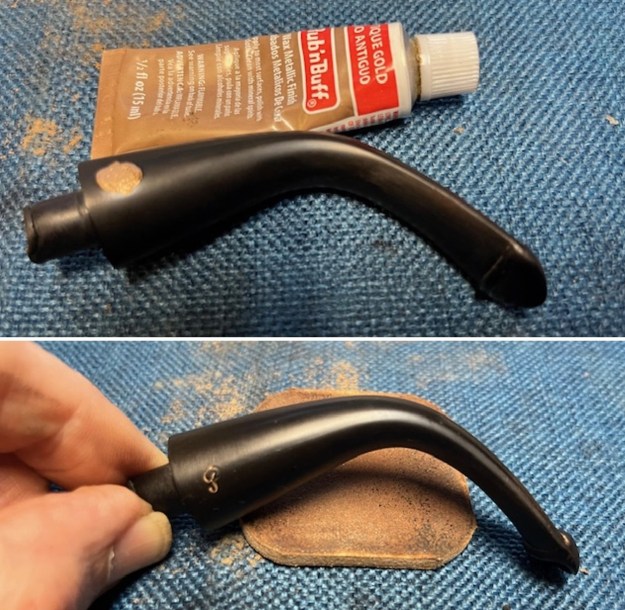
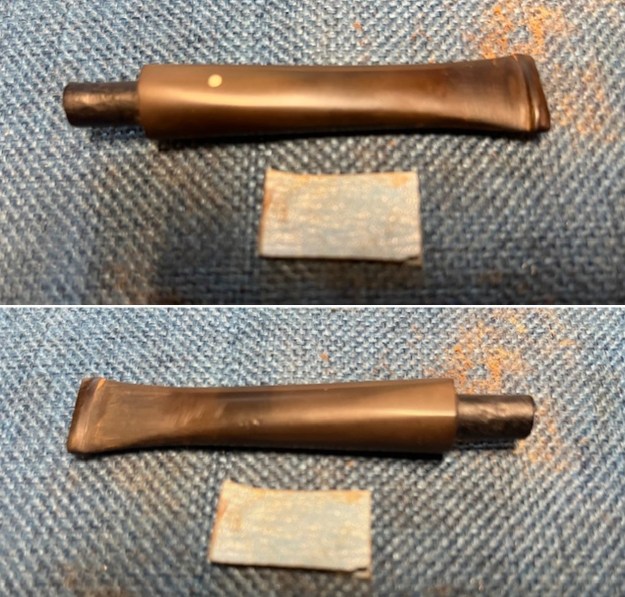
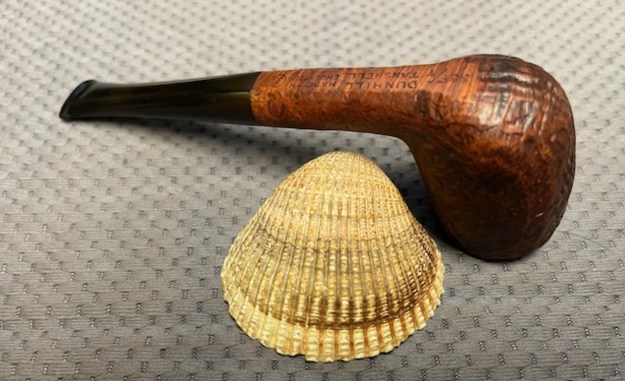
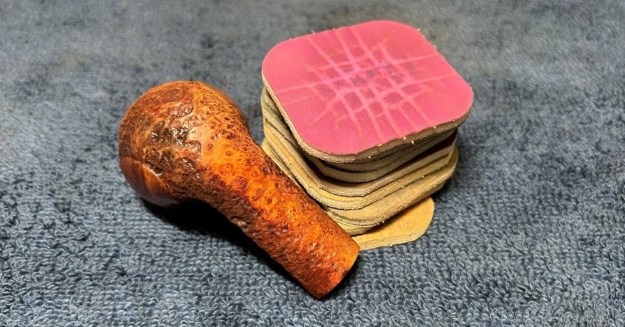
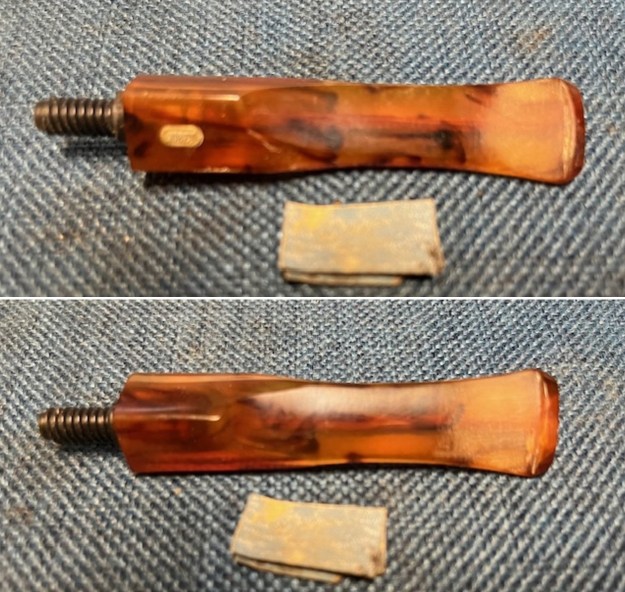
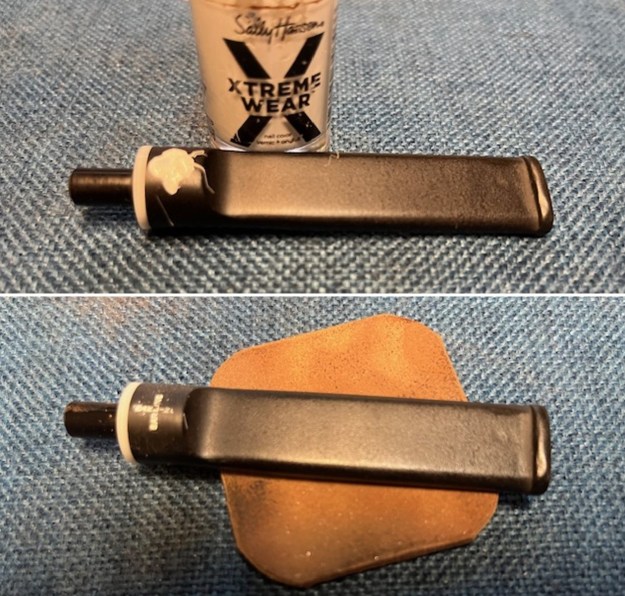
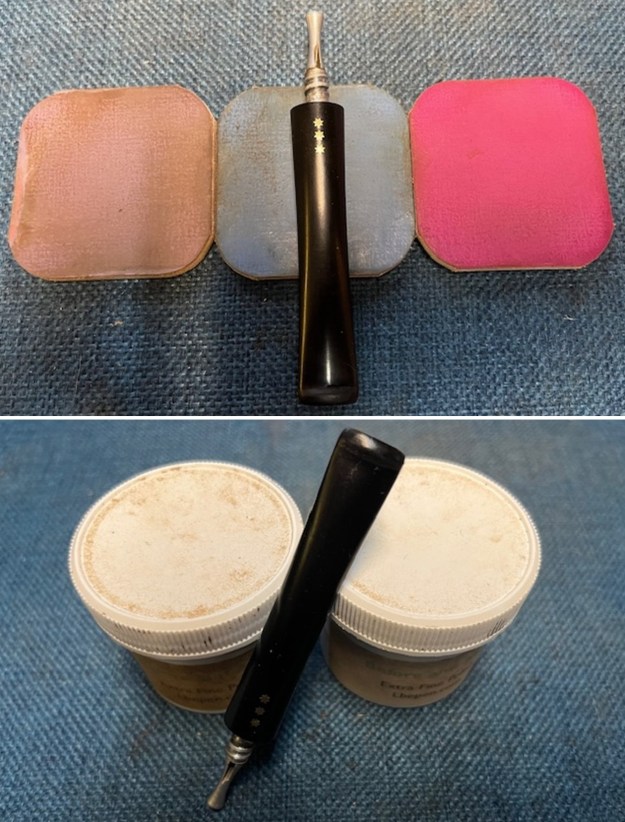
 The P logo on the left side of the stem was so faint and damaged but I tried to touch it up with some Rub’n Buff Antique Gold. I worked it into the remaining stamp with a tooth pick. It worked better than I expected but it was not flawless.
 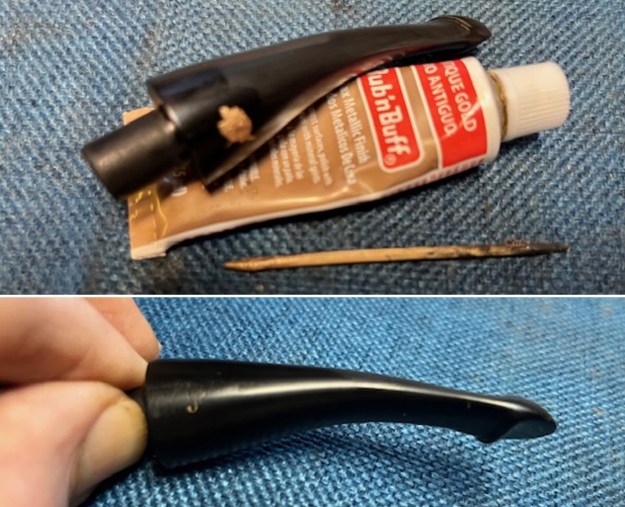 I sanded the stem with 320-3500 grit sanding pads to take out the scratching and remaining oxidation. I wiped it down after each pad with some Obsidian Oil. It is looking much better now.
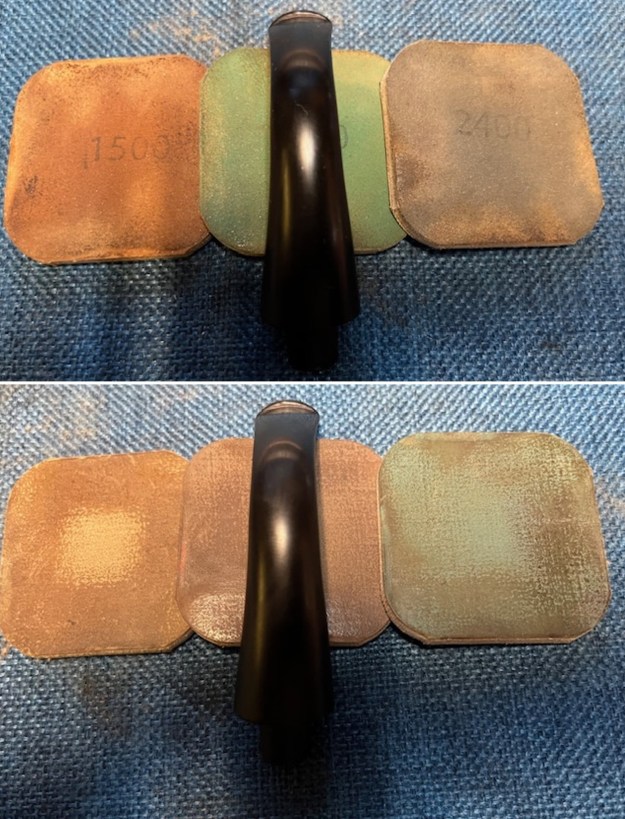
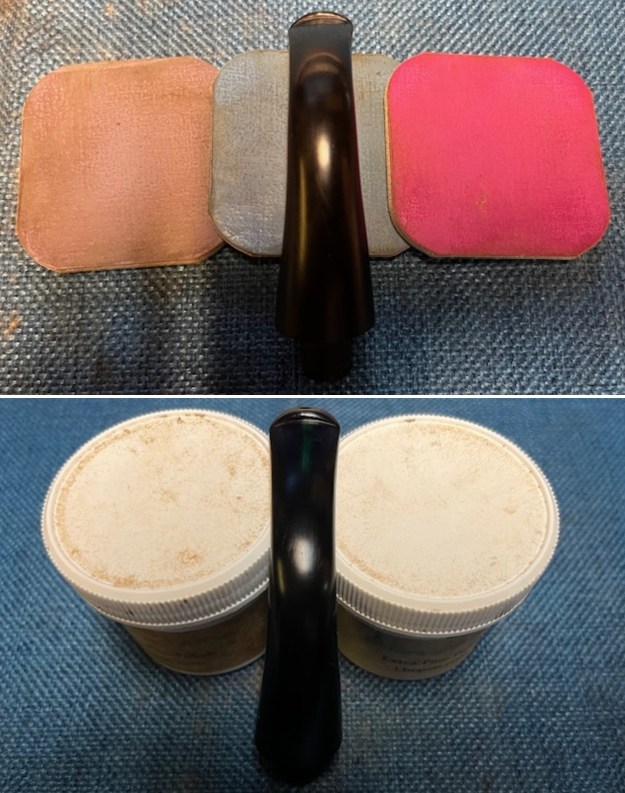
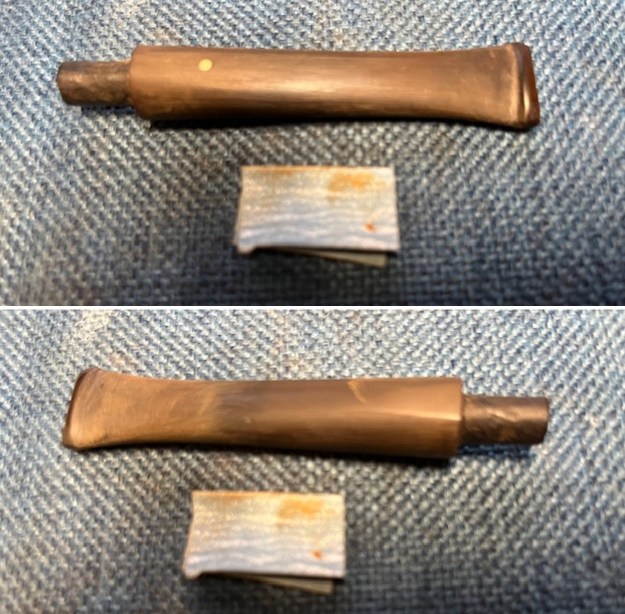
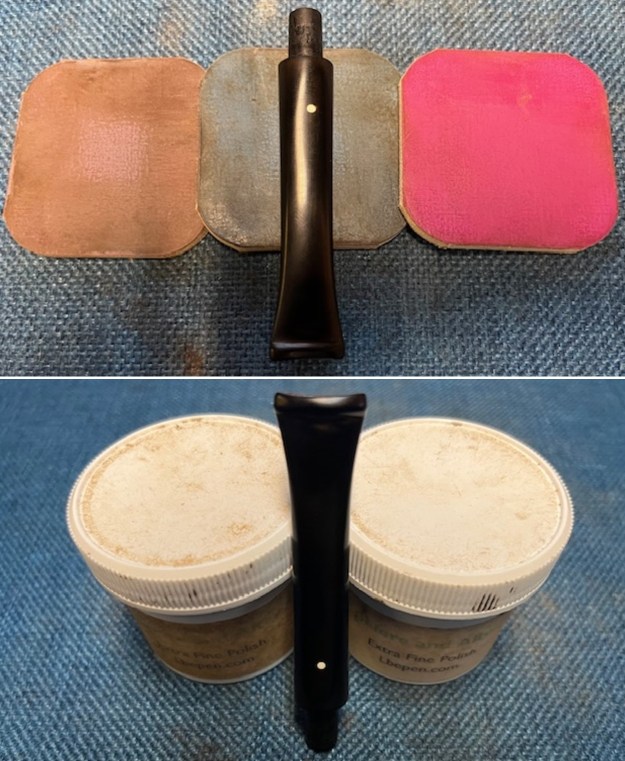
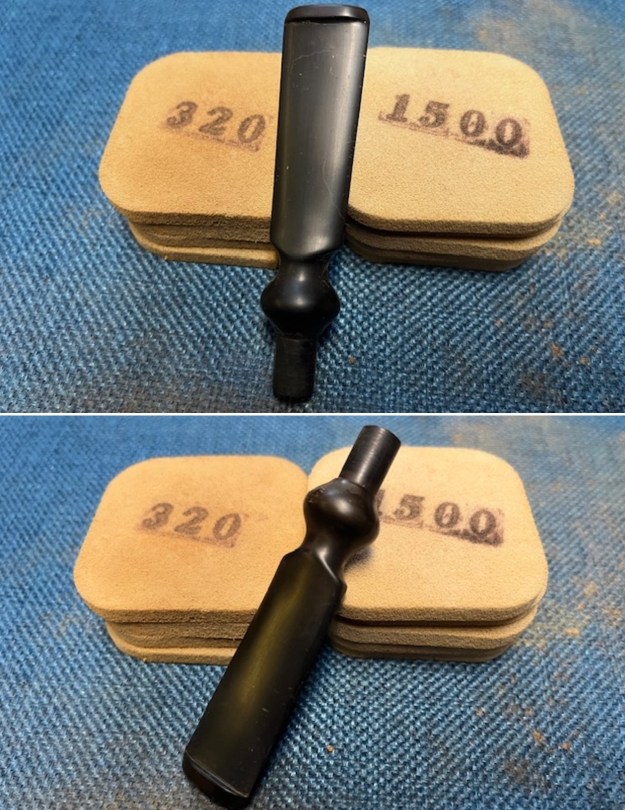
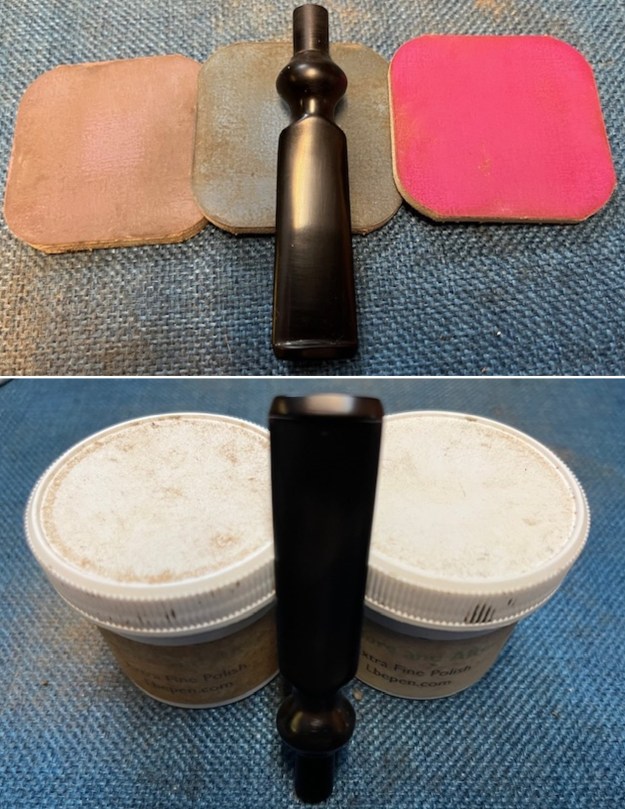
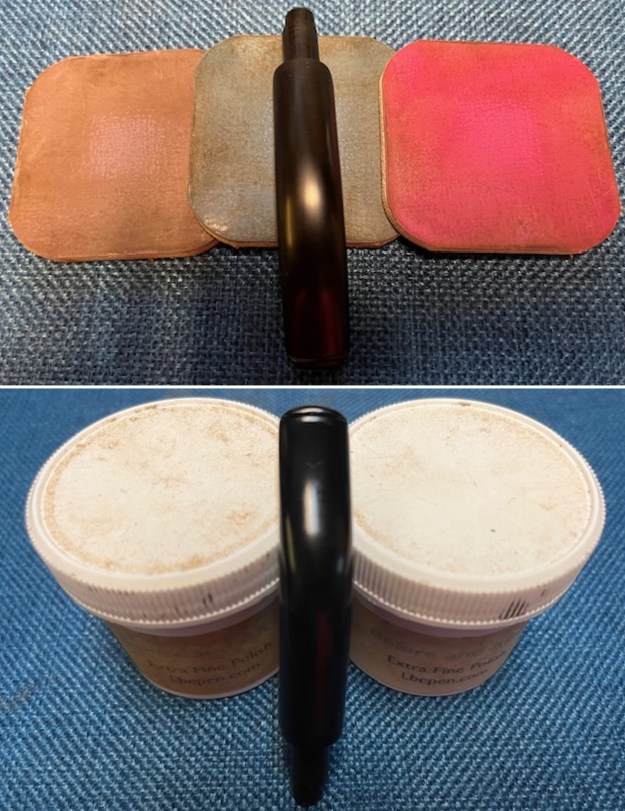
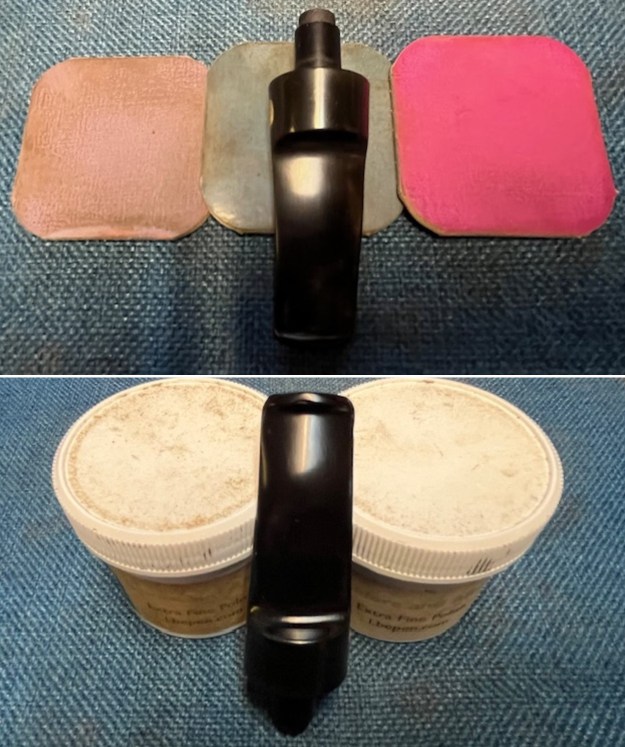
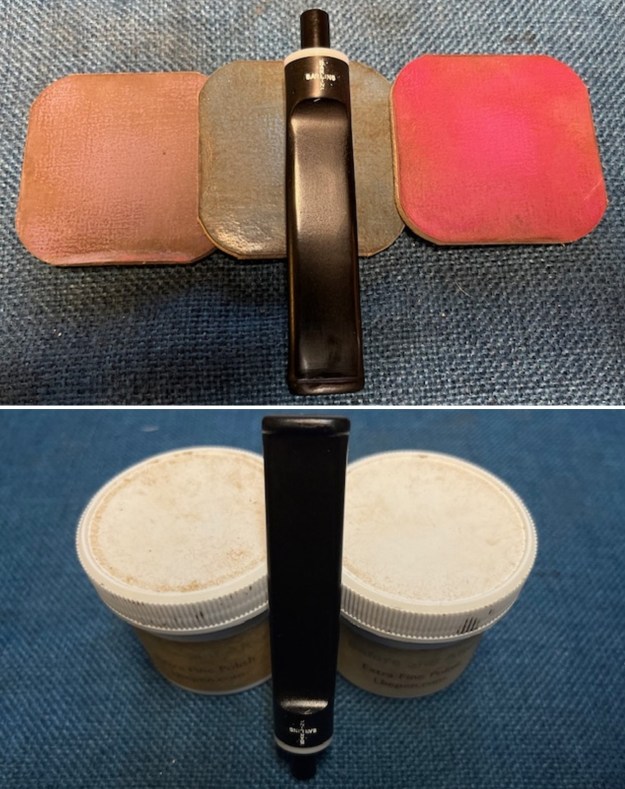
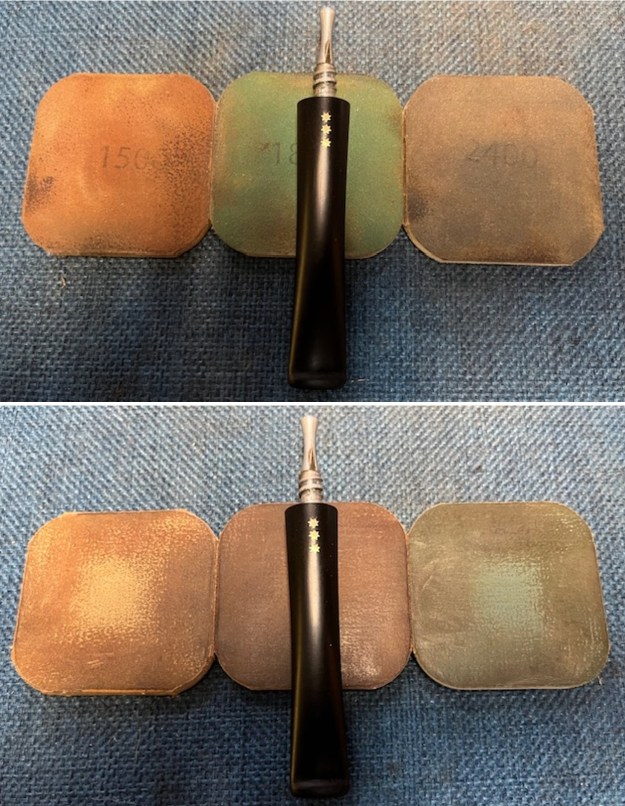
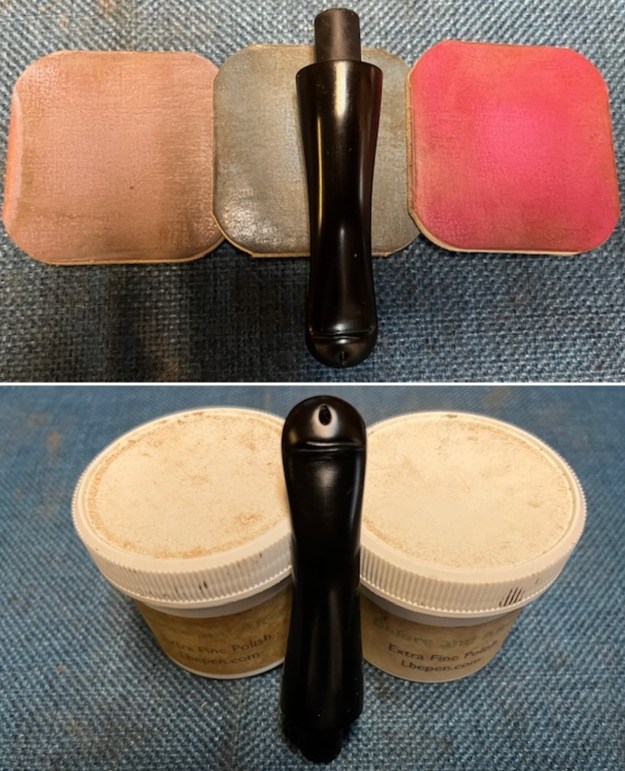
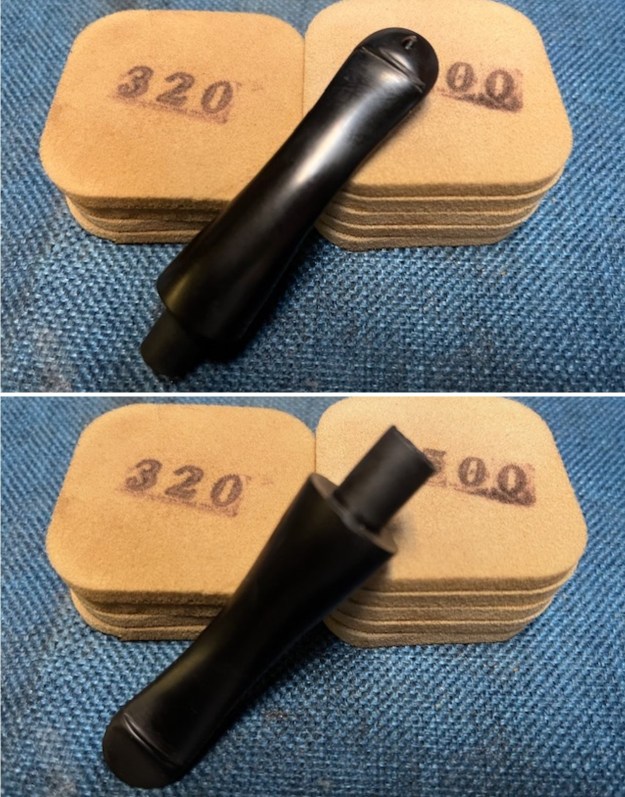 I polished the stem with micromesh sanding pads – dry sanding with 1500-12000 grit pads. Once again I wiped it down between each pad with Obsidian Oil. I further polished it with Before and After Stem Polish – both Fine and Extra Fine. It looked very good.
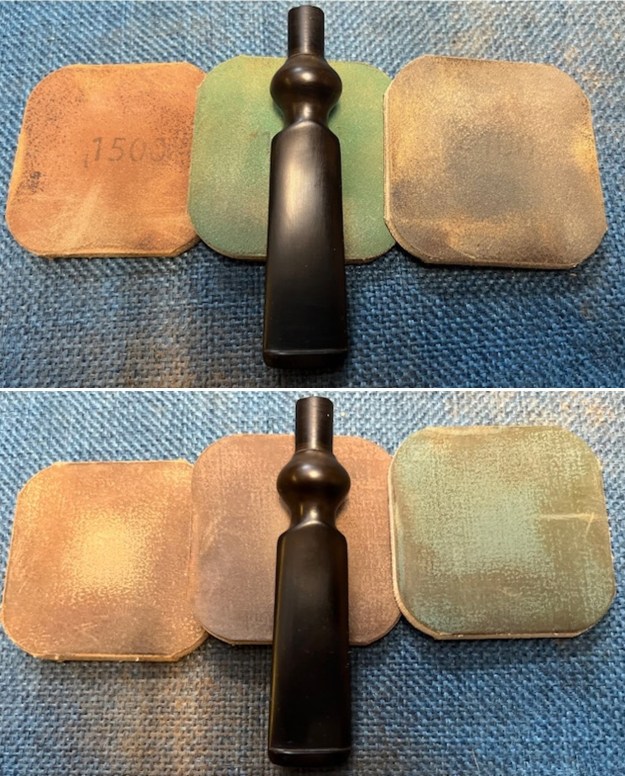
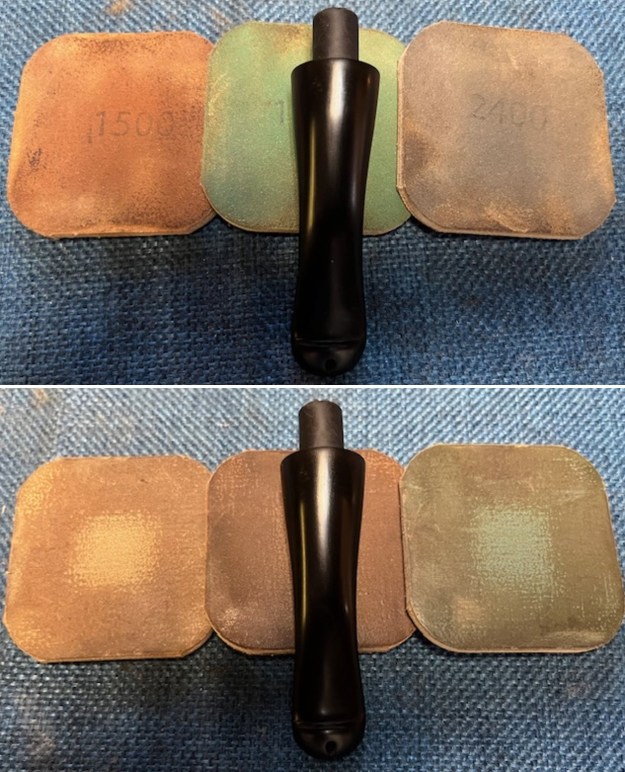
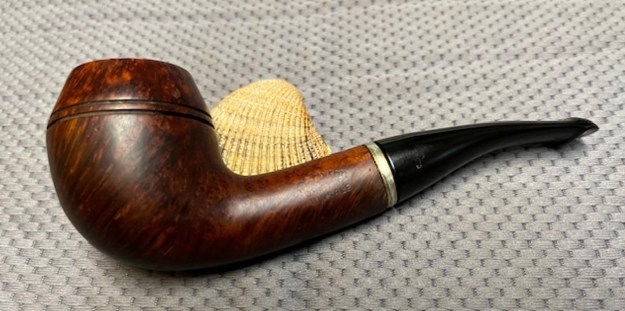
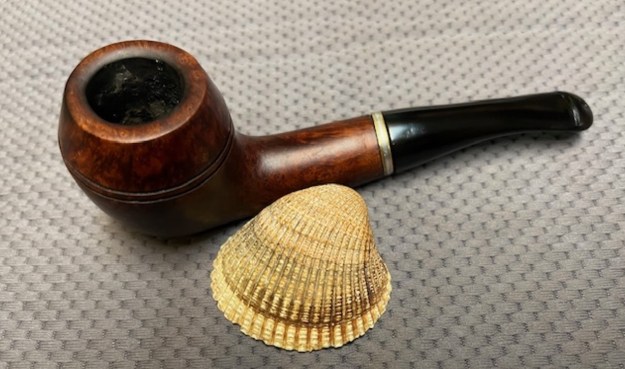
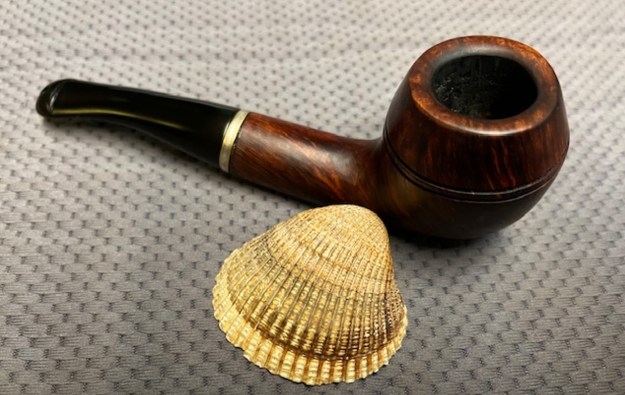
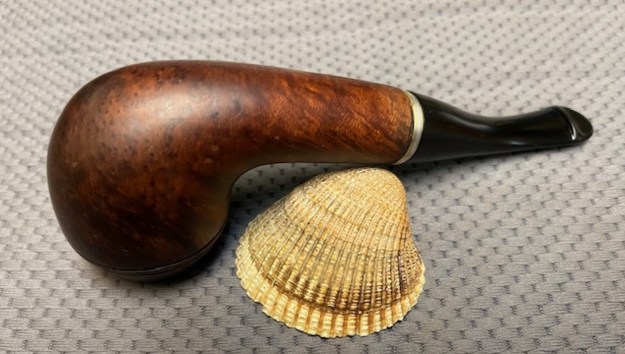
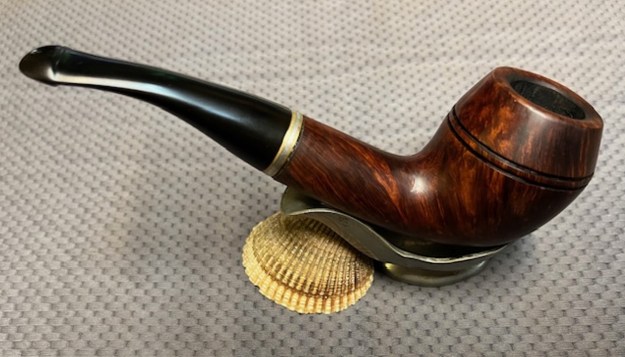
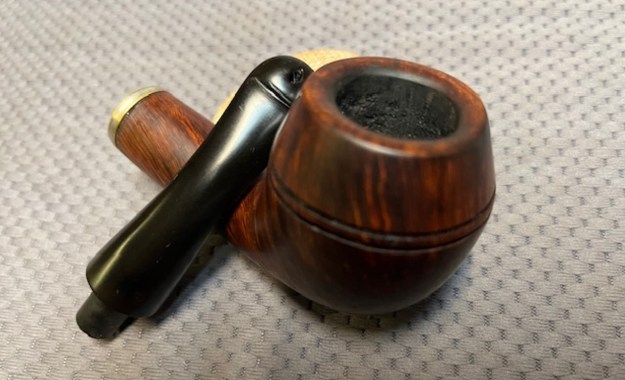
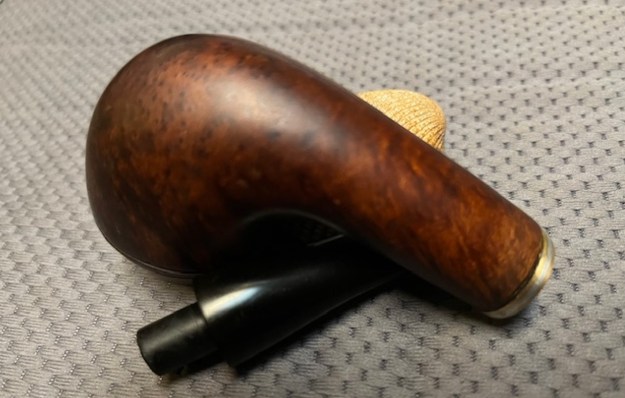
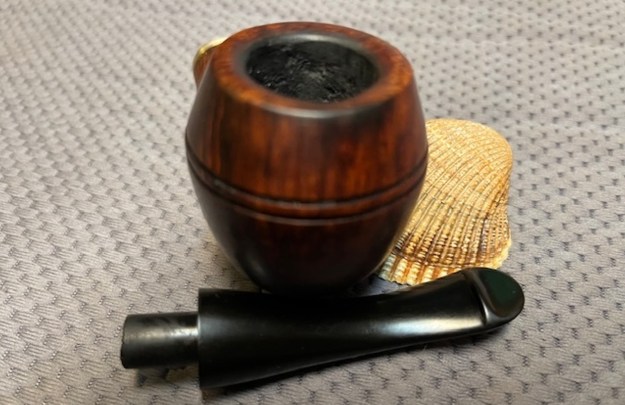
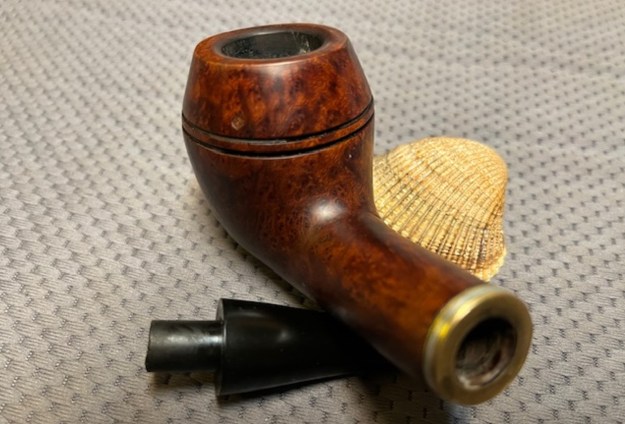
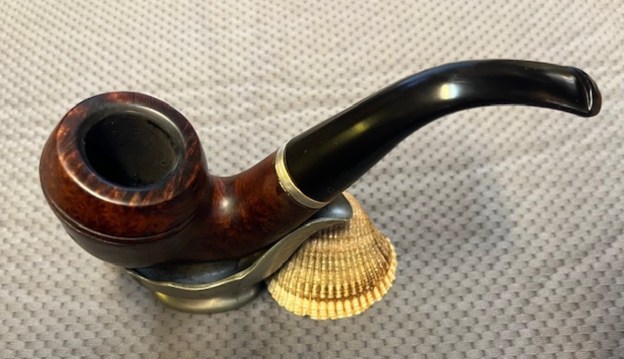
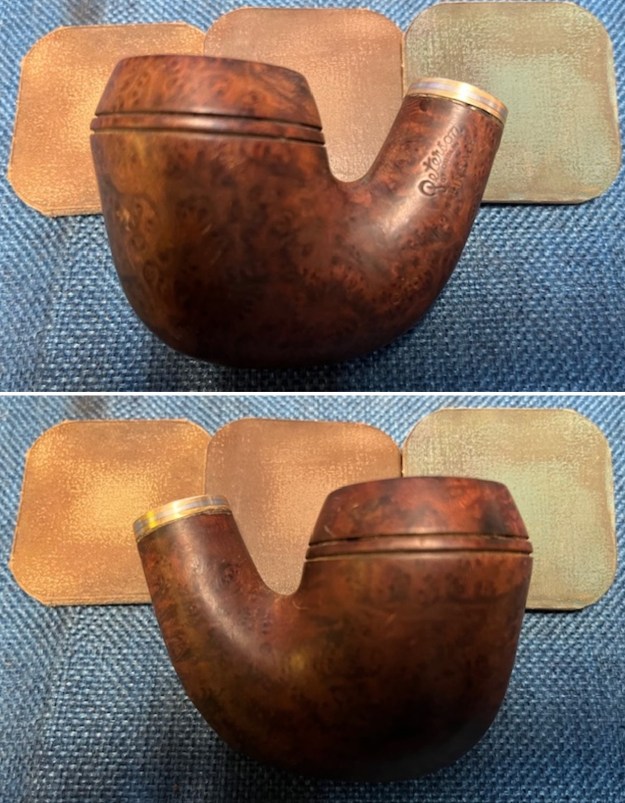
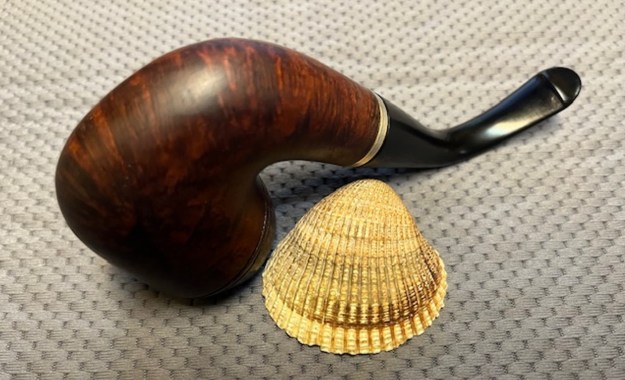
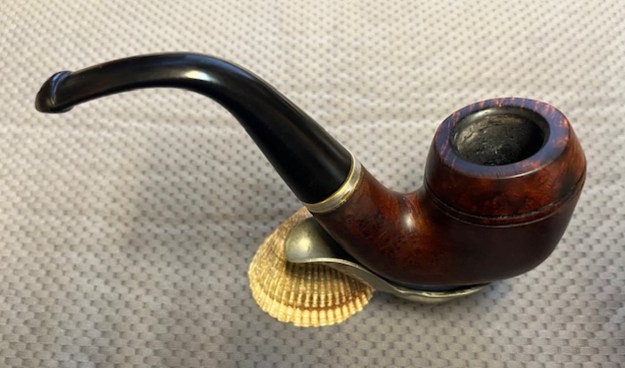
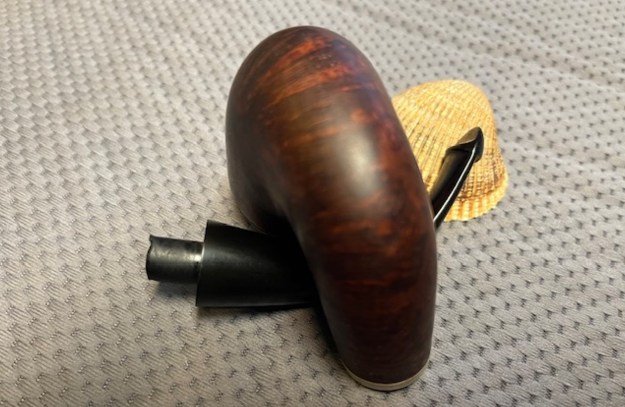
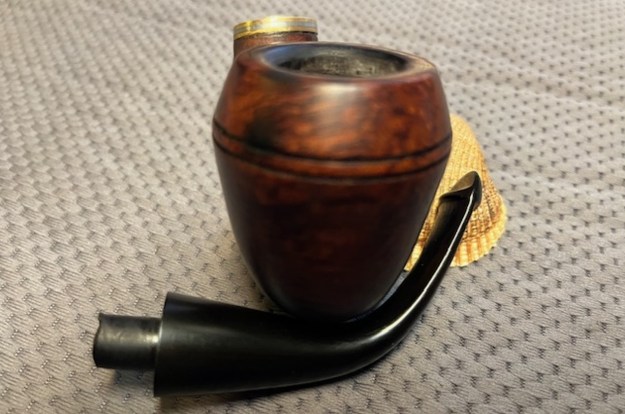
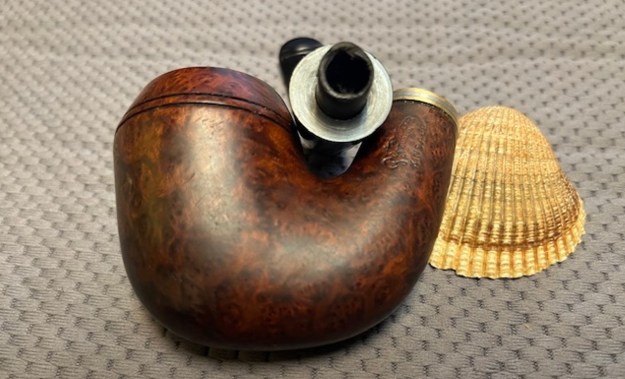
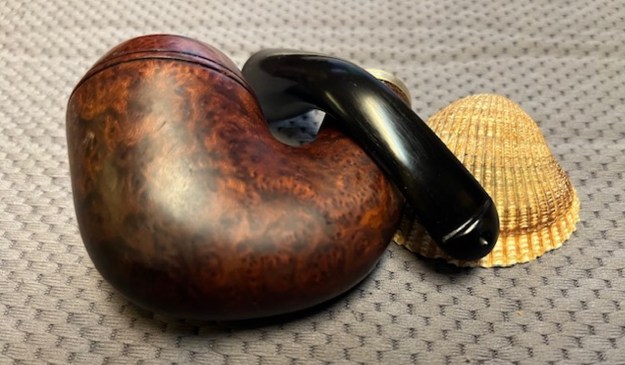
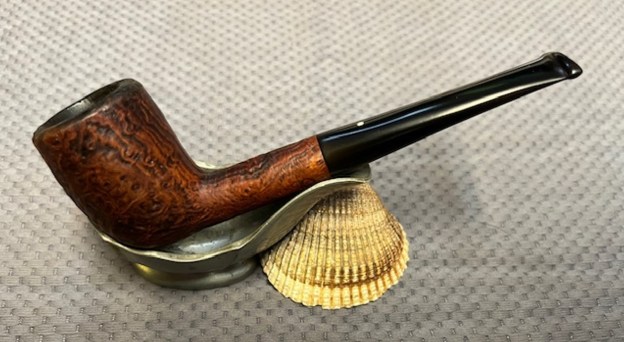
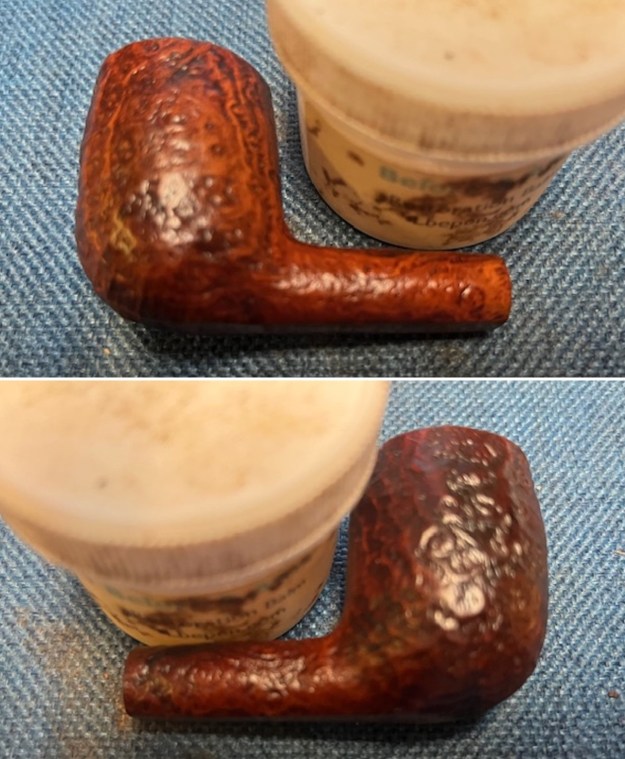
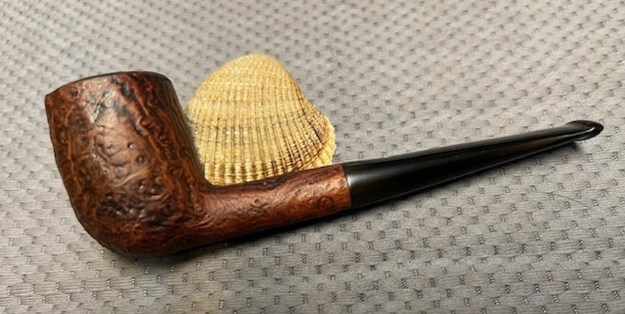
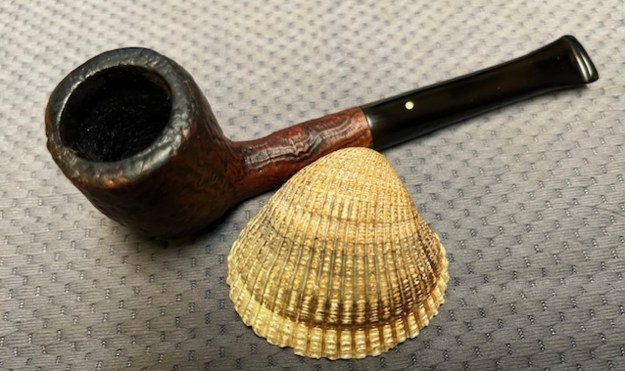
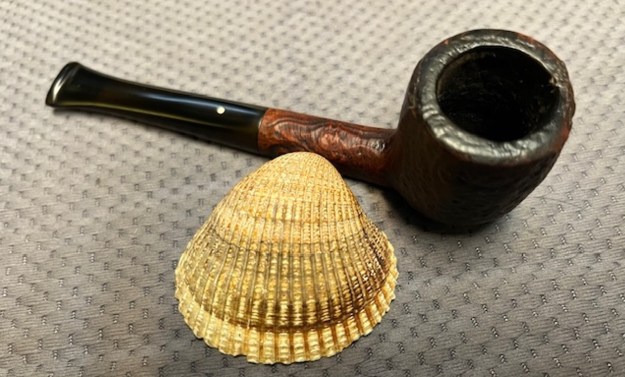
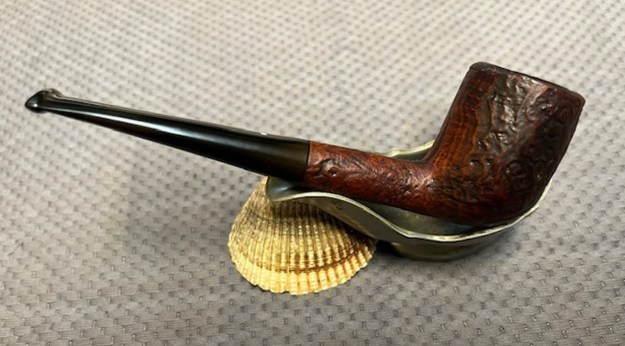
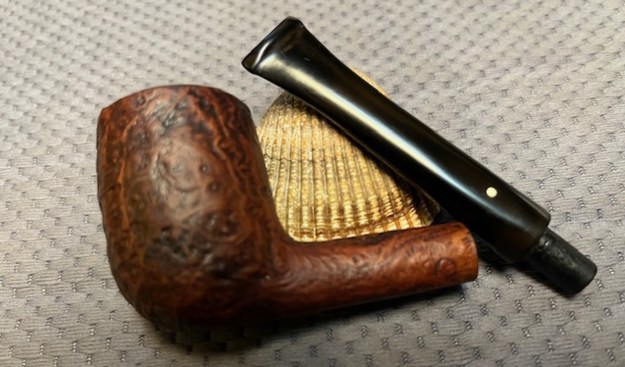
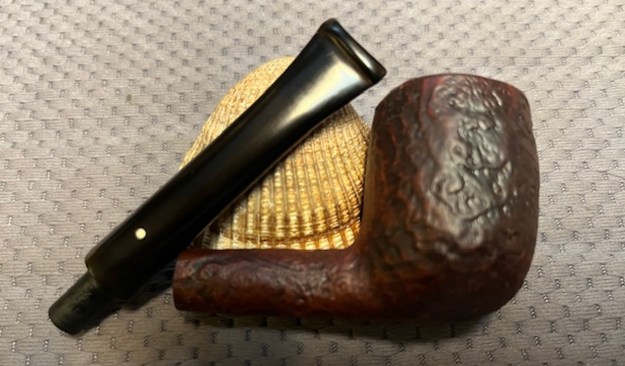
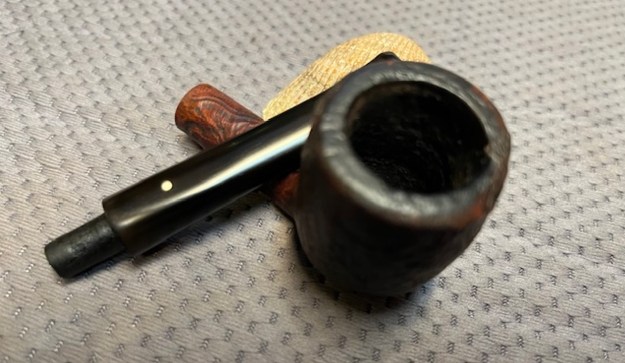
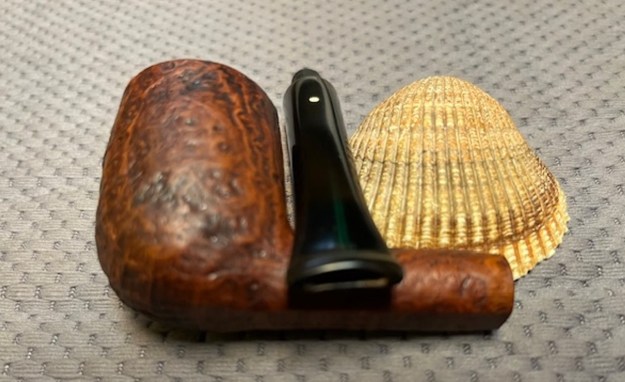
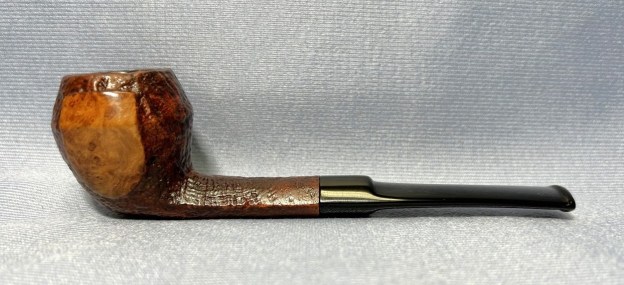
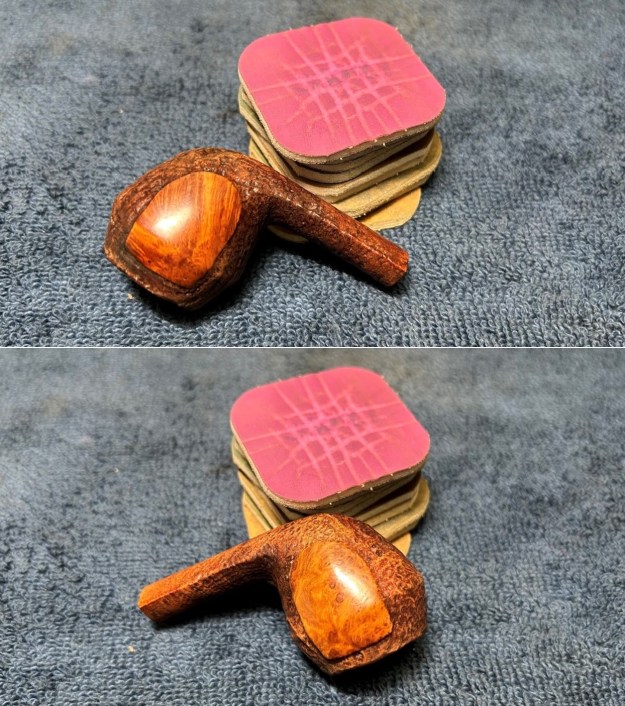
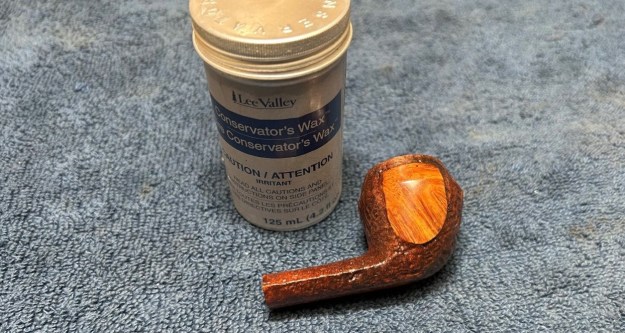
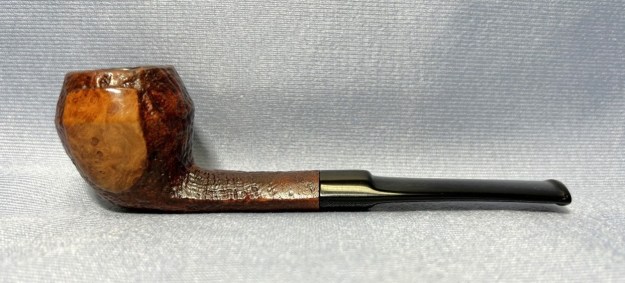
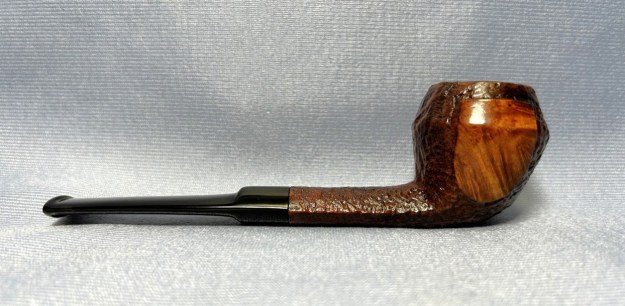
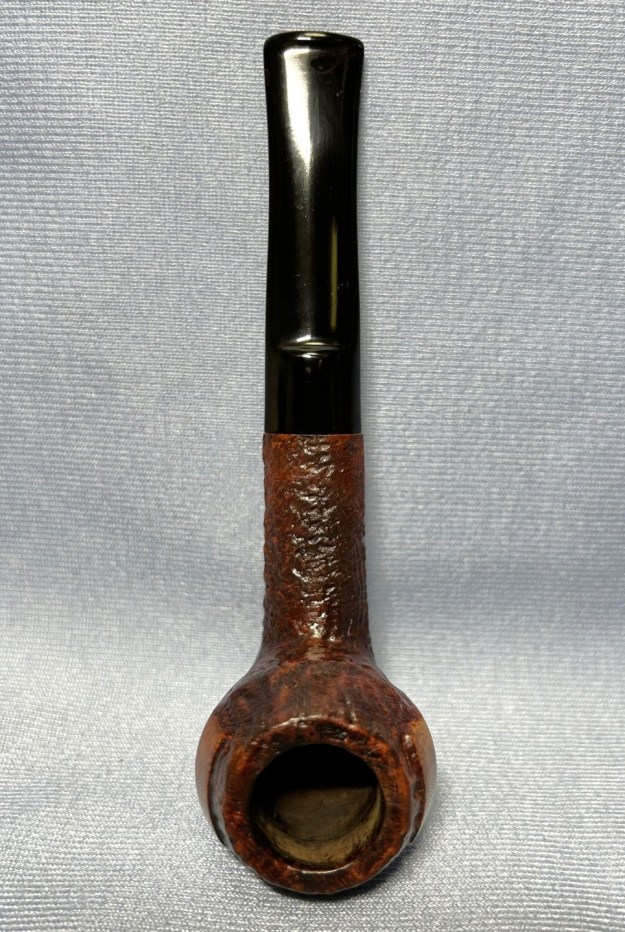
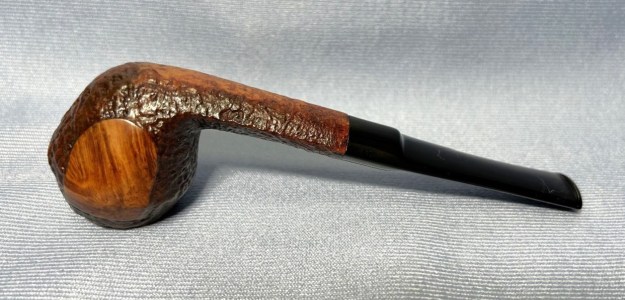
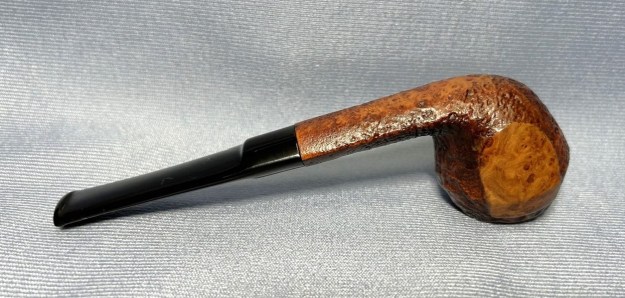
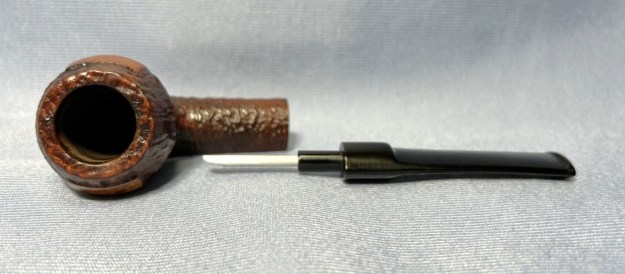
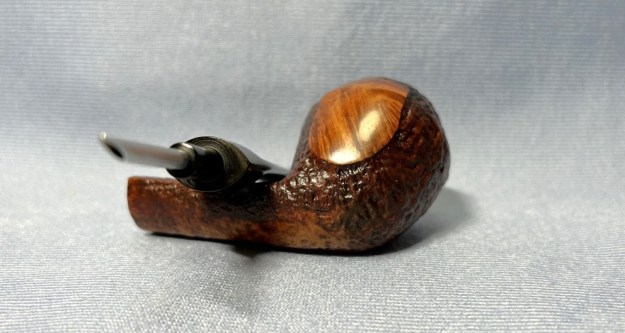
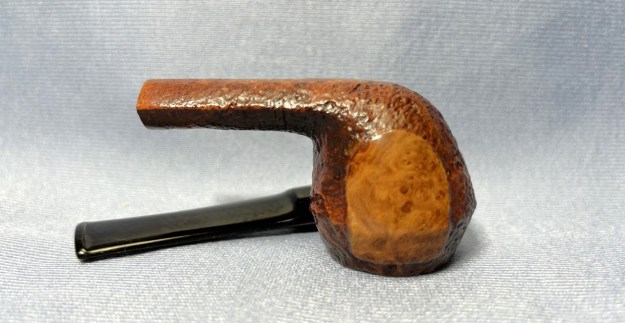
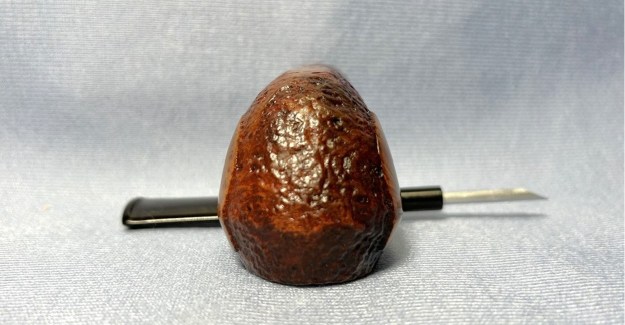
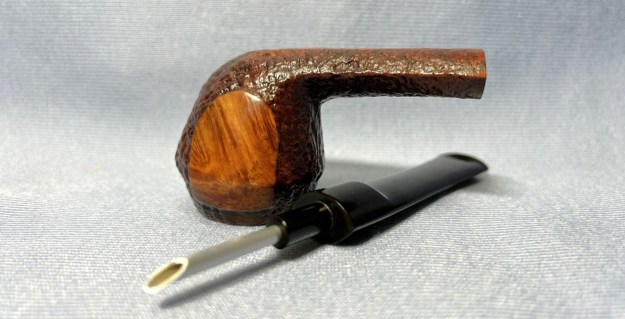
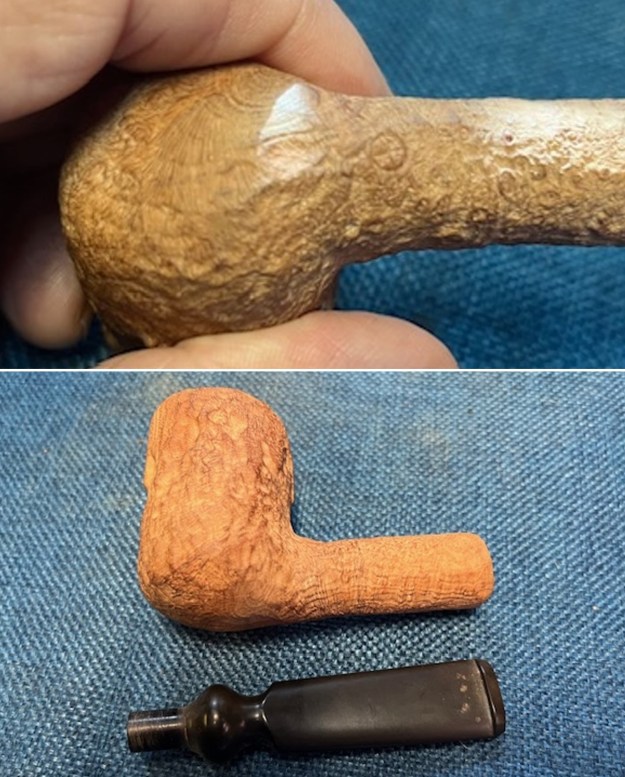
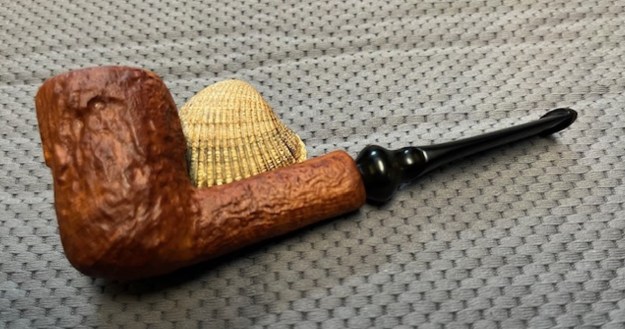
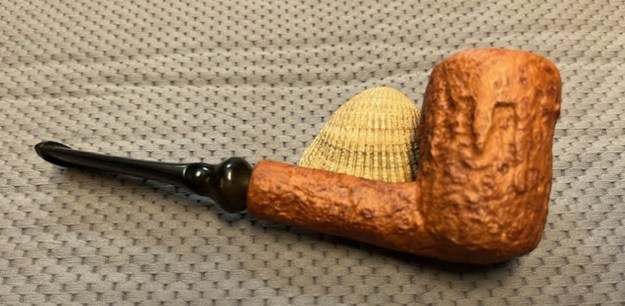
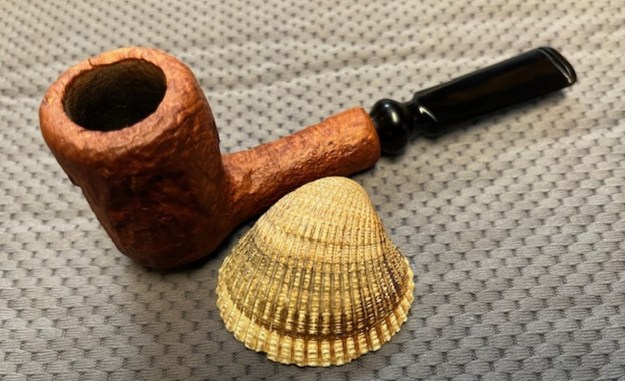
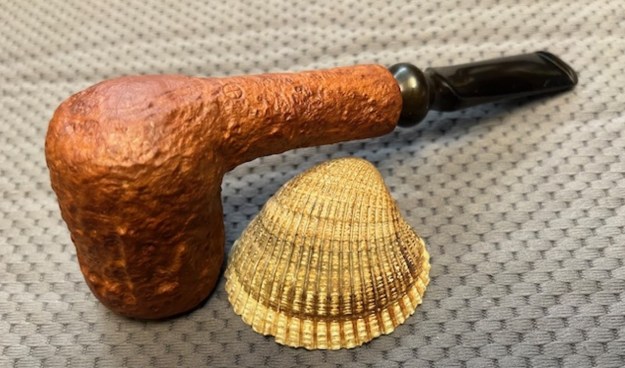
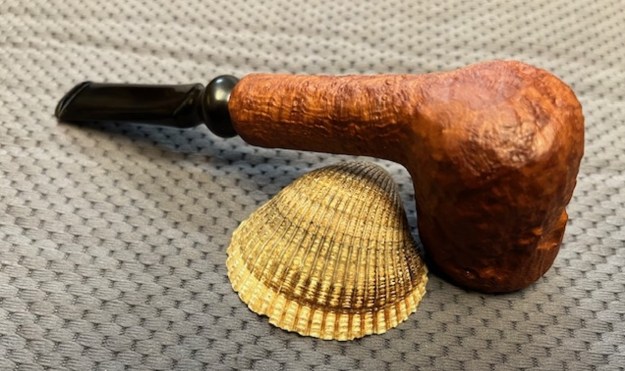
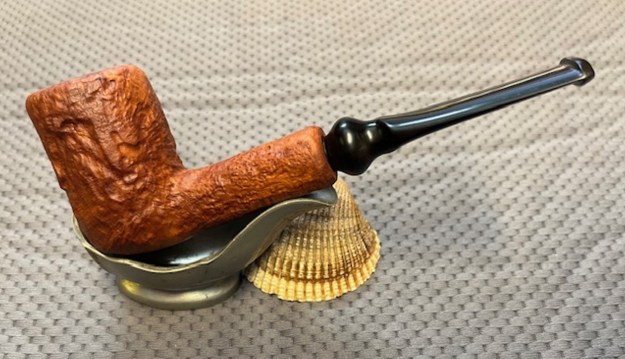
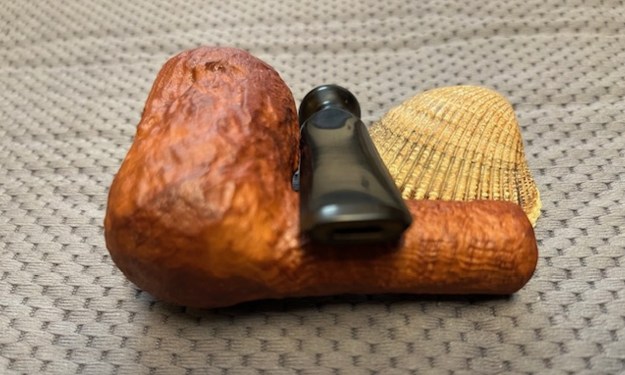
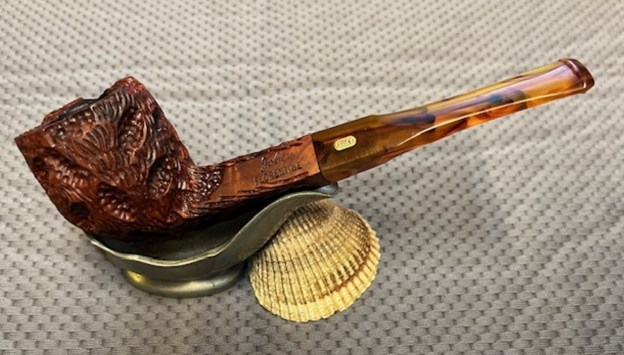
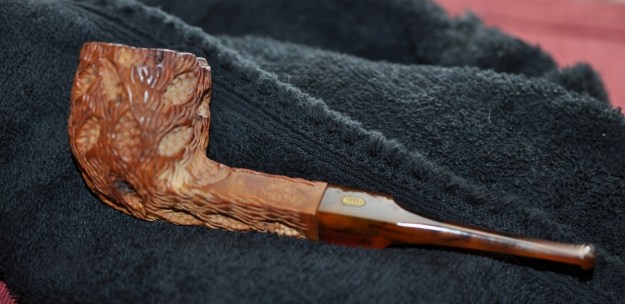
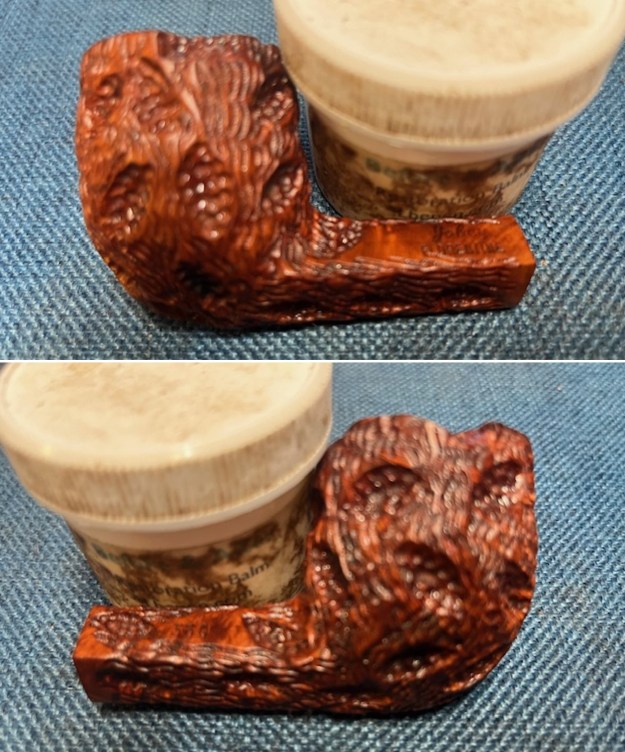
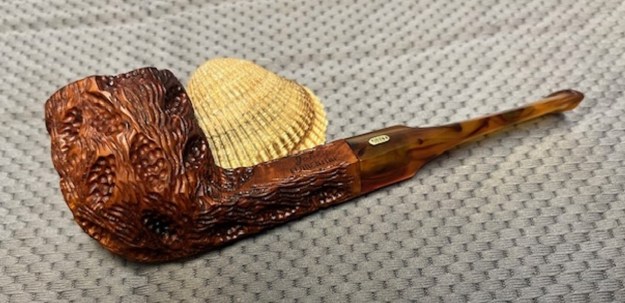
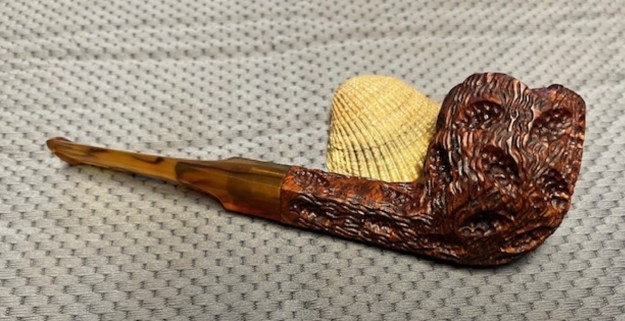
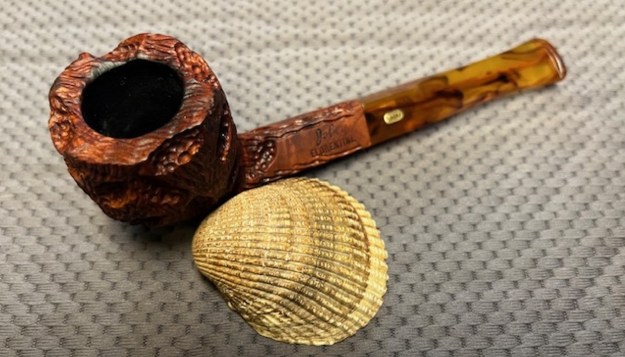
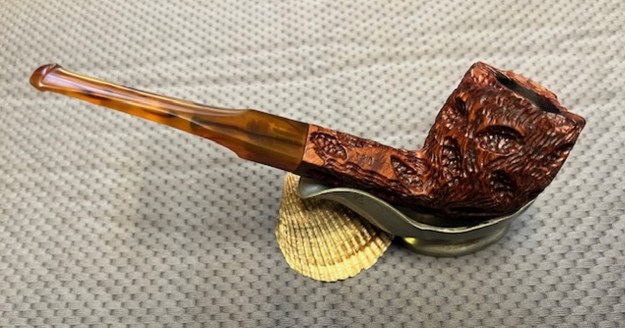
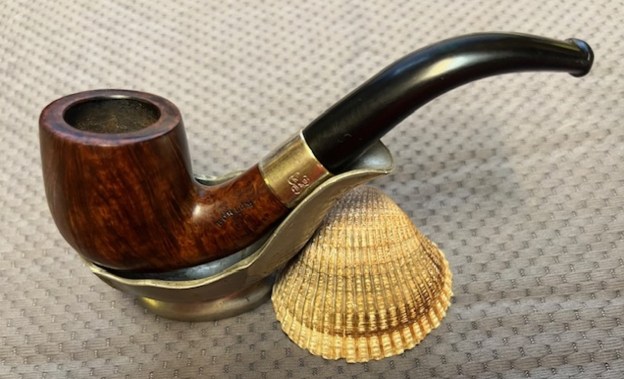
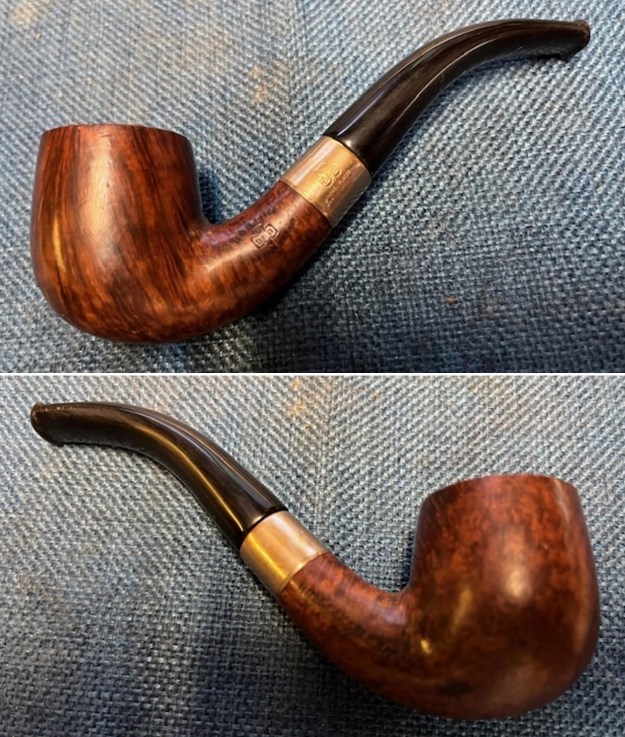
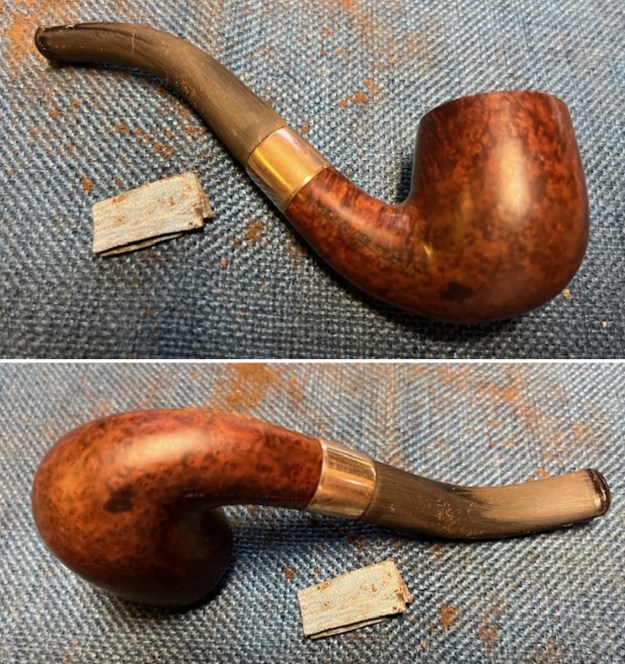
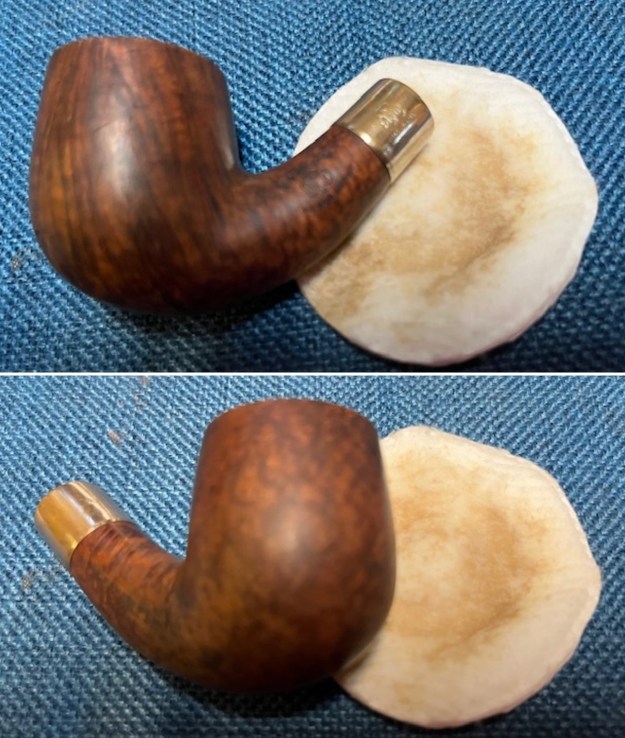
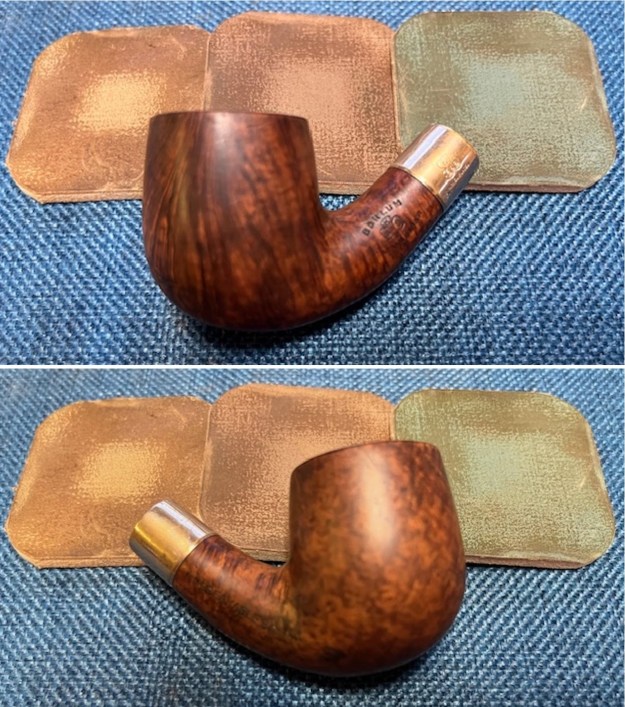
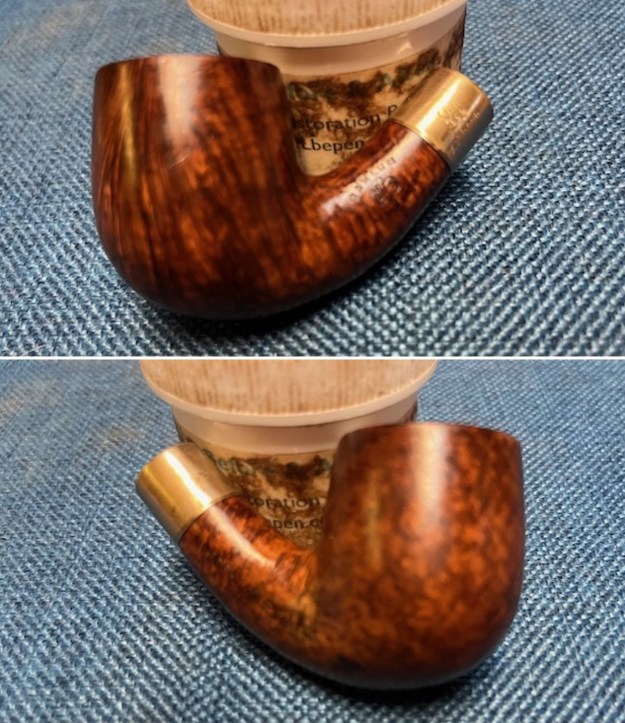
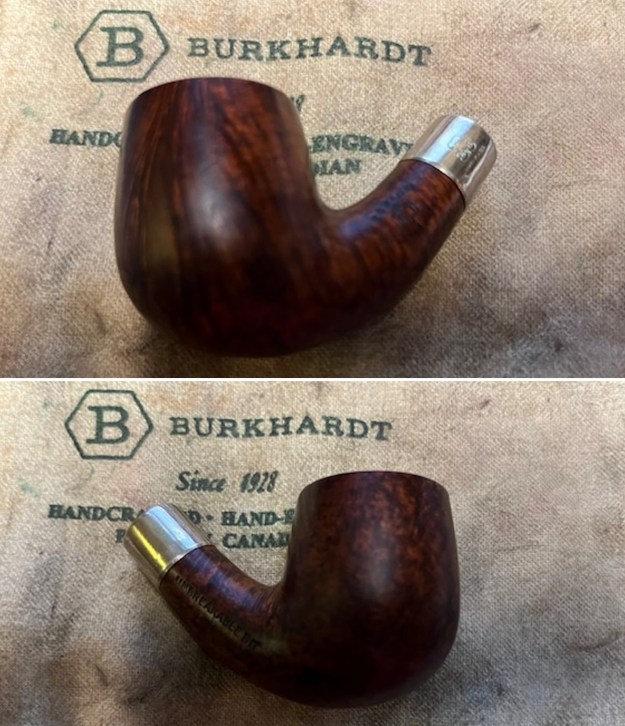
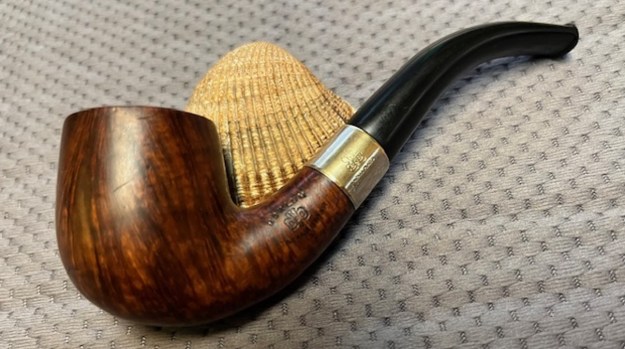
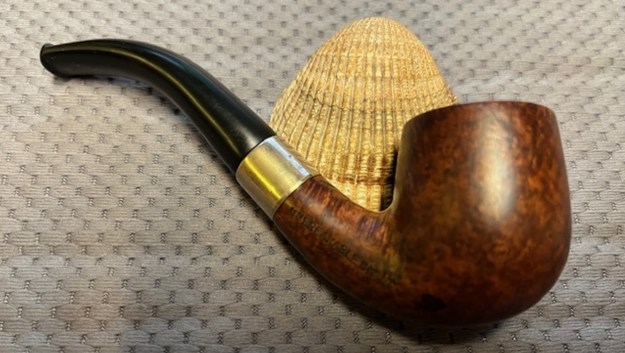
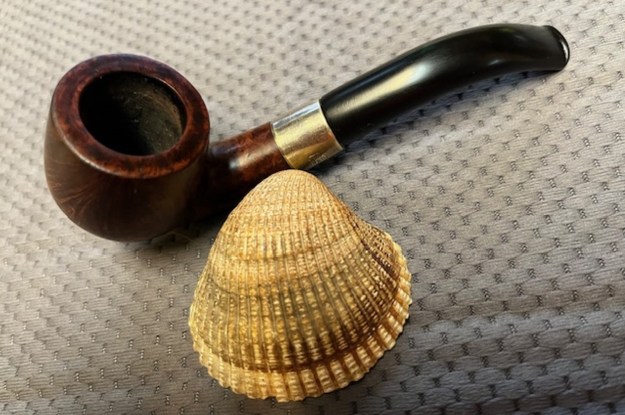
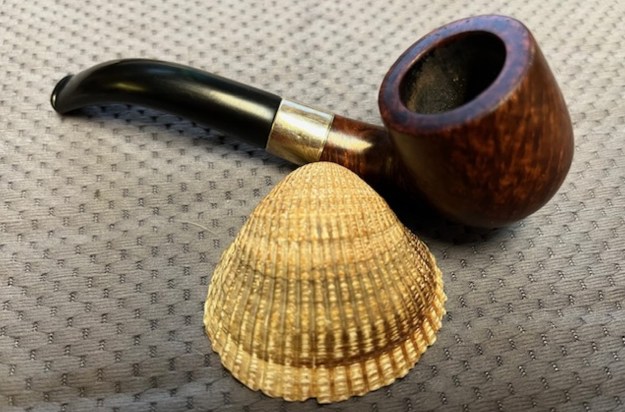
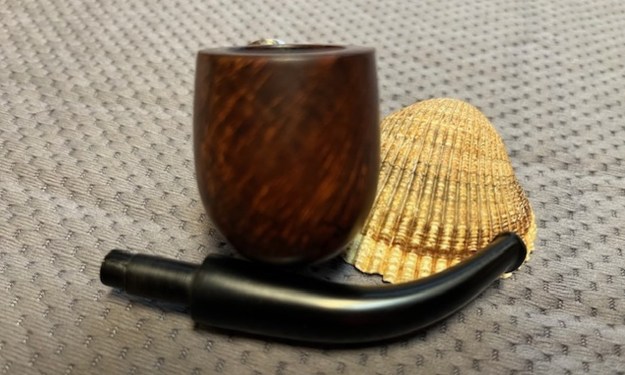
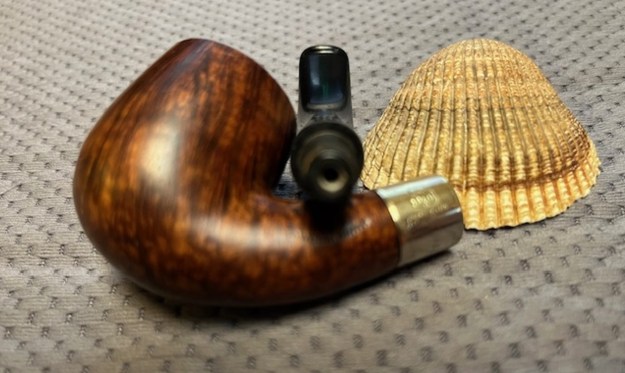
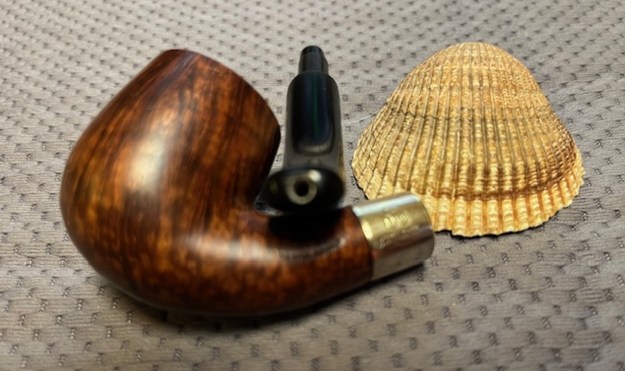
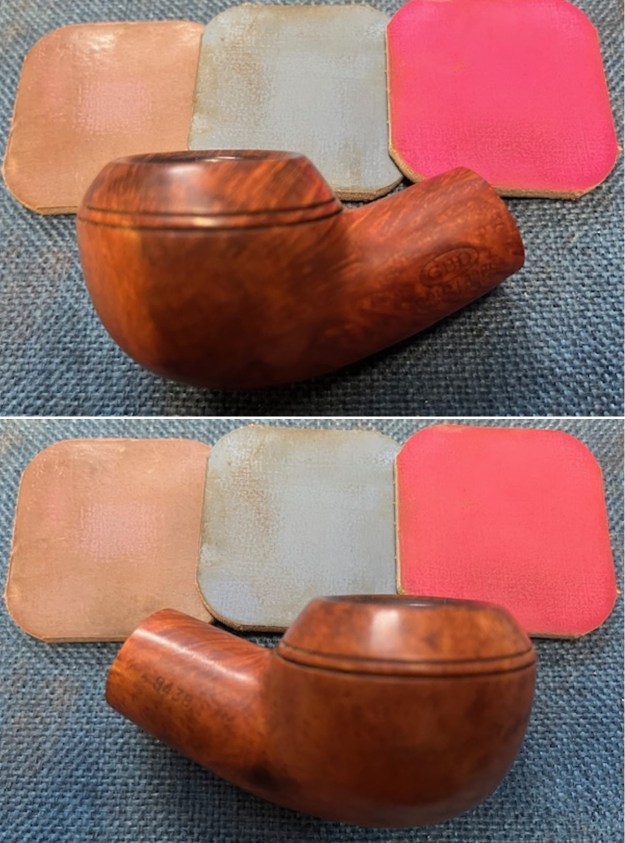
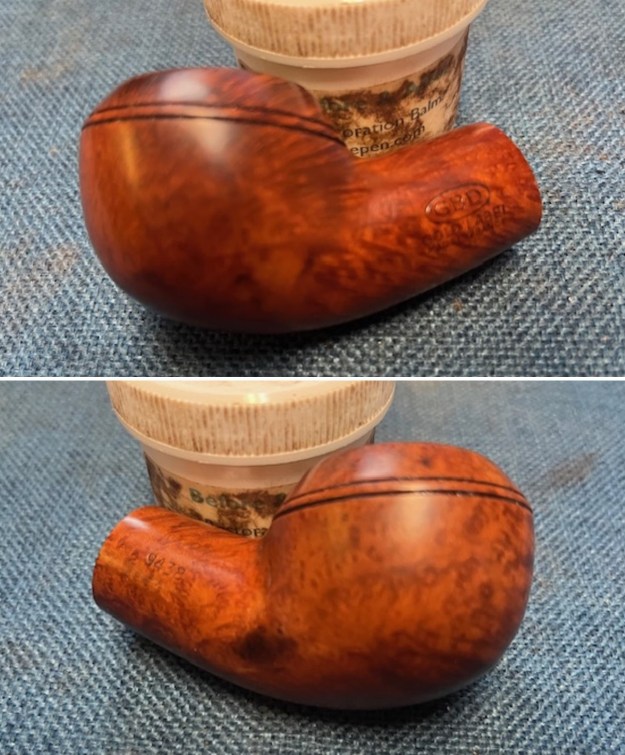
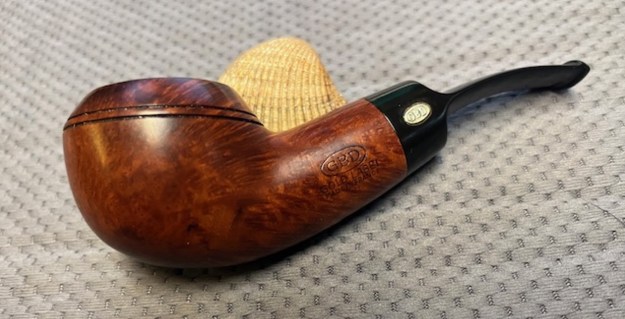
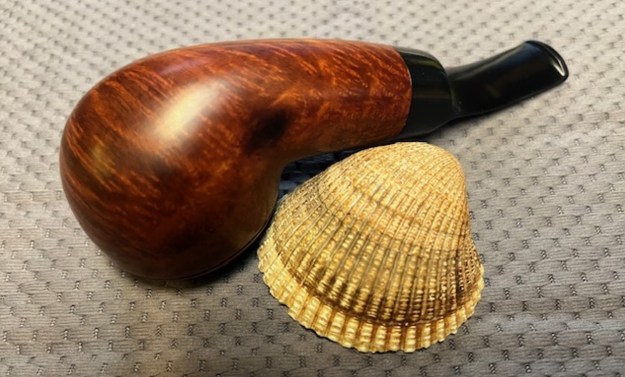
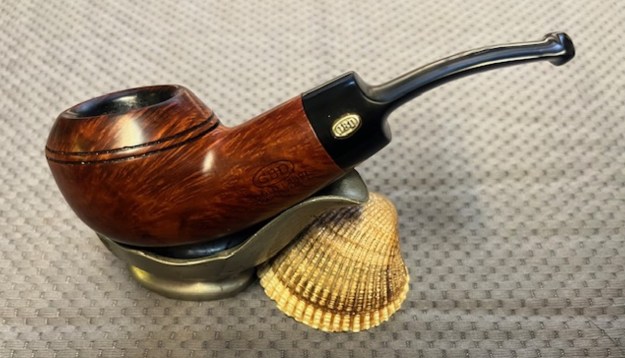
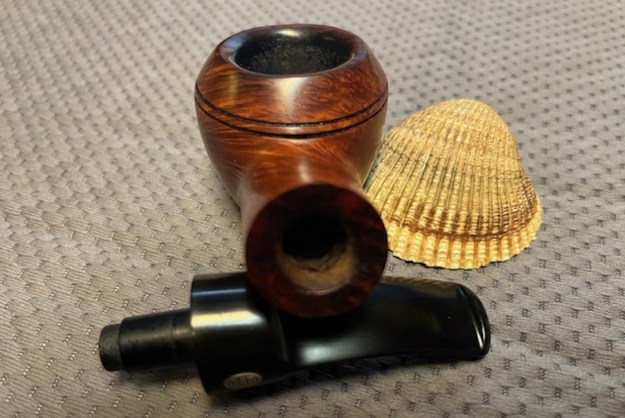
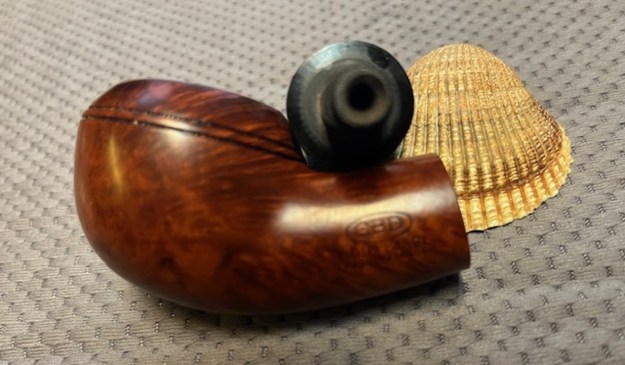
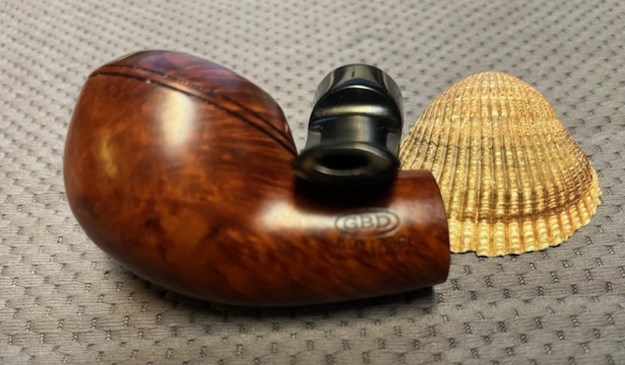
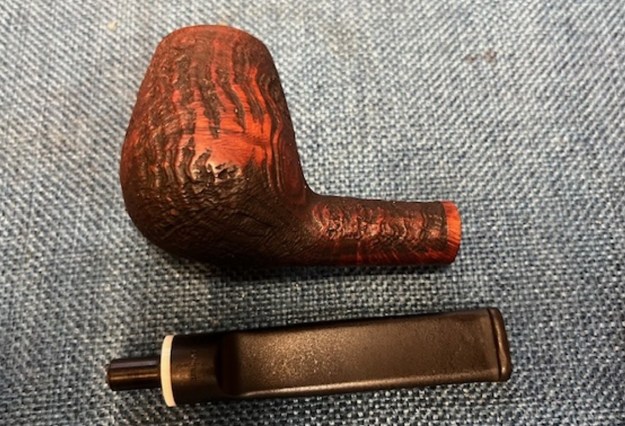
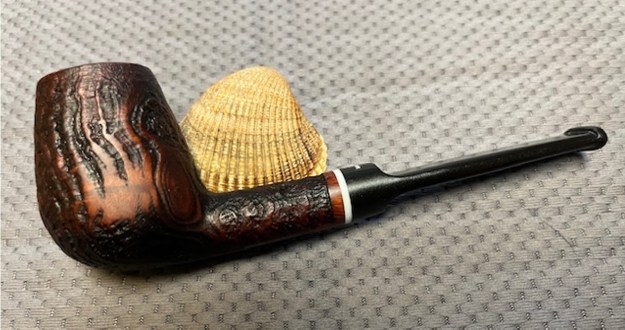
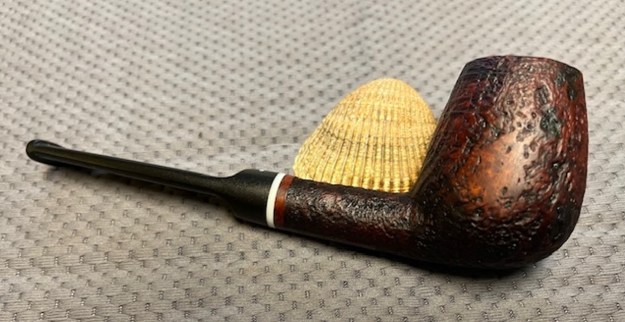
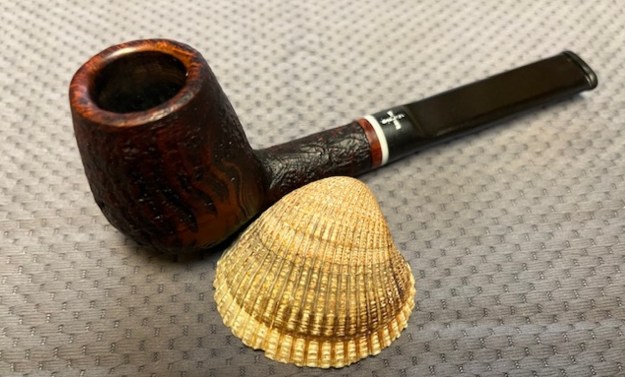
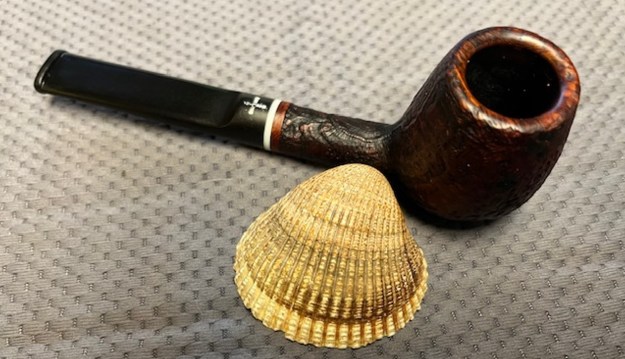
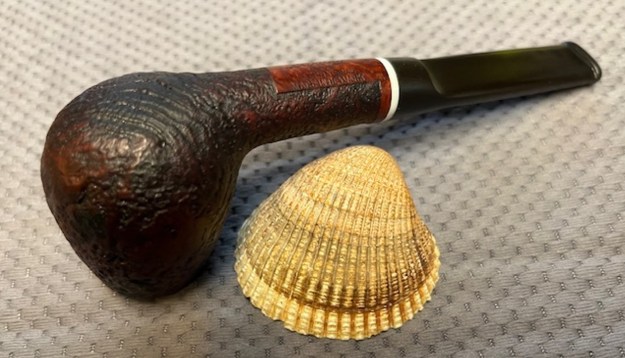
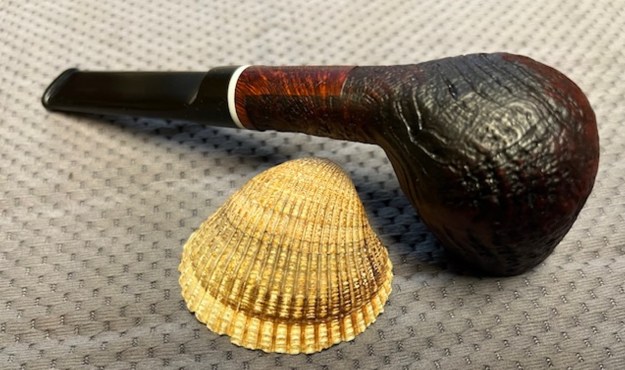
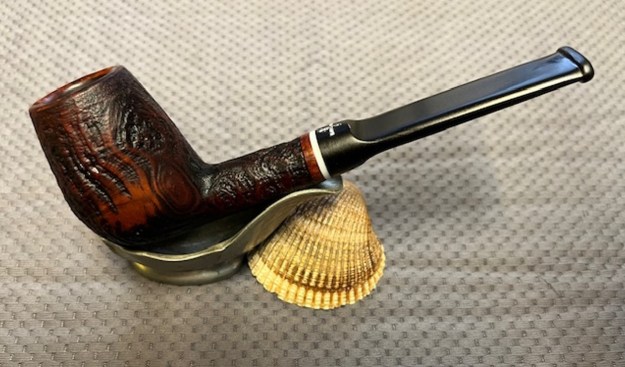
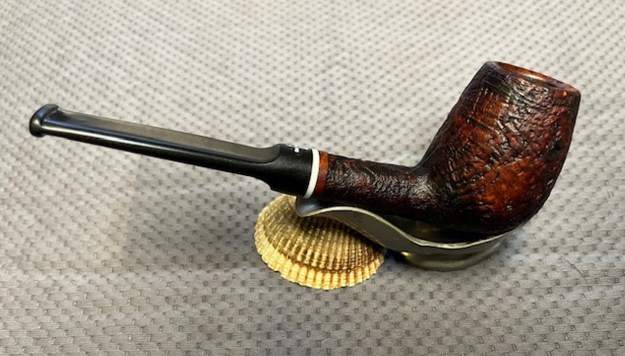
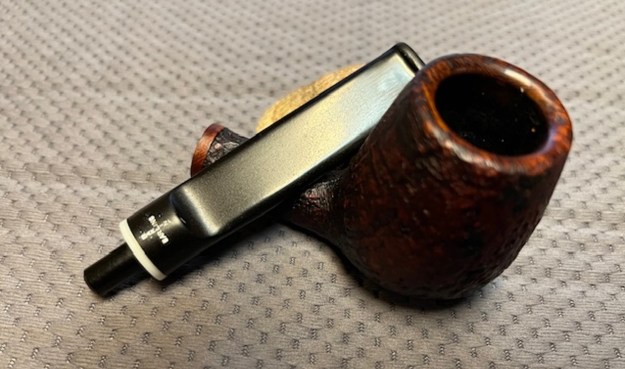
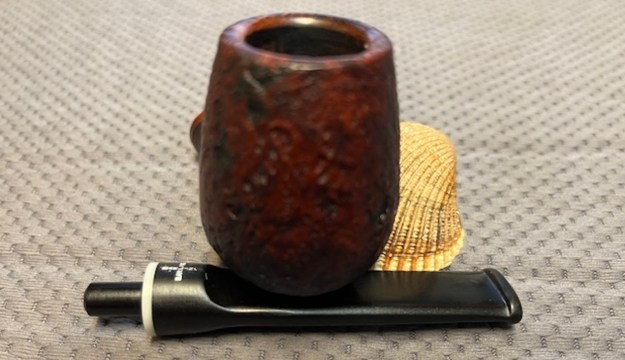
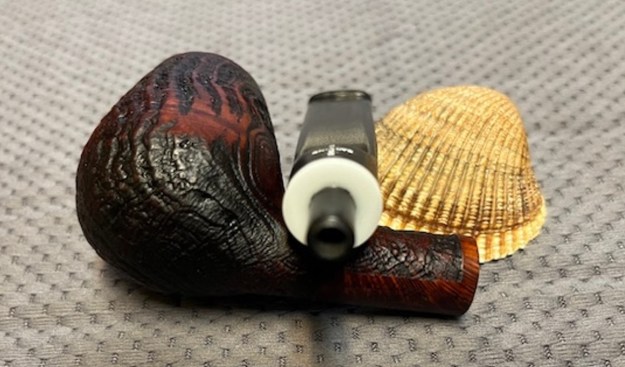
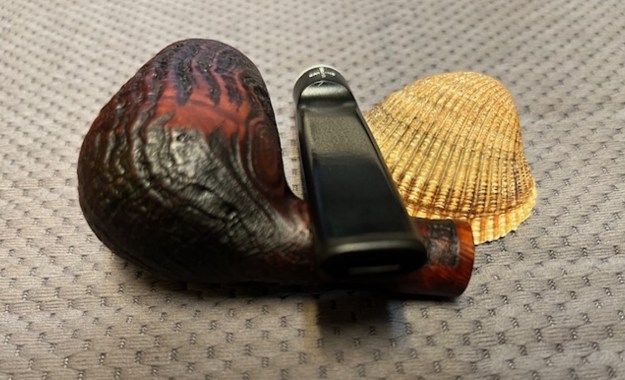
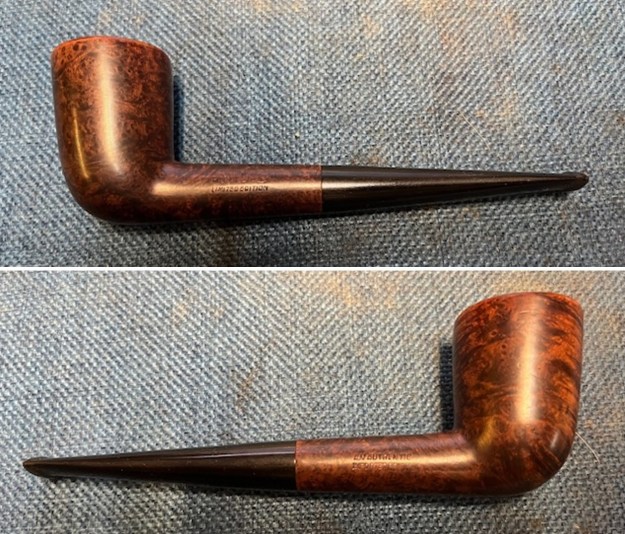
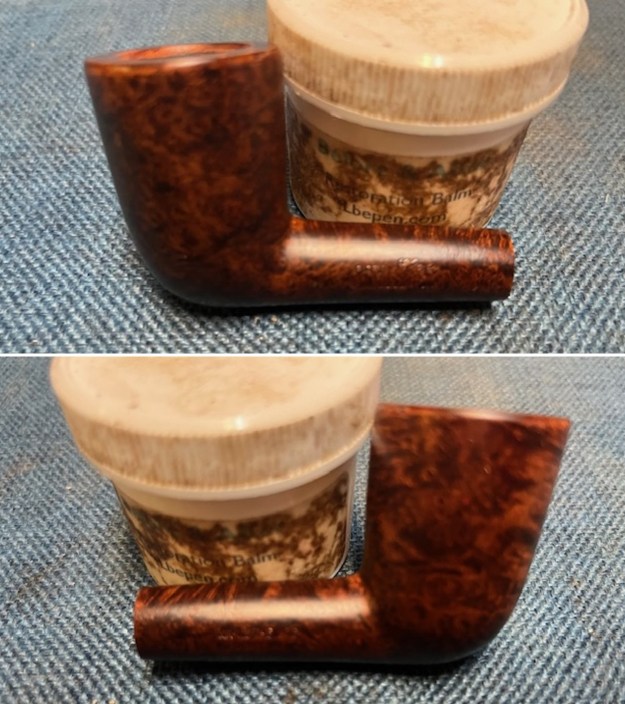
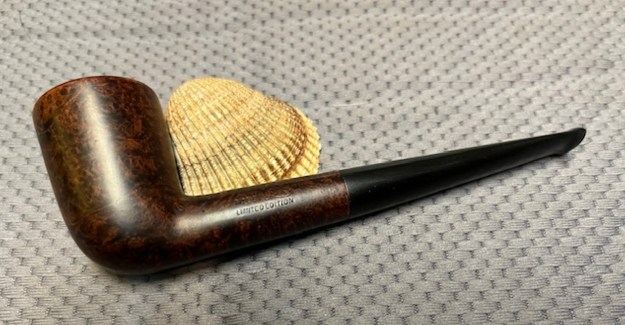
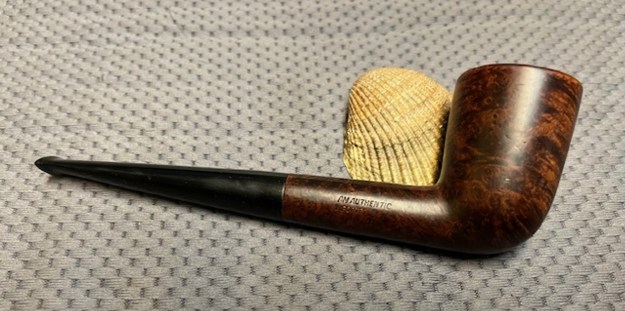
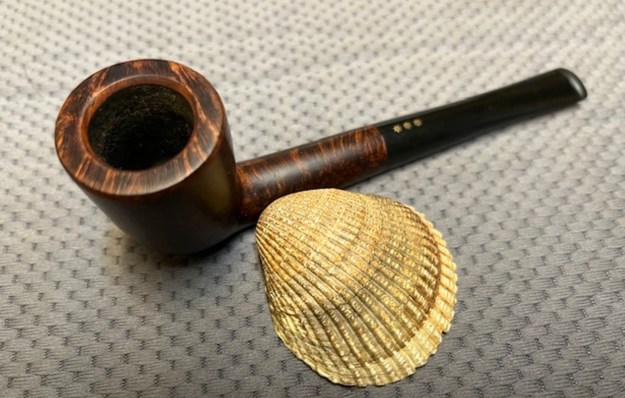
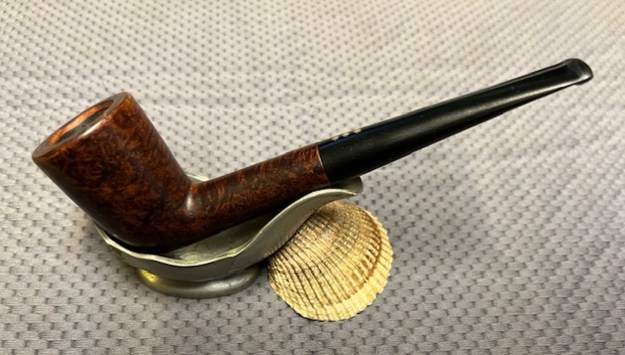
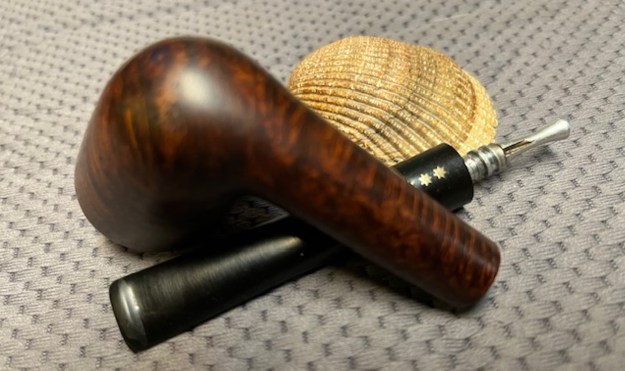
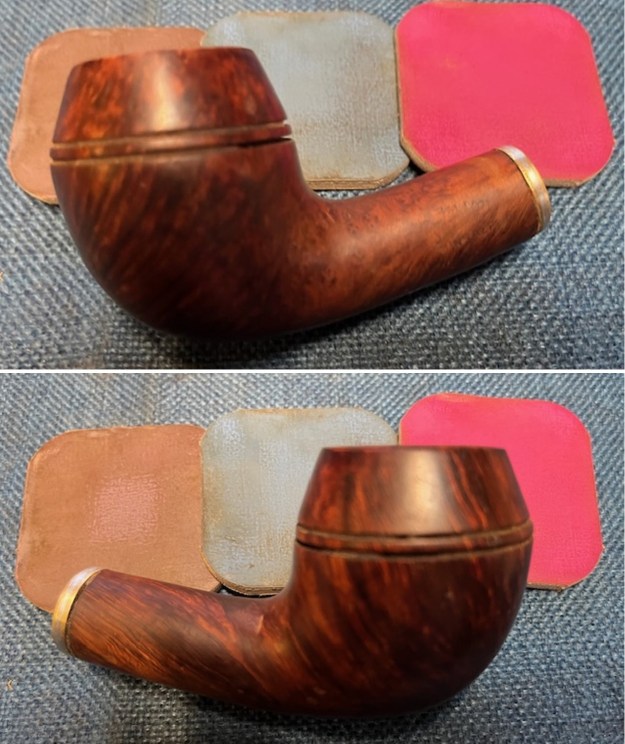
 This Peterson’s of Dublin Kinsale X14 Rhodesian with a Taper Stem has a beautiful smooth finish that was slightly worn. The reddish brown finish highlights some great grain around the bowl and shank. It has a classic look of a Peterson’s pipe. The polished black vulcanite taper stem adds to the mix. I put the stem back on the bowl and buffed the pipe with Blue Diamond on the buffing wheel being careful to not buff the stamping. I gave the bowl and the stem multiple coats of carnauba wax on the buffing wheel and followed that by buffing it with a clean buffing pad. I hand buffed the pipe with a microfiber cloth to deepen the shine. The finished Peterson’s of Dublin Kinsale XL14 is quite nice and feels great in the hand. Give the finished pipe a look in the photos below. The dimensions of the pipe are Length: 6 inches, Height: 2 inches, Outside diameter of the bowl: 1 ¼ inch, Chamber diameter: 7/8 of an inch. The weight of the pipe is 2.36 ounces/67 grams. Thanks for walking through the restoration with me as I worked over another beautiful pipe. I have two more pipes to finish but these three are ready to pick up and Sergey can take them on his travels. The last two I will give back when he returns. Thanks for your time.